


flying_dutchman2
-
Posts
1,735 -
Joined
-
Last visited
Content Type
Profiles
Forums
Gallery
Events
Posts posted by flying_dutchman2
-
-
When the weather is warm I don't work on the boat, I work outside in the garden. We did have some rain in between so I worked a bit on the Fluit.
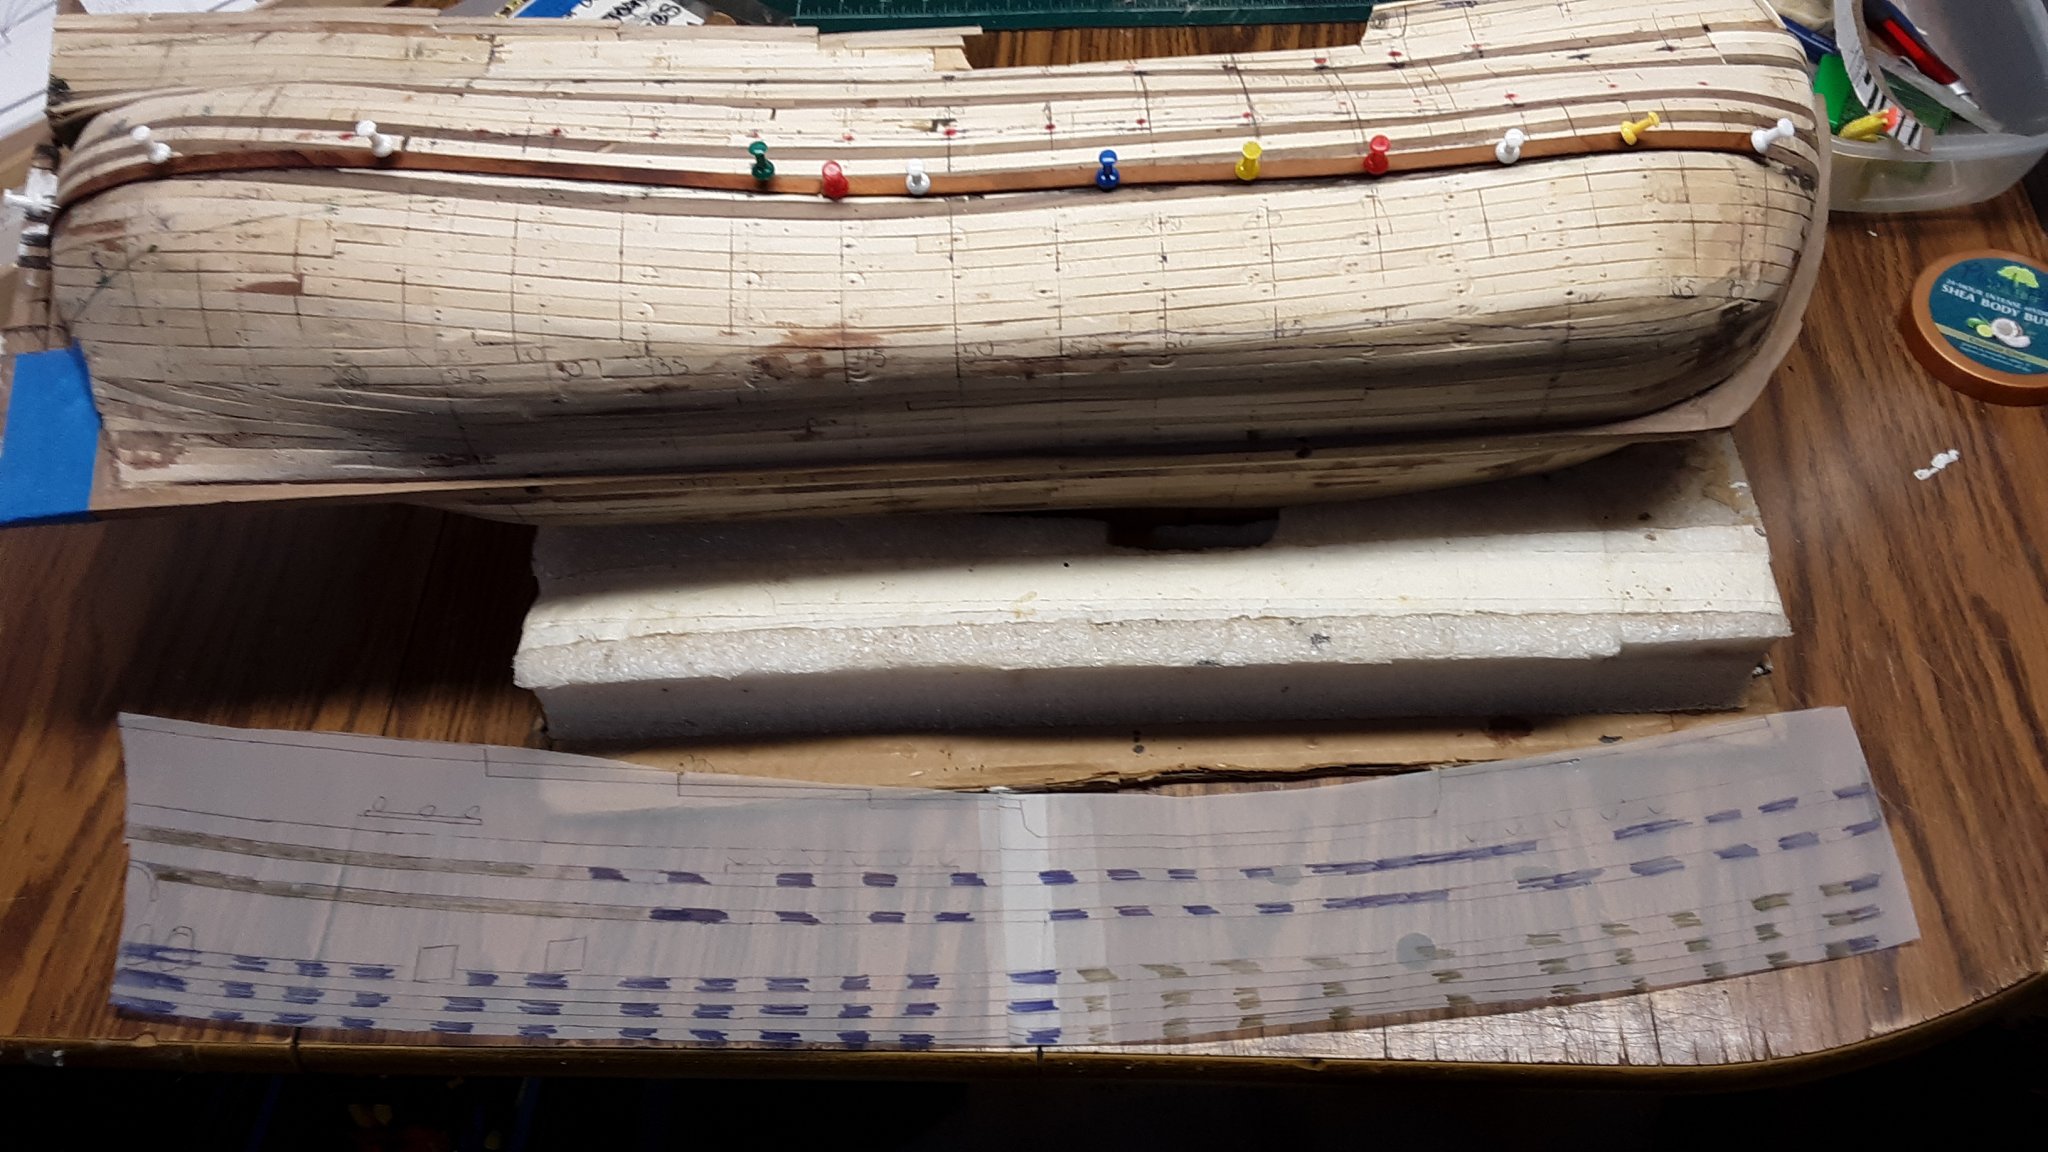
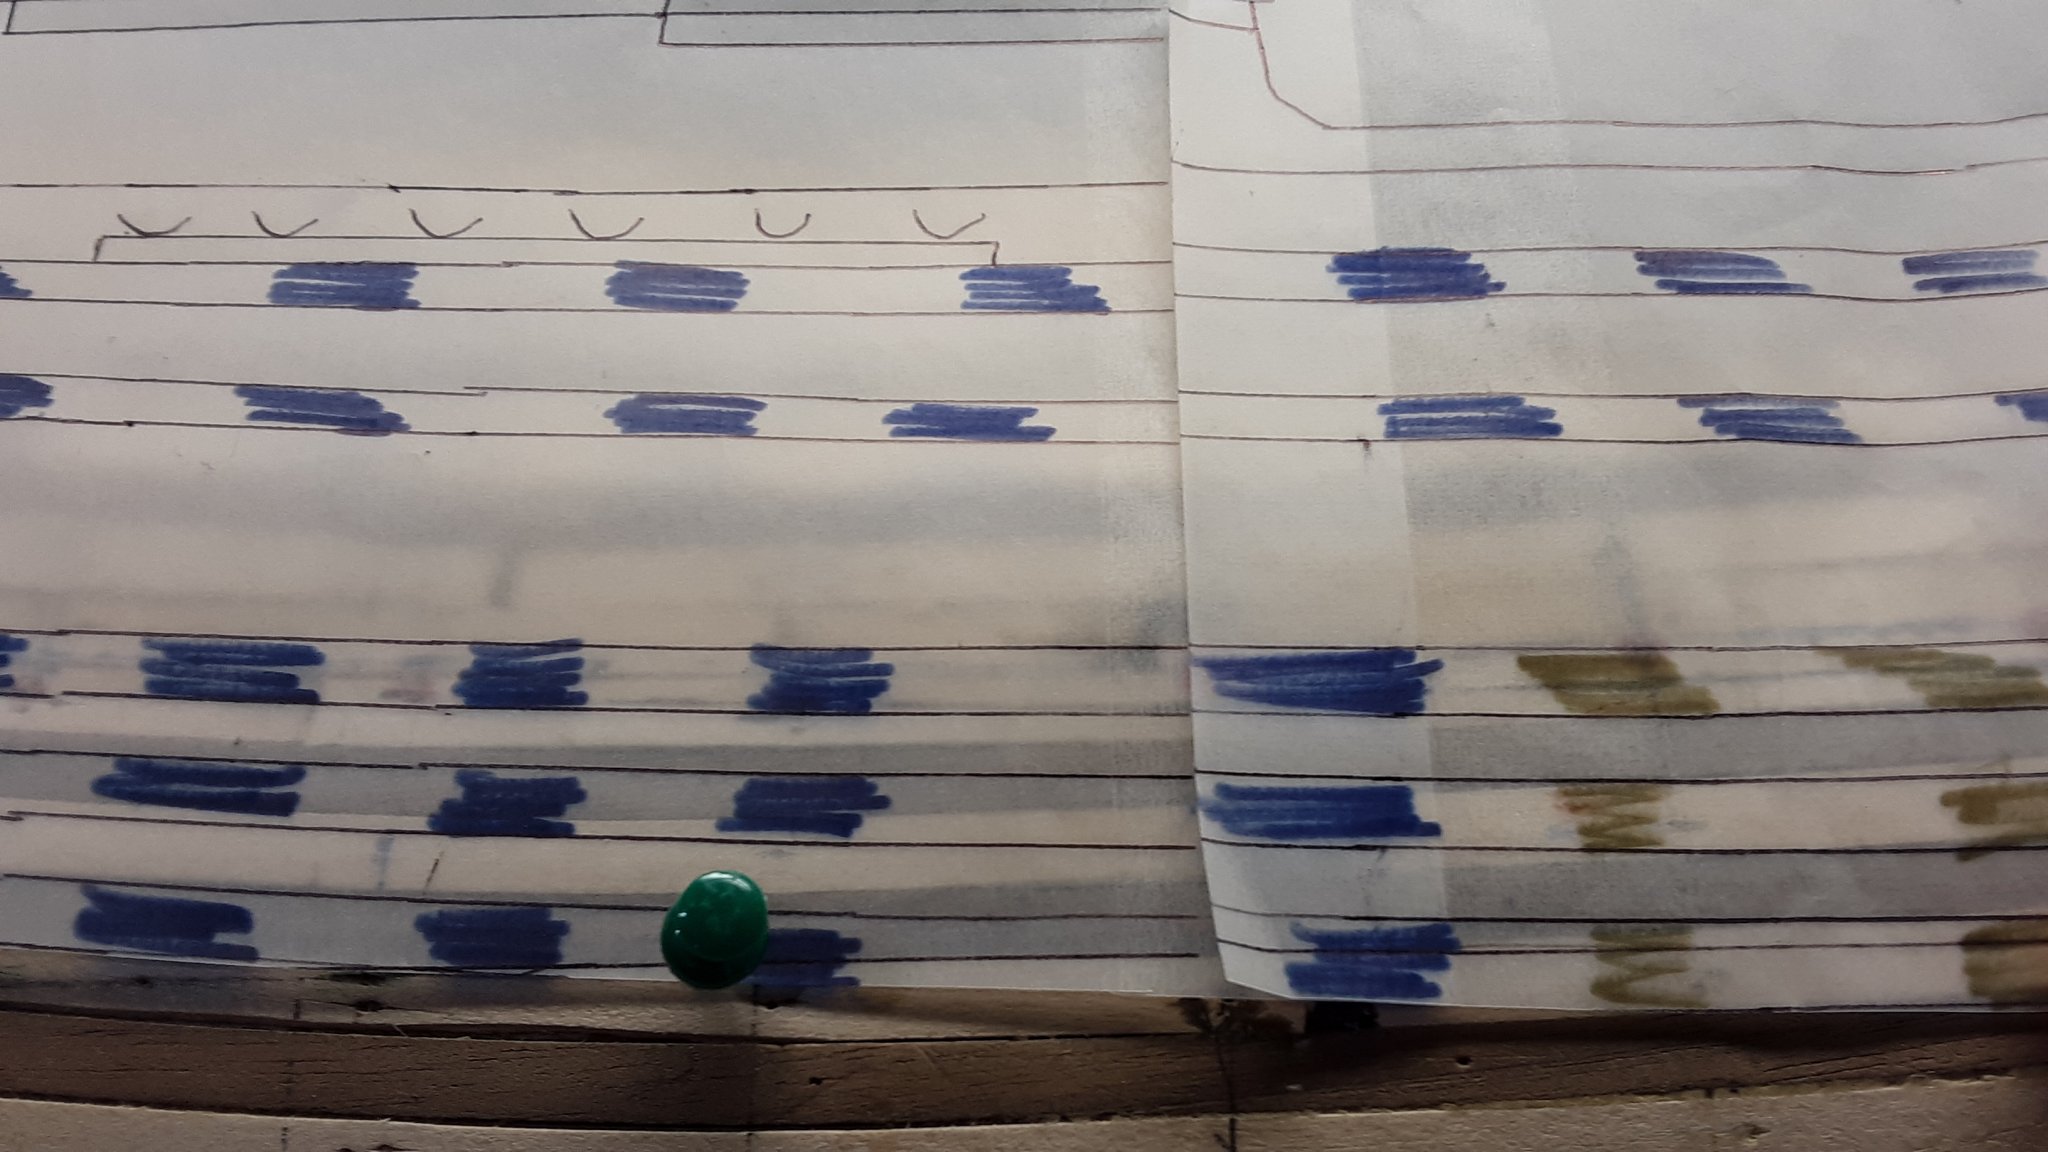
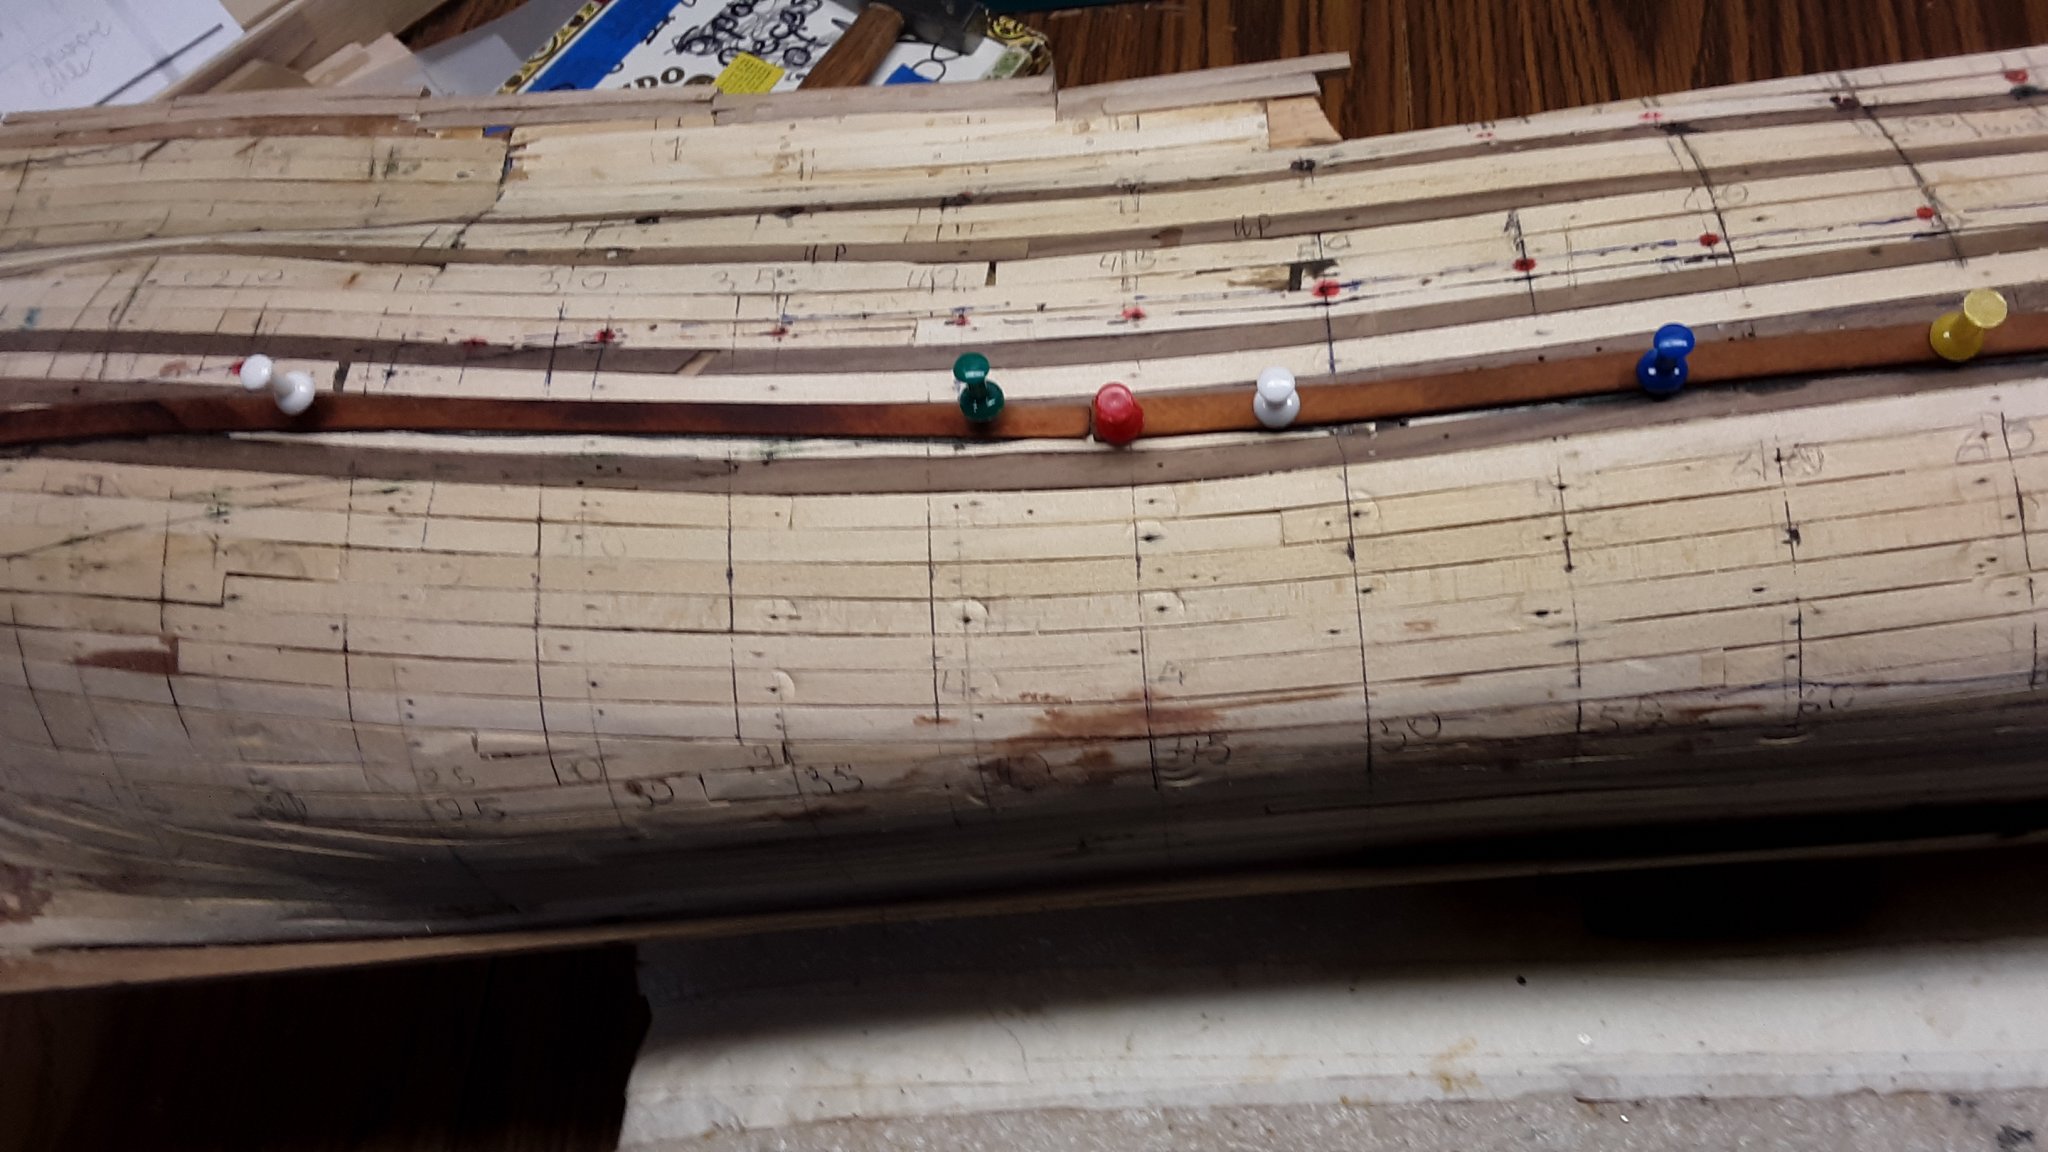
I used tracing paper and copied the curvature of the wales from the plan and transferred the lines to the hull.
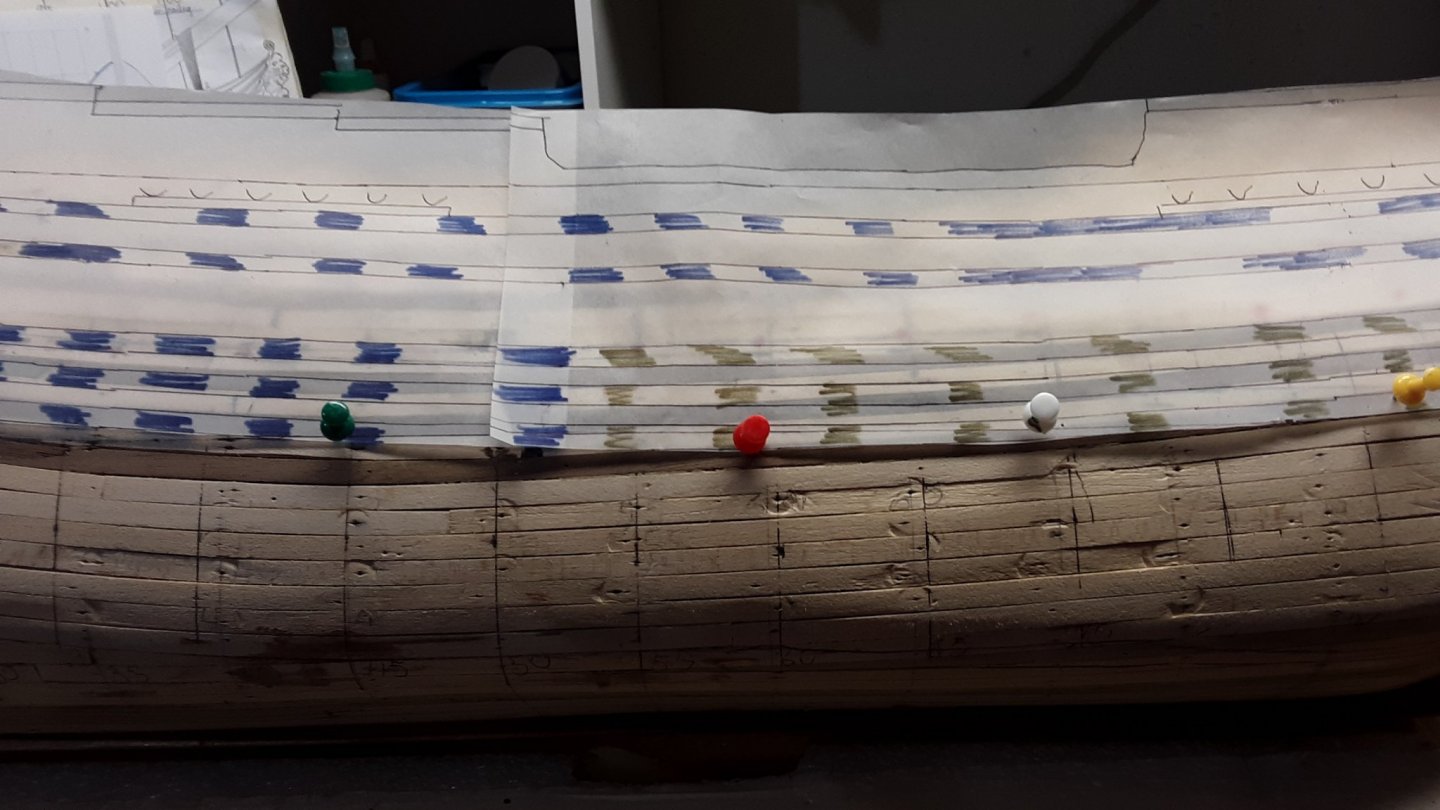

Compared to what I initially installed as the lower wale, the one on the plan follows the curve of the Fluit better. My original wale has a too steep of a curve towards the center of the hull.

Then attached 2 long planks as a temporary lowere wale.
It takes about 8 strakes from the keel to the bilge and 6 strakes from the bilge to the lower wale.
Marcus
- cog, mtaylor, GrandpaPhil and 4 others
-
 7
7
-
Thank you both, I will definitely look up both of them. I have heard from some people that they make those themselves.
Thanks against,
Marcus
- FrankWouts, mtaylor and EJ_L
-
3
-
Hans,
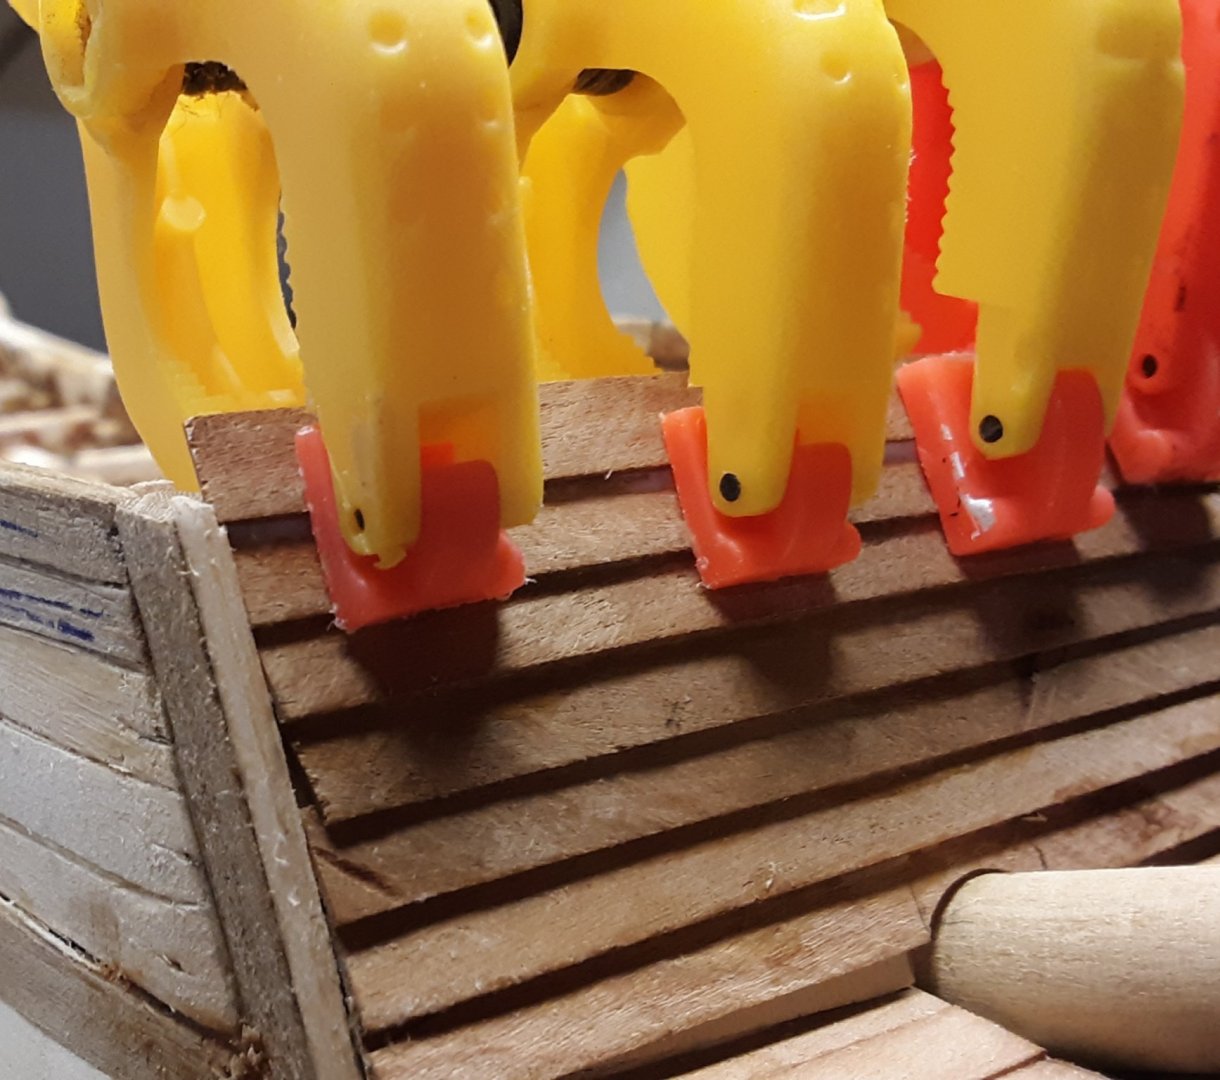
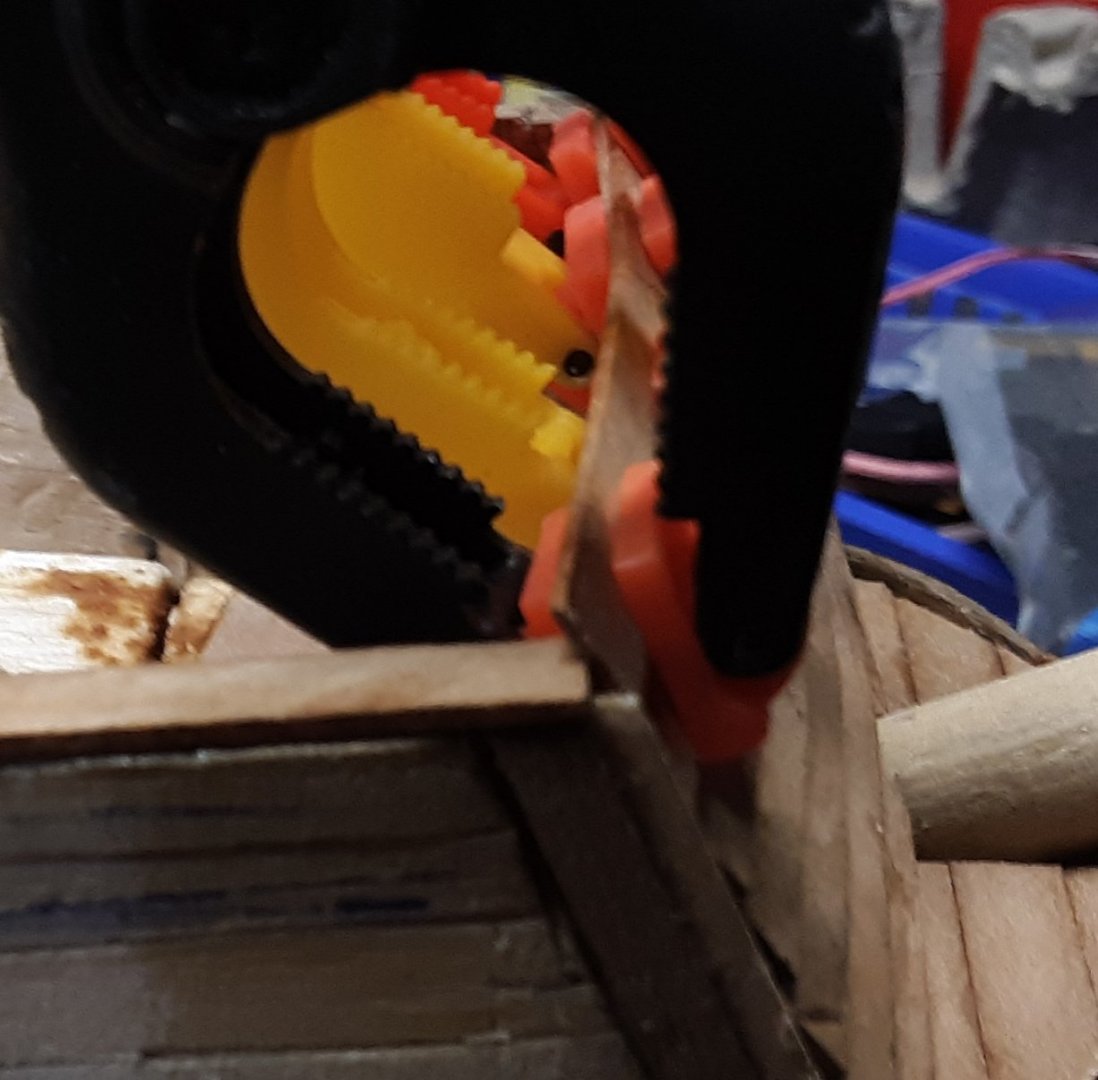
In post 152, last picture, the clamps. Self made? Here you can purchase them in 6" (15cm) and up. I have not found anything that small.
Marcus
- mtaylor and FrankWouts
-
2
-
Hans,
She is coming along beautifully and, your attention to all the details is well done.
Marcus
- FrankWouts, J11, YankeeD and 2 others
-
5
-
-
1 hour ago, Roger Pellett said:
A beautiful model!
This is is a great example of the fact that a worthwhile museum quality model does not need to be a famous ship or one with cannons. To bad we don’t see more off the beaten path subjects.
Roger
HEAR HEAR
MARCUS
- Roger Pellett, mtaylor and Colin B
-
3
-
-
-
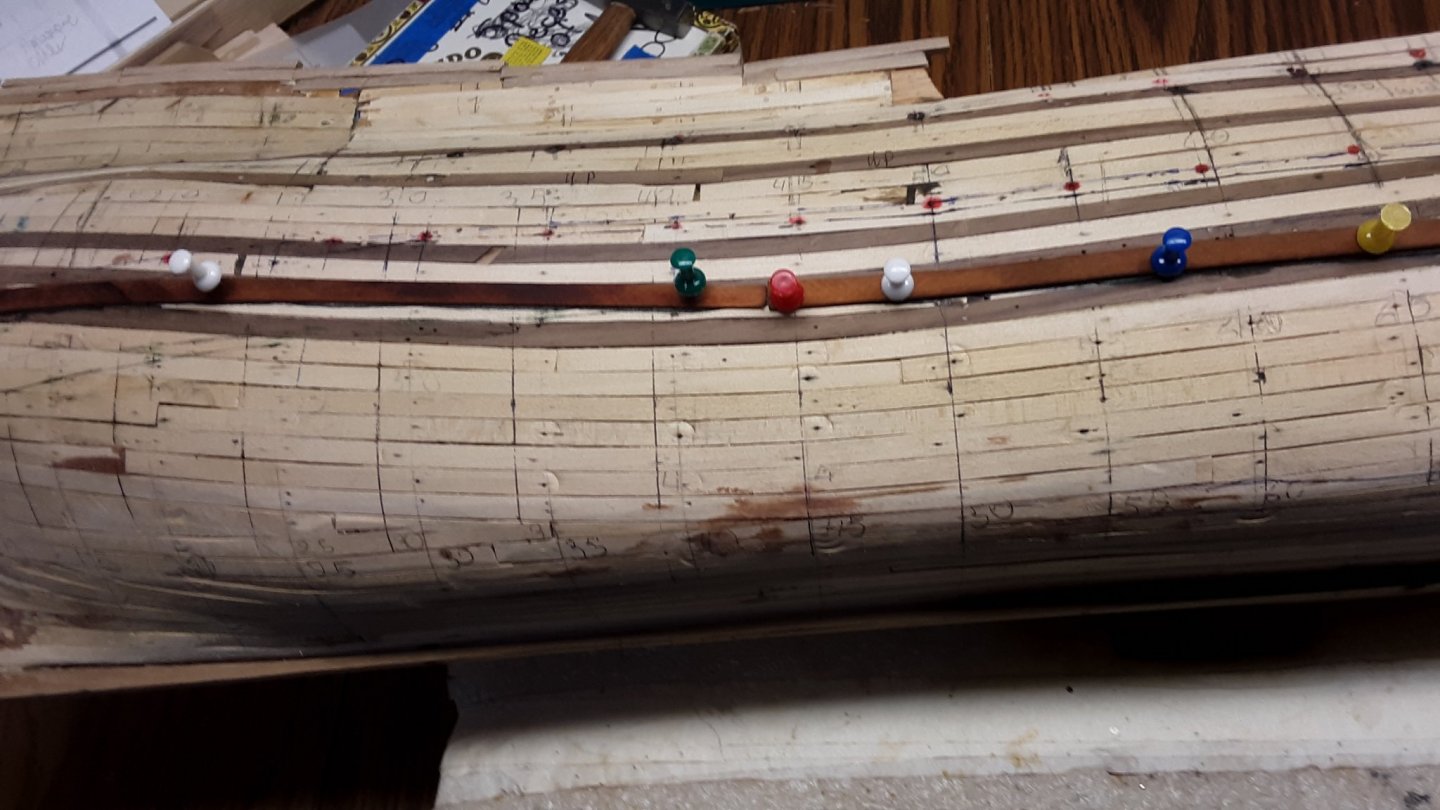
I could not wait till Monday so I did a strake next to the keel. Started with a straight butt beginning at the lowest wale and continued with the Dutch scarphs. Used 4 pieces of 20cm long cherry planks and a little piece to finish the strake.

Creating joints when the wood is wet, let the planks completely dry and then glue them together on the hull works well.
Marcus
-
Thanks, this is a great site.
Lots of great stuff.
Marcus
- mtaylor and FrankWouts
-
2
-
-
11 hours ago, YankeeD said:
0,4mm and it is soft copper, so no need for annealing in fire or so. bought at a Dutch internet modelshop
What is the name of the Dutch internet modelshop? So I can see the material that you got and compare it to material that I can get here.
Thanks,
Marcus
- mtaylor and FrankWouts
-
2
-
13 hours ago, Ab Hoving said:
For the time being you get the benefit of the doubt. If this really works it would be a fantastic system. But how to deal with ending planks in the bow and extra planks in the stern? Like here:
You really got my attention, Marcus.
Ab,
I would not use these joints at the stems of the bow and stern. Similar to the picture if that ship in your post. Monday I will do a practice strake and post it so you can see.
Marcus
-
Hans,
Your post no. 121 bottom picture you show your gunport hinges.
What material is that? Copper? How thick is that?
Marcus
- FrankWouts, EJ_L and mtaylor
-
3
-
2 hours ago, Jean-Pierre said:
Marcus,
you are a honest modeller but you should learn to cheat a little: in my opinion it is much easier to use full length planks whenever possible, and afterwards, to indent the joints.
Jean-Pierre
Jean-Pierre,
I used full length planks on my Boyer and indented them at certain lengths. This time I want to try to use 20cm lengths and fit the scaphs as I go along.
2 hours ago, YankeeD said:Marcus, when doing the planking and scarphs on my ship I found that each scarph-joint was different due to the bending etc of the planks.
Maybe that is also something that Ab means by his comments?
I also had a mould but needed to sand each scarph afterwards for a nice, flush fitting.
Hans,
I expect the scarph joints to be different while following the curvature of the ship.
Marcus
-
1 hour ago, Ab Hoving said:
Very smart idea, but I have some doubts. In real life not a single plank in a ship is straight. How will you follow the lines with straight planks?
When the time comes to plank the second layer, the planks will be soaked again for easier bending and following the lines.
Marcus
-
Thank you for all the likes.
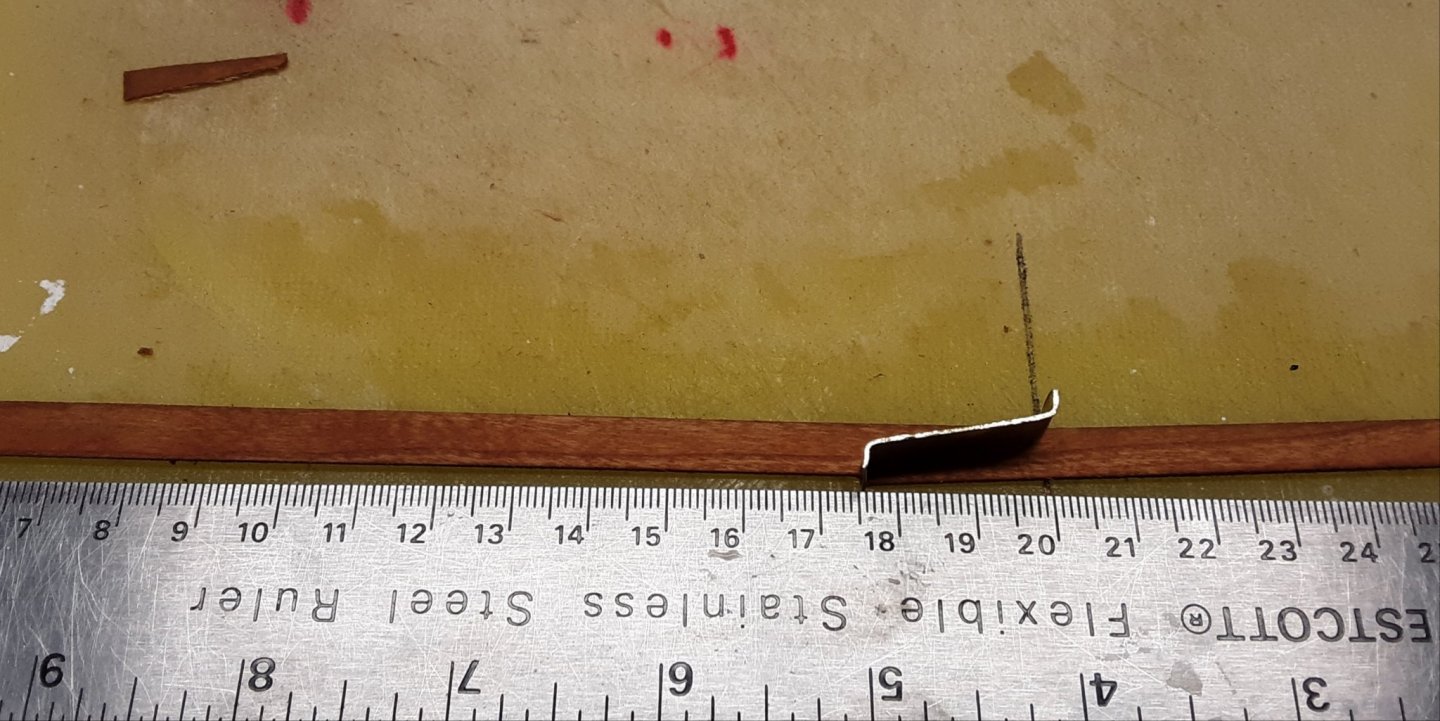
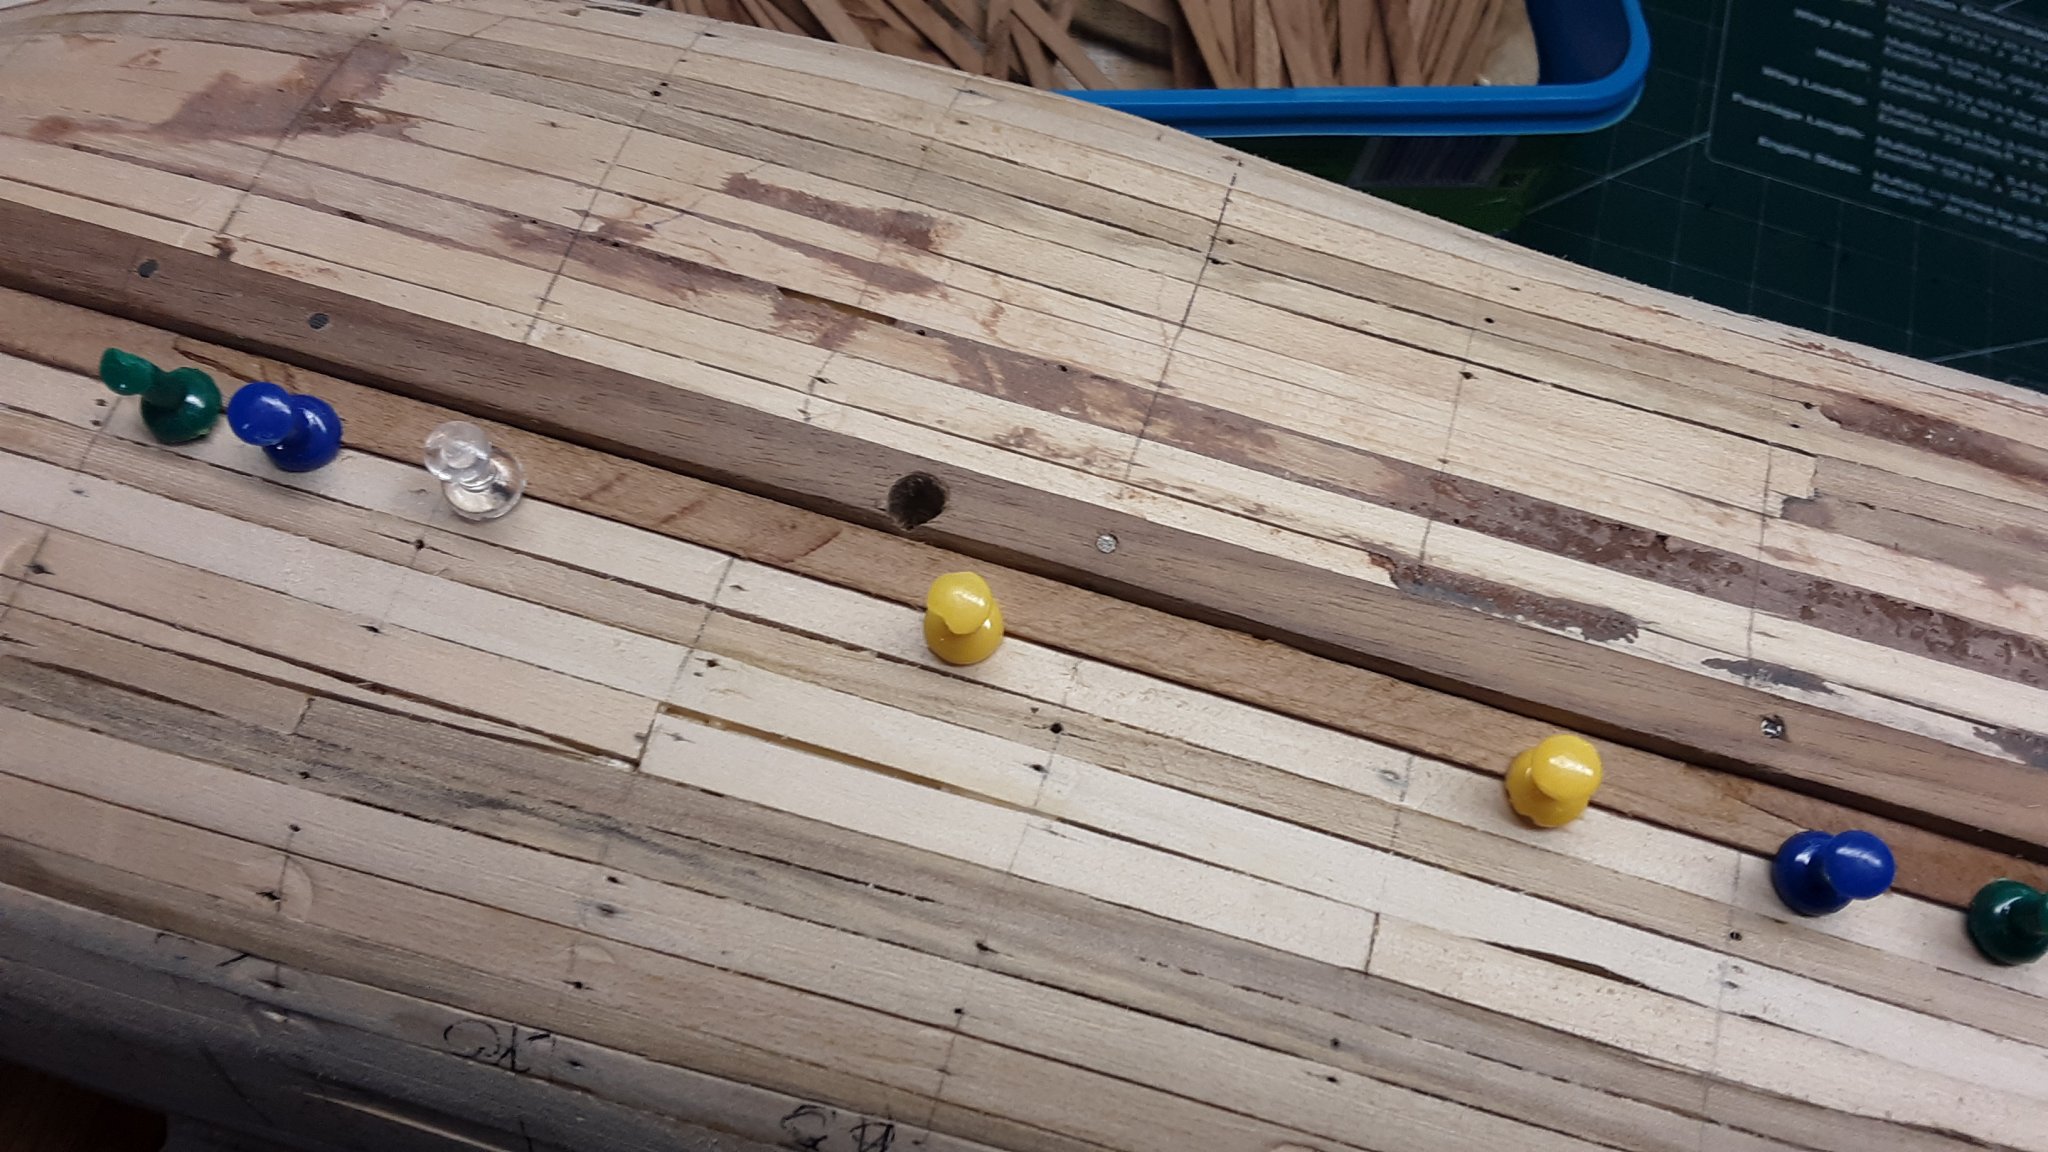
Preparing the second layer of cherry planking. Most of the planks will be 20 cm long with a Dutch scarph joint on each side. There will also be smaller lengths.
Put the planks in some water as they will cut better without splitting. Once the scarphs are cut the planks will be dried.

Top plank is to show what the scarphs look like when cut.
Middle plank is to show when the scarphs are together.
Bottom plank being cut to make a scarph.
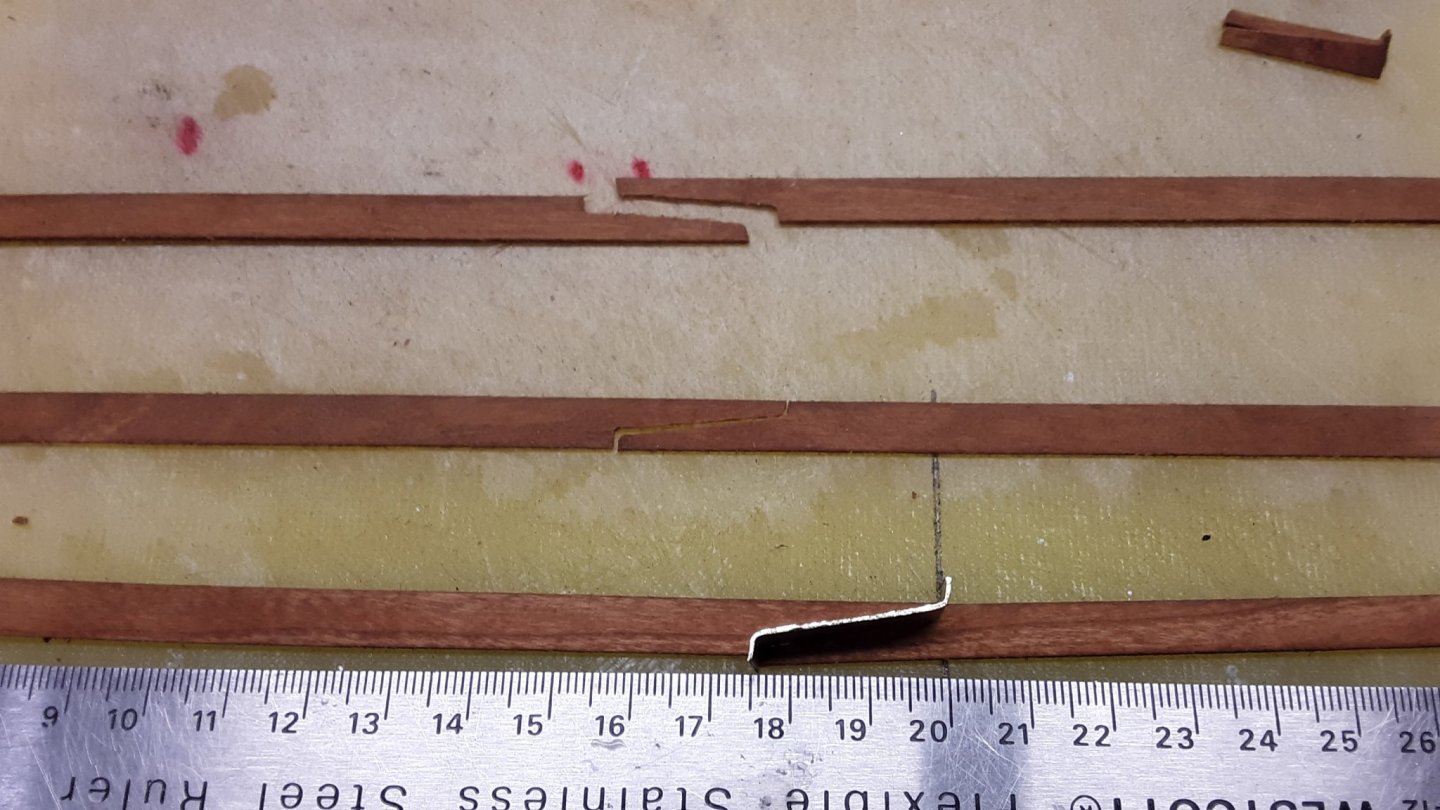
Close up from a scarph being created.
I will be creating joints on about 80 planks. Not all joints will be created now, some will be made when I plank the ship.
Marcus
-
Hans,
Finally caught up with your build. Beautifully executed. I've always built merchant ships but for a scratch built warship I will be building this one and as far as I know the book from Otto Blom is the best out there.
Marcus
- FrankWouts, YankeeD, EJ_L and 1 other
-
4
-
Thank you for all the likes and Patrick, thank you for the compliment.
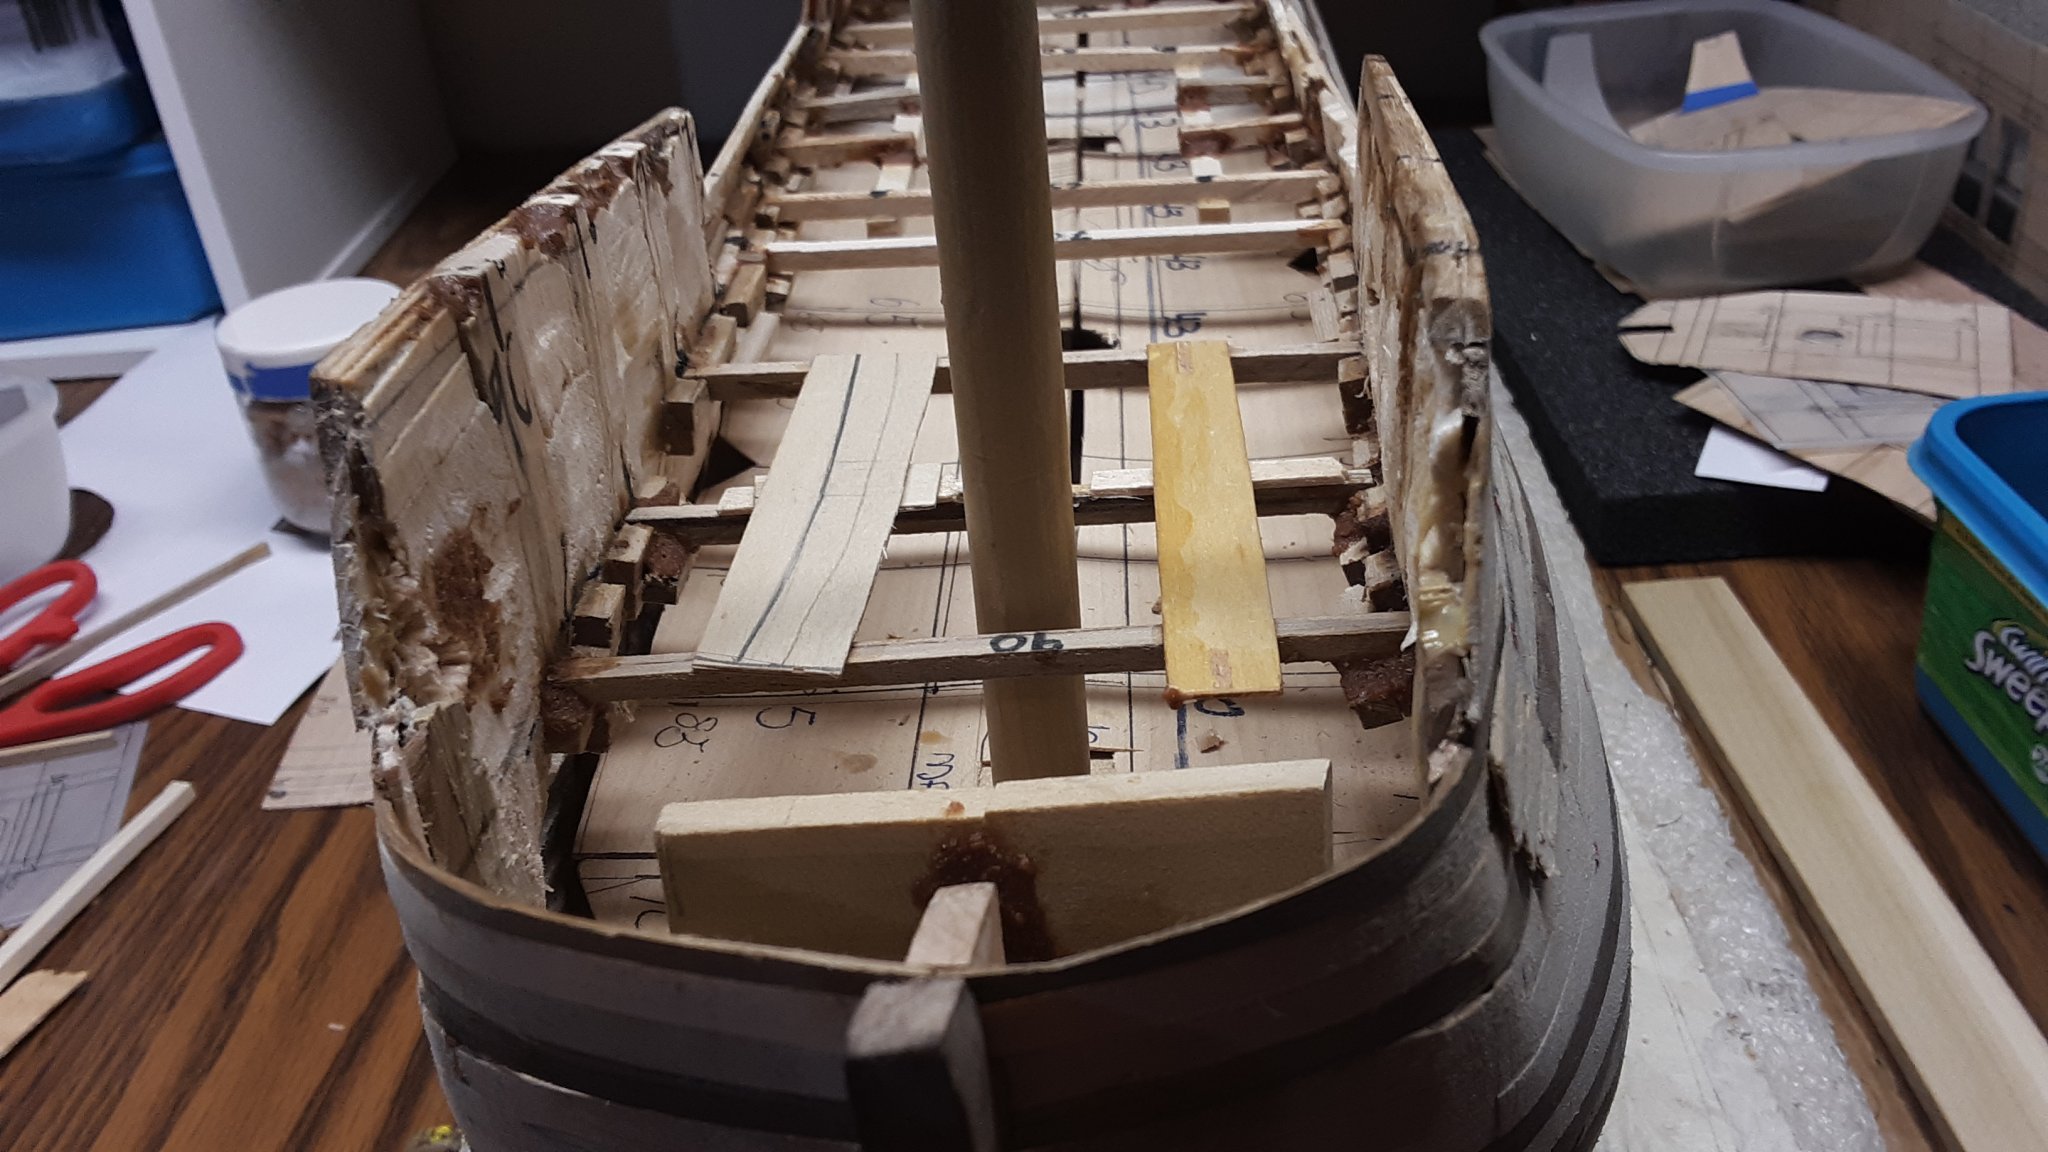
Finishing up on the location of where the bowsprite goes into its holder and the little deck located at the tip of the stem.
Started working on the bowsprite panel. Cut a piece of veneer by 0.5mm wider than the actual location of the panel so it is both a tight fit and slightly bowed or curved. Started paneling the veneer with 5mm wide cherry strips.
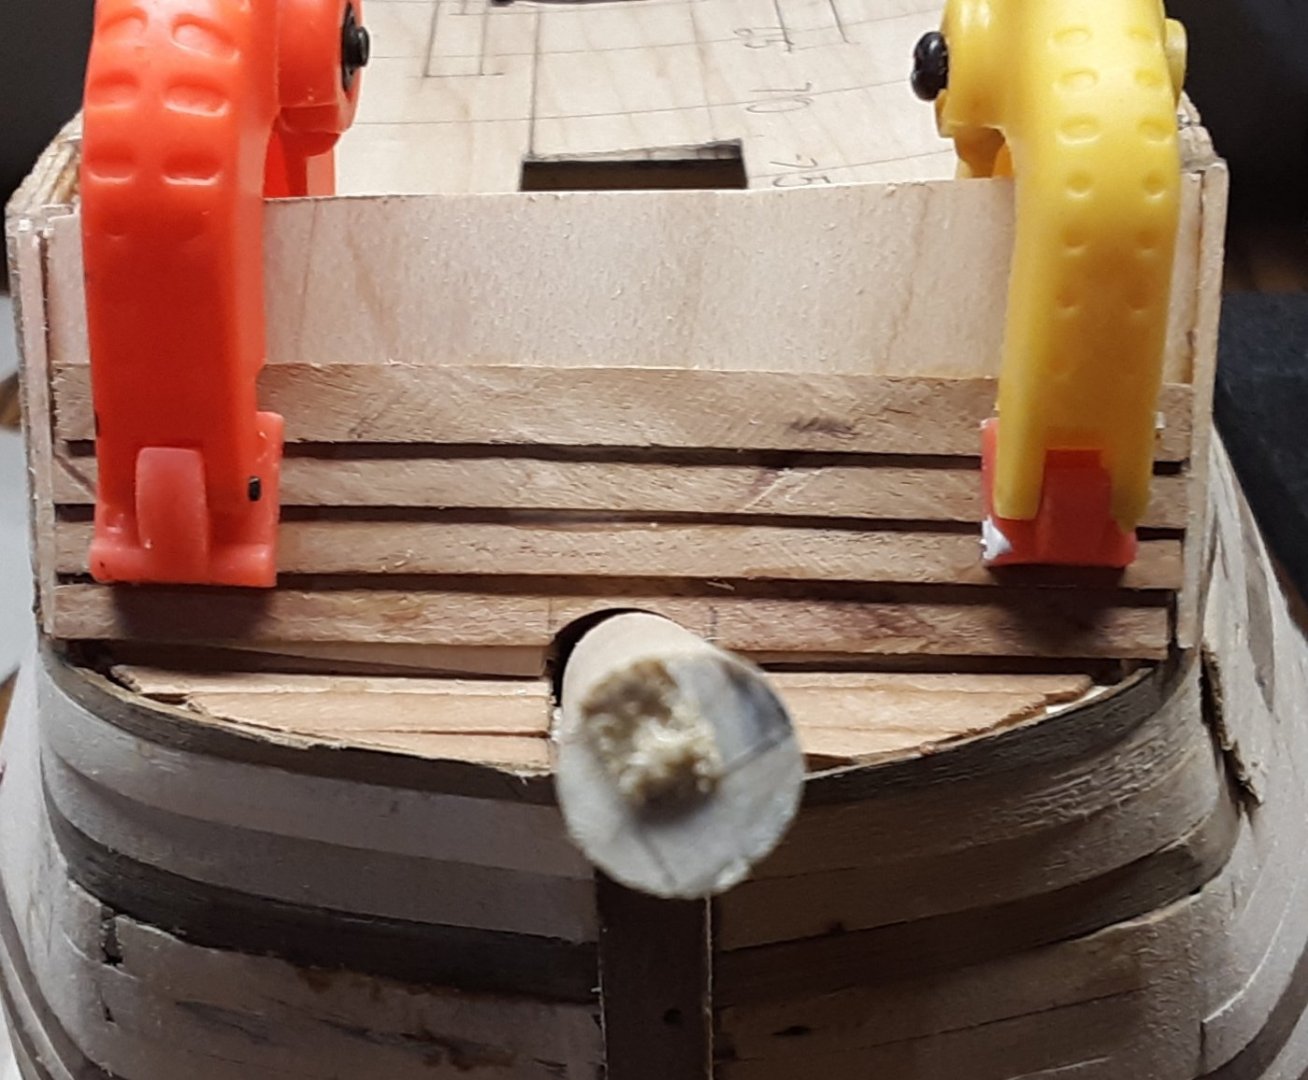
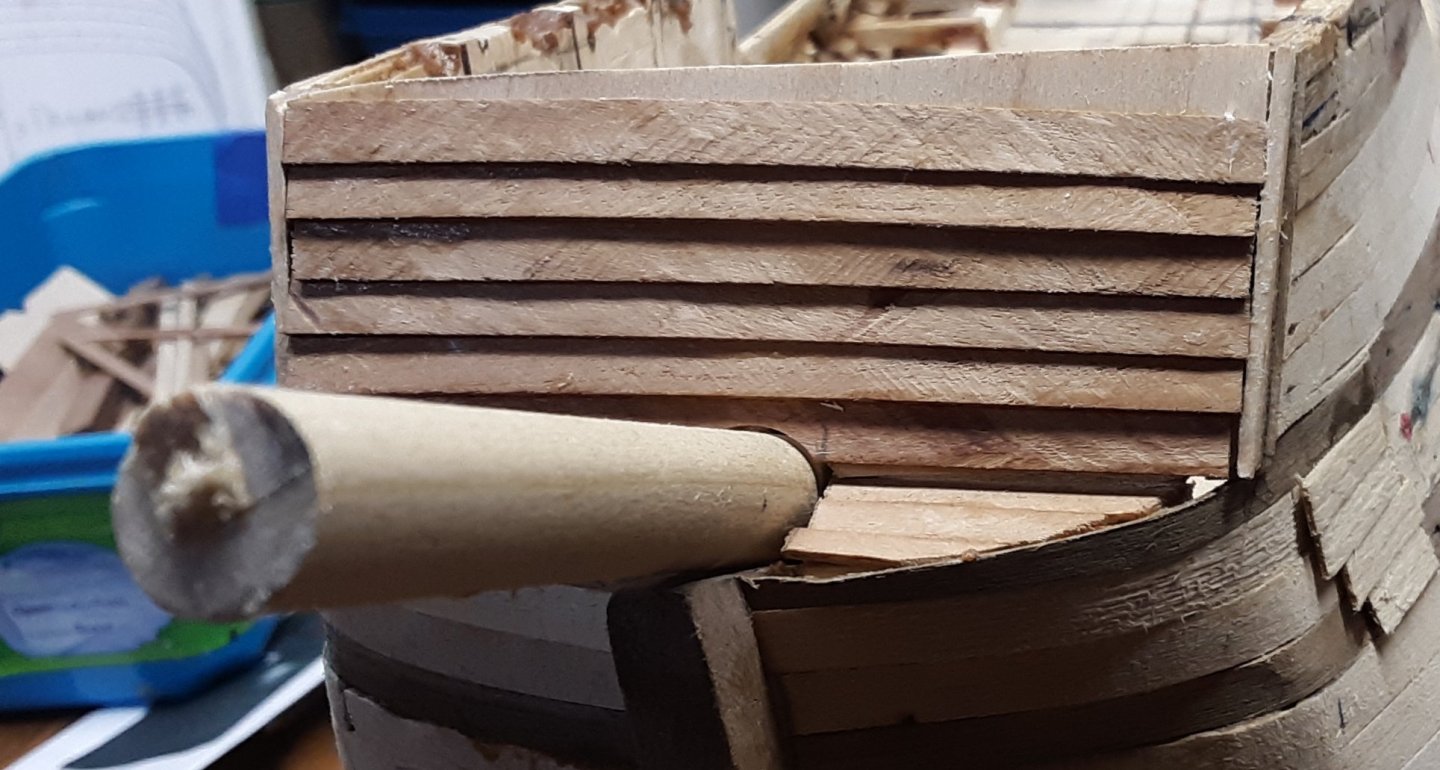
I still need to raise the wall from hull by 4mm. So then it is even with the other side.
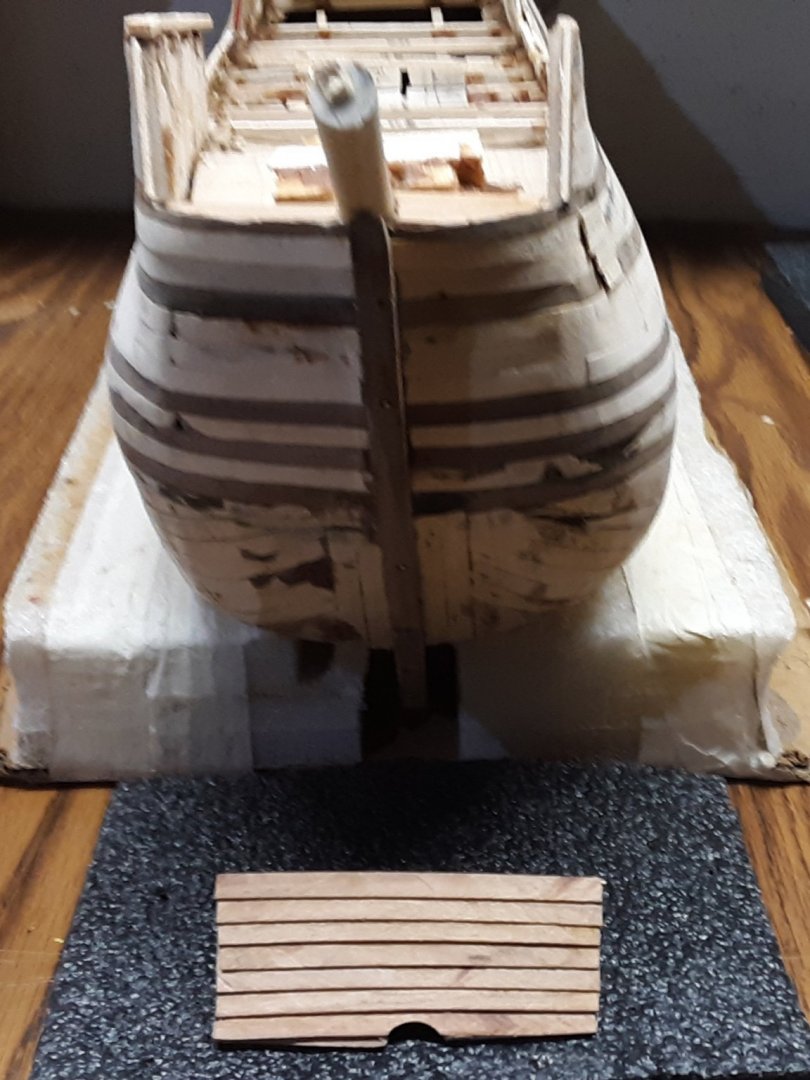
Bowsprite panel can be removed for easy adding 2 catheads squares, 1 gunprt and 3 steps.
Once the glue dried the paneling was marked for the catheads and gunport.
Tomorrow the 2 catheads squares will be removed.
Marcus
-
# Jean-Pierre.
The built looks great. I like how you did the decorations. Also, noticed that your taffrail is very different compared to mine. I like that about Fluits, numerous variations.
# Jan,
Thank you for the linguistic history lesson. Fascinating!
Marcus
-
Jean-Pierre,
Beautiful!!! You did a great job so far.
I like your explanation of the decorations.
I hope my Fluit will look as good as yours.
Marcus
-
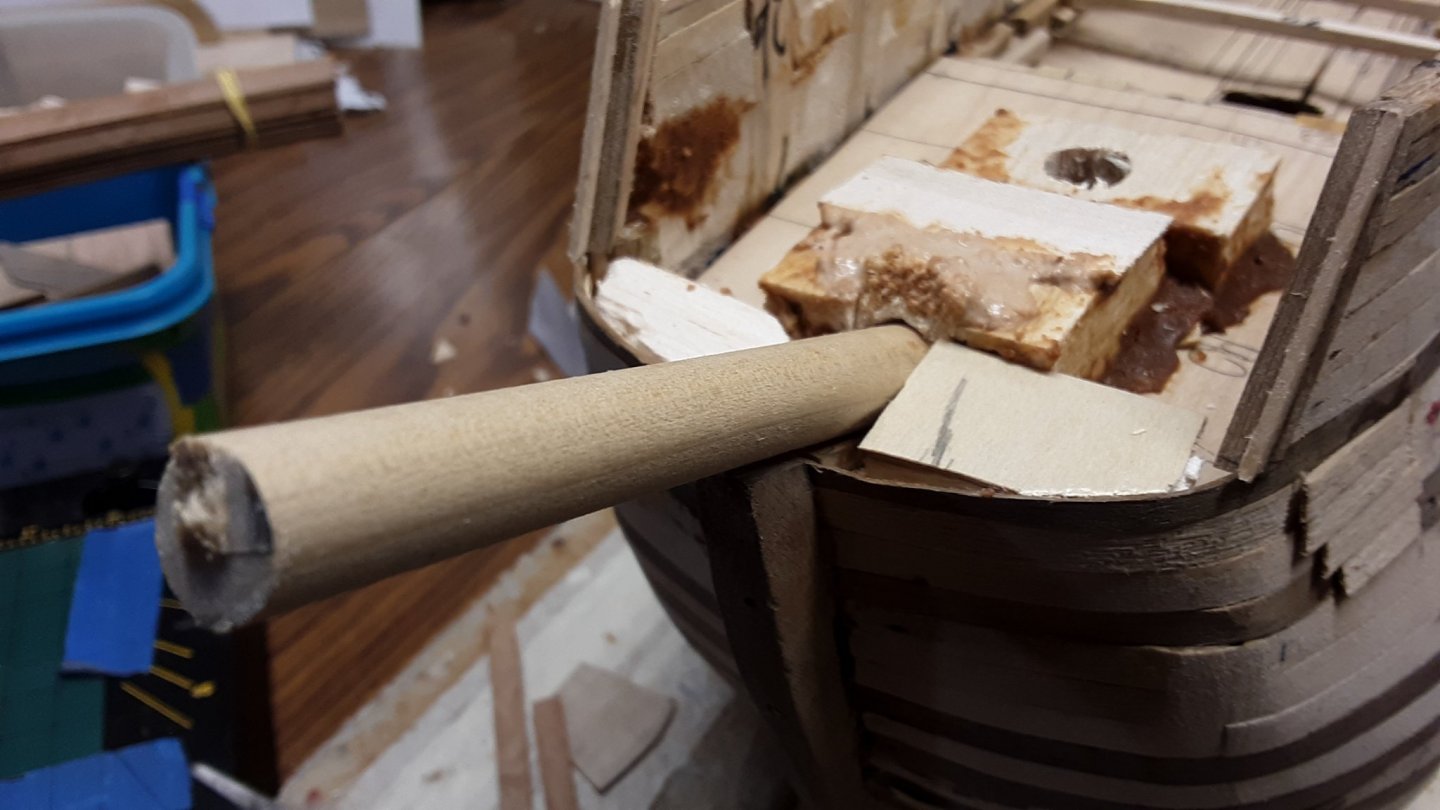
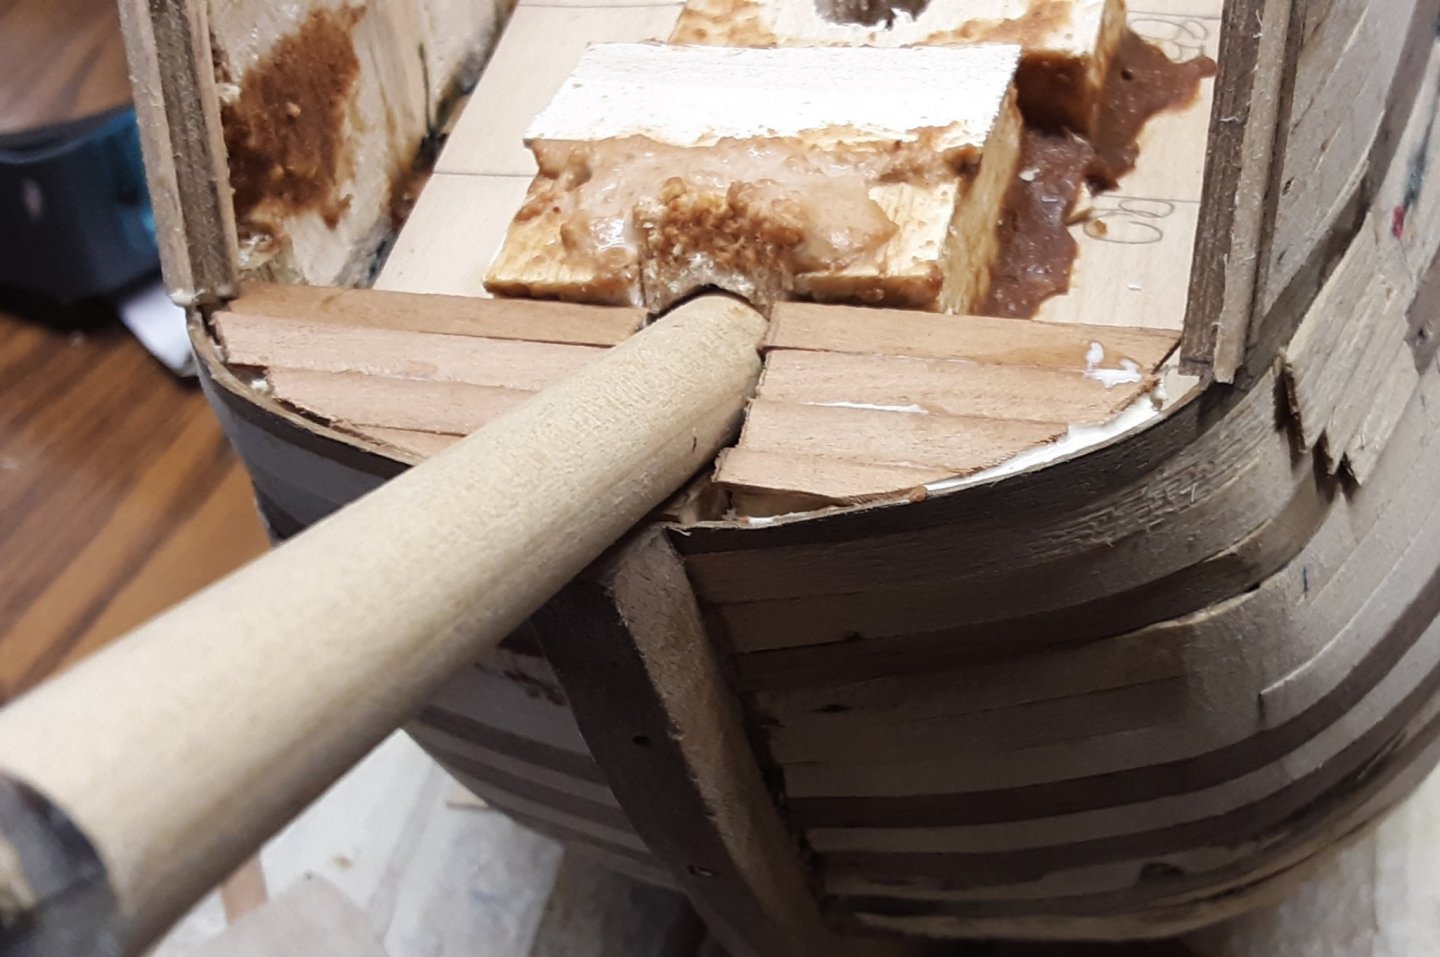
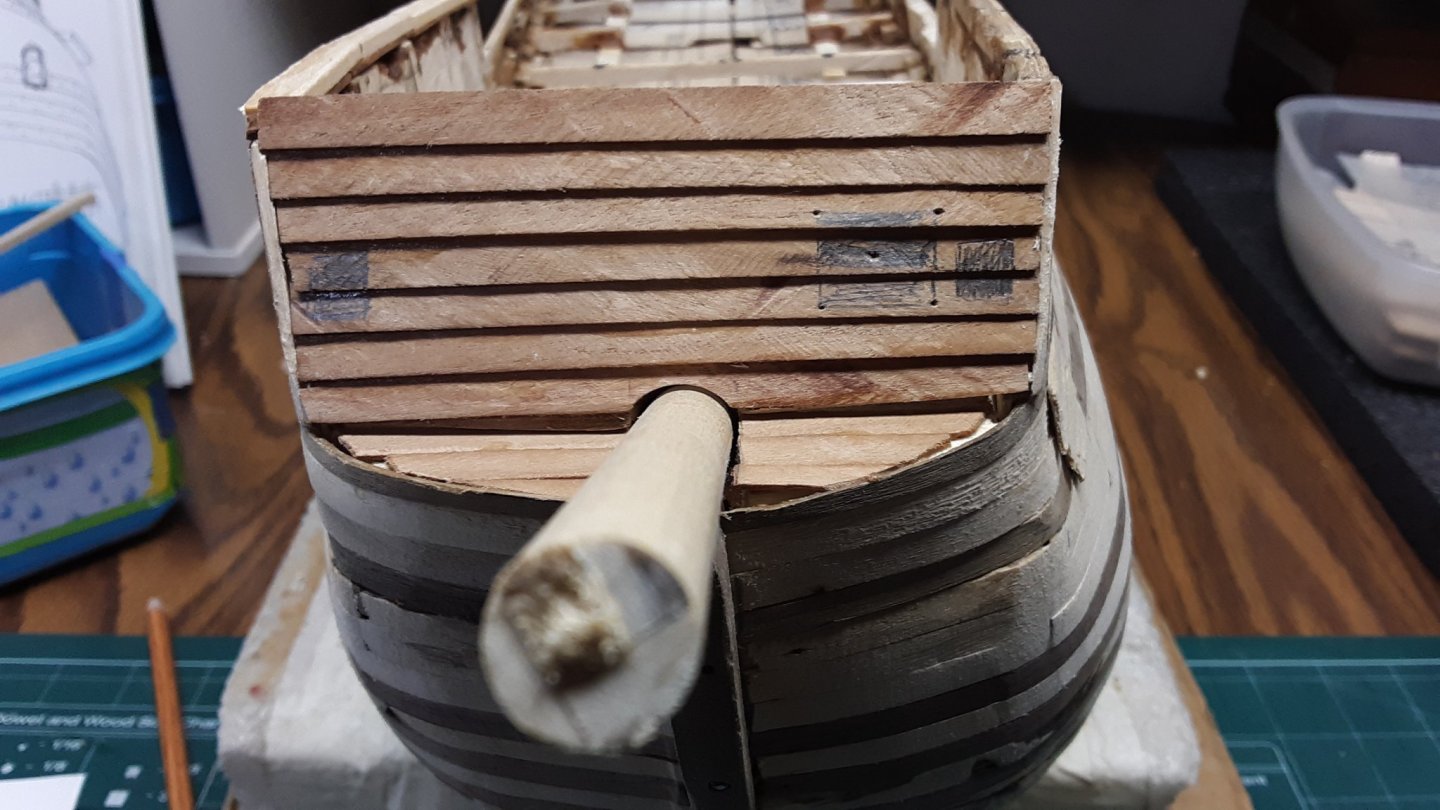
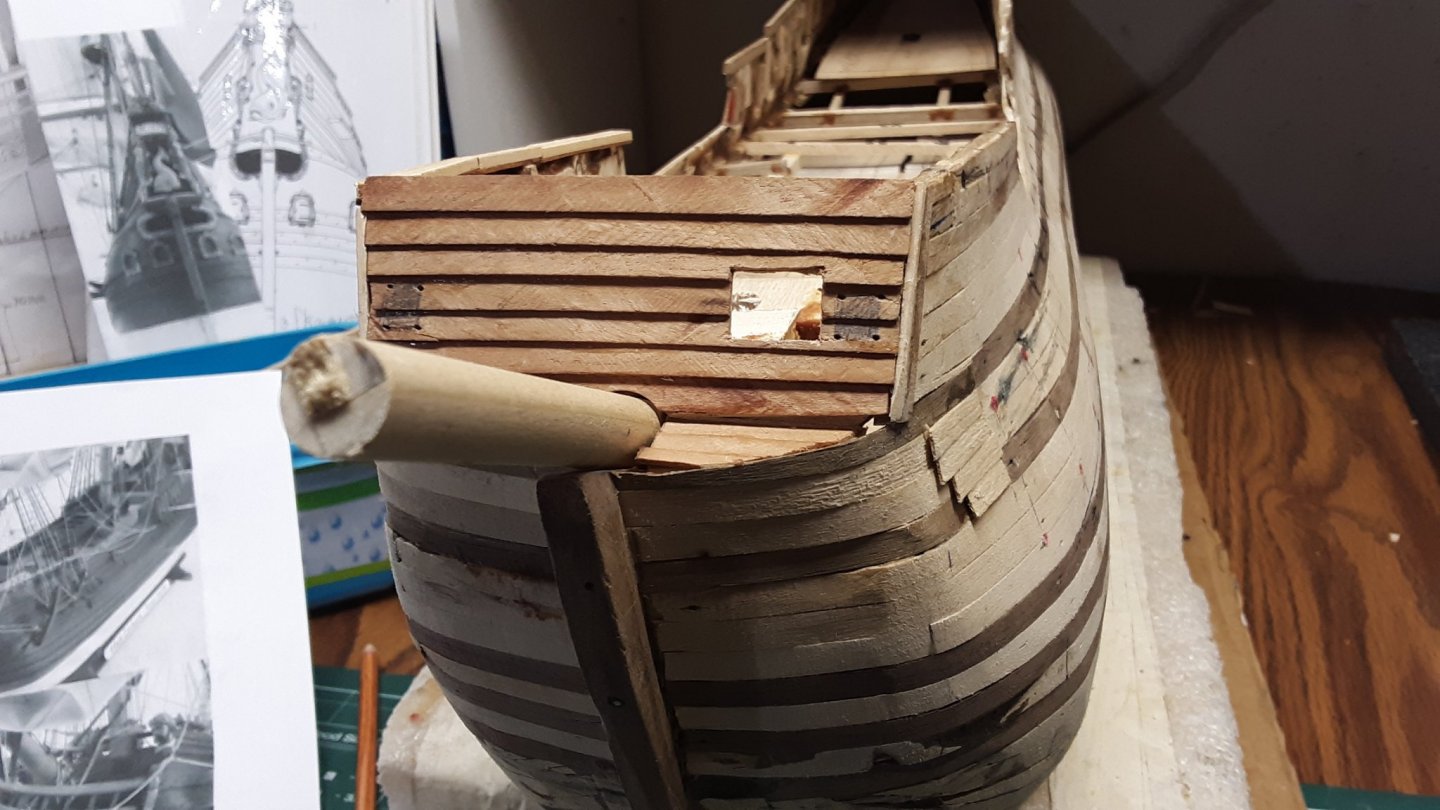
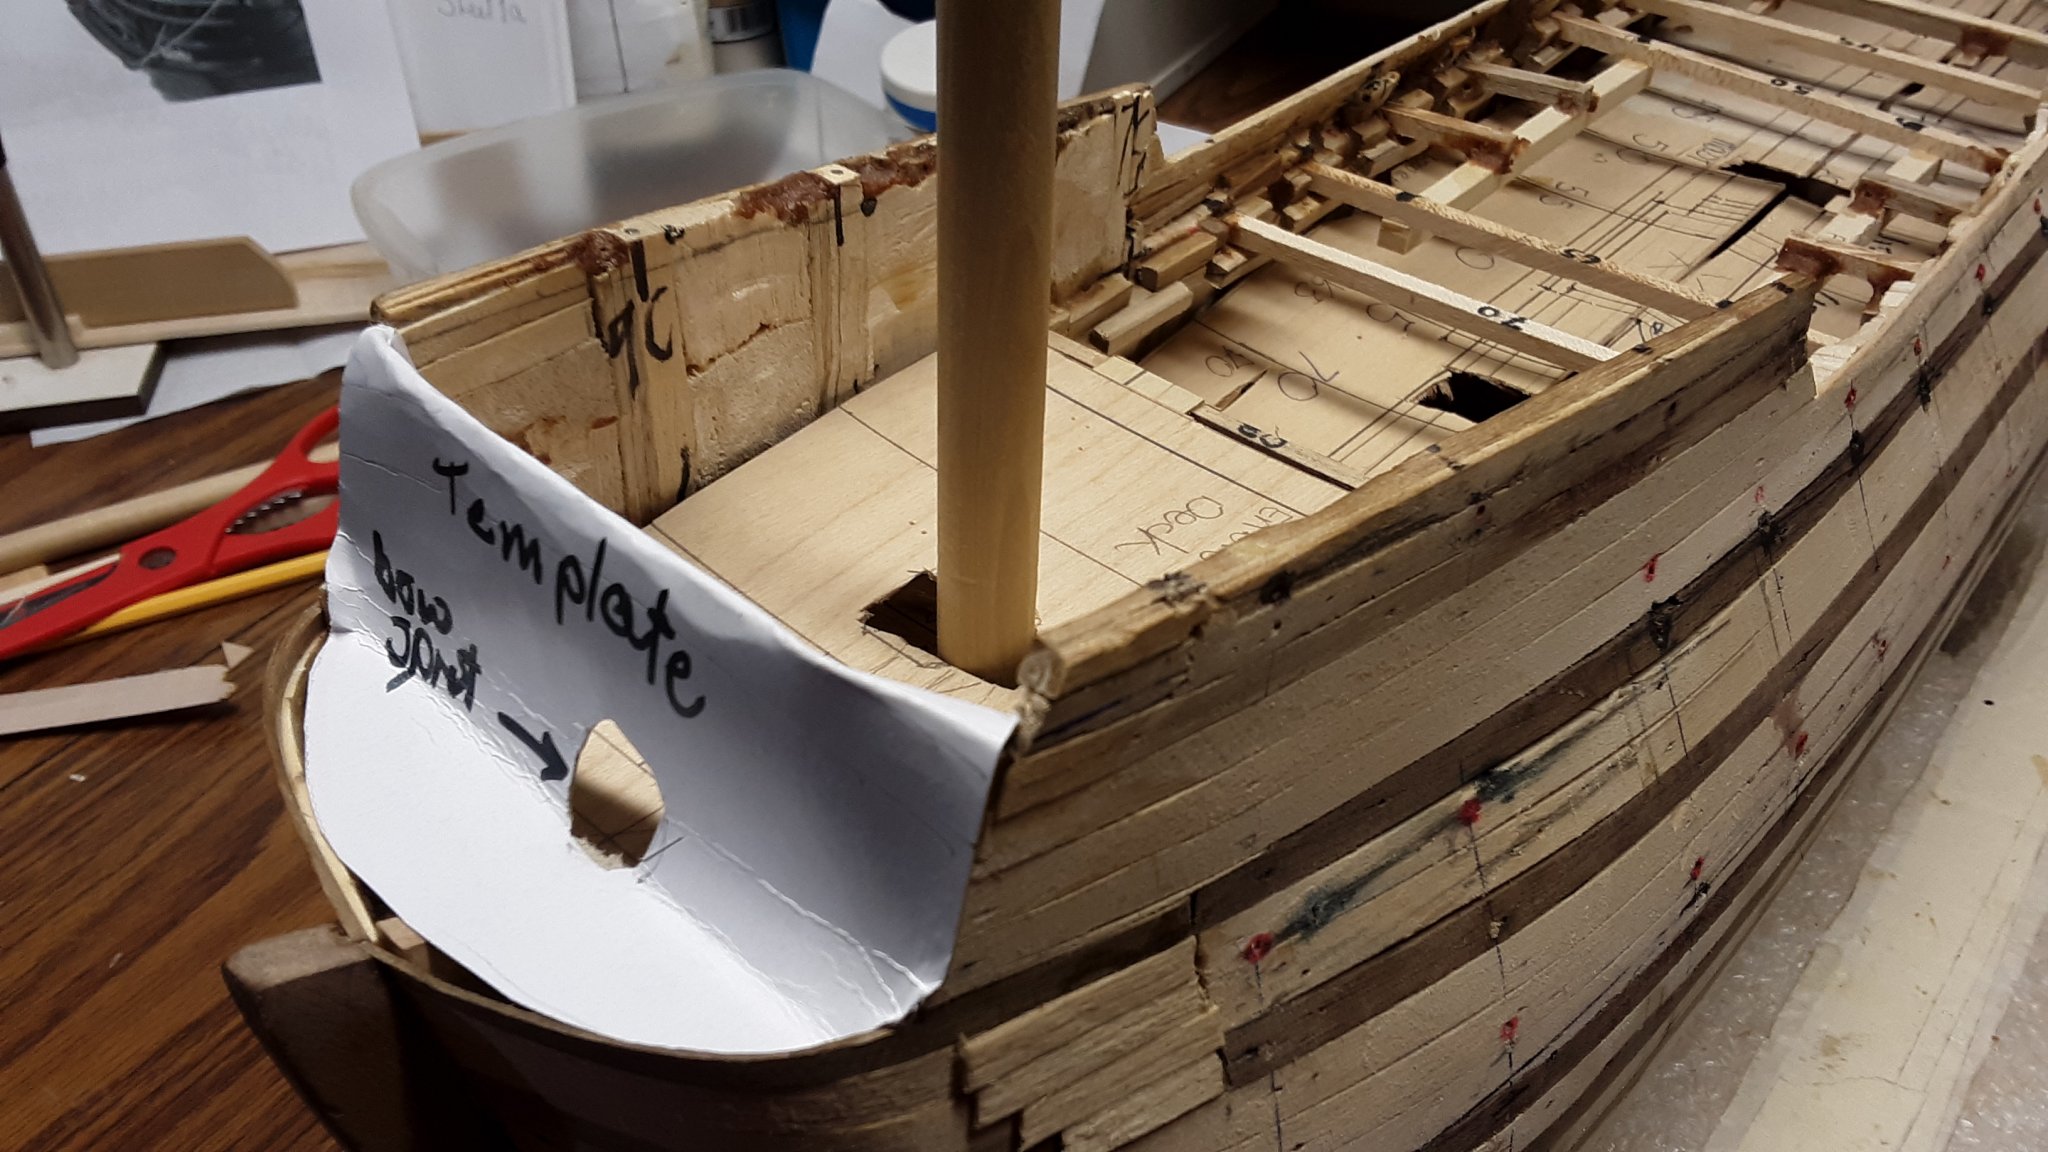
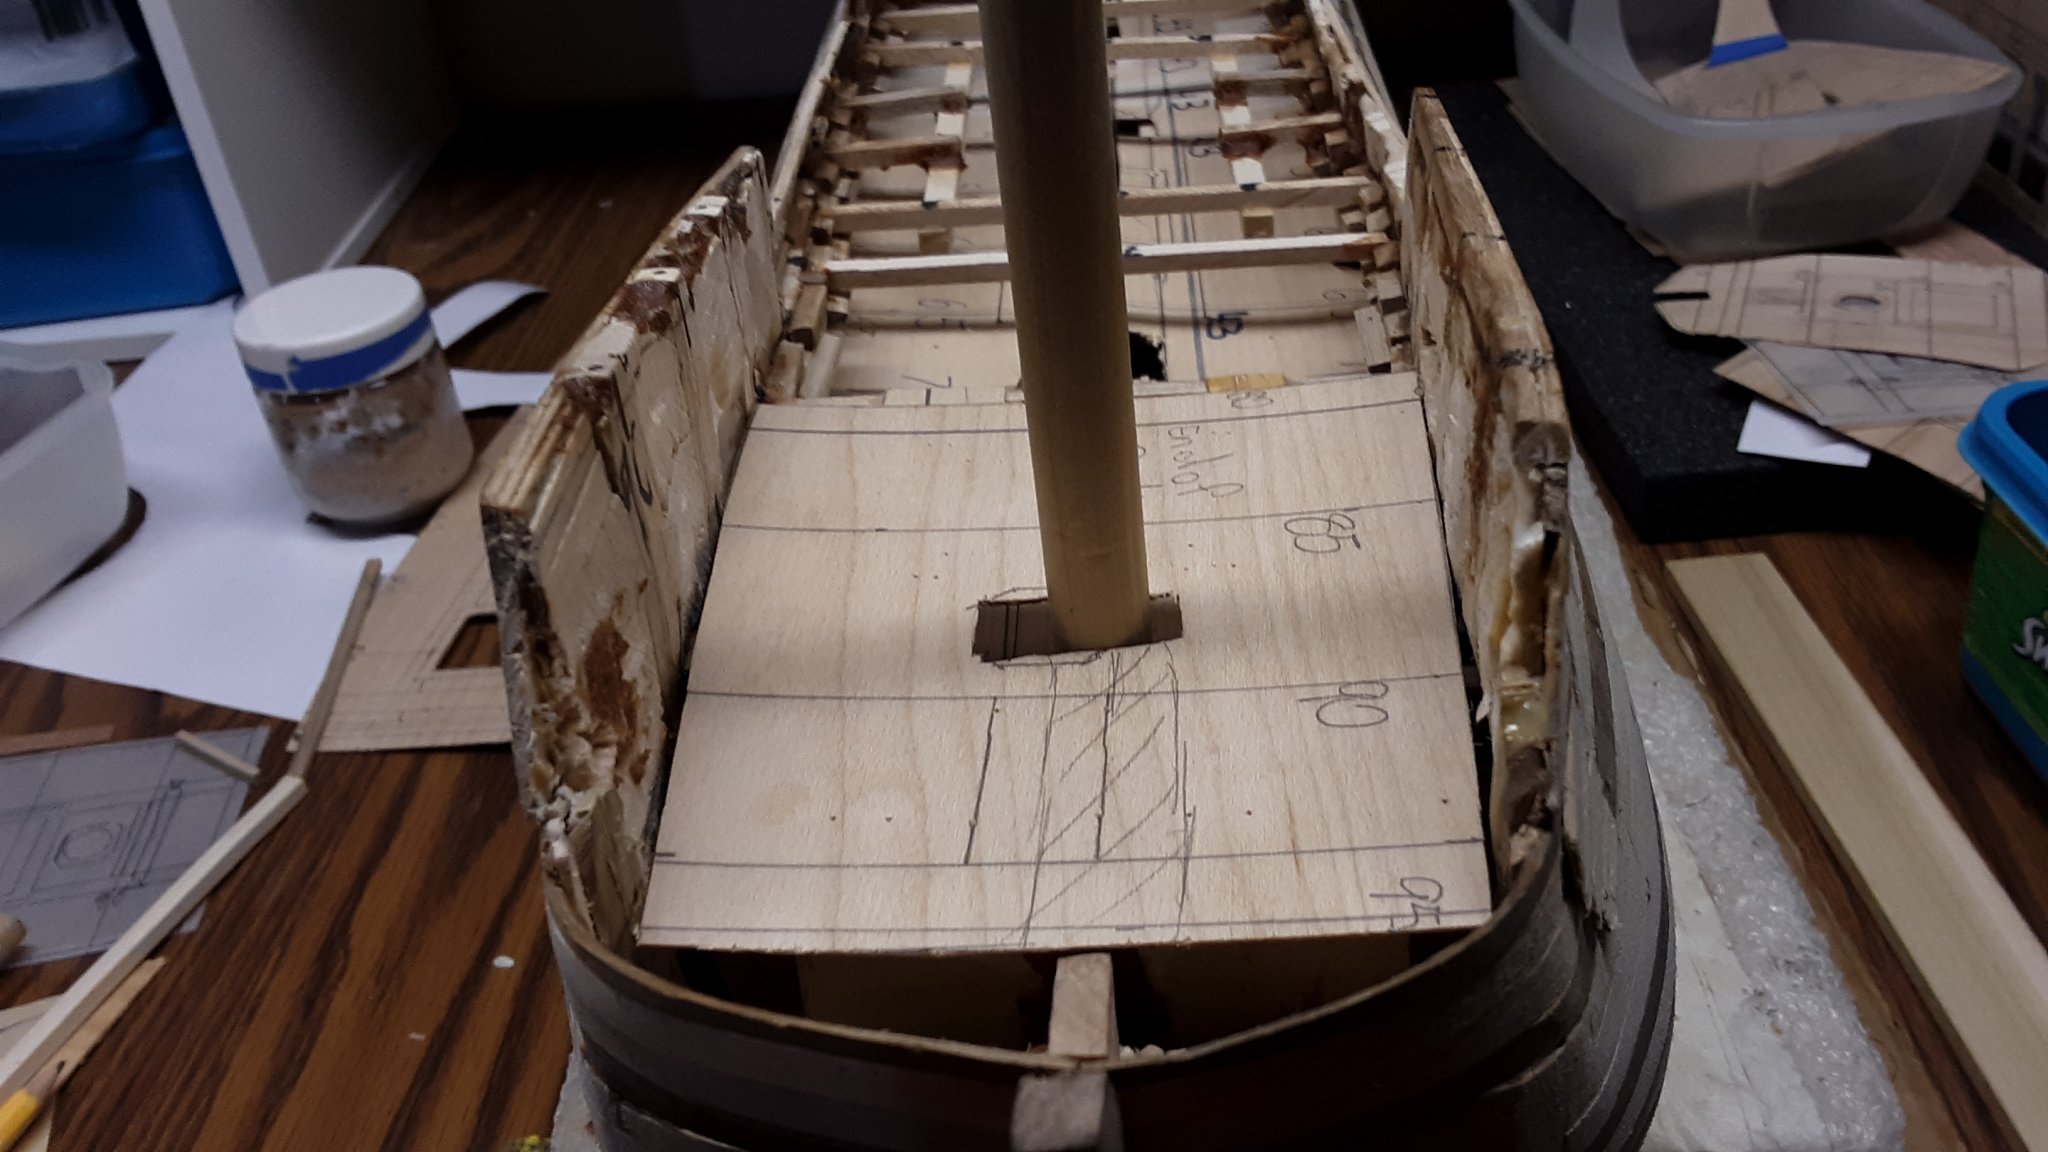
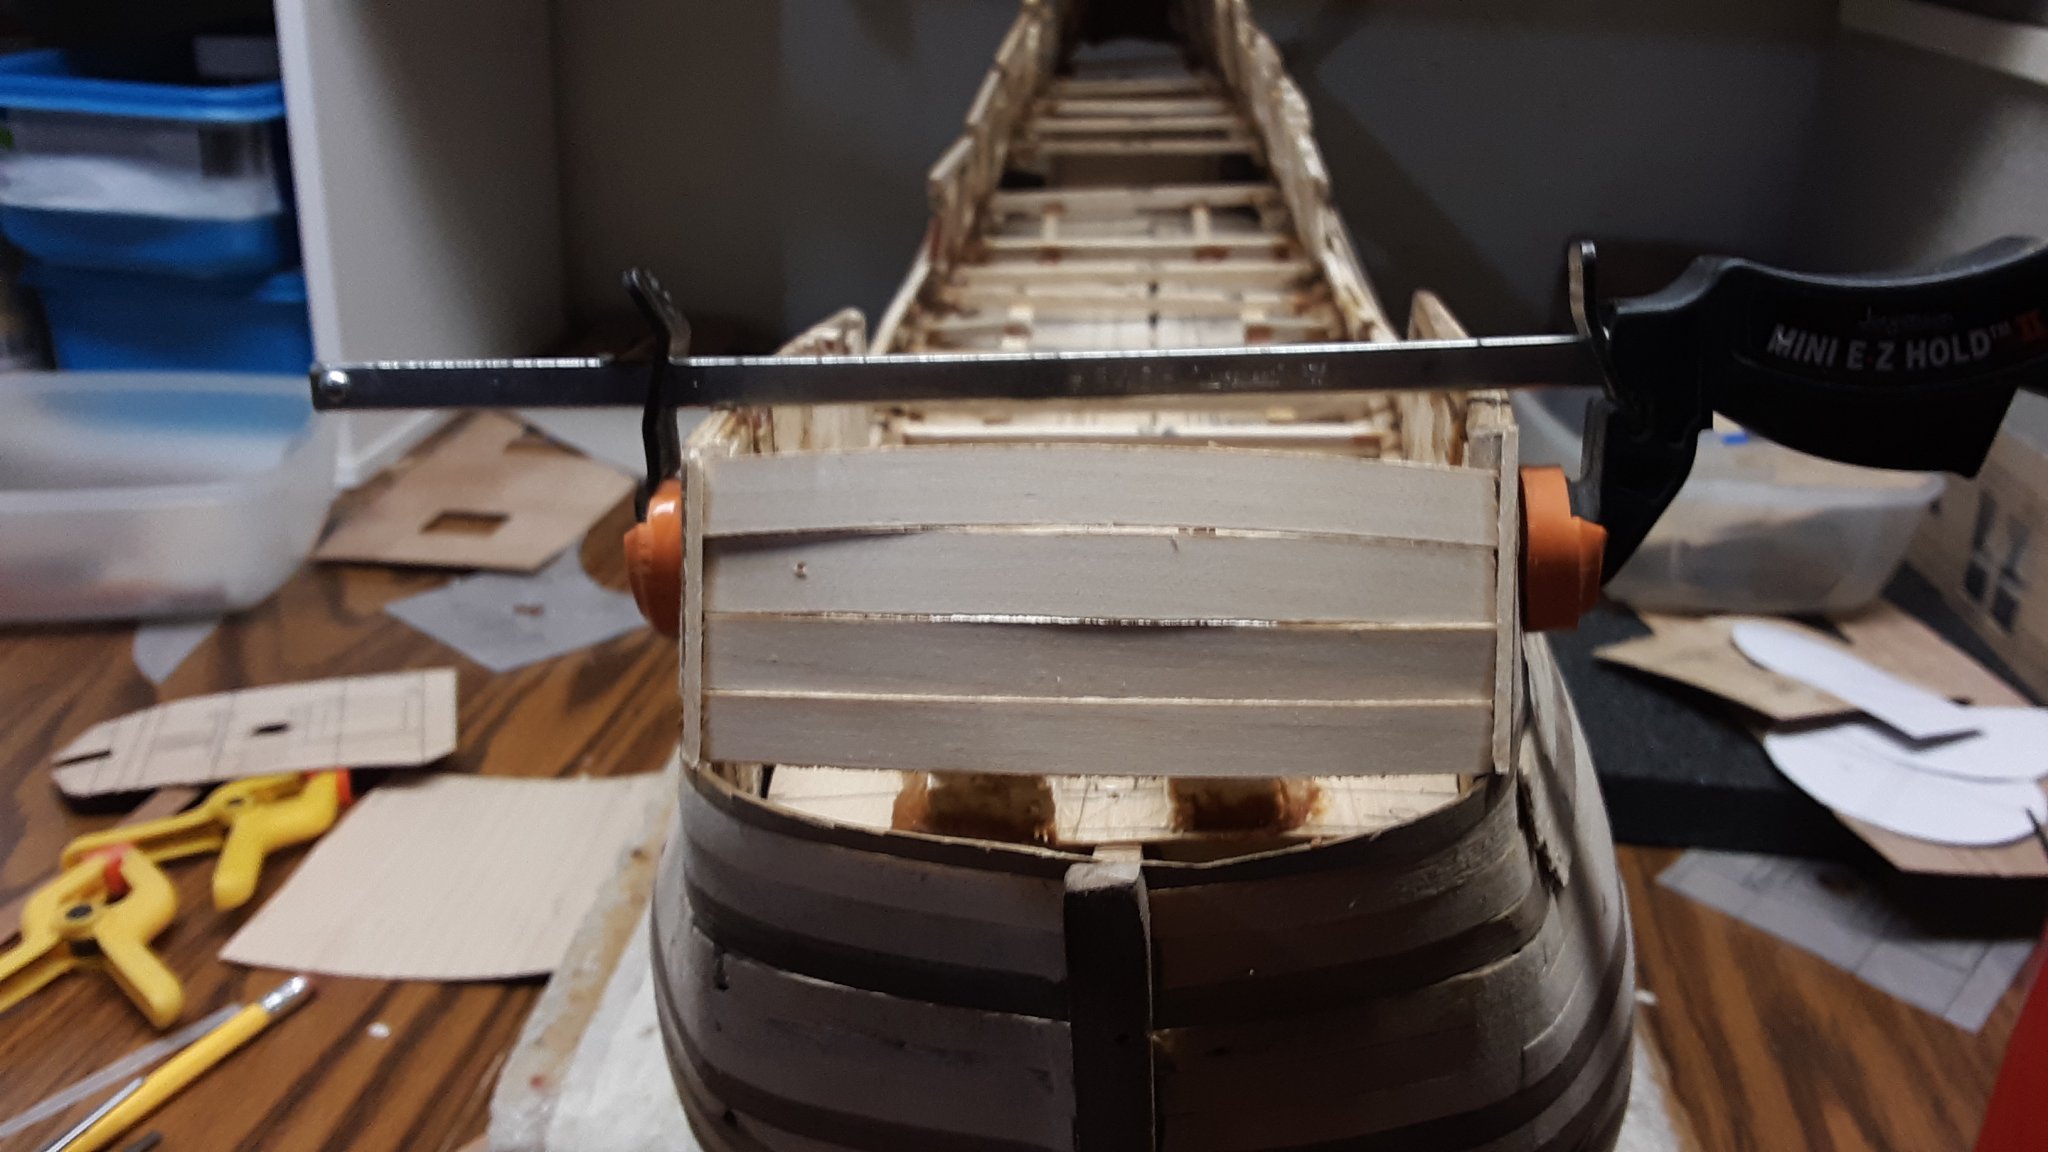
Worked on the bow most of the day. Figuring and creating a bowsprite holder.

Strengthening the deck.

Glued deck in place.

Used card to make a template of where the bowsprite goes.
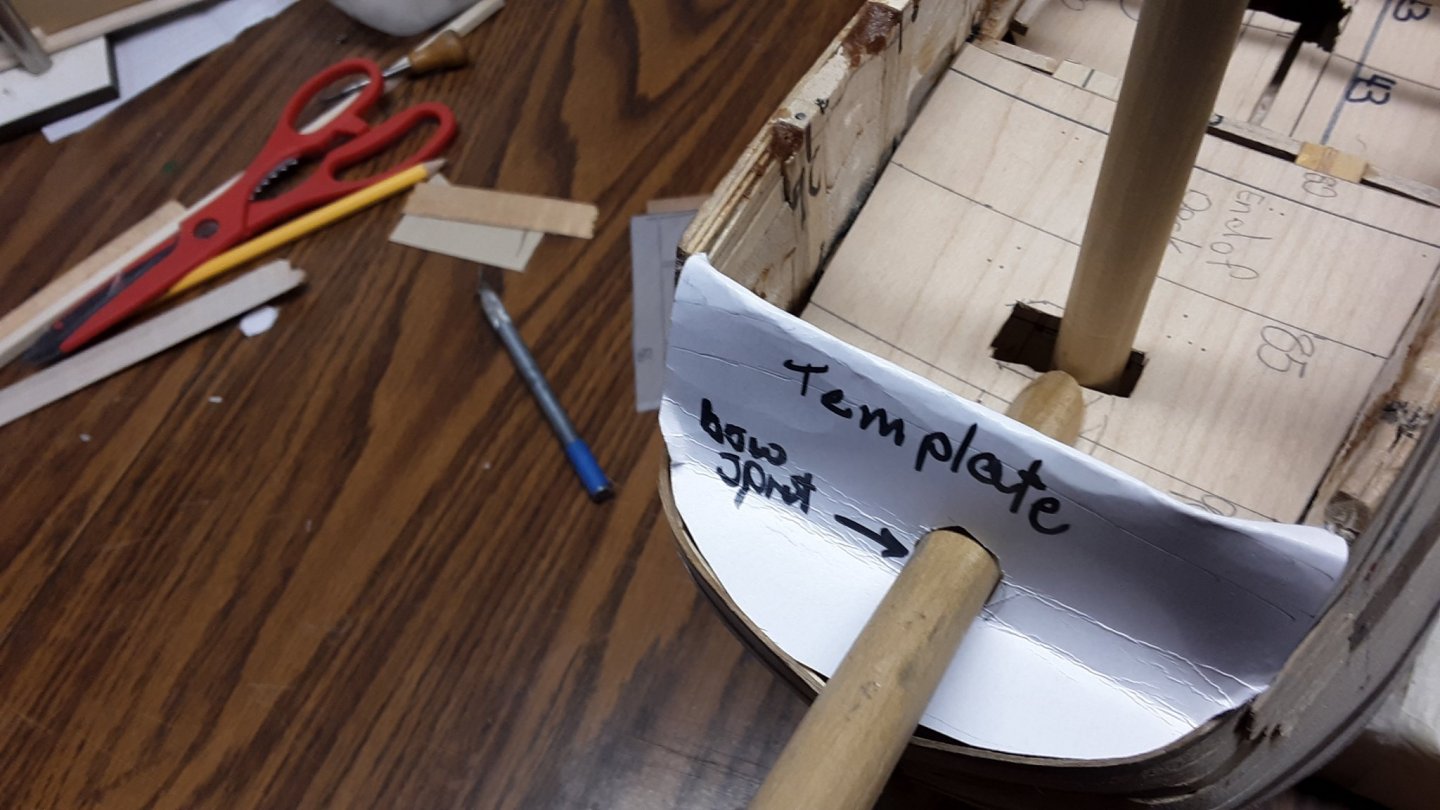
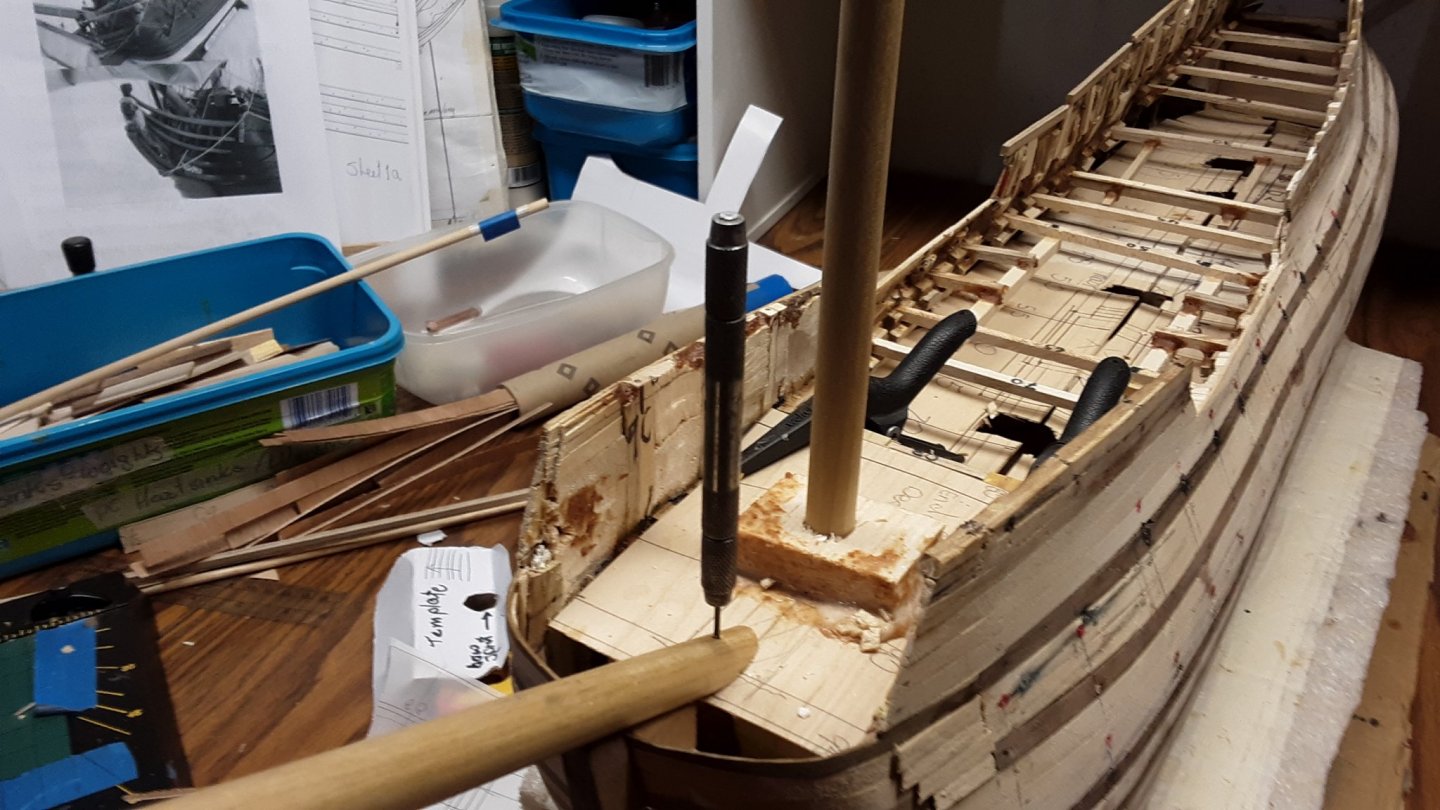
With a hand drill, drilled a hole through the bowsprite, deck and part of the wood. The drill bit kept it all in place while i could draw the lines for the holder.
The area where the bowsprite goes into the ship, is there a name for that area?
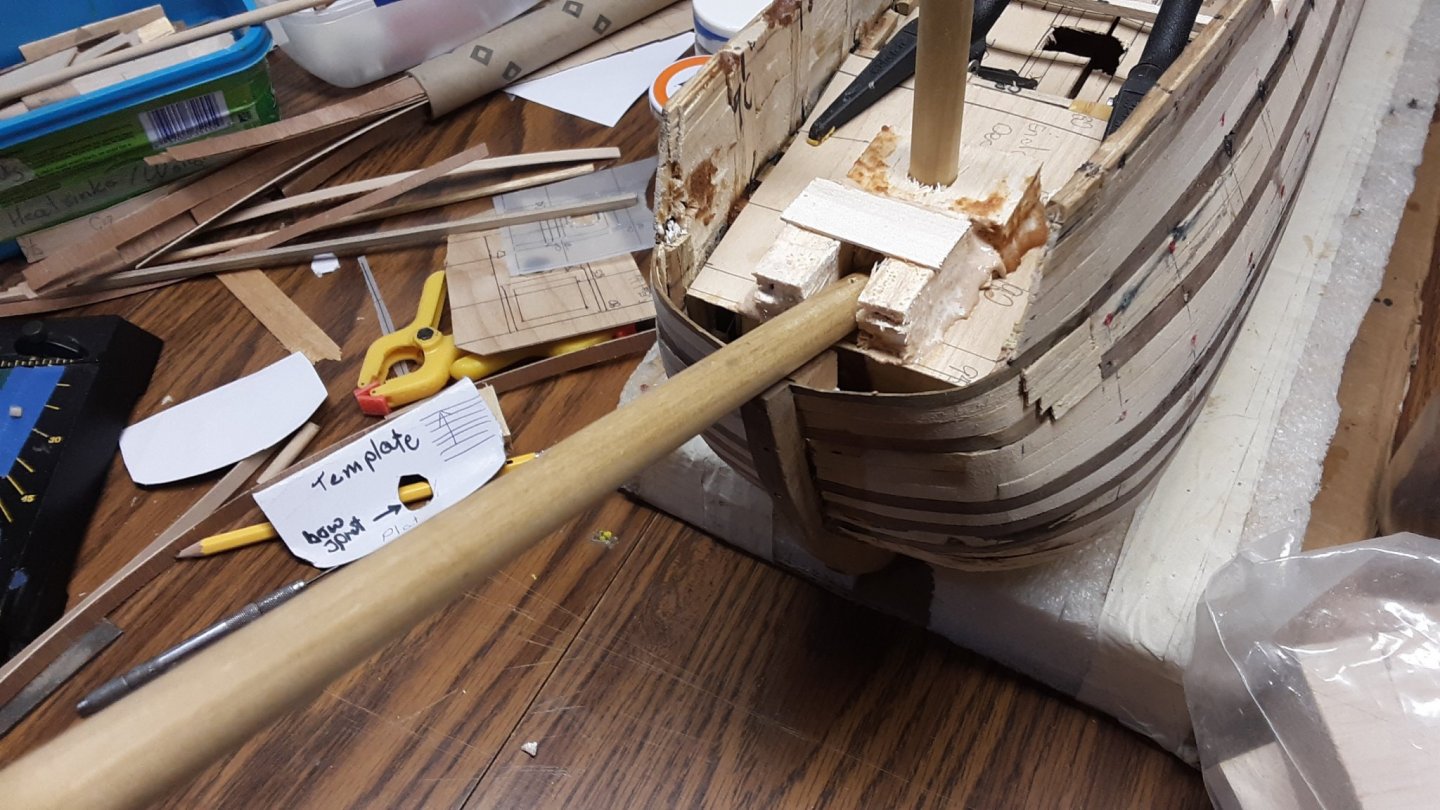
Bowsprite holder.

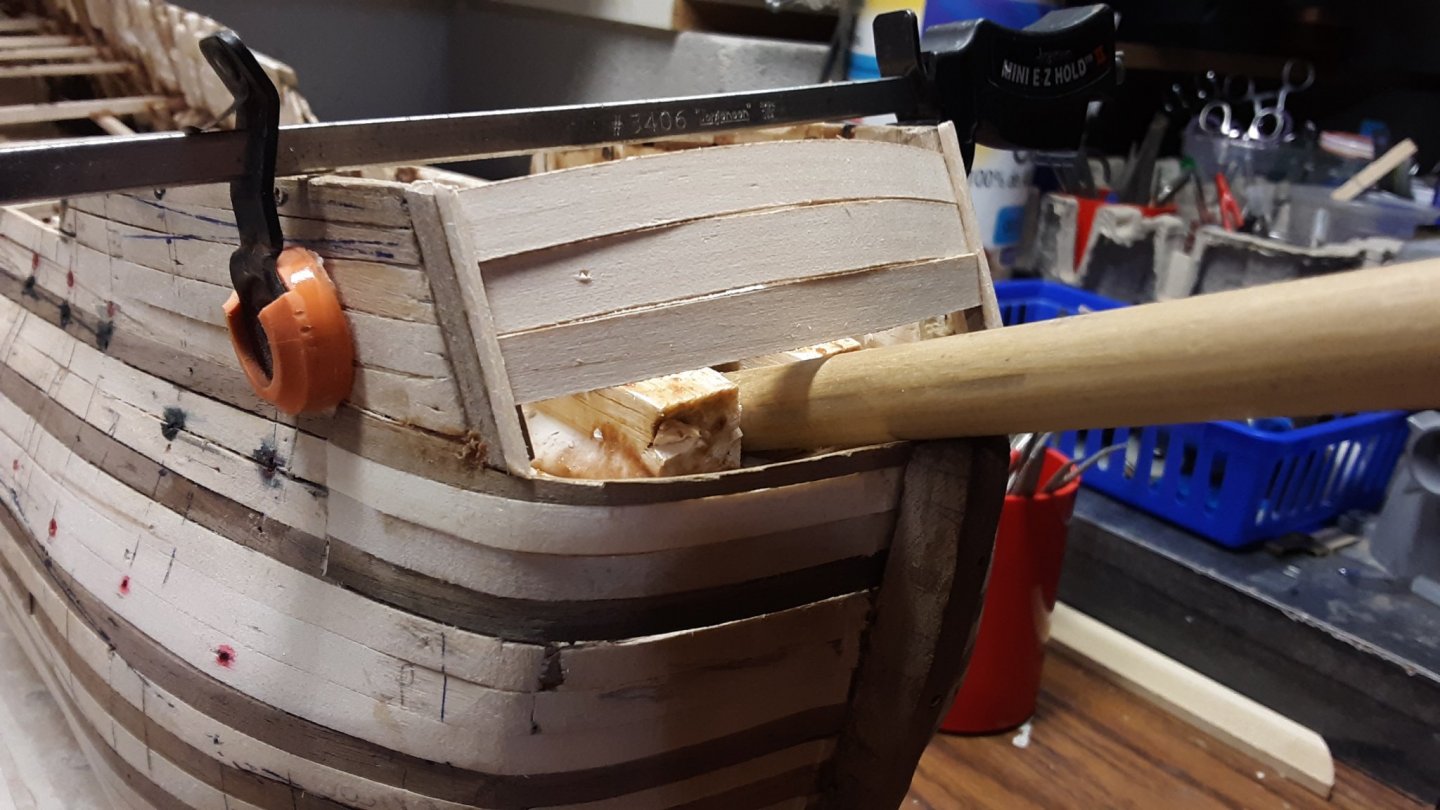
Dry fit planking and bowsprite.
Once i have planked that area and made a hole in it, I can slide the bowsprite with some glue into the holder.
Marcus
- G.L., YankeeD, Louie da fly and 2 others
-
5
-
Either a torch or plank bender will work. I think a plank bender gives you more control.
Marcus
-
Gorilla glue if they are small pieces. I have done that with epoxy. My motto is, if all else fails, epoxy is your answer.
Love the pictures. Those are beautiful looking bikes. I am signing off and I am now going to reminisce.
Marcus


Dutch Whaler by Jean-Pierre - Sergal - modified 17th century flute
in - Kit build logs for subjects built from 1501 - 1750
Posted
Pumps
On the Zeehaen there is one on the left close to the windlass and one on the right somewhere in back.
On modelbouwforum.nl there are several Fluits being built and all of the ships have there pumps located the same way as the Zeehaen. There are no 2 pumps together.
Mast bands
Some ships do and some don't.
Marcus