


flying_dutchman2
-
Posts
1,735 -
Joined
-
Last visited
Content Type
Profiles
Forums
Gallery
Events
Posts posted by flying_dutchman2
-
-
Jan,
Beautiful build. The rigging is excellent. Love the ship with all its colors and following Ketting over Corel is a smart move.
Looking forward to your progress on the PW.
Marcus
-
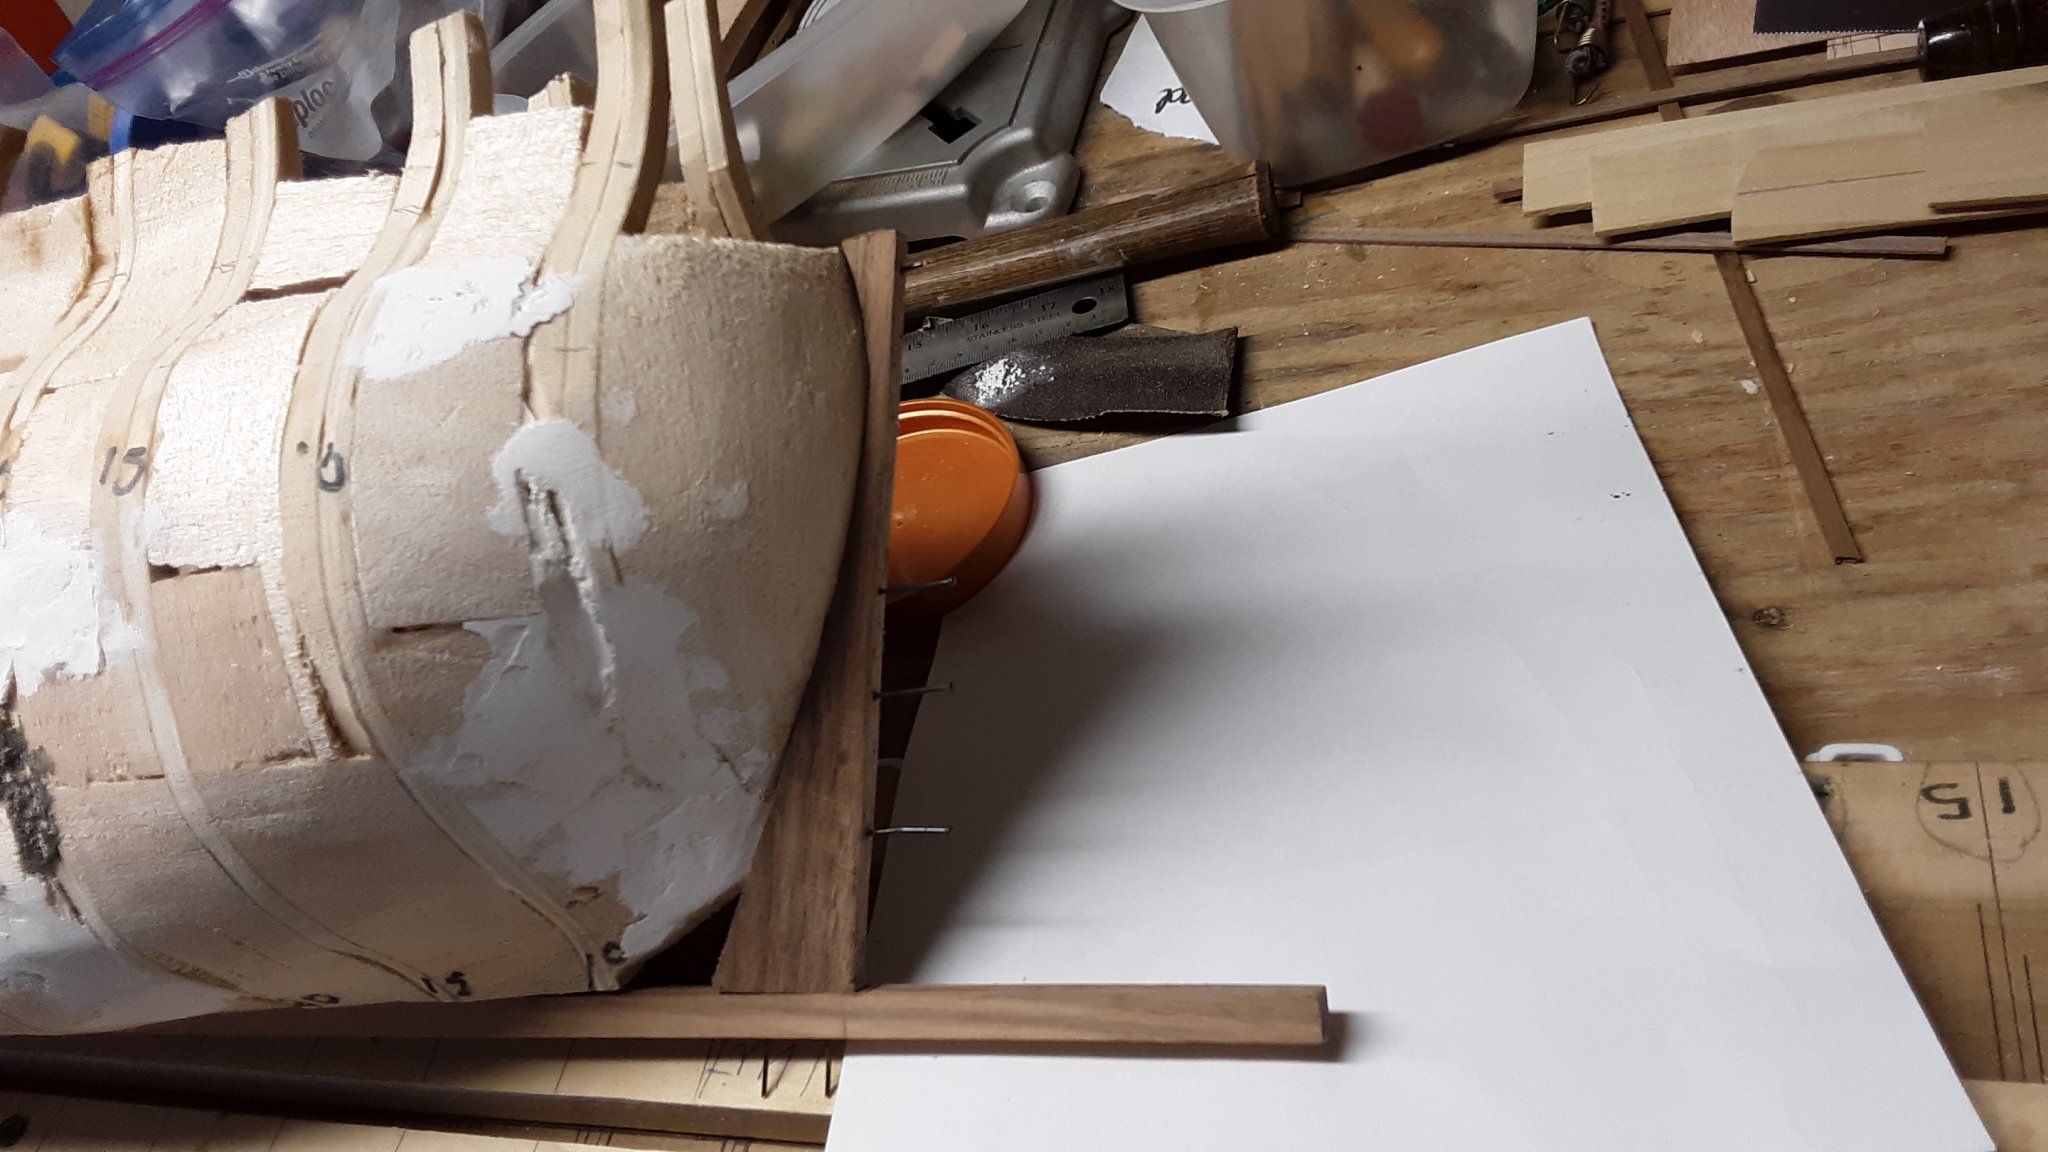
Wale installation.
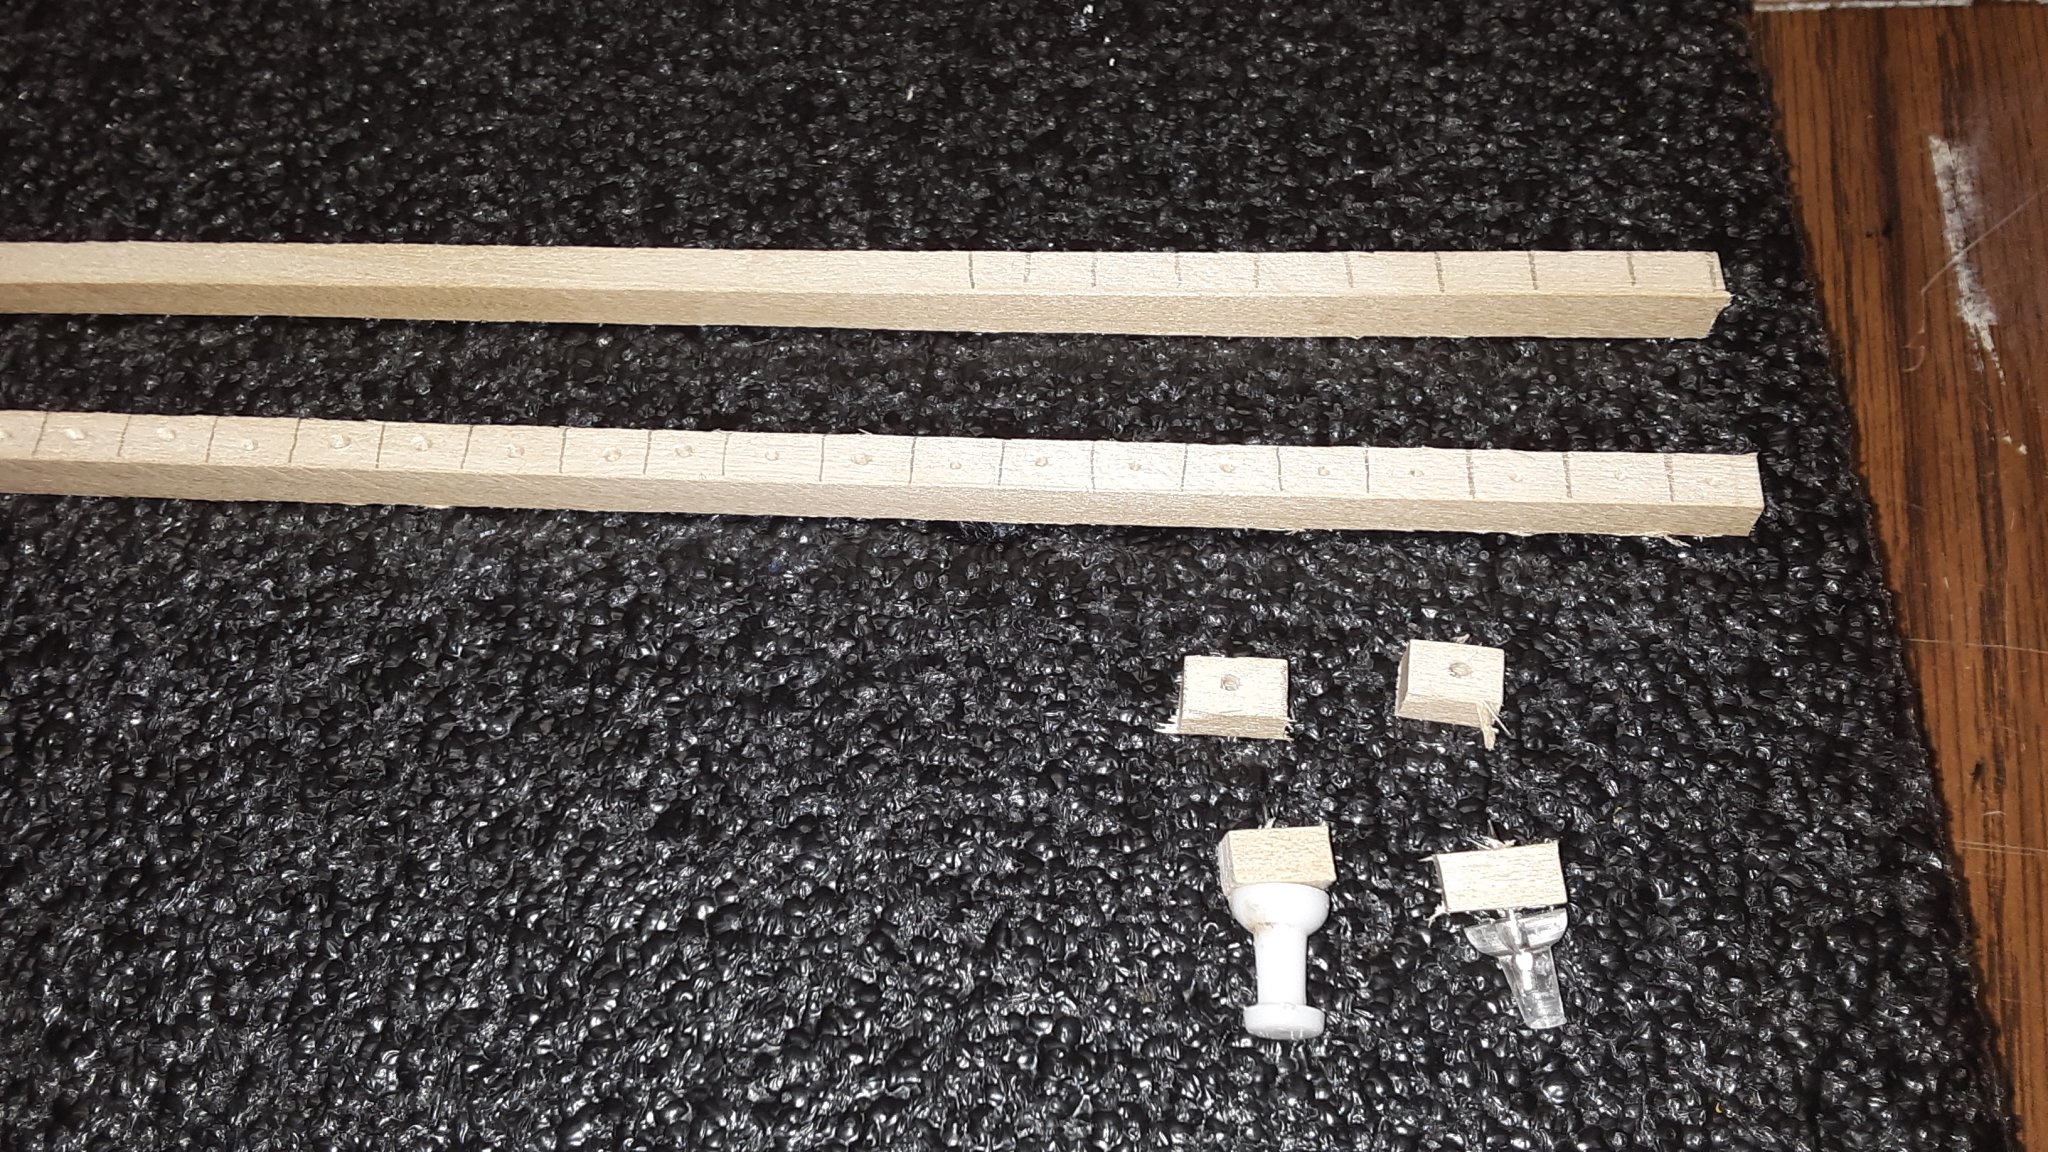
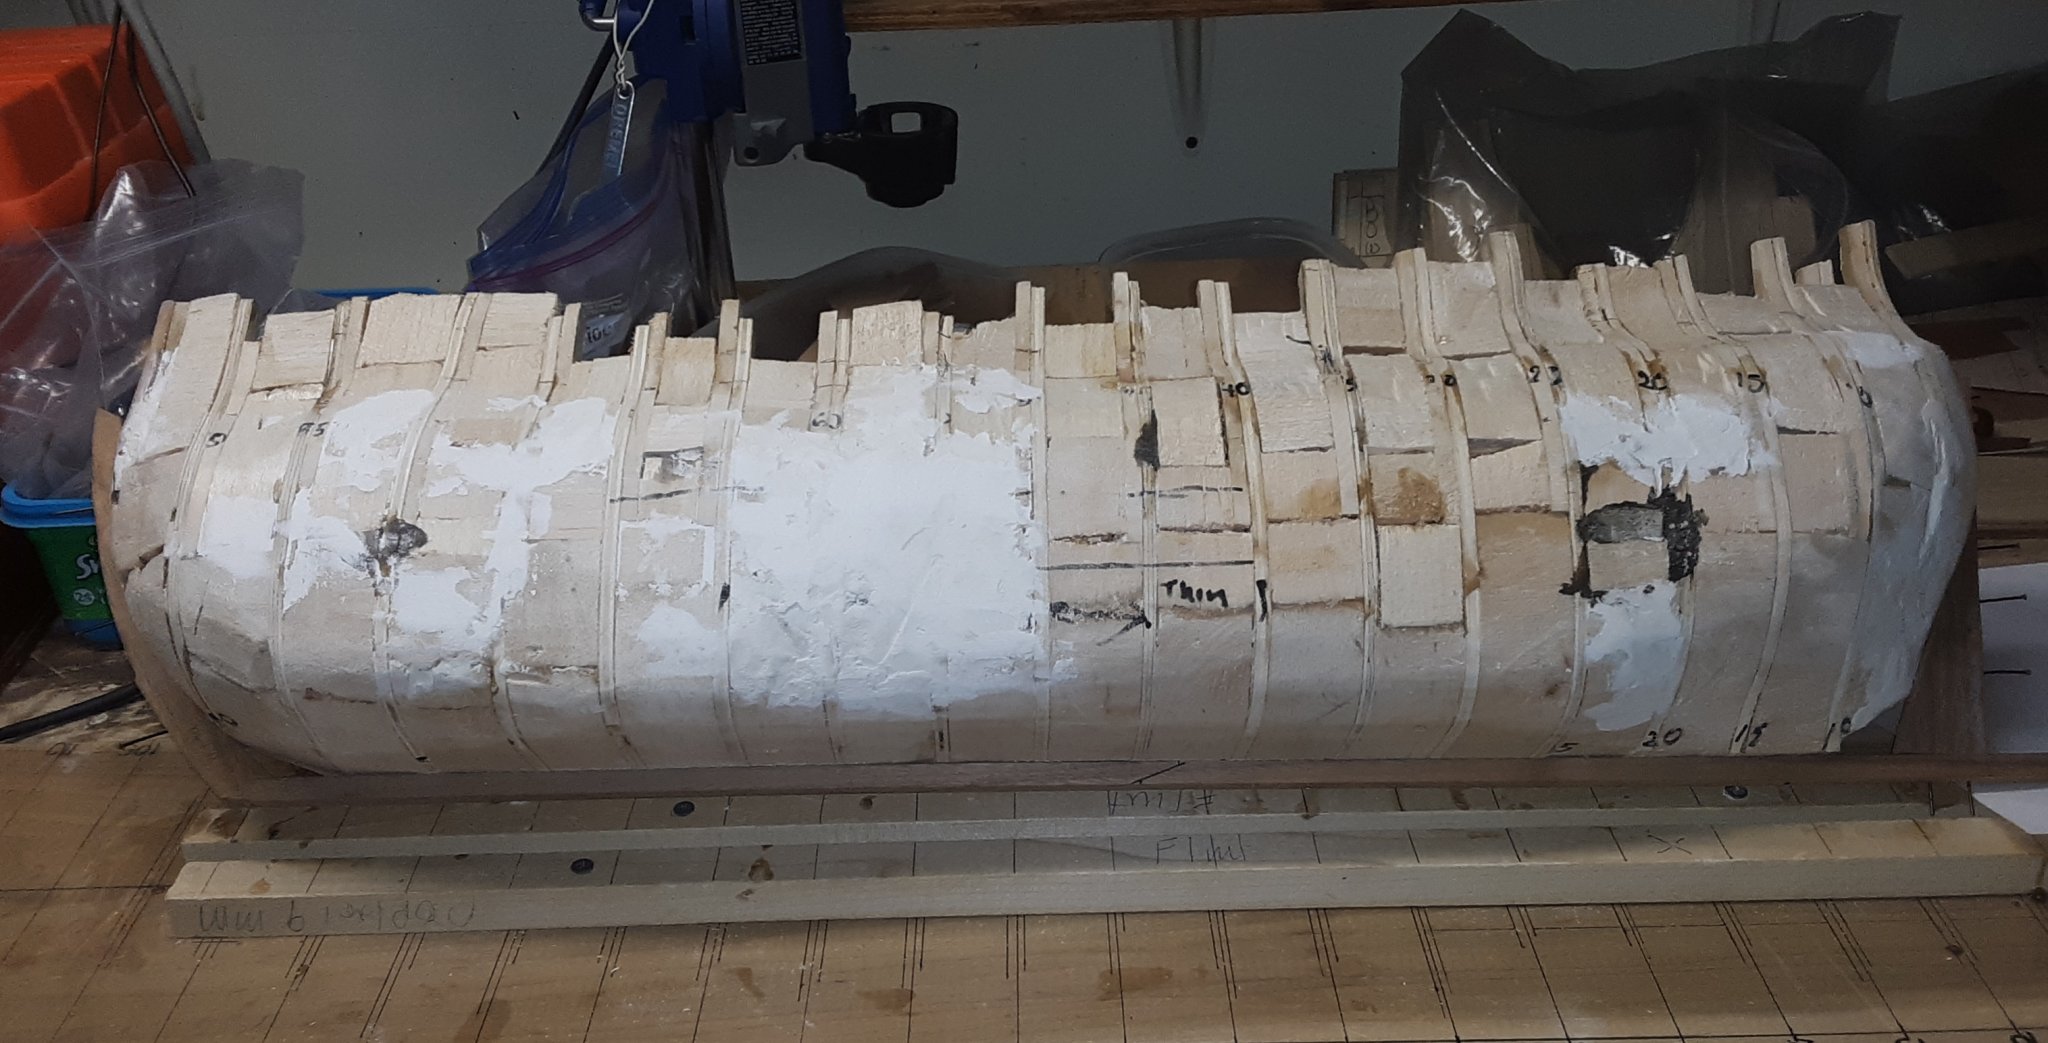
So that the wale would follow the curve of the Fluit, I created 1cm long blocks with a hole in it. The hole is for a push pin.
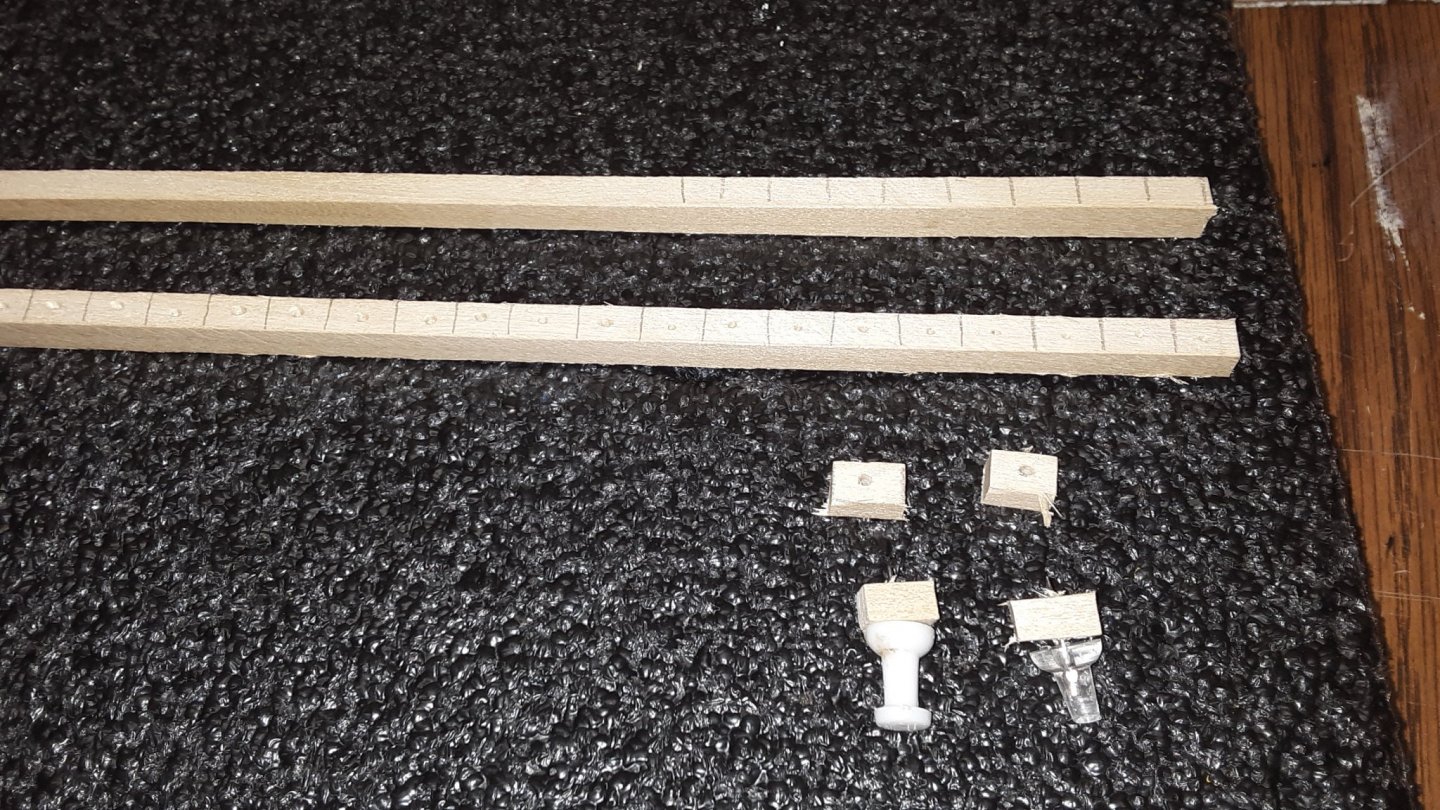
I line up a block to where the bottom edge of the walnut plank is to be. All blocks are push pinned Into a bulkhead.
Then I get 2 pieces of 2mm thick by 6mm wide by 50cm long walnut planks (soaked for several days in water) and slowly bend and push against the block each of the plank along the curve of the Fluit. The planks overlap and somewhere I lay them on top of each other and cut several notches so they will lay tightly together.
This is the most challenging part of building the Fluit. Once that is done, the rest of the planking will be easy to install.
Marcus
- GrandpaPhil, cog, mtaylor and 3 others
-
 6
6
-
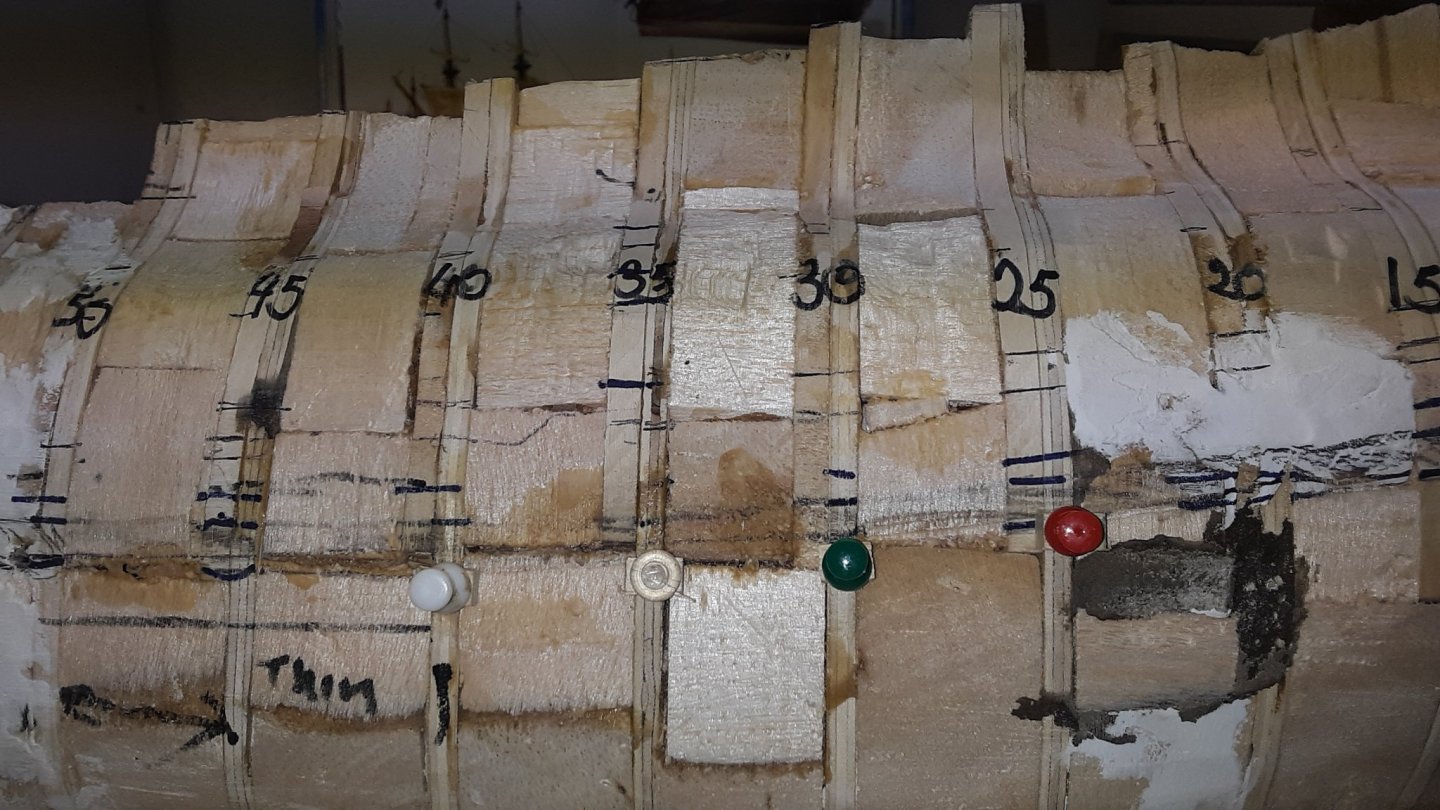
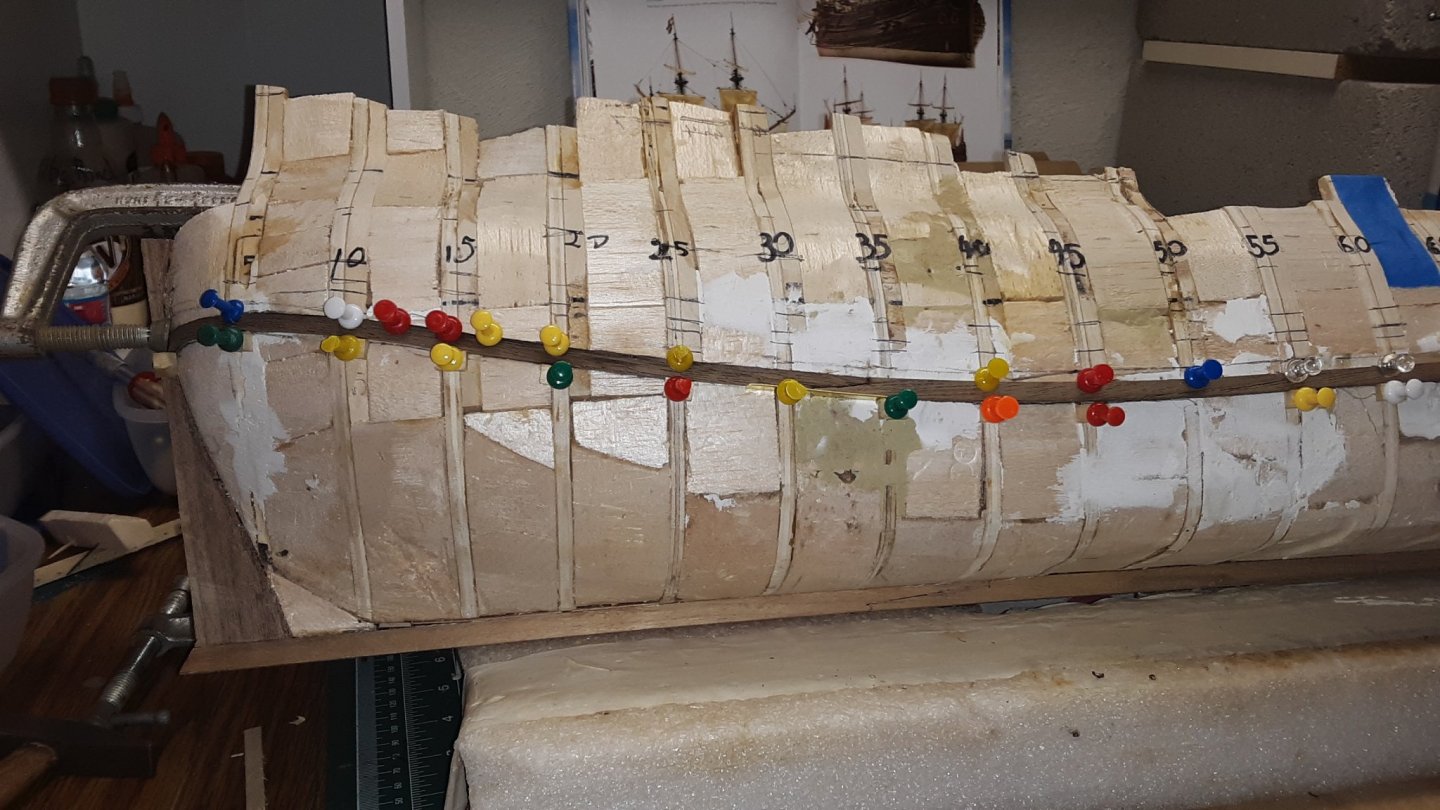
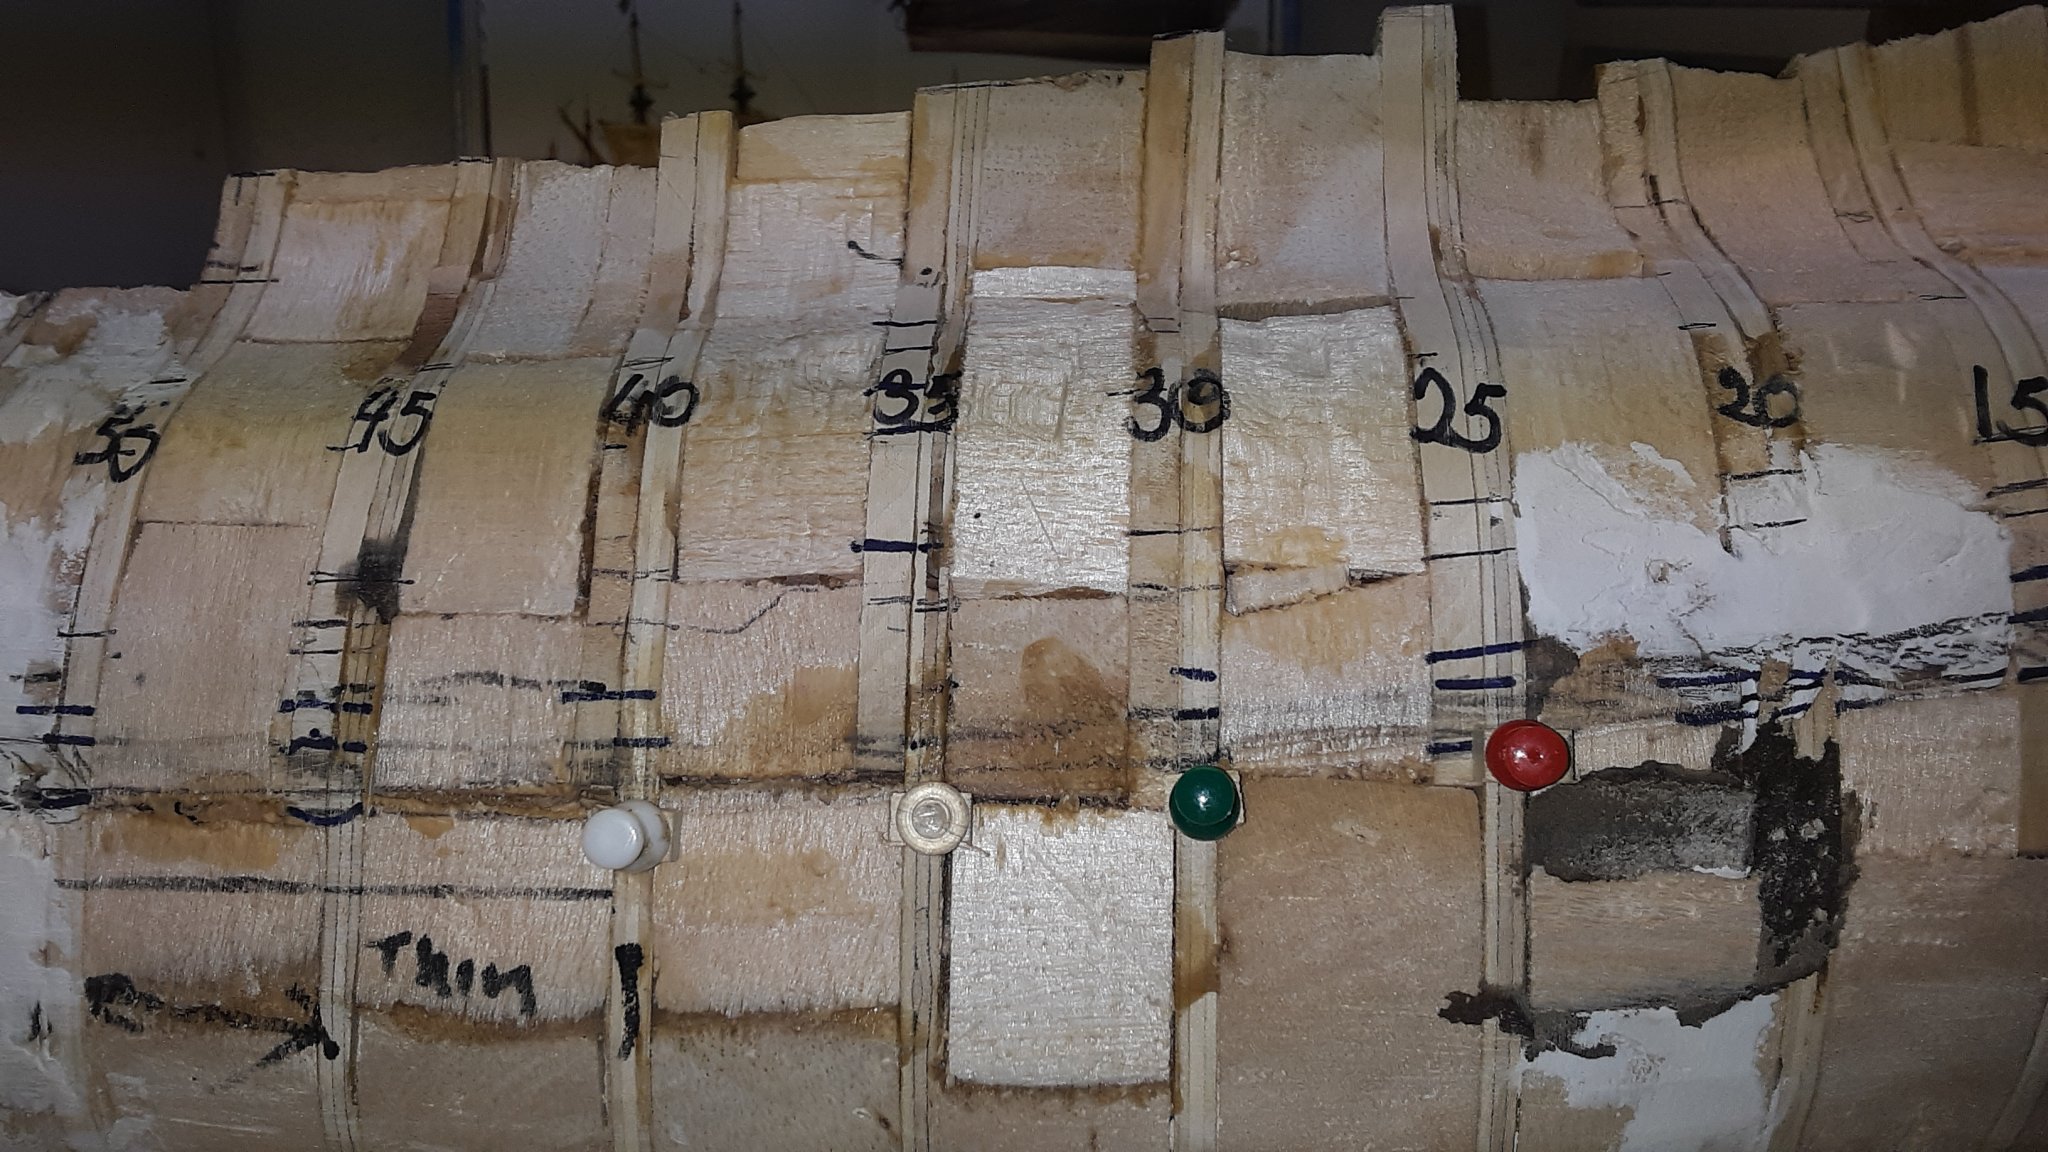
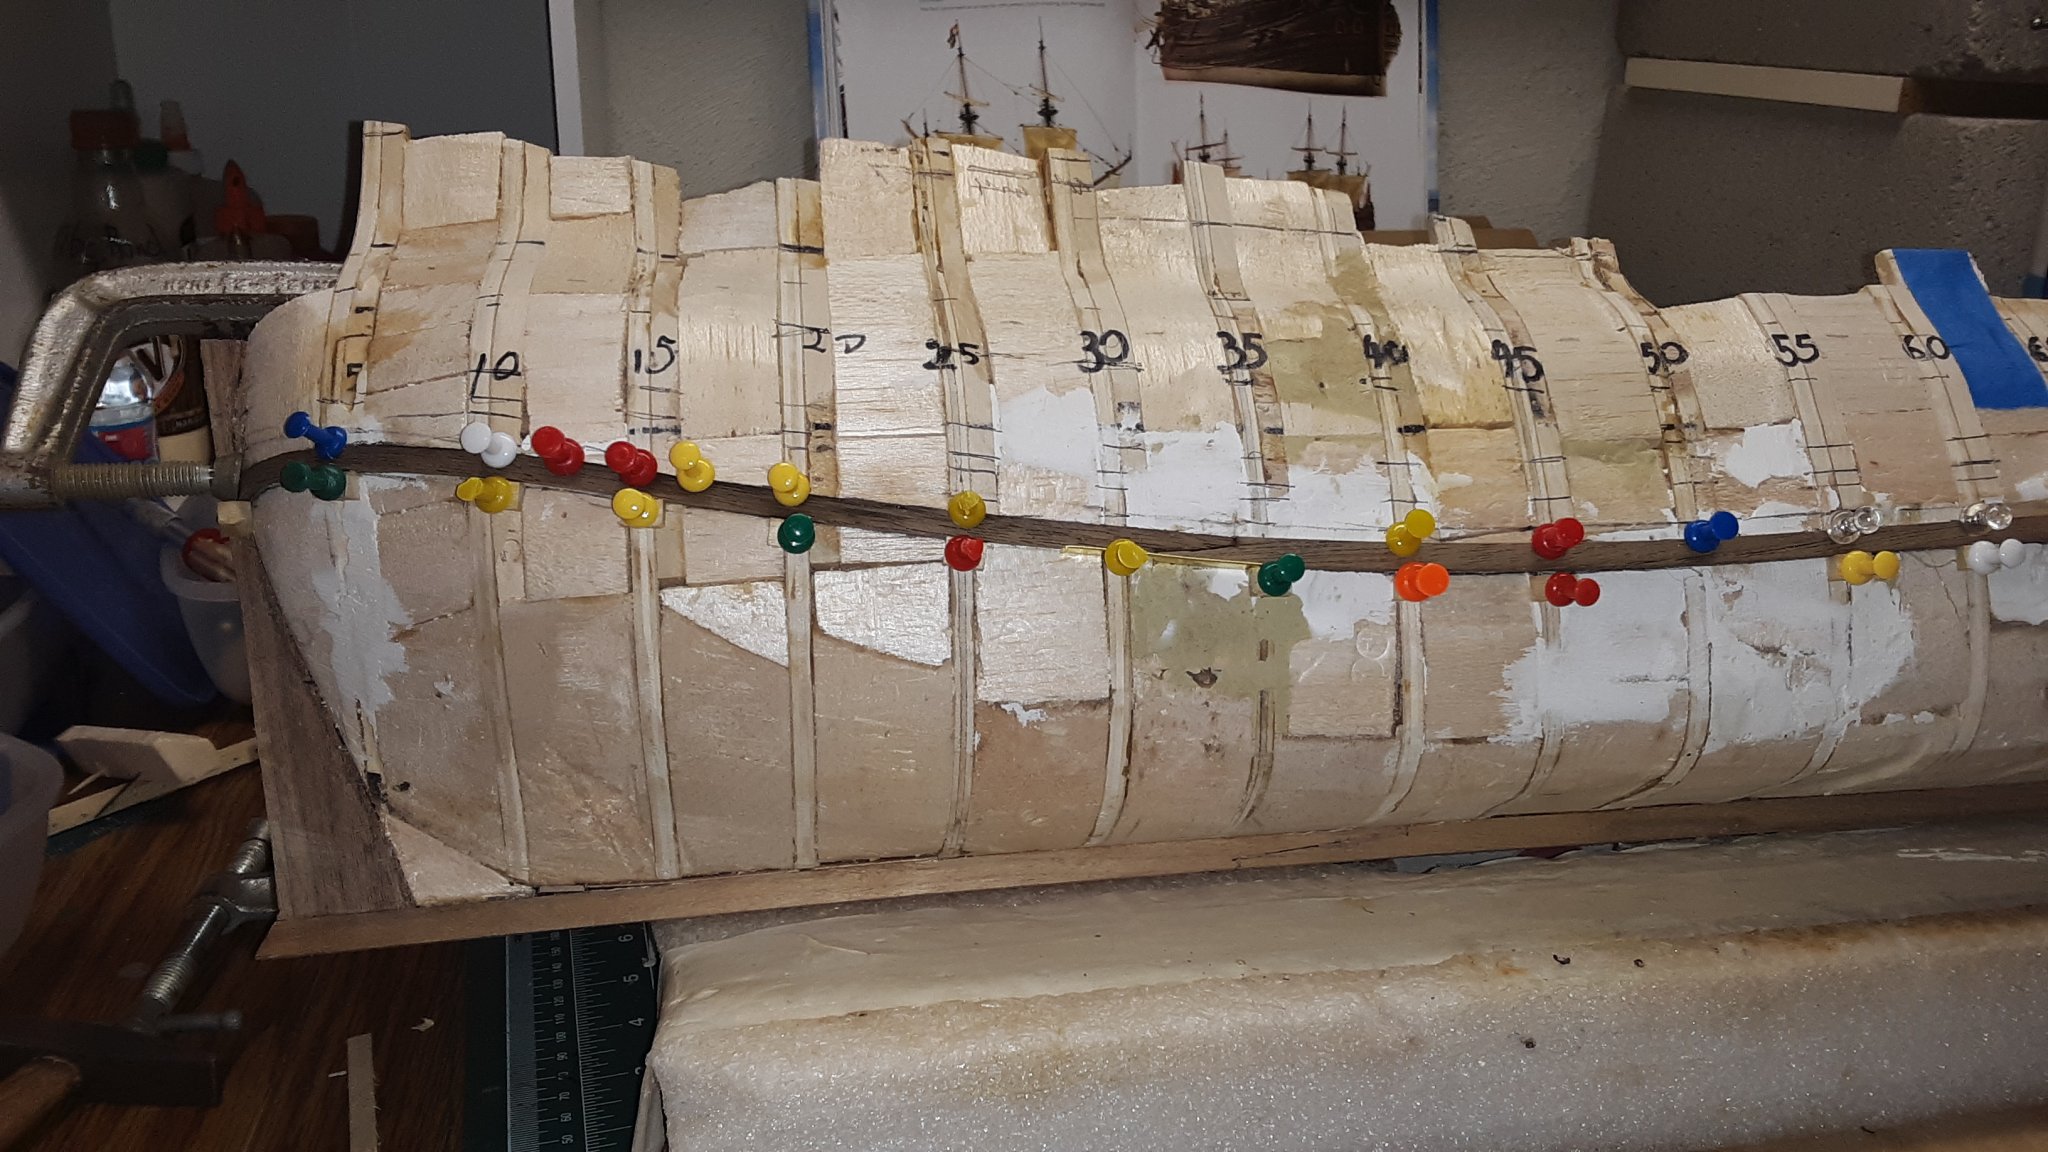
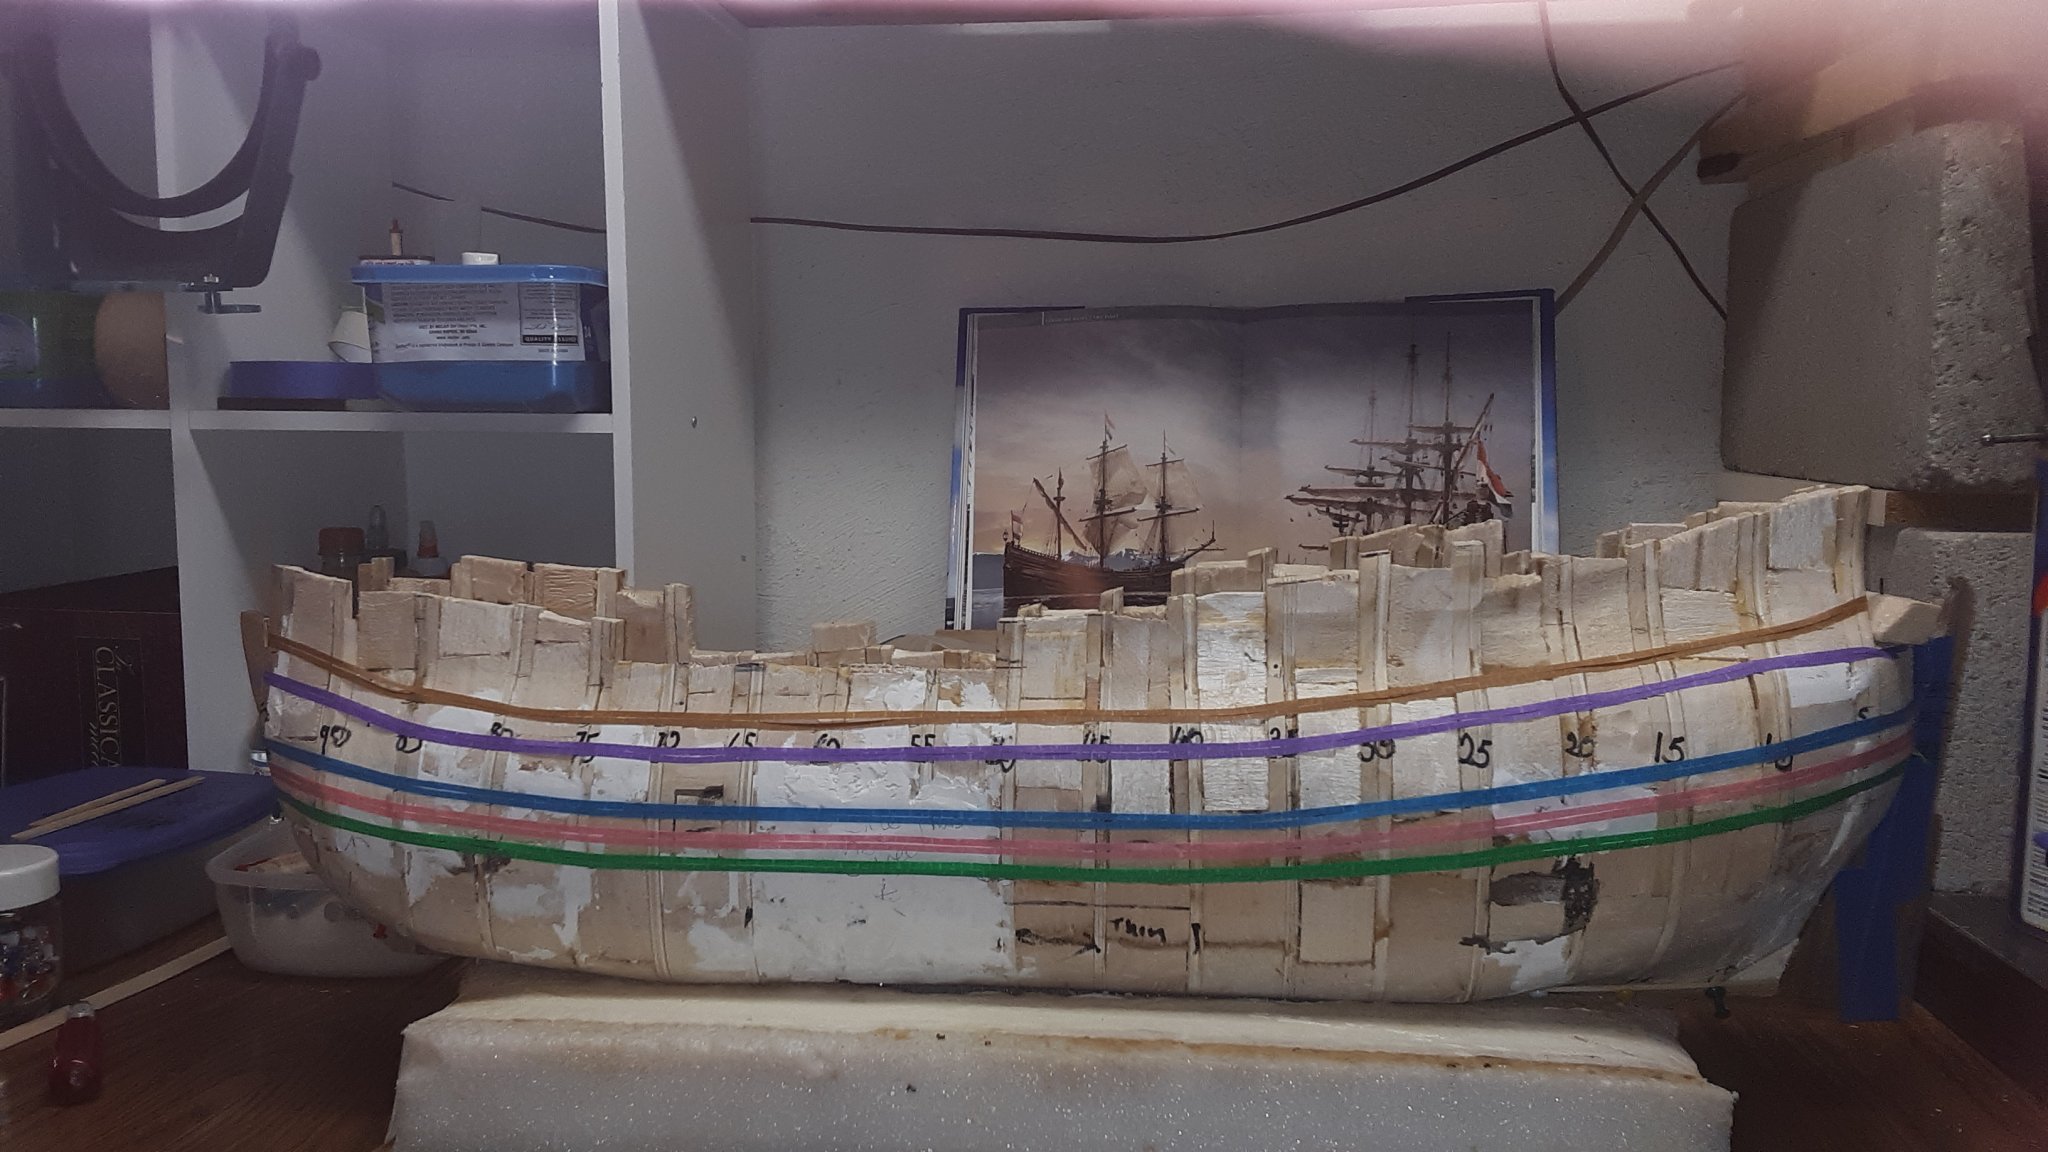
Guesstimated where the lower wale will be installed and marked it with narrow tape. The 3 lower wales are 6mm wide and 6mm apart from each other. The 2 upper wales are 10mm apart from each other.
Lower wales green, pink and blue tape. Upper wales purple and brown tape.

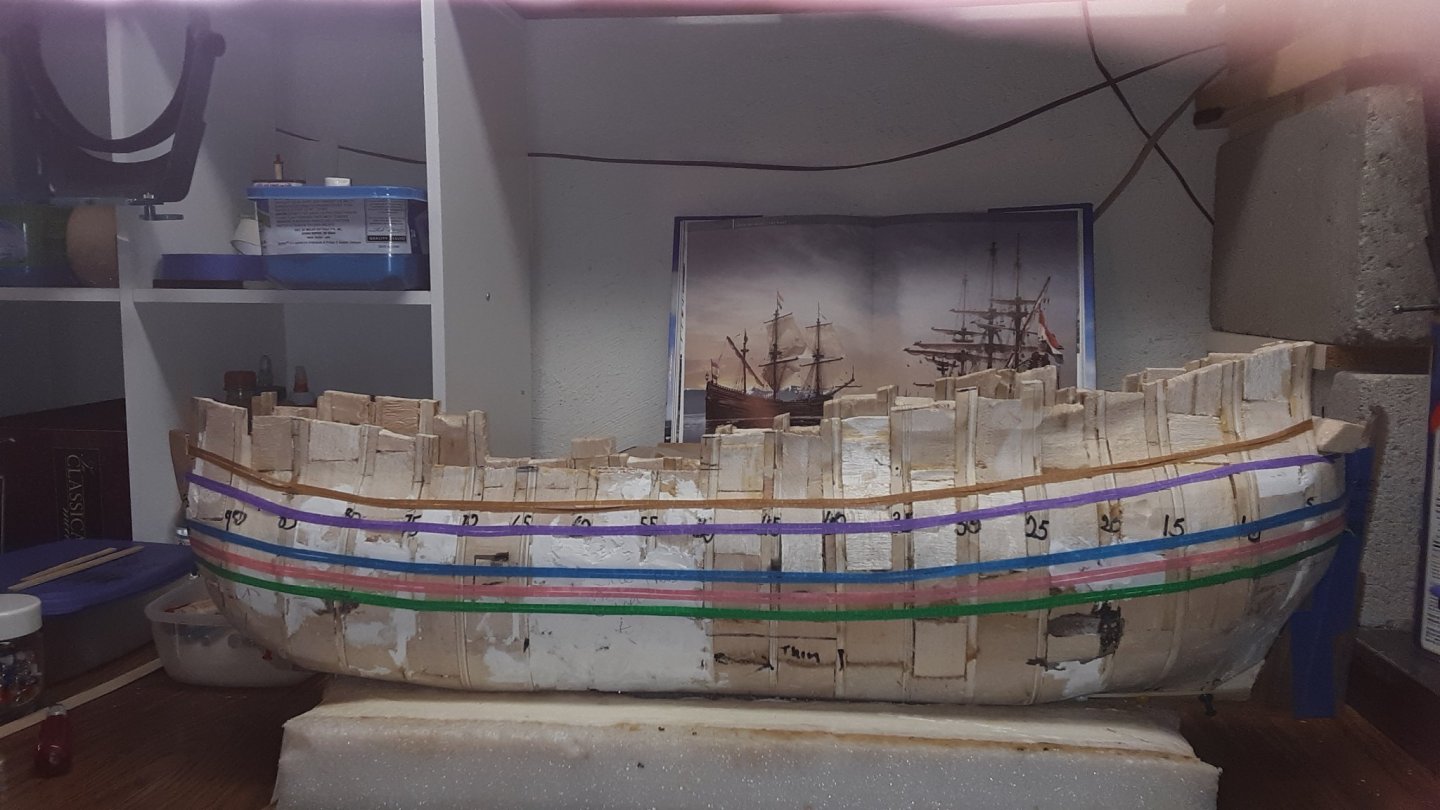
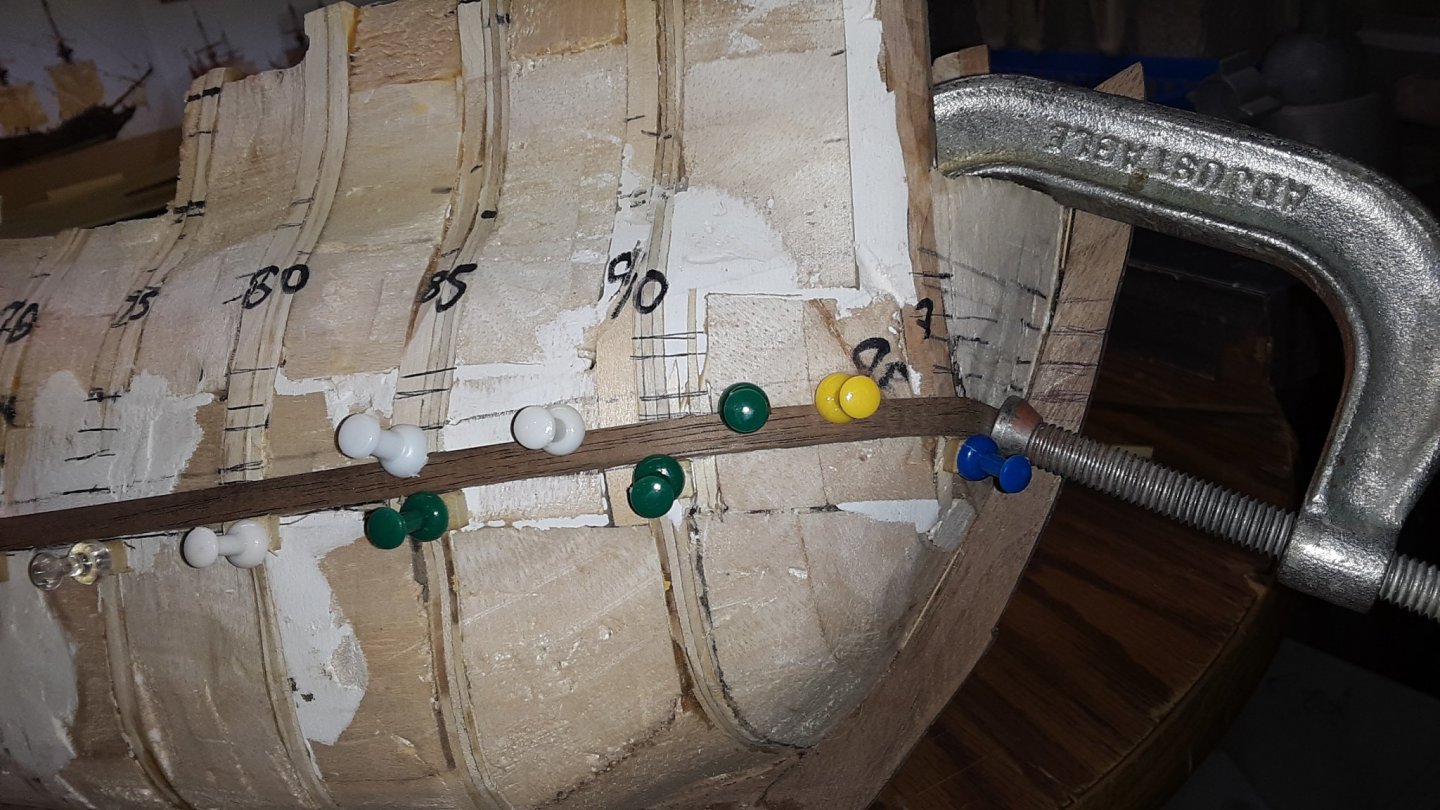
Next exercise is to completely soak several pieces of walnut and bend them according to the flow of the tape and use as many pins needed until the wood is dry. Once the wood is dry, remove tape and glue the wale in place.
Marcus
- mtaylor, G.L., GrandpaPhil and 1 other
-
4
-
On 10/9/2019 at 6:22 PM, Louie da fly said:
How did I miss this build? I once played with the idea of doing a diorama of Tasman's ships anchored off Tasmania, but too many other projects to get past the idea stage.
Beautiful job, Marcus.
Steven
HI Steven,
Thanks for the compliment.
Your plan is what I have been thinking about since I got the plans and the book.
One problem, it will be a huge display, something like 4x4x4 feet and I don't have the room for that. Need to donate it as soon as it is completed.
(I am getting ahead of myself)
Marcus
-
I've been reading several PhD dissertations from universities of Groningen and Leiden about the history of fluits and also the many wrecks that have been explored.
In everyone of the papers they talk about a vessel called a 'hekboot'.
Are there any plans available of this ship?
Marcus
-
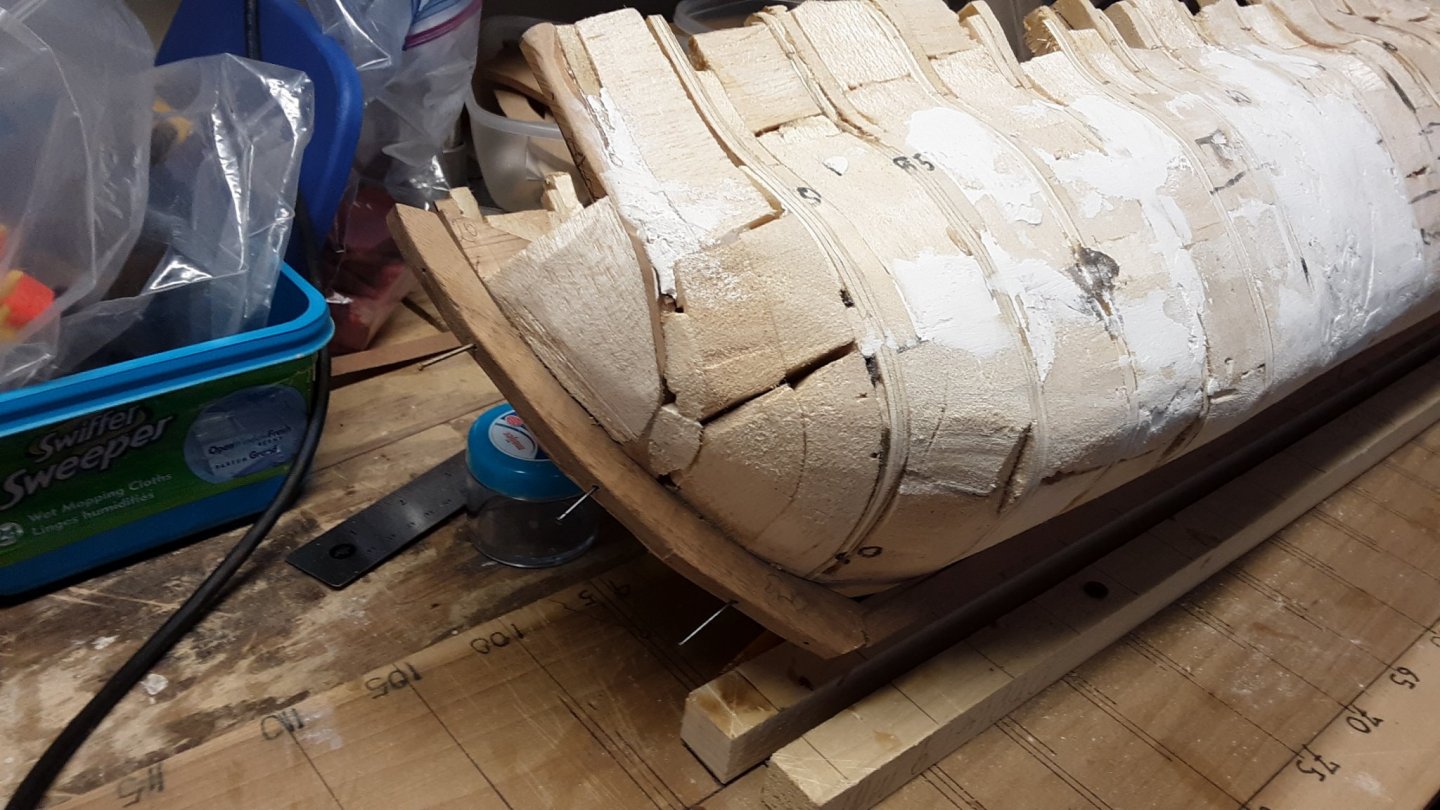
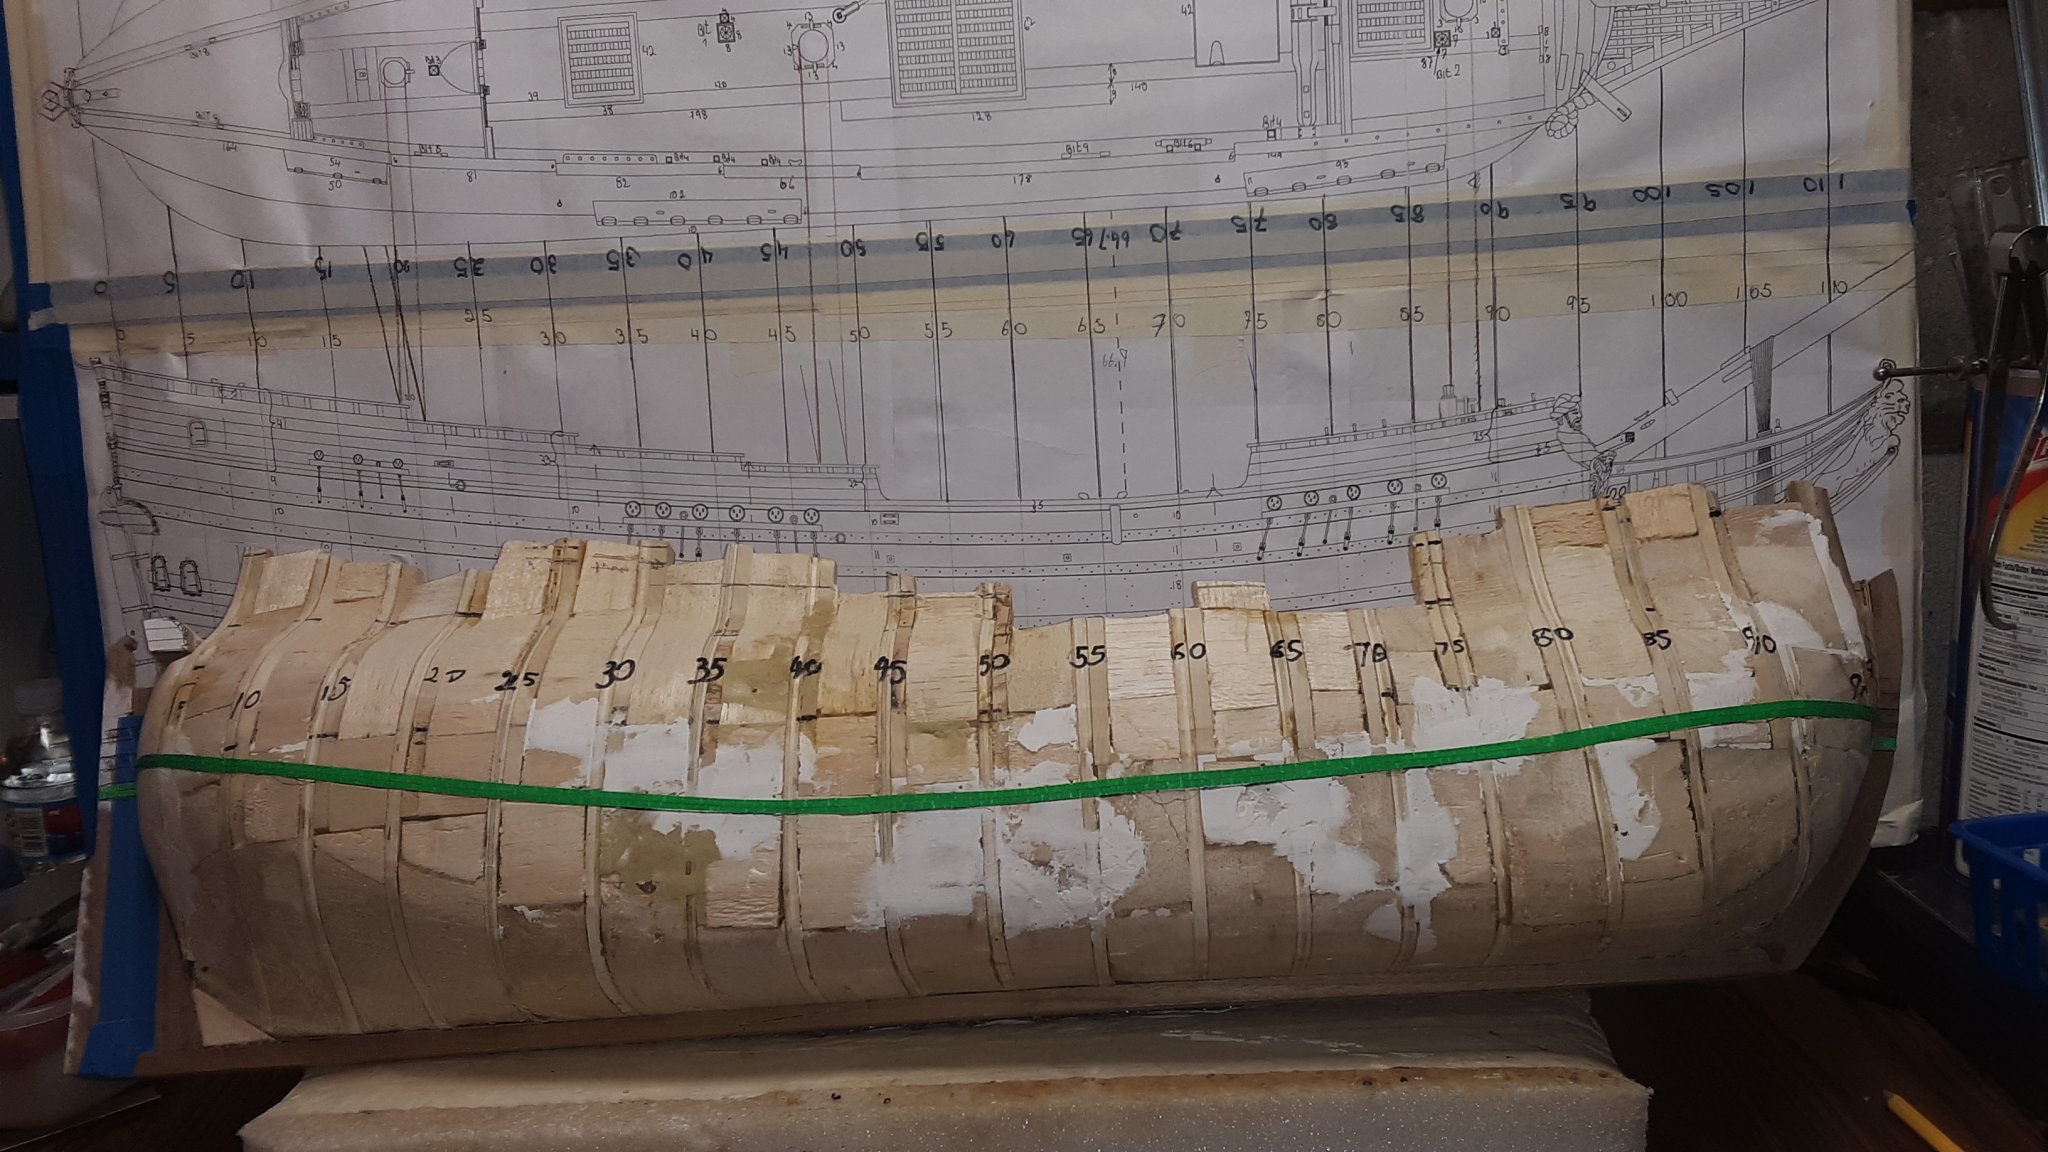
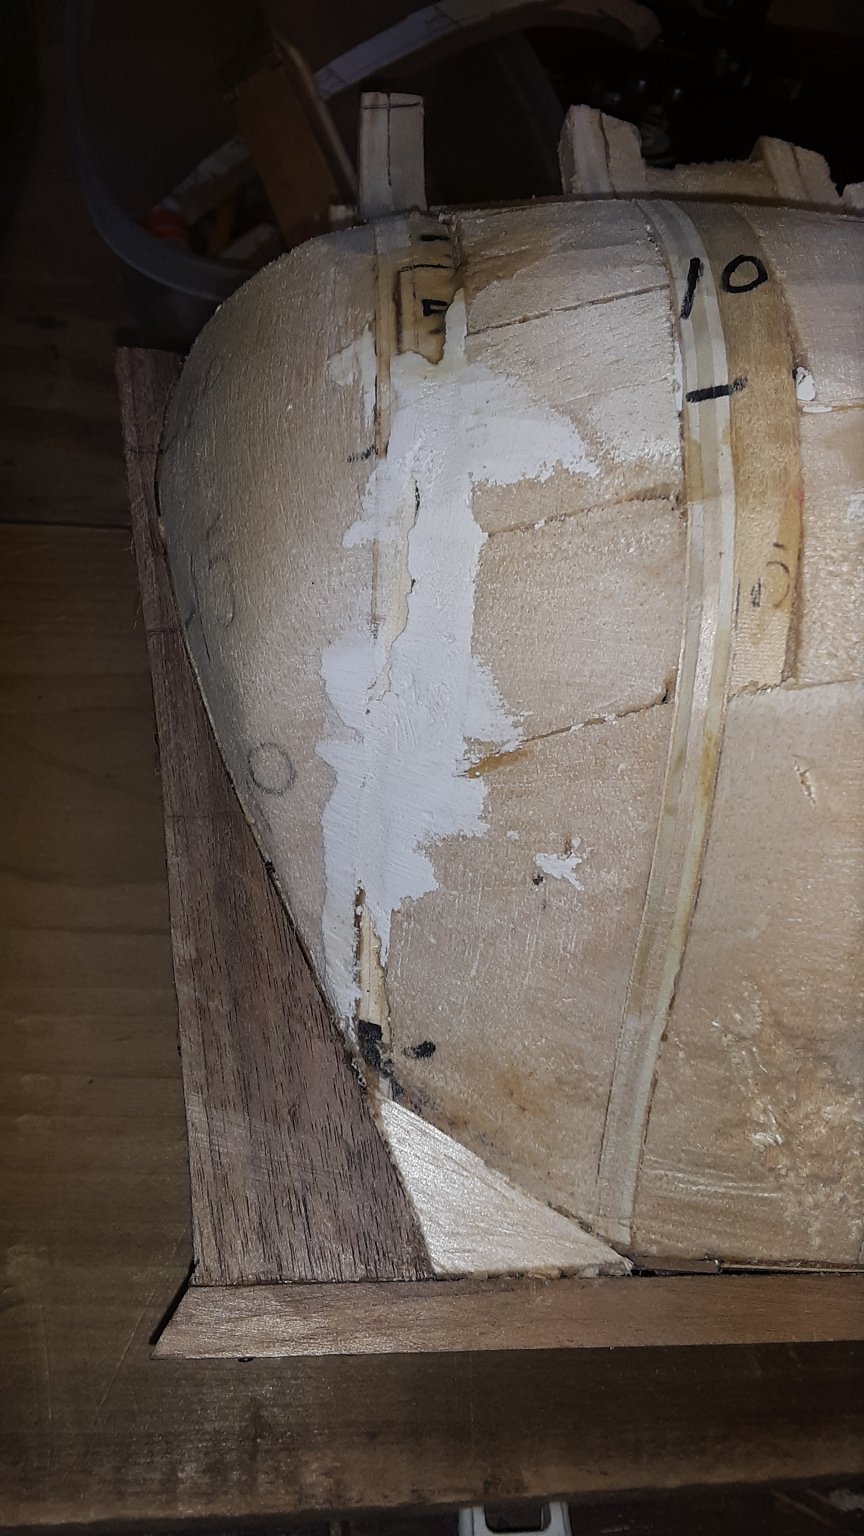
Completed the sanding of the hull to its required shape and glued in the stem post, keel and stern piece.

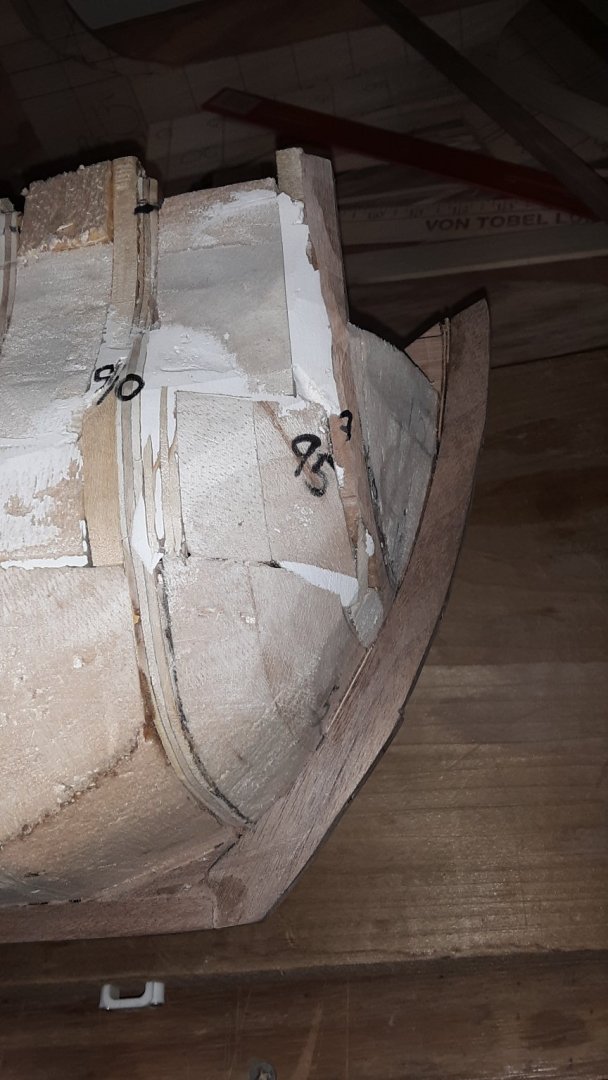
From the above pictures on can see the extreme curves of both the stern and the bow. Should be a fun project planking them.
Rough cut the top of the railings.

The next step is to figure out where the wales are going to be. This is very important. Once wales are installed the rest of the planking is easy.
Marcus
- FriedClams, G.L., mtaylor and 4 others
-
7
-
I find this conversation between Jaager and Ab Hoving very interesting. Learning some new things.
Thank you!
Marcus
-
Different question.
Book: The Ships of Abel Tasman.
Pg 33, pen painting from vd Velde de Elder.
How can you tell a 600 ton yacht from the rest?
Marcus
-
-
-
Thanks for all the well wishes. I am completely healed. Still need to take it easy. Not carrying 60lbs of goods, yet.
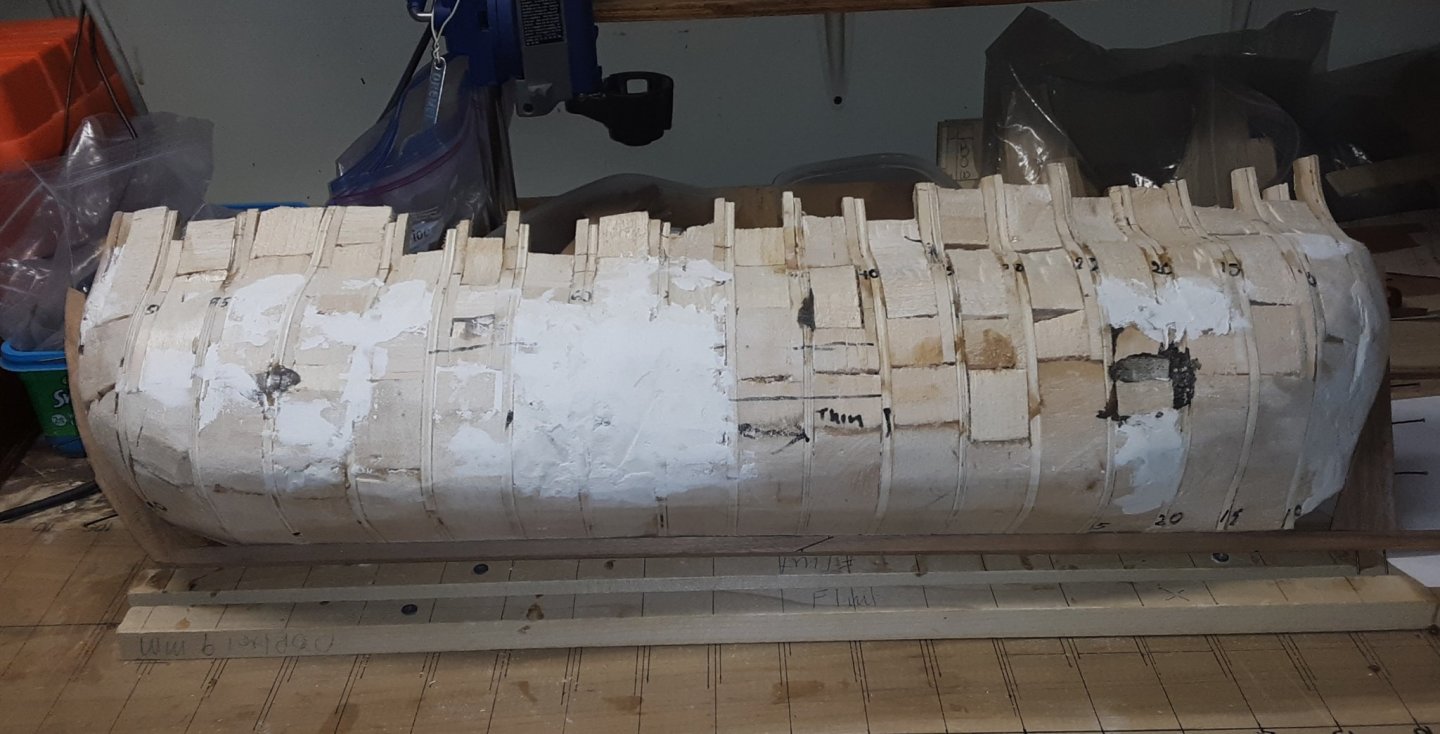
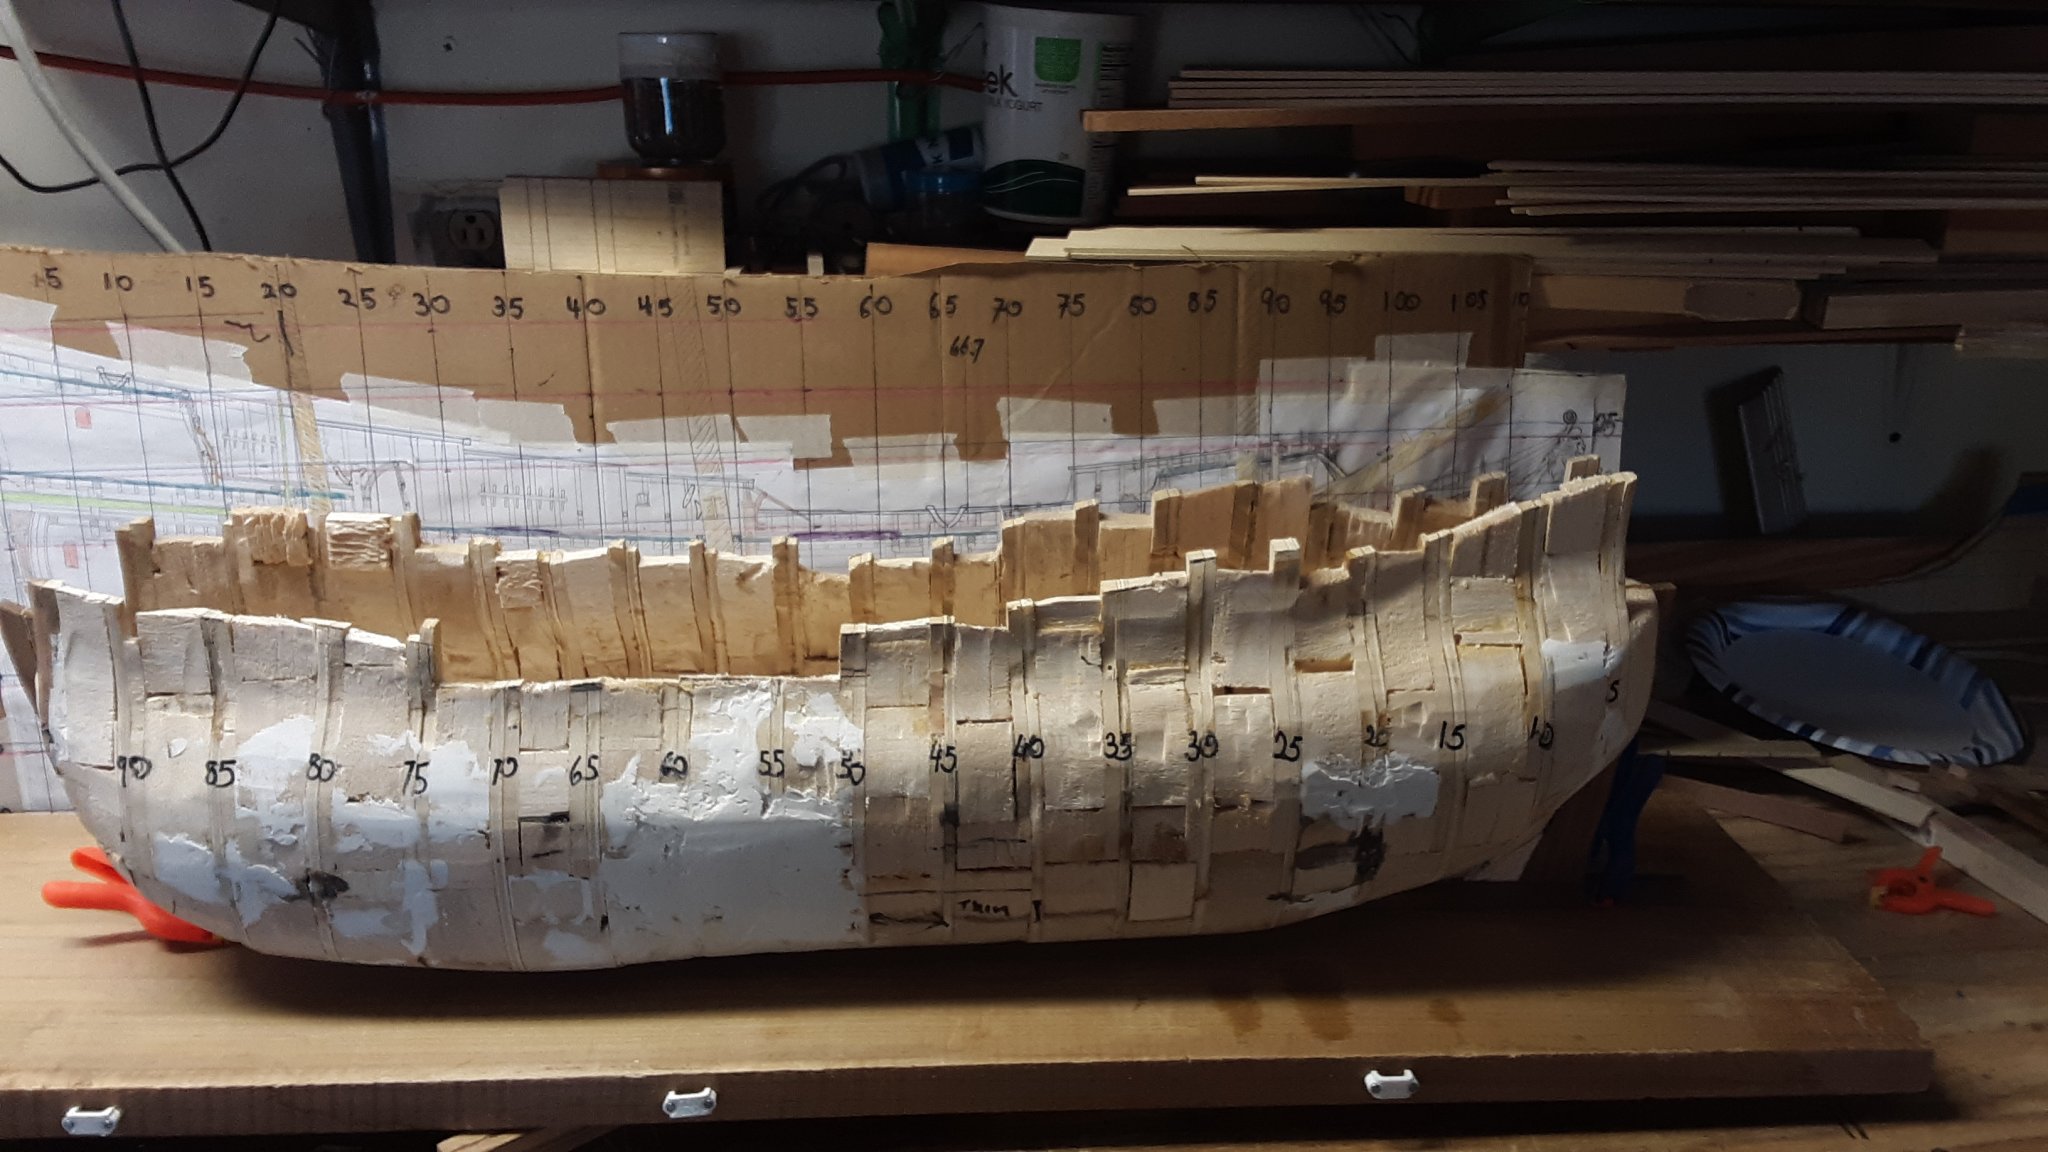
Been sanding the outside of the hull which is now 90% complete.
The stern will probably be the most difficult part. In the last month I have been looking at pictures of Fluits. In books and the Net. Staring at the curvature of the stern. I need to be able to visualize it in my head.
Temporarily attached the stem, keel and stern to the ship. I need a decent fit before I permanently glue the pieces in place.

Marcus
- GrandpaPhil, G.L., mtaylor and 1 other
-
4
-
-
Ab,
Thanks for the lines of the 1680 Warship.
All ships I built are from readily available wood. I get all my wood for free from the local woodworkers club I joined a couple of years ago. Predominantly walnut, cherry, poplar, linden and maple.
I have been studying the plans of the pleasure jacht. Once you sent me the final plans of that ship I will attempt to build it shell first. When needing a break from building the Zeehaen, I will built the pleasure jacht.
Marcus
-
Ab,
Interesting story about the warships that you and Wilma worked on. So besides finding the contract in the archives you also found the information of how the ship was built and what went wrong. Kind of like a diary.
If Wilma found a spec. contract in the Amsterdam archives, I wonder what other contracts the archives have.
Do you build your ships from reading specification contracts? All those archives with all the contracts, gives you lots of choices of what to build.
You don't happen to have plans from that Warship that you are talking about?
I like how you make your cannons from card. Something for me to try. Making the barrels from card would be easier than from either wood or brass.
Marcus
-
Ab,
I've downloaded the elevation plan and the body plan from this thread. You mentioned that the length of the jacht is 27 cm at a scale of 1:44.
I am going to play around with other scales and see what is most pleasing to the eye.
Will attempt to build a plank on frame model.
Marcus
-
-
Last Saturday I felt like I had an upset stomach and then spiked a temp of 103.
Went to the ER. After all the tests came back the CT Scan showed an enlarged, encapsulated, appendix which had ruptured as well.
Got operated on it. Was in the hospital for 5 days. Now home and recuperating.
Marcus
-
Kortes,
Beautifully executed, superb attention to details. You have done a great job on this ship
Marcus
- Keith Black and mtaylor
-
2
-
-
Mark,
Sad news. My wife's father also got Early Onset Dimentia but without the paranoia. He lived with us for a while until we couldn't take care of him.
Regards
Marcus
- John Allen, EJ_L, mtaylor and 3 others
-
6
-
-
-
-
Ab,
It is good you are showing the plans from the Speel jacht (Pleasure Yacht).
The learning curve in reading the contract from Witsen (and your latest book) has been steep.
I will take the information you have on this thread and compare it to my notes of building the jacht.
I have made many mistakes just by understanding the length, width and height of the ship. I will master this exercise,......... eventually.


Zeehaen 1639 by flying_dutchman2 - 1:37.5 - Dutch Fluit of Explorer Abel J. Tasman
in - Build logs for subjects built 1501 - 1750
Posted · Edited by flying_dutchman2
Punctuation
Installed more wales on the hull. There are 5 wales on each side.
Three wales equally spaced.
2 wales equally spaced.
Stern
Bow
Wales:
There will be 3 strips of 2mm thick glued on top of each other. Each wale will be 6mm thick and the wood is walnut.
The rest of the ship:
1st planking layer is basswood and second layer is cherry. What I like about cherry is that it darkens over time.
Last month at the woodworkers club meeting I was given lots of walnut and cherry planks so that is the wood to be uses for planking. Furthermore, someone gave me a slab of basswood (12"x 12" x 2"). This wood I will use for the carvings.
Marcus