


flying_dutchman2
-
Posts
1,735 -
Joined
-
Last visited
Content Type
Profiles
Forums
Gallery
Events
Posts posted by flying_dutchman2
-
-
On 3/24/2020 at 12:49 PM, Ab Hoving said:
You are really capable of creating a tremendous mess, Marcus.:-)
Can't wait to see the rest...
Ab
The mess will be hidden. You won't see it.
Marcus
- Landlubber Mike and G.L.
-
 2
2
-
-
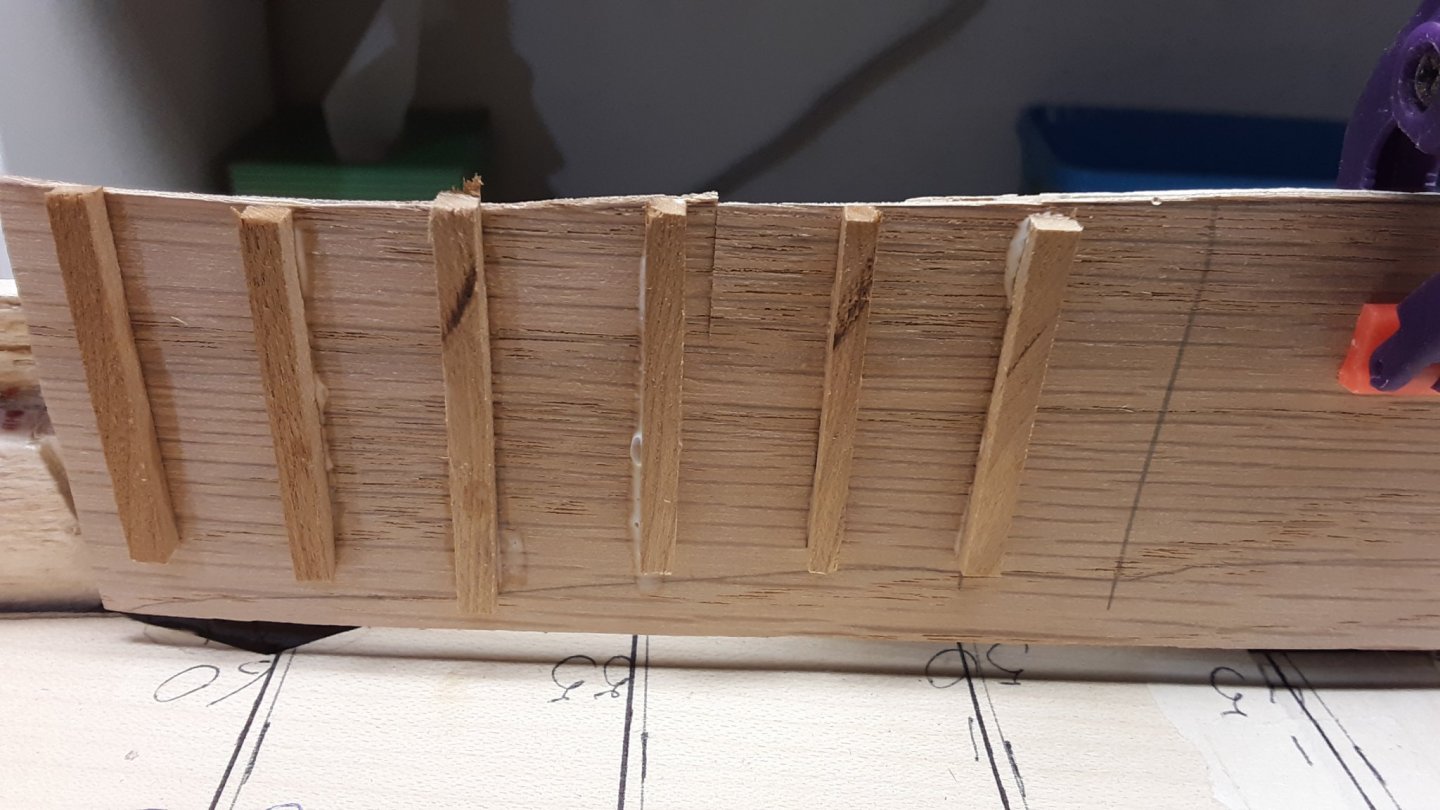
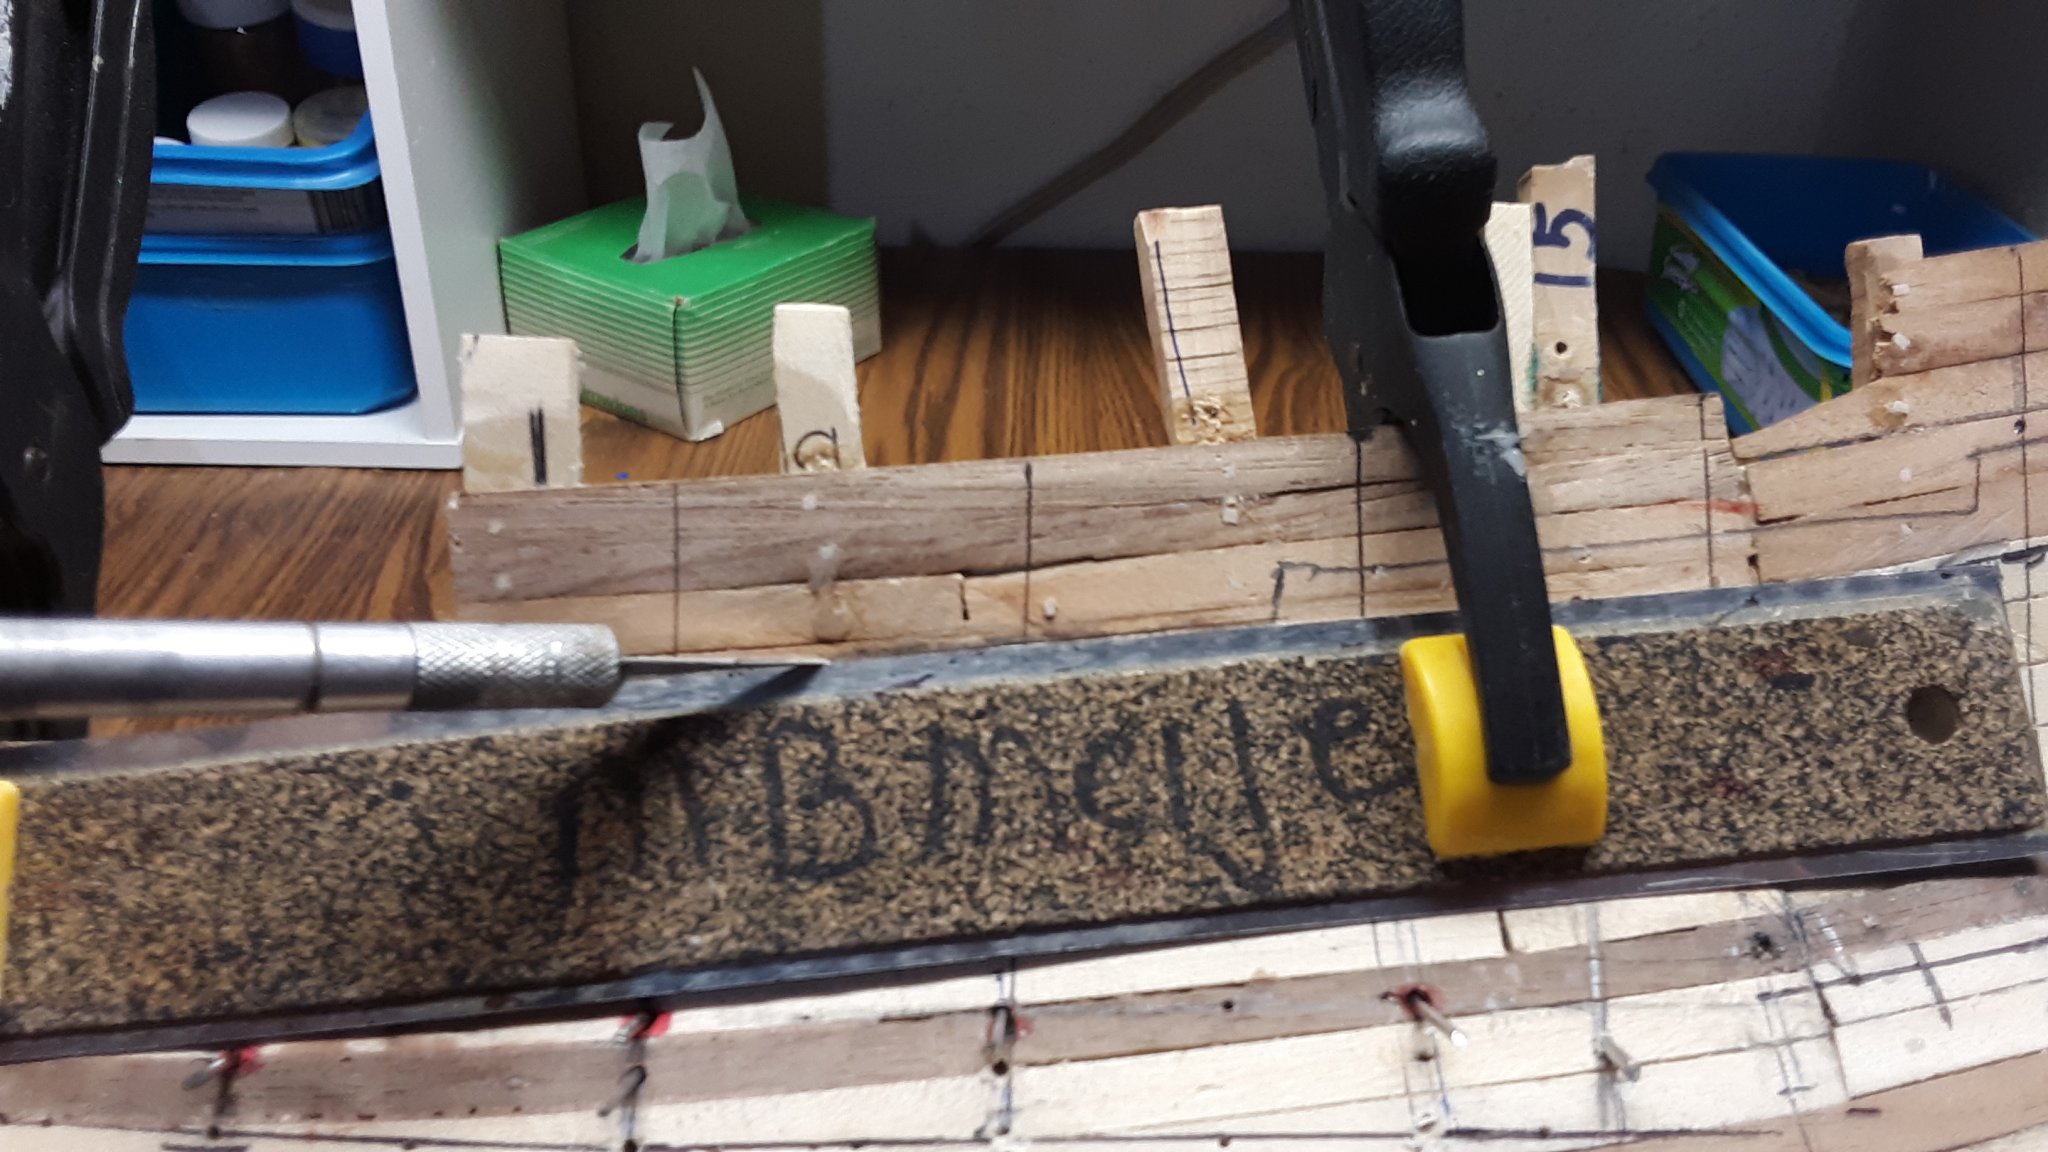
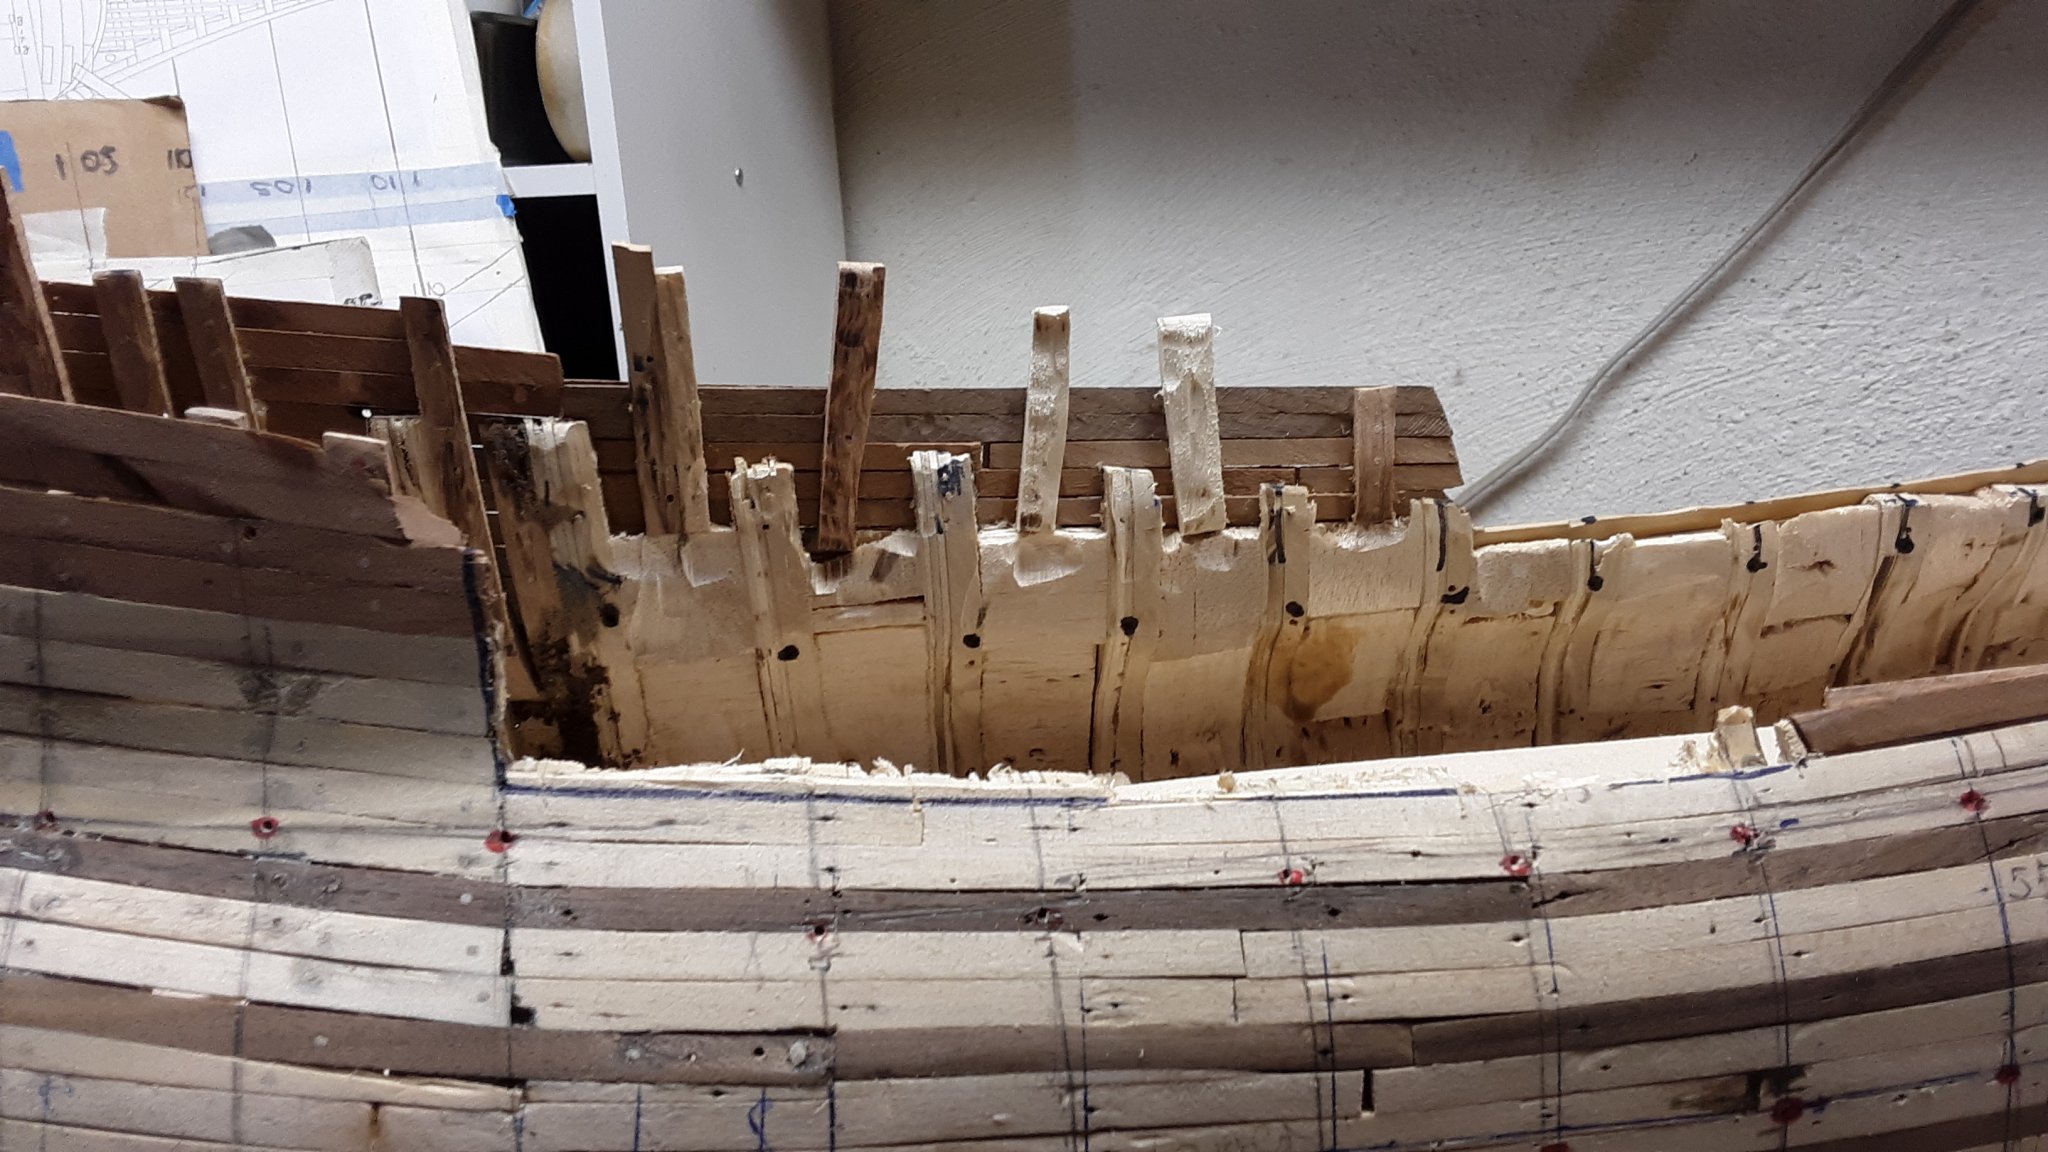
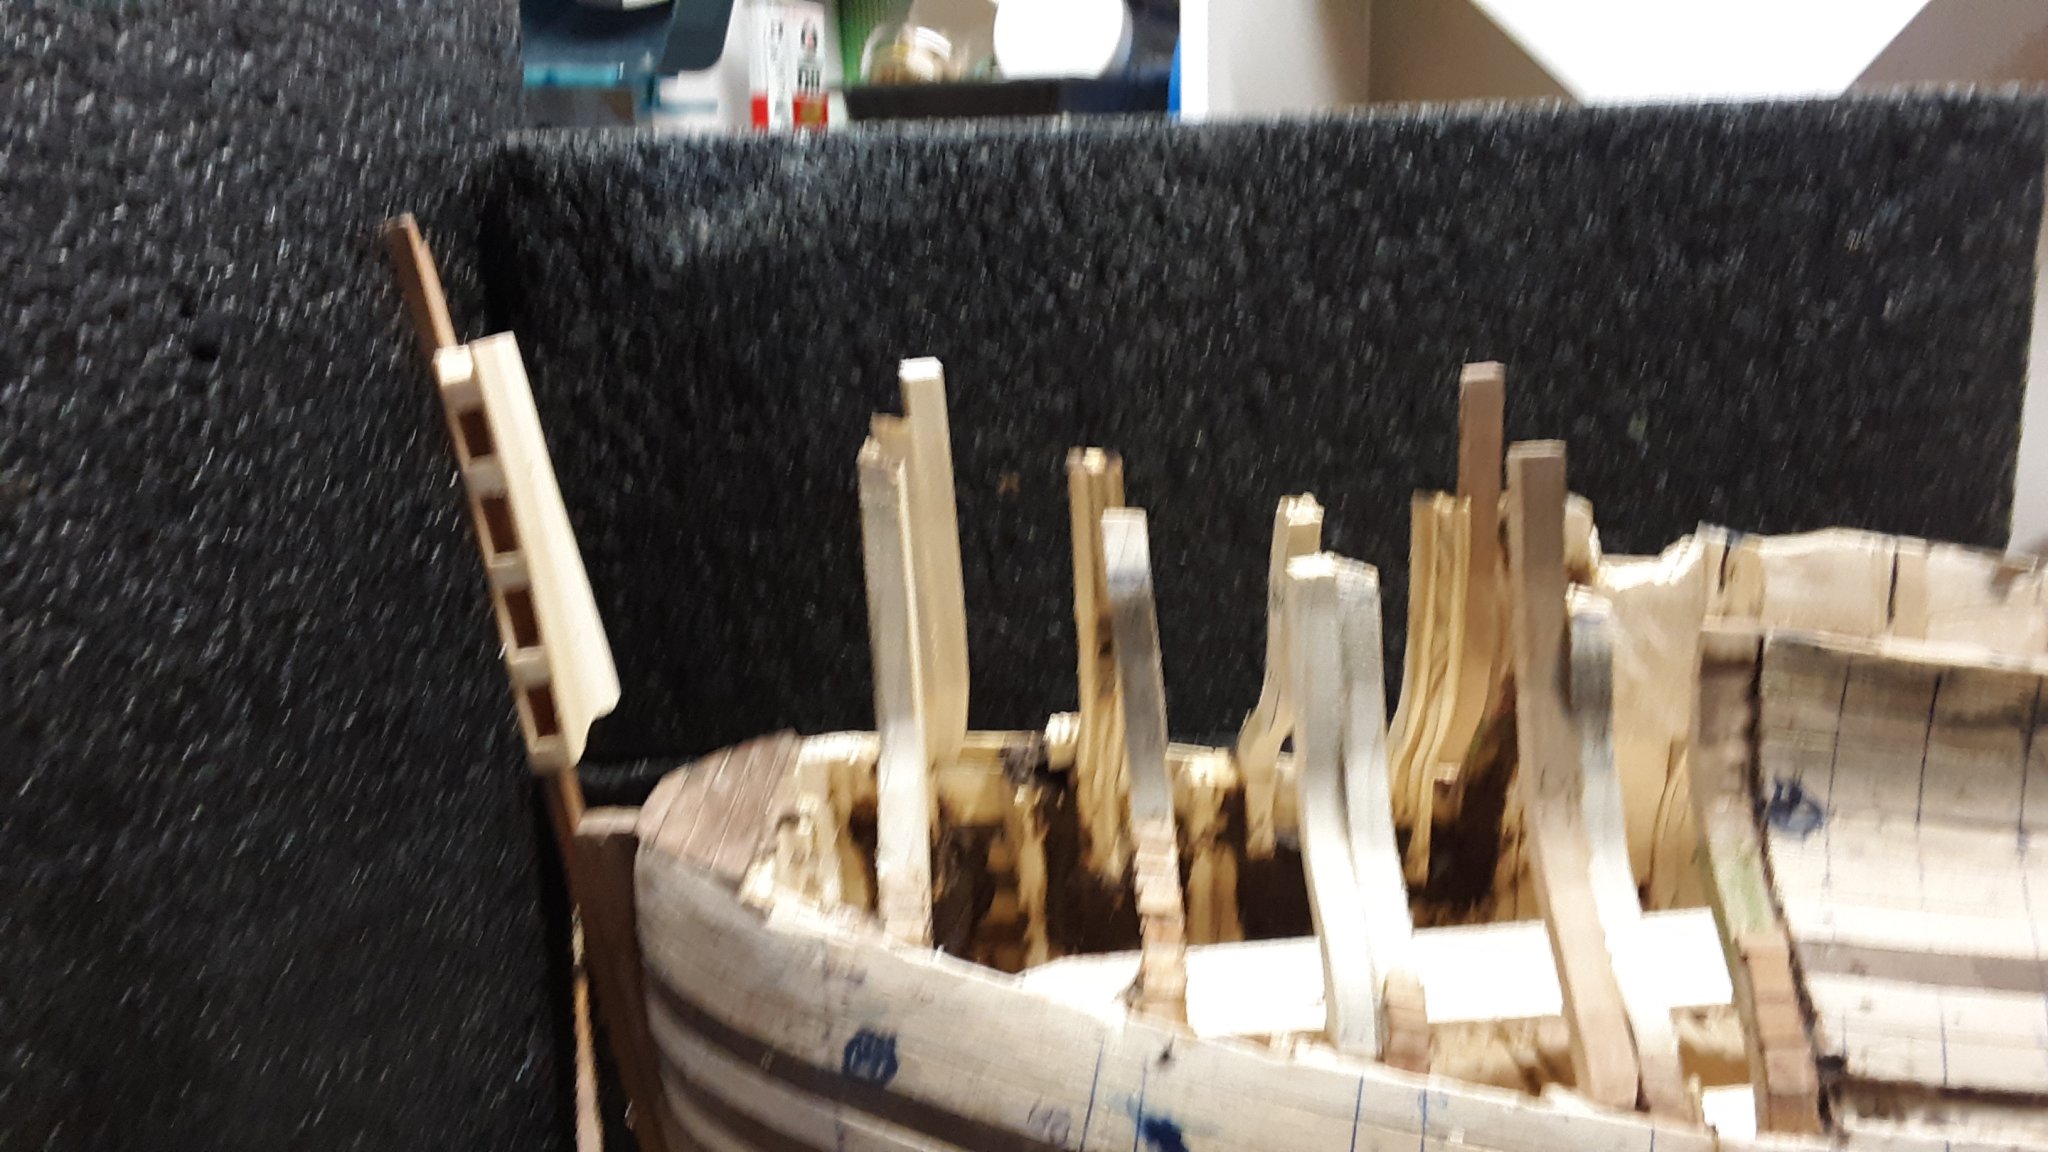
Created little deckbeam holders and glied the with a combo of glue and sawdust to the inside of the hull.
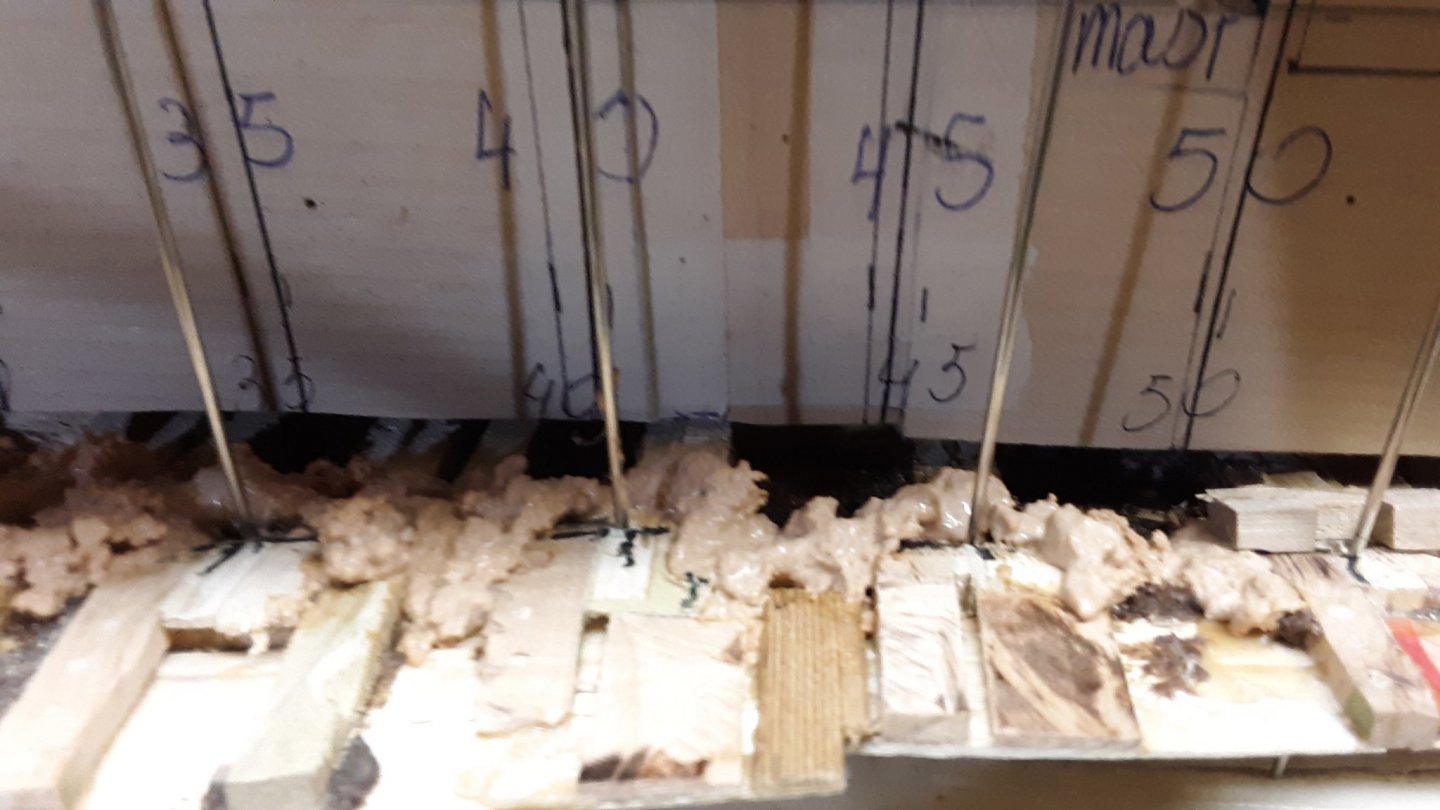
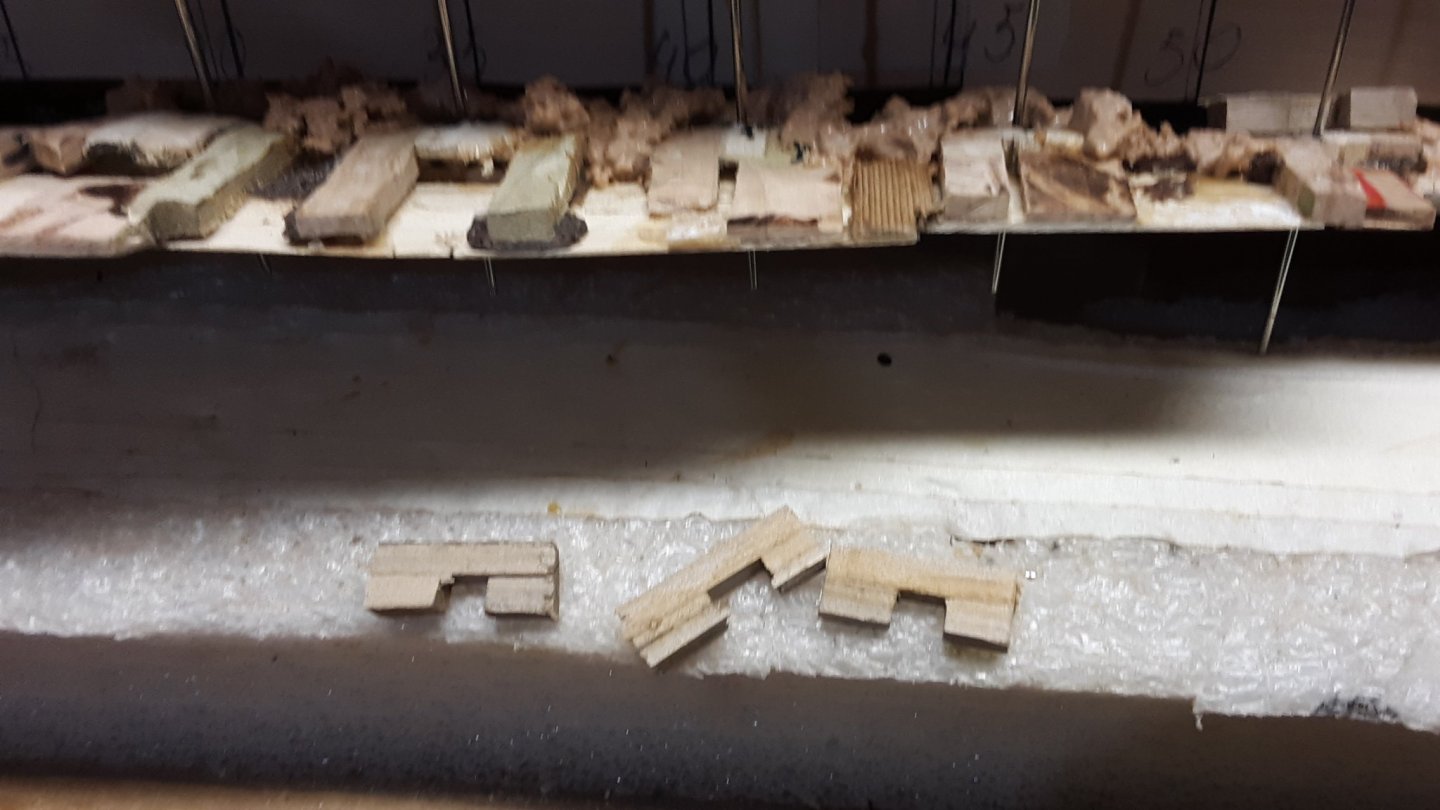

The beams are dry fitted in the slots.

You won't see any of this when the main deck is in.
Once this is completed I will start on dressing up the inside of the hull. It is the area that is exposed.
Marcus
- Omega1234, mtaylor, GrandpaPhil and 4 others
-
7
-
Druxey,
Thanks for the review. I've heard of this and will check it out.
Marcus
- mtaylor, hollowneck, druxey and 1 other
-
4
-
7 hours ago, Backer said:
Marcus,
Maybe the hull of a fluit was planked on the inside.
Then the frames are not visibleThe pictures in the 17th century Dutch merchant ships book show the outside of the hull planking and on the inside long vertical square dowels. It seems like the ship was built shell-first.
I am going to do veneer with 0.5mm planking on top with spaced square dowels on top of that. Making it look like frames.
Marcus
- mtaylor, Landlubber Mike, Baker and 1 other
-
4
-
Have been doing some ship building but the last 3 weeks it has been mostly outside. Getting the edible garden ready for spring planting and pruned all the fruit.
So I cut away excess wood from the railings.


Still need to remove the wood to where the tiller goes into the ship. It is curved.
Dry placed the decks on stainless steel rods.
Through carefully sanding the inside of the hull the bulkheads have been thinned in thickness.
My present dilemma is with what do I need to dress up the inside of the ship?
As is.

Veneer.
Veneer with spaced dowels.

Layer of veneer with 0.5mm thick planking on top of that and spaced dowels on top of the planking. The last option seems like the best option.
All advise is appreciated.Thanks
Marcus
- FriedClams, ccoyle, bruce d and 6 others
-
9
-
Back from India. The 3 day wedding was actually a 5 day wedding. It was a show of opulence. The groom arrived on an elephant.
Several things that left a mark in my brain were:
- The sheer amount of people, from dawn to dusk it is shoulder to shoulder everywhere you go. The country has 1.3 Billion people. (and I thought Amsterdam and Chicago had a lot of people)
- I thought I knew what poverty was, due to living in South East Asia and West Africa, but it is nothing like that at all. It was an eye opener.
- Three Traffic Rules: Have a working horn. Have good working brakes. Have some luck.
Use your horn when you want to pass, when you are passing and when you passed.
Use your horn when others: cut you off, going too slow, Anything you can think of. Everybody does this and it is very noisy.
Constant fender benders. It happens, check it out, continue with your journey.
Police and ambulance drive in both directions all the time.
All in all the trip was a lot of fun, didn't get sick by drinking the local water and learned a lot about the culture and history of India.
Back to the Fluit.
Marcus
- Boxbuilds, Roger Pellett and mtaylor
-
3
-
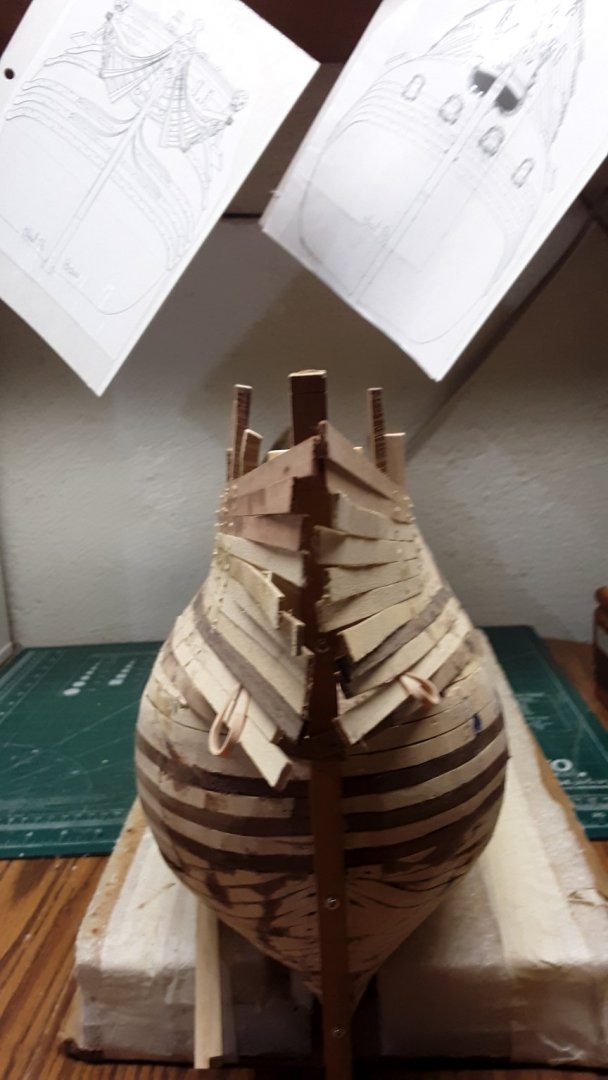
Thanks, Steven,
The 1st picture shows how the rudder and the tiller are positioned. The more pictures I see from that the better.
I have seen similar pictures like the second one. It always looks like the over do on the curvature of the hips.
Marcus
-
-
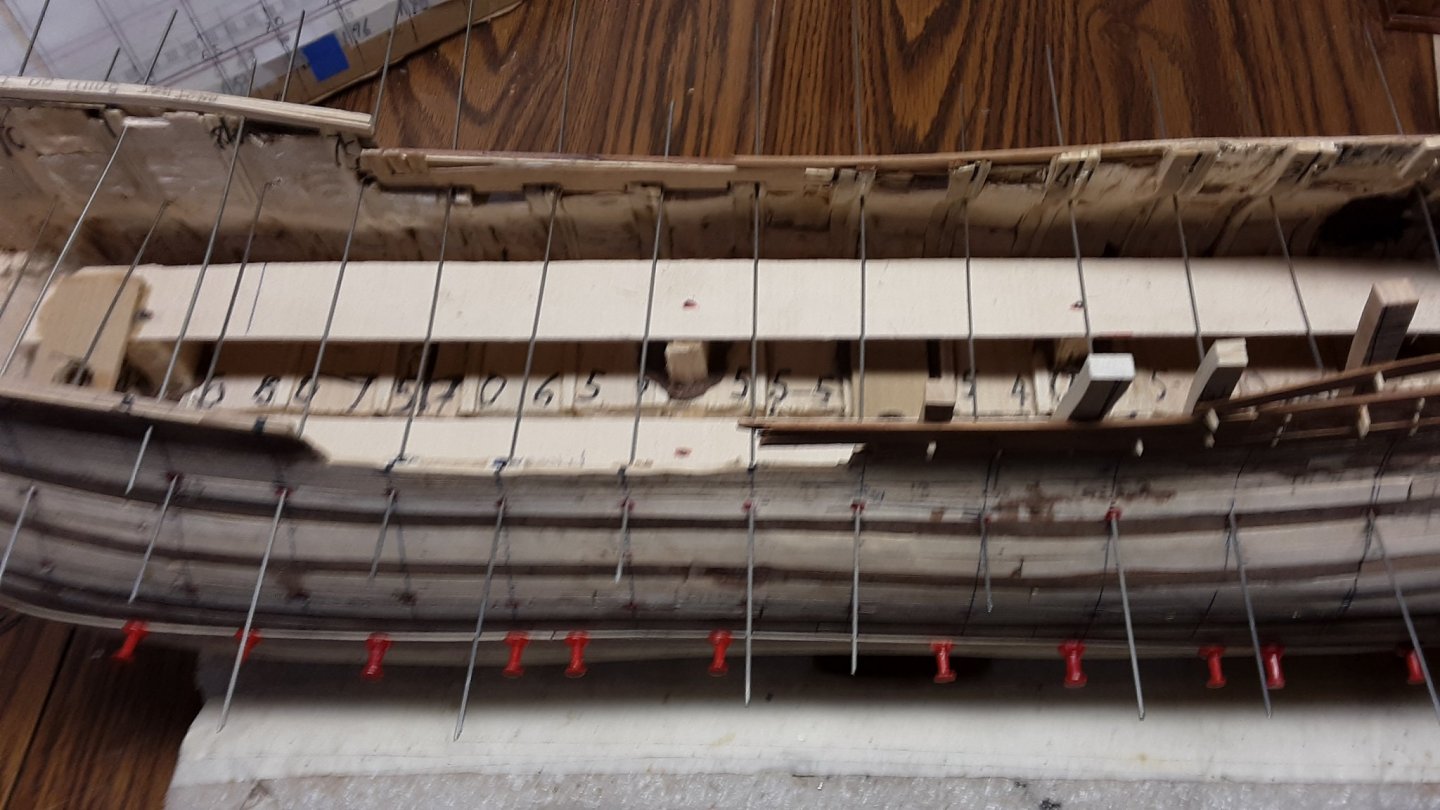
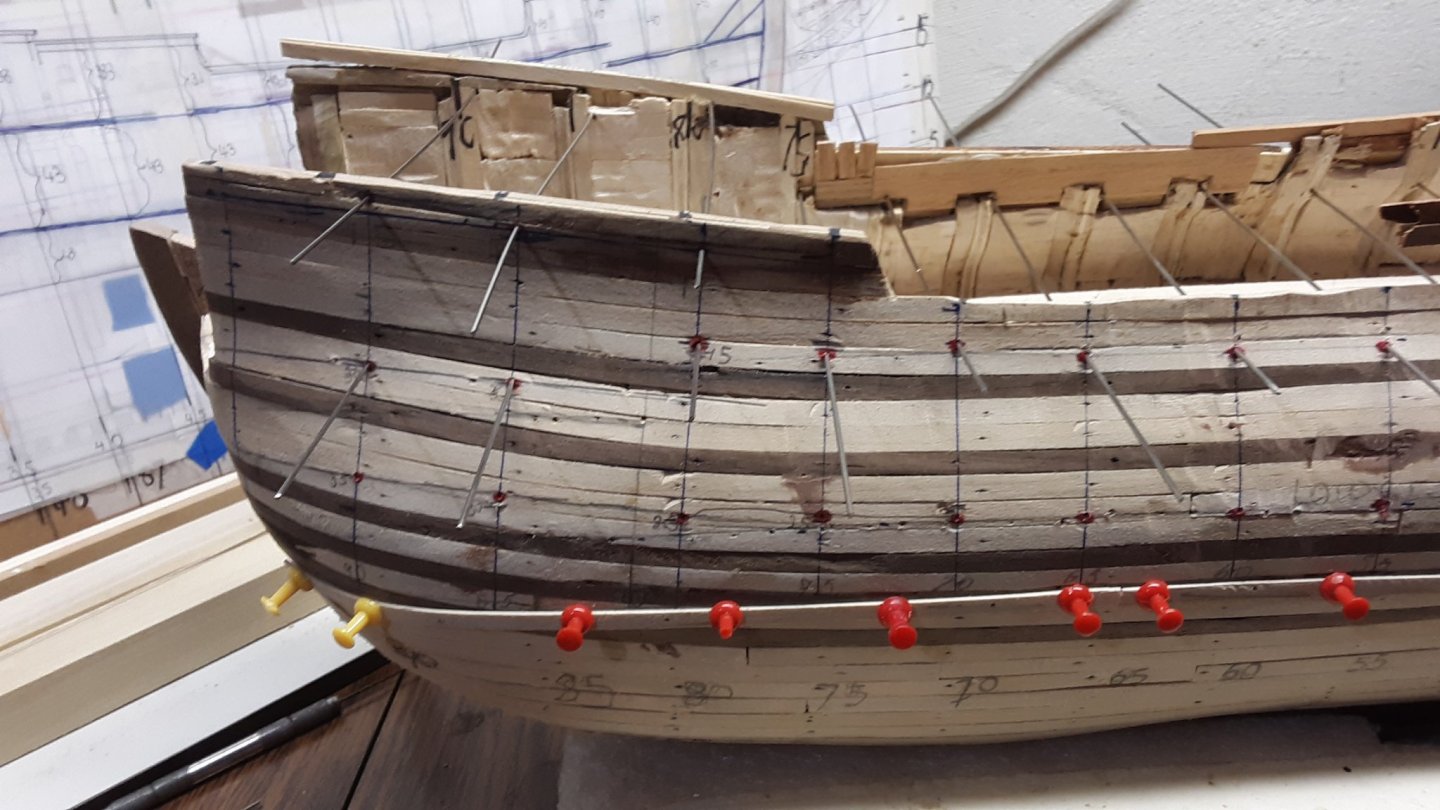
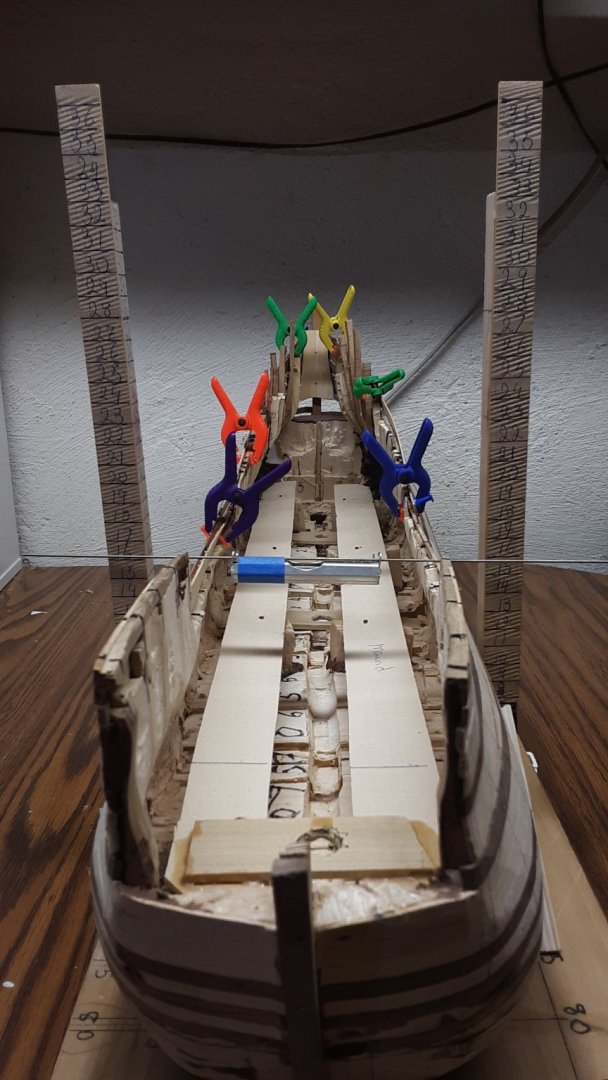
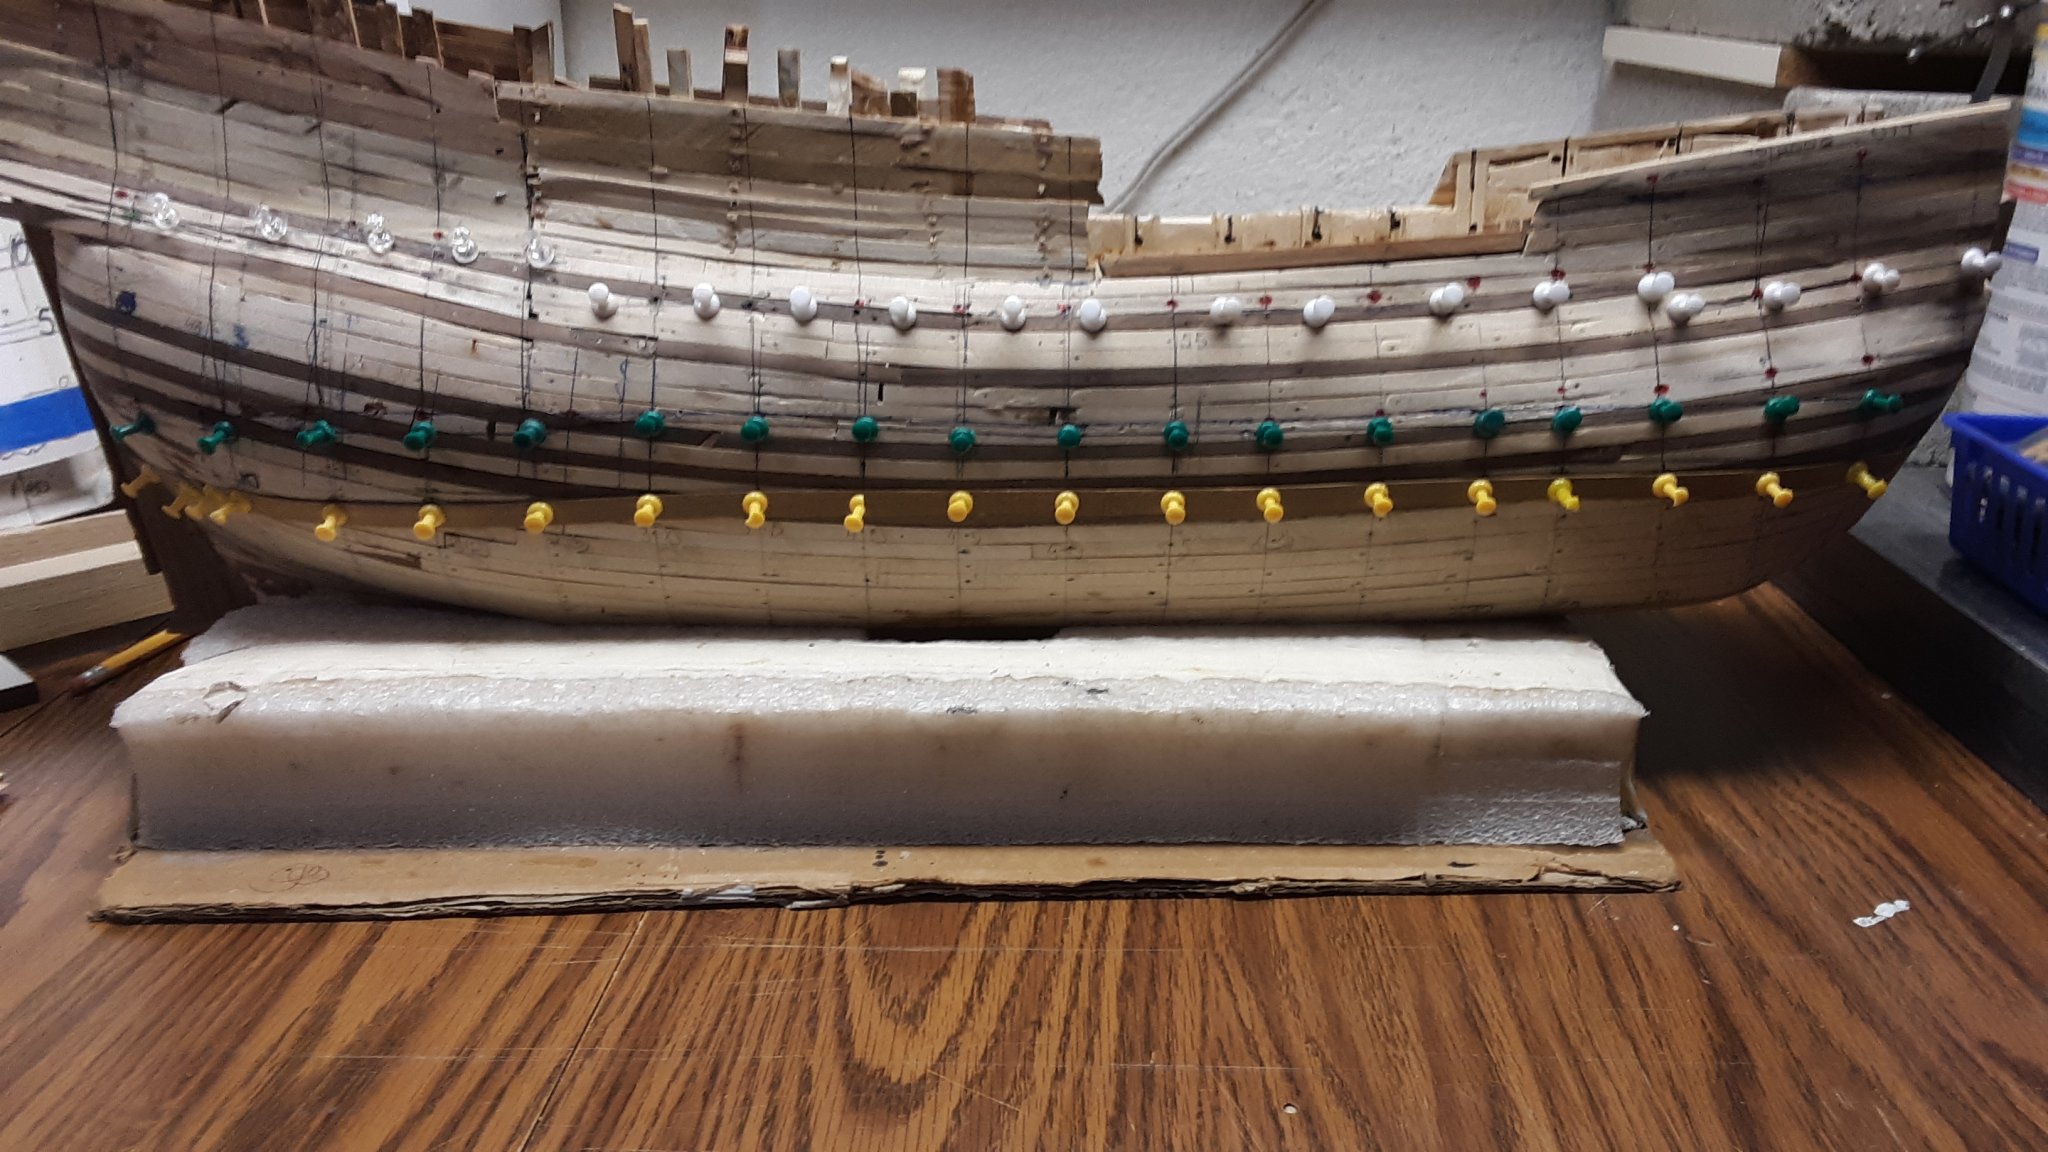
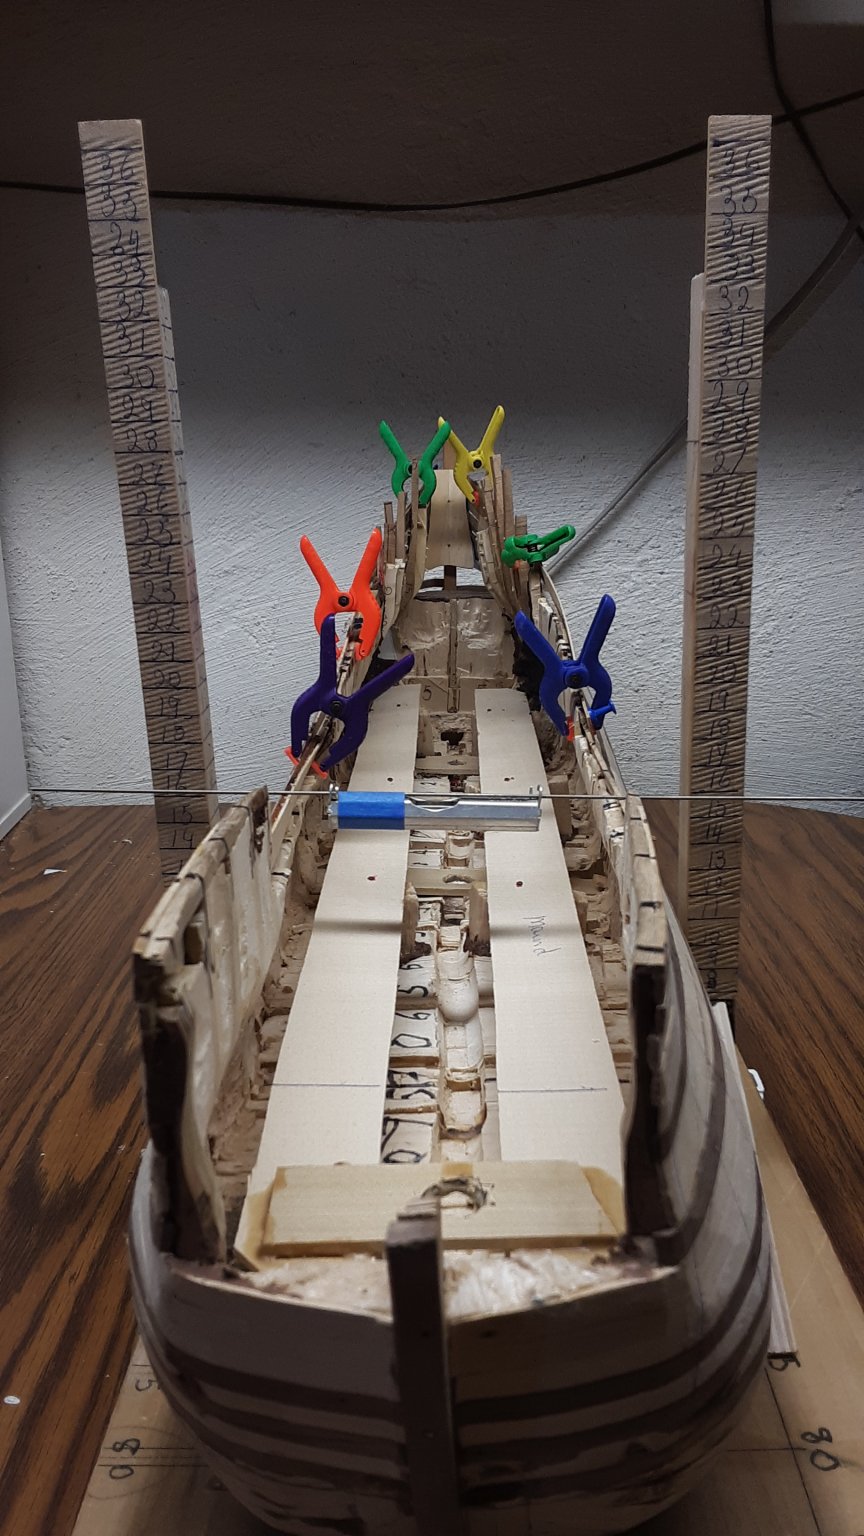
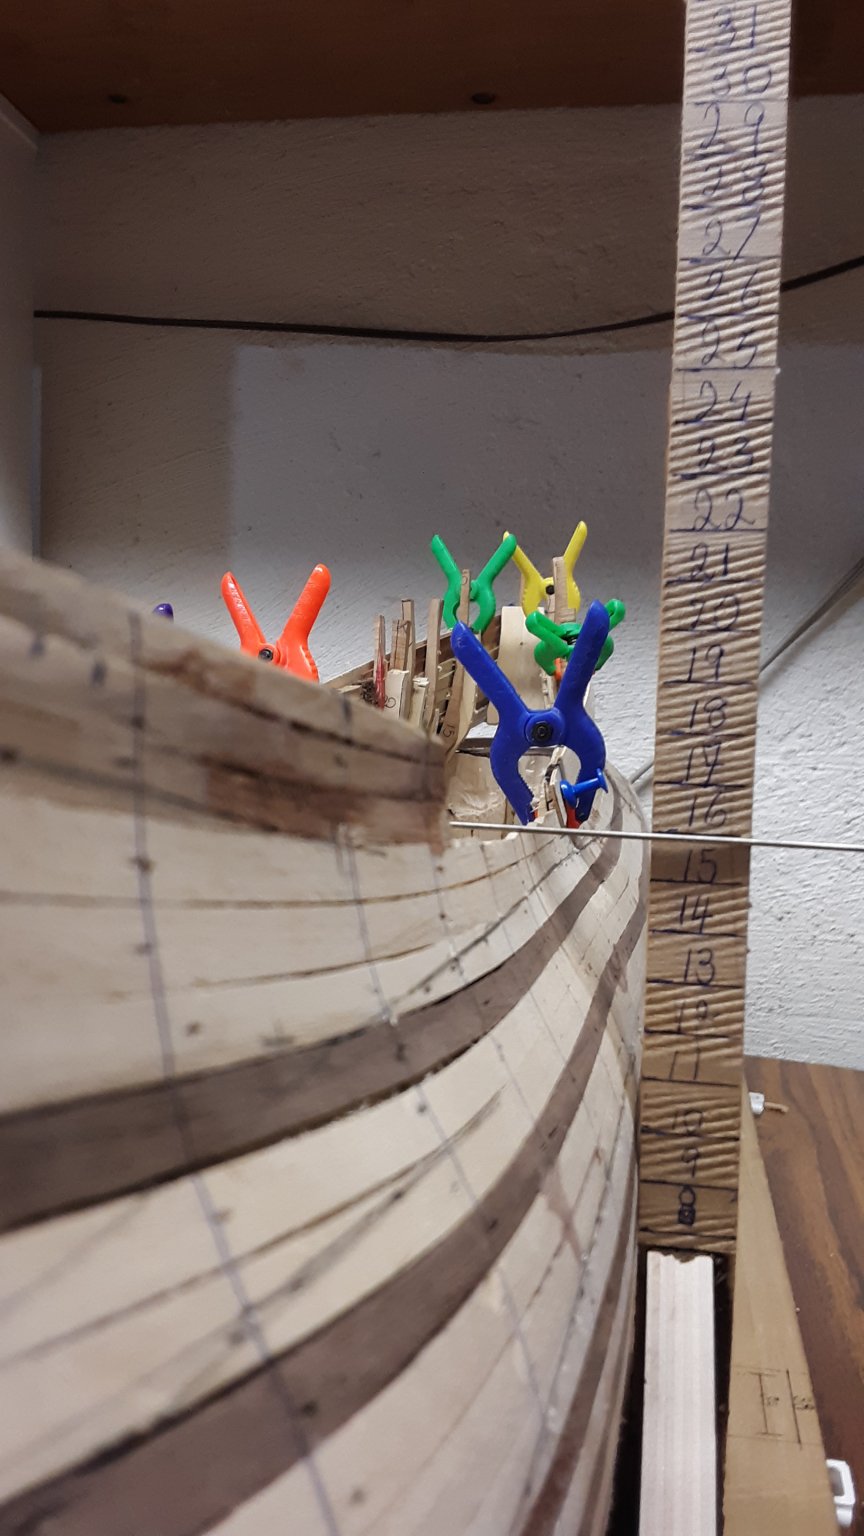
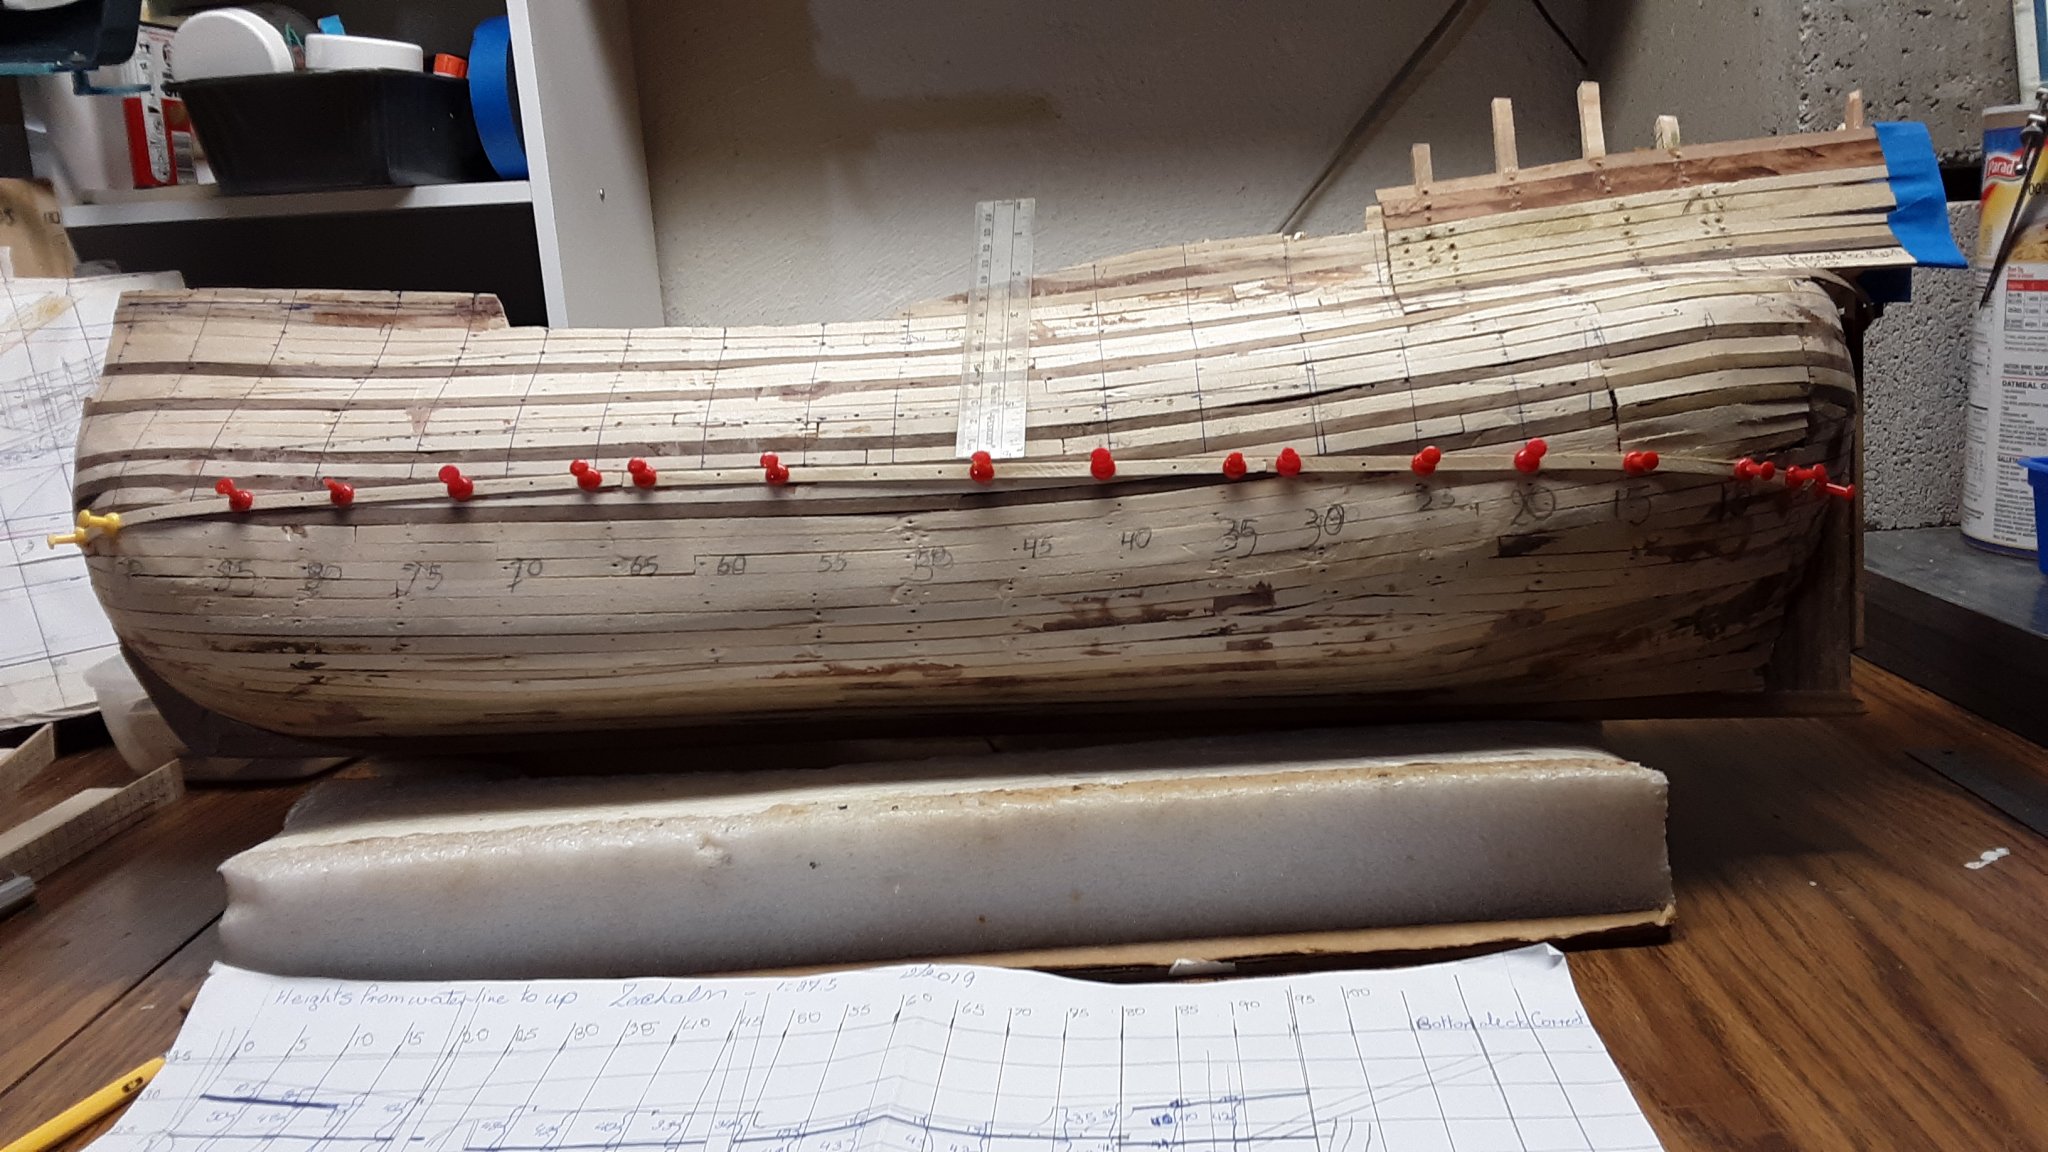
Measured many times the heights of the different decks.
Meaning of the colorful push pins:
Yellow and red is for the waterline.
Green and blue is for the lower deck
which will not be visible.
White and clear is for the main deck, and decks I don't know the names for.
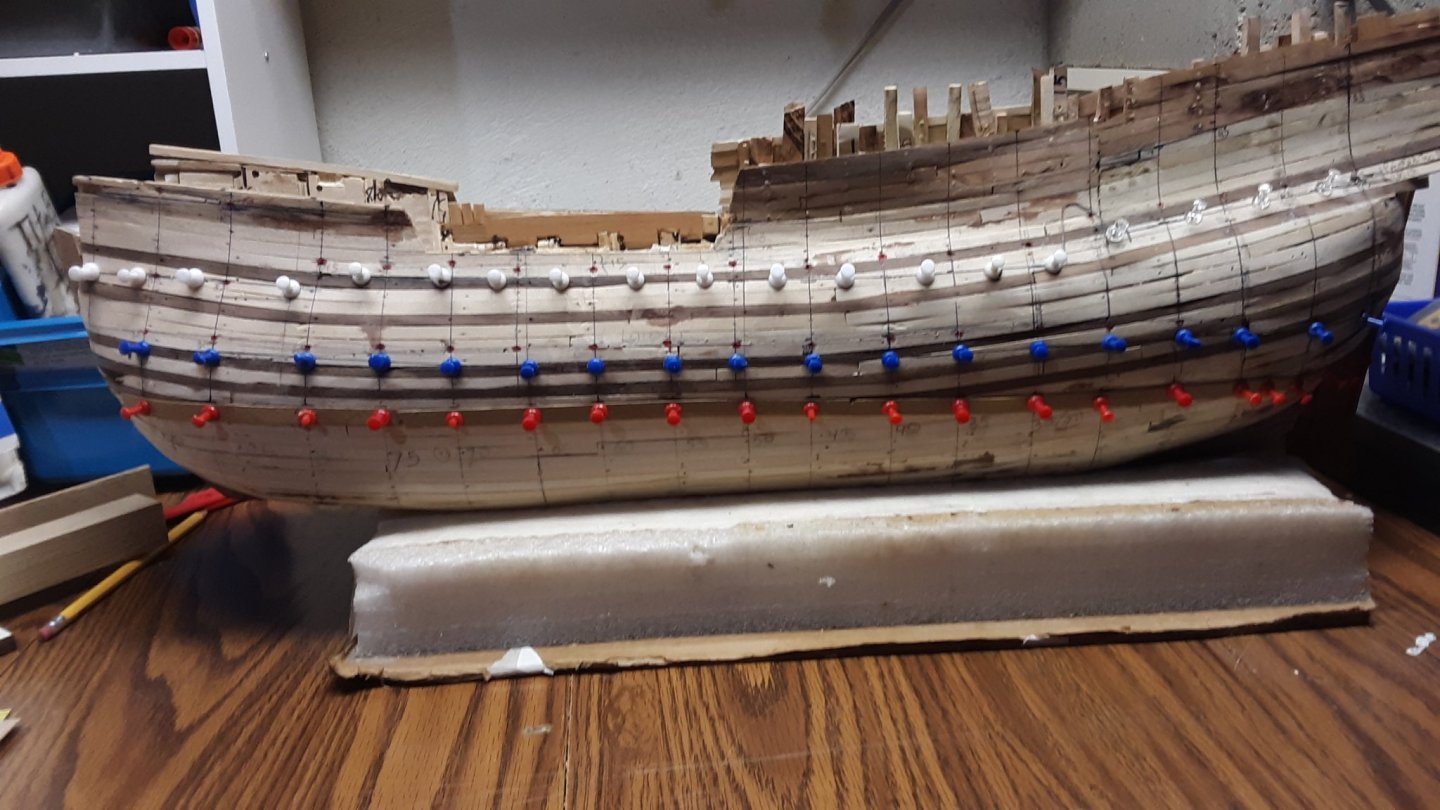
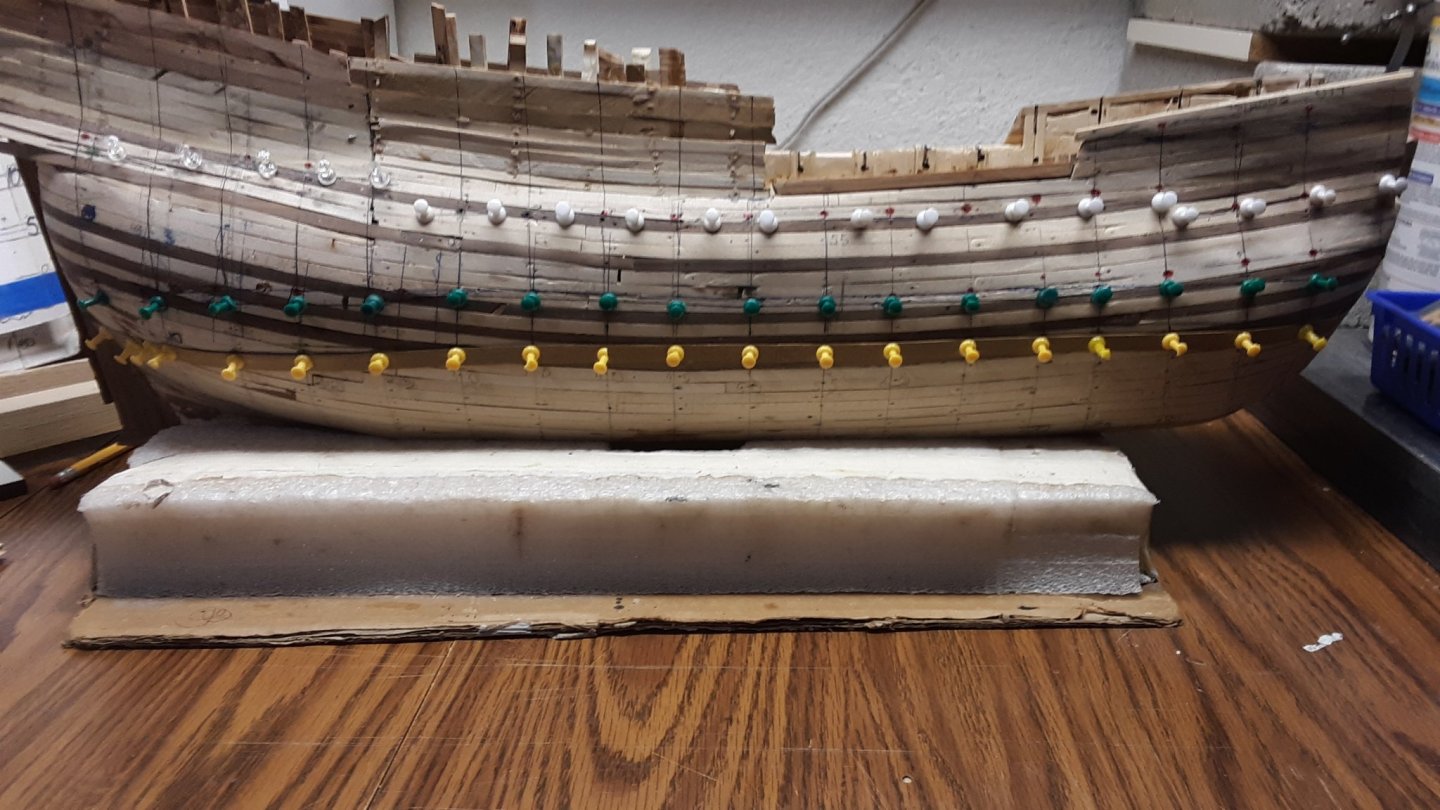
This is the lower deck that will be completely hidden. I have put it in anyway because I will use it as a guide for the beams for the main deck and other small deck.
What is the deck called under the poop deck (where does that name originate from?).
Does the forecastle deck have a focsle on top of it?
Please feel free to set me straight or steer me to a location where all decks are defined on any ship. I have books that have some explanation of decks but they are not complete.
Thanks
Marcus
- G.L., Jack12477, FriedClams and 4 others
-
7
-
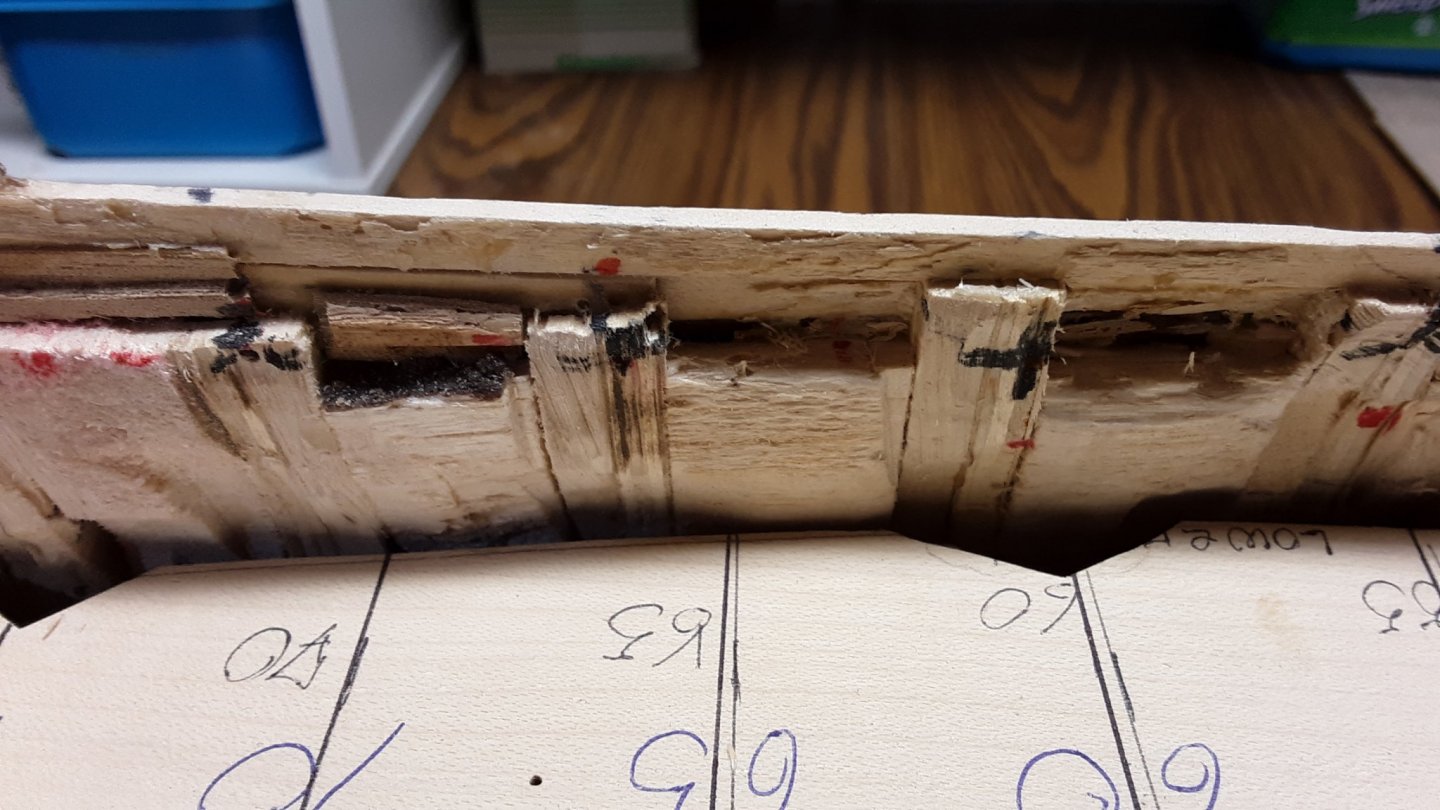
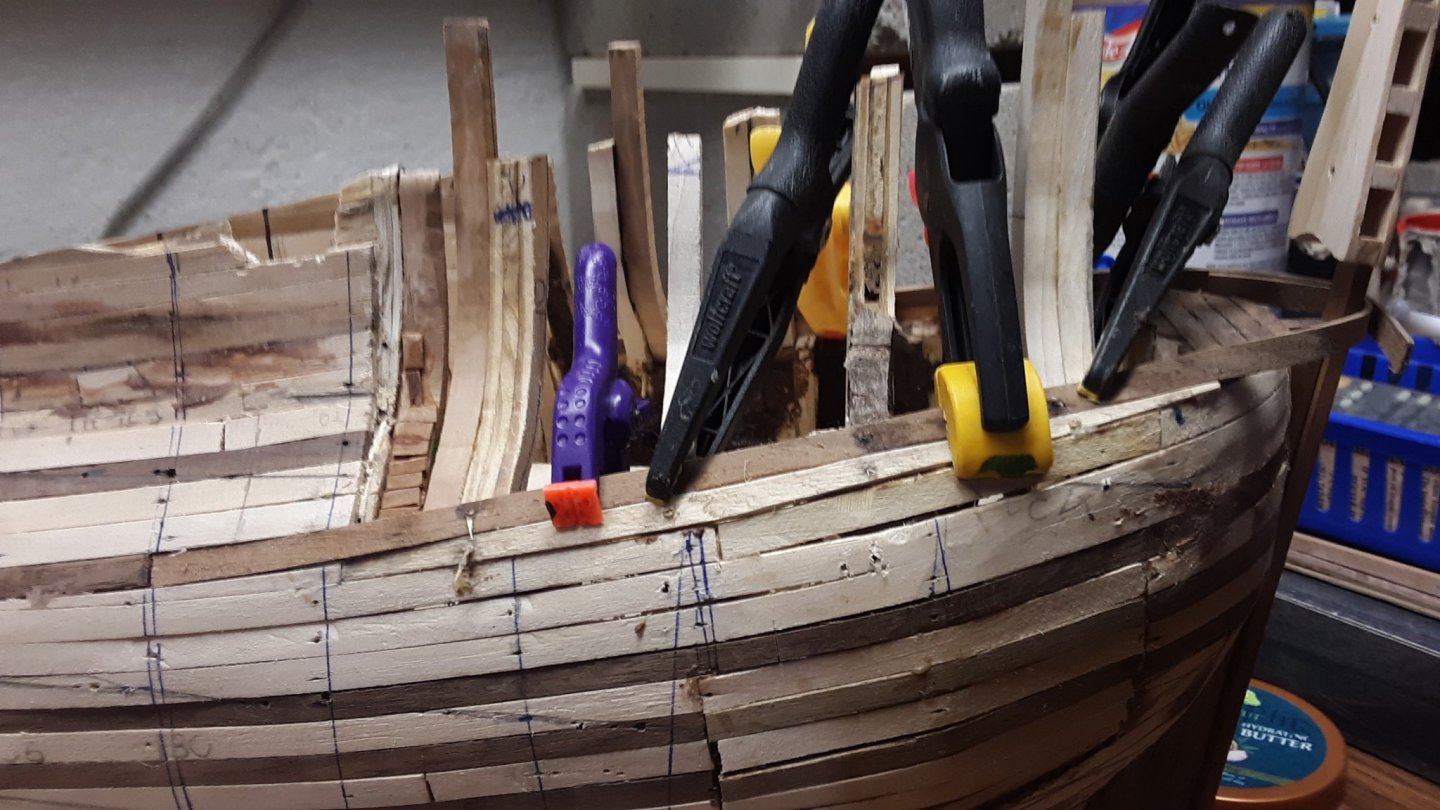
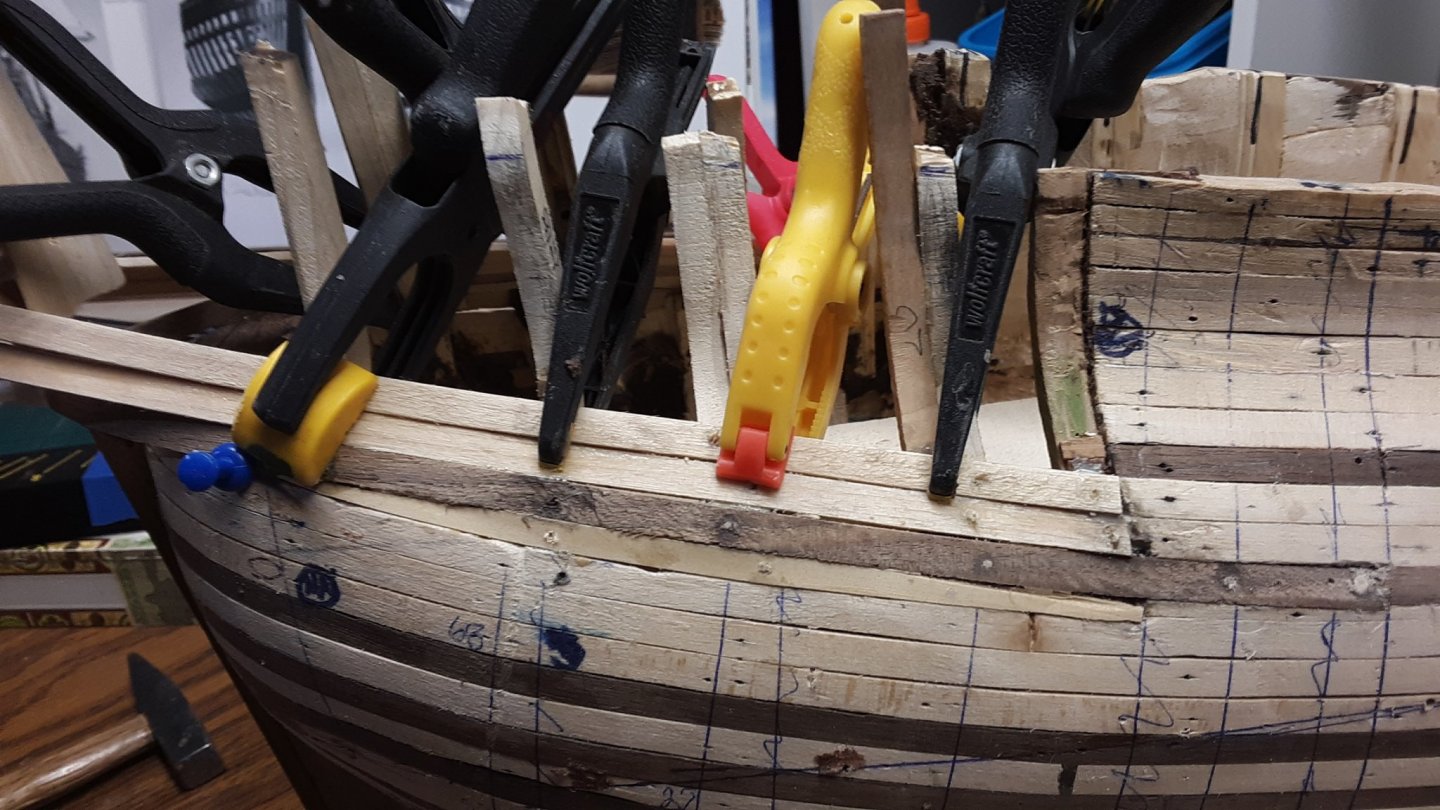
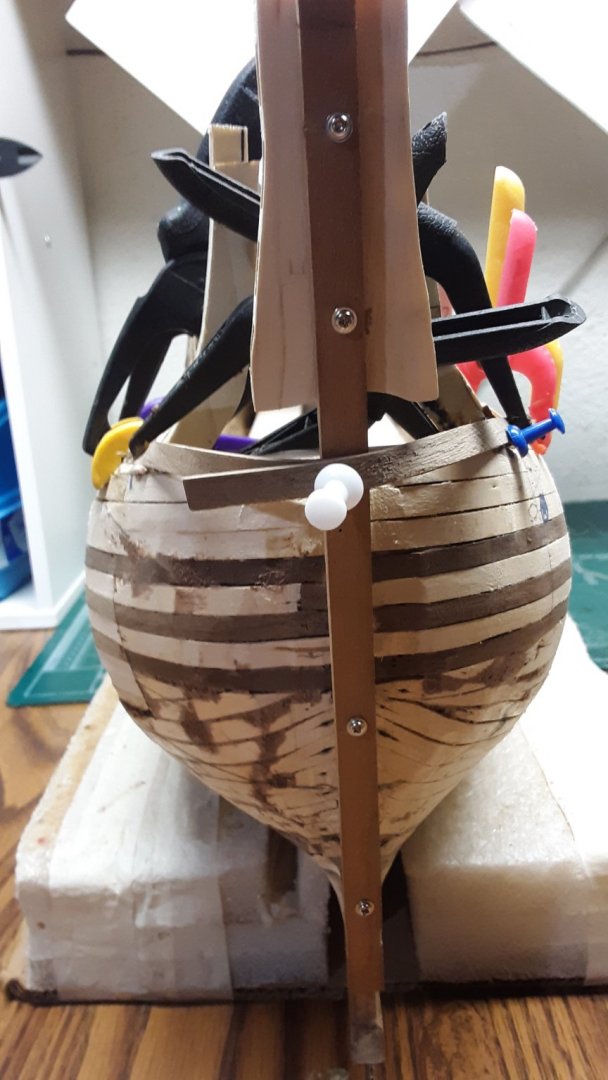
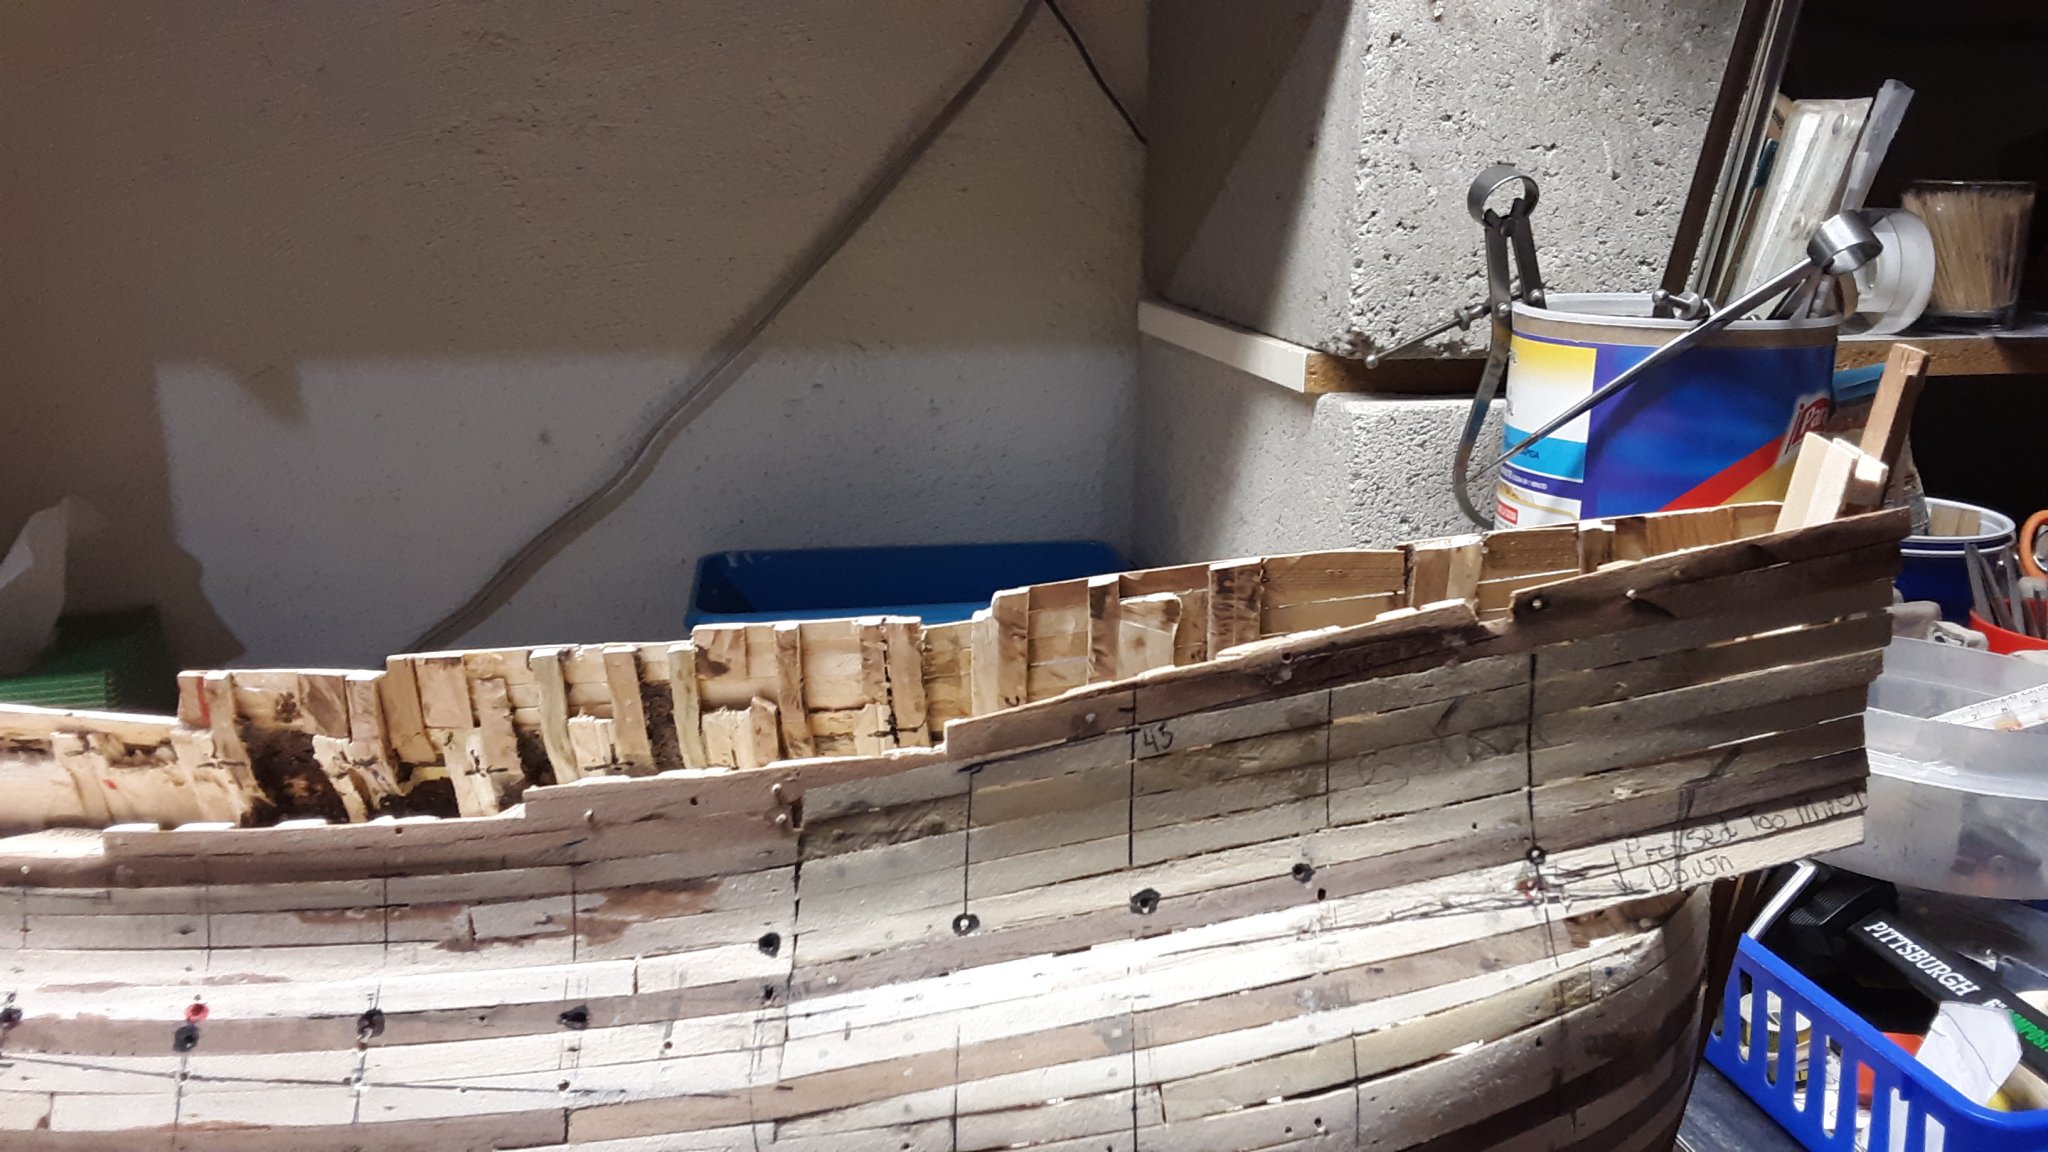
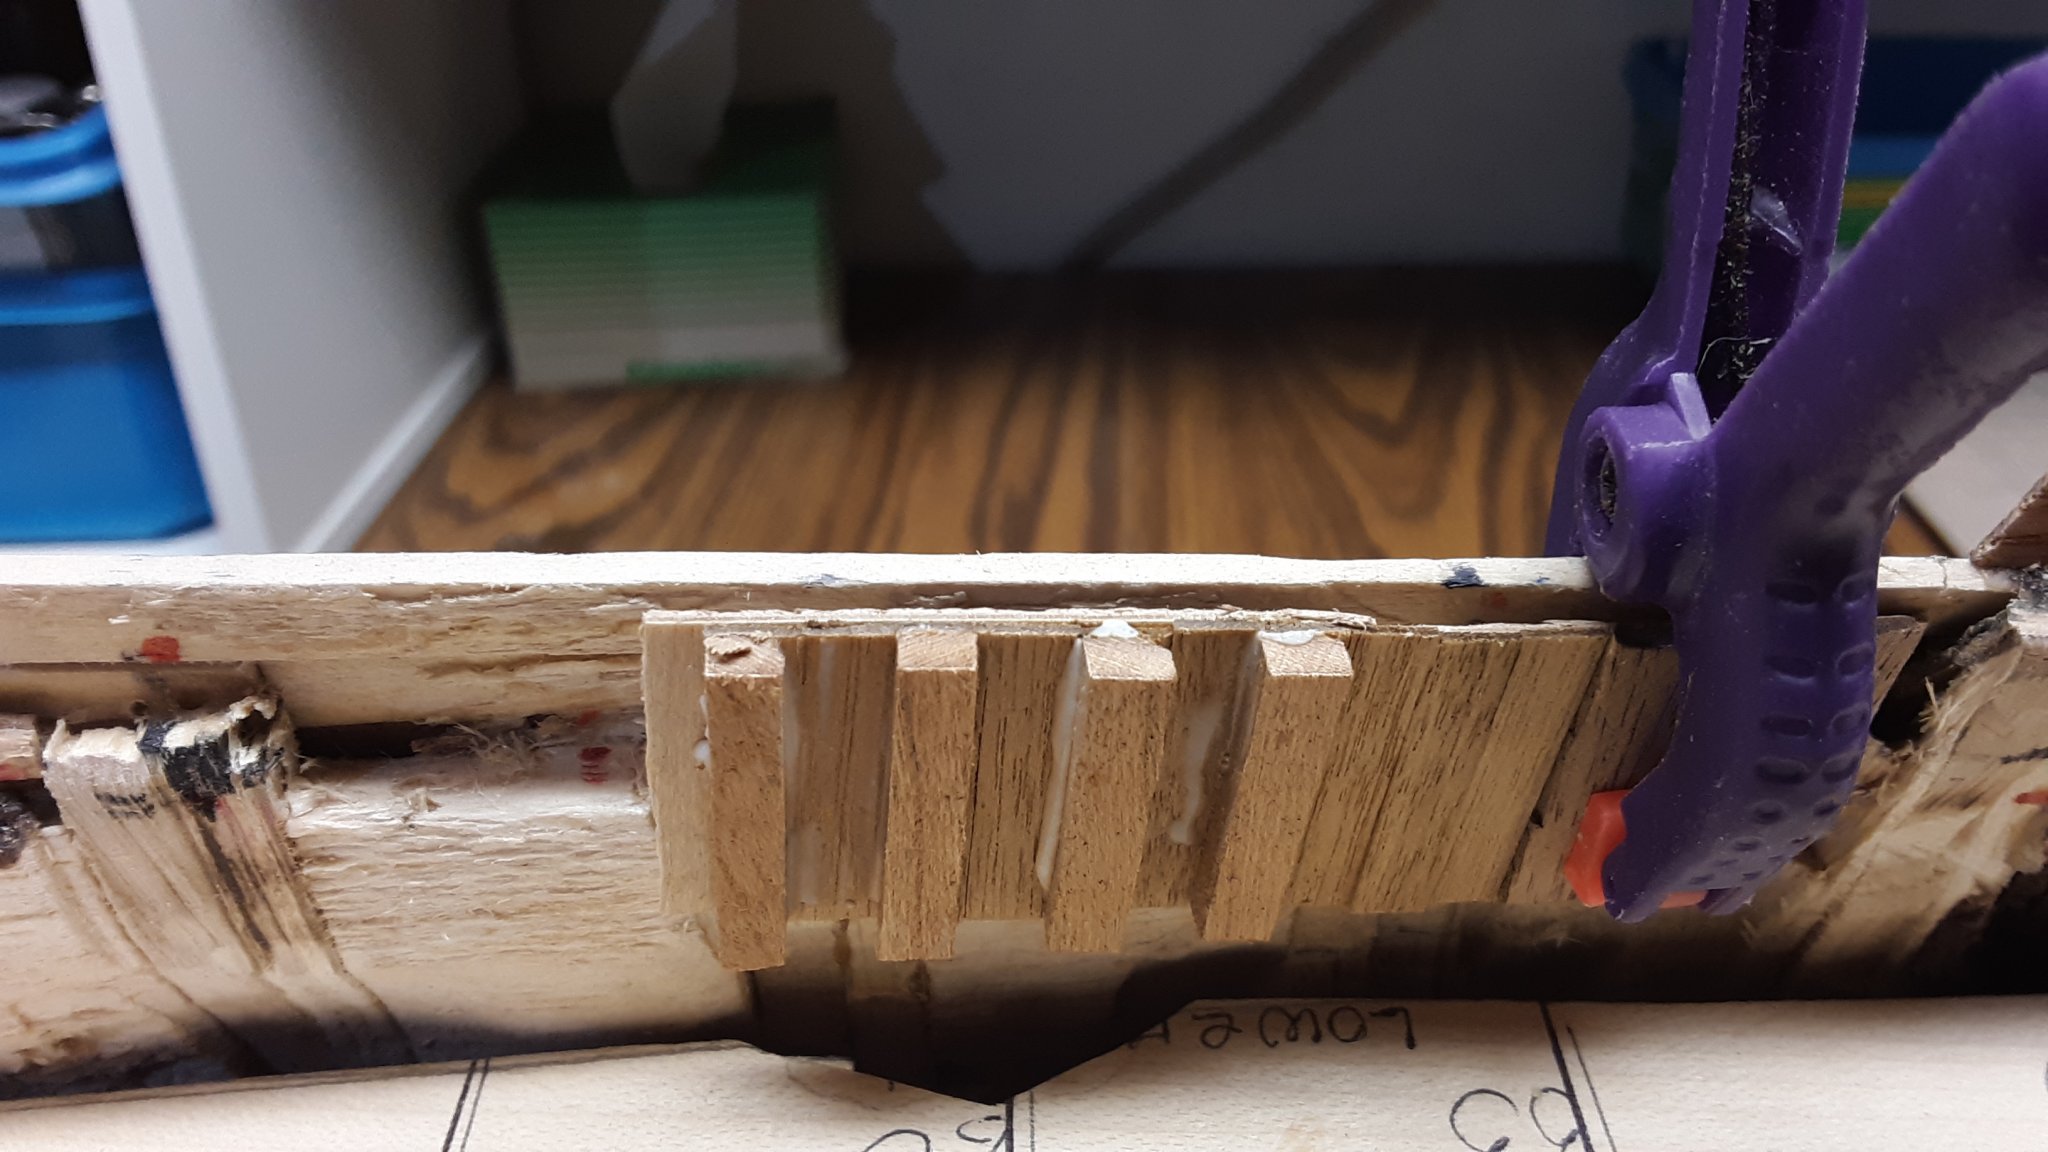
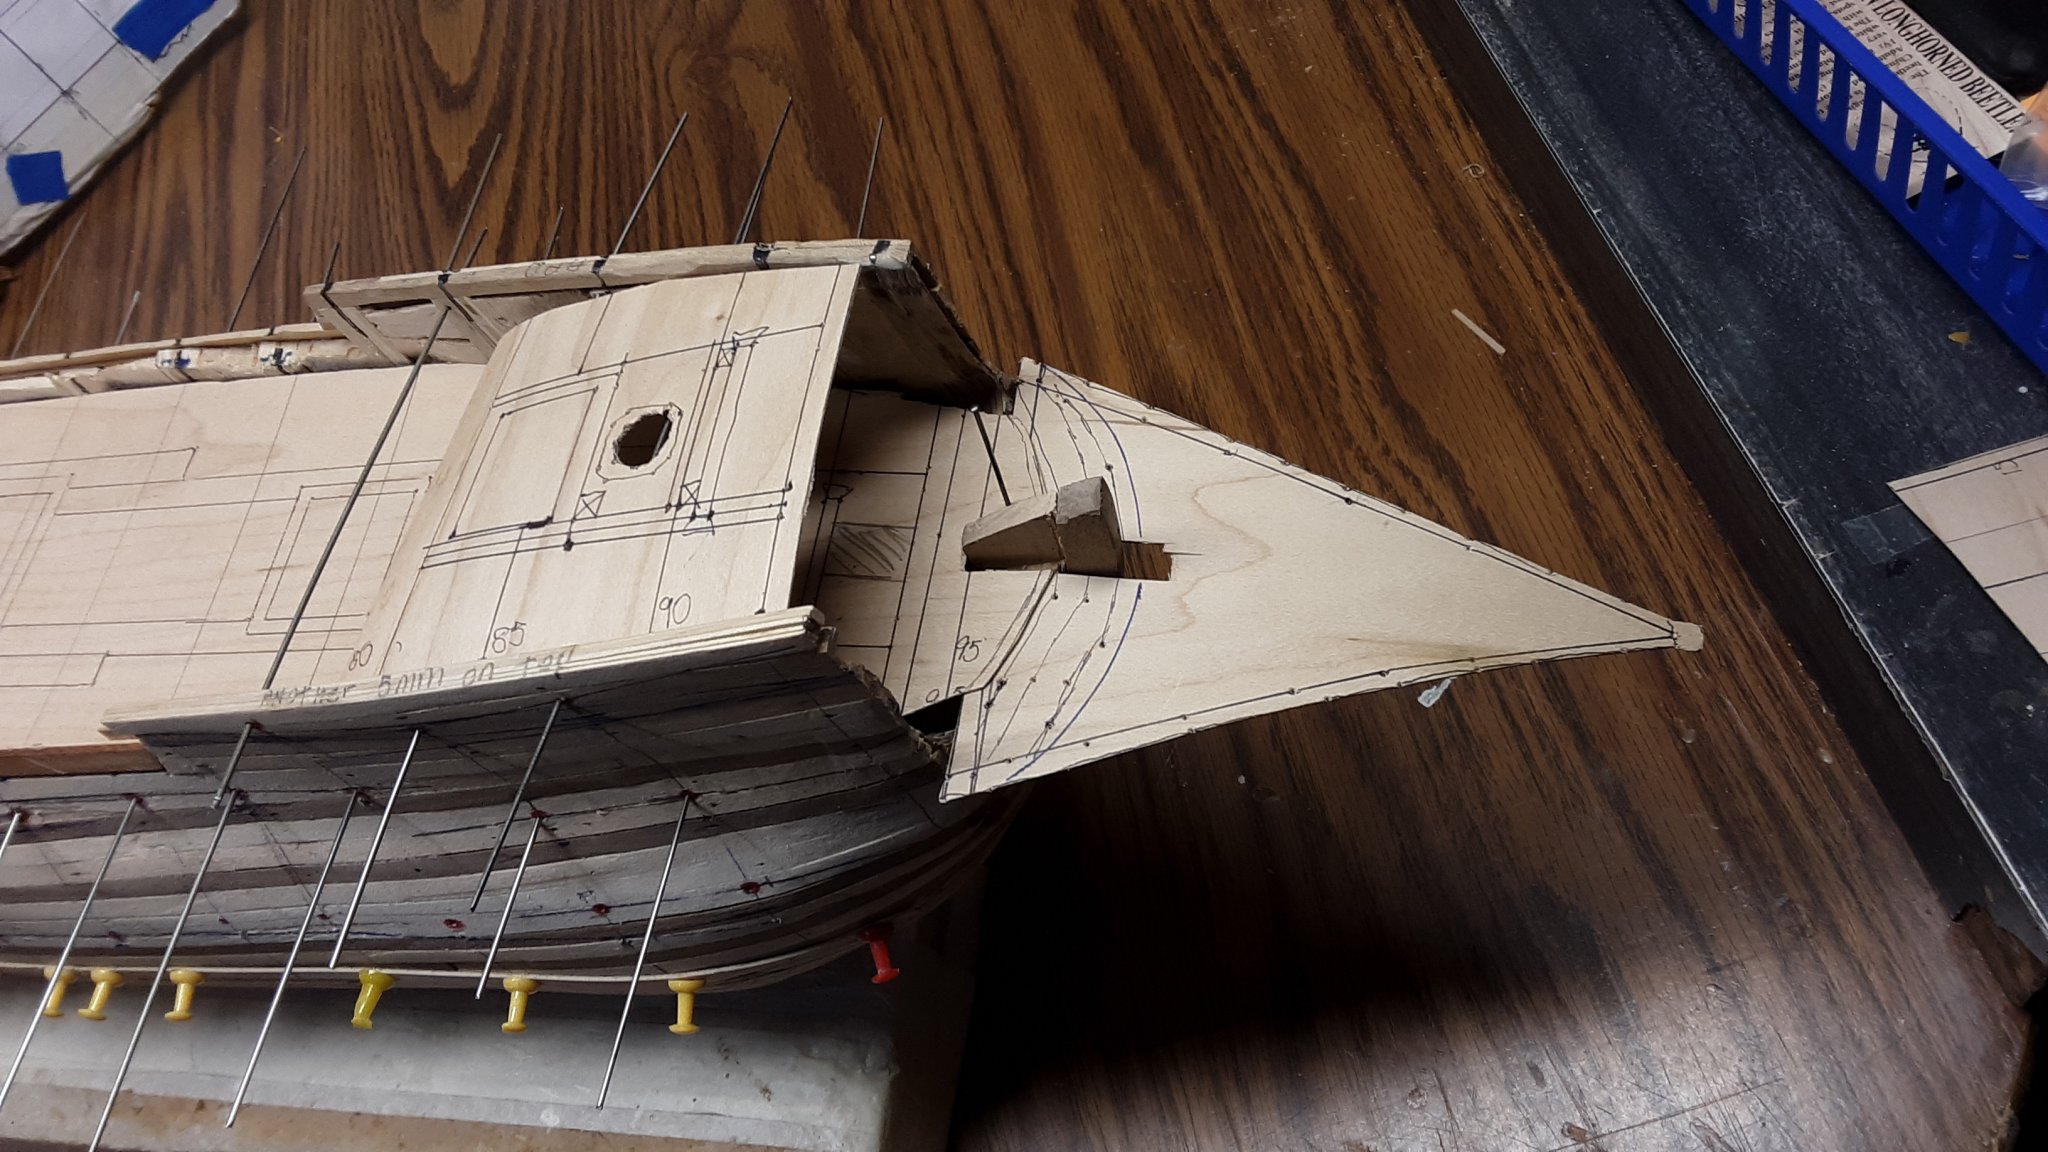
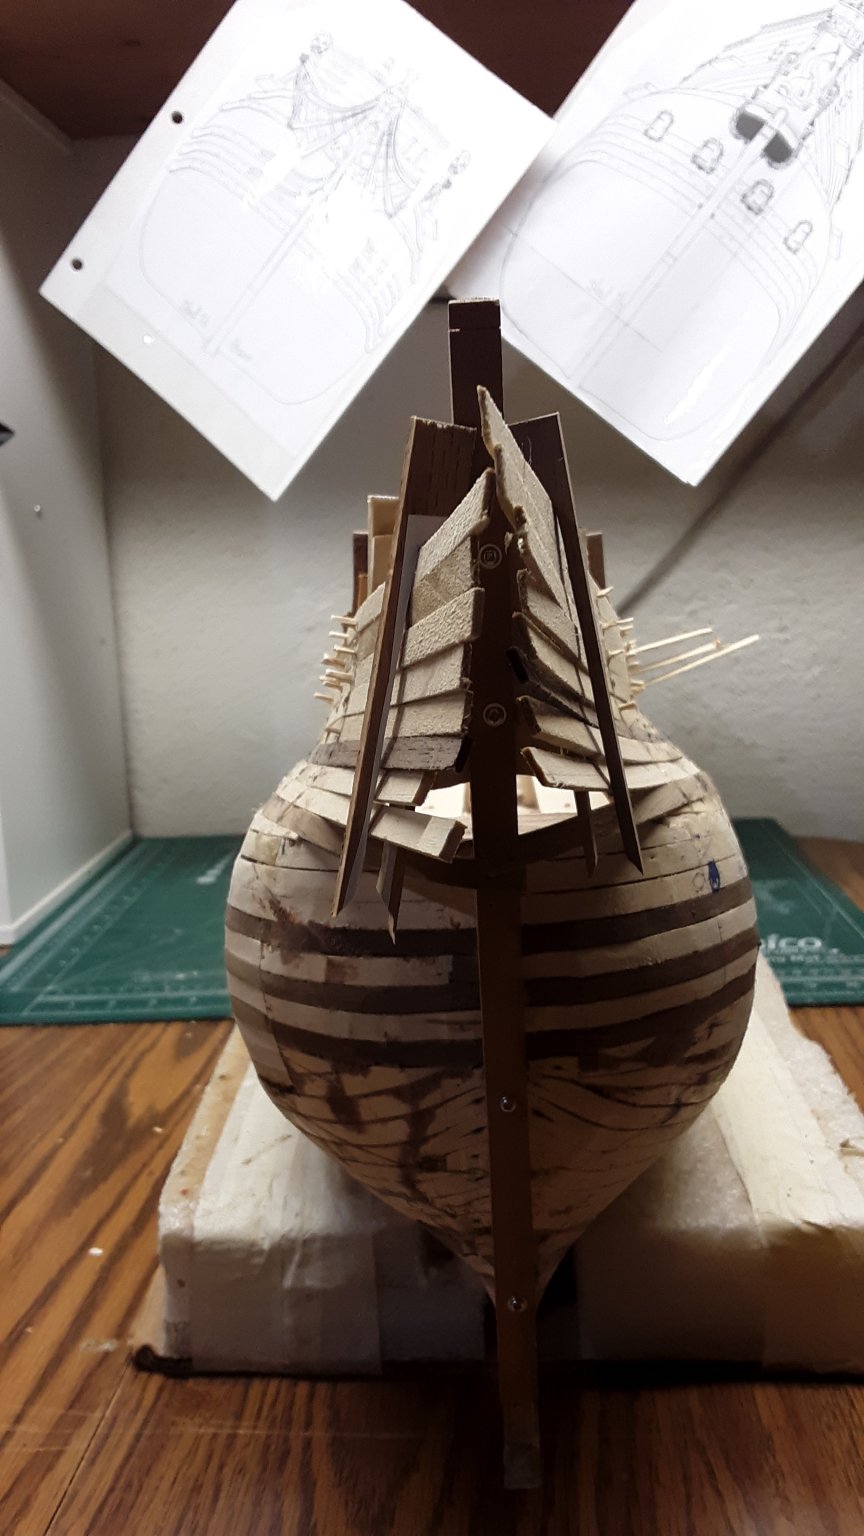
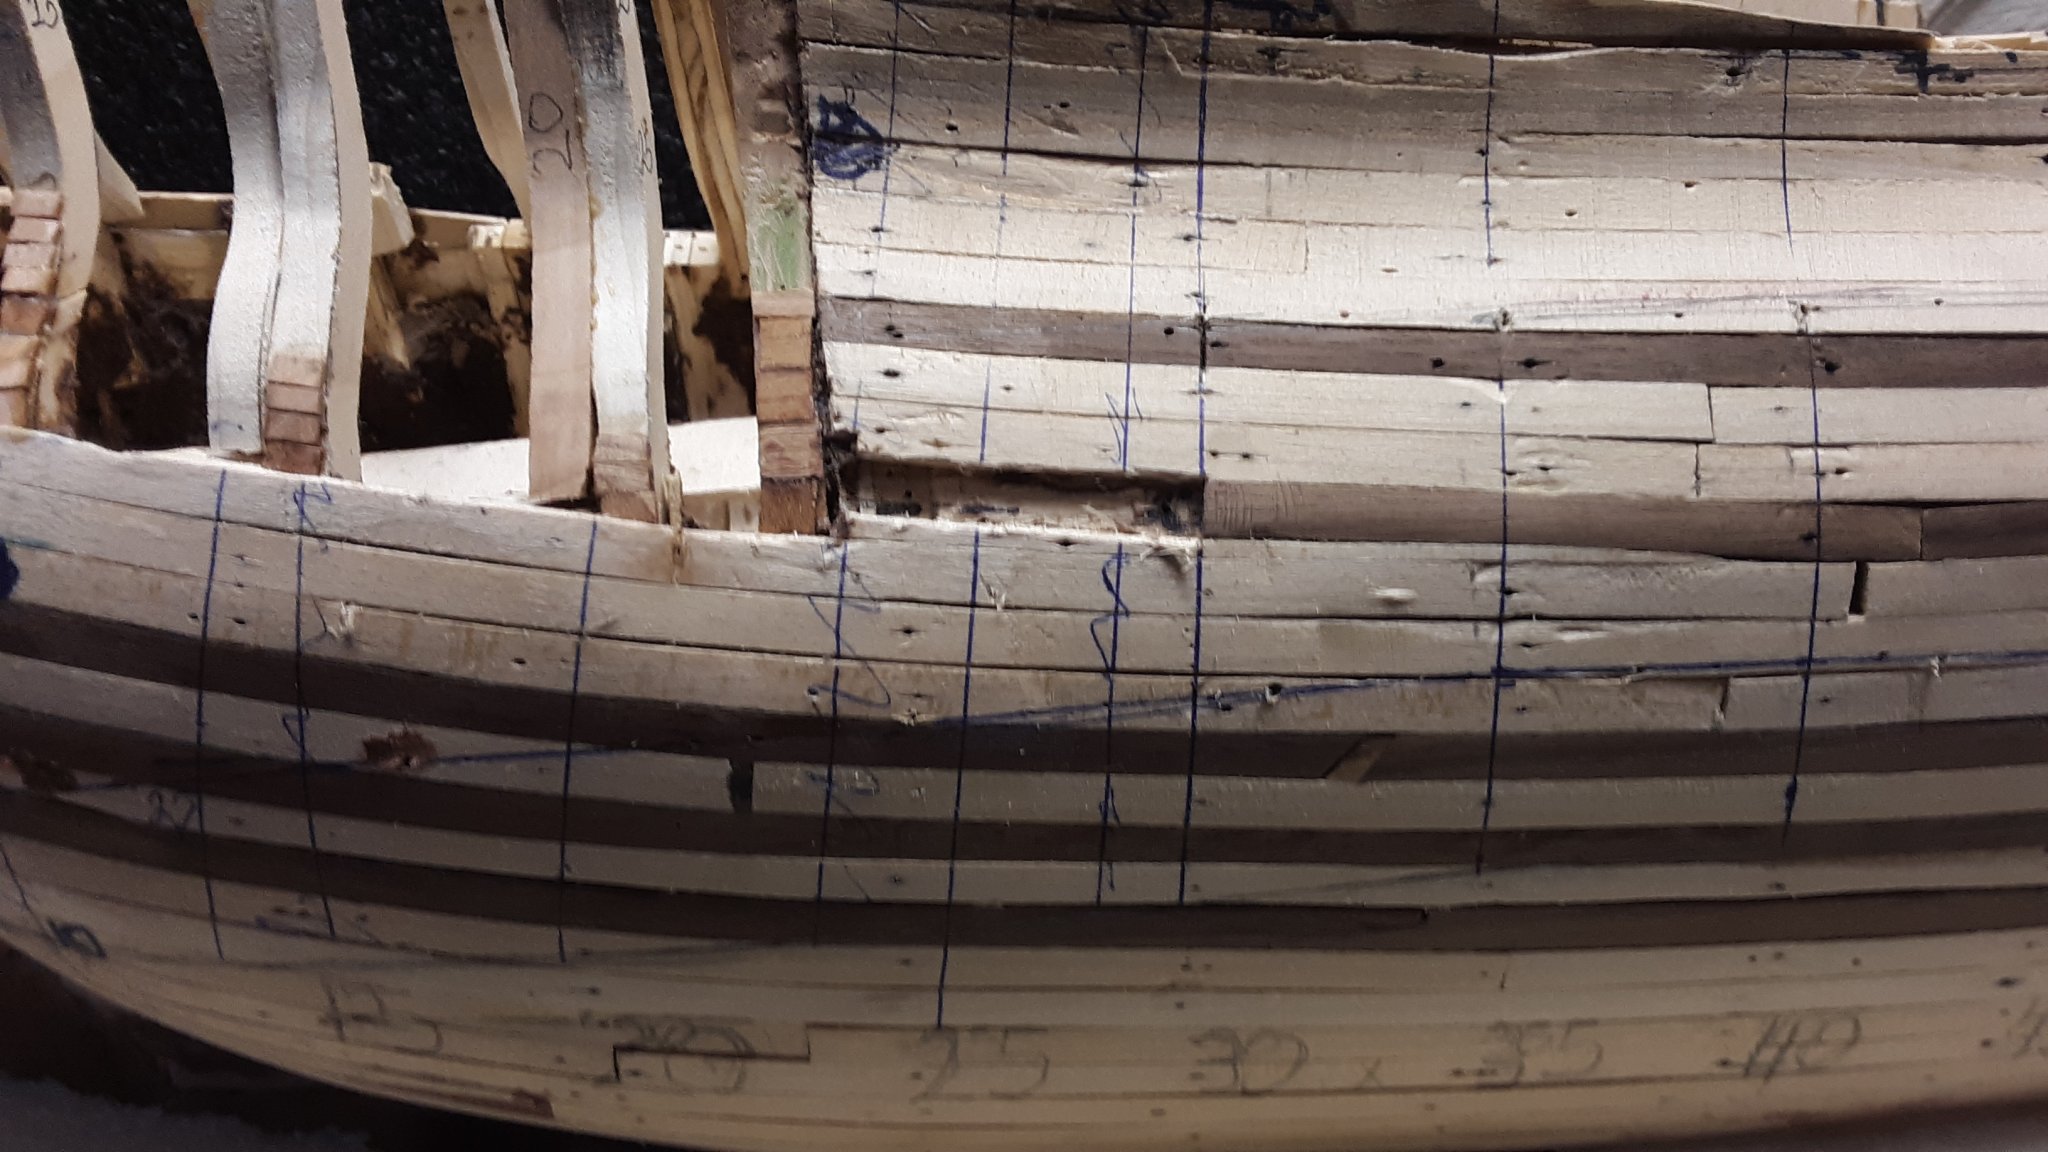
This morning I did the radical re-do without any problems.
Removed the necessary planks and frames.
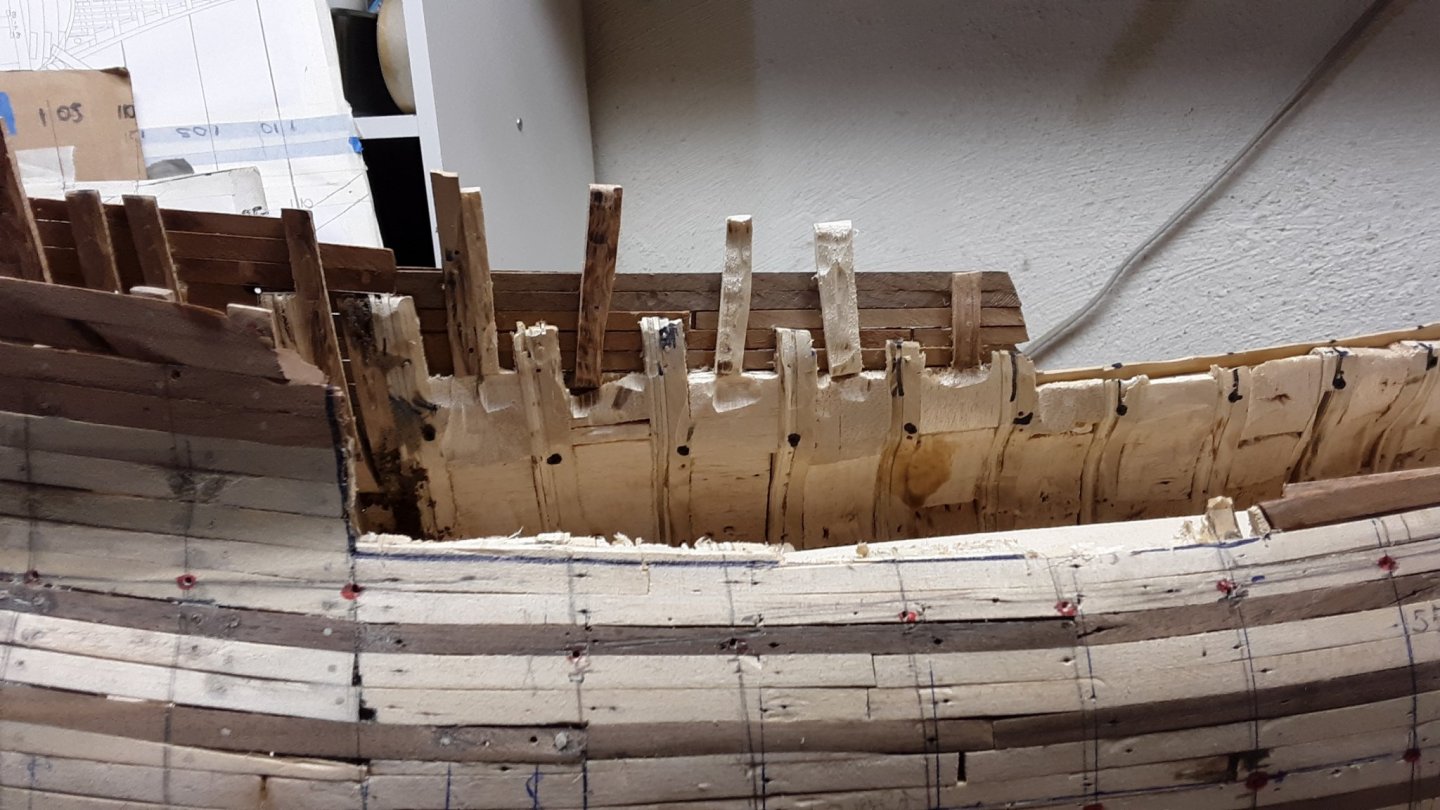
Sanded everything and glued in the frames.

Glued in the planking and for extra strength, drilled hole through plank and frame and hammered in a toothpick.
Tomorrow I will sand lightly on the outside, add some more frames to the area and make sure there are no more drastic re-do's.
Marcus
-
-
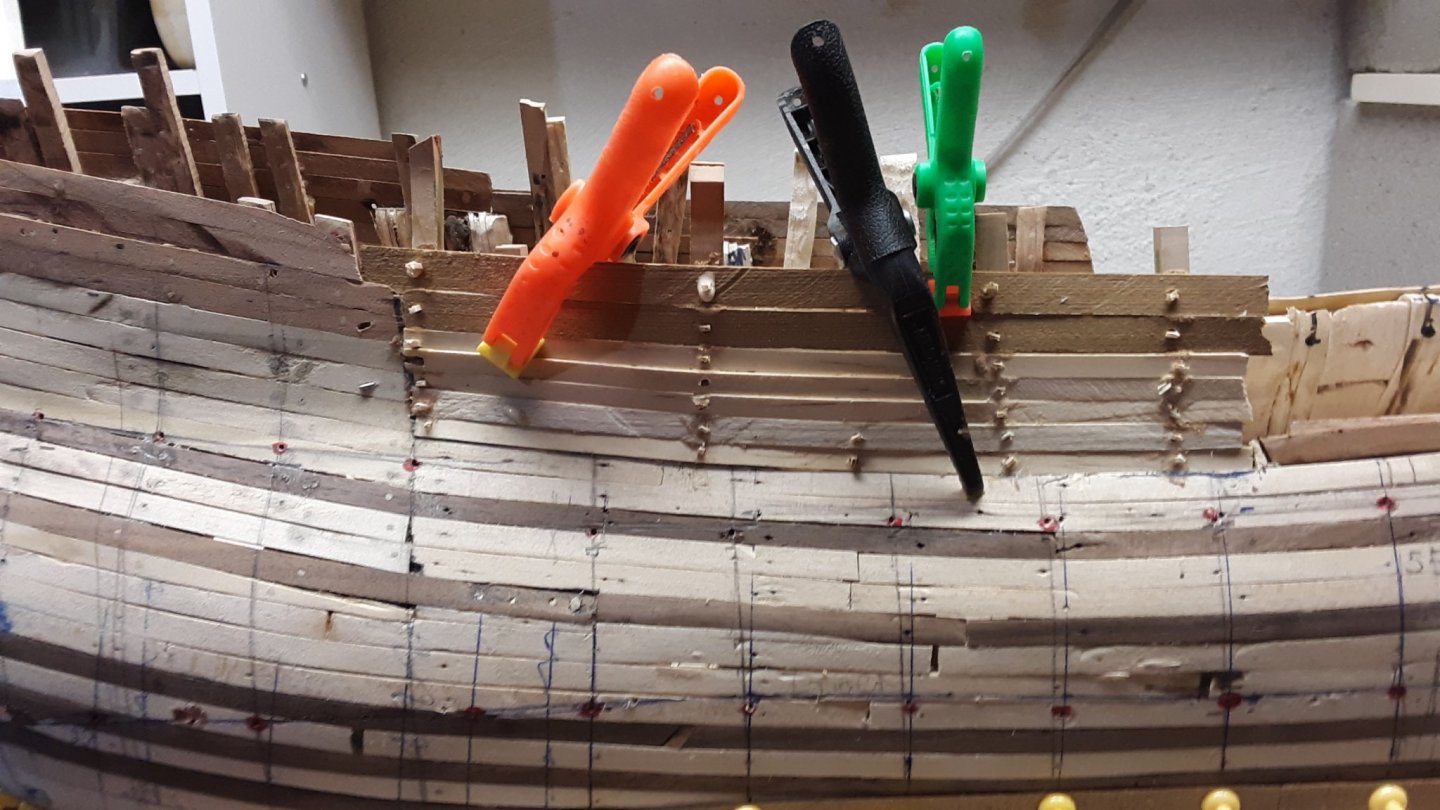
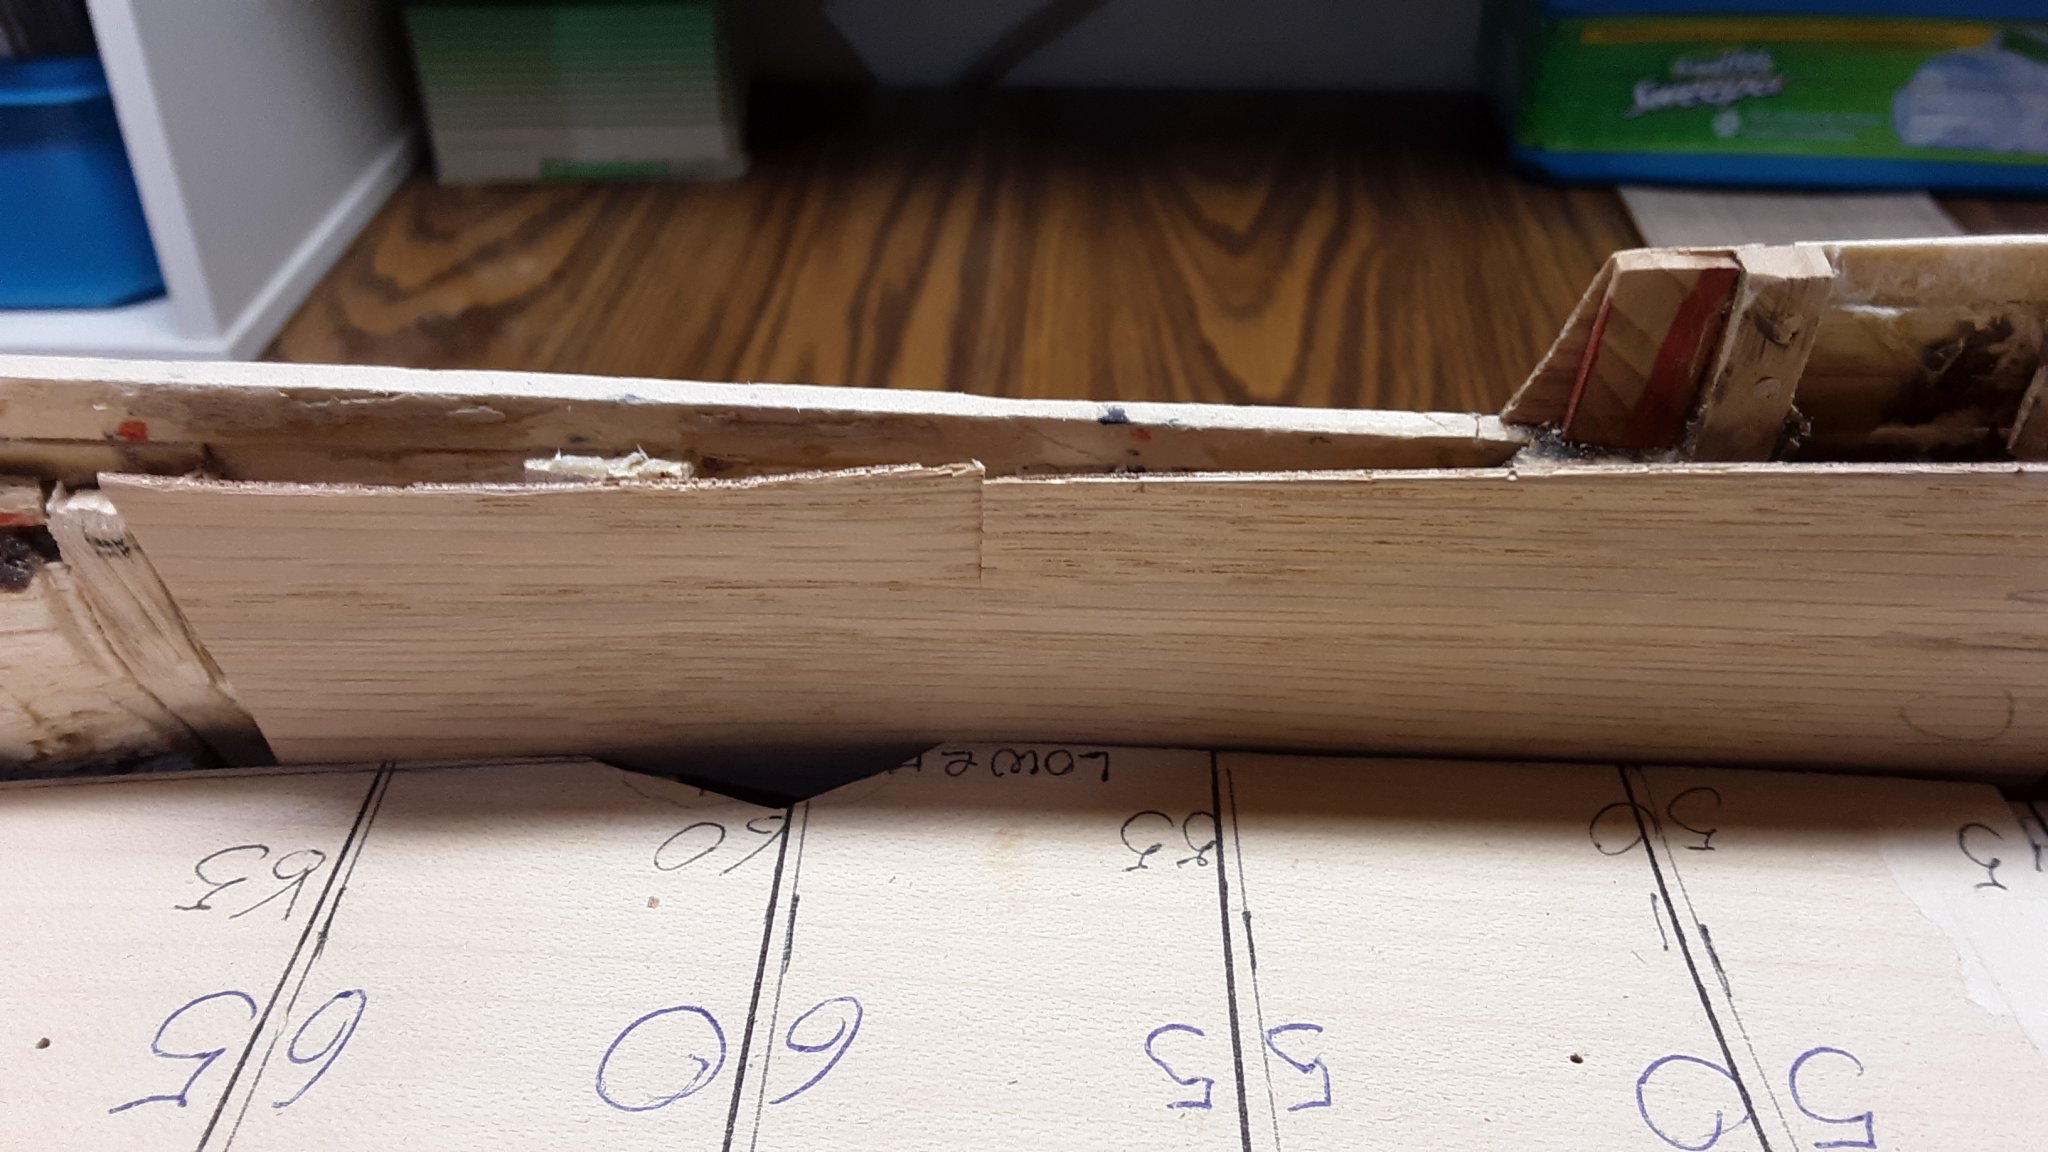
Before I do another 'radical re-do', I have the following question for the modelers who have built a Fluit.
When I am facing the ship with the taffrail/stern in front of me, on the left side from frame 50 to the taffrail the upper planking goes straight up.

Facing the taffrail/stern again, on the right side. From frame 50 to frame 20 the top planking is at an angle and from frame 20 to the taffrail the planking goes straight up.
Question: Do I need to do a drastic removal from the area on the right side from frame 50 to 20 and reinstall new frames, so when I plank that area the planks will go straight up?
I am tempted to do this as it is easy to execute and doesn't take up a lot of time.
On the pictures uploaded here, you can't really tell the angled planks to the straight up planks.
On several pictures in the Merchant book it looks that way, not angled but straight up.
Thanks for the suggestions in advance,
Marcus
- G.L., Landlubber Mike, Omega1234 and 1 other
-
4
-
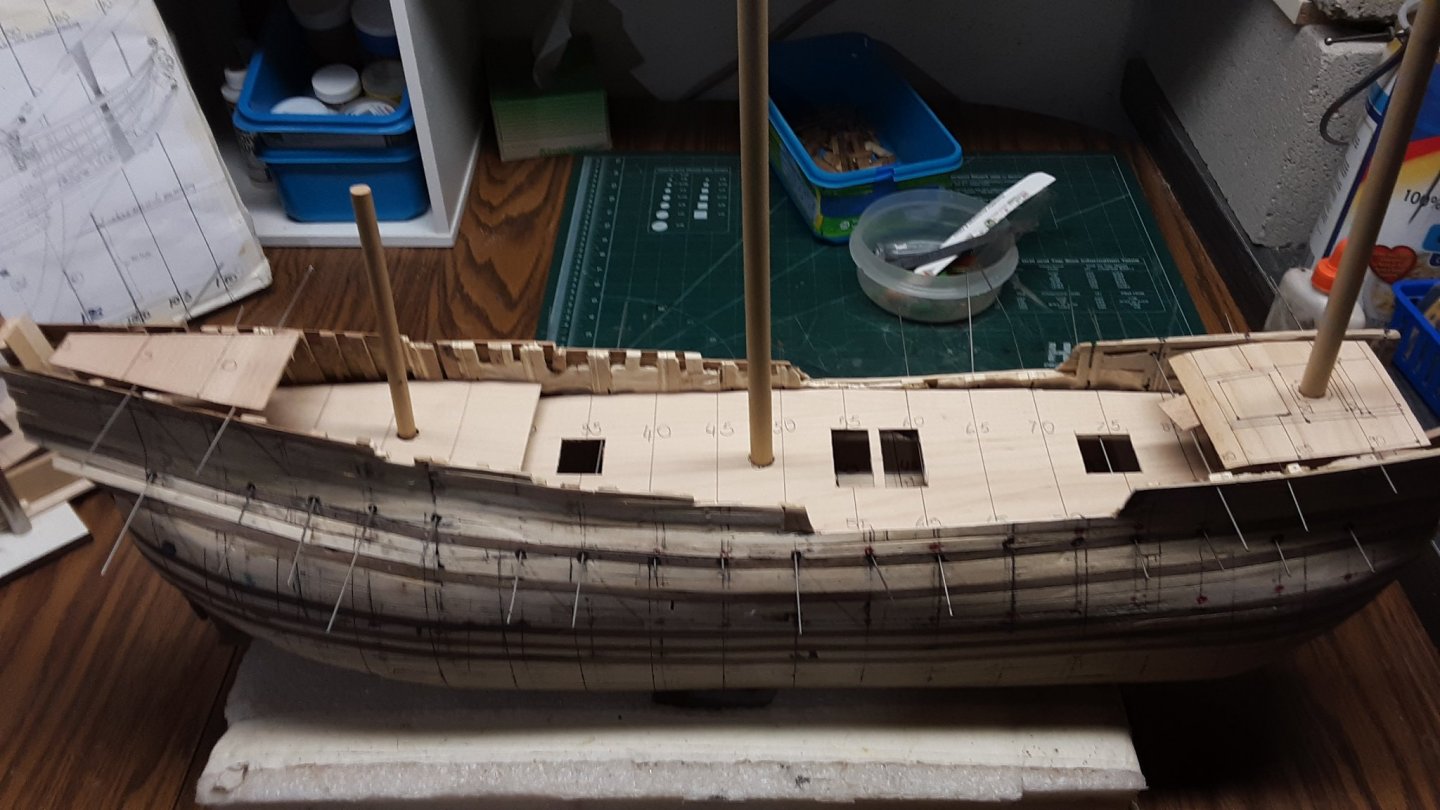
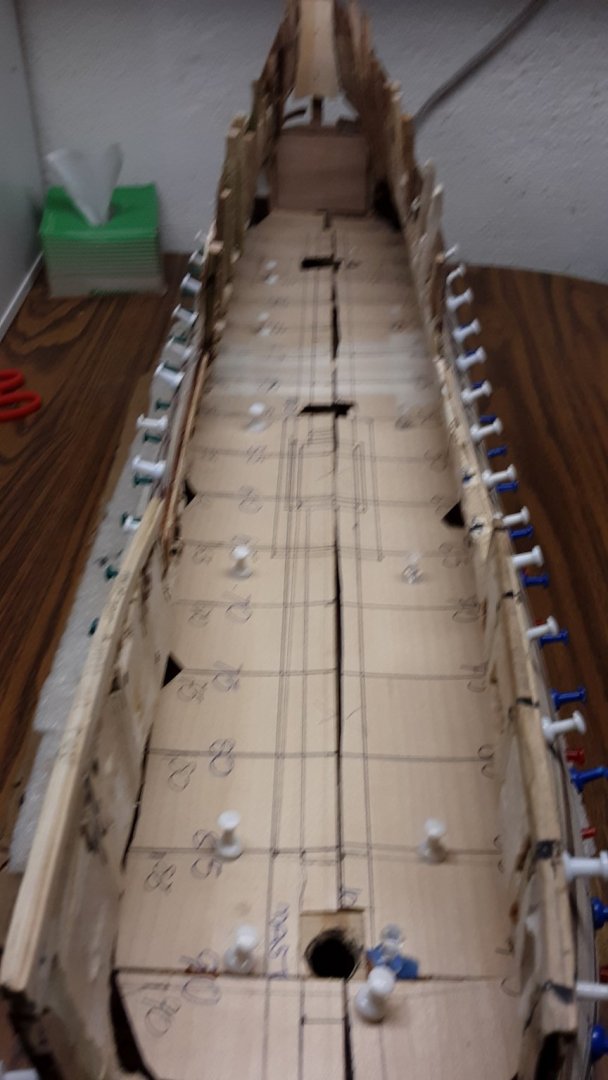
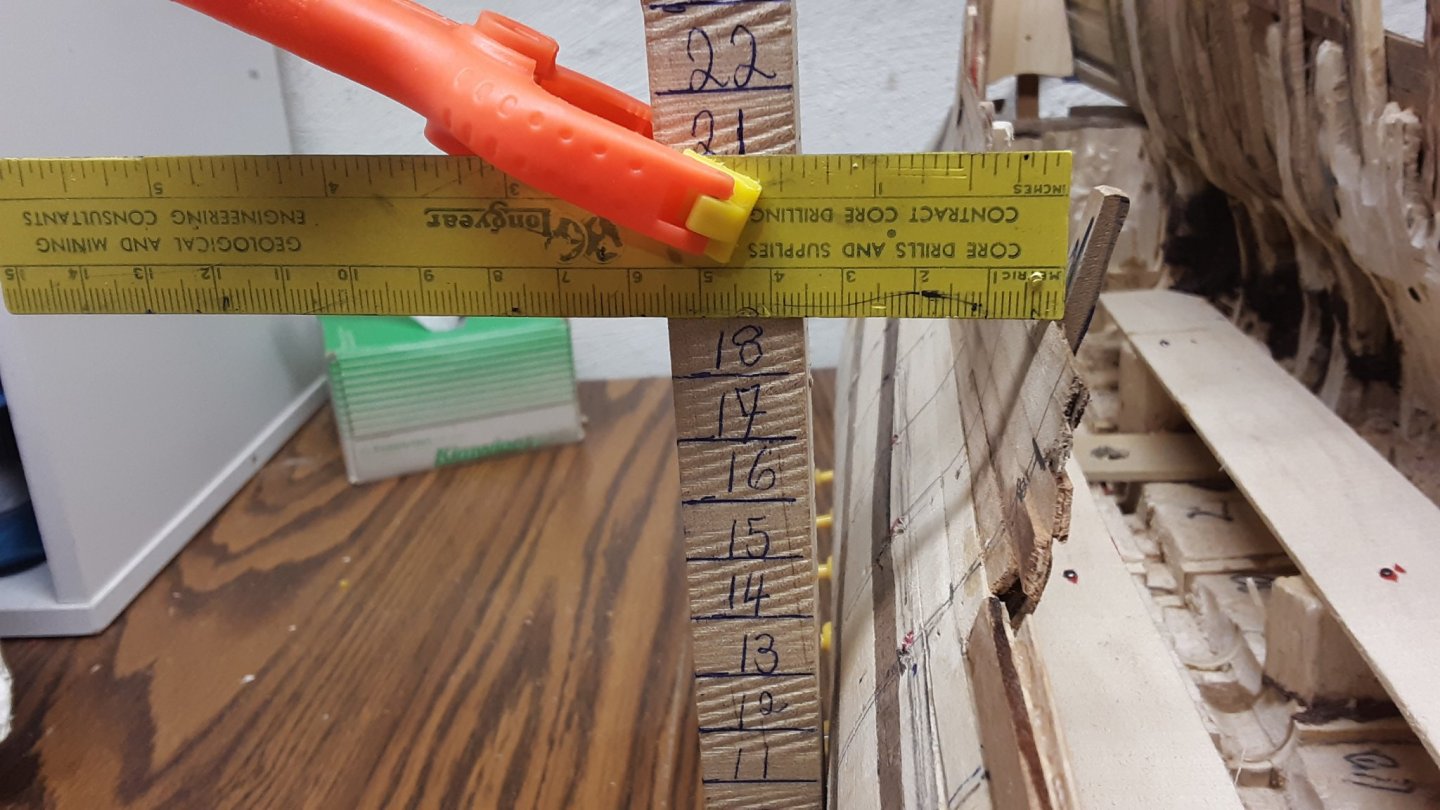
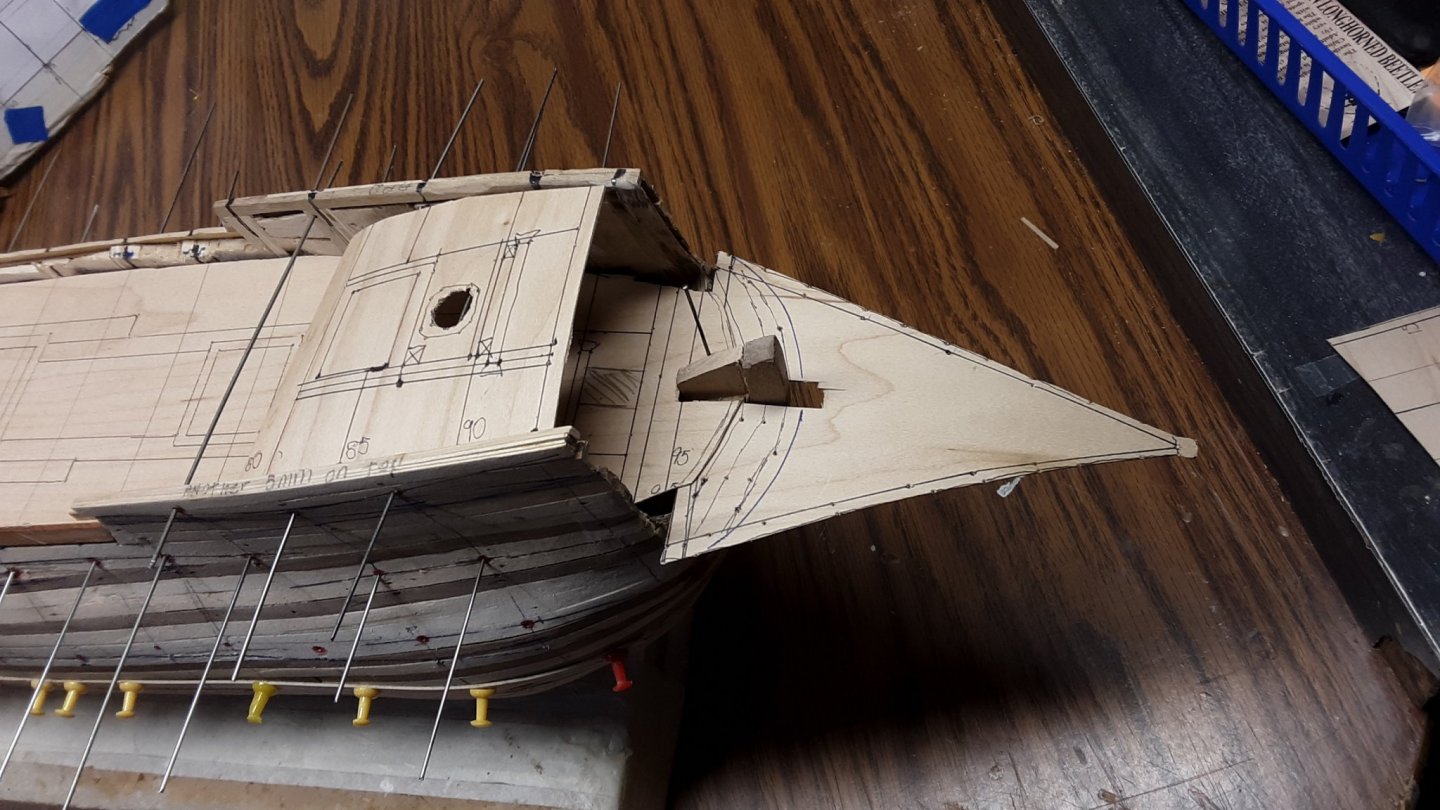
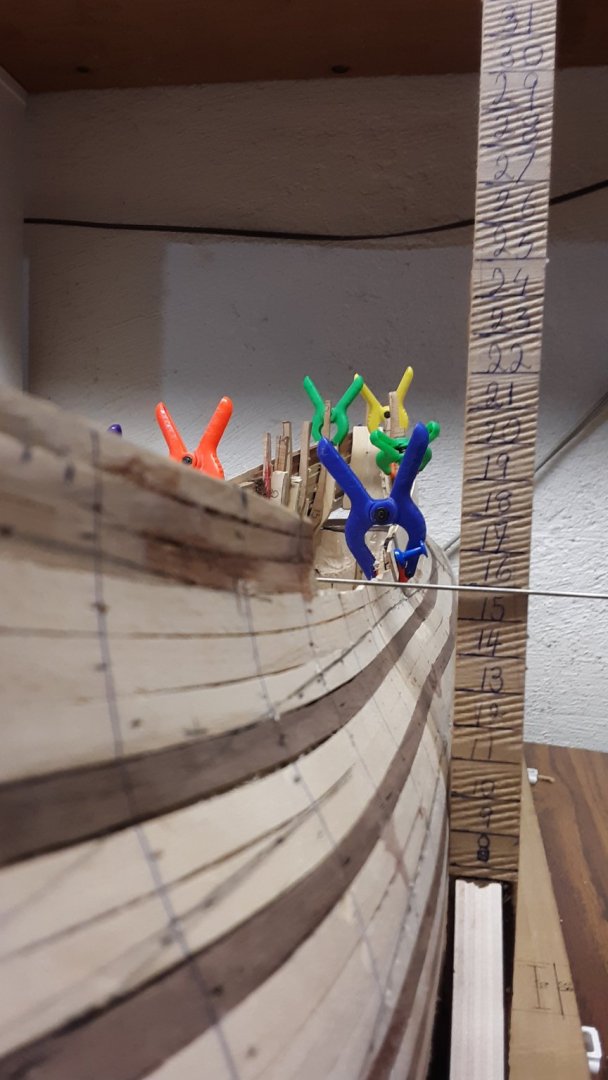
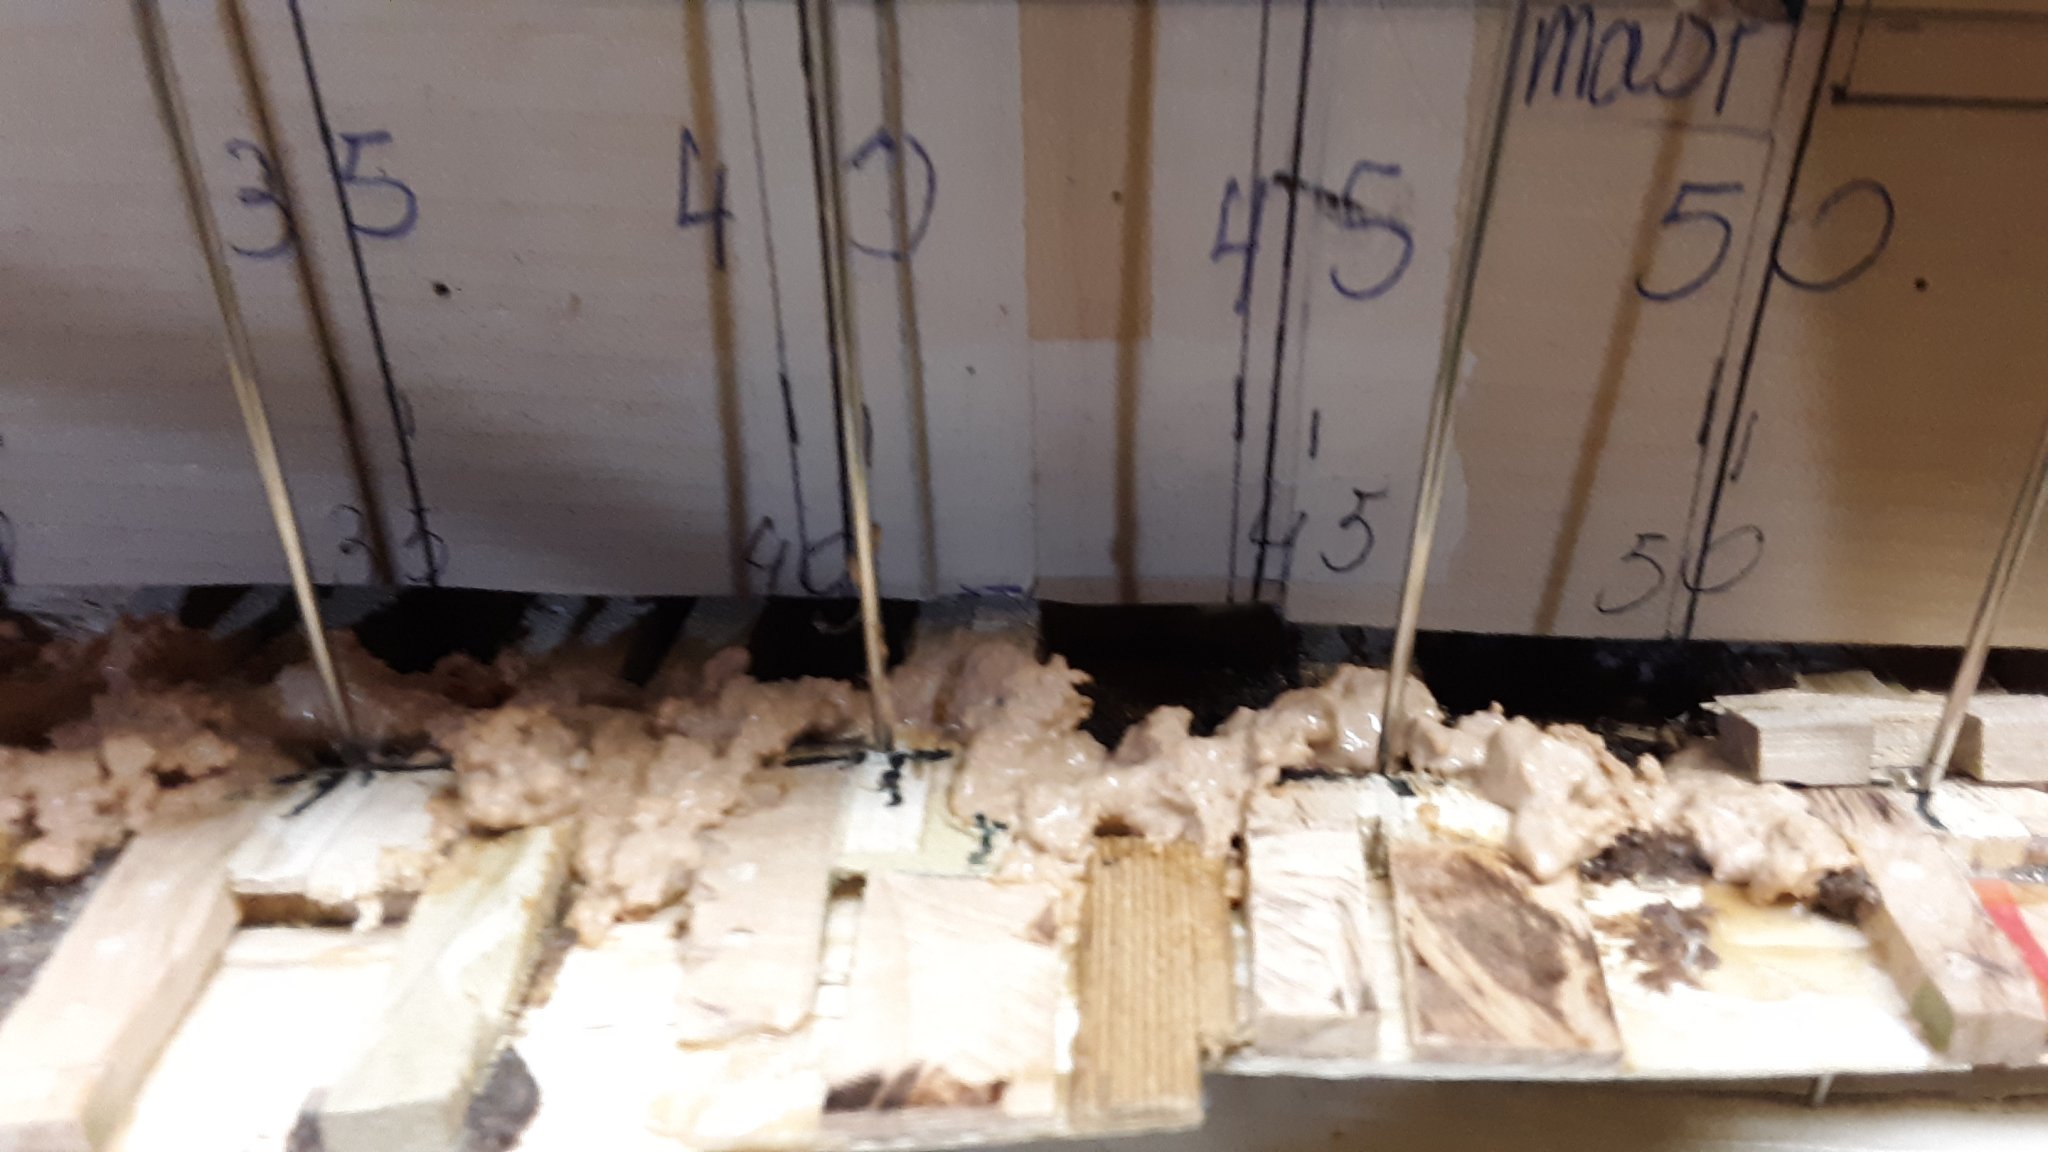
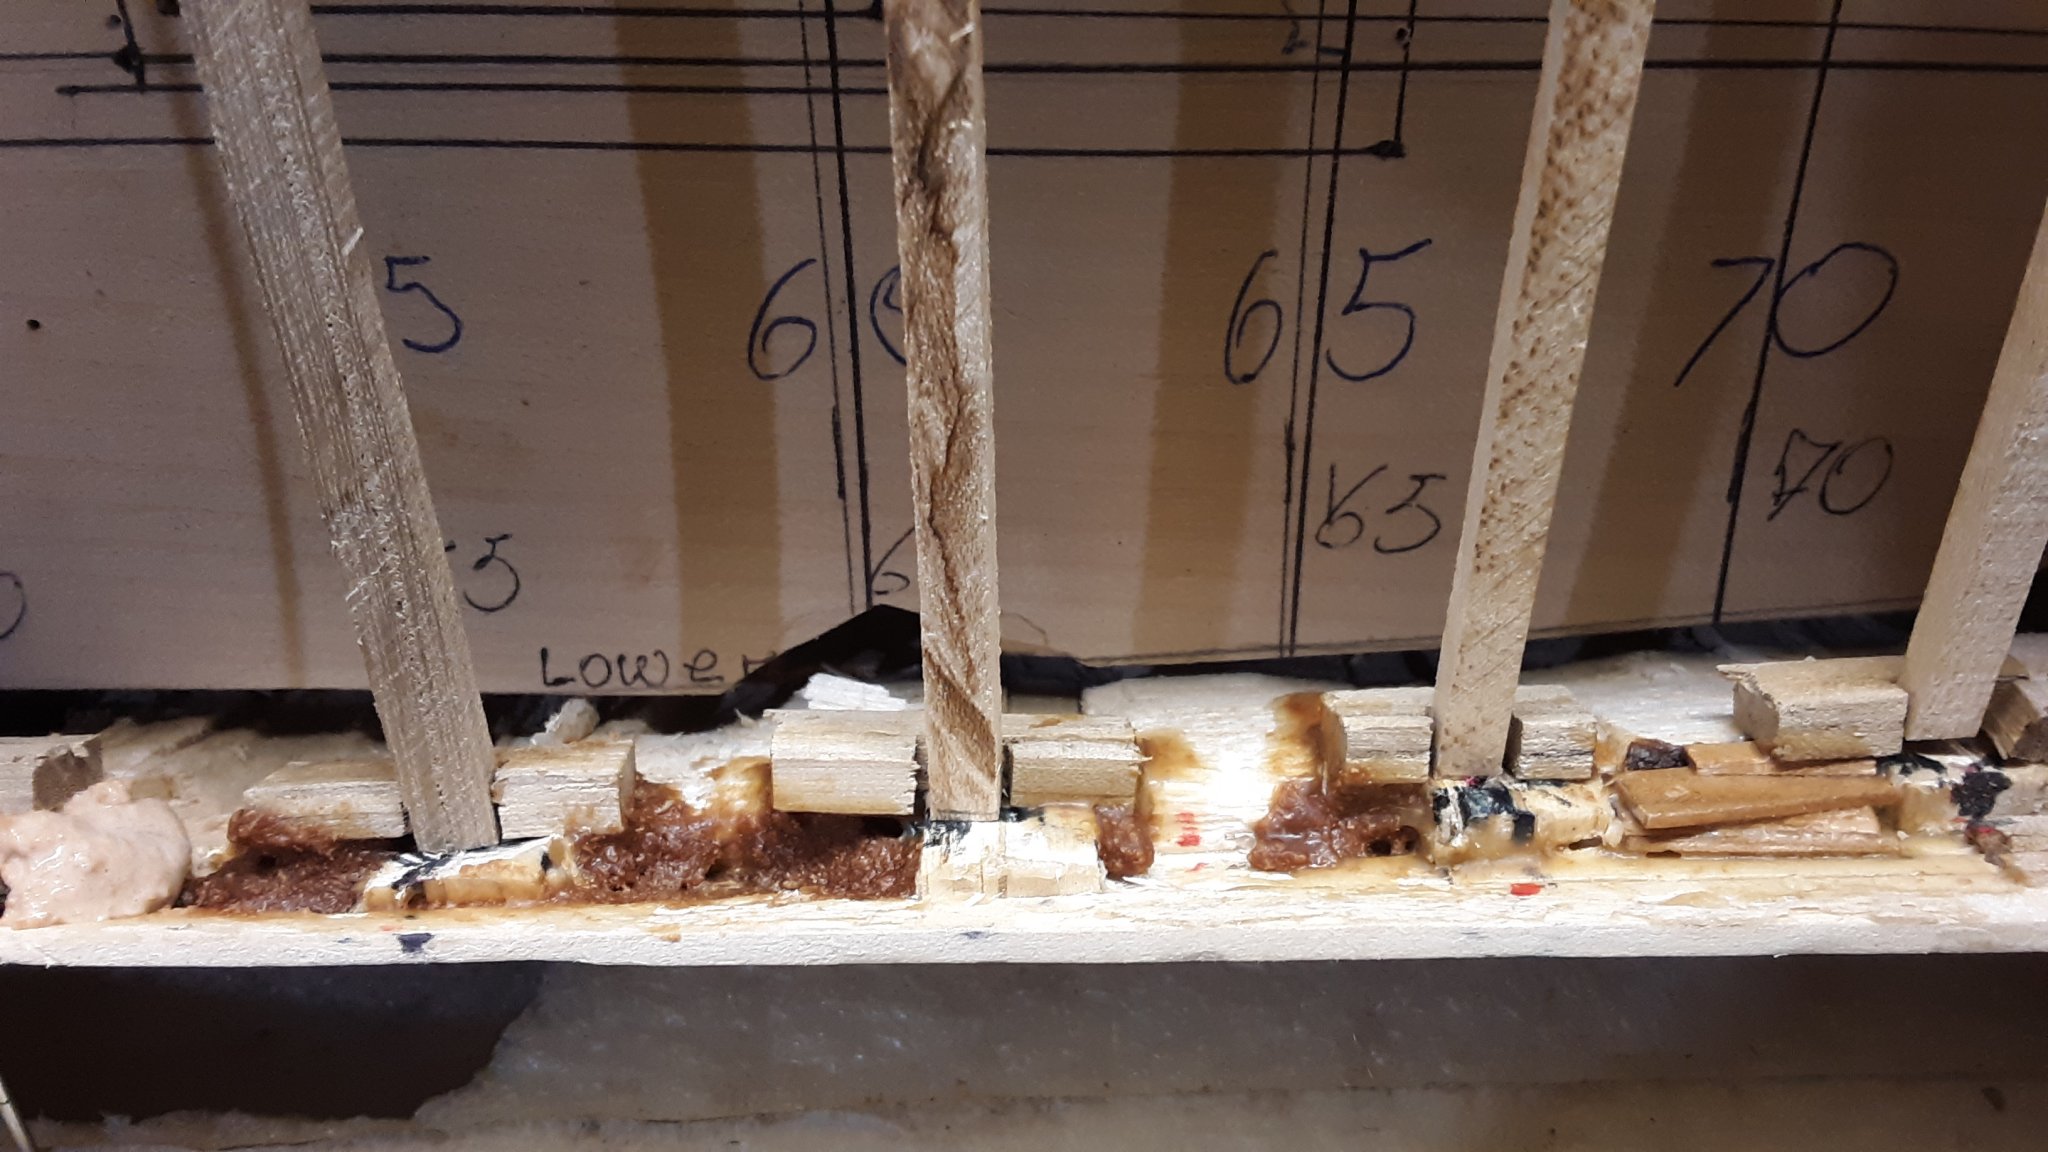
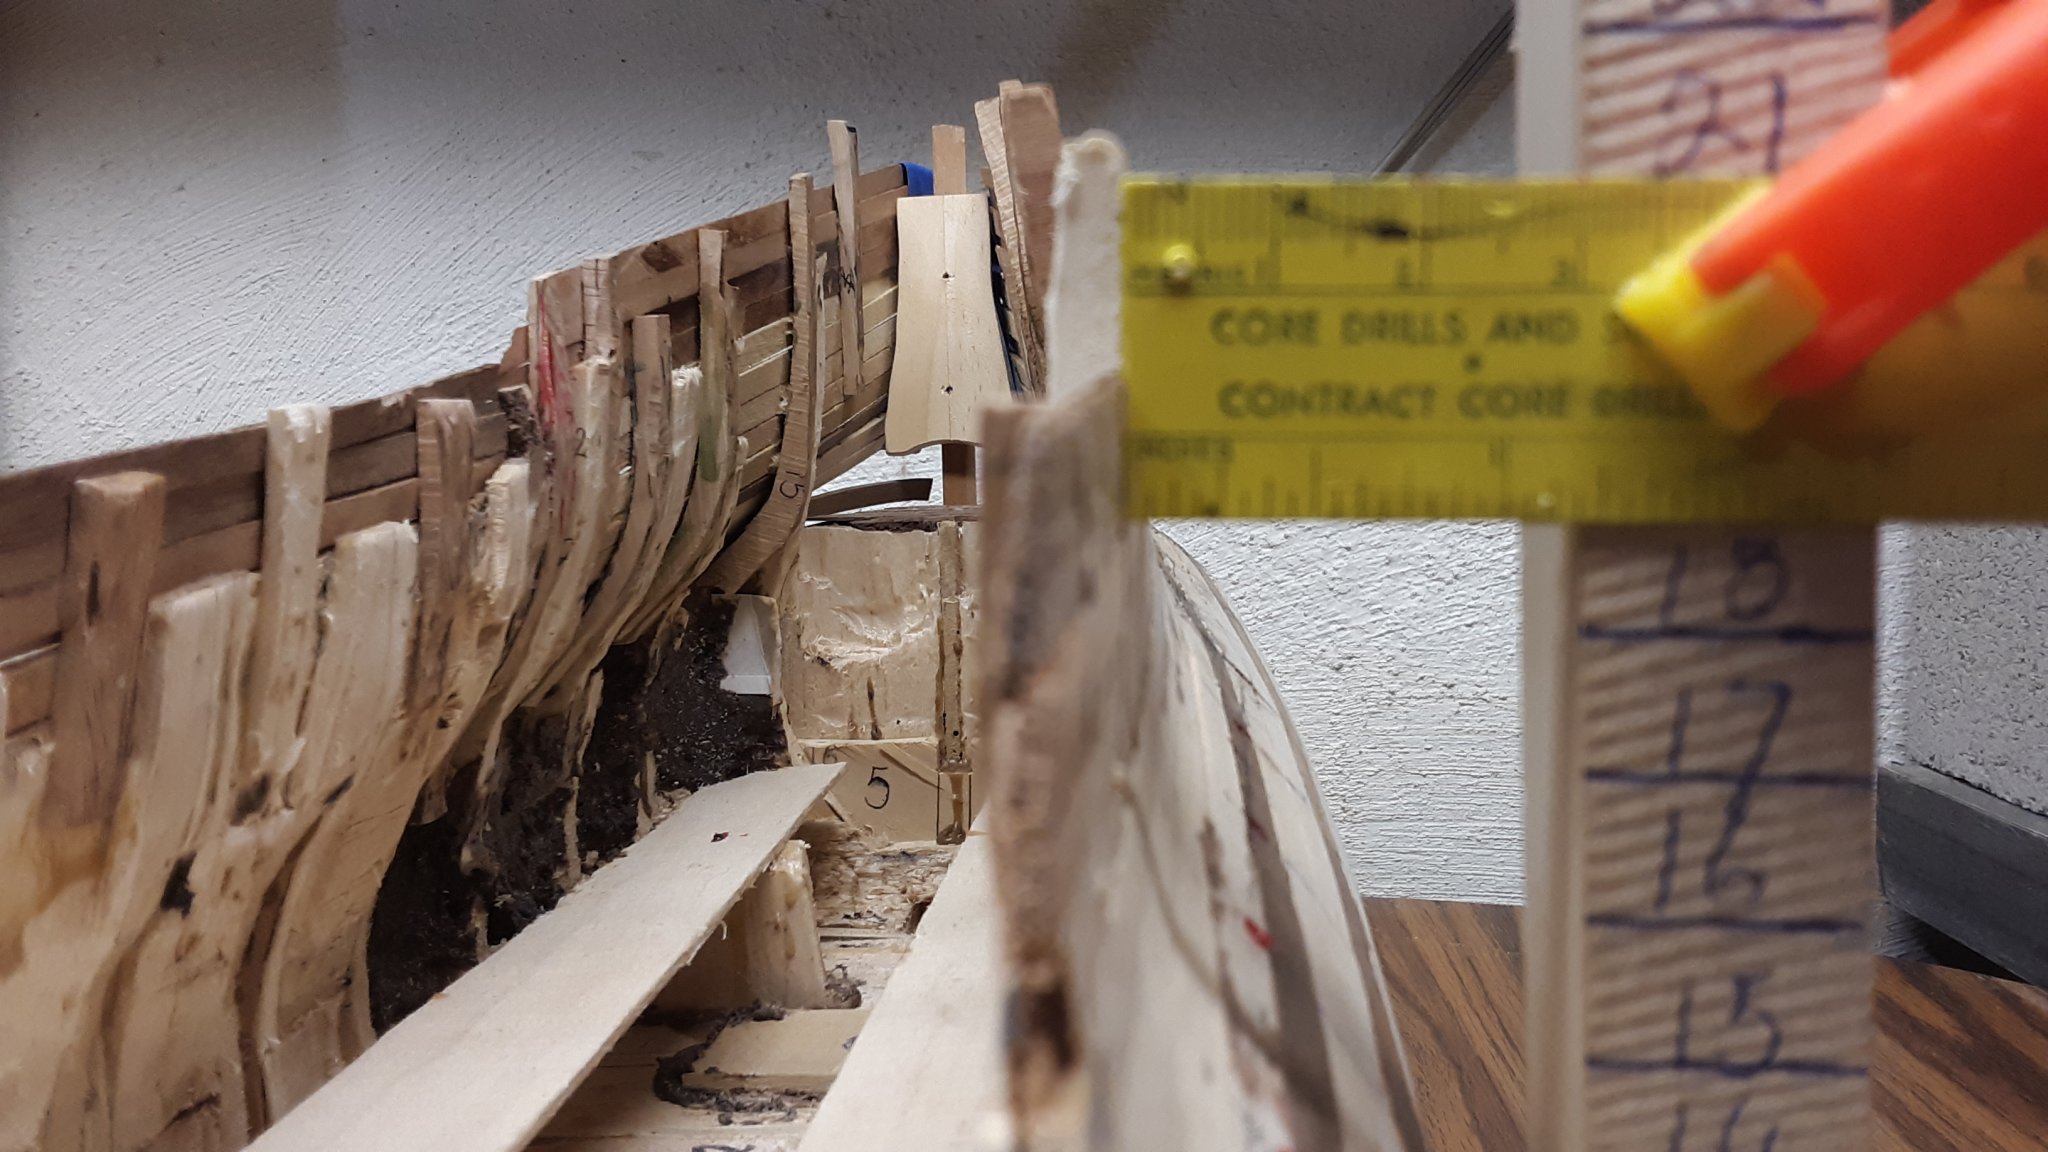
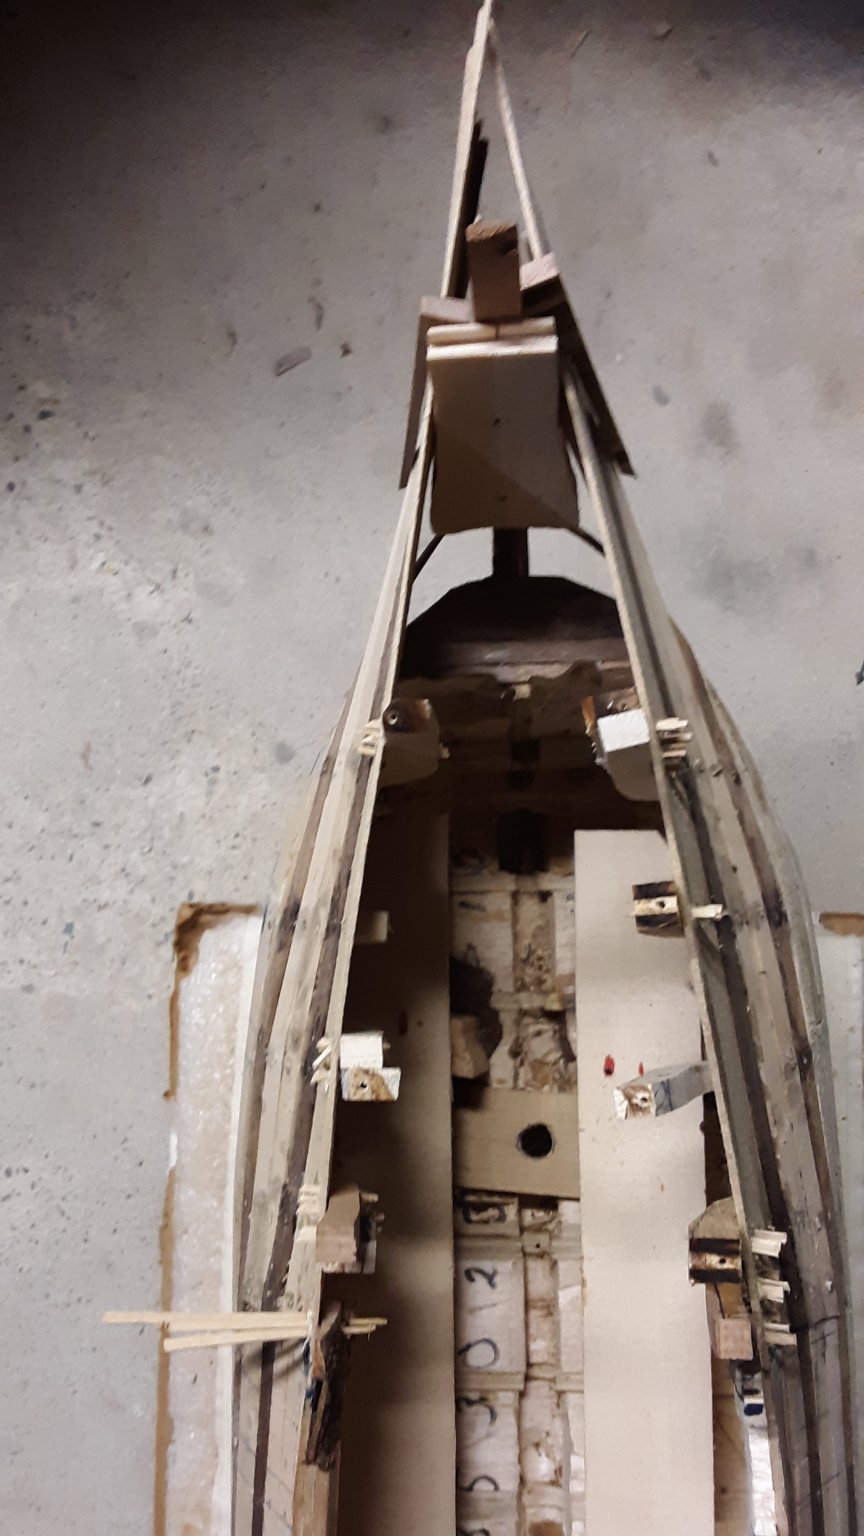
Figuring the location of the decks.
Starting at the waterline I measure between decks on the plan and transfer that number to the same location on the outside of the hull. Once all locations are marked with a pencil, I drill a tiny hole in the hull. I do the same for the other side of the hull.
Stick a stainless steel rod through all the holes which give me an idea of where the decks will be.
(From my Woodworkers club, a steel worker gave me stainless steel rods from sizes 0.3mm to 2mm) I just cut them in smaller lengths.
Made deck templates from cherry veneer
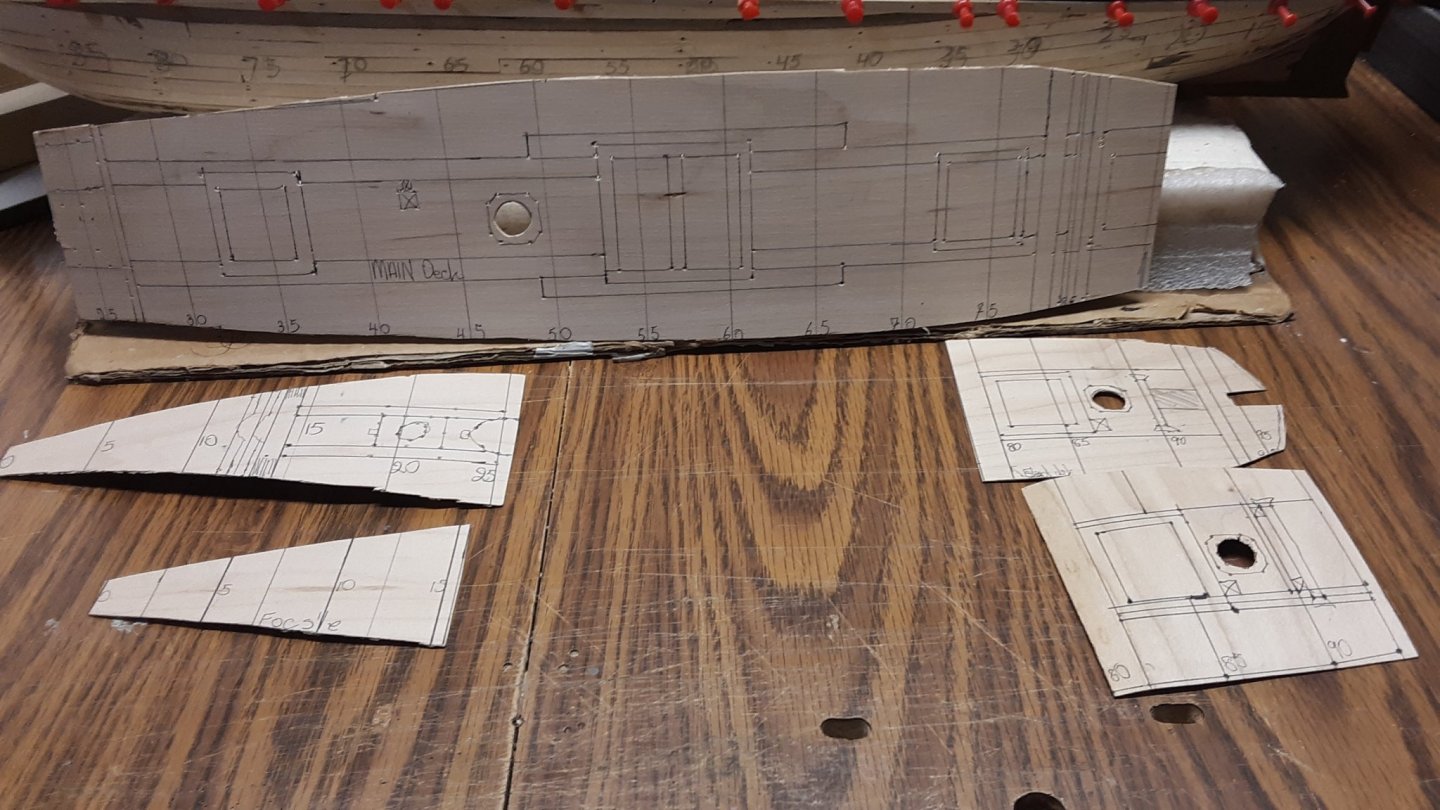
and put them where the permanent decks will be.
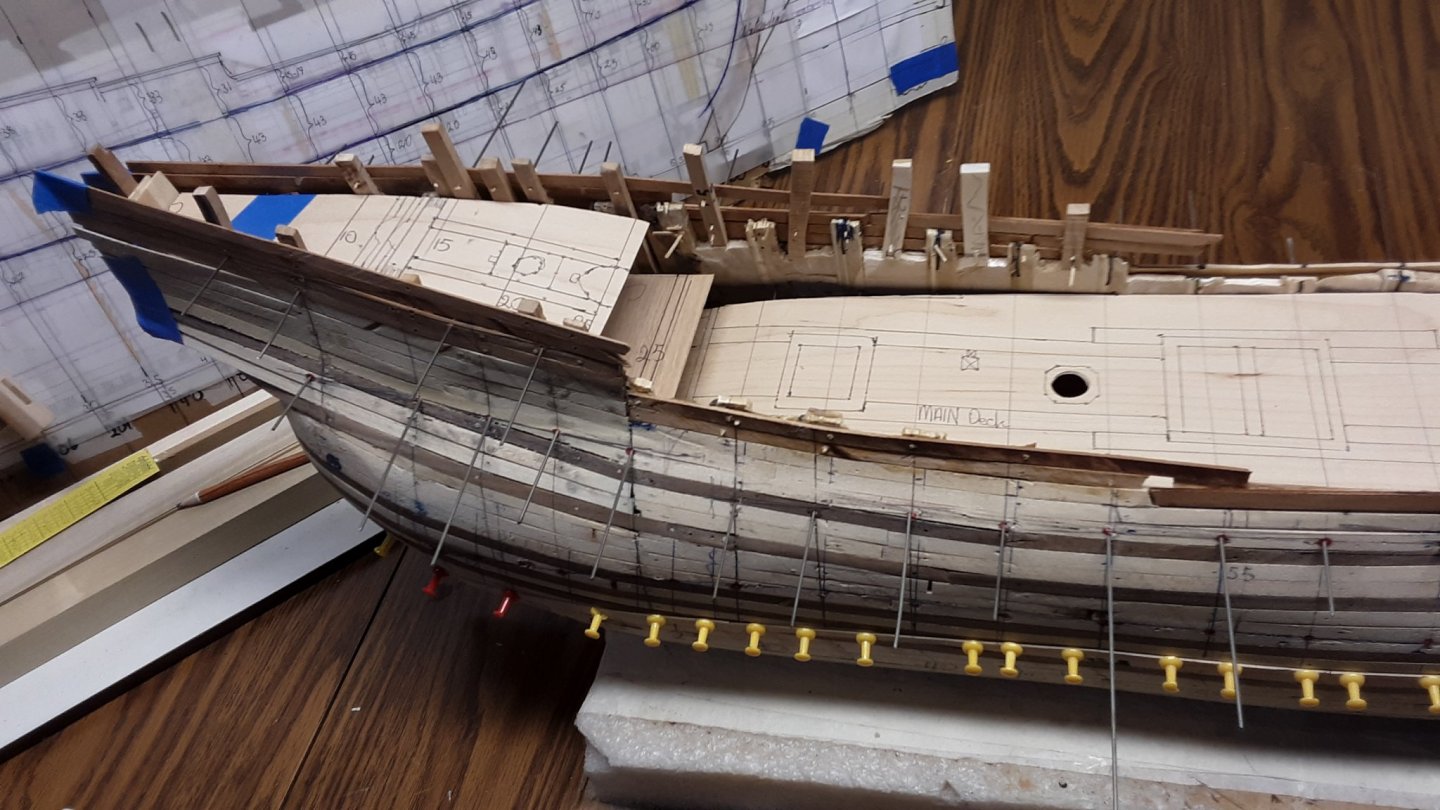
The rods are temporary. Notches will be made where the tiny holes are located and a deck beam will be installed there.
Then a new deck will be installed.
On a different note. From the 10th to the 24th of February I will be in New Delhi, India. The first week is sight seeing and in the second week there will be a 3 day wedding. My niece is getting married in a traditional Indian wedding.
I am the only paternal uncle and I have a crucial role to play. I will be giving the bride away. My wife and I have all the necessary clothing to wear for the occasion.
Indian weddings must be one of the costliest occasions compared to other types of weddings. Feed 300 and counting guests for 3 days. Our clothes are in the frugal range of $$ but the wedding dress can go from simple to having gold strings sewed into them. My guess is that my niece's dress will not be cheap.
Anyway, it is going to be an interesting affair.
Marcus
- G.L., Omega1234, Landlubber Mike and 7 others
-
10
-
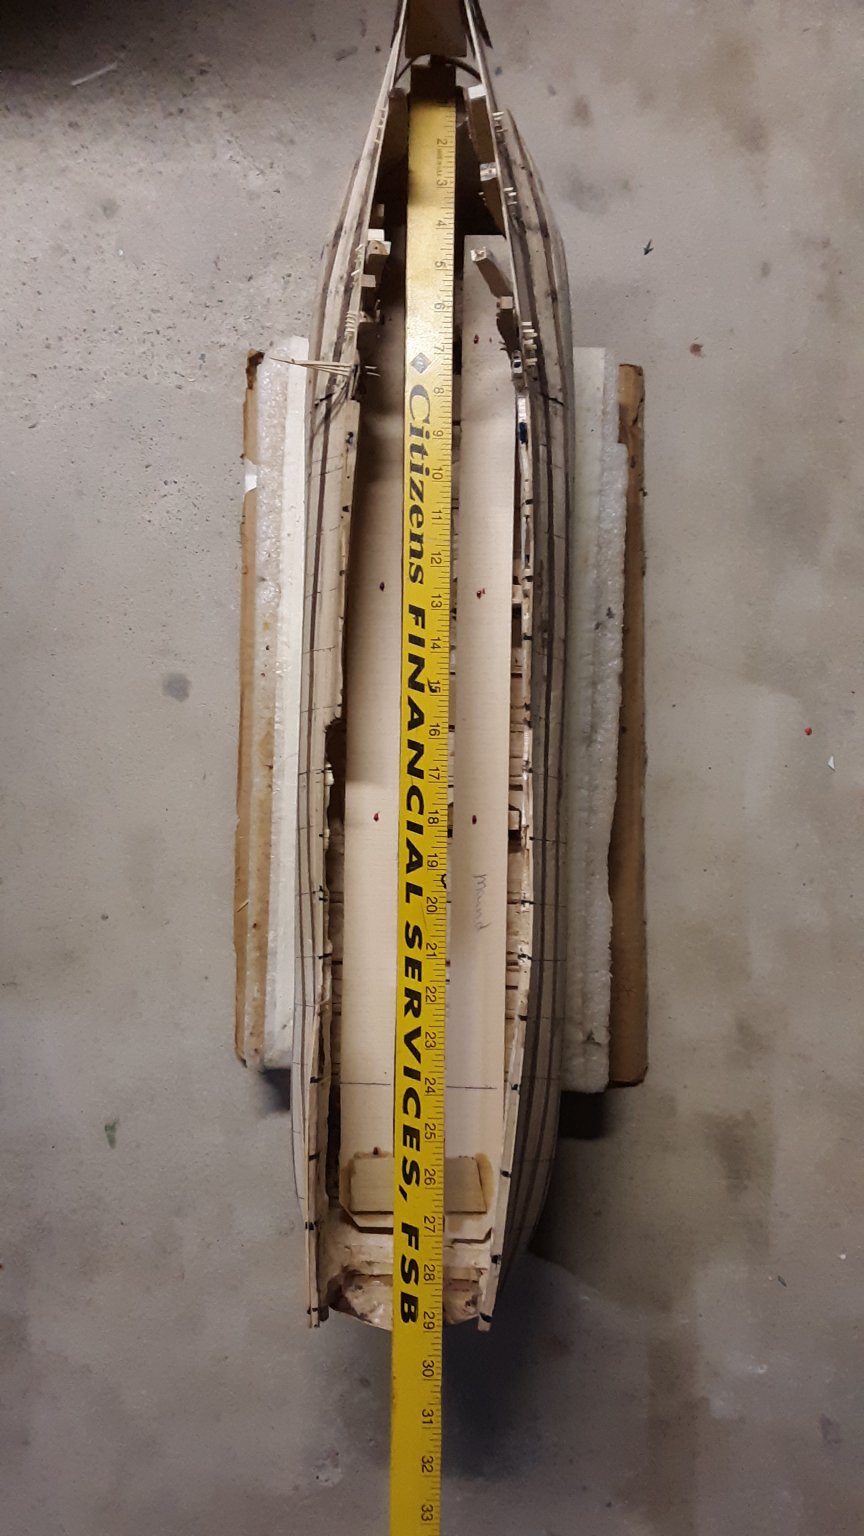
This jig measures the height and checks if both sides are level. Both sides have to be even.
Besides measuring the height of both sides, I also draw the waterline on the hull and with pushpins attach planks to the edge of the waterline.
From the plans I measure the distance from the waterline to the top of the railing. Then I transfer that figure to the ship.

Lets me know how much wood I need to remove or add.
Marcus
- mtaylor, G.L., GrandpaPhil and 3 others
-
6
-
8 hours ago, G.L. said:
I mean the final layer. The layerthat will remain visible.
Final layer not on yet. I plan to do the decks and the railings first because I will be moving the model a lot just to get the decks in the correct position. I don't want to dent the 2nd layer planking.
Marcus
-
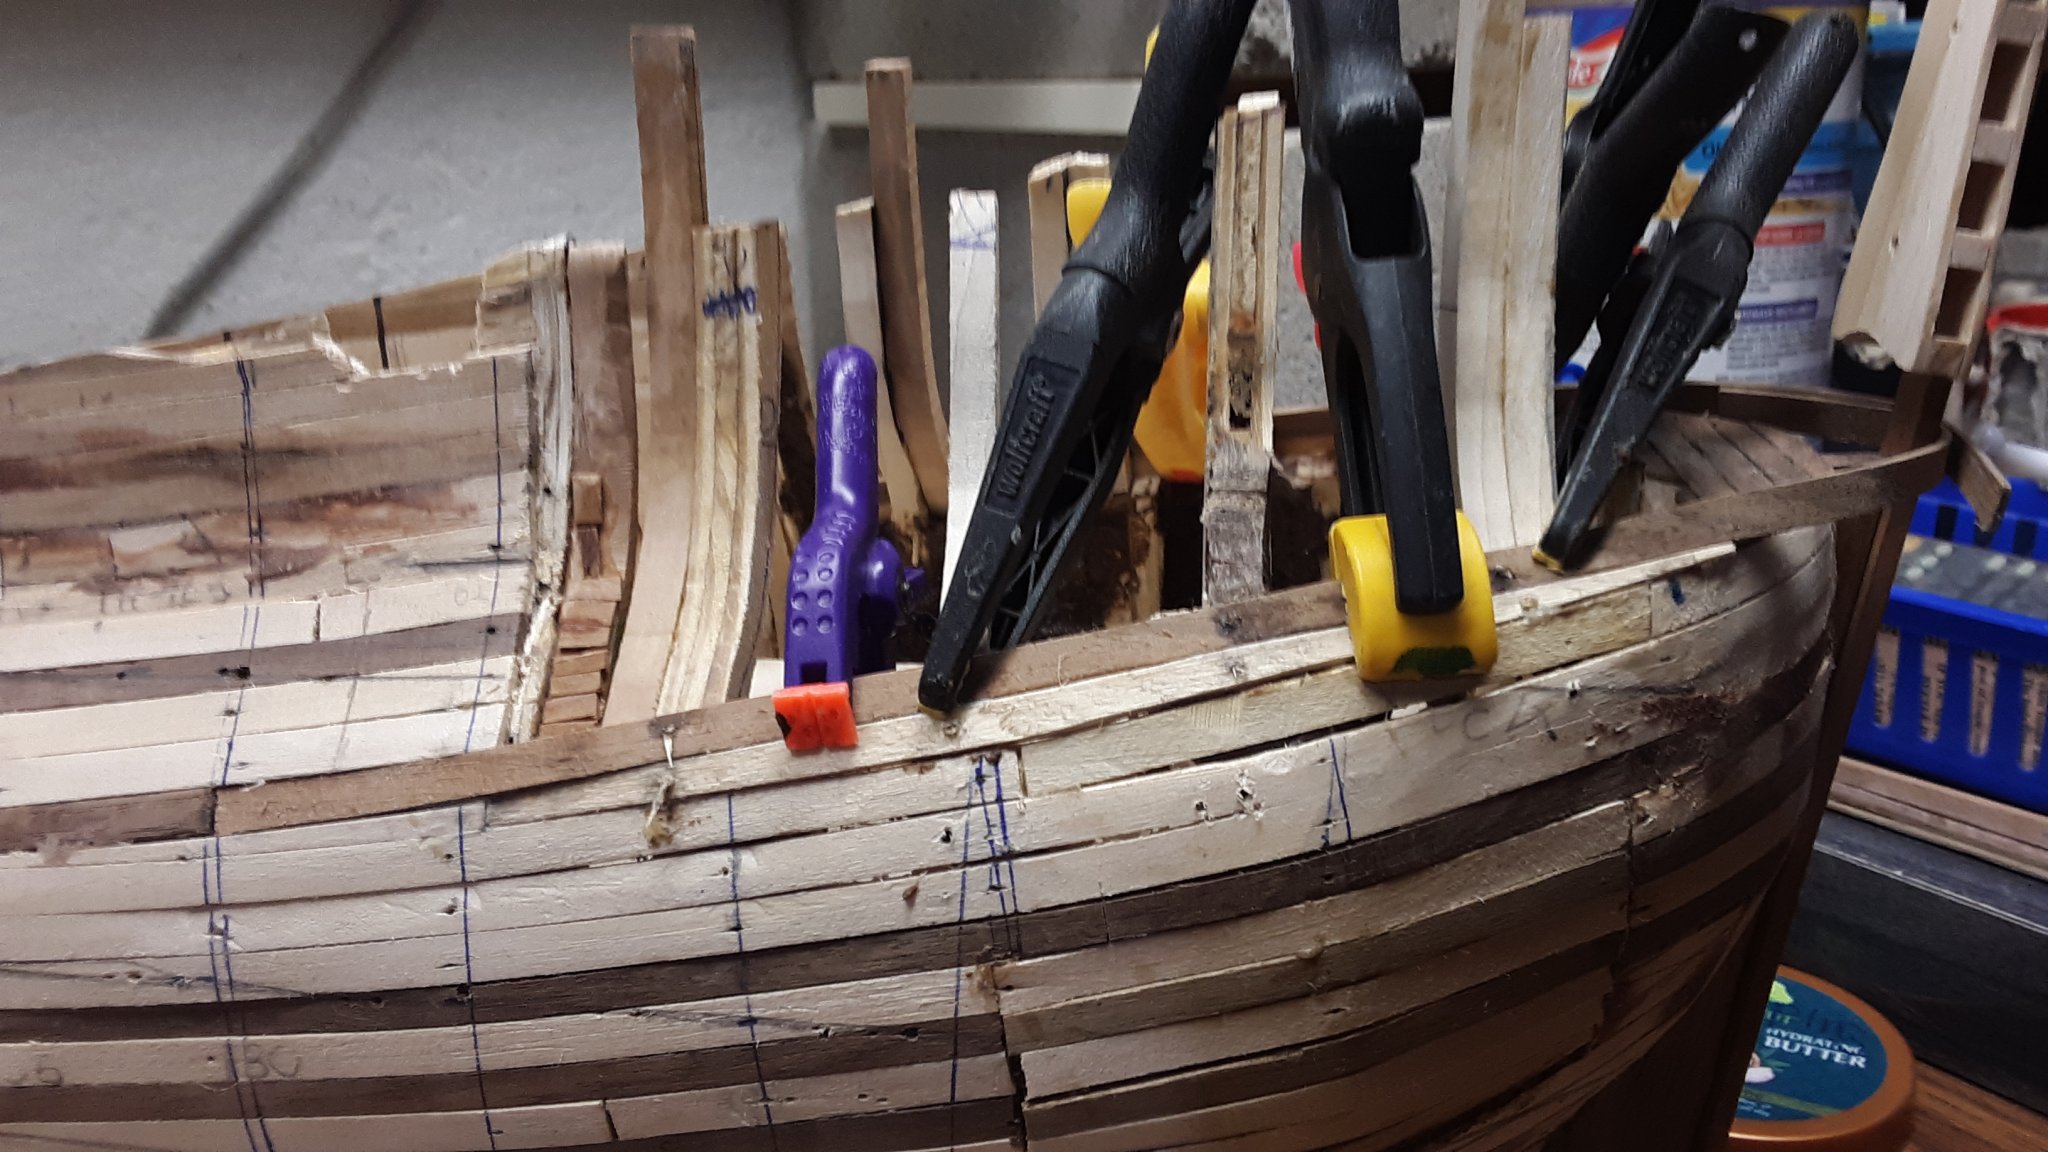
11 hours ago, G.L. said:
Marcus, I see you tree nailed the planks. Is that already the upper layer of planks?
G. L.,
Upper layer of planks? Do you mean the second layer of planking or the first layer of planking but up towards the taffrail mould?
My tree nais are toothpicks cut in half with a razor blade.
Marcus
-
12 hours ago, Ab Hoving said:
Congratulations Markus. This time it will work.
The 'man' 🙂
Thanks Ab. She looks so much better and the lines flow much nicer.
As I wrote in Stevens reply, I will start on the decks now and install some of the inside the hull planking, that is the area on the main deck and the rest of the upper decks.
Marcus
-
14 hours ago, Louie da fly said:
A wonderful job, Marcus! I can't wait to see her after second planking. She's going to be very beautiful.
As an Australian, I find this build fascinating. My first history book when I was in primary school in Western Australia was called "Australia since 1606" and I heard all about the Dirk Hartog and de Vlamingh silver plates and I've since seen the latter one in the shipwreck Museum in Fremantle, along with the relics of the Batavia, Zuytdorp and Vergulde Draeck.
And of course Rottnest Island and the Swan River where I grew up were named by Vlamingh.
Steven
Steven,
Thanks for the compliment. Over the course of this build I've been reading a lot about the Dutch Ship wrecks on the coast of Australia and the museum in Fremantle pops up constantly (just need to visit it all....... one of these days... ). Museums in Australia have a wealth of information about the Dutch. Furthermore, many PhD dissertations in marine archeology are written about Dutch Ship wrecks in and around Australia and most of these papers are free.
Because you like this build, you need to check out Jean-Pierre's beautiful build. In the search area, type Dutch whaler. It is a good looking model. Everything is nice and round. No straight lines.
The second planking will be cherry (which will darken over time), and walnut for the wales. But first I need to install the decks and figure out where the masts will be placed.
Marcus
-
2 hours ago, amateur said:
You nailed it!
So much better than the first attempt.
Jan
Thanks 😀, Jan and I got good advice from the 'man' who has built several of them.
Marcus
- bruce d, Louie da fly, Omega1234 and 2 others
-
5
-
-
4 hours ago, Jean-Pierre said:
Looks much better than your previous attempt. By the way, you may be interested by some pics of my own build of a flute (on this forum: see Dutch Whaler by Jean-Pierre: I tried to add the link, but the program keeps changing the address into an image of said build log)
You might be interested by the way I made the short bends at the stern.
Anyway, I strongly suggest that you also glue the battens to each other, which hugely reinforces the first planking.
Thank you for the complement. Yes, I checked your build and I am impressed with how you build her.
It is not an easy ship to built.
Marcus
-
Jean-Pierre,
Second layer of planking was beautifully executed.
The kit is a smaller version of a Fluit. The hull is all round, not a straight line in sight.
Did you ever finish the ship?
Marcus
-
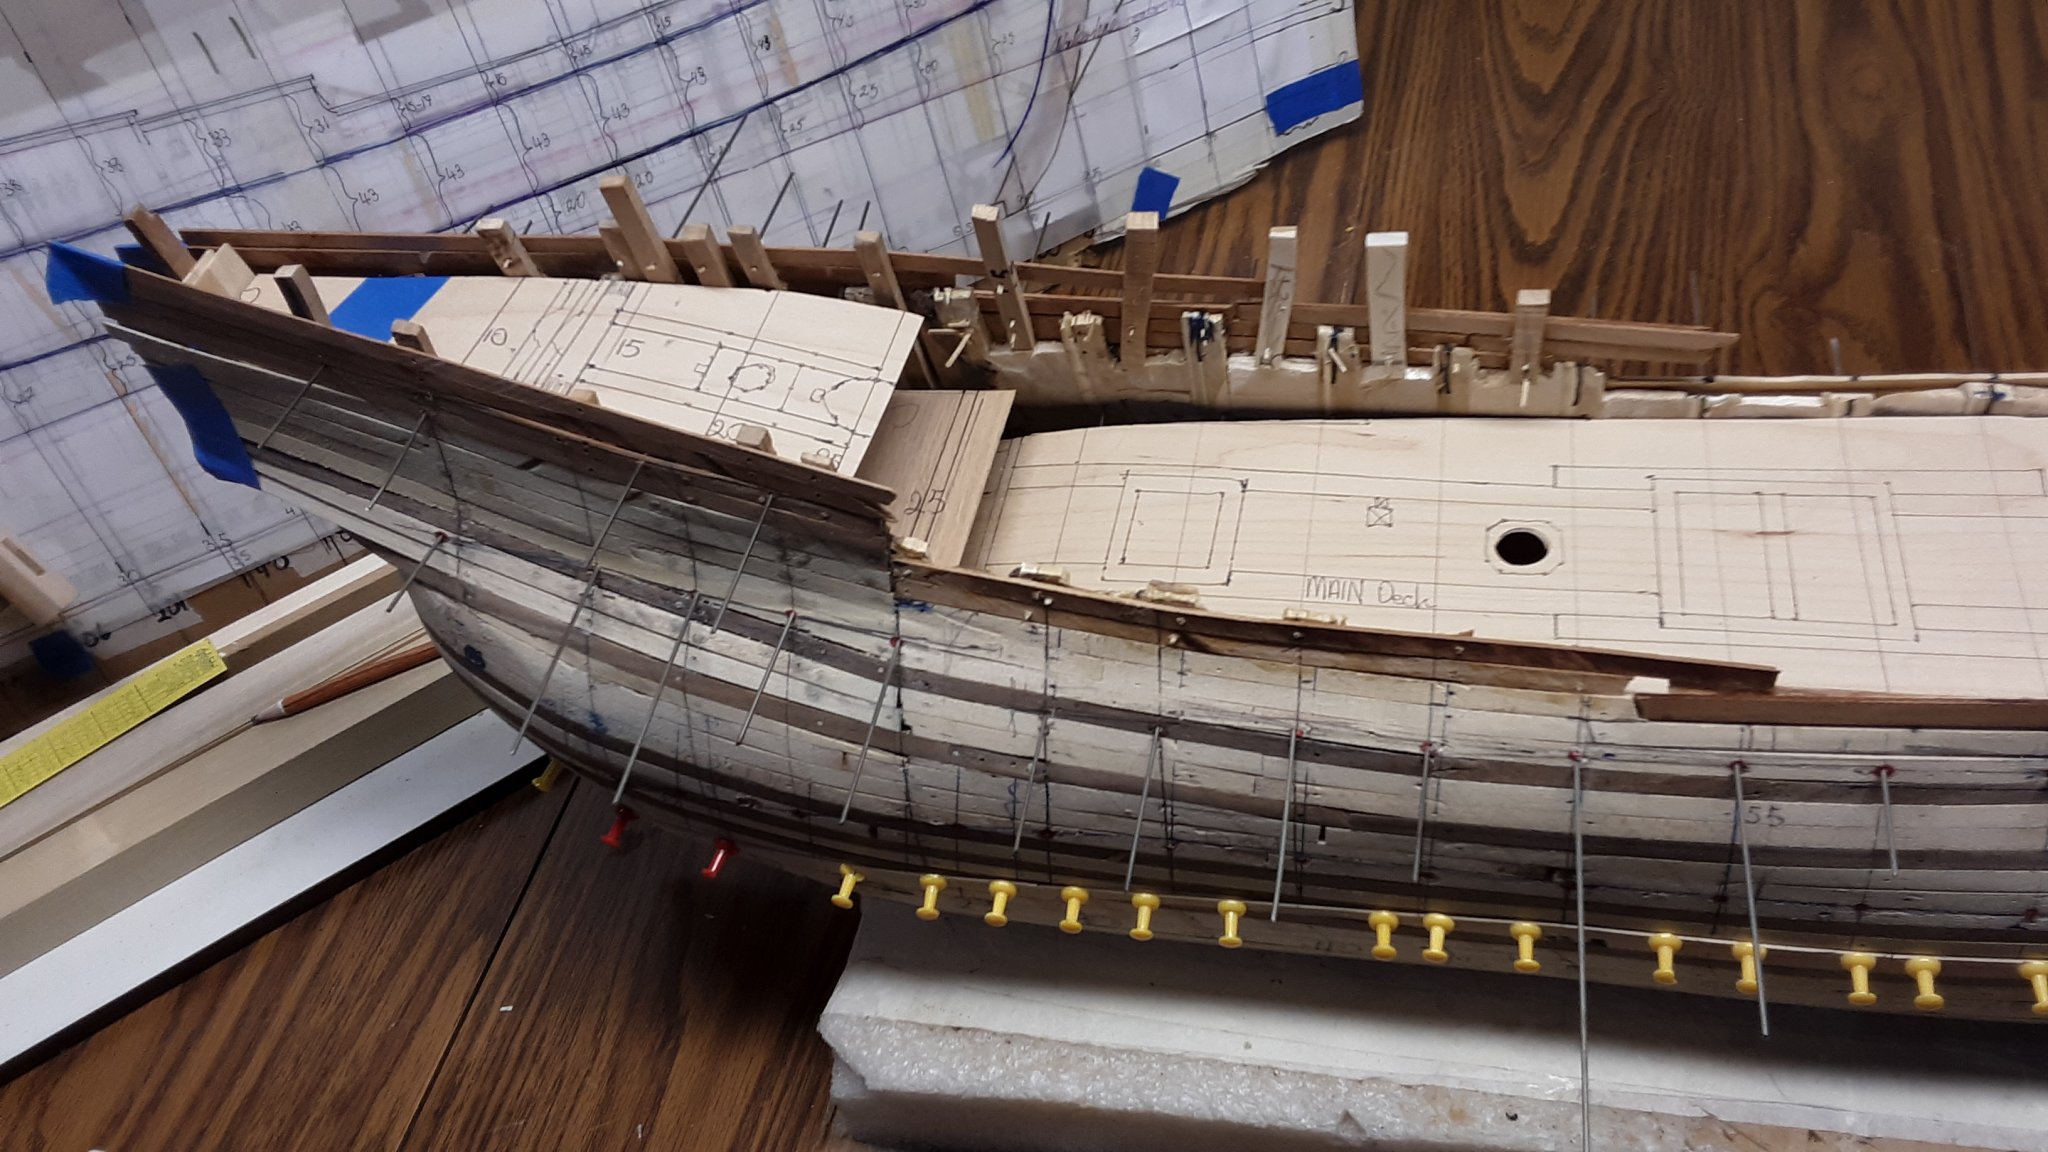
Started planking the area.
I cut out a small area where the walnut plank will be installed and curved lightly upward and follow the shear

I am slowly planking, making sure that it its a tight fit.

Marcus
- Baker, Omega1234, GrandpaPhil and 3 others
-
6


The Dutch in the Medway by P. G. Rogers
in Book, Monograph and Magazine reviews and Downloads. Questions and Discussions for Books and Pubs
Posted
Druxey, good review. I read a detailed chapter in the following book.
Going Dutch, How England Plundered Holland's Glory by Lisa Jardine.
Book starts out with a detailed Medway incident and then goes into excruciating detail about united Dutch republic politics. I will read it some other time.
Marcus