


flying_dutchman2
-
Posts
1,734 -
Joined
-
Last visited
Content Type
Profiles
Forums
Gallery
Events
Posts posted by flying_dutchman2
-
-
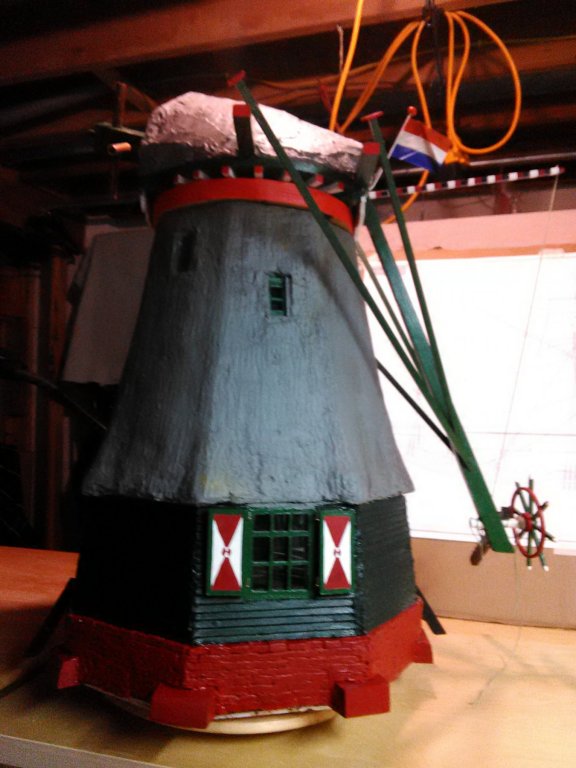
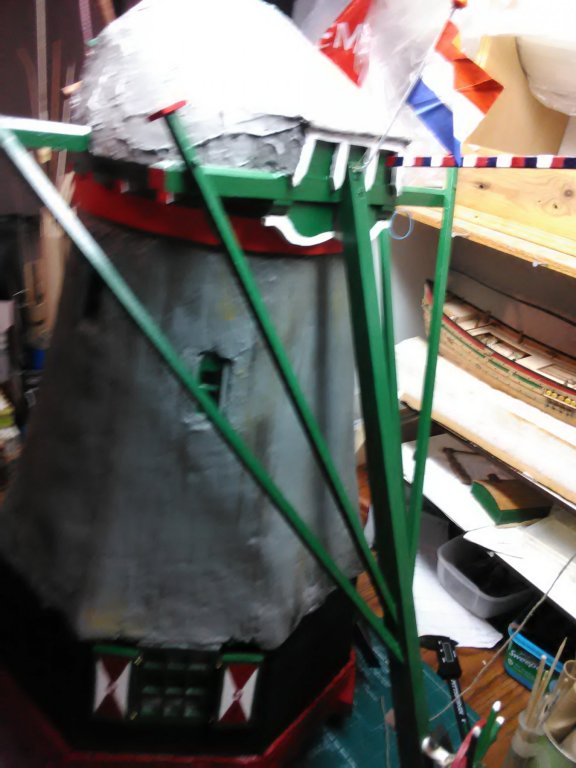
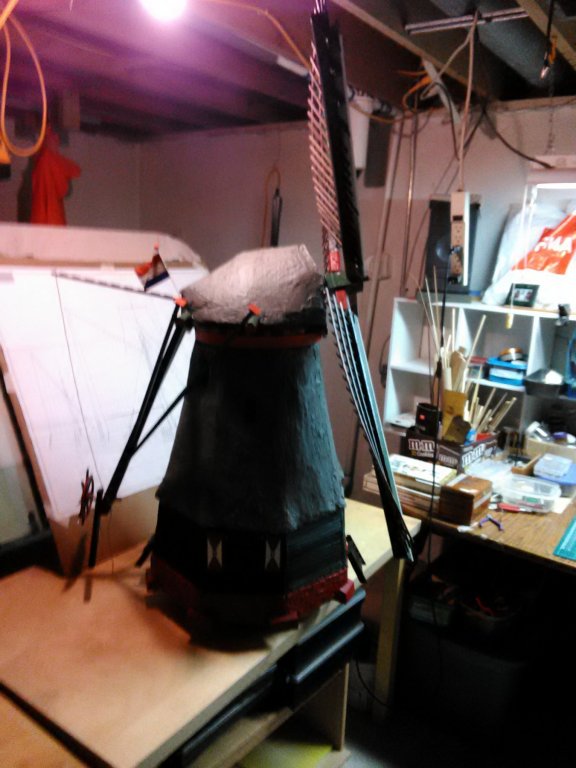
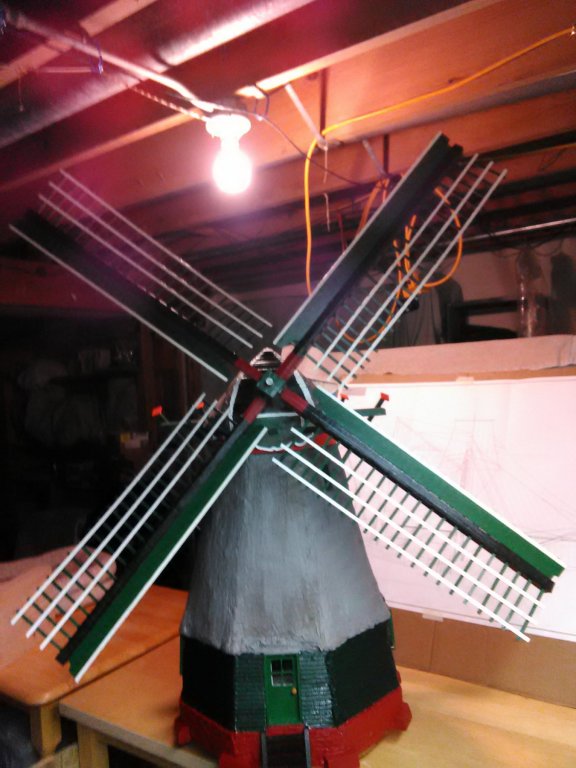
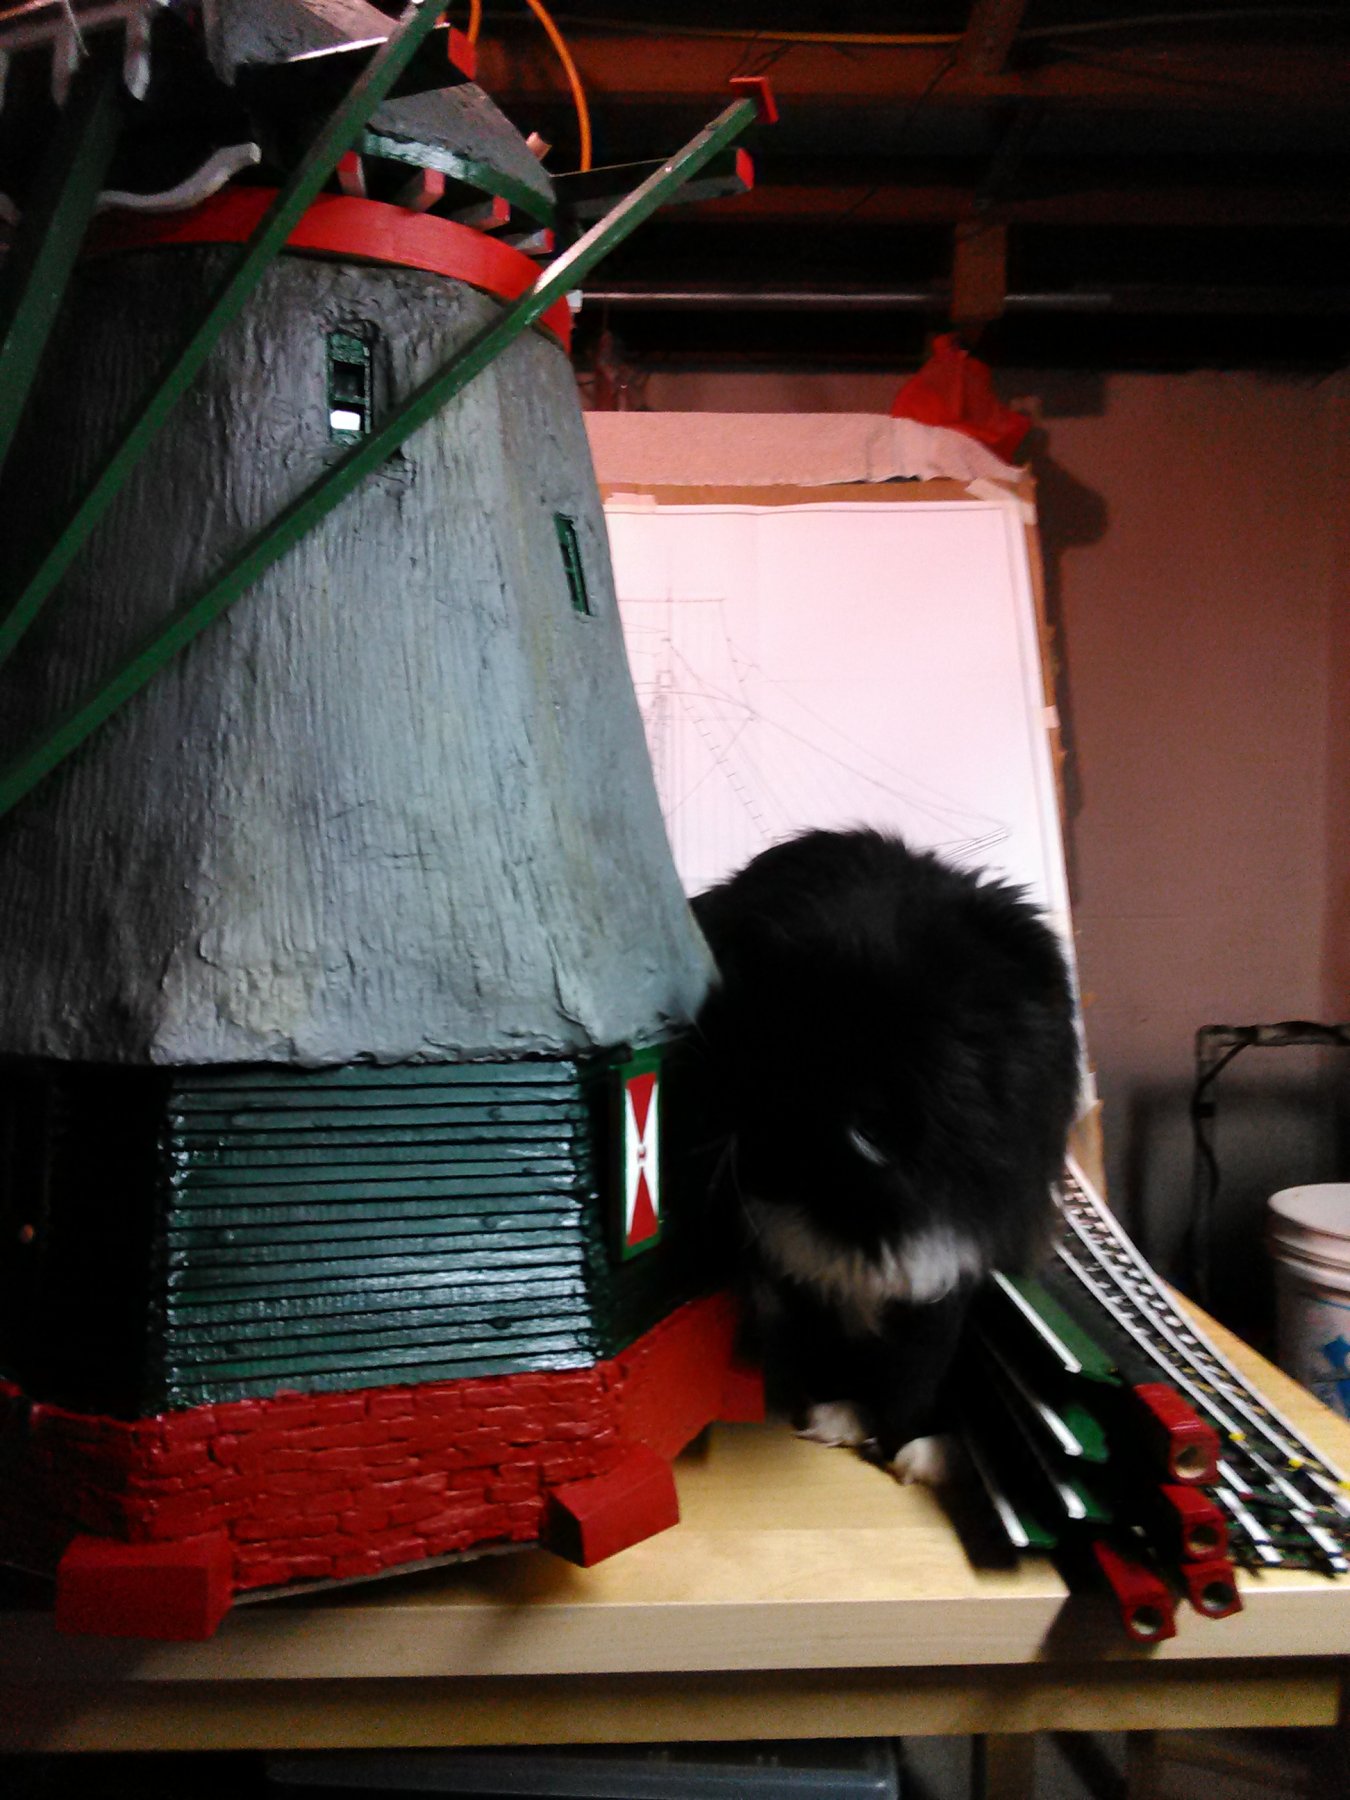
Finished the mill, except for the sails which I still need to dye dark brown. Once the weather is warm (several months from now) I will revisit this build with outside pictures. For now, here are some shots of the finished mill.
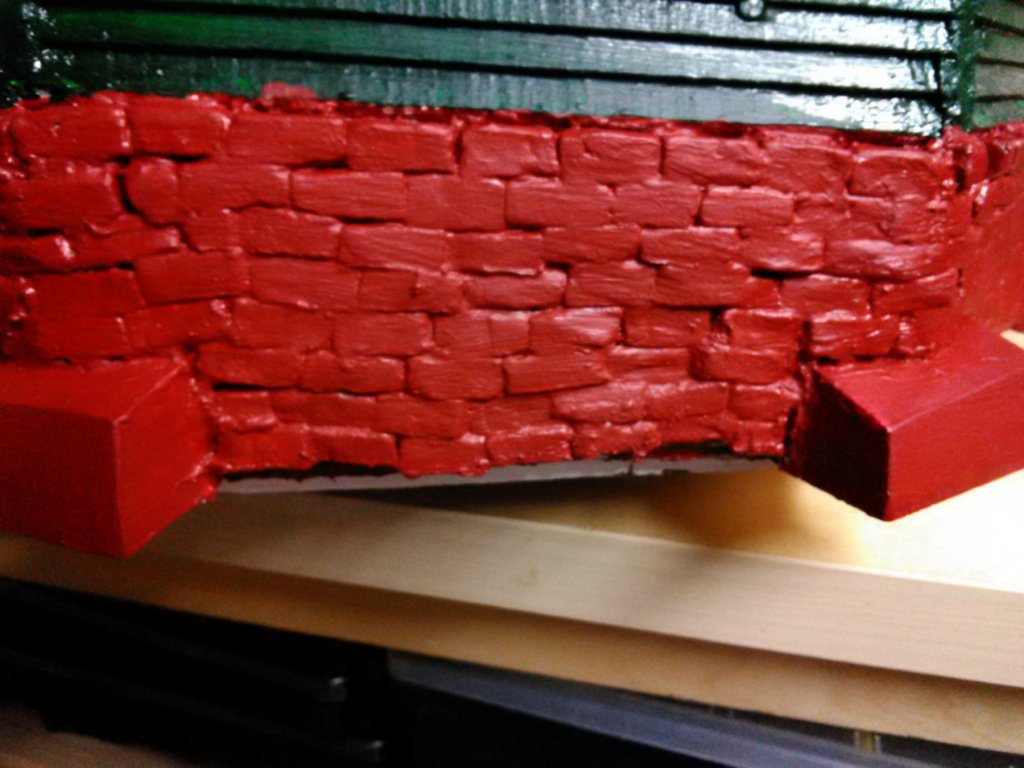
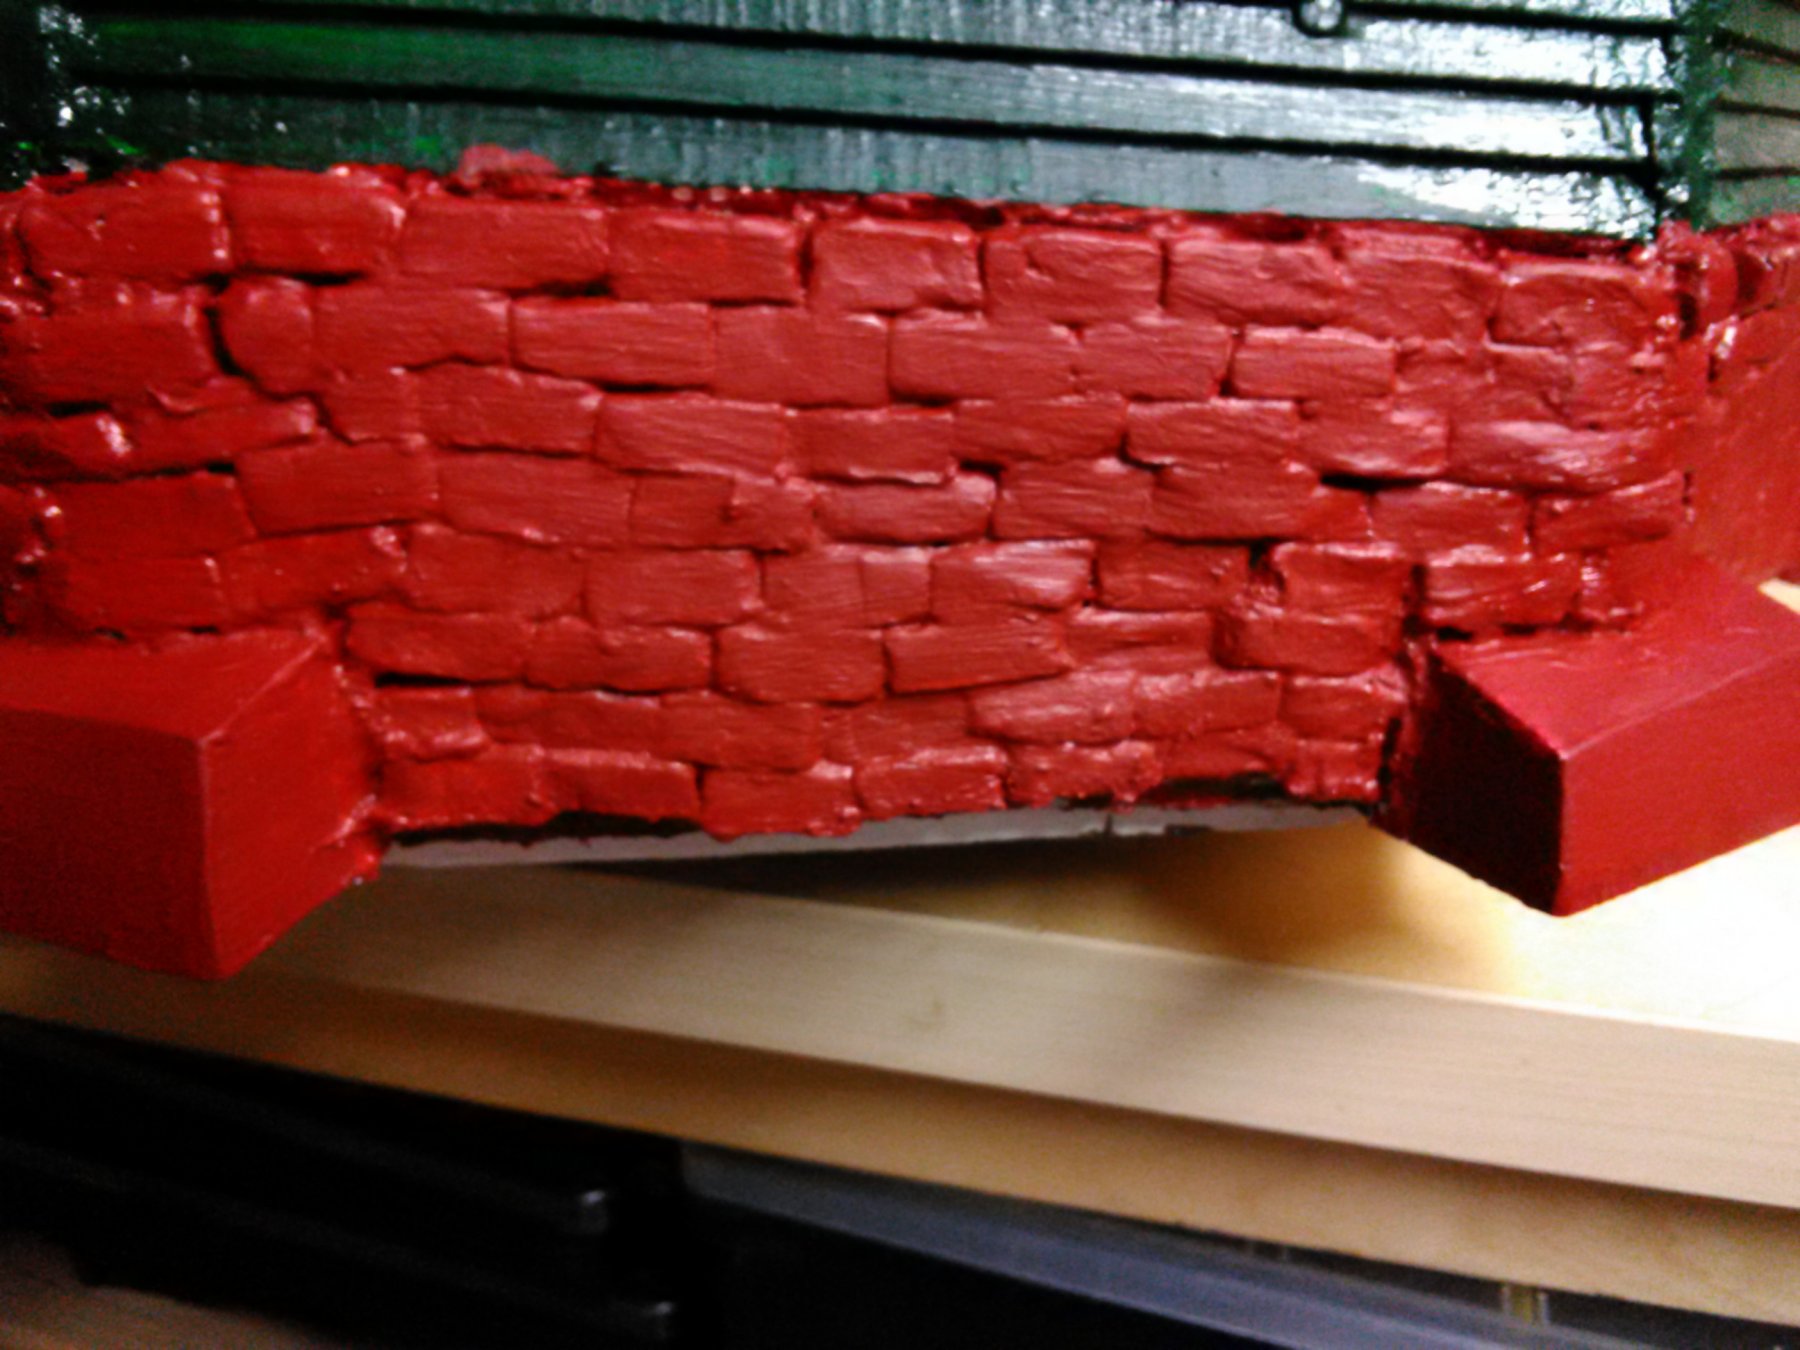
Crooked brick work. Will be improved with me next mill.


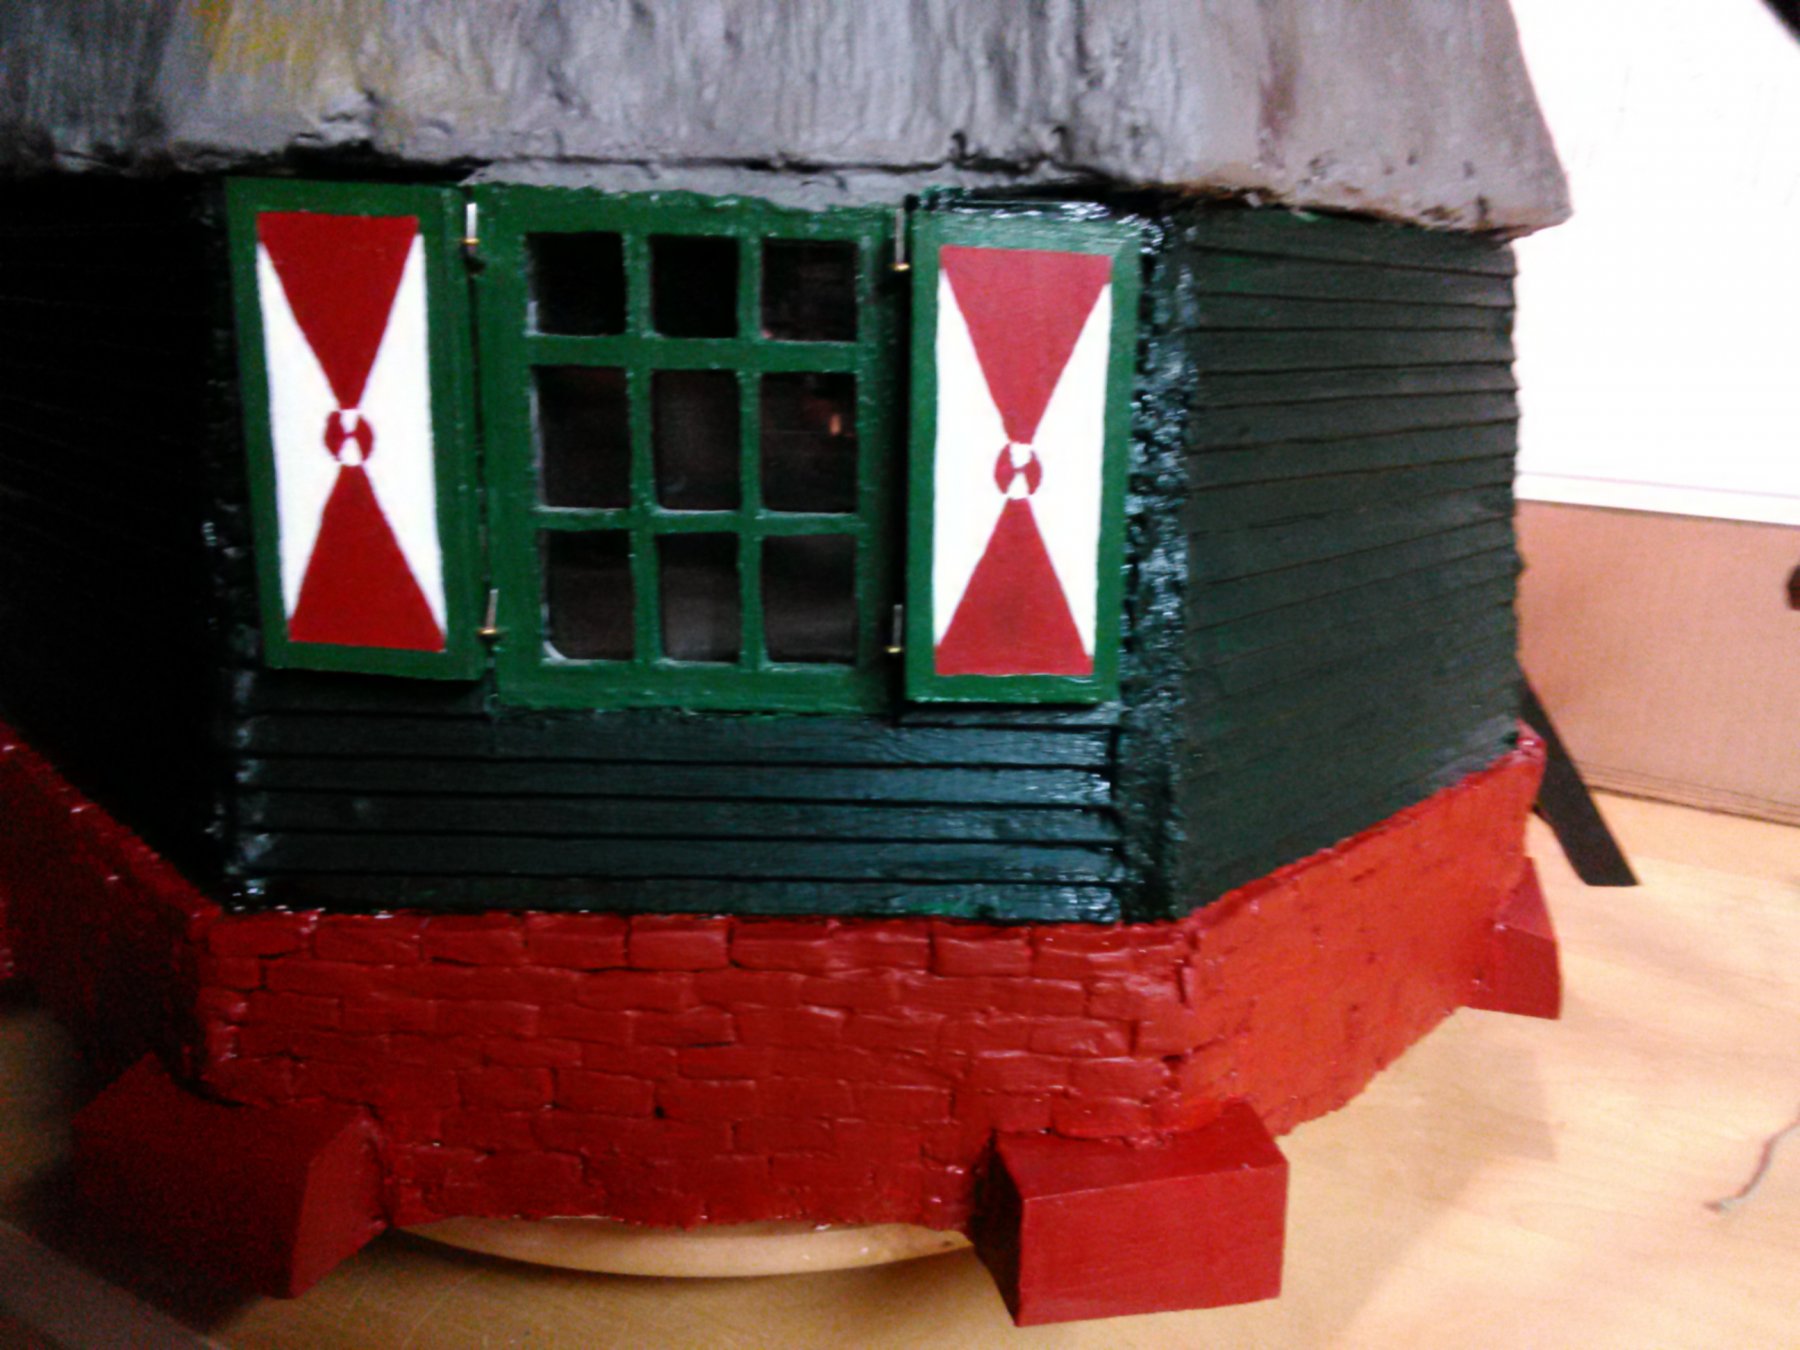
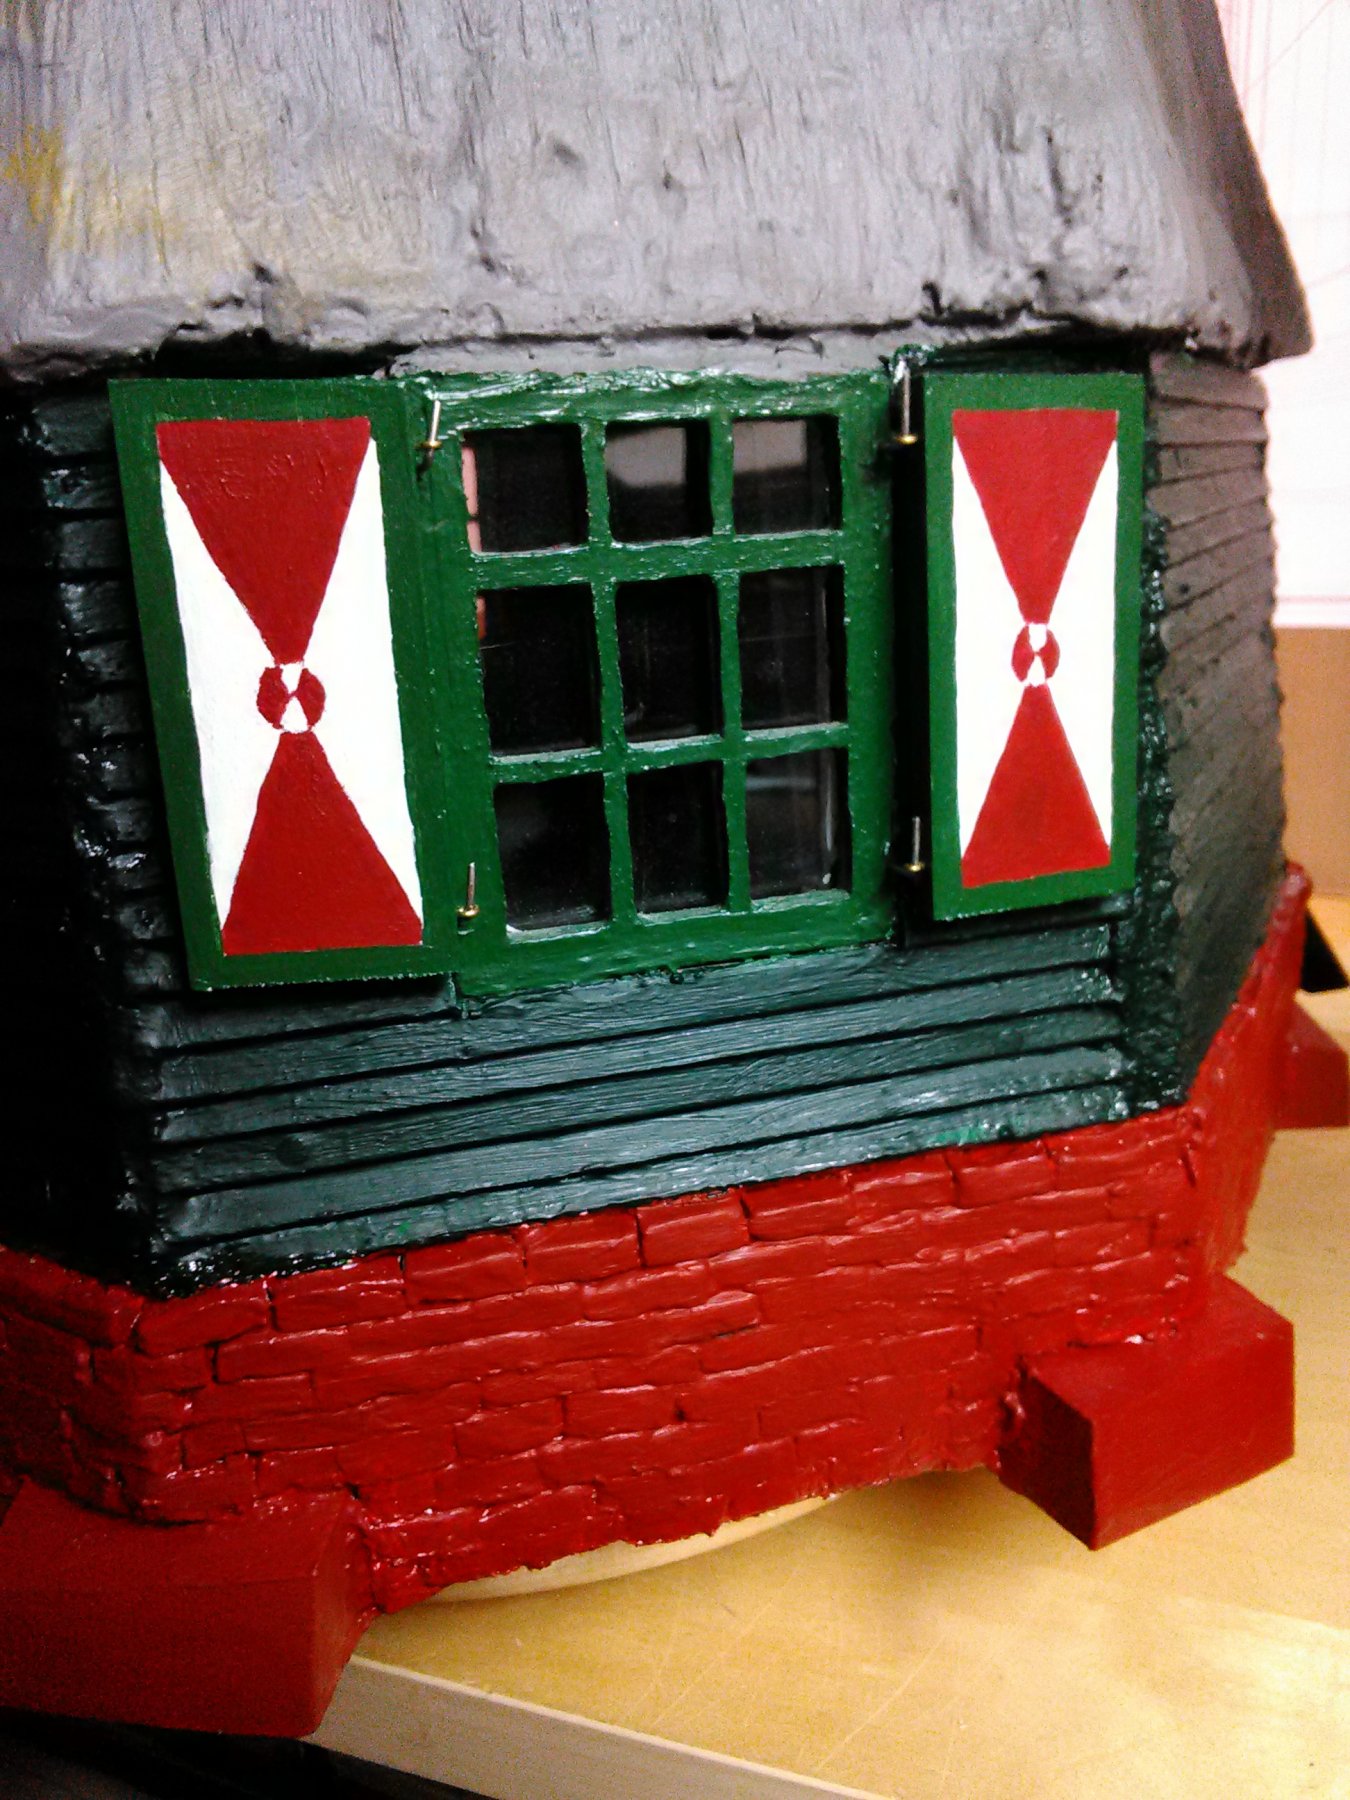
Shutters and window. Another window with shutters on the opposite side.
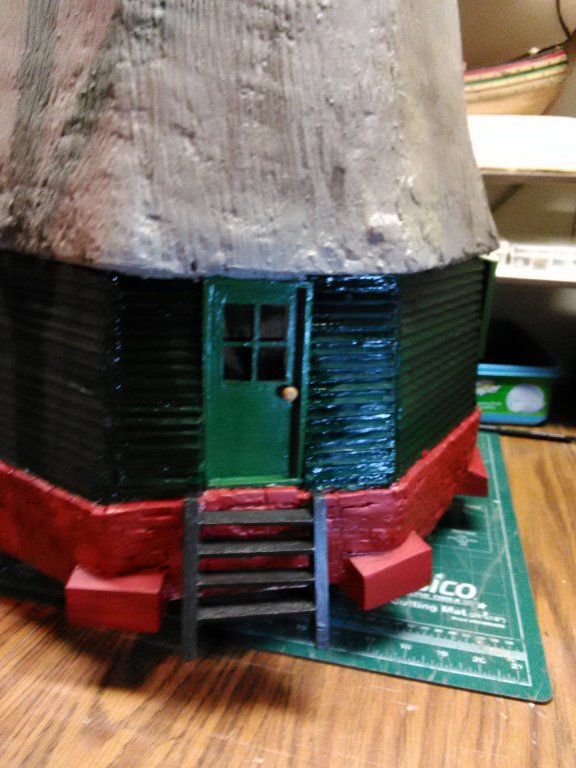
Door and step. There is another door and steps on the opposite side.

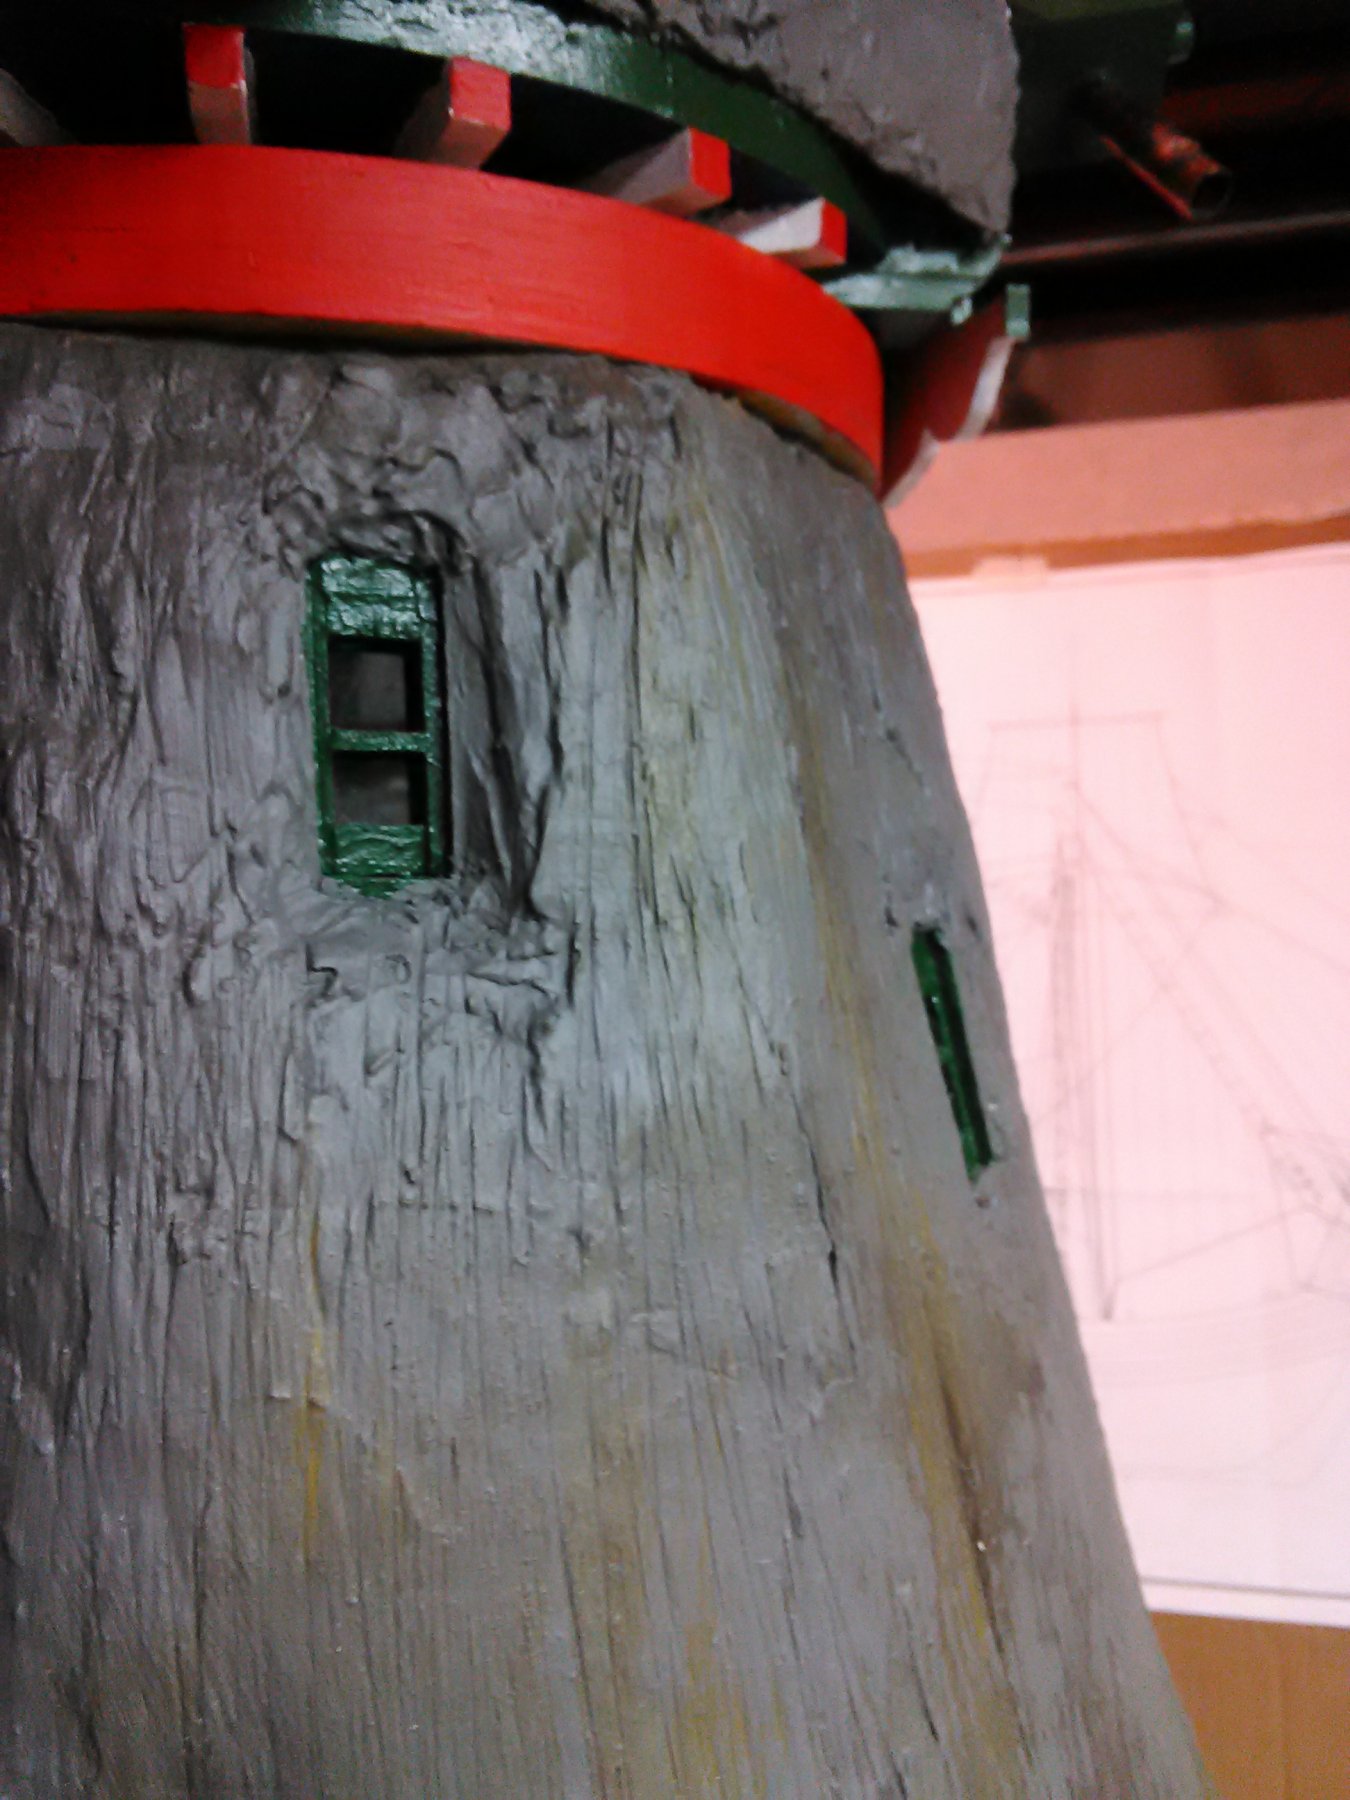
Four small windows. The imitated gray thatch has some yellow ochre painted on to give it some contrast.

Wheel with rope.
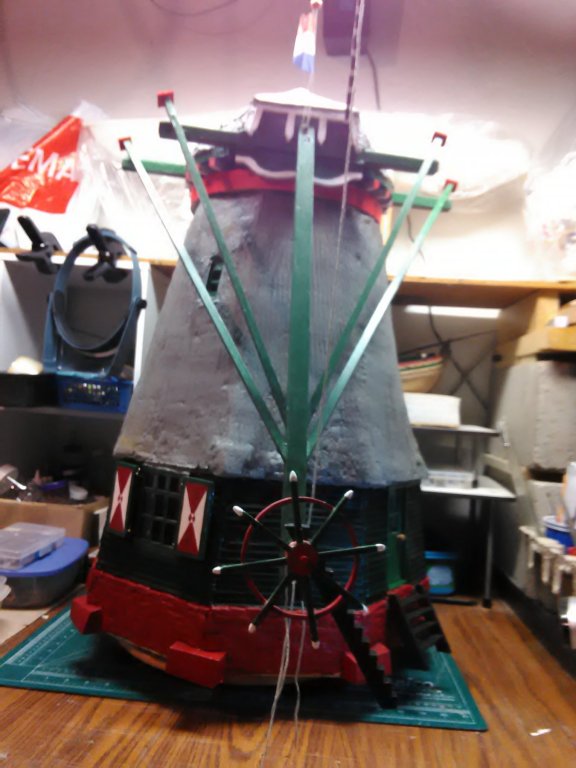
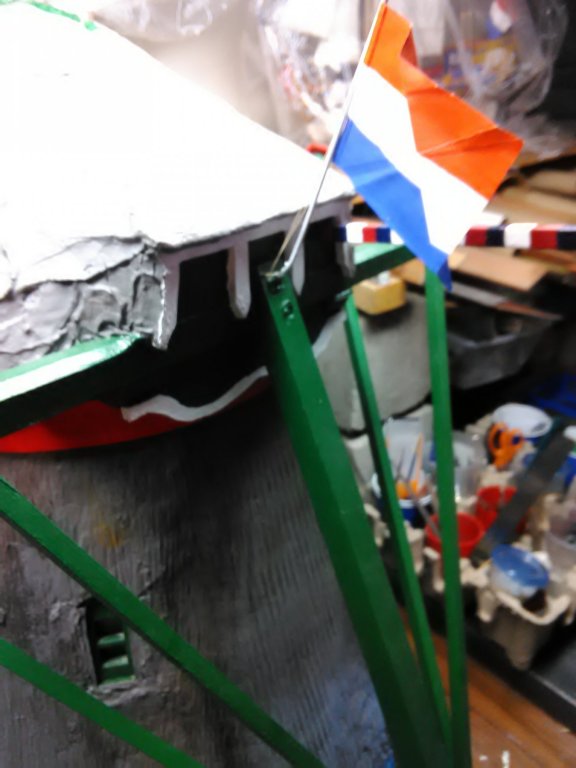
The flag is painted with acrylic. I think it will deteriorate after the first rain. Need to make something with linnen.
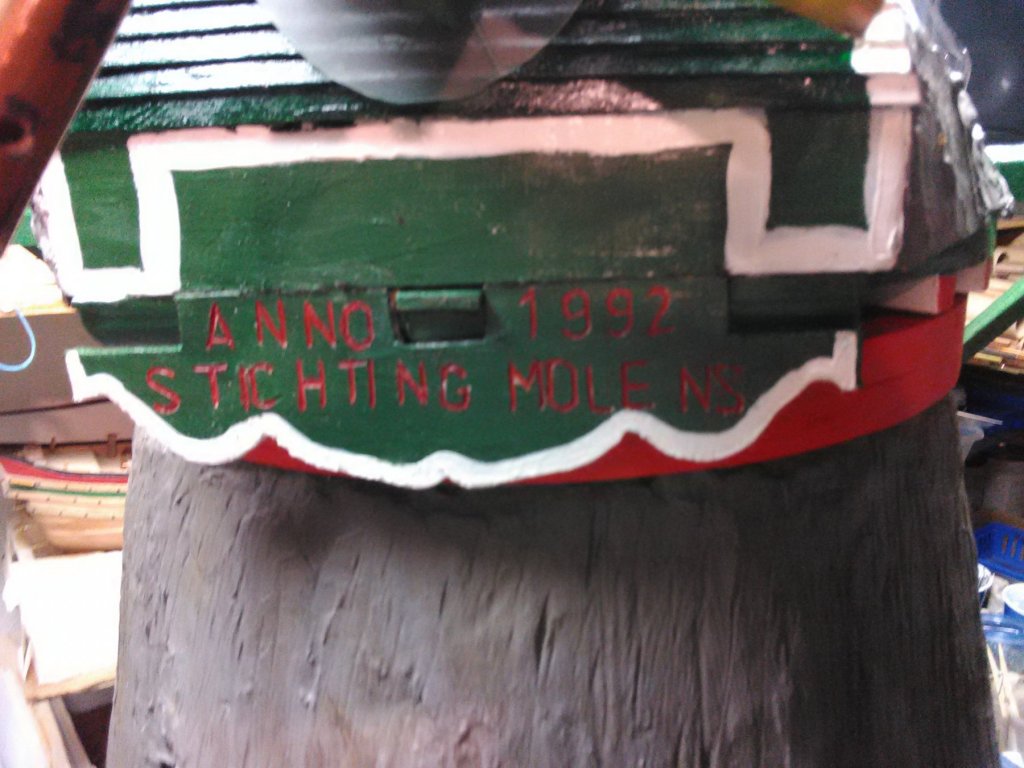
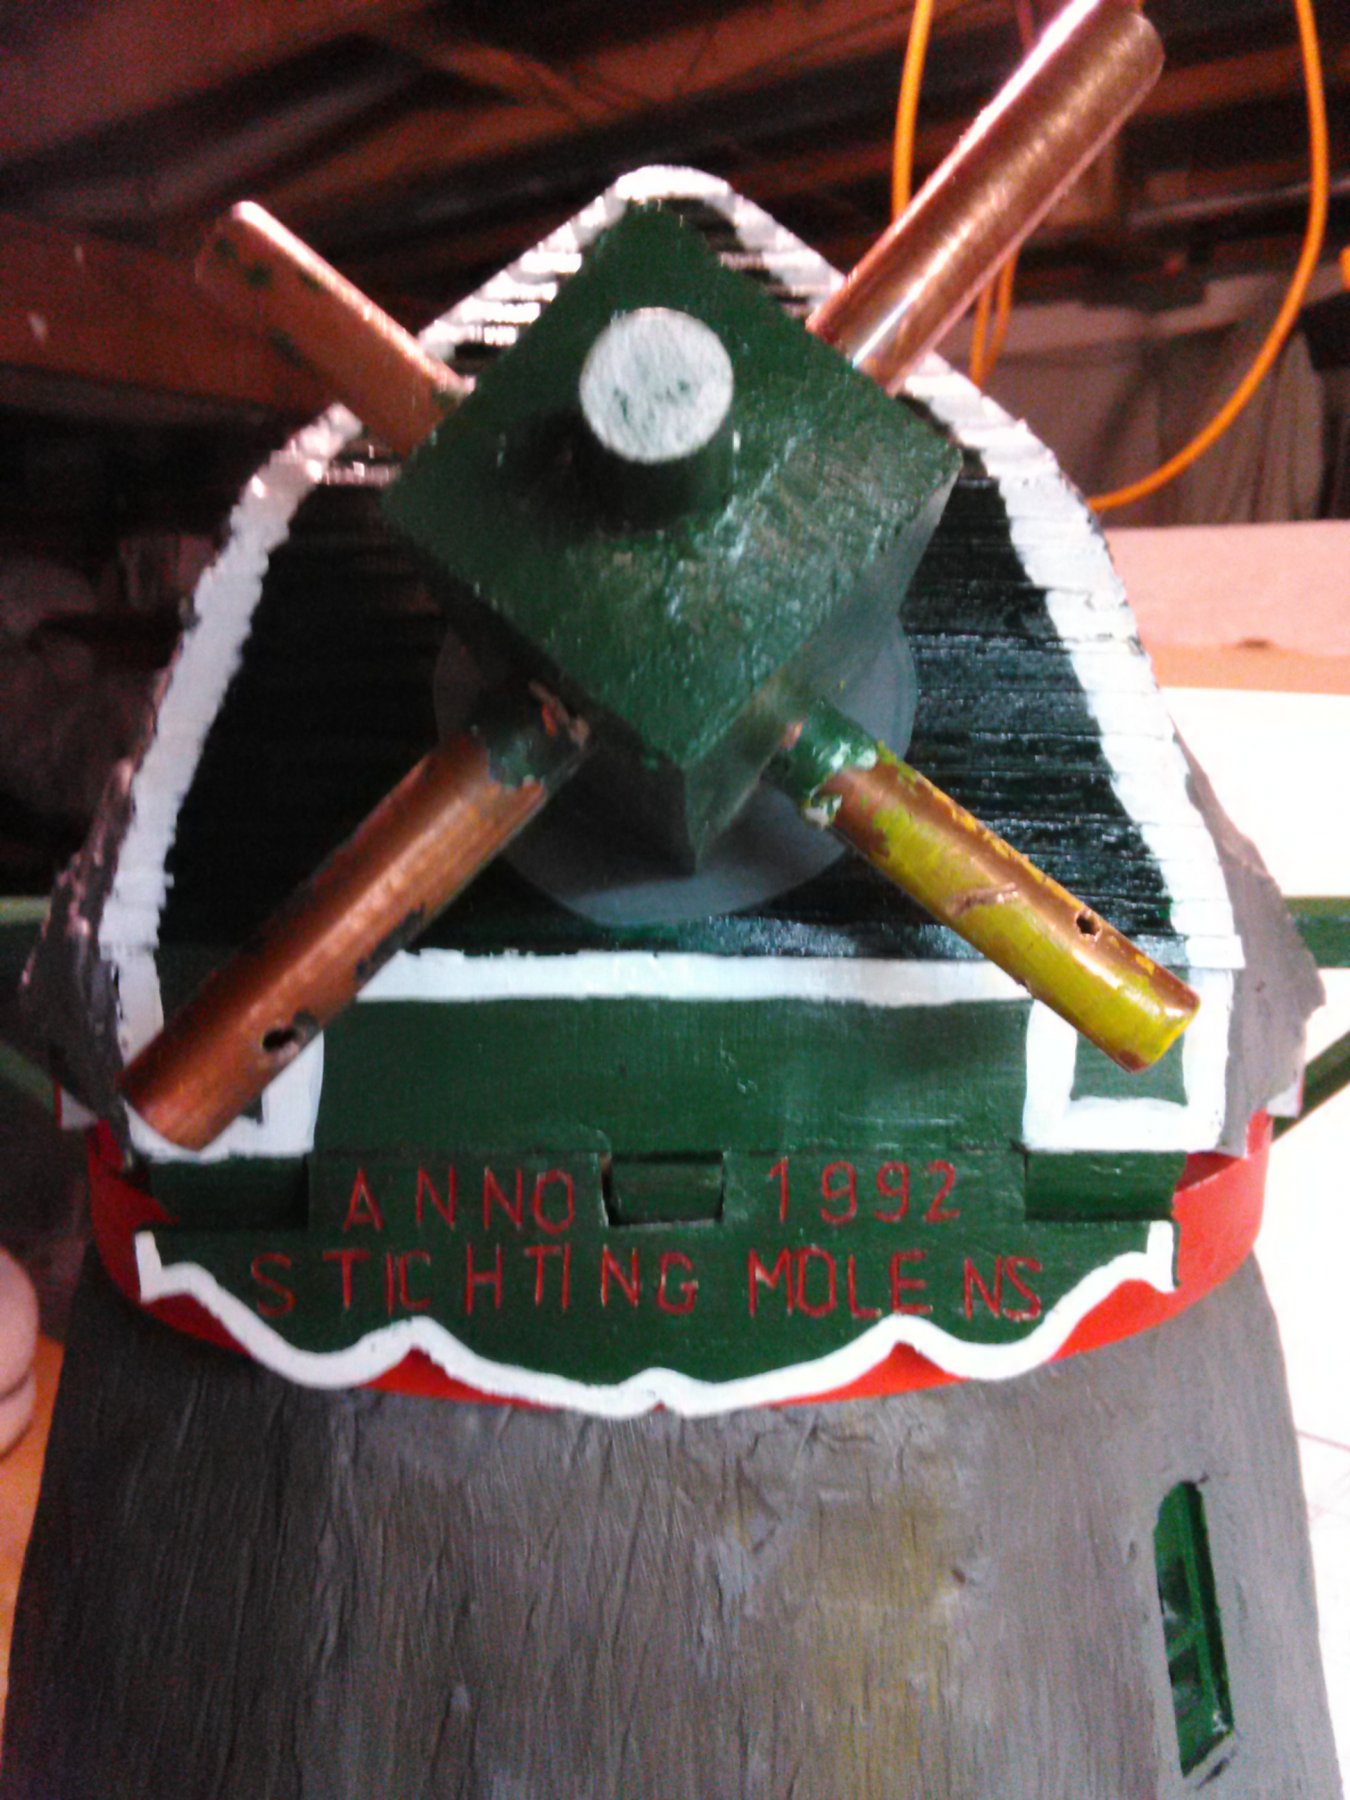
The beard.
Letters were carved out and painted red. It says "Anno 1992" "Stichting Molens". Not all the text fitted on the 'beard'. Did not have a template for smaller letters.
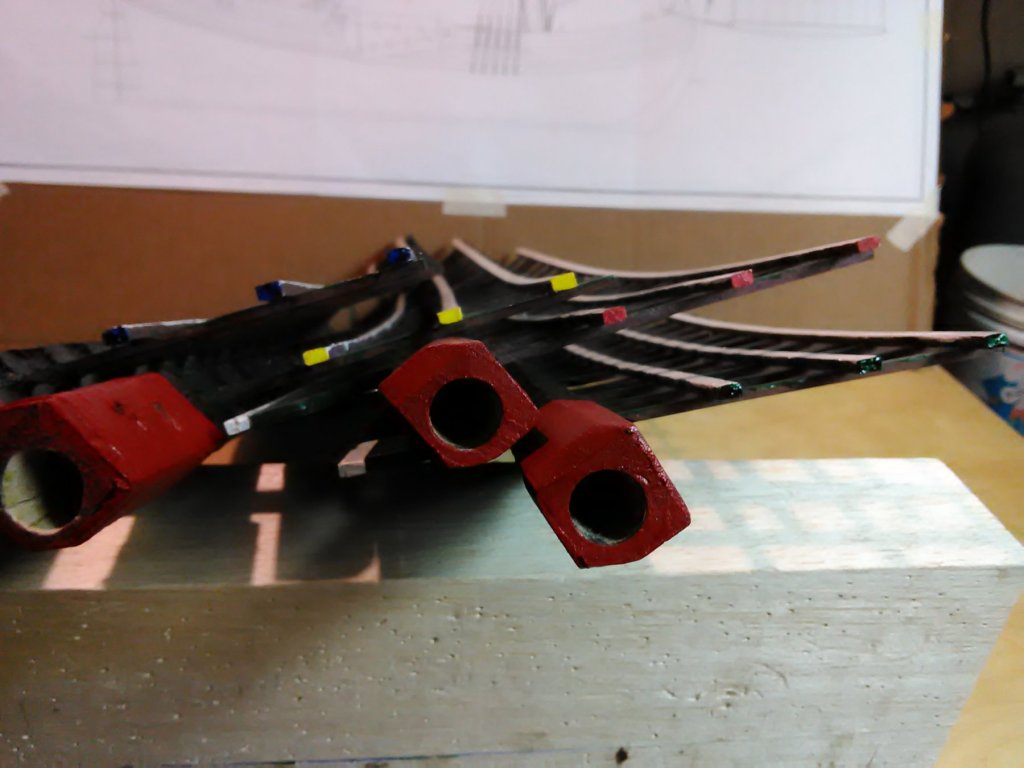
Color coded vanes. It is not visible, except if you look closely. It is coded so I know which vane goes where on the copper tubing.

Copper tubing without the vanes.

My nosey cat.
That completes the build. Thank you all for following, giving advice and uploading various beautiful pictures of the different mills the Netherlands has to offer
Marcus
-
She is starting to look great. Nice sanding job.
Marcus
- Sjors, Piet and popeye the sailor
-
 3
3
-
-
-
Have been spending several weeks making different types of blocks. Very time consuming assembly work. Several hours everyday.
After looking at prices of the different types of blocks I need for the Boyer, it made sense to me to make them myself and save some money. Compared to what is on the market, my blocks are not as nice looking...... Yet. But with time, they will become better looking.
Once I start building a Fluit and a war yacht I may just cave and purchase the blocks as I need lots of them.
Tried out different type of stock to see for myself what works. Walnut (easy, sands well, will use this for the Boyer), cherry (breaks easily), pear (sands well, no breakage), birch (splinters), and maple (too light in color).
I created my own method from the combination of several articles I have on file.
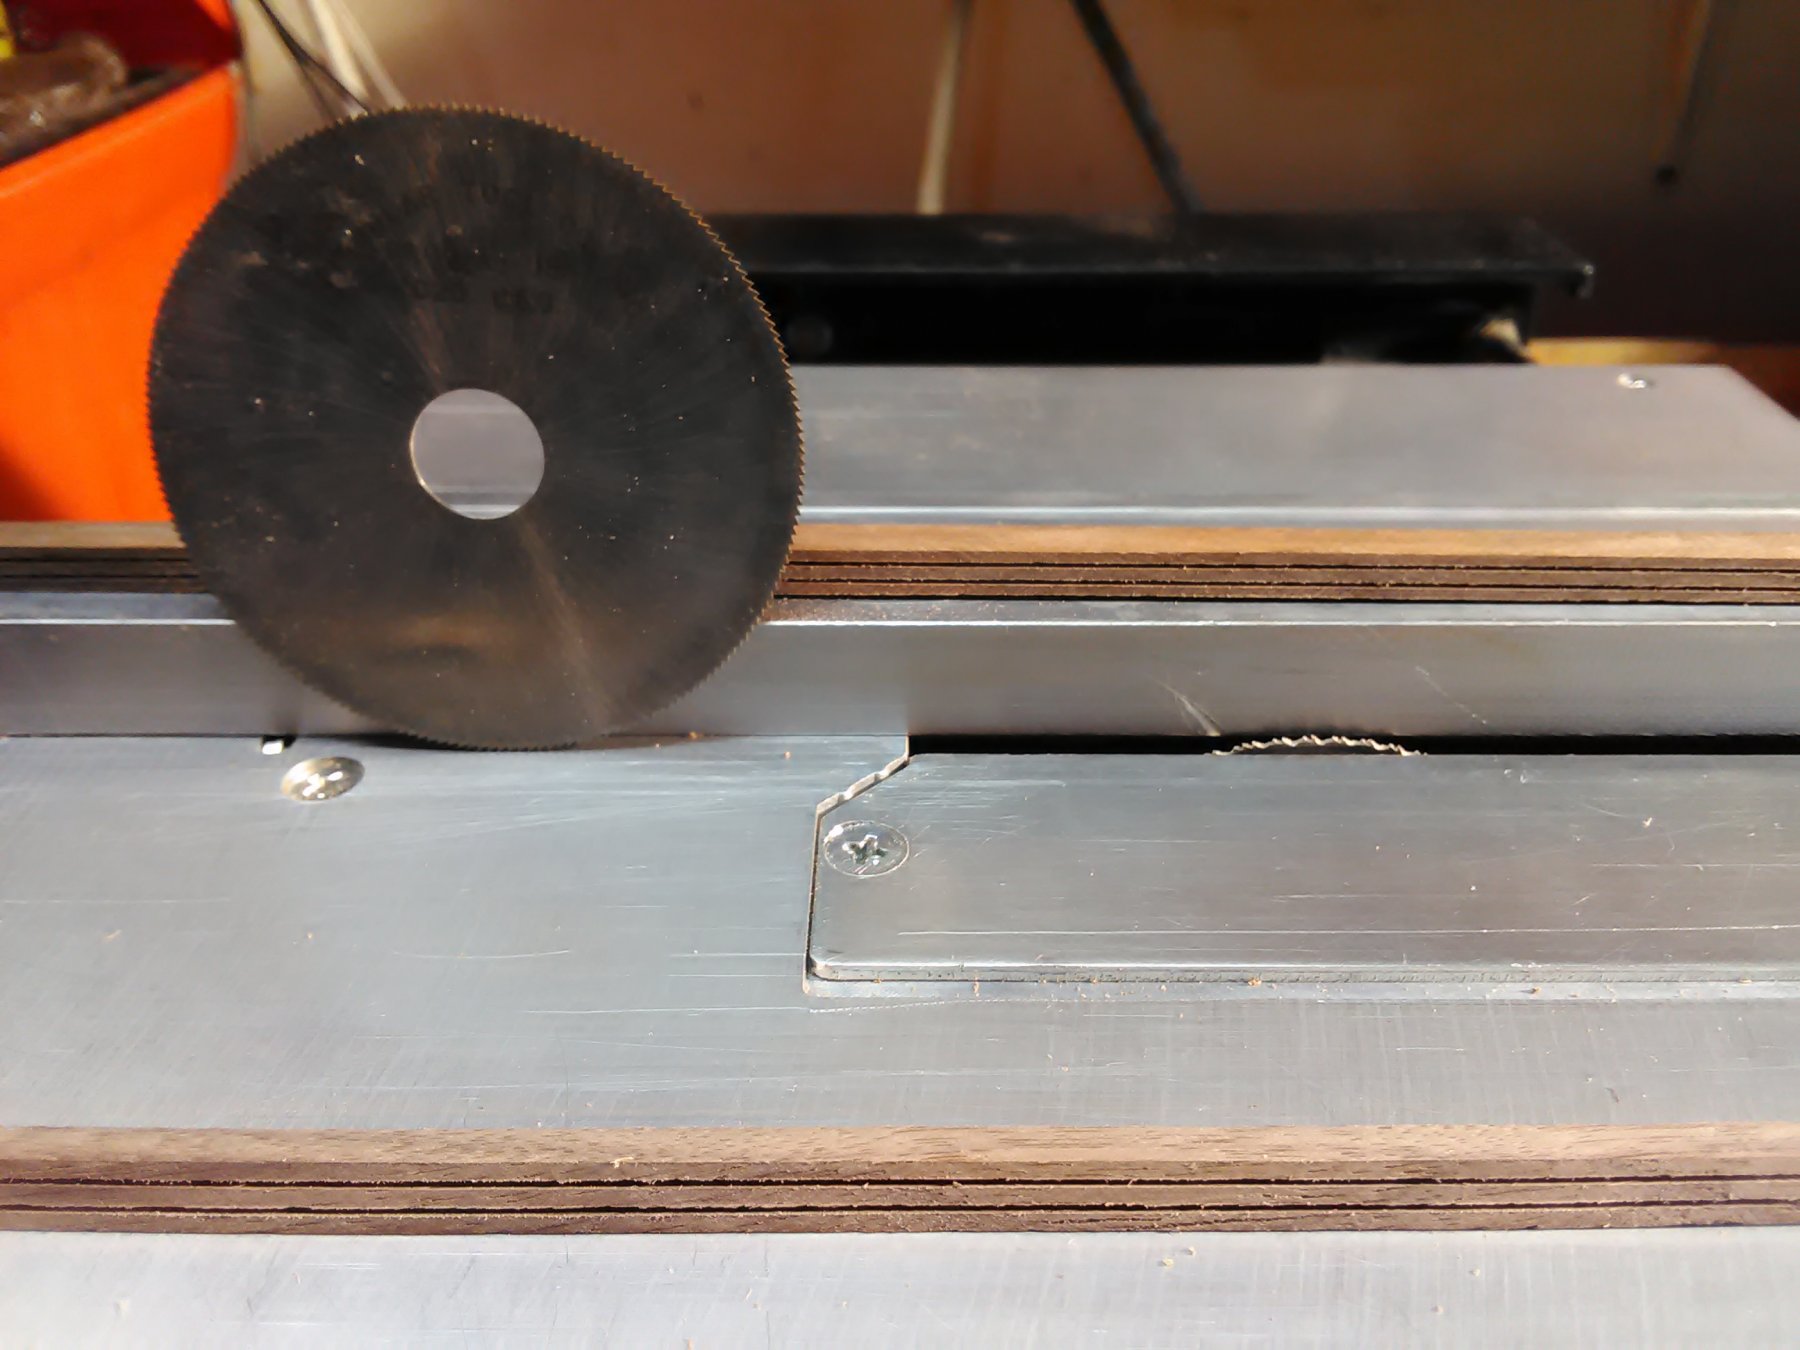
Stock is measured in 4, 5, 6, and 7mm width and thickness. Length of dowel is 30cm. With a slithing blade on the saw, 2 slits, 2mm apart, 1mm deep are cut the length of the dowel as well as the opposite side of the dowel.

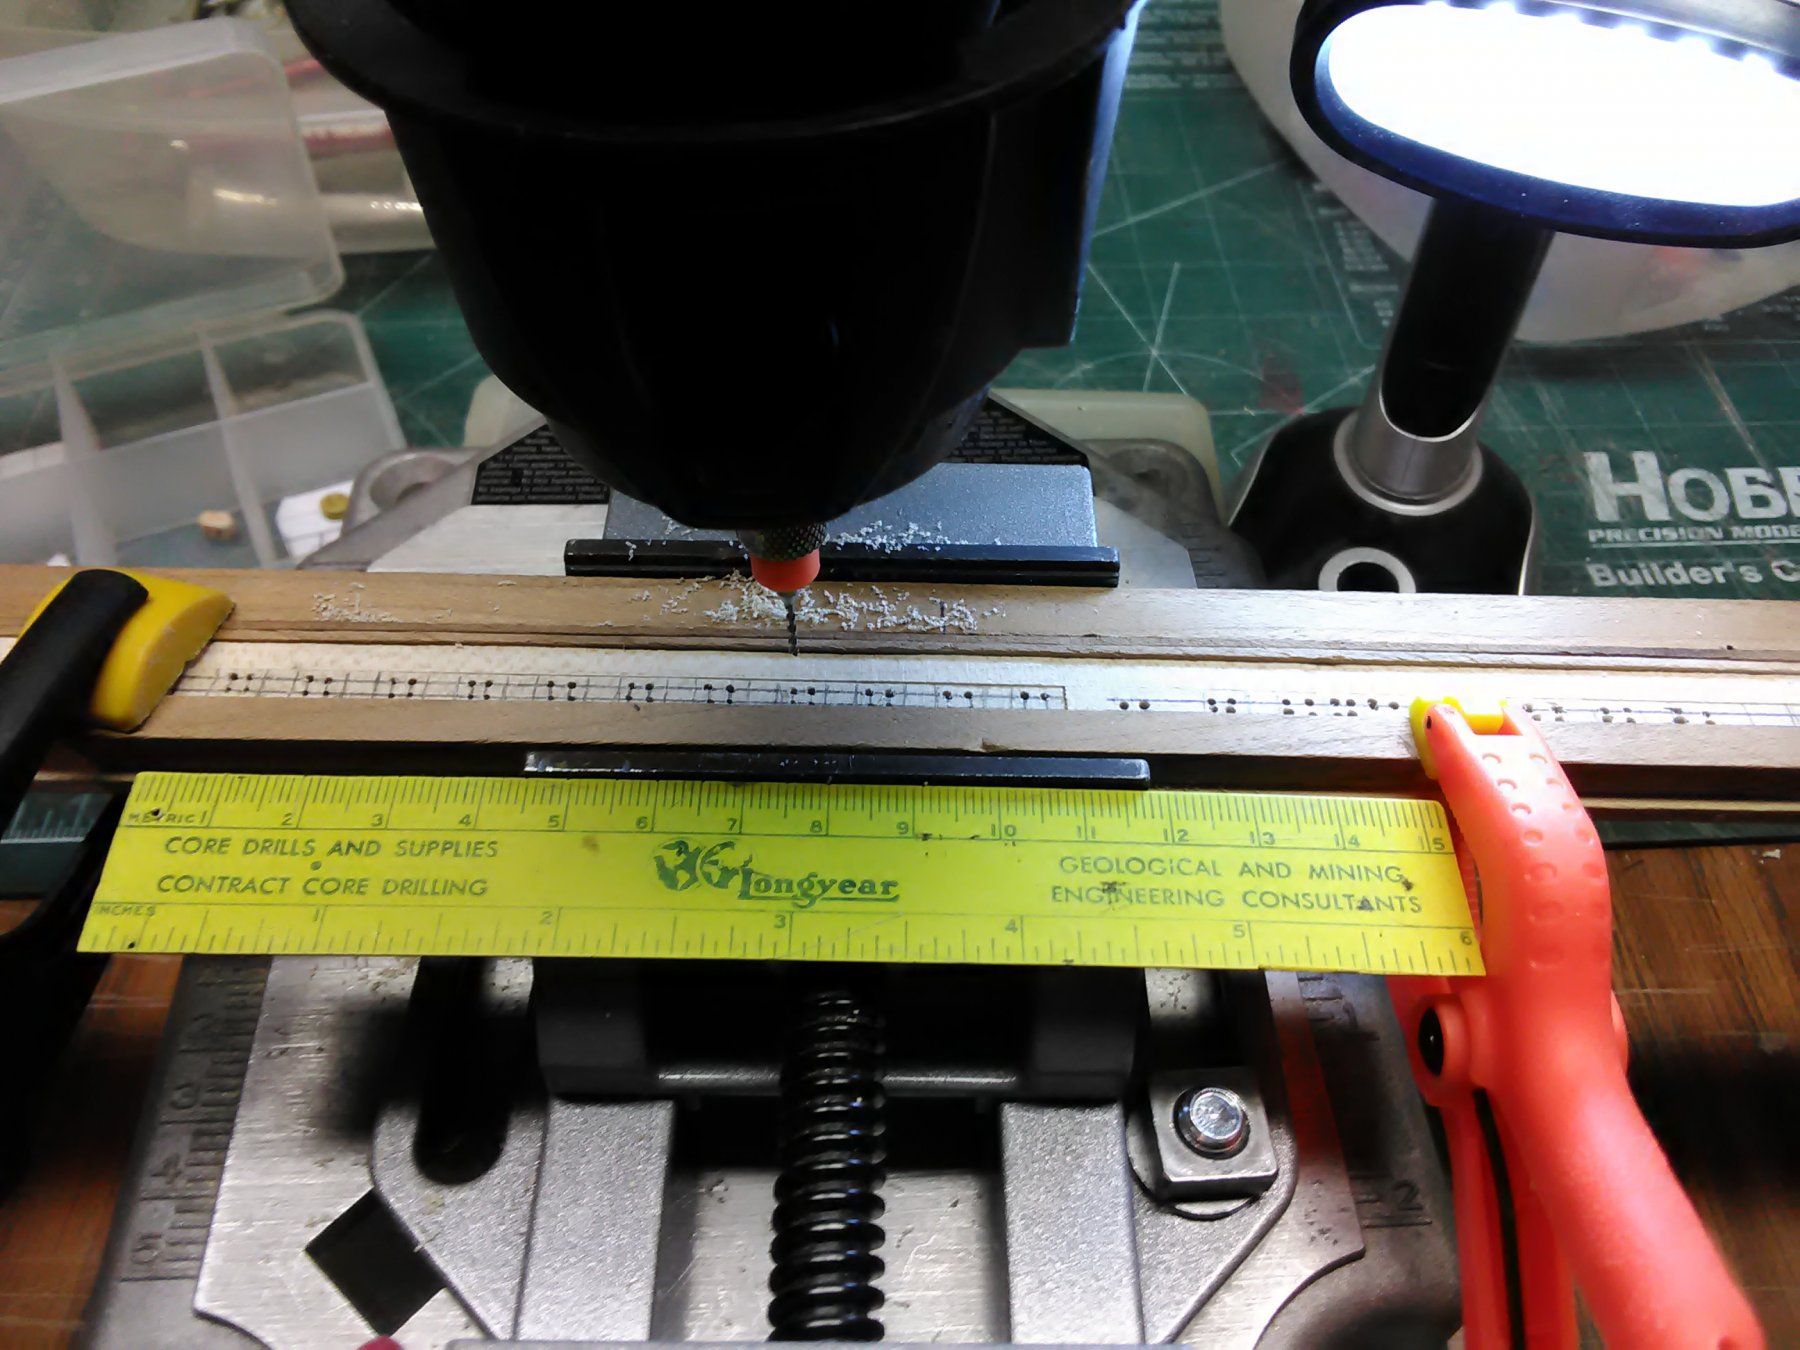
Here I will measure and mark with pencil the different sizes of the blocks. Ever block has a 5mm boundary area between it.
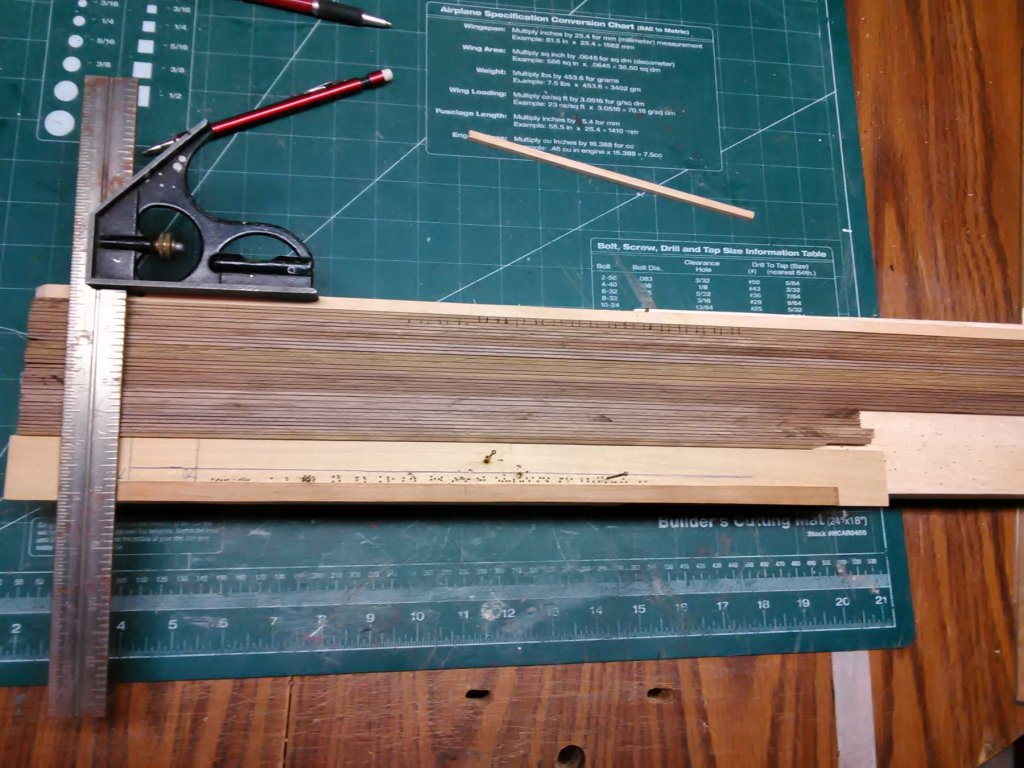
Sheave openings are drilled.

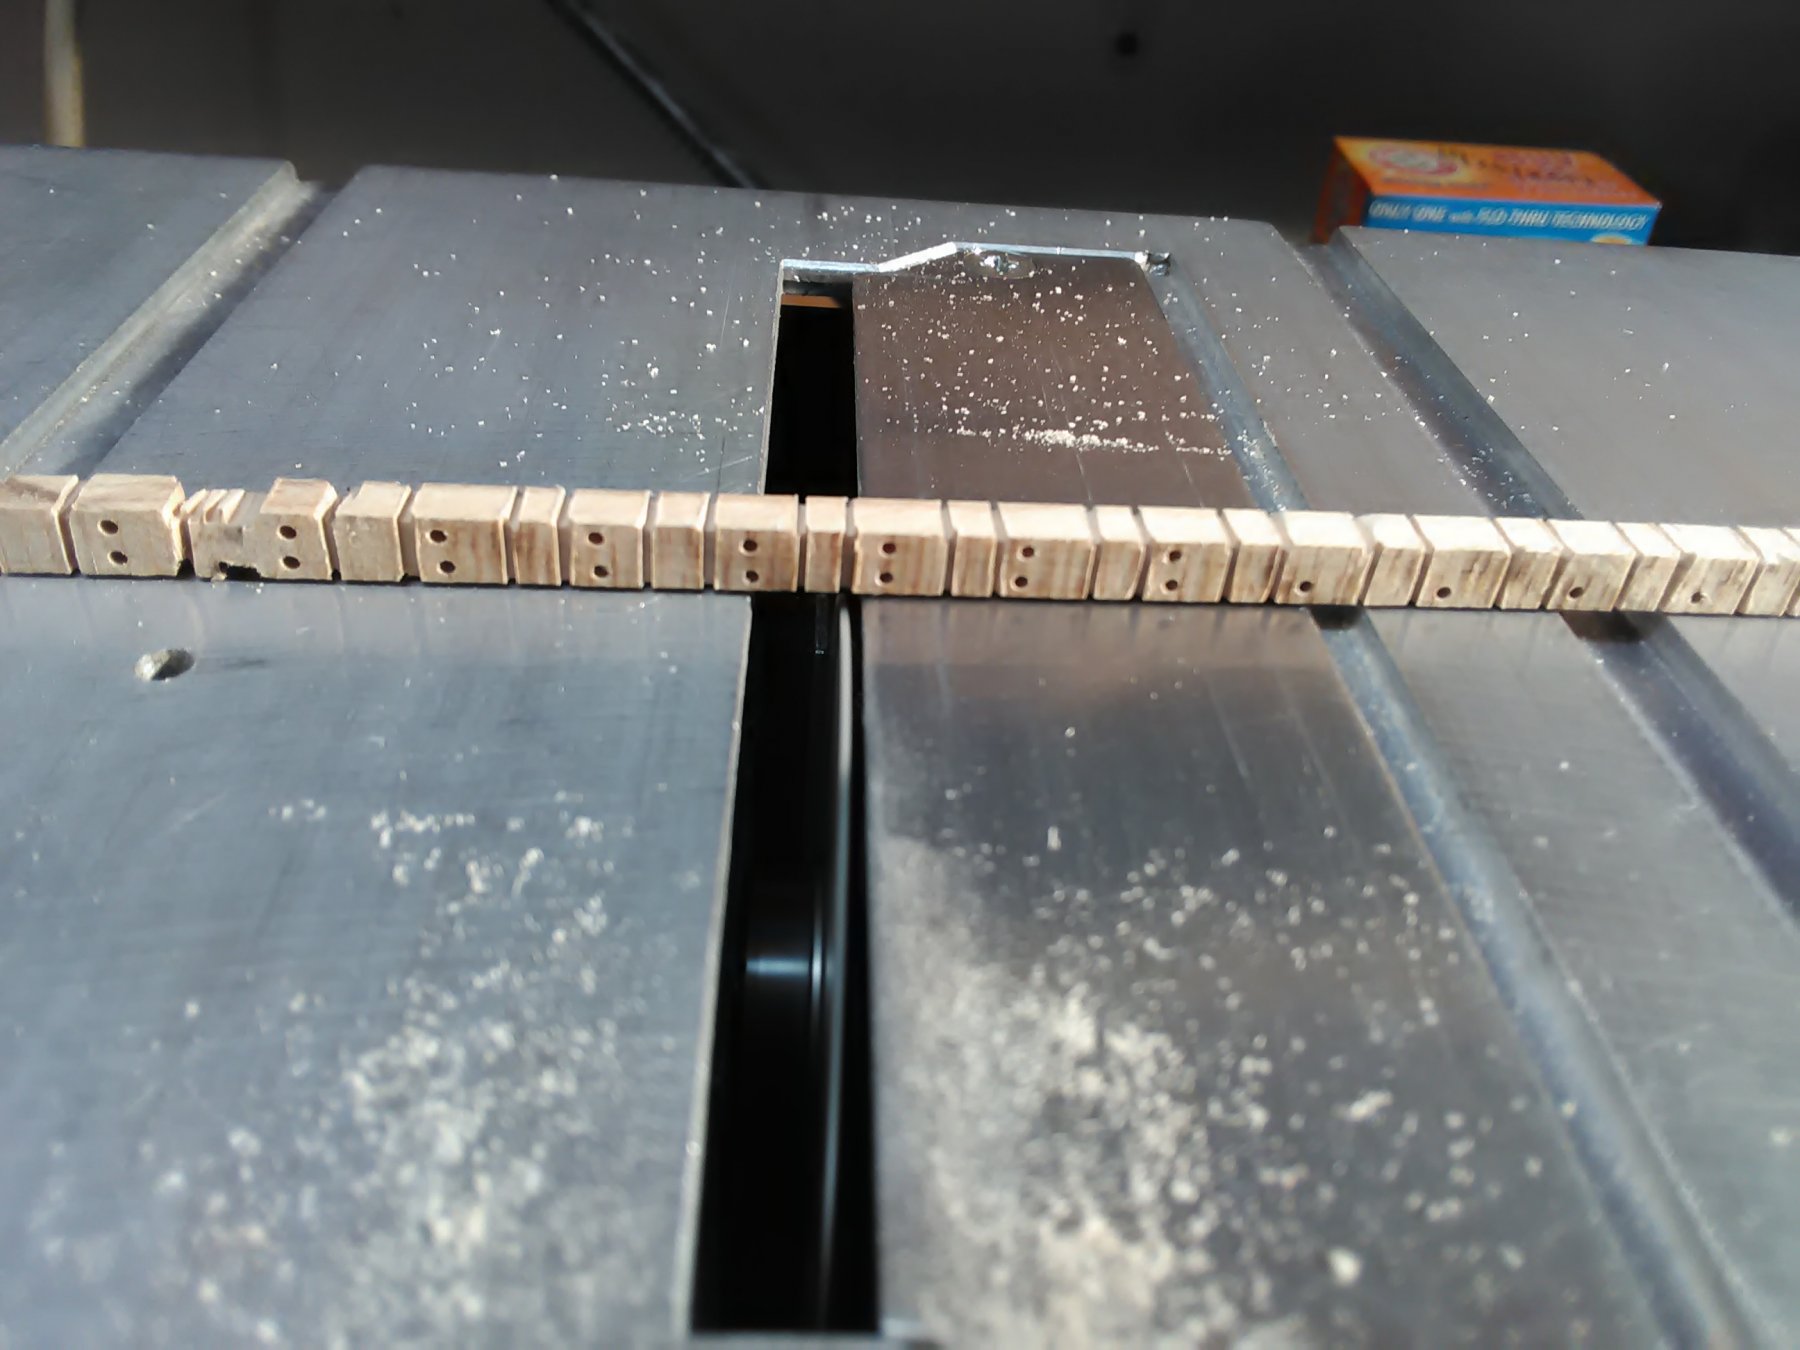
Now comes the tedious part of the exercise.
Boundary cuts are made as we as removing the rest of the stock between the blocks.

Top if the picture shows the isolated blocks.
Close to the bottom of the picture is where I am sanding the edges to create an elliptical form.
The bottom of the picture shows the blocks. The final part of the exercise is the filling in of the stropping grooves and giving the blocks a final sanding.

Hope this made some sense.
Marcus
- Ondras71, Roger Pellett, Omega1234 and 8 others
-
11
-
Cog, tigerdvr, and CapnMac82, thank you all for the extensive explanations. This has been an education for me
Marcus
-
I am assuming that before the era of PE, it is paint?
PE also gives you cleaner lines compared to paint?
Does PE come in one color or are there any other colors?
Can you use paint on PE?
I will go to Toms metalworks site and read up on it.
The above questions are for the pros and cons of PE versus paint.
Lots of questions and thanks for answering.
Marcus
- Canute, popeye the sailor, mtaylor and 1 other
-
4
-
Jan,
As usual, I am late in following this. As a newbie in card, I think you are doing an excellent job in creating this ship. Learning lots of tips and tricks just in case I want to try my luck at doing a card model.
Marcus
- popeye the sailor, Canute, mtaylor and 1 other
-
4
-
-
Have been following some of the plastic model builts in the background and I have several questions.
-- Do all plastic kits have brass etching available to them and if not is it only the famous ships?
-- Does the brass etching come in different scales, just like the ship models do?
-- Jack mentioned towards the end of his build that he didn't use as much PE as he thought he would. Can he use the left over PE for other ships?I think that does it for now.Thanks for answering.Marcus -
Sjors
Pulling up a chair and will follow this with great interest.
This model has been on my bucket list, like forever.
Marcus
- popeye the sailor, lmagna and Piet
-
3
-
To the King of Itty bitty scale,
This is turning out to be an amazing built. All the colorful furniture is in place. Don't think you have forgotten anything.
It is a sleek looking yacht. I bet that the real ship looks pretty amazing as well.
Marcus
- popeye the sailor, mtaylor, Piet and 1 other
-
4
-
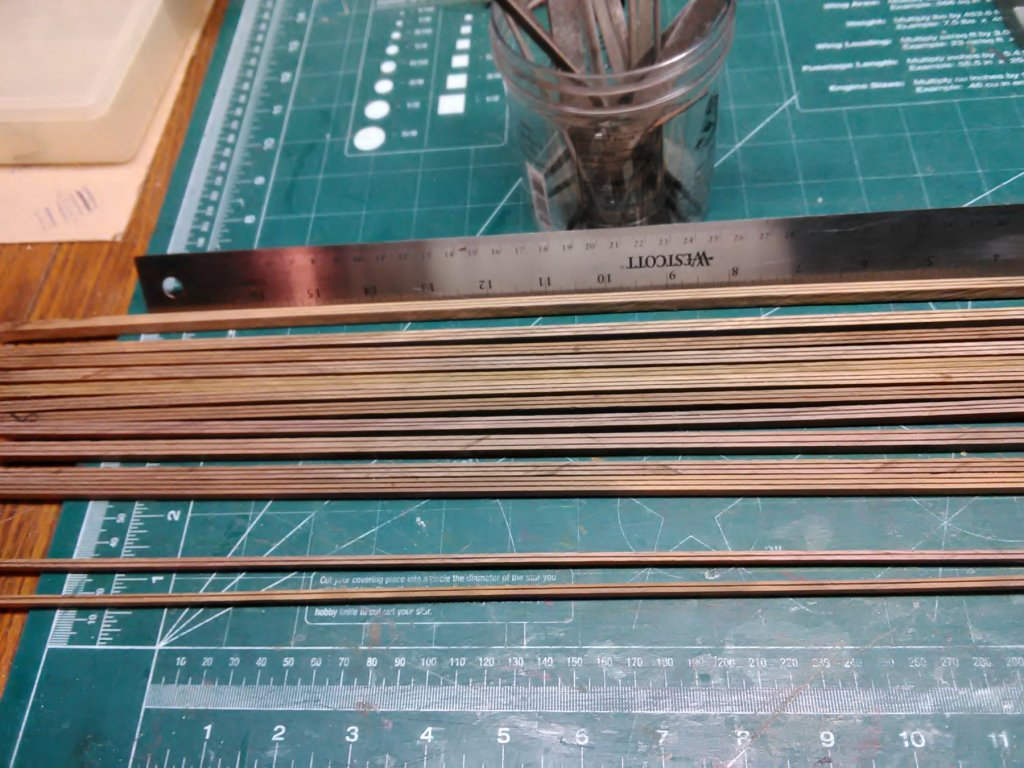
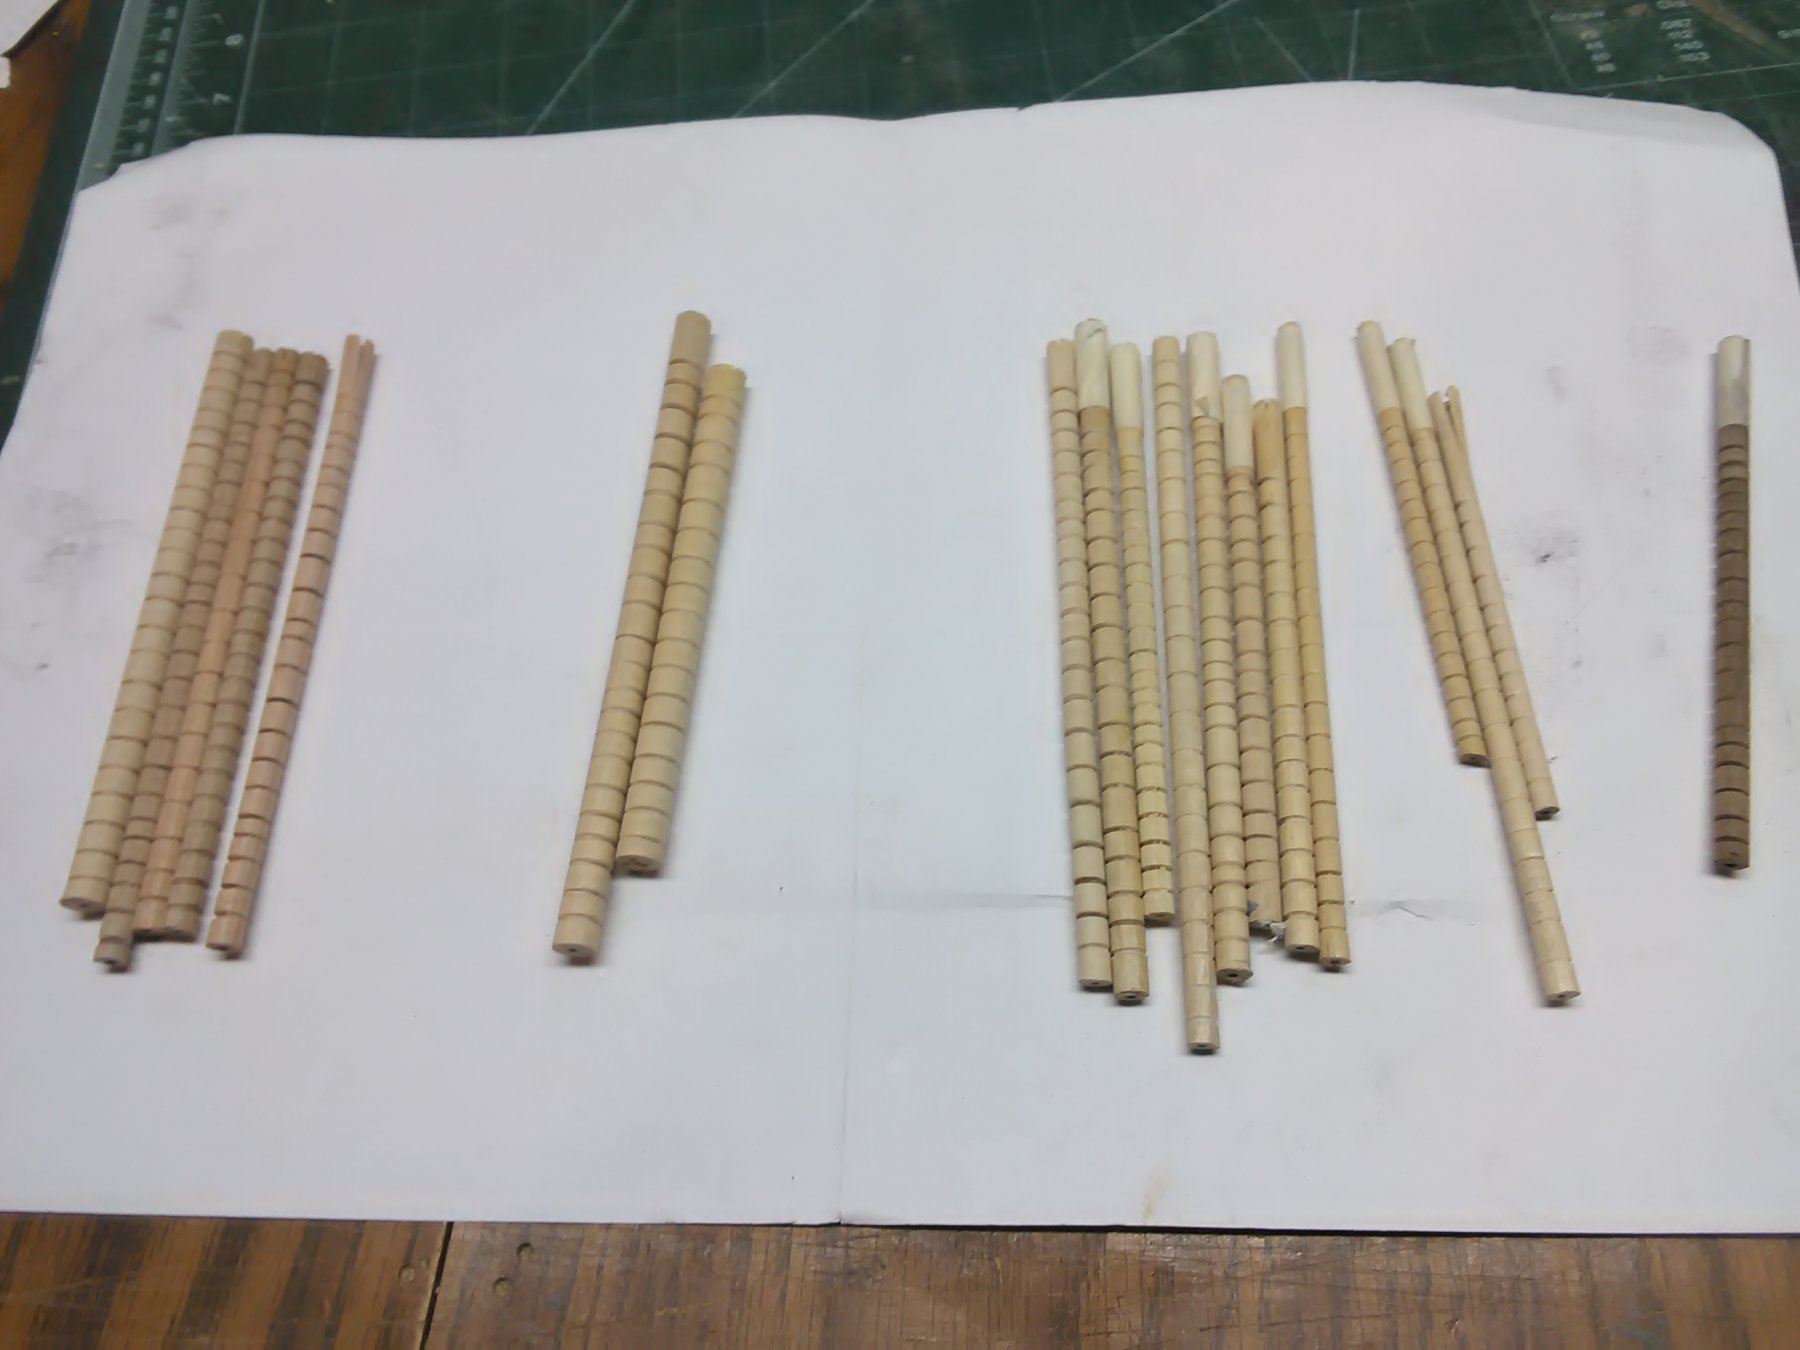
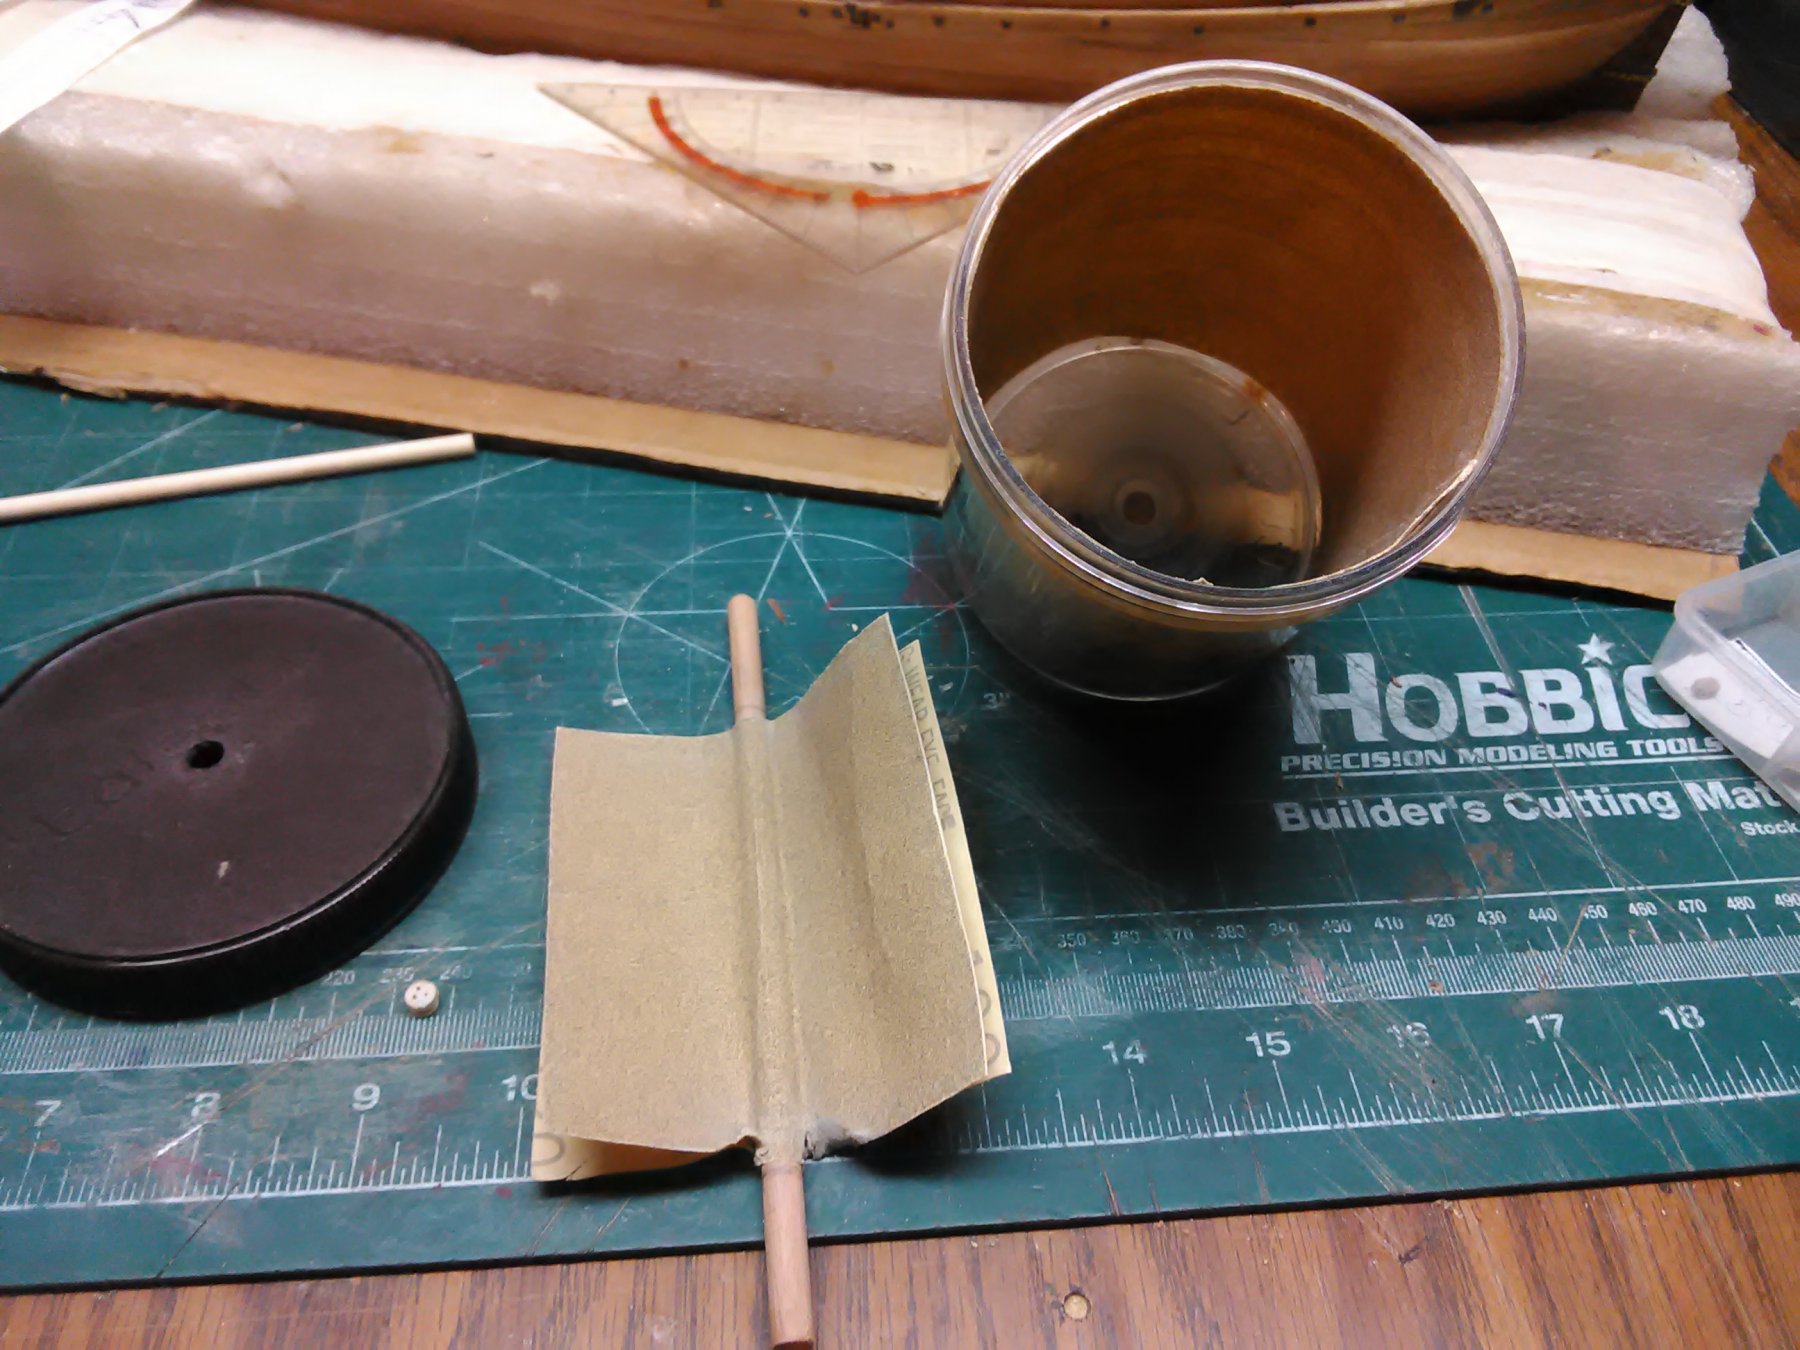
I inherited a dremel Moto 700 lathe from the secretary of the North West Indiana Woodworkers club and with that item I've made grooves in various size dowels (birch, walnut and cherry) in about 2 hours.
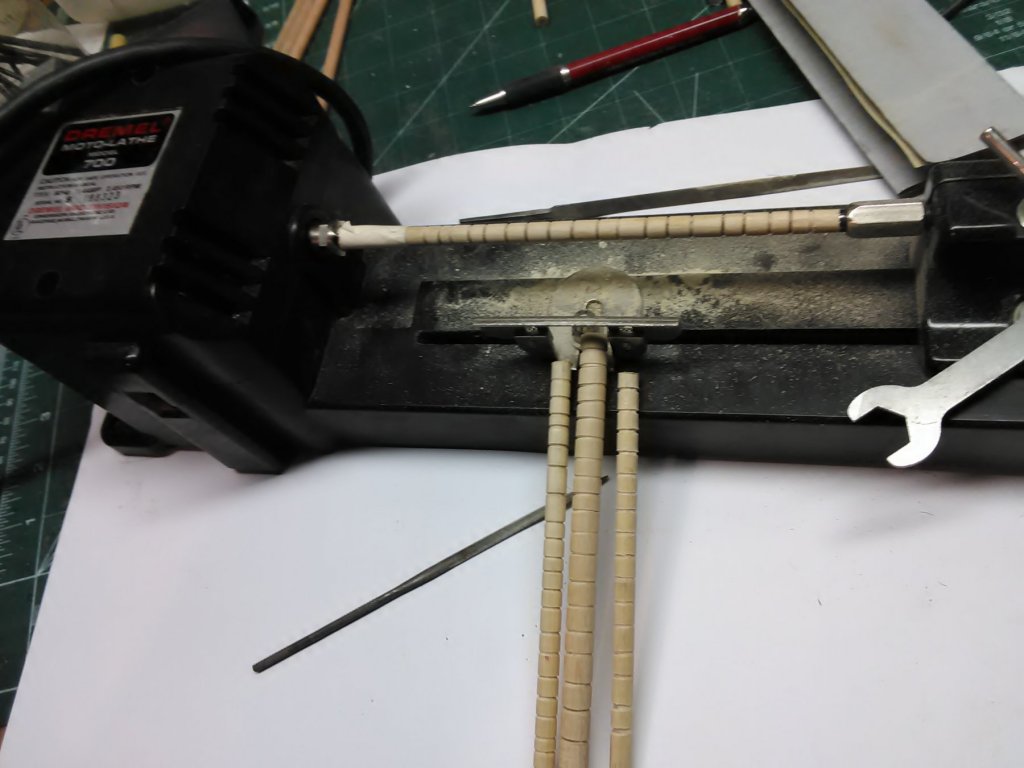
When filling a straight groove by hand this is the most difficult part of making a deadeye. With the lathe it is faster and straight.
Got 19 dowels which will be about 450 deadeyes. Enough for a few ships.

Drilling holes and cutting them off with the saw is easy.
Marcus
-
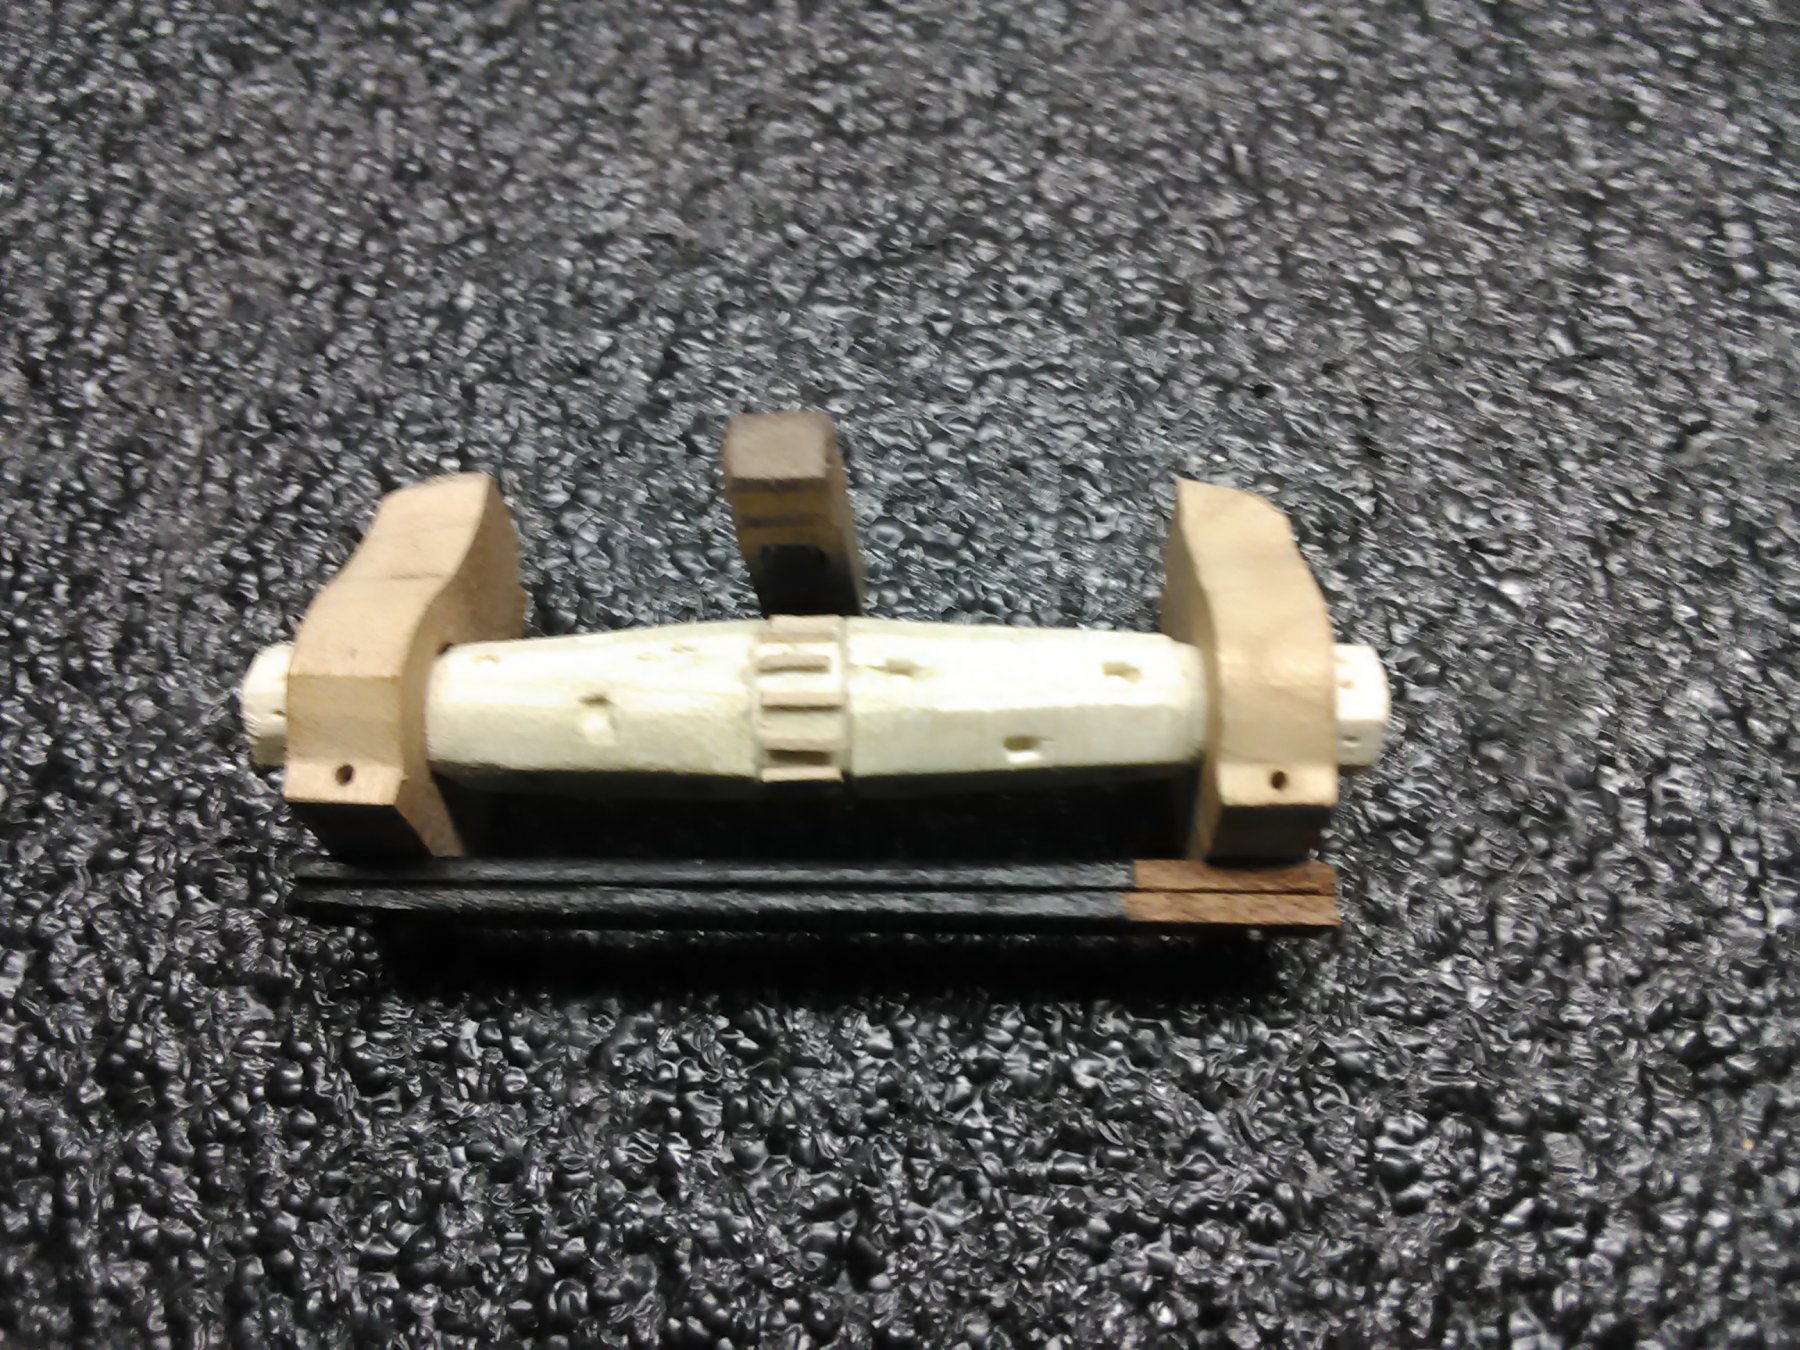
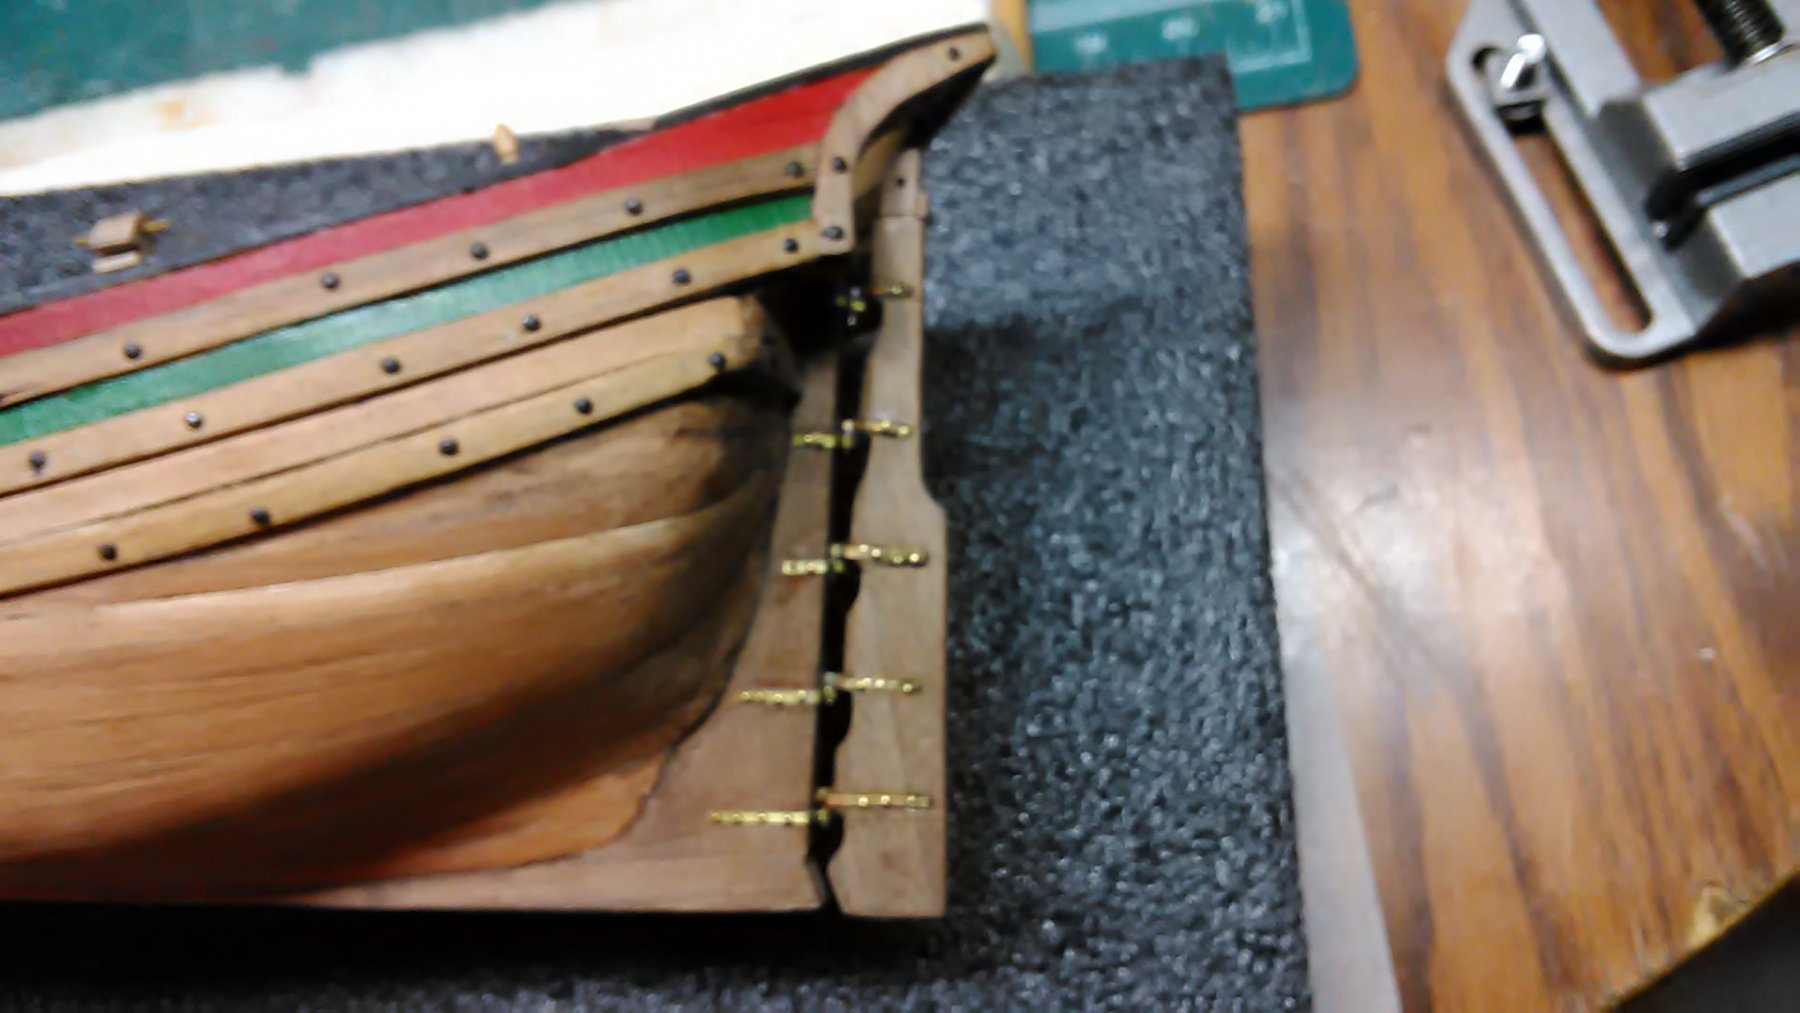
Created the windlass and the windlass pawl which will be positioned in the midline on the inboard stem. I added four sticks in a rack in front of the windlass. In real life these are used to turn the windlass.

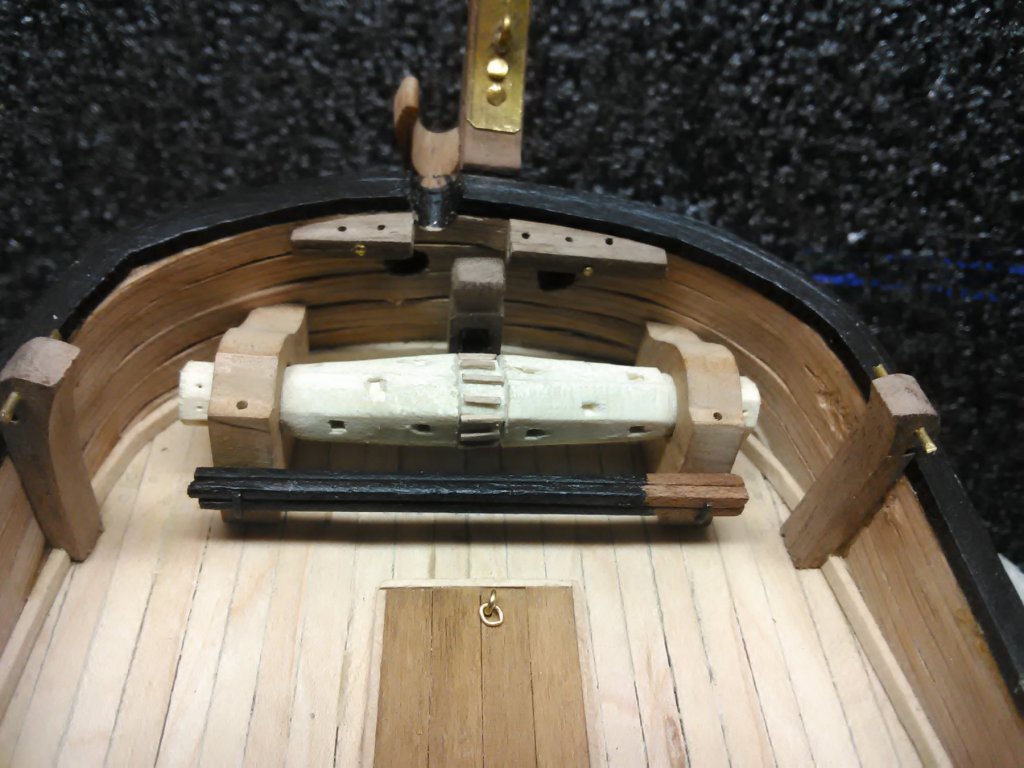
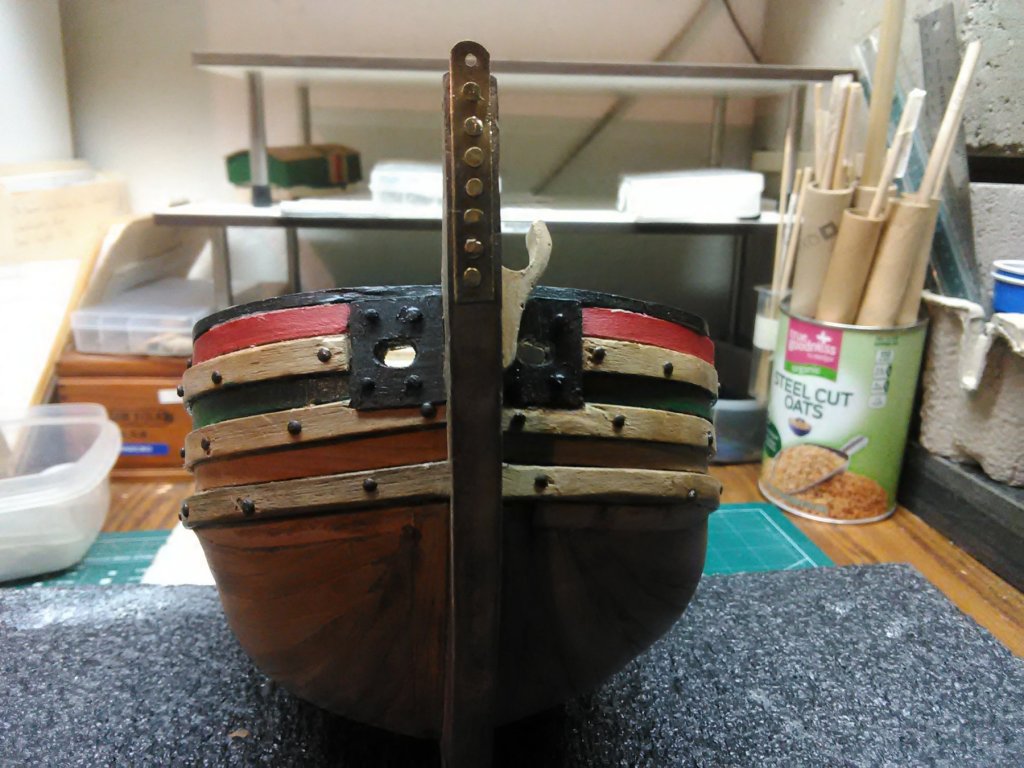
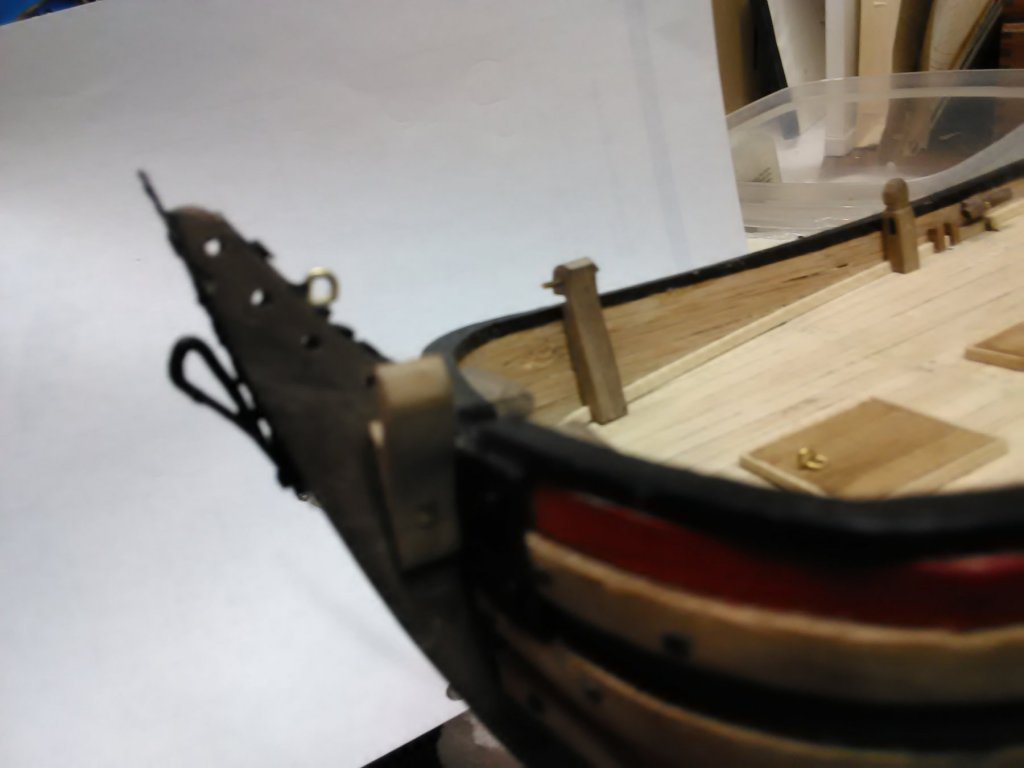
Created and installed the upper and lower brass pieces which are pinned to the upper stem to house the tie down for the main stay. Forged brass loop which has been attached to the stem and will be used to hold the gammoning ropes to support and fix the bowsprit in place.
Marcus
-
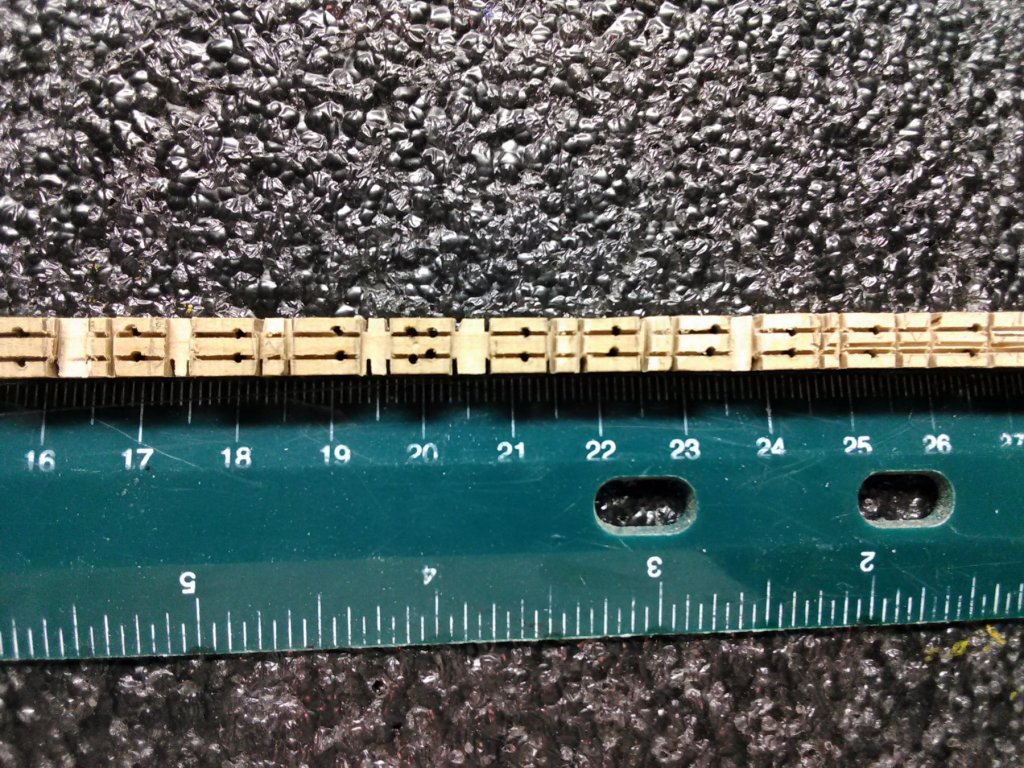
Created more deadeyes.
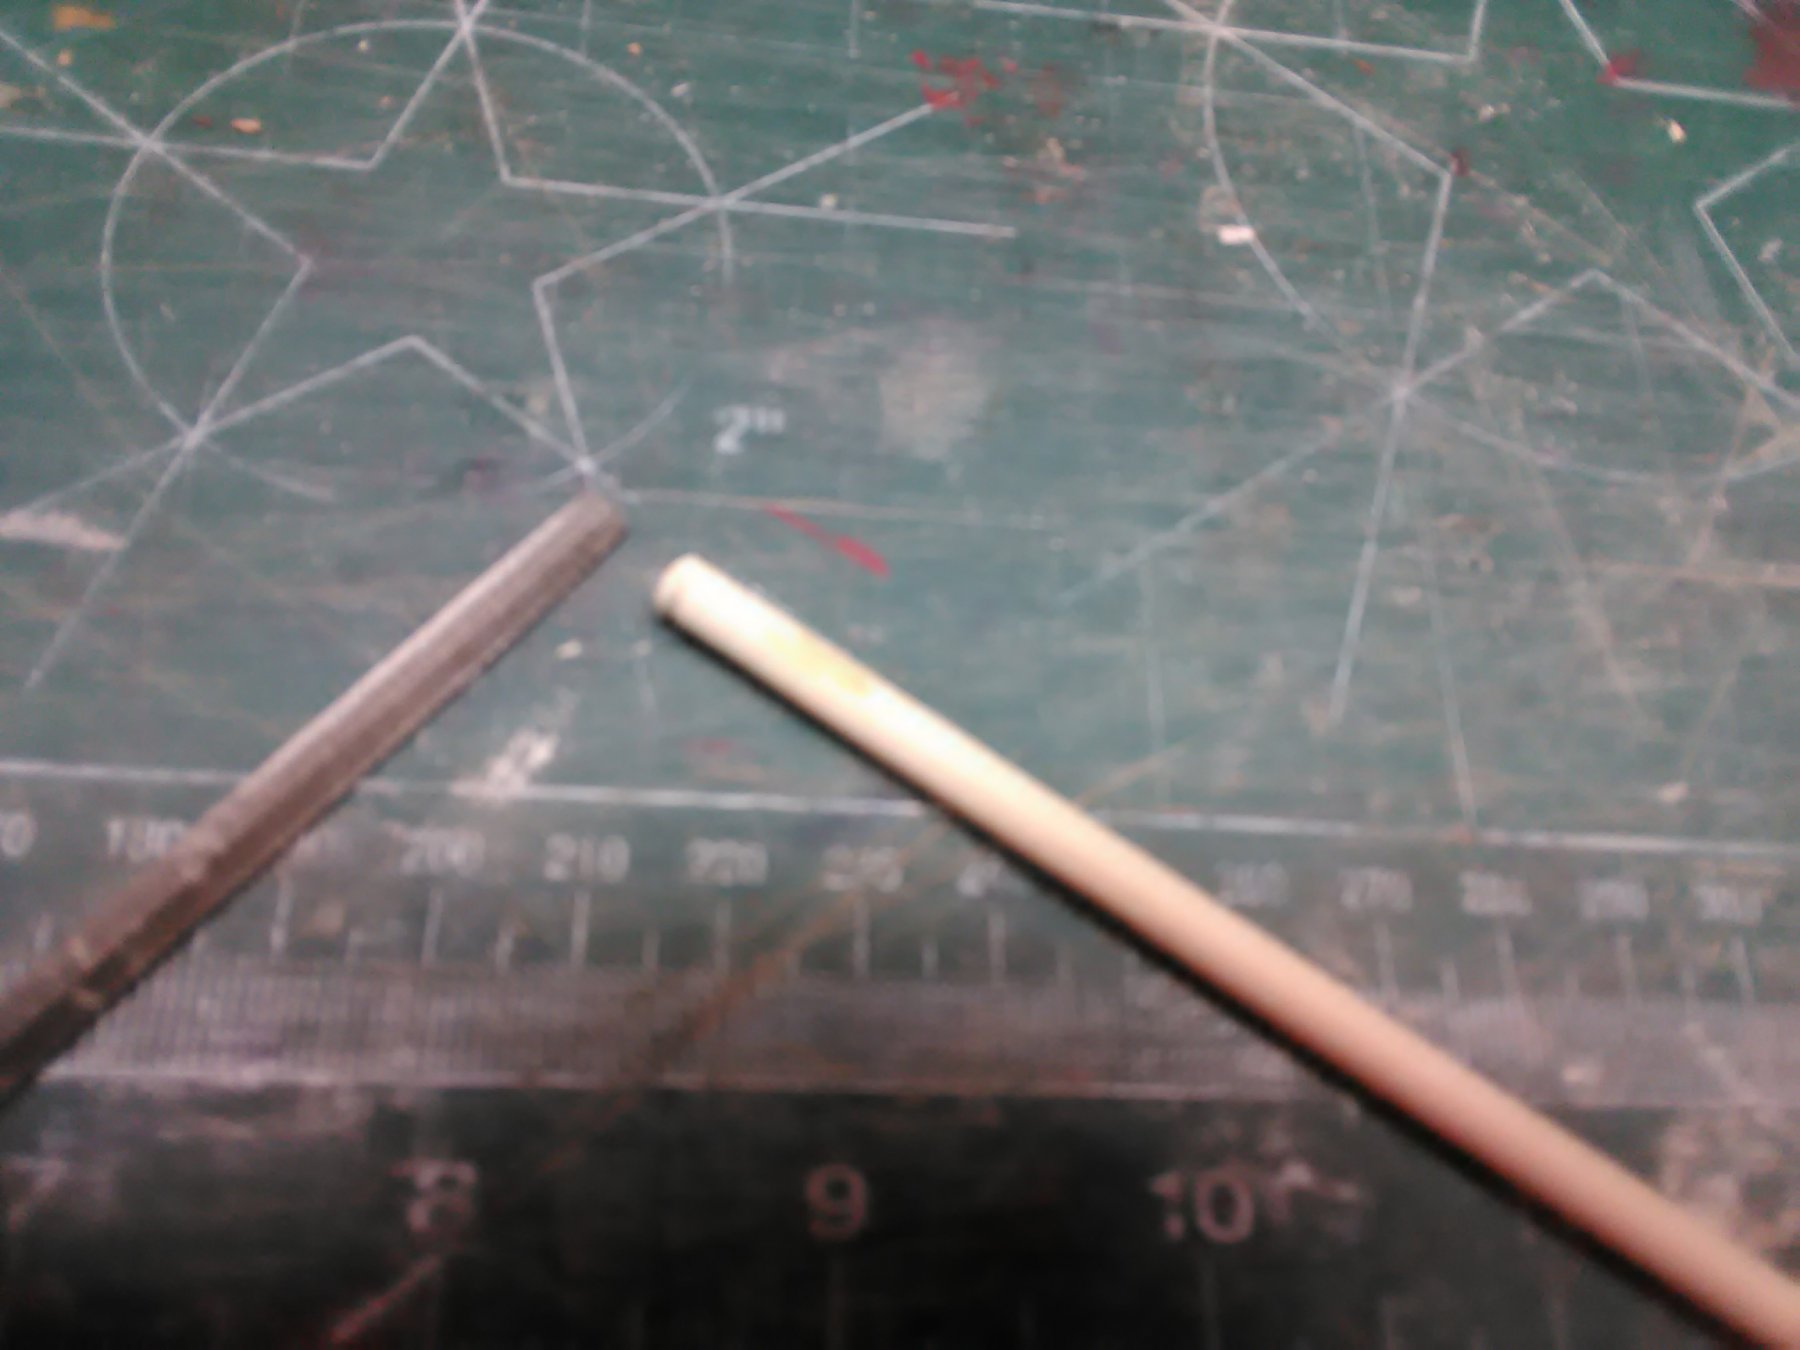
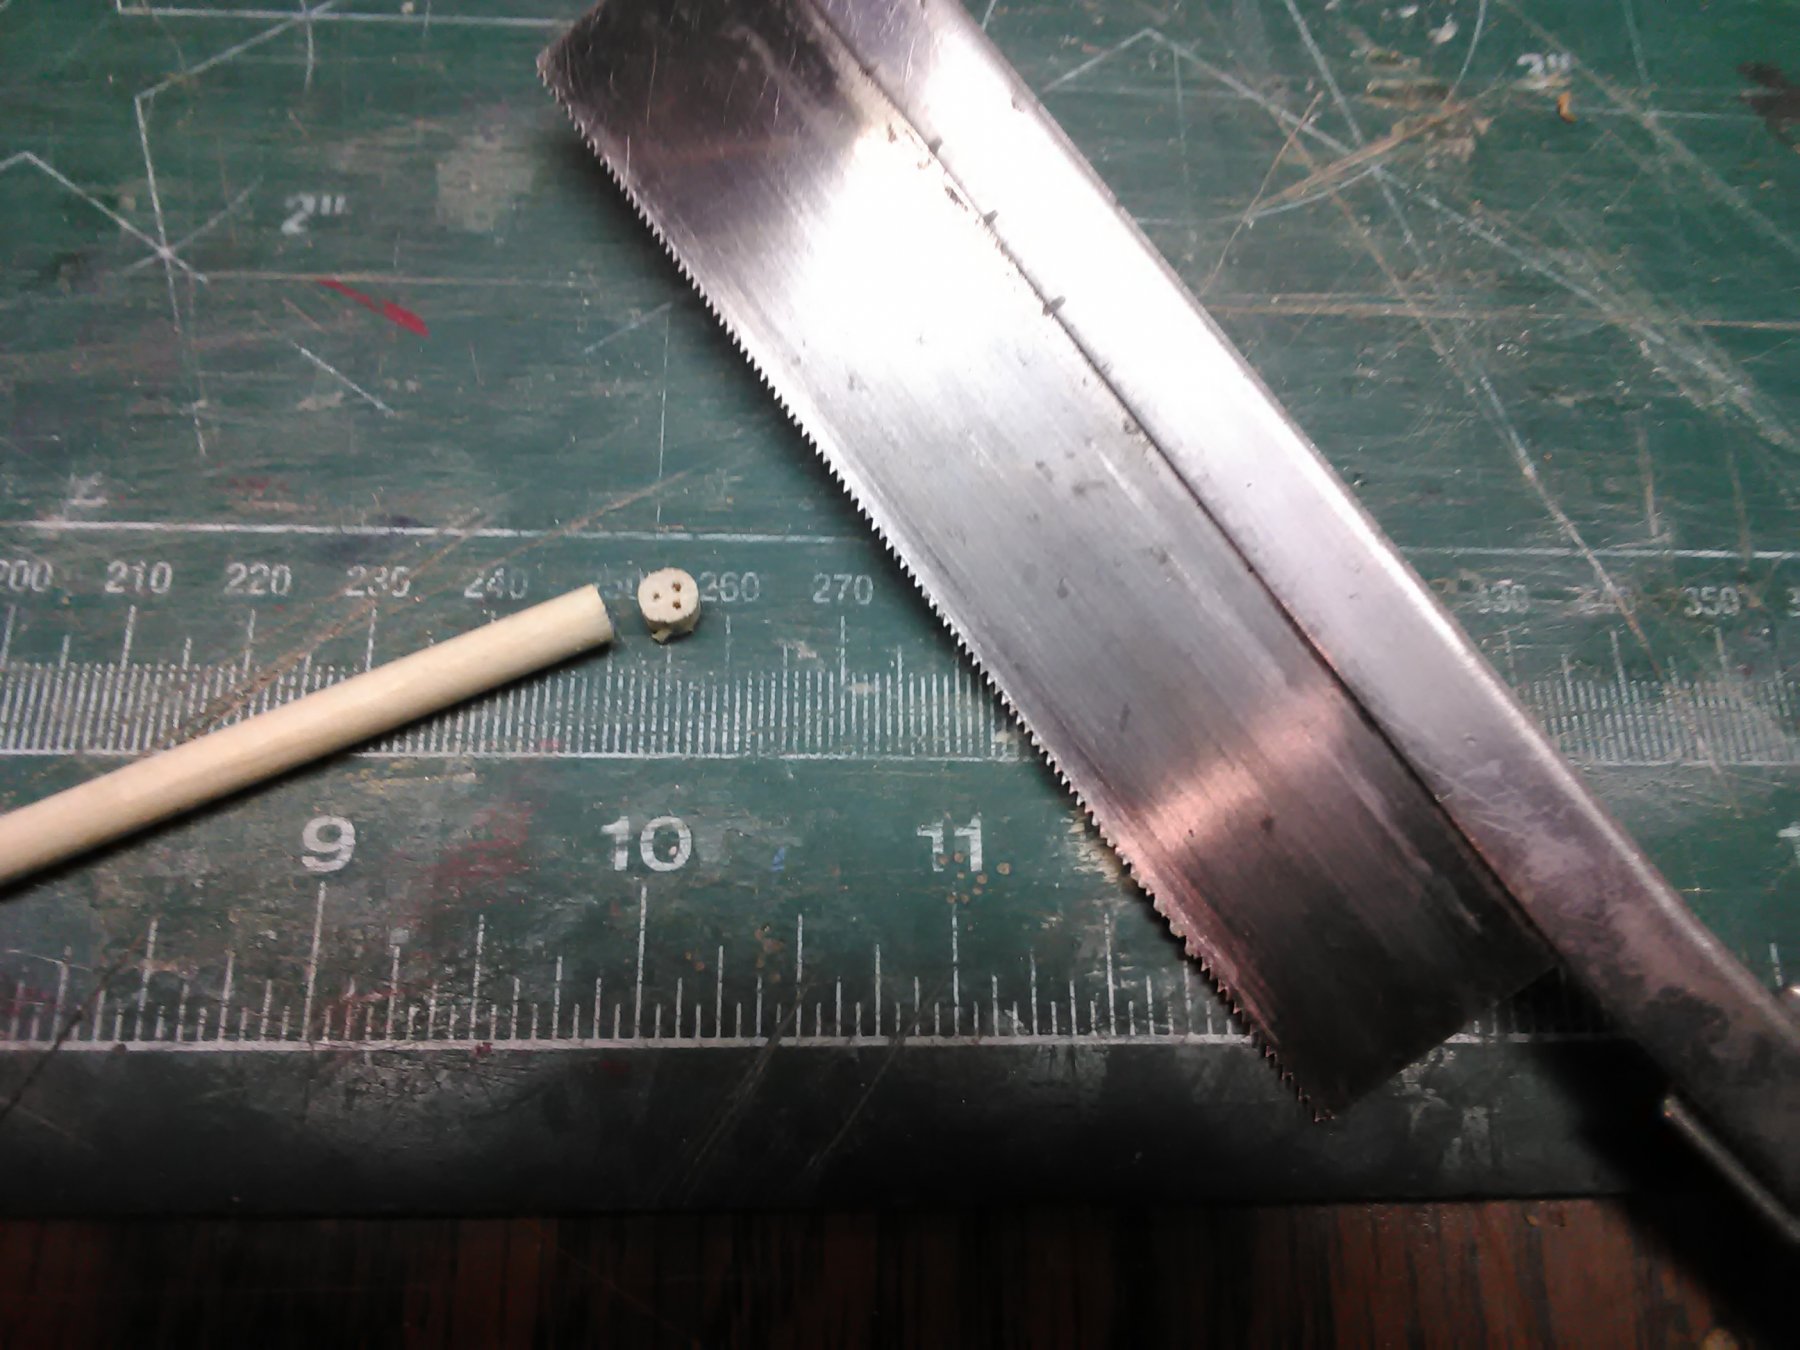
1: Take a dowel and put it upright in a vise. Use a drill press and a dremel with a 0.061 bit and drill three holes.
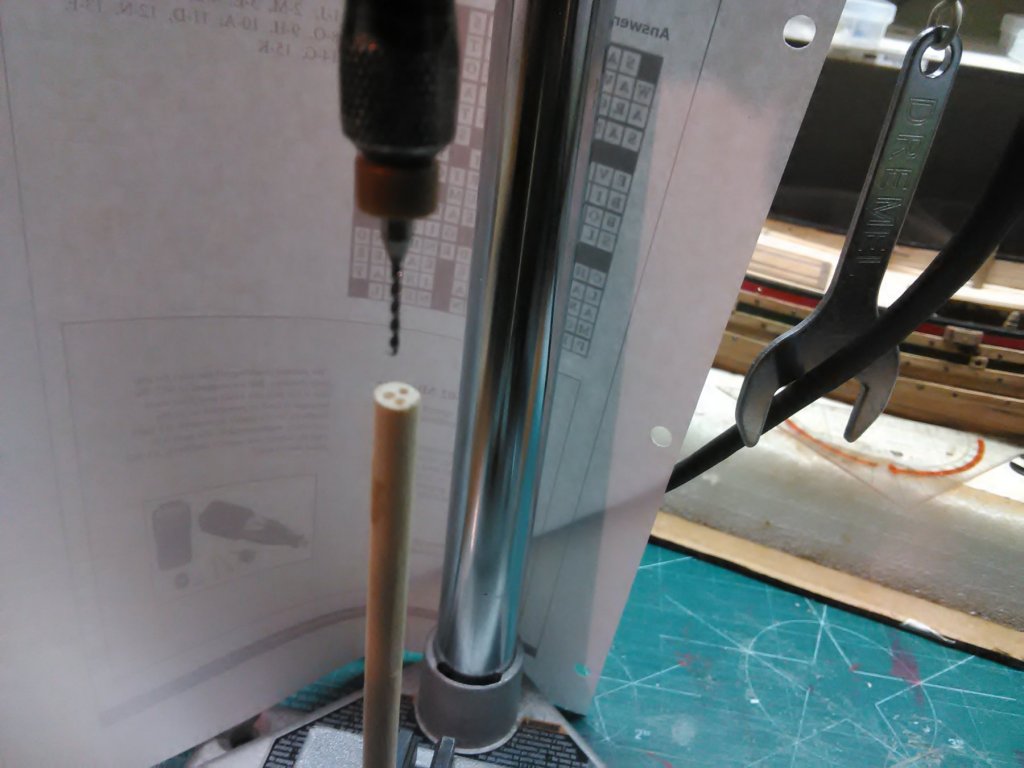
2: Remove the dowel from the vise and carefully file a groove all around.
3: Use saw to cut the deadeye of the dowel.

4: Put the deadeye in the drum sander which consists of the following: plastic jar lined with sandpaper (gritt 120) with screw lid, quarter inch dowel which have 2 pieces of sand paper (gritt 120) glued to it
I either roll the dowel by hand or attach drill to it running the drill at 3 second bursts.

Marcus
-
Excellent metal work. Clean looking as well
Marcus
- mtaylor and Keith Black
-
2
-
-
That is a serious looking rudder. Beautifully executed.
Marcus
- mtaylor and Keith Black
-
2
-
8 hours ago, Omega1234 said:
Yours is the sort of build log that puts a smile on my face. What started out as raw materials in the beginning, has now blossomed into a real little gem. Such a pleasure to follow.
Good luck with the rest of the build.
Merry Christmas and have a happy 2019.
Patrick
Thank you for the compliment. Yes, she is coming alone nicely. The masts, sails and rigging has some similarities as the yacht, Utrecht. The Boyer has an added mizen mast and a spritsail yard and sail.
Merry Christmas as well.
Marcus
-
-
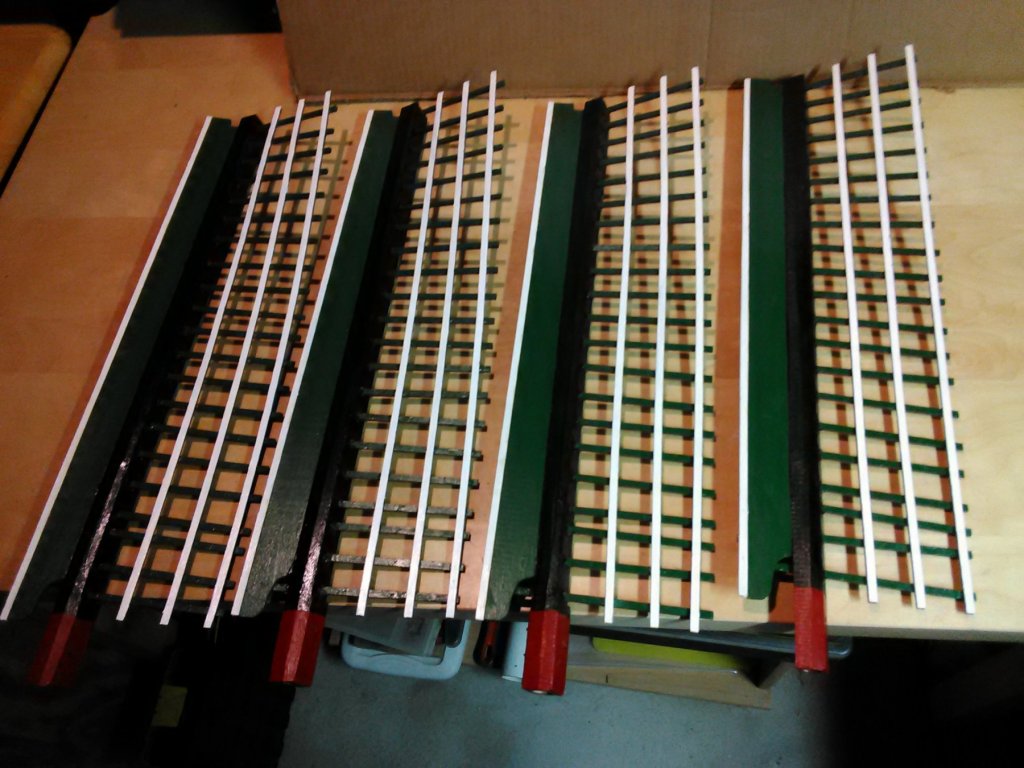
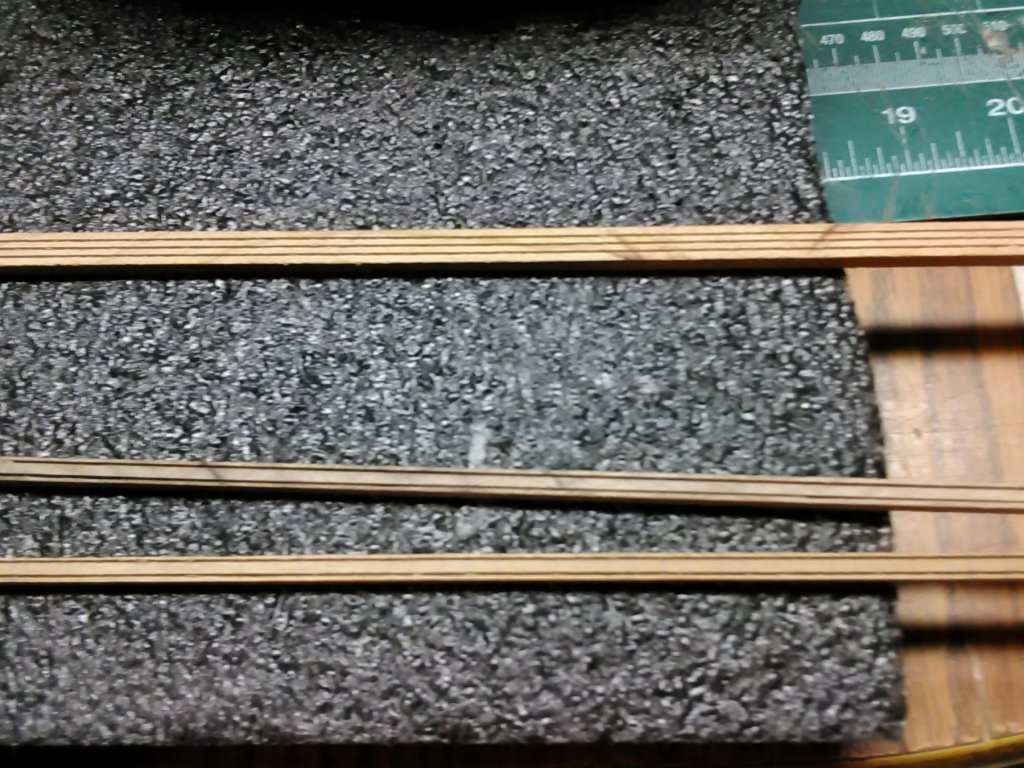
Worked on the channels and created some deadeyes from both cherry and birch.
Pictures will follow from the crude looking deadeyes.
Marcus
- Omega1234, cog, GrandpaPhil and 2 others
-
5
-
-
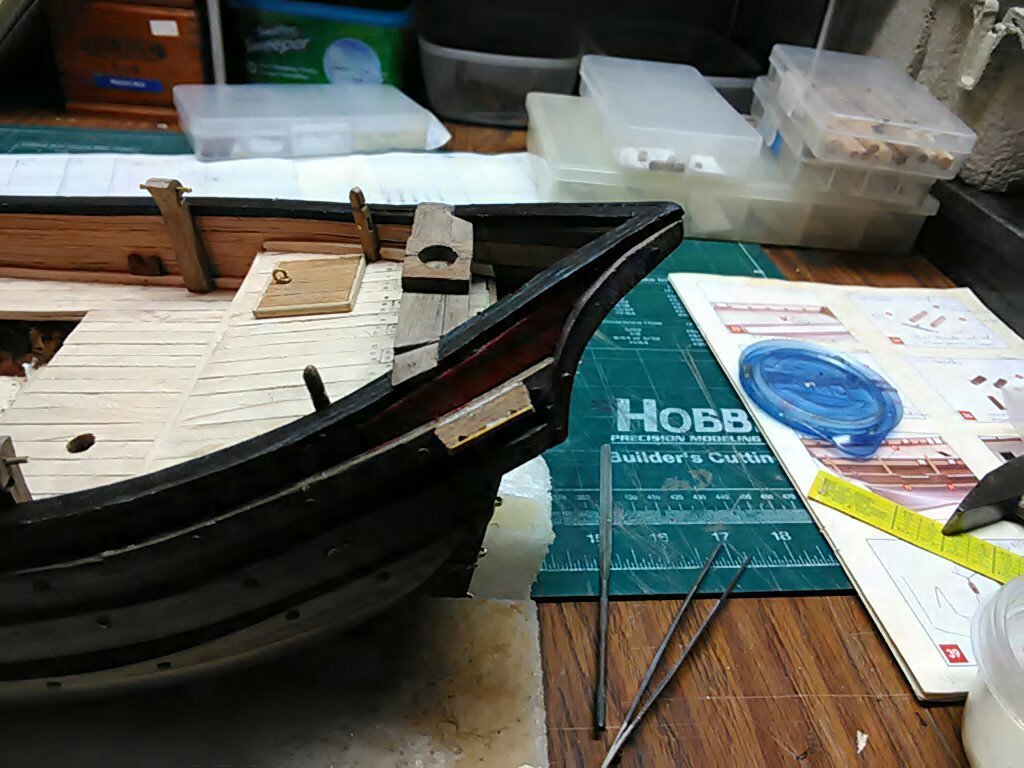
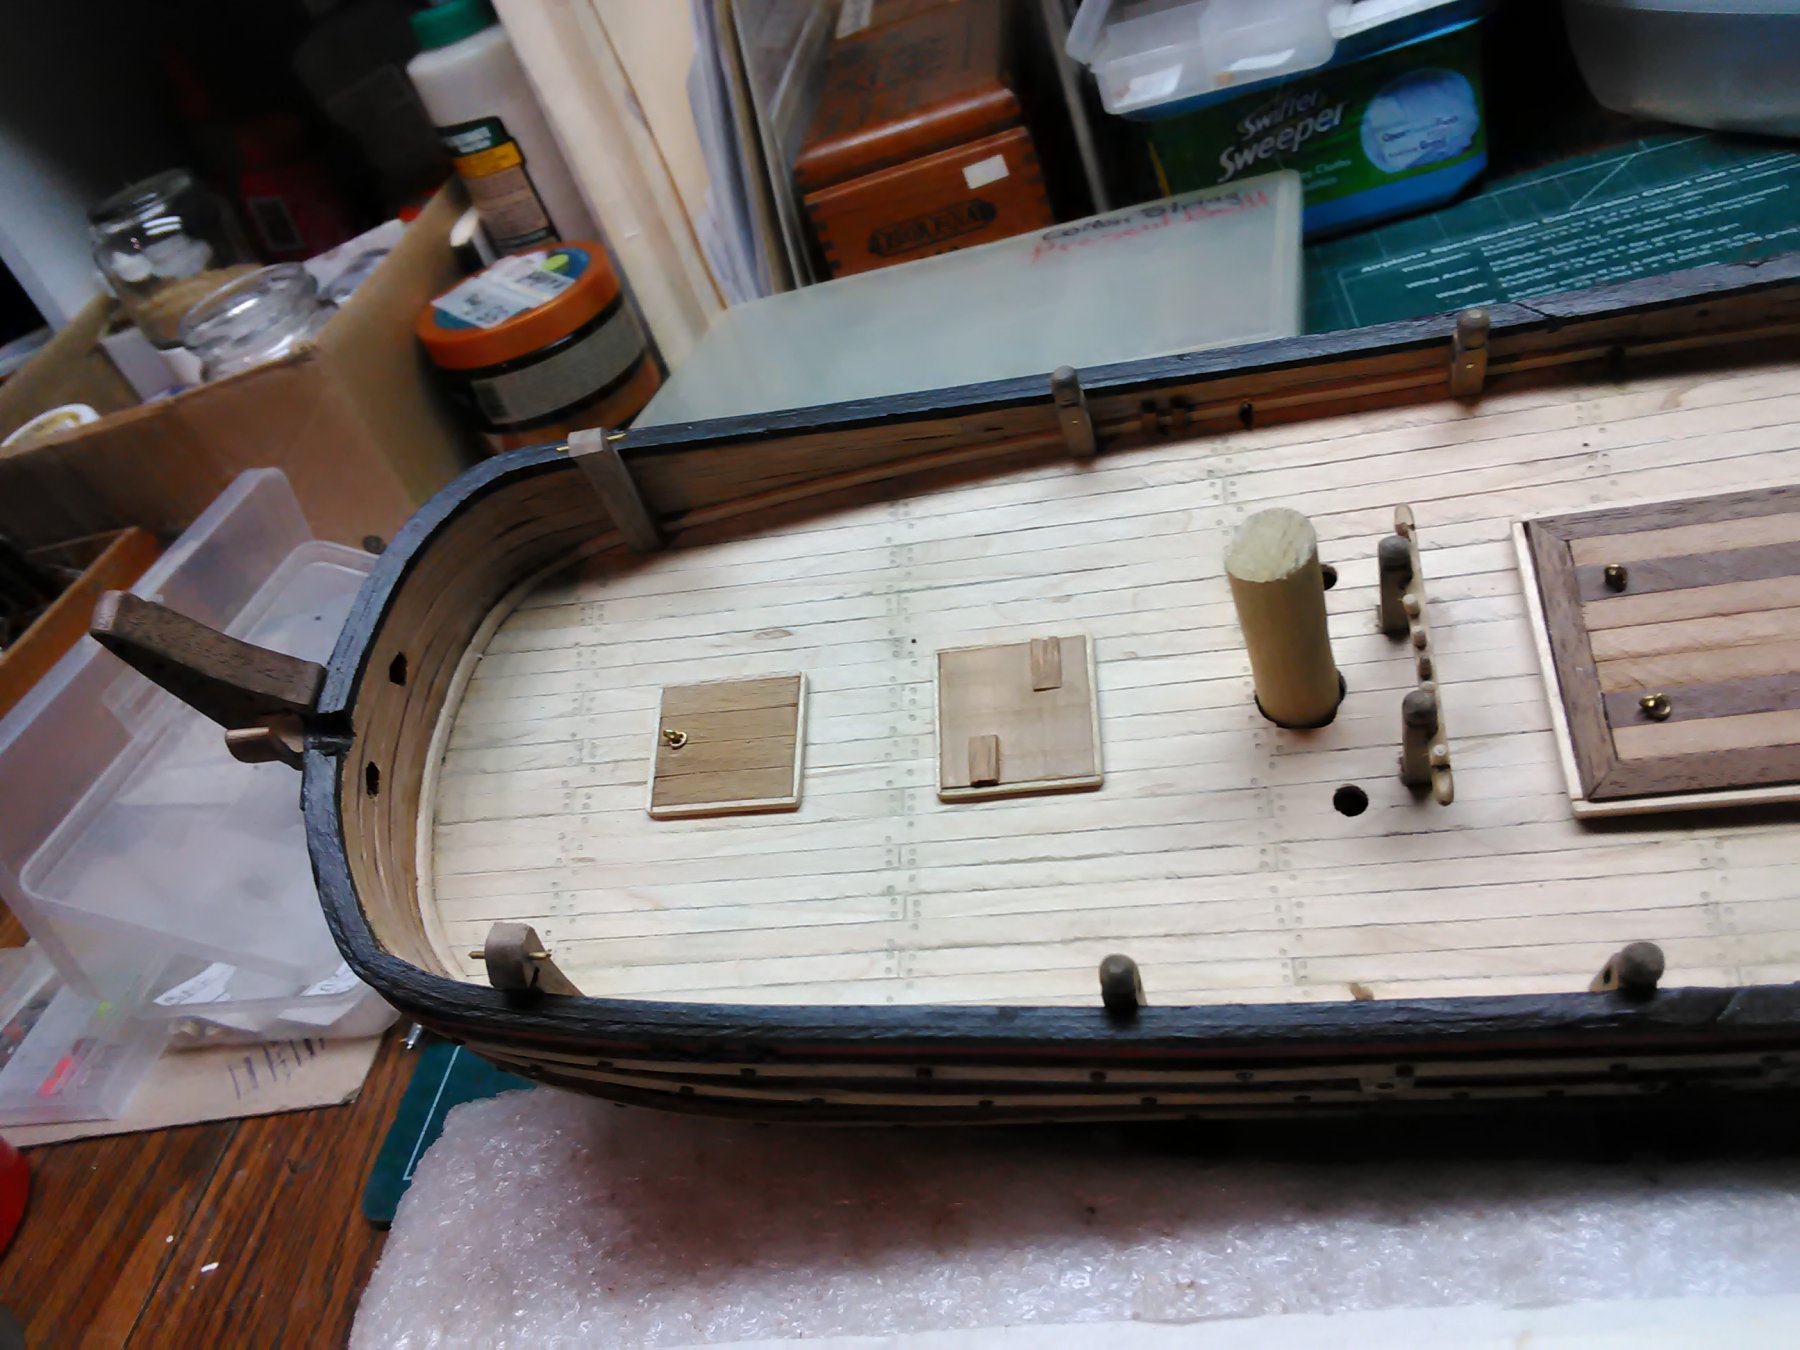
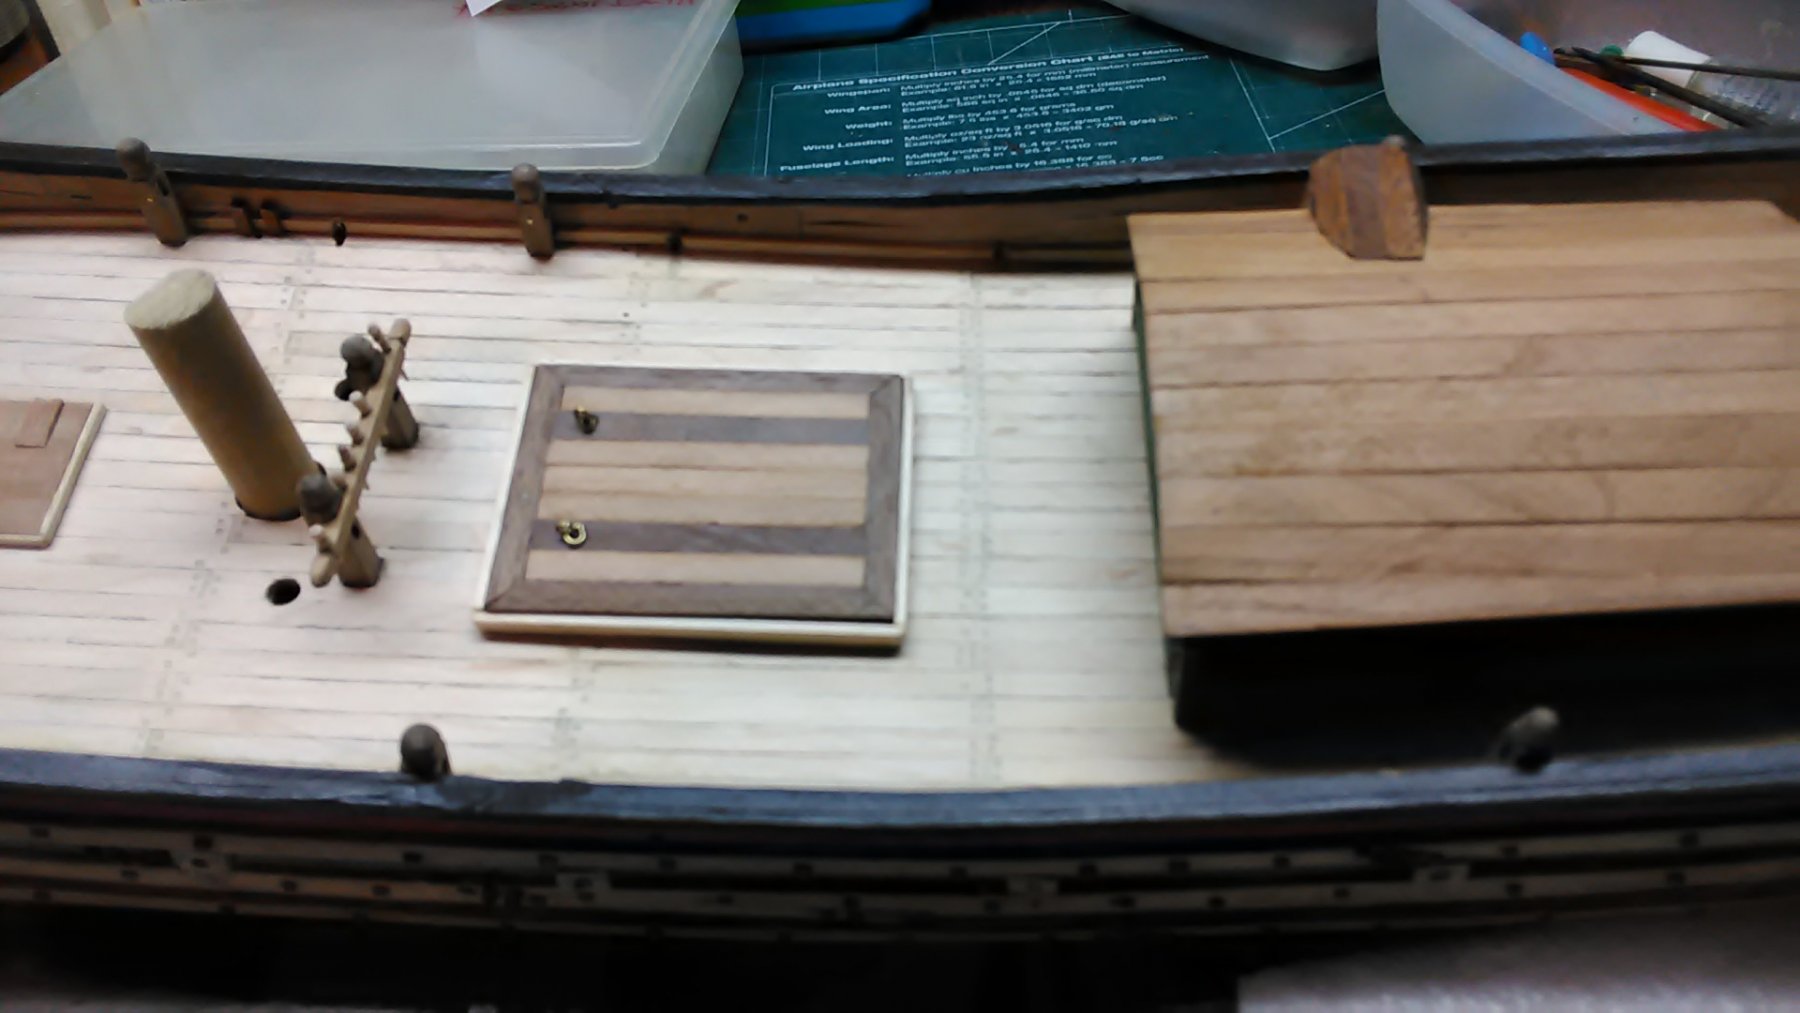
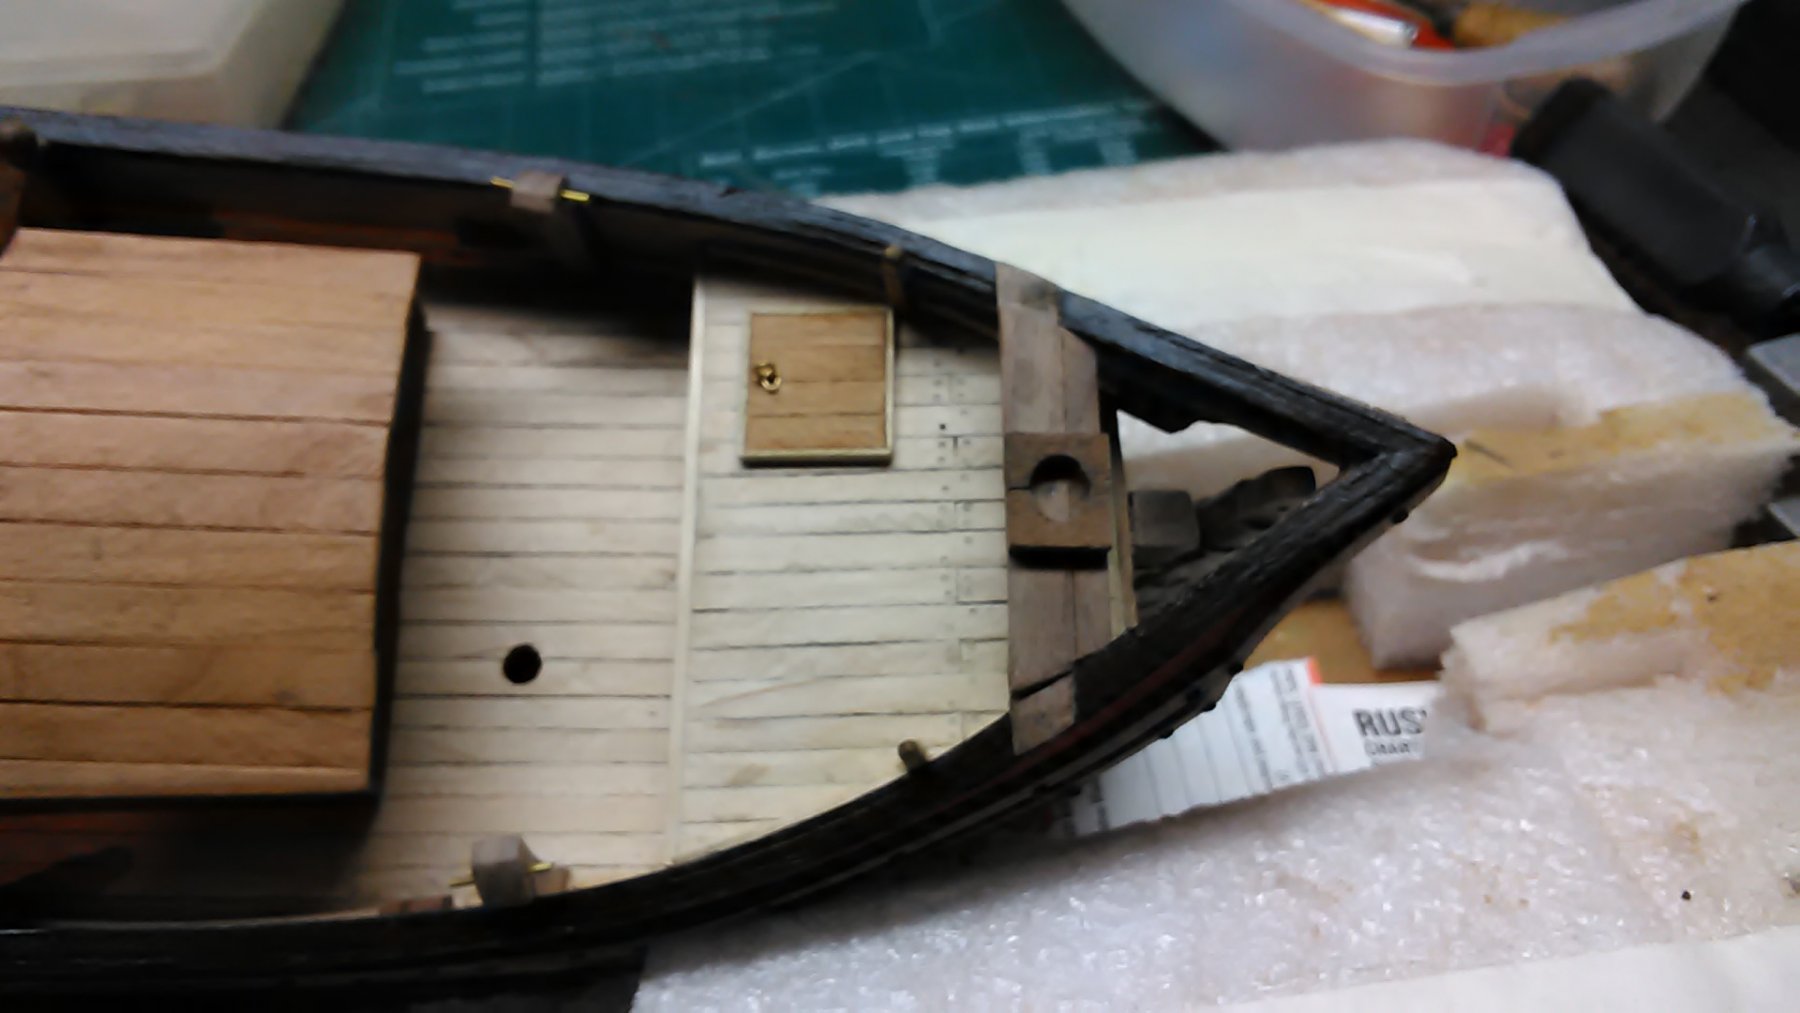
Sort of fixed the transfer of pics to the forum by setting the camera to manual and reducing the pixel size of the pictures.
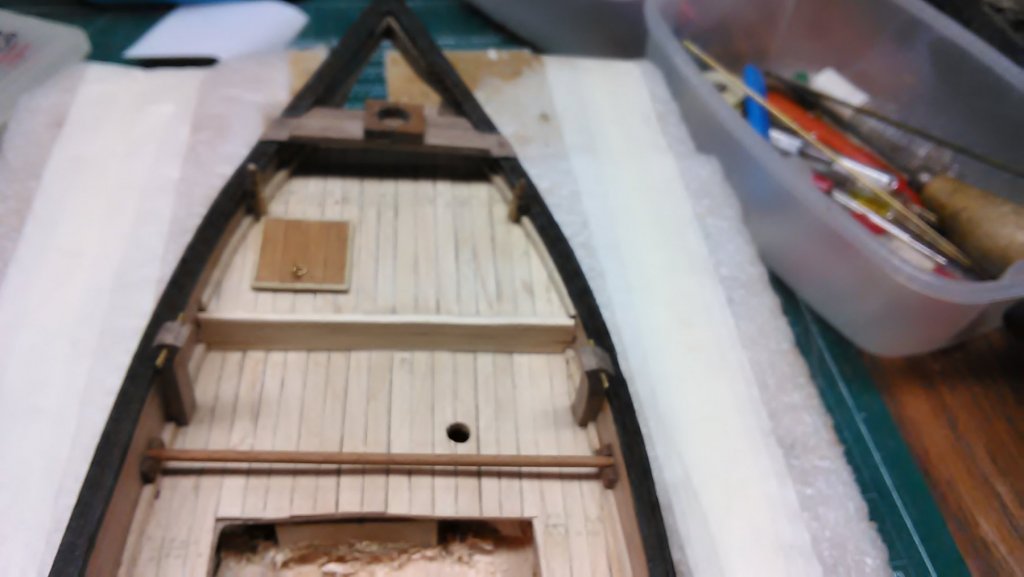
The deck items are pretty much completed.
The stem with bollards and bits. Hatches have been added as well.

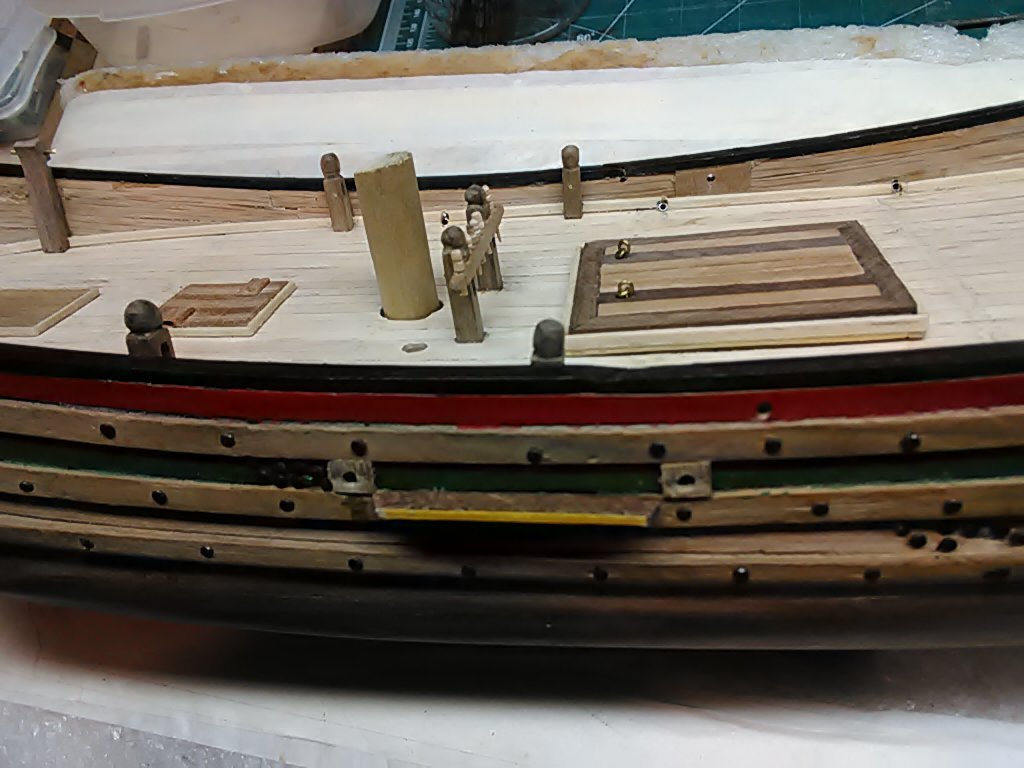
The main hatch and part of the cabin.
Bollards, part of the cabin and at the pointy bow area the mizen mast holder.

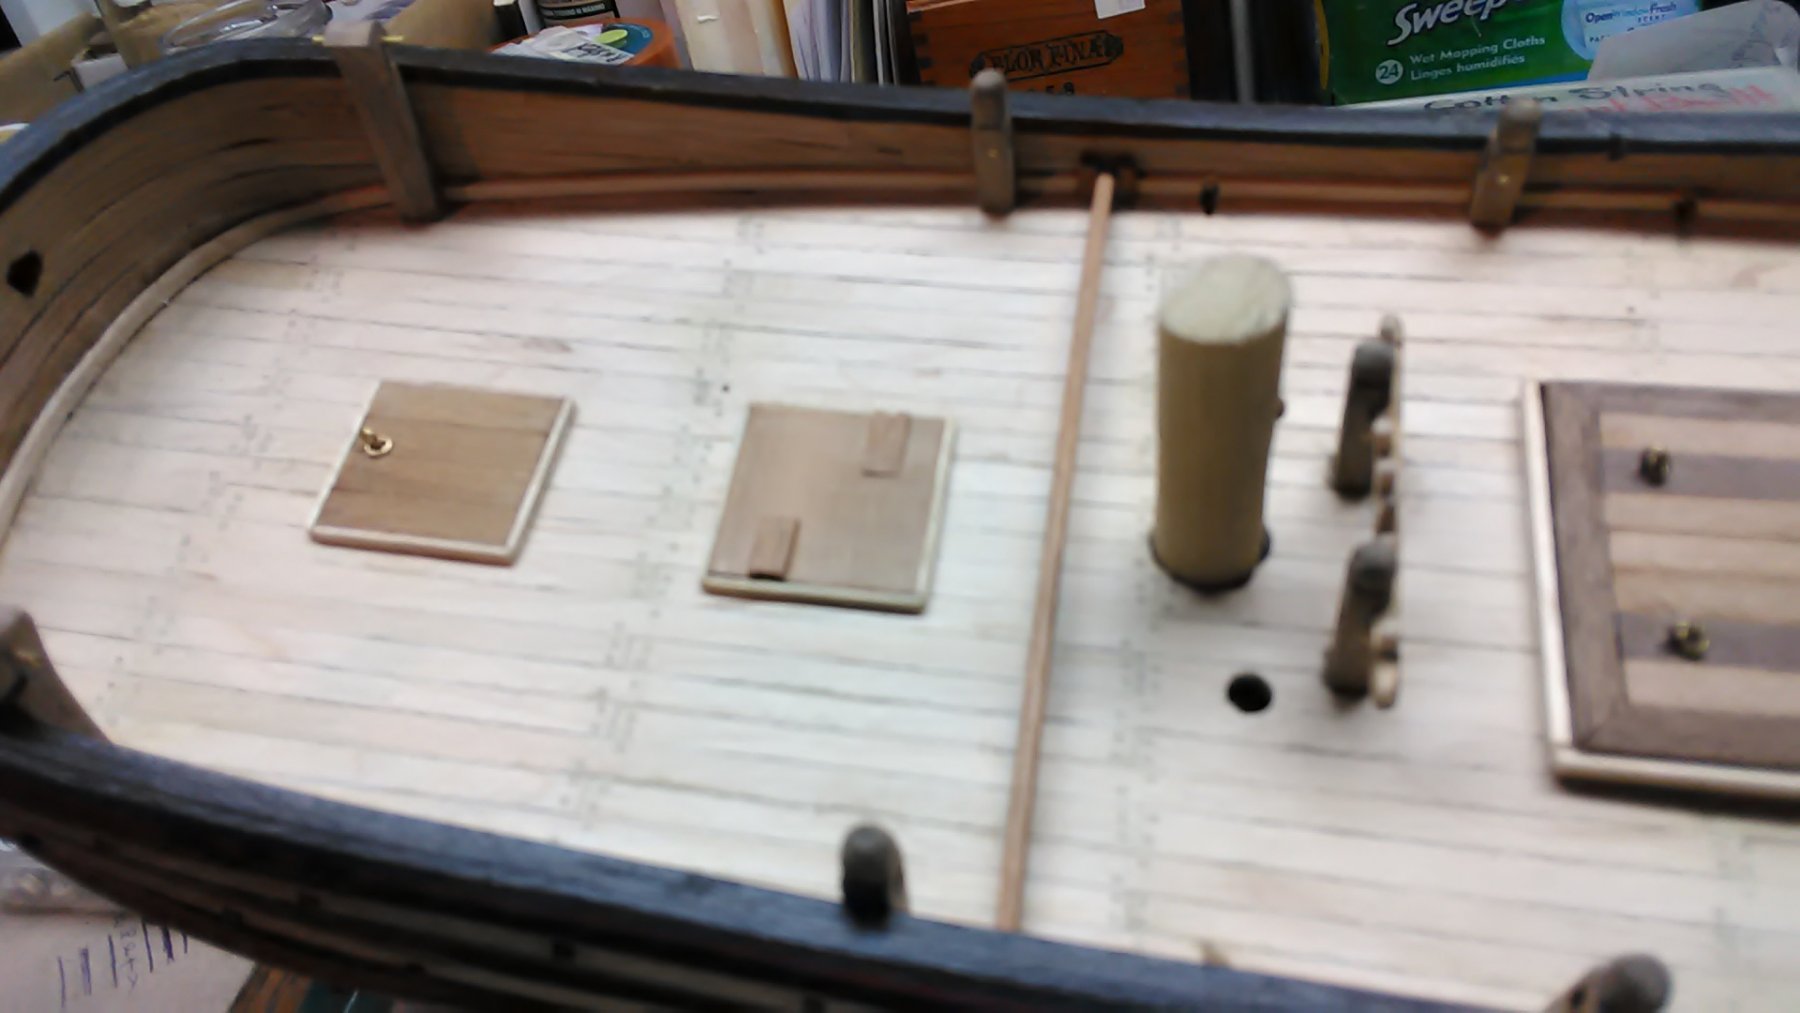
The vertical piece of wood is for the sheet. There will be two of them.

Here is the second vertical bar that will be for the other sheet.
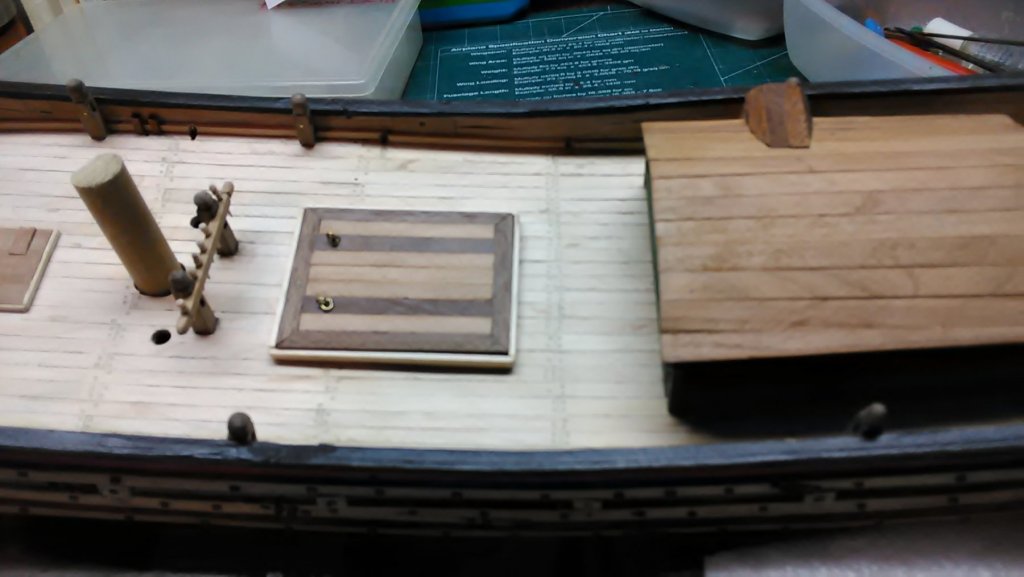
Rudder post and rudder.

Tiller under the mizen mast holder.
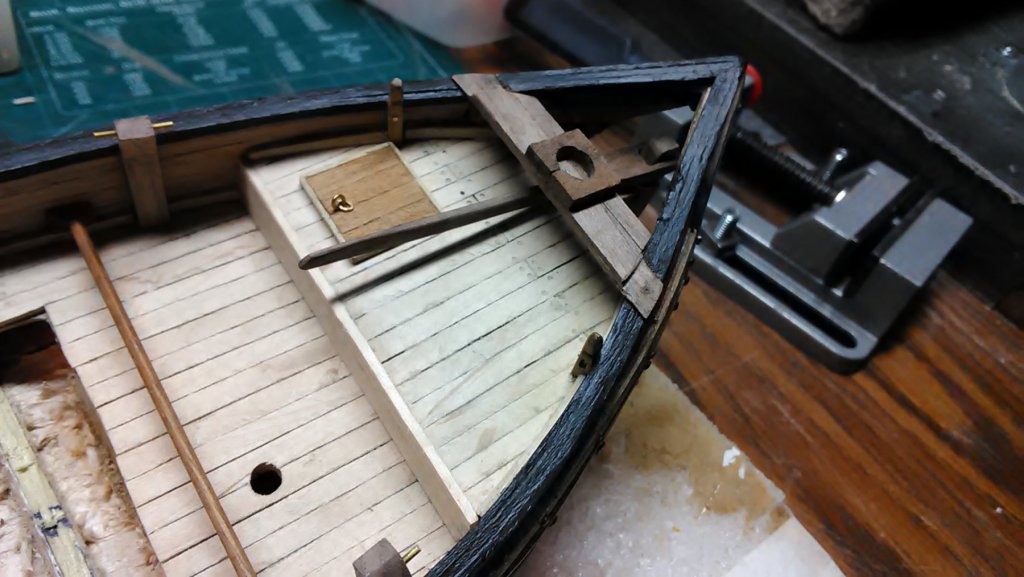
Is there another word for 'mizen mast holder'? What about Dutch?
Marcus
-
Nice pictures of the Boeier, Wefalck!
Het Friese Scheepvaart museum has a lot of plans online, free for the downloading.
Then on archive.com their are 3 books by Emile van Konijnenburg, Shipbuilding from its beginning volume 1, 2, & 3. The first 2 are descriptions of ships in Dutch and vol 3 is all plans and color drawings of Dutch ships.
Marcus


SPERWER by KORTES - FINISHED - 1:30 scale - Friescheboeier Yacht
in - Build logs for subjects built 1851 - 1900
Posted
Wonderful metal work.
Marcus