


flying_dutchman2
-
Posts
1,735 -
Joined
-
Last visited
Content Type
Profiles
Forums
Gallery
Events
Posts posted by flying_dutchman2
-
-
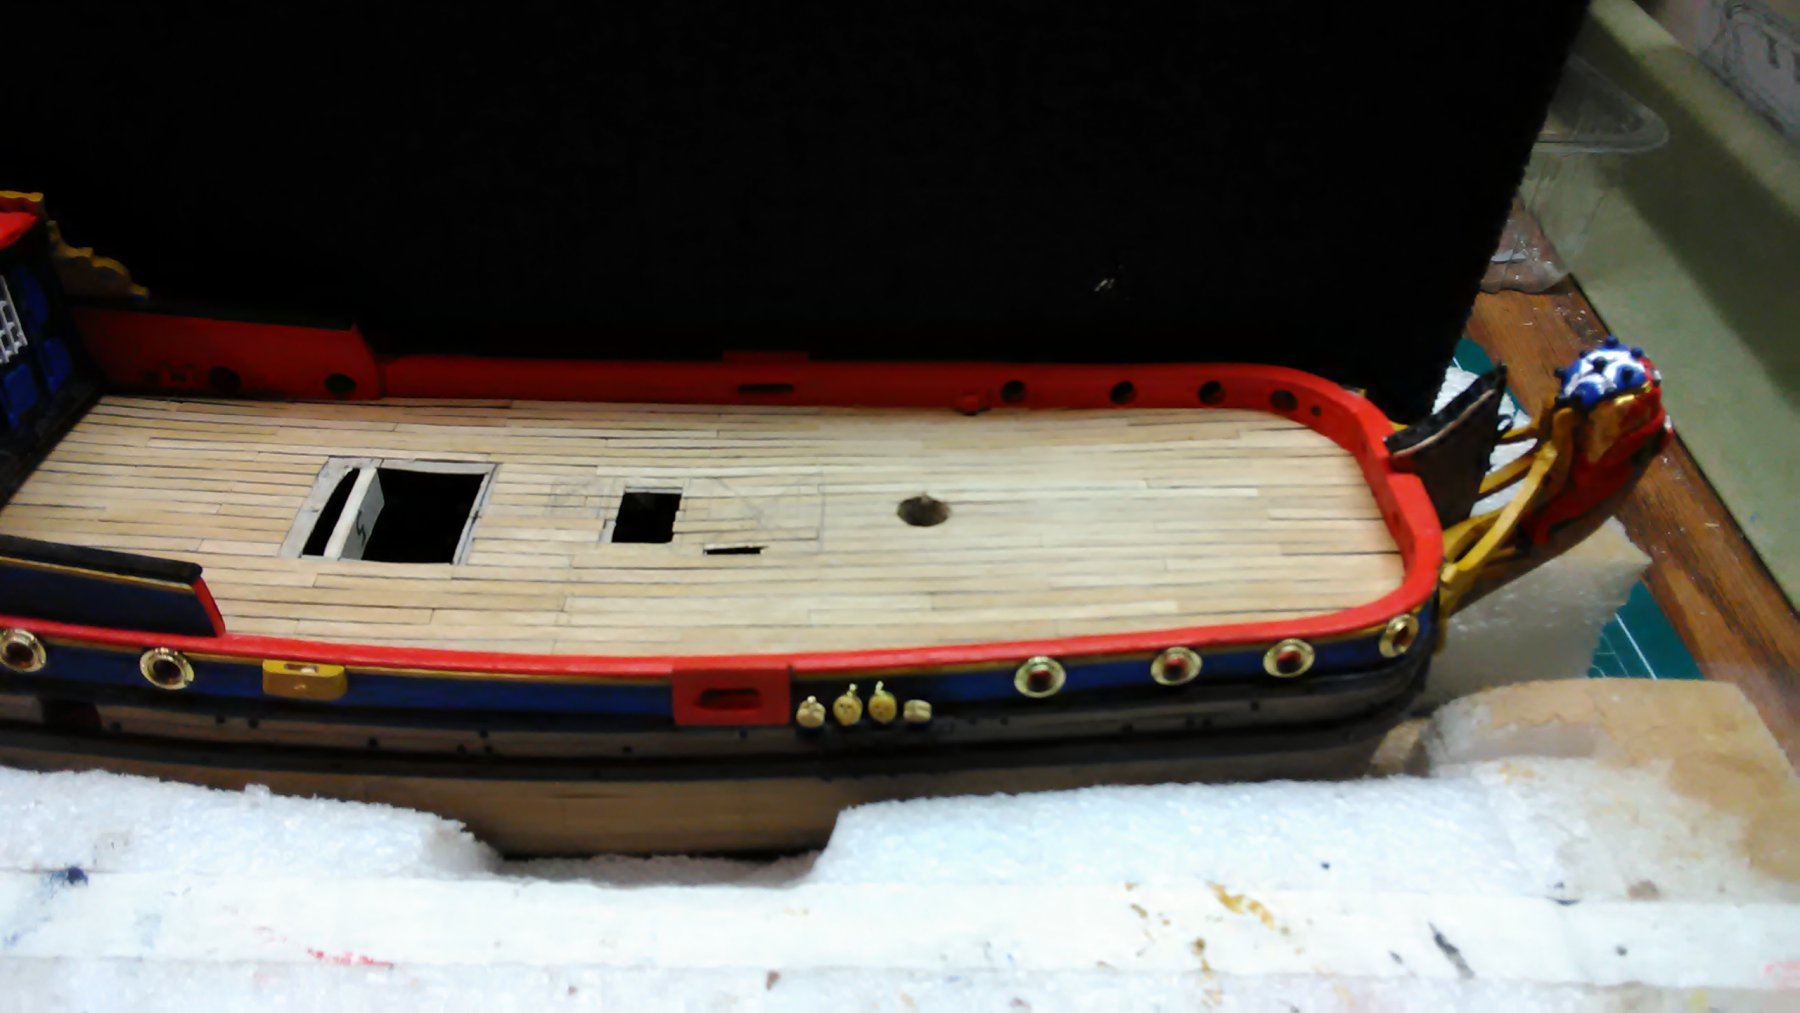
Finished all what belongs on the deck and railings, such as the windlass, cathead, scuttle doors, cleats, bits and the two wooden pieces that hold the sheet blocks that hold the main and forestall. Working on the anchors and combs.
After that is my favorite part of ship building (masts, yards, sails and rigging). Already shaped the master and added the throat halliard block.
Marcus

- Elijah, Geoff Matson, Piet and 3 others
-
 6
6
-
Worked on the bits, re-did the 2 pieces that go across the deck that hold the sail (can't think of the definition). The rings that hold the ropes for the canons (which I will omit). Also finished the heart block from Ash.
At my woodworkers meeting I was given lots of cut offs and the treasurer mentioned that if I want his Dremel lathe I can have it for free. So next month I will be getting that. Looked it up on line, can't find any good pictures
Marcus


-
Patrick and Piet thank you for the comments.
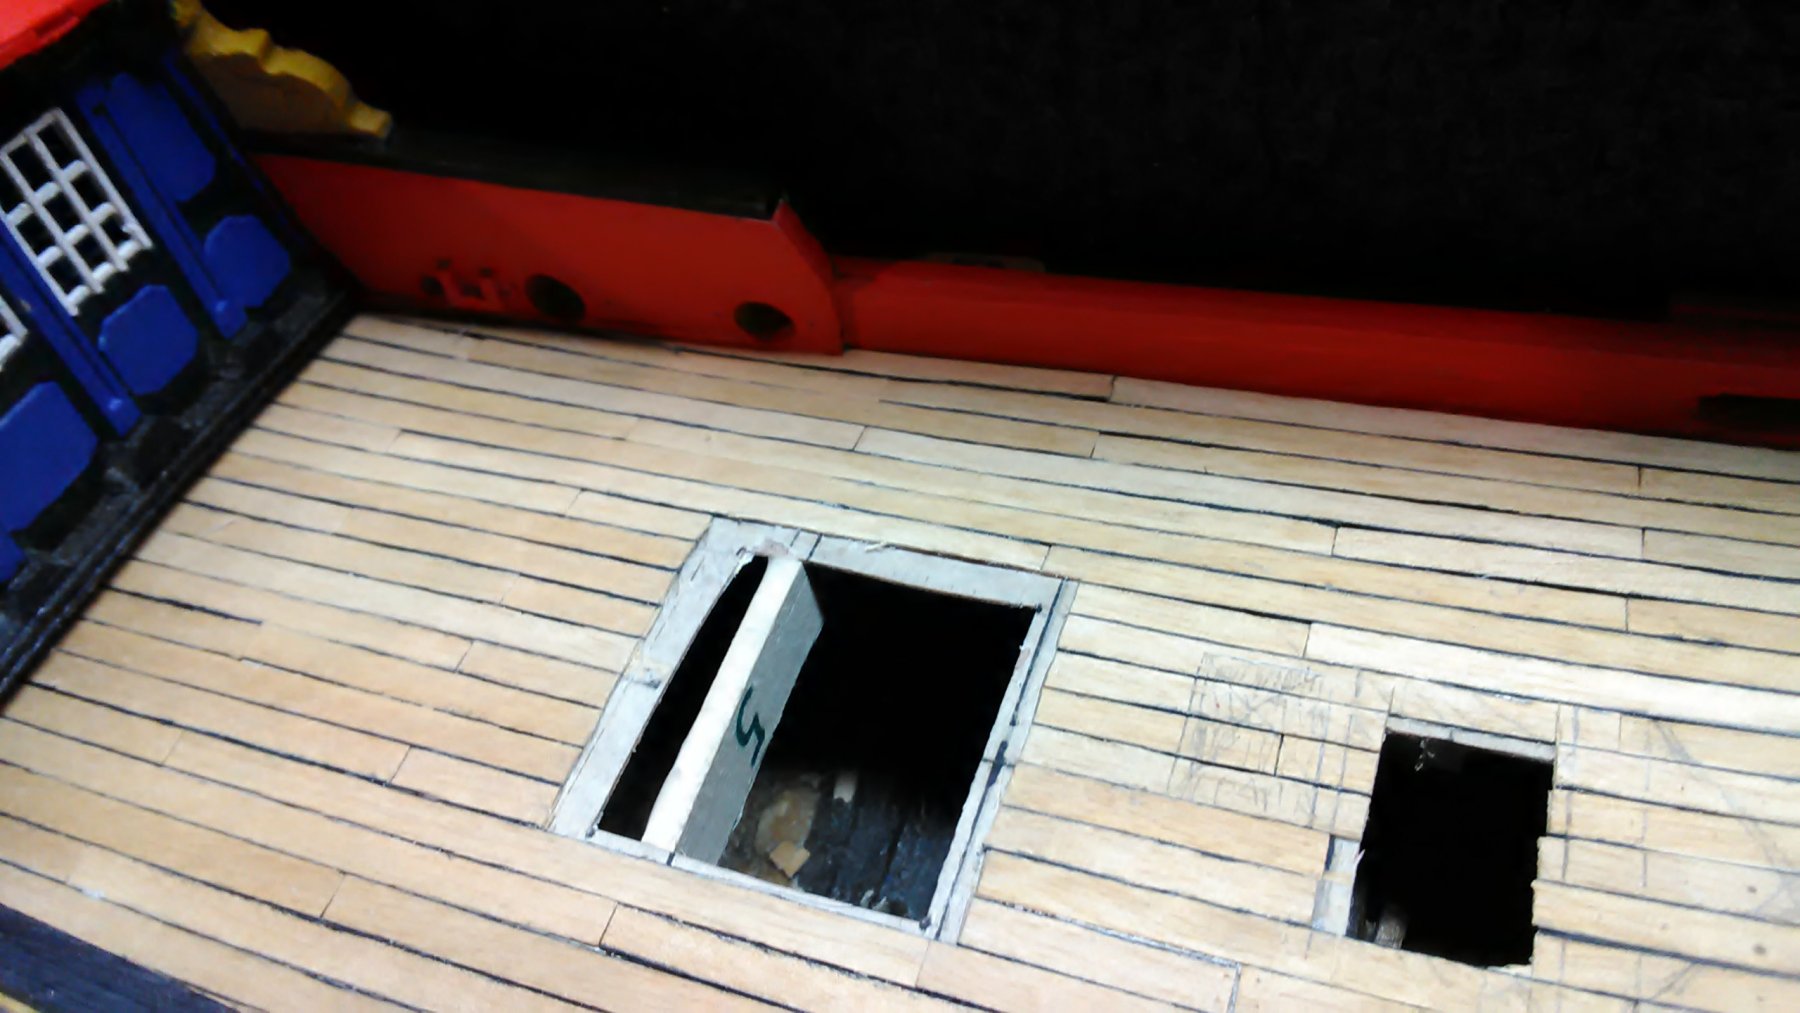
Piet : the black chalk was a disaster. As careful as I was with inserting it in the holes and vacuuming the excess some of it still got into the rest of the deck after I sanded it. So the deck has some light streaks of black. Must have gotten into the wood grain. The deck looks "used ".
Tonight I am doing a show-and-tell for my woodworkers Association on model ship building. Let people know that I can use their cut offs.
Marcus
-
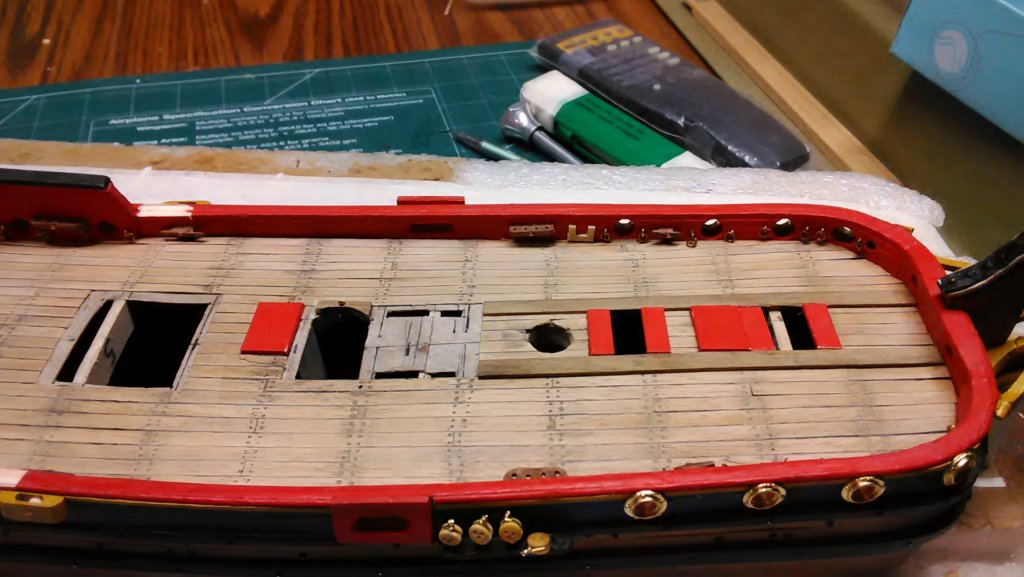
Deck is completed. Making a template that will show where all the deck items go. Still need to drill the holes on the deck and fill with black chalk and wood filler to imitate the trunnels.
Marcus

- Geoff Matson, Omega1234, YankeeD and 3 others
-
6
-
-
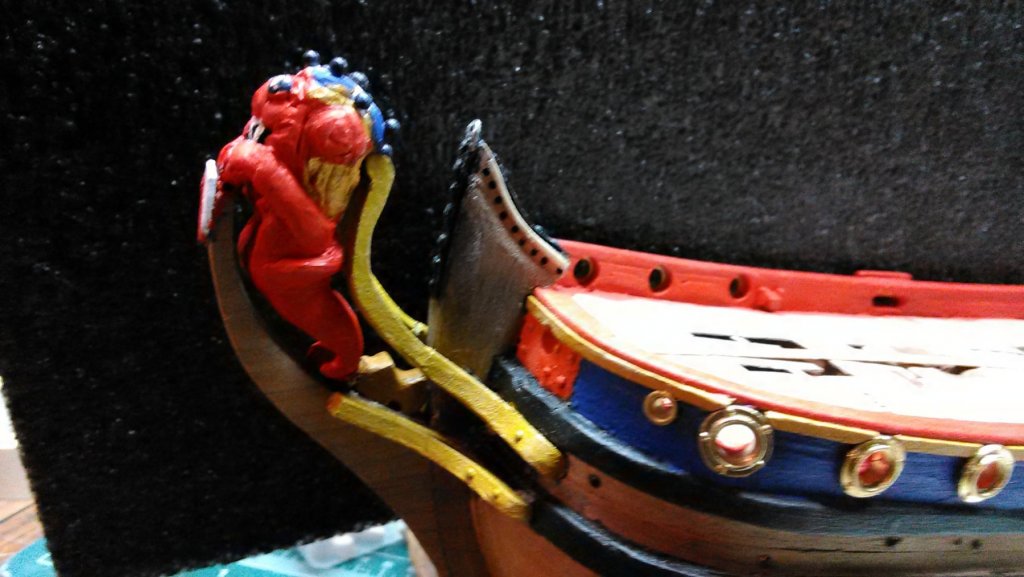
Finished the lower and upper cheeks and together with my orc (lion) glued it together. Still need to add the top cheek rail. The bow is difficult project. Lots of trail and error.
Glued 4 quarter inch cherry dowels together and started sanding the windlass.
Marcus

-
Beautiful model especially in scale you built it, well done. I especially like the figures you added on the deck, it makes the model come alive.
The bigger the scale the more details and you did an excellent job at that.
Marcus
- Piet, cog and Mirabell61
-
3
-
-
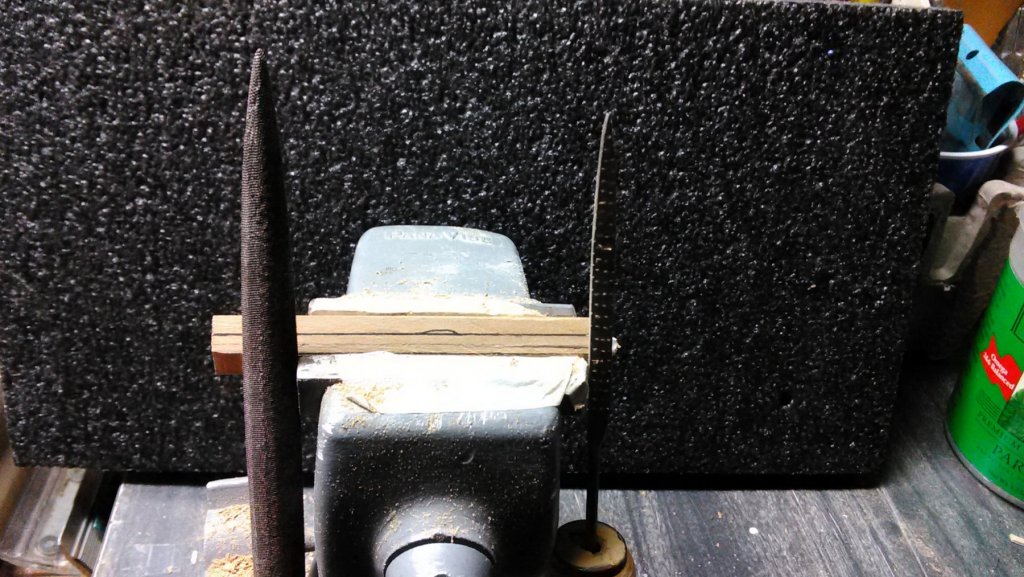
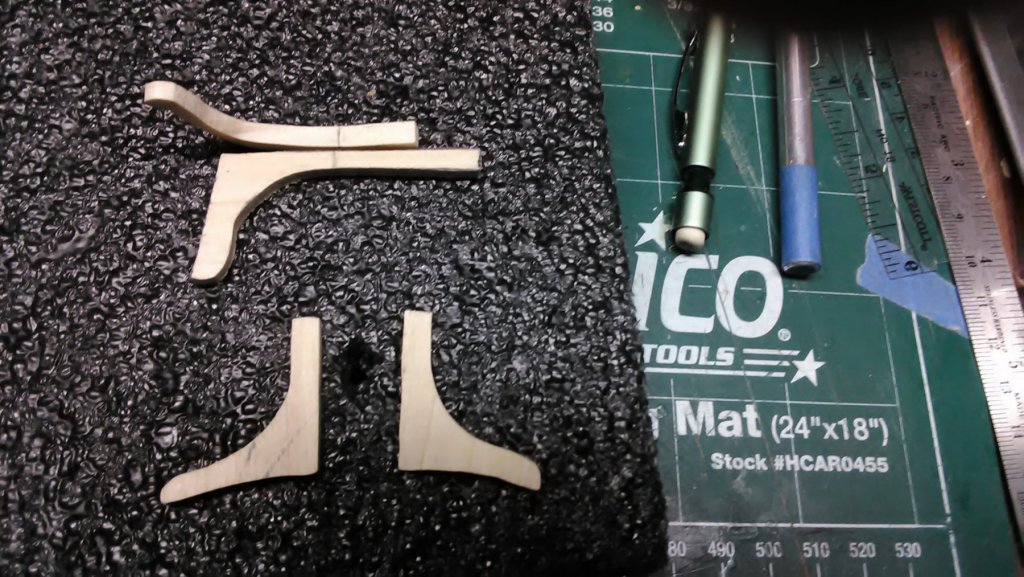
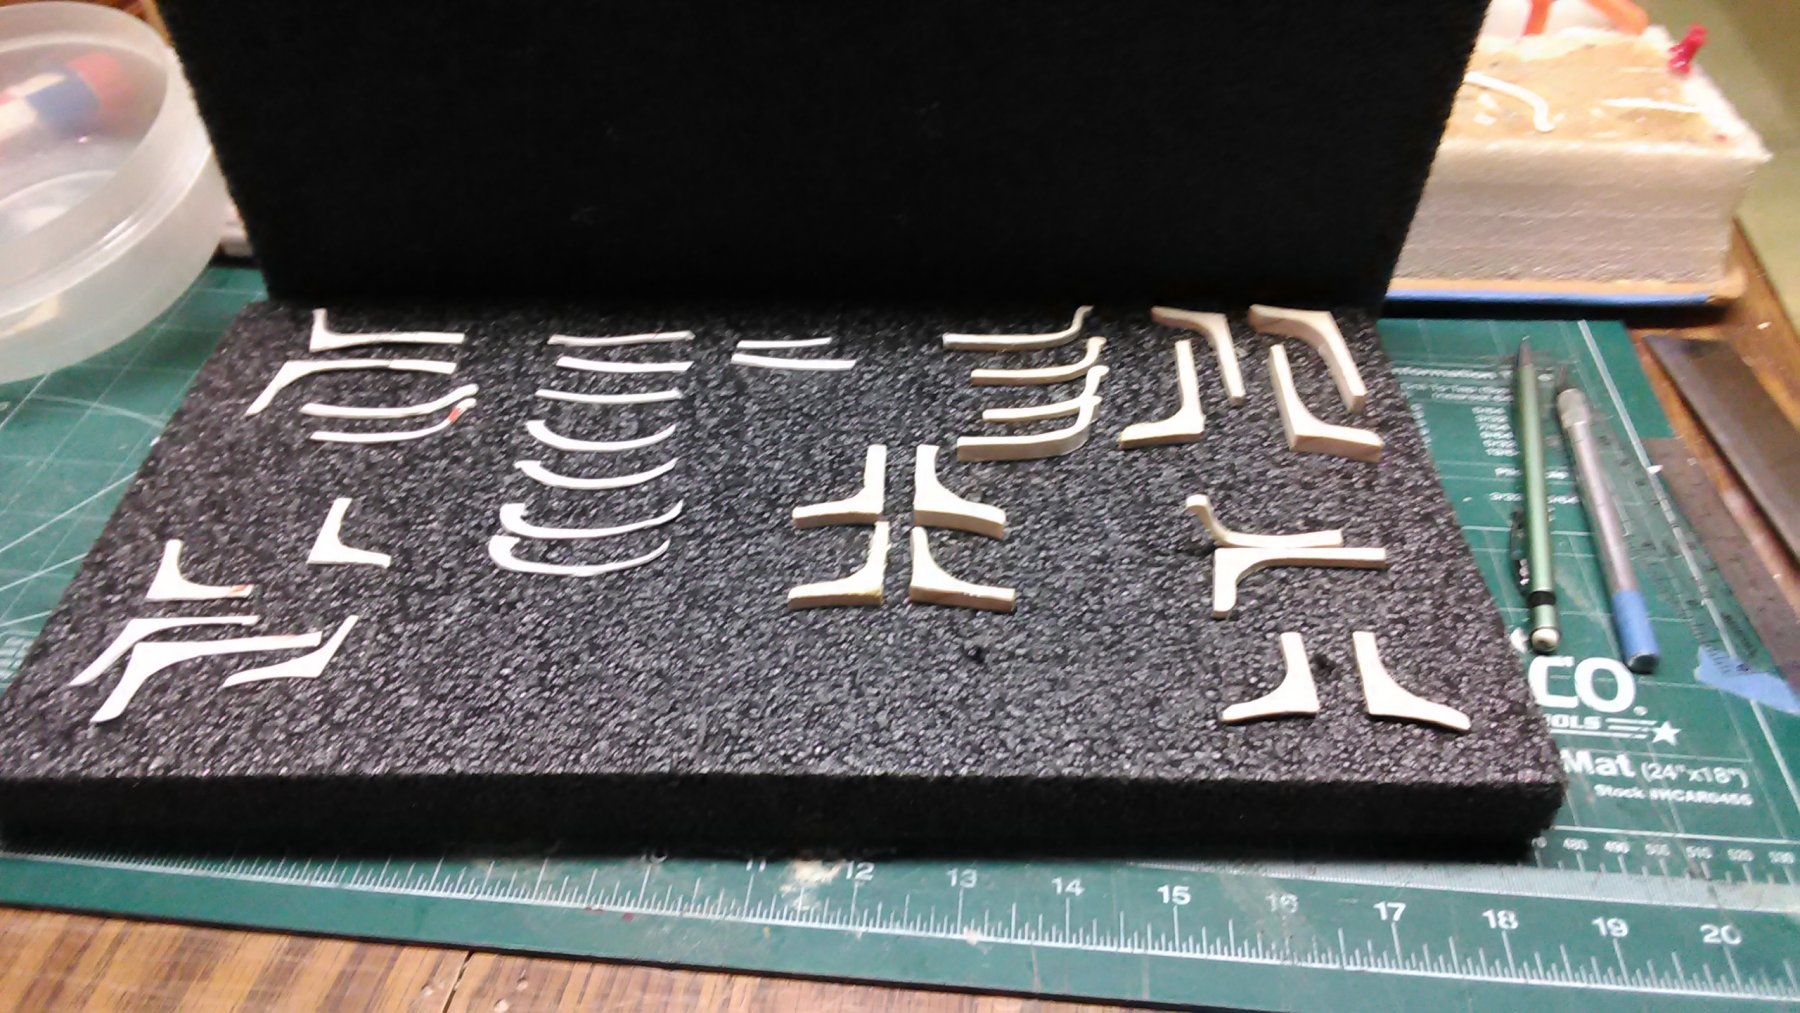
Started on the bow (lower and upper cheek and top cheek rail) which is a very demanding project. On the left I made many templates from thick cardboard. On the right cut outs in different thickness and wood types
2nd picture: lower cheeks are done and one upper cheek which still needs to be cut and glued.
Marcus

-
Note: I gave the wrong info on the potato. There are 2800 varieties of potatoes in Peru. The other 200 are available in the rest of the world. We visited a market and there were so many on display. There is even one that is completely dry which has a very long shelf life. Just soak in water, heat up and eat. Great for camping and the space station.
Lots of good food. Peru has 3 climate ranges. So they grow both temperate and tropical foods.
Marcus
- Piet, Jack12477, Angarfather and 2 others
-
5
-
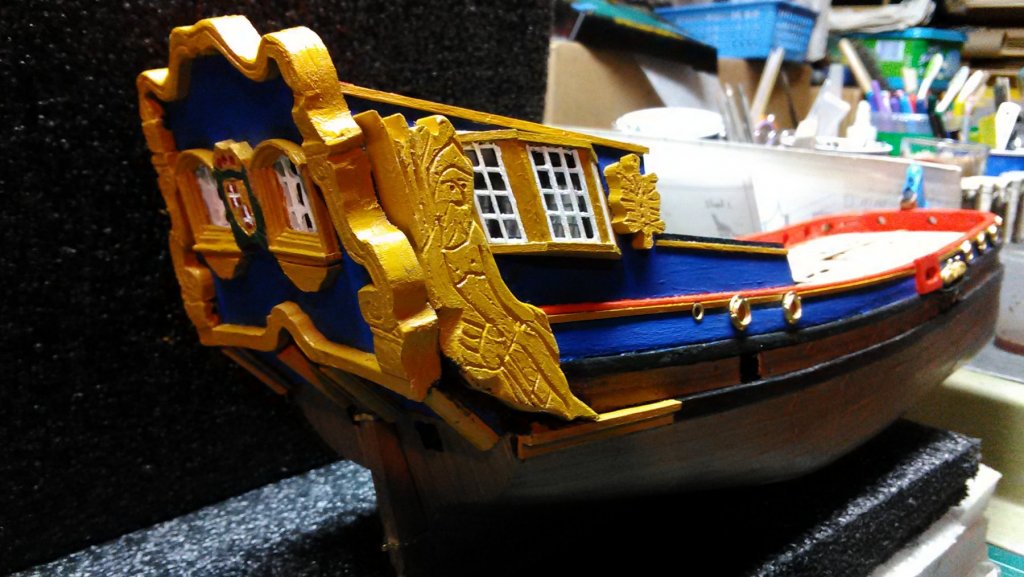
It was an awesome vacation and Machu Picchu is an amazing feat when it comes to architecture and engineering. Stone building blocks for structures are without mortar and fitted so well together, you can't slide a credit card between them.
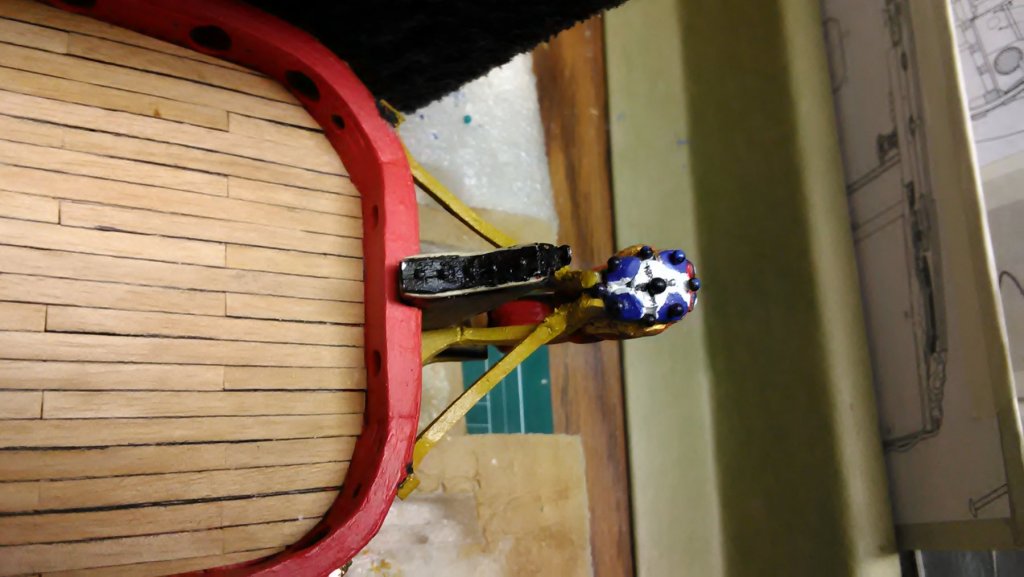
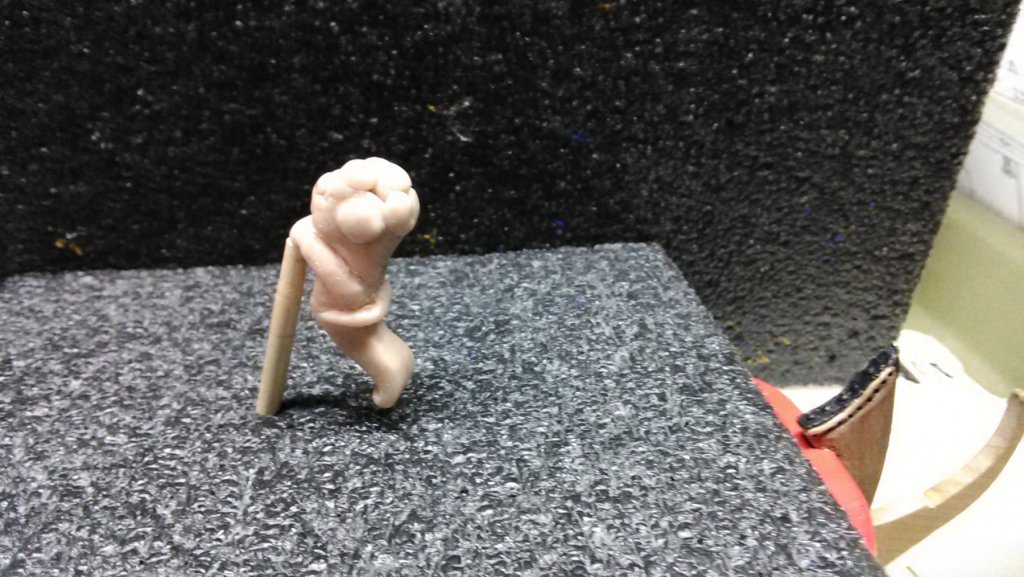
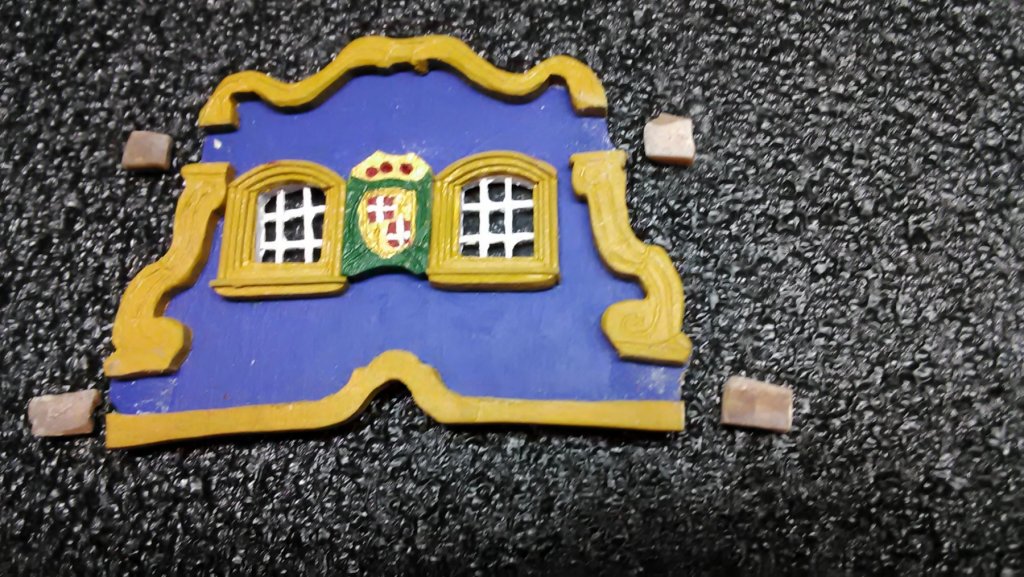
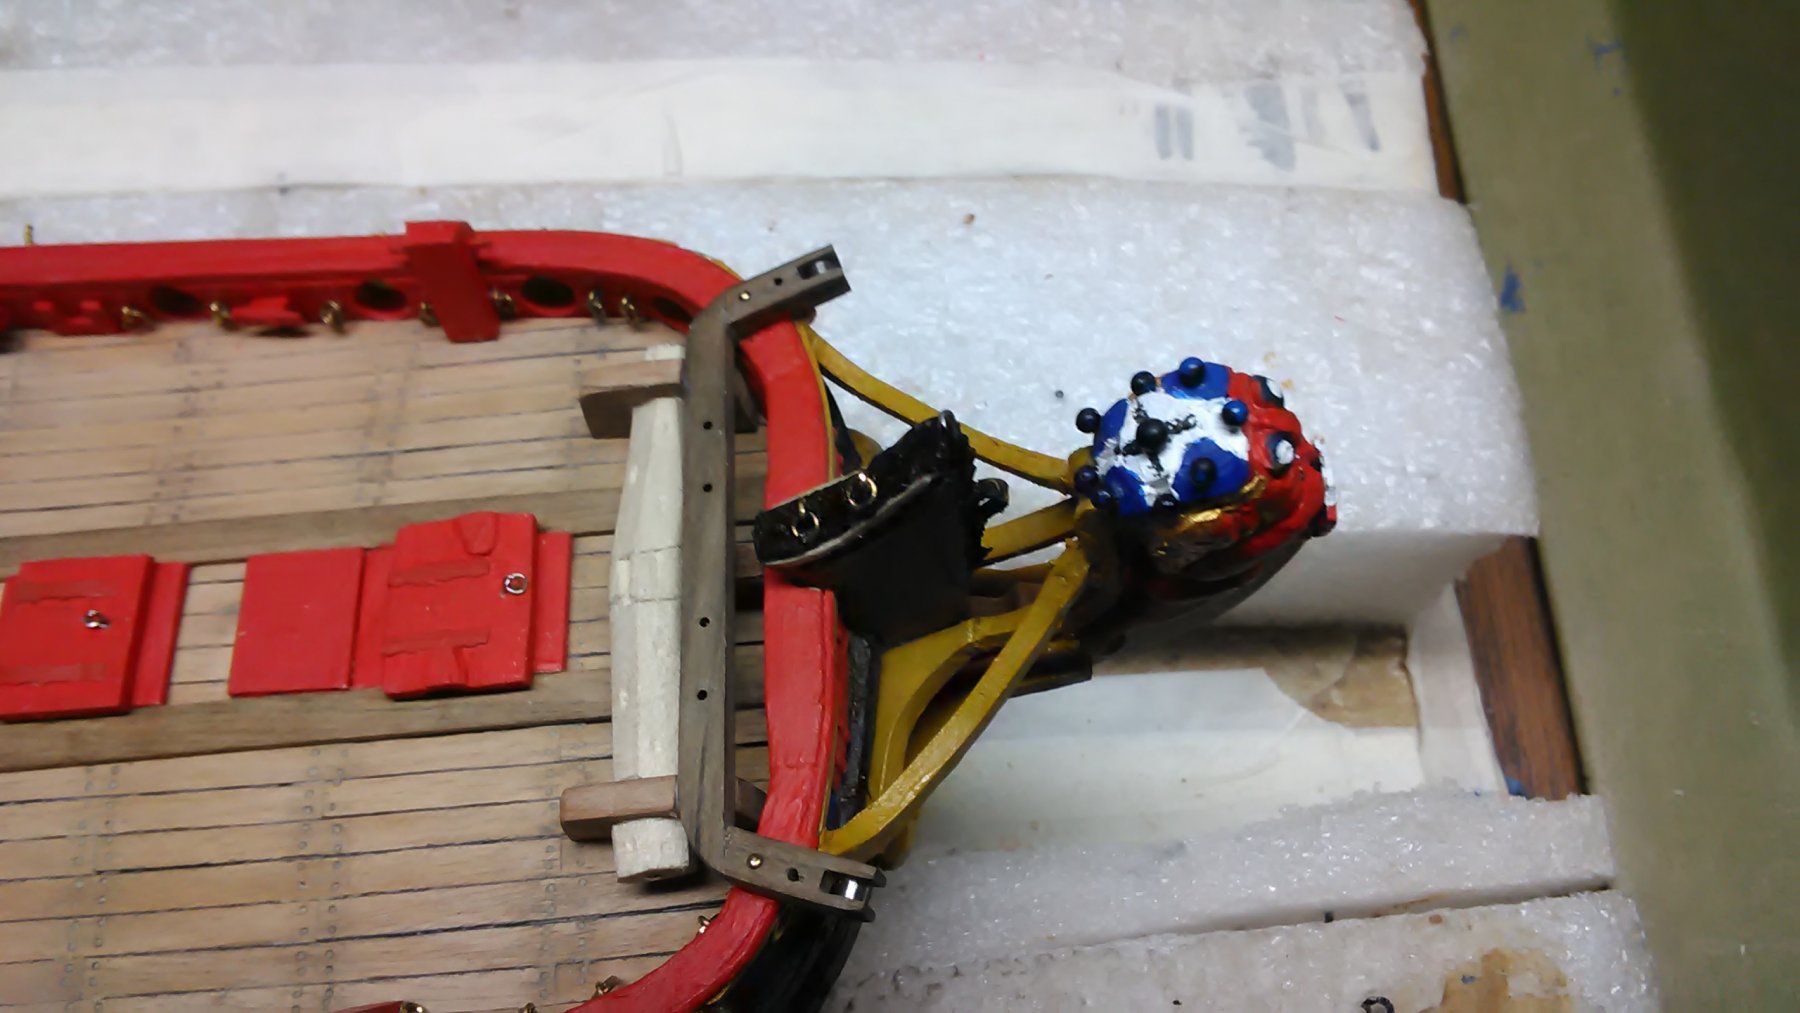
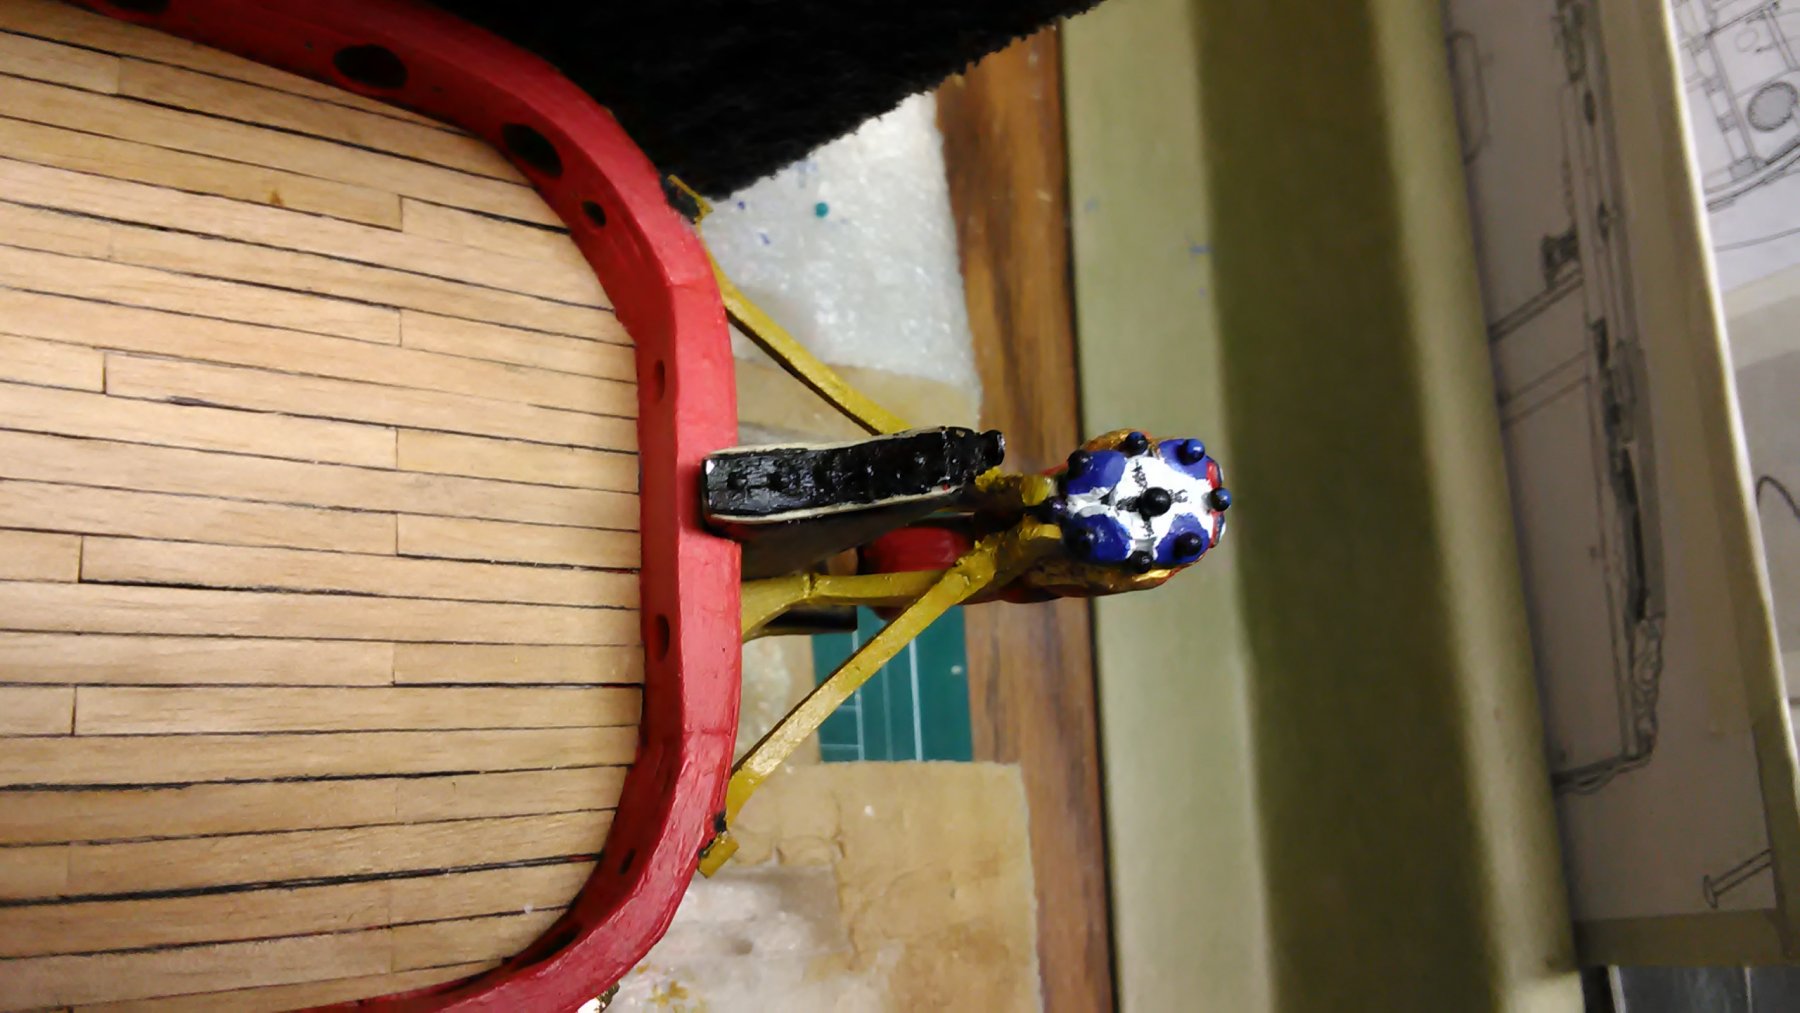
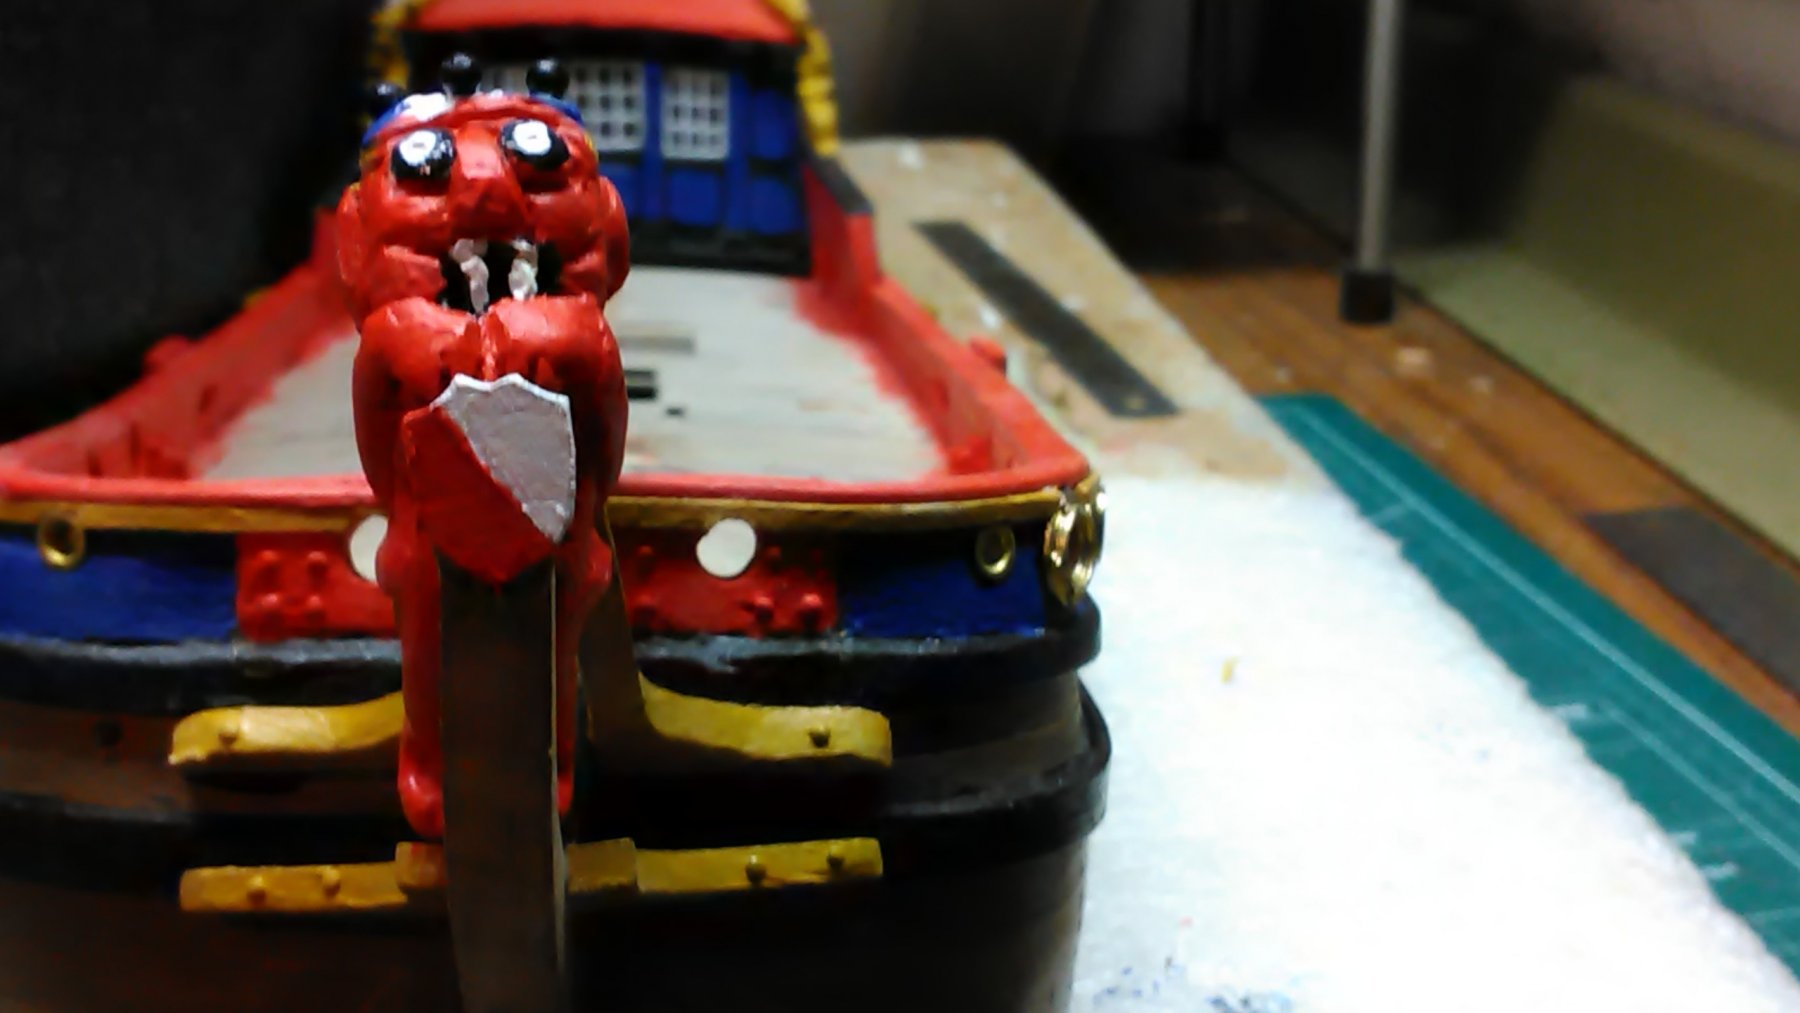
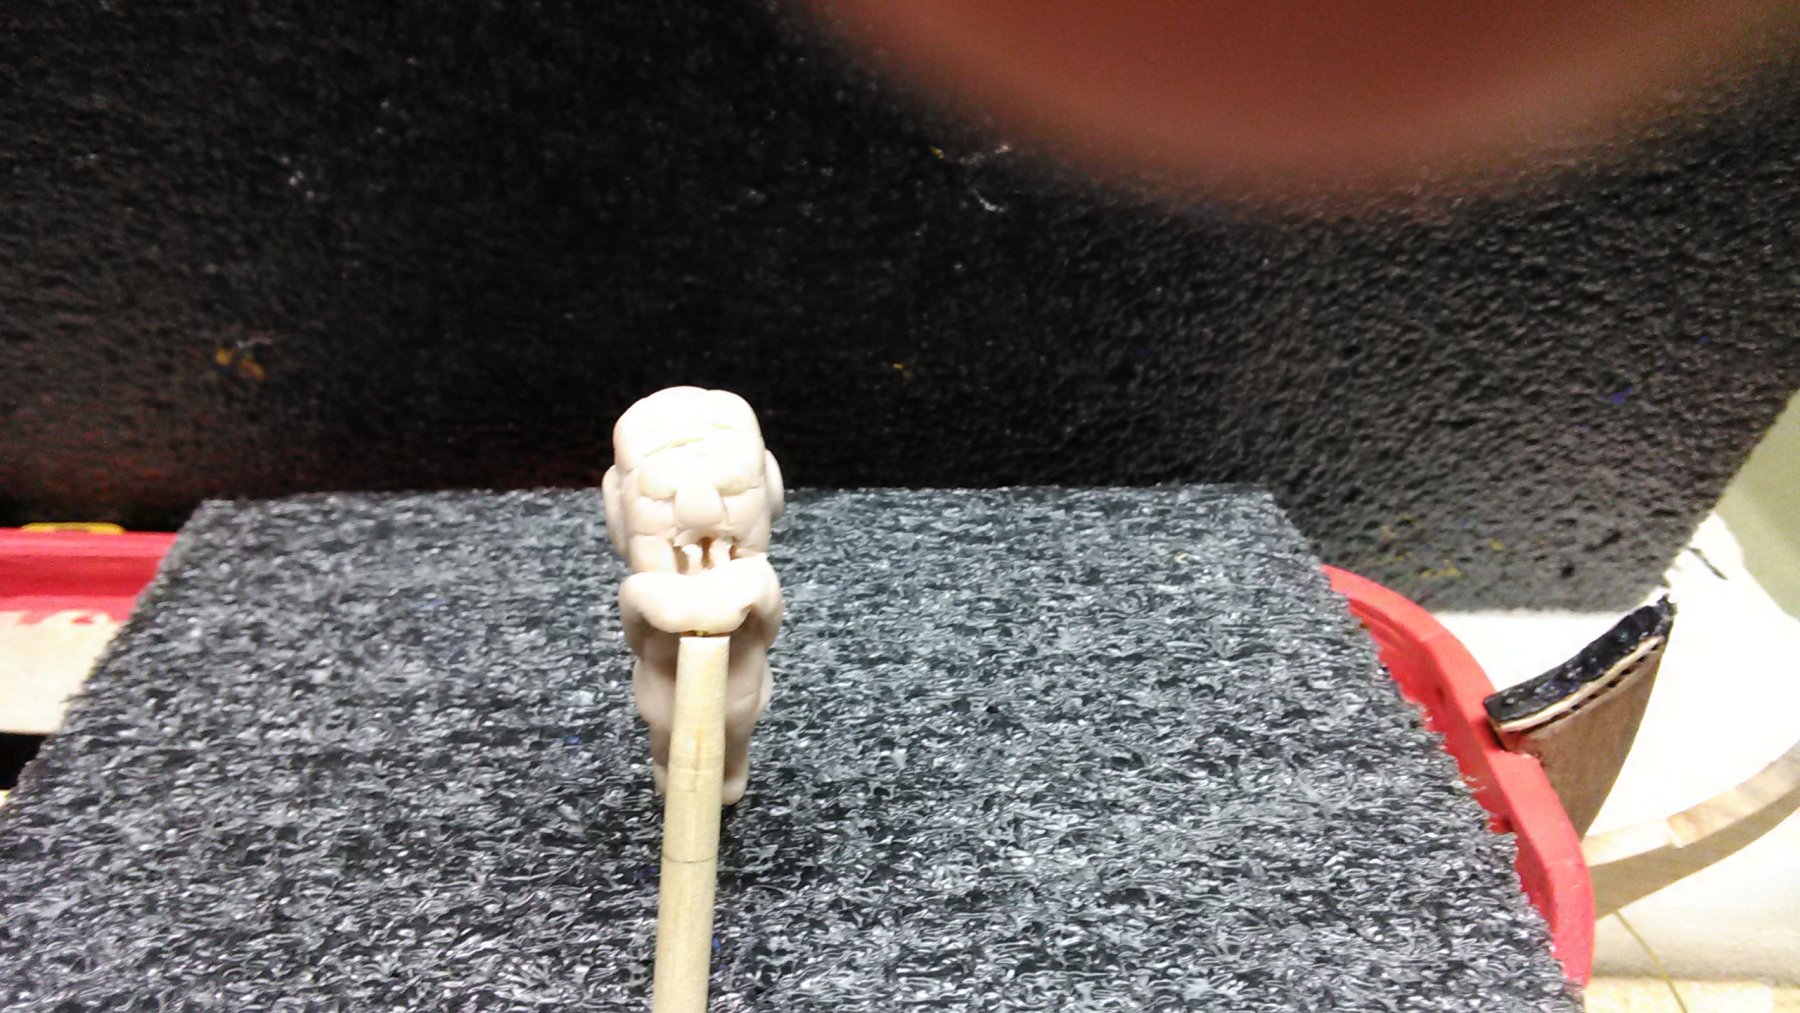
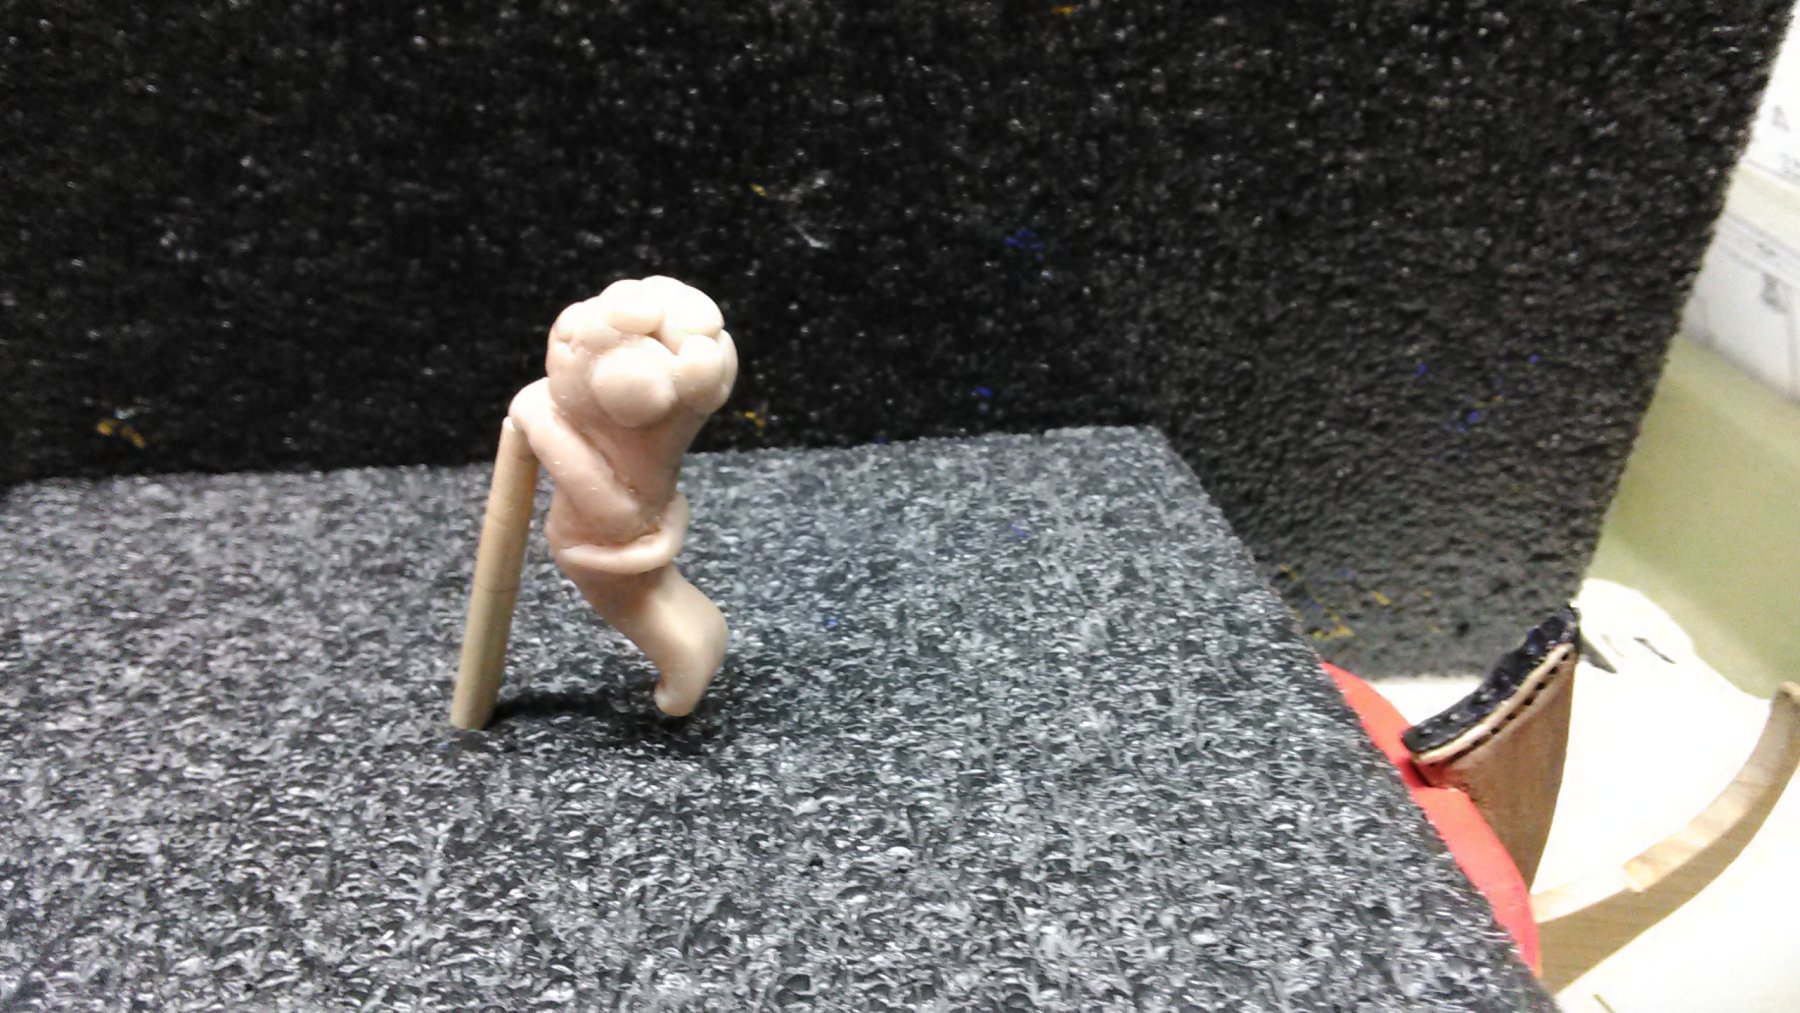
Back to the boat, glued all the carvings on the pavilion and started working on the figurehead. Made a frame from brass and molded the sculpey around it. Baked and filled it to show the parts of the body.
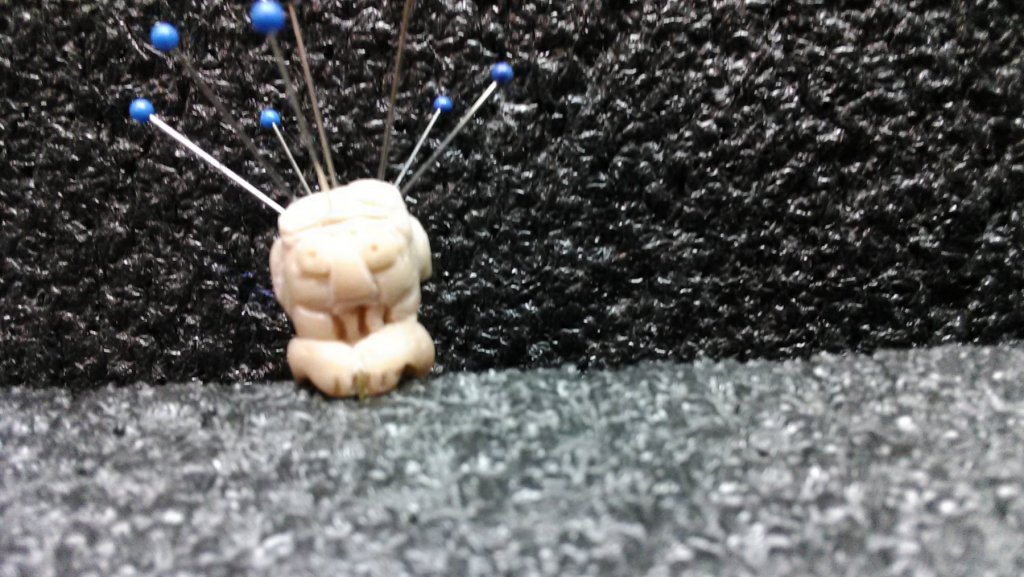
It does not look like a lion, more like a fierce Sci Fi creature. Maybe an Orc. I like it. I will paint it with the same colors as the lion. Working on the shield it is holding. The pins will be painted cobalt blue and glued in the crown. They are now showing where they will go.
Marcus


- Jack12477, Omega1234, Geoff Matson and 4 others
-
7
-
Going to take a break for 9 days as I am going to Peru, South America today. No ship museums on the list but wouldn't surprise me if they have one. Machu Picchu has been on my bucket list for decades. Christmas there is going to be a very different experience. Interesting foods such as "the potatoe" (they have 600 varieties) and marmot (yes,... Guinea pig), etc
BTW for those of you that forgot your plant biology, the potatoe has its origin from Peru.
Marcus
-
22 hours ago, amateur said:
So many mistakes, and it still looks like a boat.
So they can't be very severe mistakes
")
Jan
Jan,
If you look at it closely you can recognize the mistakes. Okay, I exaggerated a bit, there are a few big ones and small ones.
Yes it still looks like a boat.
Marcus
-
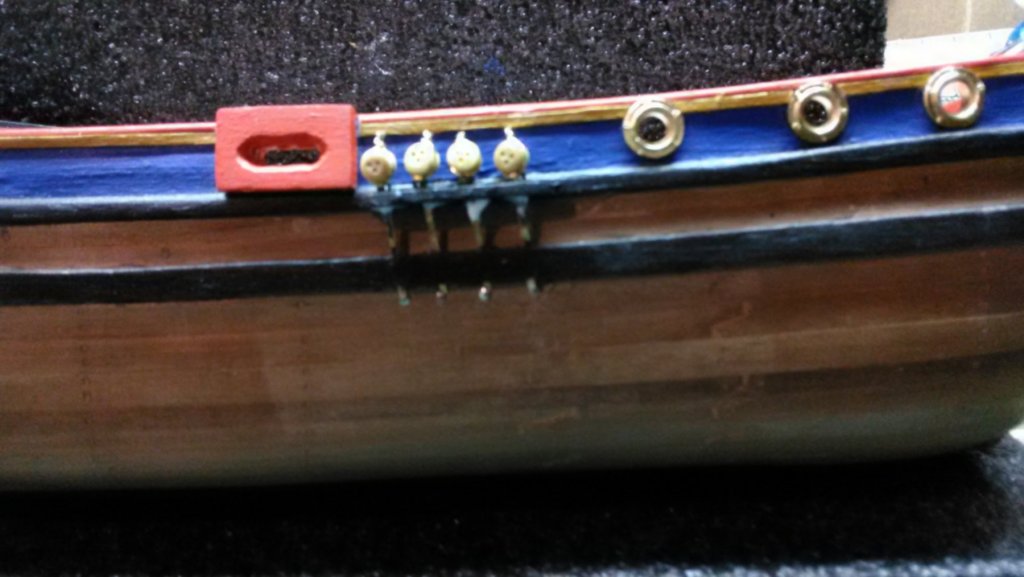
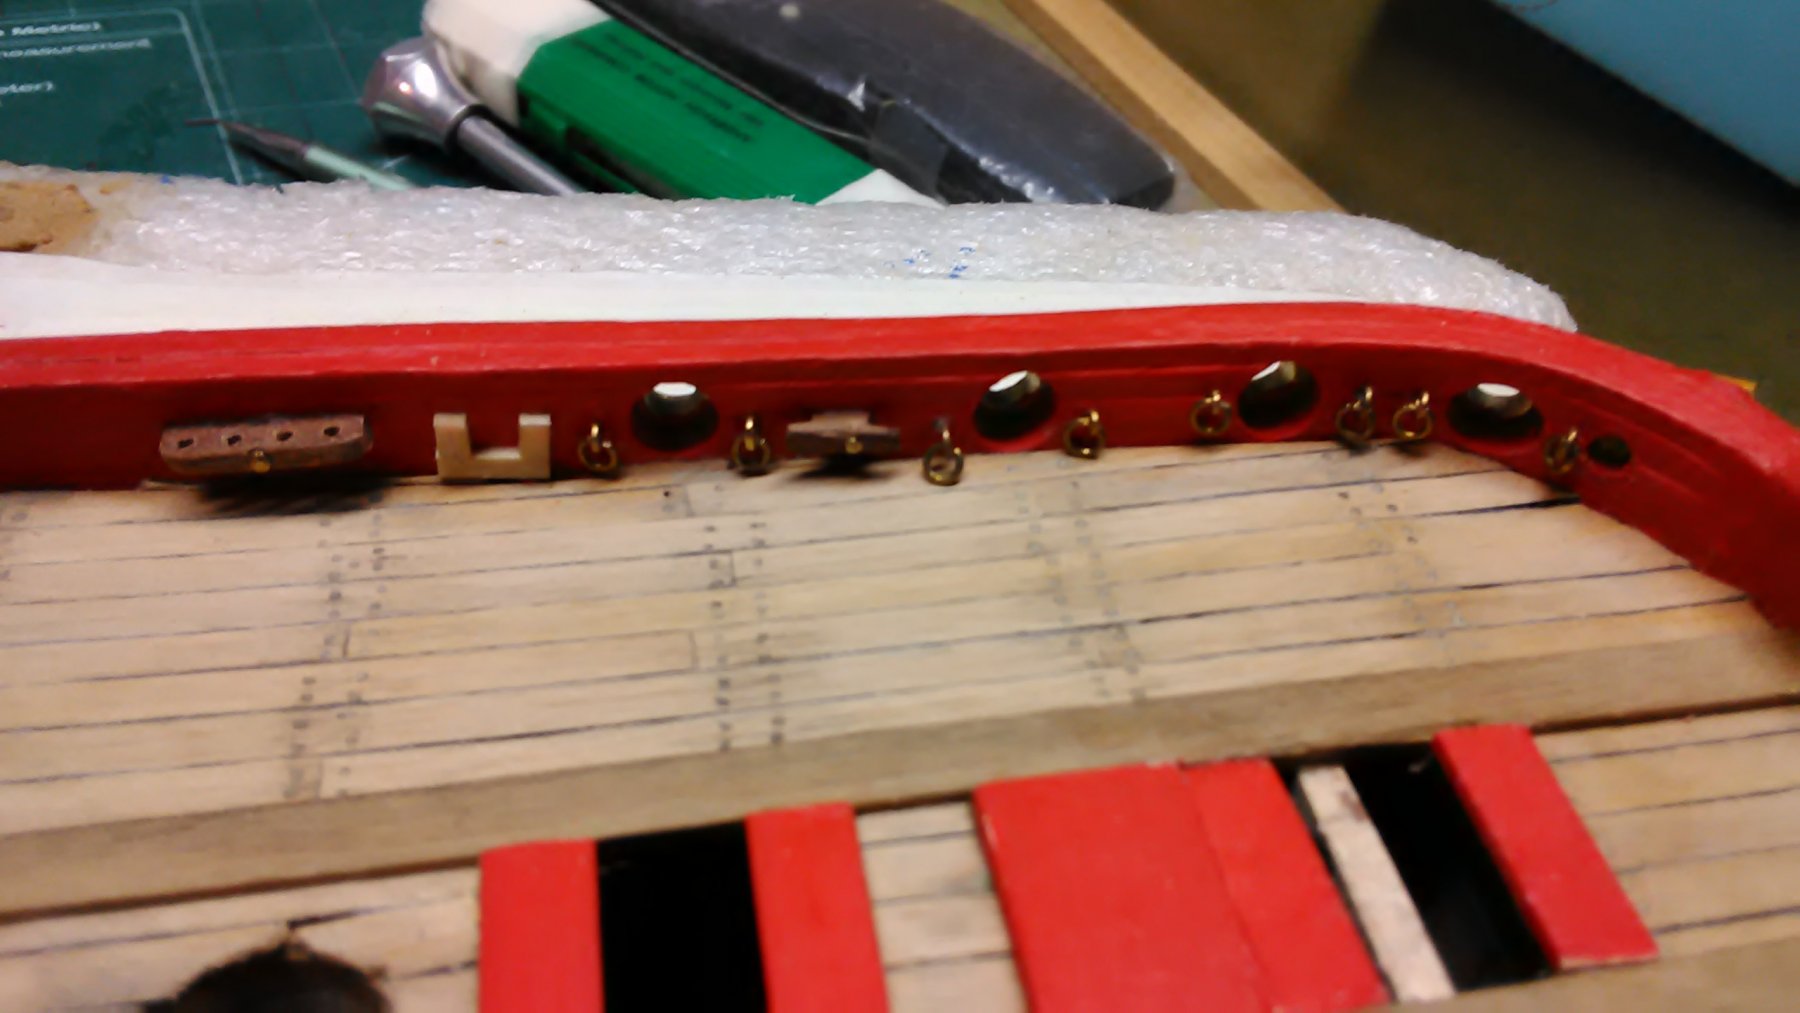
Finished the carvings of the rivergod. Just carved the outlines and sanded the edges round. Did this to all the carvings and I am happy with it.
Also finished installing the deadeyes, just need to paint the brass Mars black. Once all the deck fittings are created and painted I will install the deck.
Marcus
- Geoff Matson, Elijah, mtaylor and 1 other
-
4
-
Jan,
Thanks for the pictures.
I will not paint them and round them out. Unfortunately, my deck has a bit too much of a curve (another one of my mistakes).
I will redo the front one, the back one is OK.
So many mistakes in this boat at times I wonder that it still looks like a boat. But I am learning a lot with building from scratch and my next boat will be an improvement over this one. I am having a lot of fun building her.
Marcus
-
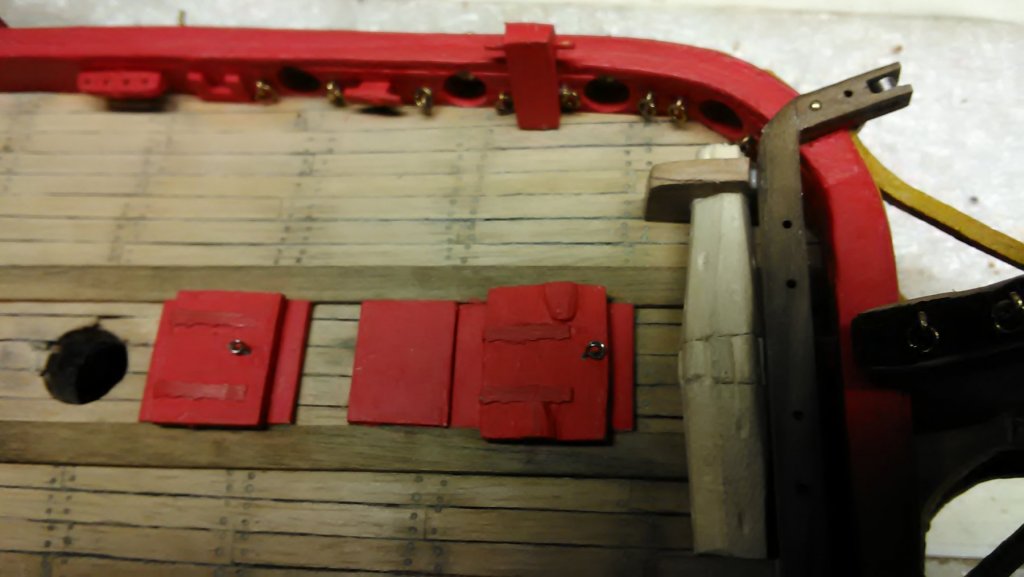
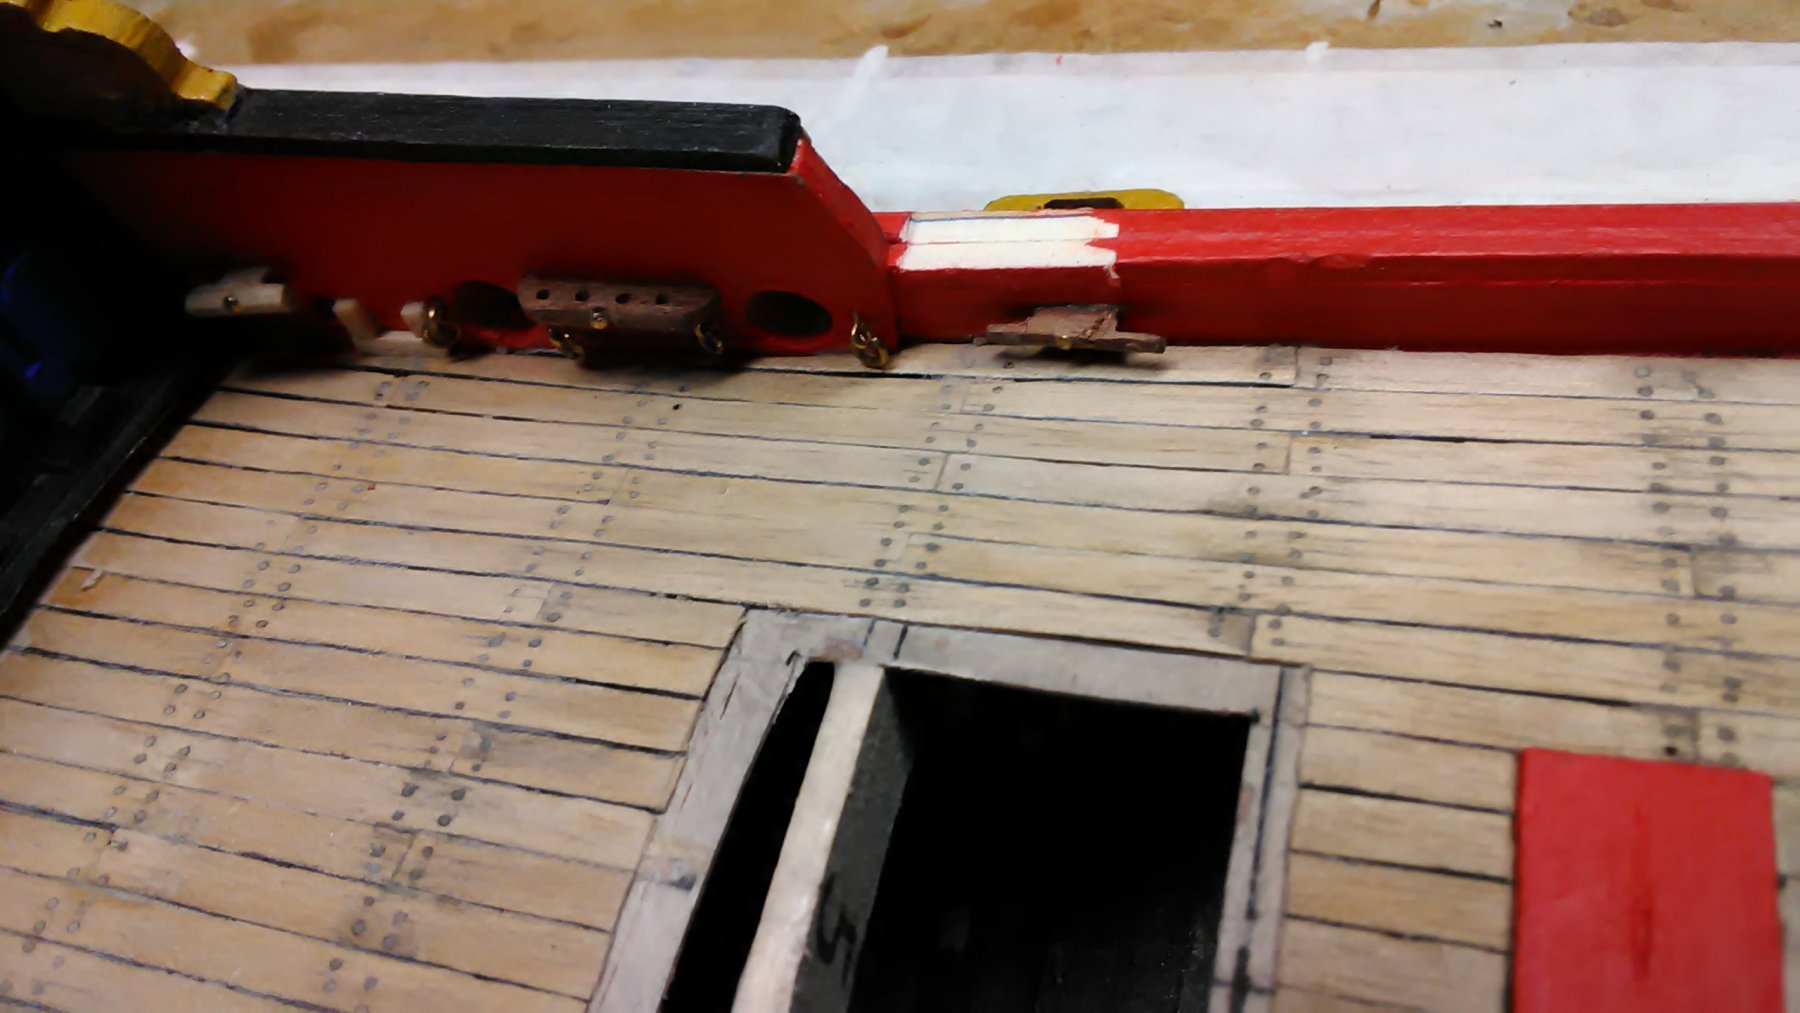
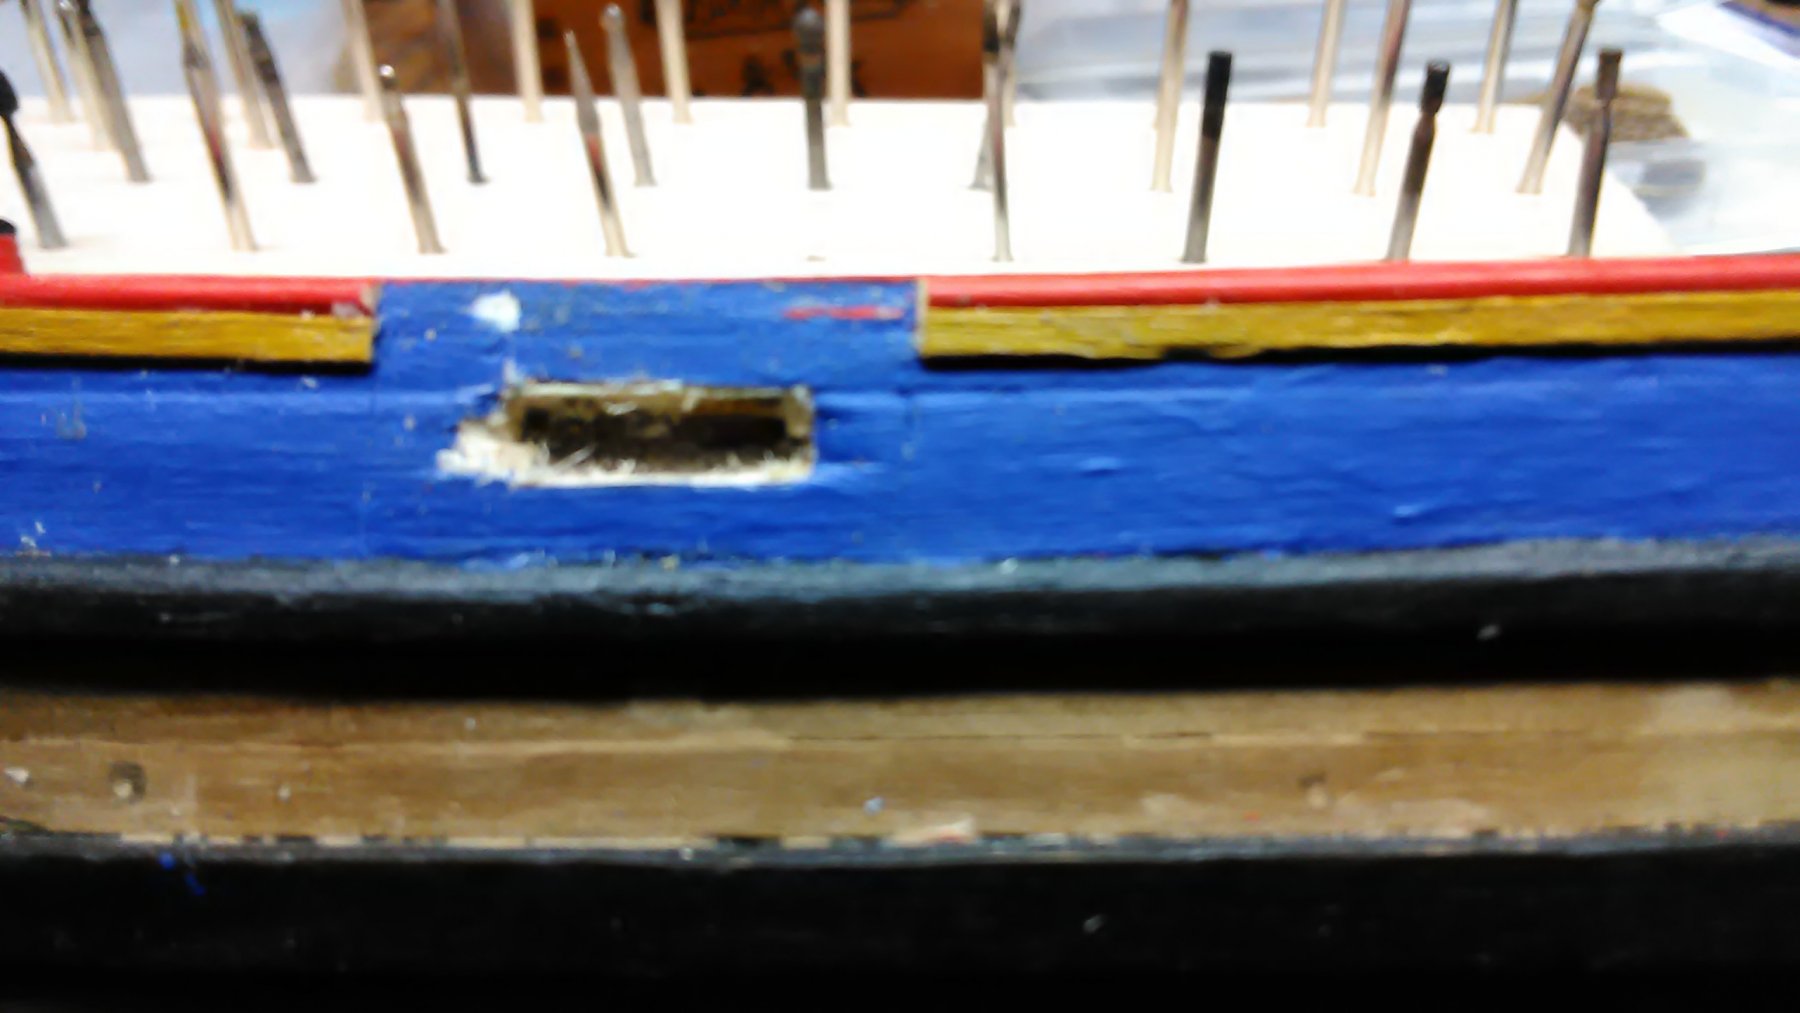
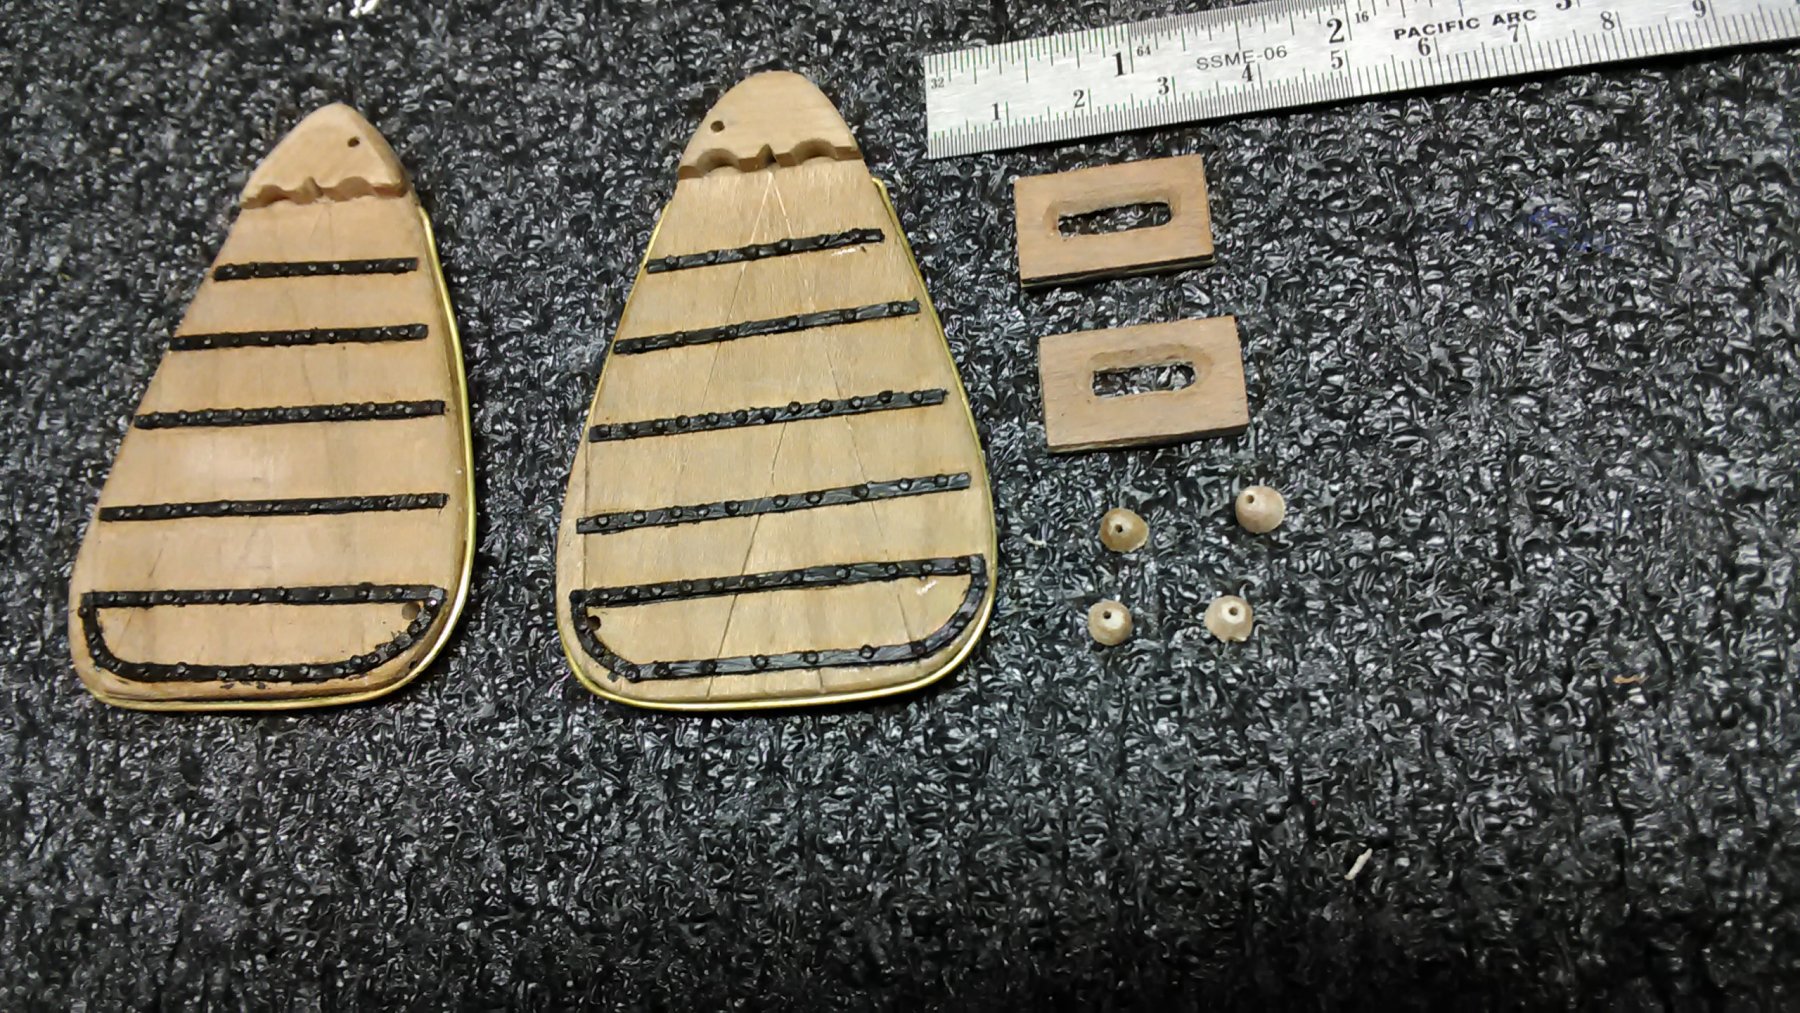
Worked on the leaboards, the recangle pieces and the little wooden round pieces that slide horizontally in the chamfer area.
Cut through the railing and sanded the inside on an angle.
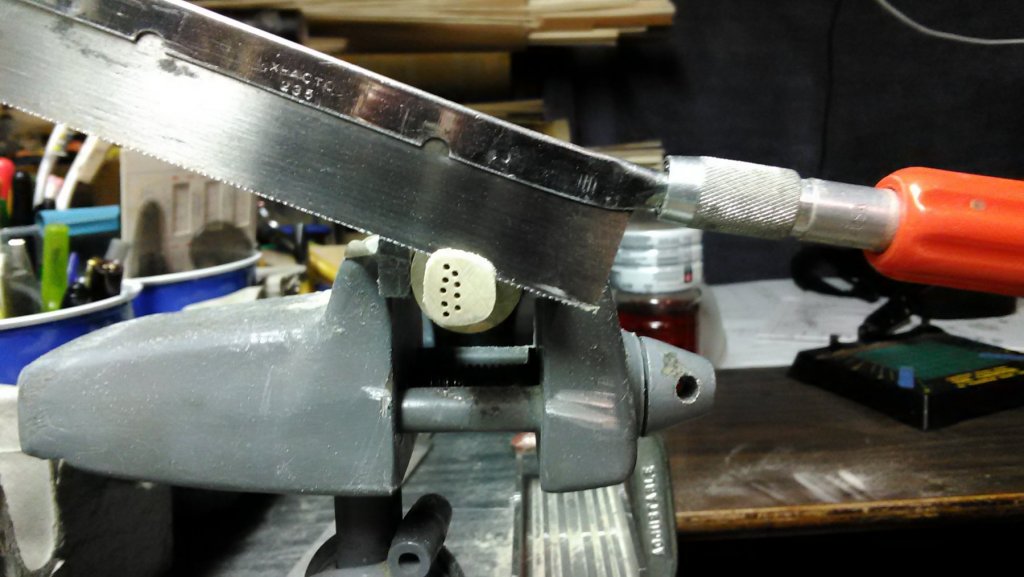
Made those round pieces by sanding the tip of a dowel round and than saw it off. Next drill a itty-bitty hole through it.
Also finished the (I am at a loss of words) two long wooden pieces attached to the railing that hold the sail down. Still needs to be painted medium cadmium red.
Marcus

- Geoff Matson, mtaylor, Piet and 2 others
-
5
-
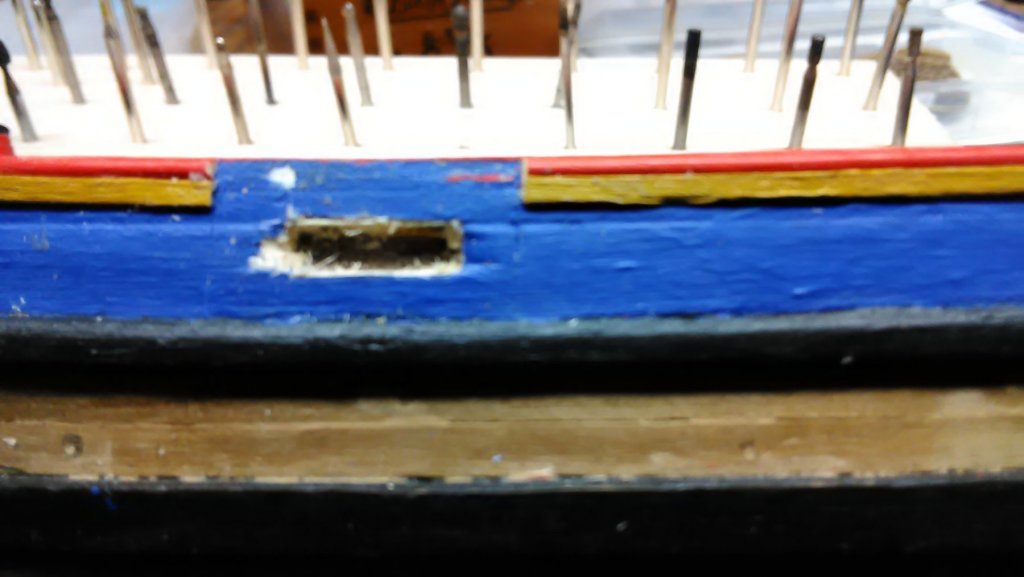
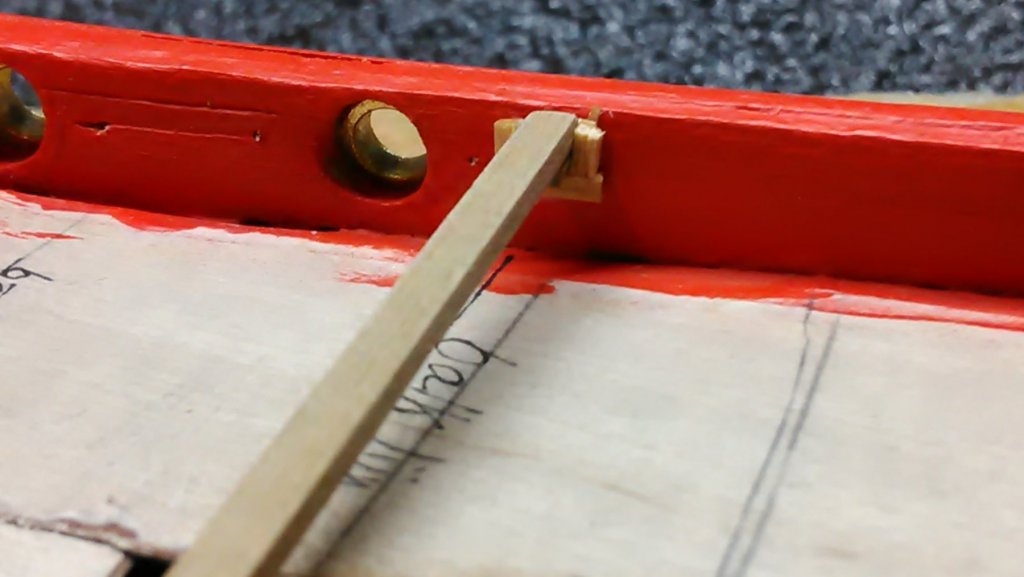
Thanks, Jan. The first picture is what I was looking for. It does go through the railing, even if it is a small hole and it makes the most sense. I looked at the same picture in the book of the Utrecht and even though it is dark, I recognize it.
In the plans of the 17th century Dutch merchant ships it shows different ways of how the leeboards are attached to the ships. They all have a metal mechanism that slides horizontally. Some very simple and some more intricate.
Marcus
-
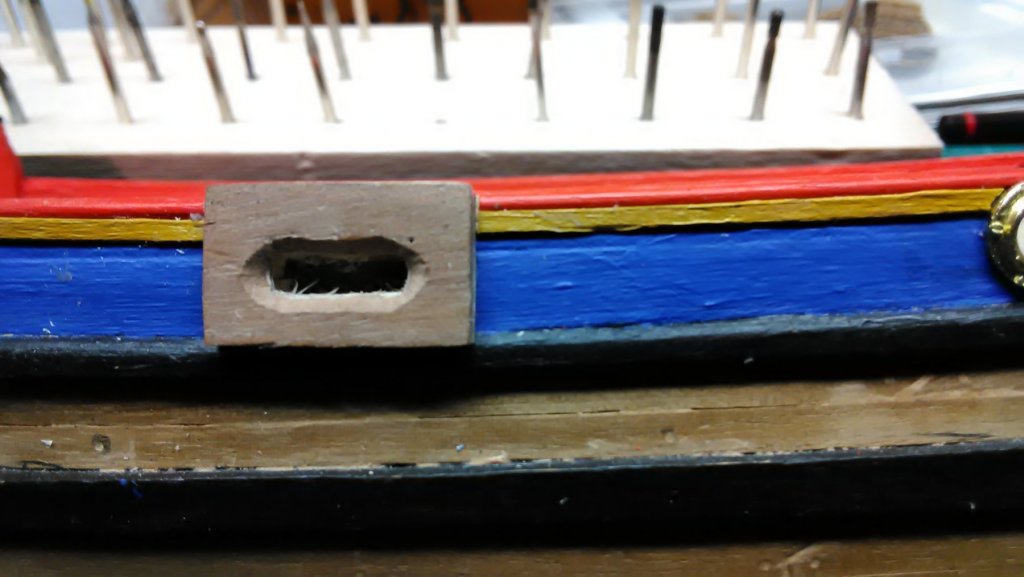
Question about the leeboards.
In the plan it shows that the leeboard is attached to this rectangle holder with a slit through it but it does not go further than that. In all my other models of Dutch boats it goes through the railing as well and is fastened with metal.
OR
Is part of the railing removed and the leaboard holder in place of that area?
With all the pictures of talks I have the leeboards go through the rectangle piece and the railing and fastened with a wire loop so it can move.
Marcus
- Elijah, Omega1234, bdgiantman2 and 1 other
-
4
-
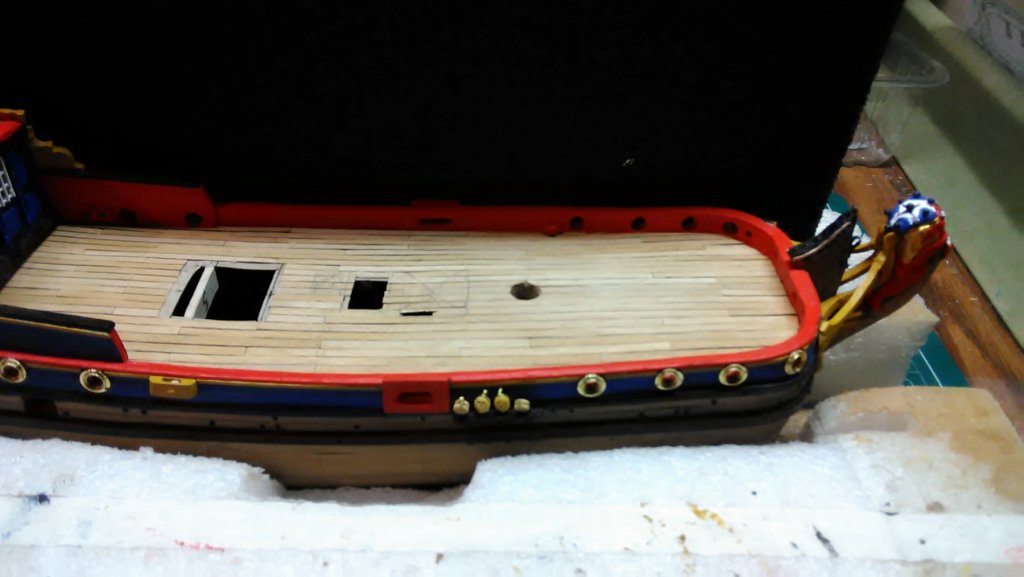
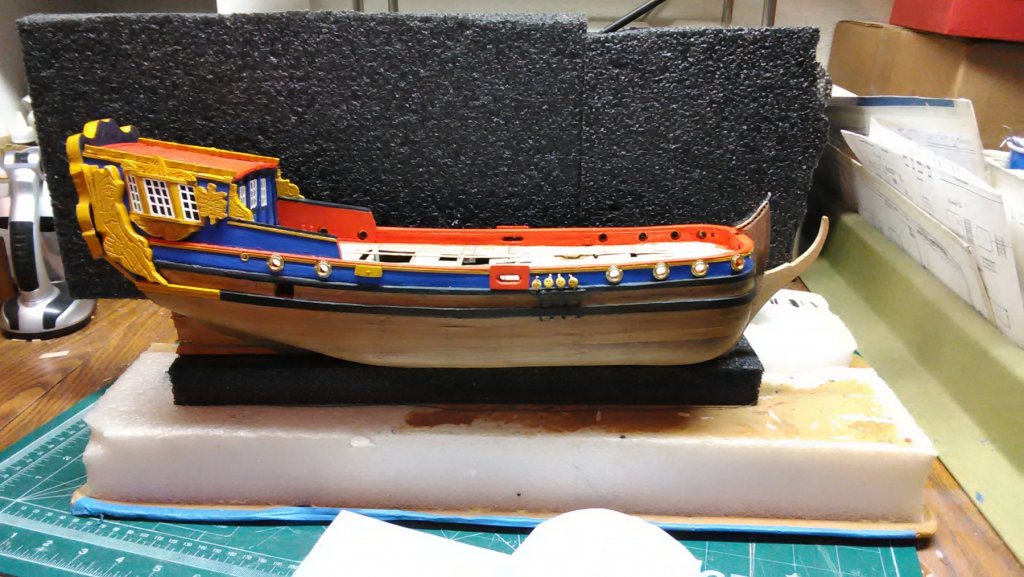
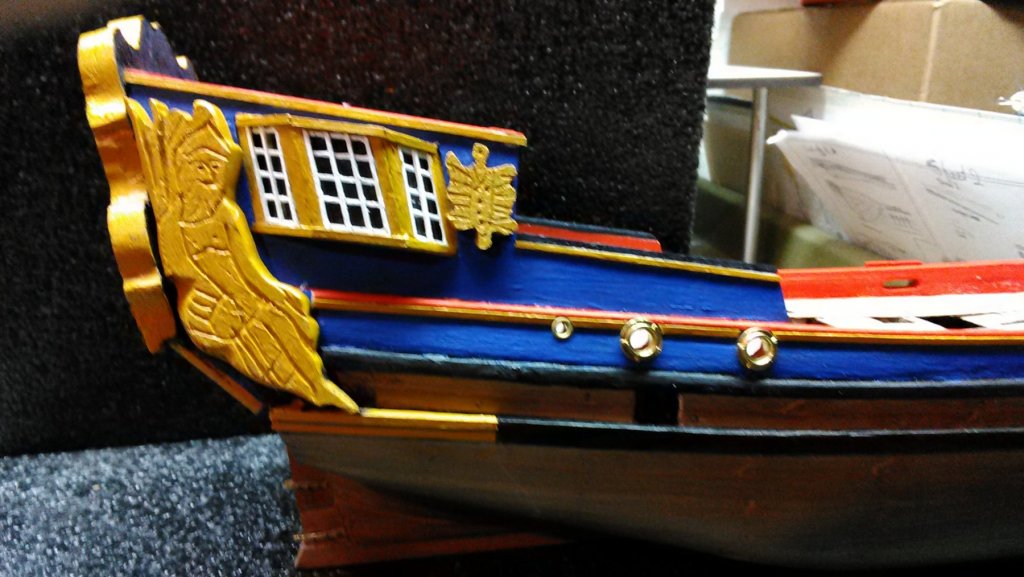
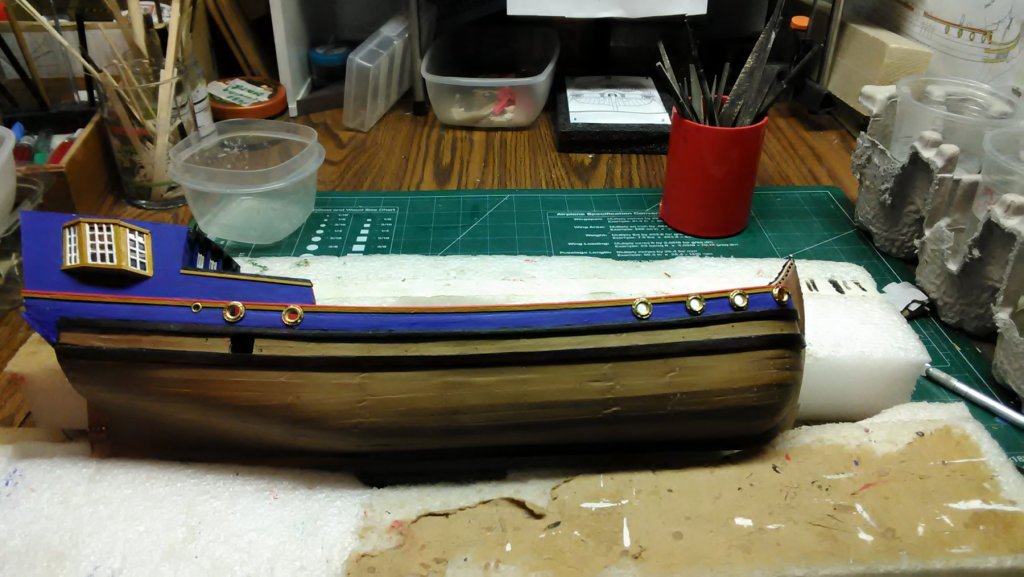
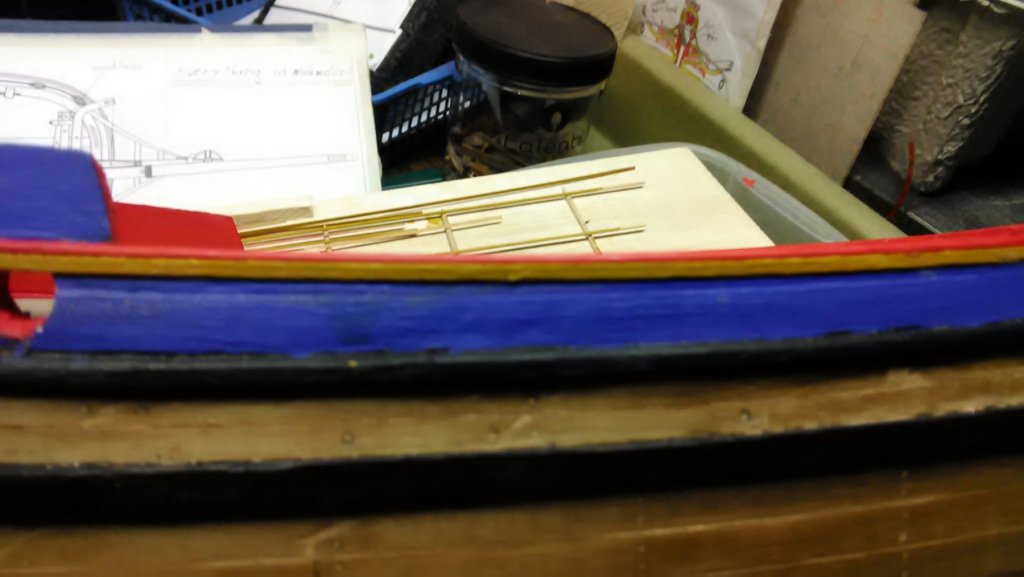
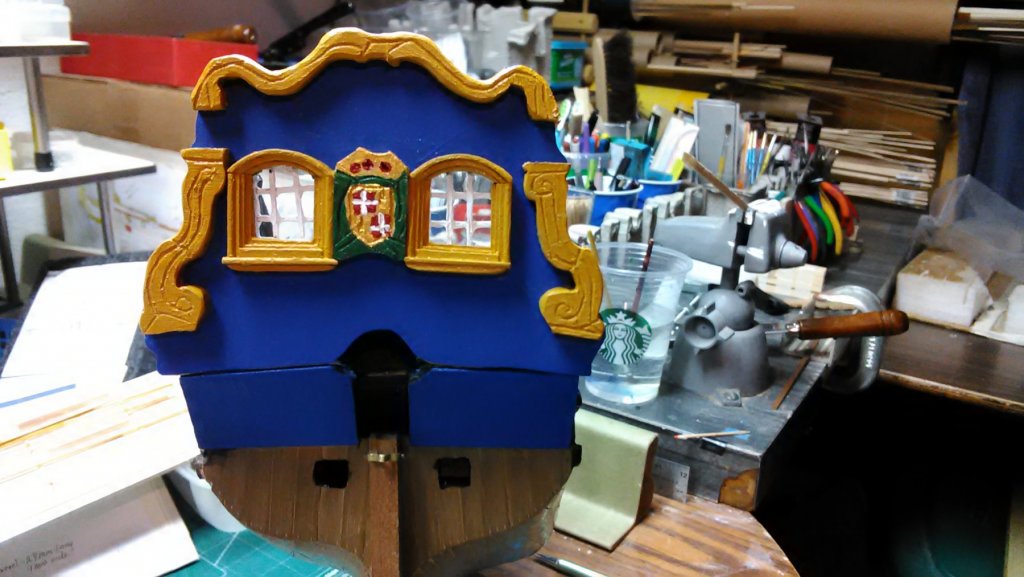
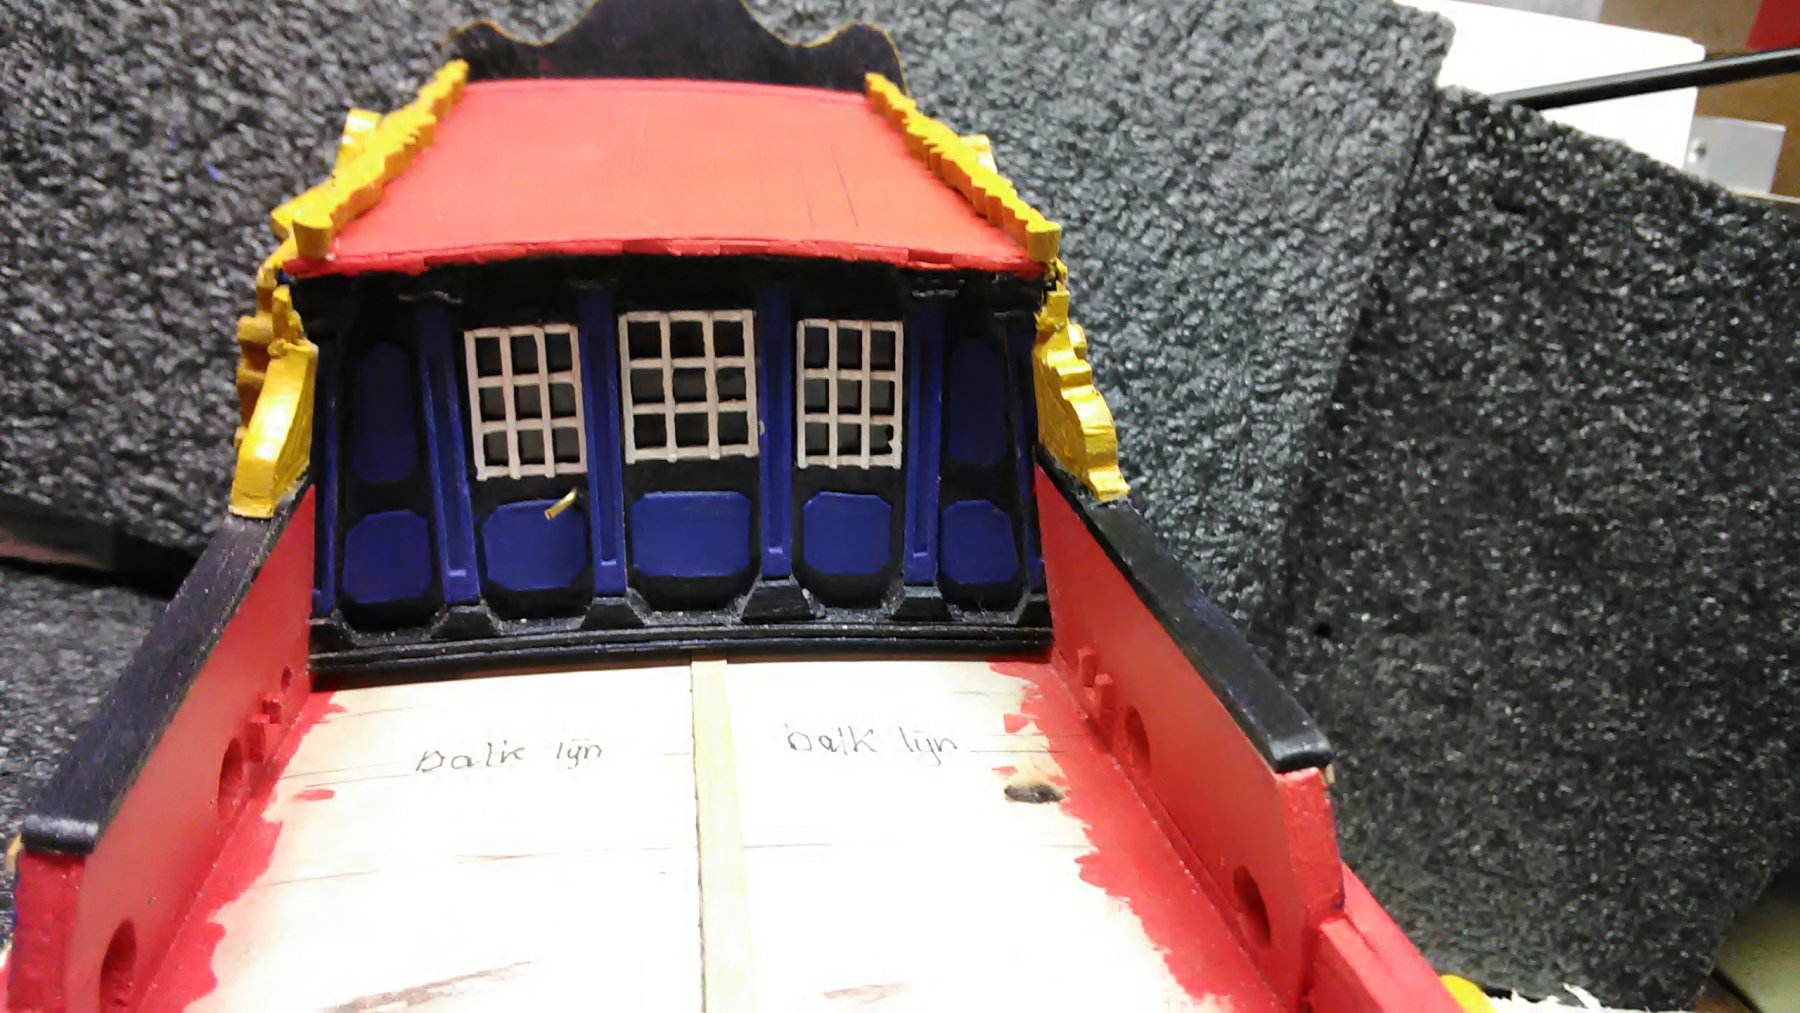
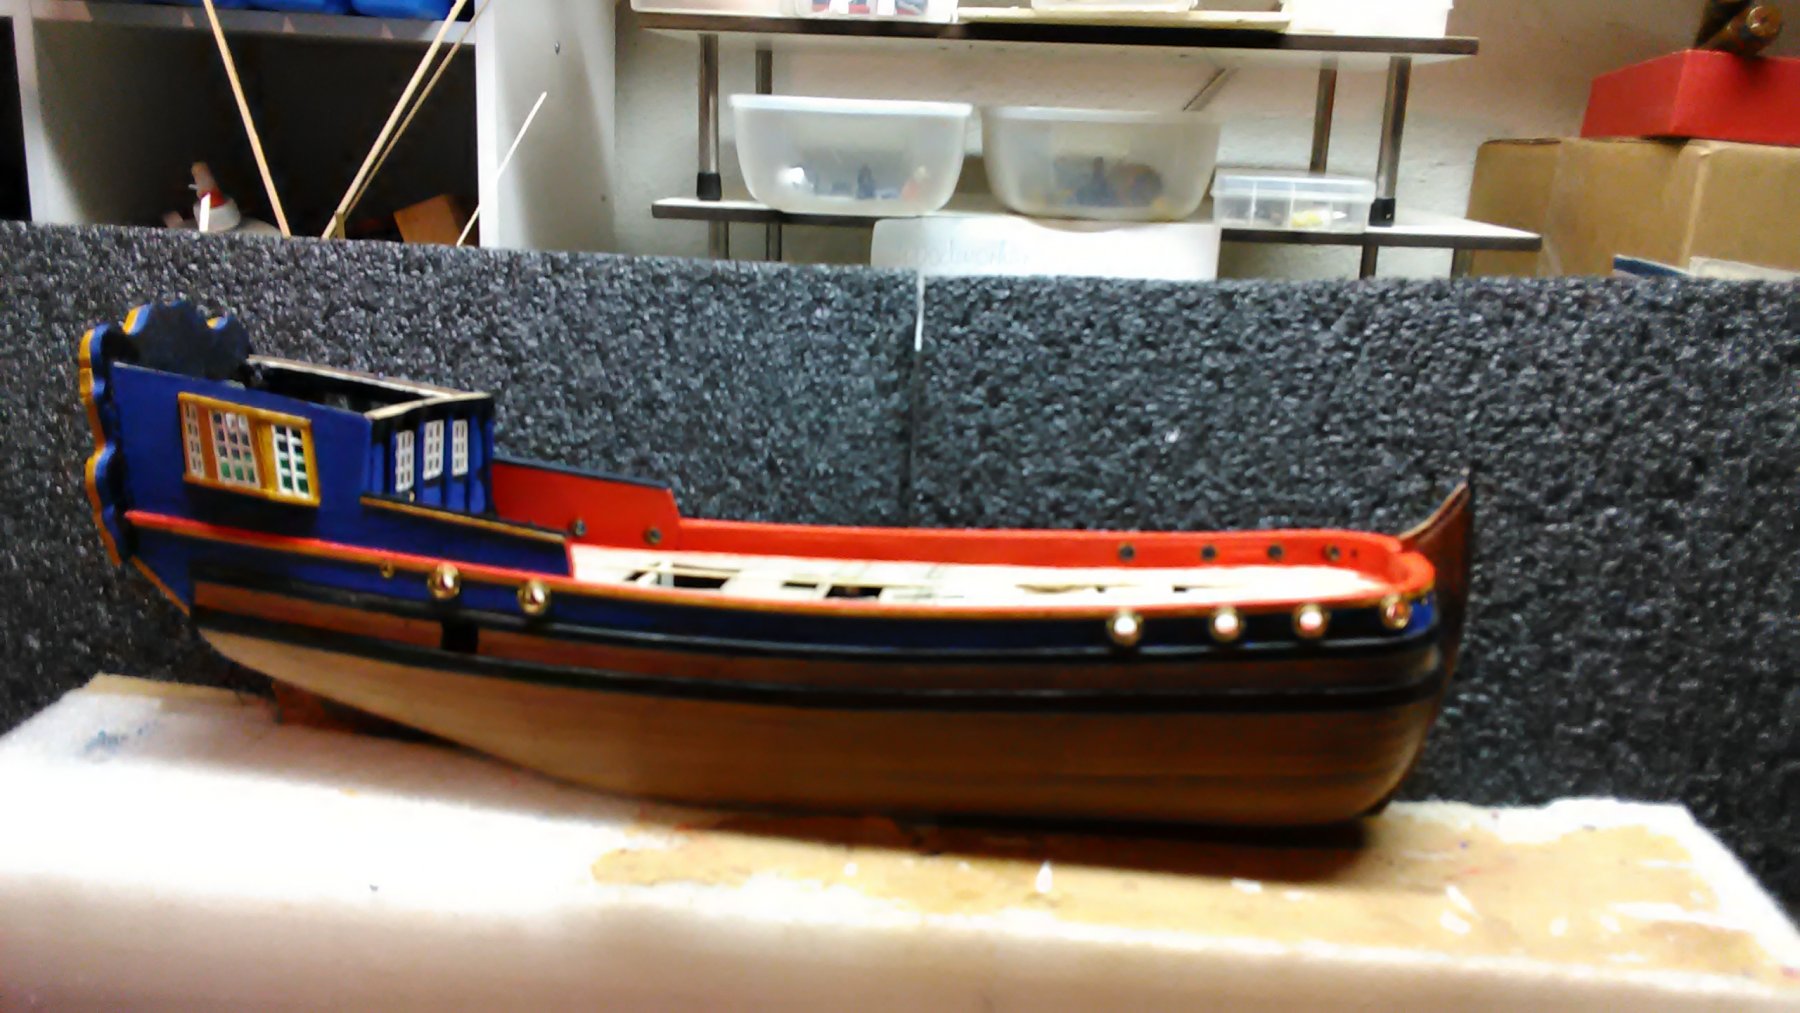
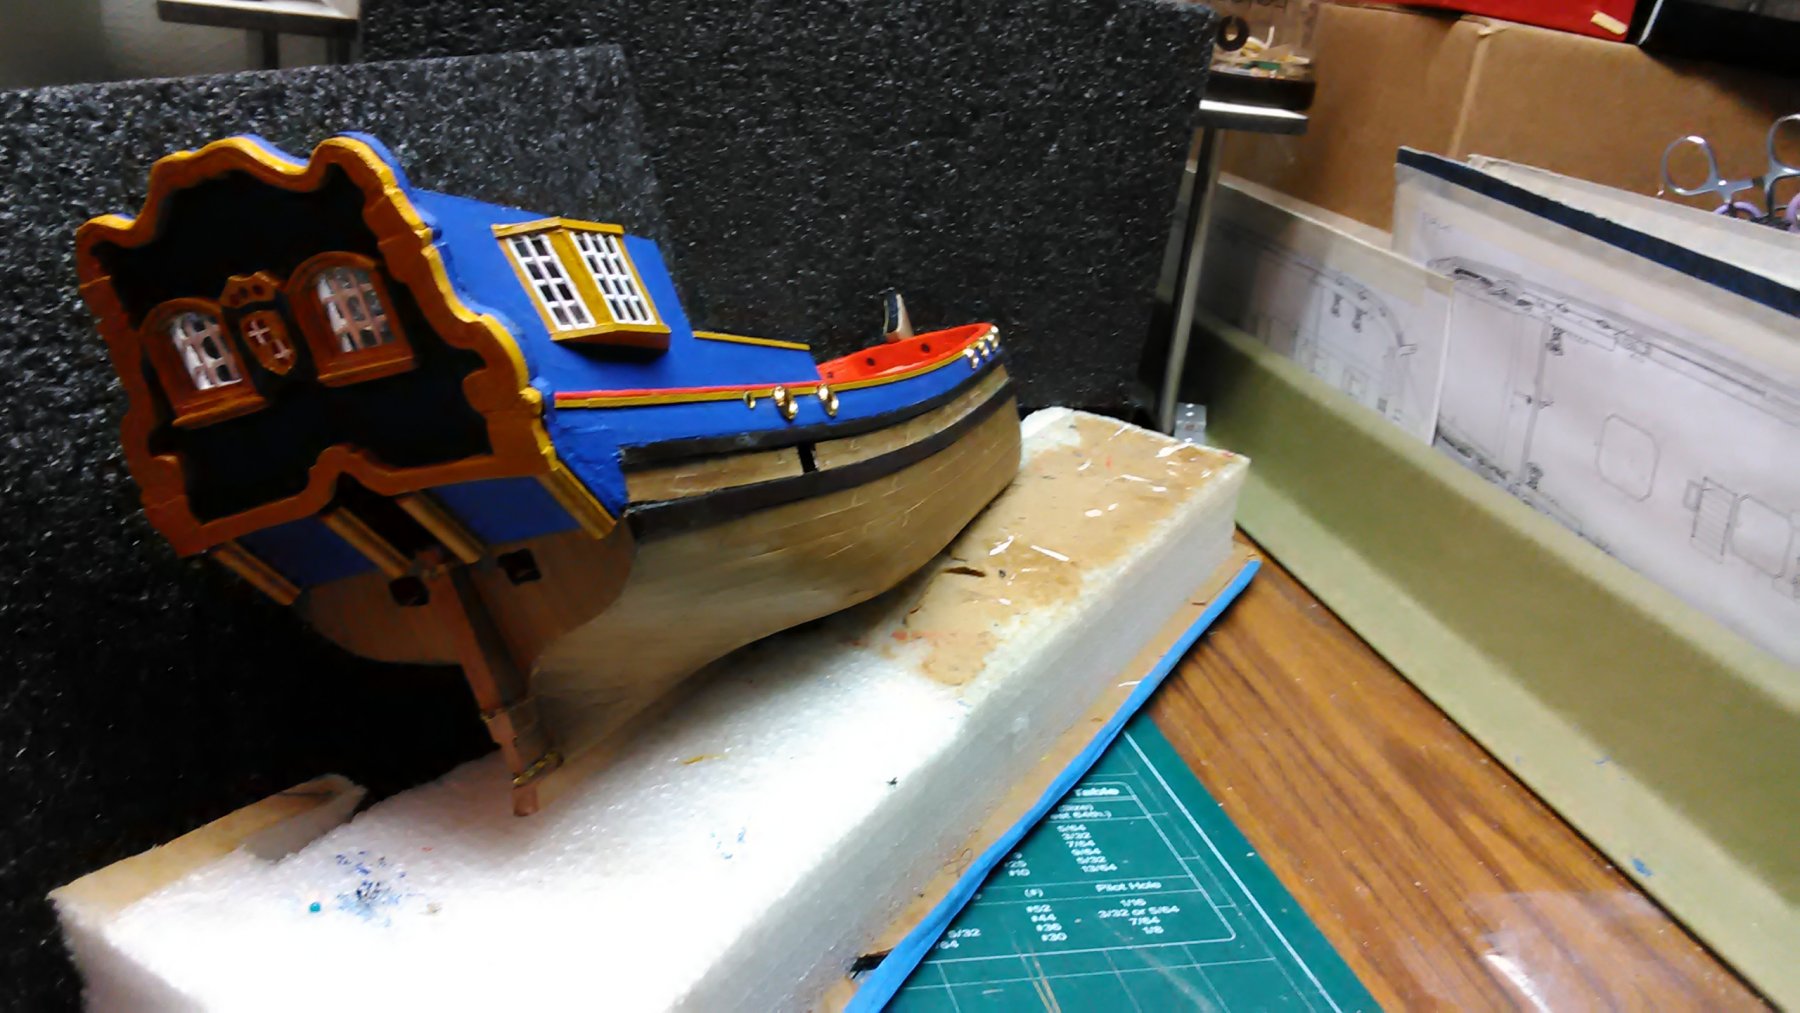
Transom glued to boat. Working on the roof of the pavilion and presently painting it medium cadmium red. Looking at the boat as a whole, it is very flashy with all the bright colors. Just imagine lots of different flashy colored yachts on the Zuiderzee in the 17th century.
Marcus


-
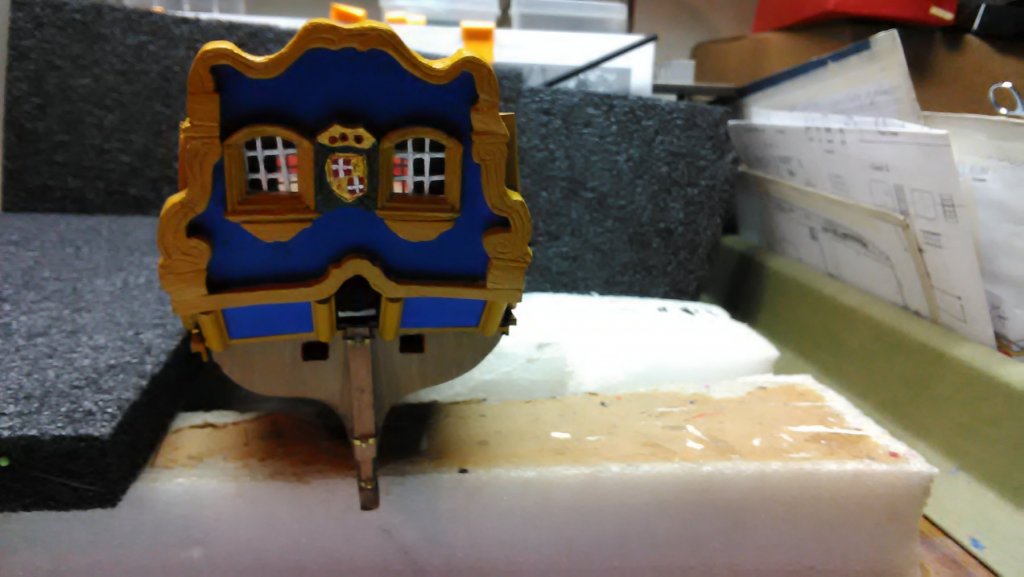
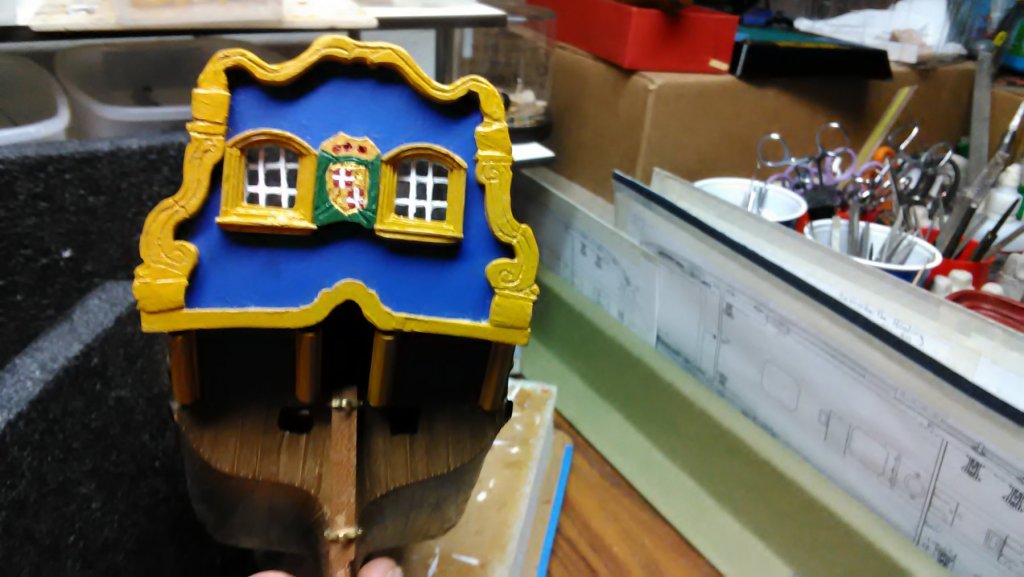
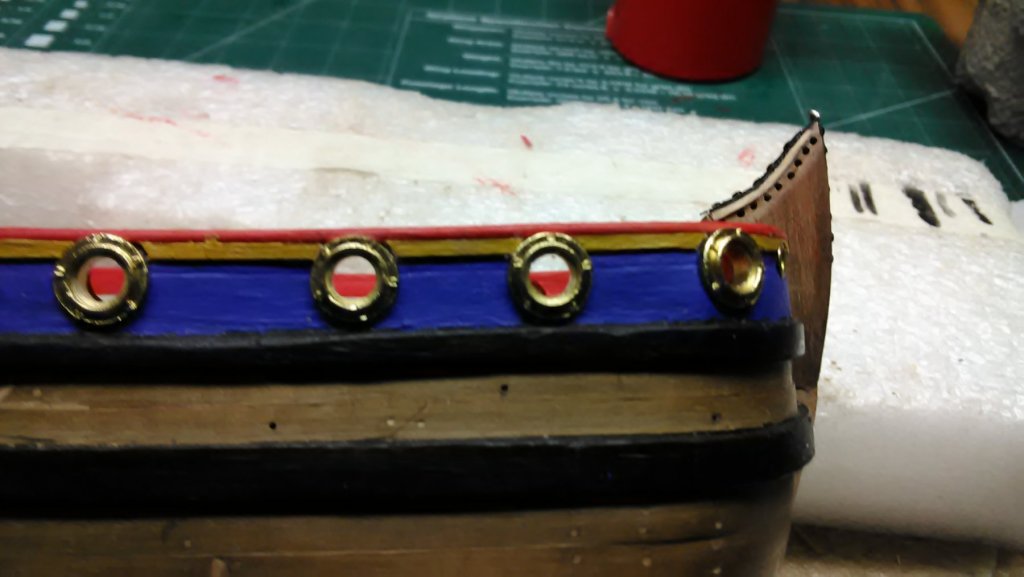
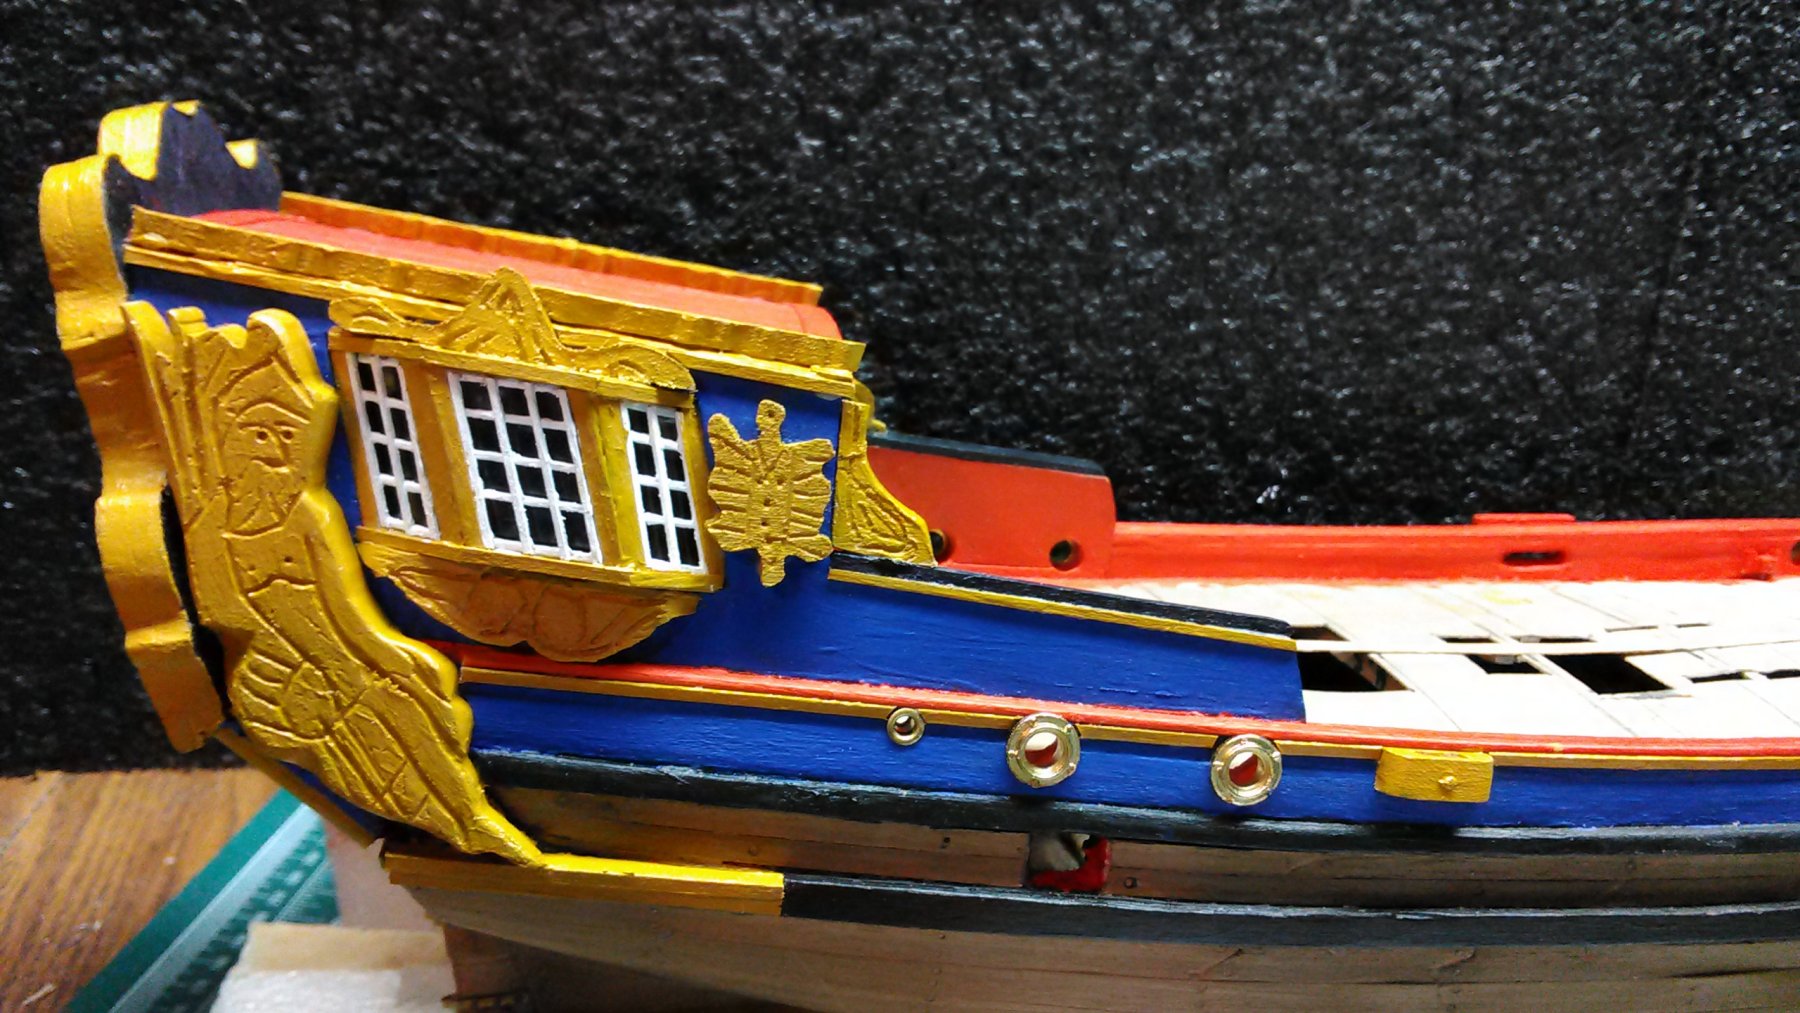
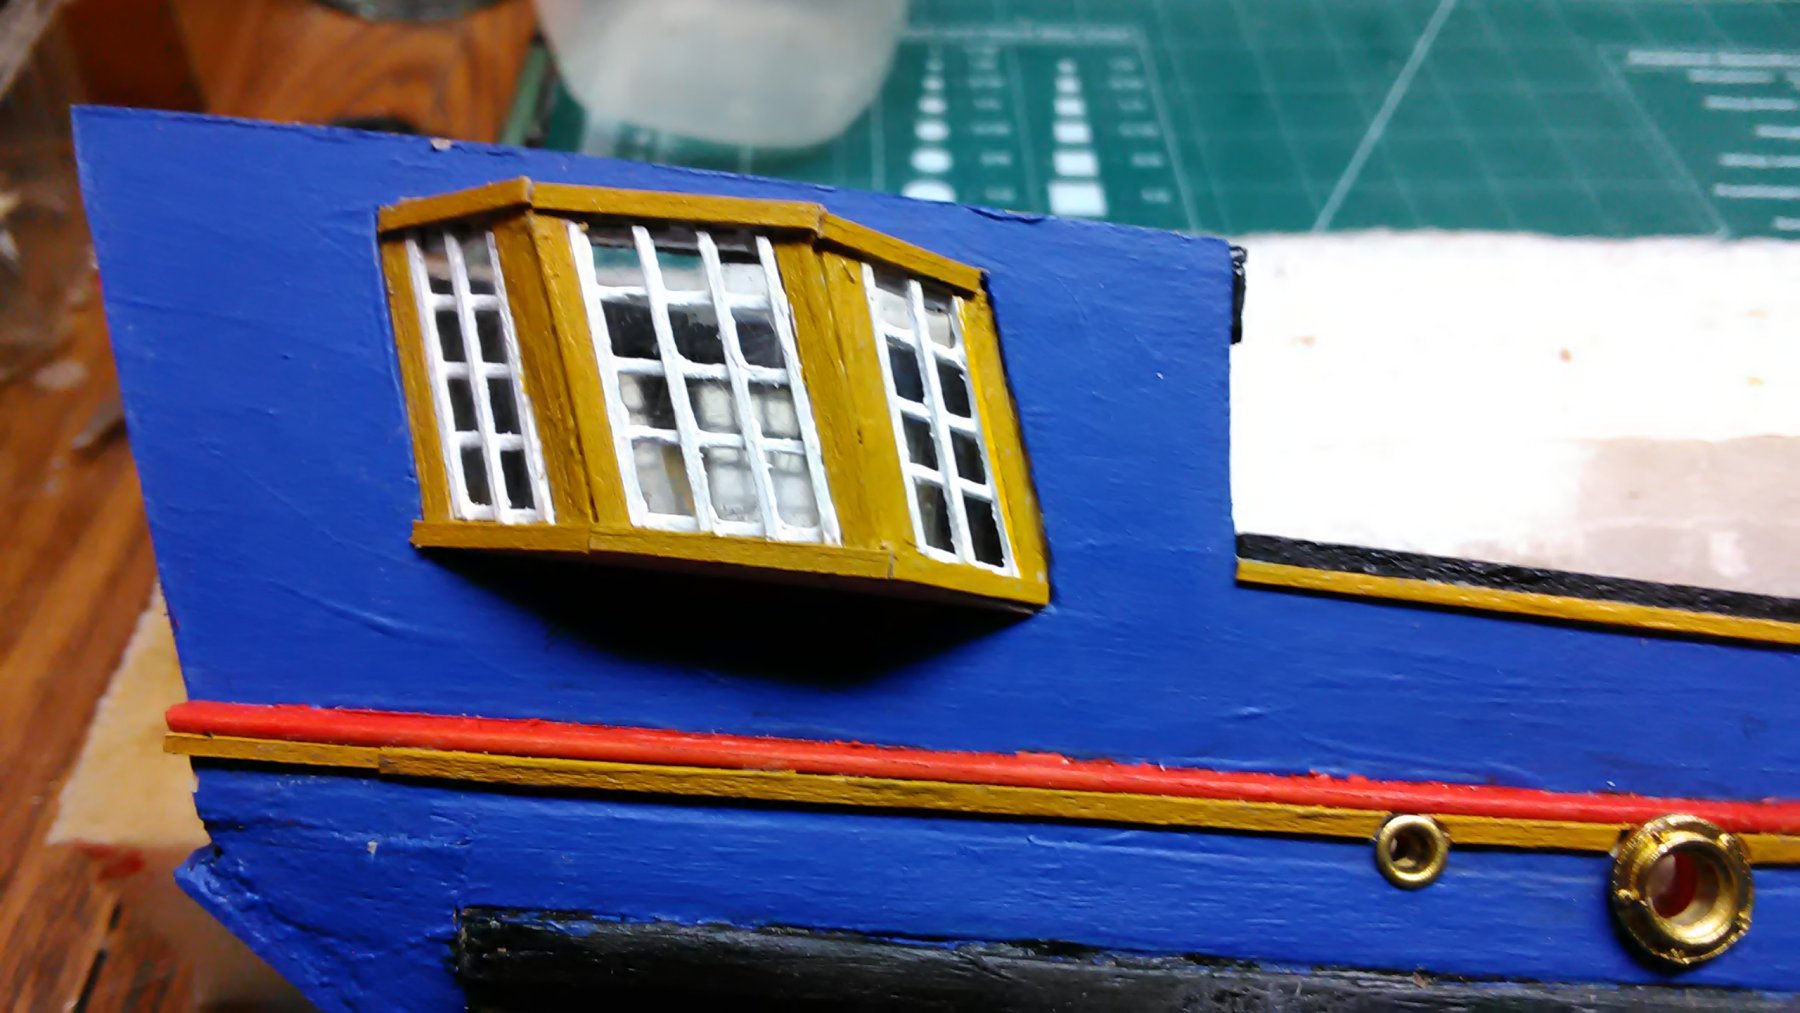
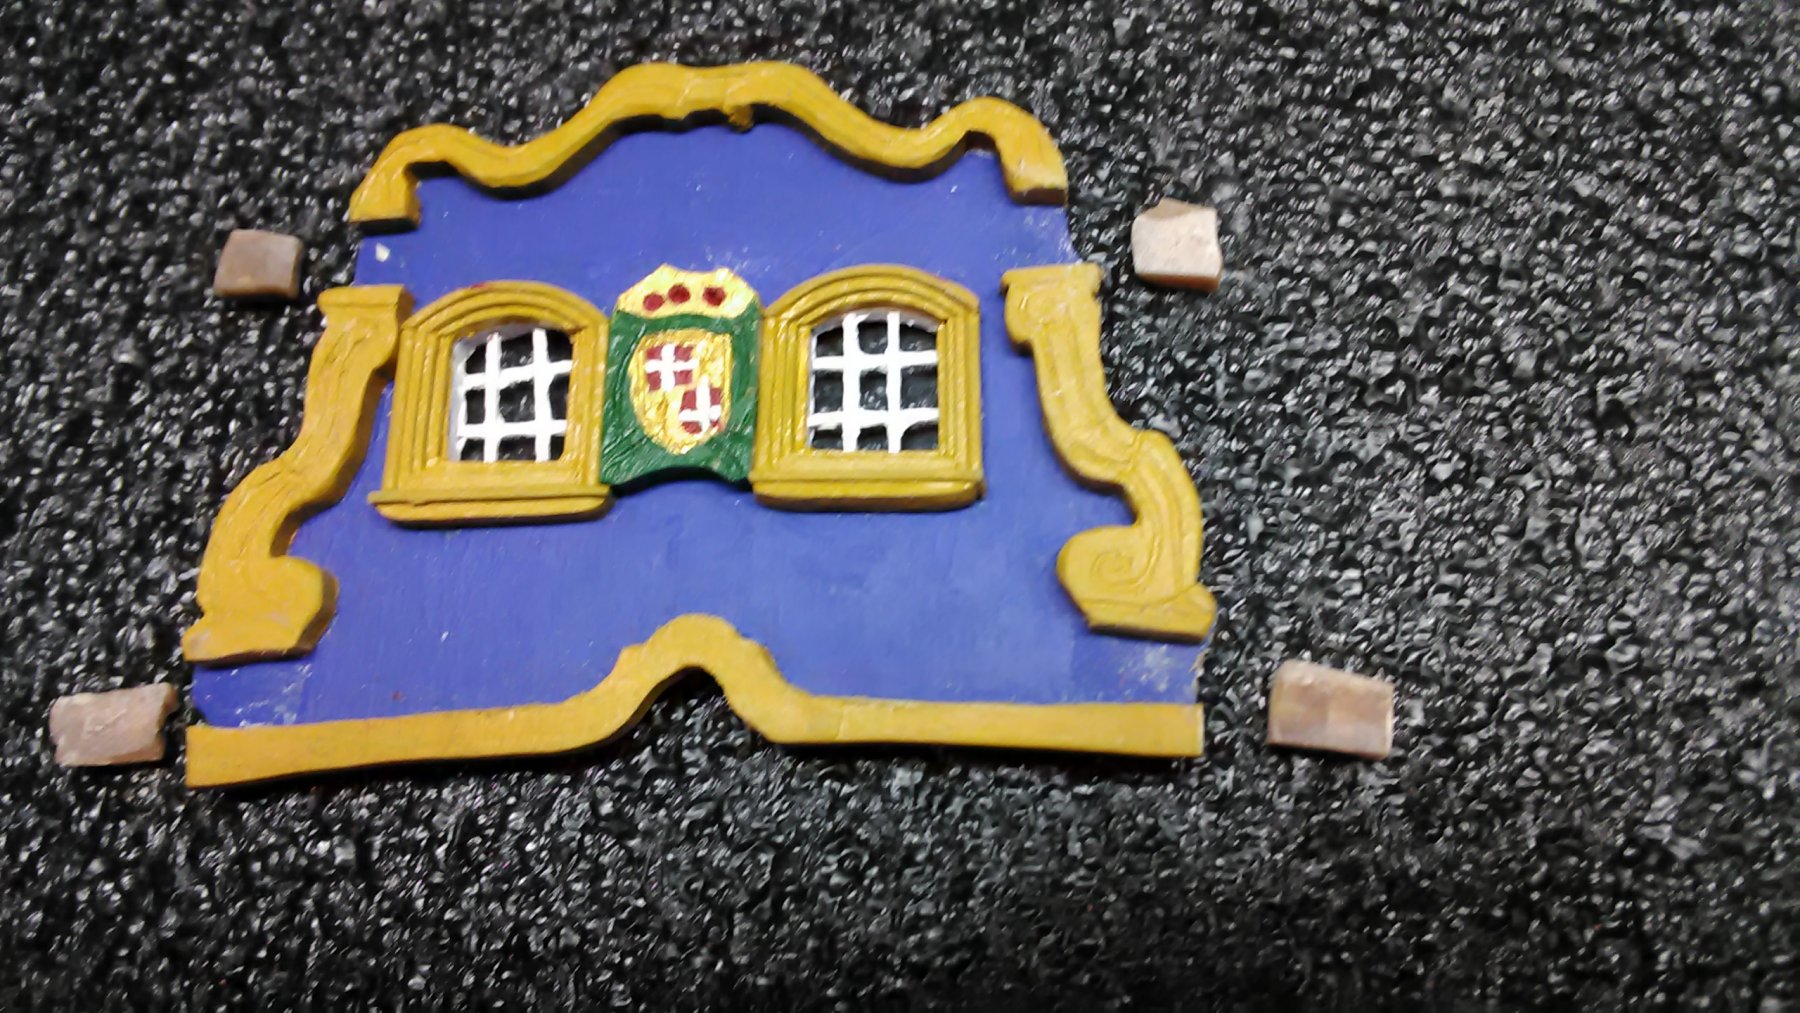
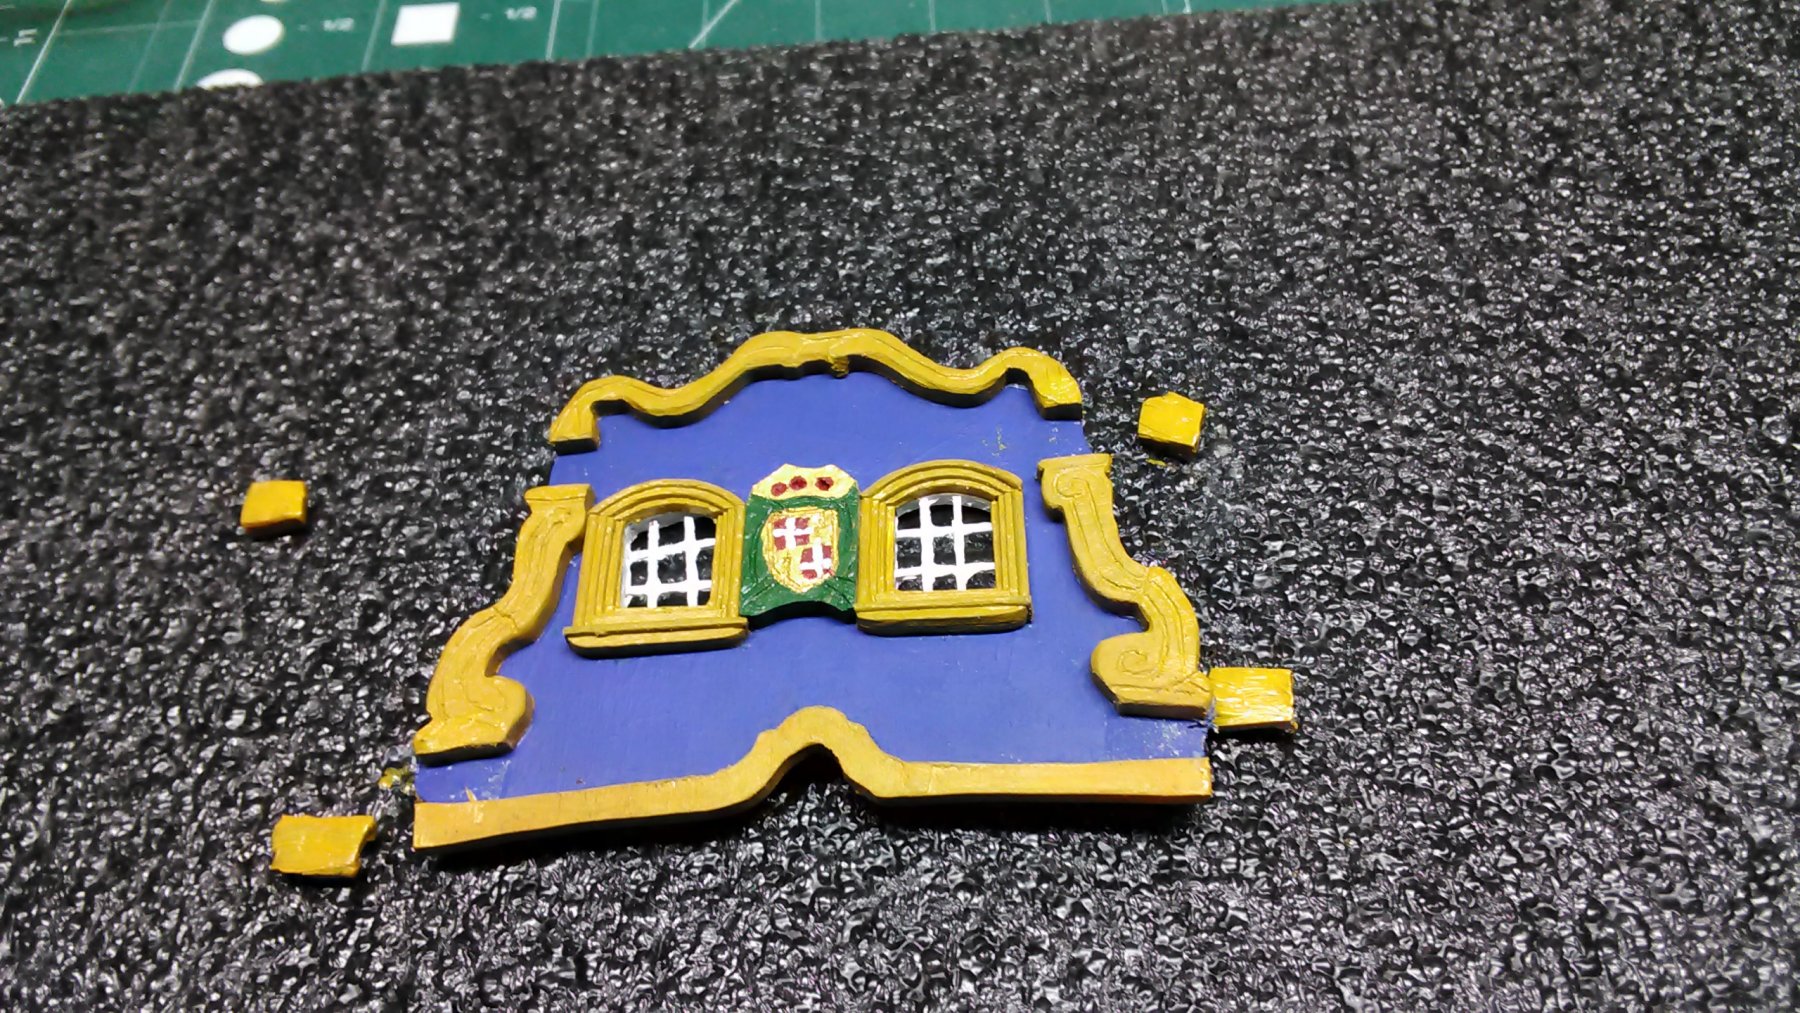
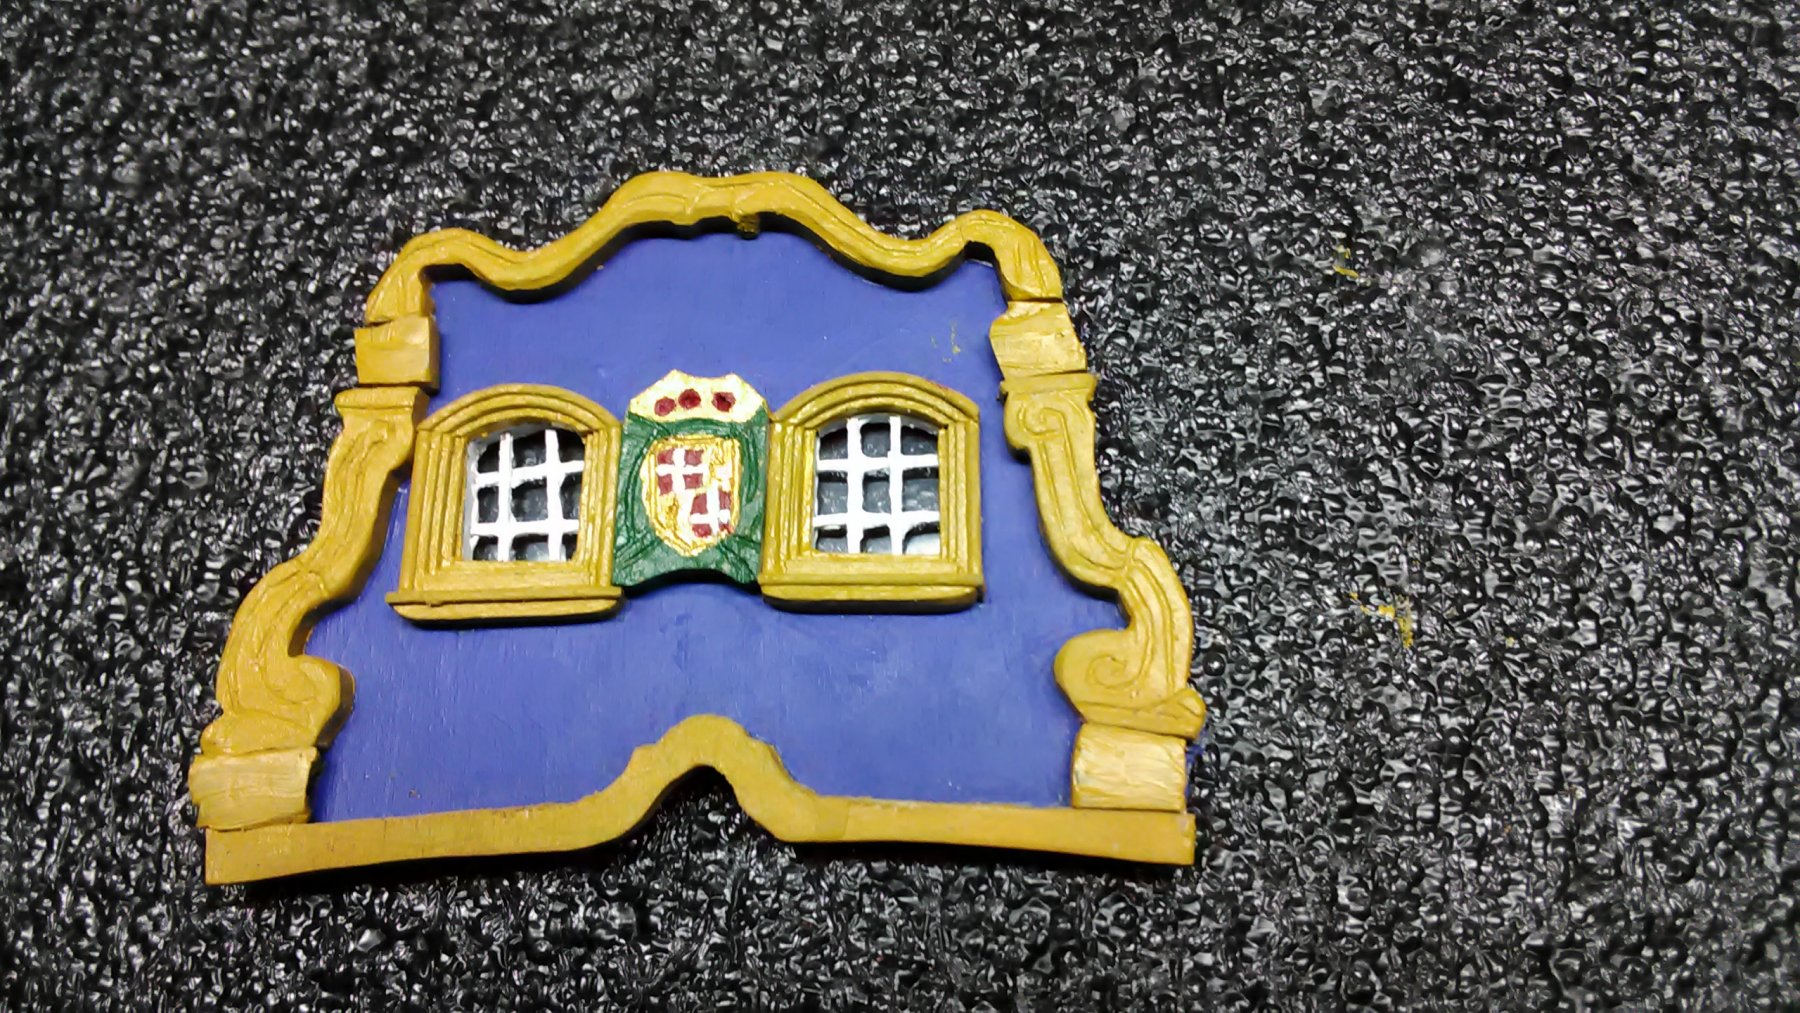
Finished putting in the pavilion windows on the side. The windows stick out too much and th width of all three is longer than the plans, so not all the carvings fit. (another mistake).
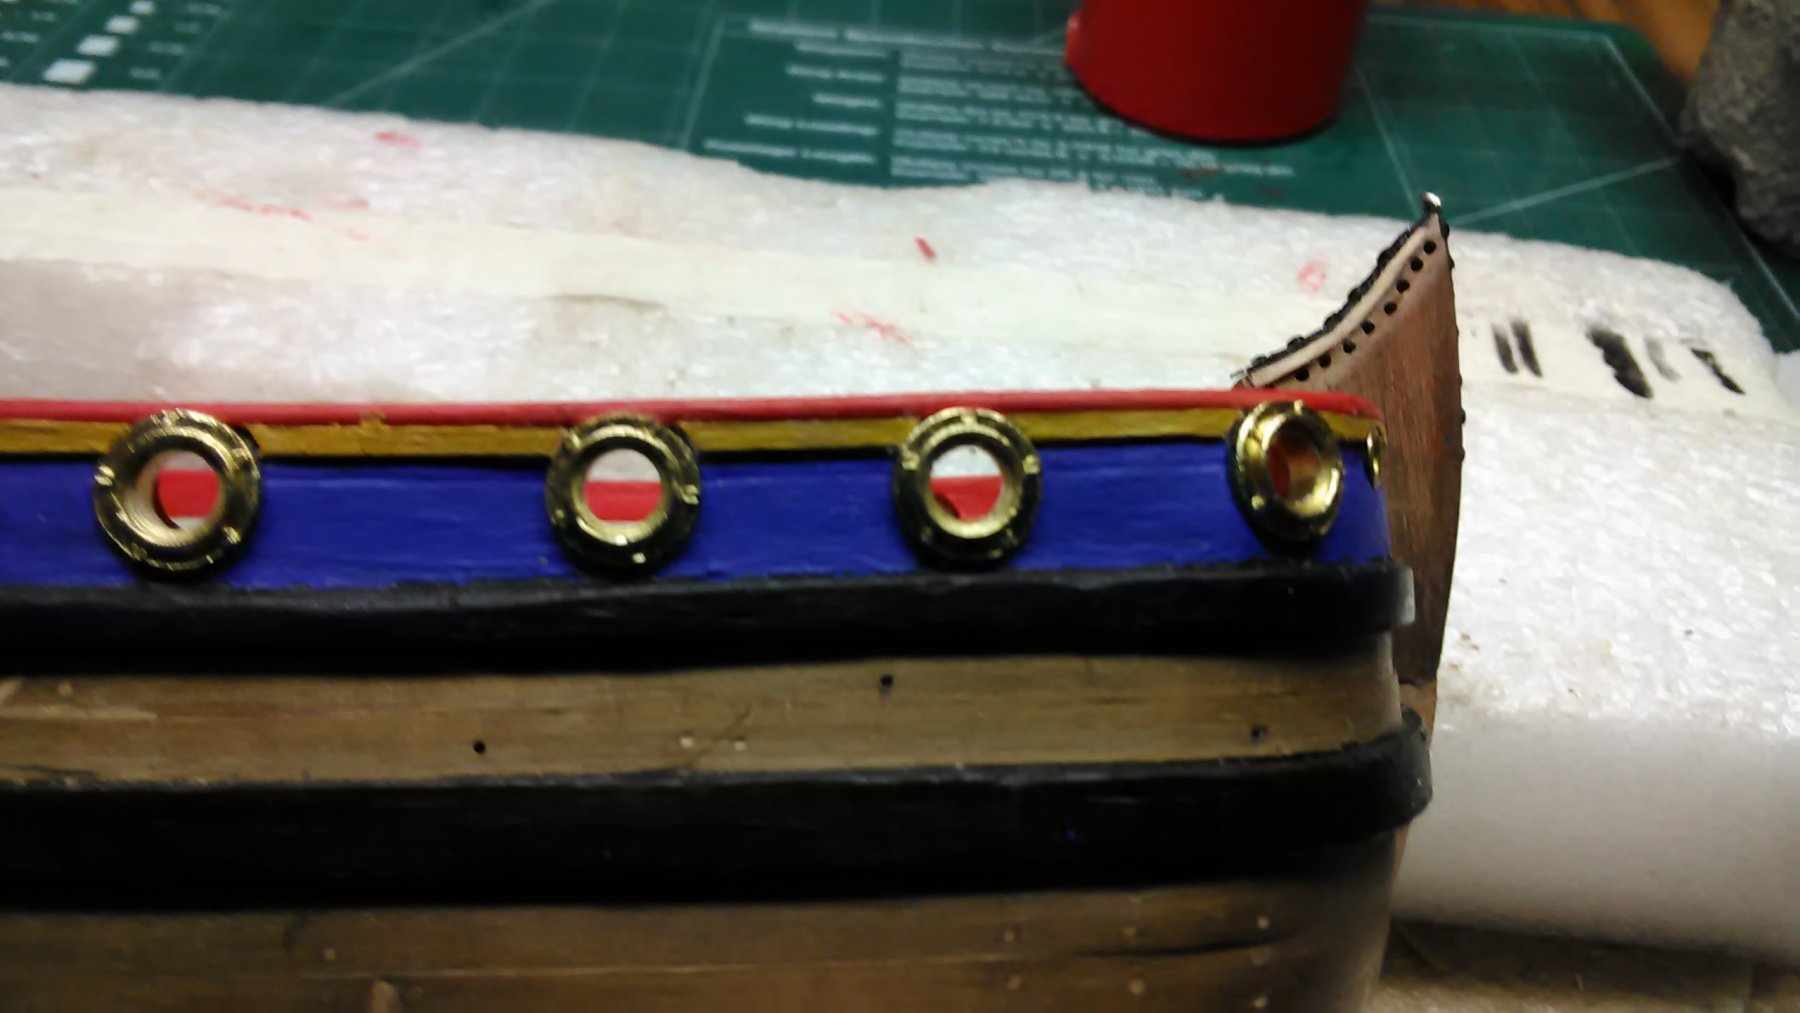
Cut out the canon holes and glued the gun wreaths (port holes in place
). I am leaving them gold and will not paint them yellow ochre.
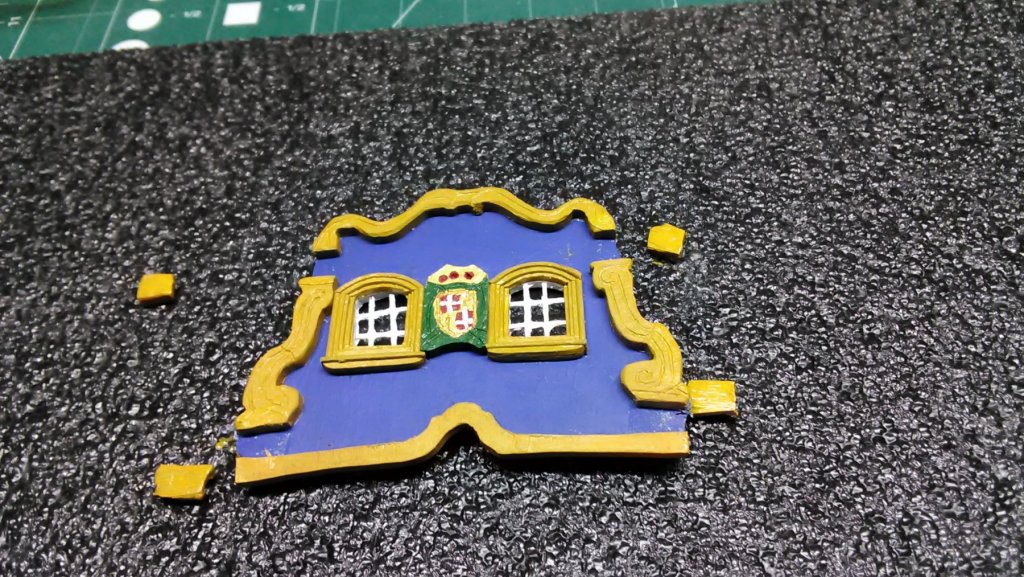
Too fill in the gaps between the carvings on the transom, I used sculpey. Formed the clay, baked at 275F for 15 minutes, cooled, painted, and glued in place.
Marcus


- cog, Geoff Matson, Omega1234 and 3 others
-
6
-
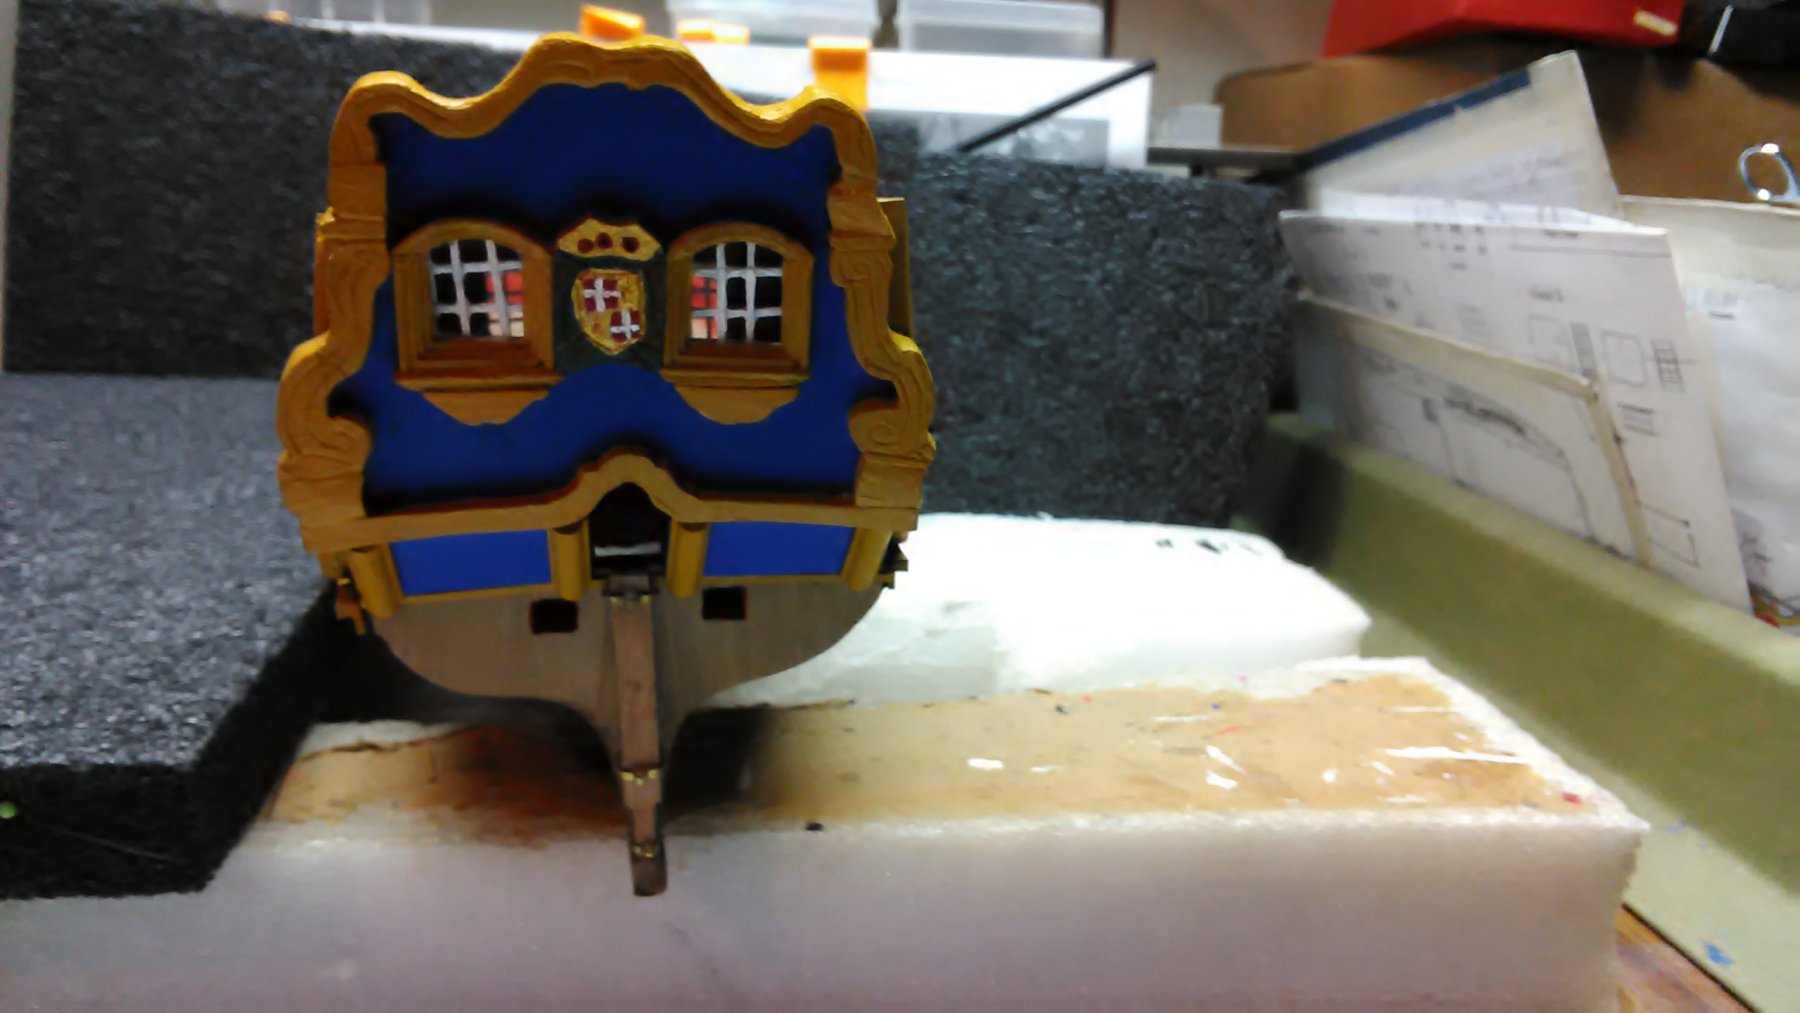
Worked on a few things. First I did the ornamentation on the railing. The cadmium red piece is a 1mm x 1mm dowel cut length wise (I did not cut it, this was purchased) and glued flush with the top. The yellow ochre piece is 1mm x 2mm glued below the red piece.
Transom with some carvings. The big mistake I made is the piece that is angled below the transom. It is too wide. It is because the sides of the pavilion are too high. Looks a bit weird but it will work.
Marcus

-
-
-


Utrecht 1746 by flying_dutchman2 - FINISHED - Scale 1:48 - Dutch Statenjacht
in - Build logs for subjects built 1501 - 1750
Posted
Thanks Patrick.
Picture of the throat halliard block and my serving jig (balsa block with two smaller pieces nailed in with stainless steel insect pins and two altered clothes drying pins held into place with toothpicks).
My woodworkers Association gave me a full 3'x2'x4' box full of 2"x3"x12" of balsa and basswood blocks and 1/8"x4"x24" sheets of basswood. So I am using the balsa blocks to make jigs. Once they are not needed anymore, I will be using them for filler in between the bulwark.
Marcus