


flying_dutchman2
-
Posts
1,718 -
Joined
-
Last visited
Content Type
Profiles
Forums
Gallery
Events
Posts posted by flying_dutchman2
-
-
Marcus,
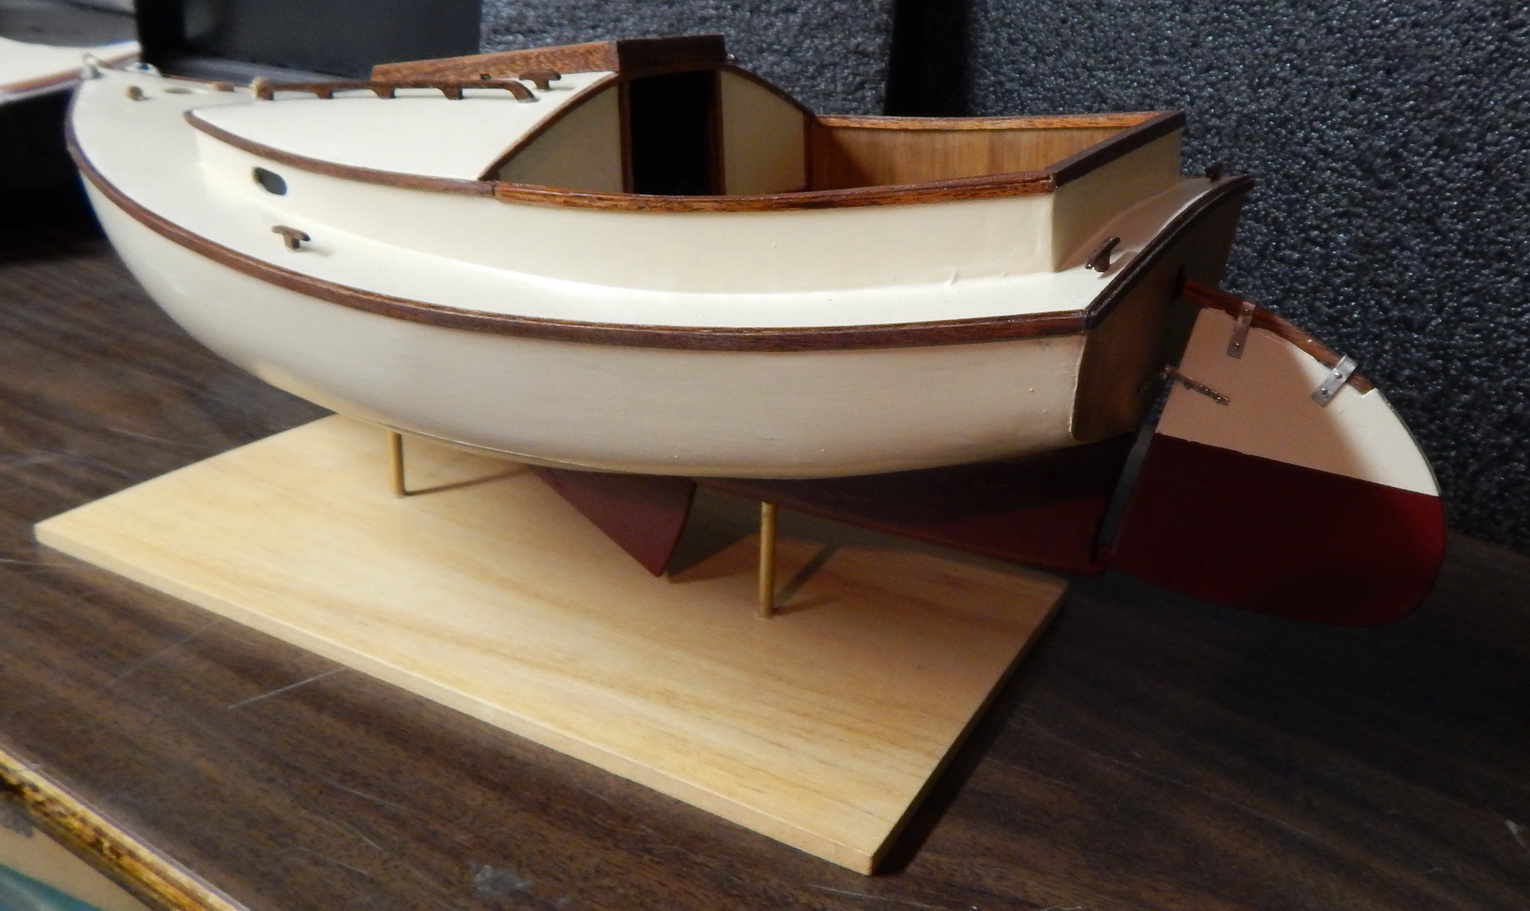
Interesting to use aluminum as weight ... Sail looks very good ... what's left ... just the decals ...your sister will be thrilled when it's finished
Cheers
I have salvaged a lot of computer parts over the years and the heat sinks are another form of paper weights. What is left is one decal "Perseverance" on the name board and I need to make a burgee.
Once completed I will send email and pictures to my sister & brother-in-law mentioning about a display case from Bluejacket. Once the case without the Plexiglas gets send to me I will get the Plexiglas, install in the case, put it all together and pack it for shipping.
The will tell me where I need to send it to.
Then on to working on the Utrecht. But I was reading a thesis from a person at Leiden University about the history of Dutch pleasure yachts. In here she mentioned a Pleasure yacht (Plezier jacht) from the 17th century. The NVM which is the Dutch Society of Model builders has plans of such a boat. ................Delima.........
Then last but not least, when my dad retired from the Dutch Foreign Service he volunteered as an administrator/touristhelper for the Dutch Windmill Society. Just before he left he gave me plans from a windmill (Polder Molen 1600). It stands about 4 ft high and it is a do-able project. Depending how much detail you want to add to the mill, you can make it work and if you get a round grinding stone you can even mill grains.
Oh yes, my wife gave me the Micro-Mark table saw for Christmas and with it a list of items she wants me to build. Our birdfeeder is falling apart so she wants me to take the measurements and re-make it.
Lots of options.
Marcus
- Chasseur, CaptainSteve, FriedClams and 8 others
-
 11
11
-
I went to the decal site and purchased the CD, paper and bonder. Will get it this week.
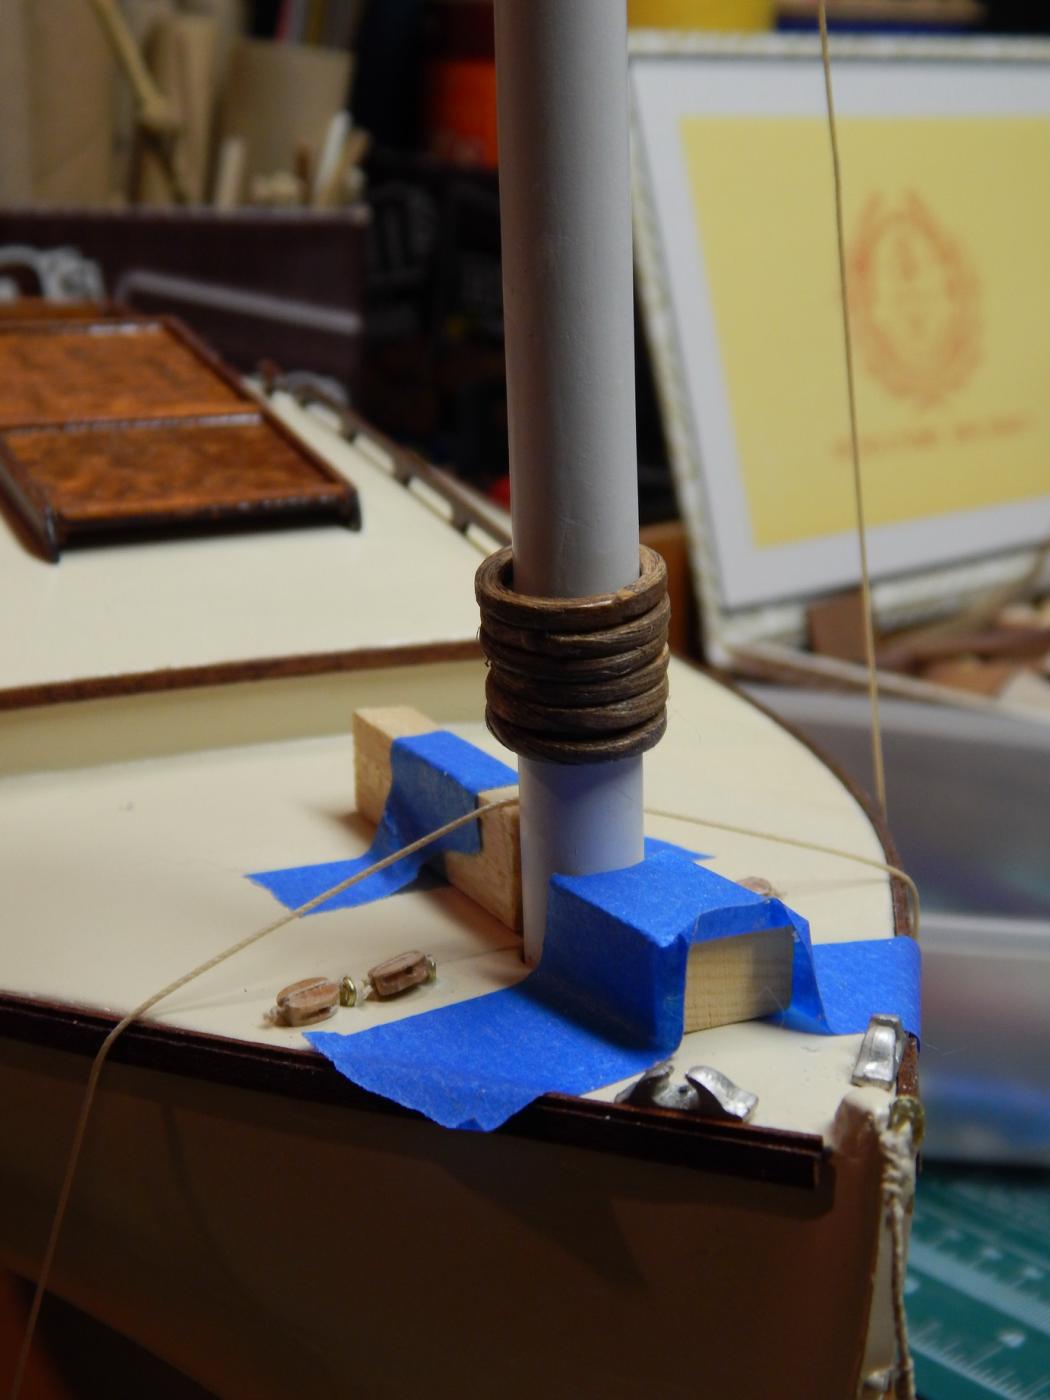
The rigging is loosely added to the mast, boom and gaff. Nothing is permanent.
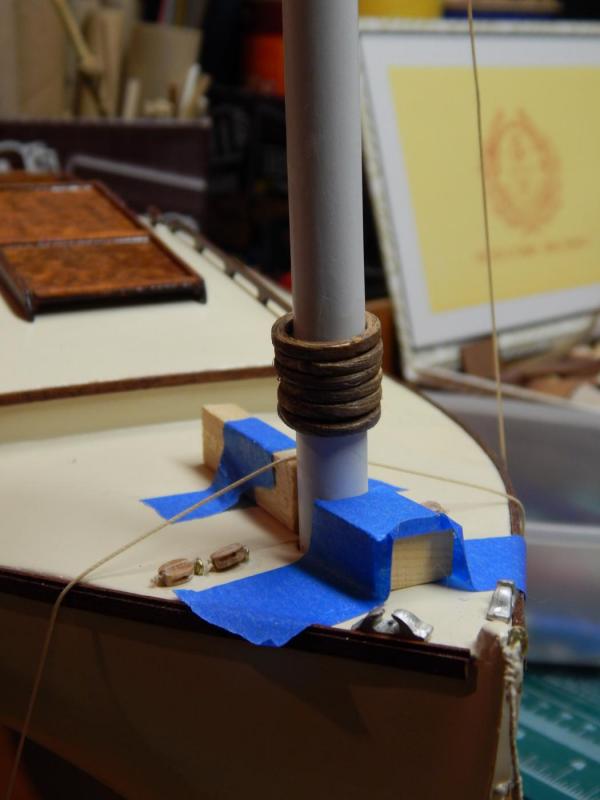
The little blocks is to make sure that the mast is at a 90 degree angle to the deck
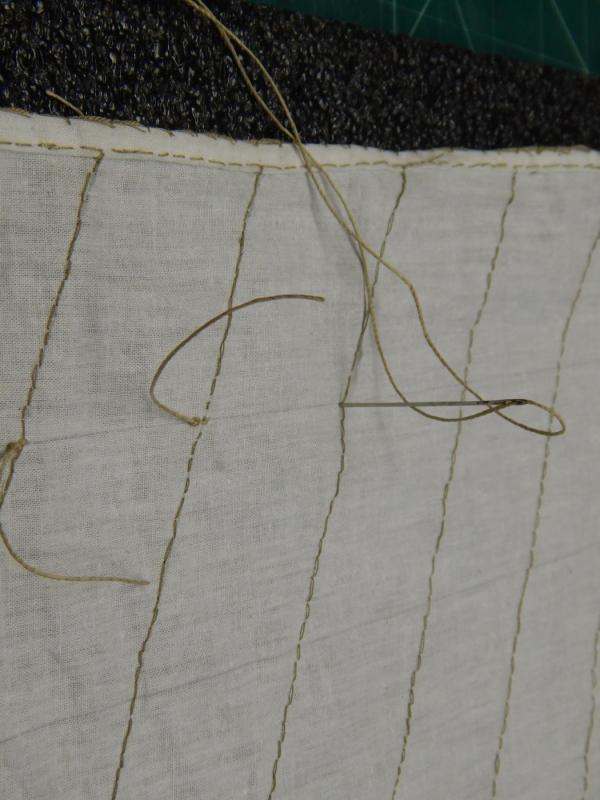
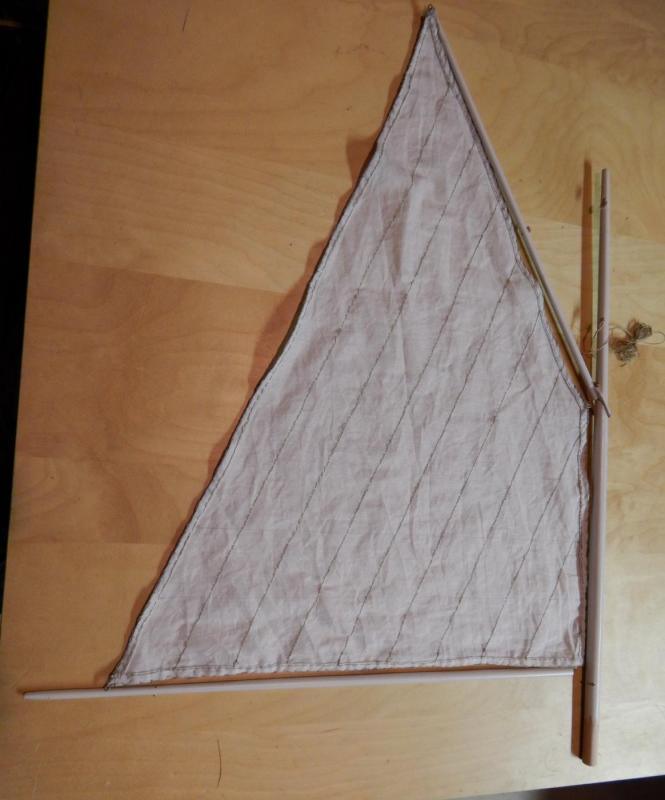
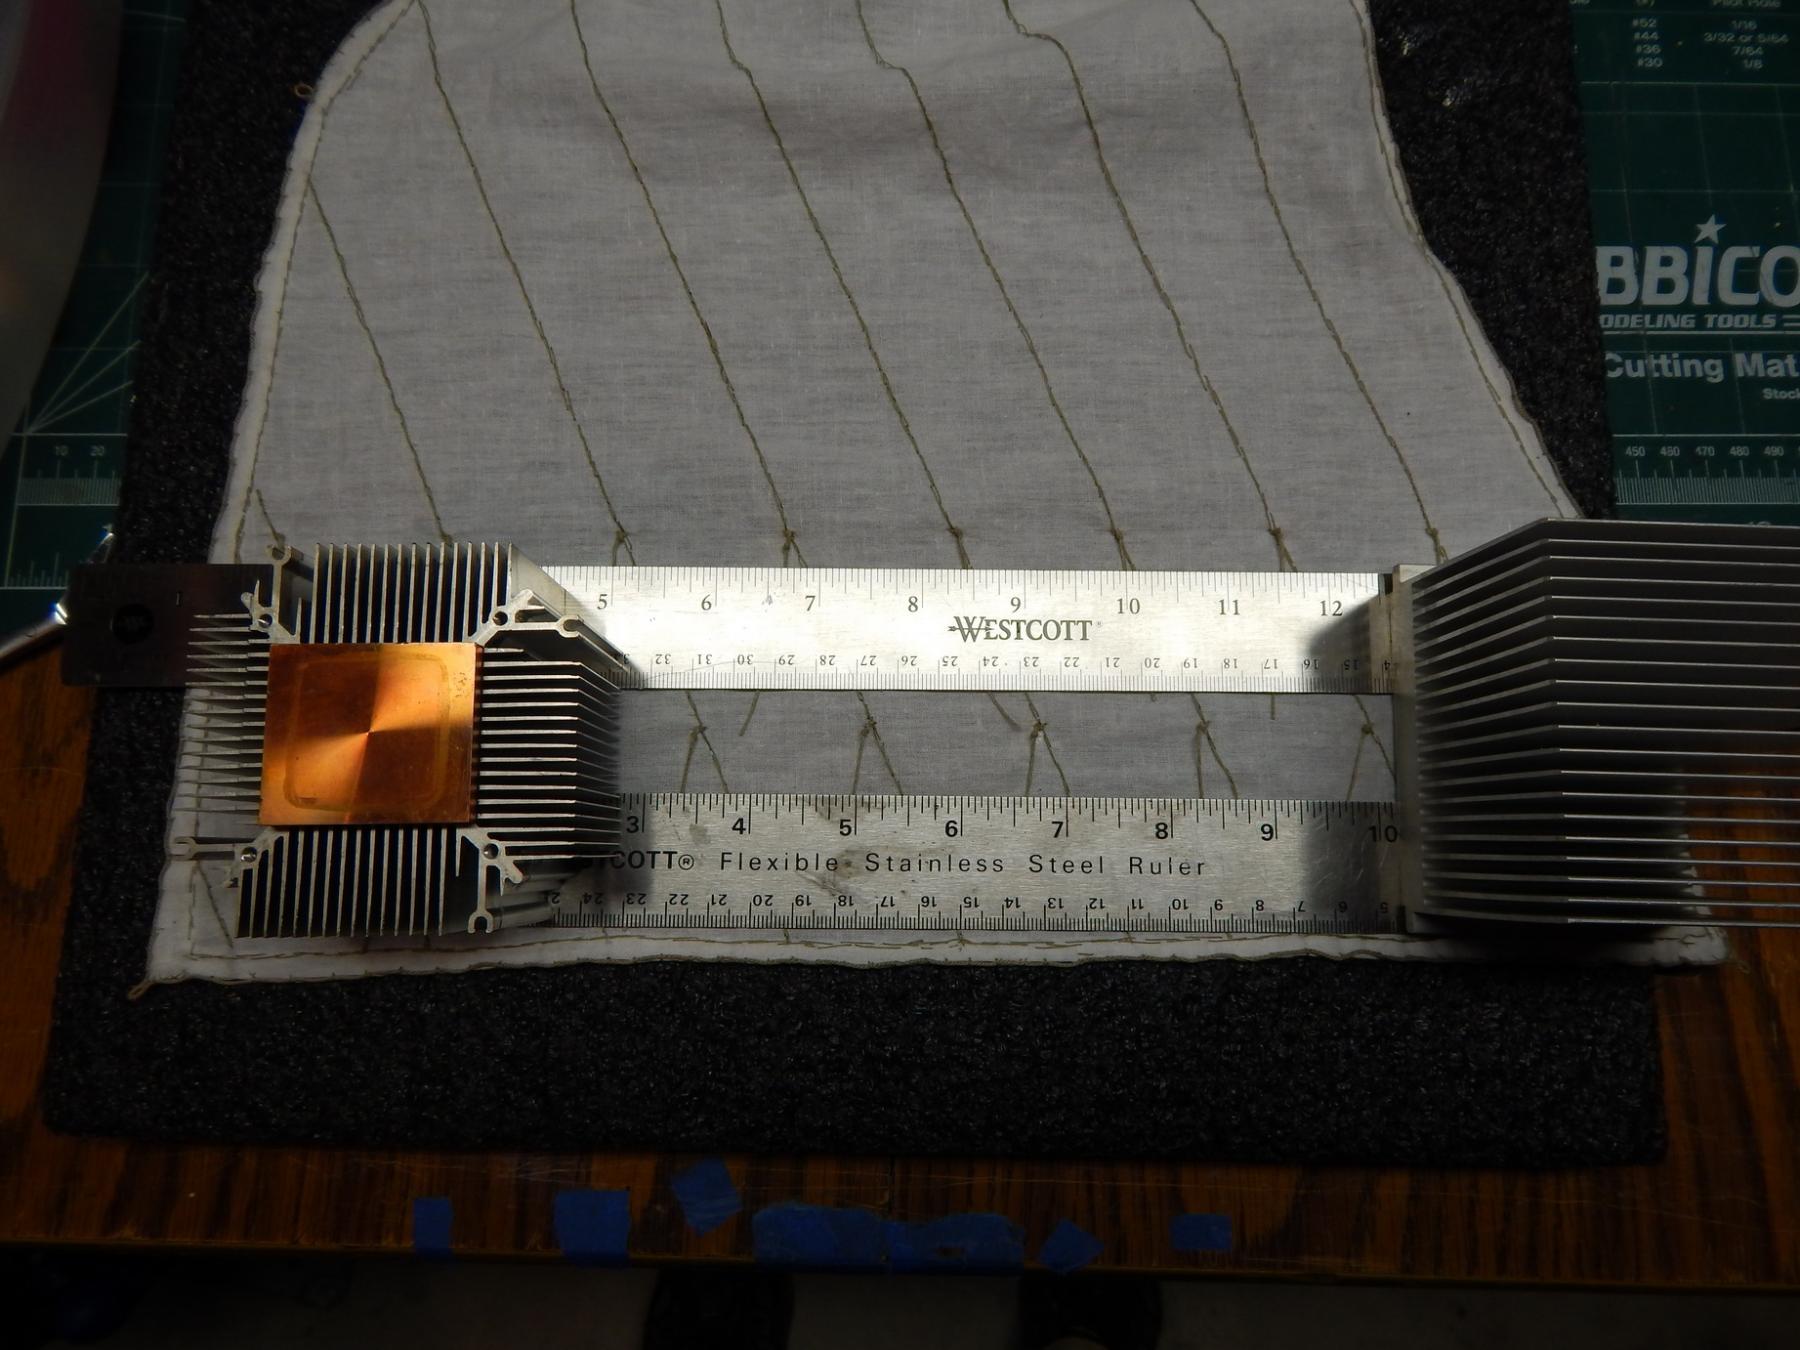
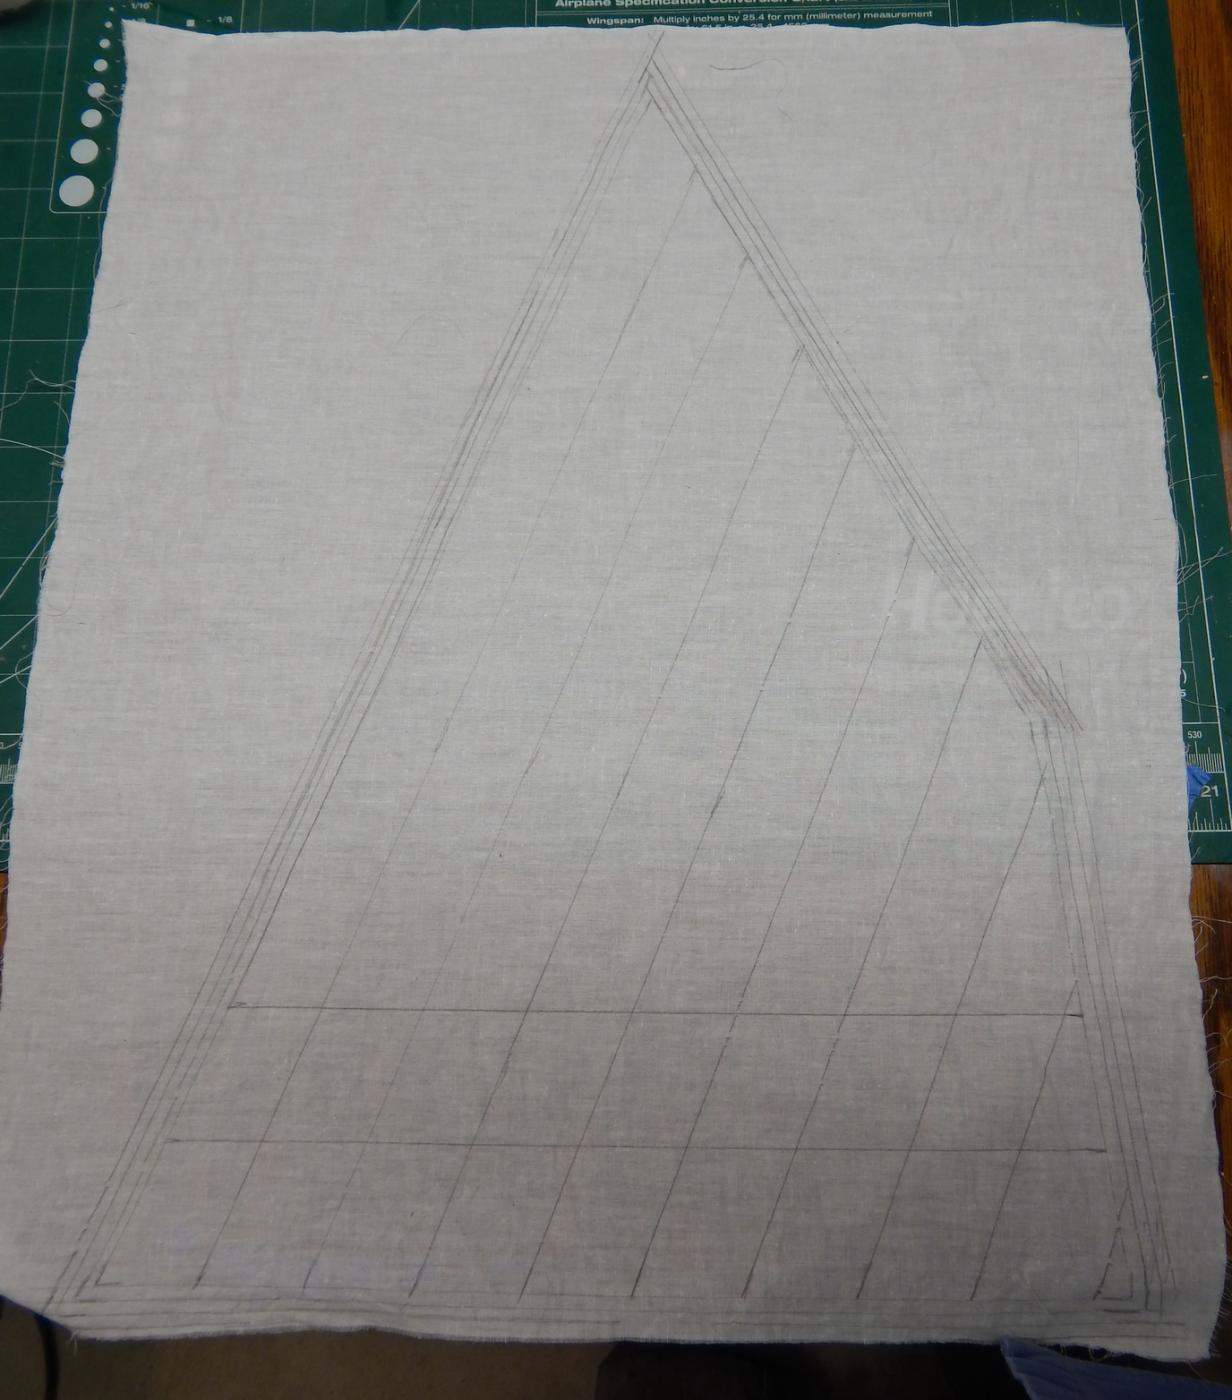
Sewing the reef lines into the sail.
After all the lines are installed, they are moistened with diluted white Elmer's glue and straightened out with clamps. The sail is pinned to the foam and the clamps which are attached to the lines keep the lines straight until the glue dries.
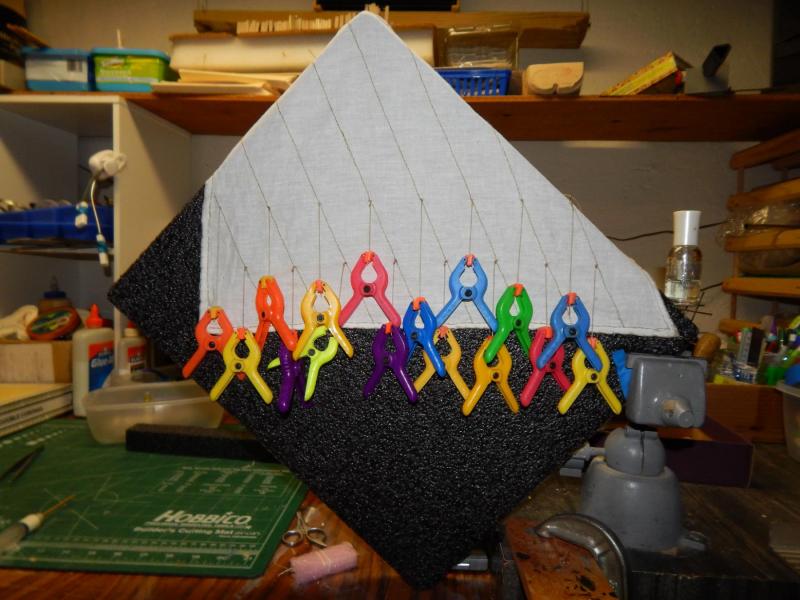
Some reef lines refuse to straighten out so by laying the sail flat on the foam, a ruler for each reef line row is weighted down by computer heat sinks (Hey Gary, another material procurement)

Attached all corners of the sail with string to there designated area so it will be easier for me to attach the sail to the mast hoops, boom and gaff.3
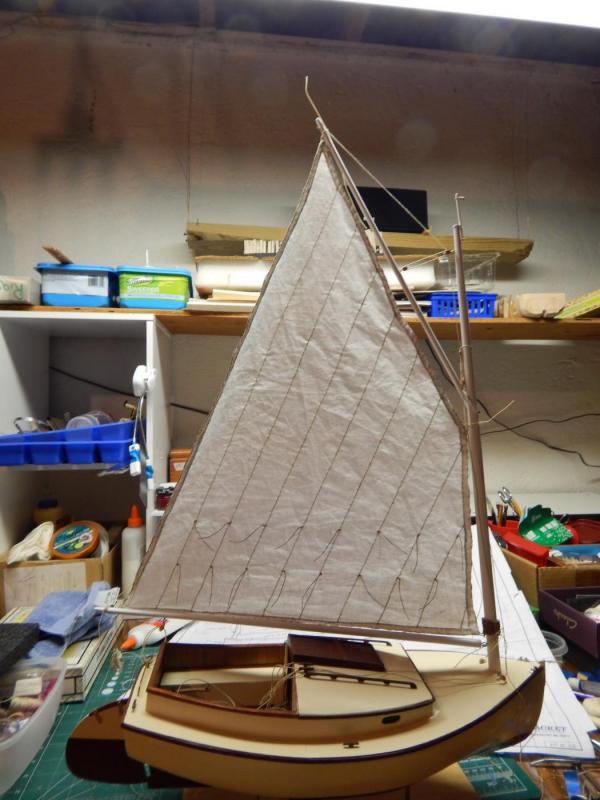
Almost done.
- Piet, Omega1234, CaptainSteve and 16 others
-
19
-
CaptainSteve, Jack12477 and Popeye Thank you very much for the information.
Jack and Popeye: I checked decalgear.com and for under $20.00 I can have the SureThing Decal Maker: Standard Edition CD, Testors Decal Bonder and some Decal paper............... Did I read that correctly? Looks pretty cool.
Thanks,
Marc
- mtaylor, popeye the sailor, Elijah and 2 others
-
5
-
So decal-it is a pc program?
Where do you buy the decal paper and the decal bonder?
or just give me link and I'll look it up.
Thanks a bunch
Marc
- mtaylor, popeye the sailor and Piet
-
3
-
you could use photo shop to create the name plates........set them up for size. but instead of paper, use white decal paper. you will also need to purchase a can of decal bonder to seal the decals. the stars though could be done in a cool idea. on one of my scavenges through Hobby Lobby, I found these stars, used for leather studding and / or decorating. I found them in copper, gold, and silver.........but I also bought a pack of red, white, and blue. it might give it a cool touch

This is something I will do.
The flag I will do by a method from Gus Augustin, member of our tri-club and a well known modeler.Post 51 on this page
Marc
- popeye the sailor, Piet and mtaylor
-
3
-
As of the last post I am ahead. Cleaned up my mistake and learned from it.
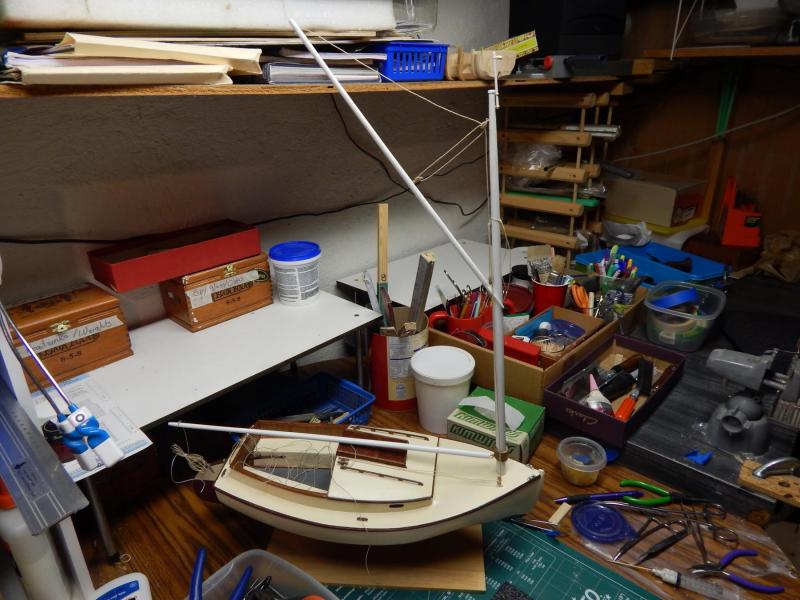
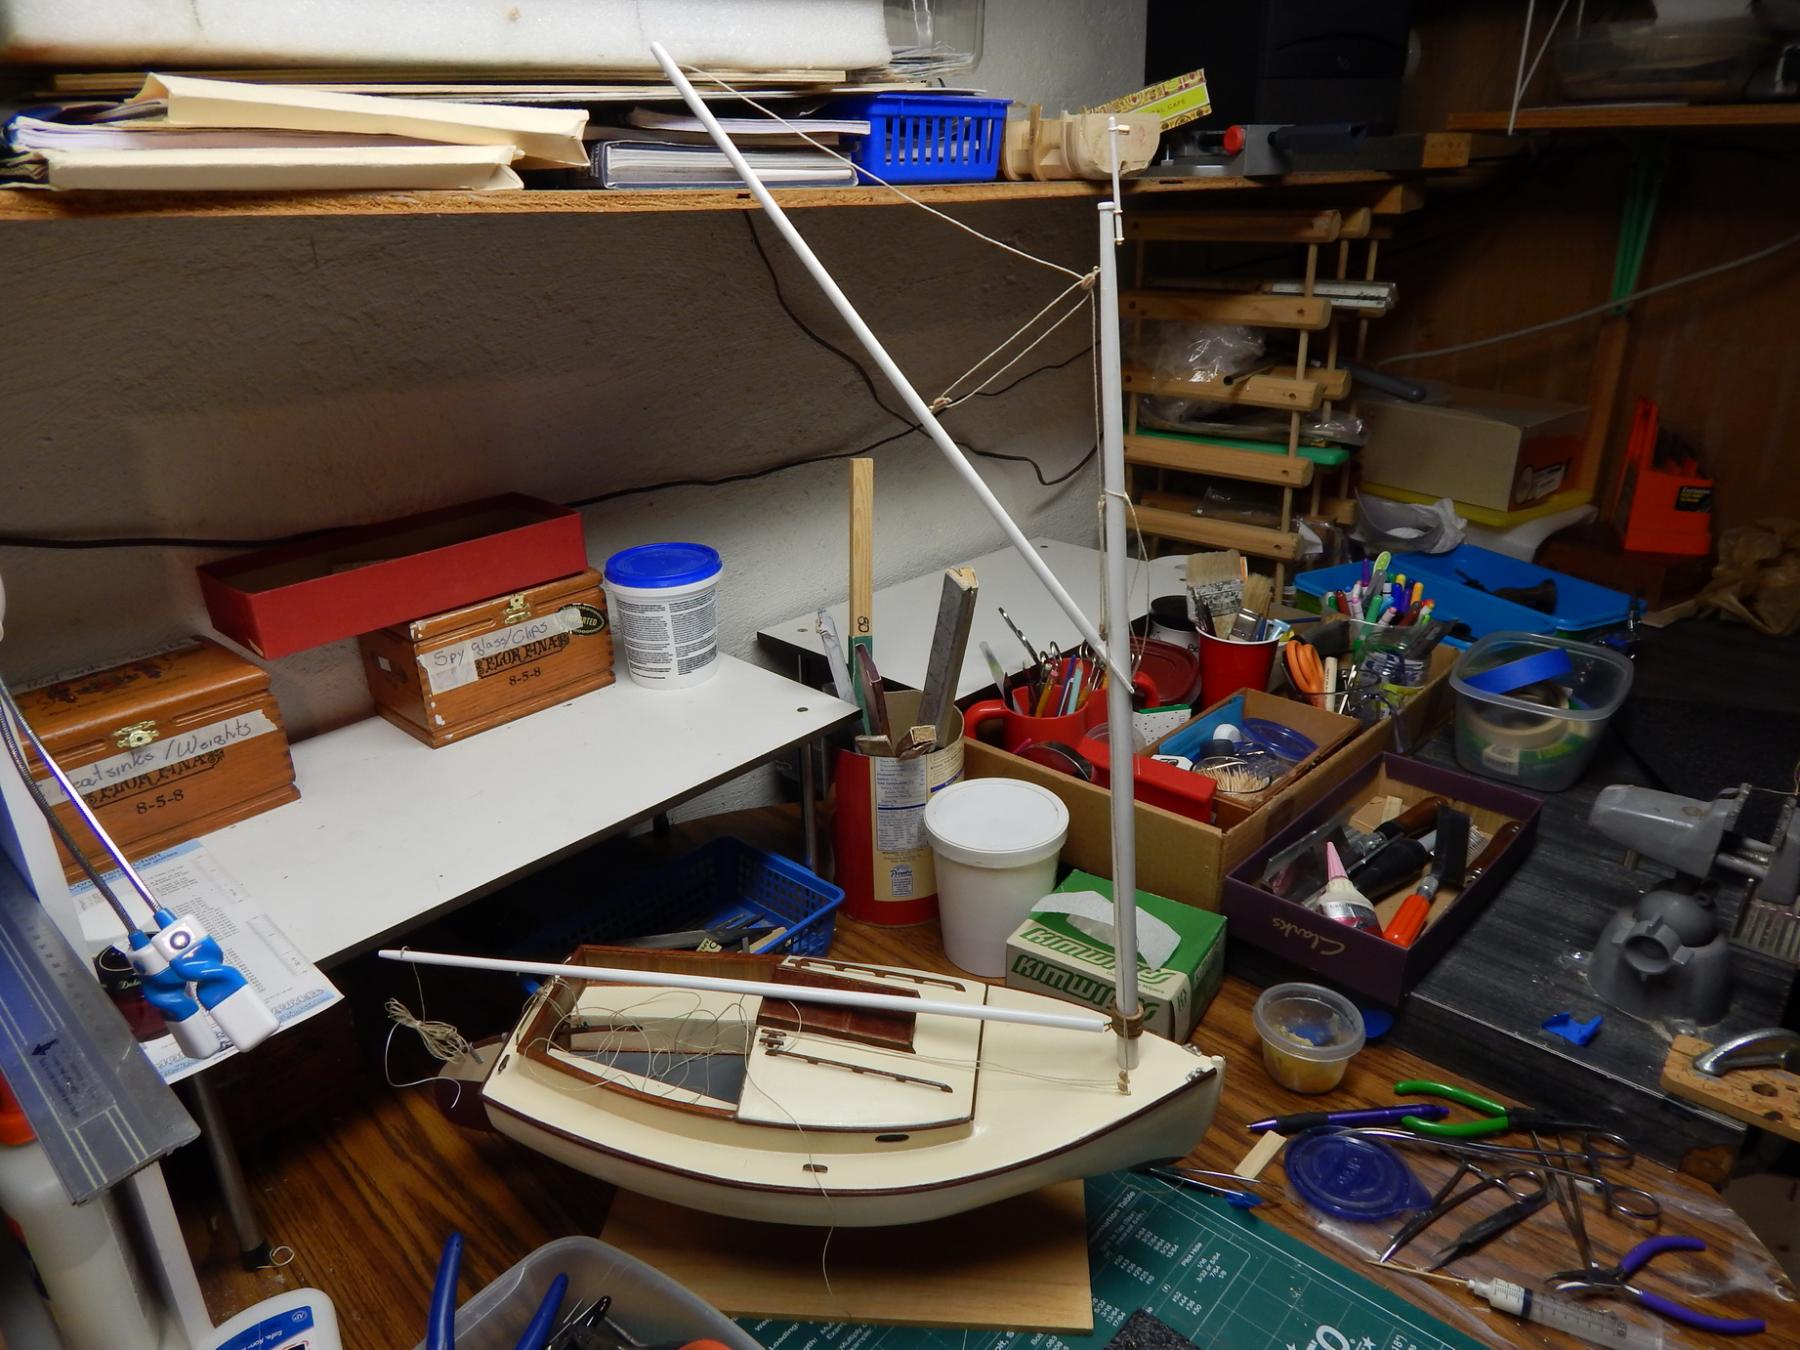
The boat is pretty much finished and all that is needed is the mast, boom and gaff with the sail.

I need to make a burgee (little flag)

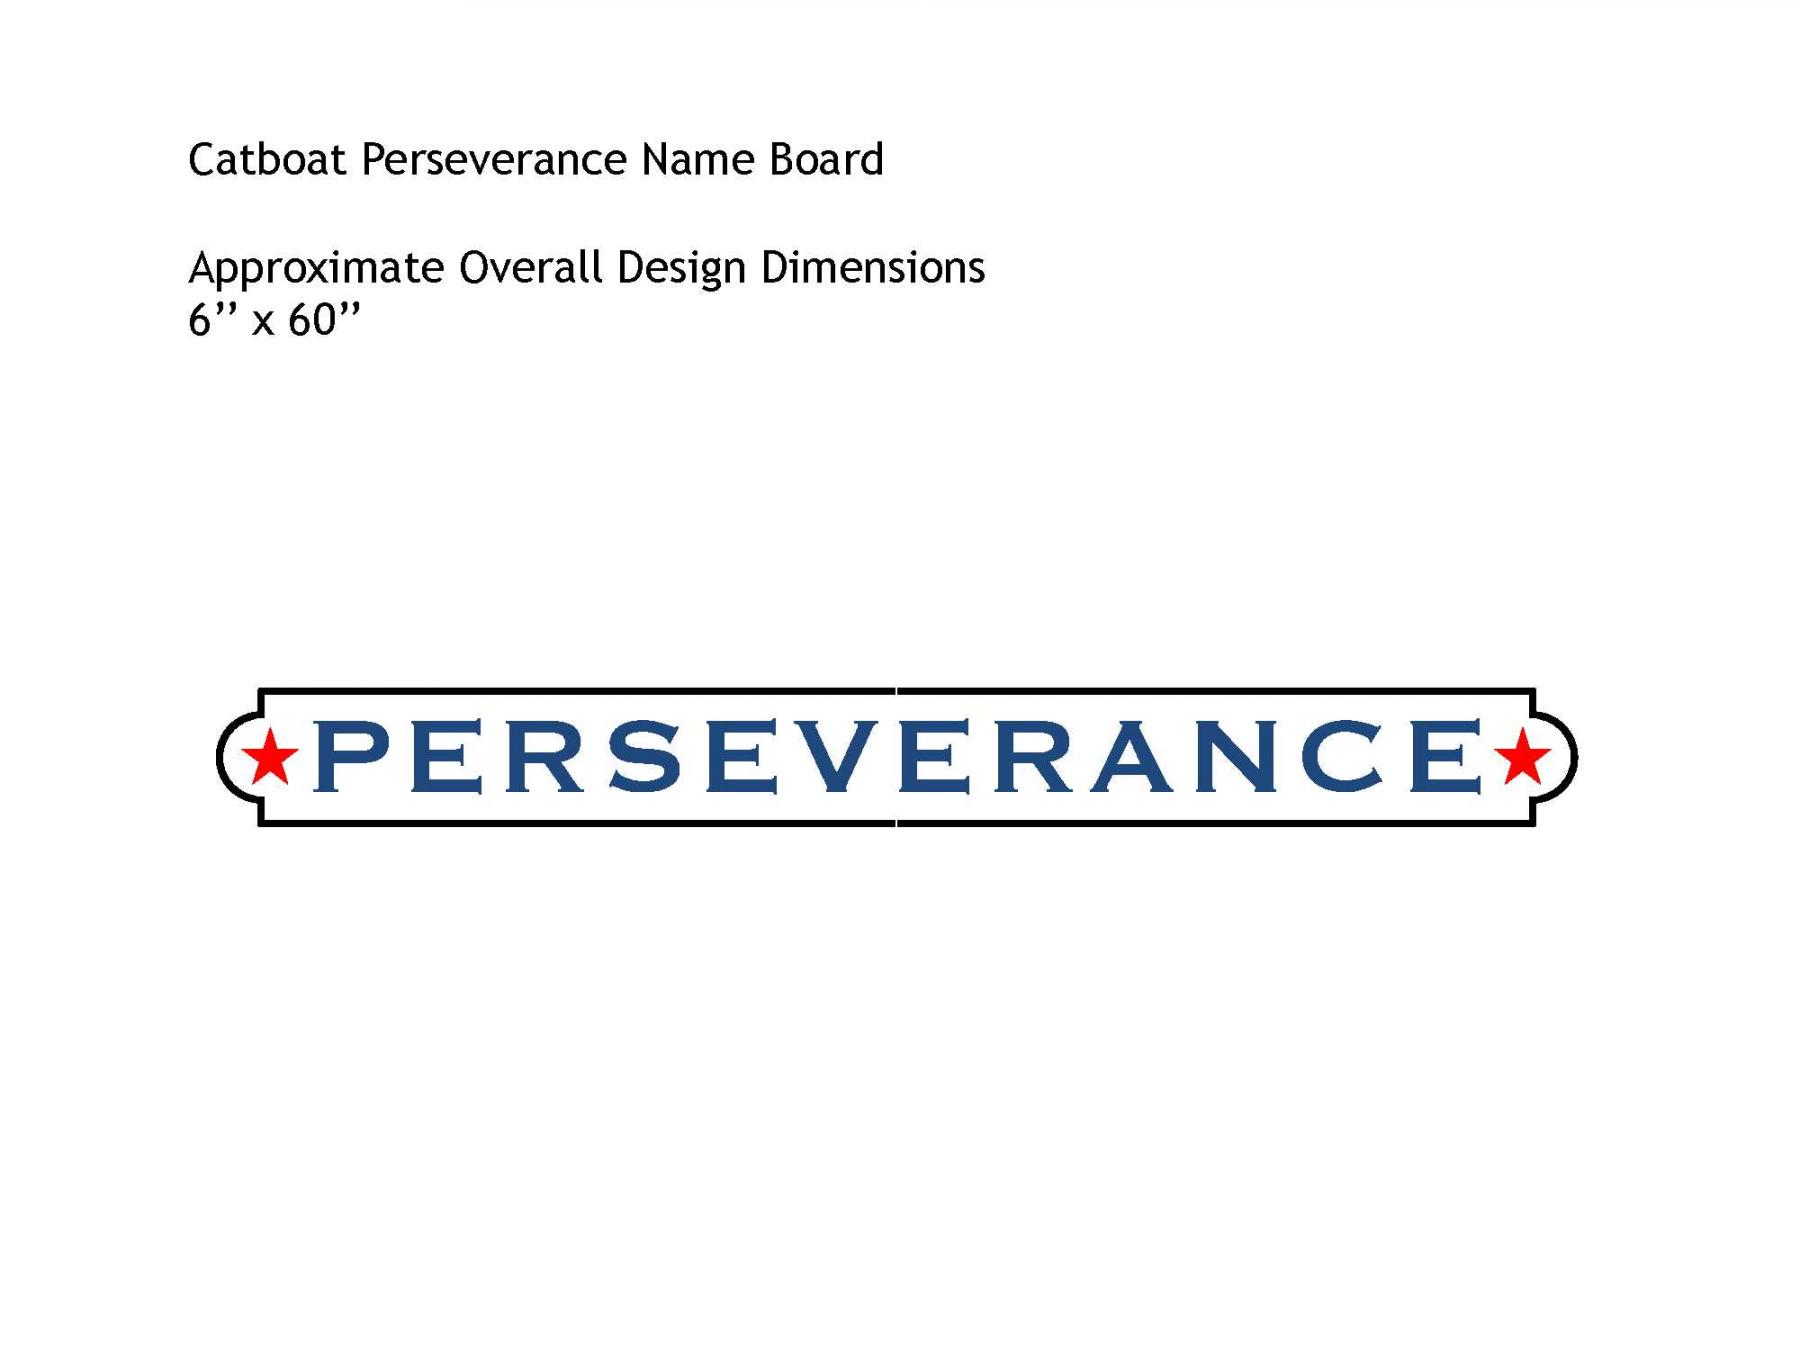
and the name 'PERSEVERANCE' on a name board.

I have no letters so I am thinking (MS Word, required font and printer).
Except if anyone has a better idea, I would like to hear about this.
Thanks
Marc
- dgbot, mtaylor, CaptainSteve and 9 others
-
12
-
Ian;
I just magnified your picture and I see how you did this.
Thanks
-
Ian;
Presently rigging my cat and I do have a question as I do not understand the description in the plan.
Looking at the plan towards the top of the mast there are 3 dots below each other and the description on the plan says, "Topping lift fairlead left side of the mast".
I understand that the rope is from the end of the boom and goes up to the mast.
What I do not understand is how the rope is attached to the mast.
Is it through a hole in the mast?
Do you make some kind of eyelet?
I cannot make it out from your pictures (post 67, 72, 76).
Thank you in advance.
Marcus
-
Piet,
The ship is looking great and you have done an excellent job with all the details that make this ship. I love this green color you have used on her. The first lion drawing is the best and I have to agree with 'cog' that the second lion looks like it is yawning.
Marcus
- CaptainSteve, Piet, Omega1234 and 4 others
-
7
-
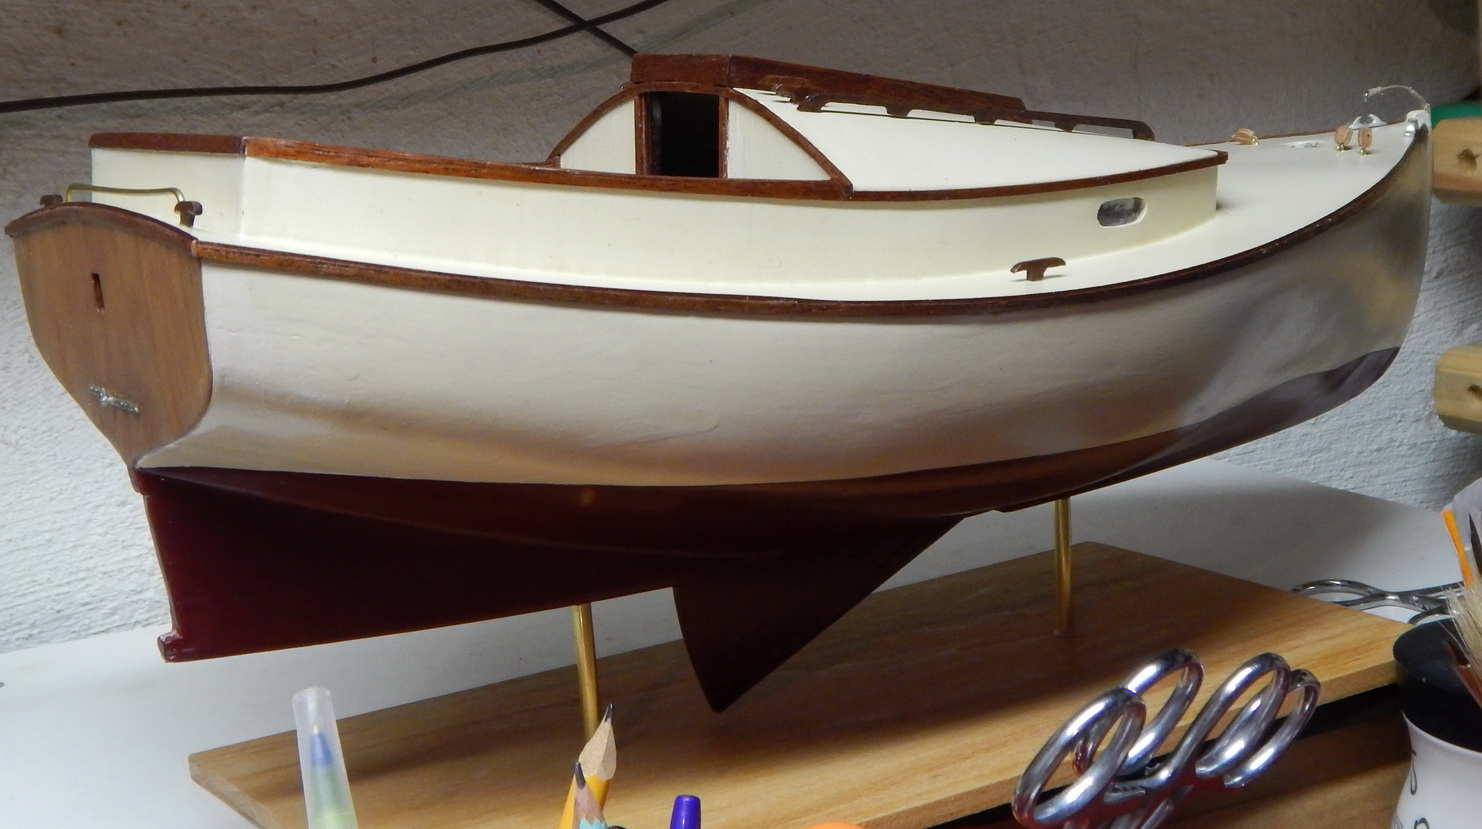
Nice work Marcus. Perseverance pays off !!!
Thanks. Did 2 light coats of paint and she looks good again.
Due to the bitter cold I have both paint can and boat in the warm basement. Then I go outside holding the boat in one hand and spray painting light coats on the boat with the other hand. Run inside before my face freezes off. Let her dry in the garage which is still cold and after about an hour bring paint can and boat back in the basement. Here I will let her dry for 2 to 3 days.
I also learned that painting is something that needs to be learned. Eventually I will get the knack of it. Another part of the hobby.
Marcus
- FriedClams, cog, Elijah and 3 others
-
6
-
SCREW-UP
I put a light coat of polyurethane on the paint and it dried blemished. Then tried the touch ups and that went wrong. So as I mentioned before, stripped the boat of all the trim and hardware and about an hour ago spray painted the first coat.
On this picture you can see it good.


Ready for painting.

What did I learn?
Once paint is completed NO polyurethane except the wood work.
Redoing the hardware and the trim will be easy as I have done this already. The display stand is ready. The items that still need to be made is a name plate with the word 'perseverance' and a burgee with the Prince Edward Island crest.
Marcus
-
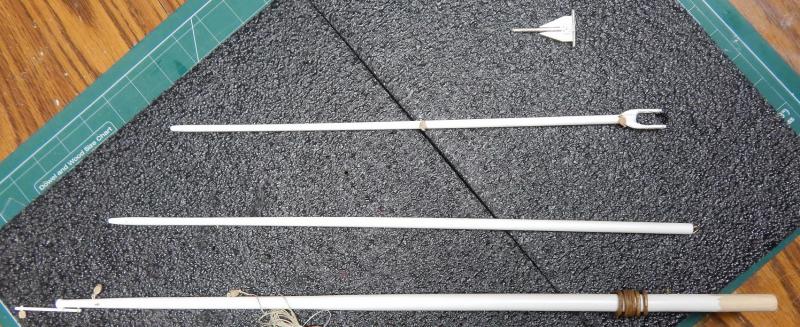
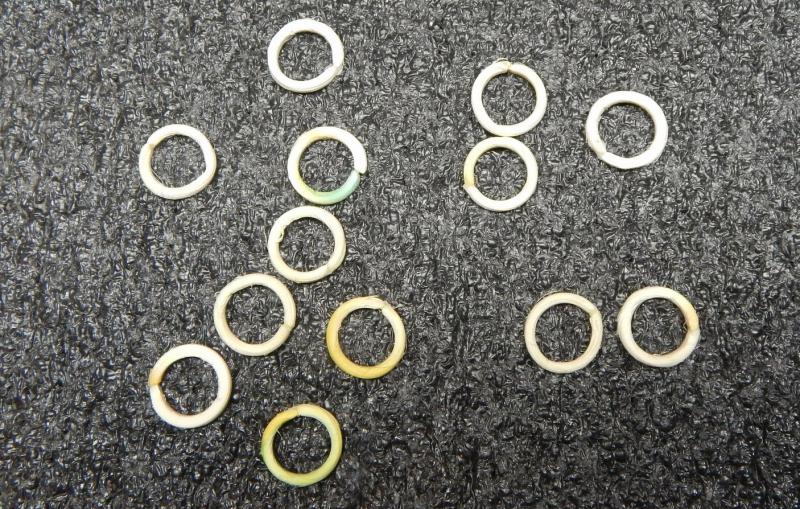
Finished mast hoops.
Sail marked with light pencil.

Sail completed but not attached to mast, boom and gaff. Dry fit.
Boomer the cat in the box. Not on the warm mat next to it, no, in the cold box.

-
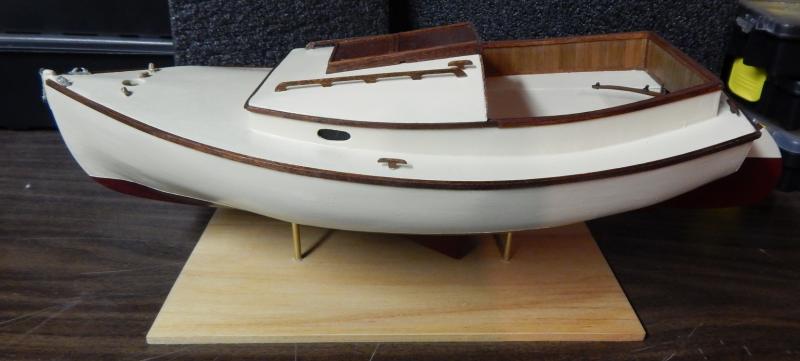
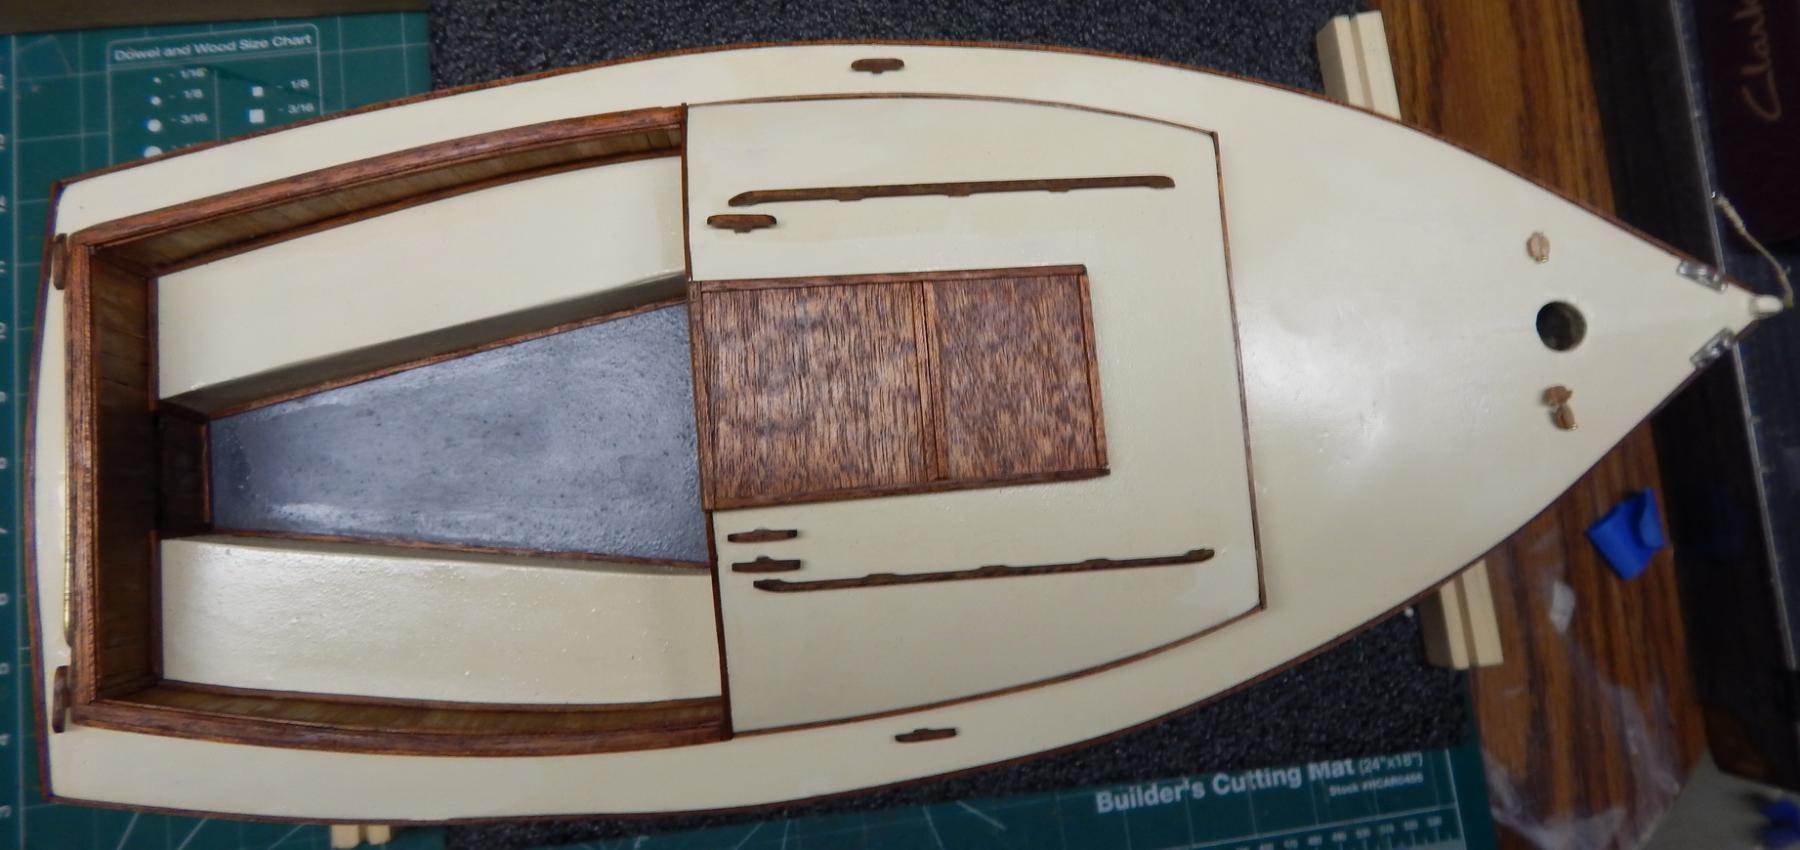
When the trim was all done. Very happy with the results.

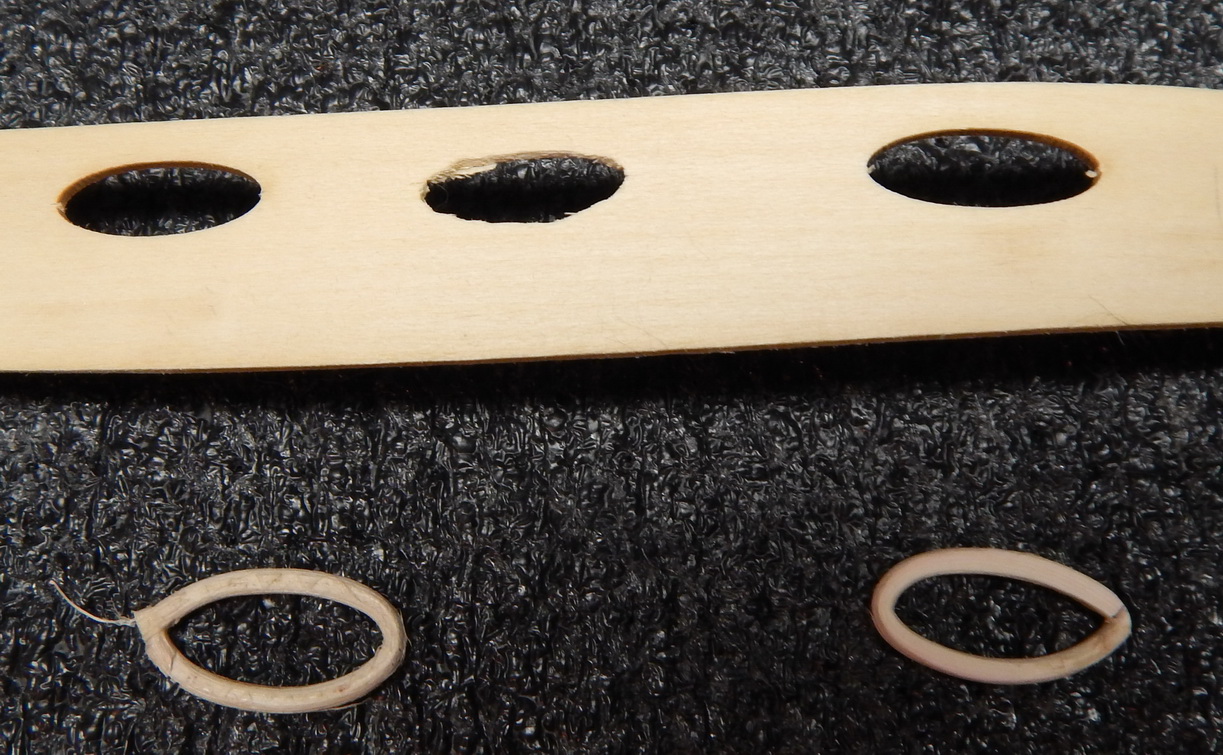
The cabin windows get trim as well made from the same material as the mast hoops.
Used a window cut-out as form. Wrapped the wet canning around the form. Held it in place with a large clamp and the ends that cross over each other with a hemostat.

-
I made a colossal mistake @#$Getverderrie%^&* I yelled all the Dutch swear words I knew...........................Didn't trash the boat.
I was touching up some paint and a piece of paper towel ended up sticking to the paint. Took it off and left the threads on the deck. Tried to take that off and it left scratch marks. Tried to sand that off and sanded some of the trim and it got worse and worse (Always does) AAARRRRGGGGHHHHHHHHHHHHHHHHH
So I stripped the boat of all its trim, and hardware, sanded it down, covered the left over trim with tape and masked the bottom and keel (rust red).
Now it is ready for a RE-DO paint job. I did take pictures. Didn't want to as I want to forget this, but it needs to be learned.
Runs of in a corner and cries.
-
-
I received the table saw from Micro Mark for Christmas and I am very pleased with it.
I am looking for the download of Jeff's (Hobbymill) saw operation pdf guide.
Does anyone have it or give me a link to it?
I've done some different Google searches but nothing comes up.
Mark Taylor suggested that I should look at the blades from Thurston (which I will do).
Thank you.
Marcus
-
WOW, Will get a few of these for both my Bonsai and ship building.
Marcus
- mtaylor, Canute and thibaultron
-
3
-
The German Nautical Journal, 'Das Logbuch' has a very detailed article on carving a ship's stern. Even if you don't read German, the detailed pictures are worth a look. Several pictures show what tools are used for the type of carving.
If you mouse over the pictures you can click on them to enlarge them.
http://www.arbeitskreis-historischer-schiffbau.de/mitglieder/themen/schnitzkurs-1/
Marcus
-
-
I bought the same book (Complete Guide to WoodCarving) Jack12477 mentioned in one of his posts.
Learned a lot from that one. Also have Bill Shorts book.
Knives? Use a variety of tools for different projects. Blade #11 for tiny items and also surgical knives I have left over from grad school.
Chisels for larger items.
Bench hook is an important tool and very handy. Kevlar tape around my fingers.
I will show my project in the next few days. I am carving the VOC emblem from the Dutch East Indies.
Also practicing figures for the Staten Jacht - Utrecht.
Marcus
-
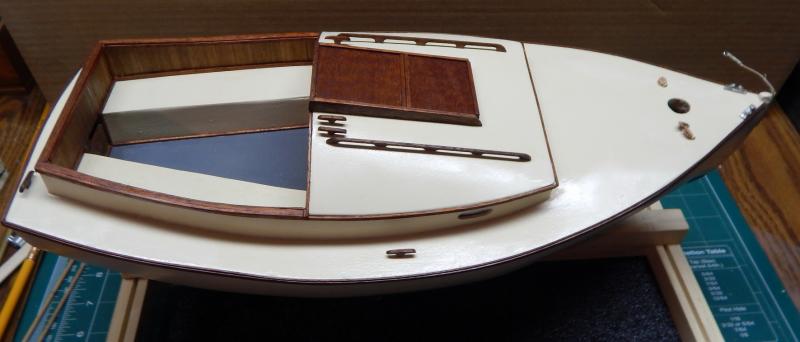
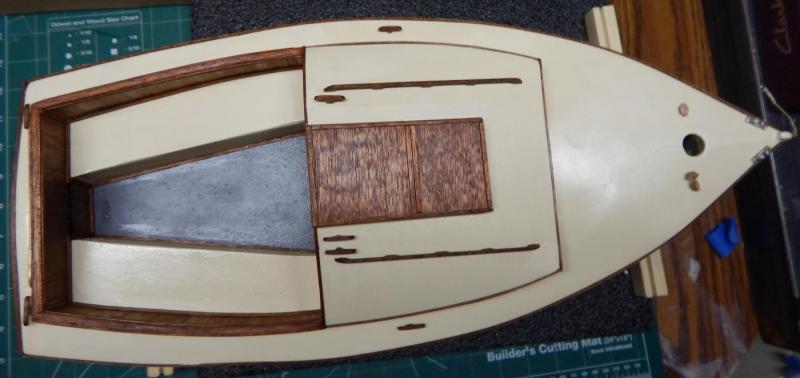
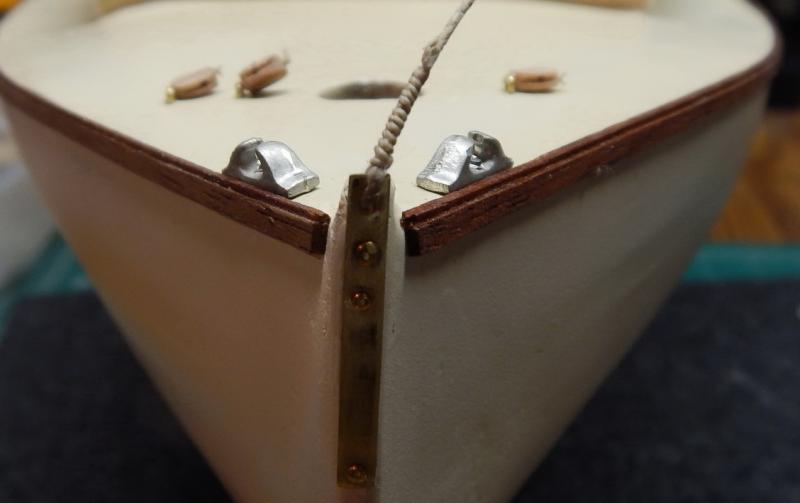
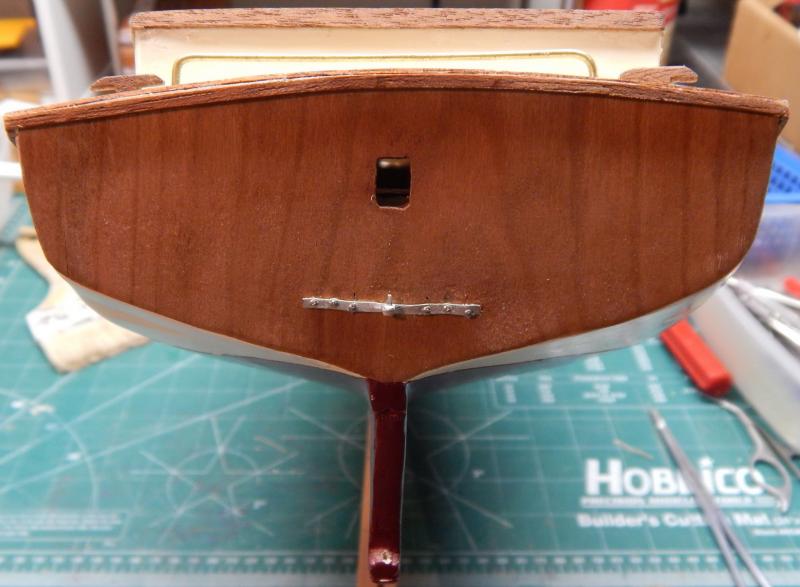
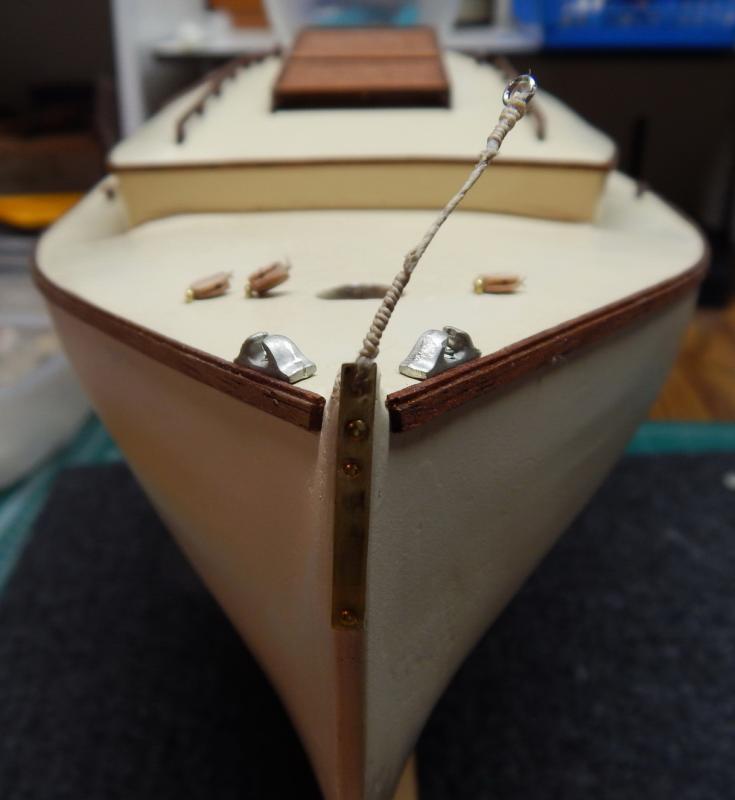
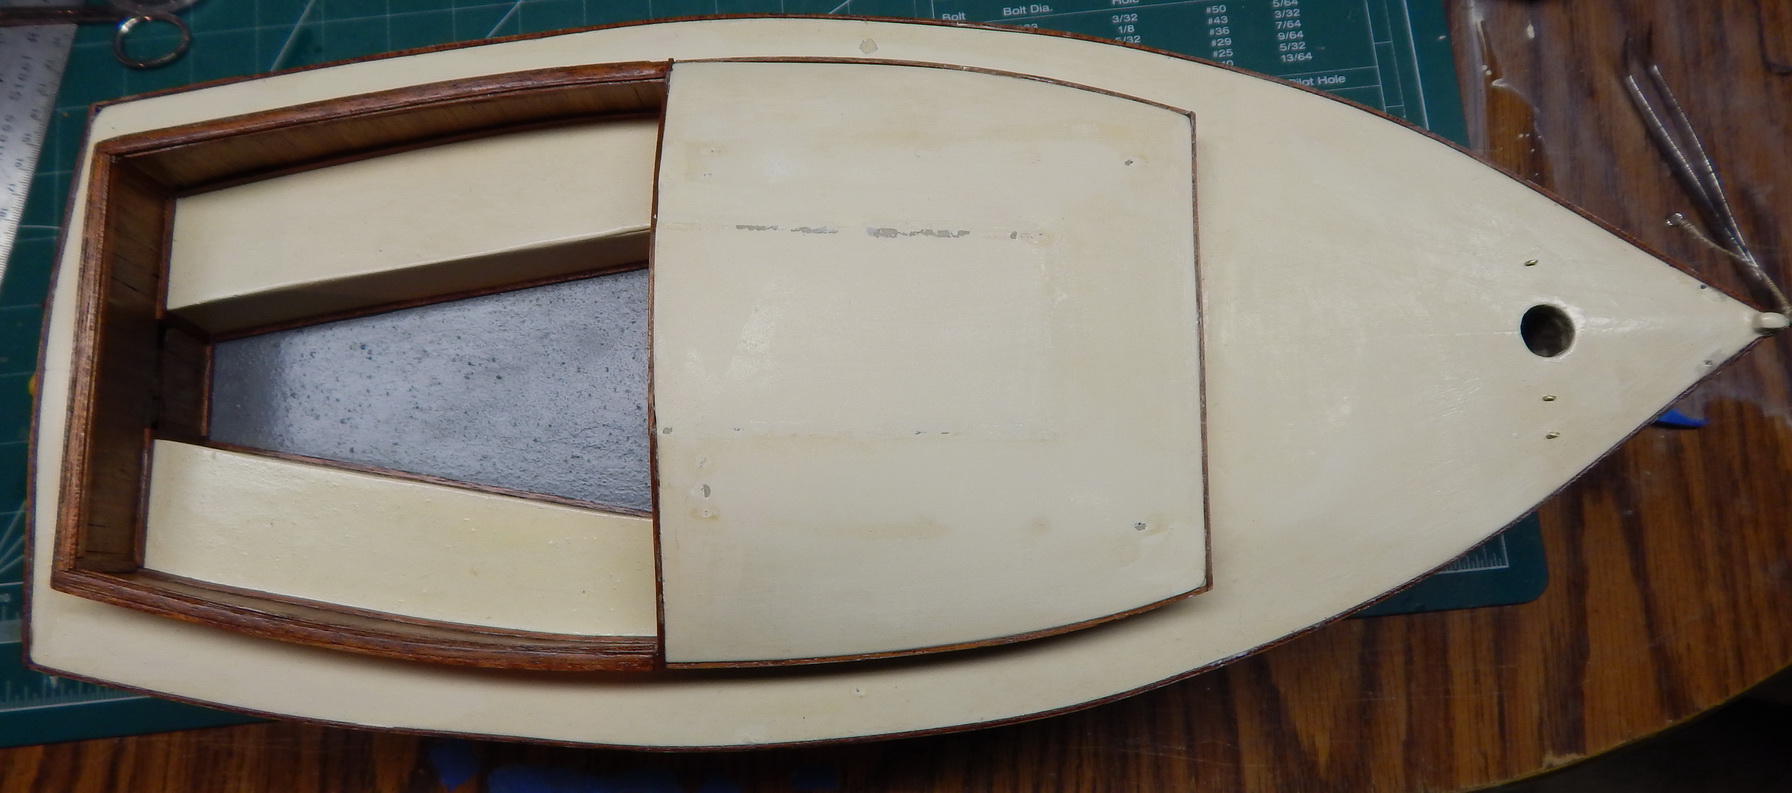
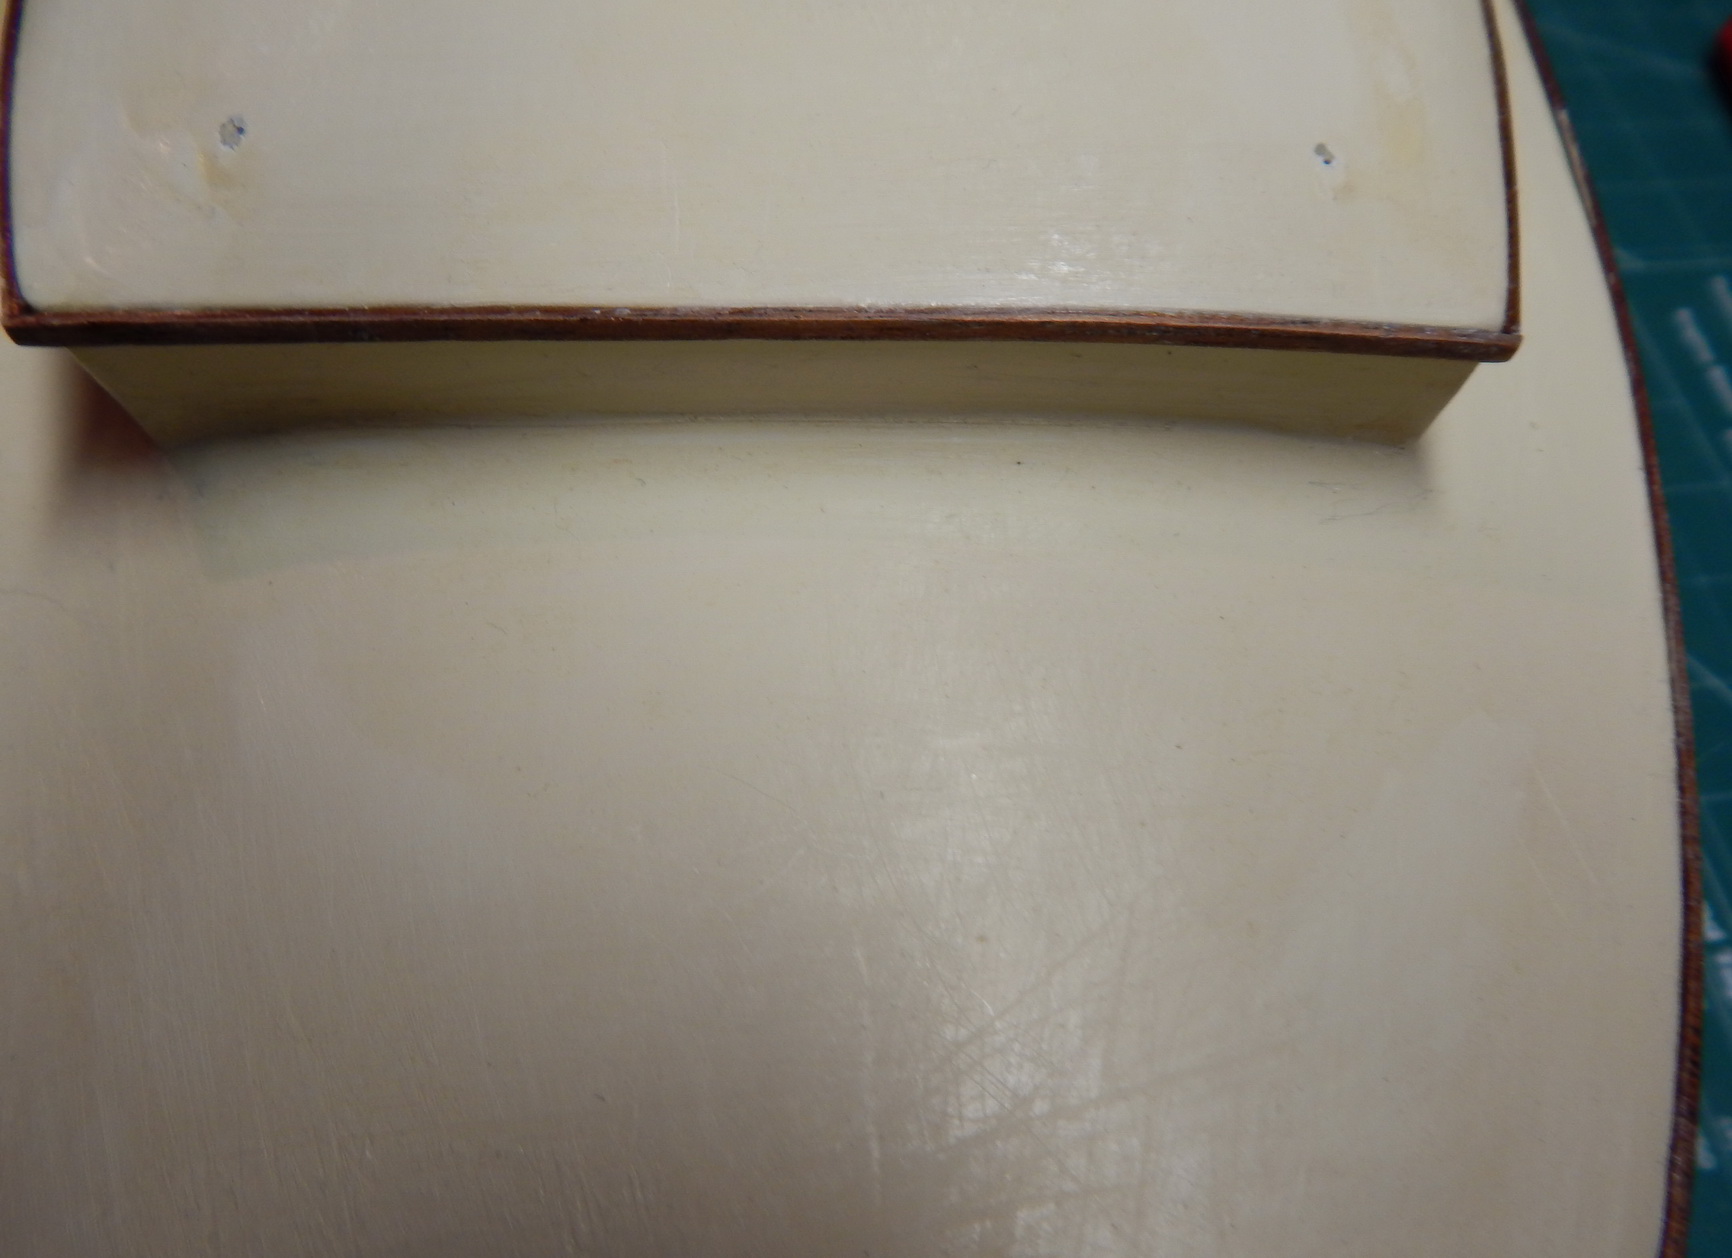
The close up of the bow. There are three blocks attached to the deck (as it is on the real boat). On the kit there are eyelets made on the mast itself. That is one of the big differences in each of the design.
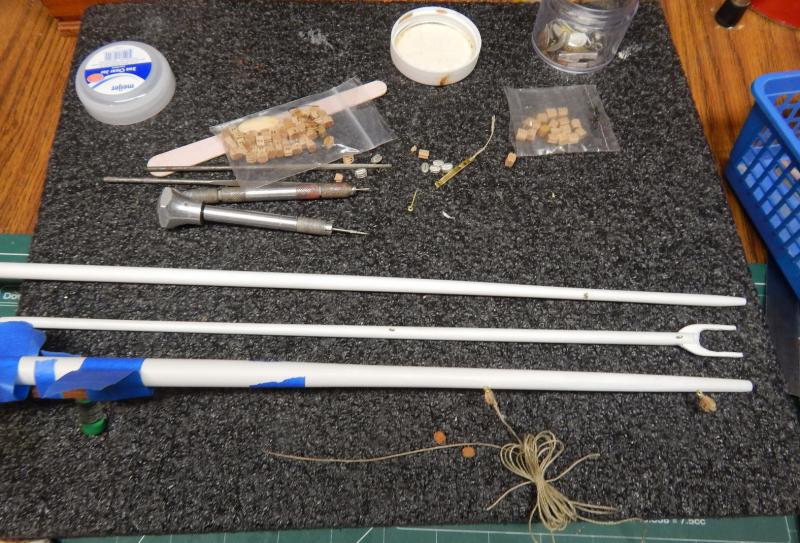
I need to sharpen my sewing machine skills, so I can make the sail. Finish up the rigging, make the stand, get a display case, pack it and FedEx it to my sister.
Marcus
-
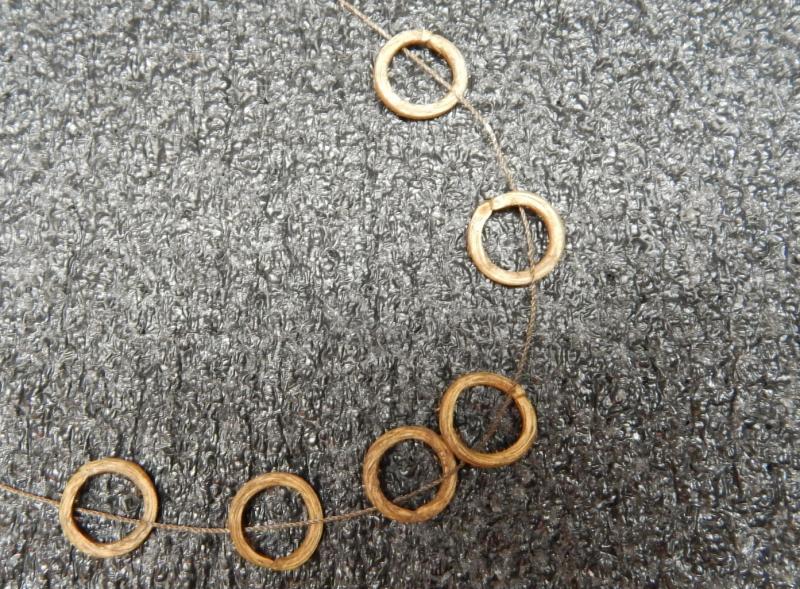
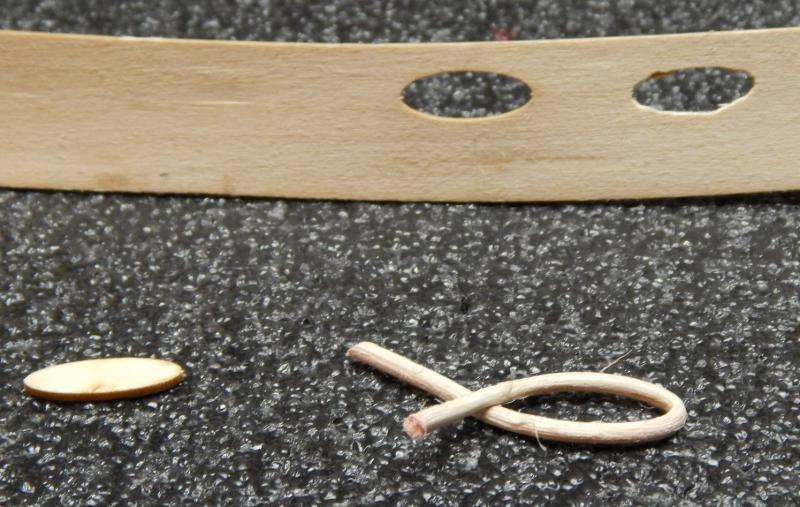
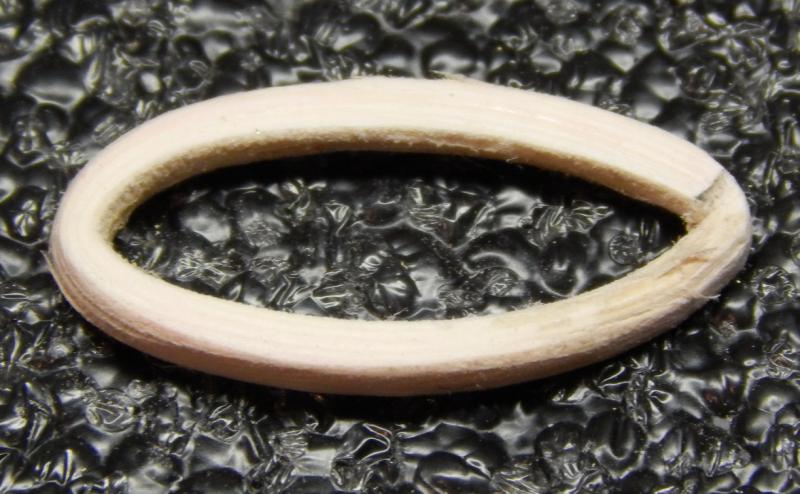
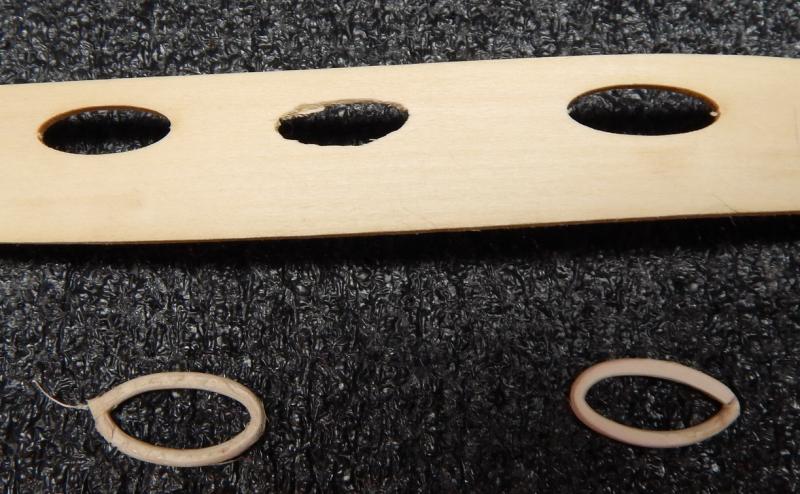
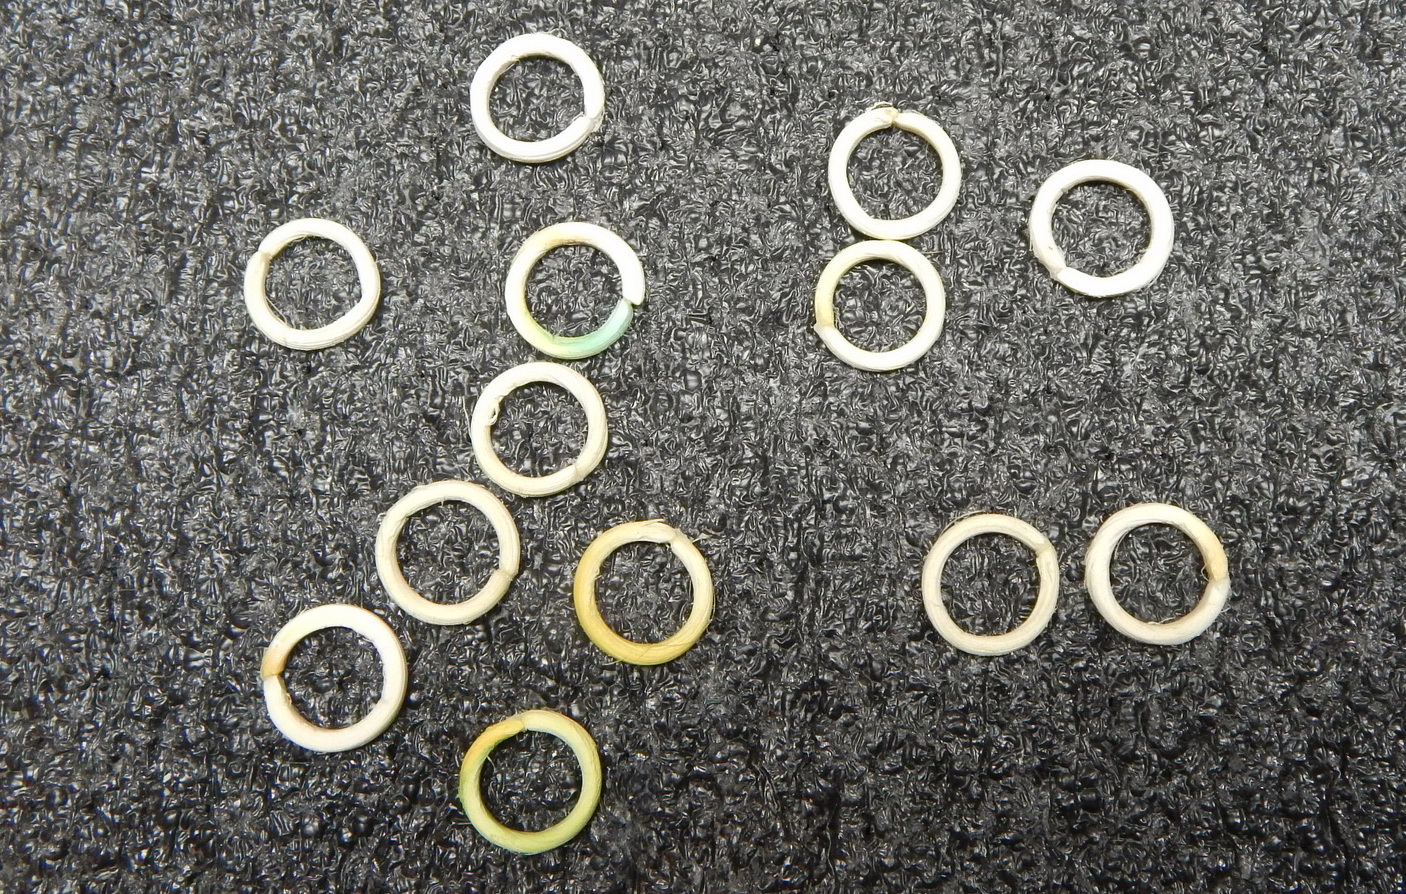
Re-did the hoops. First went to Hobby Lobby and looked for chair canning. They had none. Came home and looked in the parrot cage and one of her toys is made of chair canning. Removed it, took out all the treats and she was happy. I don't think she is going to miss this.
Pulled the toy apart and put in bowl of water overnight.
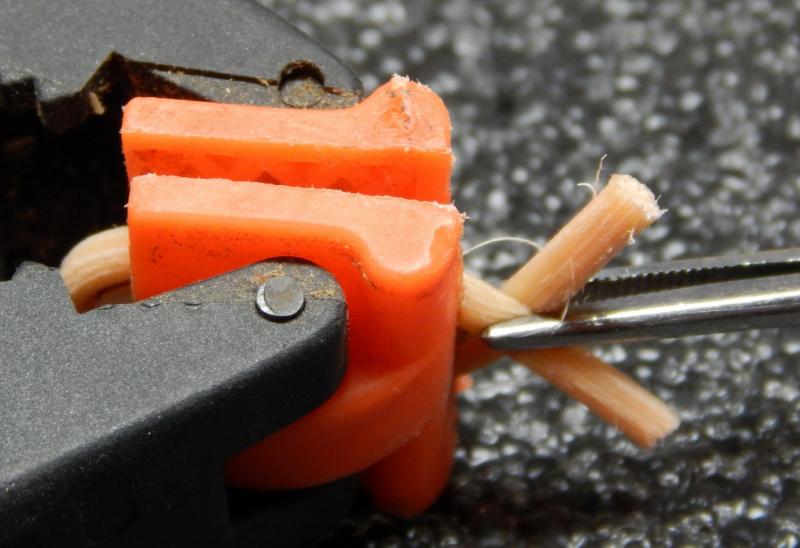
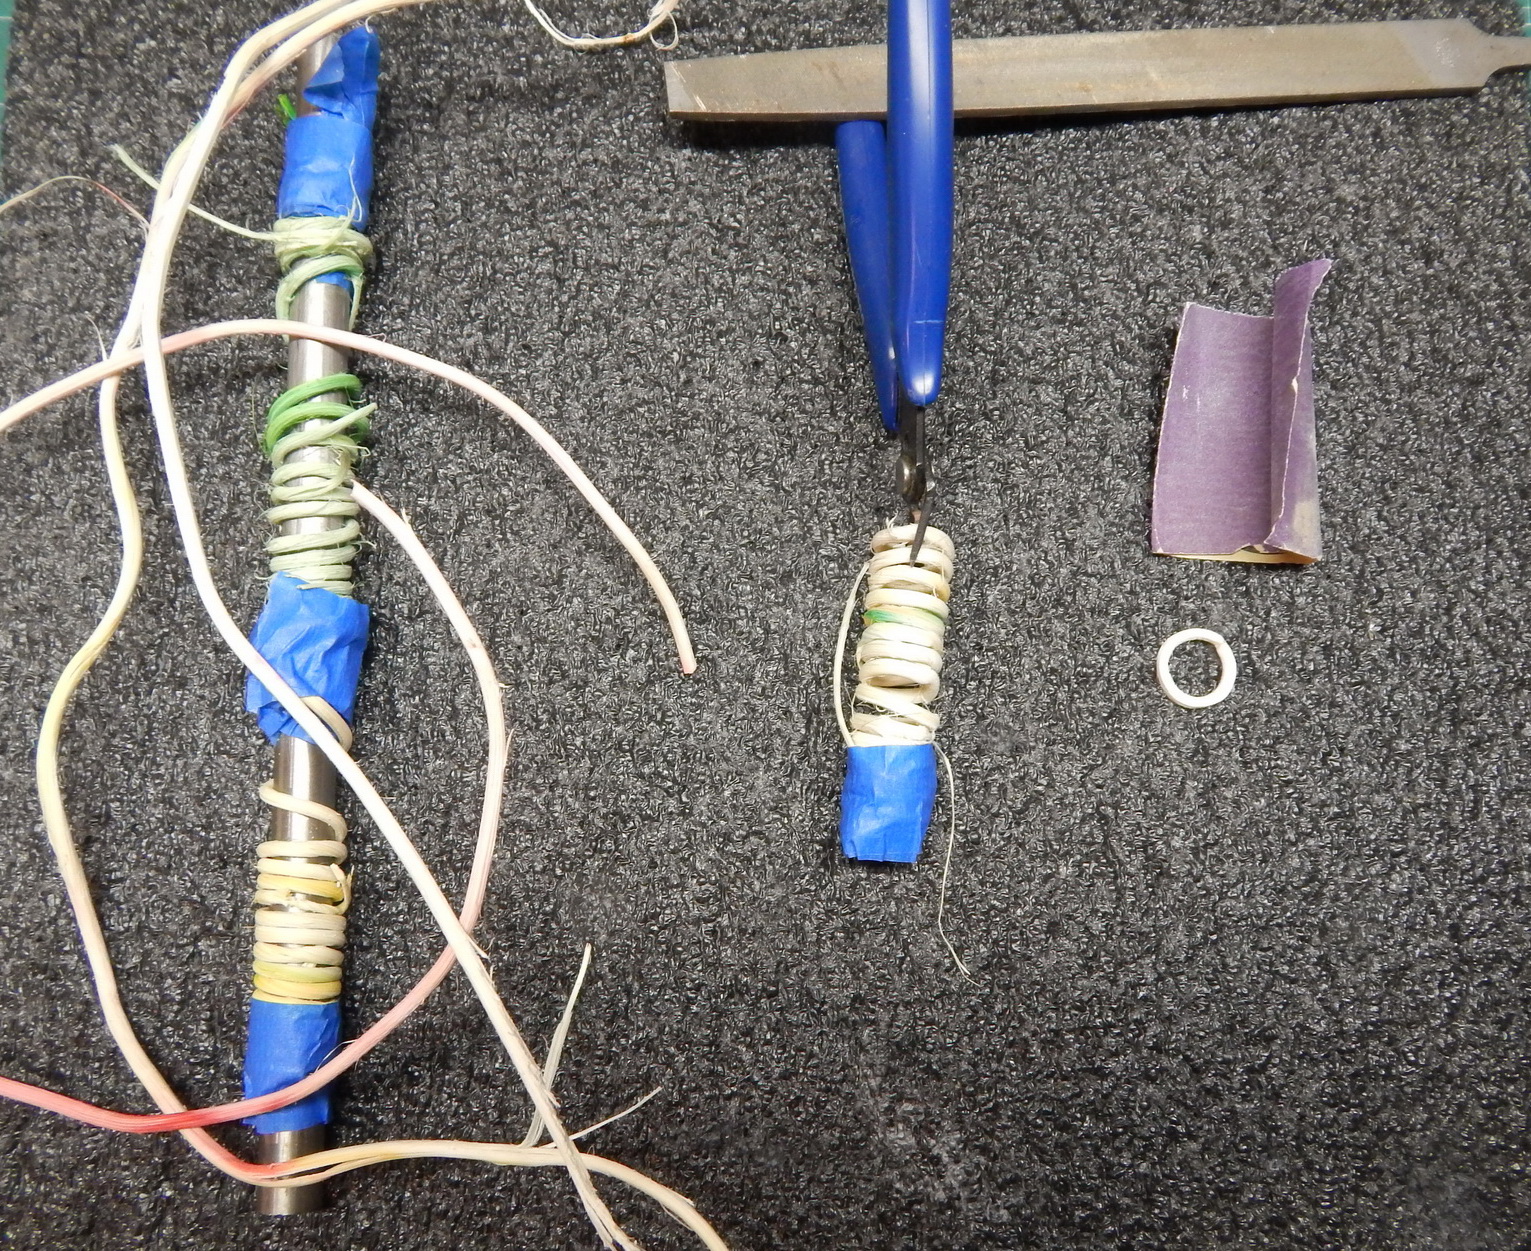
Removed the pliable canning and wrapped it around the metal cylinder (HP printer item).
Tapped both ends and let the canning dry for a couple of days.
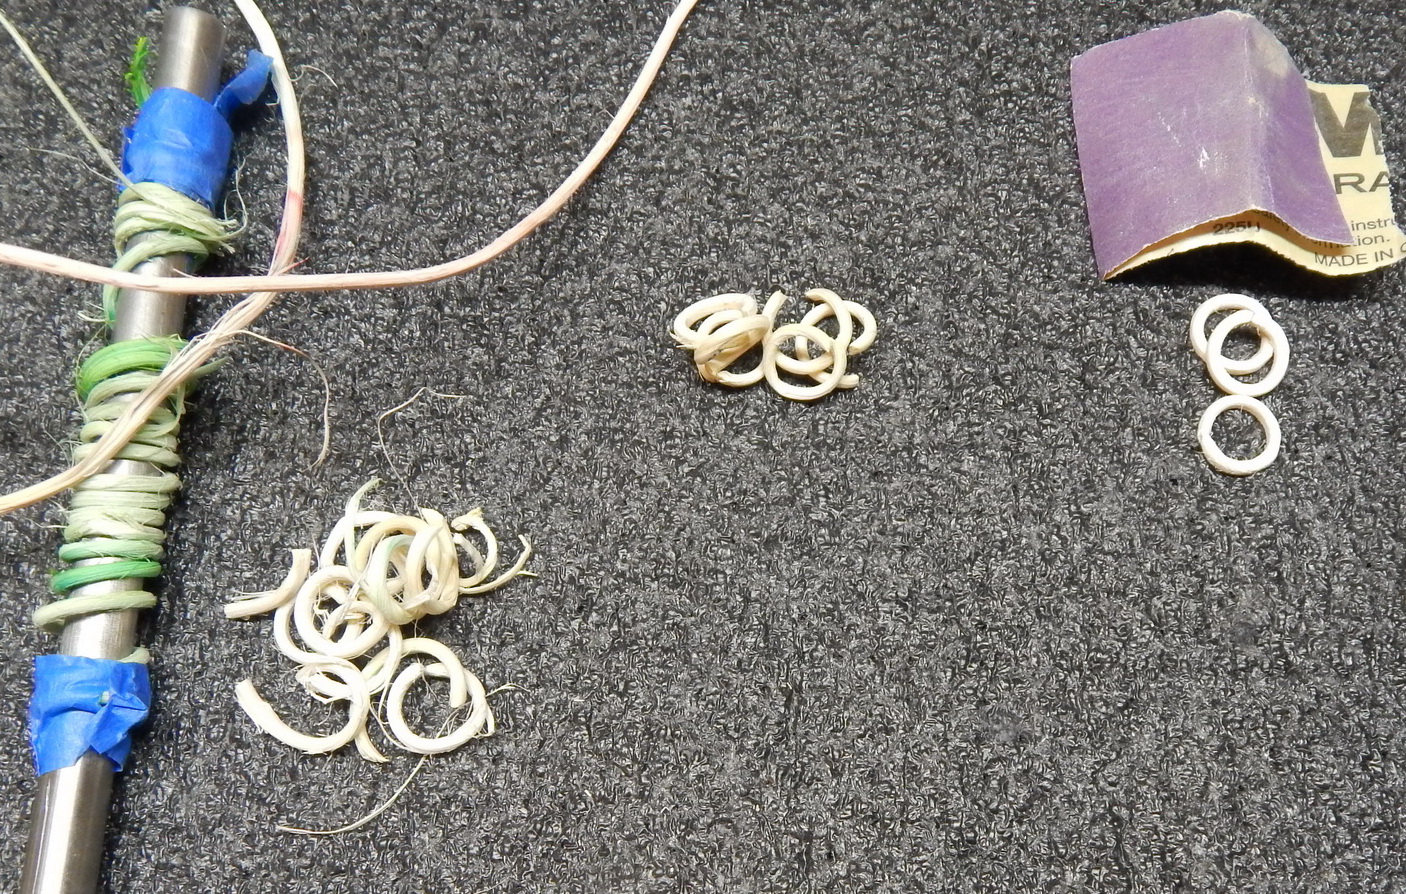
Removed the tape and took the canning off the cylinder.
On the left the canning wrapped and tapped to the cylinder.
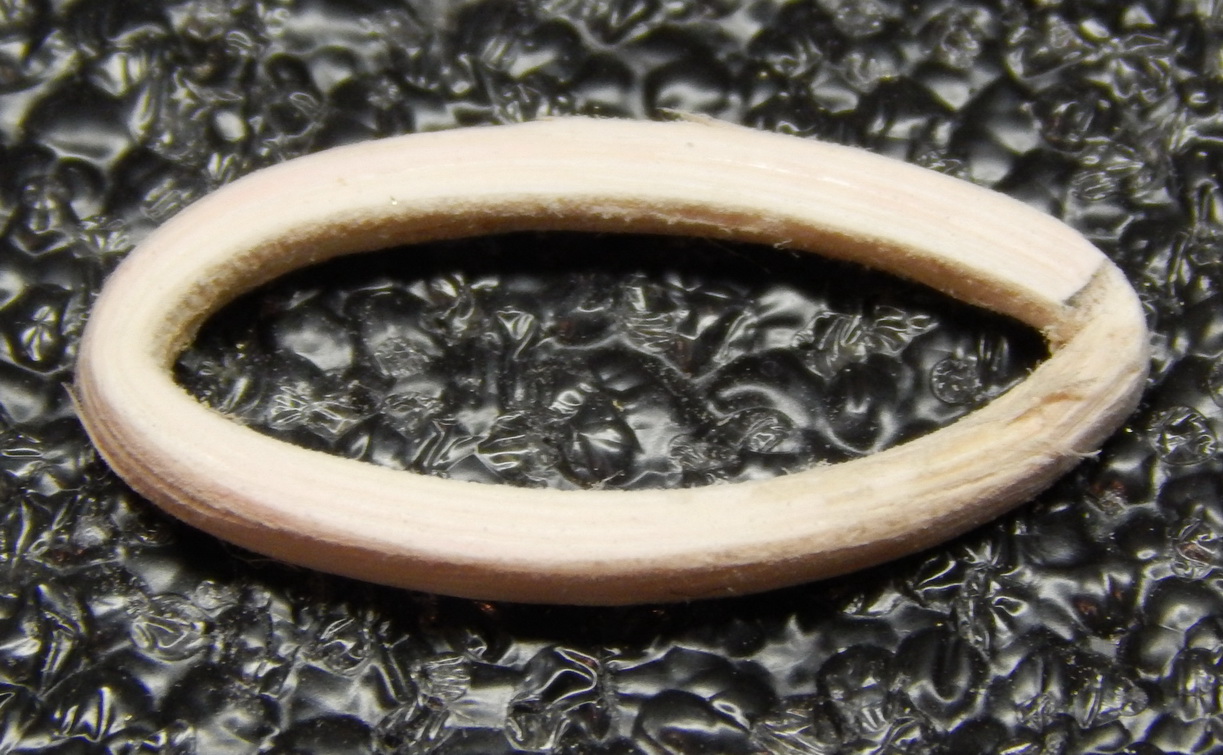
In the middle, cutting hoops.
On the right, after gluing the ends with a drop of CA, sand it to thickness.

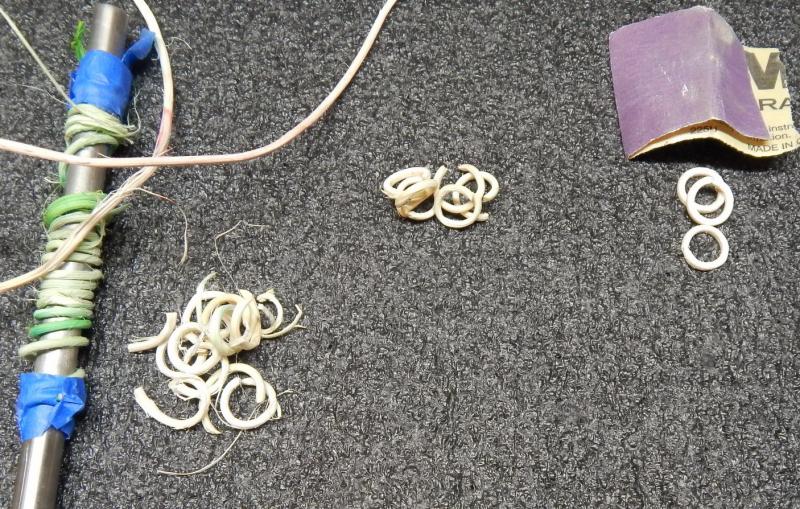
Lots of hoops, very few good ones. Also I had a lot of colored ones as the canning for the parrot toy is dyed with different colors. I picked all the none dyed pieces, glued, sanded and stained them brown.
These are the hoops. Only glued.
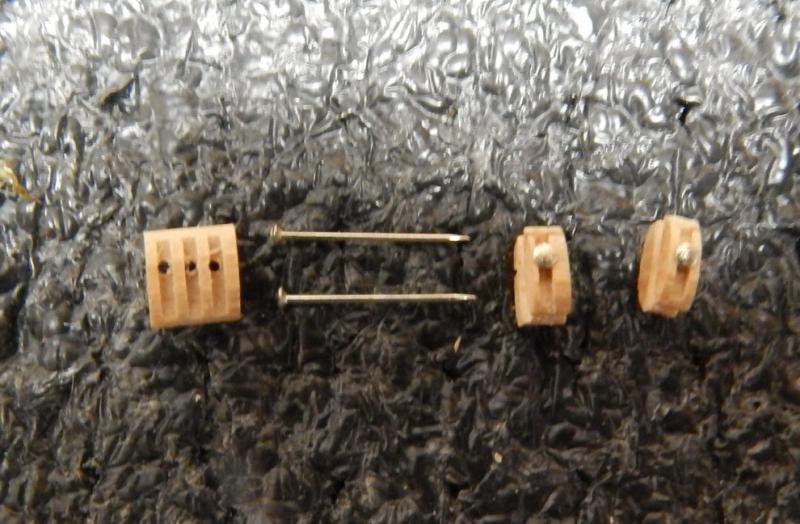
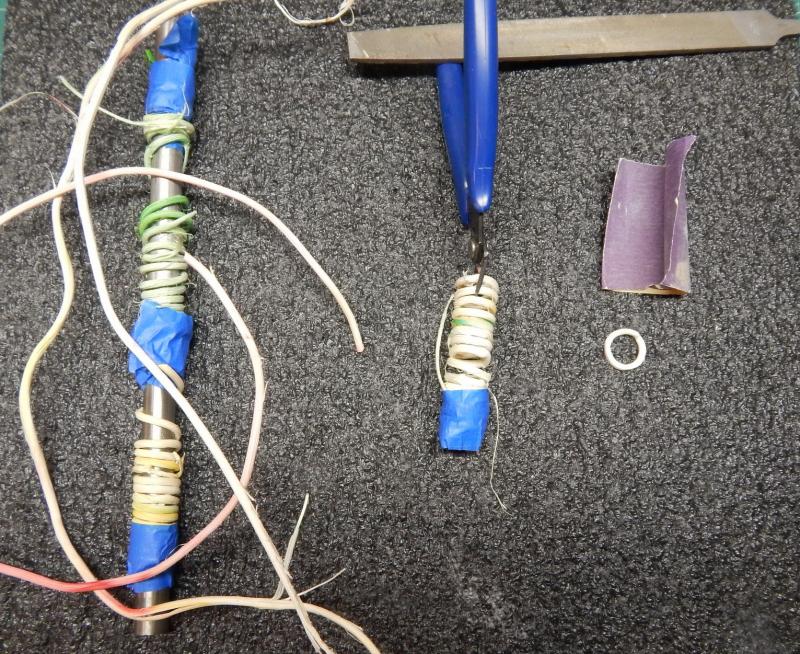
I need single and double blocks, As I don't have single, but do have double and triple hole blocks, I cut the triple hole block in half and after a bit of sanding, one has two single hole blocks.
Mast. Boom and gaff have all there blocks and attachments ready.
Marcus
-
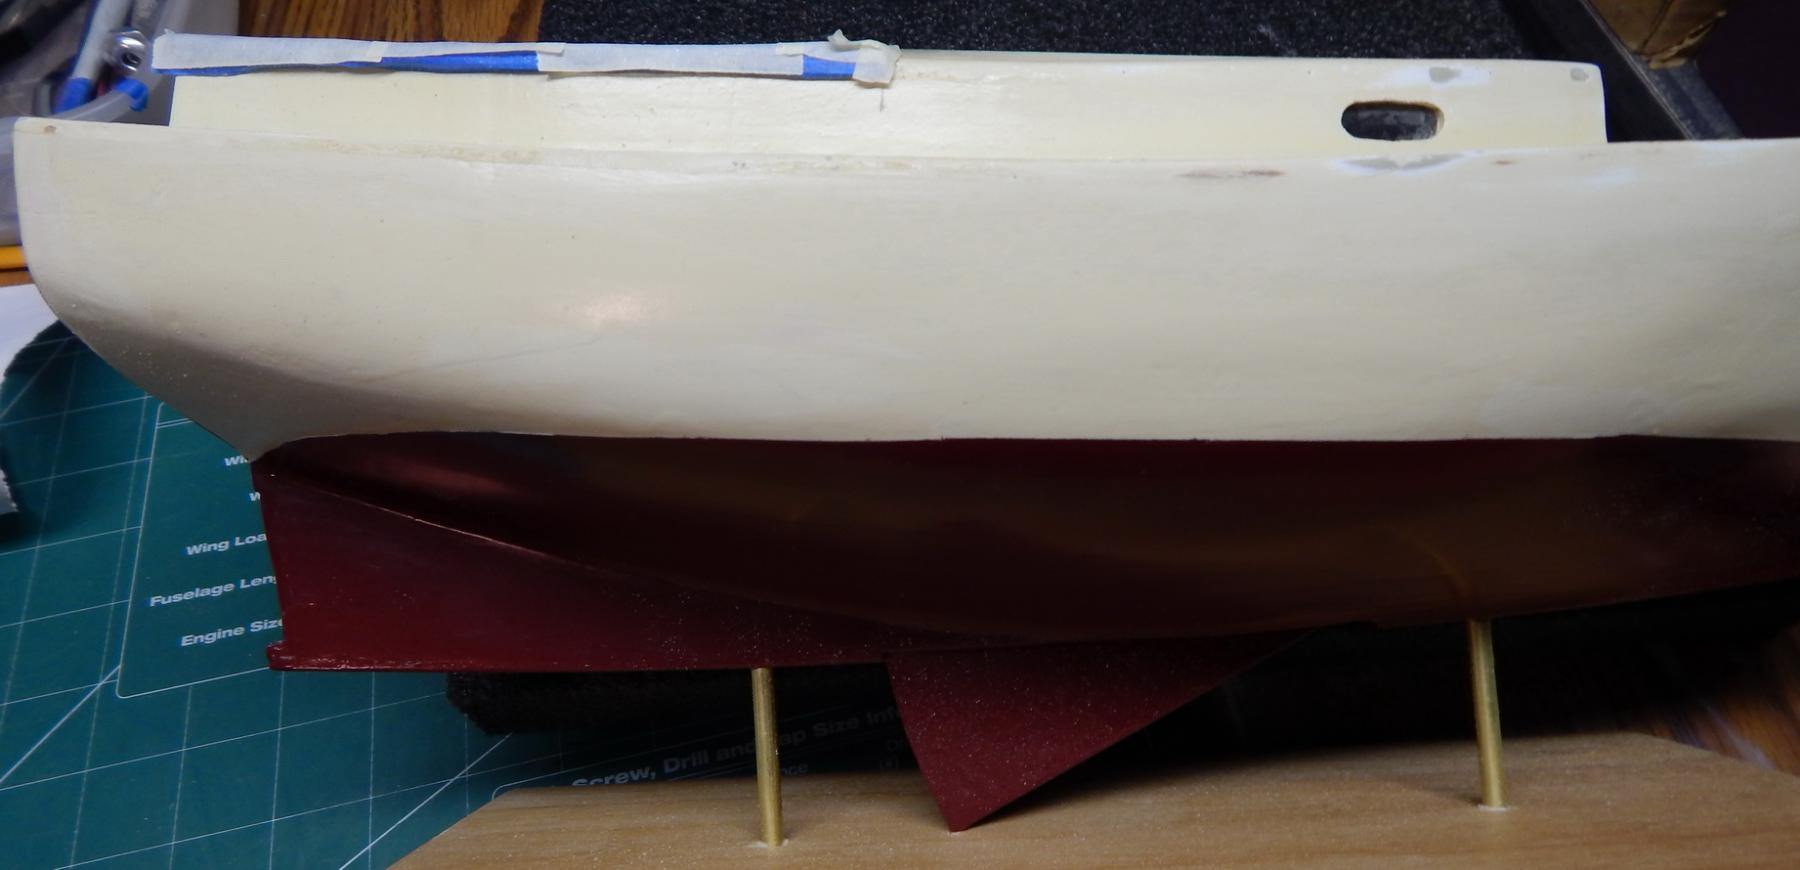
I am using the below picture as a guide of how my sisters Catboat looks like. It is very different from what the kit looks like.

More trim.
On the real boat, the bow has a metal strip attached, where as the model just has a pin in the bow.
- Seventynet, Elijah, Piet and 3 others
-
6
-
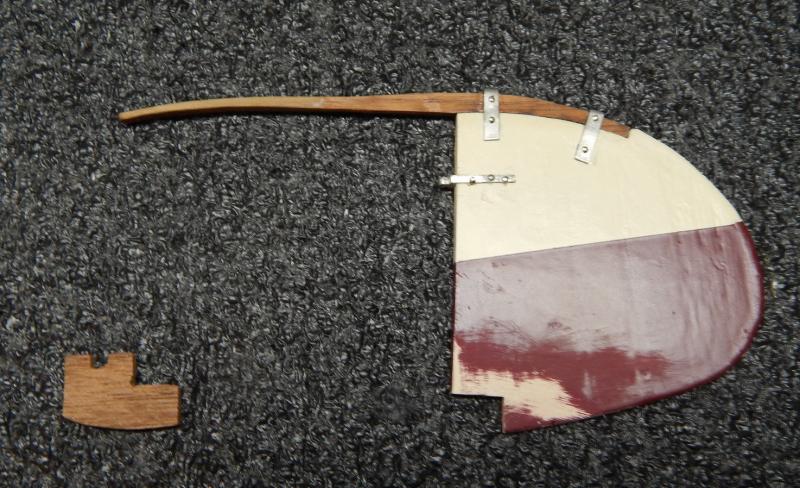
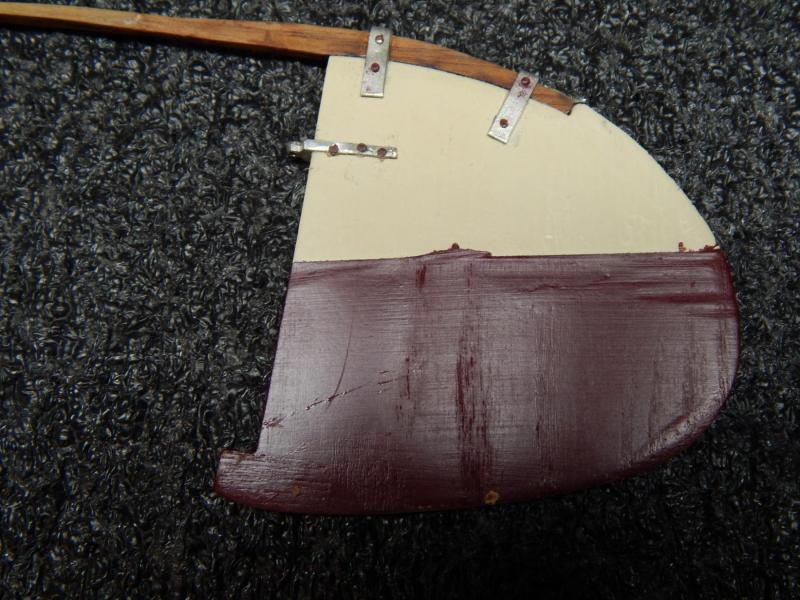
Have been doing lots of small things to finish up the boat.
First of all, being a bit careless, I broke the bottom area of the rudder. Removed it and replaced it with another piece of wood. Painted it, but did not look right, so I pulled off all the hardware and will start from scratch.
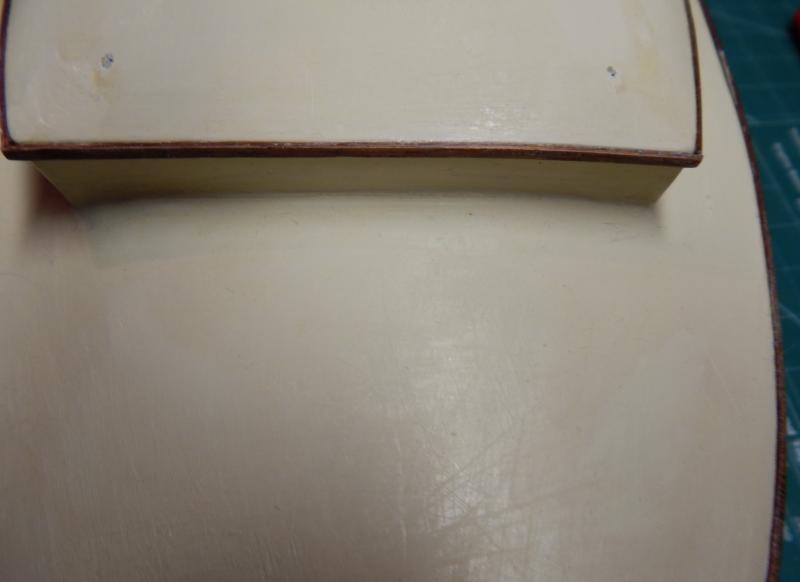
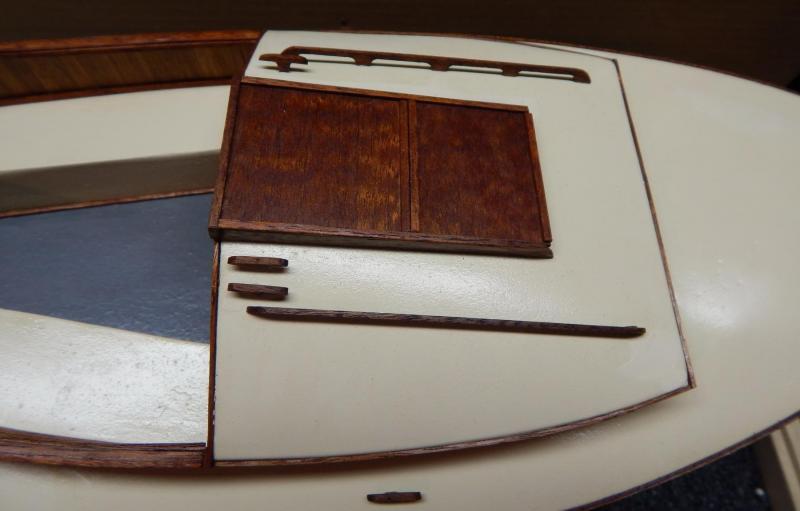
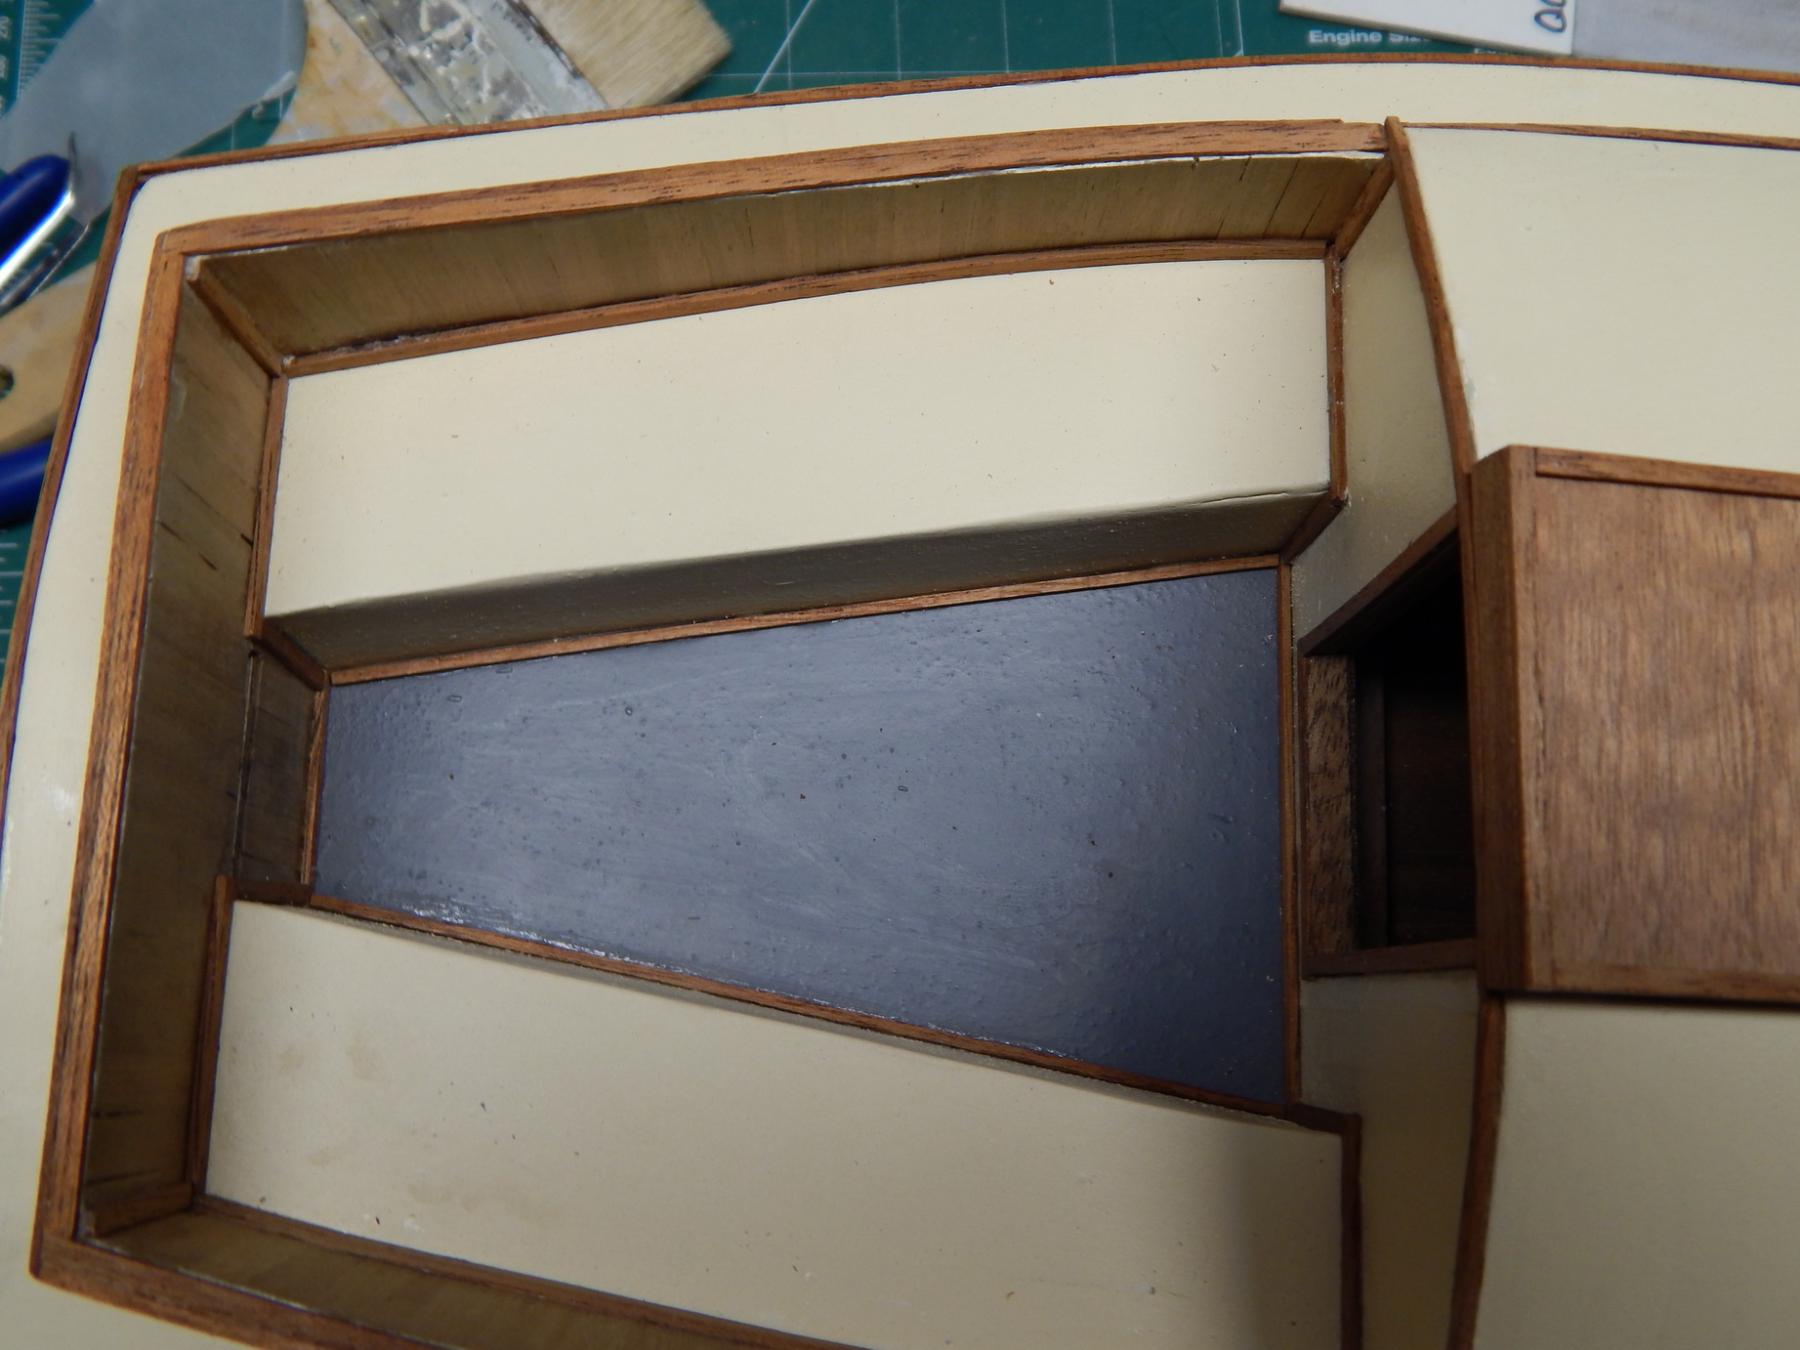
Next, finished up the trim work all around the boat.
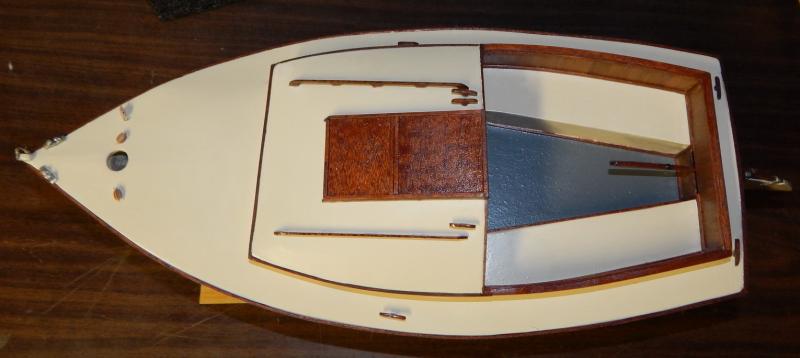
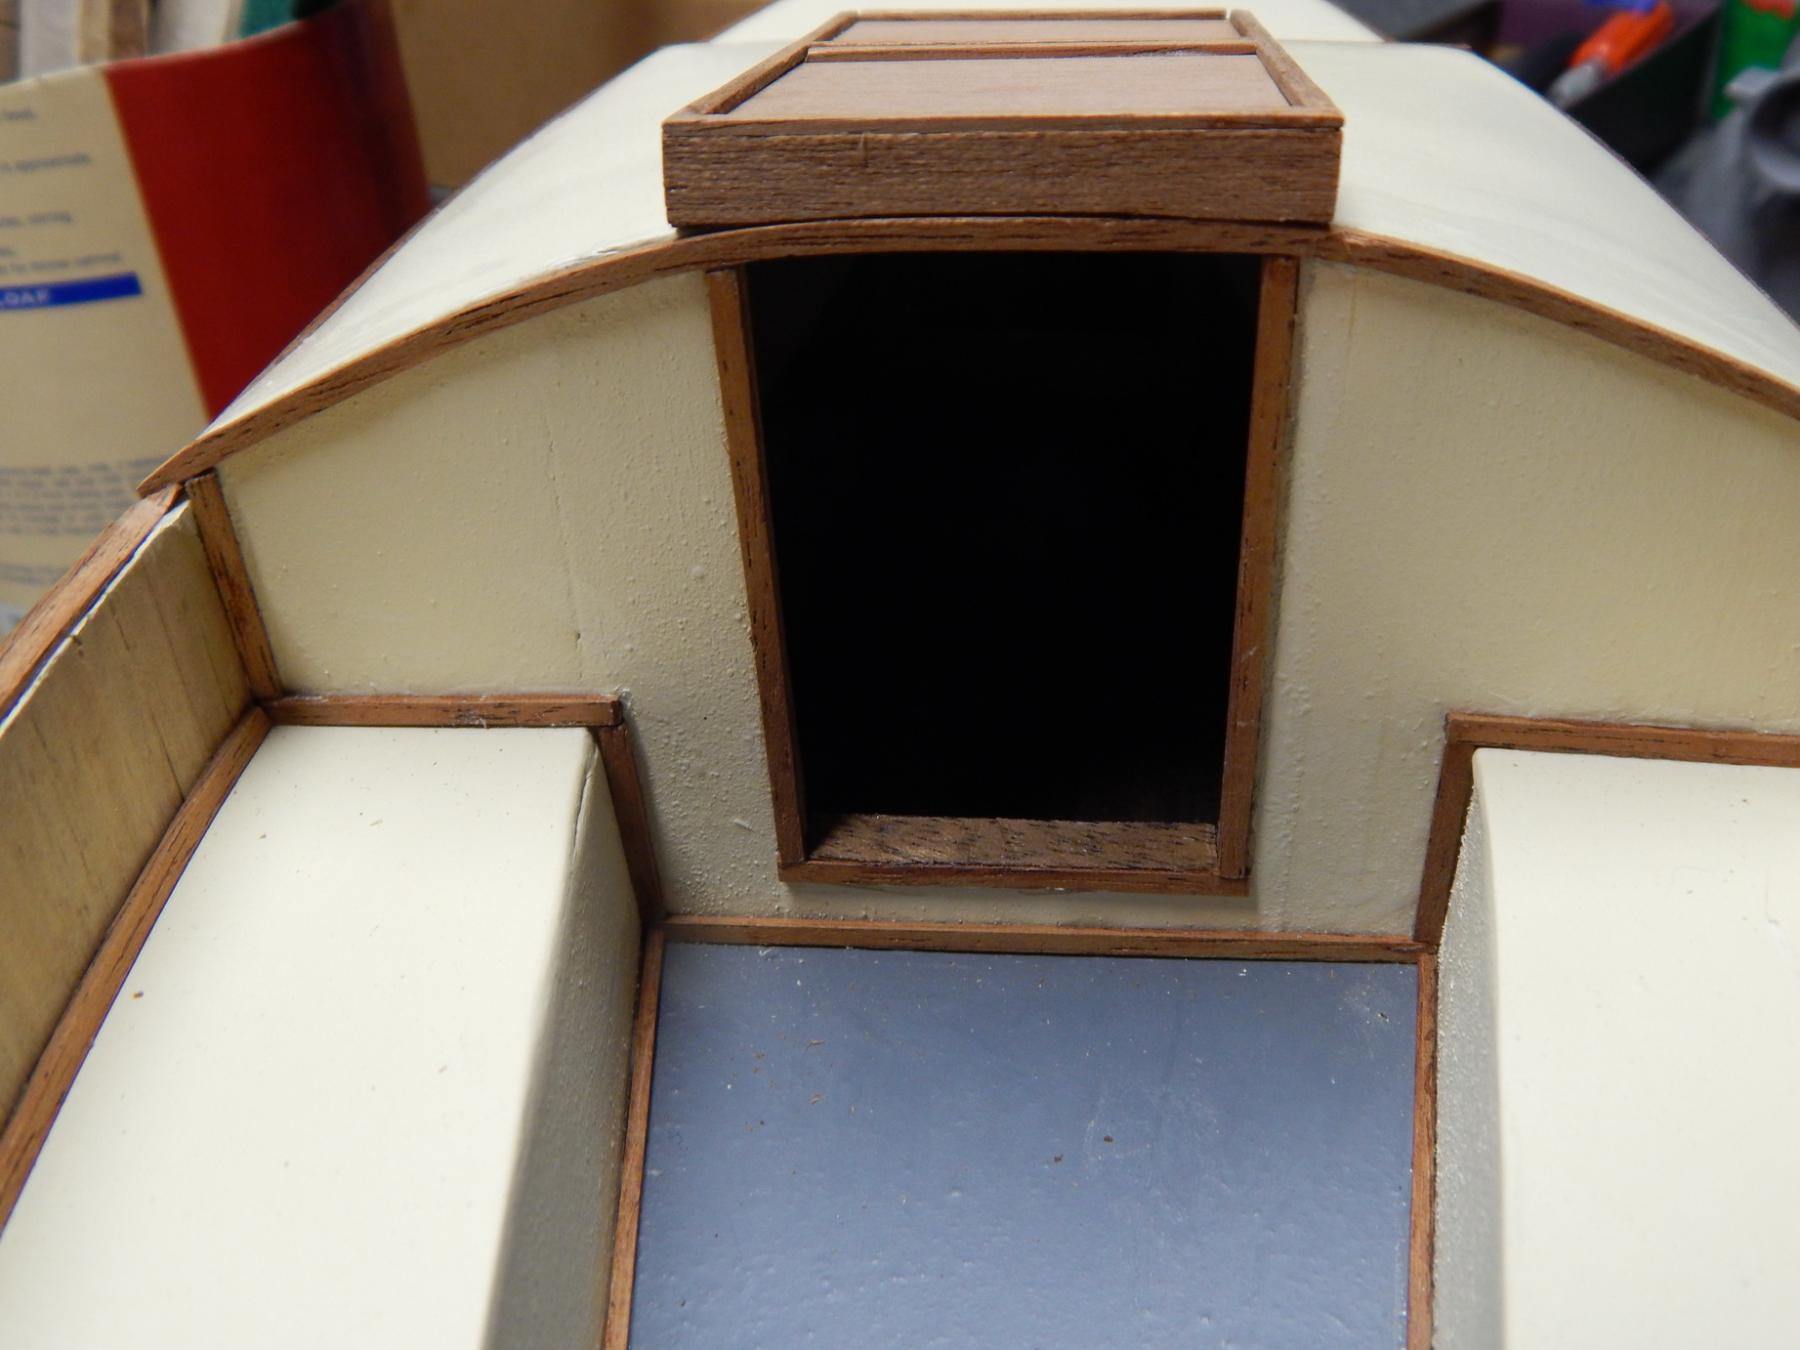
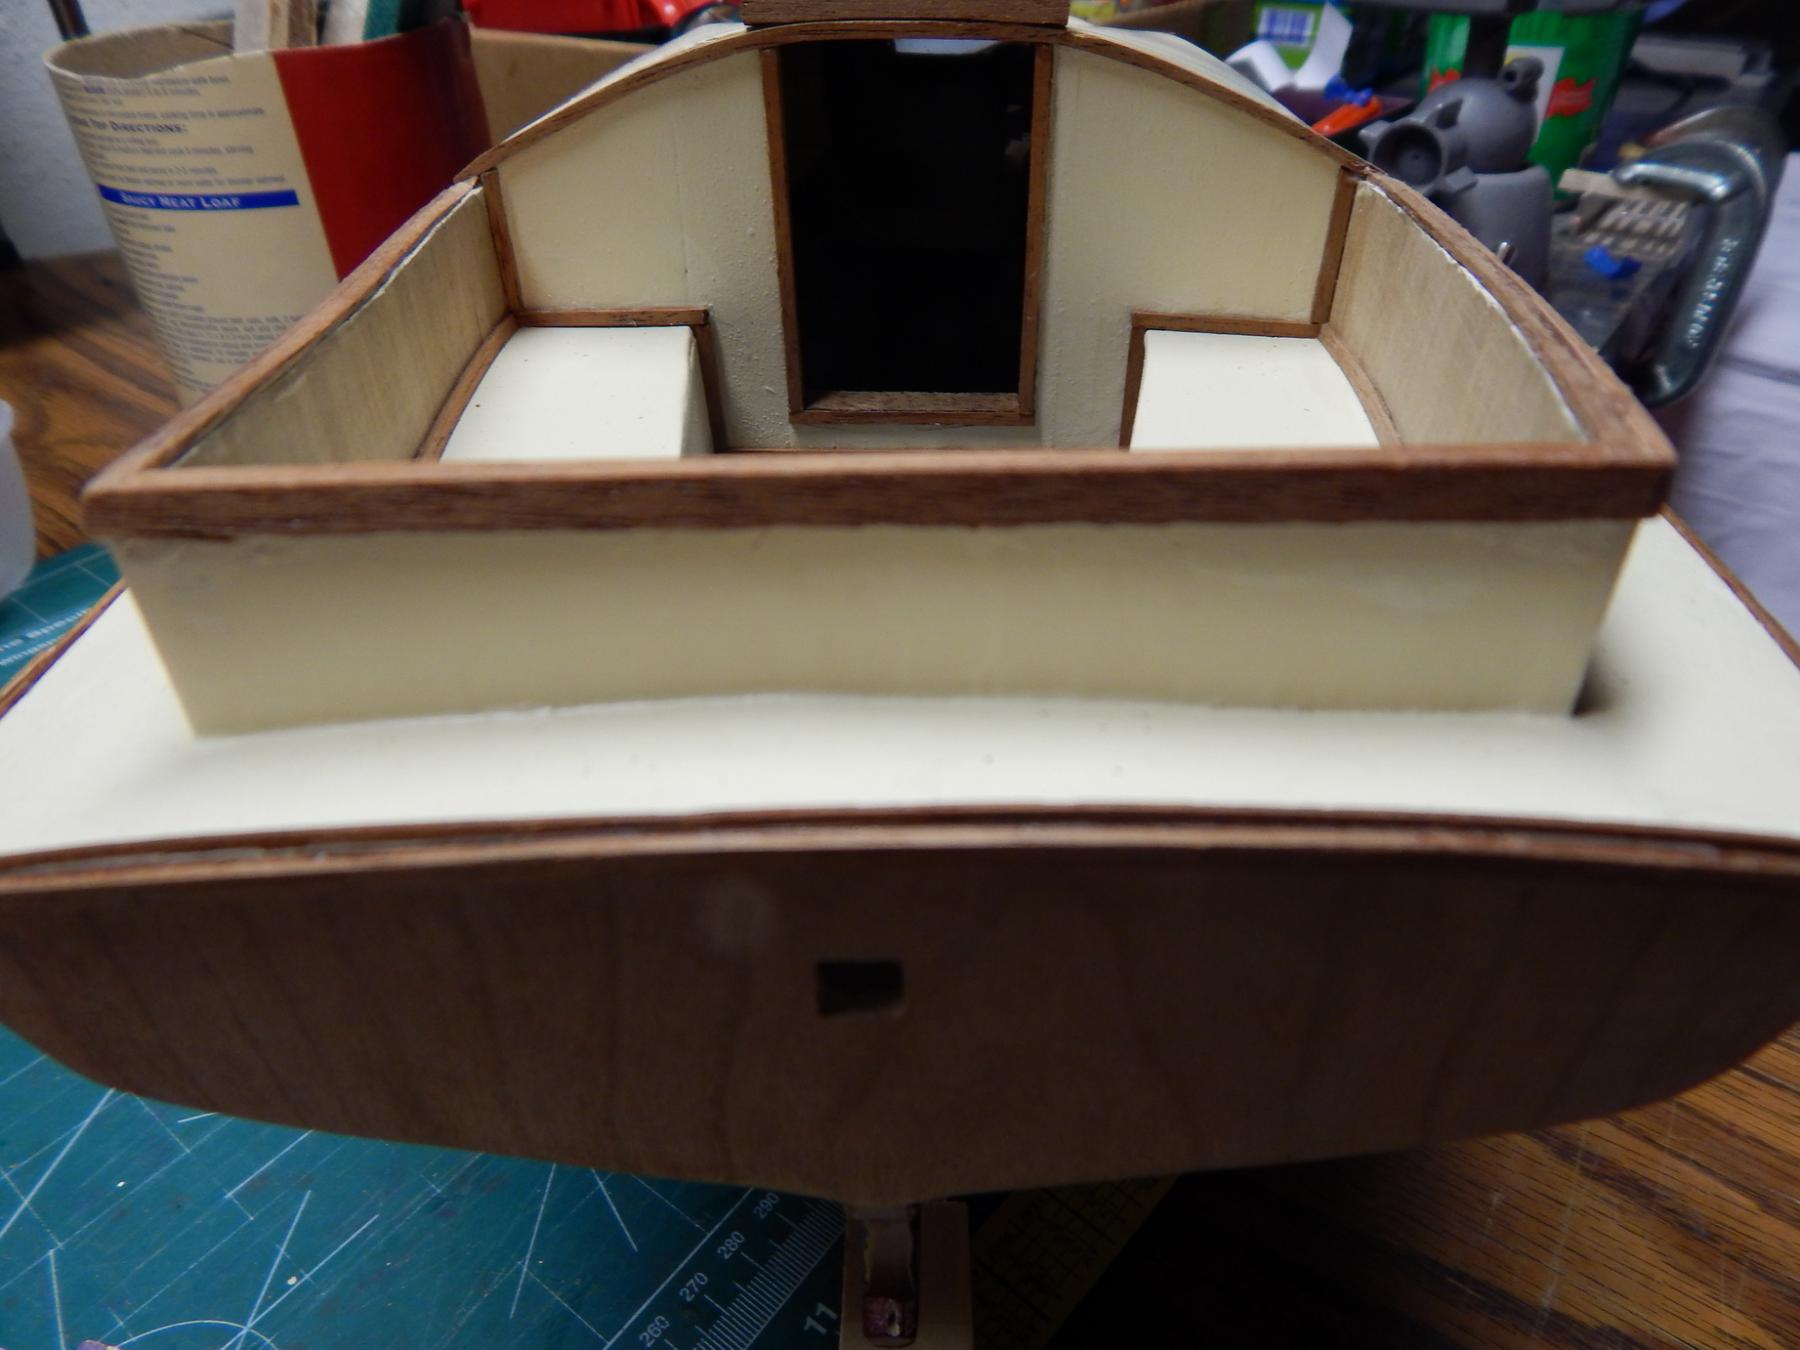
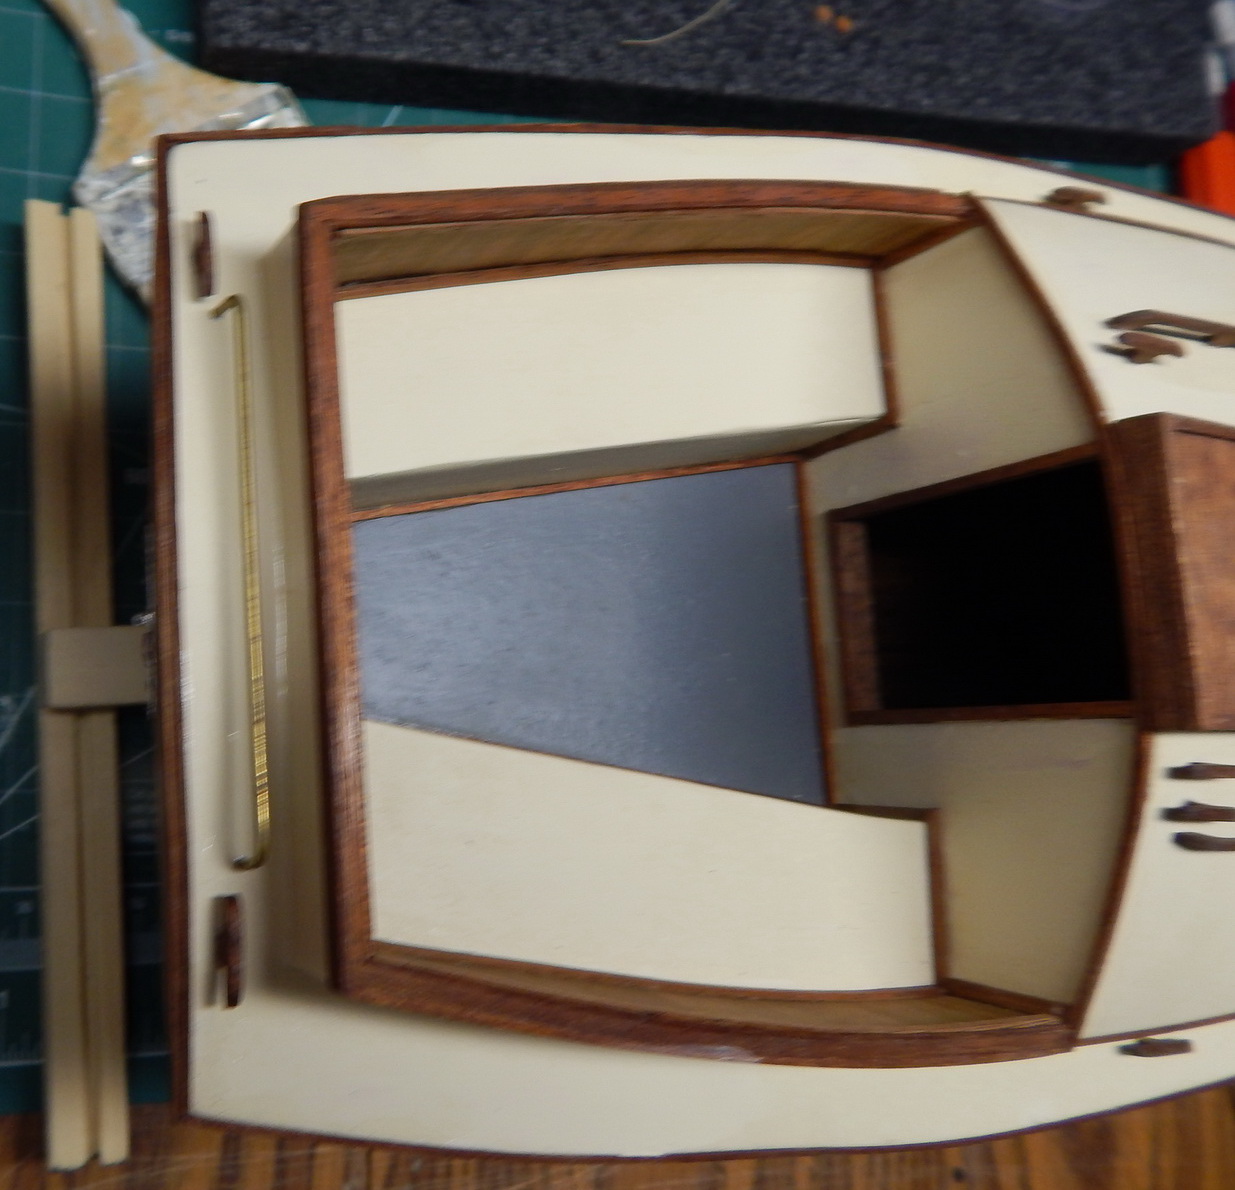
Added an open cabin door, (so you can see inside with a flash light).


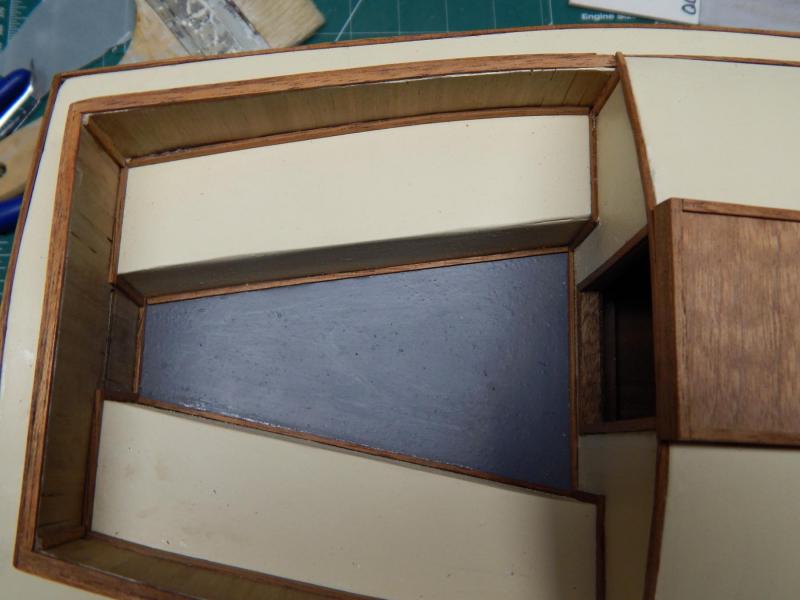
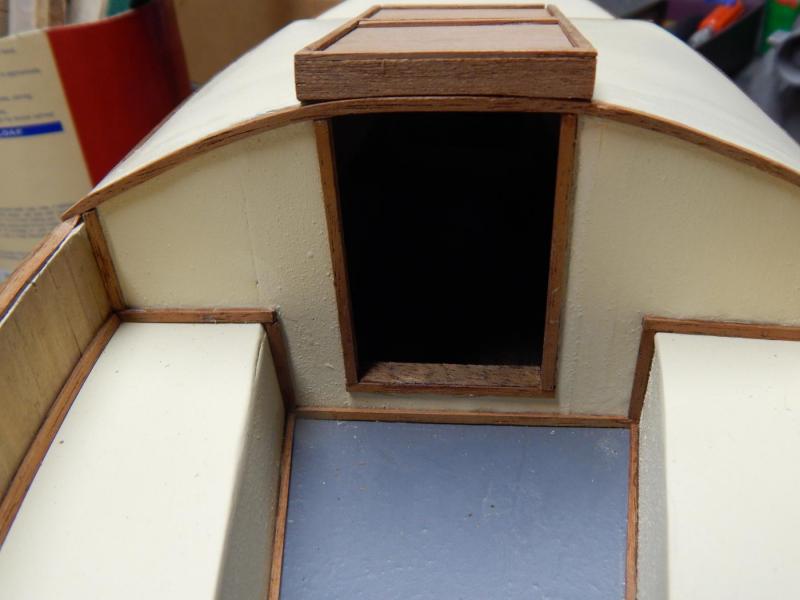


Cape Cod Catboat by Marcus Botanicus – FINISHED - BlueJacket Shipcrafters – Scale ¾”=1’
in - Kit build logs for subjects built from 1801 - 1850
Posted
Carl;
Below is a scan (A3 format) from the windmill with information. There are 23 pgs. of plans and 1page of materials and 17 pages of how to build it. The plans are to scale so trace, glue on wood and cut out.
The scan is in Dutch and describes the measurements of the mill and scale, as well as the address where it was printed, the architect and what it all includes.
I know this is a bit off-topic but wind mills have sails as well.
Marcus