


flying_dutchman2
-
Posts
1,735 -
Joined
-
Last visited
Content Type
Profiles
Forums
Gallery
Events
Posts posted by flying_dutchman2
-
-
-
# Carl, thanks for the suggestion.
# Jan, thank you for the elaborate explanation. That picture in the Rijks is also in the book. I will ask the questions as you are answering them as I built. The plans itself is an interpretation of a contract in Witsen's book and Ab mentions the pages as well.
Ab has translated this book in English and it is more than $100.00. So I have to save some money and need to get this.
Marcus
-
-
Carl, there is always room and better late than never. The Dutch community is small but very active.
I have wanted to do the Boyer since last year so I planned for it and then my wife wanted me to do the mill so I thought I can do both. Like I said before, both will be slow as I also have the garden and that includes the food. I am retired and that helps. It is not all play (boat and mill), there is house work and errands, etc.
I thought it rather odd that when I saw this book and plans figuring it would sell better in the Netherlands and the rest of Europe and not here. Oh well.
The Boyer is a challenge and the mast at the stern is held by a heavy board, it does not go into the hull. I would think with a good Dutch wind it would break off. The pointy stern is going to be fun, sort of. It is a bummer that there isn't more information on this boat. If it is worth to be one of the 17th century Dutch merchant ships you would think there is more information on this boat.
Marcus
-
7 hours ago, cog said:
P.s. Any native English speaker: I thought it's the sails of the mill, not the vaines ... please correcty me if I'm wrong
# Cog: In de van Dale (dictionary)
wiek (de) 0.1 [molenwiek] sail, vane -> wing, sweep.
wiekslag: 0.1 wing-beat / -stroke.
I copied exactly out of the dictionary.
# Jan, nice windmill.
Marcus
- thibaultron, Piet, Elijah and 3 others
-
 6
6
-
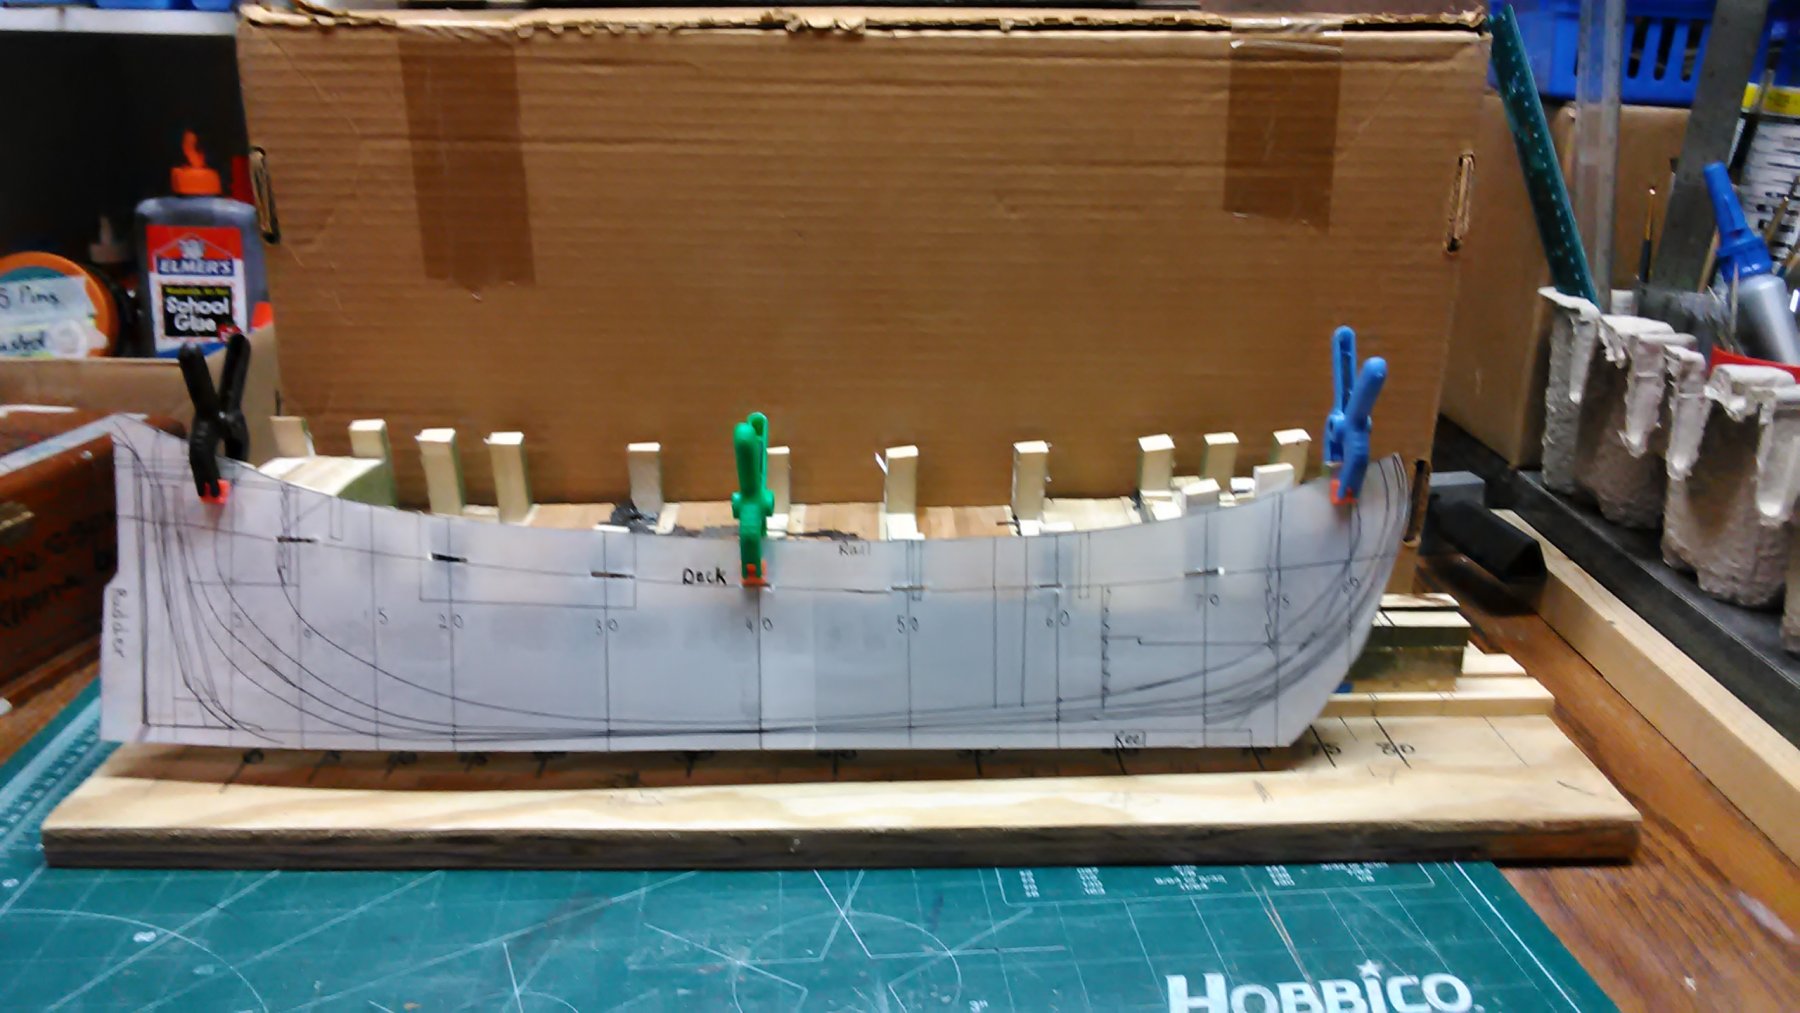
Glued it all together and made a template of the height of the railing and little cut outs that will tell me the height of the deck.
Next I need to sand the form and also use a dremel with a carving wheel to remove the excess wood as the deck is a bit too high.
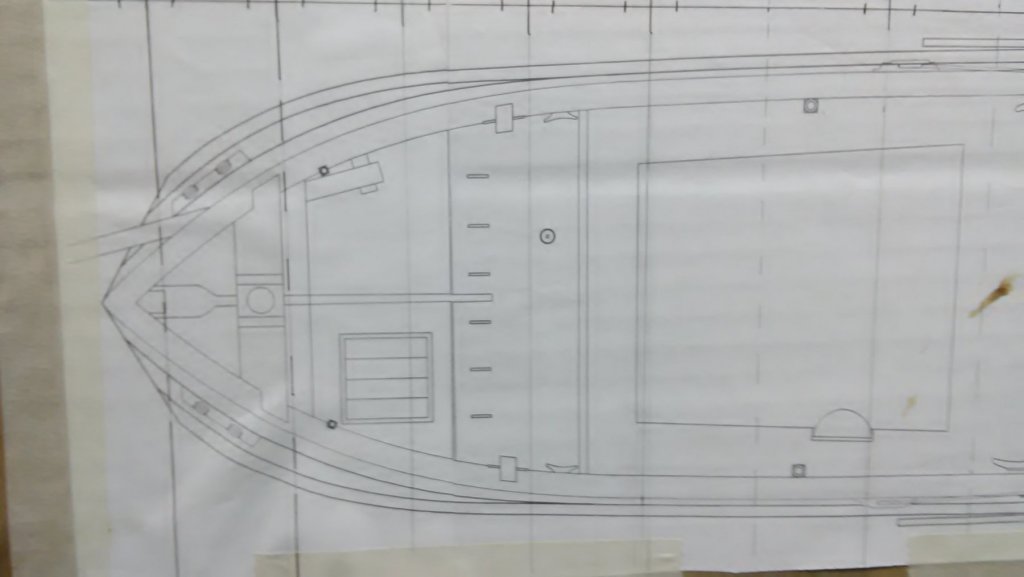
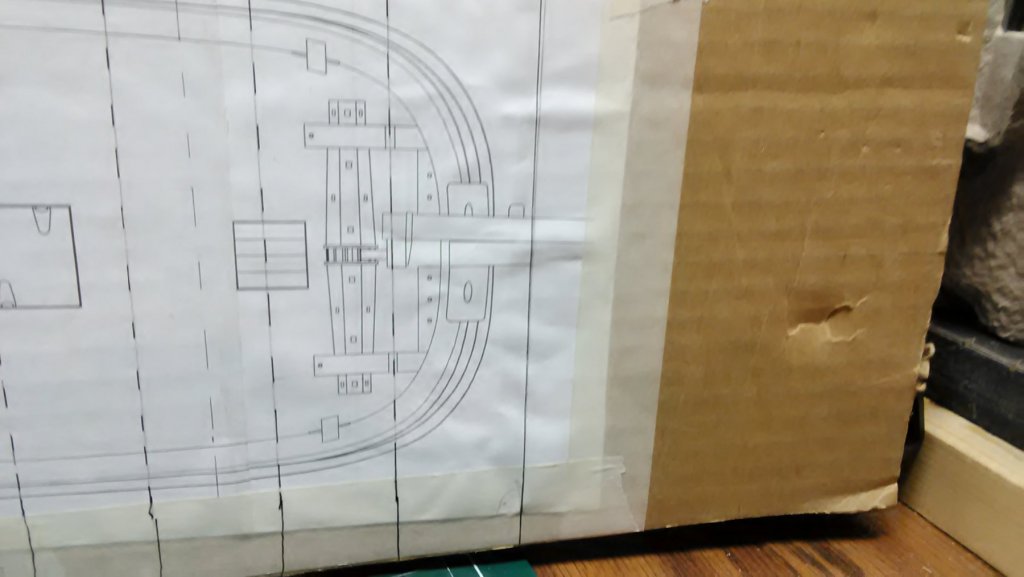
The bow is similar to a yacht, which is bluff, the stern is pointed at the end and haven't figured out how I am going to create this so the rudder and rudder post fit accordingly.
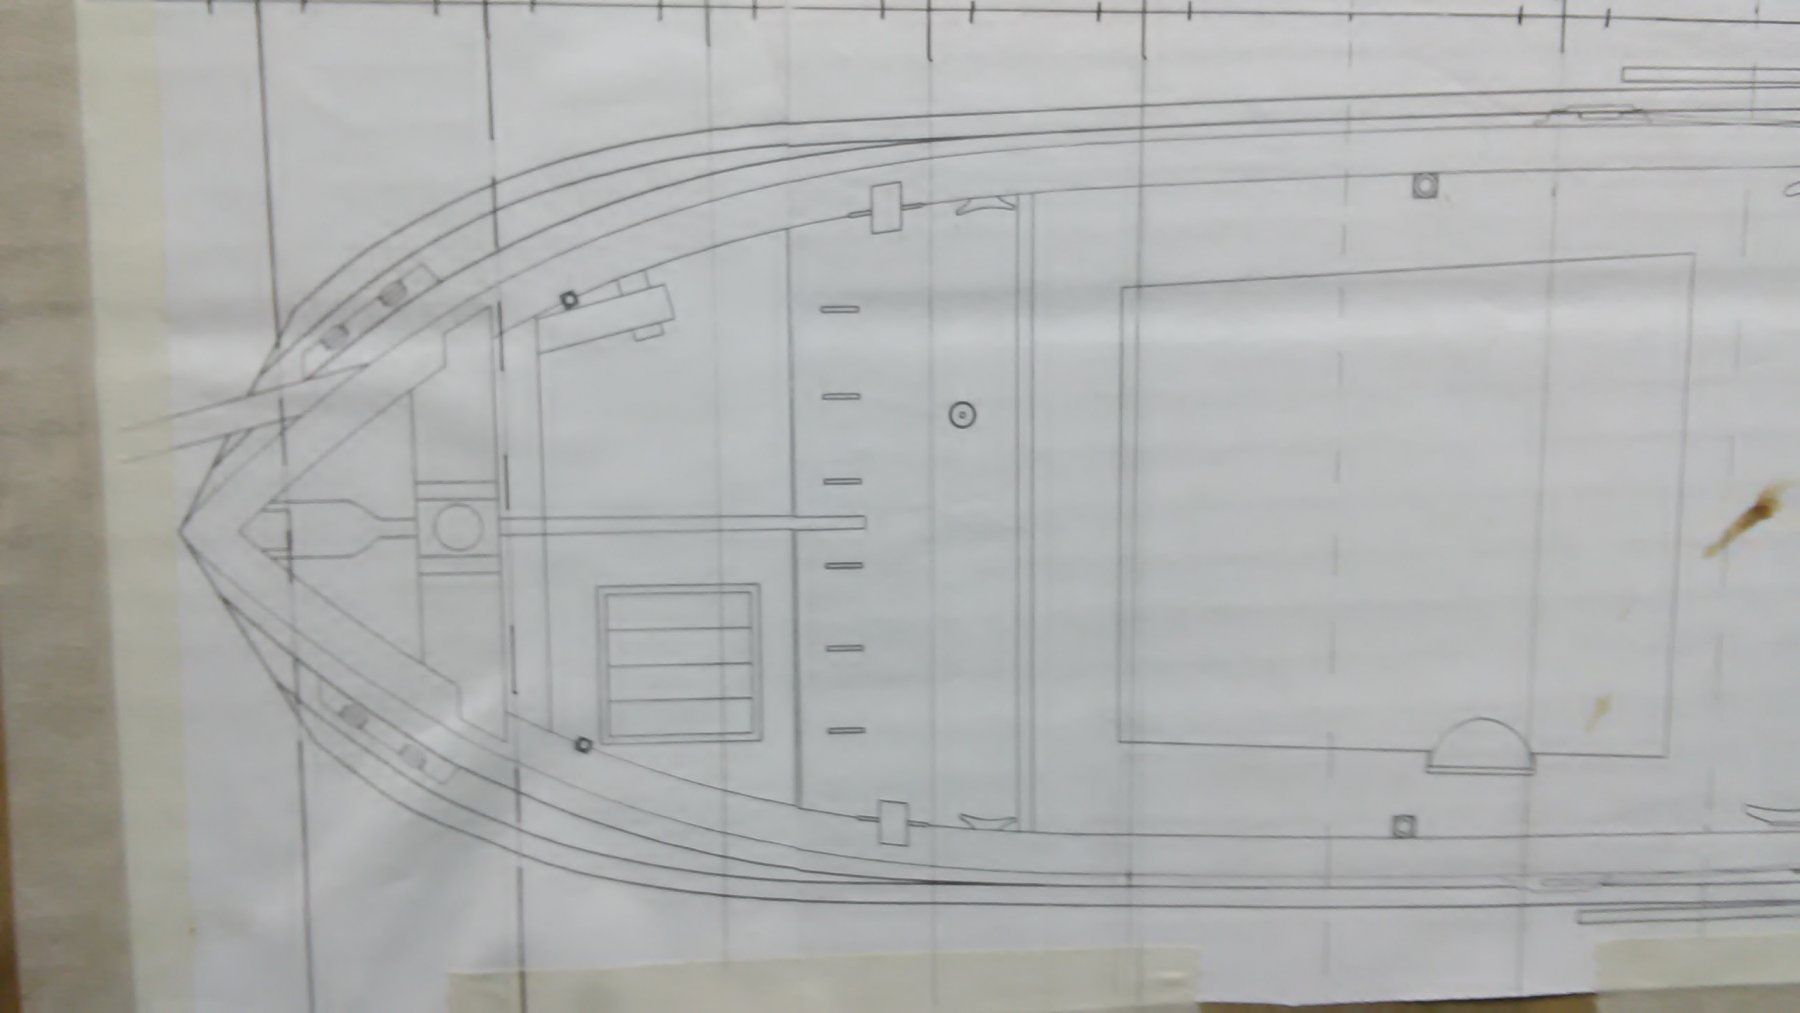
Compared to the Utrecht, which had 13 sheets of plans the Boyer has 3. So for me as a beginner scratch builder their is a lot of unknowns. The Utrecht had a sheet with the outline of the deck only. The Boyer does not have that so I guess I need to look at the top view of the deck plan that has all the deck items on it and look at the outer edge of the boat.
In the end I will figure it out.
Also, very little information of these boats on the Net or books.
Marcus


-
Thanks Carl. Nice and rough.
Thanks reklein, that made me
")
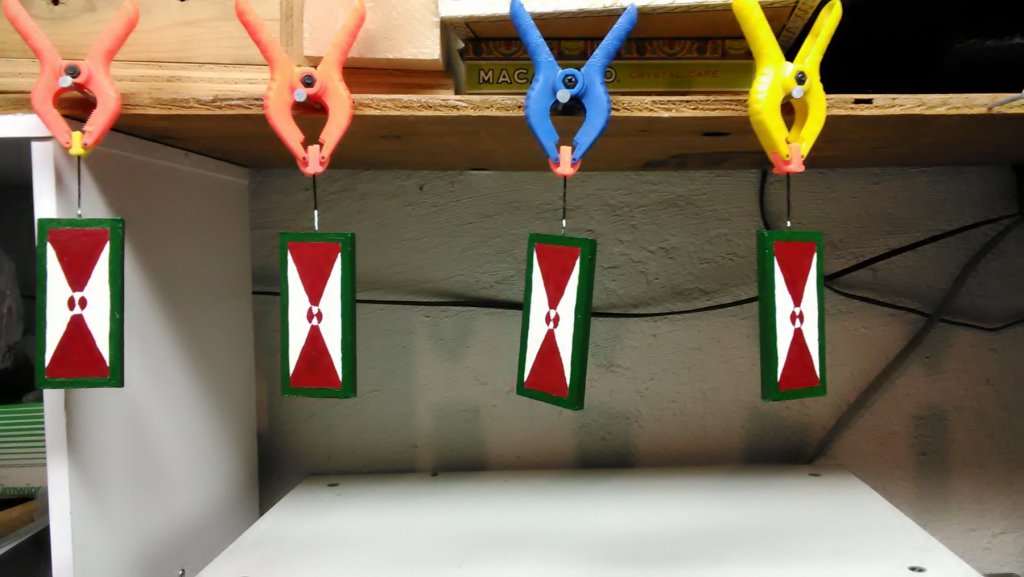
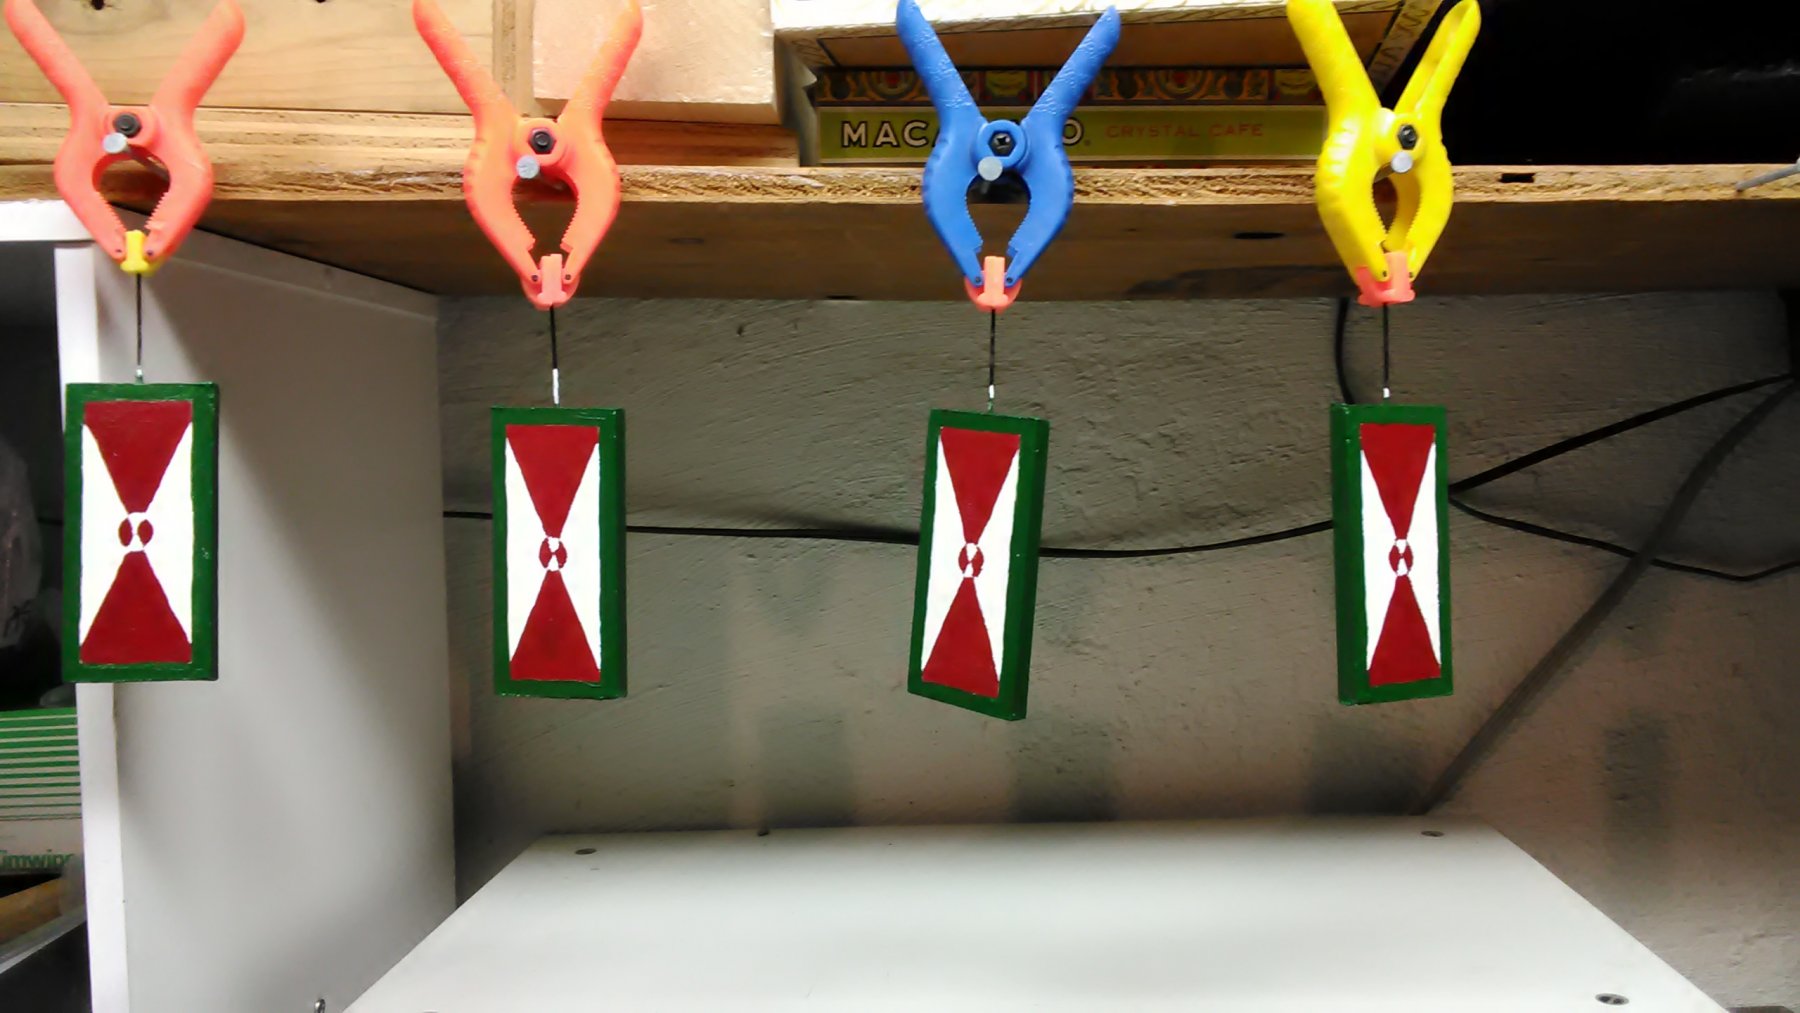
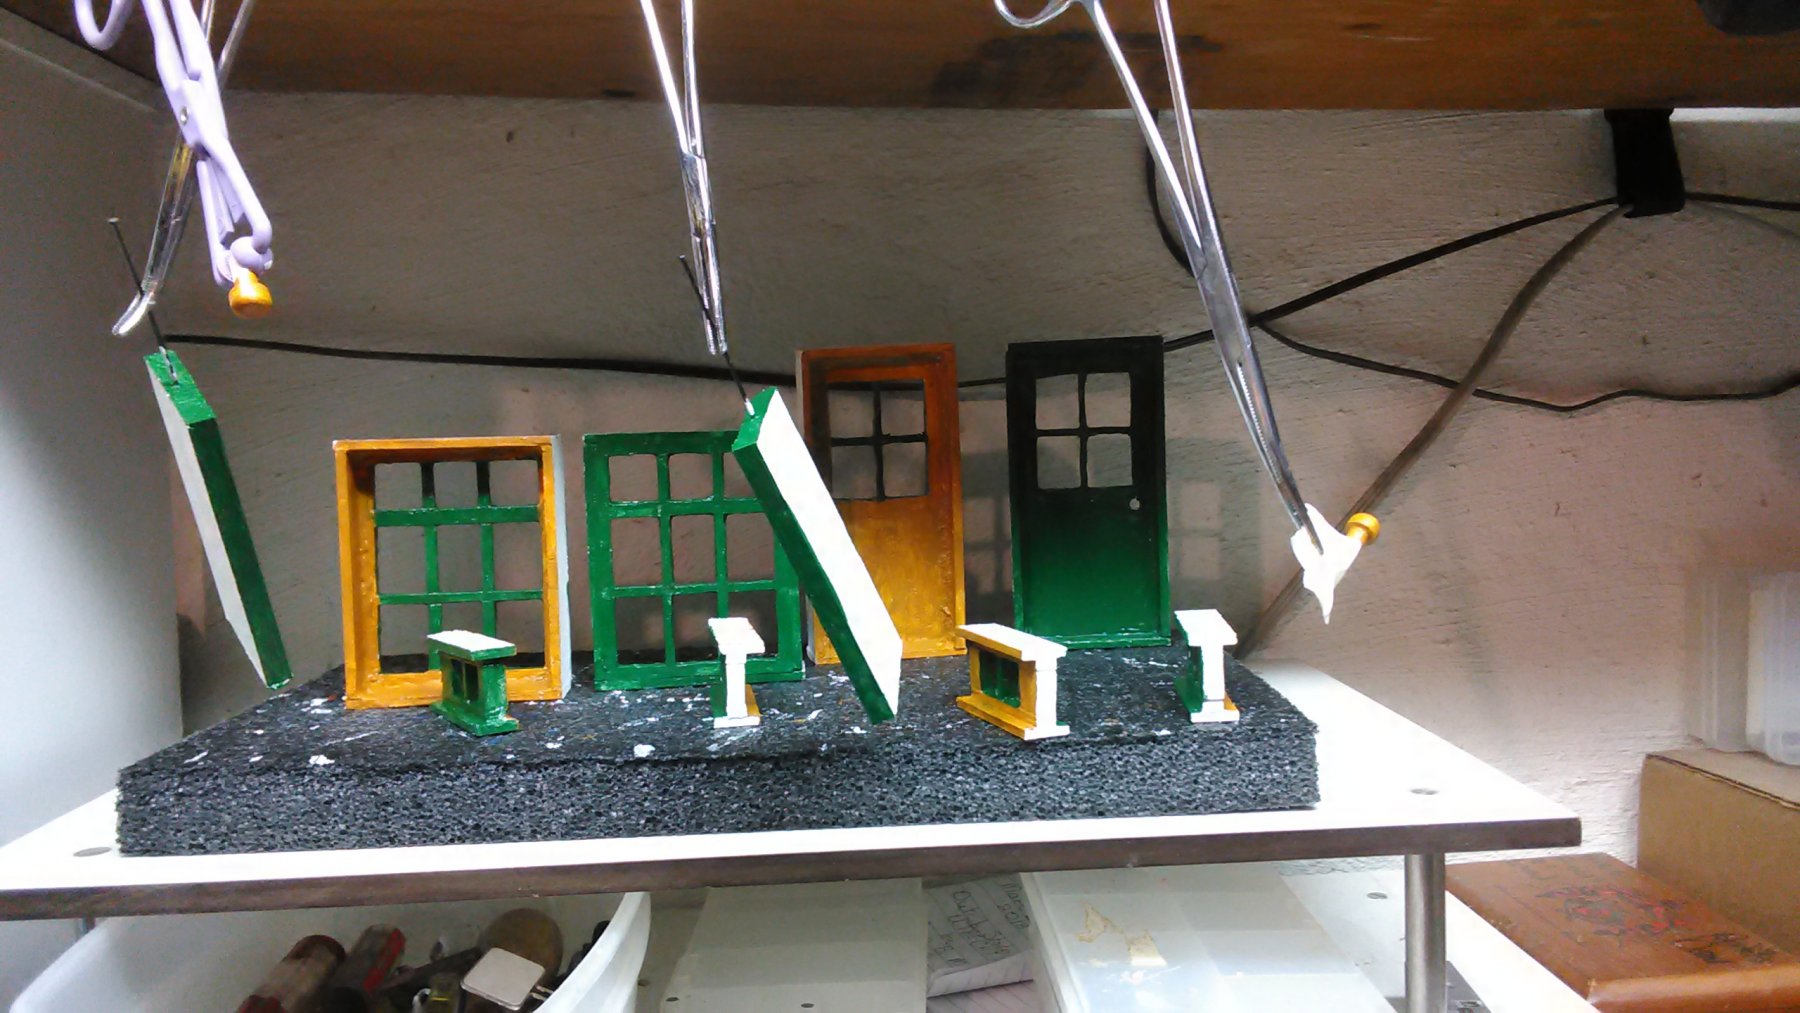
Painted the shutters by hand. Not exactly straight lines but then it does not have to be.
Colors: Van Dyk green, titanium white and dark cadmium red.
As long as the vanes are perfect otherwise they won't turn properly. The directions say that this is the most important thing about building a mill.
Marcus
- Elijah, popeye the sailor, hexnut and 9 others
-
12
-
# Piet, thanks for the info on lights and you are correct about the interest I have generated with the mill built.
We need a category on building windmills in the Scratch Building heading. Related to ship building would be a saw miill. The Dutch invented that to speed up ship building and they invented warehousing. Different tradesmen would make all the parts for building a ship and store it in the warehouse. Then when a contract was signed for a ship, the shipwright would go to the warehouse and pick up the pieces. Dutch ships were build in half the time compared to the Brits. (sorry, got off track)
Excellent pen and ink drawing, such detail.
# Jan, I think I will try that. It is cheap and readily available.
Most versions of windmills around here is the one I am building. You can always tell if a person of Dutch heritage lives in a house by the windmill in the front yard and kissing boy and girl statues in traditional Dutch clothing.
Marcus
-
Painted the first coat with acrylics. Van Dyk green and the inside raw sienna which is a light brown. I opted for a lighter color instead of black.
Due to the abundance of walnut in my possession, I made the shutters from that wood. Also, it is 4 mm thick instead of 3 mm, which it calls for
The mill will have a lot of hardwood incorporated. The plans call for plenty but I am doing more because I have lots (left overs from the woodworkers club).
Marcus

- Baker, Osmosis, thibaultron and 10 others
-
13
-
Welcome Ondras71.
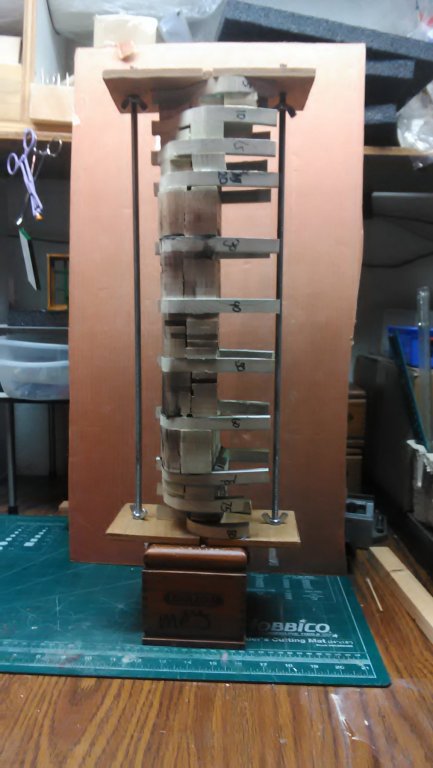
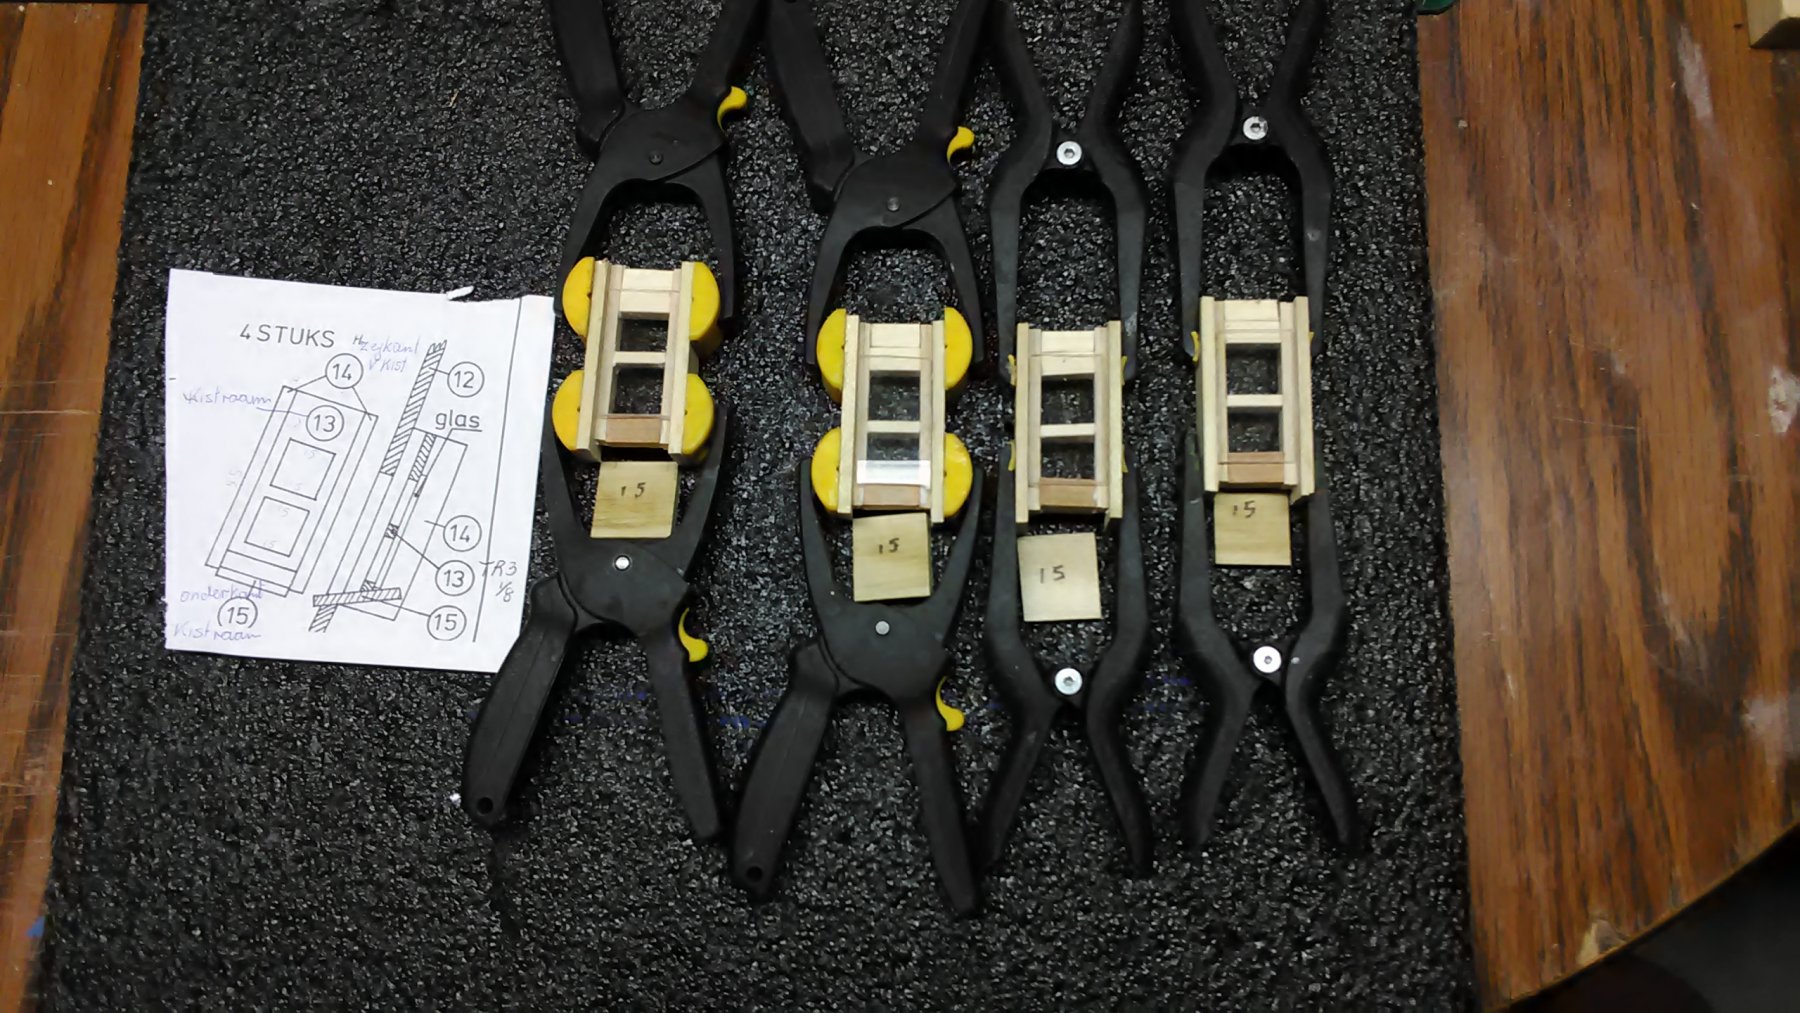
Glued everything together and she is in a clamp letting her dry overnight.
Marcus
- Jack12477, paulsutcliffe, mtaylor and 9 others
-
12
-
So far it looks promising. Looking back at the pictures of the Rocket, she sure looks sleek. I would have loved to see them outrun a train. That must have been a sight to see.
Marcus
-
-
# thibaultron: That is a good idea. Didnt even think of dollhouse stuff.
# Backer & Cog, thanks for the definition and links.
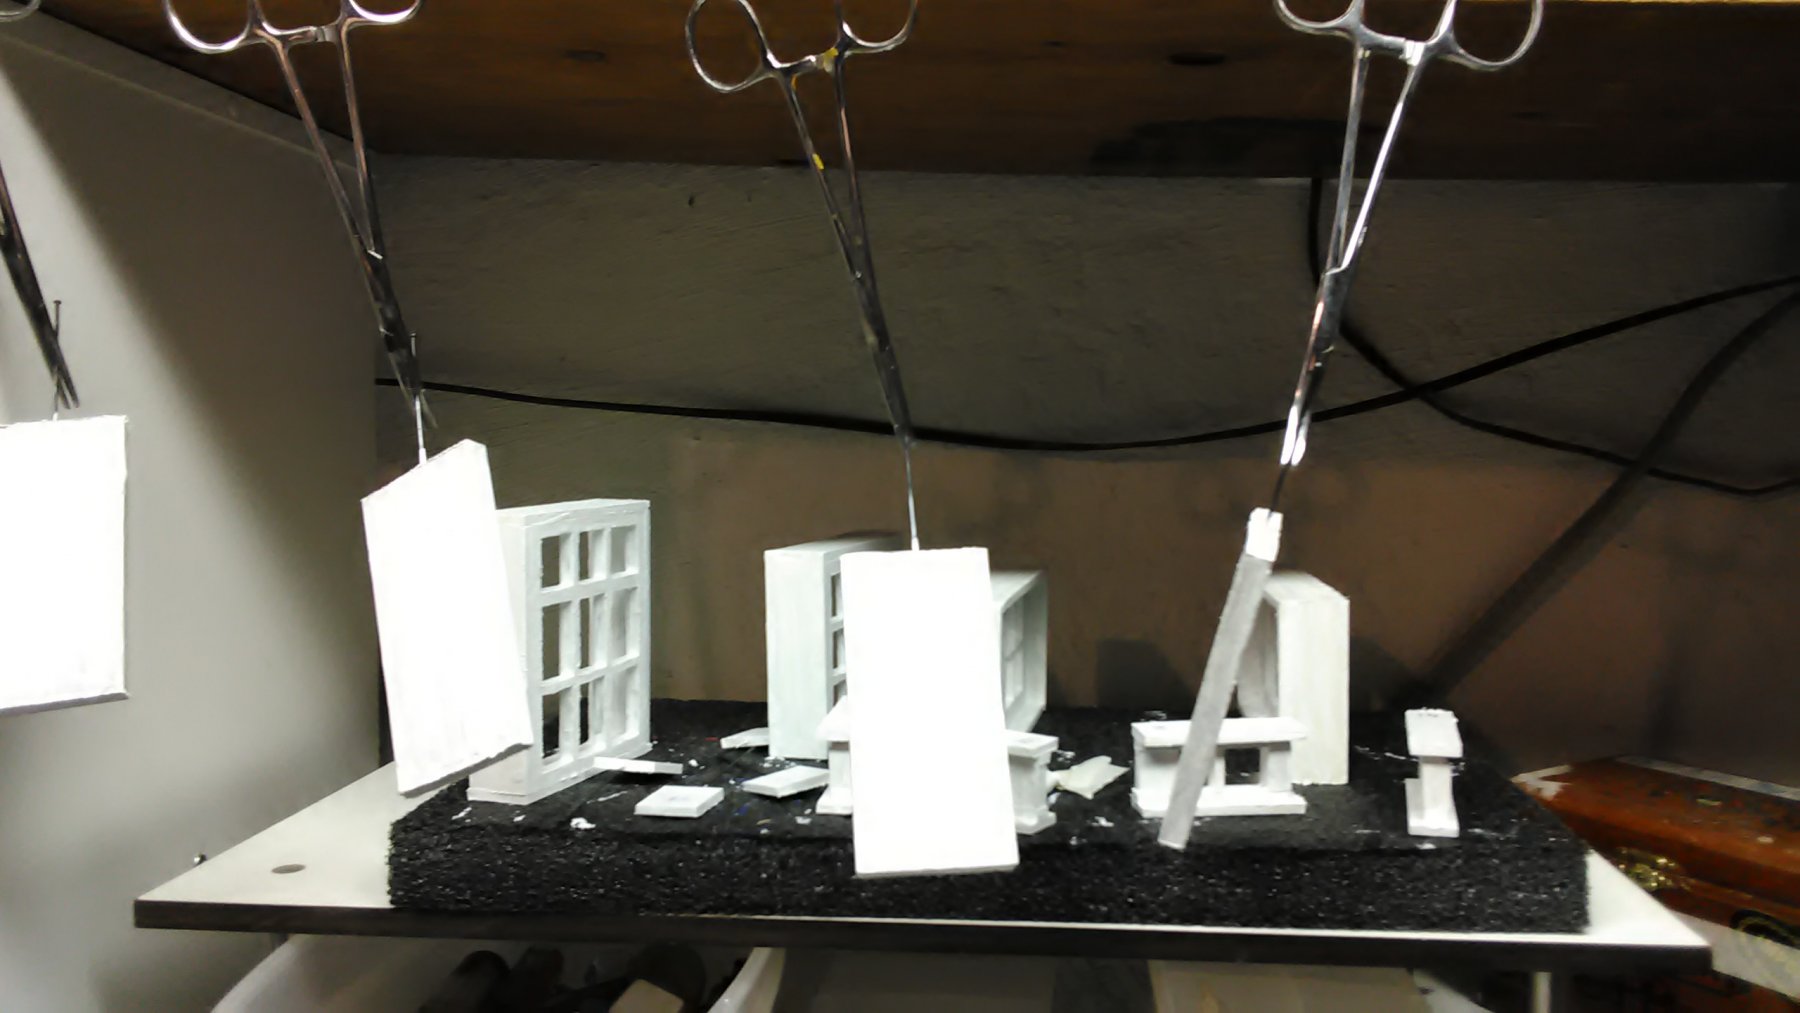
Windows, doors and shutters have been primed. I used the same exterior primer I used on my solar greenhouse 10 years ago and it is still standing. It seals the wood, mold and mildew resistant and inhibits rust (just what I need for wood :-) ).
Marcus
- thibaultron, druxey, cog and 9 others
-
12
-
Hi Jack,
I want a front seat for this built. This is awesome and looking forward to its progress.
Marcus
- popeye the sailor, cog, Elijah and 3 others
-
6
-
35 minutes ago, cog said:
Nice progress Marcus. Will you be making curtains (red and white checkered) too?
No curtains, but then again maybe.
Where am I going to get checkered cloth in that scale?
Next time someone is going to suggest figures. Thought about that too. Someone looking through the window. But what scale? Make one from sculpey?
I do have a question for you.
Page 5 #18 the penanten. I know what they are but where do they go? On the inside or outside? Looks like on the outside BUT is this permanent or temporary?
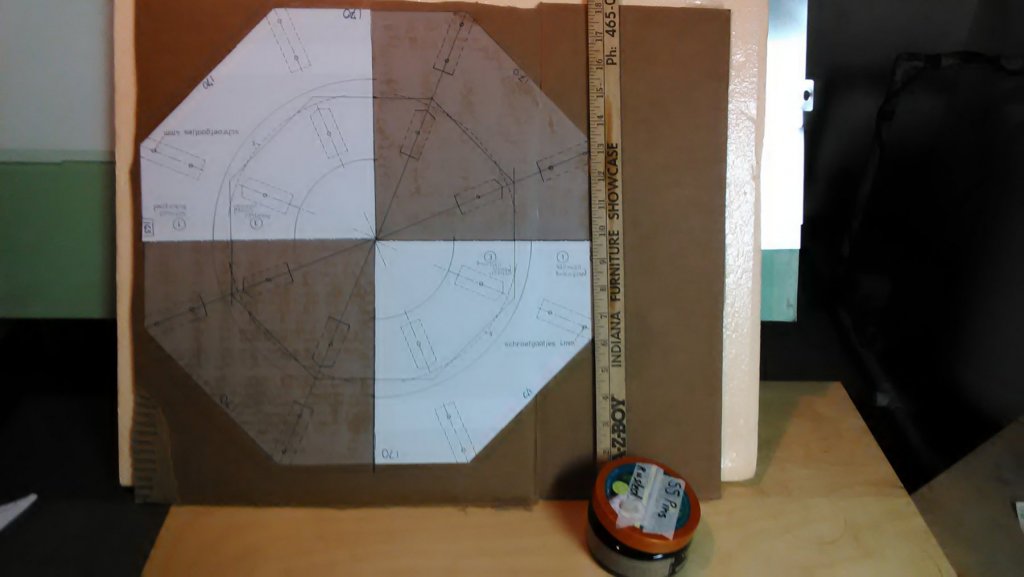
The little squares on the bottom of the diagram of the mill on page 1 are the kruipalen (sorry, it is in Dutch).
# Piet. If I am correct, didn't t you do lights in one of your models? Where would you put them in the mill? Something to think about.
I was thinking with a couple of little solar panels, then I don't have to drag an electric cord around.
Welcome aboard, Canute.
Marcus
-
Welcome Vivian, yes there is still plenty of room.
Finished the bottom plate, foundation wall, frame studs, and the thatch roof templates.
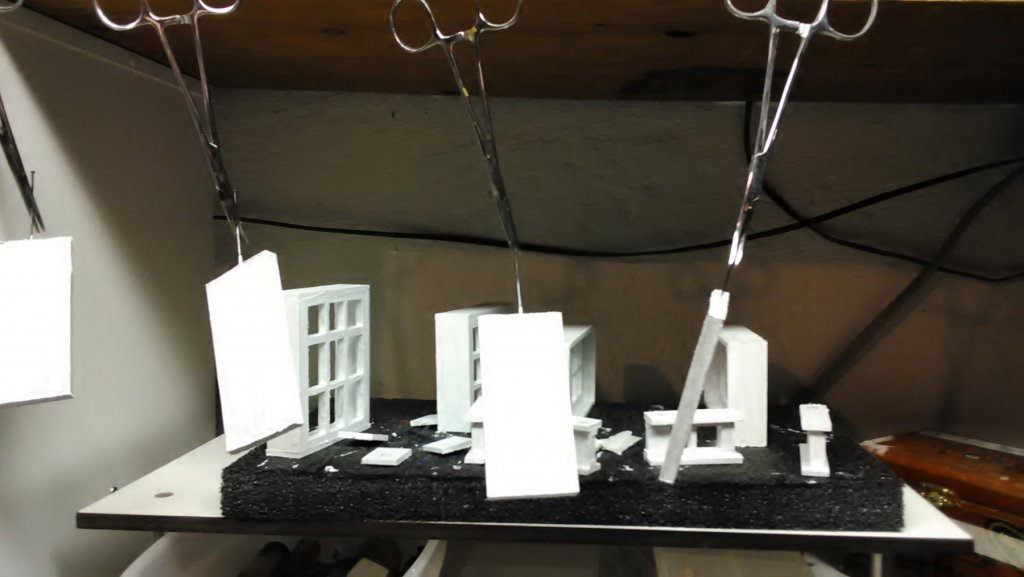
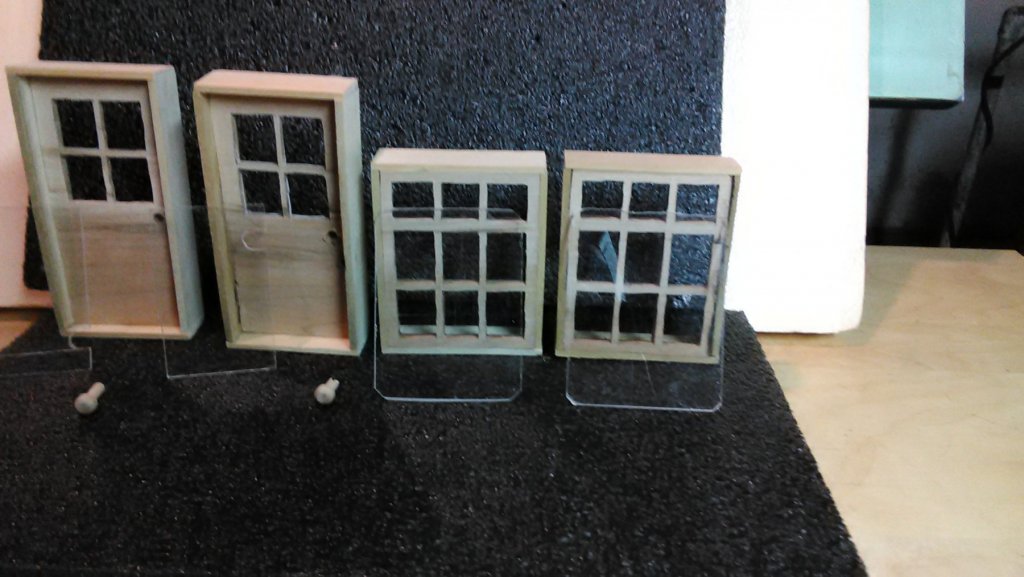
Cut the lexan for the doors, windows and windows in the thatch roof.
Added door knobs for the doors and put together the windows that will be installed in the thatch roof. Once dry, sand a bit put primer on, paint all of it Van Dyk green and finalize it with lacquer.
The window shutters will be primed as well and they have a design painted on them.
Marcus
- paulsutcliffe, Elijah, Piet and 13 others
-
16
-
Welcome Piet and yes I saved a seat for you. Correct, so many ships. I plan to do all the scale 1:48 first and then a Fluit. I also have that book, Valkenisse, Retourschip 1717 with plans but without plans for masts, sails and rigging. This I need to research as I want to build her complete.
Marcus
-
In Holland, Michigan there is a Dutch grain mill. These Dutch Americans went to the Netherlands and purchased a mill, took it apart piece by piece, put it on a ship, shipped it to the USA, to Holland, Michigan, and put it back together.
It is a working grain mill. The miller was sent to the Netherlands to learn how to run it. She had to get certified for this. It is a 2 hour drive from my house and when I am there I by the flour.
Marcus
- mtaylor, Jack12477, thibaultron and 5 others
-
8
-
3 minutes ago, cog said:
You could spray a satin water resistant "laquer" over the thatch. You should realise that thatch deteriorates over time, so if you do not treat it, it will get the authentic brownish look, passing into green (moss) Strangely enough, I've never seen a mill with moss on it's thatch ...
Good idea on the lacquer. So a thatched roof or not, I'll decide when I get there.
What I read about thatch roofs is that it is a specialty. There are tradesmen that do this. There are special tools for it and you have to prep the roof before you can thatch it. They also prep a fire retardant on it.
I learned a lot from reading these sites.
When I lived in Holland, I saw how they thatched a house ...... very interesting
Marcus
- thibaultron, mtaylor, Jack12477 and 4 others
-
7
-
Especially for the Dutch people who speak Dutch and for everybody else for the pictures.
This is a hobby site for anything people who want to build something.
www.modelbrouwers.nl and in the search type 'molen'.
Nice windmill projects.
Did not find anything about thatch roofs.
People who have model trains and want to make thatch roofs on their houses, this is what they do
Get plastic grass and glue on roof.
Use diluted acrylic paint and cover the grass
Keep painting it on to get a thick layer but not so much that the grass dissappears.
I will try this on a practice piece and leave it outside and see what the weather does to it. I am thinking it will deteriorate, so I stay with the original idea of using tile glue.
Marcus
-
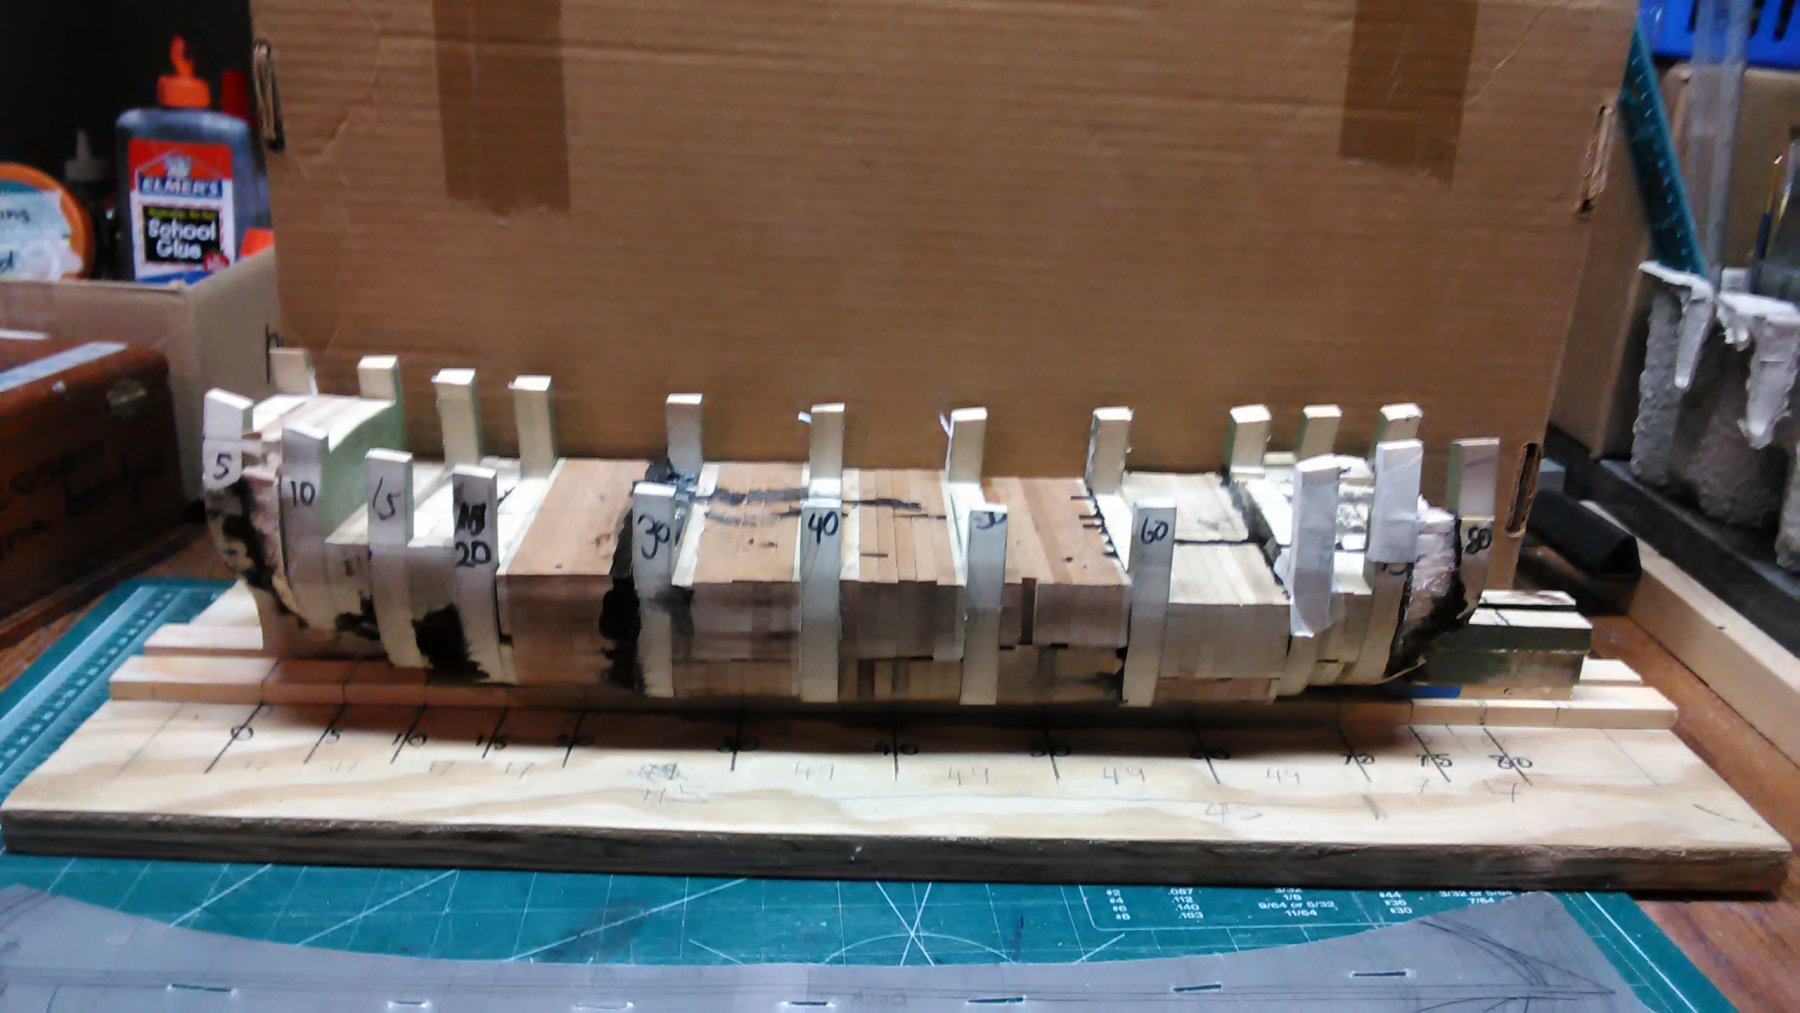
Glued the bulkheads and spaces together. The boat is in three pieces and once dry, I will glue the whole thing together.
My woodworkers club has a free bee table. This is where members put stuff on which they no longer want and this month I took about 200 pieces of 12" x 1 x "1/4" cherry. Some have been used as spacers and the rest I will cut into planks of 1/16".
Marcus
- paulsutcliffe, Omega1234, cog and 9 others
-
12
-
Welcome aboard, thibaultron, amateur and Jack.
Jan: no interior, waterscrew or wheel. For my first garden windmill that is way over my head and the plans don't call for that. Will be looking for something like that in my next mill.
Thank you for the pictures of the different windmills.
I plan to add the cloth on the frames. Joanne sewing store has nice heavy brown cloth. I saw that when I bought the sail cloth for the Utrecht.
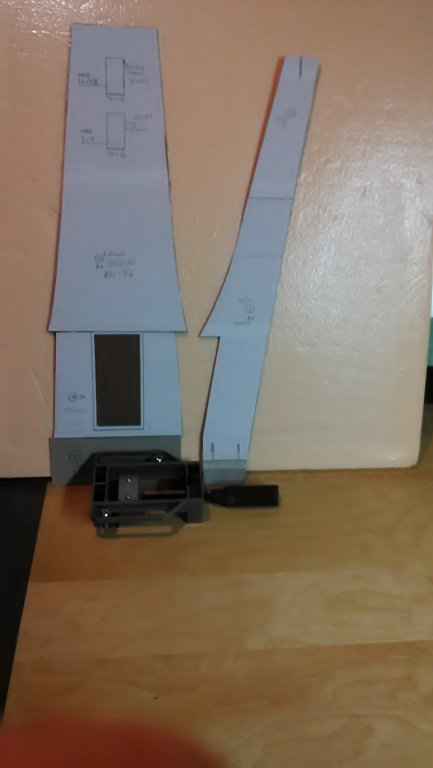
This or next week I will get the 'outdoor' plywood in several thicknesses. I have created all the templates on heavy cardboard, so it is time to start it.
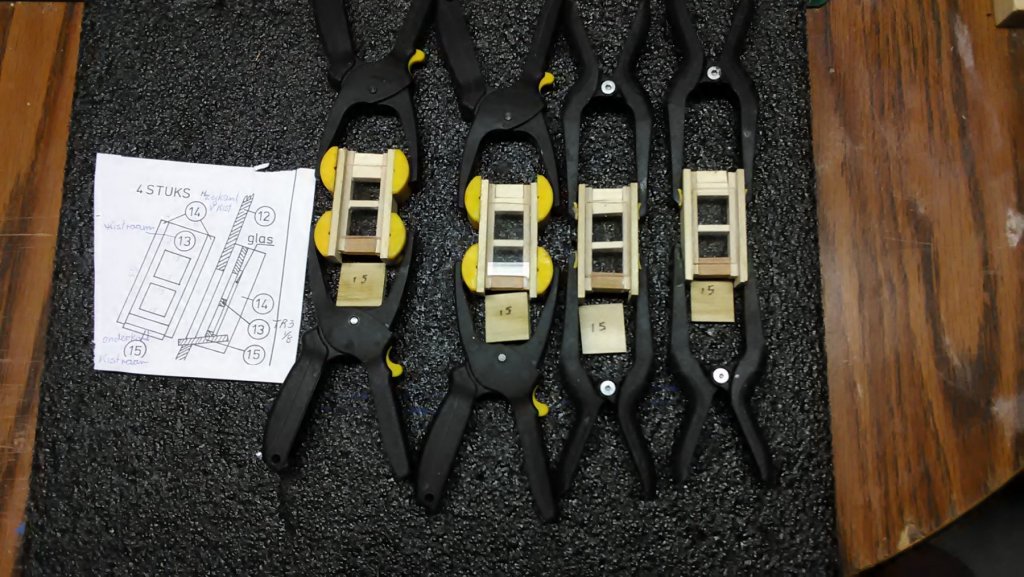
I completed the two windows and doors and casements for the items. Still needs to be primed, painted and several coats of lacquer.
The acrylic colors I am using are: titanium white, van Dyk green, medium cadmium red, dark cadmium red, cobalt blue, Mars black, yellow ochre, and orange. (some of the colors are the same as the Utrecht). The instructions also call for chocolate brown powder.
Once I get to the items that need painting, I will mention the color I am using.
This project will be slow going as I am also building a Boyer, another scratch boat and spring, summer and fall I spent a lot of time outside.
Marcus

- Jack12477, druxey, thibaultron and 13 others
-
16
-
24 minutes ago, Piet said:
Quite a nice project Marcus and how are you planning to simulate the thatch siding? Will you also make it working?
Cheers,
Thatch can be simulated with tile glue. The author describes this. Basically you need a thick paste that when dry is waterproof.
There is a windmill website in the Netherlands that sell bundles of thatch. But a bit pricy. Or in the summer go to an unmowed field and cut the straw myself.
It will be working.. This is why I need a copper tube. Probably put a LED light in it as well.
Marcus
- Piet, lmagna, paulsutcliffe and 9 others
-
12
-


Eight Sided Drainage Mill by flying_dutchman2 - FINISHED - scale 1:15 - Achtkante Poldermolen
in Non-ship/categorised builds
Posted · Edited by flying_dutchman2
Add
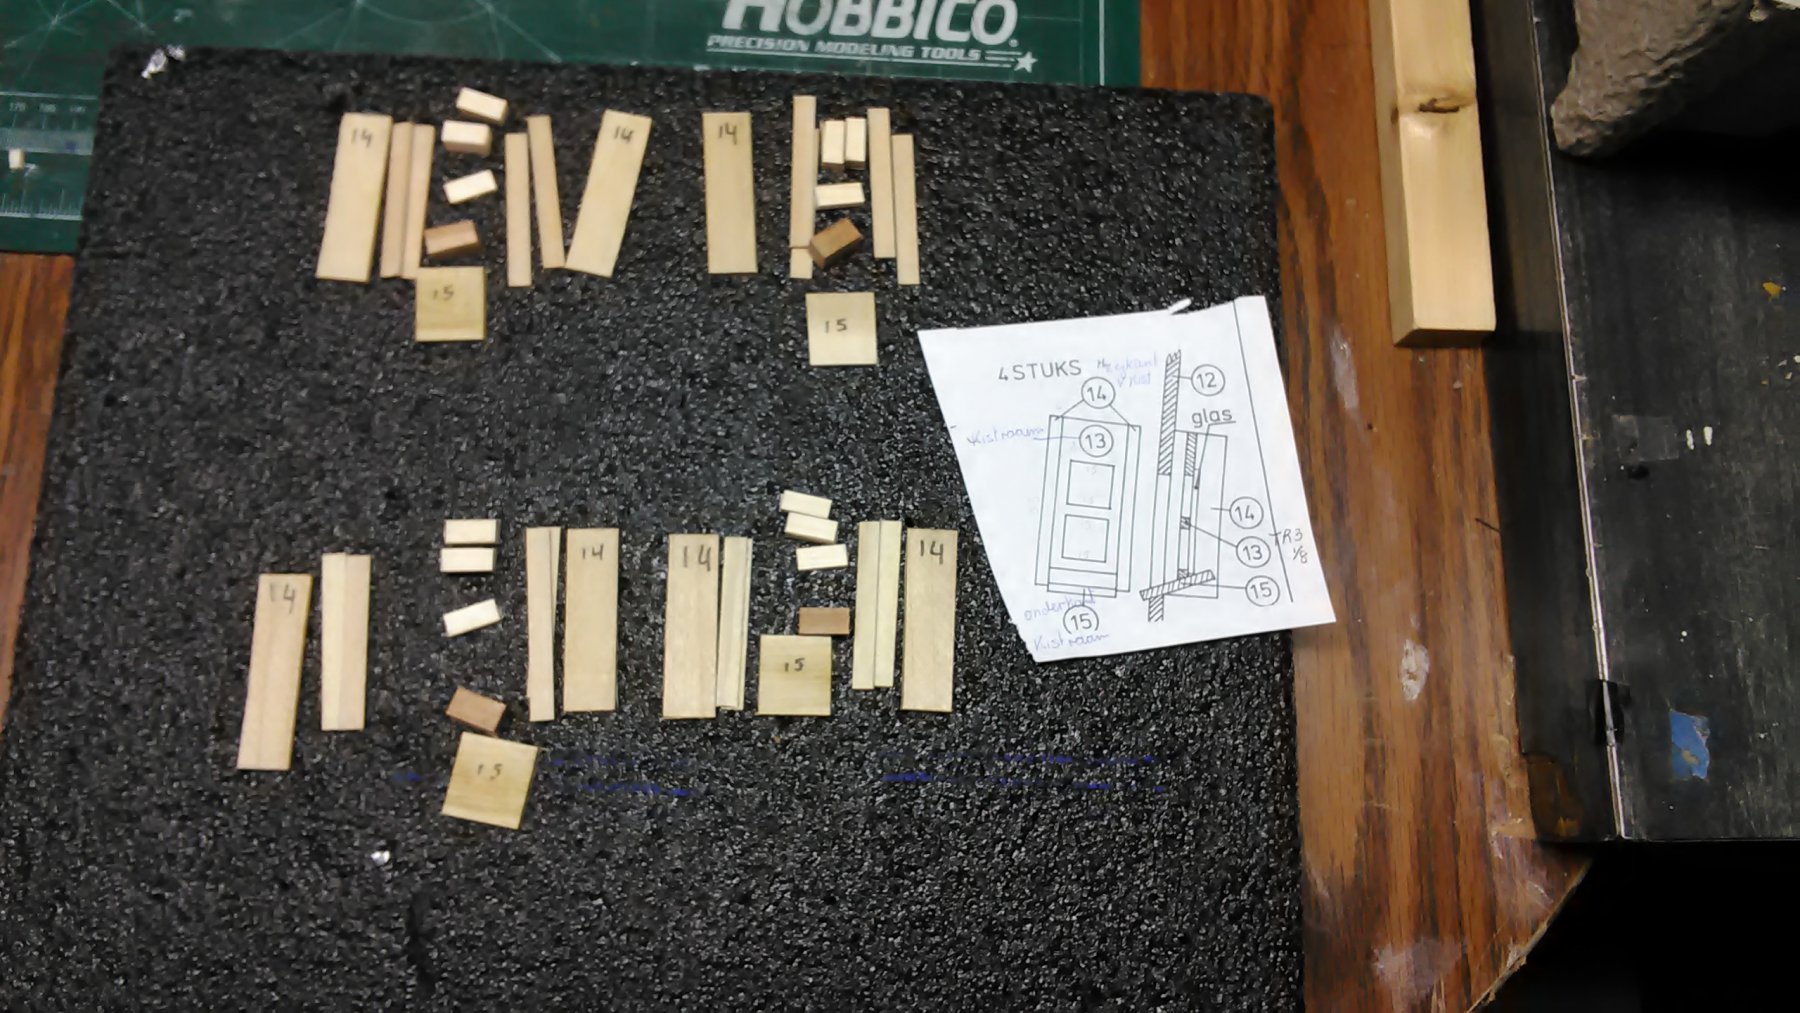
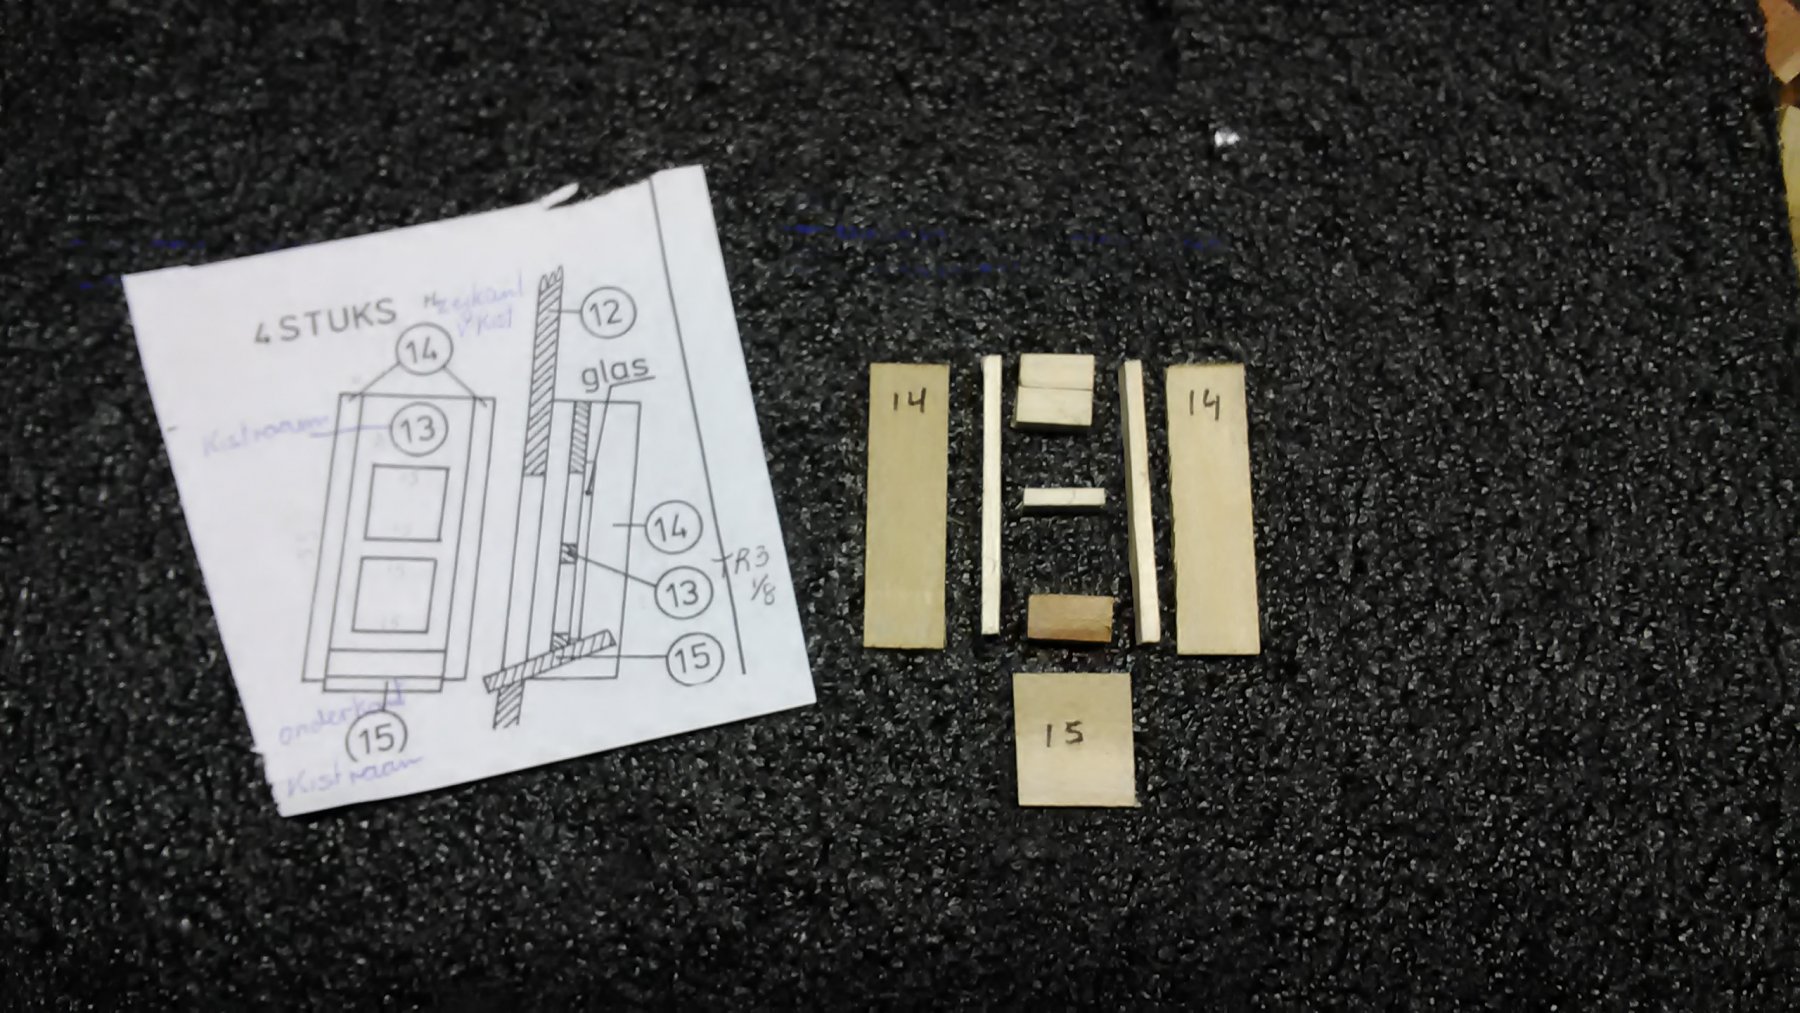
Since I am not going to get the maritime plywood this weekend (Easter weekend) I made the hooks and eyelets so shutters can go on the window frames. I used 1 mm thick brass wire. The shutter design look so Dutch.")
The doors have little knobs on them.
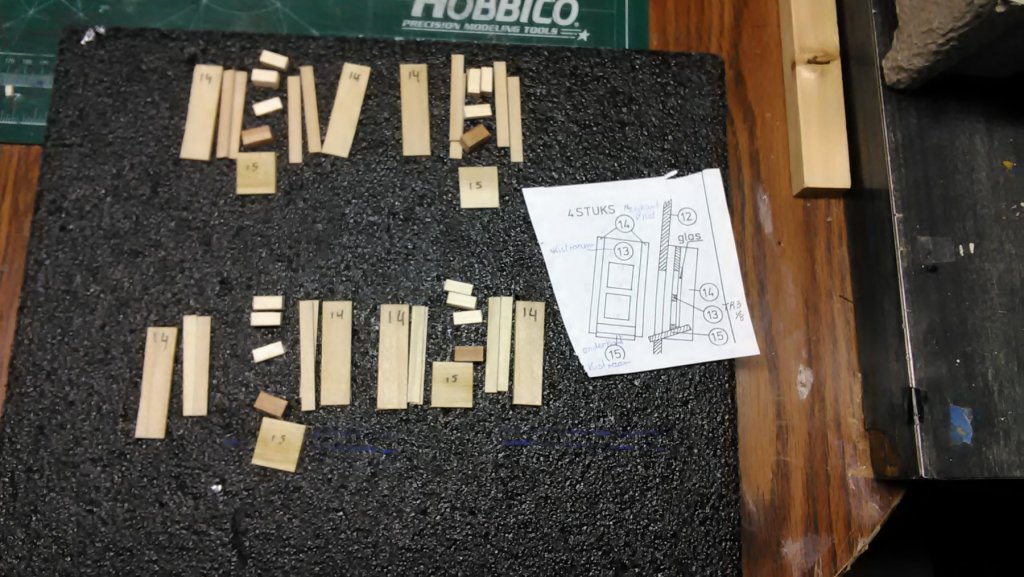
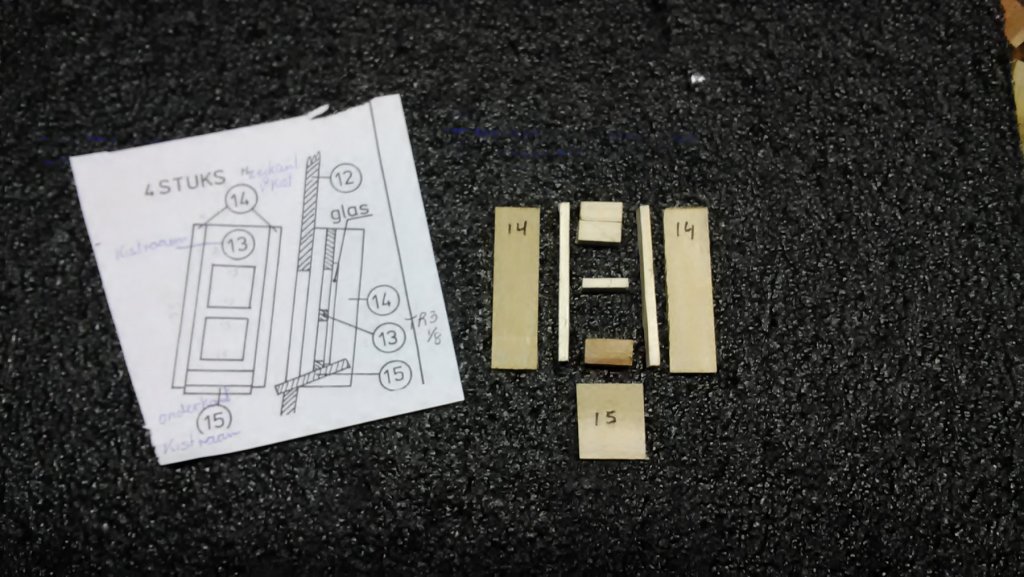
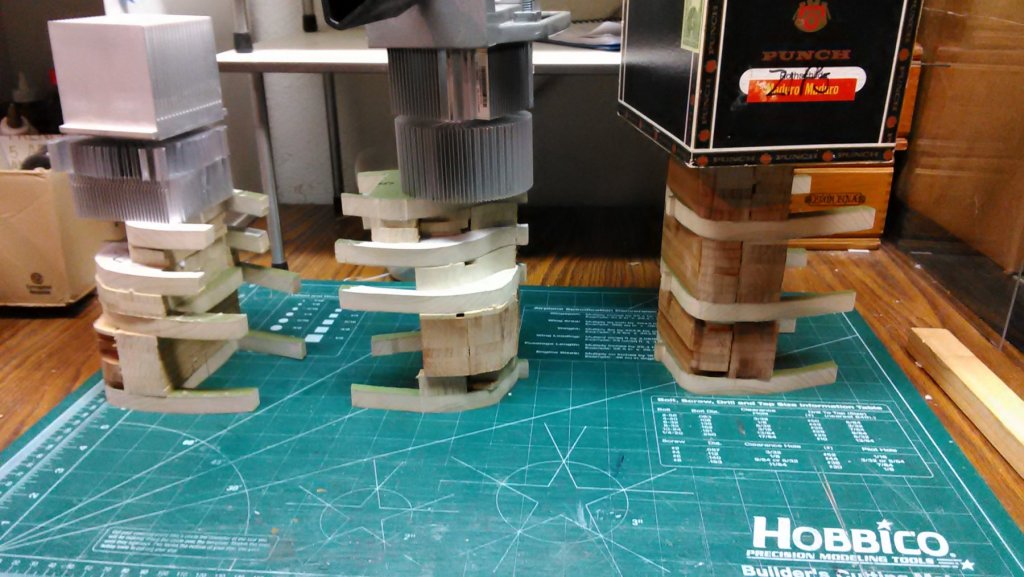
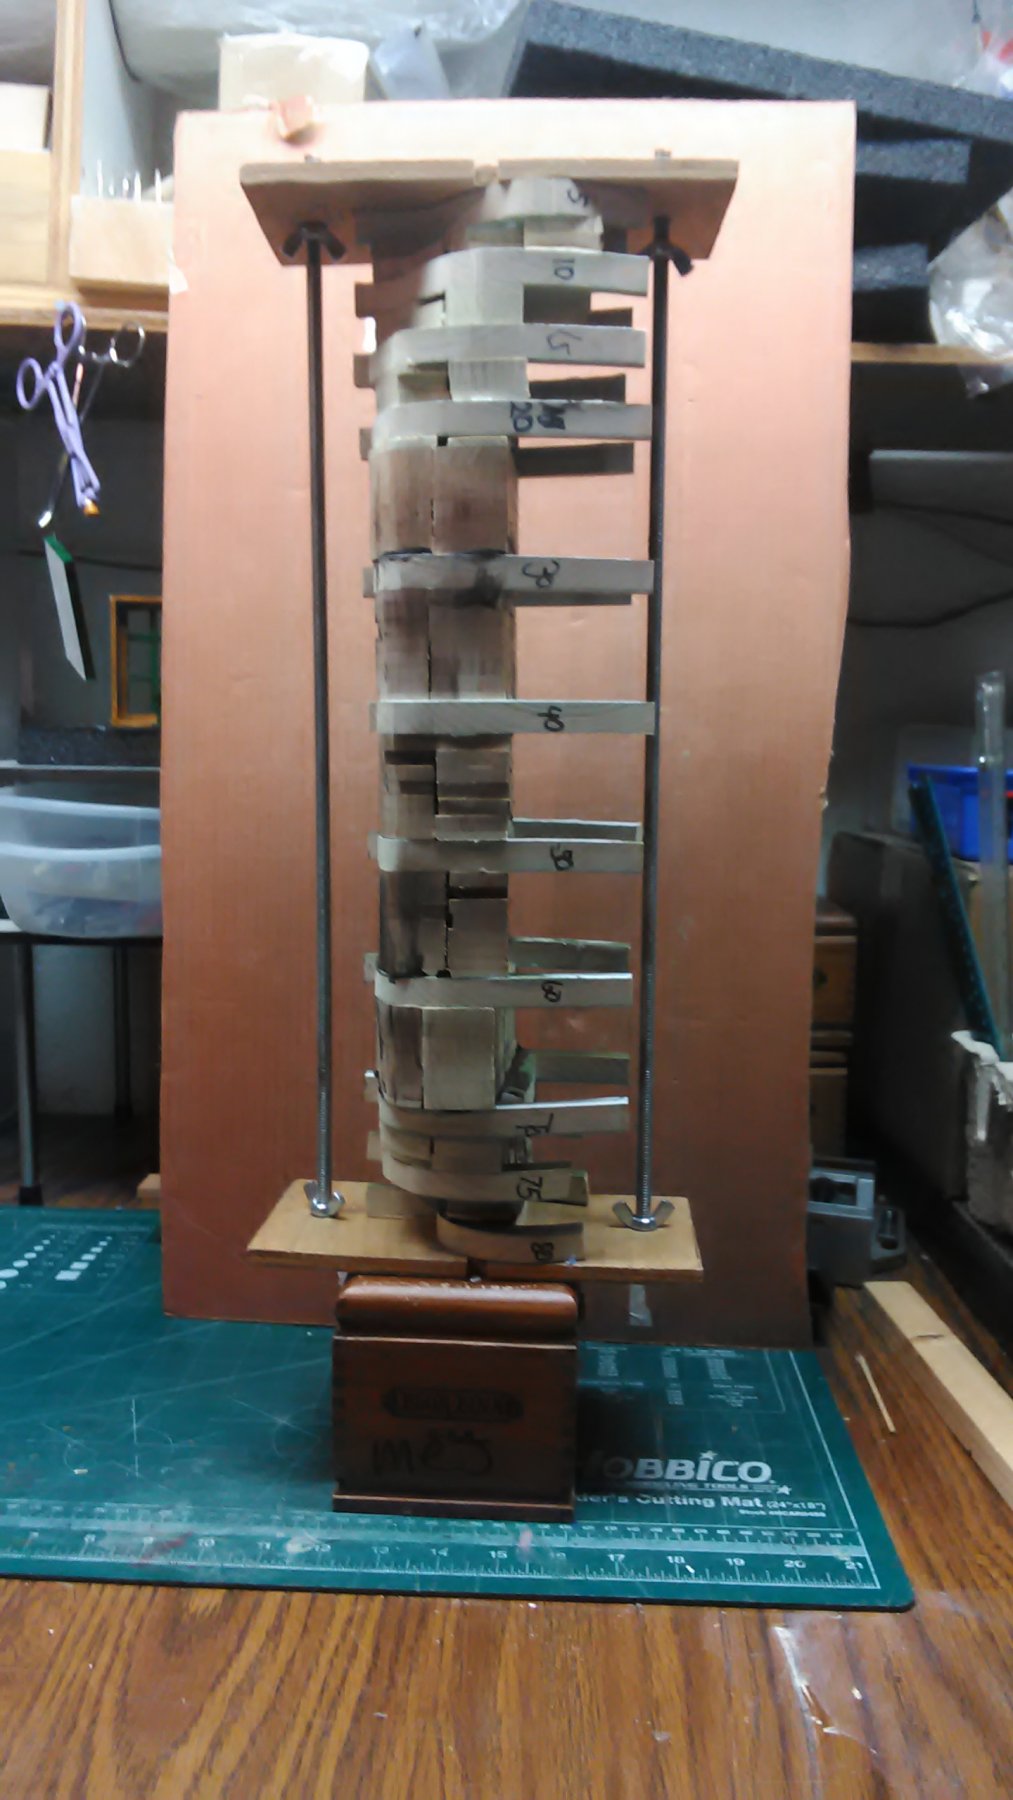
Also been going through my stash of hardwood picking out pieces for the various parts of the cap. So many odd sizes needed. The cap has about 20 pieces total
Marcus