

Timmo
-
Posts
603 -
Joined
-
Last visited
Content Type
Profiles
Forums
Gallery
Events
Posts posted by Timmo
-
-
-
-
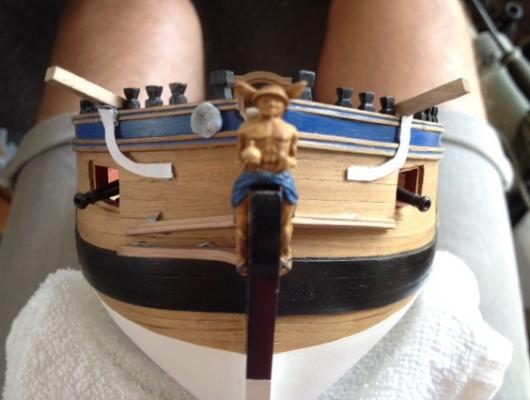
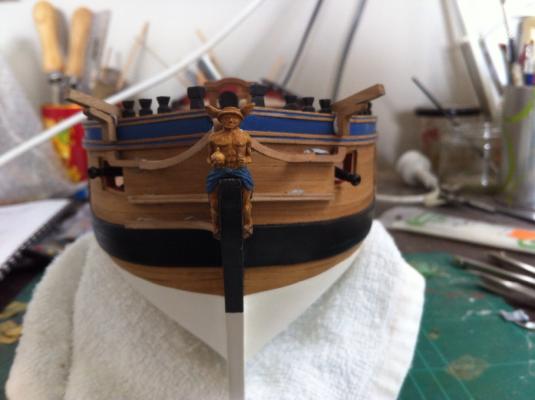
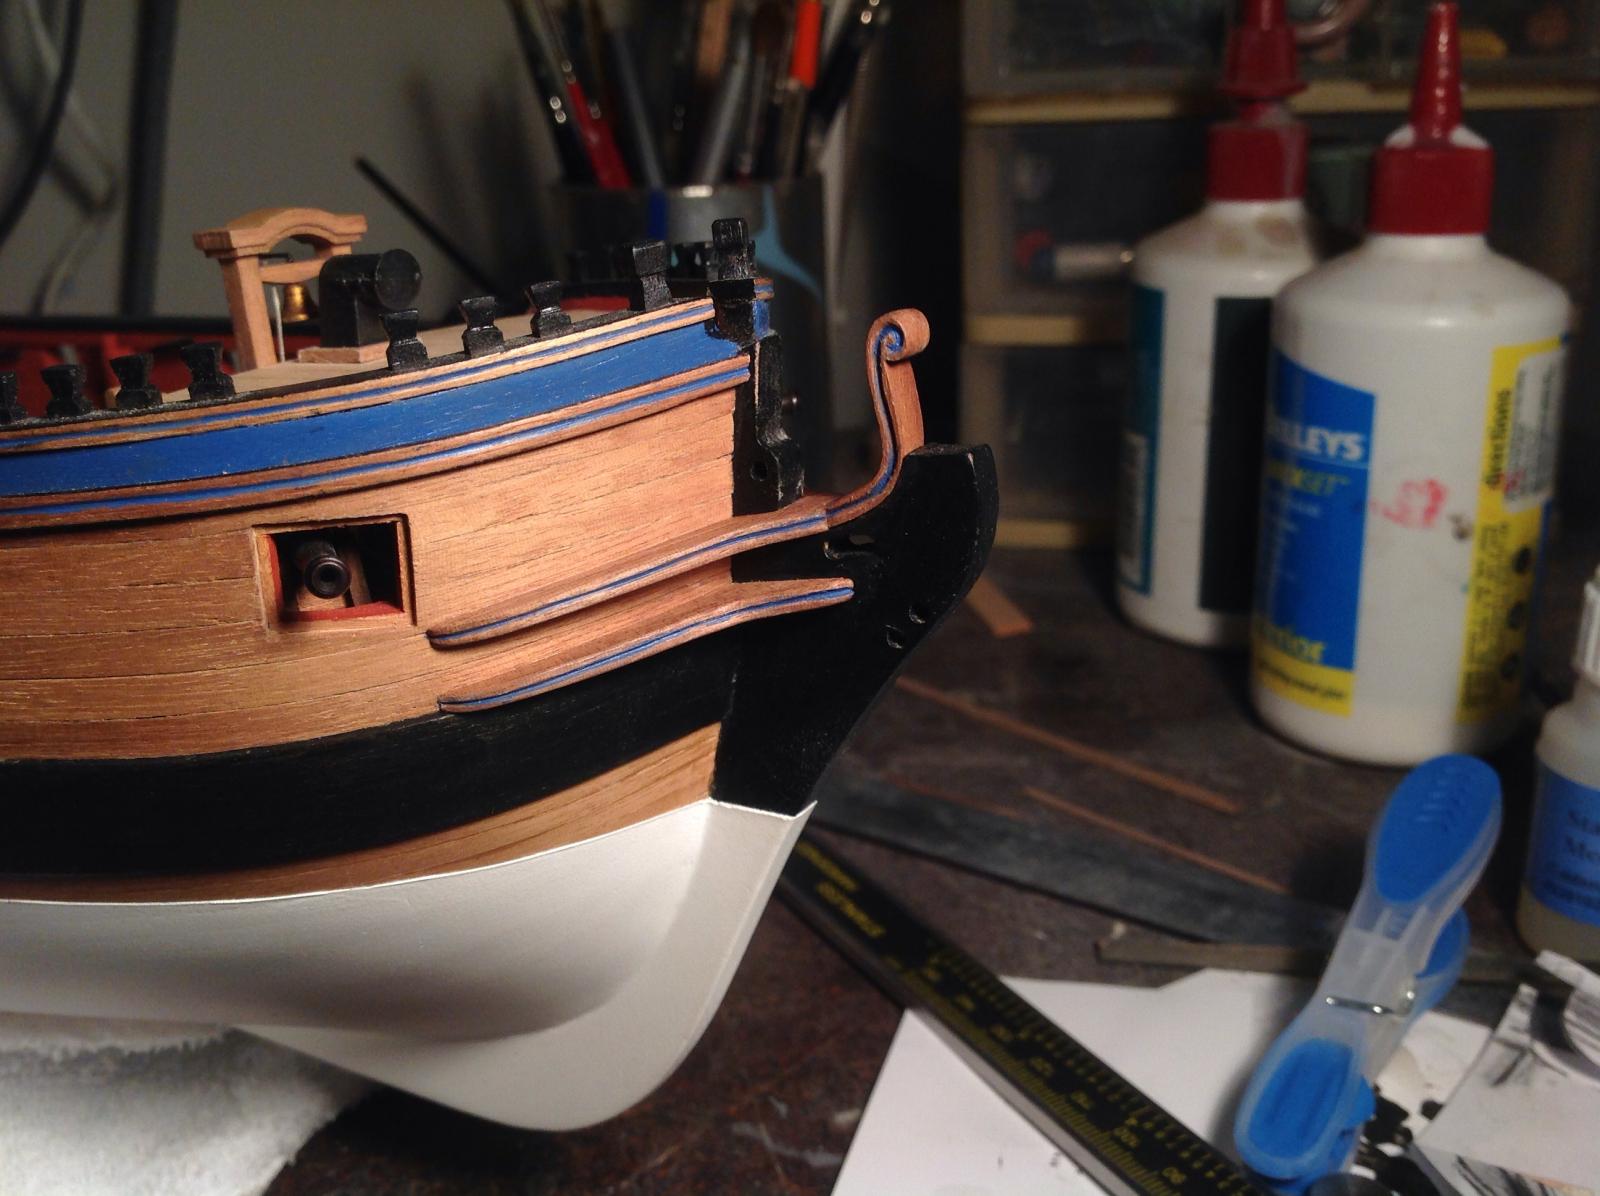
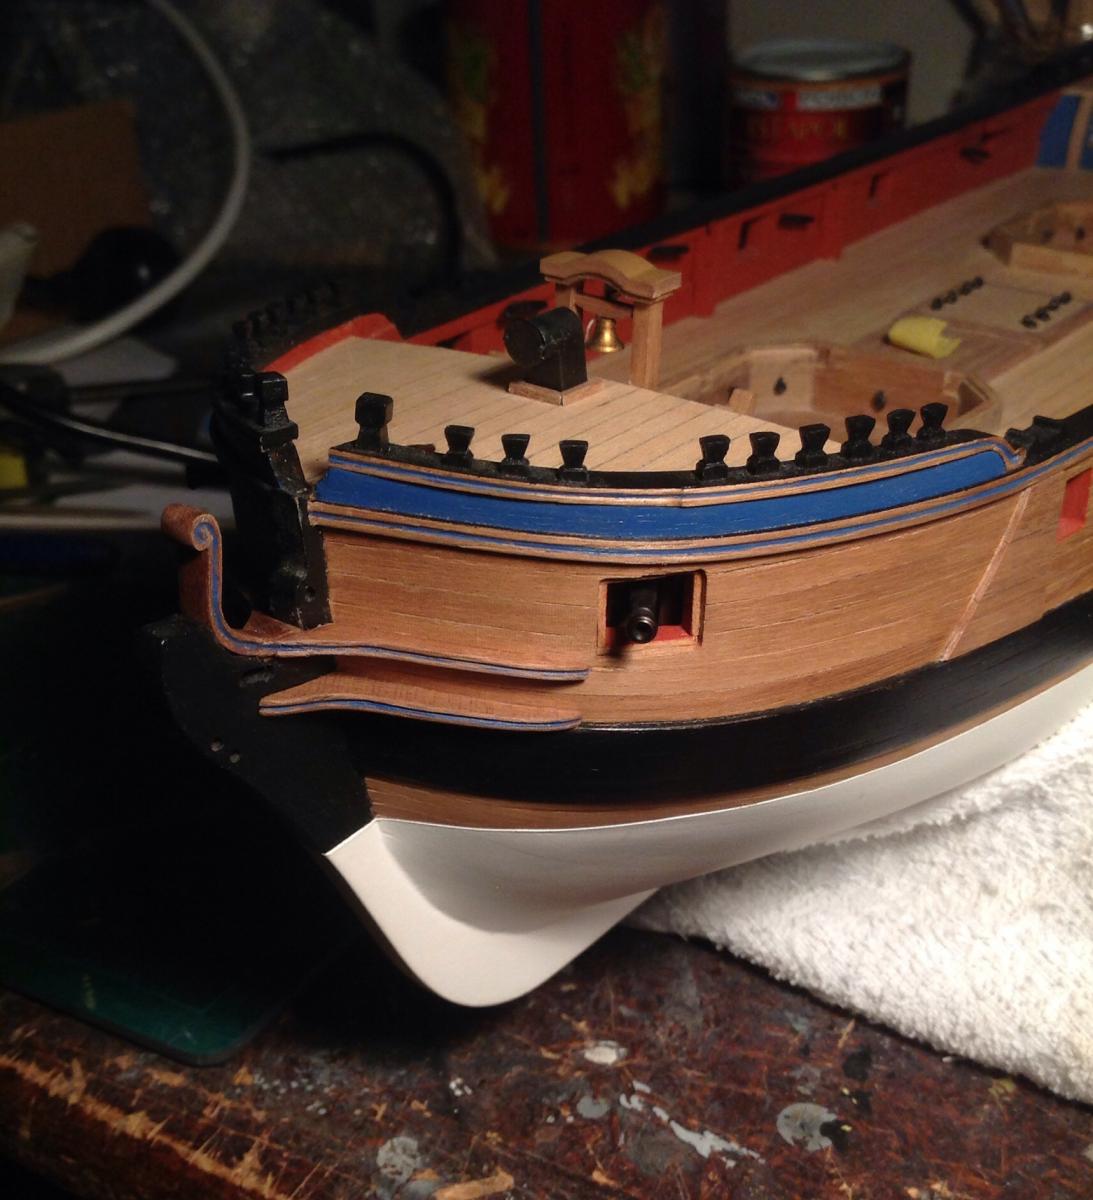
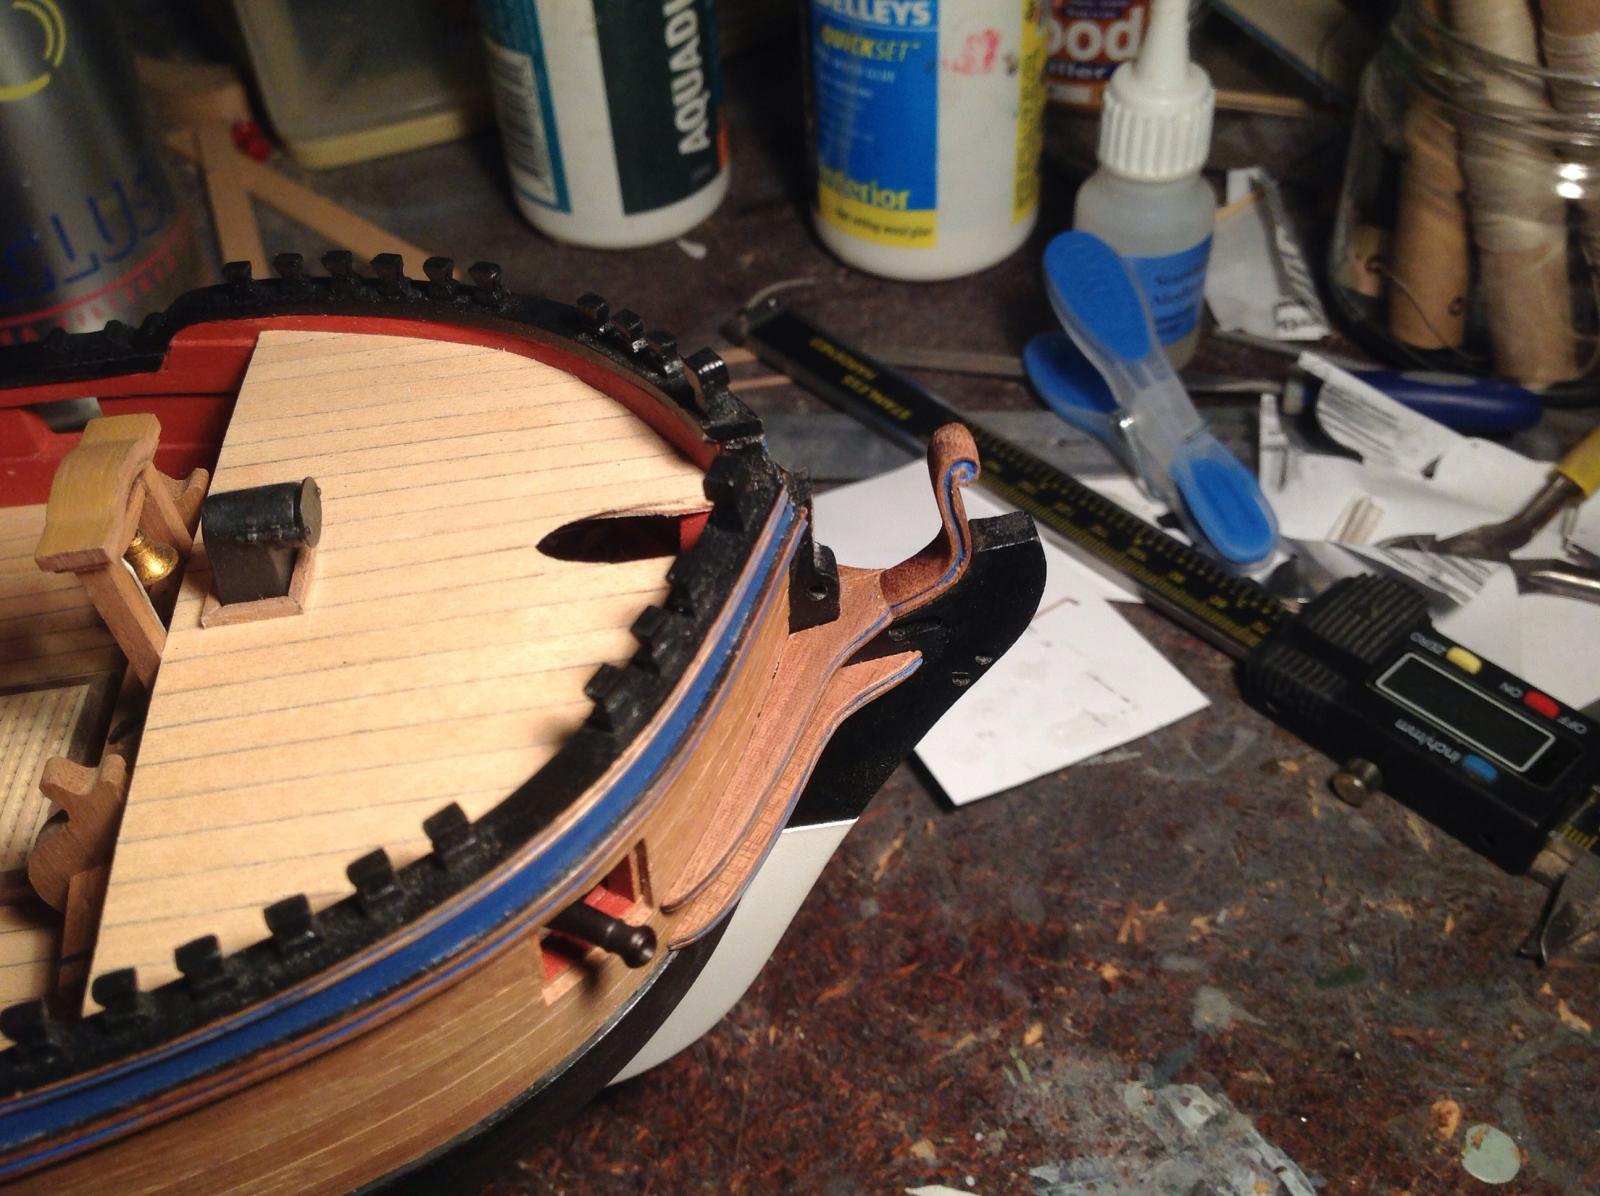
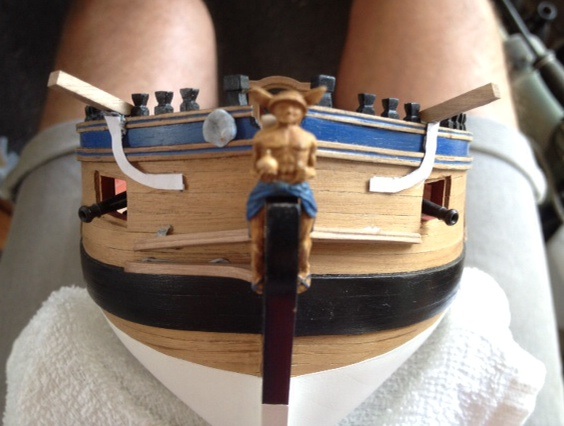
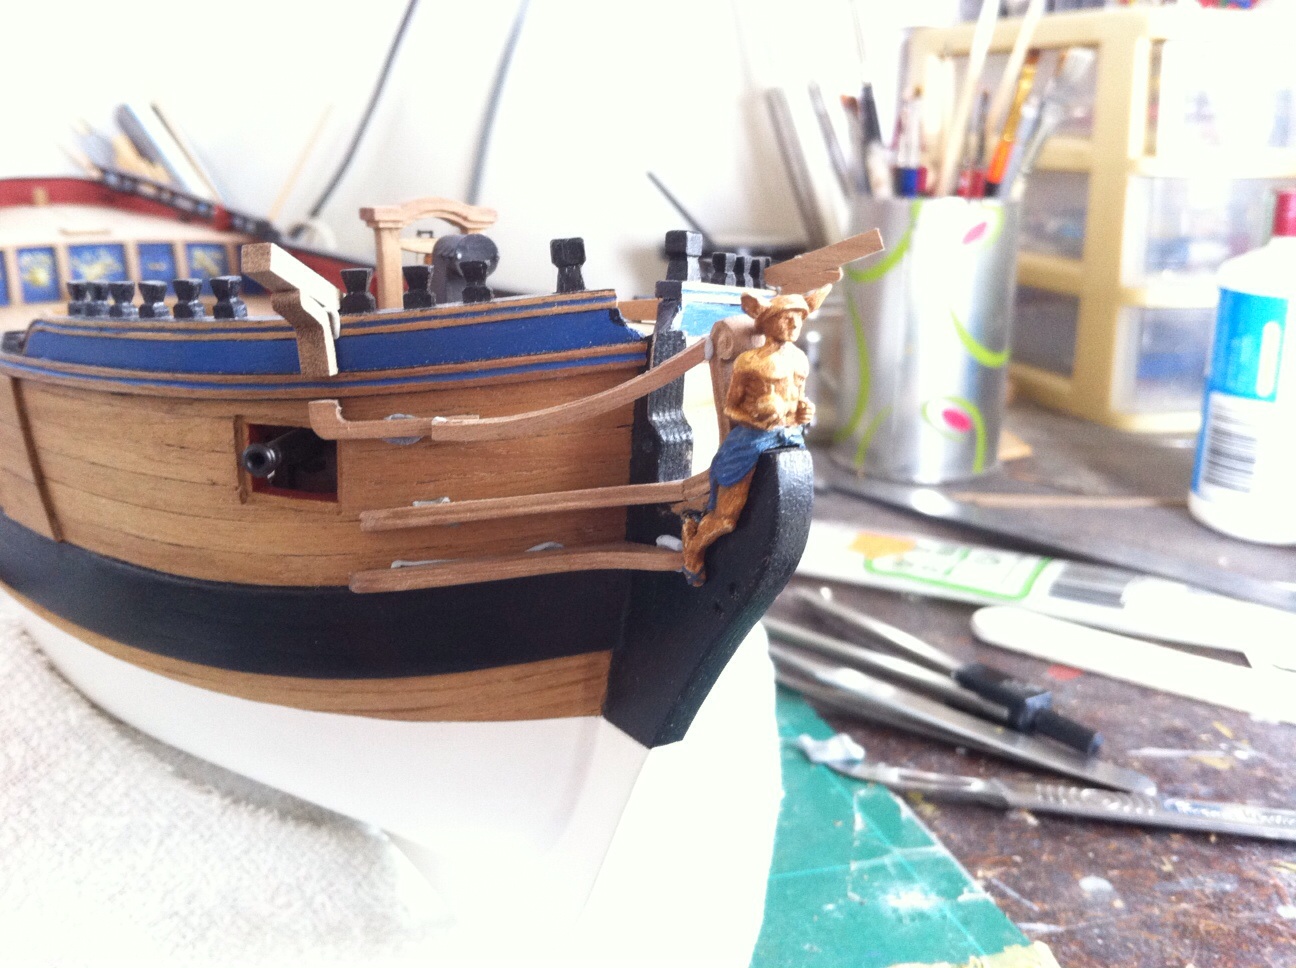
I'd laminated some profiled strip to the front face of the cheeks below the head rails in a burst of activity a few months back.
The lamination lines were still visible and not that flash so some new upper and lower cheeks were knocked up from offcuts of the kit walnut cut and shaped to fit.

The upper cheeks were made in two pieces with the join on one side.
The profile was made with a file as per the others on a ship. The timber was varnished and the blue painted in and tidied up with a blade.

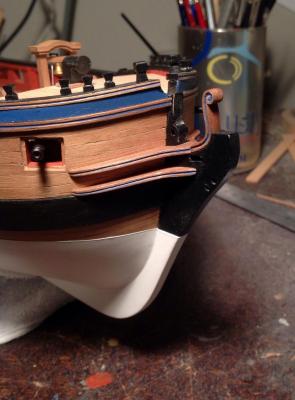
The join between the upper cheeks and the head rail will be hidden by the gammoning holding the bowsprit down.

- rafine, Stockholm tar, Blue Ensign and 8 others
-
 11
11
-
-
Thanks John. The Granado is a nice kit and a good second build. Be sure to post a build log of your first kit. Plenty of encouragement and advice from the fine people on this site.
-
Yep, reasons why I went with timber were half aesthetics and half because I didn't like the thought of fitting that heavy brass to the right curve and then relying on ithe bond holding it to the timber.
But many others have made it work
-
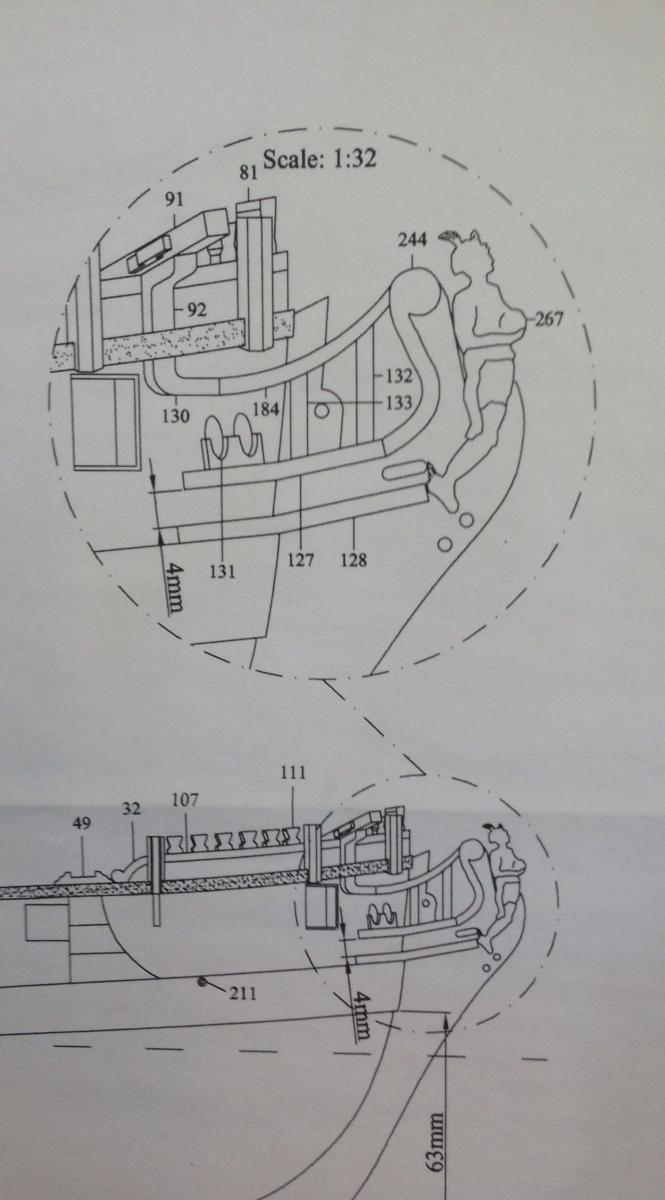
The head rails depend on the cathead for positioning so they have to be knocked out and fitted first.
The slots were cut with a jewellers saw.
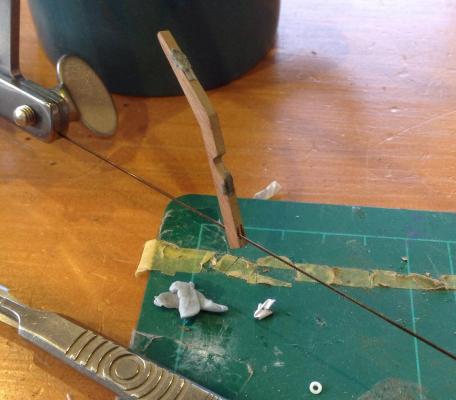
Sheaves were cut from styrene tube and an axle from brass rod.
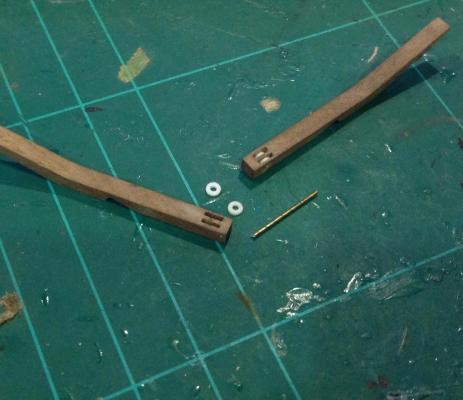
Painting, fitting and the cathead cleat next up.
-
Wow slog, I haven't seen so much photo etch since my plastic modelling days nicely done.
-
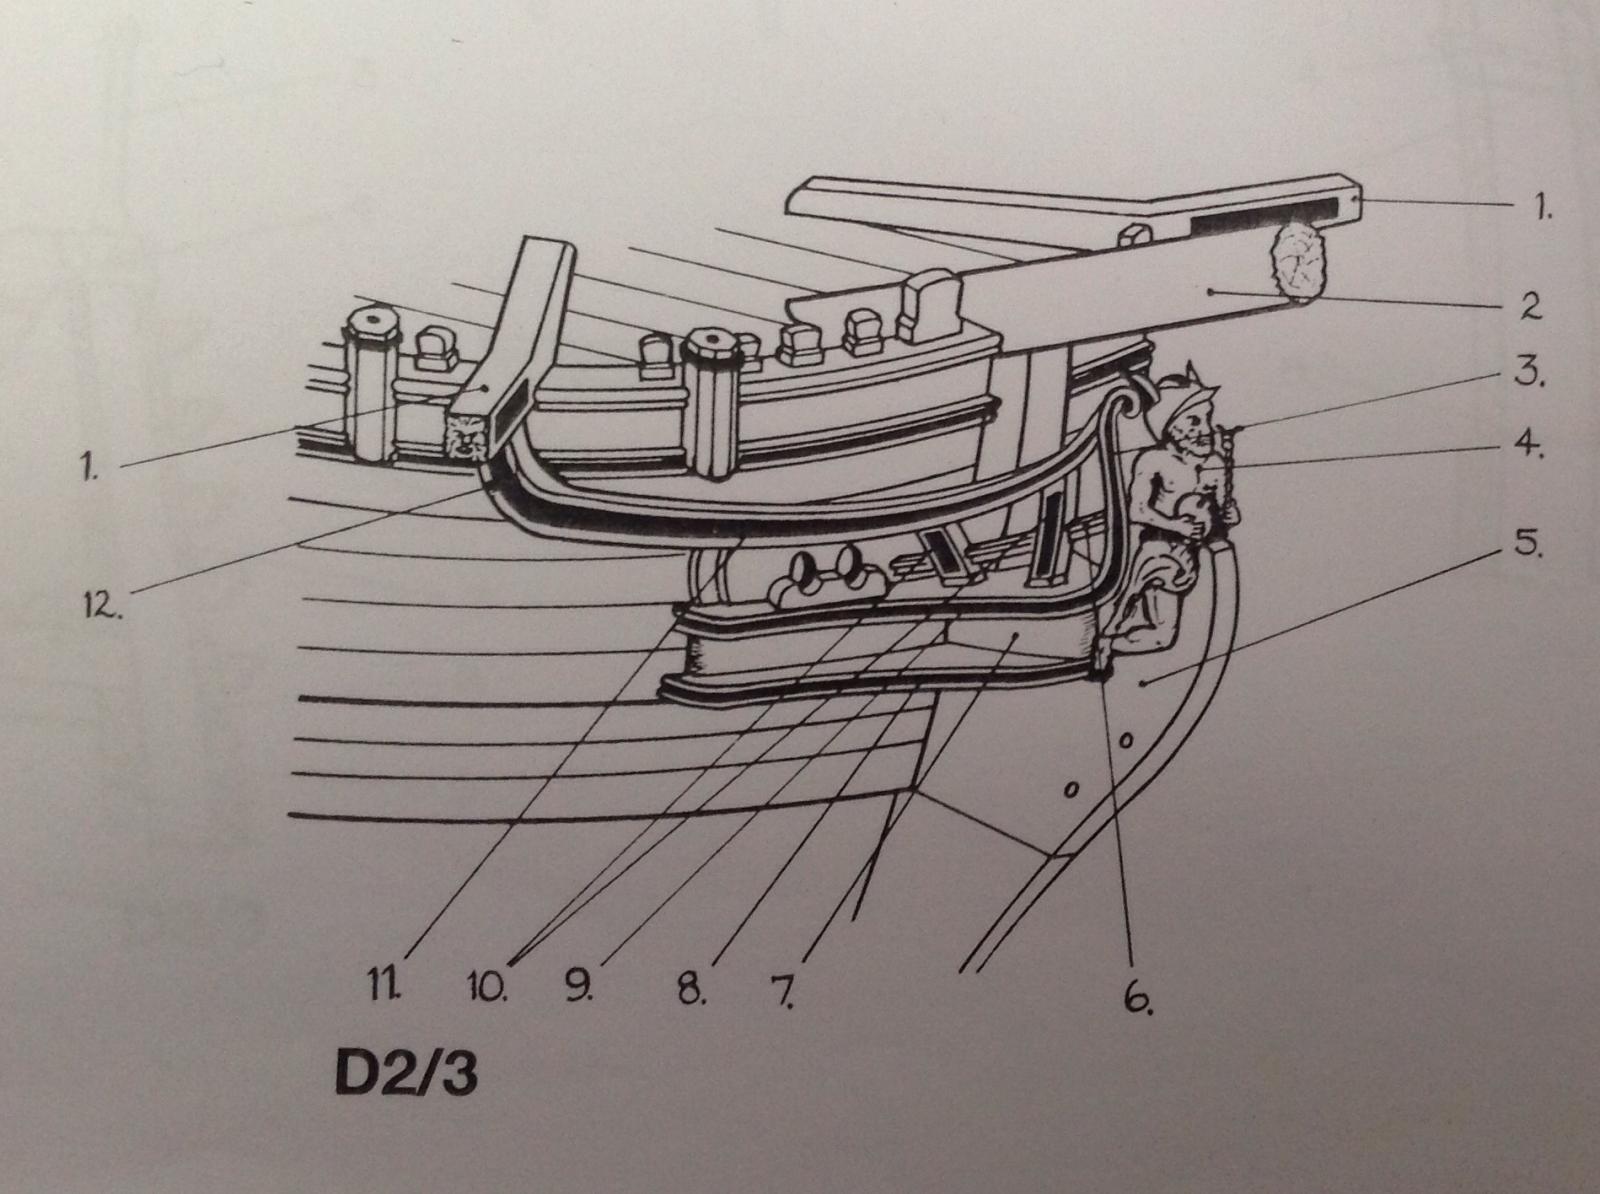
To make a pattern for the knees and head rails a rubbing of the chase port and sheer rail etc was made with a pencil.
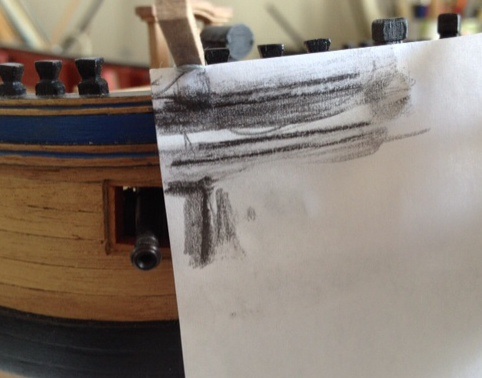
This was then used to draw in the correct shape for the knee and beginning of the upper head rail.
The resulting shape was traced and cut to check it works for the other side.
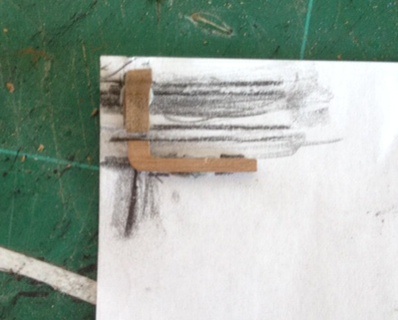
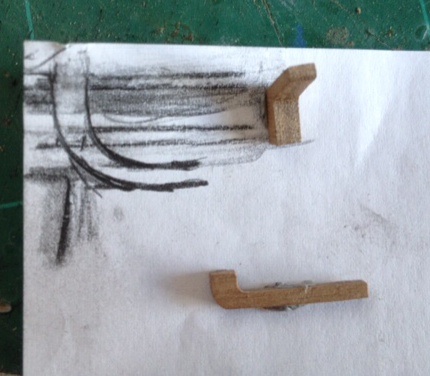
I've laminated some leftover 4mm kit walnut to make some pieces large enough to hopefully cut the knee and entire head rail in one piece,
that's it for today. For our northern hemisphere friends it's too hot working in my garage even with a fan on and a refreshing beer close to hand, especially after a morning watching my daughters compete in a triathlon. Great stuff.
-
Thanks for the suggestions Kester.
I was fairly set on just moving the timber head but I can see now shaping the cathead knee and head rail properly will overcome the problem.
I made some mock ups of the kit supplied cathead and head rails to get some idea of how it all should look. As can be seen there's no natural curve to them. It's pretty square.

-
-
-
Always room for more sanding. Did you fit the foaming with the chimney in place? It'll help get a nice fit.
-
-
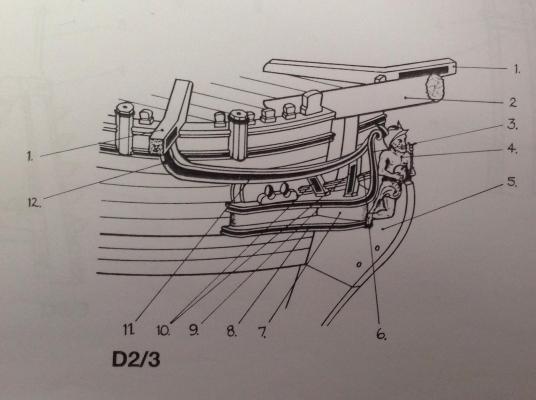
The head rails really take their starting point from the cat heads. Their positioning determines where the cathead knees run down vertically to the top head rail which runs out to the bow.
Hence here's an issue which I spotted prior to packing Granado away a few months back - I chose to wilfully ignore it and hope it would sort itself out in the meantime. Unsurprisingly it's been waiting for me ever since.
The chase port needs to be positioned far enough back to allow the cathead knee and head rail extension under it to run down from the cathead and clear the chase port like so on the instructions.
On my Granado the chase port is too far forward by about 3-4mm it means the timber forming the knee and start of the head rail fouls the port. The port is yet to receive a door which means we need even more room.
Here's what it would look like with the stock kit pieces.
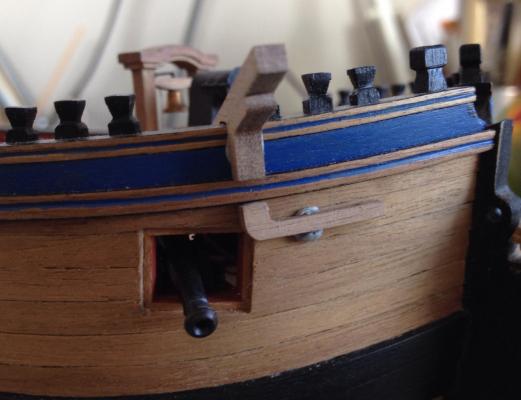
Clearly not enough room there. Craig and other builders beware and check those ports and shuffle the top rail with their timber head positions if needed. The port side has a little more room but options are:
moving chase port ( all but impossible)
Shaping cathead knees and head rails for each side so that they follow a natural line away from the port. (Possible but would not do well with symmetry when the hull and head rails are viewed from front.
Remove one timber head from the top rail on each side to allow the cathead to move forward to clear the port. (looking the best option so far as there is nothing belayed to the timberhead which would go and few would notice, I'm for the simplest and best looking fix here as this kit was never going to be 100% accurate given my lack of info and skills for many bits.
- Captain Slog, Barbossa, egkb and 1 other
-
4
-
It's very good and highly recommended.
The Granado is a fine model out of the box but I'm lucky enough that my local public library has a copy of AOTS so it's worth adding a few additions.
-
Hi Bob, Just found your build.
Great work you've done on a fine looking vessel. Keep it up.
-
Thanks for the comments Kester.
I like your Sherbourne, especially the gaff sail. I battled a long while with sails for mine before giving up as i could never get them o look right for the scale.
with the head rails, those are next up once i get back into building.
here's what the kit suggests:
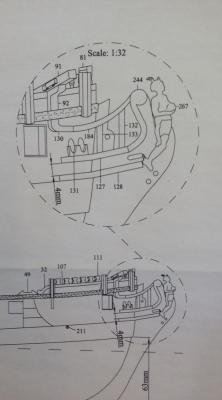
and here's what the anatomy of the ship has:
the kit parts are from walnut ply and might take a bit of bending and shaping to ease a third dimension bend into them but i suspect remaking them will be the best option as i also want the profiled groove running through the centre of the rails as per AOTS and the previous rails I've done on Granado. As for the colour, yes the kit suggests blue but I'll keep it consistant with what i've done so far with a blue strip on the varnished timber.
less is more.
-
Looking good Craig. That white on the hull always shows up everything but you'll never regret the extra time spent filling it.
Those blocks do look large. What size are they? I can't recall what size I used but they looked smaller than that. As you say it would be impossible to run the guns in all the way but it's not that noticeable once the foc'sle is on and belfry/windlass installed.
Mick, without seeing pics it sounds like parts of the filler blocks need to be sanded back.
Did you sand the bulkheads to fair them to the curve of the hull so the planks run smoothly across them and contact fully across the surface of the bulkhead?
By the time you get near the bow quite a bit of material needs to come off the forward edge of the bulkheads to get a smooth run. There's some good basic tutorials on the site, or start a build log as that's the best way to get advice from the knowledgeable and supportive folk on MSW.
-
Here's what's kept me from the Granado for the last few months:
Hopefully now it's back to ship building with some fresh progress before all the other fine Granados here overtake me.
-
-
-
Hi Craig,
I 'm still to do the hawse holes. I can't see much reason why they have to be done early at the spirketting stage. I thought it would be easy to line them up once the bow was looking largely complete.
-
Also happy birthday Dave


HMS Diana 1794 by Ray - FINISHED - Caldercraft - A 38 gun Heavy Frigate
in - Kit build logs for subjects built from 1751 - 1800
Posted
Top work Ray. I think I'll be making some similar blocks with hooks now.