HOLIDAY DONATION DRIVE - SUPPORT MSW - DO YOUR PART TO KEEP THIS GREAT FORUM GOING! (Only 13 donations so far - C'mon guys!)
×


Captain Slog
-
Posts
904 -
Joined
Content Type
Profiles
Forums
Gallery
Events
Everything posted by Captain Slog
-
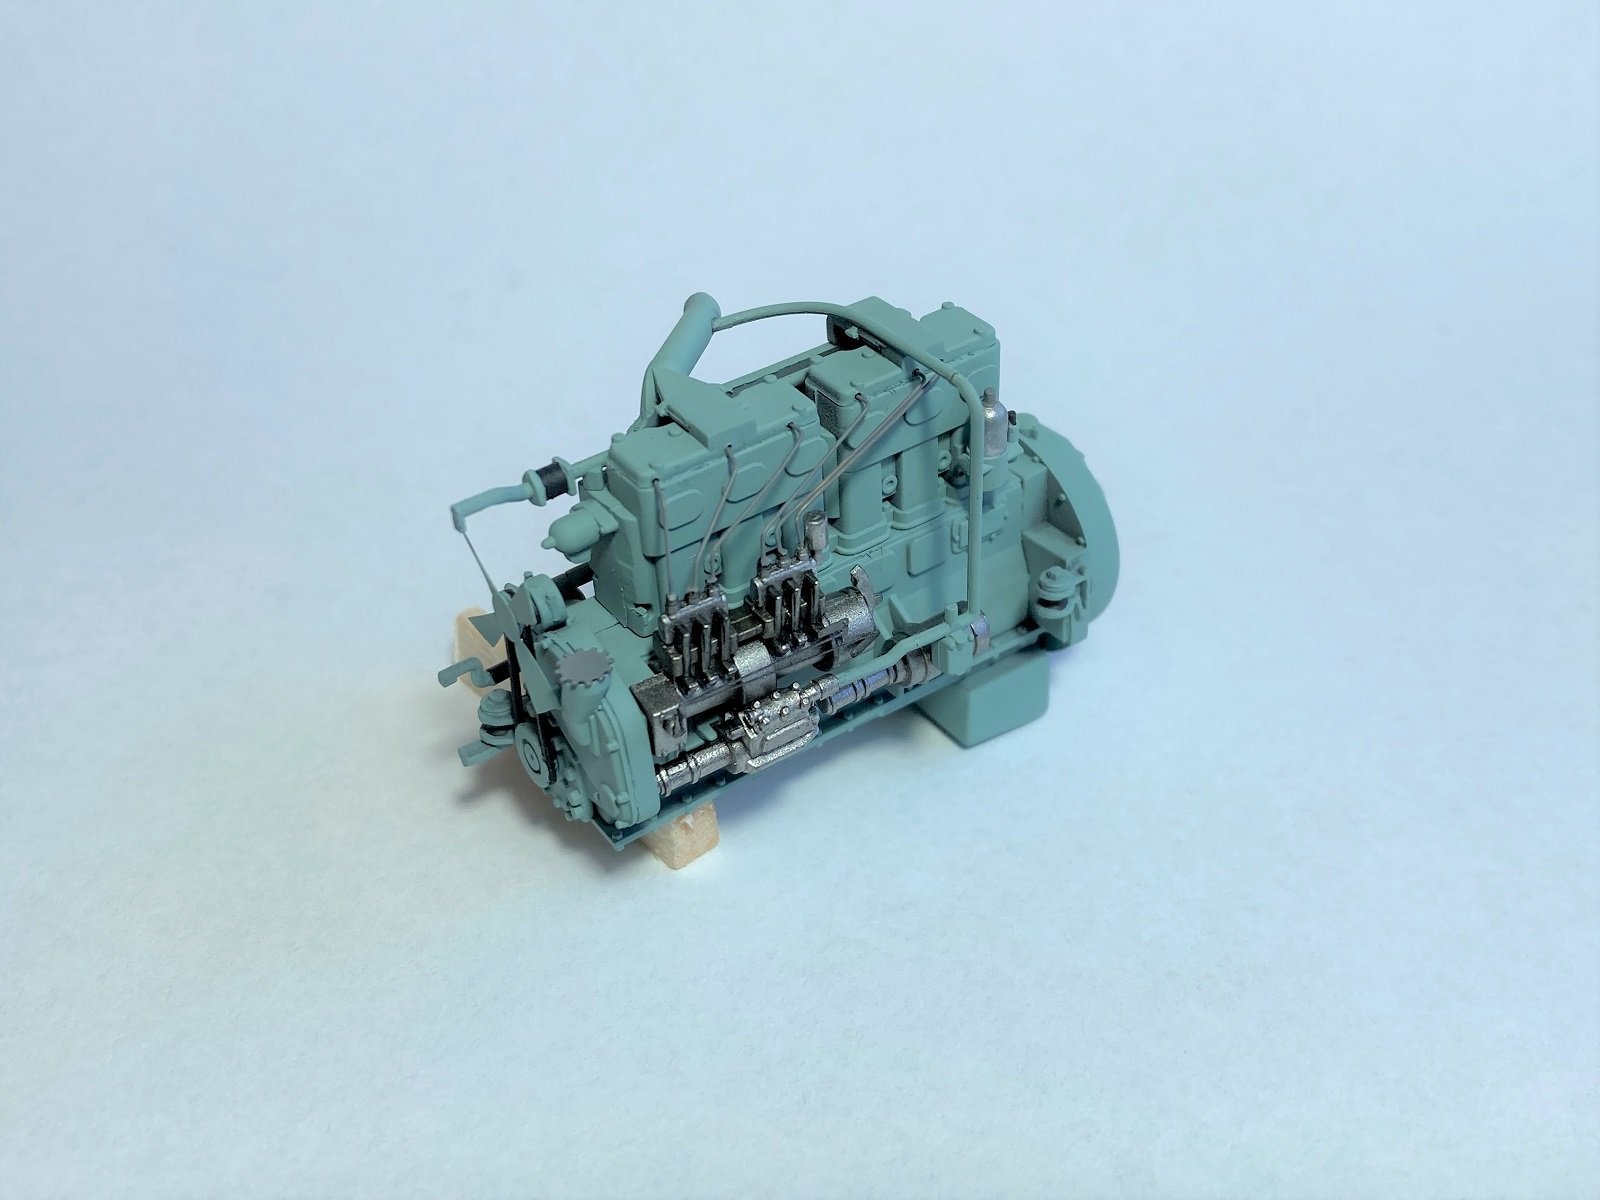
 Thanks everyone for the likes and comments. Part 2 done for the gearbox. Cheers Slog
.thumb.JPG.465b3b29594294edbd7c3ec1343dd60b.JPG)
.thumb.JPG.6e568a4bdc8e58eff4ff9440f985cd58.JPG)
-
Ah that’s good, planking between the ribs will give you a solid basis to cover without blowing out the hull dimensions. Personally I think the second covering with some kind of sheet material (paper, card, styrene etc) would be quicker and easier to produce a smooth finish as you say. When you come to construct the upper hull framework just be mindful of ribs OSp 12a & OSp 12b. These are doubled together when fitting and although different in shape its not clear from the plans the order. The rear one dictates the curved tumblehome on the rear section of hull. I had them wrong way round when dry fitting but noticed in time when it came time to glue.
- 31 replies
-
- 3
-

-
- Borodino
- Dom Bumagi
- (and 1 more)
-
Coming along nicely. Have you decided how you are going to ‘plate’ it when the frame work is done?
- 31 replies
-
- 3
-
-
- Borodino
- Dom Bumagi
- (and 1 more)
-
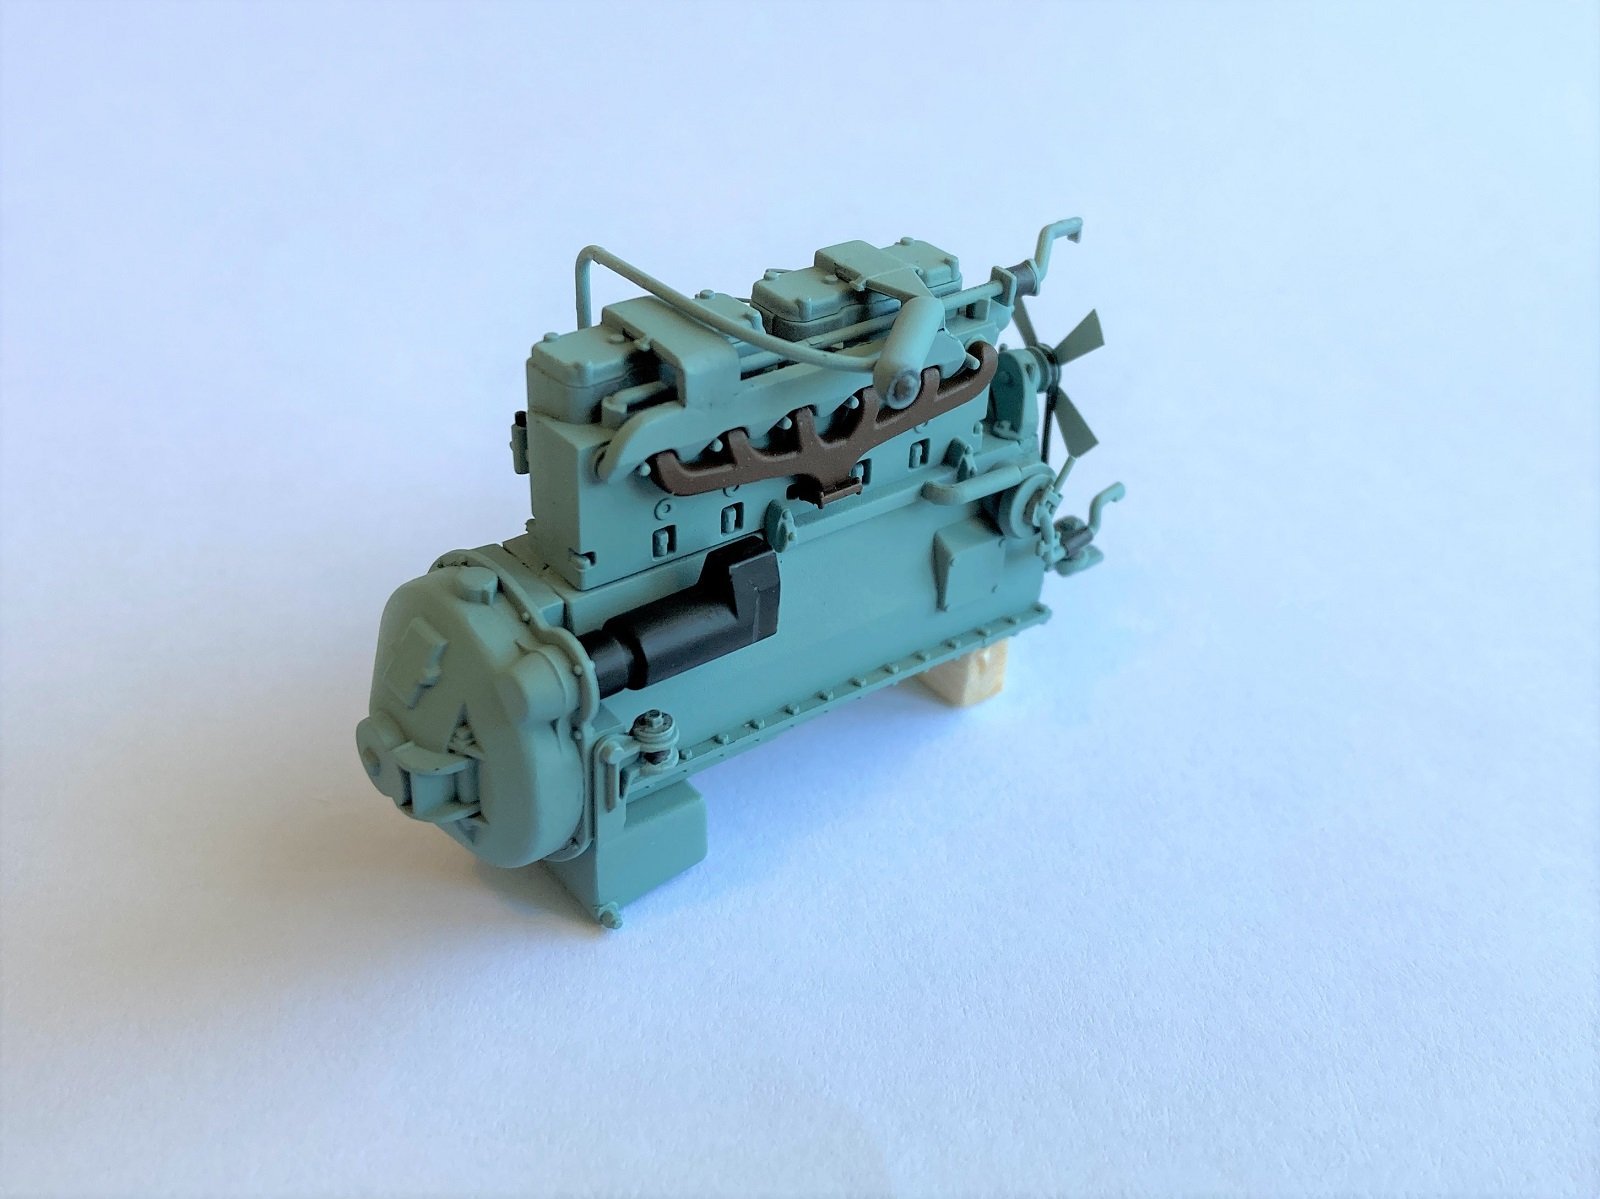
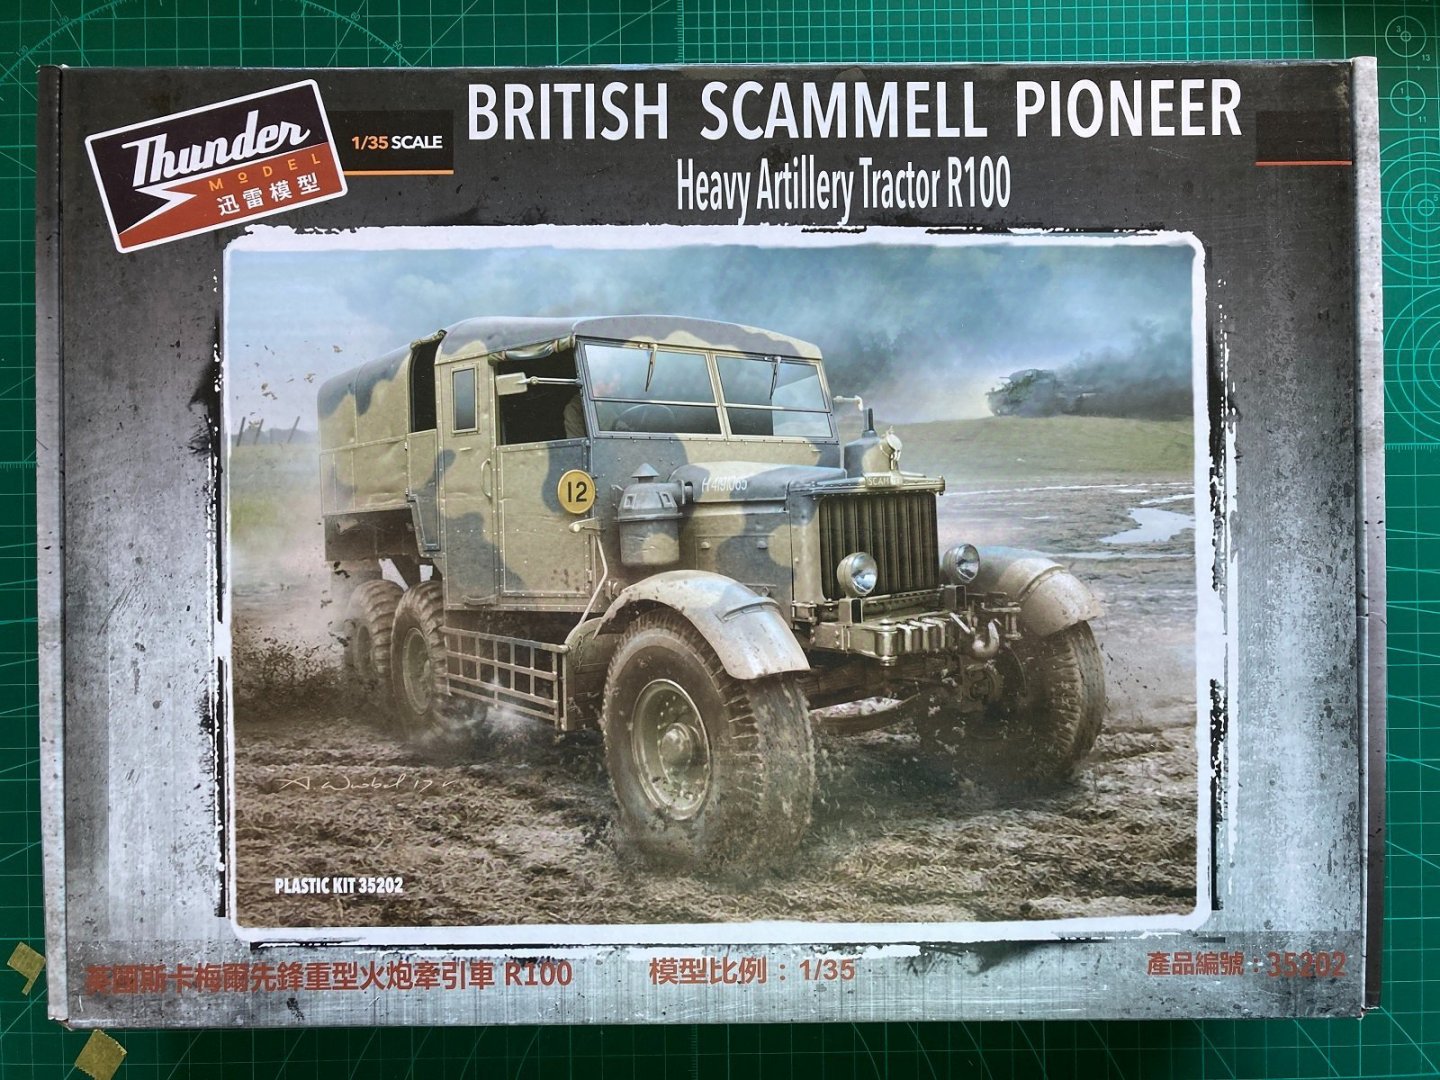
Welcome to the start of my build of Thunder Models Scammell Pioneer R100 Artillery Tractor in 1/35th scale. This is primarily a YouTube build series. The kit review can be found here; The 1st part is the assembly and painting of the engine; A couple of photos of the completed engine minus weathering. I’ll go back and weather/grime up the engine at a later time. Although this build may be in the Shore leave section of the forum it is my log so please keep comments restricted to the kit or modelling in general. Cheers Slog


- 28 replies
-
- 12
-
-
I look forward to following this build log with Borodino being an obvious favourite of mine. Chris, I am guessing this is the Dom Bumagi kit as I think Orel do a couple of the other 'Borodino' class ships but forget which ones. Perhaps this log should be moved to the scratch build section as it sounds like he is using the Borodino kit as a basis for scaling up to 1/100? Cheers Slog
- 31 replies
-
- 4
-
-
- Borodino
- Dom Bumagi
- (and 1 more)
-
Very nice Chris, it looks so clean and crisp. I look forward to seeing your next project. Cheers slog
-
Wow the finger puts it into perspective. I imagined it was at least 4 times larger than it actually is!
-
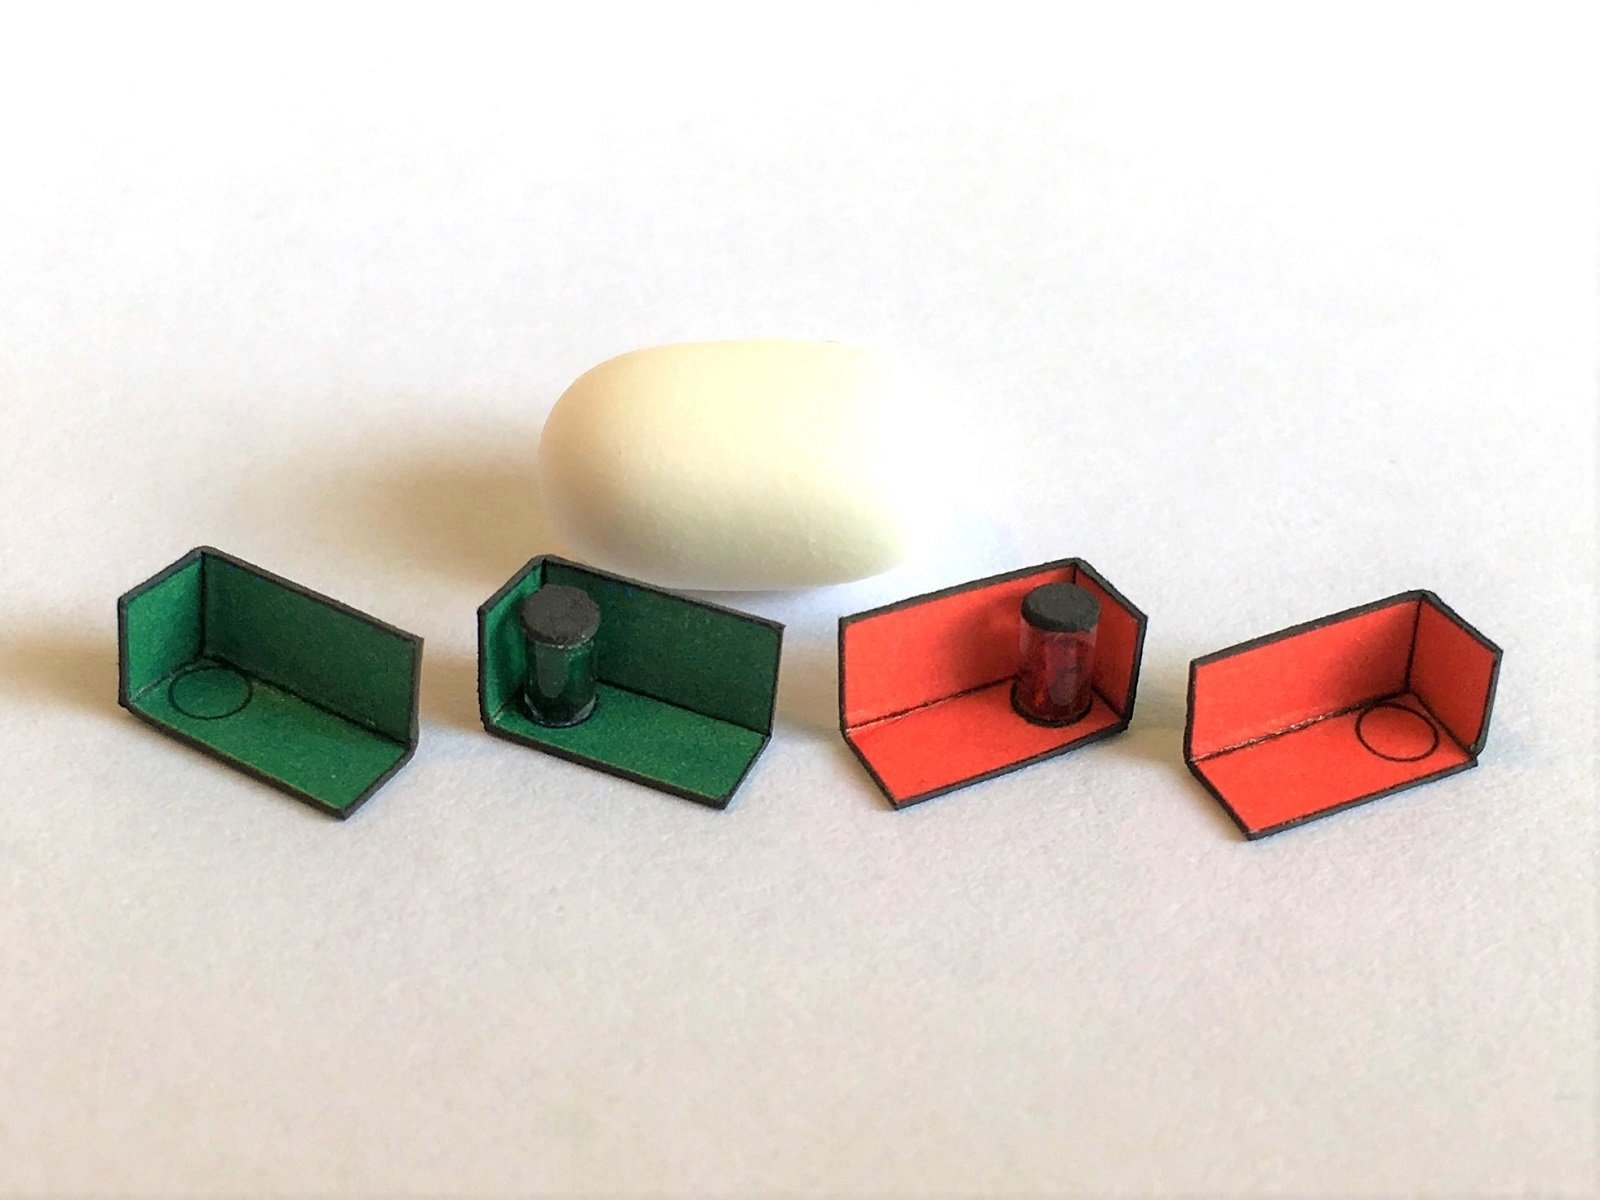
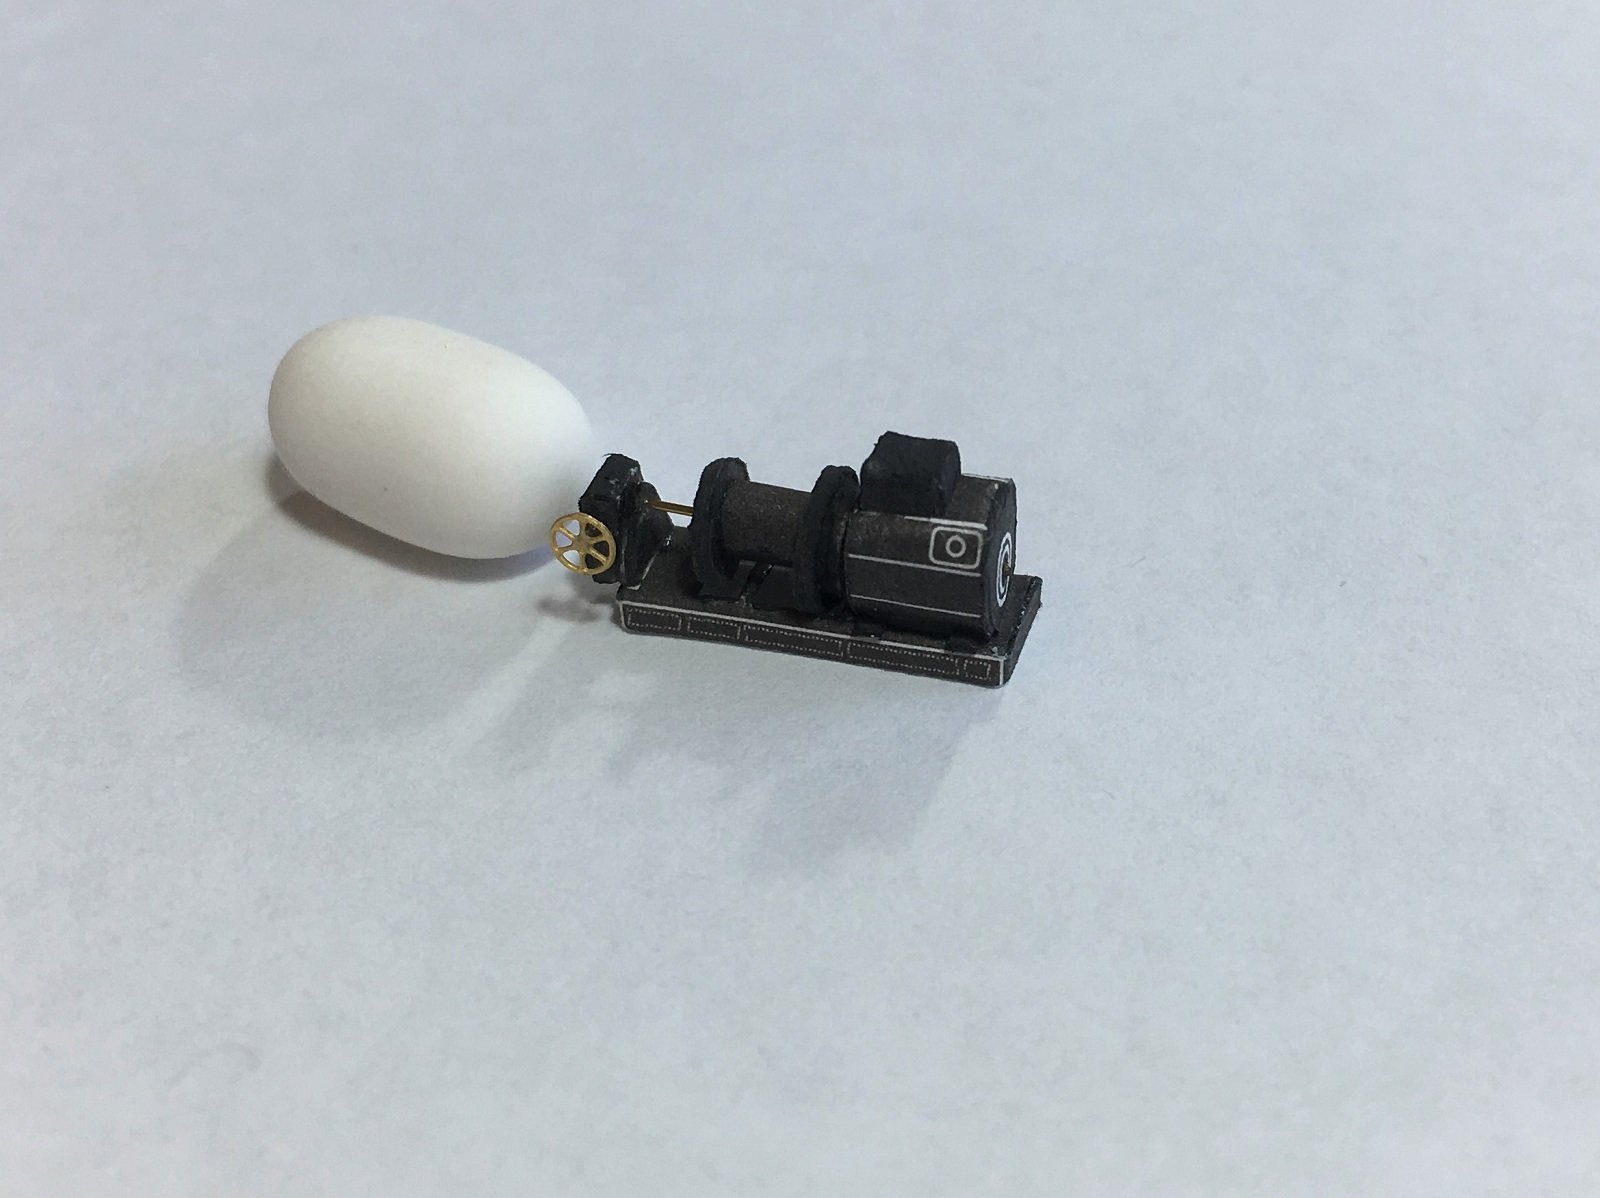
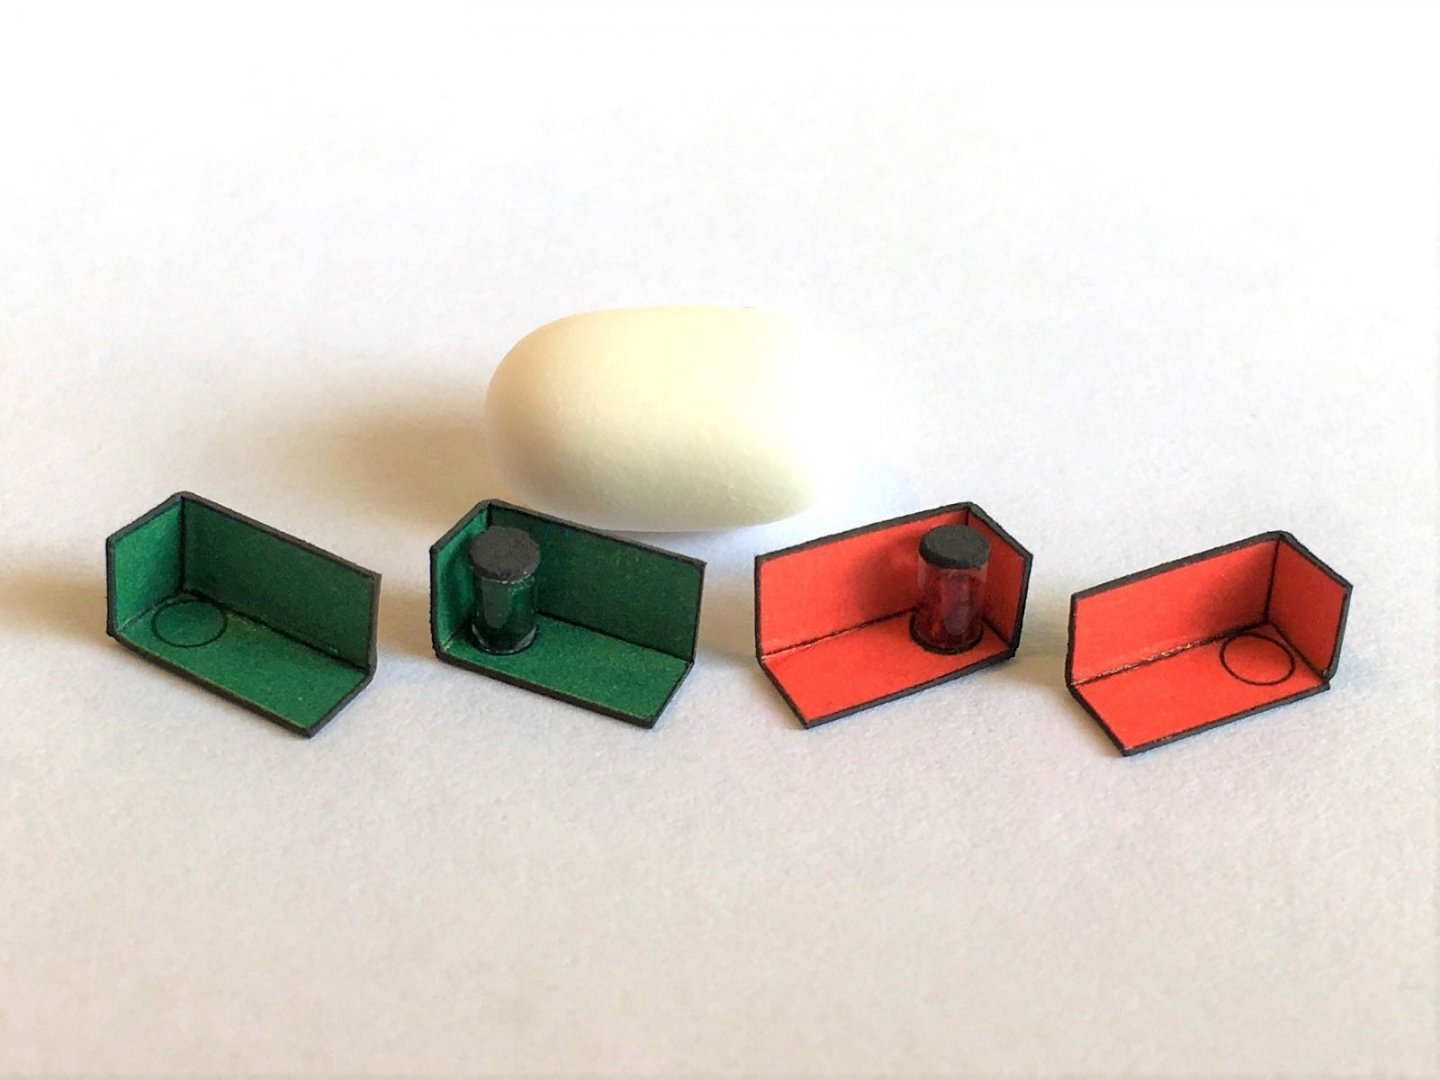
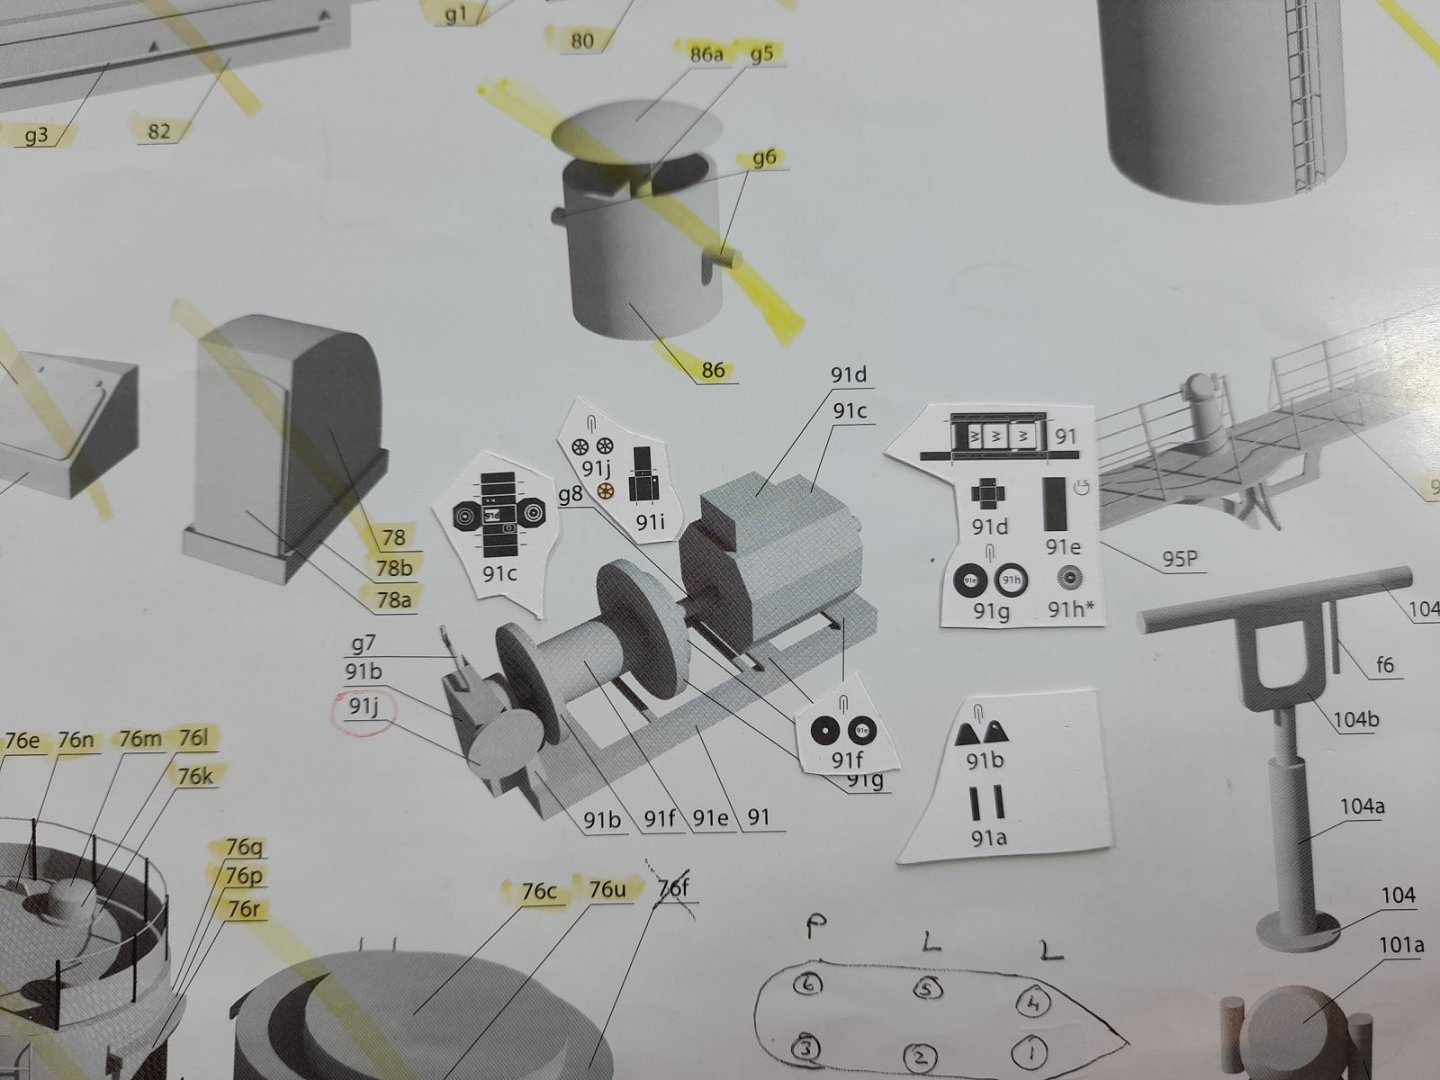
Hi All, Well finally back in Perth permanently after 3 years in Melbourne due to starting a new job last week so hopefully should see more regular progress. First week back and finished a couple of items that I had started previously. Firstly, the navigation lights/boards. Only 1 set had lights to install and rather than use the rolled paper part I replaced them with clear sprue. I spun the clear plastic sprue in the proxxon rotary tool and used the edge of a craft knife to scrap the diameter down to around 1mm or so. Then whilst still spinning used polishing compound to get them clear again. I think I may make another set as looks funny with just the empty board. A 0.4m or 0.5 mm drill was used to drill the centres out and them applied clear red and green to the inside of the drilled hole. Height is around 2mm or so. Next up was a portable steam winch. Finished winch. Cheers Slog

- 244 replies
-
- 10
-
-

-
- borodino
- dom bumagi
- (and 1 more)
-
These wheels are available in sizes sub-2mm and larger in brass photo etch. If you google GPM card models this will bring up a Polish site where I have seen them previously. I can't remember if the PE fret contains multiple diameters or 1 fret per size. I agree 3 or 4mm wheels will be more in keeping with scale. Cheers Slog
-
Which Scale 1/200 or 1/350 Kit is the most detailed
Captain Slog replied to Guyuti's topic in Plastic model kits
If you go to YouTube and search for The Model Shed Steve the author is doing a detailed build of the 1/200 Hood using the Pontos detail set. He posts every Friday UK time and each episode is in-depth of every step so far. He is upto episode 33 and is nearing completion. He has a video review of the Pontos set, which I also have and it is immense. His videos cover assembling all the PE, brass, wood decks etc. I can't comment on this particular MK1 set. He also used 3D printed parts for some of the guns. Cheers Slog -
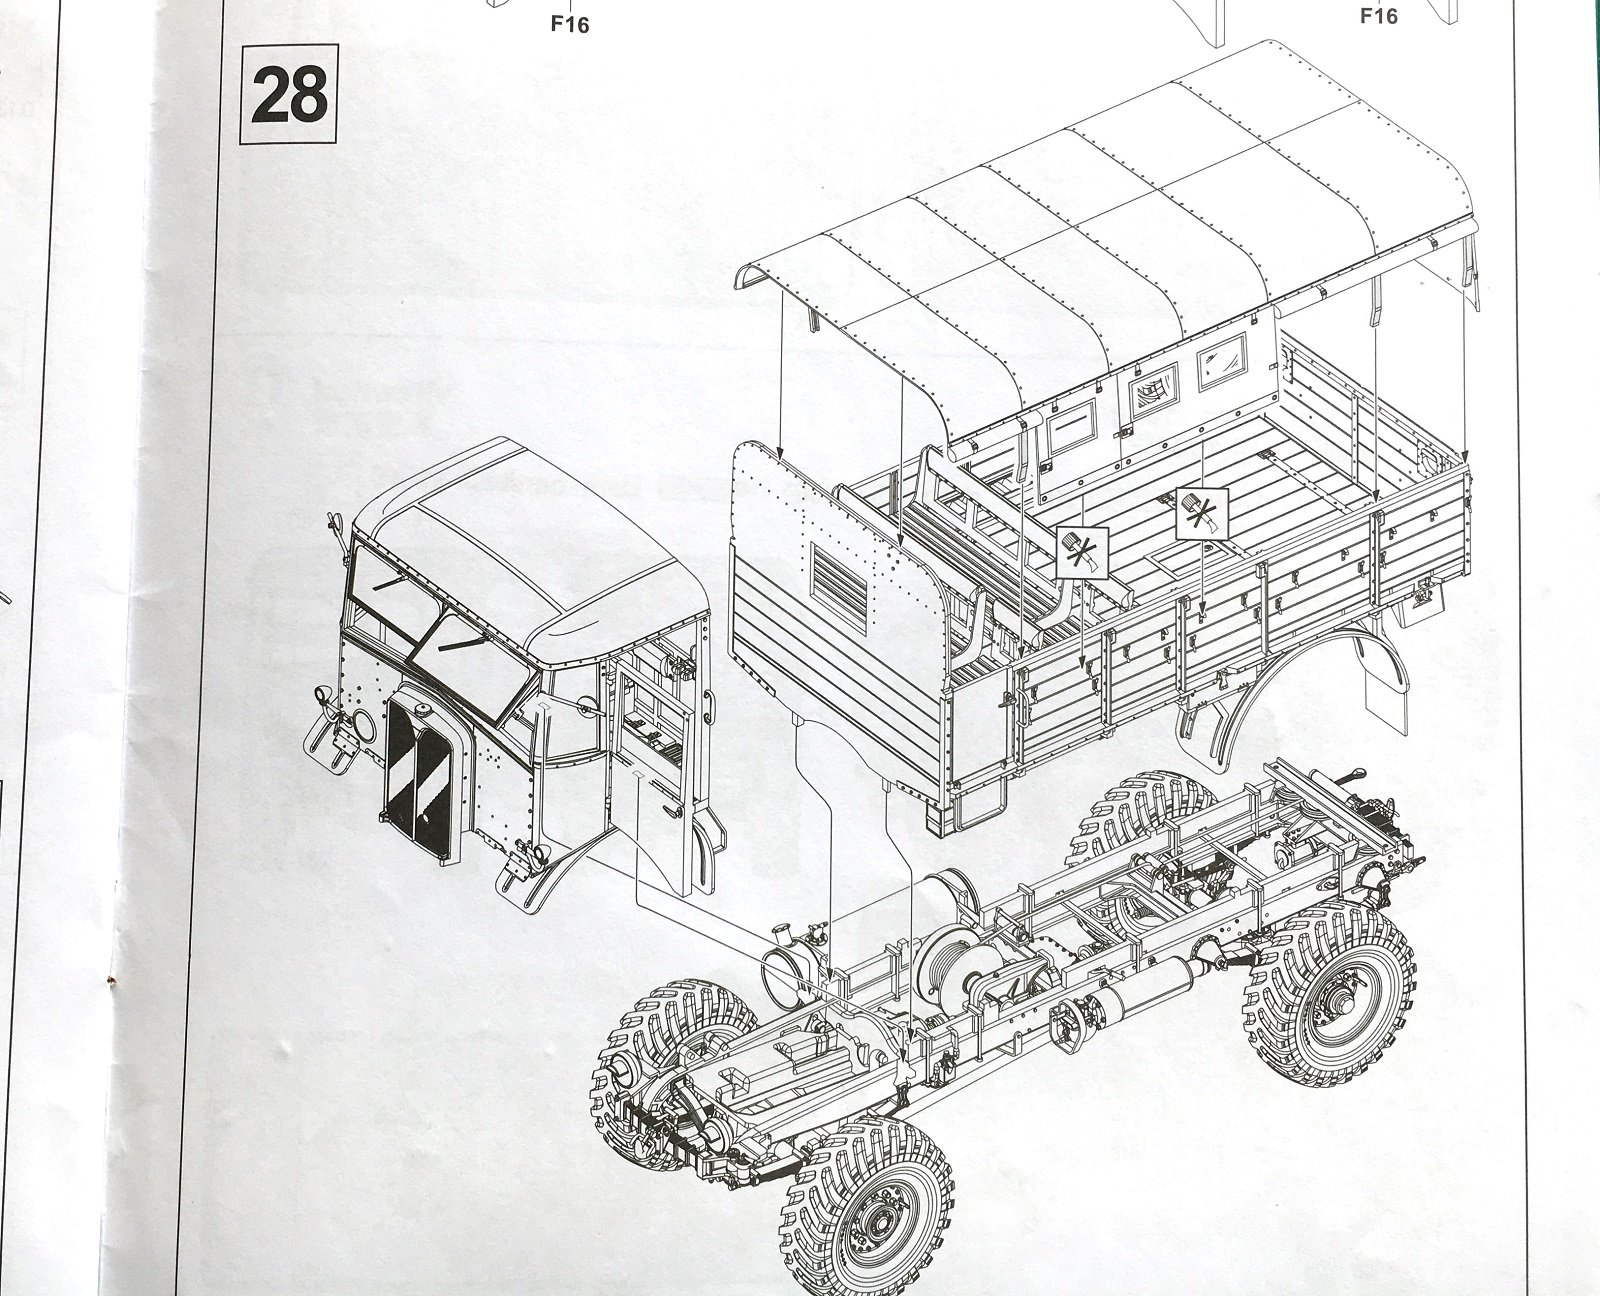
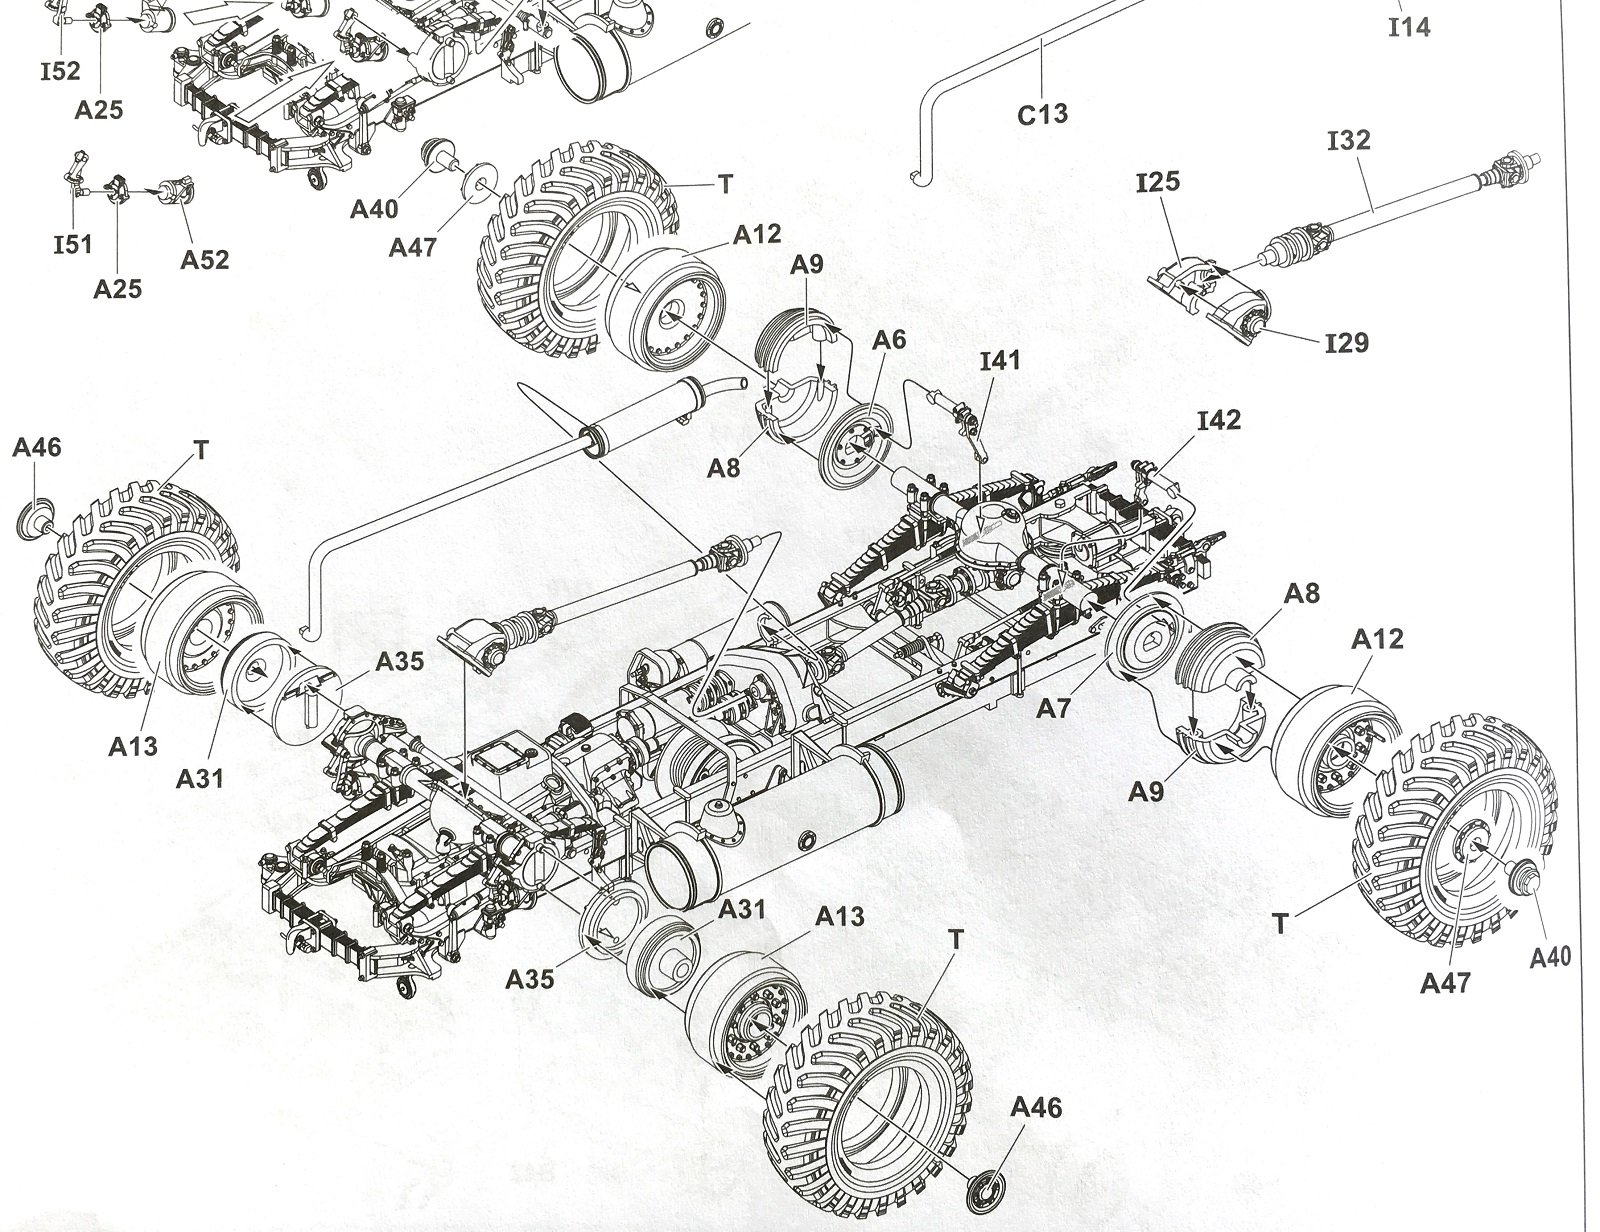
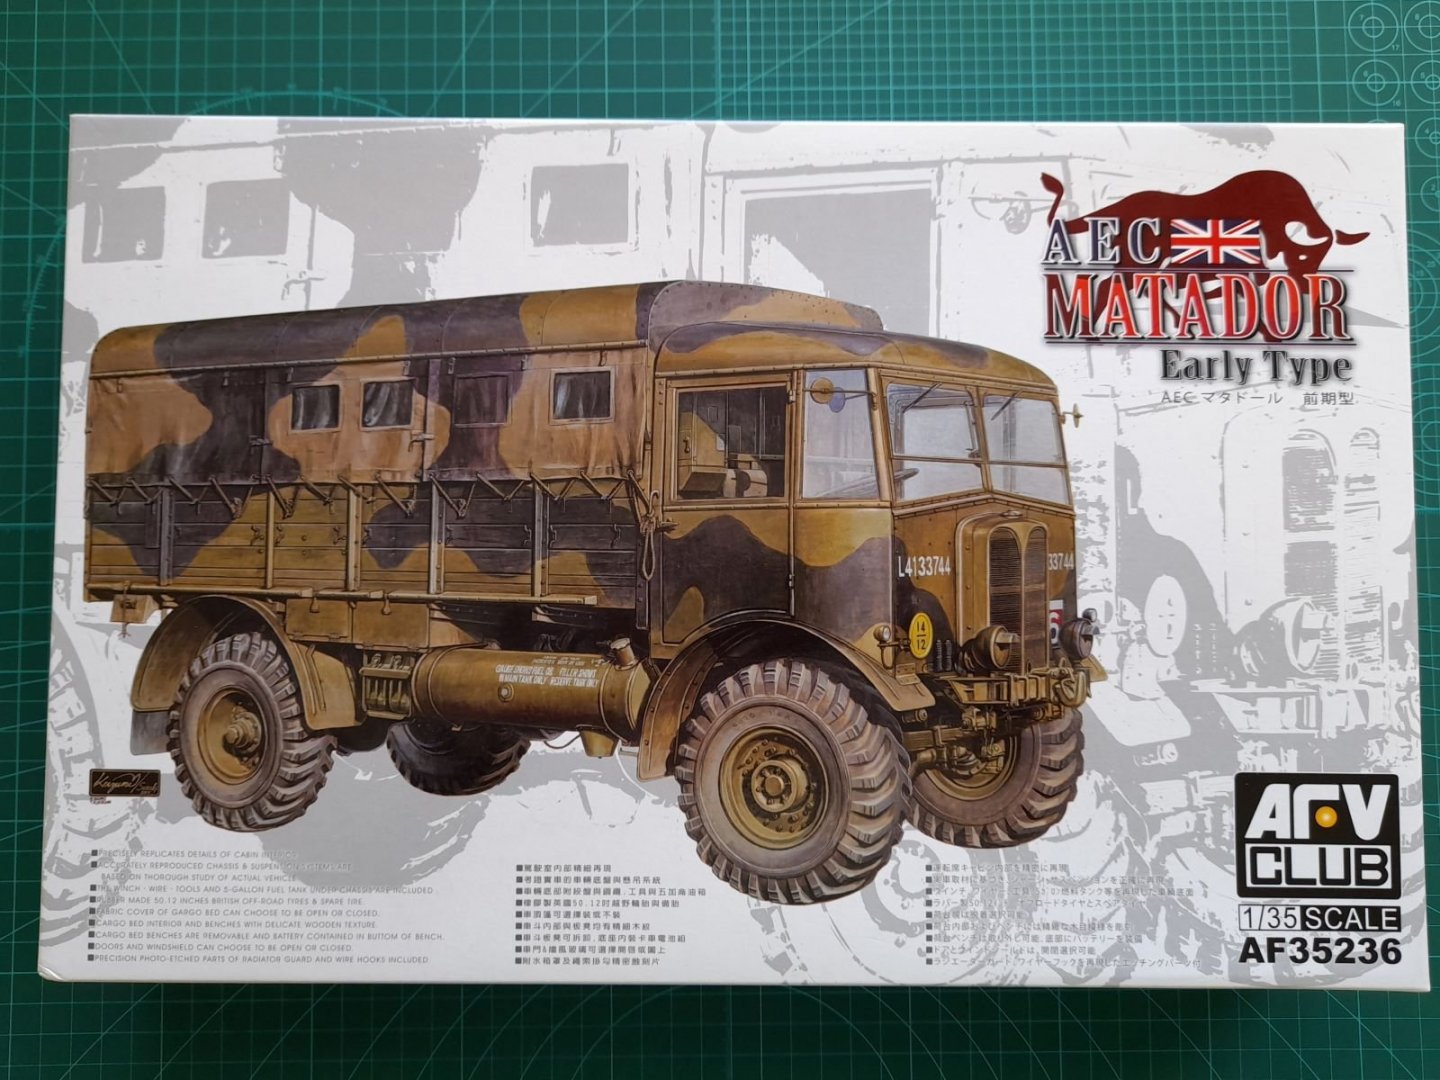
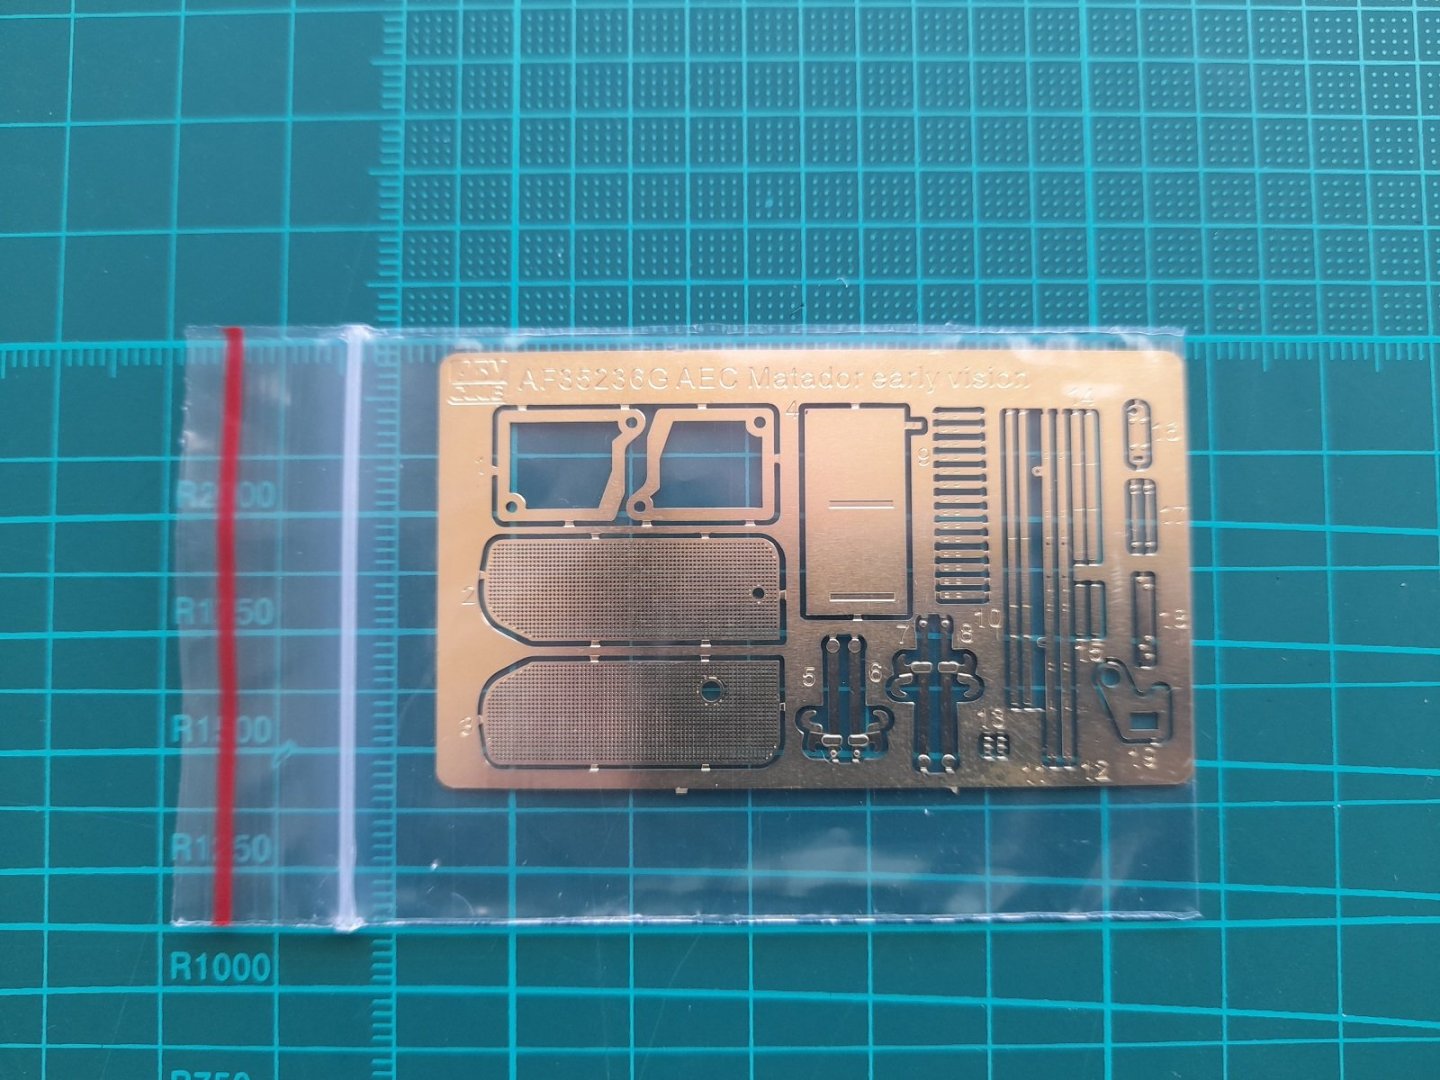
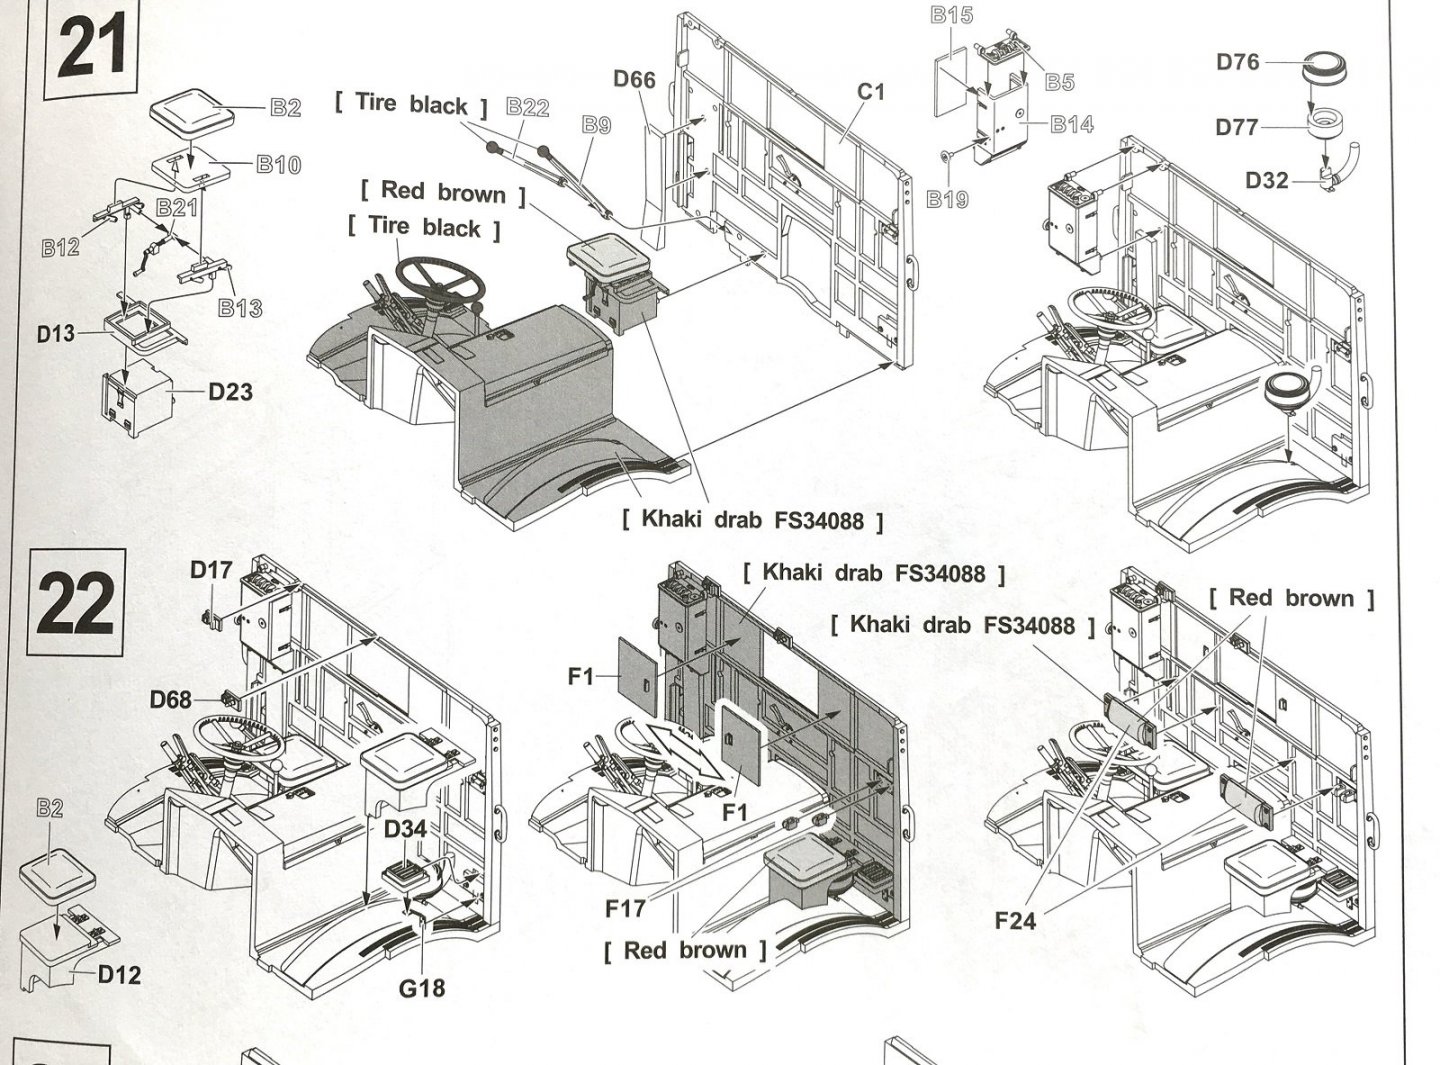
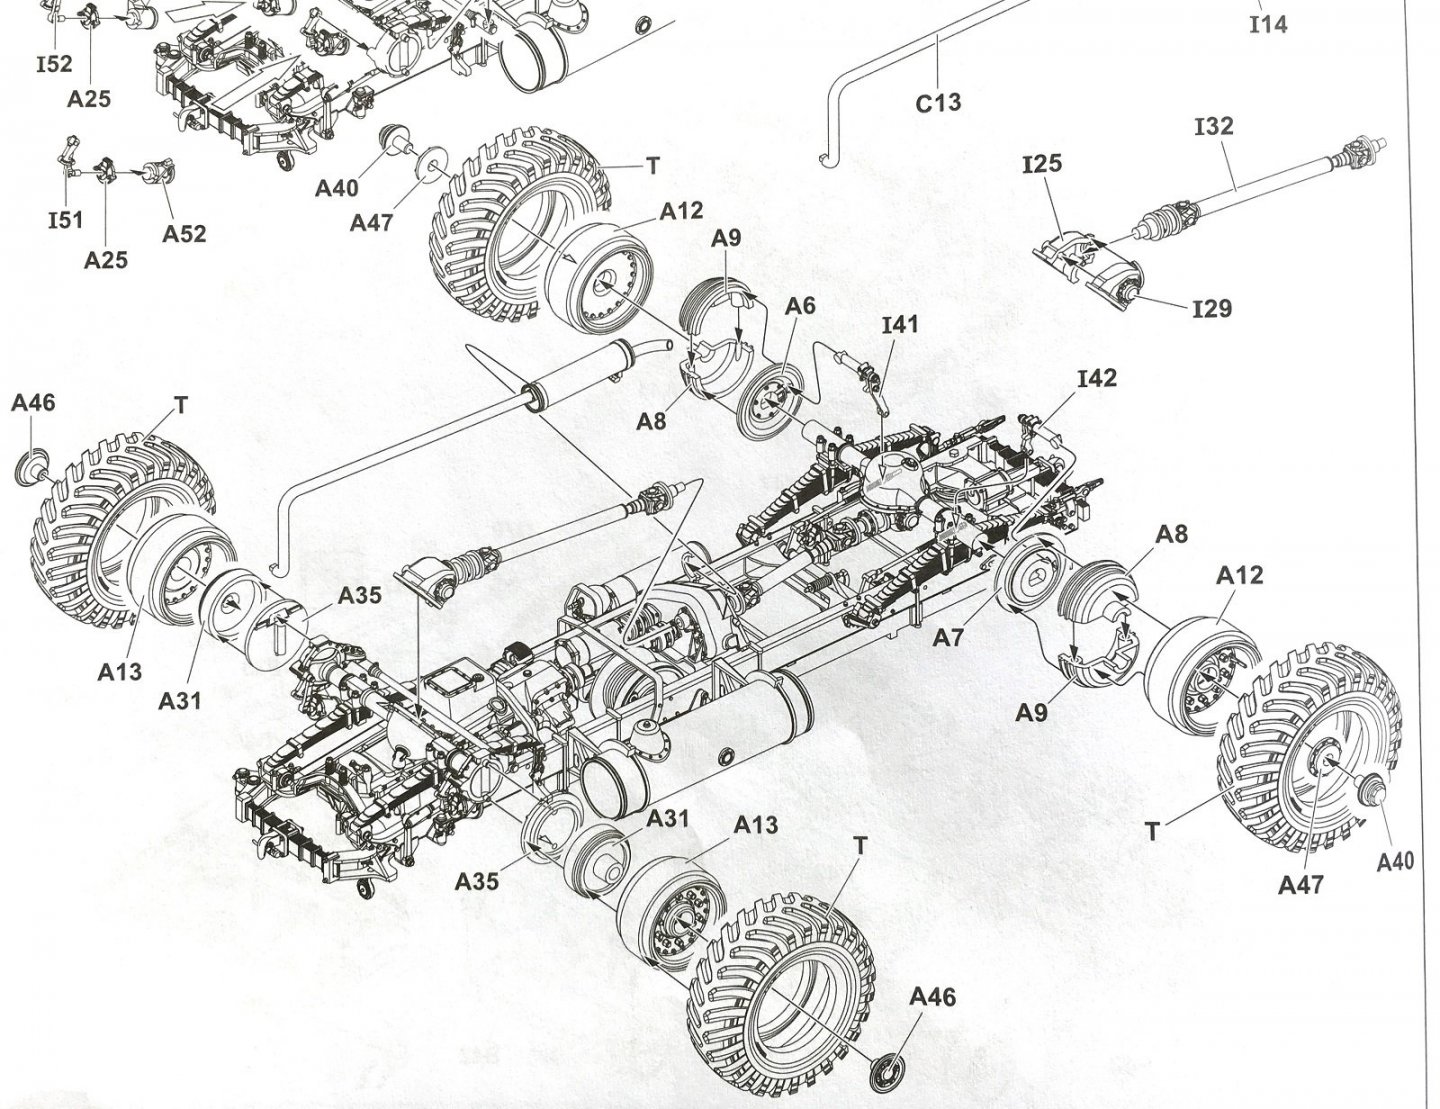
This my review of AFV Club’s 1/35 scale AEC Matador, early variant. I actually did a YouTube video of the review which can be seen in the following link; Although I am familiar with the manufacturer AFV Club, a Taiwanese model manufacturer, I was unfamiliar with any of their kits until I saw a Youtube build video of the later variant and was impressed with what looked like a highly detailed kit. The early variant was the only one available from my usual sources so purchased this one.. My interest is more towards support vehicles rather than the typical fighting vehicles. The kit itself was released I think around 2014 but the part details are comparable with any of todays kit releases. There was no flash on any of the parts with all parts being very sharp and crisp. There were the odd injection pin marks on a couple of components, but these were located in out of the way areas and were very slight and will be easily cleaned up if needed. In the review I couldn’t really detect any mould seam lines which will make clean up a breeze. Even the round tube exhaust pipes didn’t have any I could find with the fingernail test. The kit would have you make several assemblies to bring together at the end with the chassis being the most detailed and ‘busy’. This will require careful planning for breaking down to sub-assemblies for painting before final assembly although the colour schemes available would allow you almost build it complete and blast on the base colour. However I want to try various paint and weathering techniques so will paint as I go. The kit allows things like doors and windows to be positioned either open or closed. The kit comes with a small photo etch sheet with the item of note being the radiator grills which will sharpen up the front no end. What is surprising is the one of the main sprues contain the cab roof and cab front from the later ‘Mid’ variant with a small single sprue containing the roof and cab front for the early version which this kit is sold as. I am not sure if the roof and cab front for both versions are the only differences between them. If so you may be able to build either or with a little research for markings etc. One of the things I don’t like is the tyres are vinyl and I would much prefer plastic ones as the vinyl may be difficult to paint and weather although I am speaking from ‘inexperience’ so might be wrong. I might check to see if resin ‘weighted’ wheels are available. I have included a few crop shots from the instructions to give a taste of the level of detail. I was pleasantly surprised at just how detailed and nice the parts in this kit is and there is now another of their kits with a full interior I have in my sights. I look forward to building this when time allows or for a break from paper ship modeling. Cheers Slog

-
- 4
-
-
- Artillery Tractor
- AFV Club
- (and 1 more)
-
This; by coincidence watched a YouTube video the other day on a ship channel which went into this in detail.
-
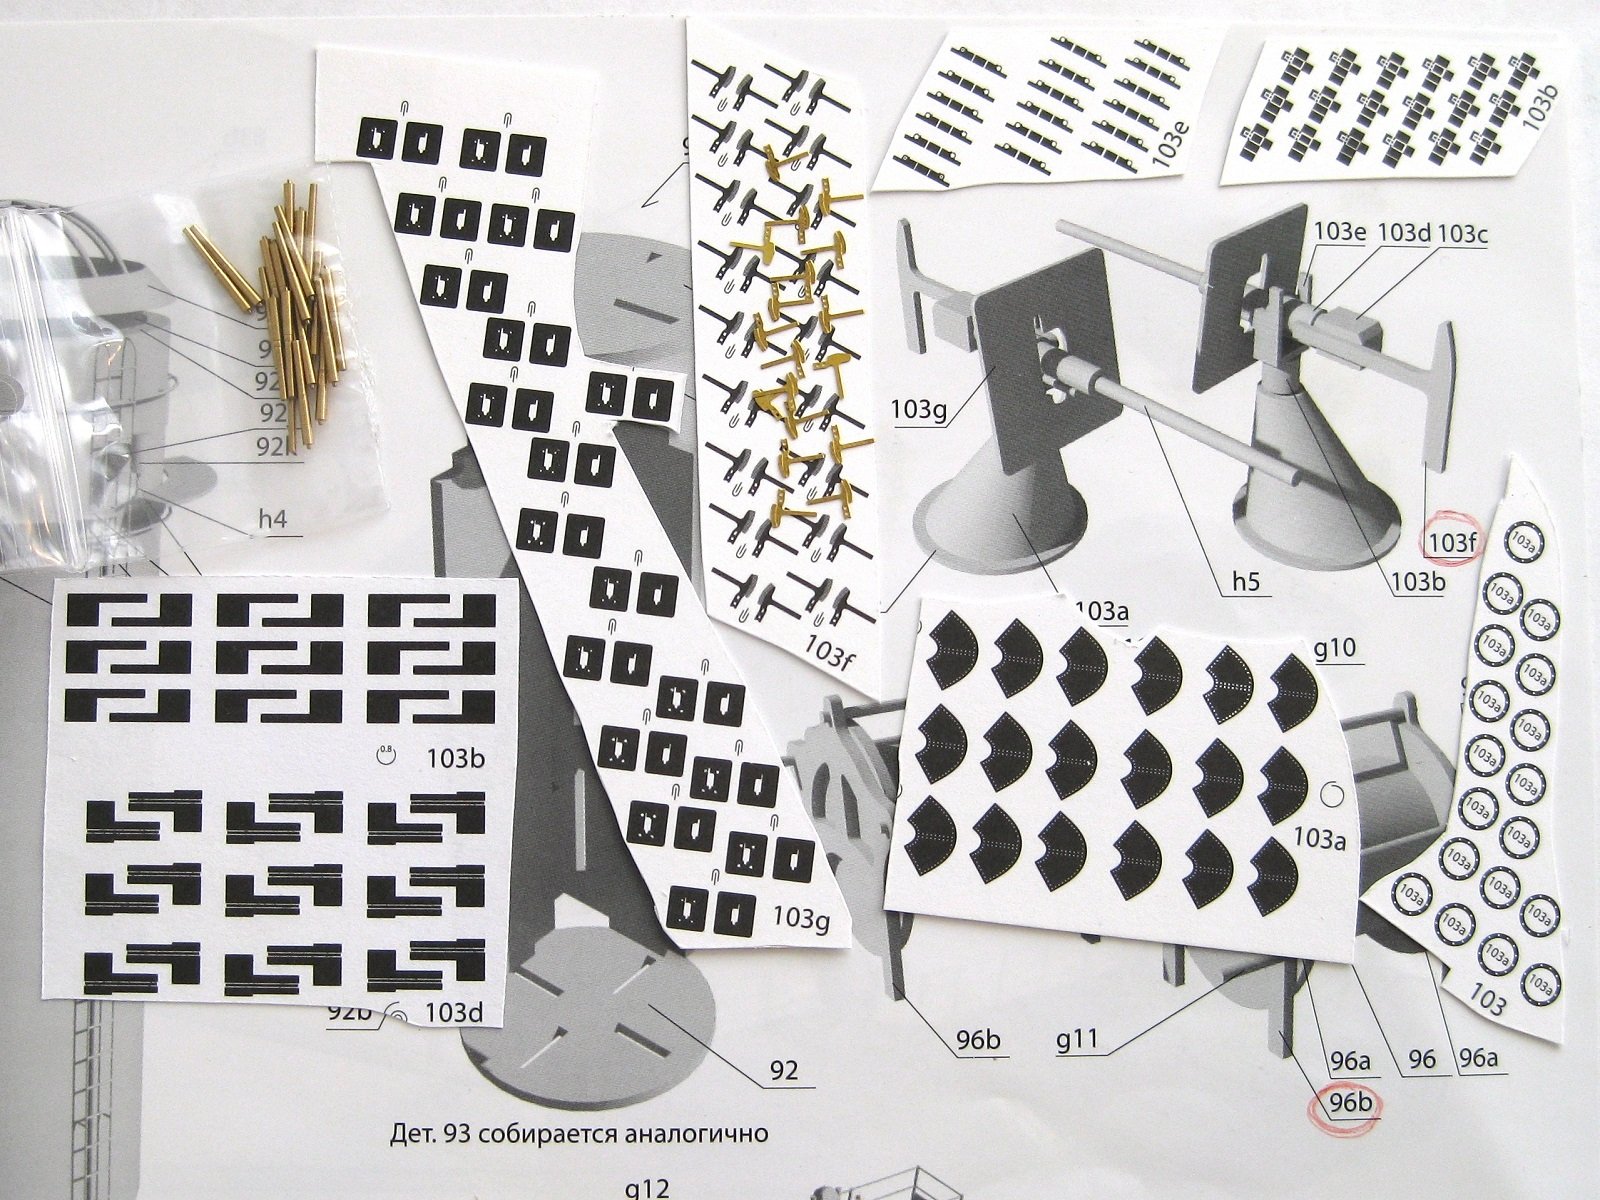
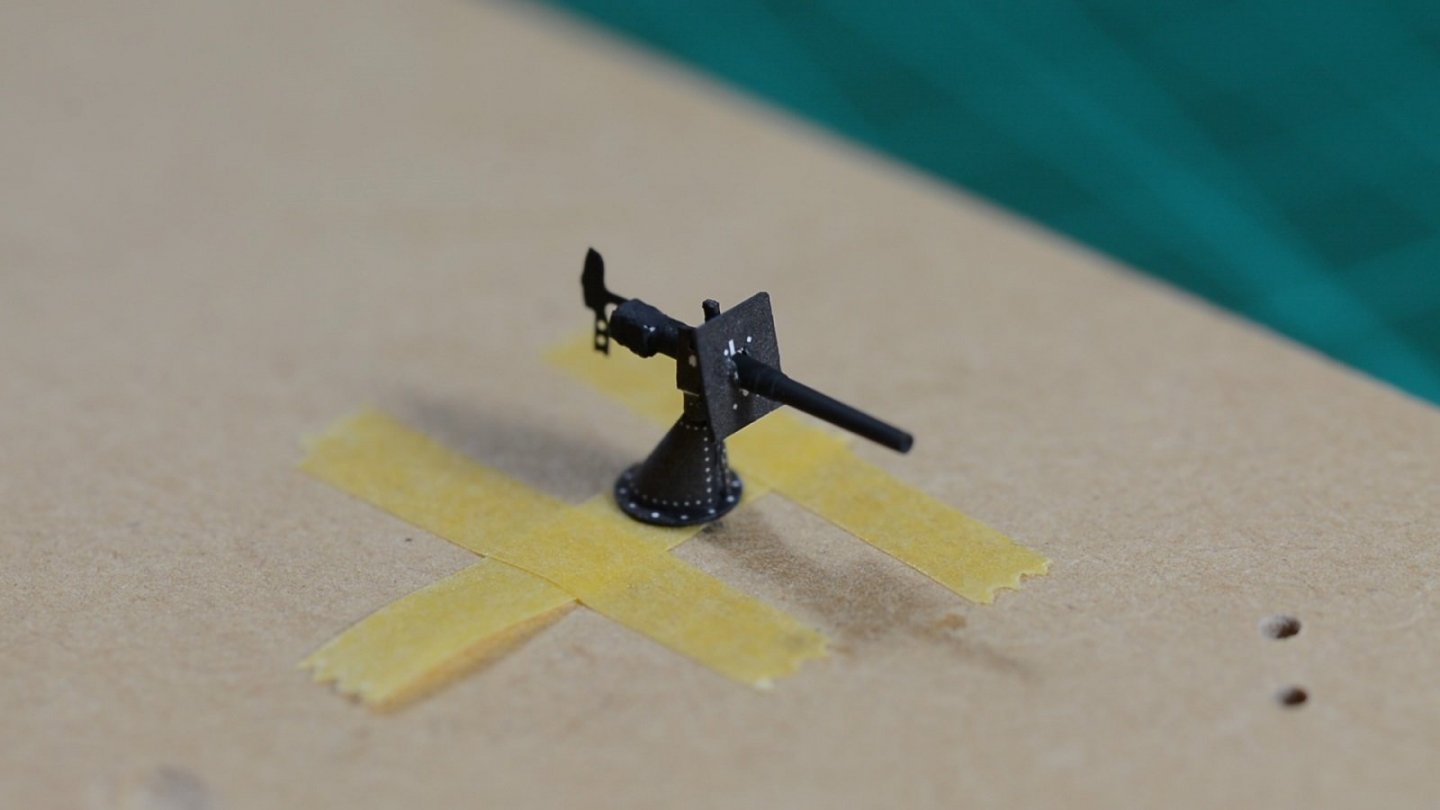
You got me…the model is actually 1/20 scale and 6 metres long! Well back in Perth for the Easter break and have done the 47mm Hotchkiss QF guns. Picture shows component parts with brass barrels and photo etch for the stock. 1 finished gun I didn’t do progress shots as got caught up trying my hand at making YouTube videos. I created the account over 2 years ago but didn’t do anything with it. Recently in discussions with another forum member I was enthused to try making videos of my latest work. These guns probably not the best example to make videos of. I did the 47mm guns over 3 videos as per the below. https://www.youtube.com/watch?v=anvGEbYohd0 https://www.youtube.com/watch?v=F958vx48xpQ https://www.youtube.com/watch?v=kTuB3m48-zk Cheers Slog
- 244 replies
-
- 8
-
-
- borodino
- dom bumagi
- (and 1 more)
-
the search continues! Wing looks great from here.
-
Rotary tools - Proxxon and Dremel
Captain Slog replied to vaddoc's topic in Modeling tools and Workshop Equipment
I bought the same Proxxon micromot 60 and power supply as per your photo as i was never happy with the same Dremel as yours and i wanted the MB200 drill stand and agree on the benefits you mentioned. I am surprised the chuck doesn't fit though. I bought the Proxxon that came with a chuck and bought the collet set separately. There may be 2 different chucks and you got the wrong one? One other advantage is the Proxxon is a lot quieter not having the high pitched 'scream' of the Dremel -
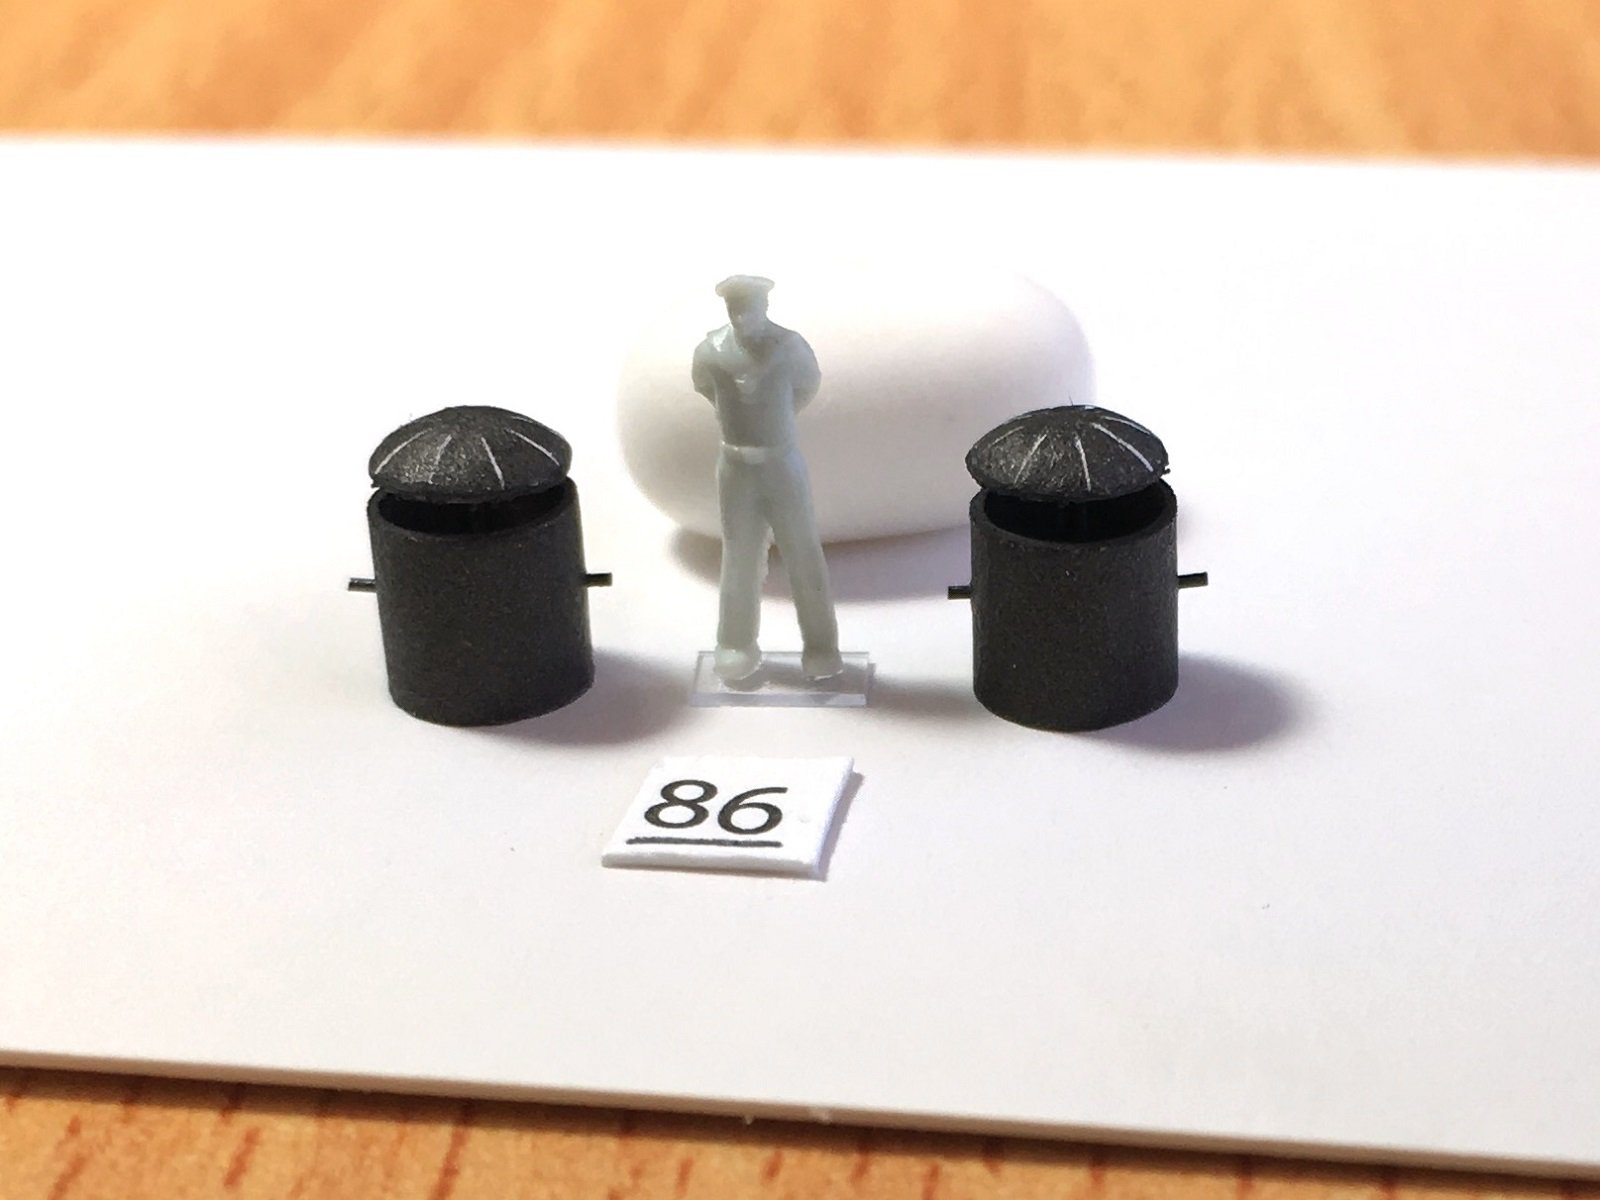
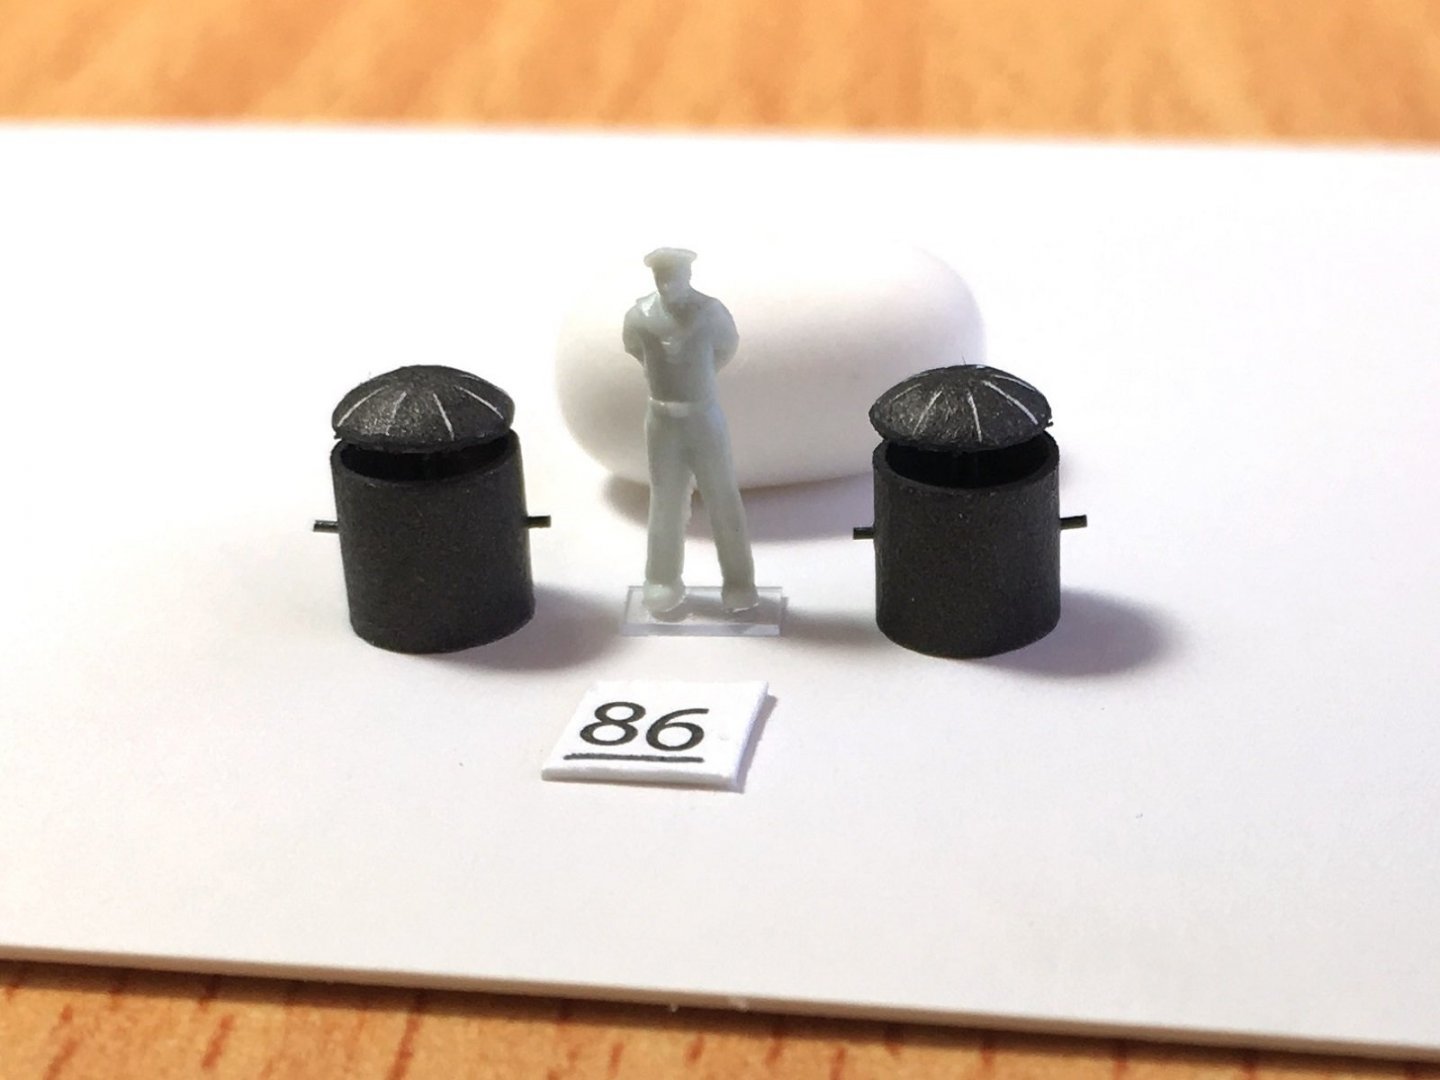
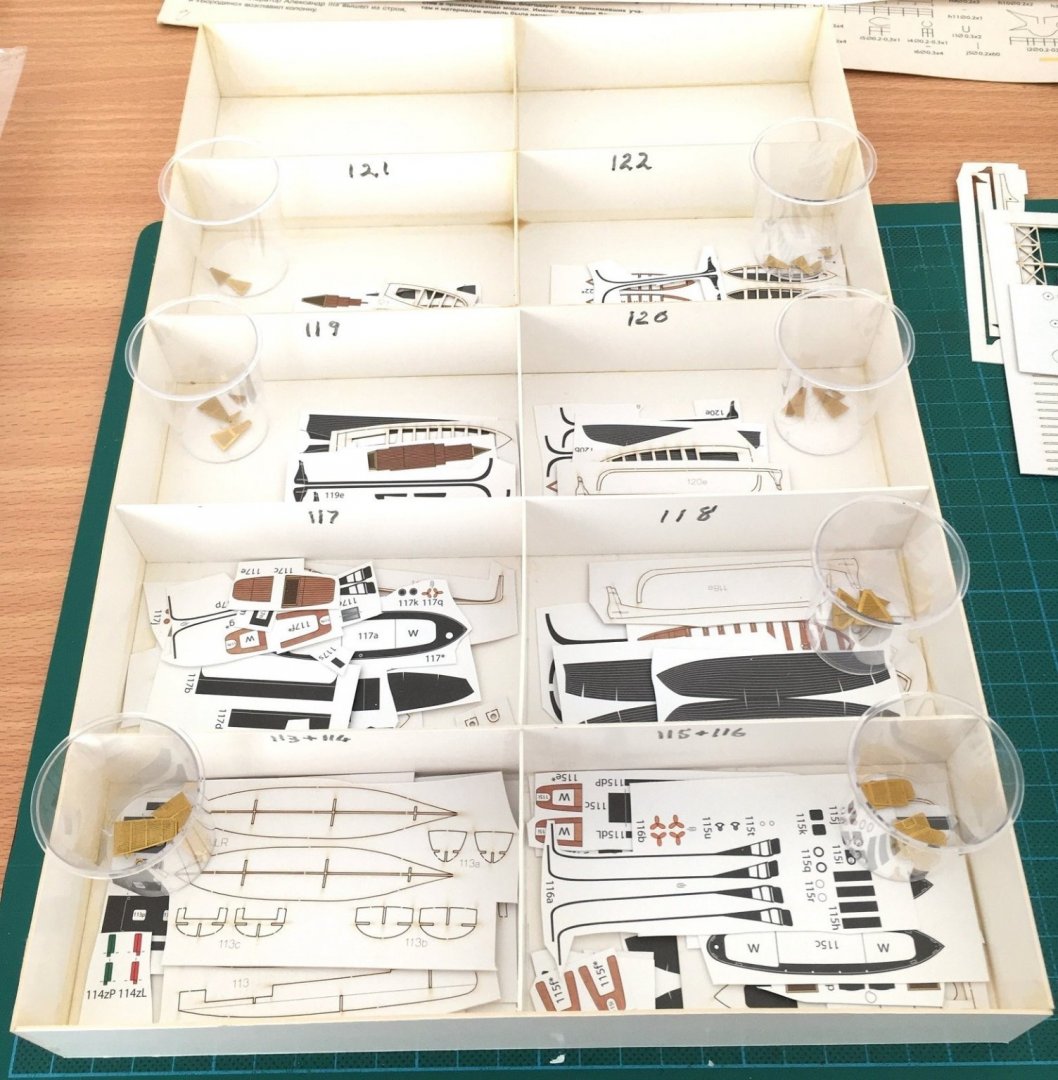
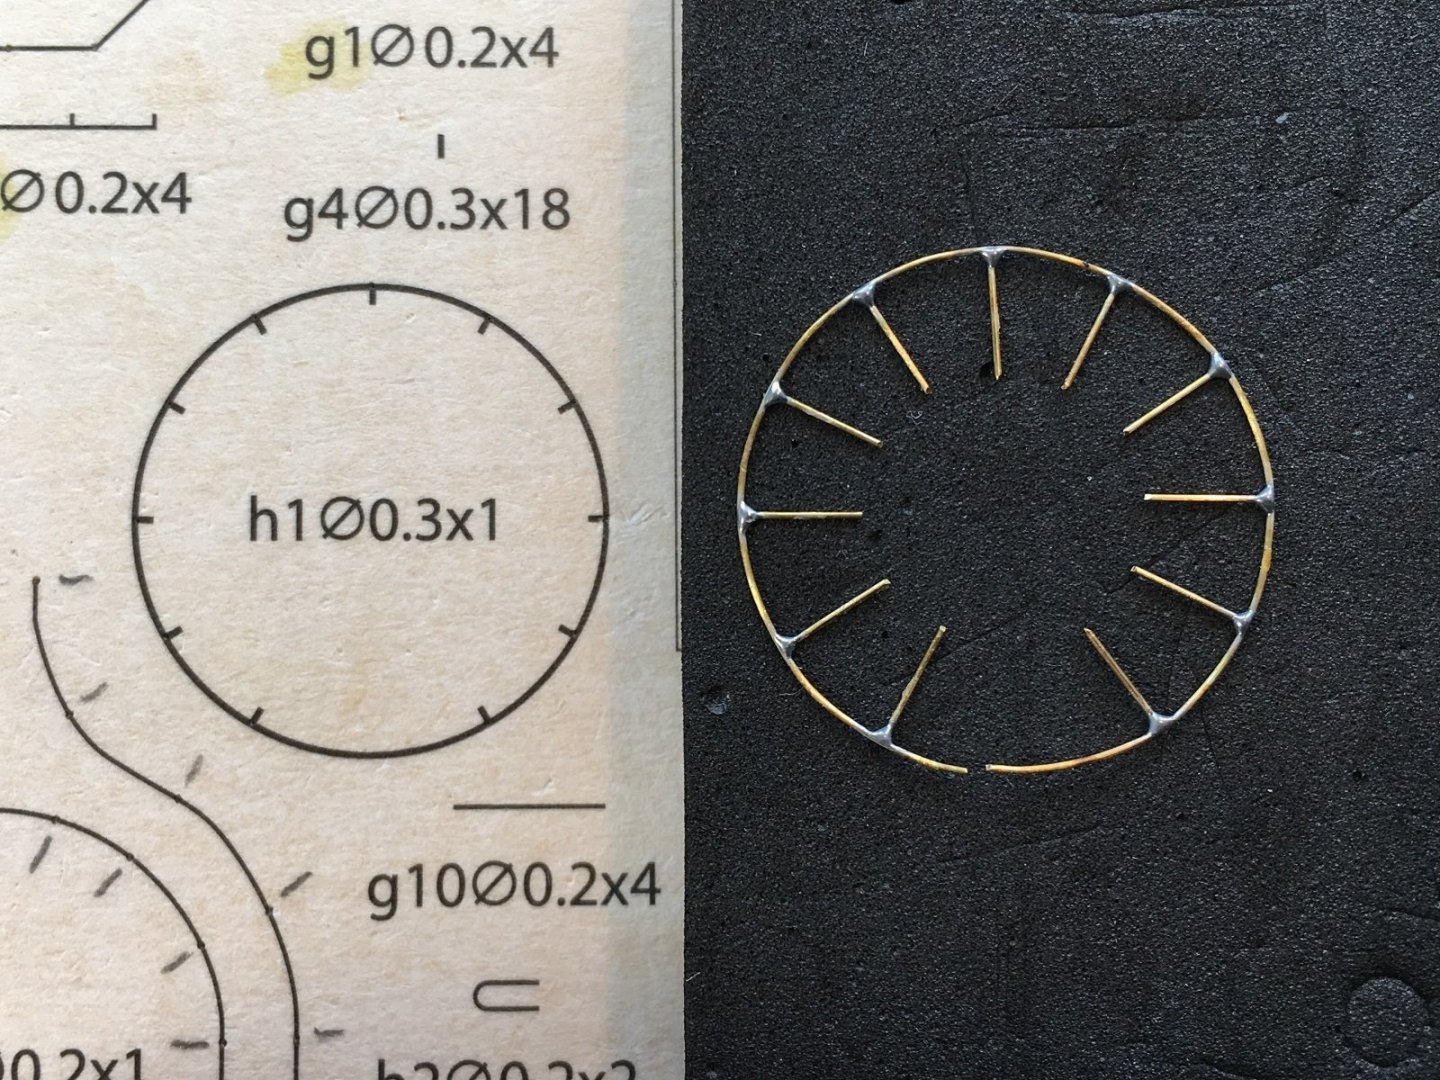
Thanks Mark. My last post for this swing…hopefully I can get home more often. Since the 12” turrets and funnels are complete the last of the major work left is all the ship’s boats and masts. This just leaves the multitude of small bits and pieces, which I have been chipping away at as per the photo. The below is around 9 hours of work. All completed assemblies are stored away ready for a major fit out once everything is completed. And a close up of part 86 for no other reason than I had it as I was going to do individual photos initially. The wire sticking out the sides are 0.3mm with a 0.5mm rod up the centre. Next time back will be more of the same. Cheers Slog

- 244 replies
-
- 6
-
-

-
- borodino
- dom bumagi
- (and 1 more)
-
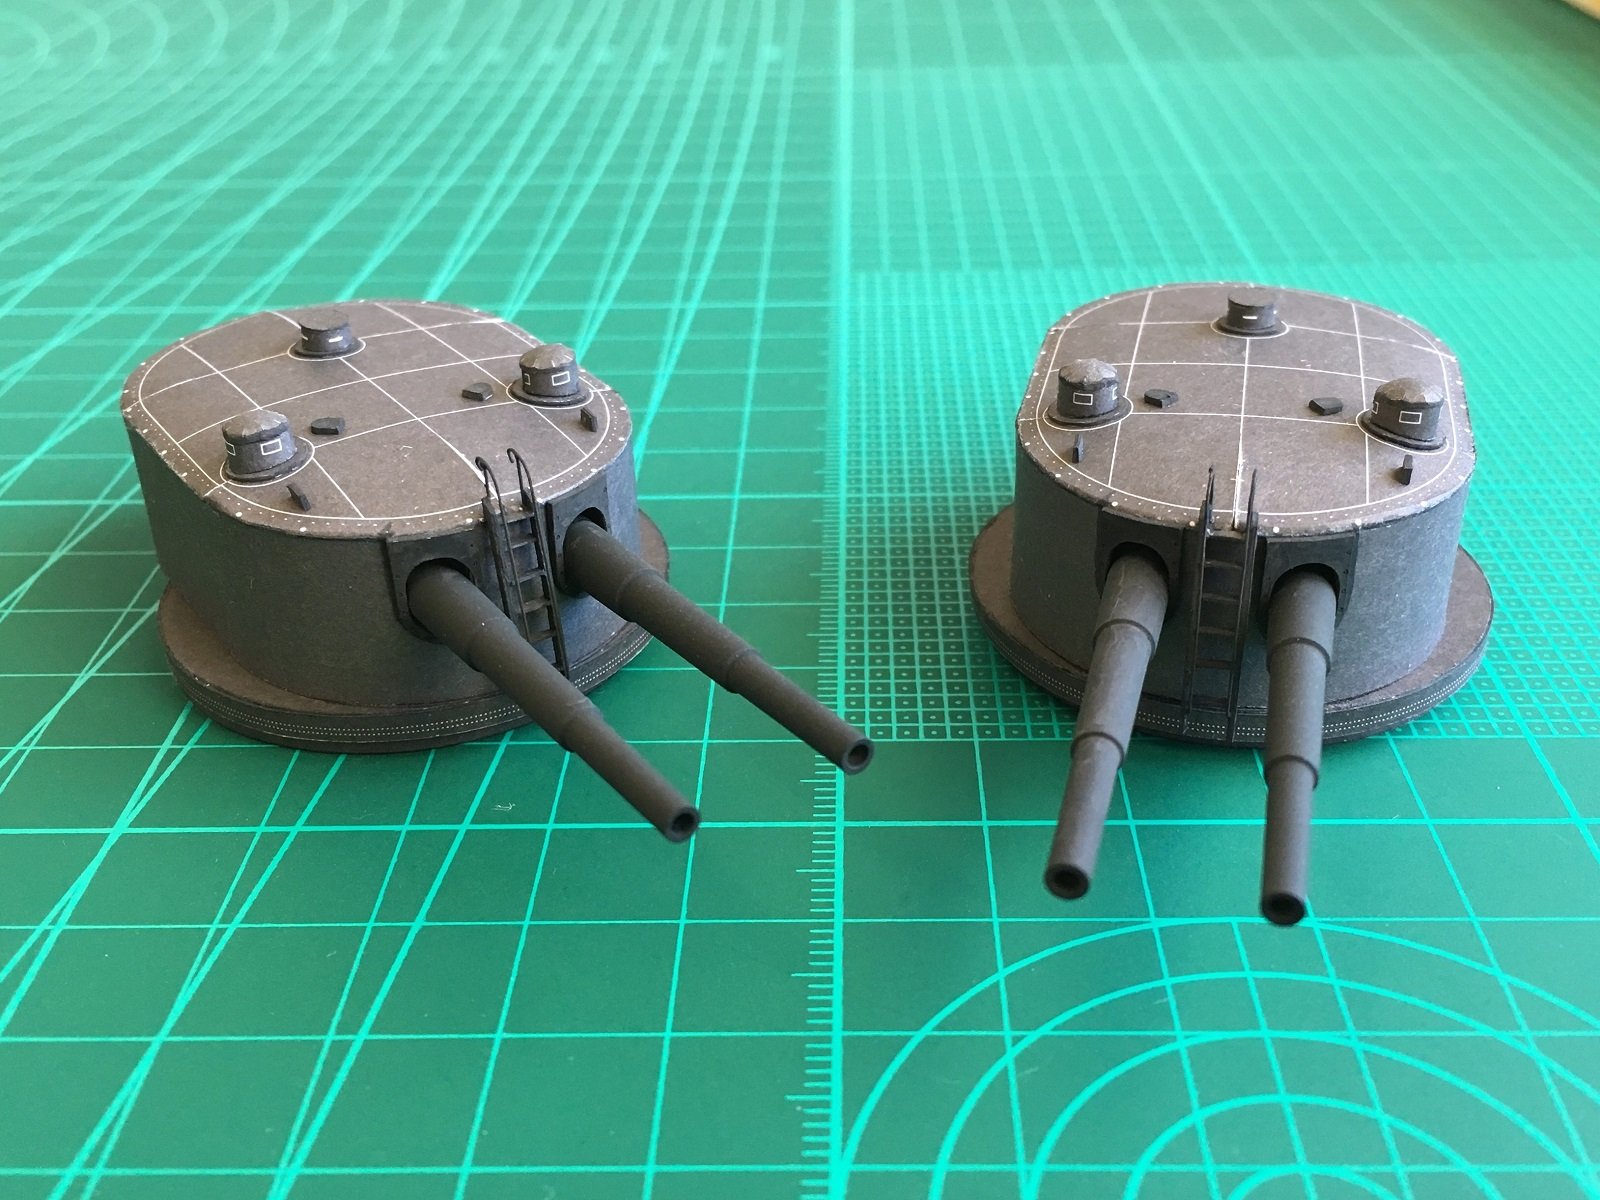
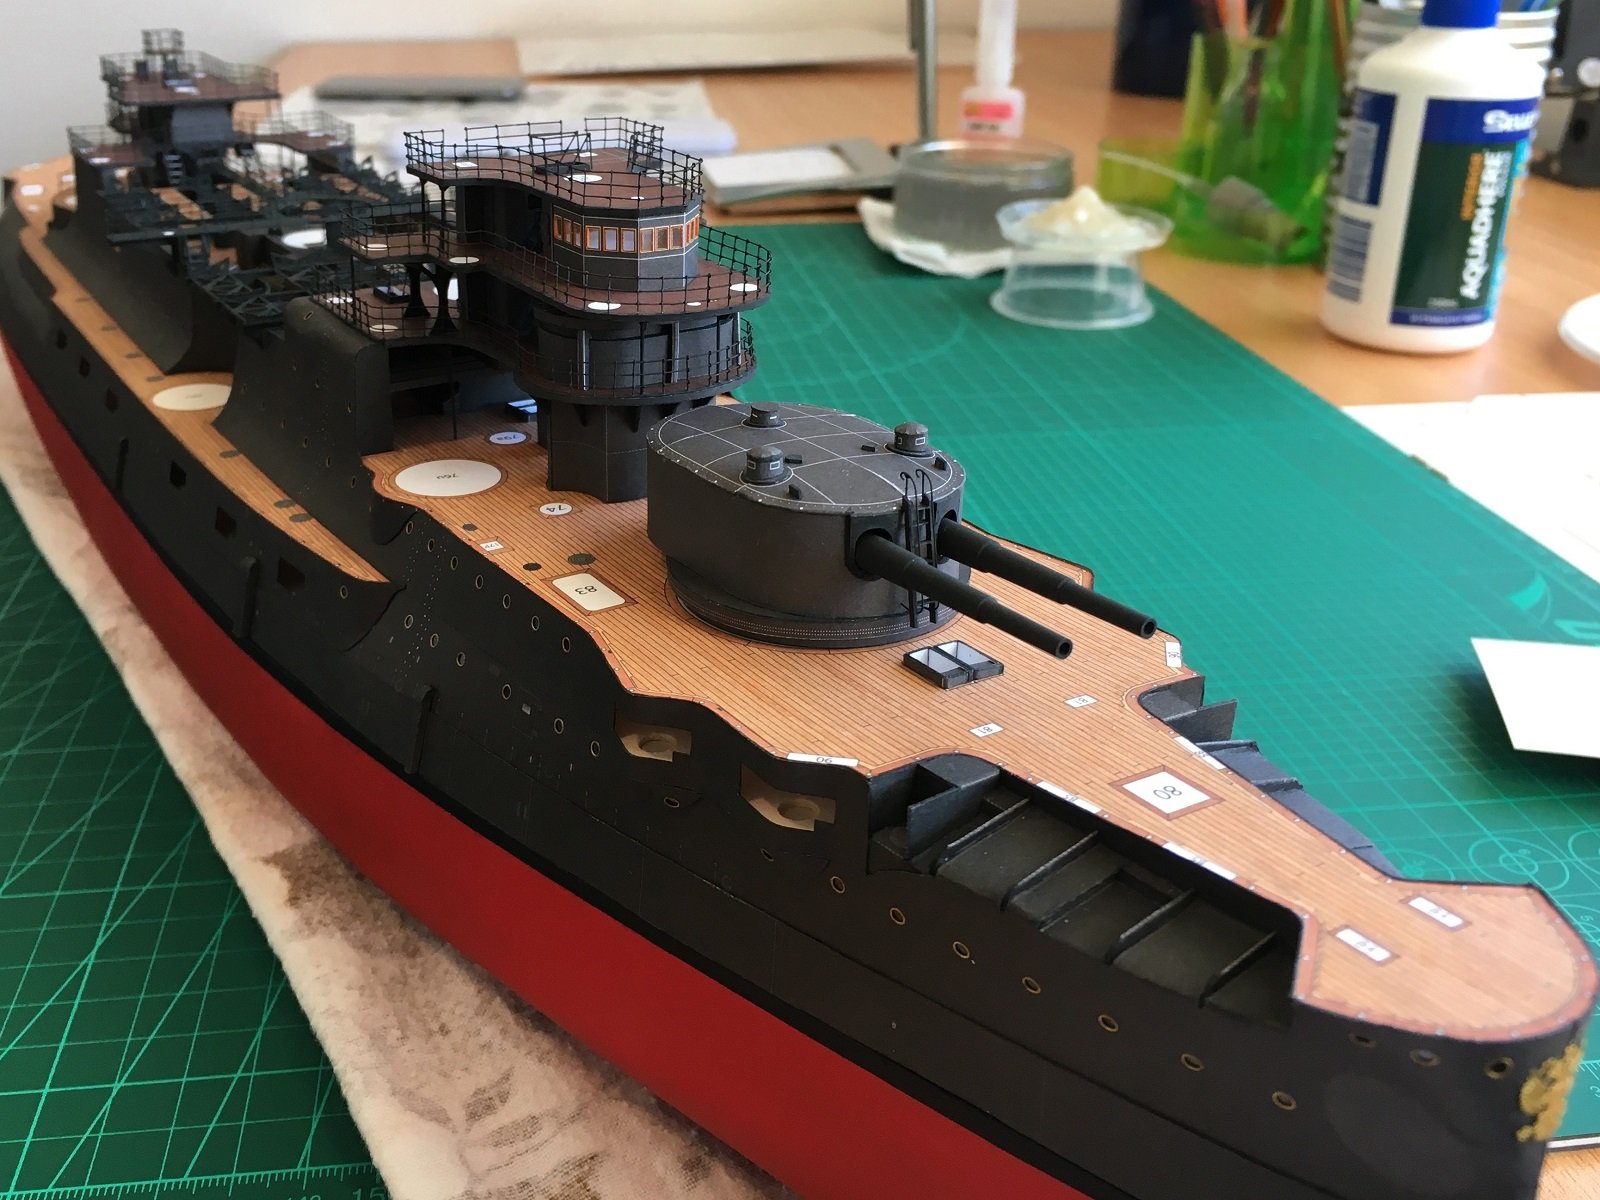
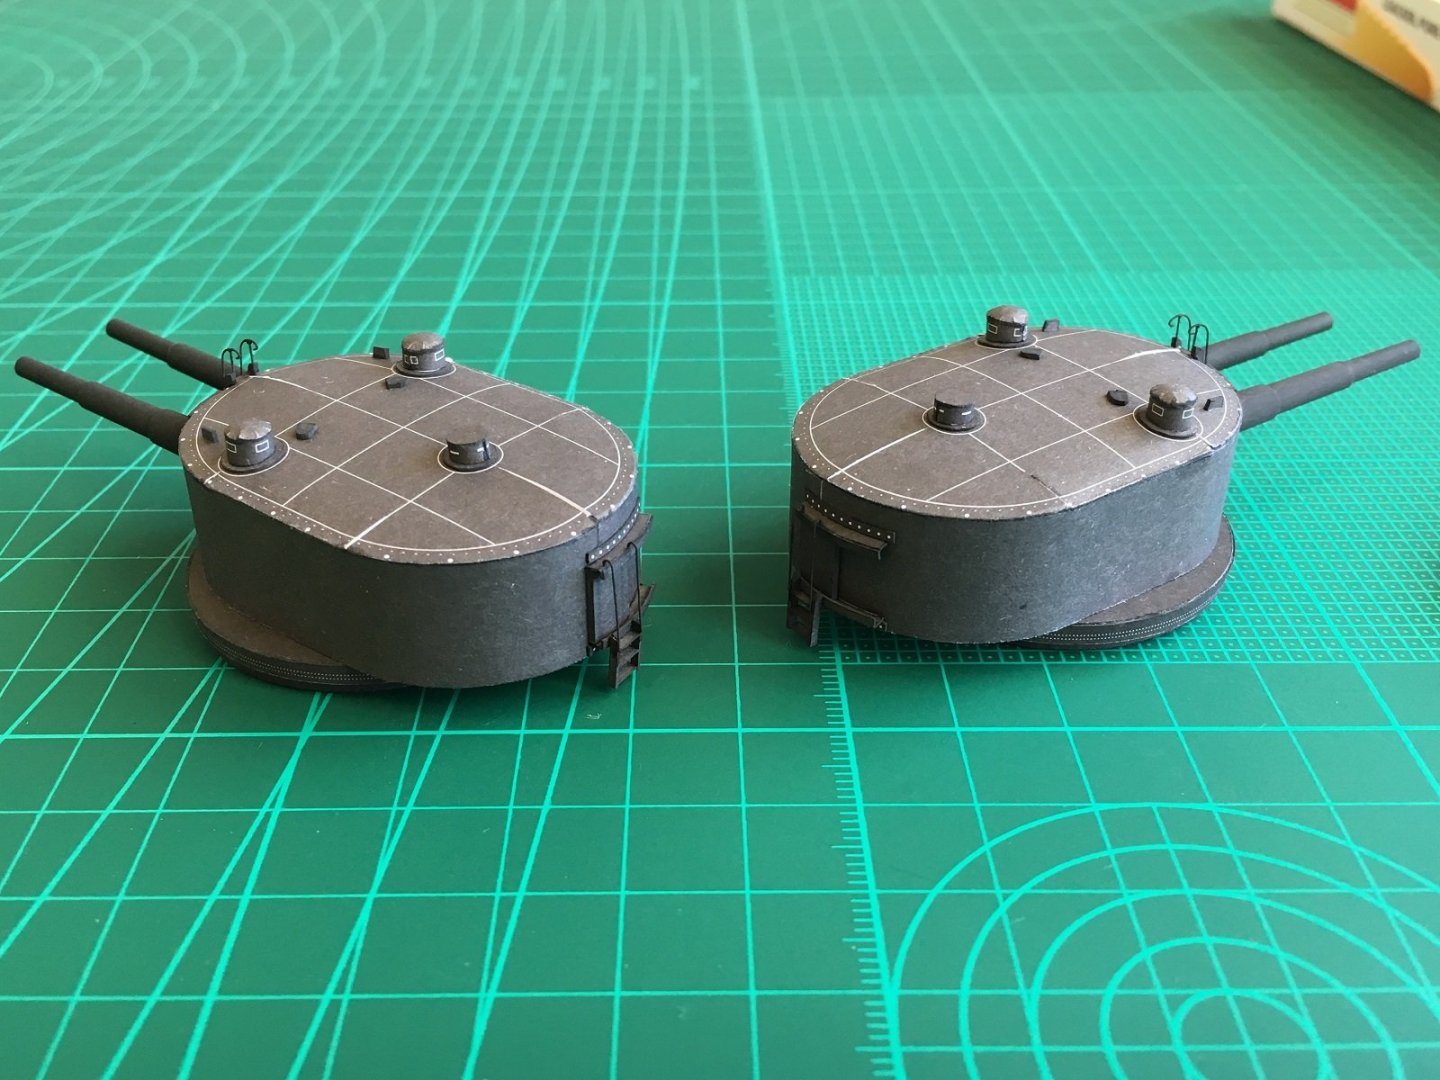
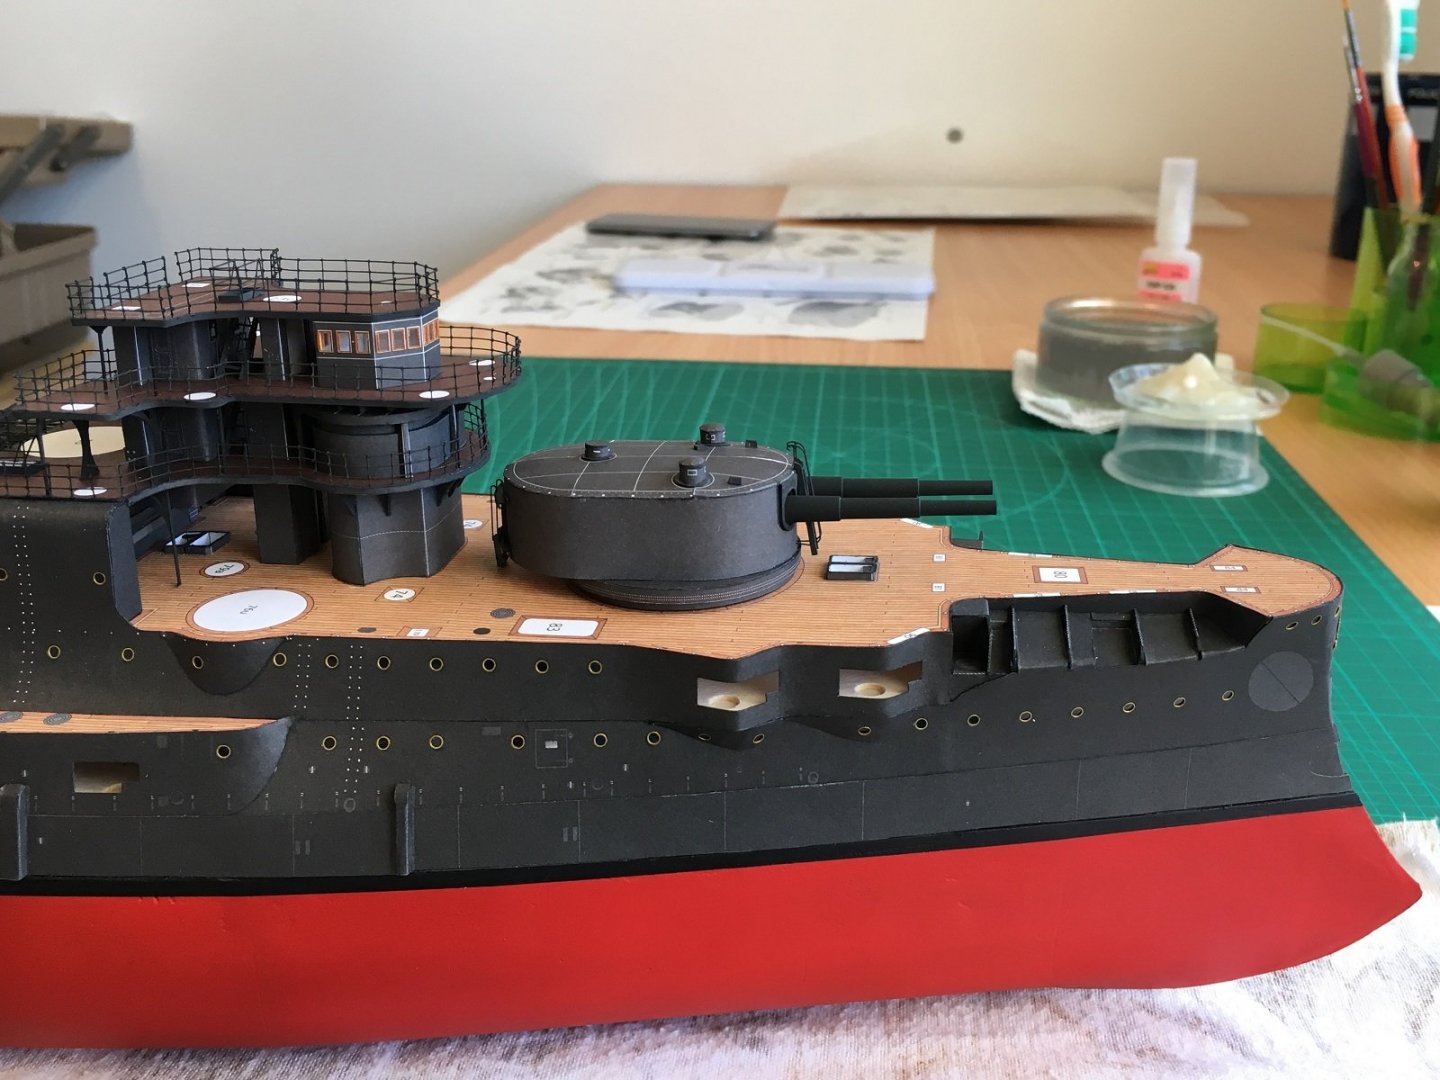
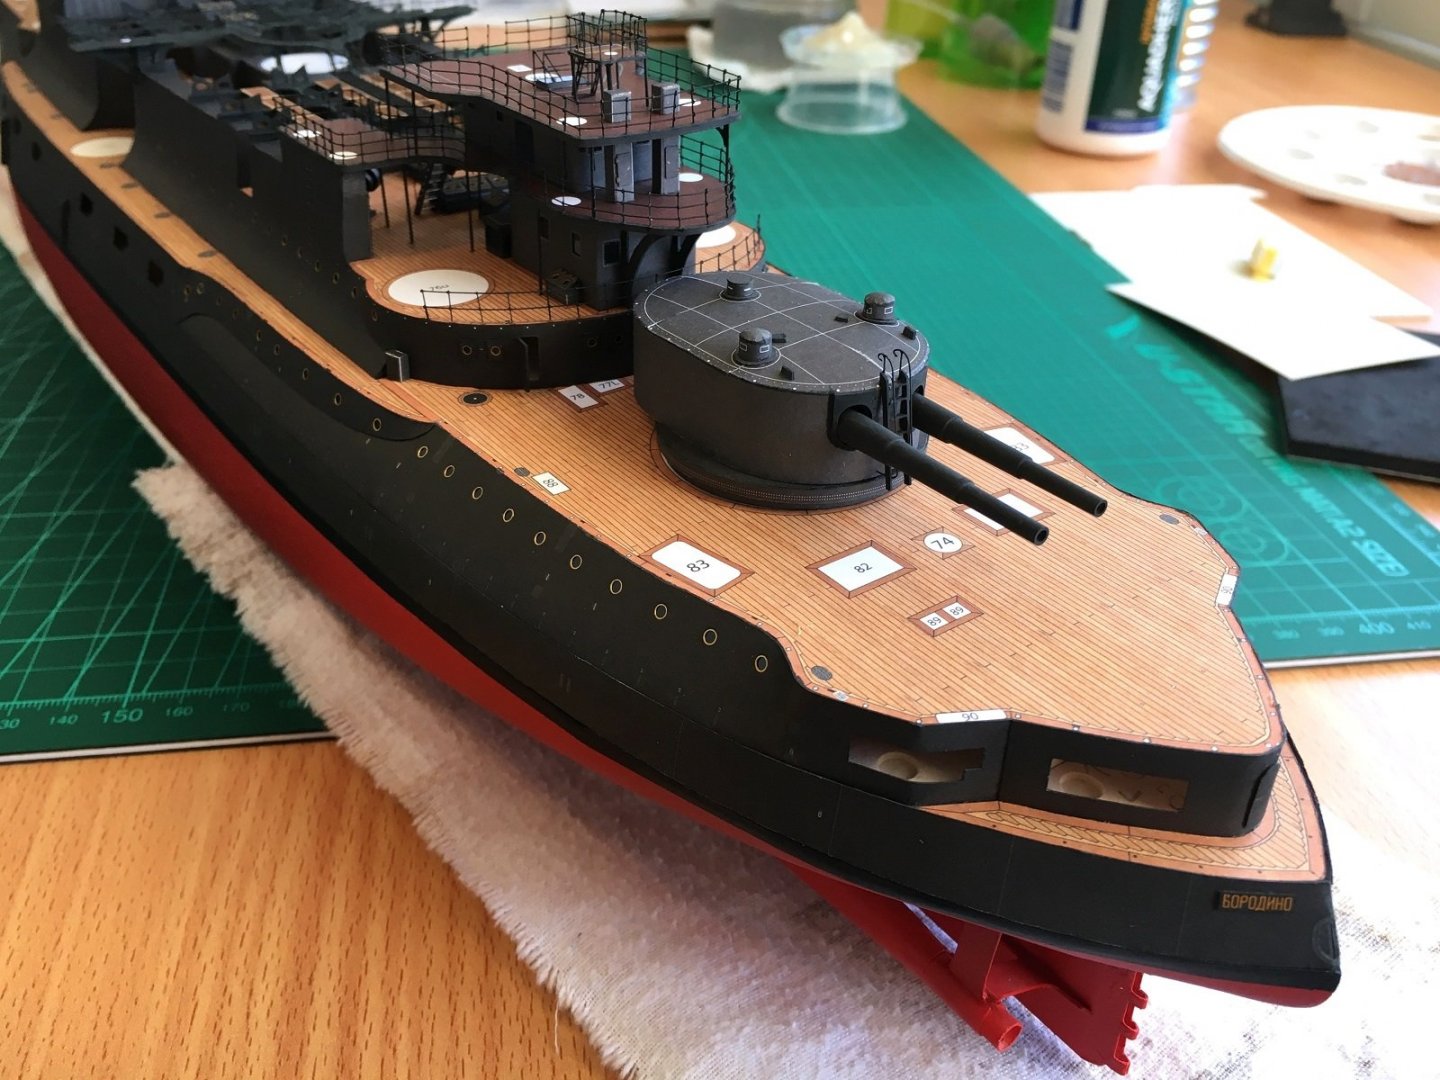
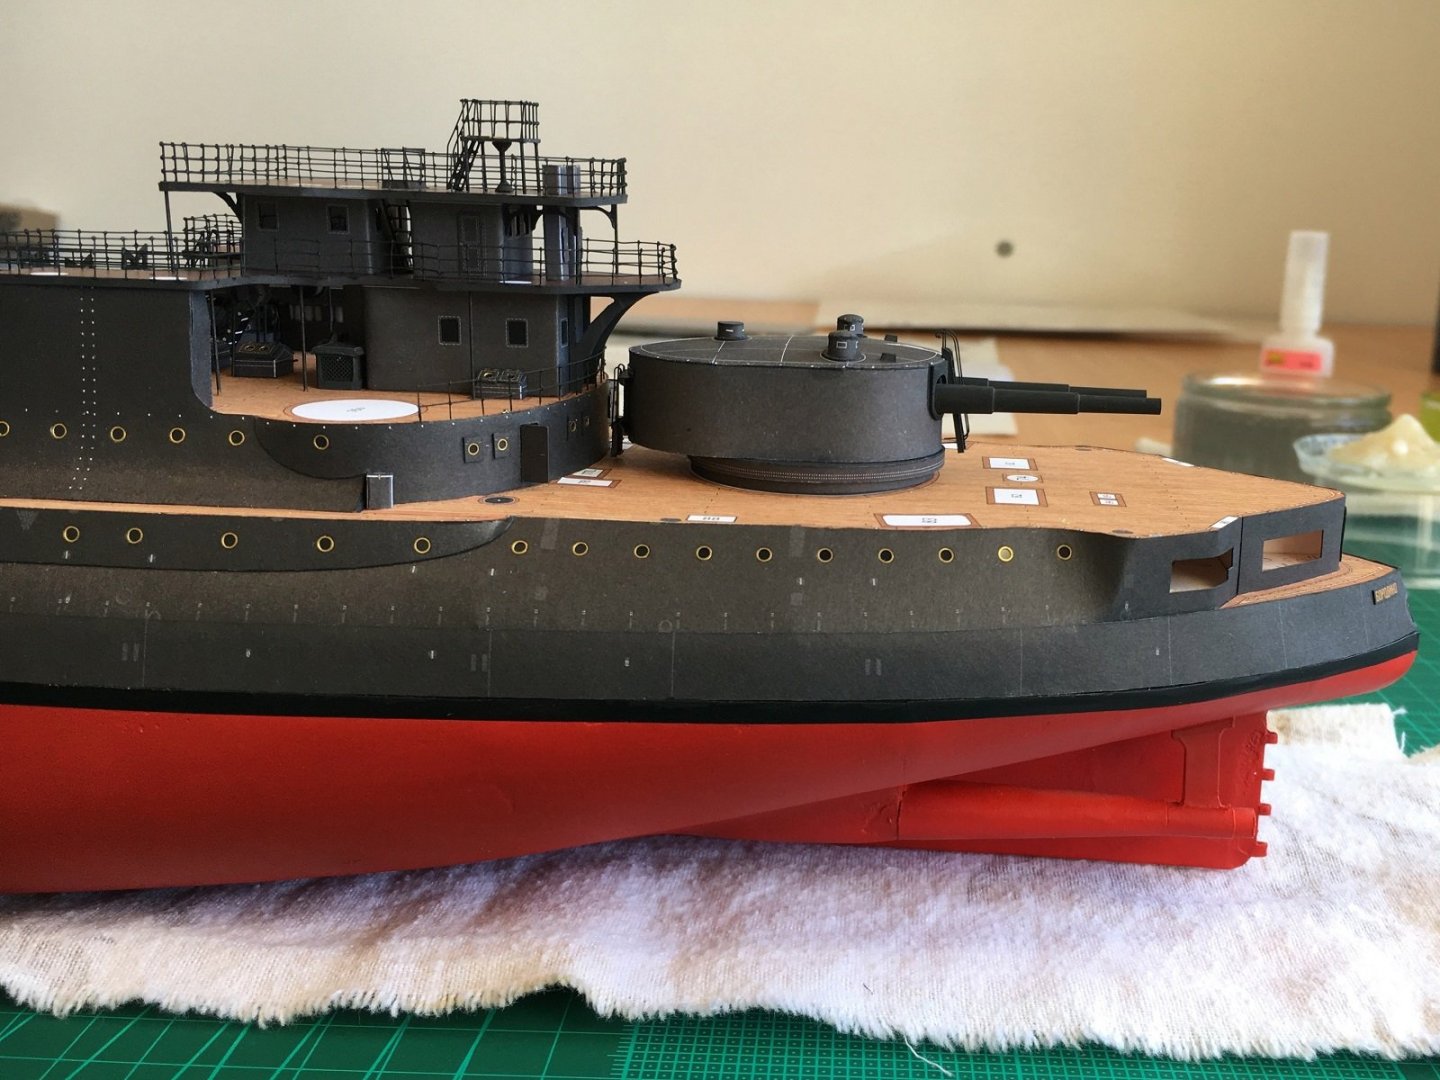
Hi, More progress, the deck and turret rings are done, and the turrets skinned. The aluminium barrels must have a larger diameter than the paper counter parts as they have pushed the opening in the skin slightly as seen on the left turret in the photo. There is a thick strengthening plate which covers the white ‘U’ area, but this plate is also pushed inwards so will need to paint a strip of the white exposed ‘U’. The top skin was very frustrating as it is designed oversize and only glued around the perimeter to give the domed shaped. The skin was fitted in six steps: the 2 sides, the 2 back curves and the 2 front curves. Lots of man handling and trial fitting resulted in soft and degraded edges. With the domed top skin fitted it was time to add all the other parts prepared earlier. I am basically finished the 12” Gun turrets now except for the single rail that runs along the perimeter. I will do all the iron work for all the guns when it comes time to fit them permanently. Front view Rear view, almost forget rear ladder handrails. And finally, some shots of them temporary in place…they certainly fill up the fore and rear decks! Front turret. Rear turret. The funnels and turrets took more time than anticipated so will spend the remainder of my home time chipping away at some of the smaller bits and pieces. Cheers Slog


- 244 replies
-
- 9
-
-
- borodino
- dom bumagi
- (and 1 more)
-
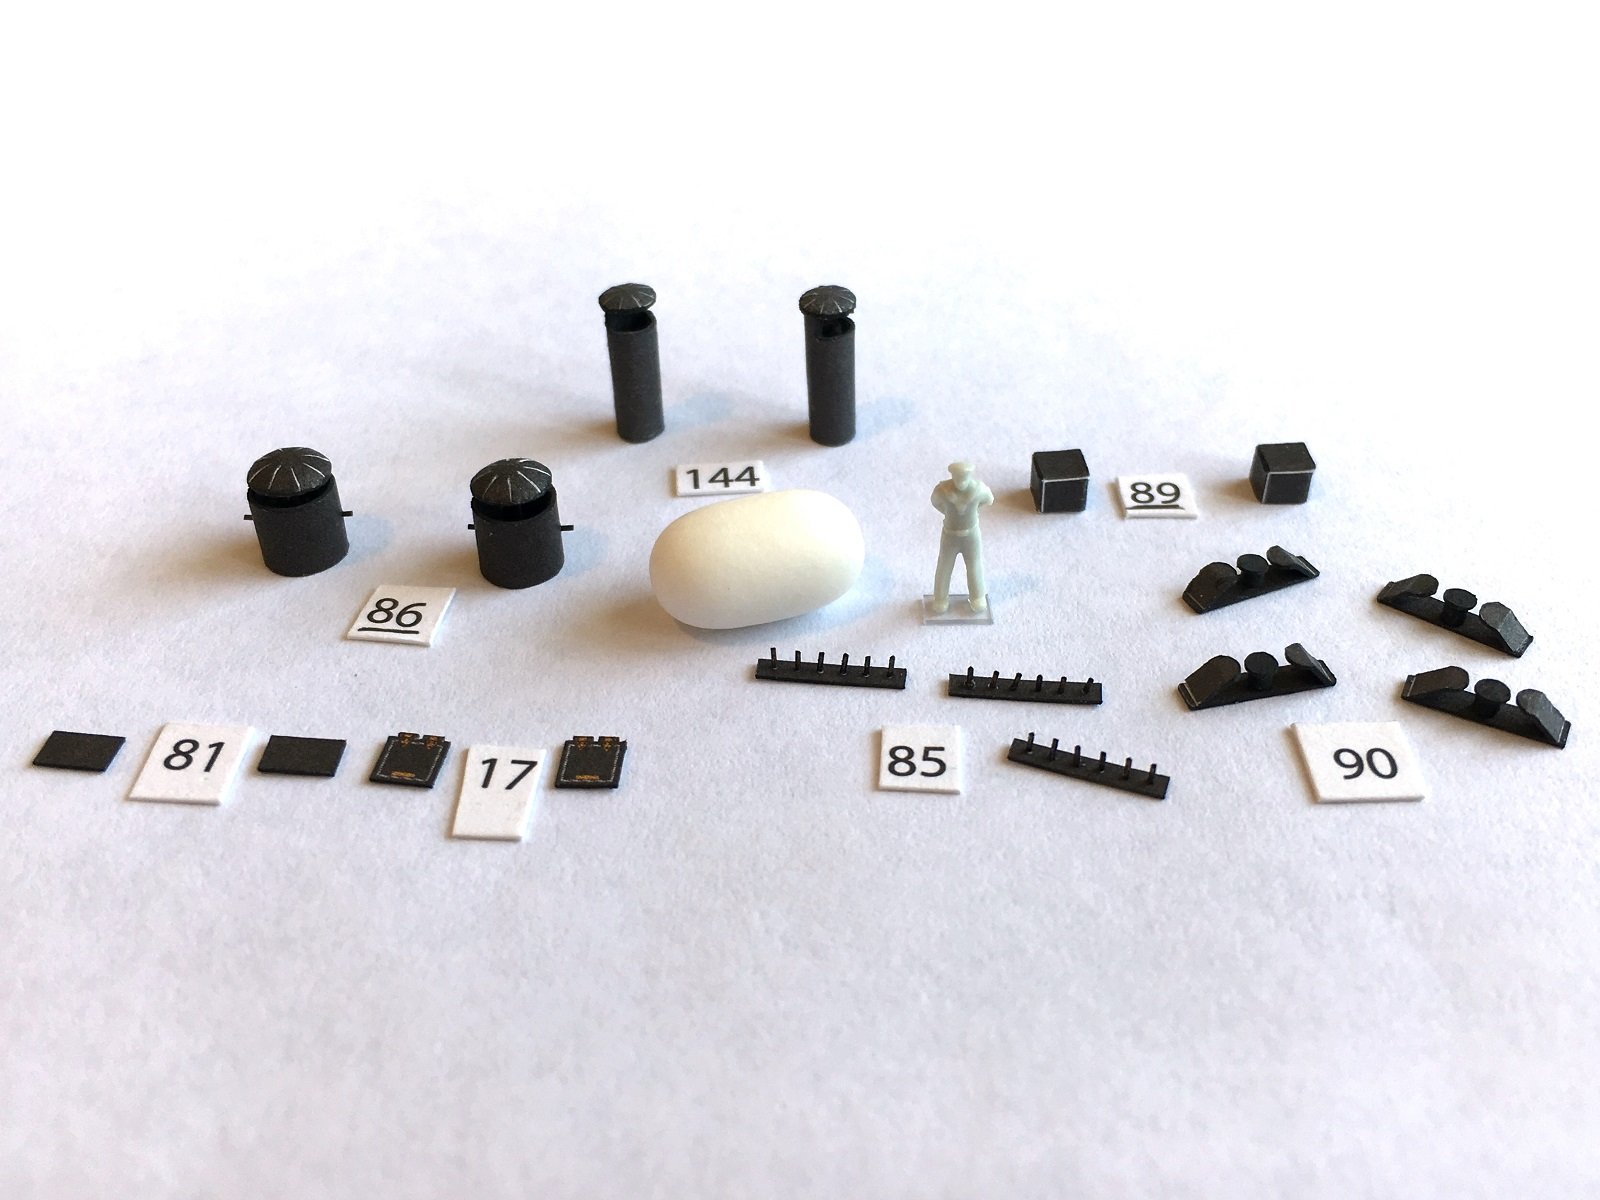
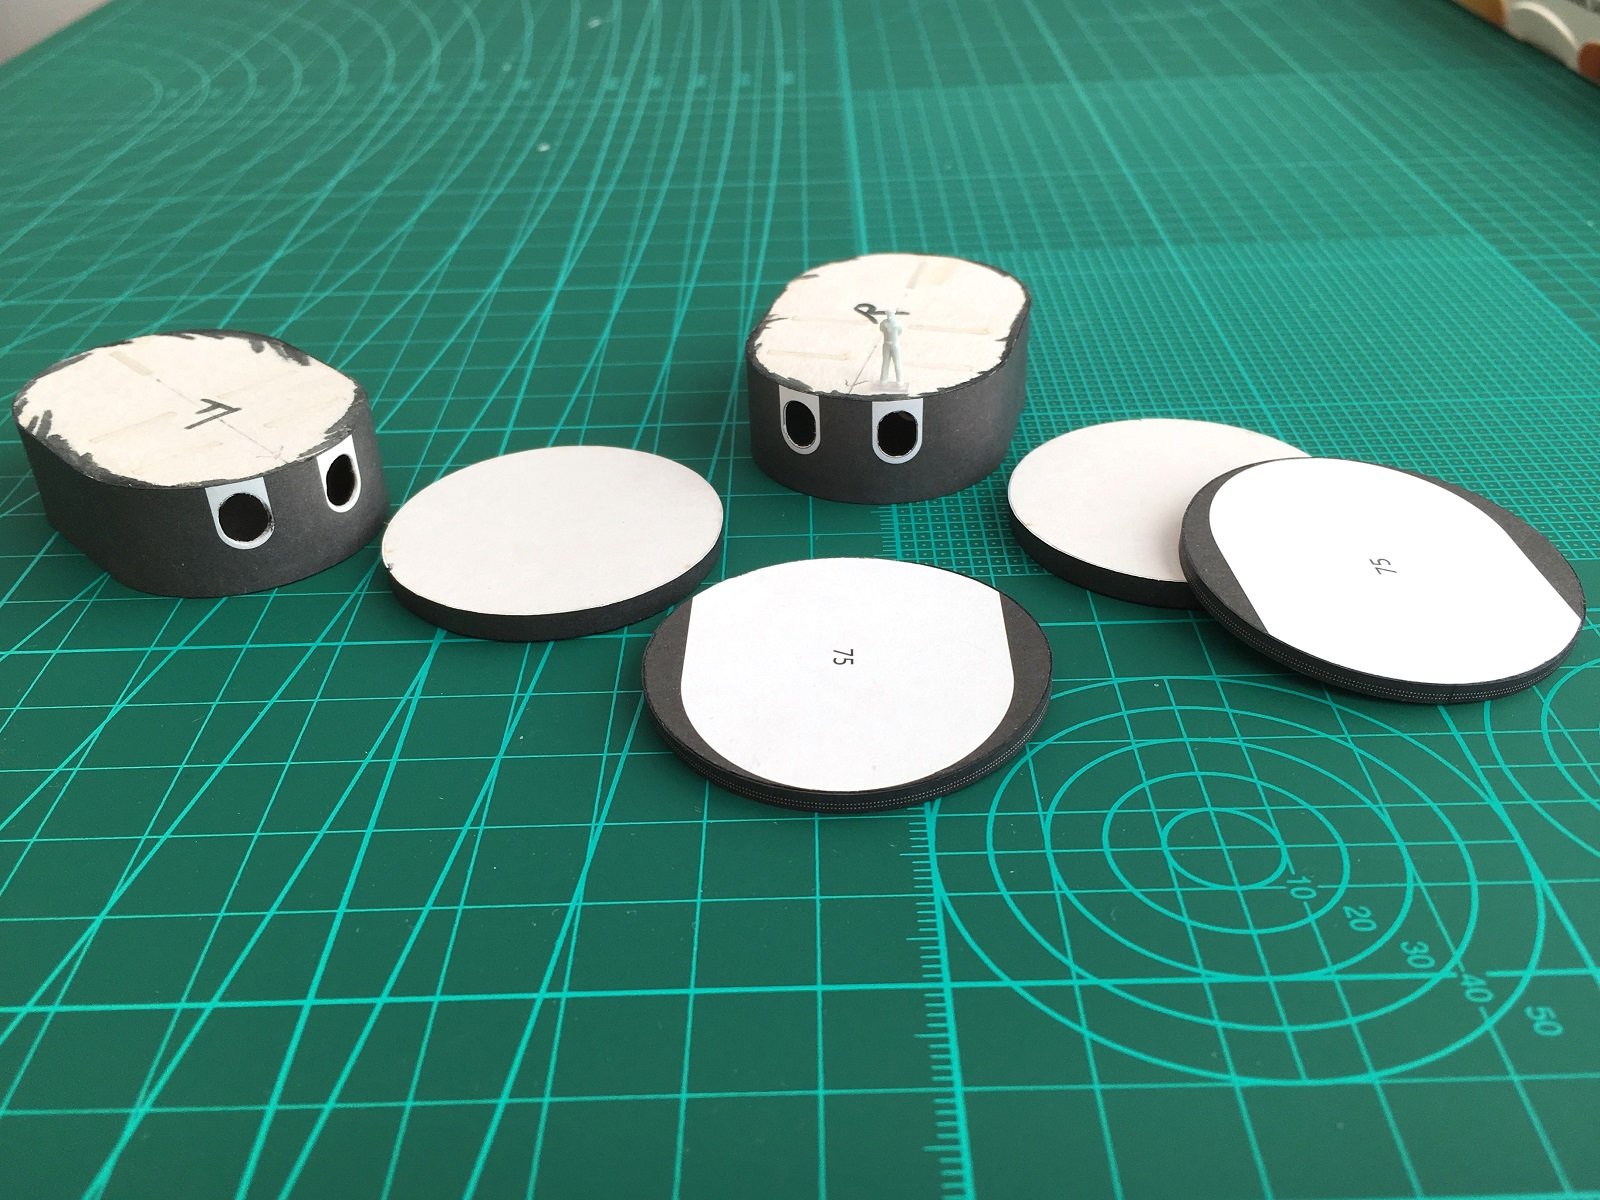
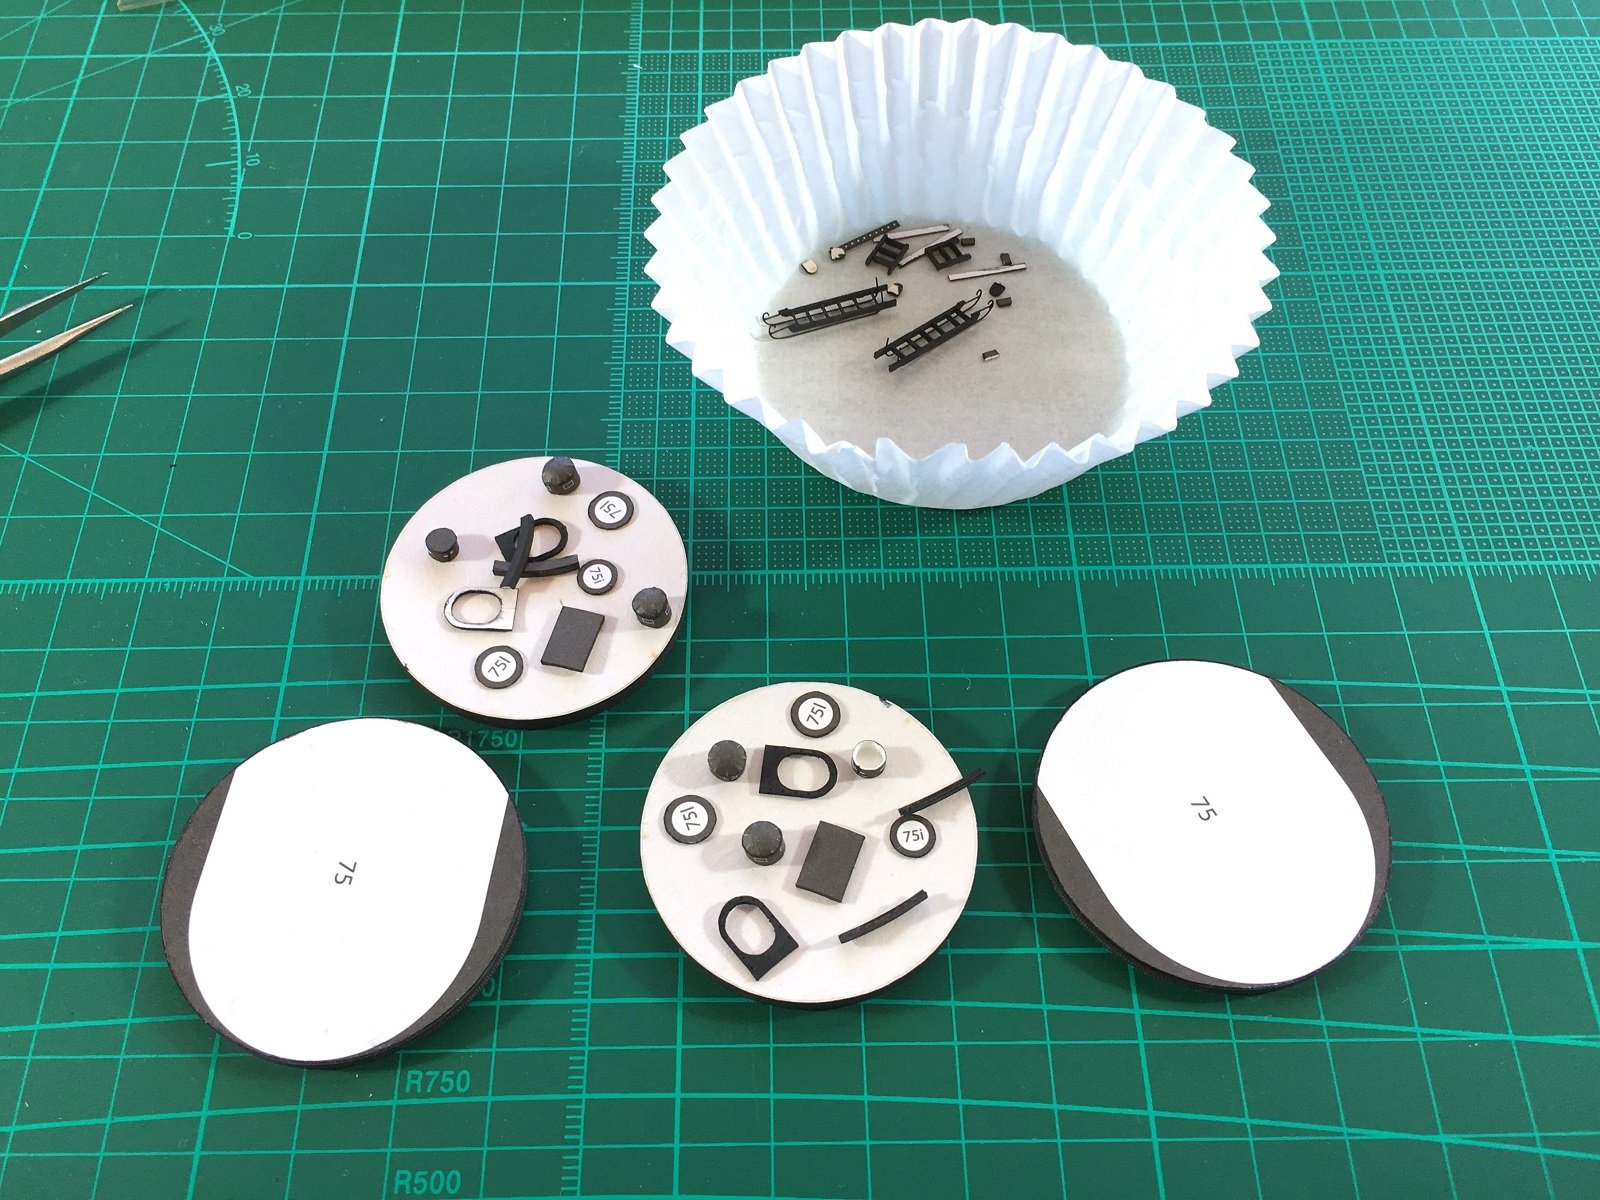
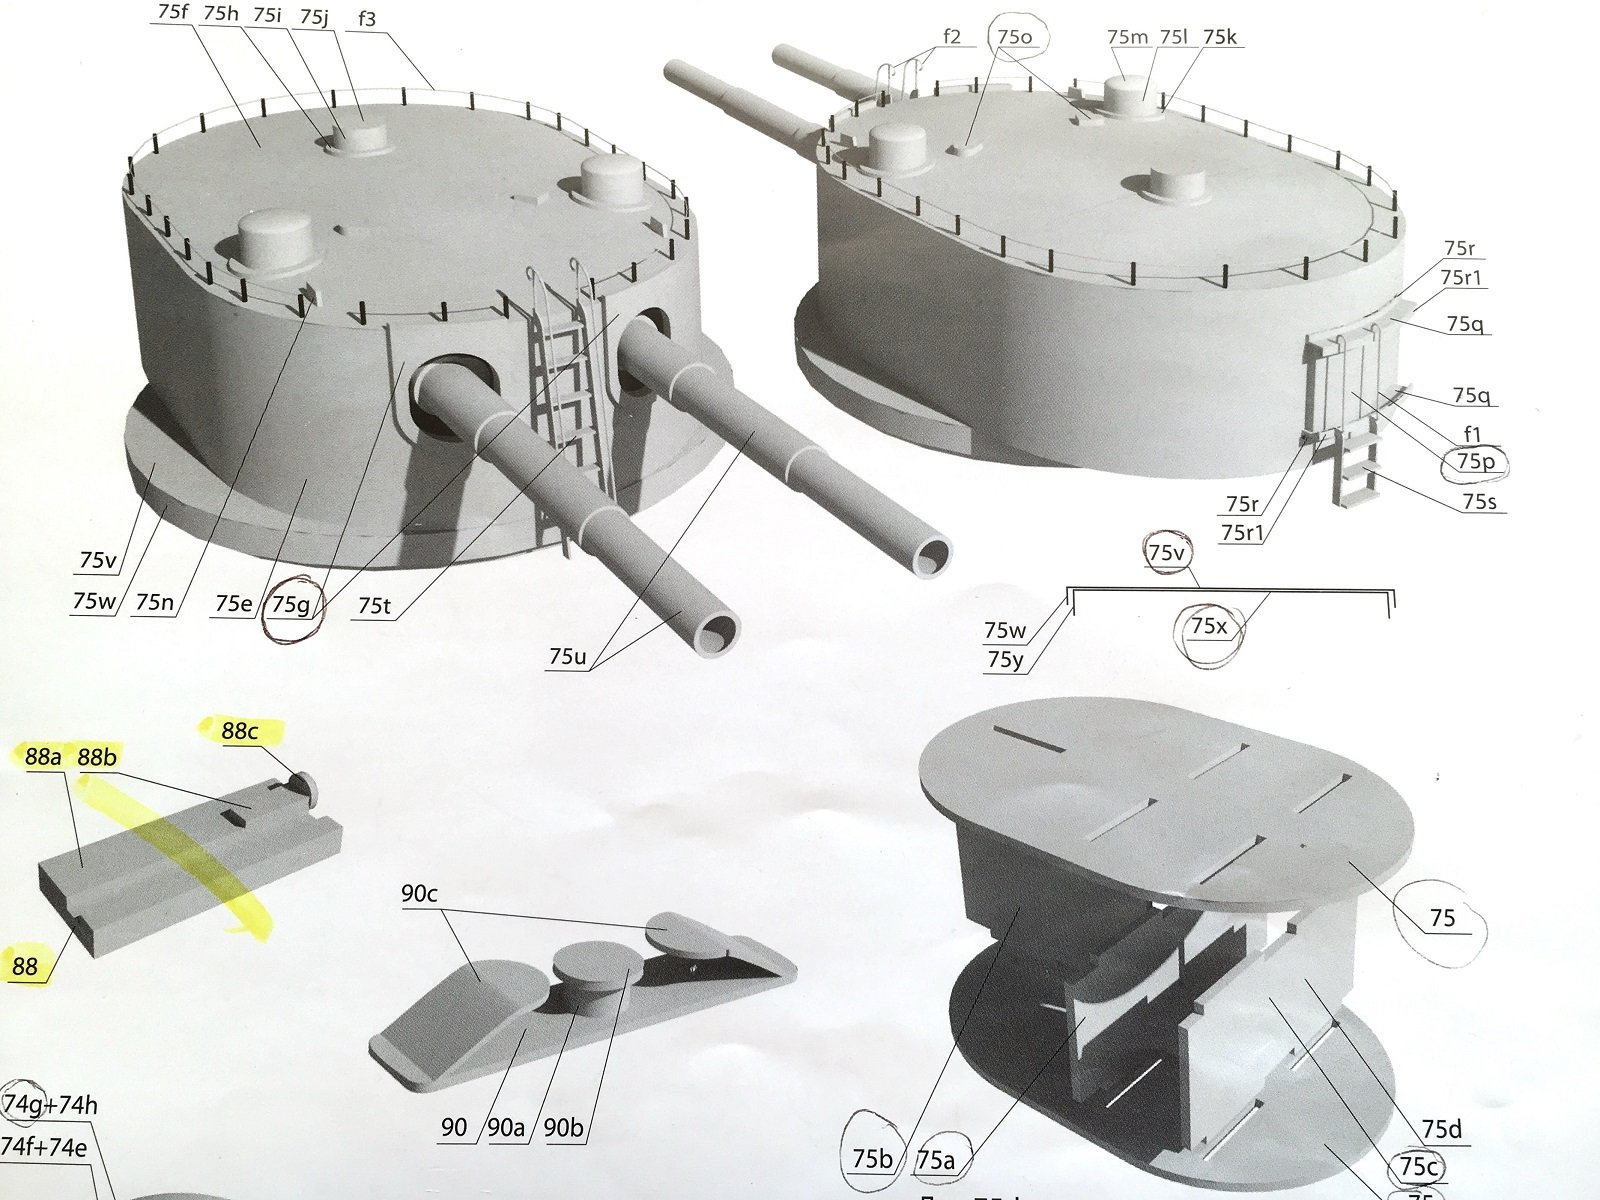
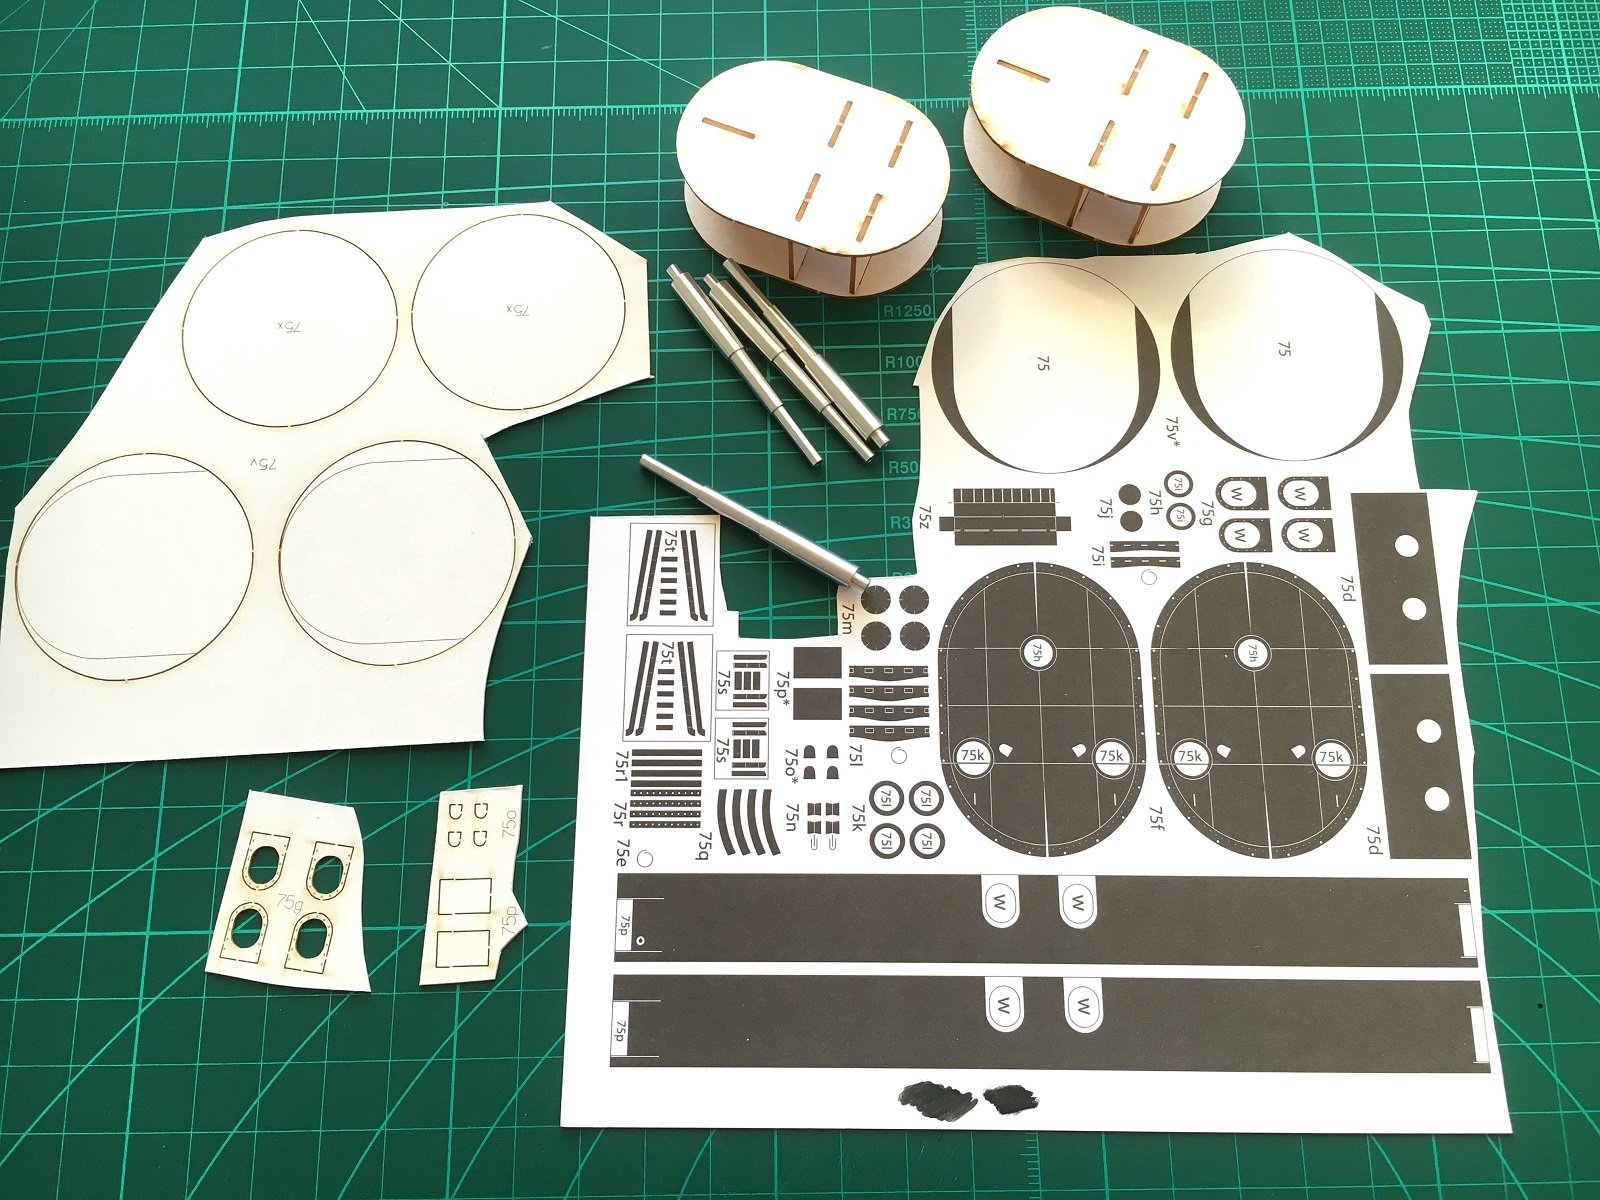
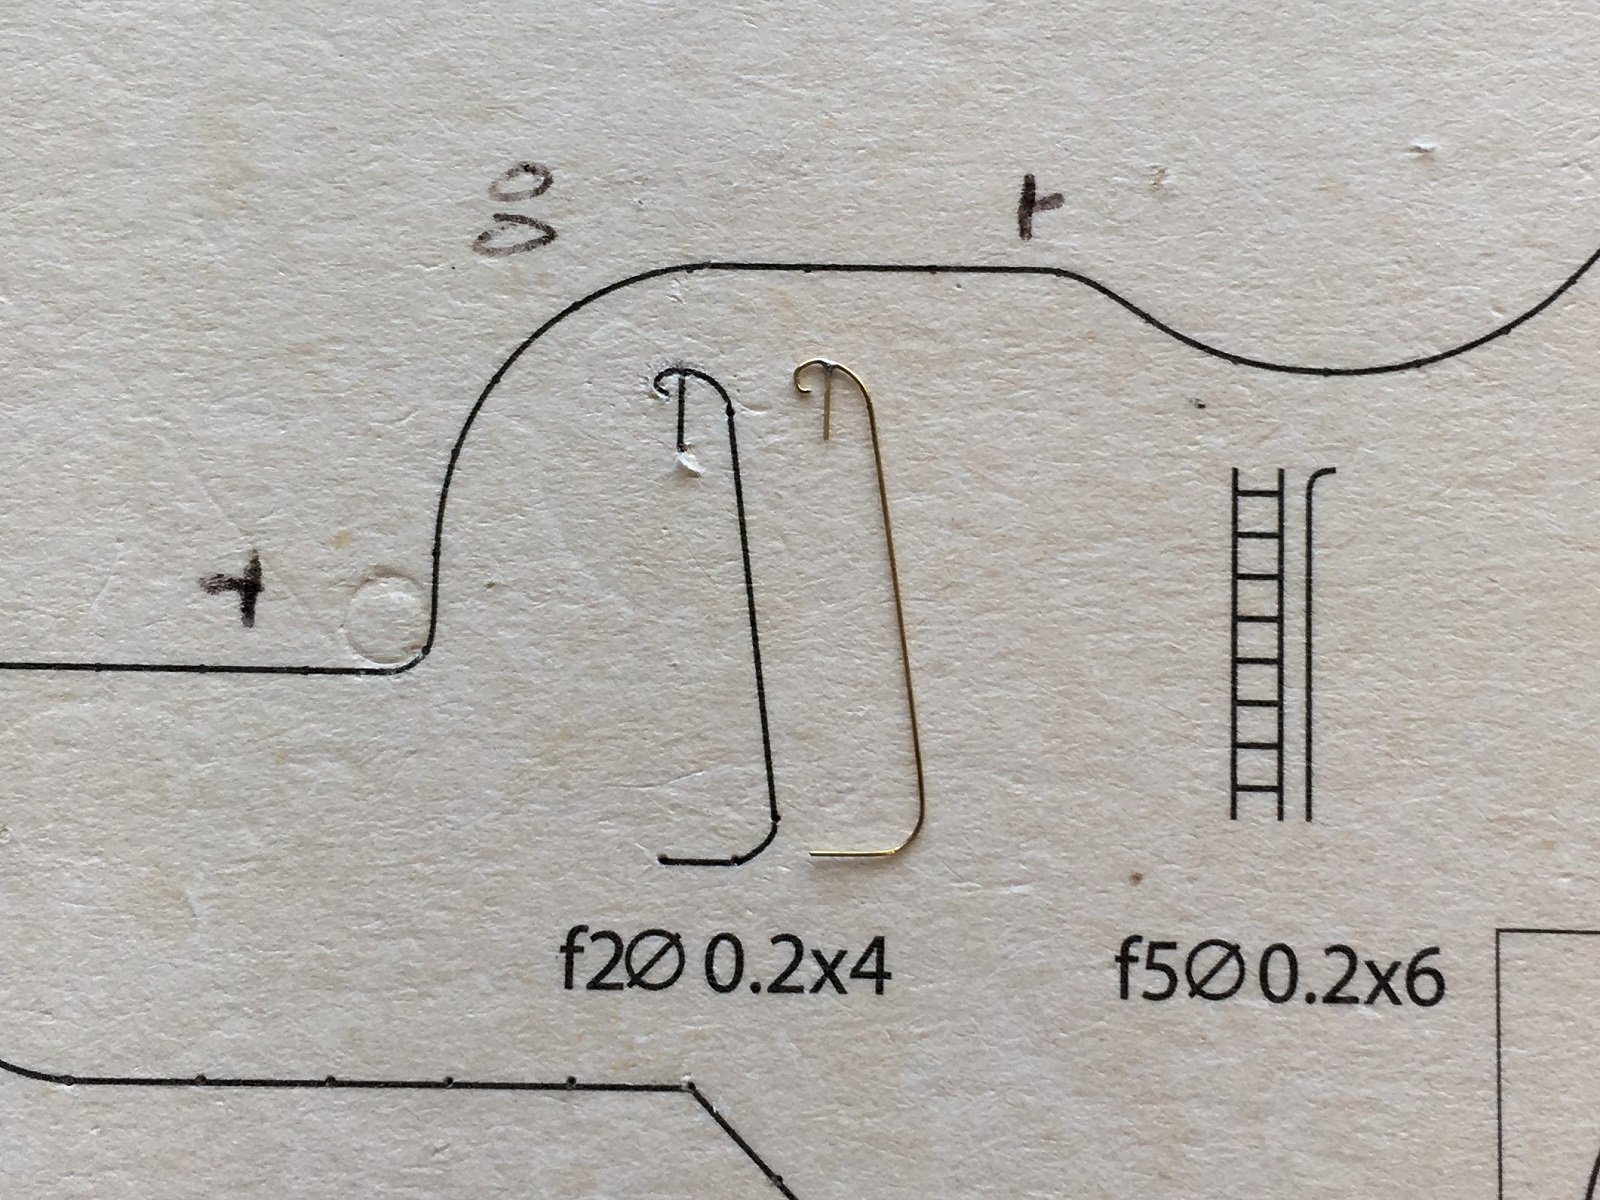
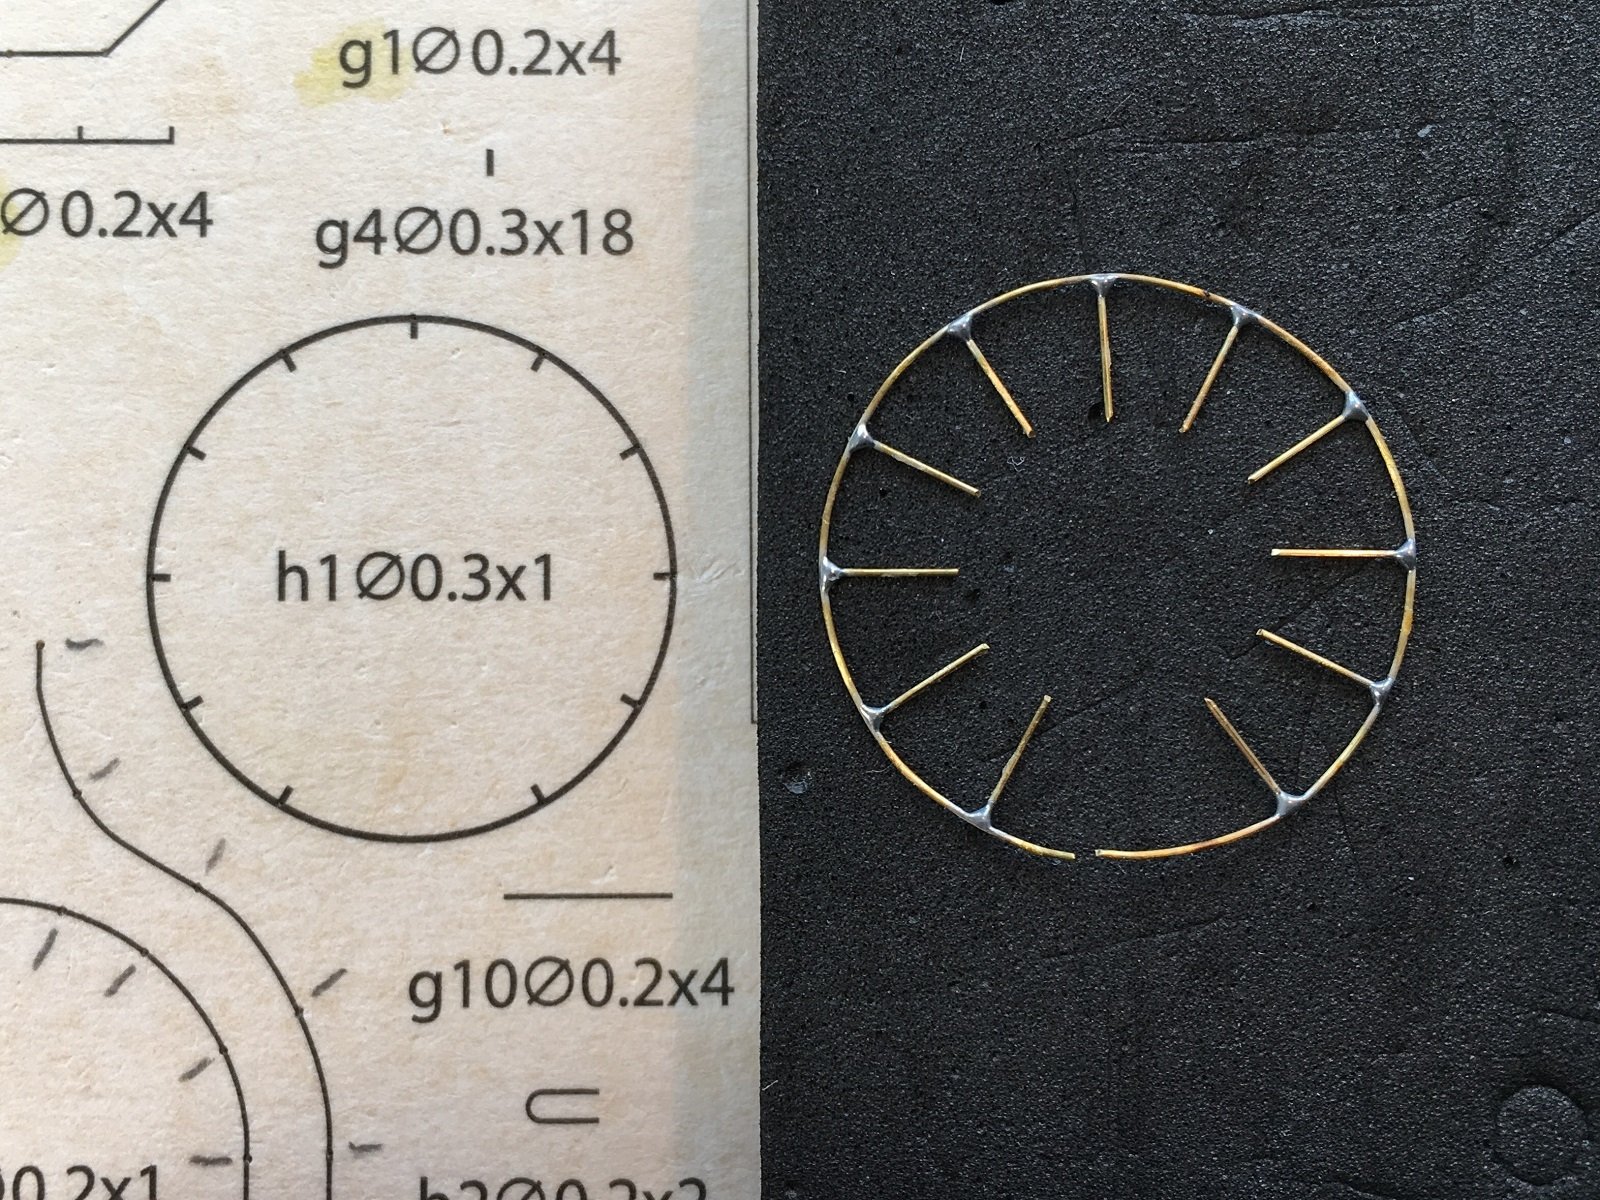
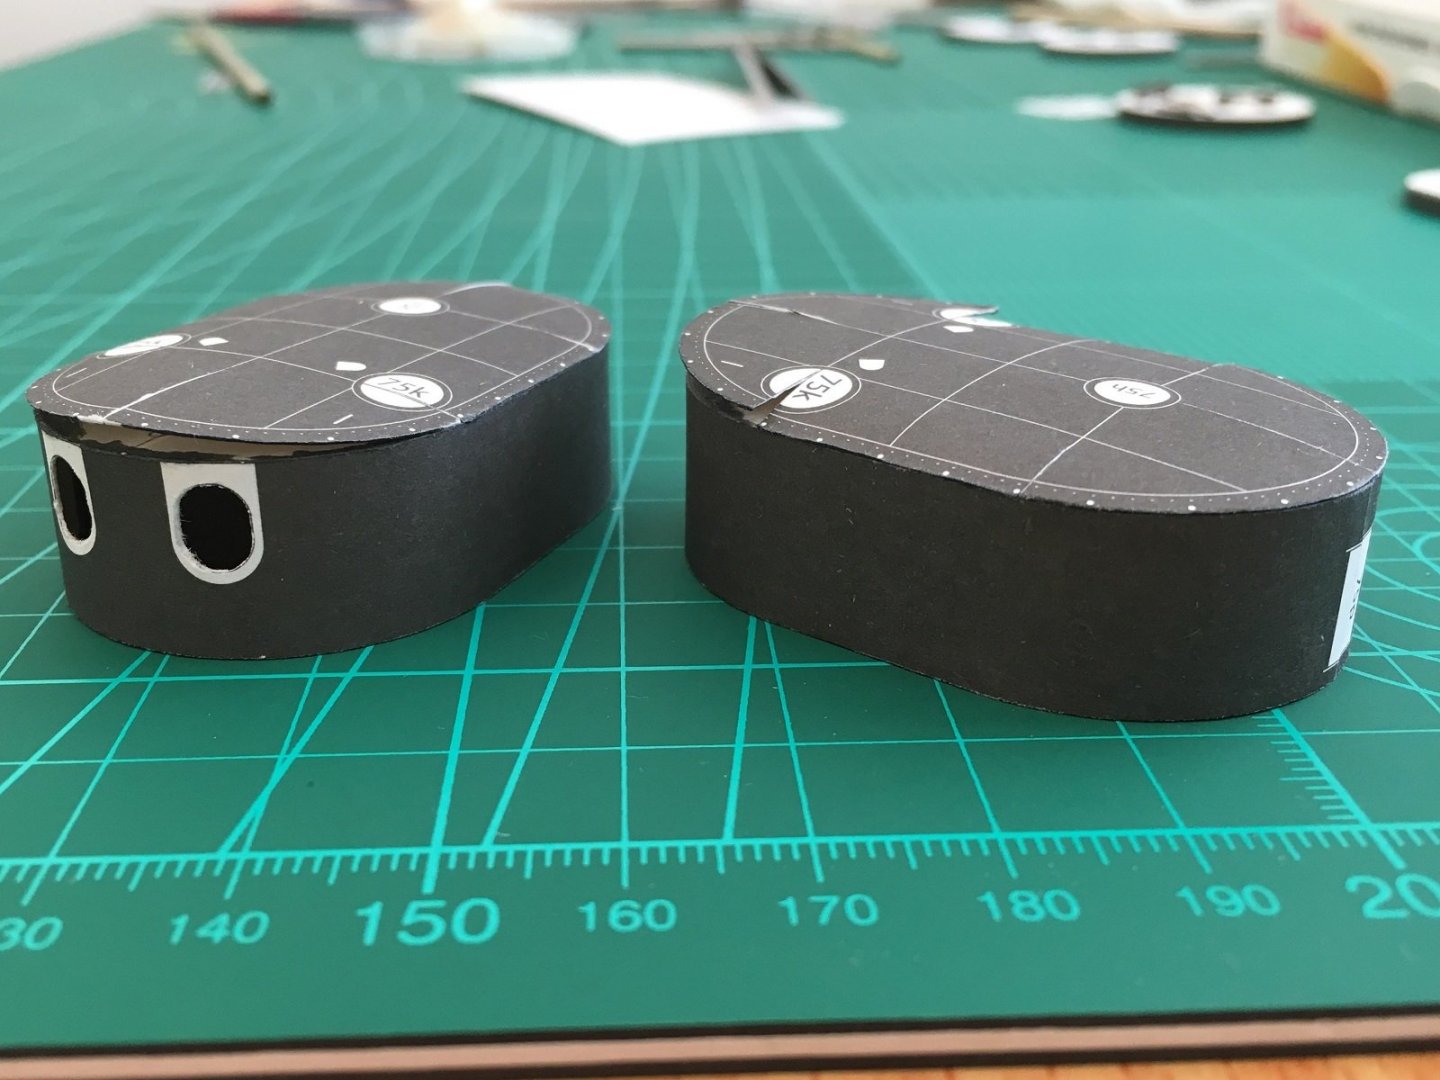
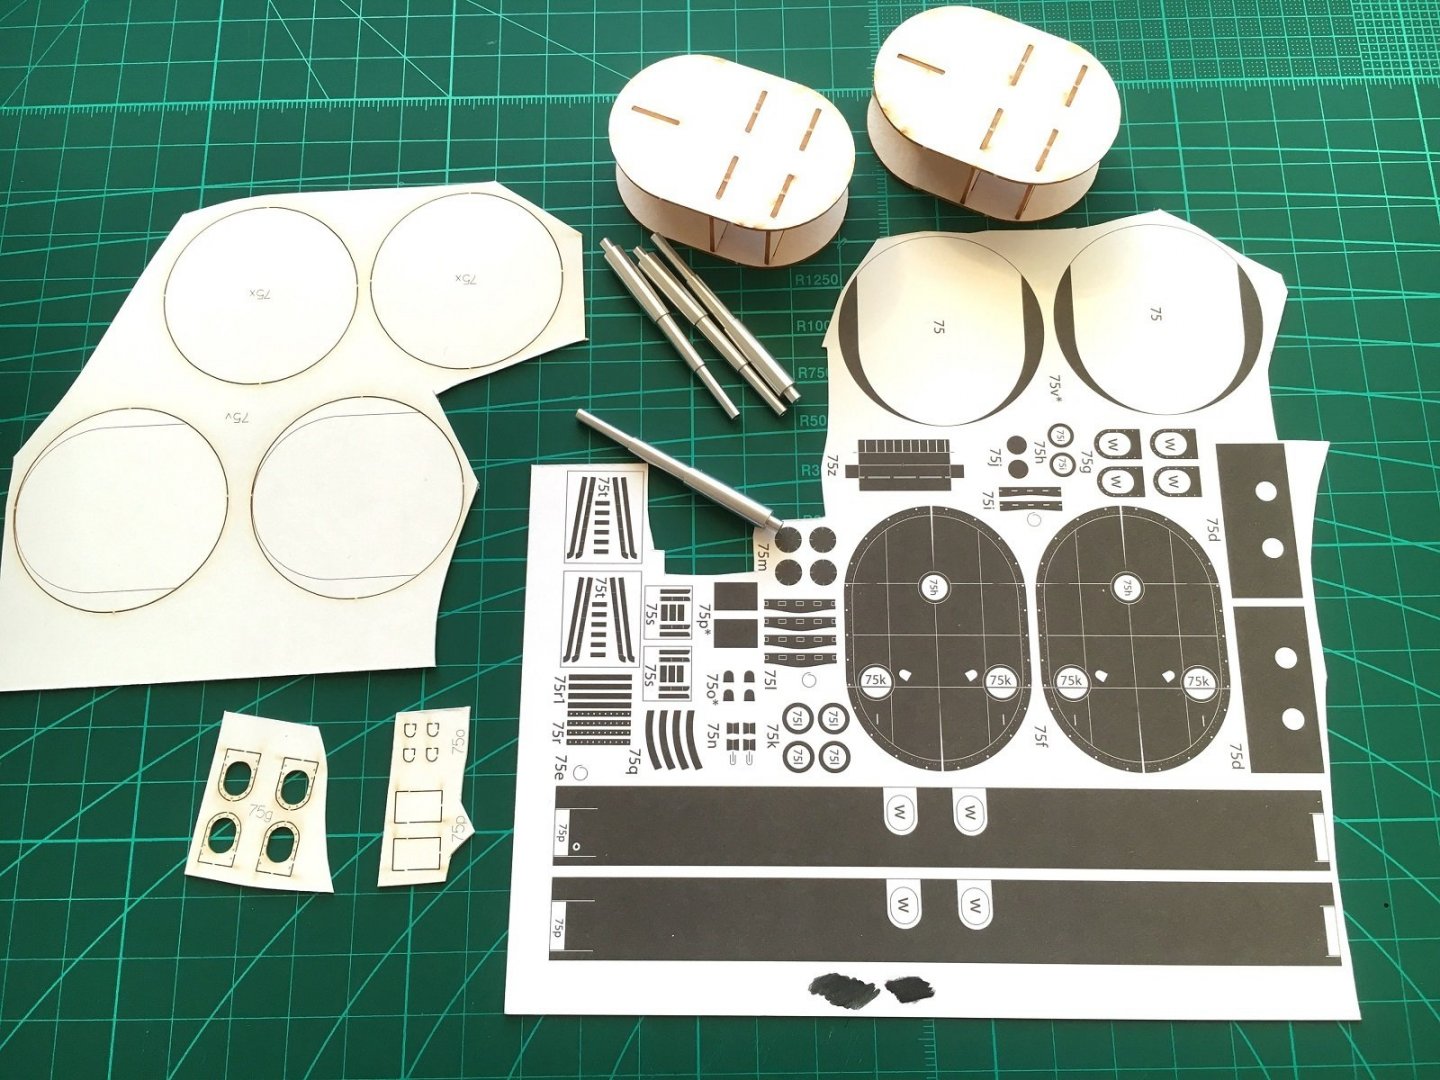
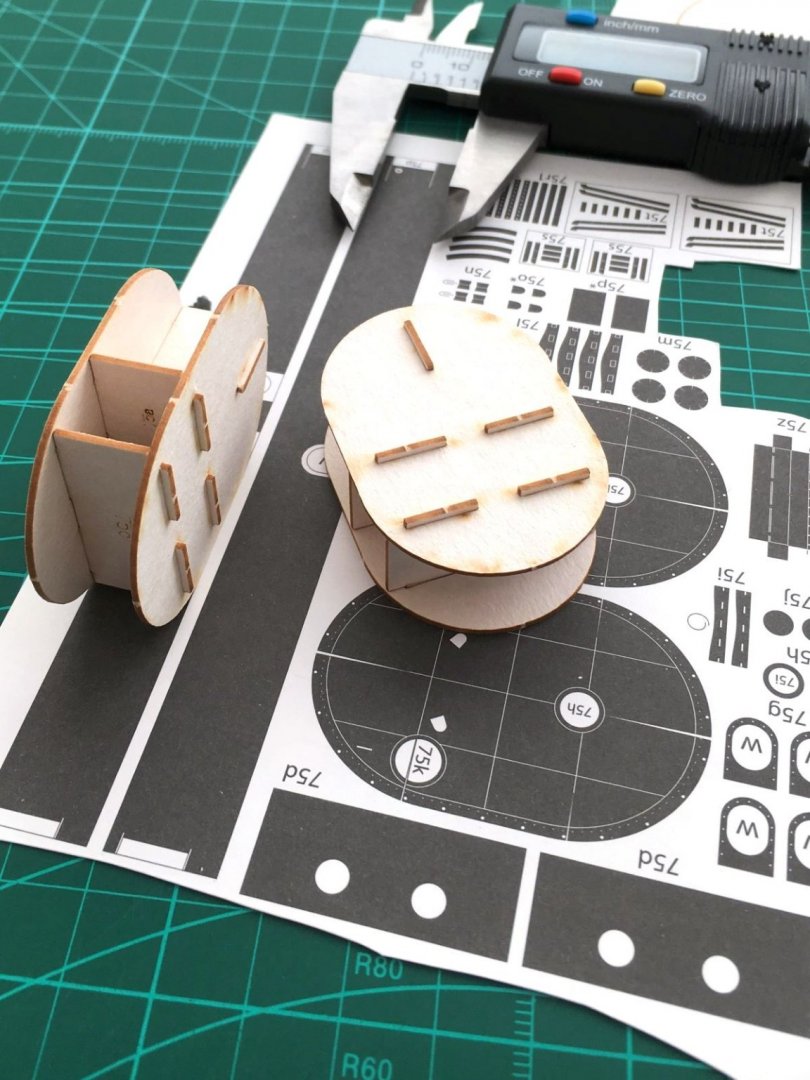
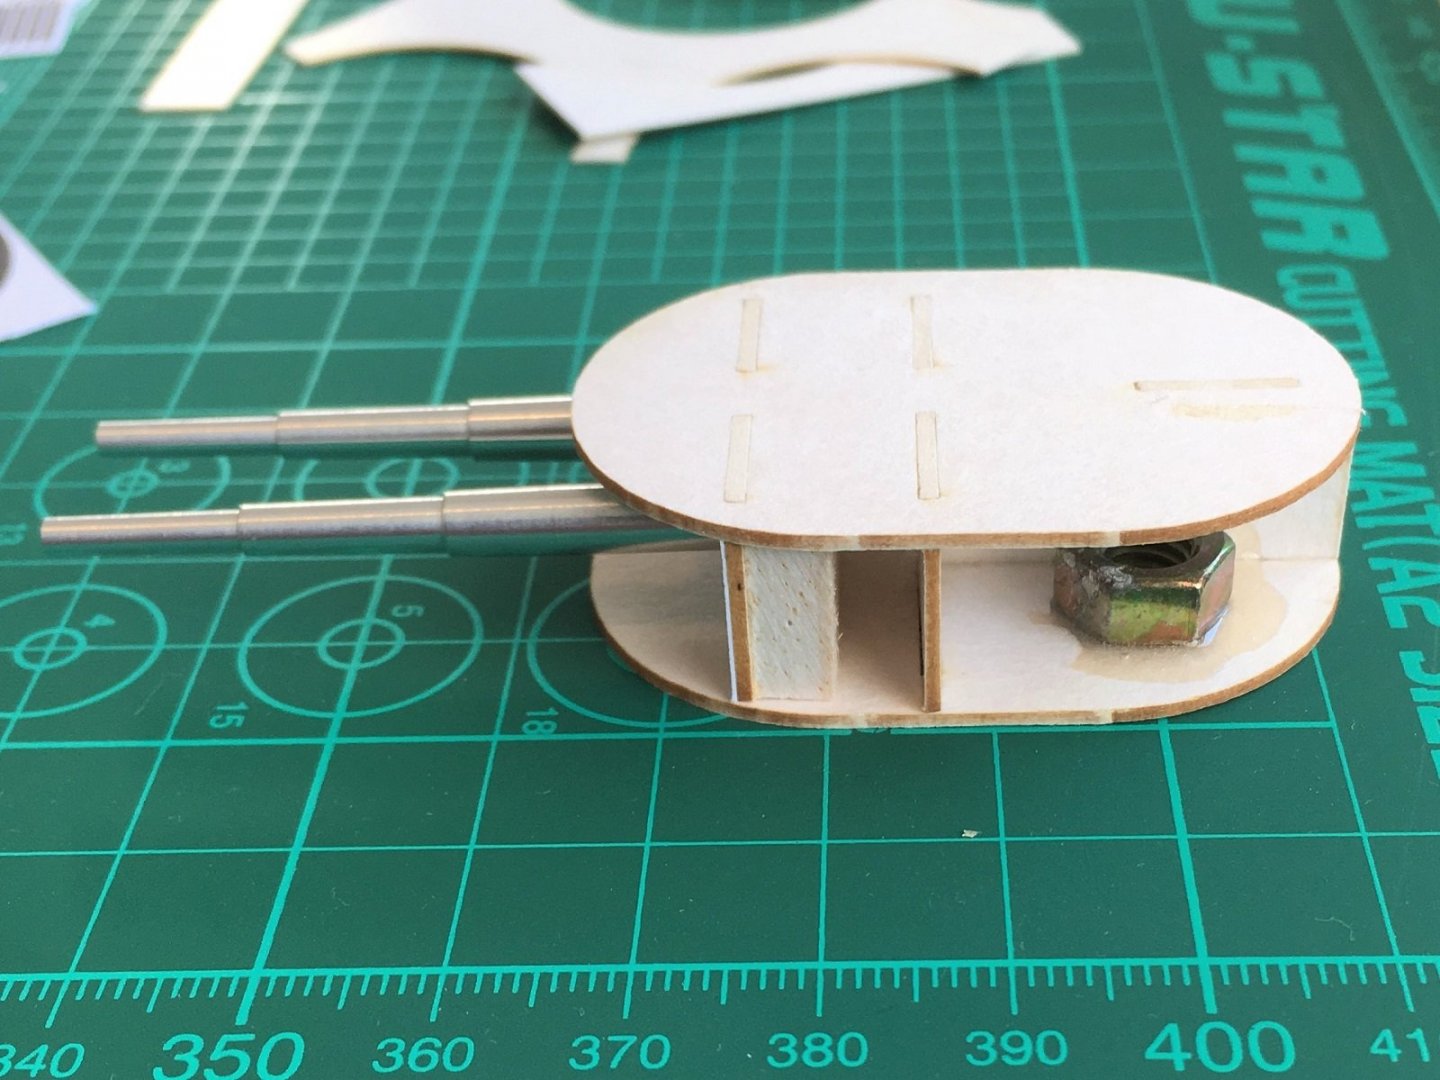
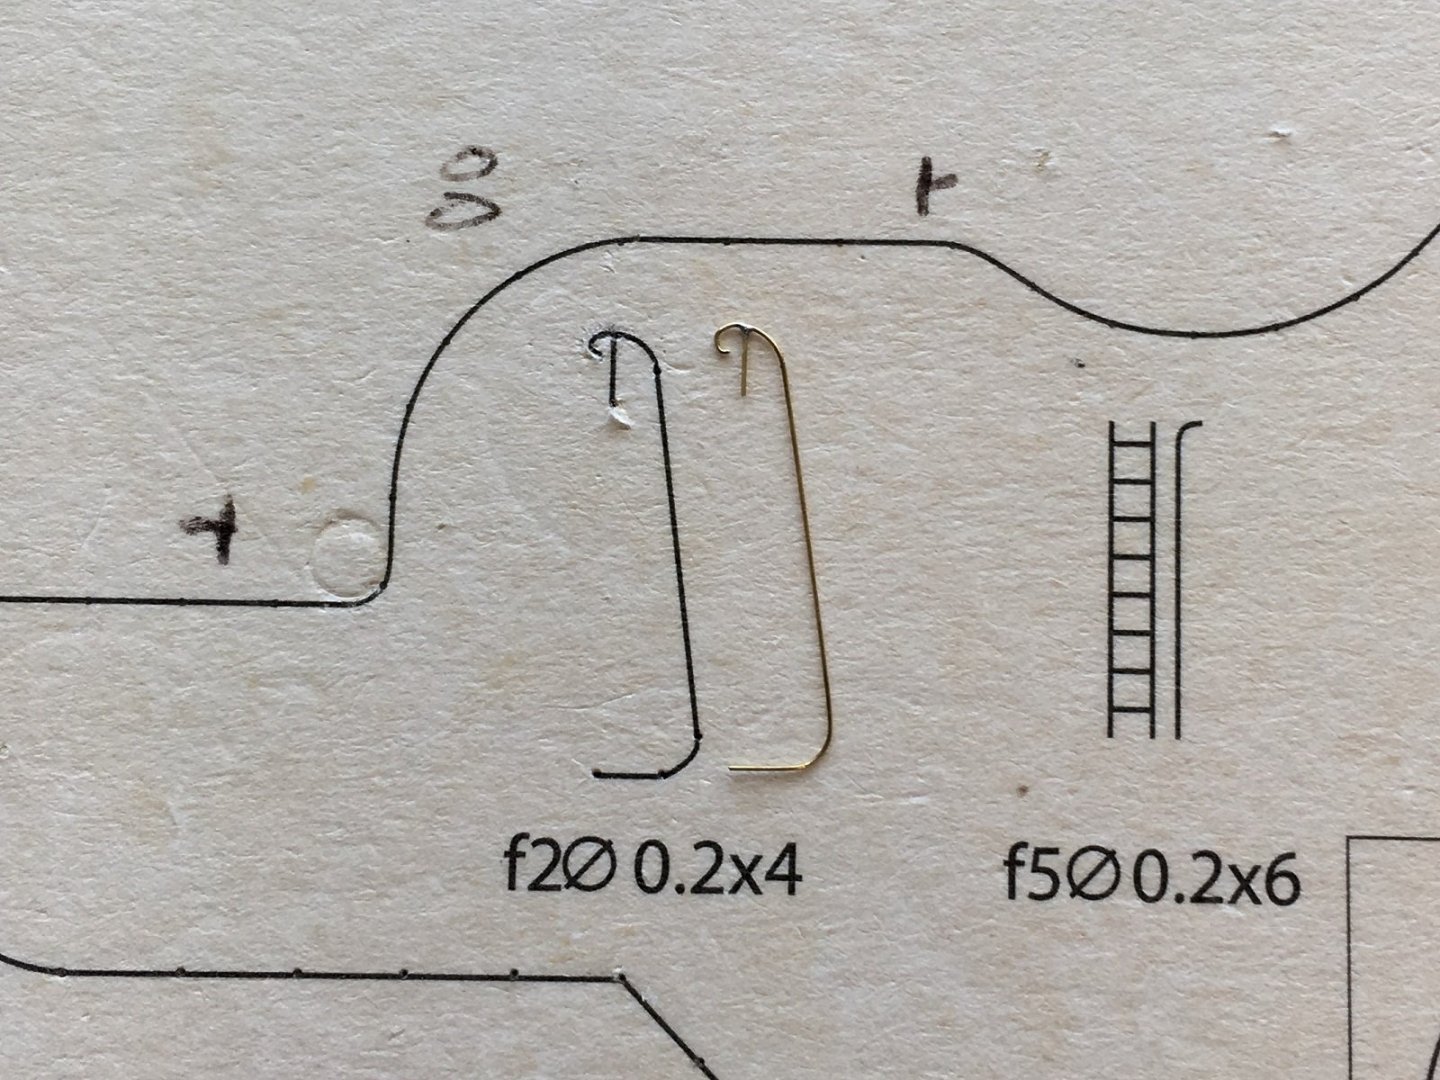
Hi, On to the 12” gun turrets next. There is laser cut forms for the main structure and I also have aluminium barrels to replace the rolled paper part. The assembly appears straight forward except for the top skin as this is raised/curved. When I did the 6” turrets I was caught out with the forms being the wrong height. A check of the 12” forms and skins show the same issue where either the forms are too tall or the side skin too short. The paper template is the same size as the laser cut forms. This was easily overcome by trimming 1mm off the vertical height of the forms reducing the overall height as can be seen with the vertical locating tabs now extending past the top forms; without modification the tabs would be flush with the top surface. Since the barrels are aluminium and being a fair bit heavier than the kit supplied paper parts I beefed up behind the laser cut form with some balsa to support the full length of the barrel mounting tang. A 2.5mm hole gives the barrels a tight fit and I will glue them in using epoxy Although the turrets sat flat with the weight of the aluminium barrels hanging out front, they were close to the tipping point so a small nut epoxied in the rear of the turret balanced them out and are now stable. The 0.2mm handrails for the turret front ladders were next. This is the 1st of the required four. After seeing how they fit to the ladders I remade them all again with a longer vertical stanchion for better gluing area. The front and rear ladders ready for colouring. The shorter rear ladders have a pair of 0.2 mm wire hangers but I’ll make then once the ladders are fitted. Next up will be skinning the turret forms and making the turret rings. Cheers Slog


- 244 replies
-
- 6
-
-
-
- borodino
- dom bumagi
- (and 1 more)
-
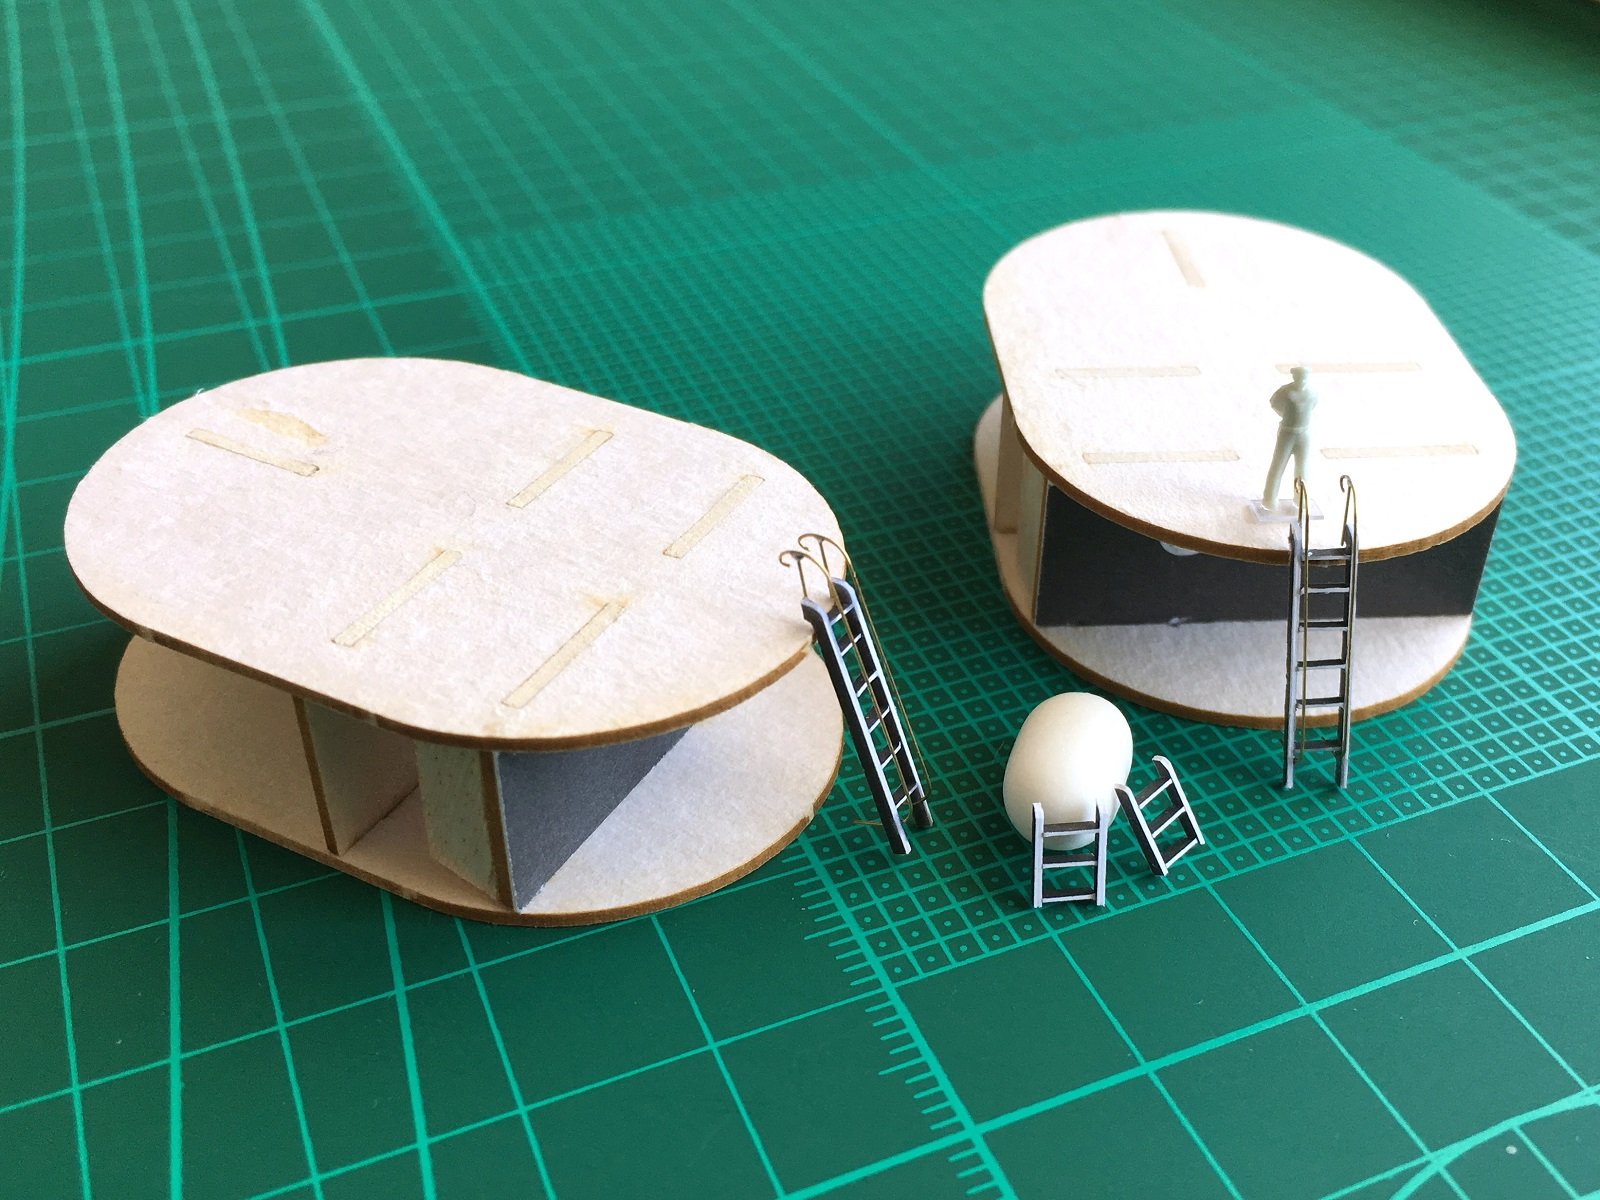
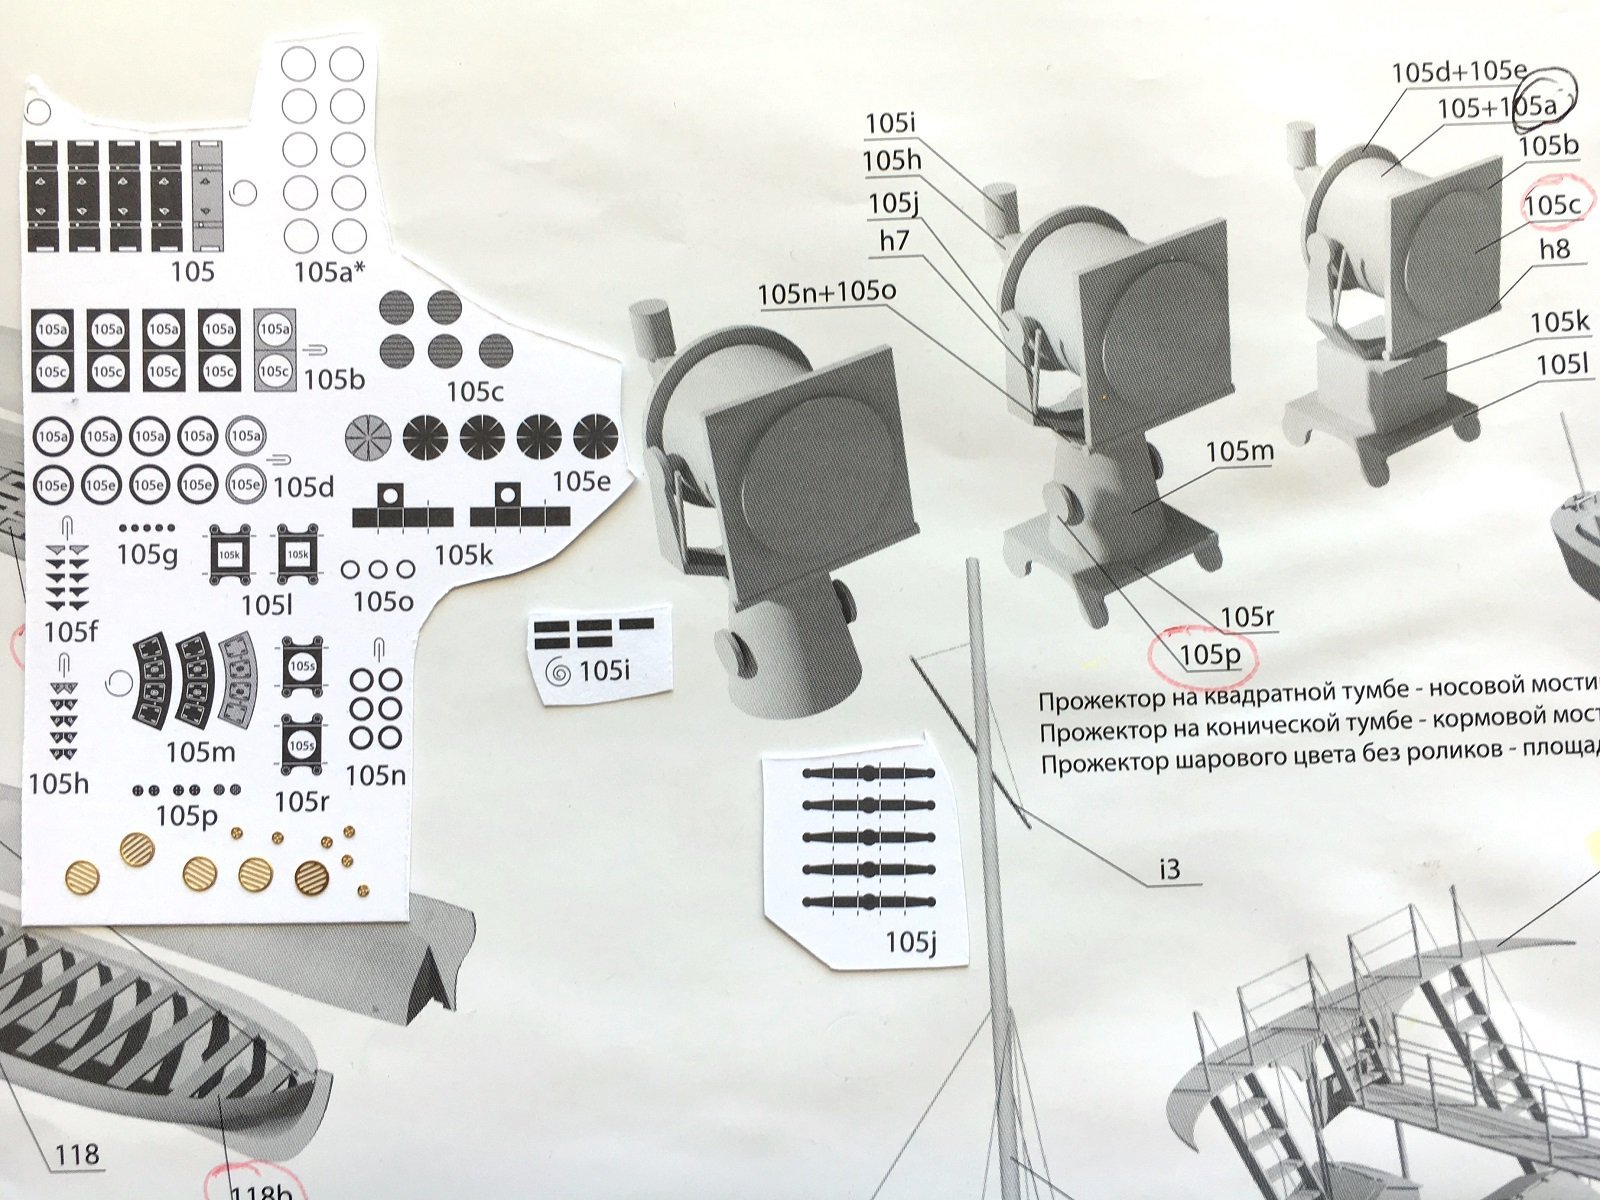
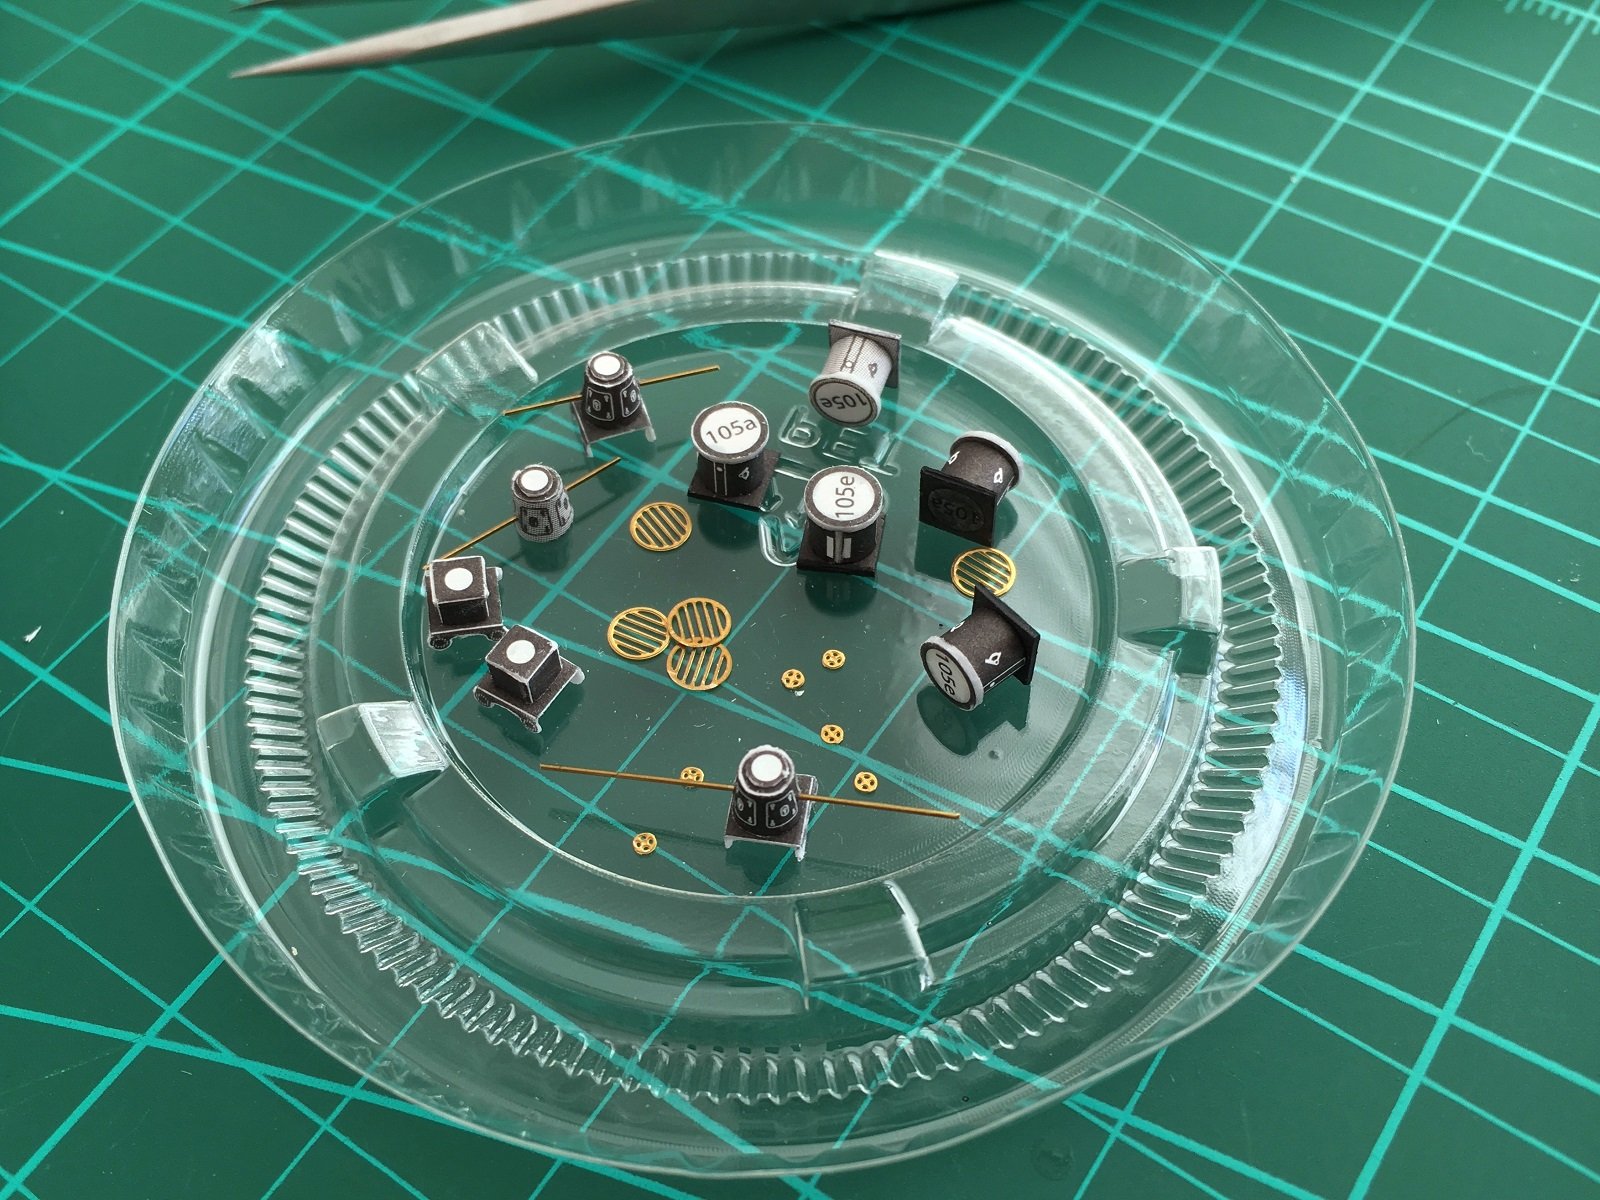
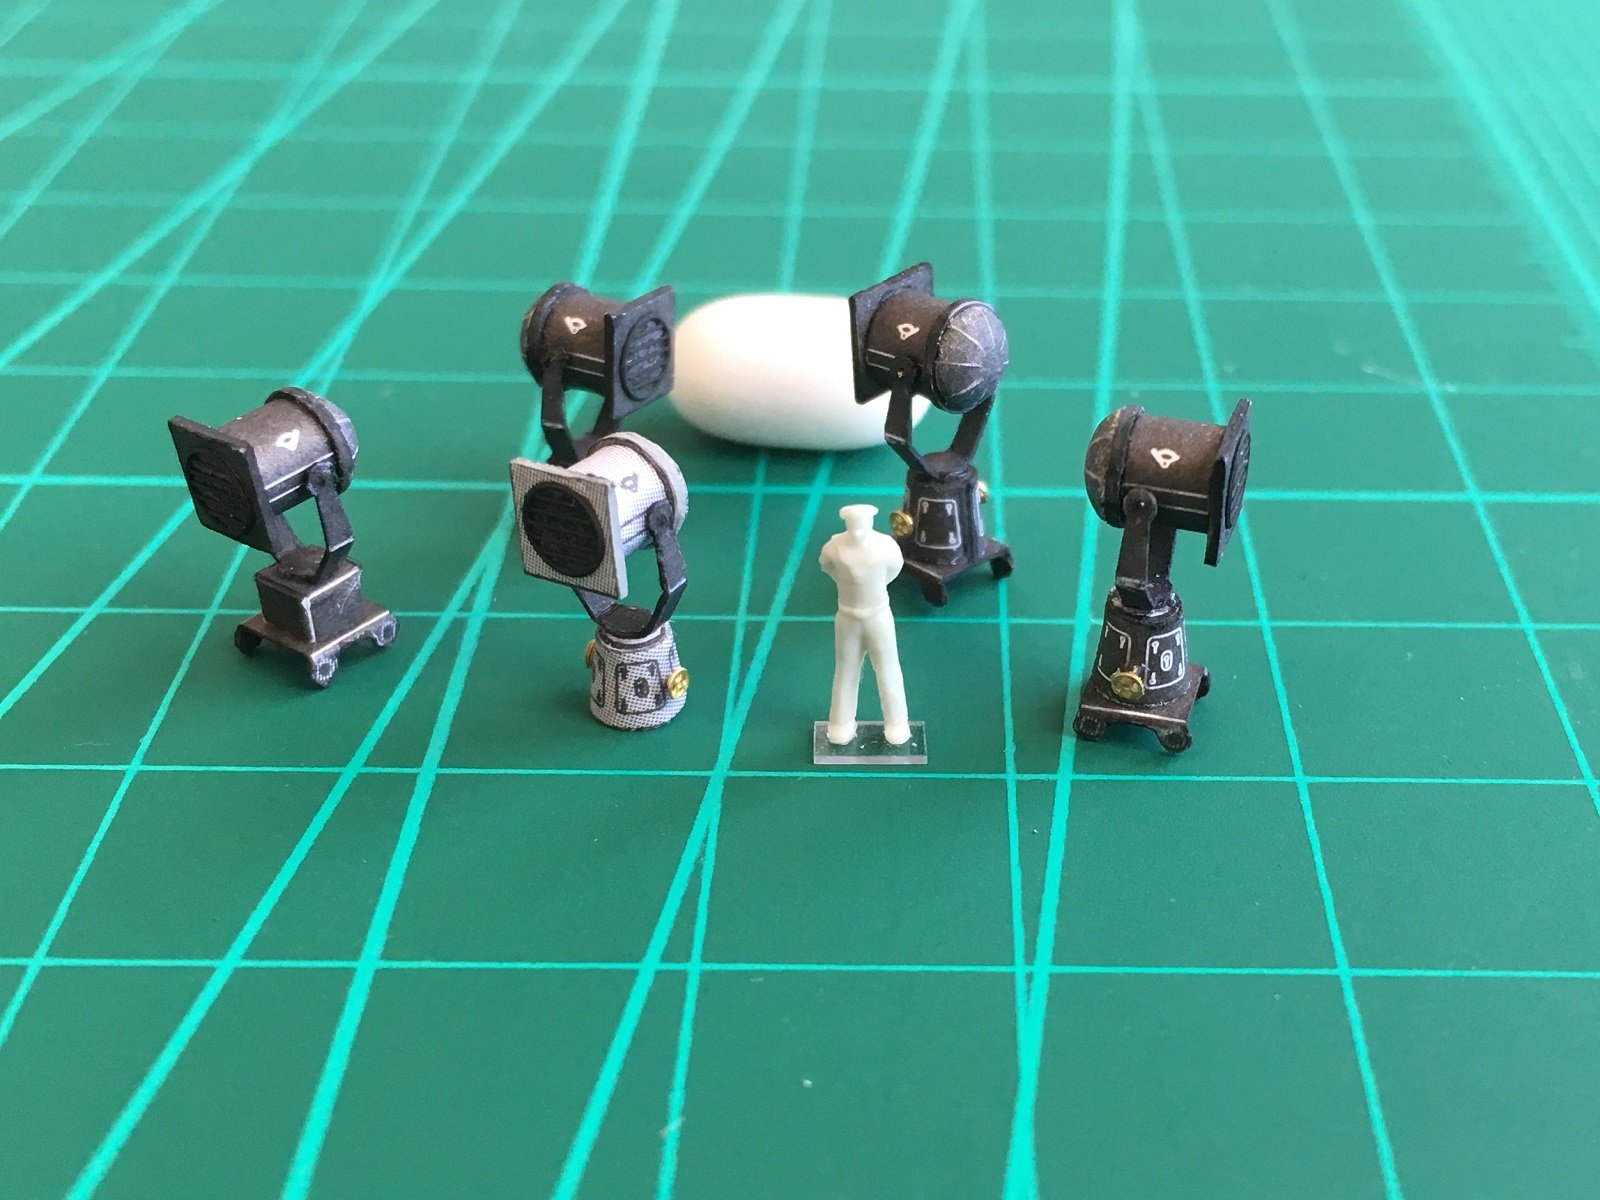
Hi all, I sorted and separated all the parts for the 8 different types of ships launches and boats; there are 2 for each type and after seeing all the work involved had a change of heart. So I thought I would do the search lights instead. There are 5 of these in 3 different styles and 2 colours; black and grey. The photo-etch includes protective screens and hand wheels. The major assemblies almost ready for fit up and prior to water colour edge colouring and touch-up. The diagram doesn’t show brass rod but put it in to have something to attach the hand wheels to, which I’ll just leave brass. I was really pleased how the sub-assemblies turned out in the photo above but when it came to put them all together it was a fight at every step and I noticed them deteriorating through handling so calling it a day with them. There are a few tiny bits I have left off but in the grand scheme of things won’t be missed. Cheers slog


- 244 replies
-
- 5
-
-
- borodino
- dom bumagi
- (and 1 more)
-
Fanastic cockpits Chris, so clean and precise.
-
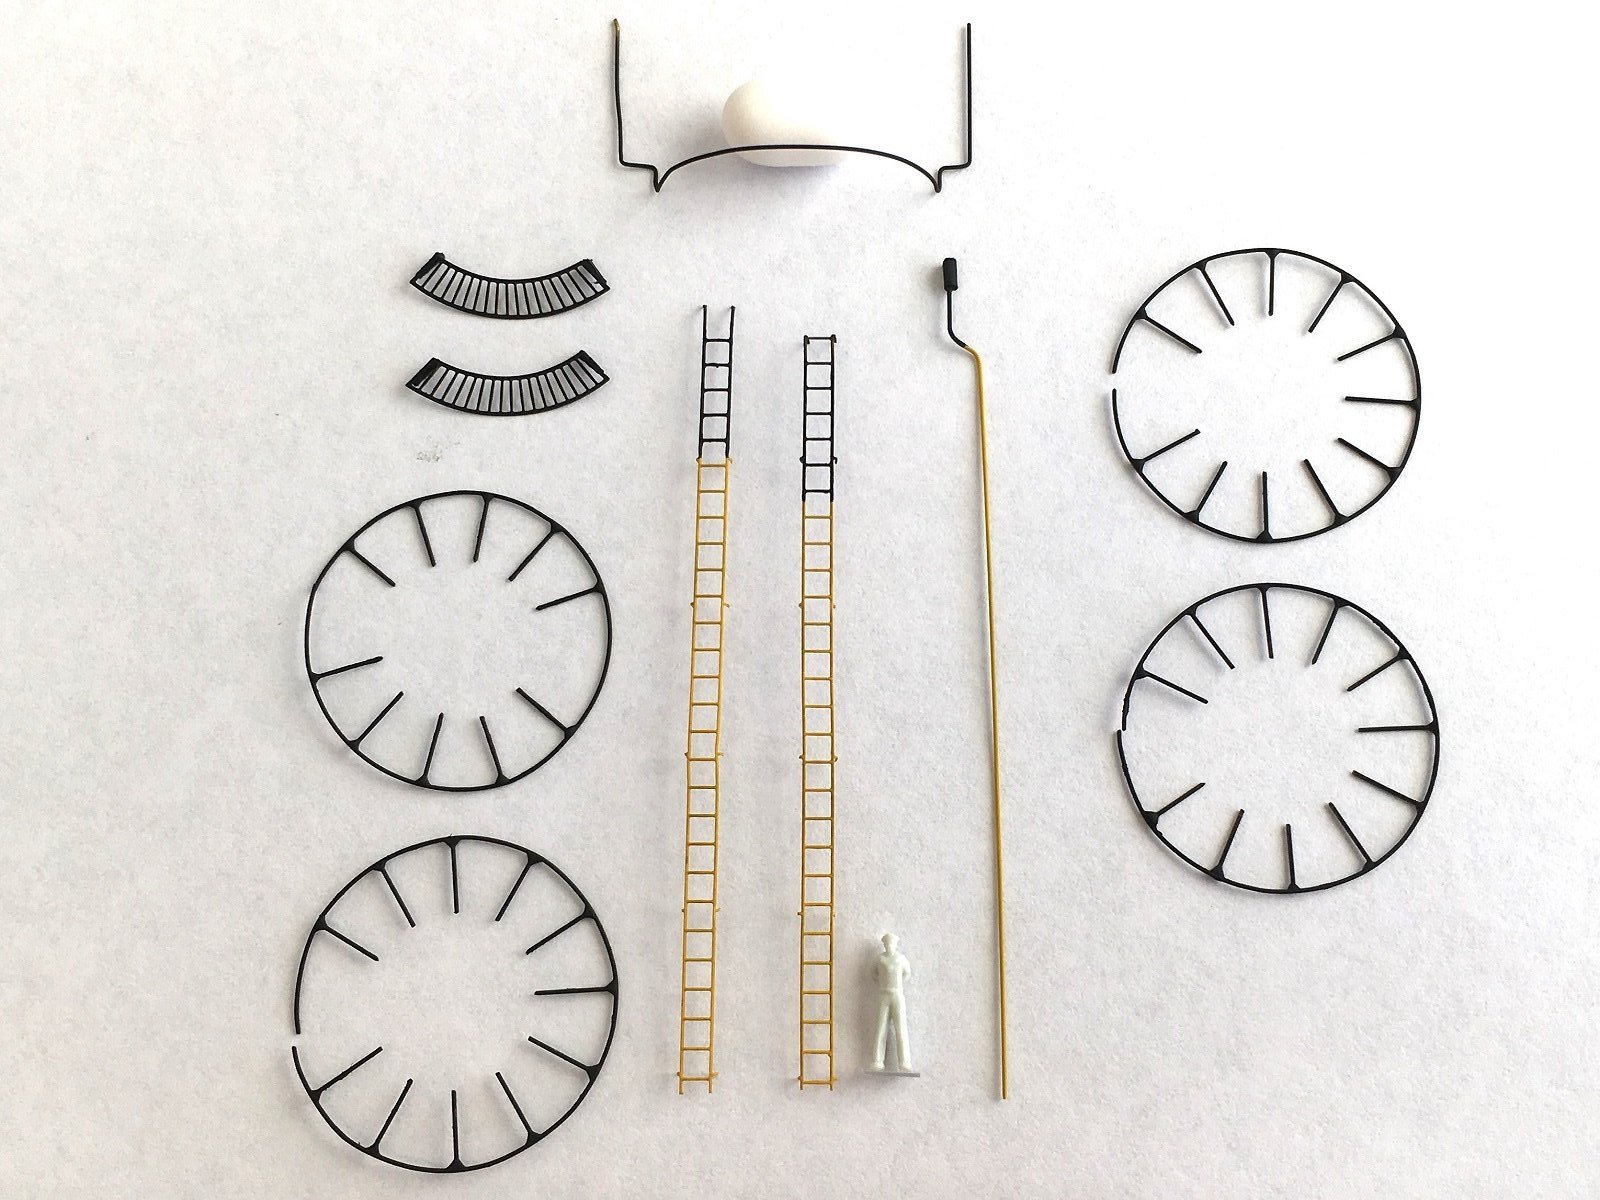
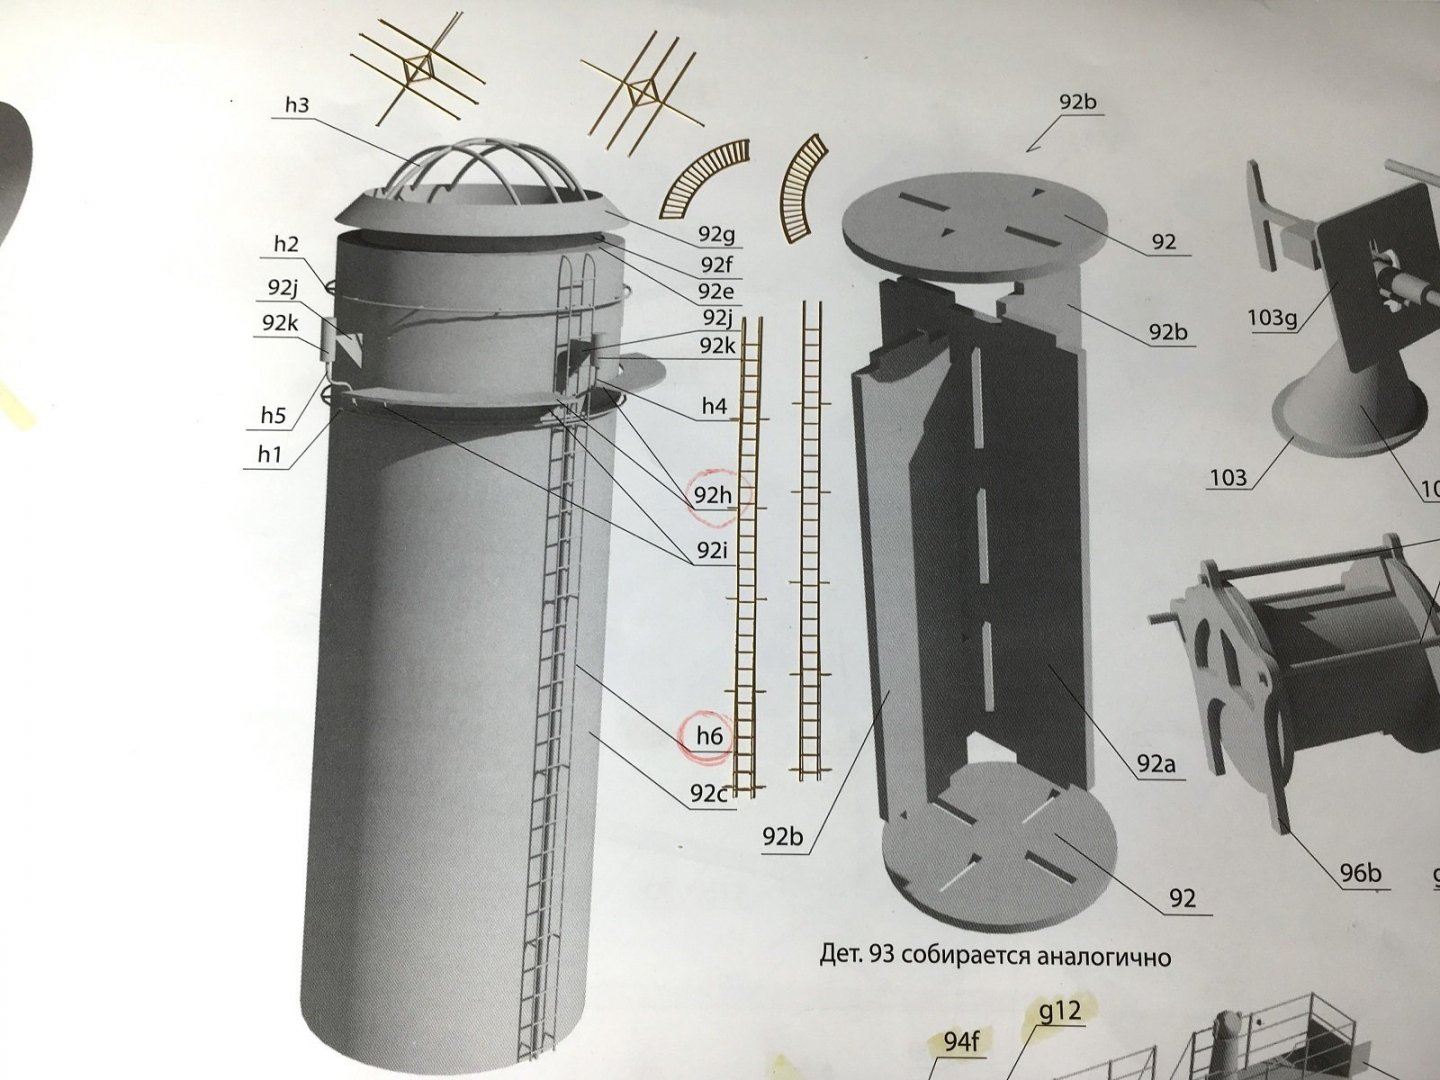
Hi all, On to the funnel details now and first up forming and soldering the hand/foot rails. To date most of the iron work is 0.2mm but these rails call for 0.3mm and what a big difference…so much easier to work with. One of 4 shown. When I came to install them I realised I still need to reduce the amount of solder as once installed the joint is quite considerable for scale. The rest of the iron work and photo etch all prepared for installation. Missing here are the top funnel guards; I spent ages trying to shape and fit the photo-etch and was getting more and more frustrated and feared damaging the funnels themselves with excessive handling so will leave them off so I can finish the funnels and keep moving forward with the build. I may revisit them but meh. The finished funnels, minus the top guards…The fore funnel is very congested with the 2 hand rails and 3 steam vents/whistles (?) and their piping as well as the ladder. The rear funnel was a lot simpler on having 2 rails and a ladder A few shots with the funnels temporary in place. Probably going start the ships launches and boats next although will mix it up with smaller components. Cheers Slog


- 244 replies
-
- 9
-
-
- borodino
- dom bumagi
- (and 1 more)
-
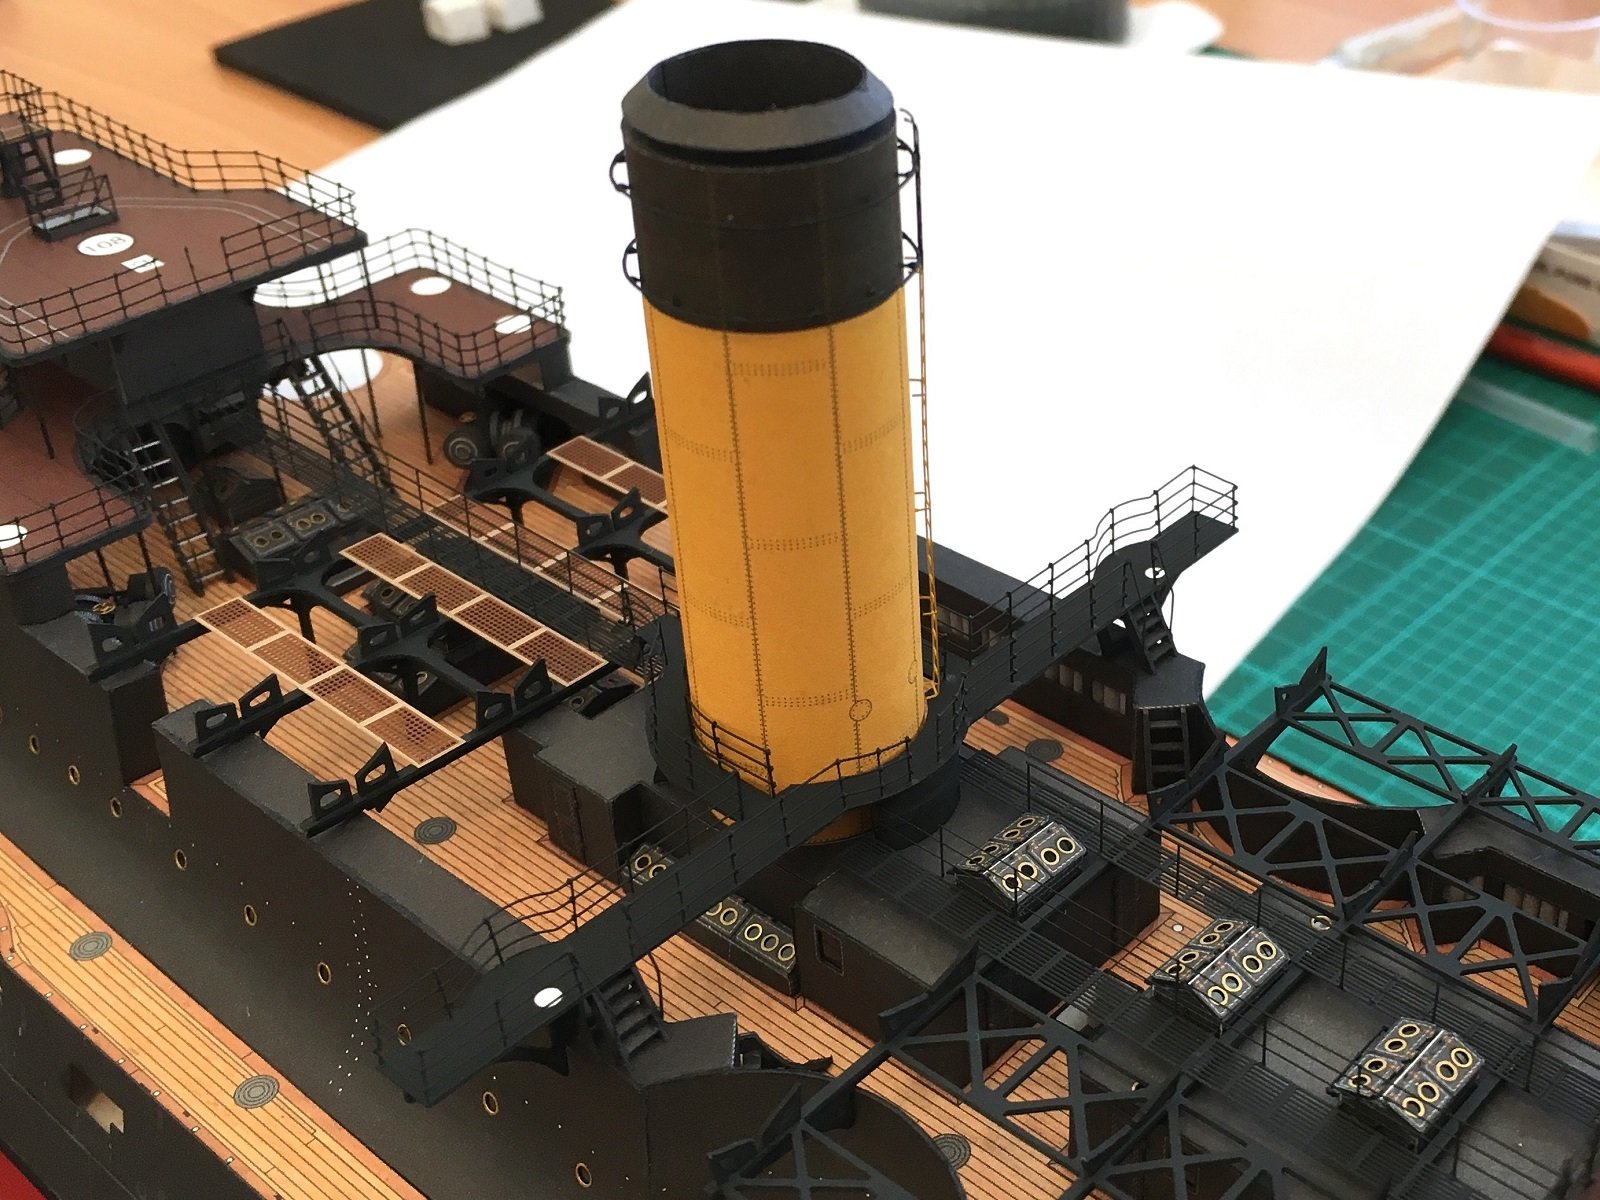
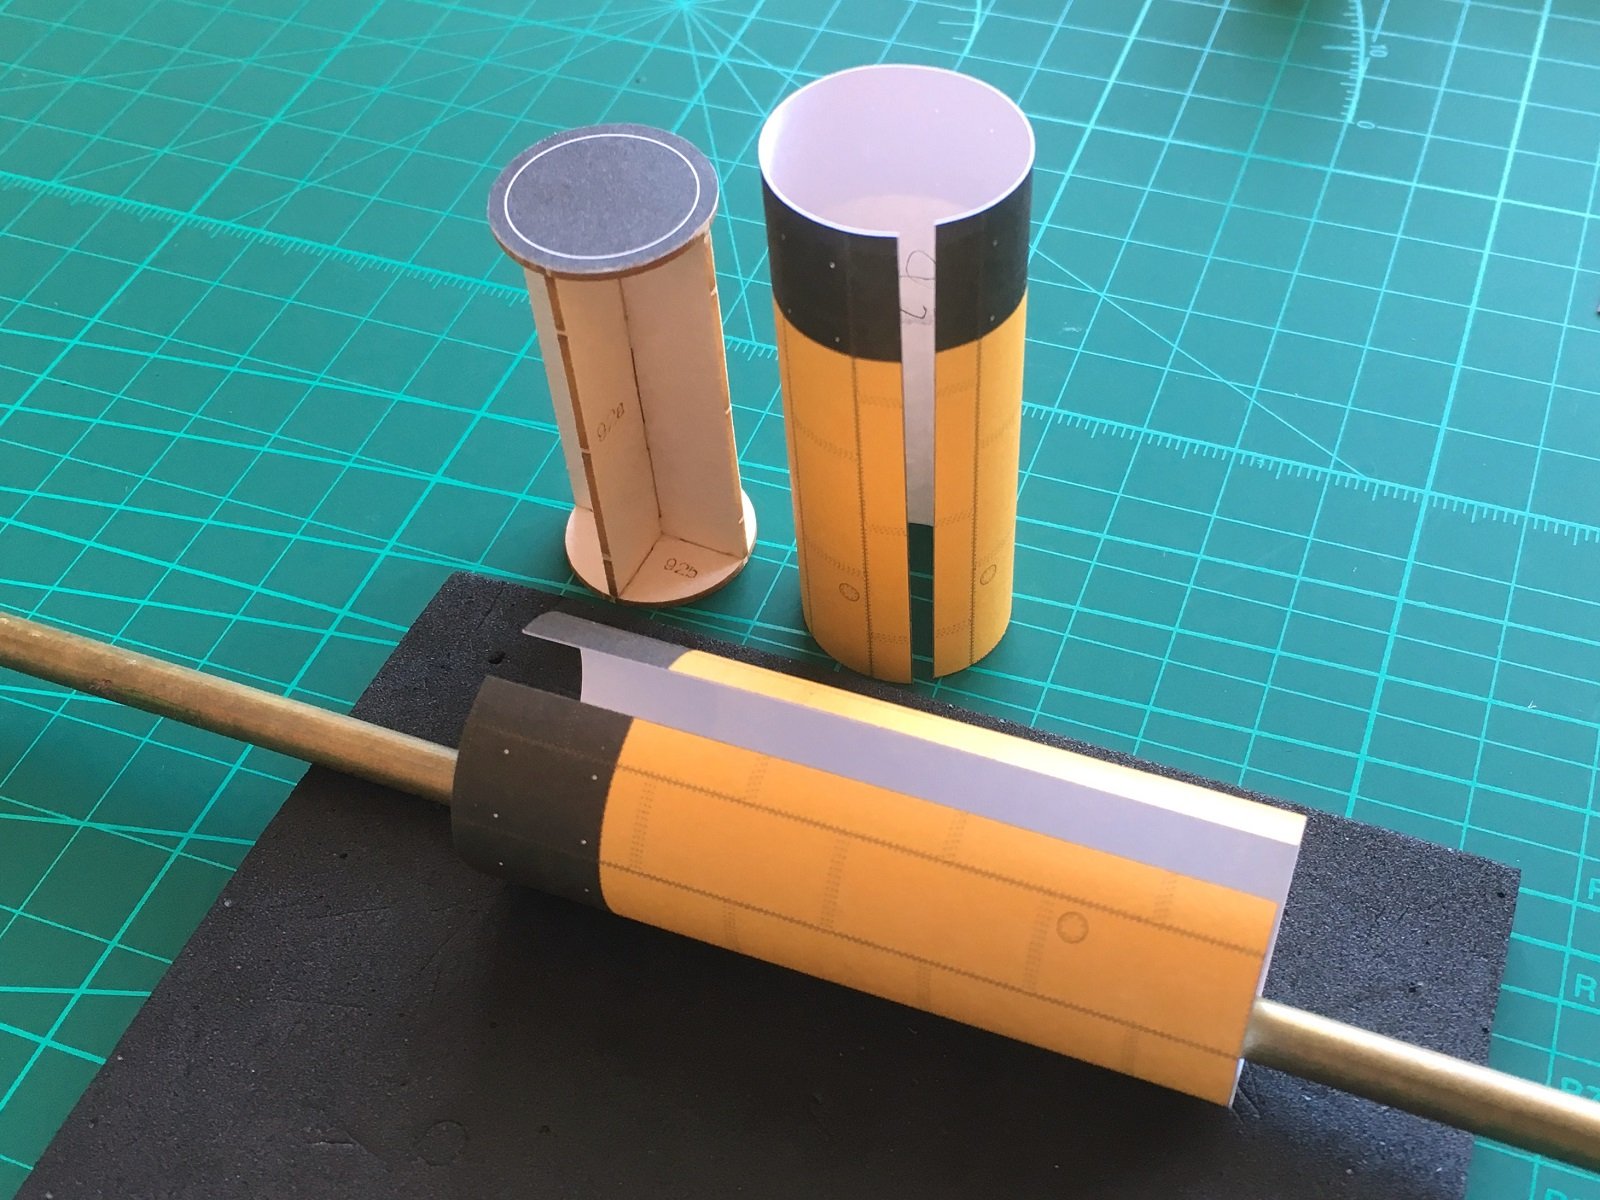
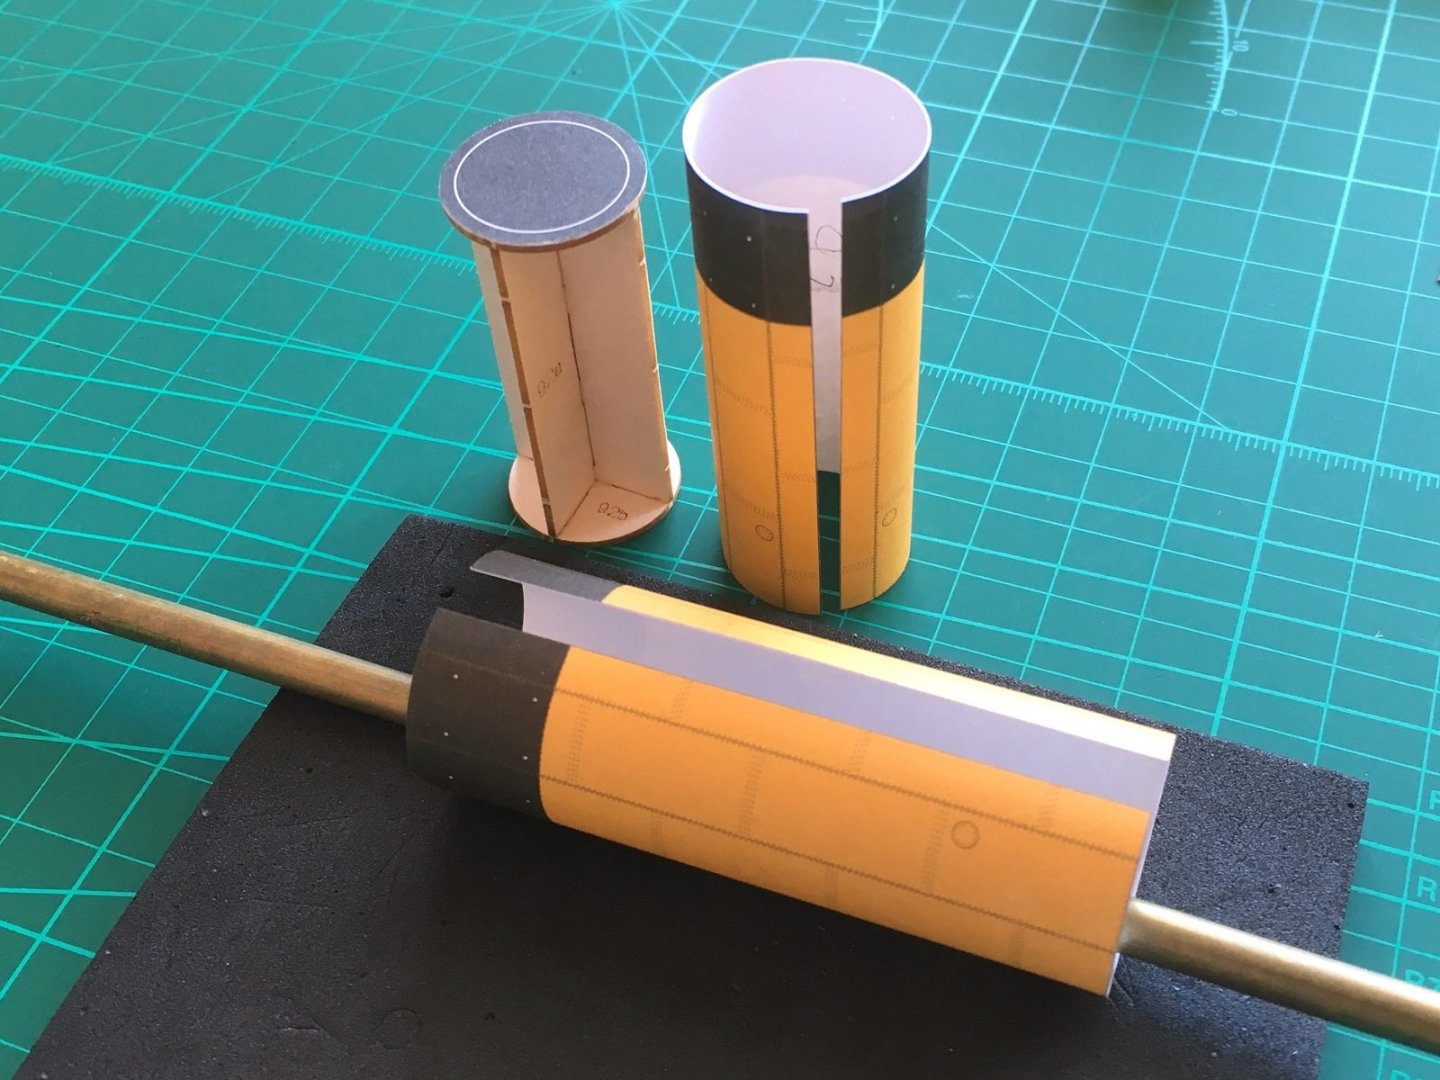
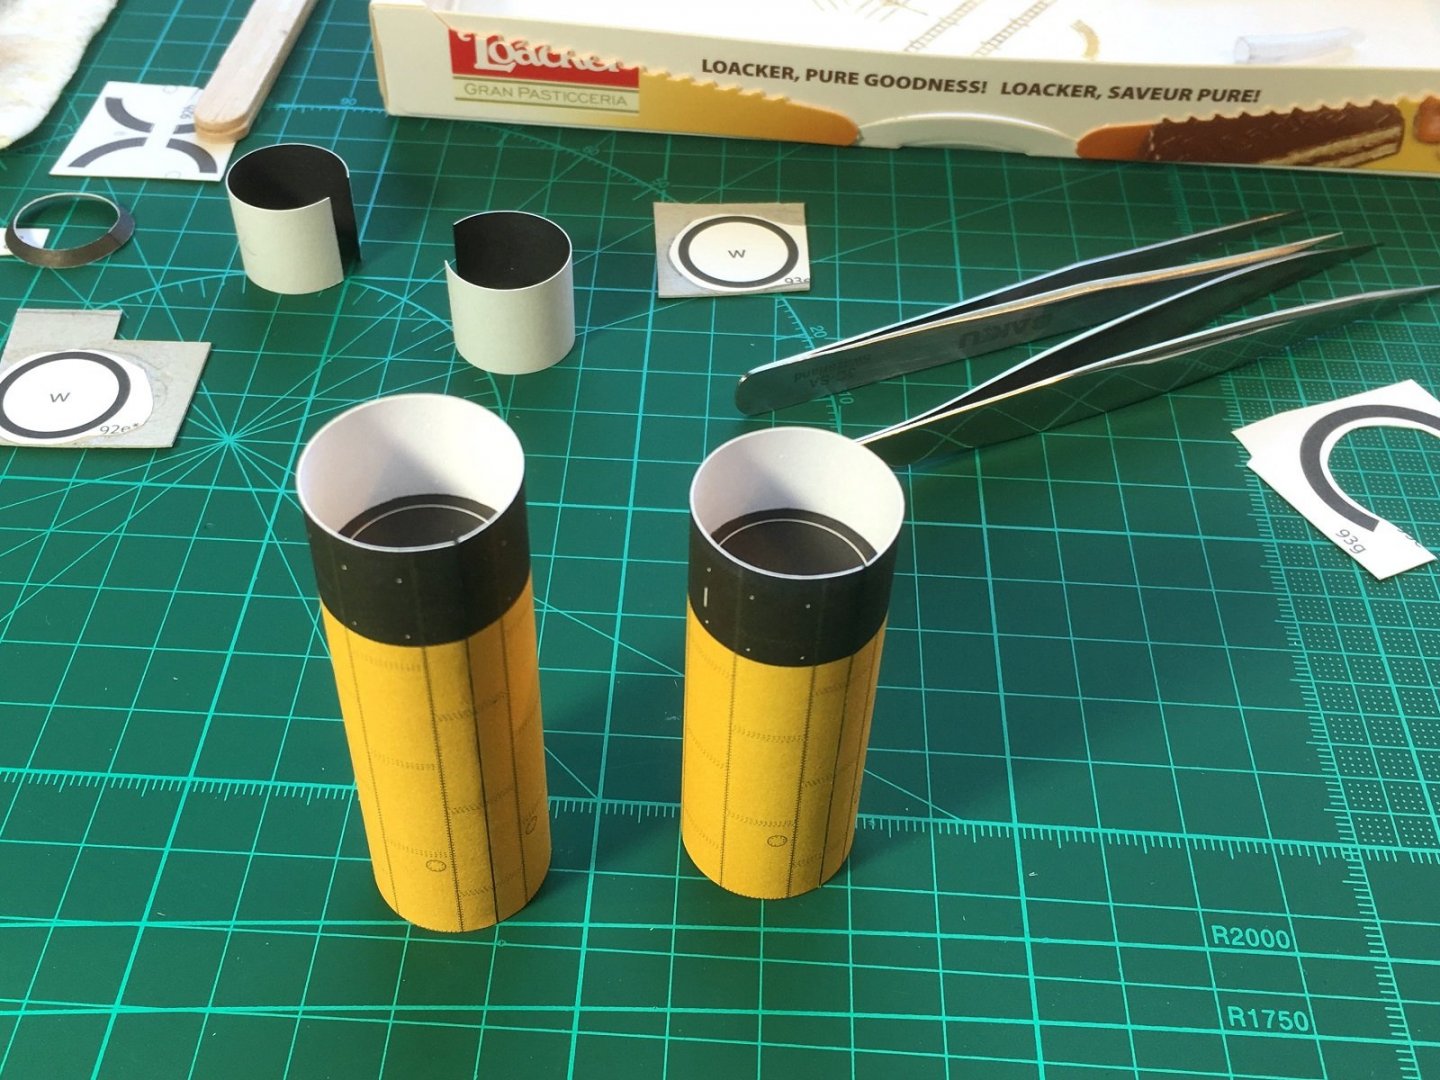
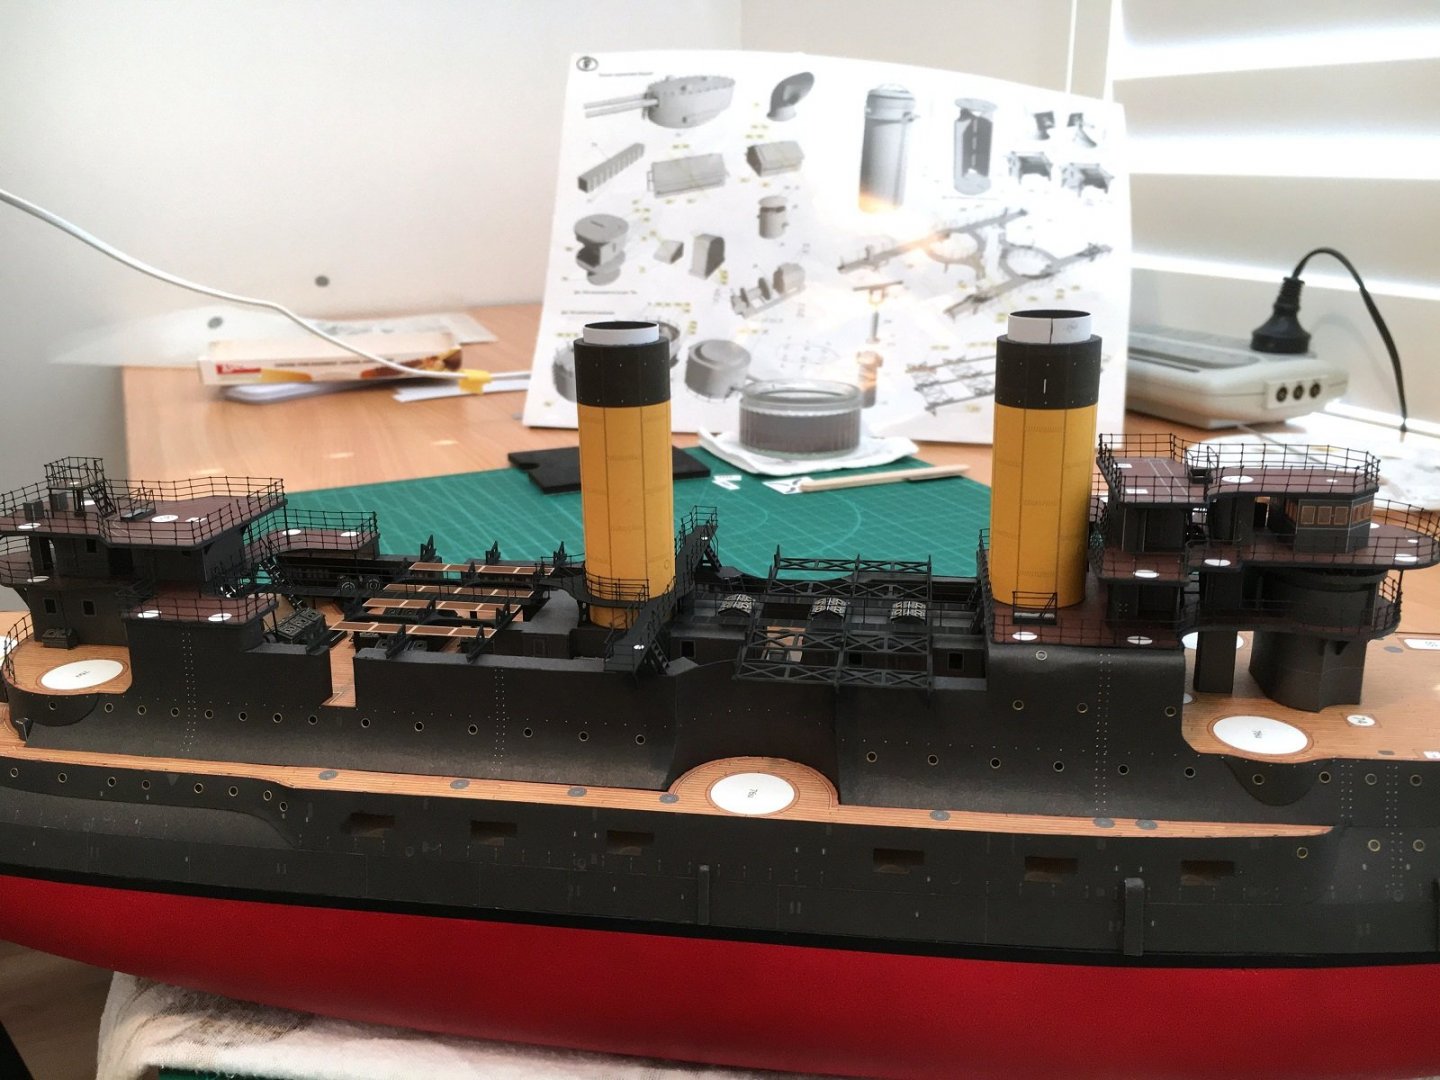
Hi, Thanks for all the likes and kind words…it’s good to be back! On to the funnels now to add a bit of colour. There is laser cut forms for the underlying structure and a few bits of photo etch (shown) to sharpen it up, although the handrails need to be fabricated. The forms glued up and the paper components laid out. Although not clear in this photo the funnels are a nice yellow colour being a bit darker and not the primary yellow provided with Aurora. The funnel skins themselves don’t have a great deal of location points to show where platforms and ladders attach and the render above isn’t very clear. Rolling the skins in to cylinders using a brass tube on relatively dense foam. Started with a fairly large tube initially and then again with a slightly smaller tube to tighten the curve. The cylinders where glued up and then the forms were slid down through them until bottomed. The funnels add a nice splash of colour to the ship. Came across a small issue where both the fore and aft funnels extensions, although physically the same size, don’t sit down inside the two funnels the same amount. Since the tops of both funnels should be in-line I’ll cut the fore one down so both sticking up the same amount. I’ll need to paint the funnel extension outer surface black and attach a cap then on to all the little details to finish the funnels. Cheers Slog

- 244 replies
-
- 8
-
-
- borodino
- dom bumagi
- (and 1 more)
-
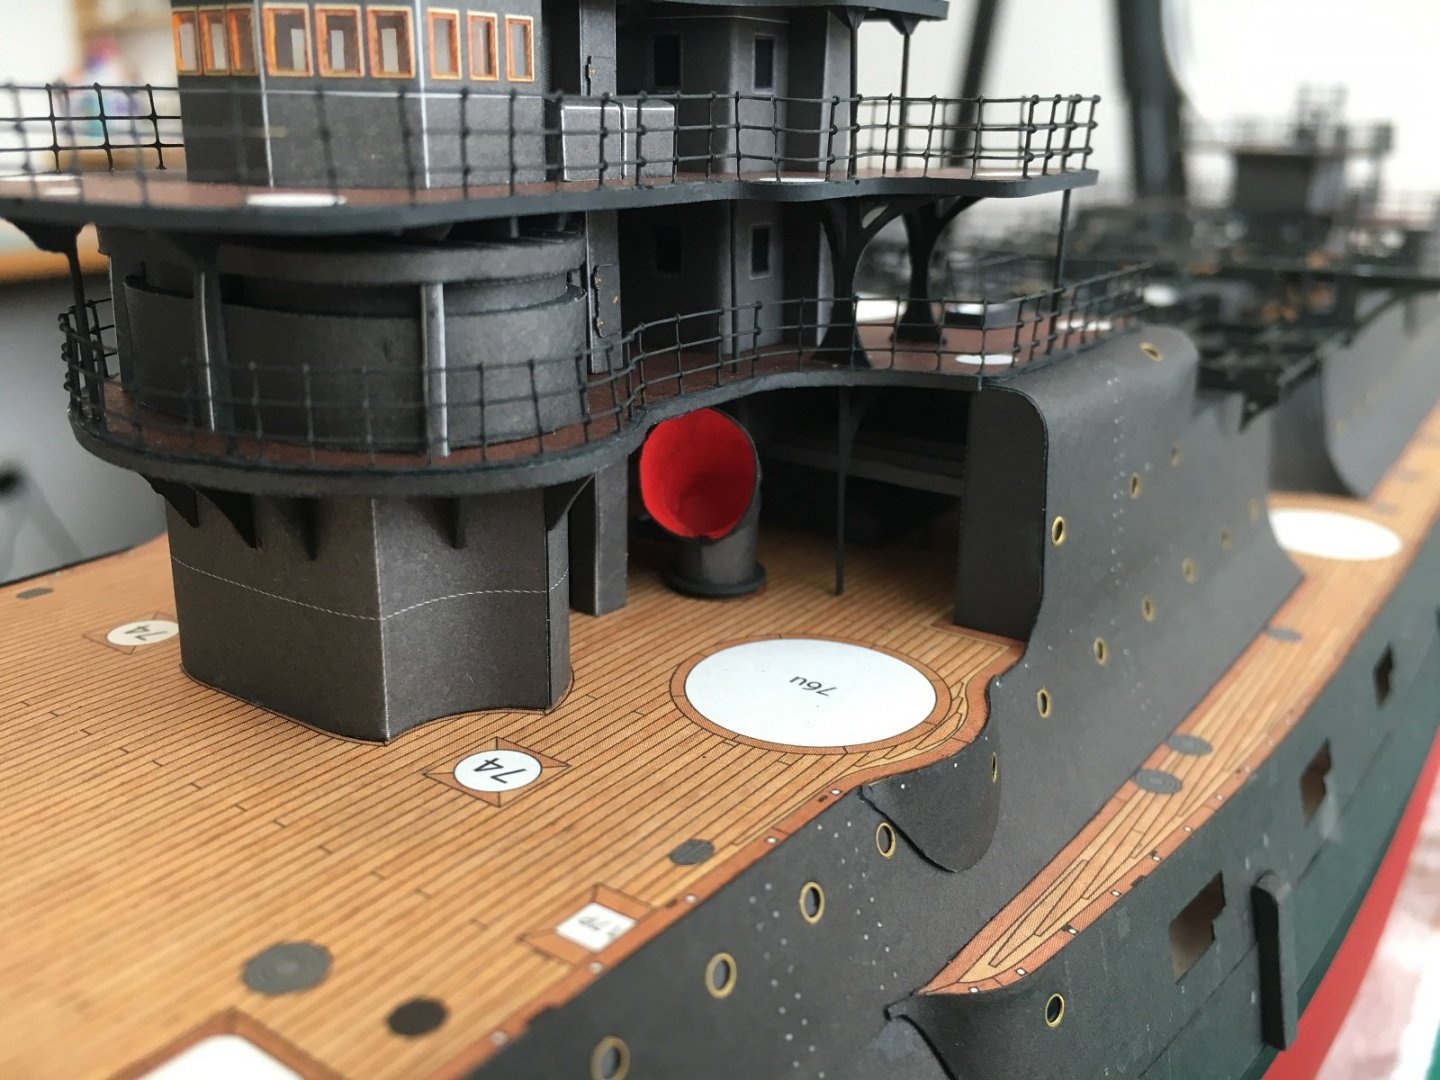
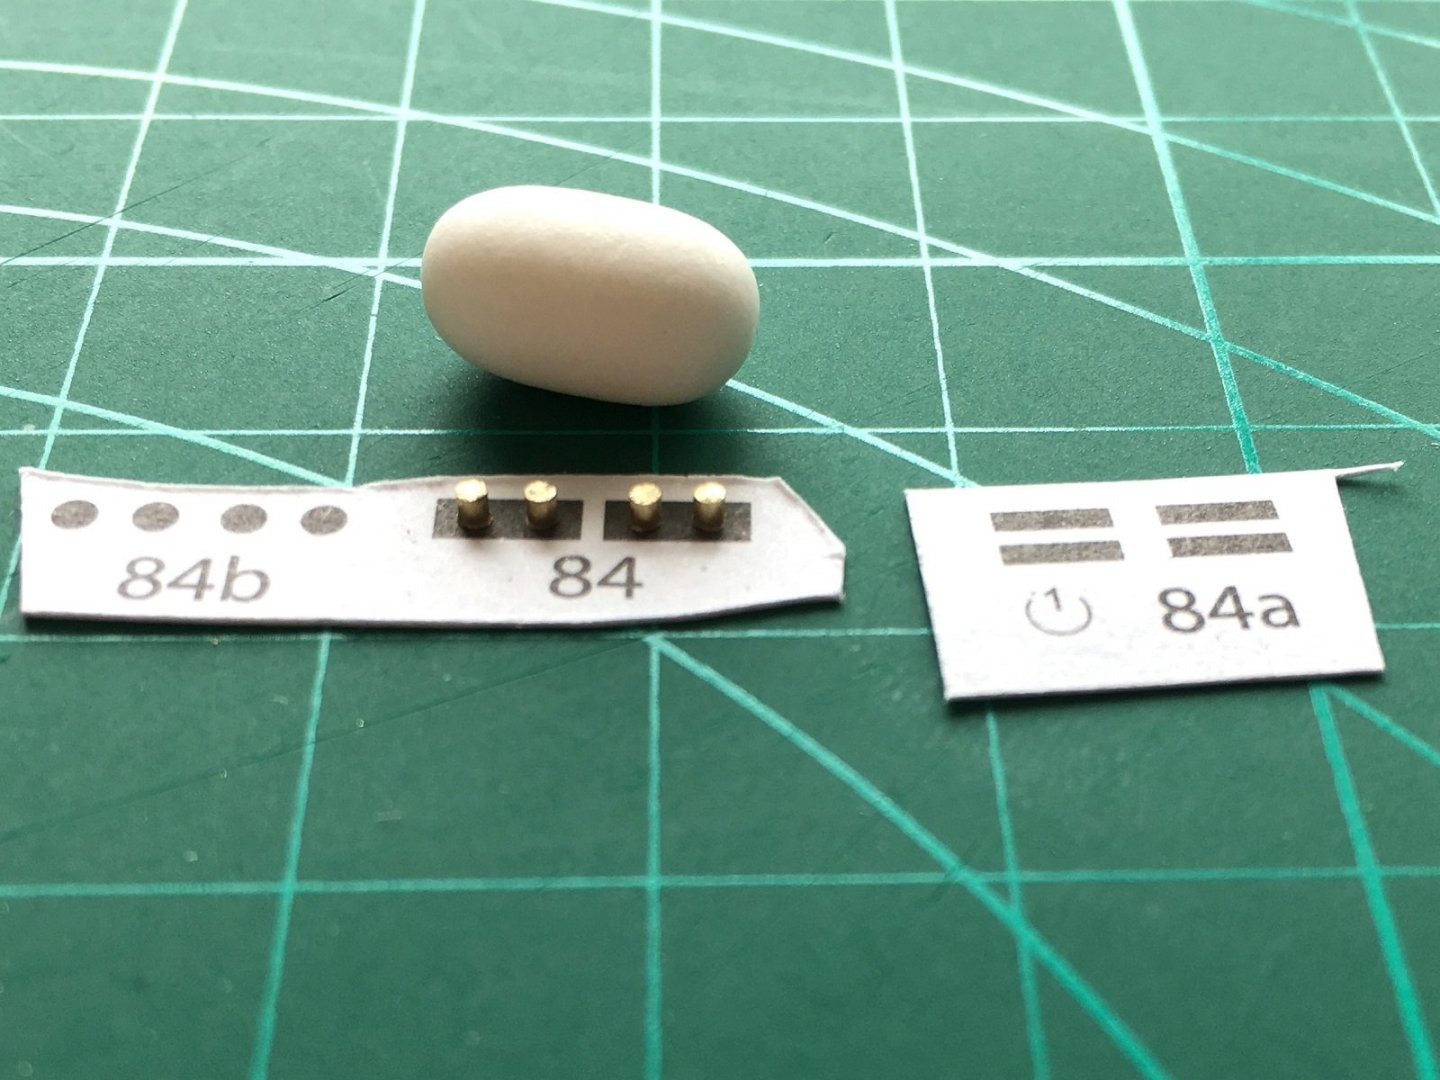
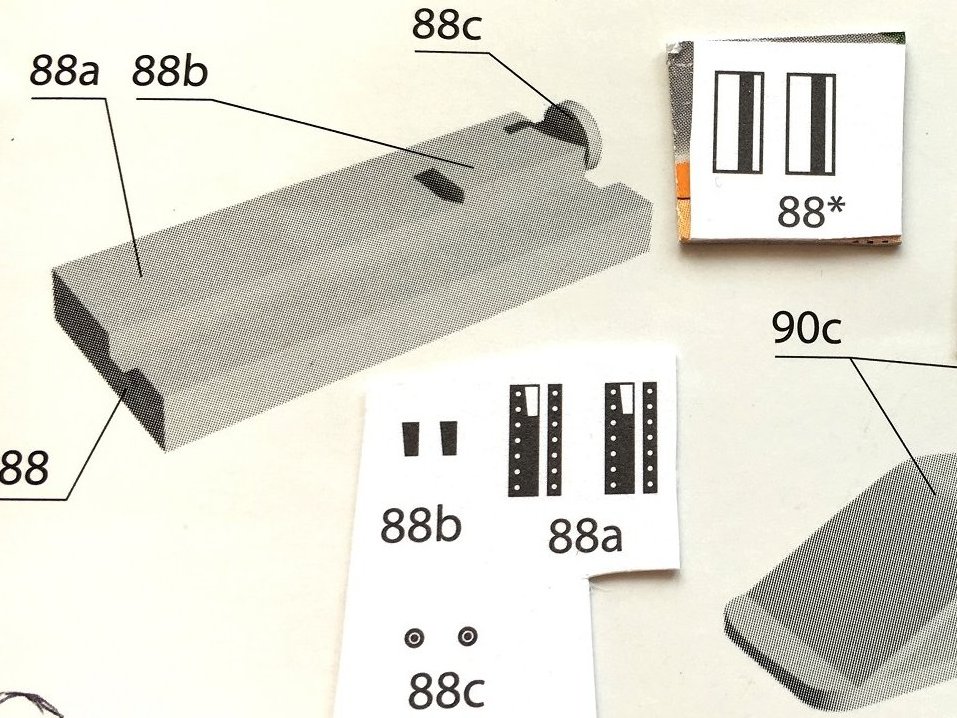
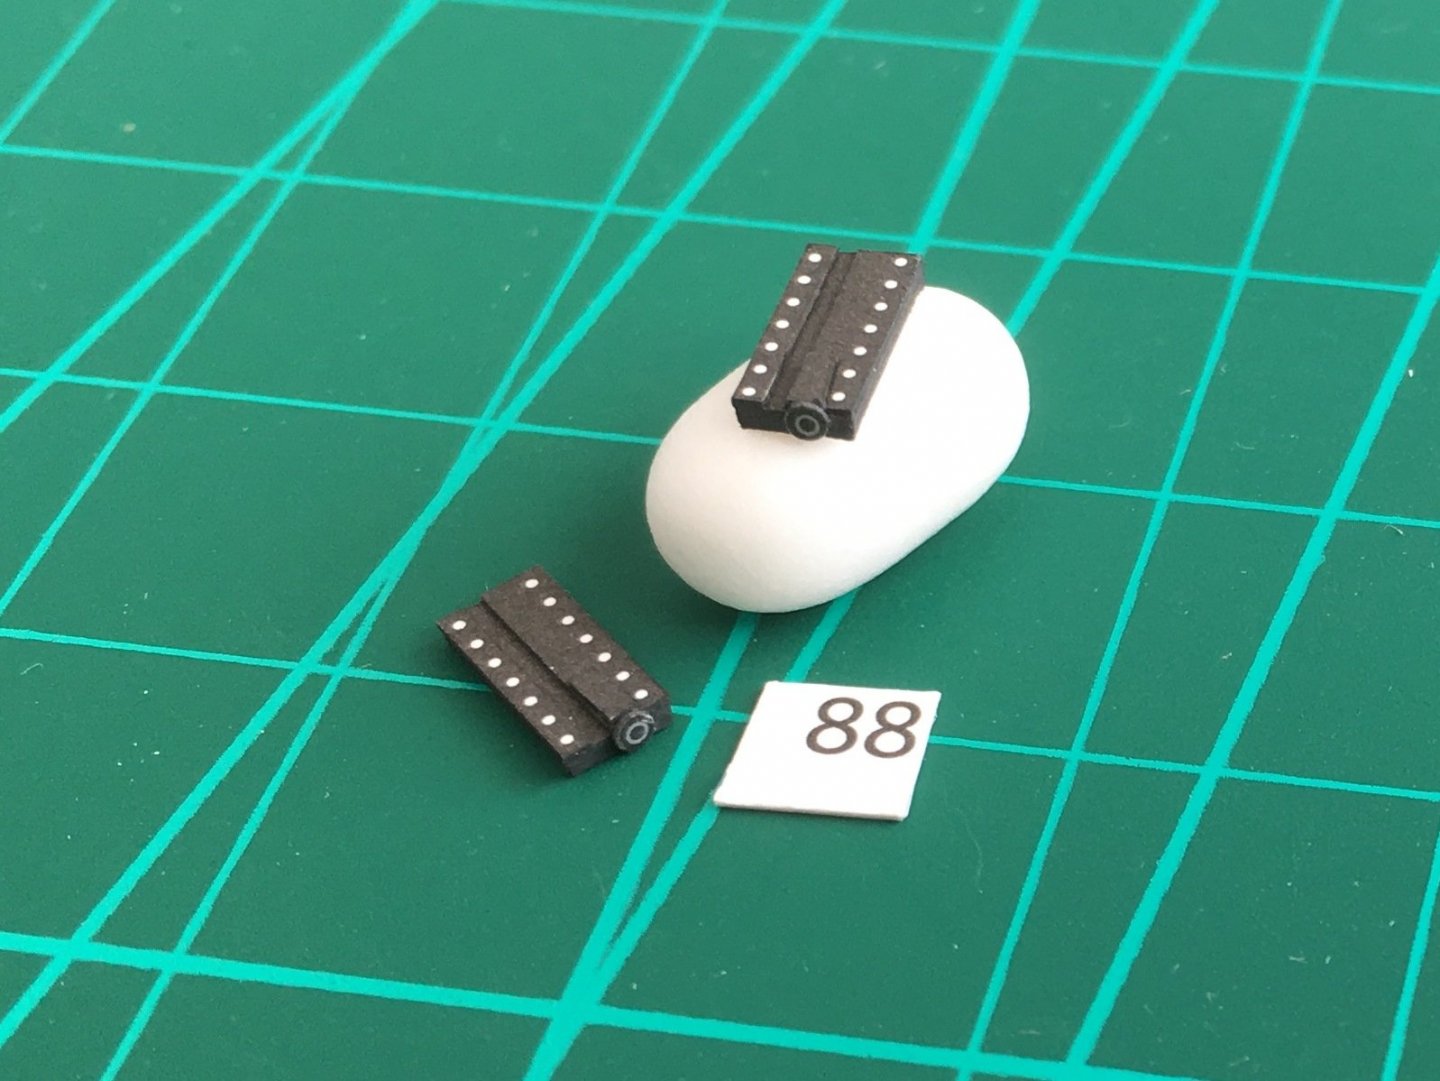
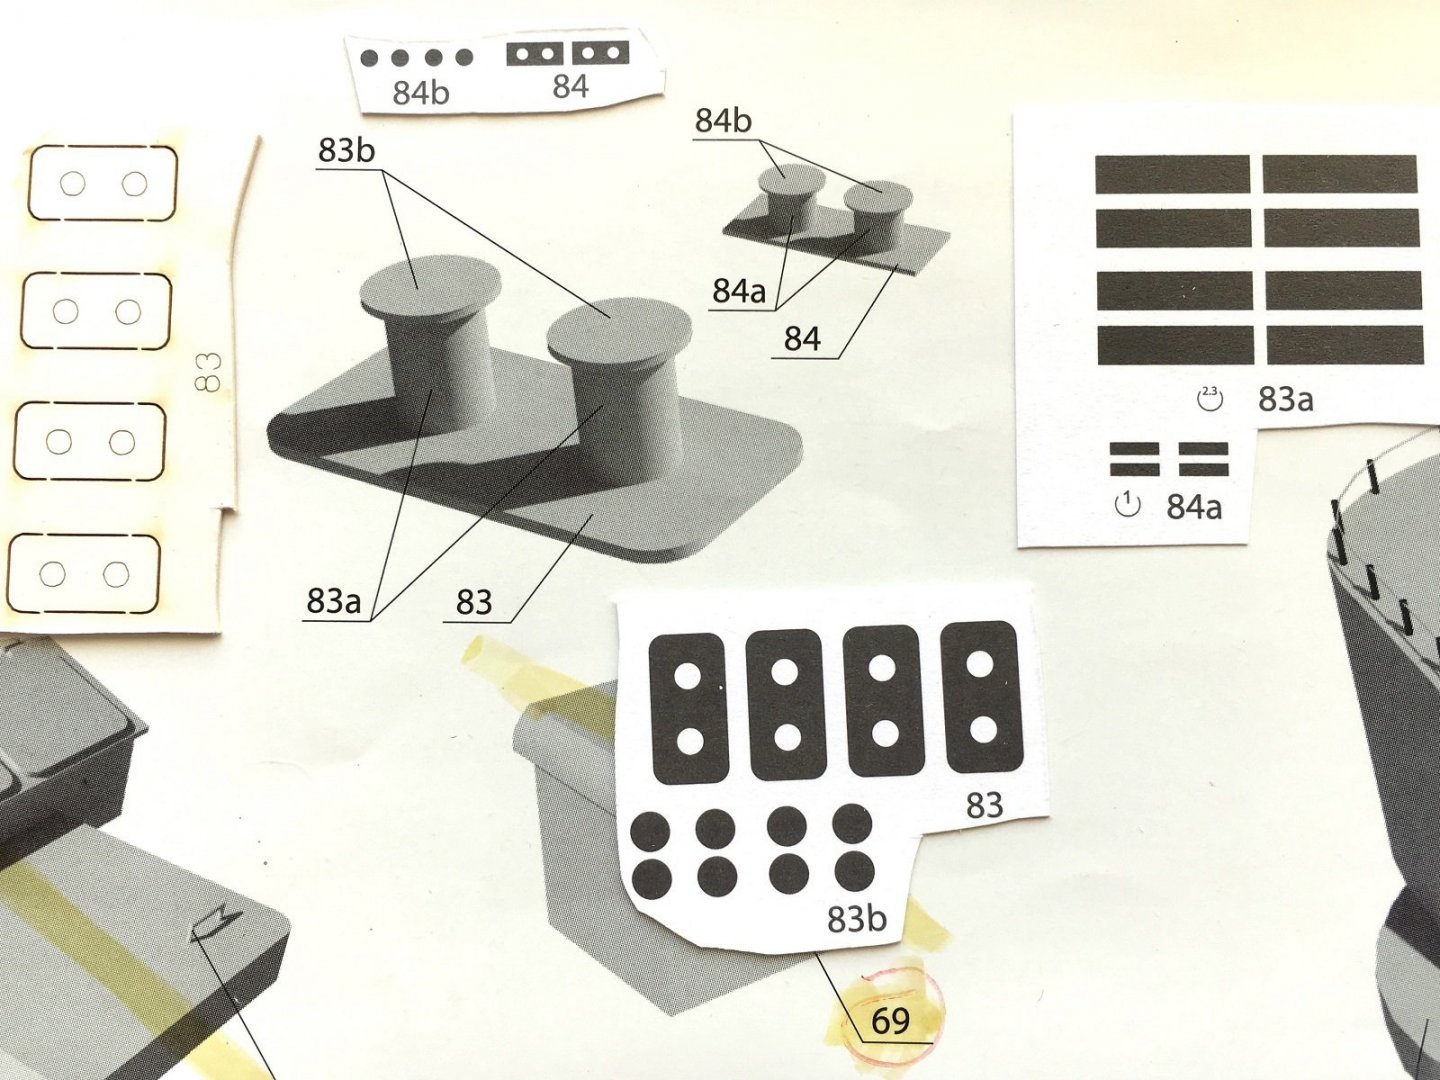
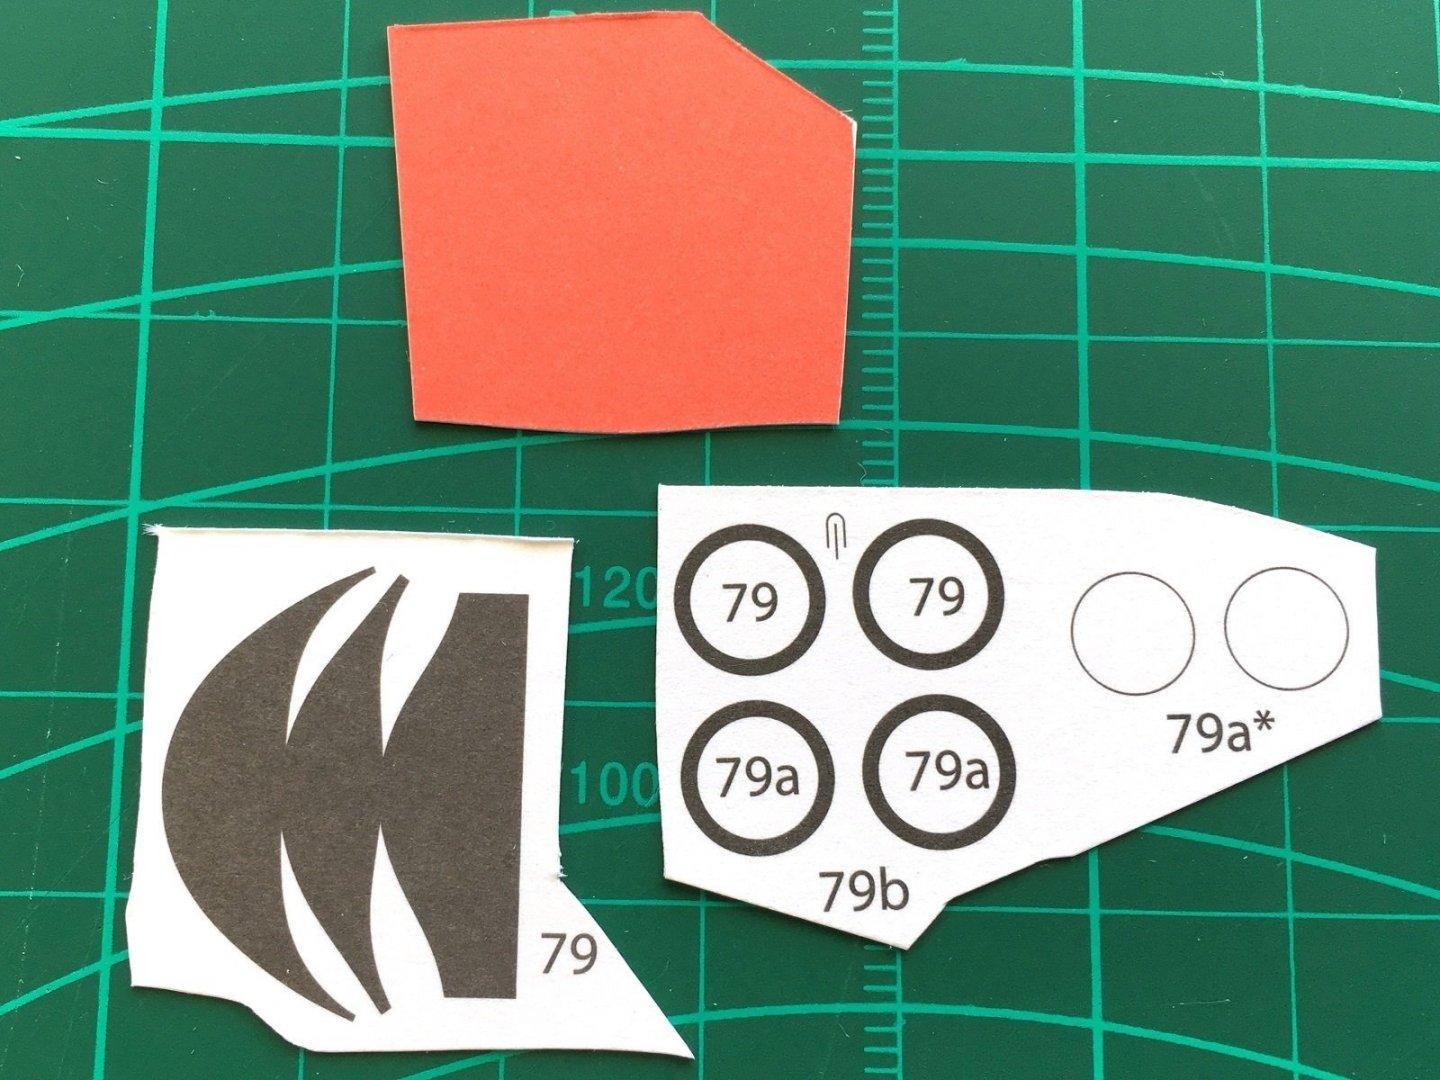
Finally back in Perth for the Christmas break with the family and modelling after being stuck in Melbourne the past 9 months and made a start on some of the smaller deck items to get back into the swing of things. First up the 2 large deck ventilators, which shows the rare occasion where the rear of the part is coloured also. Completed vents…hmmmm a bit out of practice and not particularly happy how these turned out but will be virtually unseen. I used red water colour on the inside which is brighter than the original printing but close enough. As can be seen the vents are under the fore decks and hidden behind the 6” gun turrets so despite looking a bit ropey will be good enough in this case. Next up some bollards. The larger bollards have laser cut card bases but decided to stick with the paper part to keep the original printed colour. The smaller bollards had you rolling strips of thin paper into the pillars, which is too much hassle so made them from 1mm brass rod just over a 1mm high and blacked. The finished bollards. The caps on some of them seem rough but don’t look it without magnification so happy enough. Some type of deck gear next x2 (88), which I have no idea what they are but live on each side of the rear deck next to the railings. There are still fair number of smaller deck components to do as well as the last of the larger items such as 12” turrets, 14 ships boats and the 2 funnels to tackle, which I’ll probably jump between during the 3 weeks I have home. Cheers Slog


- 244 replies
-
- 9
-
-
- borodino
- dom bumagi
- (and 1 more)
-
Silver soldering
Captain Slog replied to Dziadeczek's topic in Metal Work, Soldering and Metal Fittings
I use 'easy' grade silver solder paste from a syringe but applied with a needle for tiny components and succesfully use it on 0.2mm brass wire. The paste is sticky and once in place doesn't blow off with the torch. Obtained from a jewellers supply shop. Slog
.JPG.85a3bef7c448c972373eac3af9fd54ff.JPG)
.JPG.44431c58b39b7609189ce5cd56233972.JPG)