Captain Slog
-
Posts
904 -
Joined
Content Type
Profiles
Forums
Gallery
Events
Everything posted by Captain Slog
-
 Looking nice. Good idea with adding some width to the forms, Borodino had the same issue butting 2 skins on to 1 mm but I was too lazy to do what you did. Cheers Slog
- 295 replies
-
- 6
-

-
- amatsukaze
- halinski
- (and 2 more)
-
Hi Craig, Looking forward to following another card build. Its good to see more and more card models appearing on the site. Cheers Slog
-
Just to add to Danny's info, the 3 or 4 sets I've seen are all 1mm for the internal structures and if the kit supplies things like struts and braces etc would be 0.5 / 0.6 mm as Danny described. It will interesting to see Danny's Bismarck as if I remember correctly it was slightly thicker and if you didn't have the form set you had to glue the templates to 2 mm card. Cheers Slog
- 295 replies
-
- 6
-
-
- amatsukaze
- halinski
- (and 2 more)
-
Nice work Craig, I can't see enough photo etch details you guys are doing. Must........resist.........starting........another........build.....arrgggghhhh.
- 151 replies
-
- 7
-
-
- duke of york
- tamiya
- (and 2 more)
-
Greg, the assemblies just keep getting better and better. Your work shows that the site needs an other level of the like button! Cheers Slog
-
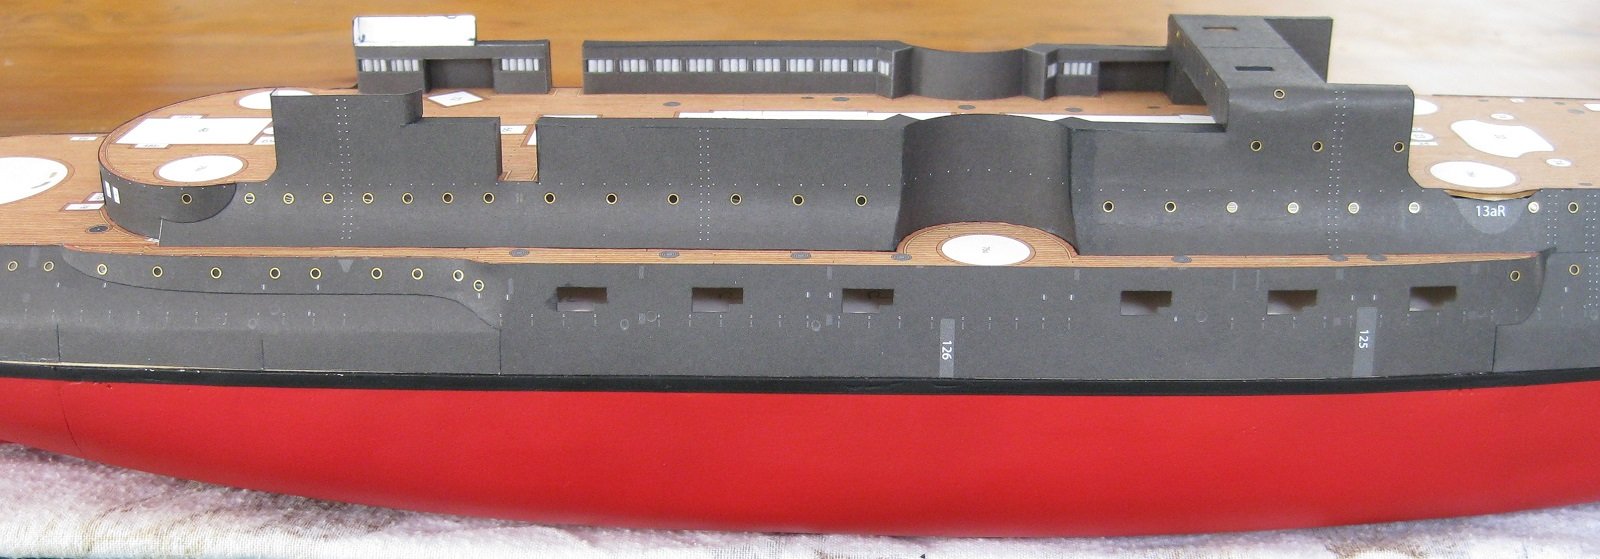
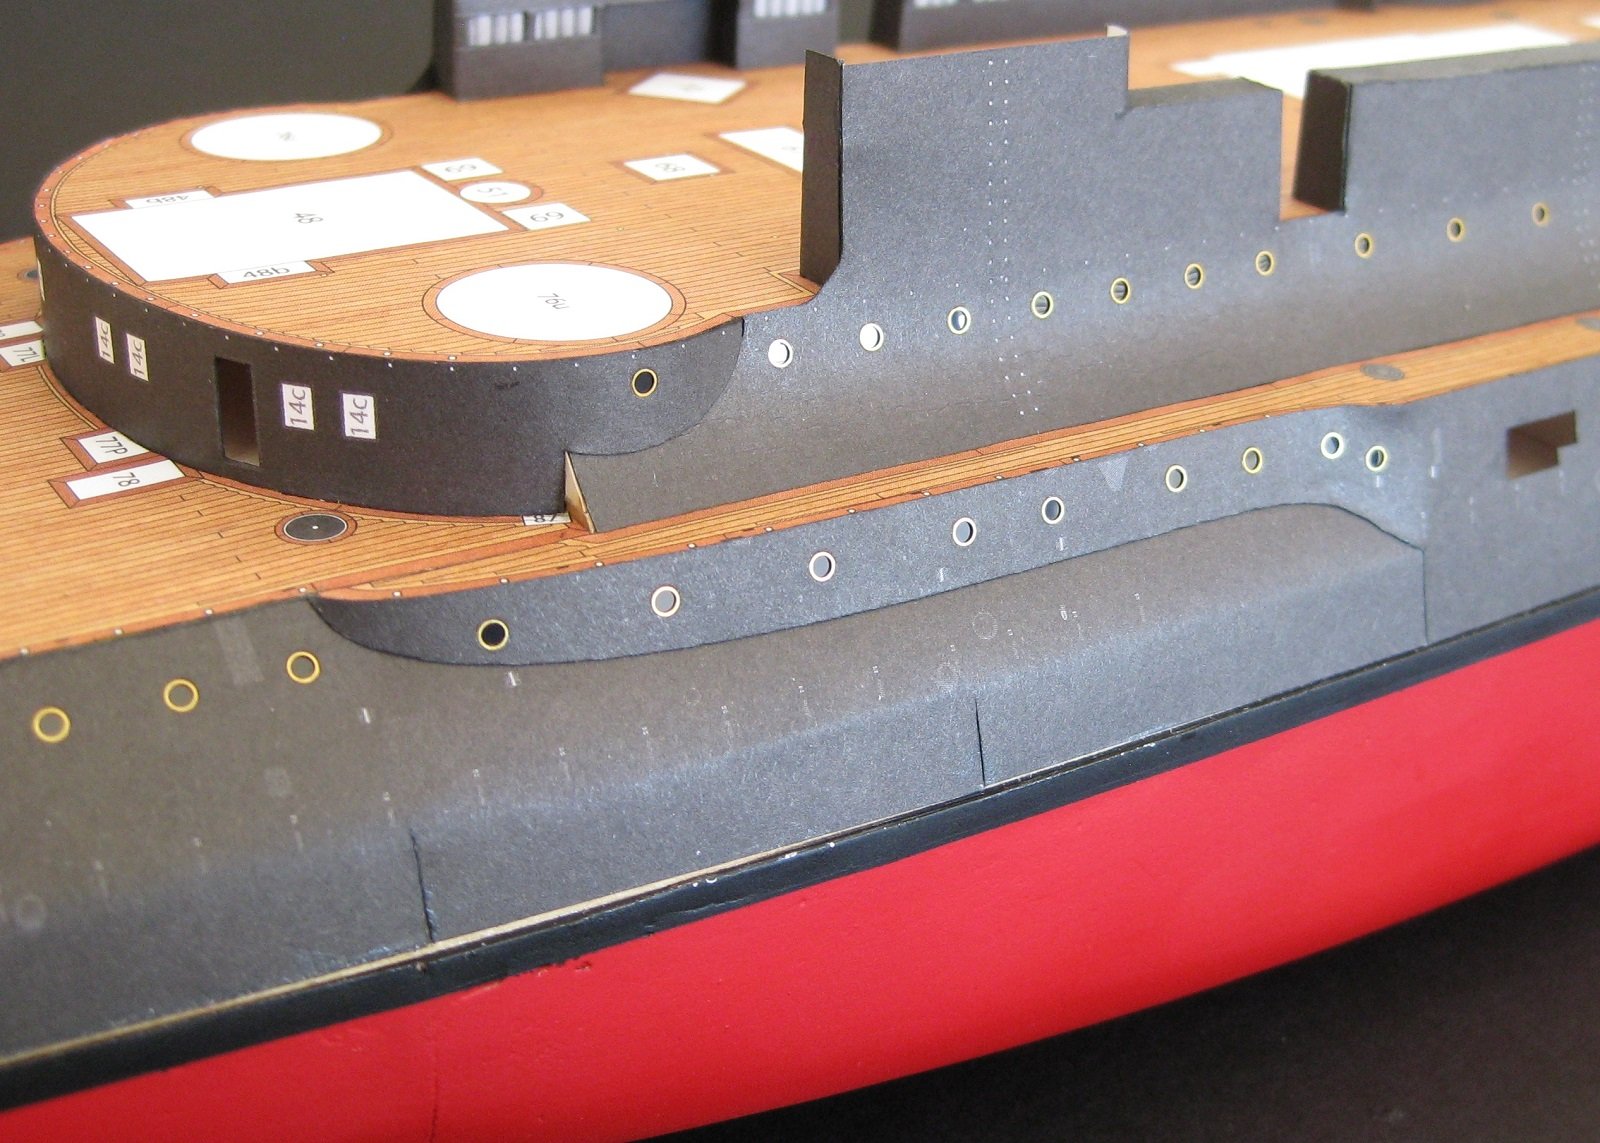
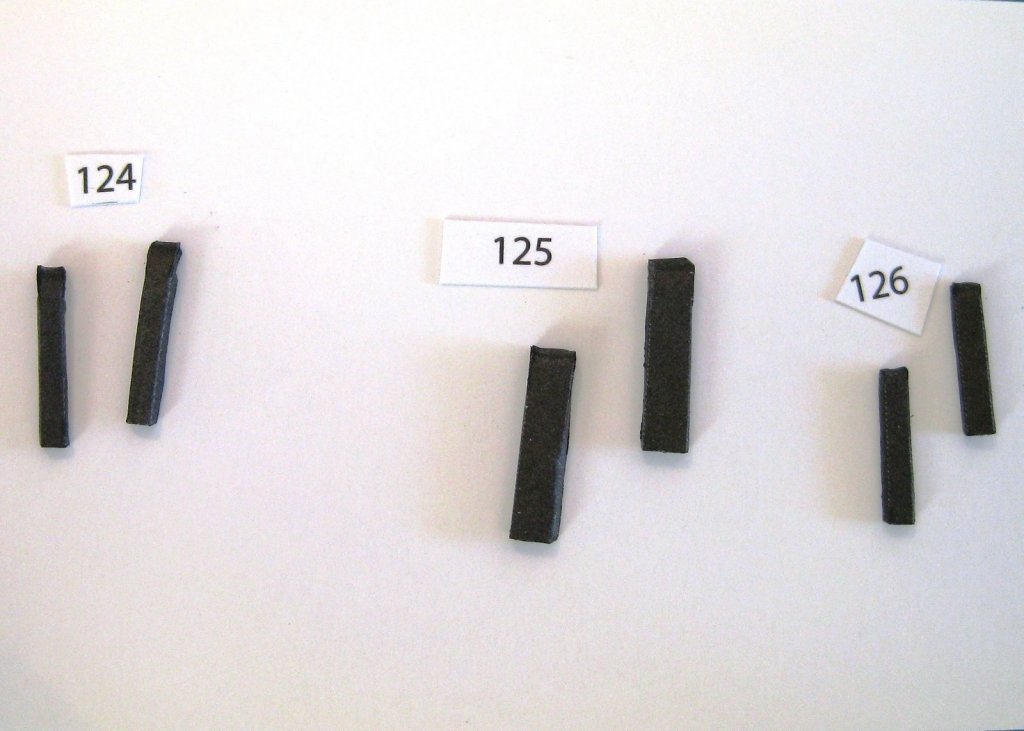
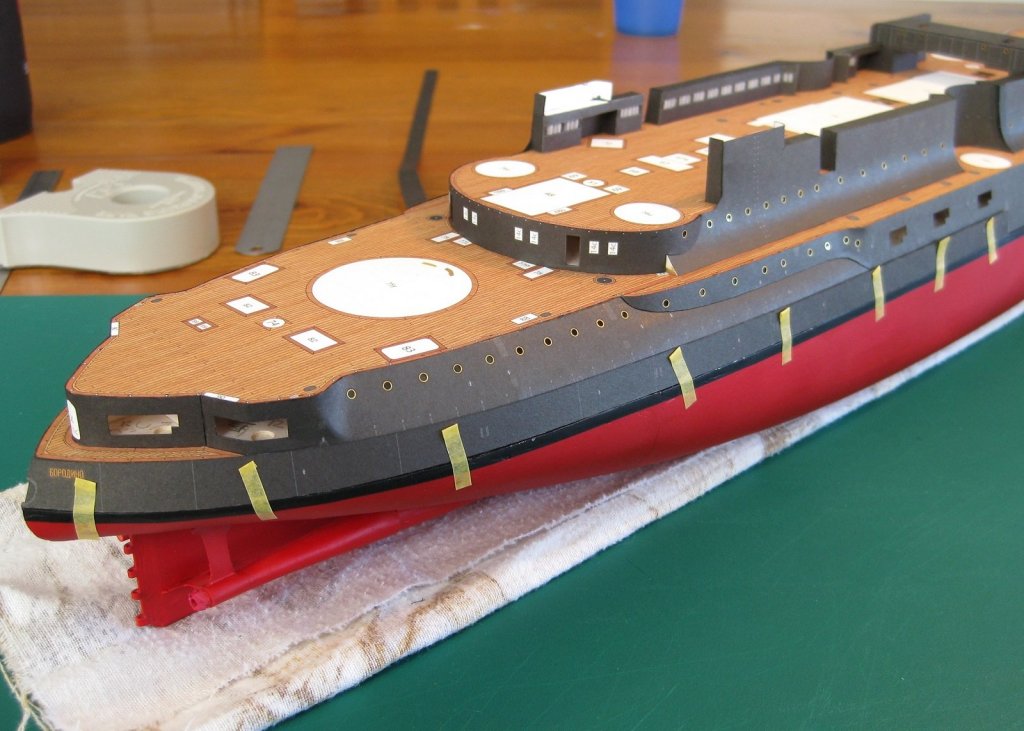
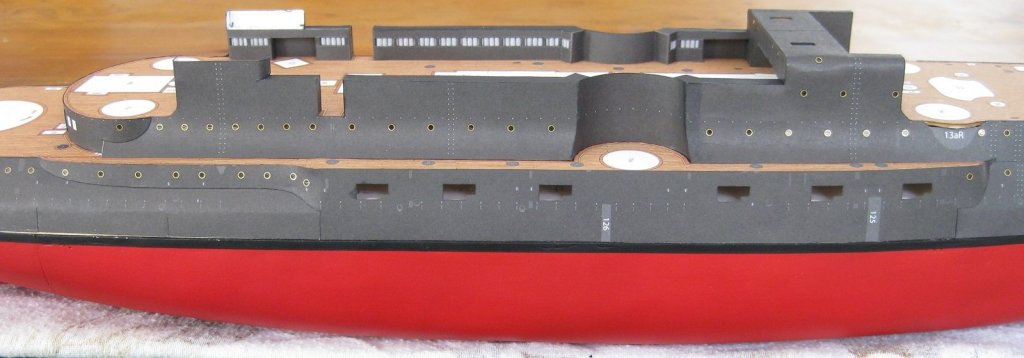
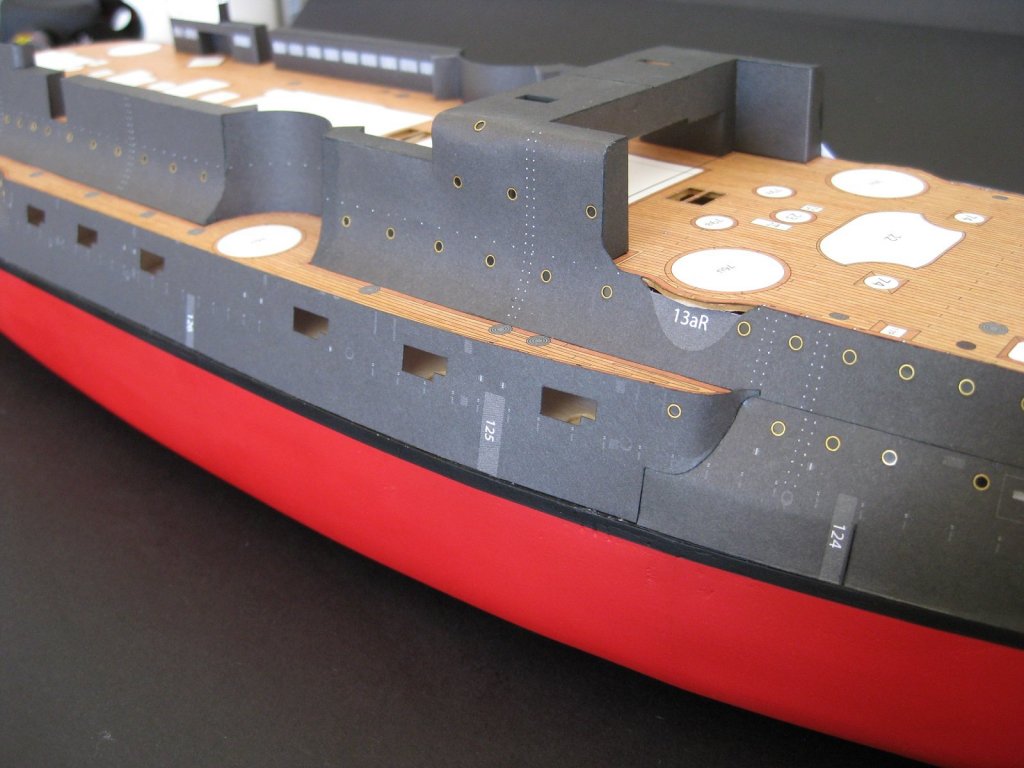
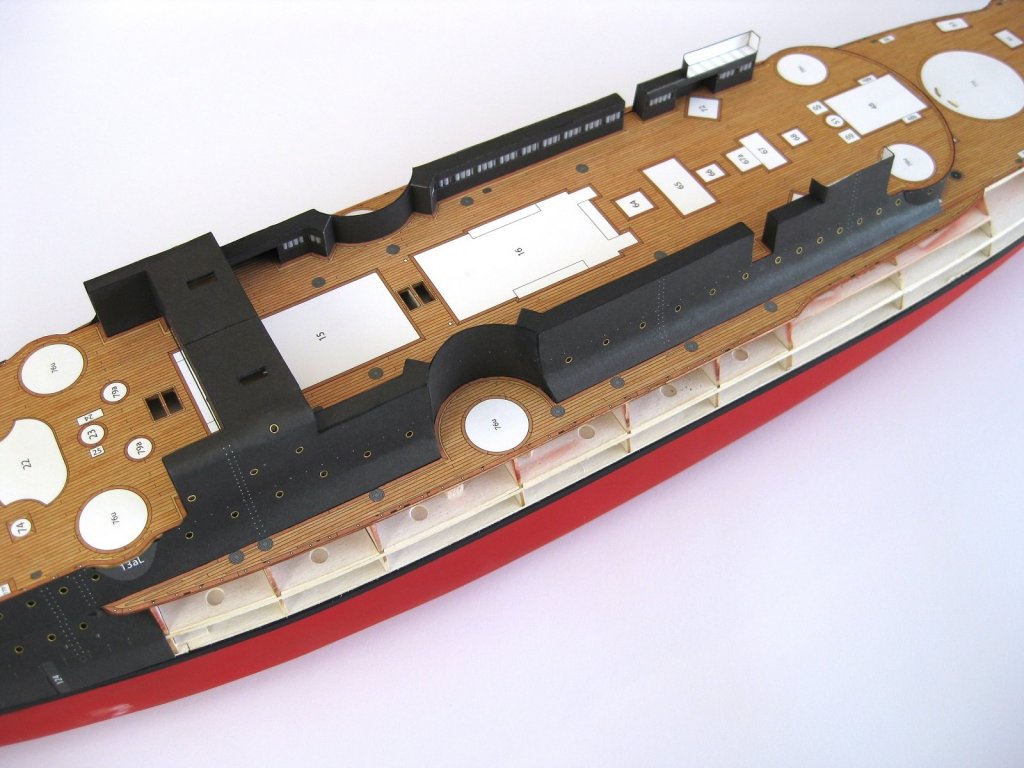
Hi all, Well I didn’t get everything fitted as I had hoped as the lower belts were quite time consuming plus I had to do a few things in preparation for fitting them, which included fixing a mess up I did previously. I mentioned away back when I fitted the port bow skin that I messed it up with a severe case of starving cow, which was an understatement. I actually cut the bottom of the skin too short and it missed the former and sunk right in between the hulls. I never showed this as it was too embarrassing. I knew the lower belts would hide some of it but remedial action was necessary. So knowing I had the height of the belt to play with I cut a slot in the skin and then slipped a strip of 1mm card in to the void to support the bottom edge of the hull skin. I then took a length of brass tube and bent one end to 90 degrees and using this pulled the strip against the inside of the skin and pulled it out flush with the surrounding area and then applied glue whilst holding it in position. Not perfect but at least I will be able to show the port bow once the belt is on! With that out of the way (whew!) I made the drain tubes which are simple U-shaped channels with curved tops. These were tricky due to the size and shape of them and turned out just okayish but won’t be noticeable once in place. Finally I can get start getting the belts on and finish with the hull. The starboard rear belt cut out and trial fitted being held in place with Tamiya masking tape. I then did the same for the other side to get the centre joint aligned. Once I was happy with the positioning I removed the tape at the end to allow the belt to be held out to apply the glue and was pressed home. I then did the same for the other side and then worked them together to form the join. The photo shows the 2 ends glued up just as far back as the tape on each side. Once the stern join was made I removed all the tape and then worked forward gluing and fixing short sections at a time. The belts end at drain 126 shown in the first photo above. Pretty happy so far how they are turning out and as expected they hide some untidy areas and clean up the hull skin joints etc. I notice in the photos the black boot topping is starting to chip so once I finish the belts I will go in and touch them up with a small paint brush. I had hoped to get the hull finished this swing but is unlikely due to the time the belts are taking but still have tomorrow to go at it. Cheers Slog


- 244 replies
-
- 9
-
-
- borodino
- dom bumagi
- (and 1 more)
-
Hi Danny, No it doesn't. I just use a single edge razor to cut the little tabs to free the part and then just a quick rub with a little sanding block to clean off the nib that's left; no need to sand the rest of it. Cheers Slog Edit: Just noticed your are talking about the skins to forms! A lot of the laser marks will come off during fairing but any left behind will still be fine without sanding.
- 295 replies
-
- 4
-
-
- amatsukaze
- halinski
- (and 2 more)
-
First in, best dressed! Front row seat. This is going to be good! Cheers Slog
- 295 replies
-
- 5
-
-
- amatsukaze
- halinski
- (and 2 more)
-
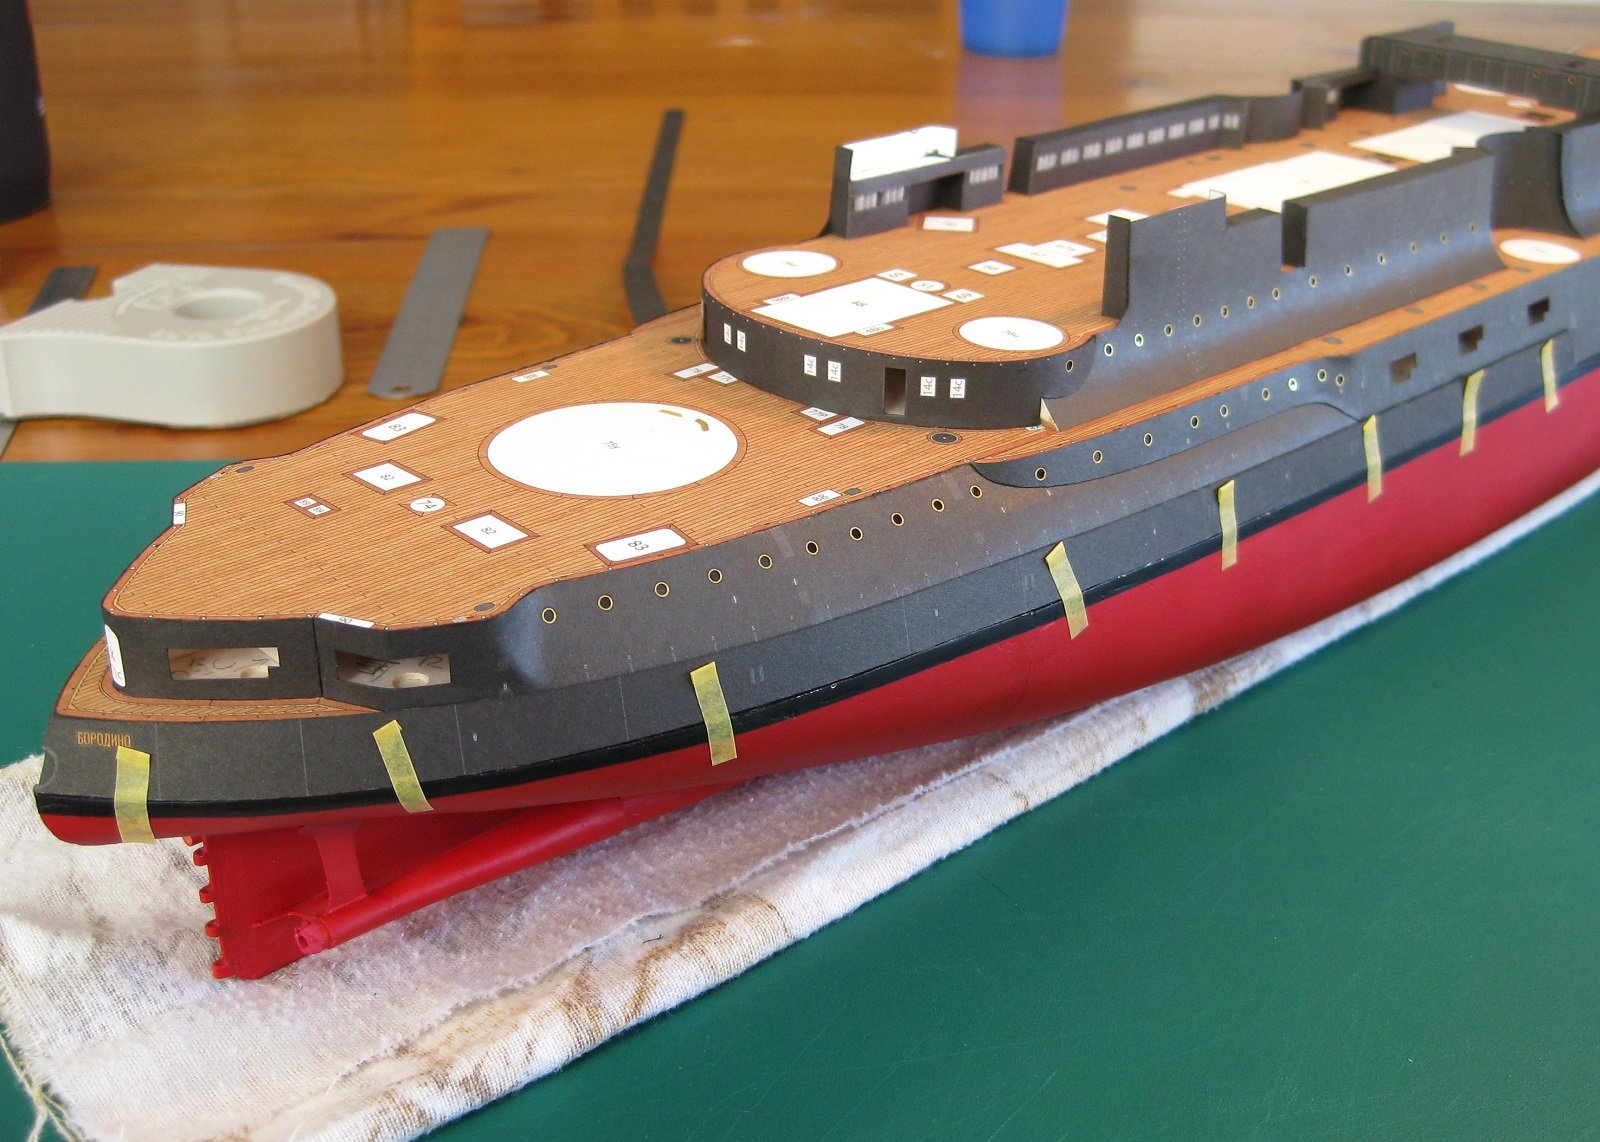
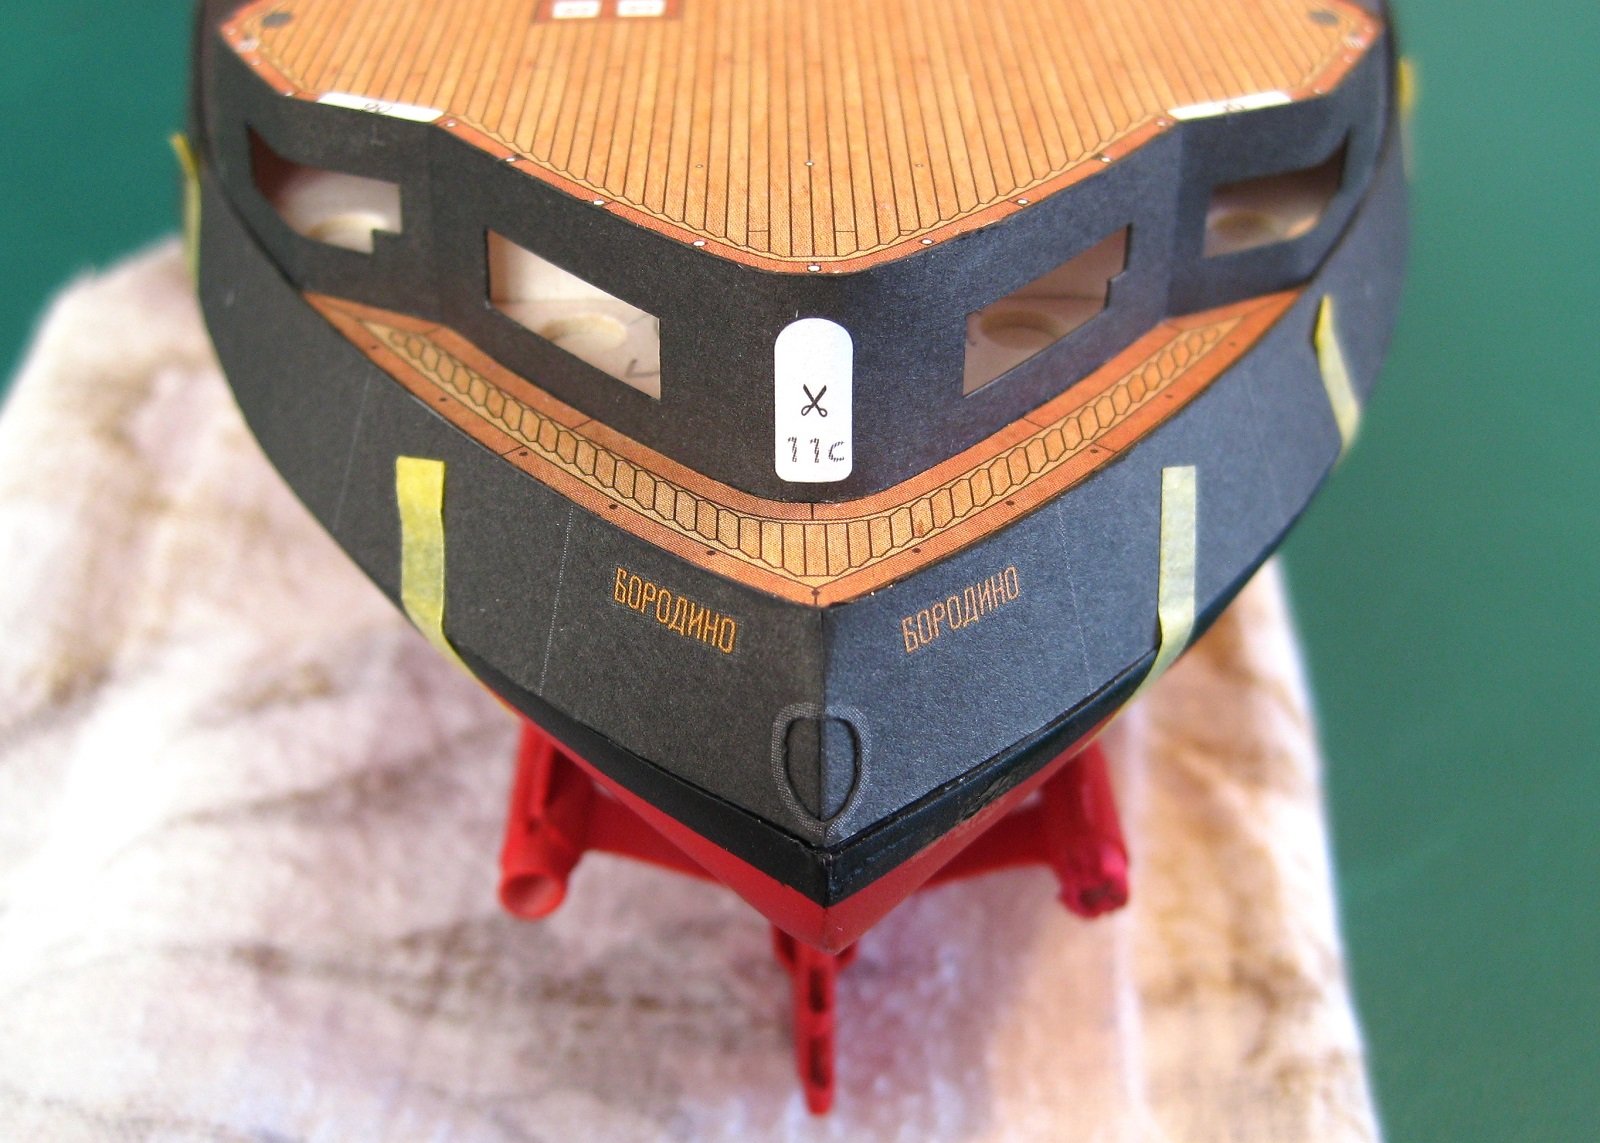
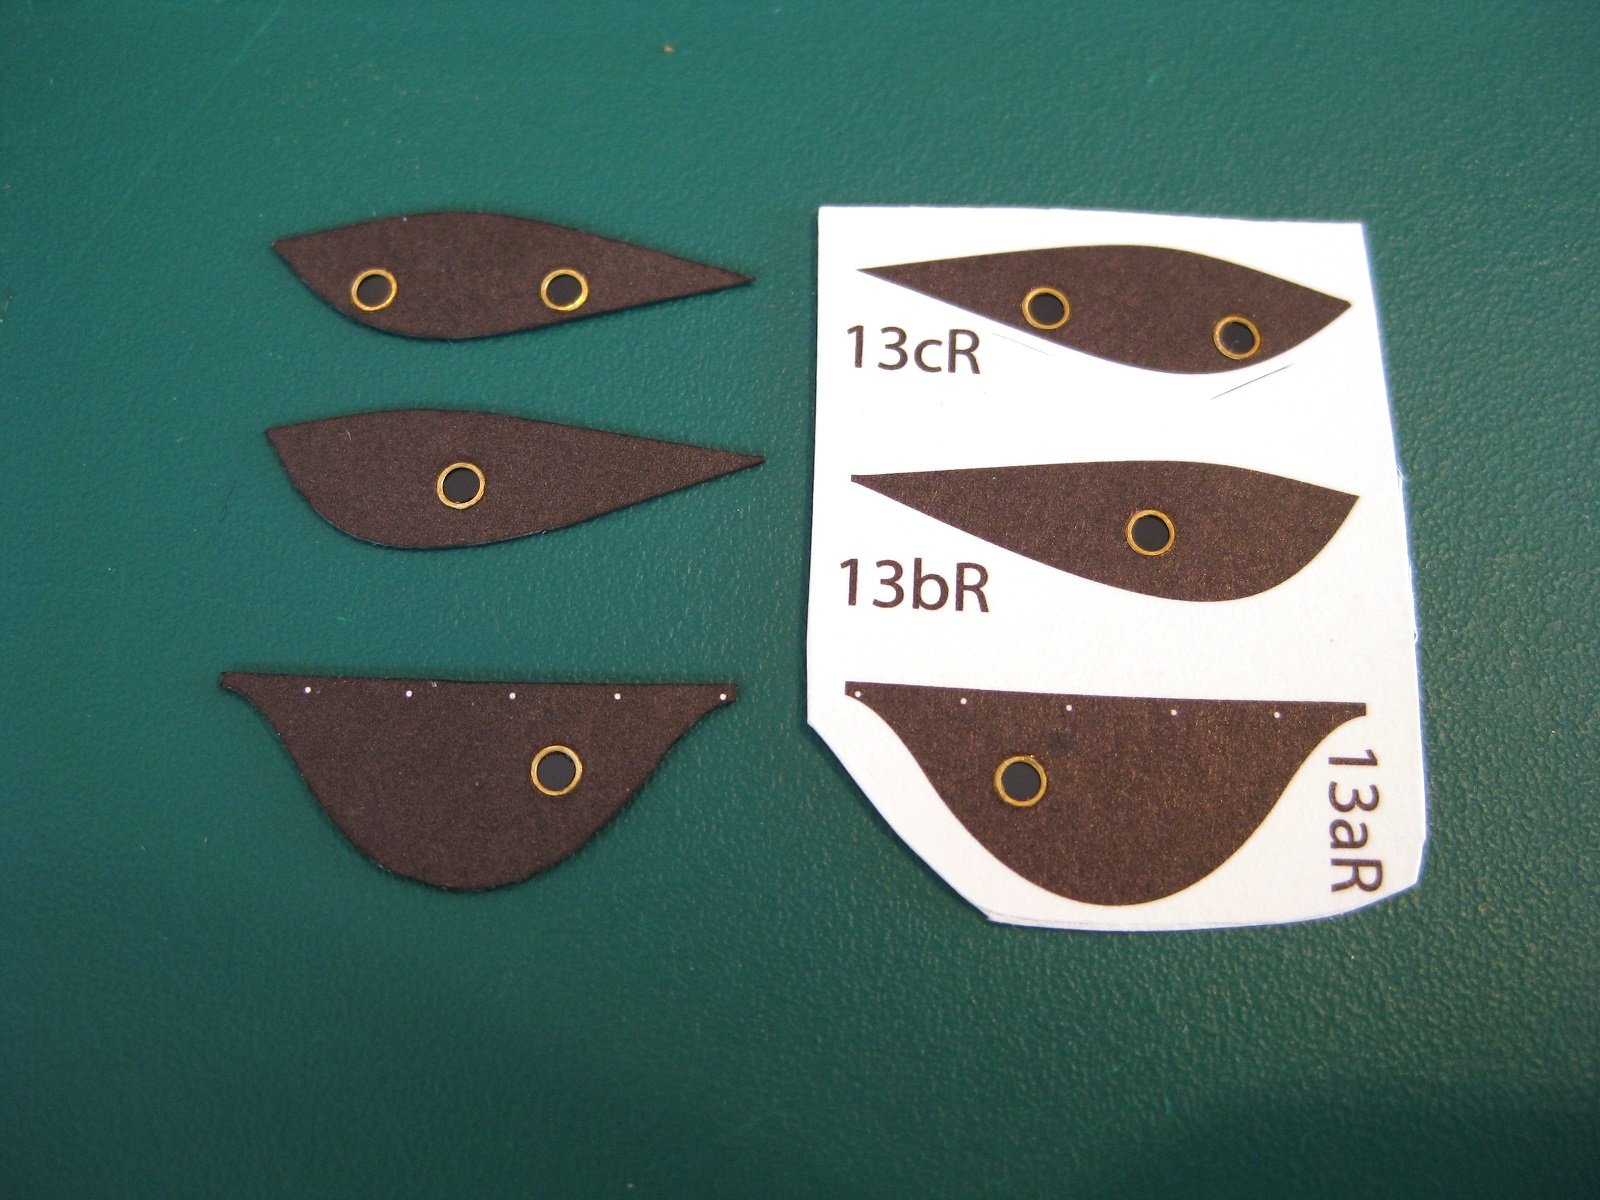
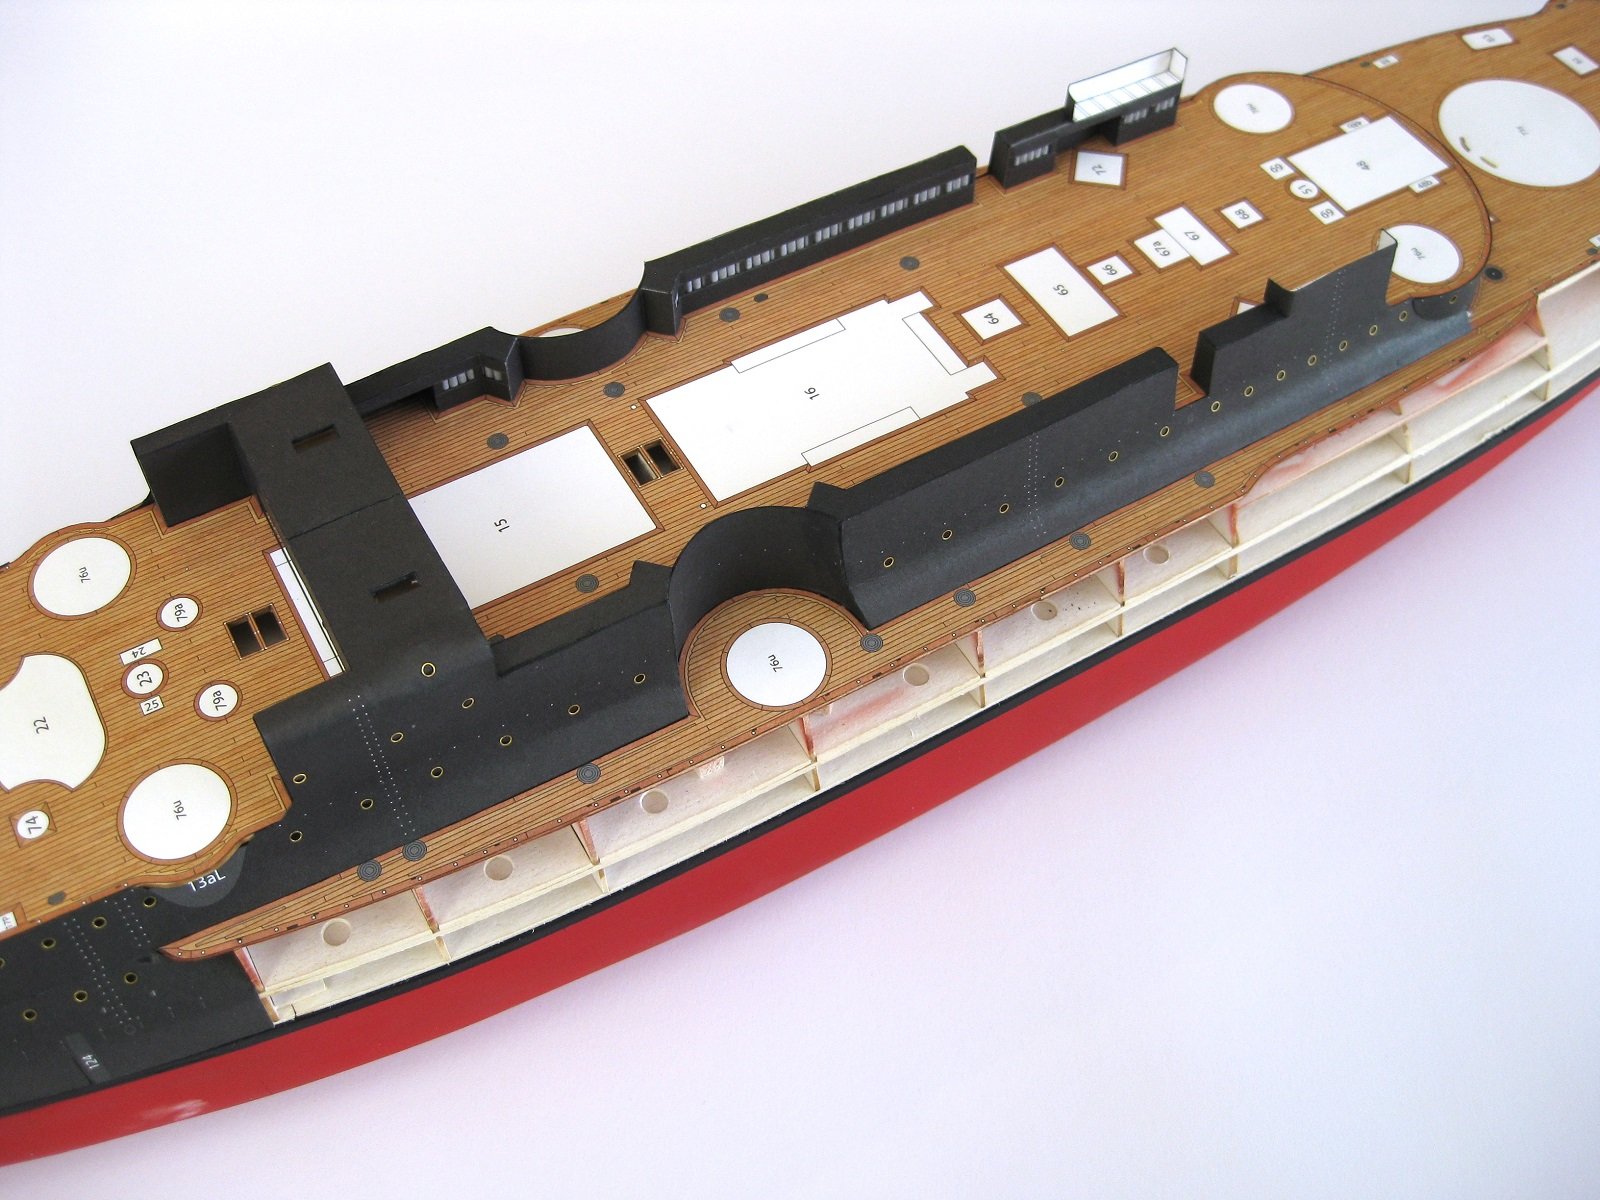
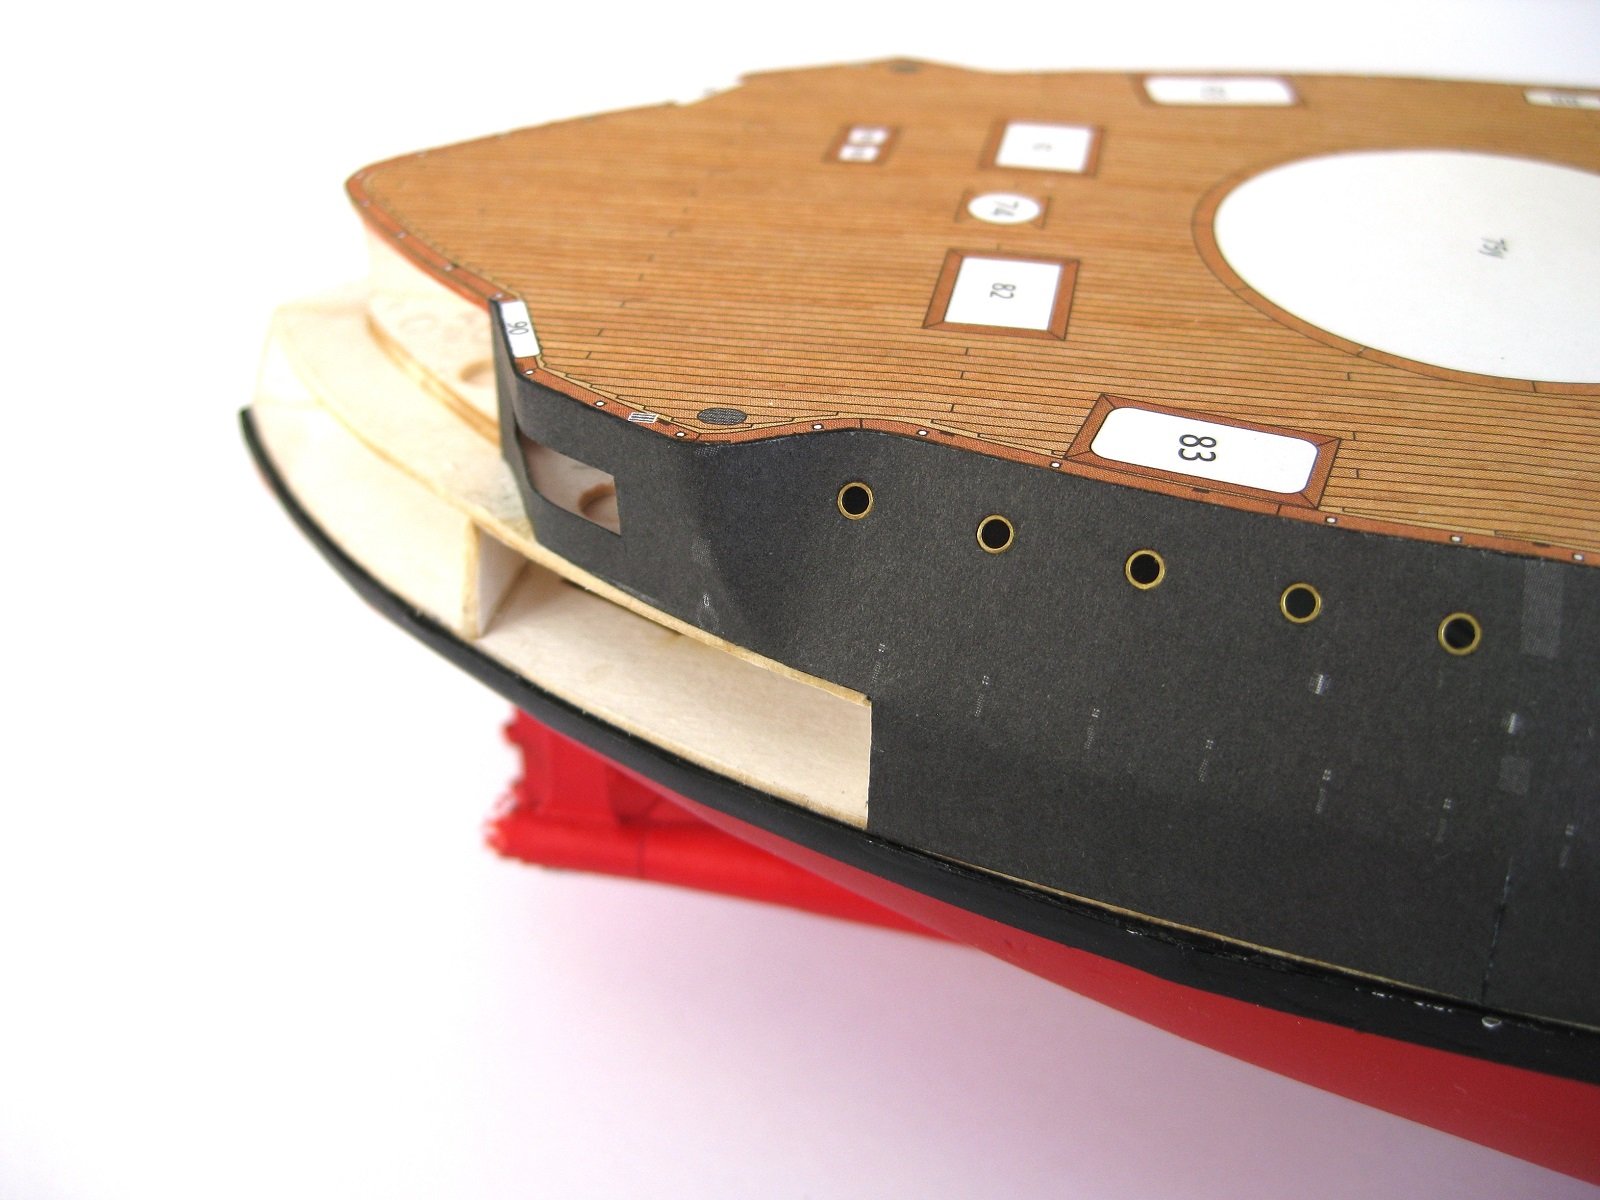
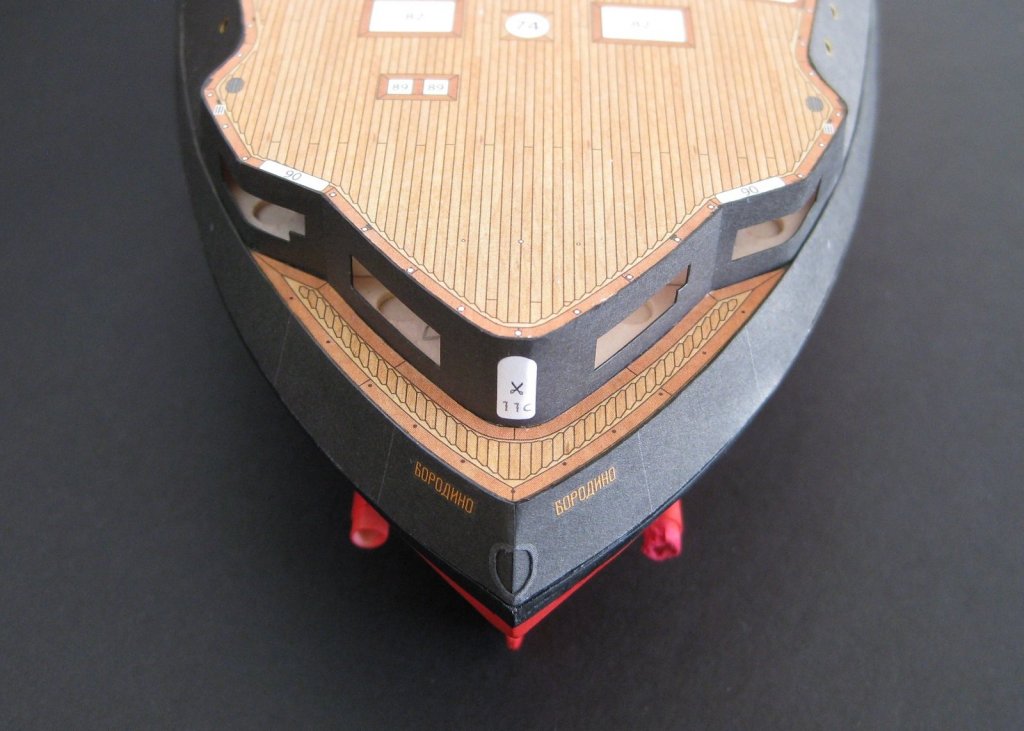
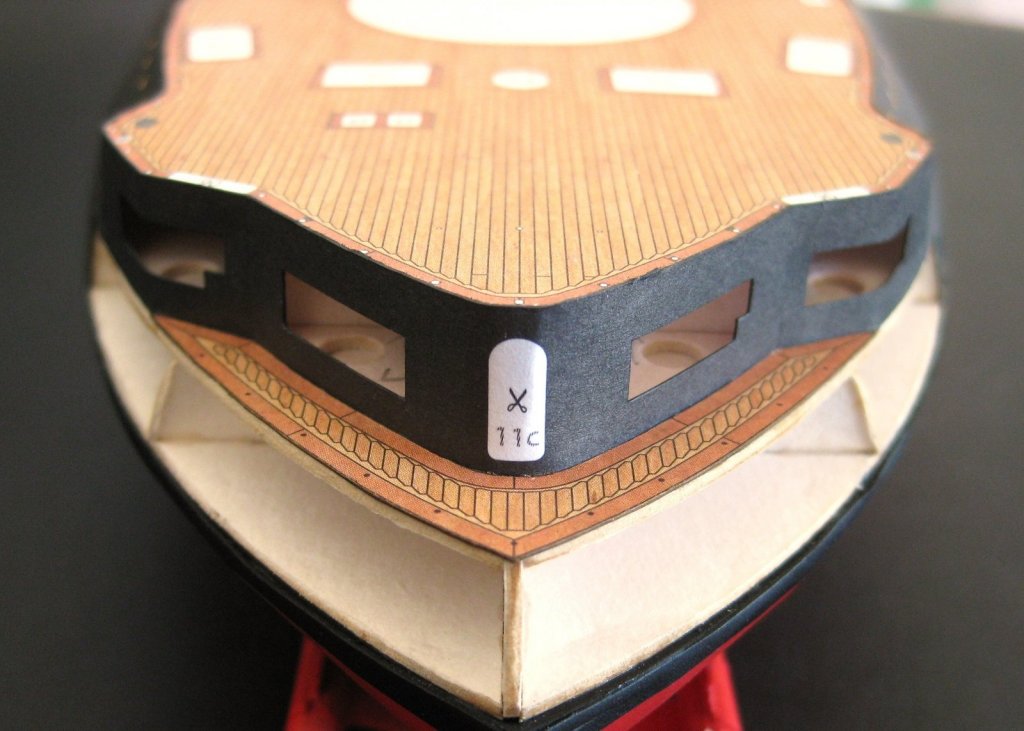
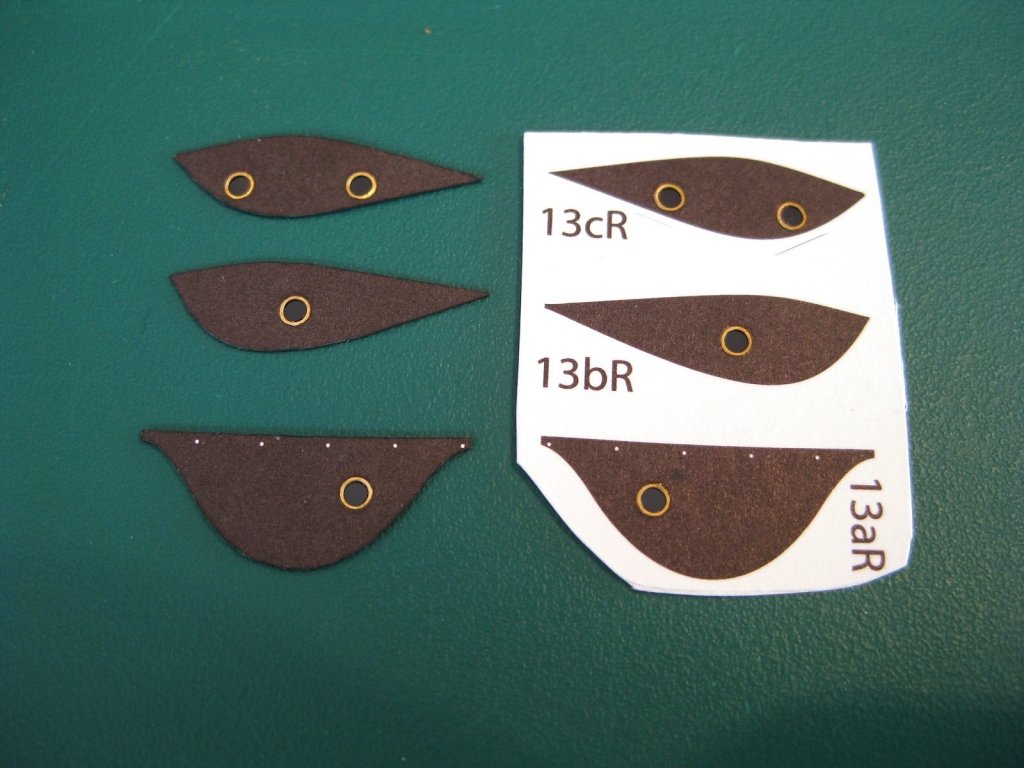
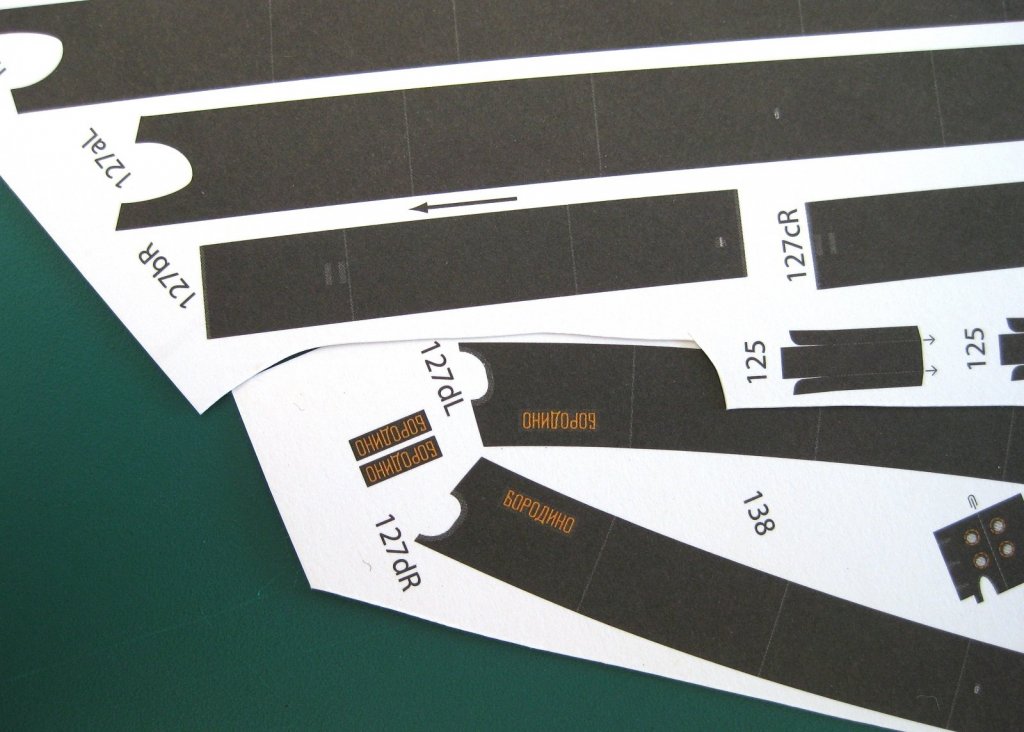
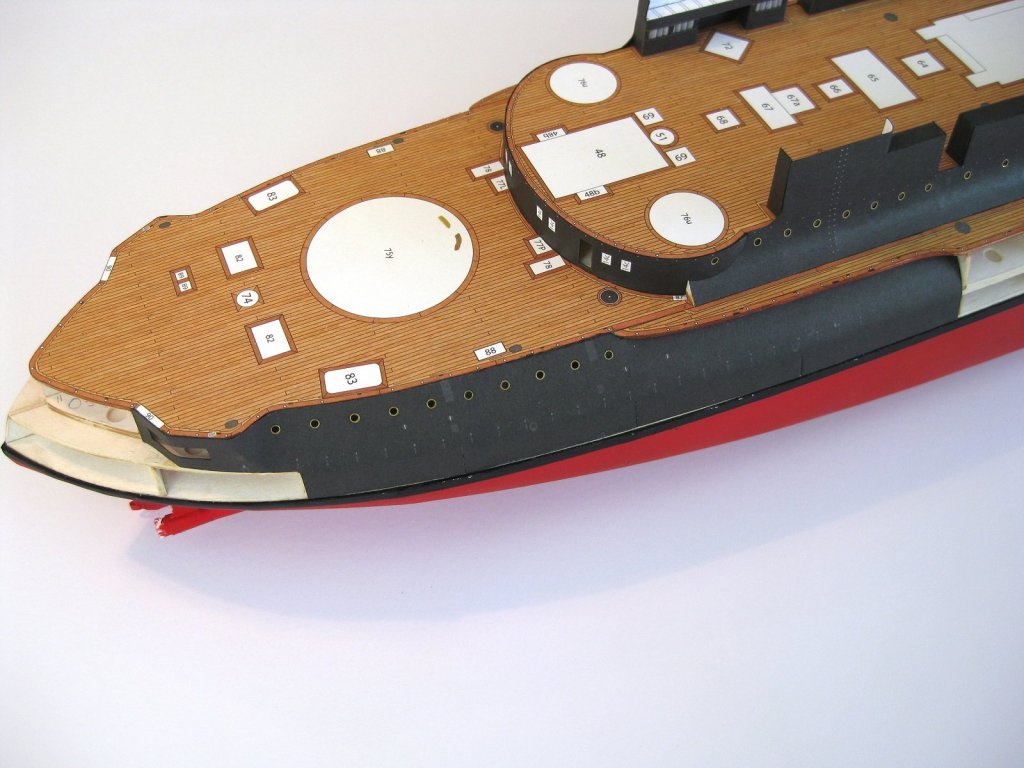
Hi All and thanks for all the likes, The hull is nearing completion with the fitment of the last 3 skins; these being the rear port skin as per the starboard one shown in the last progress post and both midship skins. The starboard midship one is shown below. These close off the mid-section and cover the rear, tucked in, sections of the tumblehome. Ignore the thin line of former showing as this will be covered as discussed below. Now that all the skins are fitted there are a few bits and pieces to do for finishing the hull, which is covered below. The rearmost bulkhead on the ‘veranda’ deck (Captains walk?) is now installed along with the deck itself. The gun ports were cut out as detailed previously throughout the log but I chose to leave the rearmost hatch in place despite having ‘scissors’ for removing; the reason being that a vertical former would run right down the middle of the opening! The rearmost deck was then fitted. Getting on to the finishing bits now. These are the closing panels for the underside of the 3” & 6” gun bays where they protrude outside of the hull. They have received the usual 2mm photoetch porthole and mylar treatment. Next is a photo of the lower belts which tidy up the bottom of the hull skins, hiding any forms showing and the vertical cuts in the skins. The rear end has the ship name printed on it and I do like the printed colours and Google translator confirms they do indeed say BORODINO. The detail set comes with photo etch name plates but I think I will stick with the coloured paper ones. Also parts 125 can be seen and these are bilge?/deck? drains?/scuppers? which need to be installed between the belts sections and there are 3 per side (124, 125 &126). I decided I will attach the eagle figure head at this stage also and again I do like the colours of the paper part but would be difficult to cut out satisfactorily. The photo etch one from the detail set is shown next to it and I will use this as is. I may tone it down a bit later but will see how it looks in place. The next post should see all of the above fitted. Cheers Slog


- 244 replies
-
- 9
-
-
- borodino
- dom bumagi
- (and 1 more)
-
Wow, that finished mast looks stunning particularly the rigging and all the steps, very neat. Cheers Slog
-
Well done Danny, you'd never guess this was your first attempt at card modelling!
- 193 replies
-
- 4
-
-
- cerberus
- paper shipwright
- (and 1 more)
-
Hi Craig, Thanks for your vote of confidence. My total card modelling experience is here on this site but I will definitely help where I can and feel free to message as you need. Don't forget Chris ( ccoyle) who is the resident card guru who I picked up most of my techniques from and I am sure he will drop in once you start your log. I advise going through his tutorial in the card section also. RE laser cut details, I haven't used them so can't fully answer your question. I know Chris is a fan and I believe they are easier to work with particularly things like railings. I went with photo etch as I assumed they would be finer especially things like gratings etc. Good luck and looking forward to following along. Cheers Slog
- 151 replies
-
- 4
-
-
- duke of york
- tamiya
- (and 2 more)
-
I would be the last person to judge someone diving in at the deep end, go with what interests you is my mantra. I look forward to a review of it and I hope you do a build log when you start it. Cheers Slog
- 151 replies
-
- 4
-
-
- duke of york
- tamiya
- (and 2 more)
-
Nice progress Craig. Time to move up to 1/200 scale with the card models. Looking forward to seeing what ones you got. Cheers Slog
- 151 replies
-
- 4
-
-
- duke of york
- tamiya
- (and 2 more)
-
Hi Danny, I know nothing about doing water but I like what I see! Really sets the model off. I keep wondering what you are going to come up with next if your next model doesn't arrive soon...the devil finds work for idle hands and all that lol cheers Slog
- 193 replies
-
- 6
-
-
- cerberus
- paper shipwright
- (and 1 more)
-
Great job Danny! looking forward to your next one. Cheers Slog
- 193 replies
-
- 3
-
-
- cerberus
- paper shipwright
- (and 1 more)
-
Hi Danny, That rendered images you posted from the book look amazing. Great work on the little details. Looking forward to you next build...or will it be a dual build! cheers Slog
- 193 replies
-
- 2
-
-
- cerberus
- paper shipwright
- (and 1 more)
-
Nice extras you are adding. I get a surprise every time there is a body part in the photo at how small everything is! Cheers Slog
-
Hi Greg, I am sure you know this already but Borodino is available in 1:350 scale by Zvezda and looks like White Ensign do a PE set for it as well. Gun barrels are also available but not sure about wood decking. I like how Trumpeter have released a 1:200 pre-dreadnought I hope more of these type of ships are released at this scale. Hi Craig, most 1:200 scale card ships will have brass gun barrels sets available and many also have photo etch detail sets but these are nowhere near the size of the sets available for plastic. Typically 2 or 3 smallish frets specific to the ship but generic railings, ladders, stairs etc are readily available. I always say this, but I recommend getting the laser cut forms also if available. I nearly always use GPM from Poland for my card model orders. The link is in the first post of this log. Its been a while since I ordered from them and it can be a pain (I am sure Danny will agree with this) but unless someone knows otherwise they are the best stocked company I am aware of. I have one more 'must get' IJN battleship to get but have another potential one; never mind all the Russian Pre-dreadnought and military vehicles I 'need' LOL
- 244 replies
-
- 5
-
-
- borodino
- dom bumagi
- (and 1 more)
-
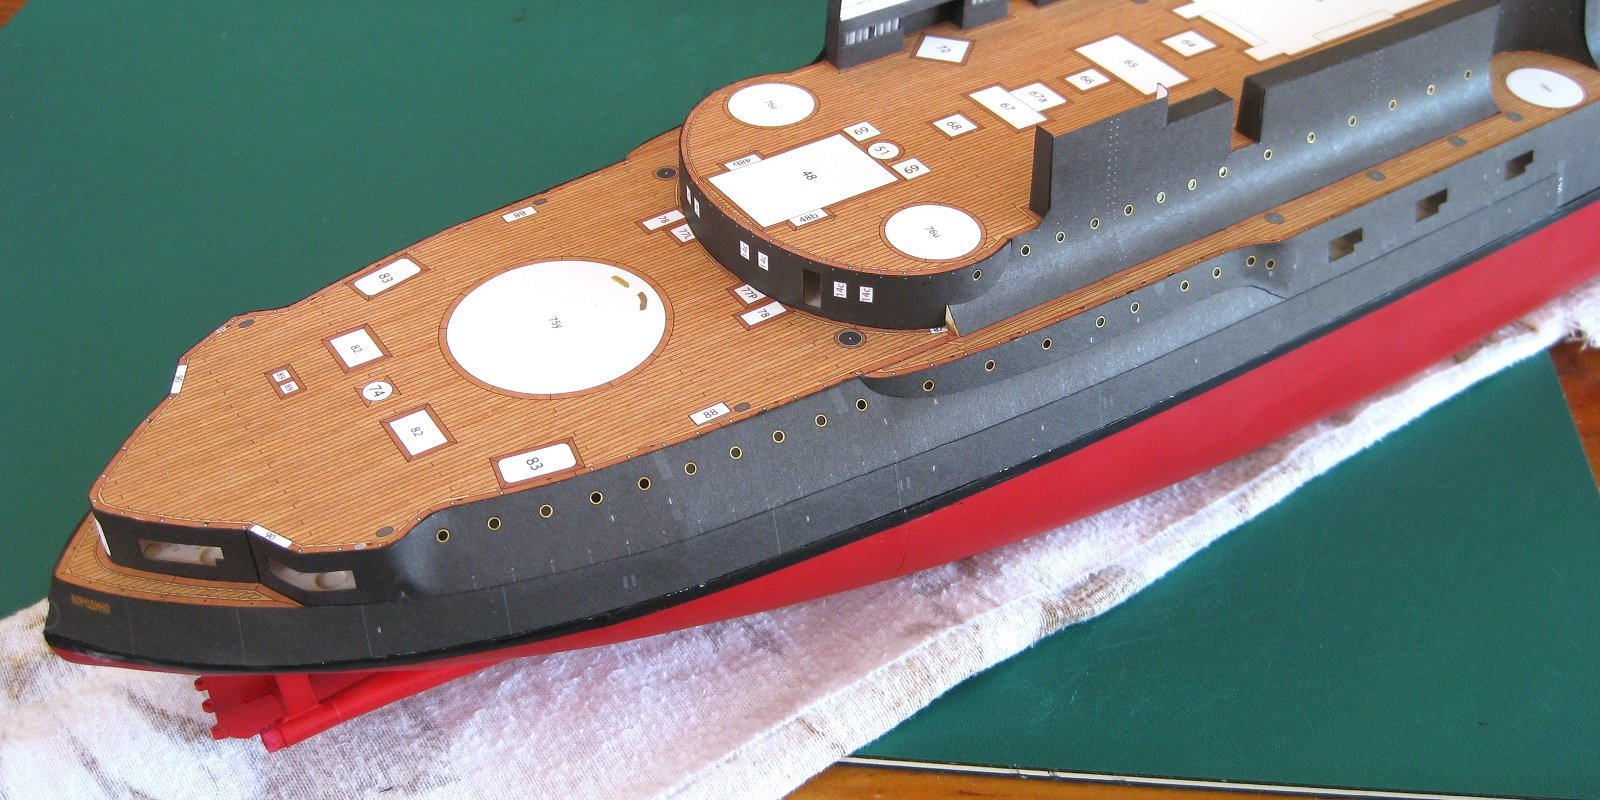
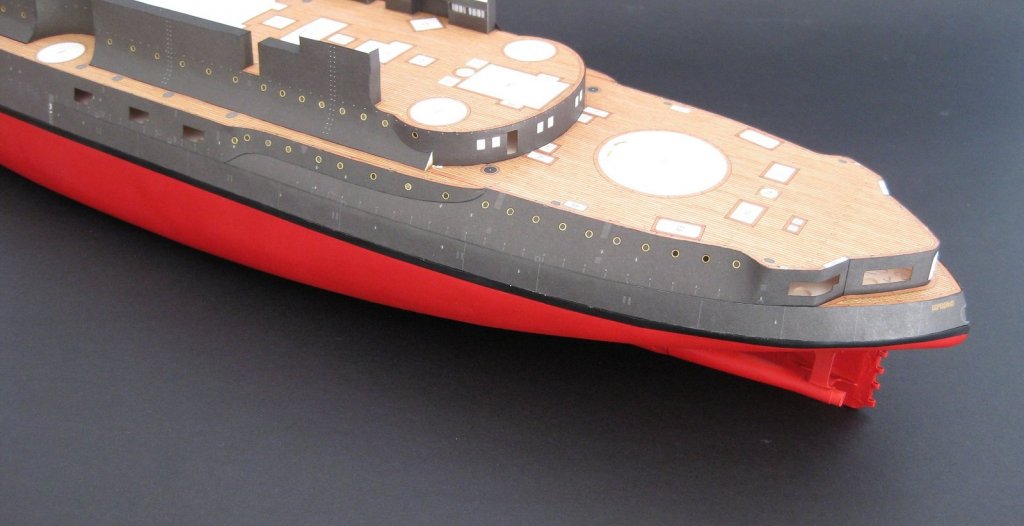
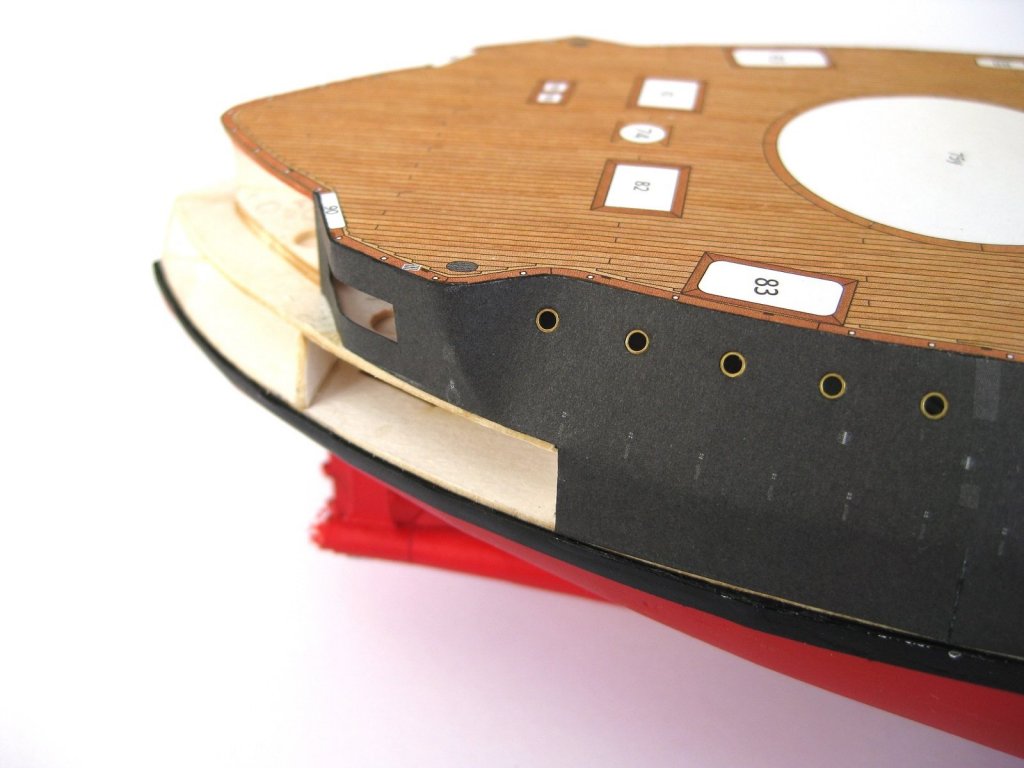
Hi Eddie, thanks for dropping by. Hi Danny, glad it is of help, look forward to you starting your AMATSUKAZE. Thanks to everyone for the likes, it is greatly appreciated. Well I have finally got spare time on my R&Rs to get some modelling done. It was near the end of March since I last picked up a knife! Hopefully the rest of them should be free for a bit. Some progress to show. If you remember the port hole and mylar on the upper starboard hull skin caused a bit of buckling where it bent round the curve. Well before fitting the port side skin I managed to pick out the photo-etch ring and slice the mylar off the rear without damaging the skin. I glued on some new mylar ‘glass’ and fitted the skin to the hull and it still had a bit of buckling around the curve although not as bad as the starboard side with both mylar and porthole. After fitting of the skin I cleaned up a new porthole and bent it to a bit of a curve and dropped it back into place. With both upper skins on I could finally glue into place the rear lower deck followed by both side decking. I had to spend a fair bit of time trimming and offering up until satisfied with the fit. I reckon this is a result of my previous form work and not a deficiency of the kit. The side skins have been a perfect fit to date. With the rear and side decks now fitted I can now continue with the remainder of the skins. The rear skin was pretty straight forward noting that the fore section of it tucks under the side deck and is covered by the last side skin. The thin line of former showing below the skin is not an issue as there is a final belt to go over this lower section which will hide a lot of sins. This belt also closes off the very rear of the hull A couple of shots of the skin where it wraps round the 3” gun openings. This was a bit tricky due to the close together changes of direction but turned out not to bad. Although I still have the rest of the day to model I like to stop after doing a hull skin or two as I find them quite stressful and don’t like to push my luck LOL. Cheers Slog

- 244 replies
-
- 10
-
-
- borodino
- dom bumagi
- (and 1 more)
-
Hi Danny, Looking good. You'll be itching for the destroyer to arrive! If I remember correctly I believe that laser printing is the issue with ink flaking off. Ink jets are fine apparently. To be honest that’s why I have never bothered with free or otherwise downloadable’s just to much hassle printing them out with my crappy printer or finding correct paper or local print shop not understanding the specific requirements etc etc (but that’s just me doesn’t seem to bother others.) You will find the commercial kit a joy to work with; the printing is spot on and the paper great to work with (in most cases, the Borodino paper doesn’t like doing some tasks). Of course I am speaking generally but I will stick with commercial kits personally. (You will still find rubbish commercial kits but sticking with the major players on the whole should be safe to a point) Cheers Slog
- 193 replies
-
- 4
-
-
- cerberus
- paper shipwright
- (and 1 more)
-
Hi Craig, Thanks for your interest; unfortunately I can’t see starting the Hood in the foreseeable future. It comes down to time, I am only home for 3 days every second weekend and for the past couple of months life has got in the way of that limited time although R&Rs should be free again from now for a while. It’s painful as really itching to do a plastic ship with a ton of PE after following yours, Gregs and others builds! I also really need to finish Borodino before starting something else and probably less than a third of the way through that. There is also a couple of card Japanese battleships that I am keen to get started on at least one of them so who knows. Cheers Slog
- 151 replies
-
- 7
-
-
- duke of york
- tamiya
- (and 2 more)
-
Fantastic looking crane Craig. Well done. Cheers Slog
- 151 replies
-
- 6
-
-
- duke of york
- tamiya
- (and 2 more)
-
I think that's acceptable, wood is just paper ore after all. Enjoying following your progress. Cheers Slog
- 193 replies
-
- 3
-
-
- cerberus
- paper shipwright
- (and 1 more)
-
Hi Craig, really enjoying following your build. can you tell what paint you are using and if it is as per the kit instructions? It looks quite dark to what I imagined (I have no experience or knowledge of RN colours) as thinking the HMS Hood on my to do list will be similarity coloured. cheers Slog
- 151 replies
-
- 5
-
-
- duke of york
- tamiya
- (and 2 more)