Captain Slog
-
Posts
904 -
Joined
Content Type
Profiles
Forums
Gallery
Events
Everything posted by Captain Slog
-
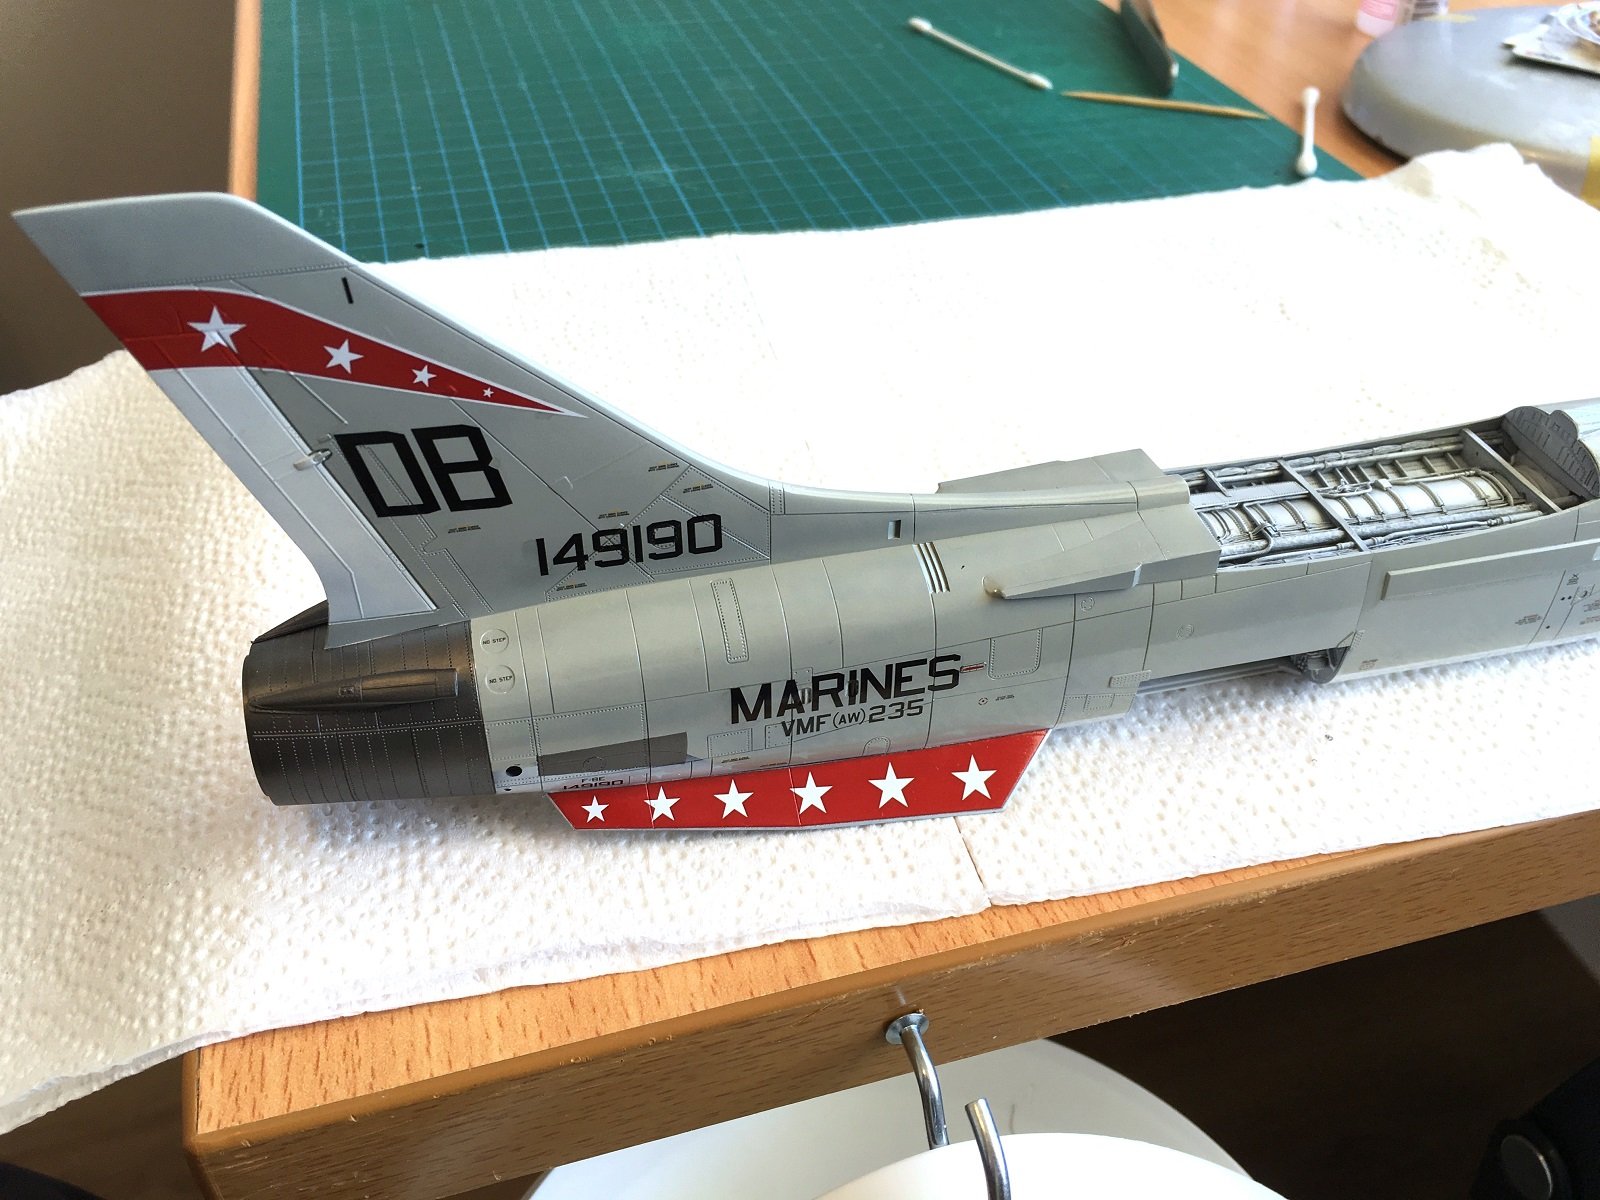
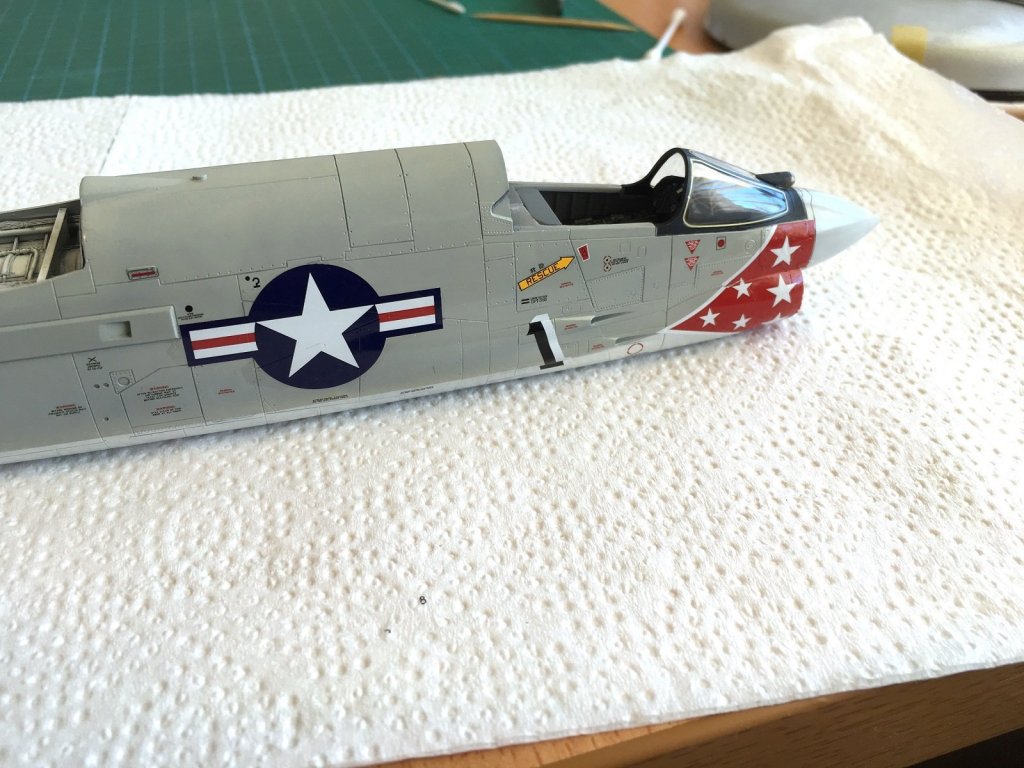
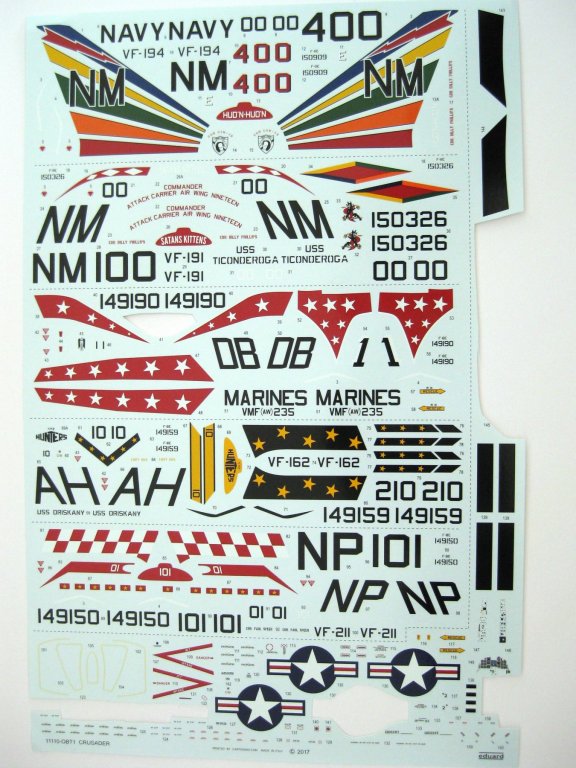
 Hi All, Some more progress. The other day I laid on a coat of gloss coat of Tamiya X-22 and I did the decals today on my ‘practice’ side. Bit hit or miss. The 2 issues I have is that although the Micro Set is fine the Micro Sol damages the paint. I had used it once before but thought it might be because I used it straight over Mr Hobby colour coat but it does the same with Tamiya clear. Will just need to be more careful when applying. The 2 area is the nose decal, this is such a complex area of different curves I couldn’t it get it to conform very well and continuously applying and removing and applying caused all sorts of tears and wrinkles which I will need to touch up with paint. I did slather the decal several times with Micro Sol and it did get somewhat better but still meh. My lack of decal experience certainly shows but hey got to start somewhere. The rest of them went on fine. Will go back over with Micro Sol another once or twice to get the larger ones to fully sink in to the panel lines a bit tighter. The decals are really nice and all the stencil data can actually be read. I will hopefully get the port side decals done the next day or so and then seal with gloss, do the panel lines and washes and finish with a mat or satin coat. But unlikely to get that far before heading off to Melbourne again. Cheers Slog
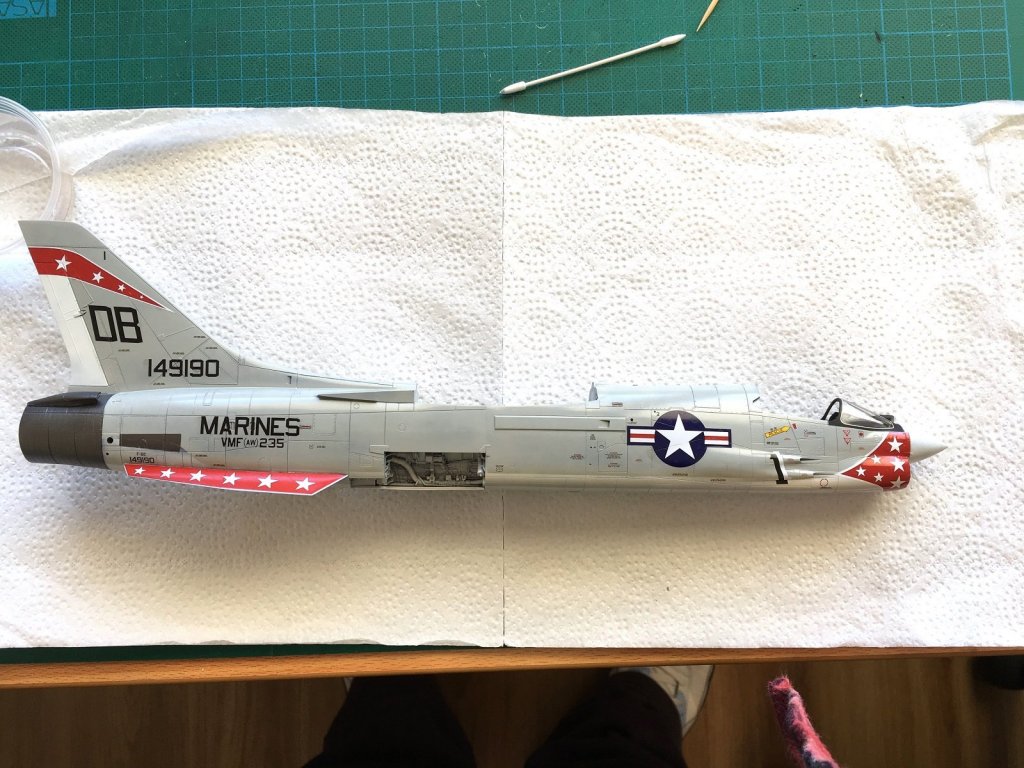

- 55 replies
-
- 19
-

-
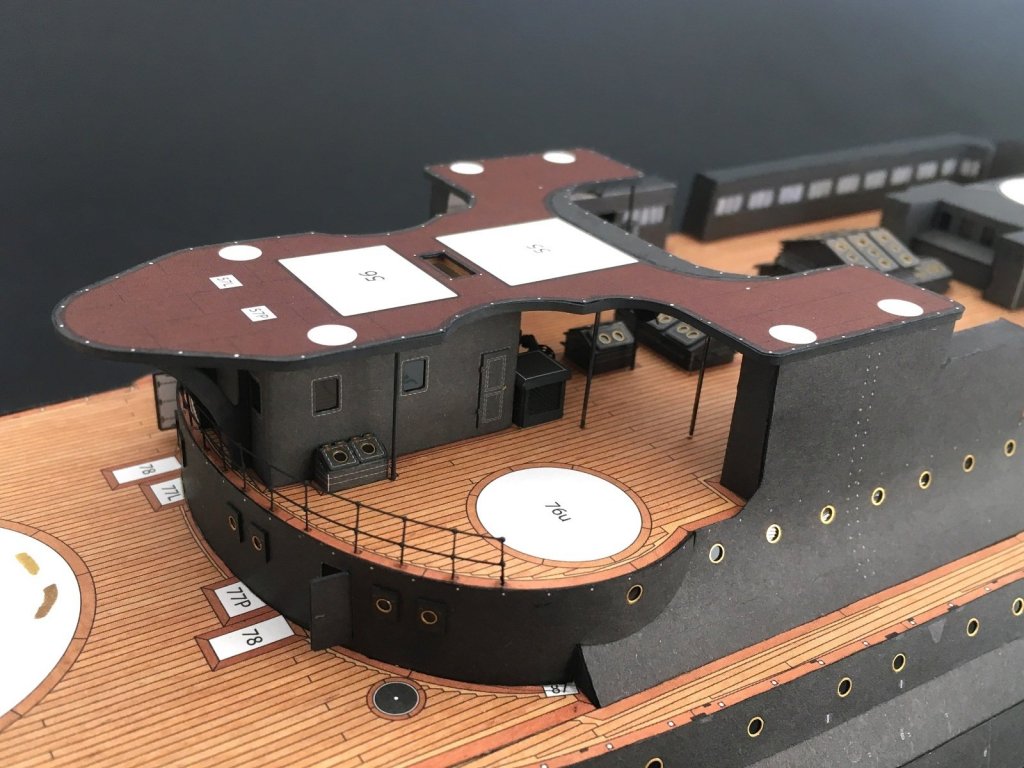
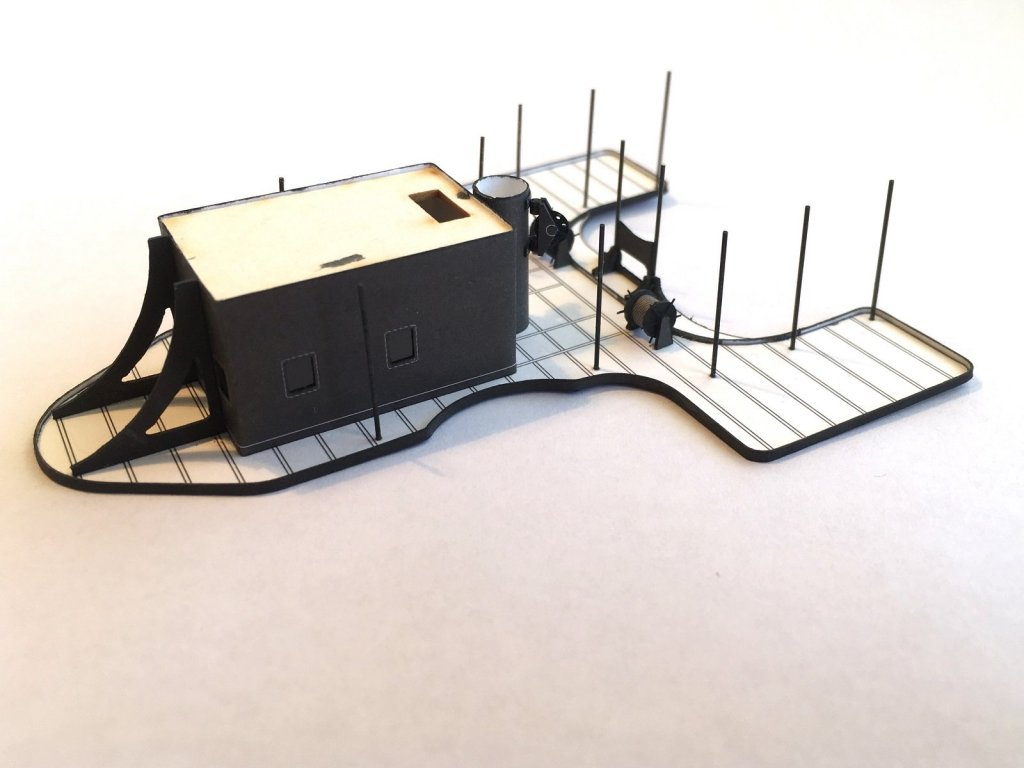
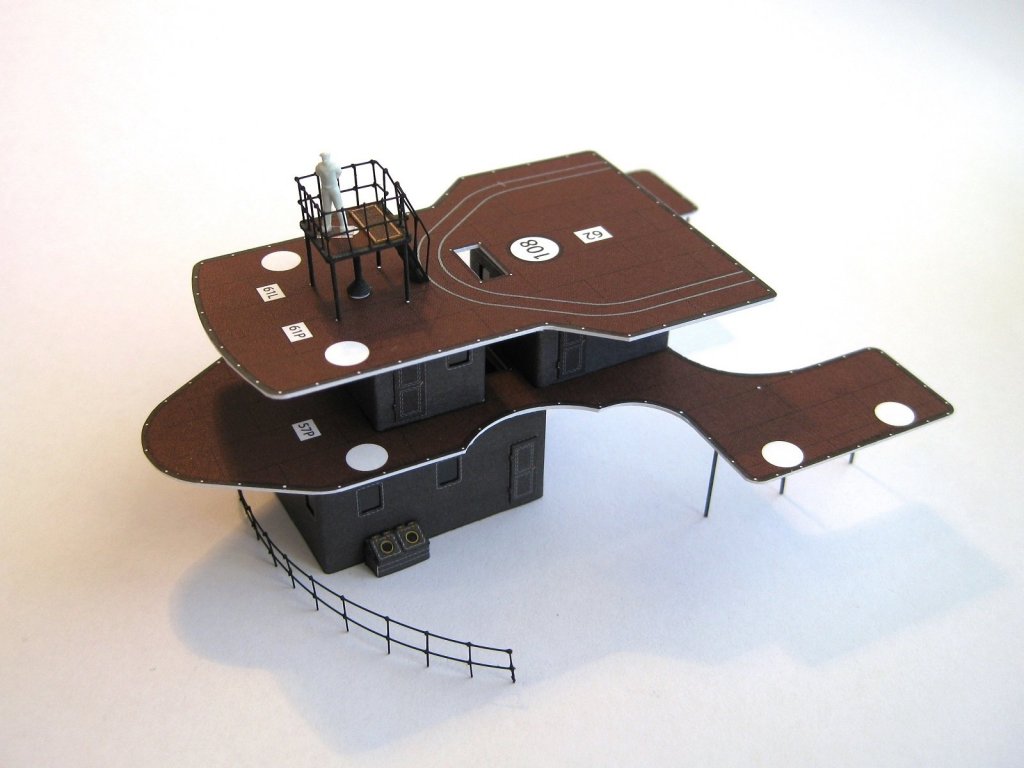
Hi All, Continuing on with the rear decks I attached the perimeter strip, the cabin, mast section and hose reels to the underside of the deck. There were a couple of braces at the front to finish and attach and a deck extension piece to fit against the perimeter strip. Then another support panel which I think a catwalk joins against. The 0.5mm support columns were chemically blackened and glued into position. The deck fitted into position. I attached the handrail before gluing the deck assembly into place and the whole deck dropped into place with no issues. My little 10 year old point and shoot has finally given up the ghost but since I couldn’t be bothered getting out the DSLR I tried using the iphone camera and on the whole the photos are pretty good. Cheers Slog
- 244 replies
-
- 14
-
-
- borodino
- dom bumagi
- (and 1 more)
-
Thanks to everyone for the interest, comments and likes, much appreciated. Thanks for the link Richmond. Turns out Hasegawa 1st released this kit in 2003 so yeah it's getting a little long in the tooth compared to latest offering but despite it's age goes together perfectly and has no flash, sink marks or any other foibles. I haven't experienced any issues with the coloured PE etc the coating has a tendency to flake off when bending it! I also use normal PVA and have tried the crystal clear also with good results. I used it for the side consuls. It certainly has, there has never been so much choice in all genres and the aftermarket has gone insane with upgrades, detail sets, decals, the works. Thanks for your real world input. F-4's a personal favourite of mine I have a 1/48 F-4B in the stash which I will model as a bomb truck in VF-111 'Sundowners' the best markings ever...well maybe 2nd to the Jolly Rogers! One of my favourite photos is of a sundowner diving at about 45 degrees unloading it bombs! Thanks Vossie, on a youtube documentary there was a story where one was launched with the ends of the wings still retracted up in the storage position but he was able to eject all his stores circle round and land again! Saying that I am led to believe that the type had one of the highest loss rates ever for a military aircraft, an order of magnitude much higher than the next high loss aircraft. I managed to get a restock on levelling thinners yesterday so will get a gloss coat laid down and on to the fuselage decals. There aren't a great deal of stencil data to add, which I don't mind really as find it very therapeutic but will start to show a lot of colour and progress quickly with the larger decals which will be good. Being a Hasegawa kit as usual they don't supply any stores or weapons but they do pylons!? I have left them off as didn't feel empty pylons add much and especially left off the fuselage side mounted pylons as even with a sidewinder (if I had any aftermarket ones) they spoil the shape fuselage. I'll just pretend it's in transit! Thanks again to everyone for the interest and comments. Cheers Slog
-
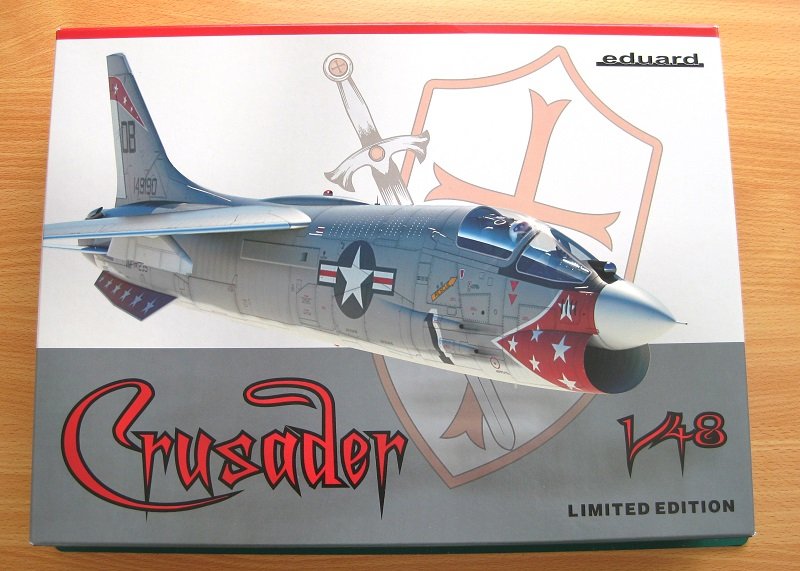
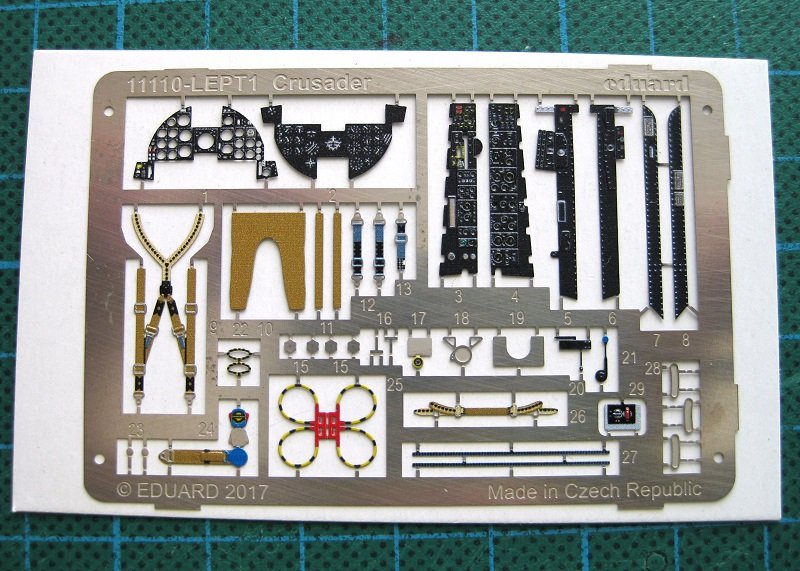
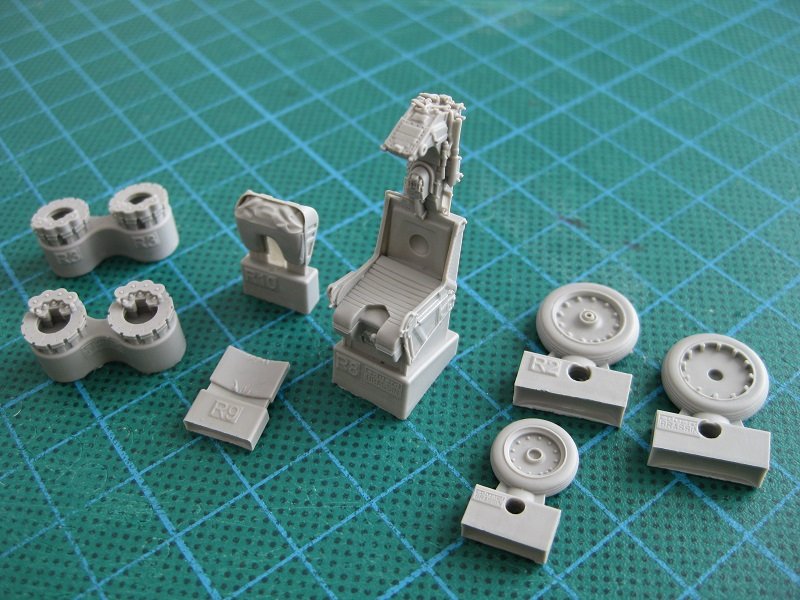
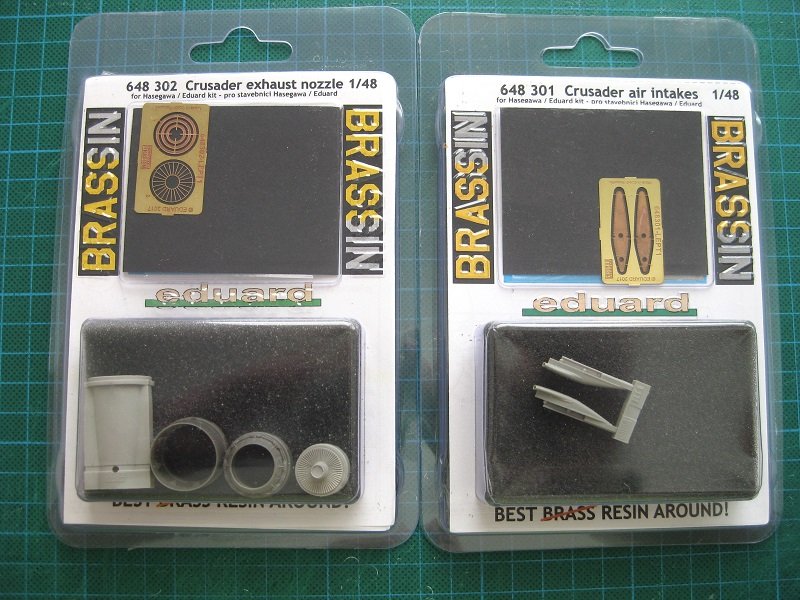
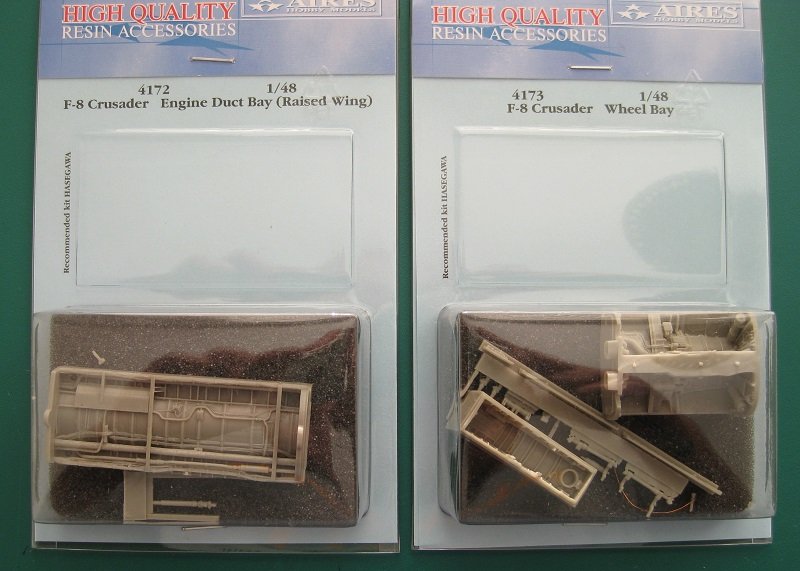
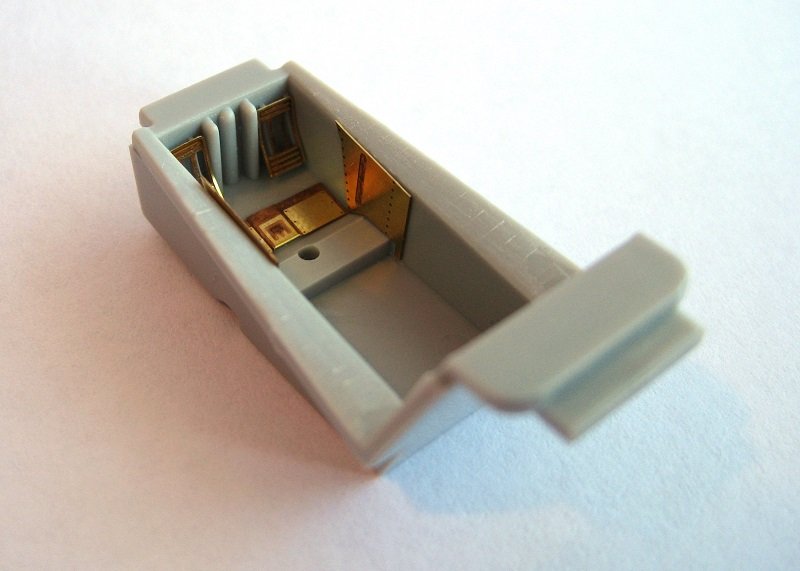
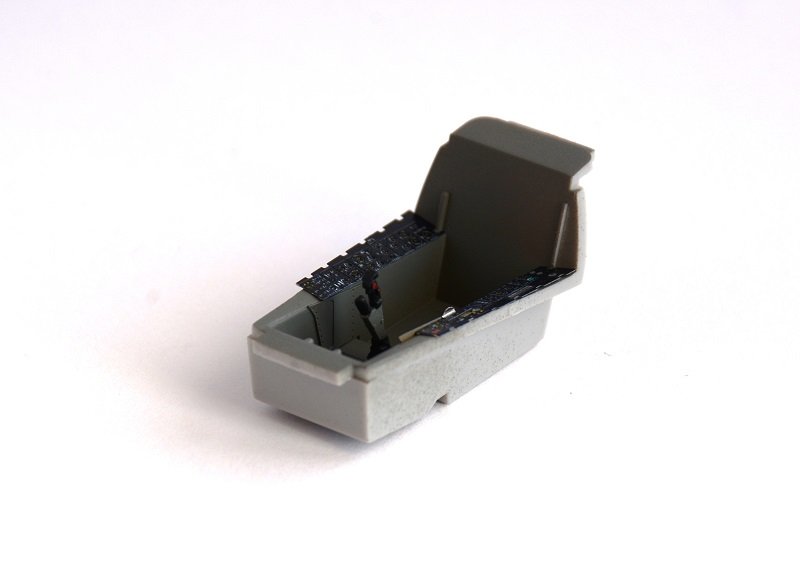
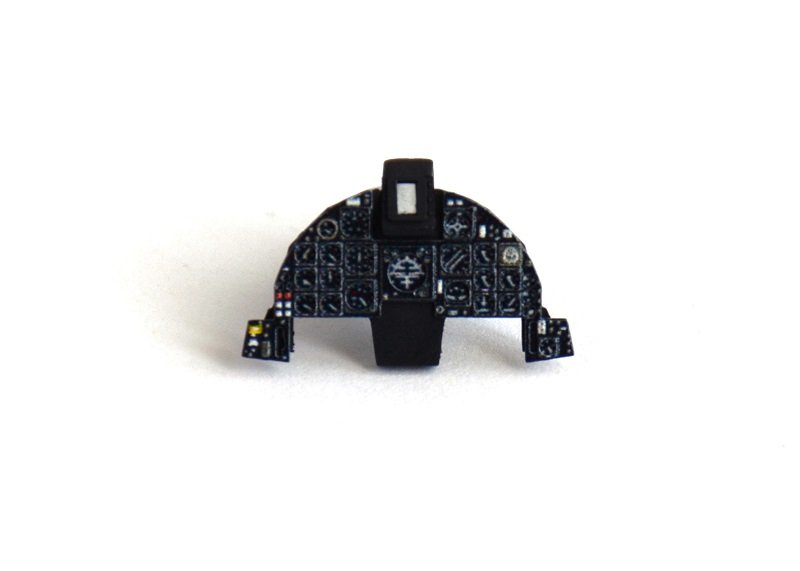
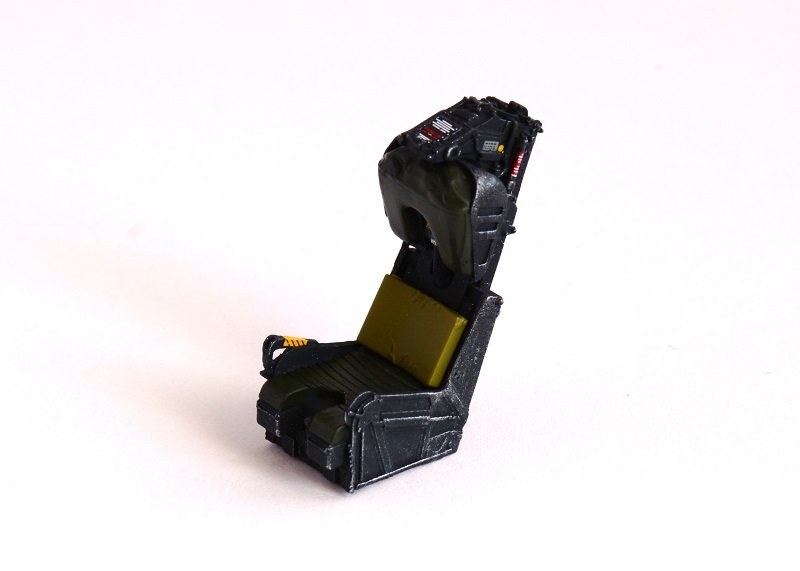
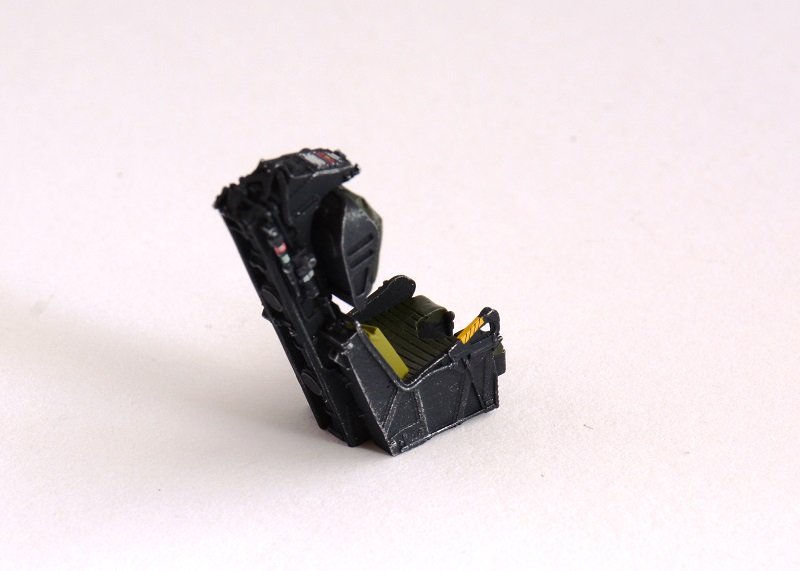
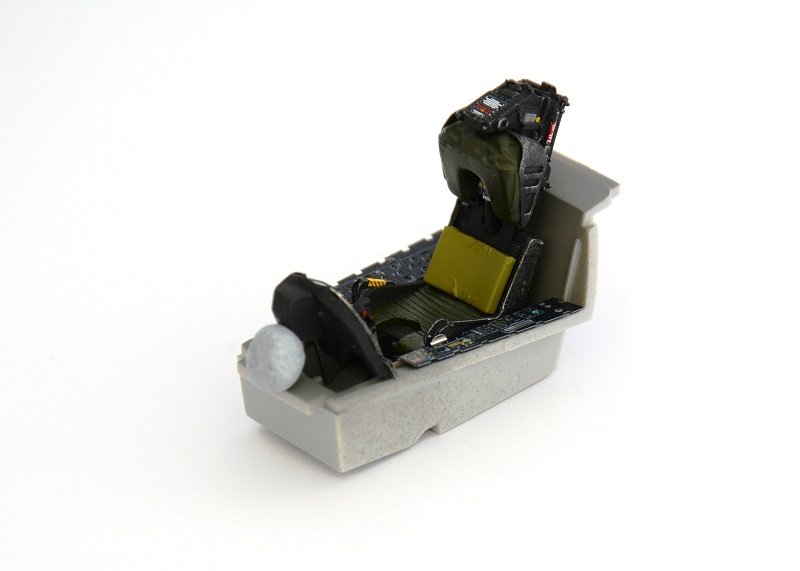
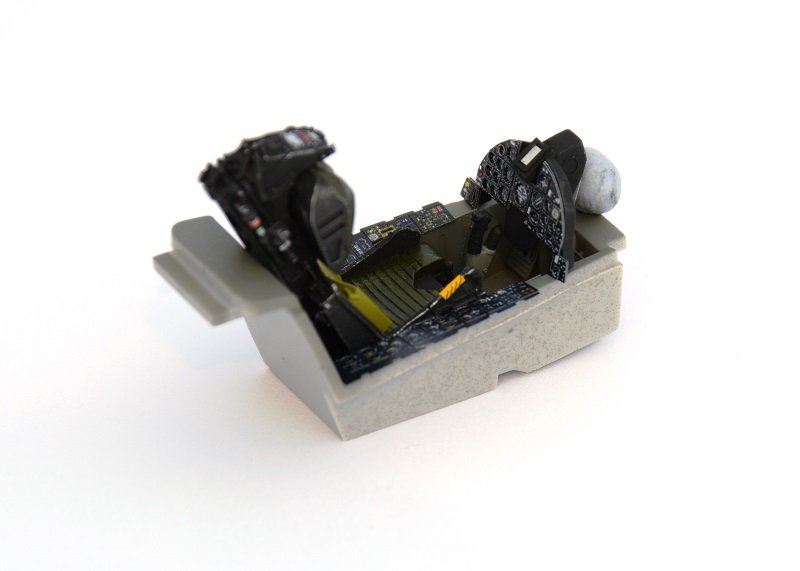
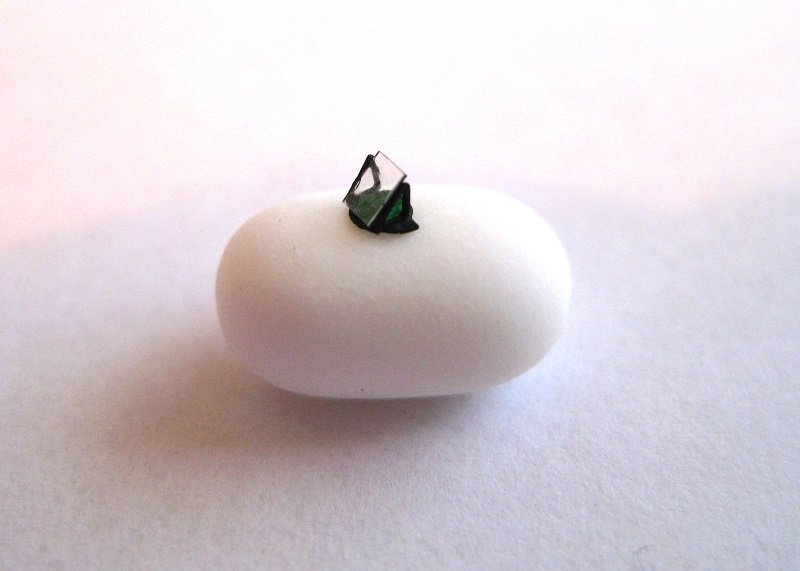
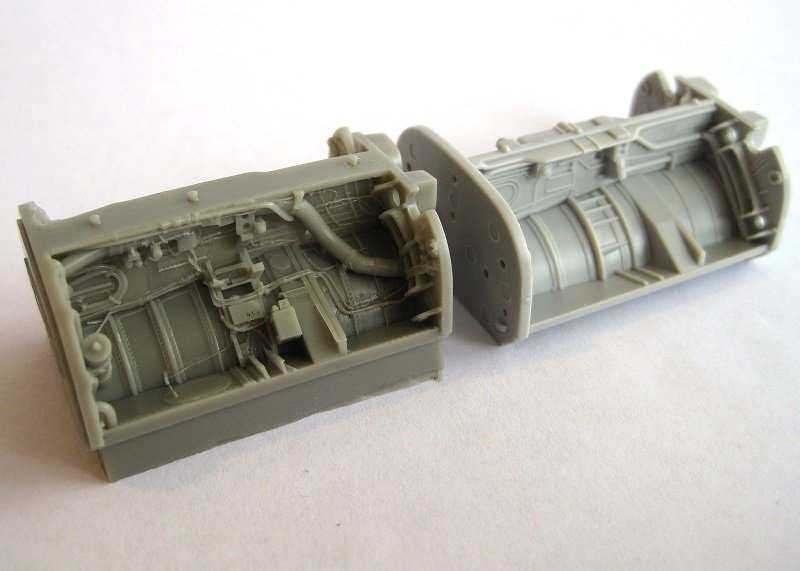
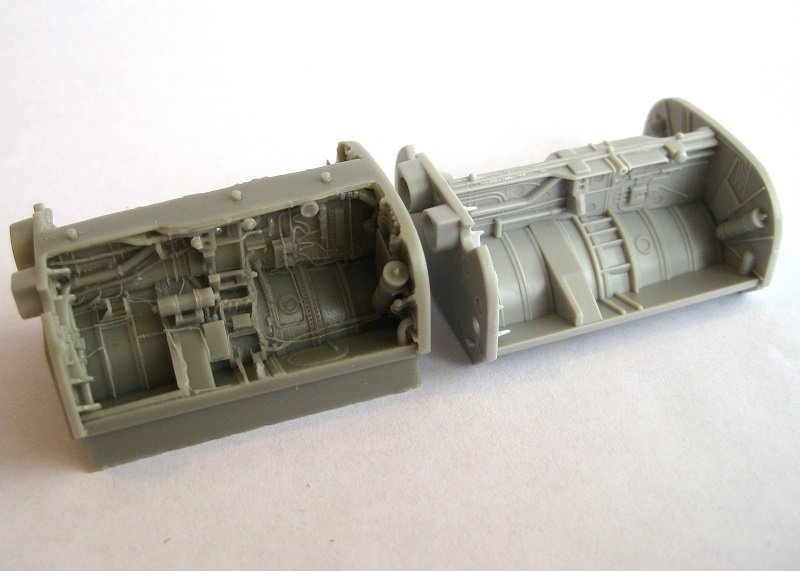
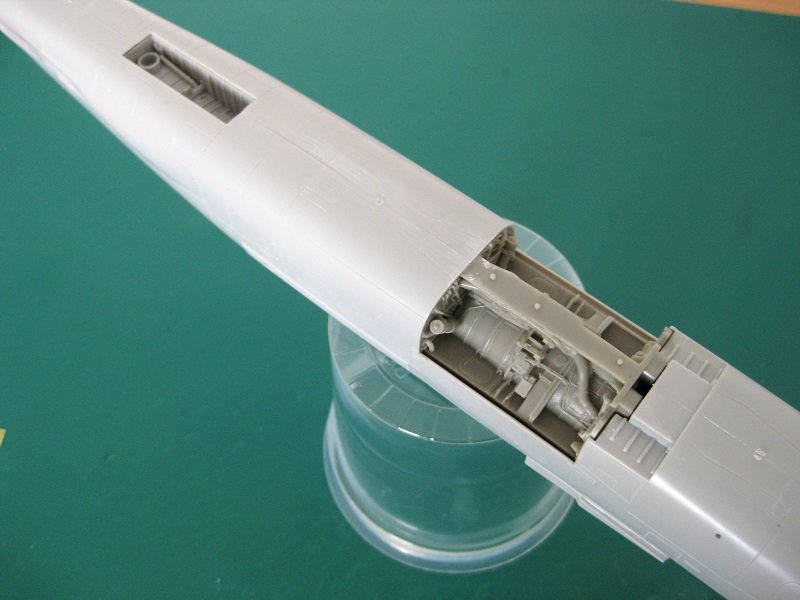
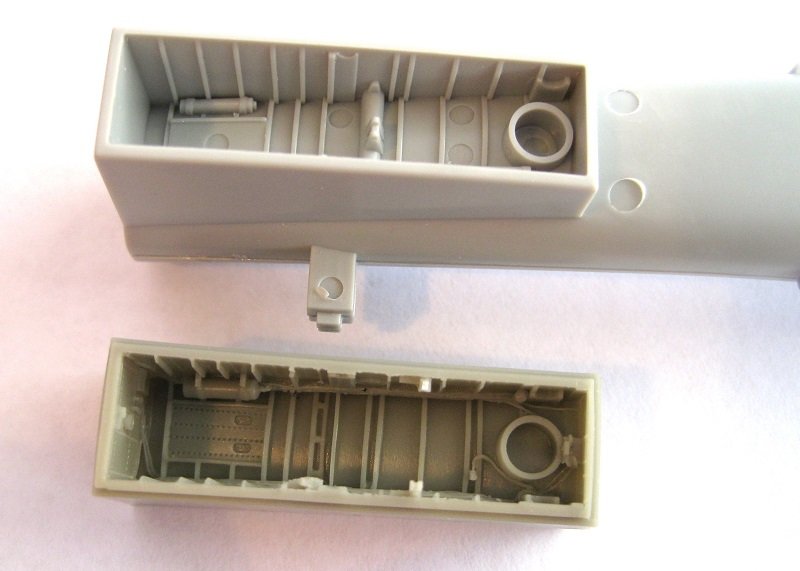
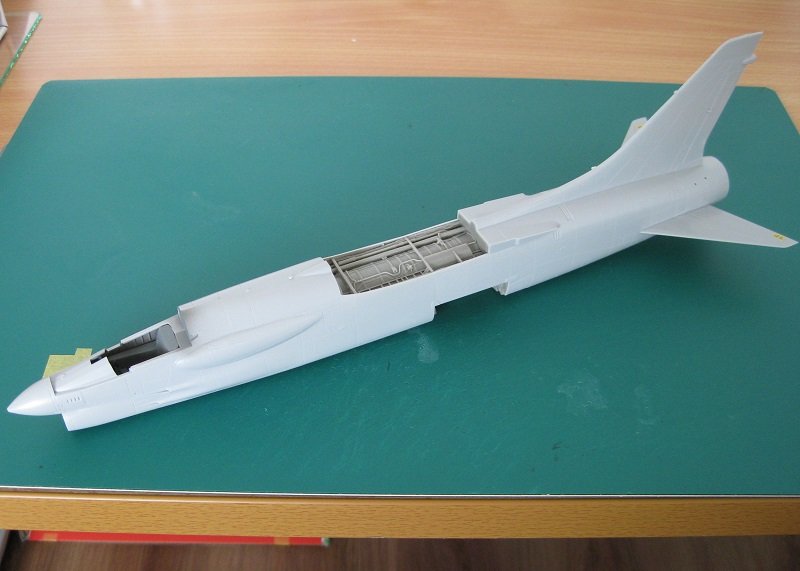
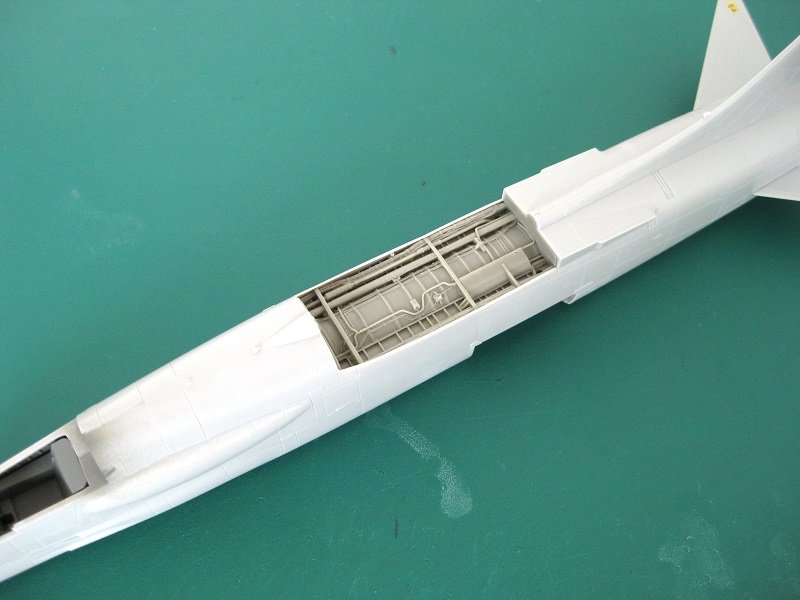
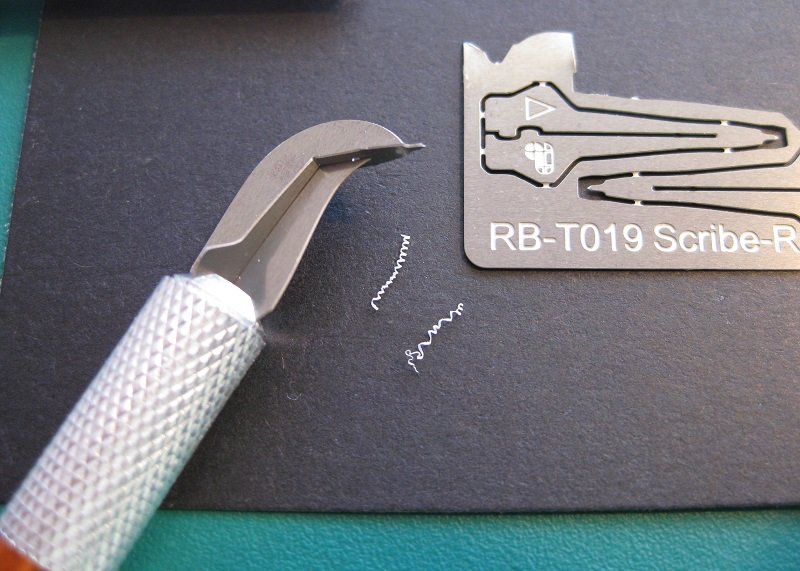
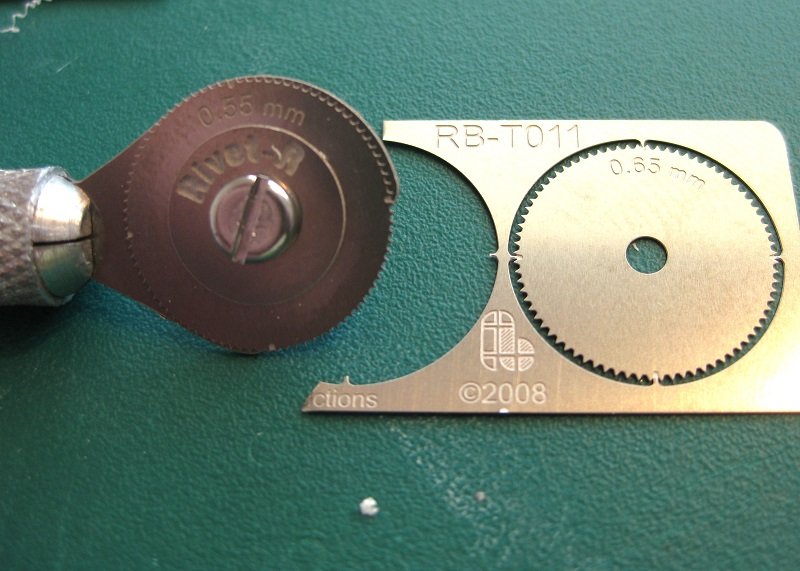
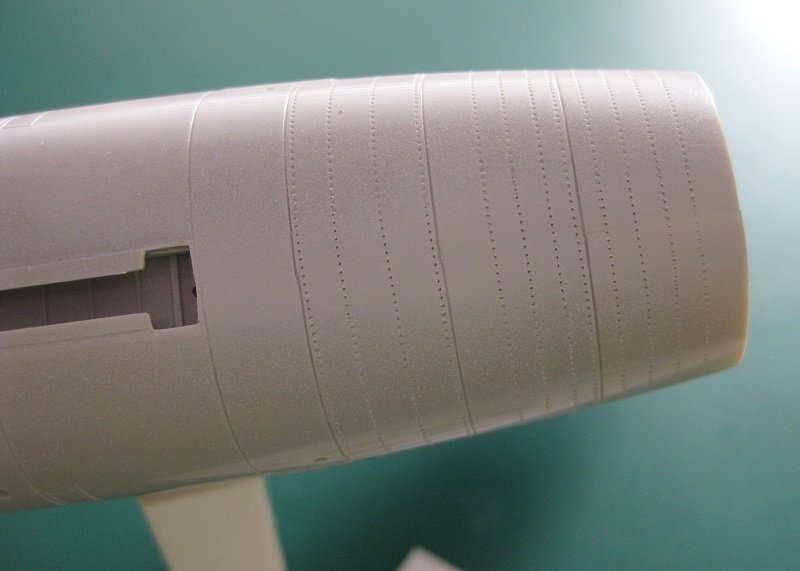
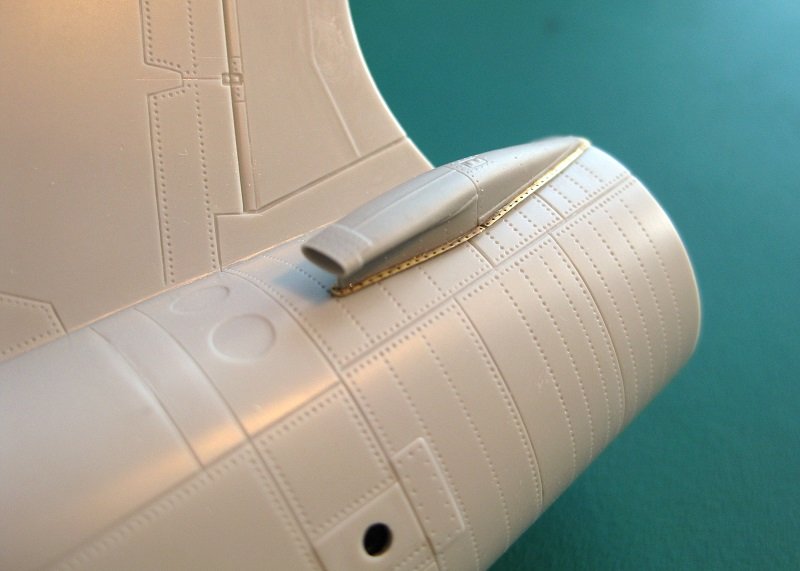
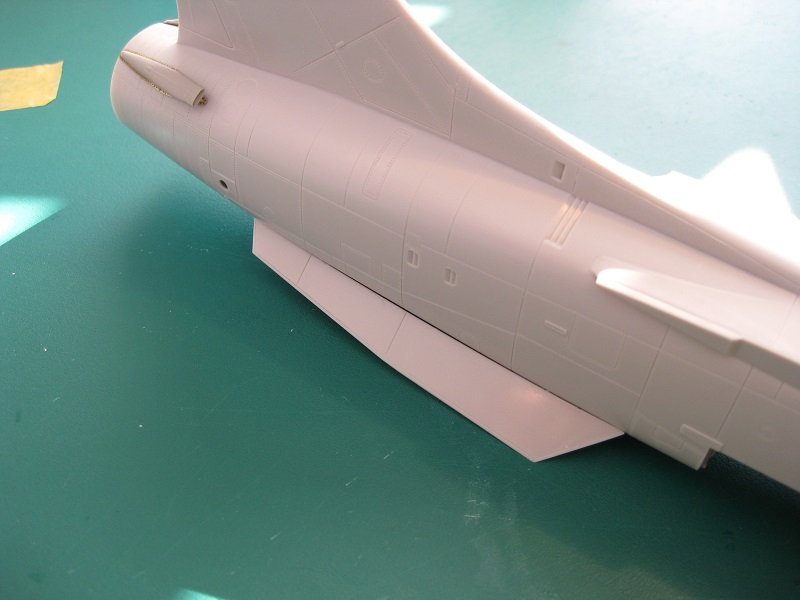
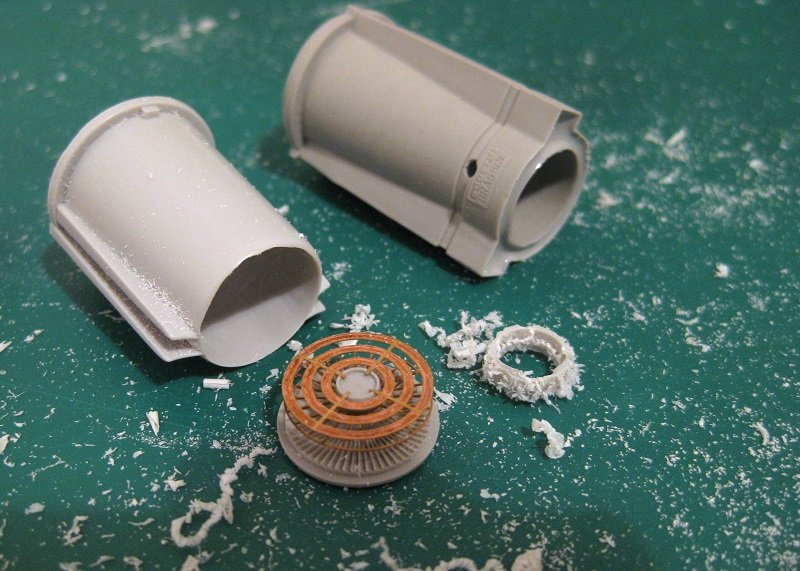
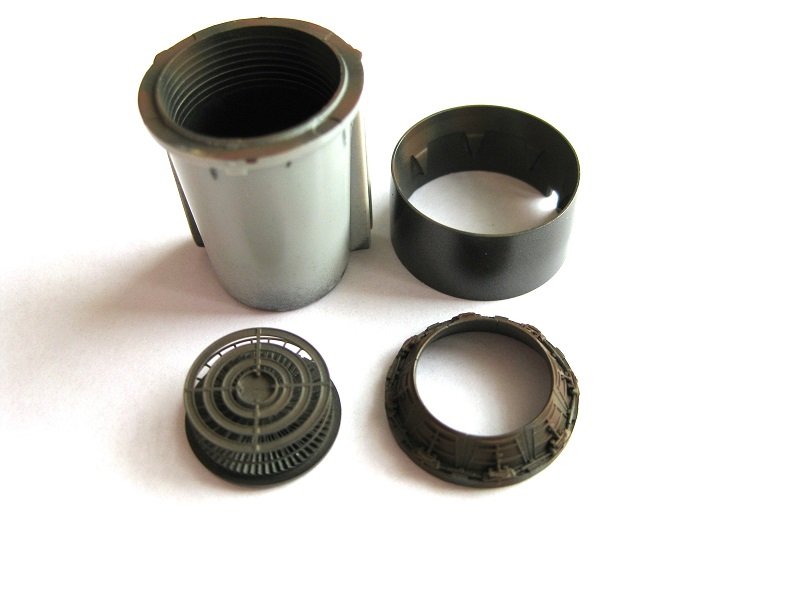
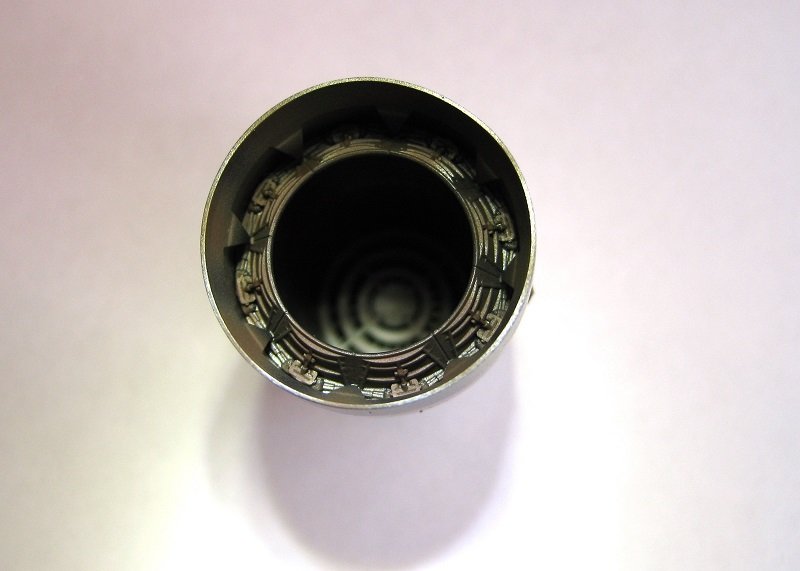
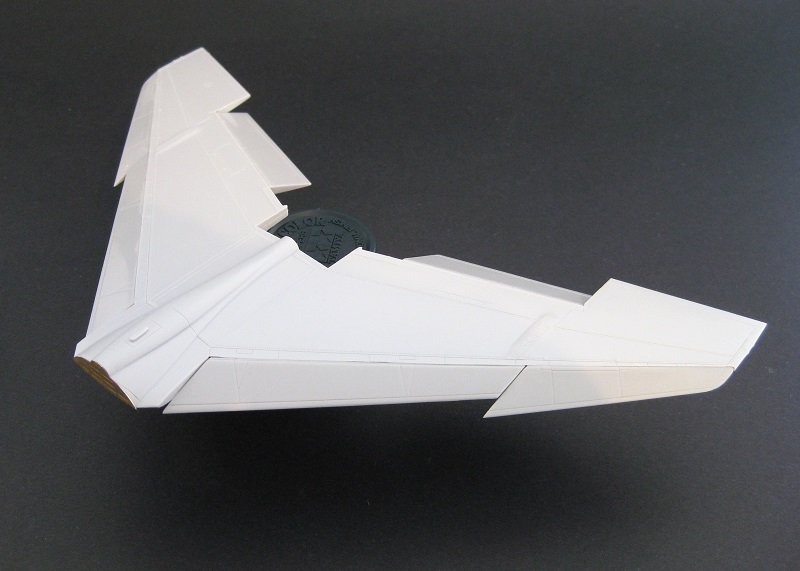
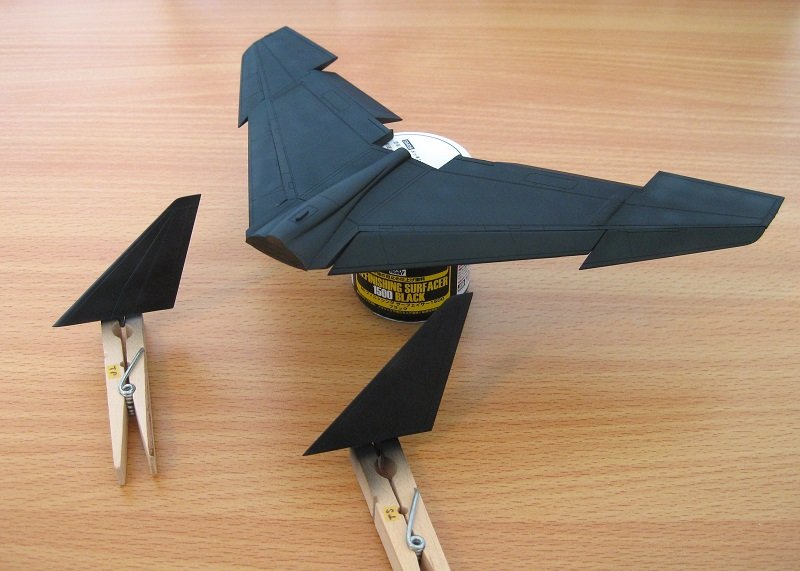
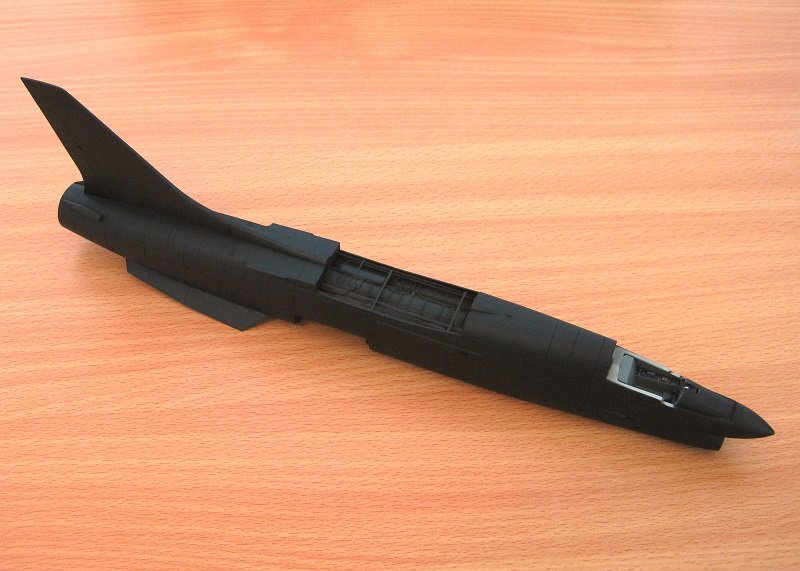
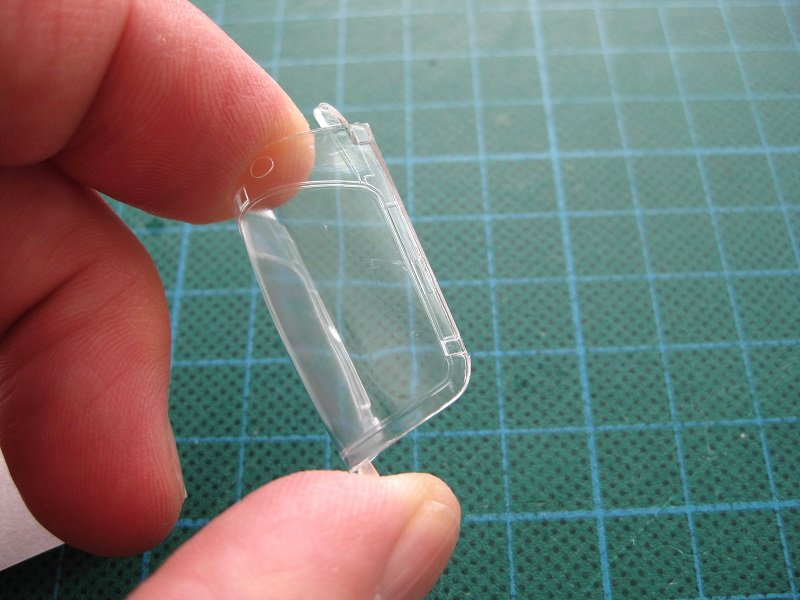
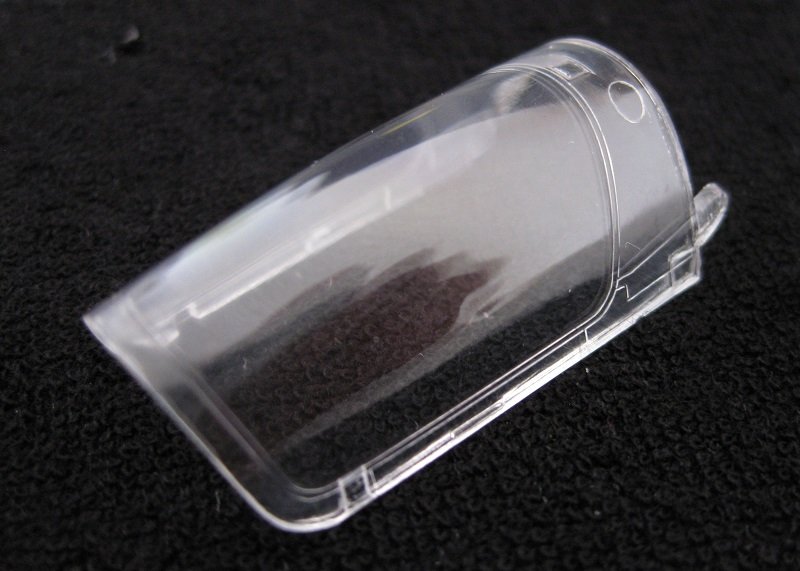
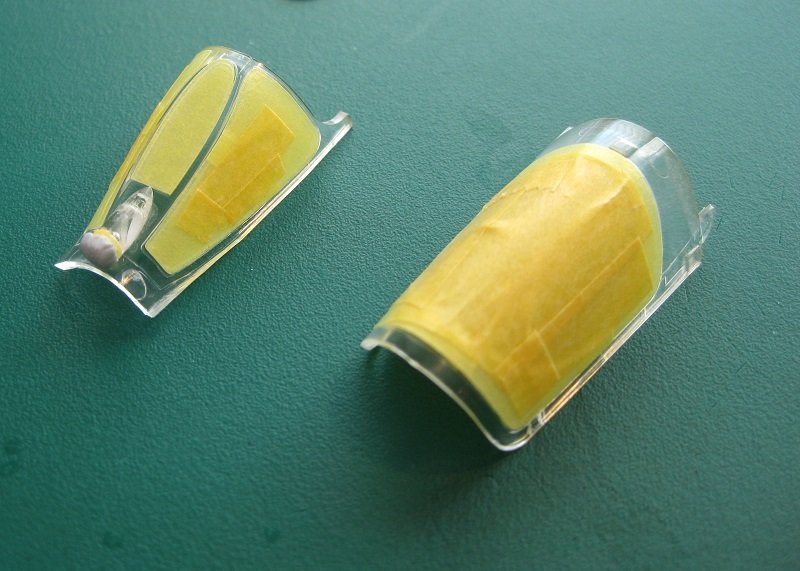
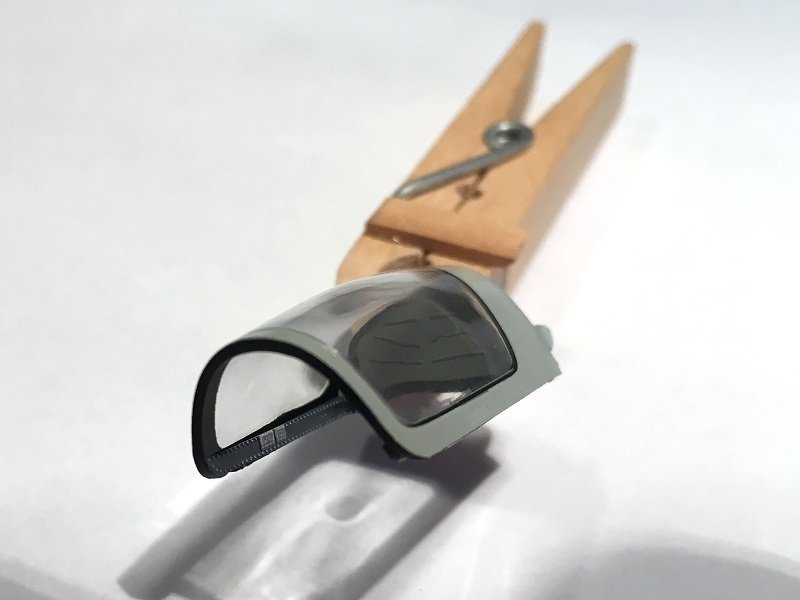
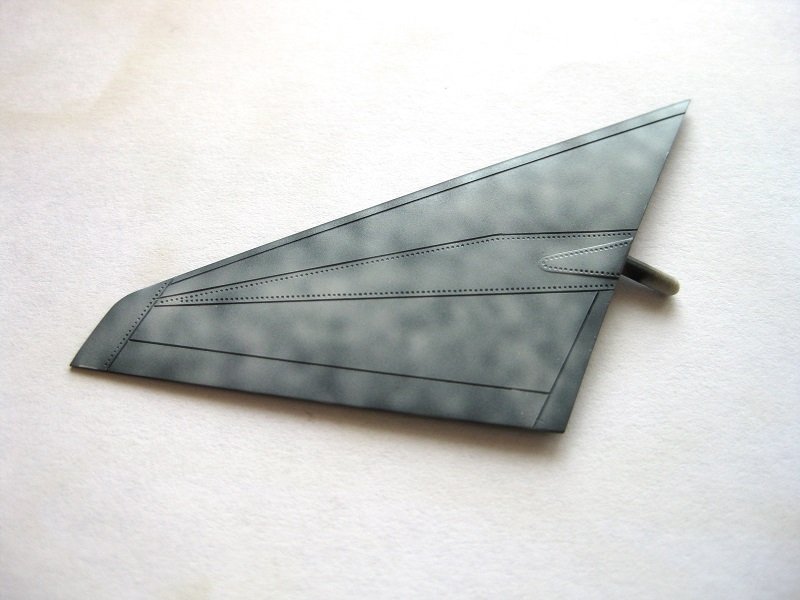
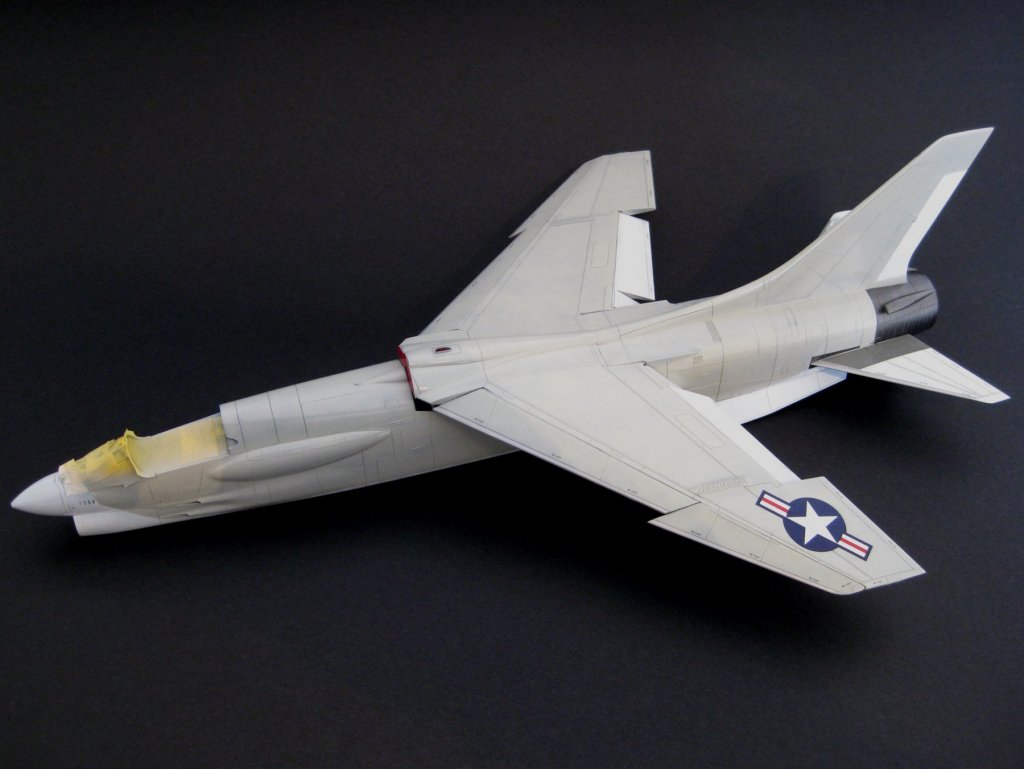
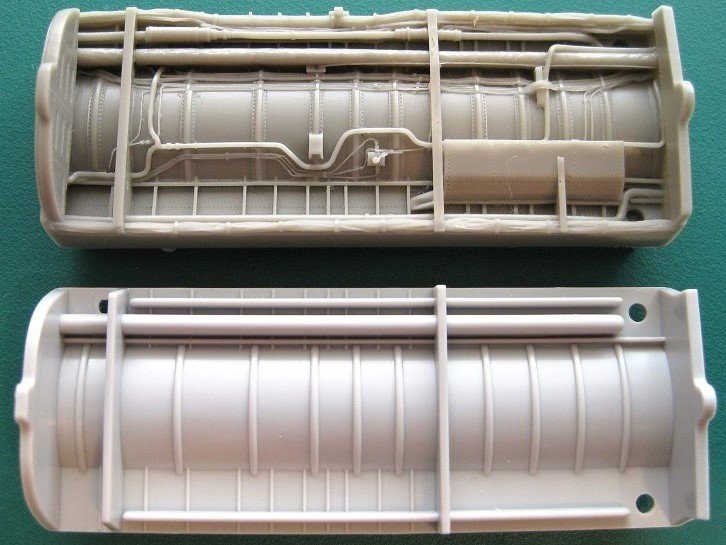
Hi All, I thought I may as well jump on the plastic aircraft modelling bandwagon and show my current progress on what I was working on earlier. I started this at the beginning of last year as a change from the card modelling thinking it would be relatively quick and at least get one completed build under my belt. As usual life got in the way and it stood still until now but back in Perth for the Easter break so hoping to make some progress on it. This is my first plastic kit since my early teens so getting on close to 4 decades since I tackled anything like it so bear that in mind. On to the kit; this is Eduard’s limited edition release of Hasegawa’s F-8 Crusader and no it is not pirated. Eduard take the best example of other manufacturers models and beef it up with aftermarket which I will cover below. This kit was released by Hasegawa and is quite old now but as mentioned probably the best example of this type in 1/48. A few observations about the kit. For a 1/48 scale aircraft I was surprised on how big it is in the flesh. As a kid it was always 1/72 Airfix and had never seen a 1/48 or 1/32 aircraft kit as they were well out of pocket money range. I was also surprised in the relatively low parts count for this kit at least. Although I have used photo etch in the past this is my first experience of pre-coloured PE and it just looks fantastic. There is also a small fret with normal brass PE for access panels and the cockpit. Eduard also include a number of Resin parts. This will also be my first time using resin and seeing it firsthand I have got to say the detail on the ejection seat is incredible. Also the resin set comes with resin “weighted” wheels, which gives the correct sag and side wall bulges. I think as a minimum to any aircraft build, aftermarket cockpit/seat and weighted wheels are a must. Eduard as usual for special editions and profi packs give decals for multiple schemes. The decals are by Cartograf, one of the premium decal companies who supply to many other kit manufacturers. There are five marking options and I have chosen the Death Angels flying out of Da Nang Air Base 1968 for no other reason than I like the markings best. I really like the concept of aftermarket accessories and detail sets for sharpening up models so also purchased the Eduard resin exhaust but on closer inspection it probably isn’t really necessary. I also got Eduards resin rear air intakes. Apart from having open intakes and some PE reinforcing panels won’t really add much. I also came across this miniscule turned brass pitot tube and just had to get it! Lastly I purchased the resin wing box and the resin wheel bays by Aires and again the cast resin detail is just stunning. I probably went overboard with the accessories for what is essentially my first plastic build and have stunning models built straight out of the box but I always jump in with both feet. Detail sets, photo etch etc really appeals to me, so be as well get experience of it now. On to the build! Starting with the cockpit there are a few bits of Eduard PE to fit such as rudder pedals, a floor plate and a couple of side panels. I found with the side panels that the spacing to clear the floor hump is overly large (not an issue) but that they also stick up past the side consoles by quite a bit and here was the first issue. I trial fitted the colour PE flush against the side plates and when fitted in to the fuselage halves the PE pushed the starboard side plate off. I made sure the PE consoles fitted into the fuselage ribs so guessed there wasn’t enough room. As can be seen in the photo below I left the Port one sticking up and trimmed the starboard one down to the console level. I did lose some detail on the side plate but doubt much will be visible when finally installed. The tub painted and the stick installed. To keep things simple I used the recommended paint call out from the instructions and this was MR Hobby, Hobby Colour H317 Gray (FS36231). I have just placed the PE consoles on to show the Port side butted against the sticking up side panel and the starboard side over the trimmed side panel. I wish I had just trimmed them both but I’ll get over it. The instrument panel was next and I enjoyed doing this. It was sprayed using Tamiya XF-Rubber Black and then the first piece of PE with the gauges was CA glued to the cleaned up plastic part. To attach the bezel PE I used Tamiya X-22 clear applied quite liberally and then pressed it home. The clear varnish filled in the space over the gauges nicely but I did go back and add a drop of Clear into each bezel. There is still the HUD and a number of tiny PE levers etc to do but that will be later once installed and the front canopy fitted to protect it. I was really looking forward to doing the seat to do some work with resin and decals. I believe it is a Martin Baker MK.7 series seat. I also discovered that the horse shoe shaped ‘head rest’ is in fact the parachute, which I thought was pretty cool. The resin plug was chopped off the base of the seat and flash removed to open up any spaces such as the ejector handle and some pipes round the back. I sprayed it up with XF-85 and the call out called for H80 Khaki Green which I started doing on the seat squab and the ‘head rest’ but found it quite dark. A look at some images on line showed different colours so used H58 Interior Green on the lumber pad to lighten it up a bit. First attempt at decals wasn’t too bad despite the small size which probably hides any issues. I used the obligatory Microscale Set and Sol. The only part I am not happy with so far is the dry brushing with Tamiya XF-16 Flat Aluminium, which is far too heavy. I even tried dry brushing neat thinners and then Rubber Black to try and reduce it but things were starting to go downhill so stopped before I wrecked it. I should have resprayed the black but already painted the greens and didn’t want to redo that (I have decided I dislike brush painting!) I had planned to dry brush lighter green on the edges of the upholstery but after the silver experience decide against it. There is still all the colour PE harnesses to add but will do that later. A couple of shots with everything dry fitted. There are the throttle and flap levers and a few other bits and pieces to go on but will wait until installed. I think I will also wait until the tub is installed before fitting the side console PE so nothing gets popped off during fitting. I thought I would have a bit of fun with the photo-etch HUD and made a little projector lense from clear sprue and painted it with Tamiya clear green. It took 3 attempts to fit the supplied acetate screen so got a bit a bit messed up LOL Next up will be fitting of all the replacement resin upgrades and I have shown the kit part for comparison. The main gear well is a straight drop in replacement and the difference in detail is staggering. There are still a few resin detail and wire parts included to fit as well. Despite the massive plug on the bottom there is enough space in the fuselage for it to drop straight in. I had to remove some flash from the holes where the undercarriage fit in to but that was it. The front wheel well would be the most difficult and will require hacking off the kit one from the intake duct and removing the large plug from the underside of the resin part as well as shaping the correct curves. I was undecided whether to use this or not. The wheel well alignment to the underside of the fuselage will prove tricky as it fits from the inside. As can be seen the resin part doesn’t really add much from the kit part so not a big loss. I will just use some of the resin details such as doors etc not shown but were supplied with the wheel well. The F-8 has a Variable Incidence Wing and the whole wing lifts up by approx 10 degrees at the front for take off and landings to provide extra low speed lift. There are so much nice parts in the resin wingbox from the distribution pipes, the insulated main line and the bundles of cables running down the sides. It’s a pity most of this will be hidden even with the wing in the raised position. The resin wing box has a 3mm plug on the underside which requires removing. I didn’t trust myself to cut the 3mm plug off the full length and width of the wing box with a razor saw and spent about 45 minutes slowly sanding it down on a large flat sanding block with quite an aggressive grit. After lots of sanding and trial fitting on each fuselage halve separately it slipped in. The only tweaking required was to gently sand the top of the front bulkhead to get to reduce the height of the top curve. Now that the fuselage halves were together it was time to sand the fuselage join seams and fill and sand the intake. Of course sanding removes some panel line and rivet details so was time to try redoing these. I mentioned previously my plastic modelling was limited to pre/early teens Airfix kits (decades ago) using tubes of poly cement and brush painting Humbrol enamels so had to investigate what’s what. For panel line scribers I settled on giving RB Productions Scribe-R a try as readily available, reasonably priced and I only found one video which sounded good to me. It is made from photo-etch stainless steel and had to be assembled by bending the scriber and slotting into the holder. Incidentally I have several different brands of knife handle (to take No.11 sized blades) but only one allowed the scriber to go deep enough in so the all four side could be gripped in the slots. It also comes with 2 spare scribes As this is all new to me, I have nothing to compare its performance against but must say it was easy to assemble and use and I enjoyed re-scribing with it! Next up was re-riveting…again all new to me. I would love a set of Rosie the Riveters but since I only had a rough idea of the size required it would quickly get expensive to find the right one plus availability. So again settled on RB Productions Rivet-R which is also photo etch stainless steel and was easy to cut out and assemble. The F-8 doesn’t have a great deal of panel lines and rivets to redo but shown below is my first attempt at re-scribing and re-riveting the underside of the exhaust. On the whole pretty happy how it turned out. One thing I noticed (which is not me or scriber related) is some of the panel lines don’t fully line up with each fuselage half but on other areas they do. The picture shows the last panel line meets perfectly but the forward 2 don’t and then the 4th one next to the tail hook recess meet again. Anyway rescribed and reriveted satisfactorily. Next up was fitting the resin rear air intakes. The clean-up of the resin was straightforward and the photo etch plate fitted perfectly to the resin. The fit of the assembly though isn’t the best with some daylight showing. On close inspection the rear heat panels aren’t a perfect cone with a bit of a depression near the rear. Just going to accept it as is though. The first real fit problem with the kit encountered so far is the fitting of the rear ventral strakes. As can be seen they only really touch at the front and rear and this is after a bit of shaping to improve the fit somewhat. I ran some Mr Hobby Mr White Putty R (quite a runny filler) into the join and then cleaned up by rubbing the joint with Levelling Thinner soaked cotton buds (Q-Tips) (Interesting fact, I think anyway, is that the first F-8’s didn’t have these strakes but were later installed to eliminate a tendency during catapult launches for the plane to spin out when it cleared the deck! There is a YouTube video showing this with the plane spinning past 90 degrees to the left immediately after leaving the deck.) On to the jet pipe / exhaust. As mentioned at the beginning I bought Eduards Brassin Jet Exhaust set (shown on the right of the photo) to replace the 2 kit supplied parts. The resin has nice detail. I really enjoy working with resin as it slices and pares so easily with a craft knife. After opening the packet of the Brassin set I discovered in the instructions that parts of the internal fuselage need to be removed for it to fit. A couple of tabs need trimming down which is fine but they also require removing the stubs which hold the polycaps for the stabilators! Apart from access I didn’t like that idea so after a bit of eyeballing the kit plastic jet pipe I reckoned I could just about fit the Brassin turbine and afterburner ring in to the back. If it didn’t work out I could fall back to the resin jet pipe. I attacked the plastic part with drills in a Dremil, round files, craft knife and sanding sticks and after what seemed like hours later the completed Brassin assembly JUST fits! For painting I really wanted to try AK Interactive metal lacquers but couldn’t get them locally and my usual on-line store would only send them by road so got some Vallejo acrylic metals instead. The instructions call for Dark Iron so used Vallejo’s steel and gave everything a coat. I came across a couple of images looking up the jet pipe of a F-8 and everything was coated in a matt brown ‘soot’ so tried to recreate the effect with Vallejo Burnt manifold but I just couldn’t get a fine enough spray and the colour in small doses didn’t stand out. I thinned down some Tamiya Red Brown and tried to spray the pattern as per the google photo. The effect isn’t quite how I imagined it but happy enough. I will probably put on some black panel line wash, which I forgot to do until I was looking at the photos. The main wing all glued up. I watched YouTube videos of actual F-8s taking off and landing to work out the droop for the slats and flaps etc. I have left off the inner flaps(?) off as these need some trimming to clear the fuselage. Also included is a bit of PE at the front which was supplied with the kit. A small tentative step towards painting with priming the main wing and elevators. I want to try black basing instead of panel line pre-shading so laid down a coat of Mr Hobby Finishing surfacer 1500. This is my first time using this and it went down beautifully. I really need better lighting when spraying as the coverage isn’t uniform (but should help with the effect! LOL) The same 1500 Finishing surfacer went down on the fuselage perfectly. This will definitely be my primer of choice for future builds. The one thing that is a little disappointing is on checking the box contents I found the main canopy had broken free from the sprue and has been scratched up a bit and there is also a strange line in the front canopy which may also be a scratch. The marks/scuffs don’t look so bad in the photo and I am hoping I can polish them out. I wasn’t sure if I should show the canopy as I decided to give this a go to remove some scuffs and scratches it had with rattling around freely in the box and came close to destroying it! I watched some YouTube videos on polishing canopies so went to work on it will various grades of sanding sticks and then used Tamiyas 3 progressive grades of polishing compounds. I wasn’t happy with it so went through the process again and this time decided to speed things up with a Dremel and felt polishing wheel I had instead of going out to get a mop wheel. I am sure you are all shaking your heads because as you will know the felt is far too hard and before I knew it I had burned the plastic and it had all burred up in several places! I set about sanding it again to see if I could remove the burrs/burns which required sanding down a fair bit in localised spots and tried to show the worst area of distortion in the photo. I couldn’t really capture it well but it is in the middle of the side and depending on the light disappears or is worse than the picture shows. I think I managed to dodge that bullet as it looks acceptable in my eyes from what could have been disastrous. Yet another hard lesson learned for this n00b! Then on to masking up both inside and out using the supplied masks which again first time using and liked how quick and easy they were to use. I just filled in the exposed sections with bits of Tamiya masking tape. The rear of the main canopy was reduced in thickness as per the instructions for installing in the raised position. The hinge points in the fuselage were also trimmed to allow the canopy to open. The finished canopy with the Eduard coloured photo etch internals. Quite happy with it. There are still yellow decal stripes though. Finally on to some painting and started to do the mottle coat on the underside of the stabilator. I believe black basing isn’t really a good option for the navy’s high visibilty paint scheme from this era but wanted to try it anyway. Finally! The current state of play. I had finished the wings and stabilators and applied the minimal decals and stencil data using the usual Microscale Set and Sol. I still need to apply gloss to the fuselage for all the decaling fun that entails. I will be applying only minimal weathering as I believe the 60’s High Visibility paint scheme was very durable but will apply various staining and panel line highlights etc. Cheers Slog


- 55 replies
-
- 22
-
-
Fantastic work Danny, well done! Seeing that is psyching me up to return to my artillery tractor...if it wasn't almost 3000kms away. looking forward to next project. Cheers Slog
-
I got my photo etch port holes from GPM in Poland. I got 1.6, 1.8 and 2mm. There are other sizes. Cheers Slog
-
Just catching up on your build Danny and great work as usual so far. Having built a 160 individual track links I can feel your pain 😃 I am guessing its because it has the 75mm Pak 40 gun to distinguish it from the other versions available from the same publisher. Cheers Slog
-
Hi Richmond, Well done on finishing skinning the underwater hull; in my opinion you are past the worst part of card ship modelling and it turned out looking great! Far better than my previous 2 underwater hulls which were so bad I had to fill and paint! I look forward to seeing your next progress shots as from what I can tell from the download it builds into a very nice model. There shouldn't be any rules if building for yourself! I for one will do anything humanly possible to get something looking half decent enough to move to the next stage. Cheers Slog
-
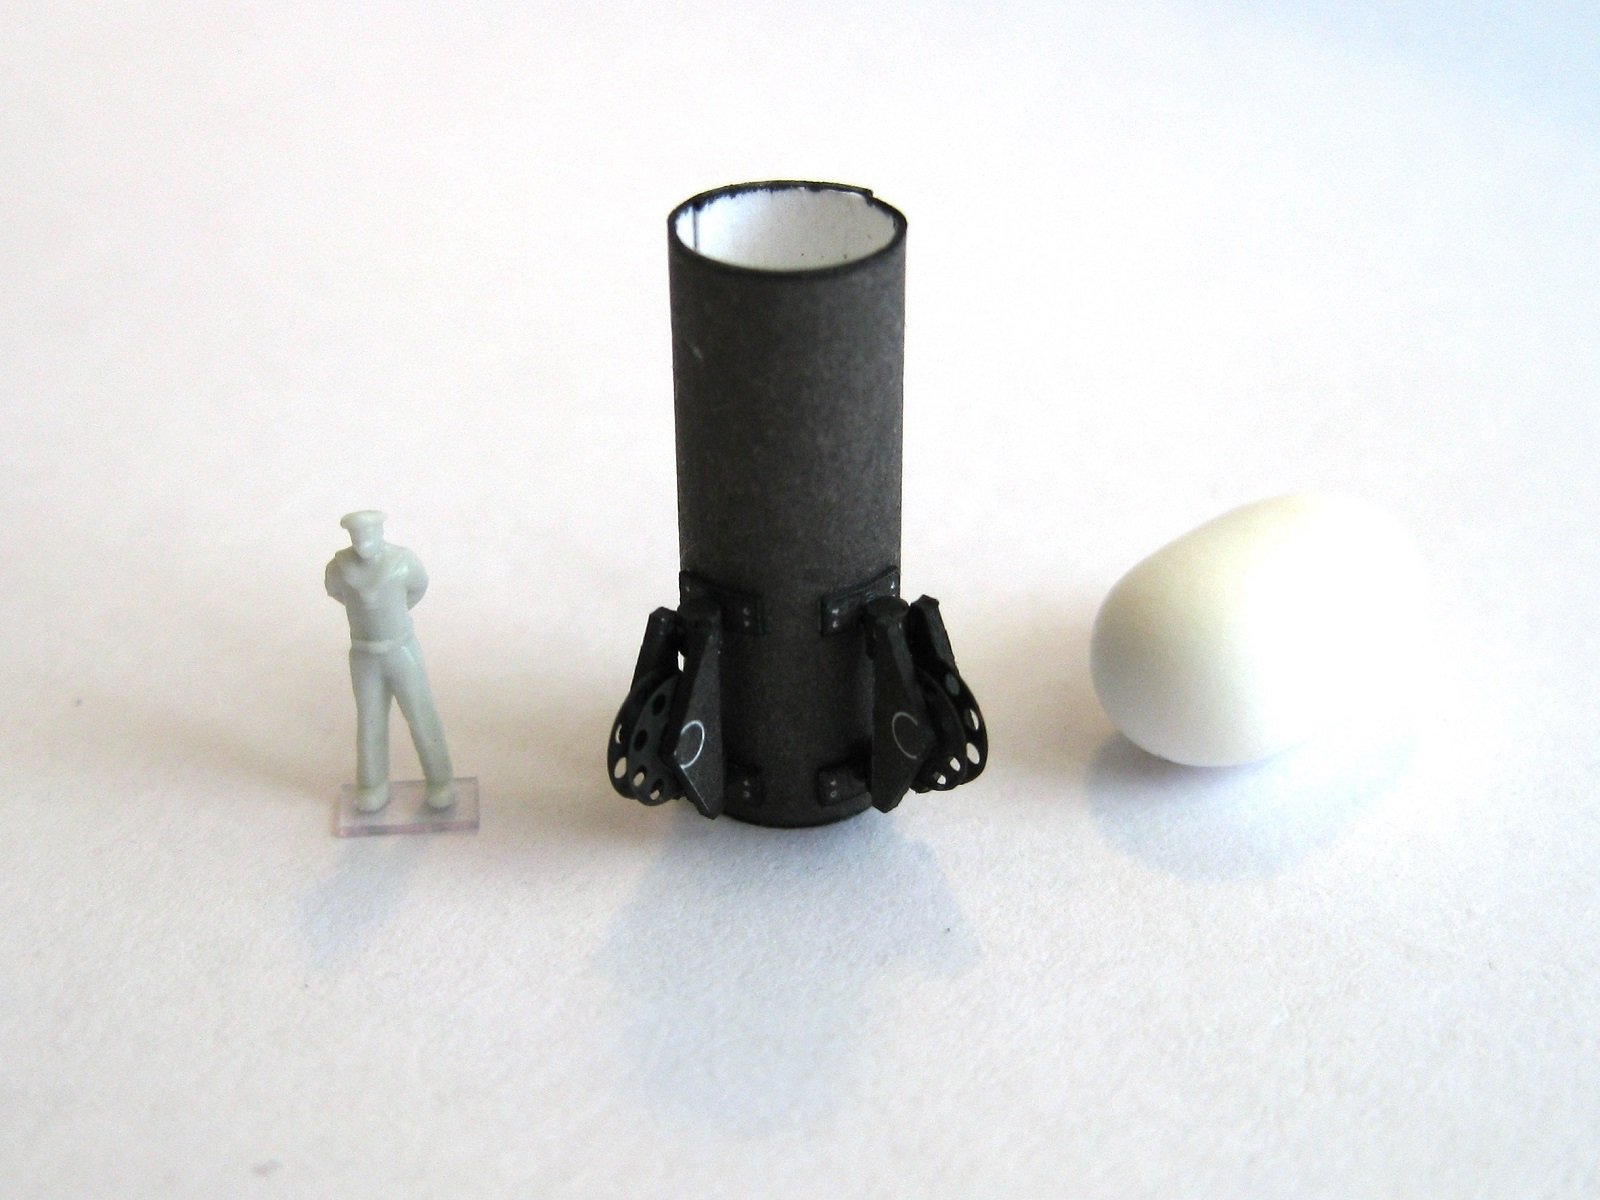
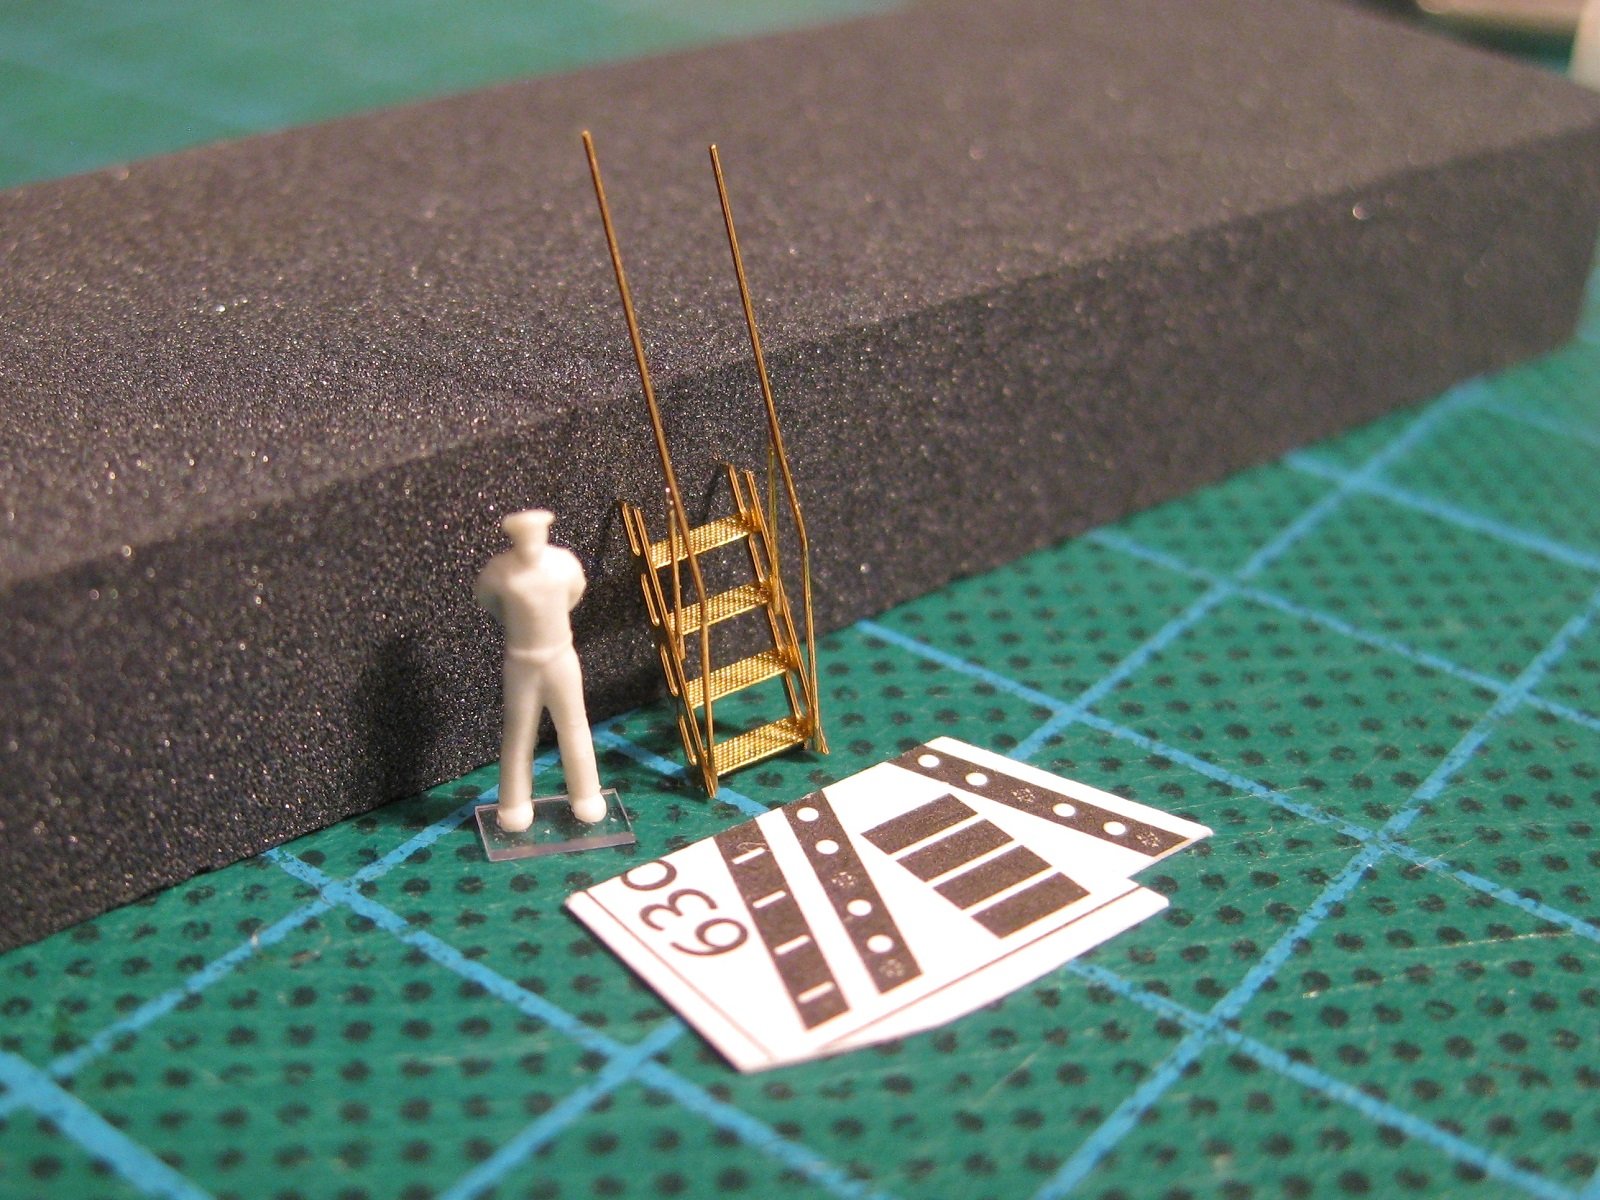
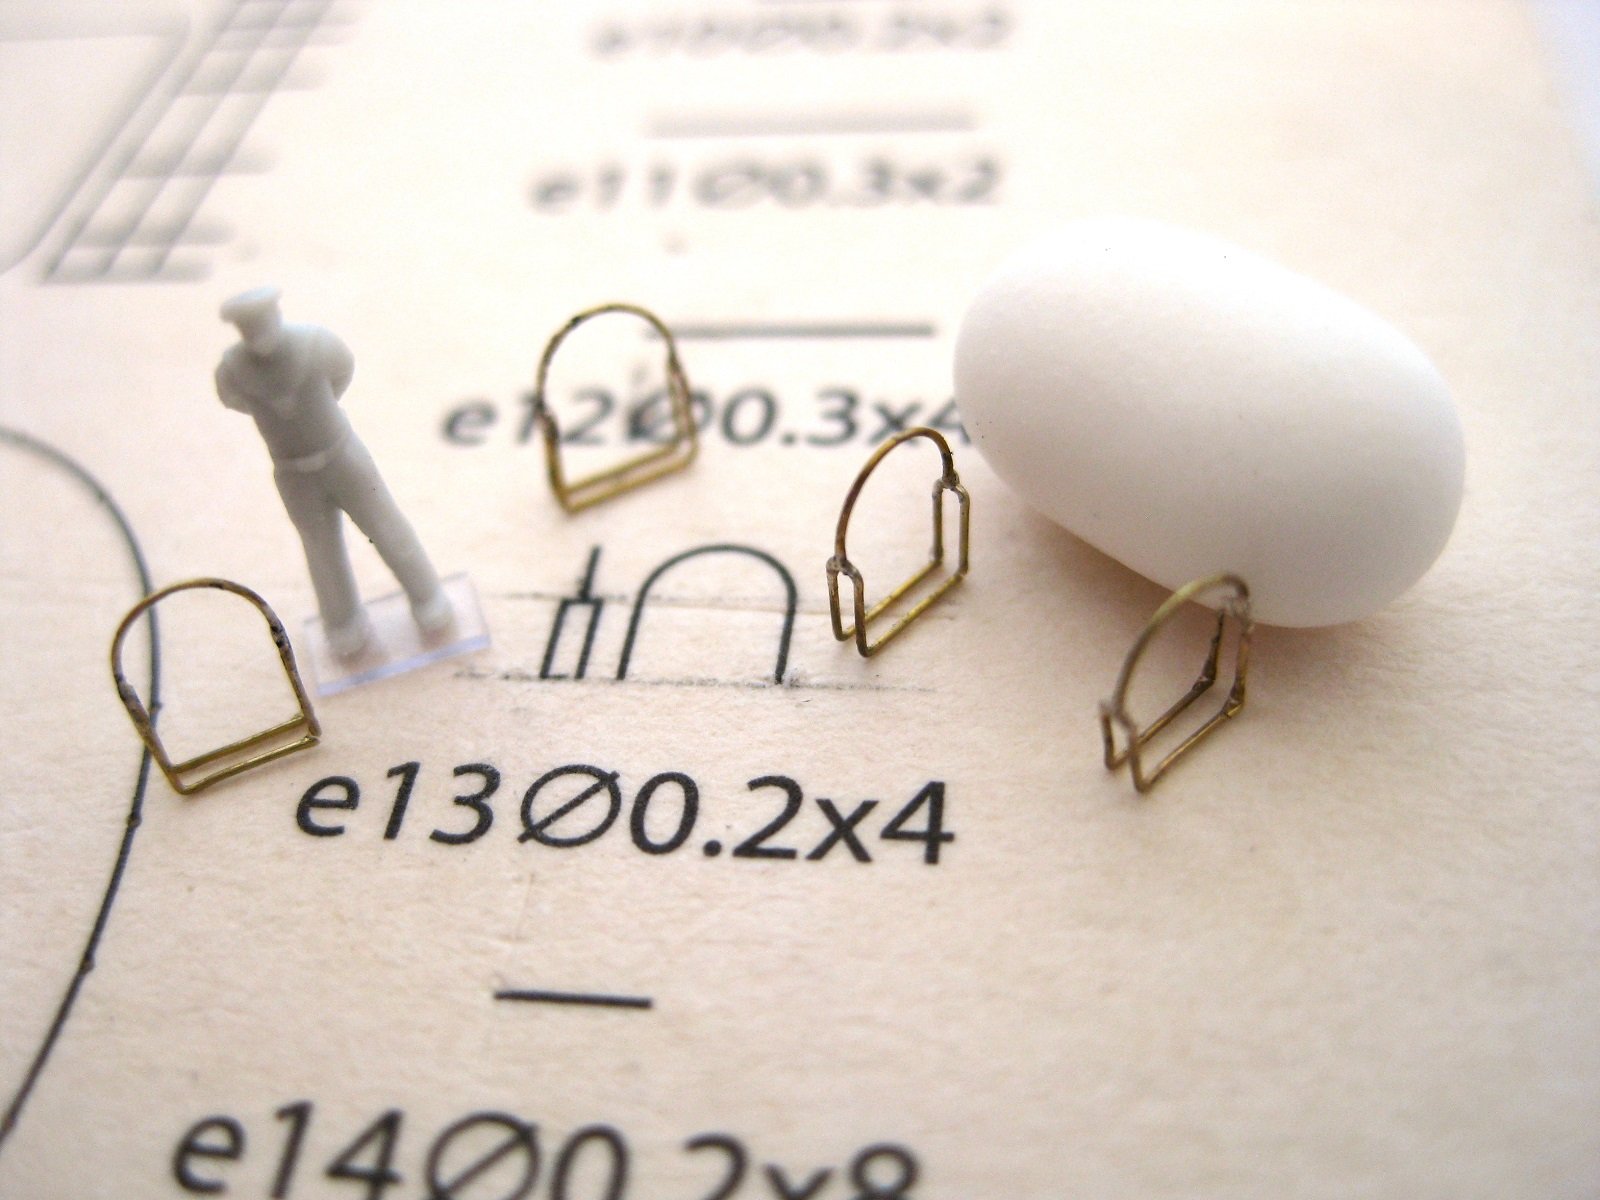
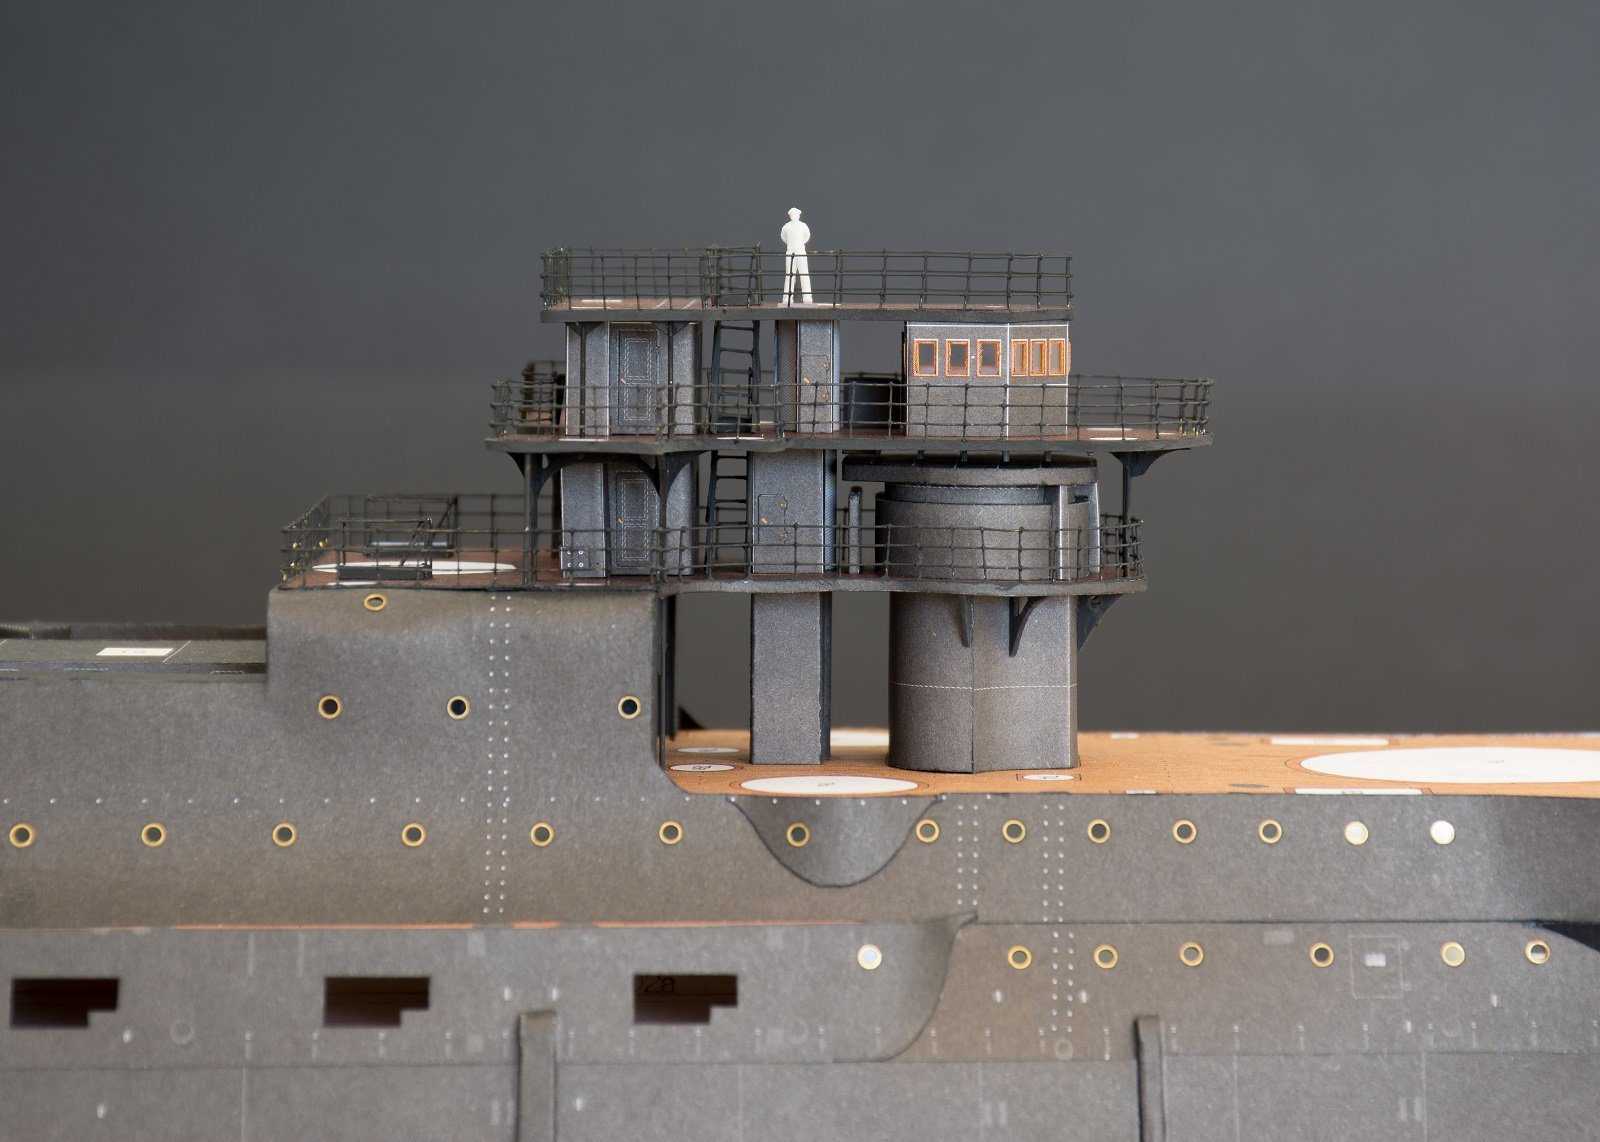
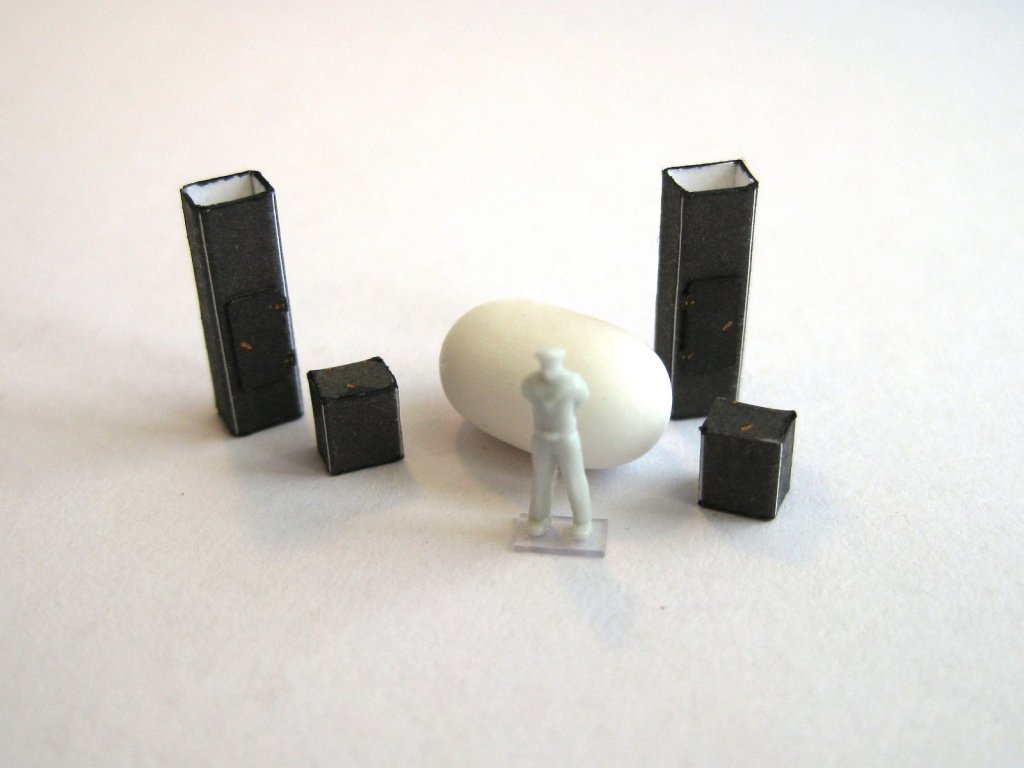
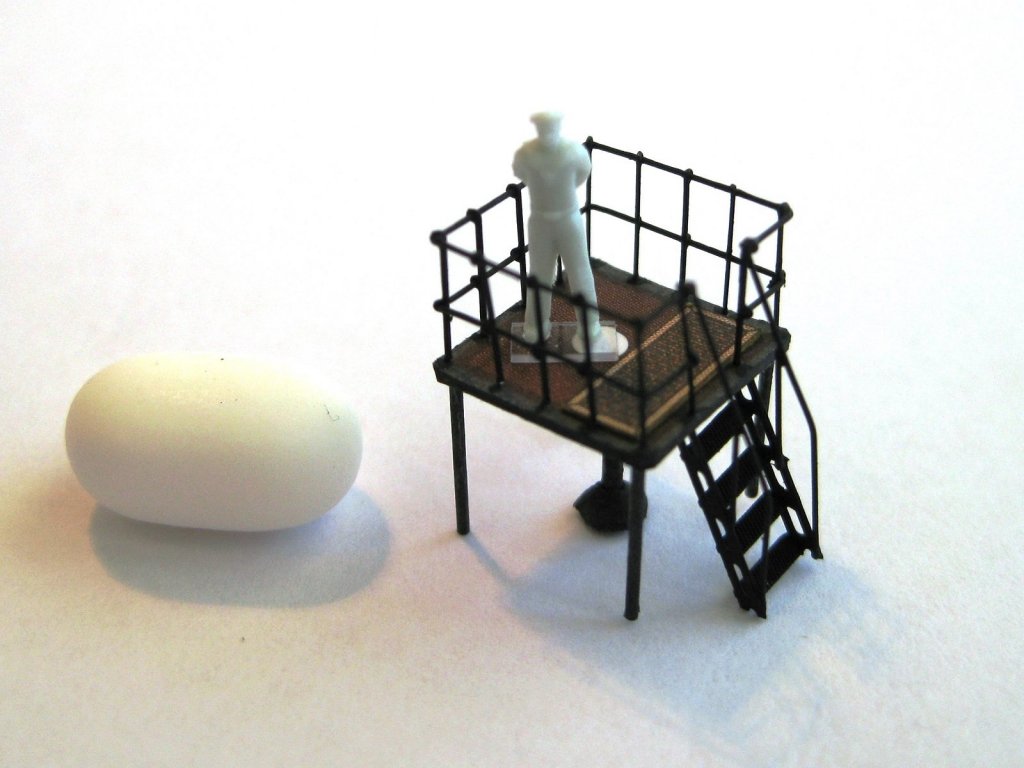
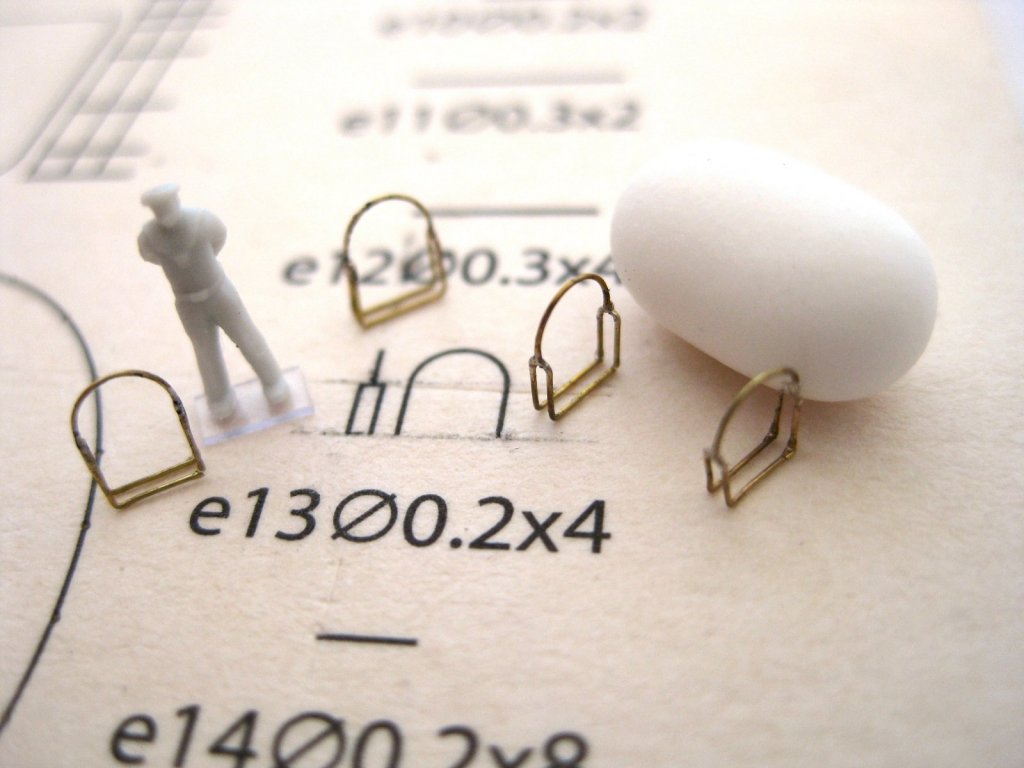
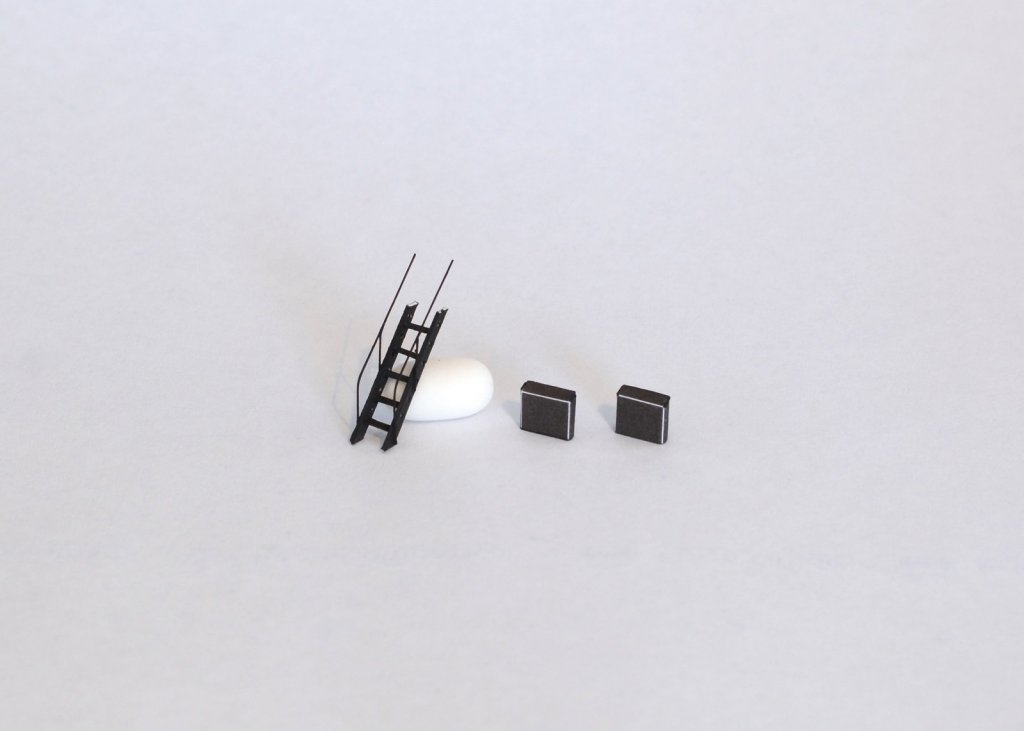
Thanks Richmond. I like doing these kinds of bits and pieces the most. The 1:200 figure is actually a WWII Kriegsmarine from North Star. I got these along time ago but think it was from BNA. They had 4 or so sets in both winter and summer outfits and one set even came with a Hitler which is always sold out. The sets have limited poses although I do believe they have new sets with more varied poses and different navies. I do like to include them to get an idea of scale and the figure works out to be 1800mm in real life. However saying that, the ladders do look a bit overscale, but the generic photo etc ladders had the same tread spacing. Cheers Slog
- 244 replies
-
- 4
-
-
- borodino
- dom bumagi
- (and 1 more)
-
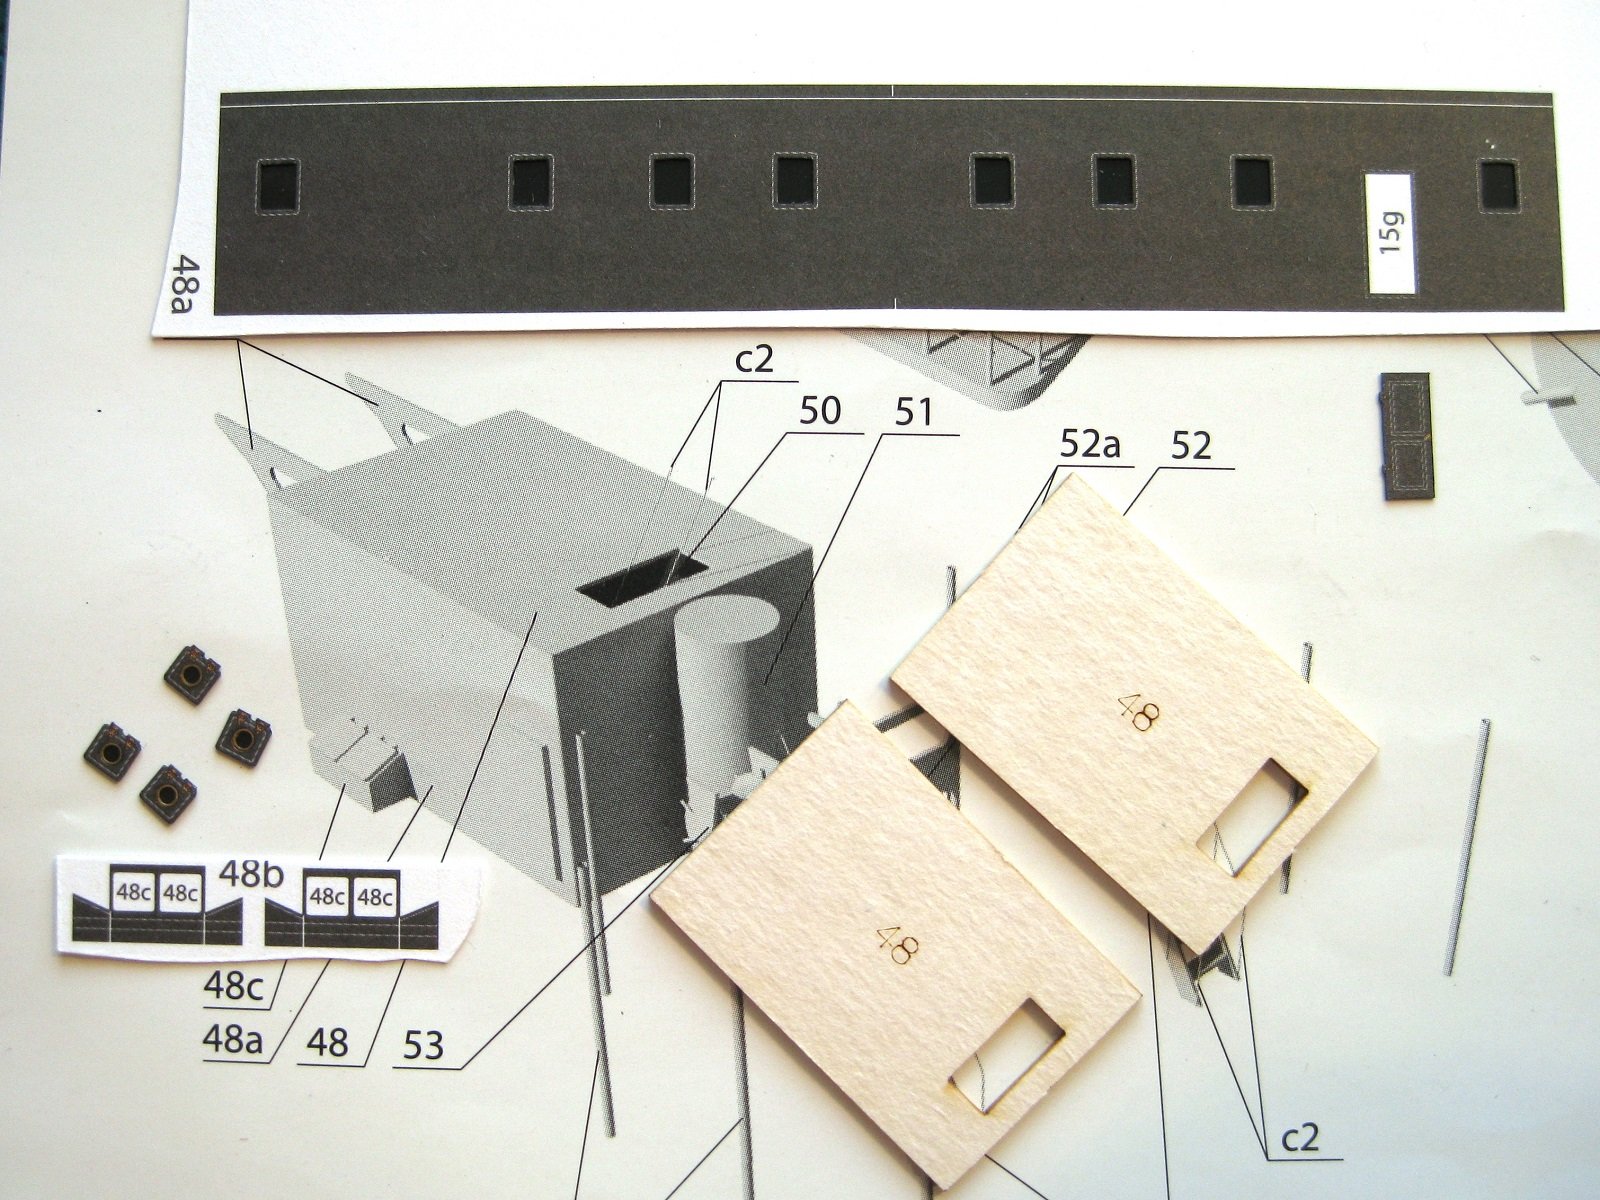
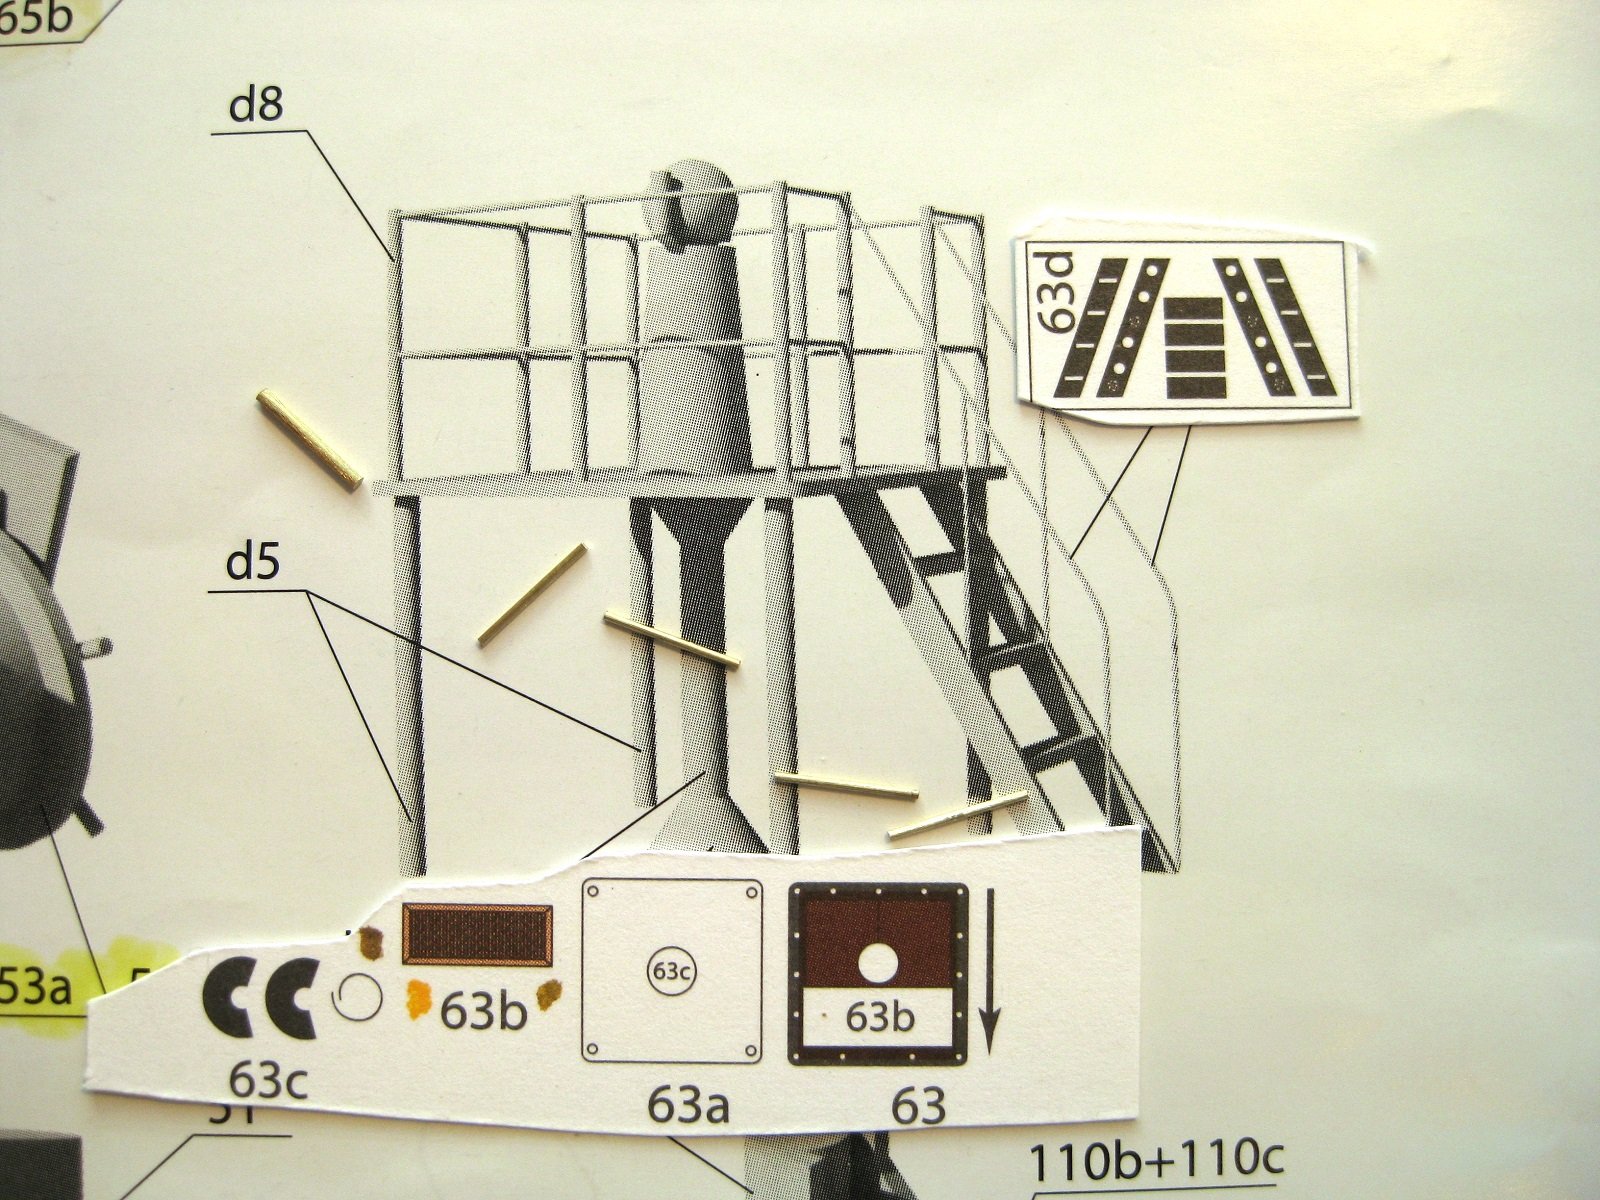
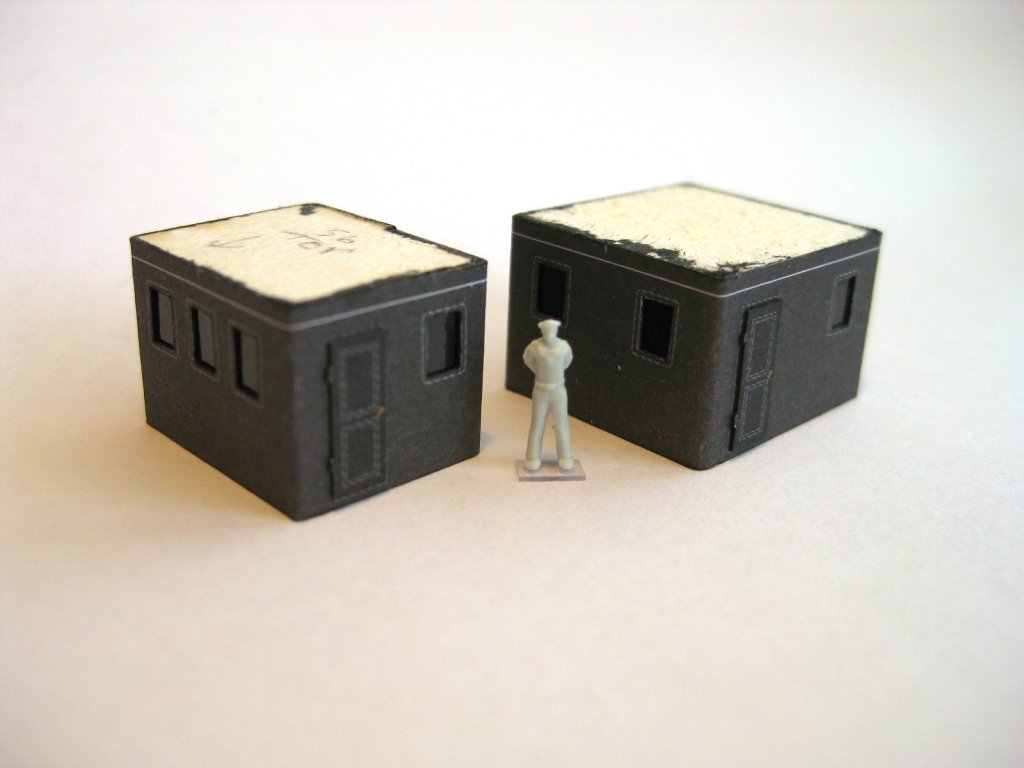
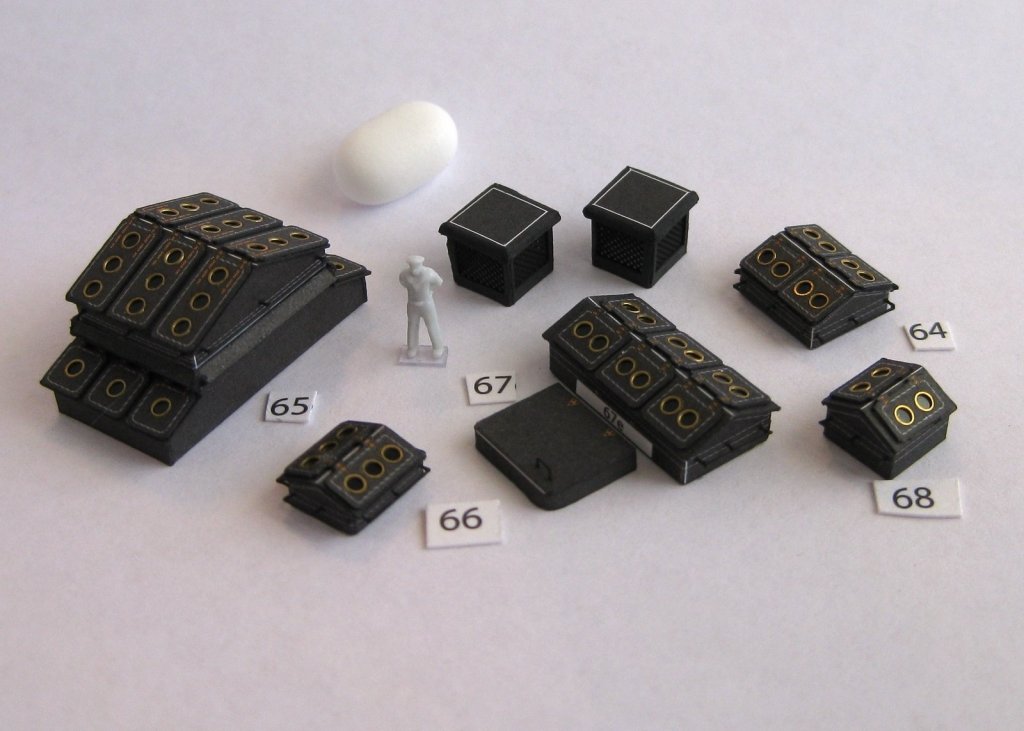
Hi All, Thanks for the nice comments guys, I’ve got to say been really enjoying getting some modelling done after being away from it for a while. This is the last progress update as head off again tomorrow. Still working on all the bits and pieces needed for the stern decks installation. These are a couple of simple trunking, which I suspect are lifts for the smaller deck gun ammo and a couple of what I assume are ready ammo boxes. This is the lower mast section, which also have a couple of pulleys attached to them. There is some photo etch pulley wheels to replace the paper part. I also punched out some styrene spacer disks as the paper part 51d kept delaminating. I also cheated and used 4 sections of 1mm brass rod to replace the swivels 51b & 51c as again the strips delaminated trying to bend them into cylinders. The paper used in this kit does not like small tight bends. It was easier and quicker to chemically blacken the photo etch instead of painting. Finished lower mast section. The supplied mast part has such extra width I found it easier to just overlap and glue it as the lap join will virtually be invisible once installed on the deck with the other decks above. In fact this whole section of mast will virtually be hidden. Three sets of ladders one of which isn’t finished as still the handrails to do. I decided to go with the paper ones again. I didn’t punch the side holes out as when I tried in the past the whole section fell apart but decided to leave white to provide some relief. Likewise I didn’t paint the front of the tread. I might go back and paint all black...will see. I had to make the 0.2mm handrails from the templates and fixed them to the inside of the stringers instead of the outside as find they line up better with the deck handrails in this position. I reckon one more session would see me in a position to install the upper 2 stern decks. Oh well, next time. Cheers Slog


- 244 replies
-
- 10
-
-
- borodino
- dom bumagi
- (and 1 more)
-
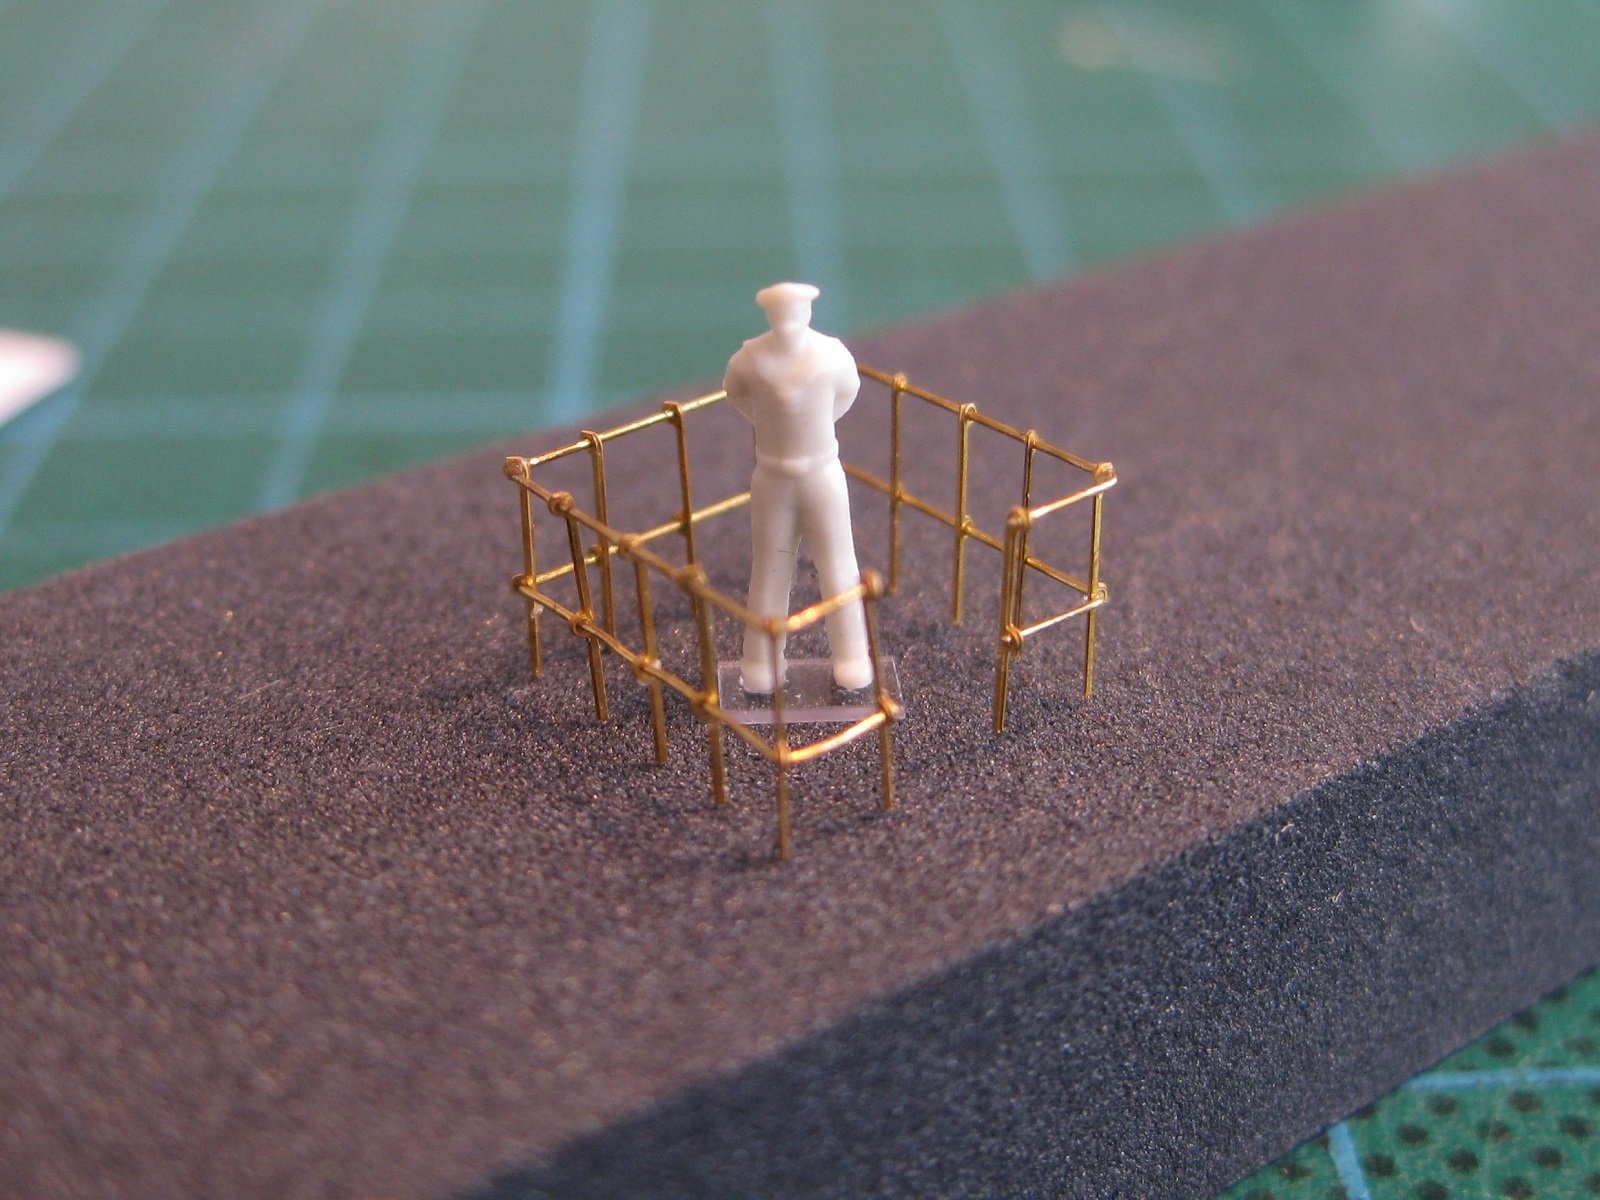
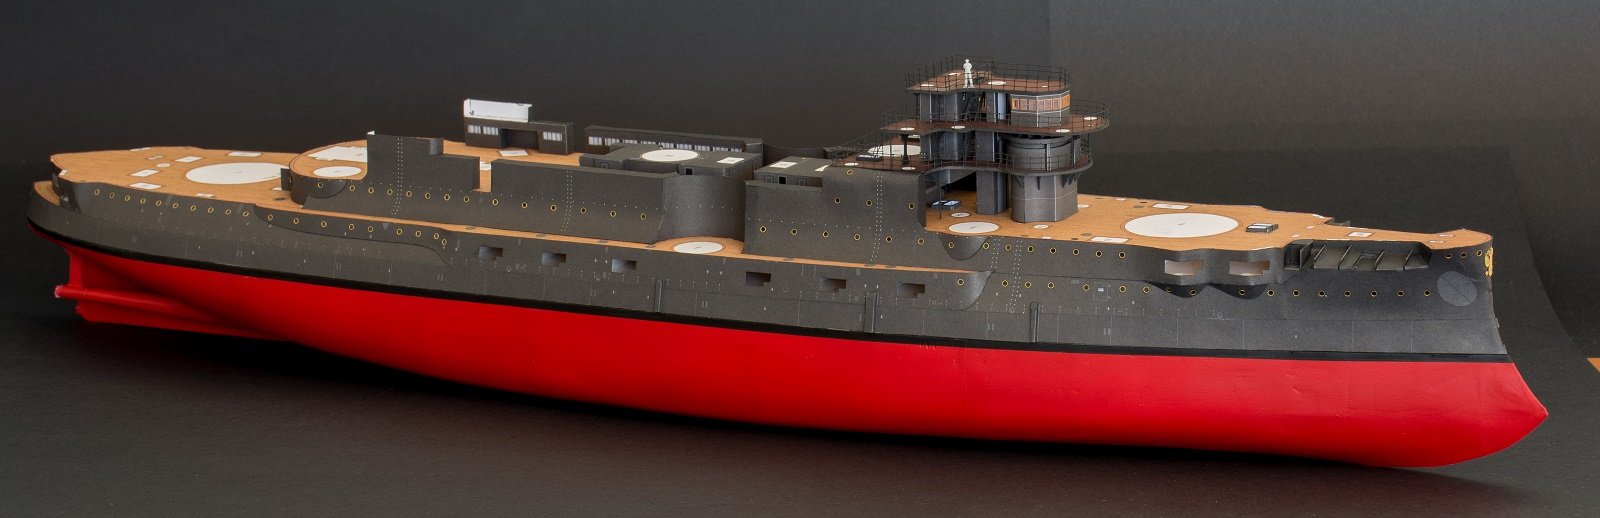
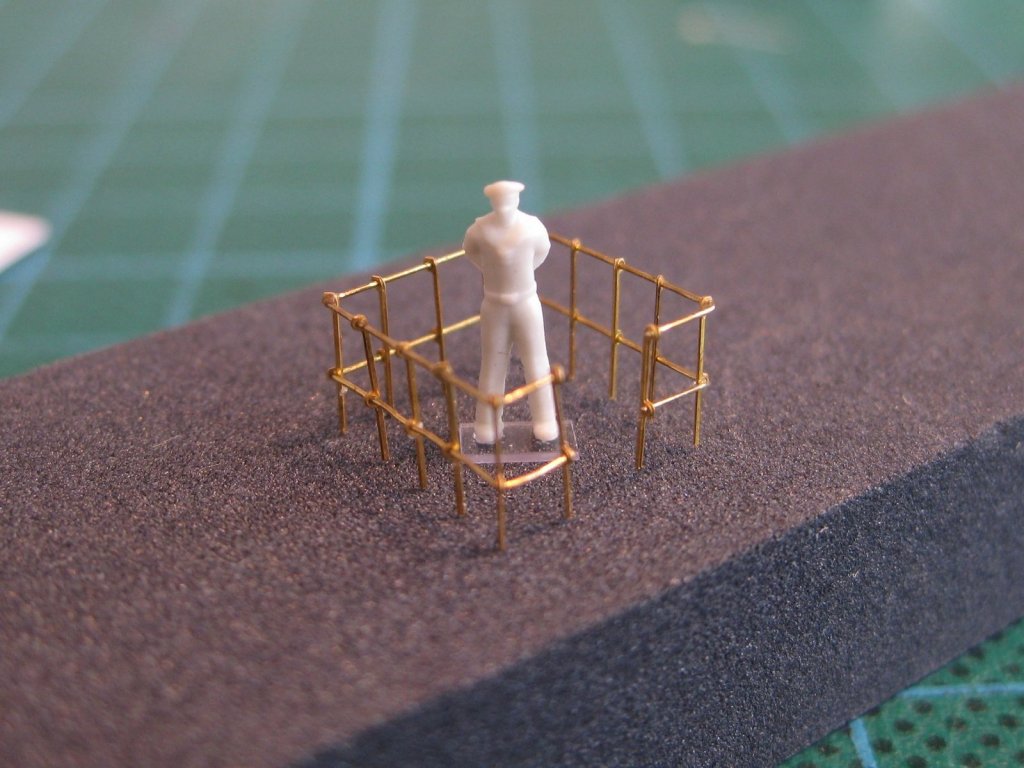
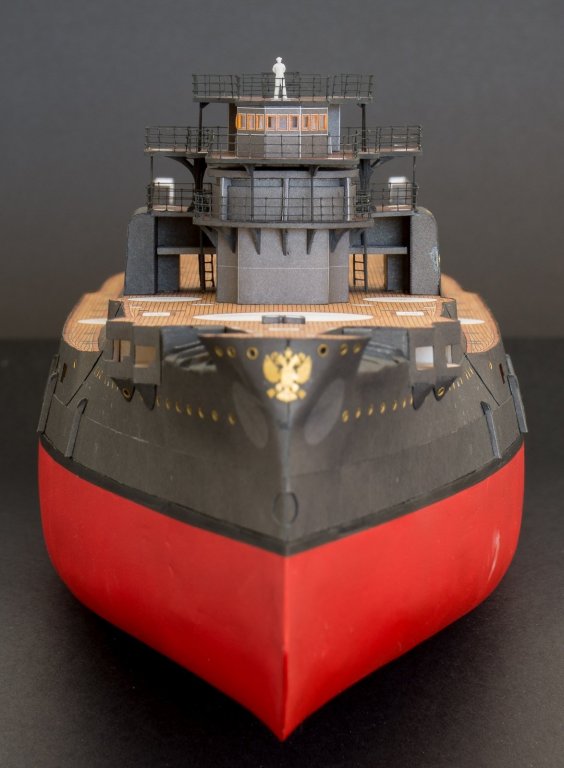
Hi Richmond, thanks for dropping by. Looking forward to seeing some progress on your Mauritania log! The deck edges are covered with strips of black paper approx 1.5mm wide which are attached around the perimeter. These are fixed flush with the top of the decks and extend down past the deck underside by approx 1mm. I cut these strips out but didn't attach. Currently making all the brass wire support columns that hold up the overhangs of the decks as well as the braces and gussets. Still got sets of stairs and handrails, combing and mast sections as well as ready ammo boxes and service conduits to make before the decks can be installed proper to the hull. Cheers Slog
- 244 replies
-
- 4
-
-
- borodino
- dom bumagi
- (and 1 more)
-
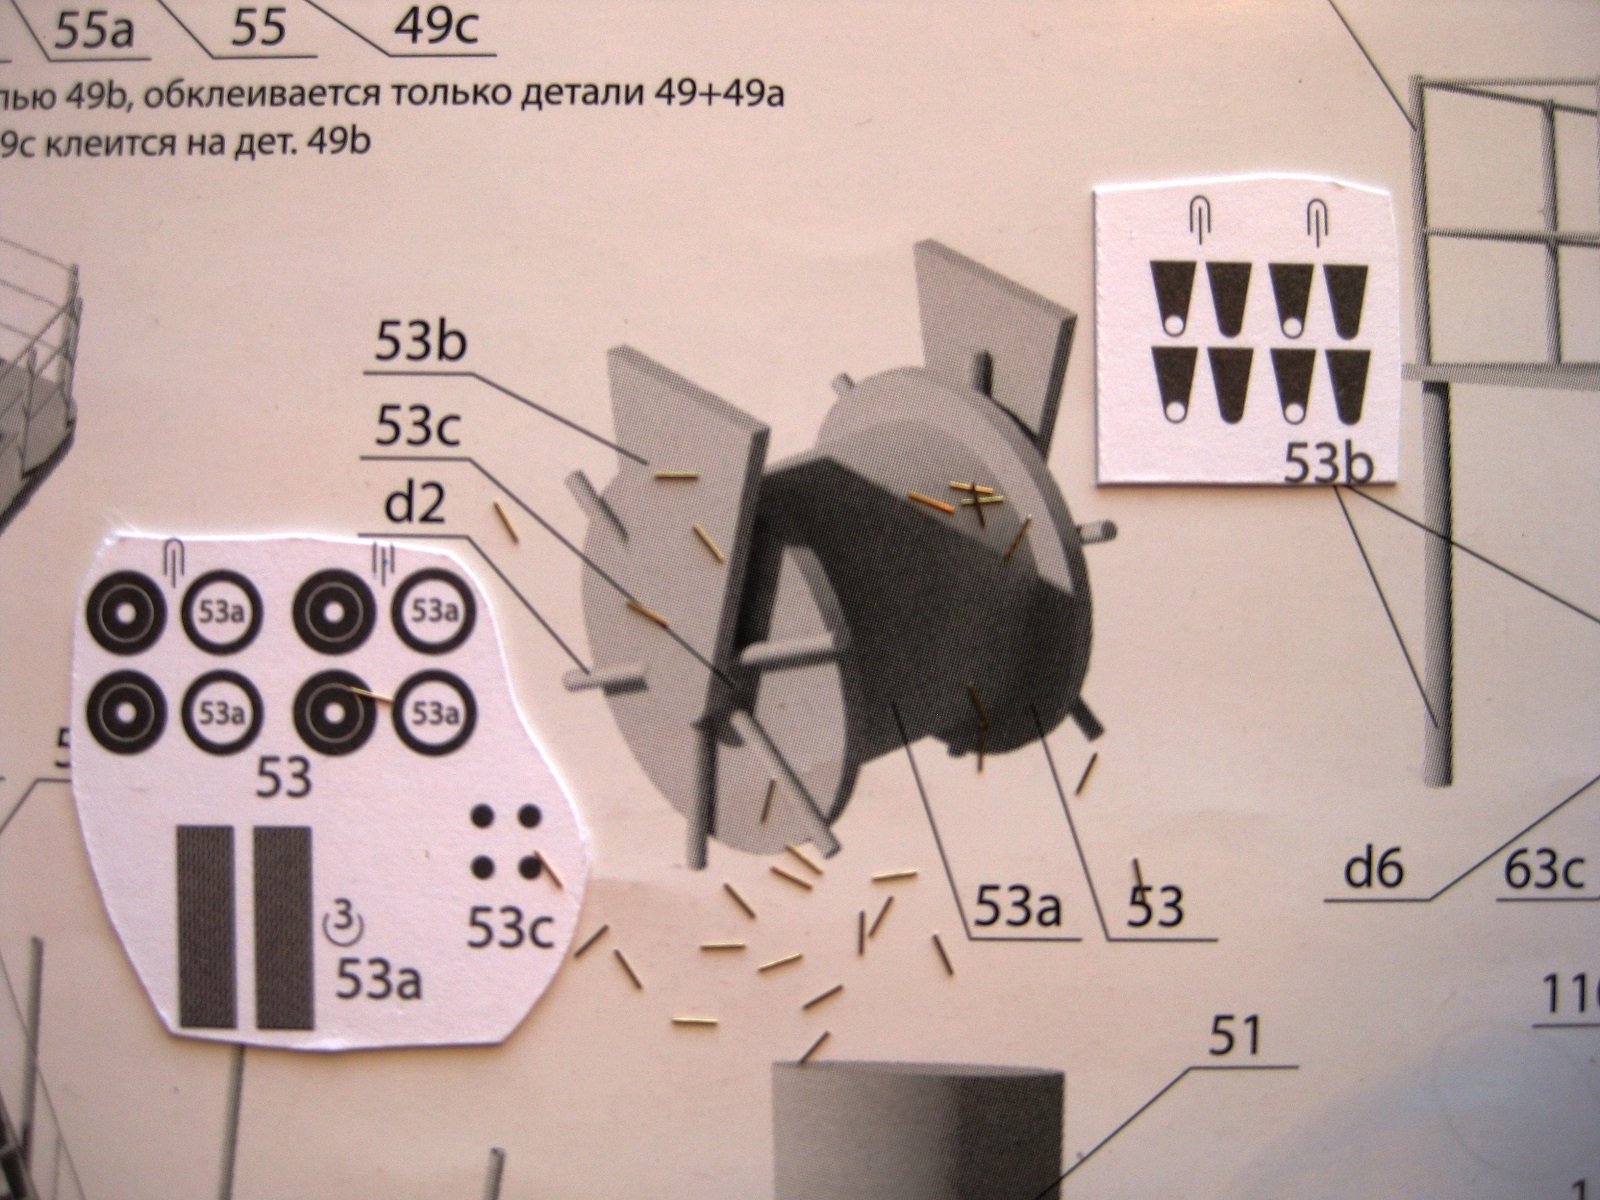
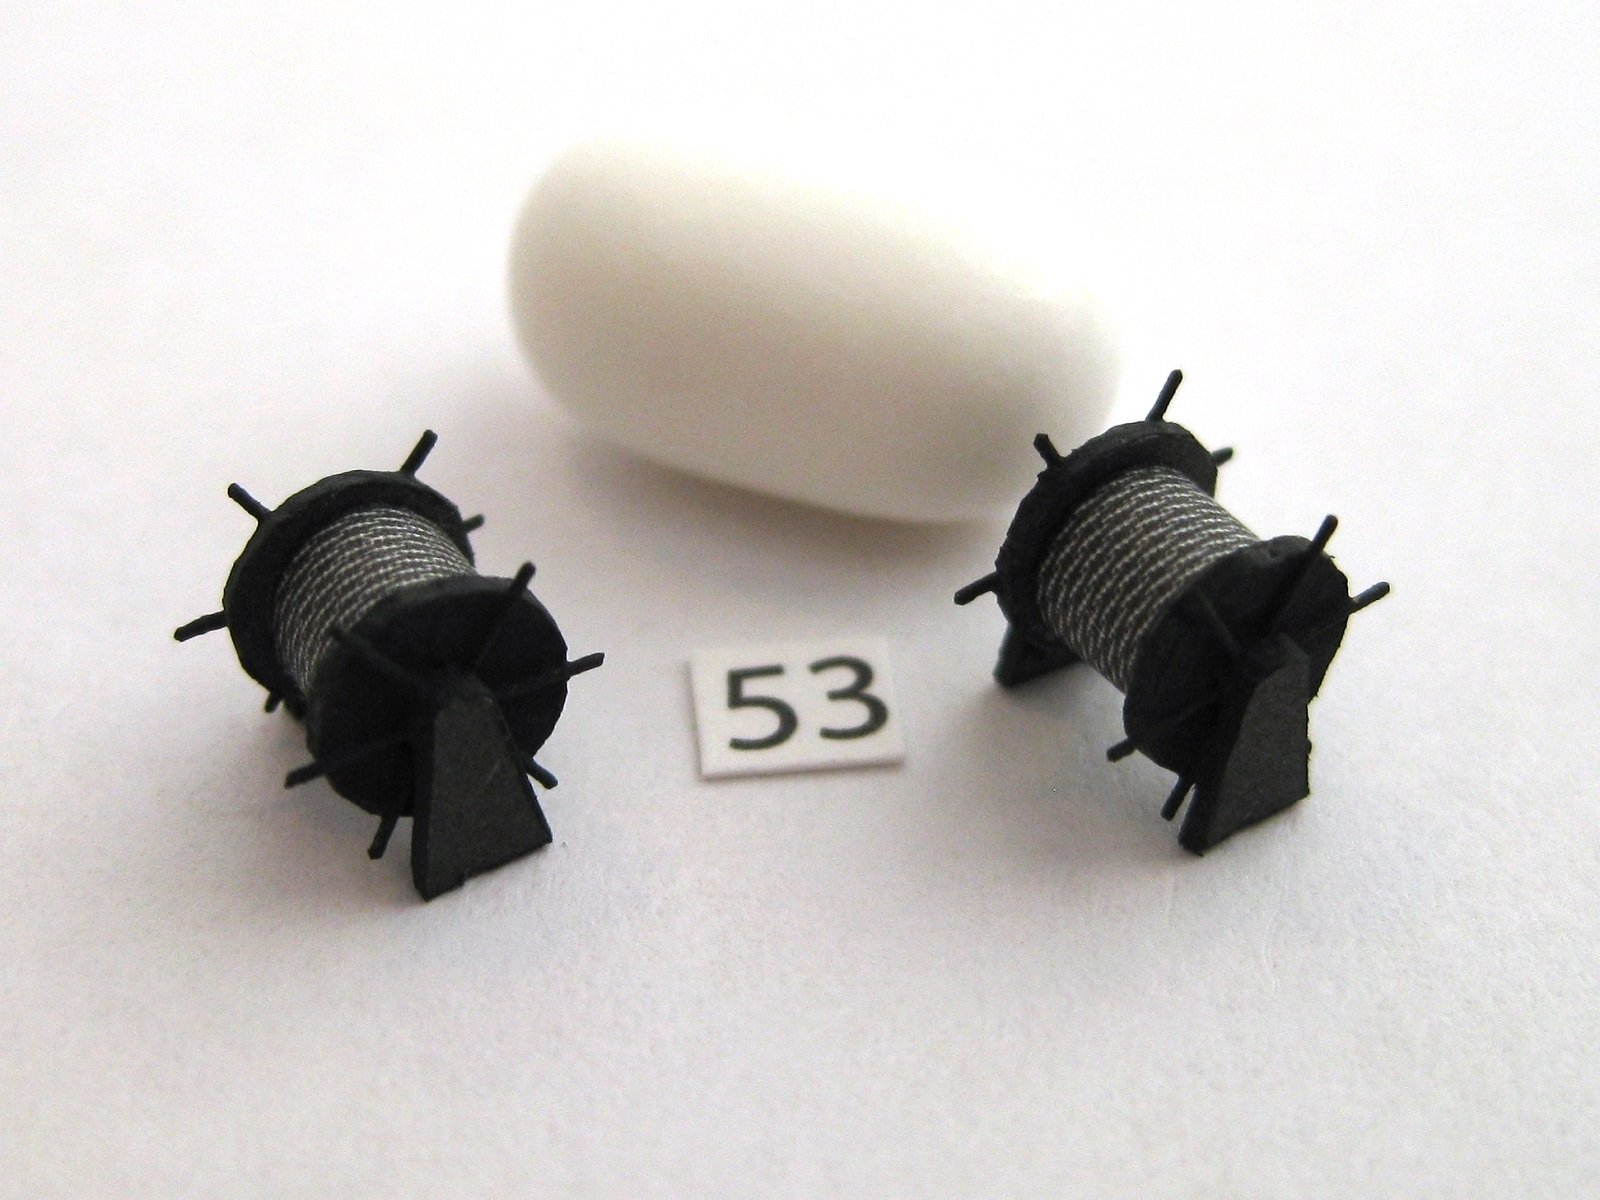
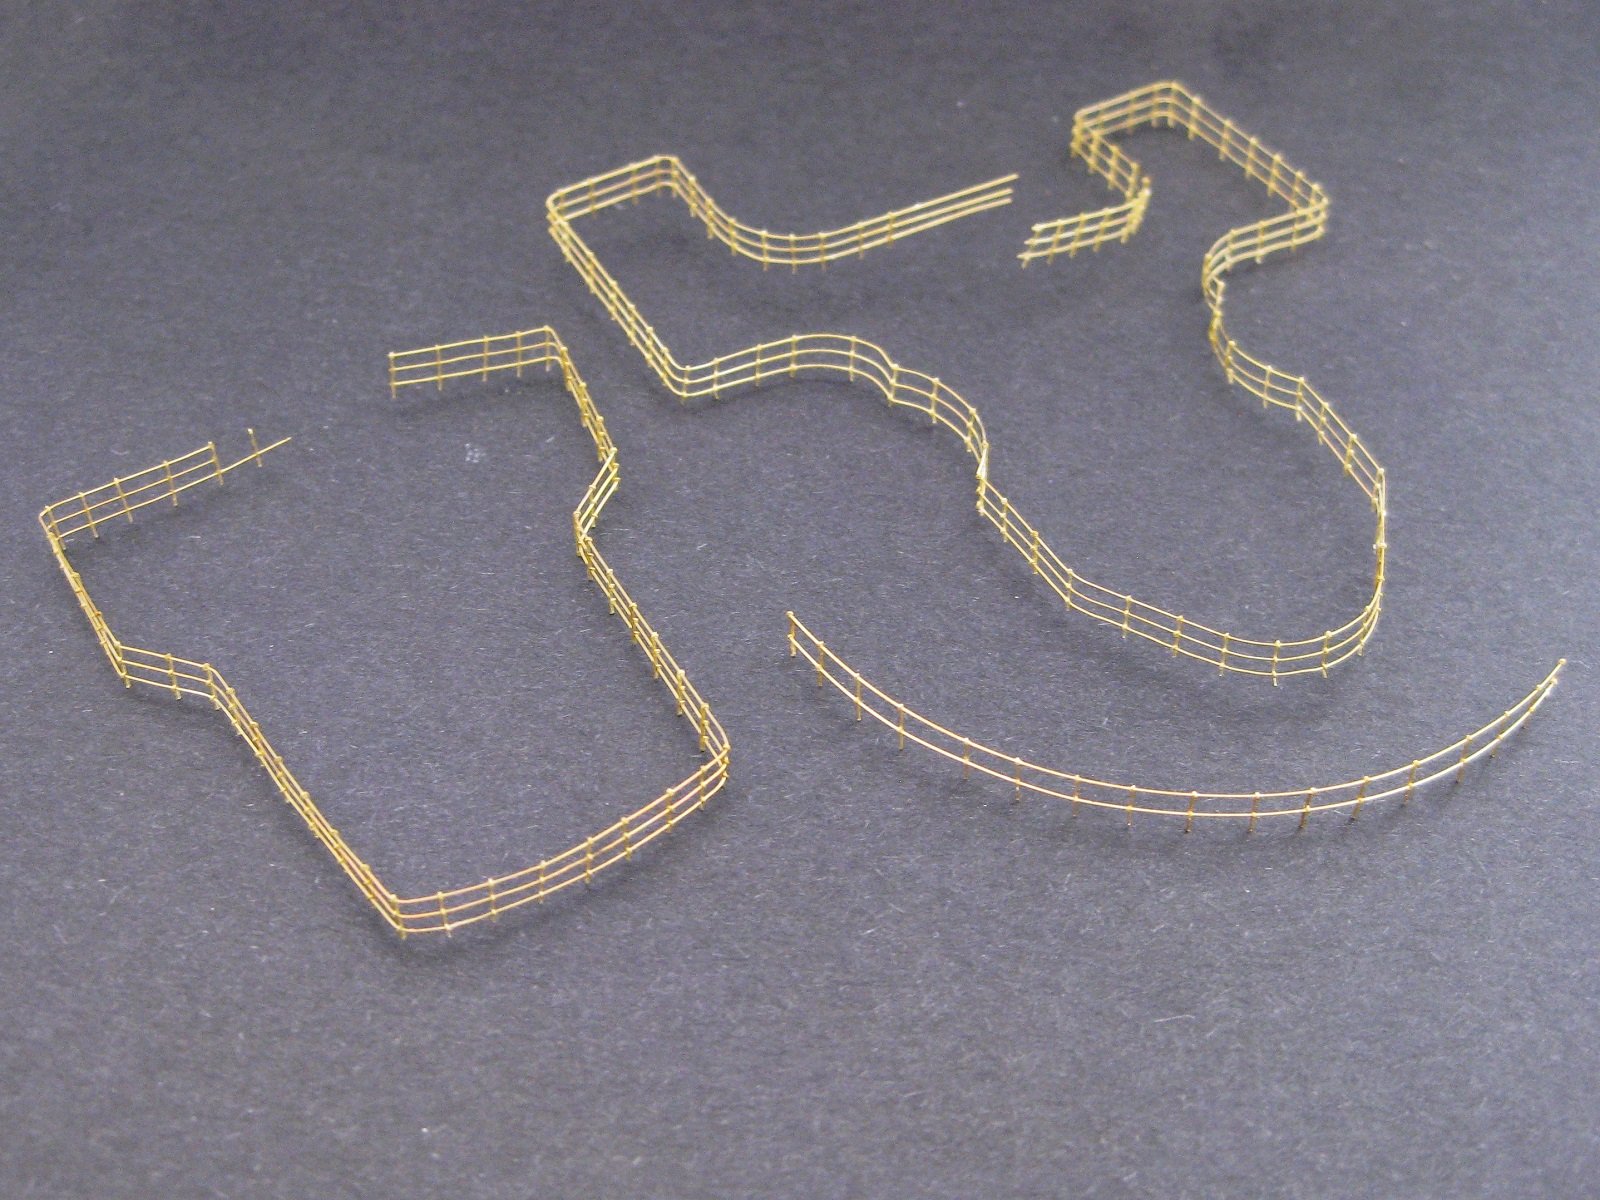
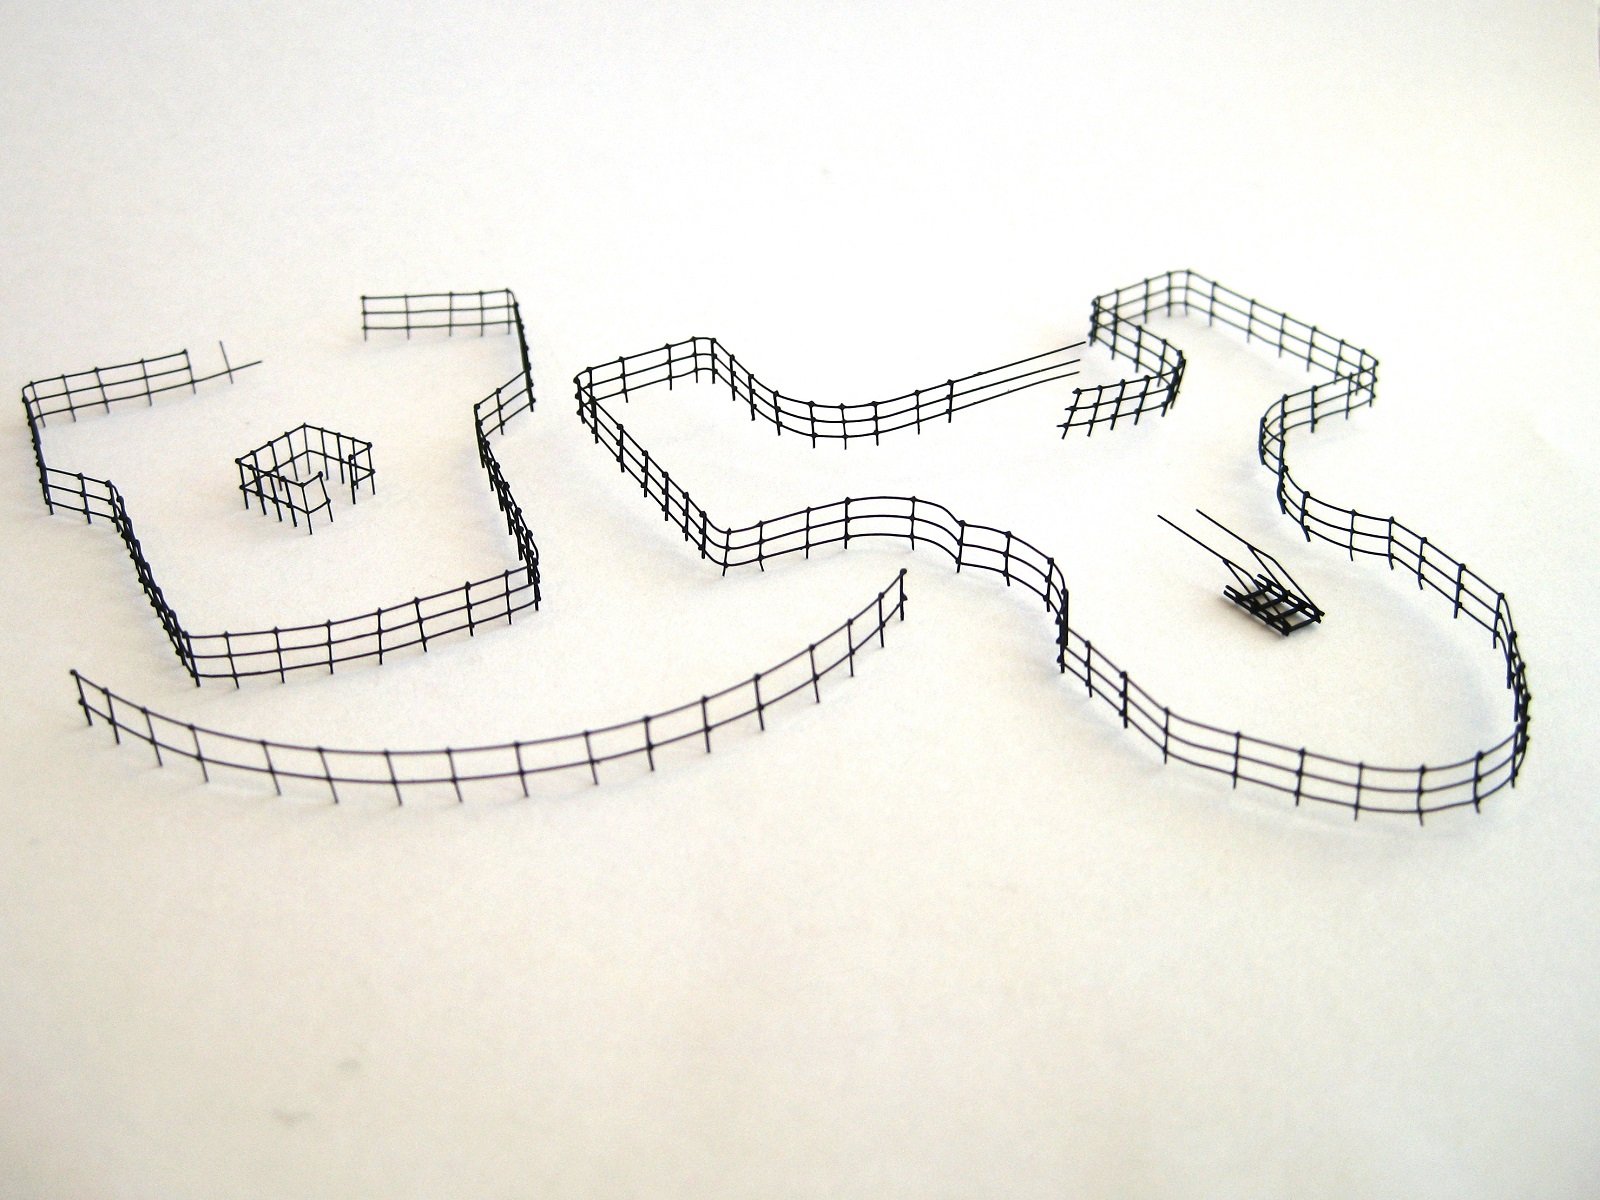
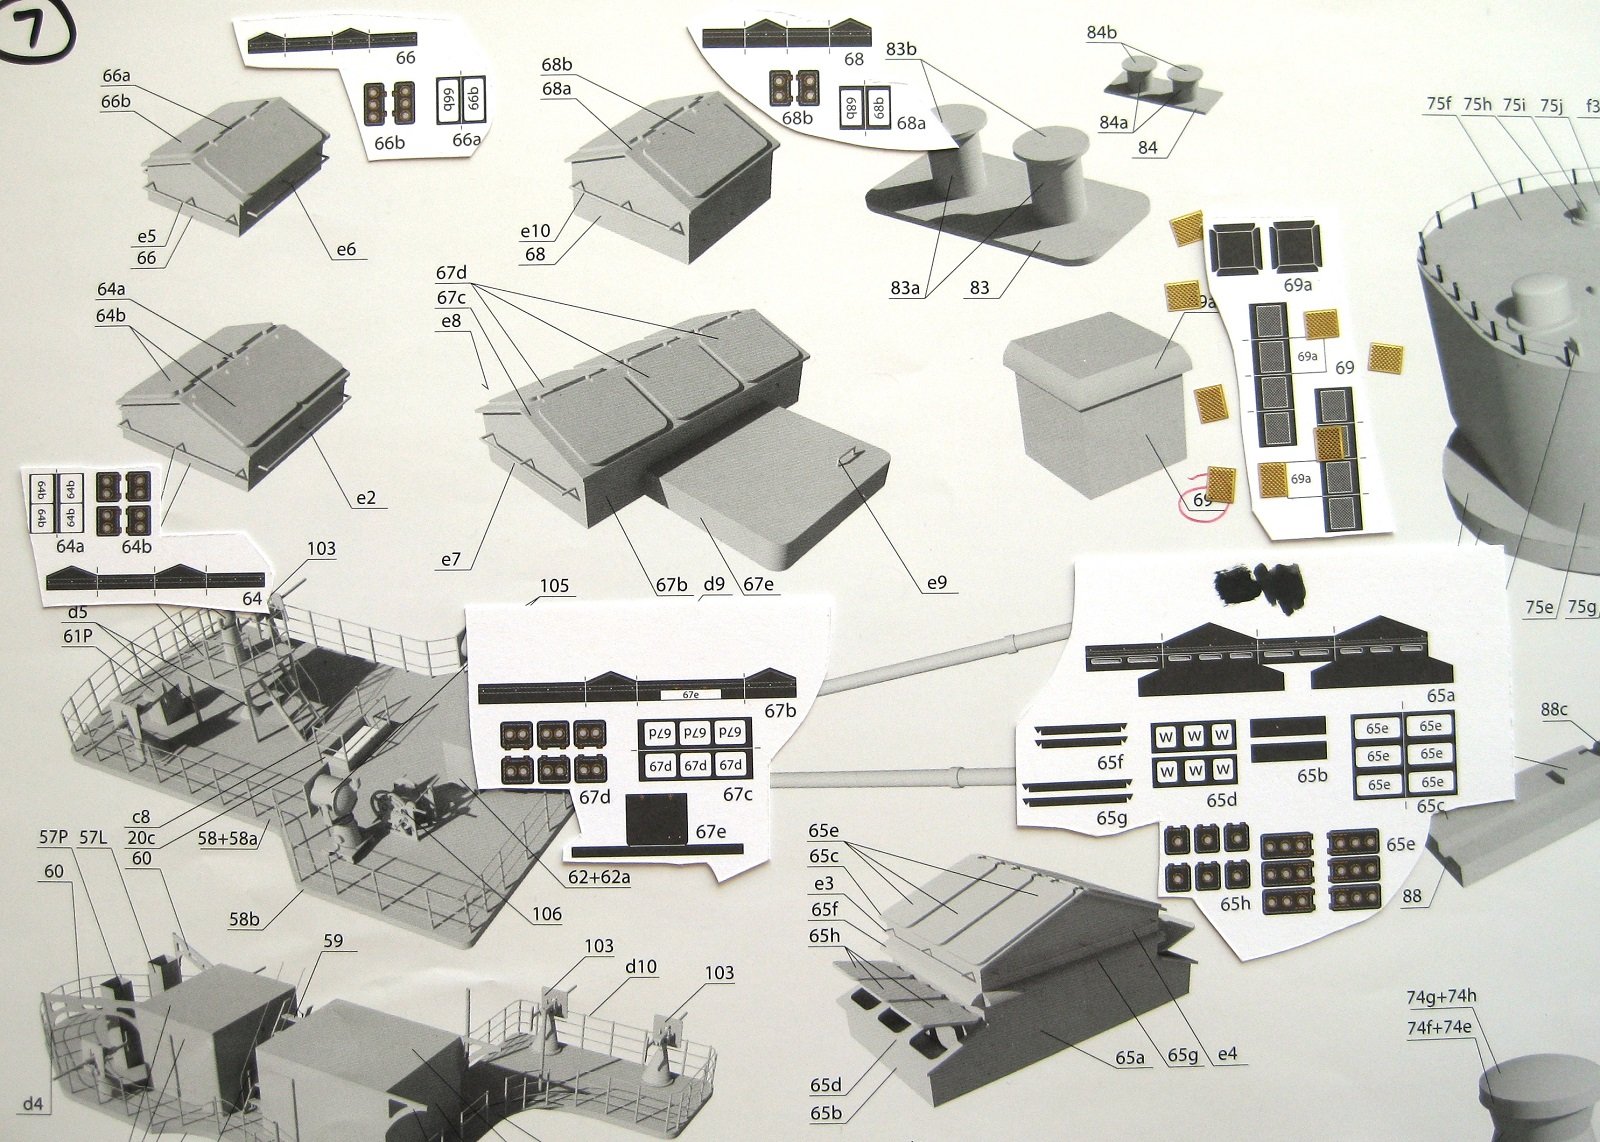
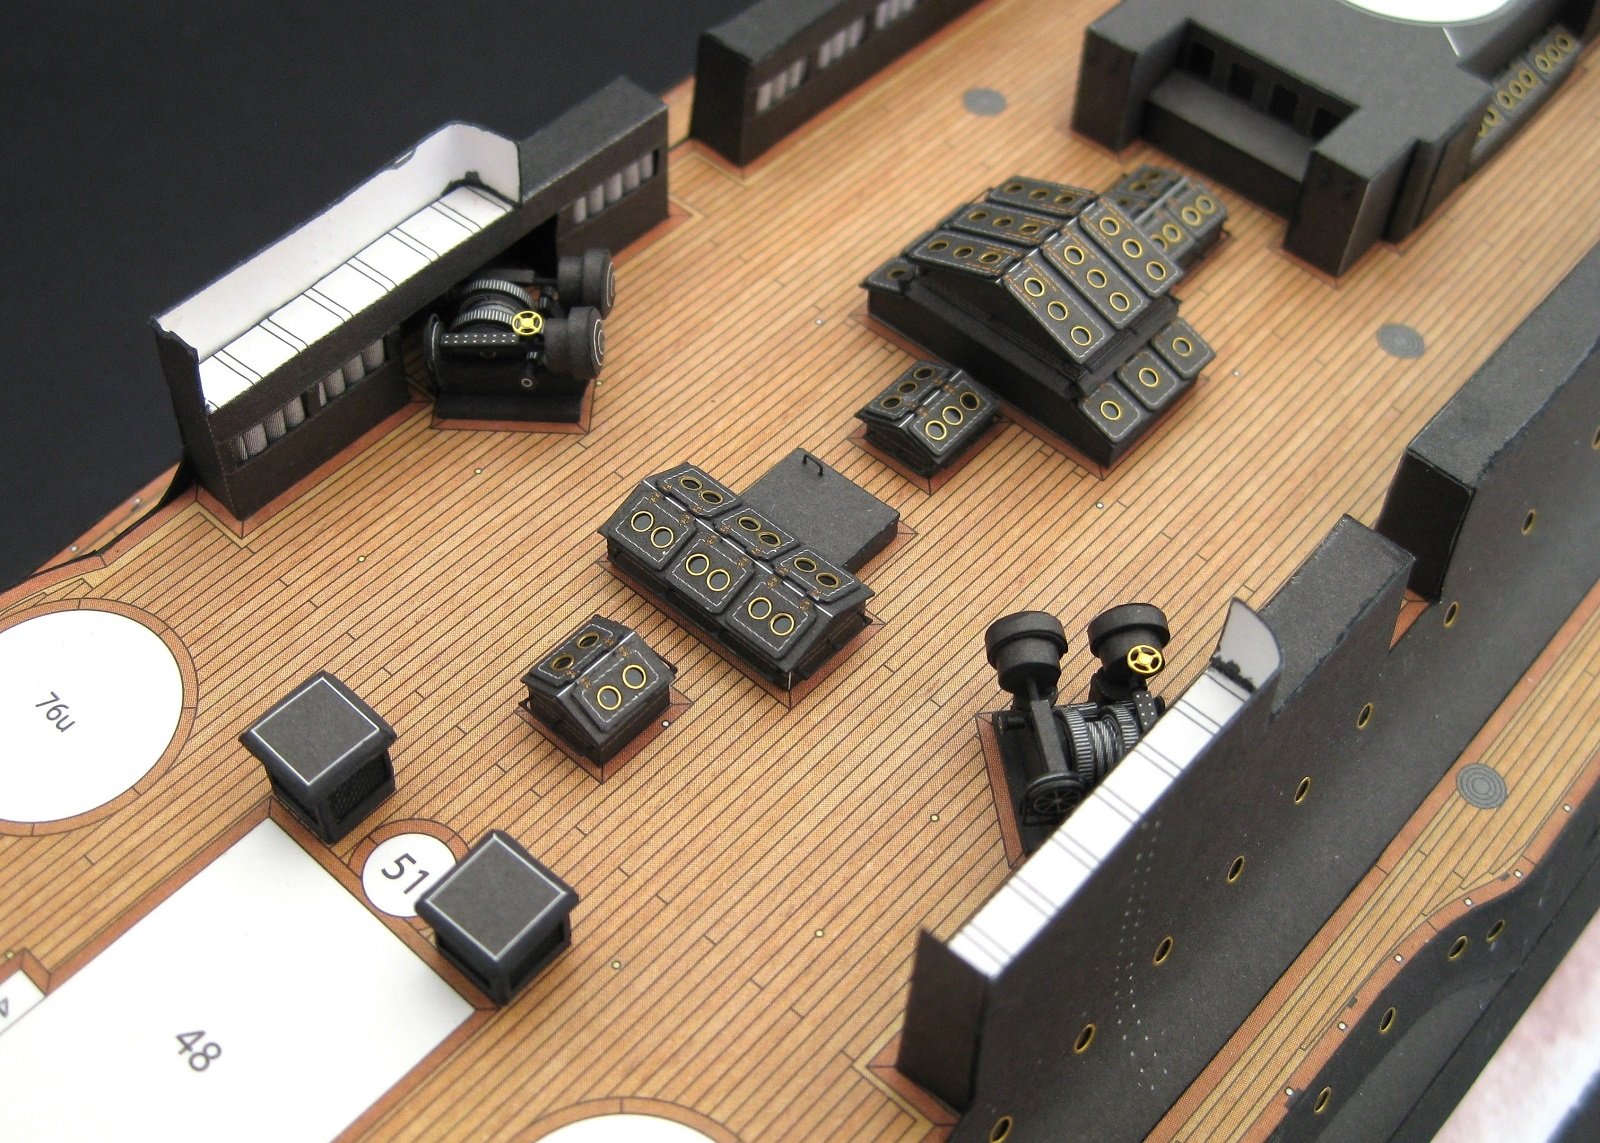
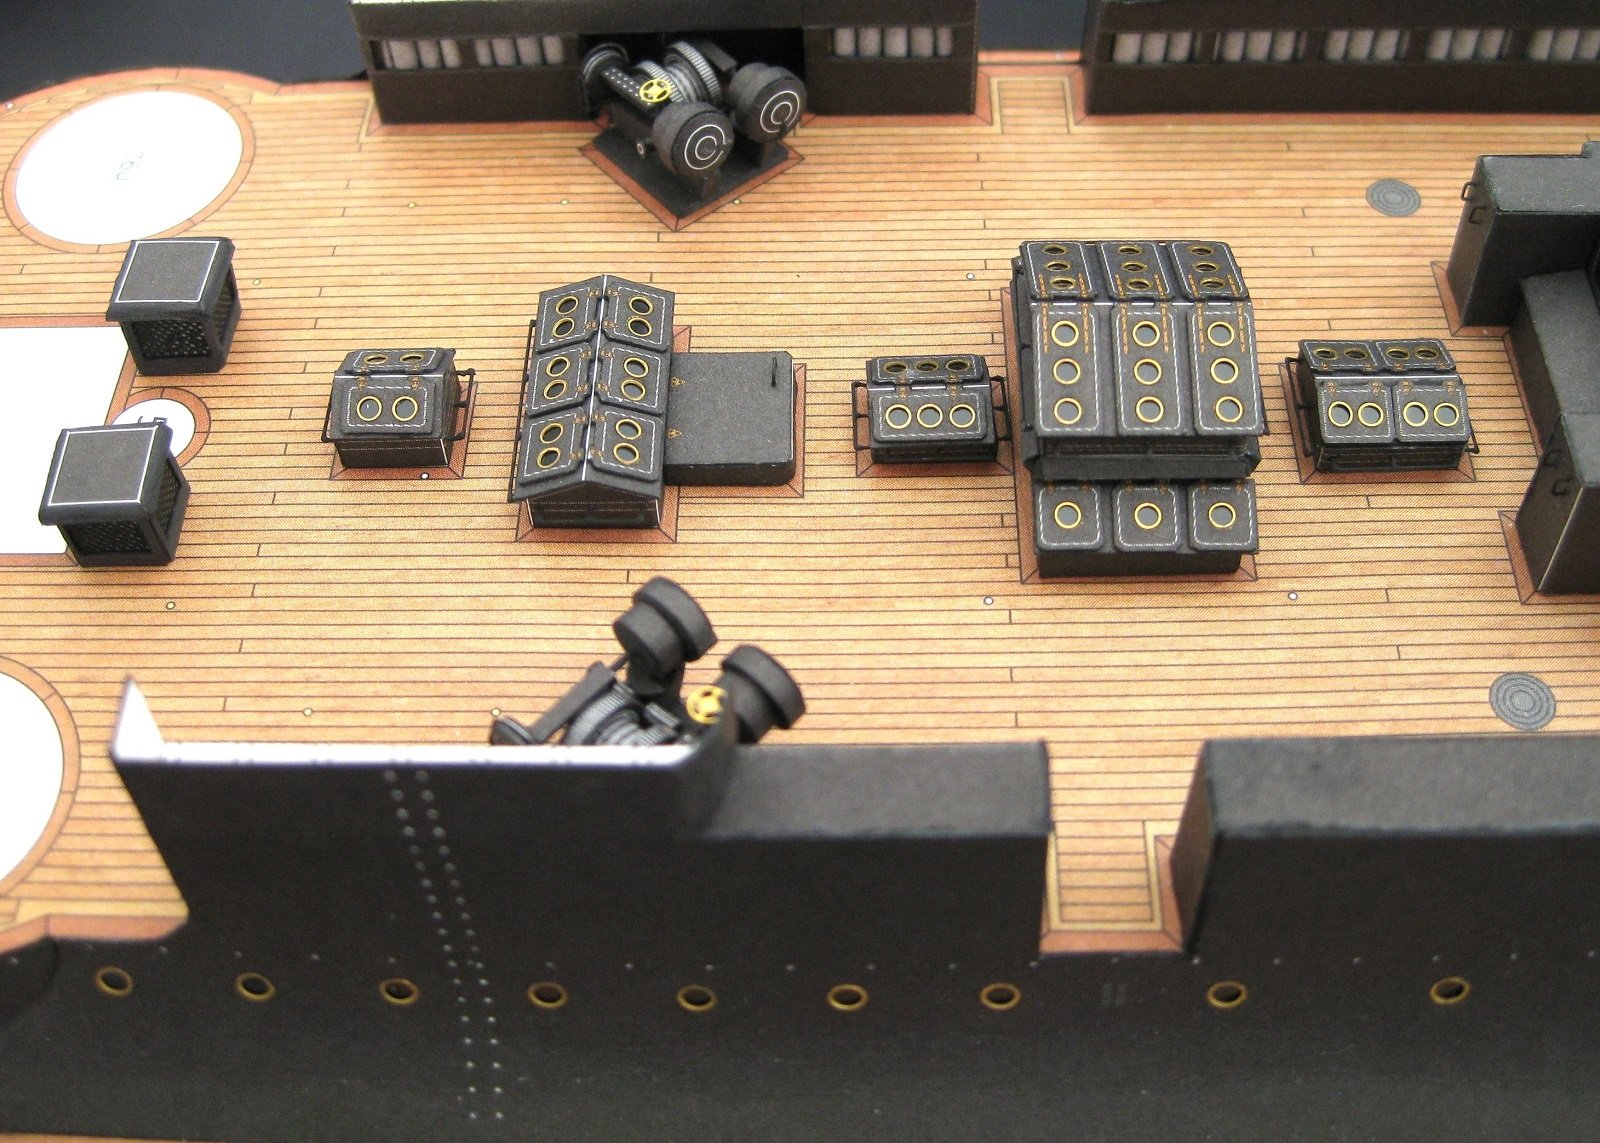
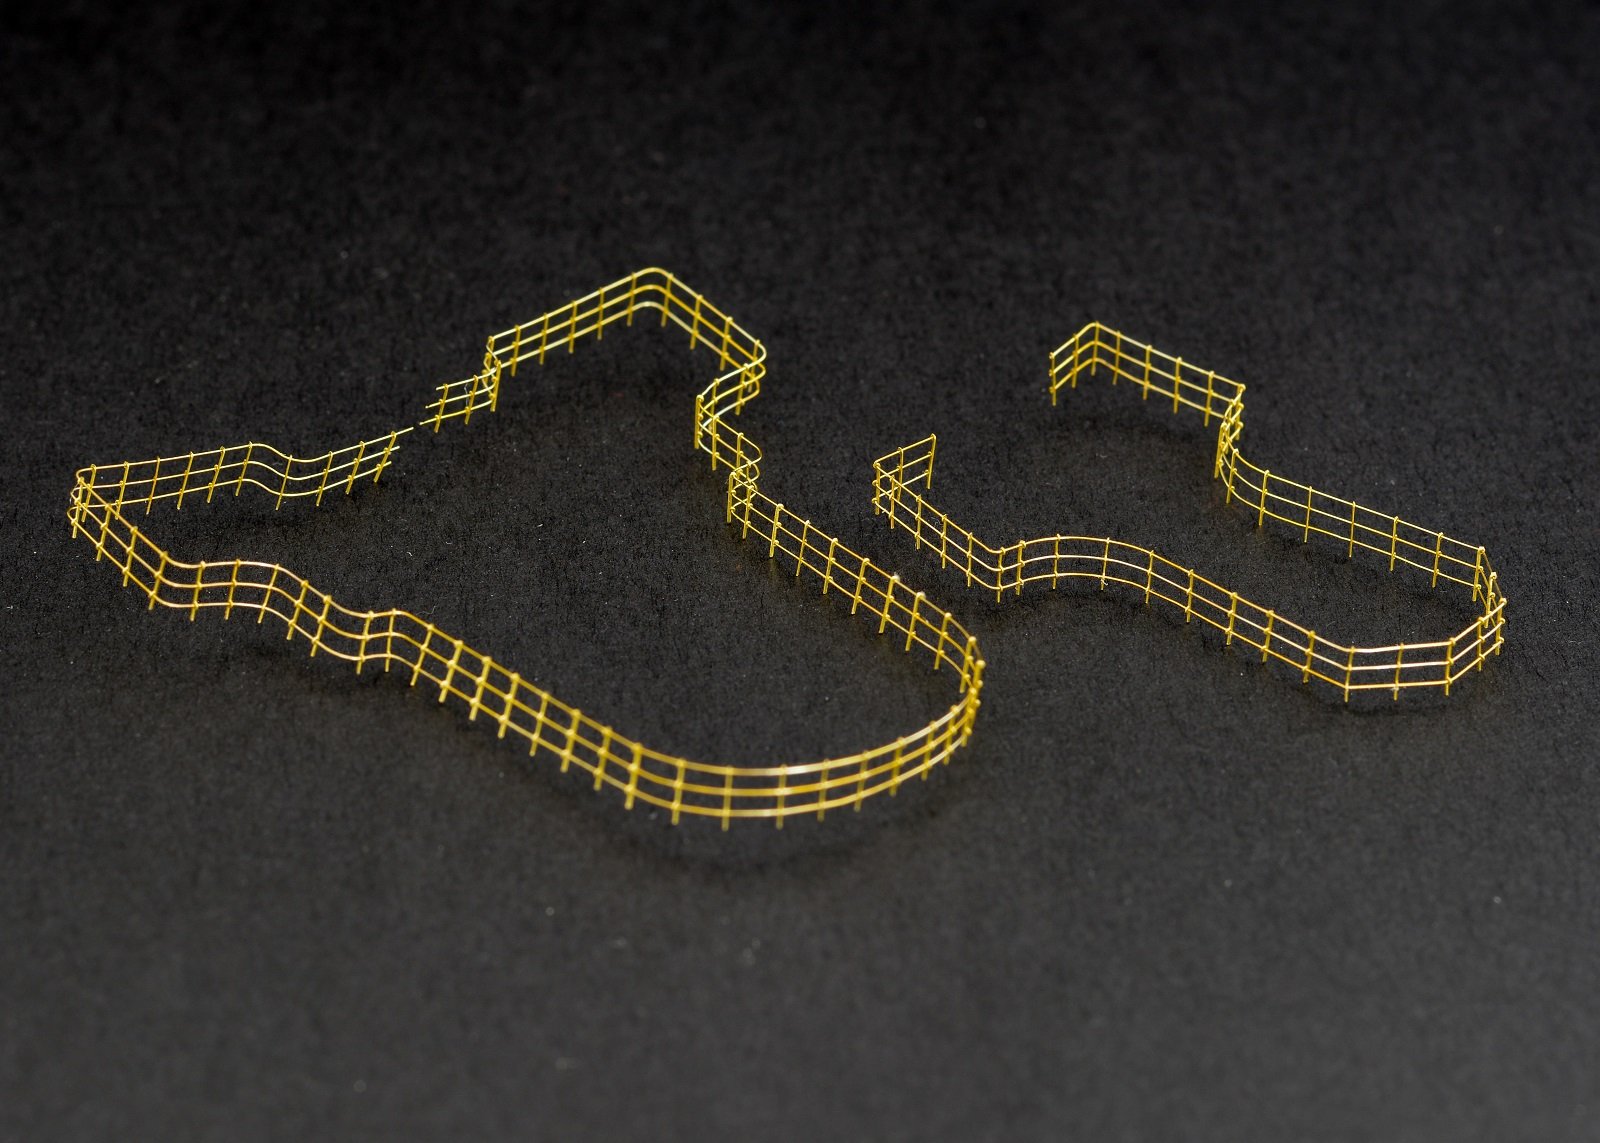
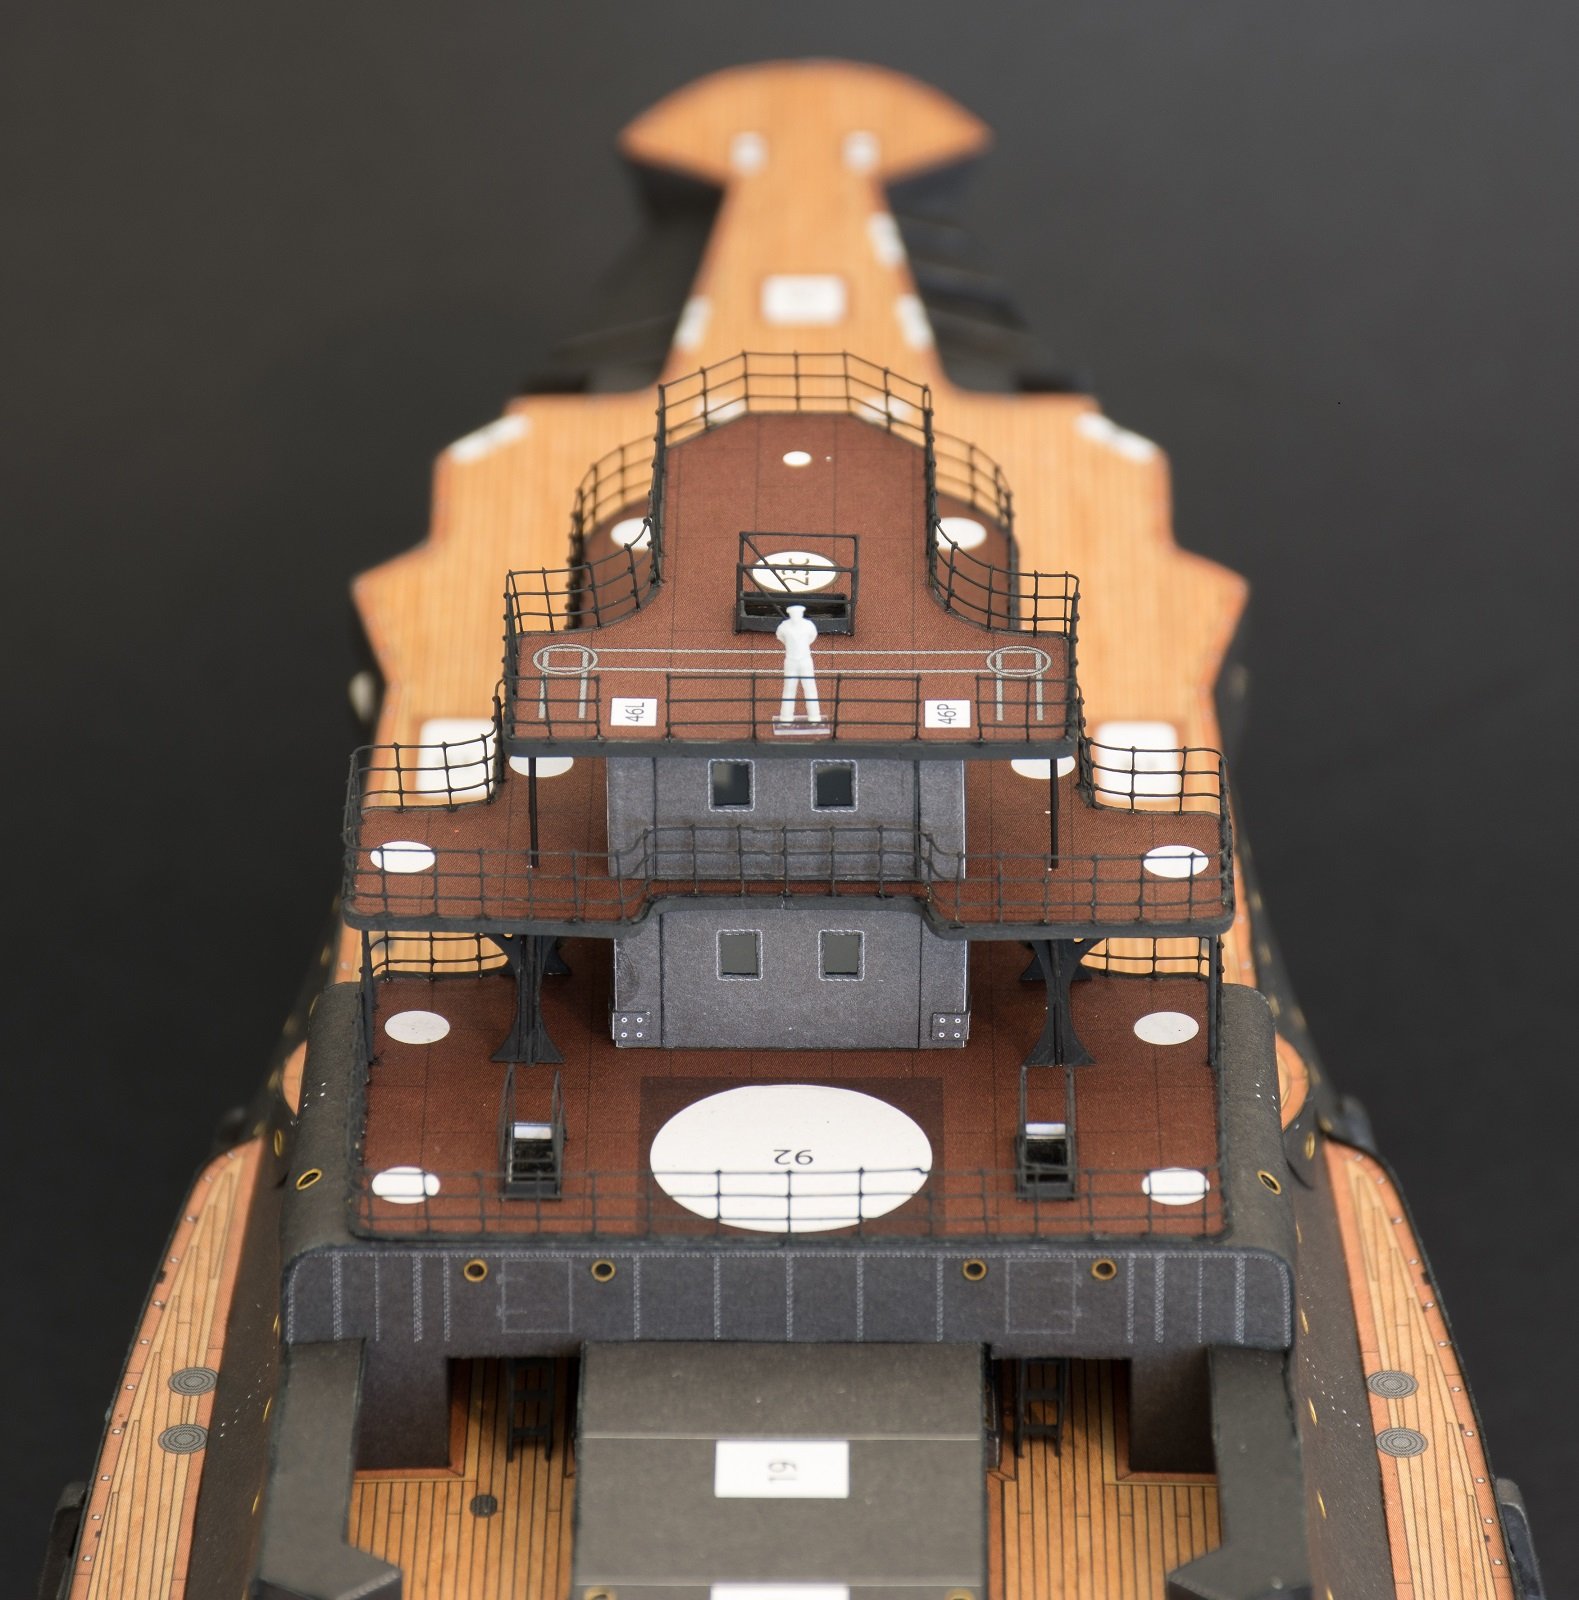
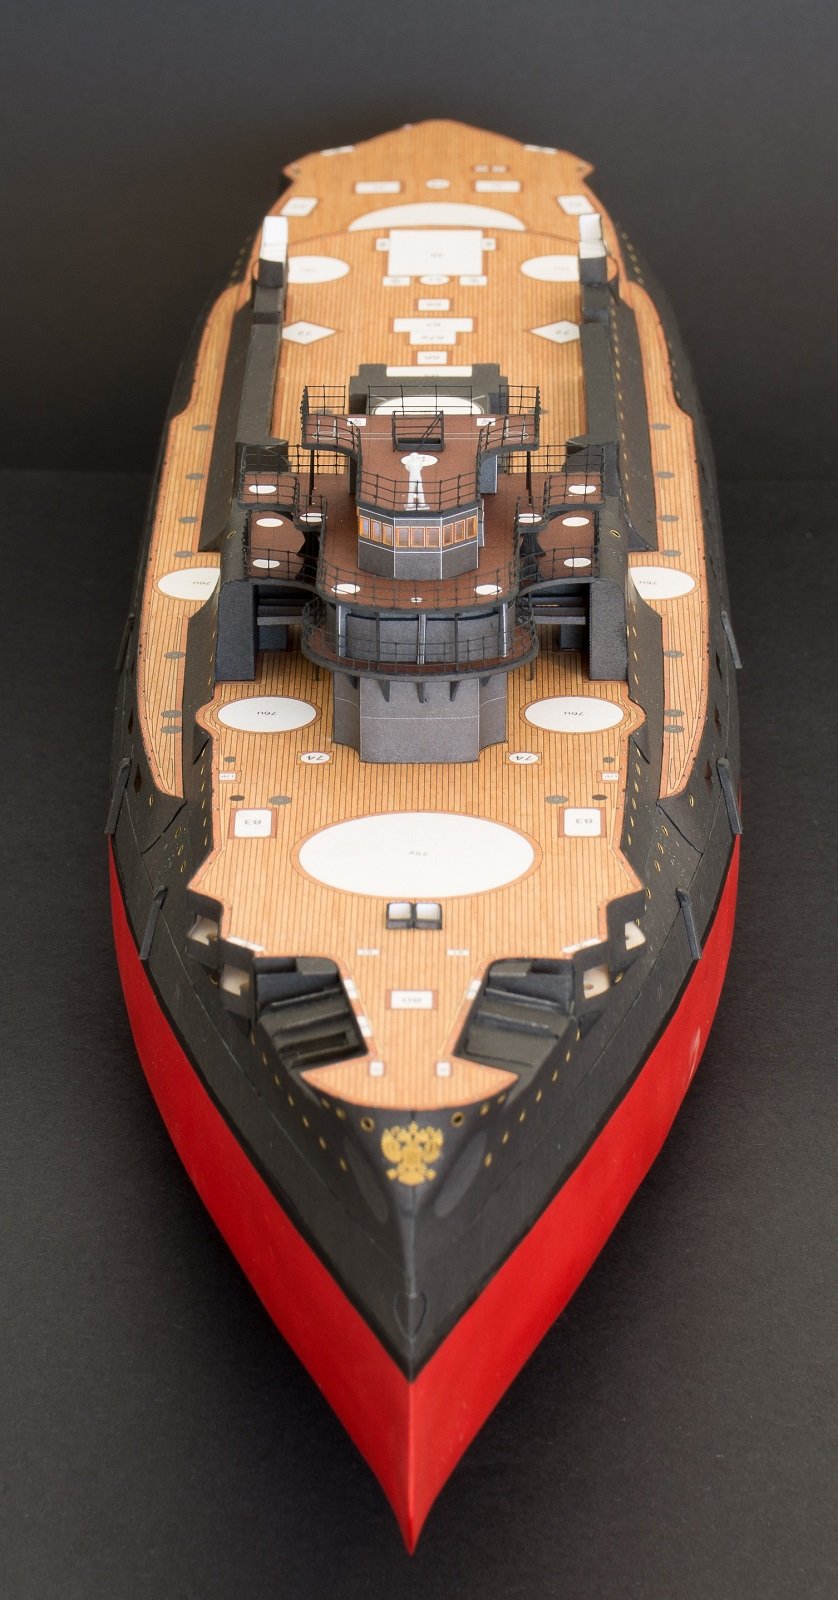
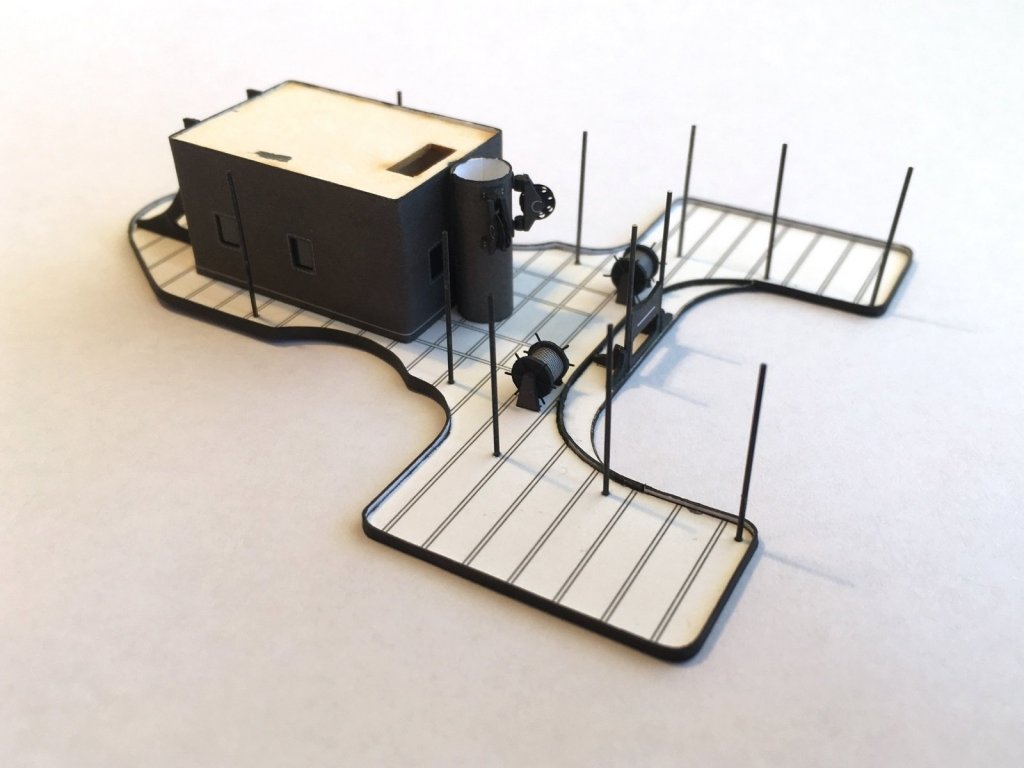
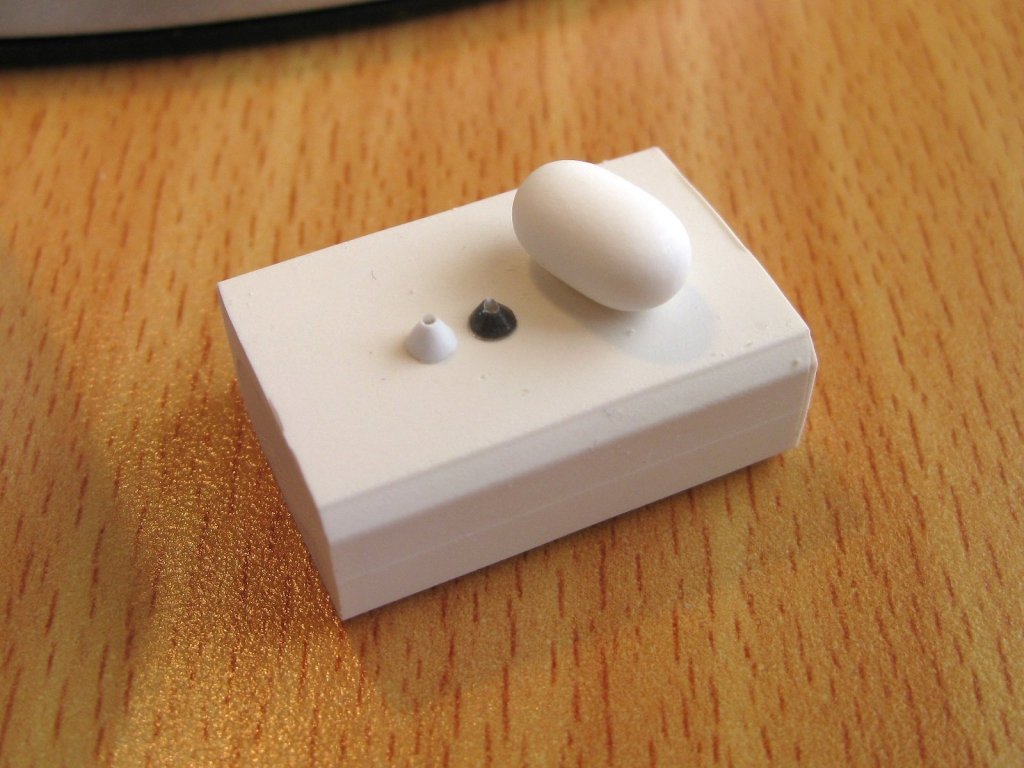
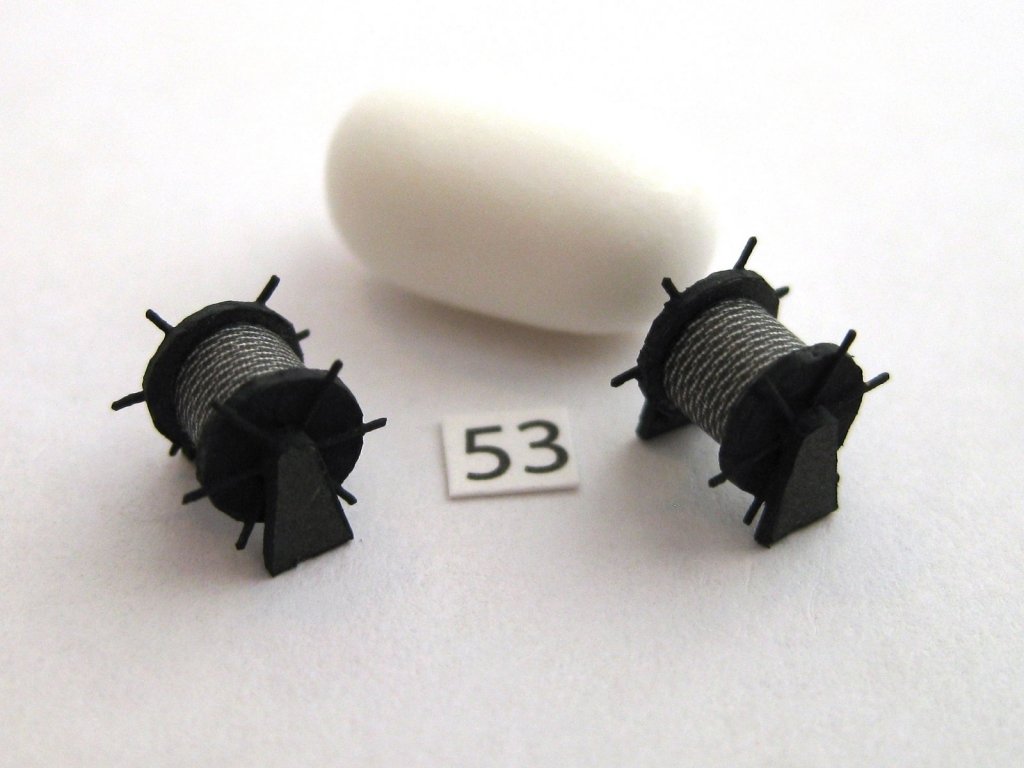
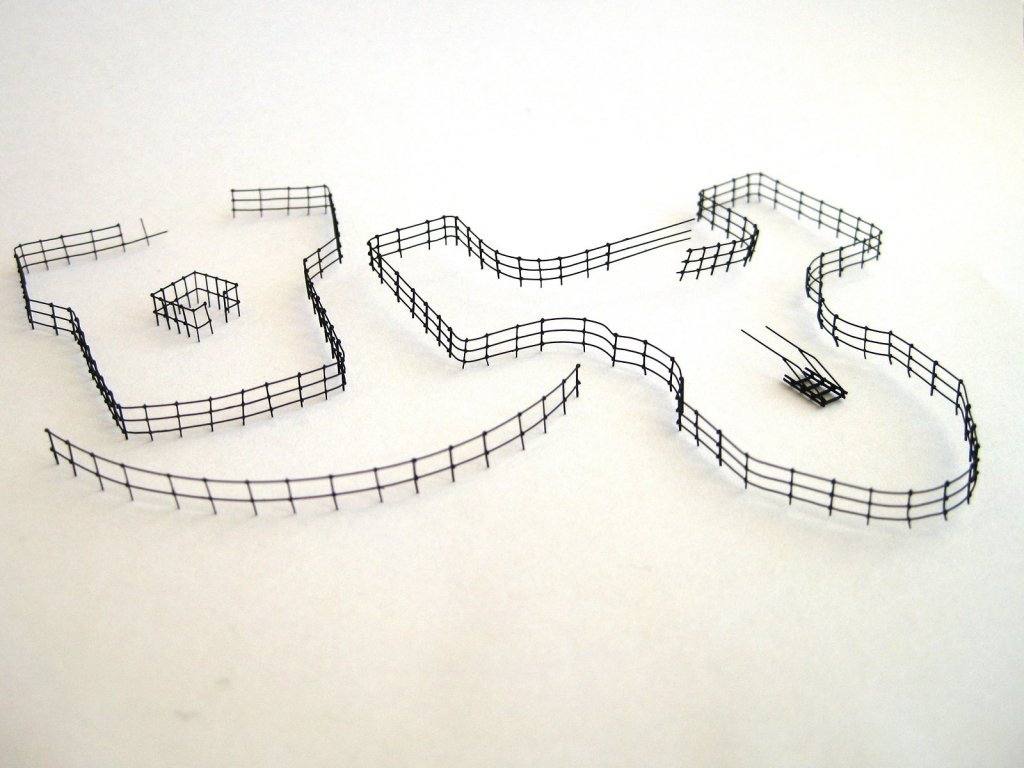
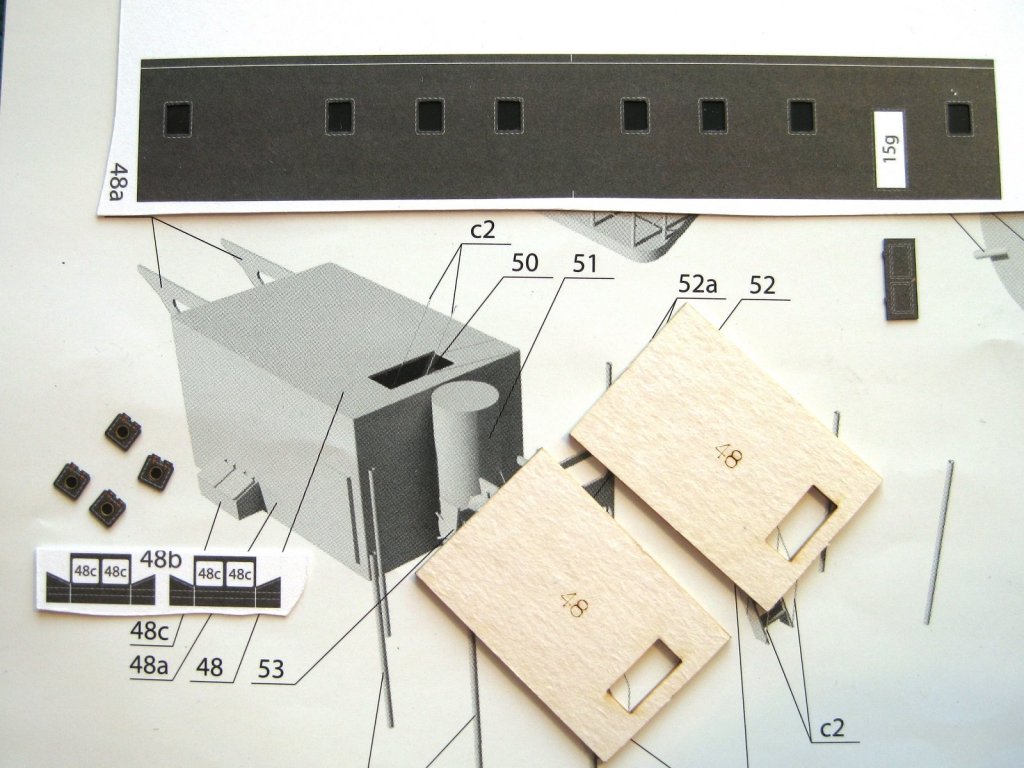
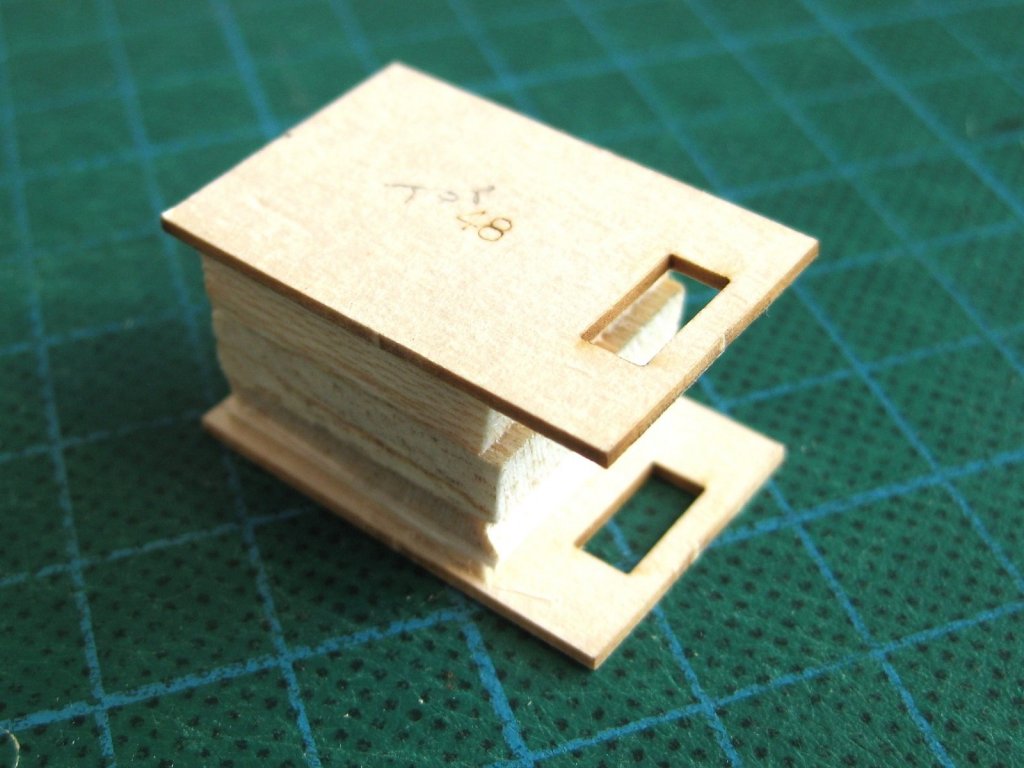
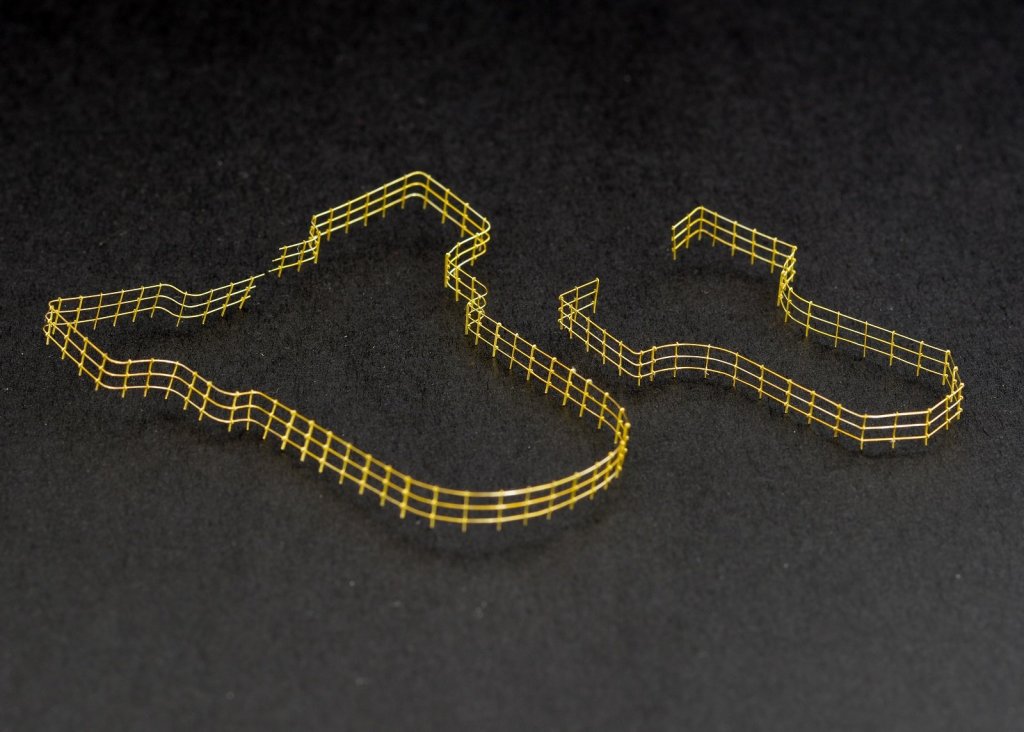
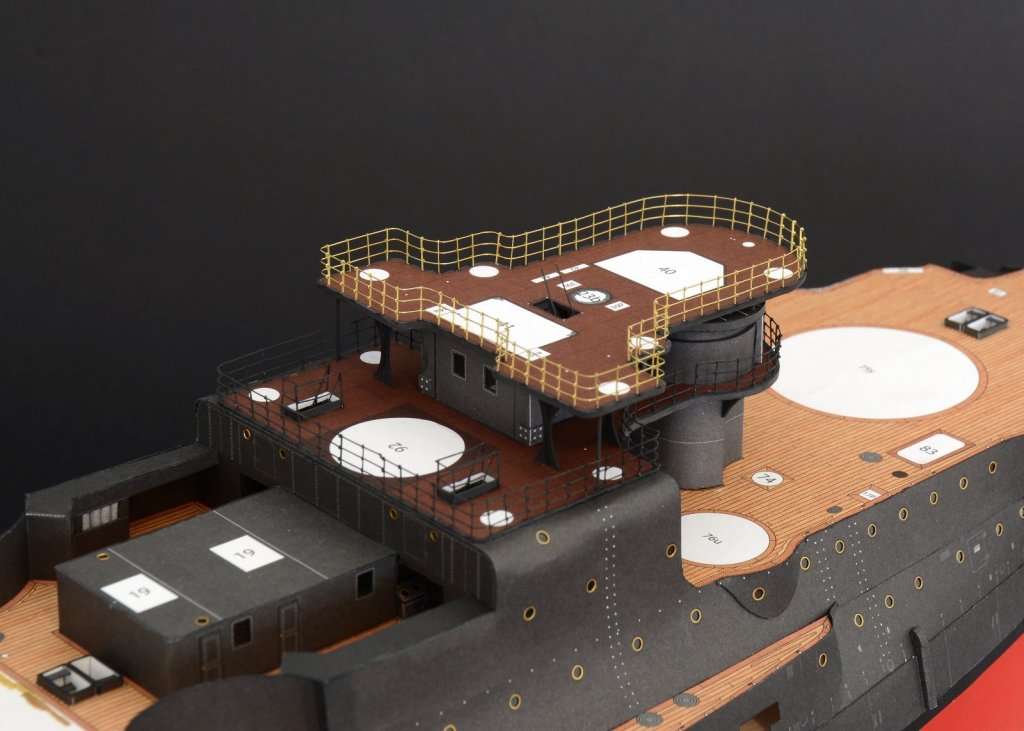
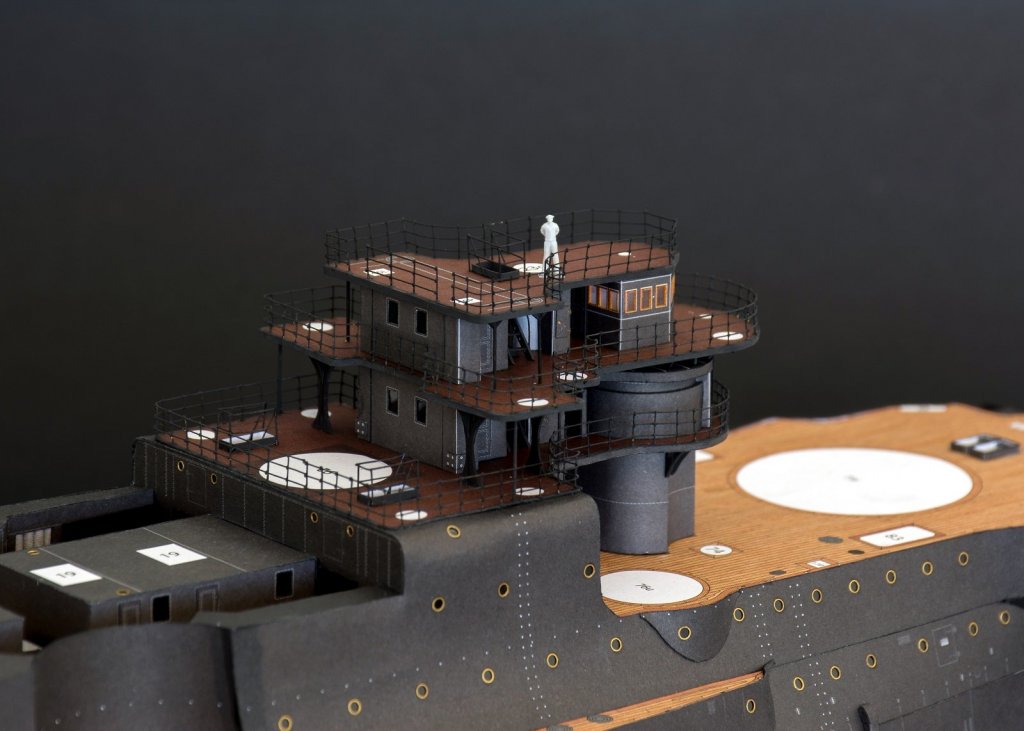
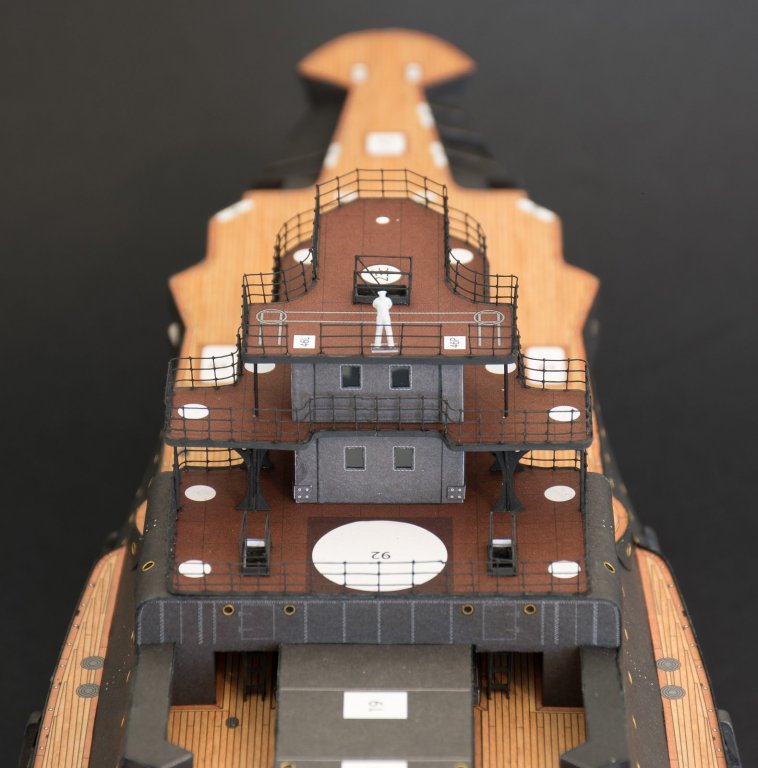
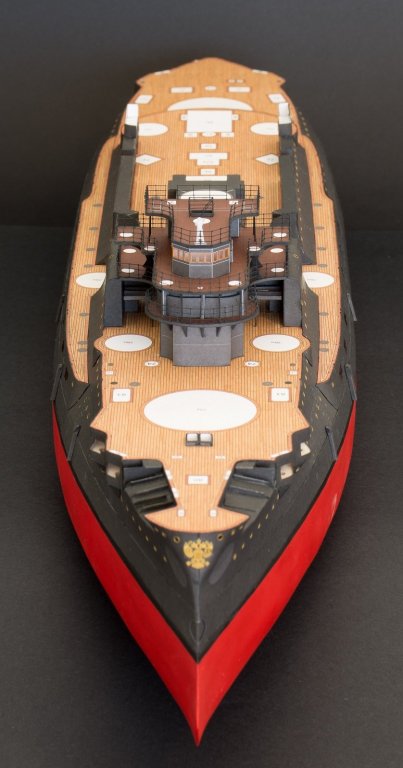
Hi All, It was this time last year I last worked on Borodino and spent this Christmas Break getting back into it concentrating on the rear decks. Started with the railings again using individual PE stanchions and bending the 0.2mm rails to shape from the templates. Painted with NATO black as this is greyer than full black and matches the black paper printing of the kit and black water colour I use for touch up. On to the 3 rear cabins. These are pretty simple Parts layout Laser cut forms spaced apart with scrap balsa and card. Finished bottom cabin with side skylights, treated using my usual method for portholes. The 2 upper deck cabins I was looking forward to doing the Compass Platform as it is a nice little piece on its own right. Parts laid out ready for assembly. The handrail built up. This was more frustrating than the large deck railings. I decided to use some generic PE ladders rather than make up the paper ones for a change but still hand to make the handrail from 0.2mm wire. The centre support column has 2 ‘cones’ but I lost one so made one from styrene. I had 2mm styrene sheet so cut and shaped it from that. However when I was having a clean up I found the lost part on the floor and ended up using both paper parts. The finished compass platform. I didn’t turn out as well as I had hoped but still acceptable for me. Made a start in the little deck attachments and there are a couple of hose reels which are fixed to the underside of the deck. Parts laid out. The spokes are 0.2mm x 2mm. Starting assembly Finished hose reels I decided to do a mock up with the parts of the rear decks made so far. Nothing is glued and there is a lot more little bits and pieces to be made before I can start assembling. That’s about all. I have relocated to Melbourne for work but my family and modelling is still in Perth so little will be done on the odd times I get home so likely the next update will be in a years time LOL Cheers Slog


- 244 replies
-
- 8
-
-
- borodino
- dom bumagi
- (and 1 more)
-
Strip the insulation off a Cat5 (patch cable) or telephony cable and unwind. Everyone has these lying around and the wires are tiny
-
This is ONE of the reasons I no longer participate on this site. This inane nonsense is reaching pandemic levels where no post, thread or Build Log is safe. MSW has become fraught with danger where a single off-topic comment anywhere on the site runs the risk of becoming page after page of similar, past, present or future experiences, anecdotes and “amusing” quips. What’s wrong with you guys? I can only assume you have no ‘real’ friends/family/colleagues to spout this crap to that you need to do it here! Try getting out and meeting people and do this over a coffee or beverage of your choice. My only regret of this post is that I broke my self-imposed ban to leave this site well alone and it was made in Craig’s build log and for that I apologise. Craig, I have been following your build from off stage as I am sure you remember I have the Merit International version of this in my stash and must say I am very impressed with how it’s turning out. Great work. Cheers Slog
- 467 replies
-
- 5
-
-
- mikasa
- wave models
- (and 1 more)
-
Did the amidships skylights, vents etc next with 6 different types and sizes. Finished ready for installation. In their respective locations but not fixed down yet. Cheers Slog


- 244 replies
-
- 10
-
-
- borodino
- dom bumagi
- (and 1 more)
-
Hi Craig, yeah used 'easy' silver solder paste and the torch. Slowly getting there with the technique but takes a few goes before I settle in to it. Hi Bill thanks for the kind words. If you haven't already perhaps start a build log as someone may be able to provide assistance with any issues. I bought the kit from GPM in Poland. The link to their site should be in the 1st post of the log. Cheers Slog
- 244 replies
-
- 3
-
-
- borodino
- dom bumagi
- (and 1 more)
-
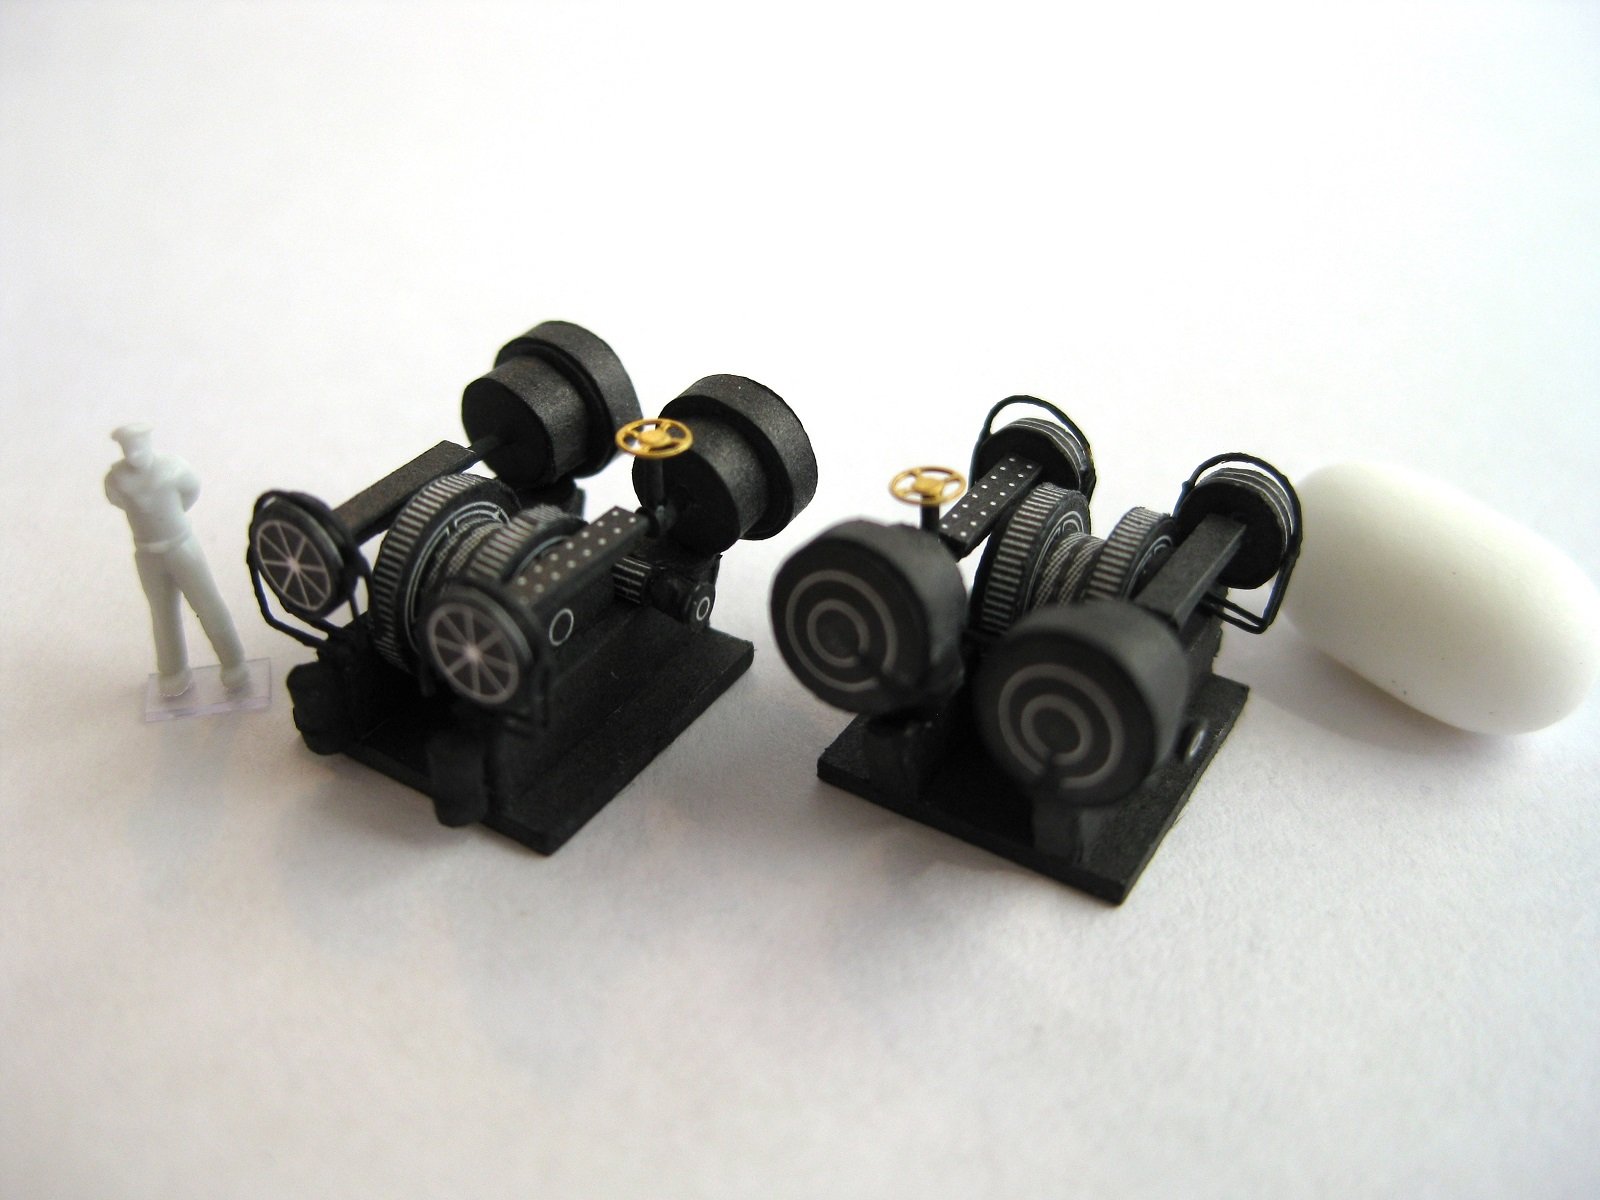
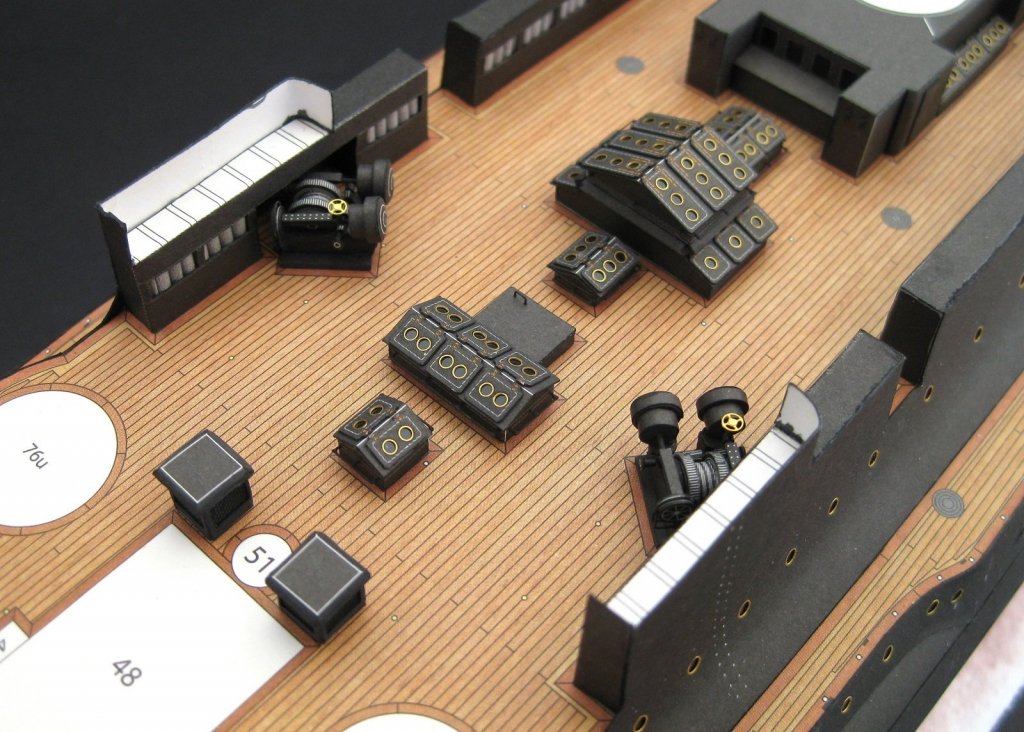
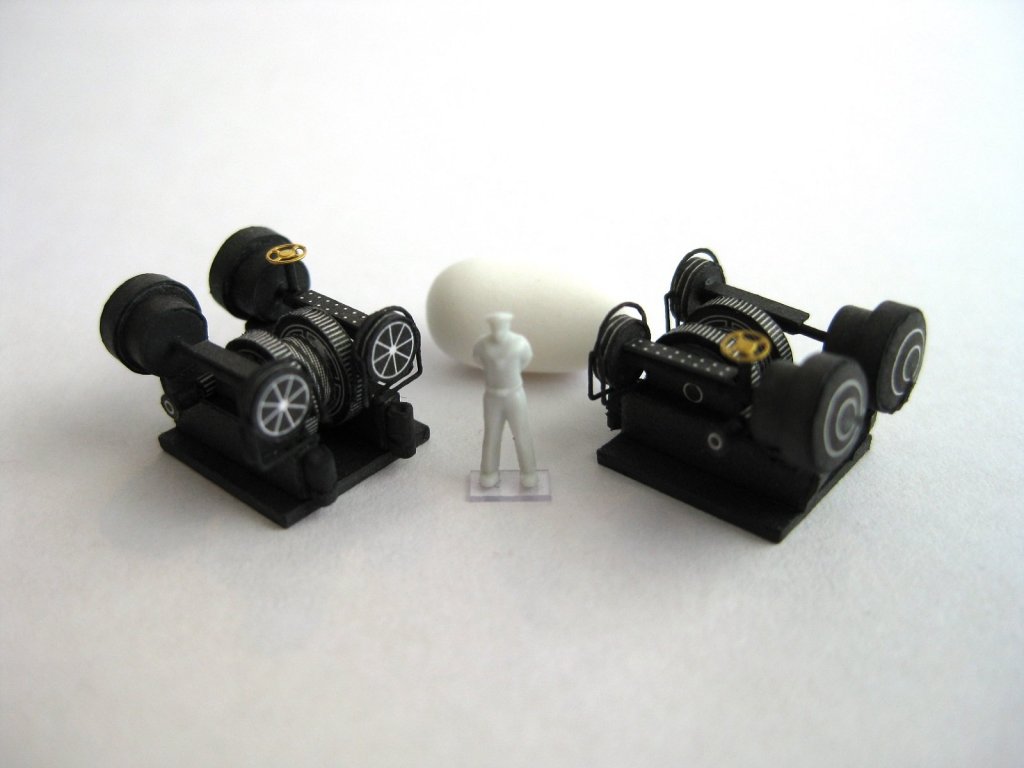
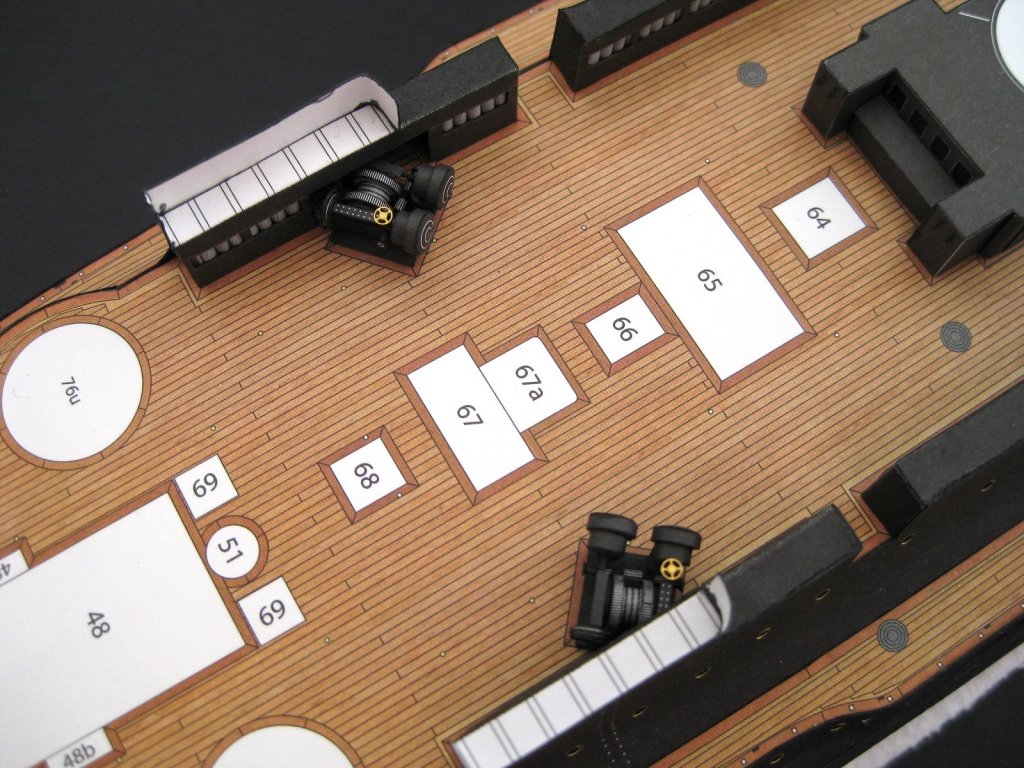
Hi All, thanks for all the likes and comments. Starting on the amidships assemblies with a couple of winches. The winches have some kind of frame or brake band made from 0.2mm brass wire. Finished ready for installation. Some discrepancies in the indicted parts positions meant pulling some of the assembly apart to correct. Installed in their location on the deck. Cheers Slog

- 244 replies
-
- 11
-
-
- borodino
- dom bumagi
- (and 1 more)
-
I am not sure but if the manufacturer did there home Work then I am guessing from the muzzle to the collar should be in the region of 6.5mm or so. There appears to be quite a bit of extra length behind the collar. If I remember correctly I had the same photo etch fret and the little diagram should state the length of wire to cut a barrel from (or have a line drawn to measure) Cheers Slog
-
Hi Danny, if it's any help the 2cm FlaK 38 (C/38 for the naval) had a 1.3 metre barrel length or L65 ( 65 x the caliber) which would give a scale length of 6.5mm. Cheers Slog
-
Very nice work Danny. Just an observation, but I think the barrels may need to slide further back into the breech block up to the collar. They do look overally long as is and I haven't seen similar 20mm caliber barrels with a such a collar away out by itself before. Cheers Slog
-
They would be the aircraft hangers. Nice progress the boat supports have come out well. Cheers Slog
-
Looking forward to following something a bit different and seeing what you come up with. Cheers Slog
-
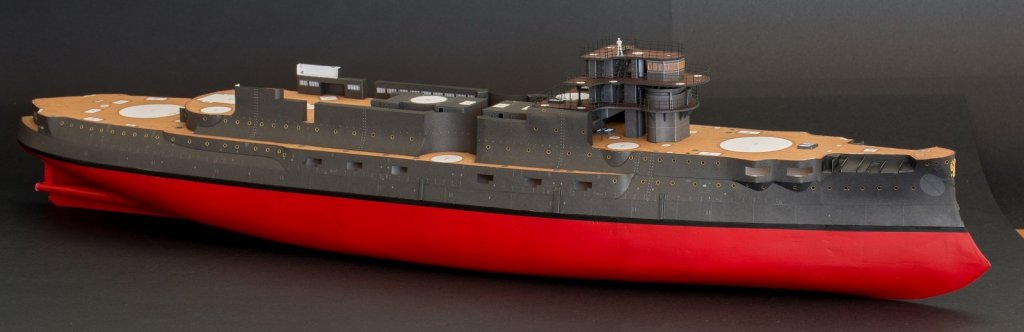
Finally the fore superstructure is more or less complete. The completed handrails ready for installation are shown below. Almost there, I had another set of stairs to make and a couple of storage boxes (?) Bridge deck handrail glued into place ready for painting before moving on up with the assembly. Finally the fore decks all assembled and complete. There are still a number of items to be installed such as the 47mm guns (white circles) and the 2 winches on the top deck for the boat booms but these can be done later. There are also a few small details such as navigation lights, search lights etc to do but these are further down the part number sequence. Before I repeat the process for the 2 rear decks I thought I would finish off all the amidships elements next for a break from doing decks as well as for accessibility since the lower rear deck extends forward a bit covering some of the components. Cheers Slog

- 244 replies
-
- 15
-
-
- borodino
- dom bumagi
- (and 1 more)