Captain Slog
-
Posts
904 -
Joined
Content Type
Profiles
Forums
Gallery
Events
Everything posted by Captain Slog
-
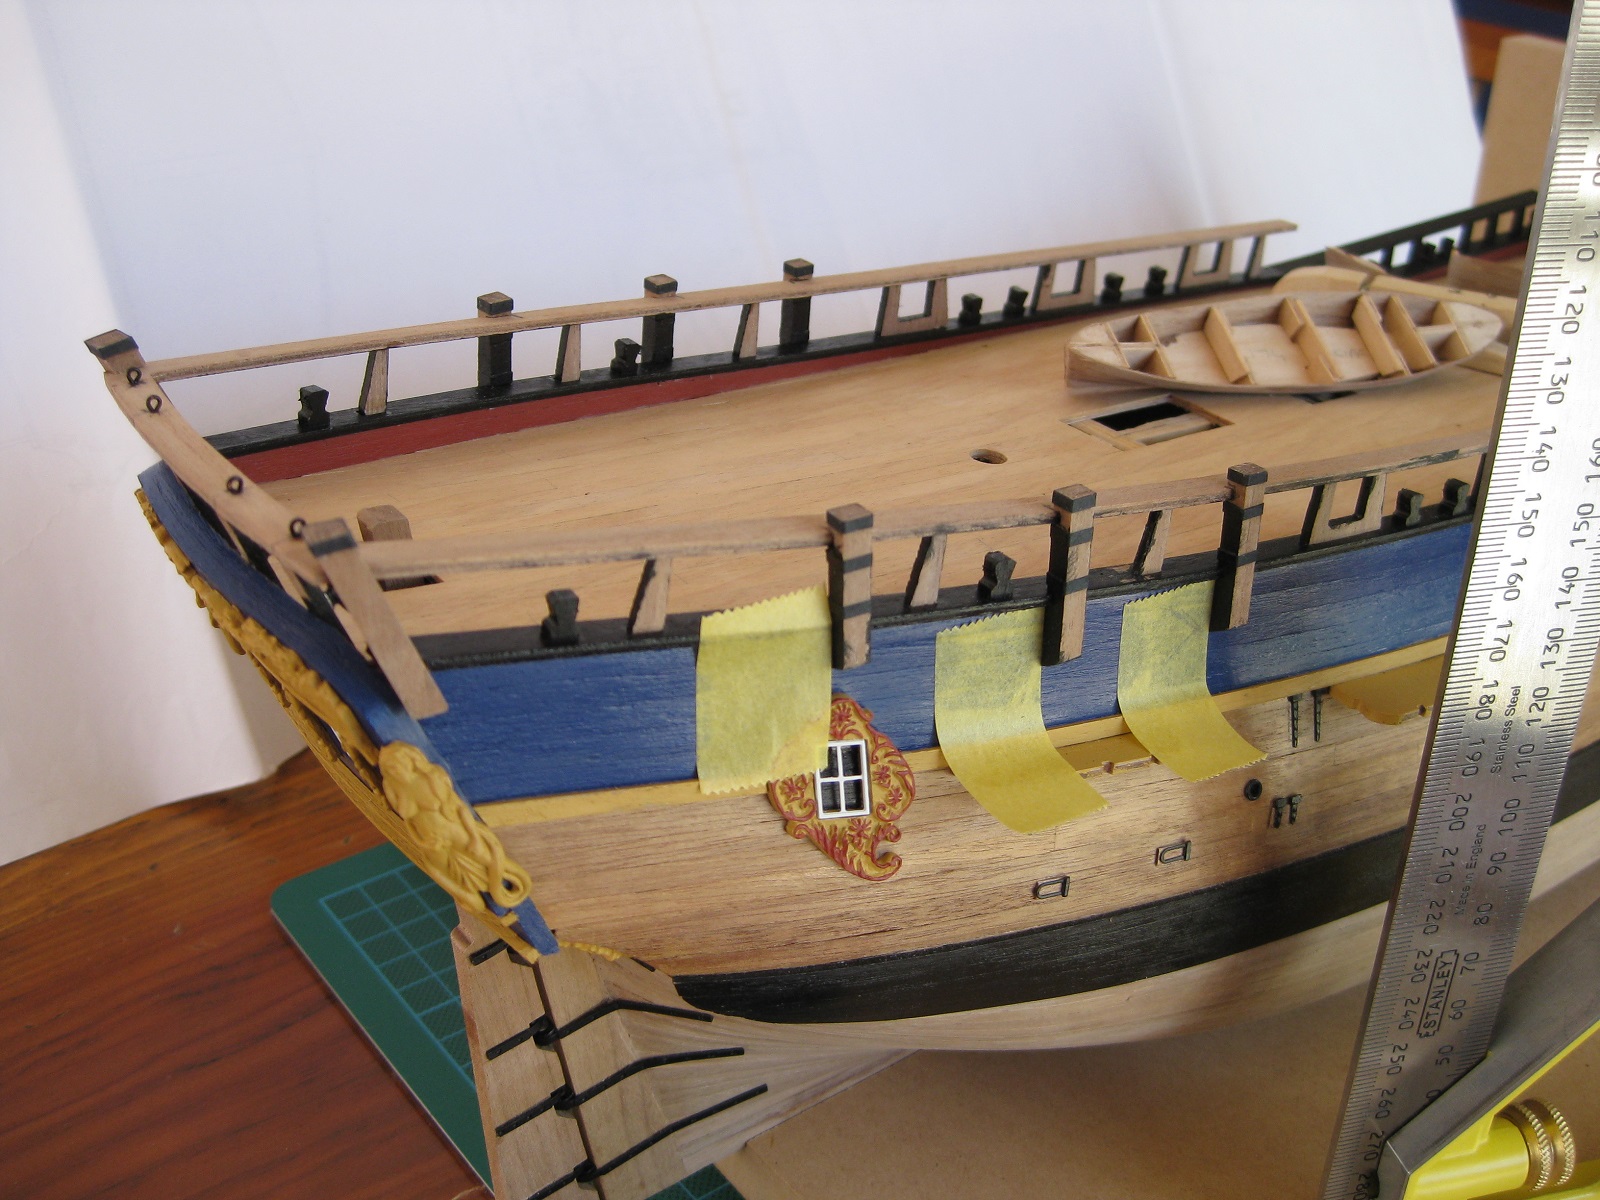
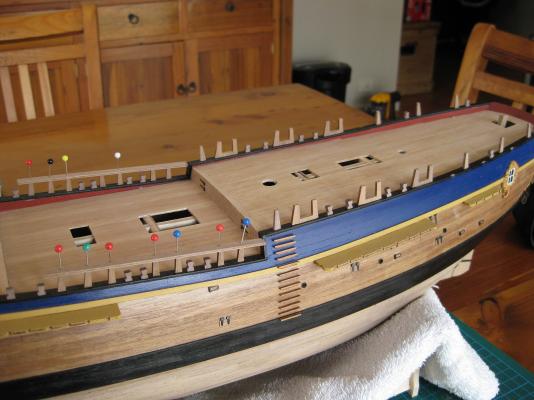
 Hi Pat, thanks for the kind words, but unfortunately no way will I catch you up. I had a nice 4 day long weekend to do a fair bit but this will be my last update for a while. Don’t know when I will get a chance again. Okay still working on the handrail area I cut out all the swivel gun posts and then used the black cartridge paper supplied with the kit to do the iron banding. I couldn’t decide if I should paint the posts black like most references/other builds or leave them natural. In the end I decided to paint them and of course the iron banding virtually disappears. I then painted the sides of the posts before gluing to the hull so I didn’t need to worry about trying to get a good edge against the blue. I used the newly made hull holder jig thingy and a square to get the posts plumb and marked the position with tape and glued them up. When I next get a chance to work on the model I will paint all the rough tree rails, swivel gun posts, rail stanchions etc black. I must say doing all the little fiddly hull details etc for me is probably the most enjoyable part of the build so far. Cheers Slog
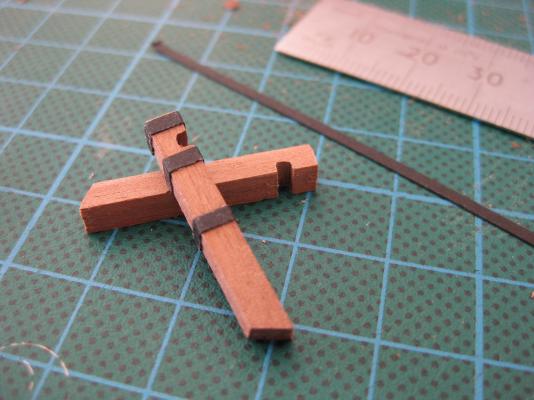

-
Hi Adrieke, Great, another Endeavour build to follow! Looks like you are off to a flying start. How do you manage to do so many builds though Cheers Slog
-
Hi Greg, Great progress on your ship, really coming together. Rightly or wrongly I will be adding bumpkins to my Endeavour as the Caldercraft version has them also and I actually think they look good hanging out there Cheers Slog
-
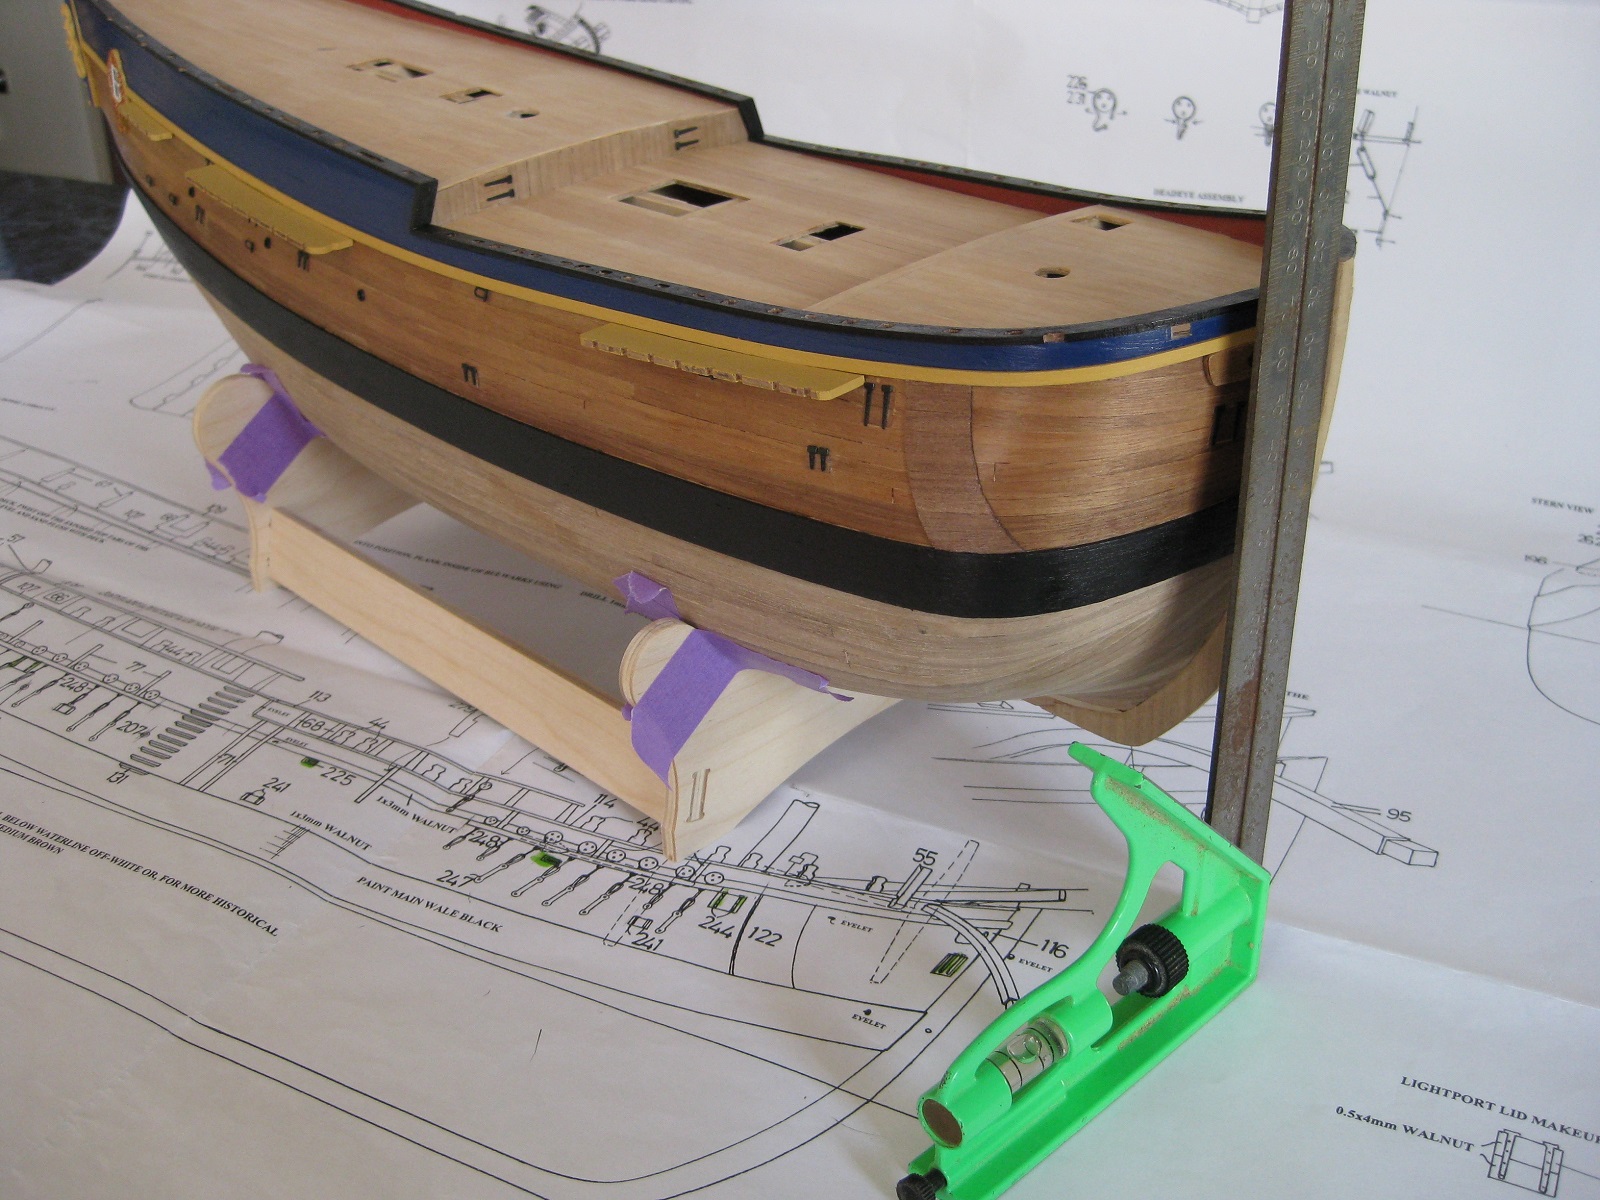
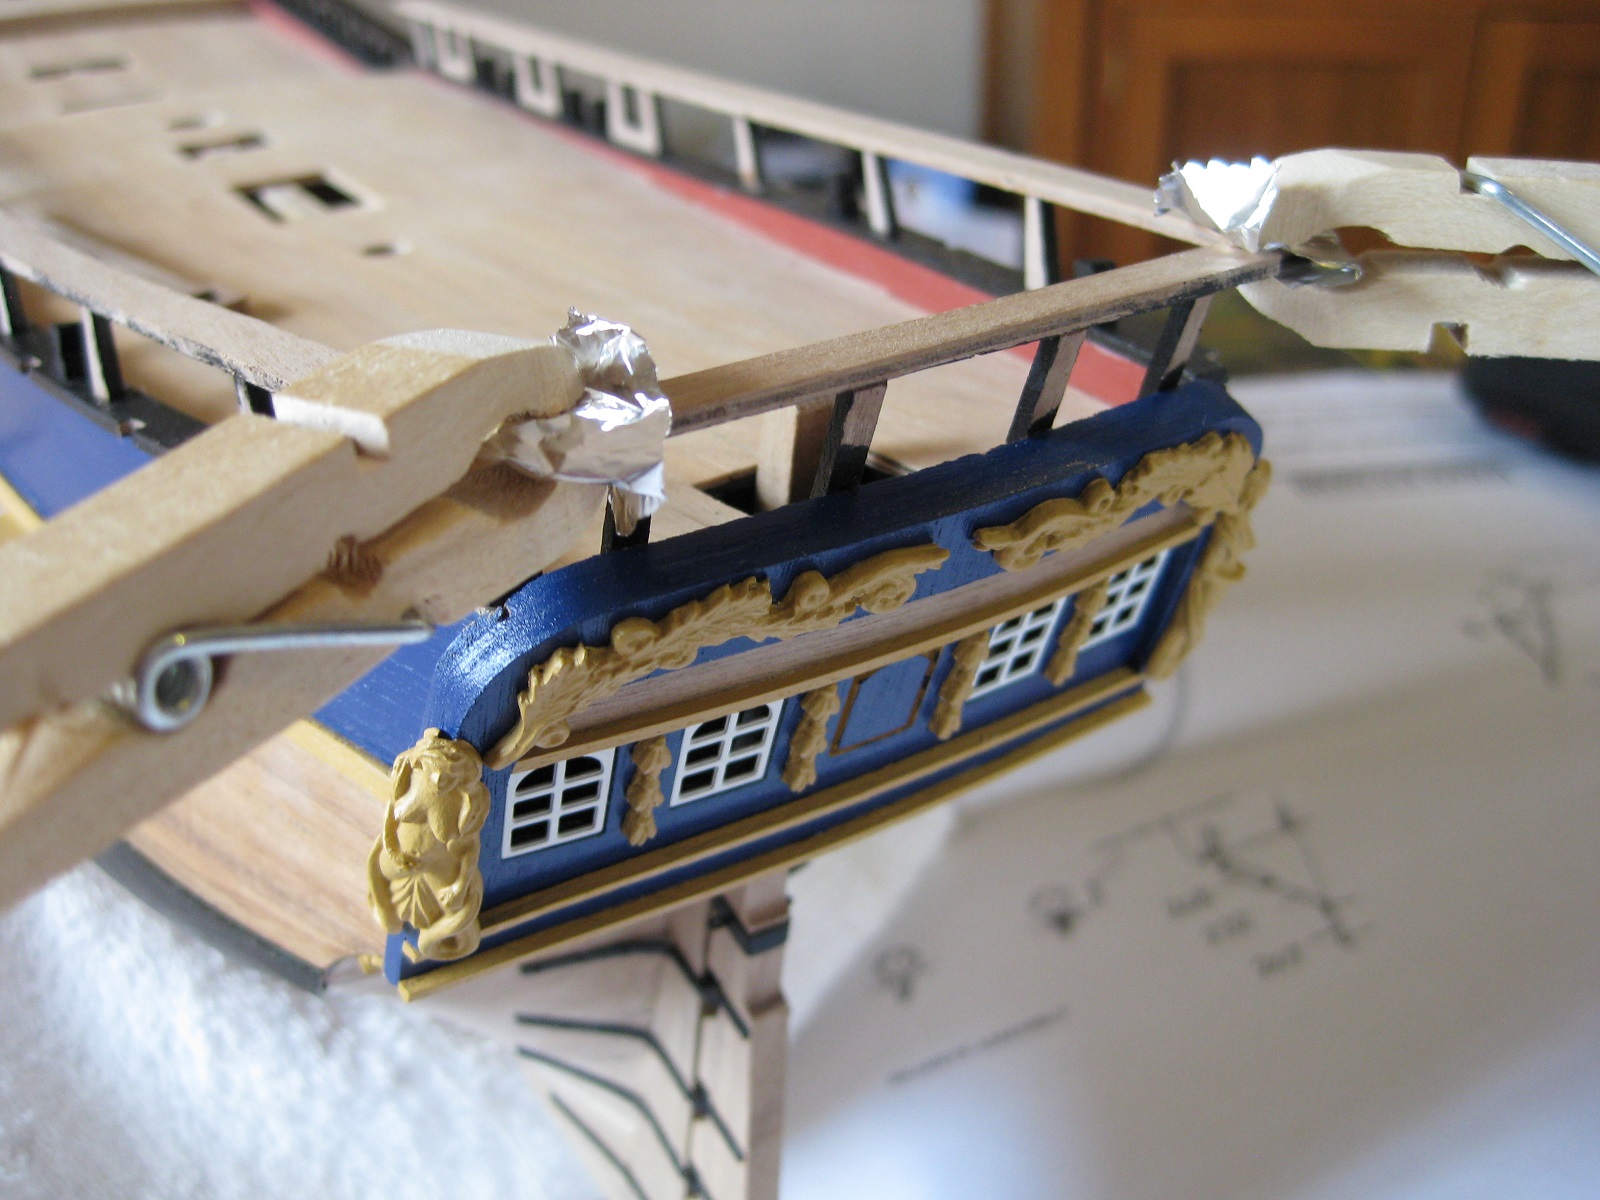
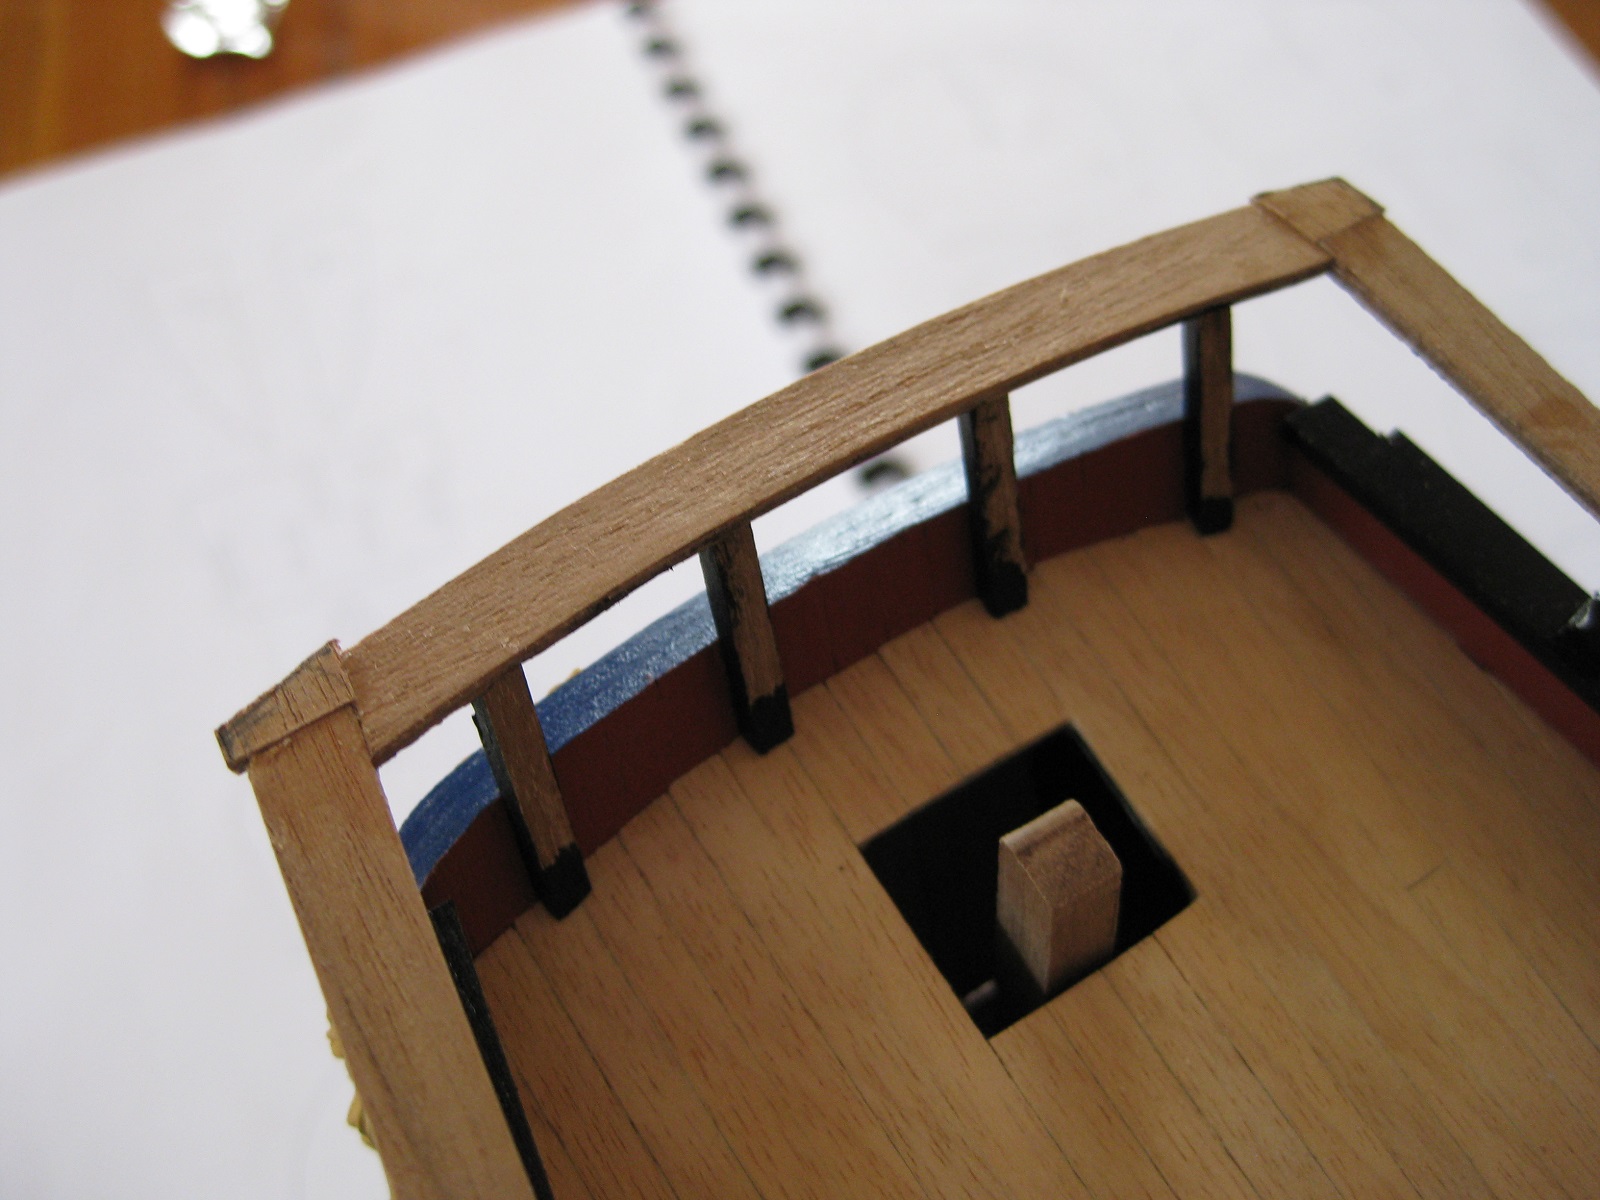
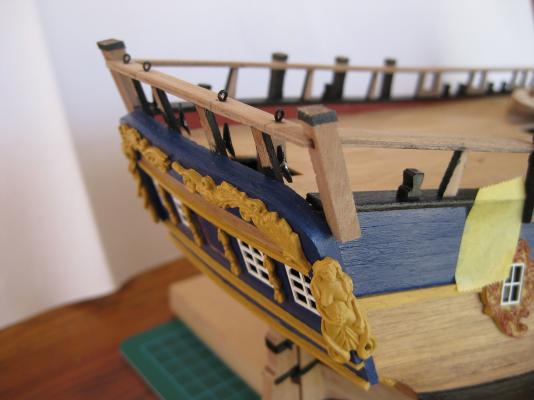
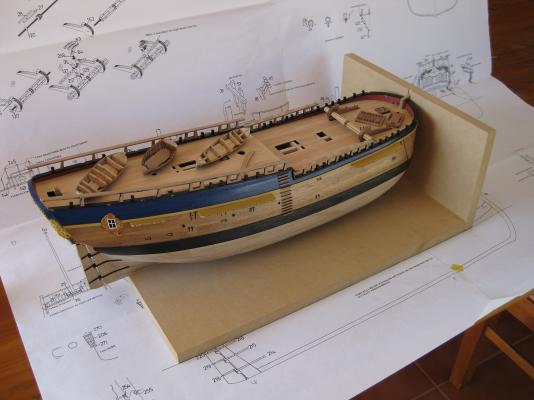
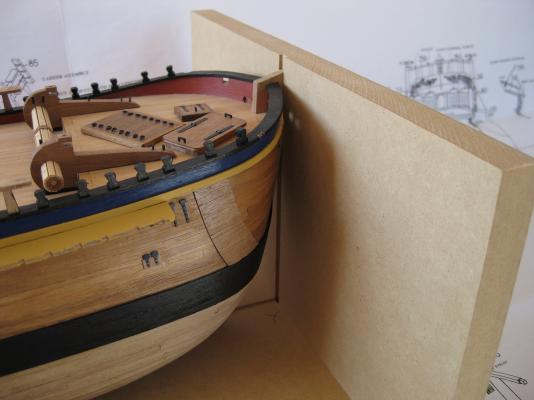
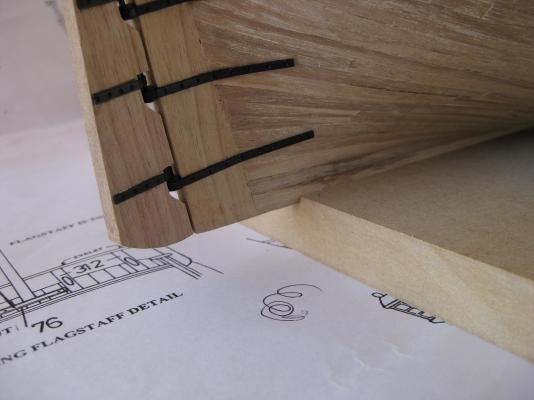
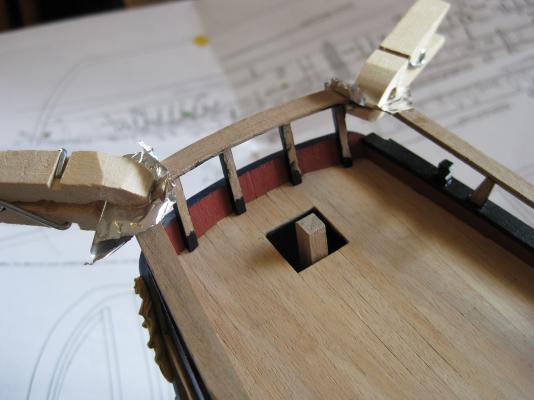
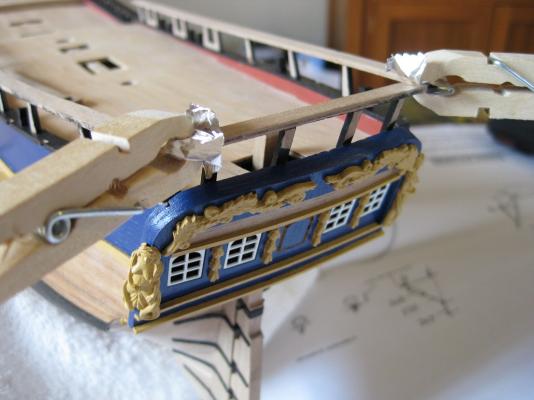
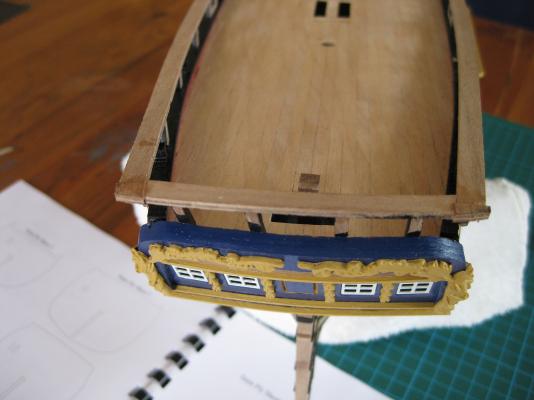
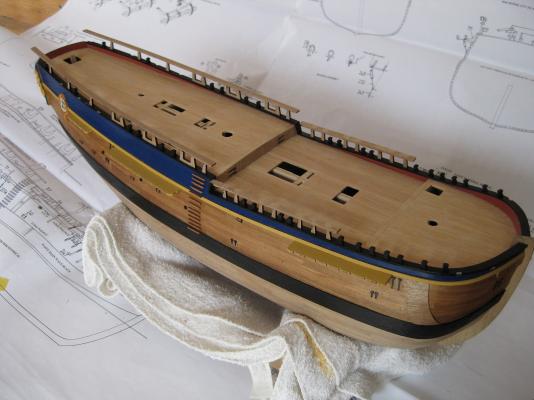
Hi Ross, Thanks for dropping by. Do you have a log of your Bounty? I would have done a refresher of my build log for MSW 2.0 but I had some kind of HDD failure back in October 2011 and lost all my photos up to that point. Probably around a year and half’s worth from box opening to finishing the second planking. (thankfully recovered all the Admirals stuff but mine was lost) I do have photos from sanding and filling the second layer to where I am today but I had a flick through them all and nothing exciting in there. So I doubt I will post them back up unless someone asks a specific question and I have a photo to show. I spent an hour or so in the shed to make a jig for an issue that was bugging me also because I will be close to marking the water line. The photo below was how I used to secure the hull in the stand to get it level and plumb for marking on and measuring bits and pieces. Basically it was aligning the hull and then securing it with masking tape to the supplied stand. Two problems, I needed to remove the hull for working on it so had to go through the measuring position and taping secure each time and I was concerned about repeatability. Secondly even if I didn’t need to remove the hull I didn’t like the tape being in place for any length of time as previously it had marked the hull which showed up after varnishing. The new jig below lets me lift the hull in and out without worrying about positioning and repeatability. The jig to holds the keel and stem post level and plumb respectively. I simply bought a sheet of 16mm MDF, 1800mm long by 300mm wide. I chopped it into 3 lengths of 600mm giving me a few tries in case I messed up and being a lazy sod just left the full 300mm width. I simply routed a channel down the middle a couple of millimetres deep. I didn’t go any deeper as the curve of the hull would have then rested on the board; to keep it level the keel needs to sit in the bottom of the channel. I then chopped a length off higher than the stem and screwed it to the end of the main board. Ideally the vertical channel could have been deeper but did the channel in one length and since I didn’t have a bit the correct width of the channel I had to make repeated passes and didn’t want to upset the router setup. Next up was the taffrail. I cut stanchions from 3mm x 2mm stock as per the plans and after marking their position with tape I painted their edges before gluing to the bulwarks. Once the glue was dried I glued the taffrail to the tops of the stanchions and the edges of the rough tree rail and held together with clothes pegs and some aluminium foil so the pegs didn’t stick to the rails. One problem was that the geometry of the hull, stern and rough tree rails all appear to be out as the taffrail didn’t fit nicely either on the ends of the rough tree rails or between them and there appears to be a considerable gap to be filled. Not sure if other Caldercraft Endeavour builders had the same experience. I cut some of the ply sheet which all the rails came from and used this to fill in the corners. Again I used wood glue and the clothes pegs to hold in position. Once sanded they blend in nicely and should disappear when painted. Cheers Slog


-
Hi William, Glad to see another card Bismarck log starting up. I am currently working on the 1:200 GPM version (link is in my signature). I haven't did much so far. Began at the start of the year and got a fair bit done on the funnel, spotlights and the hull ribs before running out of free time but all progress was lost in the big 'crash'. Just starting it up again with some photo etch guns. Looking forward to seeing some photos Cheers Slog
-
Hi Tex, Will definitely be following this log. The CWM has been on my next to do list for a long time. (hope they will still sell it by the time I get there!) Looking forward to seeing more. Slog
-
Hi Grant, Glad to see you are feeling better and back in the shipyard. Your Victory is looking fantastic. Great idea for holding the yards. Slog
-
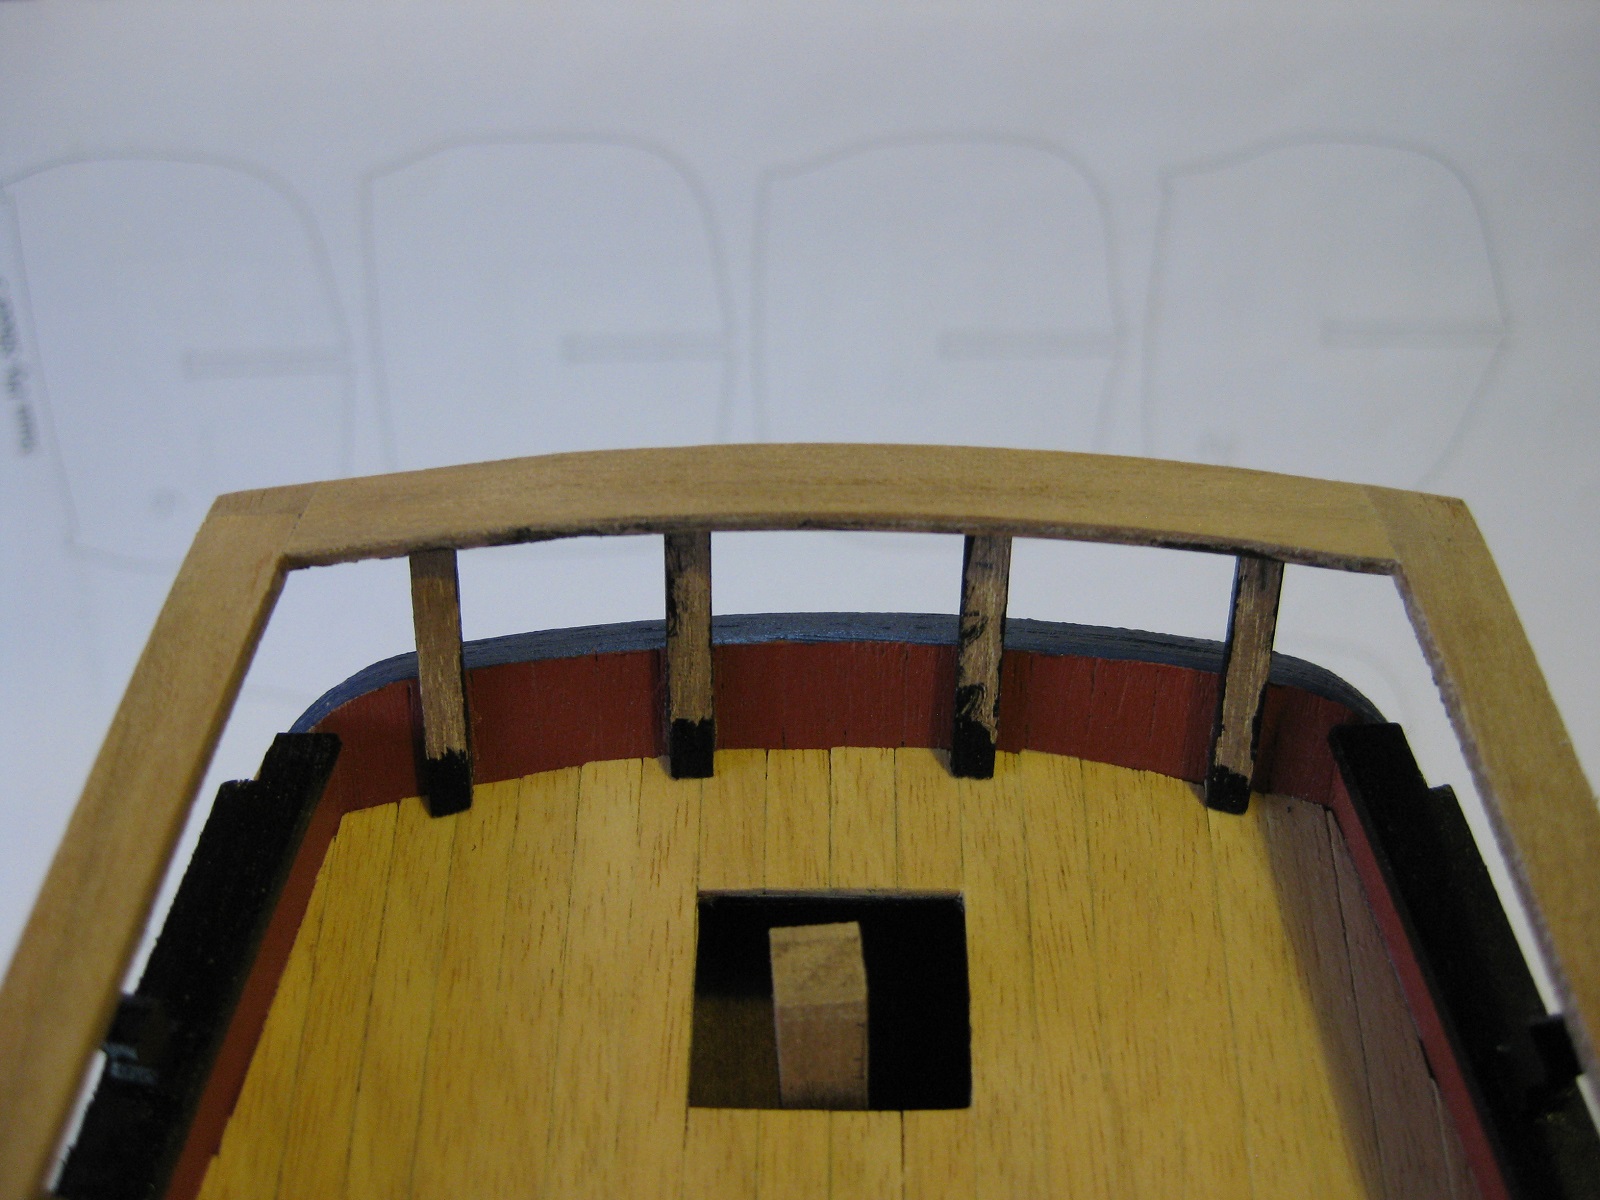
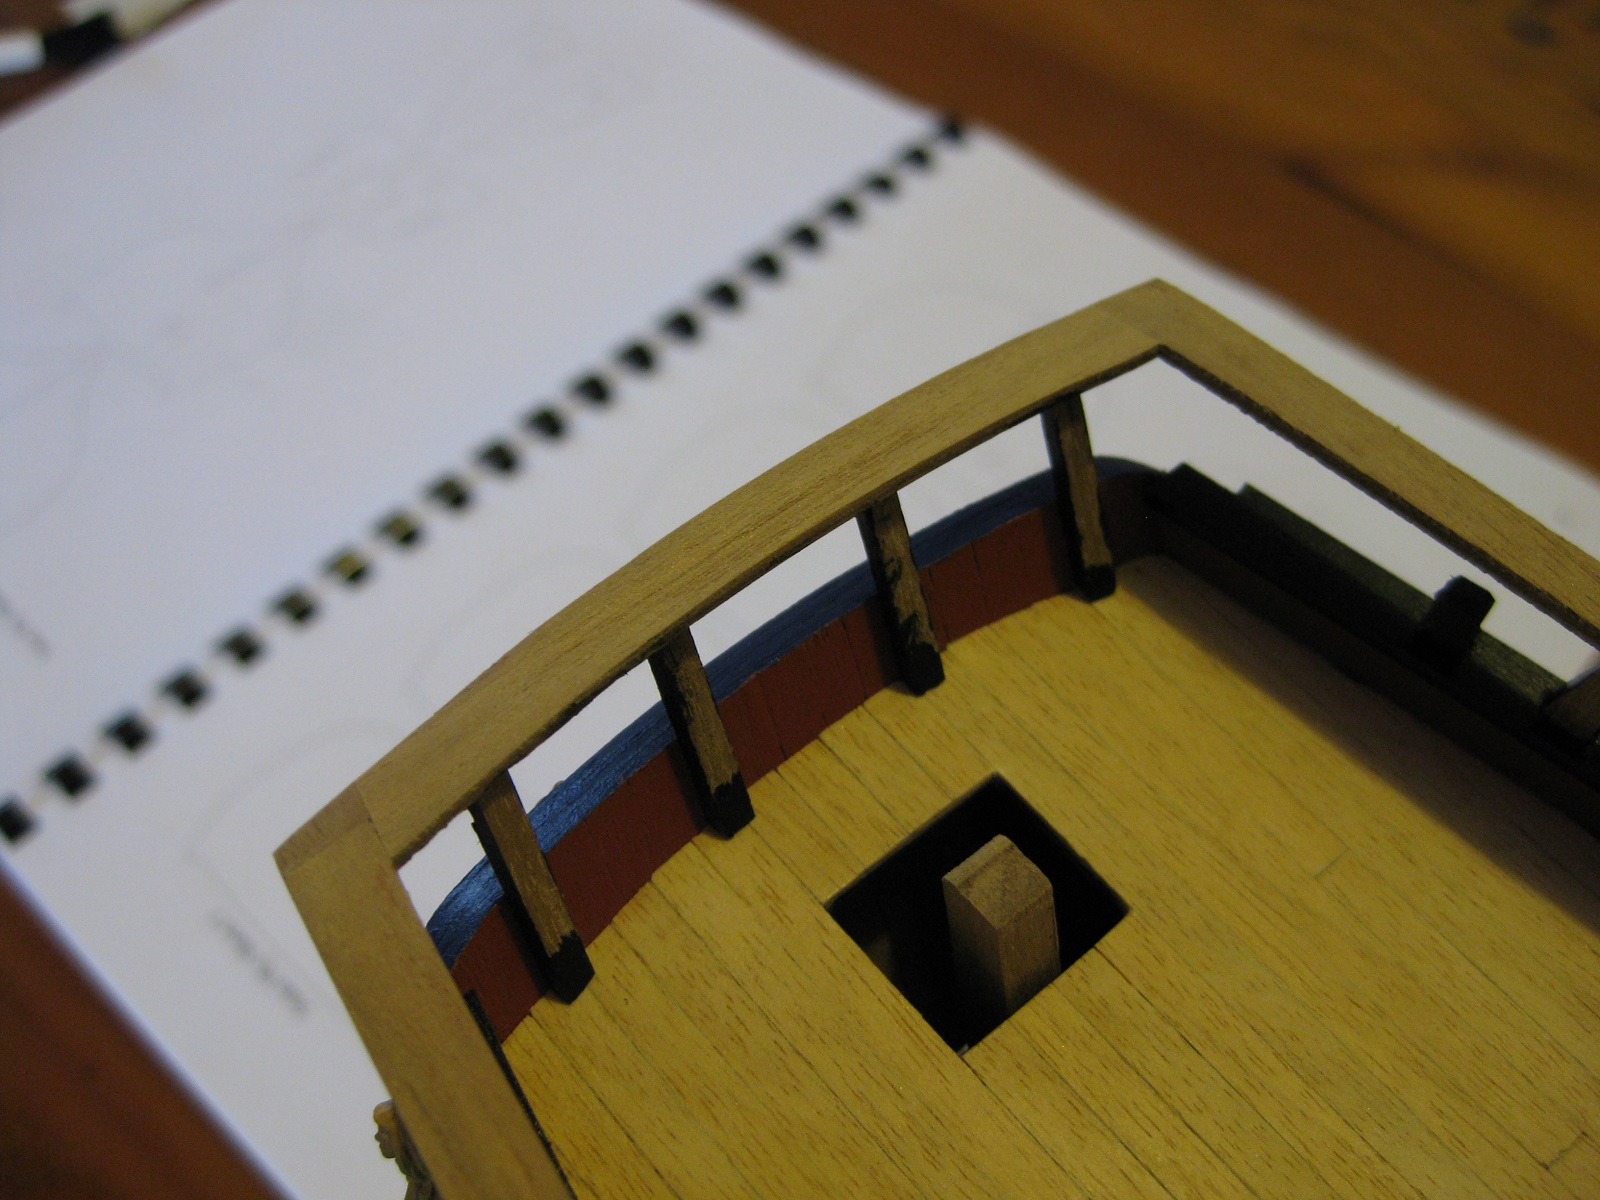
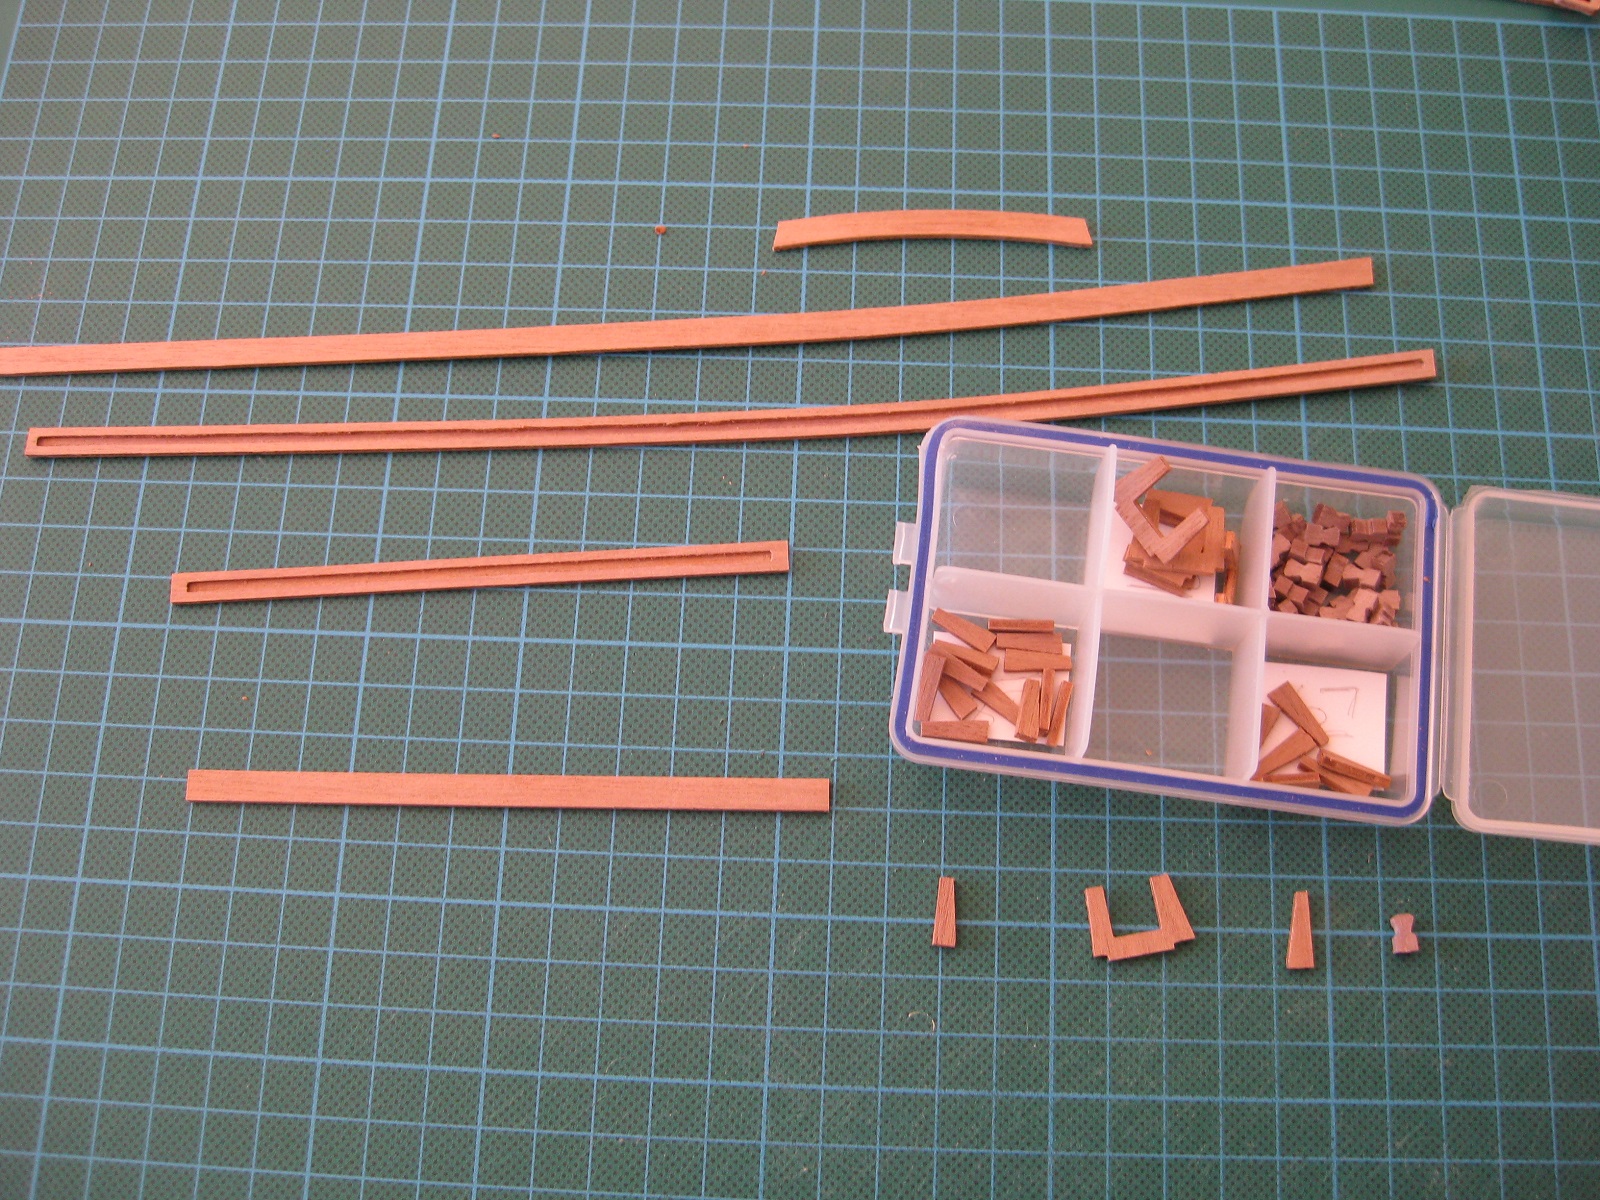
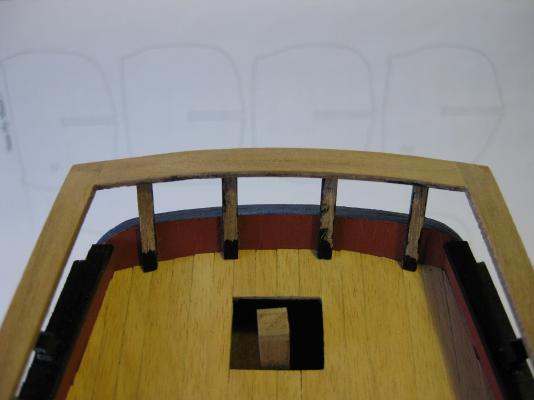
Hi Guys, Thanks for dropping by and the comments. I haven’t had much free time at all to work on my ships and the below is probably spread over 2 or 3 weeks, getting in a hour or so work now and then. Decided to do the frame tops (?) and the hand rails as pretty quick to do but adds a lot to the look of the ship. Cut out all the parts and cleaned them up and as can be seen put into little plastic box for storage for when I can work on them again. Glued all the post tops and handrails posts into the capping rail. I painted all the post tops, the sides of the posts and the undersides of the handrails whilst access was still good. Then glued the hand rails in place and fill some pin holes. Thats all for now. Next time will get them painted up and on to something else. Cheers Slog


-
Hi, I am probably going to get an airbrush shortly. After reading a review of an Iwata airbrush in MSW1.0 I did a bit of research an found an Australia mail order stockist; http://www.airbrushmegastore.com/ Has anyone had any experiance with them before? They appear to ship world wide also. Any feedback would be appreciated as from what I can see their prices appear to be pretty good. Or can any Aussies recommend an Iwata stockist in Perth. I did search but came up empty. Cheers Slog
-
Hi Pat, Great photos. Your ships boats and mast tops are very nice indeed. Looking forward to more! Cheers Slog
- 517 replies
-
- 1
-

-
- Endeavour
- Artesania Latina
- (and 1 more)
-
A small hand-held power sander
Captain Slog replied to Modeler12's topic in Modeling tools and Workshop Equipment
Hi John, I used a similar 'mouse' sander to sand both the first and second layers of planking with no problems what so ever. As Jay says you can sand into tight corners, which I did by using only the very outside edge of the sander. I could sand right up to the Stem and stern using only the edges. My sander is a Bosch which is mains powered and looks to be slightly bigger than Jays and has a 2 part sanding sheet. A triangle front and a rectangle rear. I found you get some vibration through your hand but didn't effect the wood at all. I think I got it from Bunnings but can't remember the price. Bunnings also stocked different grades of paper for it. Cheers Slog -
Hi Grant, I have to confess I also missed your build log in MSW 1.0 but glad I found it now. That was a brave and bold move re-doing the whole stern but in my opinon well worth the effort. Looks fantastic. Cheers Slog
-
Hi Greg, Your Endeavour is looking great. I like all the little extra details you are including like the mast coats and binnicle details . Your tops, masts and ships boats are also excellant. I go through stages of indecision, wether I should build it straight from the box to get it finished or add extra details gleaned from AOTS. Cheers Slog
-
Hi Patrick, Your ship is looking fantastic. I am particularly impressed with your ships boats as I currently have a thing about ships boats Currently I have put mine aside as not turning out as well as I had hoped. Yours look great. The masting and rigging is also looking very good. Nice work Cheers Slog
-
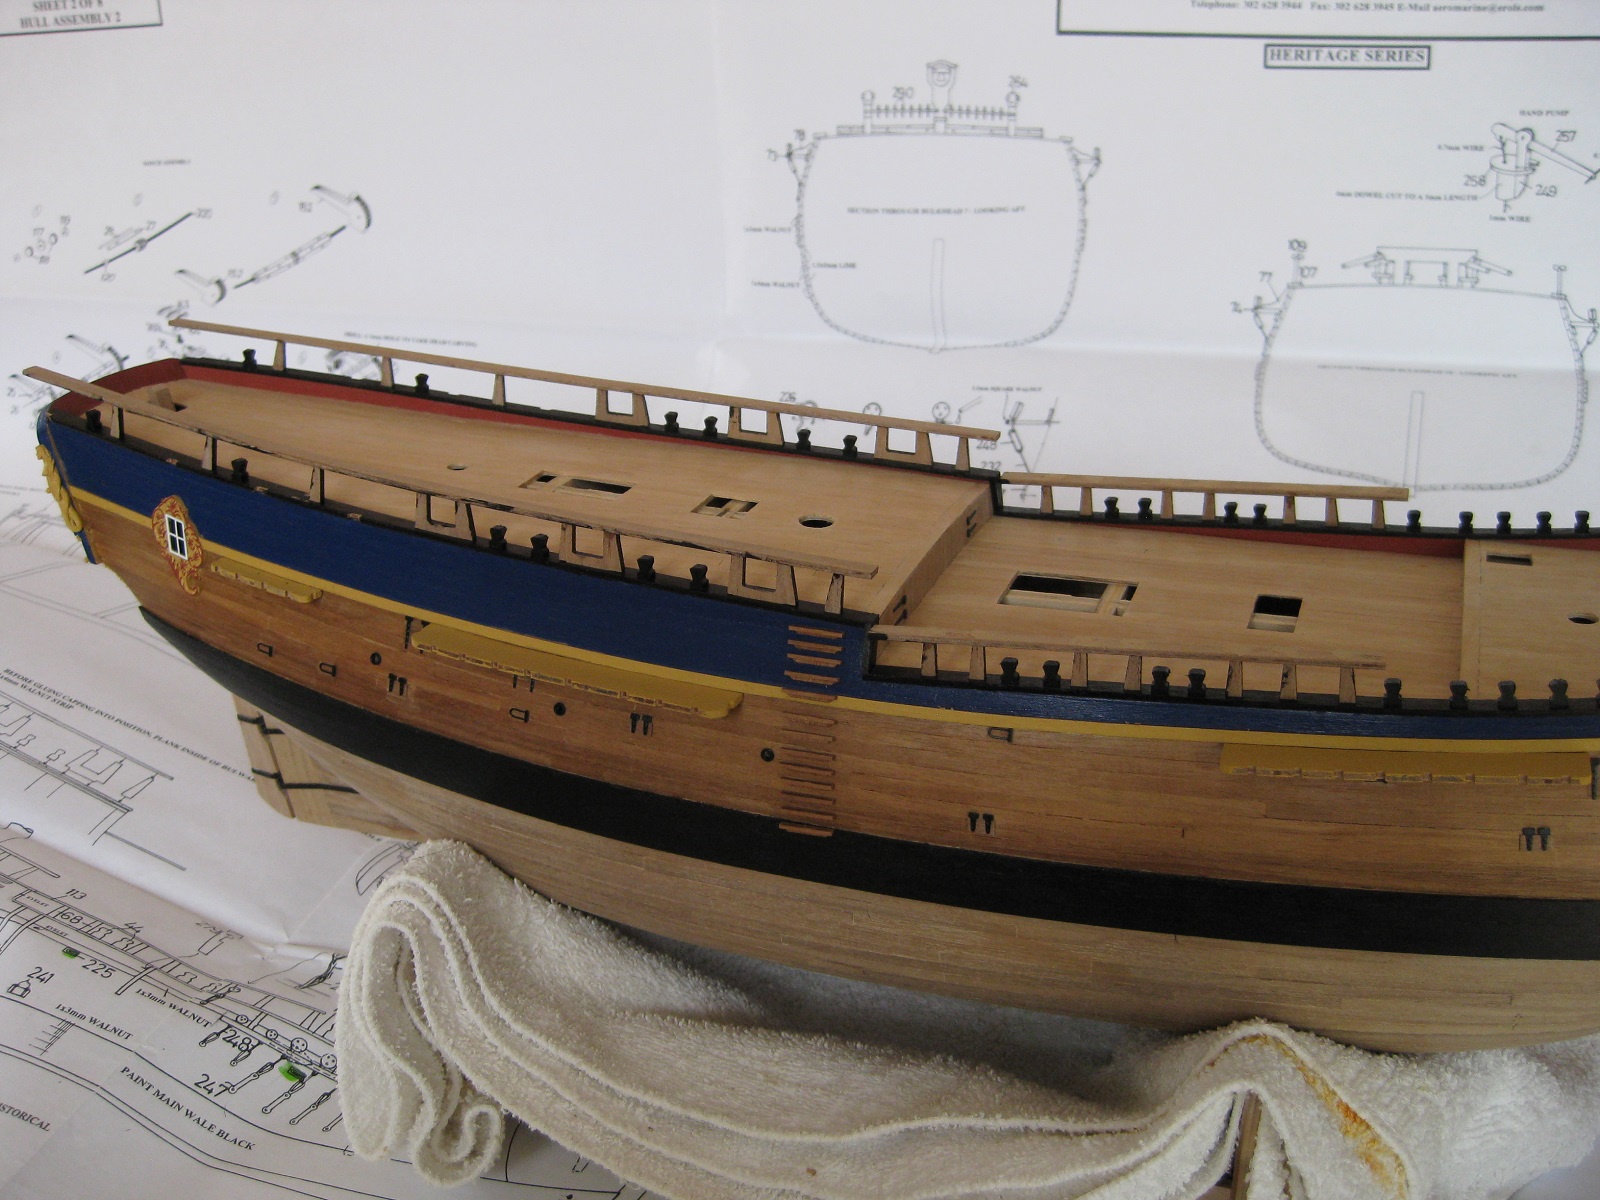
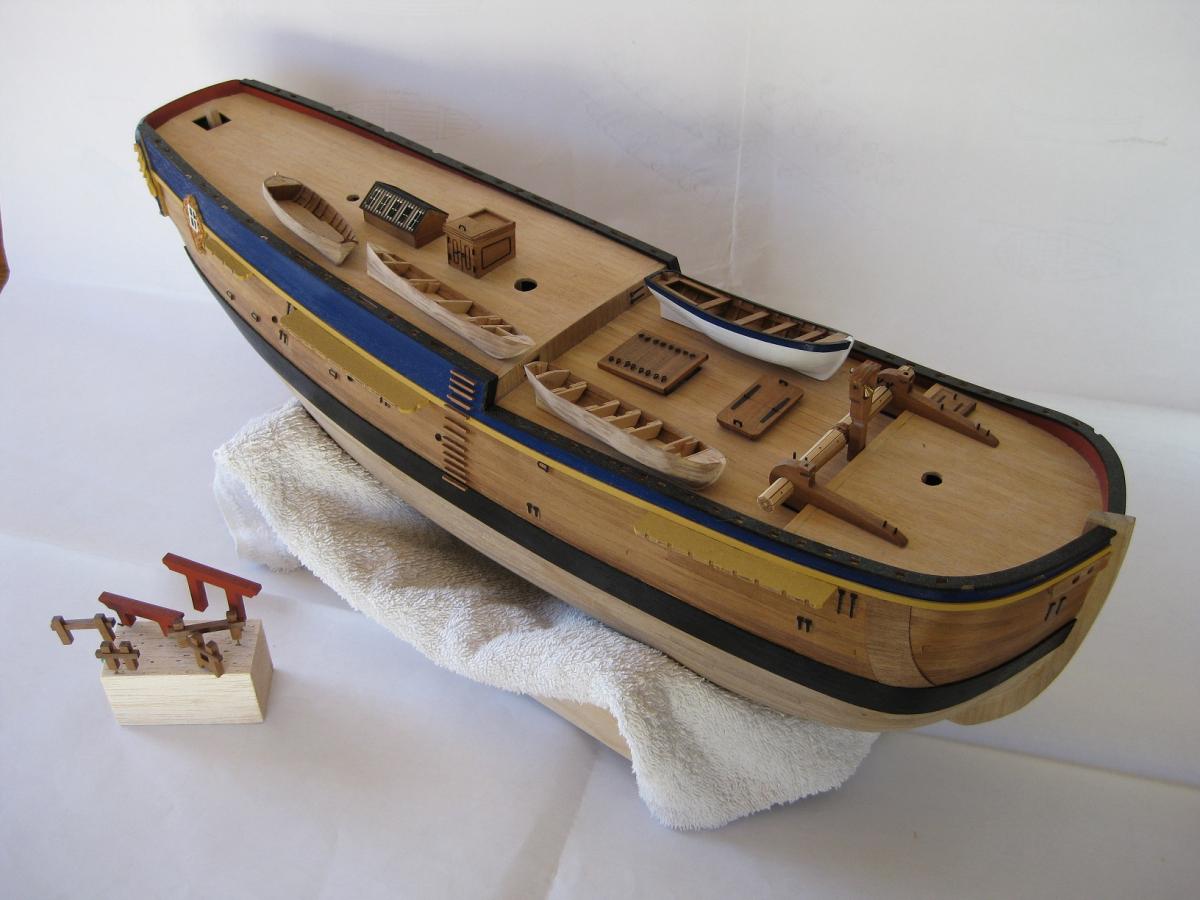
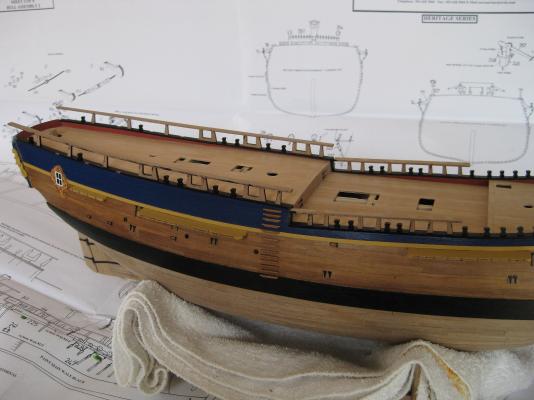
Okay, here is another place holder more than anything. I have been working on and off on the Endeavour since mid 2010 I think . I get all enthusiastic and go hard for a bit then discouraged and leave it until my enthusiasm returns. I was working on the remaining 3 ships boats before I got annoyed at myself as they weren’t turning out as well as I had hoped. Especially comparing them to a lot of other builder’s ships boats. I will get over them and continue in the near future though. I included a picture of the Endeavour at its current state right now bearing in mind nothing is fixed to the deck as still a bit of general man handling to finish the hull including painting the ‘white stuff’. Cheers Slog