Captain Slog
-
Posts
904 -
Joined
Content Type
Profiles
Forums
Gallery
Events
Everything posted by Captain Slog
-

MRAP ATV by CDW - FINISHED - Rye Field - 1:35 Scale
Captain Slog replied to CDW's topic in Non-ship/categorised builds
Will watch with interest as this was on my wish list. Slog -
Looking forward to following this build of an interesting subject. Cheers Slog
- 10 replies
-
- 4
-

-
- paper shipwright
- canada
- (and 1 more)
-
Not sure why nobody just used google translate, which comes out as; Leningrad-Kenigsberg Kenigsberg is Konigsberg which is a historic Prussian city which becsme Kaliningrad in Russia in 1946. I would guess the writing of this on the plane would rather mean pushing the Germans from Leningrad back into Germany or some such.
-
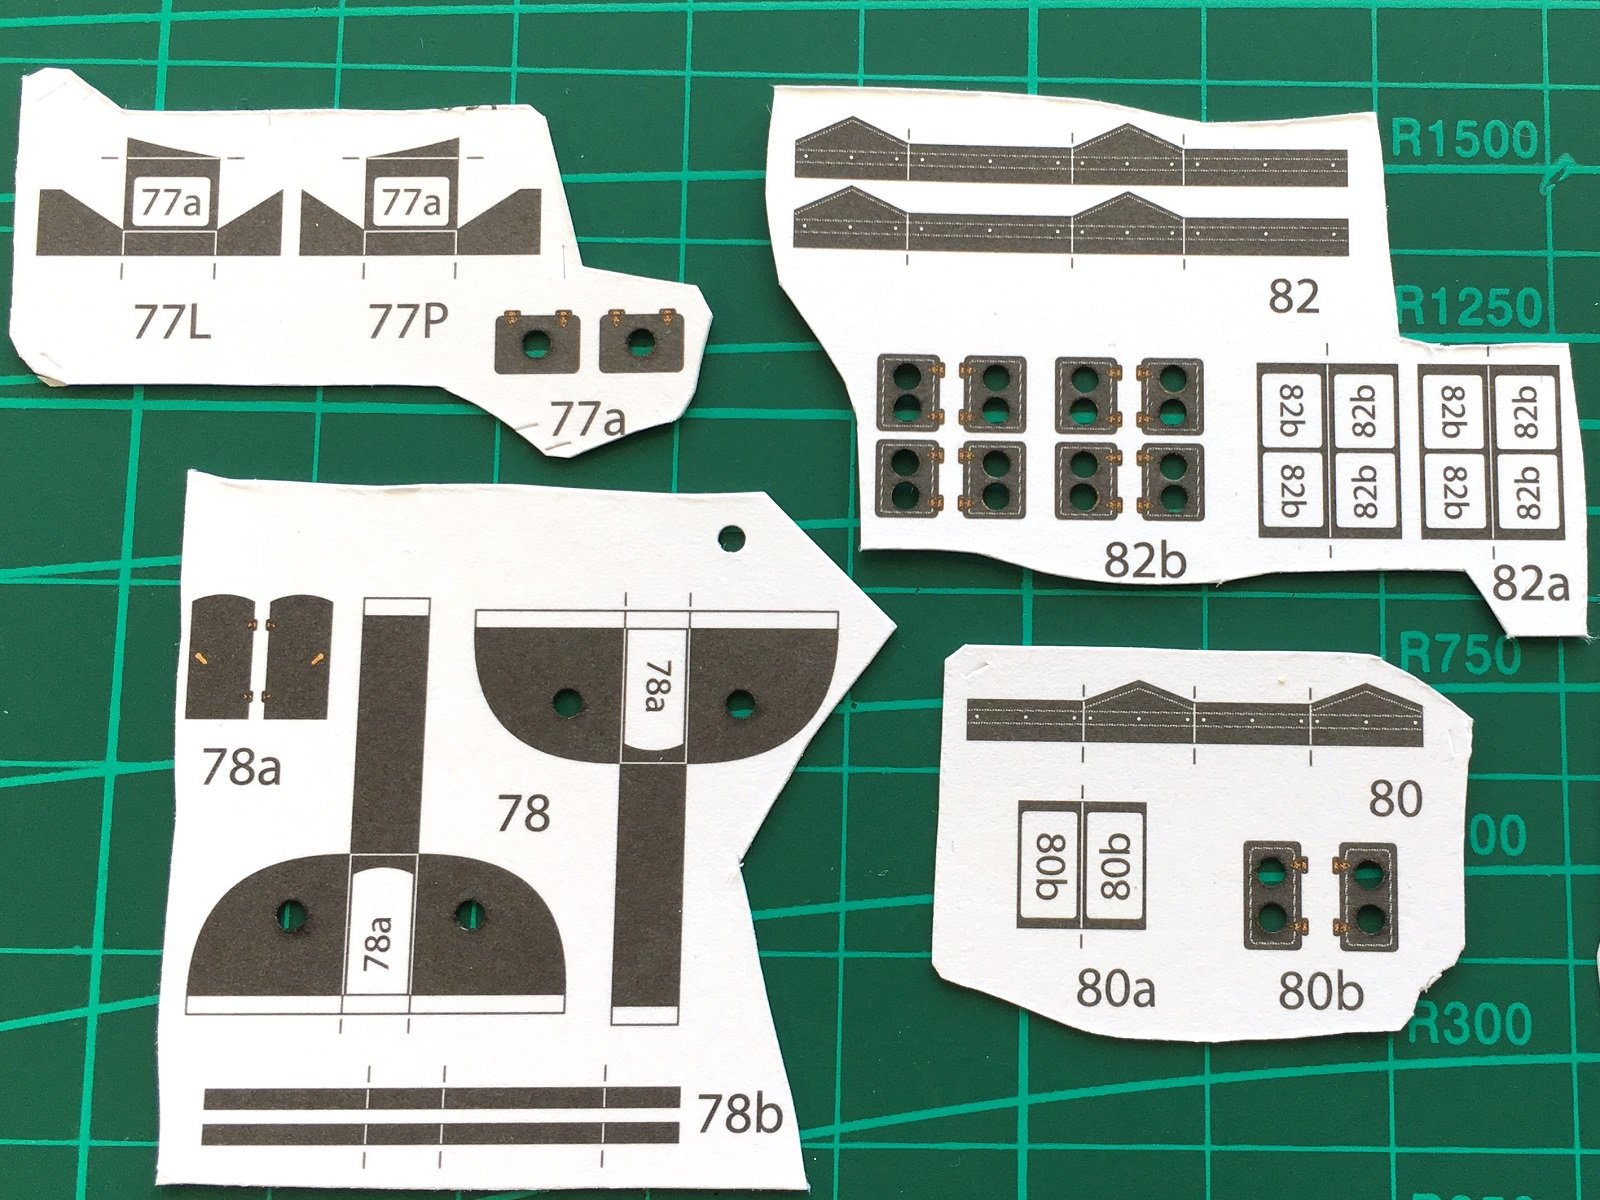
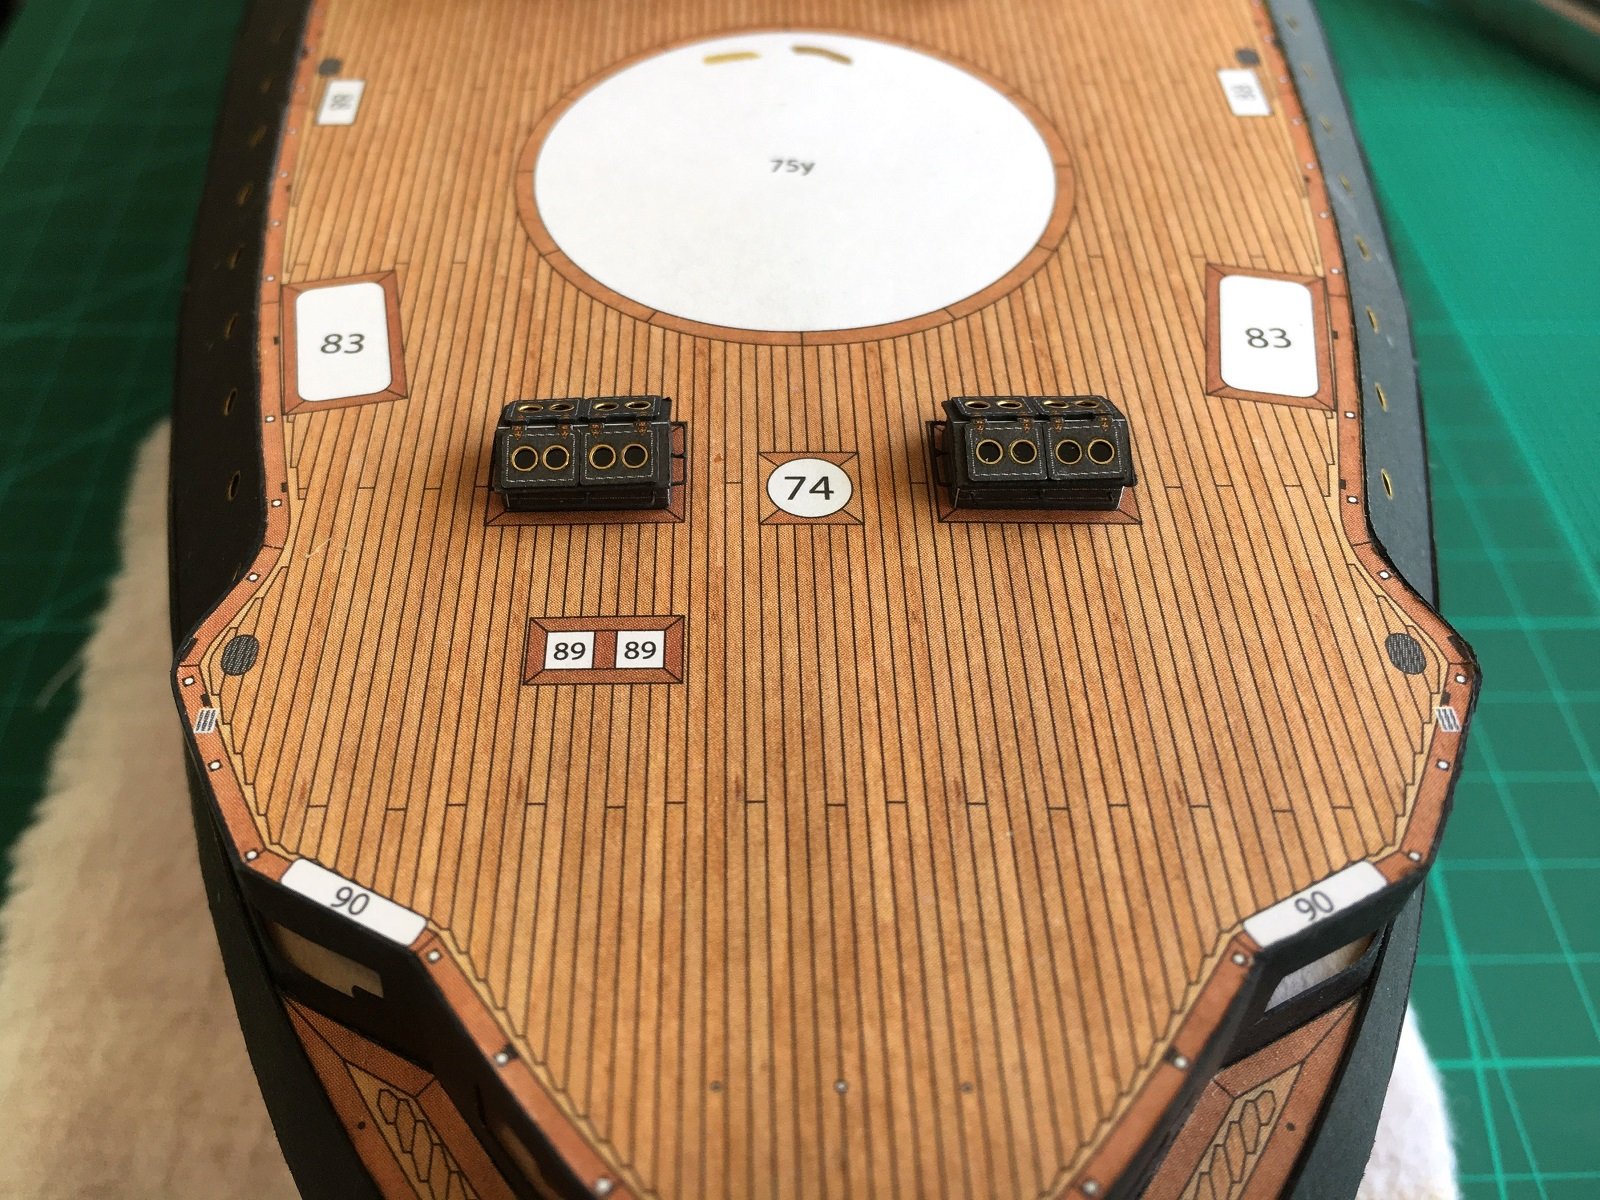
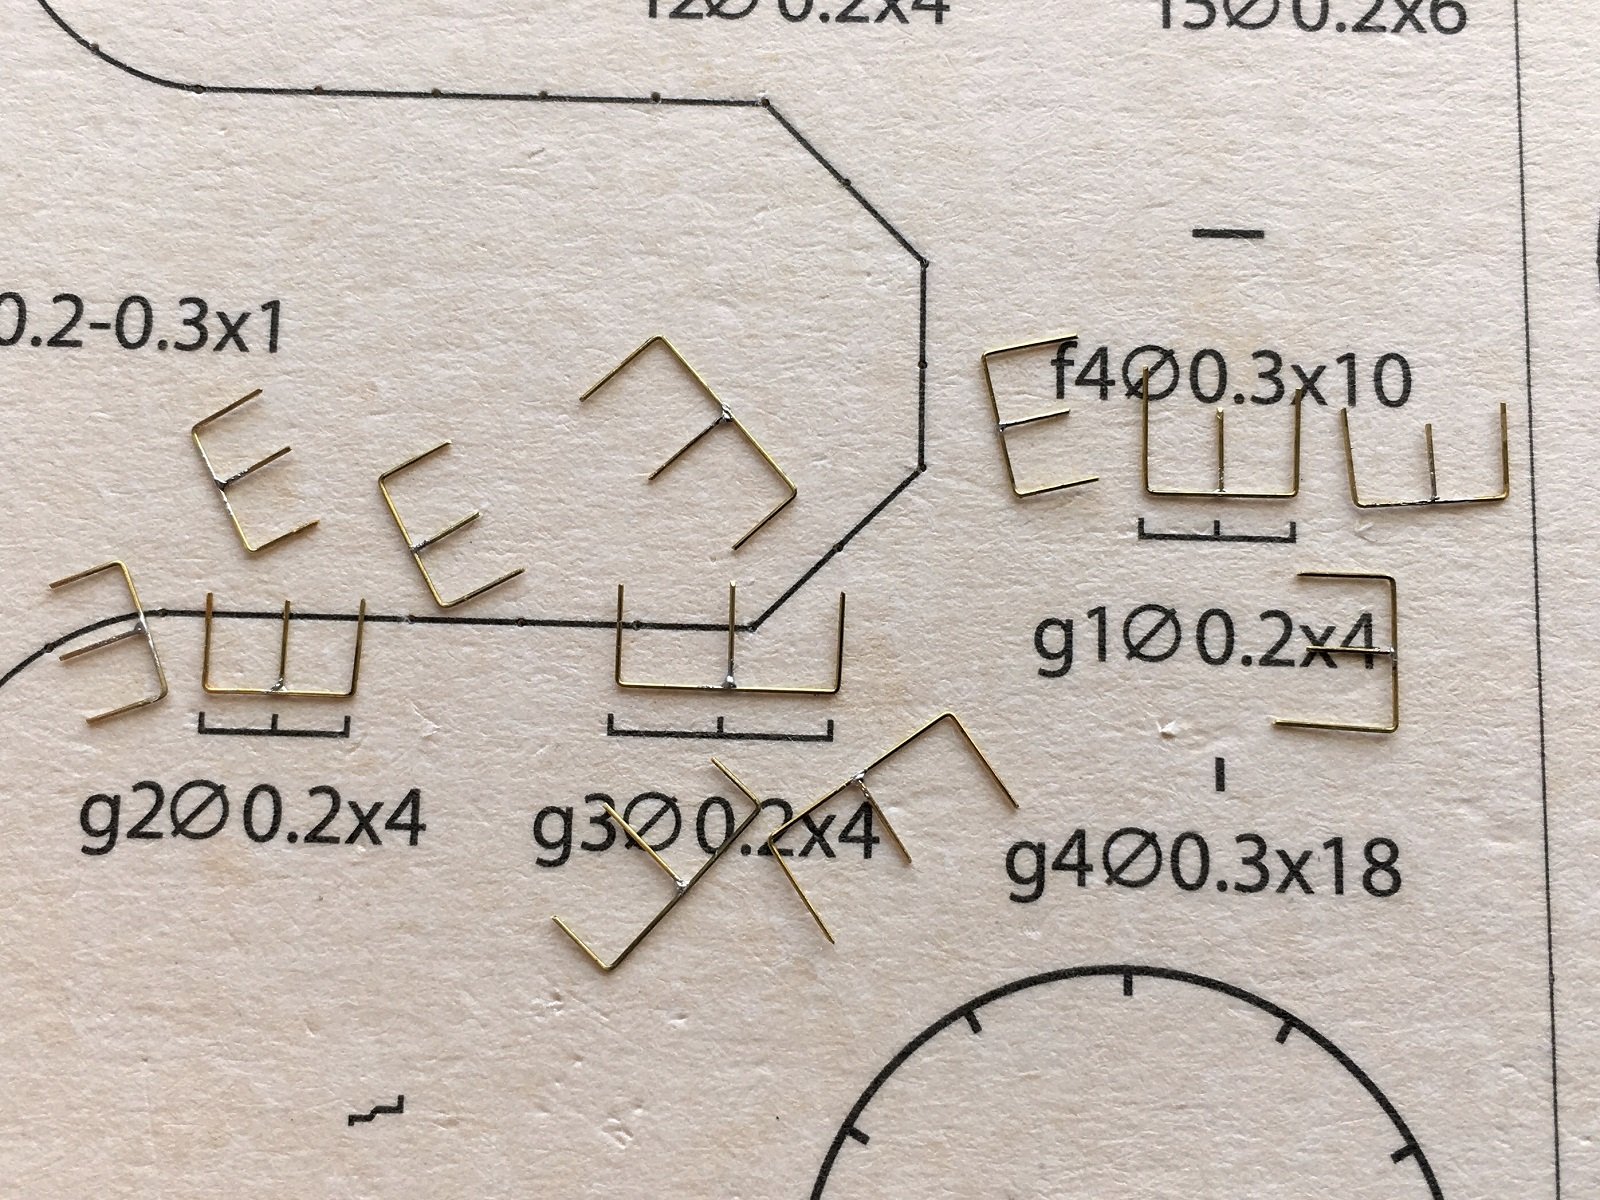
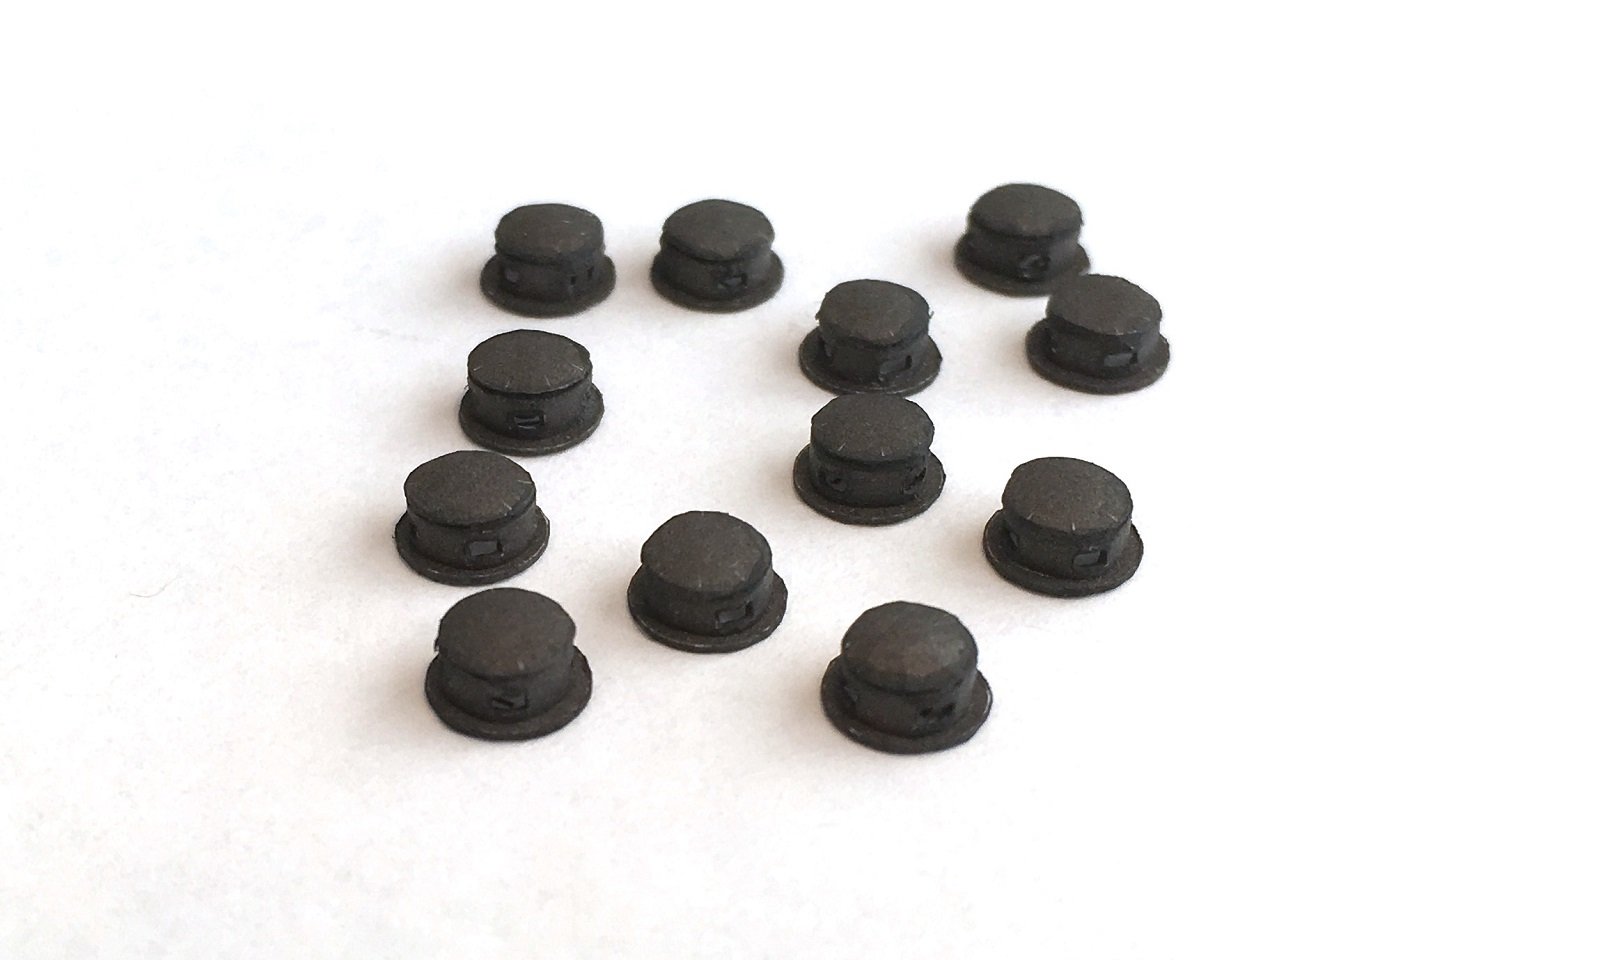
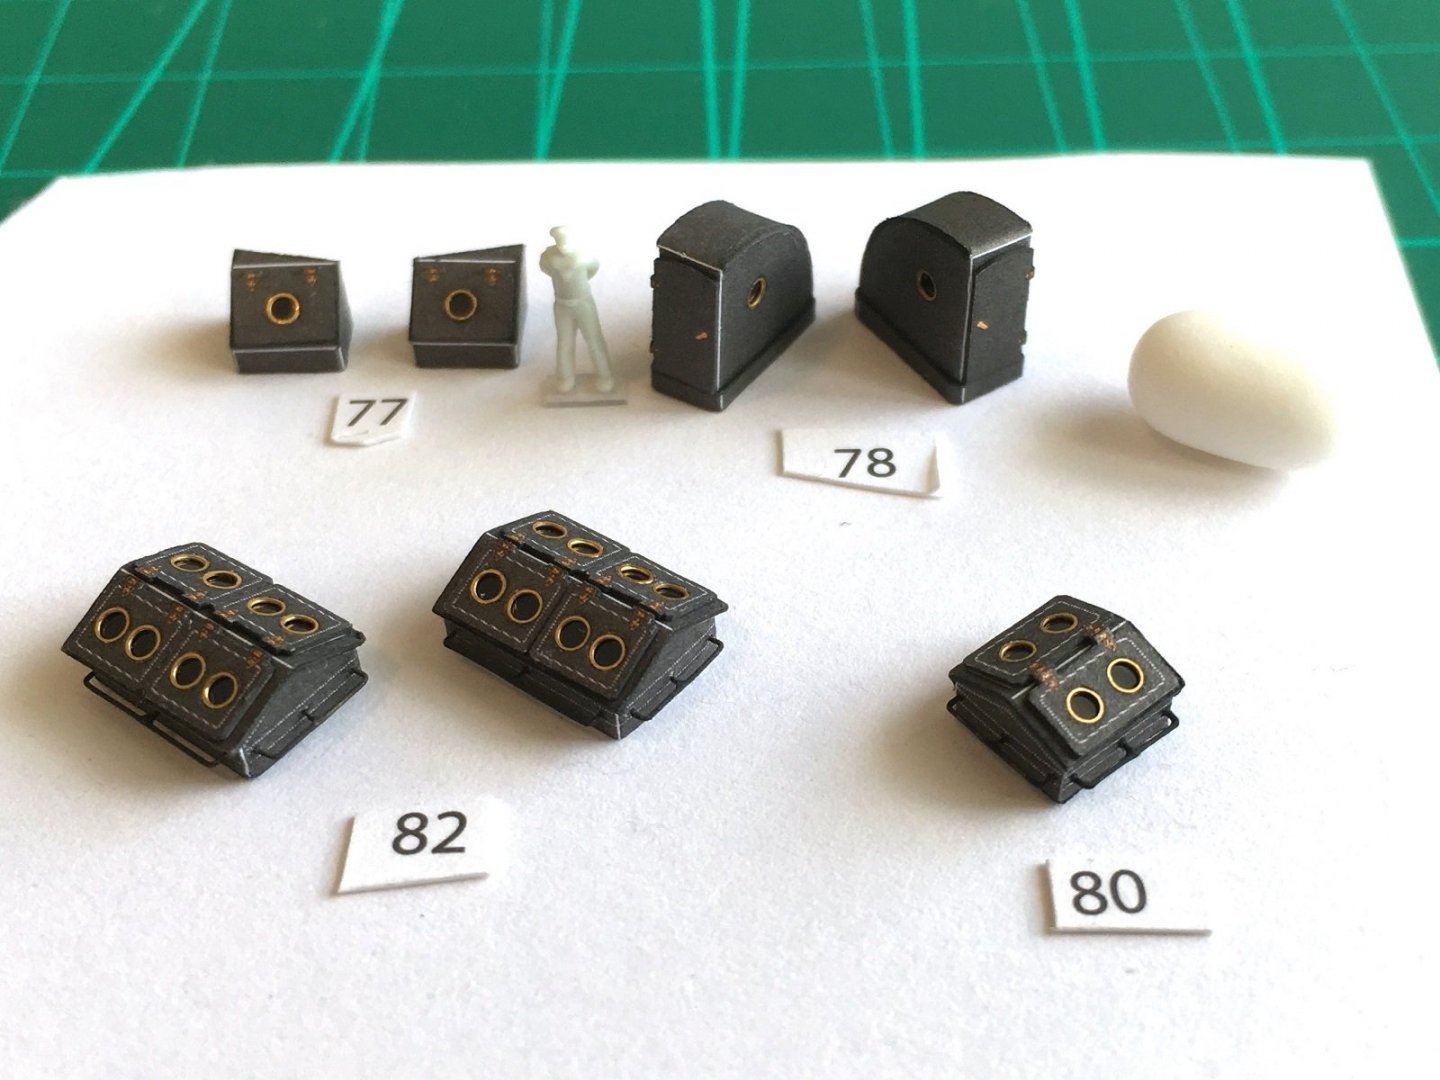
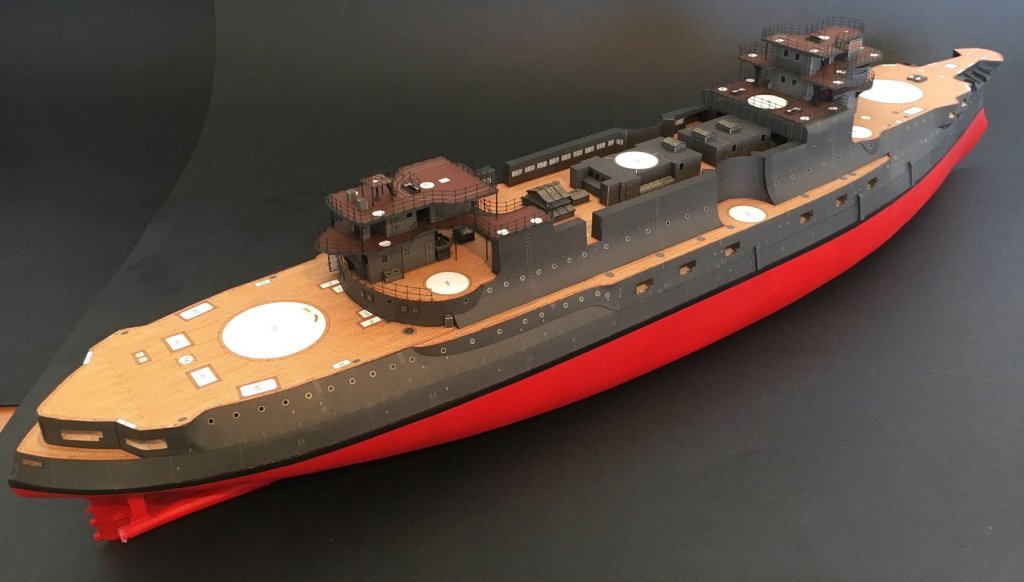
Hi all, Thanks for all the likes and to Chris for the nice words. I thought I would chip away at some of the remaining smaller deck components including a few skylights and companionways. I had already started prepping for the PE portholes before I remembered to take a photo. The 0.2mm and soldered handrails, g1, g2 & g3 for skylights No. 80 and 82. These took an inordinate amount of time to complete. Photo showing the above assembled. As usual nothing glued in place yet but shown in their locations for effect. Bow skylight No.80 Stern skylights No.82 Skylights and companionways. Well that’s all for this break. Probably a couple of months before back again. Cheers Slog


- 244 replies
-
- 10
-
-
- borodino
- dom bumagi
- (and 1 more)
-
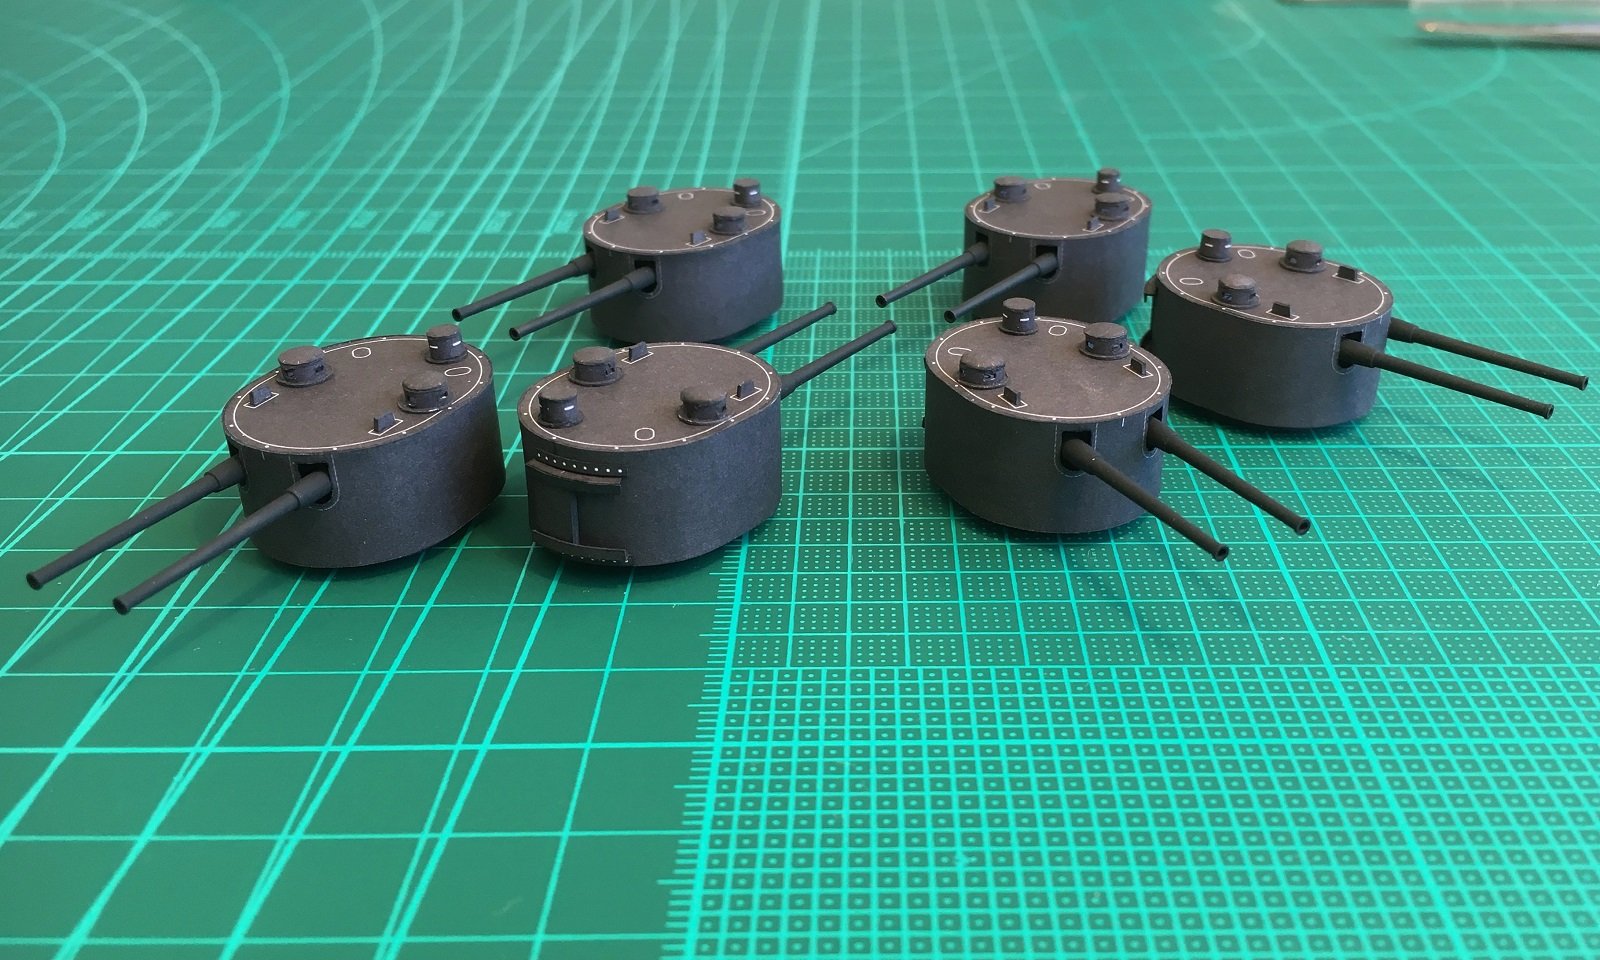
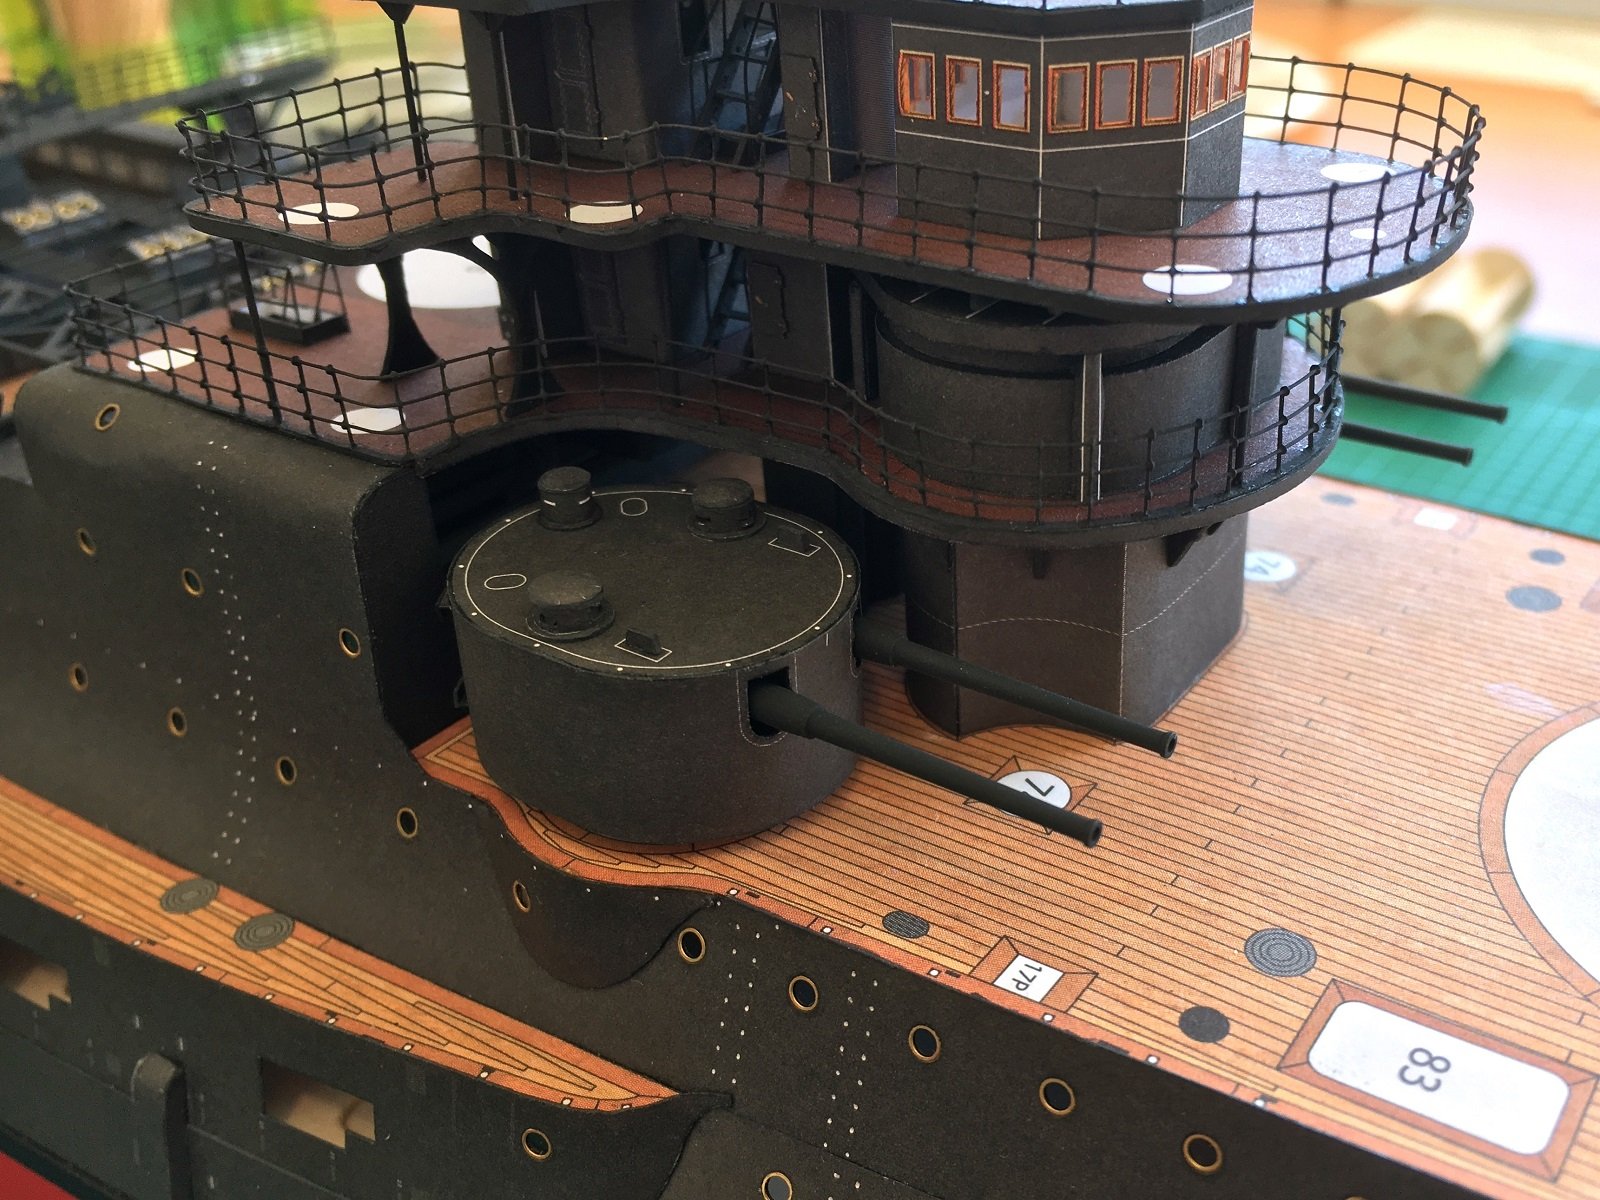
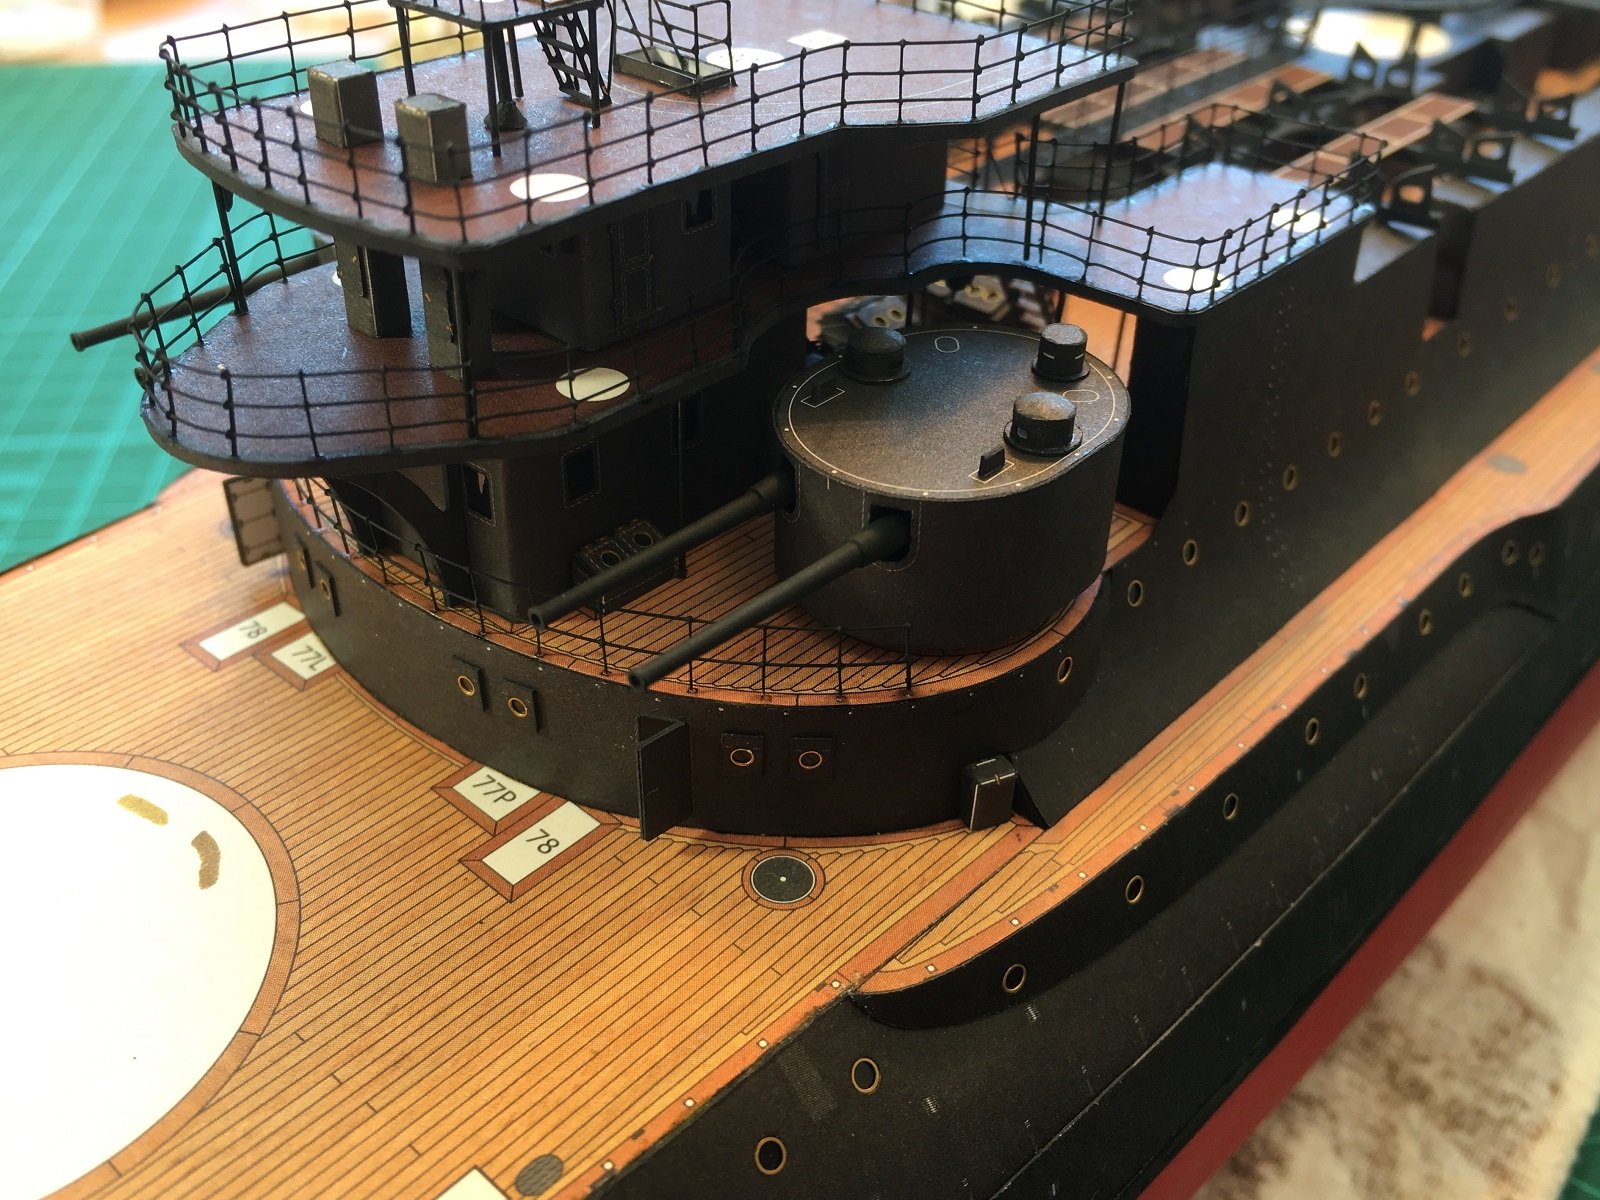
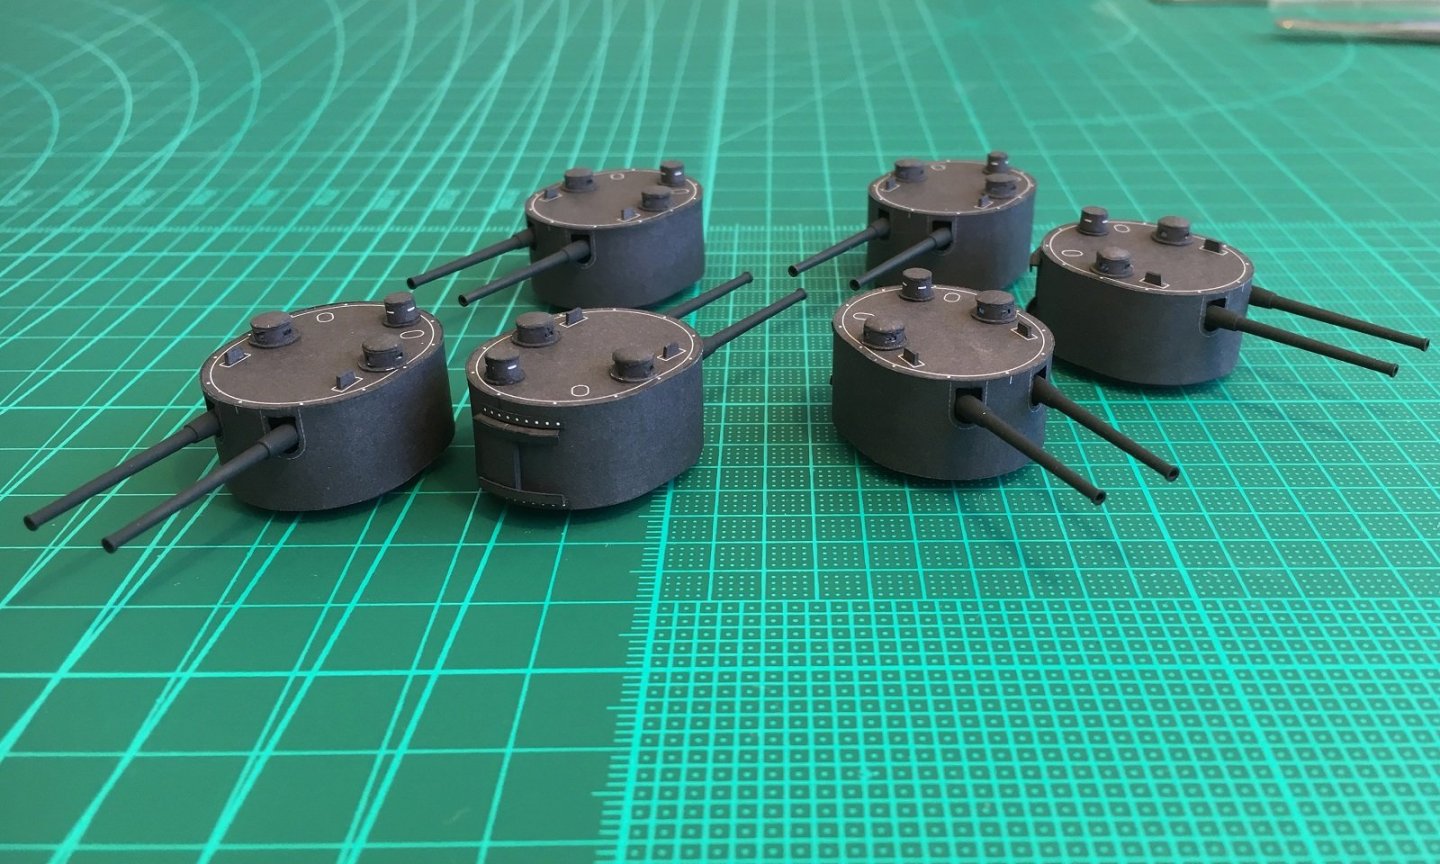
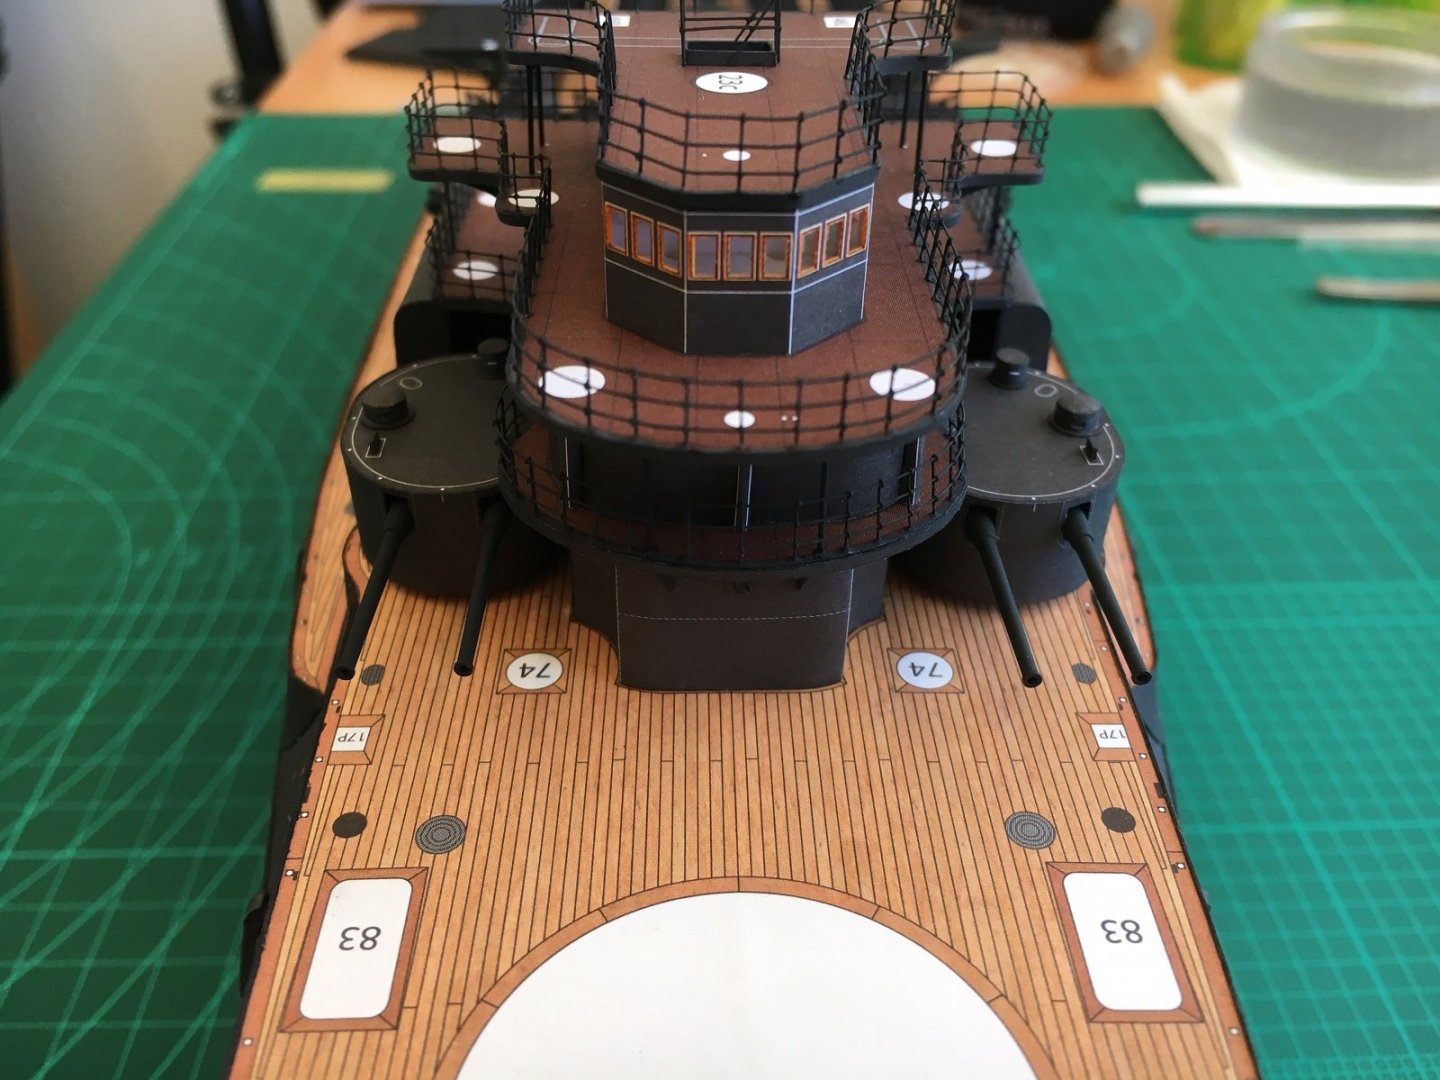
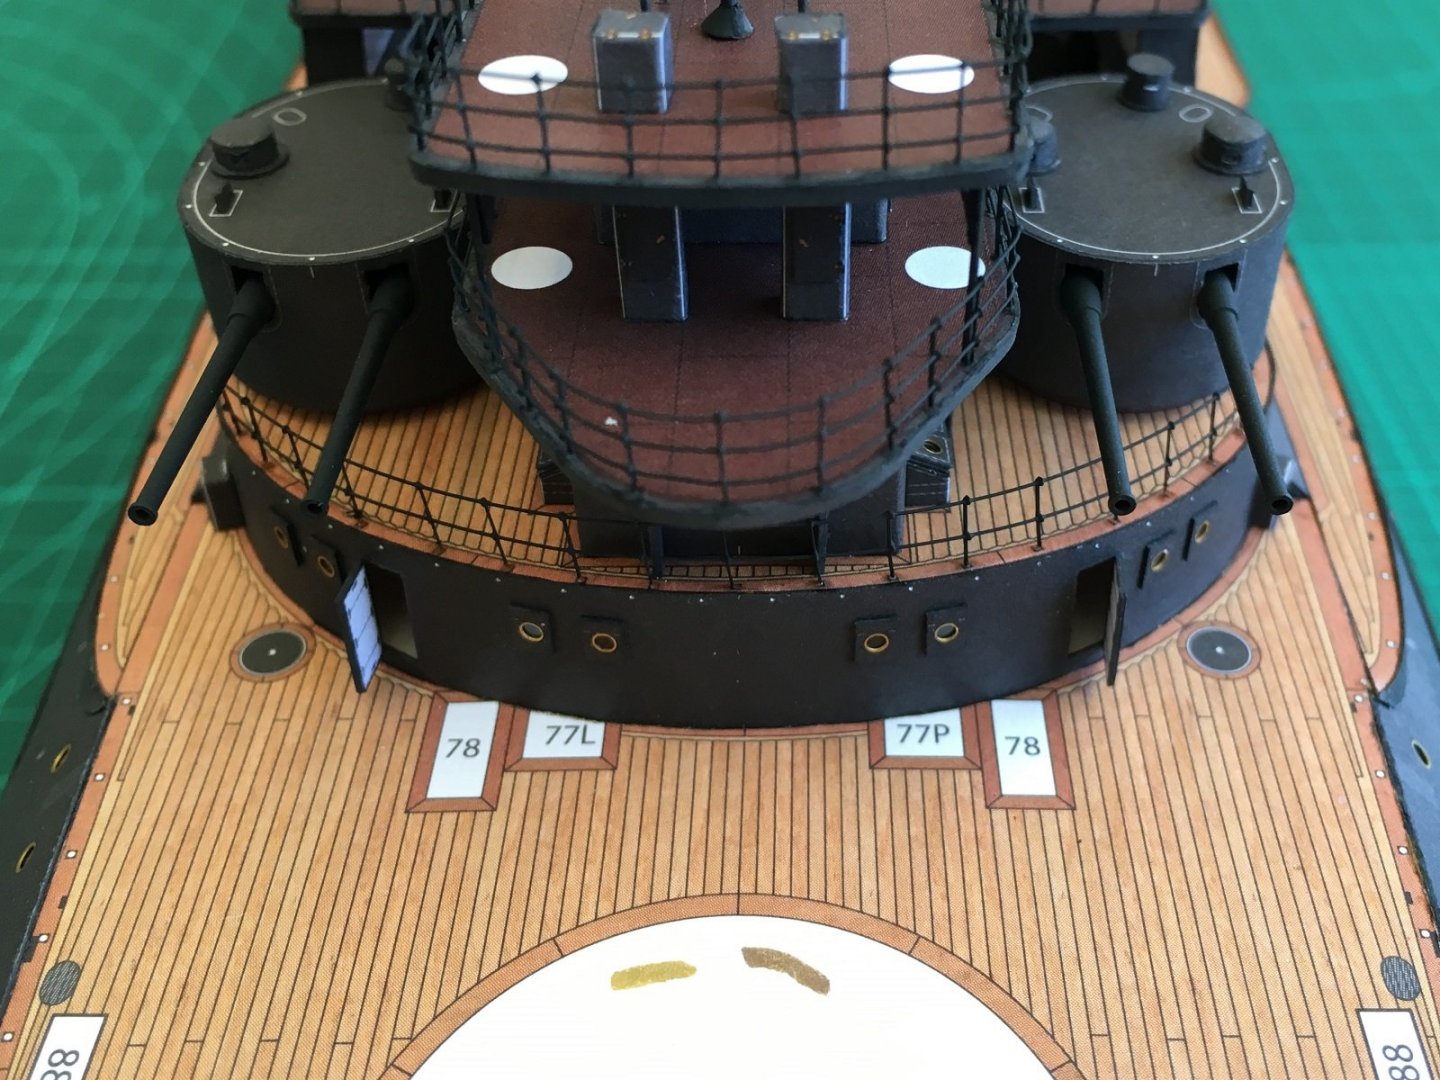
Hi Danny, Thanks for the info, I may use that method for the funnels. Unfortunately the bent ladder is supposed to be curved. For some reason the Port and Starboard ladders are different but I messed up the ‘curve’…in hindsight I should have matched the straight ladder but right now going to leave as is. The 6” turrets are more or less done. The parts for a rear sliding armoured hatch ready for attaching. Rear observation cupola. Front observation cupolas. These could have been neater. The turret rings…bizarrely I could only find 5 strips so had to make the 6th from scrap and will paint to match. Turrets all skinned up. Finished(ish) turrets. A few shots shown in place. I still have the ladders and top hand rails to do but will set them aside for the time being and work on some other bits and pieces. Cheers Slog

- 244 replies
-
- 12
-
-
- borodino
- dom bumagi
- (and 1 more)
-
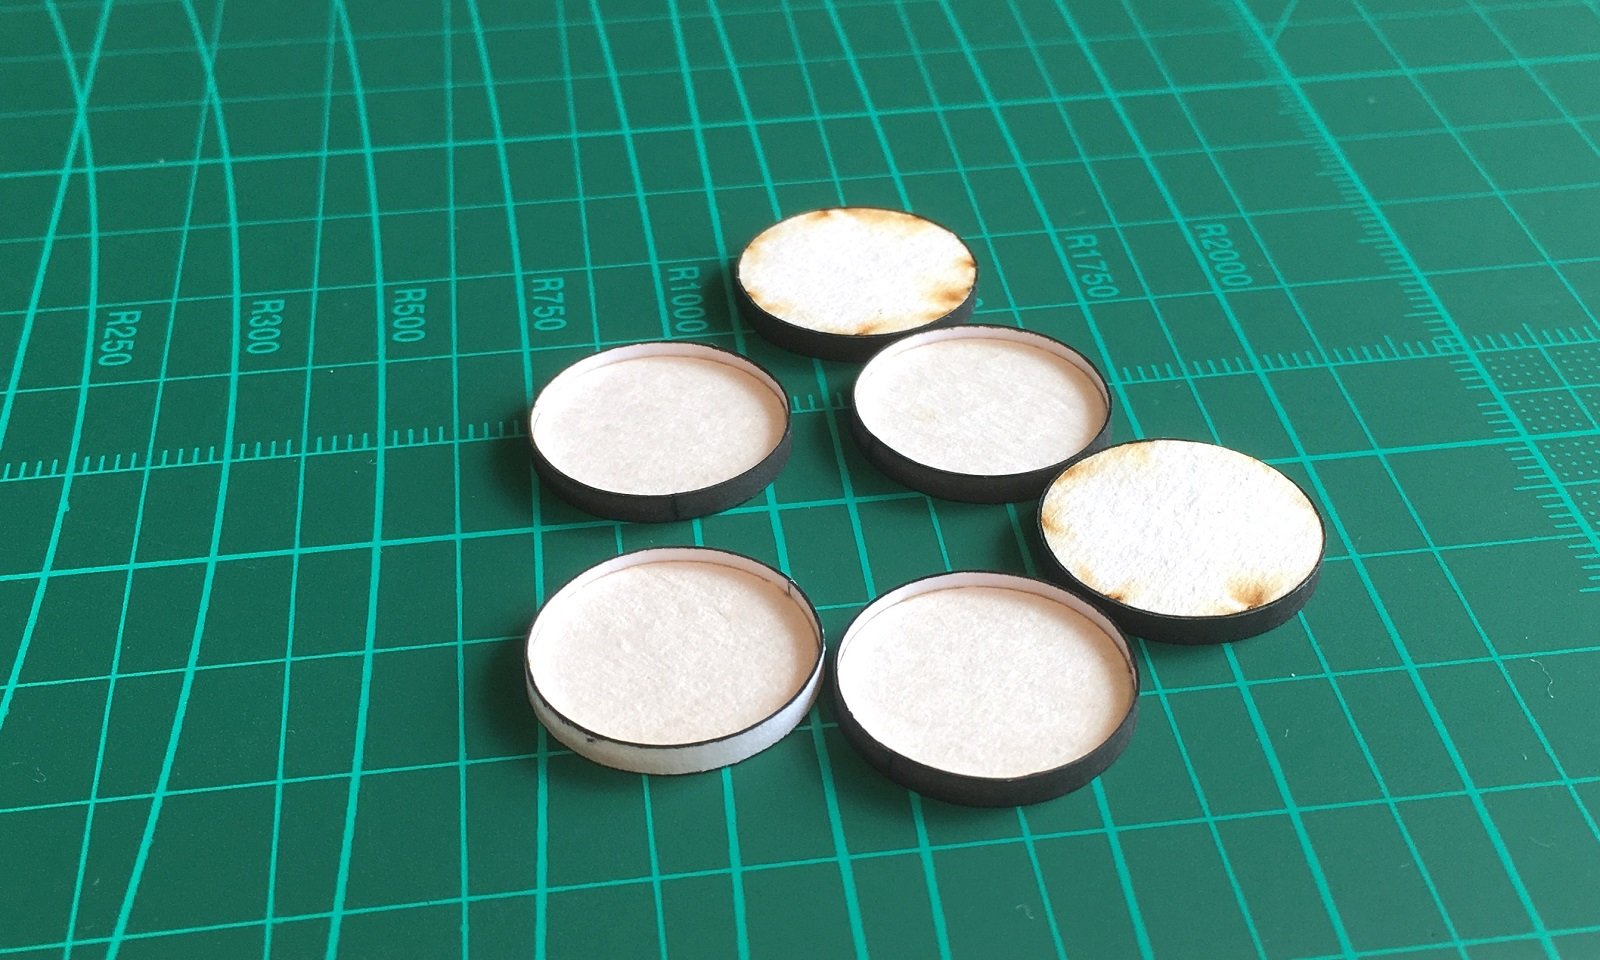
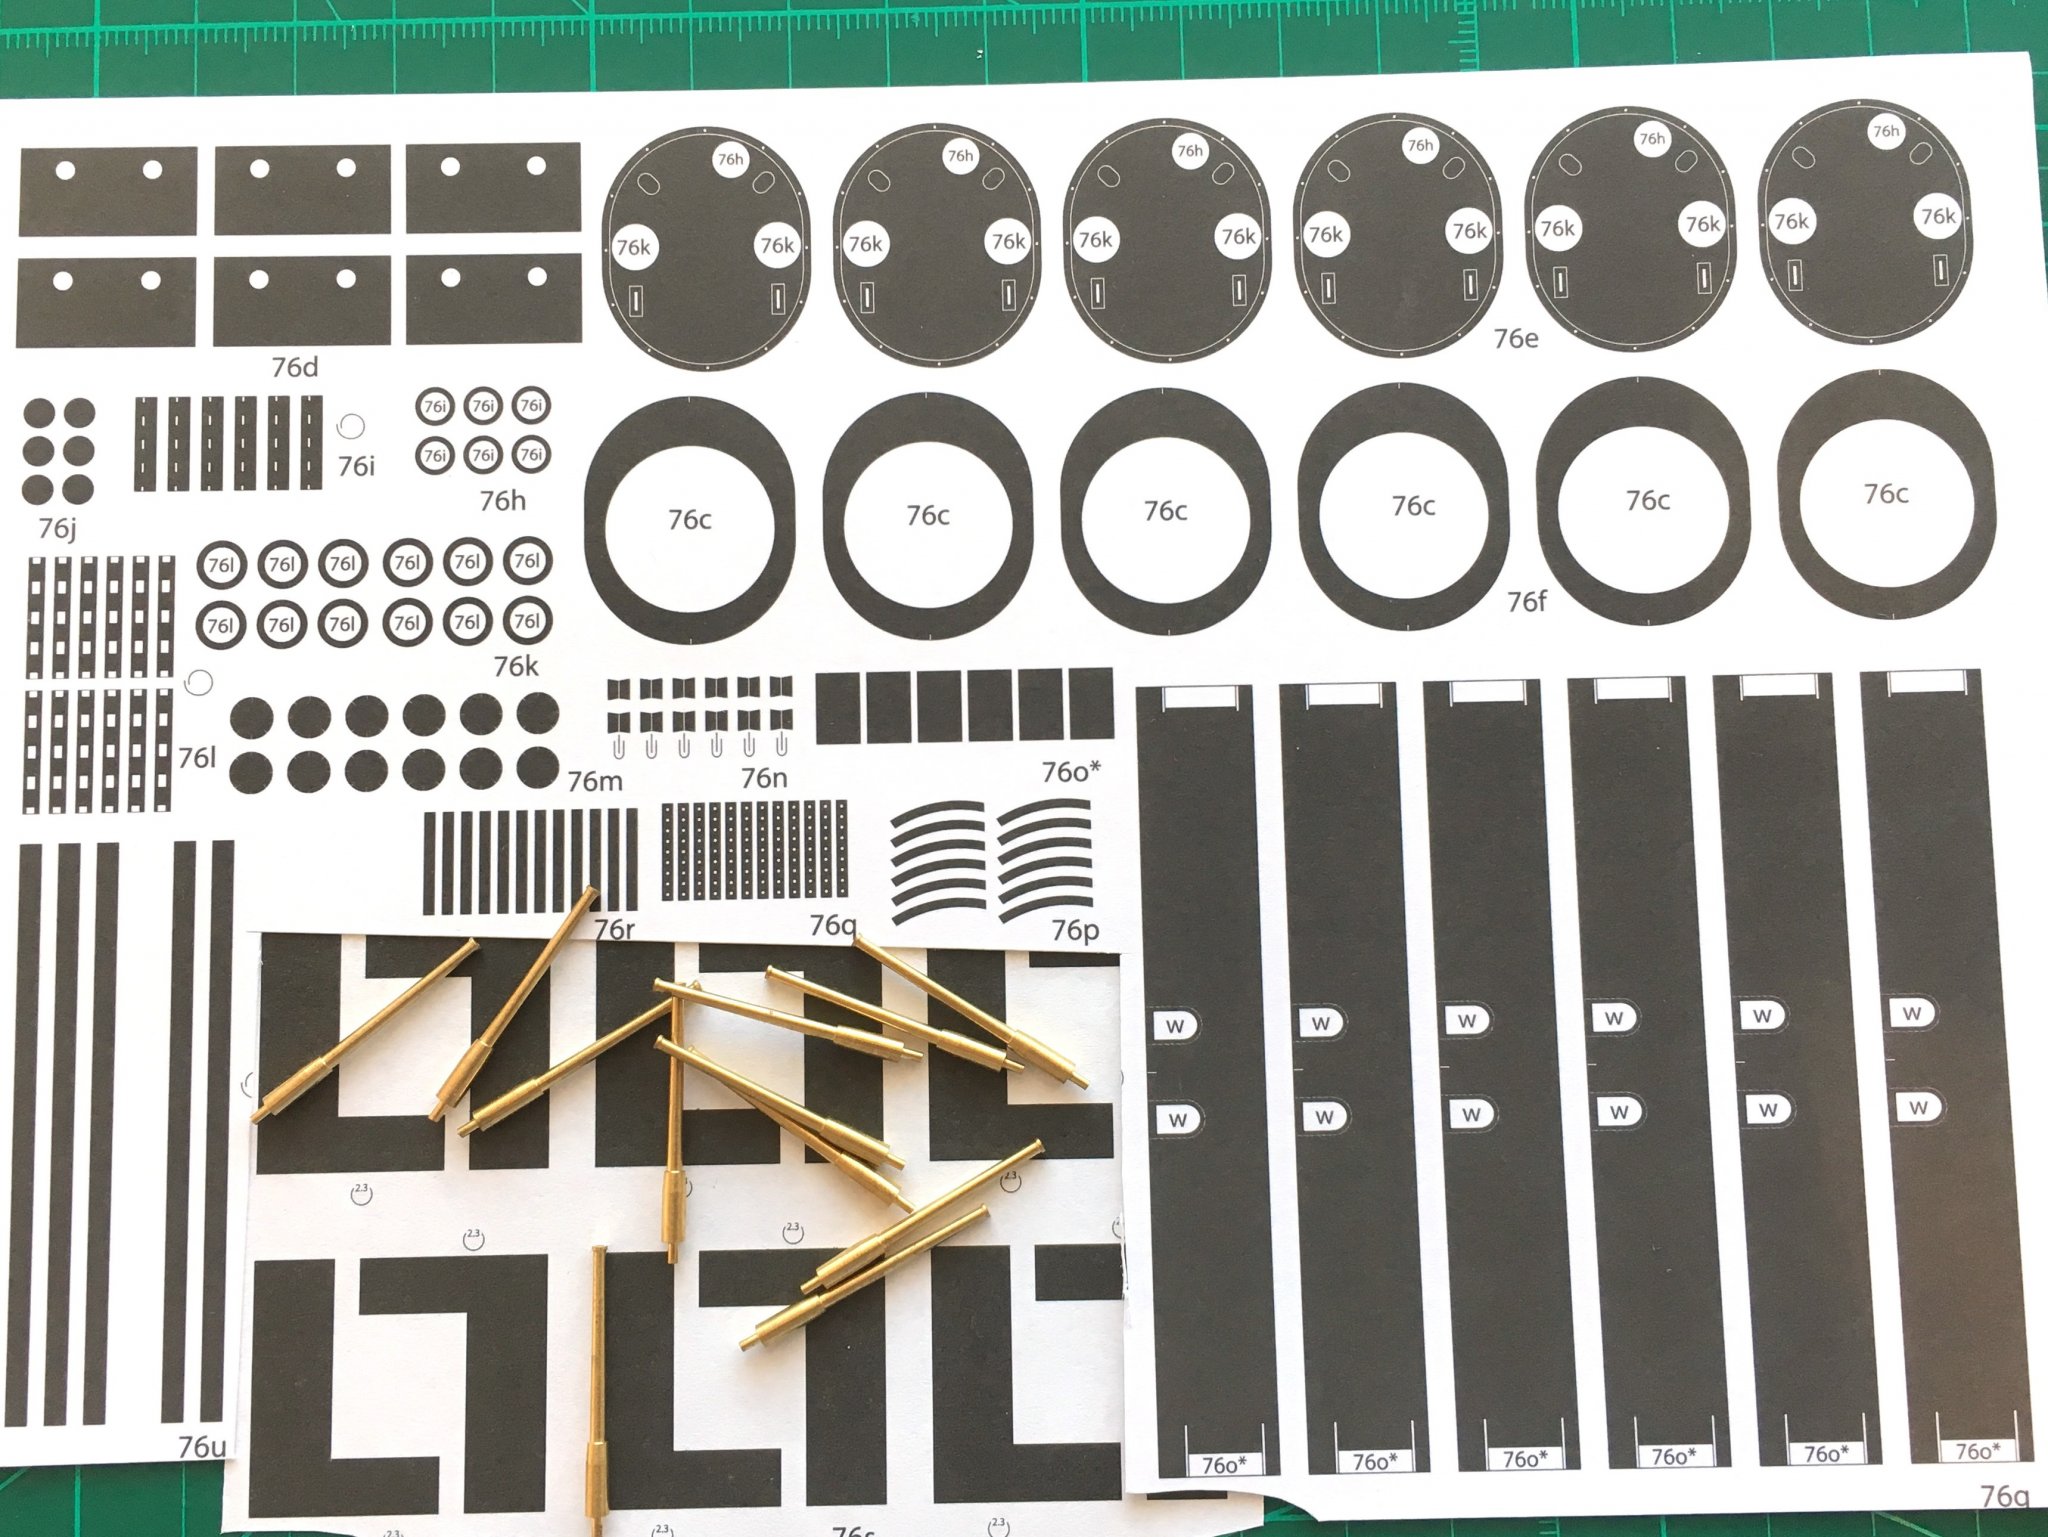
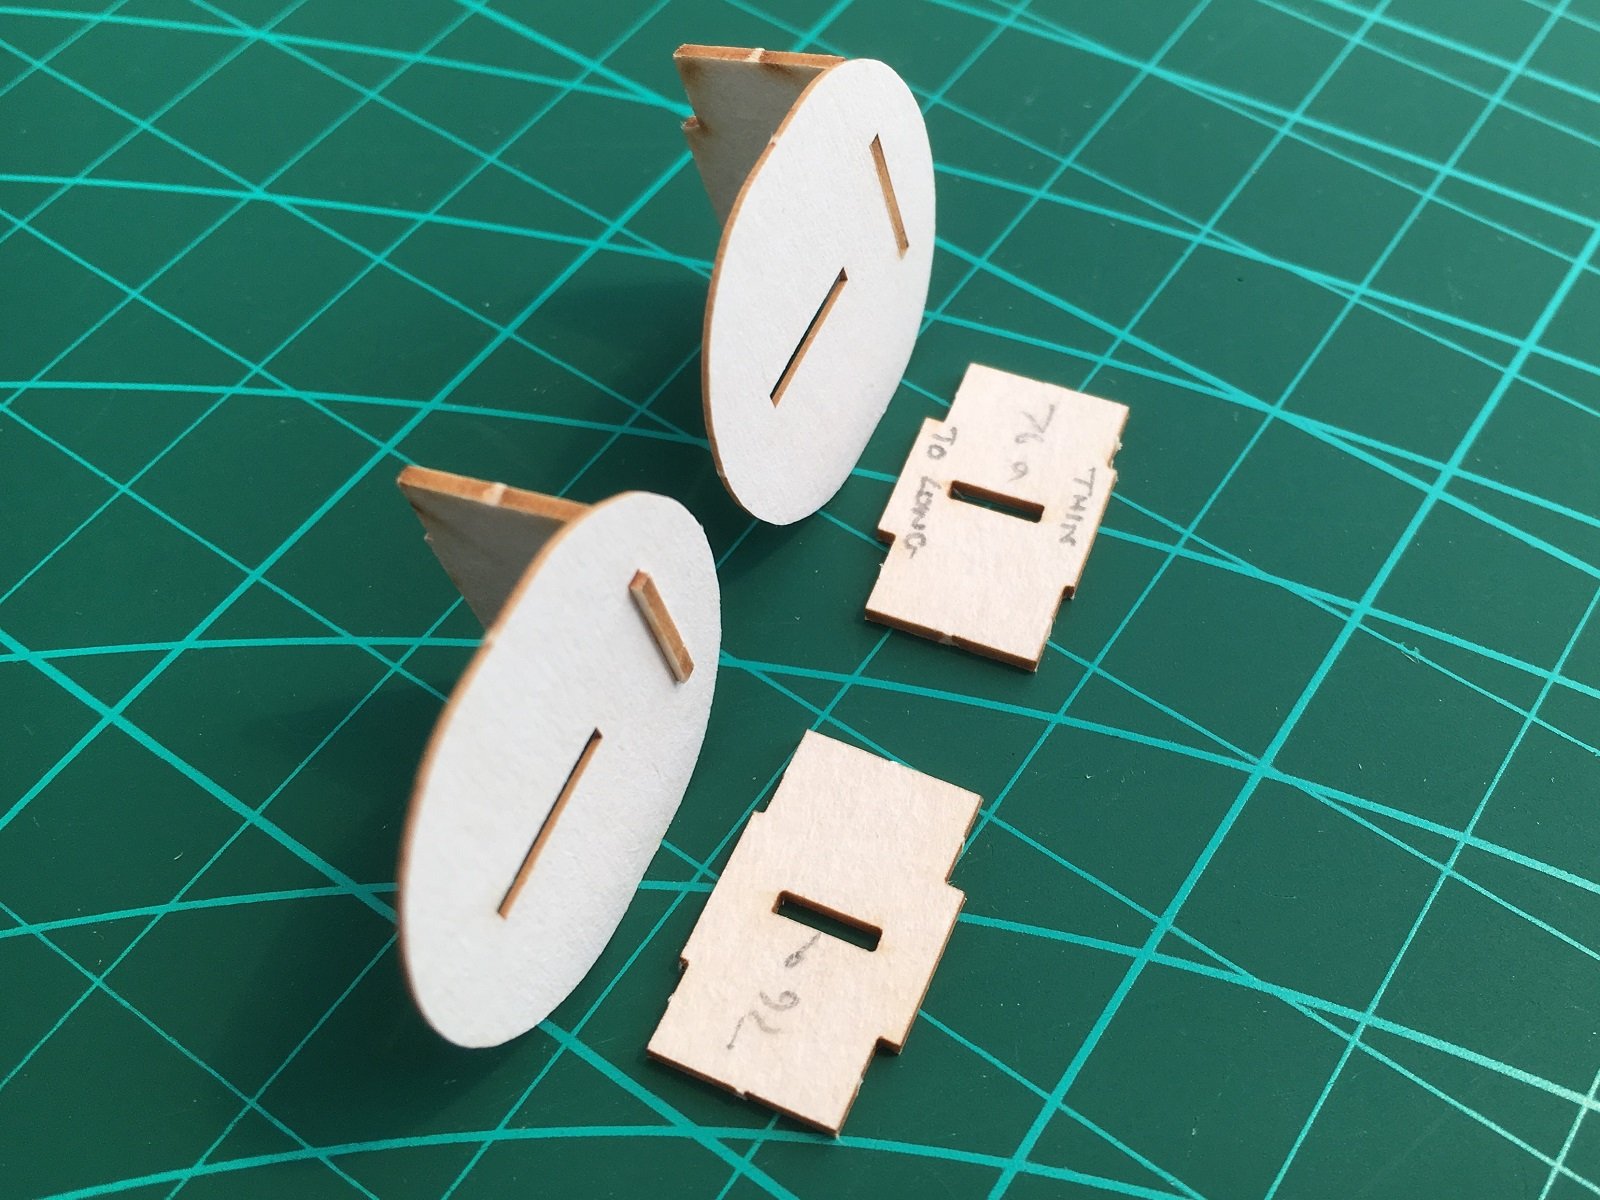
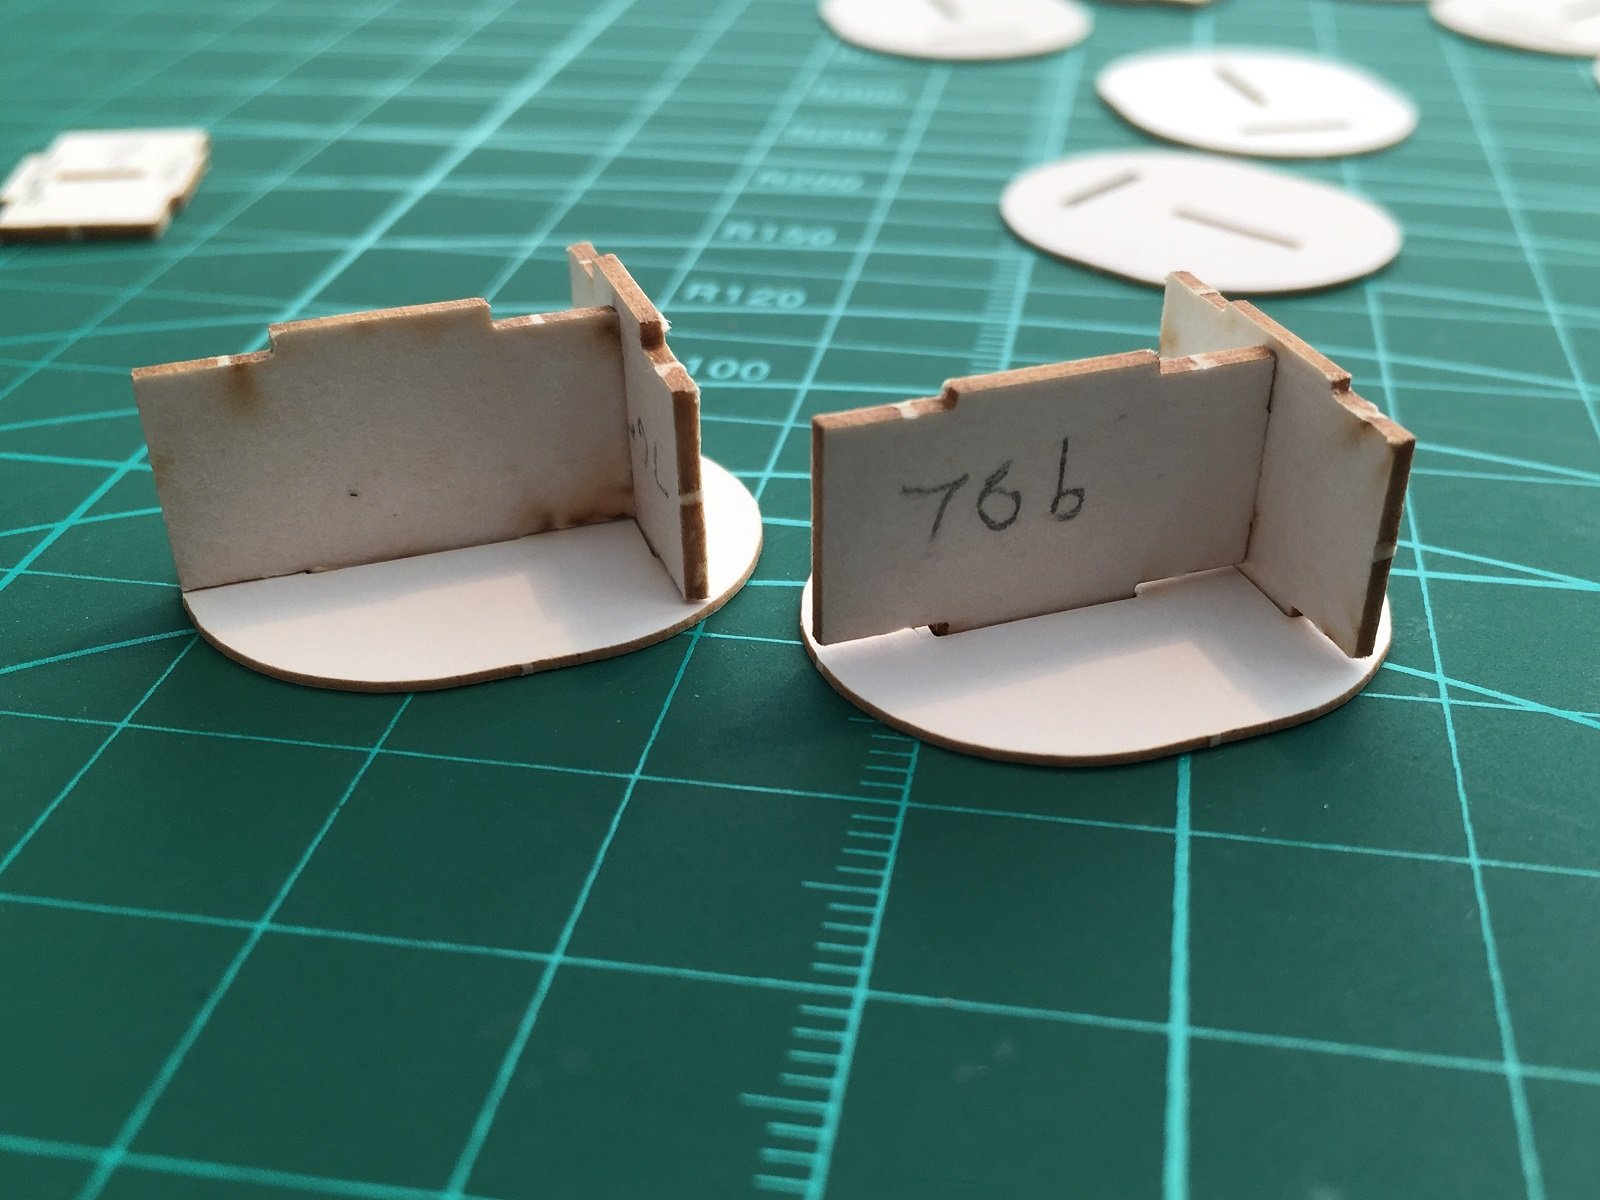
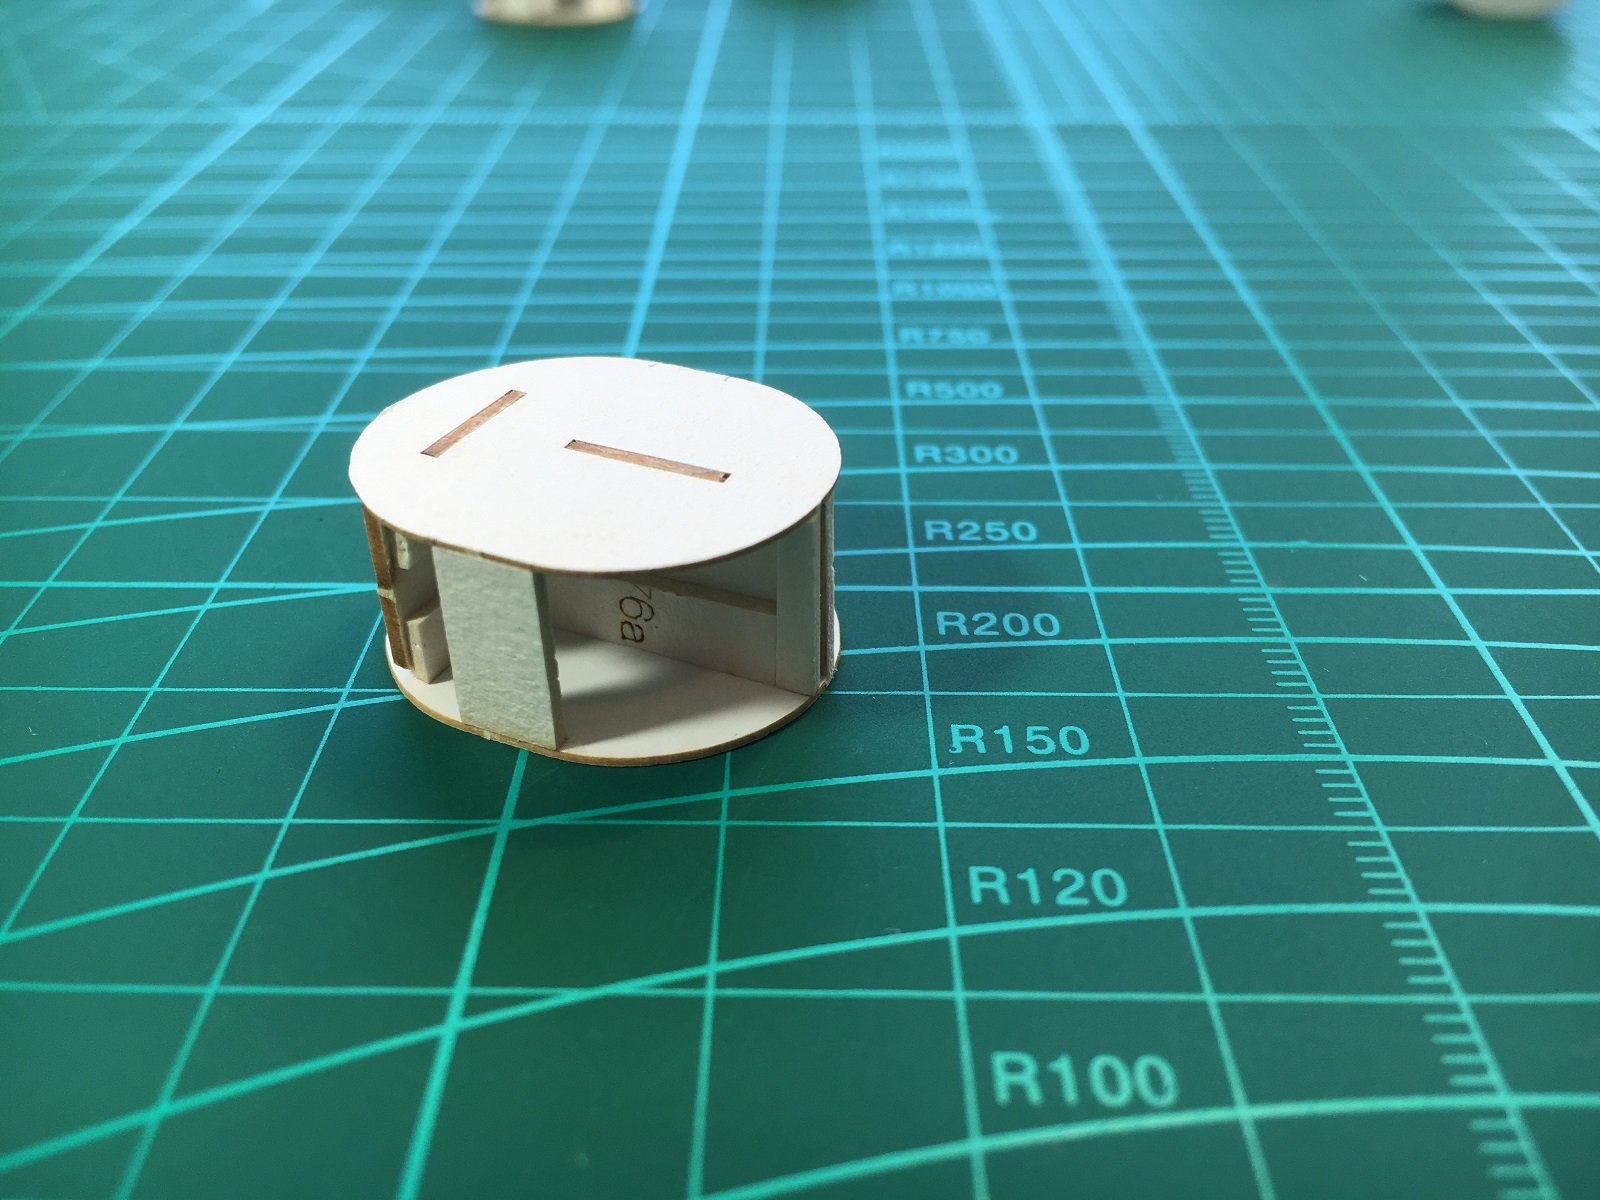
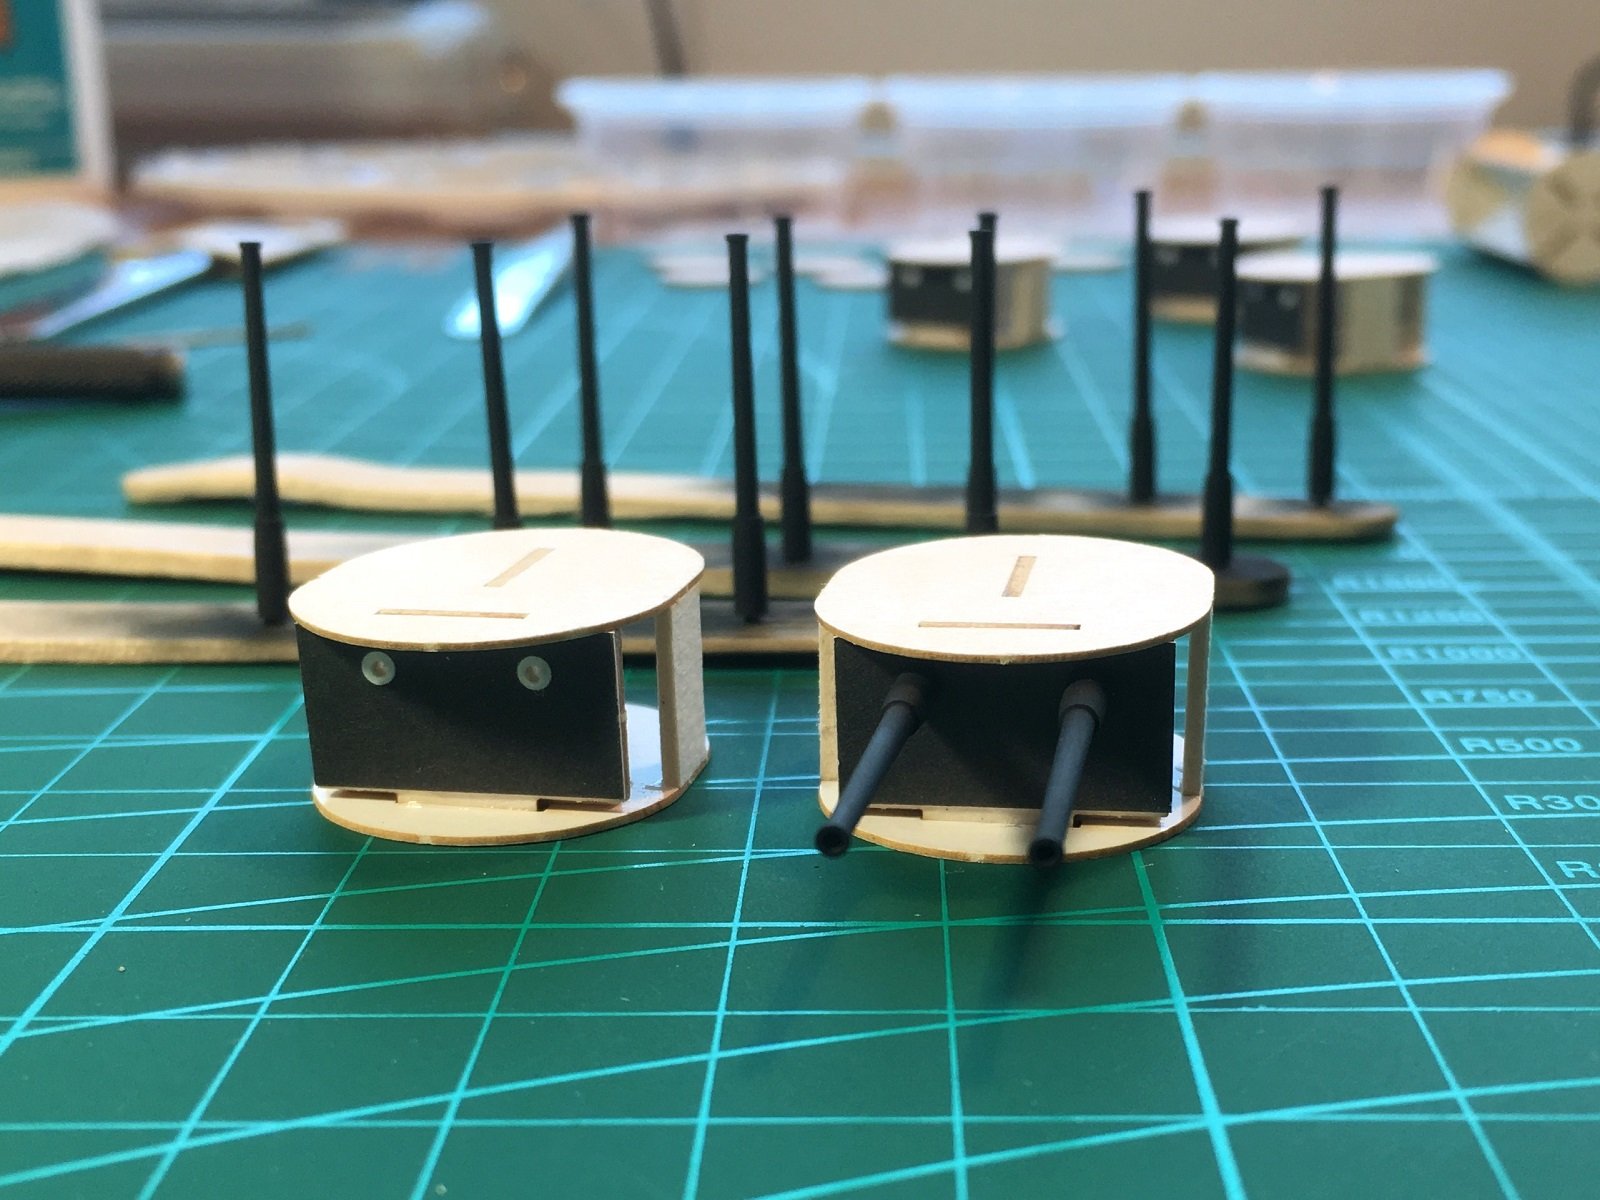
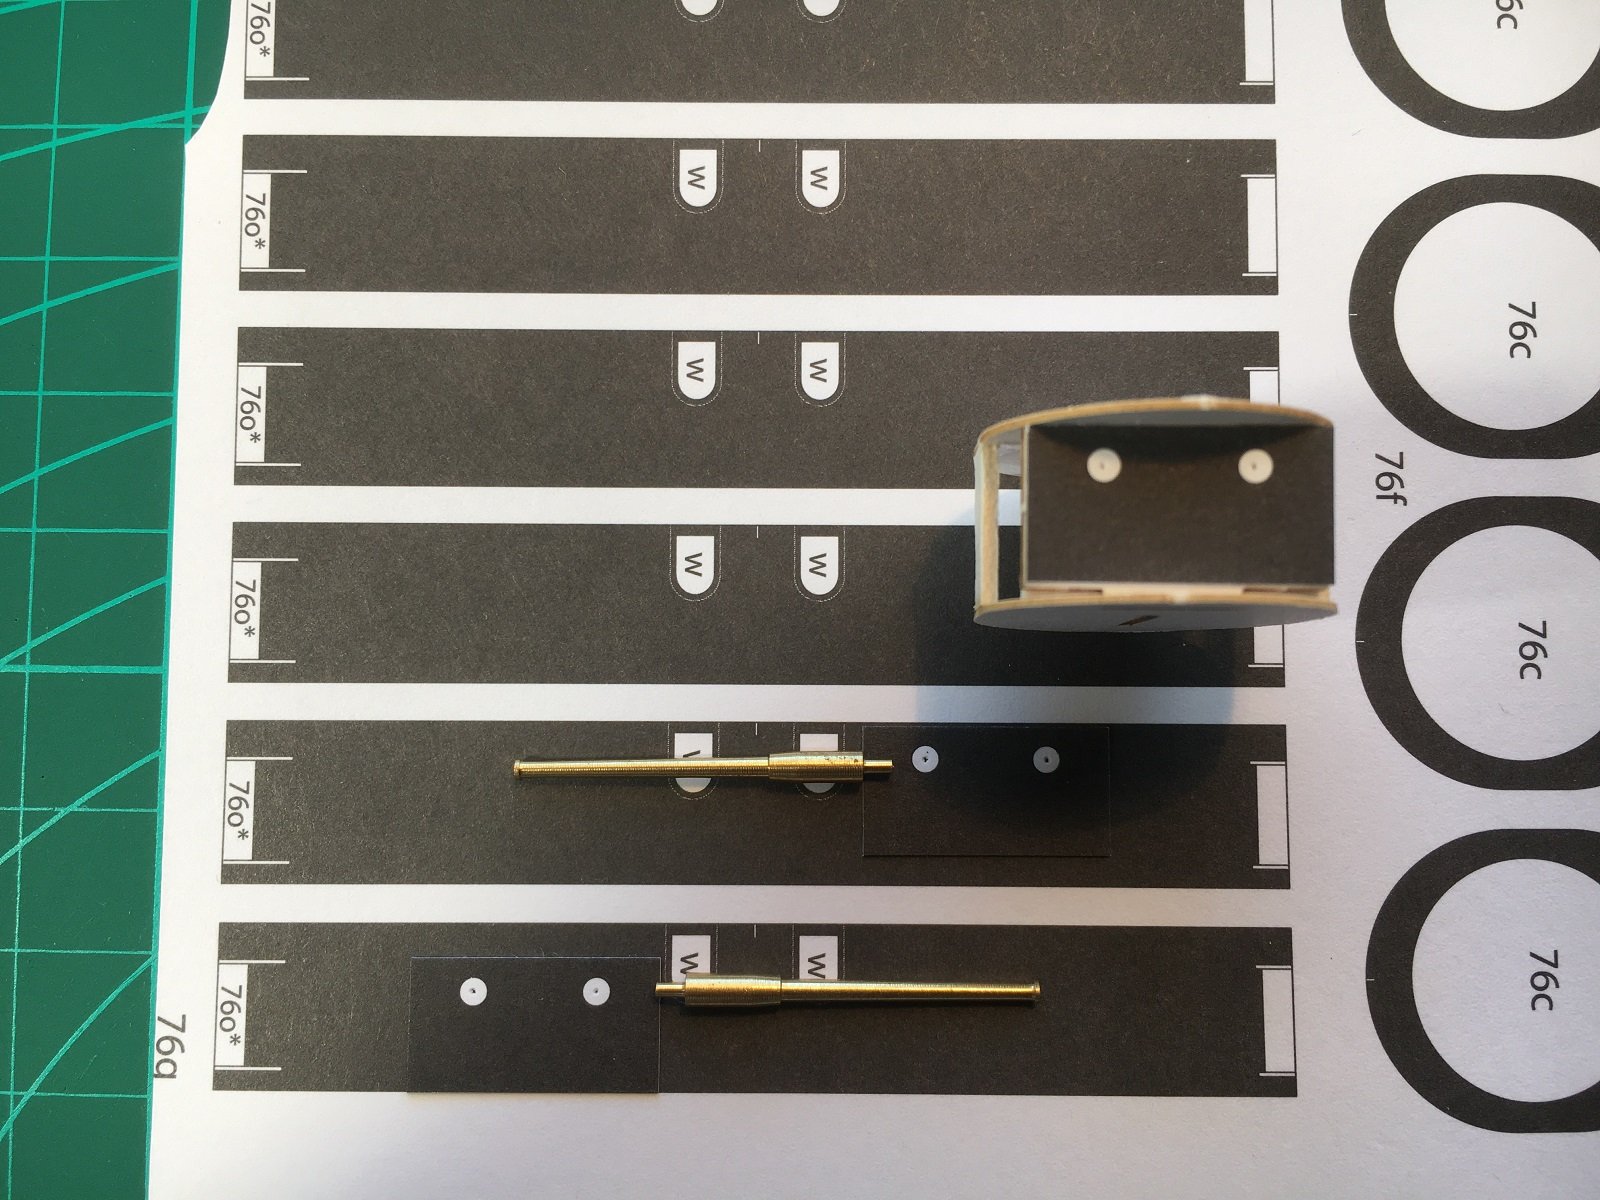
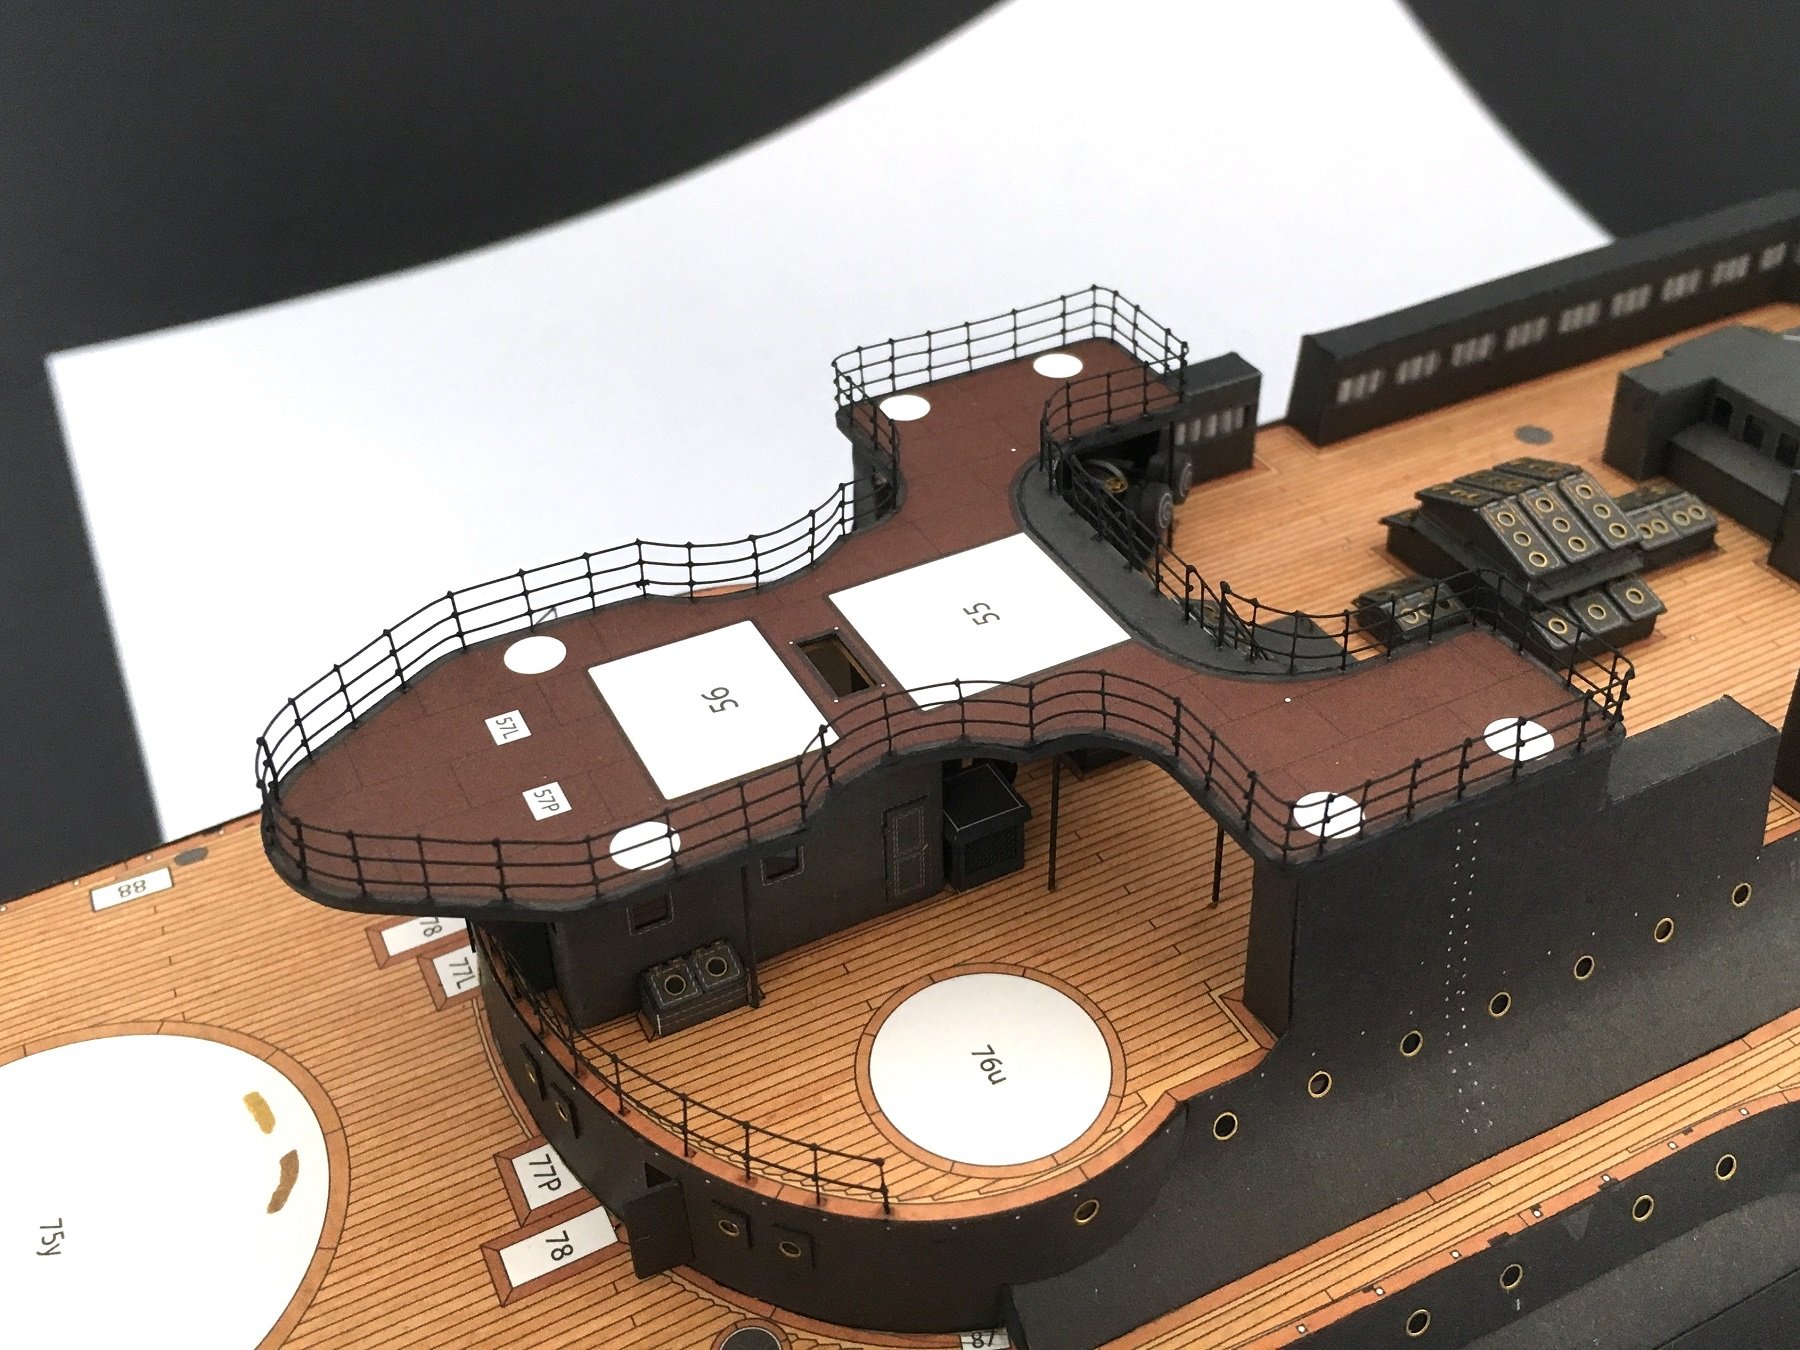
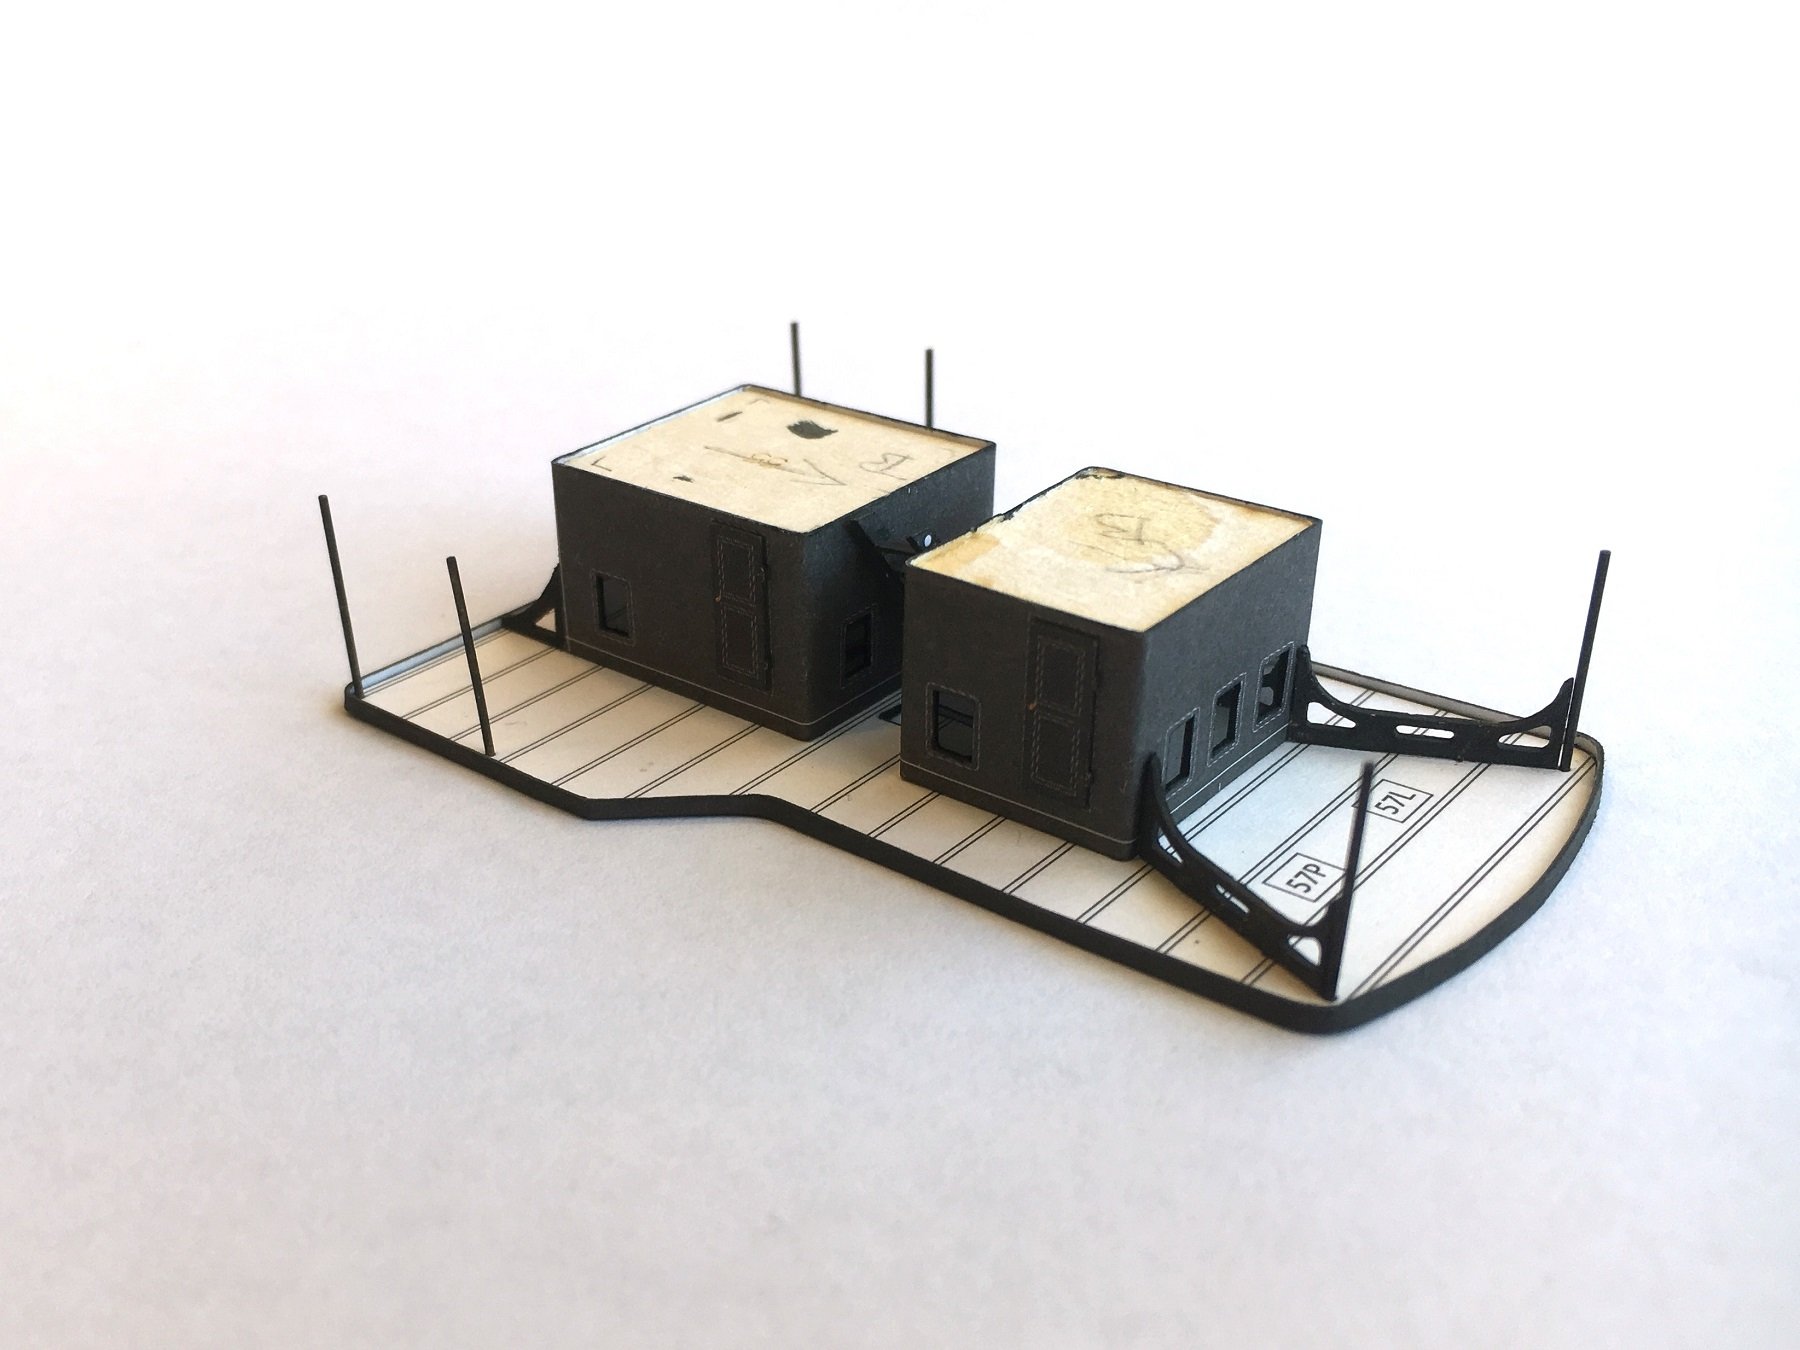
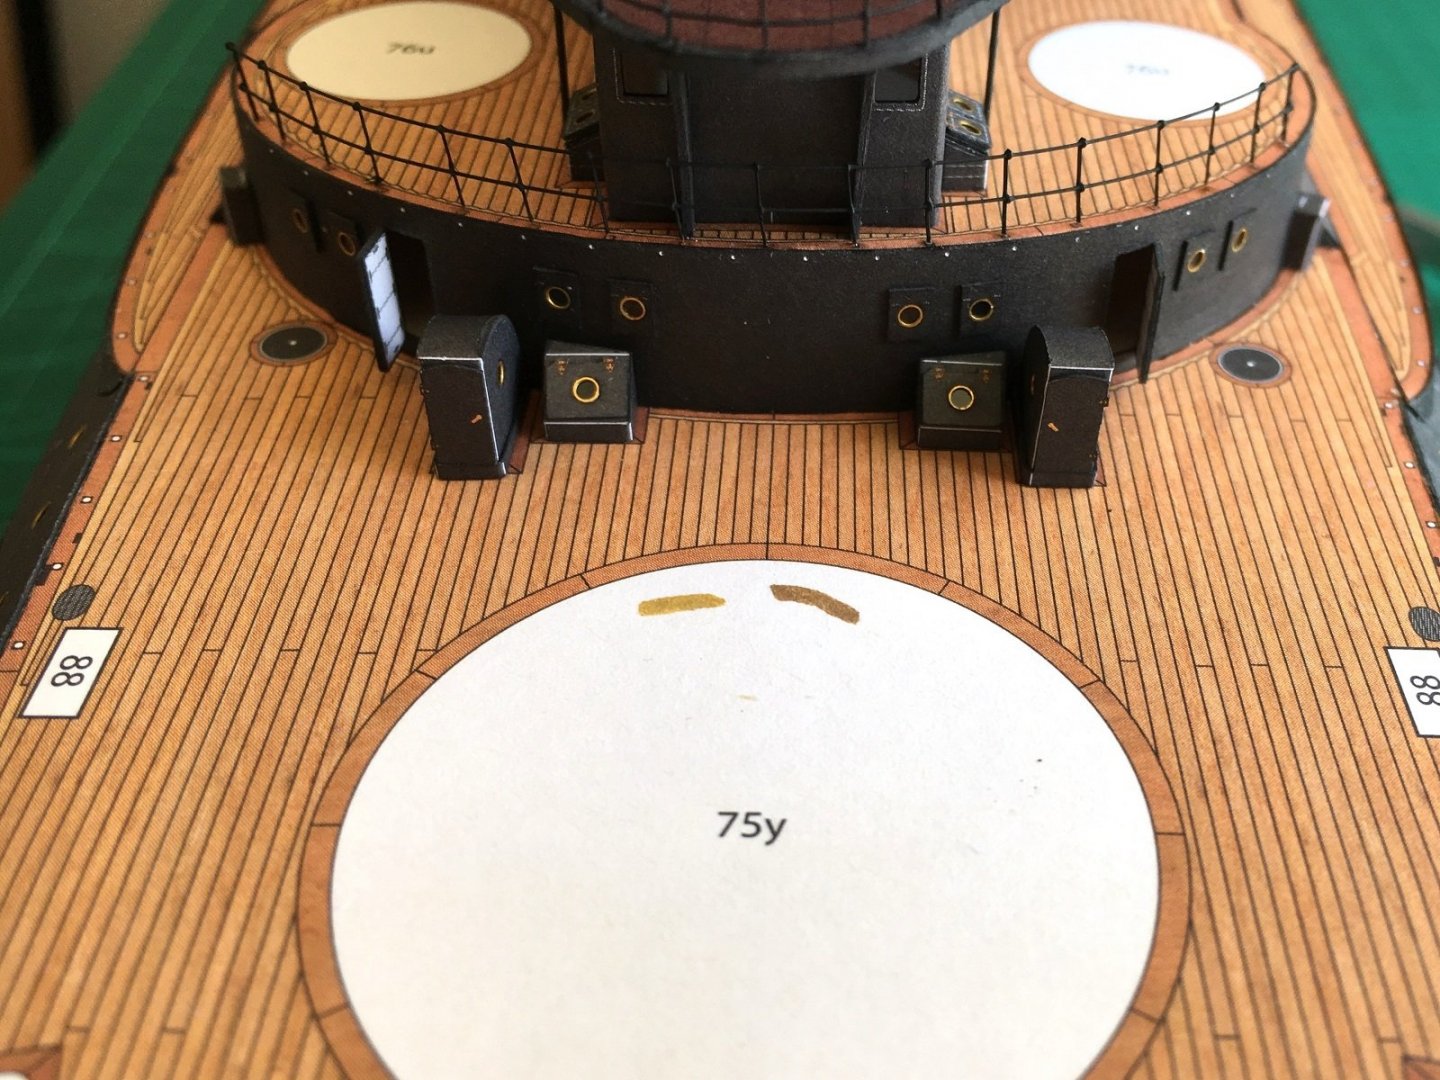
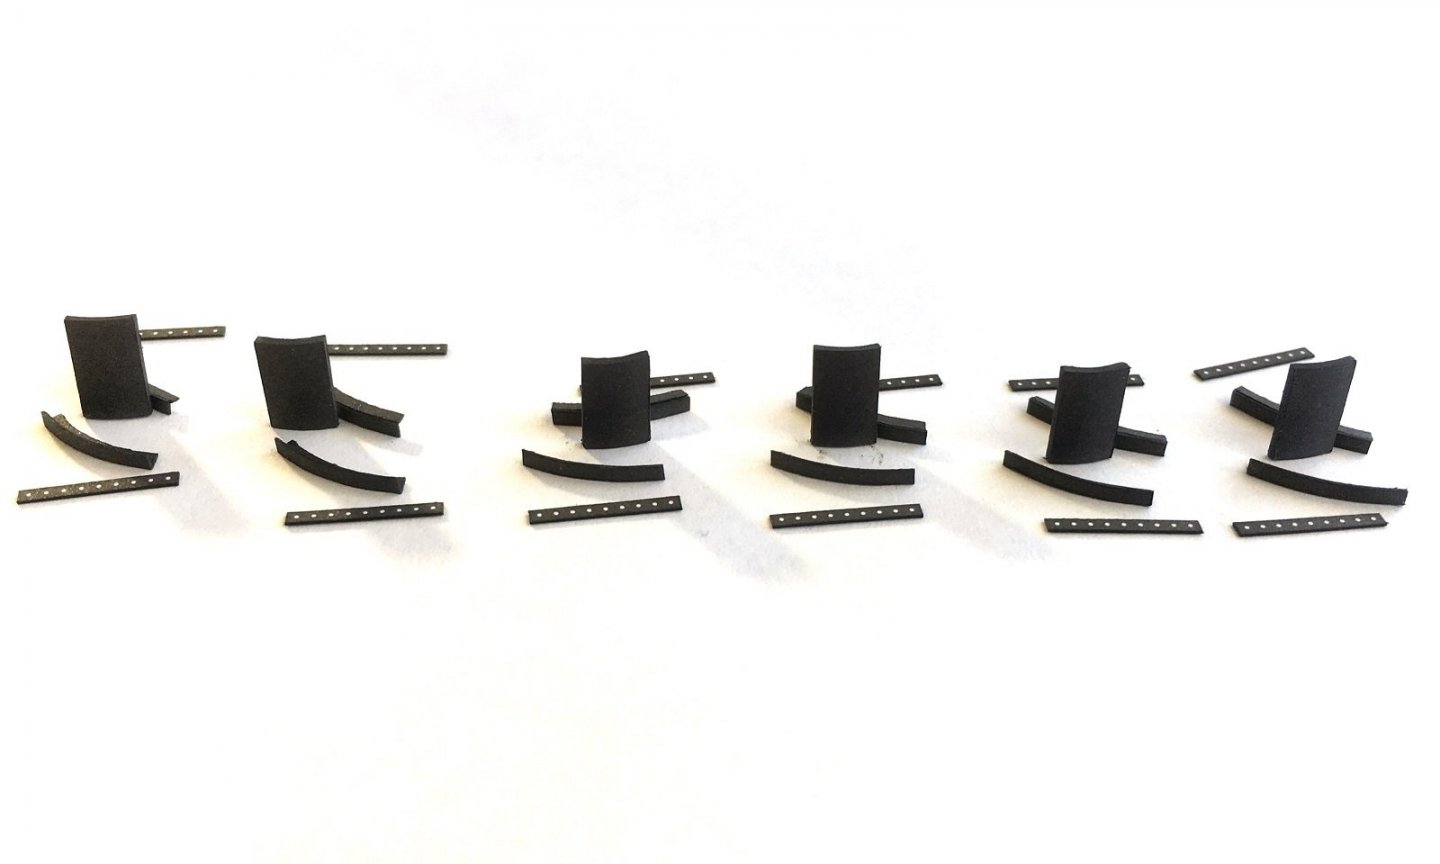
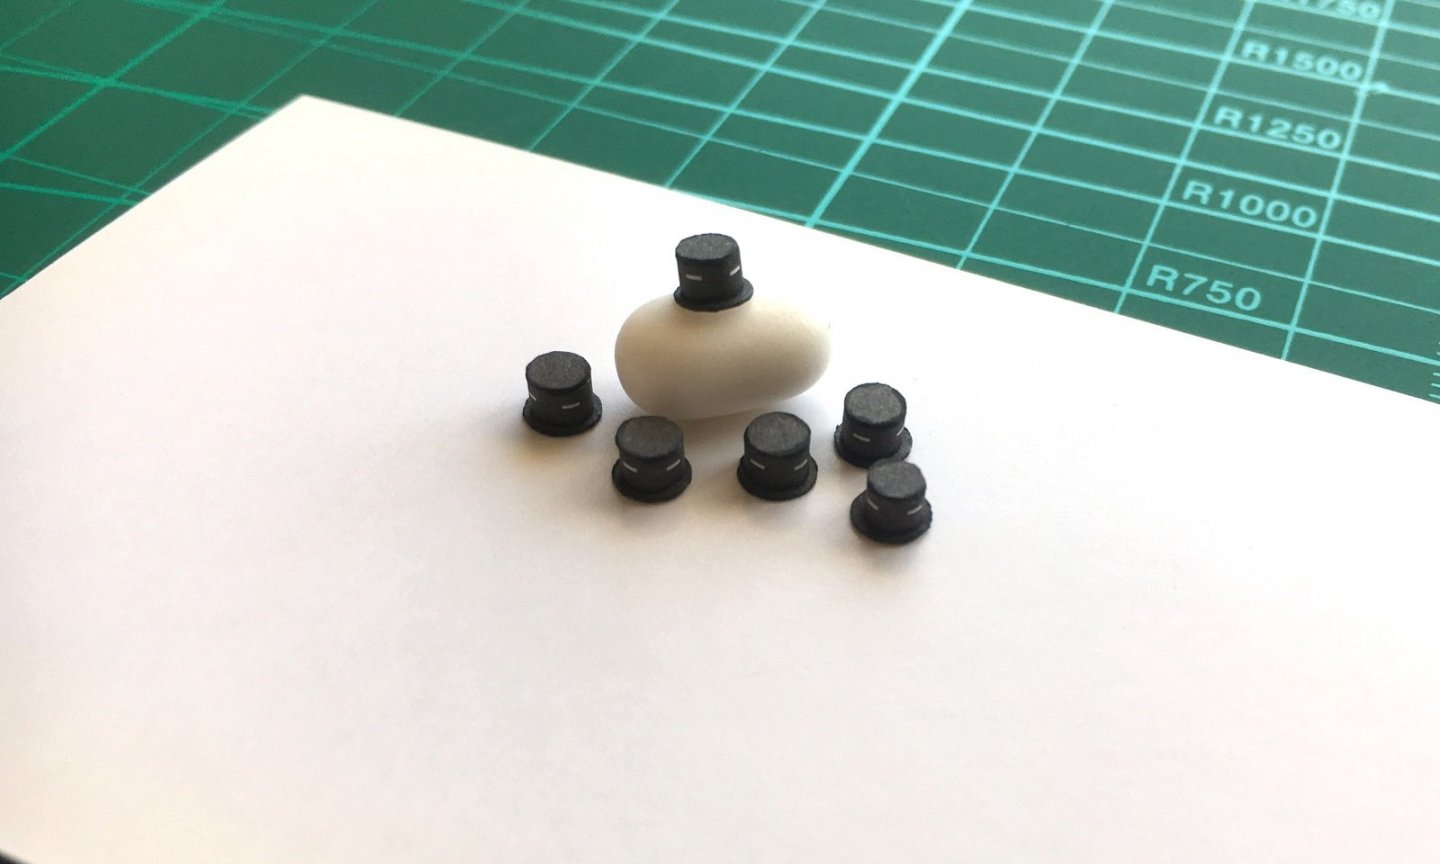
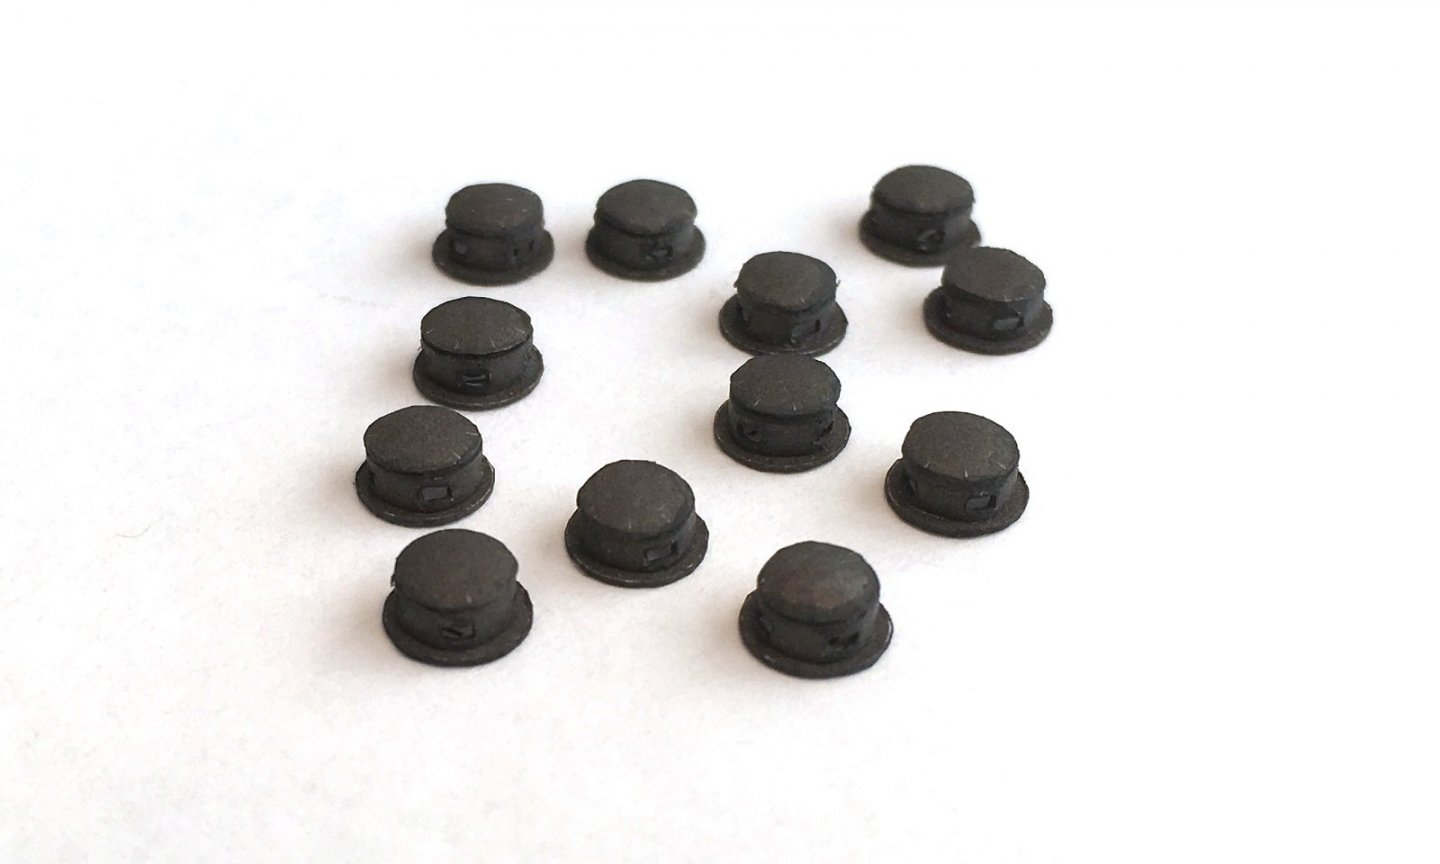
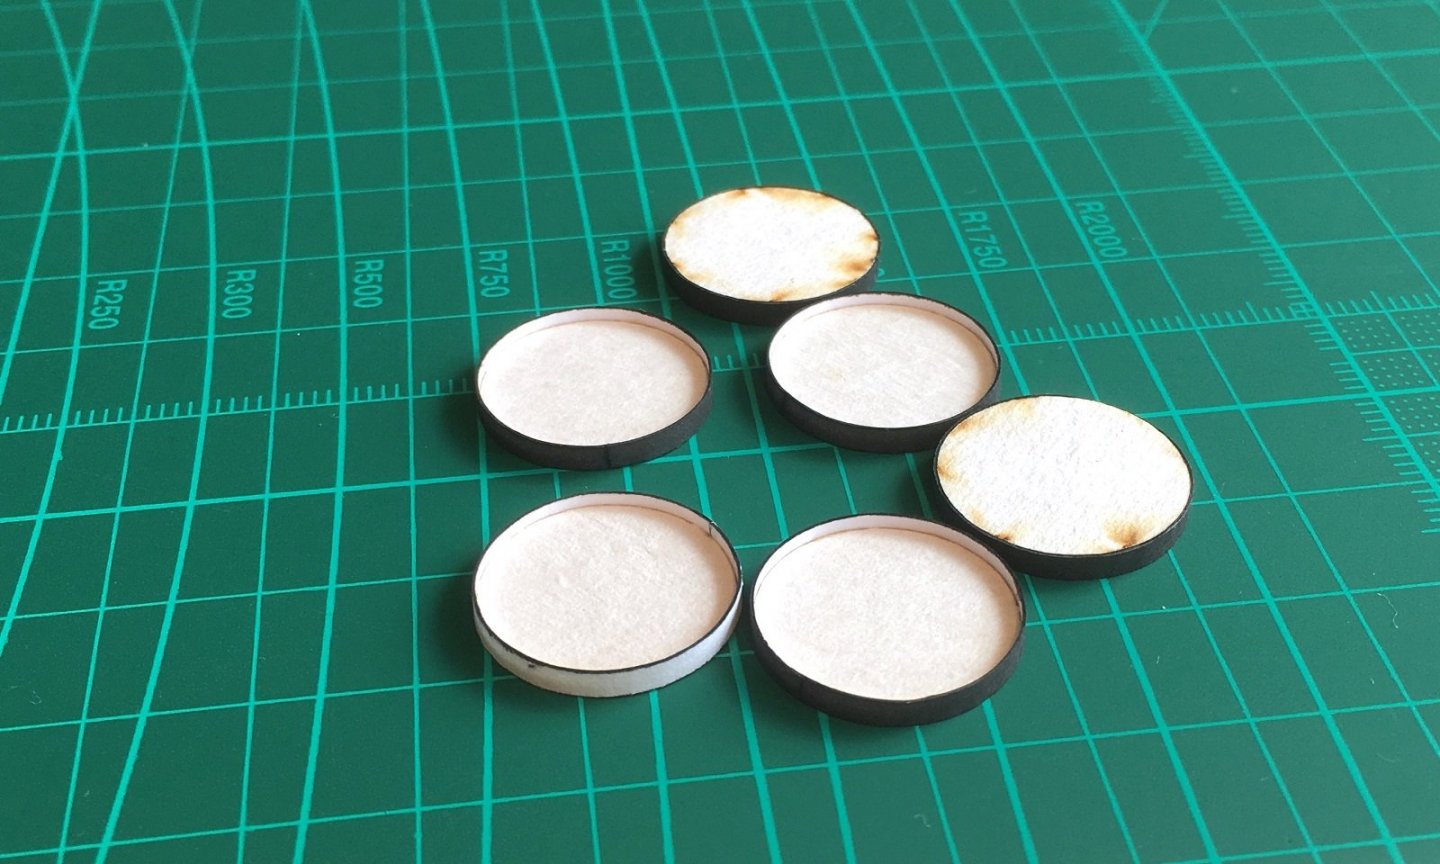
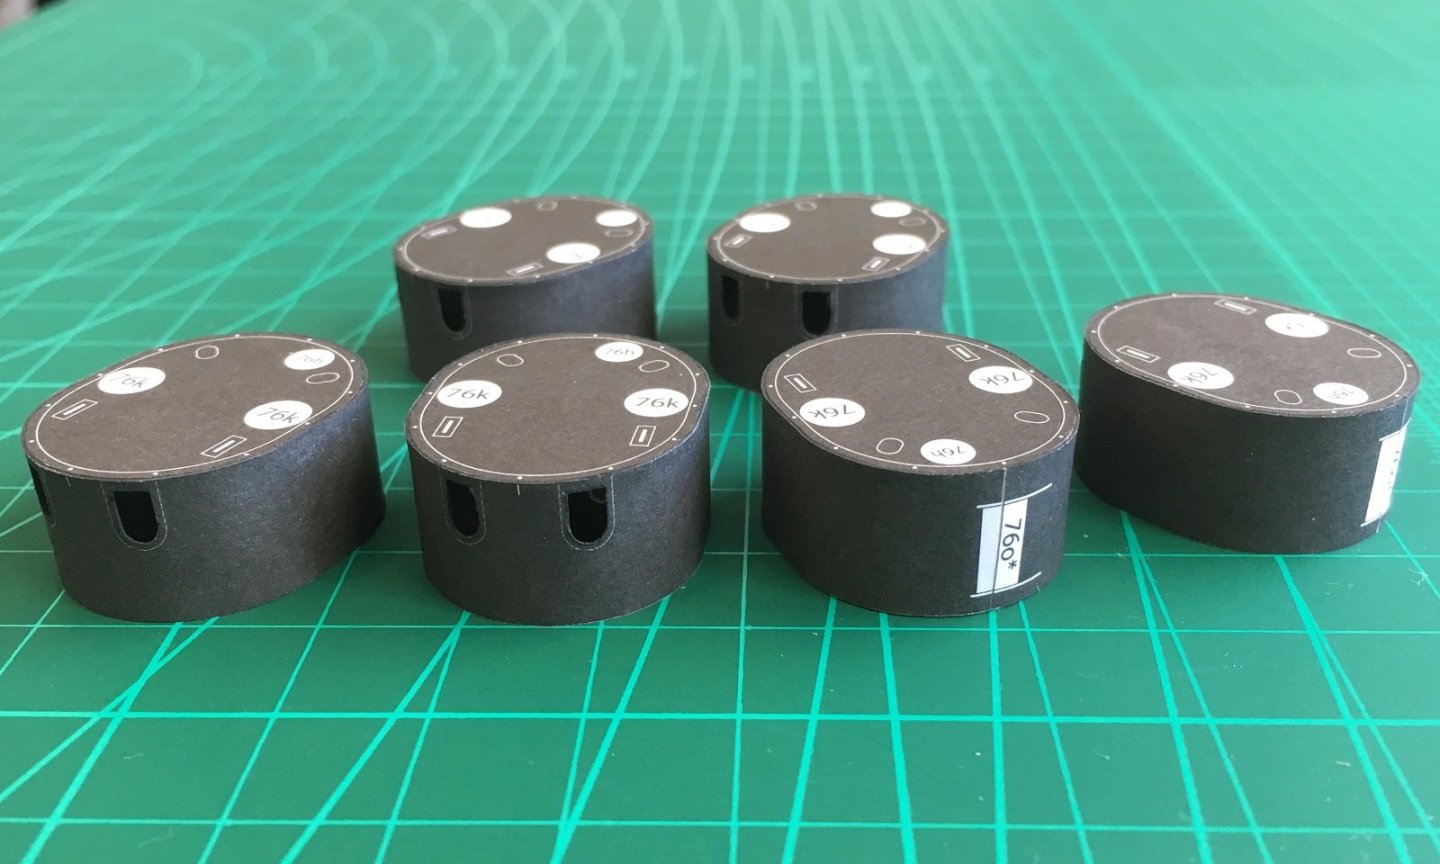
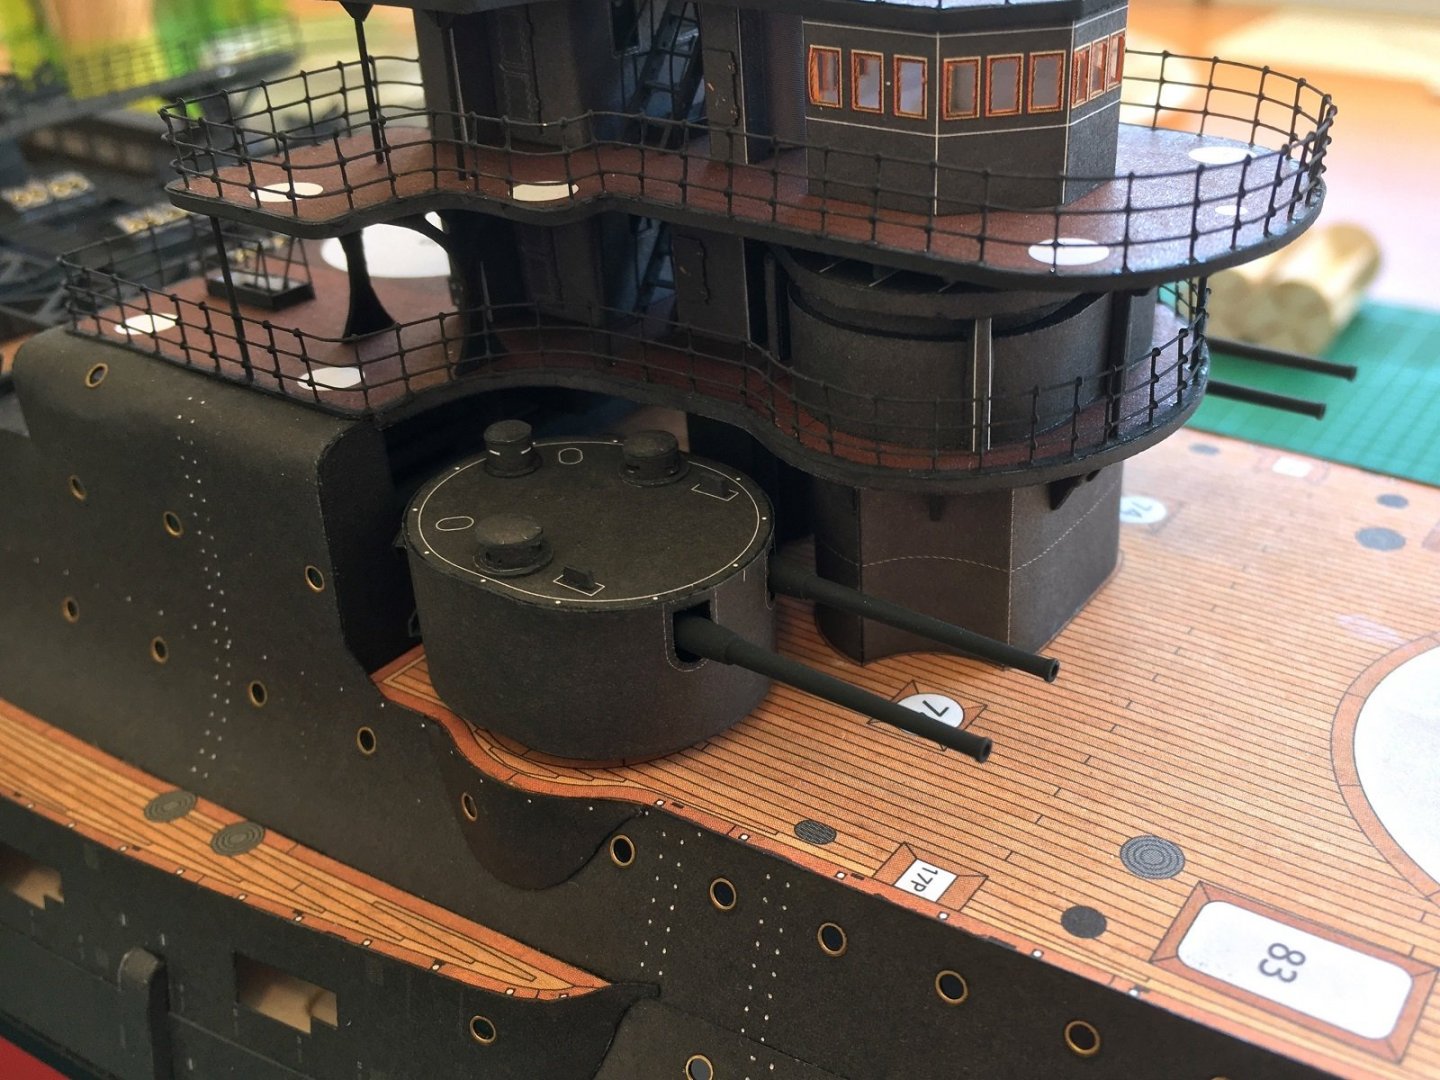
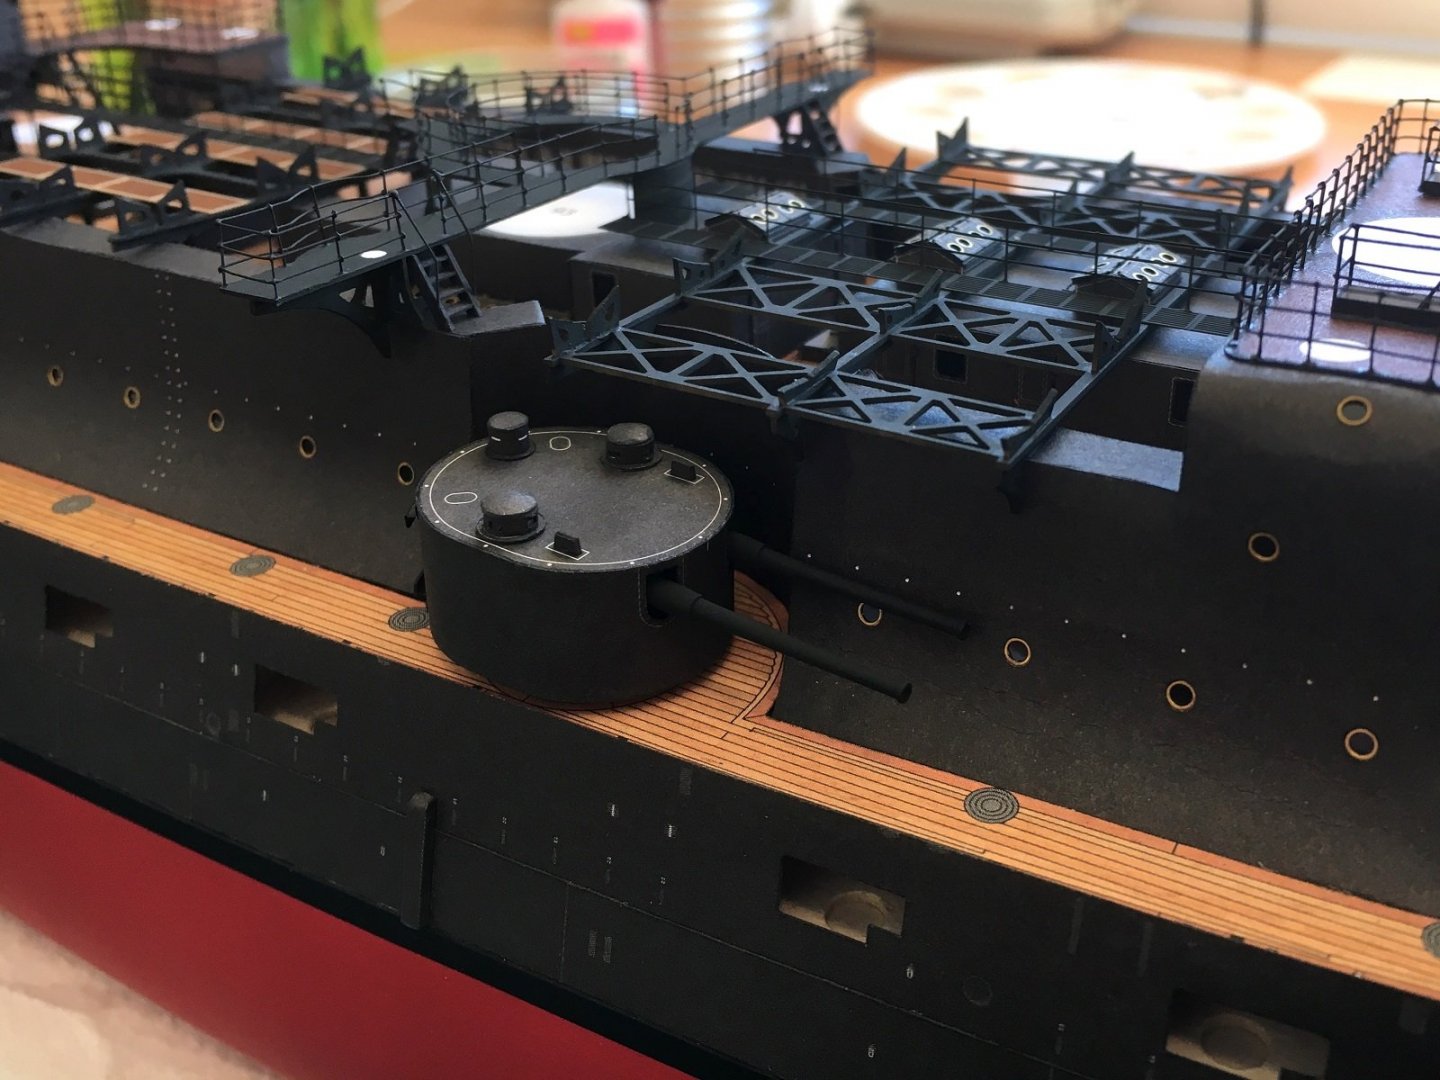
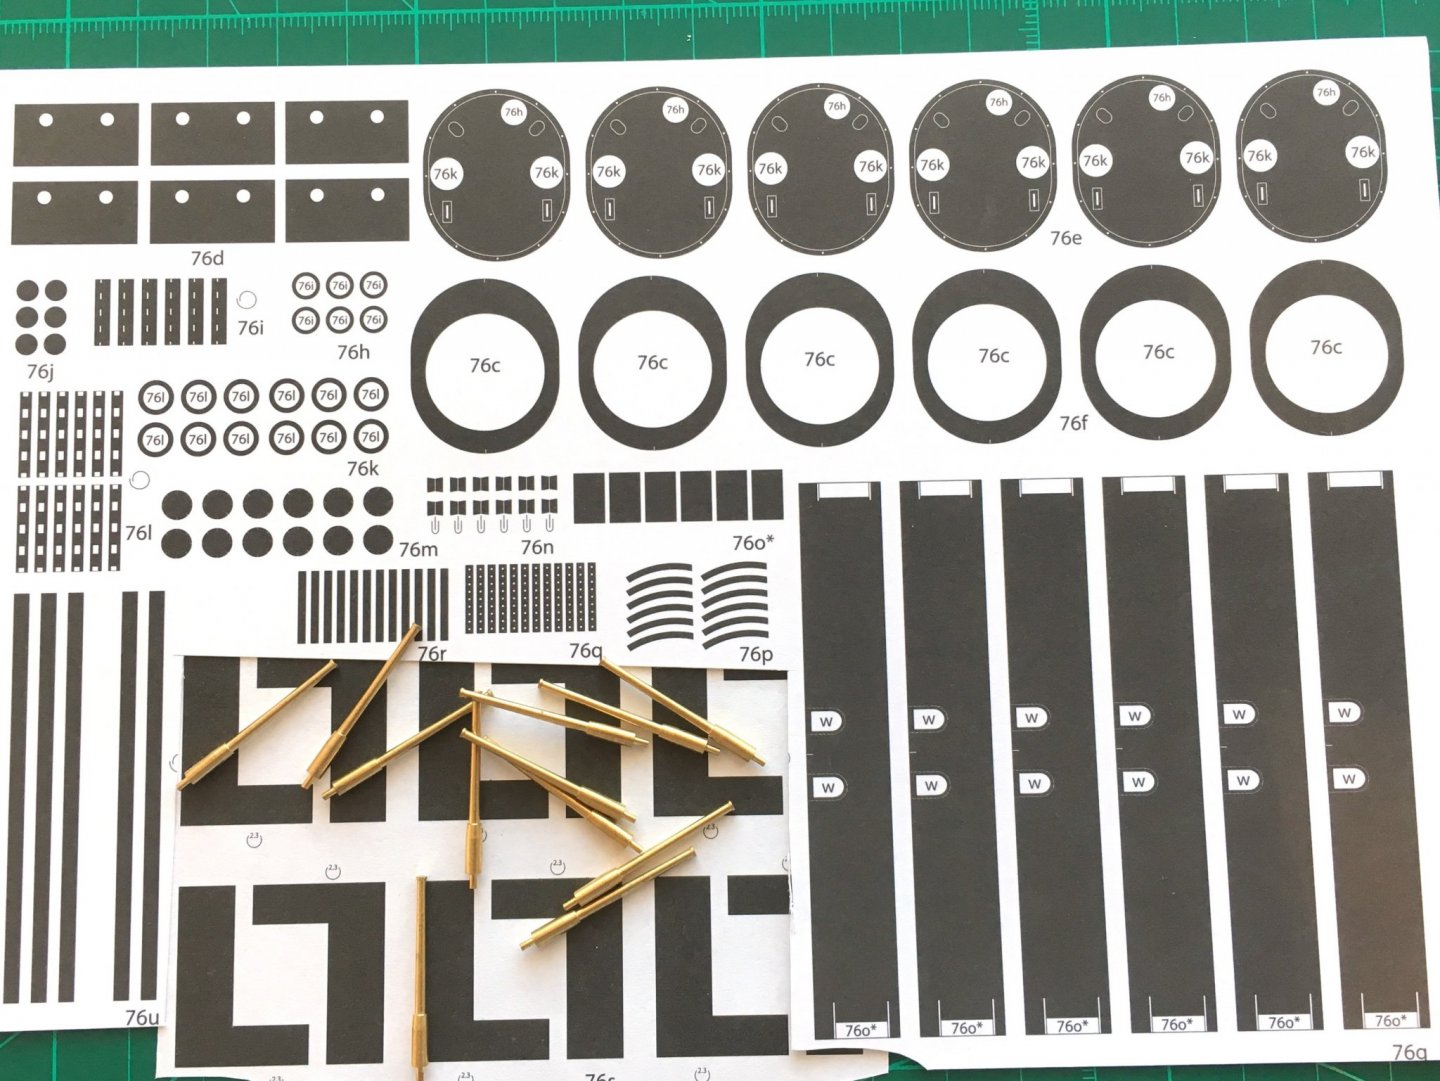
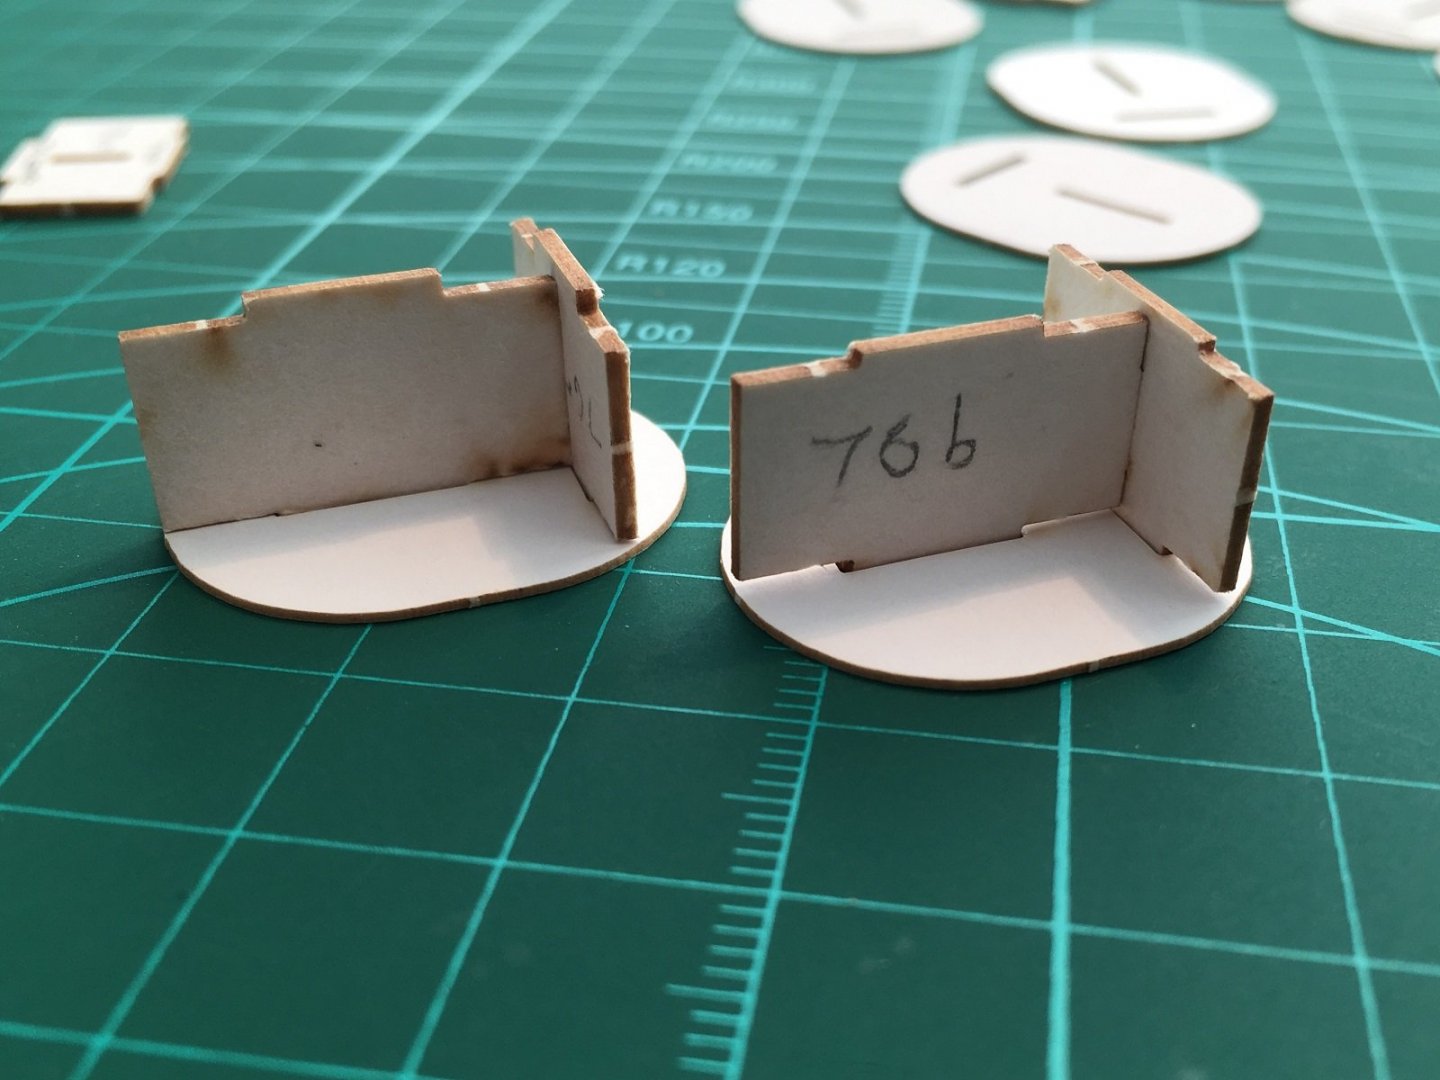
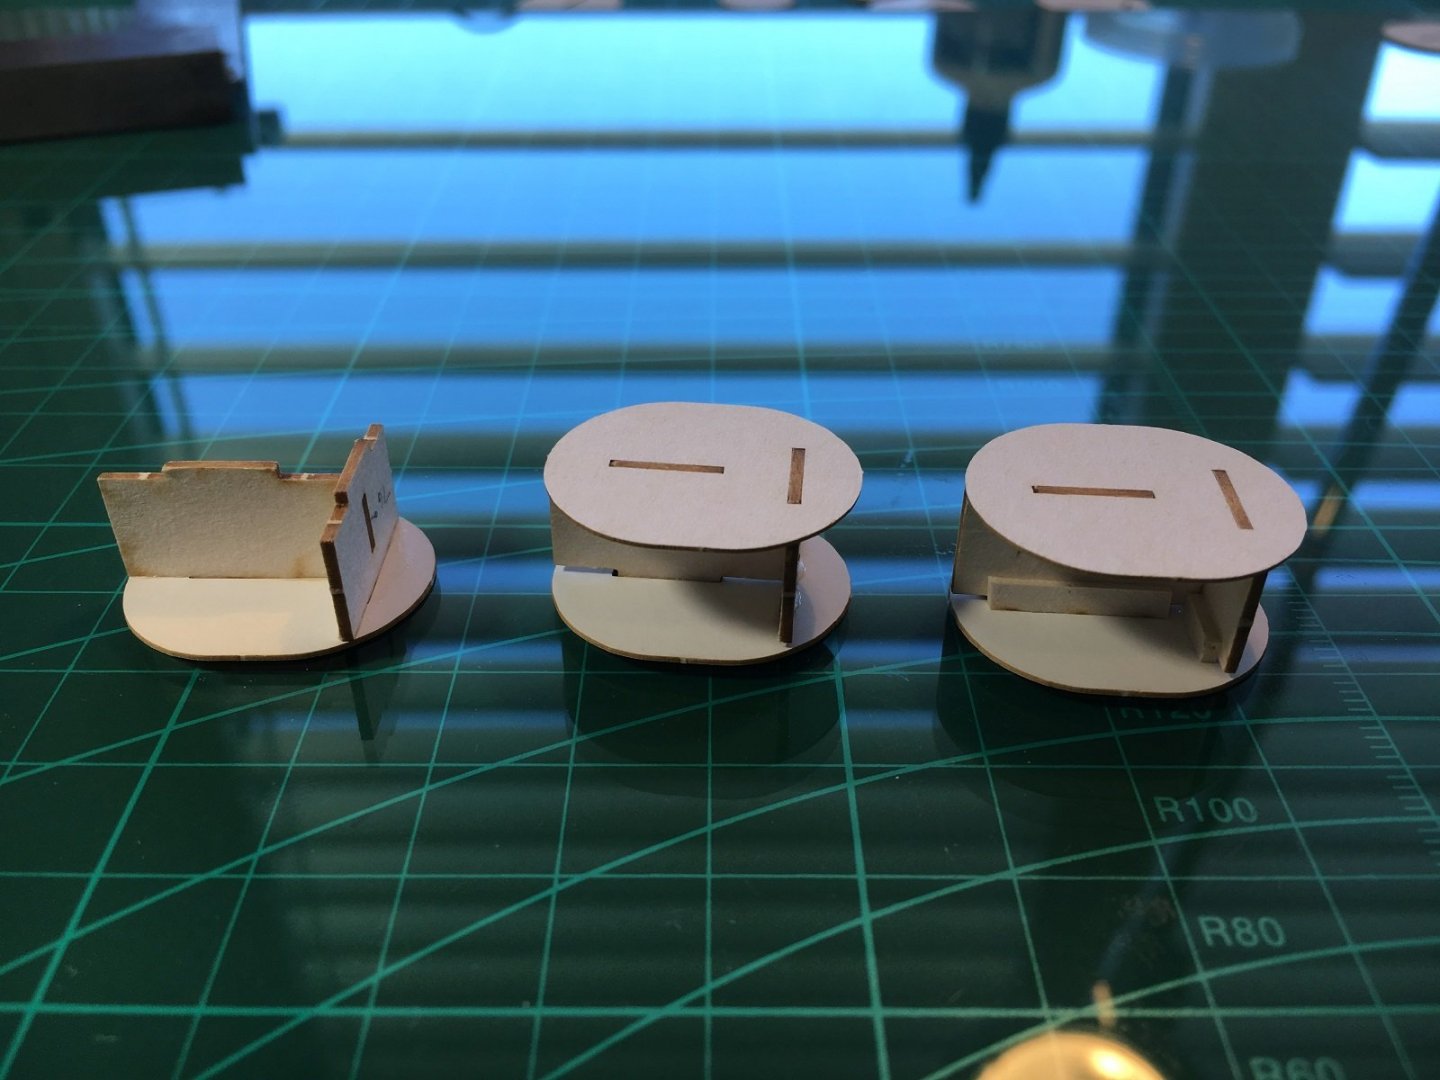
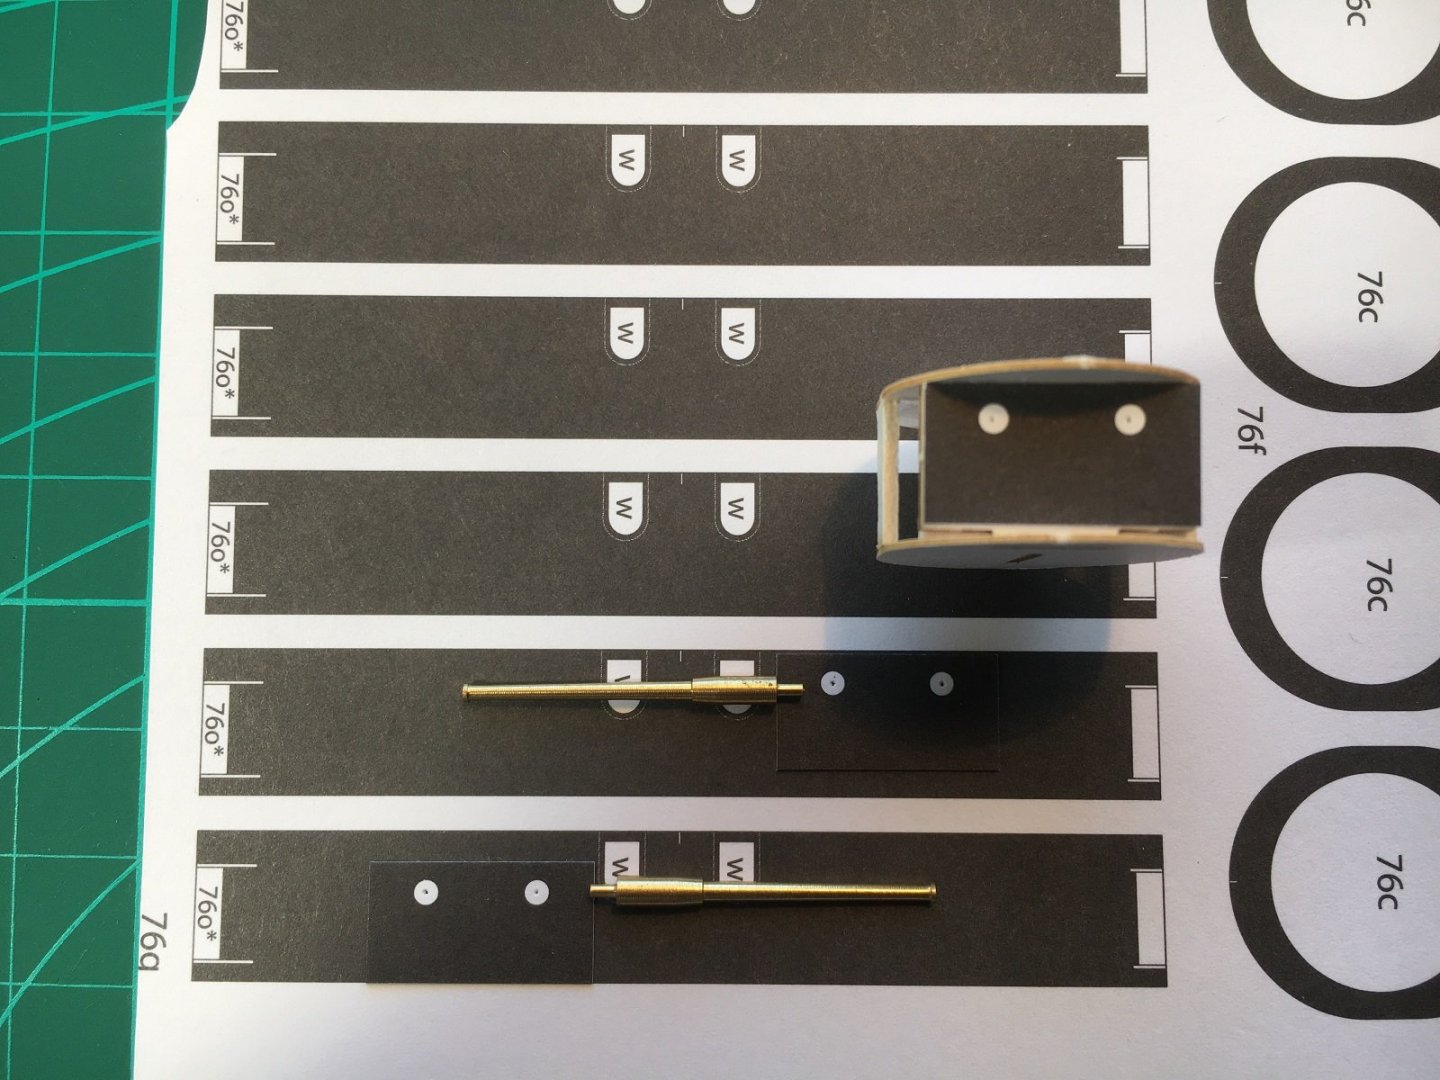
Hi all, Thanks for the likes. Thanks for the link Richmond, a lot of information to be found. The rigging is of particular interest also as the computer renders supplied in my kit isn’t very clear where they terminate. Since I enjoyed mocking up the LC funnels I decided I would do the 6 turrets for the 6” guns. Photo showing the paper parts and the brass barrels I will use. These are really nice as usual and match length of the paper part pretty closely. They also have an extra tang at the rear which will come in handy for fixing which I will show later. All the laser cut forms cut out and trimmed up. Did I previously say laser cut forms are a perfect fit? Perhaps I should have said usually, as discovered a problem with the shape if the internal walls. It would appear that parts 76a and 76b have been cut incorrectly on one side so that the tab fits perfectly in one horizontal surface and is flush with the outside as shown in the rear assembly. And on the other edge where it has too much removed the tab extends through as shown in the front assembly. The assembly on the left shows the how everything fits nicely on the side with the correct laser cutting and is all tight and on the right shows what happens if I keep the incorrect side tabs flush with the external surface. Also the flats have been cut to different lines so even if the tabs are pushed fully through the horizontal surface would be angled. Investigating further turns out I will need to assemble so that the tabs are flush on the external surfaces to keep the height of the turret correct for the side skins to fit. This will require some careful assembly to keep the top and bottom surfaces of the turret parallel. To make everything square and parallel I glued the turrets up in the following order. Firstly on the left I glued the correct fitting parts together. The middle one shows the previous part turned upside down and pressed through the horizontal panel using the glass to stop the tabs going too far through. The assembly on the right shows some scrap glued in to strengthen the walls since the only contact is with the tabs. I glued in some scrap on the flat sides to help with handling and to keep the top and bottom parallel when gluing on the skins. I also put extra thickness of support on both sides of the rear wall as this is where the skin joins. Okay the incorrect cut Laser forms has really caught me out. I thought I had done enough pre-assembly checks to know where I am at. But when I came to fit the back plate for the guns I noticed it was considerably shorter at first needed to work out if I should hold it up to the roof or down to the floor. The roof is the way to go placing the barrels nicely in the openings. Also can see the tang of the barrel which will hold it nicely in place once I drill a hole; already marked on the back plate. The side skins should just about fit by leaving off the under turret skin (number 76c shown on the right of the photo) so not a total disaster. The tang on the rear of the barrel is 1mm so drilling a 0.9mm gives the barrels a snug fit. I will probably use epoxy glue when ready to permanently install. The barrels were sprayed with Tamiya NATO Black Next up is to cut out and fit all the skins and detail parts. Cheers Slog


- 244 replies
-
- 8
-
-
- borodino
- dom bumagi
- (and 1 more)
-
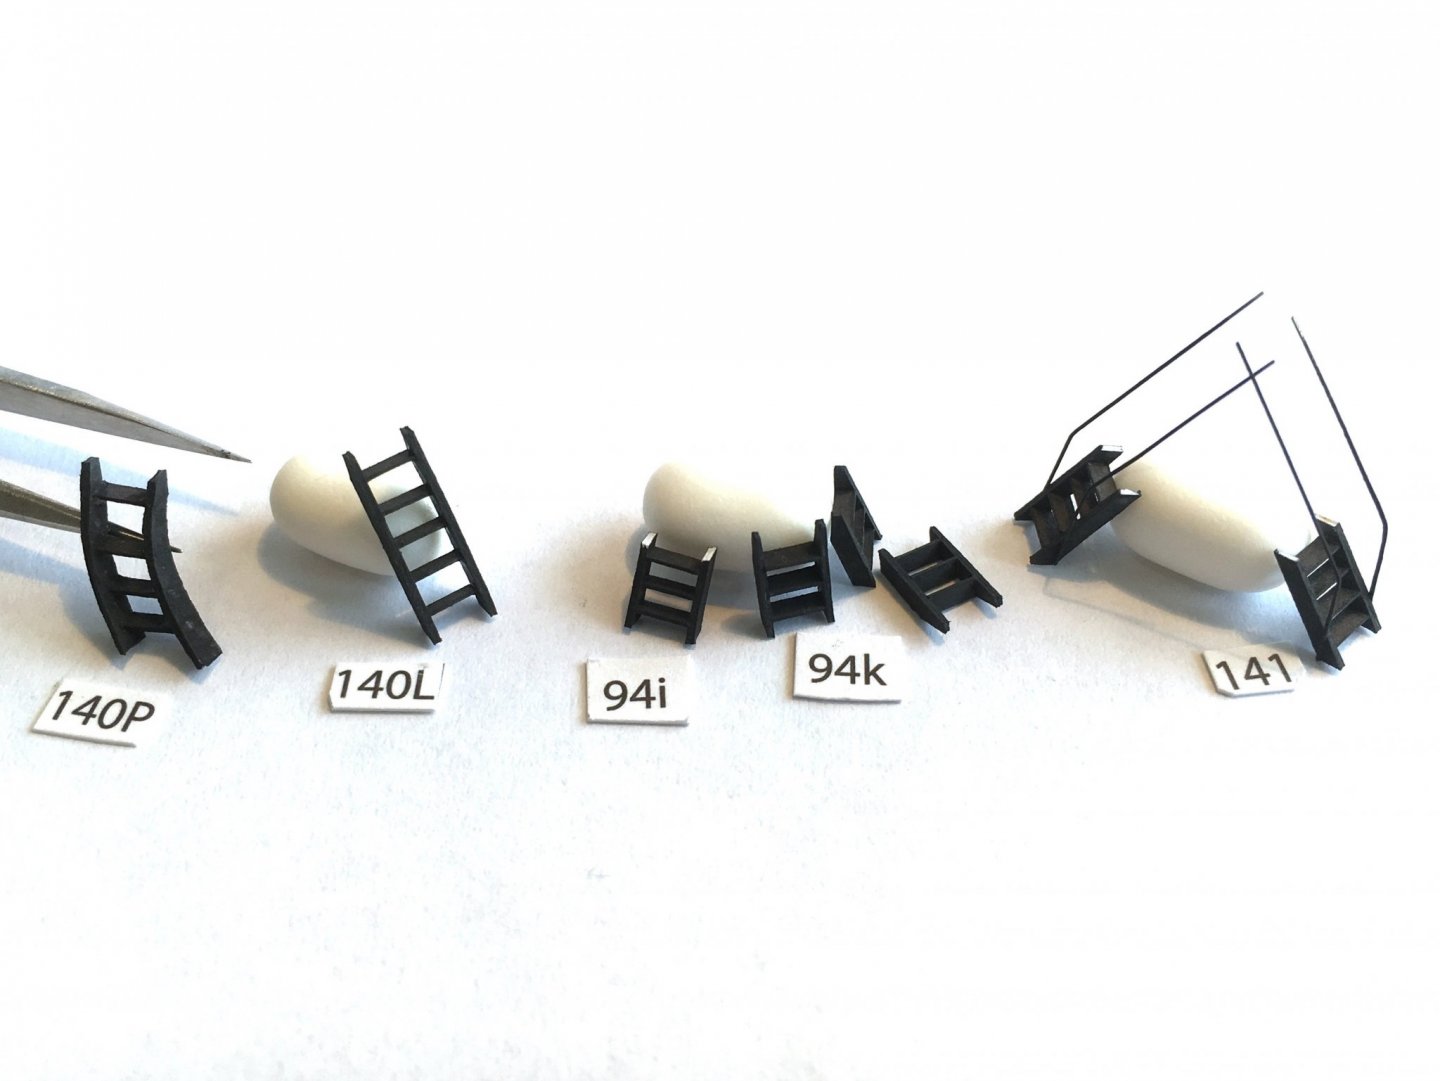
Hi All, Thanks for all the likes and comments. Well back in Perth for the Christmas break and first off made all the ladders in preparation for fitting the boat decks and central walkways. Made a mess of the curved ladder 140P but will get lost in the clutter so not too bothered. The fore and aft boat decks went on easily enough after careful positioning and the gratings glued into place. I trimmed a section off the fore handrails where they clashed with the central walkway (not in place yet). Before fitting the central walkway I wanted to check that I wouldn’t encounter any clashes with the funnel so made up the laser cut forms without glue. I really enjoy using the LC forms as the fit is perfect. Since I enjoyed assembling the rear funnel I made the fore one as well and placed to see the effect. These will add another splash of colour being yellow. For some reason I always imagined them to be a lot bigger than they are. Central walkway in place and now time to place all the ladders. I am guessing these go here as don’t mention or show in the diagrams. Small one from the central walkway to the rear boat deck. Ladders from ‘wings’ down to the main deck. And finally an overhead shot of the boat decks and central walkway…dodgy curved ladder can be seen, oh well. I have a couple more ladders to do I think but can't find any mention of them in the diagrams so will go through the parts sheets and see if anything jumps out. But a bit over the ladders now so no rush. Still got to after the new year before heading off so not sure what to work on now. I might do all the little bits and pieces next or get stuck in to the last of the larger stuff. Not really feeling it for the ships boats yet. Cheers Slog


- 244 replies
-
- 11
-
-
- borodino
- dom bumagi
- (and 1 more)
-
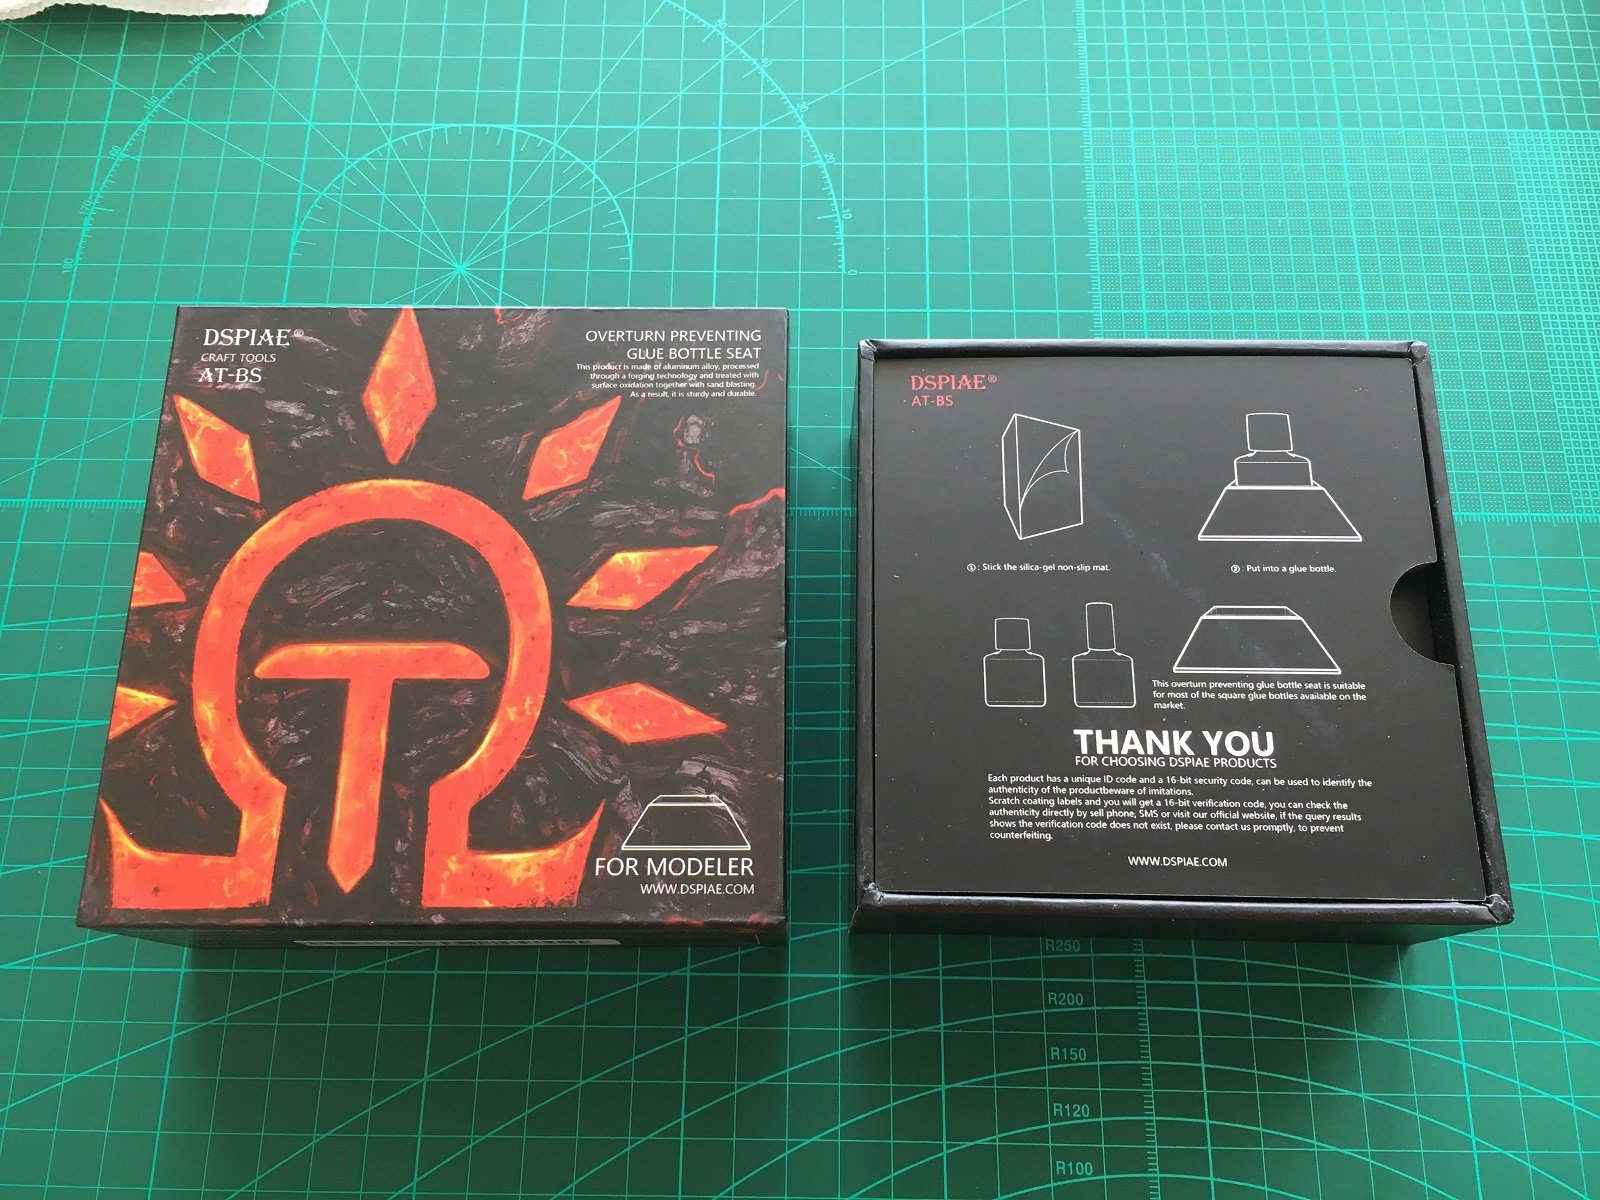
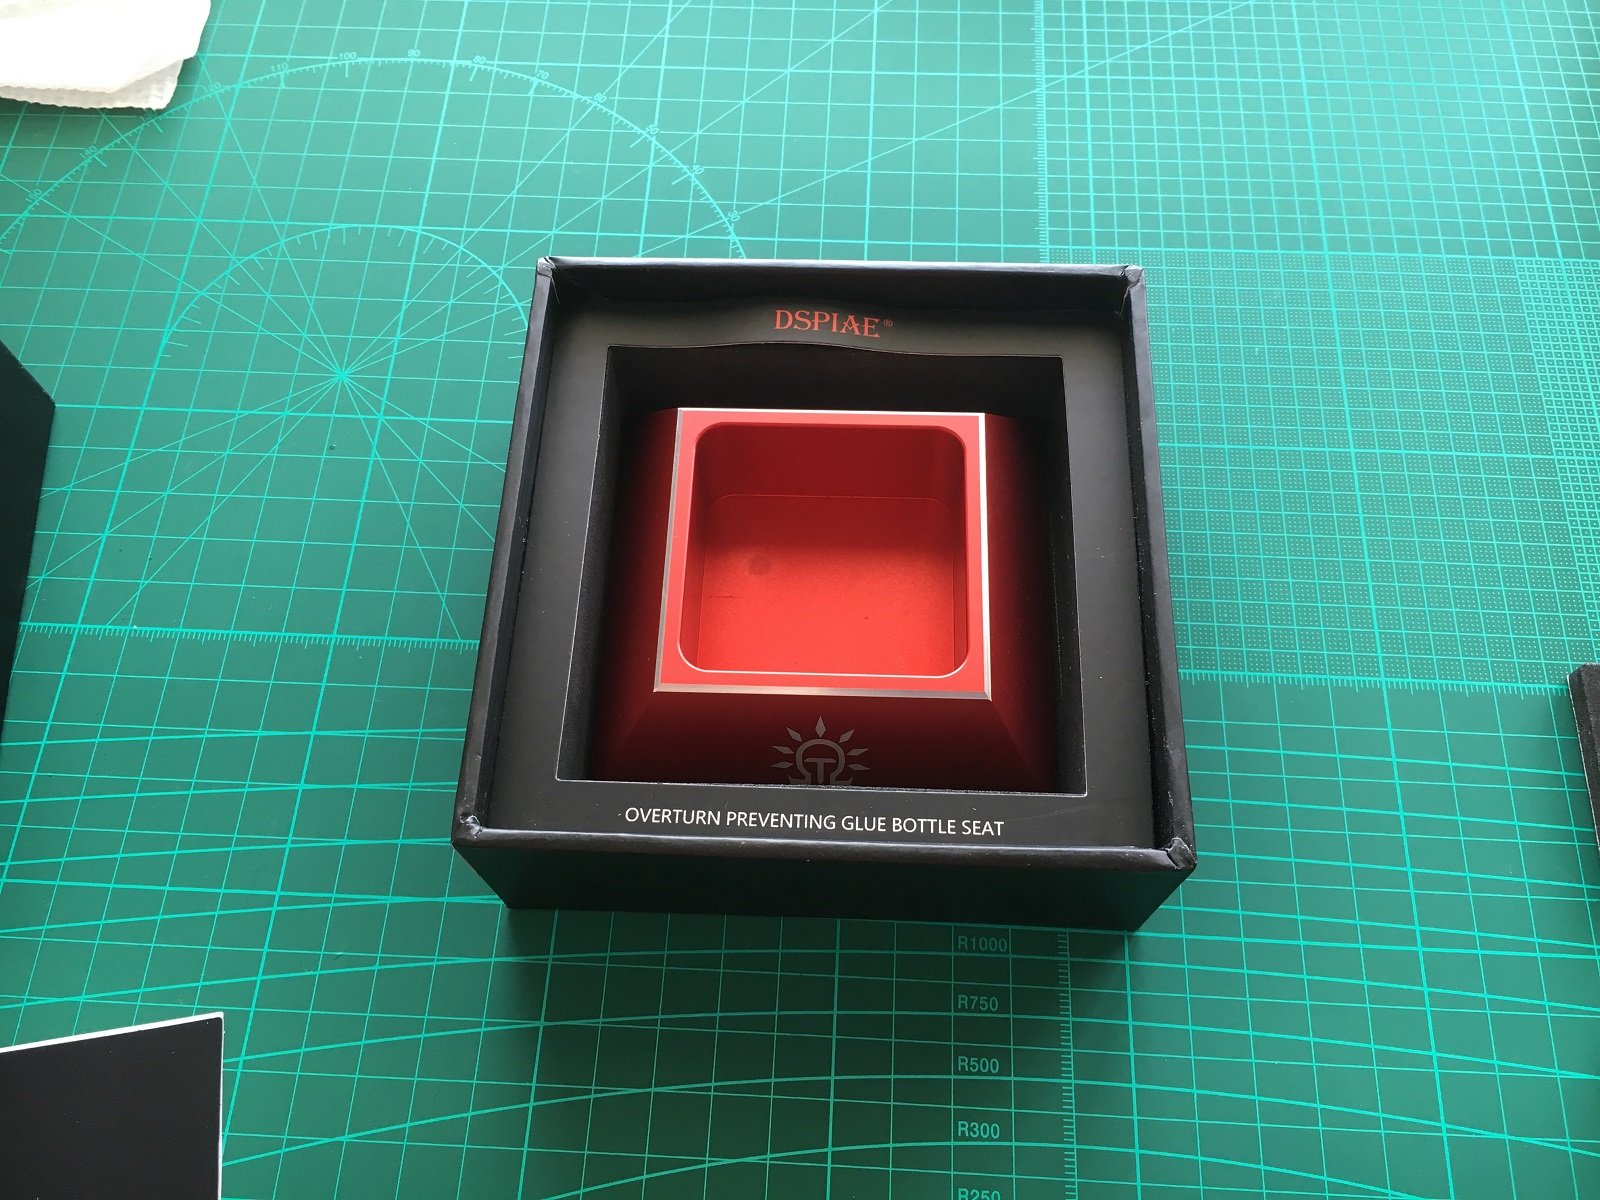
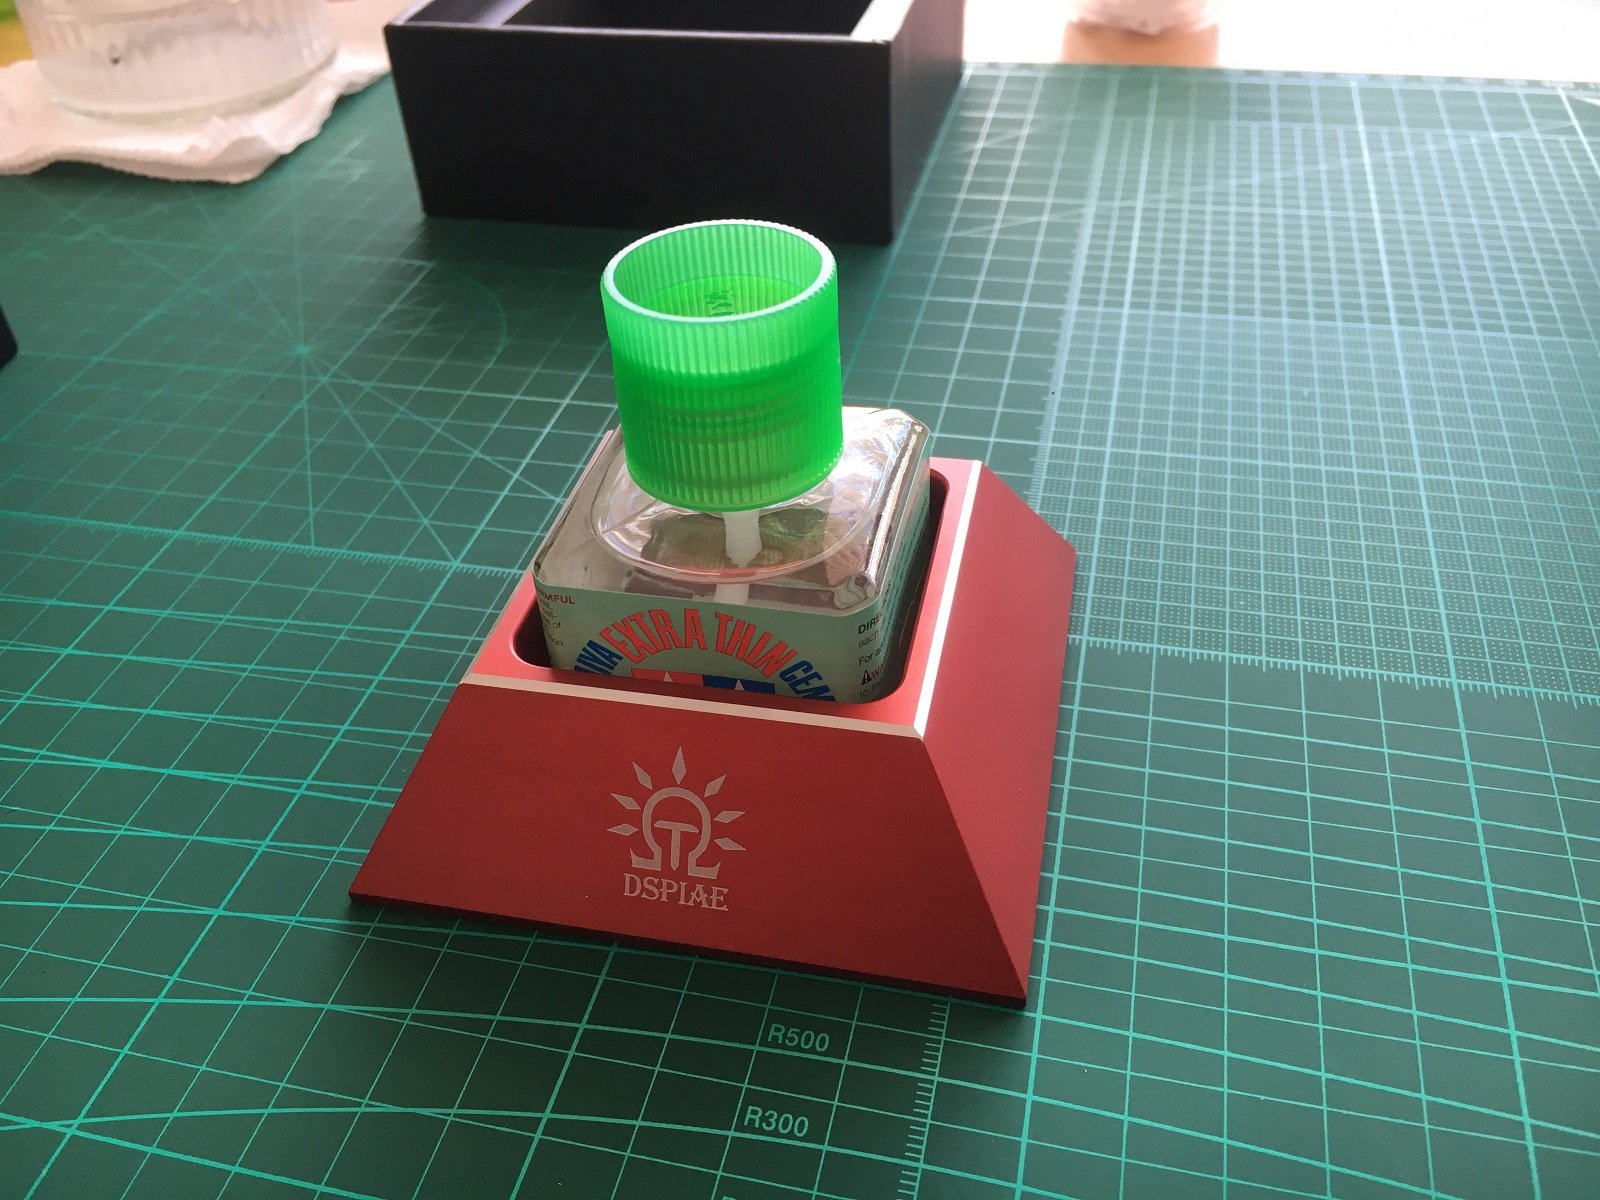
Although I only have one plastic kit under my belt since my return to modelling I have came close to knocking over the Tamiya Extra Thin glue a couple of times narrowly avoiding destroying my cutting mat, which prompted the purchase below. I really like the Dspiae products and think they have found a niche, providing well engineered products with quality packaging that Apple would be proud of. The glue bottle holder comes in a nice solid thick walled box (although mine looks like its well travelled!), with an internal lid with a Thank you and some basic instructions. The lid has high density foam on the underside which is handy for rolling photo etch and paper parts into curves. Bonus! The box holds the glue bottle holder and underneath is a sheet of very thin self-adhesive plastic like material (but behaves like rubber) which is required to be stuck on the bottom providing a great deal of slip resistance when placed on a cutting mat. Rubber stuck on the base and a bottle of glue inserted. There is a fair bit of space round the Tamiya bottle but bear in mind this is designed for other manufacturer’s products such as Mr Hobby, Ammo etc who have all seemed to go down the square glass bottle route. Is it worth the A$30 it cost? Not really as there are dozens of zero cost DIY options such as hacking a square in a block of foam or making it from card etc.; but to me Yes it is worth it. Who doesn’t love a chunk of beautifully machined and red anodised aluminium doing nothing more than holding a bottle of glue. I smile to myself whenever I look at its extravagance. Cheers Slog


-
Hi Richmond, another build off to a great start. I look forward to seeing more. Cheers Slog
- 6 replies
-
- 1
-
-
- revell
- harbour tug boat
- (and 2 more)
-
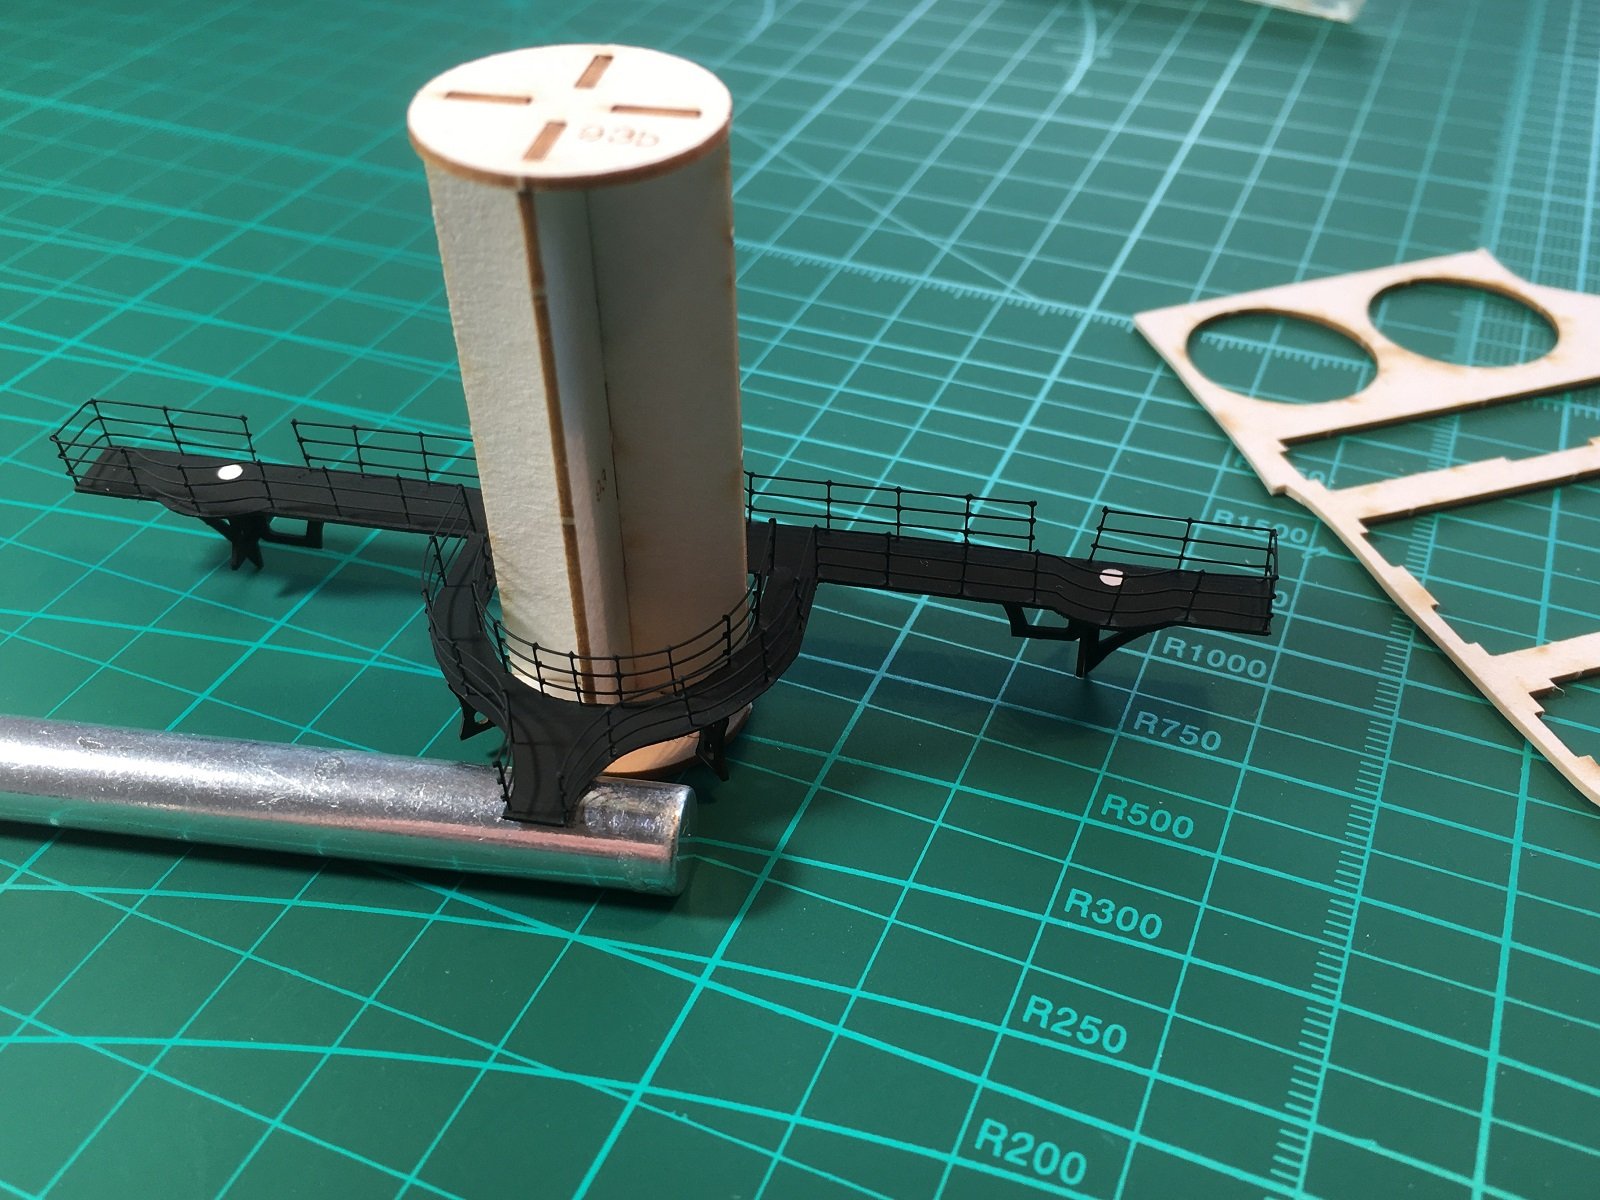
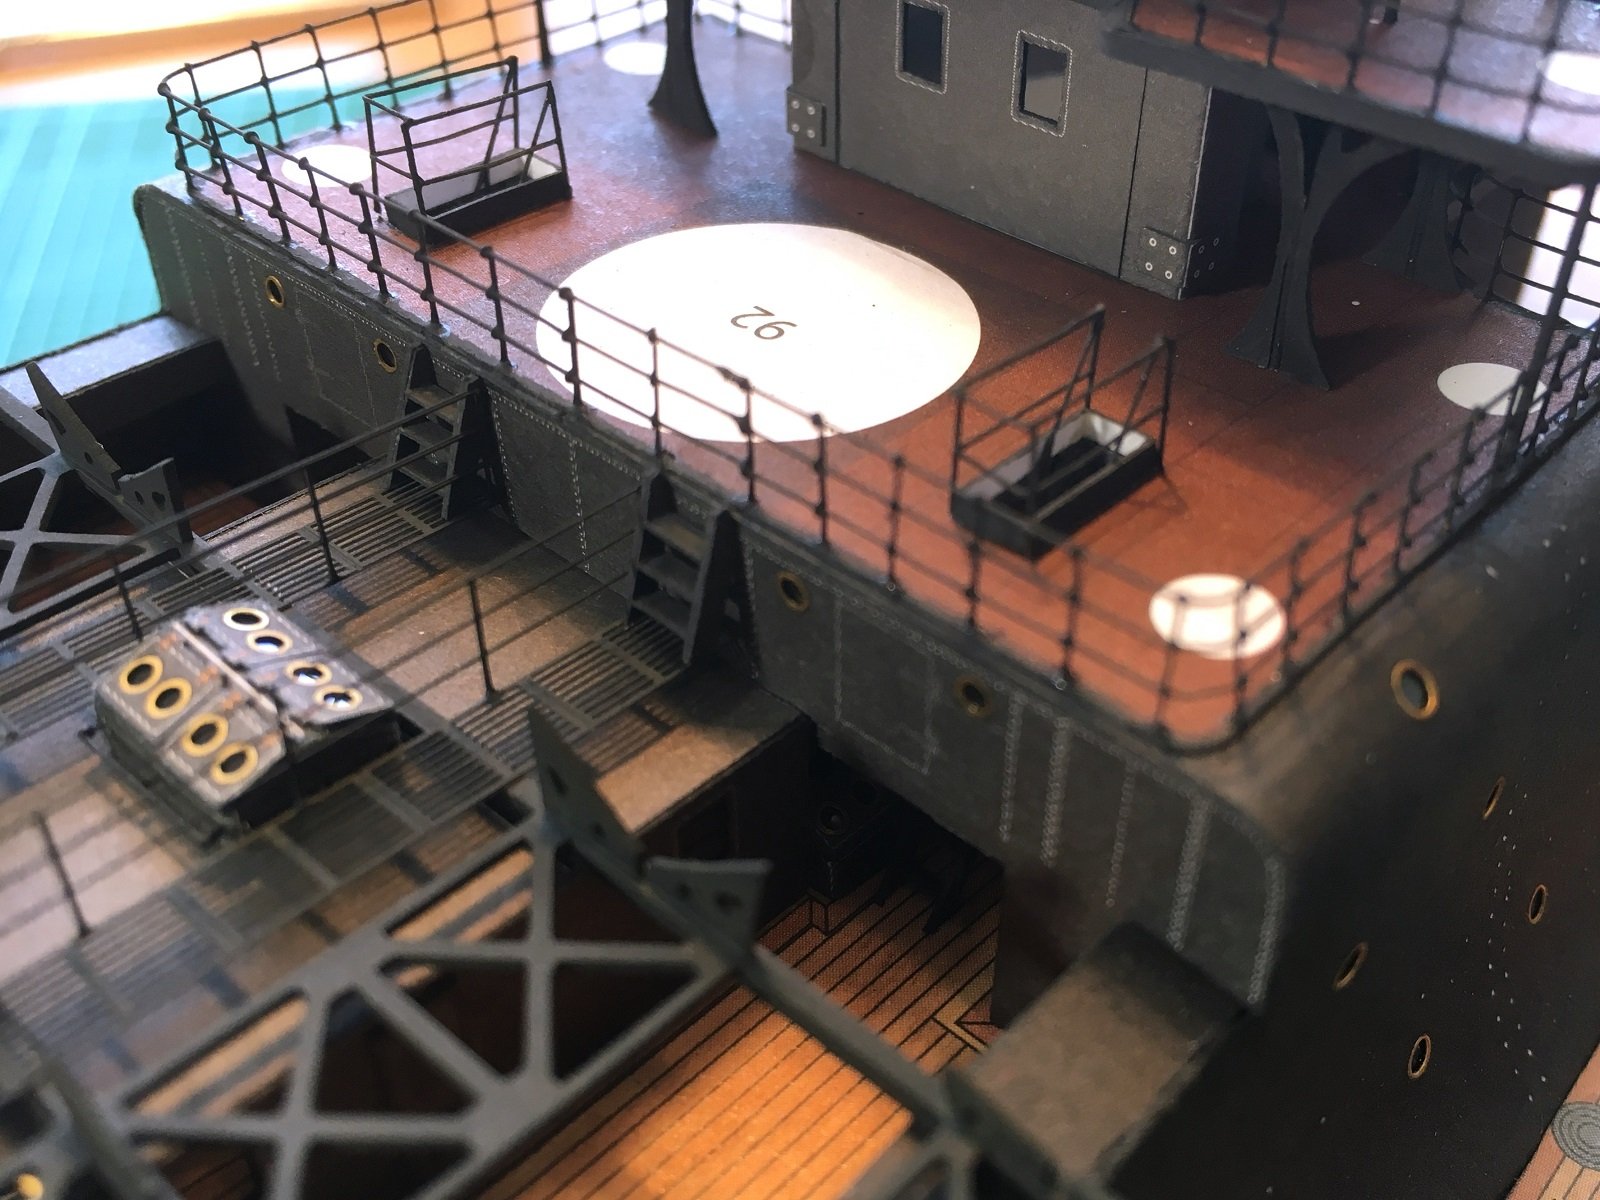
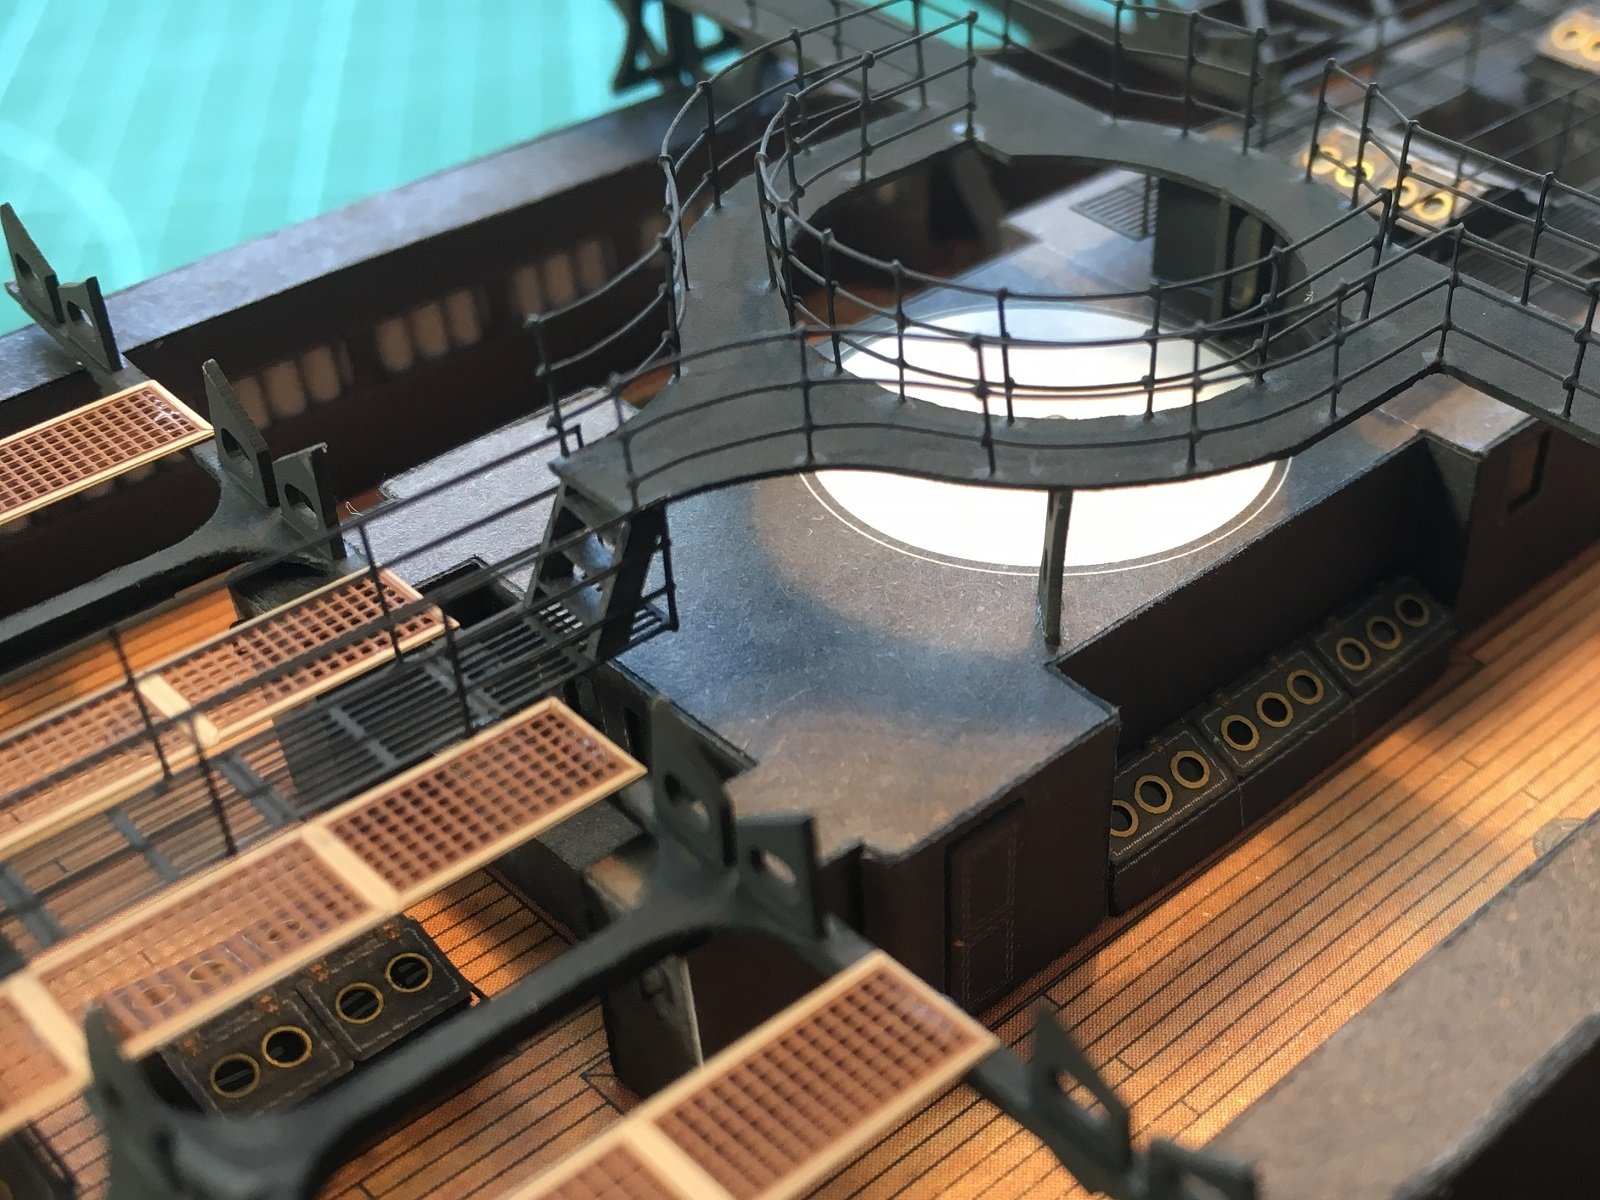
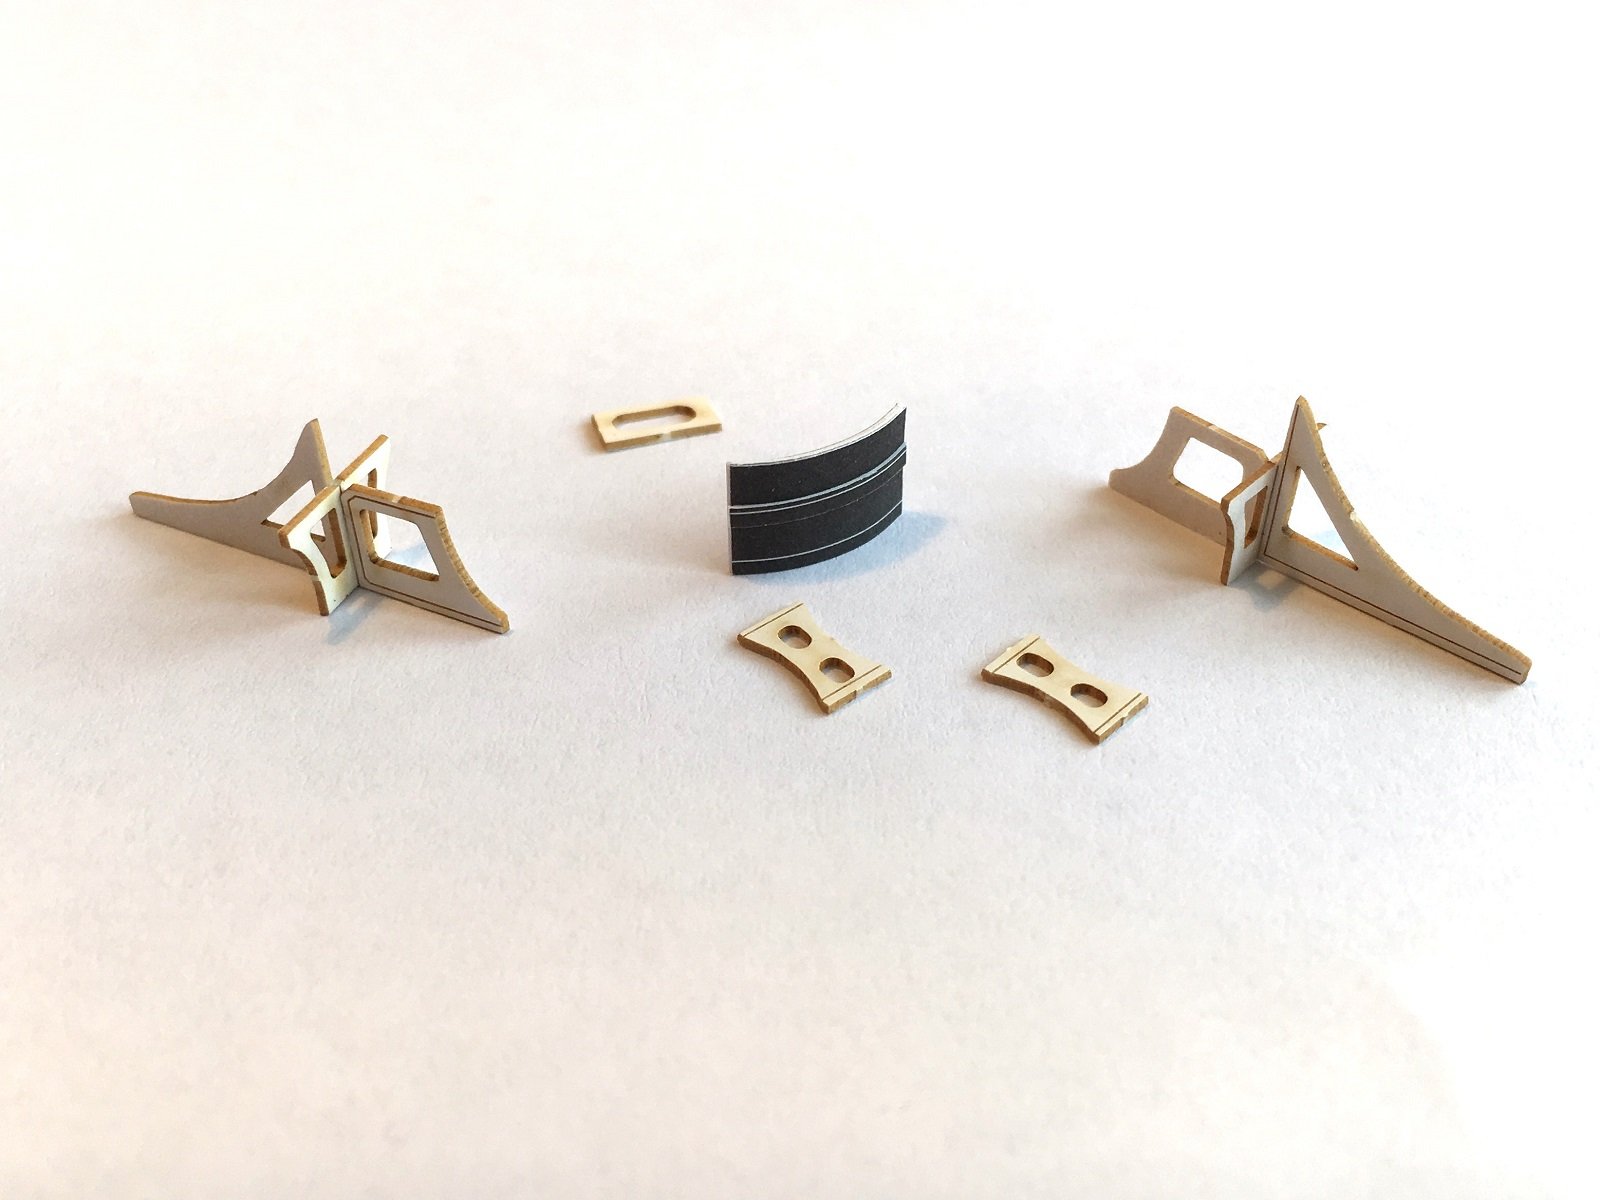
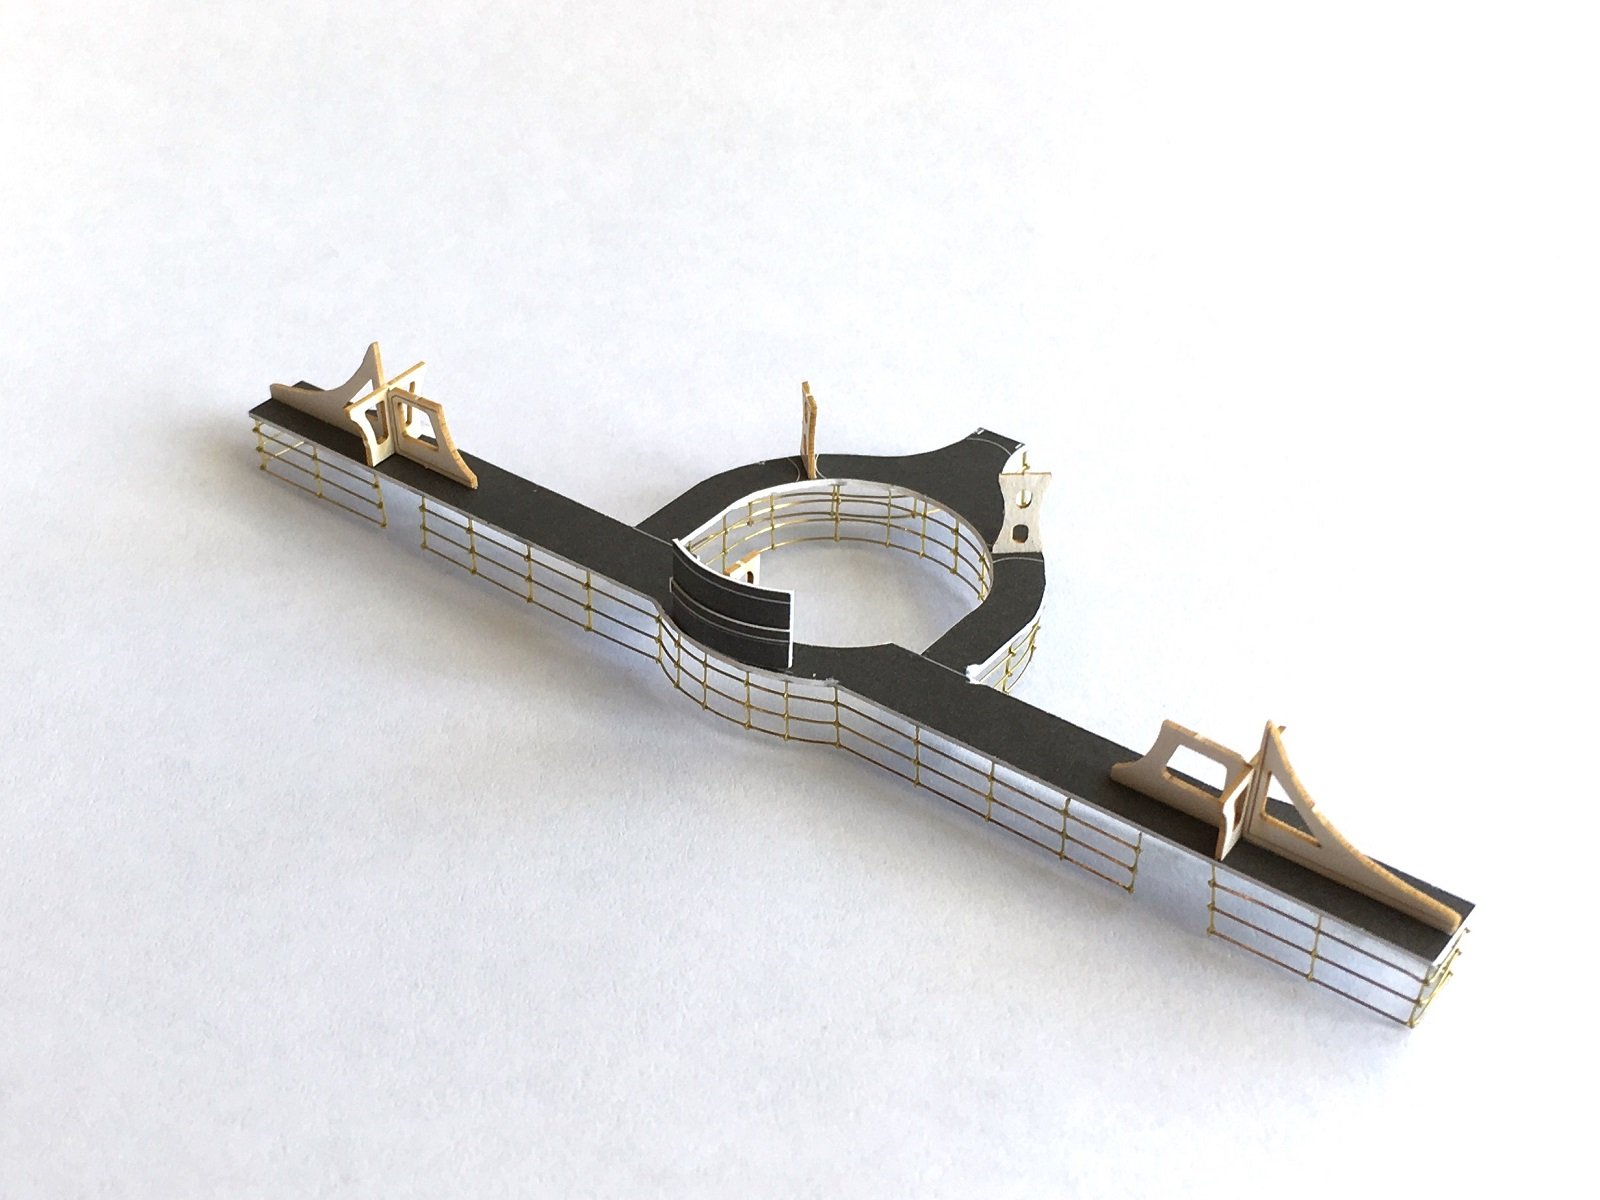
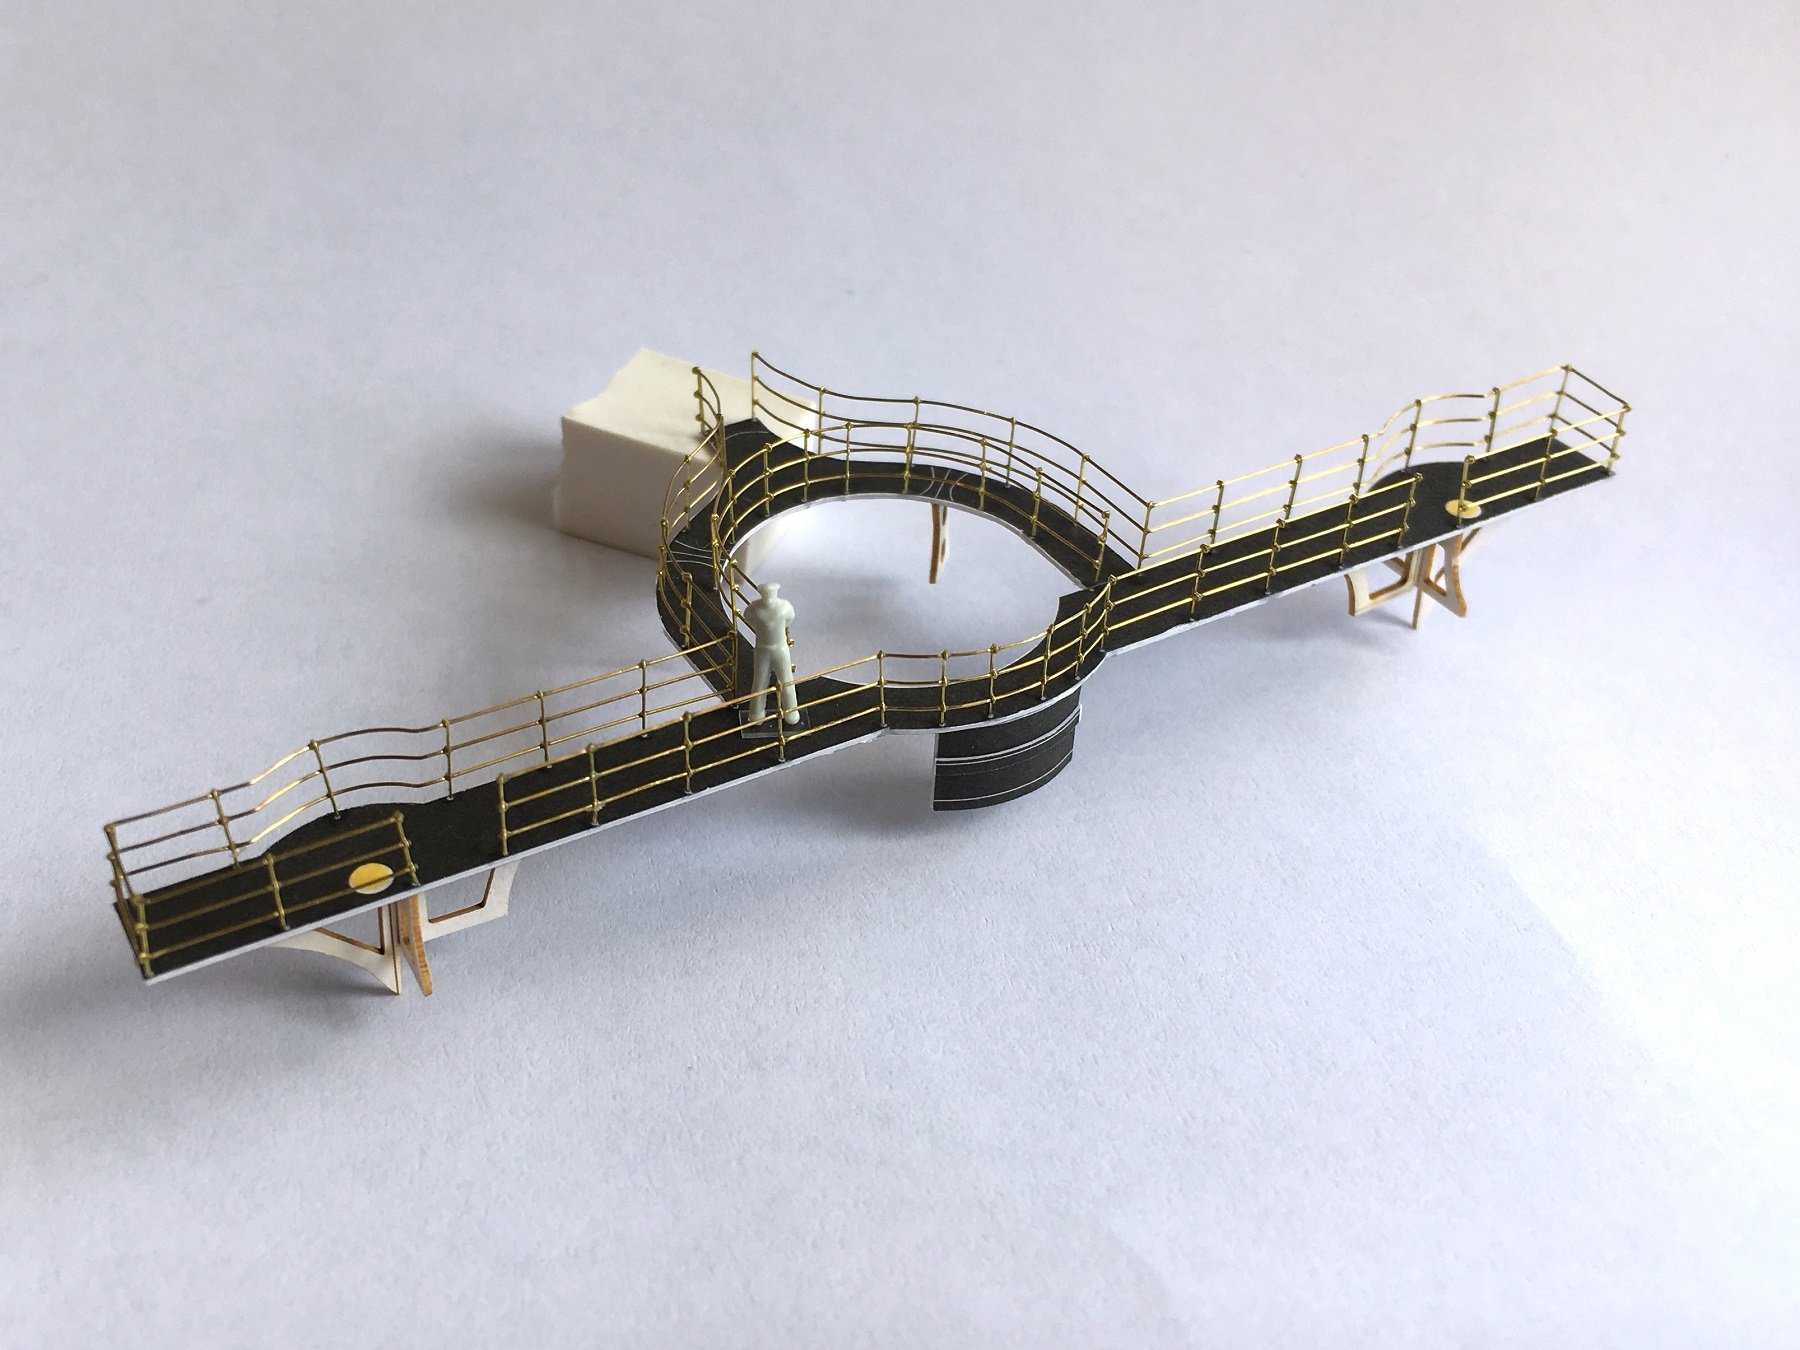
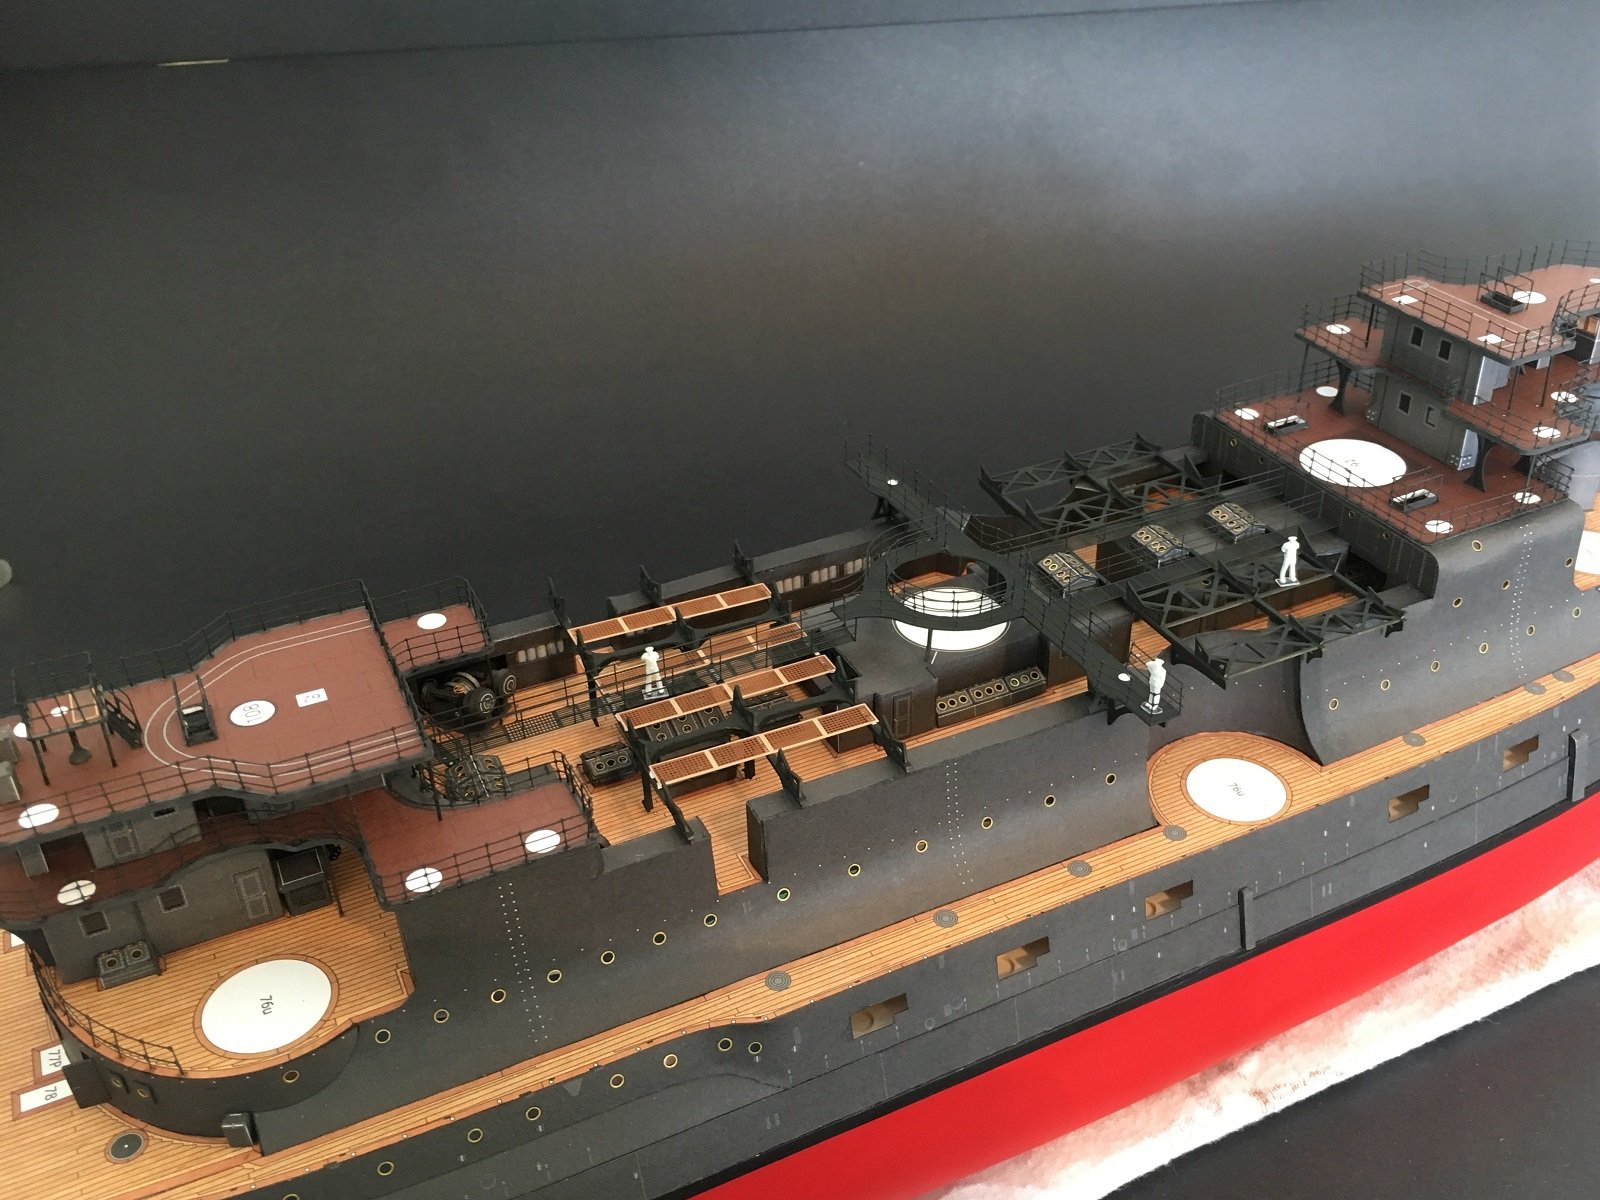
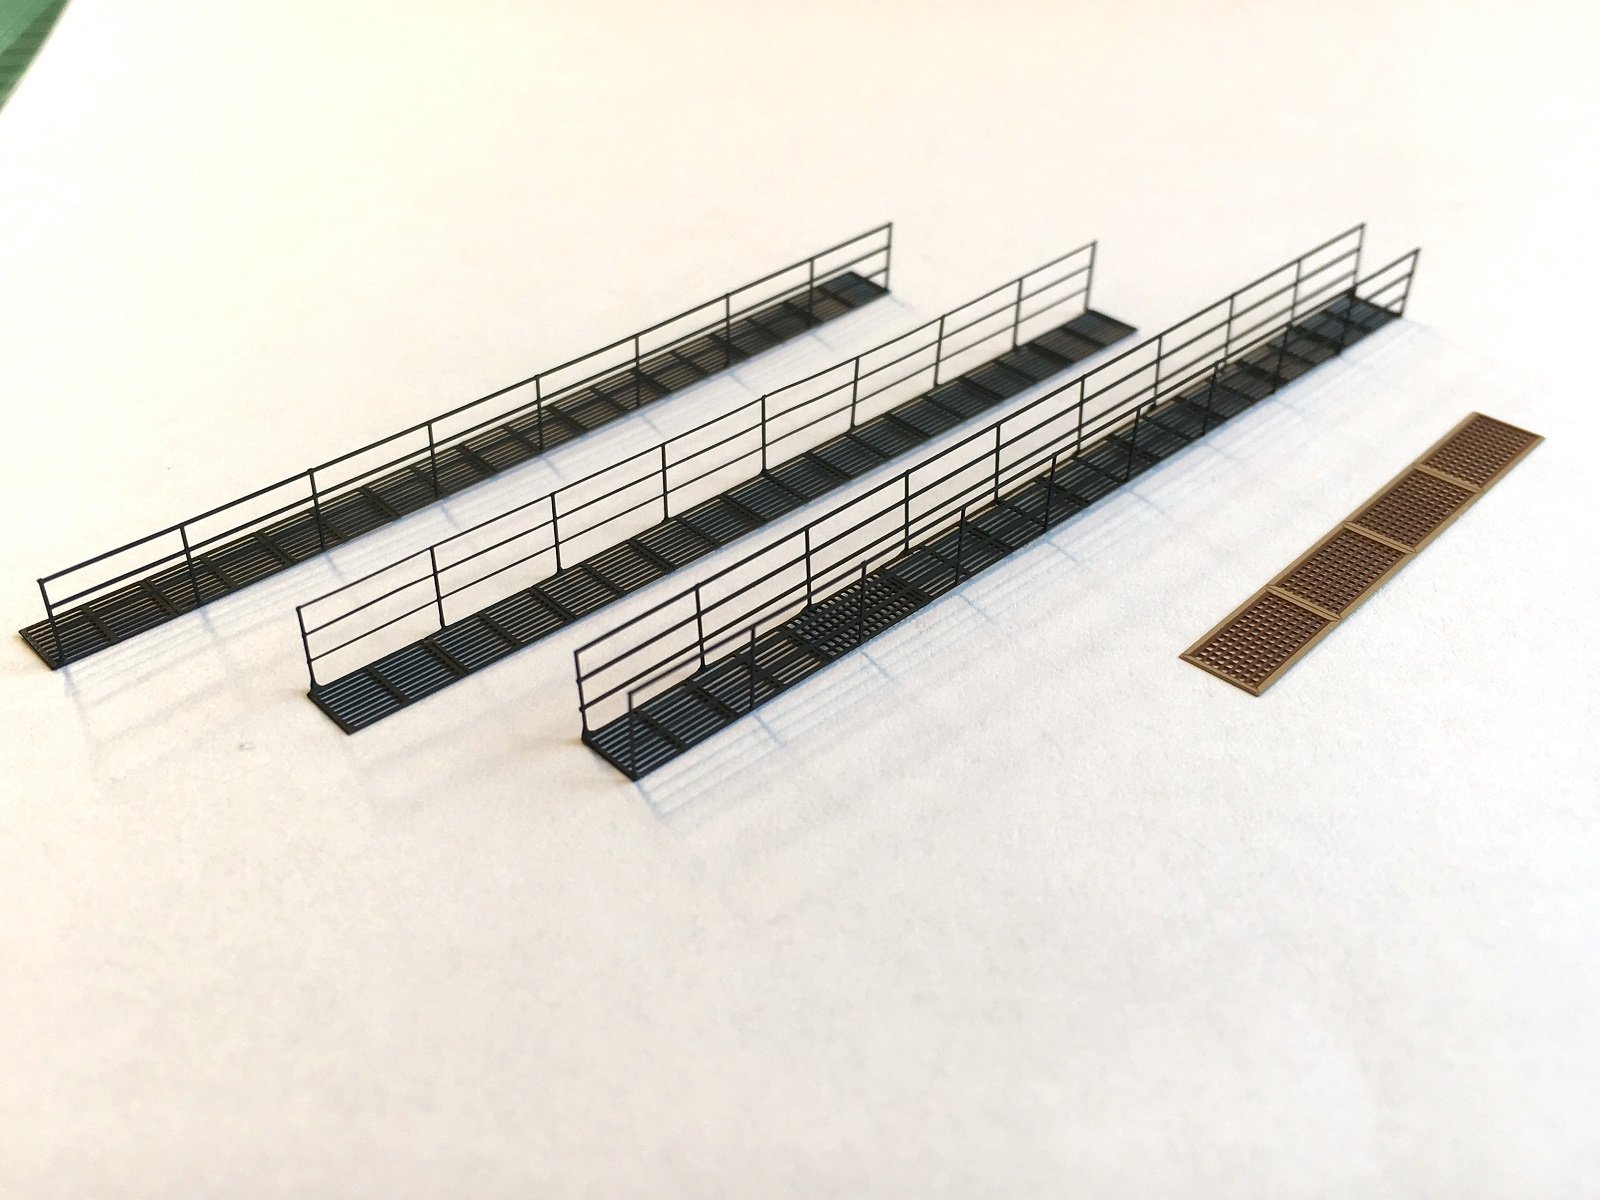
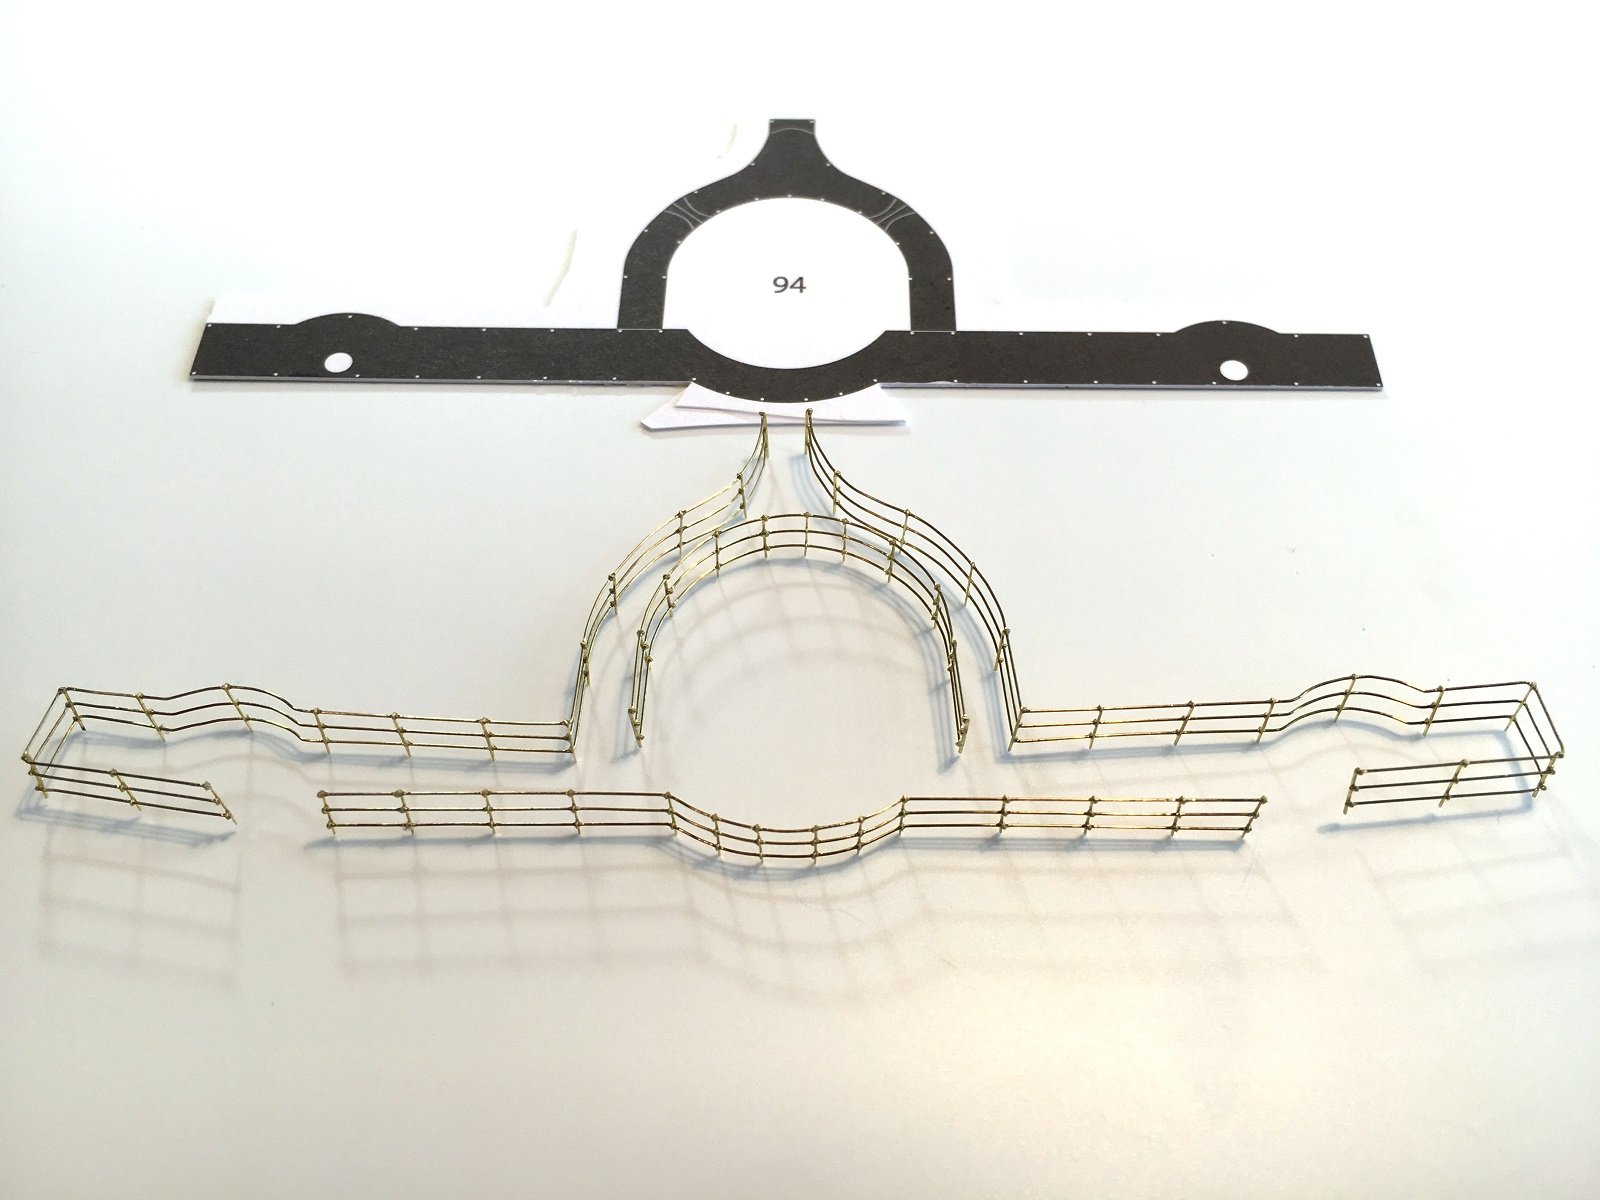
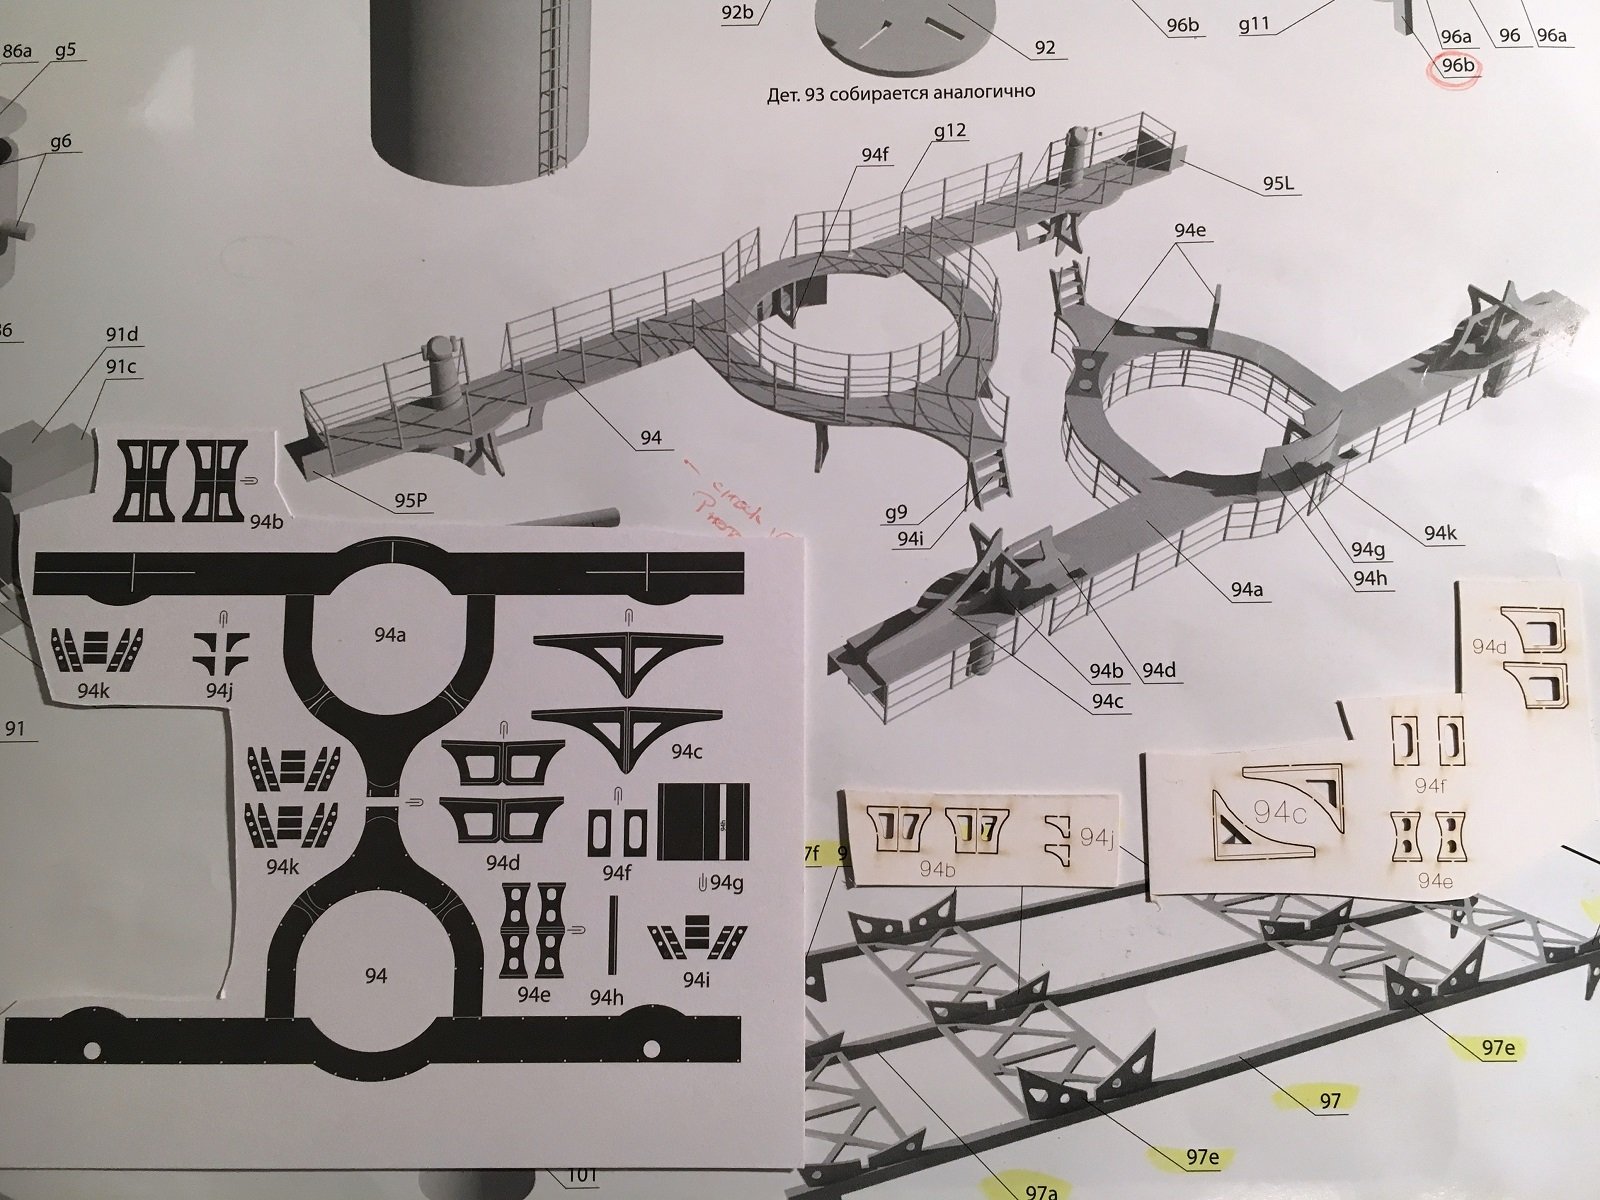
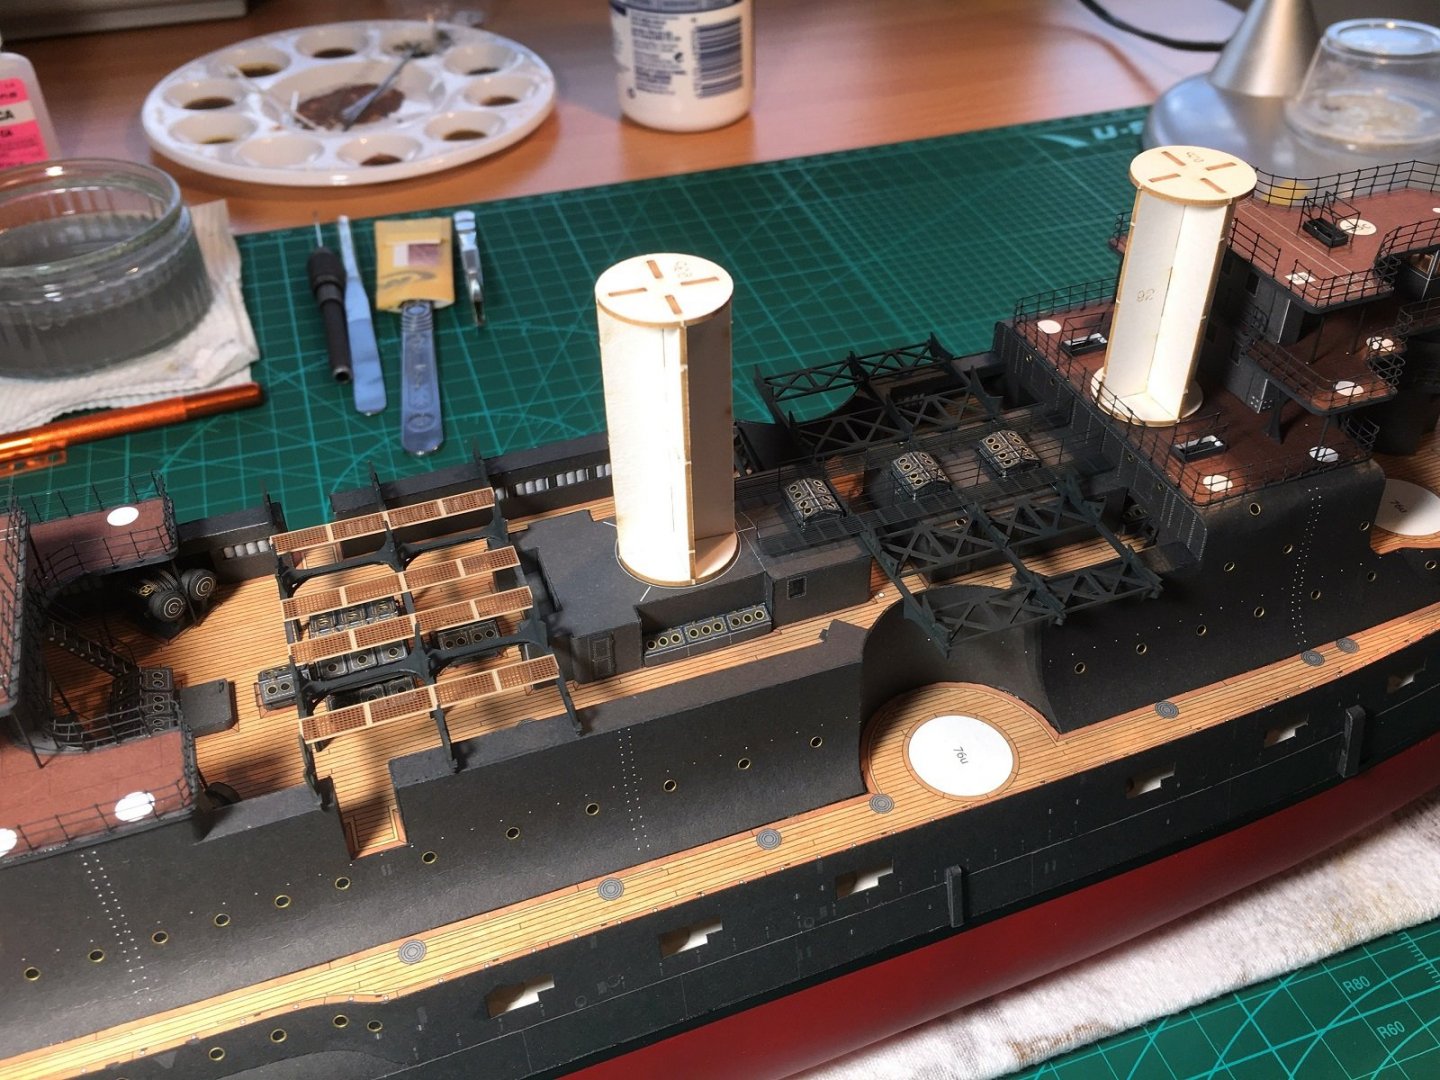
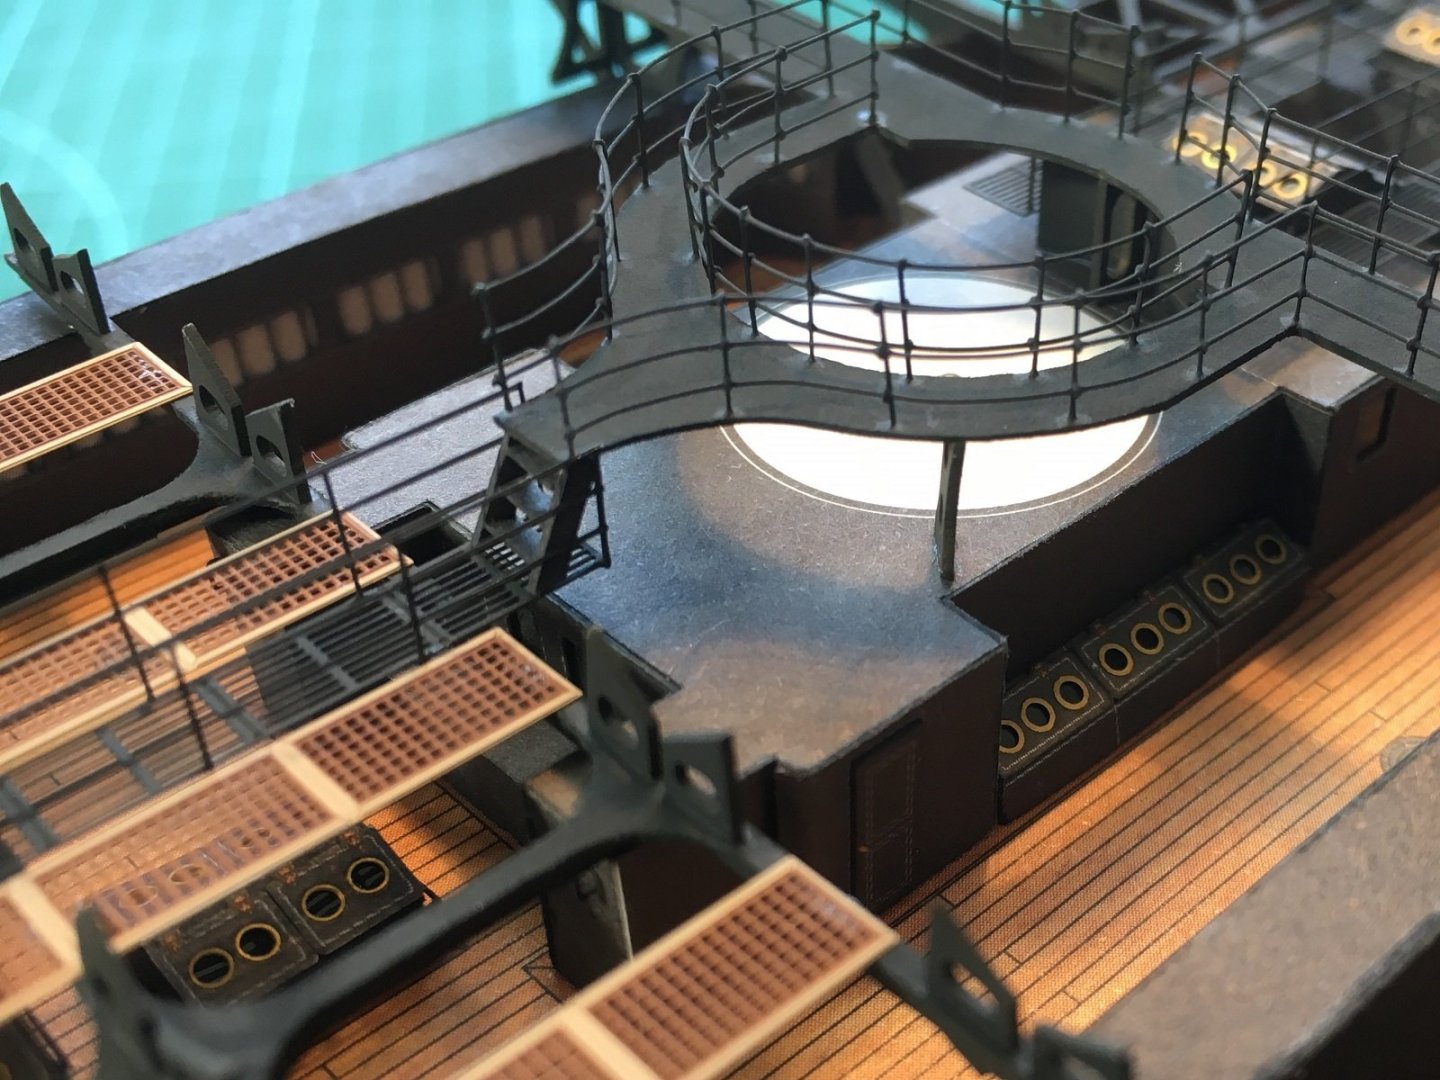
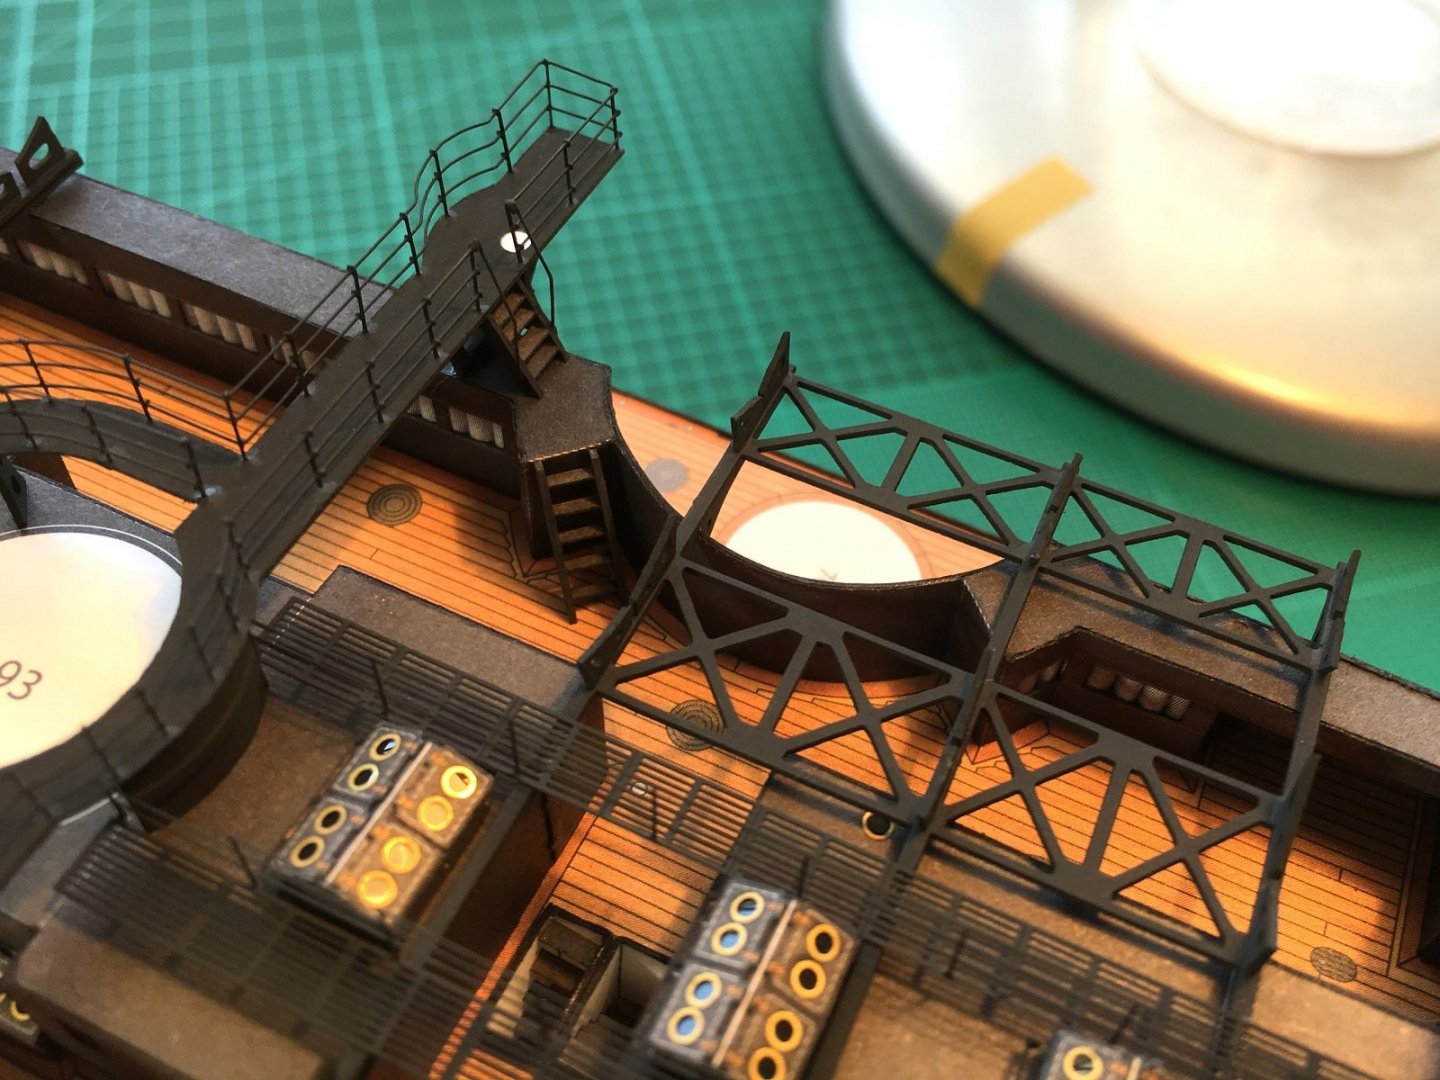
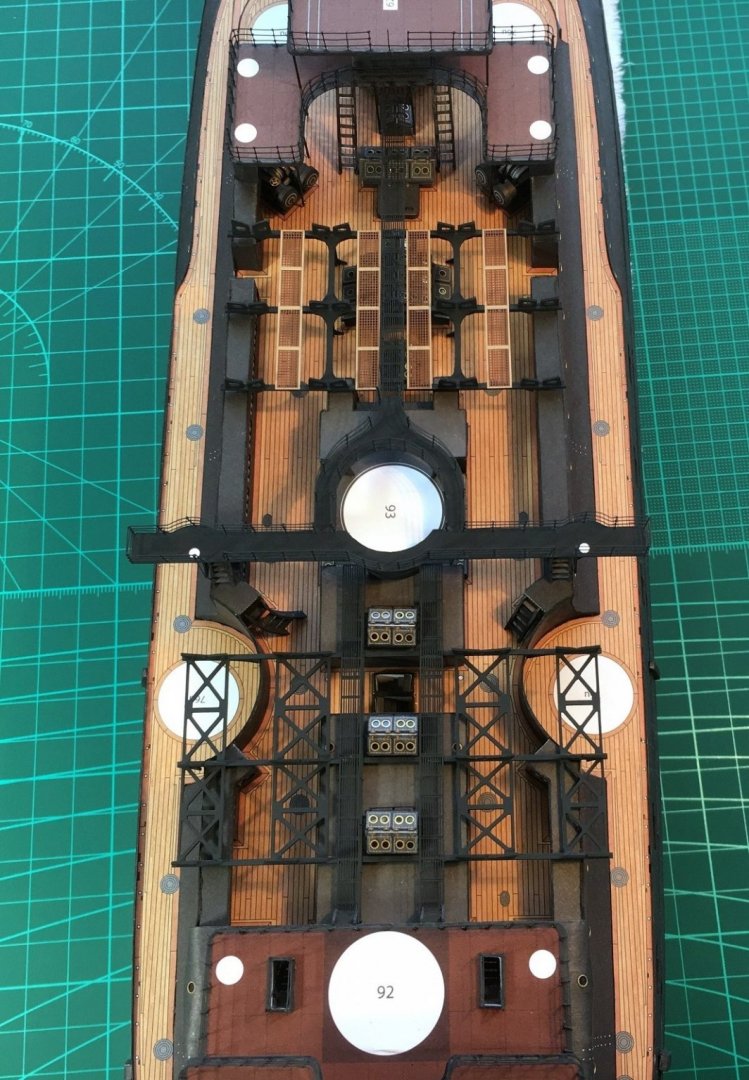
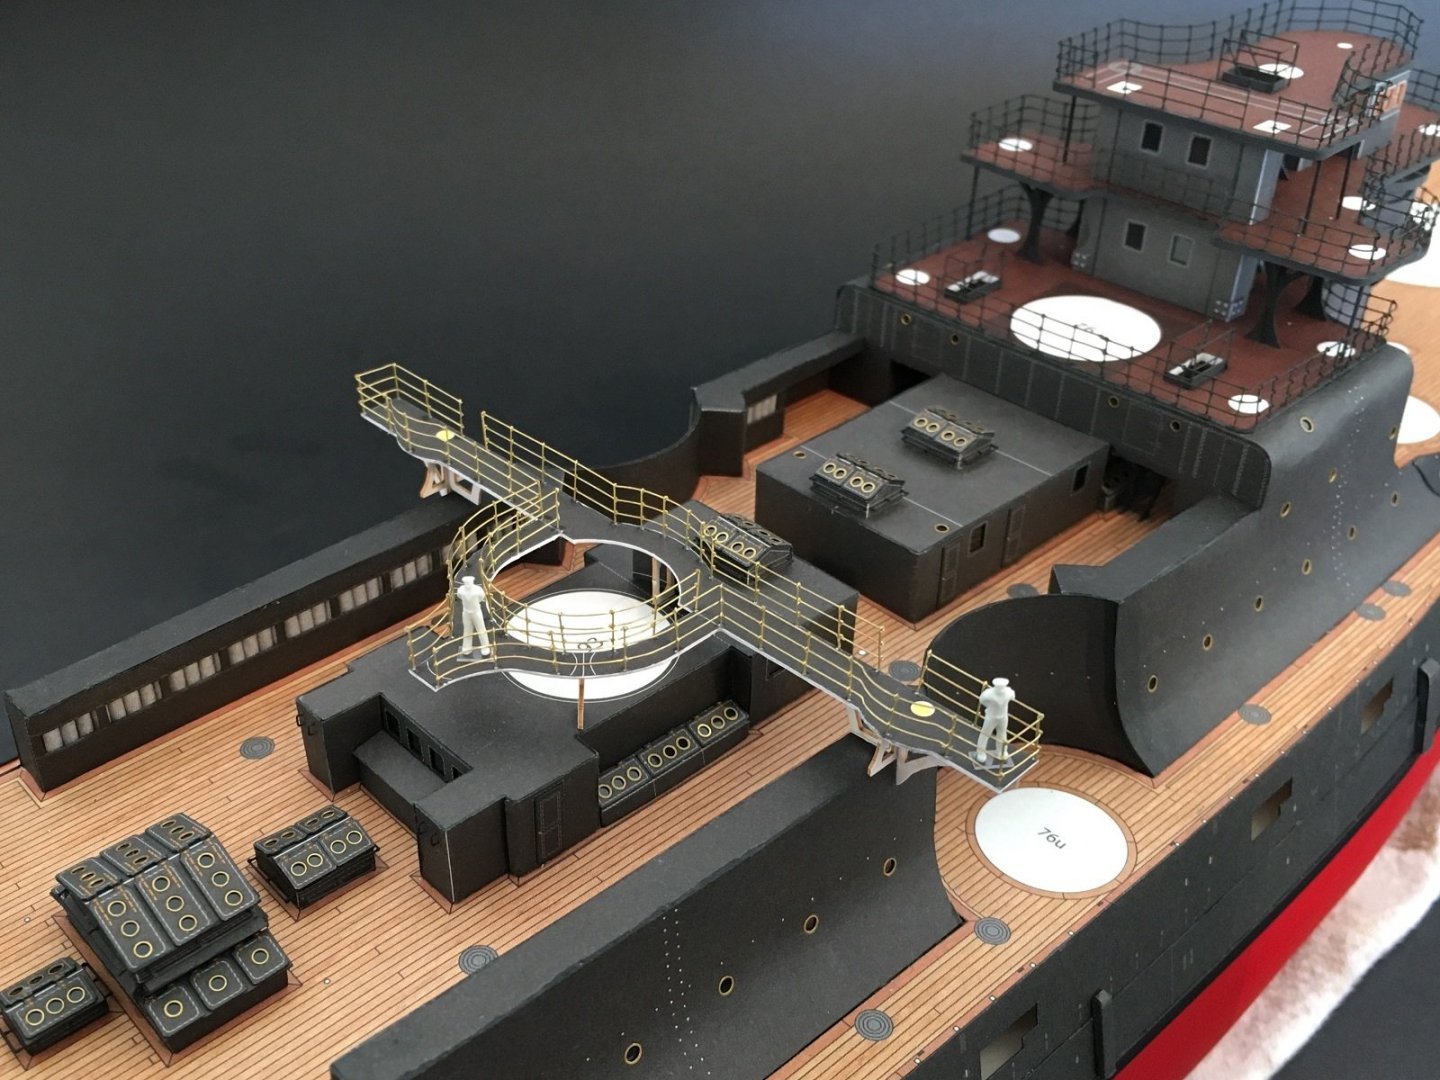
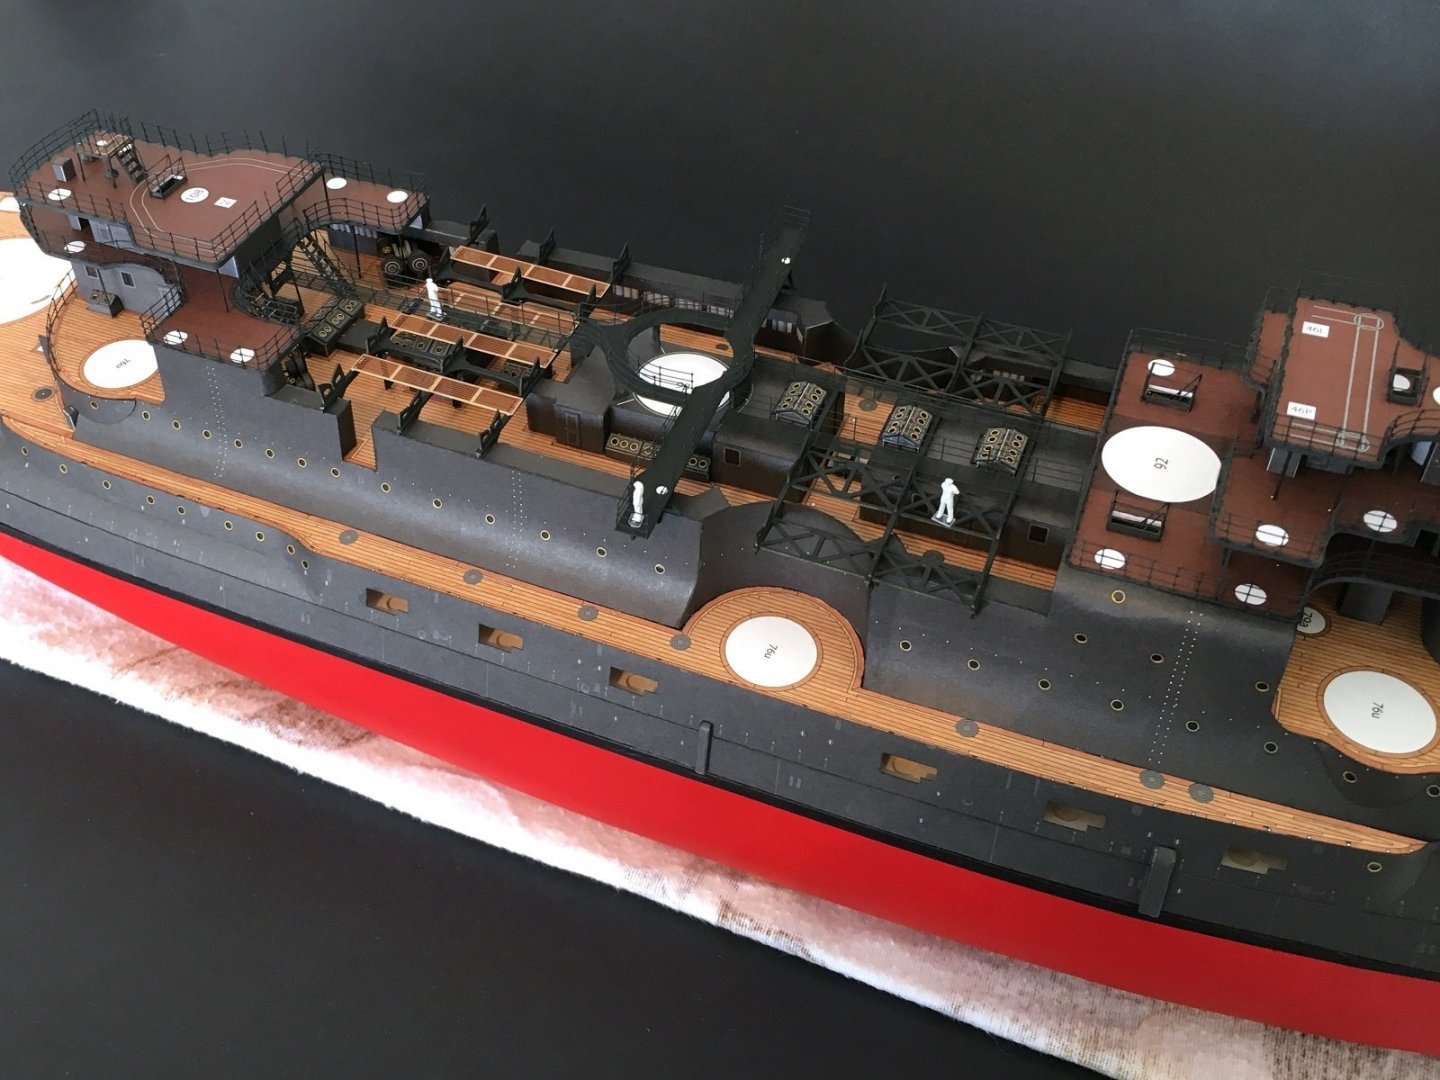
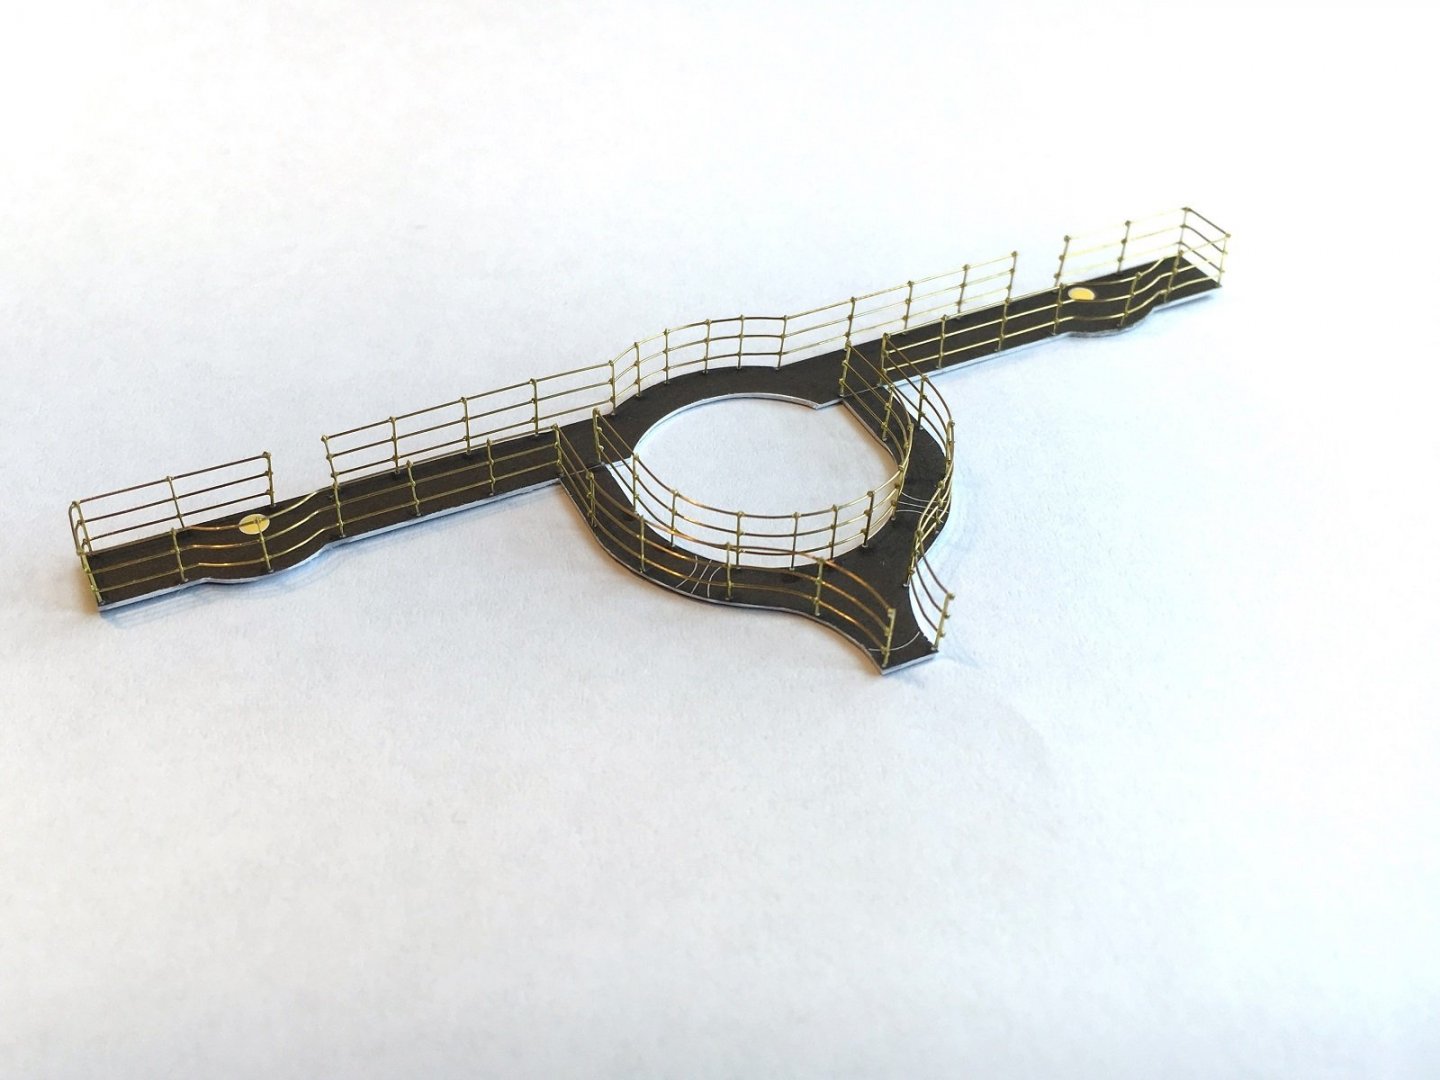
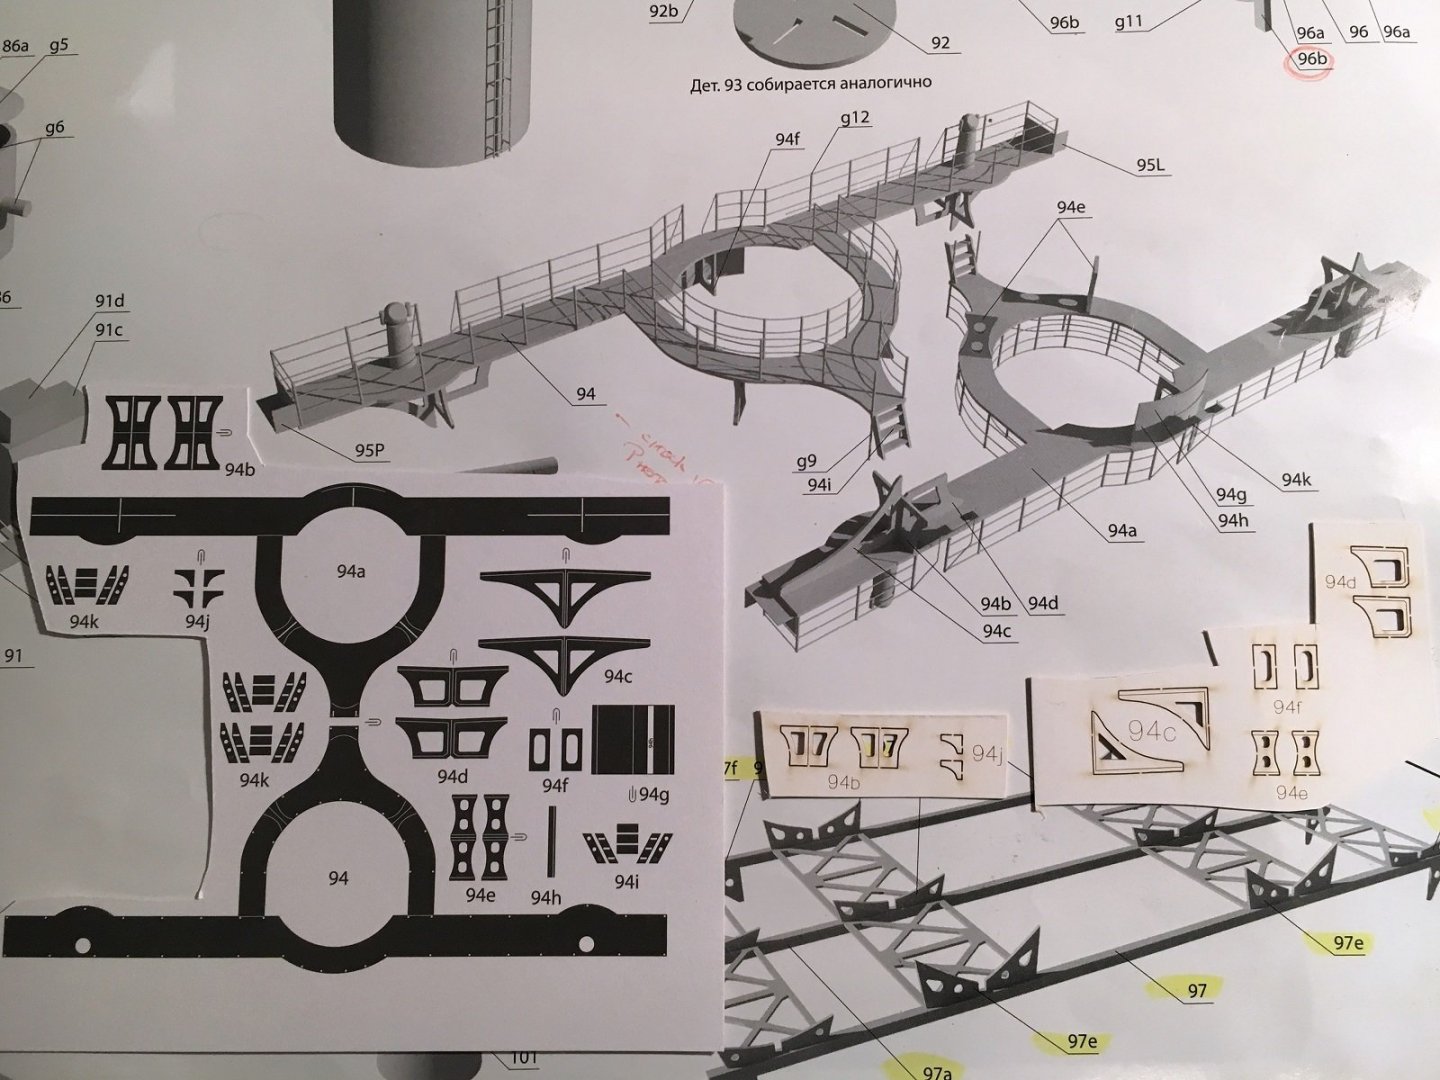
Hi all, Well back in Perth for a few days and some more progress. From left to right; I didn’t notice that there were catwalks for the fore boat deck last time round as not in the assembly diagrams but again used the photo etch parts and this time used generic handrails down one side of each, hence the posts don’t fully match the grate pattern but it was too difficult trying to glue individual stanchions. Also didn’t notice that the rear boat deck catwalk was supposed to have handrails so added more generic stuff but this restricted access to paint the one ‘wood’ section so left overall black. I was not happy with the brown I originally sprayed the wood grates so stripped them back with lacquer thinners and resprayed. A better brown but still not quite right yet but will leave them as is now. Now on to the new works which is the midships catwalk which surrounds the funnel and connects the fore and aft boat decks. Again I used the laser cut supports and brackets where provided. There are also 4 small sets of stairs required. The double thickness catwalk has been laminated together and started trimming to final shape and also shown is the handrails ready for paint. These are the usual 0.2mm rails bent to shape over the templates and threaded through the holes in 3-rail PE stanchions . Despite the shapes of these I am getting pretty quick with less mistakes due to all the practice I have had with these for the fore and aft decks. Handrails fitted to the catwalk with CA glue. Pretty happy how these turned out except the openings for the stairs aren’t very plumb. Once all black won’t be so obvious. The underside supports and braces, pretty straight forward and quick. I was worried about the laminated curved section but no issues. Supports fitted to the underside and again straight forward. The finished catwalk. I couldn’t decide whether to paint only the handrails and supports and leave the paper the printed black but decided I will just spray the whole assembly with NATO black for speed and convenience plus it will match the fore and aft decks and the walk ways done previously. I punched a couple of circles of masking tape to mark where the compasses go out on the wings. Dry fitted in place. I will need to work on a couple of sets of stairs from the main deck before final fitting and I will want to make the funnel to aid in final placement before gluing permanently. A couple of shots with all the sections and grating loosely in place. It will need a fair bit of tweeking to get the 3 sections aligned as there is slight clashes between the centre sections and the fore and aft walk ways due to the hand rails but nothing major to upset it. All the above is 19 hours of work. The last major assemblies now are the funnels, gun turrets and the ships boats after that countless small parts and railings. Heading back to Melbourne tonight and likely won’t be home again until Christmas. Cheers Slog


- 244 replies
-
- 11
-
-
- borodino
- dom bumagi
- (and 1 more)
-
Very nice work Richmond. You're off to a great start. Looking forward to more. Cheers Slog
-
Thanks to all for the likes and comments. Danny, I agree it probably is a spare as you say. Well on the red-eye back to Melbourne tonight so will just spend the day prepping parts for my return end of October. Cheers Slog
- 244 replies
-
- 3
-
-
- borodino
- dom bumagi
- (and 1 more)
-
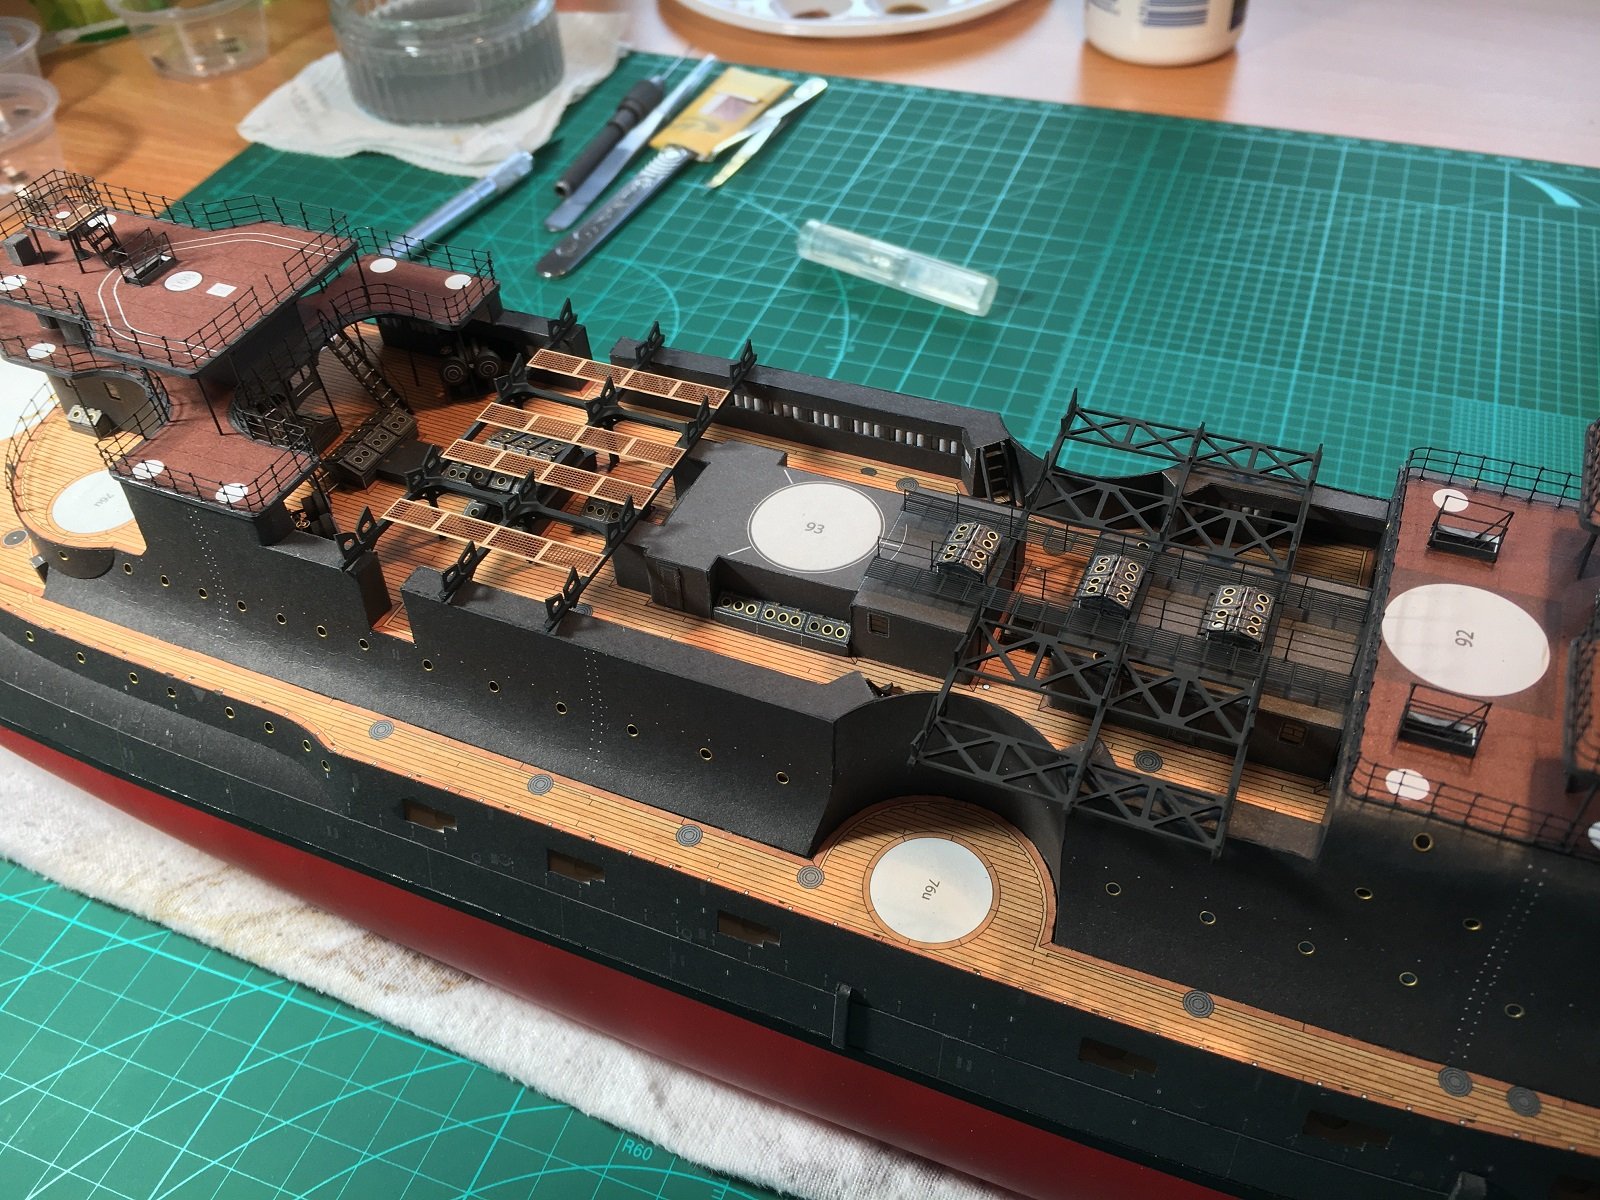
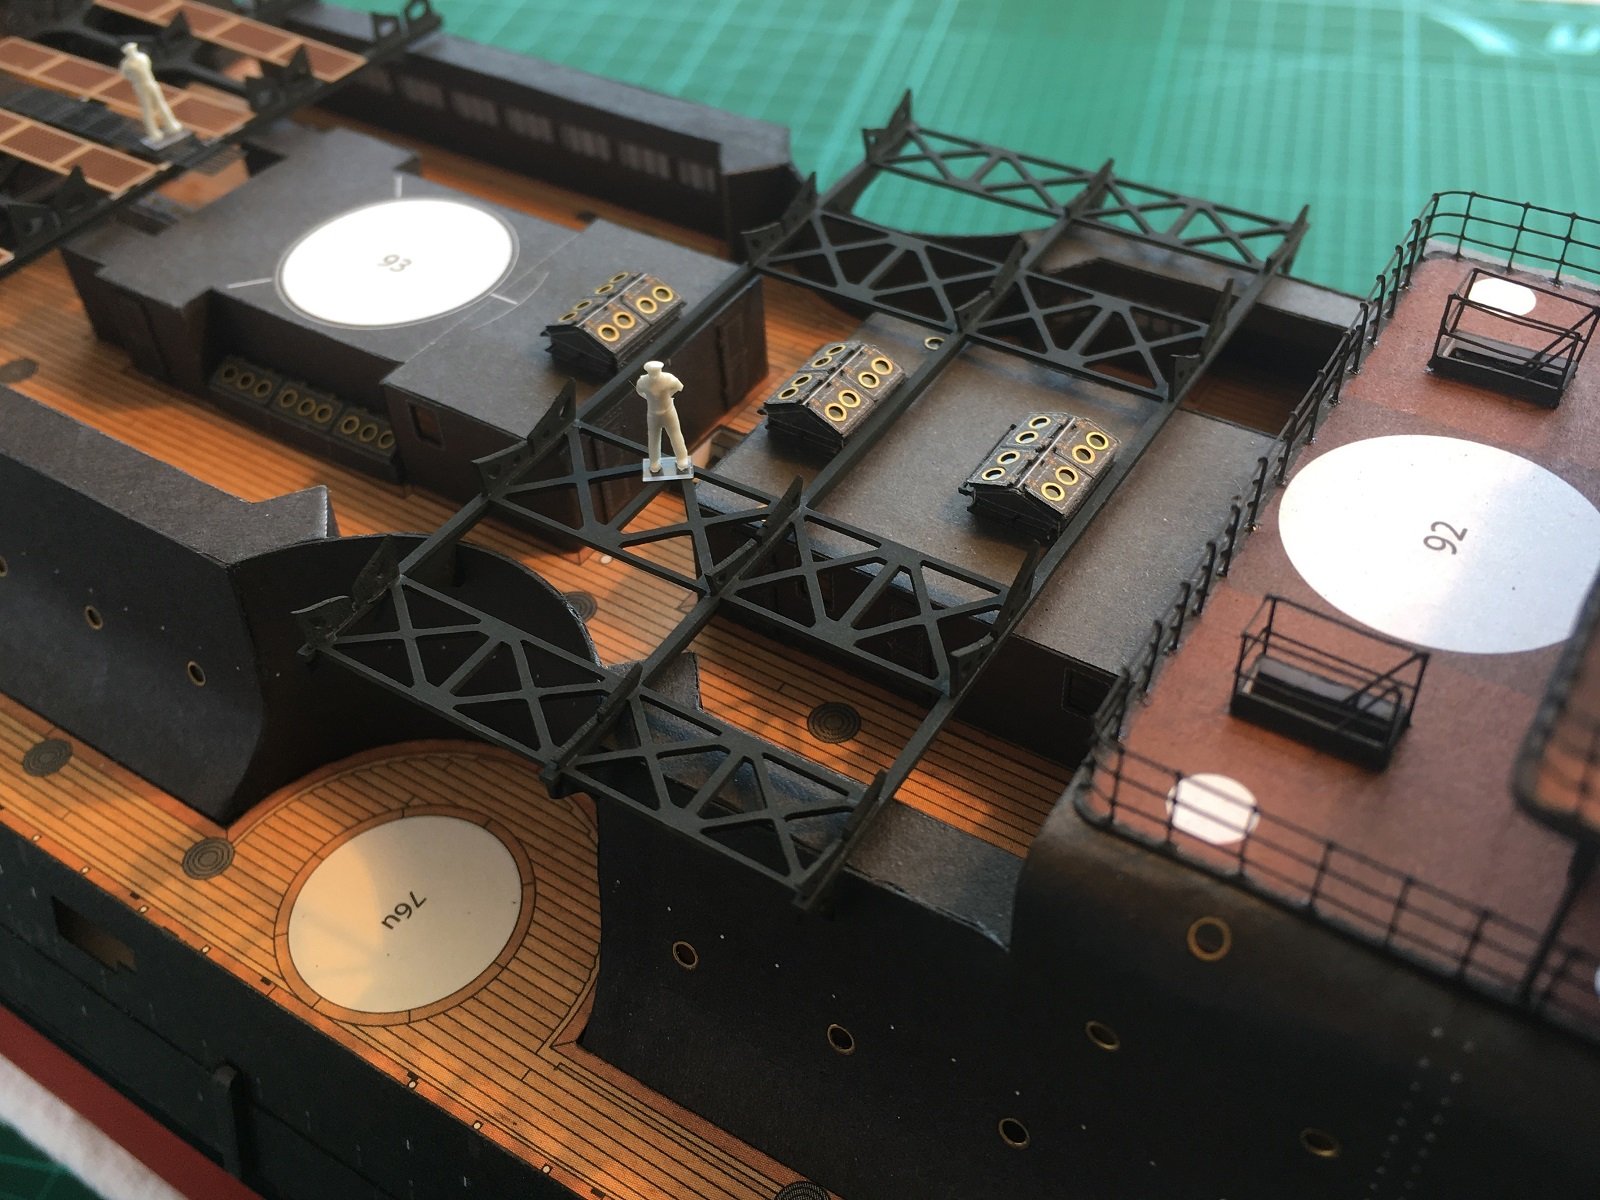
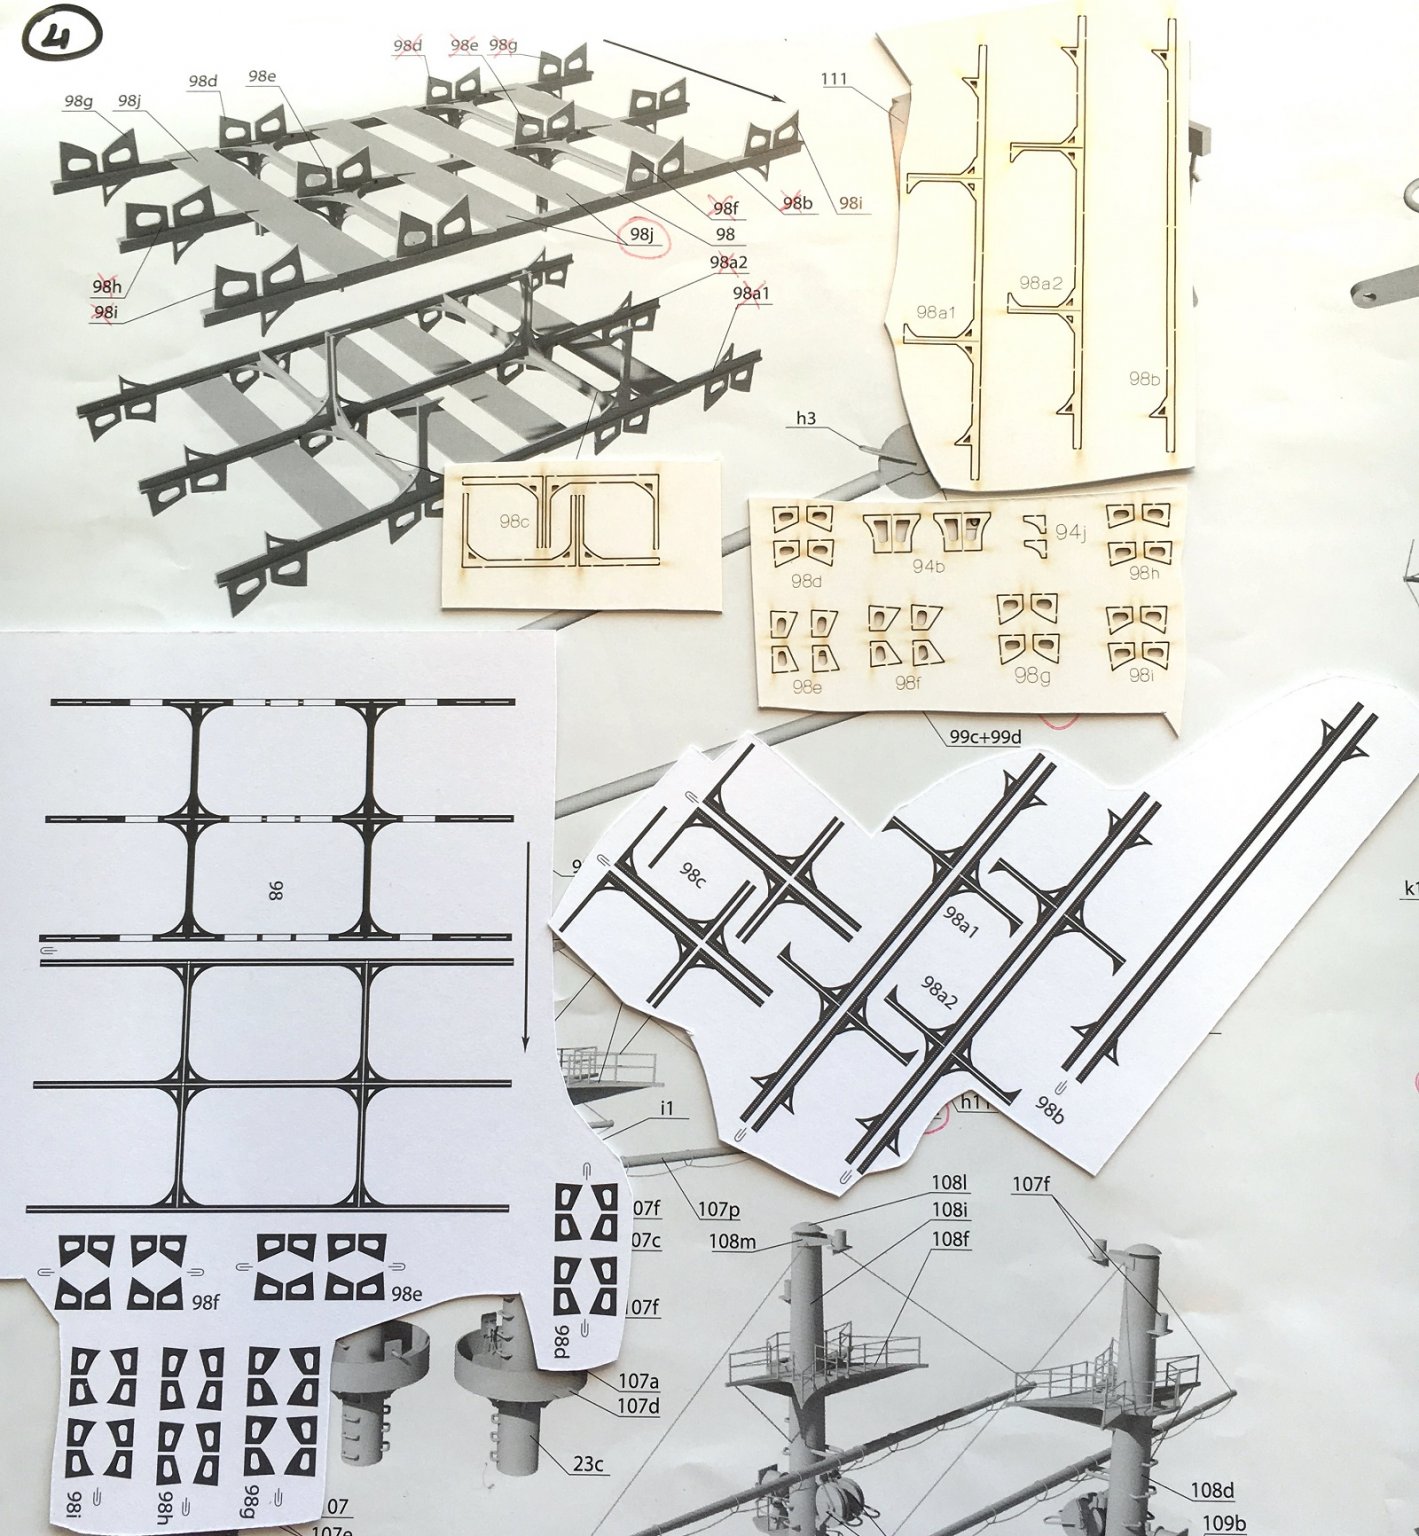
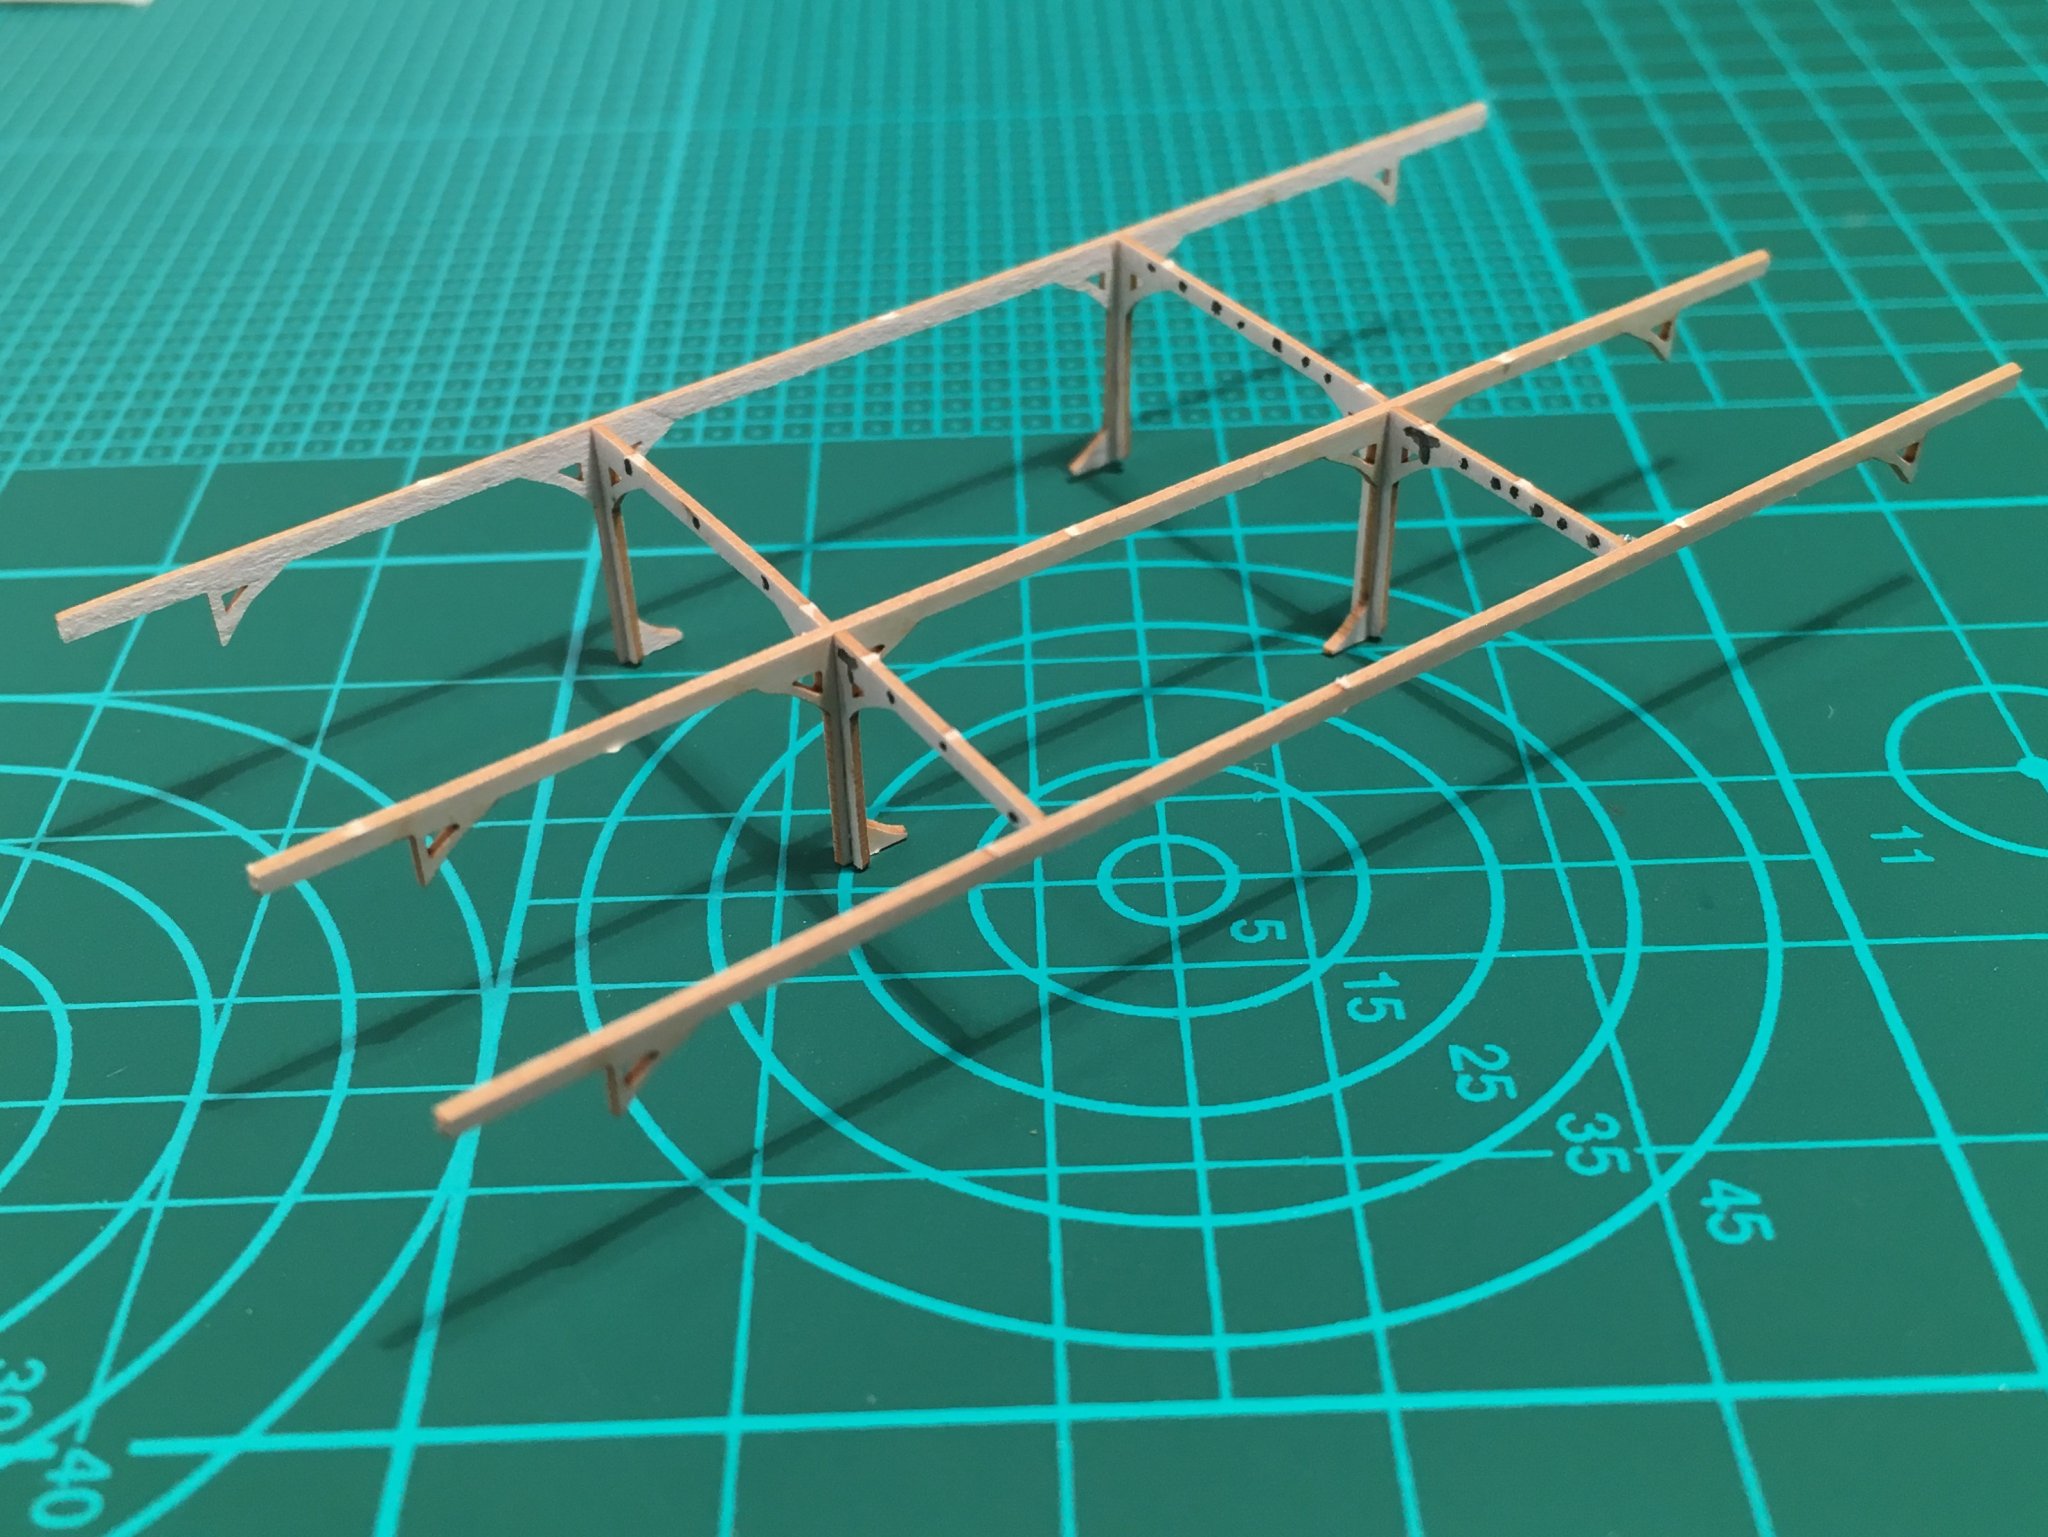
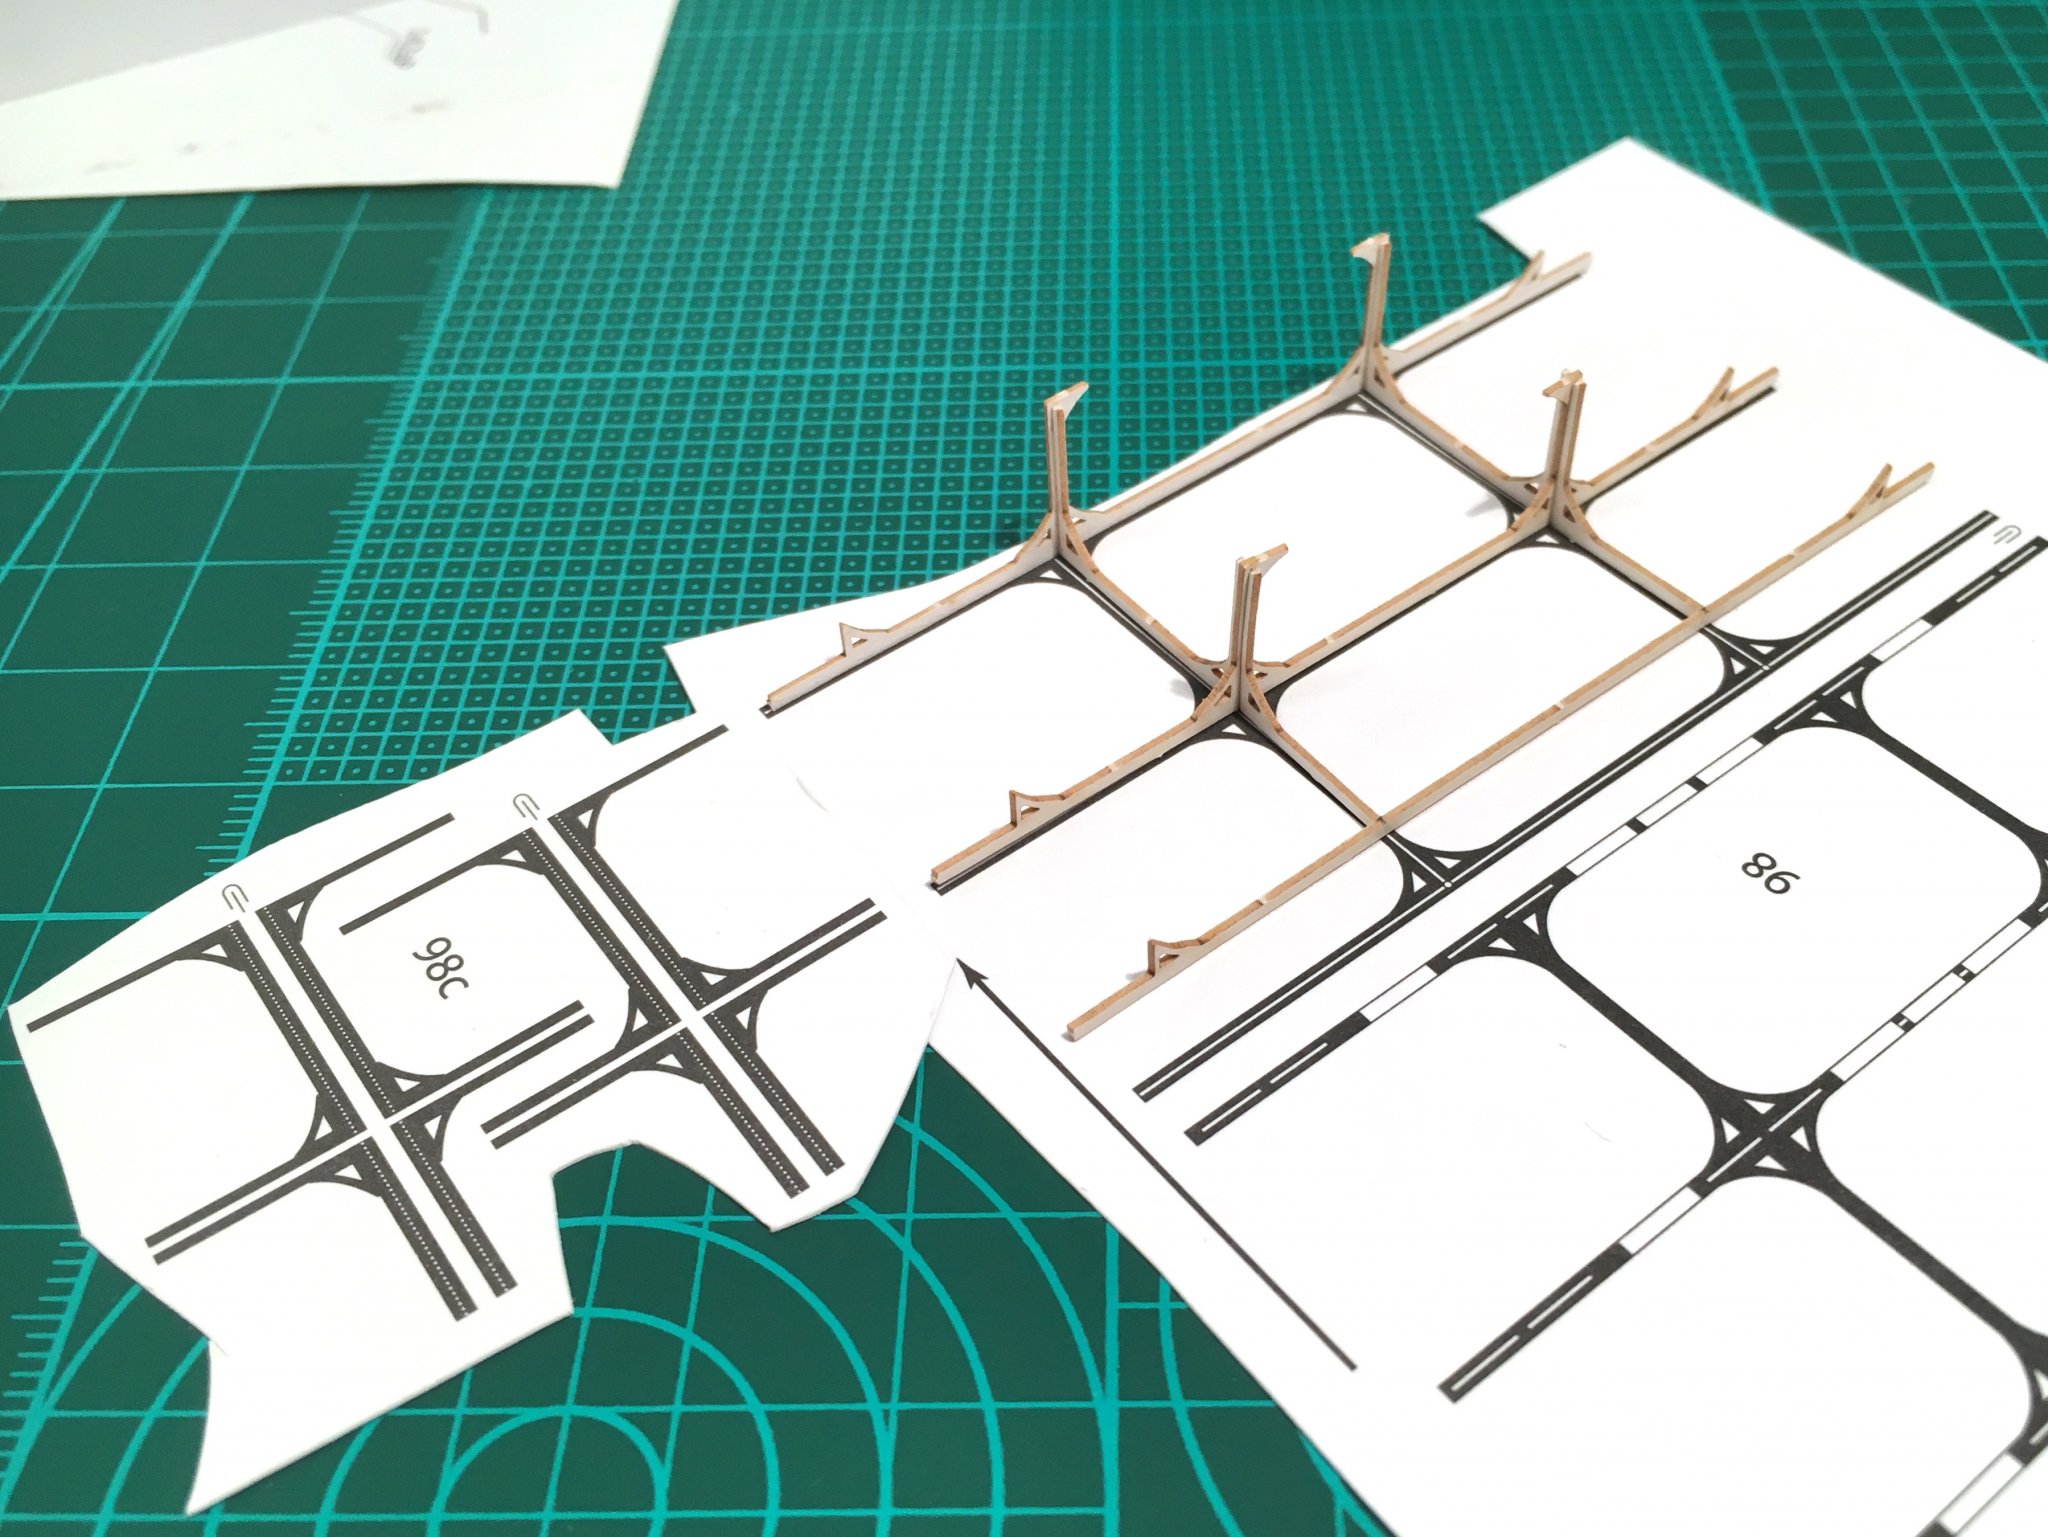
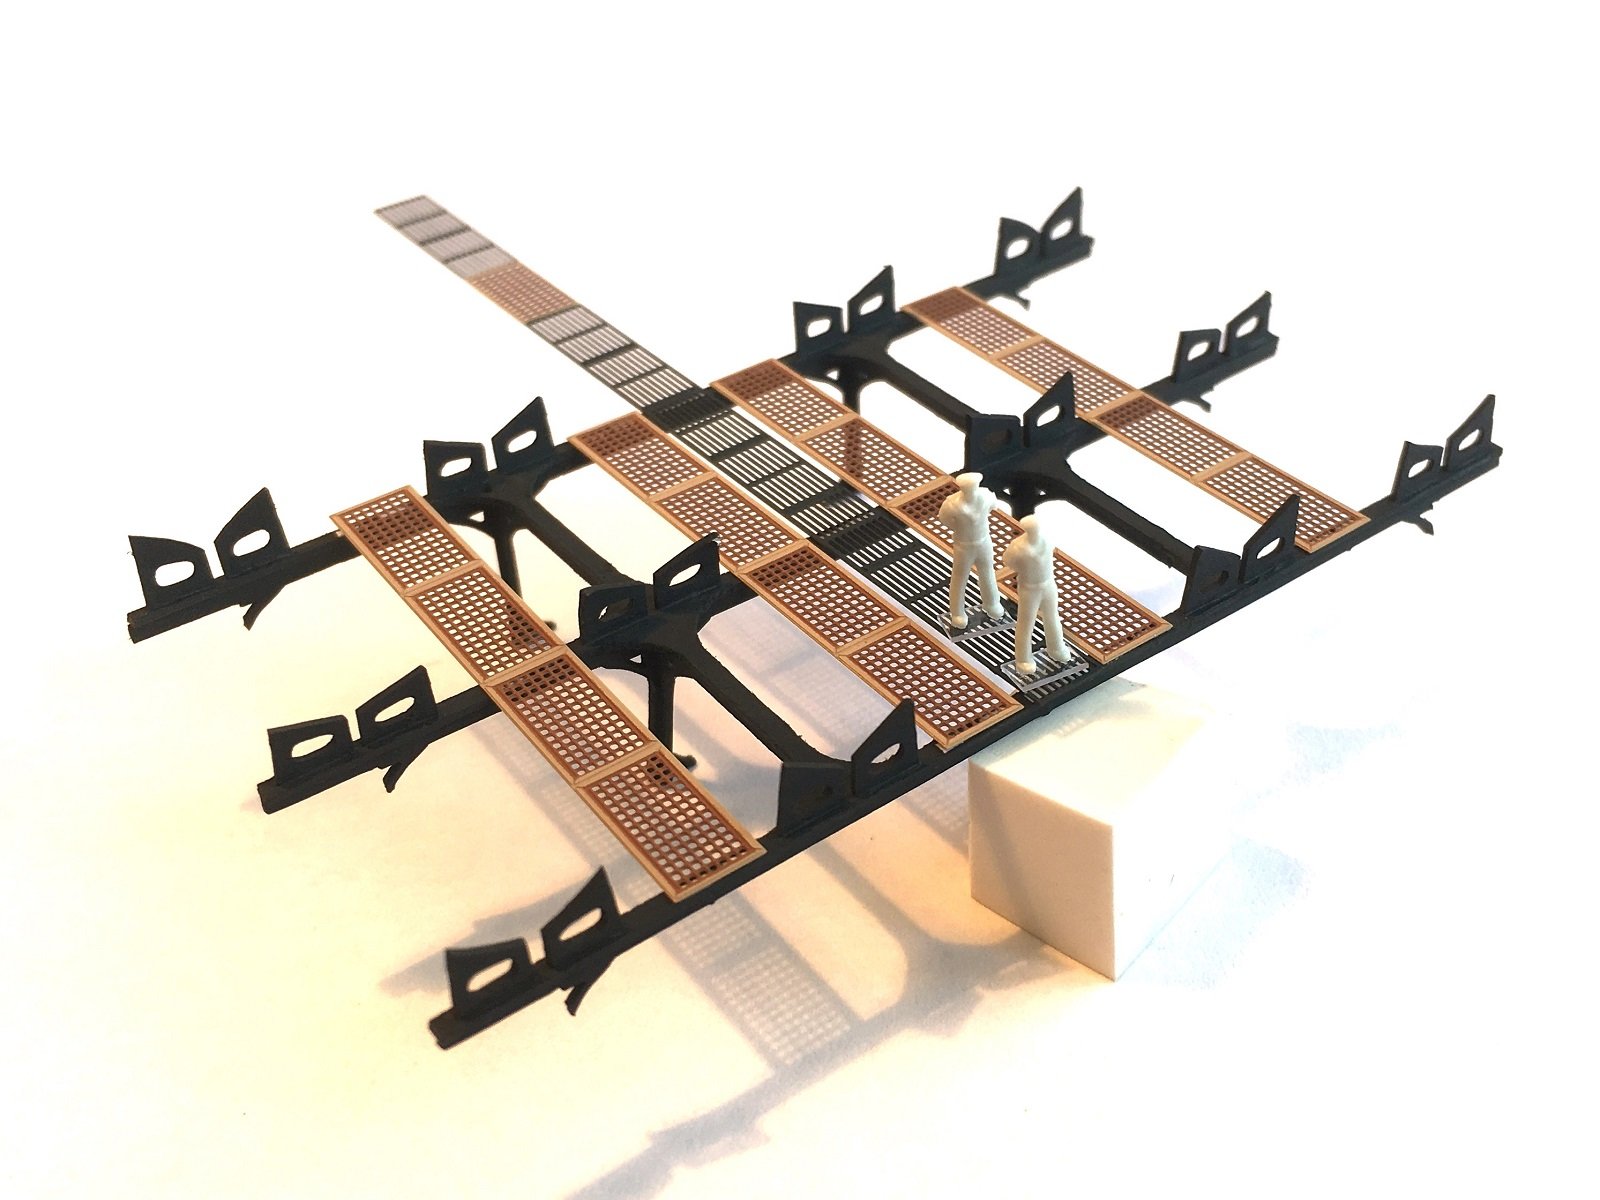
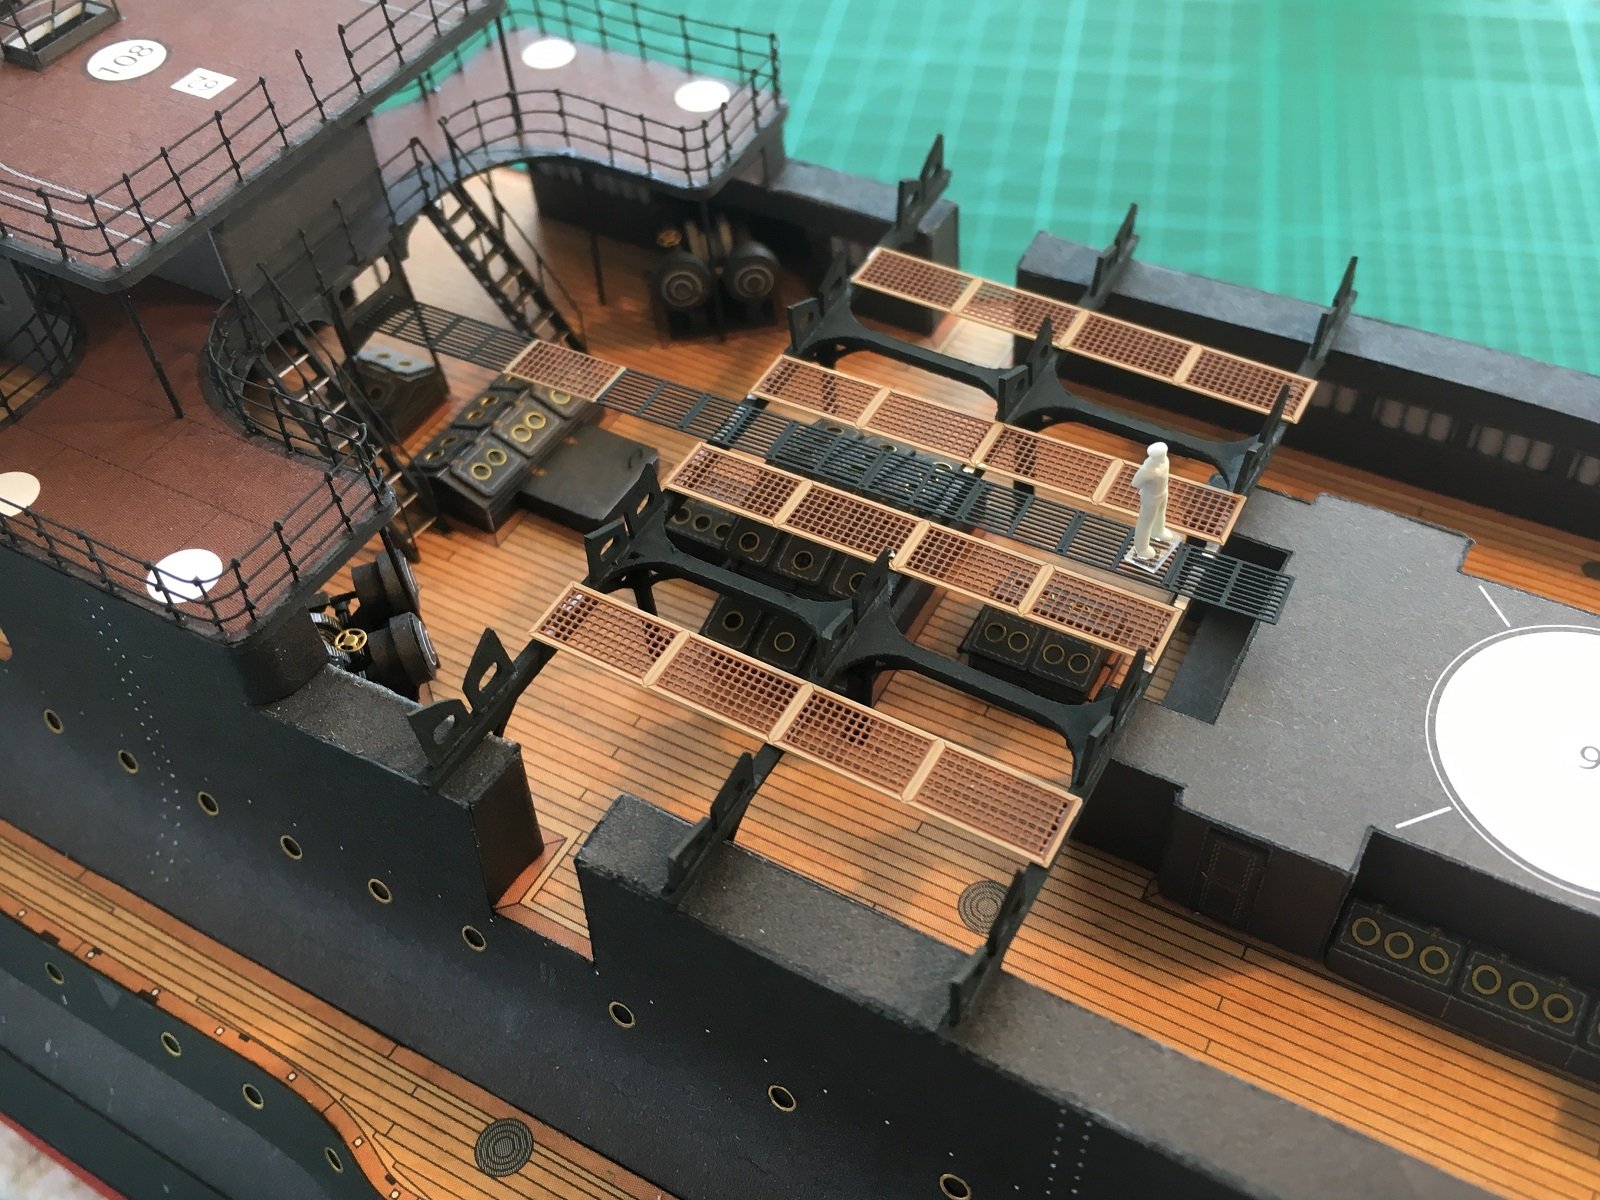
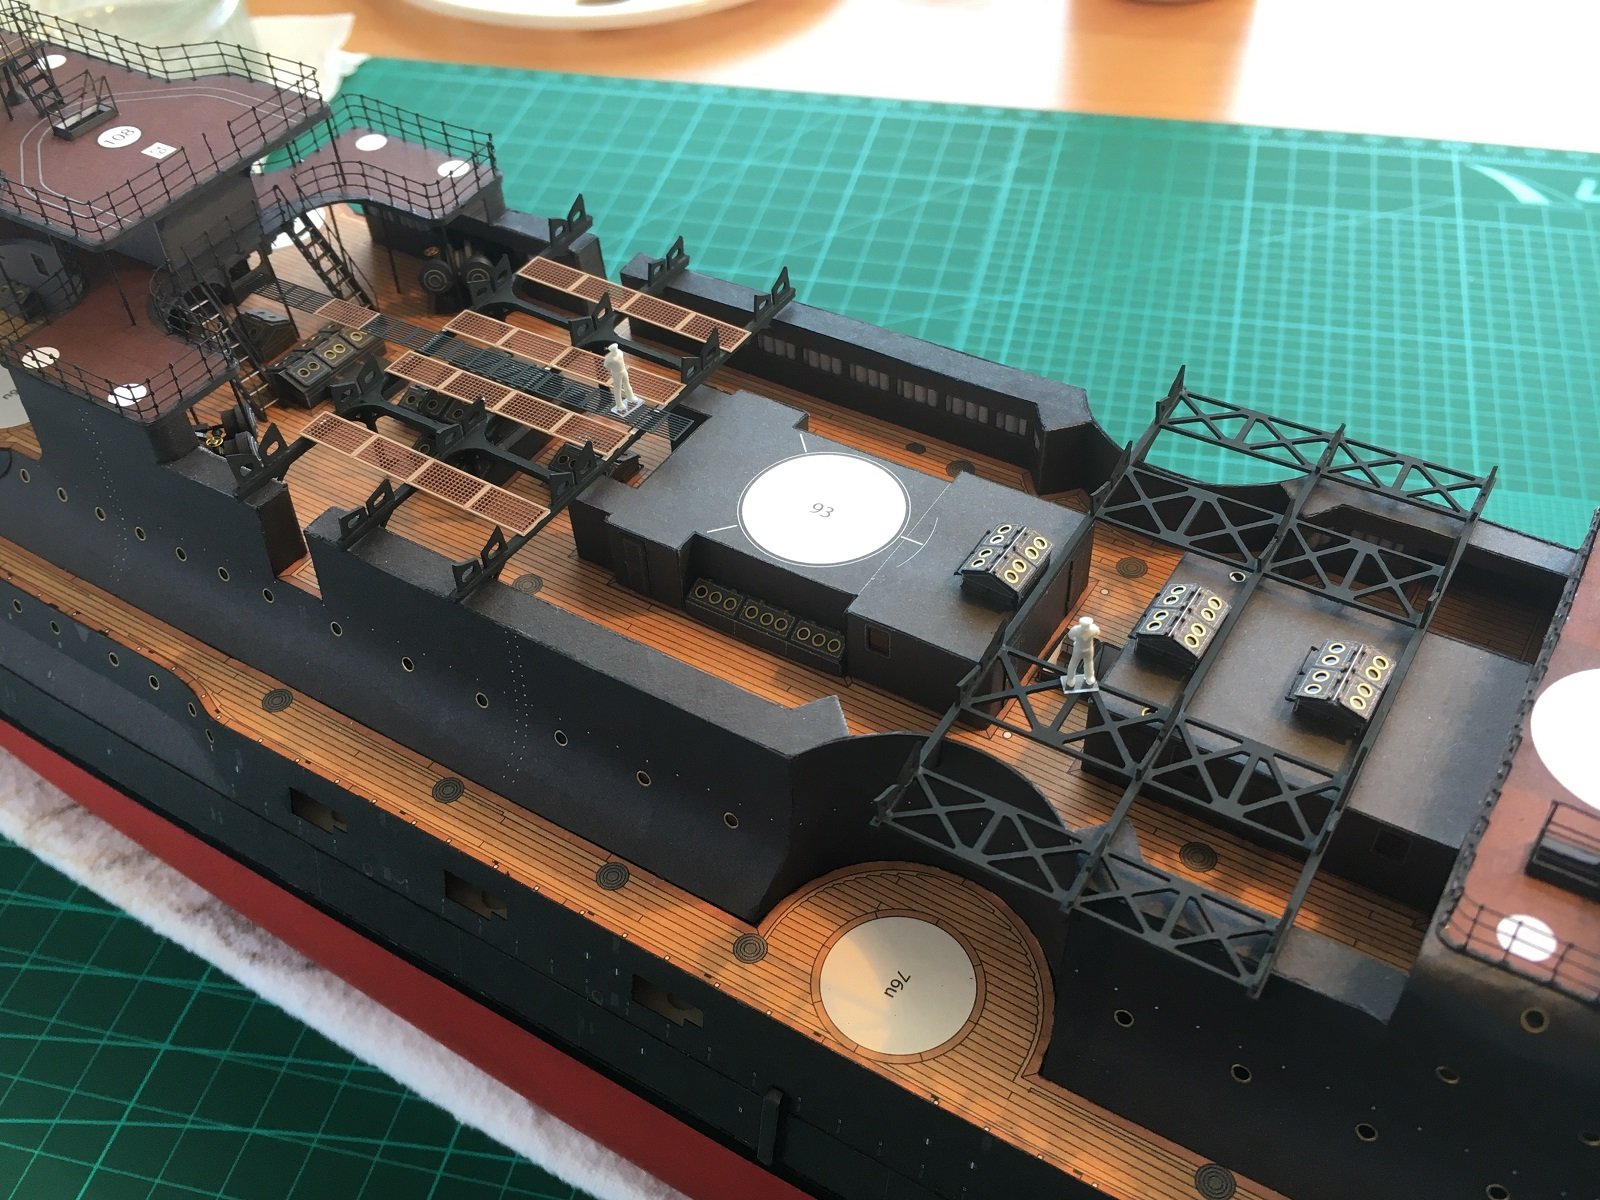
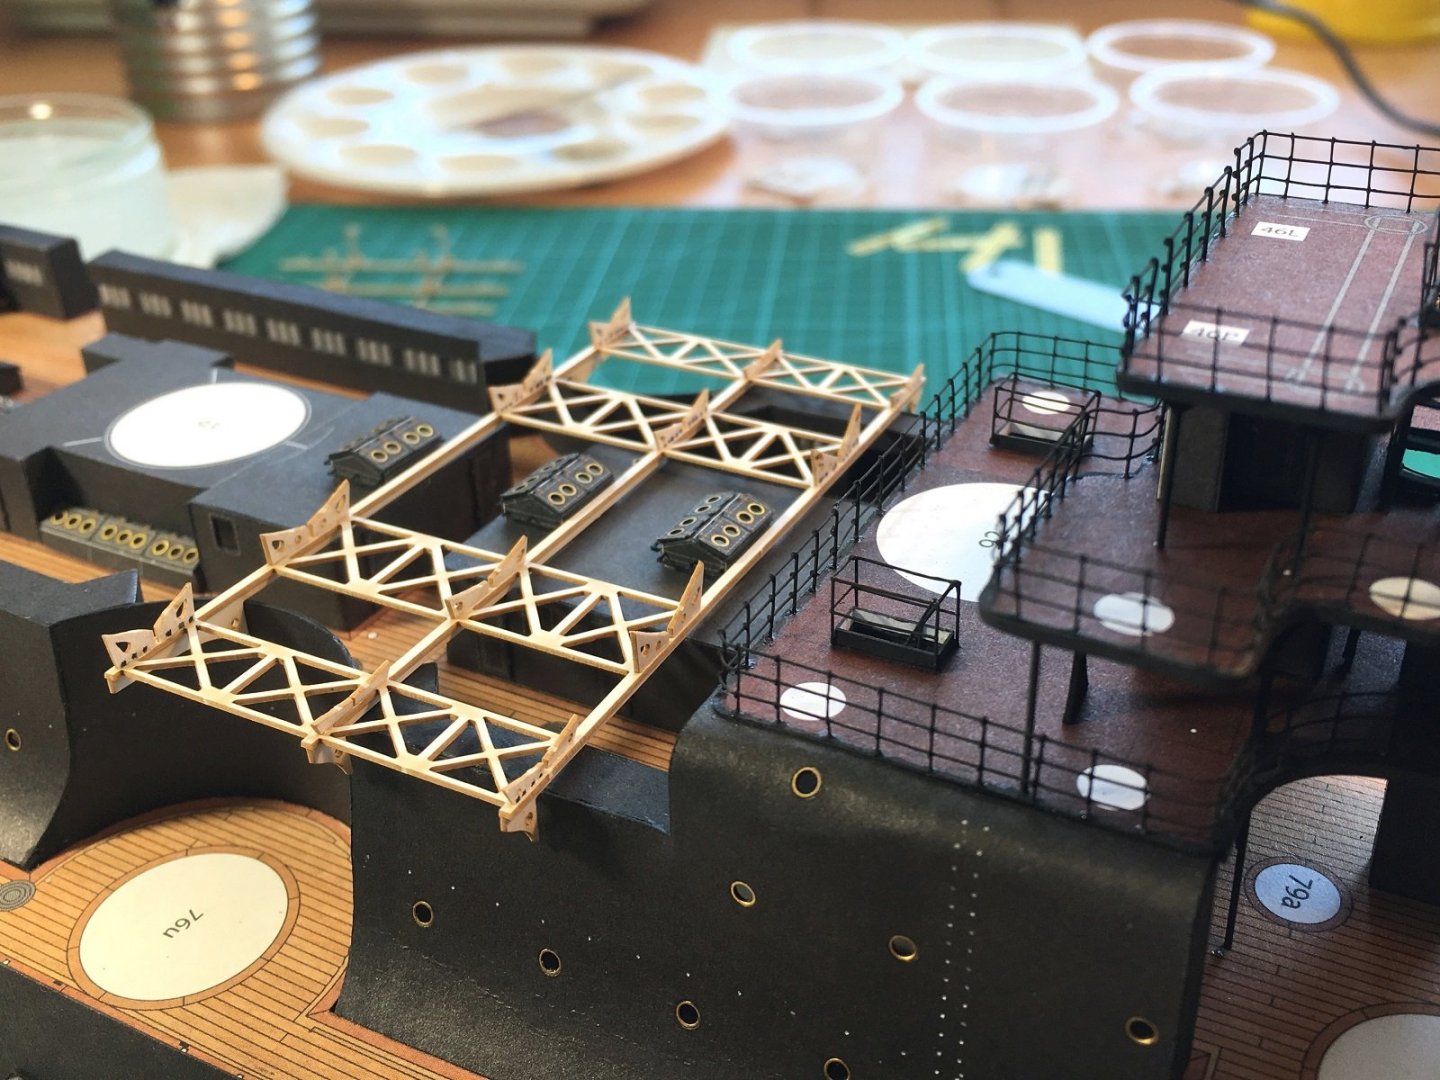
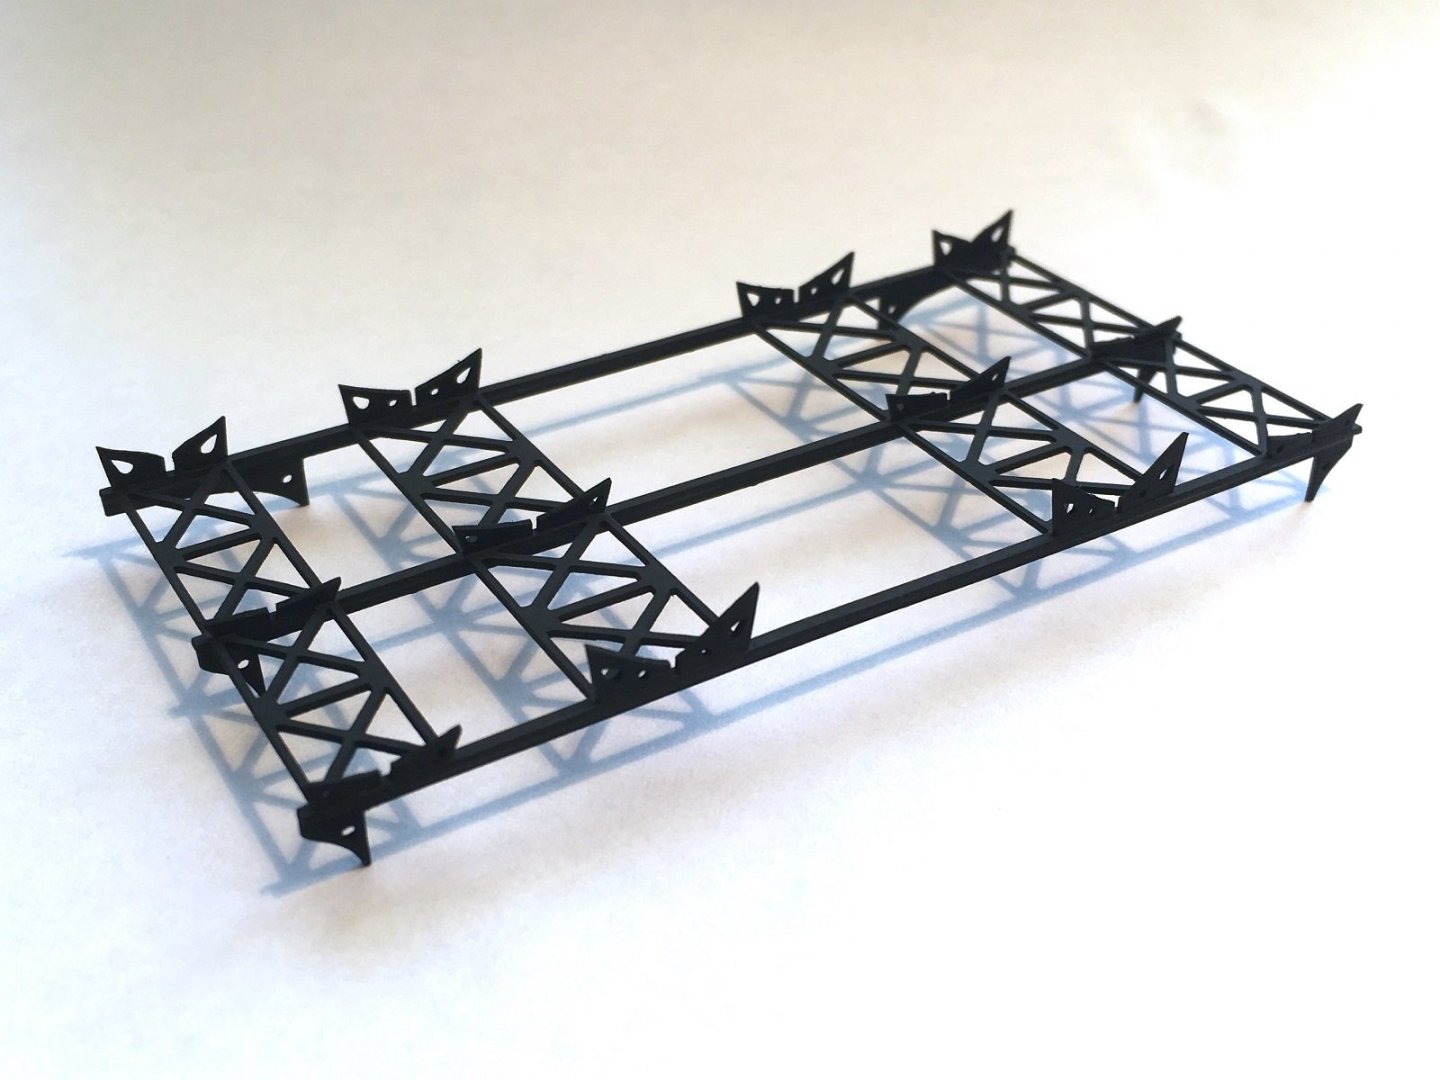
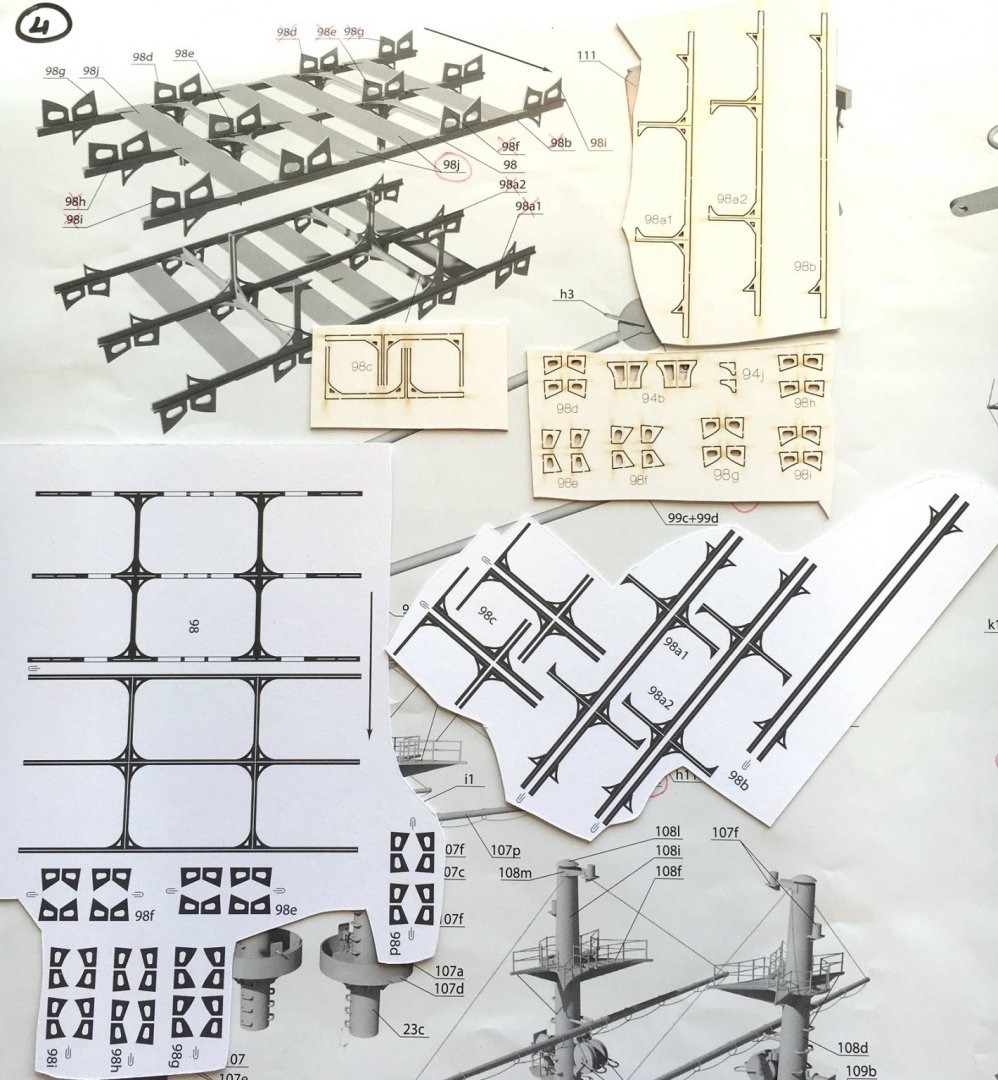
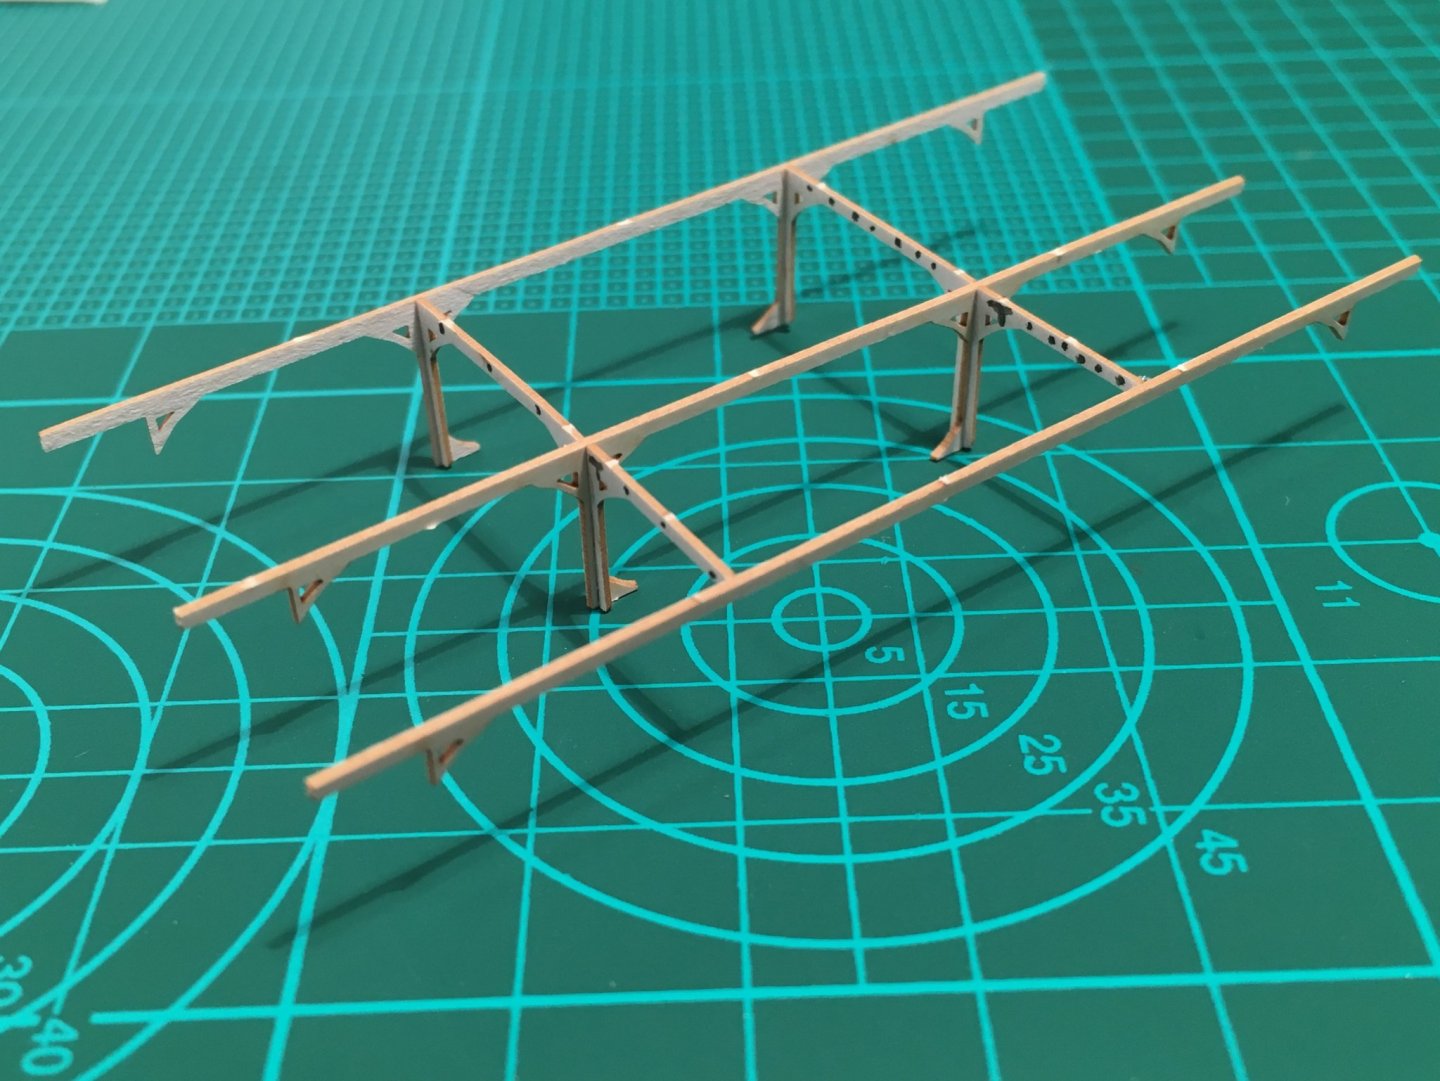
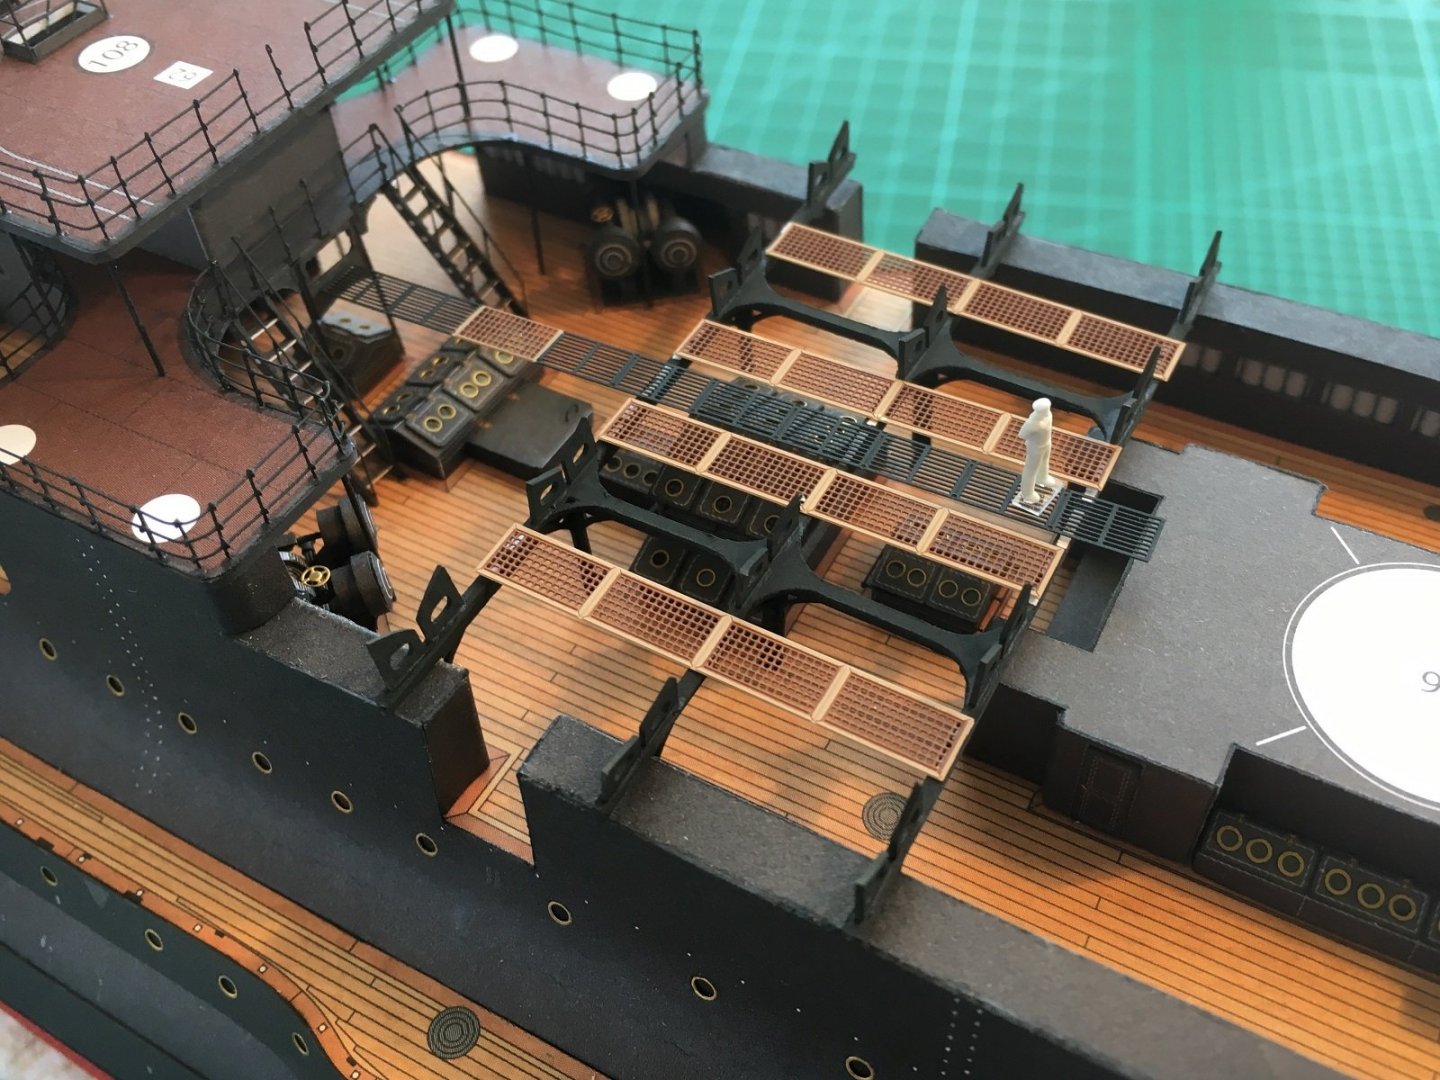
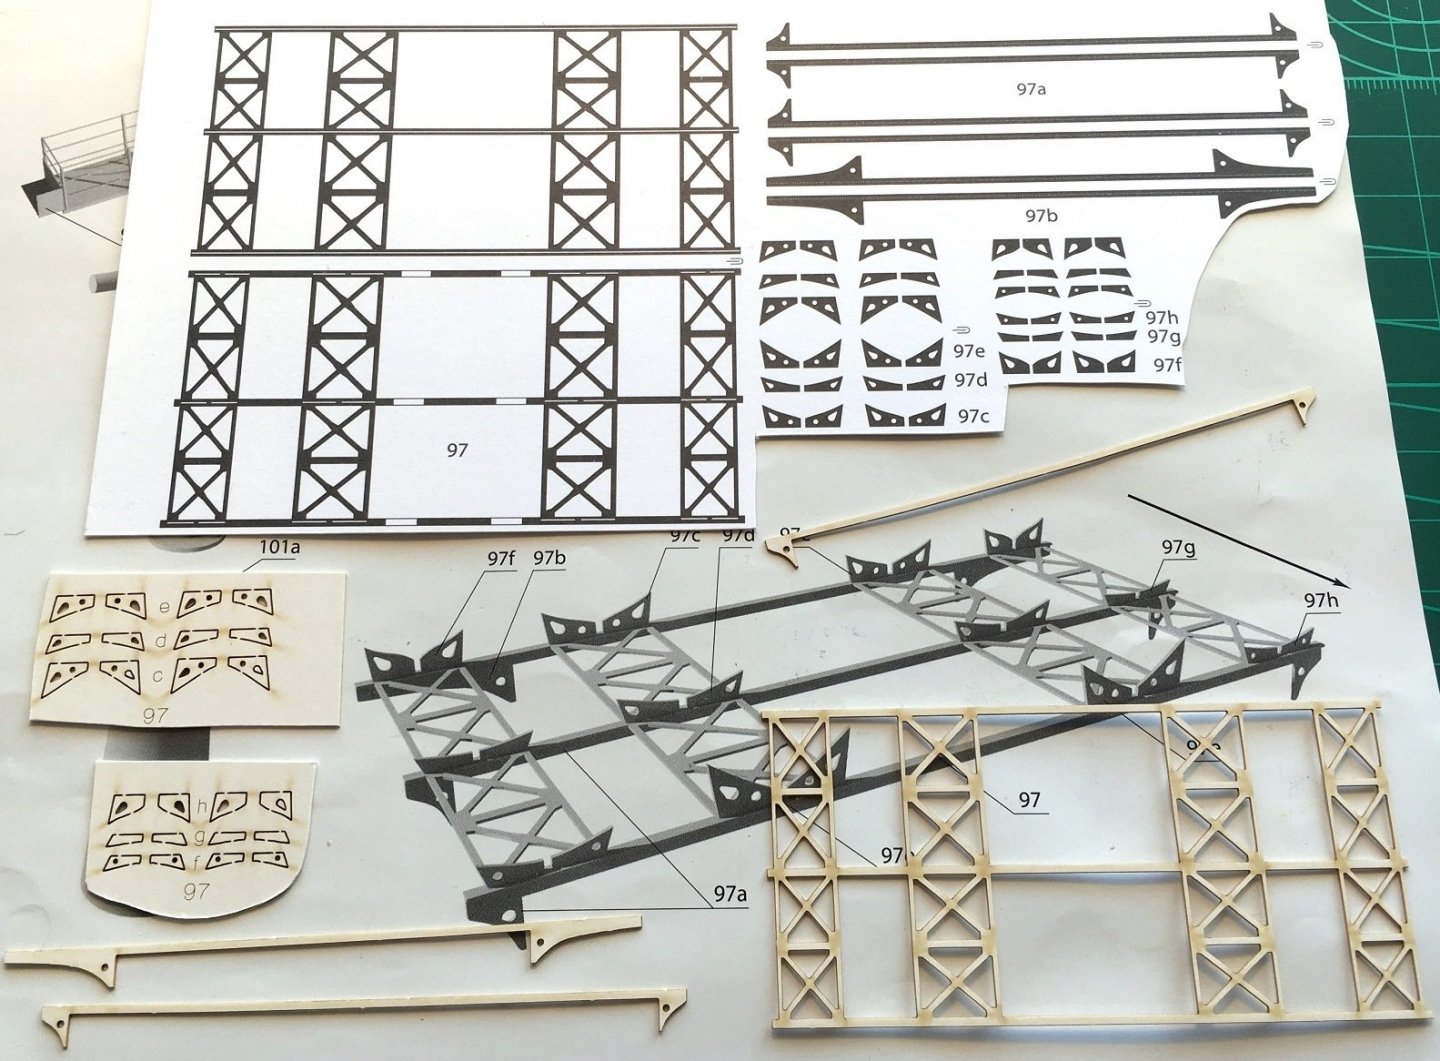
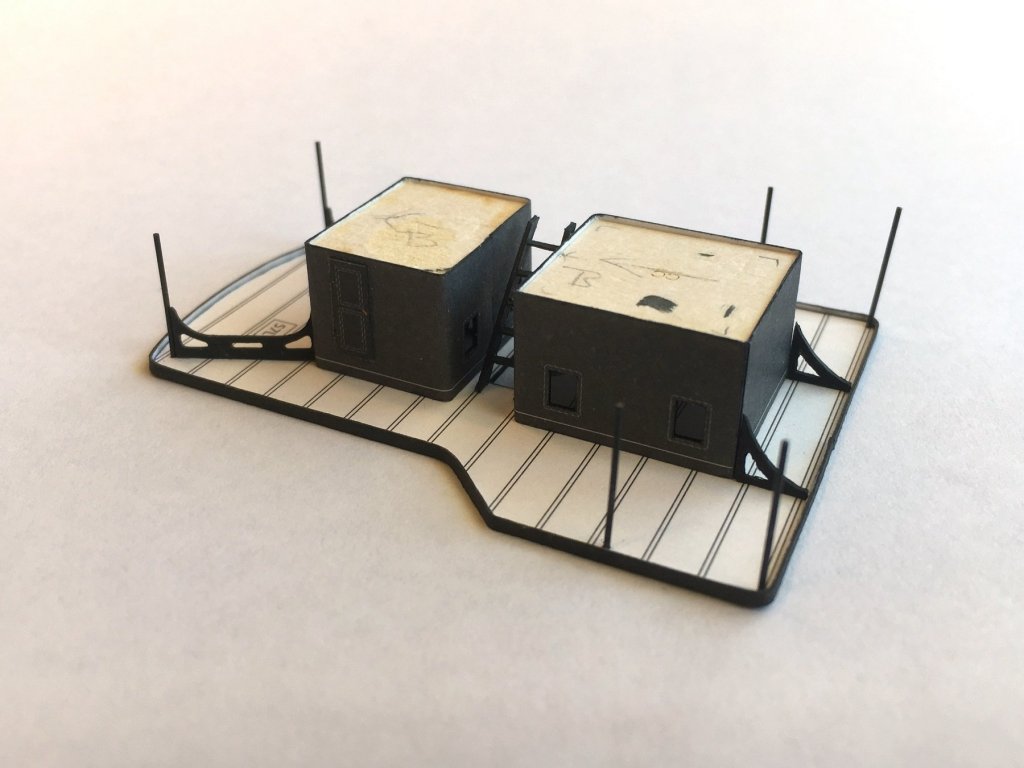
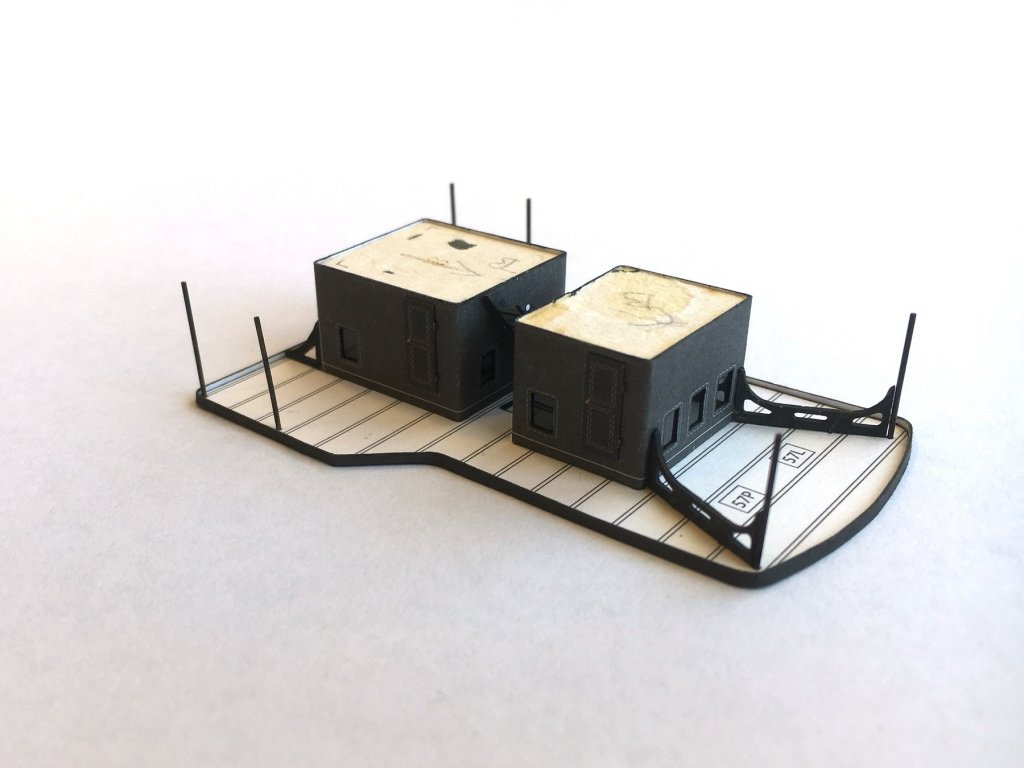
Hi all, Well back in Perth for a long weekend and made a start on the boat decks. Assembly 97 is the fore boat deck and all the paper parts are duplicated in 0.5mm laser cut card so will use those. Surprisingly they supply 2 of the trussed frame which is strange as the paper part 97 folded come to roughly the same thickness as the laser cut card. I think they made a mistake here as it would have been better to supply an aft frame instead of 2 fore frames. The part numbers on the paper parts and the diagram match however the notation on the laser cut cradle parts (h) & (f) are back to front but easy to avoid mistakes with a bit of thought. The support beams 97(a) appear to be the wrong length. After I assembled the frame and trial fitted it as can be seen there is a space both sides where I assumed the brackets should touch the superstructure. A look at the computer render shows this gap also. I decided I would just install as is. Fairly straight forward assembly. I sprayed with Tamiya NATO Black The fore boat deck in place but not glued as still need access beneath. Then it was on to the aft boat deck and most of the parts are again replicated by the laser cut forms except strangely Part 98. This is disappointing as will be a pain to cut out. This part instead of two 97s as mentioned earlier would have been better. The kit provides 2 catwalk options; either a ‘wood’ or a ‘steel’ grate. The photo etch provides both as well and I went with the ‘wood’ for no other reason than a change of colour from the usual black so far. The laser cut supports assembled but the spacing doesn’t seem equal. Placing it on the Paper ‘deck’, supports 98( c) are too short. Both the laser cut and paper part as shown are the same but this is an easy fix. Assembled parts all painted. The structure was again painted with Tamiya NATO Black. I masked up and sprayed the Photo-etch grating’s but I didn’t have a darker more browny brown which is a pity as it’s a bit light. There is a longer centre catwalk which I again masked up and painted the photo-etch part. Nothing is glued. Shown temporary in place. There is centre catwalk which circles the funnel and will probably tackle this next. Nothing glued yet until I fix the relationship with centre catwalk. An overall shot of the boat decks. I can look forward to making eleven (I think) ship’s boats, eight of which sit in the shown cradles. I hope to get back to Perth again at the end of October for more progress. Cheers Slog


- 244 replies
-
- 11
-
-
- borodino
- dom bumagi
- (and 1 more)
-
Thanks to all for the likes. Thanks for the kind words Richmond. I find it easier to do the rails first as they are pretty springy and having clear decks allows me to place bits and bobs on it to position the rail for progressively gluing. Unfortunately I'm working below the line as it is a behavioral thing...I just try and be mindful of the rest of the model 😀. Thanks Greg, your latest build is pretty special and looking sweet. Cheers Slog
- 244 replies
-
- 4
-
-
- borodino
- dom bumagi
- (and 1 more)
-
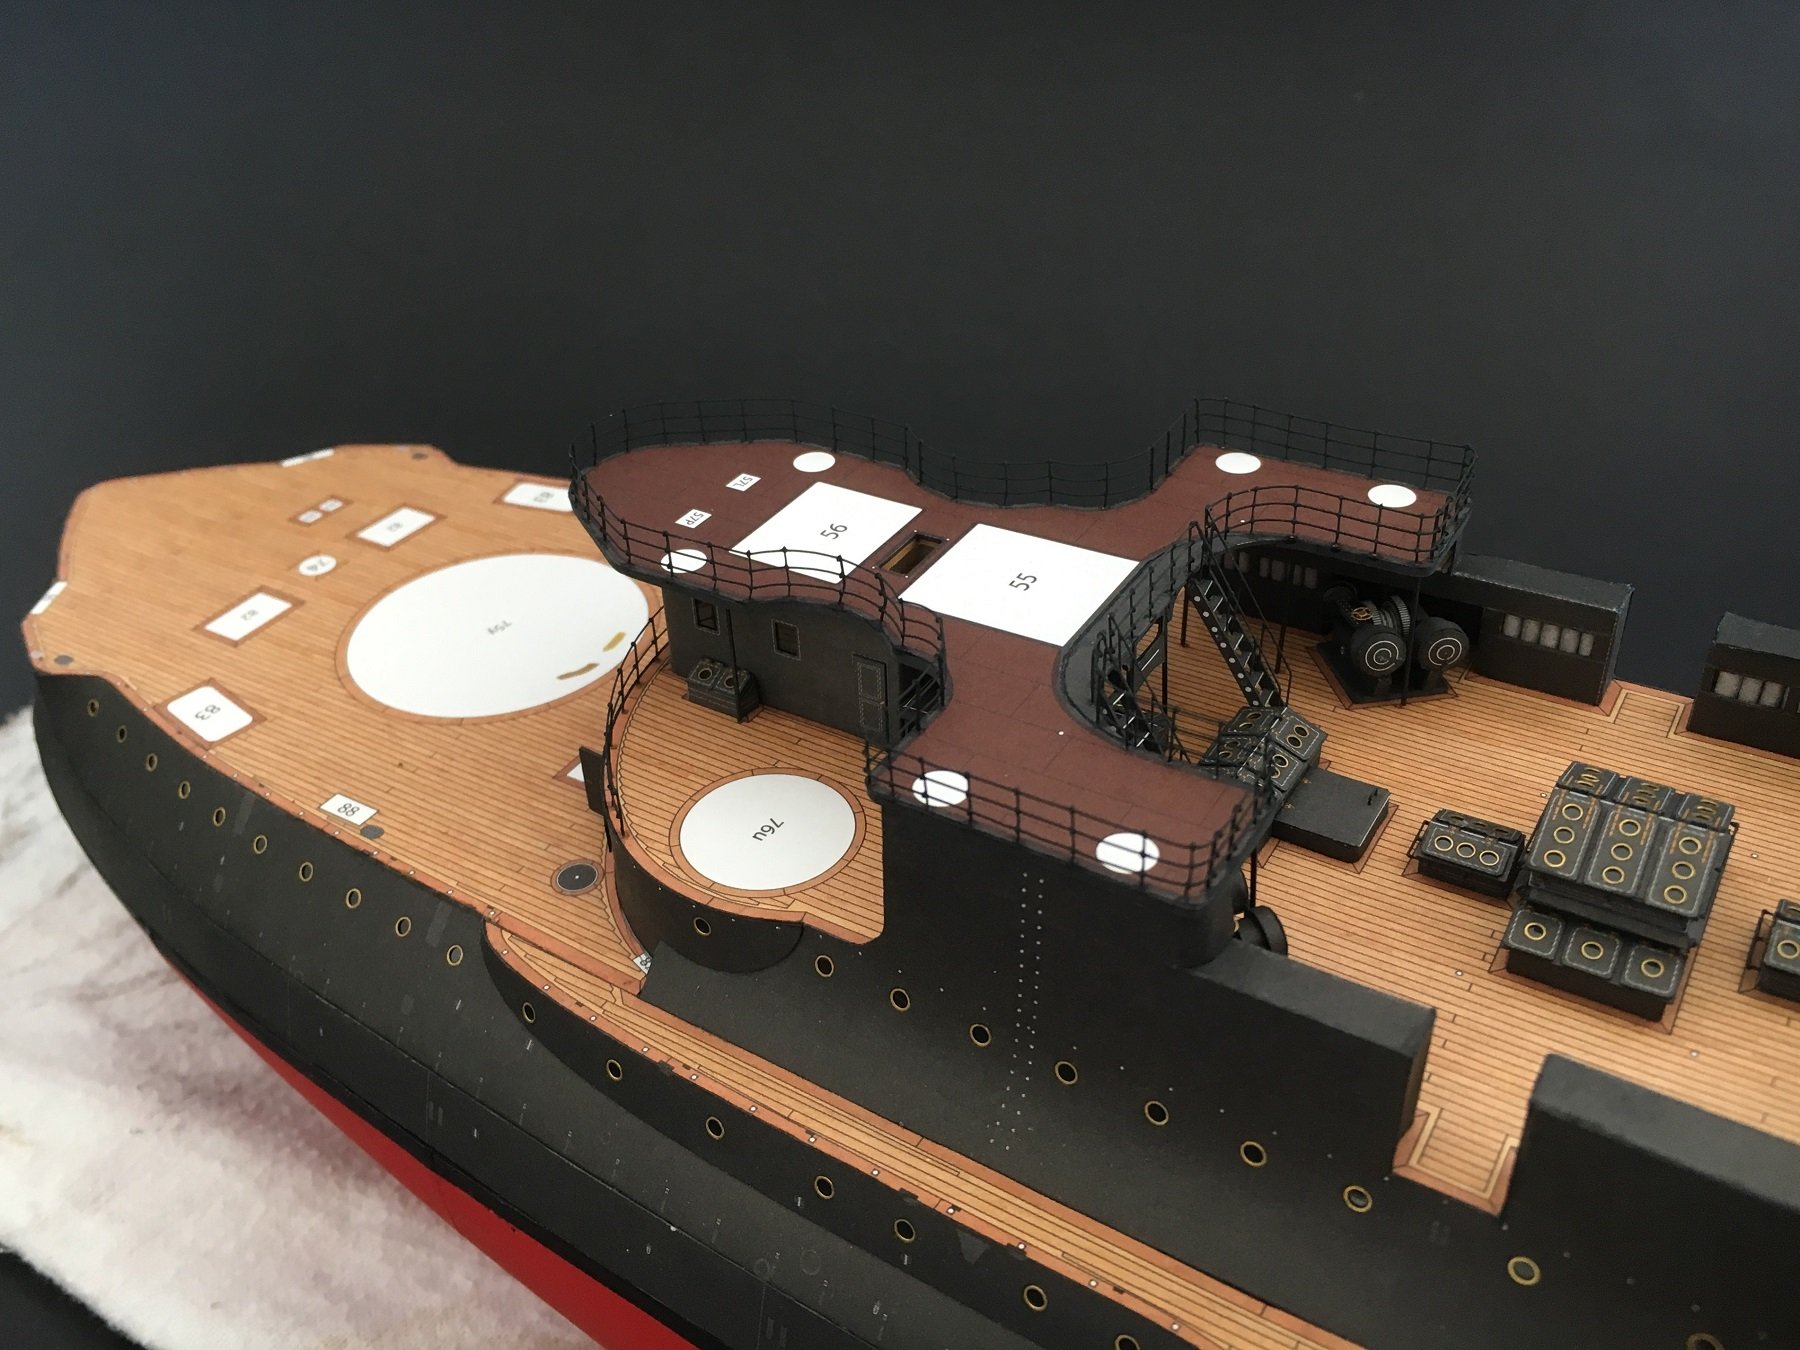
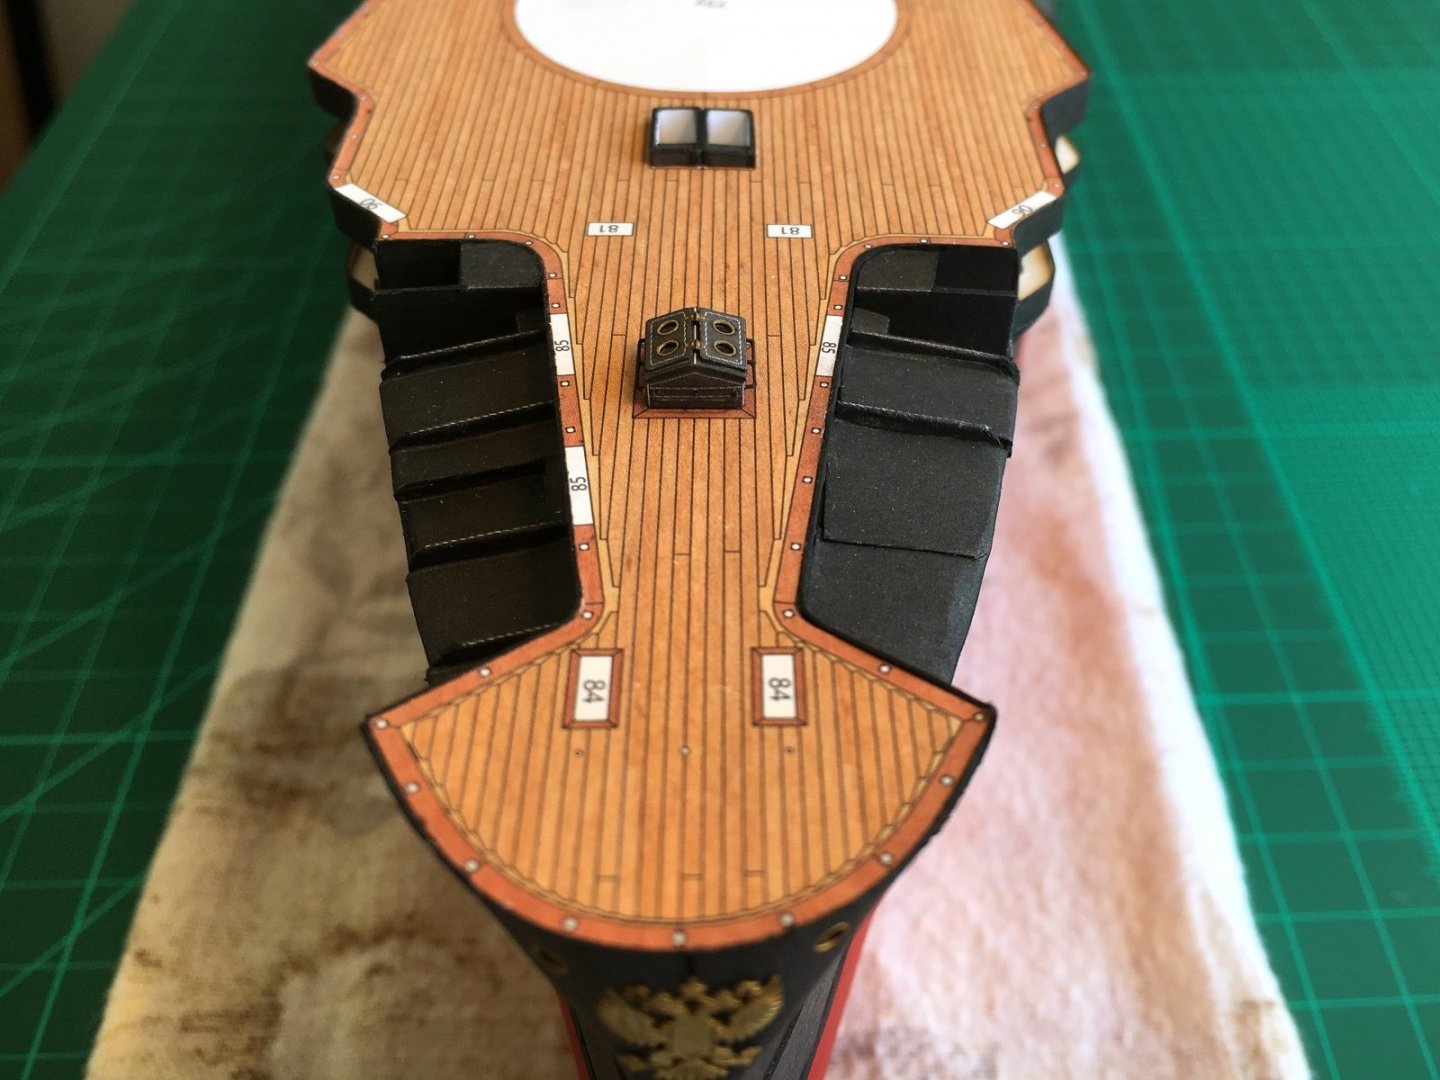
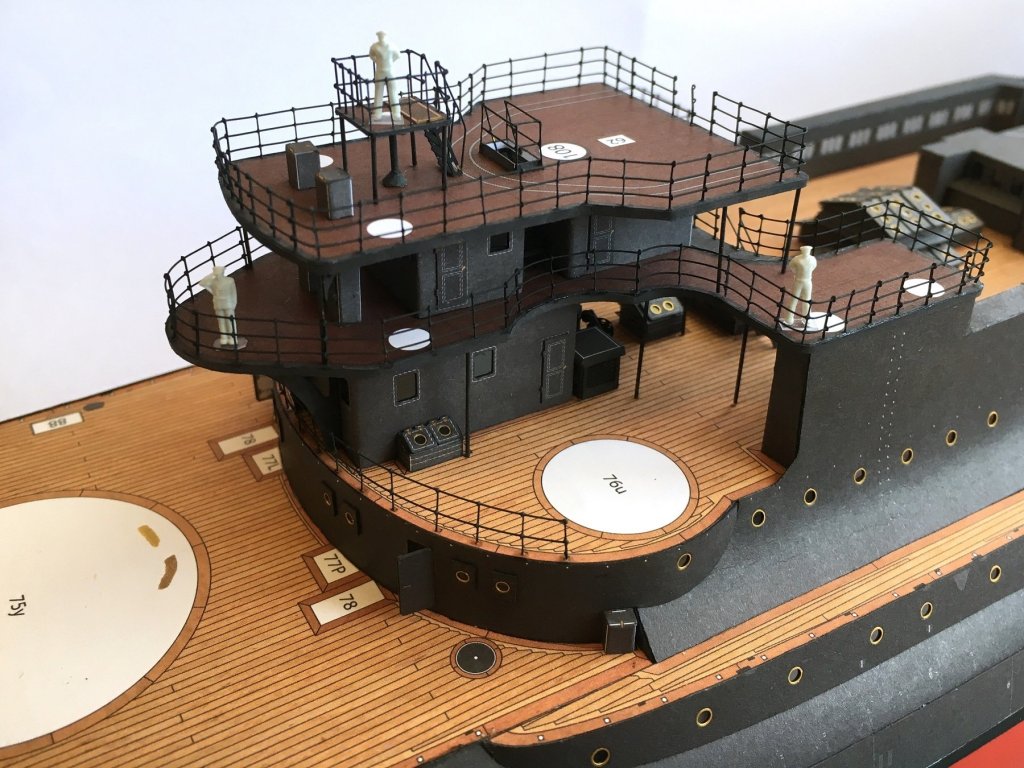
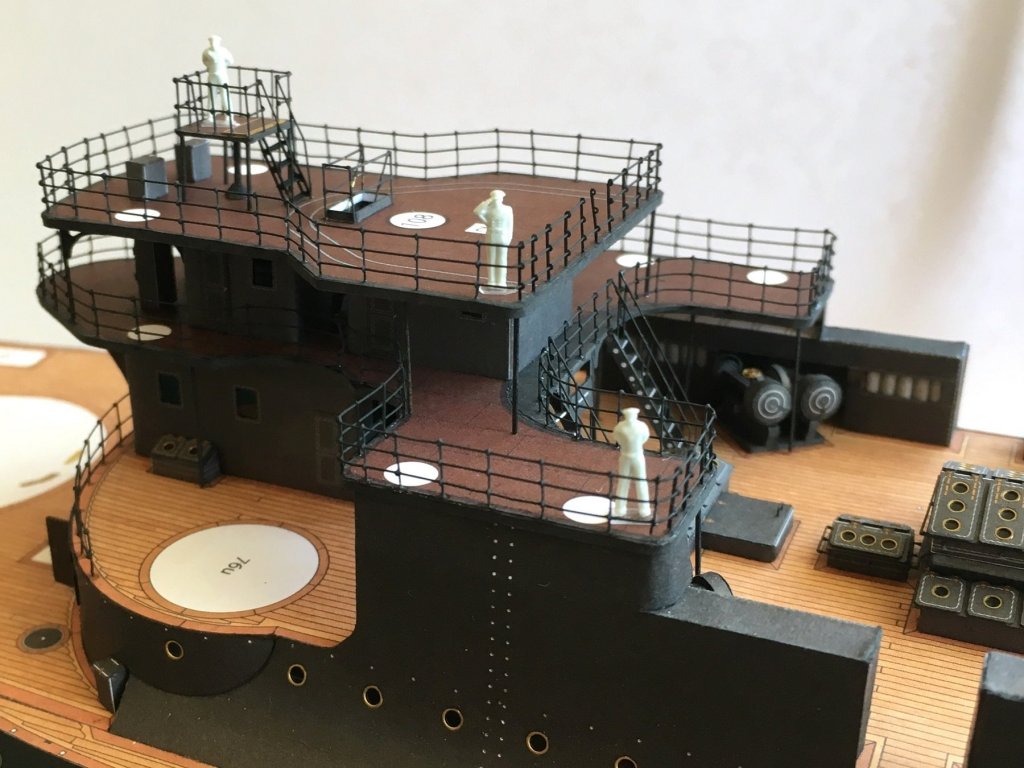
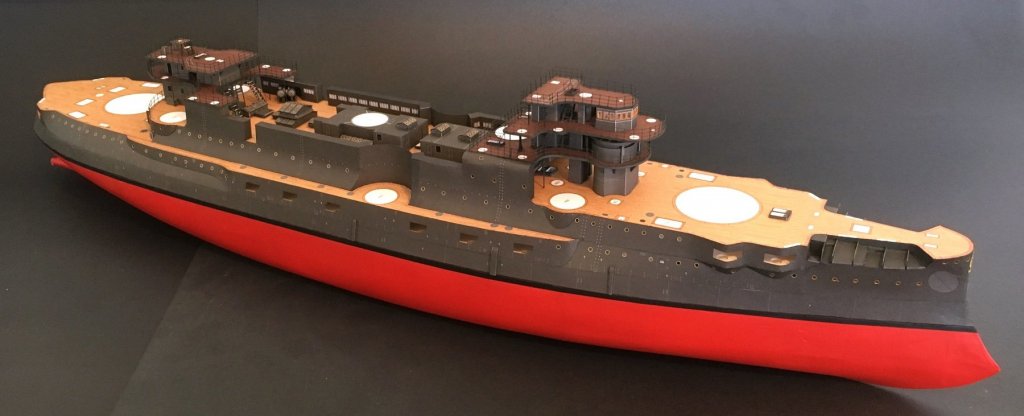
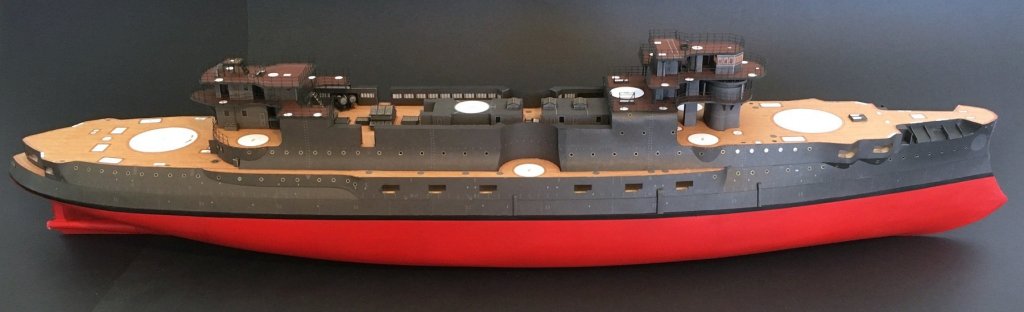
Hi all, A bit more progress, the rear deck fitted last time now has its hand rails and stairs fitted. Then is was on to the upper deck fitting the cabins, stair, bracing and columns ready for installing. The finished rear decks and structures with previously made compass platform and a couple of ready ammo boxes. A few shots of all progress to date Heading back to Melbourne tonight for who knows how long but looking forward I think I will head concentrate on the ships boat decks amidships which go over and cover all the previously installed skylights etc. Cheers Slog


- 244 replies
-
- 14
-
-
- borodino
- dom bumagi
- (and 1 more)
-
Thanks to all for the comments and likes, much appreciated. exactly, just need to practice, try out different techniques out and practice, practice practice... I did break open the box and peruse through the contents of the next build again... but sensibilities kicked in! With only a couple more days before heading off again I am spending the time working on the rear decks of Borodino. Cheers Slog
-
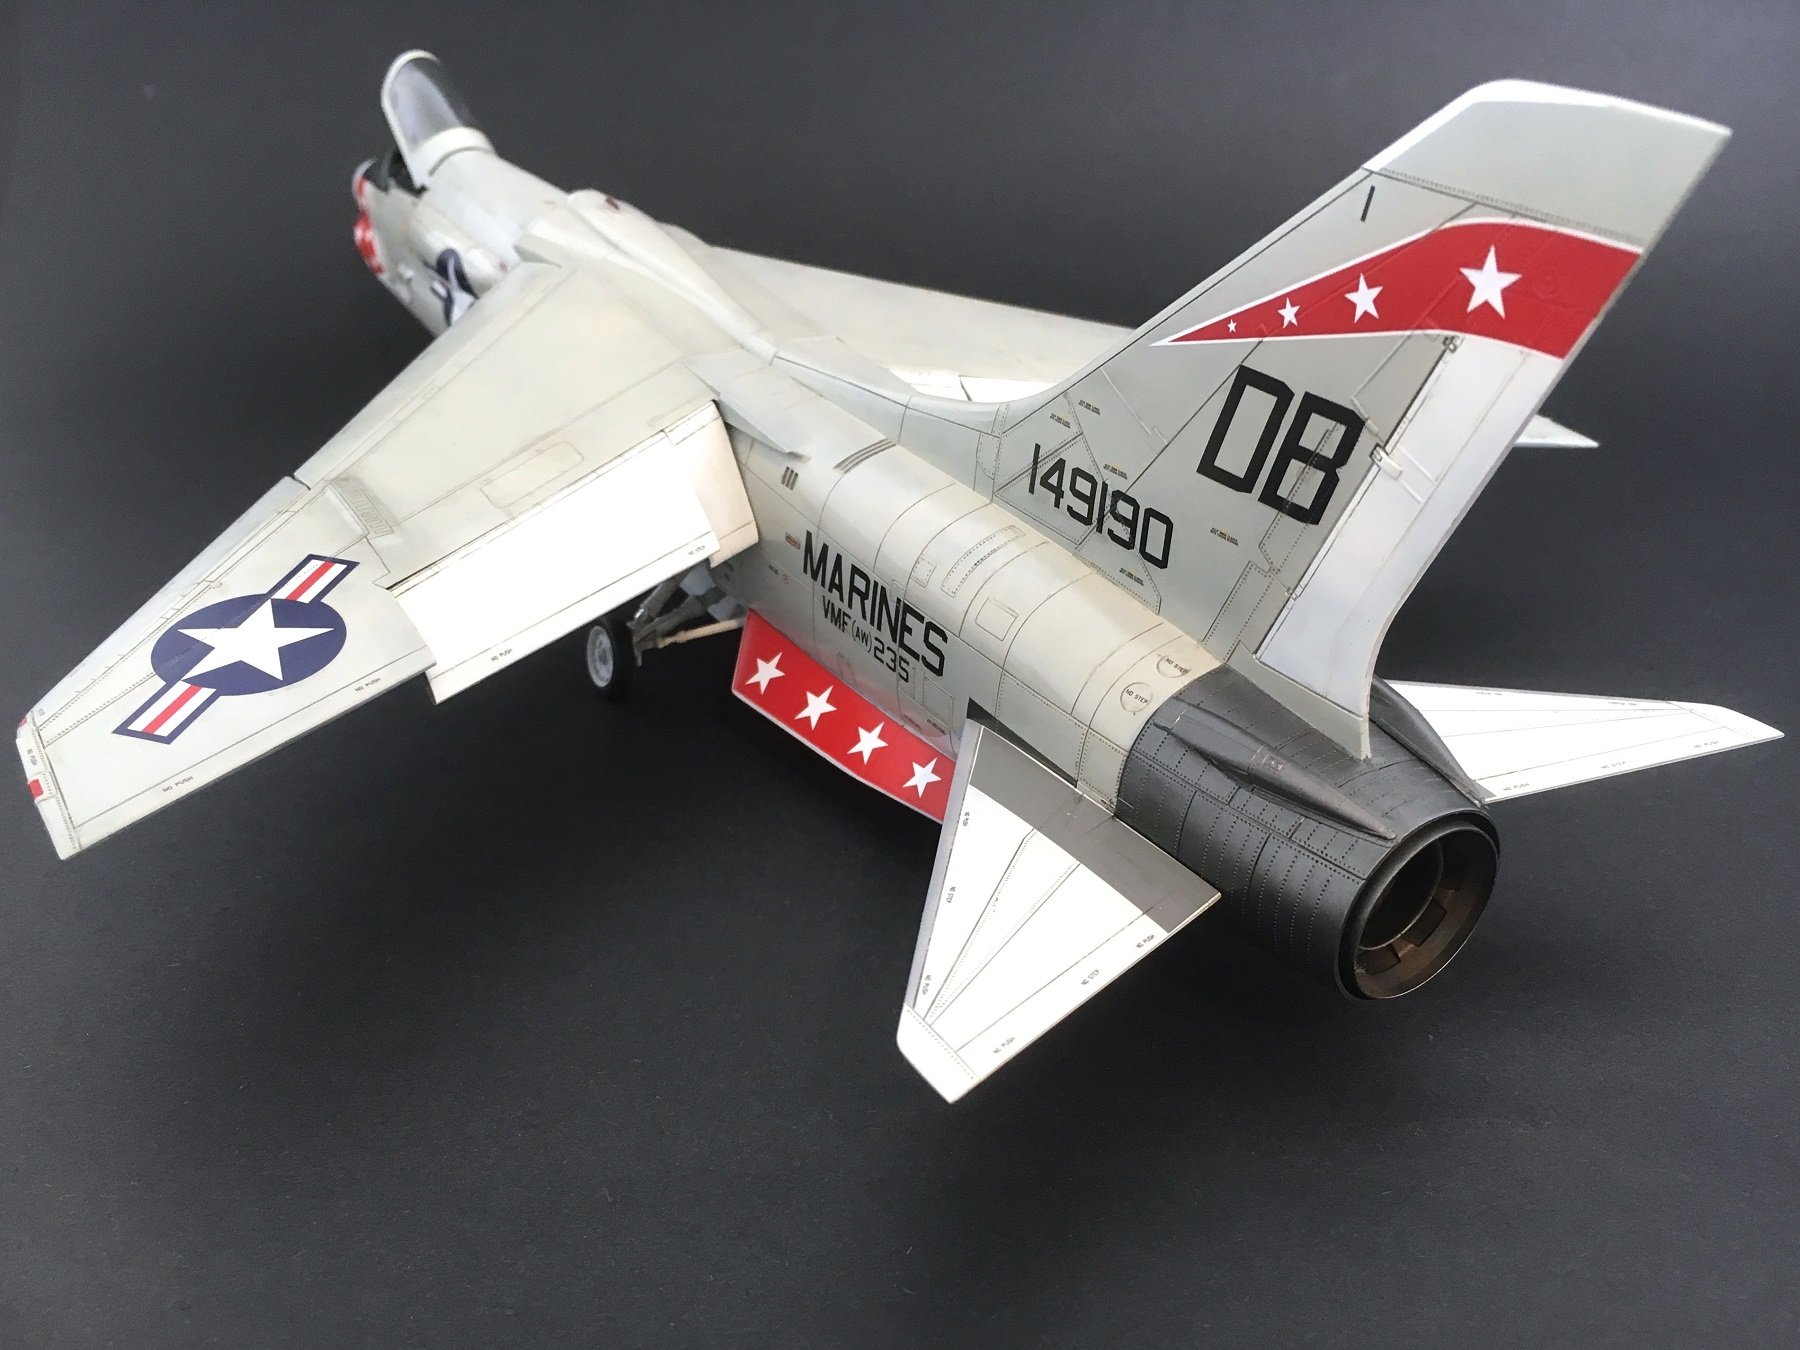
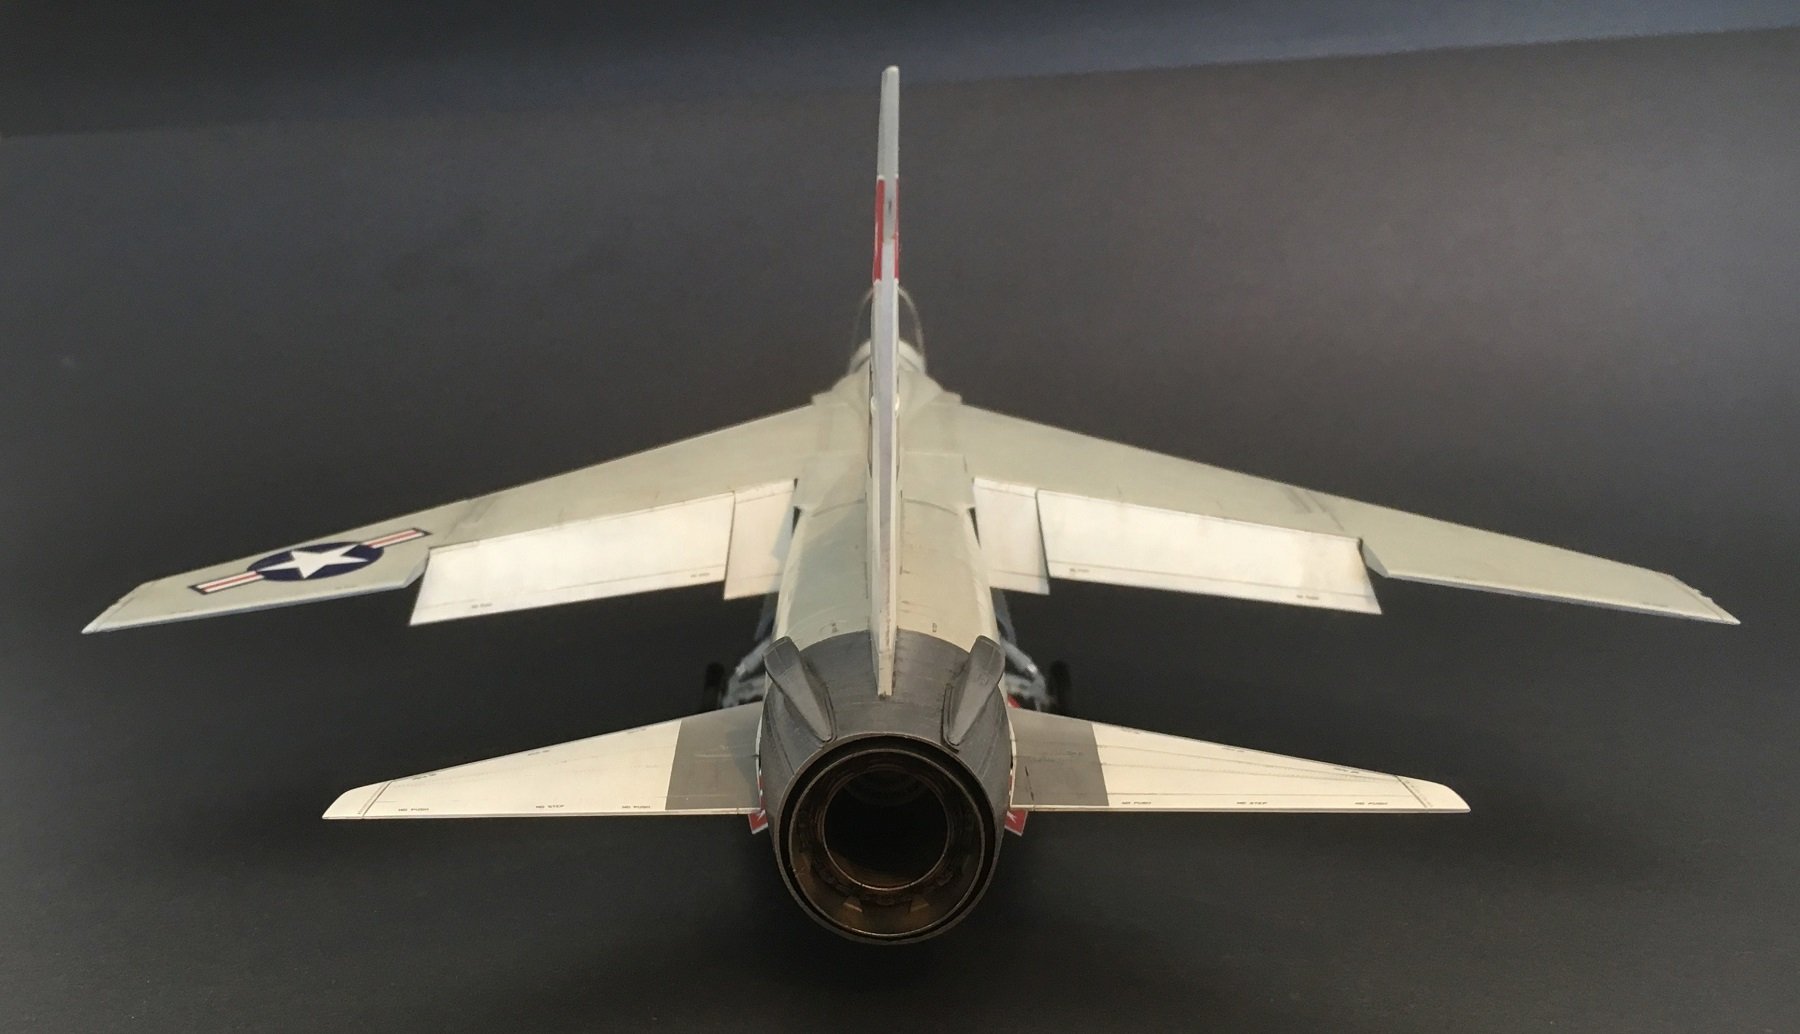
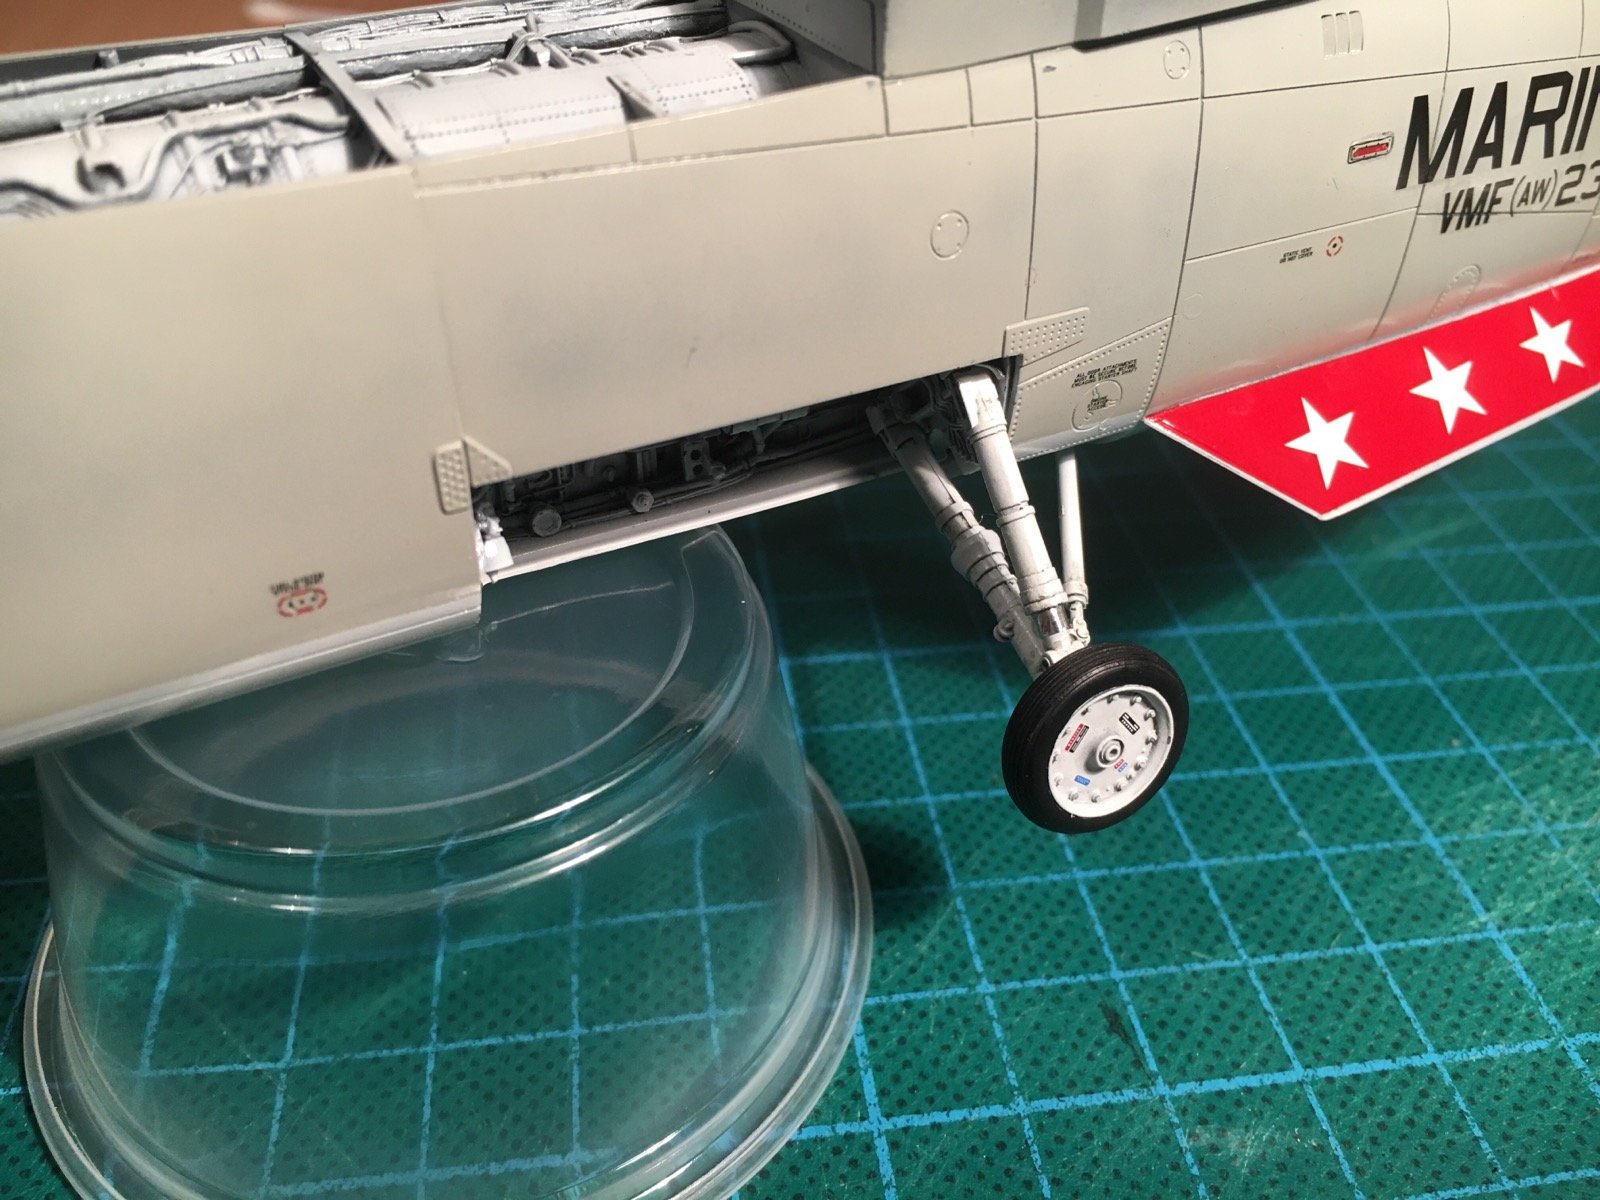
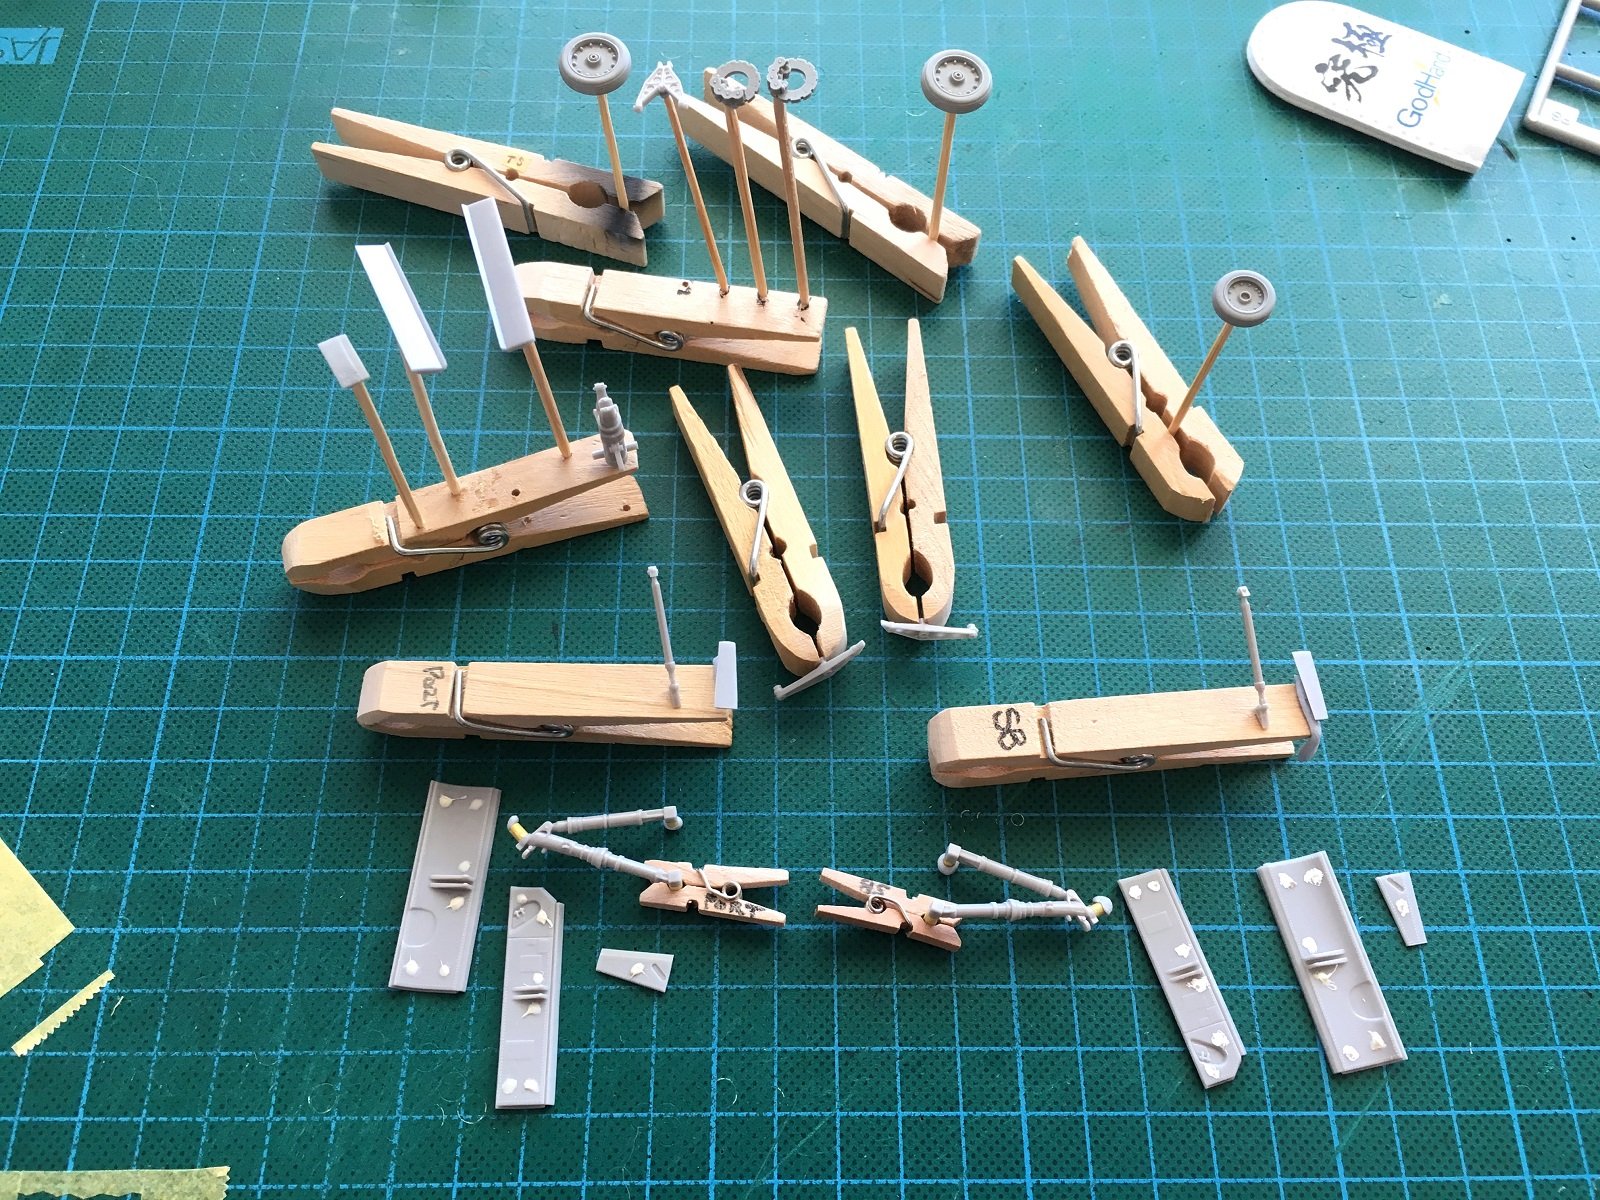
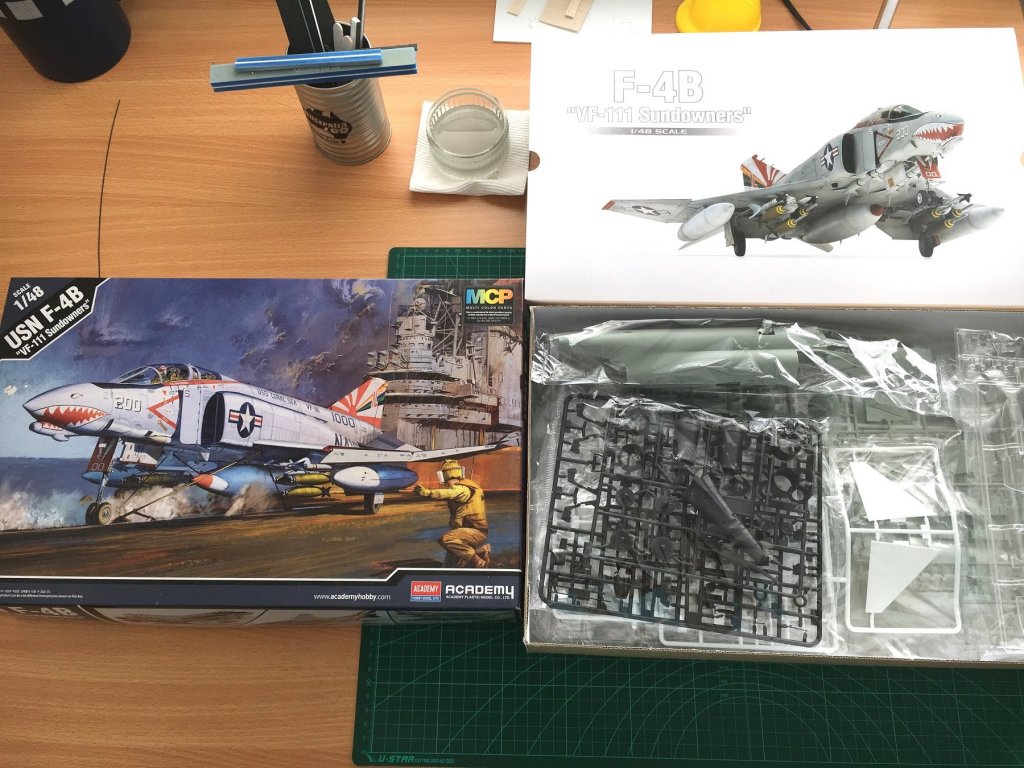
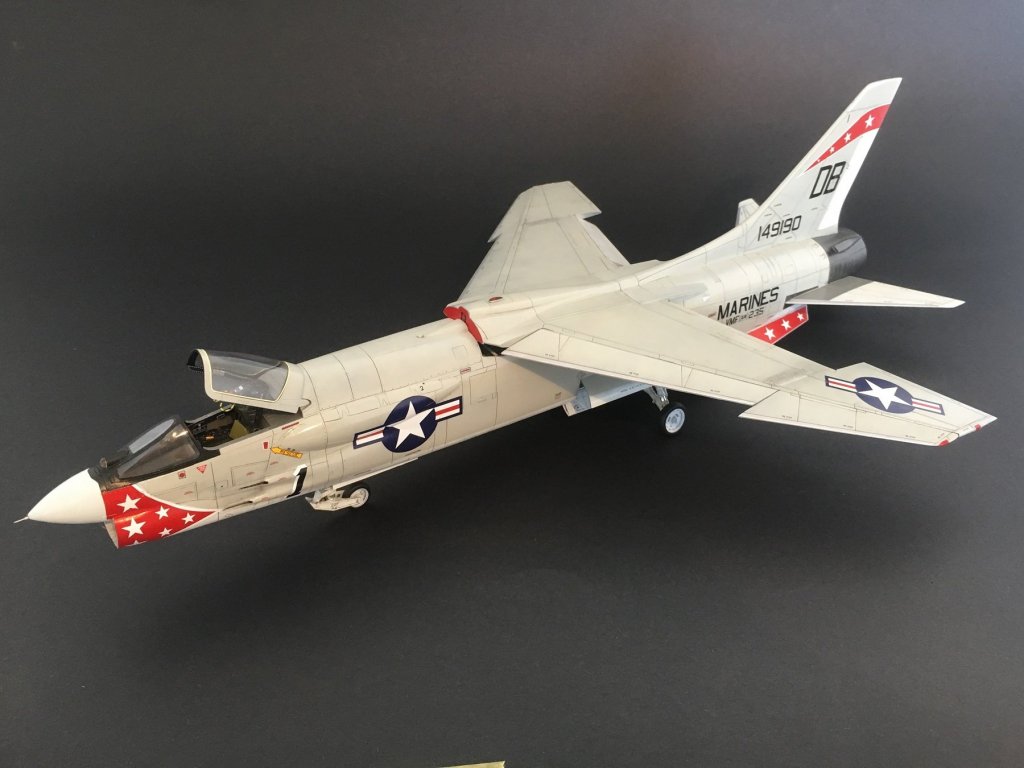
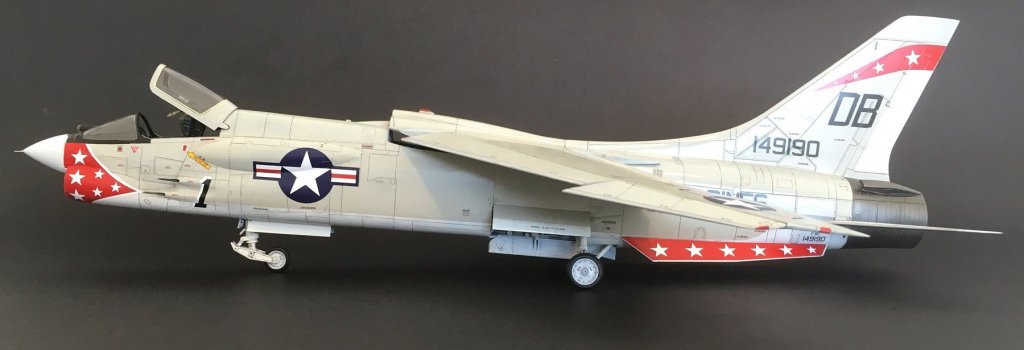
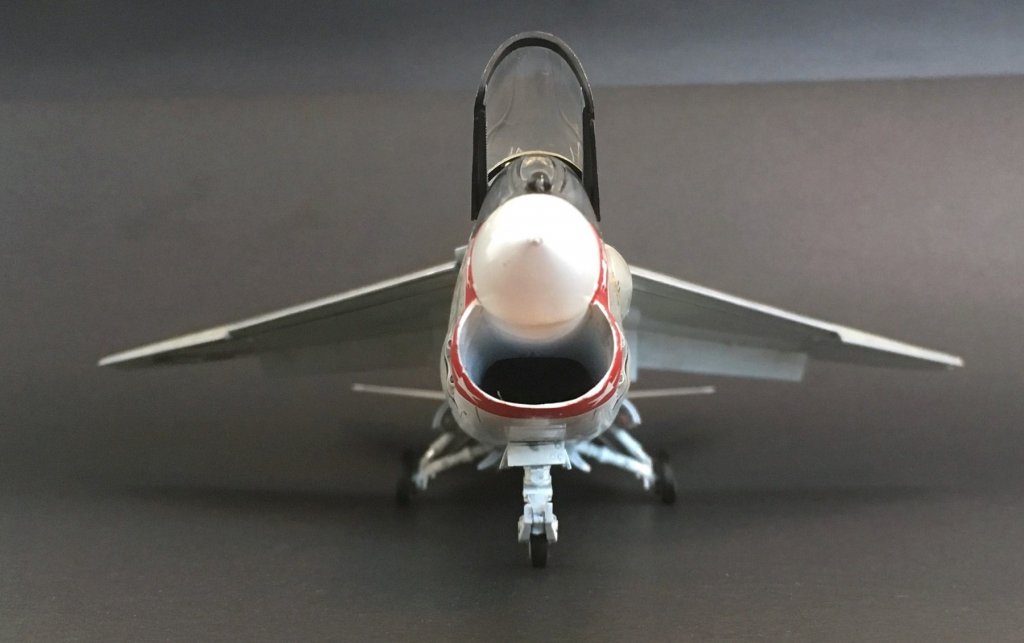
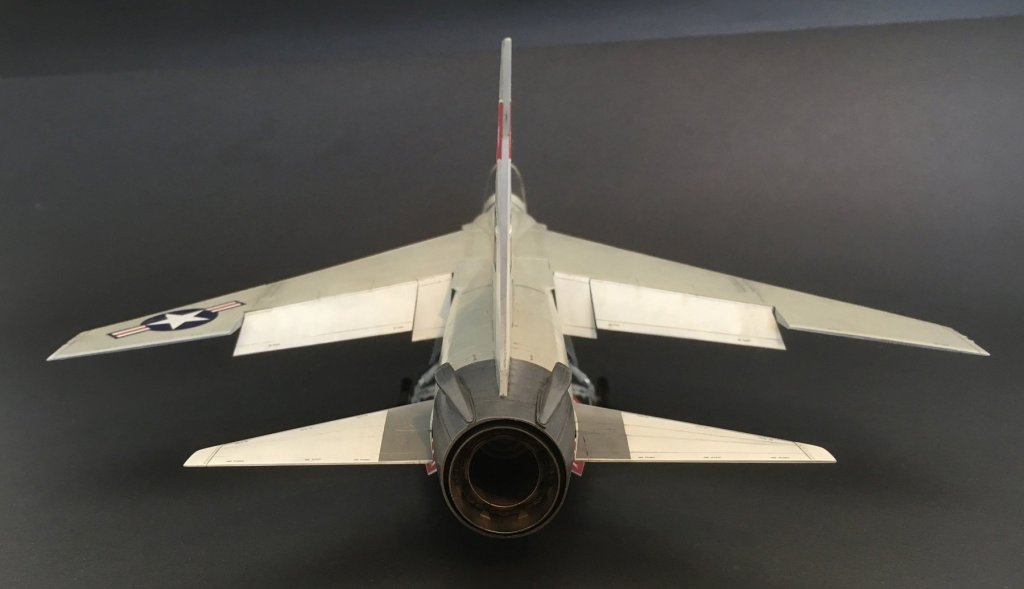
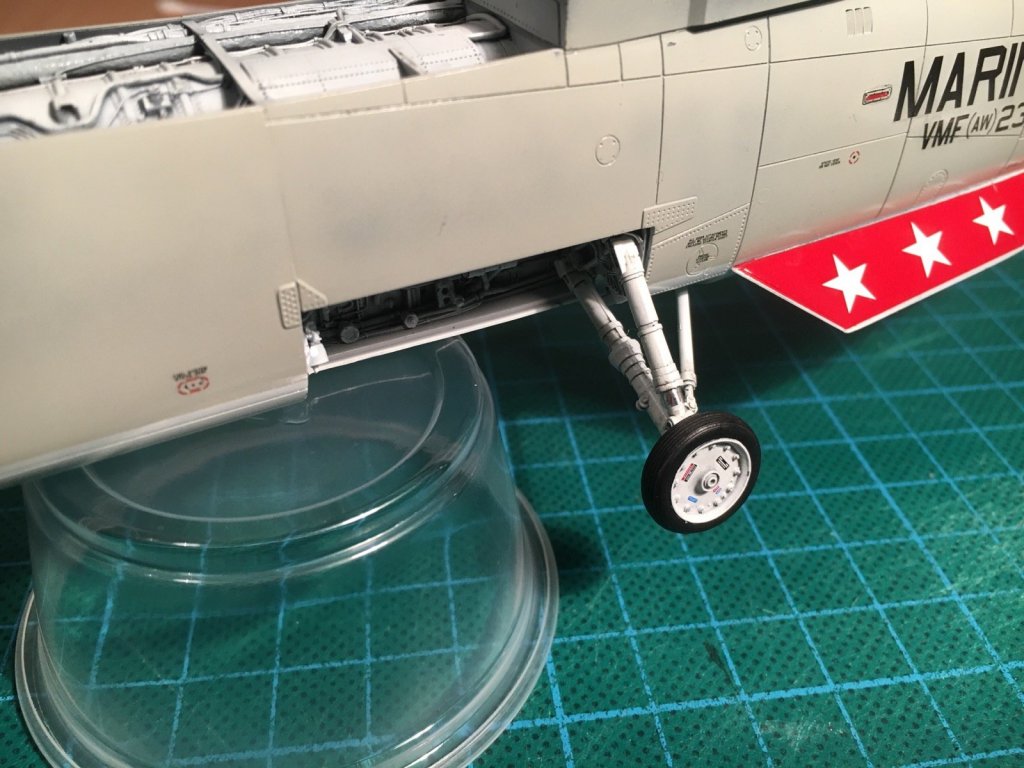
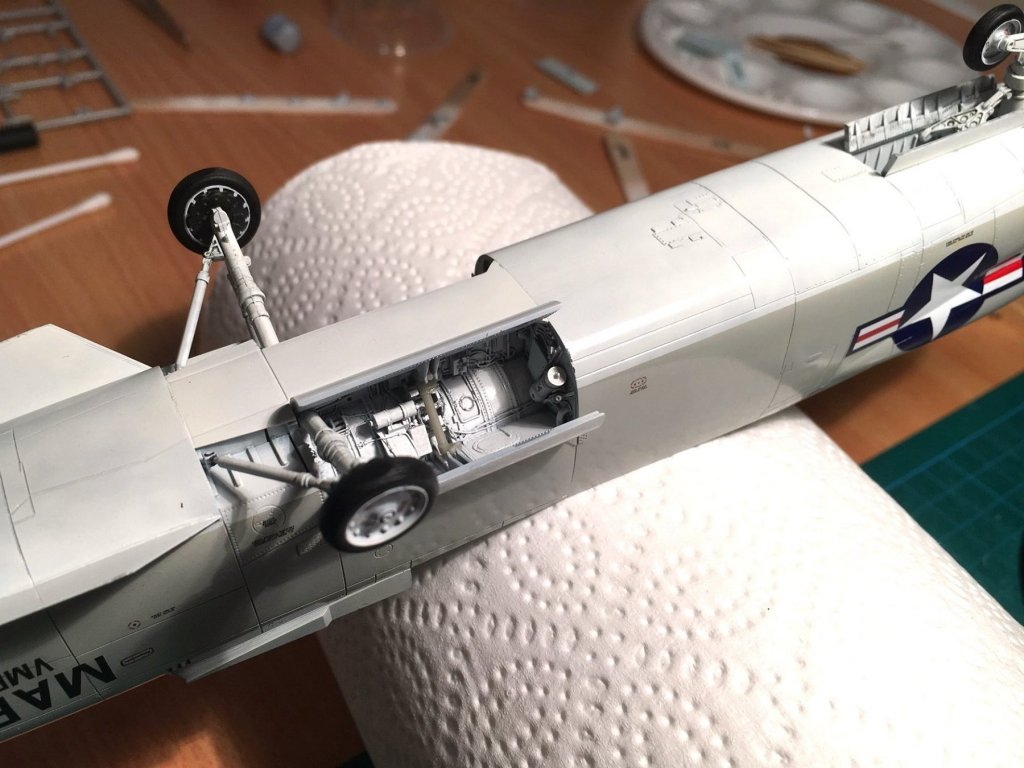
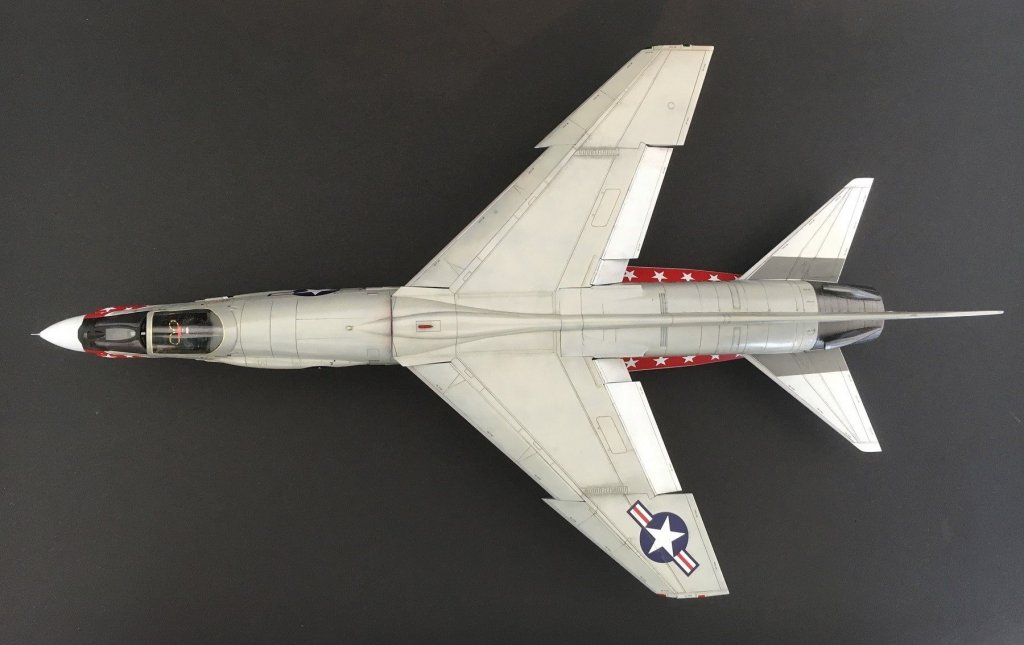
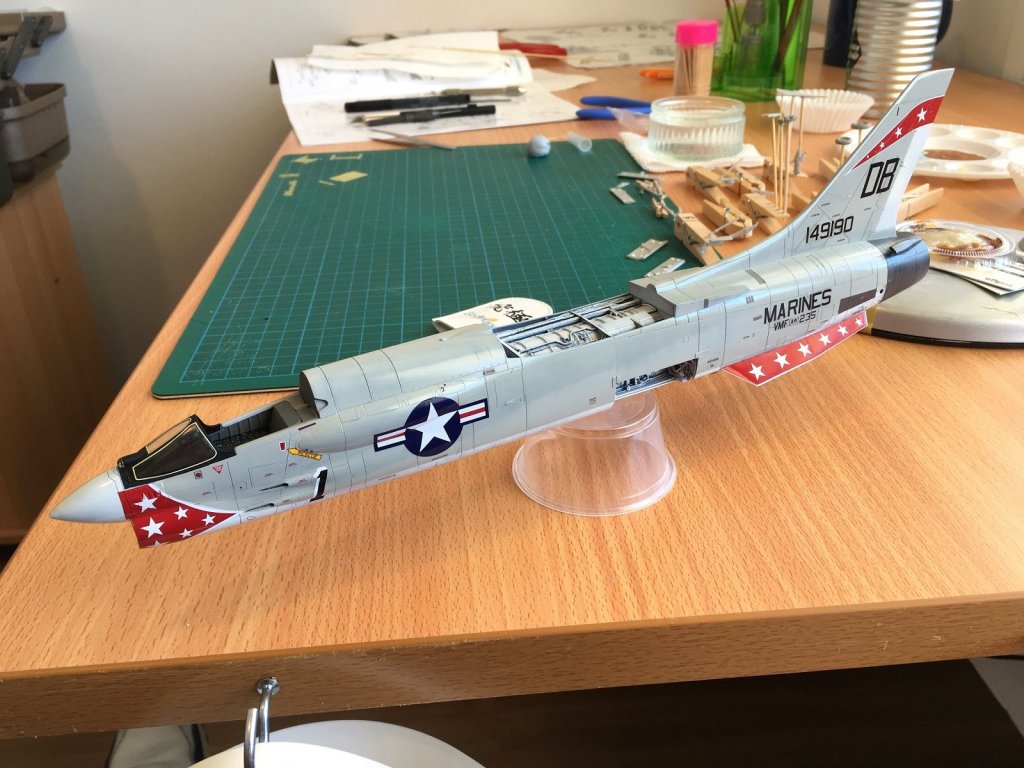
Hi All, Back in Perth for a week and finished the Crusader off. Last time back I managed to prime all the under carriage components and wheel well doors and now finished them up with colour coats and the last of the wheel decals and a couple of No stand stencils on the doors. Got to say the landing gear and wheels on these birds are pretty spindly compared to Phantoms and Hornets etc. I forget about the resin wheel well door actuators to go with the resin wheel bay, which have a couple of arms to slot on to the doors. One of the brackets was broken off but found in the box and easily fixed with a drop of CA. Shown being trial fitted before painting and gluing. Lastly a few bits and pieces of photo etch in and around the cockpit and the previously made HUD finishes it off. It was gloss clear coated previously for the decals and this time wanted to finish it a satin but only had Tamiya Gloss and matt so tried mixing it 50:50 to see if that gives satin. Finished I did leave off a few little bits and pieces and had a big picture of weathering it in my head but ultimately bottled out as what I did wasn’t turning out how I envisaged and didn’t want to mess with it anymore. However the photos don’t really capture the weathering/staining I did do very well. It’s certainly not up to Plasmo or Scale-a-ton standards but considering it’s my first plastic build since my adolescent Airfix days I am pretty chuffed how it turned out. It was great fun and learned lots of lessons for the next one. Hope to get a few days on the Borodino before heading off again next weekend. Cheers Slog


- 55 replies
-
- 21
-
-
Very nice clean and neat build Craig, particularly like your rigging, very tidy. Cheers Slog
-
Great work Richmond. Looks like you’re off to a good start. Cheers slog
- 5 replies
-
- 1
-
-
- san juan nepomuceno
- artesania latina
- (and 1 more)
-
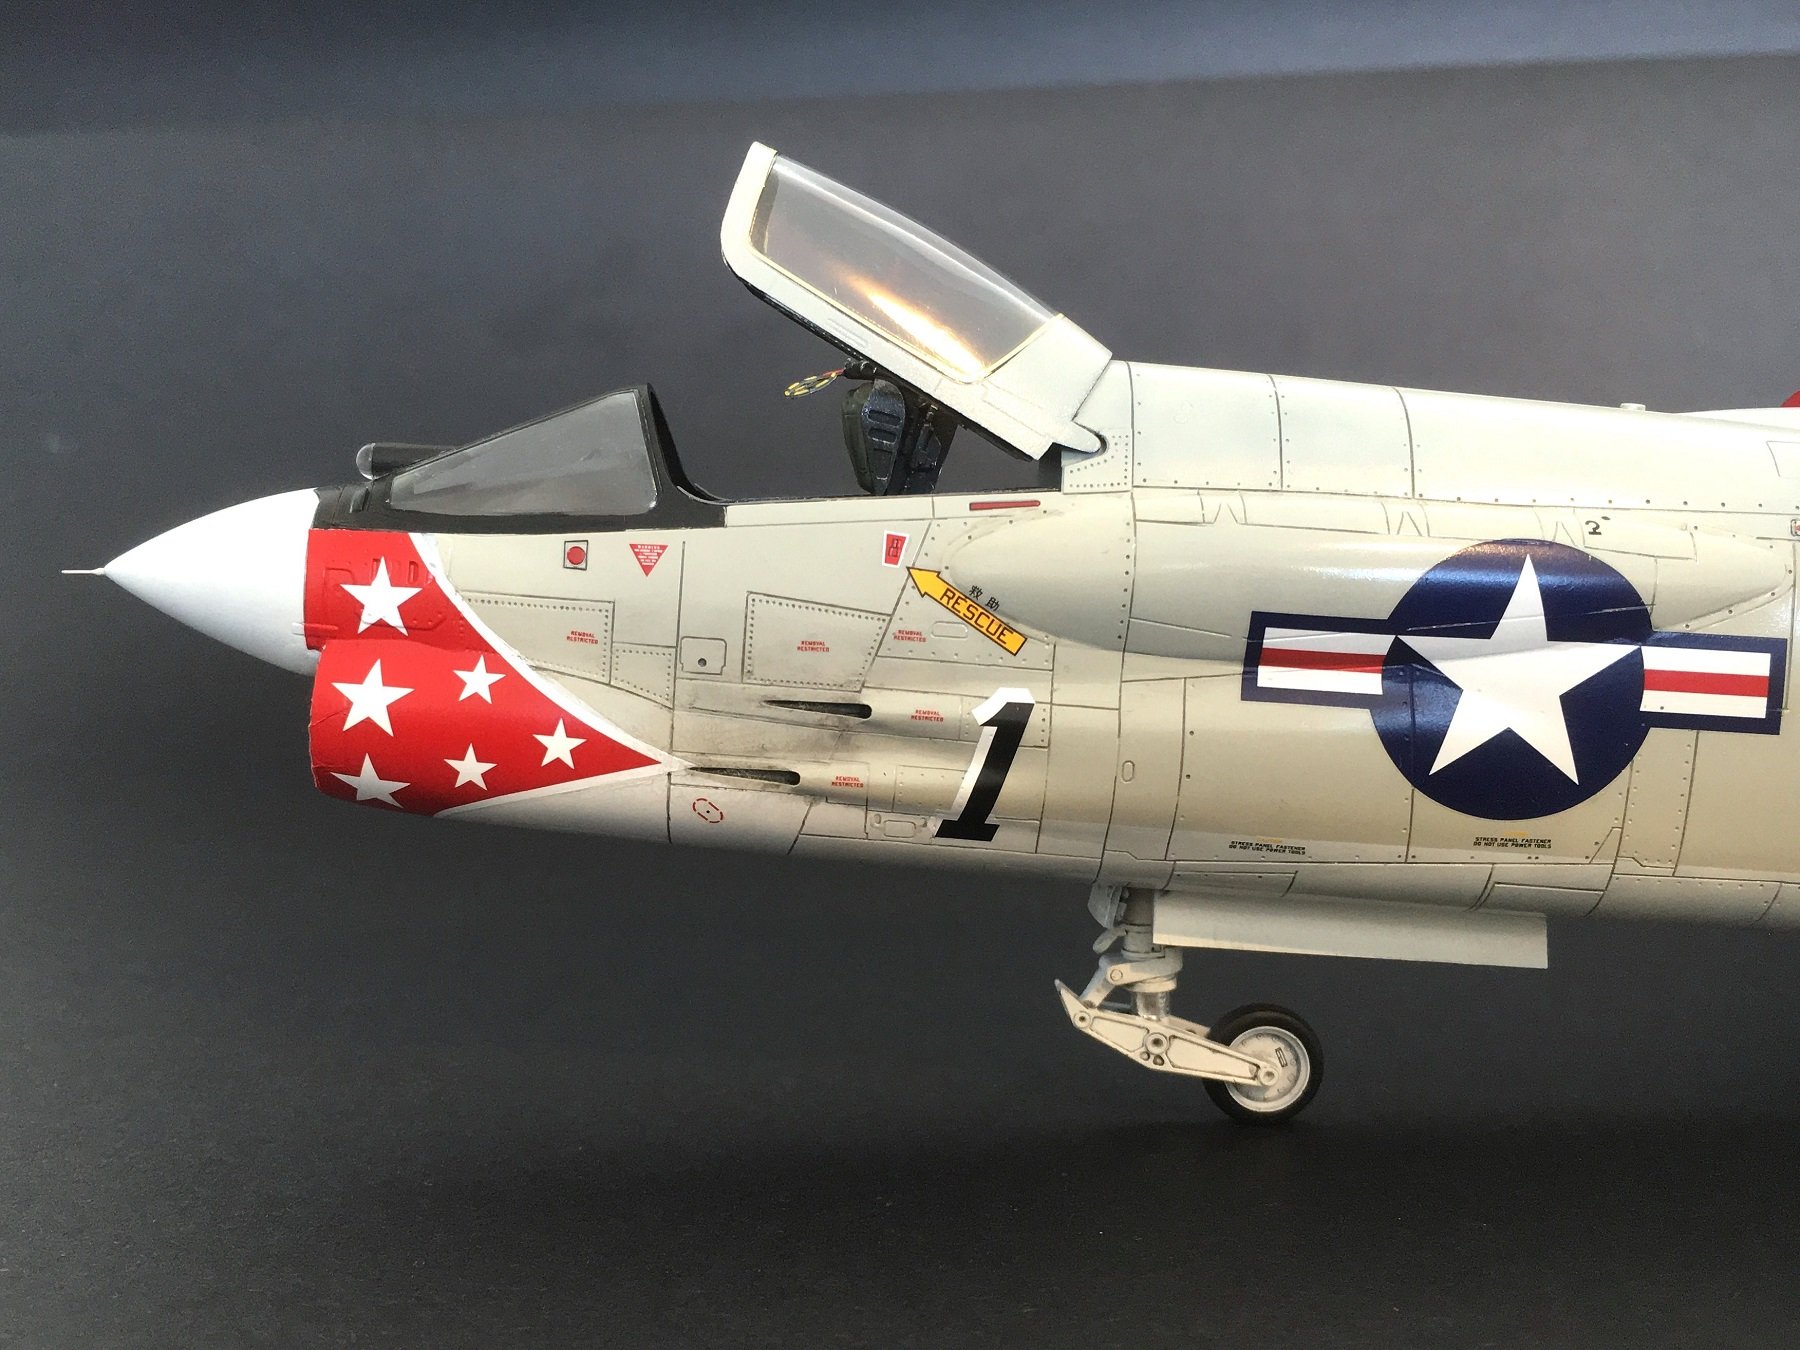
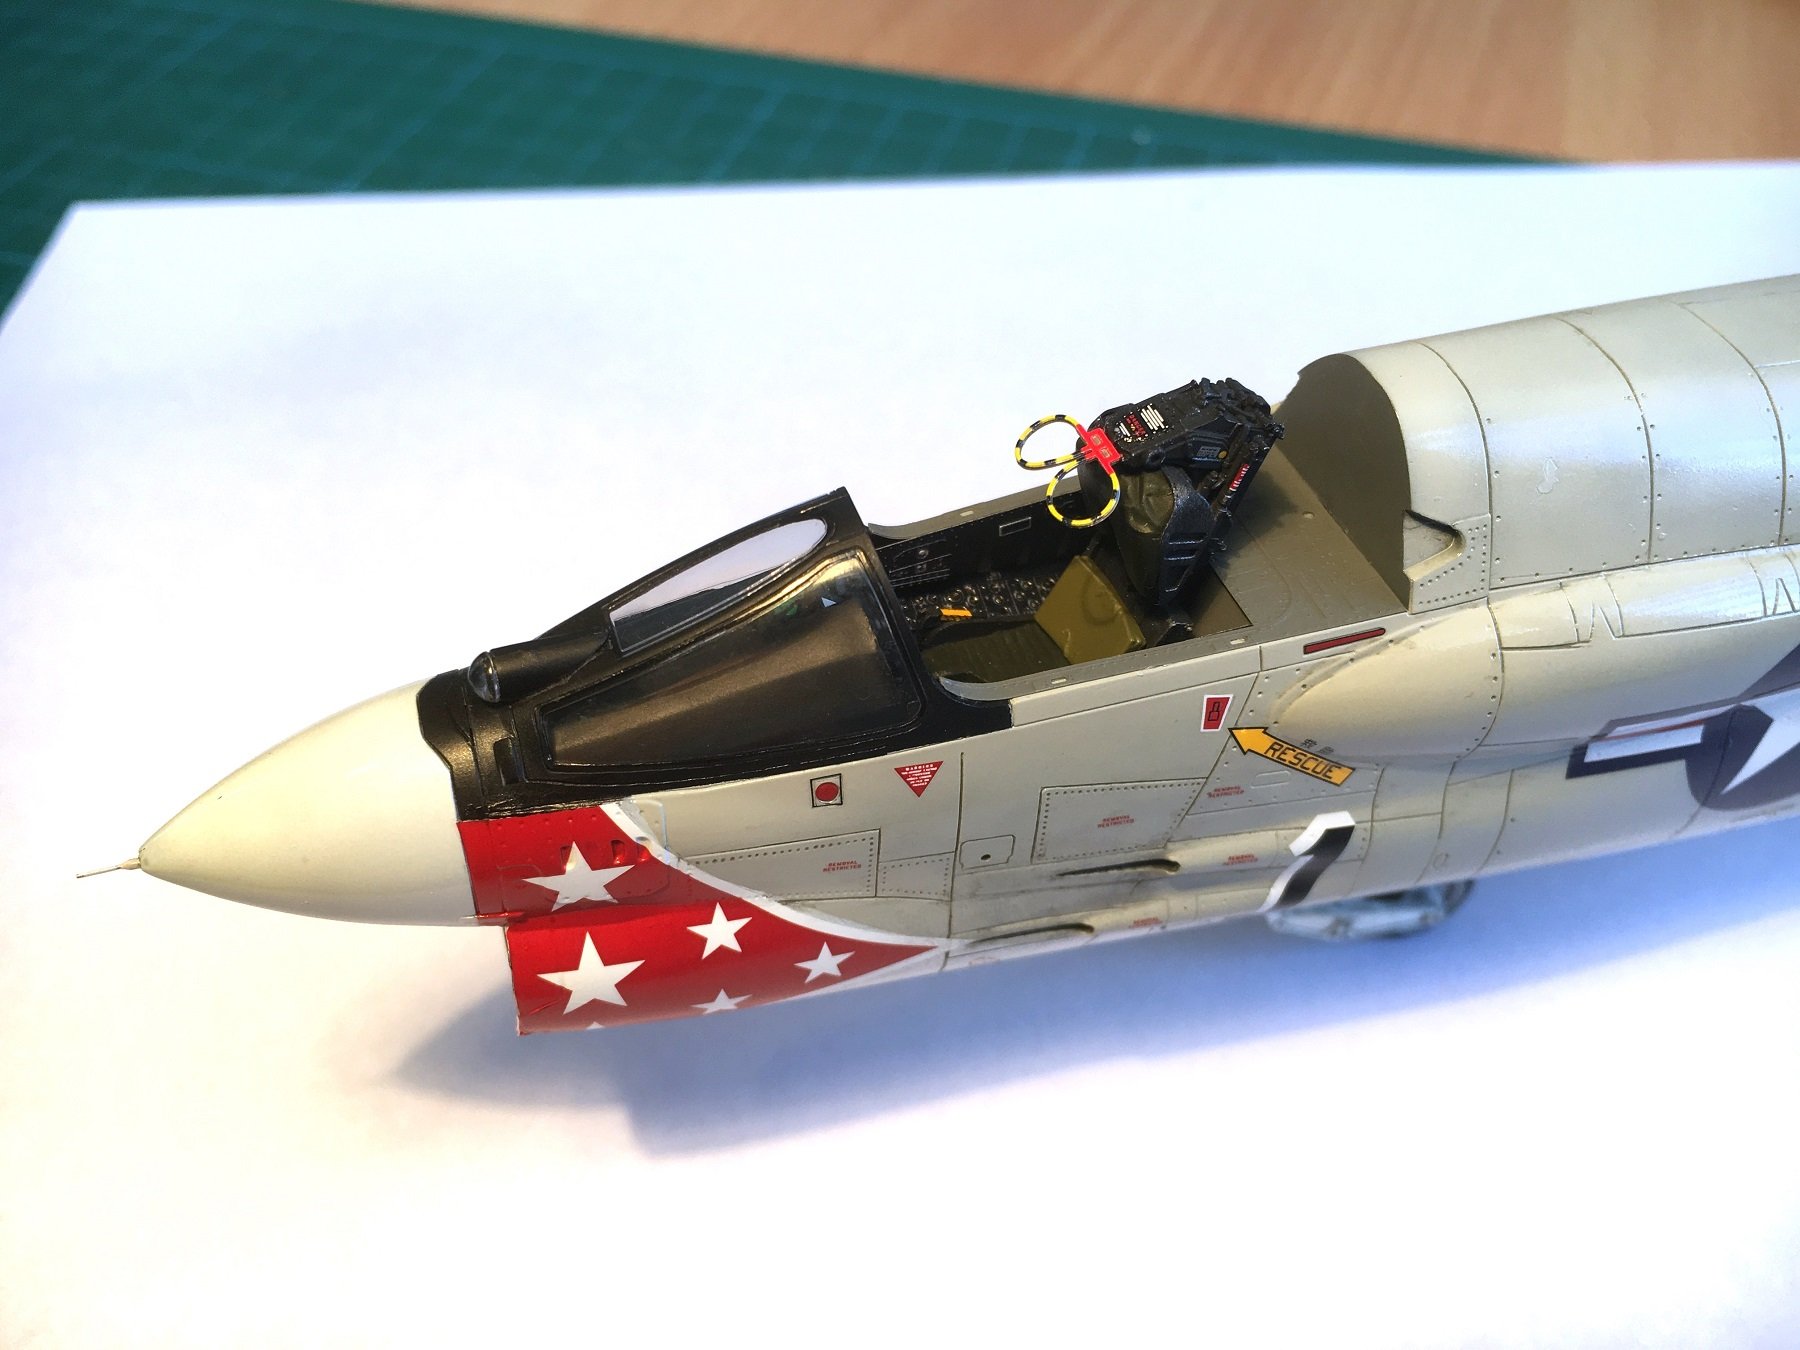
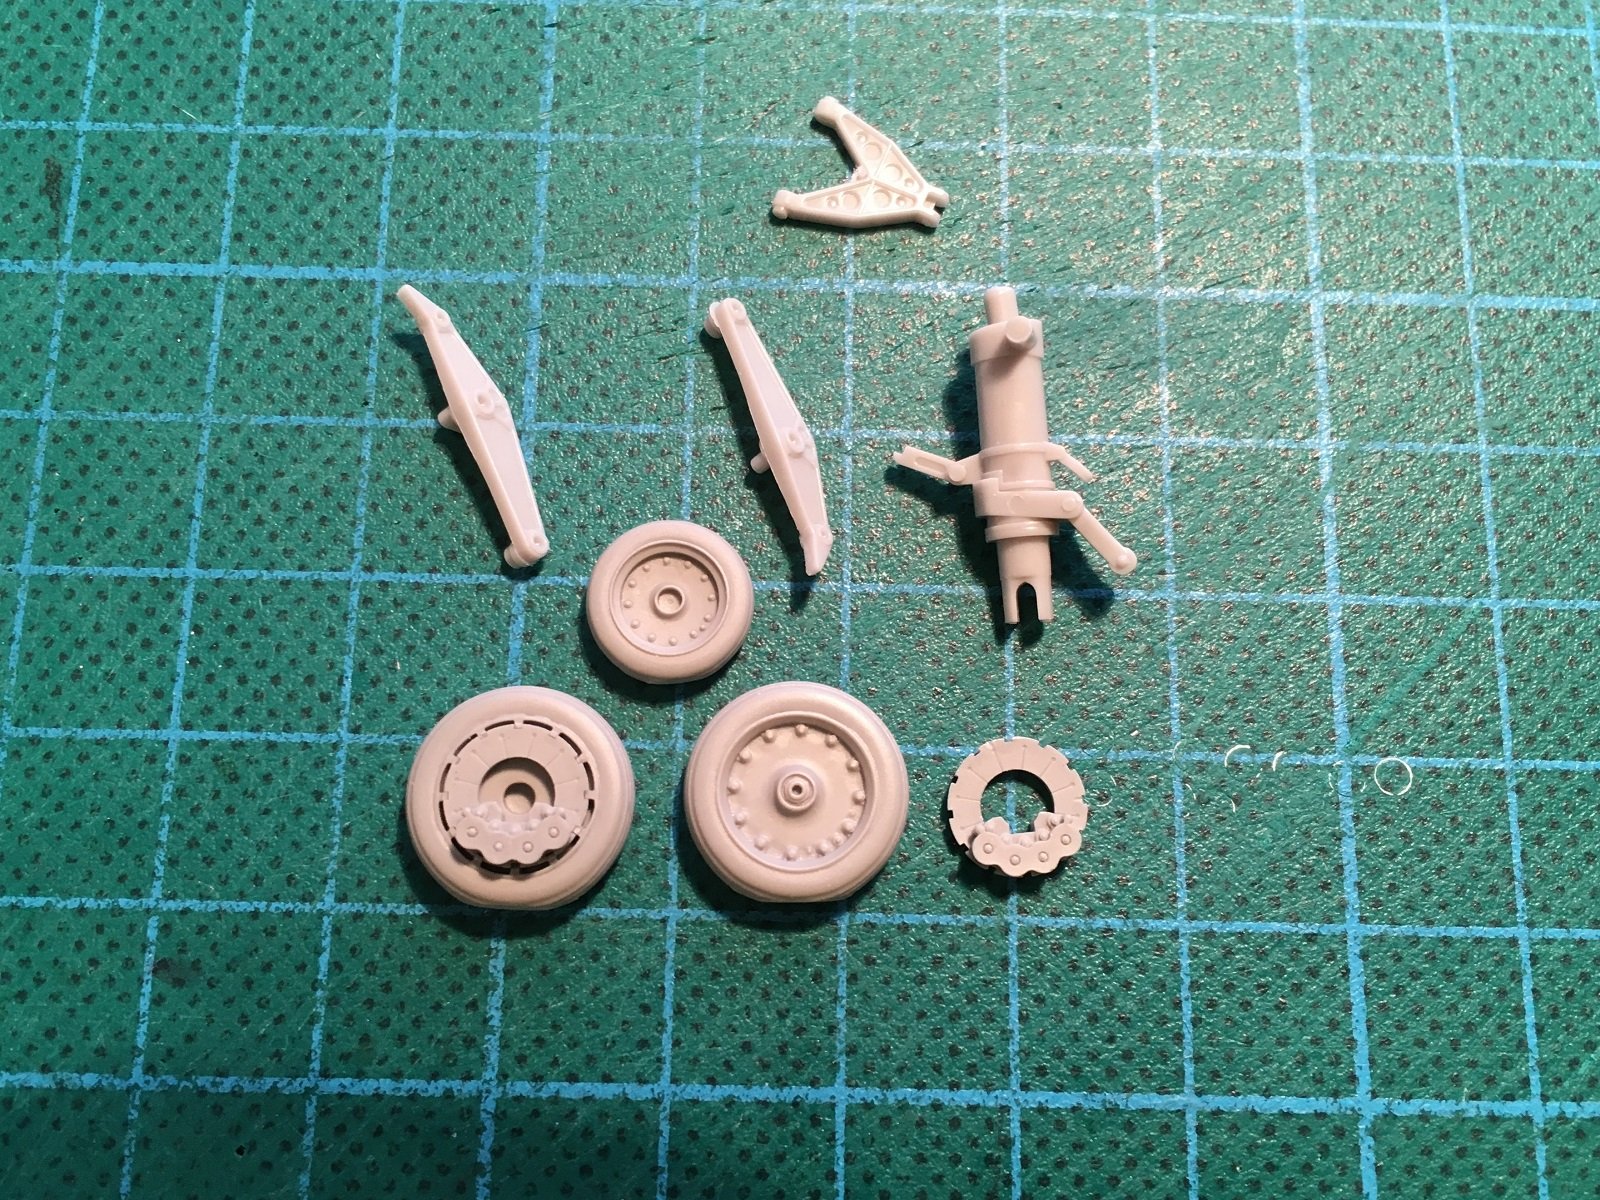
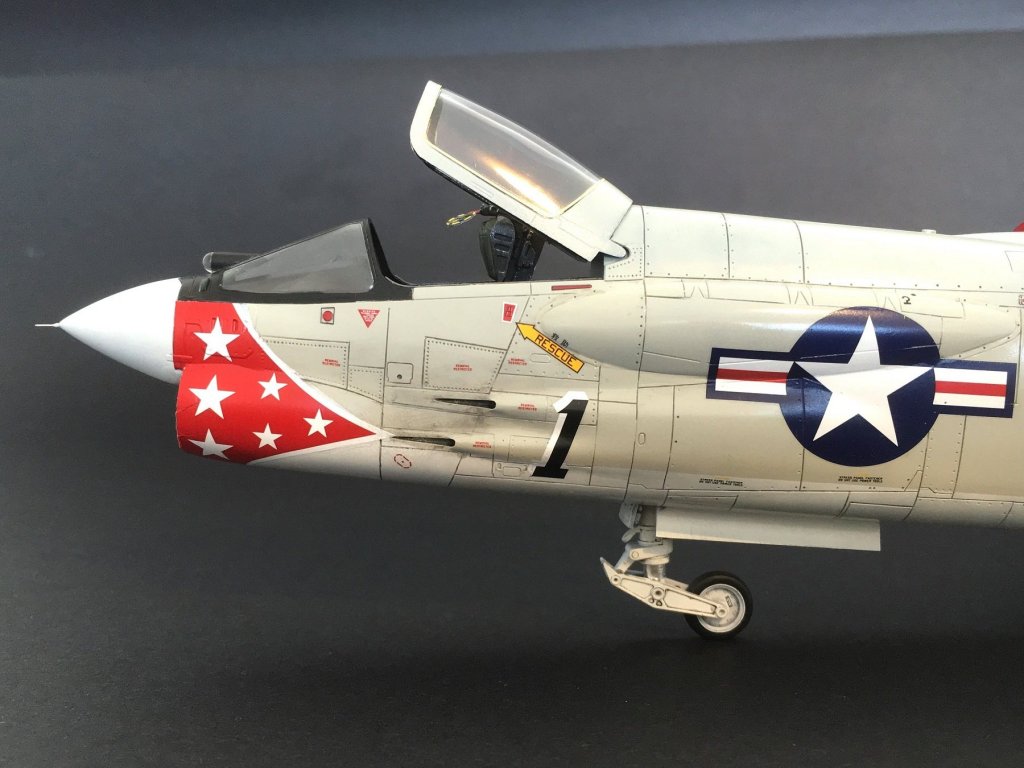
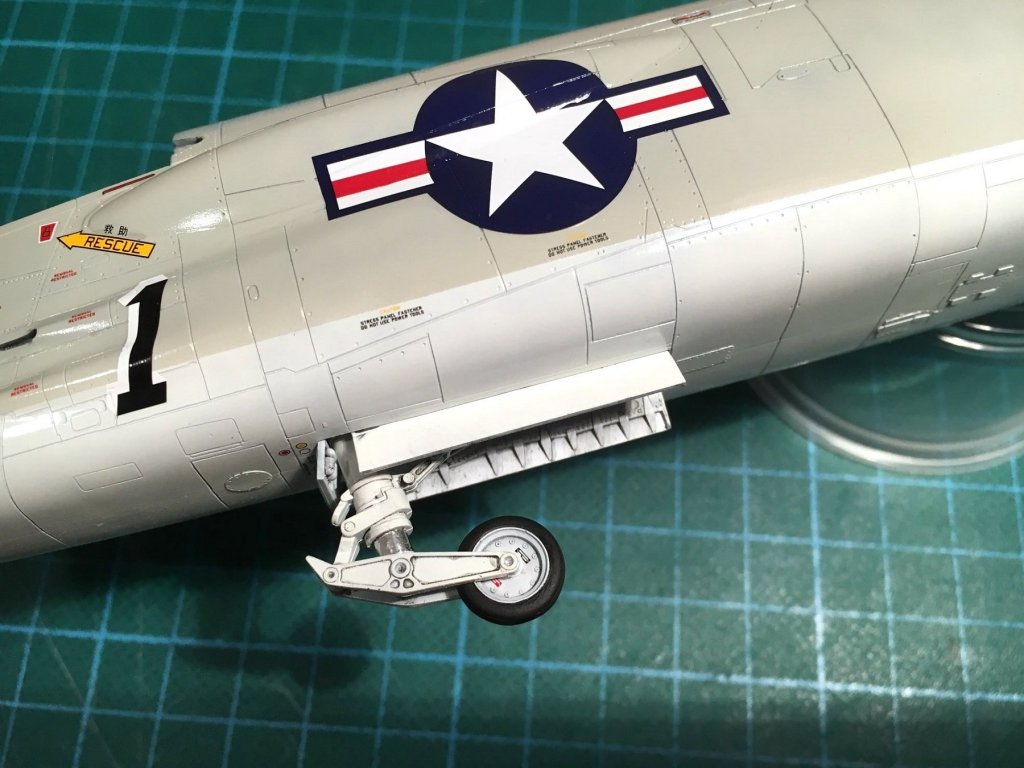
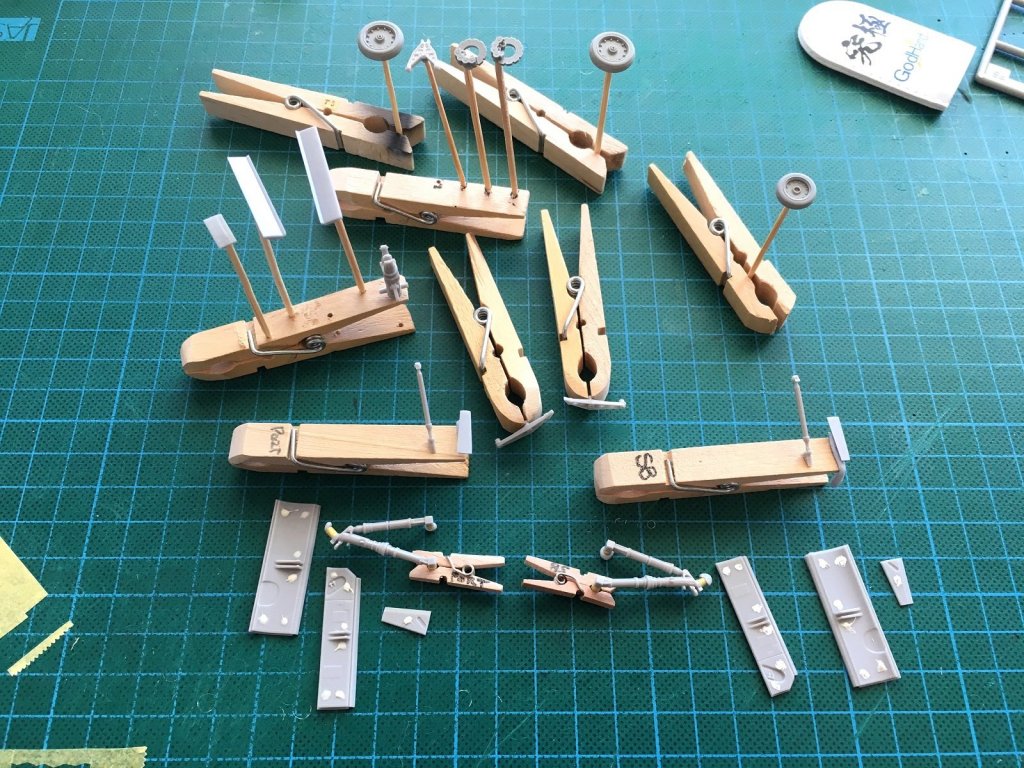
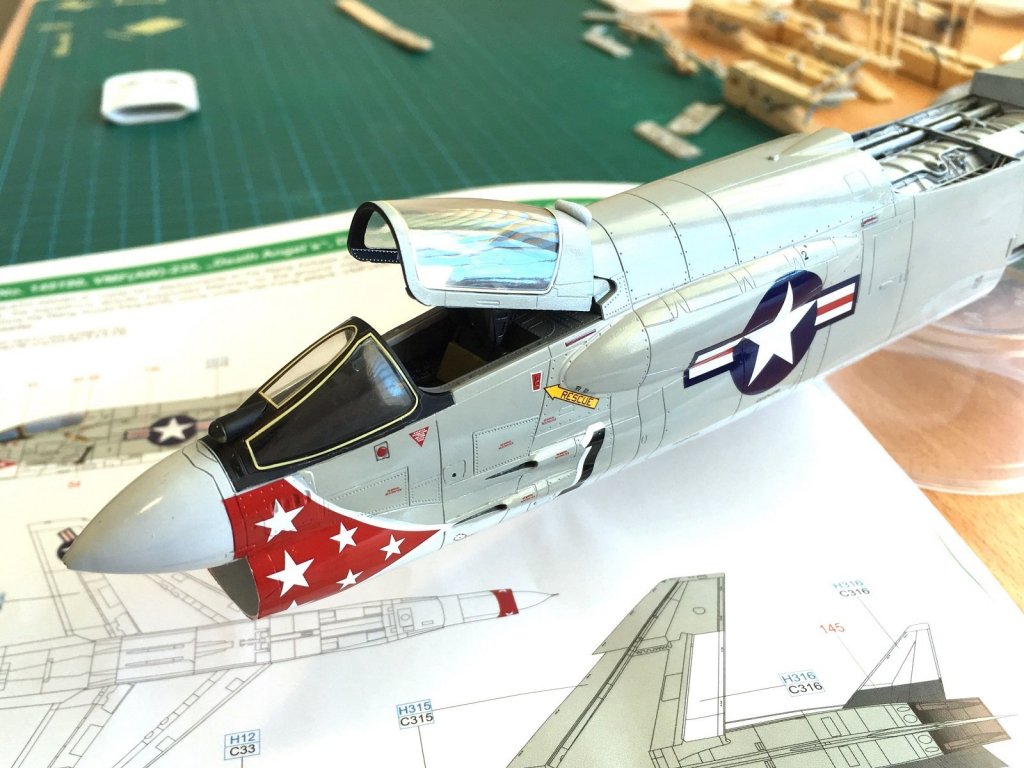
Hi All, Just a quick update. Below is the resin wheels and disc brakes and the kit front undercarriage all cleaned up. There is a supplied piece of PE to replace the kit A-Arm at the top but decided not to use it. Here is all the undercarriage parts and wheel well doors almost ready for prime. I still have to clean up the filler used for some small ejection pin marks. I will prime everything in 1500 surfacer. I also did the decals on the port side and came out not to bad. The problematic nose decal went down a lot better this time around as knew what to expect this time. Still a couple of touch ups needed. The nose decal is a different shape from the artwork so will need to extend the anti glare black from the canopy forward inline with the front of the red. I will need to also touch up with some red to meet the canopy black and will need to touch up with red on the underside where the decals meet but other than that pretty chuffed how it turned out. That’s the decals complete other than a couple on each wheel. Just a quick mock-up of the cockpit. The cockpit PE top trim can just be made out (not glued yet) and a couple of coloured PE side consoles attach to this. Still got bits and pieces to add to the seat also. The yellow ‘rubber’ seals are actually decals and went on pretty well to the front screen but the main canopy came in two halves and messed up slightly on the ‘practice’ side but know why and this side went on pretty good. Hopefully get some priming done before I head off again tomorrow night. Cheers Slog

- 55 replies
-
- 17
-
-
My limited understanding of the two is that the Set is a mild softener as you say ( even smells like vinegar) but the Sol is more aggressive for difficult surfaces. My experience is the Sol really softens the decal and it goes all wrinkly (leave well alone during this stage!) but when it dries it smooths back out and really sinks the decals into the panel lines and rivet details. I haven't noticed this pronounced conformity using Set only. I think the solvaset is more aggressive again? but still feeling my way! Thanks will have a look. Cheers Slog
-
Great progress Craig, I really like the wing tape effect/shading brings the wing to life and the engine work is sweet. Wingnut Wing kits are absolutely gorgeous. I watch builds and reviews of them all the time. I really want the Felixstowe (red/white striped one) but too big and too expensive (even with their sale) for me at the moment but it is a lot of kit! Cheers Slog
-
Thanks Richmond, I have seen Plasmo's bike build but think I will try dipping it in warmer water and then apply some Set and leave it a bit to soften before wrestling it into shape. I am going to use Ammo by Mig Panel Line Washes (got a dark gray for light gray subjects and a black) for the panel lines. I am not going for an overly weathered surface but will add some streaks and discolouration with oils as never tried that before. Thanks Craig, I had heard of solvaset but can't remember coming across it anywhere. Its funny but out of all the videos I've watched no one has mentioned the Micro Sol attacking the paint work that I can remember. Yeah I think clear coats are a real personal thing. Starting out I just went with Tamiya as readily available locally but always looking for alternatives. I actually hate spraying clears as I struggle to see where I have applied them and think I missed a bit then apply more and suddenly the area is swamped! I wasn't aware they did clear coats as well. Makes sense the whole system should be compatible so will keep and eye out for them. An other alternatively would be to try Tamiya decal solution as should work with their paints. I really like the Micro Sol as it really gets the decals down into the panel lines and rivet details etc. I thought Tamiya only had the one solution so may be milder than the Sol. Thanks Dennis, yeah the F-4 in my stash has literally hundreds of 'No Step' all over the place. Interestingly, for me, was one of the stencil data decals which I barely read even with the head magnifiers states that the Tyre Pressures for land operations is 230 PSI and for carrier Operations is 365 PSI! LOL Only got a few free hours today so will hopefully get a little more done. Cheers Slog