DONATION DRIVE - SUPPORT MSW - DO YOUR PART TO KEEP THIS GREAT FORUM GOING!
×


rwiederrich
-
Posts
5,519 -
Joined
-
Last visited
Content Type
Profiles
Forums
Gallery
Events
Everything posted by rwiederrich
-
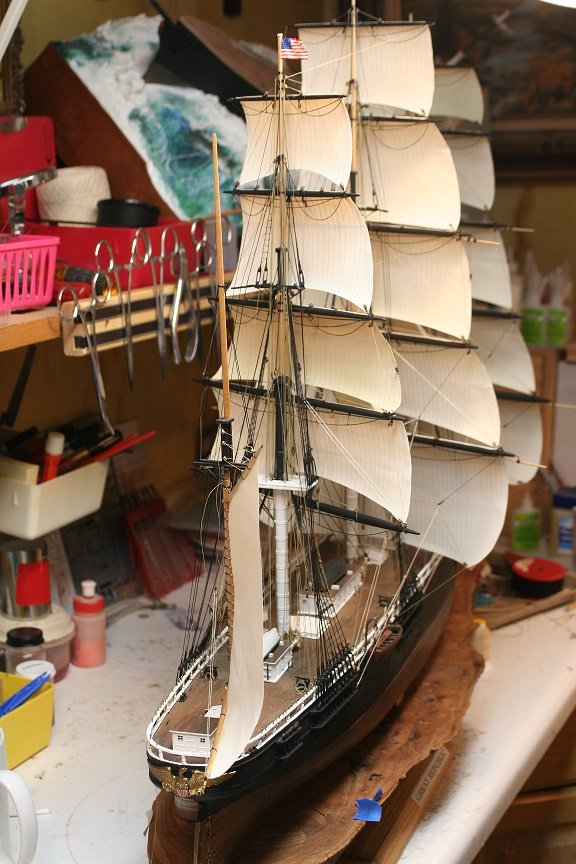
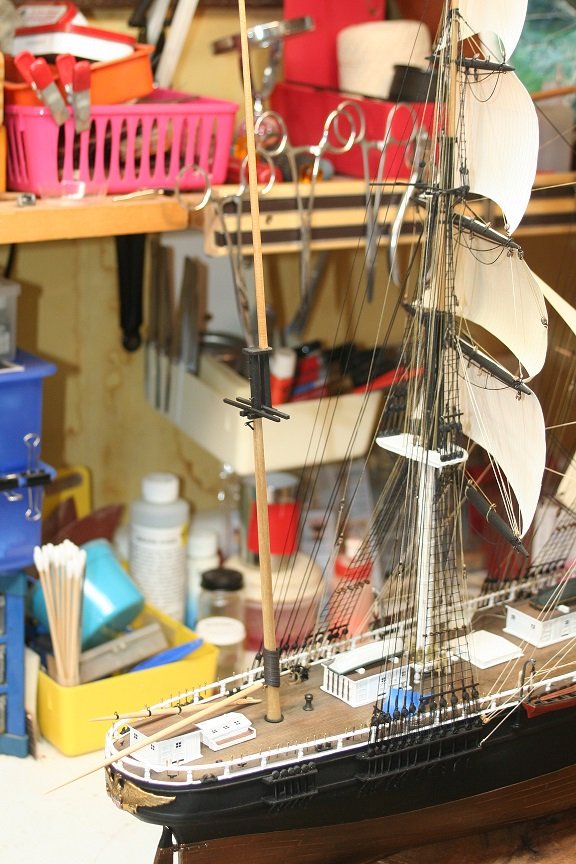
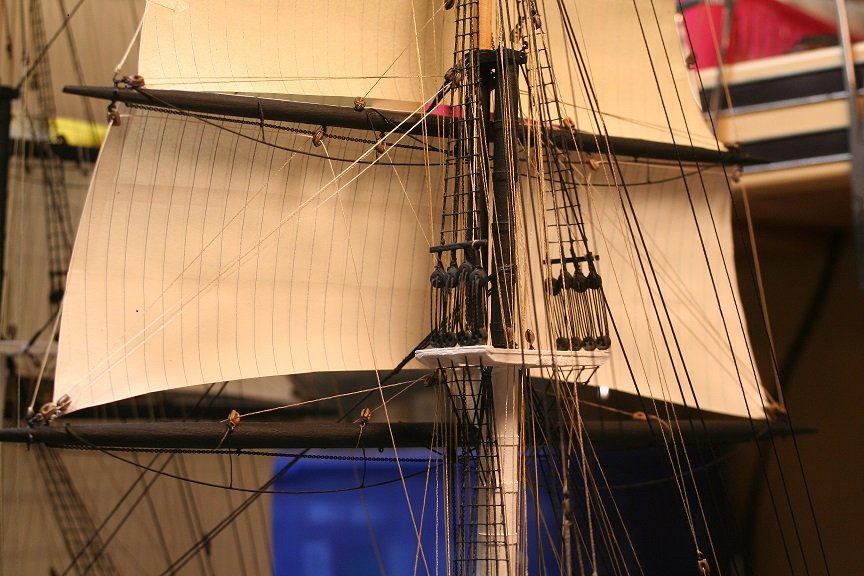
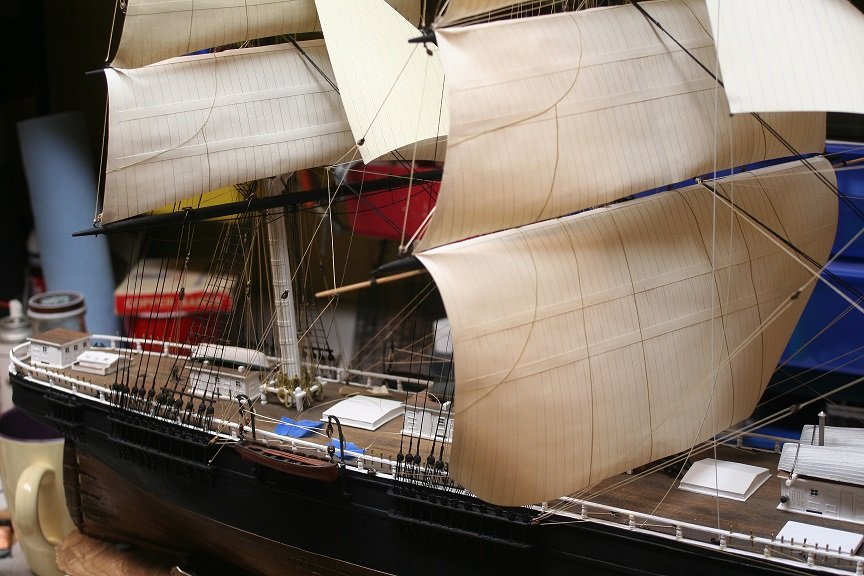
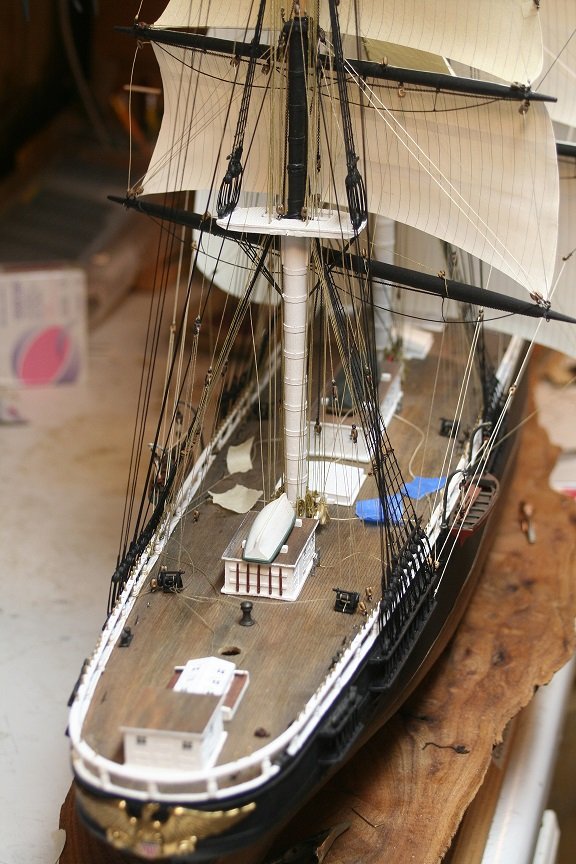
I'm sure that she did....however, records indicate she was only partially rigged when she went down from Boston to New York.....suggesting she would fill out her sail compliment once there. I took the liberty to remove the crossjack for better viewing of the mizzen rigging and that of the spanker. Sail configurations were in part that of the privy of the captain........So I *Privied*..... Thanks for noticing. Rob
- 1,208 replies
-
- 5
-

-
- great republic
- clipper
- (and 1 more)
-
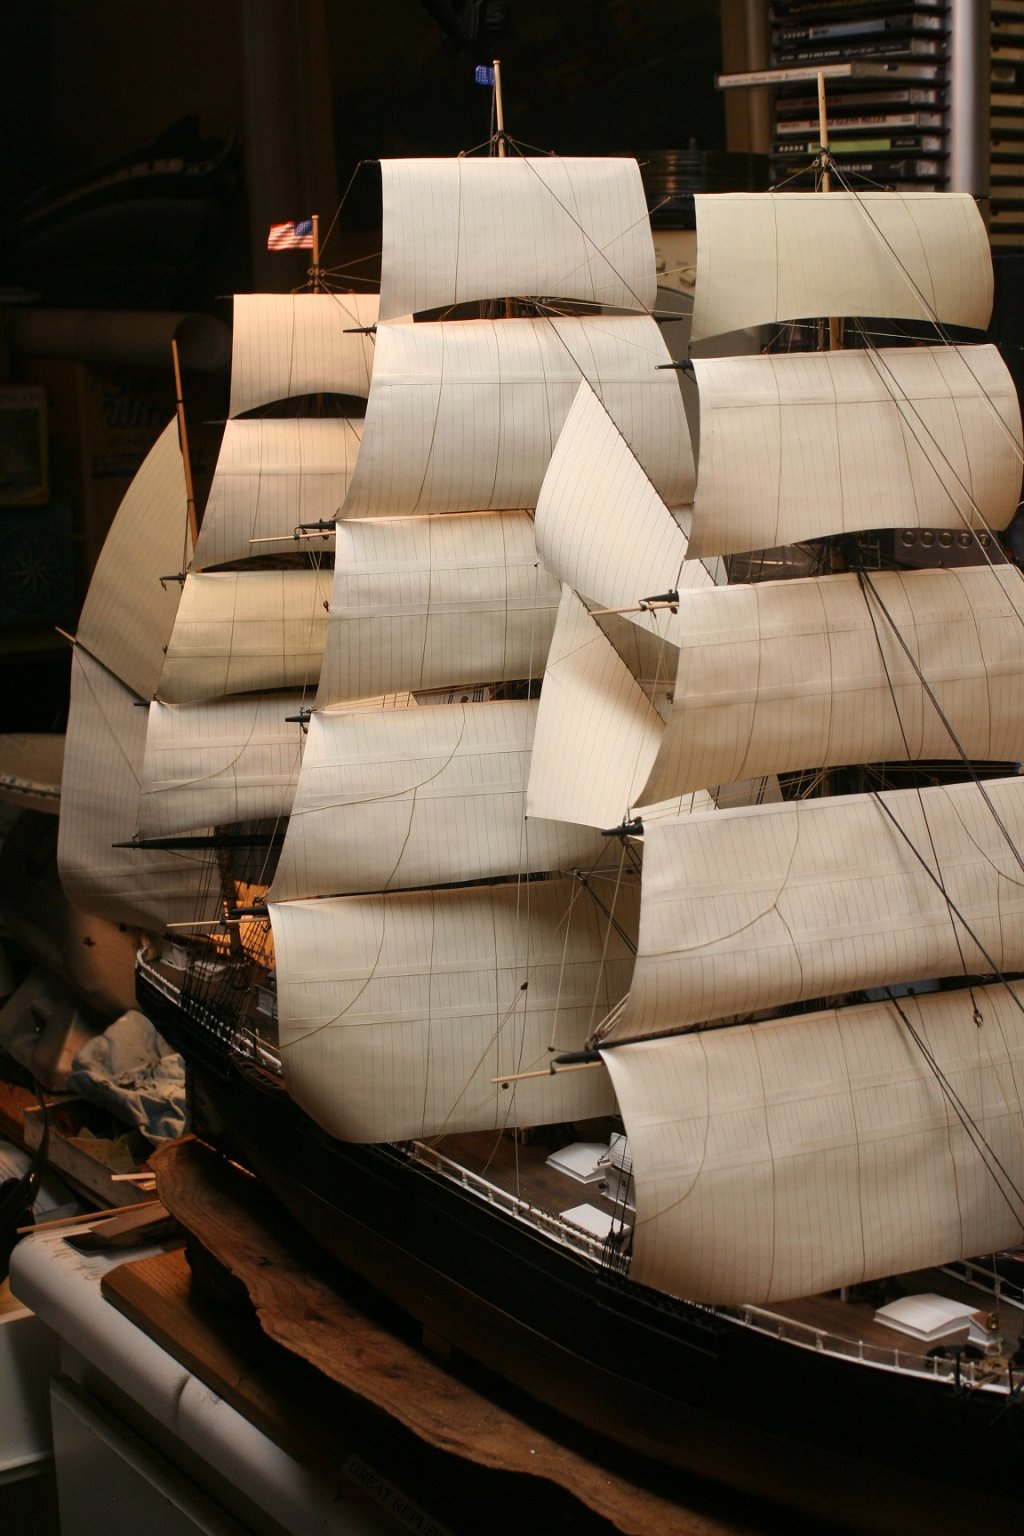
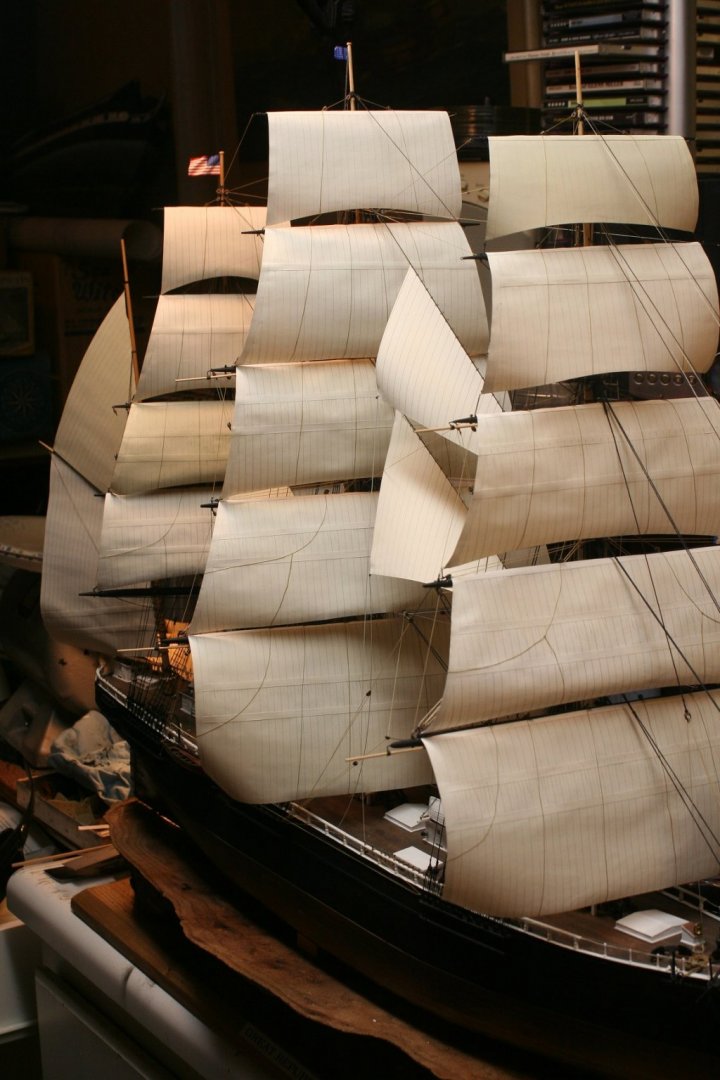
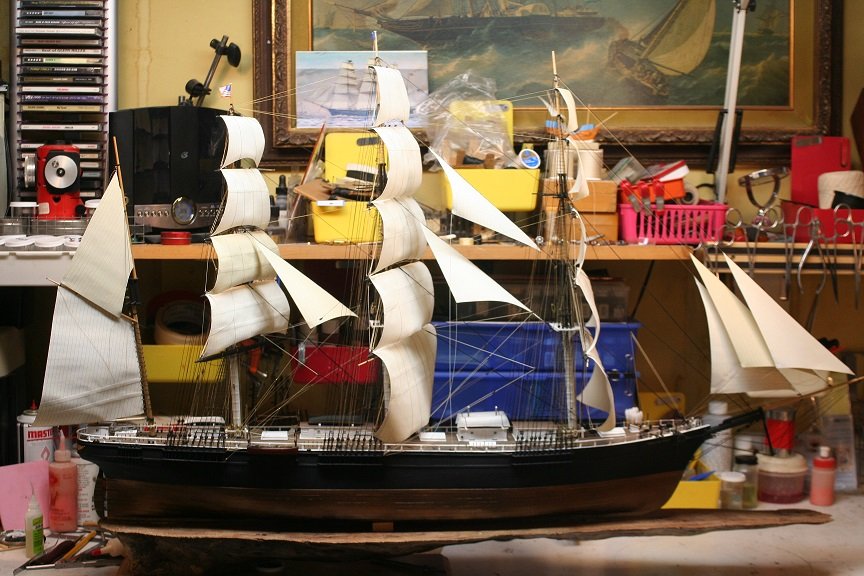
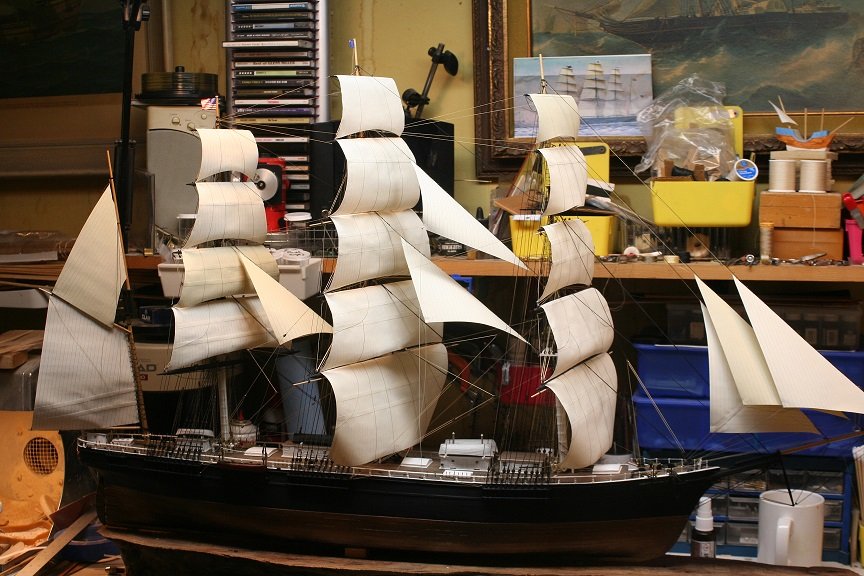
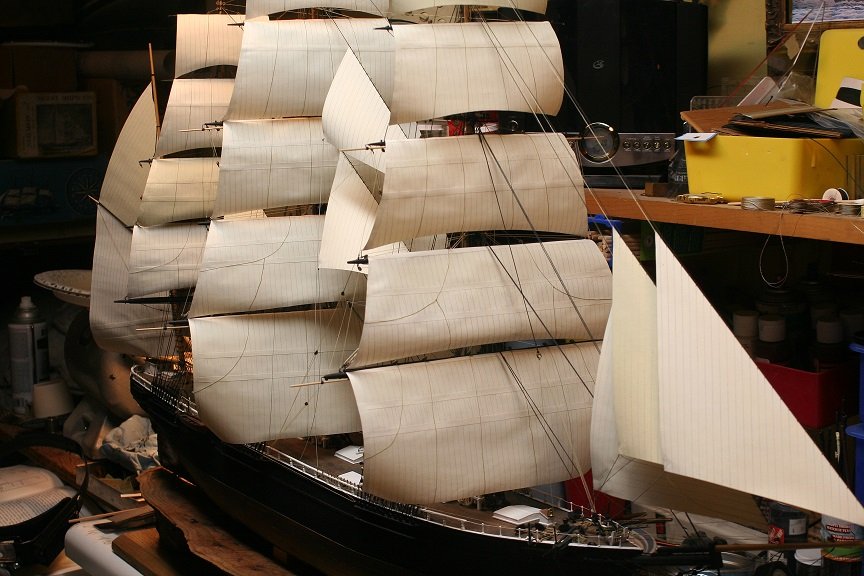
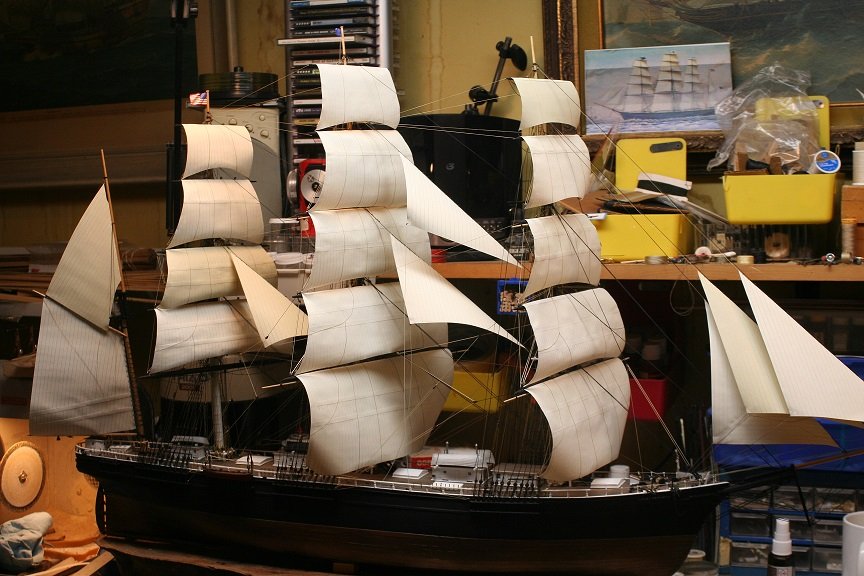
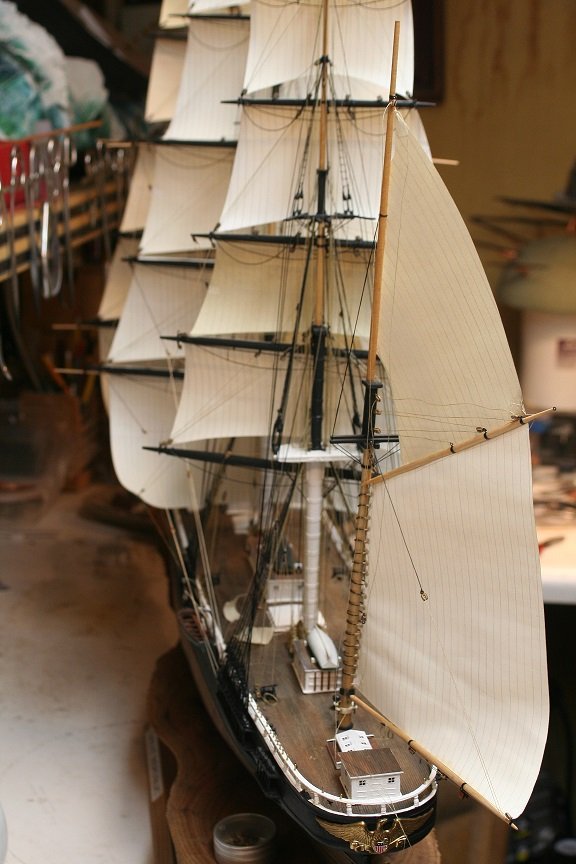
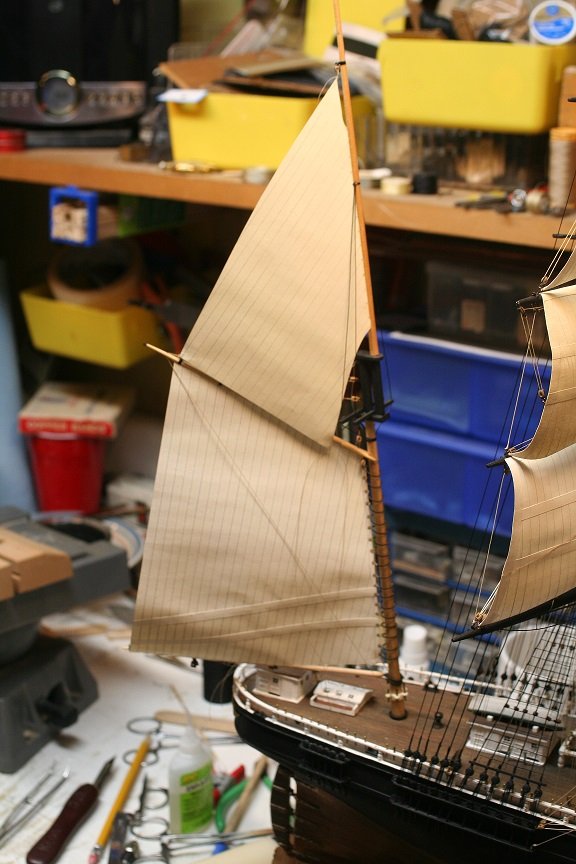
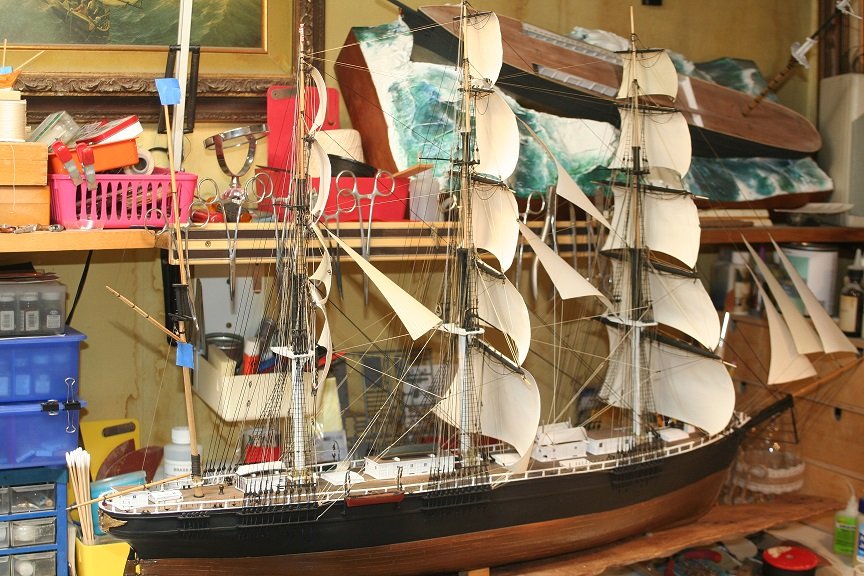
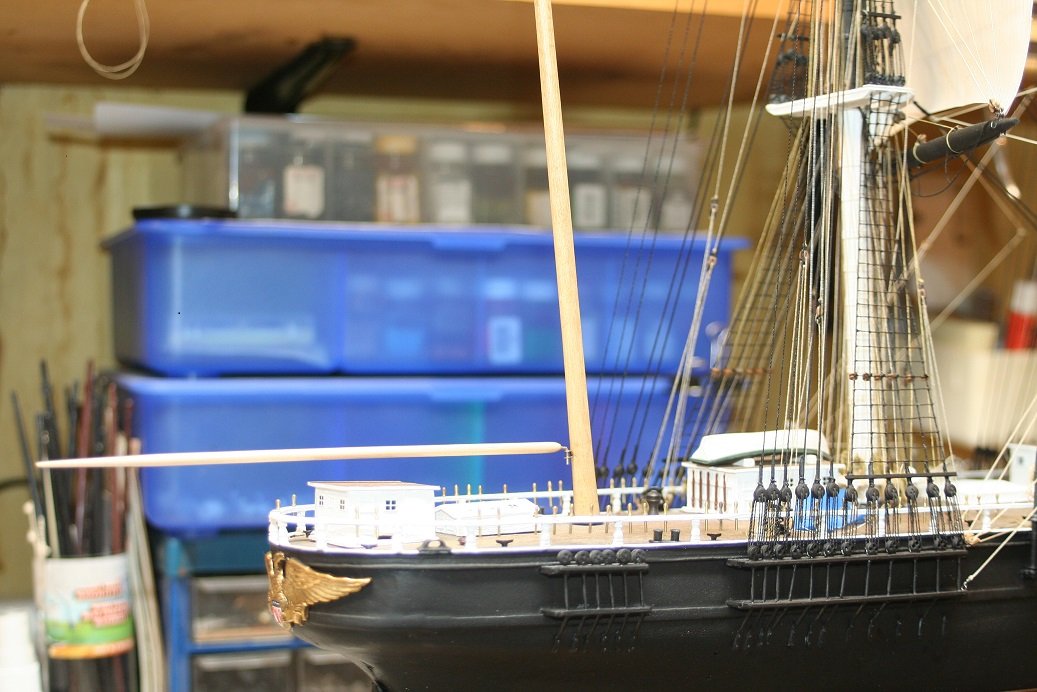
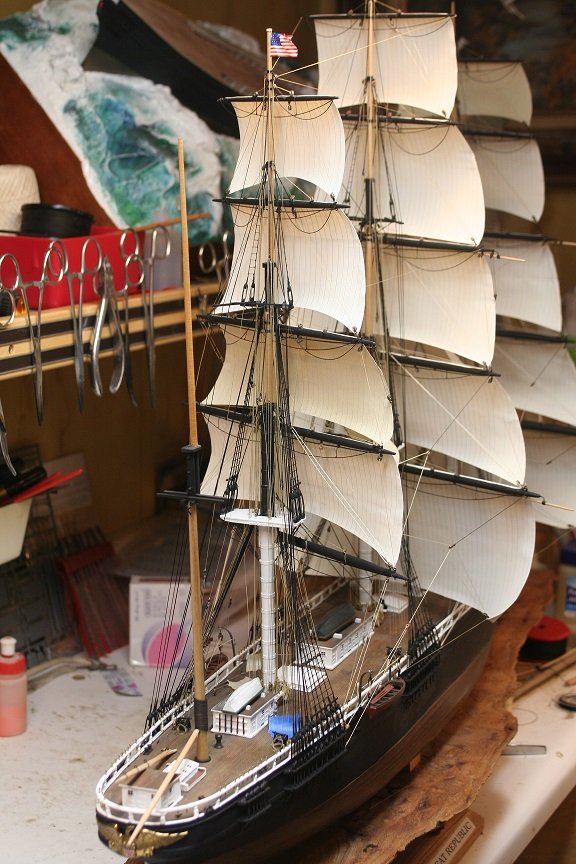
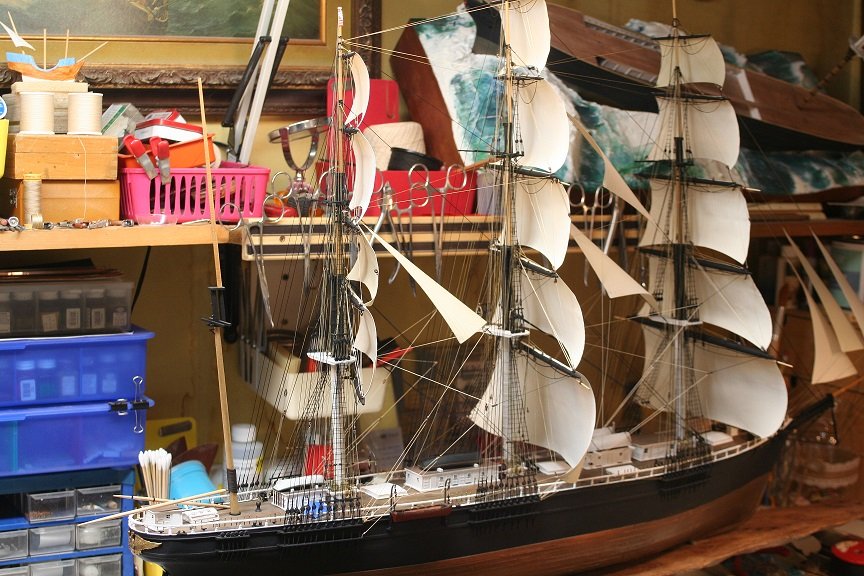
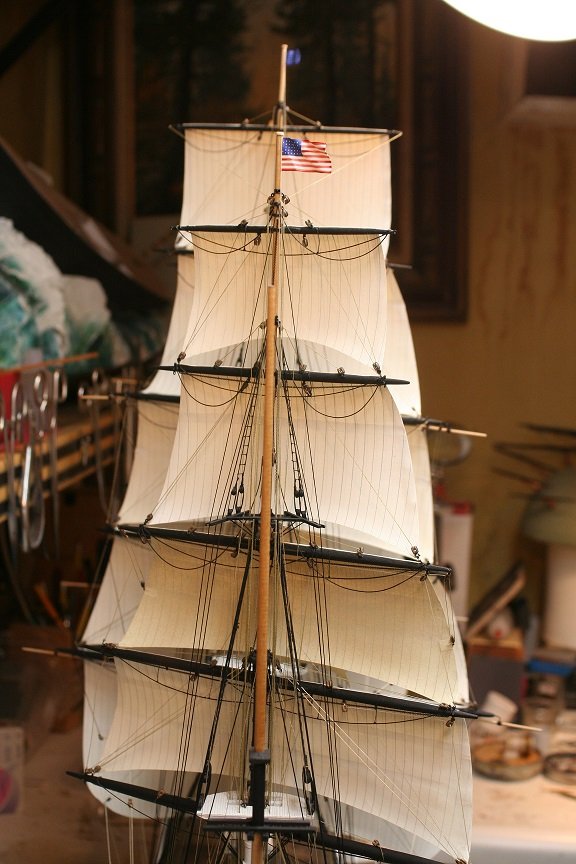
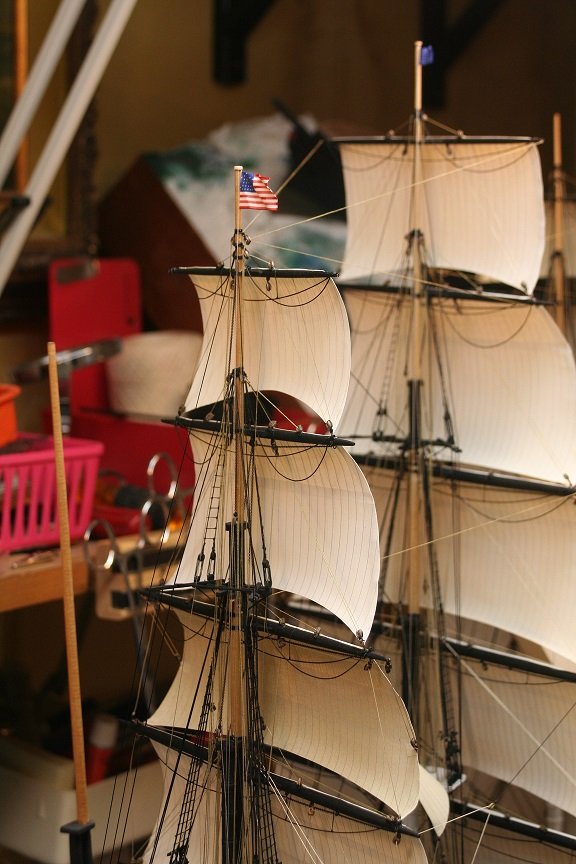
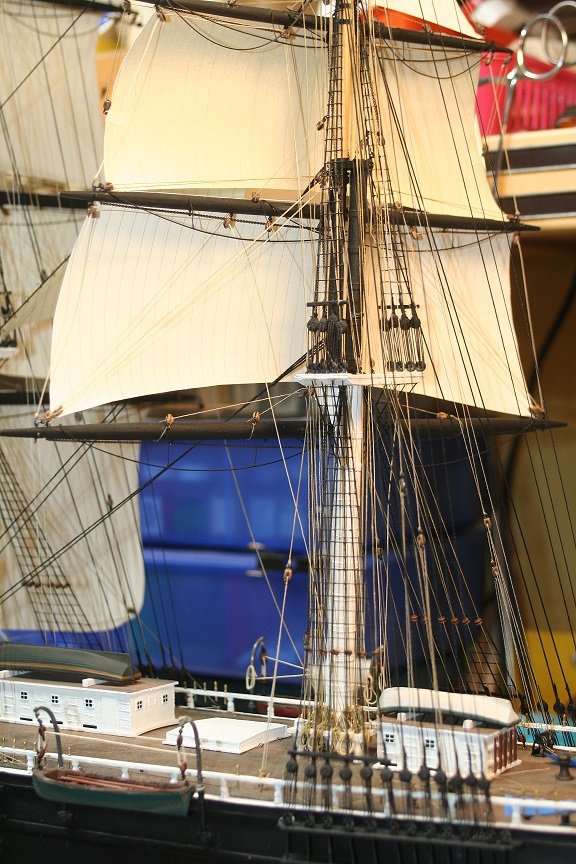
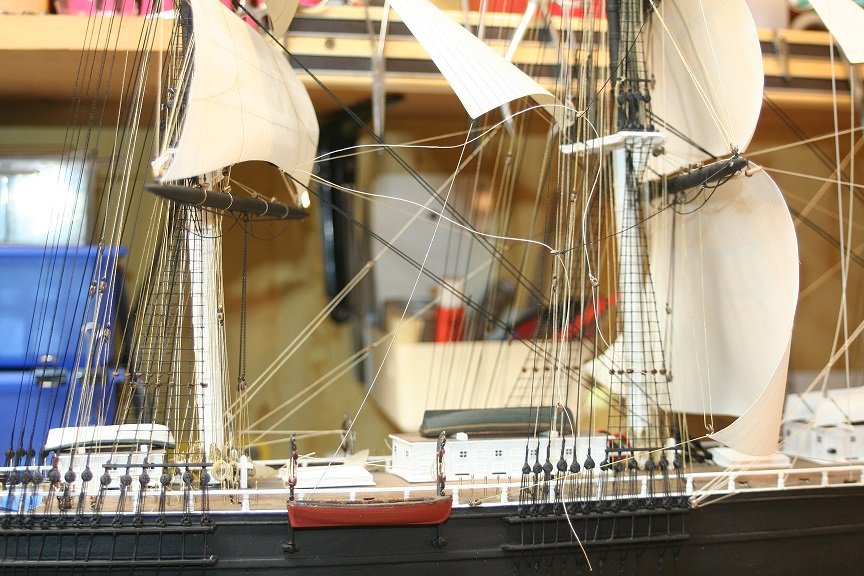
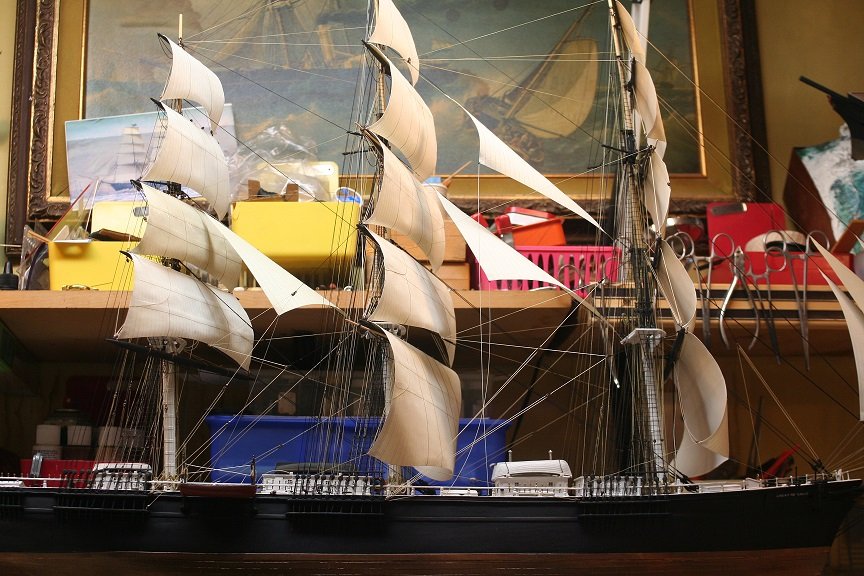
I wanted to add this new image to give some balance to the entire rig of the ship. Rob
- 1,208 replies
-
- 12
-
-
- great republic
- clipper
- (and 1 more)
-
Oh, she is looking magnificent. wonderful work on the boom and gaffs. Will she be getting sails.....? Rob
- 356 replies
-
- 2
-
-
- red jacket
- finished
- (and 1 more)
-
Funny..as I survey the situation....it appears all that is needed is the stays and the shrouds/ratlines...not to mention lots of final finishing details and some running rigging for the gaff and boom. I'm shocked I'm gonna be finished with this model in a month or so(assuming a lot). I'll have to take some good photos of it, outside the model shop, that is. Happy new year everyone. Rob
- 1,208 replies
-
- 4
-
-
- great republic
- clipper
- (and 1 more)
-
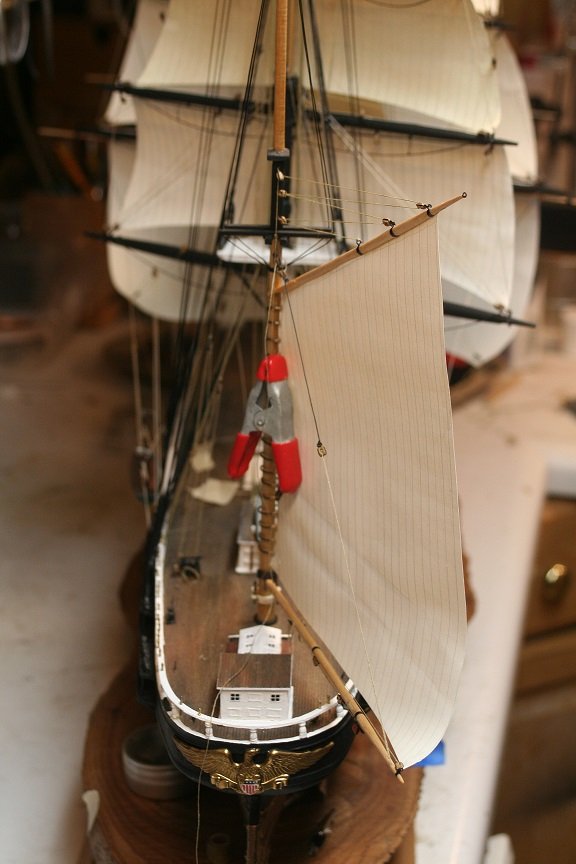
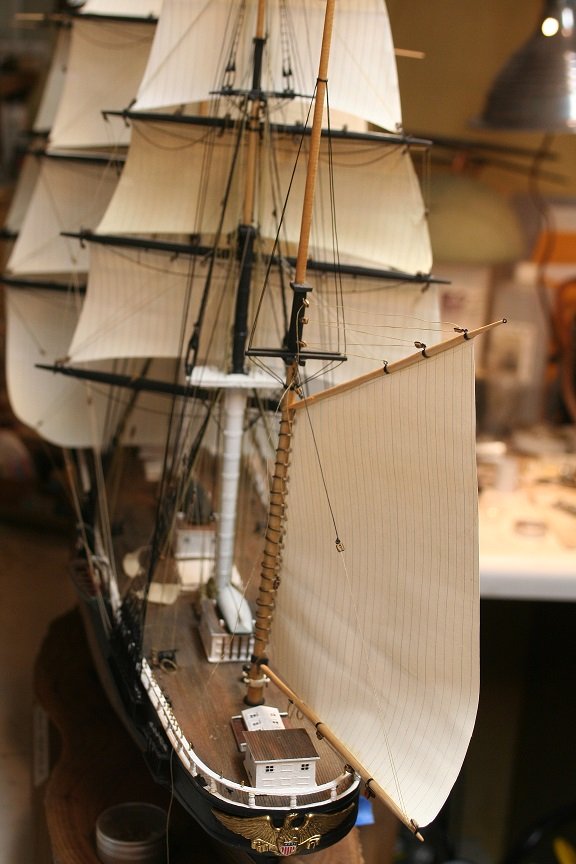
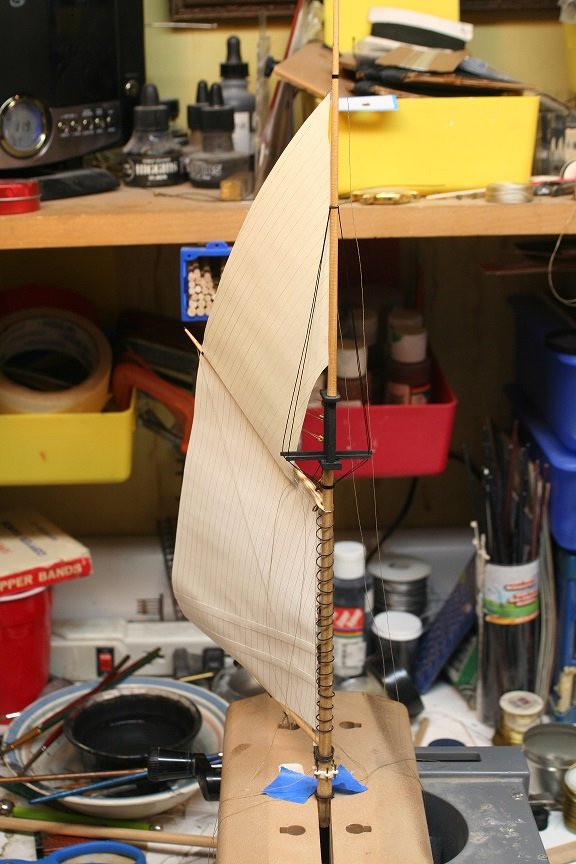
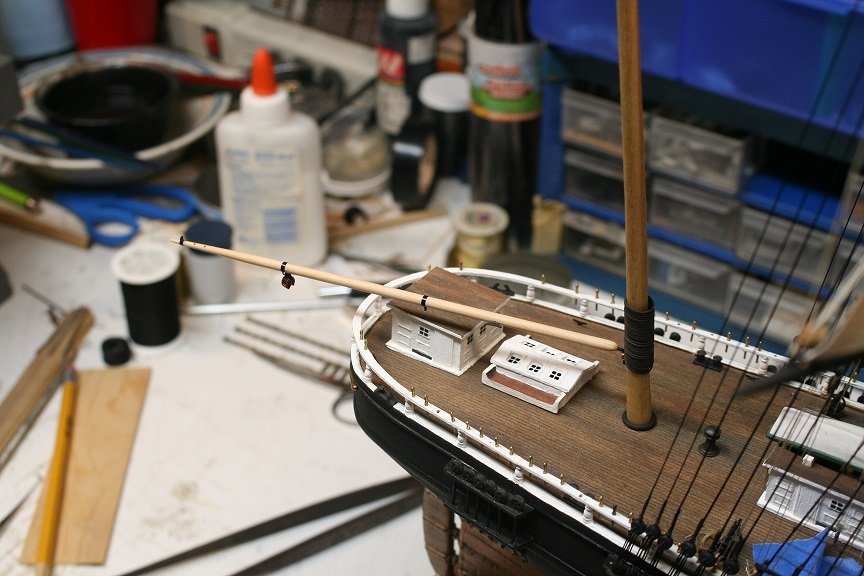
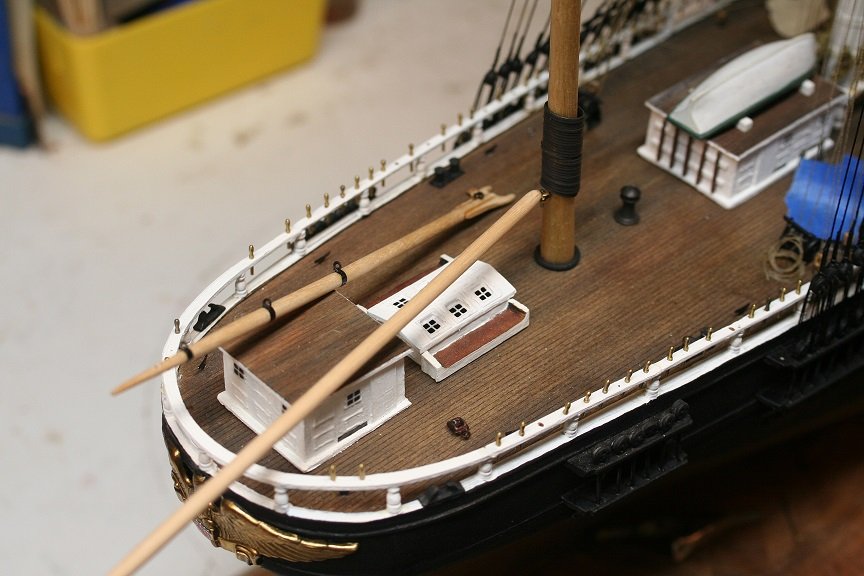
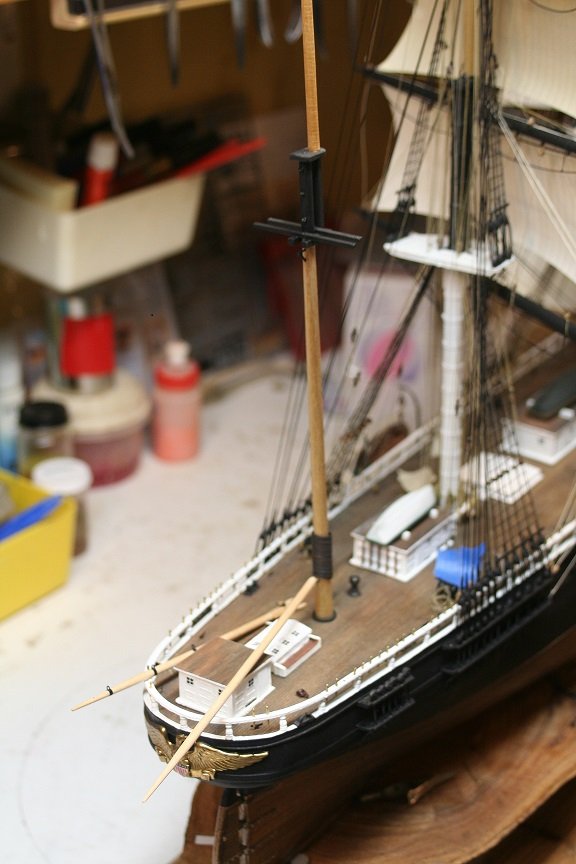
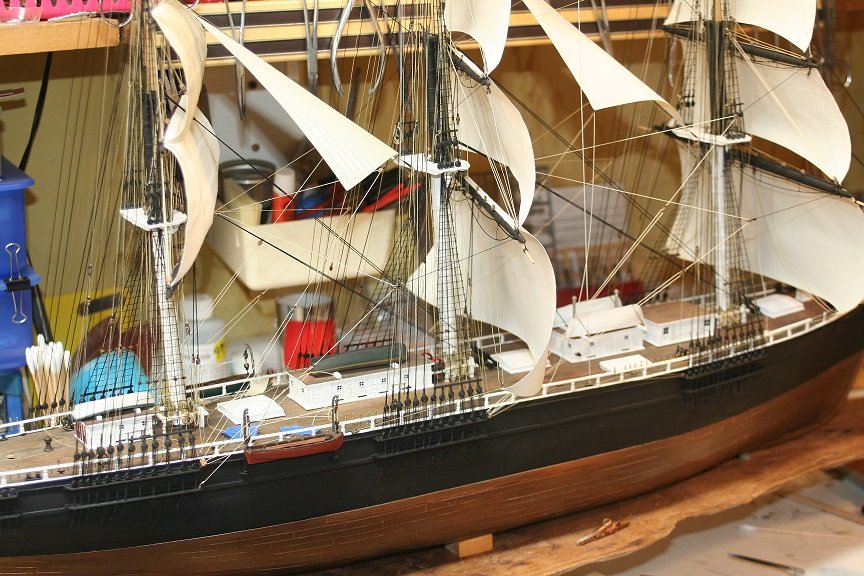
Placed the spanker in the hull for some balance and measurements. Making sure everything is correct before I finalize the stepping and glue the mast in place. Rob
- 1,208 replies
-
- 12
-
-
- great republic
- clipper
- (and 1 more)
-
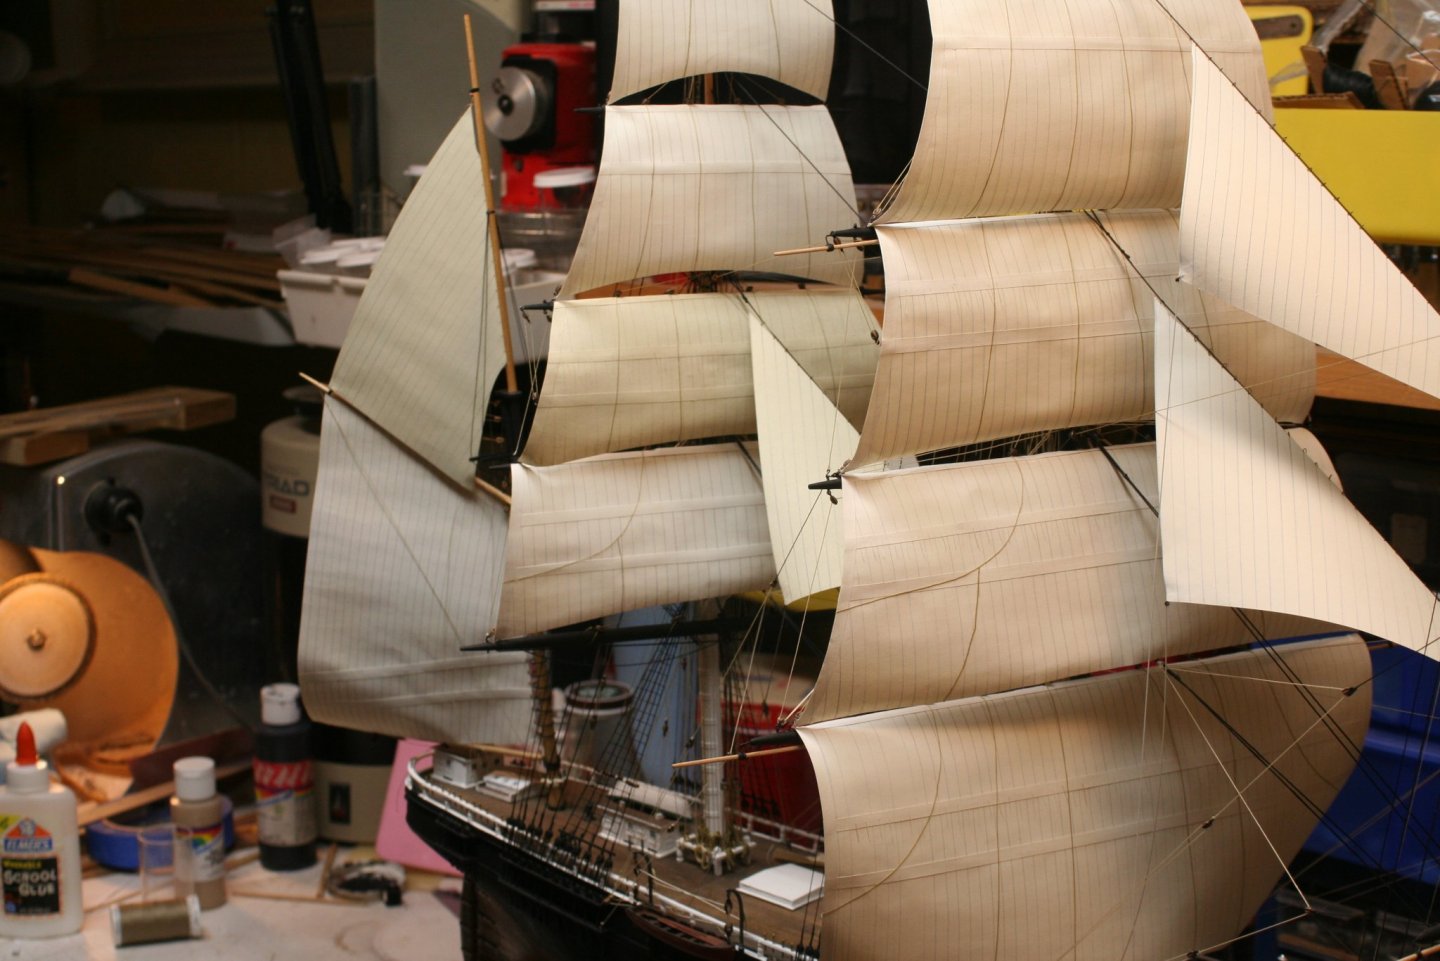
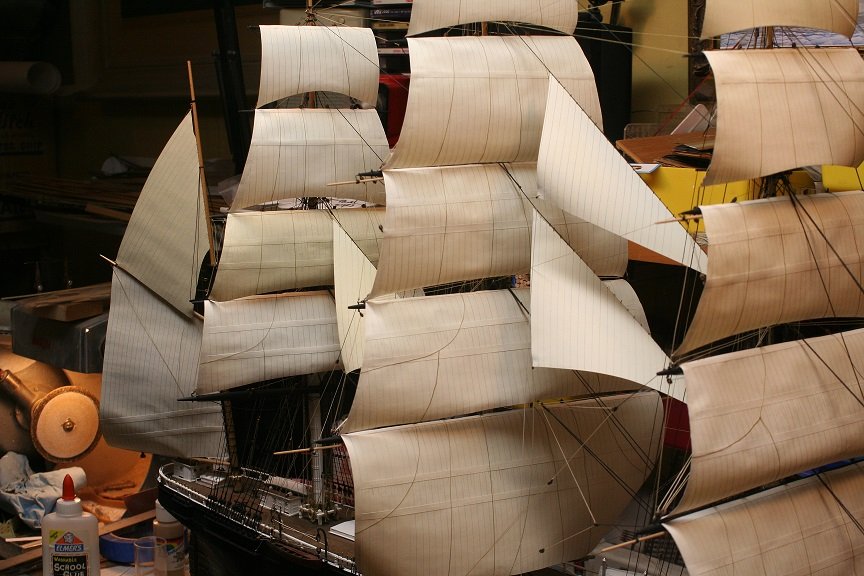
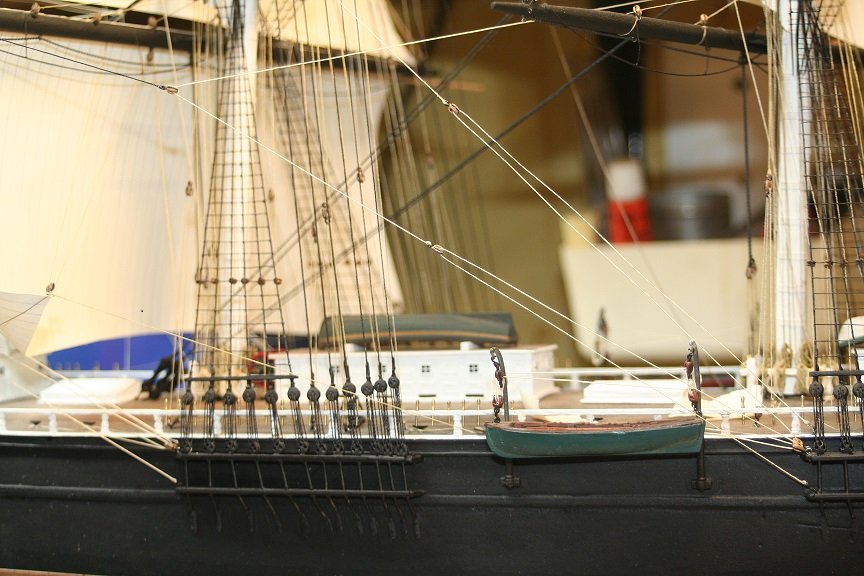
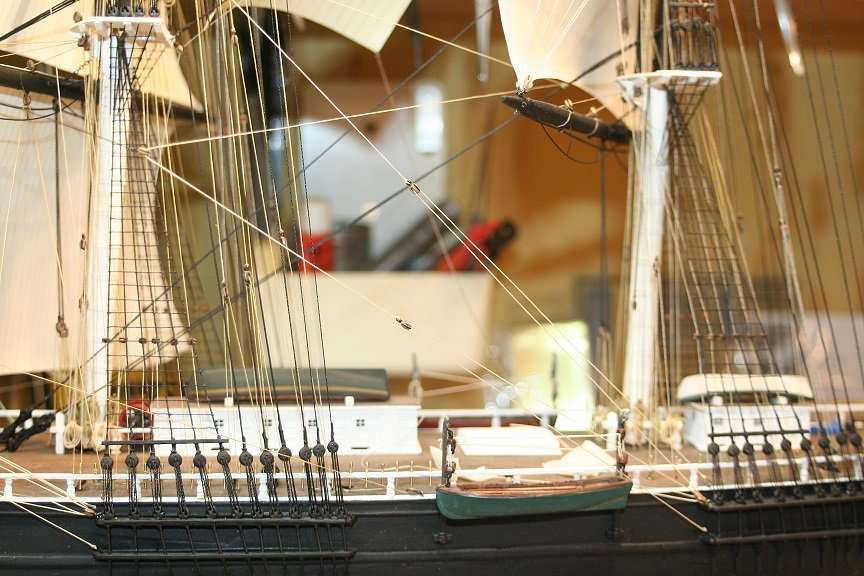
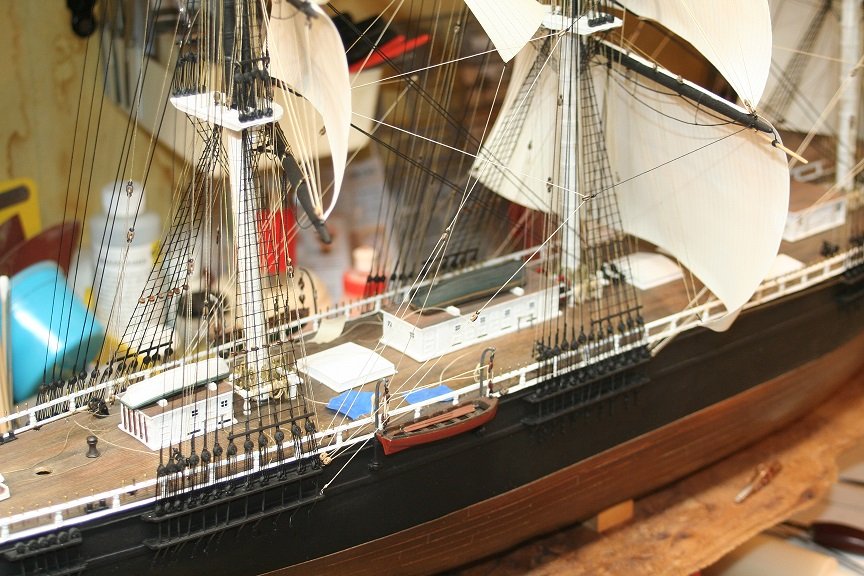
Here are some images of todays work. I set the topsail and am finishing up its rigging with sheets and downhauls. Pretty close to stepping the mast in the hull. Enjoy.
- 1,208 replies
-
- 11
-
-
- great republic
- clipper
- (and 1 more)
-
Thanks so very much.....I'm working the best I can..... I'm afraid the next year will find me completing the Great Republic...sooner than I had imagined. Rob
- 1,208 replies
-
- 2
-
-
- great republic
- clipper
- (and 1 more)
-
Riiiiight….I used spit to get the job done. Like threading a needle. Rob
- 1,208 replies
-
- 2
-
-
- great republic
- clipper
- (and 1 more)
-
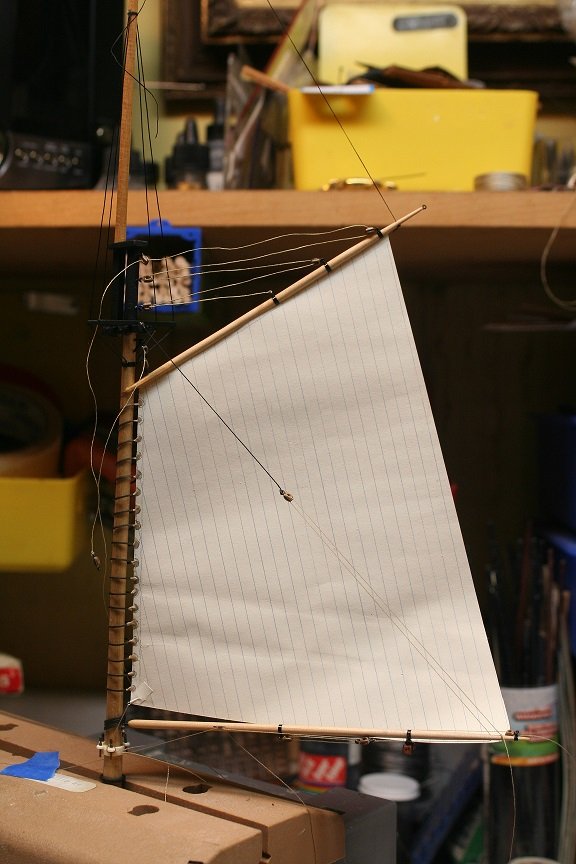
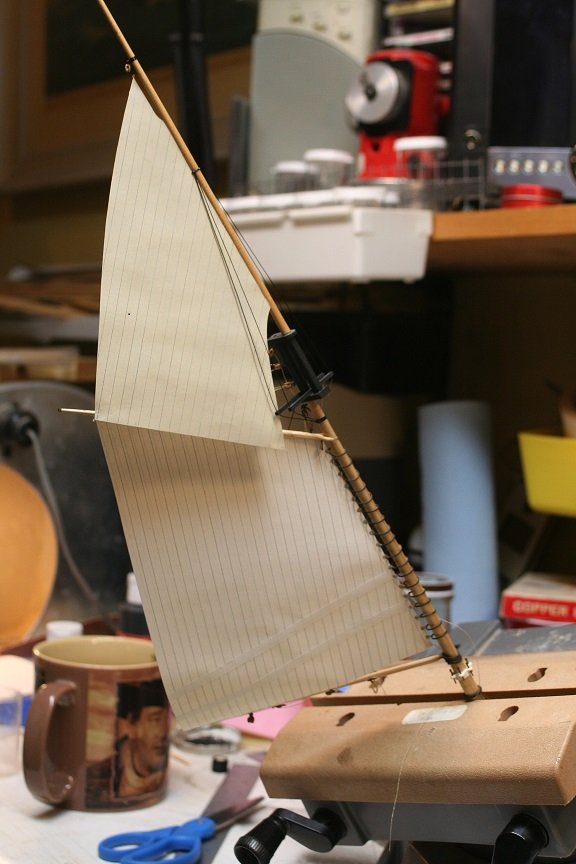
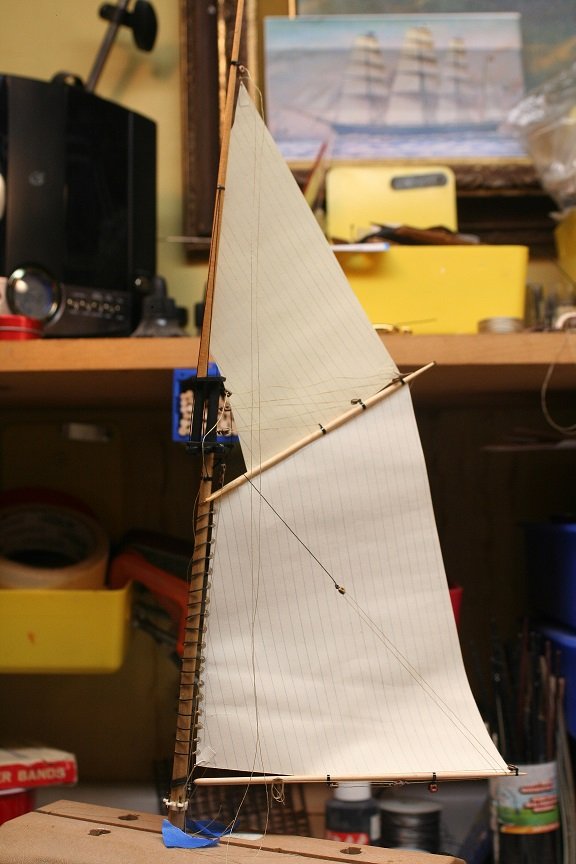
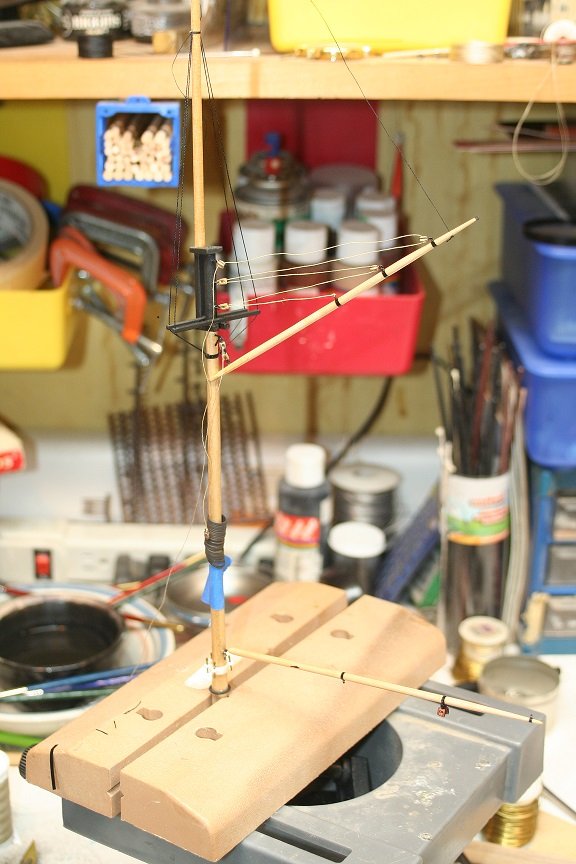
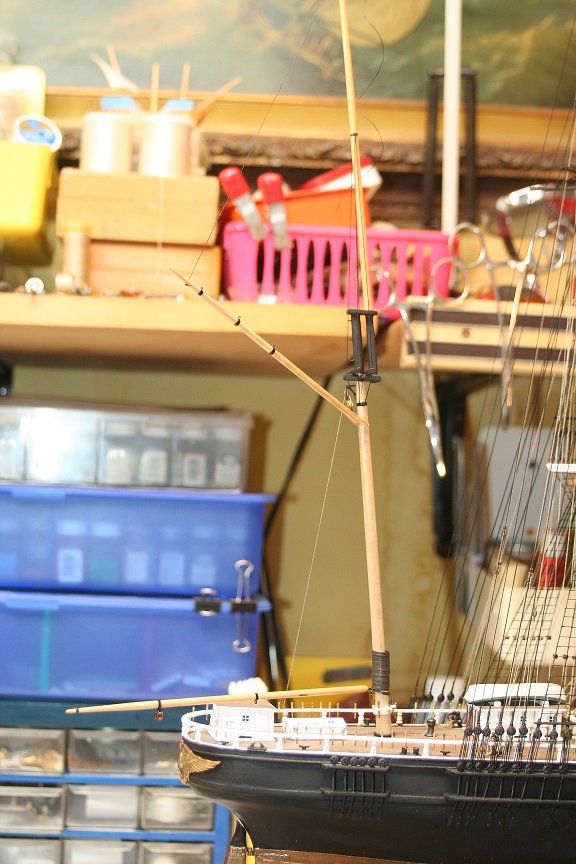
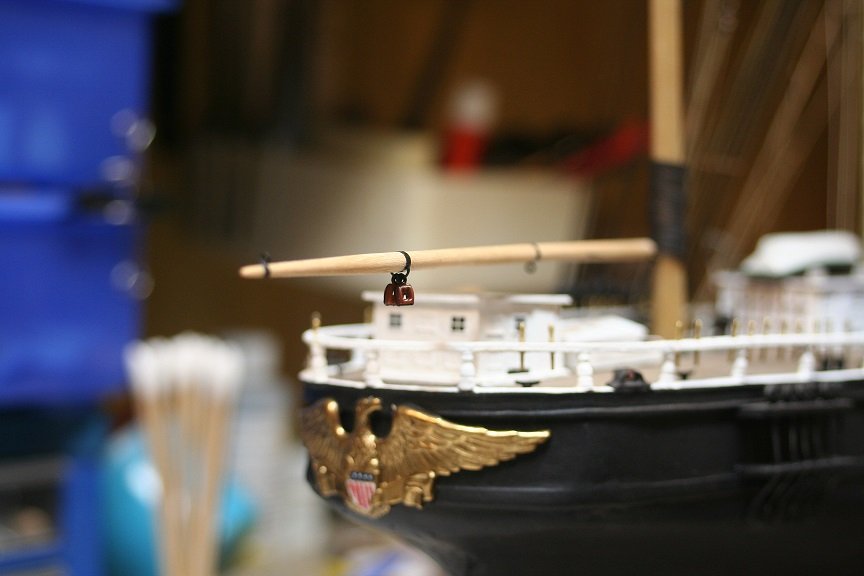
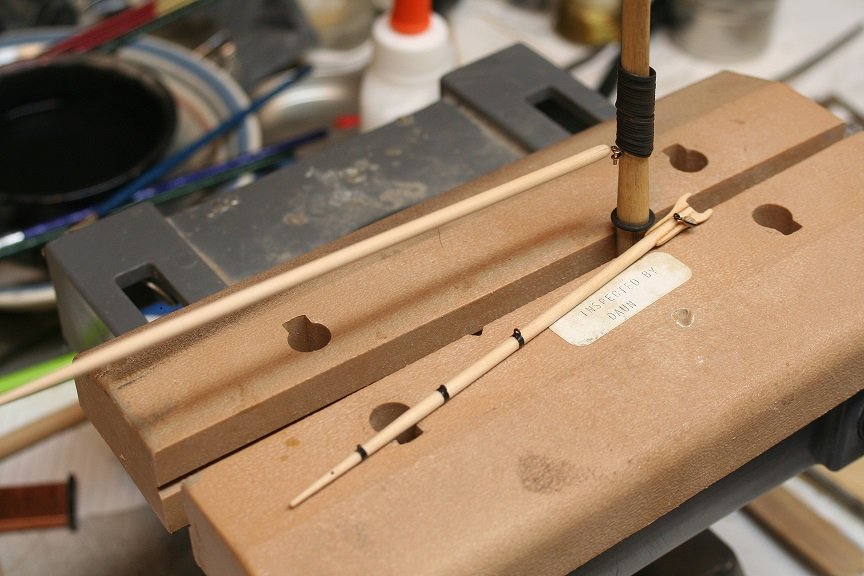
Doing a little off ship work on the spanker mast.
- 1,208 replies
-
- 6
-
-
- great republic
- clipper
- (and 1 more)
-
Thanks Michael...I appreciate that. However, your models are a bit larger in scale so your detail (IMV) is more exacting. Again...thanks for the fine comments. Rob
- 1,208 replies
-
- 1
-
-
- great republic
- clipper
- (and 1 more)
-
Fantastic work.....oh so clean. I'm working on the same thing on the GR. Magin....that! Your moving along nicely. It will be a beautiful model. Rob
-
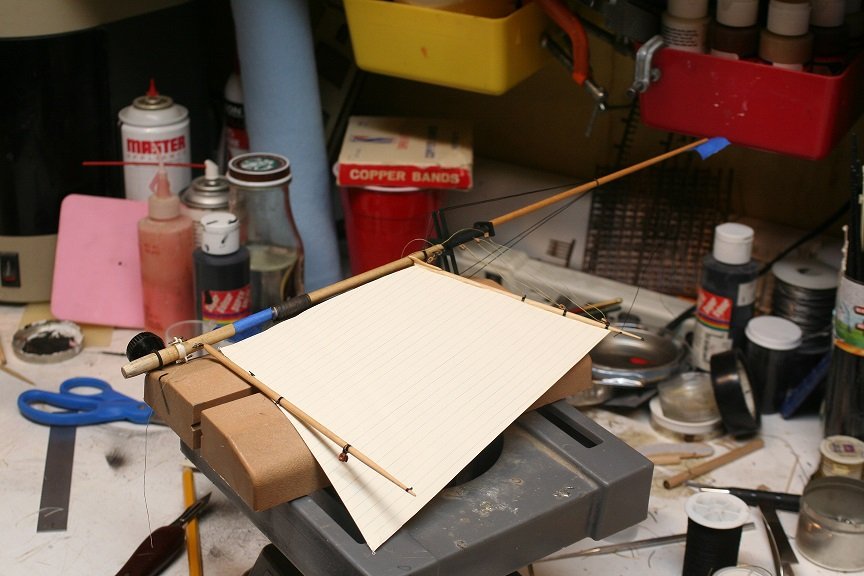
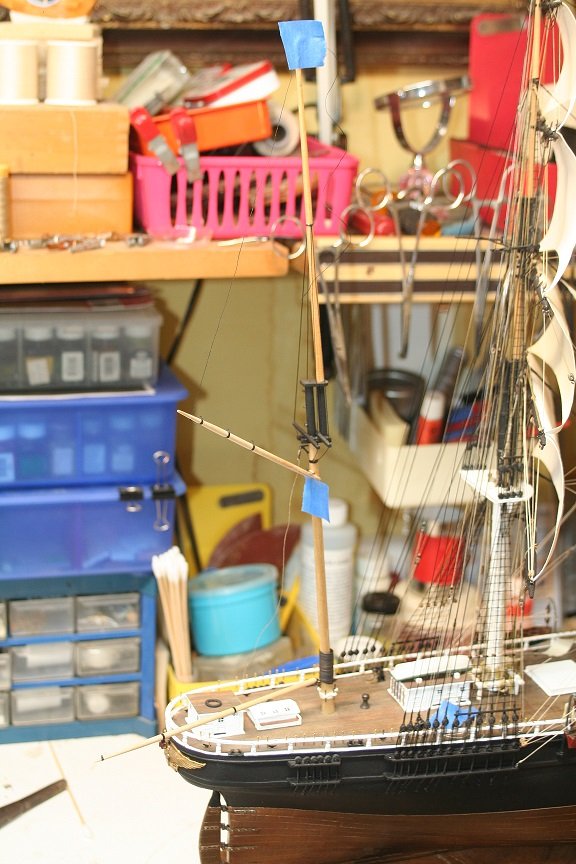
Finally I gave the boom and gaff a wash of tongue oil to even up its color and to preserve it. Rigging the sails will be done off the model as is my habit. A bit more details to finish up before then. Thanks for all the likes and views. Rob
- 1,208 replies
-
- 6
-
-
- great republic
- clipper
- (and 1 more)
-
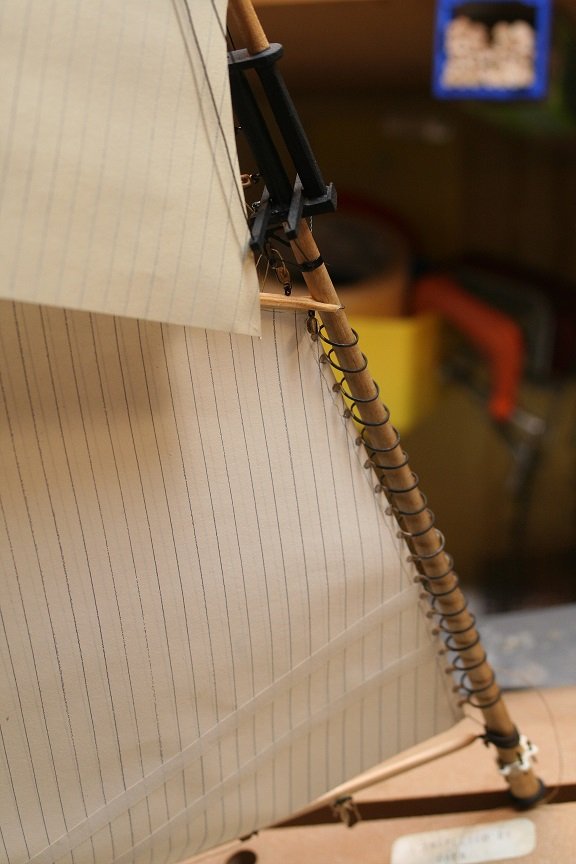
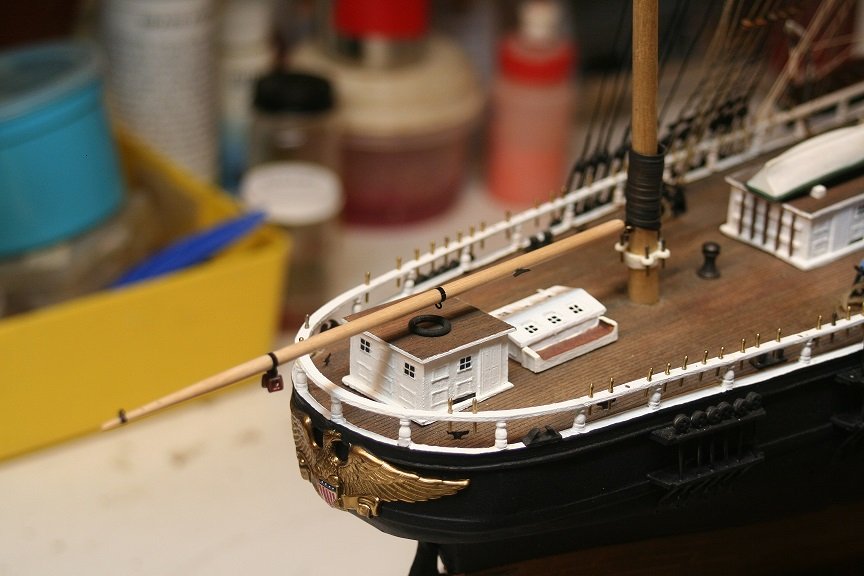
Here are some general views of the gaff being added as well..along with its lift/blocks.

- 1,208 replies
-
- 5
-
-
- great republic
- clipper
- (and 1 more)
-
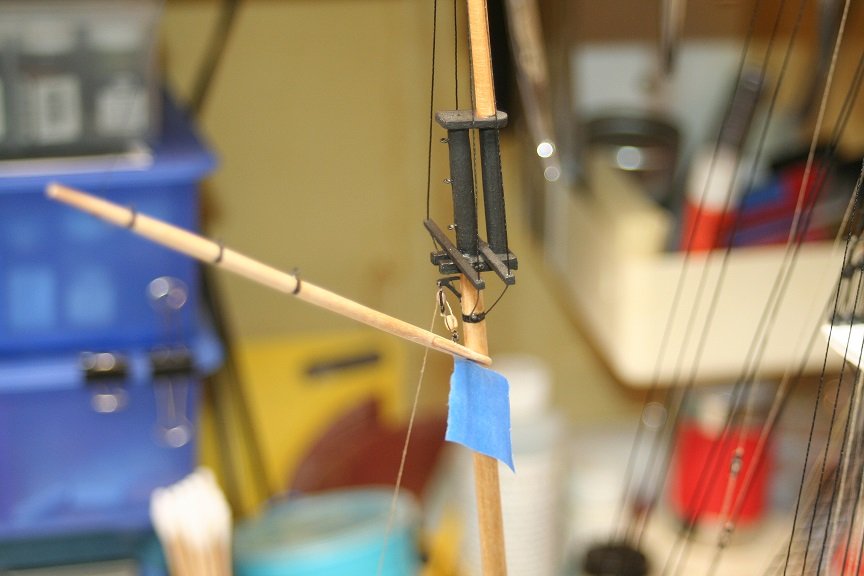
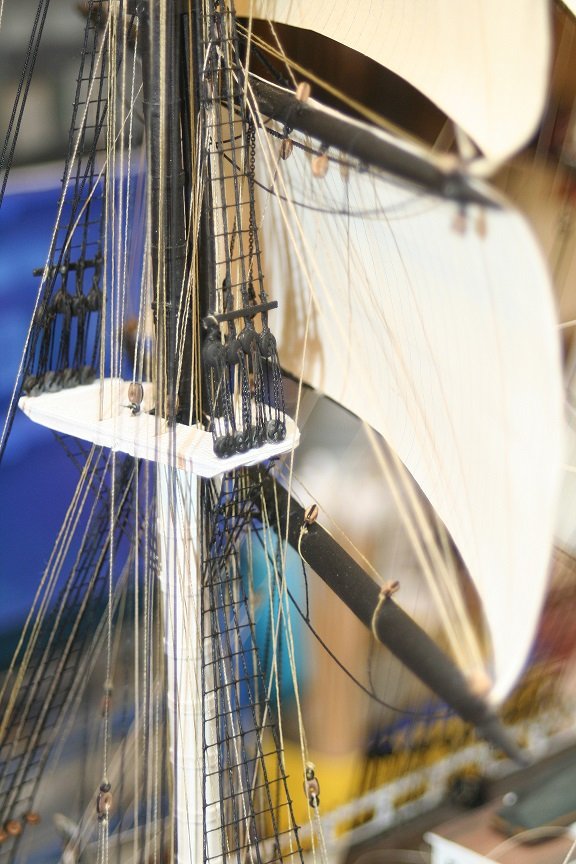
Worked a bit more, by finishing up the boom and adding the cleat to secure the topping lift and the blocks for the boom sheets. Also finished up the spider fife rail.
- 1,208 replies
-
- 9
-
-
- great republic
- clipper
- (and 1 more)
-
Good question...each yards requirements are different. I really don't know, actually. But, if each yard requires 8~10 per yard and plus purchases, lifts, braces, downhauls....probably around 300~350, thus.... far.
- 1,208 replies
-
- 2
-
-
- great republic
- clipper
- (and 1 more)
-
Still have loads to do on the boom and I still have to add the spider band and pins to the mast as well. Thanks for all the likes and comments. Rob
- 1,208 replies
-
- 2
-
-
- great republic
- clipper
- (and 1 more)
-
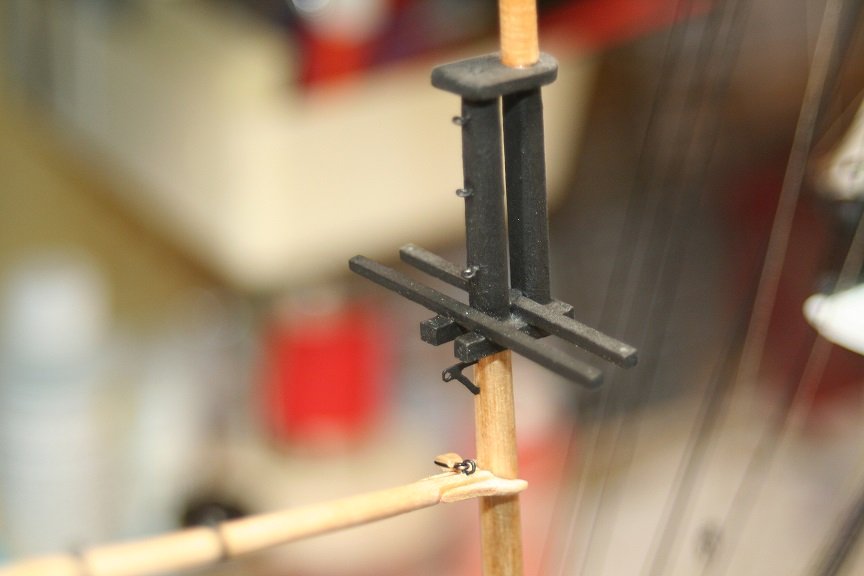
I them moved on to the spanker mast build..beginning with making the boom and gaff and the hoop rings. I made the lift truck for the purchase block and mounted it to the spanker.
- 1,208 replies
-
- 12
-
-
- great republic
- clipper
- (and 1 more)
-
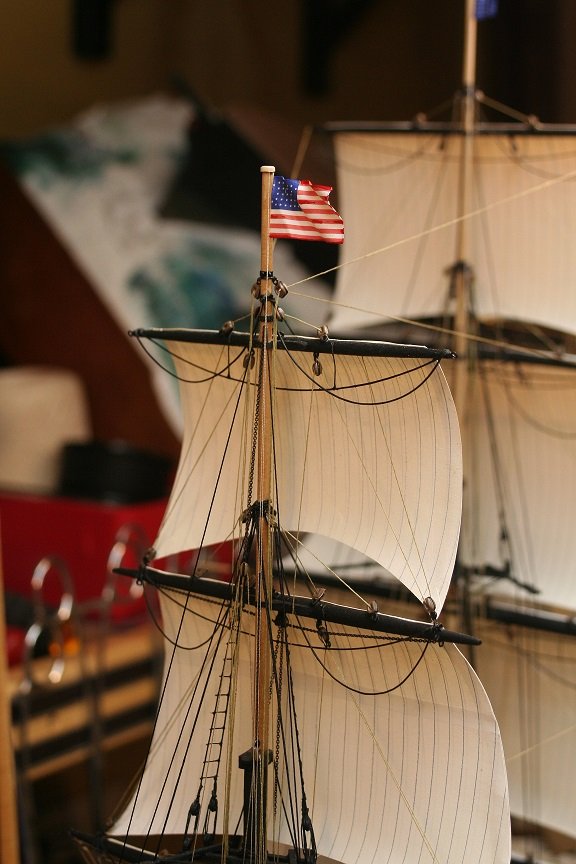
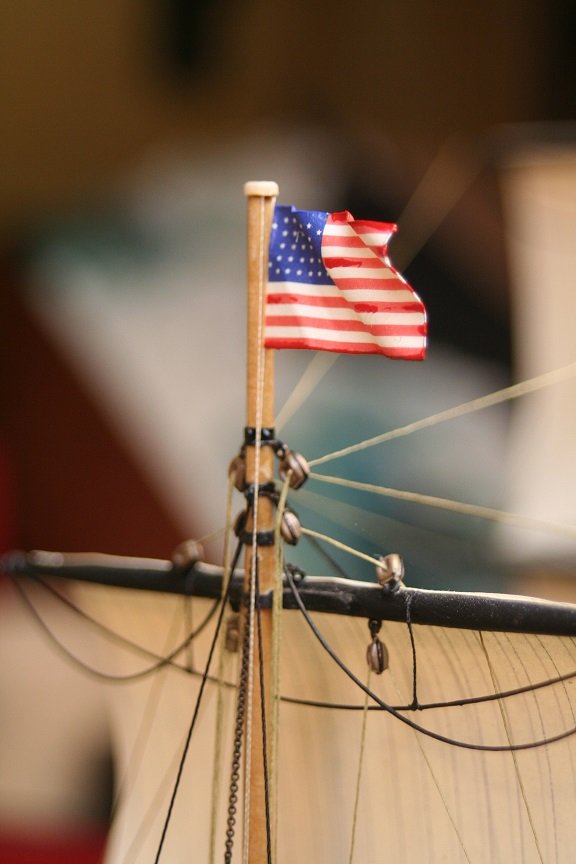
Spent some more time on the GR...I started by finishing off the mizzen pennant and old glory. Rob
- 1,208 replies
-
- 7
-
-
- great republic
- clipper
- (and 1 more)
-
Thanks Bob. I feel the sails are the biggest contributor....to what makes a clipper so majestic. I hope to get some work done on the spanker mast today...Images will follow. Thanks everyone for your likes and fine comments. Rob
- 1,208 replies
-
- 4
-
-
- great republic
- clipper
- (and 1 more)
-
Pat..if feels so good to be back working on the GR
- 1,208 replies
-
- 7
-
-
- great republic
- clipper
- (and 1 more)
-
Well today I got to spend several hours in the shipyard..and I was able to finish up the main braces for all the yards. Still need to remove tape and add some rope coils..but I'm getting close to beginning the spanker mast instal........ Anjoy.... Rob

- 1,208 replies
-
- 12
-
-
- great republic
- clipper
- (and 1 more)
-
I too have been anxiously waiting to get a copy of volume II...and was greatly pleased to find a copy for sale on Ebay…….at a fantastic price! YIPPY! Now patiently waiting on a copy of volume III to find its way to me...…... Rob