HOLIDAY DONATION DRIVE - SUPPORT MSW - DO YOUR PART TO KEEP THIS GREAT FORUM GOING! (Only 27 donations so far out of 49,000 members - C'mon guys!)
×


lb0190
-
Posts
686 -
Joined
-
Last visited
Content Type
Profiles
Forums
Gallery
Events
Everything posted by lb0190
-
 Model ship building has taken a small delay in construction due to visitors and family, but I want to share something that I seen come up for sale at an excellent price. I follow Augies excellent build of the US Frigate Confederacy - MS 1:64 and like many enjoy his craftsmanship as well as his friendship. A short while ago he mentioned how he likes a microsander sold by Micromark and it looked like an excellent tool for sanding difficult places. Once I seen it, I had to have one but I hate to pay retail or normally advertised prices for anything, so I've been waiting for this item to go on sale. This week Micro-Mark has their power tools on sale which includes the micro-sander (mine is on order) The price that has been advertised lately was $92.65 USD, but this week it's $69.95. Here is the web page link for their sale, http://link.micromark.com/YesConnect/HtmlMessagePreview?a=hC-QgesCZVEcAYGjbwhQdS
 -
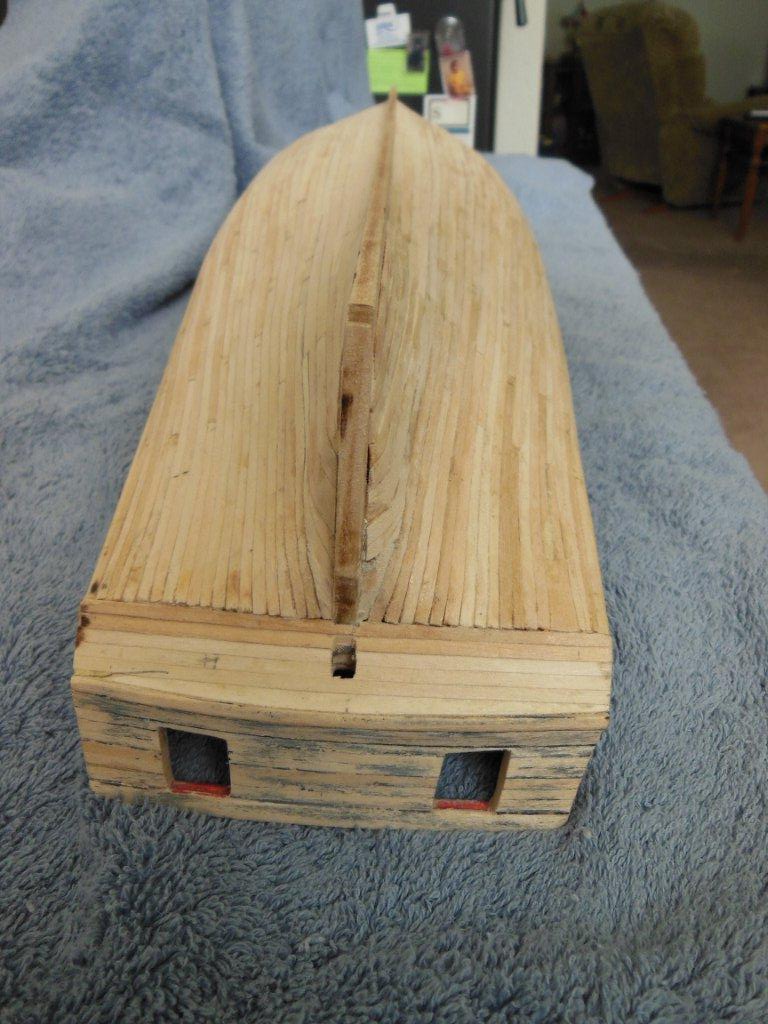
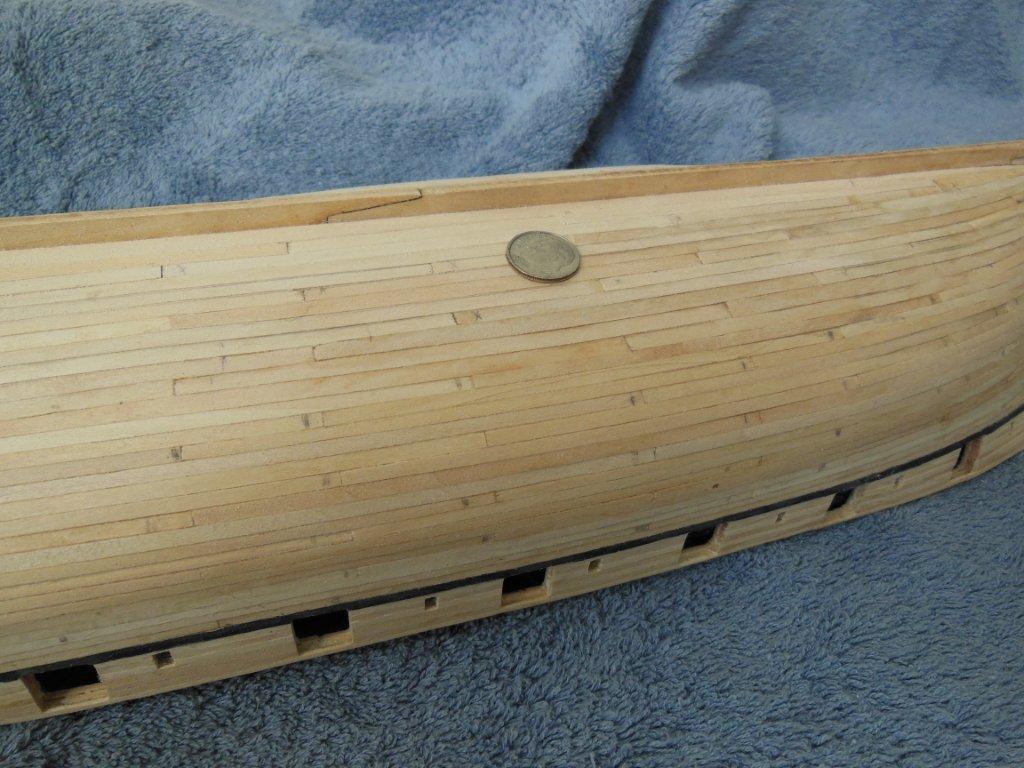
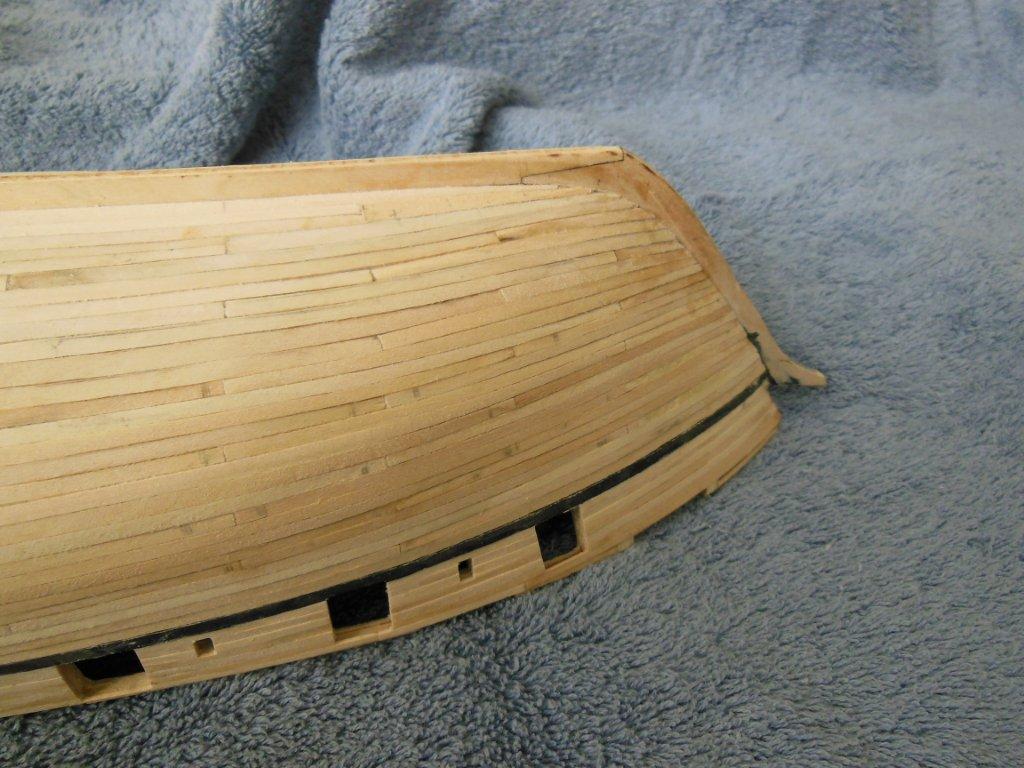
Quick update... I've been busy filing the gunports and sweep ports to the final size. I did not realize how much I left them undersized until I started filing, and filing and filing. Ten gunports are completed as well as all of the sweep ports. I also applied some Hobby Light filler in a couple of places on the hull that had a small void. When I needed a break from filing, I took some scrap planking and glued it together as a paint test board. I was wondering if the primer made much difference in how the paint looked. Immediately I discovered a lack of primer resulted in the glue smears standing out very plainly, leaving a blotchy look. A very light coat of primer made the paint very consistent. I'll also use this scrap piece to experiment with Wipe On Poly, the sealer purchased from Model Expo and Dull Coat. During another filing break, I cut some stock paper (10 mils thick) to see how it would look as the side butt boards for the sweep ports. Overall the card stock looked right, so I'll use that material if I can do a decent enough job getting them cut to the correct size, aligned correctly and painted - they are very small. Hopefully I'll finish up filing the remaining gunports in a day or two and get back to sanding the hull.
-
Hi Ken, Thanks for looking in. I was debating on first applying white primer. I'll probably procrastinate over the decision for days...
-
Thanks Popeye, Sjors and Augie! I thought I would never get it done. I'm still thinking of the Wappen von Hamburg for a future build and it's certainly a bigger model, but it's many months in the future. I'm currently sanding the hull, and starting to realize getting every high and low spot out may not happen without the possibility of sanding in a flat spot. Using filler does not appeal to me, so I'll get it to a point where I believe it's acceptable and see how it looks with paint.
-
John, the bowsprit and chain work looks good! On my tugboat I used (may be more accurate to say I tried to use) blacken- it on the chains. It never did turn black and after repeated attempts it looked corroded, which was probably more realistic...
- 2,250 replies
-
- 1
-

-
- model shipways
- Charles W Morgan
- (and 1 more)
-
Hi Michael, Are the gun ports laser cut, stamped or simply outlined for reference?
-
Hi Augie, I'm impressed the jig was included with the kit. Do you know if this occurs with other kits or was this an exception.
- 2,191 replies
-
- 2
-
-
- confederacy
- Model Shipways
- (and 1 more)
-
I agree completely, it feels solid and looks halfway decent. Now all I need to do is resist sanding the planks down to the bulkheads.
-
Thanks John. With it being my first planking, I'm OK with how it turned out. I'm anxious to get started onthe deck planking but it will be a week or two before I get started on that. I just finished coating the inside of the hull with two part epoxy. It added some weight to the ship and hopefully some strength.
-
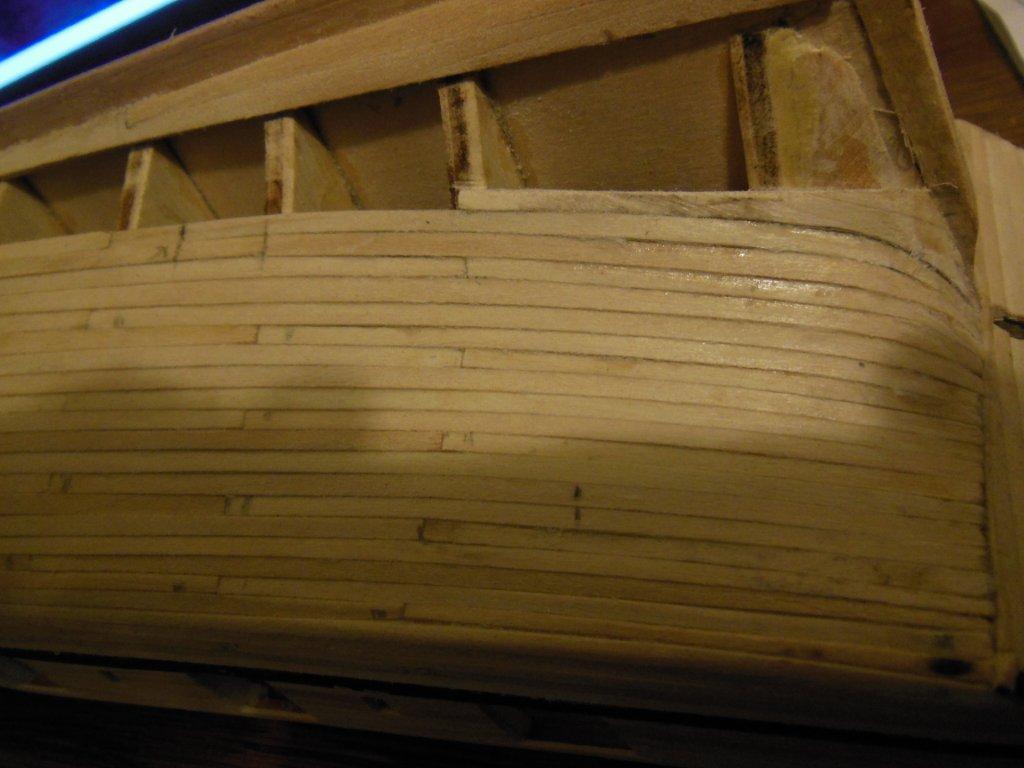
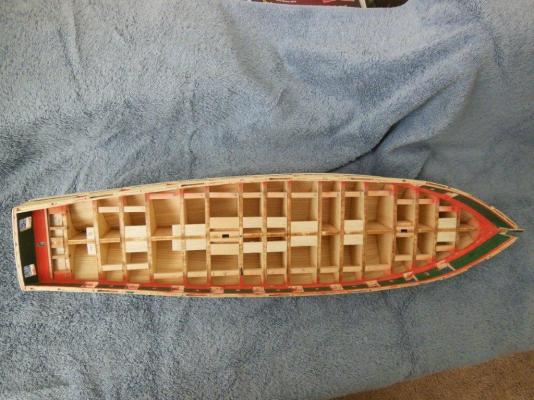
Thanks John! The last two planks went on much quicker than anticipated. Next is an epoxy coat on the inside of the planks. I know it's not really needed, but since it's single planked, I feel more at ease sanding on the hull with the epoxy adding some strength to the assembly. After sanding, I'll start working on some of the details I left for later, yes... putting odds and ends off have finally caught up with me. Gun,sweep ports need sanded to final deminsion, end planks need to be made and installed on gun/sweep ports and after that I believe it's time to do some painting.


-
Thanks Patrick and Gerty (sorry about the late reply). Happy New Year everyone. I'm down to lacking only two planks to finish the hull. Once the glue dries, on the plank I just installed, I'll start on the final two. I cannot believe it's been a little over six months to plank this hull. This effort was one of those "it hurt so good" kinda tasks If mistakes makes one better at something, I should be an expert by now. Pictures are coming, hopefully tonight or no later than tomorrow. Take care everyone.
-
Hi Michael, I'll follow your build with great interest. The Wappen is aso on my list of future builds and like you, I'll hold off on the temptation until I believe my skills are up to task. Good luck with the build and above all, enjoy the many months it will take to complete her.
-
Hi Rich, Congrats on ompleting the move. I'm sorry to hear you lost a pet. They become family and a part of our lives so easily.
-
Augie, Happy new year to you and yours. Excellent work as always!
- 2,191 replies
-
- 1
-
-
- confederacy
- Model Shipways
- (and 1 more)
-
The planking looks good! Pretty soon you'll be seeing and counting planks in your sleep...
-
Hello Edwin! Thank you and I hope the holidays have been good to you and yours!
-
Thank you for looking in. I've been following your build also and I'm impressed as well as amazed at how fast your build is moving, with excellent workmanship.
-
Hi Dave, Welcome aboard and thanks for the compliment! The Niagara is a great model ship to build and has a strong national history. It is a challenging build for me due to my limited experience but I believe anyone with a little experience and a fair amount of patience can complete the build and end up with a nice display.
-
Hi Sjors & John, Thanks for looking in. I suspect making the butt strips will be the most time consuming part. I may end up using card stock for the sweeport strips, I'll have to wait and see how it looks. Yes, the curves are a challenge but it gives the ship interesting lines. John, make sure you verify with your plans before you copy anything from my build... :D
-
Thanks guys! Still adding hull planks when time permits... Yes a little (I hope) sanding, some paint then a coat of wip-on-poly to protect the paint. I may end up spraying on some dull coat if needed. I still have a lot of detail work to do before even considering hull paint; Verify/set proper height of gunports - I believe they are a little short right now Set proper width of sweep ports - I believe they are a little too narrow Square up gun port and sweep port corners Make and install butt strips for gun/sweep ports Make and install top outside bulwark rail
-
Thanks Alistair. I hope the holidays go well for you.
-
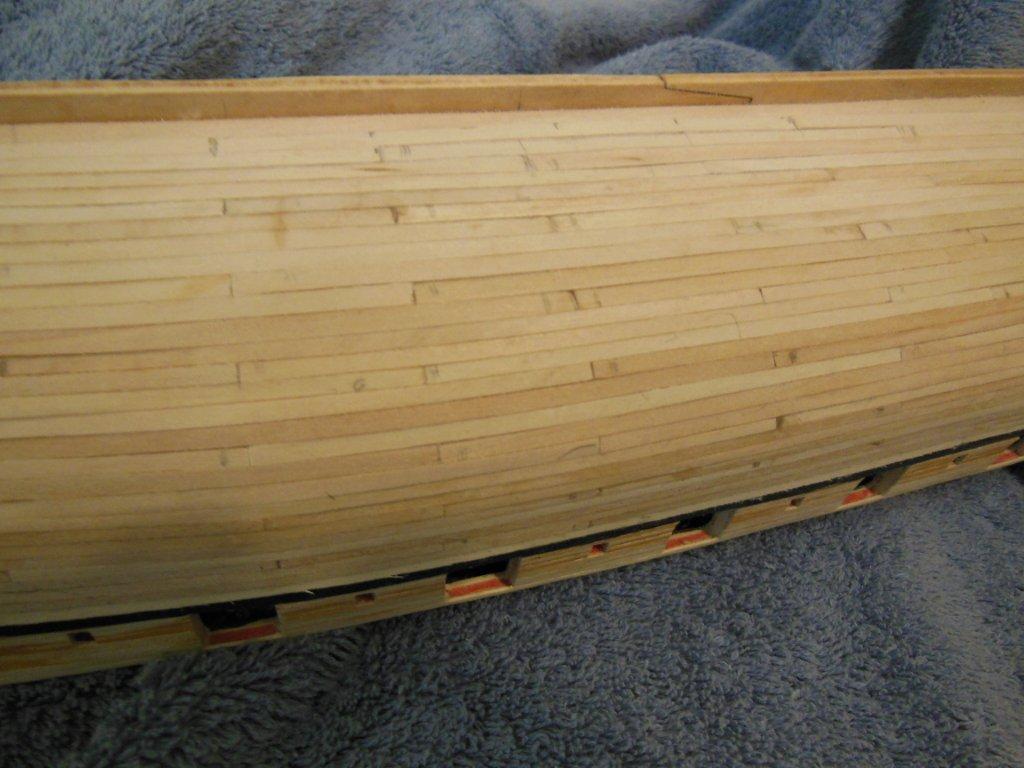
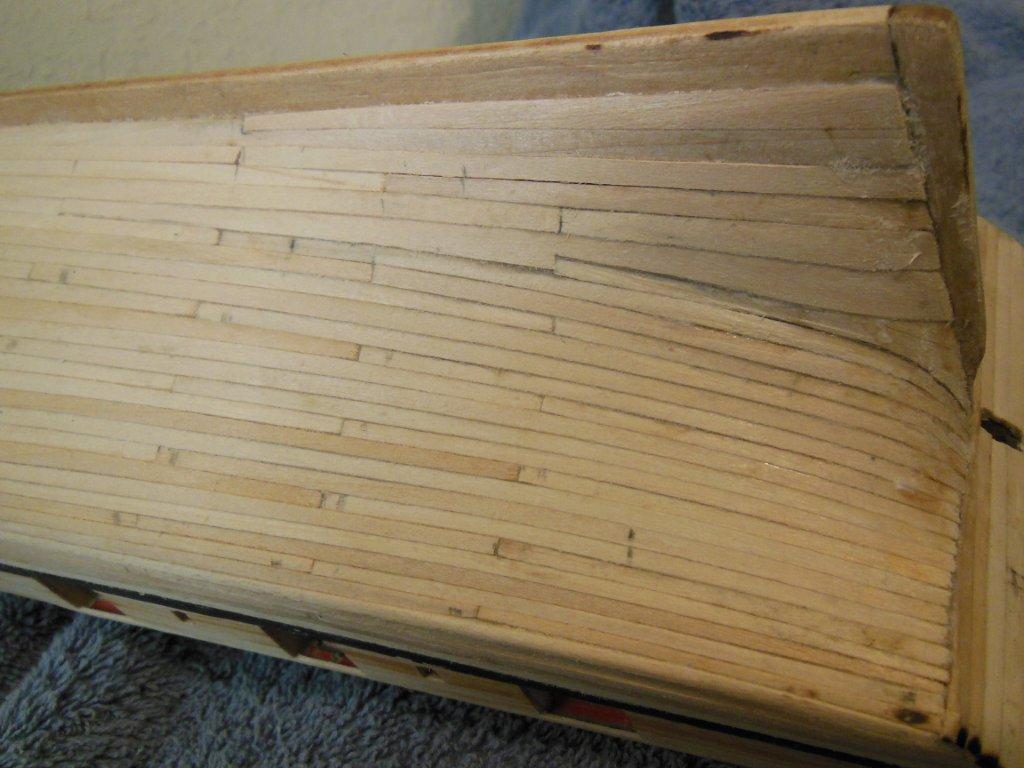
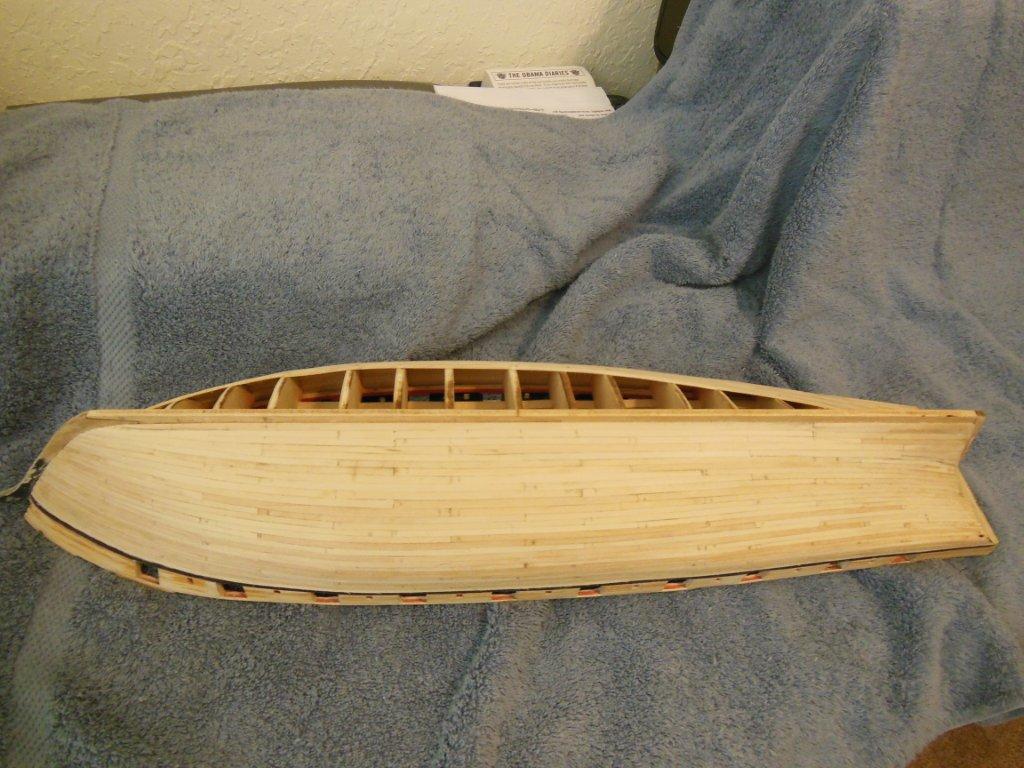
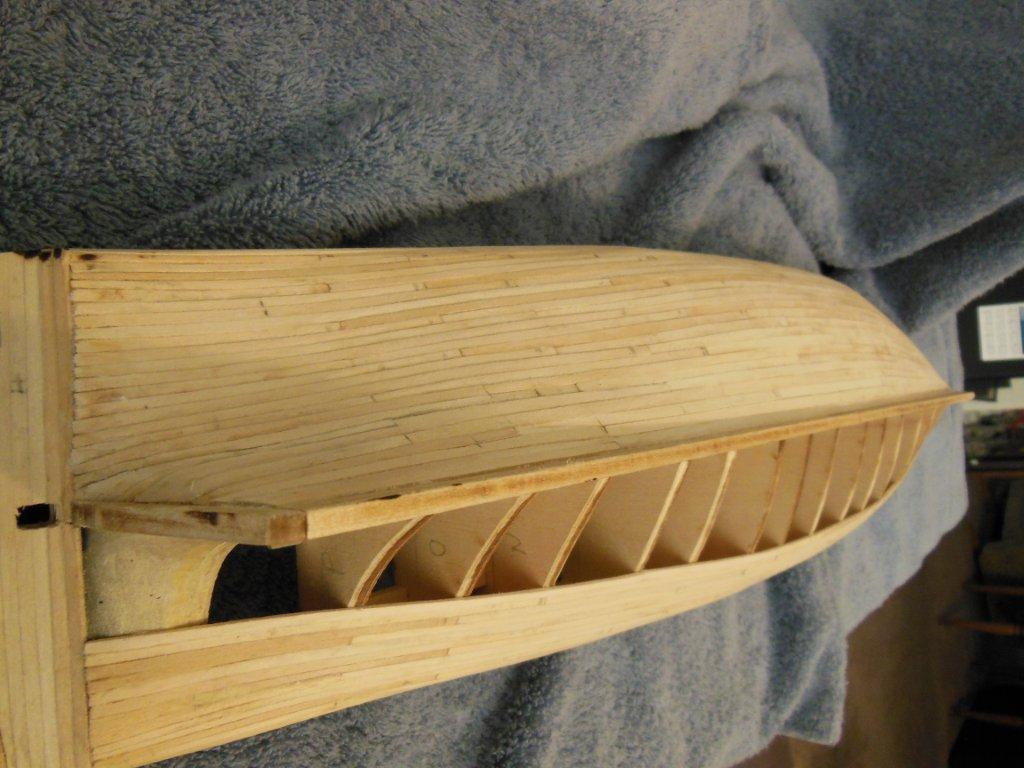
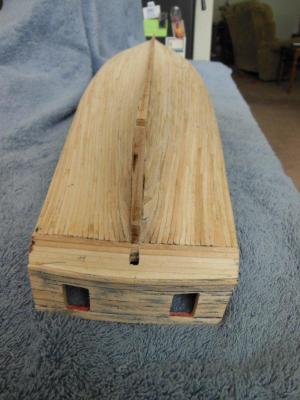
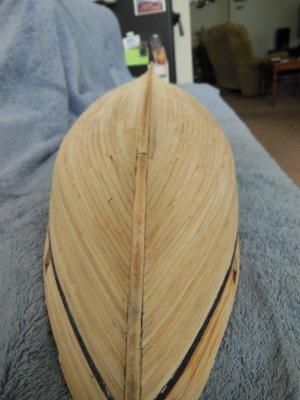
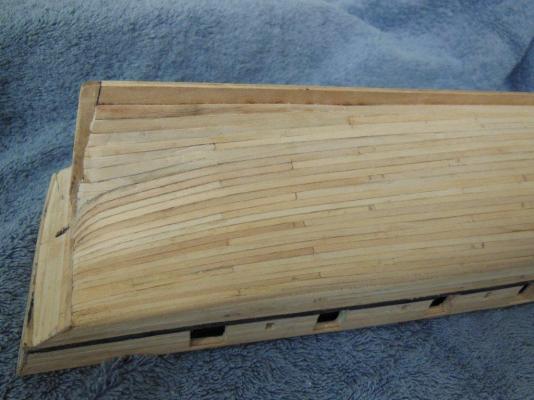
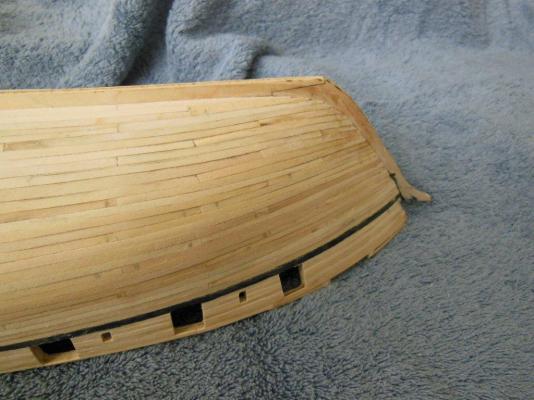
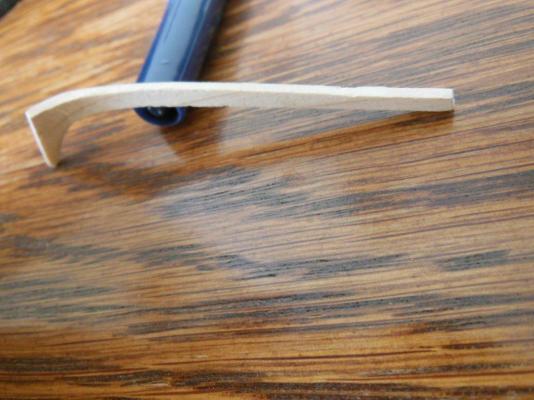
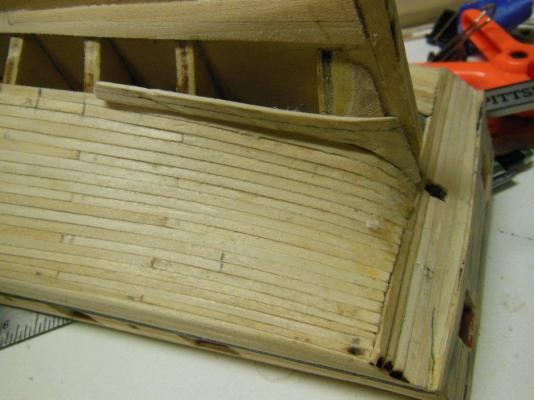
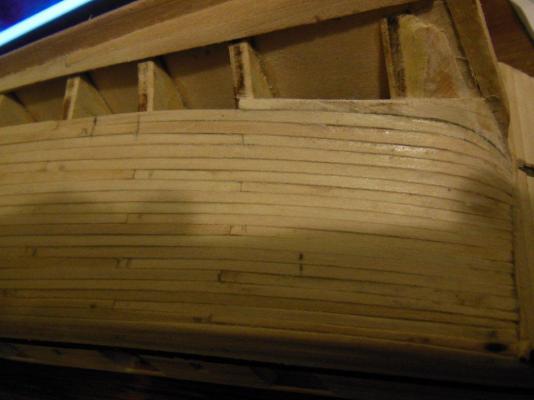
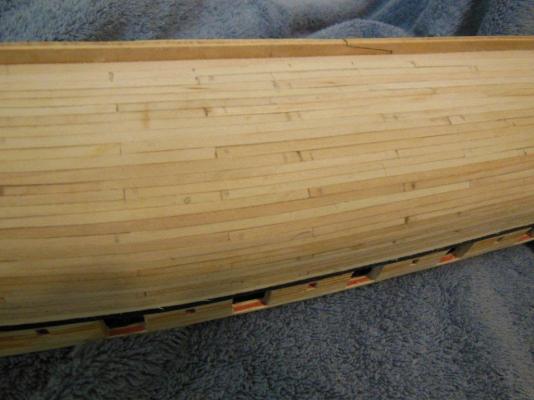
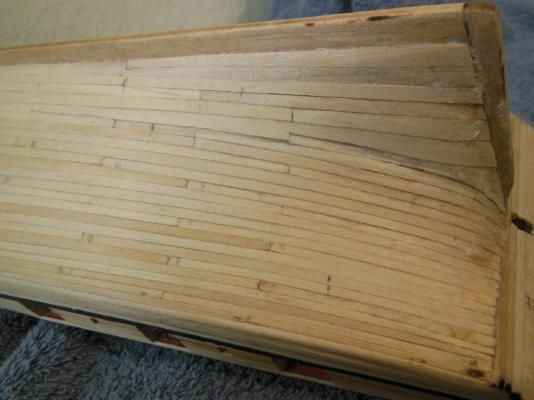
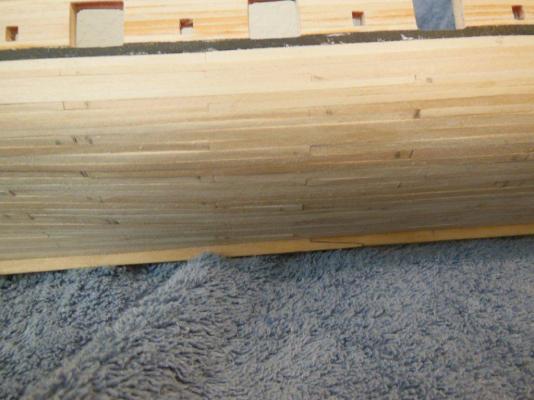
It's been a while since I've provided an update. Travel, life in general and family have kept me busier than normal but it's starting to calm down enough to let me get back to the shop and my friends at MSW. My plans were to hold off on doing so until the hull planking was complete, but there's enough progress to show some pictures and point out areas that were more difficult than the normally difficult parts... Before I start, my previously posts indicated I was working on the port side, well. I may have had one or two too many holiday spirits, I actually have been laying planks on the starboard side... Looking at the first picture you will see where I was attempting to make a piece of wood for the stem area. I wanted to remove the downward curve in the aft planks in effort to get a run that is more straight. I probably made 3-4 pieces before I could get it close enough to glue in place. I kept breaking the wood or just did not het the shape right. Finally I had a brain storm and decided to make a prototype using heavy stock paper. Once I had the paper shape close, I traced it on the wood and file it to fit from there. The remaining pictures show the starboard side planked, minus the sanding. I have a few spots that looked low enough that I applied some Hobby-Lite filler. Hopefully the remaining high/low spots sill sand out – there are also a lot of pencil marks that I hope the sanding will remove. I tried a pencil eraser on some of them but for some reason would not come off. Next steps Finish planking the port side Sand hull Start working on that long list of “I need to touch that up” items start deck planing


-
Hi Popeye, I love the colors and detail on your ship, a very professional looking build in progress!
-
Hi Sjors, Your ship is coming along very well, I can only hope mine will be at least half as good! I hope you and Anja have a Merry Christmas and a Happy New Year.
-
Hi John, Your ship looks great and the details are amazing. Merry Christmas to you and yours and a happy new year!
- 2,250 replies
-
- 1
-
-
- model shipways
- Charles W Morgan
- (and 1 more)