Osmosis
-
Posts
626 -
Joined
-
Last visited
Content Type
Profiles
Forums
Gallery
Events
Everything posted by Osmosis
-
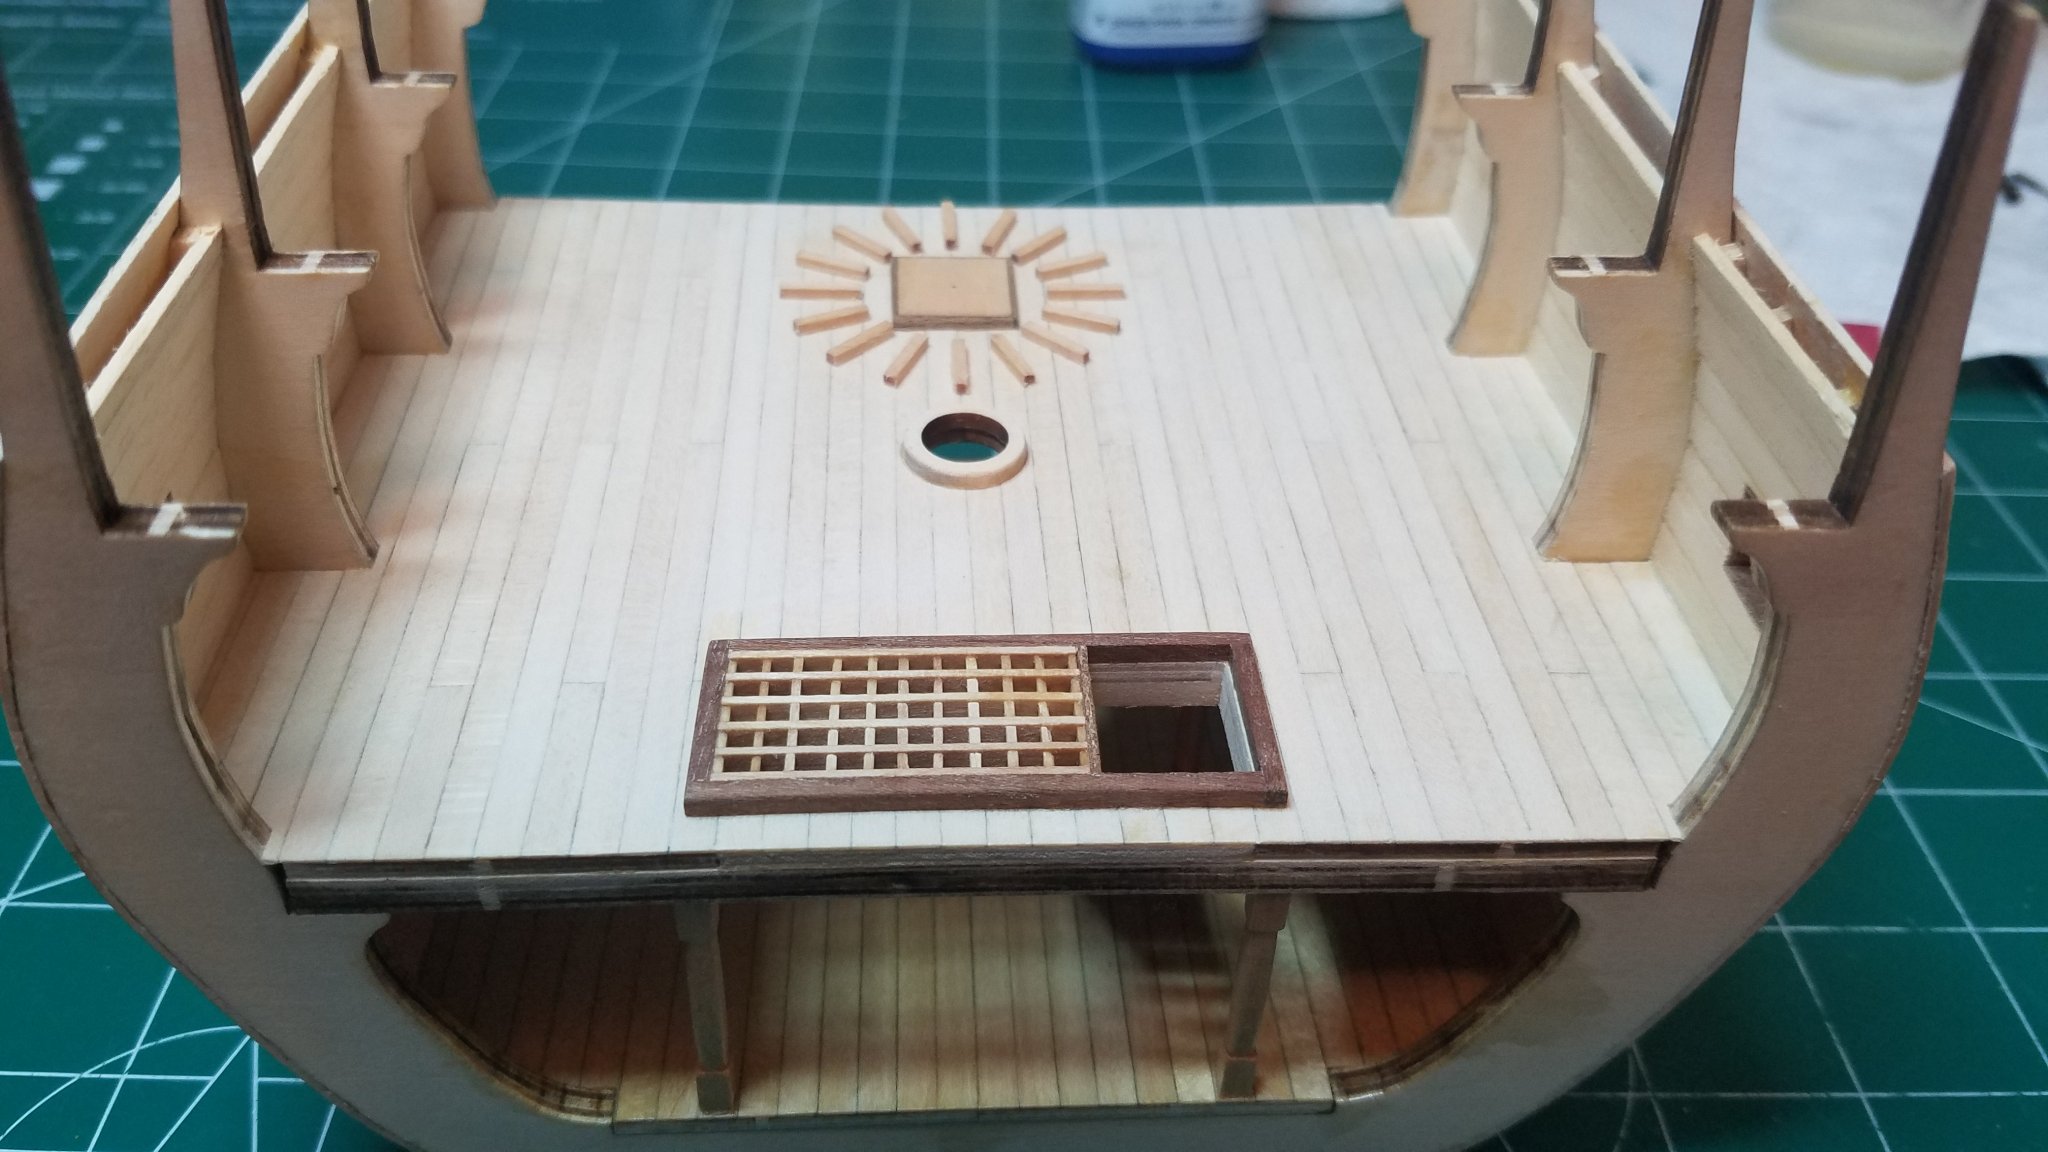
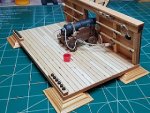
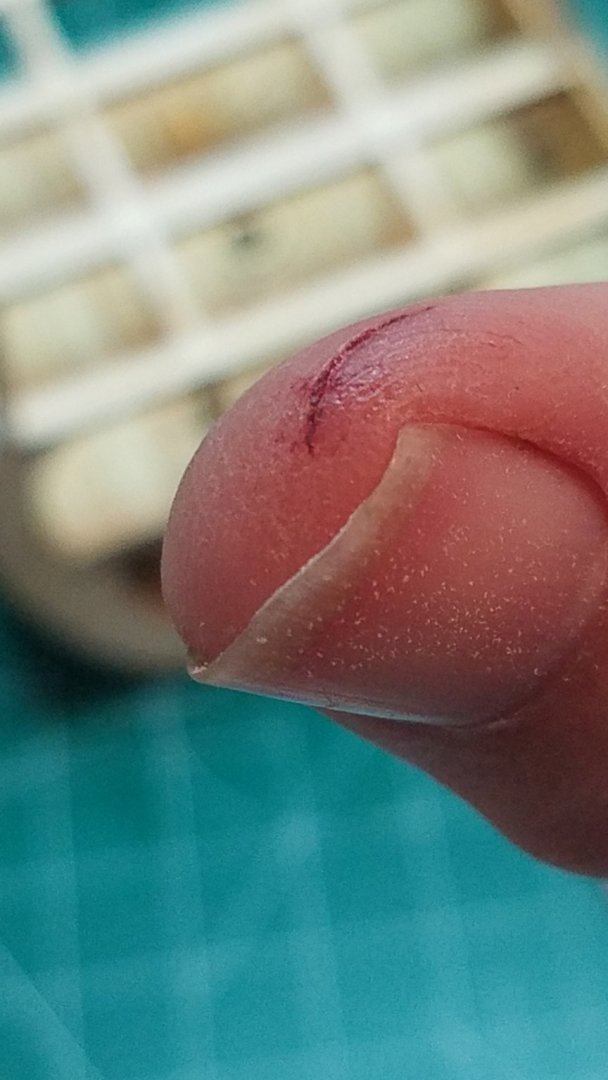
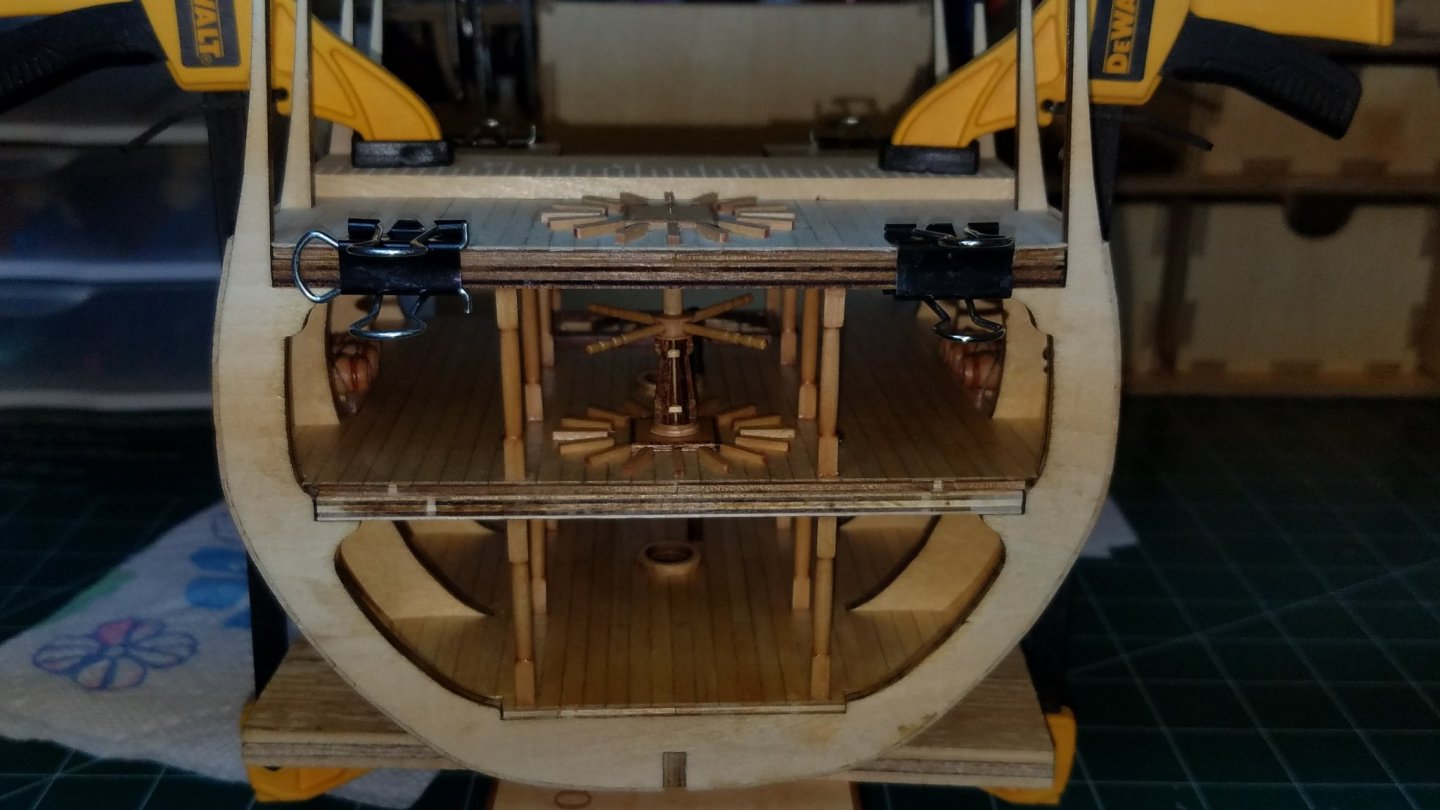
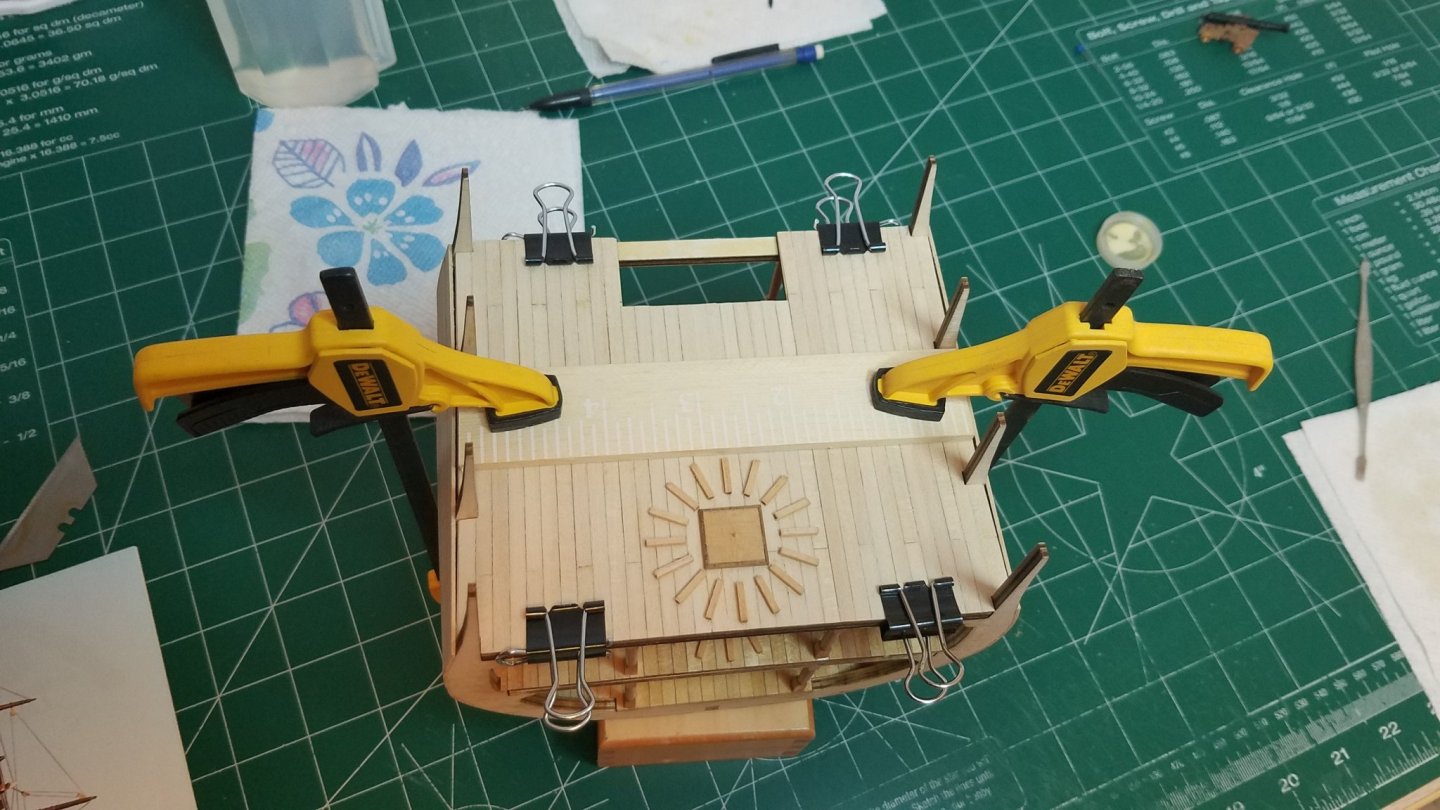
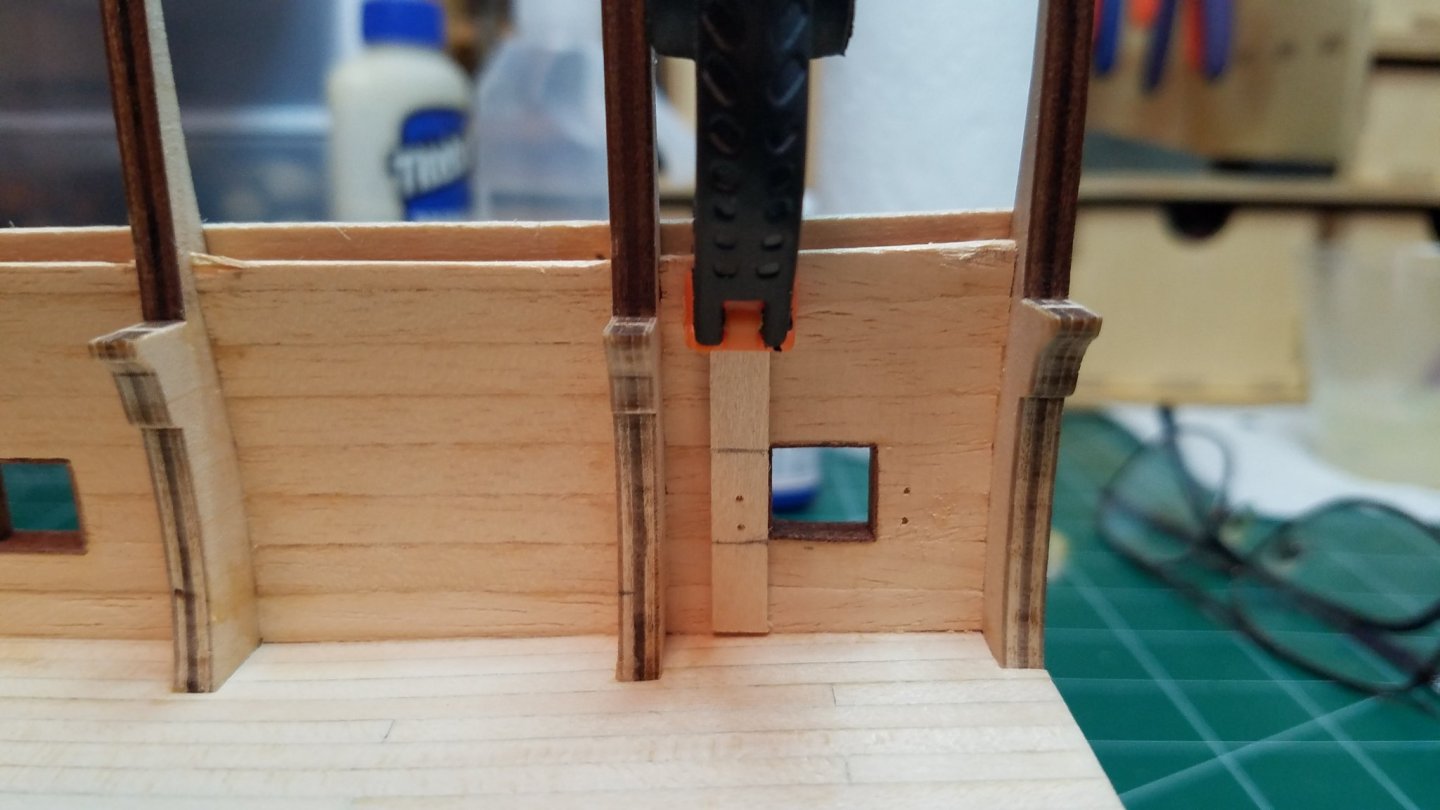
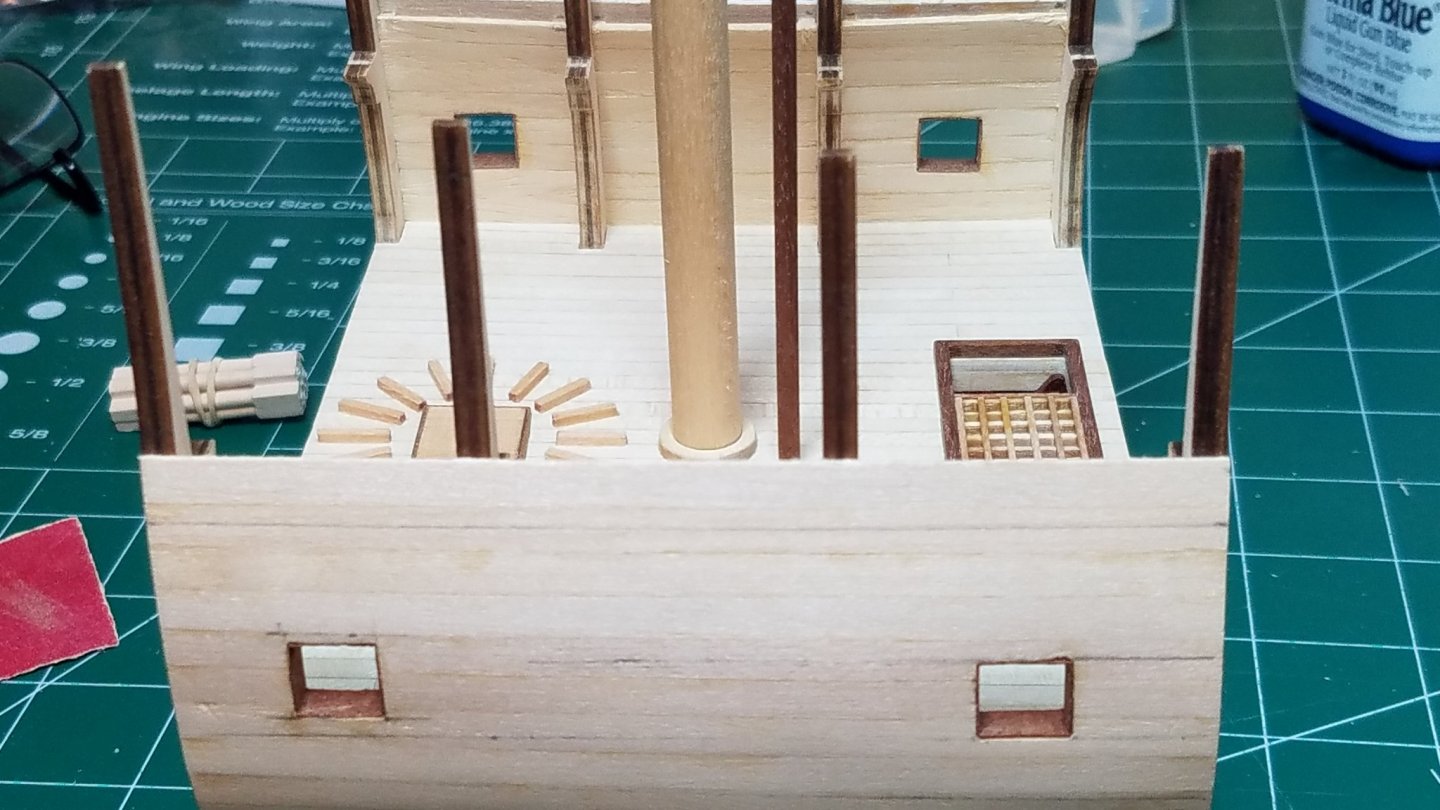
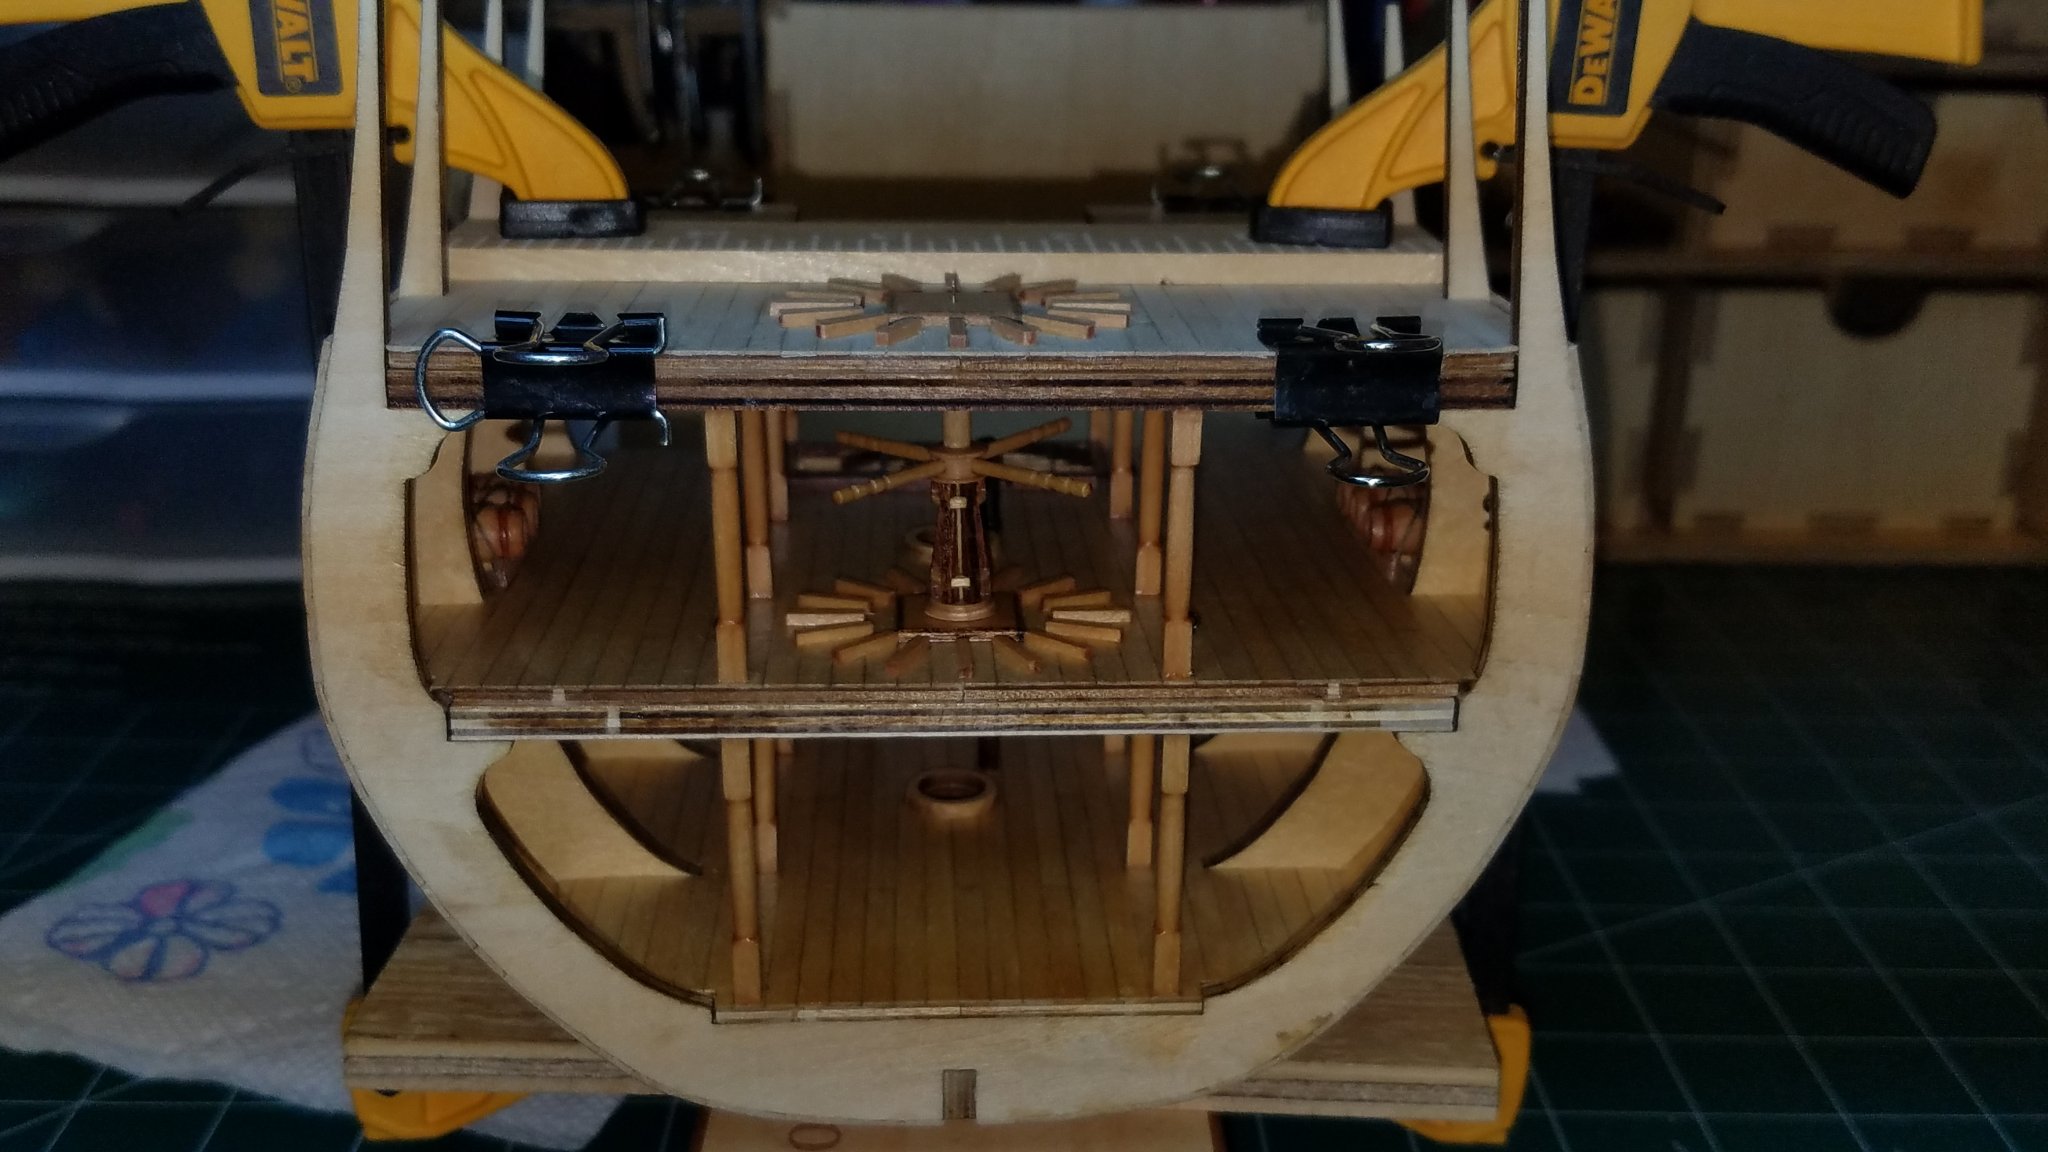
 I got started Saturday by back tracking So that I could correct something I left out Friday night. One detail I wanted to add from the start which is not in the kit is the gun port raising tackle. In order to do this I new darn well that I had to add the anchoring hardware prior to closing up the second deck. After going to bed I realized I forgot to pre-drill the longitudinal beams for the rings. Doing it after they were installed was a lot harder than it would have been . But they are in. After that it was two coats of Wipe on poly for everything in preparation for installing the main deck. Then while making breakfast Sunday morning for me and the Admiral I got into it with a can of corned beef hash. And Lost. On the right thumb which as you well know you need for everything. So I took Sunday off and went to the casino and played poker all day. Tonight the pump got glued in and the capstan installed Then the main deck went on without any trouble. I am going to have to stick an eraser or something on that alignment pin til I am ready to install the upper capstan. I think I will leave it all clamped up over night and start on the deck filler for the hatch opening tomorrow. That is it for tonight. The Panthers are playing the Leafs.
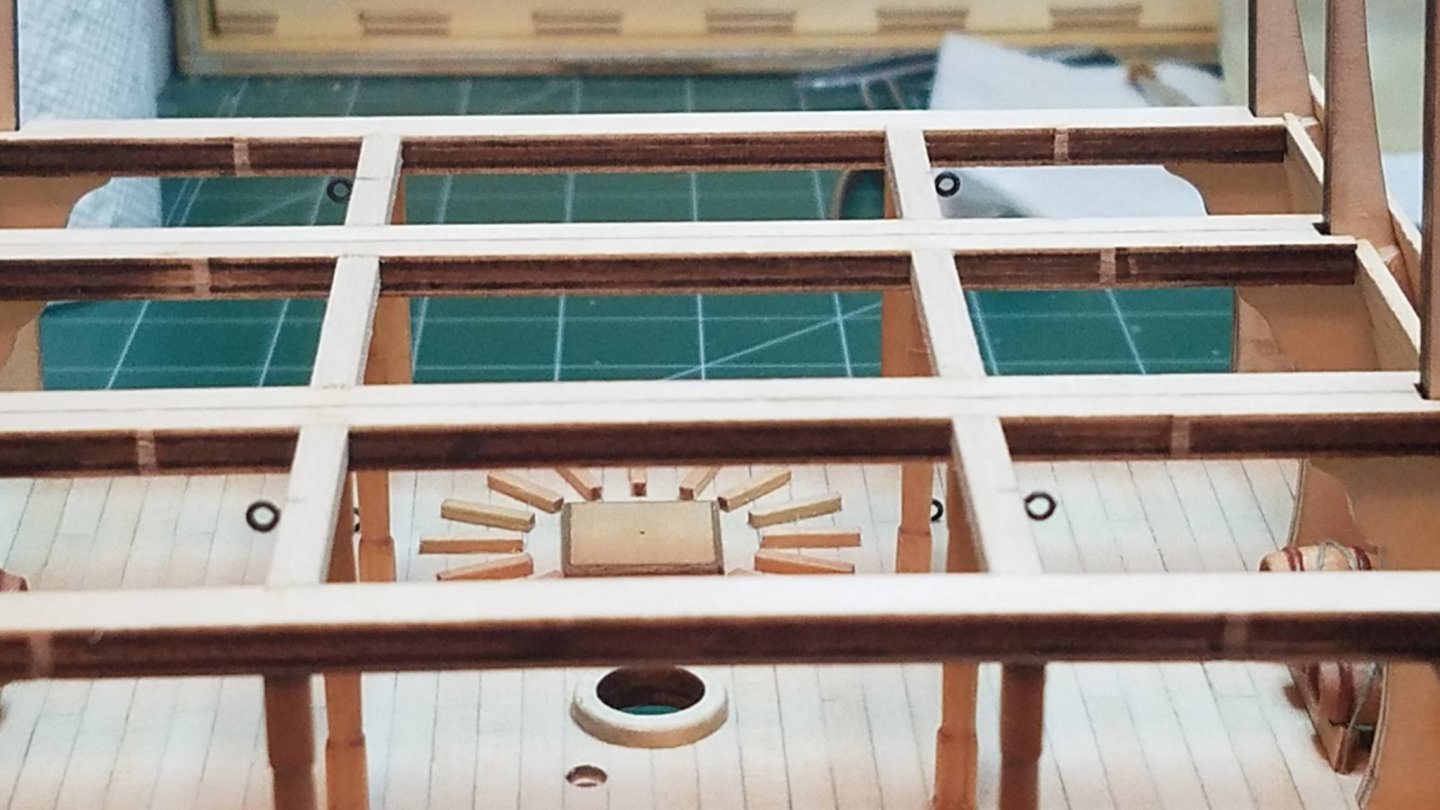

- 139 replies
-
- 6
-

-
- san francisco
- artesania latina
- (and 1 more)
-
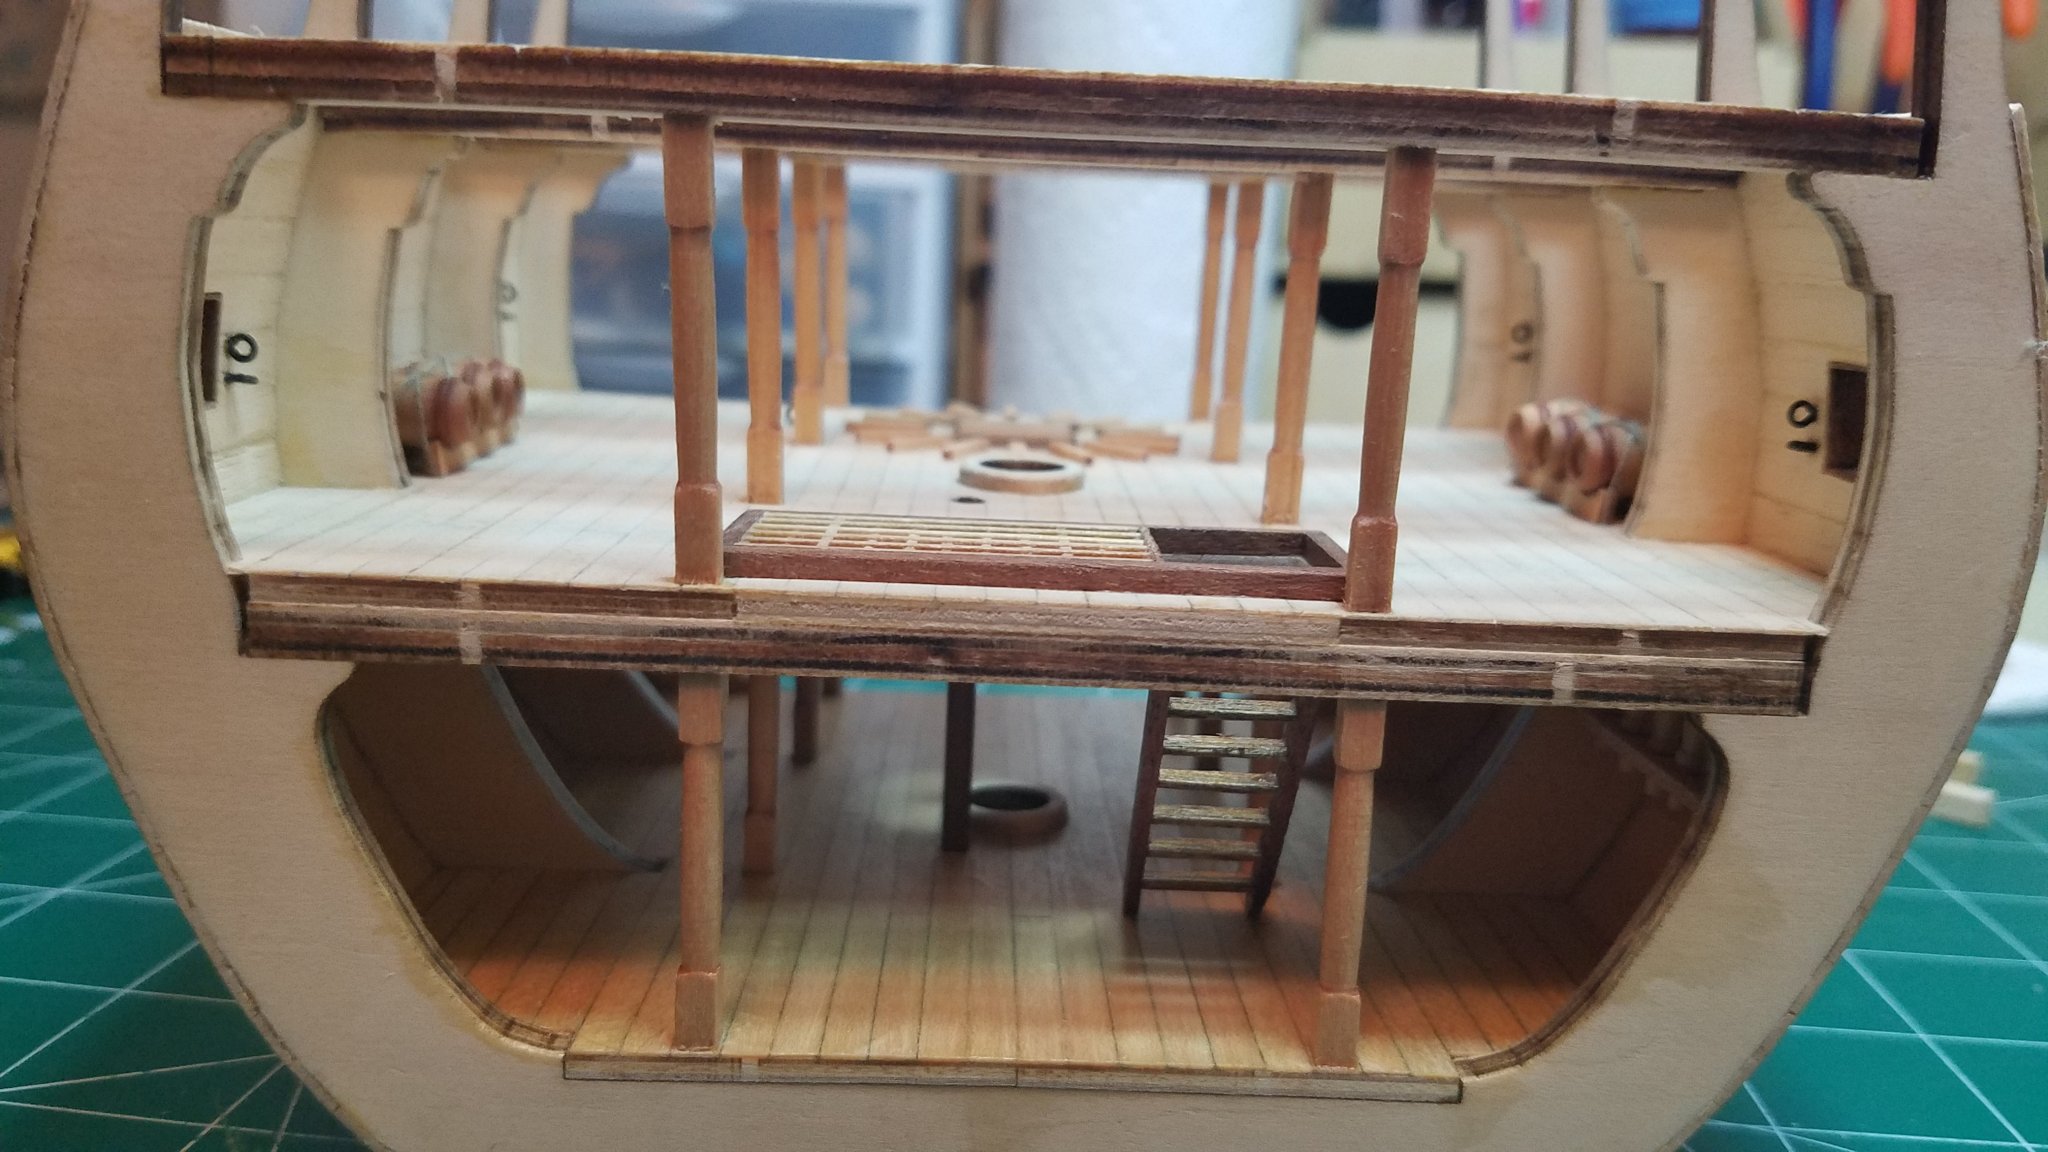
Thanks for the likes and comments, After letting the stain dry overnight I got the stanchions glued in place this evening. Then after letting the glue dry for an hour or so I put in the longitudinal deck beams. Again I know that no one is going to see these but at least I will know they are there. I will let this dry overnight. Then tomorrow some light sanding and a couple of coats of wipe on poly. Regards


- 139 replies
-
- 3
-
-
- san francisco
- artesania latina
- (and 1 more)
-
The more build logs of the same type the more ideas are out there for others to grab and use. If you start your own build log you will get a lot more exposure to a lot more people with A LOT MORE experience and knowledge then I could ever hope to have. All of the changes I have made in this build started as ideas that were gleaned from other builds or articles on this forum. Sorry if that got a little preachy but this forum is a great tool so put it to its best use is all I am saying.
- 139 replies
-
- 4
-
-
- san francisco
- artesania latina
- (and 1 more)
-
Dr Paul, I PM'd you in regards to the drawings. By the way why have you not started a build log. It is the best way to get help ideas around here. Regards
- 139 replies
-
- 1
-
-
- san francisco
- artesania latina
- (and 1 more)
-
Not much to do tonight literally watching paint dry, stain actually. Not much I can do until I get these in so I will let them dry till I get home from work tomorrow. Then I can start the rest of the framing for the top deck. Till Then have a good night.
- 139 replies
-
- 2
-
-
- san francisco
- artesania latina
- (and 1 more)
-
Thanks for all the nice comments and the likes. Tom, it feels good to be back at it again. Looks like Model Shipways is having a huge sale 40% off everything in the place. It may be time for another trip to Miami. Paul, I don't know how I would have done it if I did not have the luxury of Autodesk Inventor. I would be more than happy to send you my drawing of the lower ladder if it will help. Regards
-
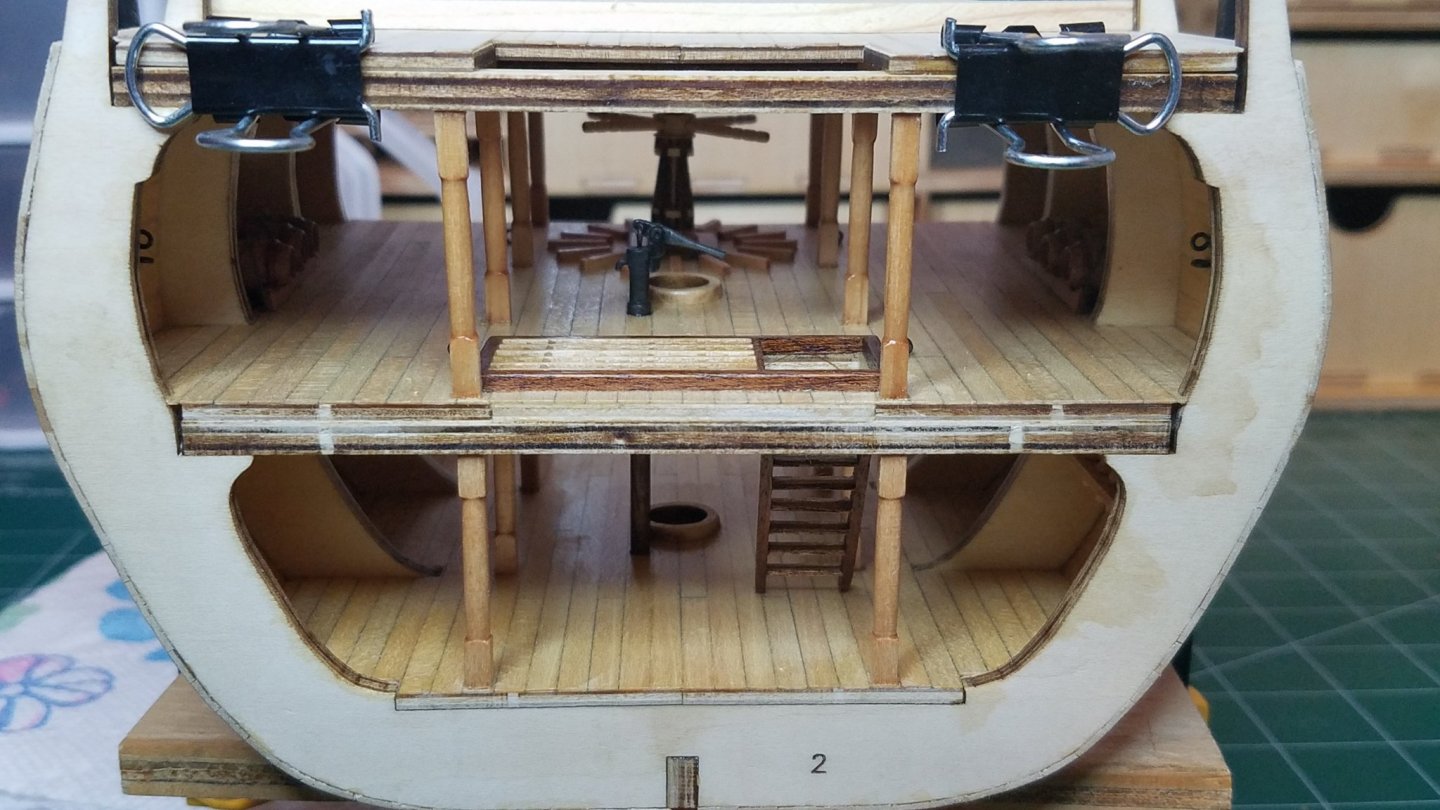
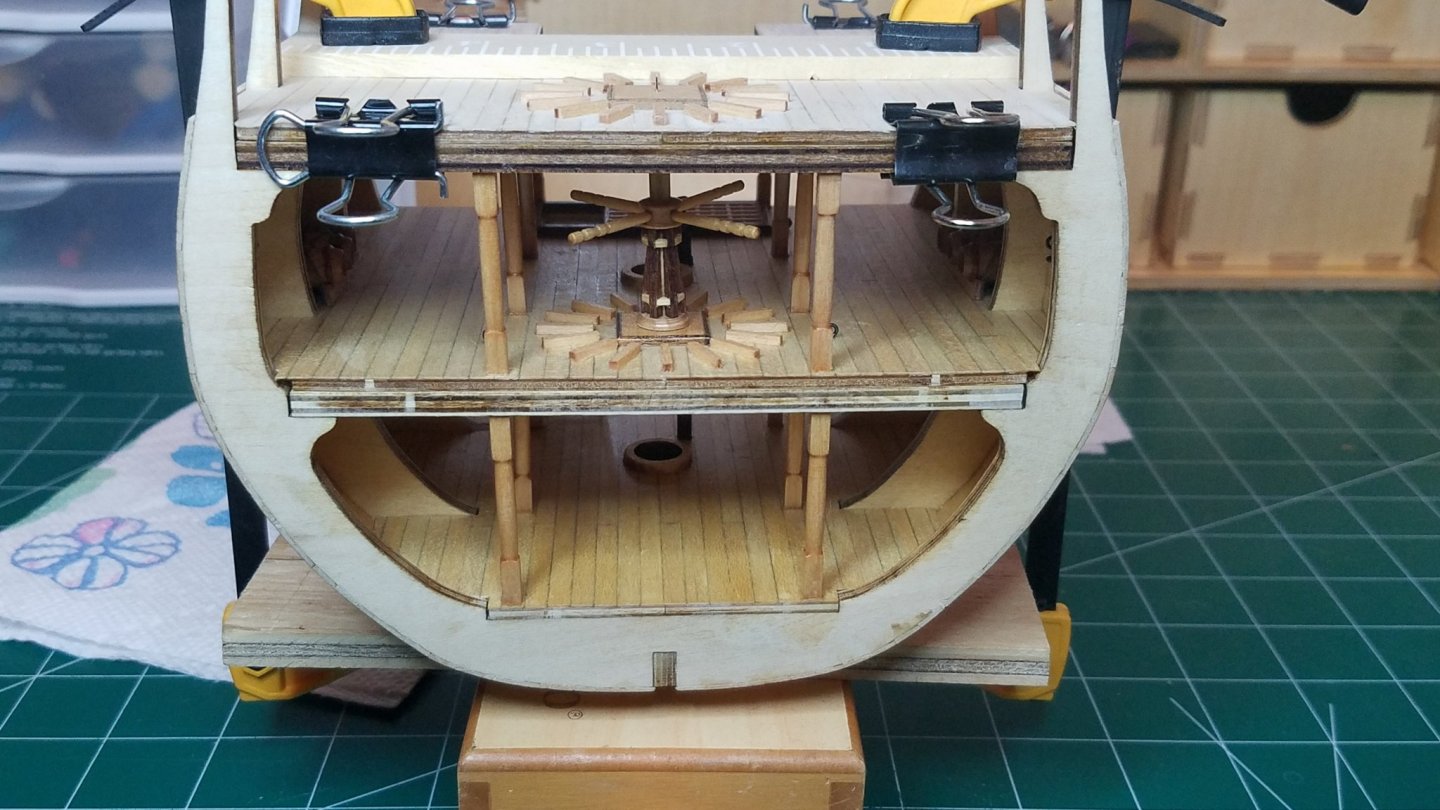
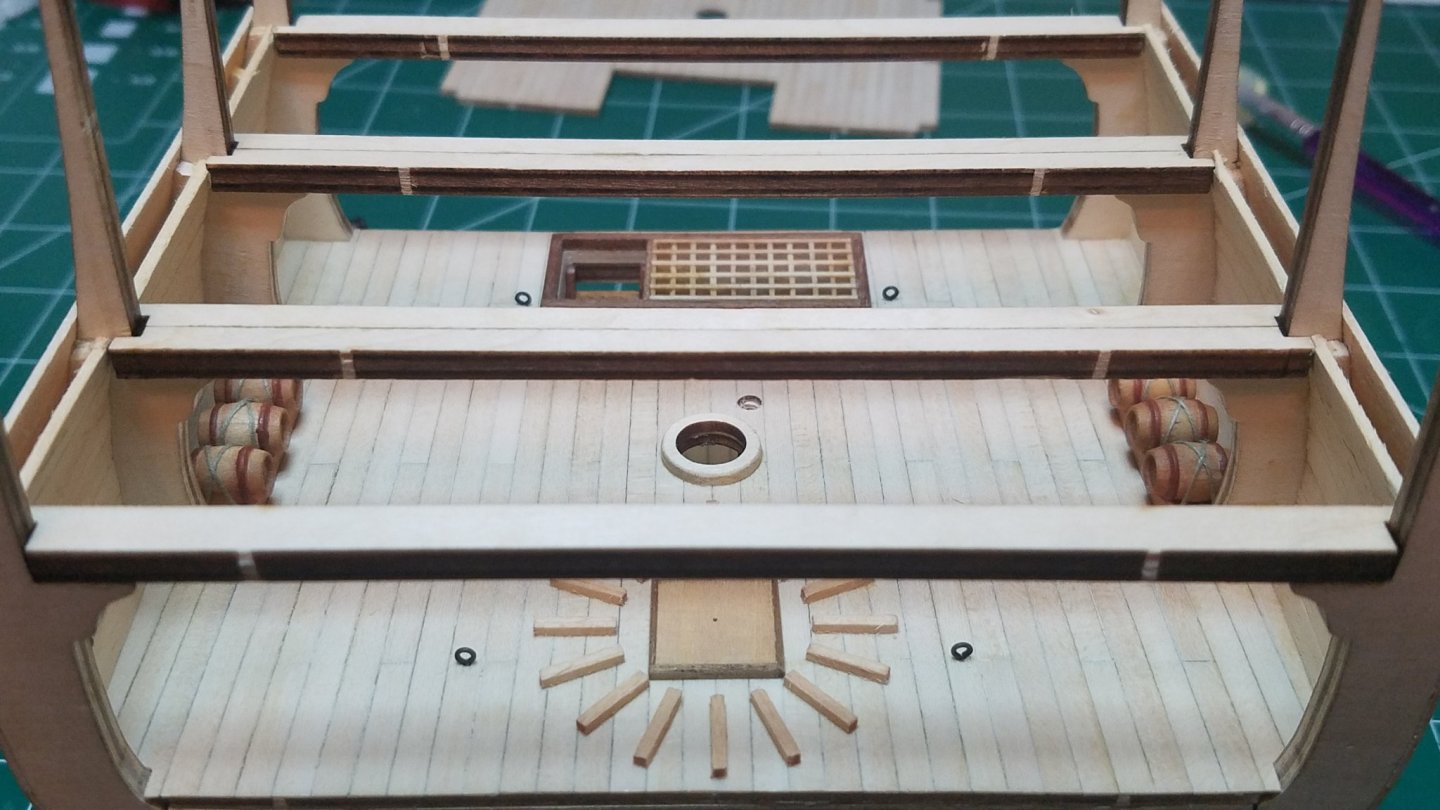
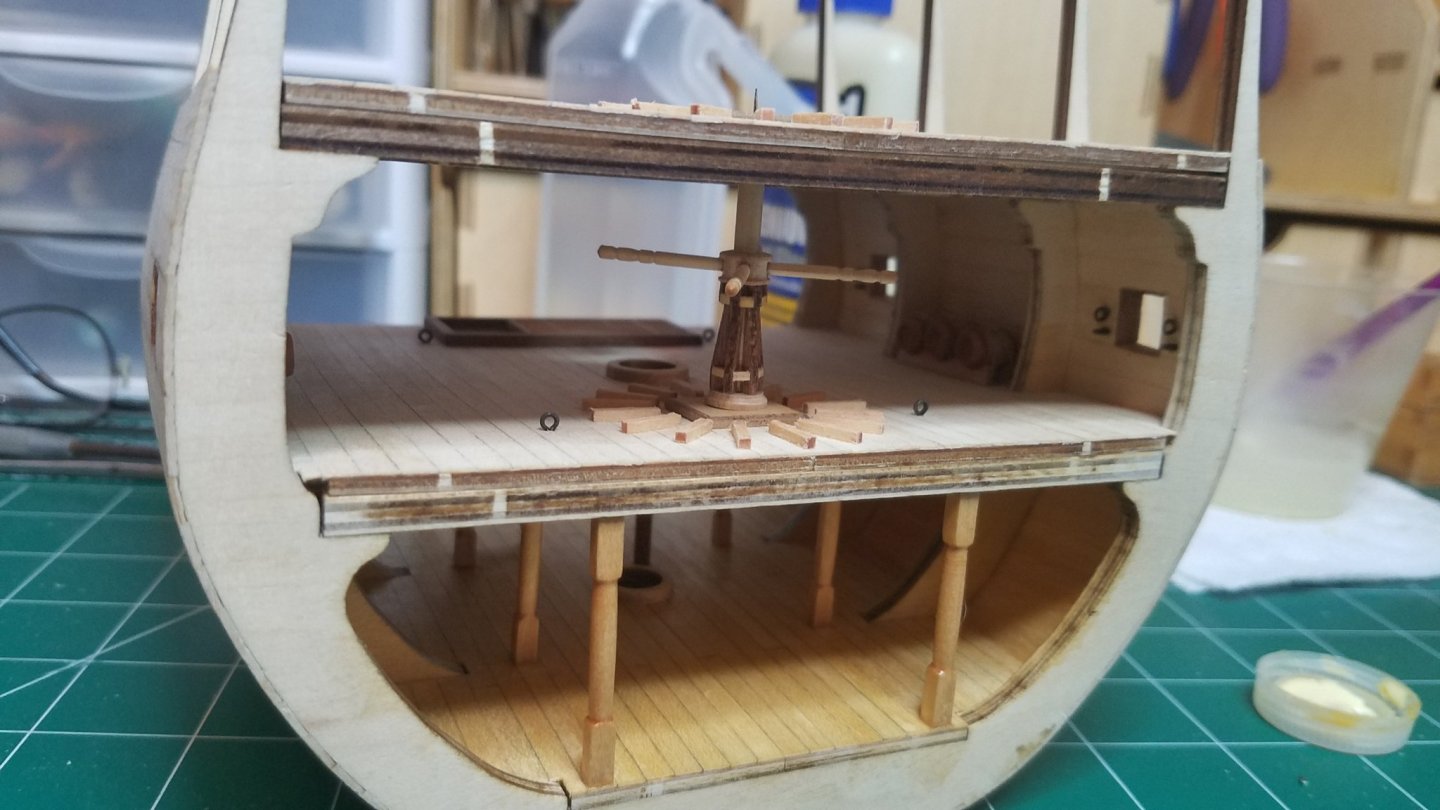
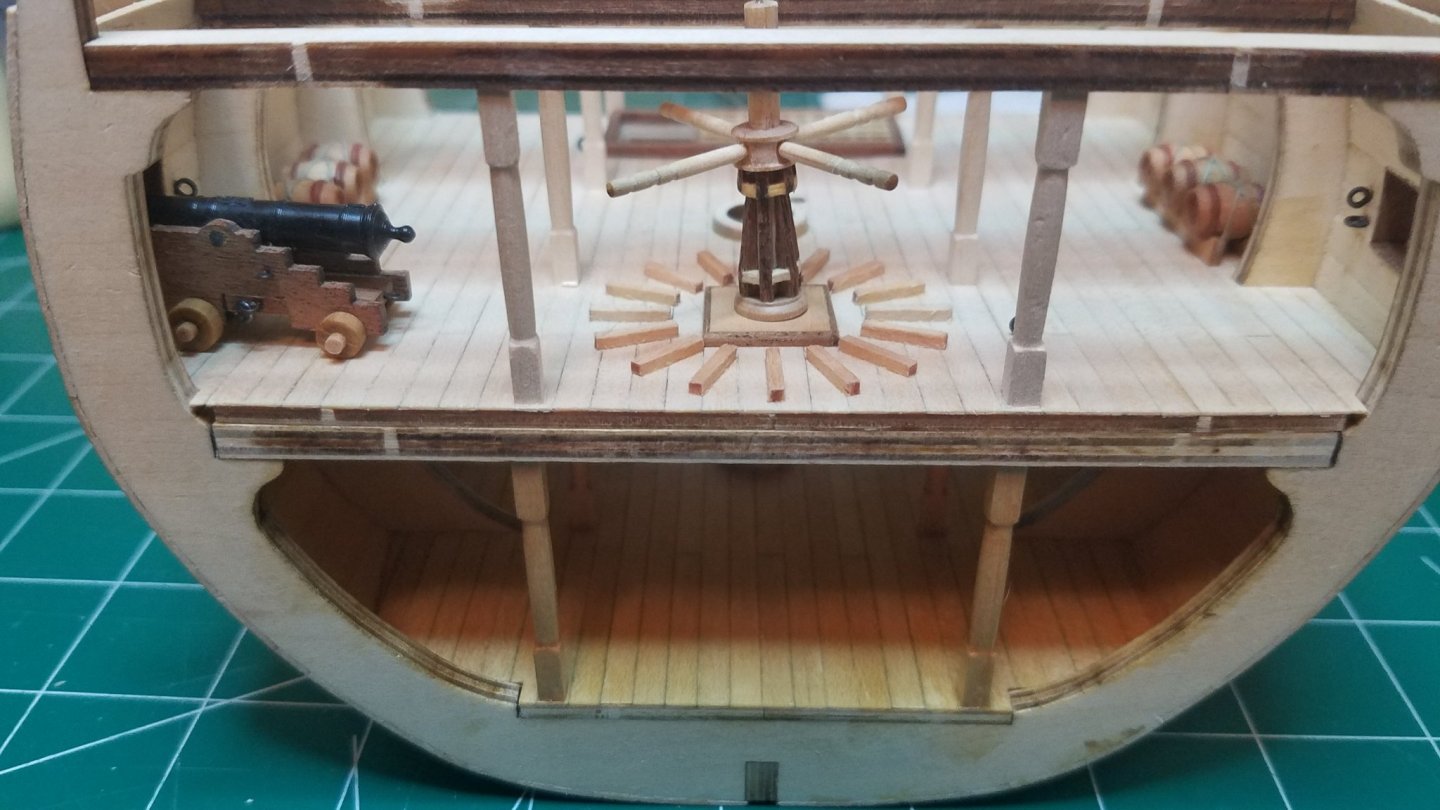
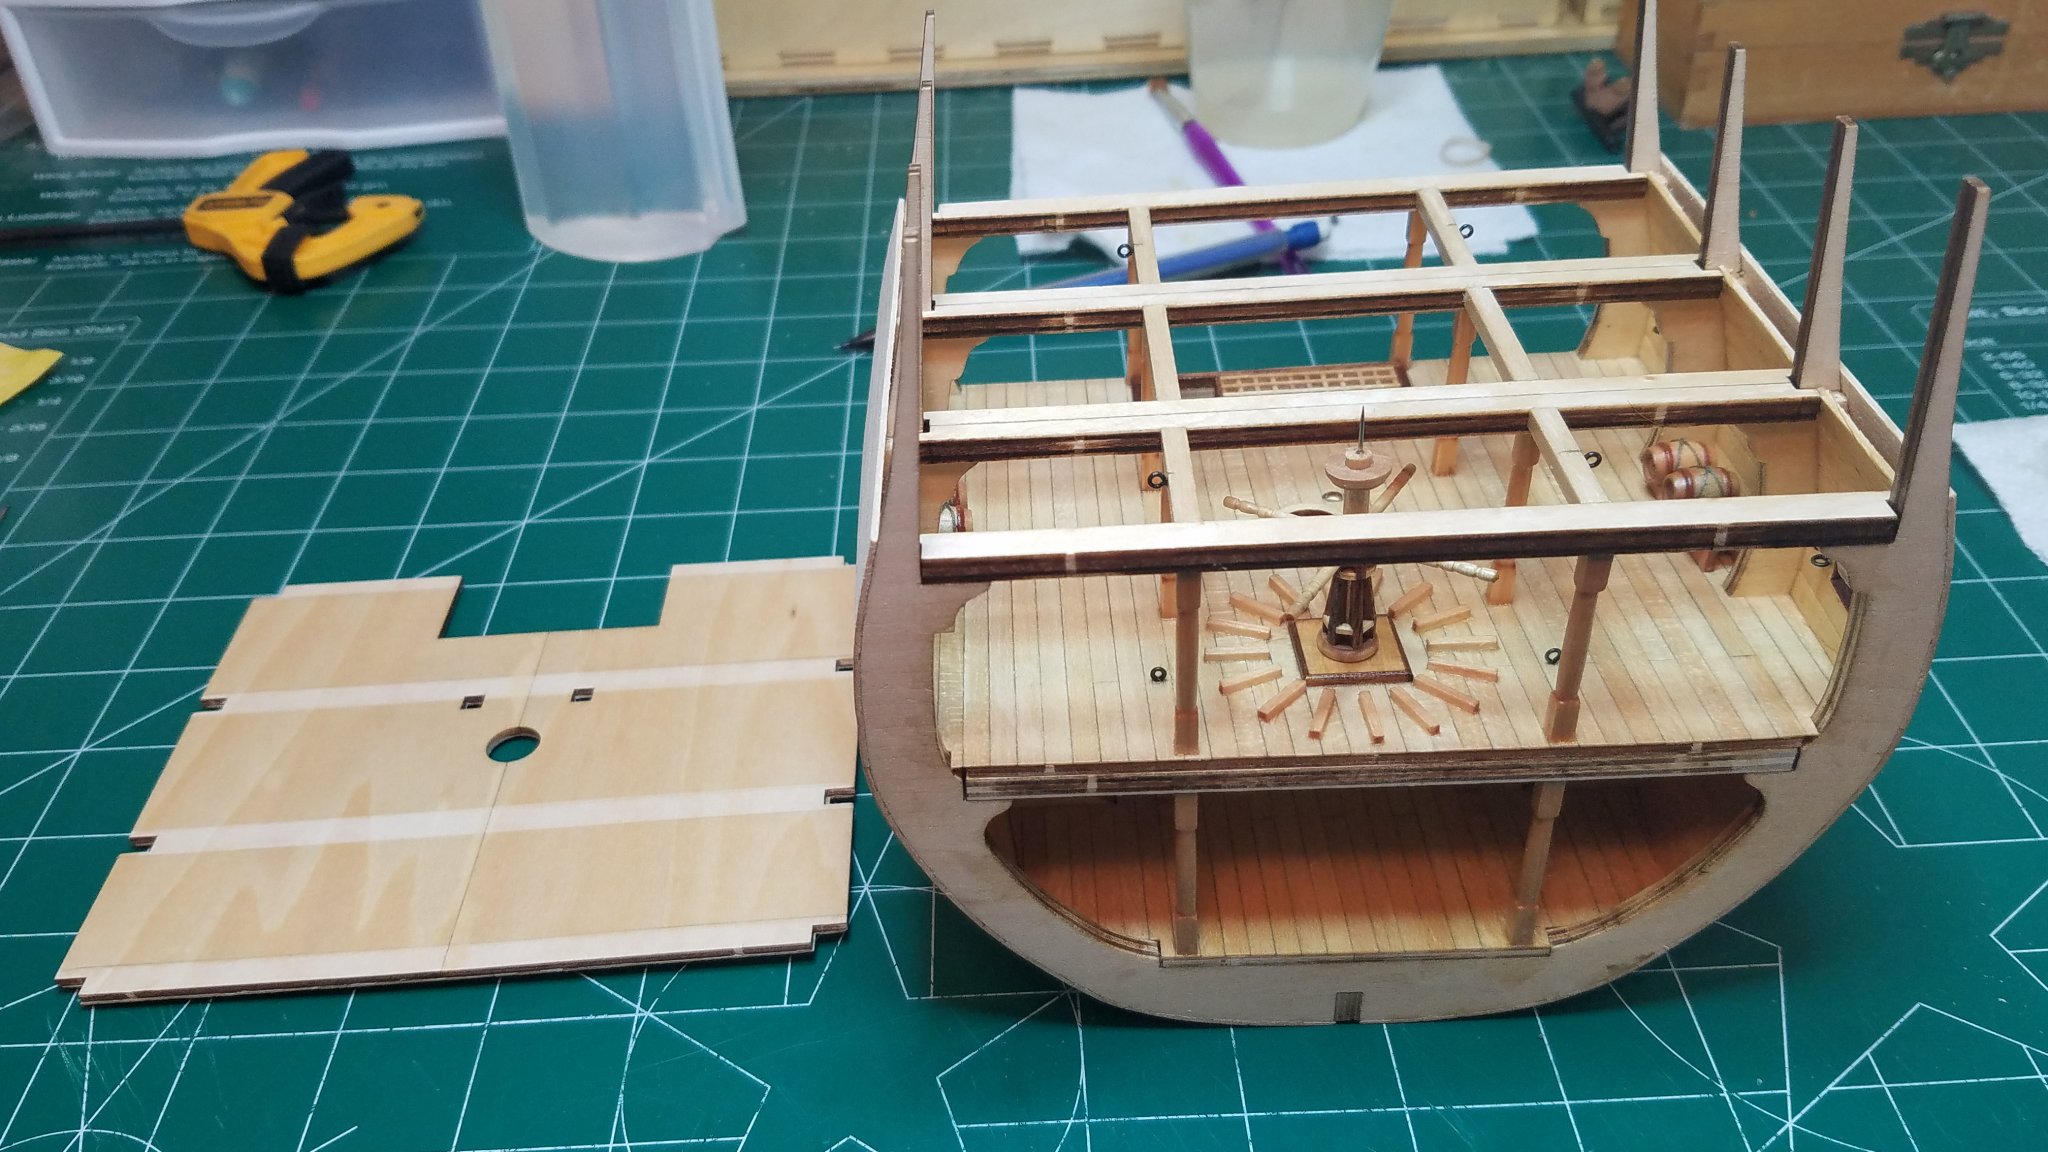
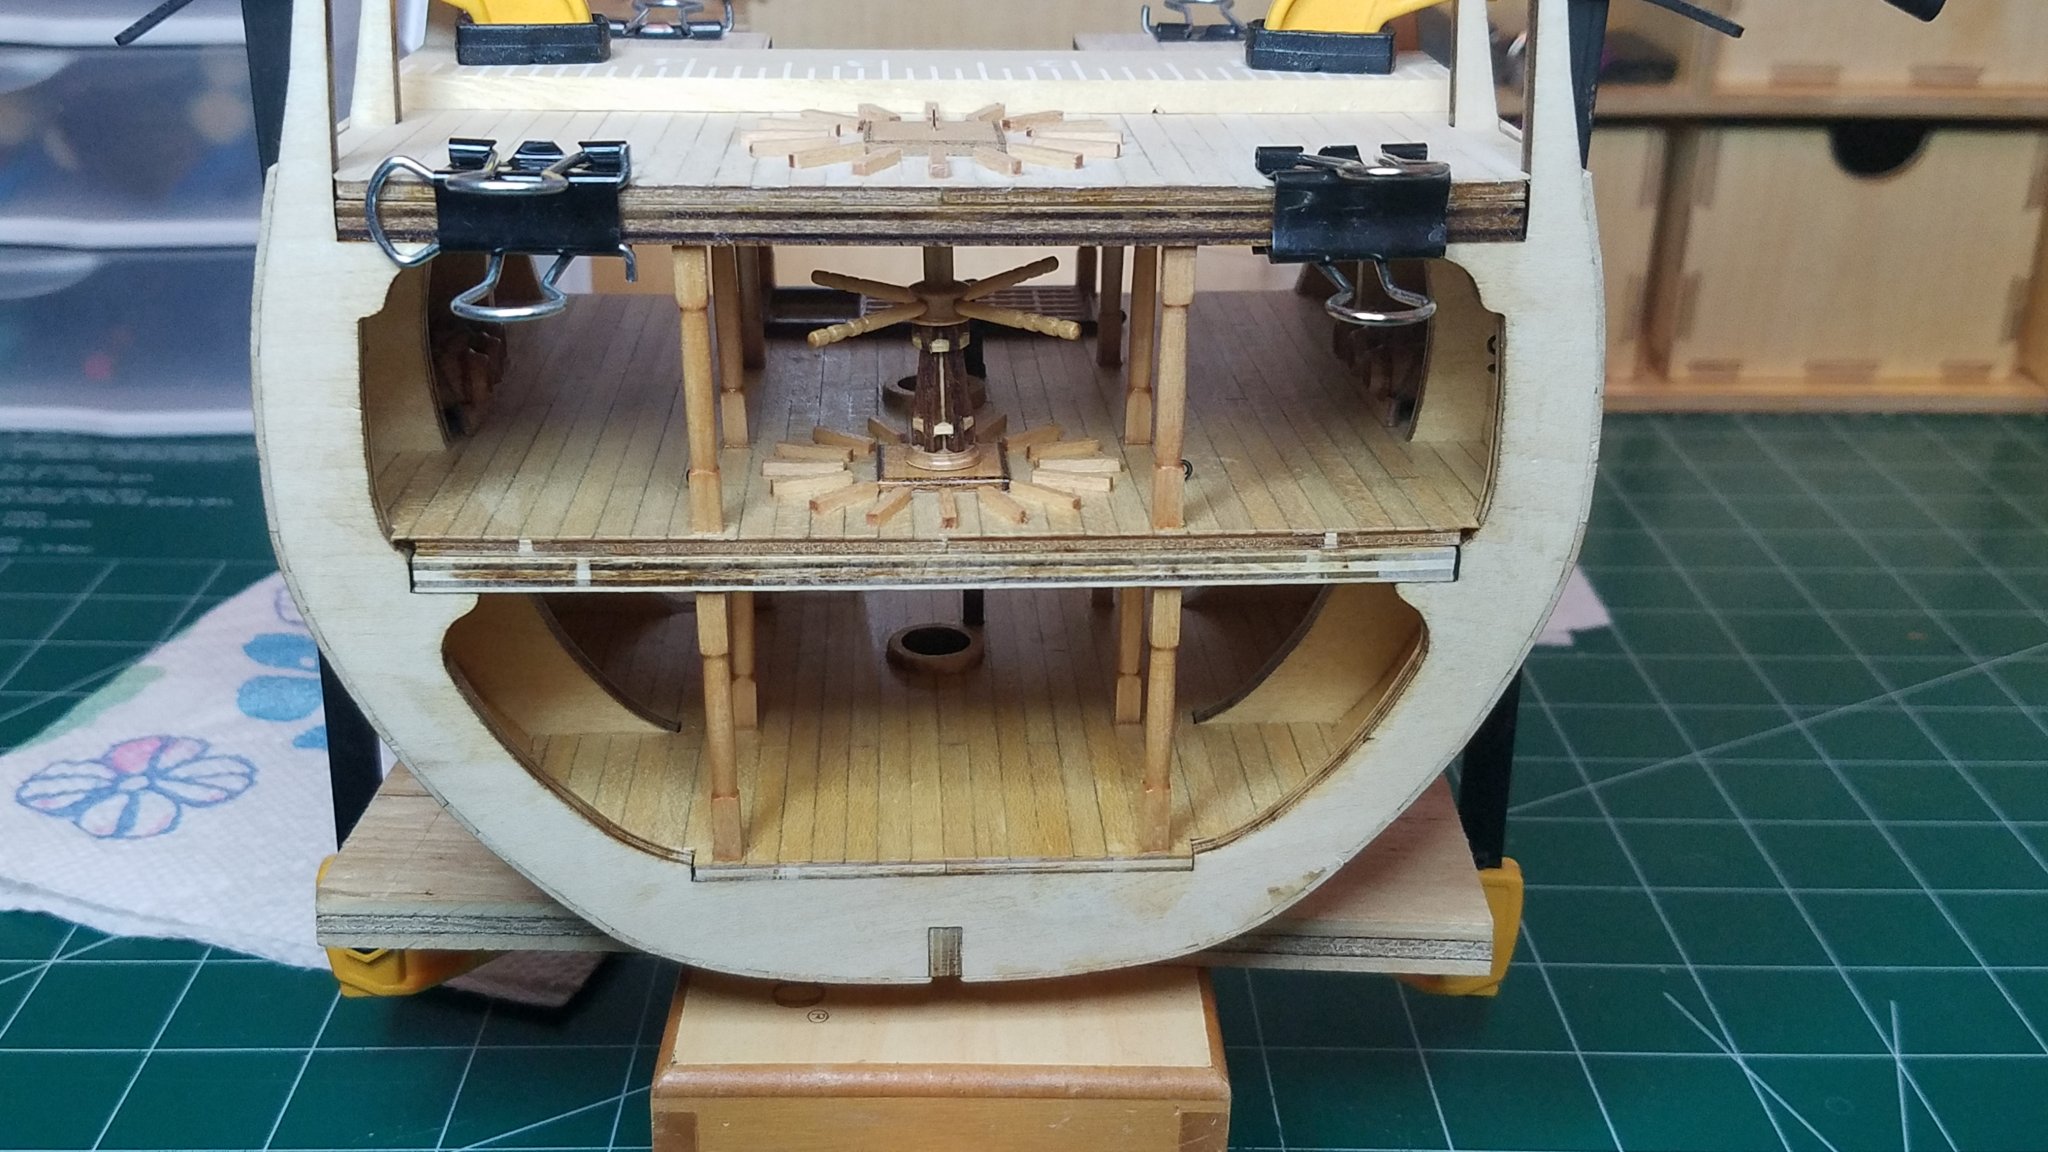
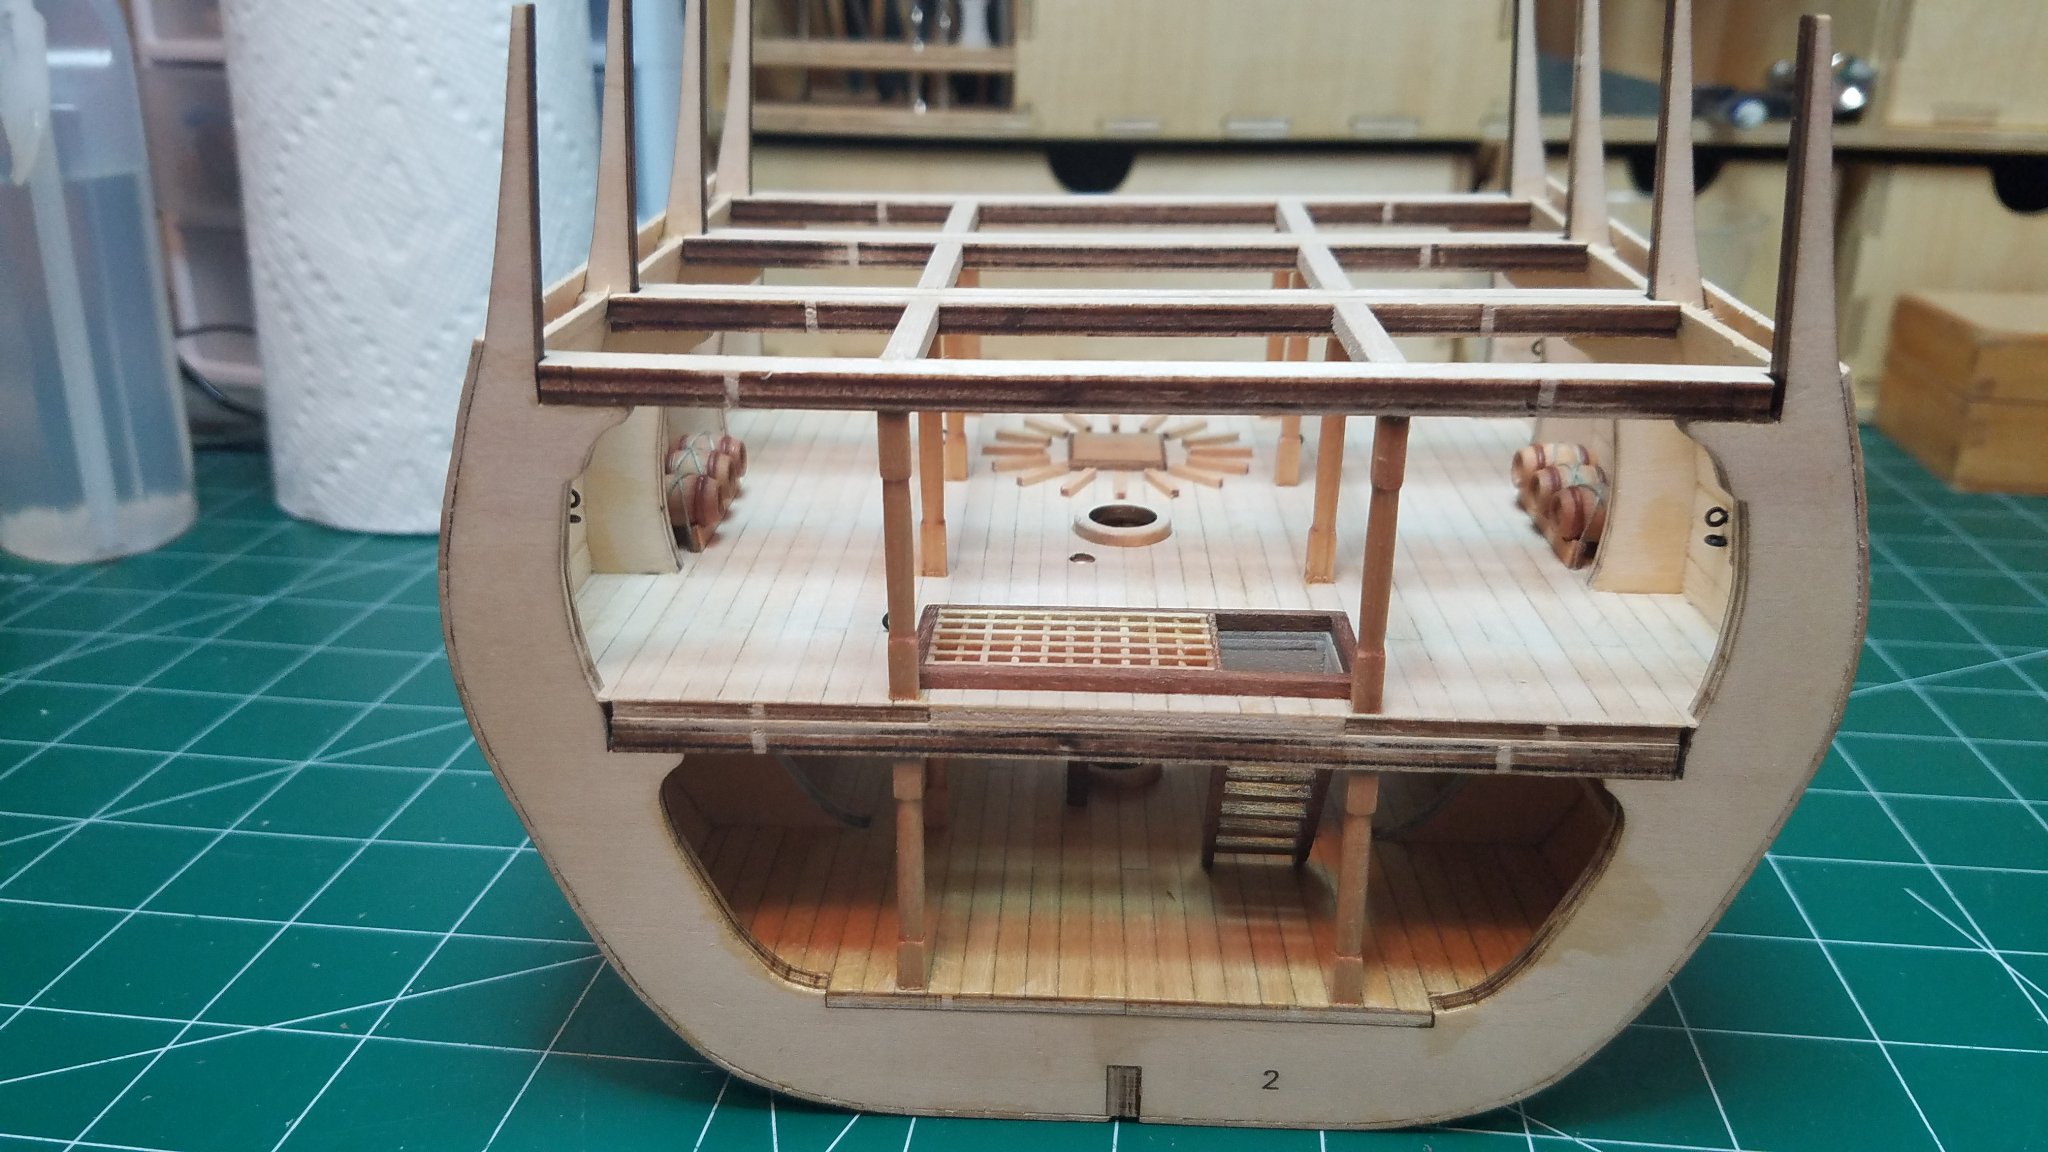
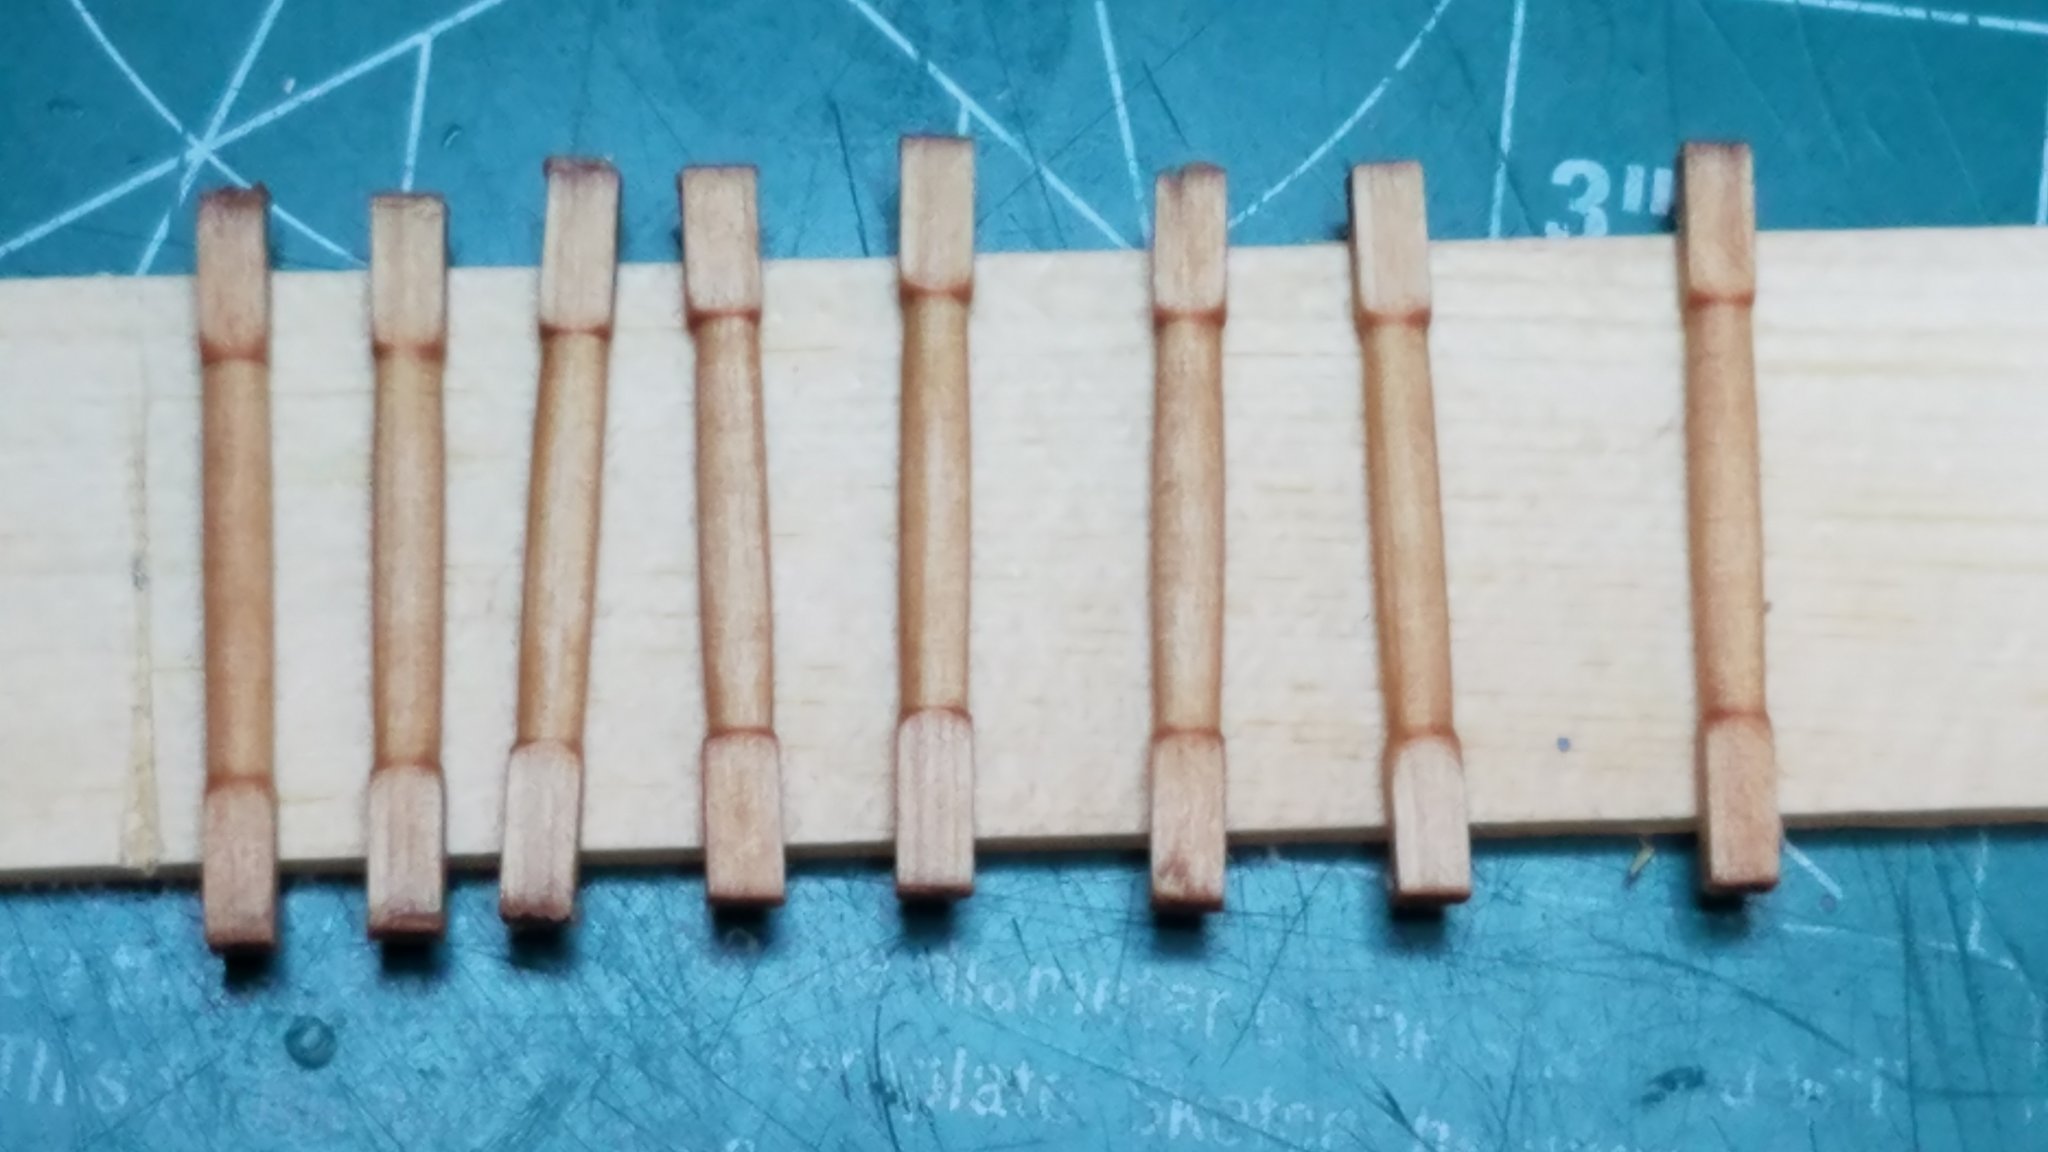
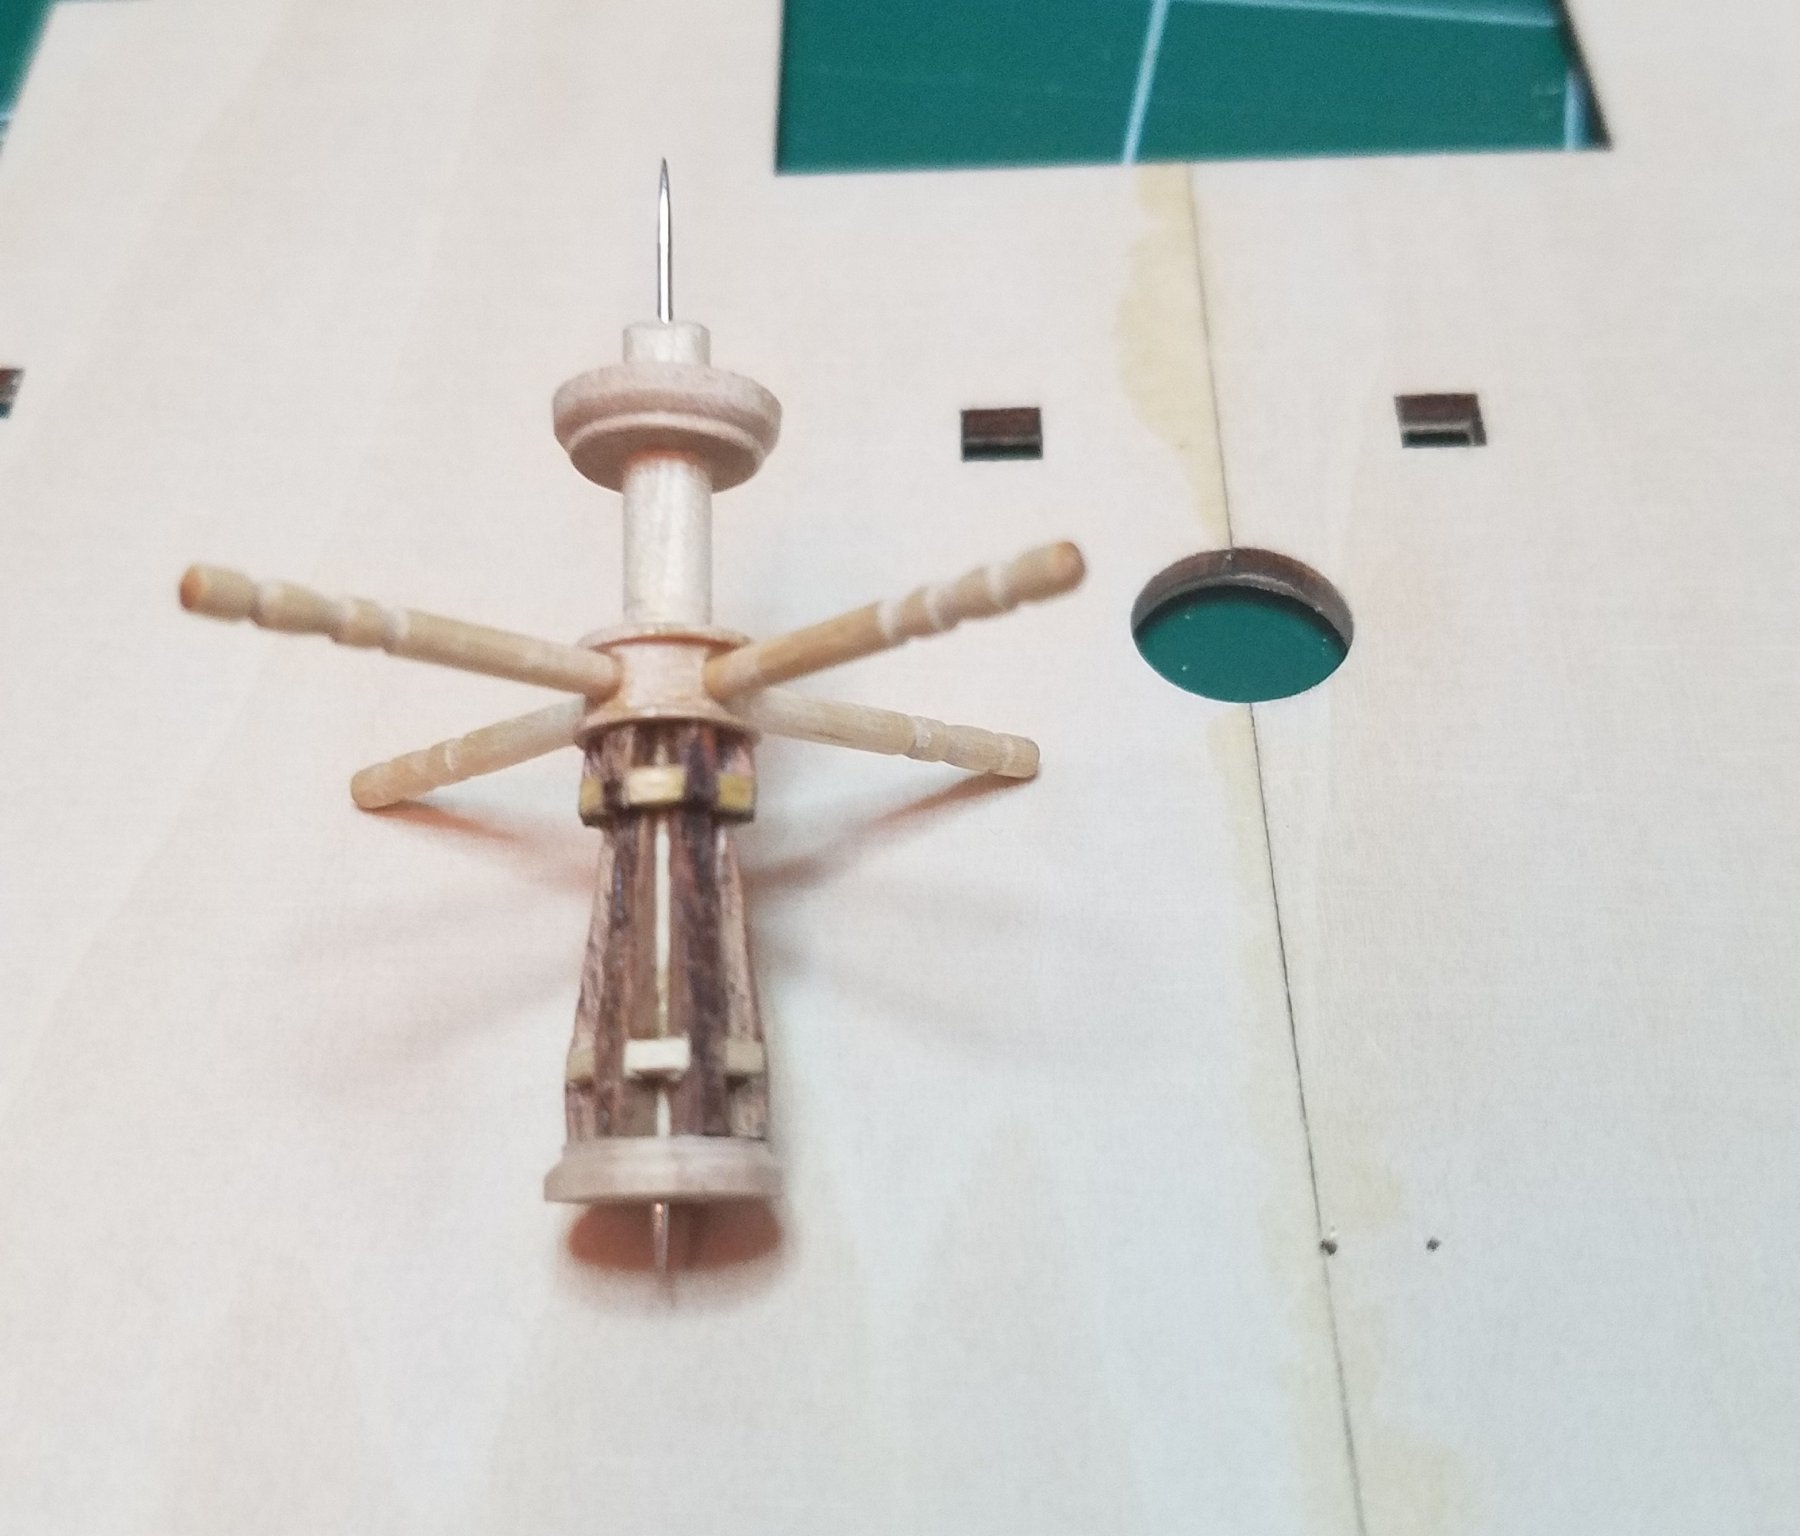
I got started last night by installing the deck rings for the cannon. I had thought about omitting these and the associated rigging because I thought it would be too much clutter but changed my mind. Then I installed the deck support beams. I almost forgot the barrels and racks. They would have been impossible to place once the deck was in. I then turned my attention to the capstan. I drilled a .028" hole in each end as near to the center as I could. Then I cut and inserted a couple of stick pins in the holes for aligning the capstan between the decks. The round piece ( one of the cutoffs from the spools I used for the capstan) above the capstan will serve as the upper escutcheon plate instead of the square piece of bass wood provided in the kit. Once the upper deck is installed I will slide it up and glue it in place. And a dry fit with the upper deck in place. Finally I trimmed and fitted the stanchions. I will stain them tonight. Regards


- 139 replies
-
- 8
-
-
- san francisco
- artesania latina
- (and 1 more)
-
New US carrier to be named for a WWII hero, not a president
Osmosis replied to mtaylor's topic in Nautical/Naval History
Actually the USS Carl Vinson was the first US Naval Vessel named for a person who was still alive although he passed away prior to commissioning. His wife did the honors at the Commissioning ceremony. -
Thanks Rusty, I am going to need about 40 of the little buggers though and my fingers ached after just 2. Yes Dr Paul they are the kit supplied rings they are a little bit over sized to the eye but they were at hand so I went with them. Thanks for all the likes. More updates soon. In the mean time I played in two poker tournaments at the local casino here in Coconut Creek and placed 7th in the first one and won the second one outright.
- 139 replies
-
- 1
-
-
- san francisco
- artesania latina
- (and 1 more)
-
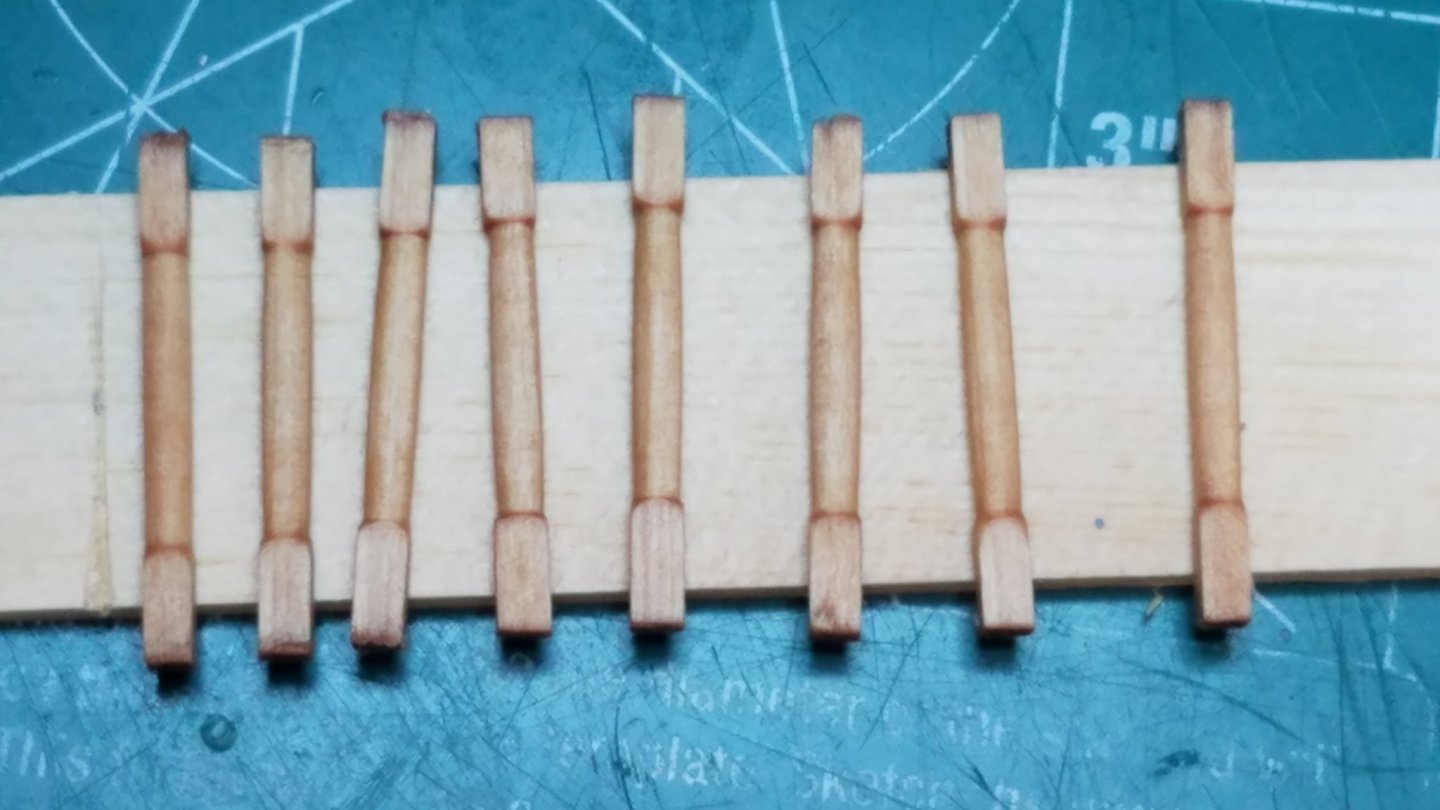
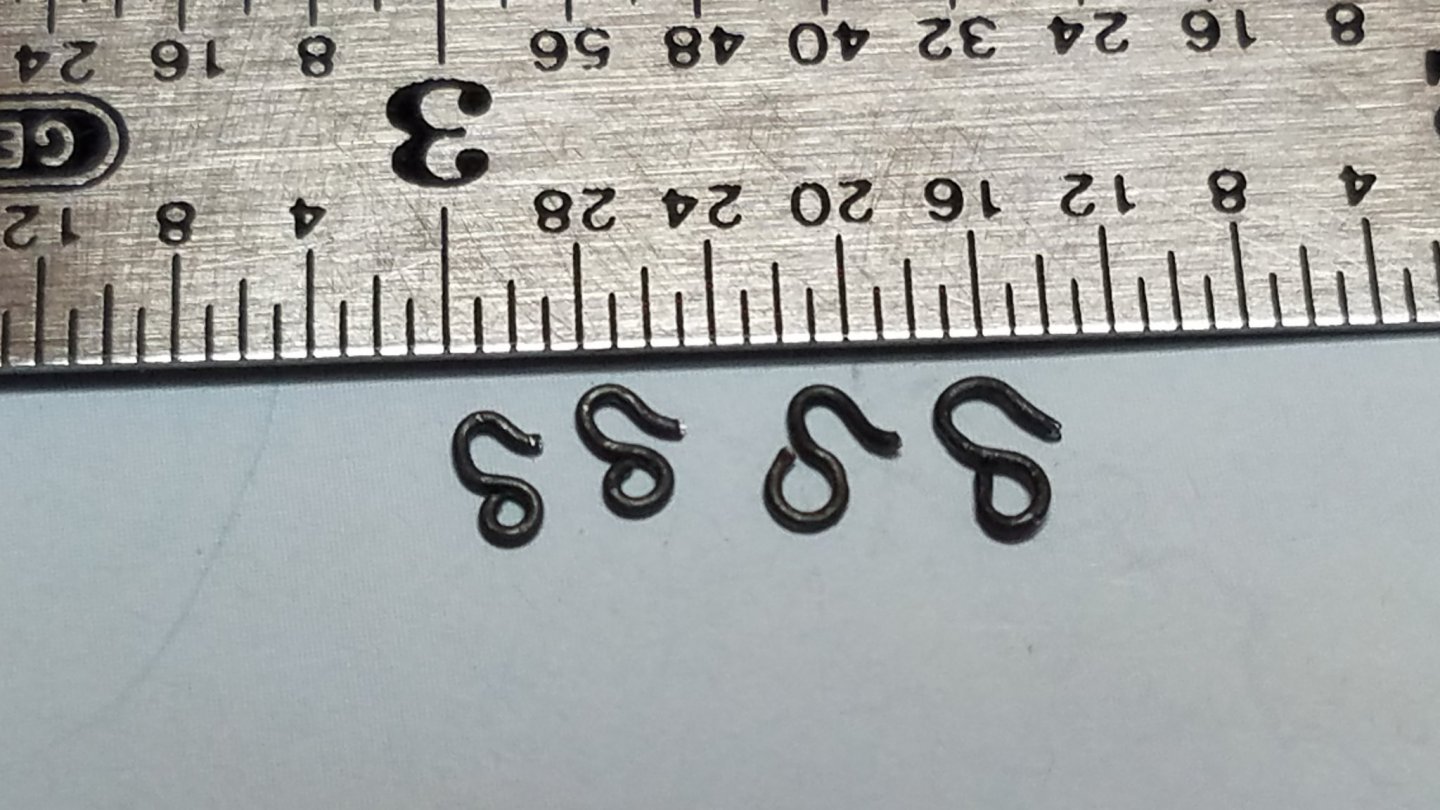
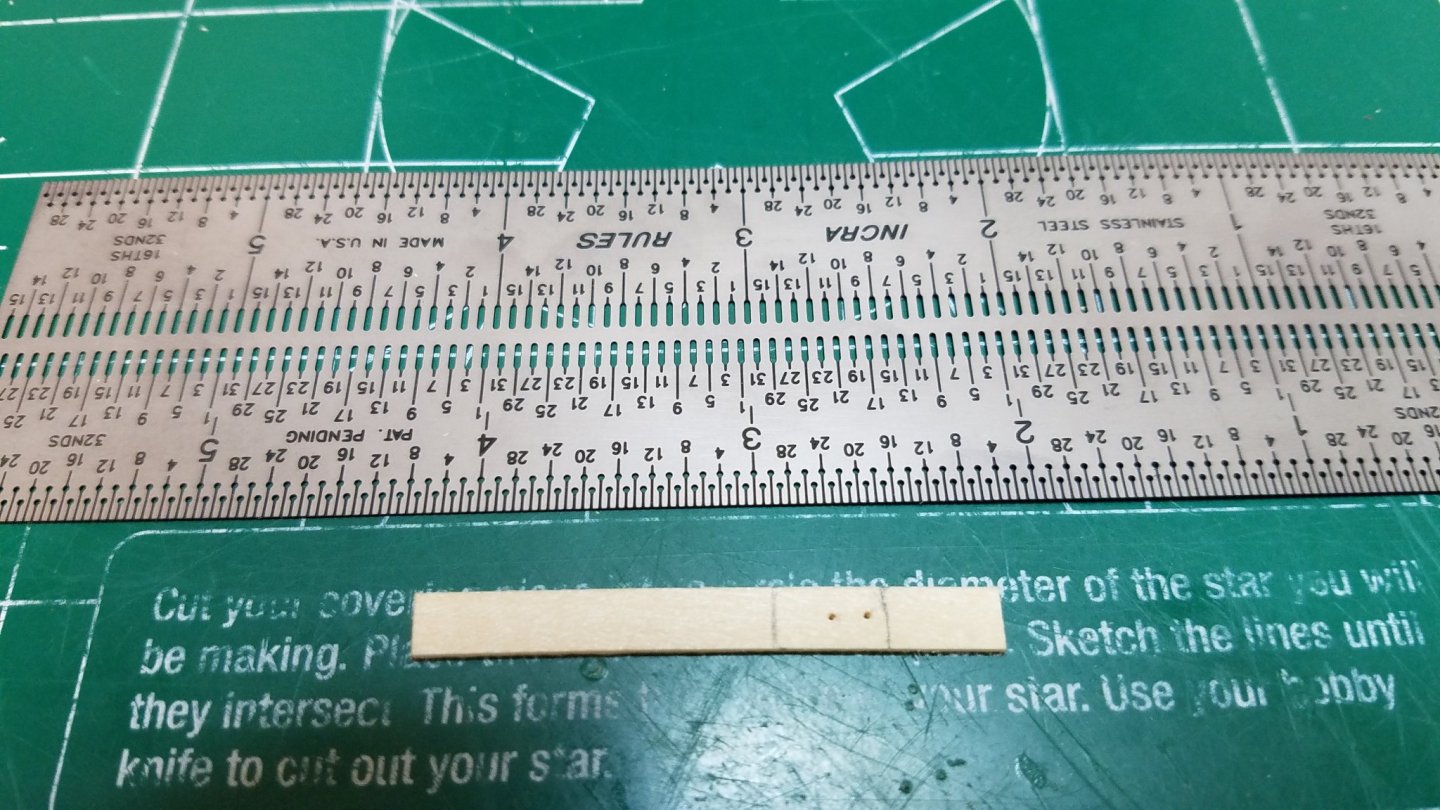
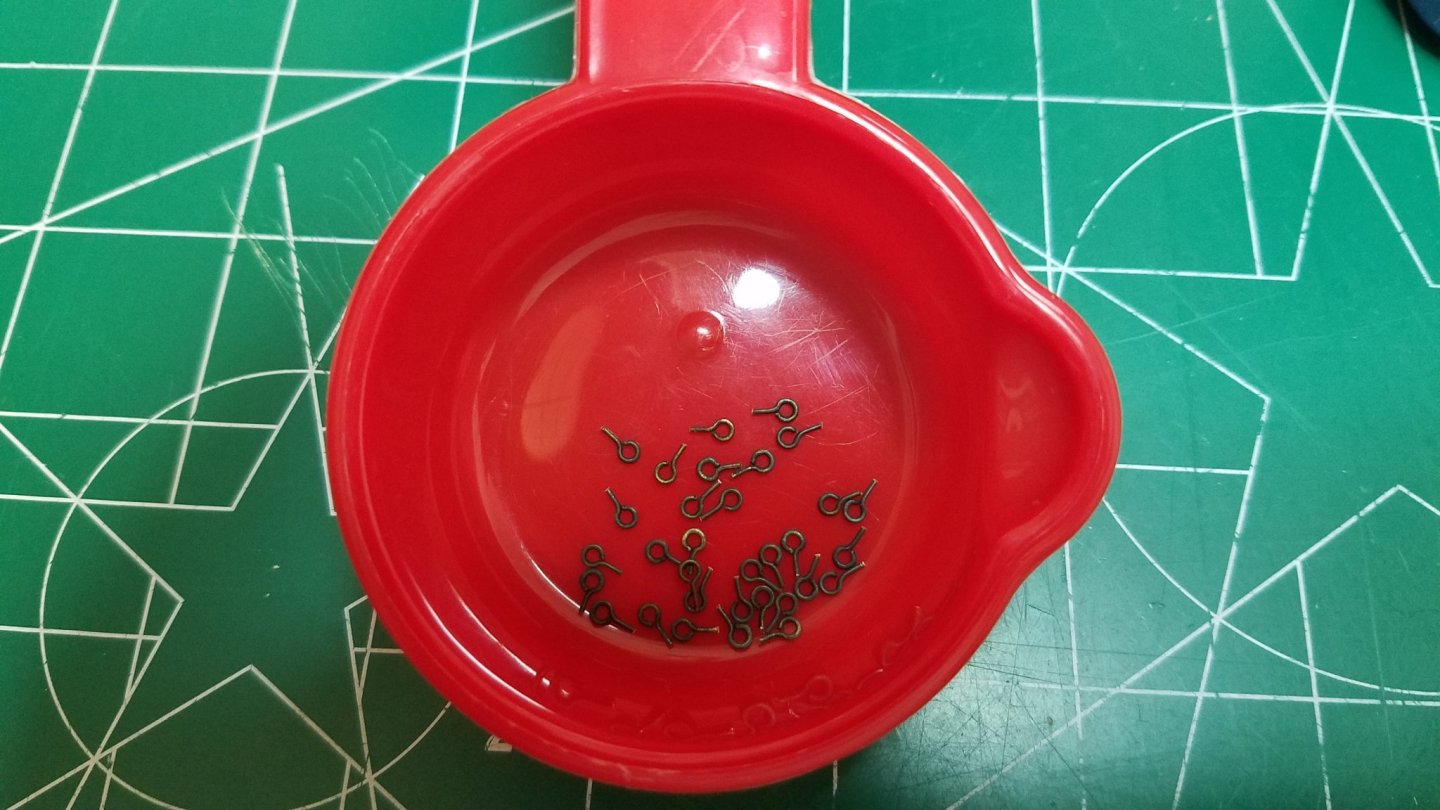
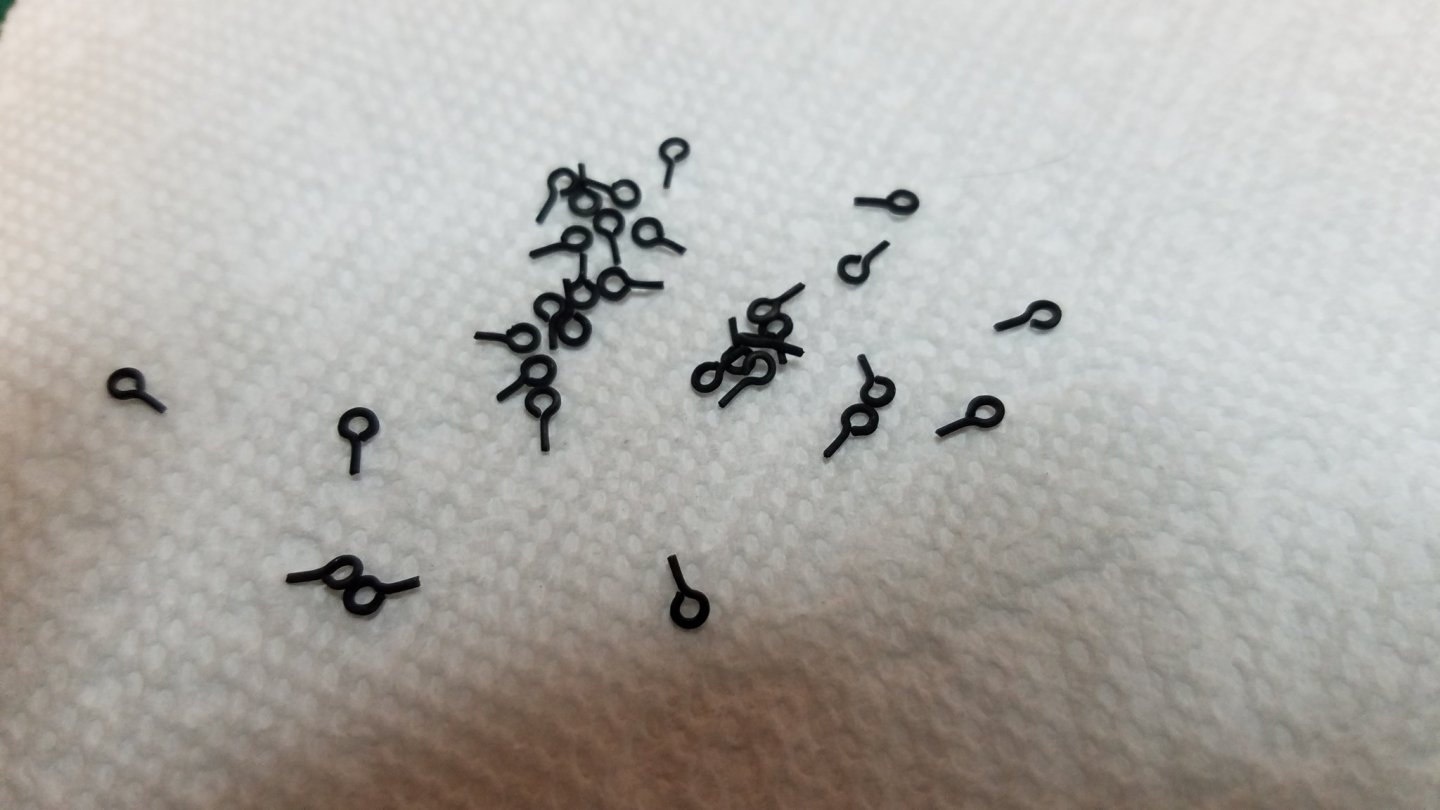
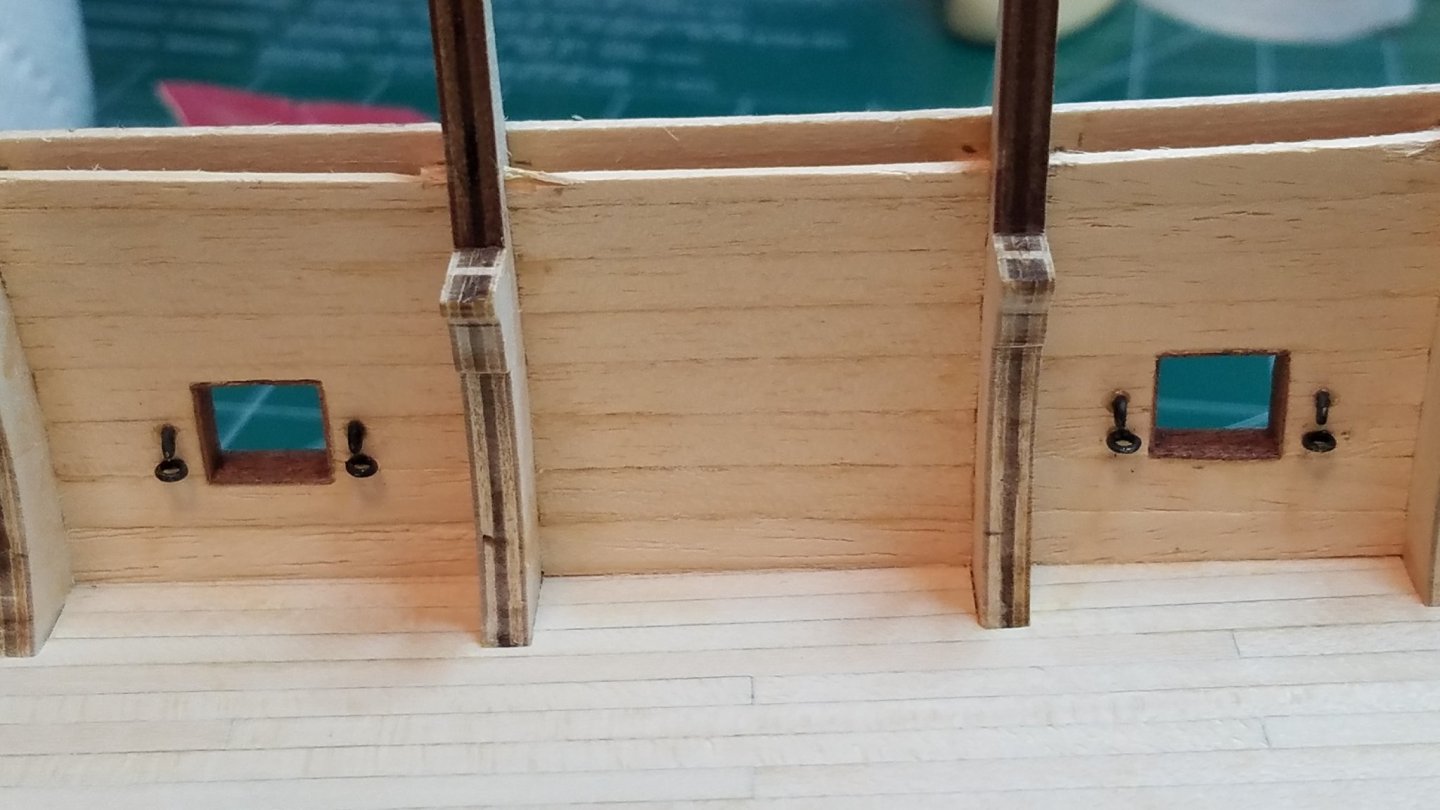
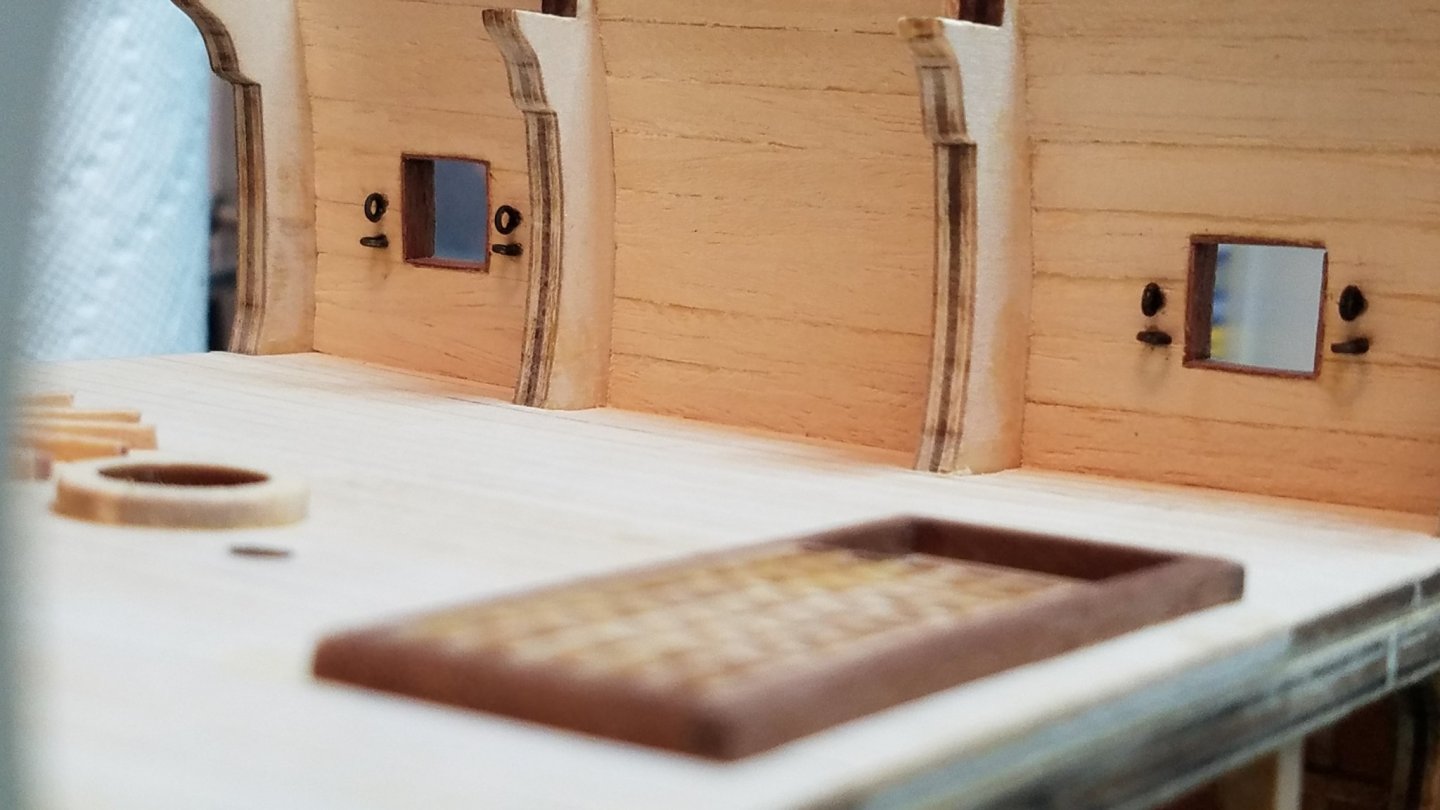
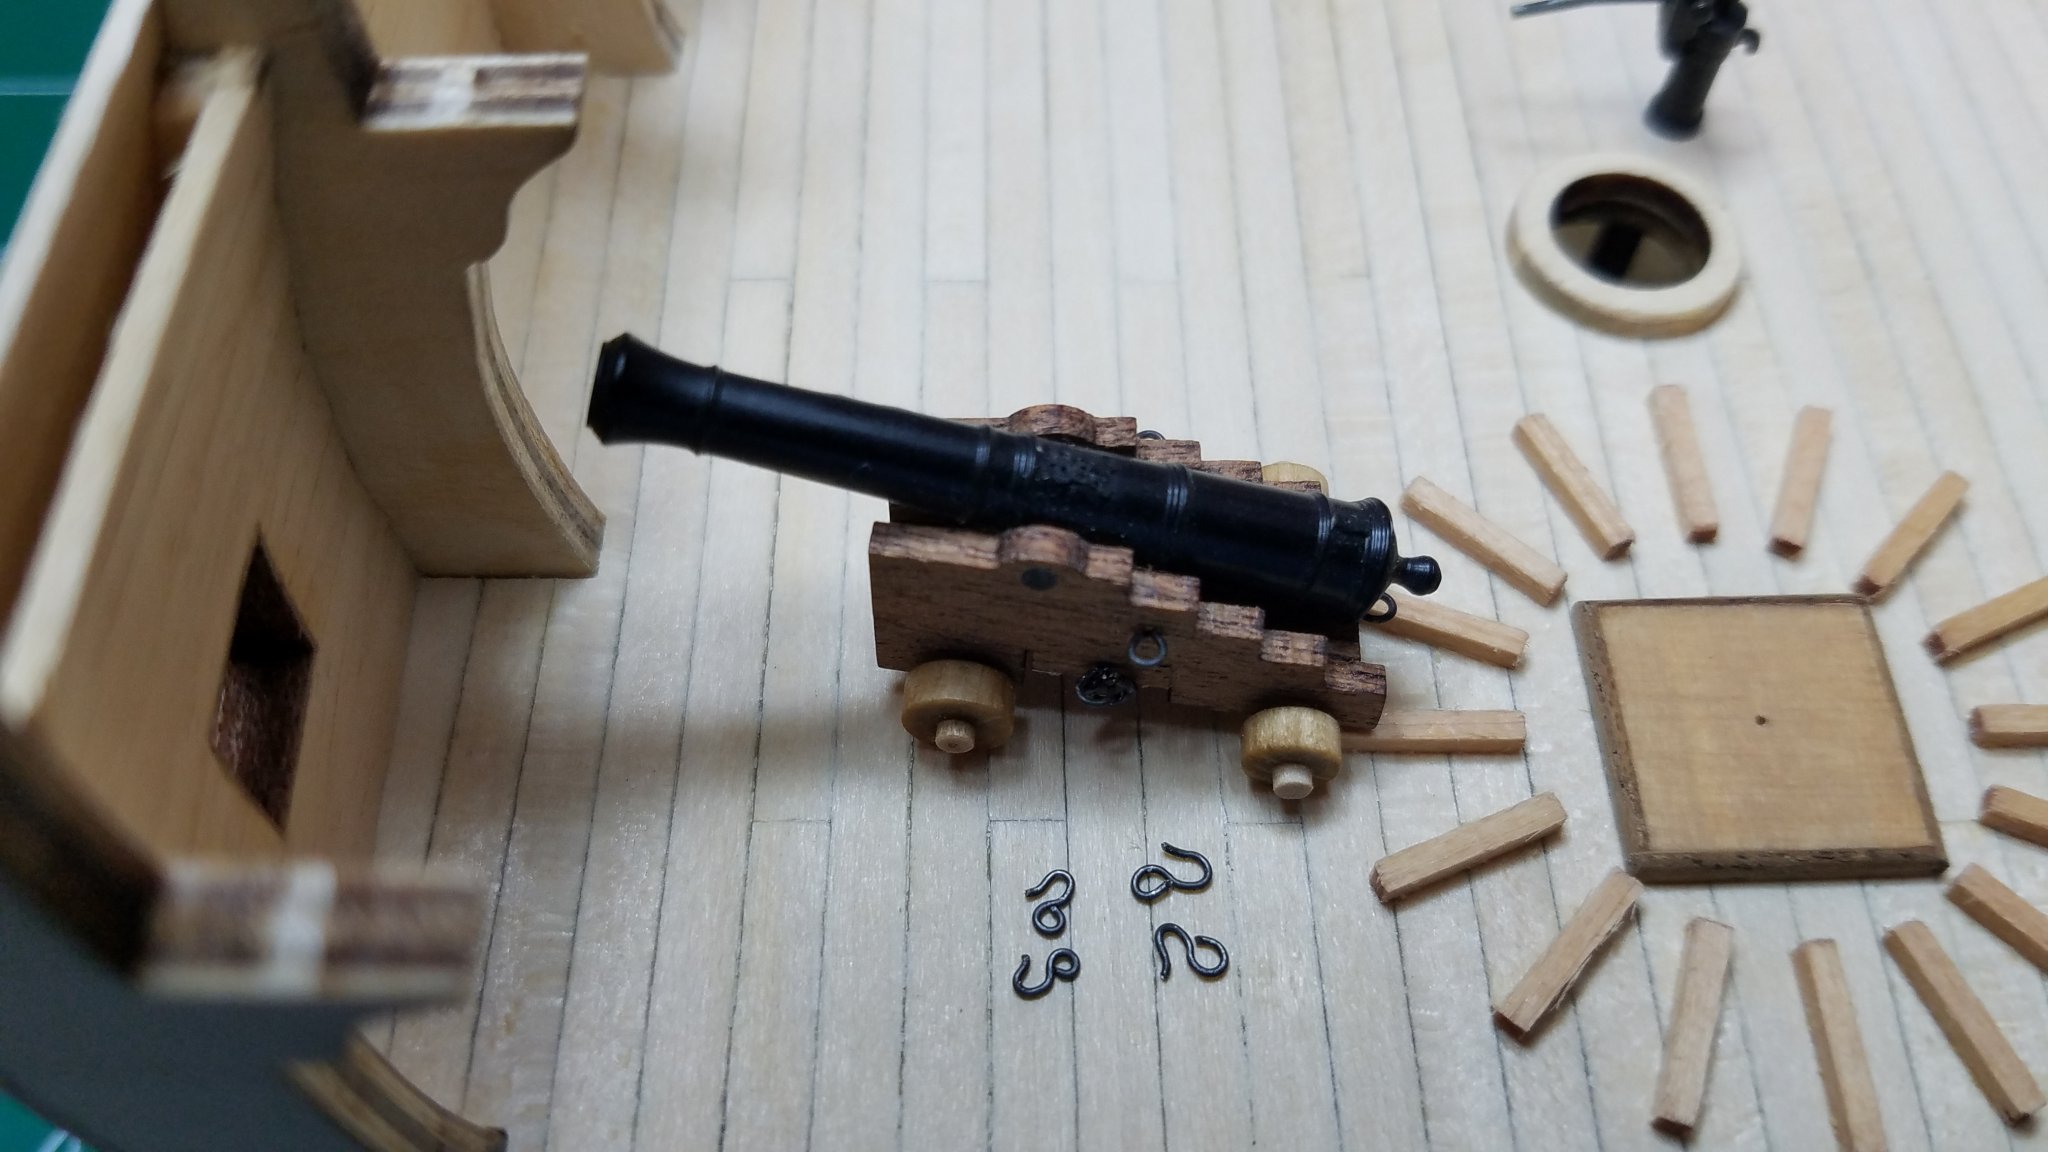
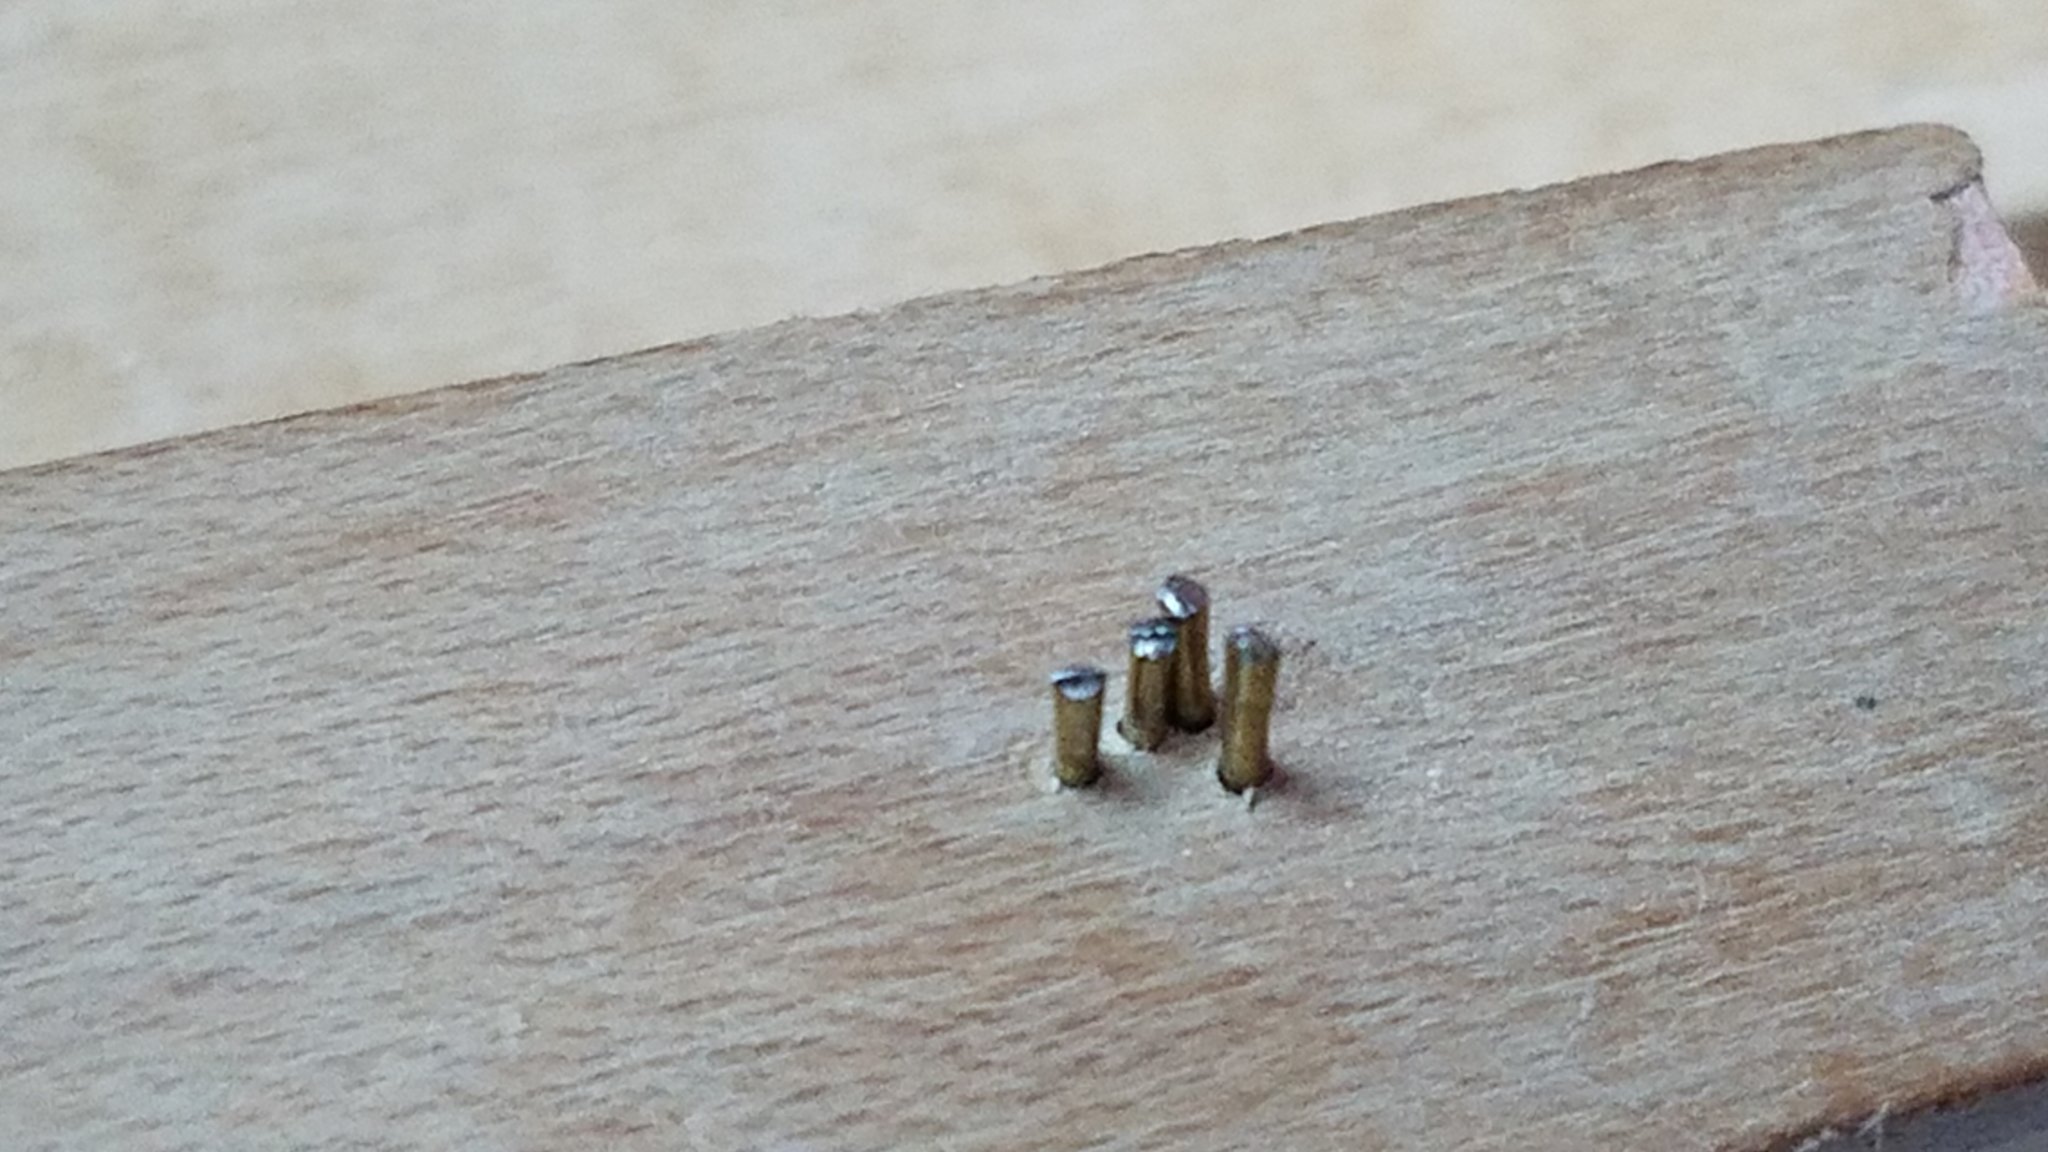
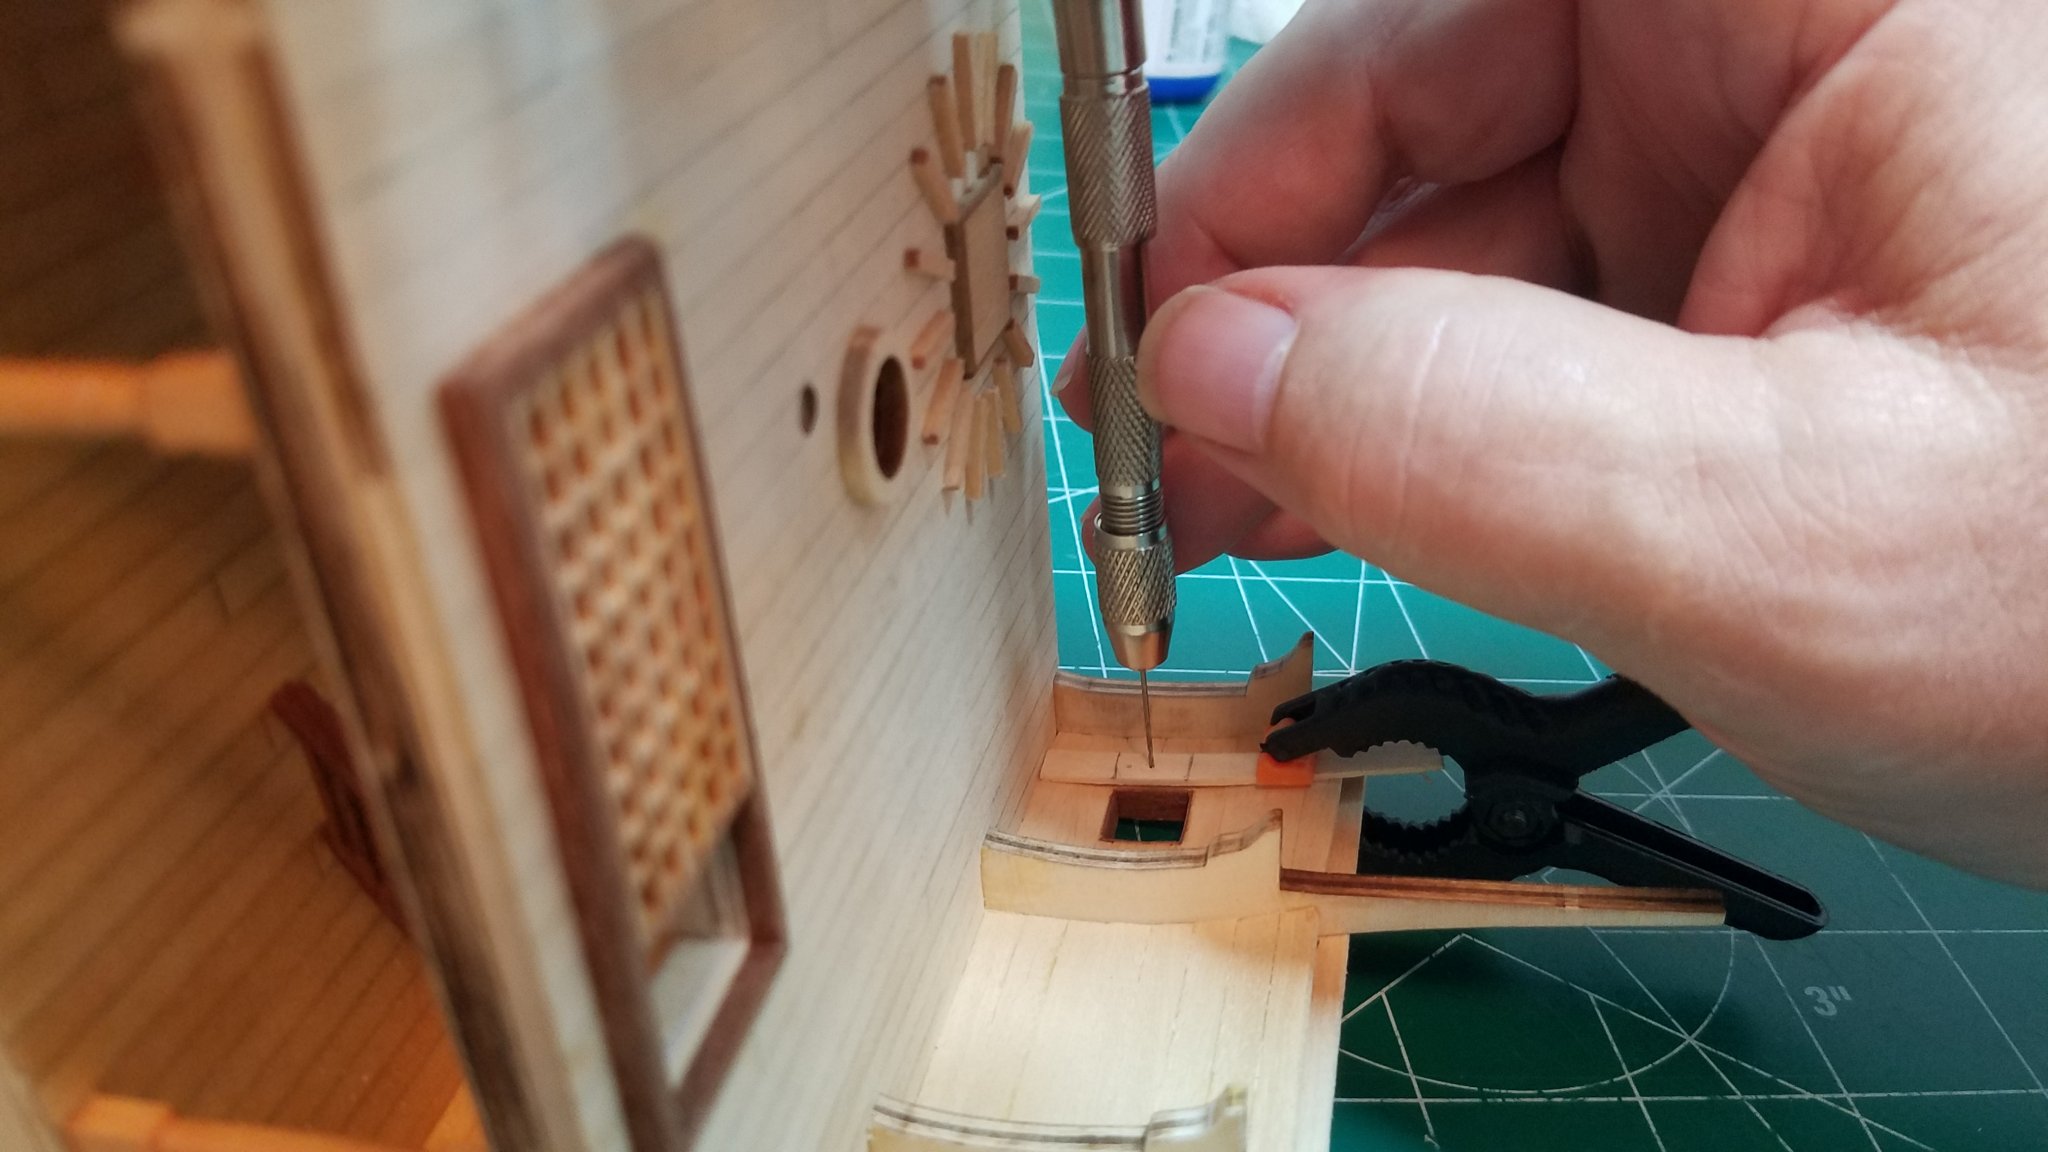
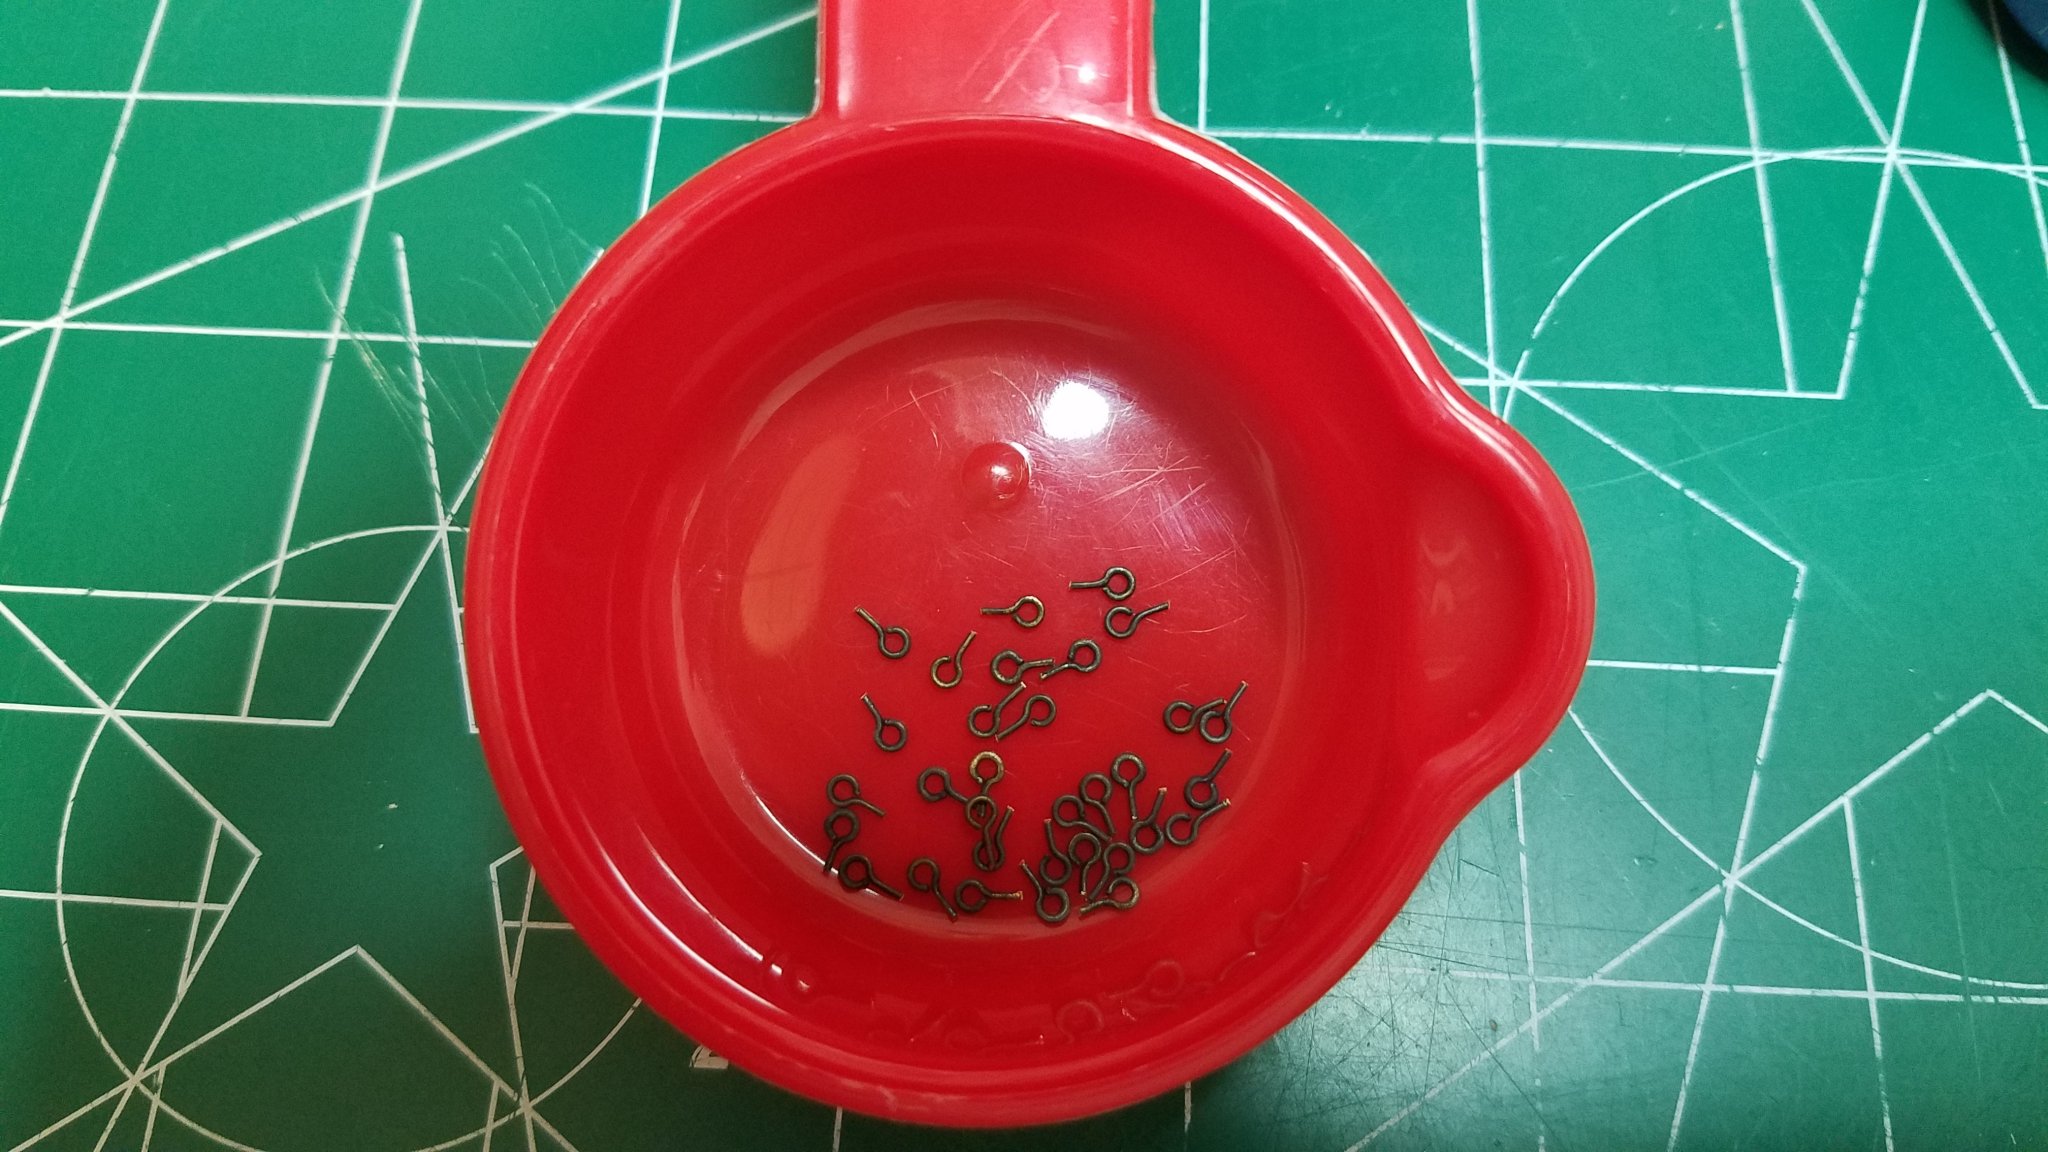
Well I have made a little progress (emphasis on little) in the last few days. The rings for the gun rigging attachment points are finally in. Once again using Rob Durant's Excellent pictures of the HMS Victory (there is a link to them in my battle station build) as a reference for the placement and orientation of the rings. First I made a template out of a piece of scrap planking by placing one end on the deck behind one of the gun ports. Then I traced the top and bottom of the gun port on to the template. Then I drilled two holes approximating the location shown in the pictures. Then it was a simple matter of clamping the template alongside of the gun port and lining up the marks. Then rolling the hull onto its side I drilled just enough to leave a dimple before removing the template and drilling all the way through. This is the 30 or so rings I will need for this deck going into a second, 60 second soak in Brass Black. And ready to install. I placed one drop of Medium CA onto a bottle cap that I use and dipped the end of the eyelet in before installing them. I literally used less than one drop of Medium CA to install all of these. Then I tried my hand at making some really small hooks for the gun rigging. The larger ones on the right were the smallest I could make using my round nose pliers and the smallest beading wire I could find. These were to big so I made a jig by placing four tiny brads in a piece of wood and wrapping the wire around them. I think if I refine my technique a little I will be able make something usable. Now I am off to the park with the Admiral and our Grand Daughter. Best Regards


.thumb.jpg.c343a1aa45e3d77d9605589472b6621a.jpg)
- 139 replies
-
- 7
-
-
- san francisco
- artesania latina
- (and 1 more)
-
Hello Bob, I just found read through this thread. Amazing job so far. Now that I am up to date I will be following along if you have room for one more. Best Regards and happy new year. Art
-
I have one and have pics of using it to build the keel and frames in my San Francisco Cross Section thread click the link in my signature below. Dead accurate for frame alignment. Also have a link for all of the Hobby Zone stuff I have built and used.
-
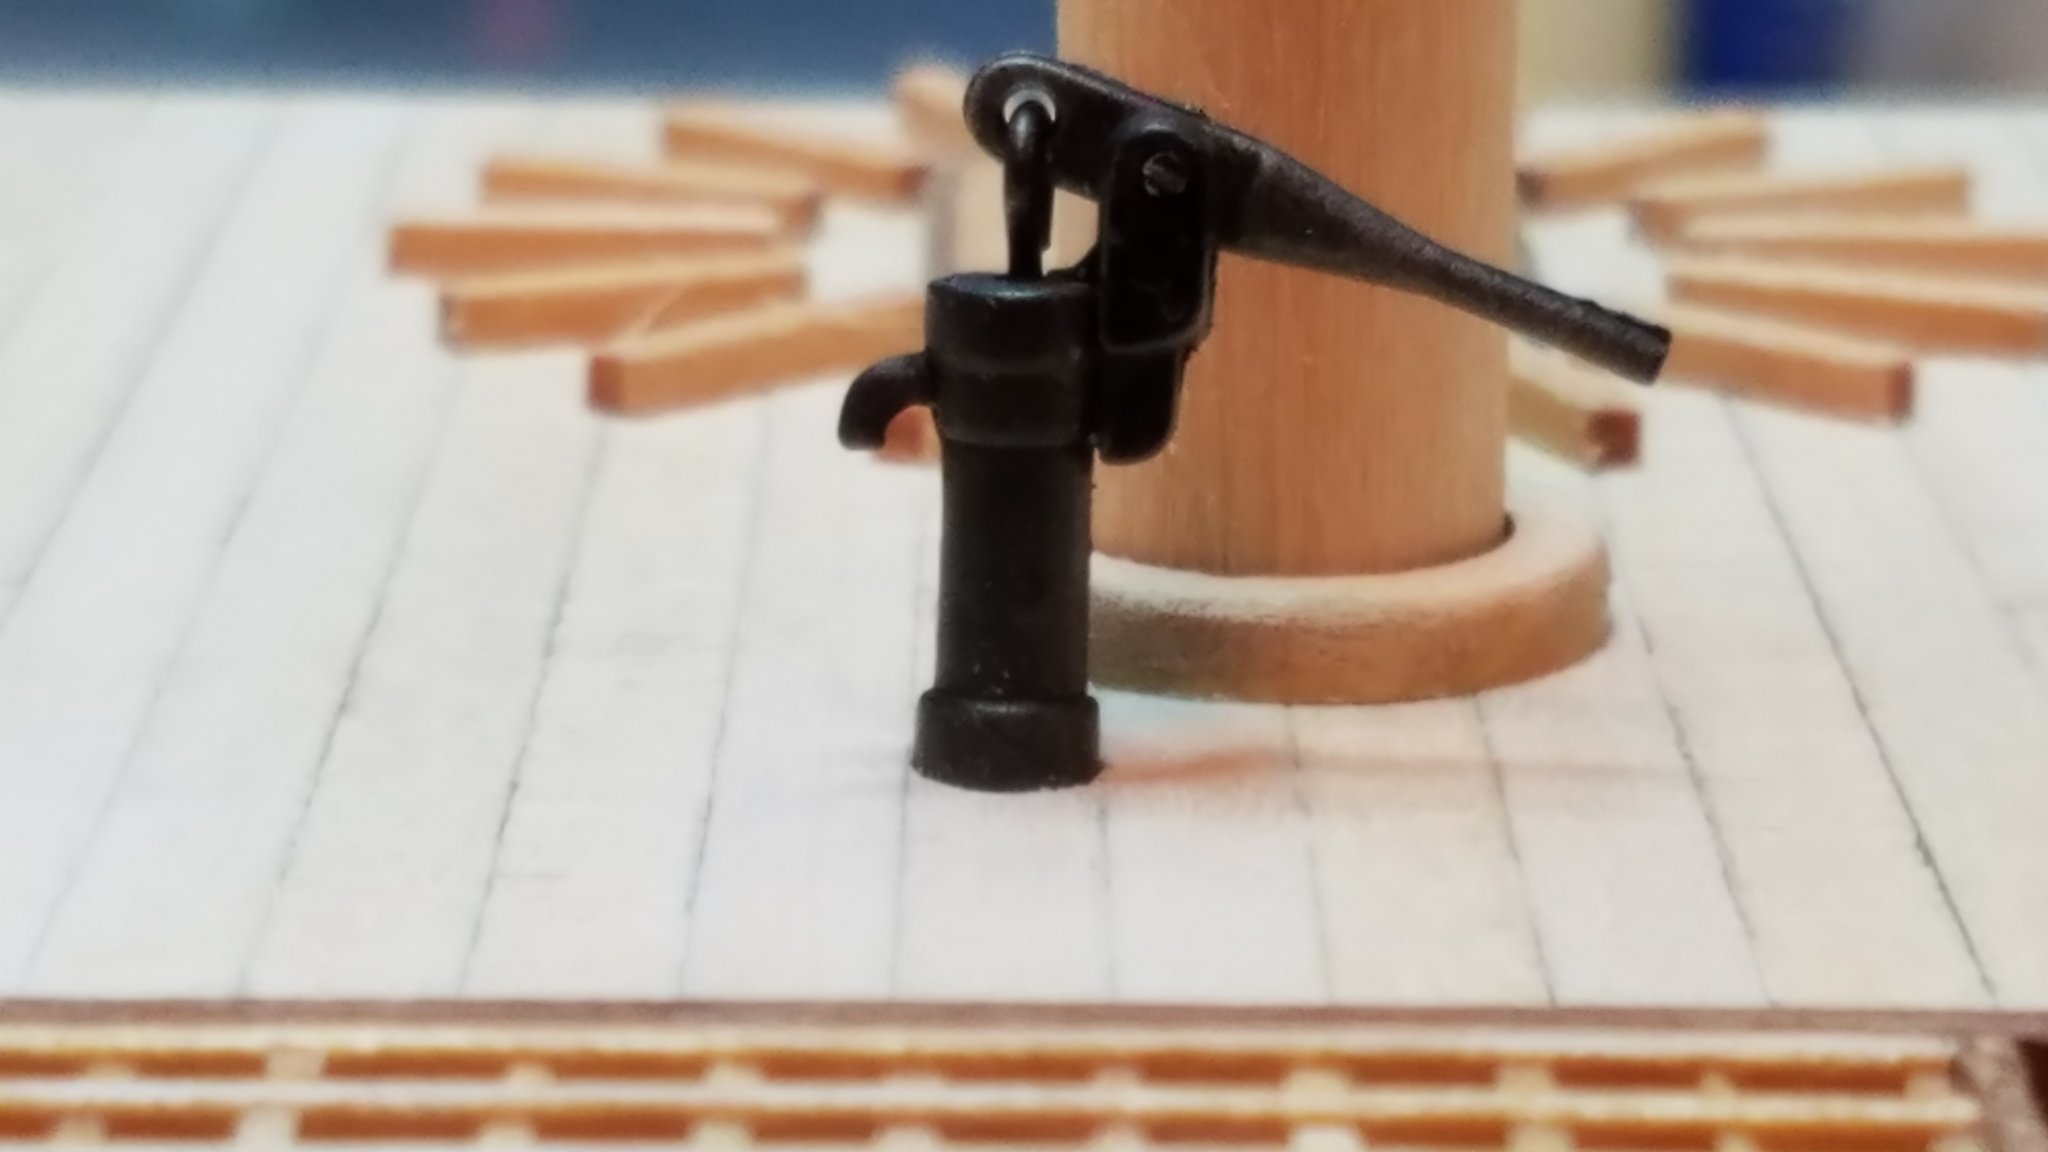
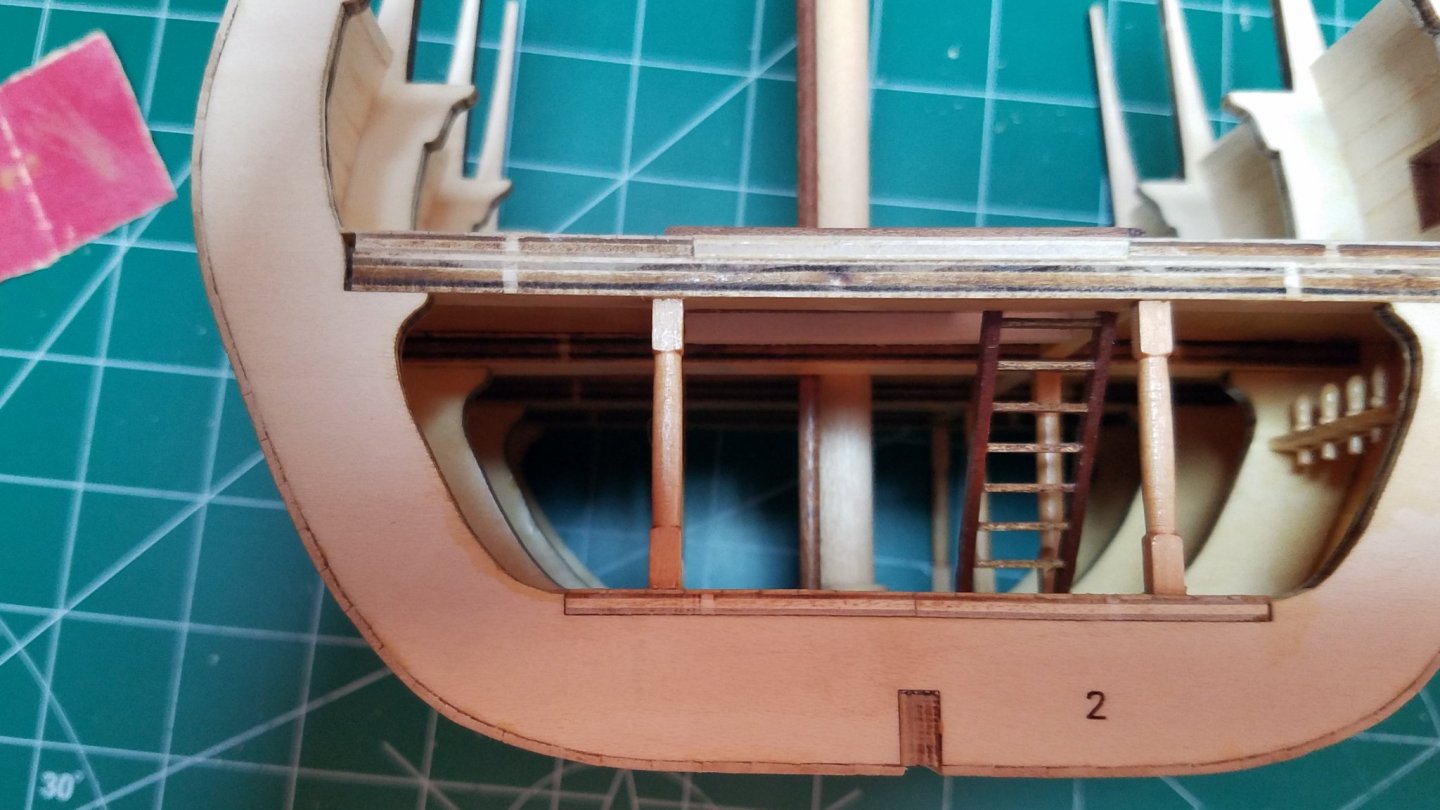
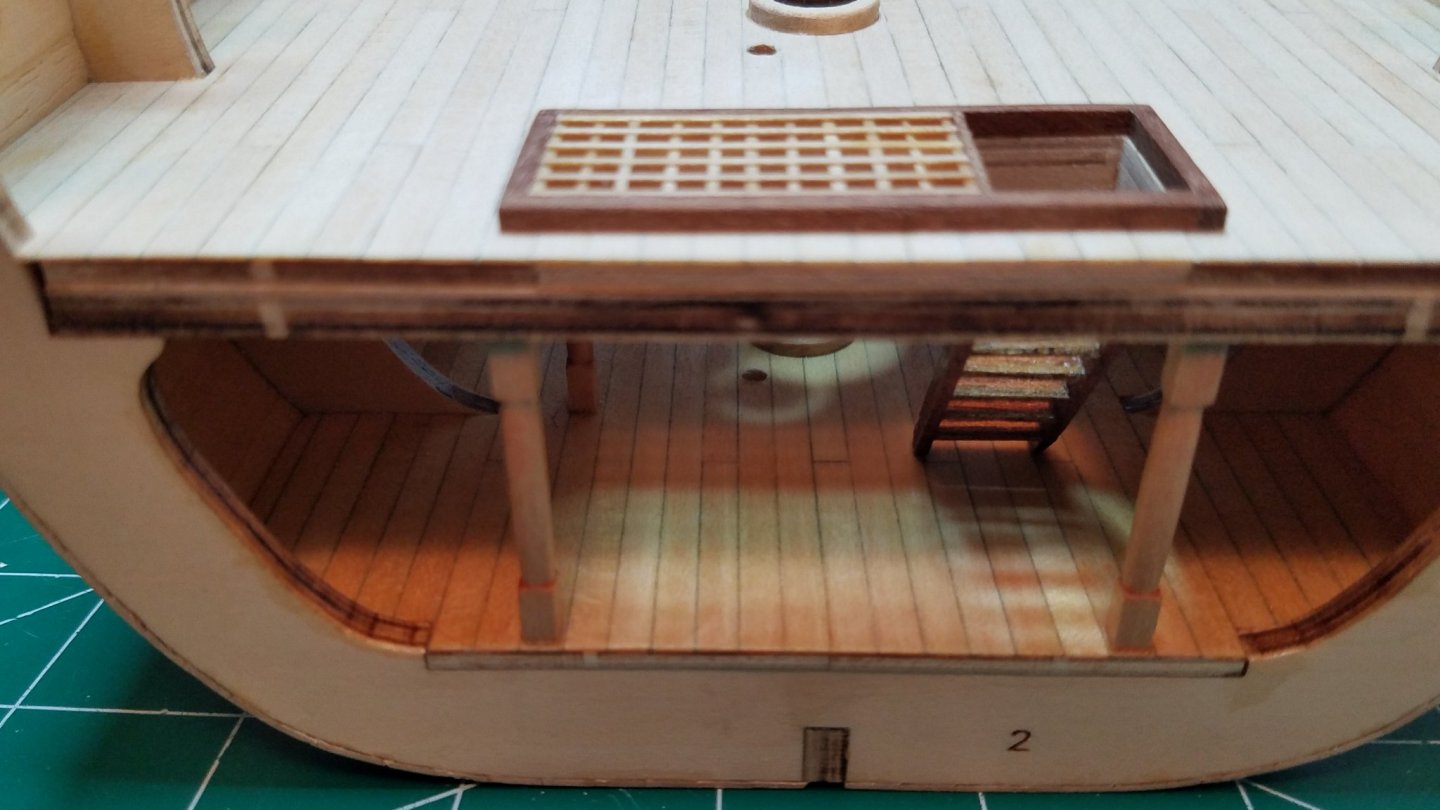
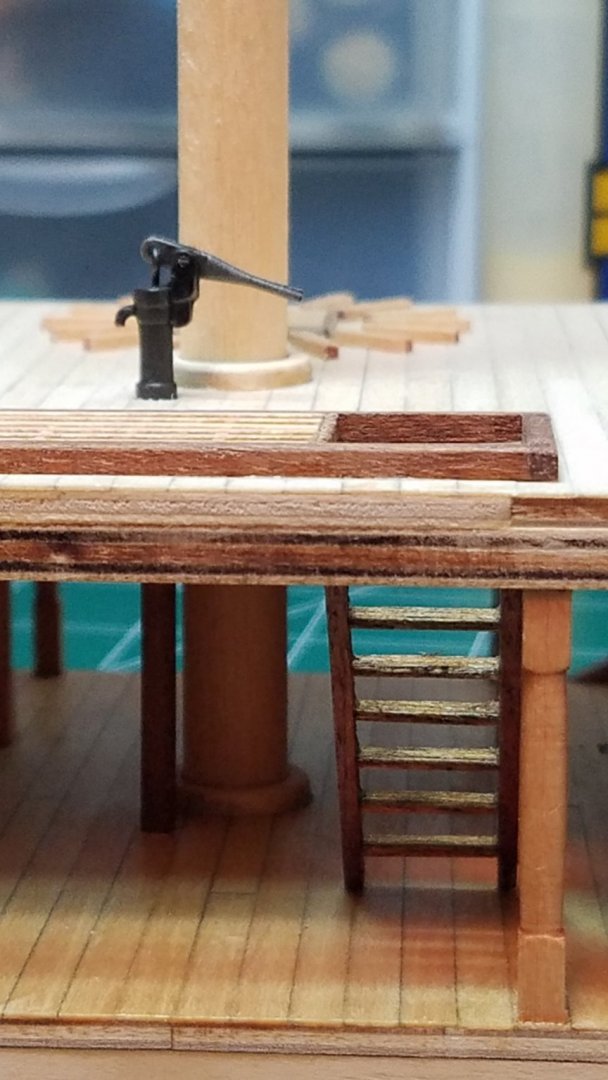
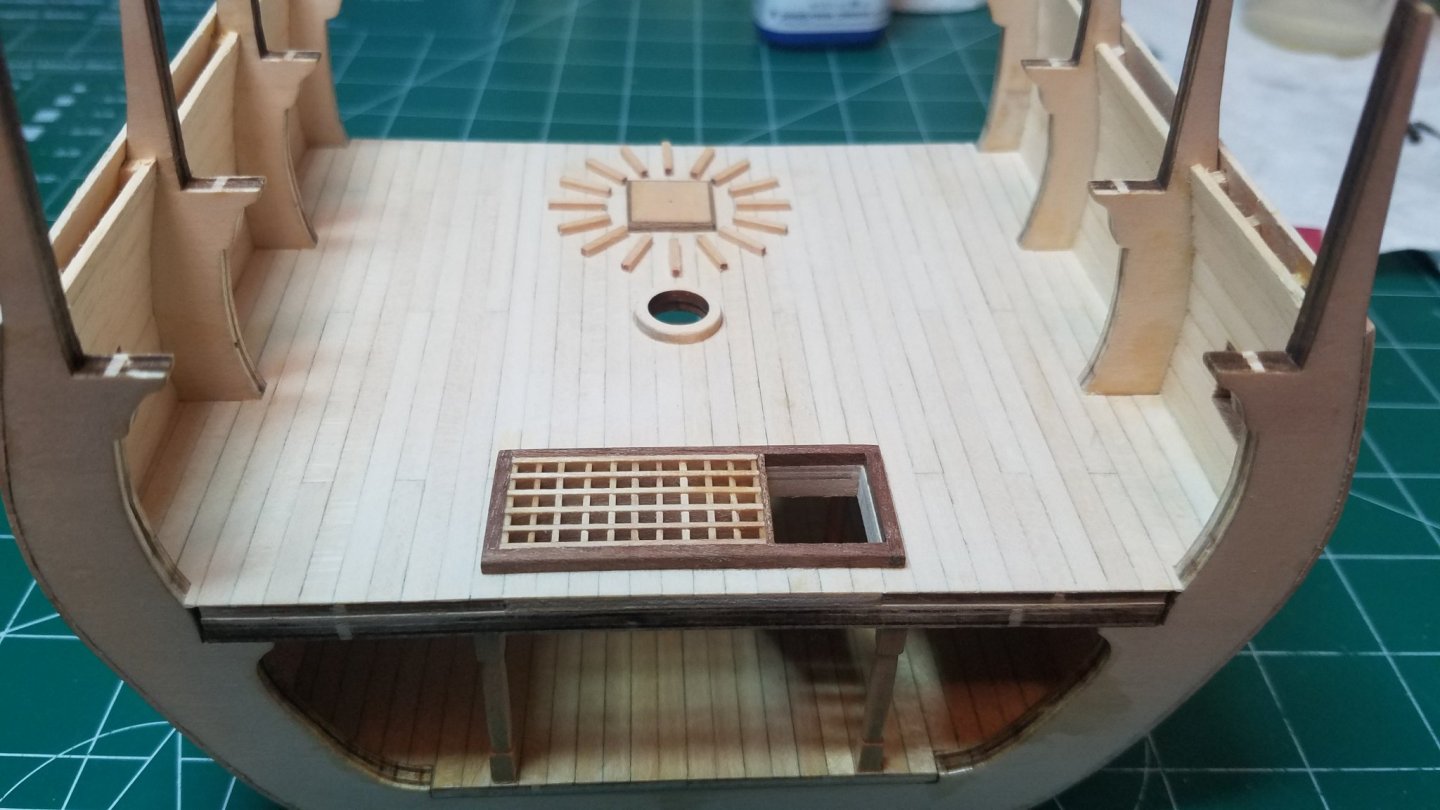
Good Evening All, The bilge pump is in place. The instructions call for it to be mounted on the lower most deck in the hold. In doing some research and reading Prof. Oertlings thesis on the subject I have moved it up one deck and extended the riser tube down to the bilge as it would have been. Slightly off center line and forward of the mast. First I had to drill a hole through both decks trying to keep it as straight as possible. Mission accomplished step one anyway. The mast was inserted just as a guide. I know it looks crooked above deck but I think it is a bend in the dowel. Because below deck it looks straight and that is where it matters. I cut the dowel to length and pressed in into place. leaving a slight dimple in which the pump will be mounted. The pump is simply pressed into the hole for now. One or two drops of 5 min. epoxy will hold it in place. But not until just before the top deck goes on. I know if I were to put it in now I would knock it loose a dozen times. That's it for tonight. Best Regards

- 139 replies
-
- 7
-
-
- san francisco
- artesania latina
- (and 1 more)
-
Good Morning Dr. Paul. My adventures with the lower gun ports is fairly well documented on pages 2 and 3. I probably have more pics though if you would like them. Regards
-
I have this one waiting in the wings so I am in for the whole ride.
-
Just found this thread and glad I did. Very nice job so far.
- 27 replies
-
- 1
-
-
- grand banks dory
- first build
- (and 2 more)
-
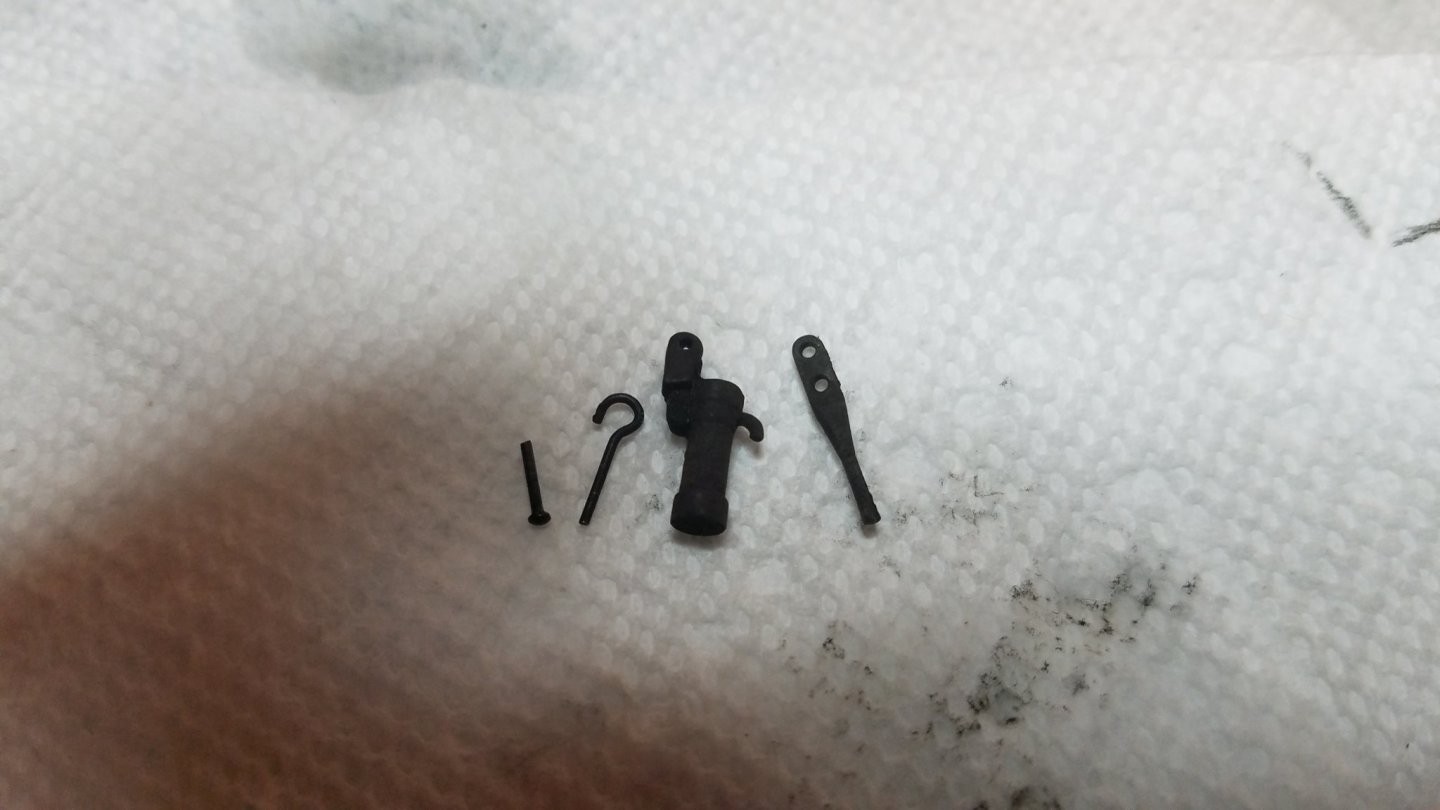
Hello Again, Many thanks to Rusty and Dr. Paul for dragging me out of my funk. Well not much of a restart but I am back at it at least. I actually had to reread most of my thread to refresh my memory on how and why I did certain things one way or another. An option I would not have had if it were not for Model Ship World so thank you once again for for providing us this wonderful resource. I decided to use the kit supplied pump after all. So I got those parts blackened using Birchwood Casey Perma Blue on the white metal parts and Bichwood Casey Brass Black on the brass pins. I will let them sit overnight then hit them with a little scotch bright prior to installing them. Thanks very much to Dr Paul for posting pics of his build as it pointed out an omission in mine. I forgot to put in the lower mast escutcheon ring. So I got that and the middle one in without too much trouble. I also glued in the hatch grating and coaming in preparation for the installation of the stanchions and upper deck supports. Tomorrow I hope to get the holes drilled for the gun rigging attachment points and the pump installed. Thanks for coaxing me back to work the Admiral was getting worried about me. Best Regards Art

- 139 replies
-
- 6
-
-
- san francisco
- artesania latina
- (and 1 more)
-
I Had planned on installing all the tackle rings in the appropriate places for the cannon and gun ports while the deck is still open then placing all of the guns and rigging after the hull is complete. But really guys I spend a lot of time falling down rabbit holes then have to spend even longer trying to get back out.
- 139 replies
-
- 2
-
-
- san francisco
- artesania latina
- (and 1 more)
-
Absolutely beautiful, It was a joy to tag along on this build with you. I can't wait to see what is next. Happy New Year.
- 88 replies
-
- 1
-
-
- finished
- artesania latina
- (and 1 more)
-
Sorry Guys, I have not been very active around here as of late but I have been lurking about. I am going to knuckle down and get back to work this weekend. Really no explanation for what happened I just took a break I guess. I have been keeping busy with my RC sailing and other vices (hobbies) though. I promise an update this weekend. Best regards Art
- 139 replies
-
- 2
-
-
- san francisco
- artesania latina
- (and 1 more)
-
Beautiful work as always Bob. What else have you been working on? I have not been around much lately so I have been out of the loop as they say.
- 78 replies
-
- 1
-
-
- medway longboat
- Syren Ship Model Company
- (and 1 more)
-
I just read the thread. I have not been around much ( although I have been feeling the modeling itch lately) and as a result have been out of the loop on all things modeling. Sad to see. I still have their Mayflower and King of the Mississippi waiting patiently on the shelf.
-
Congrats and all the best on your new journey. Oh yes and your model is coming along nicely also.
-
Wonderful work so far on this one Bob. I hope you are still in NewJjersey till this storm decides what it is going to do. Is anyone looking in on your house while you are away? I don't know if there is anything I could do but if you need me to just shoot me an email. Best regards
-
Very nice work as always Bob. Looks like a trip back home is just what the Doctor ordered.
- 78 replies
-
- 1
-
-
- medway longboat
- Syren Ship Model Company
- (and 1 more)


.jpg.9f5394d29e0794d33d5a57c3b778c31b.jpg)