

J11
-
Posts
519 -
Joined
-
Last visited
Content Type
Profiles
Forums
Gallery
Events
Posts posted by J11
-
-
Neat info, didn't know all the releases. Thanks.
- popeye the sailor, mtaylor, EJ_L and 1 other
-
 4
4
-
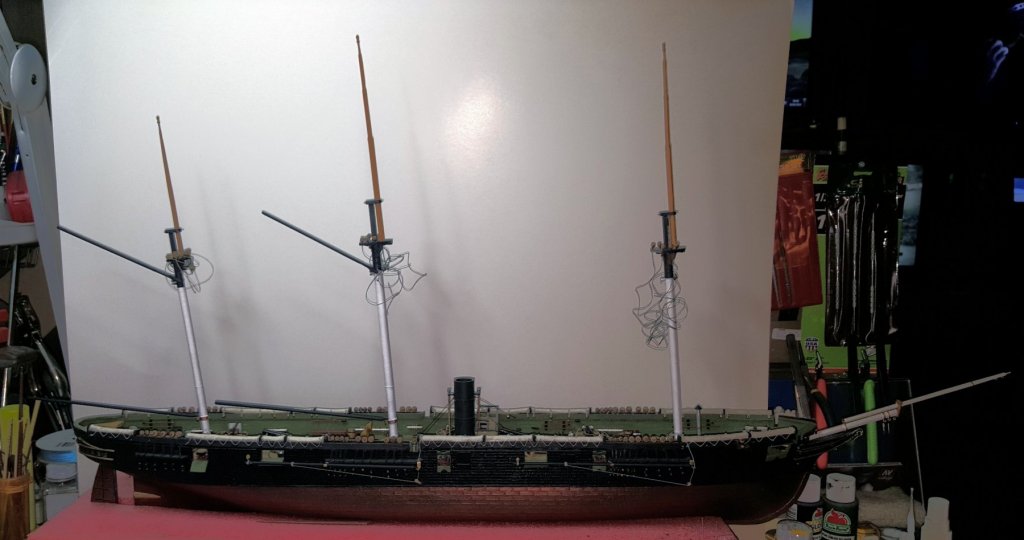
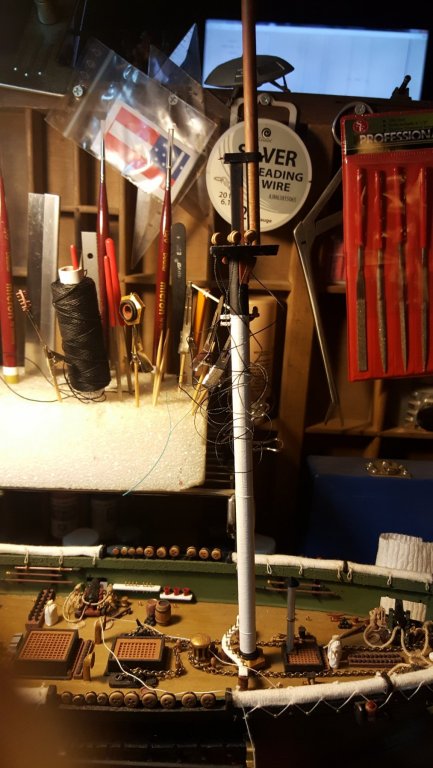
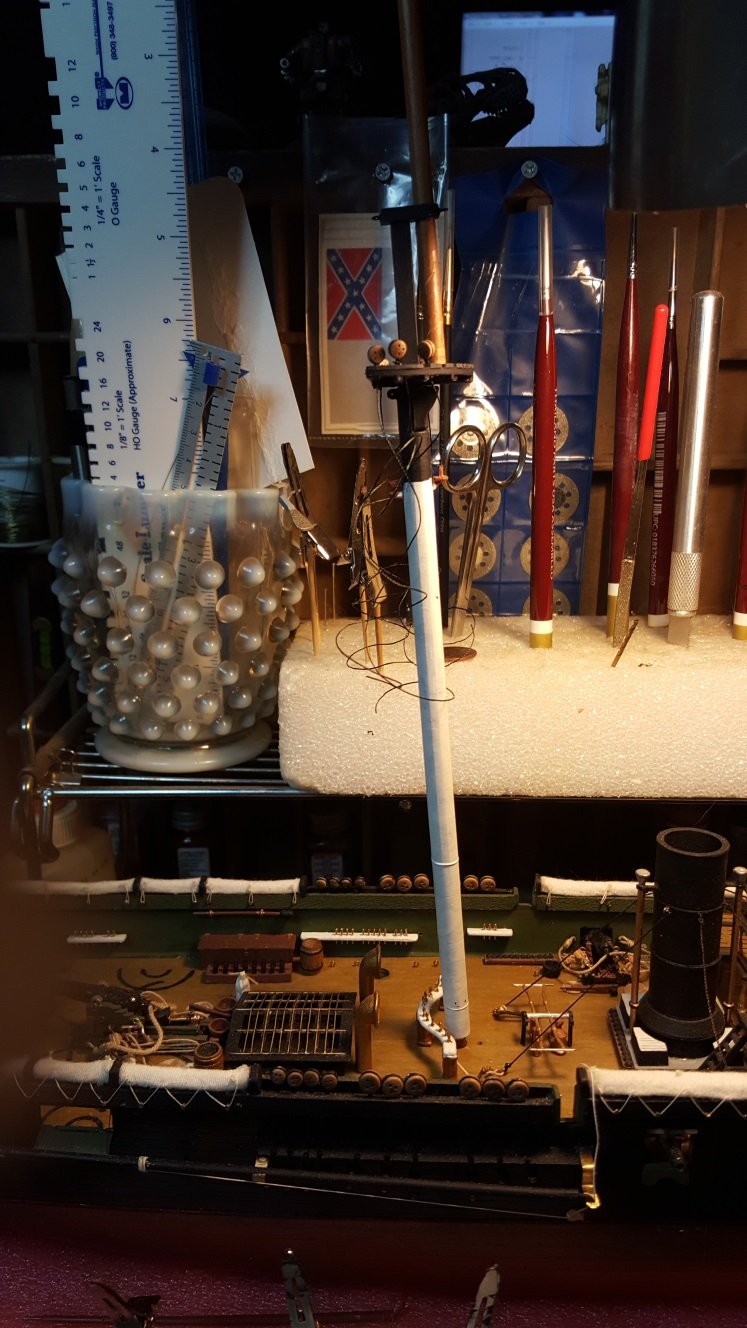
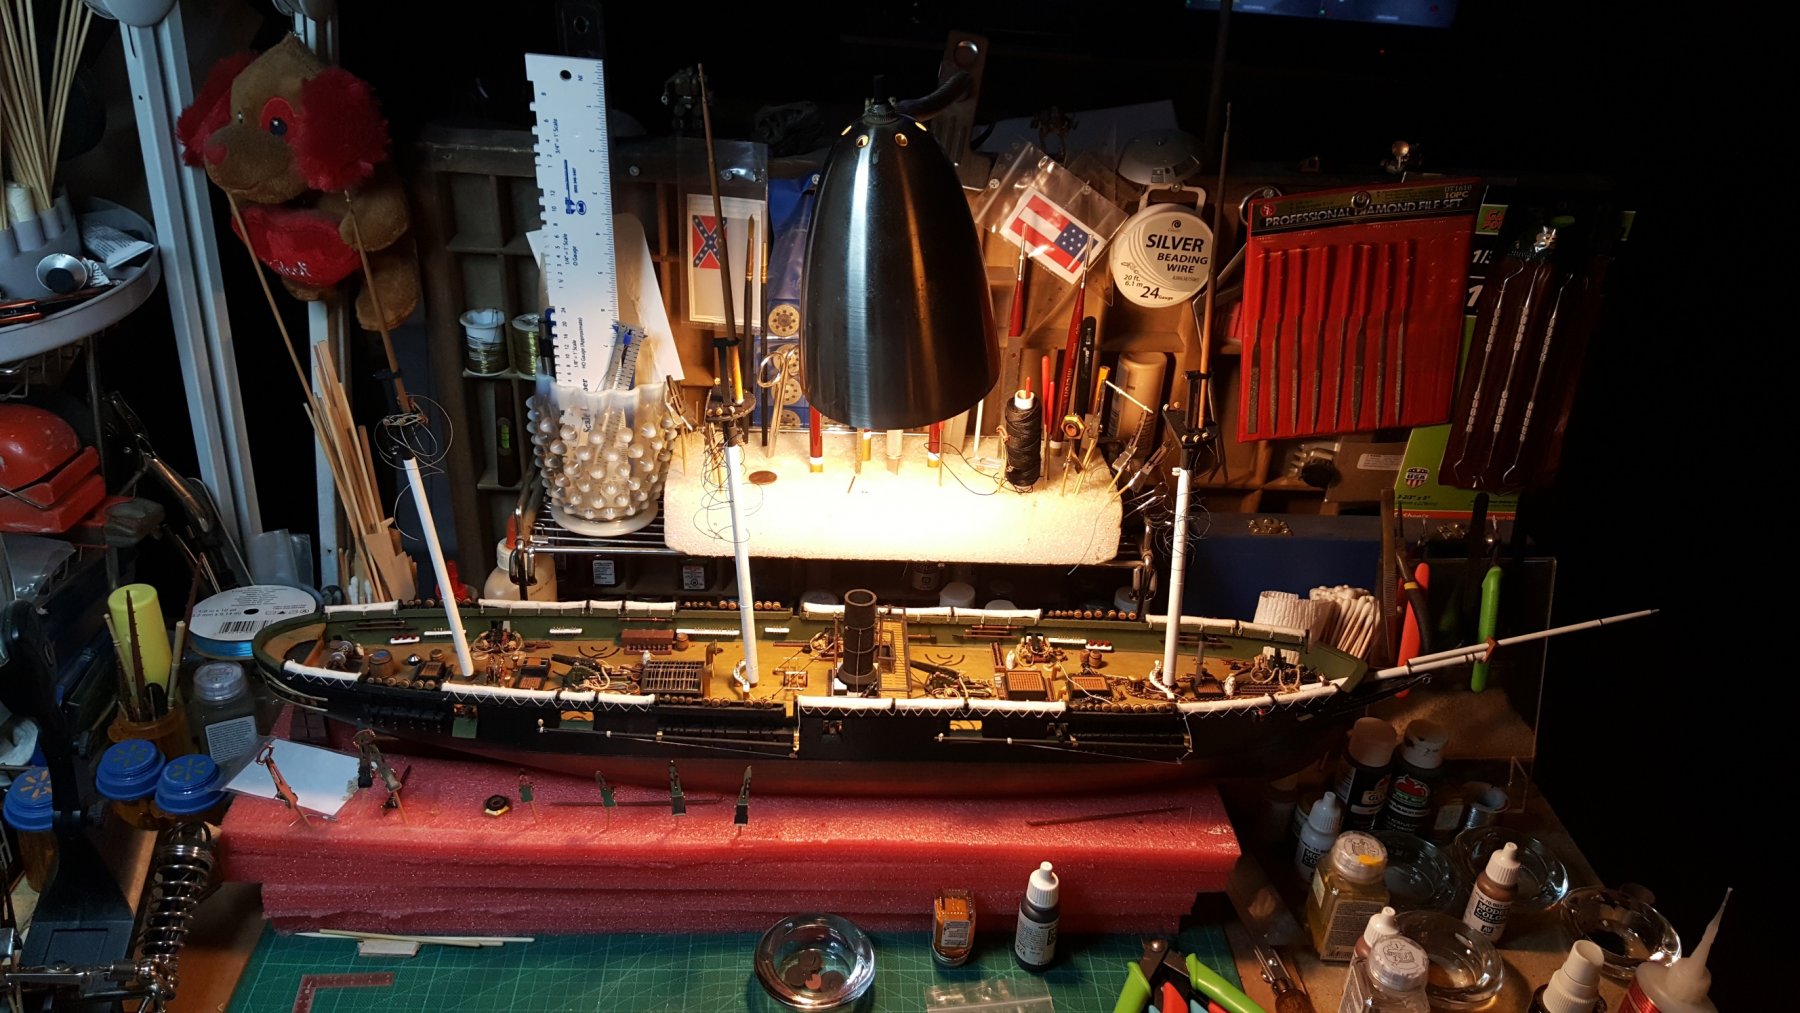
Here's a quick update on hows she's shaping up:
-
Prayers you'll heal quickly!
- popeye the sailor, EJ_L, mtaylor and 1 other
-
4
-
20 hours ago, popeye the sailor said:
..and a happy Father's day to you! {belated}.....that looks like an older kit Billing's kit of the Wasa. having built one of these older kits {of the Nordkap}, and getting a second chance to built the Progress......I think you'll find a lot of enjoyment out of the experience. you'll also have better control over the inconsistencies with the kit, since a lot of the build will be scratch built
") what is the kit in the upper left........looks like a 1:150 kit.......another Alabama?
what is the kit in the upper left........looks like a 1:150 kit.......another Alabama?
nice work on the masts
Thanks, the other kit you are mentioning is just the box my Alabama came in which is in pristine condition and will moth ball it with all my plans and research when I'm done with her.
The Vasa is going to be quite a build as so many parts does come with it, will be painting them for months for that build. If I decide to go for it next will be going over all the builds of the Vasa on here for reference's. Some great Vasa builds are here which helps in putting that kit together.
I should have some more updates this weekend as most of the mast parts are finished except for foot ropes for the fore mast. Those are being worked on now. Seems fairly close to being finished as just the rigging and men are left with putting all the scratch built parts on her and the smaller boats. Then Glass time.


-
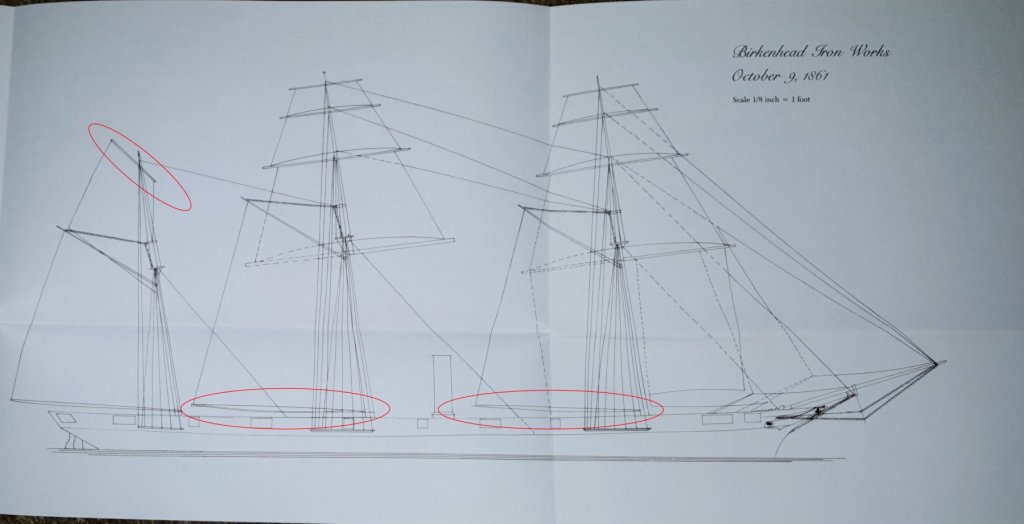
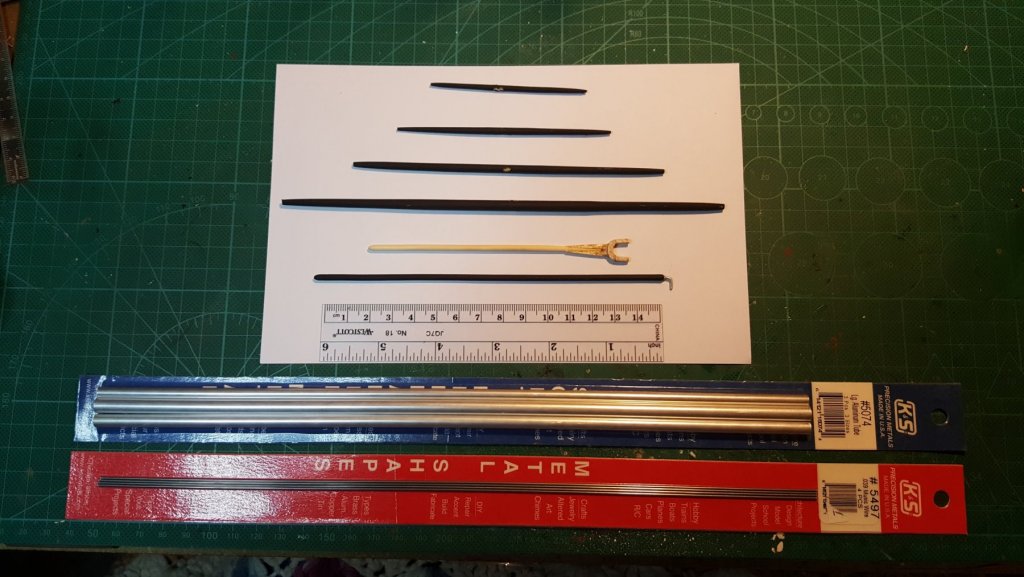
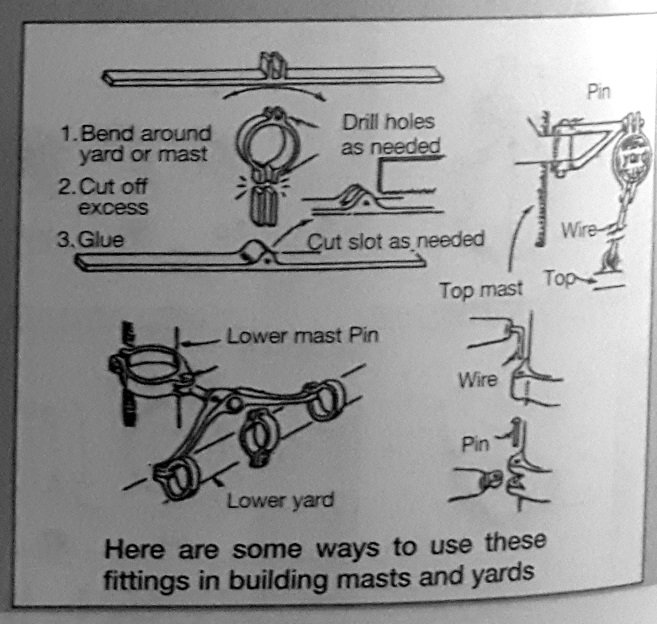
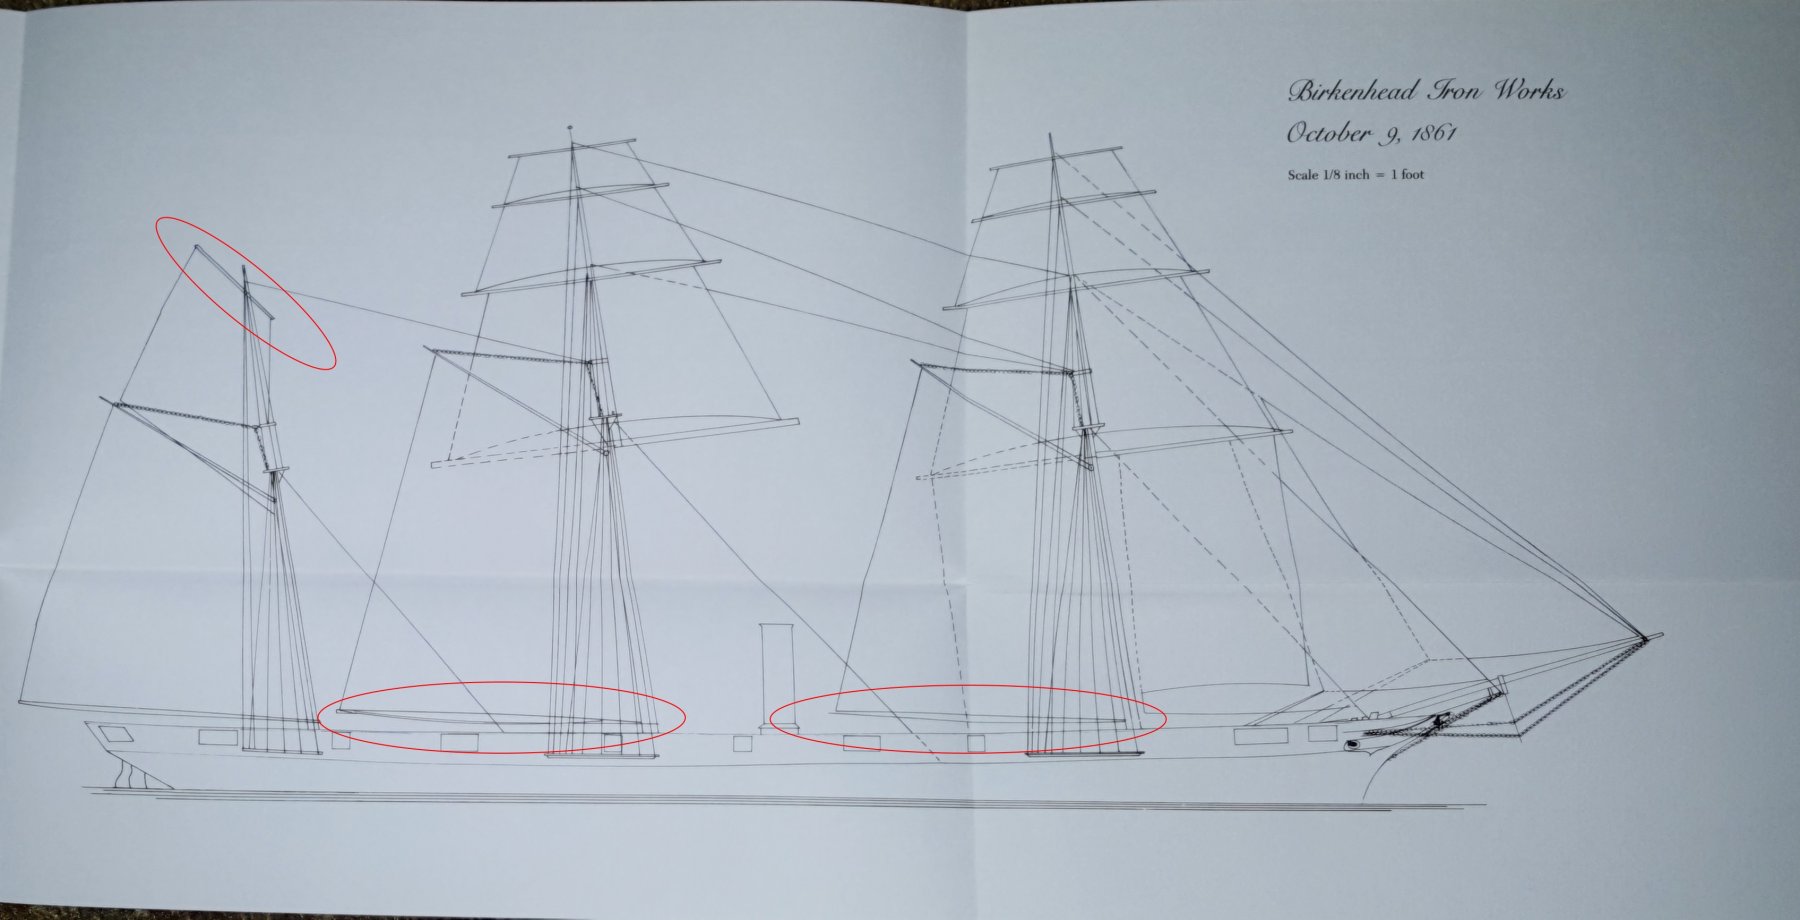
Well found more parts to scratch build for the masts, one main boom and fore boom along with a top mizzen studding mast yard from the 1861 prints of the original build from the Iron works. Also worked on the mizzen Gaff (Scratch) and will also build the fore and main gaffs. Got the parts for the extension booms for main and fore topsail yard and lower topsail yard which should have them done this week. As the old saying goes one step forward and two steps back when putting this ship together. Worked also on the dead eyes for the upper ratlines so I would have them in place. I'll have to make the gaffs mast attachment rings by scratch which will probably be made out of hardwood or I'll buy them from BJ. I'll add the hoop rings also for the sails also.
Here's some updated images:
Extra mast parts needed:


- EJ_L, JesseLee, GrandpaPhil and 6 others
-
9
-
Impressive representation! May I ask if you will put the flag on her?
-
-
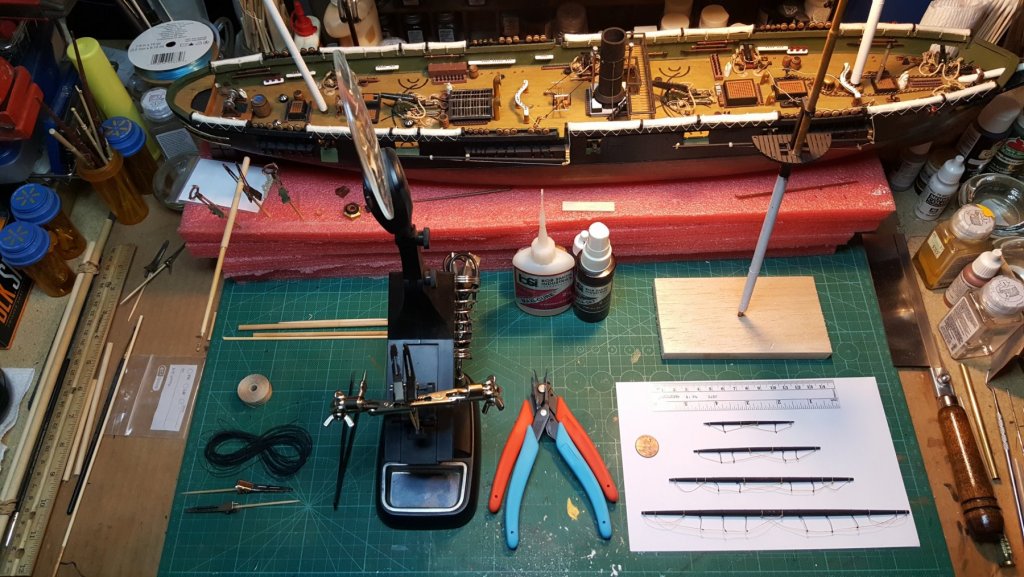
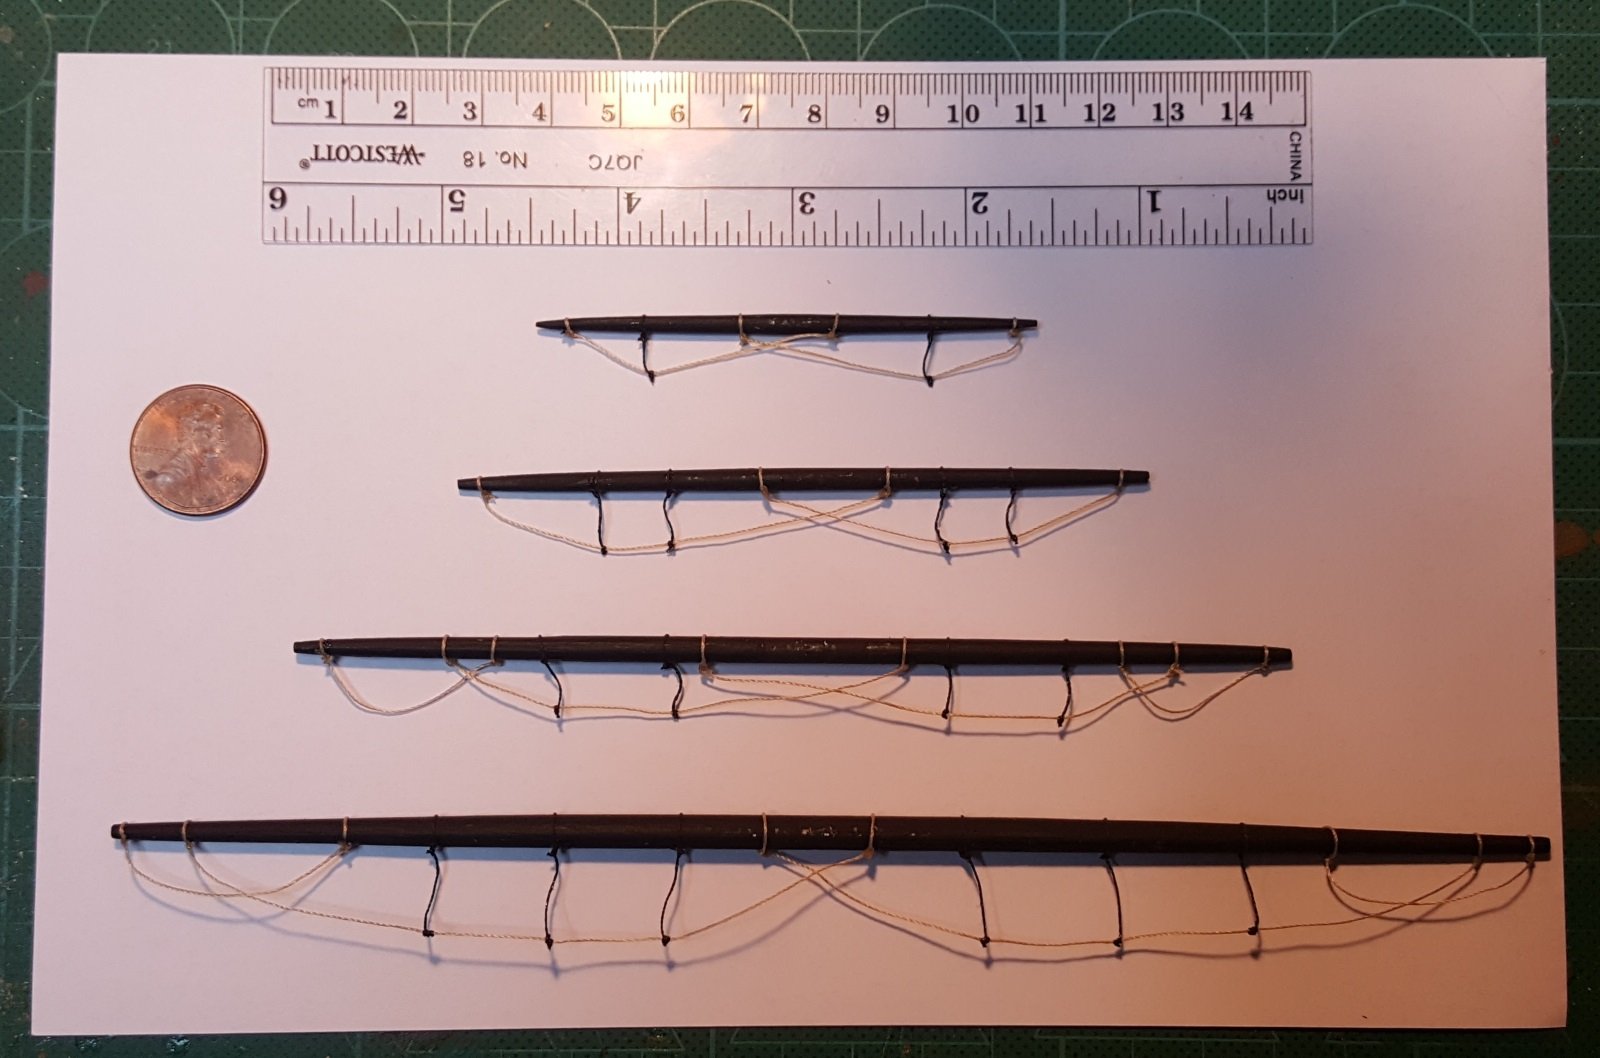
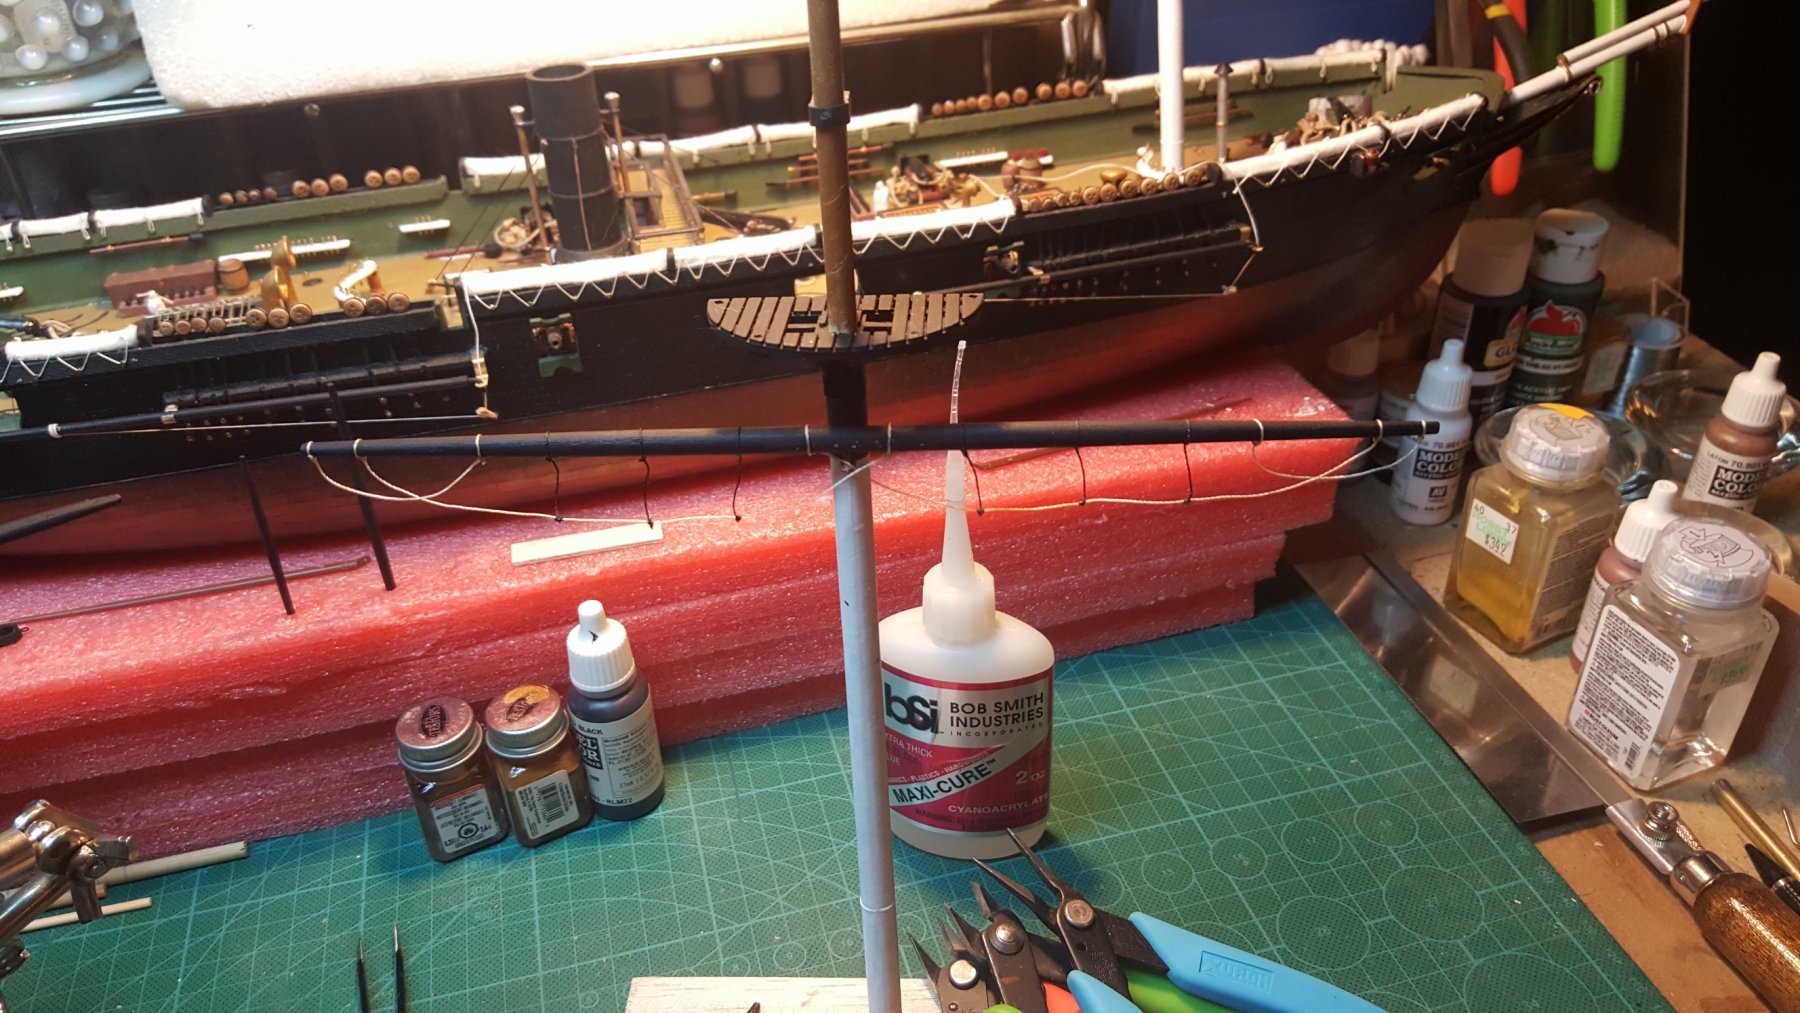
I have one set done, and feel with the scale it's close to proper size for the foot ropes. Have another set to complete and should be done by today as these are taking longer than anticipated. The block and tackle will have to be added to the yards also then when the parts come in from Blue Jacket I'll assemble each mast along with added rigging so final tie down rigging from each mast will go simpler.

Also "Happy Fathers Day " from a non-spoiled Father.


Yep got my work cutout for me.

-
-
Coming along nicely KScadman. Your rib frame work is nice and straight.
-
Another update as I work on the foot ropes for the yards. Trying to keep in scale and also accent them a little, they are turning out fairly well. I'm going to have to order some yard mounting parts from Bluejacket for mounting them securely to the masts.
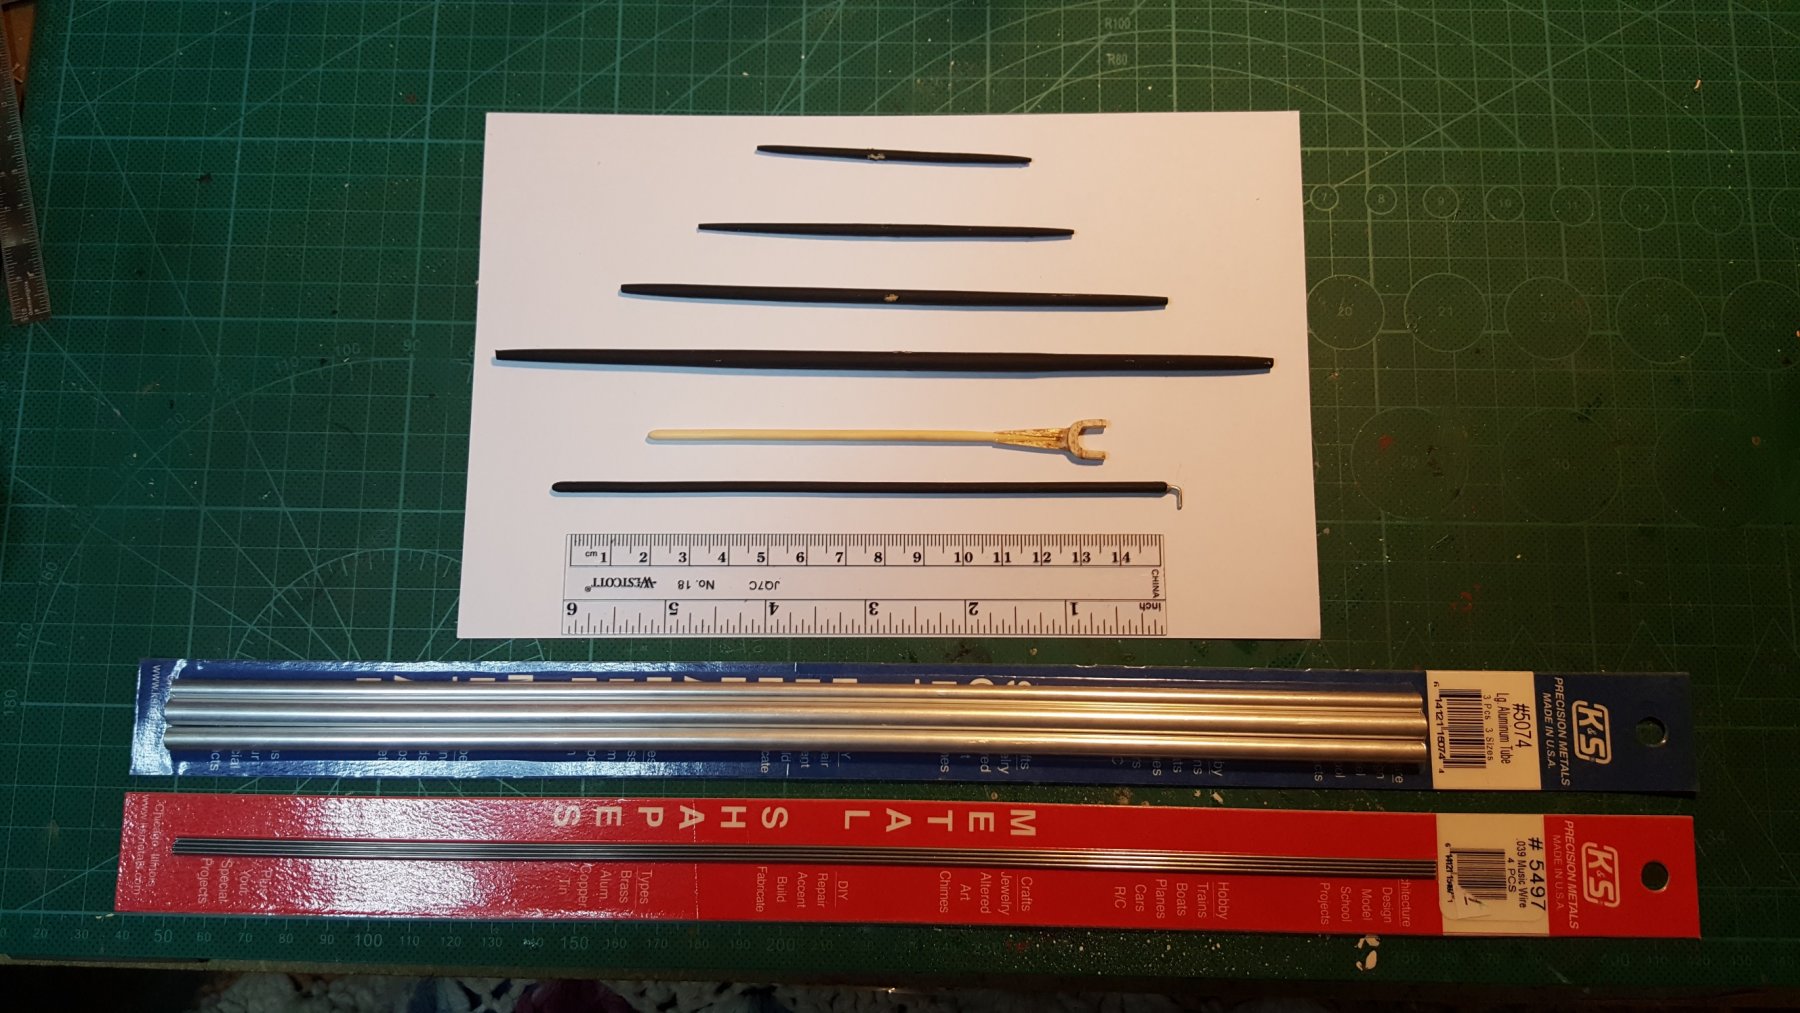
Associated parts needed for them:
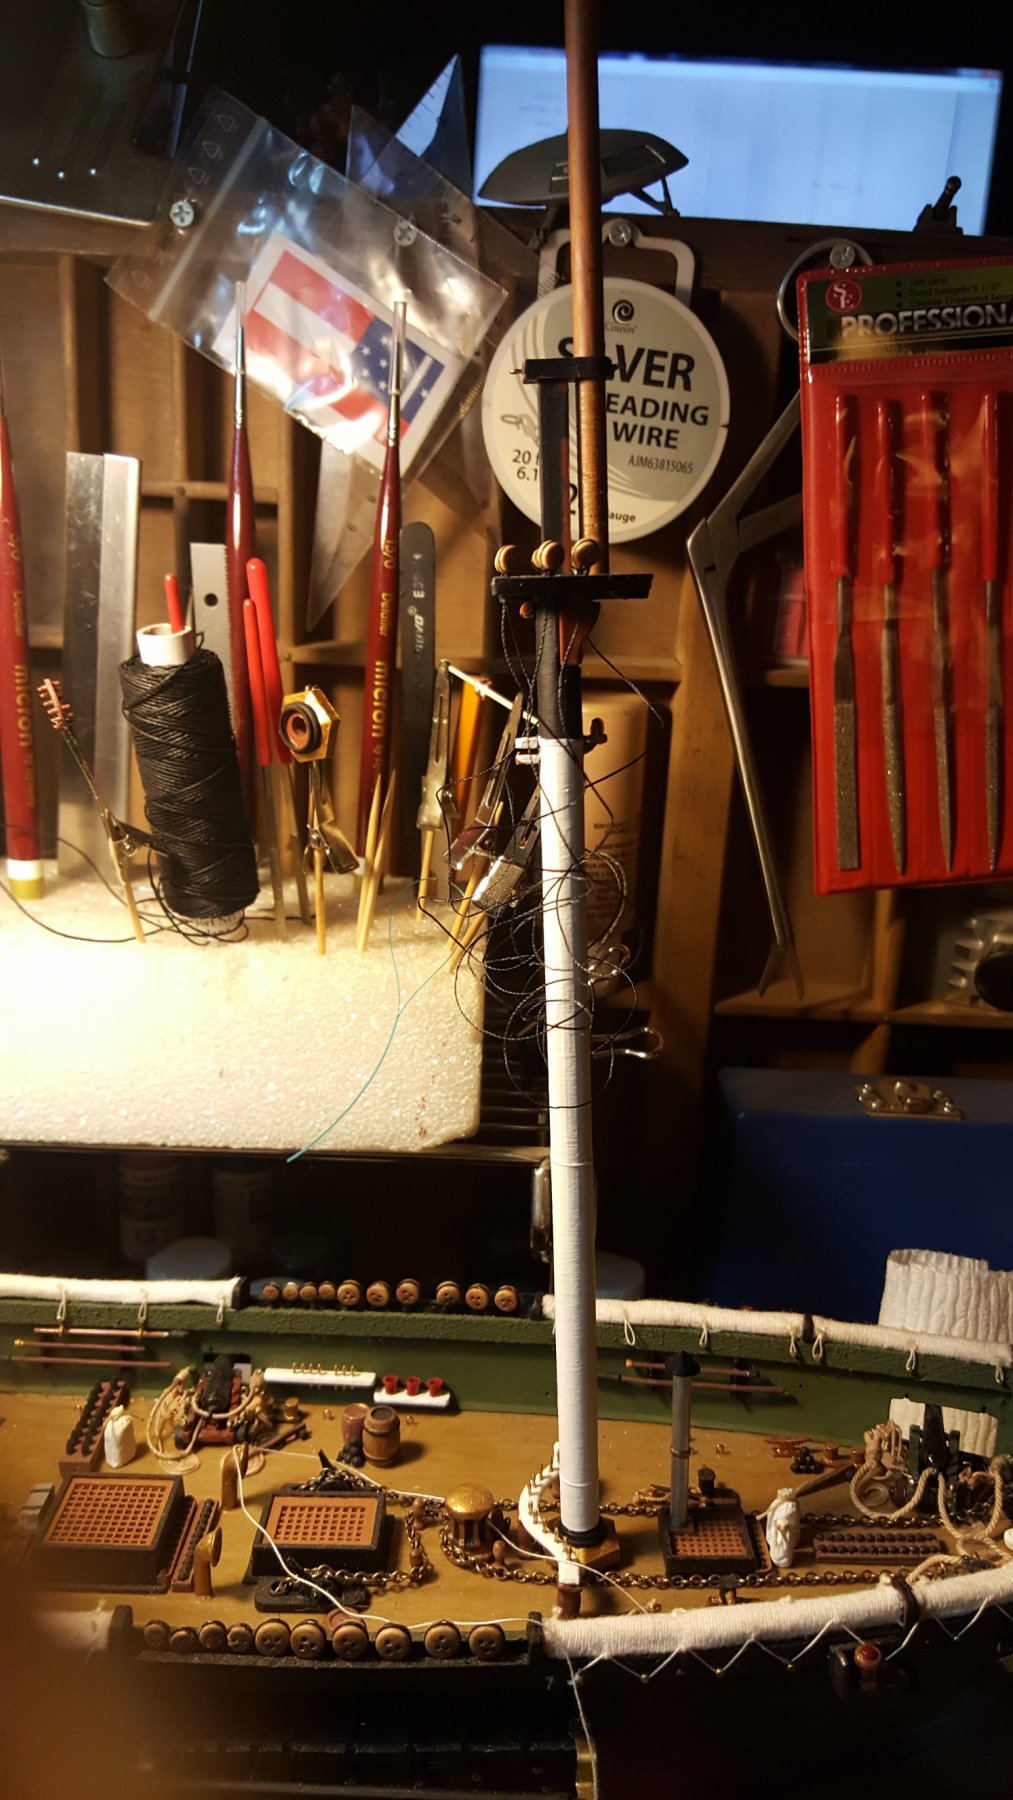
A couple of images of work in progress:


I'm hoping that I will have the foot ropes done for all of them today and then work on the yard extension pole hardware as I am going to see if I can scratch build them instead of buying the parts. With the BlueJacket parts it should give me the strength I need for rigging purposes and tightening down the lines associated with the yards. The supplied parts with the model just won't work for my application with the historical documentation.
- coxswain, popeye the sailor, CDW and 7 others
-
10
-
How very true, the H.L. Hunley also comes to mind. Thanks for the appreciation on the build along with the problem solving. Funny because I had racked the old noggin for months trying to come up with that possible historical solution and backed off of it till just recently working with the build blog. Sometimes it's good to just back off of a problem then in time the answer presents itself.
-
I really appreciate how you are taking archaeological finds from early century ships and incorporating them into your build. We all as model builders strive to do just that with our representations. Who knows when the last time a actual 1025 AD three-sheaved block and single sheaved block were actually used, but now threw your effort they will be used in historical context for many years to come threw your modeling expertise. I do applaud you sir and all the others whom produce these finds into reality once again. Personally ship modeling needs to be incorporated into all of our schools classes as the wealth of learning just from simple builds would be a wonderful teaching tool in many different discipline's.
- EJ_L, mtaylor, CaptainSteve and 1 other
-
4
-
-
41 minutes ago, Salty Dog said:
Hello all,
I just put one of the most difficult, most fidgety things you will ever do with PE. I had to take a break because I thought I would explode because I have to make another one! The PE is so incredibly fragile that just breathing on it just about bends it! (exaggerating). There is hardly any surface contact at all. Now, back to the next one


Wow! 1mm across is incredible. Nice work.
-
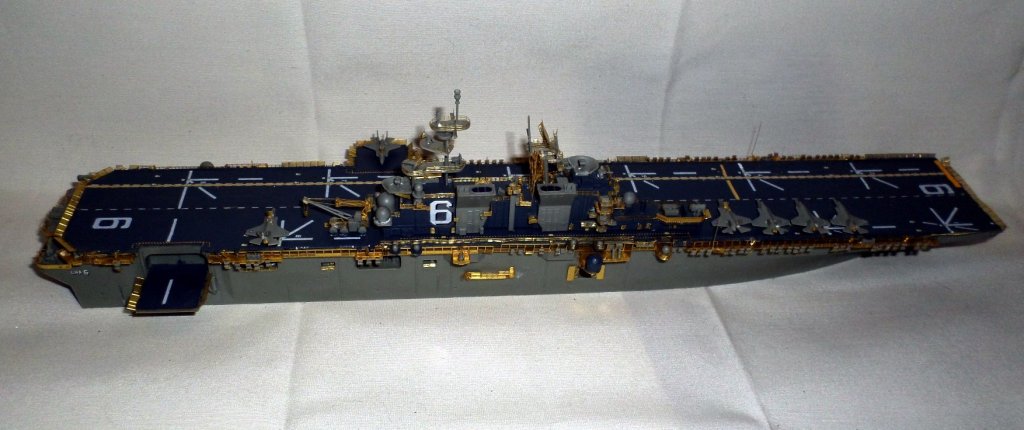
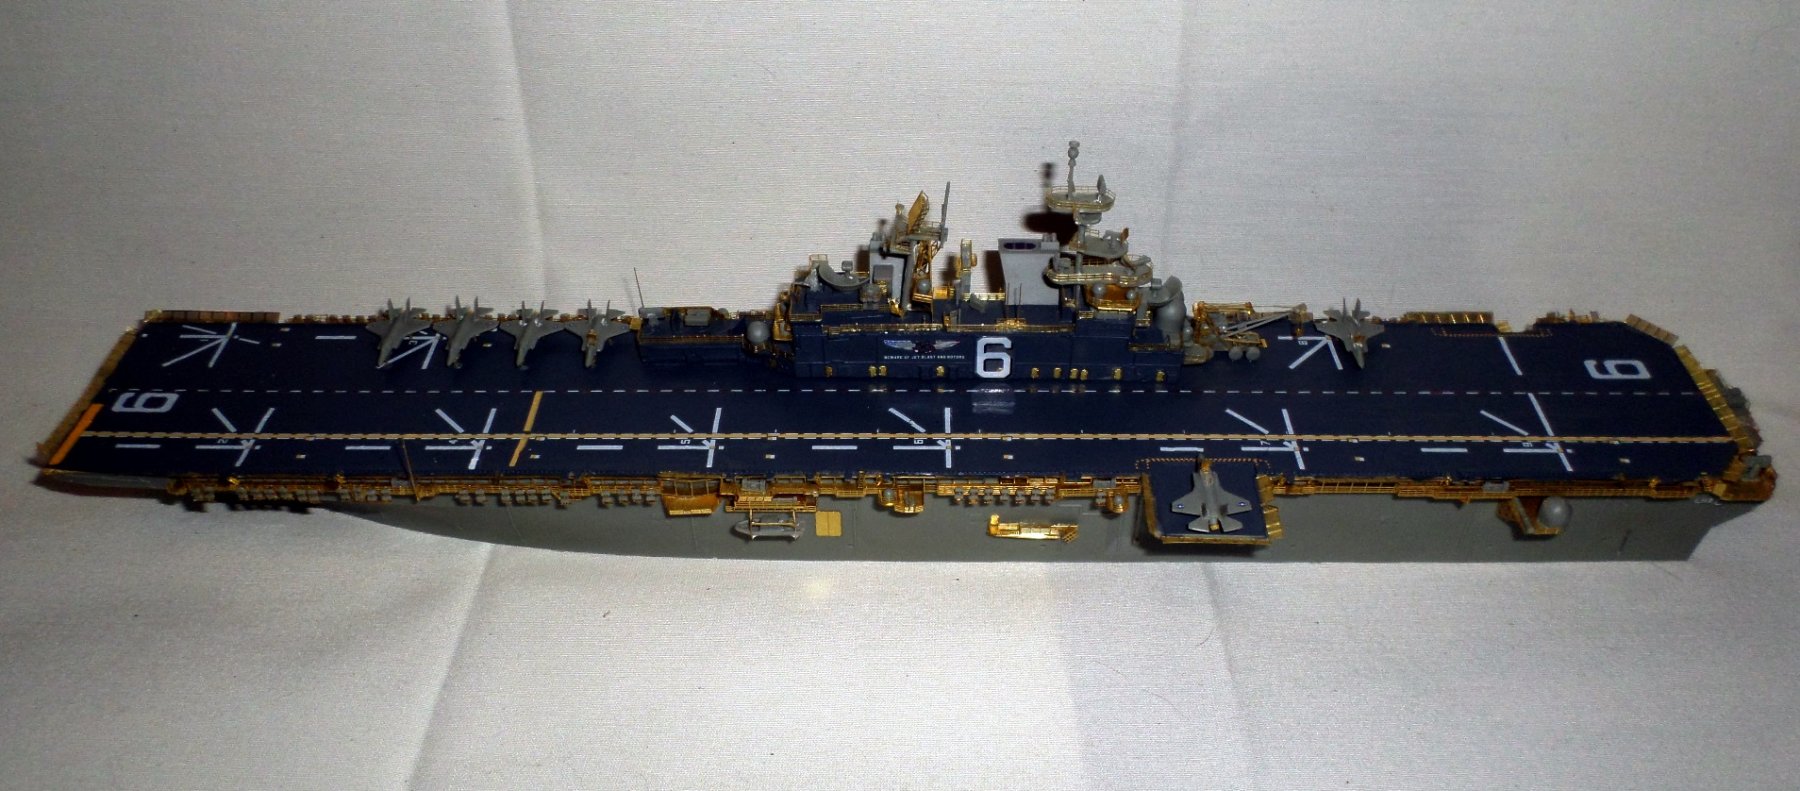
6 hours ago, CDW said:
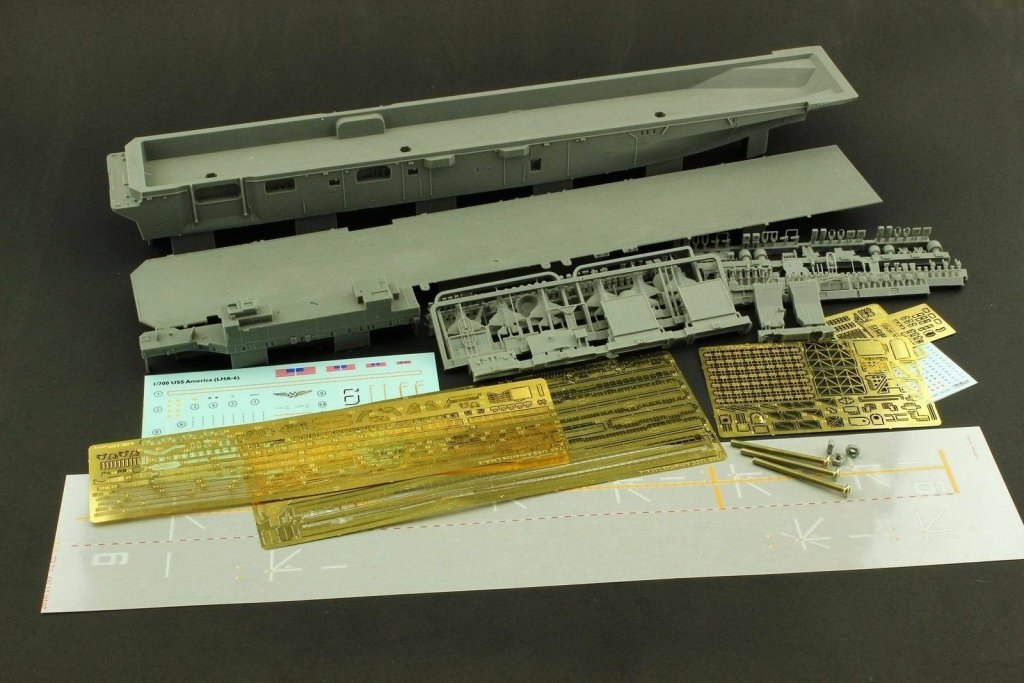
Are those F-35's on the carrier deck, and which model is this? Looks super!
Yes they are, the proper designation if I remember right they are F-35 B's.
- Canute, Old Collingwood, lmagna and 2 others
-
5
-
1 hour ago, Salty Dog said:
This is really beautiful! I have thought about what other colors I would use instead of black for the unpainted brass look, and dark blue and dark red are my next ideas. I love how that looks and you did a fantastic job!
Thank you Salty. With ten thousand curse words I did complete it and man what a tedious rascal it was! Here's the ebay kink for the model. We have a family member on board serving so it was a special family heirloom build.
- popeye the sailor, Canute, CDW and 3 others
-
6
-
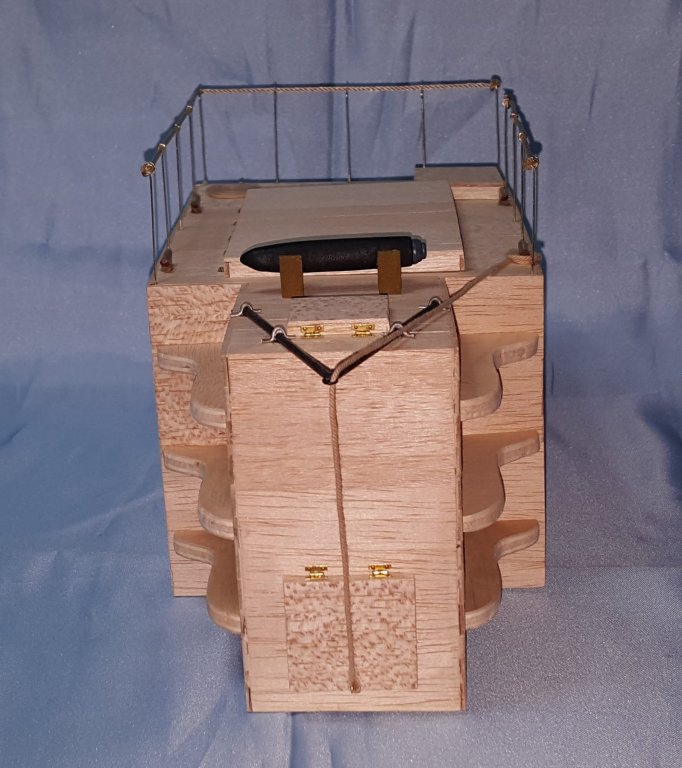
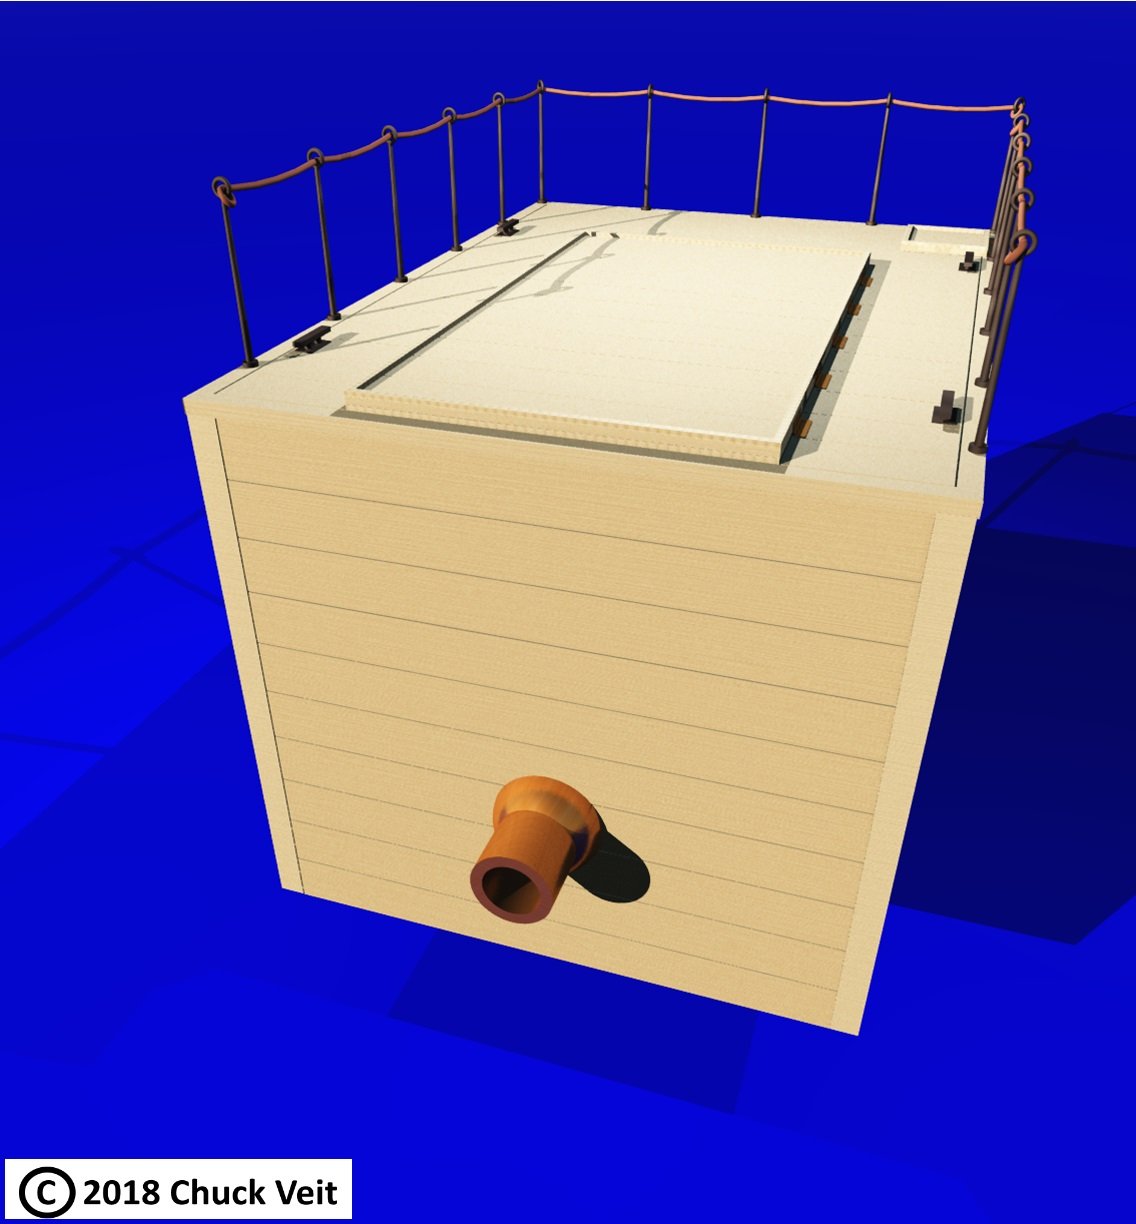
Well I couldn't put it out of my mind and came up with a simple solution to the problem which would easily be implemented for the design historically. This would be the only working solution to the historical documents found.
1) Pull handle.
2) Pulley bar put across the opening of the access hole.
3) Hook and hook latch.
4) Locking bar for tube hatch plates handle bars. Lock first hatch plate in open position to allow loading.
5) 6) Removal of tube hatch plate handle support bars.
7) Increase hole in oblong shape and seal with cotton and pitch to allow movement of launch tube. Keeping water tight seal.
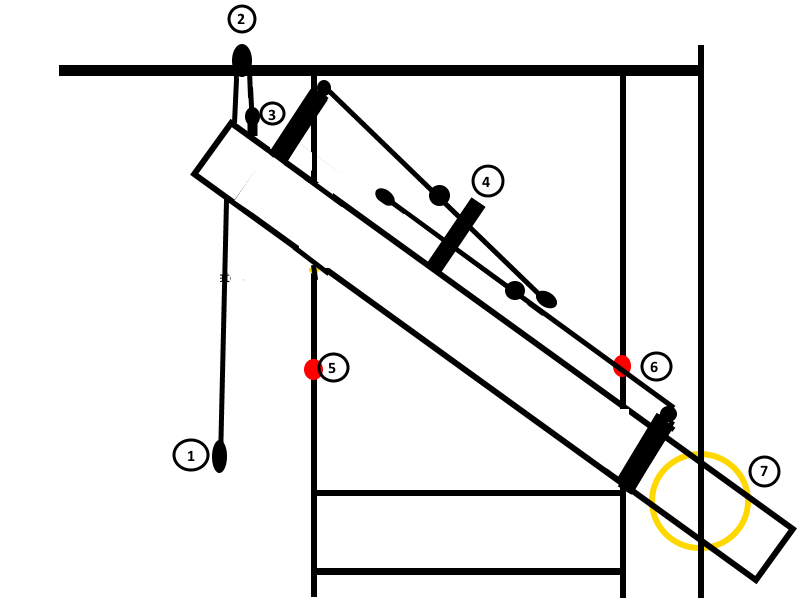
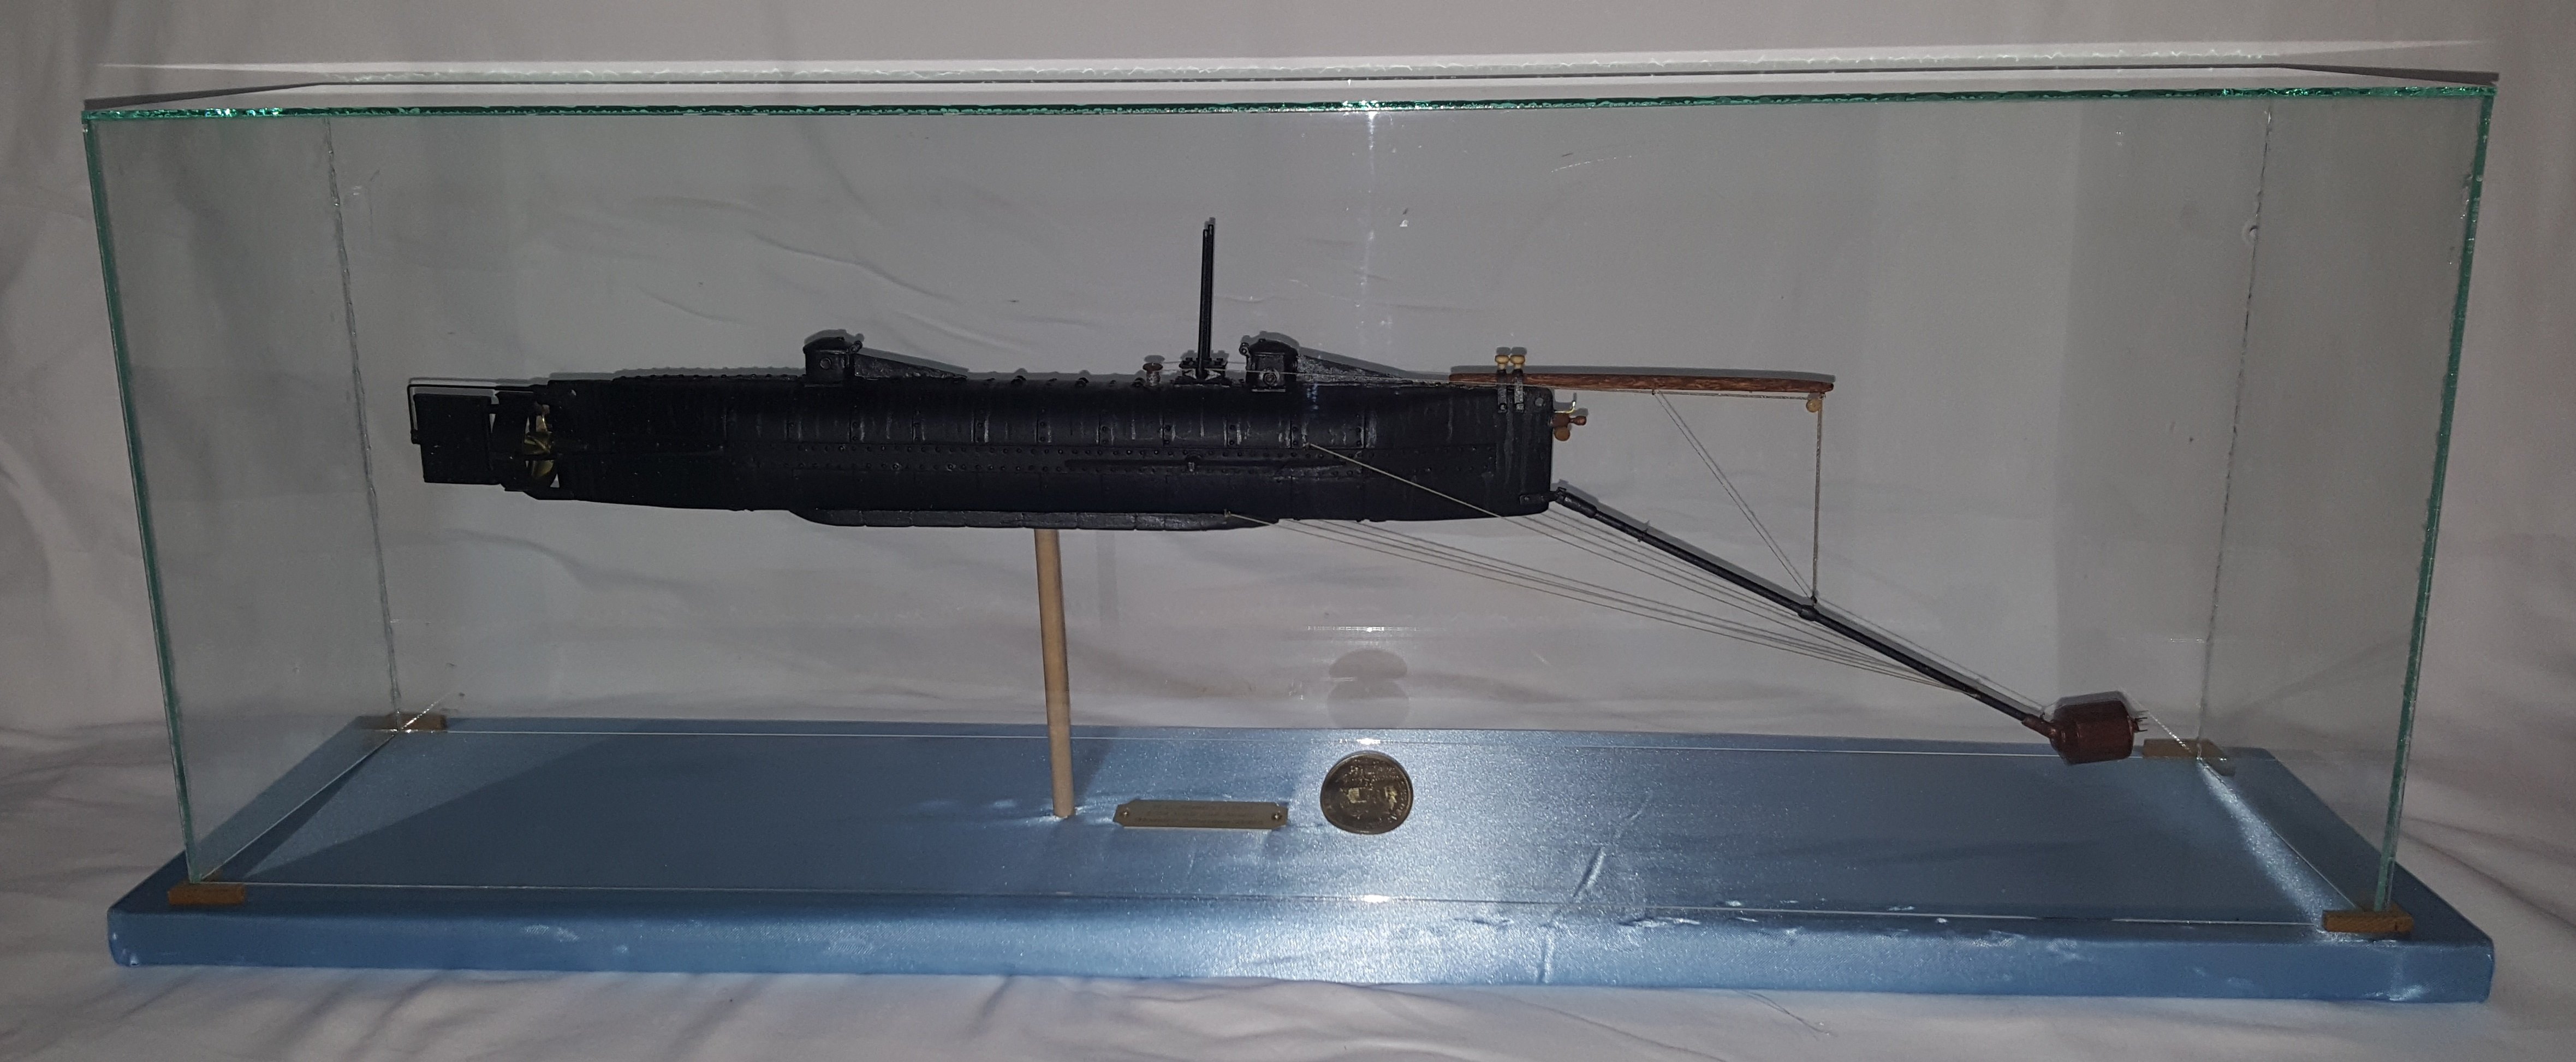
Problem is solved and can be operated from one man inside the box. This seems the only logically way they could have done it per historical information. So I'll get to work on the phase two model soon and then I will have both "What is it's" test torpedo launchers completed which will be the fist time these have every been modeled. I do encourage anyone else to tackle phase two model using my examples, please feel free to make a working model.
- CDW, GrandpaPhil, Nikiforos and 3 others
-
6
-
32 minutes ago, CDW said:
Great find on the Kearsarge pieces. Where did you find them?
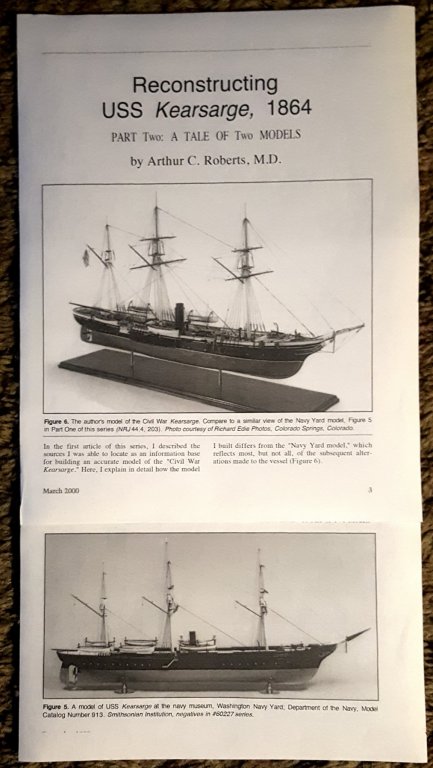
I had contacted this seller on Ebay and ask for a copy on the build, this is also the original model from the paperwork. he was very receptive to making me a copy and mailing it out for a price which wasn't bad at all. I think if not mistaken it can be found in the THE NAUTICAL RESEARCH JOURNAL IN 1999-2000 but I'm not sure how to find it in those files if they are available.
- hexnut, Old Collingwood, CDW and 4 others
-
7
-
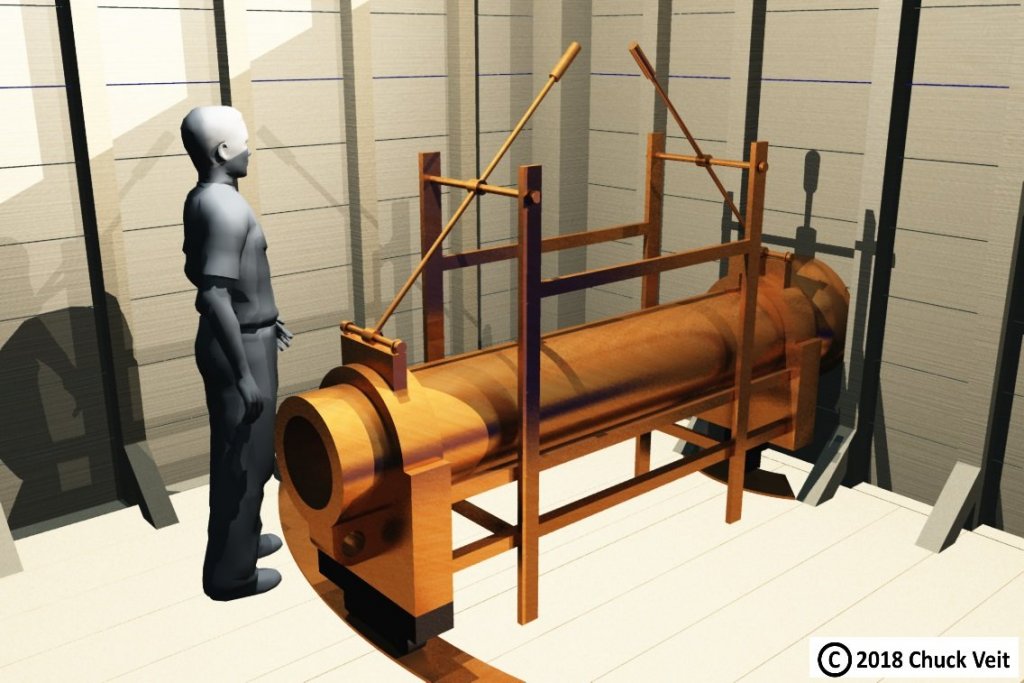
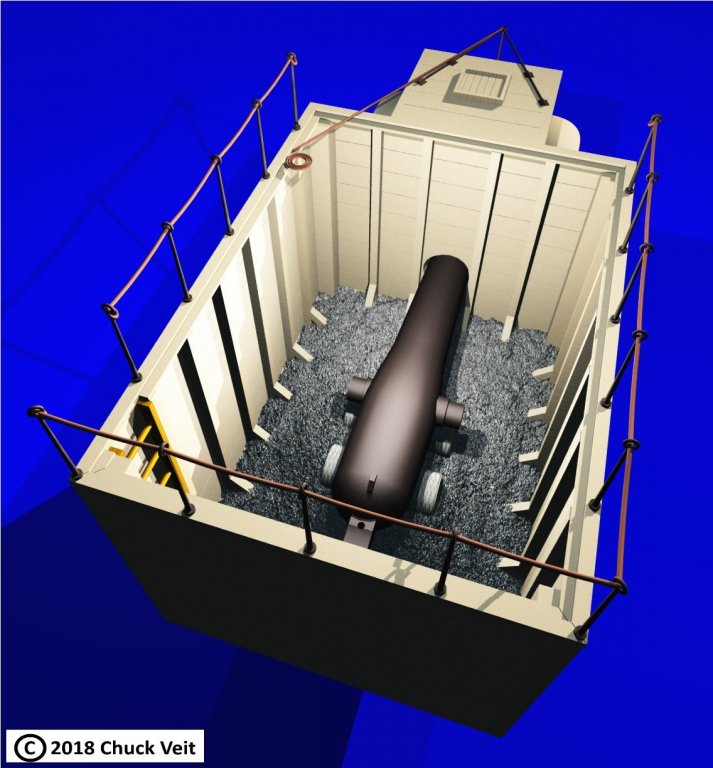
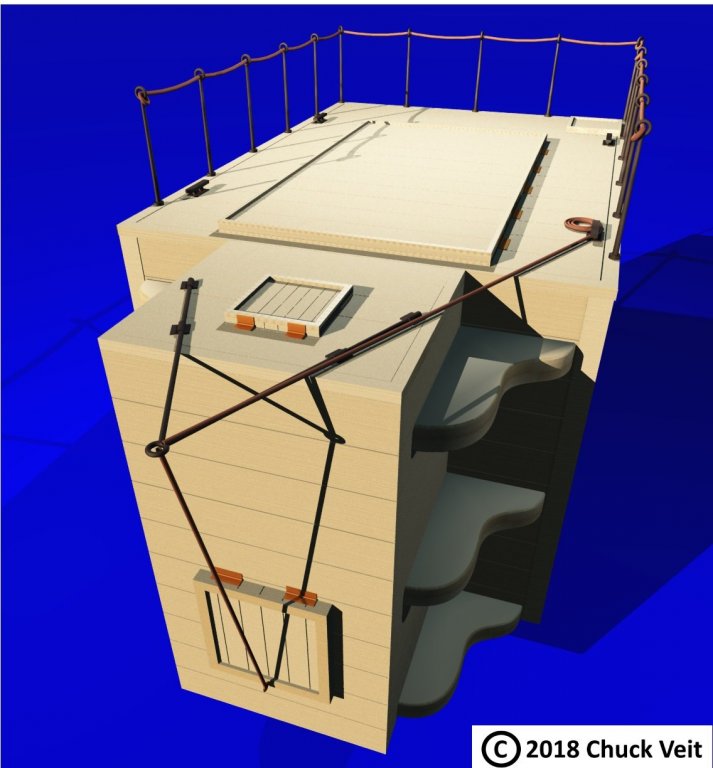
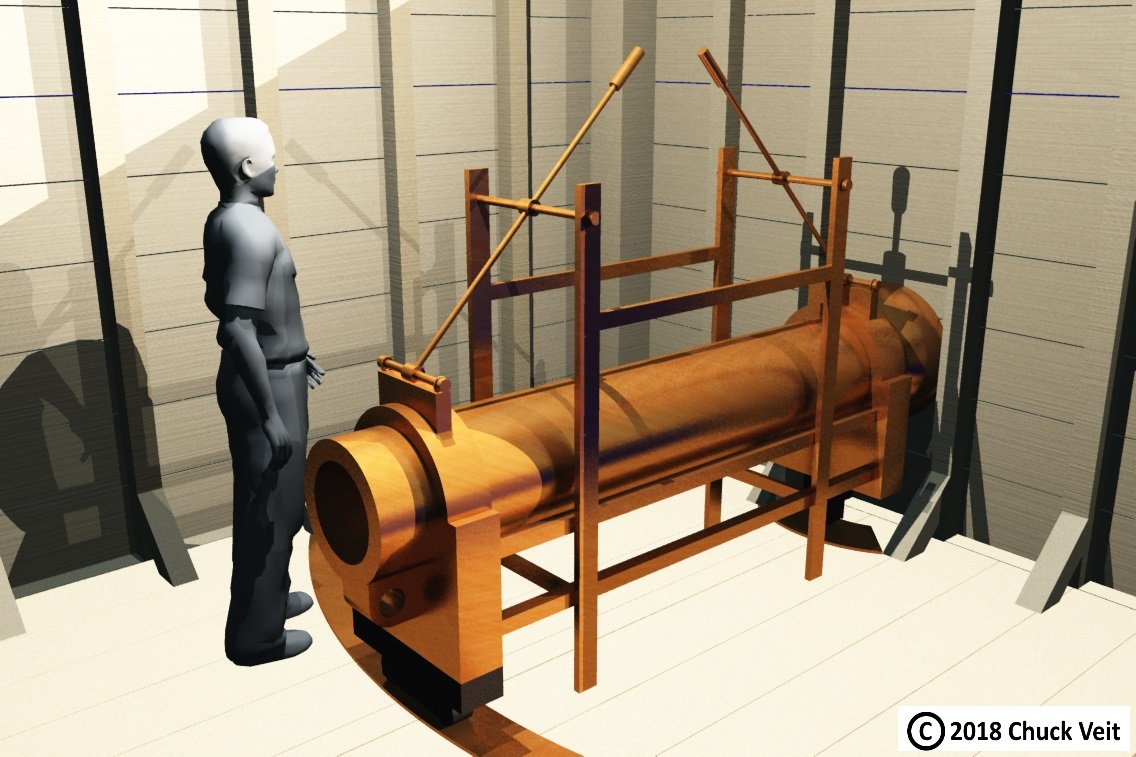
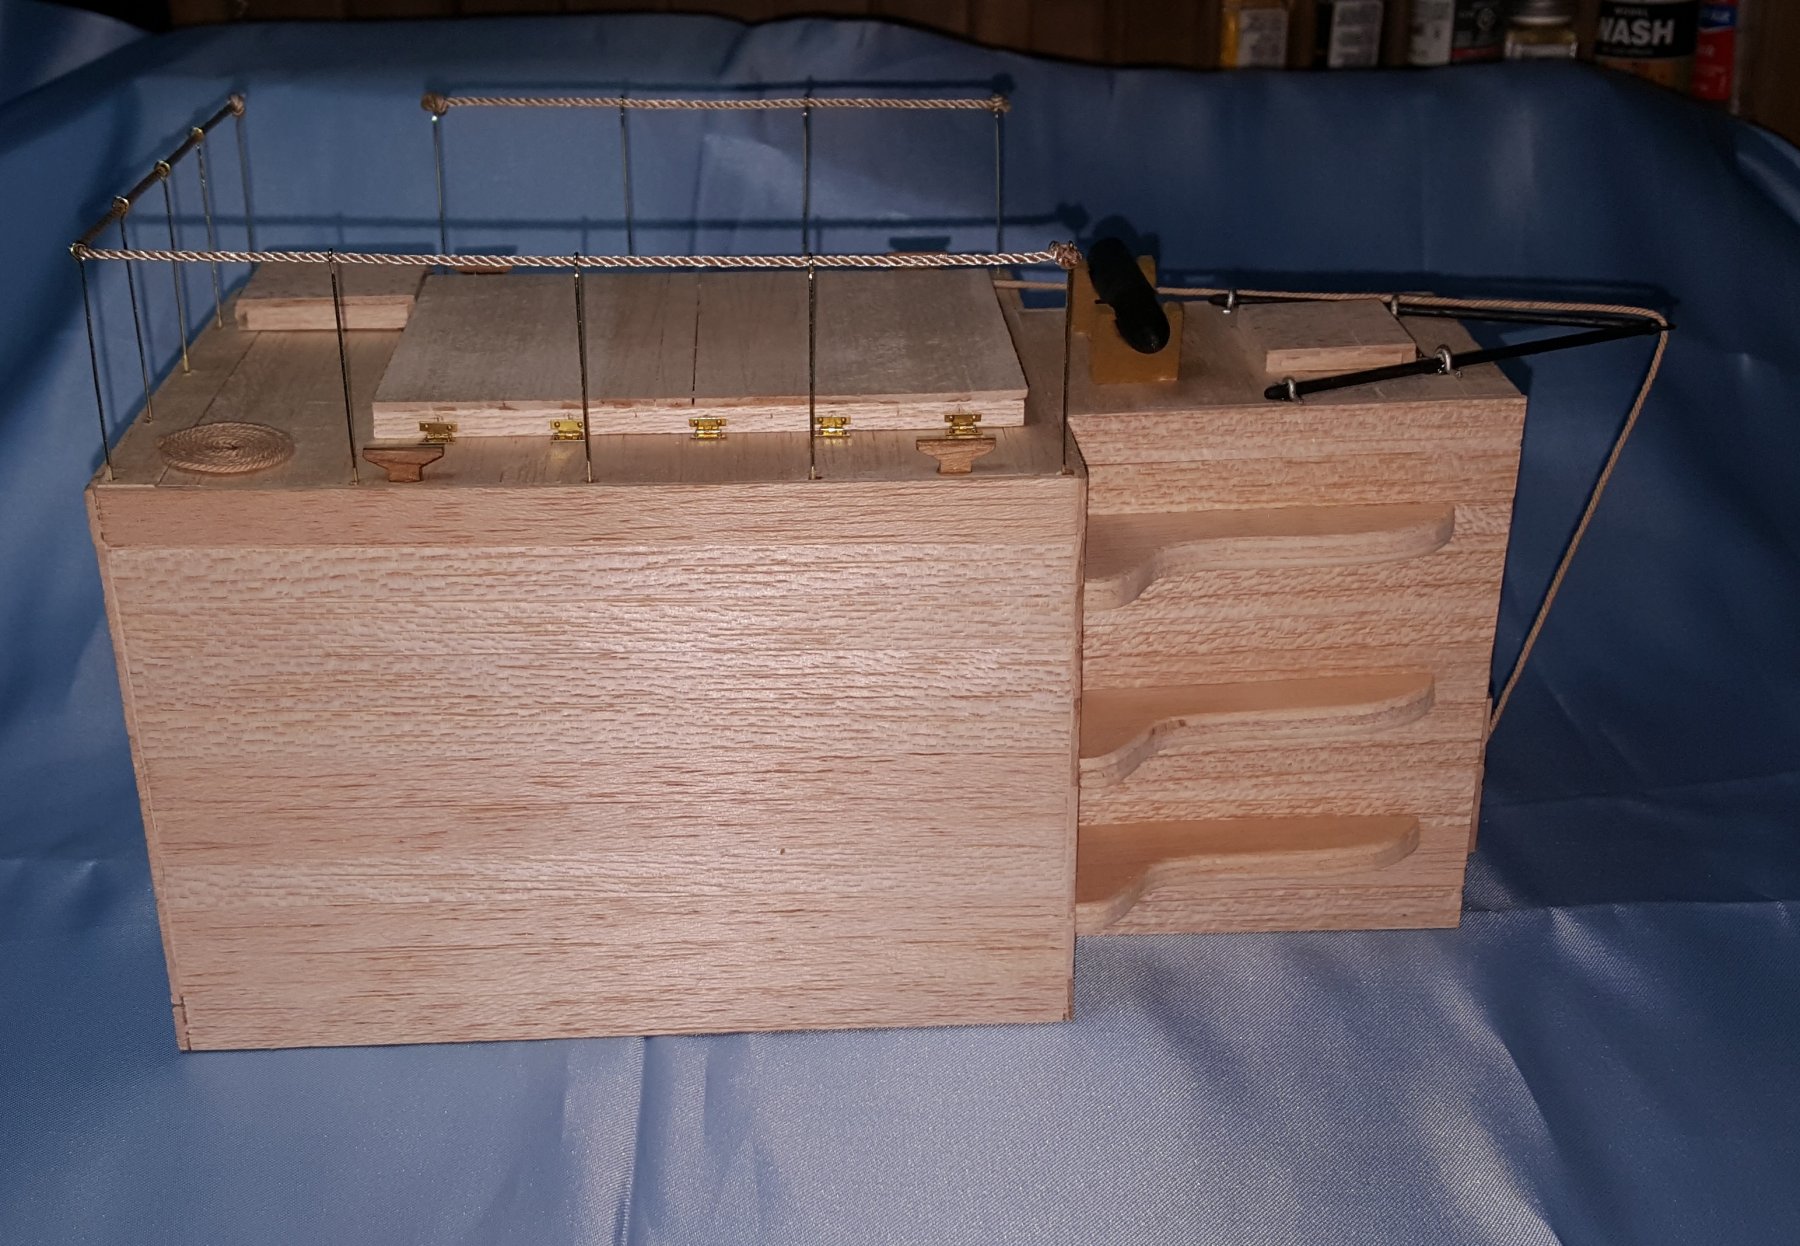
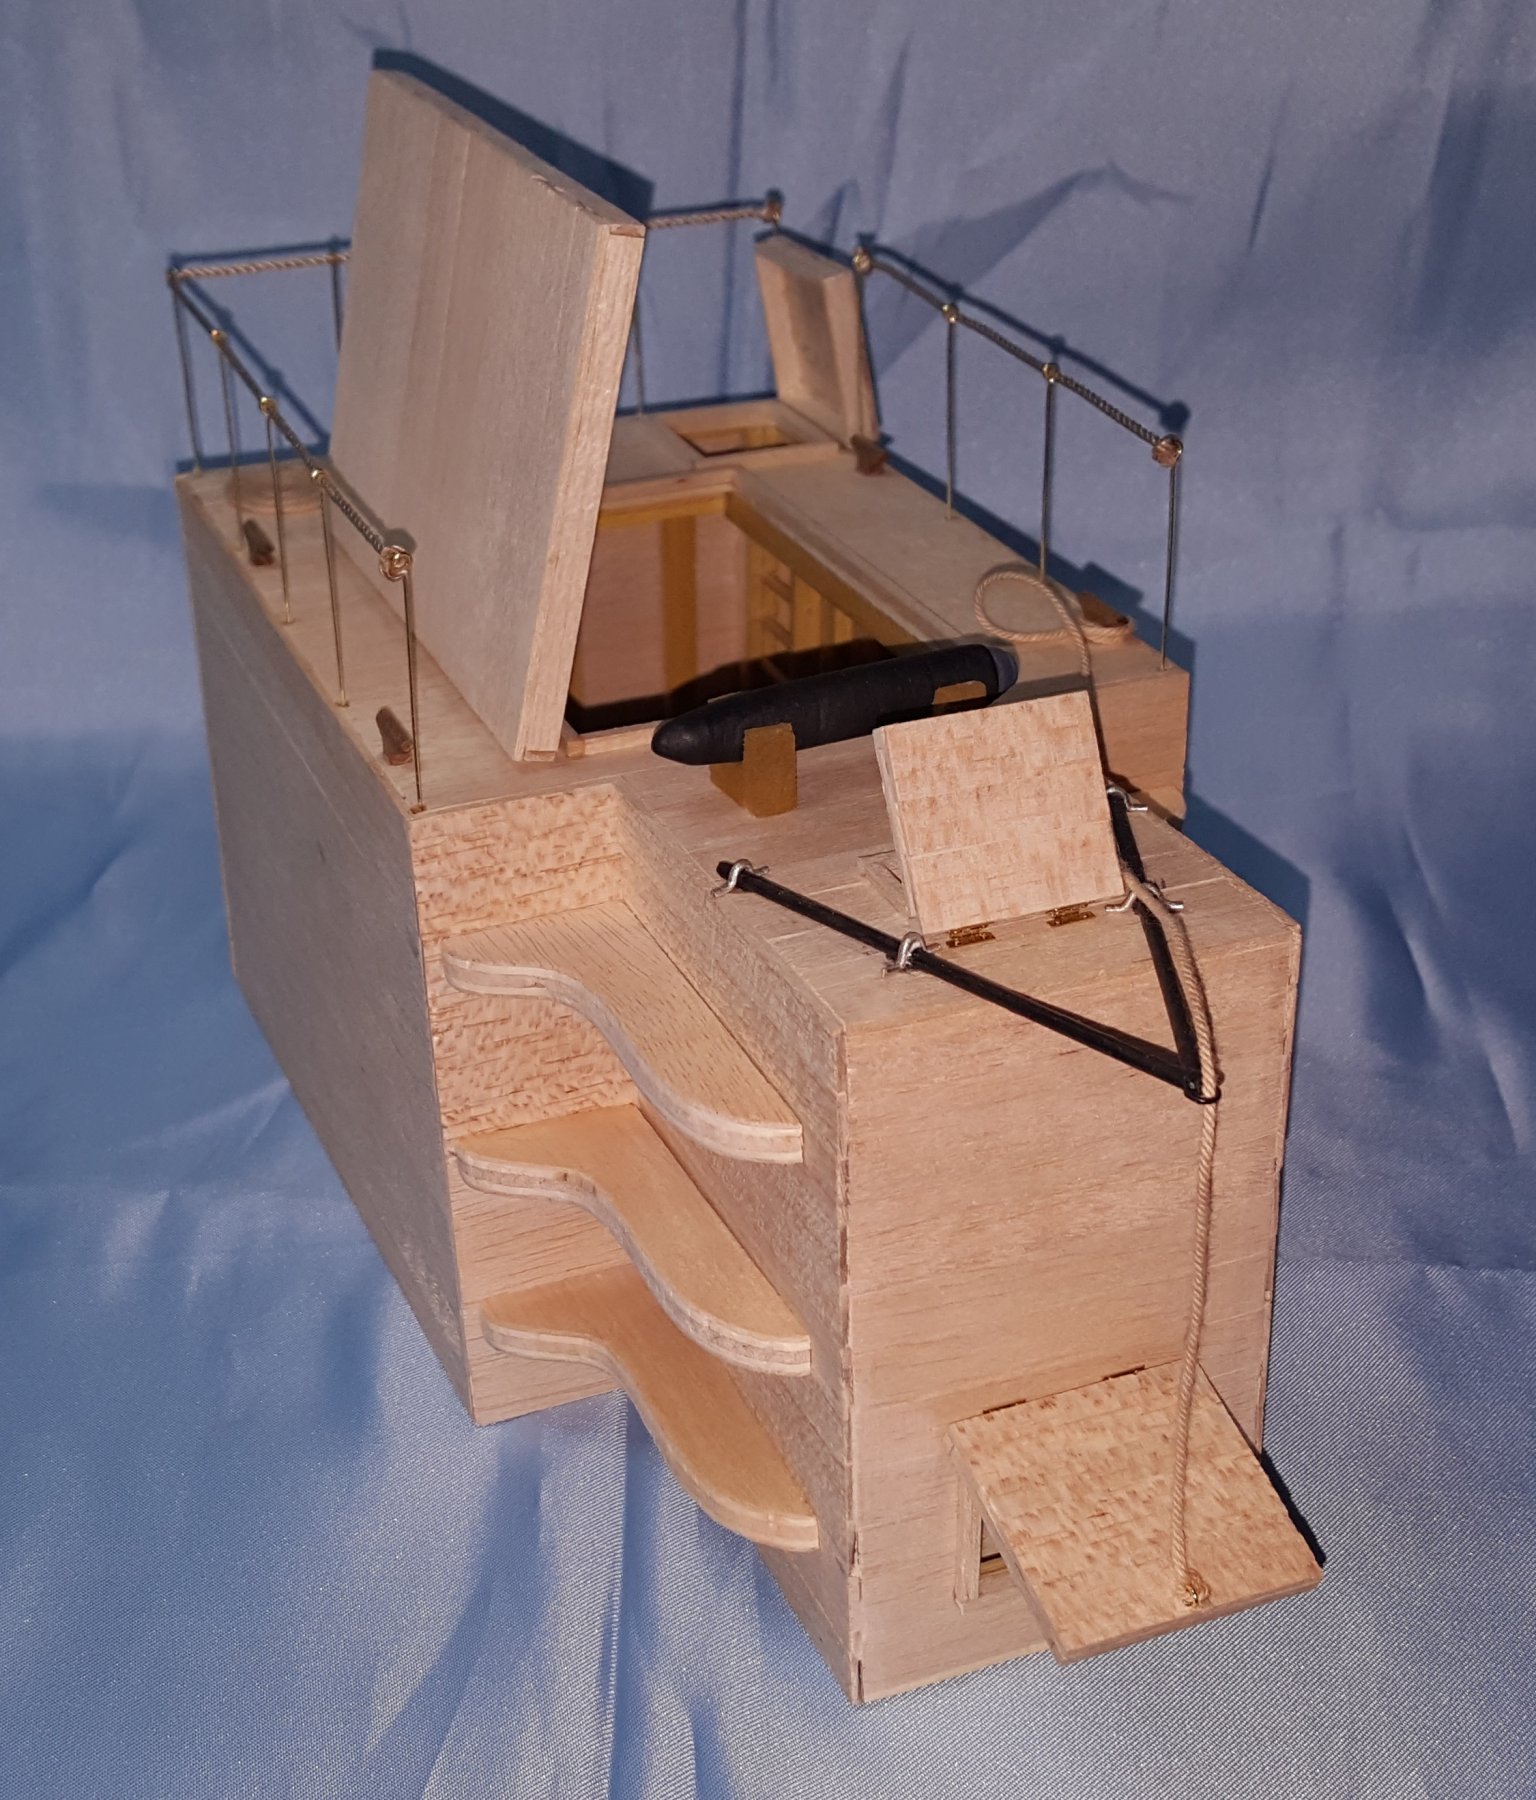
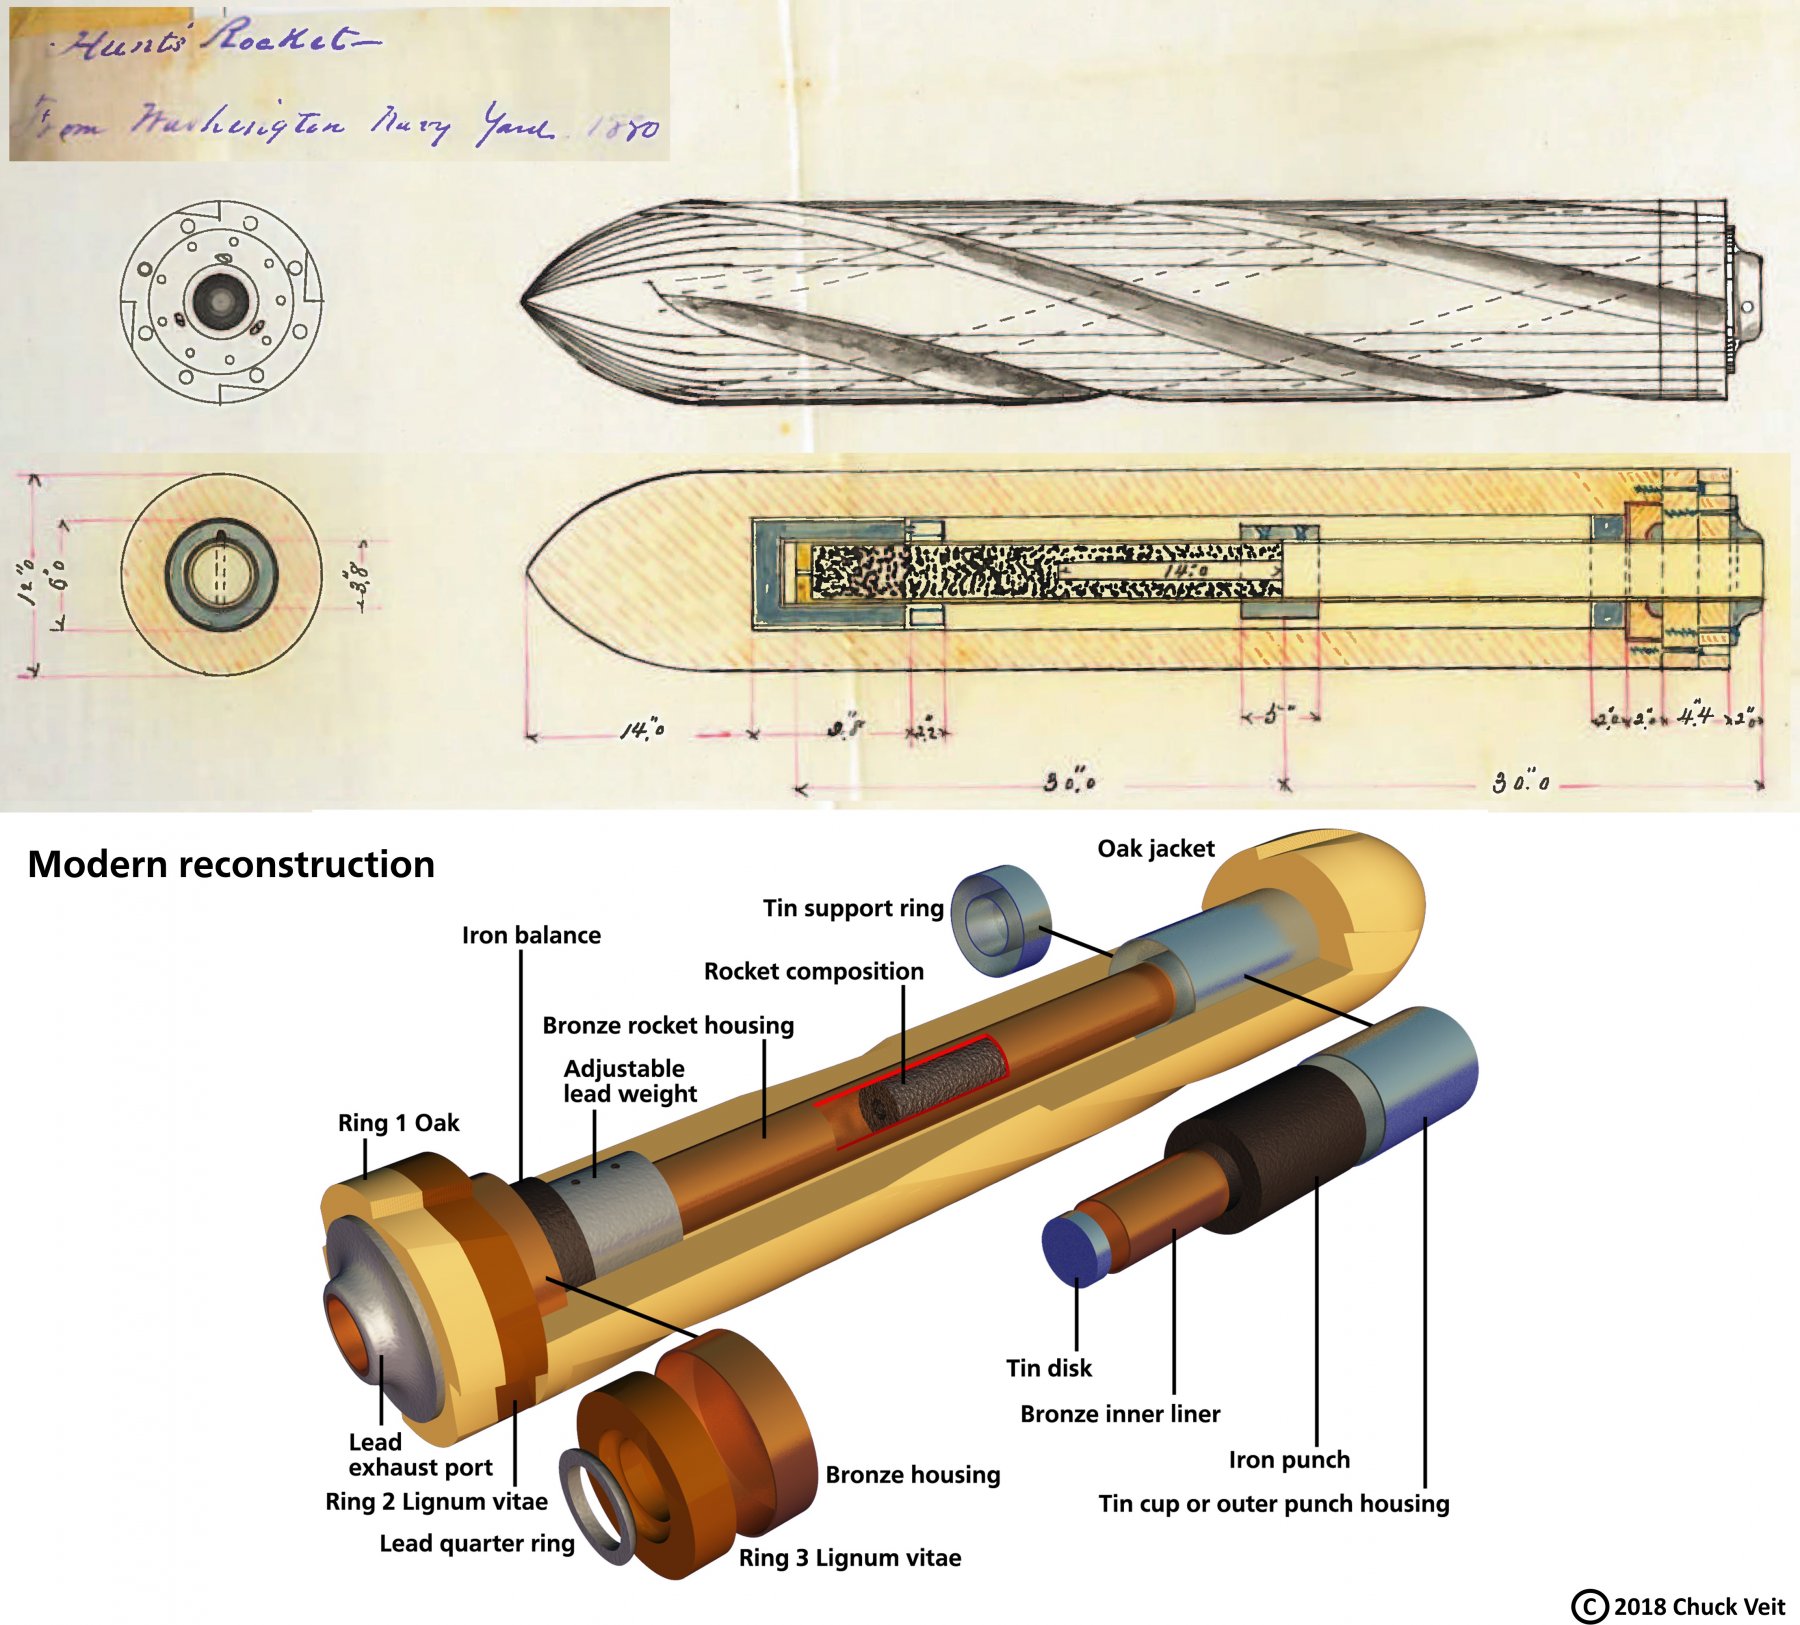
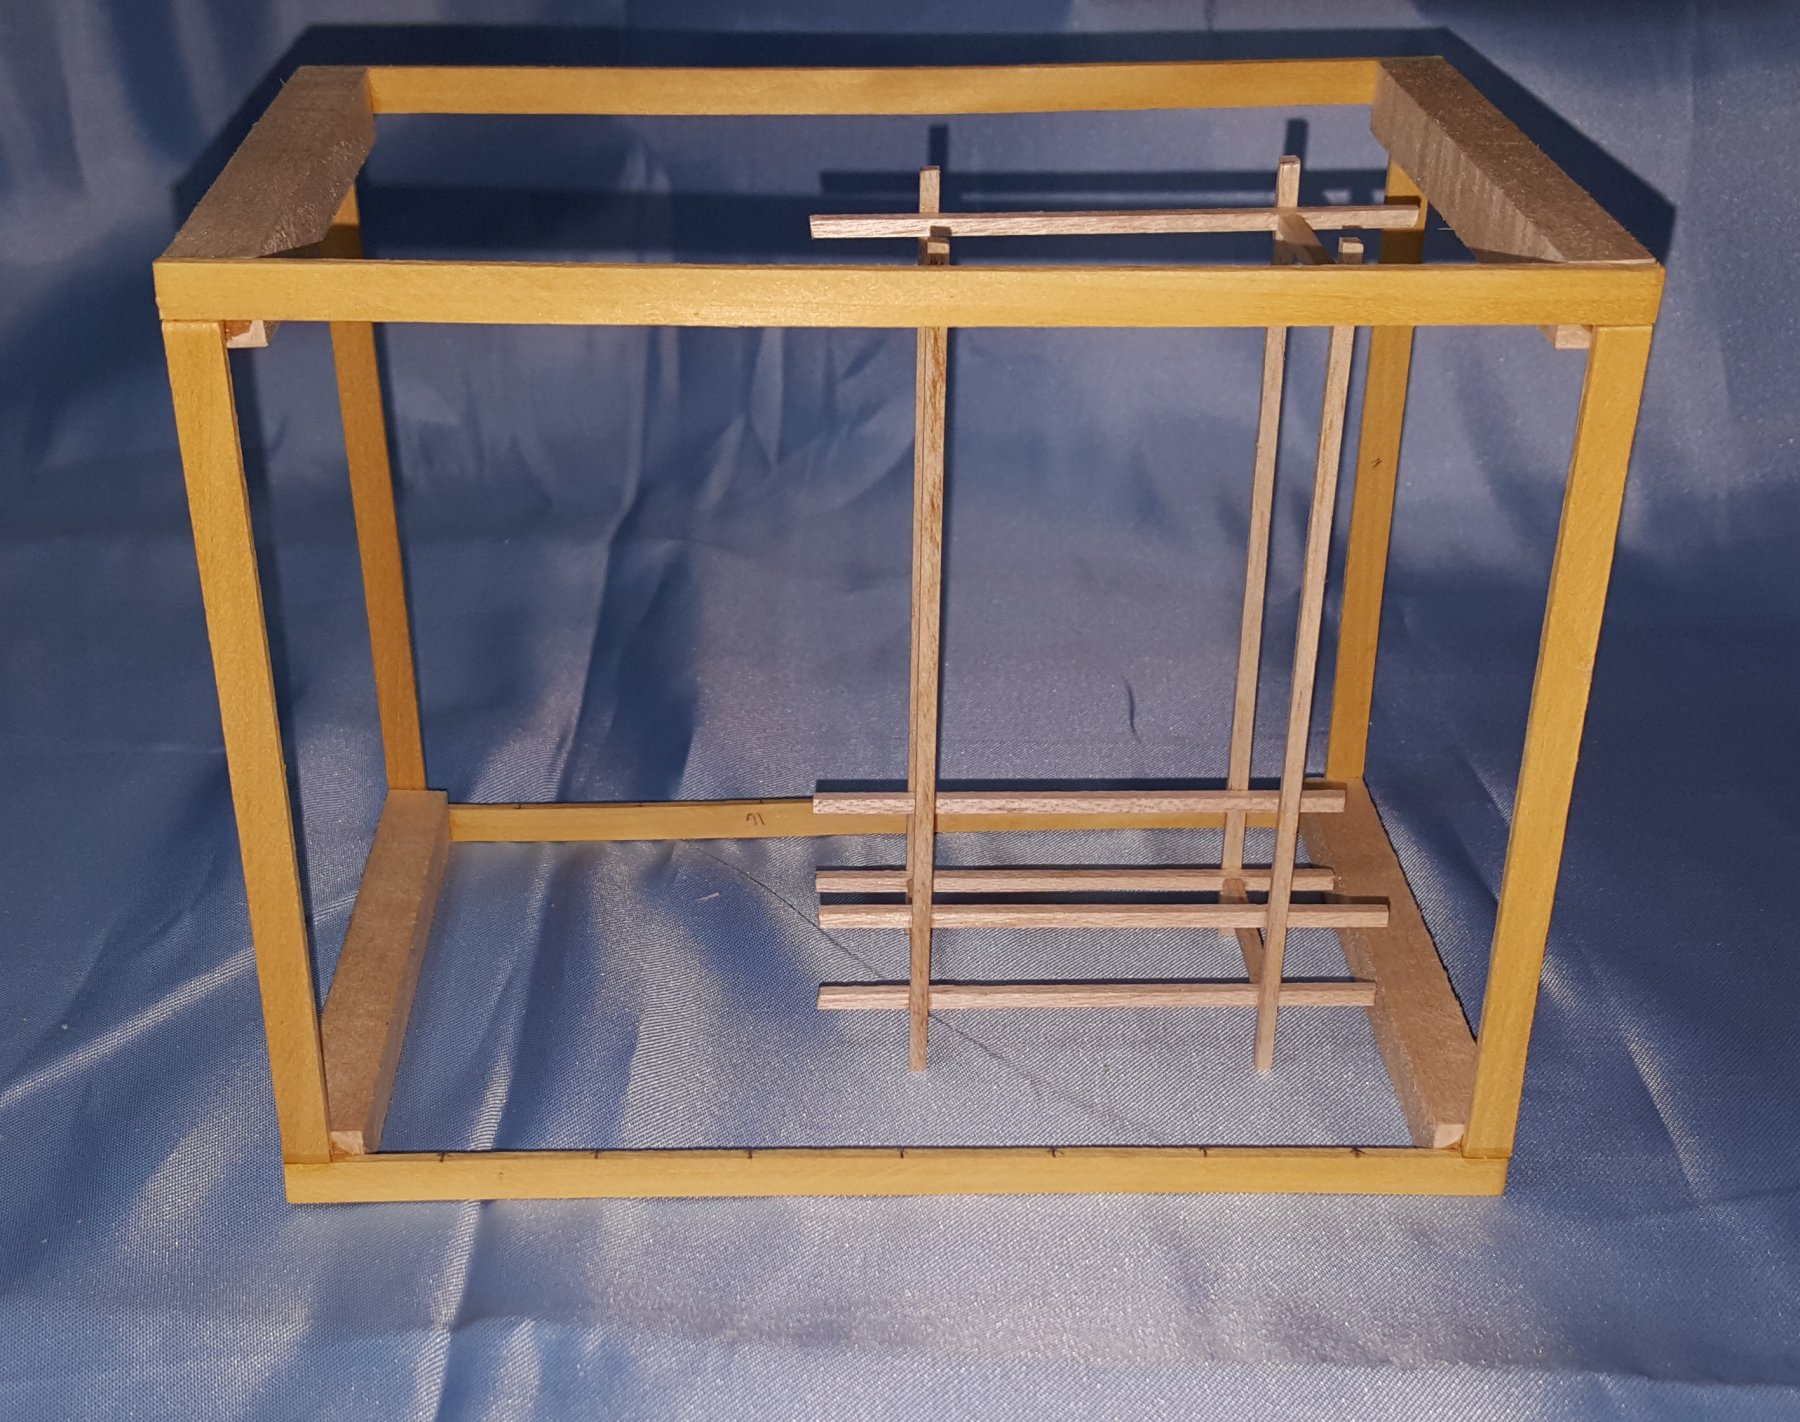
Here's some of the completed images of phase one along with the phase two problem in assembly which needs to be resolved and I think I have the solution as I have gone back to the torpedo tube launcher doing this build blog.
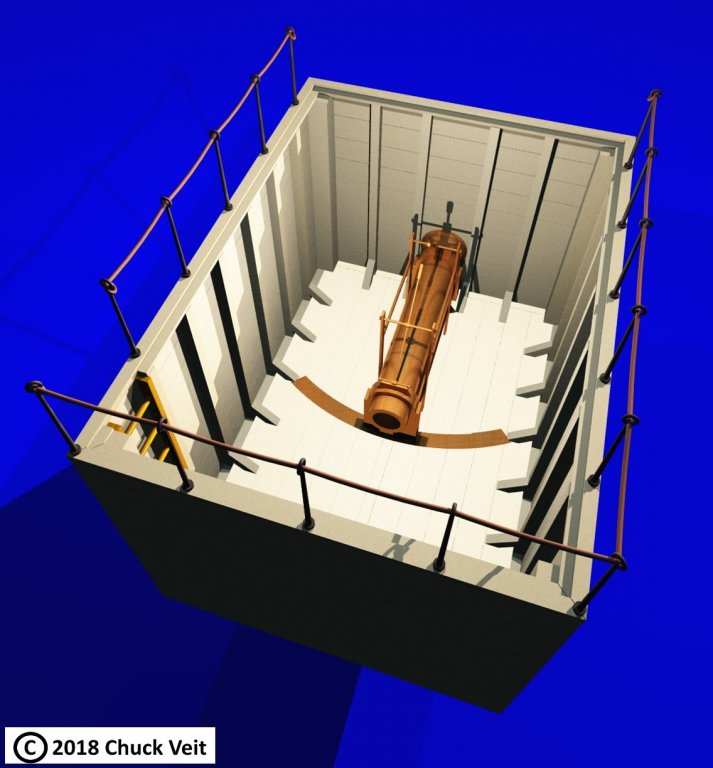
Mr. Veits diagrams:

Completed model phase one:
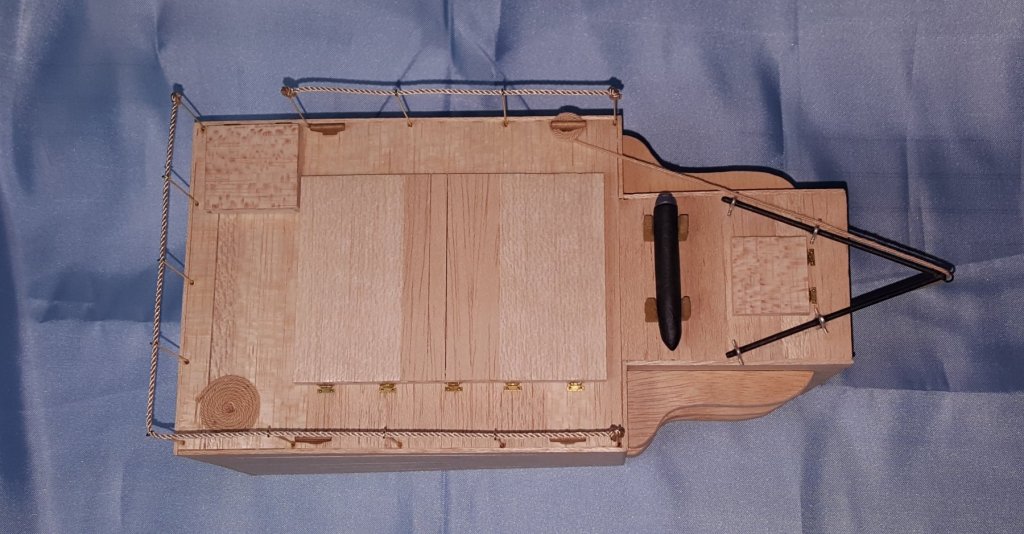


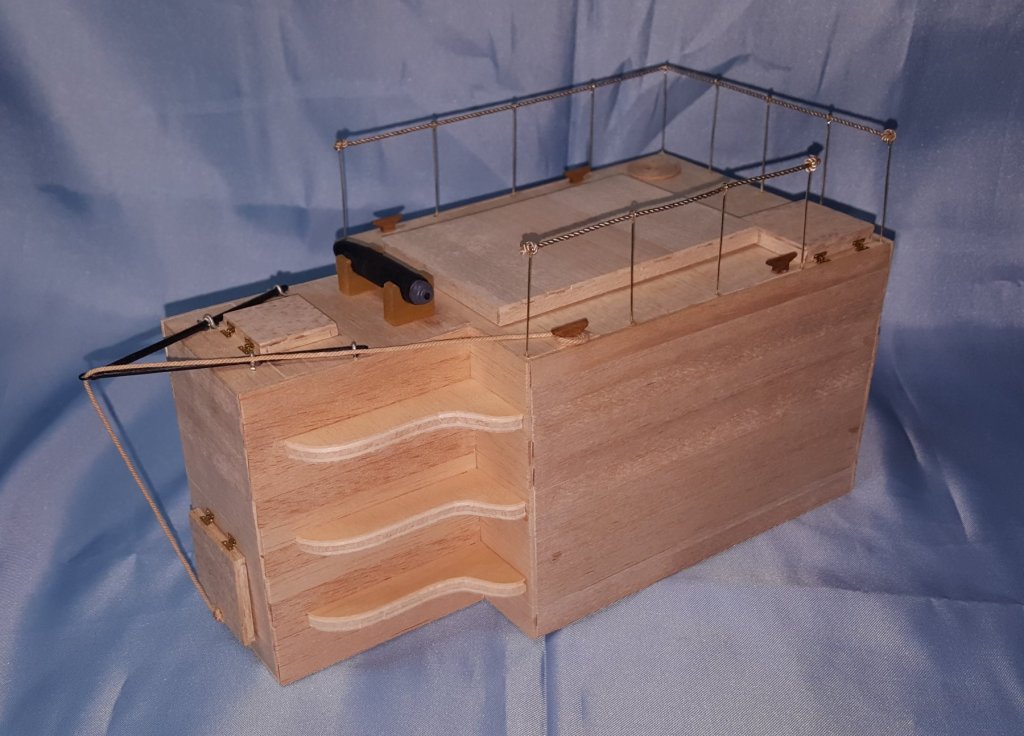
The launch tube problem is loading the tube from above and working out the mechanism to do so without damaging the tubes front water tight seal, then lowering the tube down without smashing the tube frame, seems a set of pulleys at certain locations would do the trick. Alas it's such a small space inside theoretically a two man operation. the torpedo couldn't be loaded from the back of the tube as it sits, it's to long for that per historical dimensions.
Mr. Veits images:


My in progress build for phase two and simple drawing to extend the frame work:
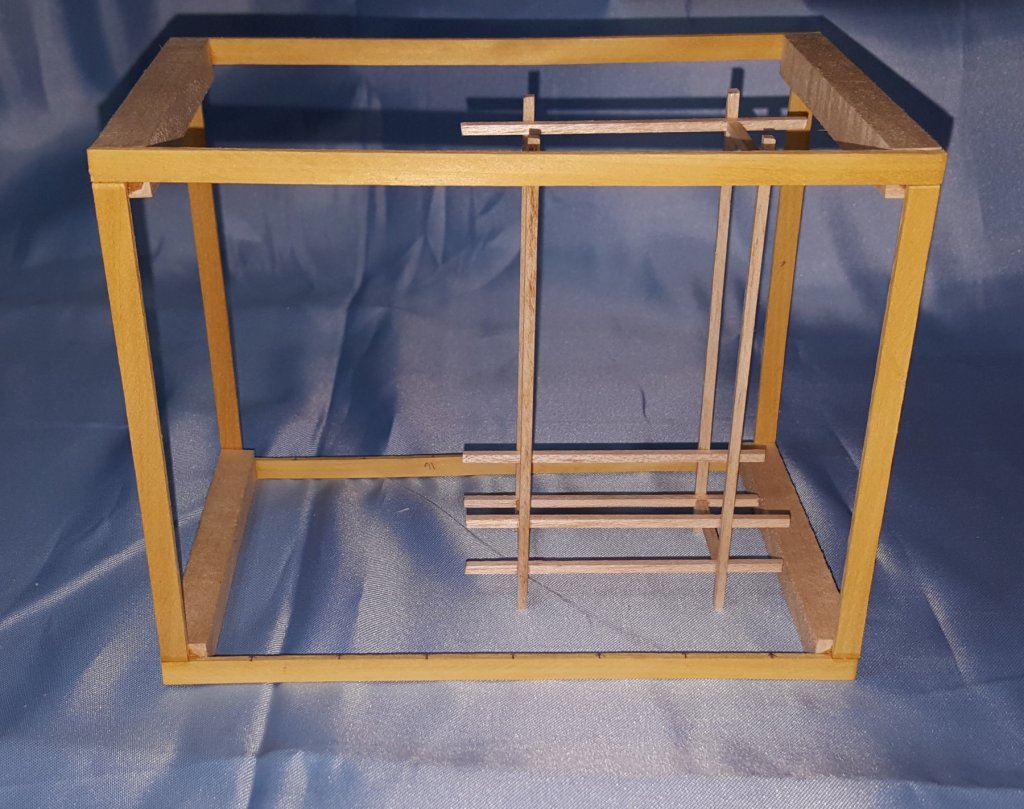
I will update this blog in awhile as I get back to the design on a working model on the tube. Any suggestions or ideas to help is much appreciated as long as it stays as close as possible to Mr. Veits original concept from historical documentation. Up to a little challenge in history?
-

Admiration for all the PE work also, my attempt was once with 1/700 scale and will never do it again. Myself and PE don't mix.

- popeye the sailor, hexnut, lmagna and 7 others
-
10
-
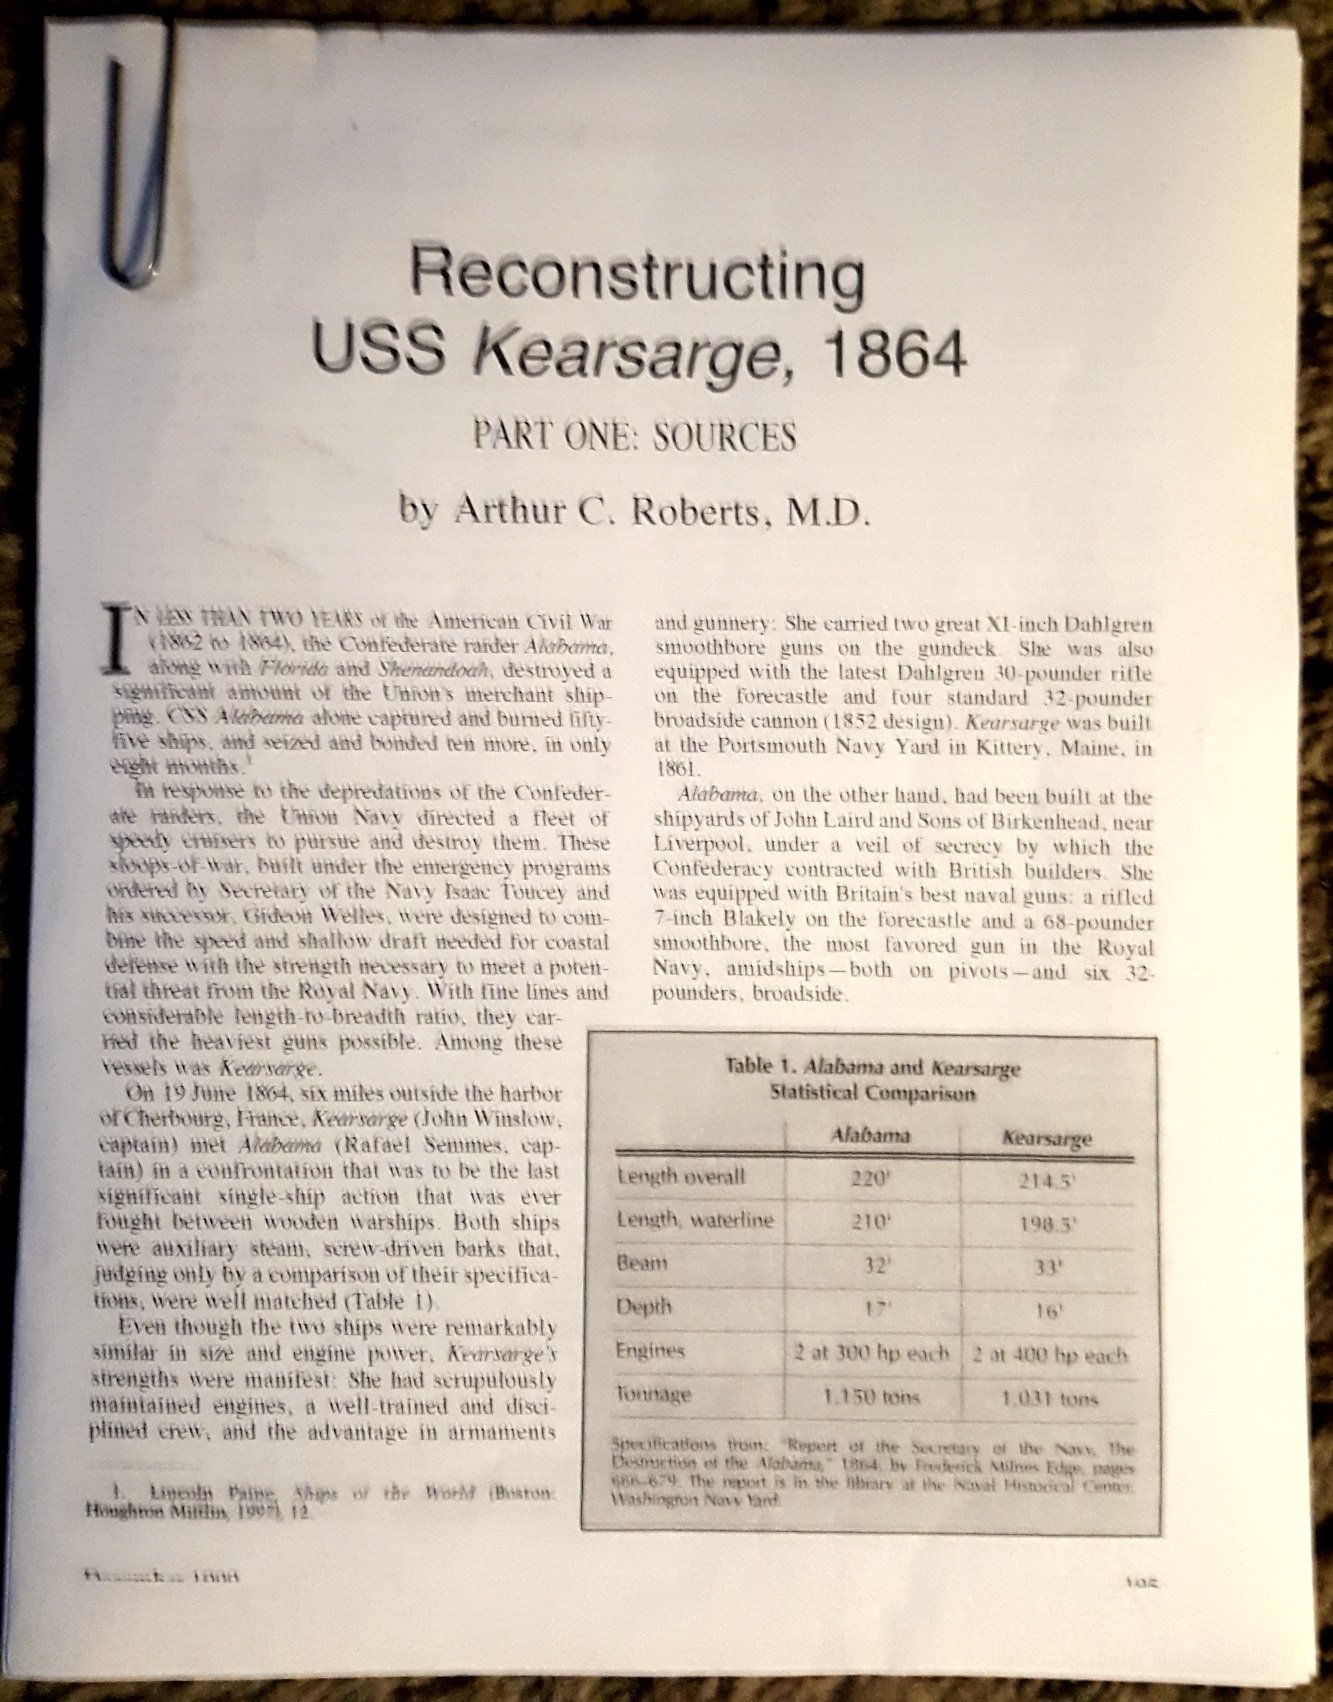
I have received the " Reconstructing USS Kearsarge, 1864" and will scan the 34 pages into a pdf doc soon for those interested in the data. I haven't read the whole set yet but the information seems to be a nice research work for the ship and modeling per historical dates.
Here's a few images in the series of articles and will have the scan done soon and will post it. as promised.


- CDW, Old Collingwood, EJ_L and 8 others
-
11
-
-
@popeye the sailor I can't seem to find the PM switch, so if you can direct me I'll set it up. Sorry about that. Love your USS United States blog and that deck is fine work on her!
Thanks for the appreciation on the Alabama, as we all know research is the key and it's time consuming but worth it.

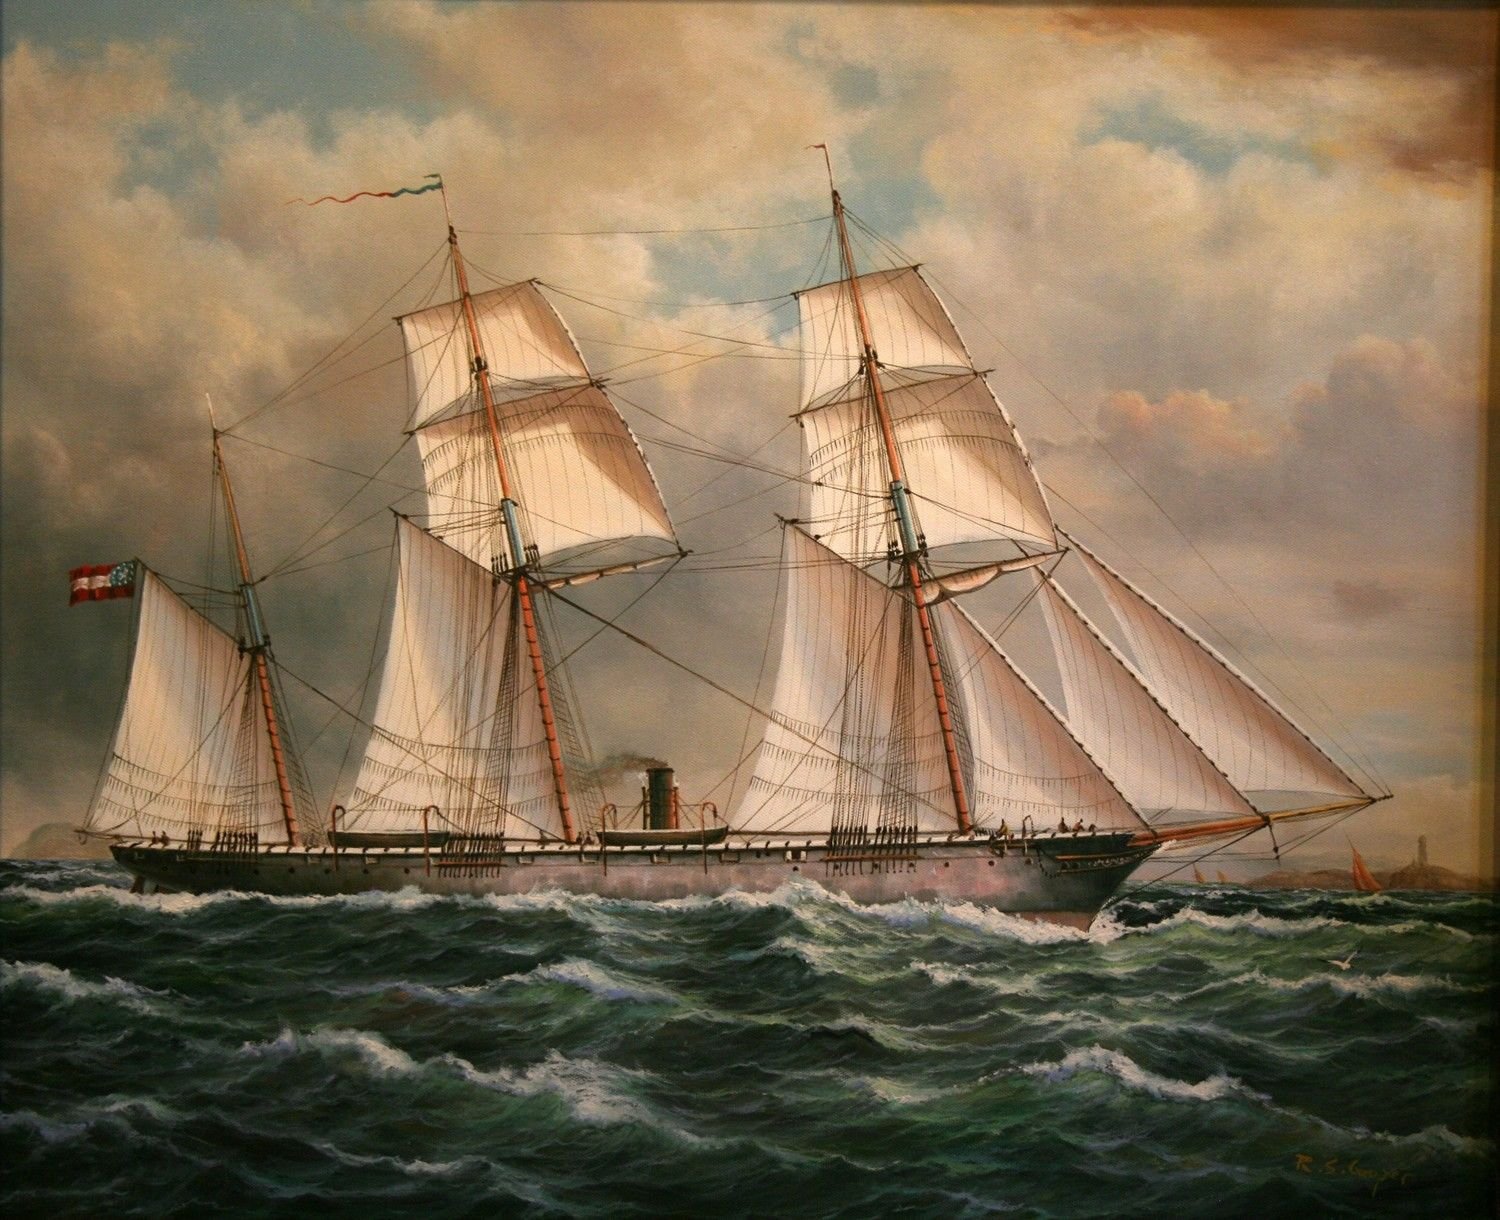


CSS Alabama by J11 - Revell - 1/96 scale - PLASTIC - kit bash 90% historical accuracy
in - Kit build logs for subjects built from 1851 - 1900
Posted
My pleasure Y'all, research is always to be shared. Many a fine gents have given me a huge amount of data for many ships, just passing along.