

J11
-
Posts
510 -
Joined
-
Last visited
Content Type
Profiles
Forums
Gallery
Events
Posts posted by J11
-
-
-
-
Your attention to detail and excellent craftsmanship is perfection with this build. As I was going over this gem of a ship I felt as if I was looking at a real ship in dry dock being built. Really like the over-all color contrast you have used. Your other two competed ships are true master pieces.
-
14 hours ago, BlackGSD said:
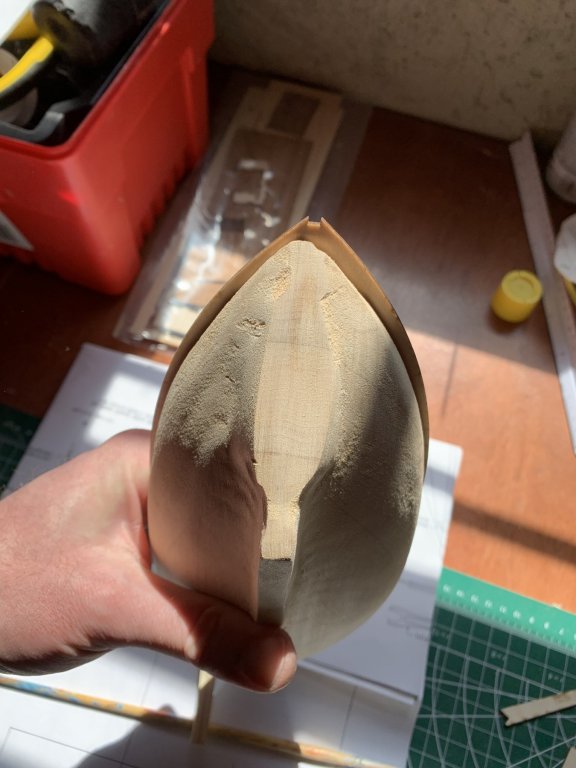
While the bow was straightforward, the stern is . . . wonky. The deck overlaps considerably. I’m not sure what to do, exactly. Cut the overlapping portion of deck with an Xacto knife?
Welcome!!
Check you scale measurements from the BL plans, see if you can get a good reference number to how wide the stern should be at your over lap point. If it is smaller than your actual deck board then cut and sand it down to match, (When cutting the deck board watch your deck board lines for proper fitting) If the overlap (deck board) is correct you will have to add some wood putty to increase the stern of the ship and sand the bottom solid hull to match you upper stern deck. Or add some wood extensions to in create the solid hull width at the stern and then sand her down. The BL solid hulls won't be perfect and there are a;ways adjustments one way or another.
Once you have this completed, my suggestion is to individually plank your deck when it's time.
-
4 hours ago, CDW said:
Beautiful work. I've been waiting a long time to see someone make a detailed build thread for the Revell CSS Alabama and you have certainly filled that void. My copy has been on my shelf for lots of years, waiting to be built. Your thread will serve as an inspiration to start mine.
Thank you, I was amazed at how the Revell model was still around considering the last run of it was in the late 70's. I had picked mine up on Ebay and was 100 + dollars just for the model and now I'm seeing them go for even higher than what I paid for it. It was a hard decision as to even build this antique kit, but I broke the wrapper and went for it.
Glad it has inspired you to start yours, if I could change one thing it is the dead eye stomps, try to find some already built as the scratch built one's I have done are really a pain. Look forward to your possible build blog.
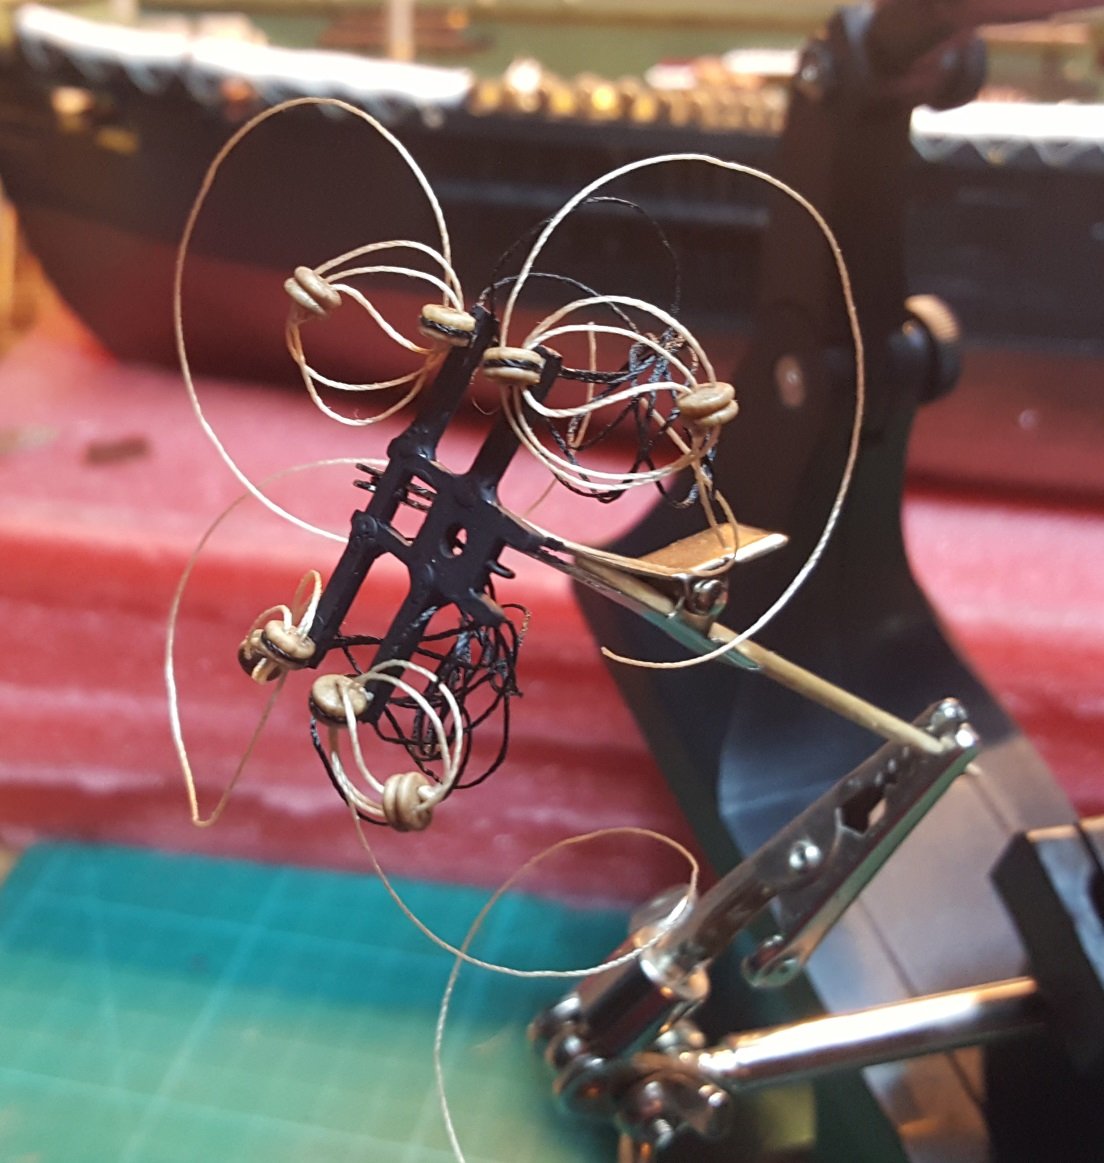
Here's the stomps almost finished as more painting has to be done but gives a good idea how these are turning out. But they are breaking and a real pain.
Not to shabby, just wish I could have gotten them more even.
-
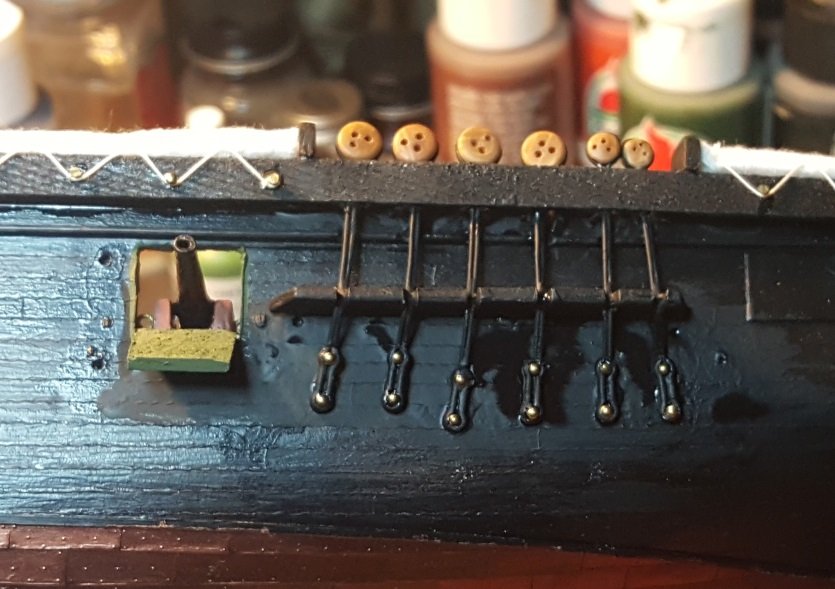
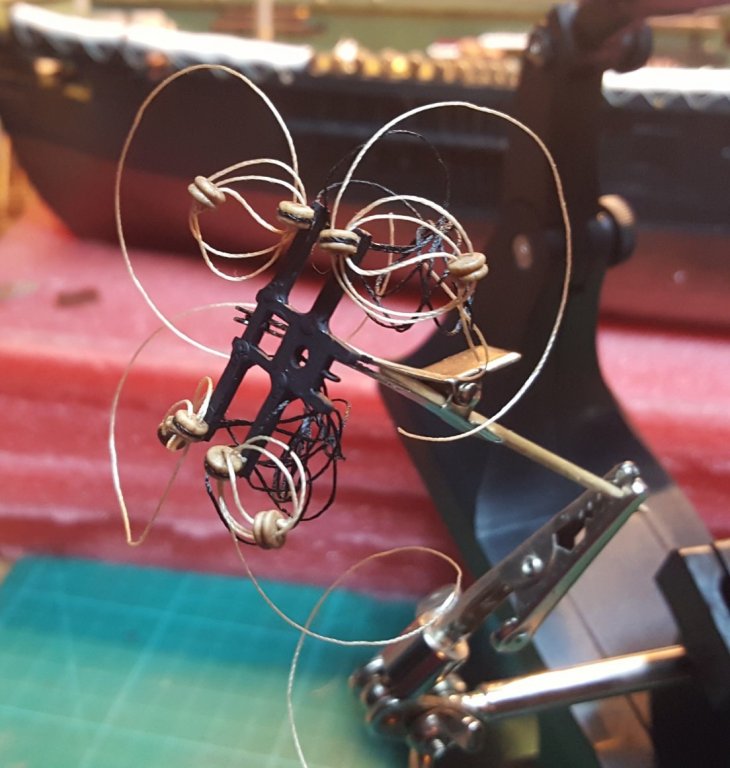
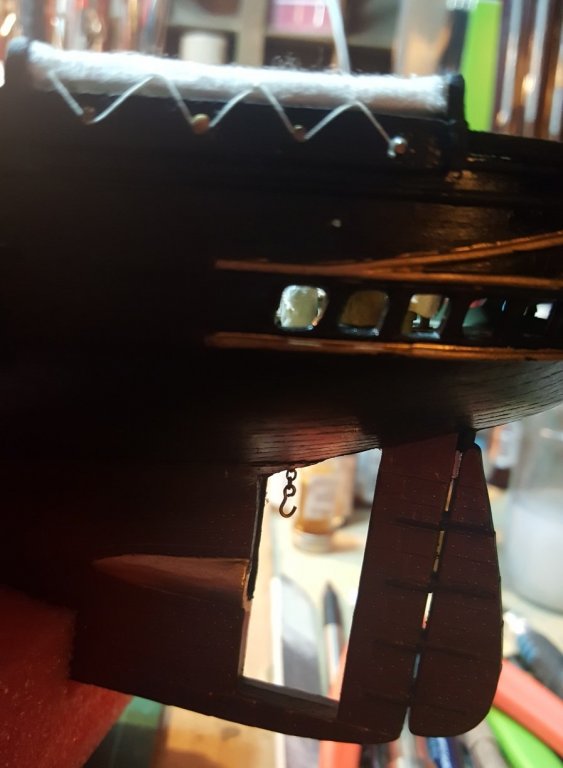
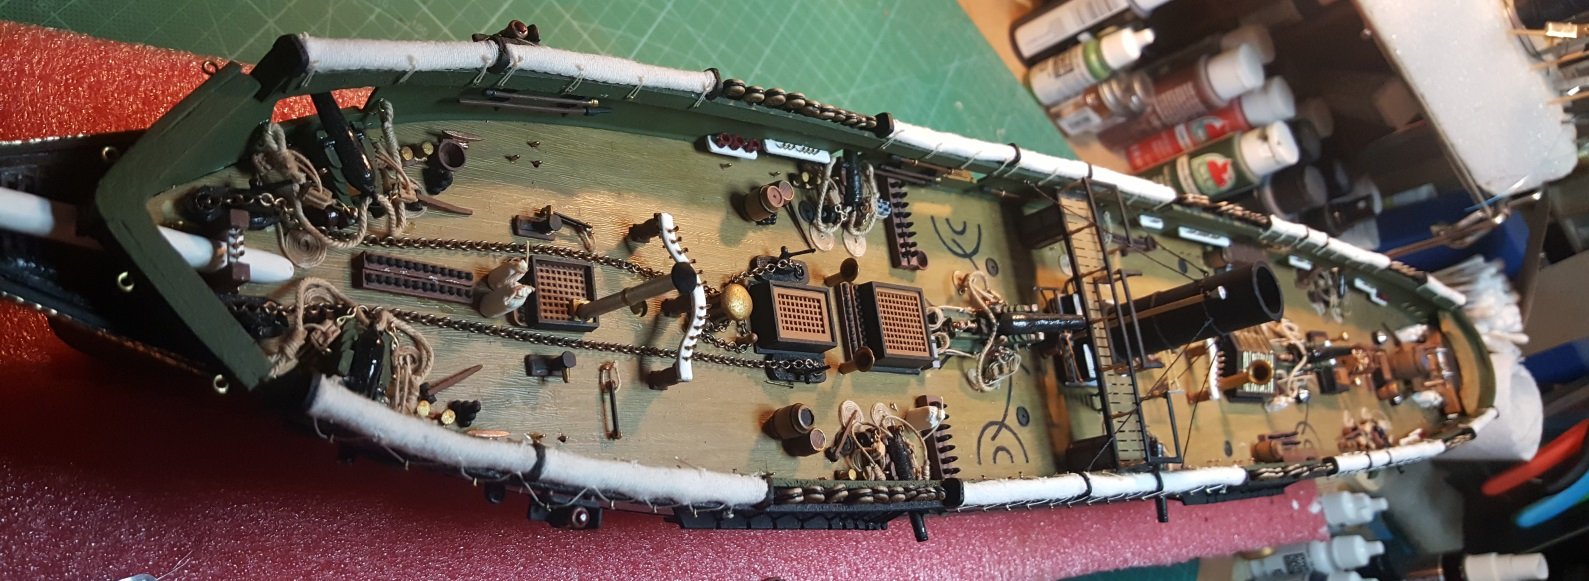
Some more images of the dead eyes being worked on as I will have to rig some of this backwards so not to break these fragile guys. Working out the procedures now to rig her and parts starting to come in. Love the Syren wooden blocks they offer and ordered a bunch. Thanks all for the info to find them too, really appreciate it which helps in a better quality model. Now for all my rigging I will only use Syrens blocks and other fittings they offer.
Top Dead eyes prepped: Mizzen mast
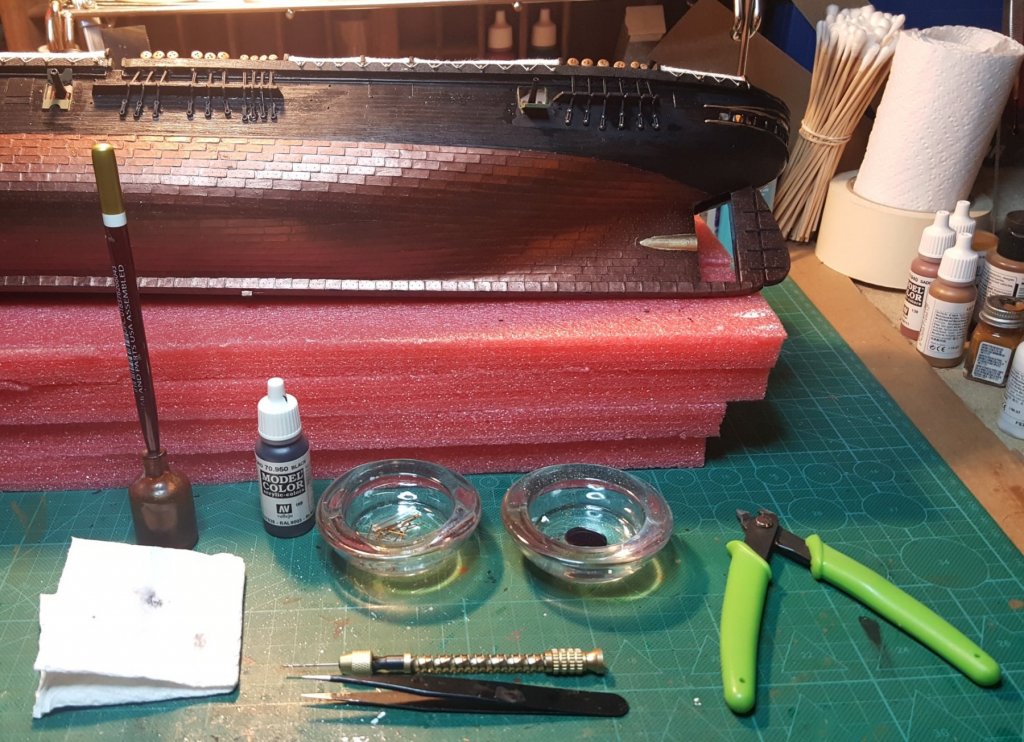
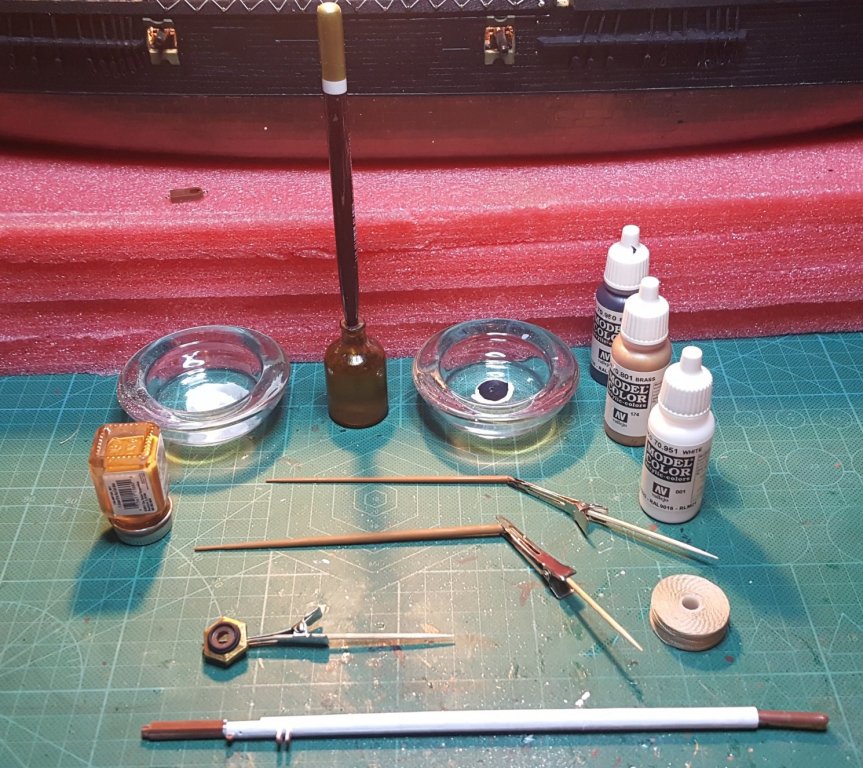
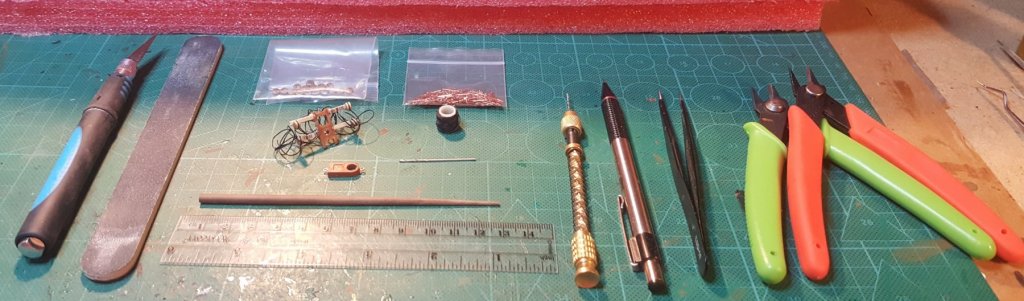
Parts and pieces with tools, note the small amber brush cleaning bottle. It dates from CW America 1862 and works wonderful for paint brush cleaner and holder as I work. The smaller glass bowls are from wally world which are very cheap .50 each and work great for dropping paint into and working from.
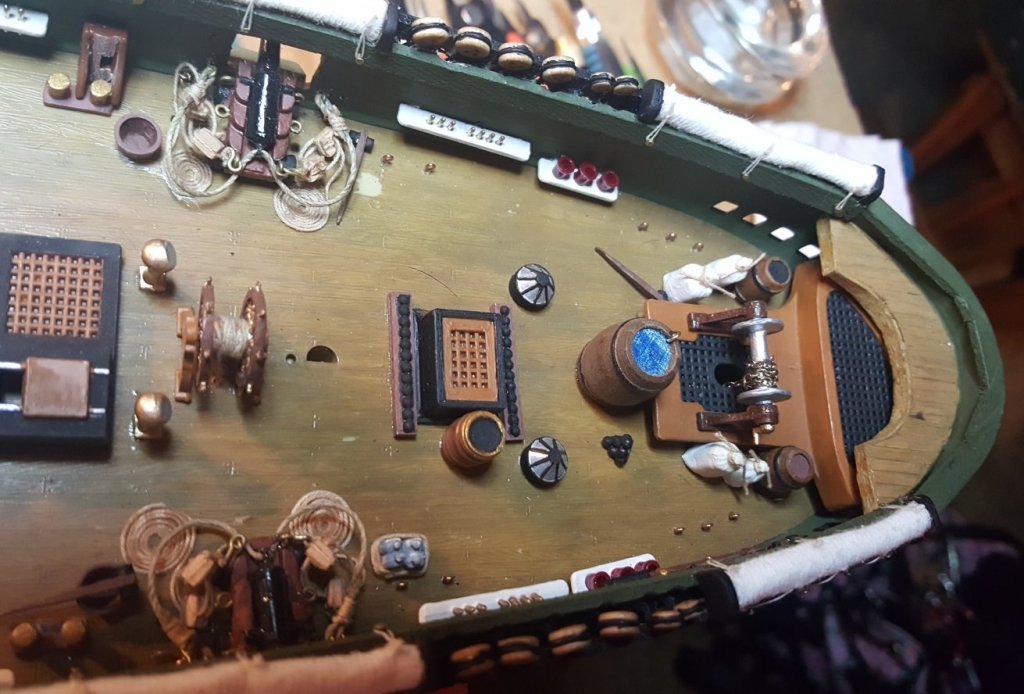
Also a full view of the deck with all the completed tie downs on the hammocks done.

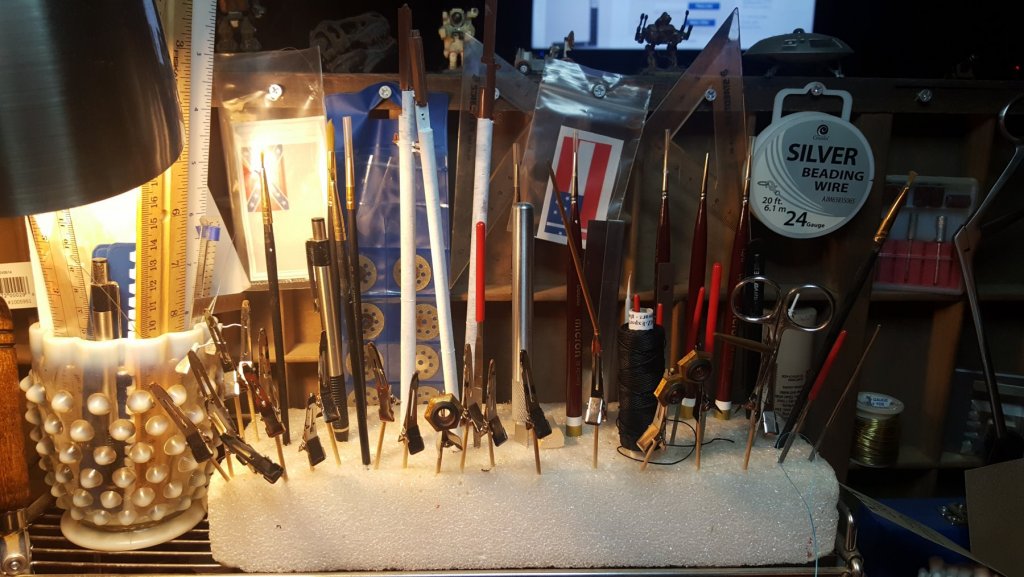
Plus my cheat trick for painting many parts at once using just tooth picks and hair clips with a Styrofoam block.
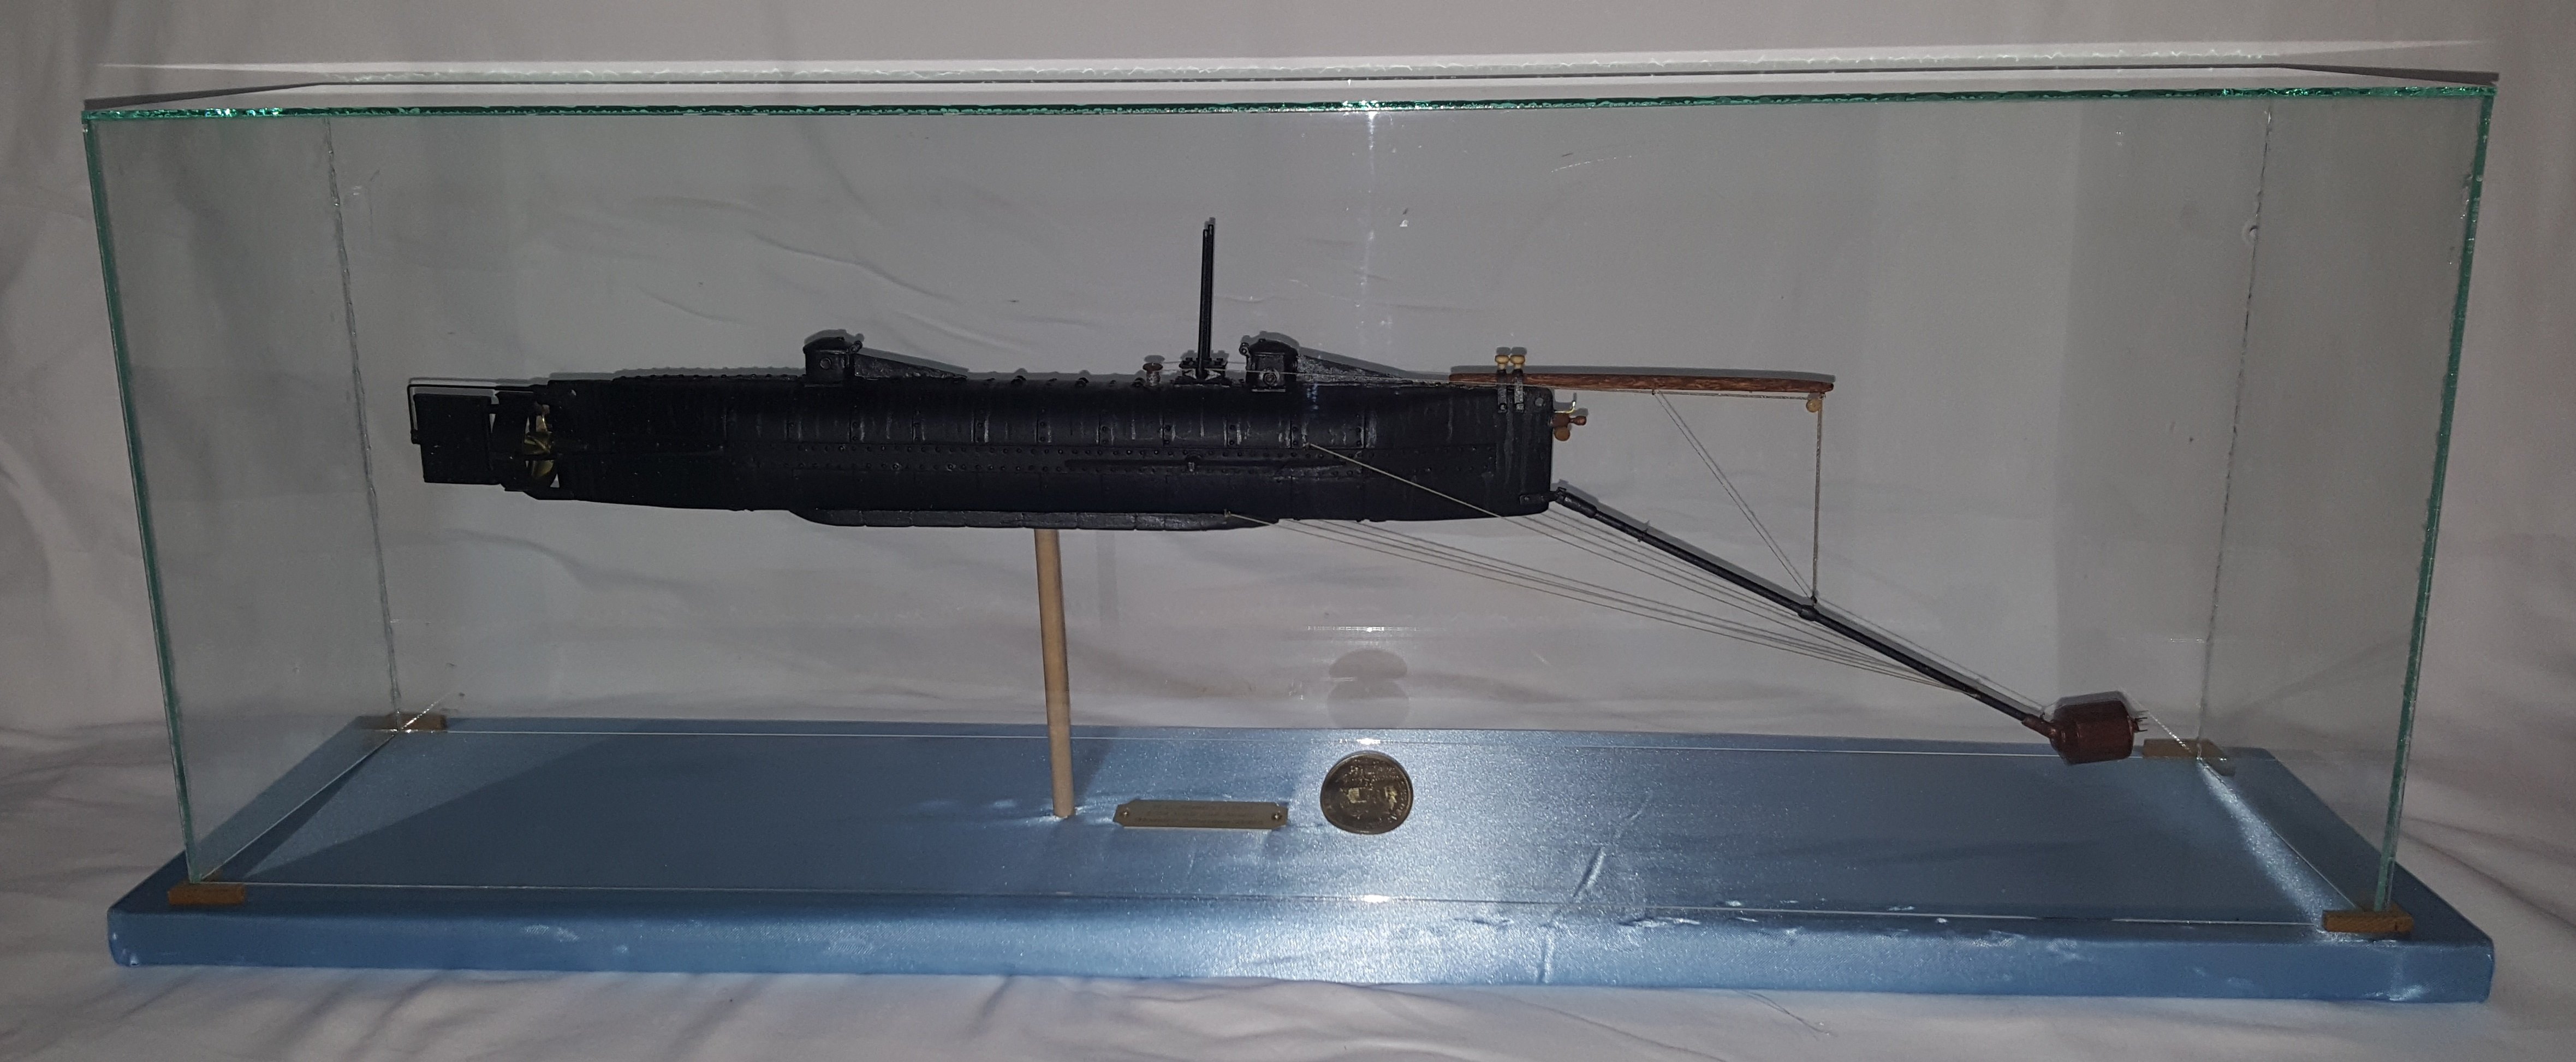
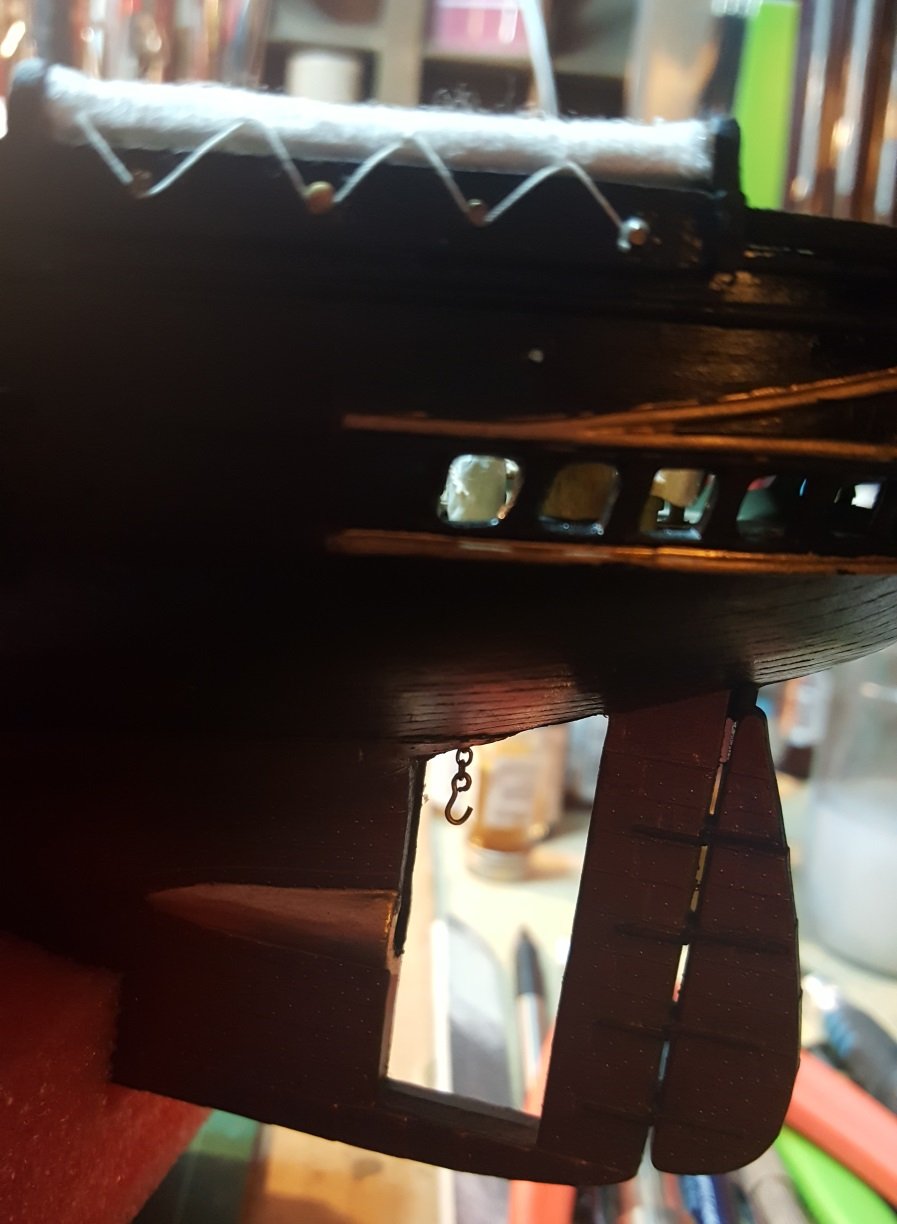
Here's the propeller chain which works to pull the propeller up and down when it was needed. This was a very innovative device for the period.
- coxswain, popeye the sailor, EJ_L and 6 others
-
 9
9
-
11 hours ago, CDW said:
Sig epoxy has become harder to find but can be bought on line directly from Sig.
Here is an on line shop I order from a lot. Excellent service and lightning fast turn around time to receive orders from them. Best thing is, they only charge $3 for postage and that's real hard to beat. This epoxy is not Sig, but I've used it a lot in the past with very good results. I recommend the 30 minute epoxy rather than the 5 minute as it gives you extra working time before it kicks off.
https://www.headsuphobby.com/search.asp?keyword=epoxy&search=Search
Excellent, many thanks for this site info.
- mtaylor, CDW, popeye the sailor and 1 other
-
4
-
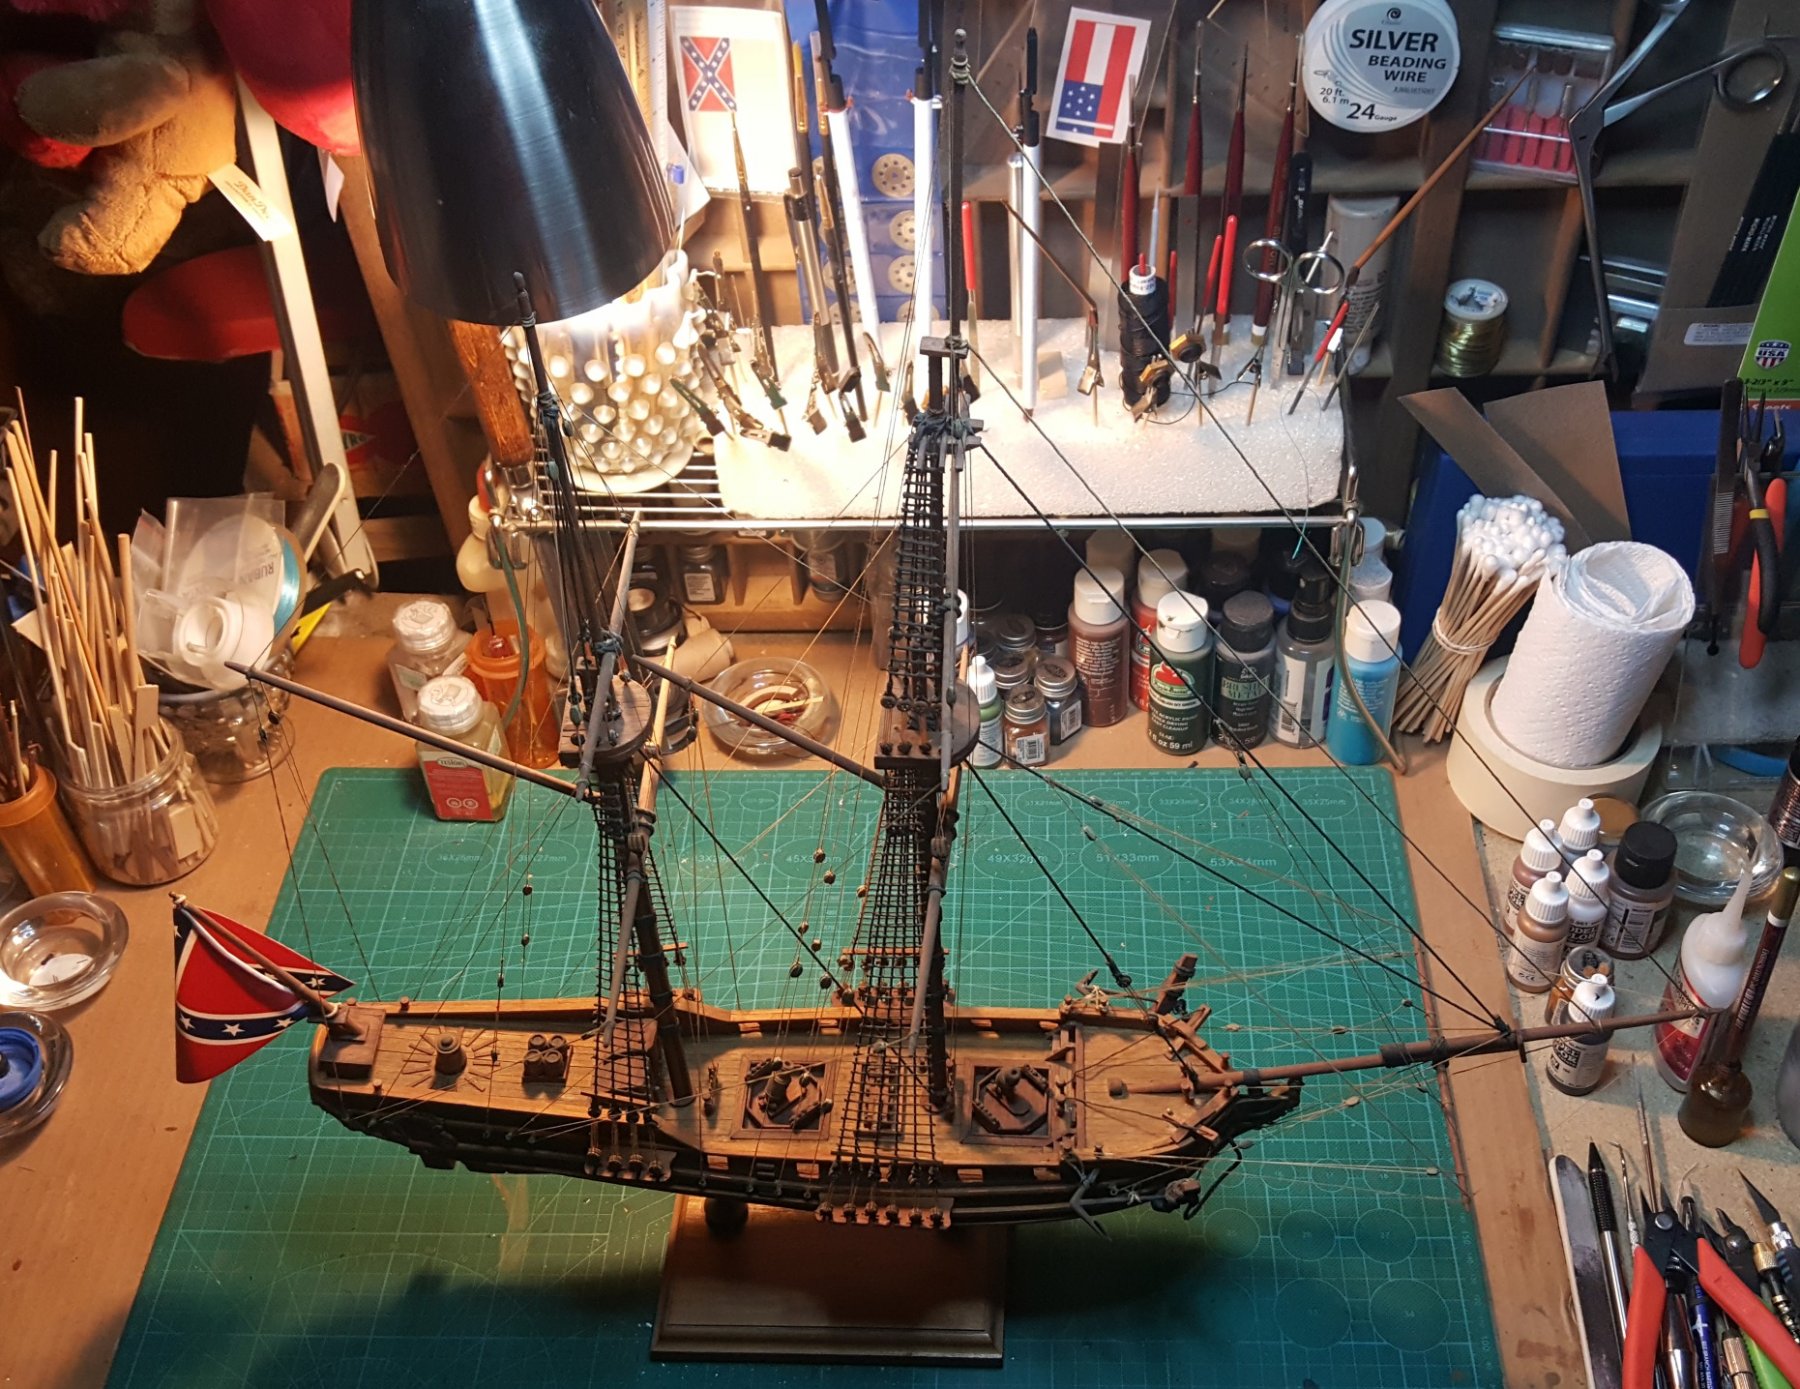
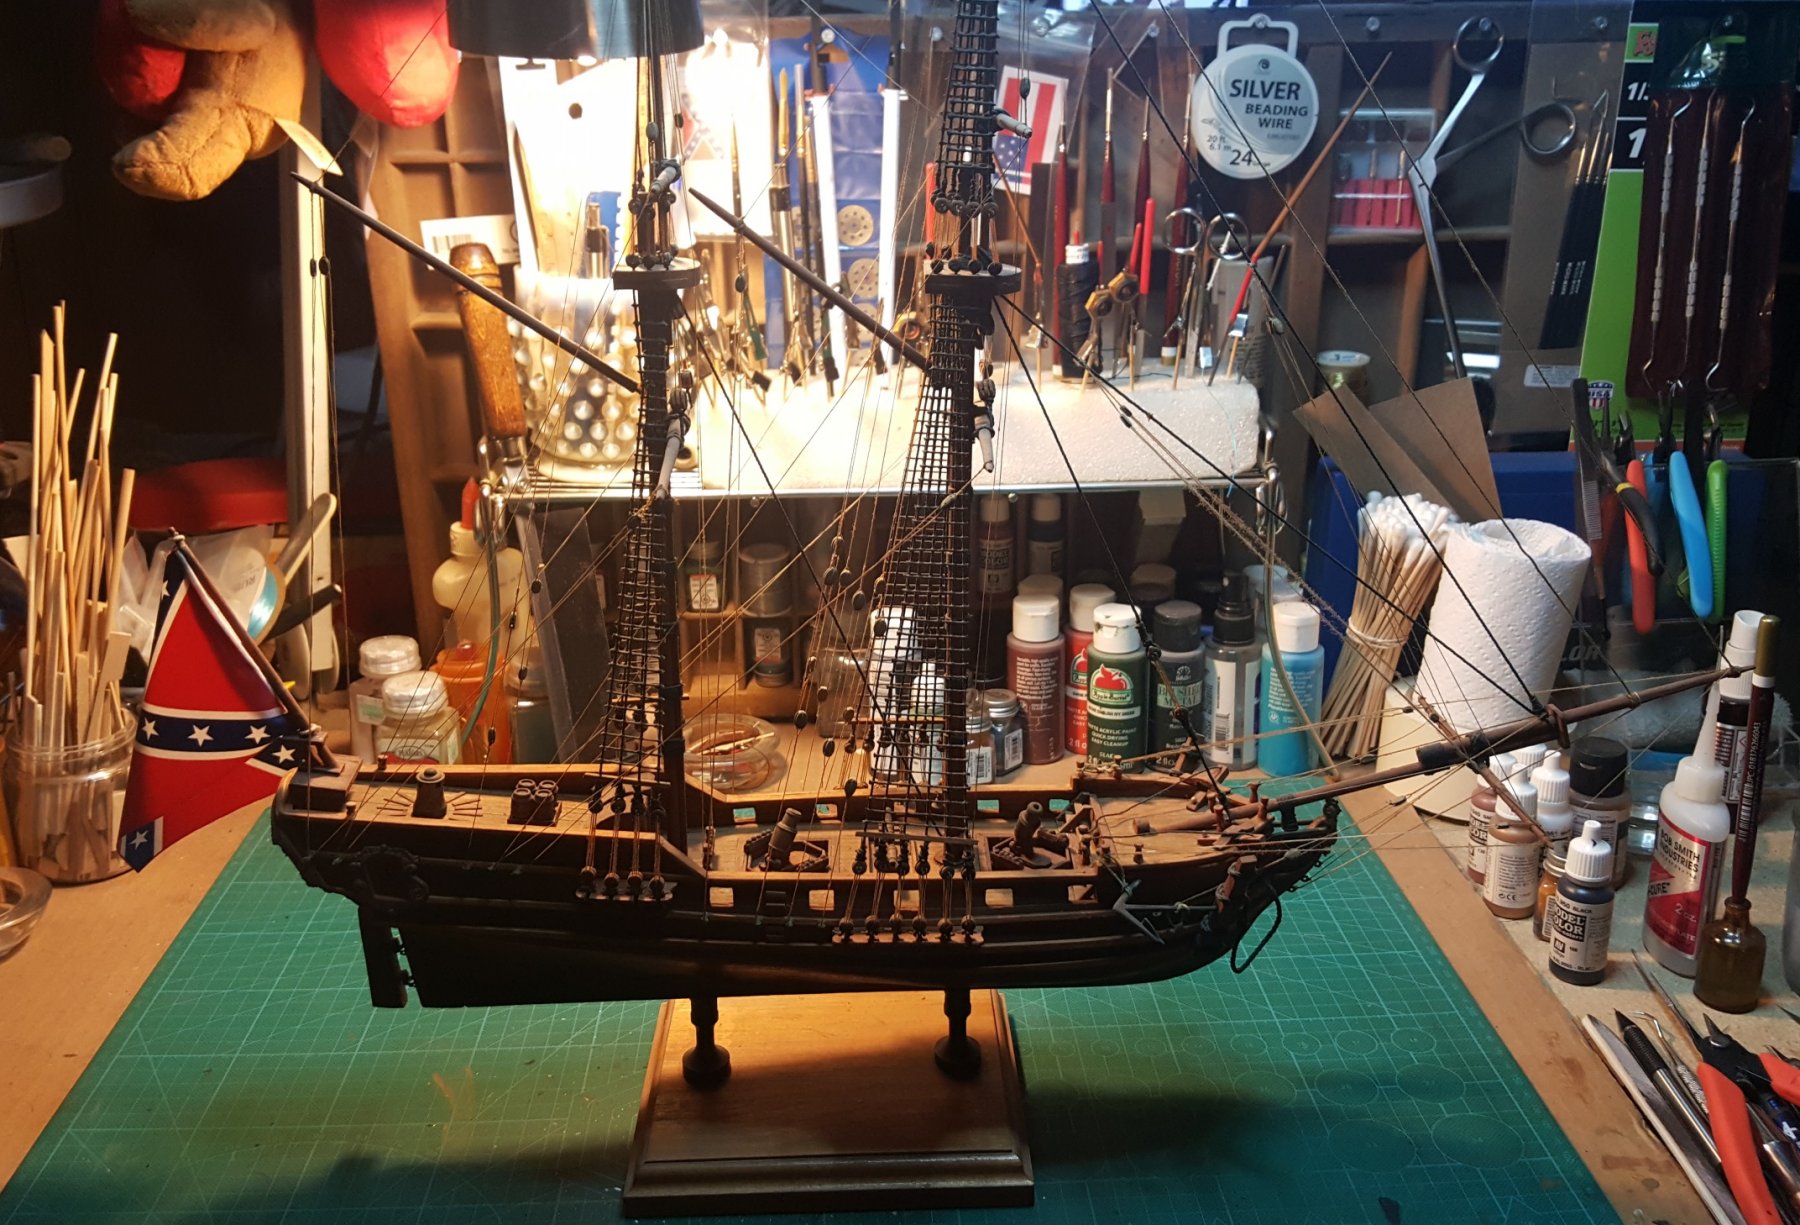
First rate work @SHIPSCAT for you first wooden ship build. My first wooden build was the Race Horse and was a couple of months on just sanding the hull right. All because of excess glue showing up, then learned I didn't need that much to hold the planks in place. That was 25 years ago which taught me a bunch on wooden builds as wonderful sites as this one didn't exist as of yet. The race Horse took me a year and half to complete.
Here's a couple images of her, still holding up after building all those years ago.


Yep the flag is wrong as the original England flag deteriorated after many years. So I turned her into a CW Confederate privateer.
So keep up the great work on yours as it will become a wonderful family heirloom.
- SHIPSCAT, vossiewulf, BETAQDAVE and 5 others
-
8
-
-
Popeye I will try the white the white glue as I do know it dries a lot clearer than CA, but so far I haven't had any trouble with the CA. Good old Elmers has come in handy in the past but didn't think about using it for rigging. Thanks ya'll been trying to scan some of the how to do files here, wow got a bunch and have already learned some new tricks for the wood ship builds which I'll probably start my La Couronne in between my other CW ships I want to complete.
- mtaylor, EJ_L and popeye the sailor
-
3
-
CDW, I haven't heard of Sig epoxy and appreciate the info on that. Be looking for some real soon also.
- Canute, mtaylor, popeye the sailor and 1 other
-
4
-
12 hours ago, CDW said:
Is the burn caused by the catalytic action of the epoxy, or is it something else?
I figured it's the type of plastic used as other types from the instructions are not effected, so probably has something to do with molecular bond of the plastic in these kits. I would do a test on any item with this product first just to gauge the reaction, I had tested first before I started to apply this bond epoxy, main reason was to see if it would caused a problem. Plus I have not seen a reaction yet with the CA either, which I was concerned with too.
Also it is a pain because it take at least 24 hrs to dry, but I am allowing 48 hrs, I am first gluing with CA and the with a toothpick mixing the bond and applying very small amounts along the edges of the strops for more strength. I feel it's working but really won't know till I start gently drilling these, it's a trial and error process as I felt this was the best way to solve me strength problem for these. Will keep the blog posted on these and post images soon.
- EJ_L, mtaylor, popeye the sailor and 2 others
-
5
-
12 hours ago, Hubac's Historian said:
Oh, okay. Good to know. I’ve been thinking about what I might use to bond wood to styrene. I’ll be scratch-building all my masts and spars in wood, but stepping them into a plastic hull; in certain applications, I need strength.
Since I have not used the epoxy on styrene, I would do a test first with a small amount to see the bonding reaction to it.
- popeye the sailor, EJ_L, mtaylor and 1 other
-
4
-
-
6 hours ago, src said:
Johnathan,it looks like I have been missing out on another great build. Well done.
sam
Thank you Sam!
- popeye the sailor, mtaylor, EJ_L and 1 other
-
4
-
Sea Hoss here's the information on the flags. No one can confirm as yet what the jackstaff flag was.
The star count should be 35; it was just a few days before the 36th state, Nevada, was admitted.
The Union position was that all states, including those which claimed to have seceded, were in the Union.p.s. just speculating, but if I were carrying out the attack, handling the spar torpedo and possibly the howitzer, I would dismount and stow the jackstaff.
-
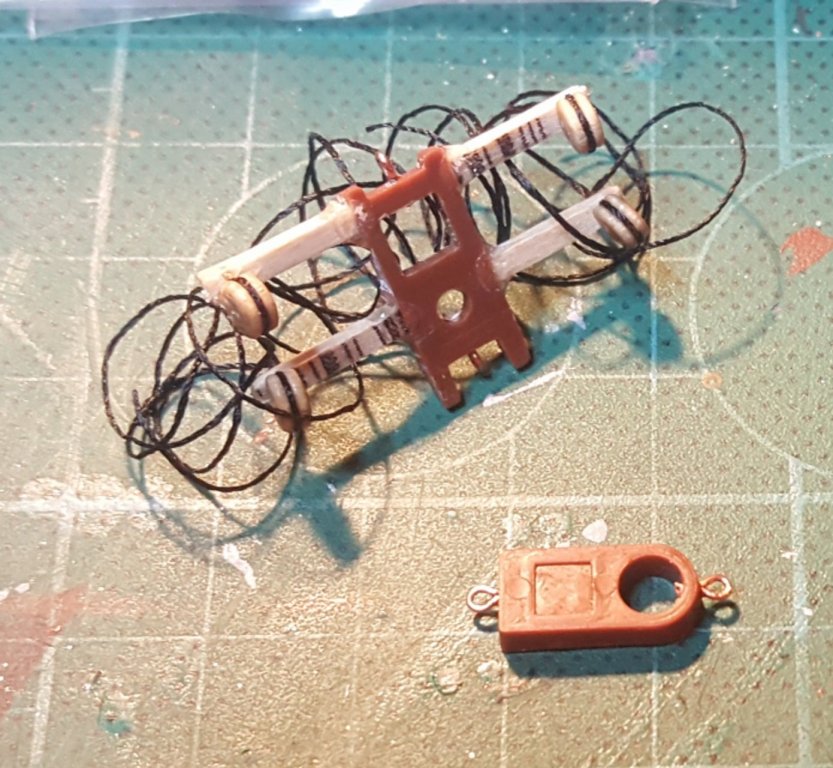
Here's what I'm doing for the mast changes from the plastic kit. Kinda cheating to keep everything the same scale without driving myself crazy scaling all the scratch built parts. Dead eyes are 3 mm and will paint the mount black when I finish adding the other dead eyes before final assembly. Also drilling the small parts for adding the brass eyes for block tie downs.
The added square wood extensions are 1/32" square basswood as I knew I was going to have to fine drill each one and wanted as much strength as possible for them. I will be cheating a little for these but they will look close to what the knots should for the dead eye mounts.
Black walnut dowel, shaped for the upper extension of the mizzen main mast is above the small ruler. I'll have to make a few of these for added strength for extensions and masts.

-
Wow!! Fine family heirloom!!
-
12 hours ago, src said:
Jonathan, thanks for the good words.
I bought all my rigging from chuck@ syren ship modeling. There should be a link in the home page here.
His prices are pretty reasonable and a very fast turn around here in the States
Many thanks.
- popeye the sailor, src and mtaylor
-
3
-
11 hours ago, Sea Hoss said:
Thank you Jonathan, I'll have to rethink the mast situation...
Glad to help, amazing that this smaller Union historical Civil war ship is limited in historical drawings for us modelers. I have not found any reference to what other possible flags were used on her. The Union flag is on the stern flag pole as illustrated ( Watch the star count for proper flag) http://www.civilwar.com/resources/313-flags/148536-union-flags.html but not sure what was flown on the bow flag pole, possibly a pennant. Will put a feeler out for some more info on this boat to a couple of Civil war naval historians I know. See if we can find anything confirming the bow pole.
-
11 hours ago, Old Collingwood said:
I feel your pain with the deadeyes.
OC.
I am still going threw them very slowly to bond them properly to the hull as it takes a couple of days for each one to dry and I have to keep strong pressure on them to seat them properly. A real challenge for these scratch built guys. When I have some drilled and mounted properly I will post some images. Plastic, metal and wood; one weird combination of parts, just glad the ca and the bonding epoxy is work well so far.
- popeye the sailor, mtaylor, CDW and 4 others
-
7
-
10 hours ago, Jim Rogers said:
You can get those closed heart blocks (green circle)at Syren Ship Company.
Excellent and many thanks, sometime these are a treasure hunt for parts.
-
11 hours ago, Old Collingwood said:
Very fine work, just shows what we can all do with plastic and a little imagination.
OC.
Thank you, glad you like her Old Collingwood.
- popeye the sailor, EJ_L, mtaylor and 3 others
-
6
-


Constructo Victory 1:94
in New member Introductions
Posted
Welcome to MSW!