niwotwill
-
Posts
597 -
Joined
-
Last visited
Content Type
Profiles
Forums
Gallery
Events
Everything posted by niwotwill
-
 john as allanyed mentioned liver of sulfur does not stain wood surrounding the copper you are coloring and is very easy to use.
 -
Magnificent work on the yards and you are right on the Proxxon lathe. I've done both but being able to have the work piece go through the lathe is great.
- 778 replies
-
- 2
-

-
- cheerful
- Syren Ship Model Company
- (and 1 more)
-
Looking good Maury. I like using the AYC as it is not a hard a boxwood and when treated with wipe on poly it really comes to life.
-
Good catch on the pins. Have run into similar problems with kits and pins. A while back I bought some from different suppliers and got varying sizes. One web store I use almost entirely is: modelmotorcars.com. In the Hardware Store they have rivets from .4mm up. The heads are round like the nails. Just thought it'd help.
-
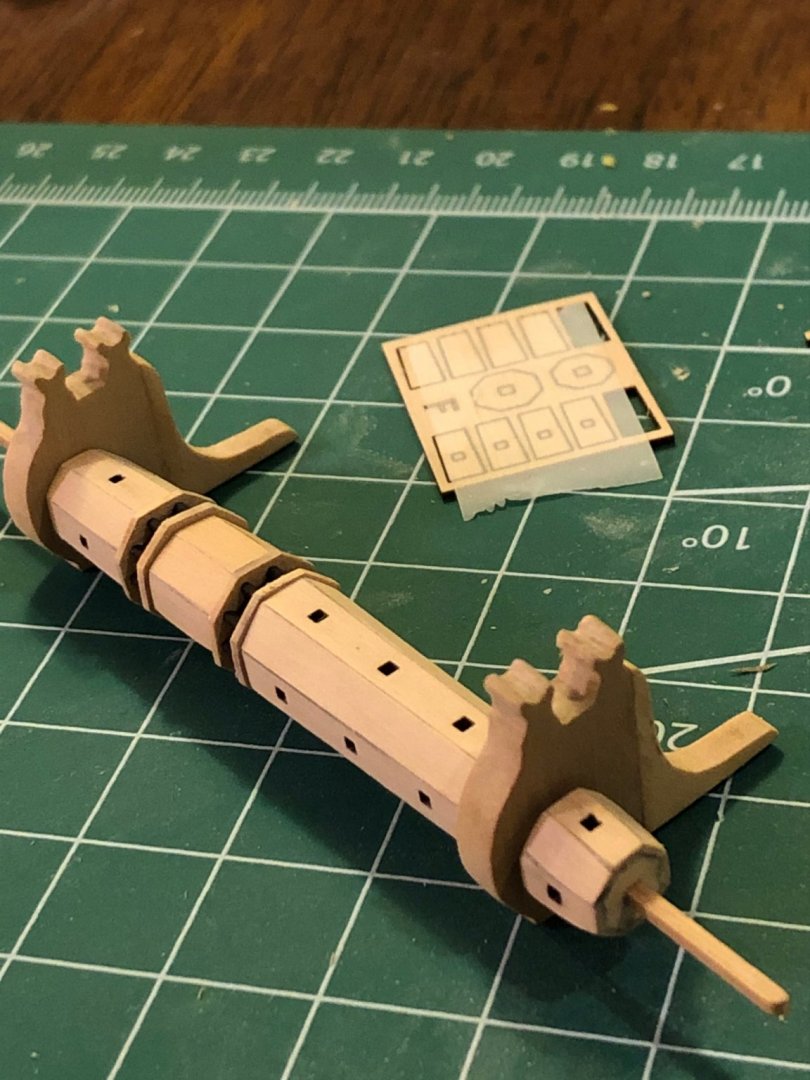
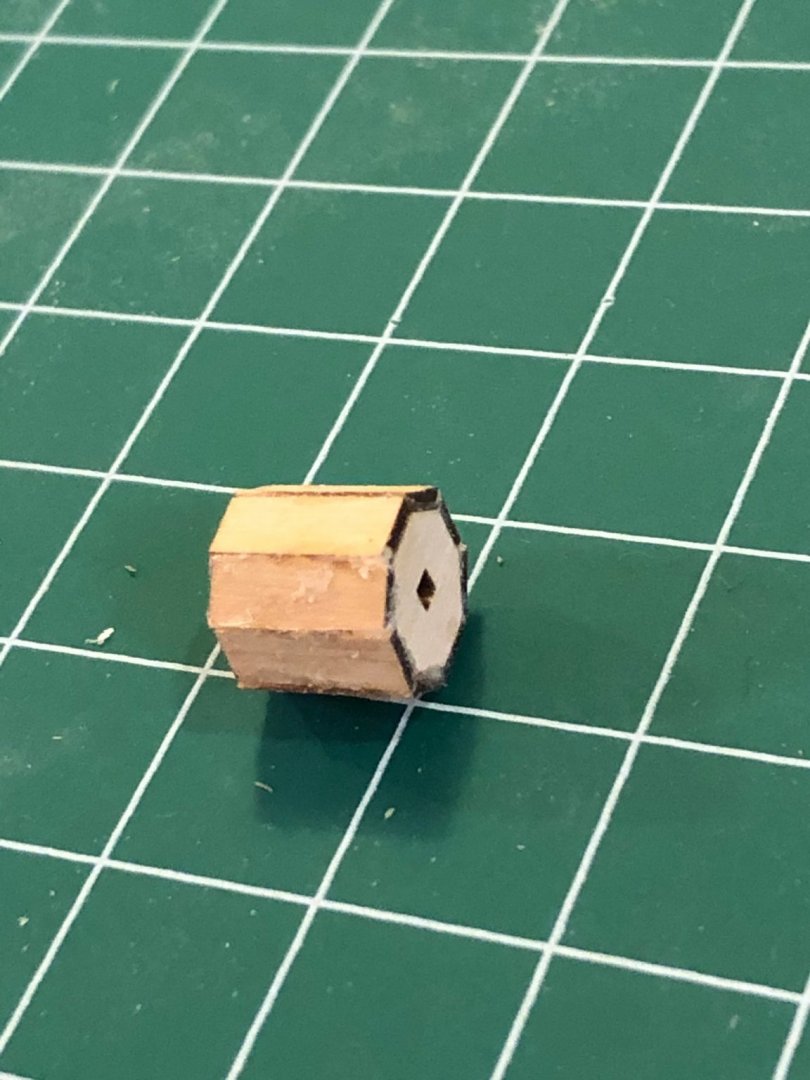
I want to thank everybody for the nice comments and likes it provides great motivation. 👍 All's that left is to paint and assemble, snip off rod and glue on end caps.

-
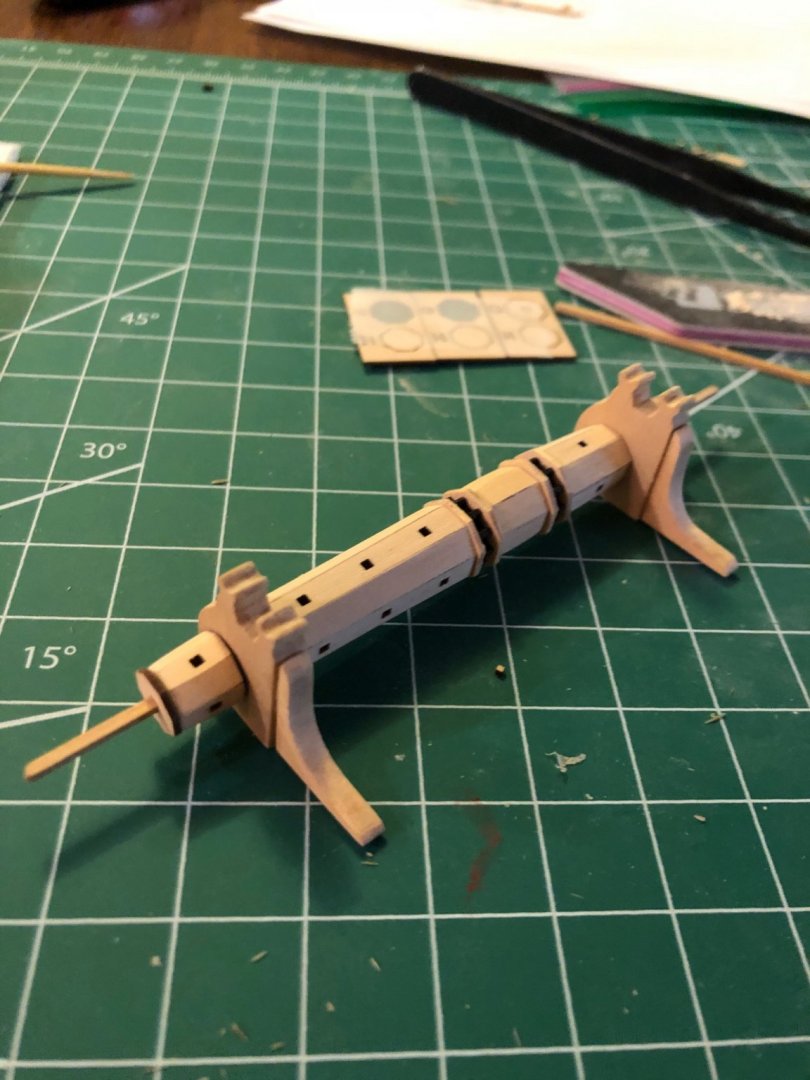
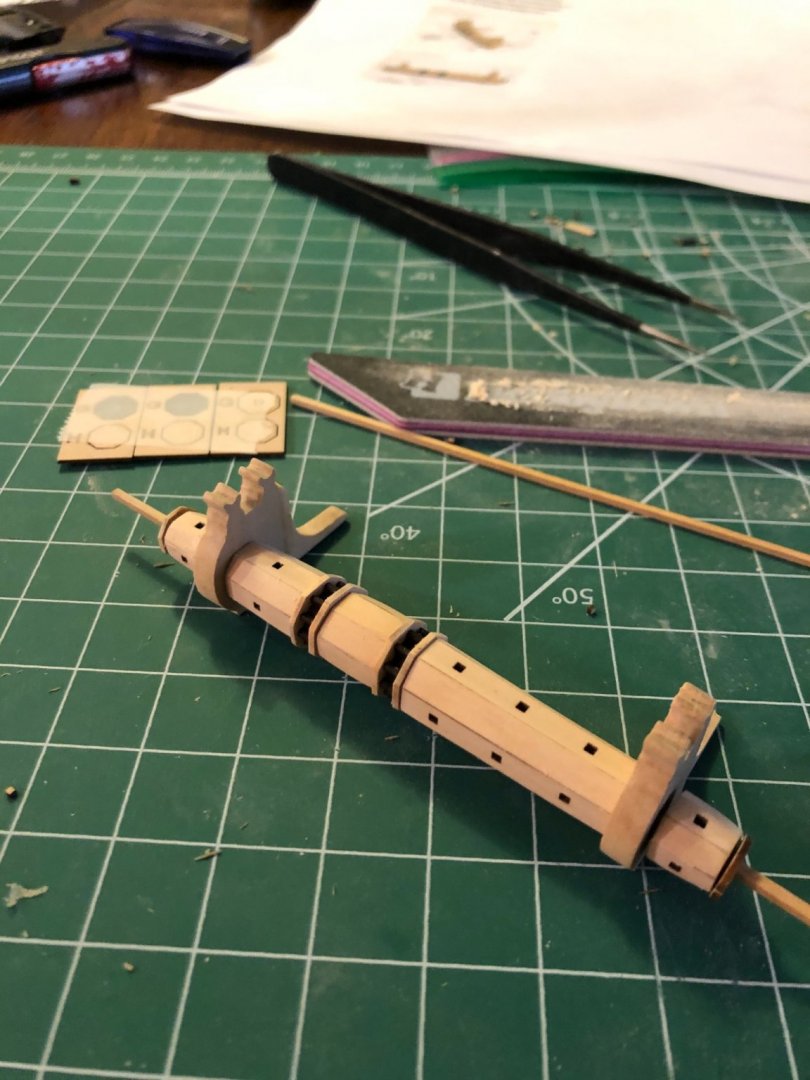
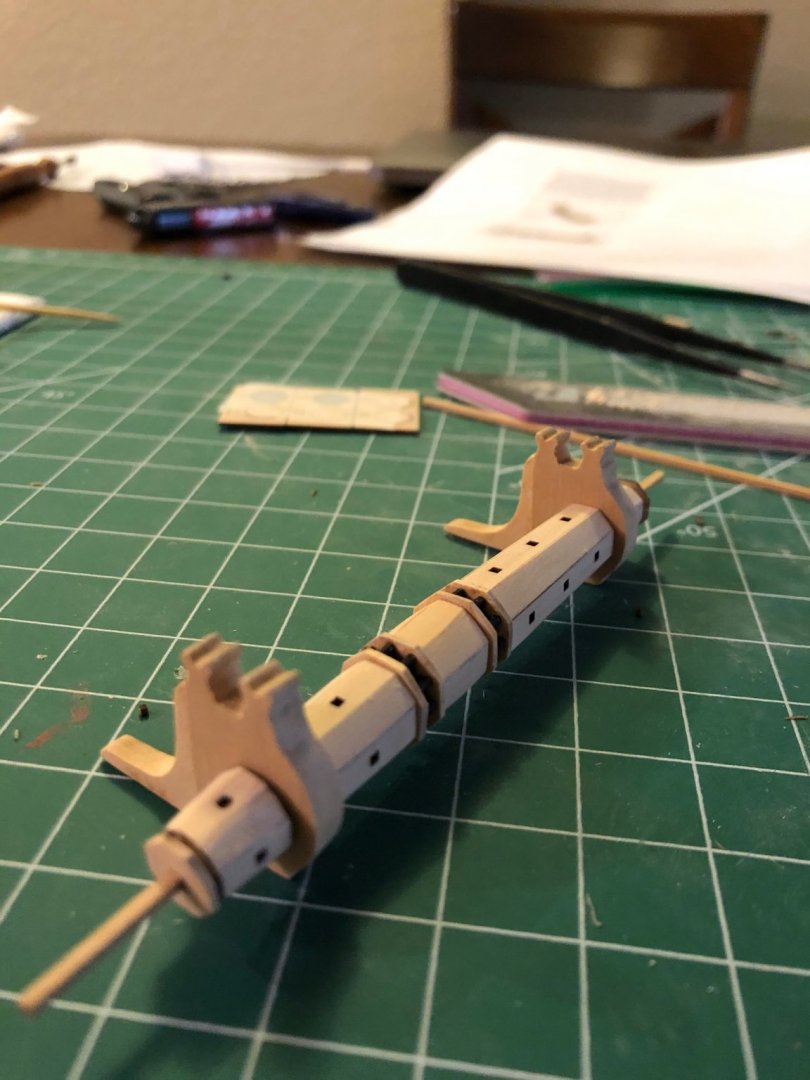
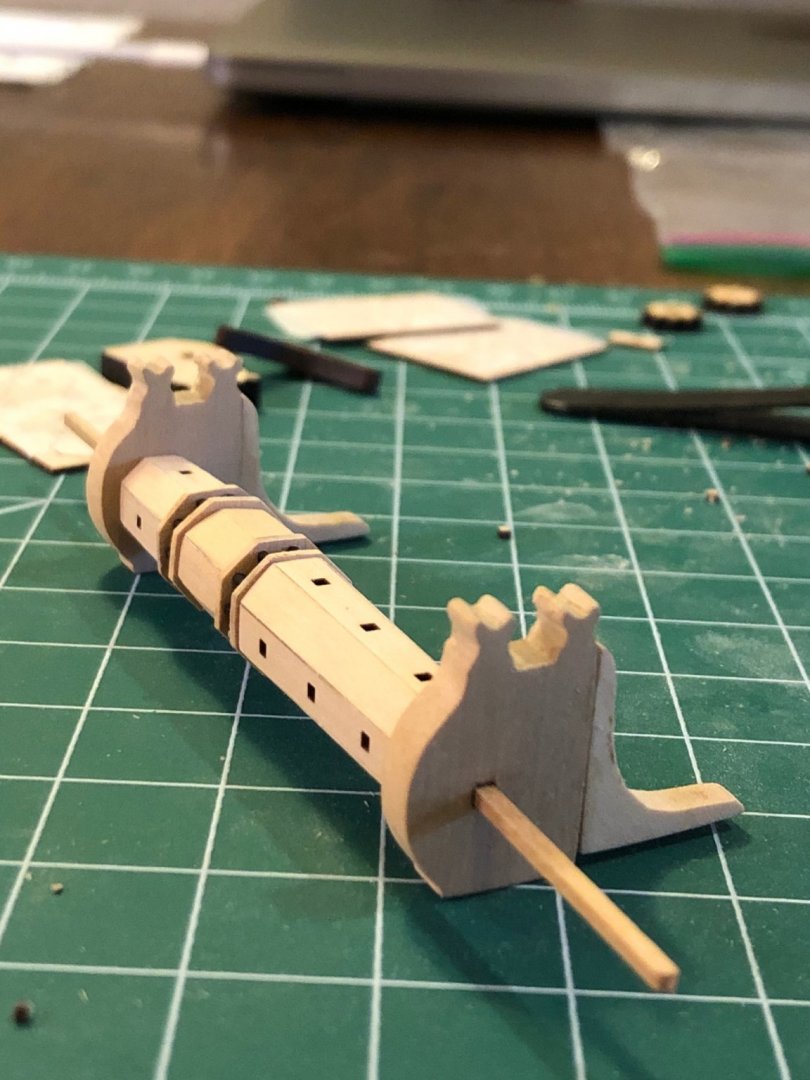
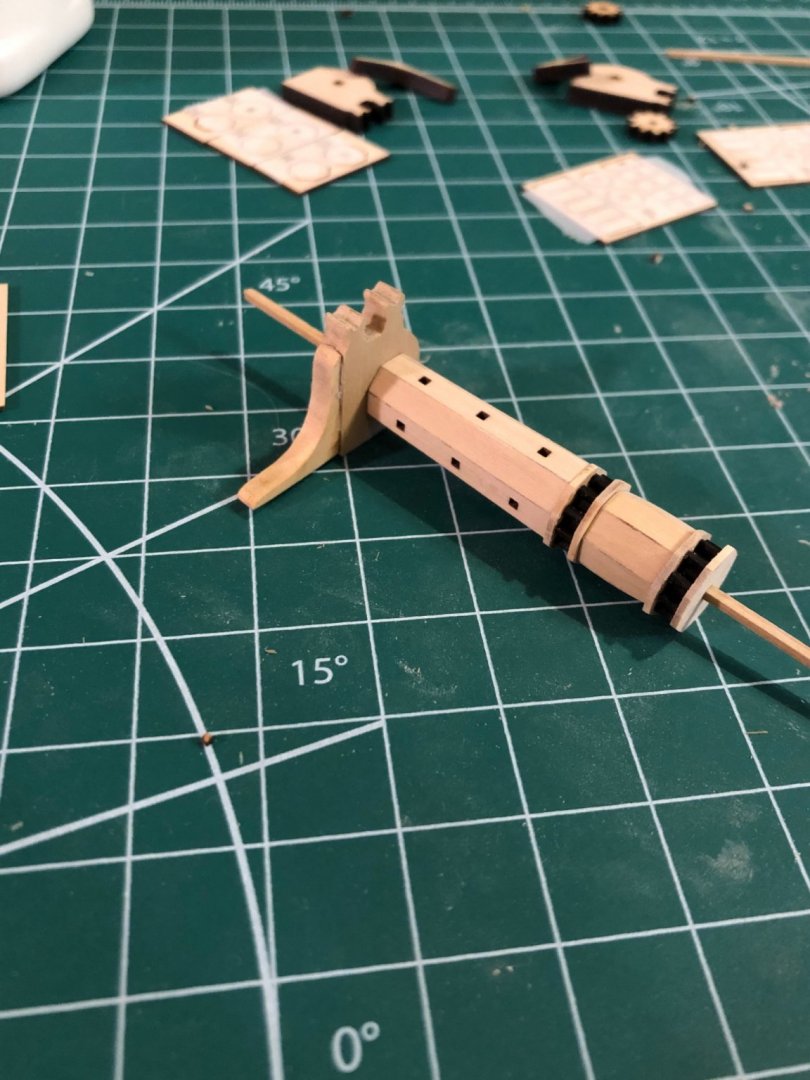
Completed segments D, E and F. Practice does help when cleaning the second segment E it only took 3 hours to clean the char and I spent some more time on the first segment E char. Segments D and F were straight forward as the others with only segment F a little harder to hold because of its size. Only one more part to build which is segment F. segments A, B, C, D, E (2x) assembled on square rod Segment F added to assembly I may redo the first segment E as I'm not very happy with show the bracket and standard fit together. Fortunately Chuck furnished spares just for this purpose.
-
It doesn't look rough but if you wish making another is not too hard. Before giving it up try to dry fit the coaming. It sit fairly low below the deck and you might be surprised. If Basswood is a problem many craft stores sell good quality wood.
- 52 replies
-
- 2
-
-
- Model Shipways
- muscongus bay lobster smack
- (and 1 more)
-
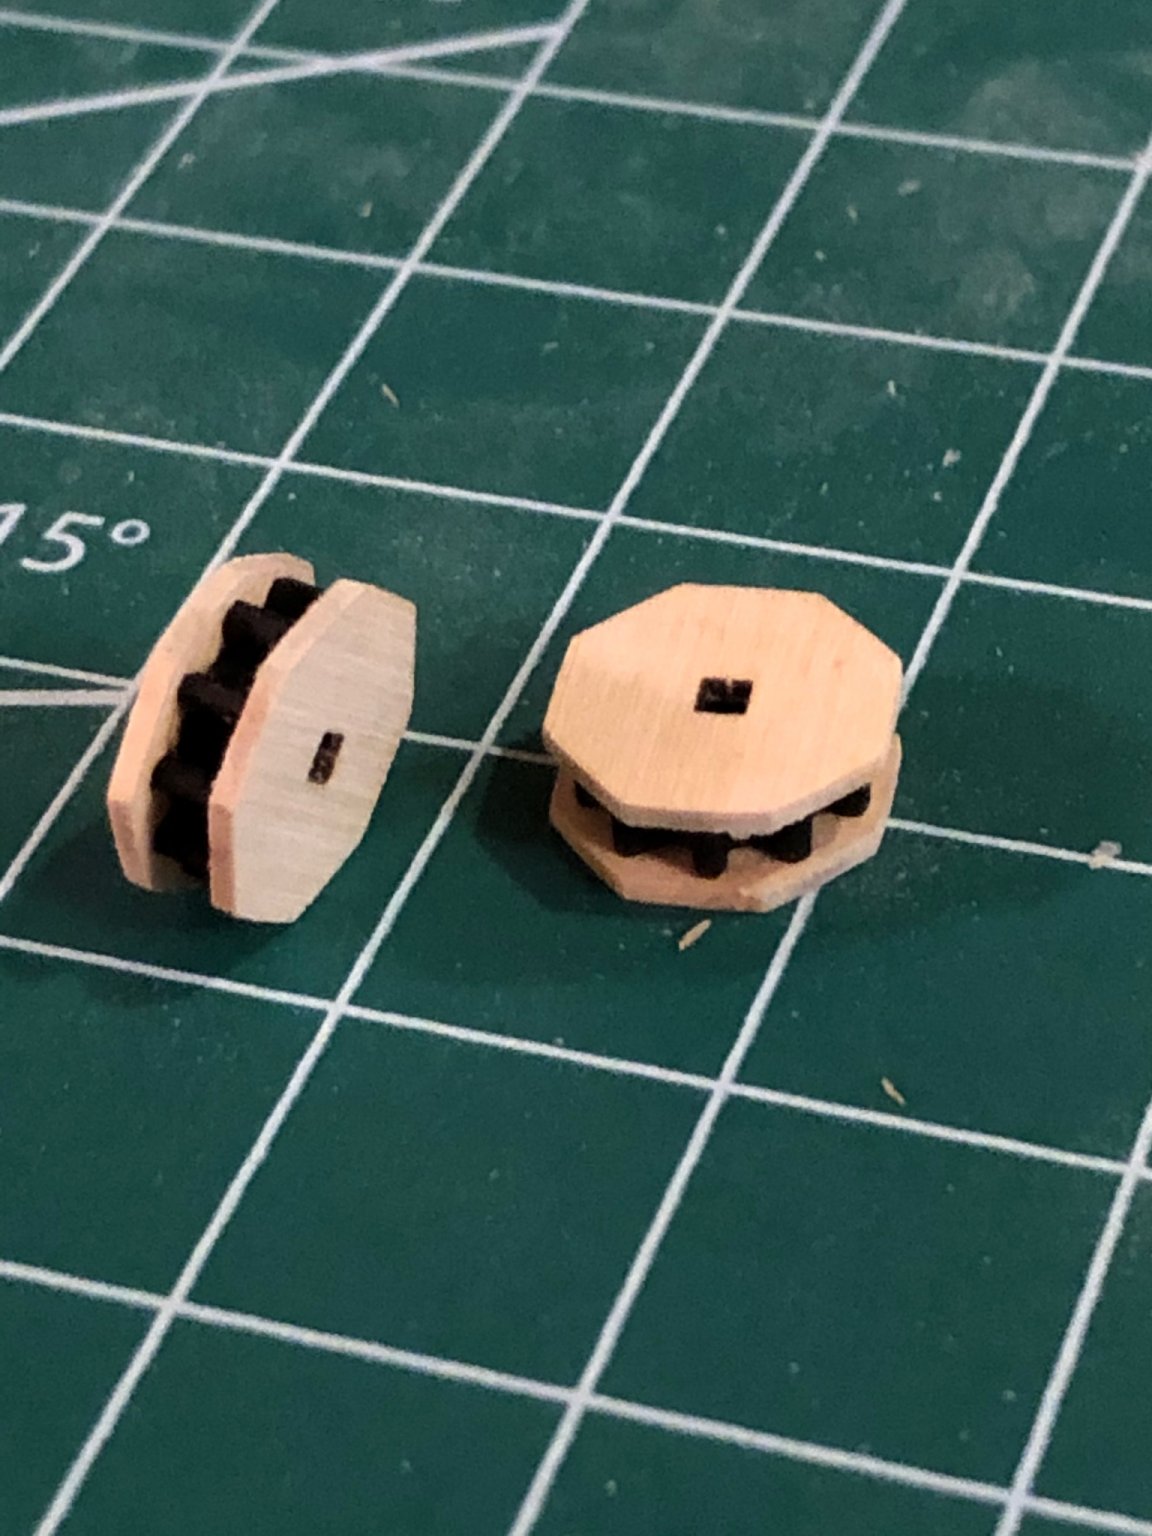
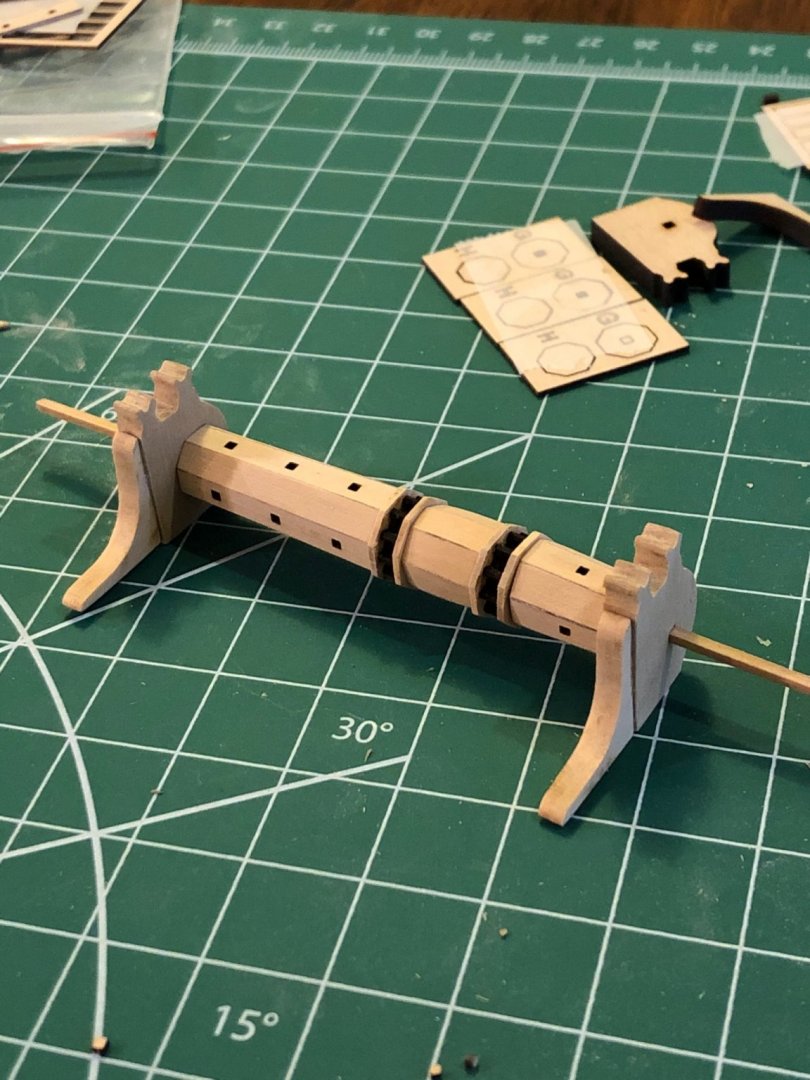
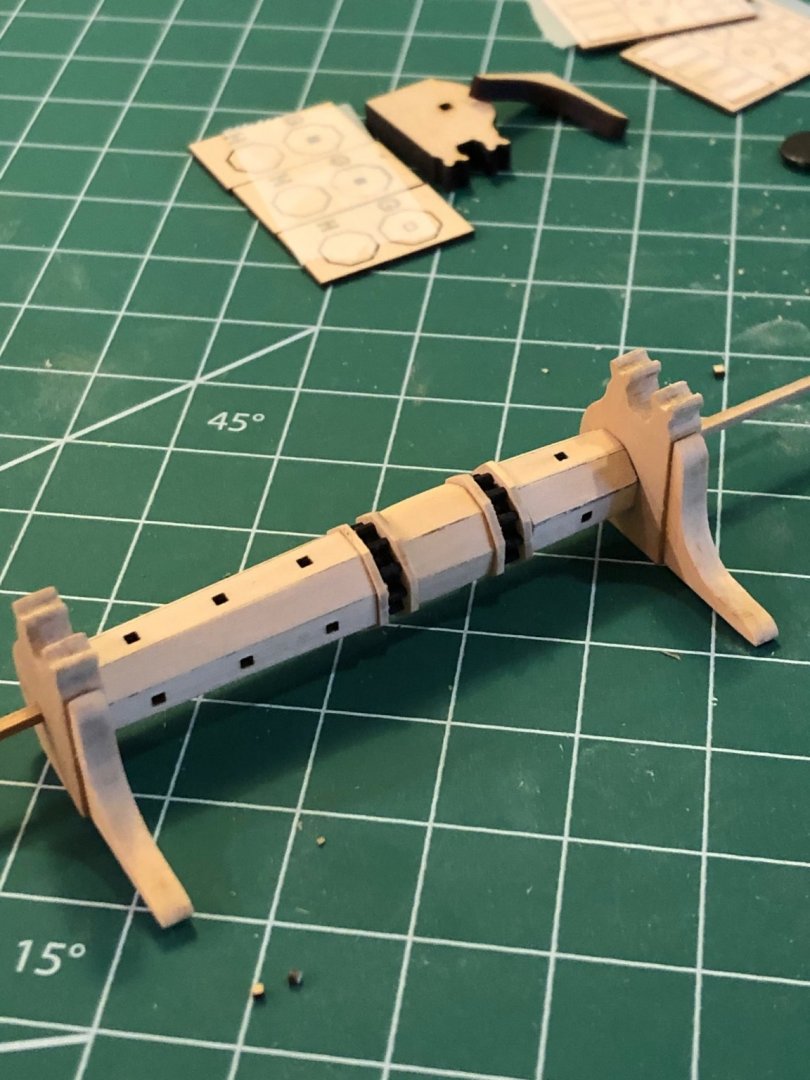
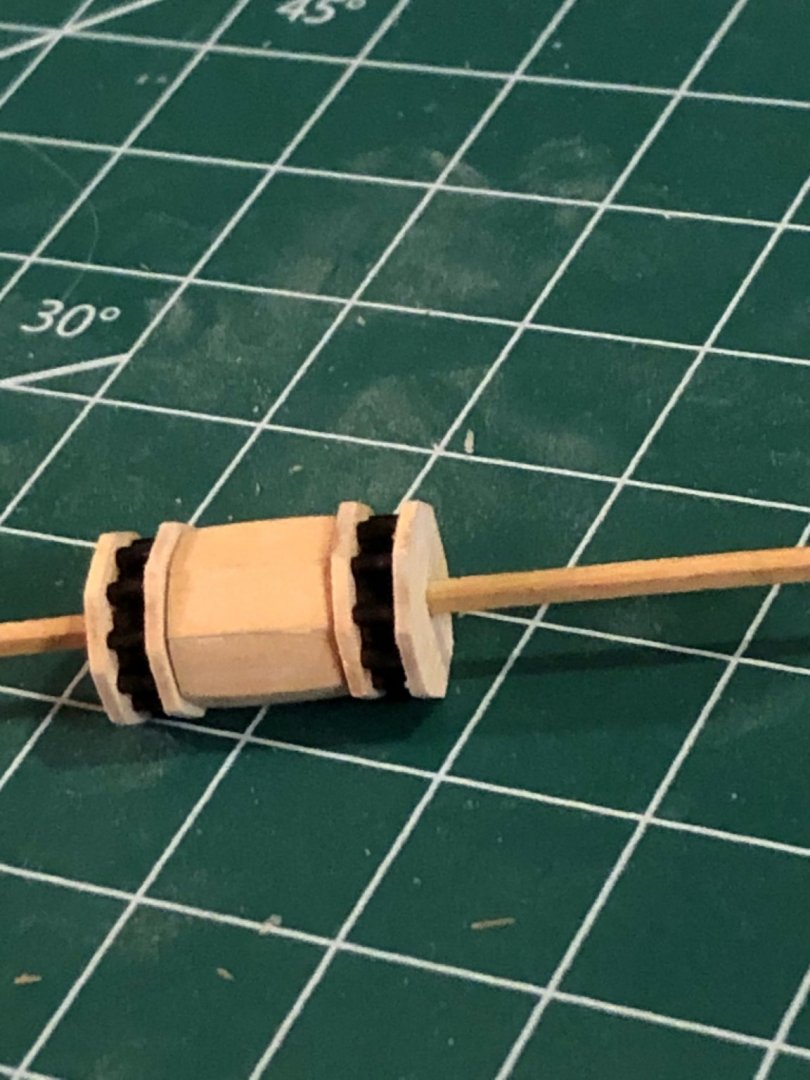
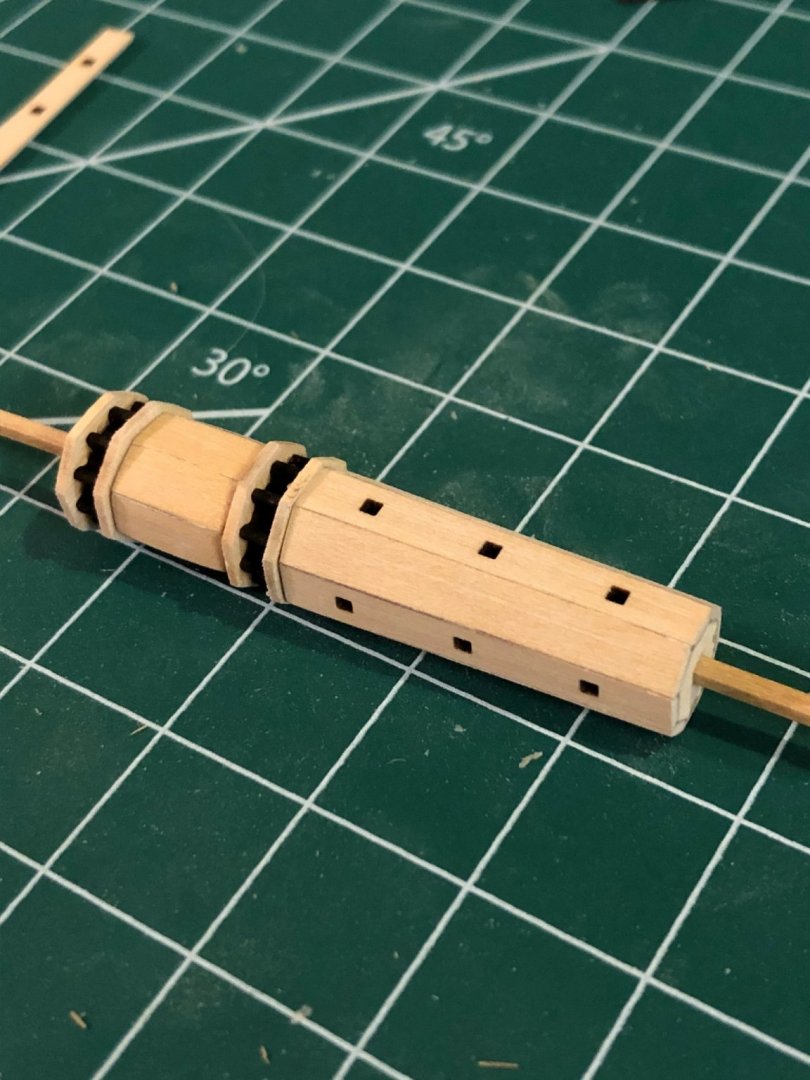
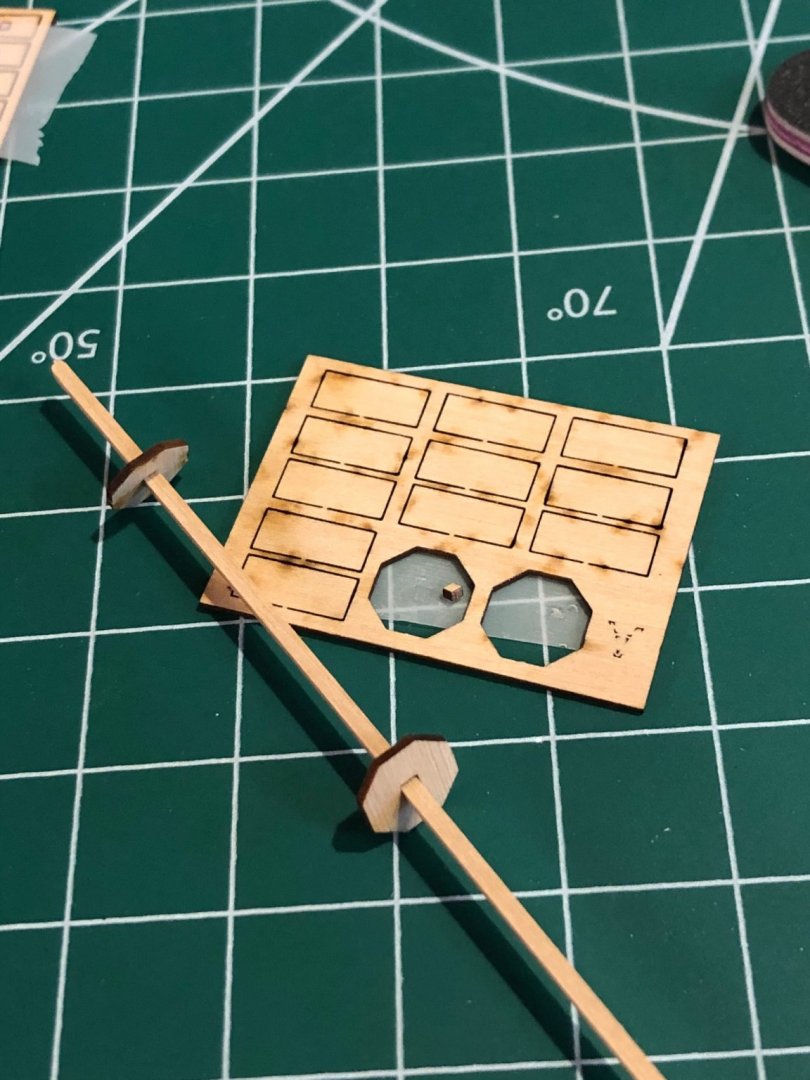
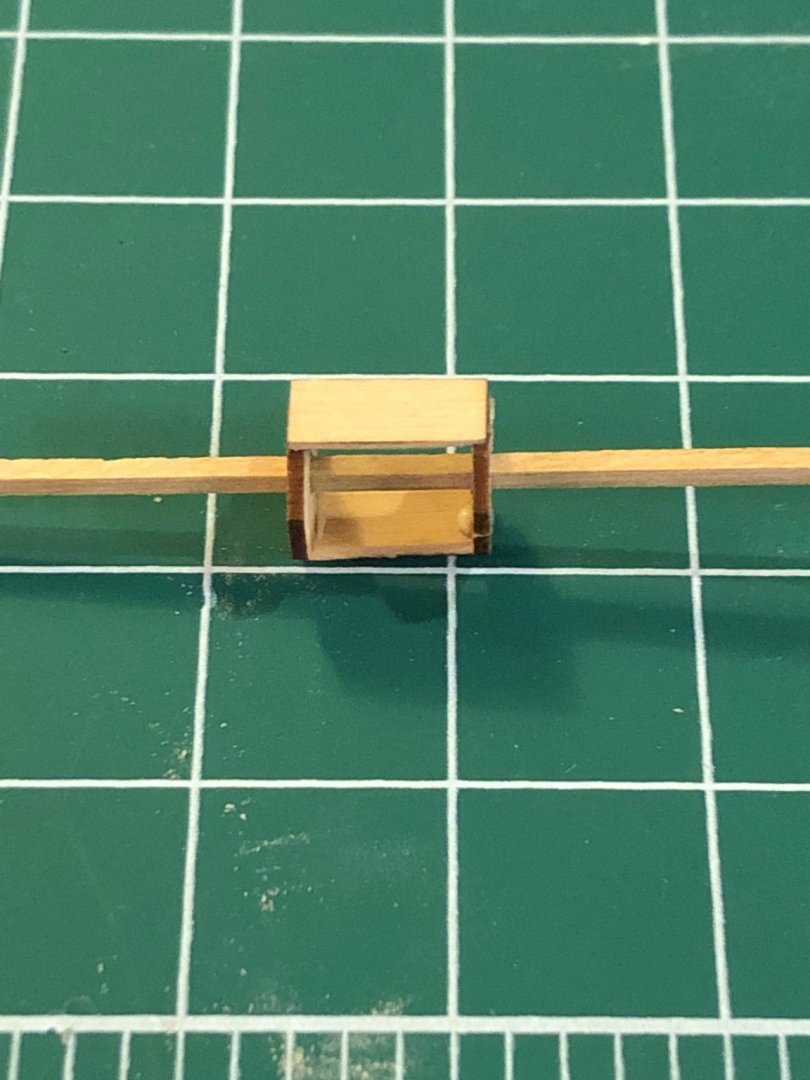
More work on the windlass got the largest section completed and as the monograph says sanding edges gets easier with practice. While sanding the angles to the slats I carefully removed the char from the octagonal disks in the B part. Once removed I glued the disks to the ratchet wheel taking care not to get glue in the square hole or on the 1/16" square rod used for alignment. Ratchet gear and disk assembly (B) Ratchet assembly B on square rod The completed "C" assembly on square rod ready for sanding " "C" assembly sanded and on rod with the "A" and "B" assemblies Next I removed the char from the brackets and standards "Segment E". The brackets have fairly intricate shapes and presented quite a challenge removing the char without softening or loosing the curves and corners. I spent 4 hours removing the char using files and sanding sticks but the shape were kept sharp. Segment "E" in position on rod Next segments D & E


-
I've had some luck with Elmers white school glue thinned to a fat free milk density. Painted on and does not change color of original substrate. Good Luck
-
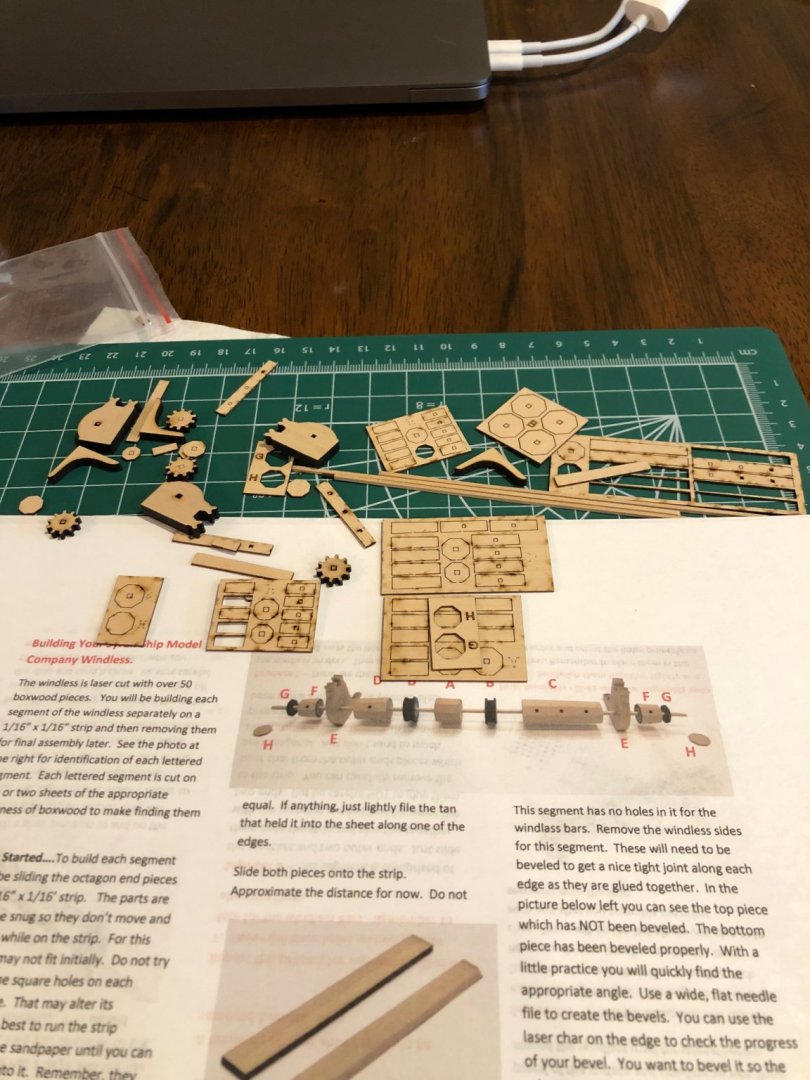
Well we're settled in our air bnb apartment close to Niwot where used to live. Got set up and started working on the windlass mini-kit from Syren. Spread out the parts to inventory and make sure all was well. There are 50 parts into the windlass and spares for us (me) who get carried away. All parts were there and nothing damaged but it was like putting a picture puzzle together as you can see some parts came free from the sheet and were loose in the bag. After getting everything back in place I put clear tape on the sheets keeping the parts in place. Read the instructions several times looking at parts to identify them fortunately Chuck has labeled each sheet A thru H. You have to be very carful as some of the end disks are slightly smaller than the other end and some of the slats are wider at one end. The wide end goes on the larger octagonal disk. Started with the smallest section without holes in the slats. I found it easier to use a sanding stick to bevel the edges of the slats as you can hold the part on the sanding surface while holding fingers are over the edge of the sanding stick. First slats glued on the disks All the slats assemblied Carefully sanded the ends and the sides making sure to keep sharp corners on the slat joints. On the next section tomorrow

-
Great catch on the chainplate. Always nice when the fix is relatively an easy fix. Great photo is that Emma? and where did you find it?
-
Looking good Maury. It will be fun to watch your progression of the interior
-
Thanks Glenn for the nice comments and all you others for the great likes. It helps me keeping motivated. While I'm away (6 weeks) I brought Chucks mini kits for the deck fixtures and while working of those making posts. Just a note that before I left I started the aft port sills and lintels. Noting Chucks reference for having tight joints but not so tight to move frames I started on the sills. I soon realized that they are going to be a real sniggly job since the frames angle in two directions. Left that work until I return. Next post when I get settled in our place.
-
John the deck and fittings look amazing. I like your description and pictures of the the fittings made of wire. As to the hull, I don't think a shipyard would sand the planks. It seems as they would just remove the old and clean up the adjoining good planks. The weathering looks perfect as it would in a refit. I've seen pictures on the web that show this condition you might search to find a ship on the ways. I think the black should be weathered also but not as much as the anti fouling paint. Another thought is when she's brought out the first thing that would be done is washed off with high pressure hose and then scraped before repair work. Looking Great
-
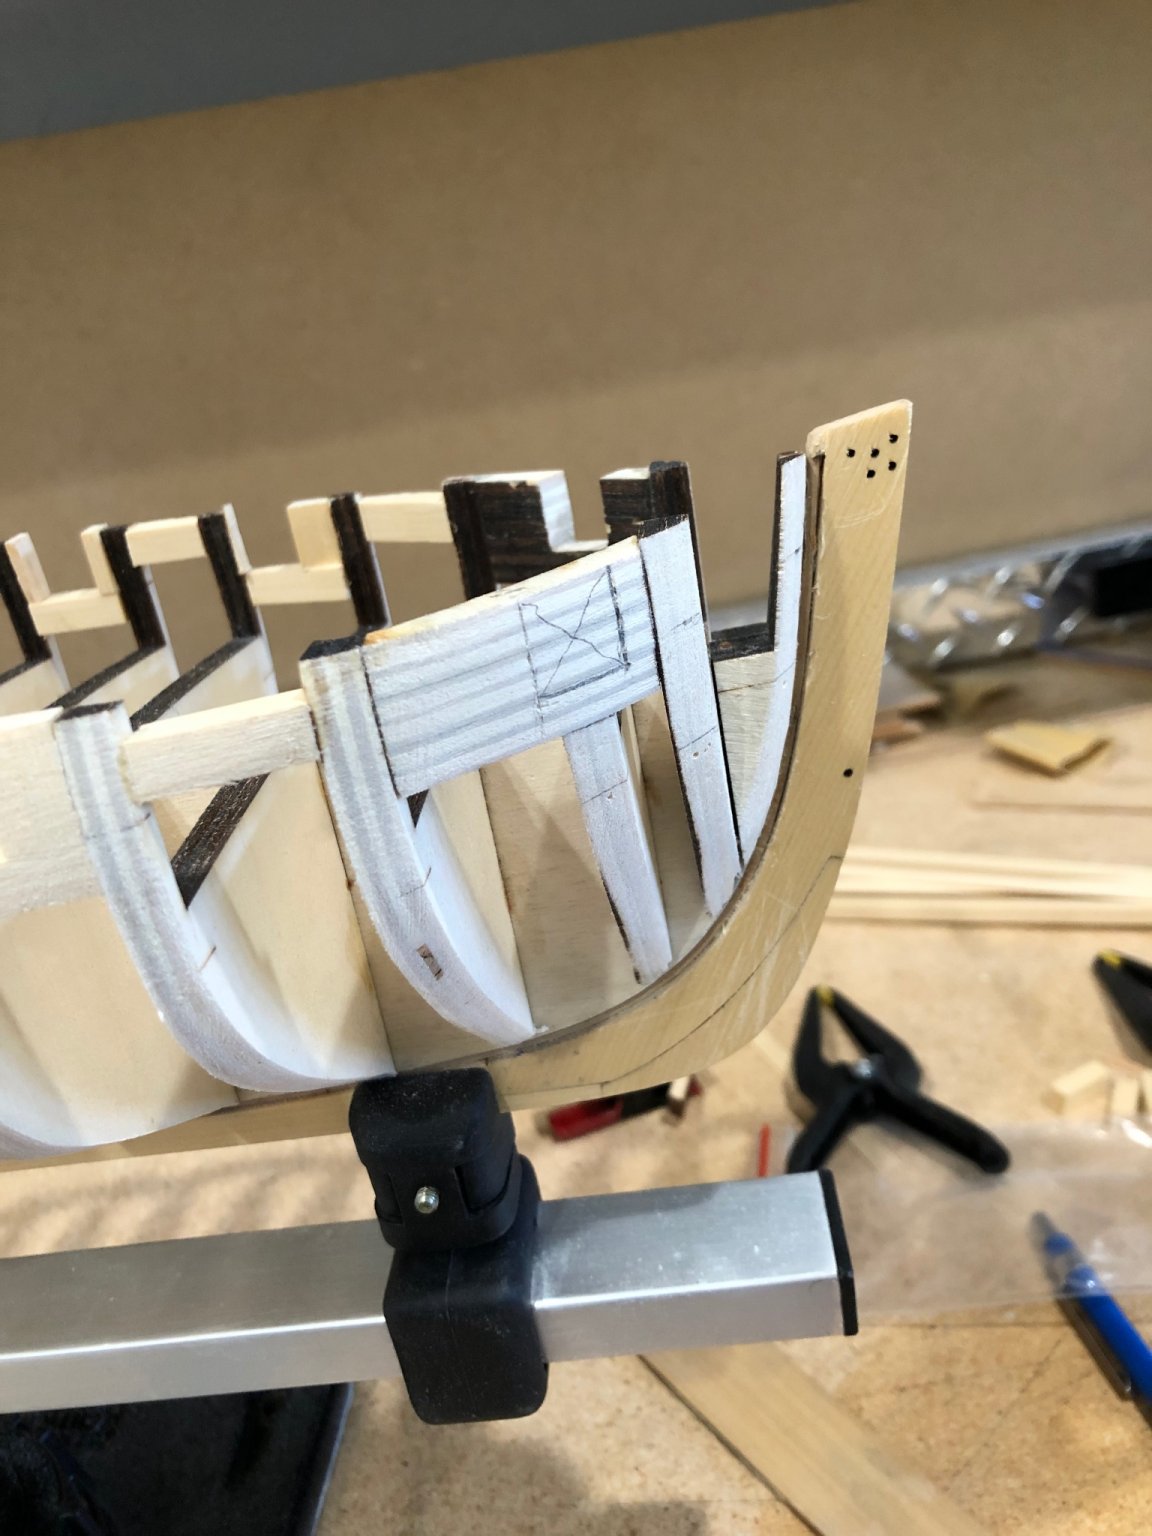
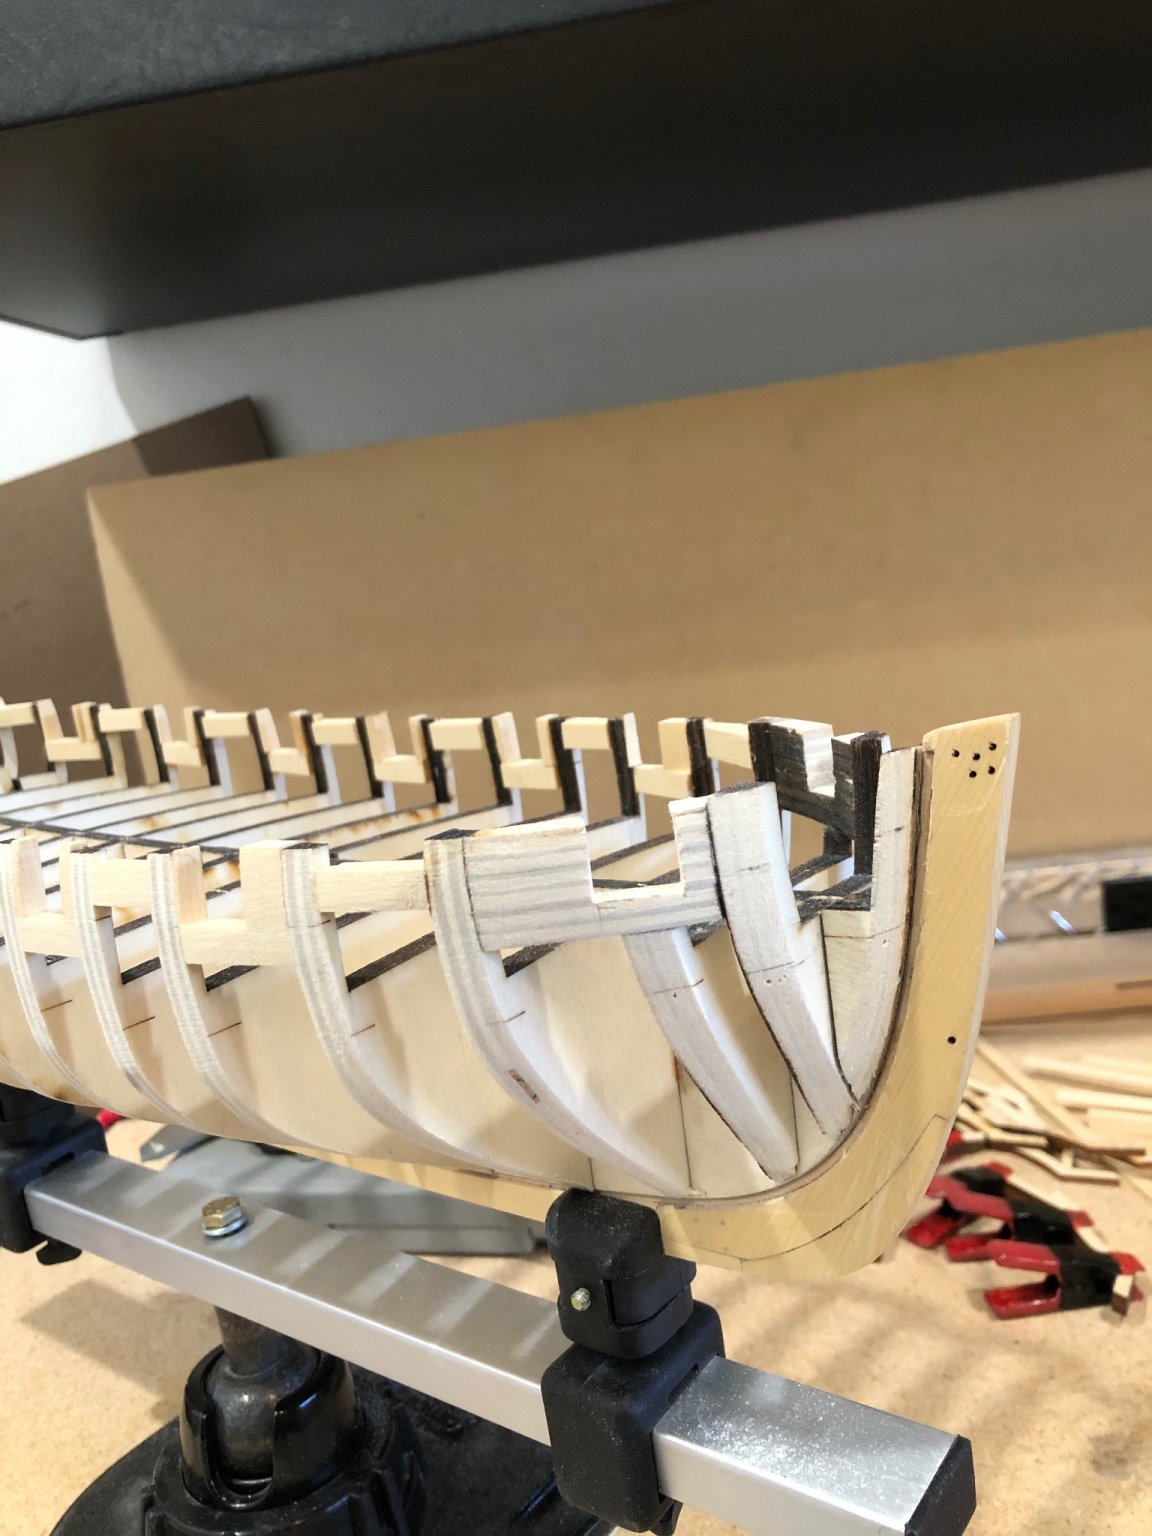
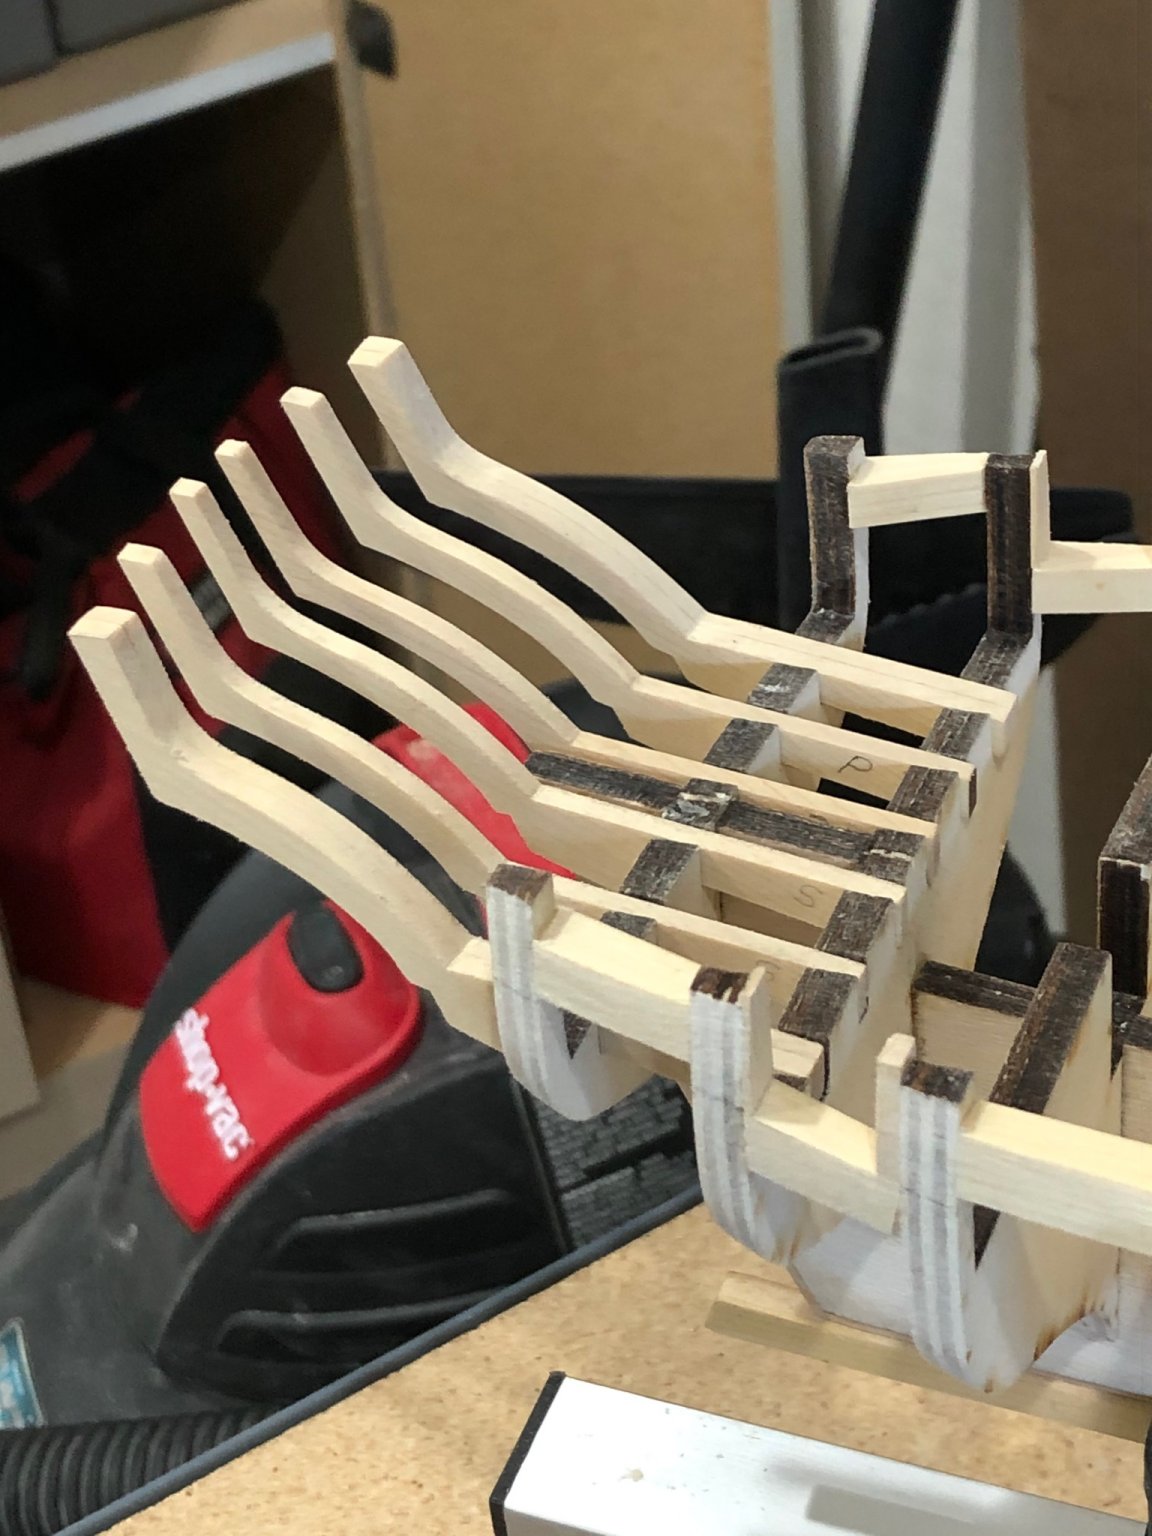
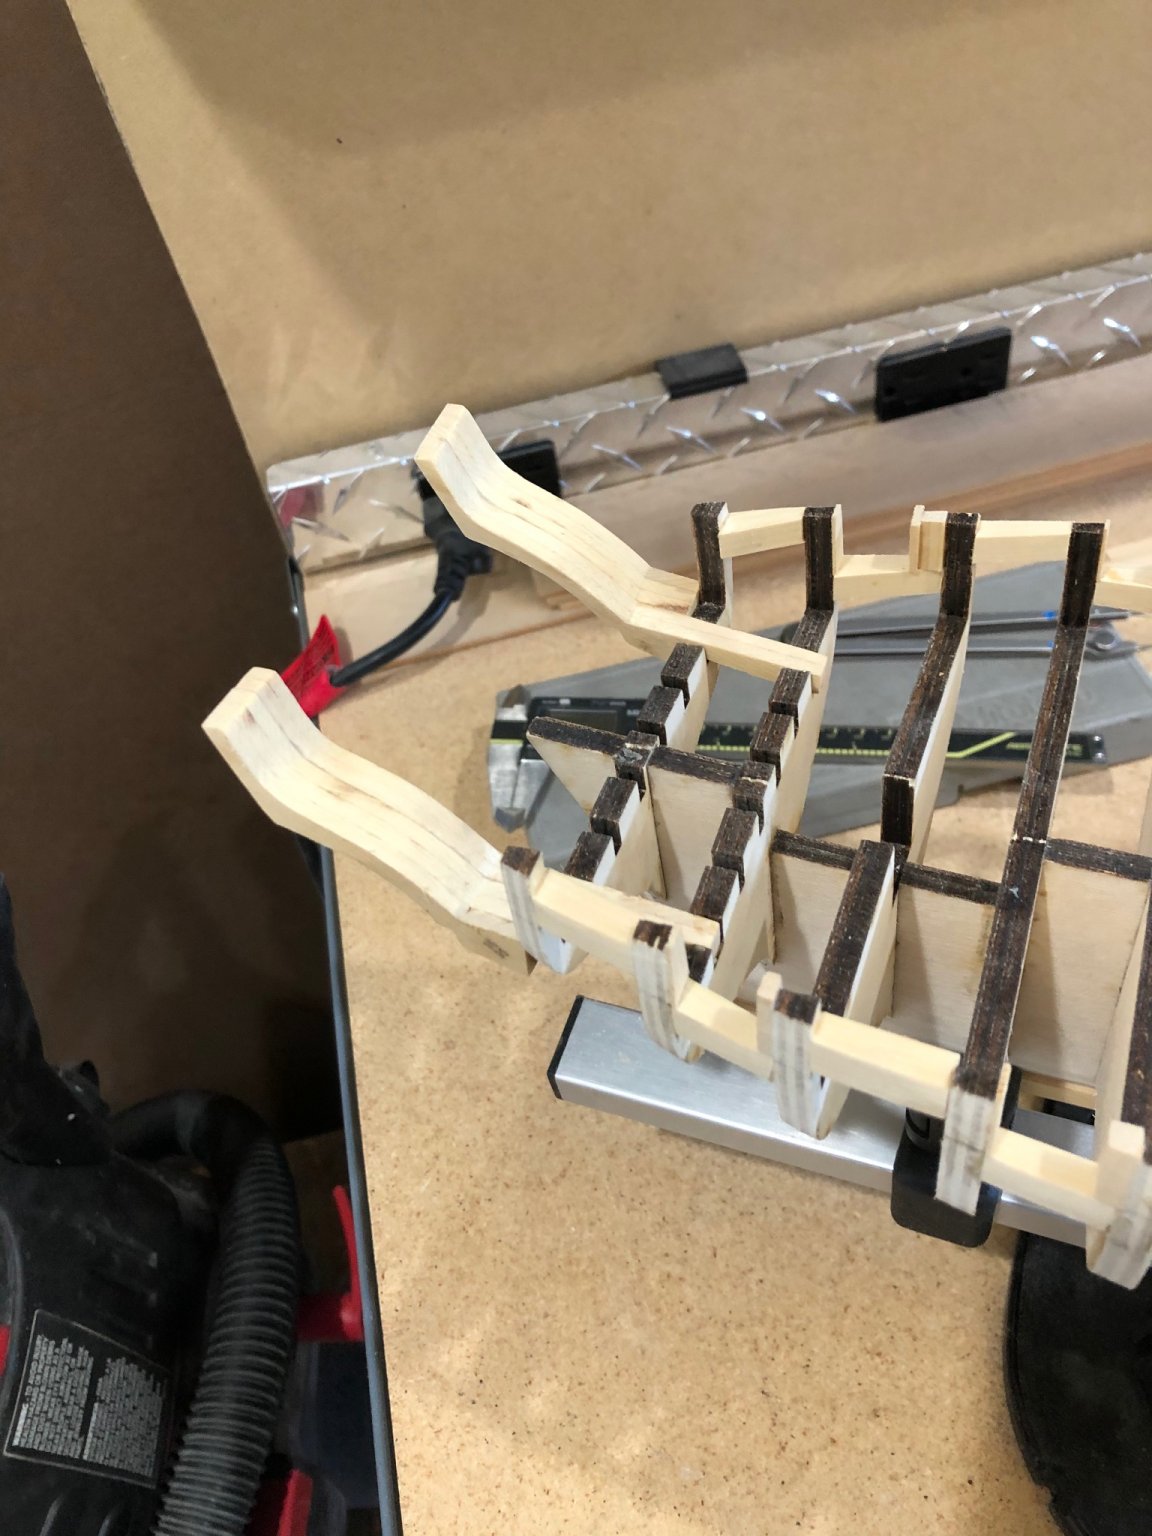
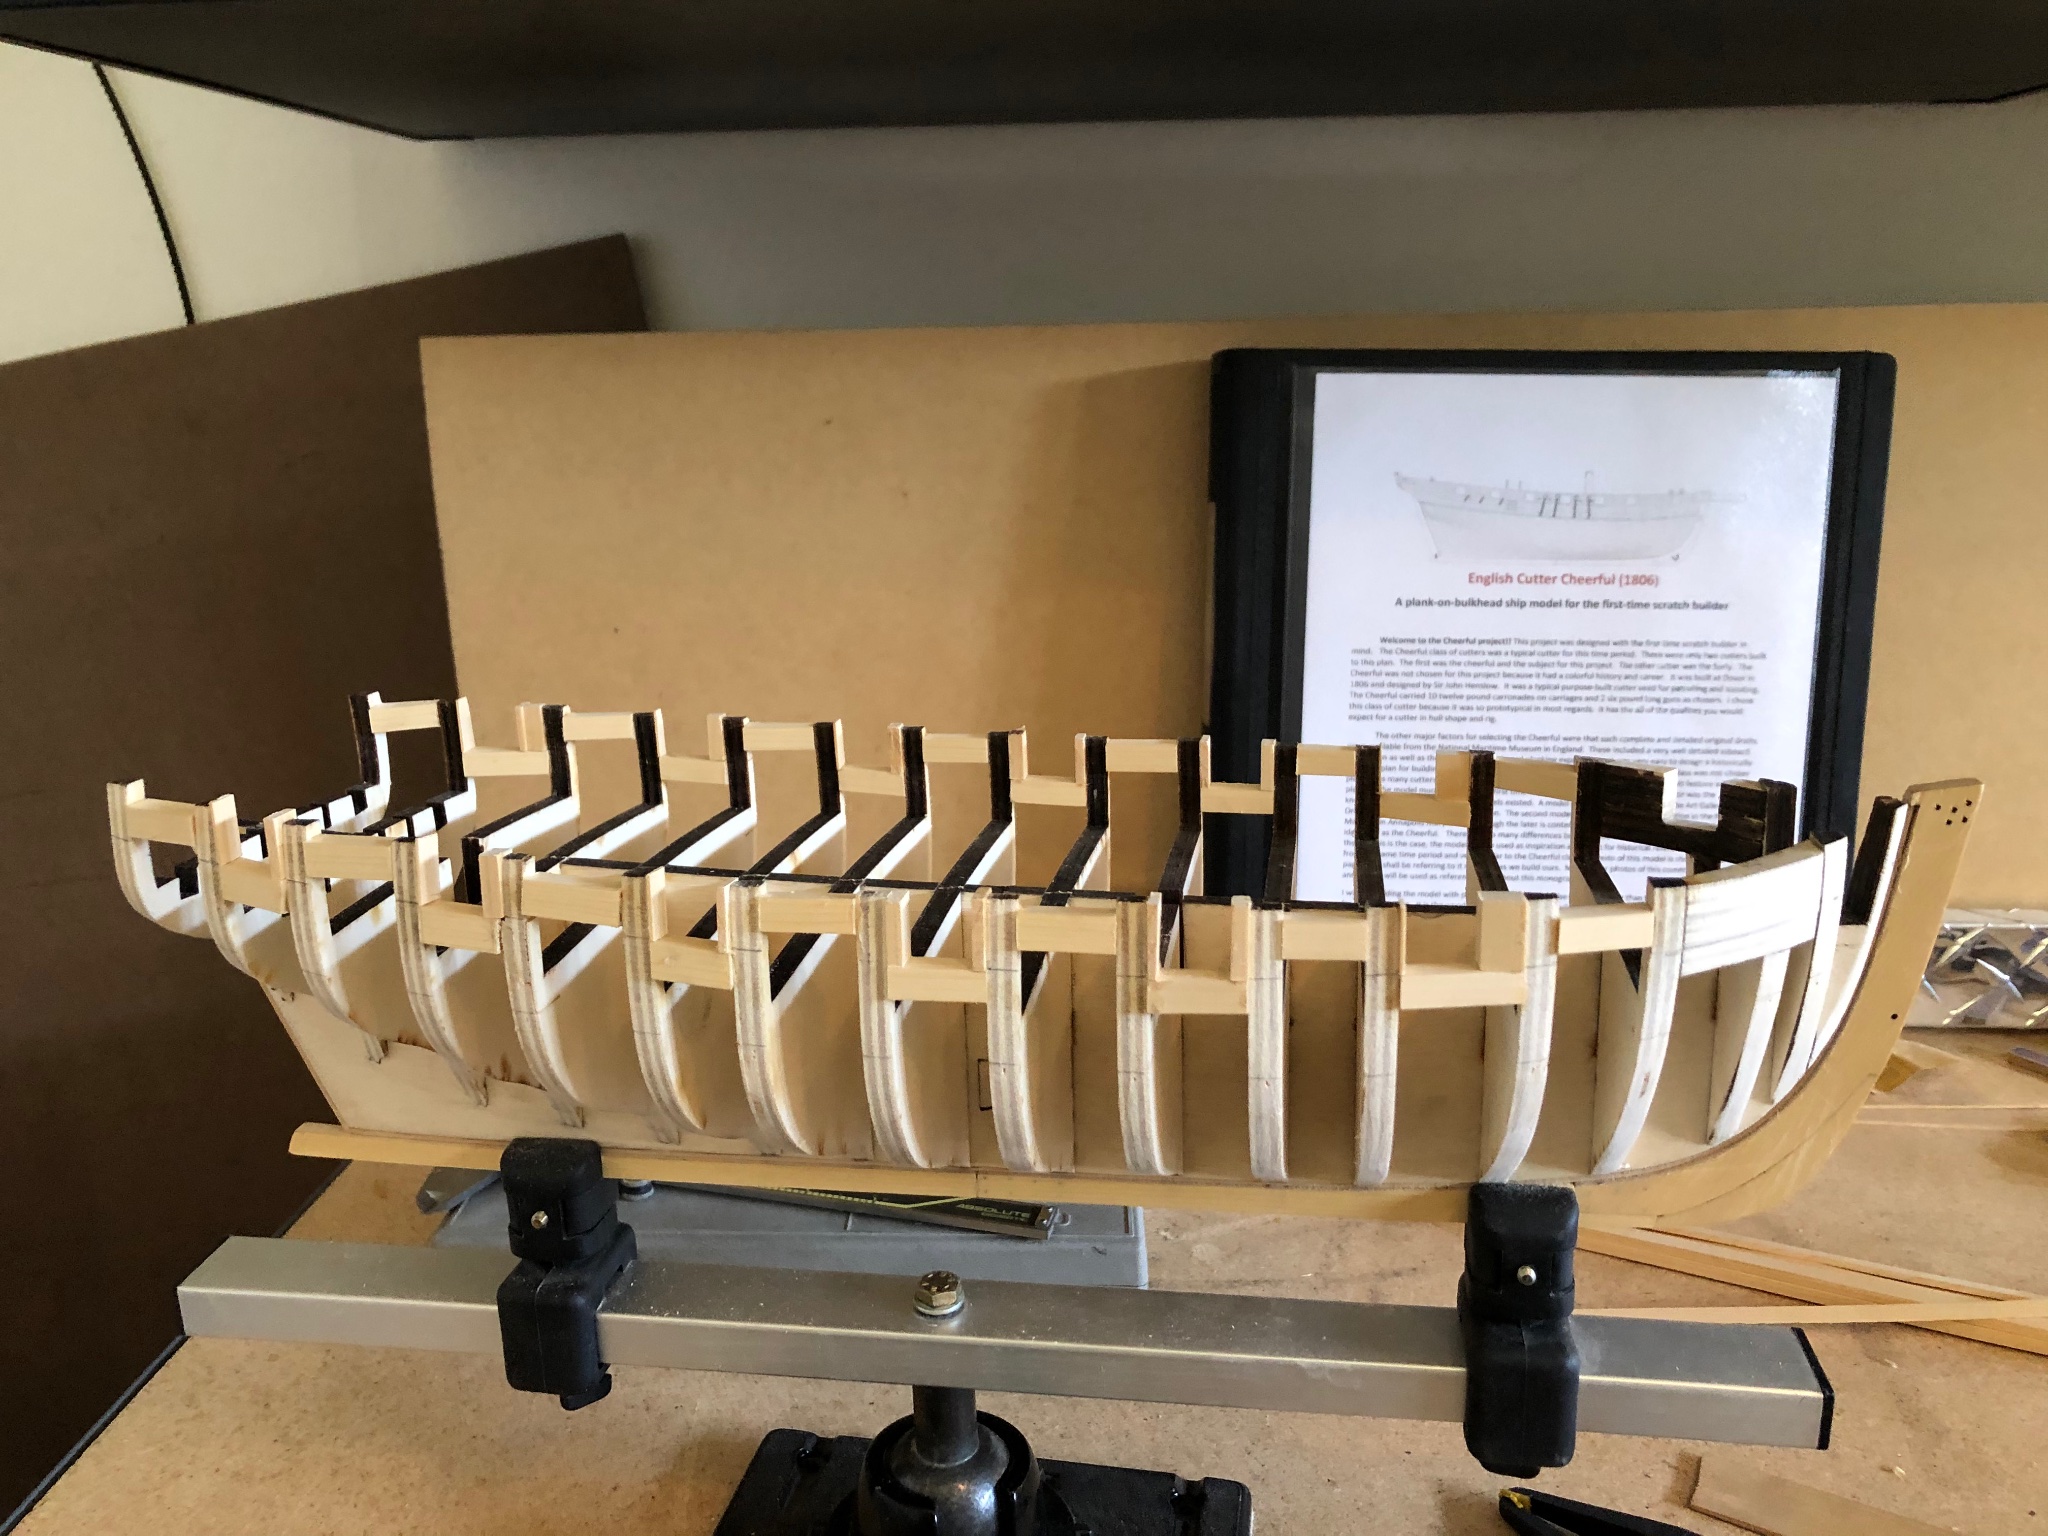
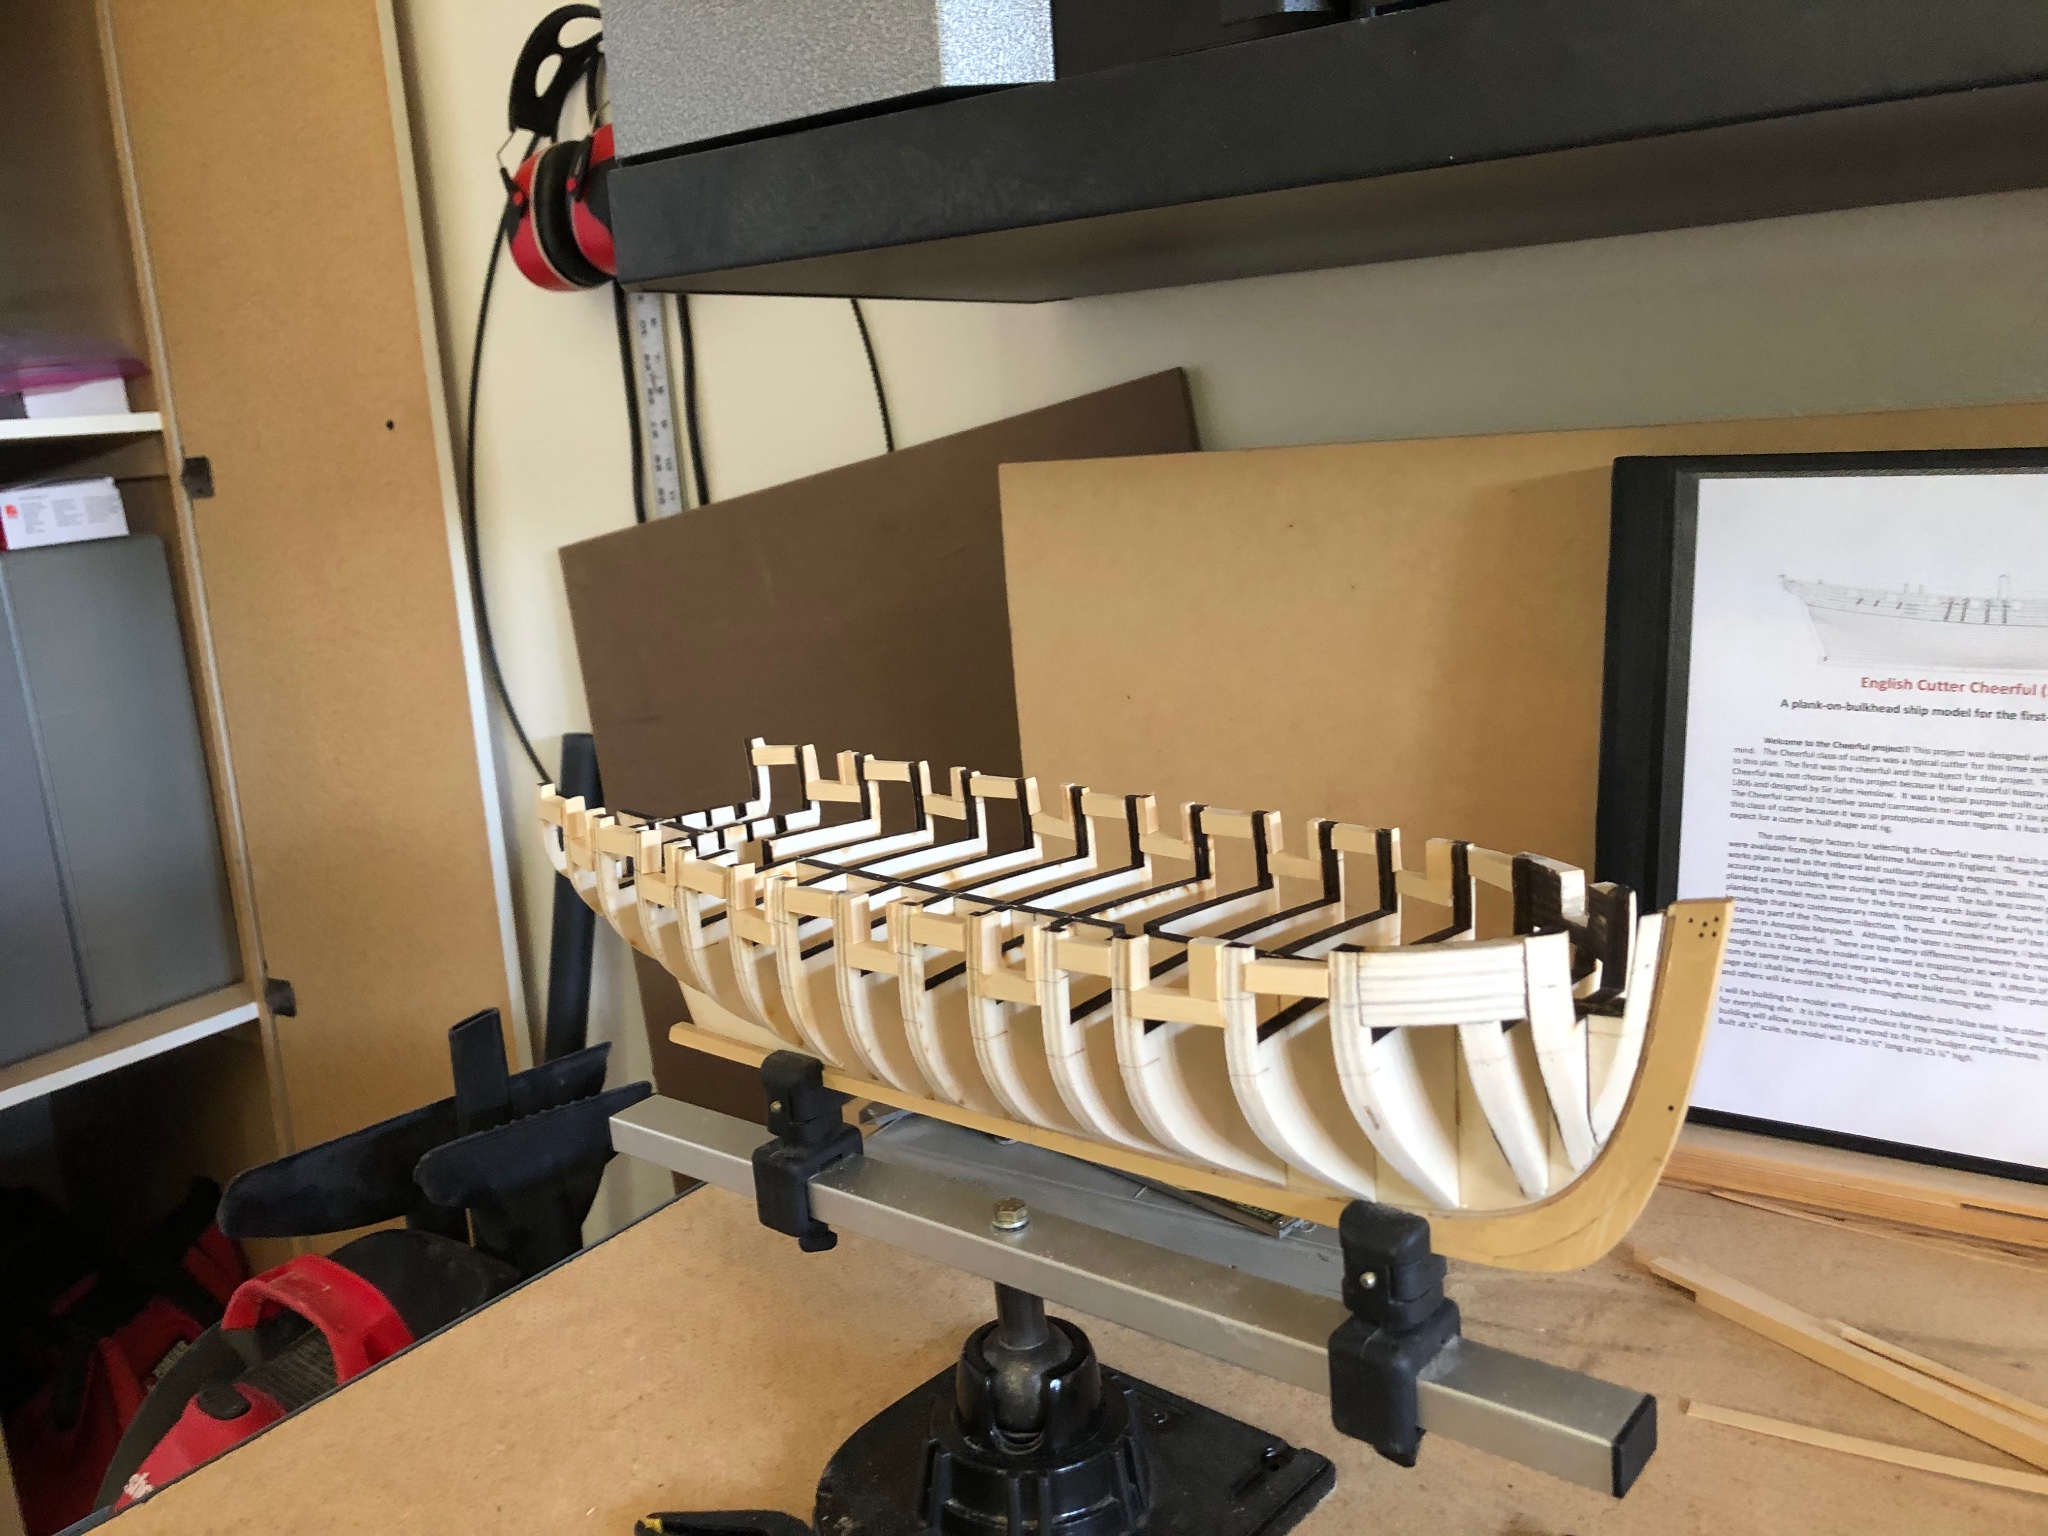
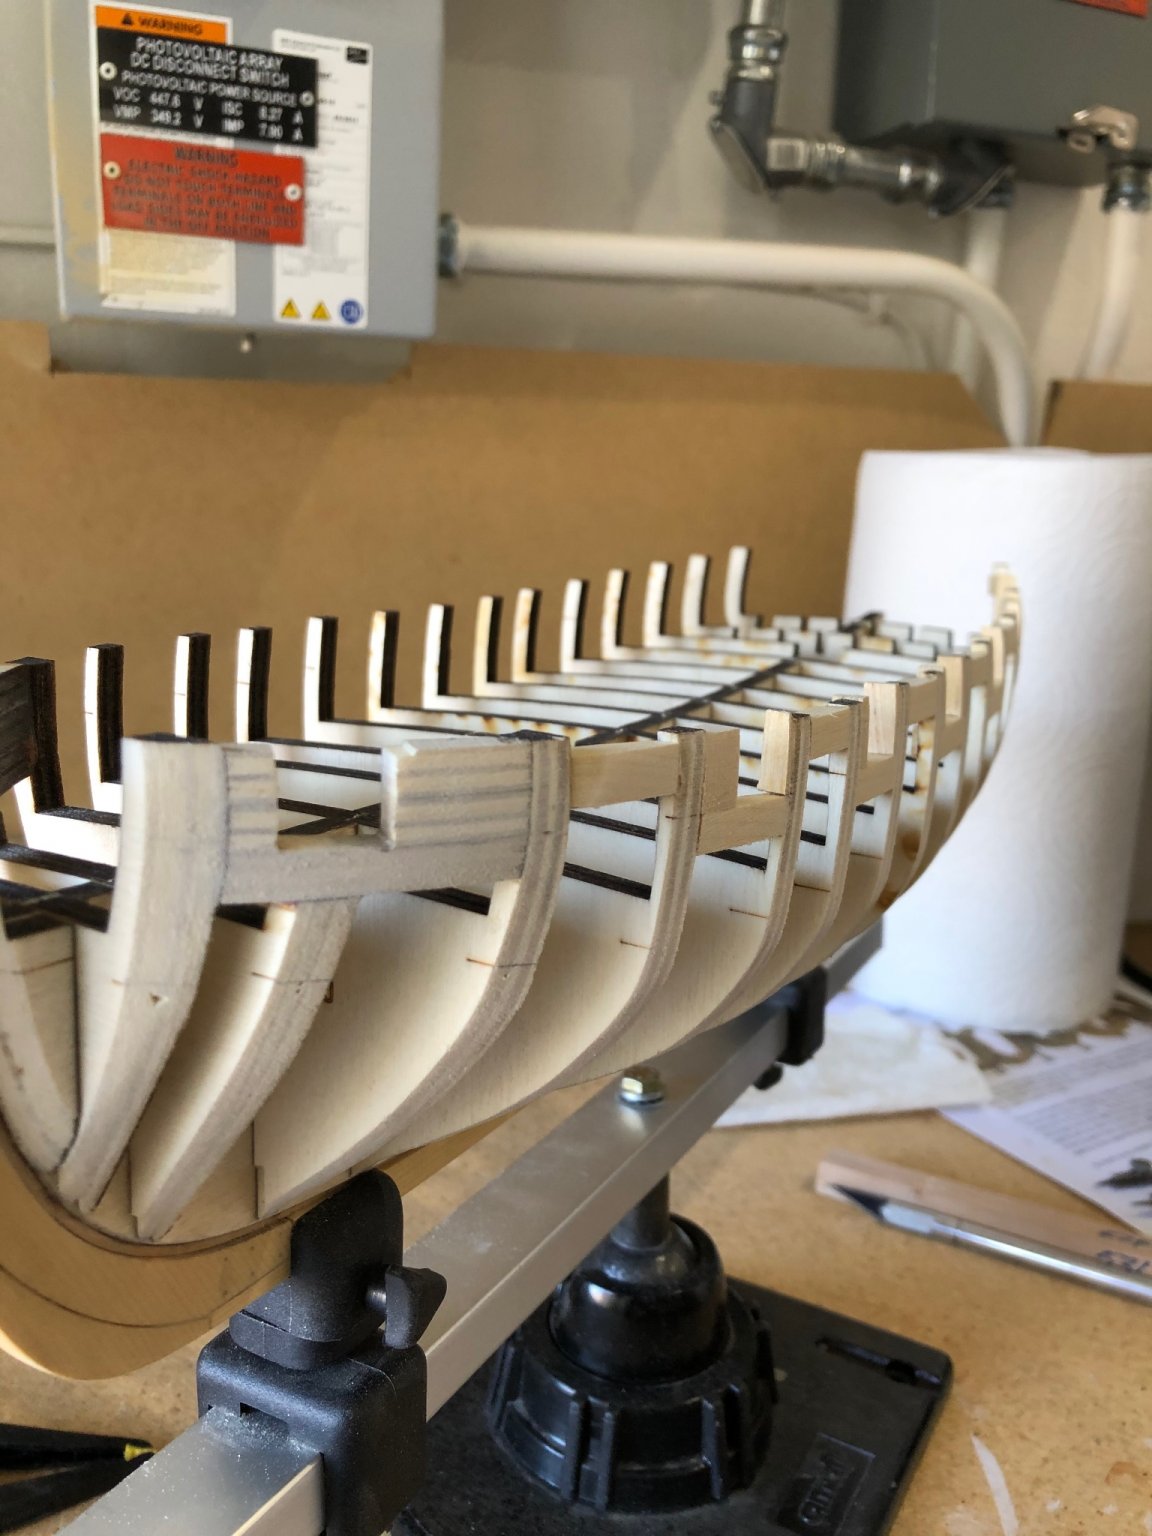
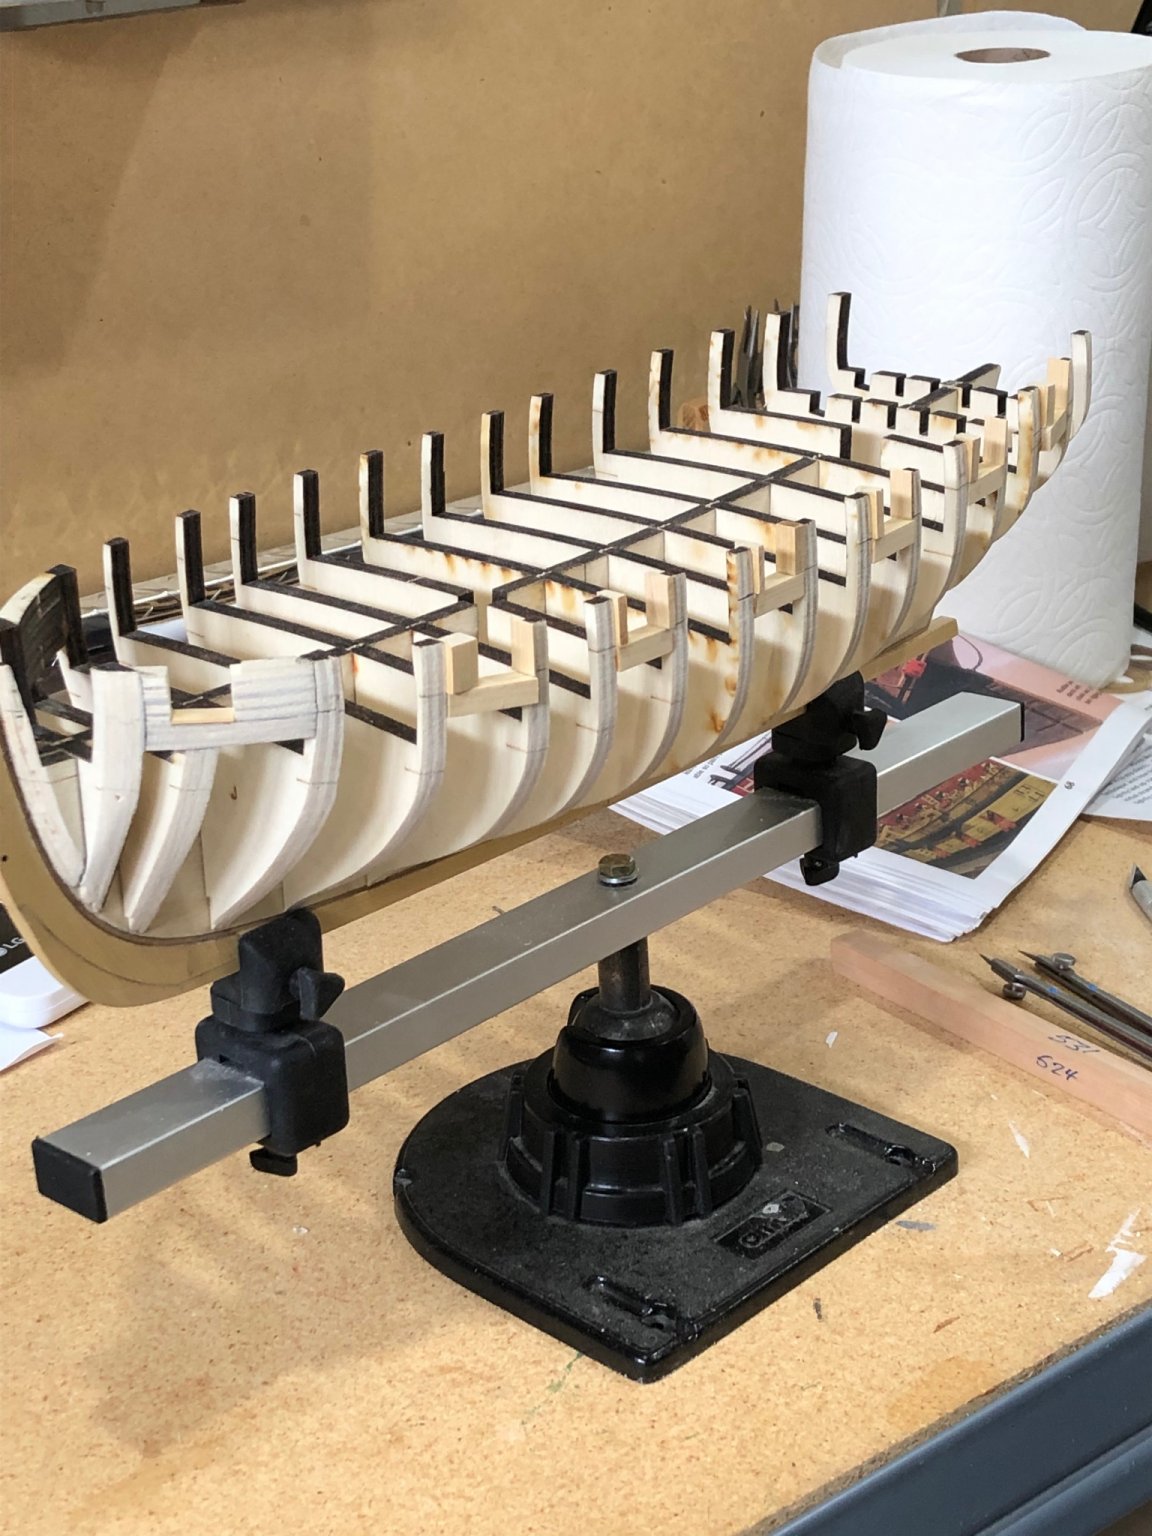
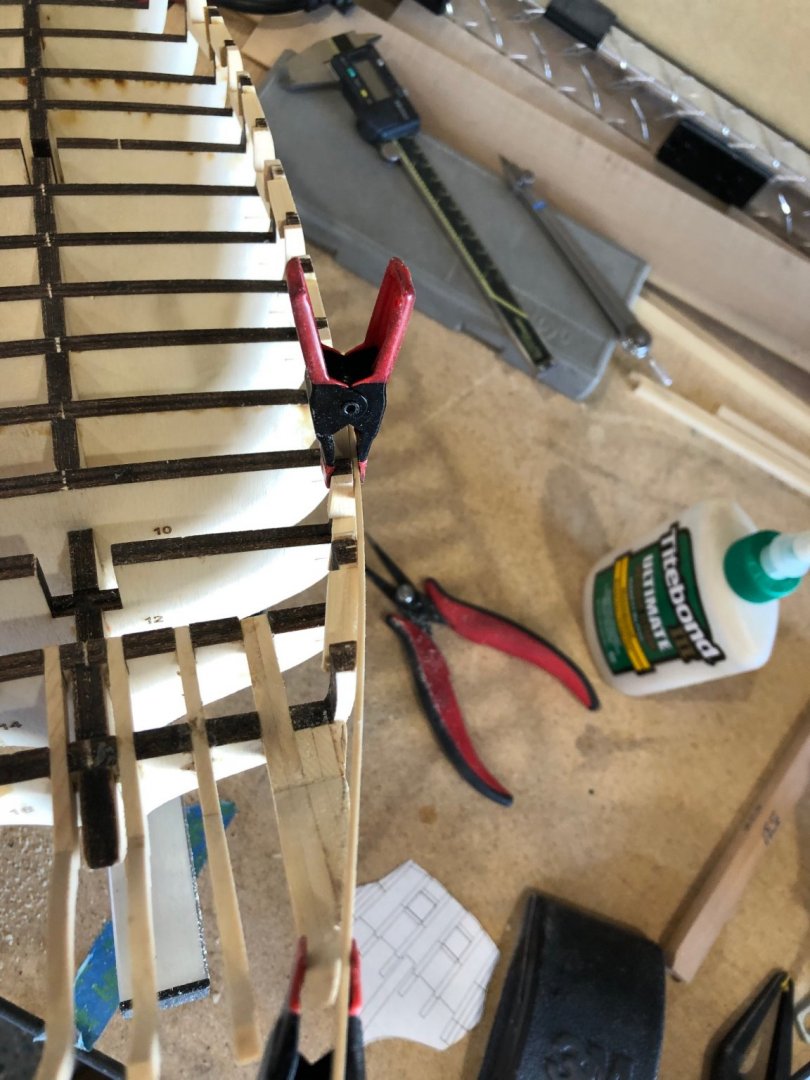
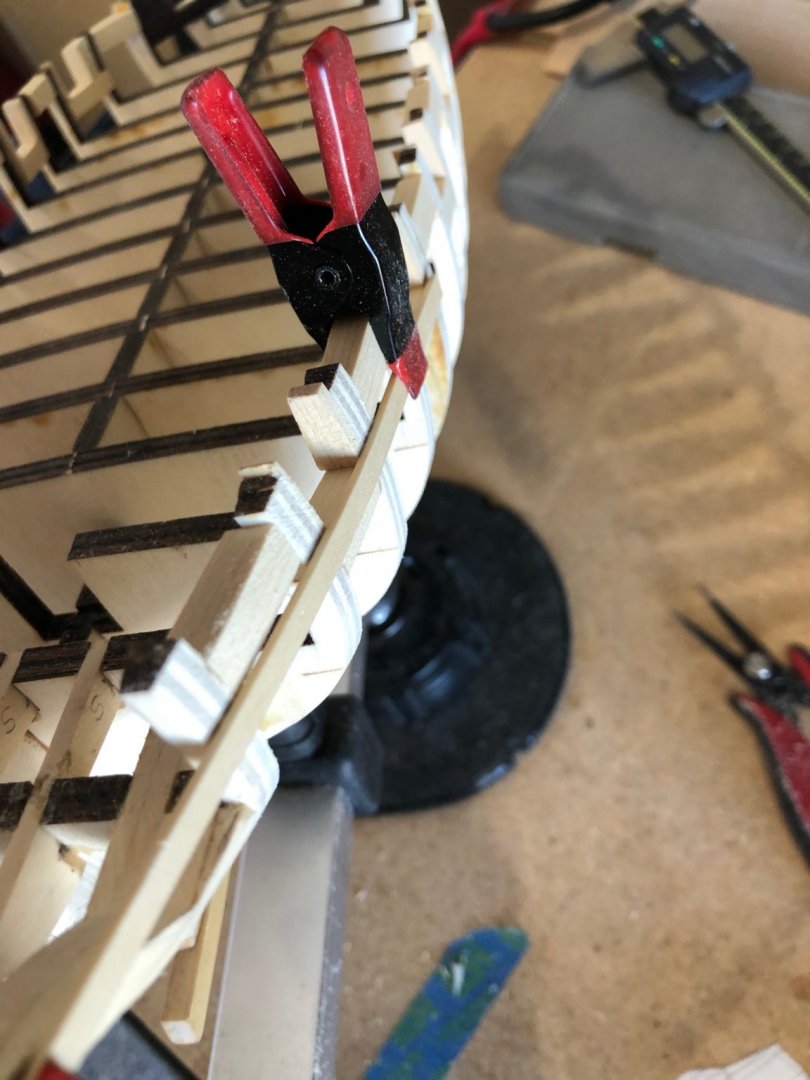
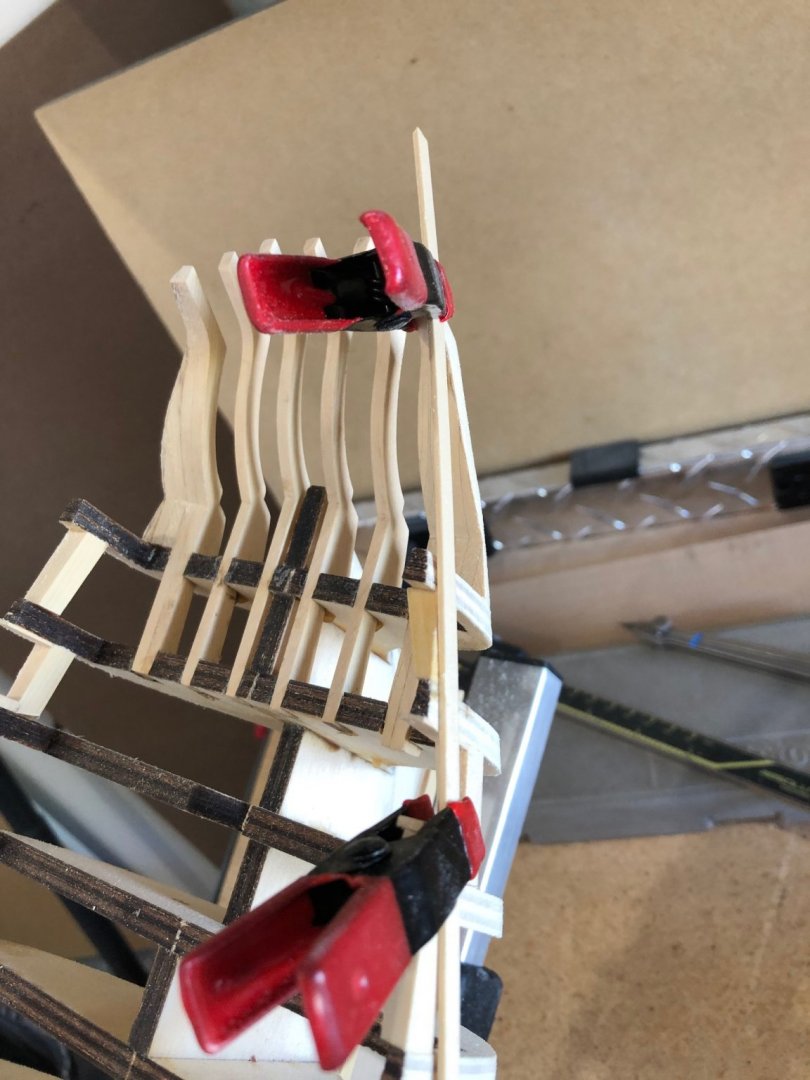
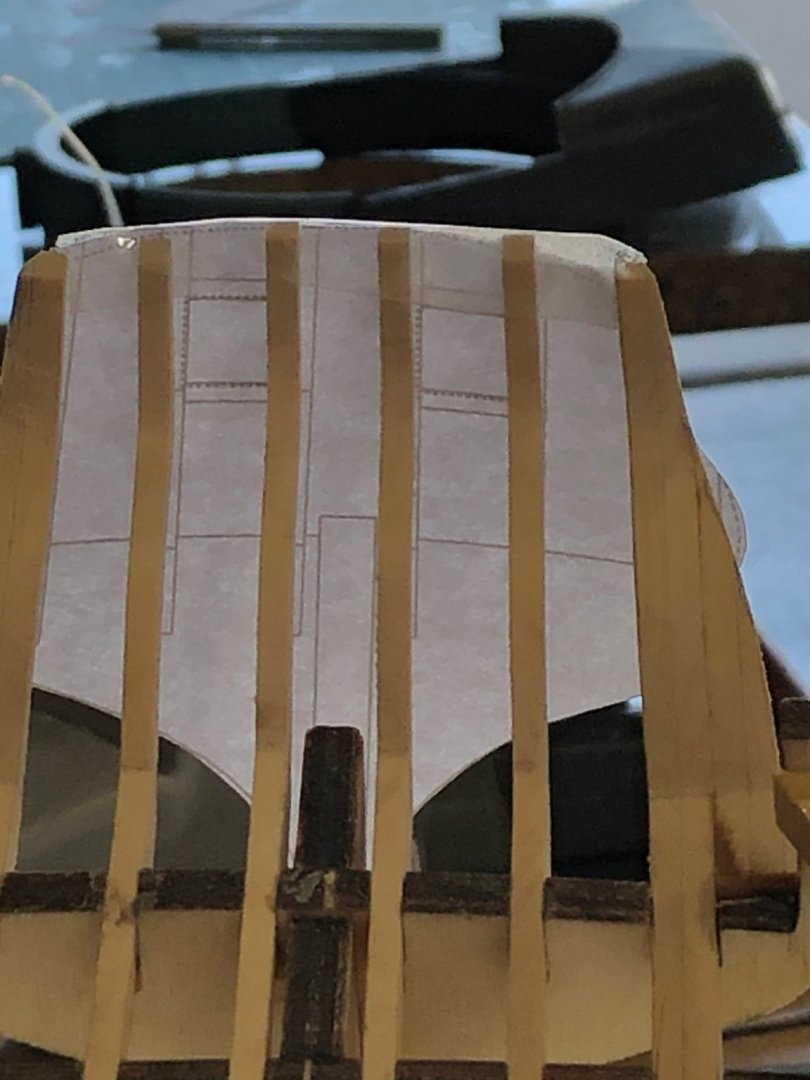
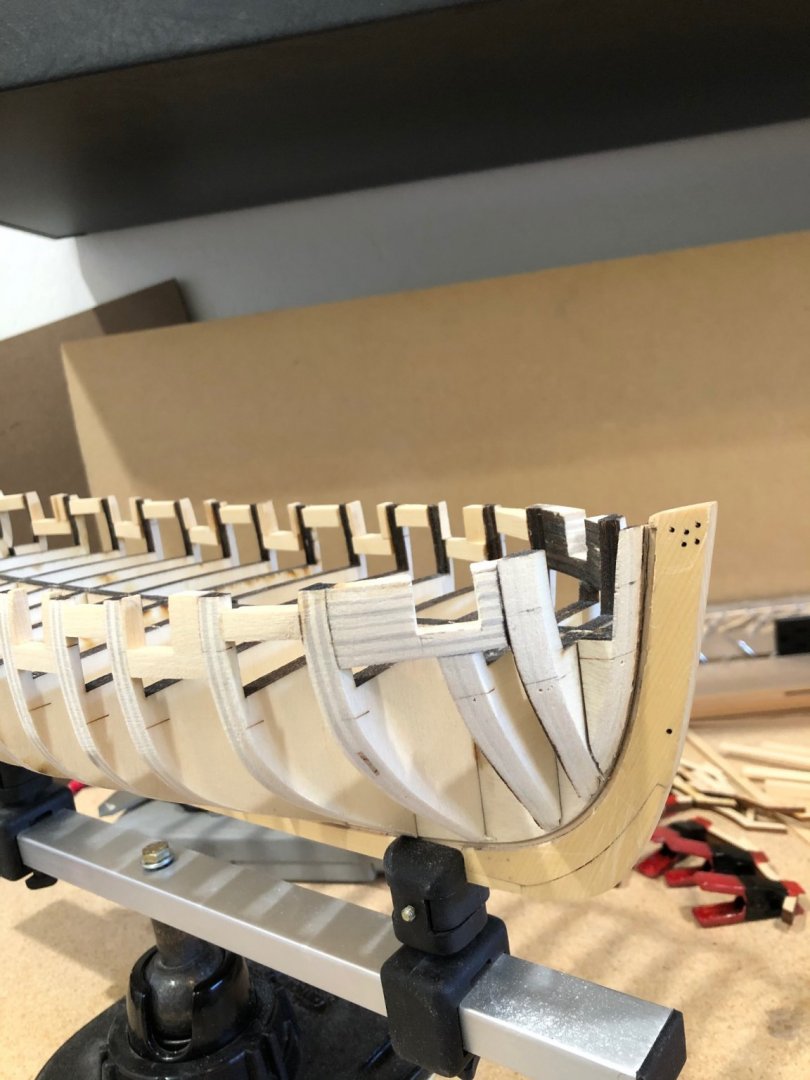
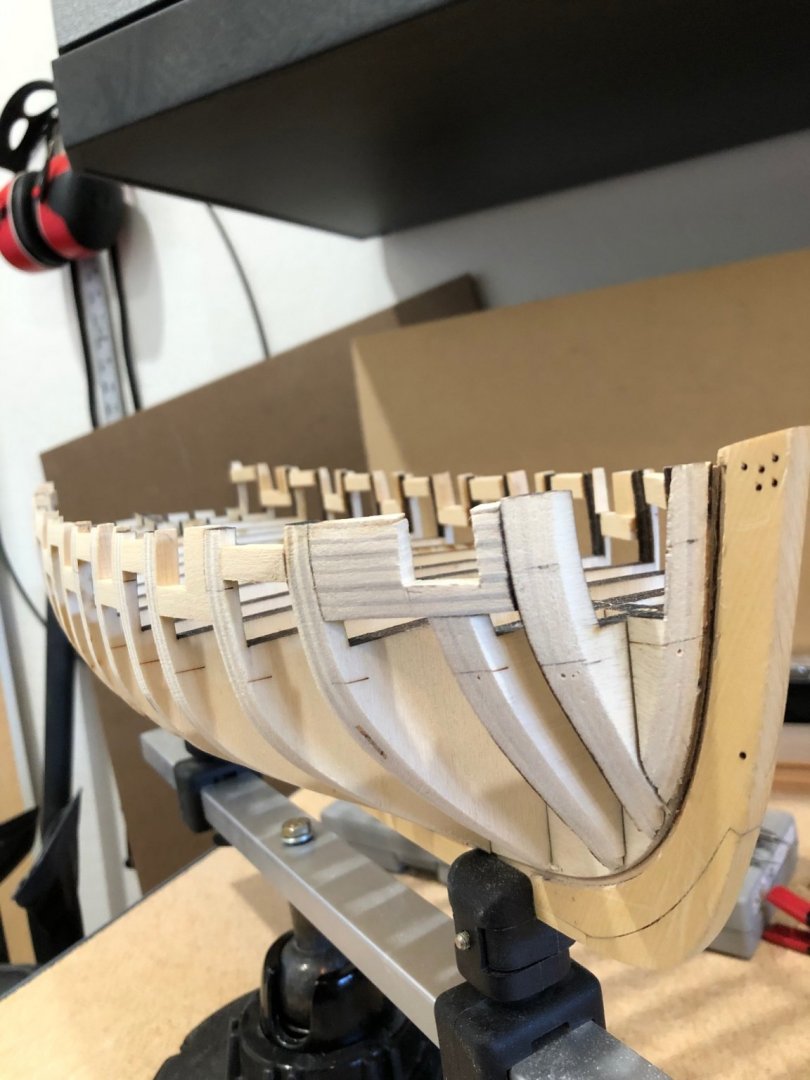
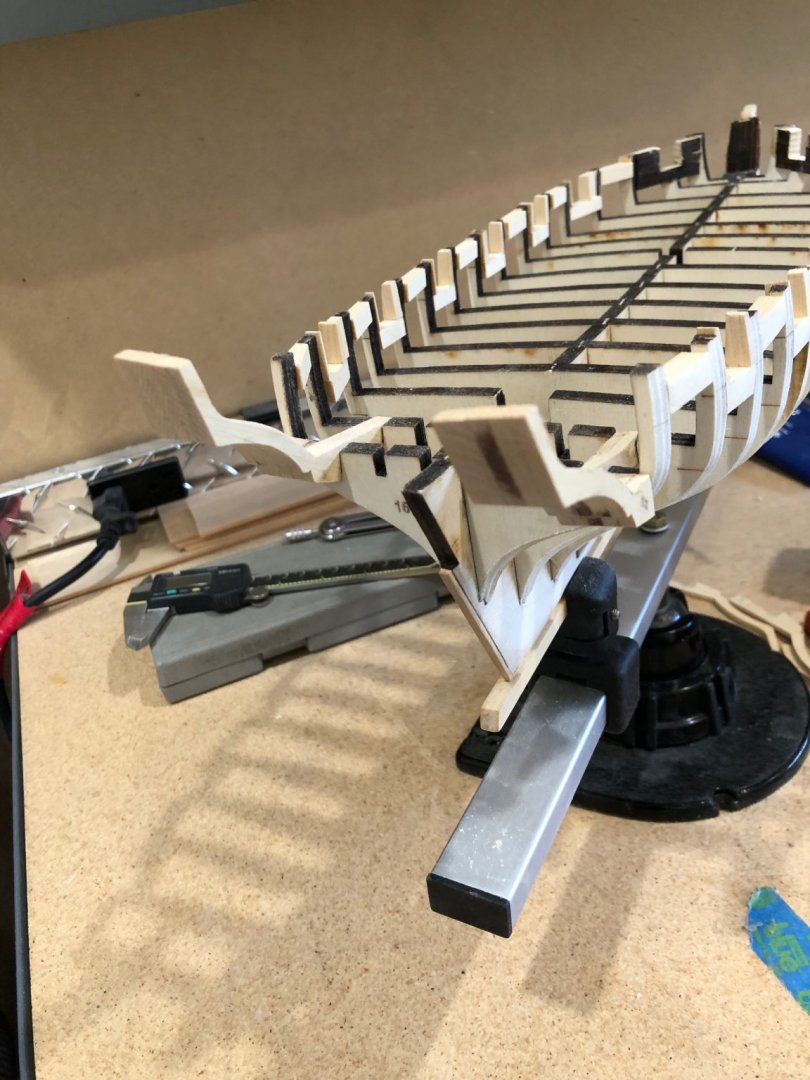
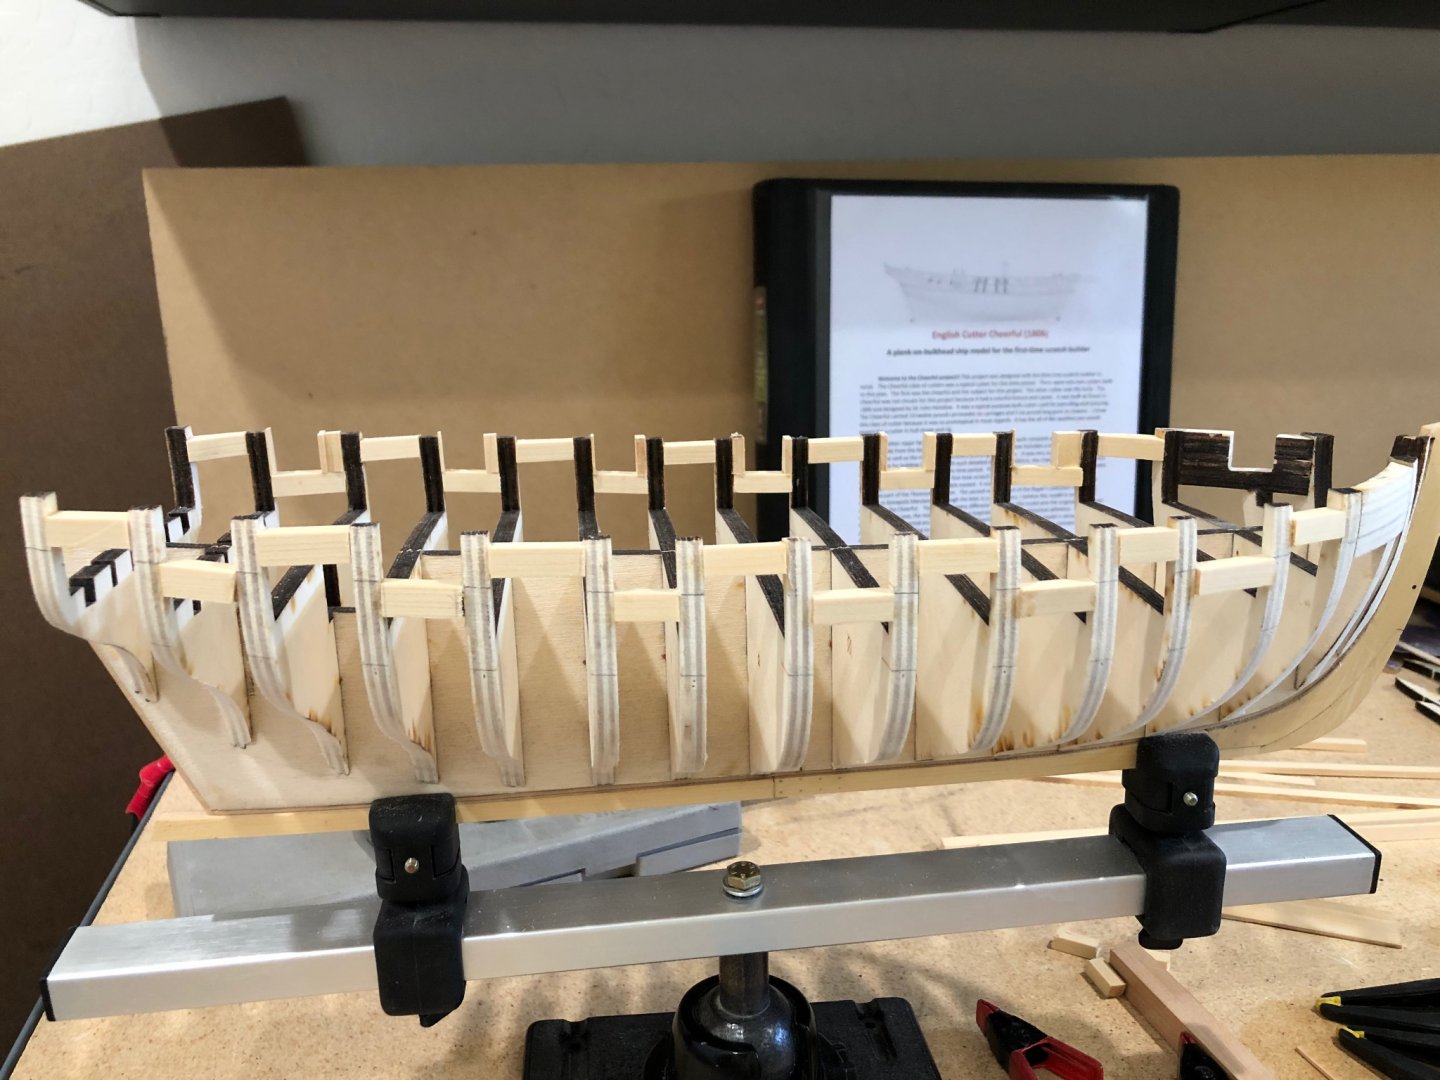
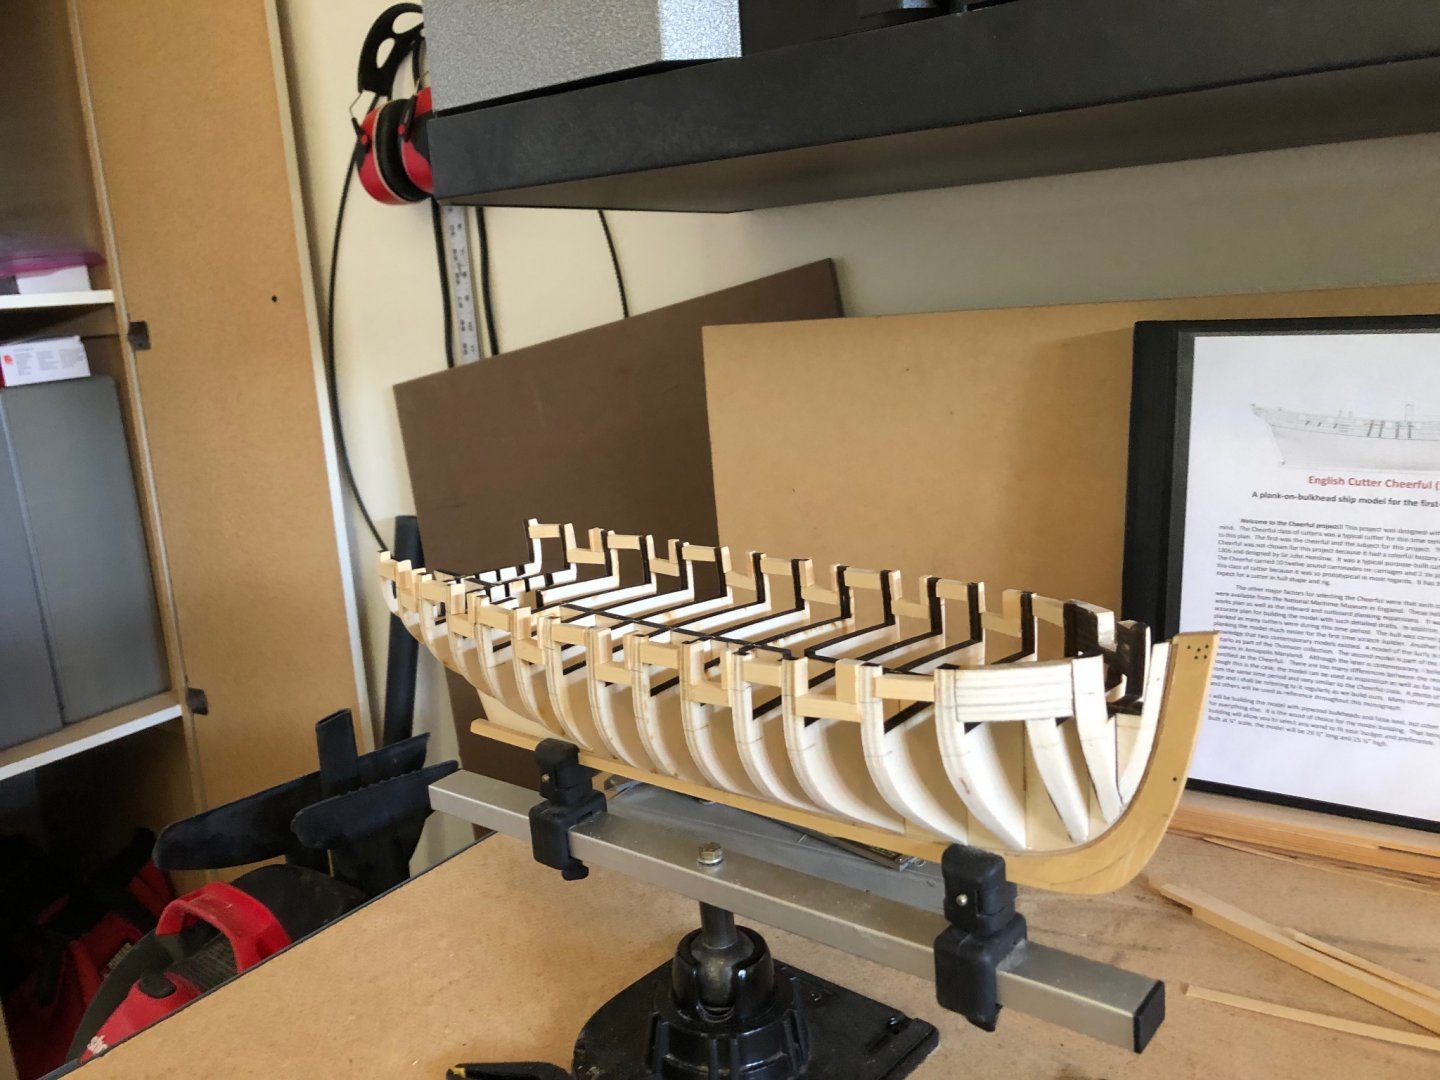
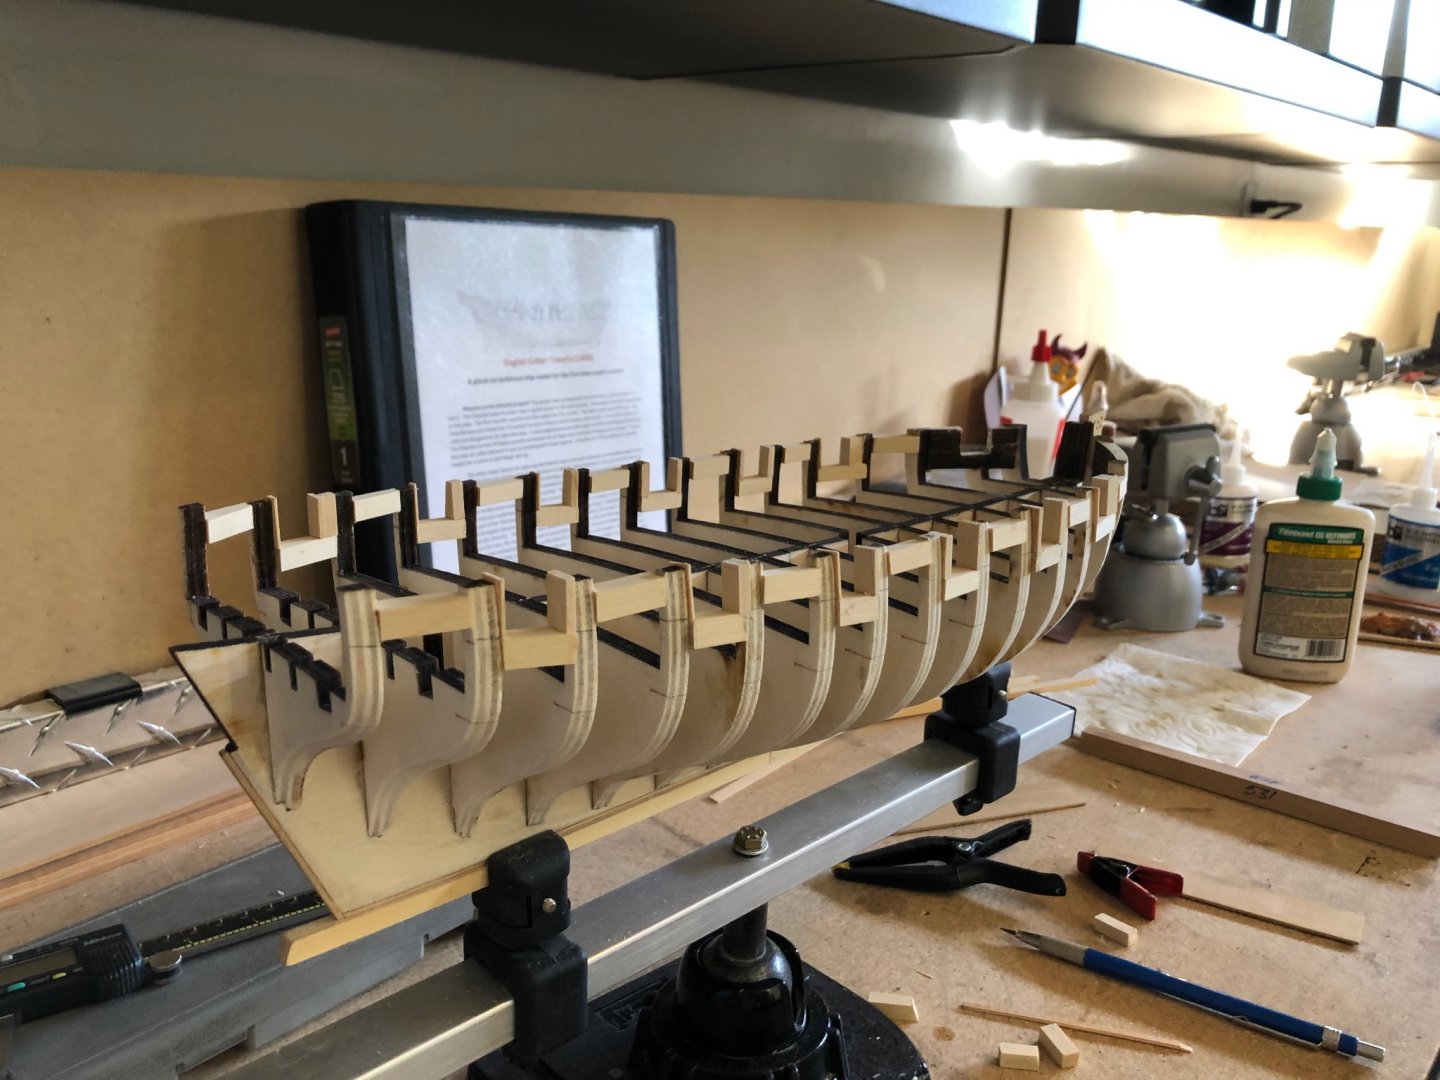
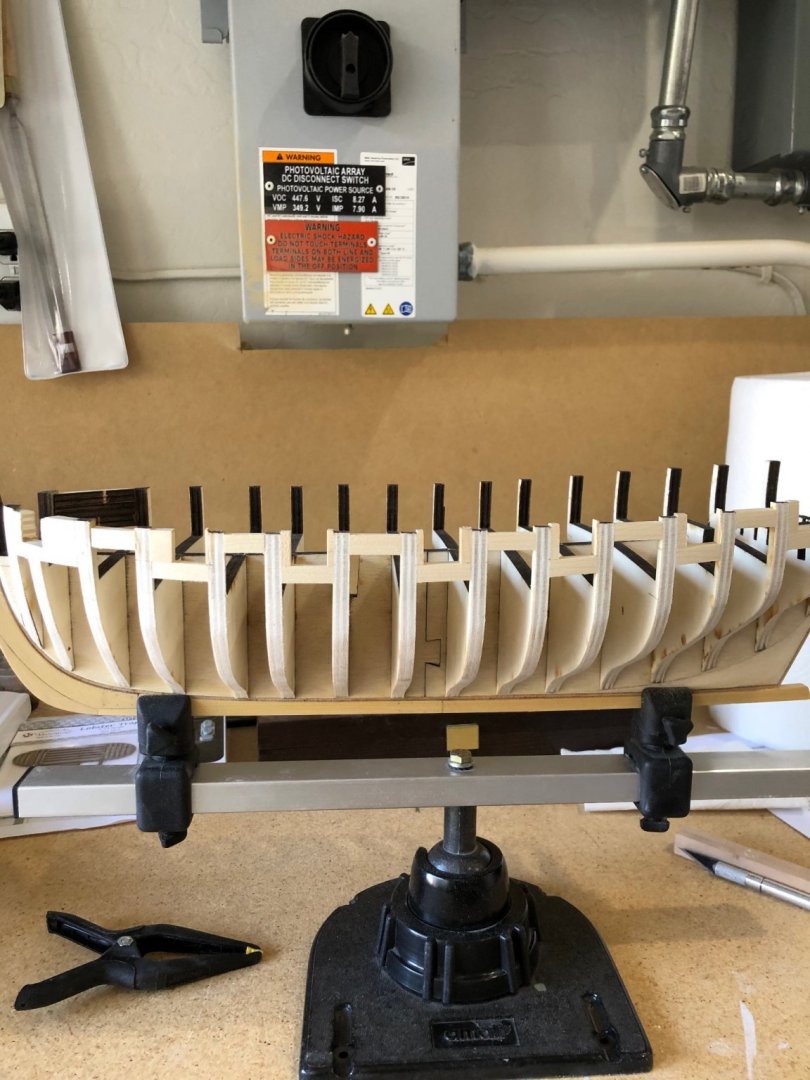
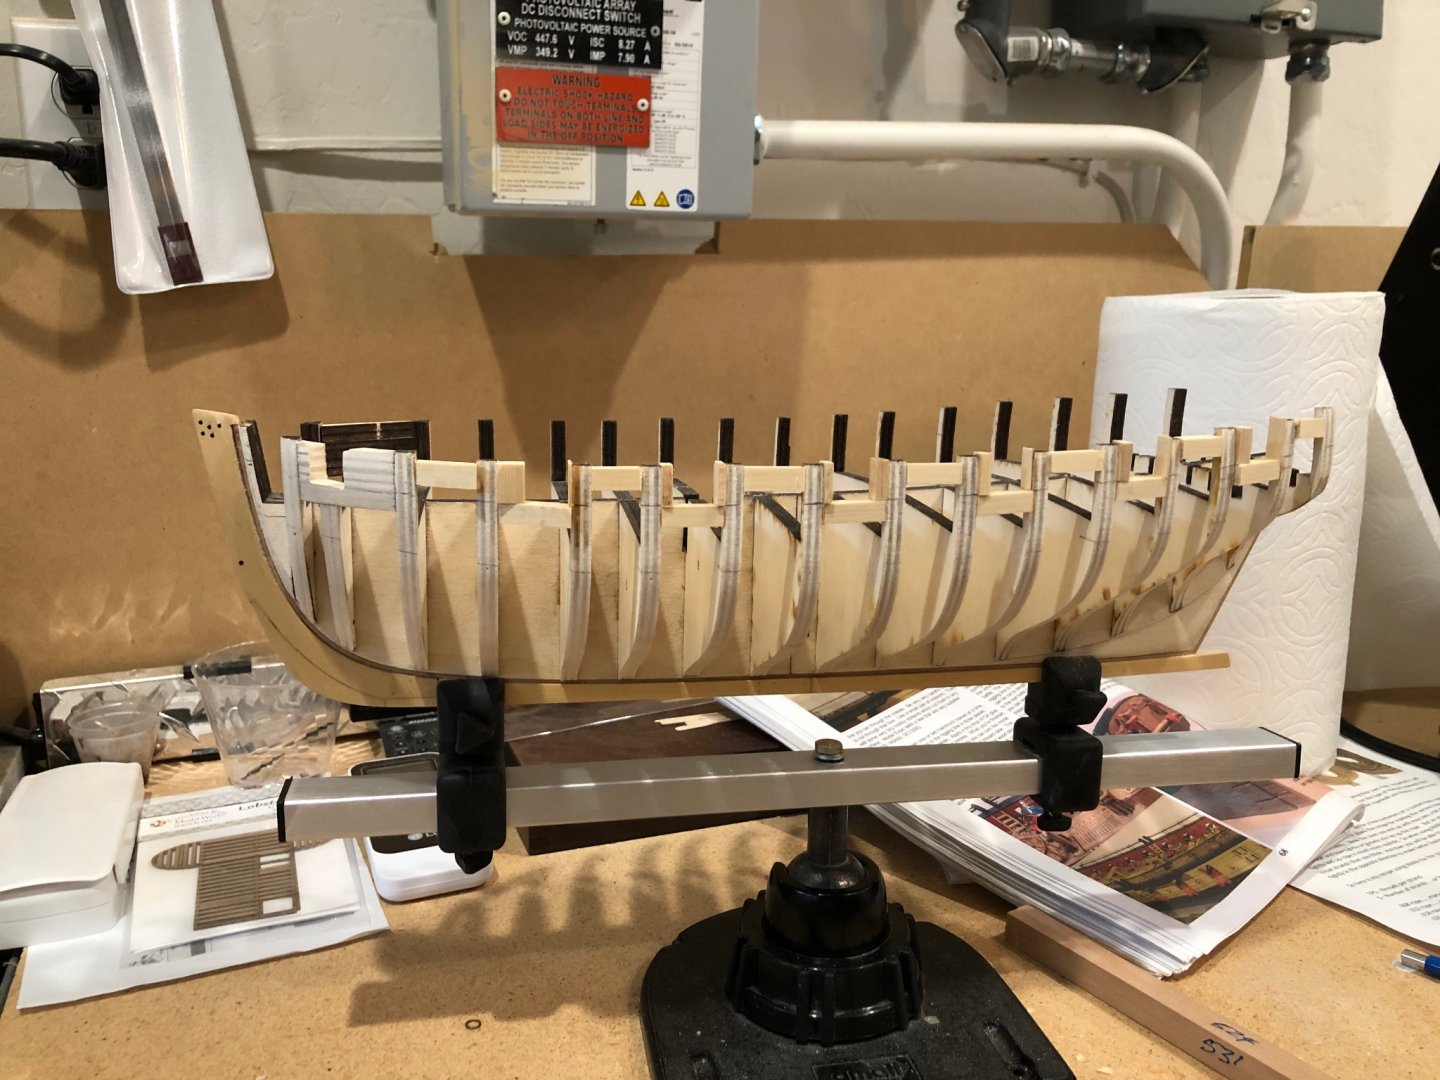
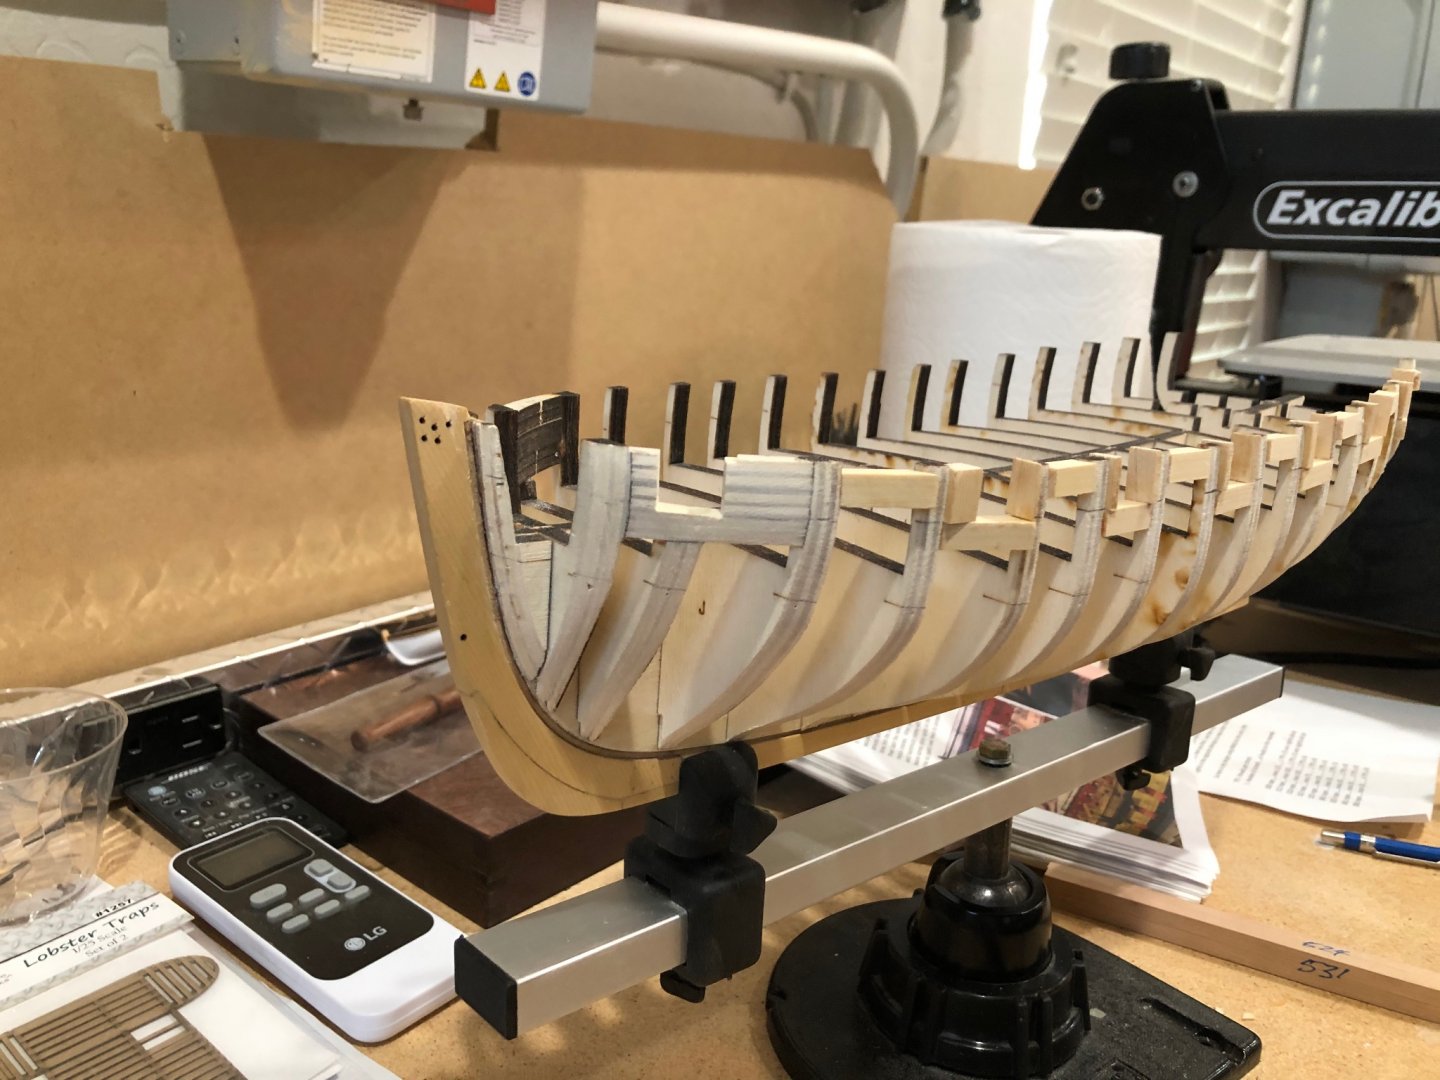
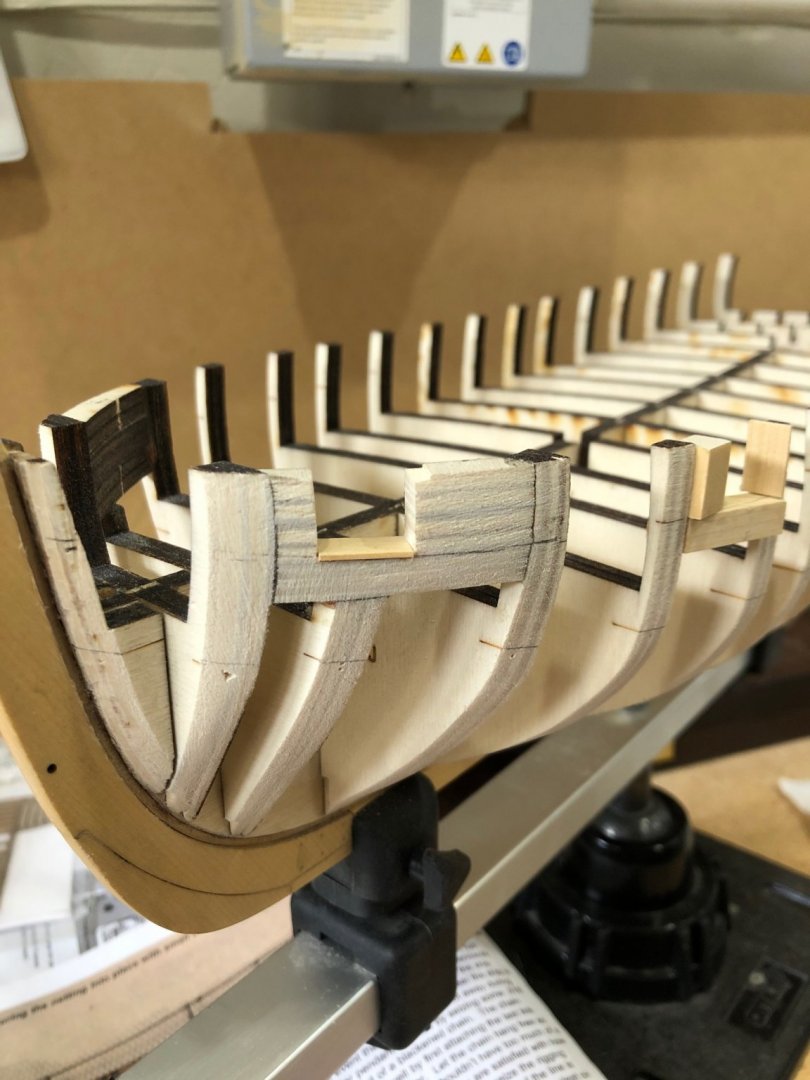
Forgot to take picture of how I marked the ZZ frames so I'll just say I used the same method as Rustyj and glbarlow. That being a lead taped to a piece of wood that is used to slide down the sides of the frames while marking the cut line on ZZ frames. That done it used a small sanding drum on my rotary tool to remove all excess material up to the line. I then used sanding block to fair the zz frames to the line of the hull. frames glued in before marking frames ground and sanded fair. Used a strip to verify the fairing after sanding, checking, sanding, checking, sanding and more checking. Kept working until the strip was flush to the frame surfaces. Starboard side being checked from top to lowest Port side being checked Made copies of the stern frames from the drawing and held to the frames. I was amazed how the 12 pieces of framing aligned with the copy. Best I have ever done. Taking time and repeatedly reading, measuring, and checking shows the results. Translucent photo showing the alignment of all the frames. The angle taken gives the impression that there is misalignment but it is aligned as the frame tops show in the previous photo. Now to lintels, sills, square tuck and fillers which I'll try to get done before we leave. I'm taking some of Chucks mini-kits for the Cheerful to work on while we're away.


-
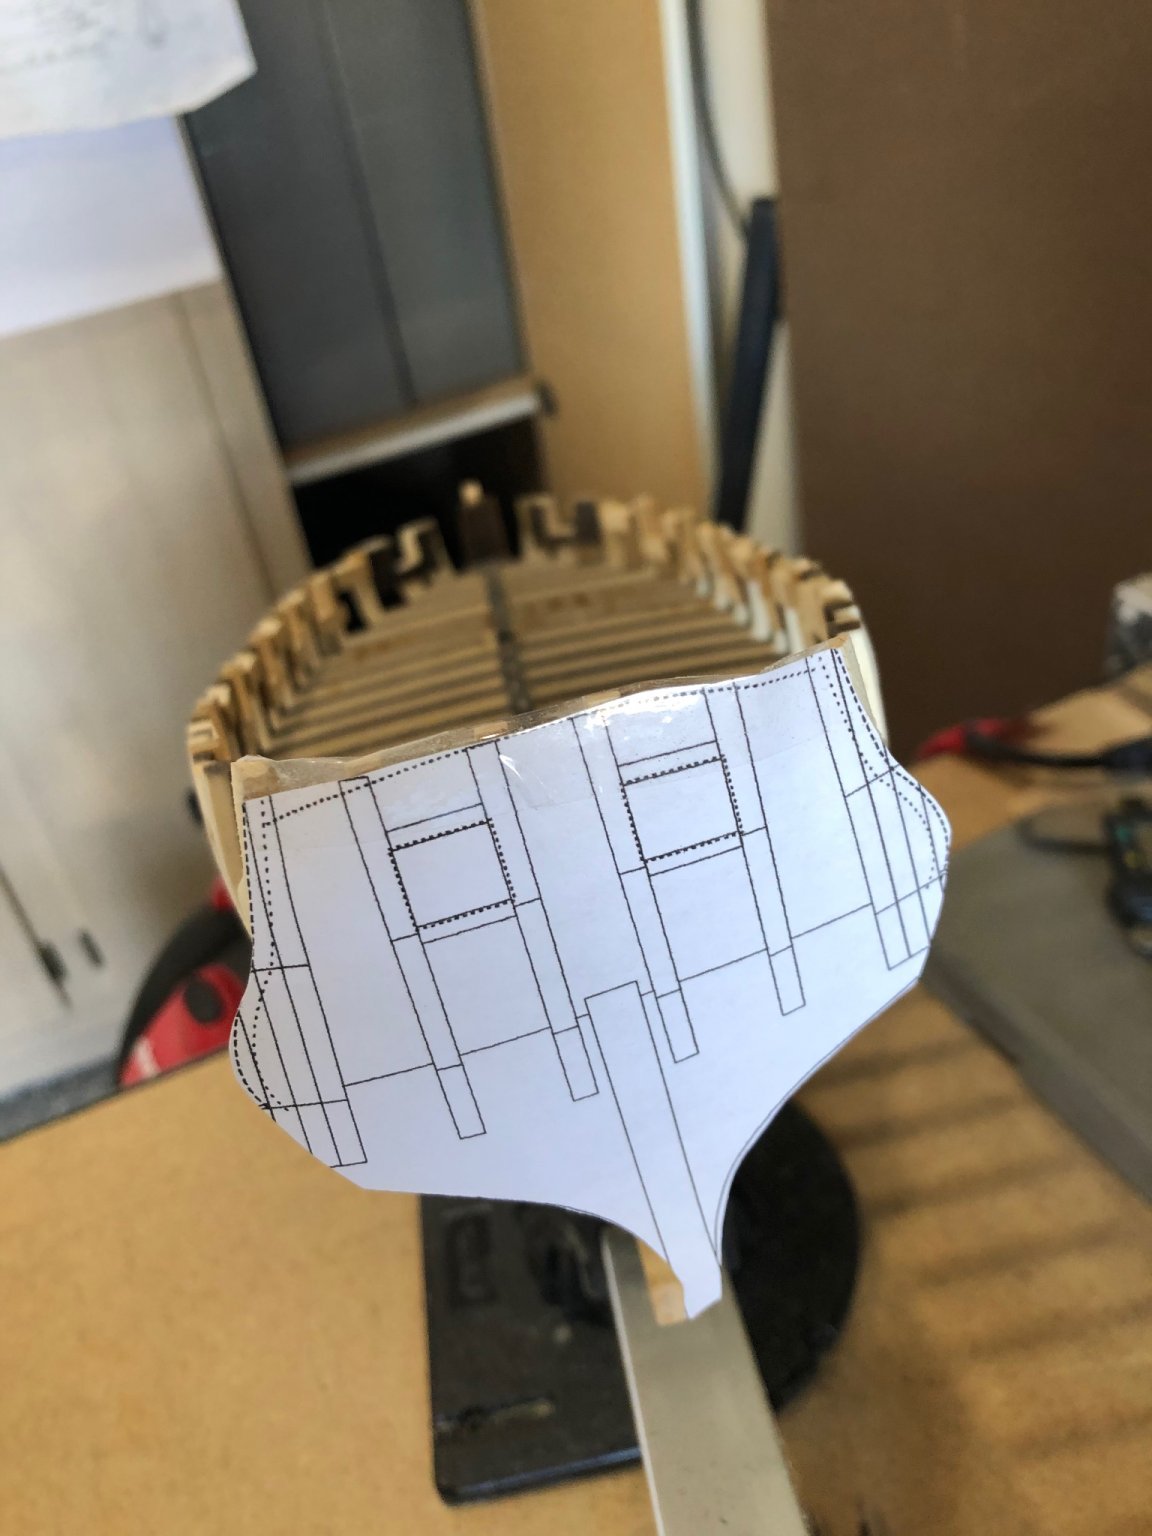
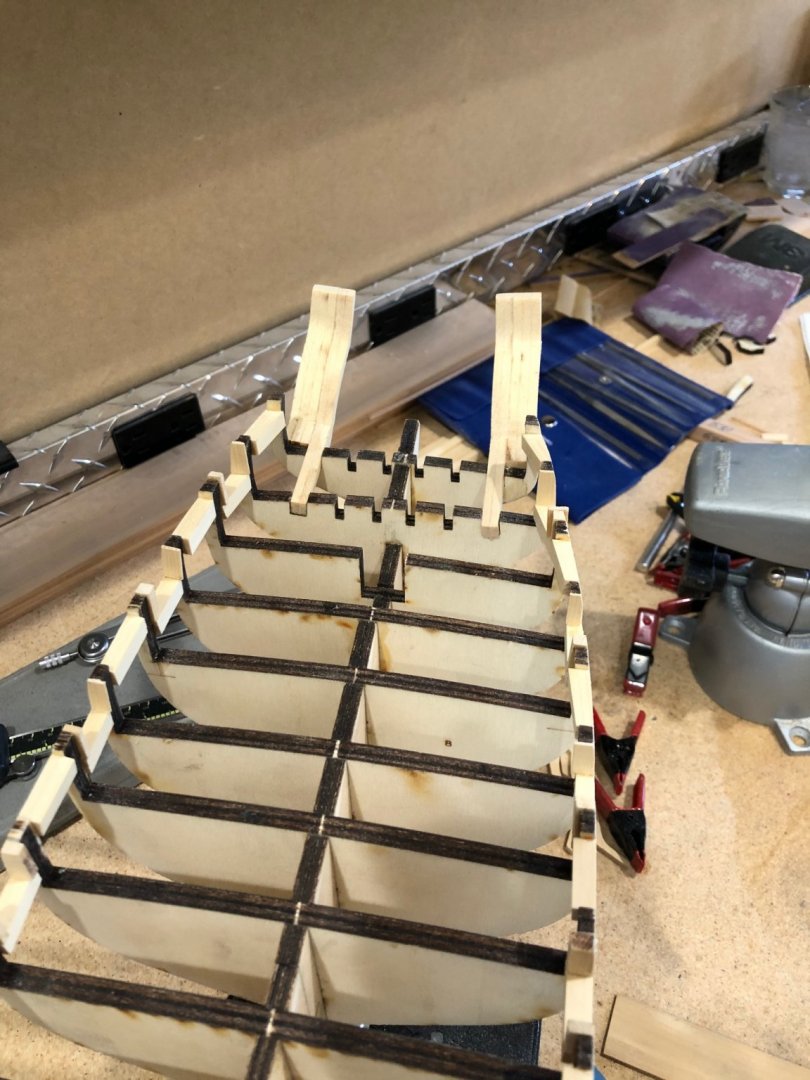
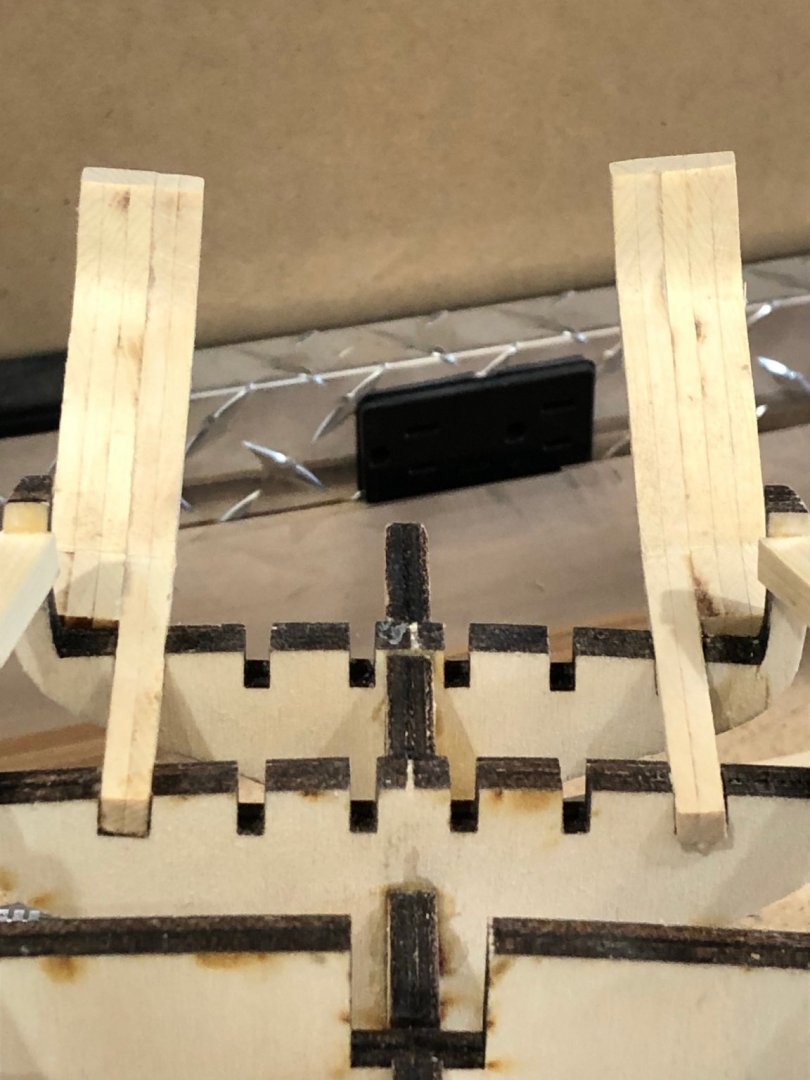
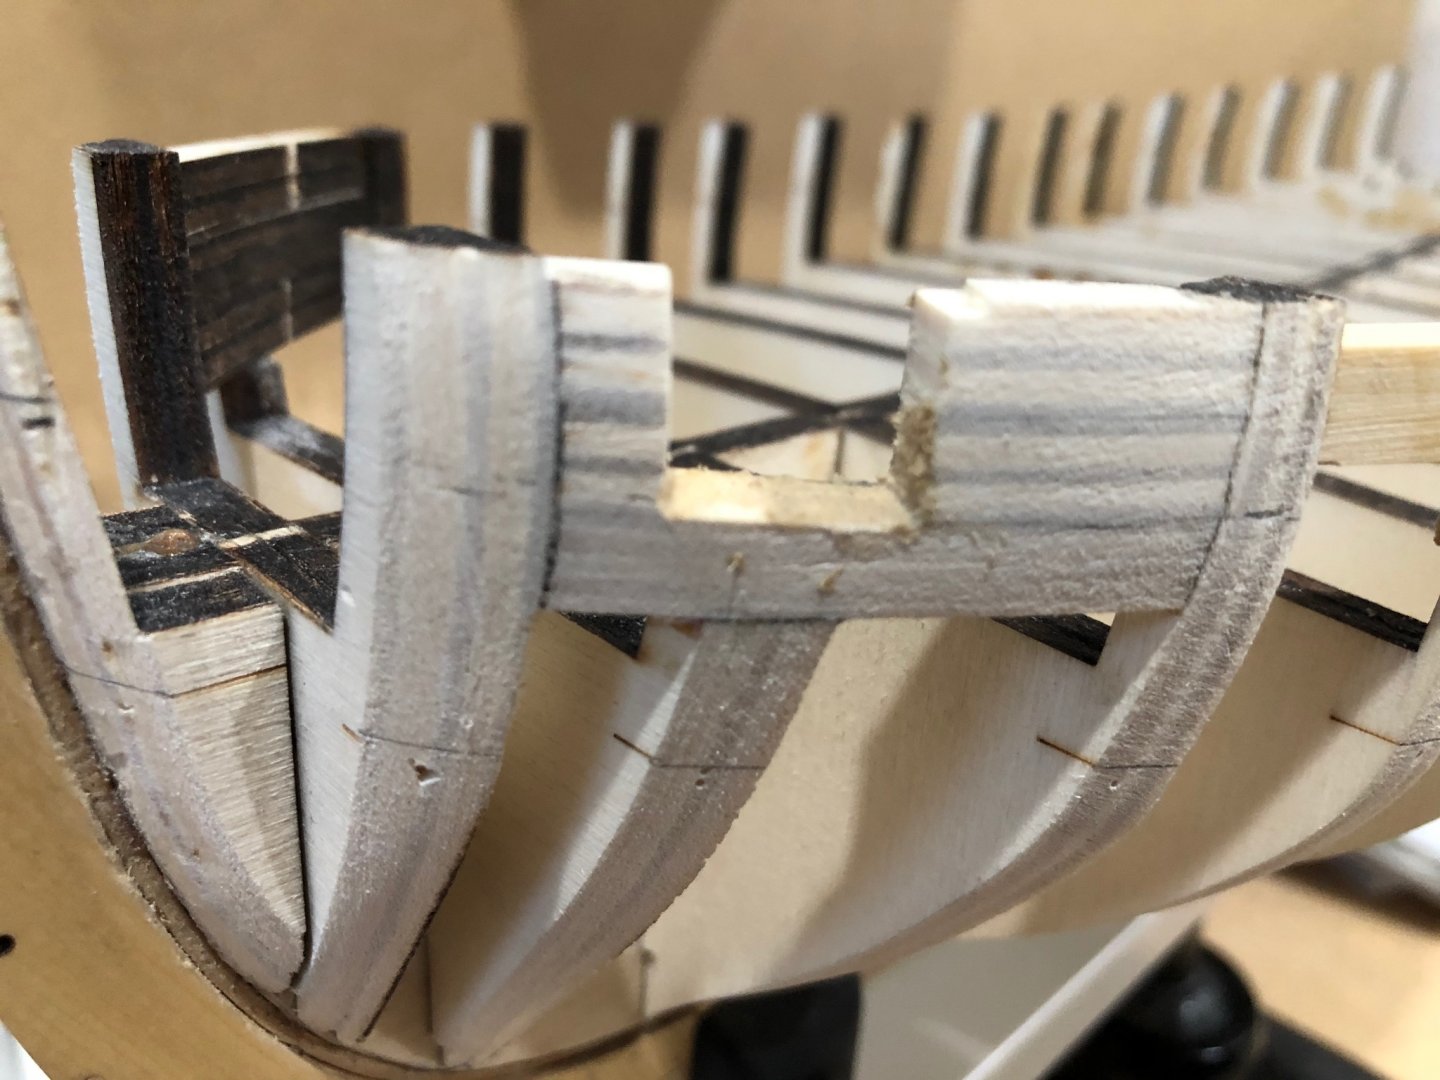
Took time today to cut the forward gunports fortunately without any mishaps as on the port side. Filed and sanded the opening to match my .571 tool and now on the stern frames. Now on the stern frames removing the laser char was quite a challenge as the boxwood takes the char into the grain deeper than the other part of the wood which resulted in removing more surface than I would have liked. The X and Y were done singularly and I decided to glue the two Z frames together before removing the char. After the Z frames set the char was removed and while removing the char I glued the two sets of ZZ frames together and then glued to the Z frames. Removing the char from this assembly was much easier to keep the shapes while sanding to remove the char. With char removed from all the frames it was time to glue the Z assemblies to the rear frames. When the glue sets the Z frame assembly will be marked for the fairing as is the monograph. Waiting for glue to set before marking to start fairing with a small sanding drum.


-
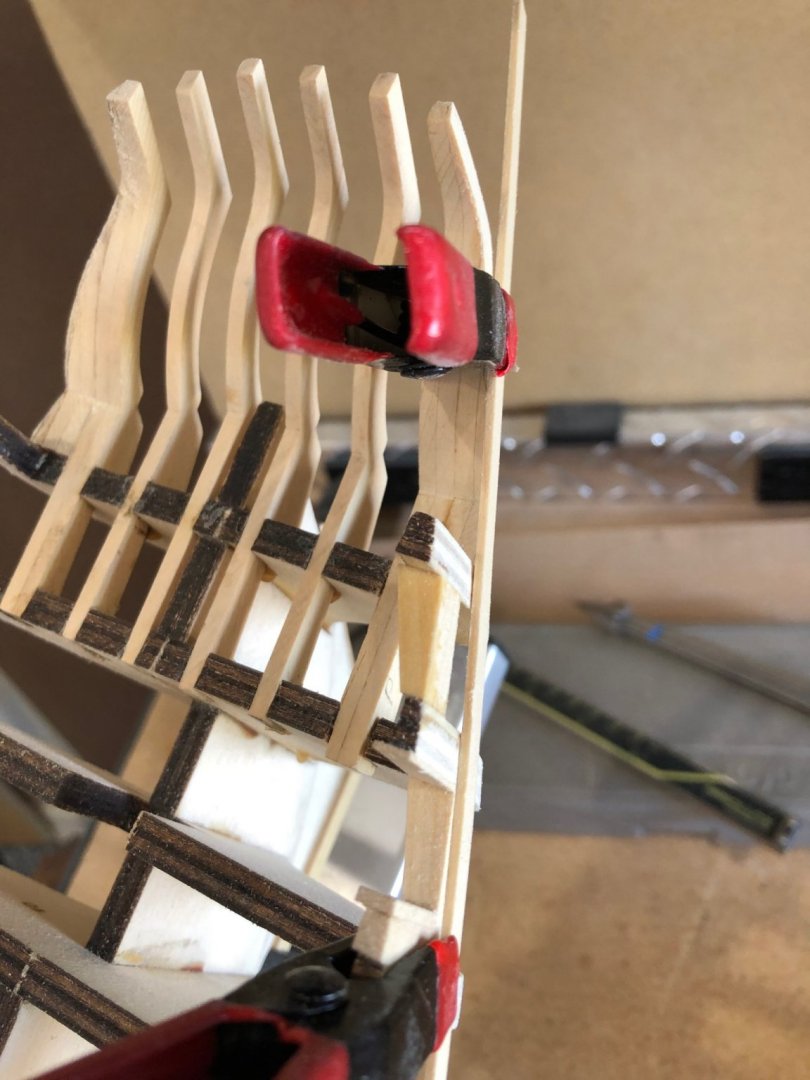
Well I snuck out into the shop today telling my wife I was ready to go on vacation. 😜 Got the starboard sills installed and stiffeners installed in the open bulwarks. Starboard side went much faster and easier. It looks ugly but no one will see it when planked. Placed the gunports sides making sure that everything was level and in alignment with the port side. Finished up by fairing both sides getting ready for the next step planking the wales and bulwark planks. Before any planking I need to pick a red color and paint the gunports.

-
Well done its looking great. Hard to believe you've finished the Syren in such a short time. Great job. The whole project and the log are fantastic.
- 950 replies
-
- 1
-
-
- syren
- model shipways
- (and 1 more)
-
Thanks guys I go and give it a try.
-
As Druxey said not to worry we all used/use filler on planking. It looking fantastic for your first planking.
- 52 replies
-
- 2
-
-
- Model Shipways
- muscongus bay lobster smack
- (and 1 more)
-
Well back to fairing the portside and fixing the first gunport sill. I had placed reinforcing spacers at the top of the open frames which needed to be faired along with the sides of the ports. That was a straight forward process without changing the existing faired line. Using a strip of 1/8" x 1/32" boxwood I kept checking the existing fair making sure that I had not changed it while bringing the stiffeners and port side in line. The port side is done and now on to the starboard side, but it will have to wait as I'll be out of town for 6 weeks.


-
I have never been able to paint flat surface without brush strokes and would like to hear how other people do it. Any and all help is appreciated.
-
Still more problems with first gunport. Sanded down the 1/32" filler shown in previous photo and still not enough to stay in line with the sills. I removed the balance of the filling shim and went to option one and and made up filler with sawdust and glue. Evenly spreading a thin layer of this mixture on the sill of the port to be sanded when dry. Mixture drying Closeup of the mixture I went ahead and added fillers between the empty positions between bulkheads without gunports. Everything ready for final fairing hopefully tomorrow. Then on the starboard side without the OOPS I'm hoping.
-
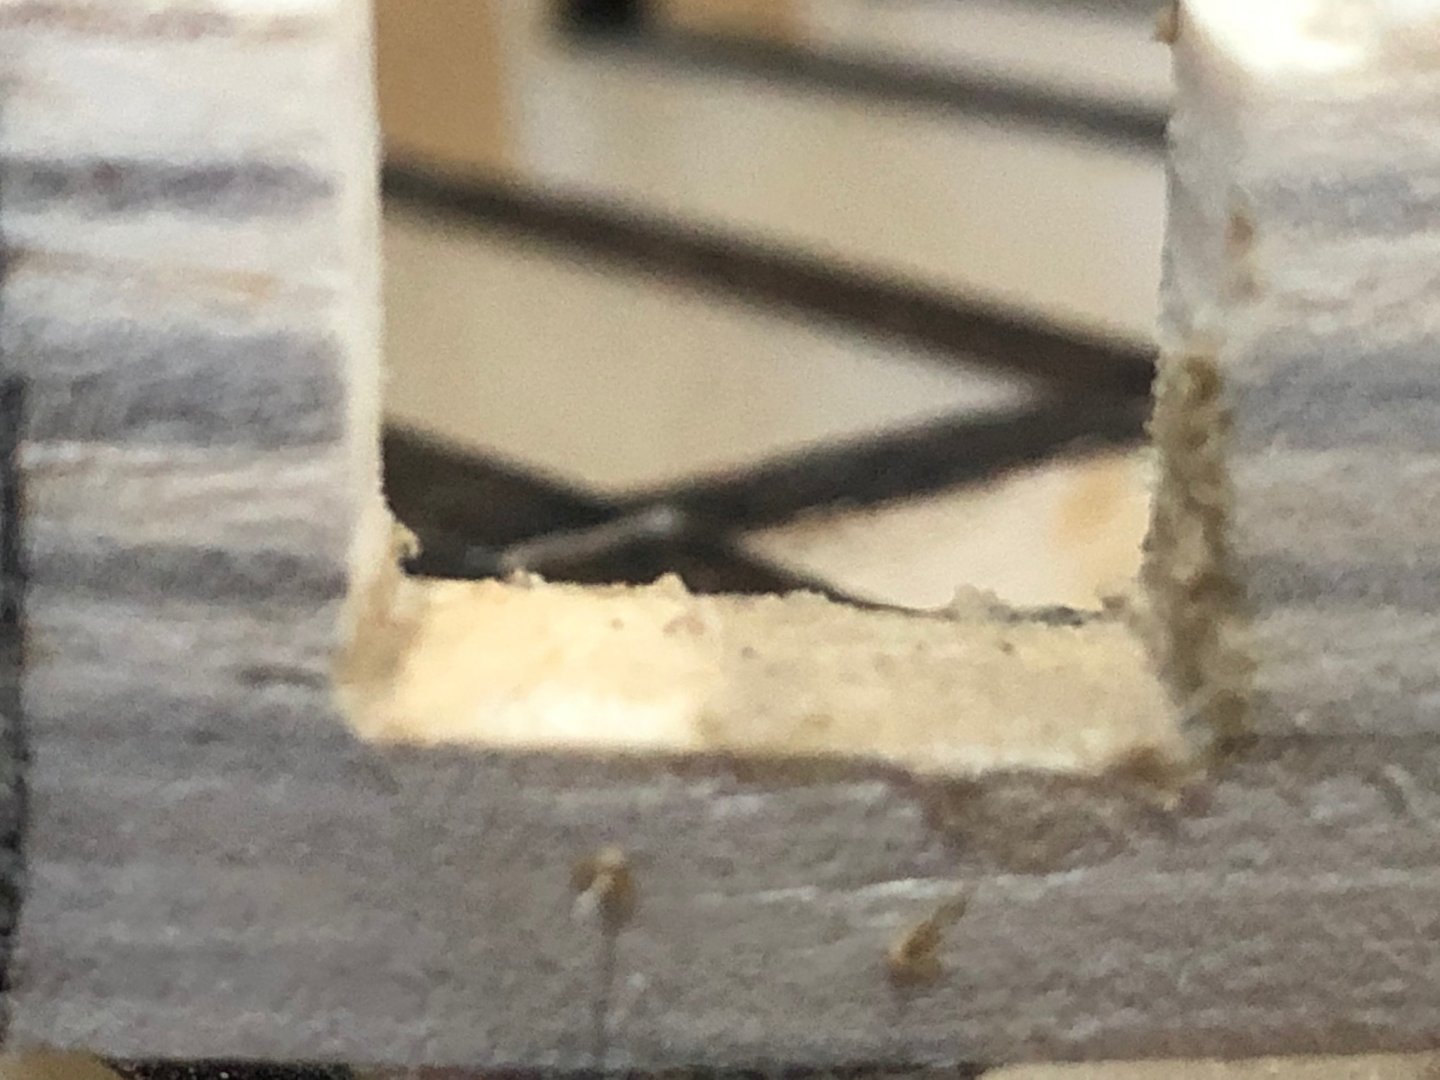
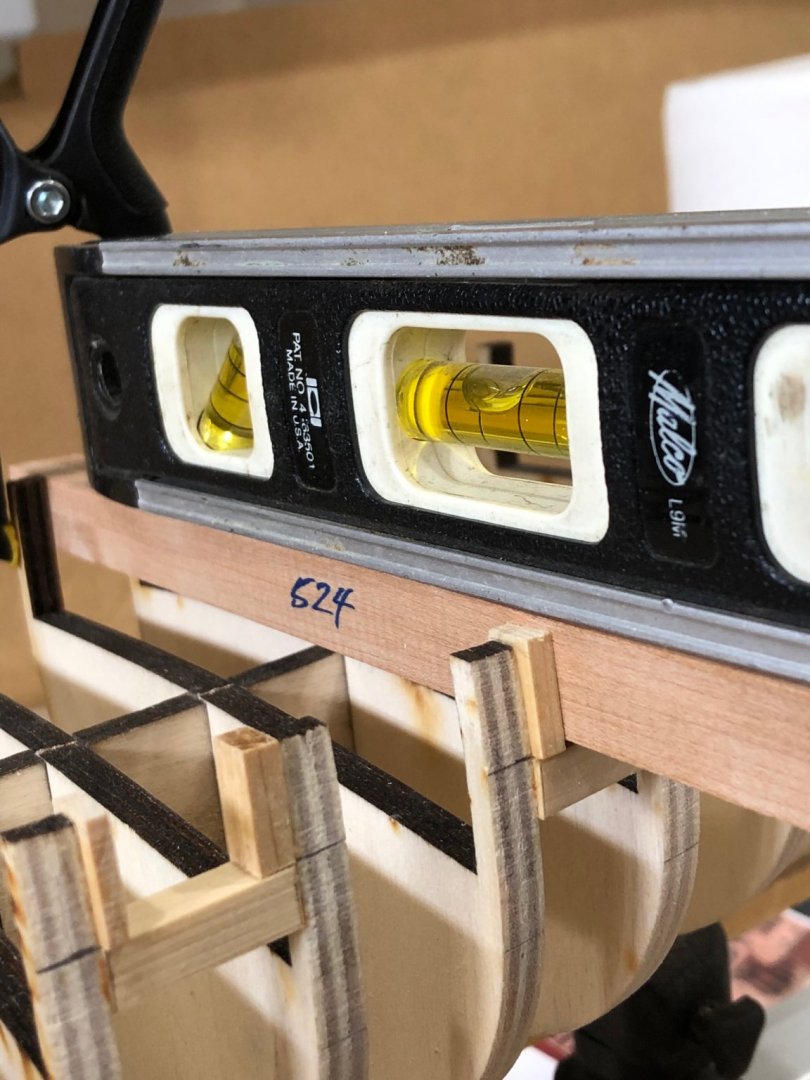
While placing the port side sills I borrowed Glenn Barlows method of aligning a level to the starboard side sills thereby ensuring that the sills would be level. I made a port sizer out of some scrap cheery and surfaced on direction to .531" and the other .524"; I use the smaller side as a quick check so that when sliding the sizer into a port I don't scrape the ports surface. Thats the sizer in the photo. With all the ports done and the glue set it was time to cut the forward port. I measured and measured again. checked the monograph, looked at logs and bought the bullet 3/4" from the aft end of the fillers and the forward face of "J". Who knew scratch building would be so hard, whew. Scribed in the aft line and 17/32" forward for the forward side. I don't take enough pictures to show the individual steps, I'll try to get better. I started to the first cut using the razor saw but the blade started to flex so I went to a mitre saw. Getting the cuts just inside the lines so I could finish the port with files. I used a #11 knife to slice down to the bottom or top of the sill. As I got close to the sill level I encountered an OOPS or should I say "a learning experience". After so many cuts the blade had become dull and dug a gouge below the sills top surface. I don't know if I'm cheap or lazy but whatever you can't make that many cuts and still be sharp. So to fix this left two options as I saw it 1) to fill the gouge with filler made with sawdust and glue 2) would be to carefully cut lower and fill with a piece of .031 AYC. I remembered that someones log had lined the ports to make them smooth so I chose option 2. As you see while filing the top piece of ply broke off. I'll fix this when I see what happens as I progress or if anyone has thoughts please send them. Now only to put fillers in the open frames and fair it all down to final surface. Oh yeah the starboard side. Make it a good day Will

-
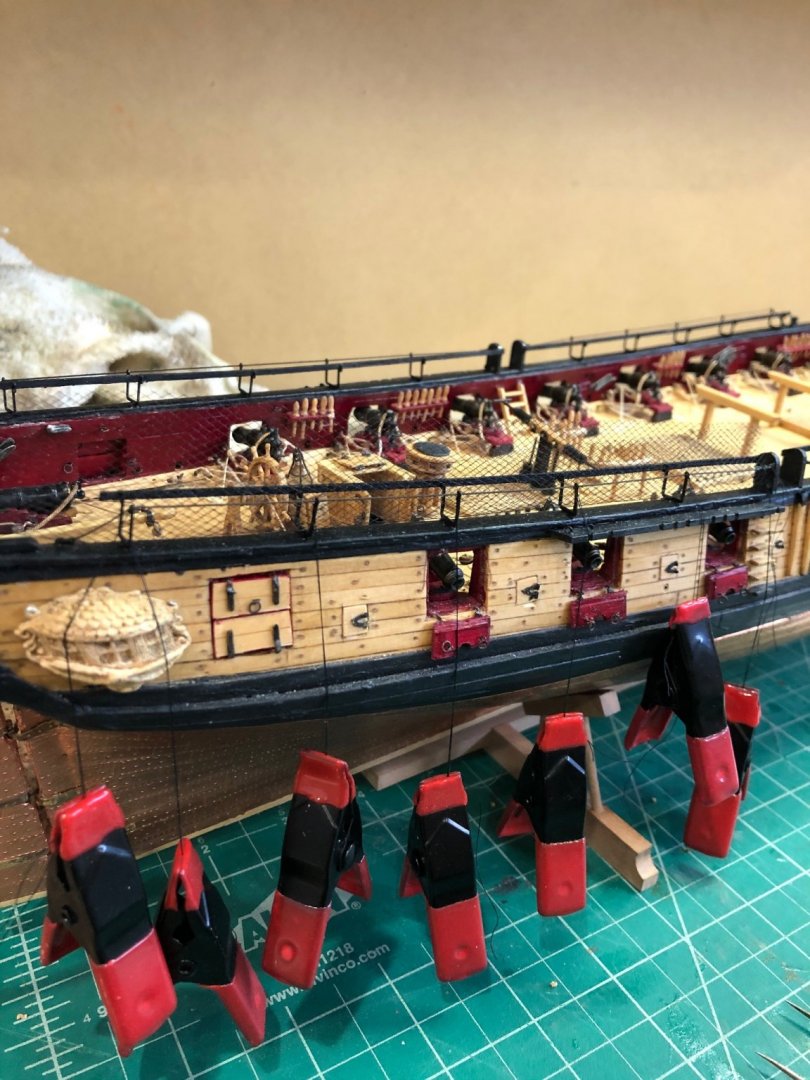
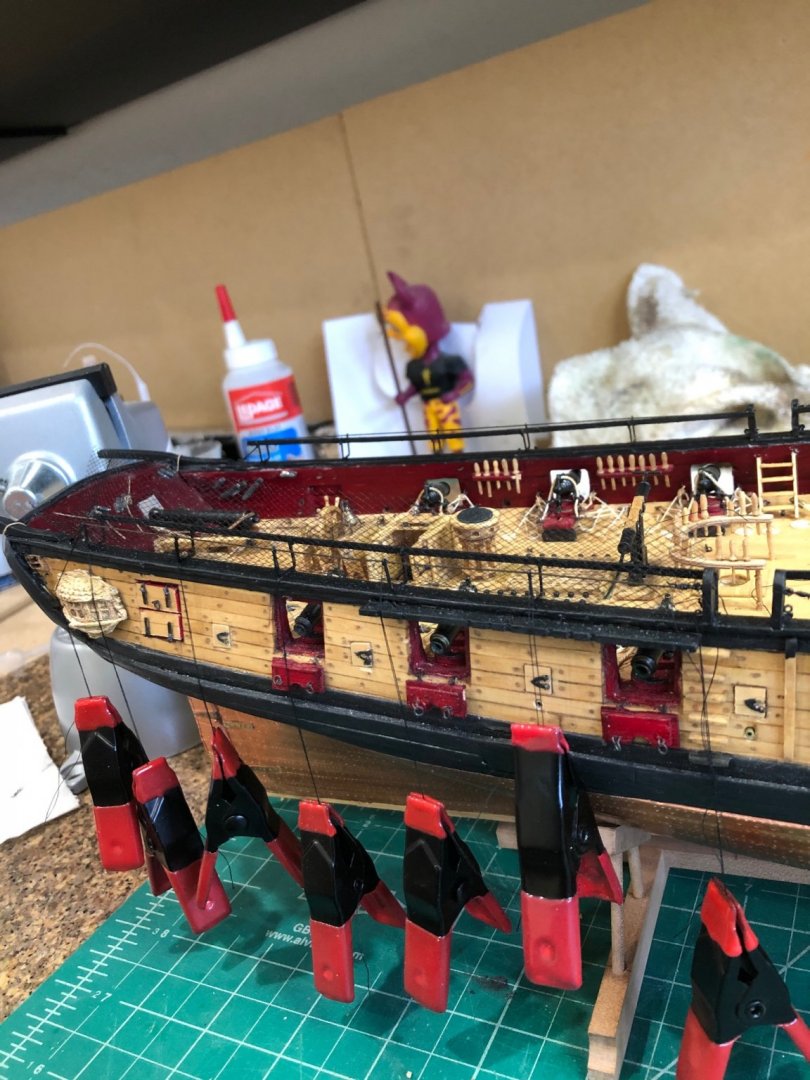
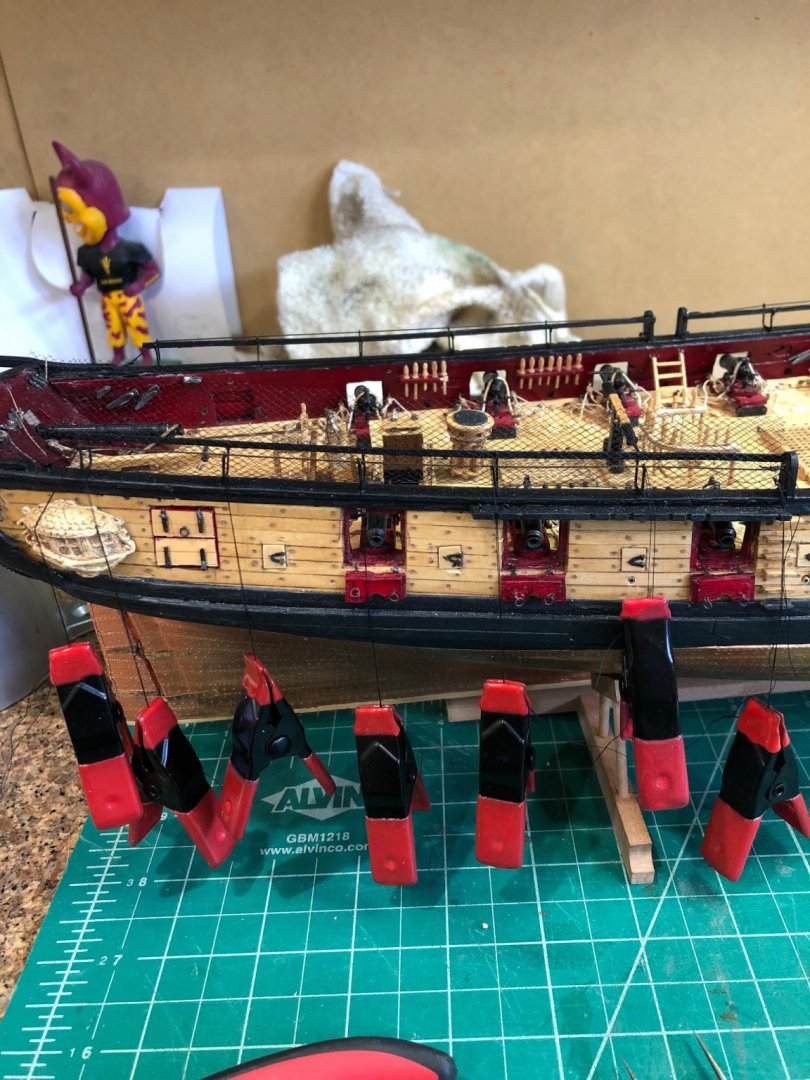
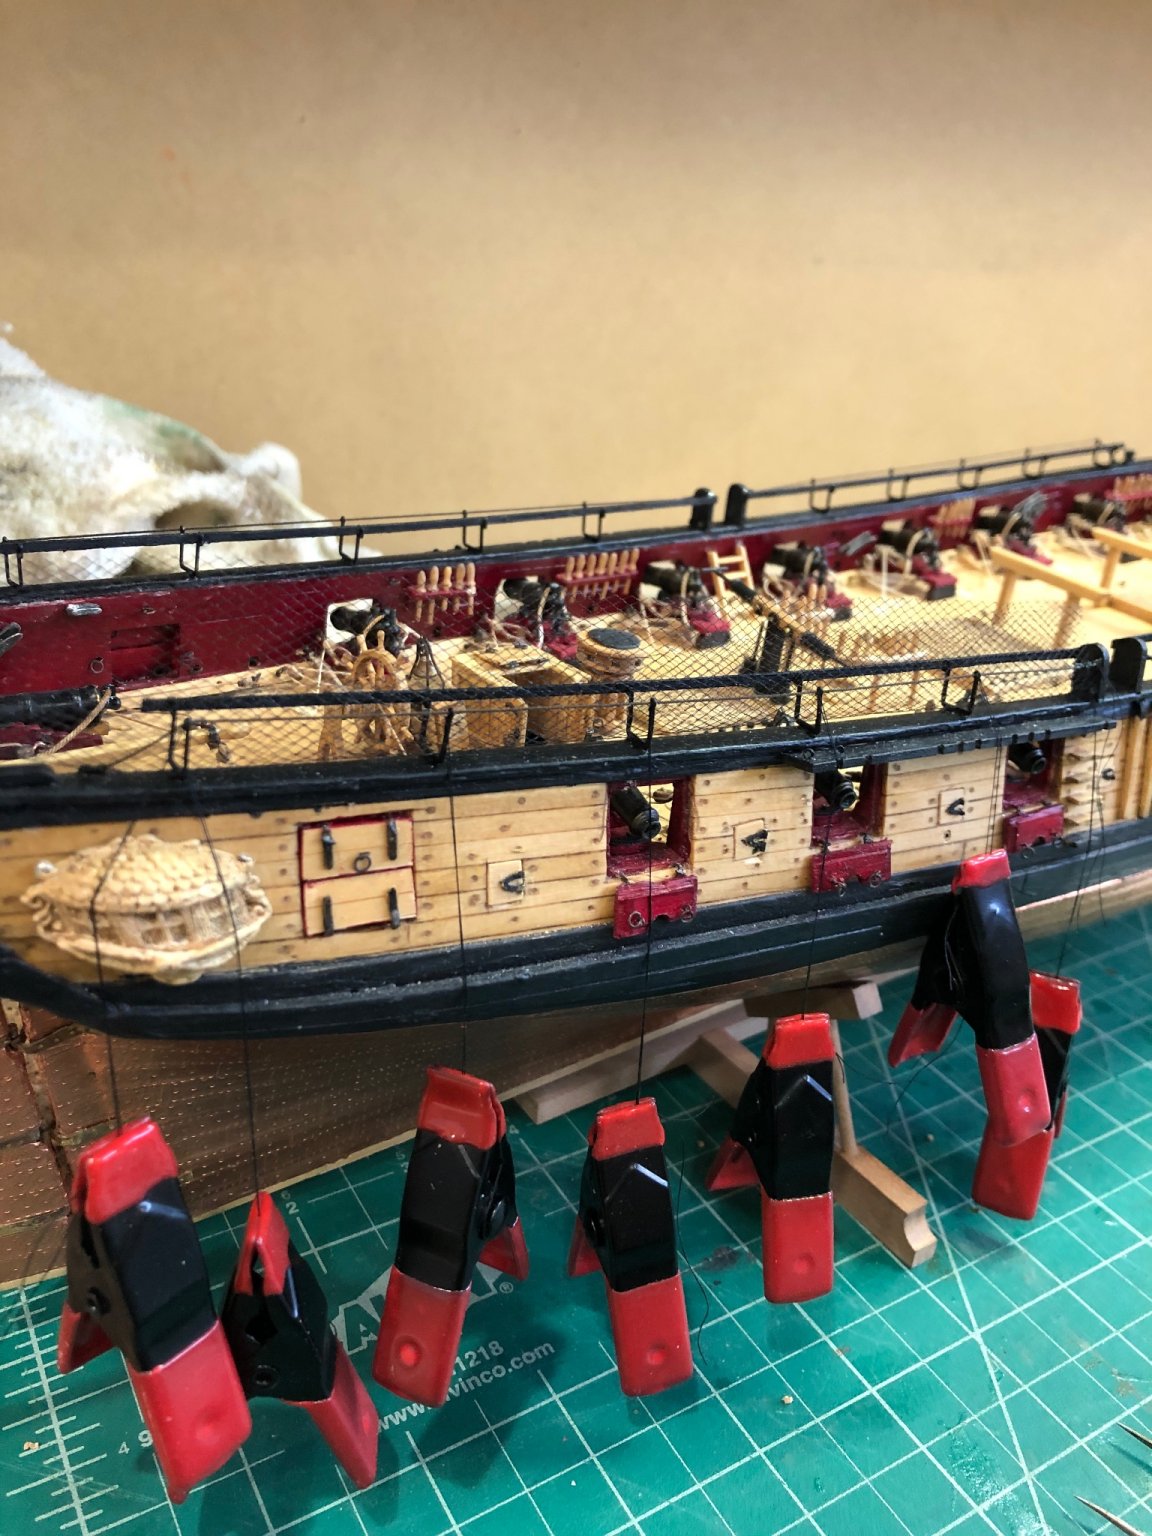
Finished lacing up the first starboard aft netting. I haven't trimmed the netting as I plan to wait until I look at it again tomorrow with rested eyes. I was able to use admirals needle threader to pull the thread through the top outboard holes in the cranes and it really made it fairly easy to get everything straight and secure. Lacing the inboard side onto the wood was another story though. I use the clips to hold the threads out of the way while working on other areas. Just couple photos of the completed section Ive decided not to put the hammock rolls in the cranes for several reasons. The first is I like the uncluttered look and they would hide some detail when the model is displayed in a case on a shelf. Another thought that comes to mind is on painting and drawings of the Tripoli engagement some had bed rolls up and some did not leaving me wondering. Just another thought is if they were up during an engagement all the carefully coiled rigging would not be the case so why have both? Just my opinion though. Make it a good day --- My dear old friend Carl "Nick" Saids salutation to you whenever you parted. succumbed on May 20th to his battle with time. May he rest in peace Make it a good day Will