


niwotwill
-
Posts
560 -
Joined
-
Last visited
Content Type
Profiles
Forums
Gallery
Events
Posts posted by niwotwill
-
-
Andrew I noticed that you're referencing March's drawing of the ketch rigged Master Hand for you bowsprit detail. I've not spent the time researching Nisha as you, I used March's mumble bee measurement on p202 and if I read correctly the 98mm outside mightn't be 104.8mm. If this is correct the 6mm would be more in line with prototype build. By no means am I an expert and please forgive me if I'm wrong.
Regards
Will
-
Just a quick photo showing the sails true colors.
Regards
Will
- yvesvidal, Charter33, Nunnehi (Don) and 5 others
-
 8
8
-
Thanks James for the photo rotating. Tell me about how you did the rotation in paint?
Regards
Will
-
-
I'm very happy with them Andrew and thanks for the multi-colored suggestion. Really happy with the dye that colored the stitching. Next week is my birthday and the Admiral got a package from England that's about the size and shape of a model from Vanguard. She put it away somewhere so I'll have to wait.
Best Regards
Will
-
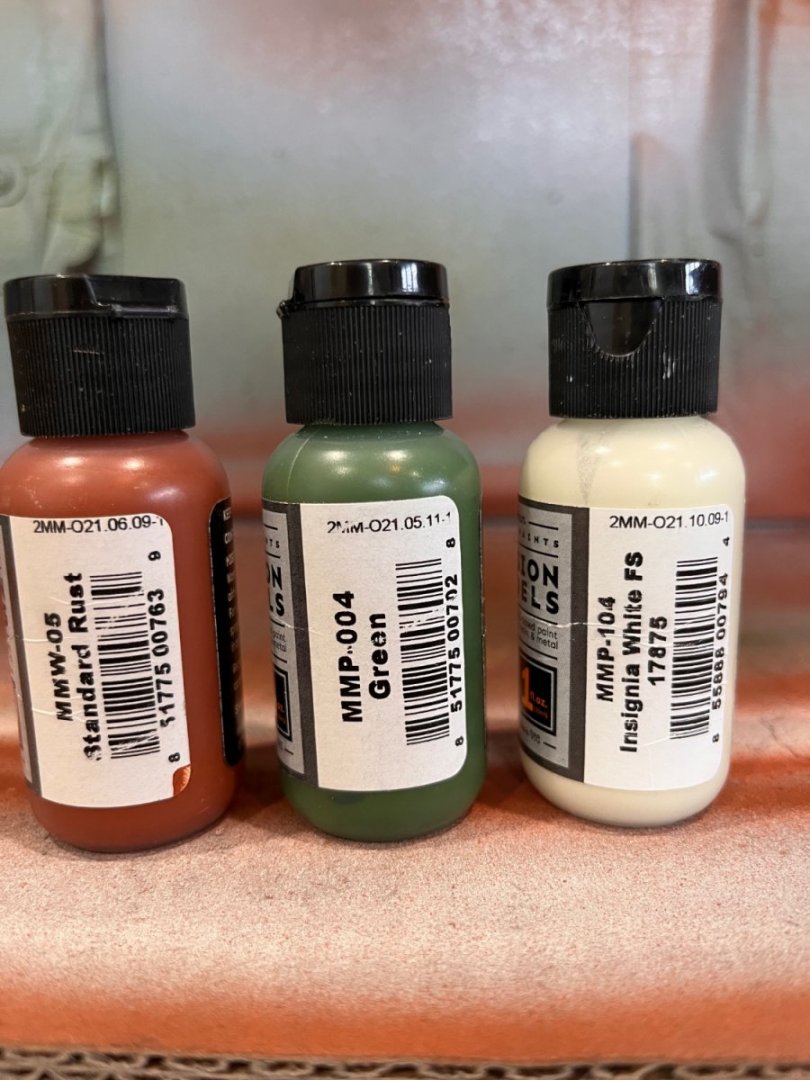
Sails dyed with no oops. So glad its over. The dye used also correctly colored the sewing threads. Now on to shaping and attaching to the mast rings. No Problems there. 😁 Riiiiight
sails drying after rinsing in cold water
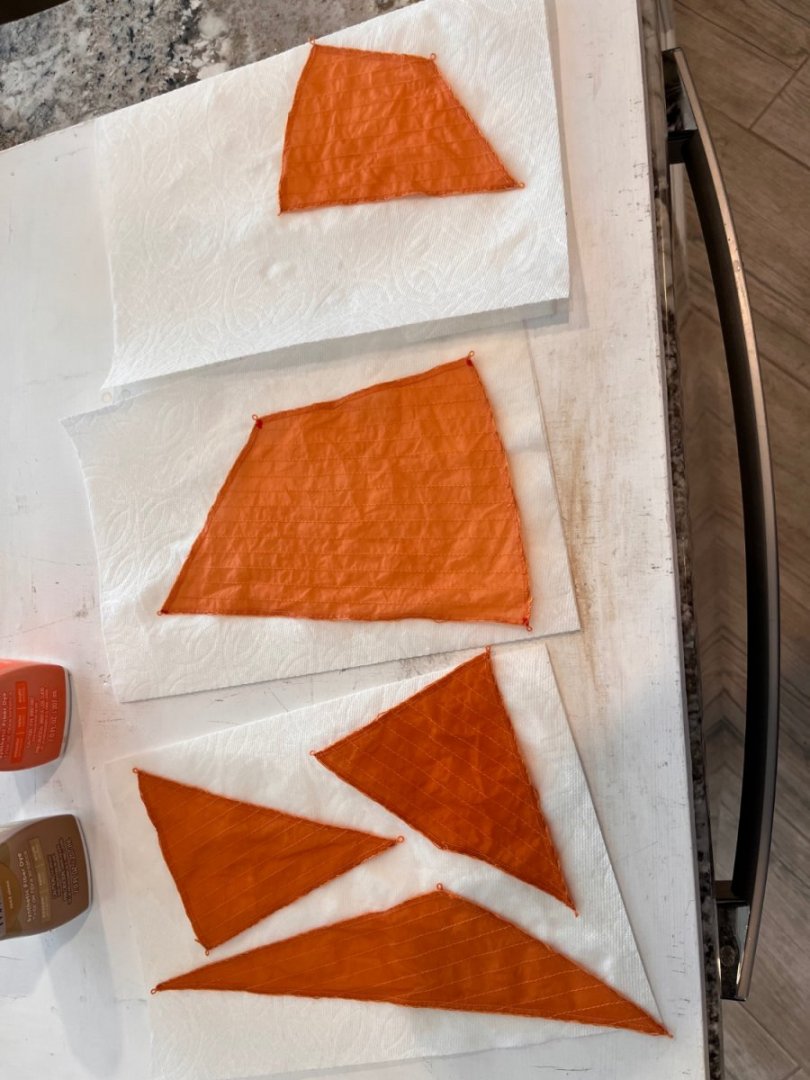
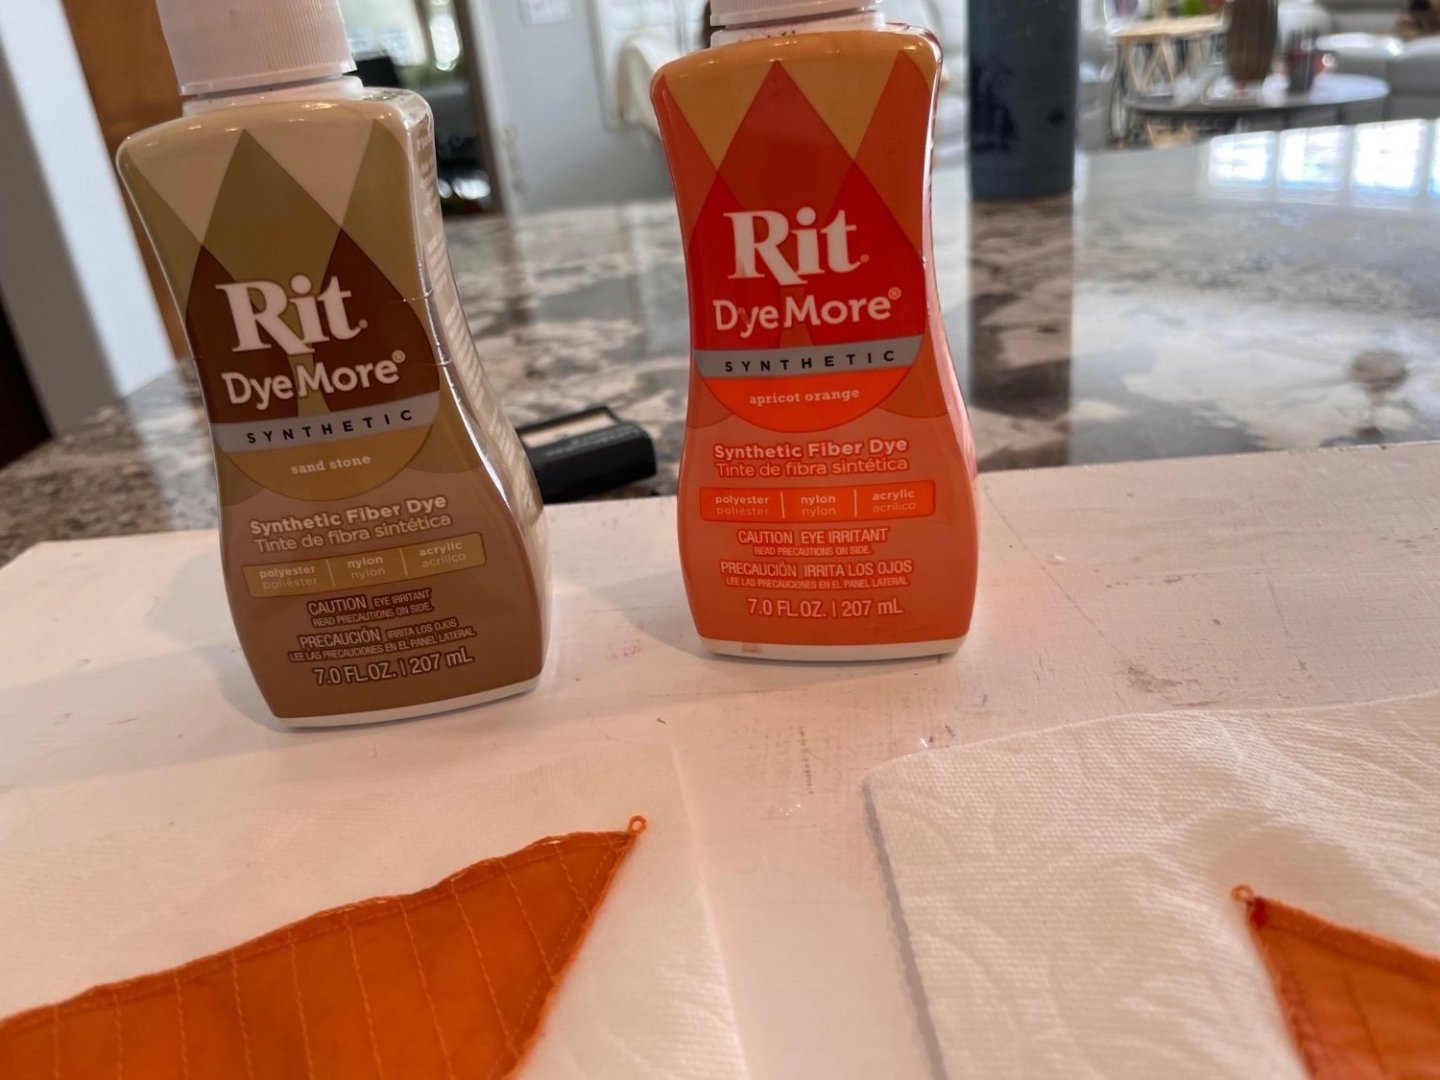
I used the time in the dye solution to create the different shades the darkest being the least used and lightest be used the most. Below is the dye used.
Best Regards
Will
-
-
Thanks james. I'll definitely iron after sail dying. Thanks to everyone for the looks and nice comments.
I've been noodling about the sail colors and have decided a more brown red color for my Erycina. I'm kind of partial to the brownish color as when I bought a dirt colored T-Shirt in Hawaii year Rit Dye in for all fabrics in orange and tan. I kept saying I want brownish red how's that going to happen with bright orange and tan? So I got one of her looks and said ok. We cut up an old pillow case just a little heaver weave for samples. She then gave me a starting formula and said off you go. Got my hot plate and old SS pan and set up on my work area.
Here are all the supplies
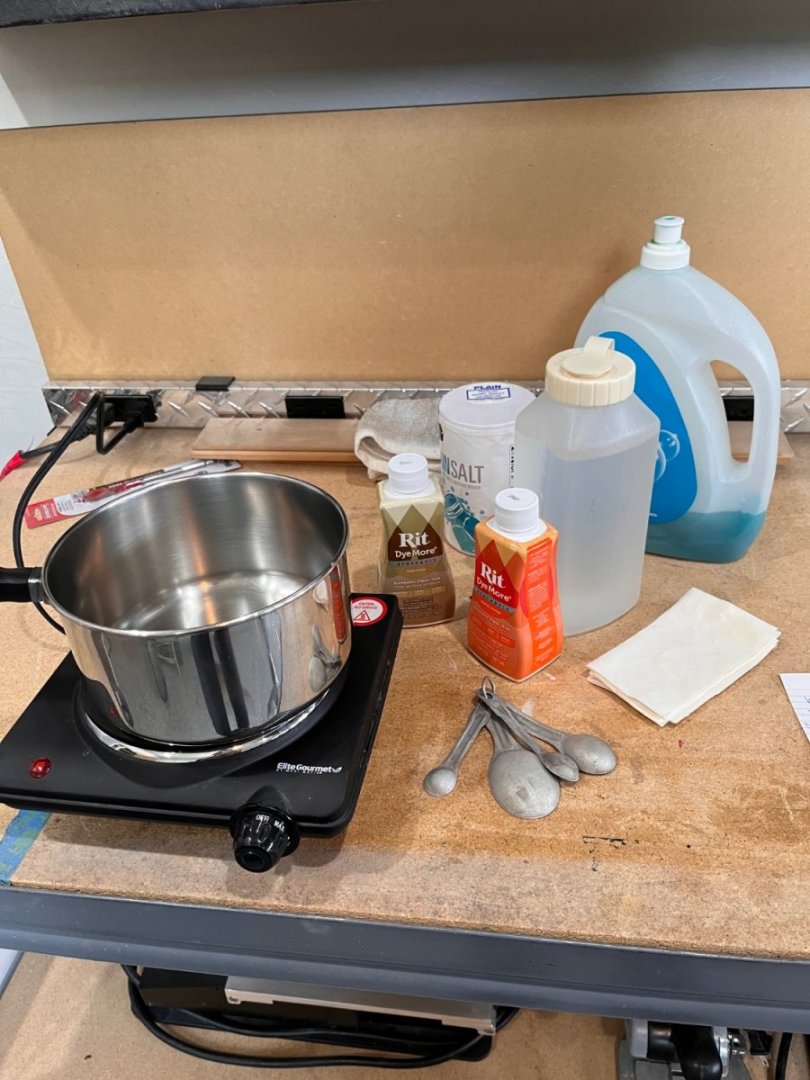
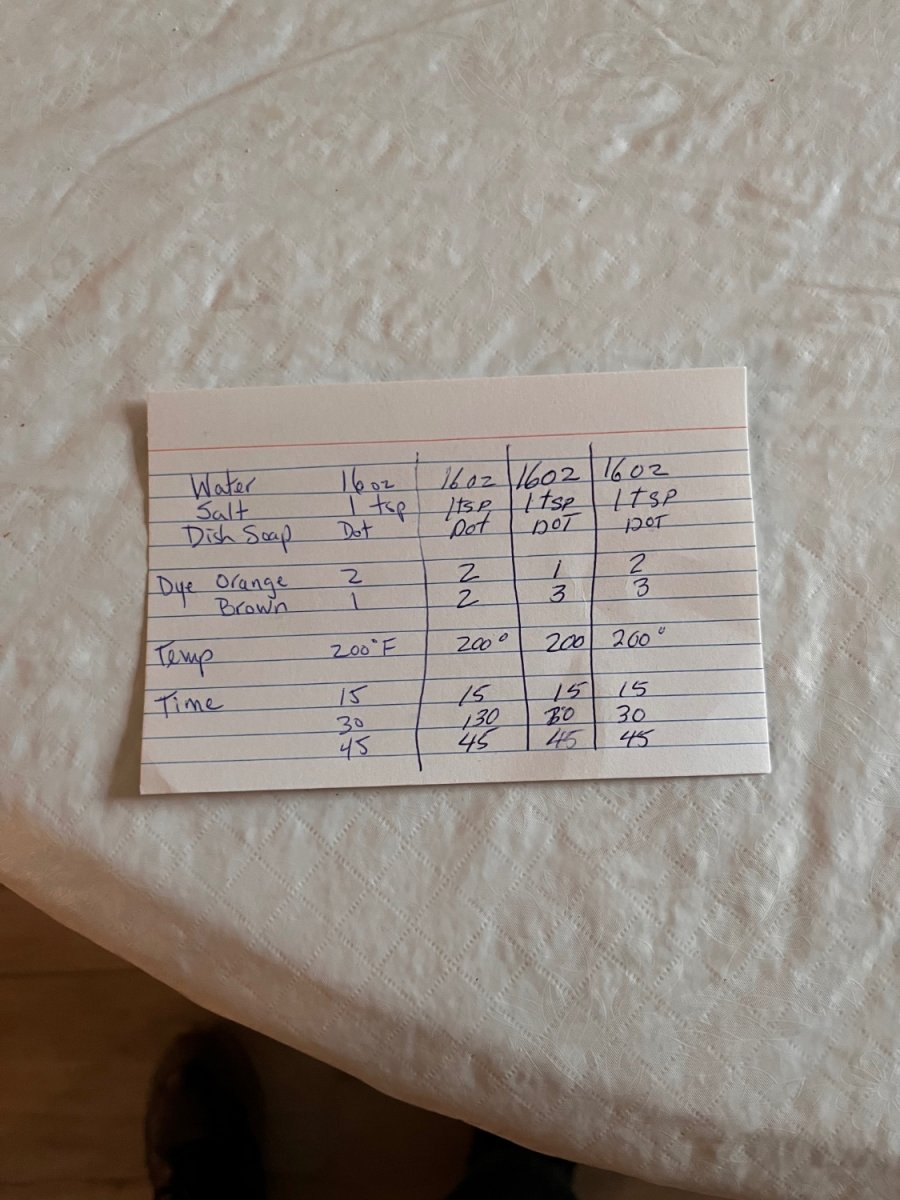
supplies gathered so off I go to mix my first patch. 16 oz of water, 1 tsp of plain salt, a dab (Admirals measurement) of dish soap, 200 degrees fahrenheit and 15 minutes.
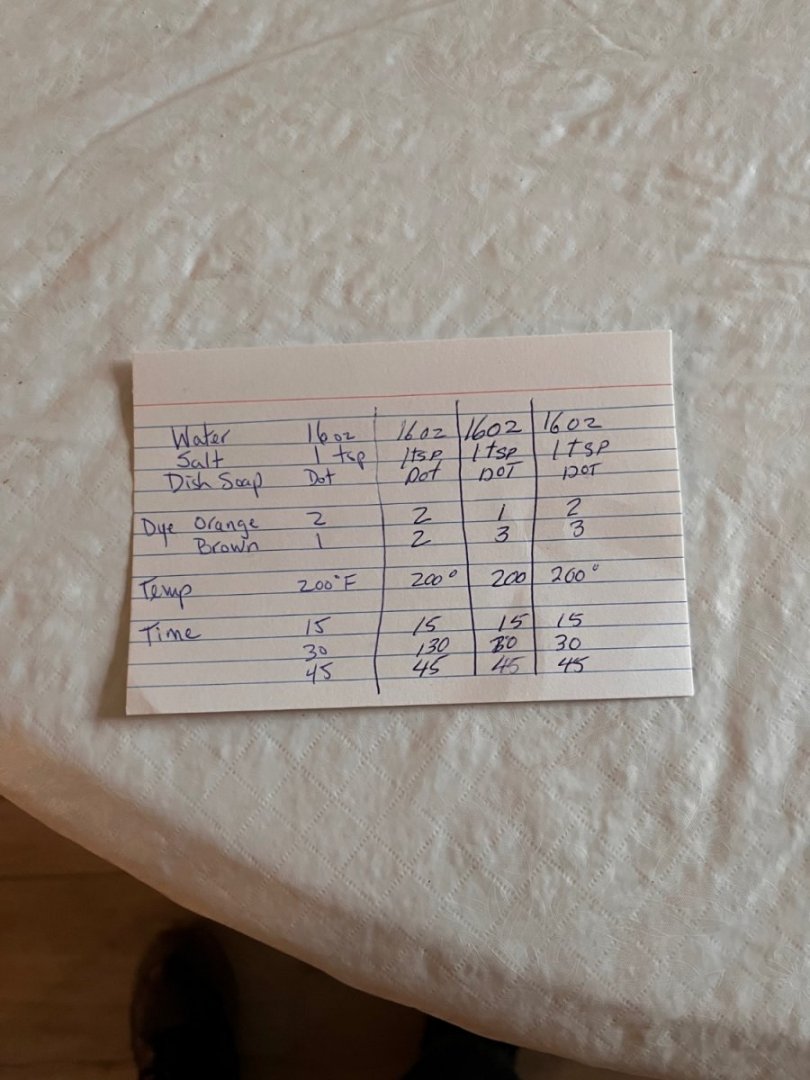
I made four batches as the receipt shows
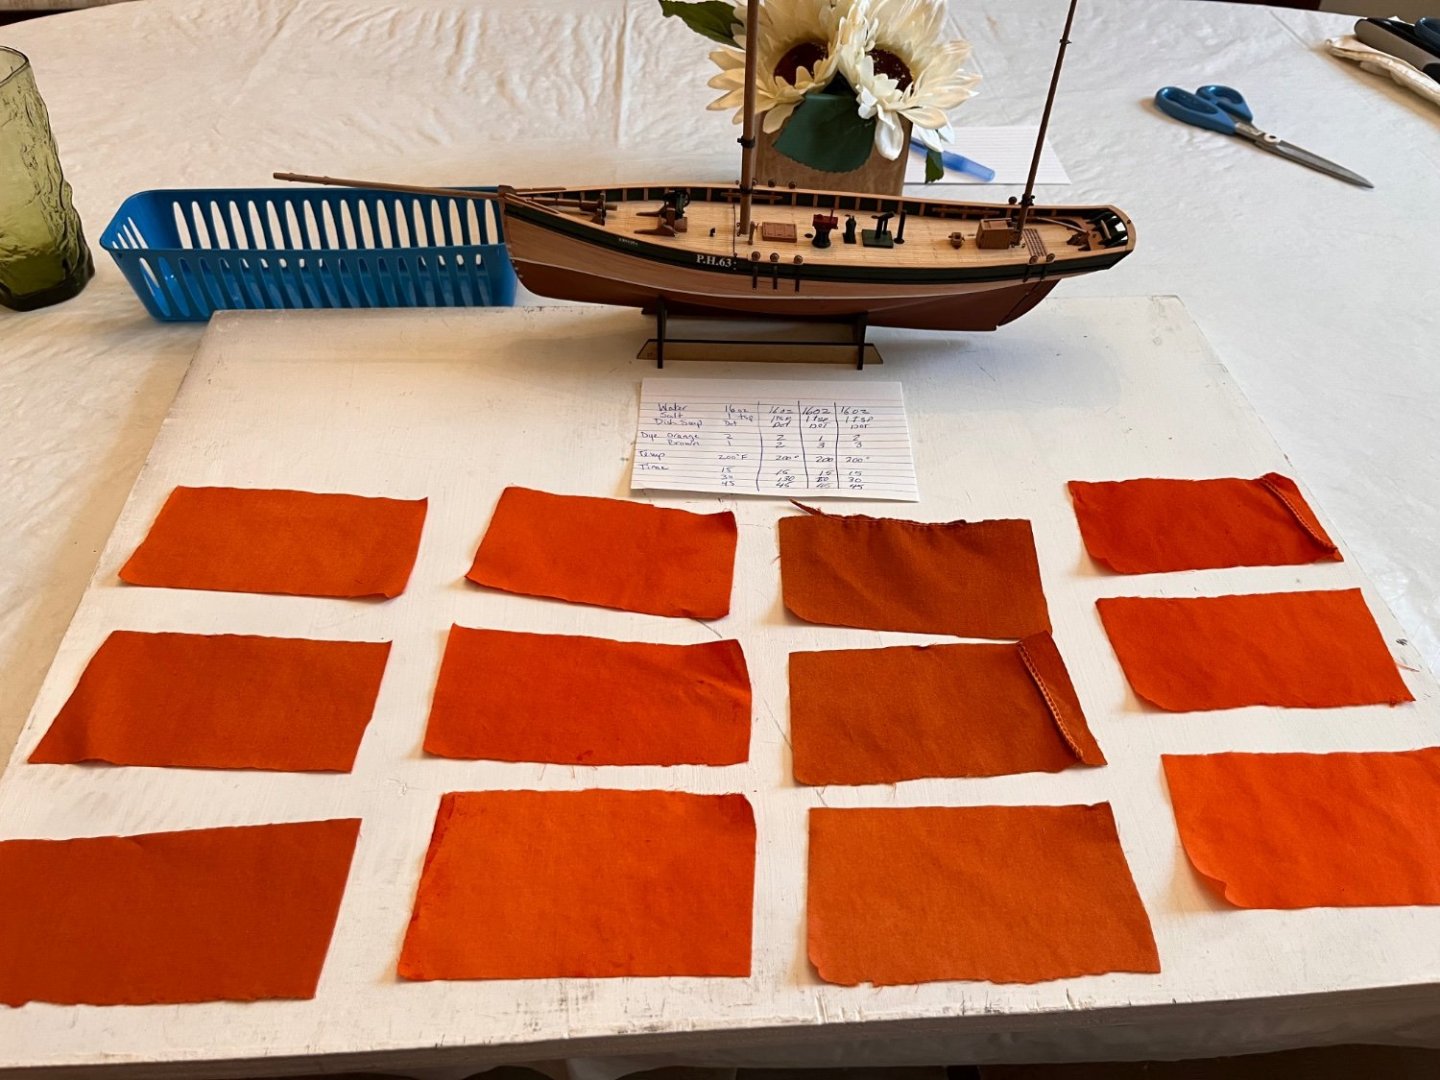
They are not as red as the picture shows much more brown I even set one on Erycina to get a feel of the color.

I'm going to use the 3rd row from the left center swatch. Tomorrow I'll start dying sails and hoping they will look as I hope.
Best Regards
Will
- chris watton, Matt D, AJohnson and 5 others
-
8
-
beautifully done as you have shown in all your work. Glad to hear you got the thickness sander as you said it makes less sanding necessary.
Best Regards
Will
- glbarlow and FrankWouts
-
2
-
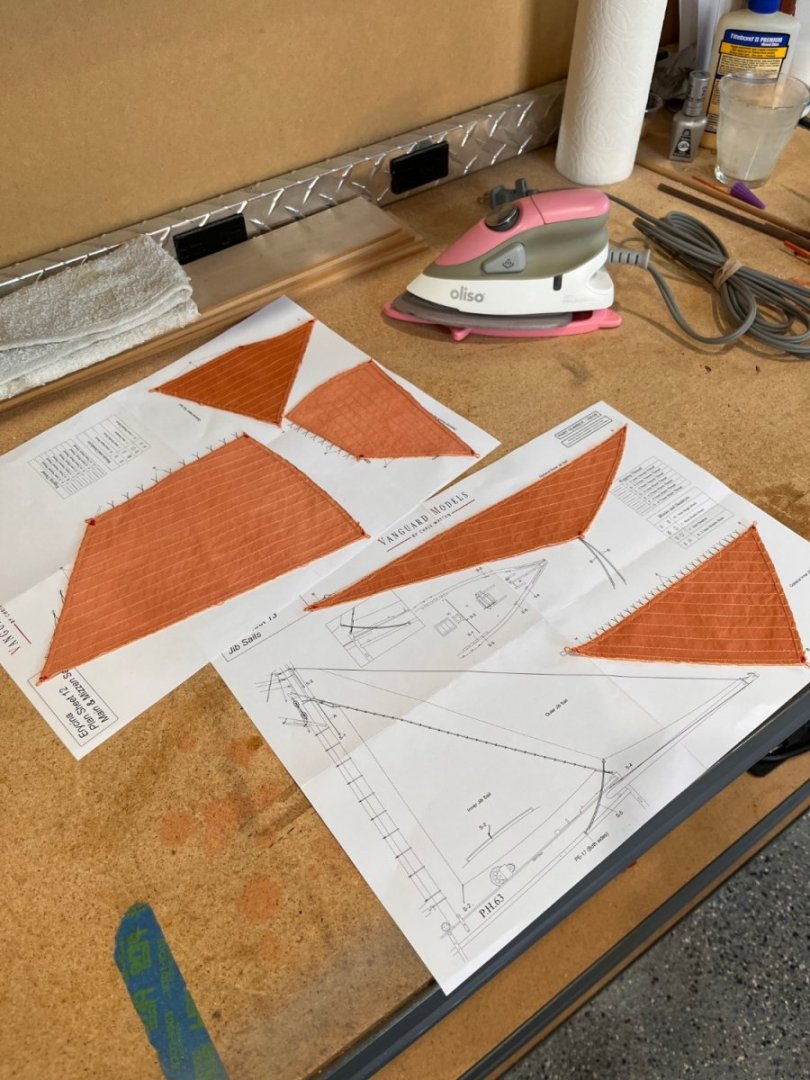
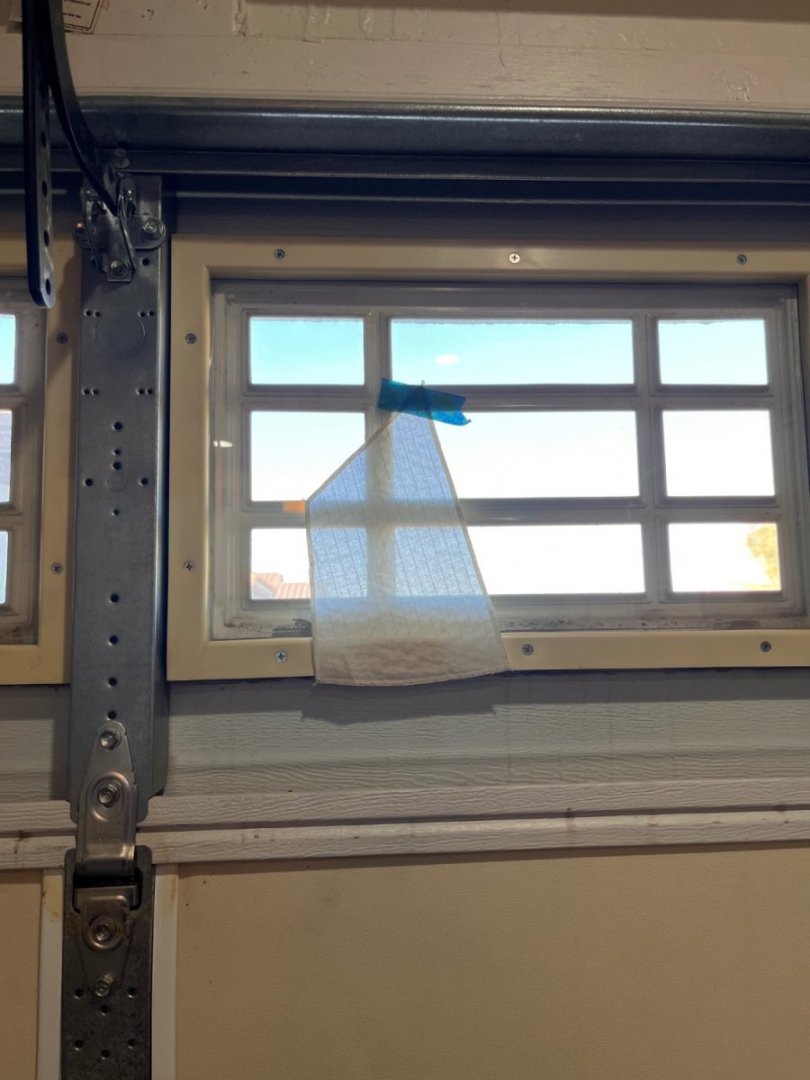
I've reached the point of dread, I've got to dye the sails. They have been laying flat since the beginning of the model and most of the fold creases have flattened. The next sail post will be them drying but here are some pictures showing the translucency.

Best Regards
Will
- BenD, Ryland Craze, chris watton and 3 others
-
6
-
Andrew and all thanks for the looks, likes and comments.
Andrew
I made the decision is keep the model as designed and therefore am using Chris's sails. Small comment on the sails. The furnished (bought) sails are a great quality and the material is the best I've seen. They are tightly woven, thin in depth, very translucent and have a correct feel to them when compared to the models feel. They've laid flat for several weeks and the shipping folds are coming out. I'll post a picture today so you can see what I've described.
Best Regards
Will
Andrew PM me about silkspan
-
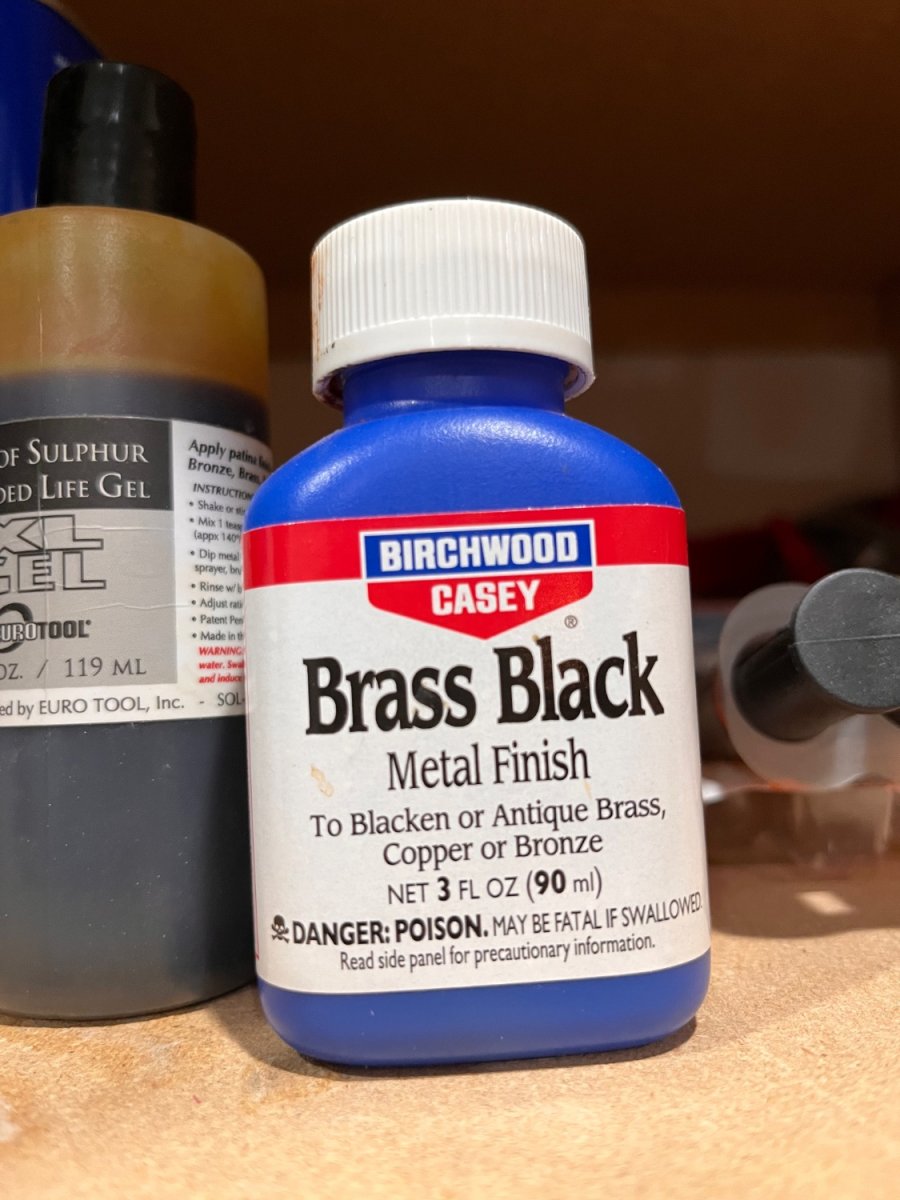
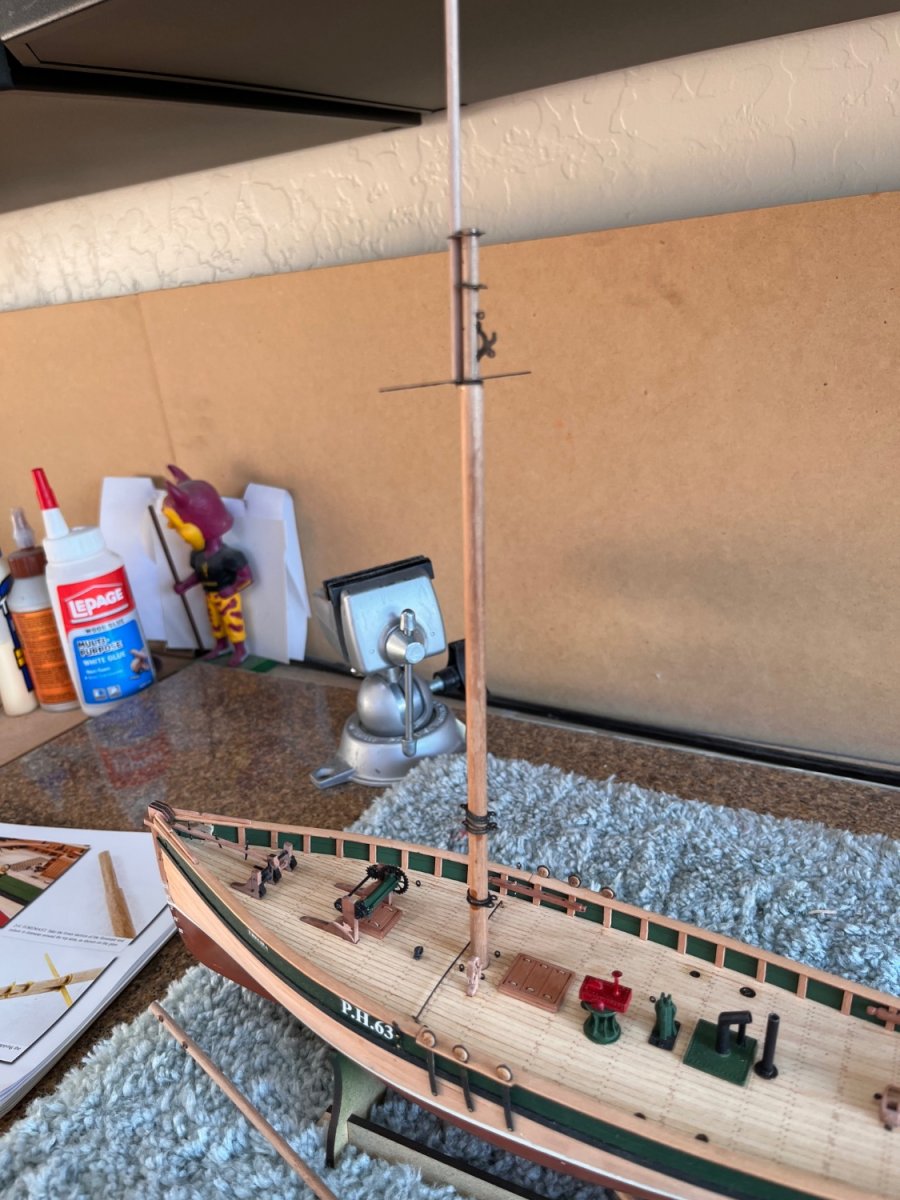
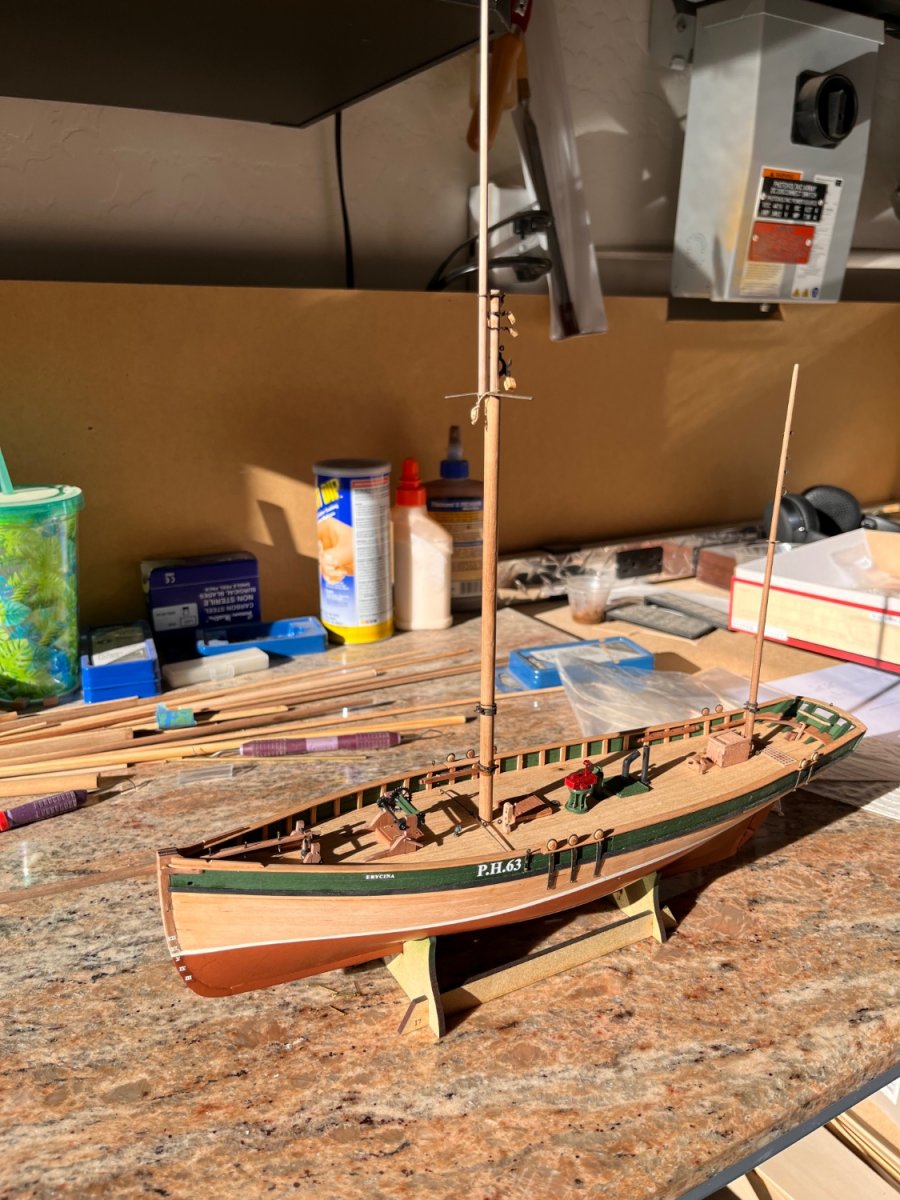
Been awhile doing less important, IMO, but they needed to be done so i'm back. There's not much to say about removing PE parts from the sheet so I'll go on to cleaning. Oh yes! One thing I found out was if you use the side cutters with the flush surface in the wrong direction it allows the cut to be controlled so there's less to trim. With the parts trimmed they were cleaned by soaking in acetone. Drying one a clean paper towel doesn't take long and then into a 91% alcohol bath again to dry on the paper towel. When dry put them into a glass with Brass Black. Watching them until the turn the black color you want. Again too a paper towel to dry. After dry washed in warm water and wiped to remove the excess material.

Just mast showing some of the brass

It seems obvious but remember to slide the rings on before the upper hardware.
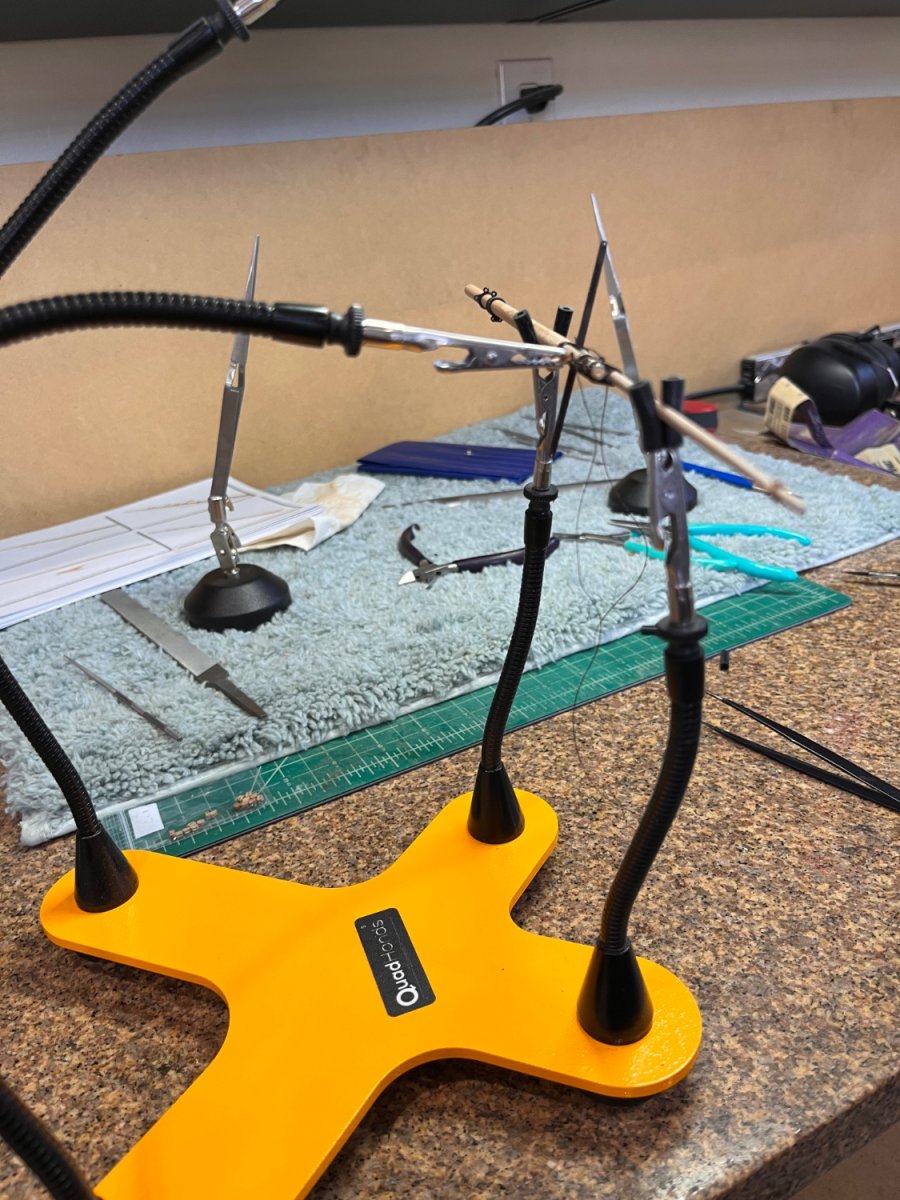
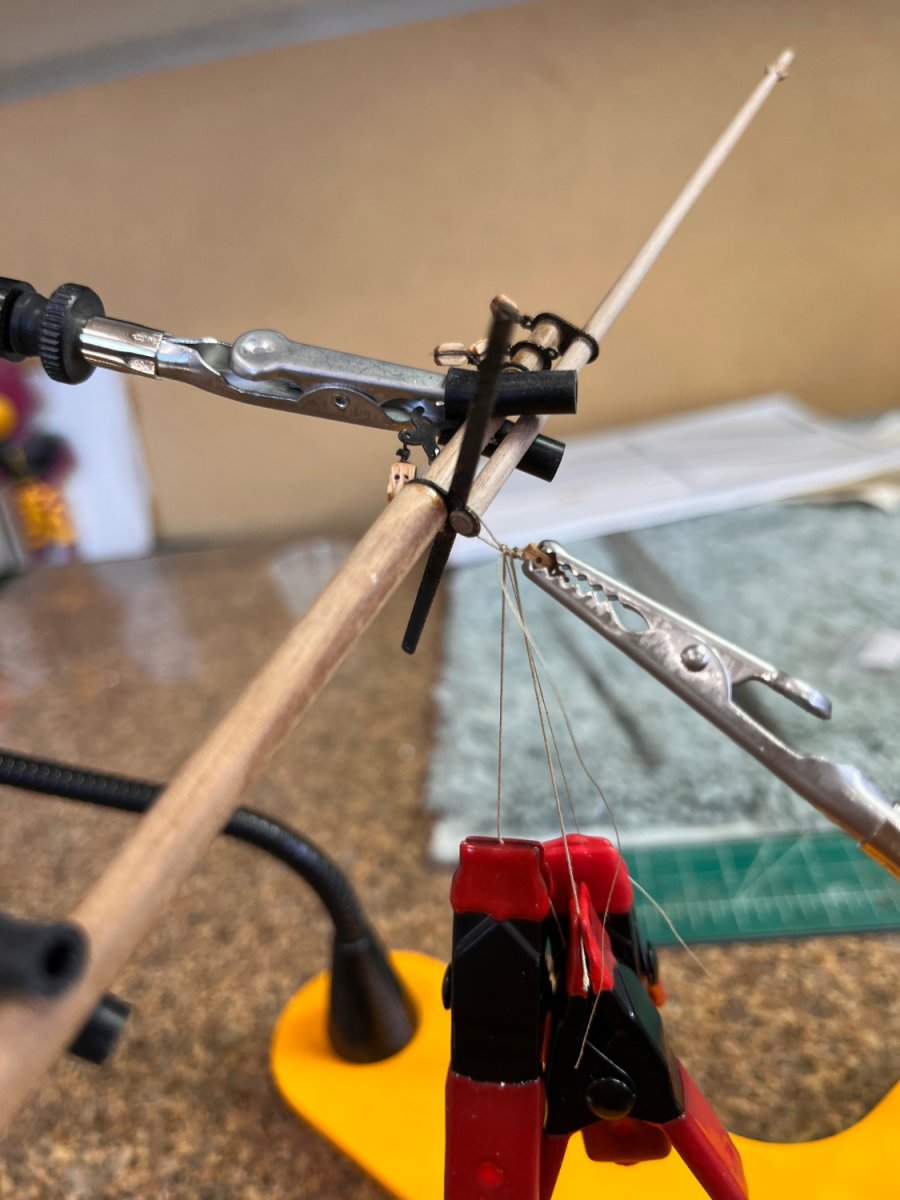
Spent the afternoon strooping blocks to the mast. With help of my third hand it was done holding the block while being seized. The mast held in place with the fourth hand. Taking the line from the block through the eye and back the to block.With a block seizing line wrap both lines to simulate actual seizing. A method I found that works is to tie an overhand knot next to the block on one of the lines and then take one seizing line away from the block and wrap 3 to 6 time away from the block. When complete tie and overhand knot and slide the wrapping up to the block. A very tiny drop of thin CA to hold in place.

Hardest one was the lowest with becket. To make the becket a loop was seized around a pin and tied with an overhand knot directly adjacent to the pin. A drop of thin CA was applies opposite of the knot. When the loop dries bring it up to the block and seize as I had the others. They last thing was the block hanging from the mast. First seize the block and then one up around the mast and seize together with seizing lines from the block. Not sure if this makes sense but that's how I did it. Maybe a photo will help.

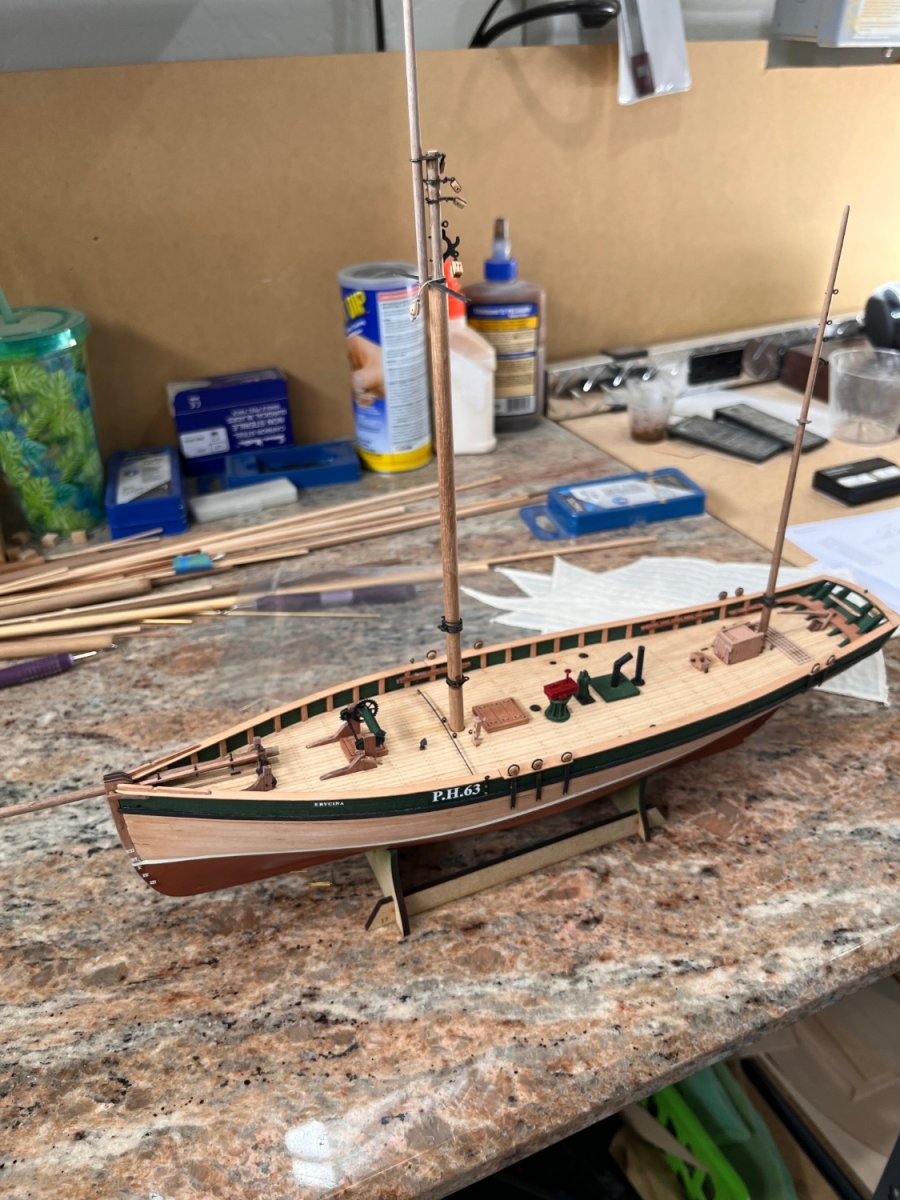
All done for today and a couple of photos
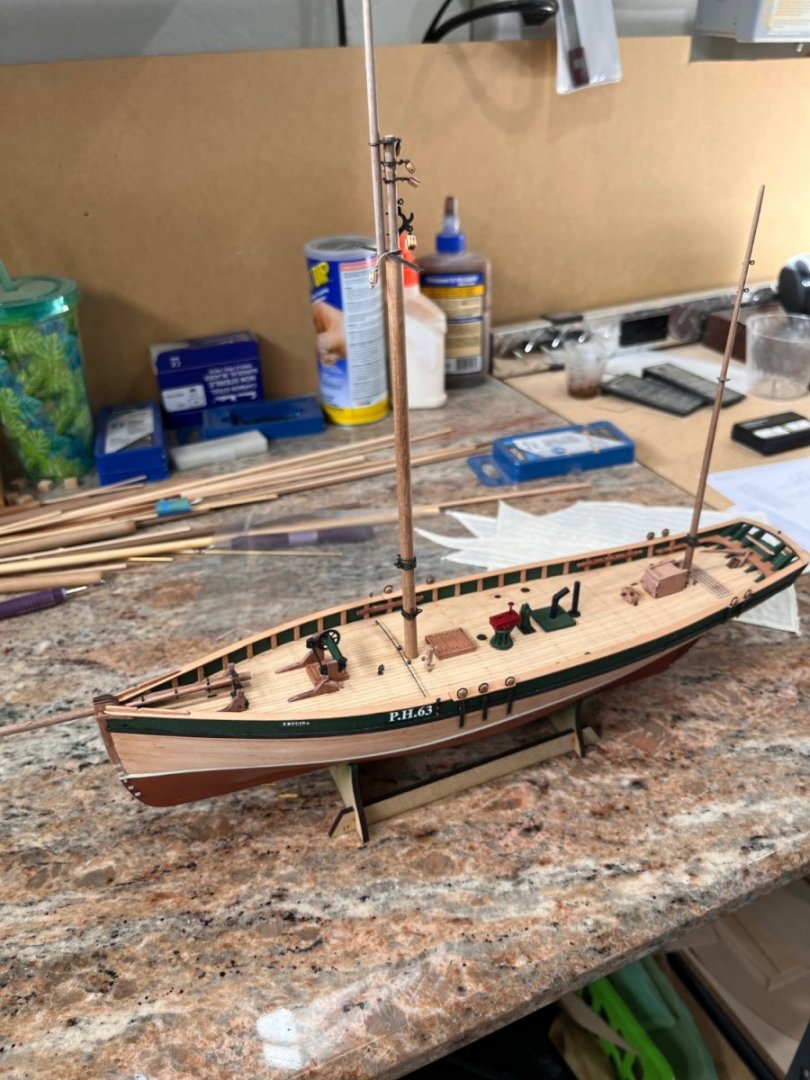
In the sun

Best Regards and thanks to all the looks and kind remarks
Will
-
-
-
-
-
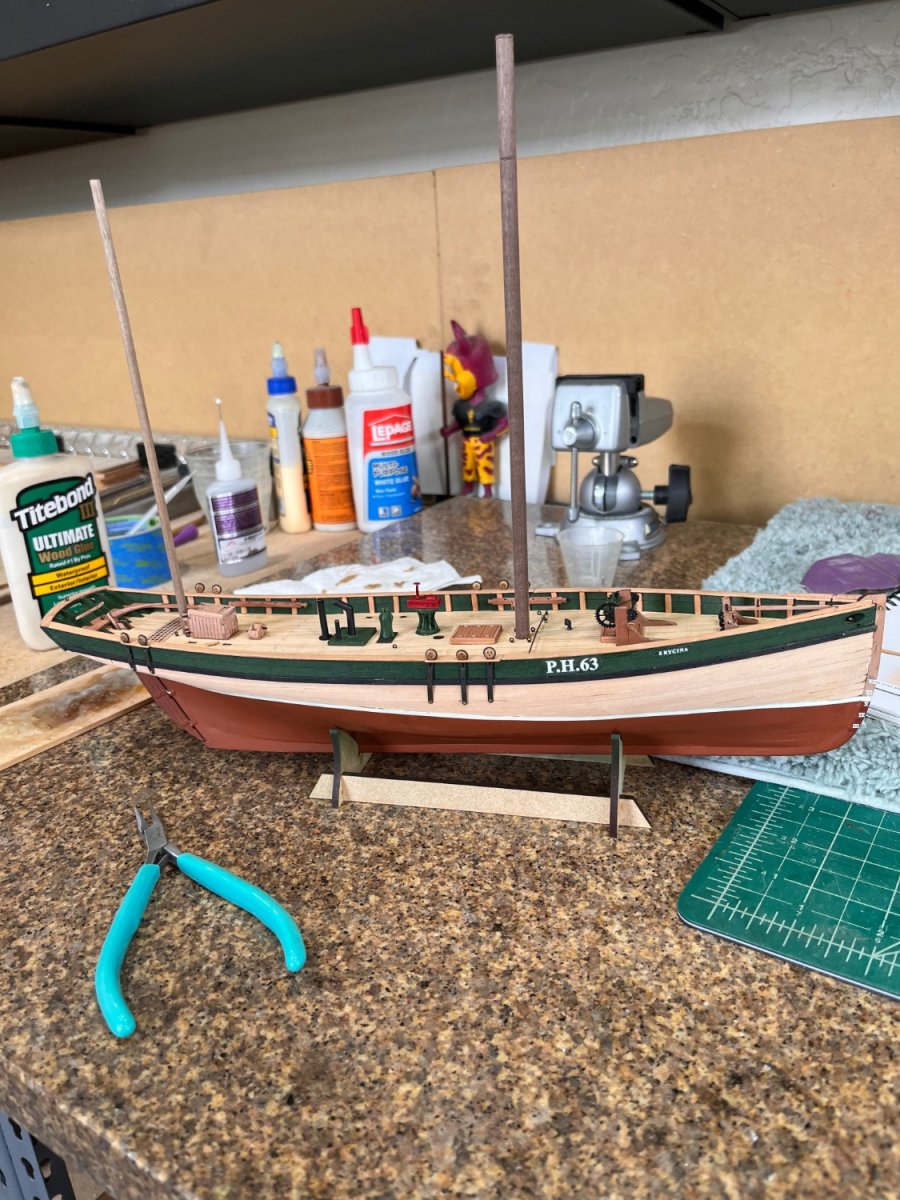
Thanks Don she's becoming a beautiful ship you can see why some became yachts.
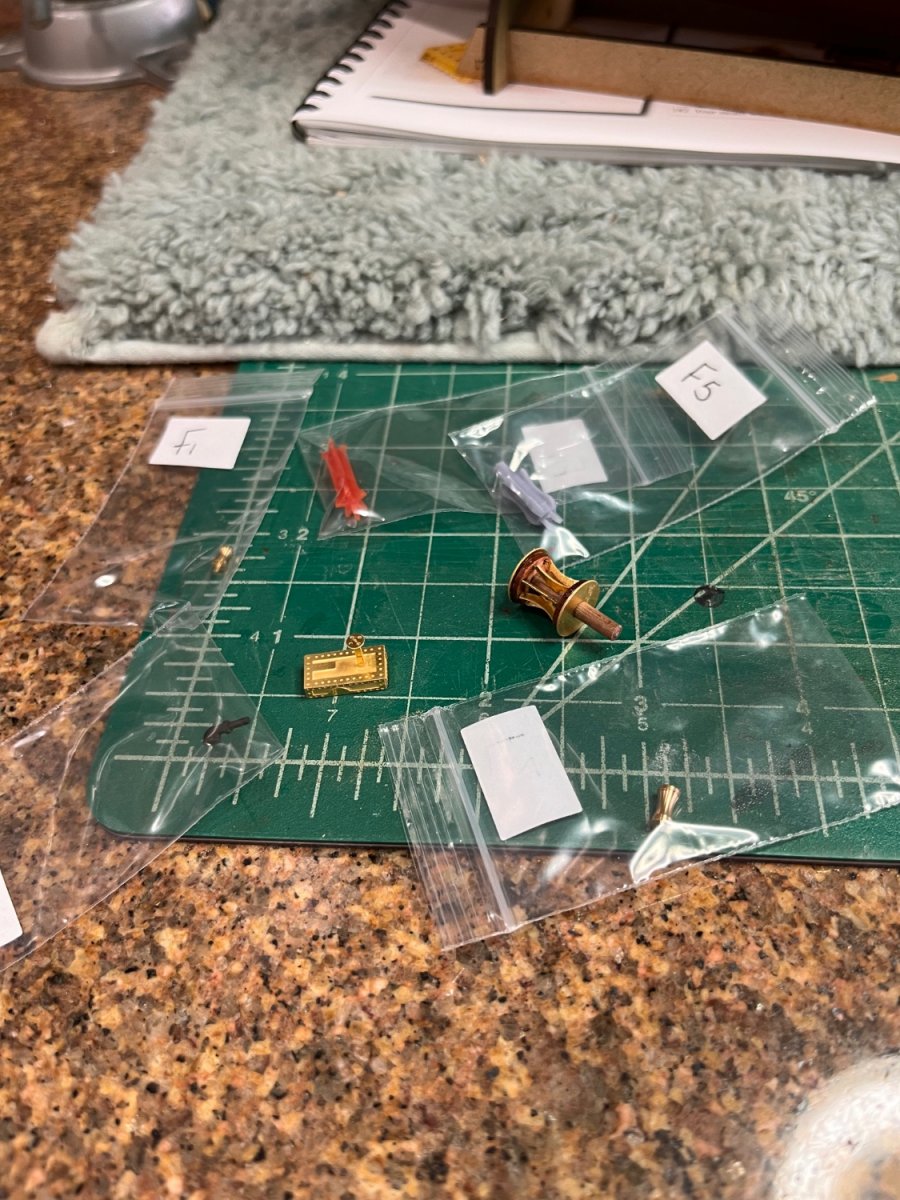
Finished up fixing the whoops and then started on the working part of a sailing ship. Removed the shroud ironwork from PE sheet and carefully filed the holding tabs until a smooth surface. I use

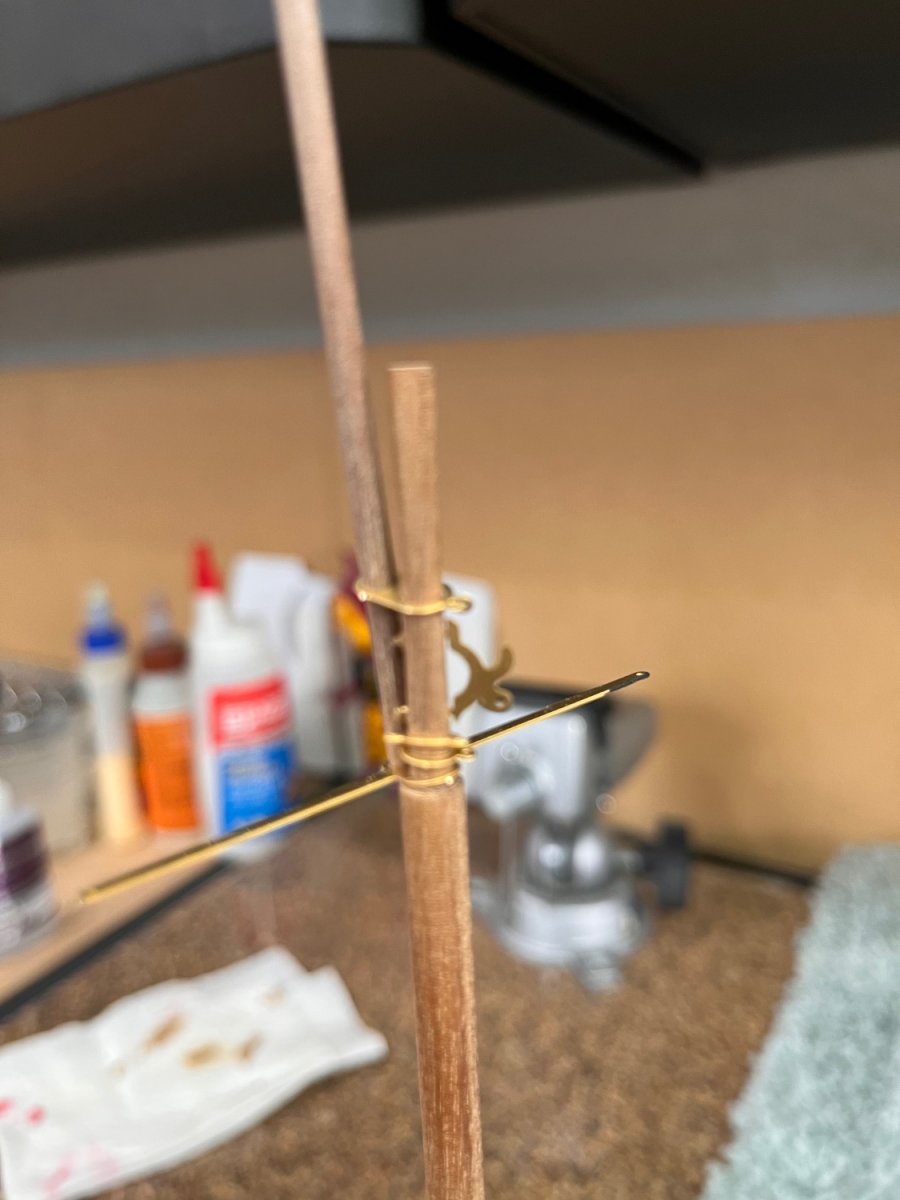
Parts are cleaned with 91% alcohol before being immersing in solution. After cleaning all handling is done with tweezers. I've found that if you leave the parts in the solution until they turn to black and remove them to dry on a paper towel gives me the best results. Once dry parts are dry they're washed with water and left to dry. The deadeyes were put into the ironwork as described in the instructions. To get the angle correct to the shrouds a thread was strung from a dowel the height of where the shrouds attach. A mark was made using the ironwork with a straight pin and then a pilot hole was drill for the nail.

The main mast required a 2mm relief at the top so out came the lathe. Simple matter of turning the 6mm dowel down to 4mm diameter at the required length.
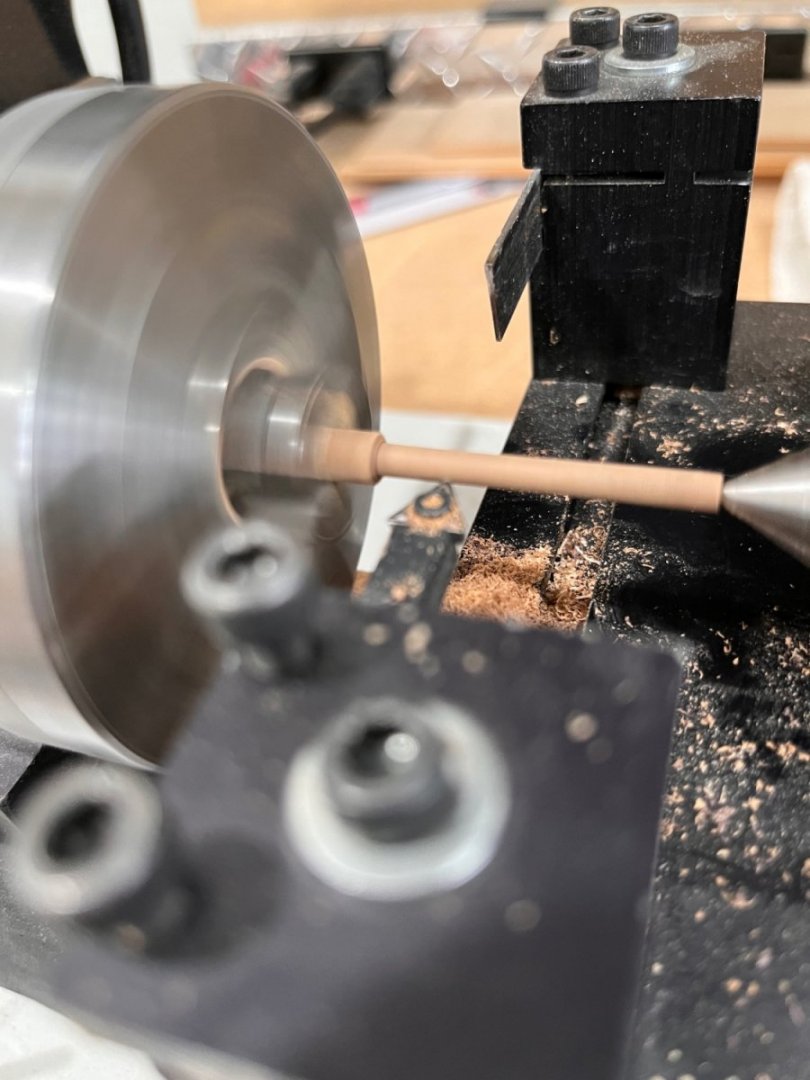
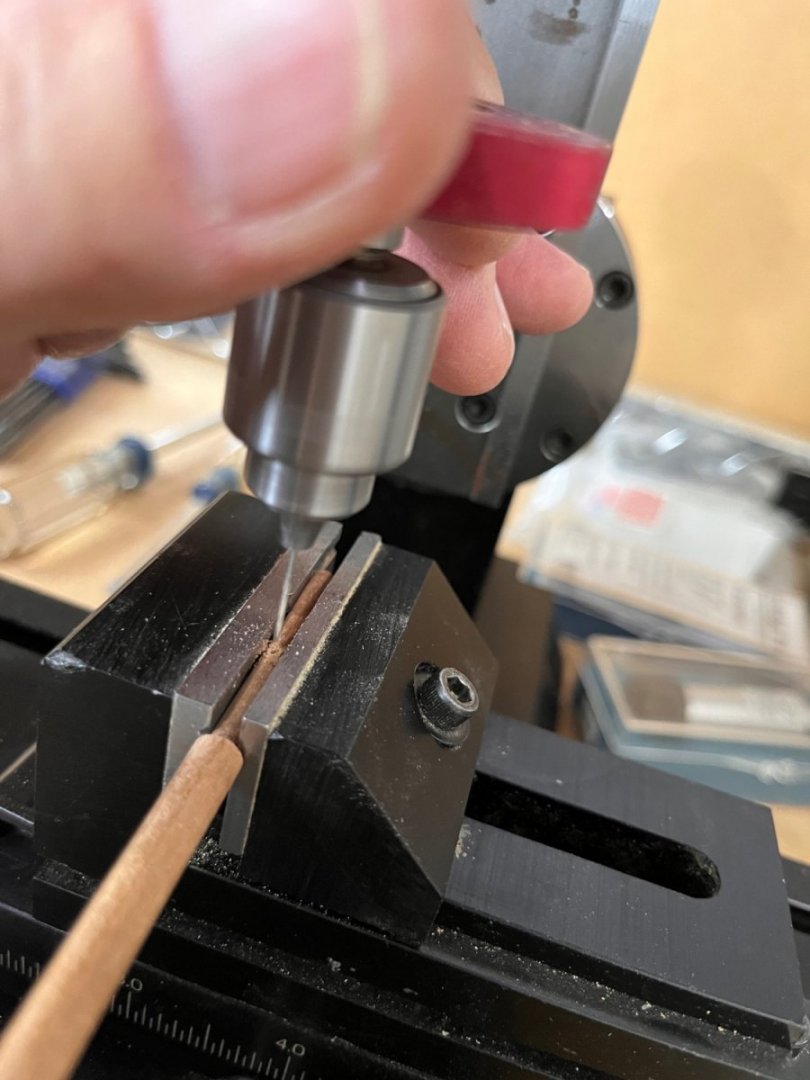
The 4mm portion required 3 holes for the metal work and an eyebolt. Using my ratio to find their positions and drill the holes.
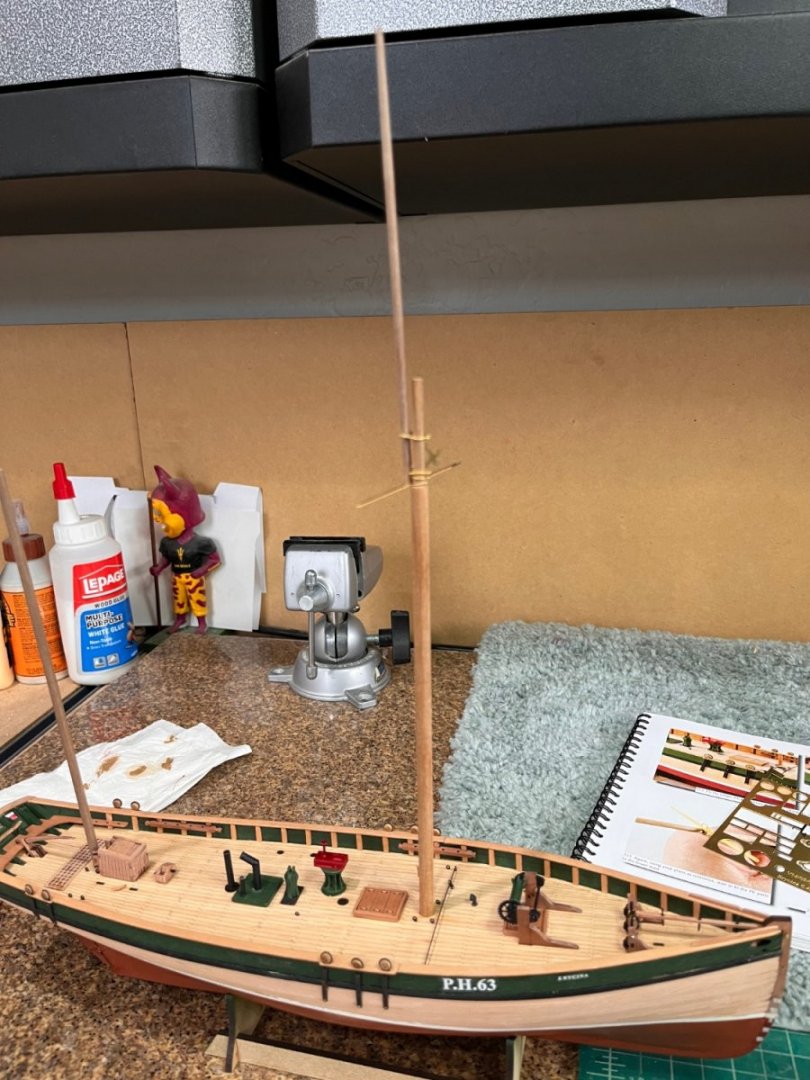
All parts made they were dry fit on the boat.

Next to blacken parts, sand, stain, and finish parts and on the yard and gaff.
Best Regards
Will
- ct mike, BobG, chris watton and 6 others
-
9
-
I've made the change to Mara awhile ago with fantastic results. Quick question: the rope in the picture is that the #854?
Best Regards
Will
-
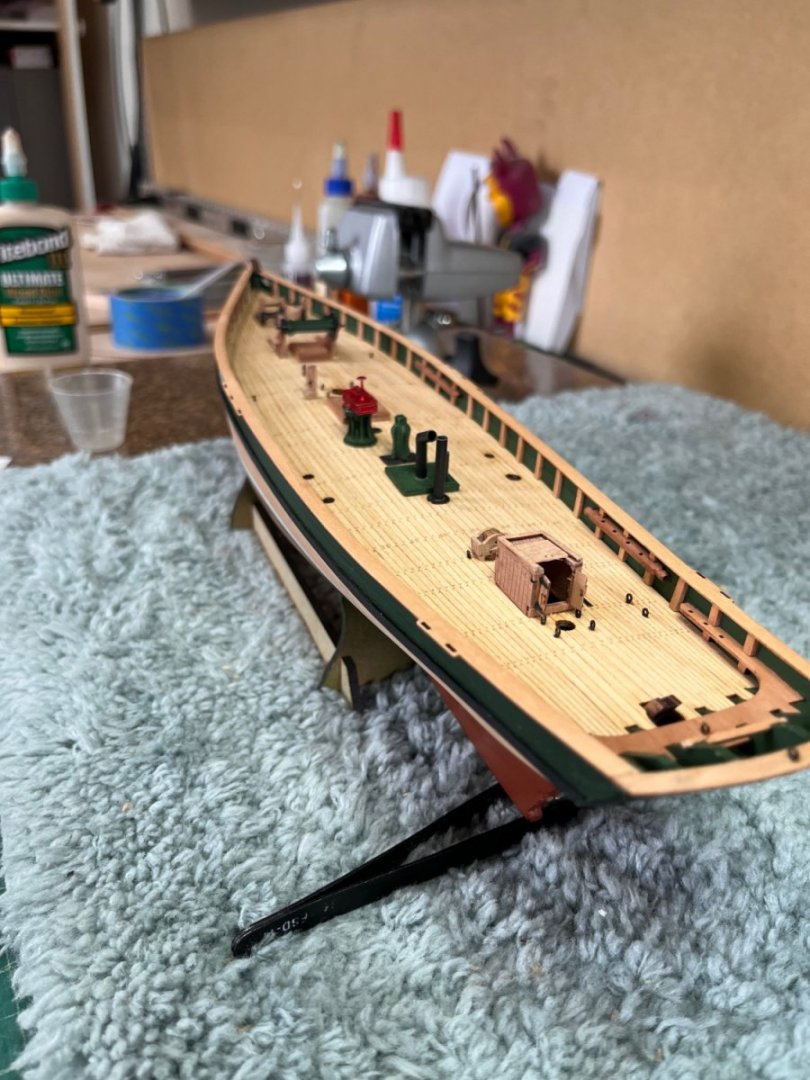
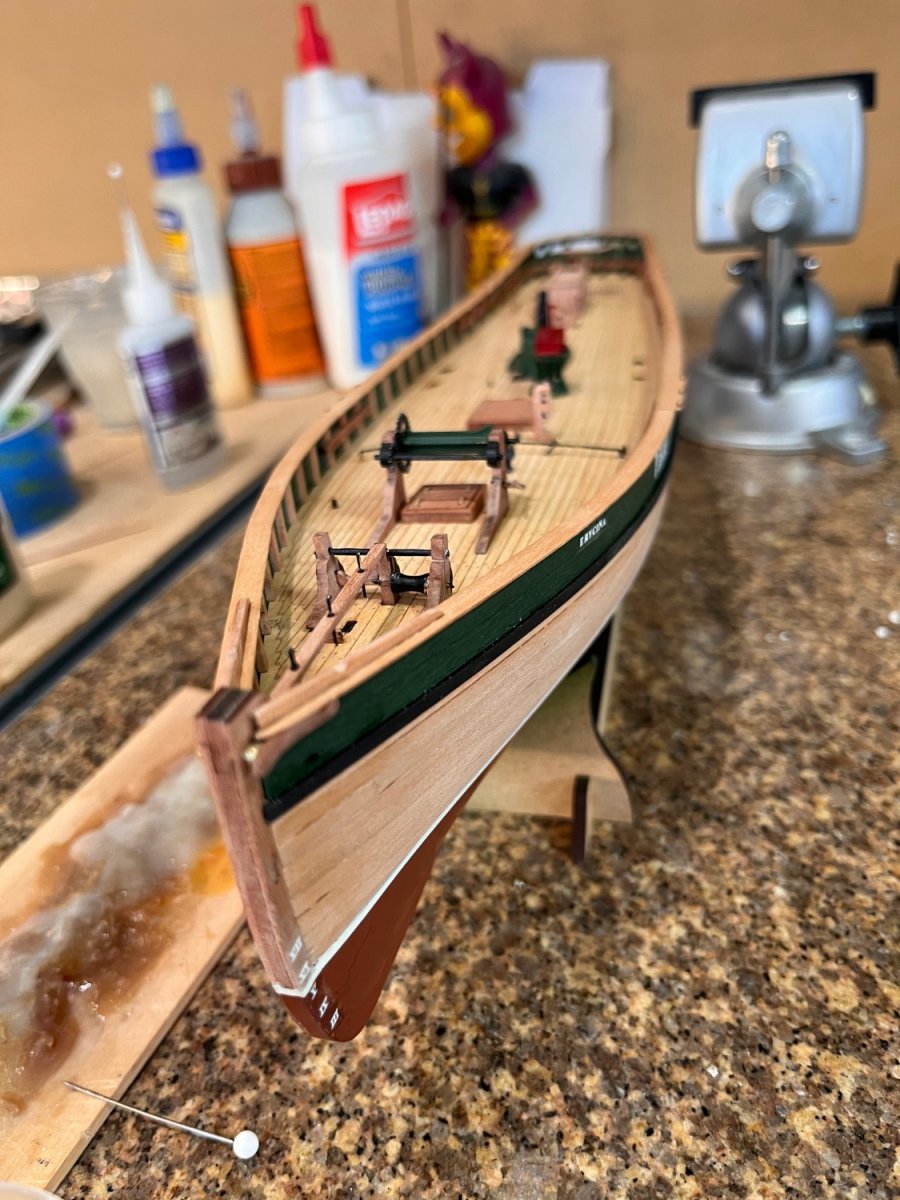
Finished the deck furniture today and started with the deadeyes. Not much to this work but to post ahead with sanding and shaping each part.
First thing was the steam winch painted the winch with green paint and painted the un-named top red and when dry assembled and fixed to deck. The exhaust pipe was made from brass tubing I had. I filed a vee in the tube almost through and bend it to shape the angled part. Silver soldered the tube then filed smooth ready for paint. Fixed the tubes to the deck when paint dried. Very nice of Chris having the lower deck for the tubes sit. The tow post or dummy post depends who you read was painted green and fixed to the deck. An interesting thing about the tow post is that it also was used as the pivot point for a pump fulcrum. I wonder what Chris was thinking when he left the two sides on the top for attaching the fulcrum. I was tempted to make a pump but as I said I'm leaving the kit as designed.
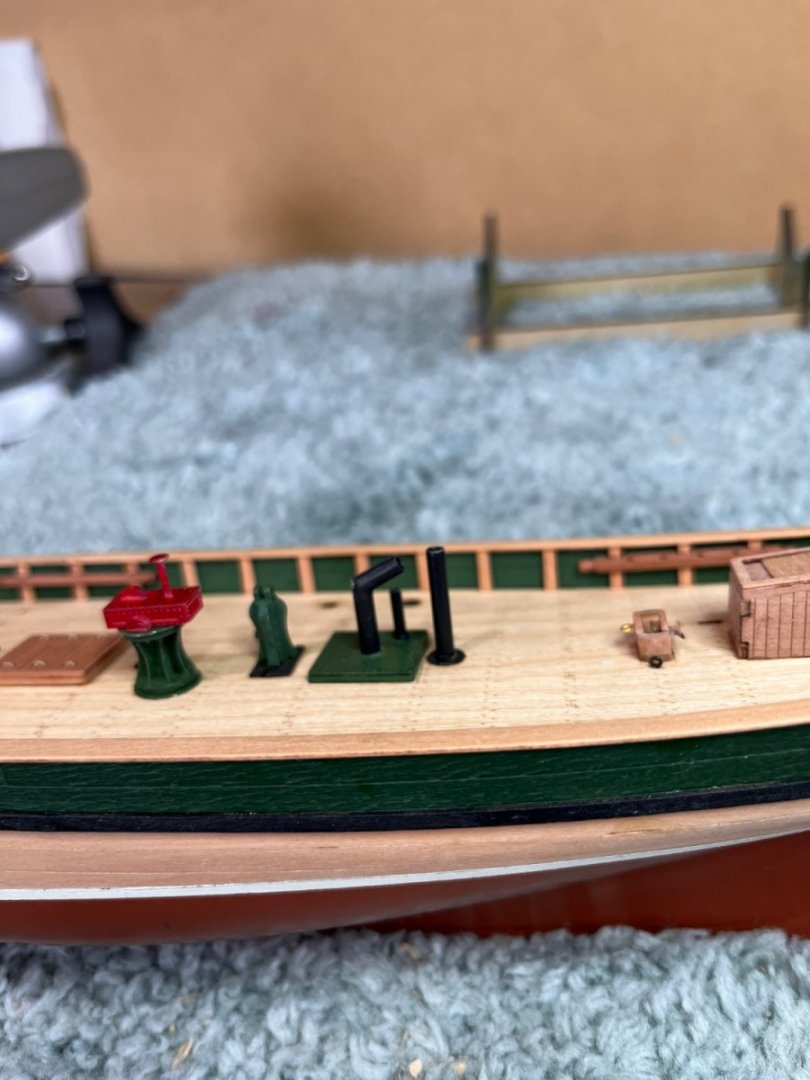
Oh whoops! I just looked at this picture and noticed the semi-circular pieces on the red box did not get painted black. Silly me.
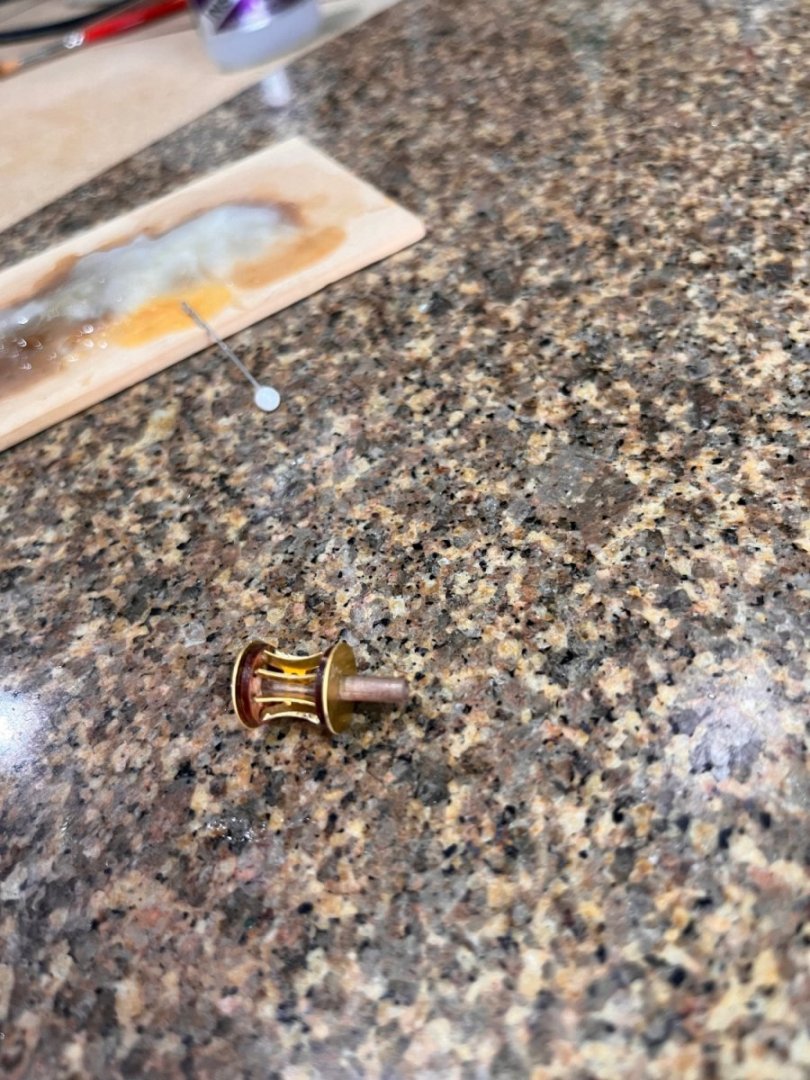
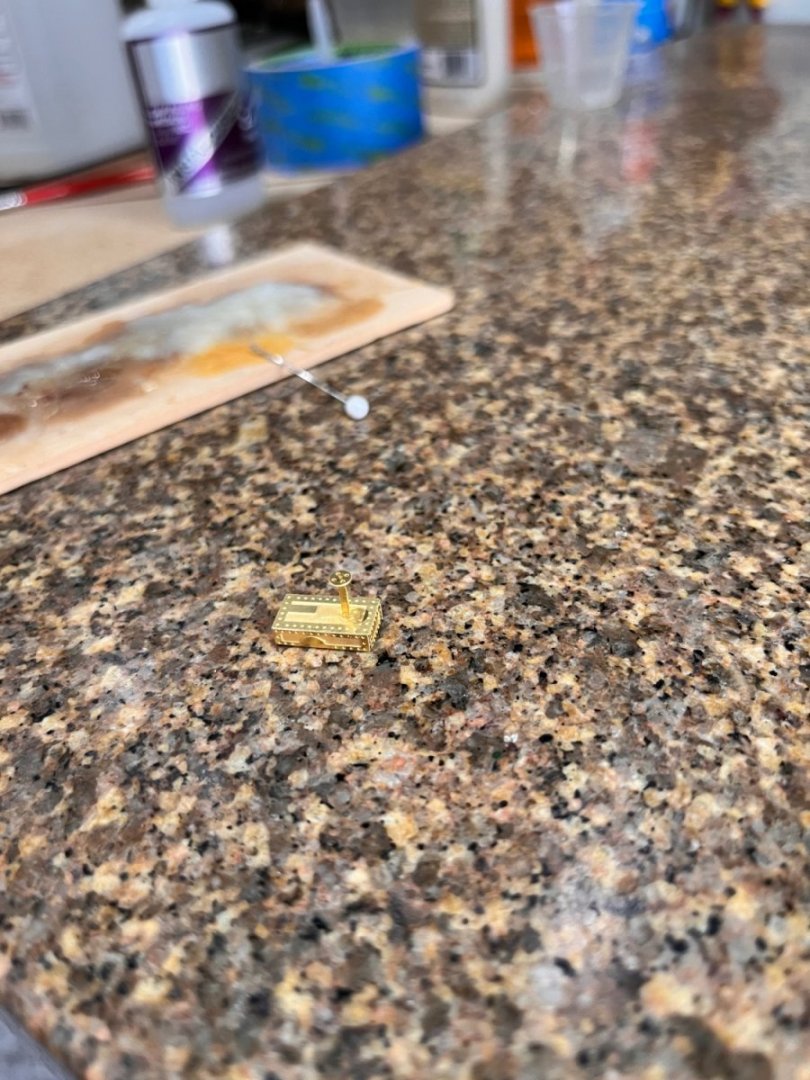
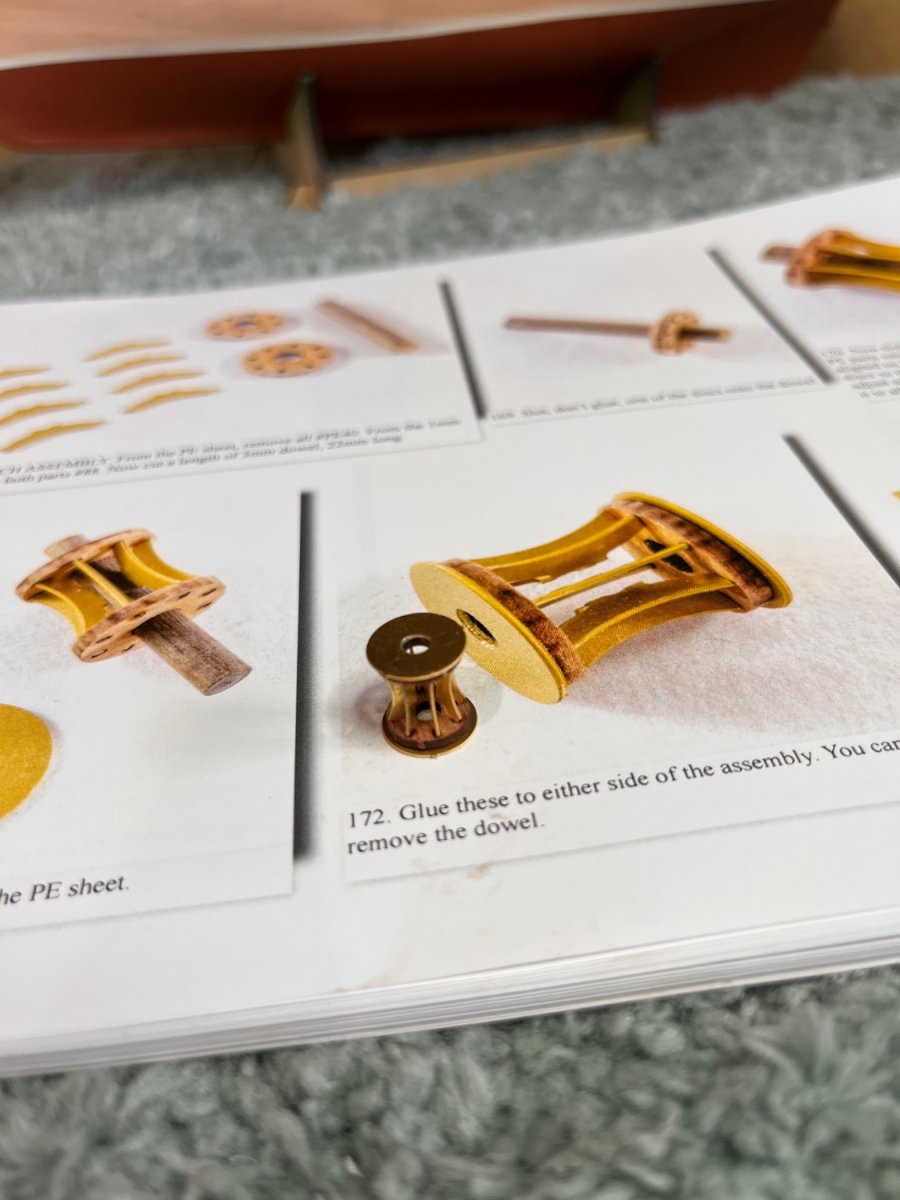
Next was to make the winch and bowsprit support. Clean the char paint the parts and put them together. When done fix to deck in the slots. Very hard to get this wrong. Splash rails with hawse grooves were next. Same process clean and fix no paint. Then the pulley. Made out of brass instead of the wood and I'll leave it brass colored. The only brass showing on the boat. The pulley was used as part of the trawling rig and looking at the drawings its not clear what this accomplished. Lastly the cavil between the stem and bowsprit support.

another whoops should be an eyebolt on the top of the stem. Easy fix.
All furniture
Best Regards
Will
-
they look nice. what scale are the stoves in the pictures? I suppose that the scale would be just a matter of scaling the CAD data or am I being too simple again?
Best Regards
Will
- mtaylor, Canute and thibaultron
-
3
-
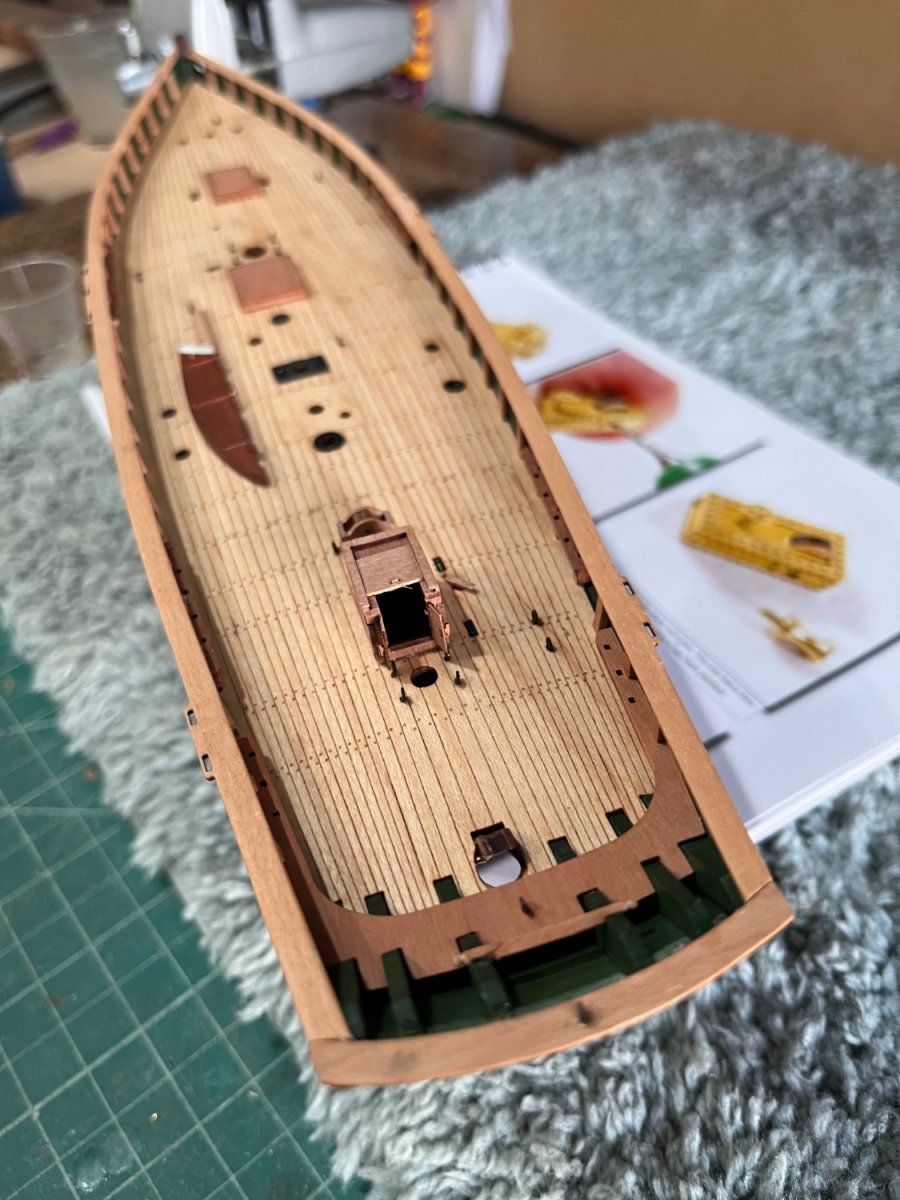
Adding the false deck makes the whole thing feel like a ship. Great job on the fit
Best Regards
Will
- FriedClams, JpR62, Saburo and 1 other
-
4
-
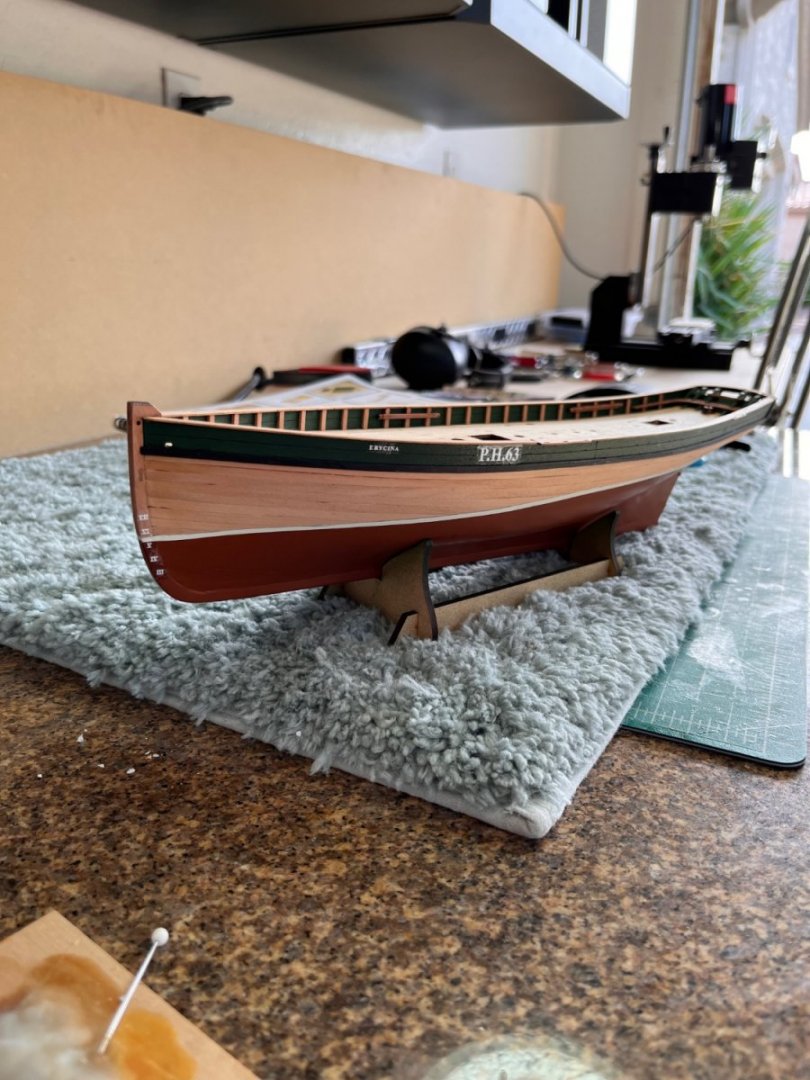
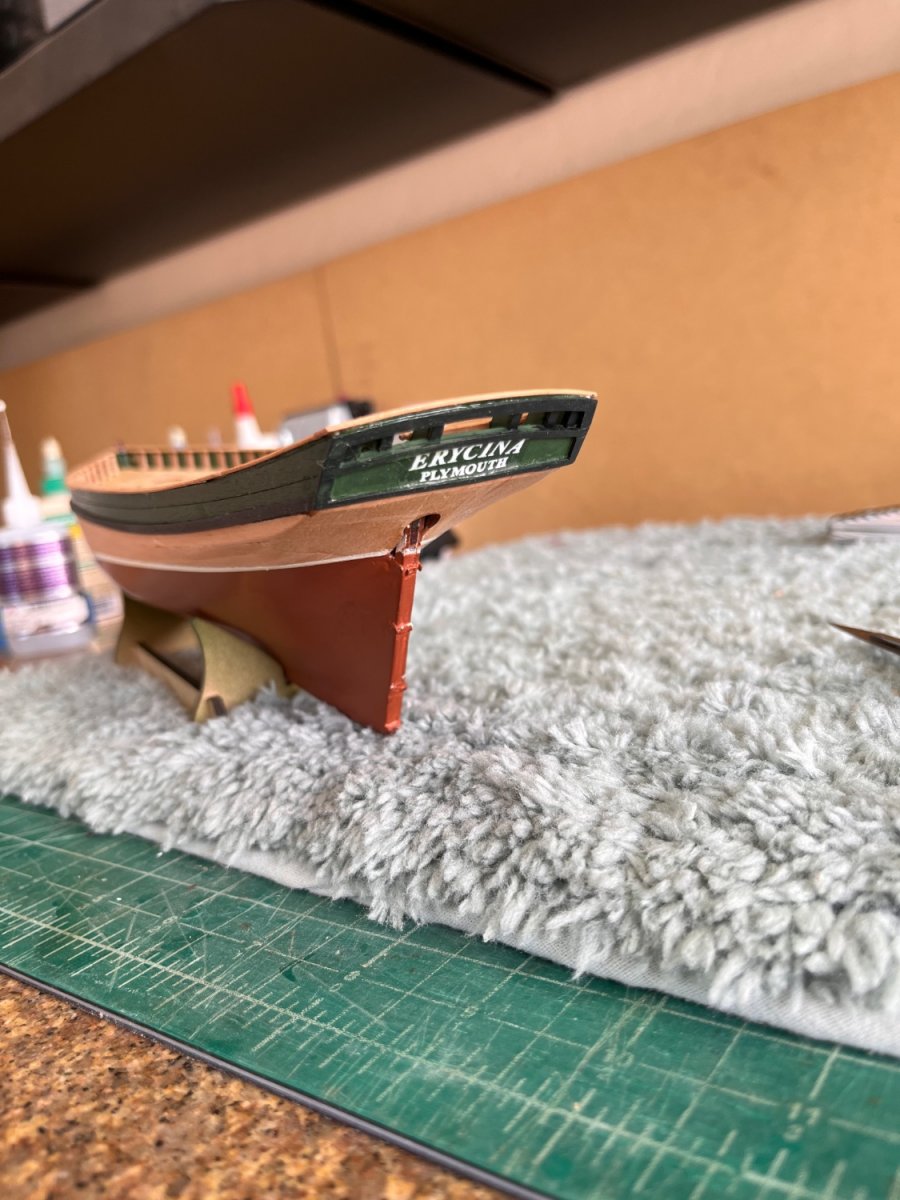
Time to put the decals on so starting with the stern the has the "Erycina Portsmouth" inside the framing. The framing should have been painted black so not I'll hand paint black. Not to future modelers PAINT THE TRANSOM FRAME BEFORE MOUNTING
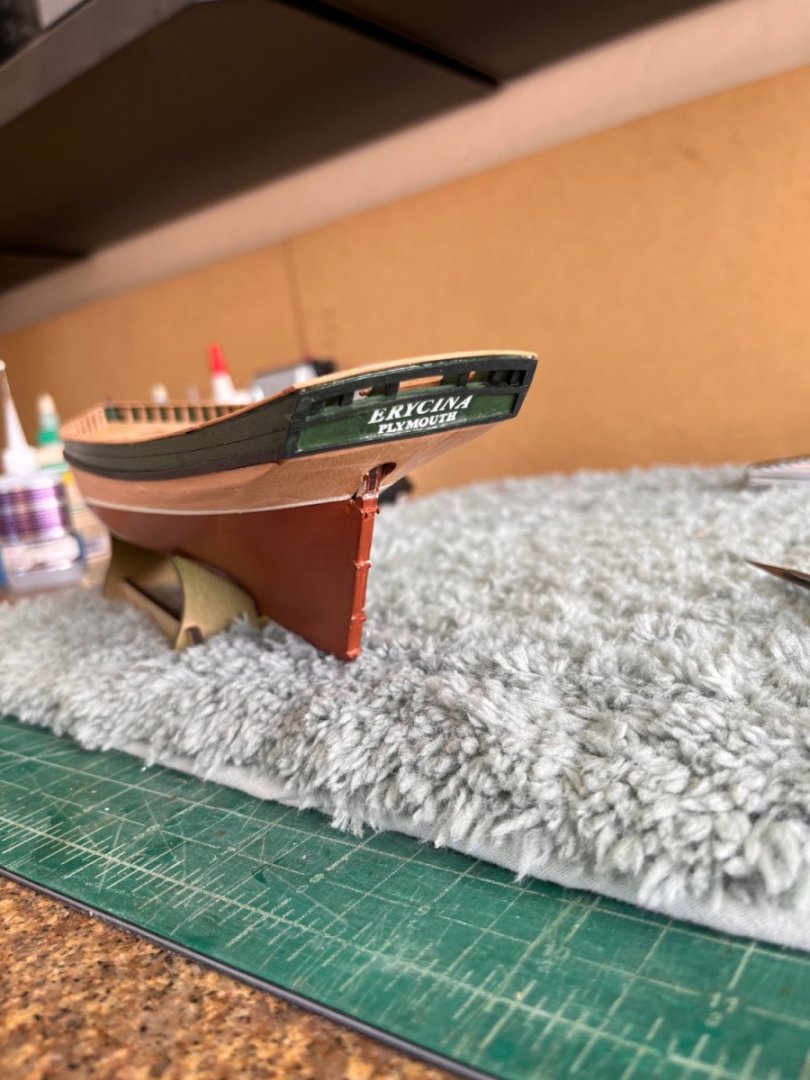
Name and registrations number along with water depth decals
Getting the deck populated with eyes and lids. Not much to say except the eyebolts are too long to sit with the eye flush to the deck. Decision time 1} trim the shank 2} drill hole in false deck. Not liking either I used a straight pin to punch a hole the slots. The drilling option was discarded because the deck has rectangular holes to receive the eyebolt shank and drilling might change the shape or scar the deck. While holding the model and pushing the pins I broke the rudder from it position. It is held with 3 small tabs glued into the stern post. I going to leave it off until the time for the tiller and in the meantime hopefully find another way to mount the rudder.

Notice the poor rudder


That was yesterday finishing the main chock and companionway today was spent gathering up the parts needing paint and making the steam winch. Building the winch was a challenge with eight whelps to mount between two discs but when you loose one of the whelps the fun starts.
Taking a piece brass from the photo etch and making another whelp took five hours. To make the whelp I needed a pattern I tried to trace a whelp on paper glue the tracing to the brass and file a whelp. The paper pattern became worn and not a true shape. Finally I glued a whelp to the brass and very carefully filed the shape using #2 swiss files. It did come together and the new whelp fit as the others. Oh well! the shop floor needed cleaning anyway so looking for the lost whelp gave me a reason.

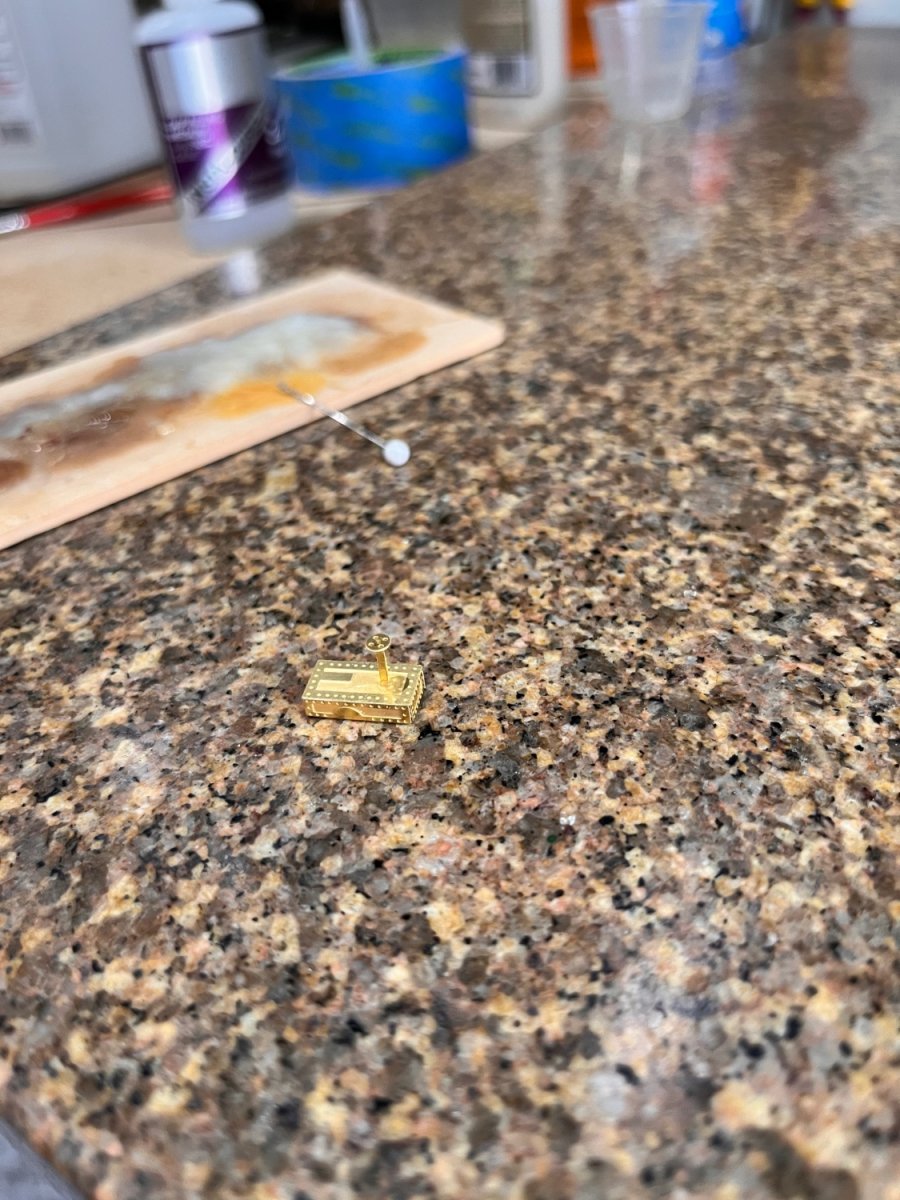
Next was the steam box (don't know what else to call it) that sits on top of the winch. It fun to build something without having to make a part.
all the parts gathered up for tomorrows paint

Best Regards
Will
-
Ah! the horrors of first coat of paint. It looks like you did a good job planking, I've done worse. Filler and sanding to fix. Your adaptation of scuppers is right on. When on the wind or towing the net the sat low to the aft. Pictures I've seen they are wet boats in weather so your scuppers are right on.
Best Regards
Will
-
Andrew
I use Mission Models paint and as said above I tested for coverage and lifting with great coverage and not being able to lift with tape. I was spraying at 35psi but have found 25psi give a more even pattern and easier to use as it uses less paint. I used the thinned ready to use paint.
Here's a picture of the paint used the white is for the boot line

Best Regards
Will


Nisha by AJohnson - FINISHED - Vanguard Models - 1:64 - Brixham 'Mumble-Bee'
in - Kit build logs for subjects built from 1901 - Present Day
Posted
My bad Andrew. Since nothing is attached to the heel of the bowsprit I just shorten it to agree with the prototype. (my opinion visual appearance overcome actual dimensions)
With Erycinas drawings I found them to be reduced by 16%. That being said I multiplied measured dimensions by 1.16.
What I found was sails about 1/8" longer along the mast.
Regards
Will