niwotwill
-
Posts
593 -
Joined
-
Last visited
Content Type
Profiles
Forums
Gallery
Events
Everything posted by niwotwill
-
 Where would we be with Amazon Prime? But I do hate to see local business getting hurt. Regards Will
 -
Hi Glenn As they say I brought up a chair for your next build. Couldn't stay away from the scratch builds. HA HA HA It is looking good so many frames. You go Glenn Regards Will
- 840 replies
-
- 2
-

-
- winchelsea
- Syren Ship Model Company
- (and 1 more)
-
Lovely work Kevin. Really enjoy your video of the planking, I forget what that type is called, you make it look easy. Looking forward to the next steps. Regards Will
-
Your right Mark I've left the template on for days with no staining. Also the glue stick goes on purple and drys clear telling you when its ready. Regards Will
-
Patrick She's coming along nicely very nicely. You might check with Model Shipways that multiple size cannon balls. Regards Will
-
Thanks Maury. I'll file that away for future use. Regard Will
-
Just started following your build but still need to go to the beginning and really study your posts. A comment on paper patterns which I also use for cutting is try using the glue sticks that are used for school work, photo albums, etc. It holds very tightly to the wood when cut and washes off with water leaving no residue. Amazing work i'm looking forward to reading your log from the start. Regards Will
-
Very nice Maury. I like the sliced brass tubing. Did you also use the tubing to score the rudder post? Overall she's looking fantastic. Regards Will
-
Thanks for nice comment John. I spent my working days as a electrical design engineer and many nights brought the answers for previous days problem. And thanks all for the looks and likes it keeps me motivated. Regards Will
-
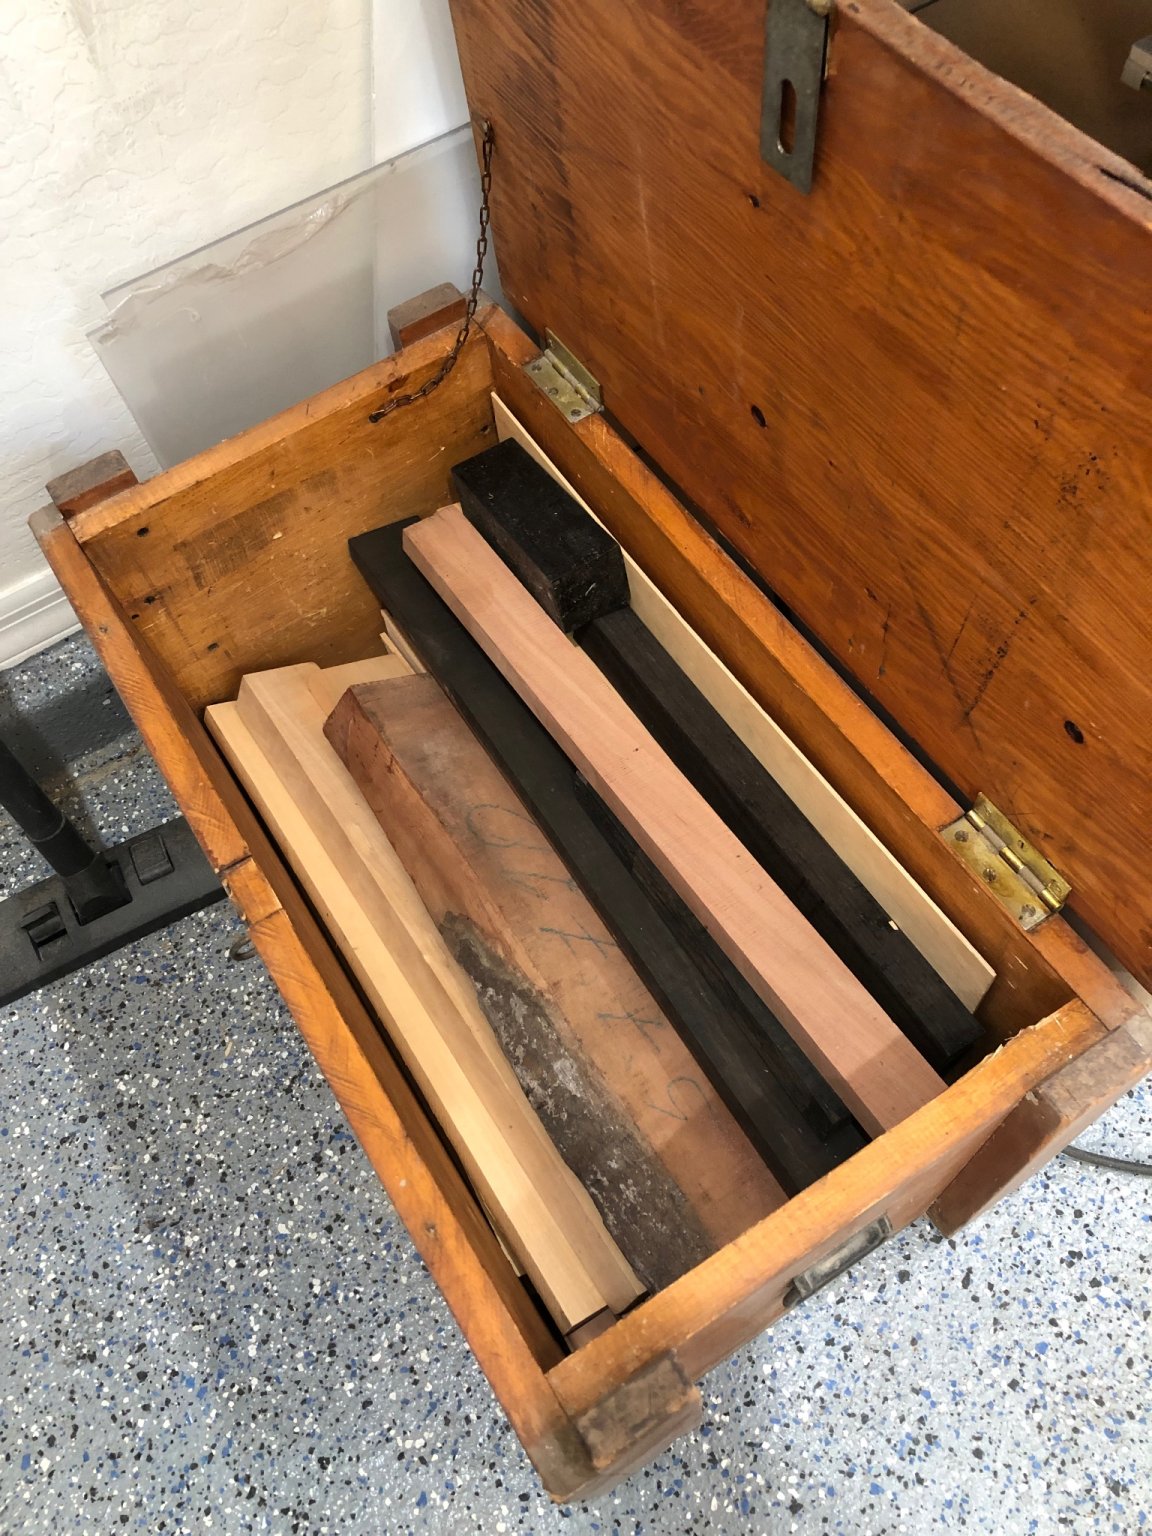
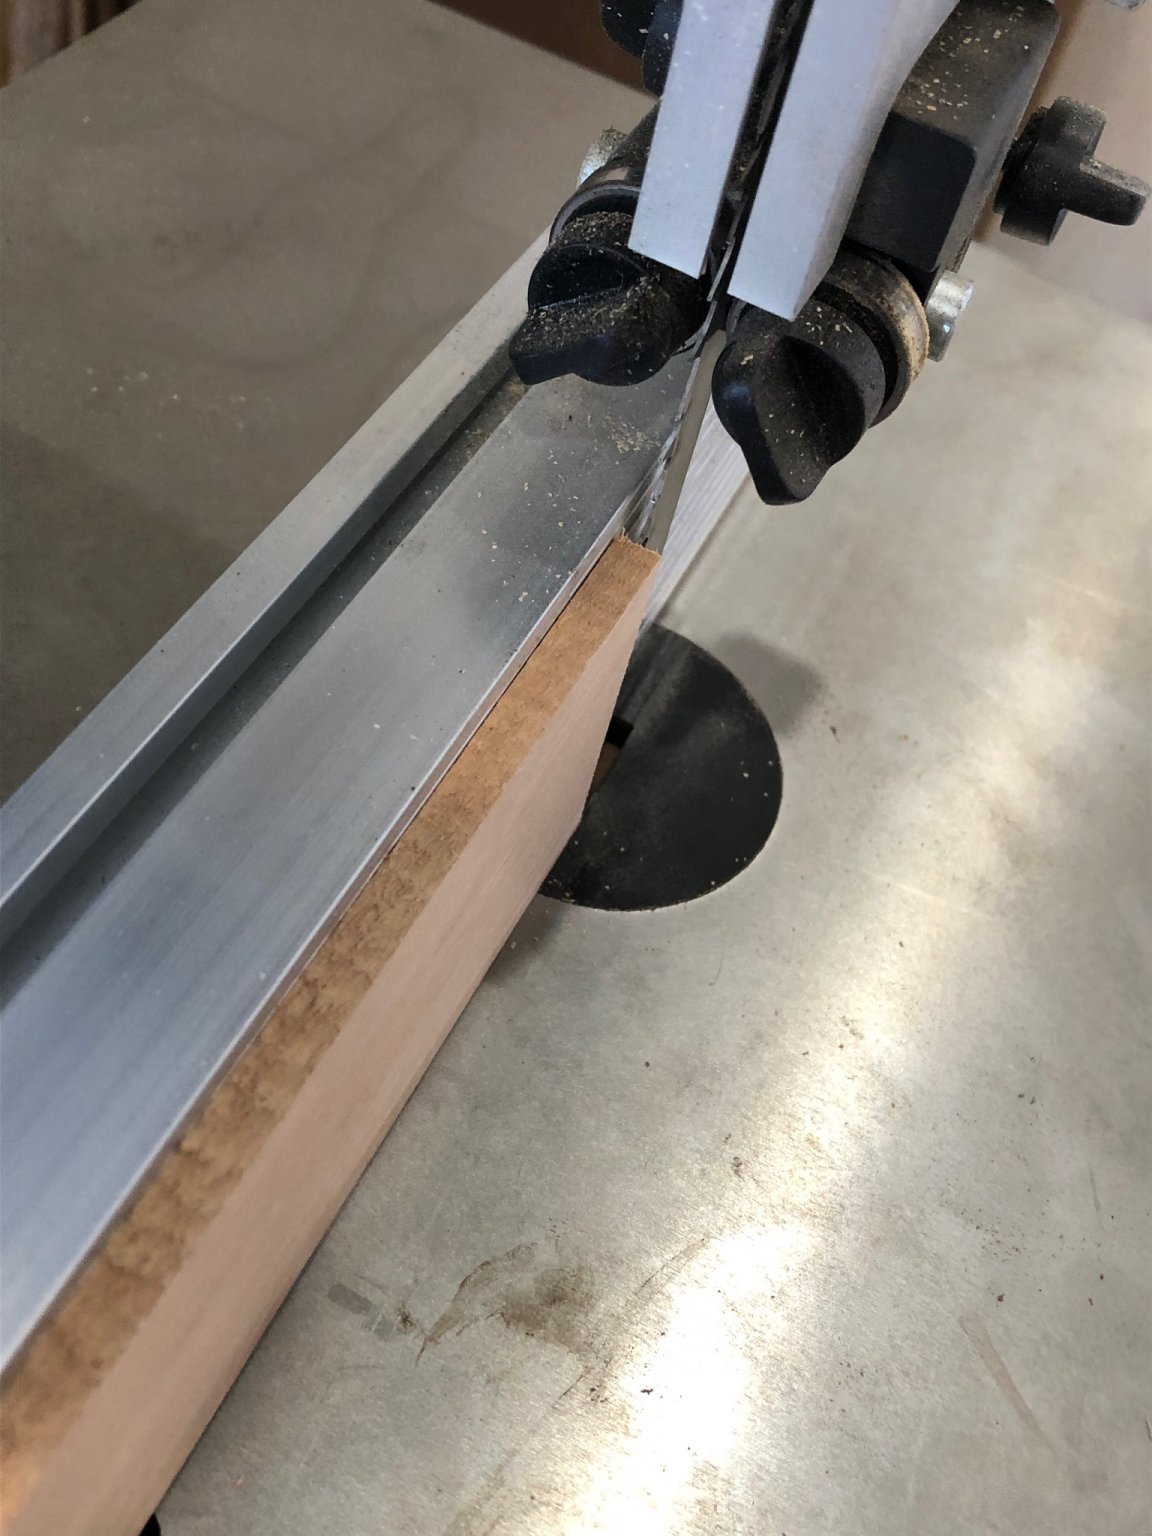
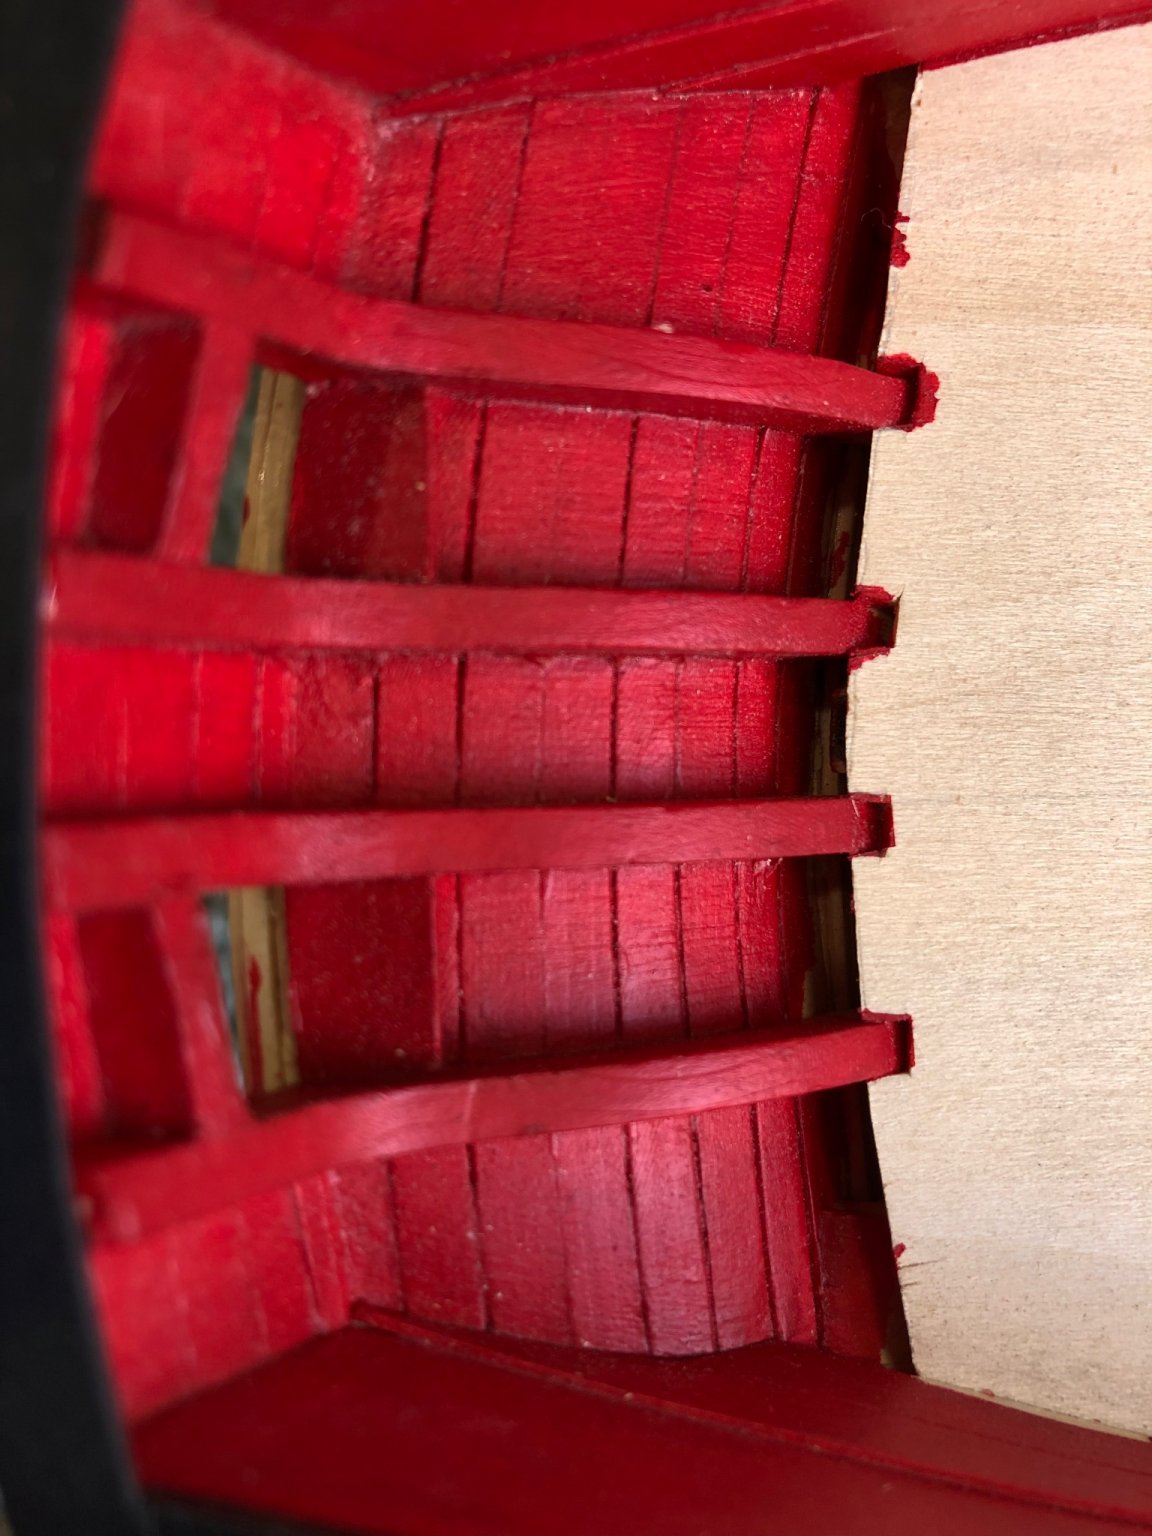
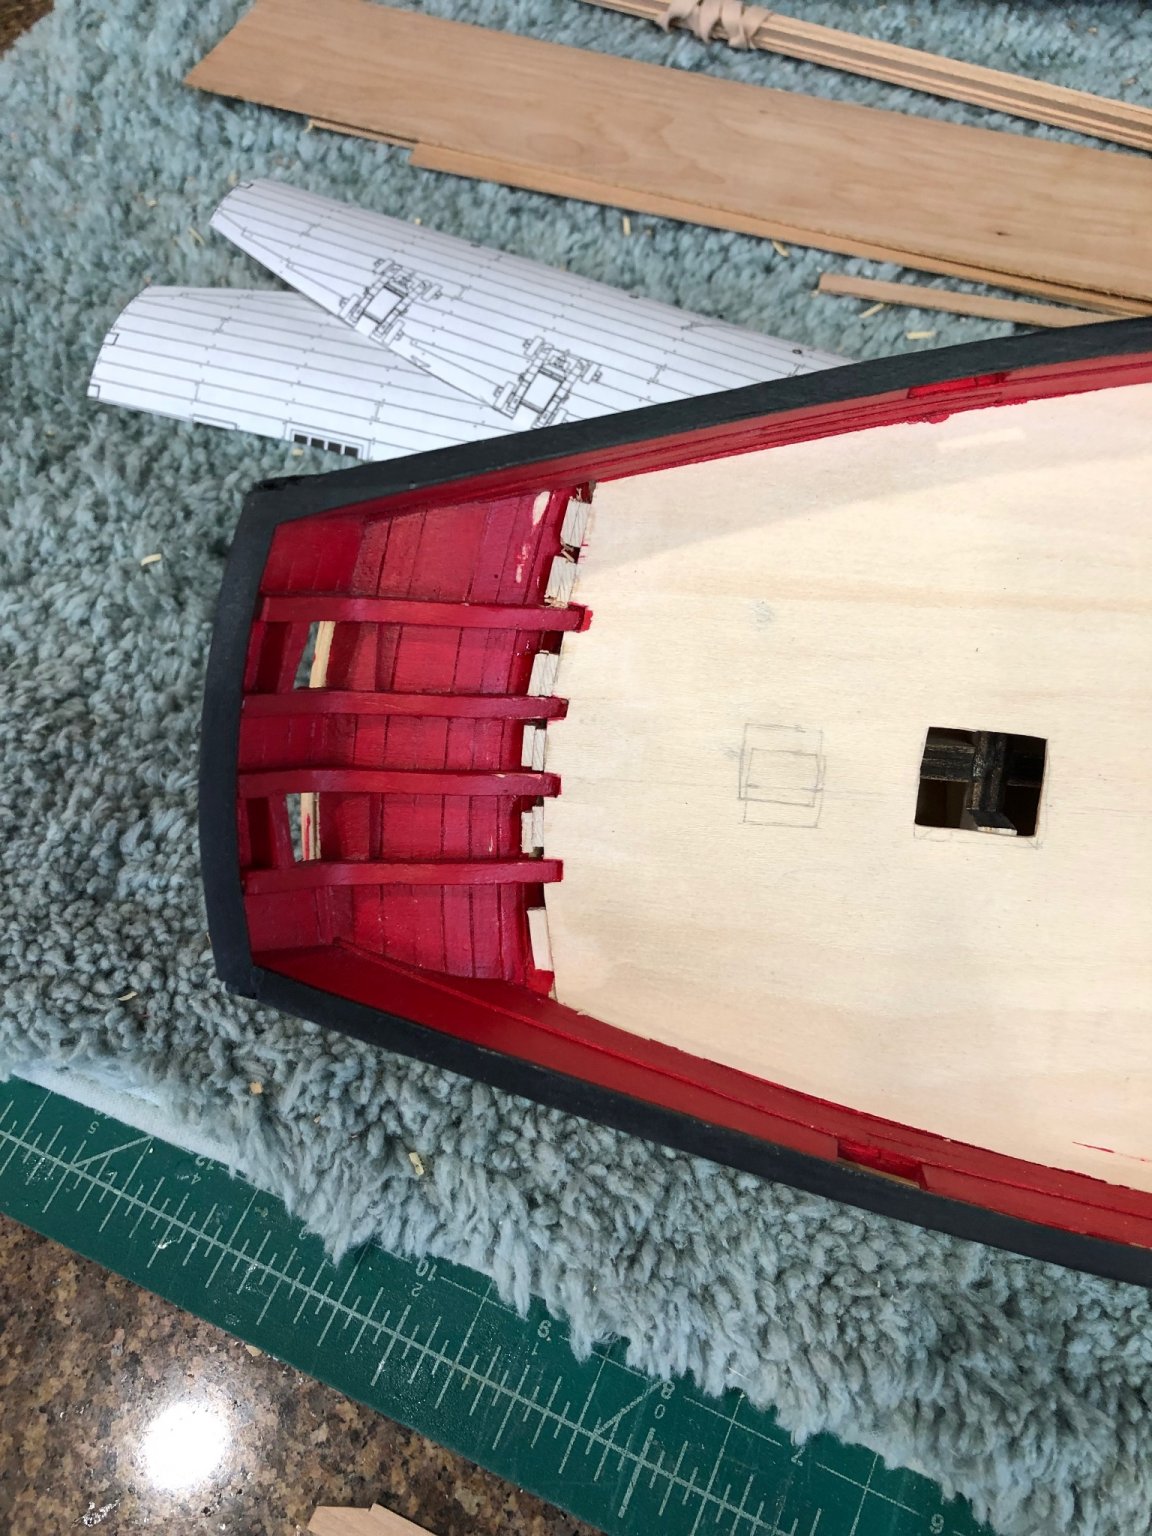
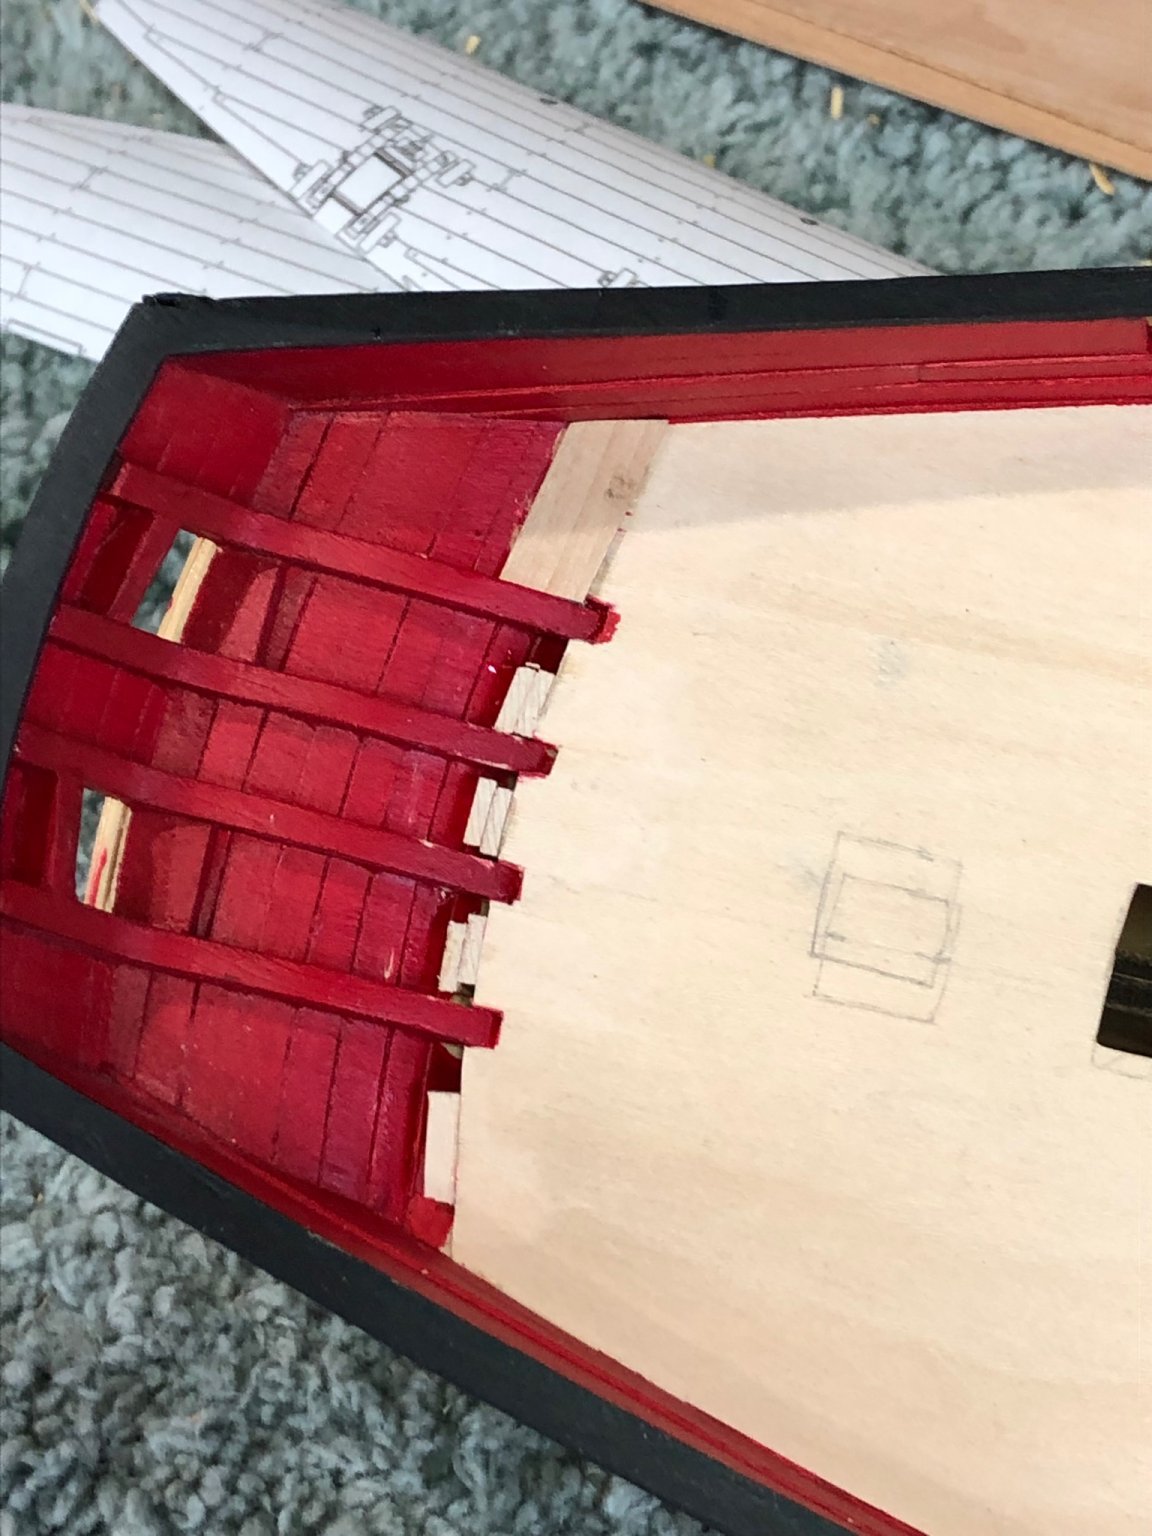
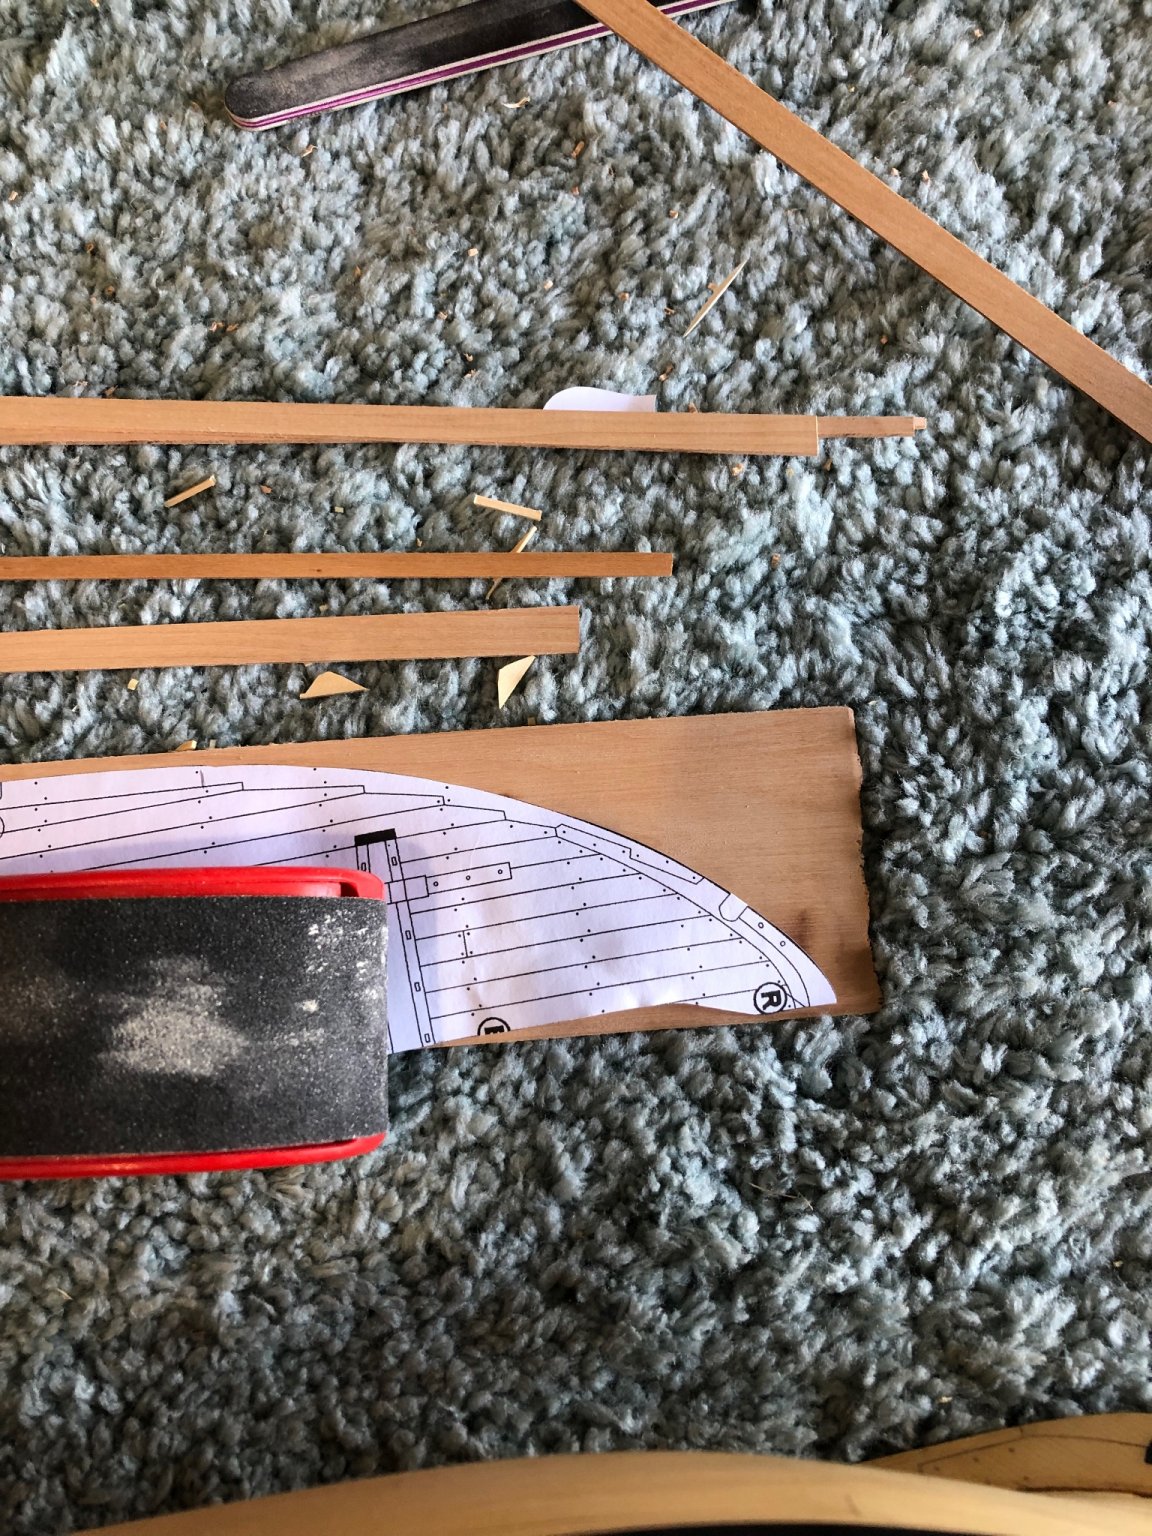
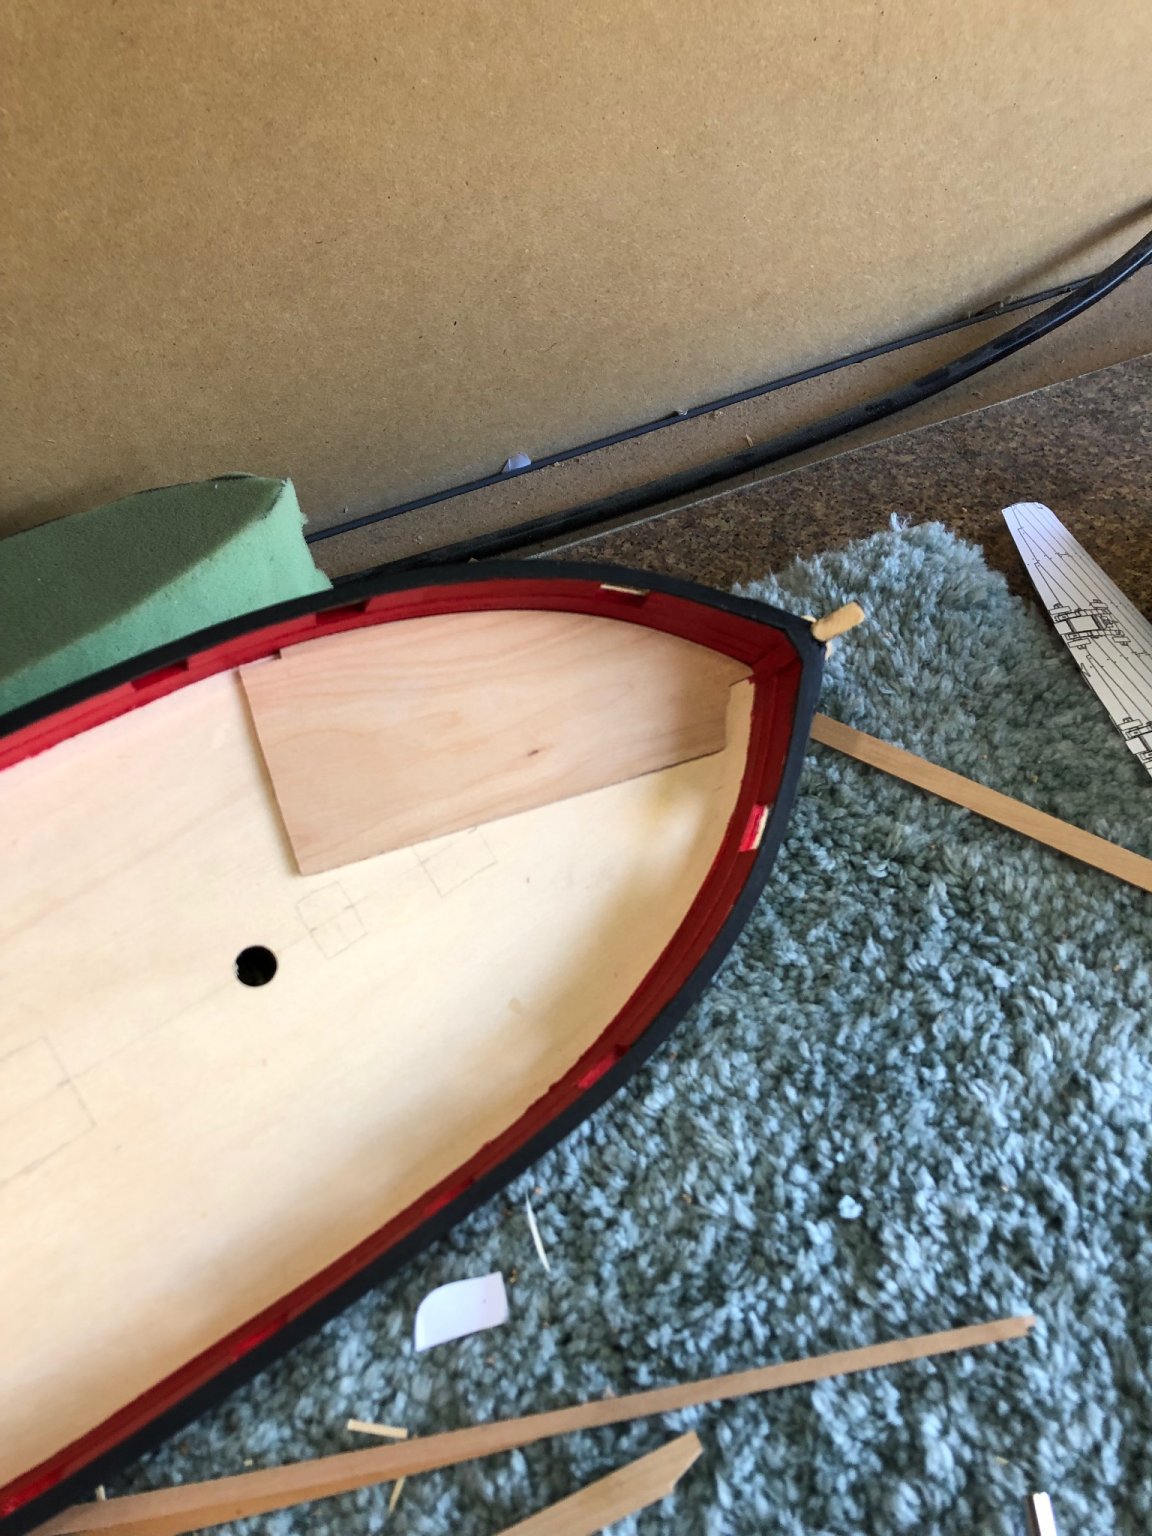
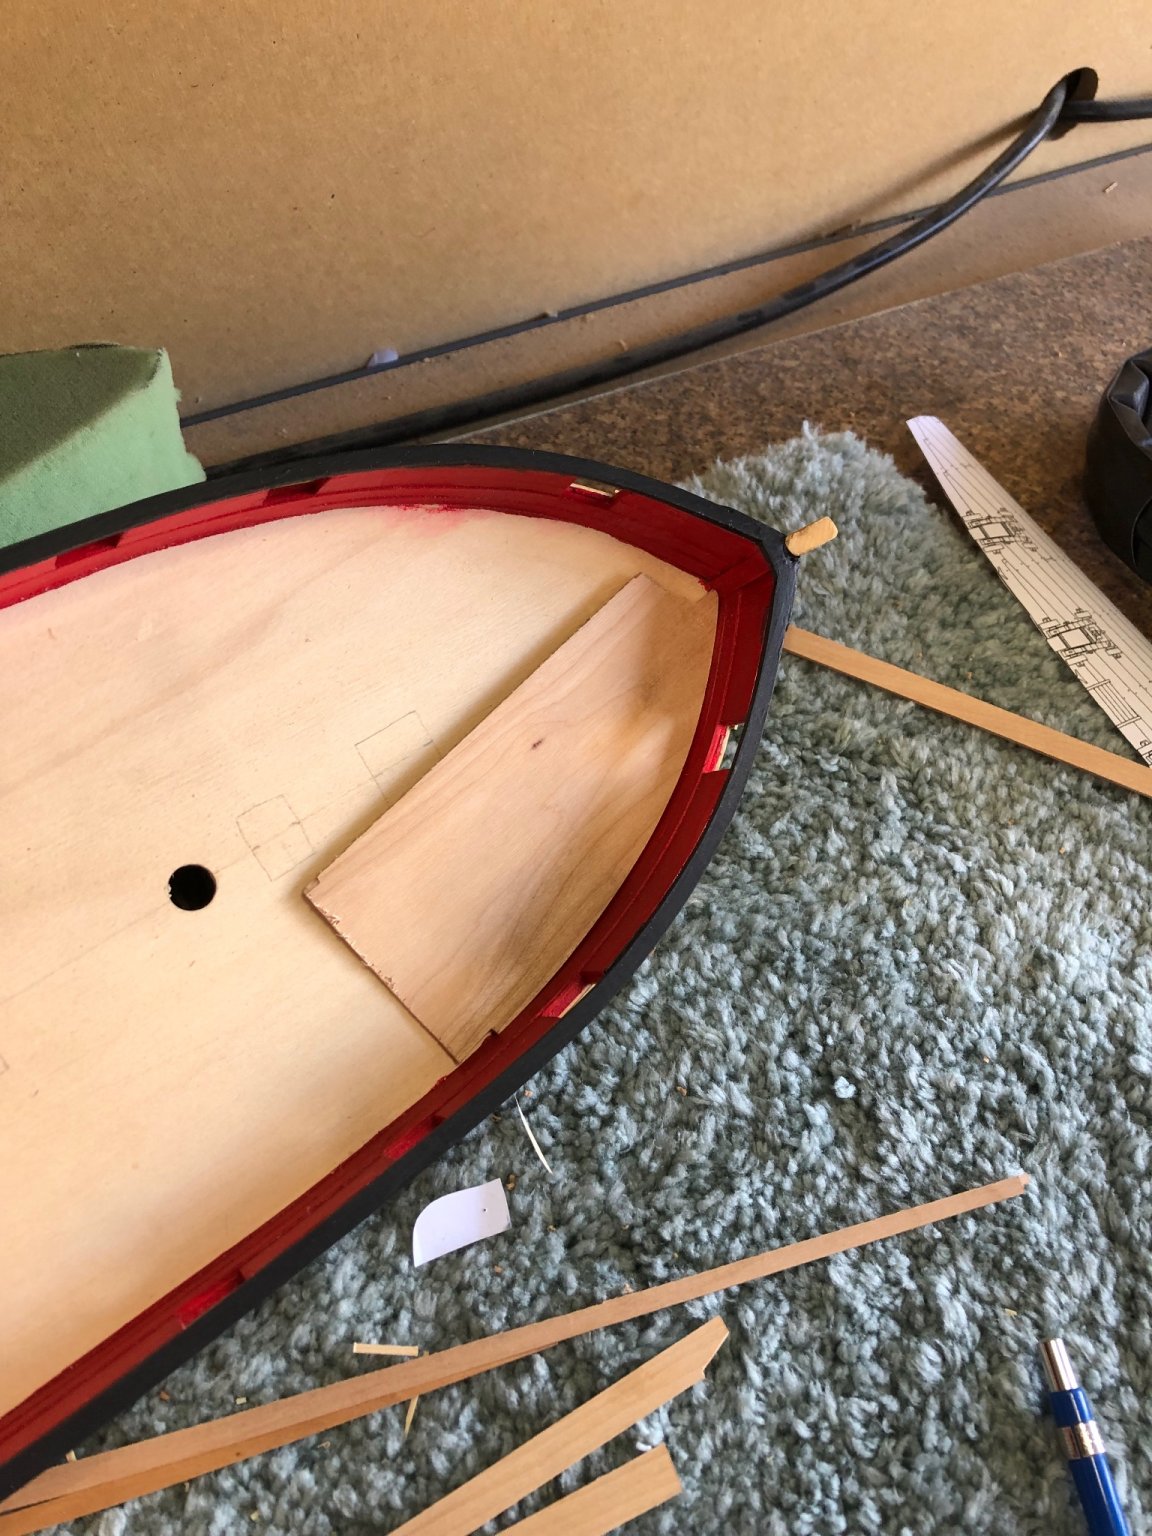
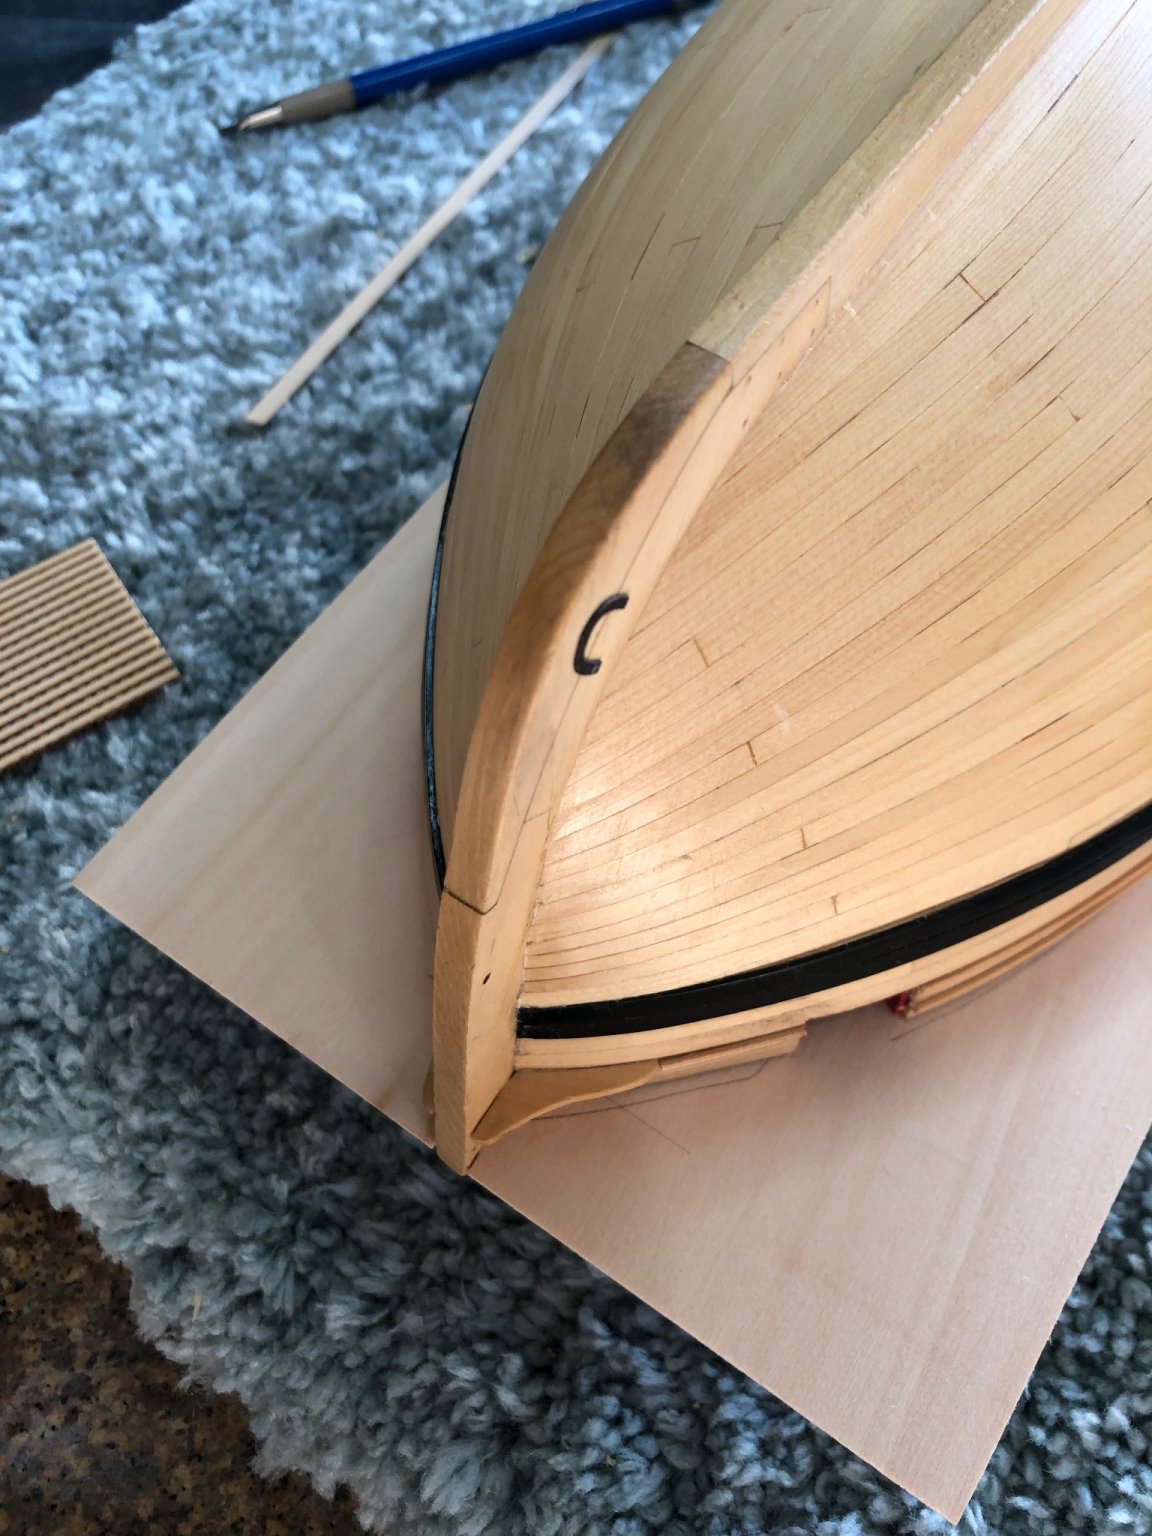
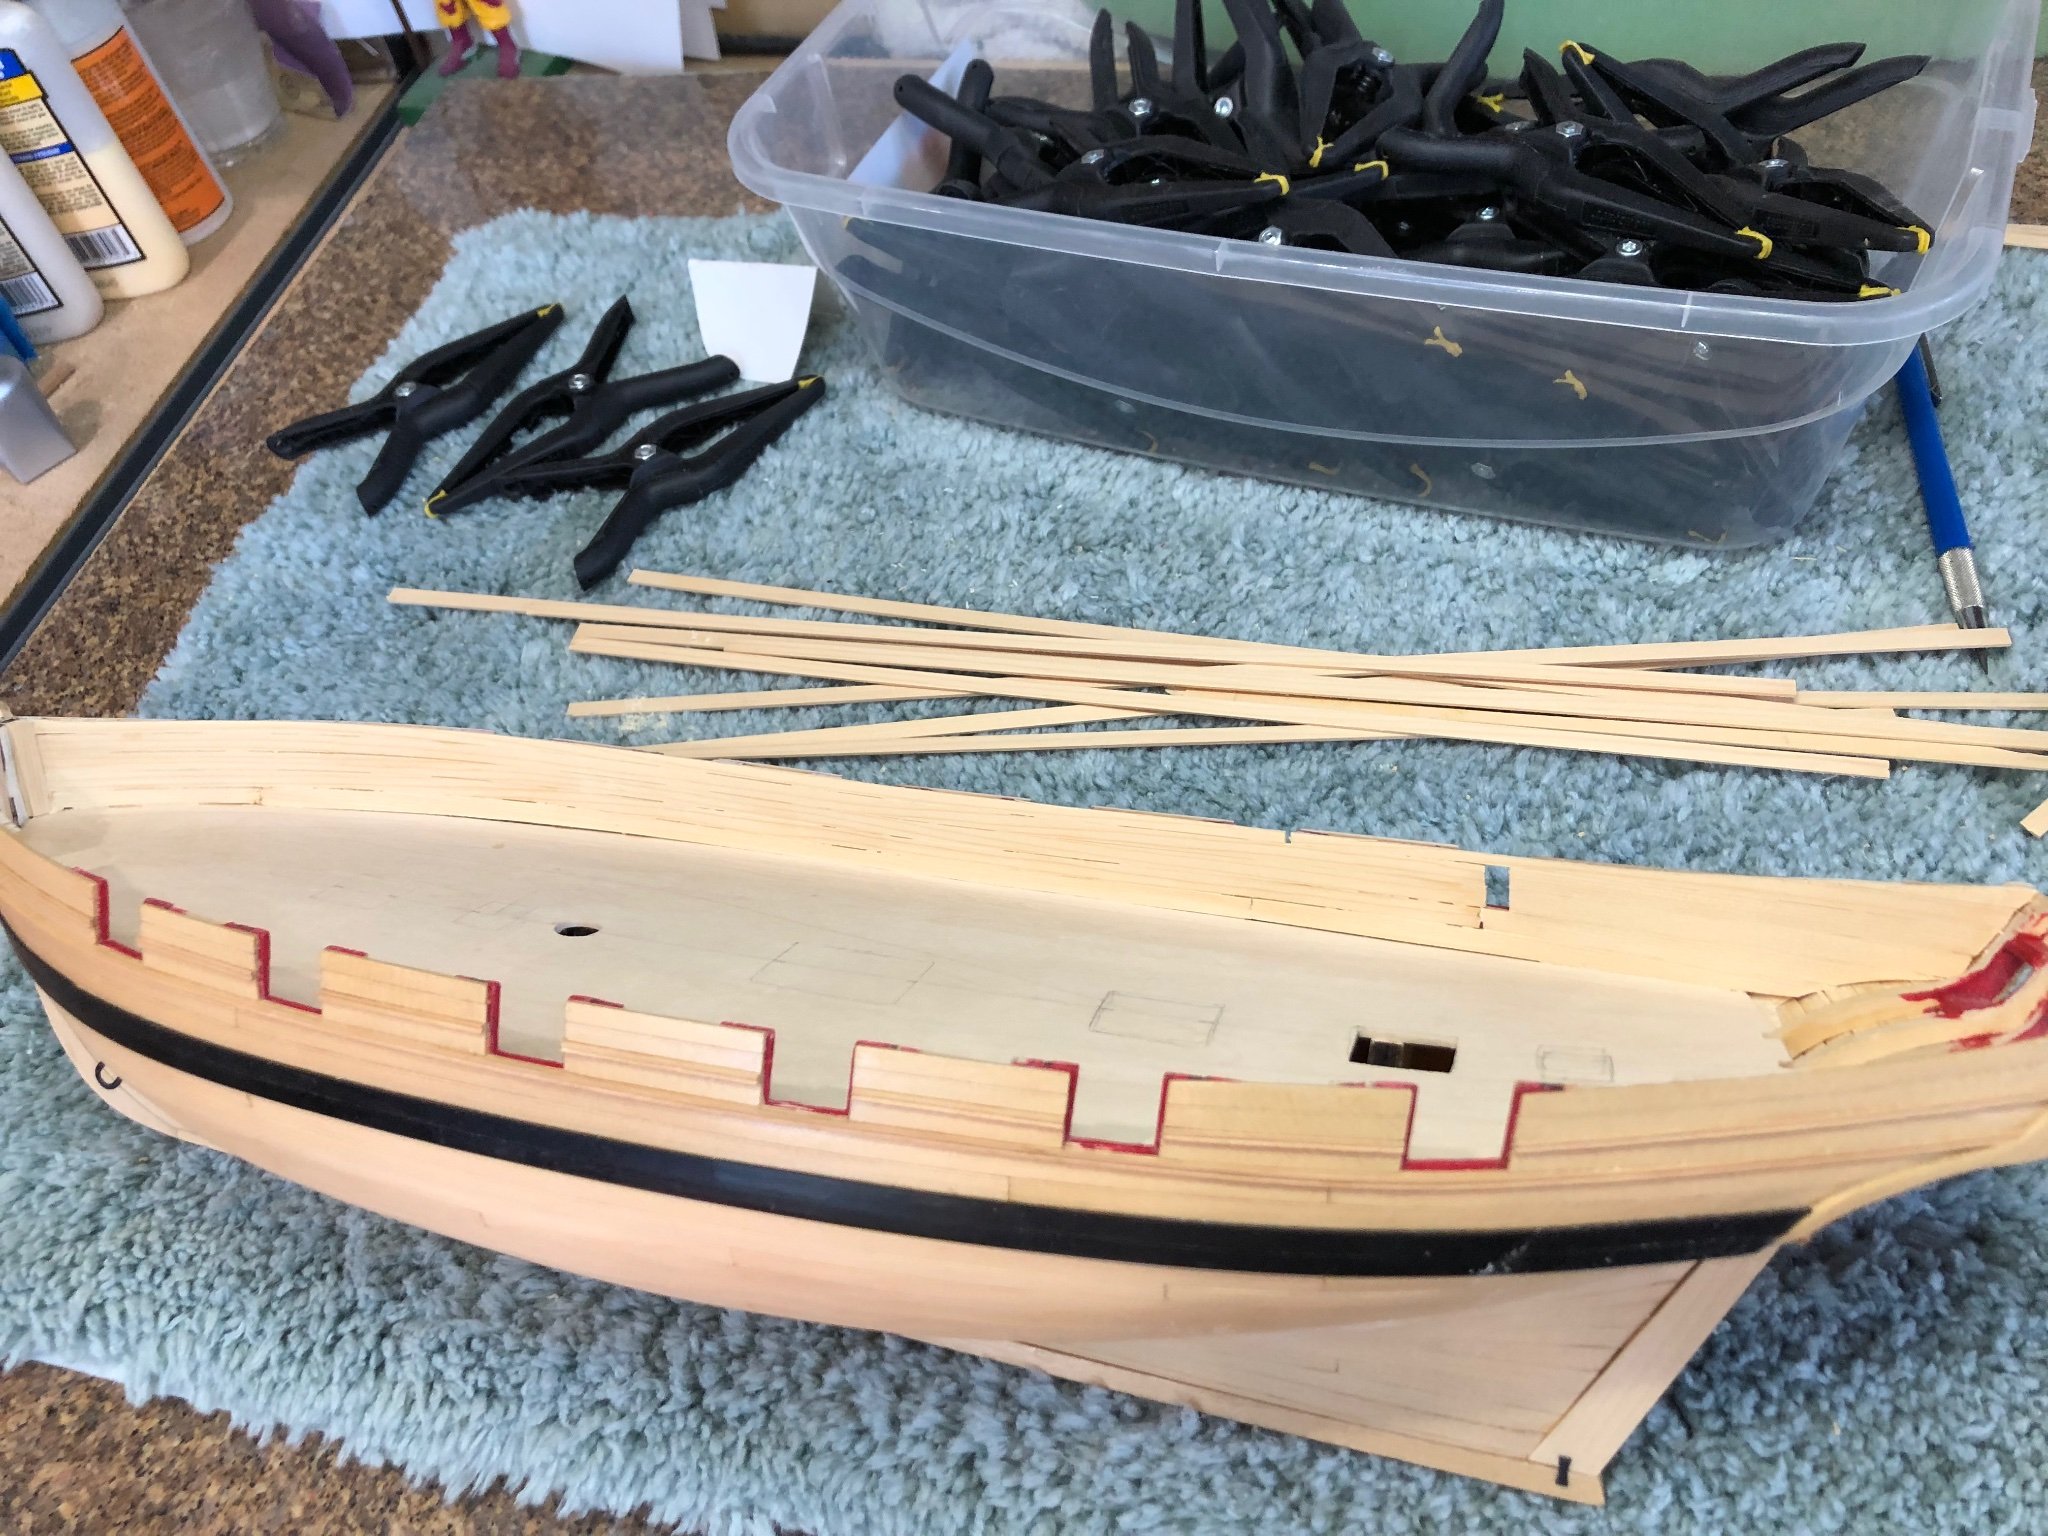
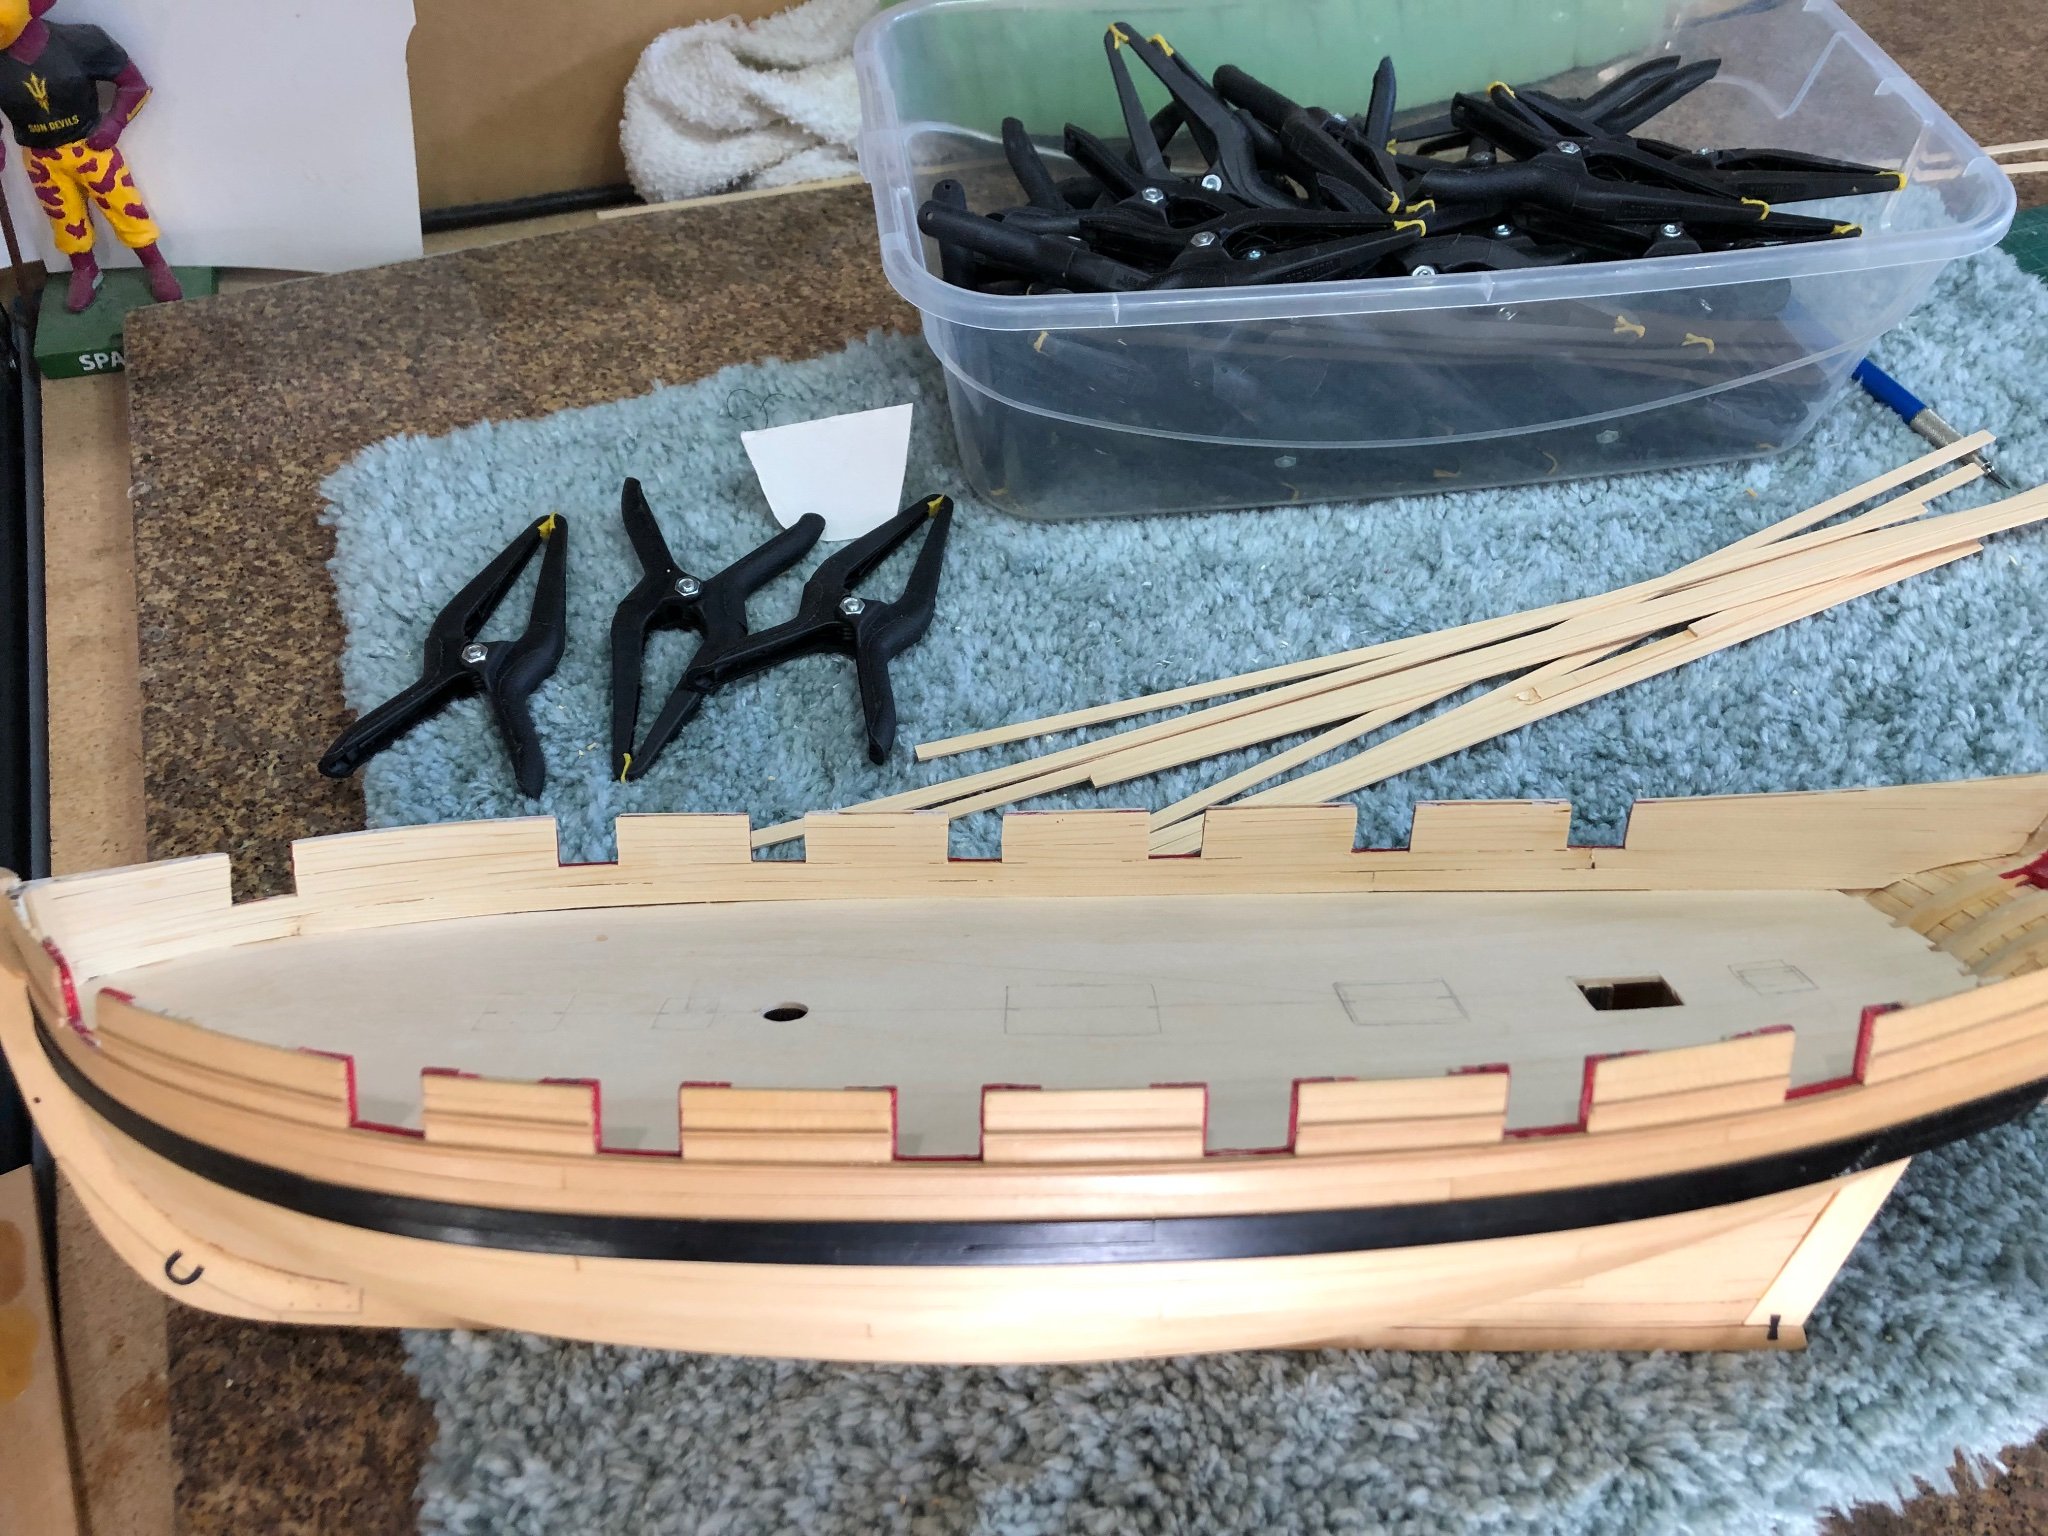
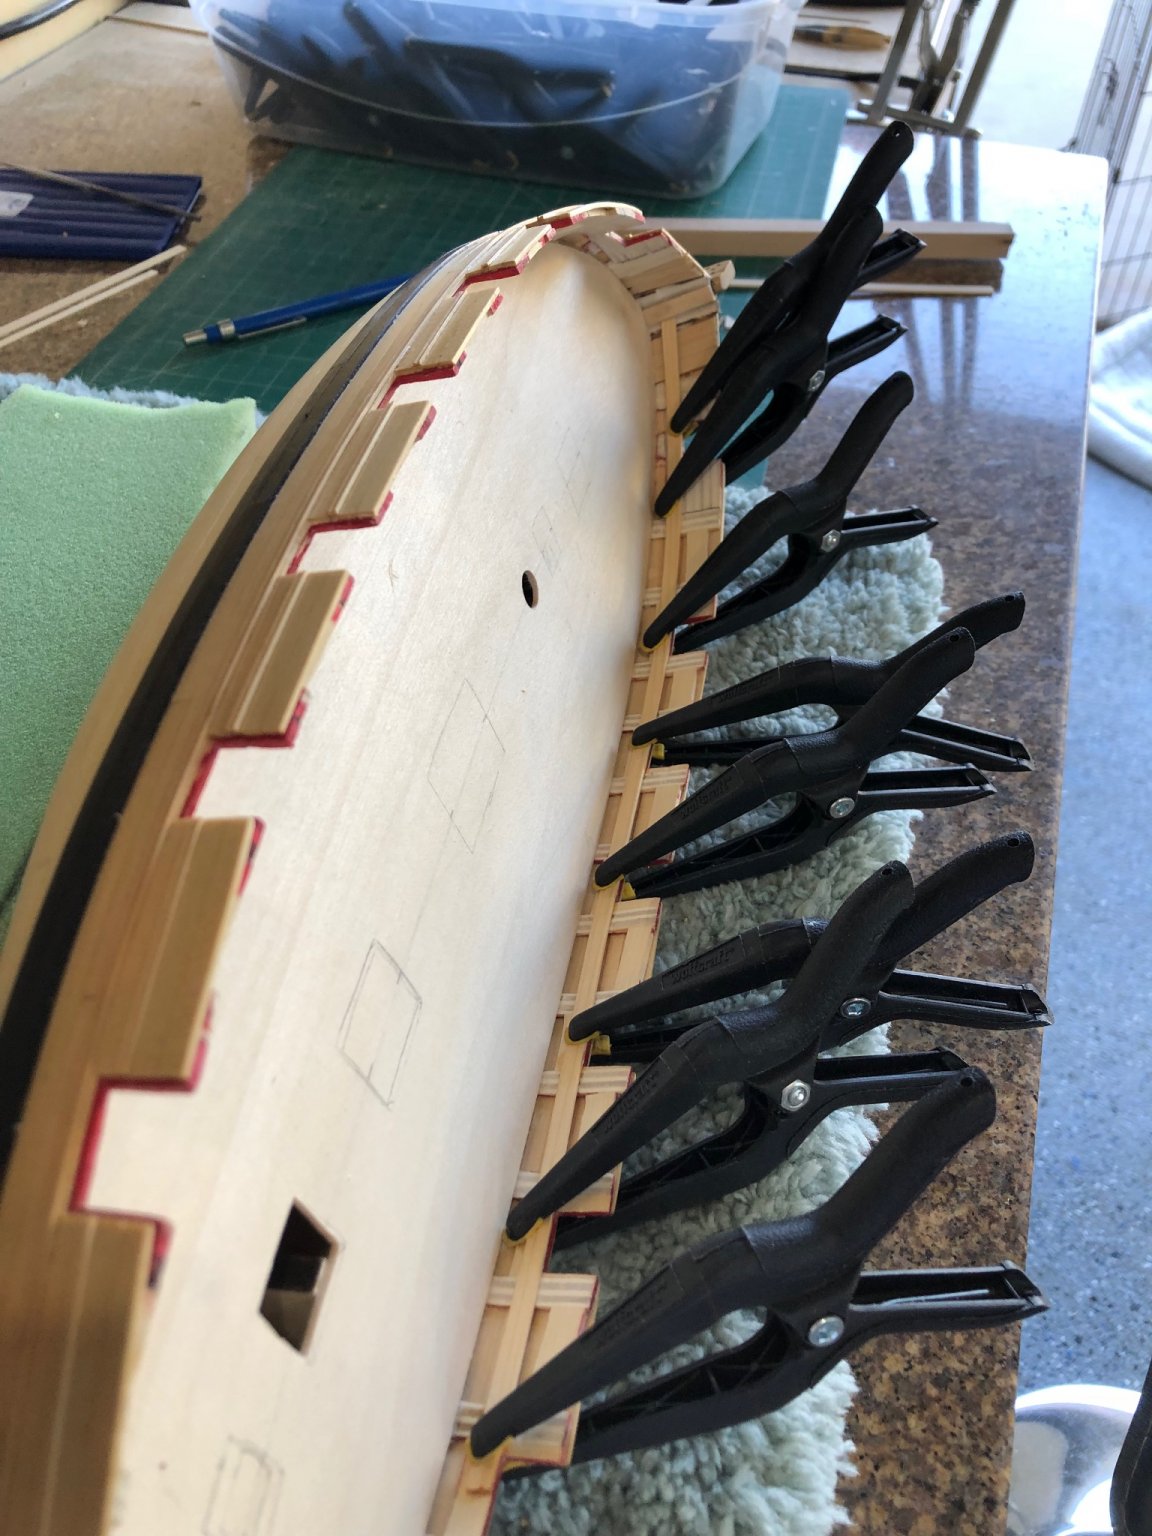
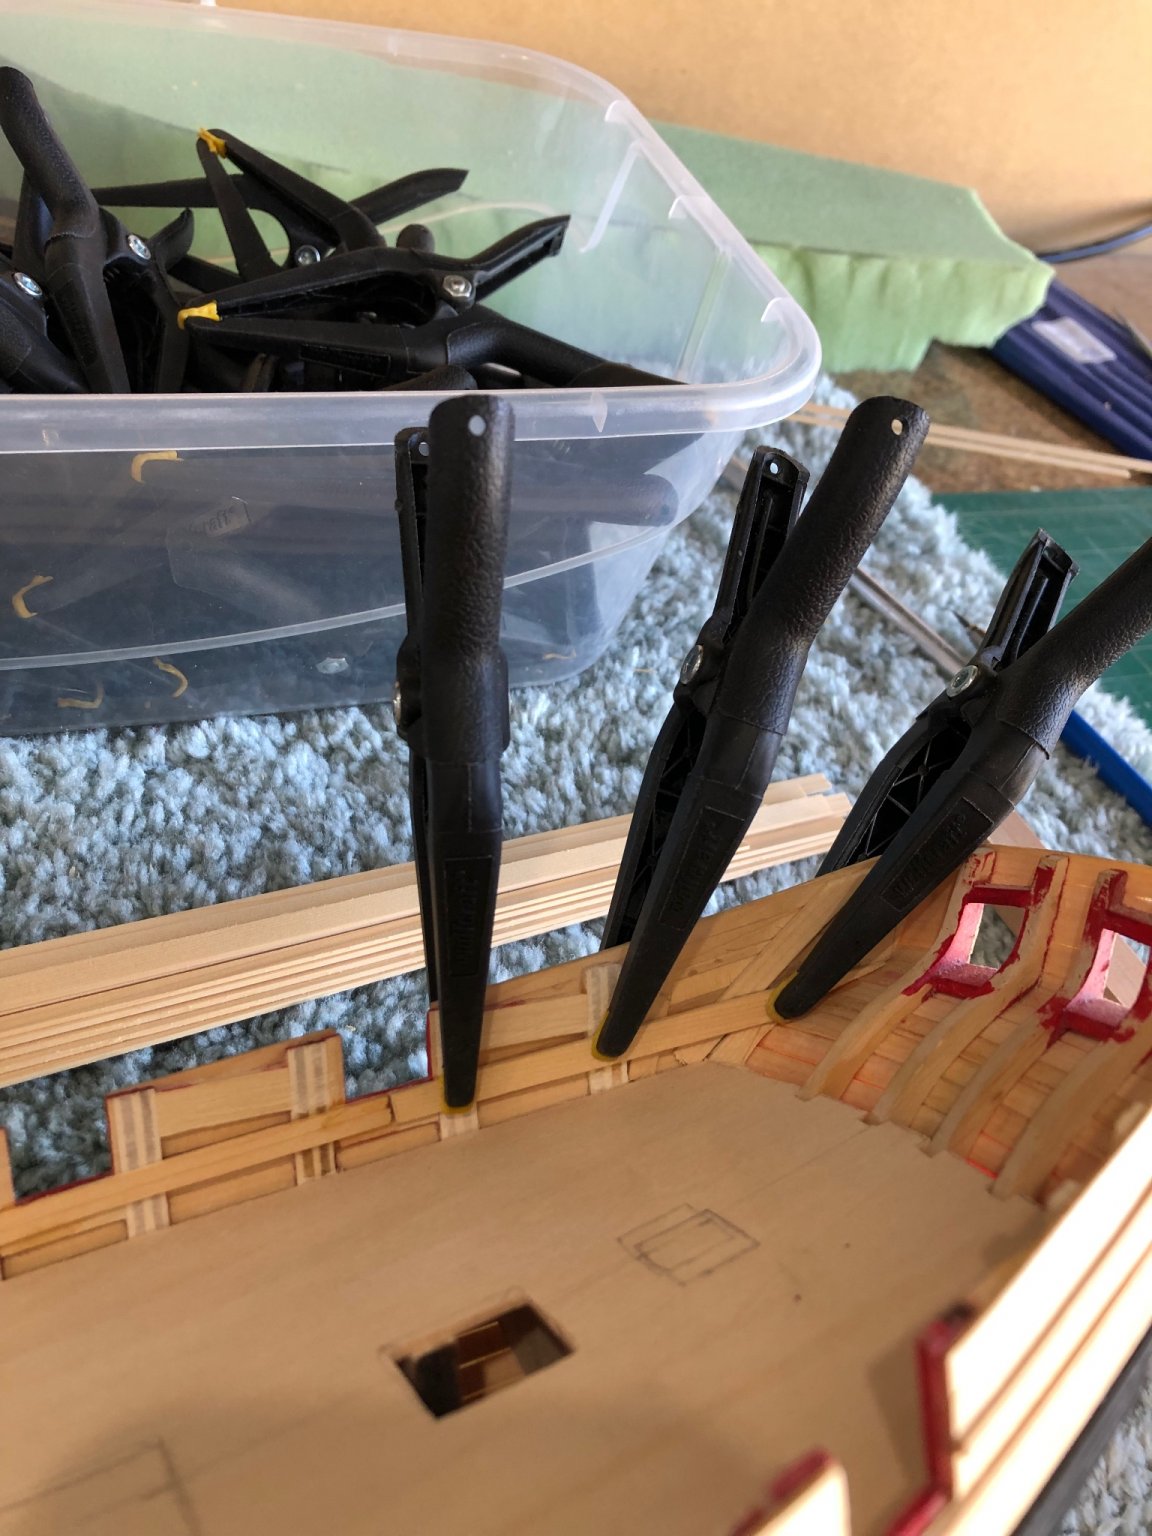
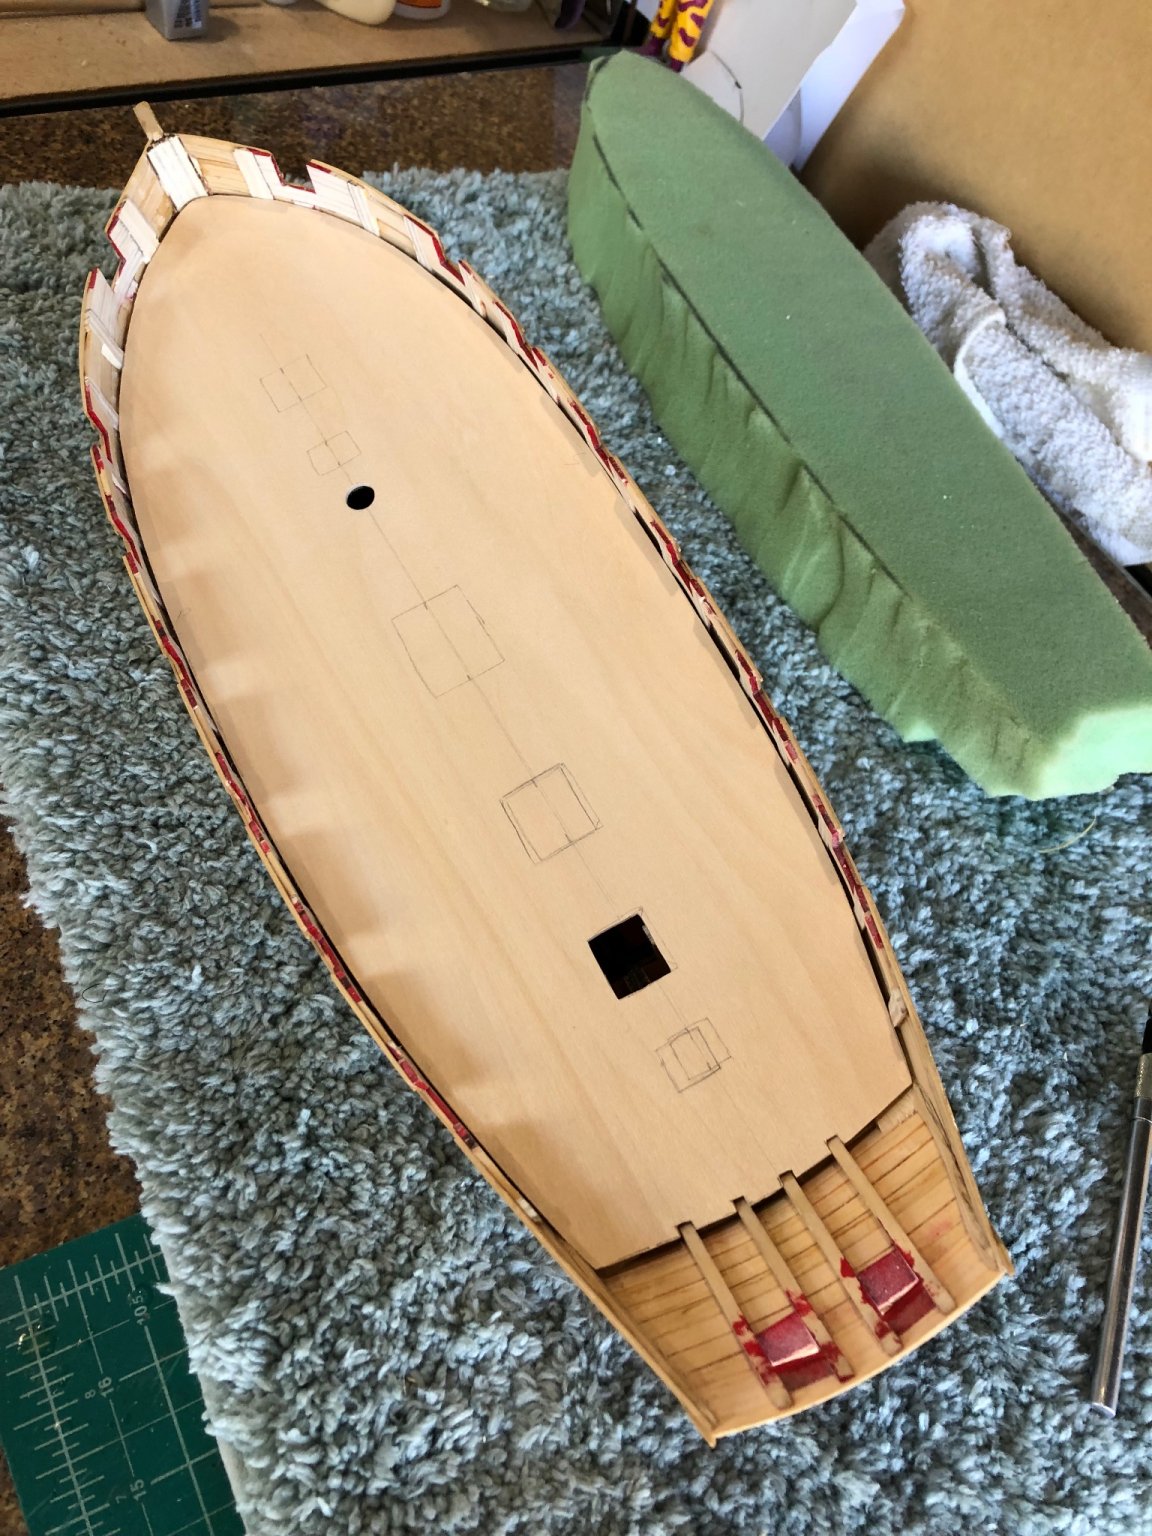
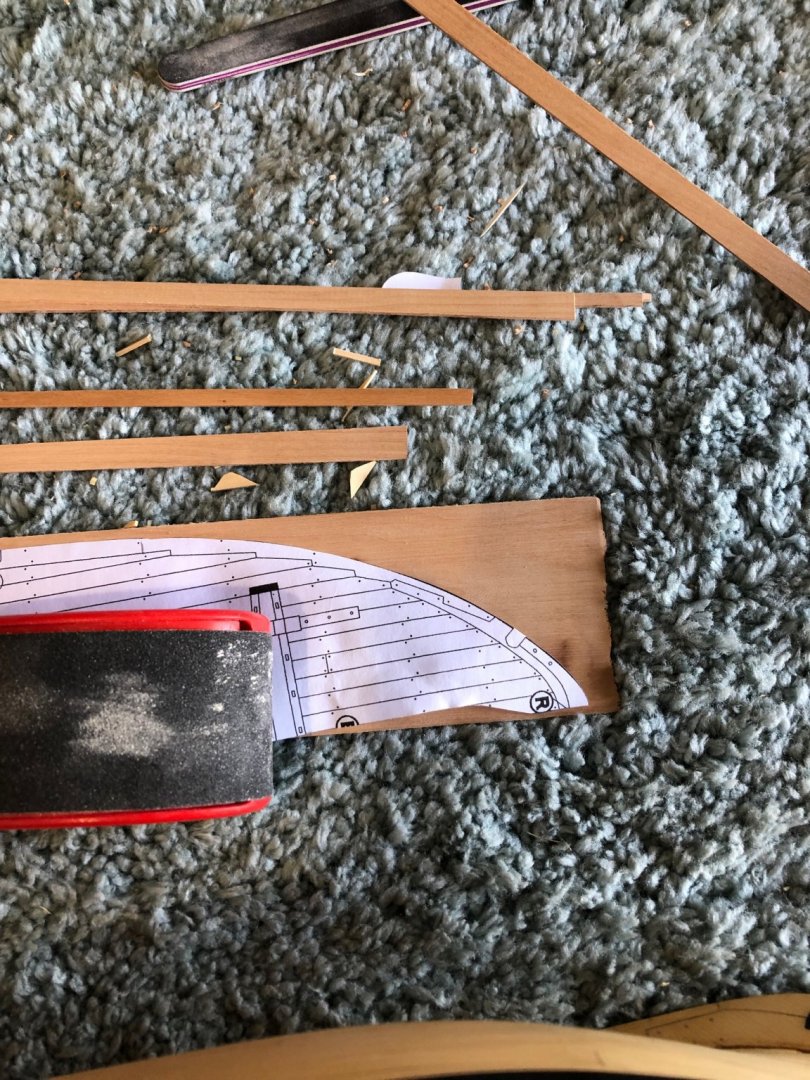
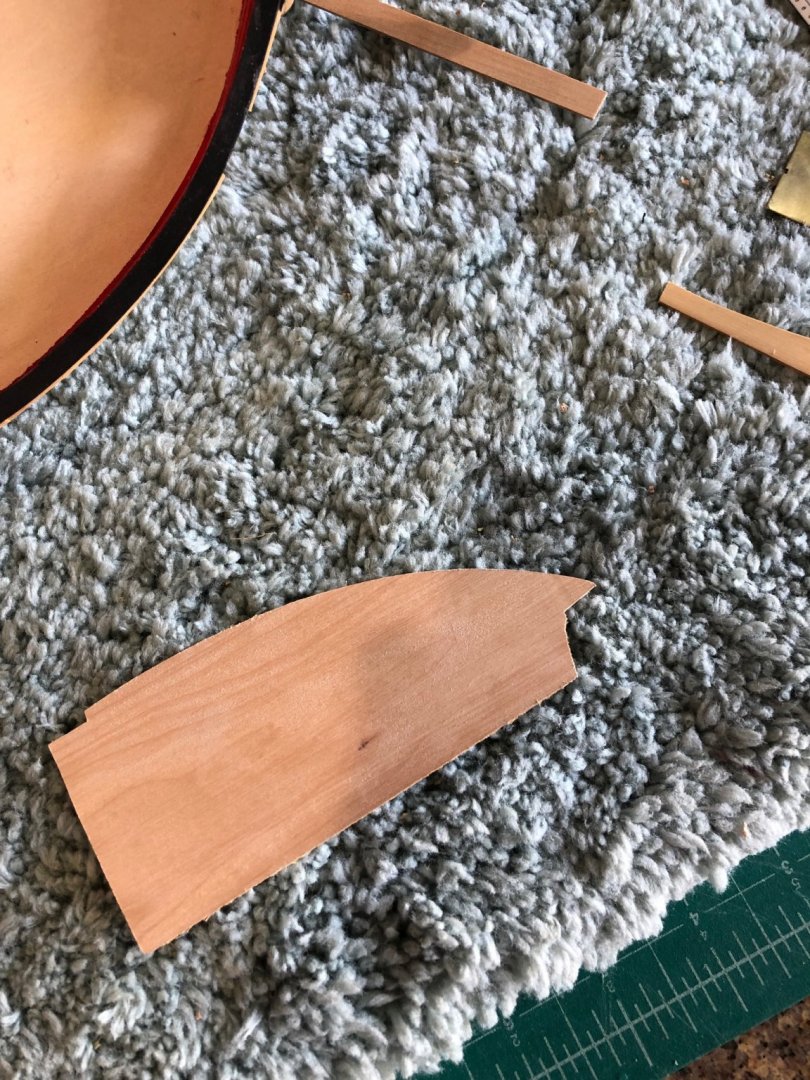
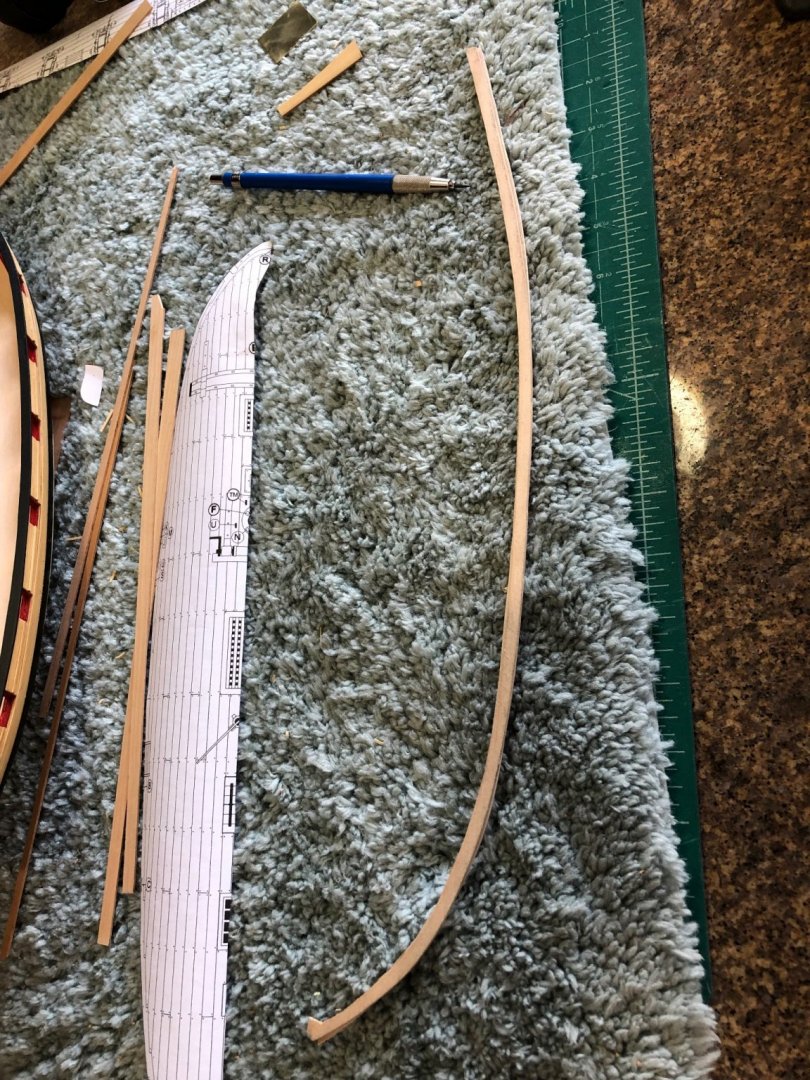
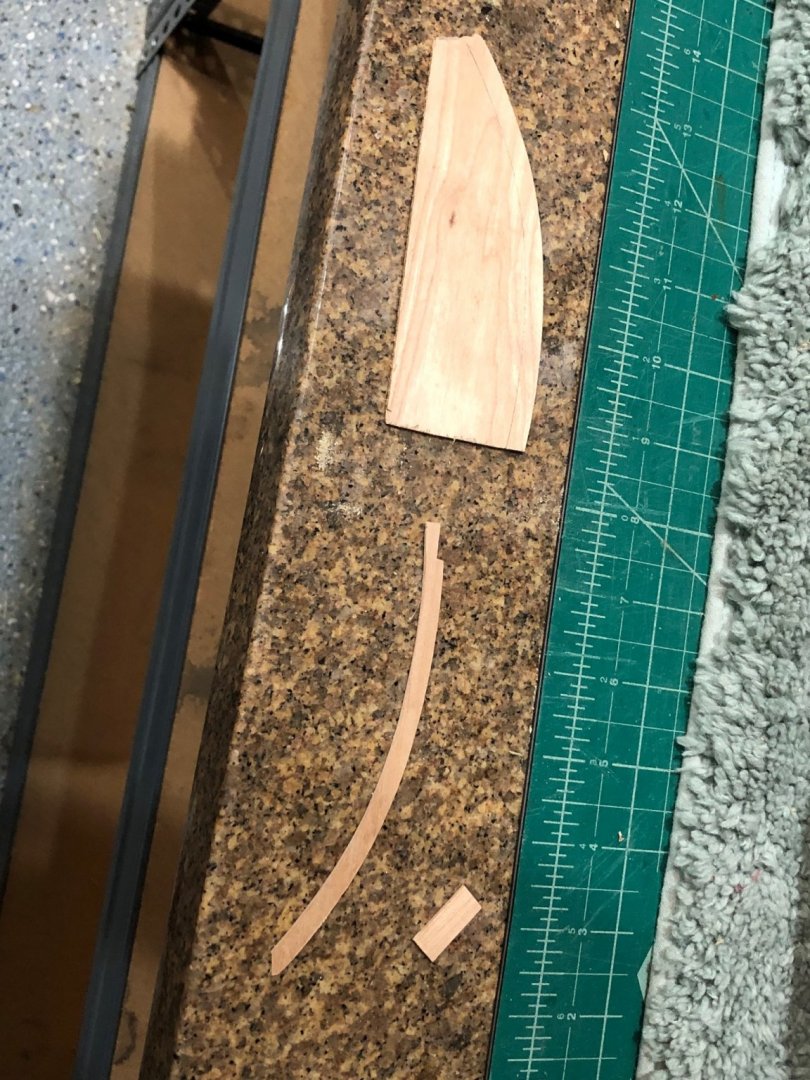
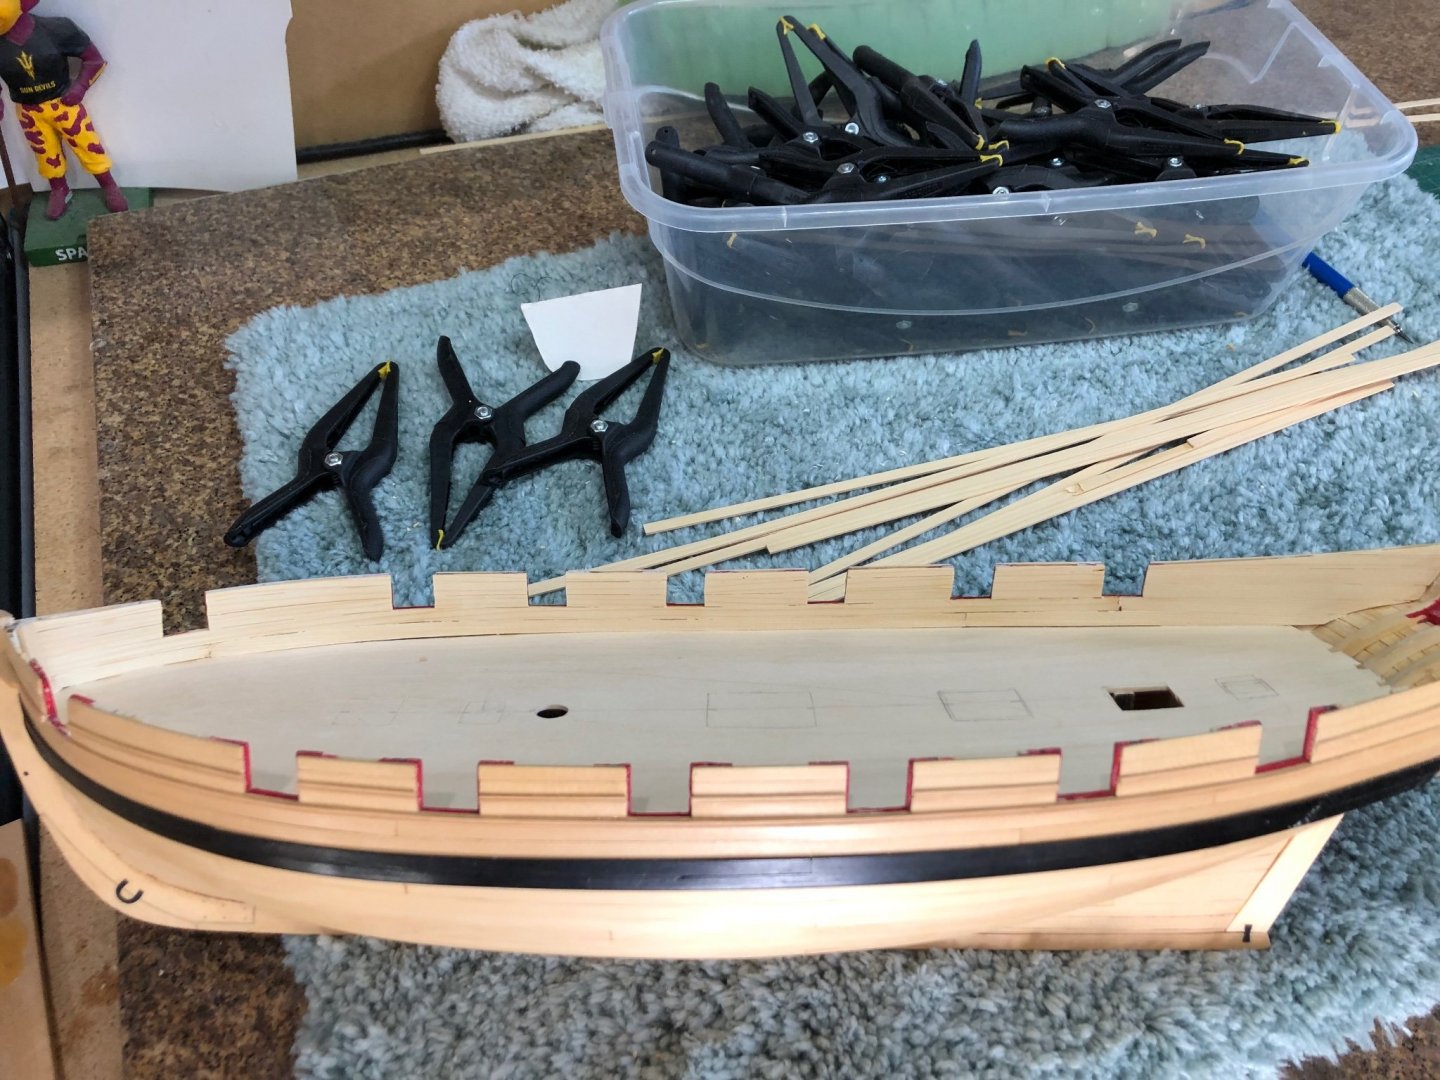
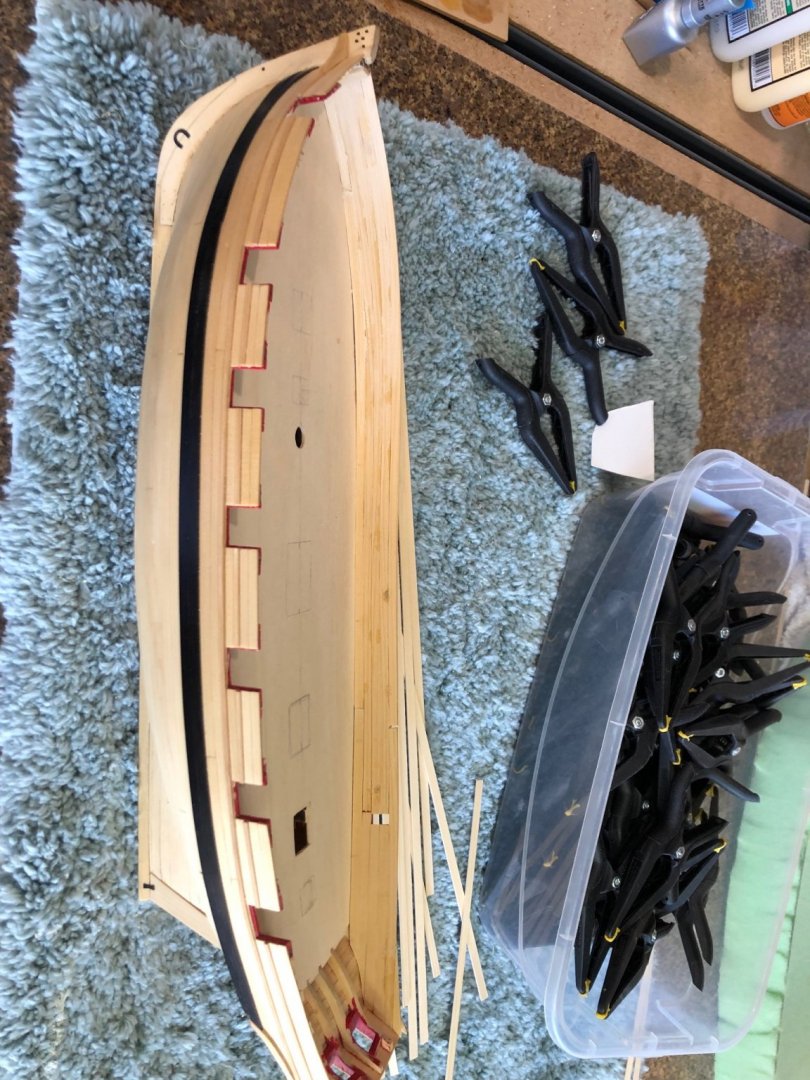
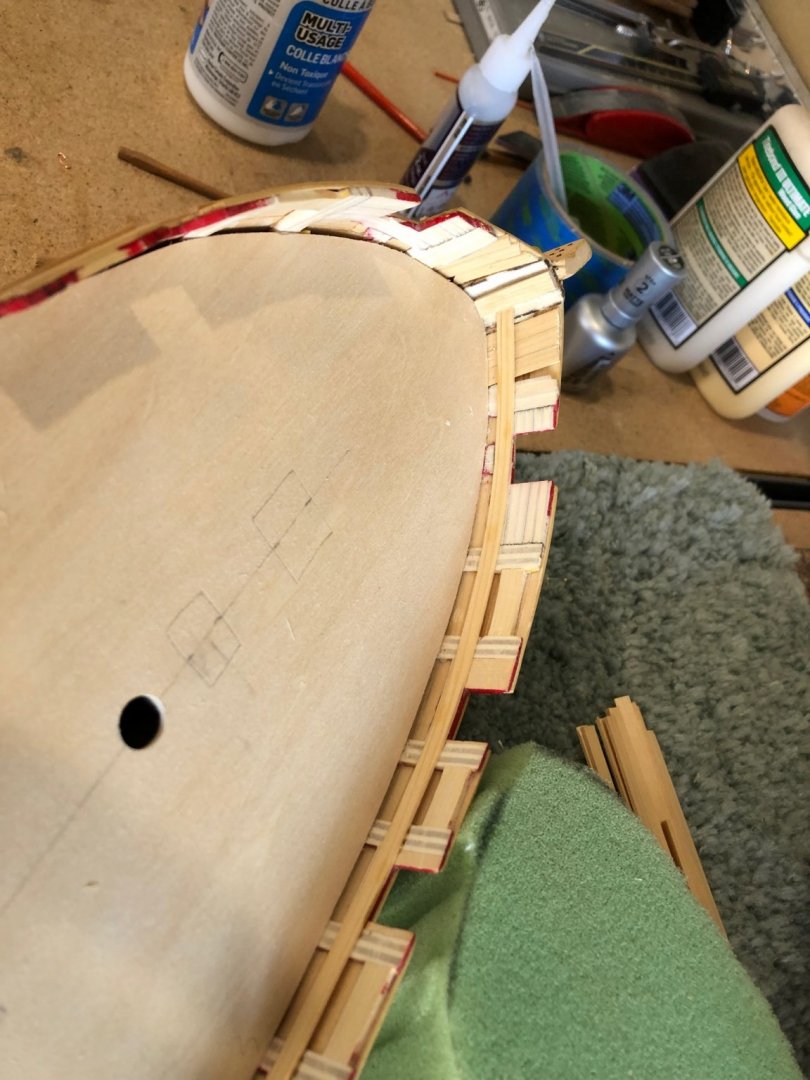
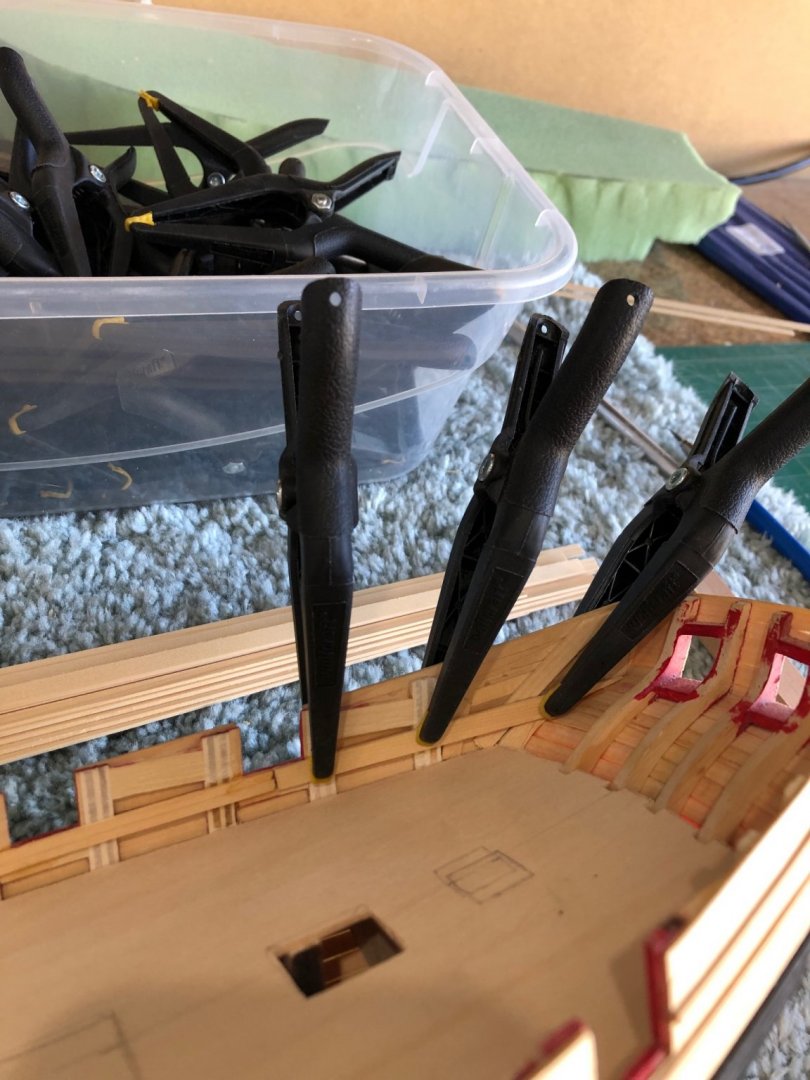
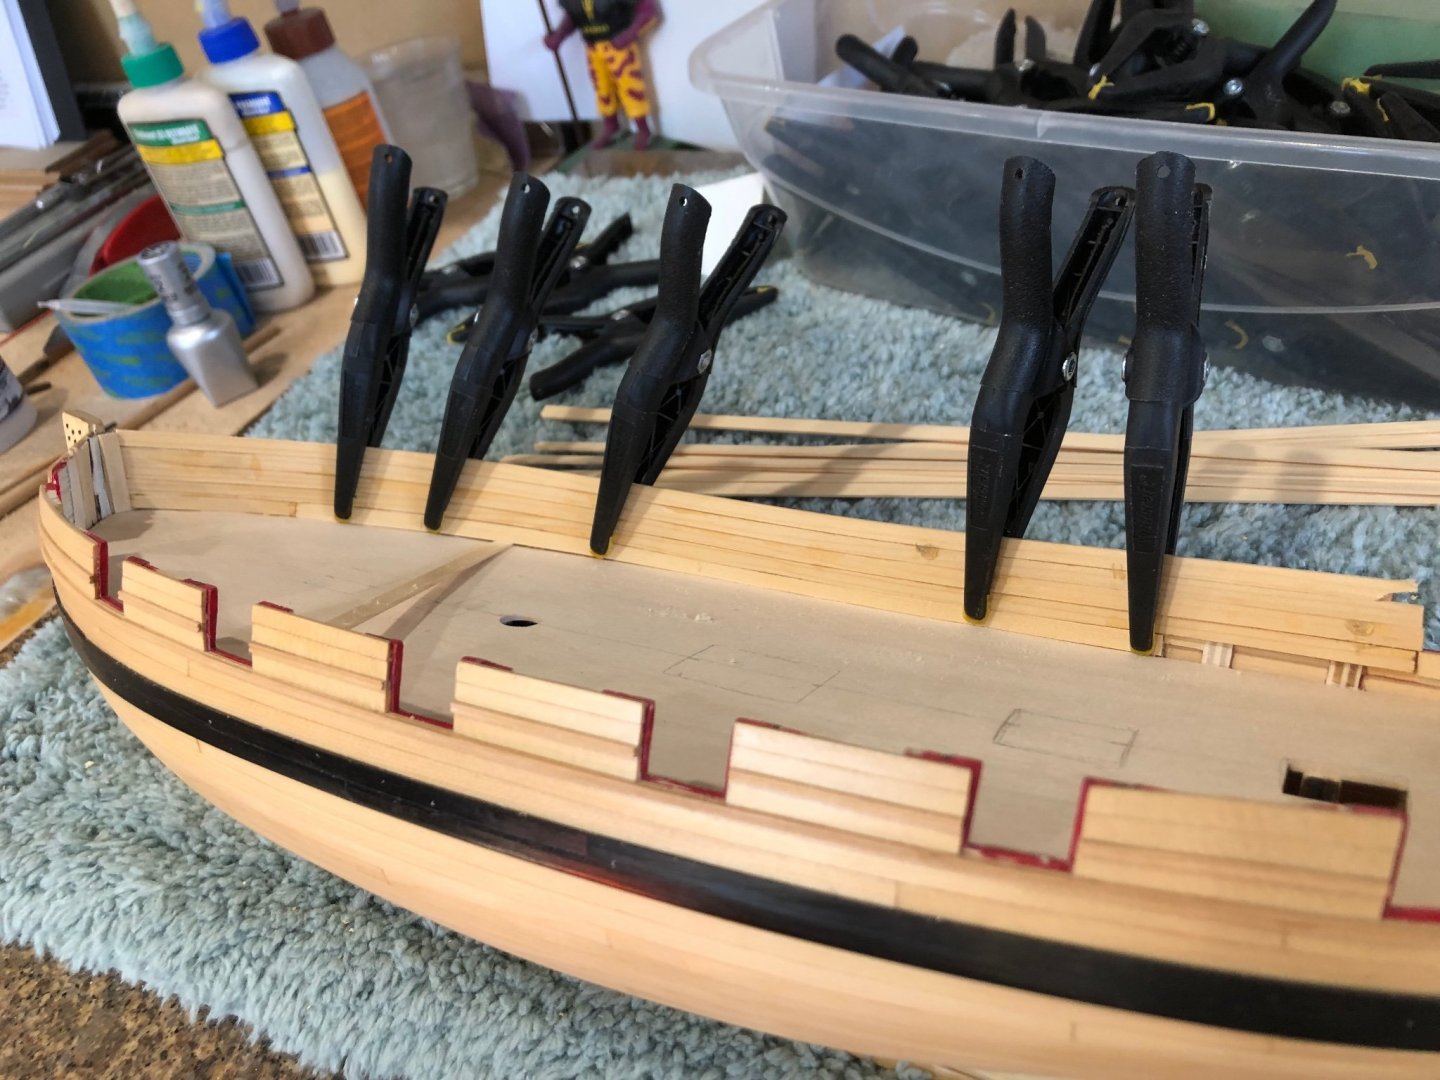
Started the margin planks and waterways but have to decide what wood to use. Choice of boxwood or AYC or maybe I can fine something in the crate of wood Peter gave me. I found cherry, pear, ebony, mahogany, and some unknown white wood along with maple. After looking at the choices I picked maple. I like the color and tight grain. So knowing I'd need some 1/4" strips, a bunch of 3/16" strips and a sheet all being 1/16" thick. The maple I had was 5/16" X 2" S 24" so on to the band saw for ripping. Being very carful I was able to get 3 .075 pieces from each 5/16" plank and I mean very very carful. Sanded the .075 down to .062 using the thickness sander. Wood being sized it was now time to rip strips on the table saw. Now that the necessary wood ready its time to start. Following the monograph you start with the after area against the counter. Thats when the Devil made his appearance and left me with a OMG moment. The 1/4" wide margin fell into the opening between the false deck and counter planks. I HAD MADE THE FALSE DECK TOO SHORT. I went to bed. While trying to go to sleep I kept coming up with ideas of how to add at least 1/8" to the false deck. The longer I thought about it the more elaborate they became so sleep did come. Next morning I kept thinking "mistakes and just an opportunity to succeed" when suddenly it hit me. The fix will be hidden. Just glue some strip vertically until sufficient surface for gluing the margin plank. DUH! Strips mounted and sanded flush now only to touch up the paint and start the margin planks. This piece of margin plank is just dry fit into position along with my signature of dirt. With this area of concern fixed now I moved on to another area I've been working about. Margin planks at the stem. As Blue Ensign mentioned in his log the drawing shows a short margin plank and the monograph shows a longer plank. I'm going with the longer version as I think it looks better and will be easier, I hope. I had such good luck using templates I'll follow that method with the margin planking. I cut the drawing into halves and using them as a test fit before making a template. You can see the mark along the plank just behind the scarf of decking. Tracing the drawing unto a piece of maple. Again you can see the mark where I make the scarf joint between the the forward and middle planks. The process being simple it was time to take the wood to the scroll saw. Test fit and sanded the first cut. Port side dry fit starboard side You'll notice this is the same piece only upside down. Both sides are the same which I can't believe but a photo is worth a thousand words. Now I must comment that this mini-kit and drawings are wonderfully executed by Chuck Passaro. To think the using the cut bulkheads and monograph would create an almost symmetrical model. I know it is not my skill that made this but Chuck's wonderful work. And to just restate how good this mini=kit is look at the caprail templated on top on one another. After my short digression this is the port margin plank ready for the scarf with starboard marked and ready for the scroll saw and sander. I used a drafting compass to copy the outside at 1/4". I find the using the 2H lead leaves a clear line without blurring by getting dull. Just a little picture of a maple strip with one coat of WOP cut into pieces to get an idea of how the deck will look. Thats enough for today on to the margin planks and scarfs tomorrow. Regards Will


-
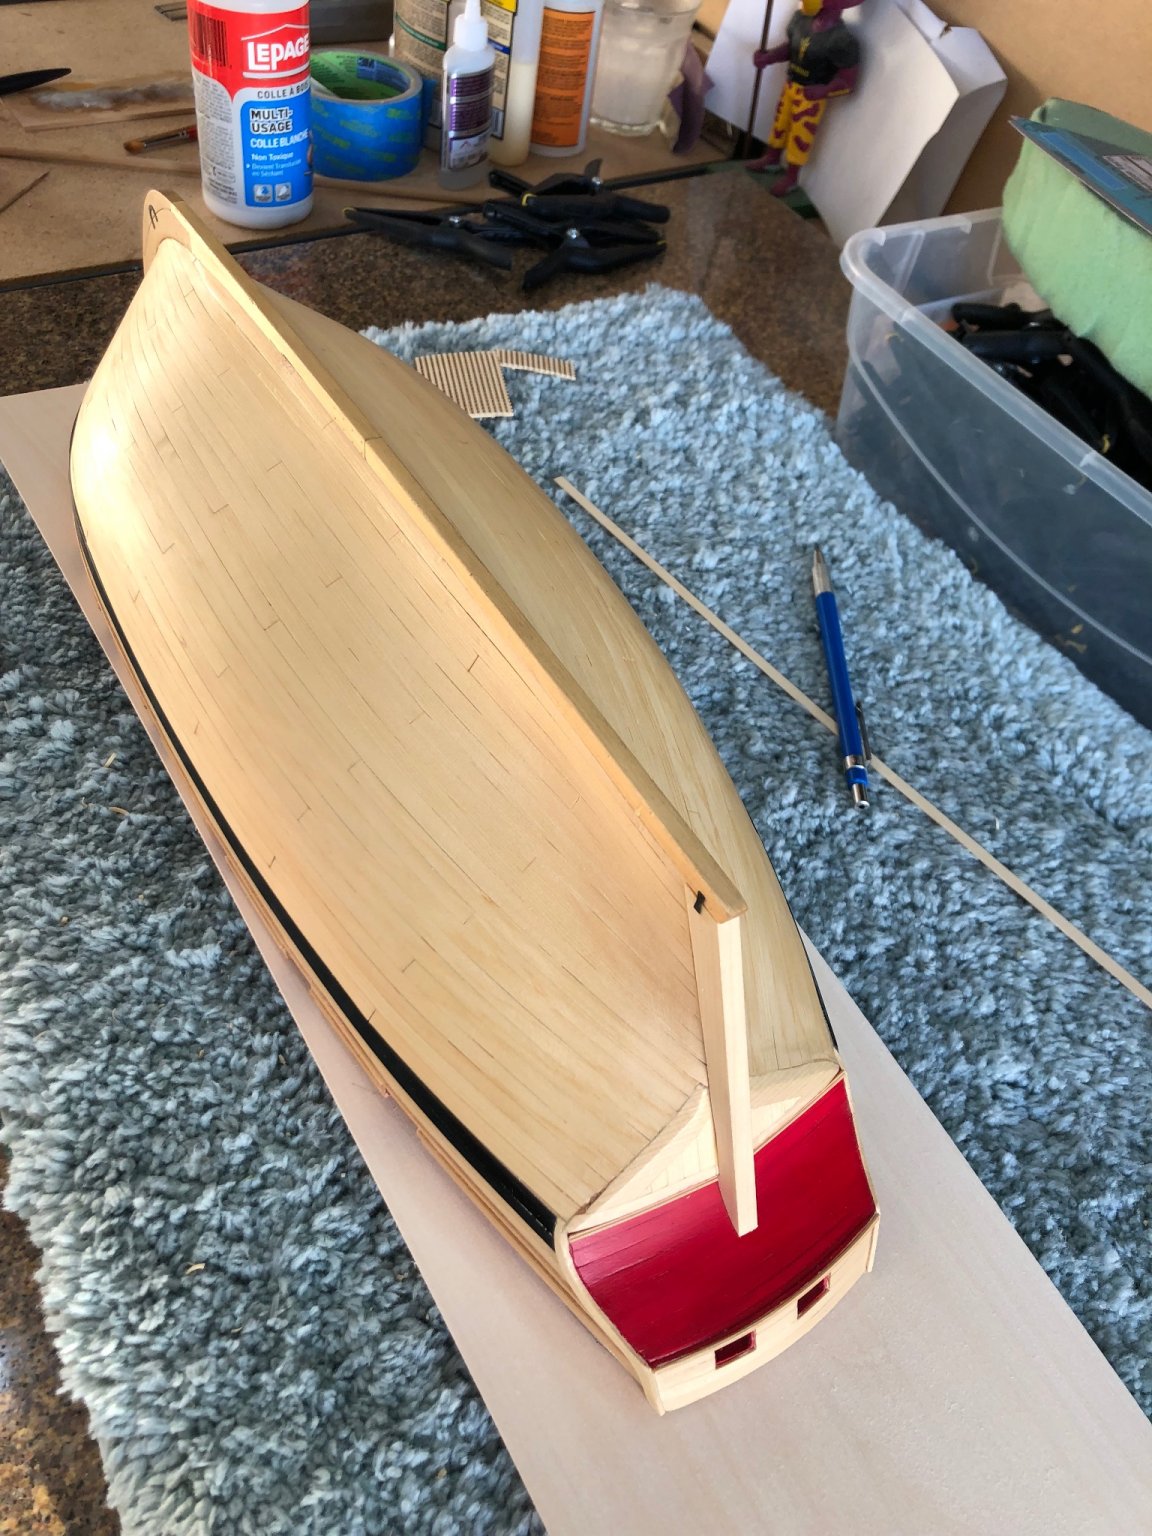
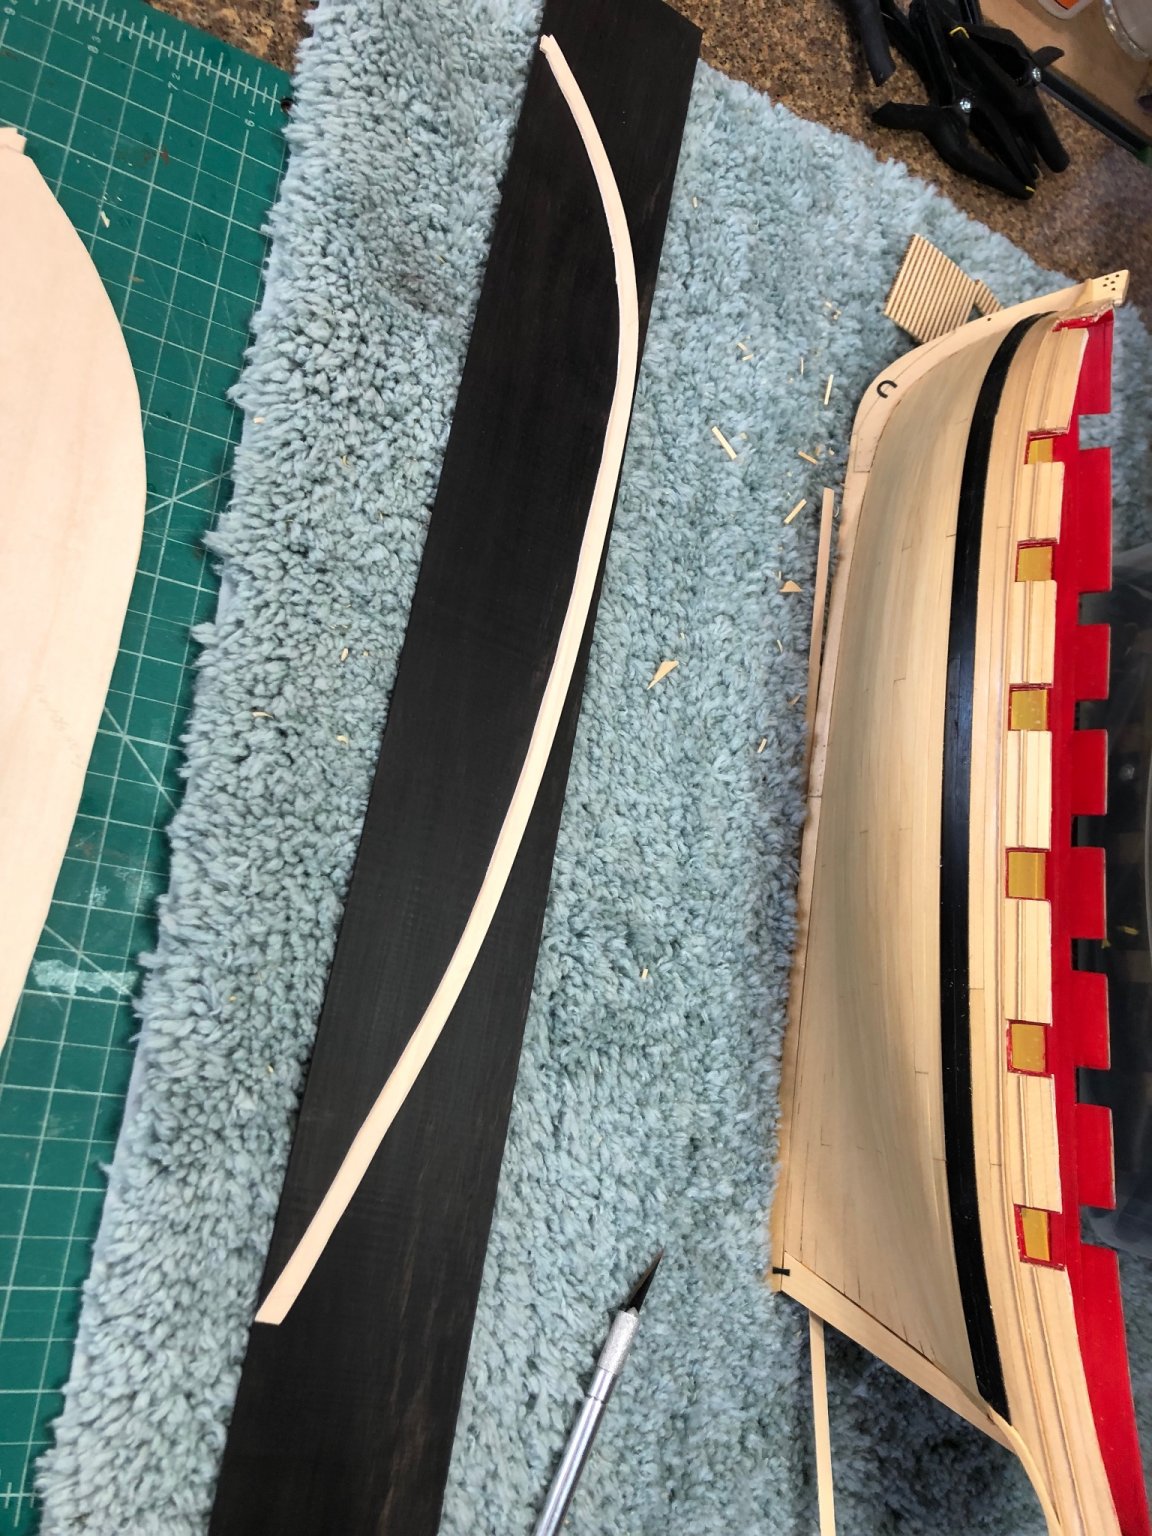
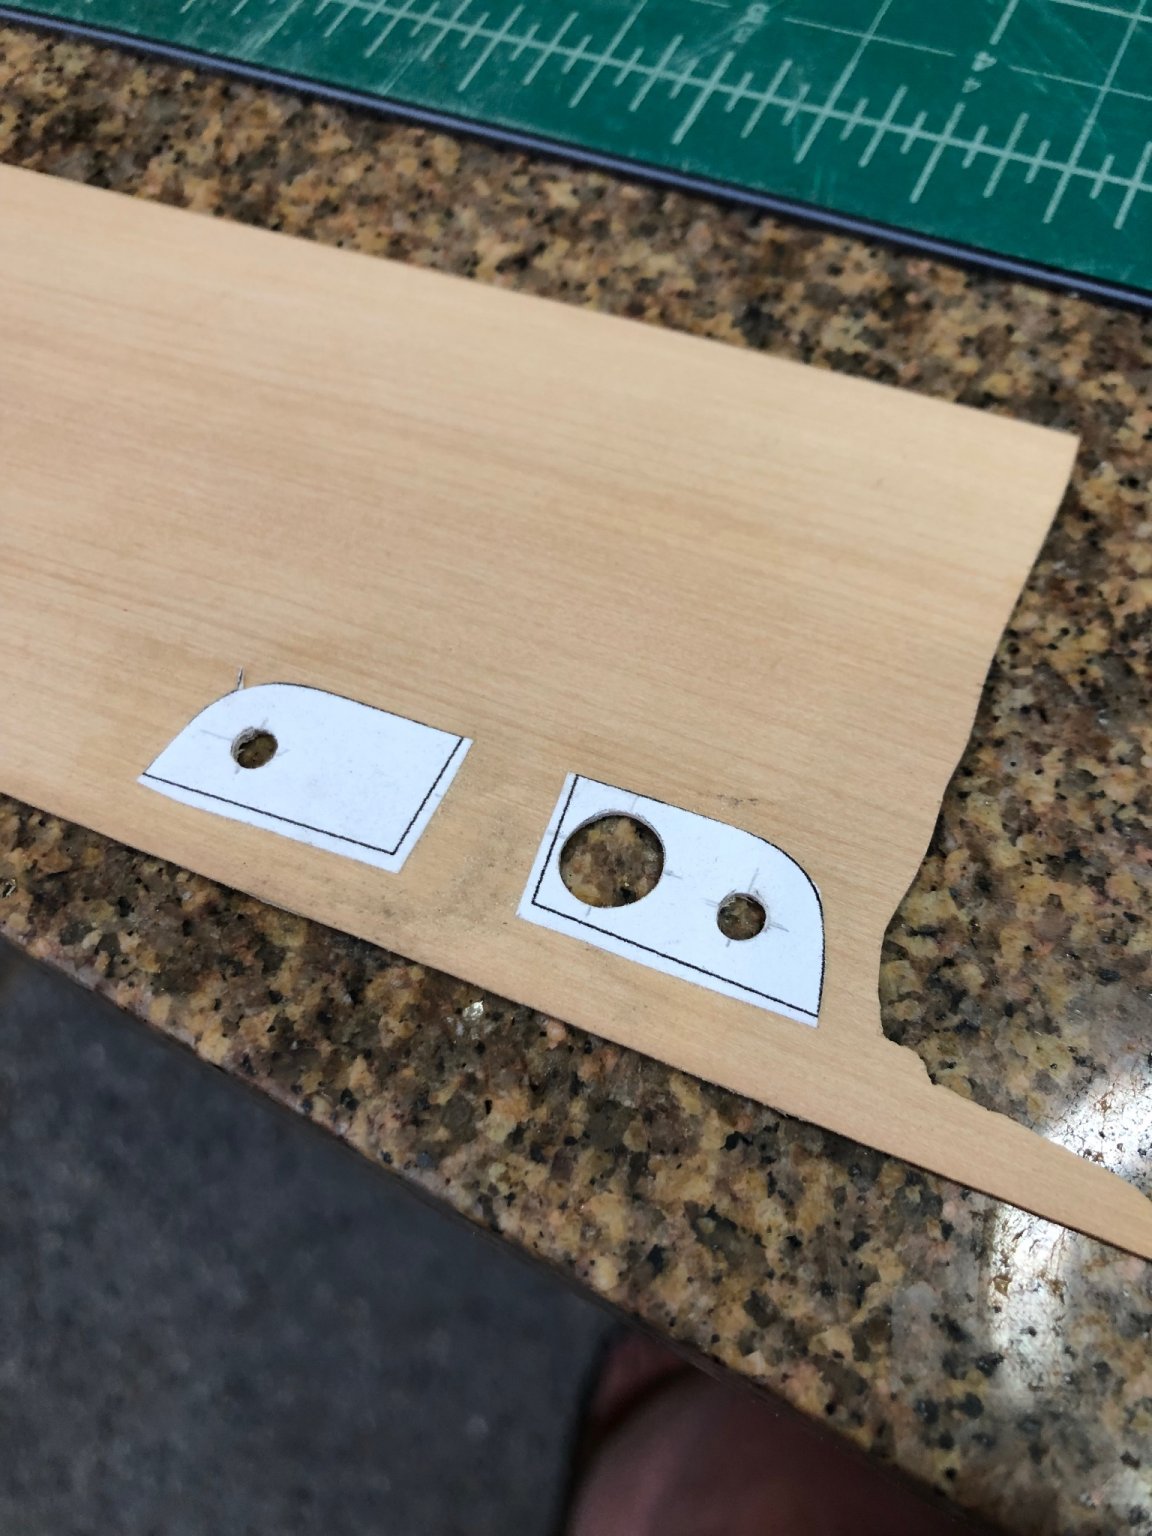
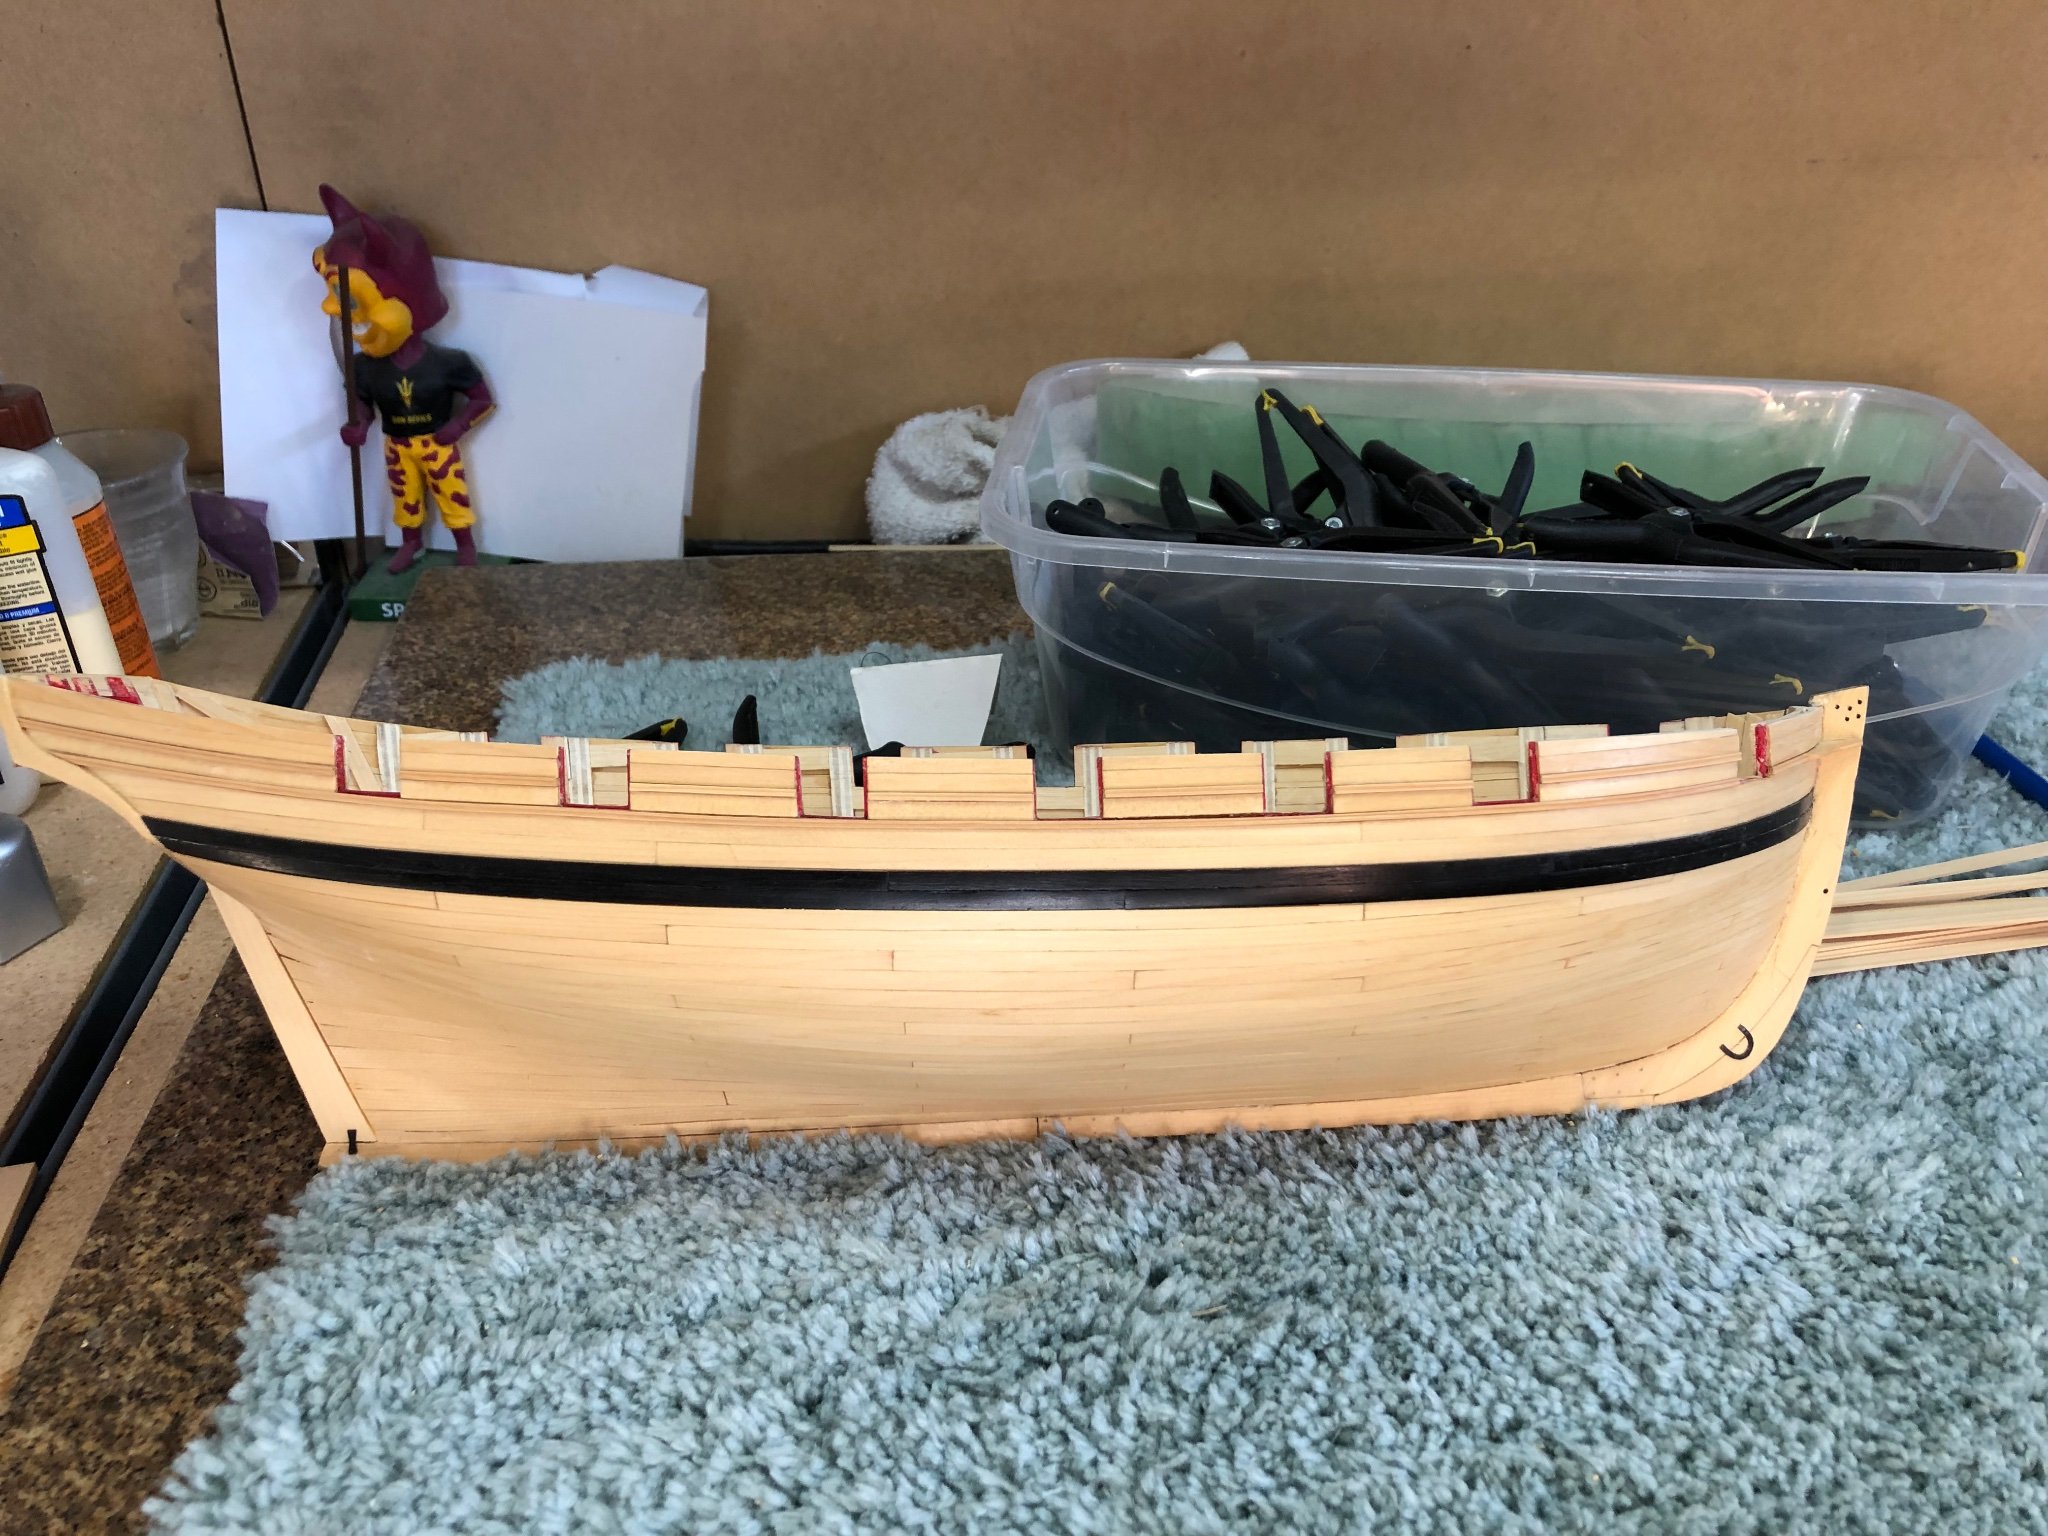
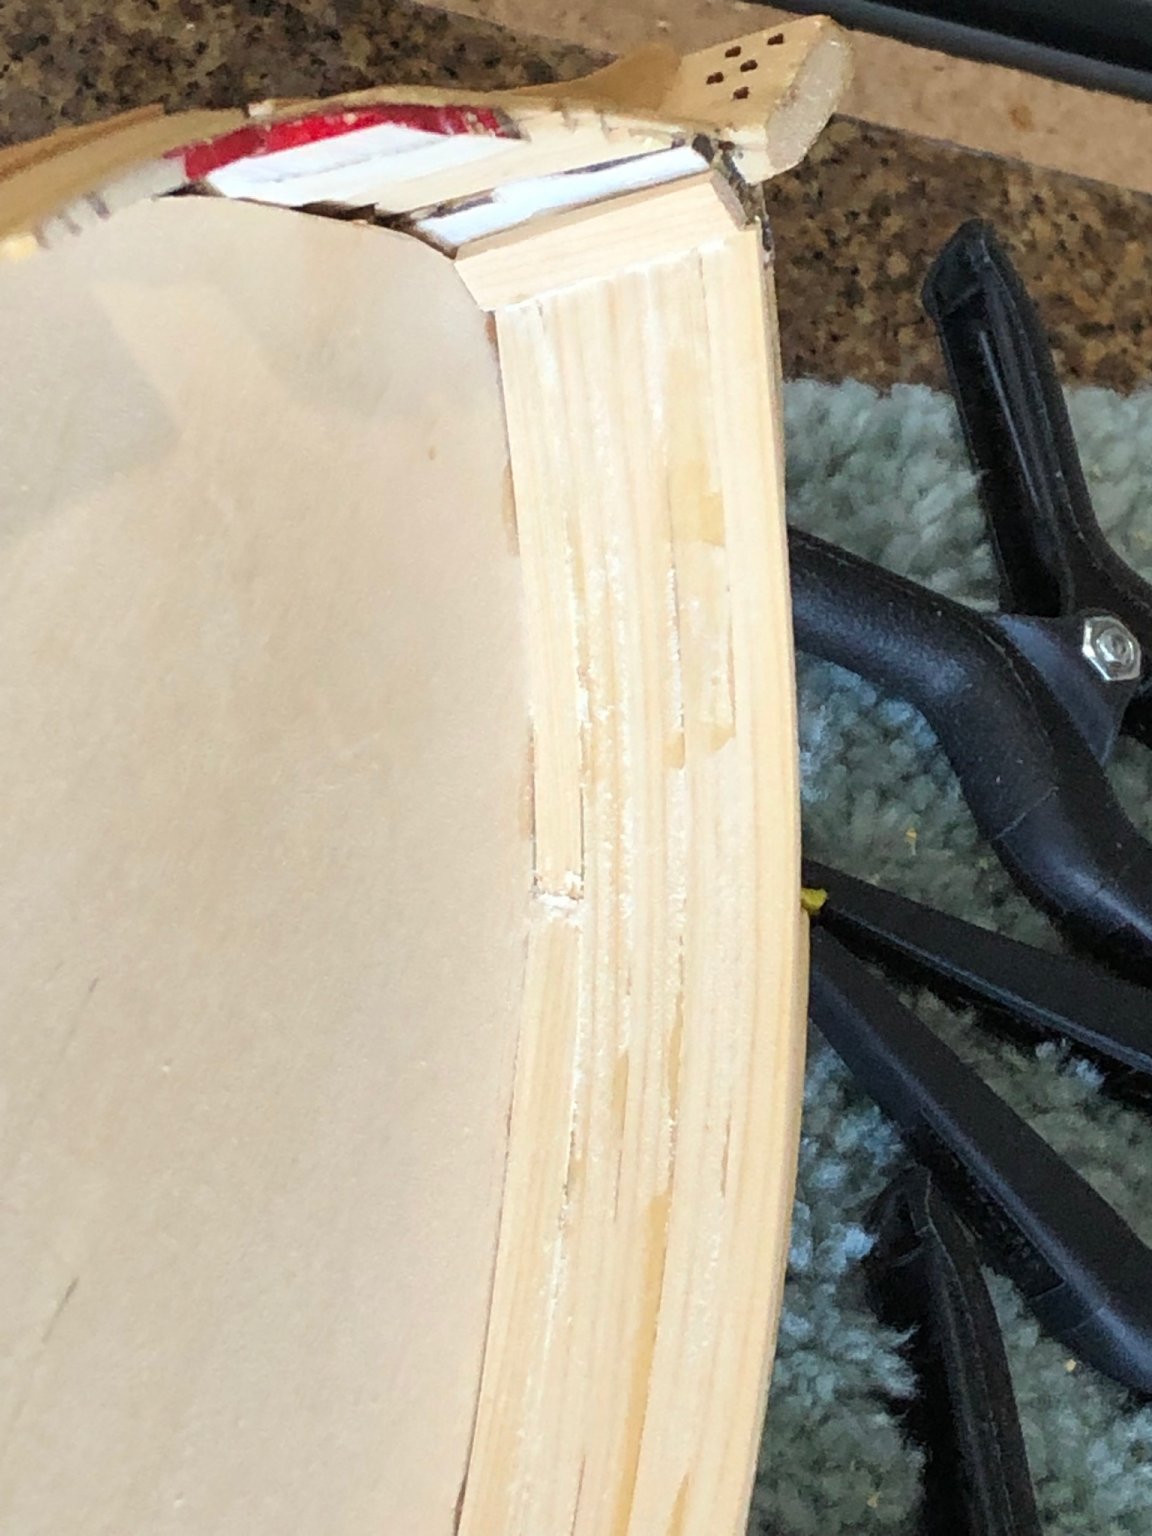
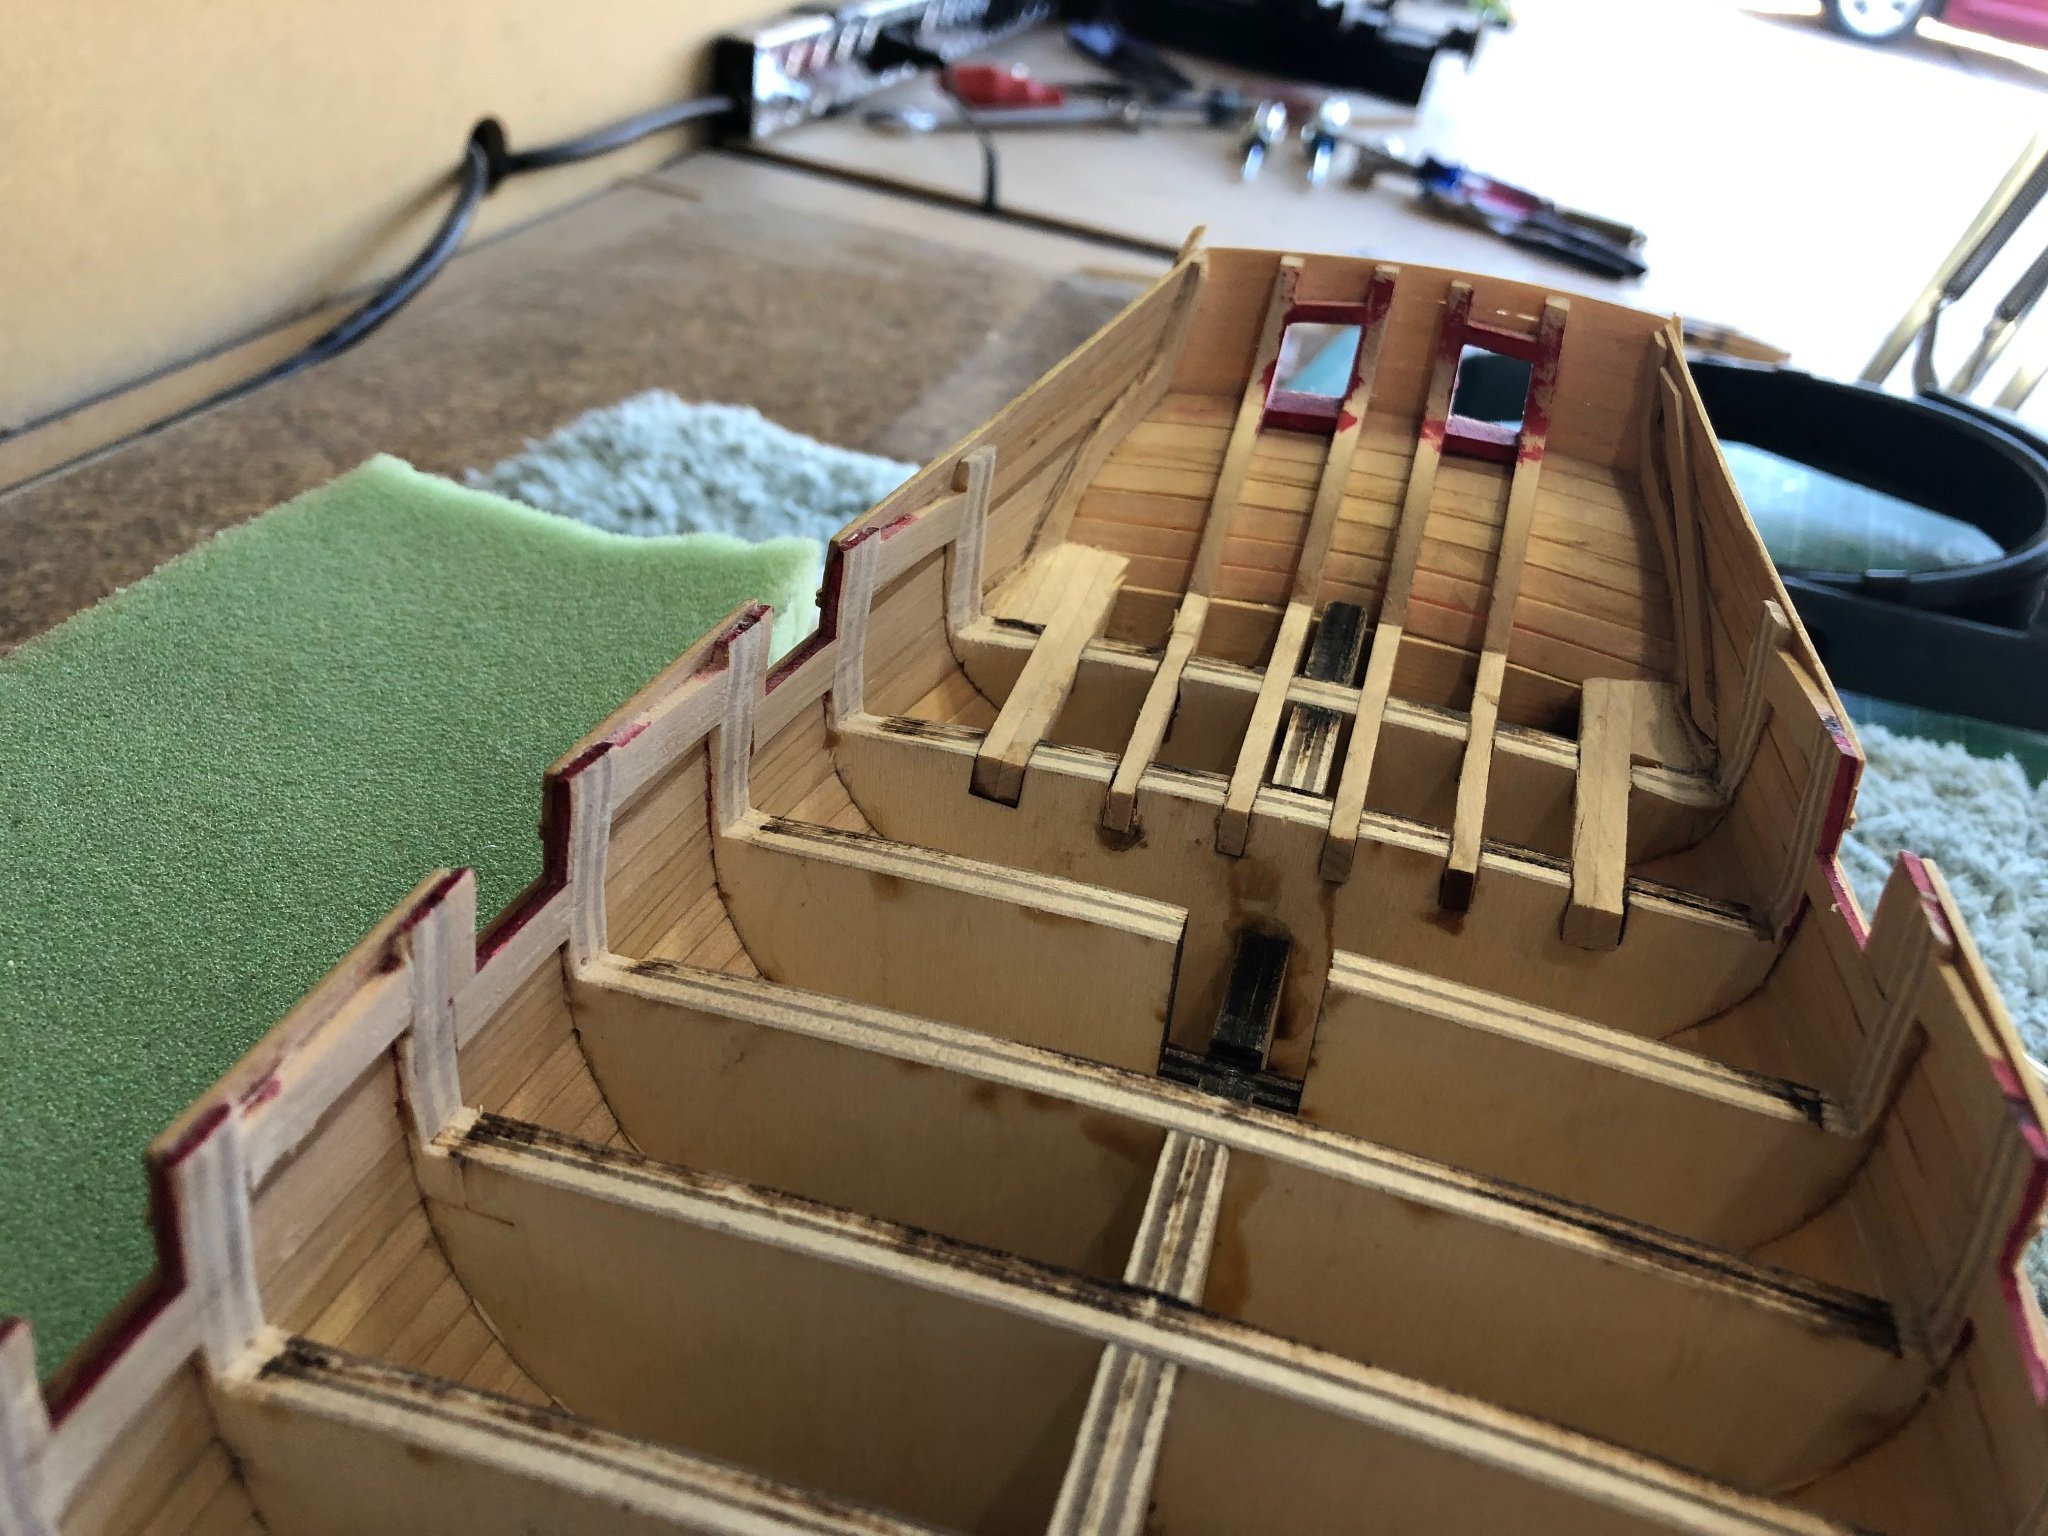
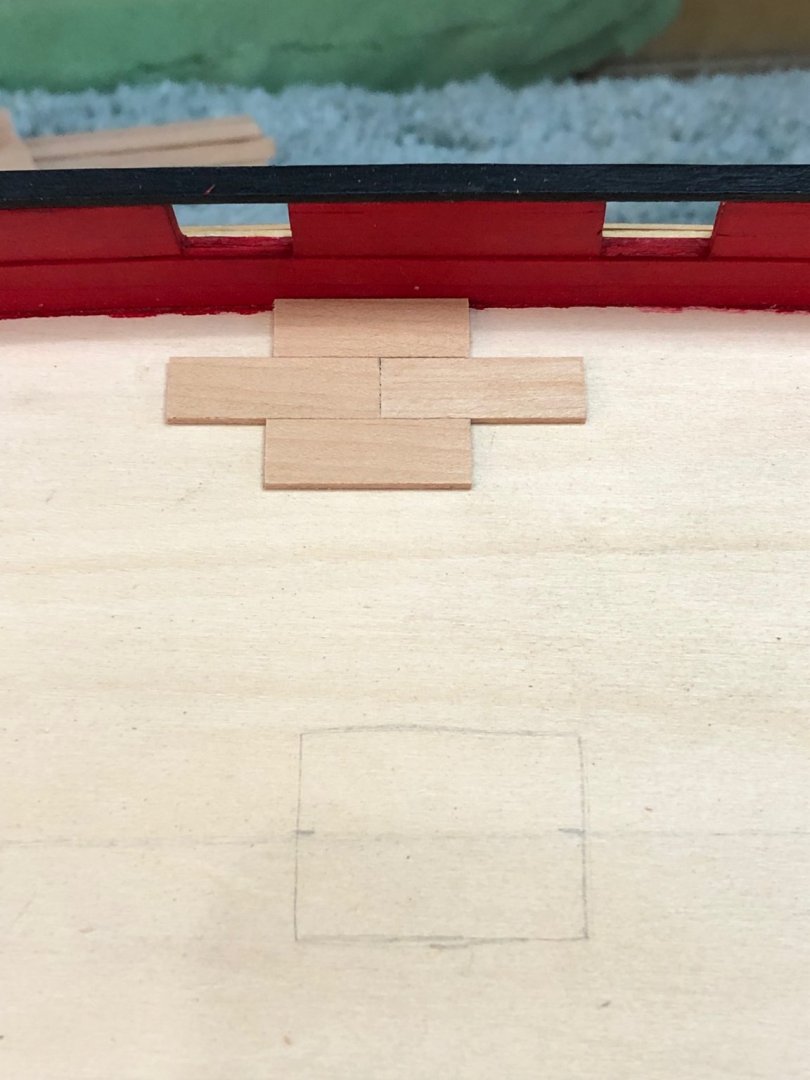
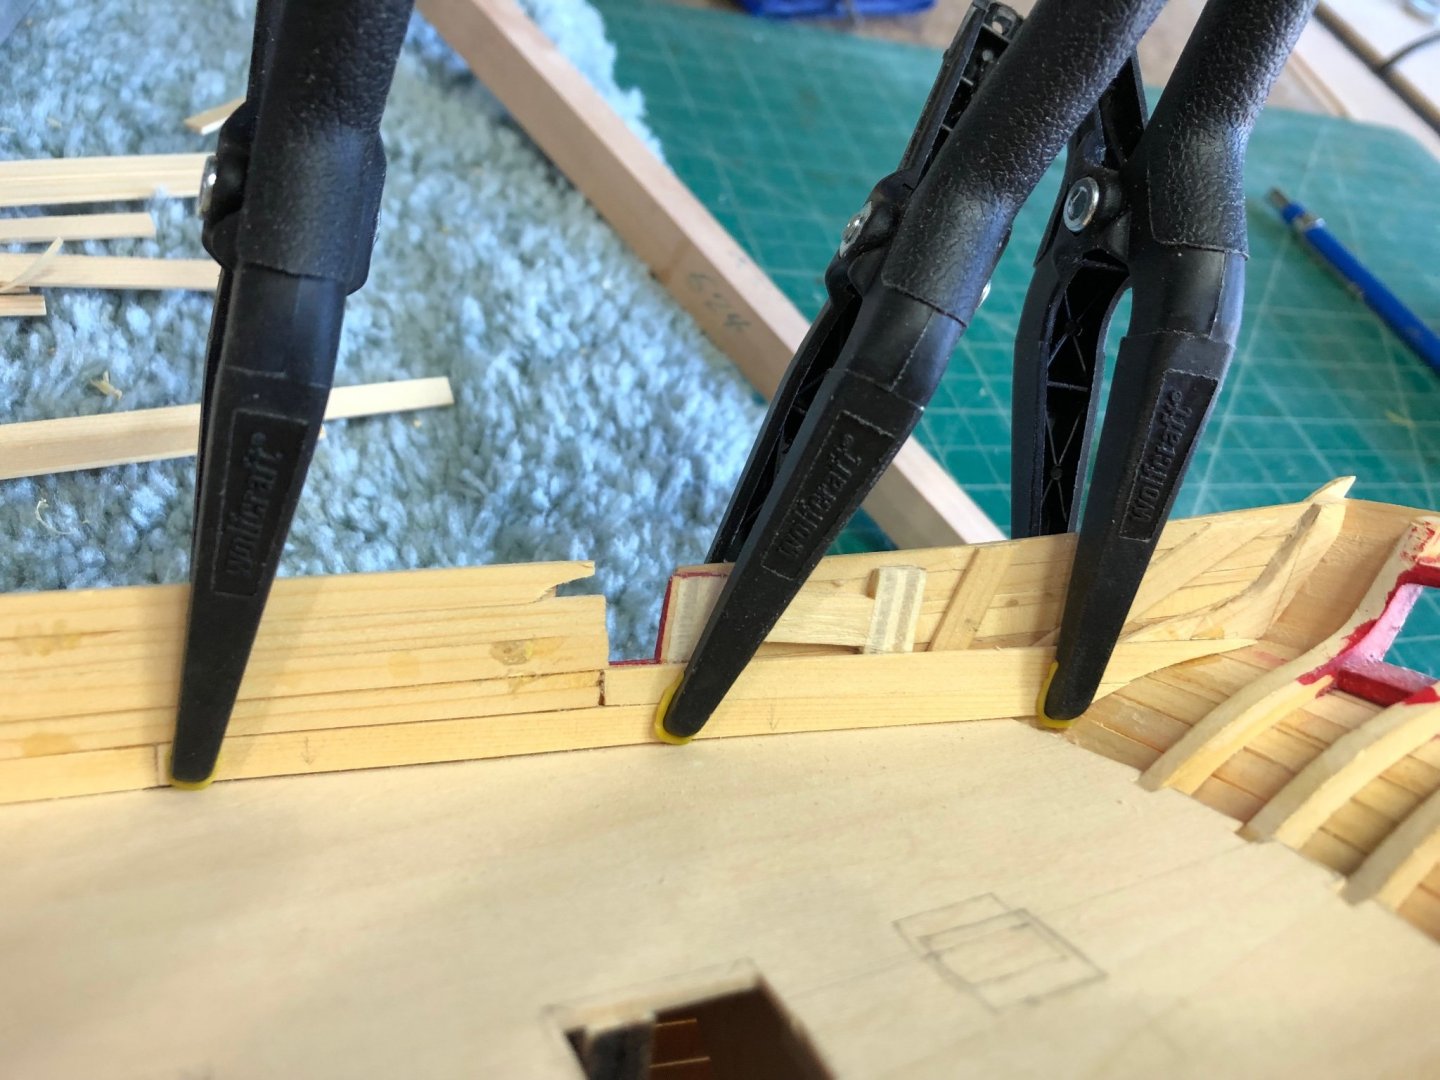
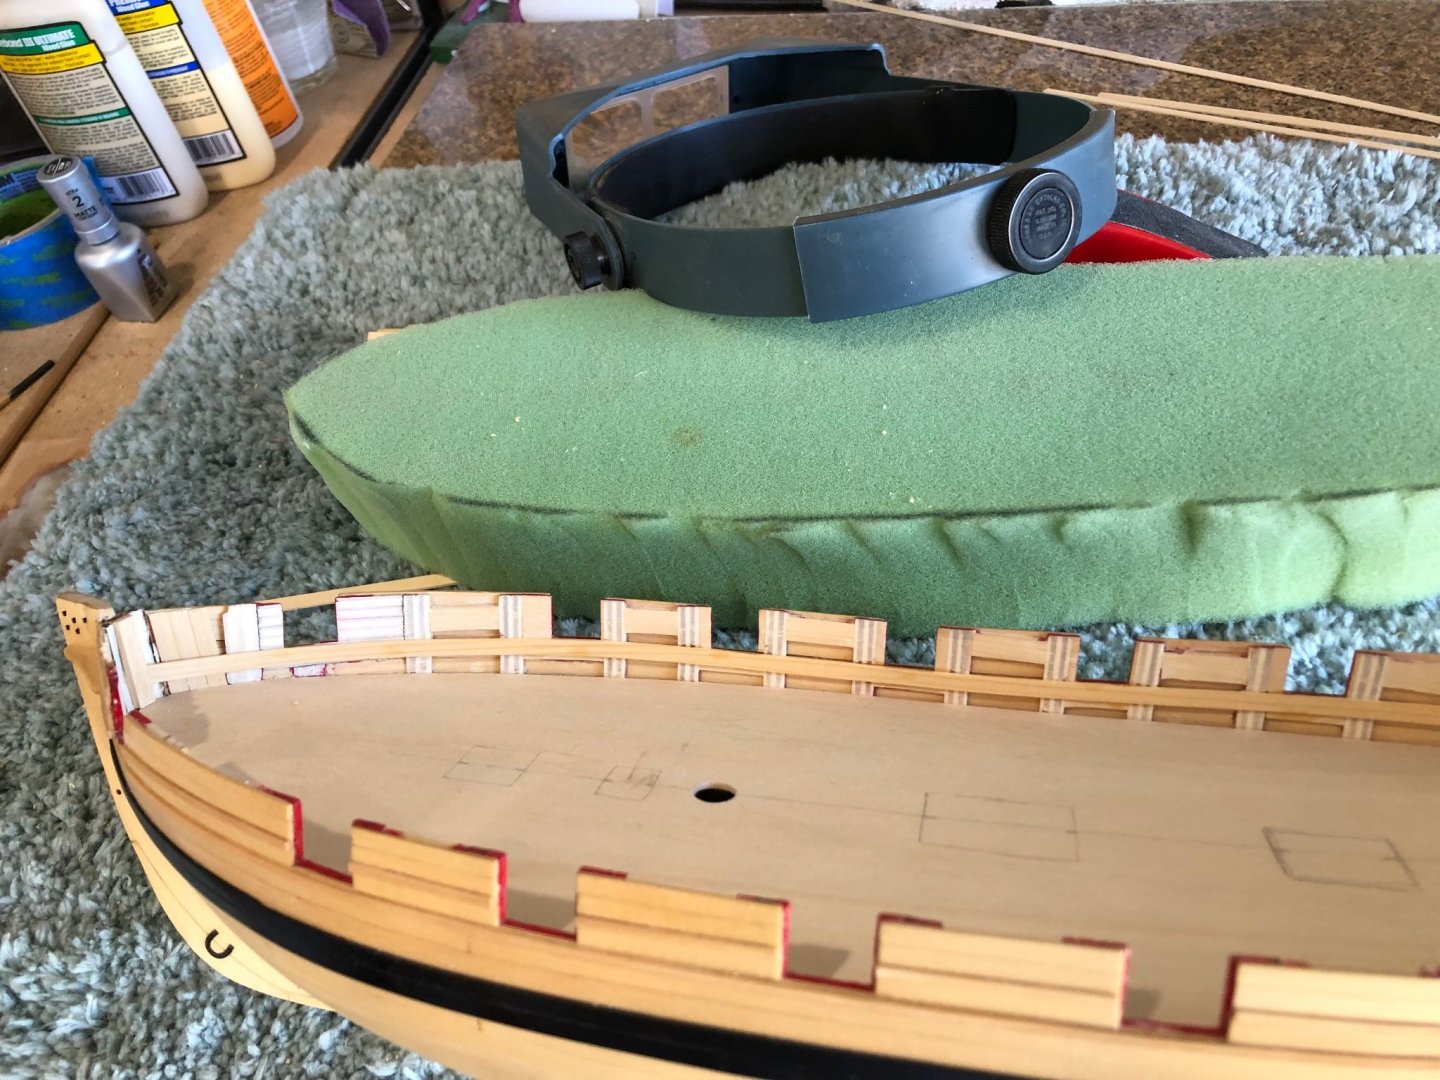
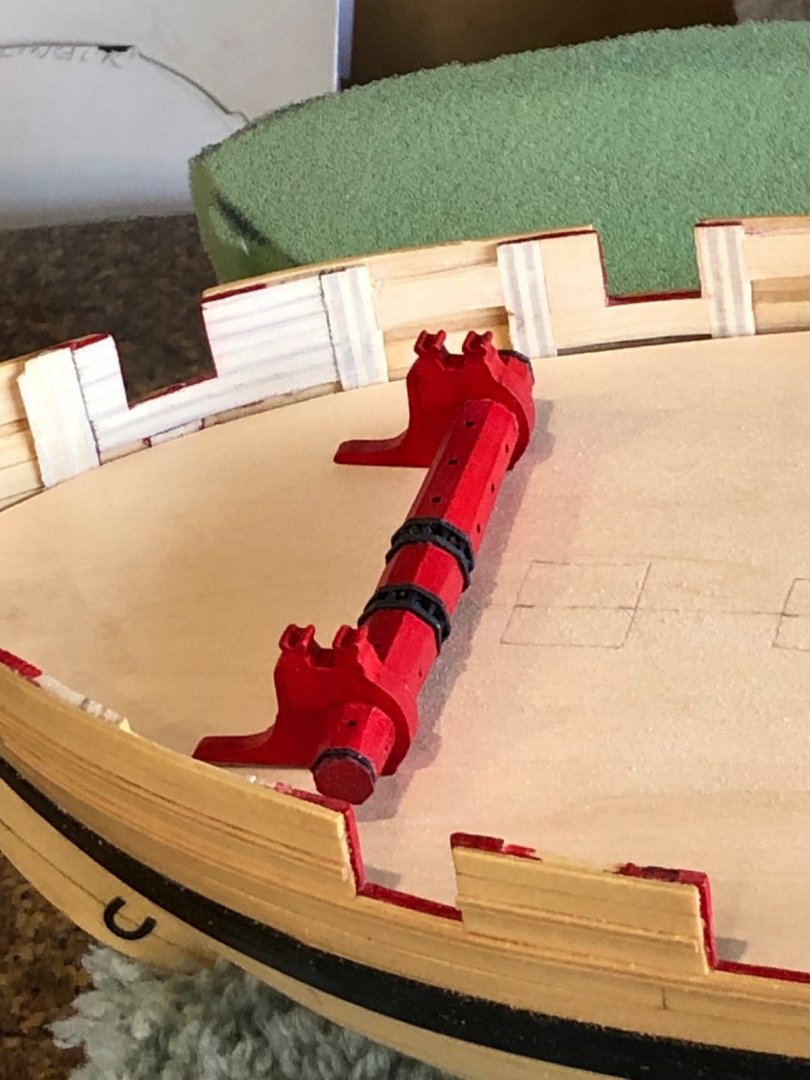
Well time for another report on Cheerful progress but first I'd like to thank everyone for the looks and likes. On to the cap rails. The monograph suggests making the caps in pieces but I thought I try to make them from one piece on each side with the transom between. I was going to use ebony so I ripped a piece .075 X 2 X 24 using the Byrnes thickness sander taking it down to .062 was an easy task. I must say the sander is amazing just like the table saw. There is a thumb wheel with gradients engraved that make it simple to take a know amount off with each pass. The gradients equal .001 to .002 off that material. Still struggling with how to make a template with card stock from a 12 pack of soda. The problem here was it wasn't wide enough to make both side in one pattern. I worried that two patterns would be hard to align at the stem while keeping the after spacing correct. Remembering that my local Michaels had a large selection of basswood sheeting and off I went. Using a 1/16 X 6 X 24 sheet I inverted the boat on top of the basswood which was on a thick fuzzy carpet that allowed the pattern to rest against the bulwarks. Before tracing the outline a notch had to be make for the stem. Prior to cutting the pattern I needed to add the 1/32 overhang on the outer perimeter. I had some 1/32 X 1/32 strips in my scrap box so using the glue stick they were glued to the outline and traced. Now it was a matter of cutting the pattern on the scroll saw and sanding the edges to the line. A little water and the glue dissolves its amazing stuff. Now with outline on the basswood sheet I used a drafting compass to draw the inner edge. Now the inner edge could be cut using the scroll saw and sanded smooth with the spindle sander. This is when the best laid plans went awry. My ebony was too narrow by 3/64". Fortunately I had a piece of boxwood that would work I'd just have to paint it black. Now worrying will the black paint match the ebony wales or will it be far enough away so color differences won't be noticed? Time will tell. Attached the templates to the boxwood and traced the outline. Back the scroll saw and spindle sander and test fit onto the bulwarks. All my work and planning paid off. The exterior edge needed very slight sanding to get a good fit. Using the brass scraper i fashioned the fancy fashion edge. Since the monograph used a separate piece for the fancy molding and I incorporated it into my cap the hawse plates needed to be made before attaching the cap rails. The printed patterns were glue stick attached to a 1/32" boxwood. Cutting and sanding was an easy task. The holes were put in prior to cutting the hawse plates. After attaching the plates it was time to notch the fancy molding on the caps so the hawse plates would fit and be level with the top of the cap, I painted the cap rail bottom and side prior to gluing on the bulwarks. Finished painting and now ready for margin planks and waterways. Regards Will


-
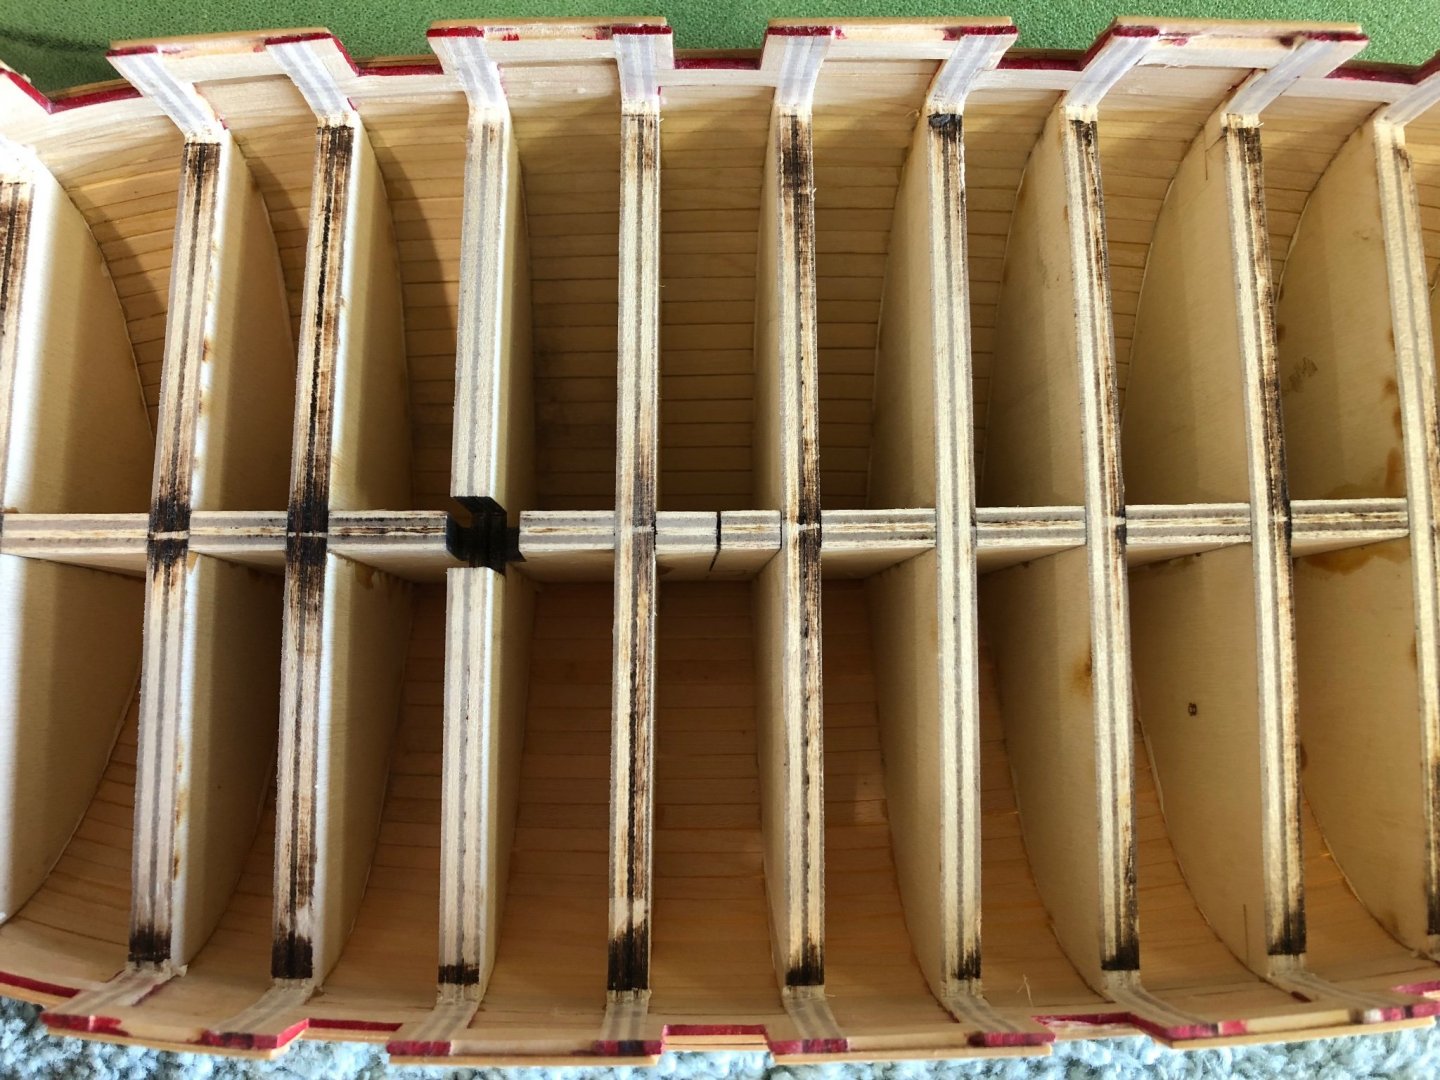
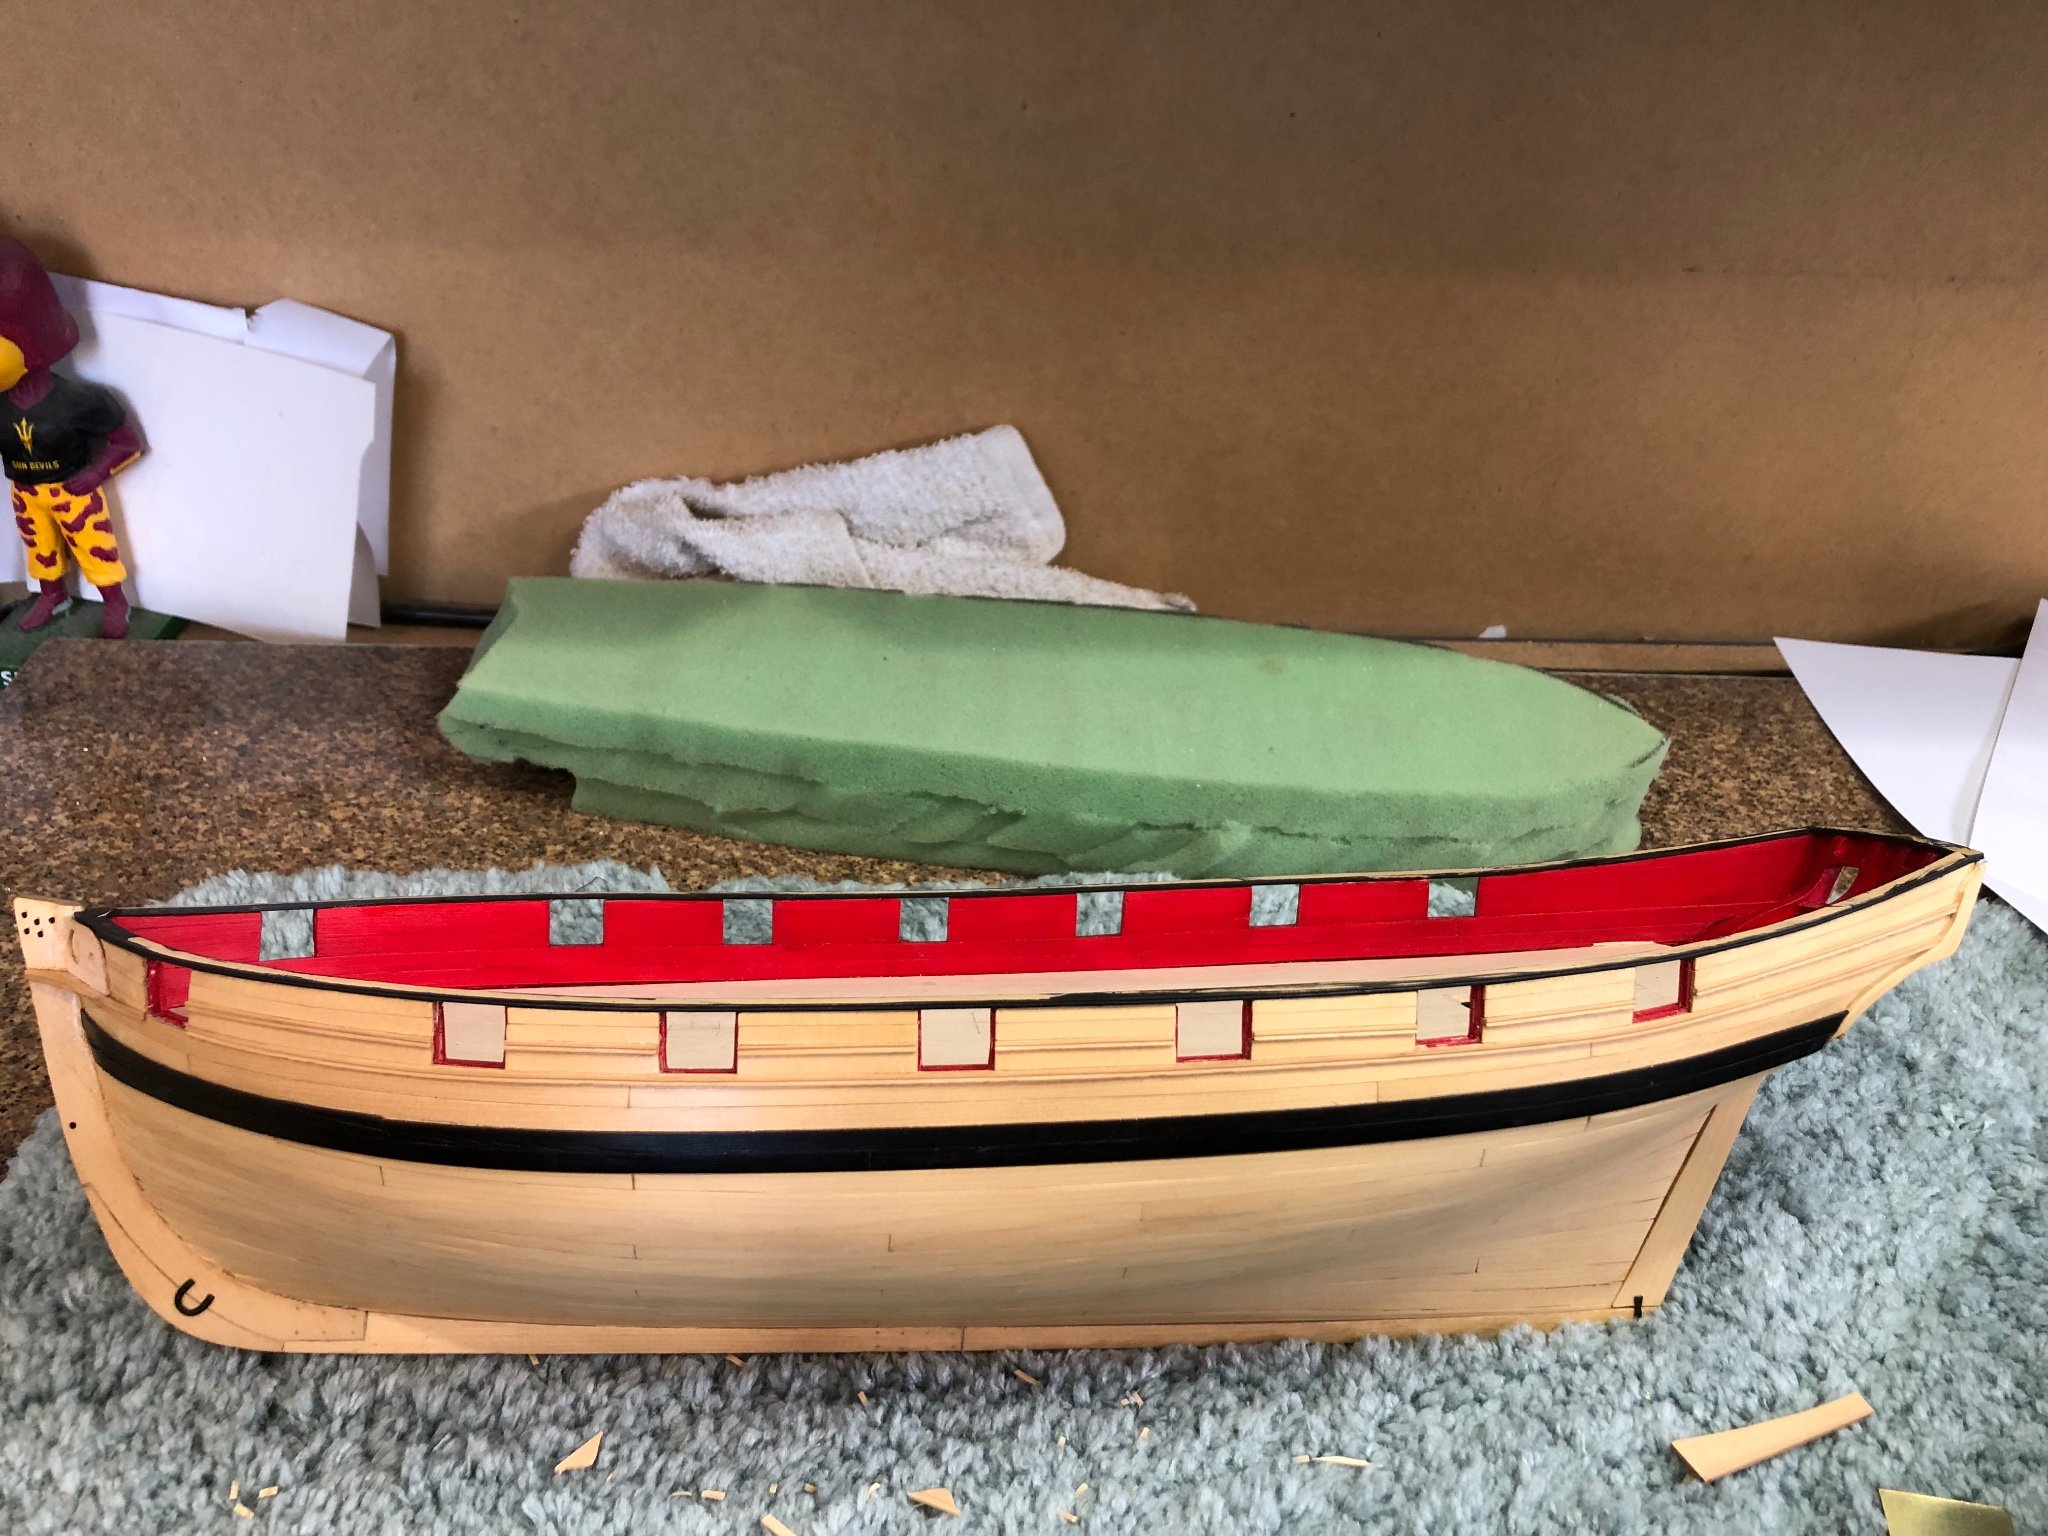
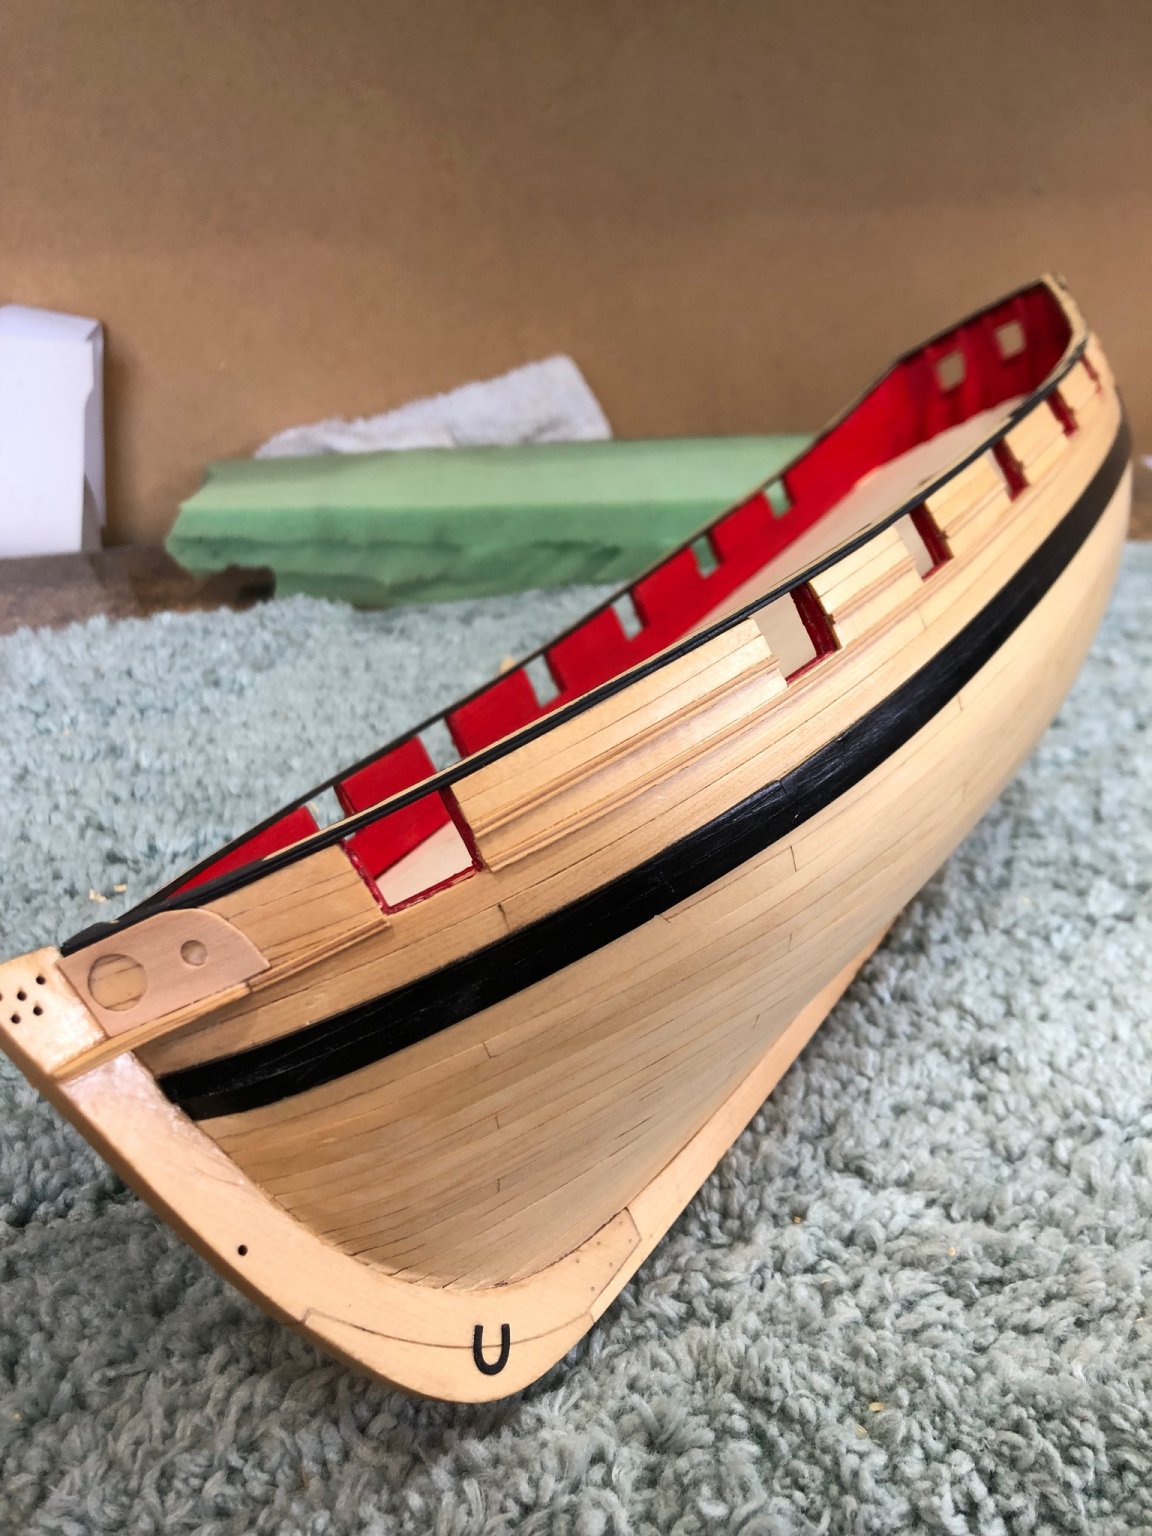
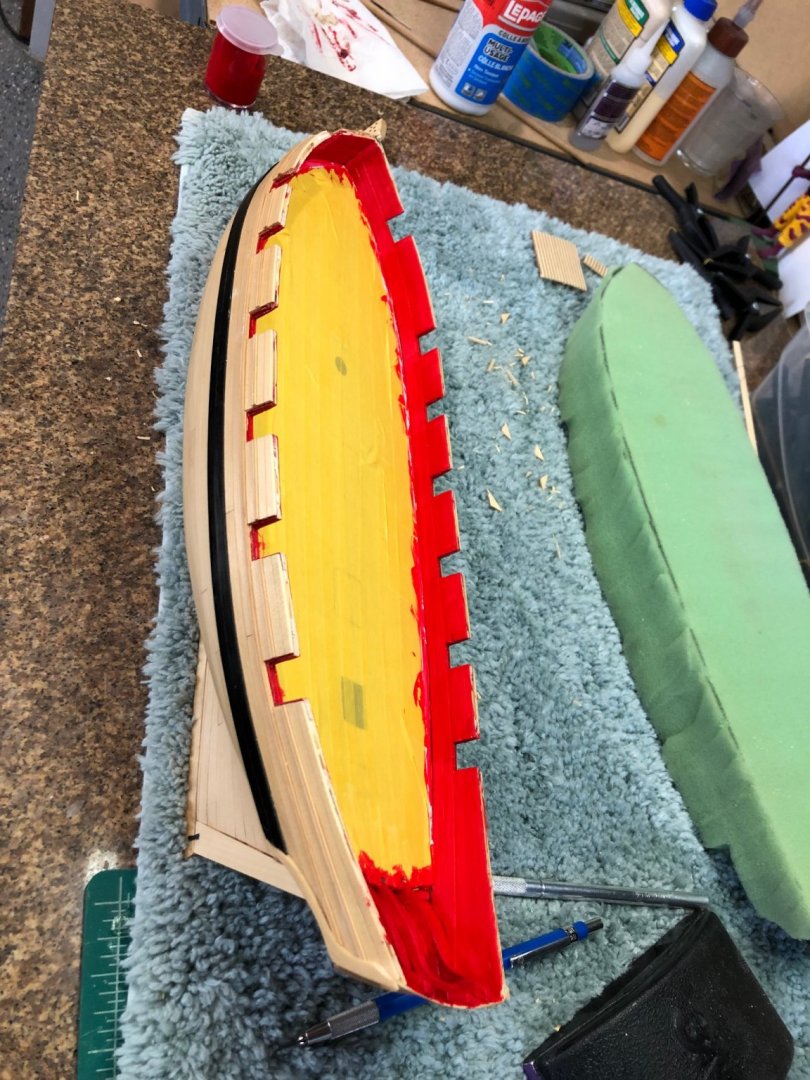
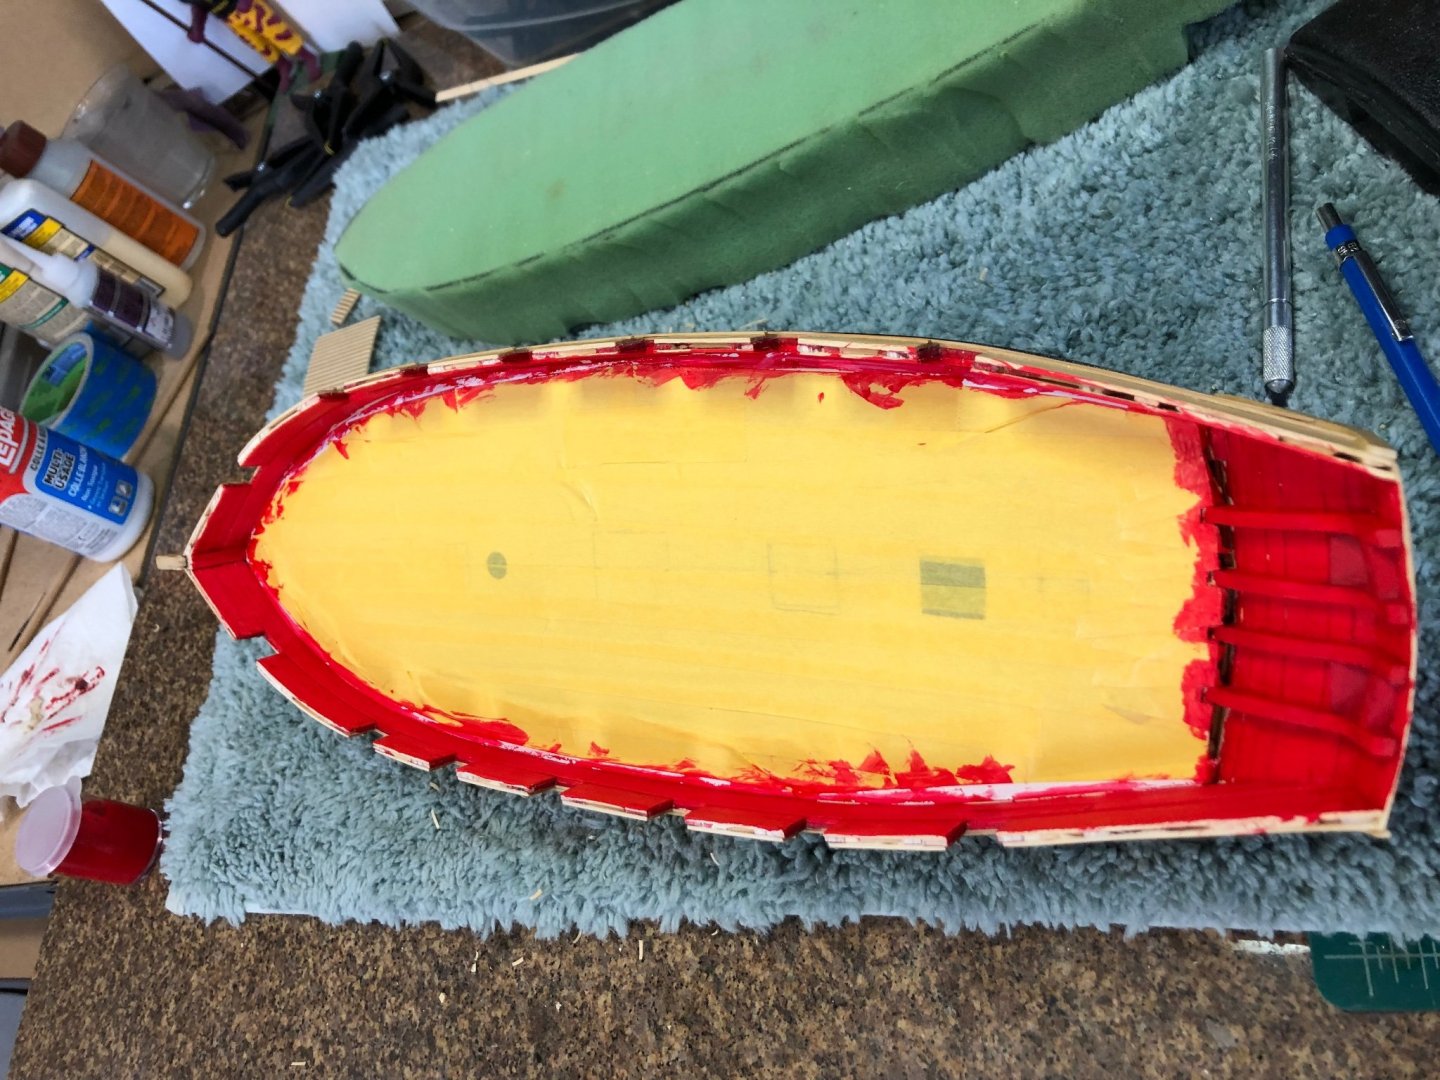
Port inner bulwarks planked as the starboard was done. Next was to add the spirketing on both sides and as said it should stand proud of the first layer. The suggested was 1/32" or thinner so I laid a 1/32" piece against the first layer to me it appeared too heavy. The suggestion to use a thinner layer seems to be what was needed. I thinned a plank to 1/32" but this still seemed to be heavy/thick. Next planned the plank down to .028" using the byrnes sander. I liked the ratio of thickness and this is what was used for the spirketing. Not much to show or tell except using this thin piece was much easier. Next I sanded the planking making sure that the spirketing edges were softened but still very defined. I taped off the false deck and painted a thin layer of primer. Soft sanding 400 grit to smooth the primer and wiped with a tack rag to get ready for the first coat of paint. Carefully painted a thin coat of red paint trying to keep the coverage even without dark areas. I remember from using this paint on the counter how red it was until the subsequent coats created the darker vermillion red. Couple of photos (Boy is it red but not at red as the photos) Now on to a coat a day Regards Will
-
Really nice and looks like fun to build. A couple of weeks to release. I better tell my Santa to order soon for Christmas. Regards Will
- 36 replies
-
- 1
-
-
- vanguard models
- Erycina
- (and 2 more)
-
Love the shingles, any chance you'd make me a pair? HA HA HA Just remember that the recovery is a long process and don't push it too hard! Regards Will
-
Love the work scaffolding and ladder. Amazing can't wait to see you next project. Regards Will
-
Great catch Steven. I had used an eyebolt to keep the loose lanyard out of the way and somehow snagged the line and couldn't fine where I pulled the eyebolt from. It must have been loose in the deck. Great catch now I'll check all the eyebolts before going forward. Regards Will
-
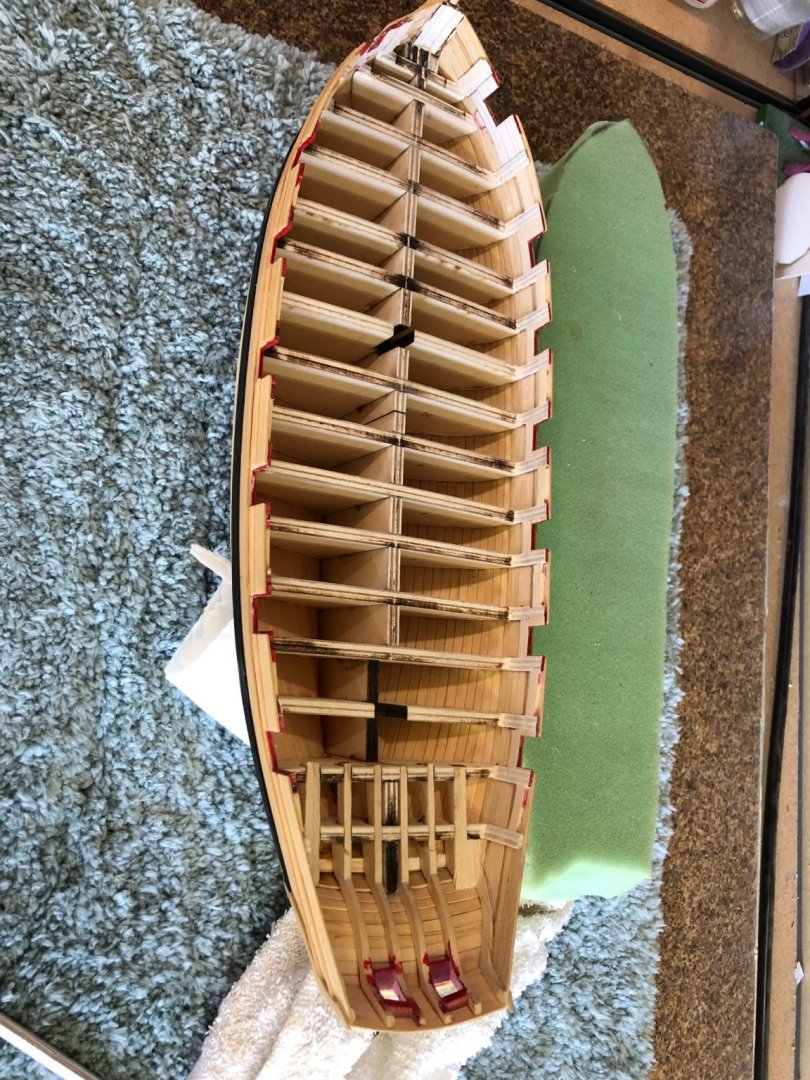
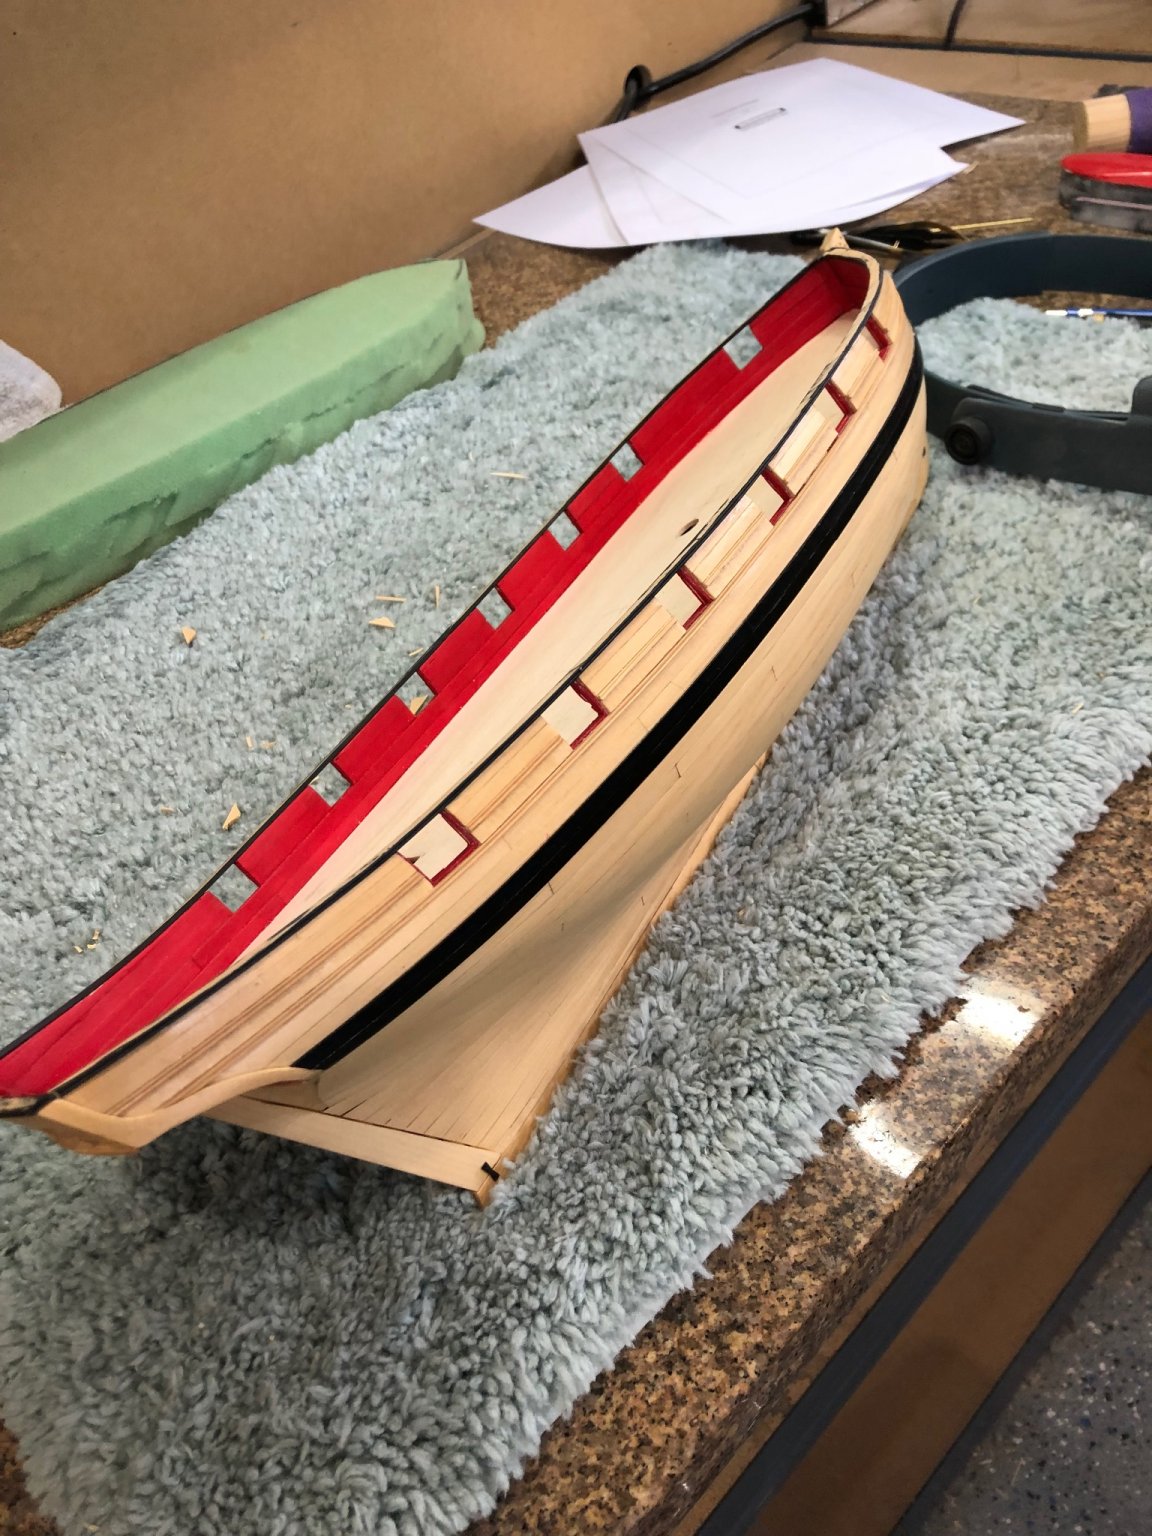
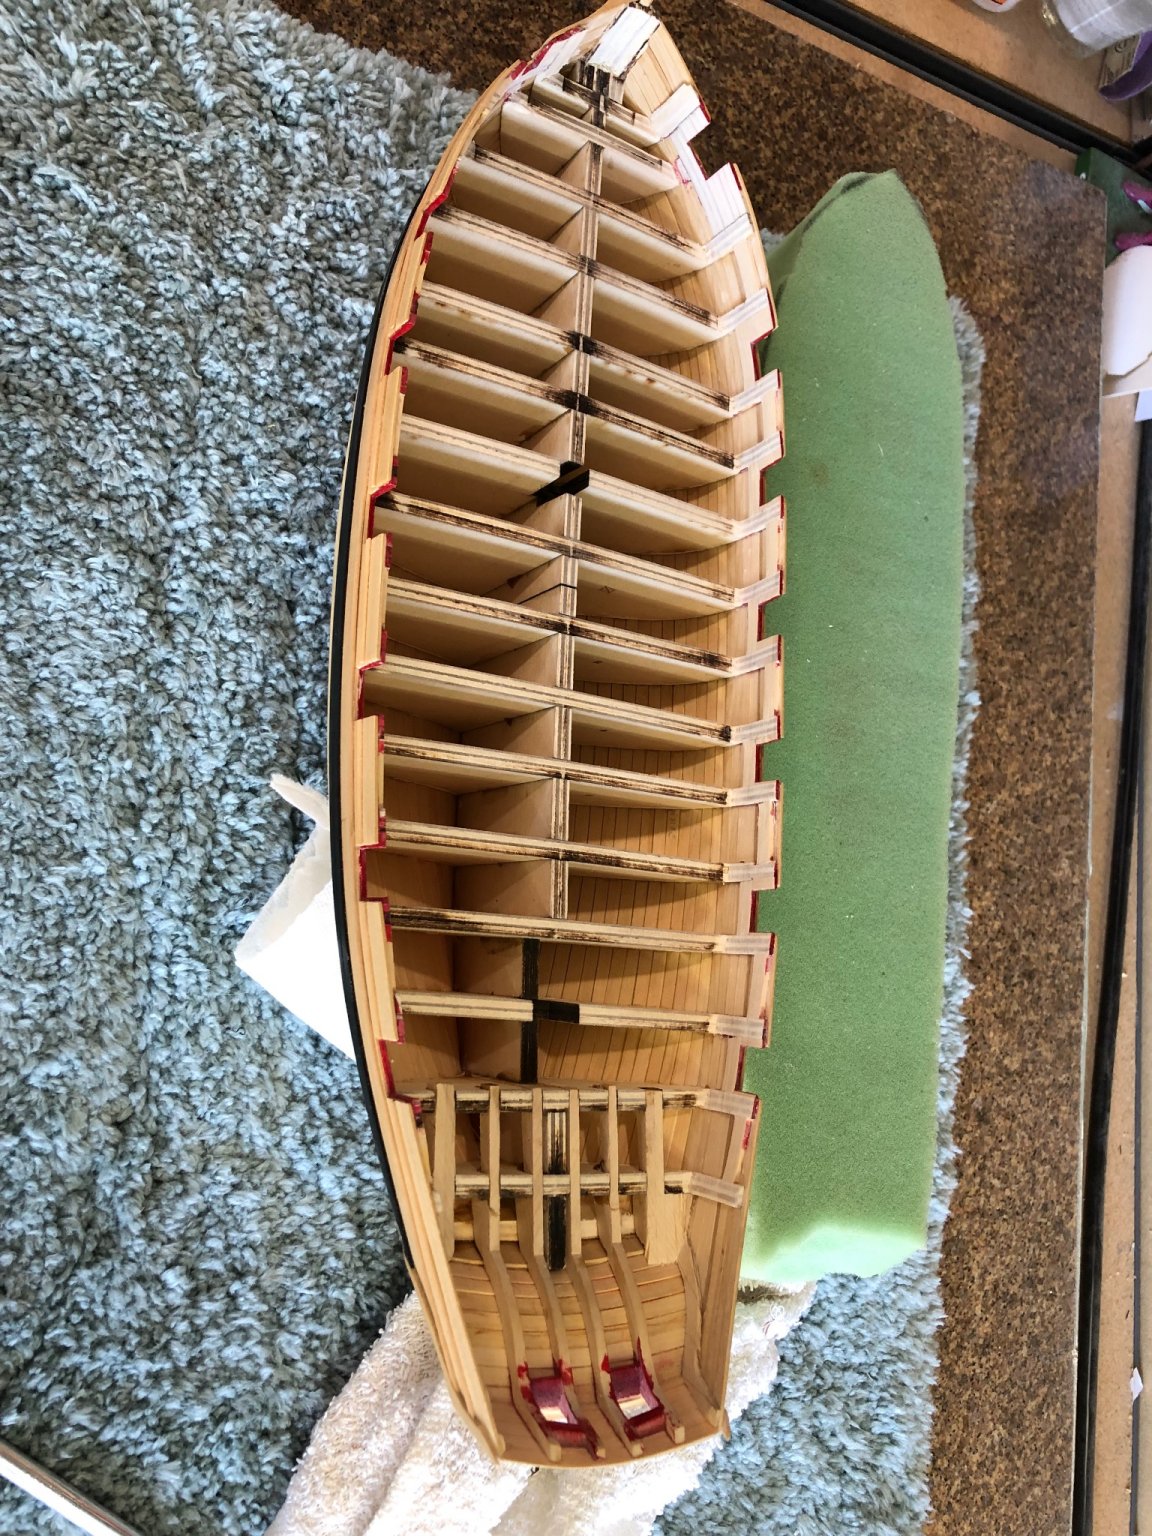
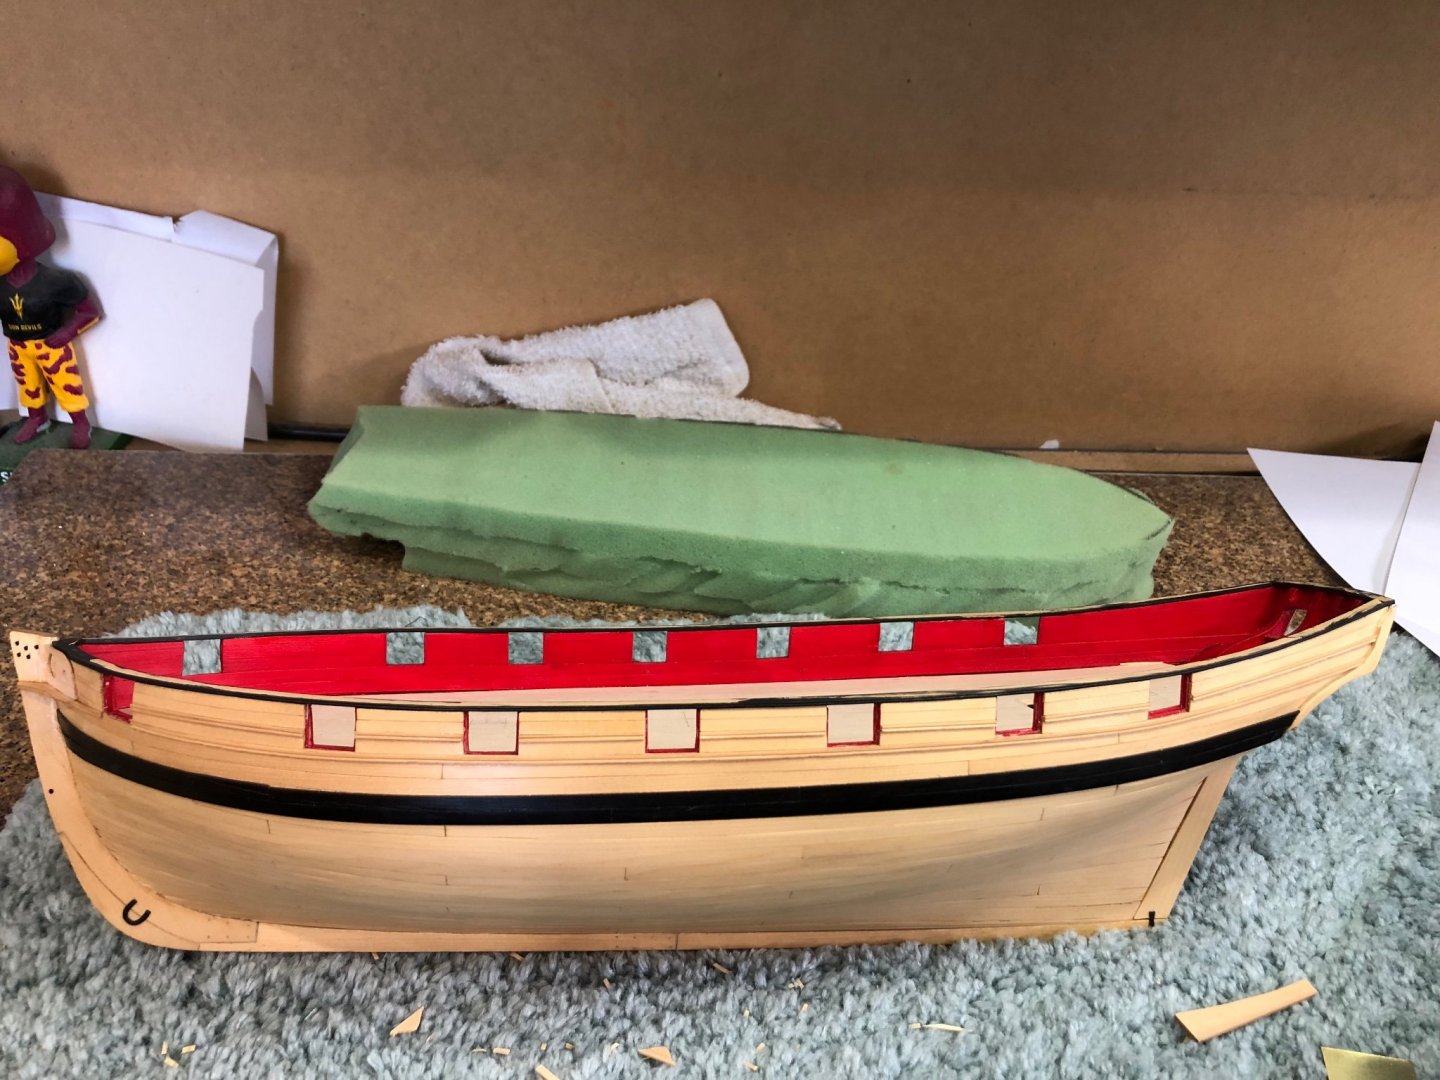
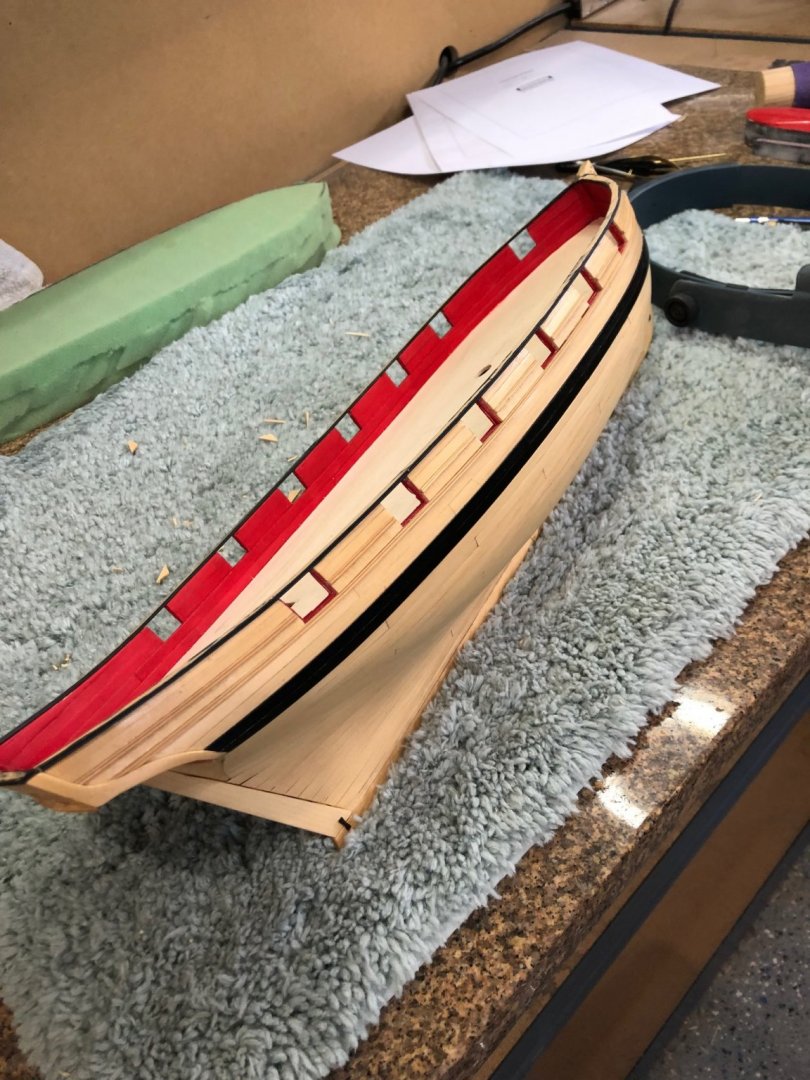
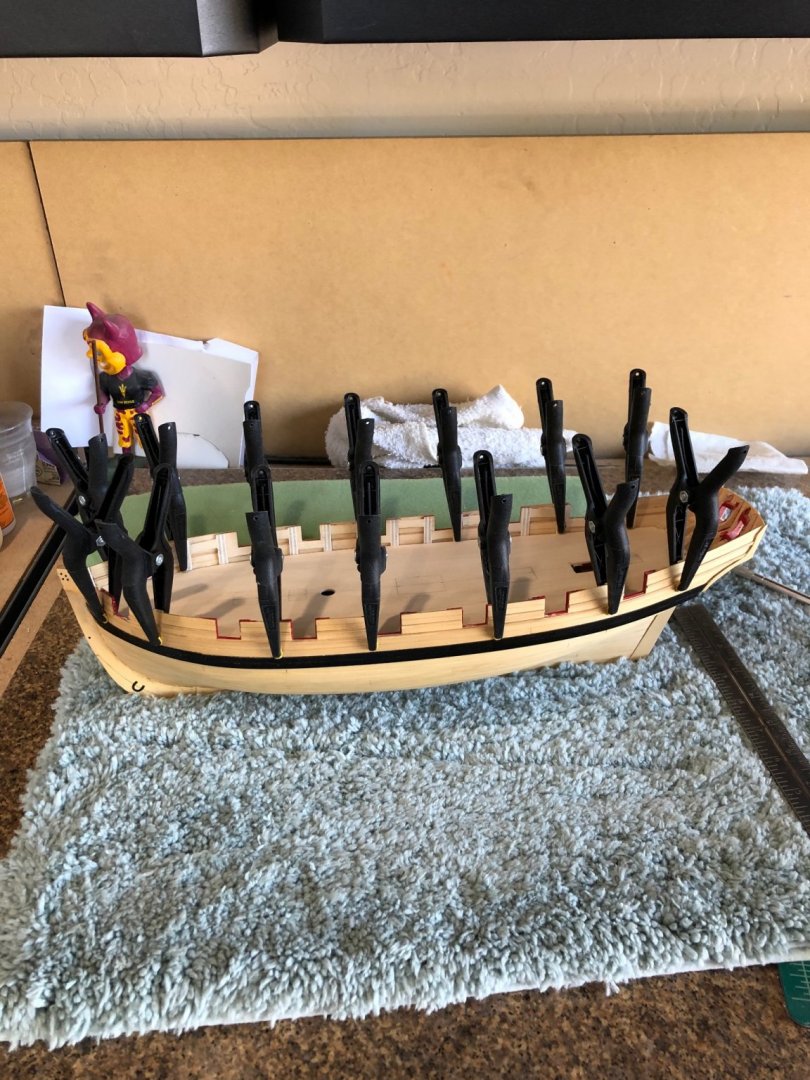
Starboard side inner bulwarks completed. 2 days work really hard compared to planking the outside. Worst part of this was the process which made everything look like a mess. (I read a book of building Essex Schooners were there was a photo of bulwarks as a deck was being built and it looks like my Cheerful) But in the end it came out as I had hoped it would maybe even better so on the port side. All sanded and leveled ready for the cap rail Exterior view of starboard with gunports opened. View of starboard interior bulwarks again with gunports open On the port bulwarks tomorrow Will


-
Thanks Paul really means a lot and keeps me motivated. Inner starboard bulwarks planked with gunports covered to be opened after sanding. Must admit its pretty ugly at this stage but hopefully it'll get better 🤐 Decided to plank with individual planks to the top realizing the topmost will not be much more that a sliver. To support this sliver plank fillers were added so the sliver will actually be double thick. Not sure why this photo got rotated but here is the planking completed View of the counter with planking View of inner stem with very light sanding more sand to come bringing the thickness down to 9/64" universally along the entire length. Again thanks for the likes and nice comments Will


-
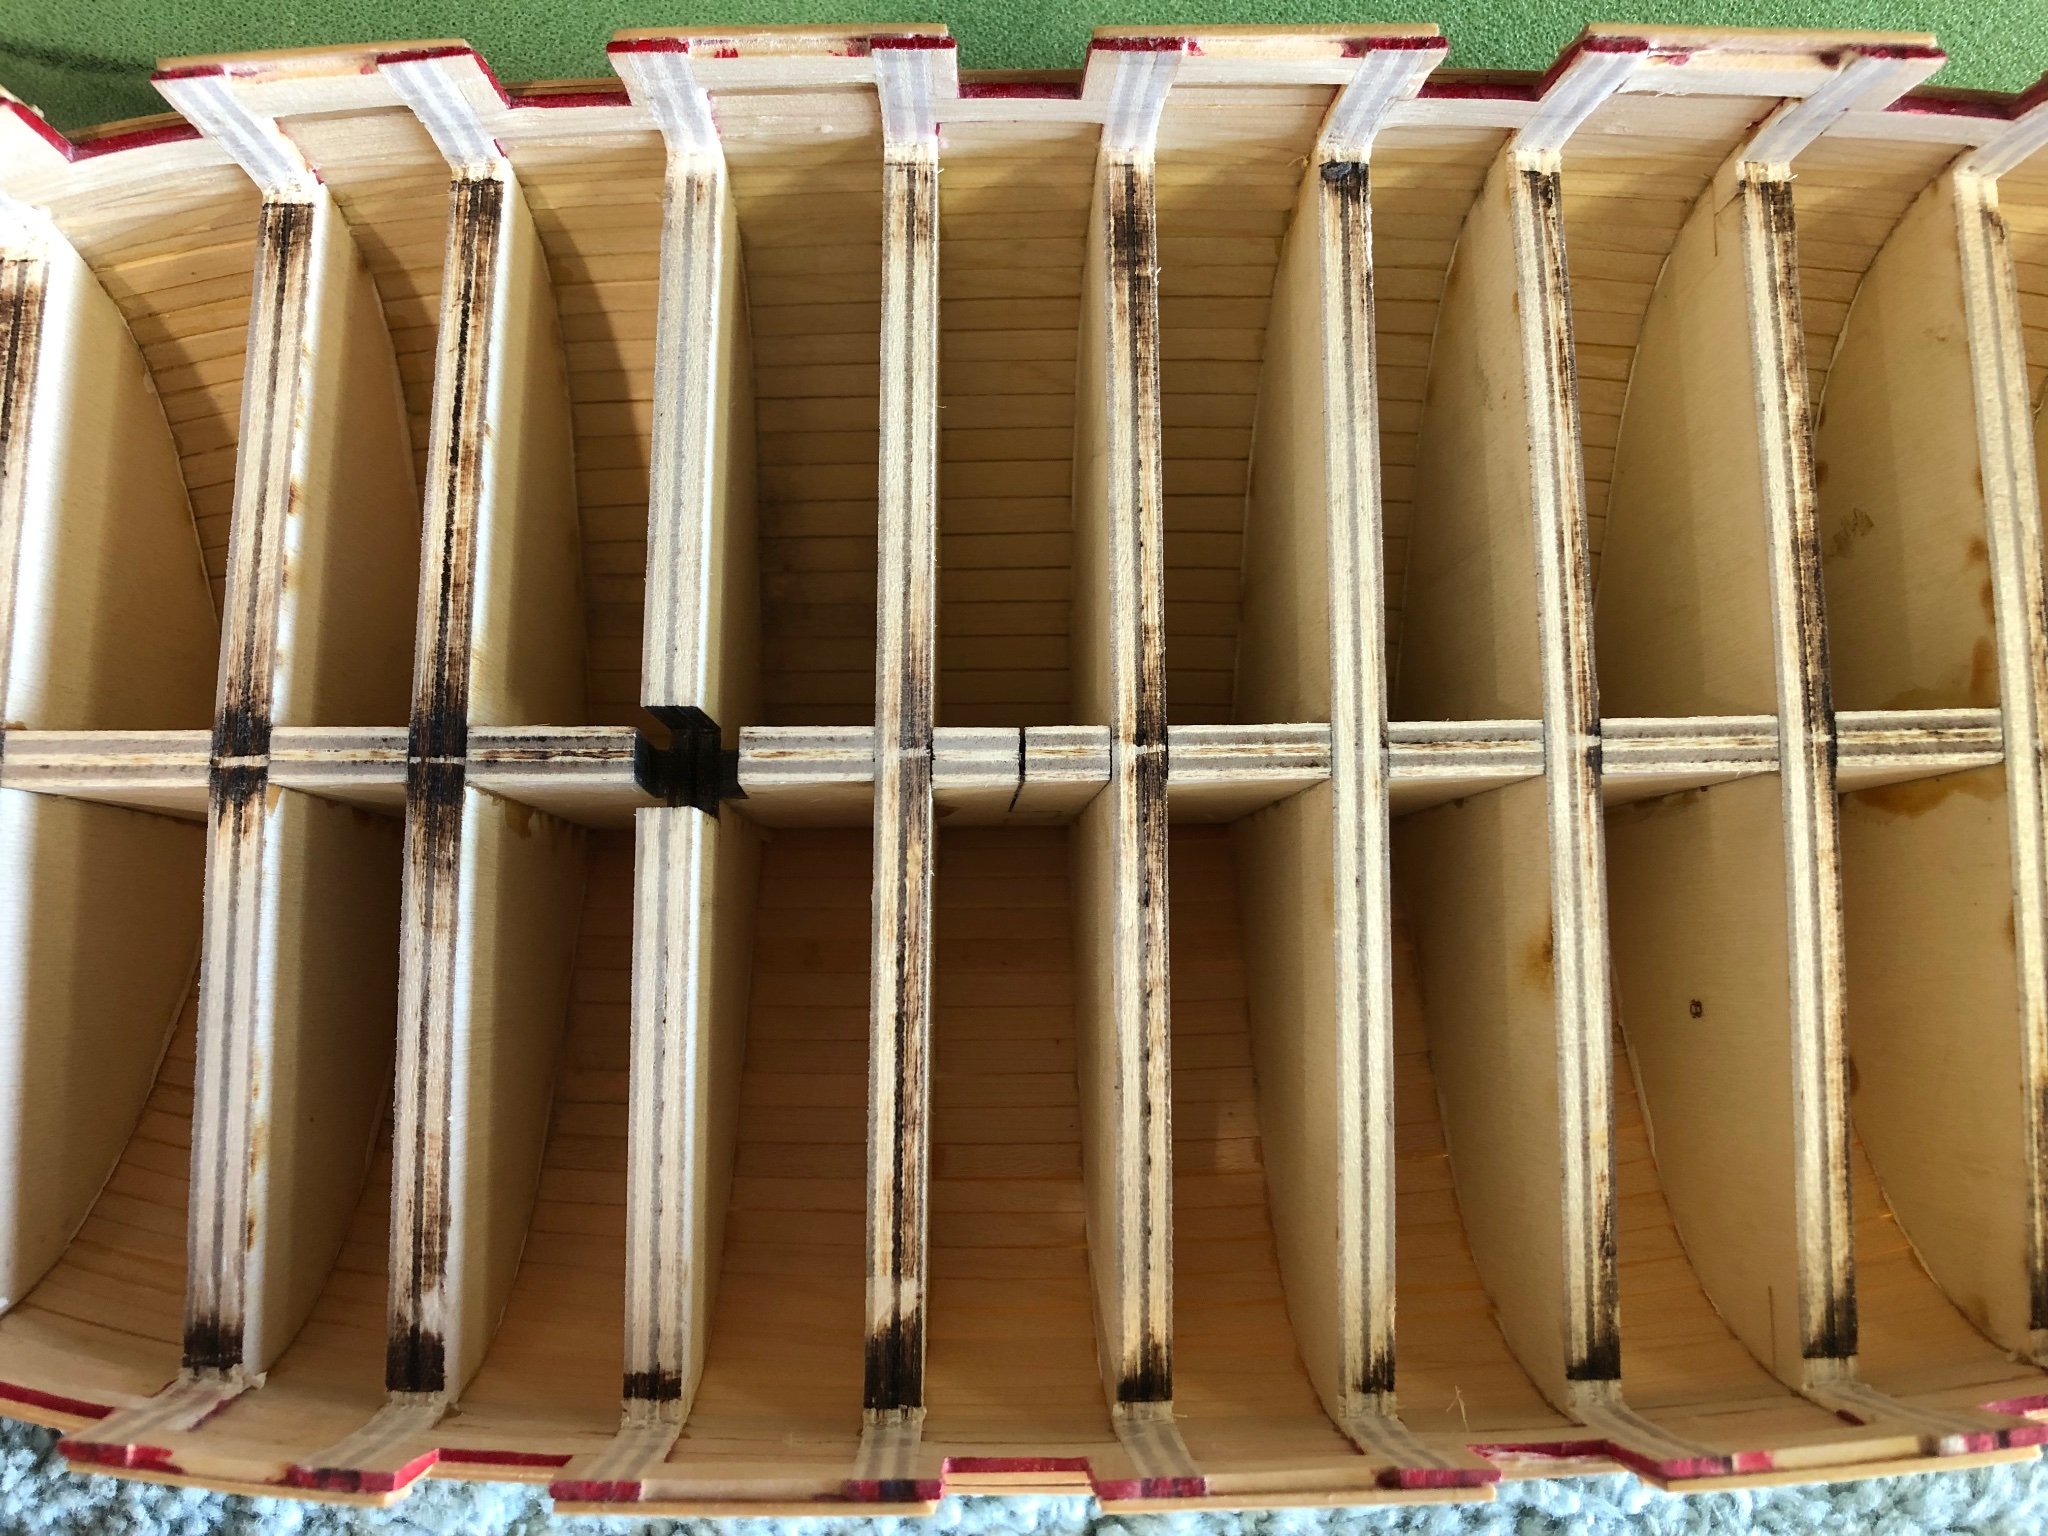
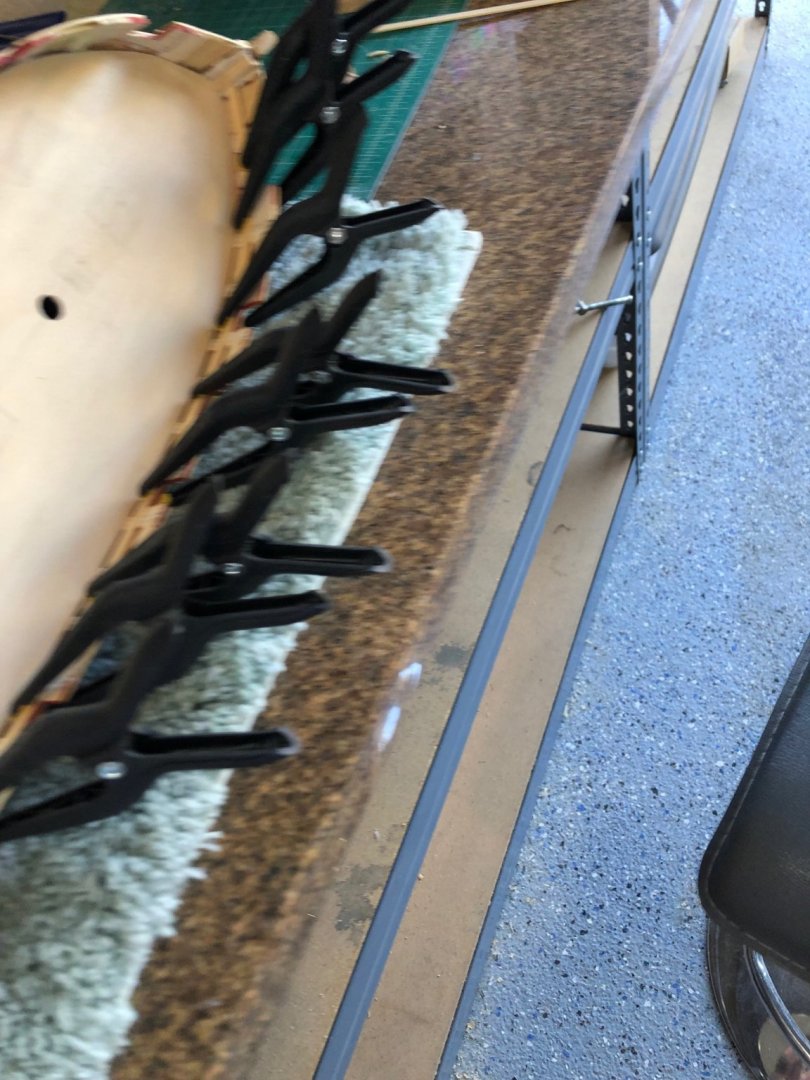
Started planking the inside bulwarks with the first strake even with bottom of the gun port sill. One thing surfaced that I hadn't thought of which is how fragile the bulkhead stanchions had become after thinning. While fitting the lowest bulwark strake I broke two stanchion off just handling the boat. Fortunately I was able to glue the section on but was still very weak so what to do. Remembering gbarlows log where the upper strakes were done in one long piece and the gunports cut open with all the planking completed. First plank of gunport sill strake set in place and glued First plank after clamps removed The second plank of the first strake was very tricky to get the counter curve correct Once it fit properly it was set and glued This the forward section of bulwark planks ready for the gunports to be opened. Next will be finishing the after sections of the bulwark planking completing the bulwark strakes. The thickness of the ports is about 11/64" and the instructions suggest it to be 5/32" or a little less. I'm going to leave the gunports closed while sanding the bulwarks to smooth them and reduce the thickness. With planking run in a continuous length the stanchions are very strong and won't create the above problem. Again note to others planking the inner bulwarks is very hard compared to planking the exterior of the hull. Will

-
Nice, Nice, Nice when can I buy one? Will
-
Maury it looks wonderful. Patience paid off surface is flat, color is even, texture is nice. 5 days of work and now look at the results which you'll admire as long as you look at your model. Well done. Will
-
Don't know how the last picture got of of sequence but 🤫 this is before the deck was glued.
-
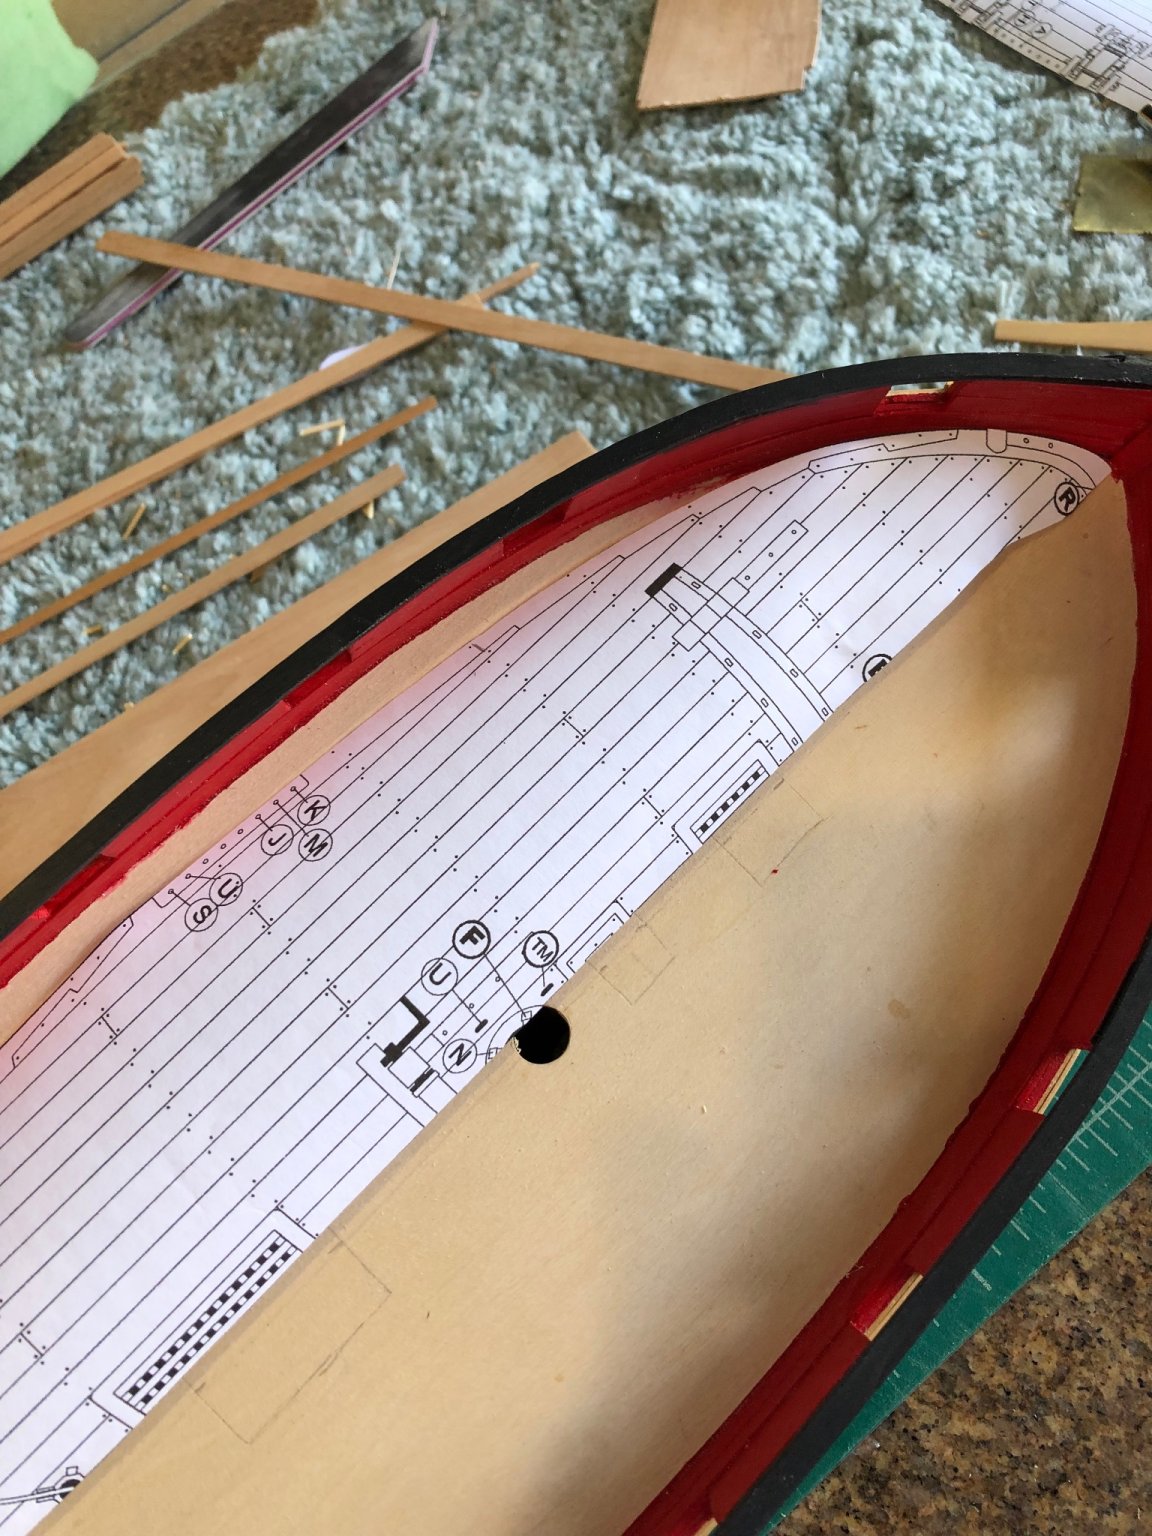
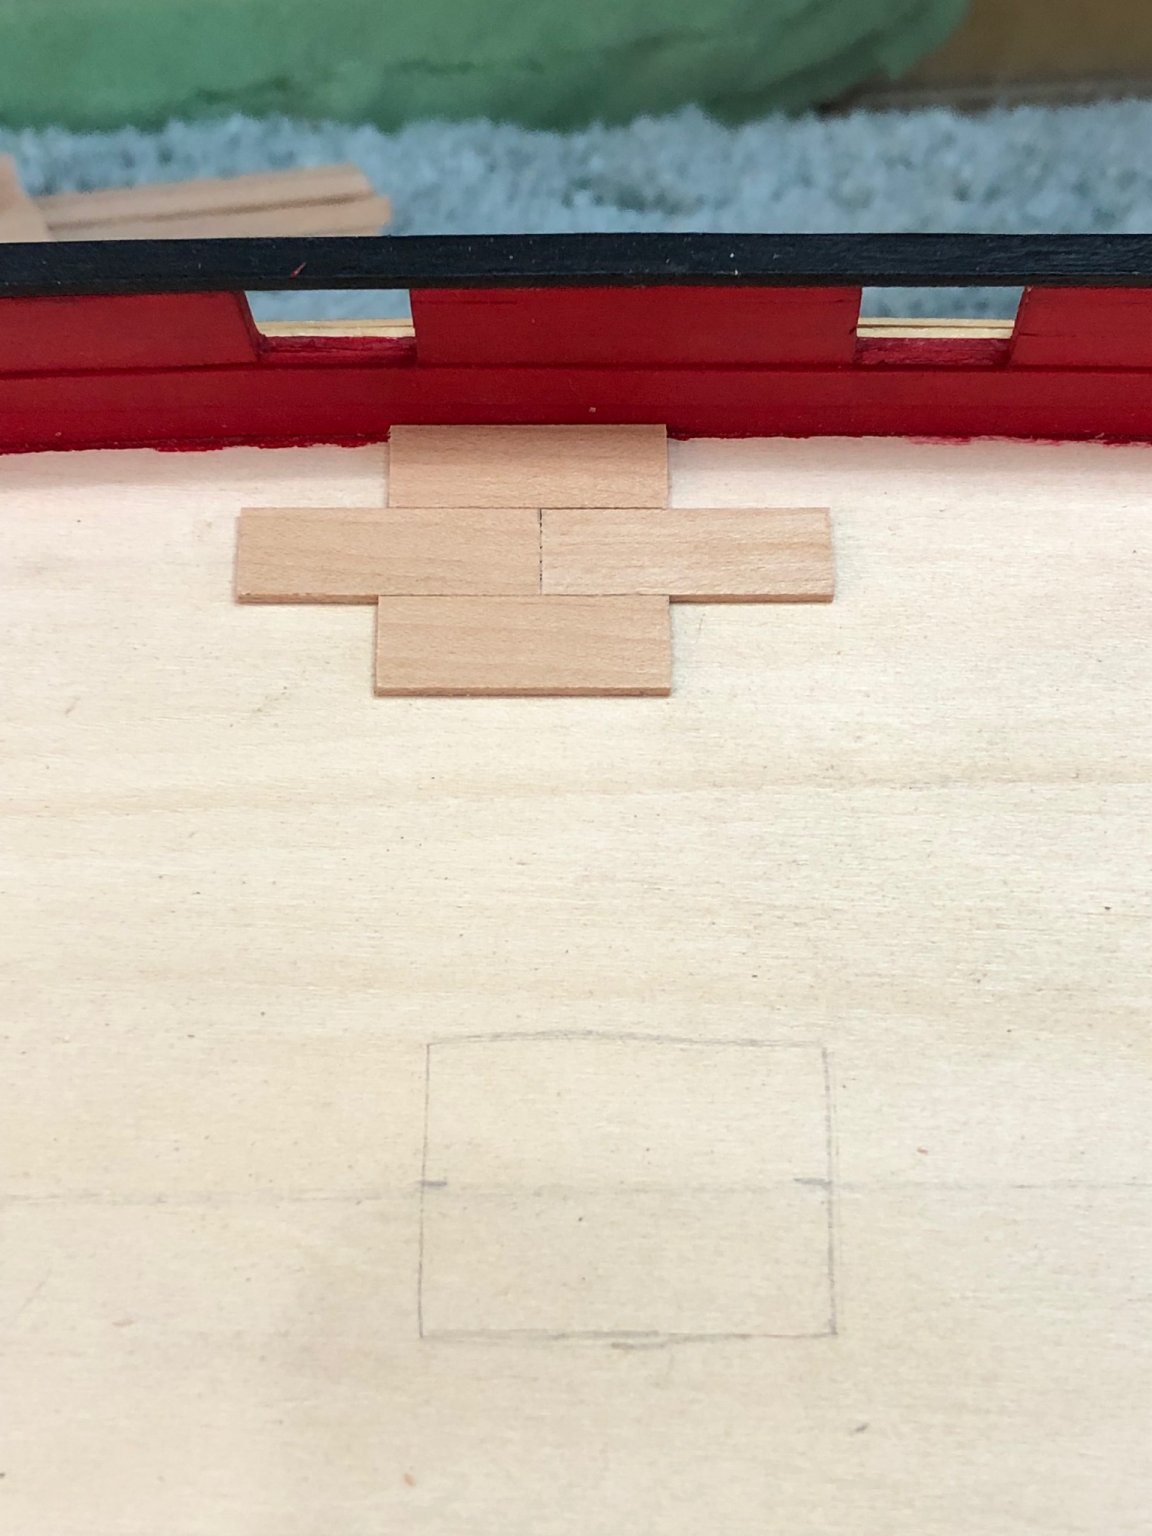
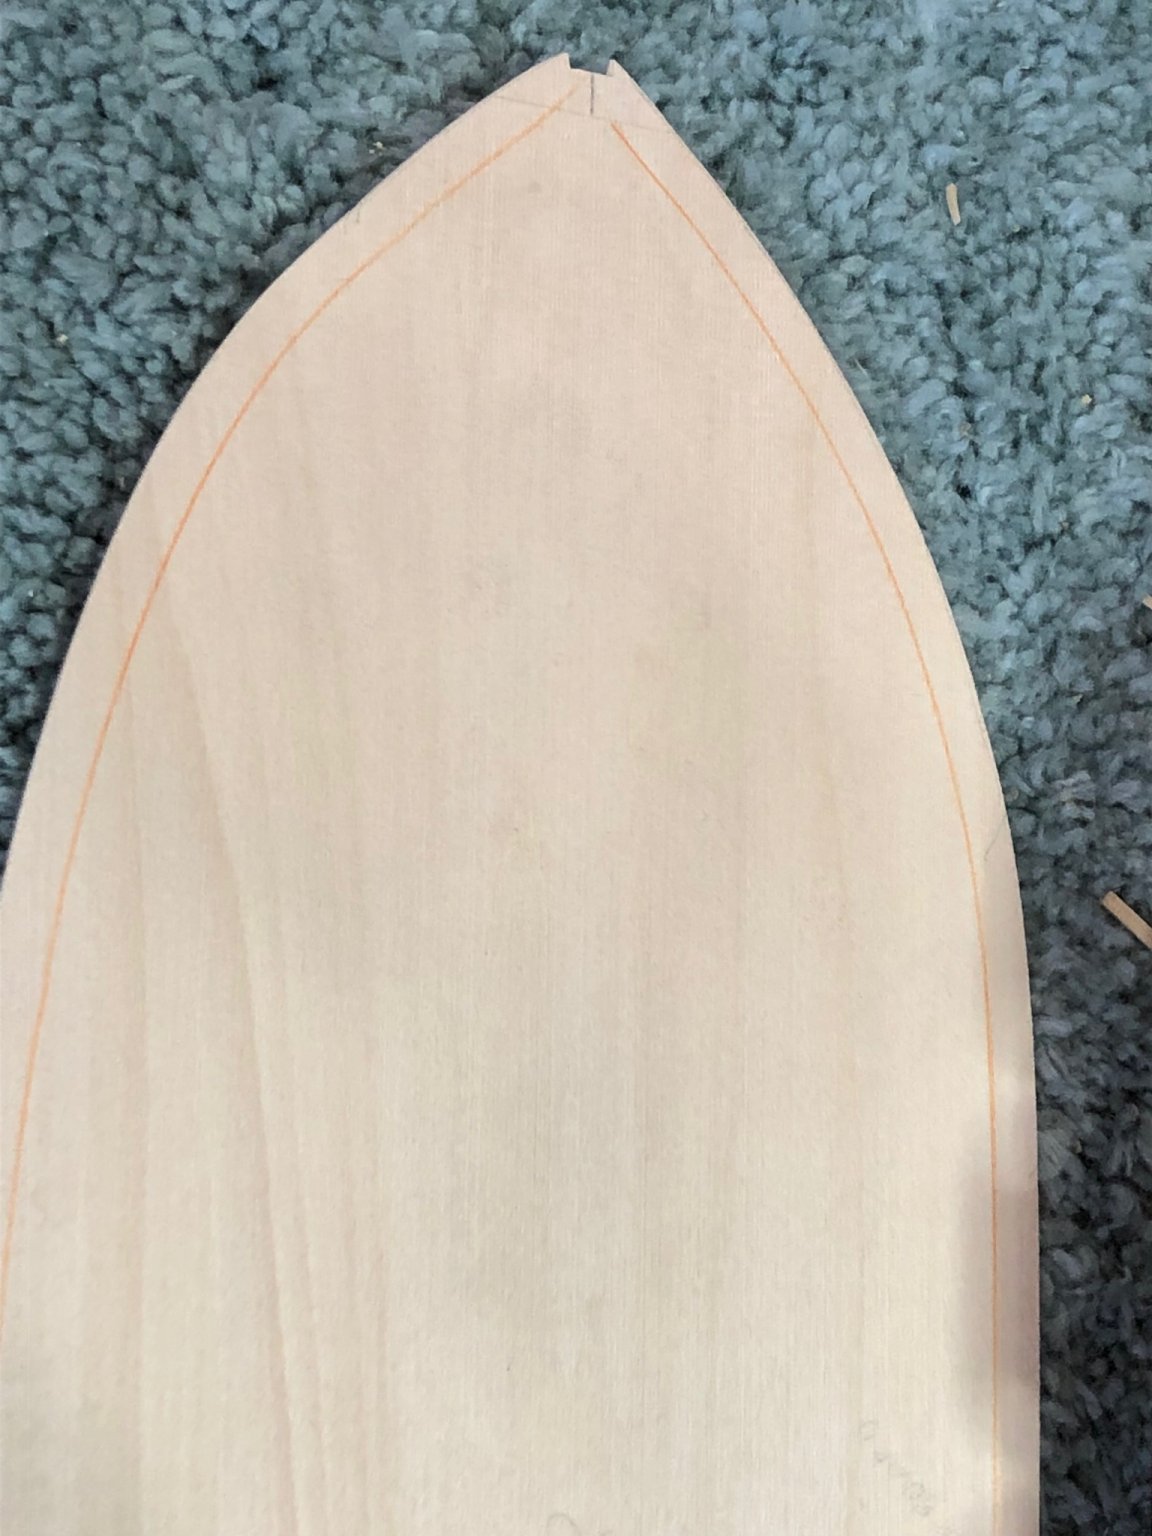
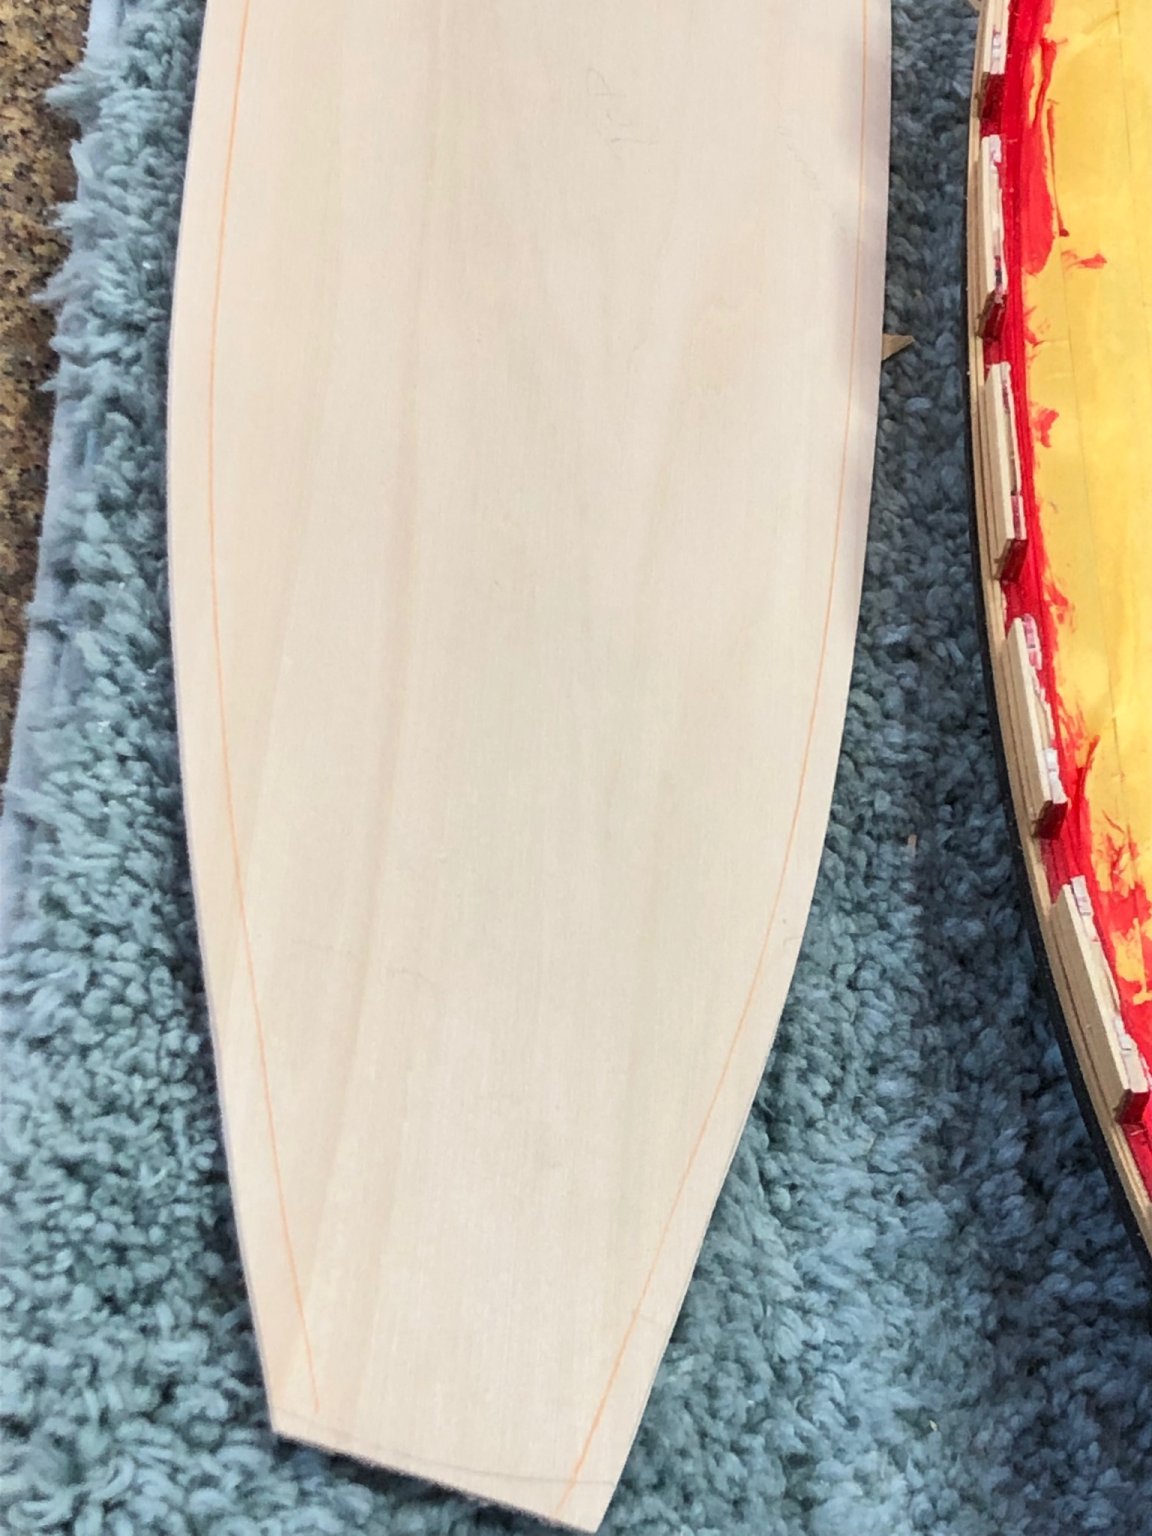
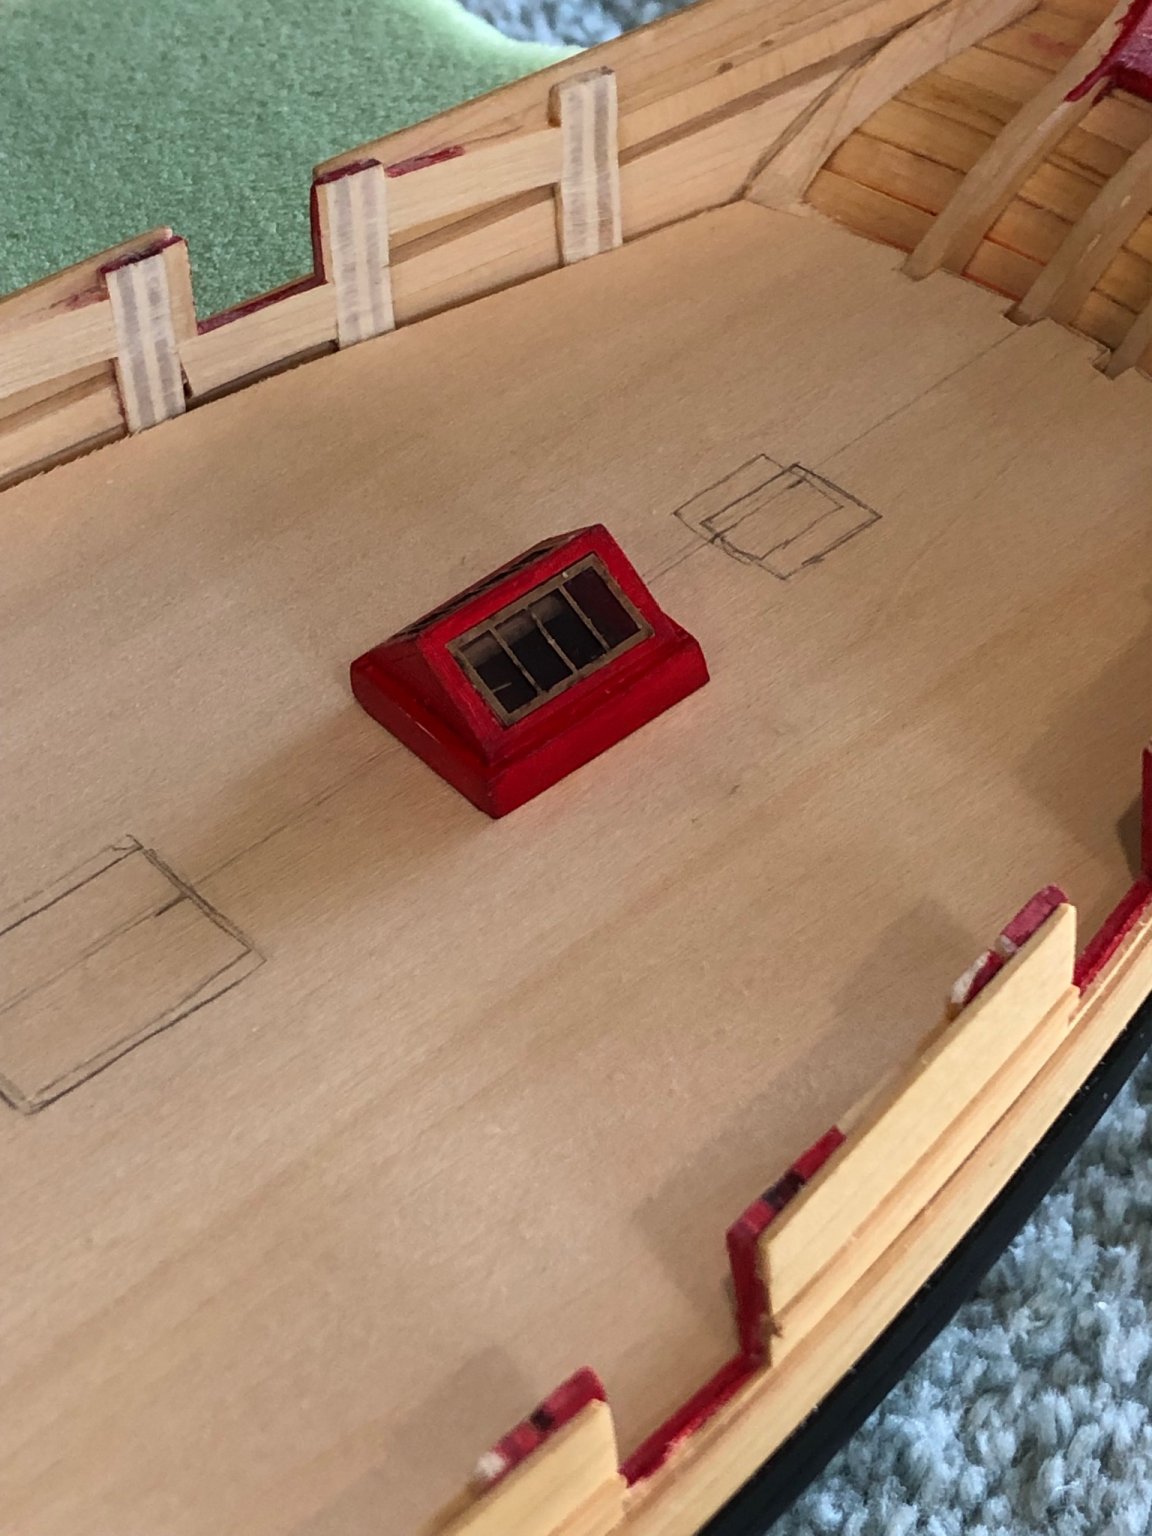
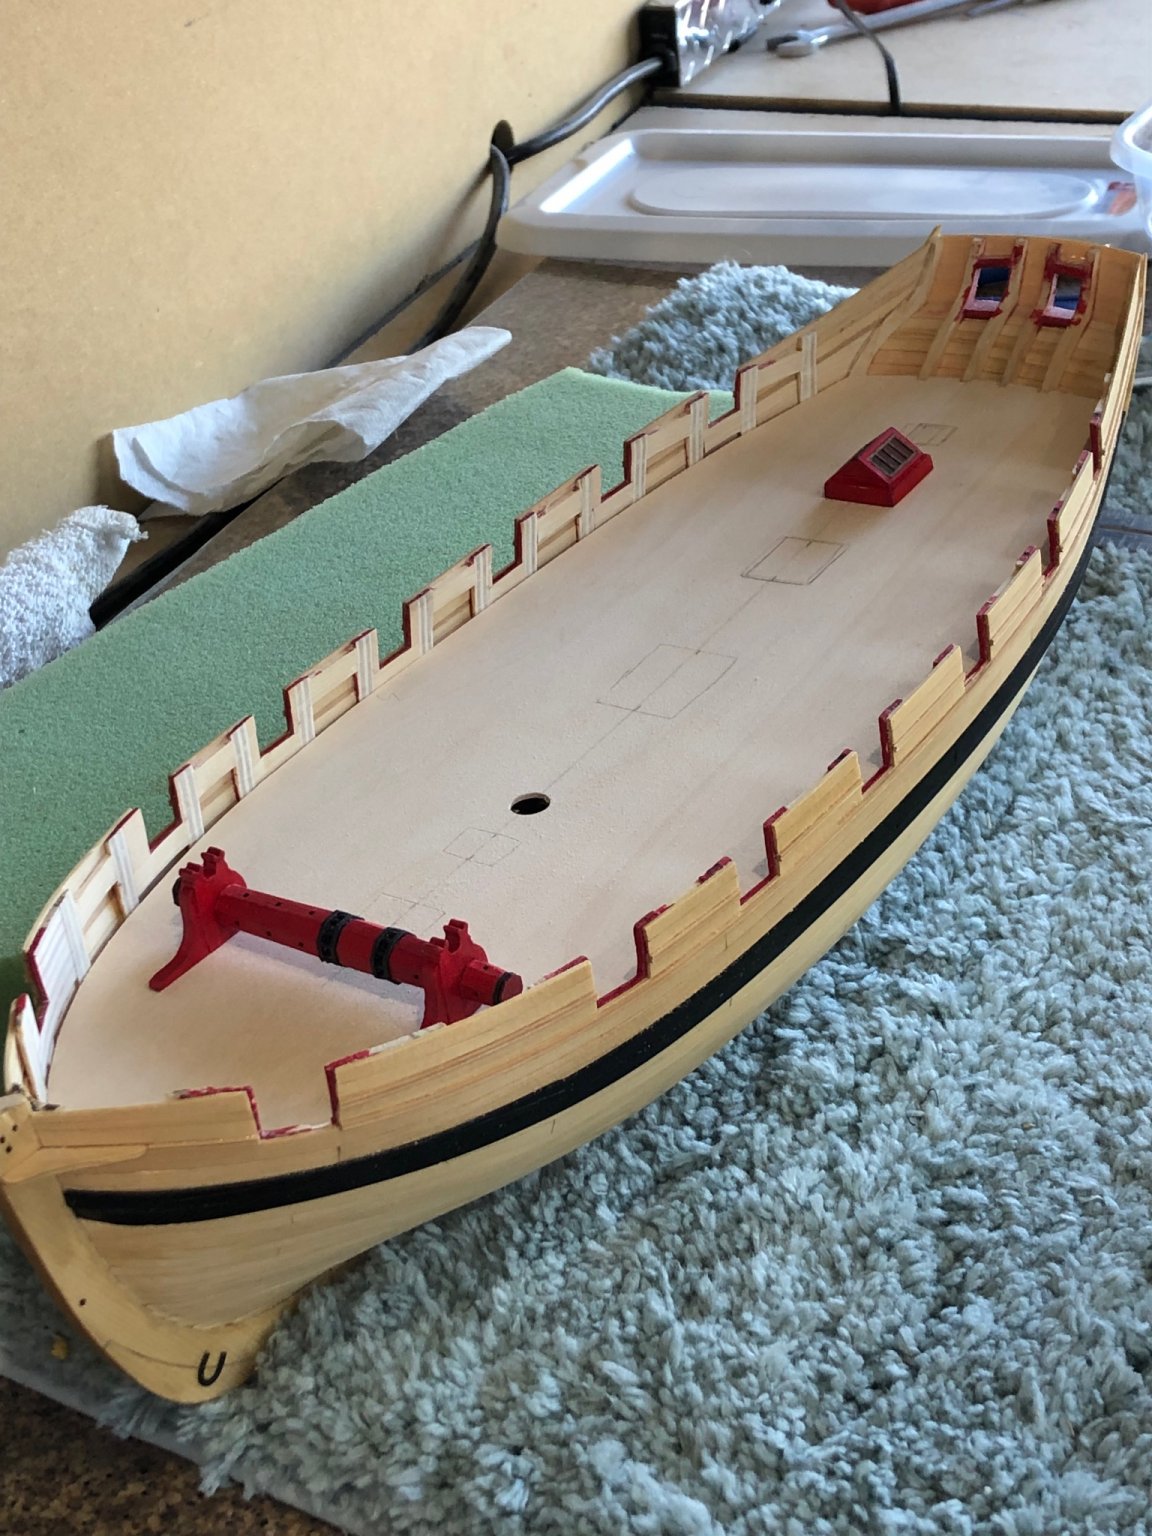
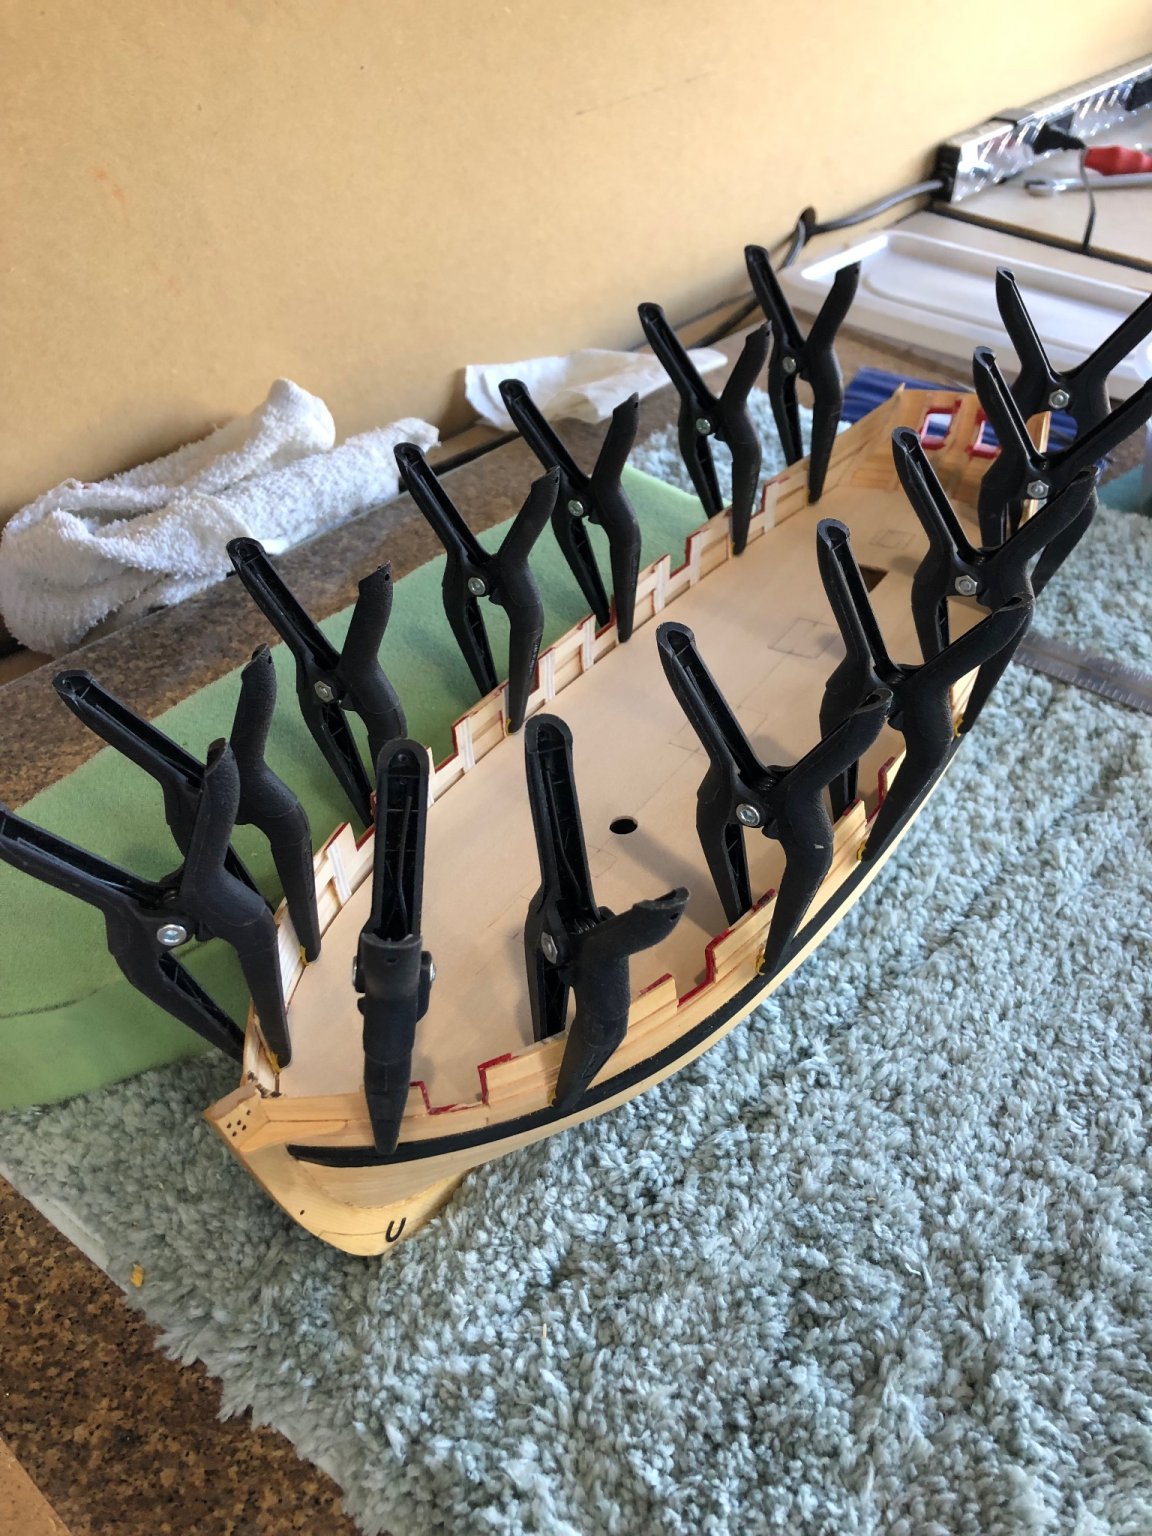
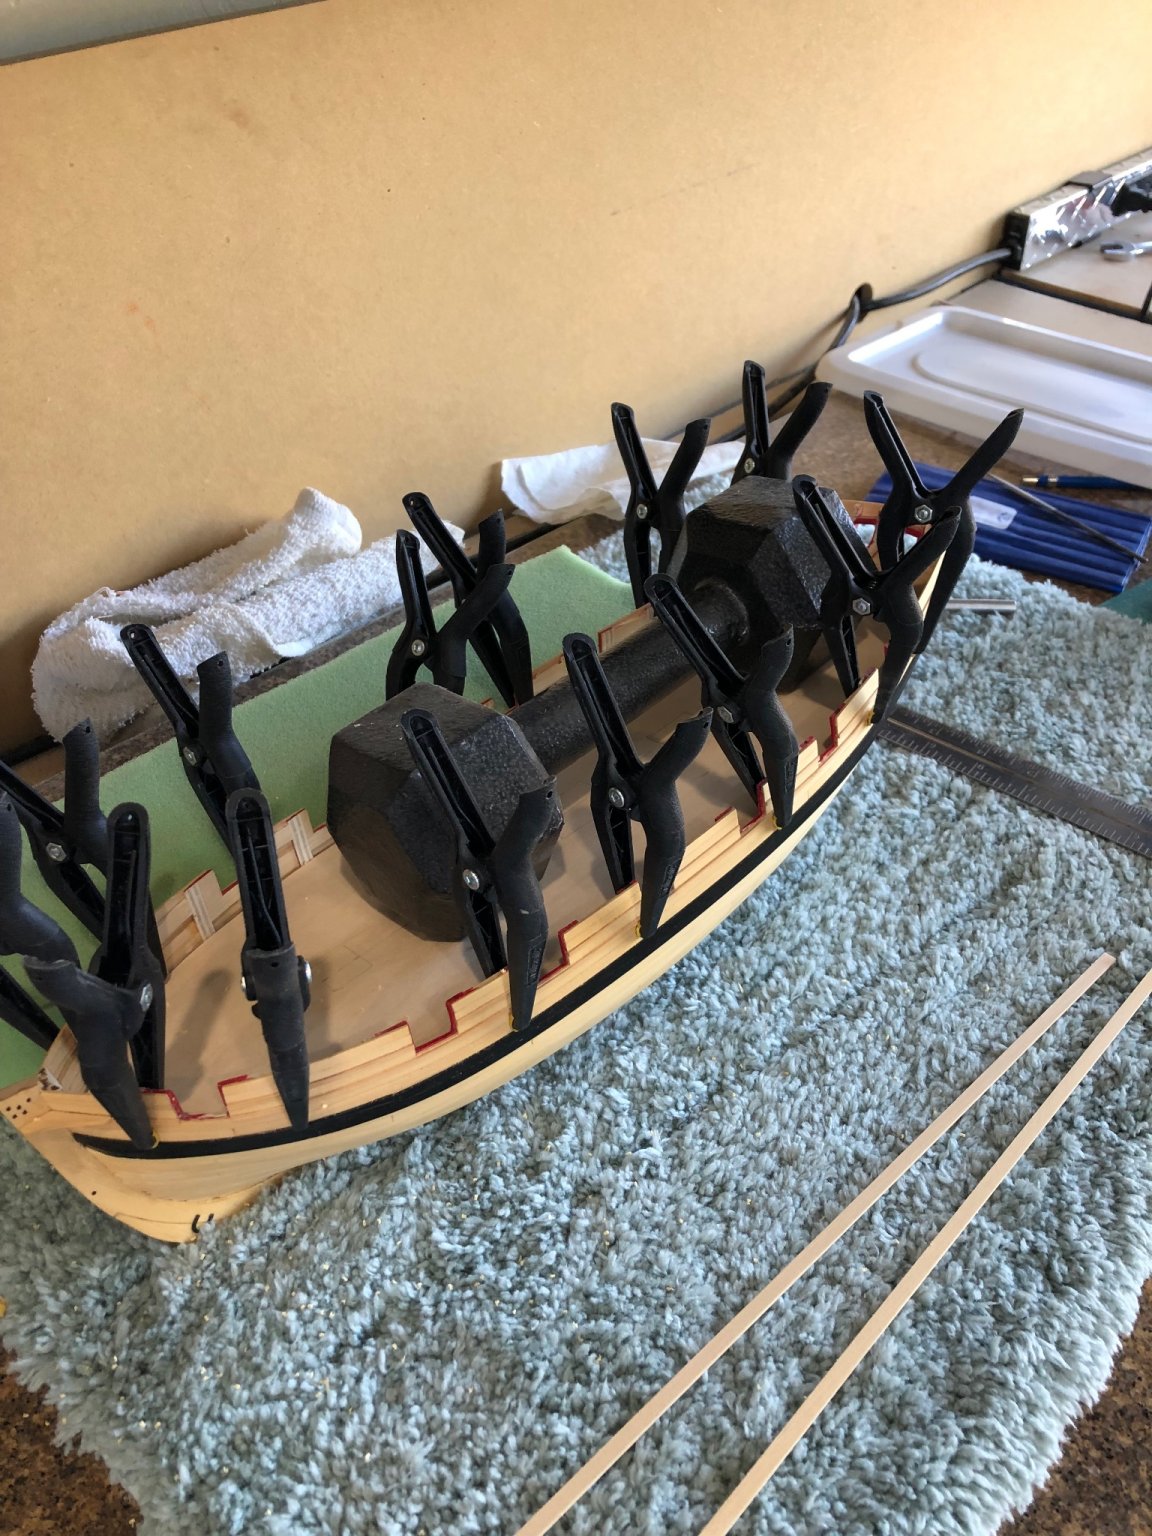
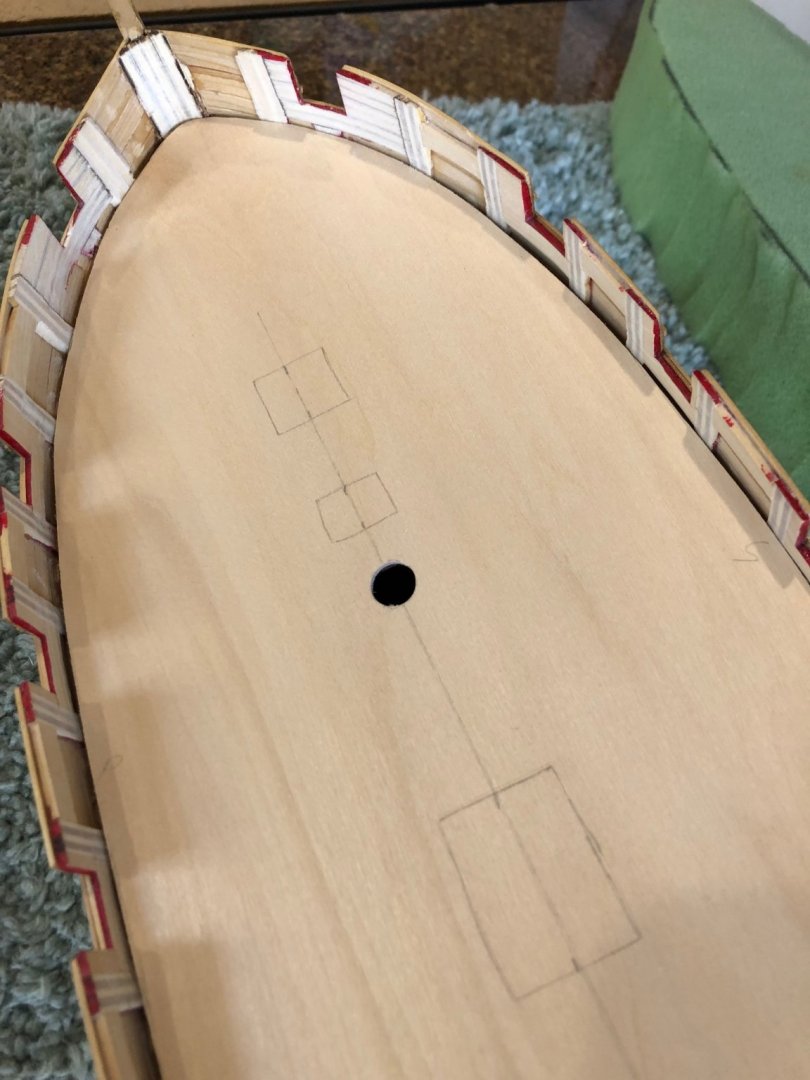
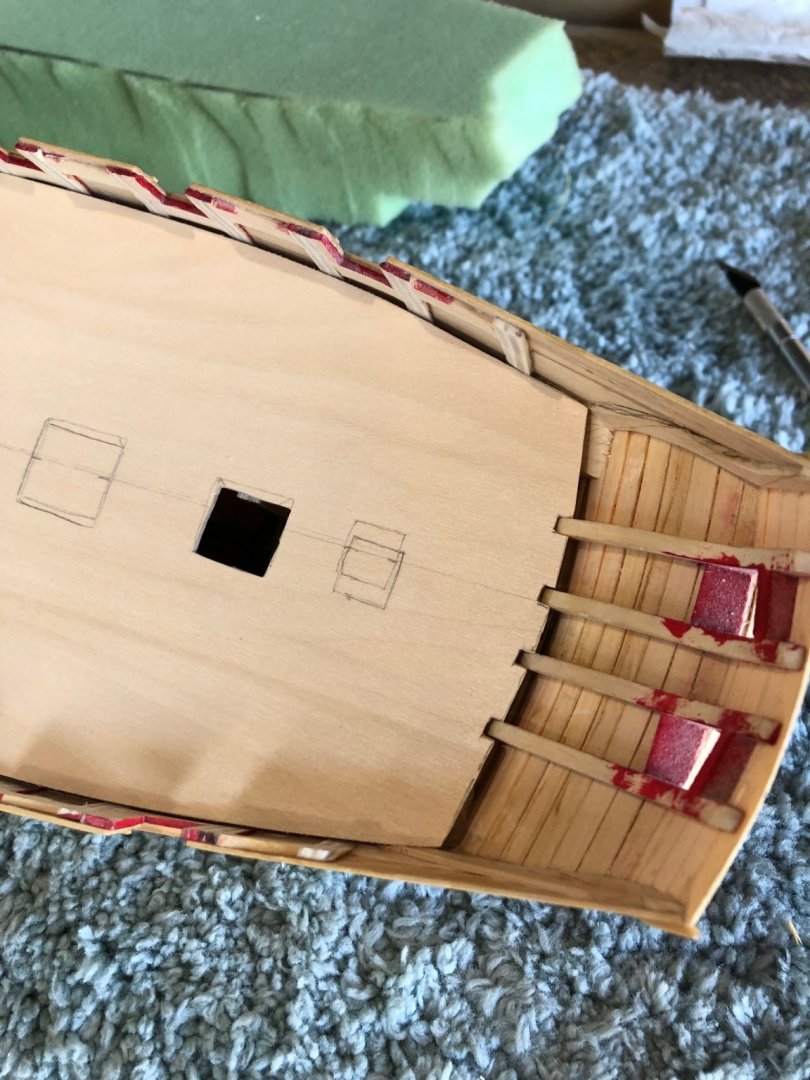
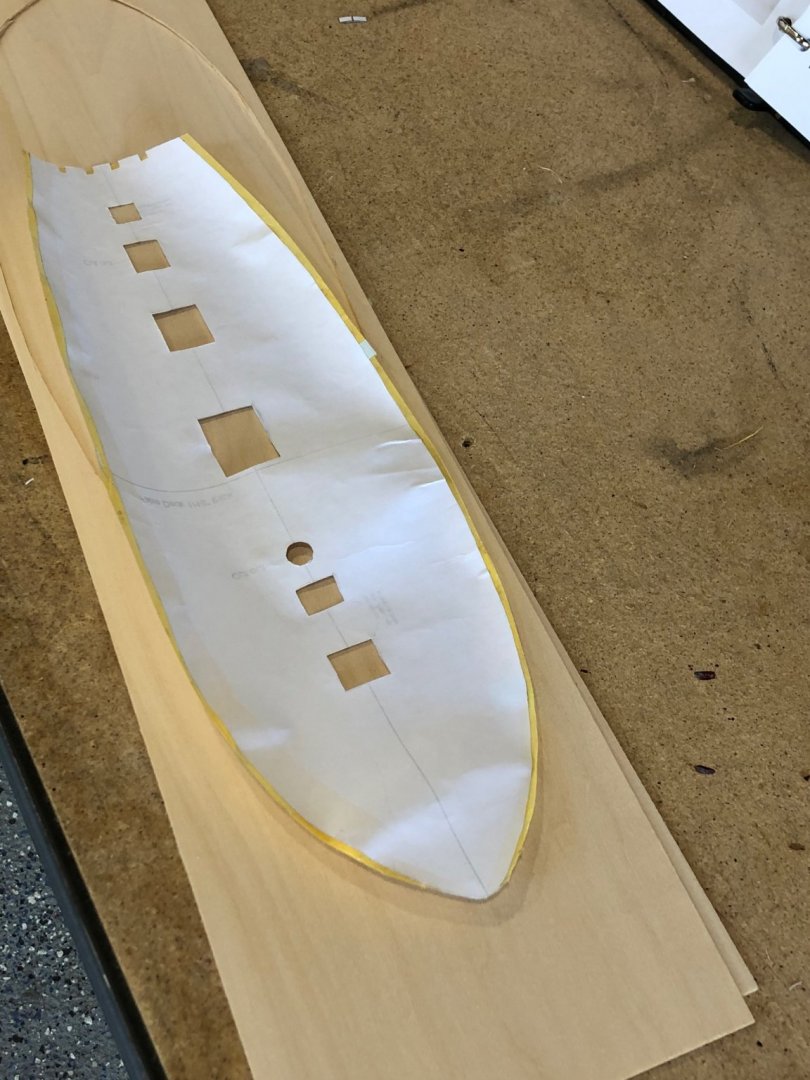
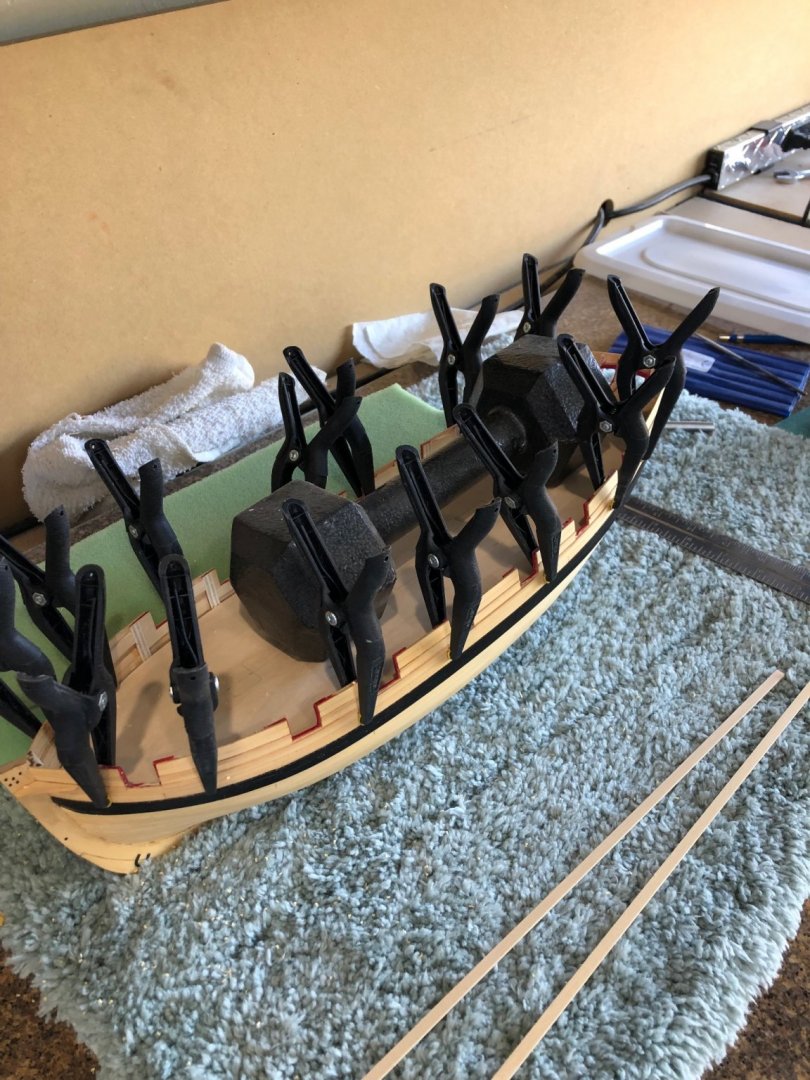
Thanks for all the likes and looks it keeps me motivated and Glenn you are right about a very tough step thinning the bulwarks it was very nerve wracking and tedious. Now with the bulwarks thinned and bulkheads faired it was time to make the false deck. I used Chucks method of cutting the pattern from the plans and edging it with tape to secure on the bulkheads. Then just a matter of removing it from the model and securing it to a piece of 1/16" basswood. (purchased a Hobby Lobby for $4.69 for 1/16 by 6 by 24 I bought two just incase) After securing to the basswood and tracing the outline it was a matter of tracing the holes and deck furniture locations. After cutting the outline the outside was sanded smooth and with so little tumblehome it wasn't difficult to slip the deck in place with a slight amount of radius. After fitting the deck I had some slight leveling to do at the stern on the port side that done and with the deck in again checking fit I had some fun with the already made skylight and windless. After applying a sufficient coat of glue the deck was set and using sprint clips to hold the edges against the bulkheads to dry. Also used a dumb bell to hole the deck down at the counter as there is a slight rise the the clip couldn't address. While the deck drys 3/16" by 3/64" strips were ripped and when the deck dries filler pieces can be added prior to starting the planking.


-
Thanks Paul I have not stopped on Cheerful but I take breaks to work on other projects. Went back and cleaned up the bulkheads adjacent to the bulwarks. Took a couple of hours but I'm much happier now. Look at the new photo. When thinning the bulwarks I used a piece of 3/64" planking scrape as a gauge while sanding with the rotary tool and vibrating mini-sander and chisels and #11 blade for the corners. Note to self and others: when fairing the bulkheads make sure that you maintain the crown of the deck as I almost forgot in my enthusiasm. You can still see the burn at the center. That was a close one.
-
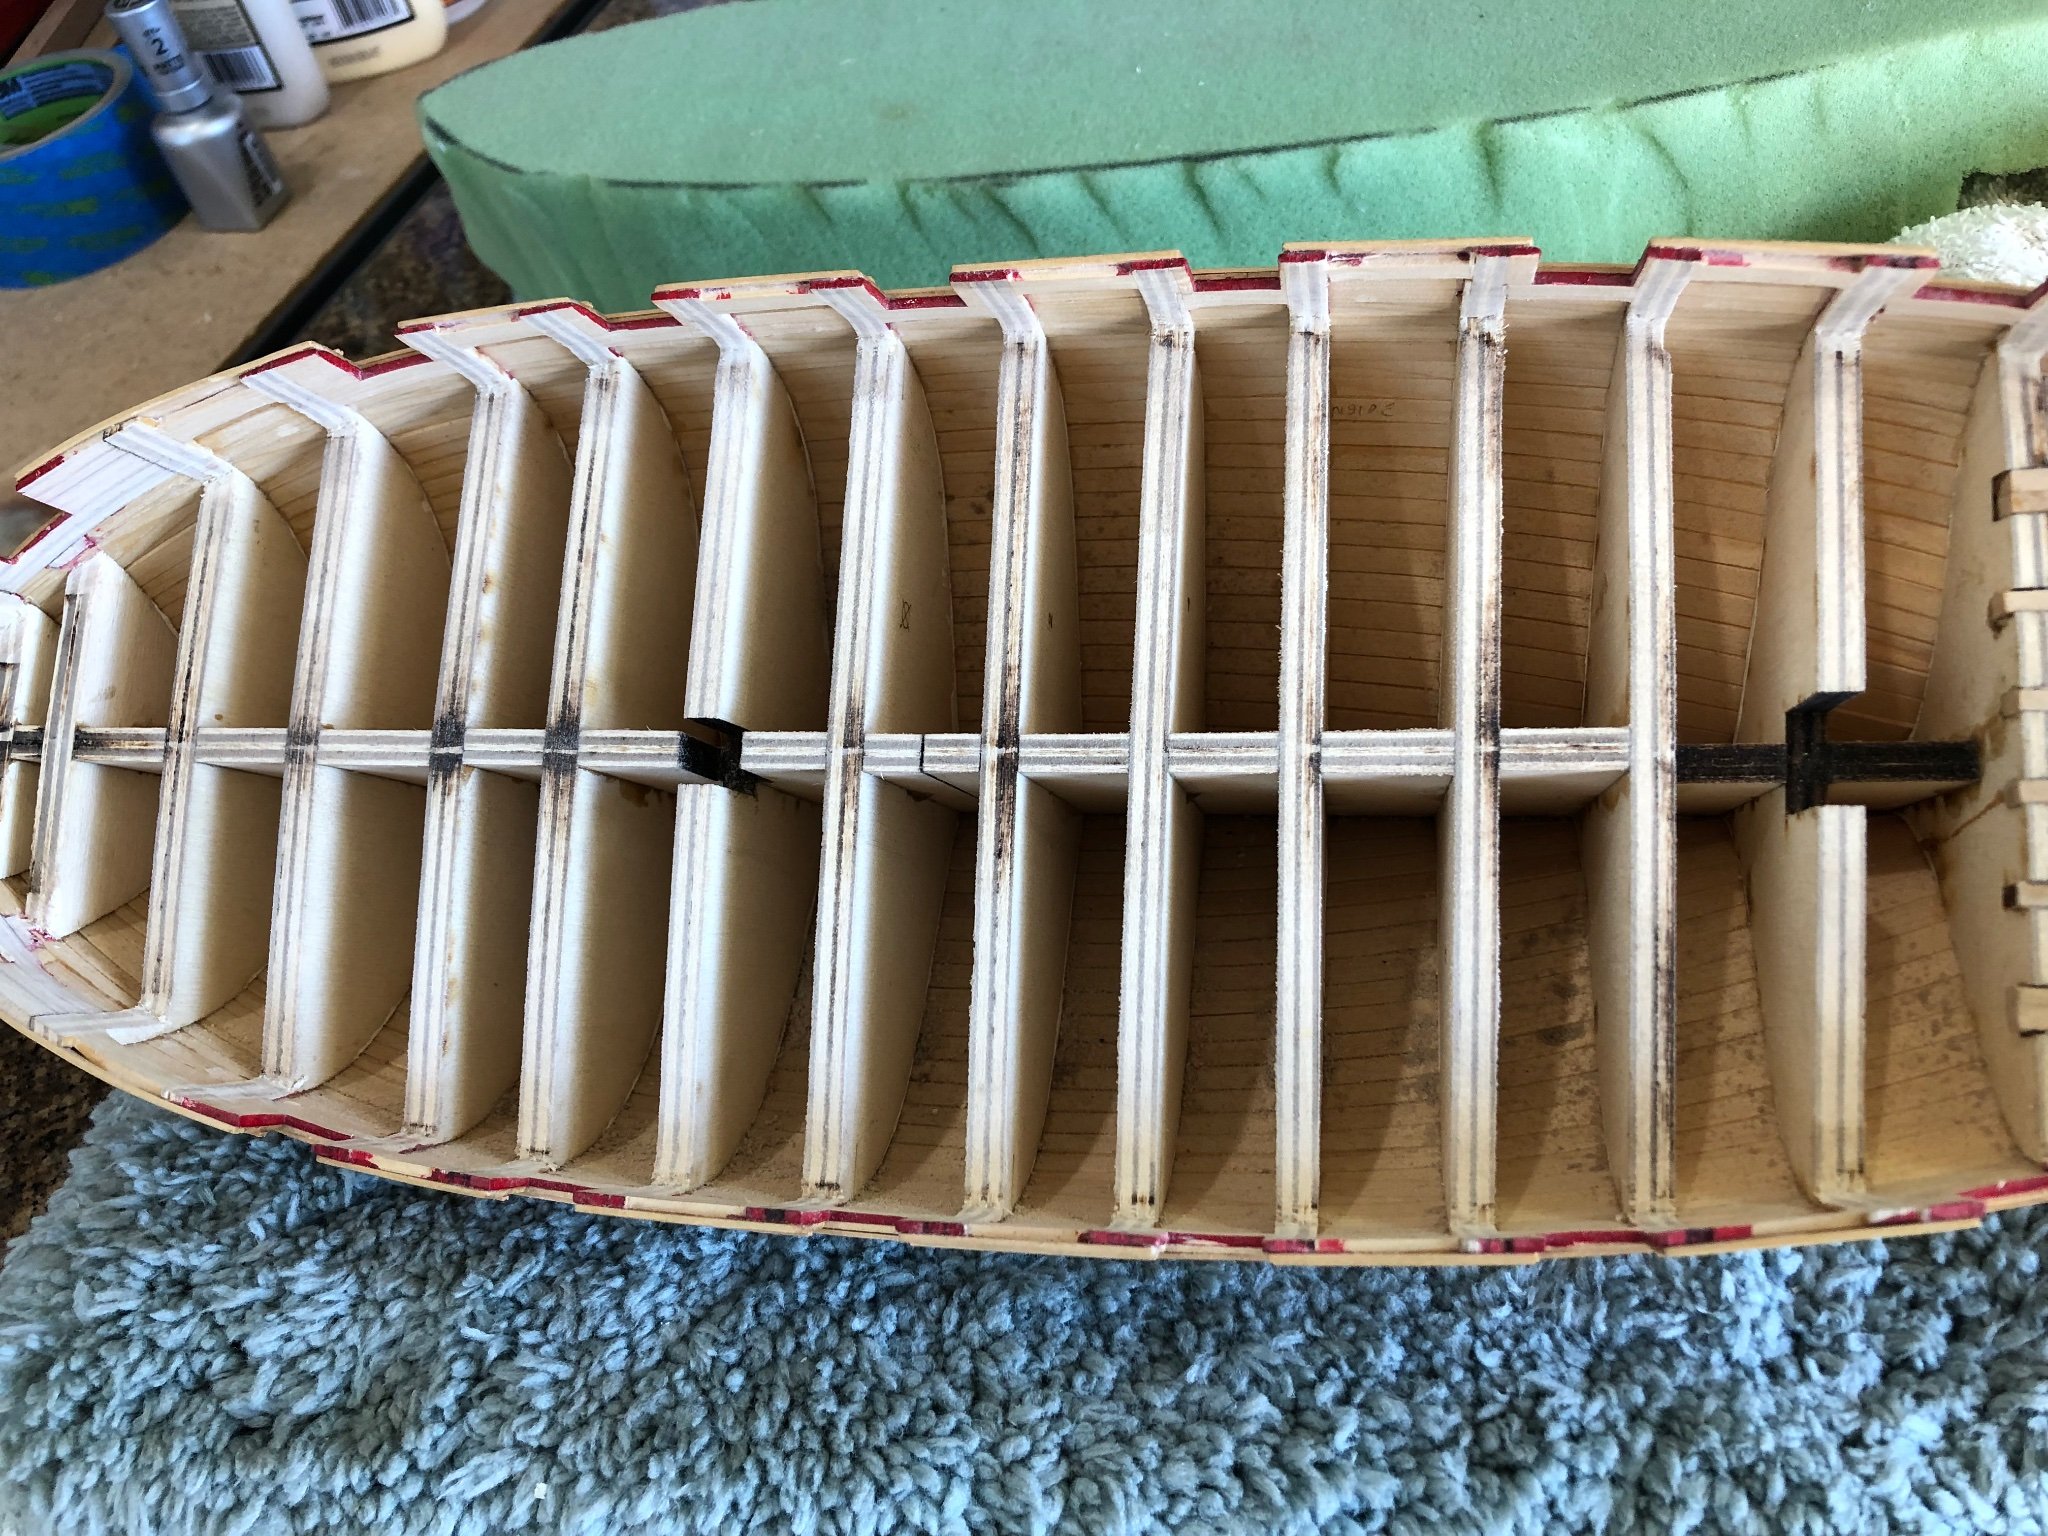
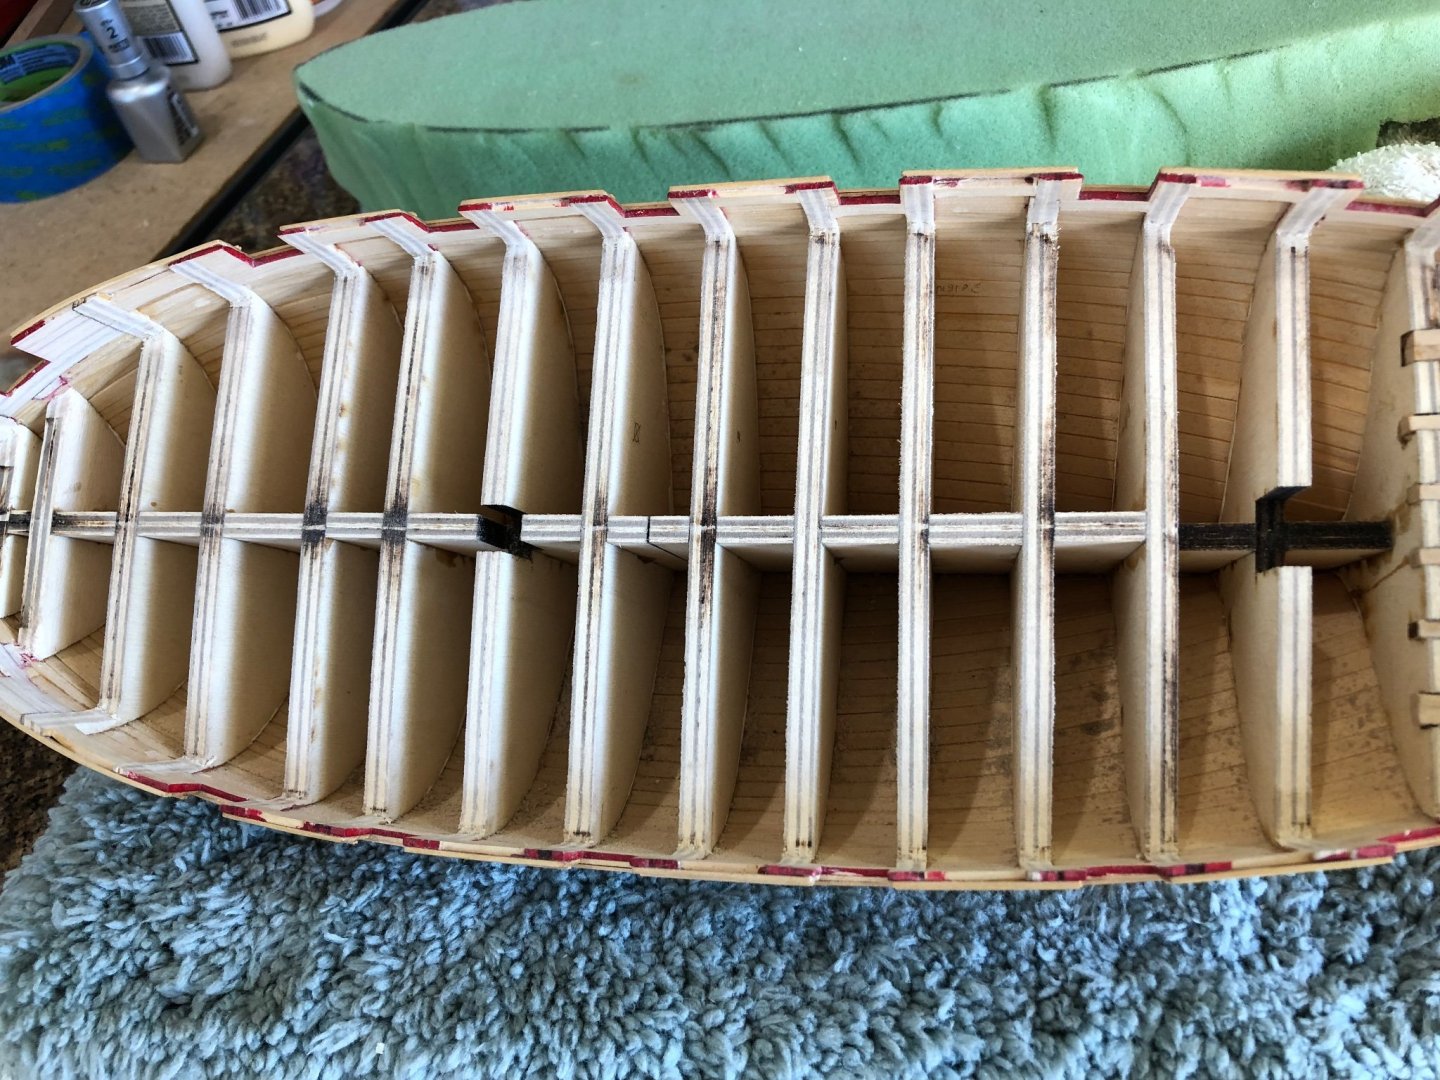
The last of the really messing work according to Chuck was to thin the bulwarks. Spent many days carefully sanding then chiseling and then more sanding to get them down to 3/64" thick uniformly the length of the model. The last thing was to fair the tops of the bulkheads so the false deck rests flatly. A lot of work without much to show so here's a couple of photos. Looking at this picture it seems as I have some more work in the corners. I'm going back to a little more work in the corners. I think I'll use a small pieces of 1/32" sheet to make sure my corners are correct and then to the template for the false deck. Really exciting to think of closing up the inside and moving on with more construction.