-
Posts
1,360 -
Joined
-
Last visited
Content Type
Profiles
Forums
Gallery
Events
Everything posted by hollowneck
-
Interesting. I'm looking forward to seeing what they look like after painting. What did you pay for this set? Ron
-
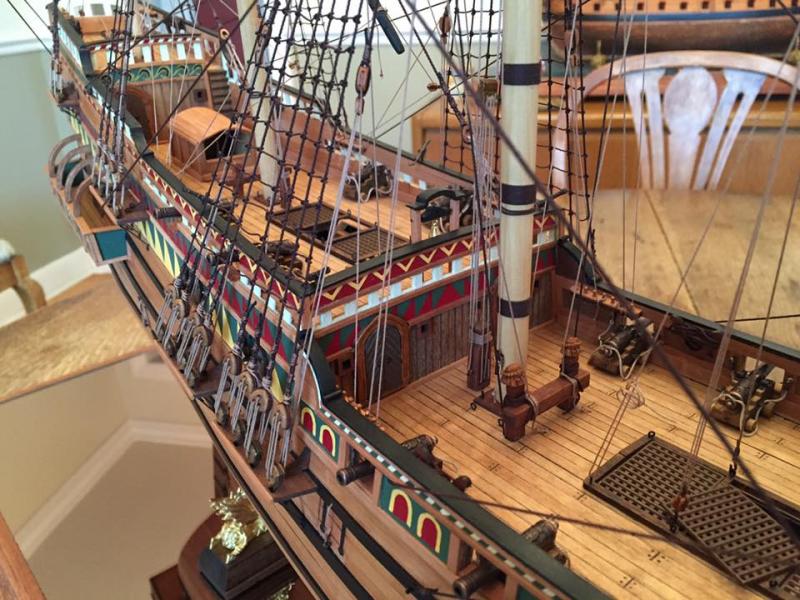
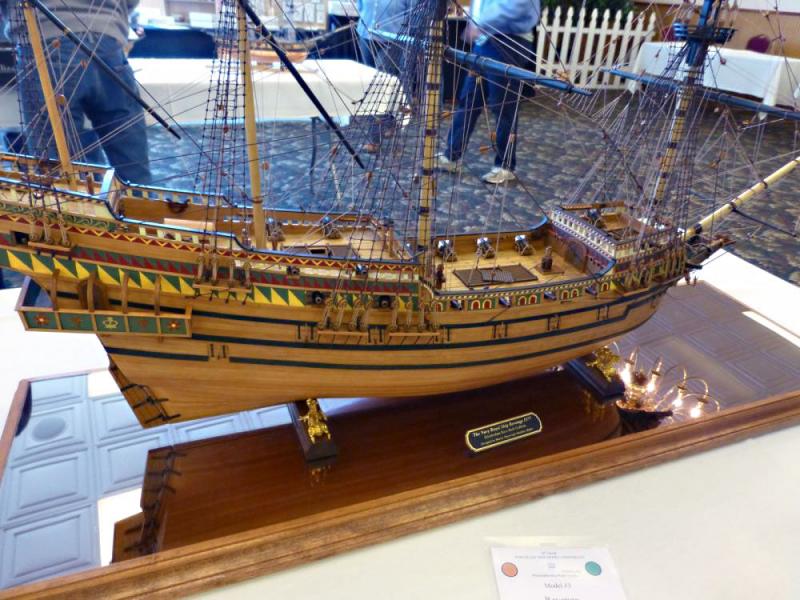
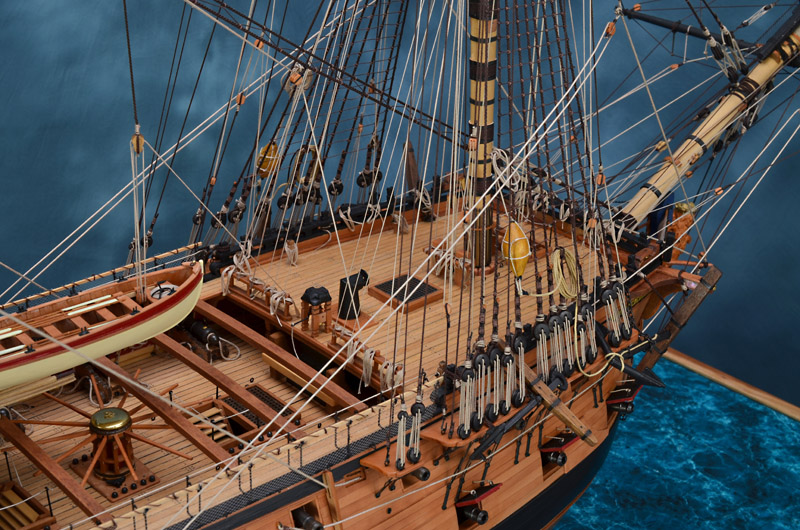
Don, Thank you. No, I didn't do a Build Log. I have a handful of photos I will post in the Gallery in the next day or so. The model is truly unique looking, very colorful and has lots of interesting geometry, especially with full rigging (the mizzen and bonaventure masts with lateen yards). From her cozy spot in my dining room, my Revenge garners quite a few comments - and questions! I'm also a history buff (like many others here) and my answers can result in mini-lectures about the defeat of the Spanish Armada! Some feel sorry they asked... Zamuel, Thanks also...I guessed at the deck planking pattern. On locations for plank ends, I envisioned where I would have placed beams in the real ship and then carefully measured out from a datum point which I believe I referenced to the forecastle bulkhead. I use a product called "Minwax" stain. It's petroleum-based and comes in several wood "colors." (natural, oak, cherry walnut, etc.). I mostly use the Minwax natural stain since I prefer my models to present a look of the modeling woods I use - boxwood and pear, predominantly. I replaced all the wood in the kit (with the exception of the decking) with pear or boxwood. Once dried, I hand rub a clear satin polyurethane to most stained wood surfaces. This coat has a subtle reflectance and provides a practical sealing moisture barrier. This kit is definitely an advanced one, and I assume you have some experience. The instruction book is reasonably well done for the hull components - however, you're on your own when it comes to the rigging sequence. Fortunately, the excellent set of plans provide a decent guide. You've chosen a great ship model kit to build. Ron
-
Greetings Zamuel, I used the included deck planking in the kit and cut lengths to approximately 20 feet. I've attached a close-up of my completed Revenge which you may find helpful. I use a "Sharpie" black marker (felt tipped pen) and run it (carefully) along ONLY one edge of adjacent planks to simulate caulking. I then use an awl for simulated planking trunnels. After the awl "pokes," I use a darker oak stain applied by brush over the holes. This stain is darker than the natural that I use for the actual deck planking. Remember that the butt ends of the deck planking should terminate where beams would be located. This was a wonderful and fun project. I'm certain you'll experience the same. Good Luck. Ron
-
Chris, Thanks for the update and all the contributions, including some new studio pics of your excellent prototype. I am looking forward to Amati's release of this kit. What good news it is that you've completed the plans and instructions - and that Amati is now working on the components. As you've seen here over the last few weeks (since you "popped back-up" in this forum), there is still considerable interest in your new Vic. Your explanations of some of the models' details are much appreciated by many. Seeing an in-progress shot of the "New" Prince is also encouraging. Great to know you're working on keeping fit. Chipping away at the “stones” is good - and we Watton-Watchers are eagerly awaiting the additional pounds that will inevitably show-up in the Amati Victory kit box! Ron
-
.jpg.d84ec4dad1d7791e855dca06210ab6f3.thumb.jpg.f45209242e851d4409eca1a09293165b.jpg)
Comparison of Victory kit manufacturers
hollowneck replied to dchrismiller's topic in Wood ship model kits
Chris, No idea - zip - nada. I wish there was some news, one way or the other. I also have queried the owner of Cornwall Model Boats to keep me updated on news from Amati when the Vic actually happens. When distributor/resellers know something, then us (internationally-aware) modelers will get the info pretty quickly. Like all manufacturers, Amati will fill the "pipeline" when they actually have something to ship. For now, those of us who want to build this monster just need to keep a dry towel handy...to catch the drool. Ron- 19 replies
-
- Victory
- kit manufacturers
- (and 5 more)
-
.jpg.d84ec4dad1d7791e855dca06210ab6f3.thumb.jpg.f45209242e851d4409eca1a09293165b.jpg)
Comparison of Victory kit manufacturers
hollowneck replied to dchrismiller's topic in Wood ship model kits
Chris, You're most welcome. Glad you checked-out Cornwall. Keep an eye on the US posted price as it moves with the exchange rate, currently listing the Vic at $801. As I recommended previously, opt for the standard Royal Mail delivery (through the USPS here). This is a real bargain, a direct result of the ill-advised Brexit. ----------- PS to dafi: the Heller kit is excellent too, especially with all your upgrades and extensive notes here (and other forums) on bashing it. If Chris is looking for a plastic build then there really is no other choice. However, for a wood(en) model kit, it's Caldercraft until Amati's Watton-designed Victory becomes available. Good luck- don't forget to search for member builds here! Ron- 19 replies
-
- Victory
- kit manufacturers
- (and 5 more)
-
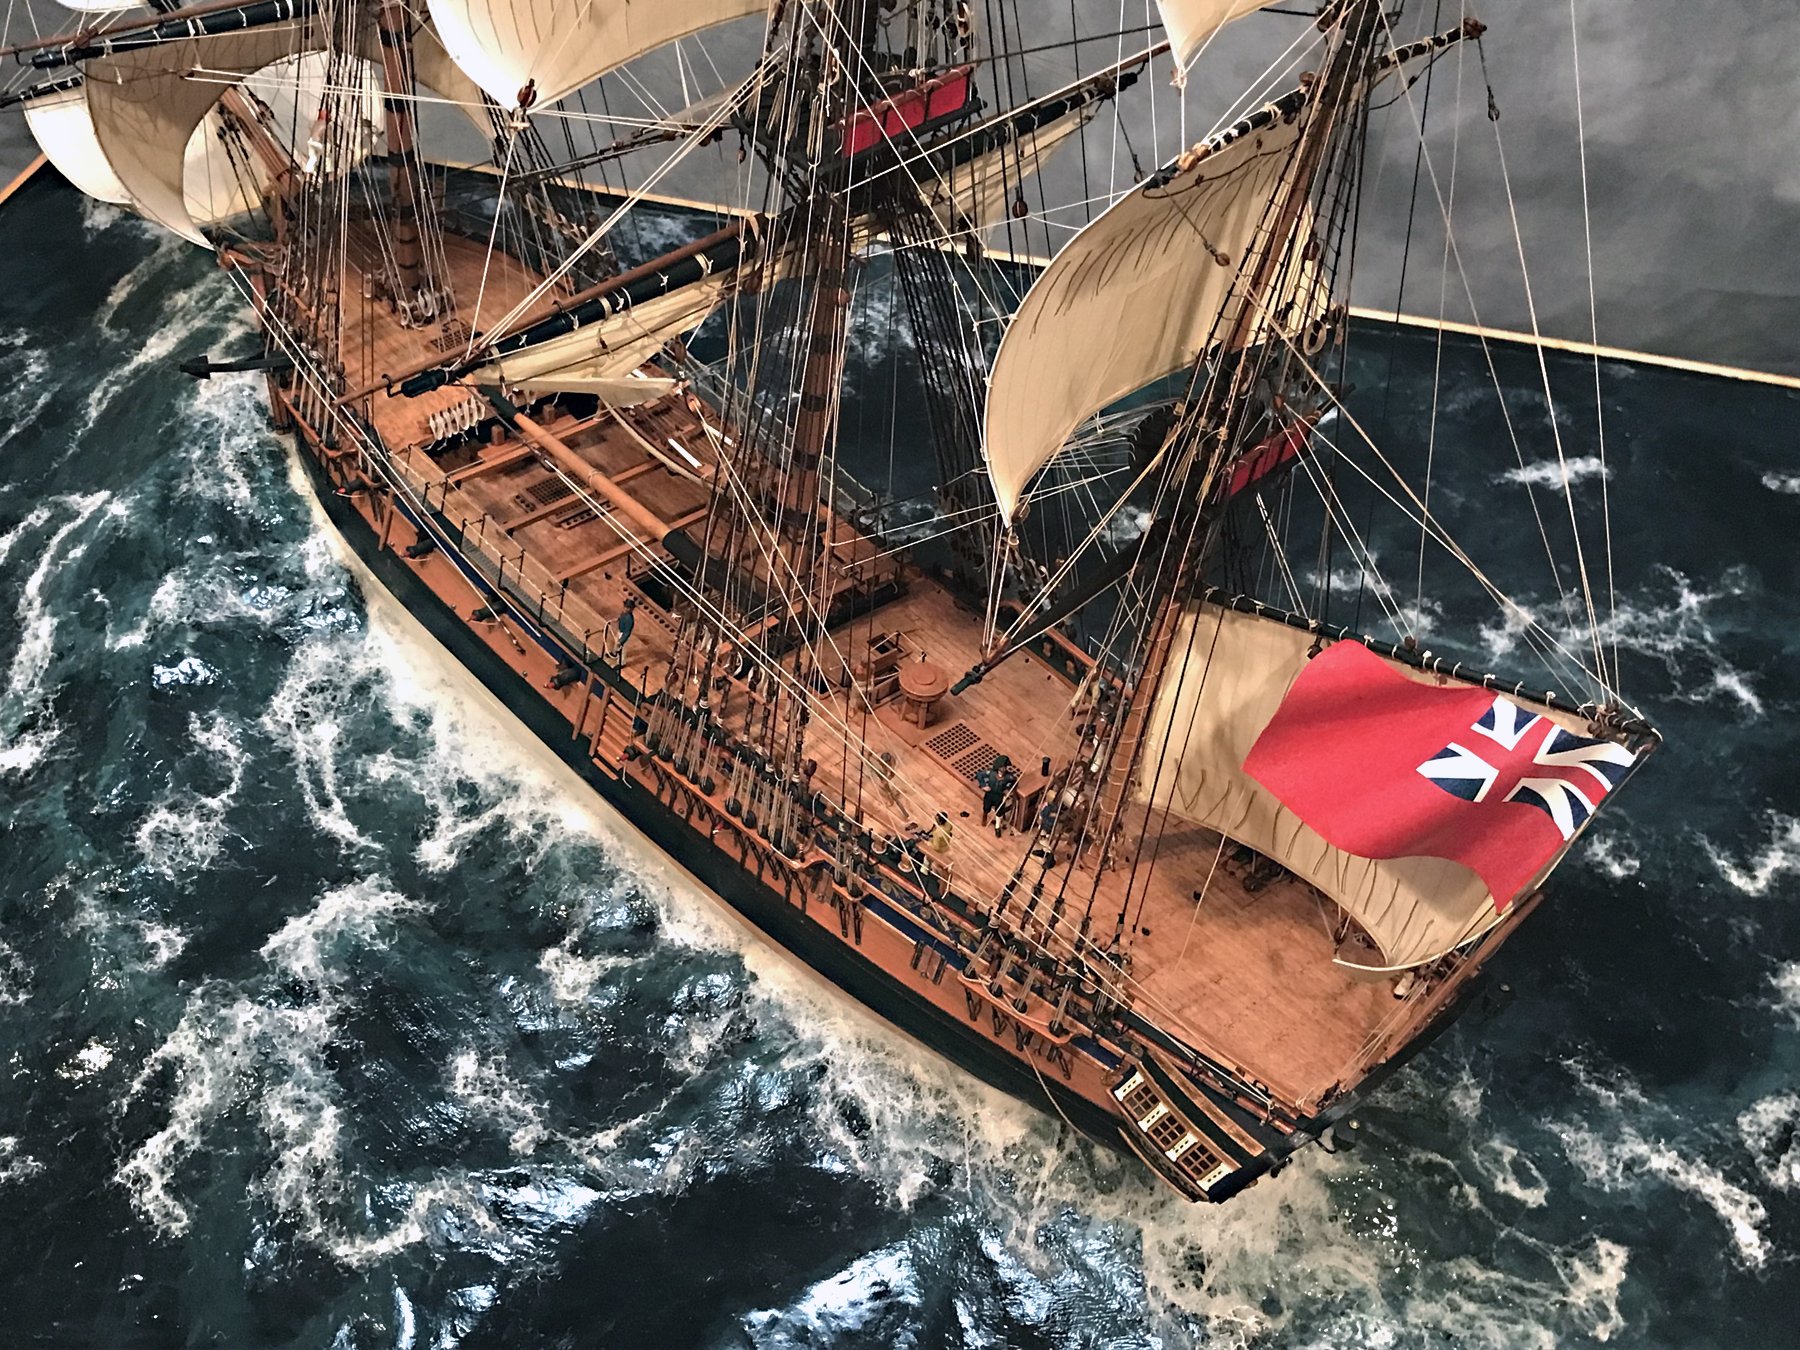
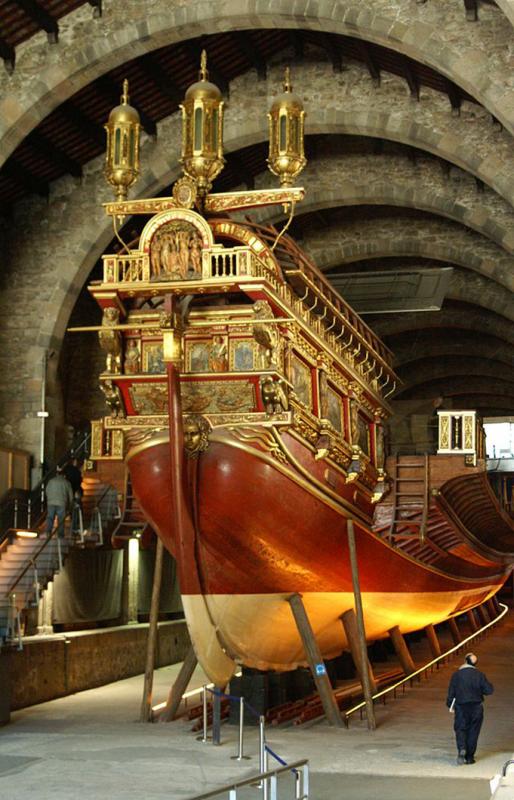
Mark, I will post some photos along the way, but not a full build log. The La Real is my "Winter Project" and I'll post progress pics with brief notes. As many here already know, doing a decent build log with good notes/explanations/photos will roughly double the actual build time for nearly any project. I want to have a completed model ready-to-go by next April, an 8-month turnaround. I like to keep my model builds to not longer than a year, ideally 8-9 months works best for me - from an interest point-of-view, as well as other competing schedules that inevitably crowd in on one's available time. Here is a pic of my last project which took approximately 8 months, a modified Revenge from Victory Models. This was fabulously fun to build, especially the decorative elements. I displayed it at the Annual Northeast Ship Modeler's Show last April. Stay tuned, I'll create a thread and post some pics for LaReal within the next 30 days. Ron
-
.jpg.d84ec4dad1d7791e855dca06210ab6f3.thumb.jpg.f45209242e851d4409eca1a09293165b.jpg)
Comparison of Victory kit manufacturers
hollowneck replied to dchrismiller's topic in Wood ship model kits
Chris, I have built and modified several Caldercraft kits as well as several of the Amati Victory Models kits. Caldercraft's Vic is old now (circa 2000), but it still is regarded the best of the Vic kits - if you can afford it. Here is a helpful link: www.cornwallmodelboats.co.uk/. This UK-based reseller has excellent service and low prices (an accurate floating exchange rate on current currency rates). Shipping will not be inexpensive (the kit is HEAVY), but this firm knows the best way to make sure you receive it safely - and without U.S. Customs delays. The Caldercraft model's designer, Chris Watton, is a master and has designed a newer kit of the Victory for Amati/Victory (there is an extensive thread here on MSW that details his efforts, just search either Watton or Victory). However, this new kit is currently unavailable and has been eagerly anticipated for about 2 years now. As of this writing there is still no news on its availability or expected price (expensive, more than Caldercraft). I modify my kit projects extensively, even the "better" kits. On an involved build like the Victory, one of the most important aspects of the kit is the quality of the plans. Chris Watton is a master draftsman and the near two decade old plans for Caldercraft's Vic are still quite good: reasonably accurate and detailed, with good rigging details. His plans for the Amati/Vic (when it appears!), will be CAD drafted by him and likely be superb. I hope some of this will be helpful - and useful. Especially for your wallet. Ron PS: No, I don't work for Cornwall Model Boats.- 19 replies
-
- Victory
- kit manufacturers
- (and 5 more)
-
Daniel, Thanks for posting the photo links on examples of copper sheathing. Indeed, these examples show nailed sheets, which would give the appearance of "dimples" in the metal. Such a minor detail, especially at small scales. As I said earlier, you've done an excellent job with this component of your kit. I am currently working on your La Real. I'm very impressed with the kit's extensive plans and all the materials right out-of-the-box, especially the laser-cut pear sheets. I'm also using many reference photos of the full-size reproduction ship in the Barcelona museum. I'm confident that this model will be stunning when I get her completed! Ron
-
Daniel, The resin die you've created for stamping copper tape looks good; also, being able to form a continuous run is a plus. Supplying this die in the kit is a great idea. However, I noted on the hull of your ST that it appears you've mounted the embossed copper tape upside-down! The actual copper plates would not have had a "dimple" (recess) once fastened onto the hull planking; the fasteners would have raised surfaces (the head, likely rounded). These were first made from iron and subsequently (after the discovery of adverse electrolytic action that would eat away the fasteners), non-reactive copper. Other than this small detail, your copper job looks very nice! Ron
-
Mike, Yes, of course I remember you. I don't spend much time here, only look in every few weeks to see what's happening and if I can contribute something with a comment or two. Or learn something new! - LIKE: fading black dye! Eeeeeek. I just checked on my Mercury on which I used Fiebings black dye for the wales. Chris is right. In fact, an area that gets a little sunlight is faded- slightly - but nonetheless is being affected even though I used a Wipe-On poly over the dyed strips. Many thanks to you for mentioning this in a subsequent post. Makes sense; UV will fade just about anything- except two layers of flat black acrylic paint. I used paint on the cap rails and there is no sign of fading whatsoever in a similar area that has had some sun exposure. As I already mentioned, you are doing an impressive job with this model. I am really happy that my Pegasus went to a Good Home. Ron
-
When I want a black color, I either dye (Fiebings or a selection of others, alcohol-based) my boxwood pieces or simply paint them with a high-quality flat black acrylic (Vallejo). More often than not I use dyes (usually two applications). Boxwood is difficult because of the tight grain, but is does take dyes/stains. I recently stained boxwood blocks (from Syren Ship Model) with a red chestnut stain (Minwax) in order to make them look like Swiss pear; it worked just fine. When I paint with flat black acrylic I usually apply a single wipe-on polyurethane coat to give it an ever-so-subtle sheen to reflect a bit of ambient light. This "lifts" the color and makes for an attractive contrast, especially on rails and wales. Hey...I made an unintentional rhyme! Hey Mike. Your Pegasus is looking excellent. Ron
-
It's always fun to speculate on what's happening in new products with the foremost high-end European model ship kit manufacturer: here's mine. I believe the ideal timing for Amati to release their 1:64 Victory will be next spring, possibly even later in 2017. It's likely that the content is more or less "ready-to-go" (including the shipping boxes and printing). However, if it isn't, by next year all the laser and P/E work should be completed. AFterall, Chris' prototype was amazingly aggressive in the sheer number of components and additional high-end detail. The model's instruction book and (extensive) plans (likely around 24-28 large prints) are likely completed (assuming Chris finished these up late last year). My reason for this opinion on (delayed introduction) timing? Exhibit #1: We all know that this kit is going to be mucho dinero. My best guess for a retail price (at today's currency rates): $1,200-1,400. We also know that Europe is still in crises of various sorts and the euro is steadily dropping against the world's reserve currency. My sense is that the euro will be at parity with the USD right after our Fall election cycle in the U.S. - and when the U.K.'s Brexit specifics are made clearer. There are other extenuating political instabilities to consider but we'll put these on another burner for now. In other words, like many things in the world we are witnessing, business survival is as much about politics and relevant repercussions as it is about pure business reasoning and careful management. As a retired businessman, It would make a lot of sense to me for Amati to plug this product into their growing Victory Models line-up but not until the international market improves and develops. The Revenge kit has been a success and it was hurried to market - but, it is only a $400 Kit. I suspect the high-end market WILL ACCEPT a $1K (USD) kit; but - a $1,200- 1,400 one - I'm not so convinced. A 10-15% drop in the value of the euro would put the Vic at right about $1,000 USD. The Sweet Spot. If I were Mr. Amati, I'd hold out for this inevitability. Also, don't forget that for most of Amati's customers, one needs to add about 20% to any street price to cover VAT (which is another reason I think the US market is an important one for Amati). Does any of this speculation make sense to anyone else on the forum? I'd love to hear facts, like an announcement of when a launch is planned. But when facts are scarce, customers are entitled to speculate! Ron
-
Homer (Ron), Thank you for the compliment(s) on my display baseboards. And thanks for the Birthday shout-out! I think about how my finished model will be displayed early-on in my building cycle. In most cases, I'll have very specific thoughts about the materials and especially, color(s). I did a baseboard recently with routed profile moldings (in cherry) with a flush, incised base of bronzed acrylic (my model, Godspeed - a 4-masted schooner- sat on this base until it was suspended in a church nave). However, I kept the base and it now sits beneath my Revenge. I will add this model to my gallery here as soon as I take the time to take nice shots. This baseboard is nicely reflective, but not like a standard mirror; the bronze color softens the reflectance and compliments the wood tones of the ship beautifully. Generallly-speaking, since my approach to model ships is primarily that of attempting to create an art object, I believe the entire presentation is also important. The models that have impressed me the most over the years are ones typically mounted on beautiful, hadrwood bases or are presented in compelling dioramas. A finely crafted baseboard of say, highly-figured walnut burl (veneer) is hard to beat visually. I also think nice marquetry (inlay) works on the perimeter of most baseboards. I buy my patterned inlays from suppliers who cater to guitar luthiers. Although most models are presented on dark wood bases, don't rule out a contrasting, lighter color such as a figured maple. One of my nicest models to look at has a dark walnut hull that "floats" over a book-matched Birdseye maple base that also has inlay marquetry "purfling" on the edges of the maple. The extreme contrast sets off BOTH the model- and the base, itself. I do NOT have large woodworking equipment (routers, table saw, planers, etc.) in my building space. I depend on friends in my model club to help me realize my design ideas with their skill and resources. I always supply detailed, dimensioned drawings or sketches as well as all the materials. I recommend looking at more models in the galleries here for ideas and if you can, source the Seawatch books which show many stunning (mostly antique) examples of superb baseboards. Thanks again for the compliment. Regards, Ron
-
Many thanks to all - Mark, Henry, Laurence. I'll check back later to see if there is more collective wisdom on the subject; in the interim, I'll advise my model club colleague to proceed with his plan to display his Sovereign Of The Seas model with "cock-a-bill" yards." My best guess is that the SOS never got anywhere near to either a wharf or quay after her launch, so I'll inform my friend to do some research and decide who might have passed away so he can answer queries when asked why the model's yards are "crooked!" Ron
- 5 replies
-
- yards
- death of an officer
-
(and 1 more)
Tagged with:
-
A member of my model club asked me a question about why yards on square-rigged sailing ships were sometimes skewed at severe angles to their masts. He mentioned that he's seen this unusual aspect in various historic paintings of square-rigged sailing ships in harbors. I told him all that I knew - which is that this was a practice to signify that a senior officer aboard the ship had died. I believe this practice (ritual) was only done while the ship was anchored in harbor, for obvious reasons. Can anyone confirm when and where this practice originated and whether or not countries other than England also practiced this display? Also, can anyone add more details about the practice and if, in fact, it was always called "cockabill?” Thanks! Ron
- 5 replies
-
- yards
- death of an officer
-
(and 1 more)
Tagged with:
-
In a somewhat strained metaphor to "rubber meeting the road", I believe rigging is where the "cloth meets the wind." And, "knowing the ropes" means harnessing the forces that makes a sailing ship, a ship. I believe spending the effort to detail accurate rigging on one's model is when a sailing ship truly comes alive. It's one of my favorite tasks! Ron
-
Generally-speaking, the walnut strip wood in CC kits are of inconsistent quality; most of this particular wood has only one good purpose: aglow in one's fireplace, keeping you and your shop warm in the winter. Of all the kit providers (not that many in reality), my experience is that the Victory models line (from Amati) and the Dusek (Czech) brands have very decent strip wood (walnut as well as other assorted woods). Laser or even CNC cut woods for both these brands ranges from acceptable to excellent. My "specialty" is building heavily modified kits wherein I typically replace the majority of the kit's supplied wood. It's worth it to me for the keel and bulkhead pieces which are nominally pretty decent, the plans which range from O.K. to superb and all the "bits" that are critical - like PE brass as well as some of the critical castings (figureheads, decorative pieces, ship's bells, turned cannon etc.). I have focused here only on the "euro" brands, not the American ones (there are only two major ones, which is another topic unto itself). Hope this info will be helpful...months have passed since your first post! Ron
-
Excellent job. This model kit is one of the nicest ones available. Congrats on a model that will earn well-deserved compliments for years to come! Ron
- 536 replies
-
- diana
- caldercraft
-
(and 1 more)
Tagged with:
-
.jpg.d84ec4dad1d7791e855dca06210ab6f3.thumb.jpg.f45209242e851d4409eca1a09293165b.jpg)
2015 NRG Conference Update - MYSTIC
hollowneck replied to Chuck's topic in NAUTICAL RESEARCH GUILD - News & Information
I also thought the Conference was very good. Well-planned. Well-attended. Hilton's facilities were perfect for our members and the staff were good. Thanks to all in the NRG that organized this event - Good Job! Ryland, thanks for posting the pics. As promised, Yukon Mike (Kusawa) remembered to bring a (still cold) can of the Yukon's Chilkoot beer for me. And what might you guess is the beer company's marketing slogan? "Beer Worth Freezing For." I'm not certain any beer is worth freezing for, hmmmmmm...but wait a minute! - if one's blood alcohol level is very high....I felt terrible that I had forgotten to bring a Two Roads brew from nearby Stratford. Catch you next year in San Diego, Mike. I'll buy you a Margarita- promise. Ron -
.jpg.d84ec4dad1d7791e855dca06210ab6f3.thumb.jpg.f45209242e851d4409eca1a09293165b.jpg)
2015 NRG Conference Update - MYSTIC
hollowneck replied to Chuck's topic in NAUTICAL RESEARCH GUILD - News & Information
High Five! - to Mike's comment about the book store. It is very good. Full retail, no deals, but the selection is excellent. I'd also suggest to everyone that the adjacent art gallery is world-class and you should plan to spend a little time there. The Mystic art gallery has only a couple models to see but they are quite nice (and expensive). It's the fine art paintings of all sizes and styles that's the primary reason to go, a wonderful selection of many maritime/nautical subjects. A separate "art photography" area adjoining the gallery is also excellent. If you can't covet at least a dozen things in these nicely merchandised, spend-significant-money venues, then you're probably not on the NRG Conference attendee list anyway. Ron -
.jpg.d84ec4dad1d7791e855dca06210ab6f3.thumb.jpg.f45209242e851d4409eca1a09293165b.jpg)
2015 NRG Conference Update - MYSTIC
hollowneck replied to Chuck's topic in NAUTICAL RESEARCH GUILD - News & Information
Mike, Don't forget your Cutlass...arrrrgggh. Tip: pack it in your checked luggage . I think I'll bring a sixpack of Two Roads Ol' Factory Pilsner from Stratford, CT. Craft beer with a capital "C." ...you know, just in case the hotel runs out of Sam Adams... Ron -
Mike, You are most welcome. I just looked at your Gallery pics of your Bounty. You certainly have the skills necessary to build the Caldercraft Victory in my opinion - including the extensive rigging the model requires. You like sails, so the possibility of adding them to a CC Victory build is there for you- although the kit DOES NOT include them. I would estimate that a suit of sails (I personally recommend the "silkspan" technique) will add another2-3 months to the build- but this isn't that foreboding except that you'll want to plan for this addition BEFORE you start the running rigging. I noted that your planking job is quite good and perfectly adequate for Victory's - but the hull will be approximately twice the size of your Bounty- AND, you'll need to affix a couple thousand small copper plates to her hull for the accuracy you'll want to achieve with this model. In our skill-intensive, interesting hobby one usually gets what one pays for (unlike an investment in Volkswagen's "Clean diesel" cars- ). The calibre of the components in a Caldercraft kit is excellent and the wood components (routed pieces and plank wood) are high-quality. P/E brass and cast metal items precise and the brass turned cannon are also excellent - and close to accurate reproductions with a little bashing). This kit remains a favorite because it is actually good value, even at the relatively high tag it commands. Some of the money one spends is in the well done, large-scale plan drawings (there are many sheets); these are well-drafted, especially the masting/rigging ones. Personally, if I'm tackling a long project that's going to absorb me, the additional cost of working with materials and plans that are top-notch is well worth it - even if I have to save for a while to come up with the extra Dosh! You have the skills. You also have this excellent forum for help when you need it. Put a few more pounds into the jar, my friend. YOu won't regret that decision- either way! Cheers Ron
-
Mike, Without question, the Caldercraft kit is the best available - with a basic assumption that price is no object. If you can wait several months, it's quite possible that Victory Models (Amati) will release a larger (3/16"=1') scale kit - a definitive kit of the Victory, albeit even more pricey than CC. Both of these kits have been designed by master U.K. designer, Chris Watton. The materials are very good in both, the plans are excellent for both (with an edge to Victory/Amati for more important detail), the instructions for both mediocre at best. One needs to be quite advanced to build these "high-end" kits as they are demanding and will require a years-long dedication for most. When the hull is "complete", one is halfway done for a completed model; you'll face another prolonged build to complete either model's impressive masting and rigging. If you're anxious to get started on this project, you can't go wrong with Caldercraft's kit. It's also one incremental scale smaller at 1/72 versus the 1/64 of Victory/Amati's forthcoming release (likely next year). I hope this recommendation helps! Ron
About us
Modelshipworld - Advancing Ship Modeling through Research
SSL Secured
Your security is important for us so this Website is SSL-Secured
NRG Mailing Address
Nautical Research Guild
237 South Lincoln Street
Westmont IL, 60559-1917
Model Ship World ® and the MSW logo are Registered Trademarks, and belong to the Nautical Research Guild (United States Patent and Trademark Office: No. 6,929,264 & No. 6,929,274, registered Dec. 20, 2022)
Helpful Links
About the NRG
If you enjoy building ship models that are historically accurate as well as beautiful, then The Nautical Research Guild (NRG) is just right for you.
The Guild is a non-profit educational organization whose mission is to “Advance Ship Modeling Through Research”. We provide support to our members in their efforts to raise the quality of their model ships.
The Nautical Research Guild has published our world-renowned quarterly magazine, The Nautical Research Journal, since 1955. The pages of the Journal are full of articles by accomplished ship modelers who show you how they create those exquisite details on their models, and by maritime historians who show you the correct details to build. The Journal is available in both print and digital editions. Go to the NRG web site (www.thenrg.org) to download a complimentary digital copy of the Journal. The NRG also publishes plan sets, books and compilations of back issues of the Journal and the former Ships in Scale and Model Ship Builder magazines.

