HOLIDAY DONATION DRIVE - SUPPORT MSW - DO YOUR PART TO KEEP THIS GREAT FORUM GOING! (83 donations so far out of 49,000 members - C'mon guys!)
×

Sea Hoss
-
Posts
420 -
Joined
-
Last visited
Content Type
Profiles
Forums
Gallery
Events
Everything posted by Sea Hoss
-
USF Essex by mtbediz - FINISHED - 1:50
Sea Hoss replied to mtbediz's topic in - Build logs for subjects built 1801 - 1850
Looks beautiful, nice work! Also it looks huge, how long is the hull stem to stern? -
Lookin great Will.
-
Thanks will, yes I was trying to keep in mind while working on her that she's an old working boat with dings and dents and decades of repairs etc. I guess like a lot of us, I'm a perfectionist! Also, I sort of just winged it with the open parts of the hull on the starboard side. I now wish I'd left more planks off, oh well, it is what it is, I'm happy with it. Your Syren is looking great by the way.
- 101 replies
-
- 1
-

-
- emma c berry
- model shipways
- (and 1 more)
-
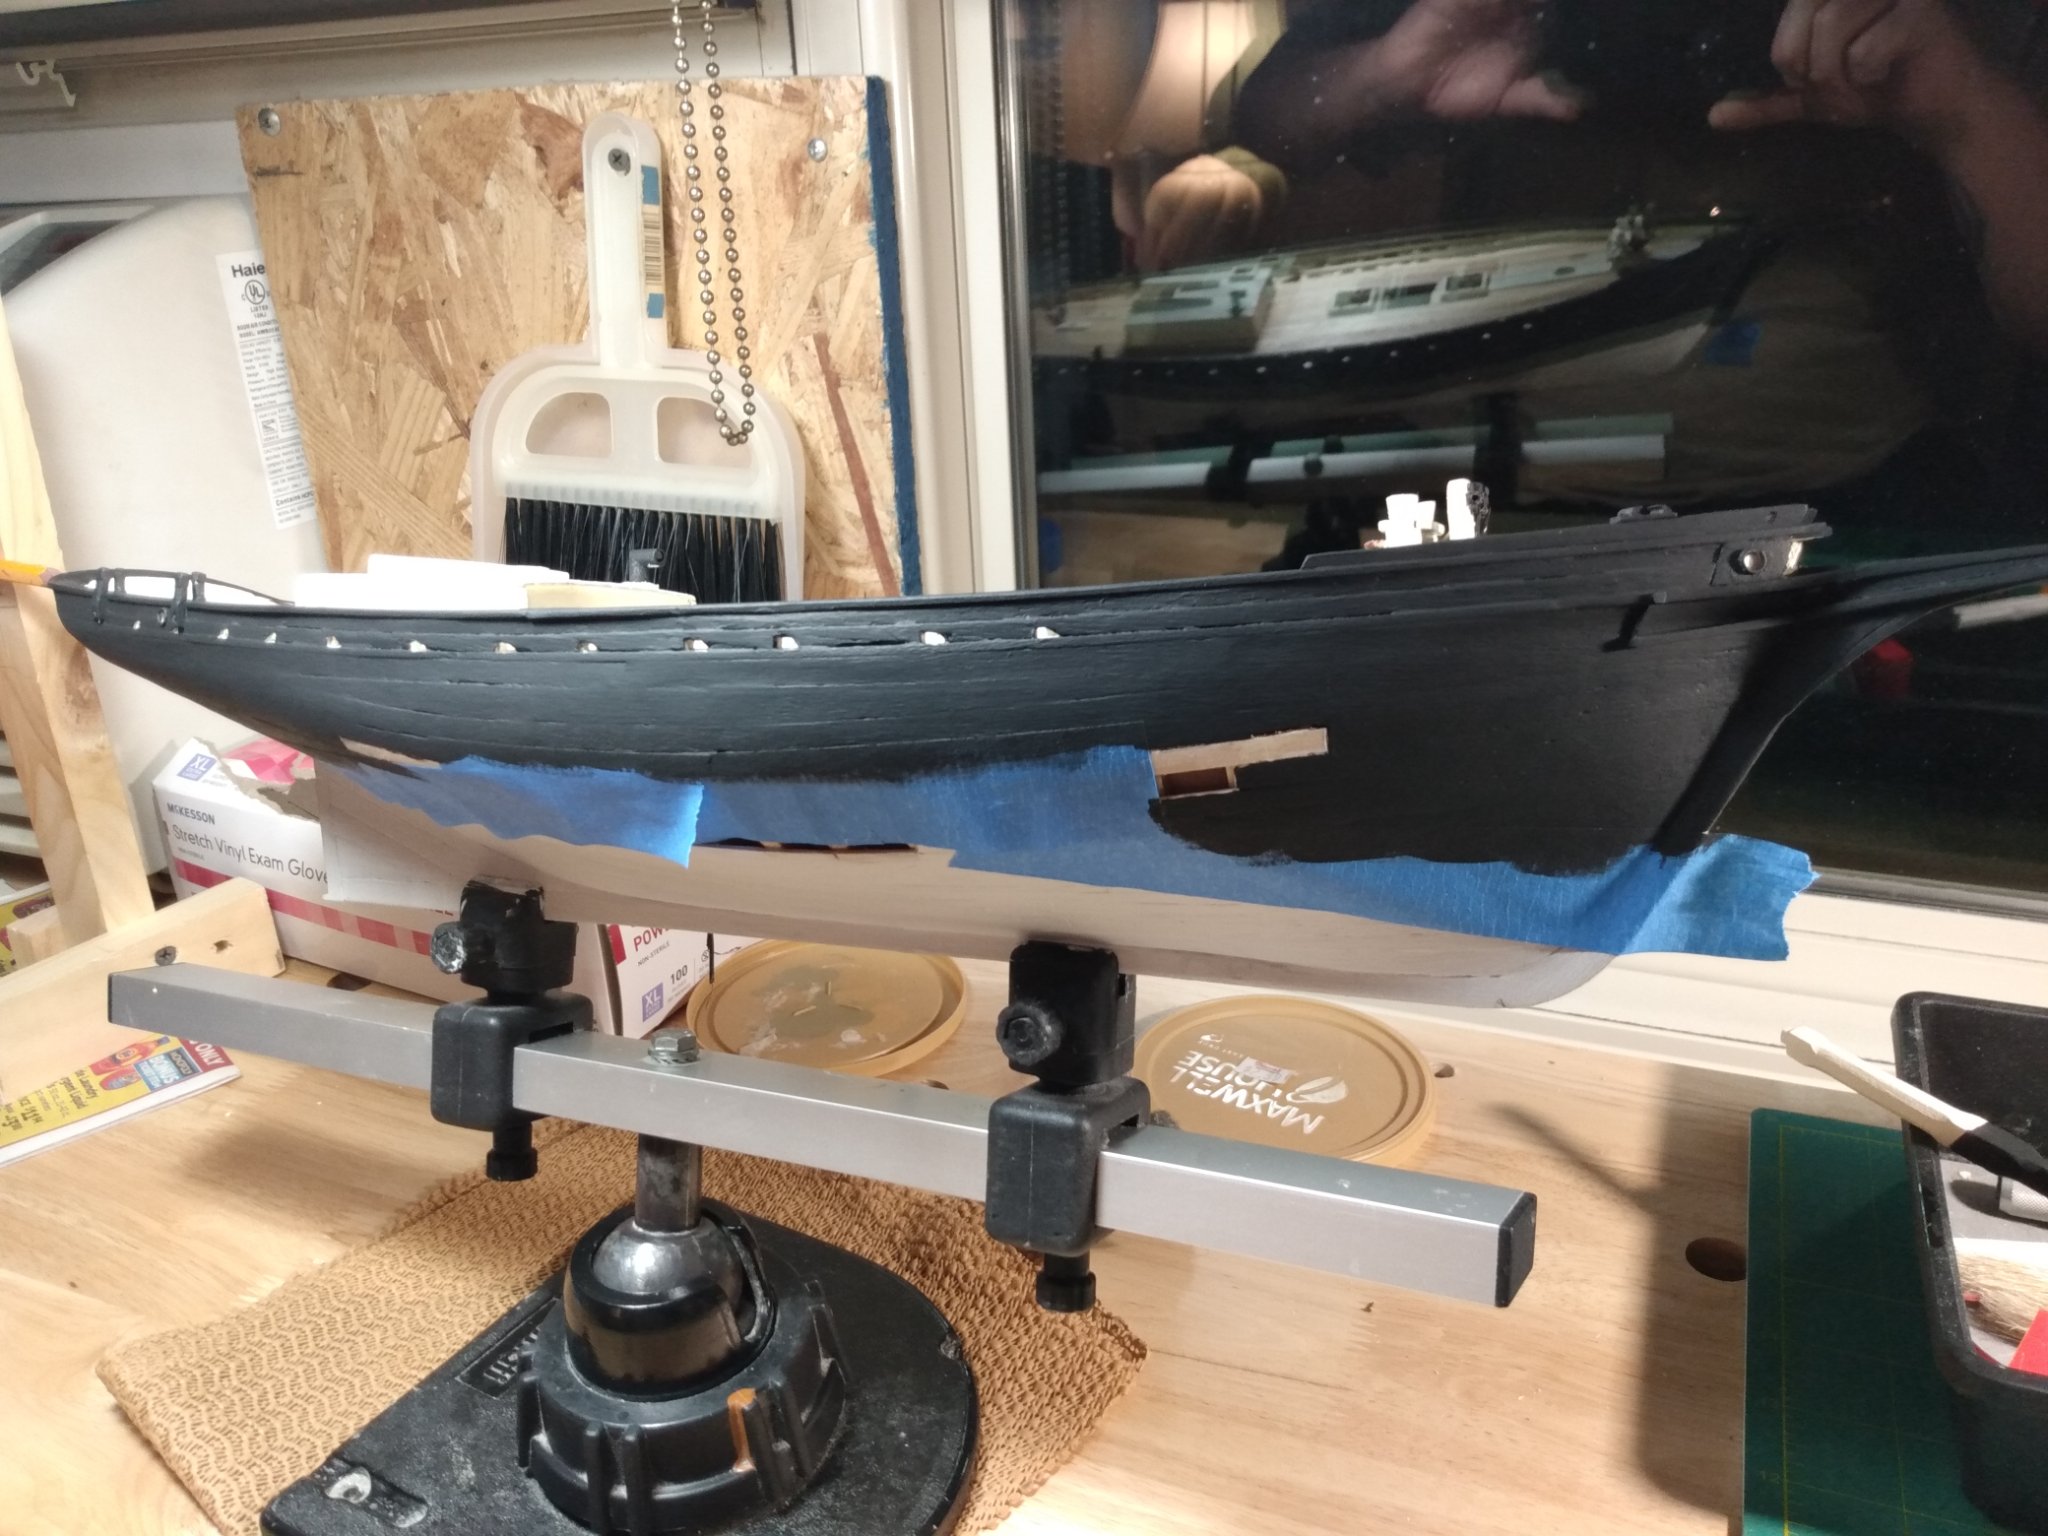
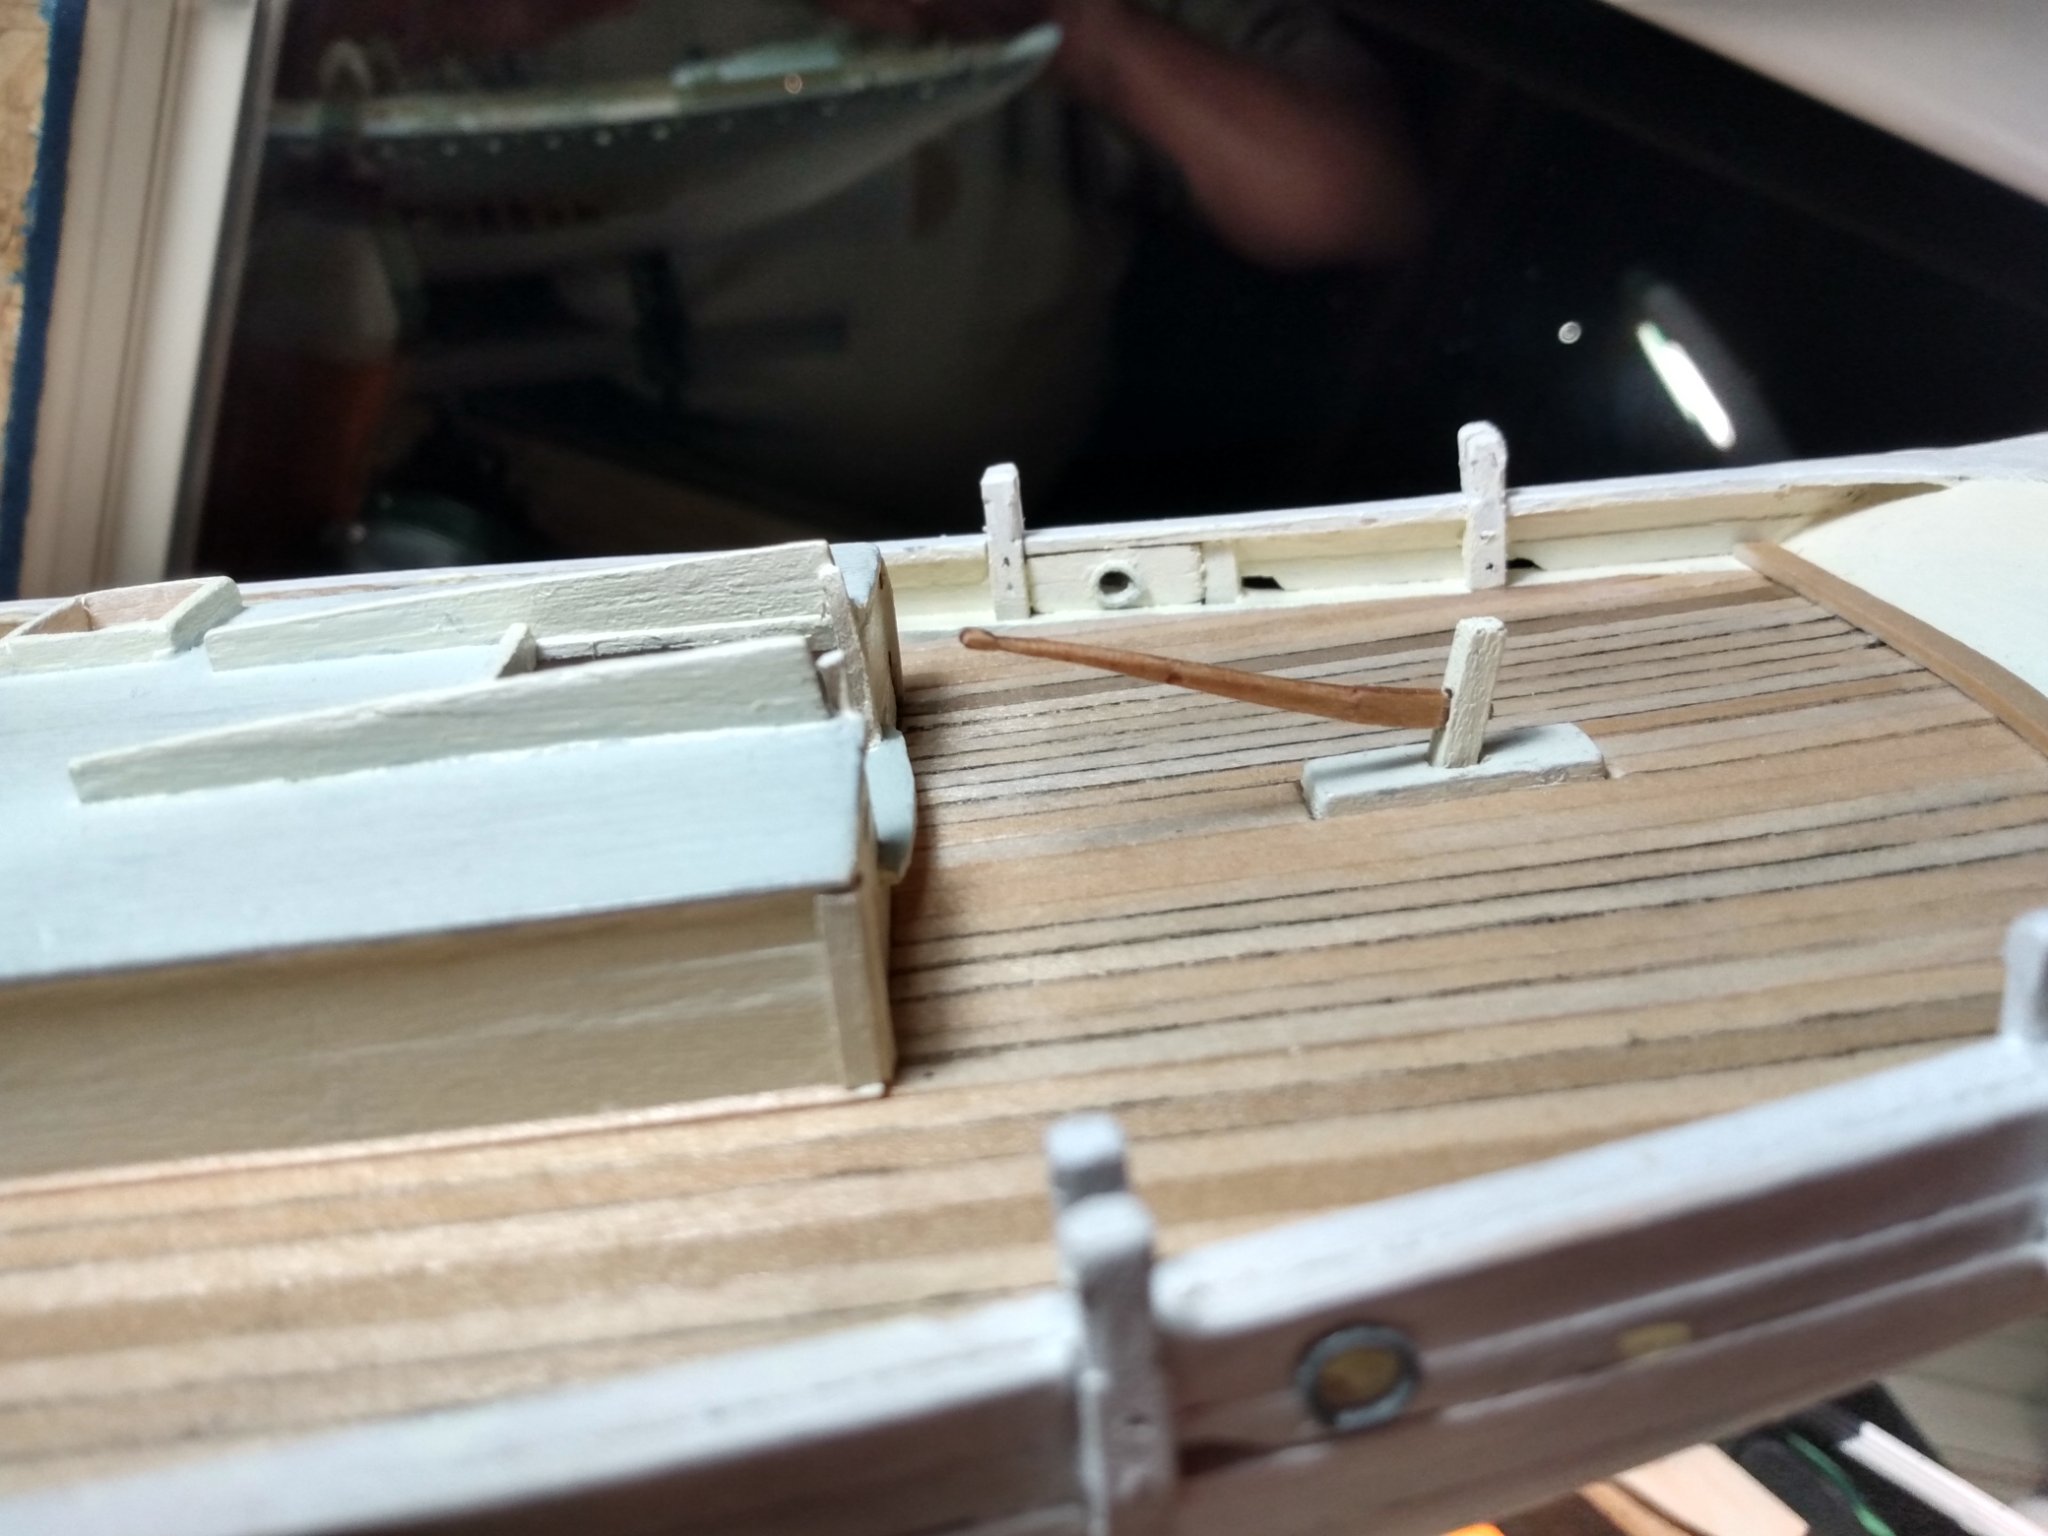
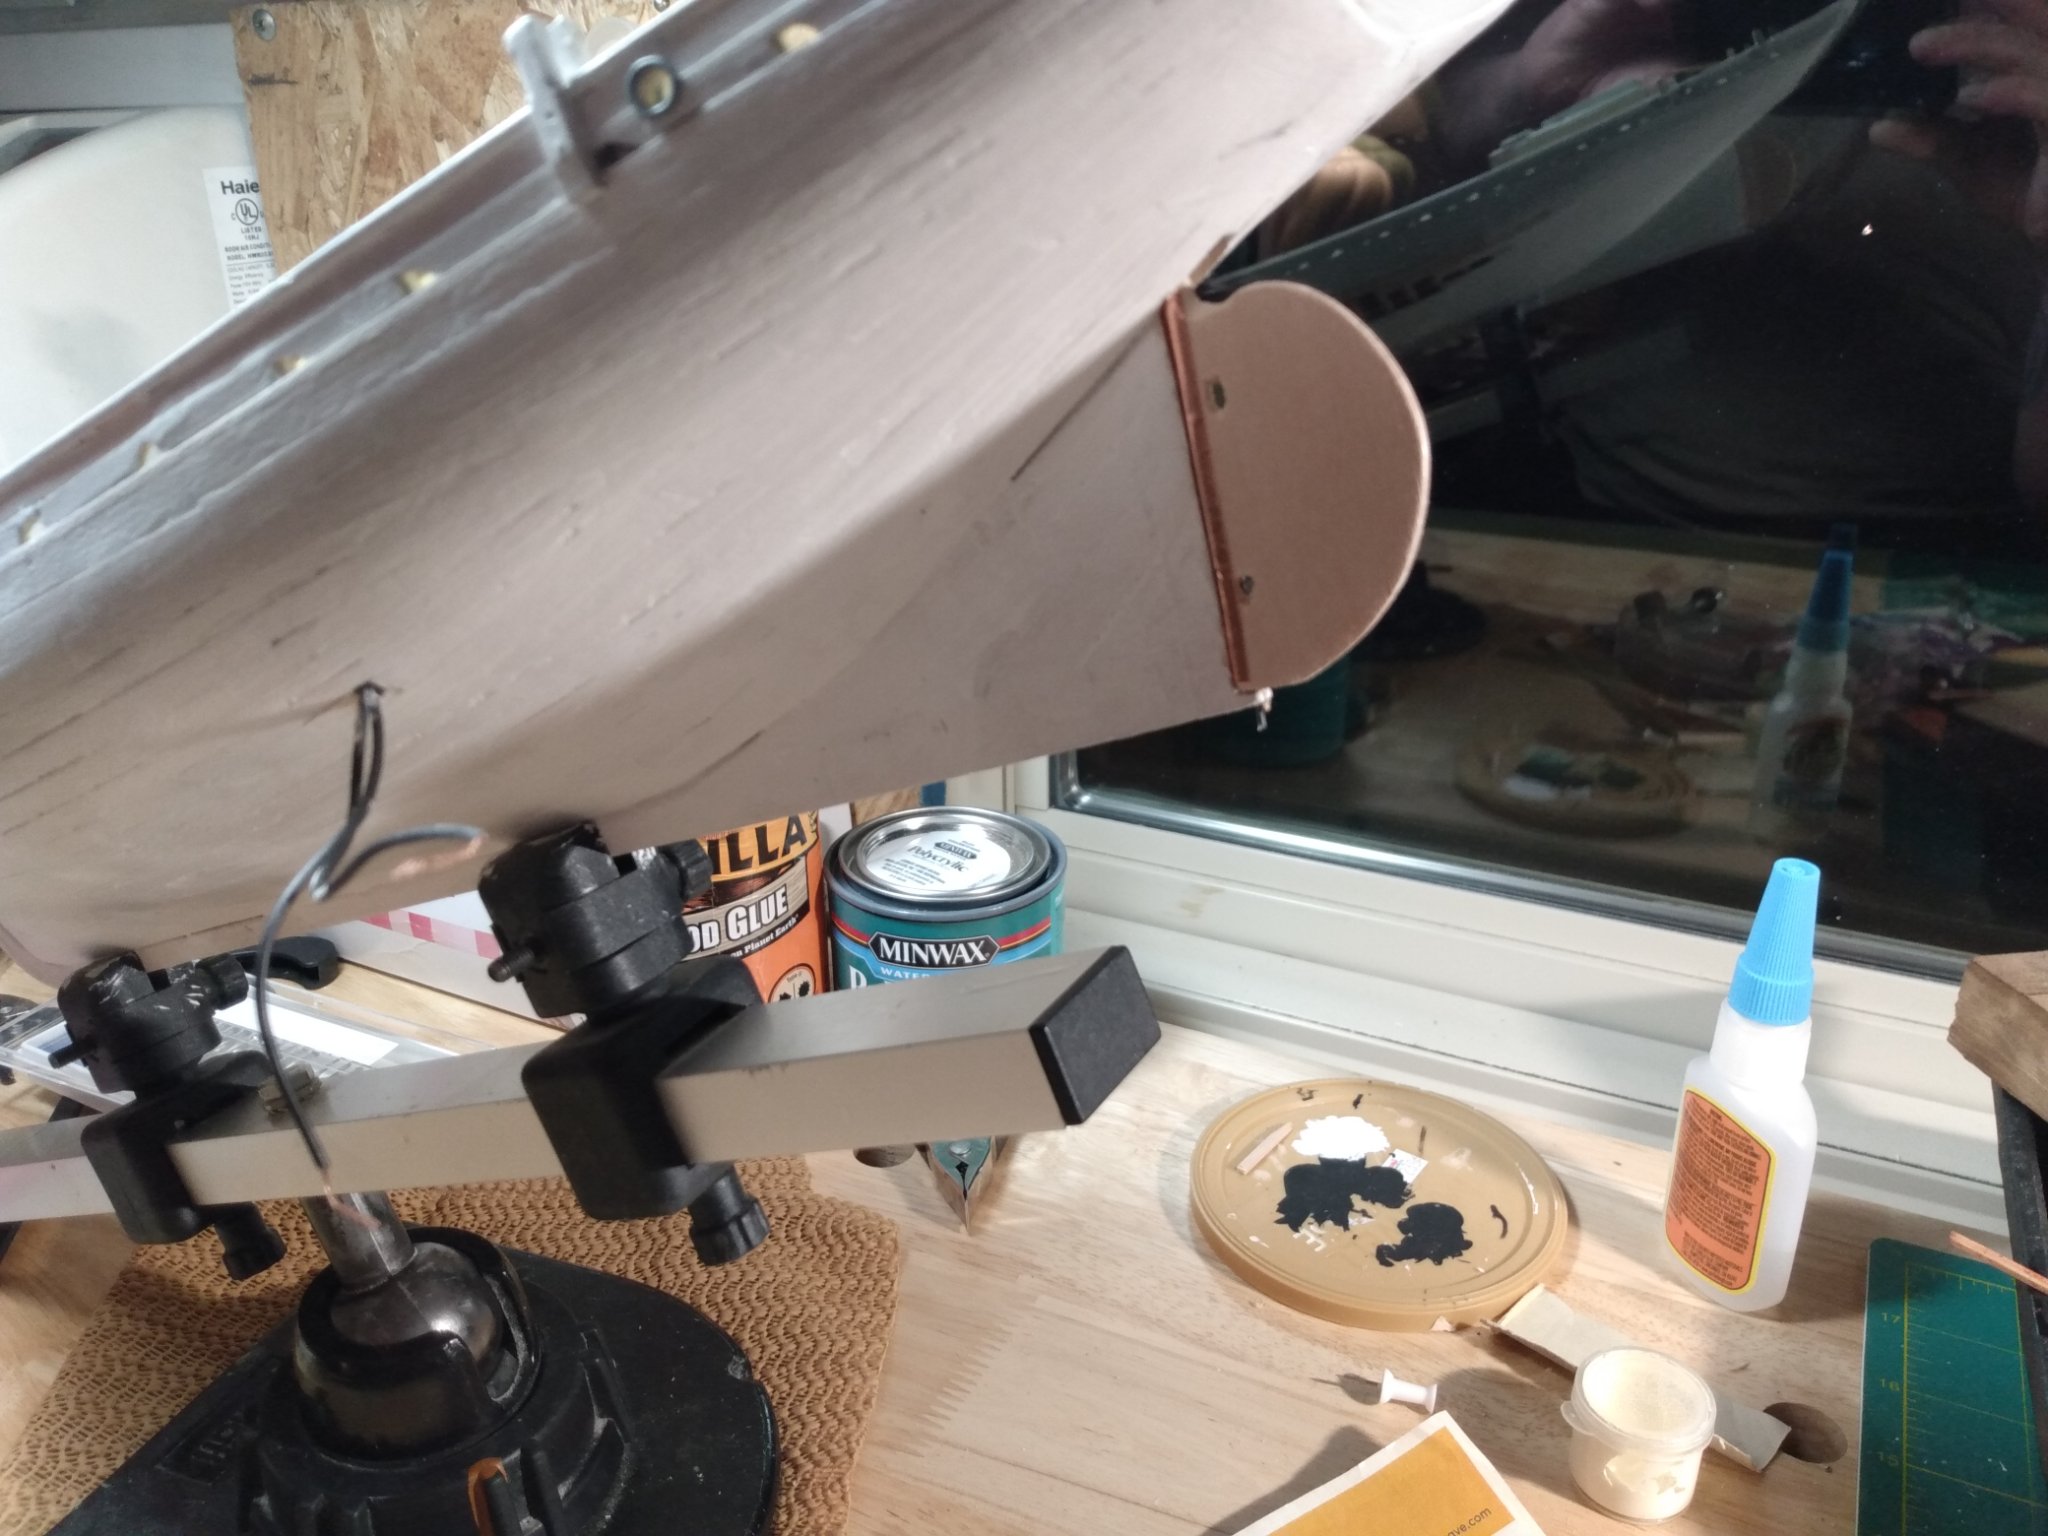
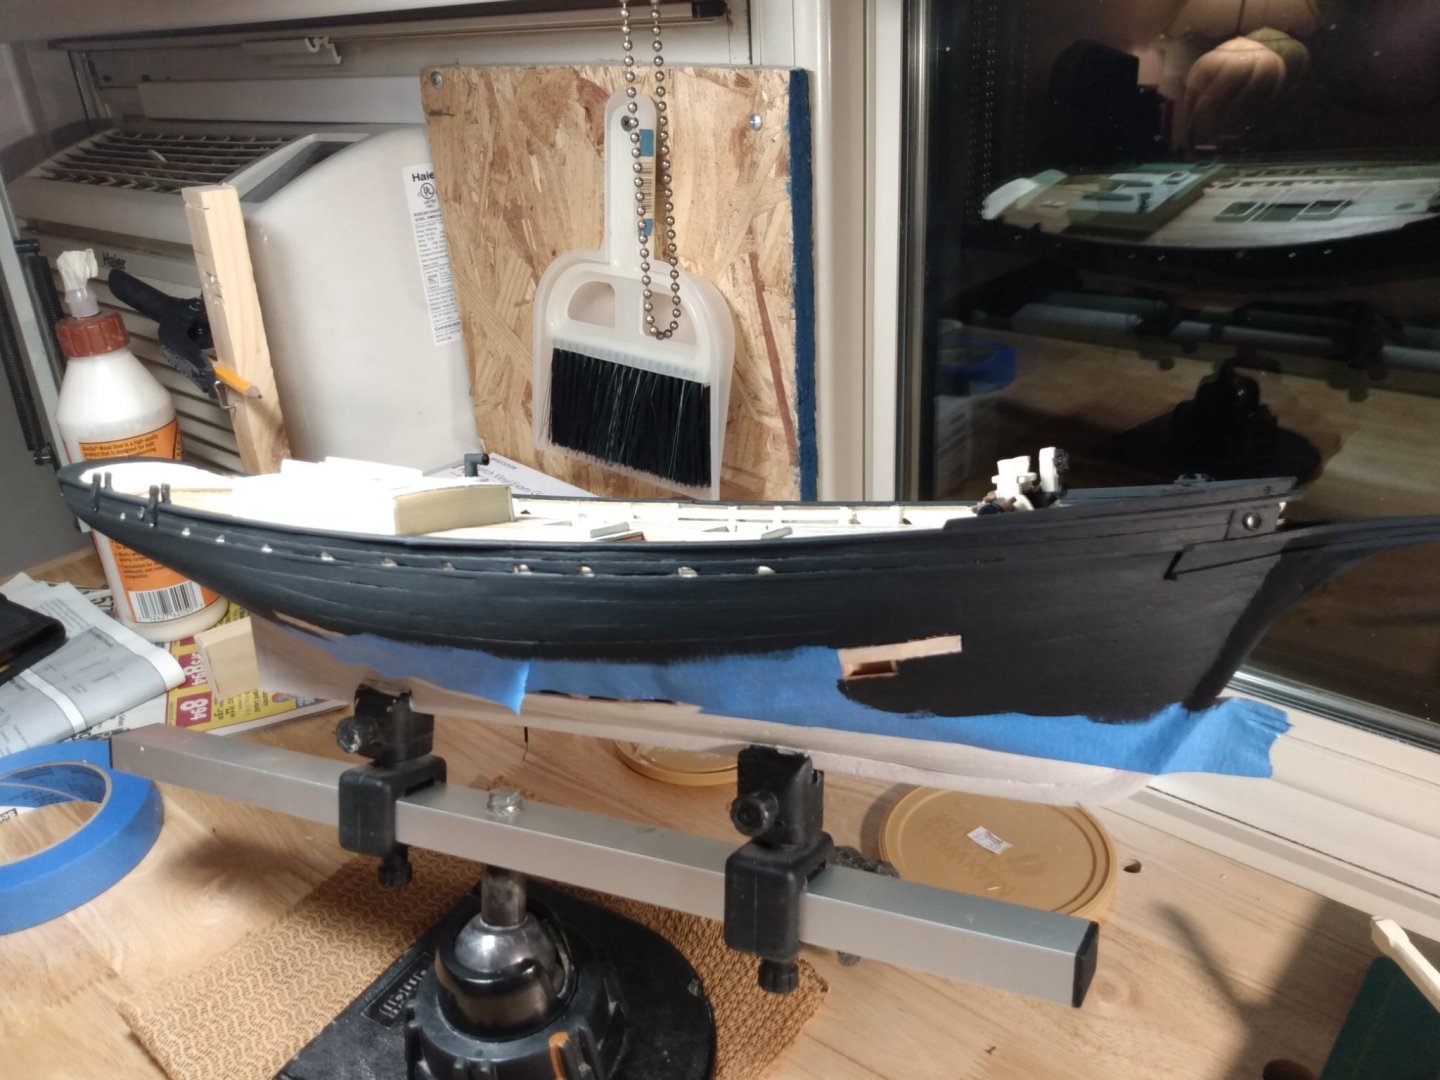
Hello all, been enjoying the great posts of great builds on the forum, thanks. Got to the point where painting the hull was next on the agenda. Actually I've been looking forward to this! So, I looked everything over and taped bellow the waterline after adjusting my waterline marking contraption that I put together a while back. It was a bit tricky when going around the underside near the rudder. I decided that I will "free hand" that part when the time comes. I had already primed everything a while back, so I went ahead with a matte black and ofcourse the imperfections jump out at me! May have to do a little more filling and sanding later on. Oh well, I think every build needed the touch-ups. Made a few paint boo boos also. Fix those when the painting is done. But, all in all, I like the look. The black makes everything pop! The starboard side has two coats and I taped and put the first coat on the port side. Bellow the waterline will be a red oxide matte color. When all is touched up and meets my approval, I'll brush on a satin poly. Oh ya, before the poly I need to put on the "Emma C. Berry" lettering and trailboard garnishments. The transom also requires some fancy gold paint work too, will need a real steady hand for that it looks like!


- 101 replies
-
- 6
-
-
- emma c berry
- model shipways
- (and 1 more)
-
Thank you Will, it actually looks better in real life, I'm a lousy cameraman with a lousy phone camera... I enjoy your work also.
-
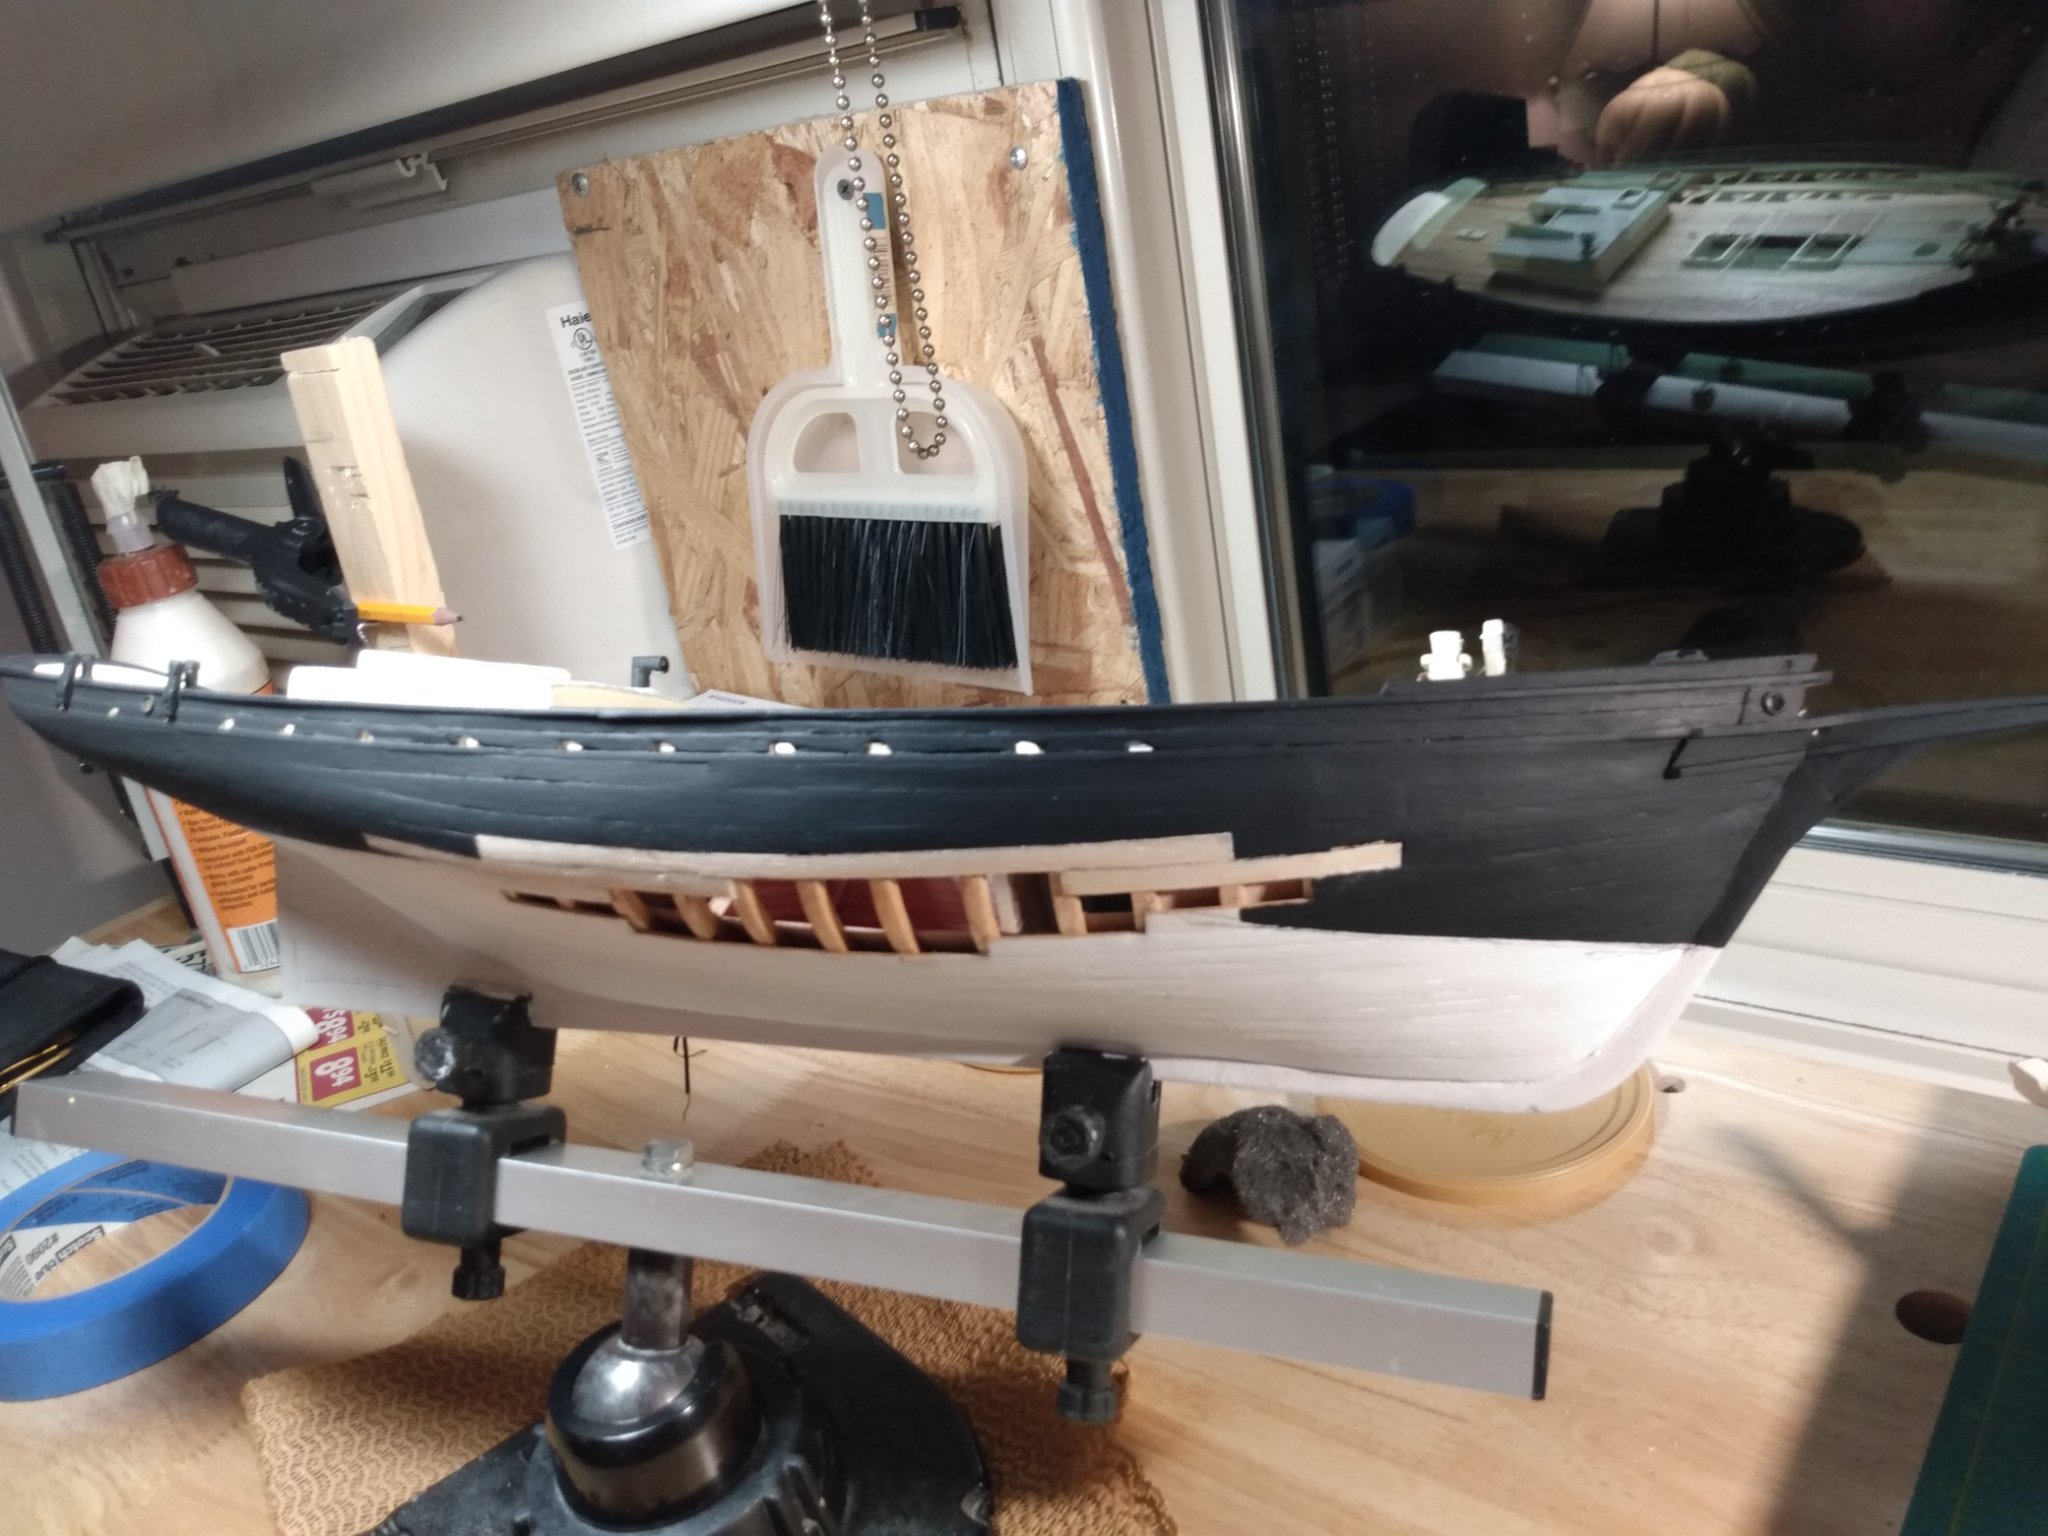
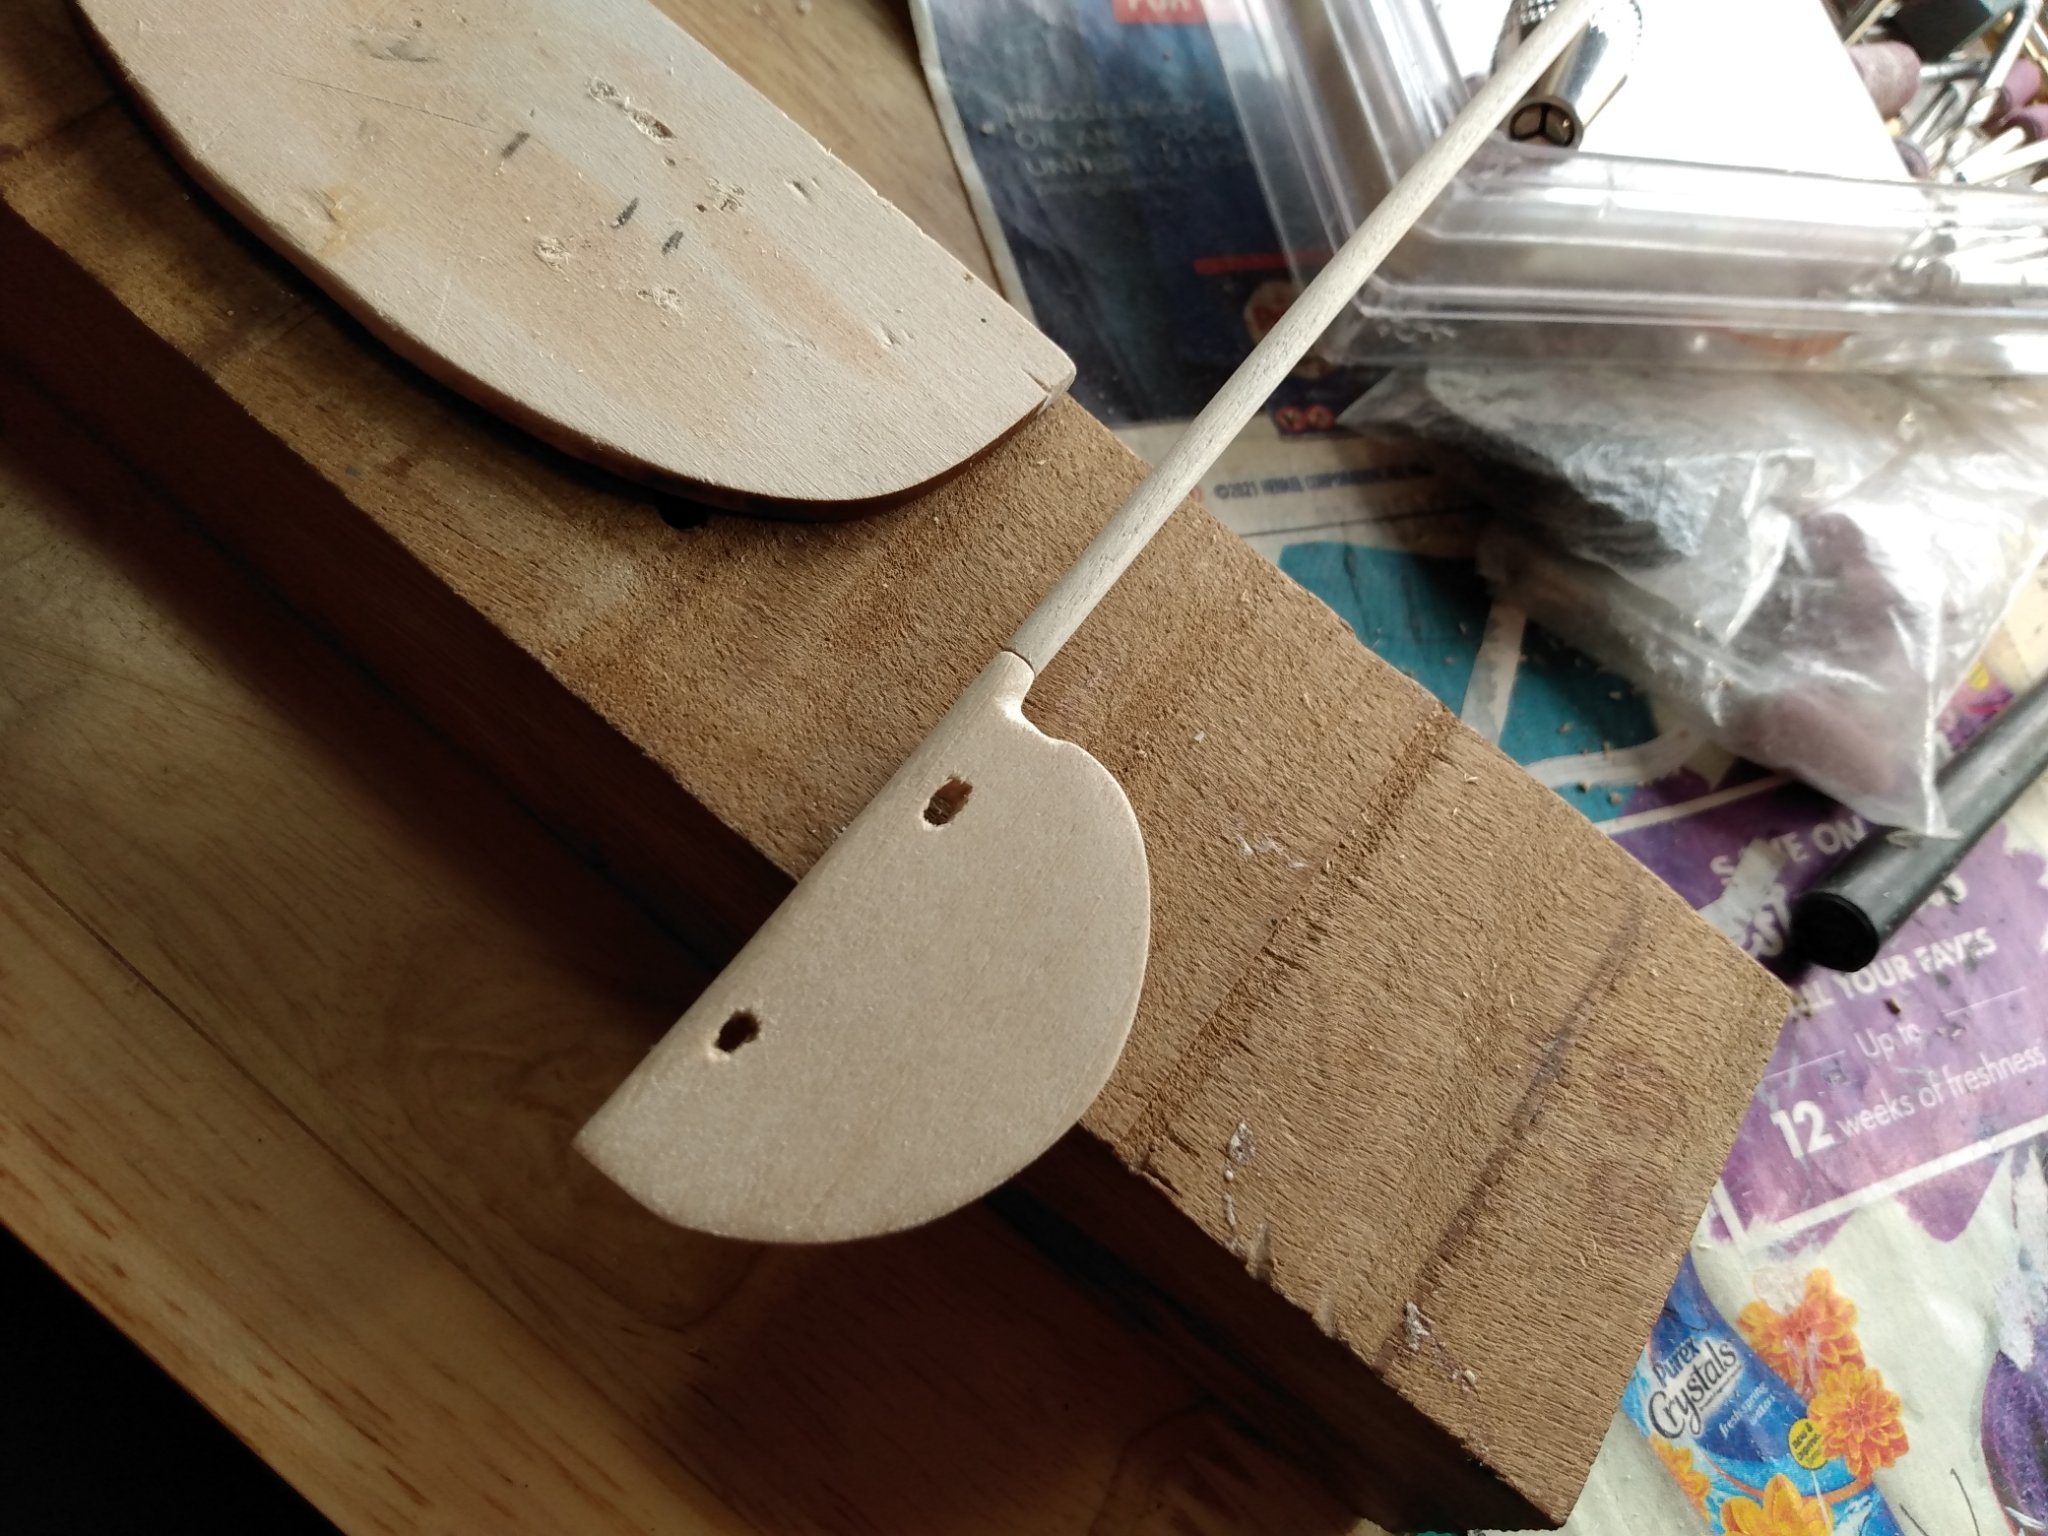
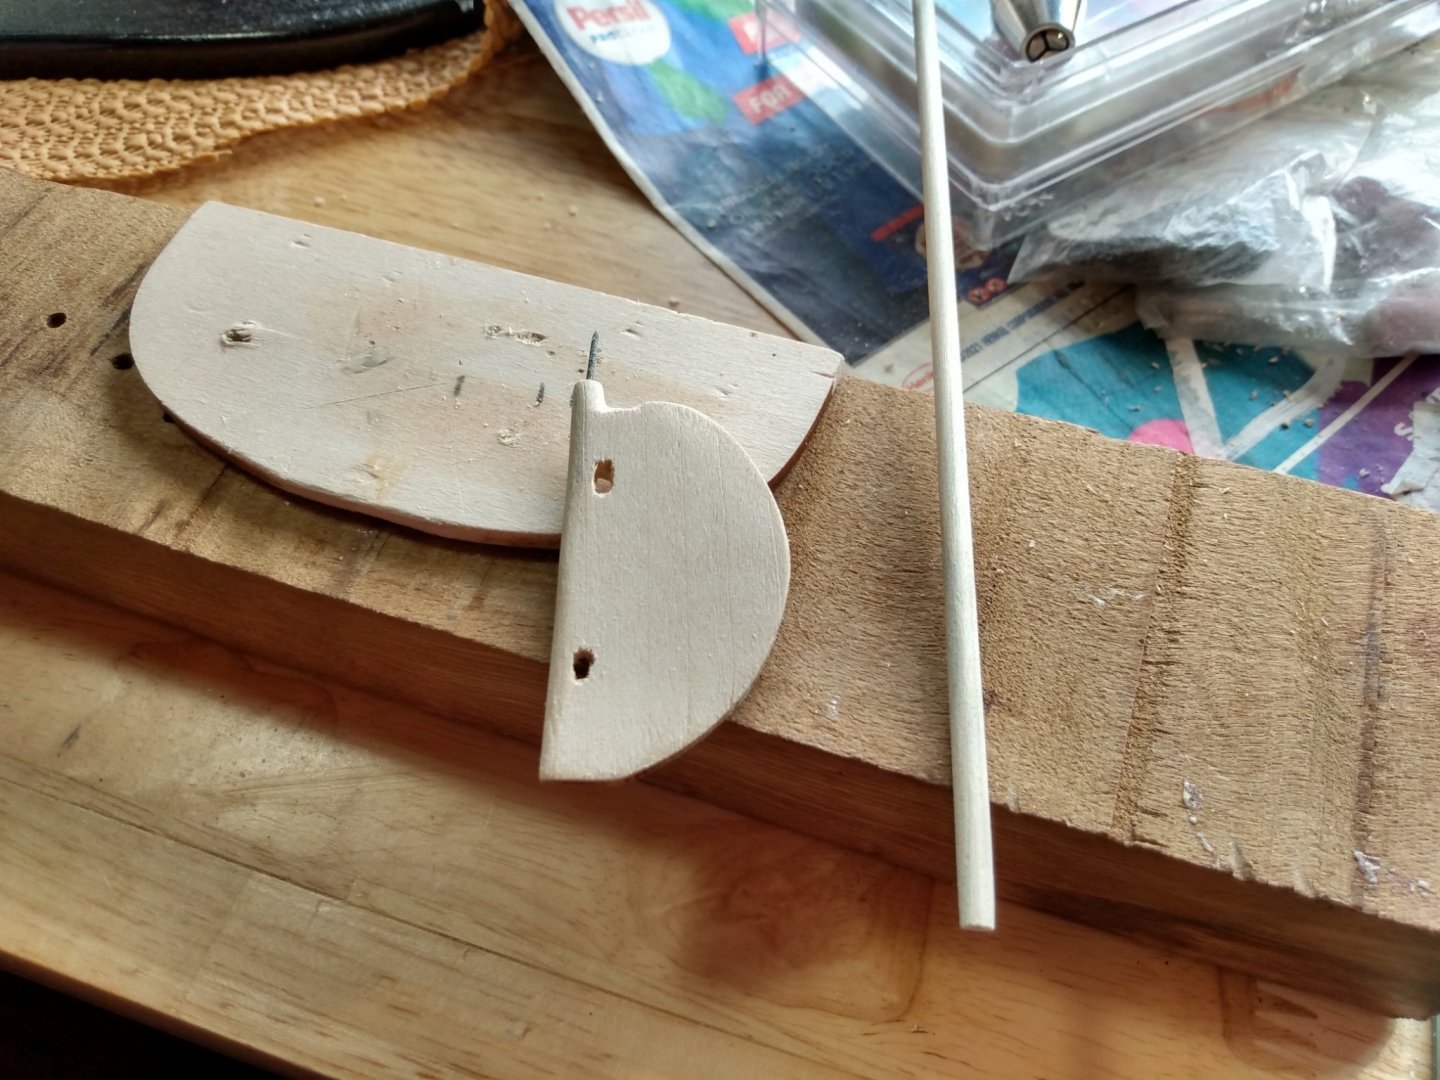
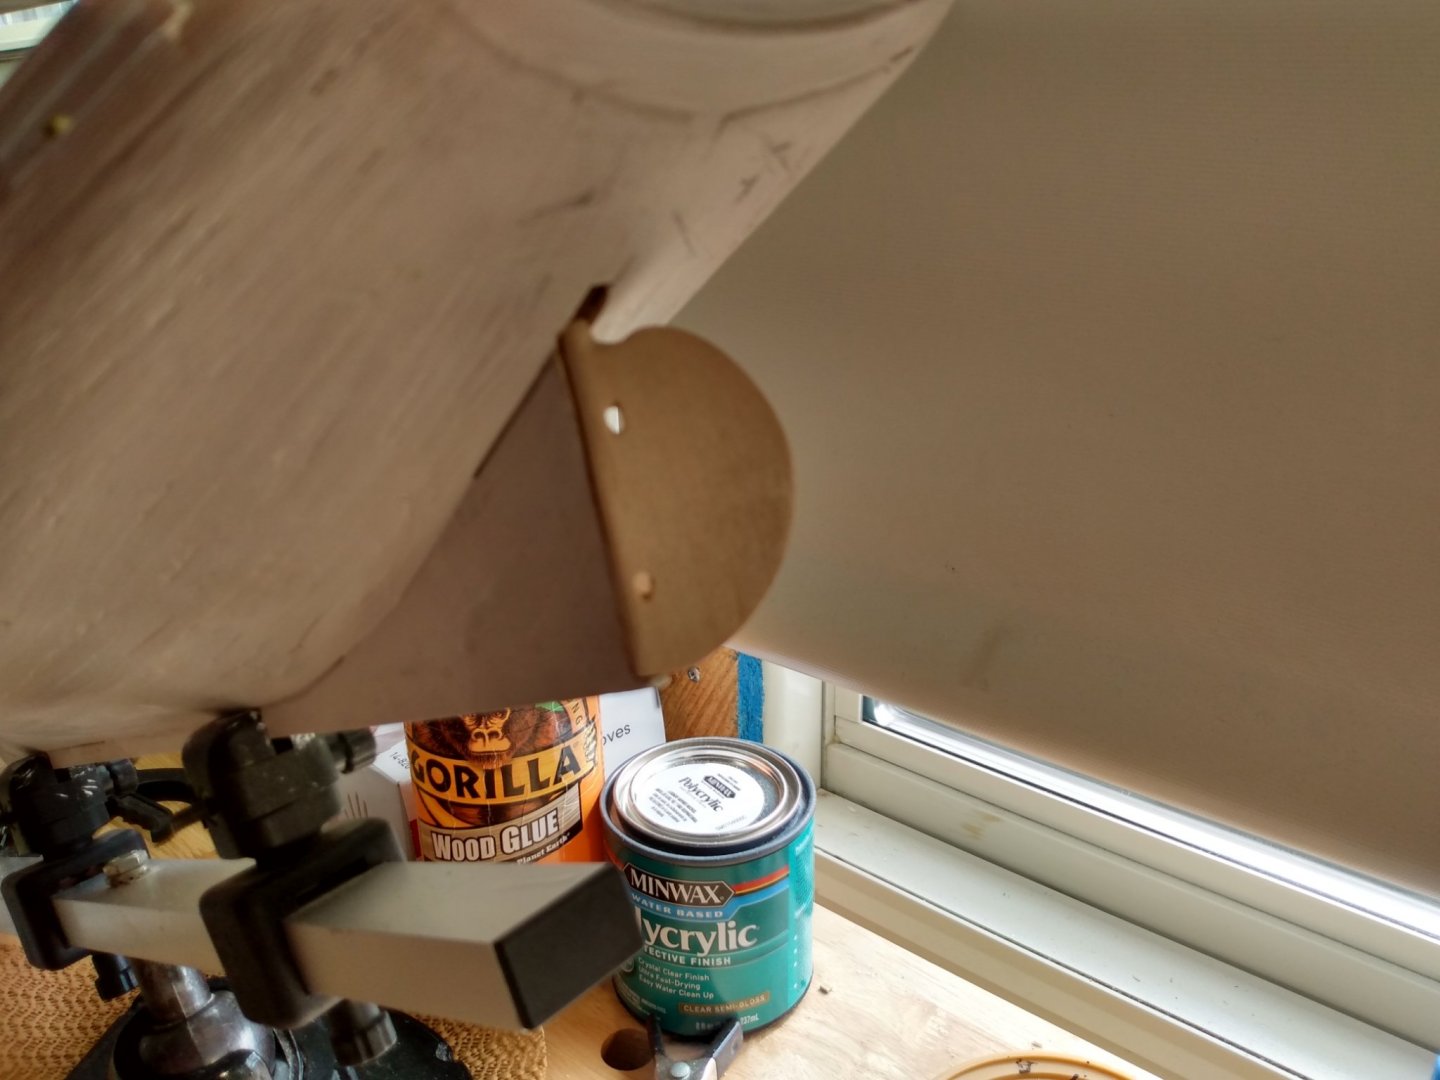
The rudder assembly was next. Rounded the forward edge as shown and tapered it aftward. Set up the rudder post to attach to the top of the rudder with a pin in the middle of the rudder box. Covered the front edge of the rudder with copper where it will fit into the concave edge of the stern post. After everything is finally assembled, I will put all this together, too fragile to leave it exposed to my clumsy hands! At that point I can add the copper straps that hold the rudder to the sternpost. I have it dry fitted now to see if it will go together right.


- 101 replies
-
- 8
-
-
- emma c berry
- model shipways
- (and 1 more)
-
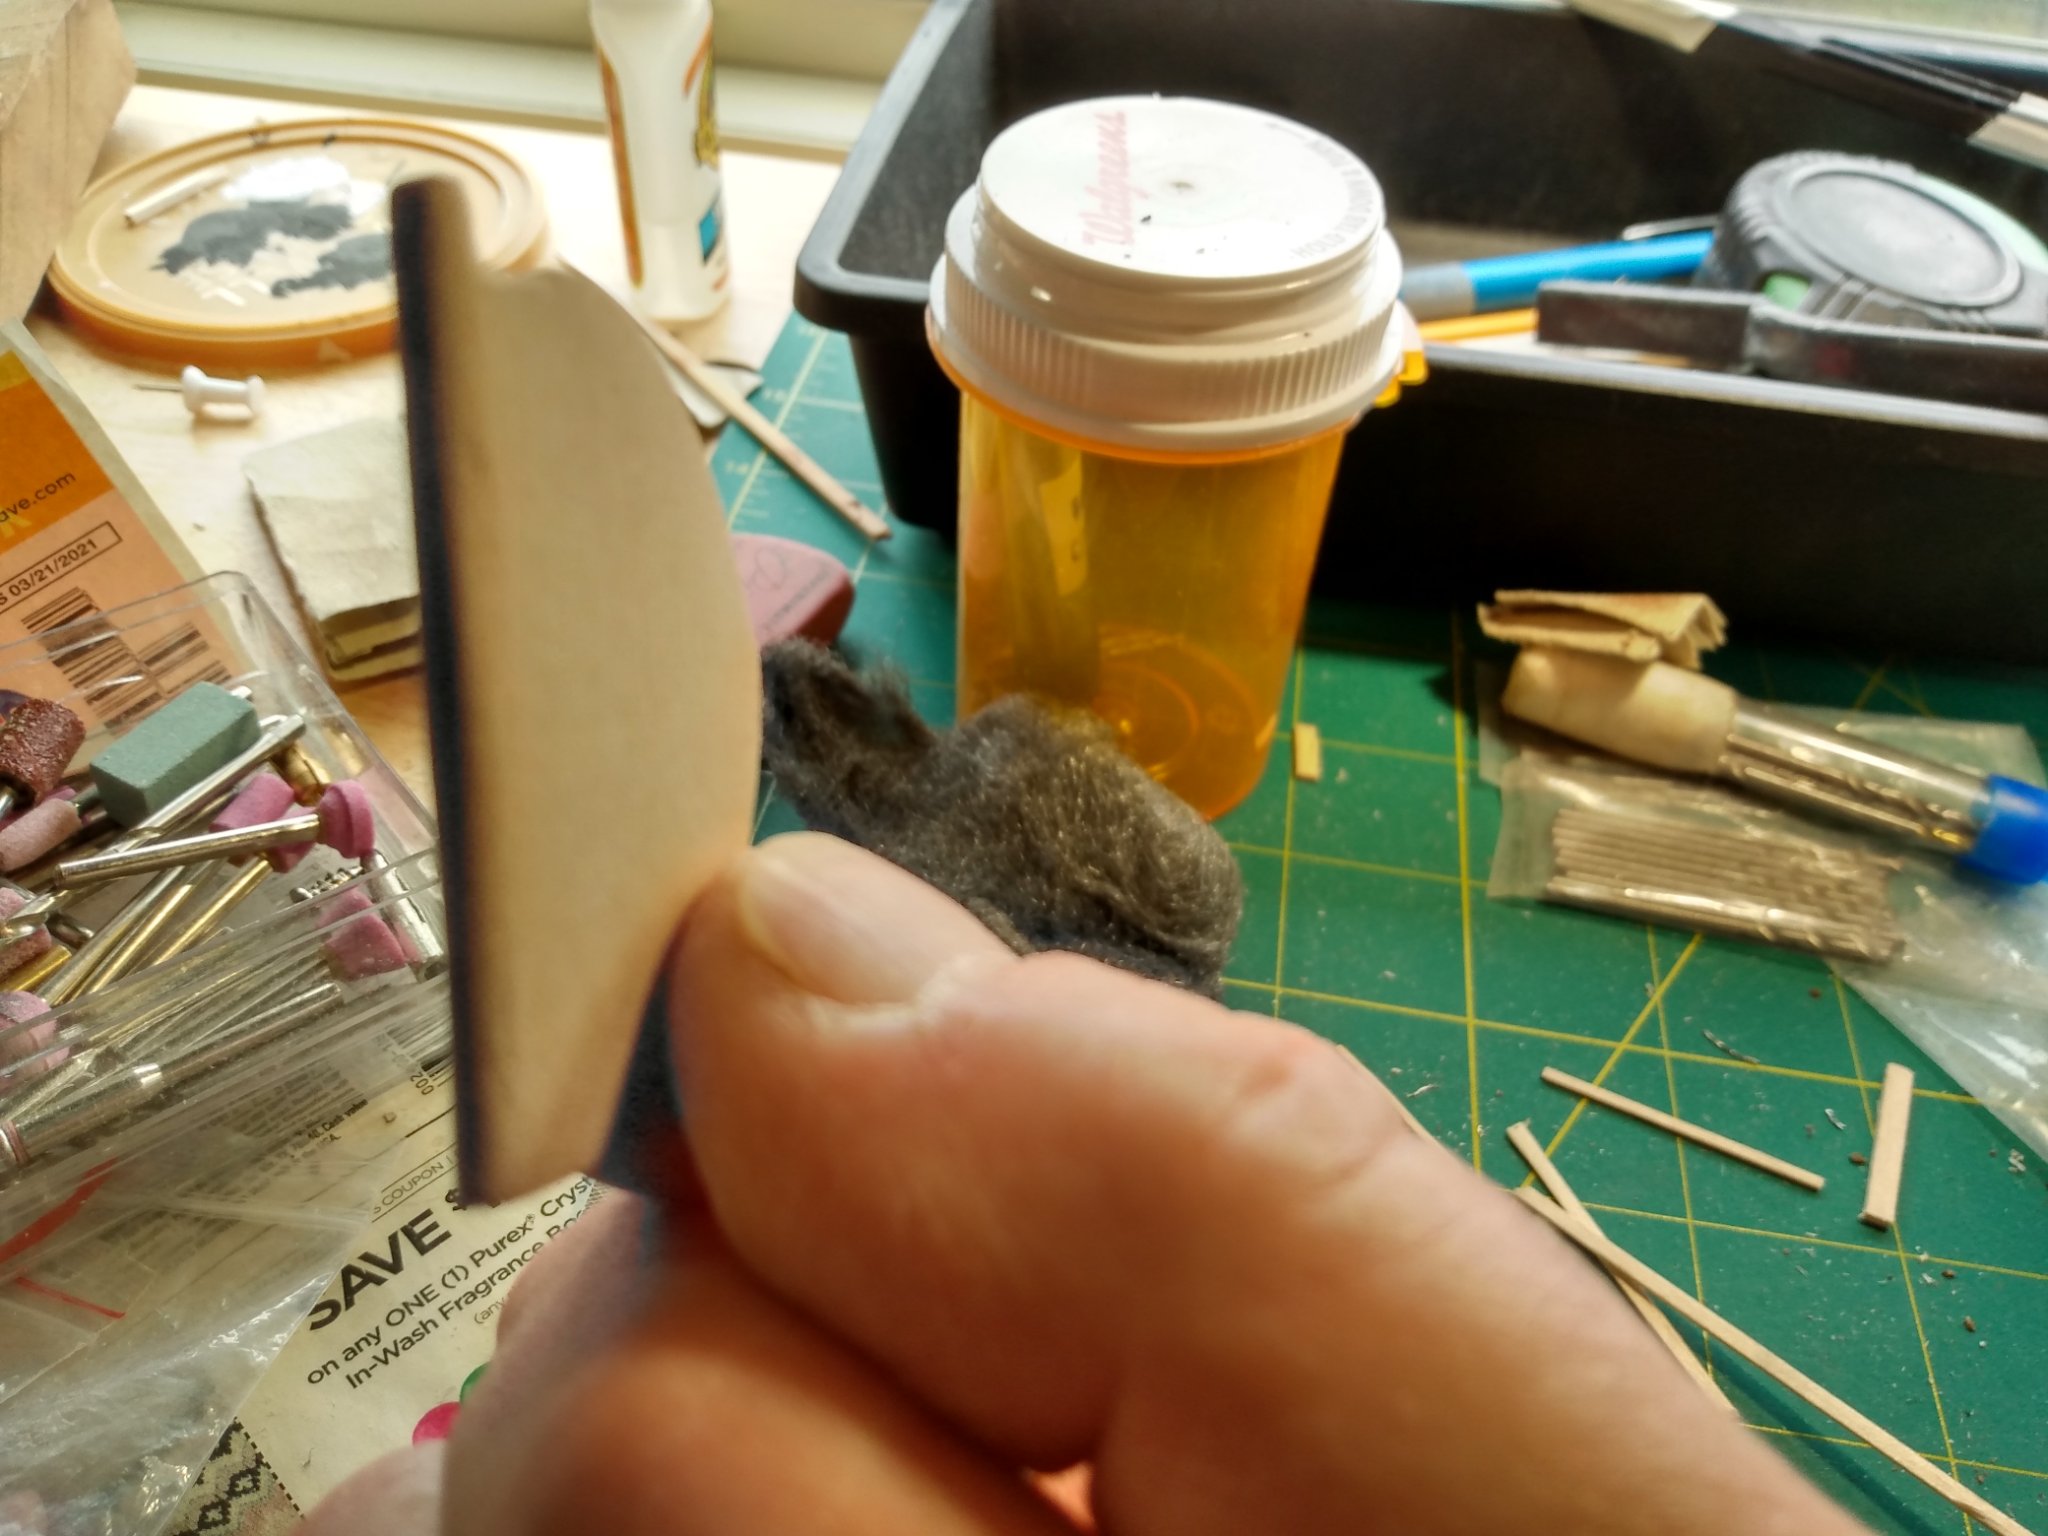
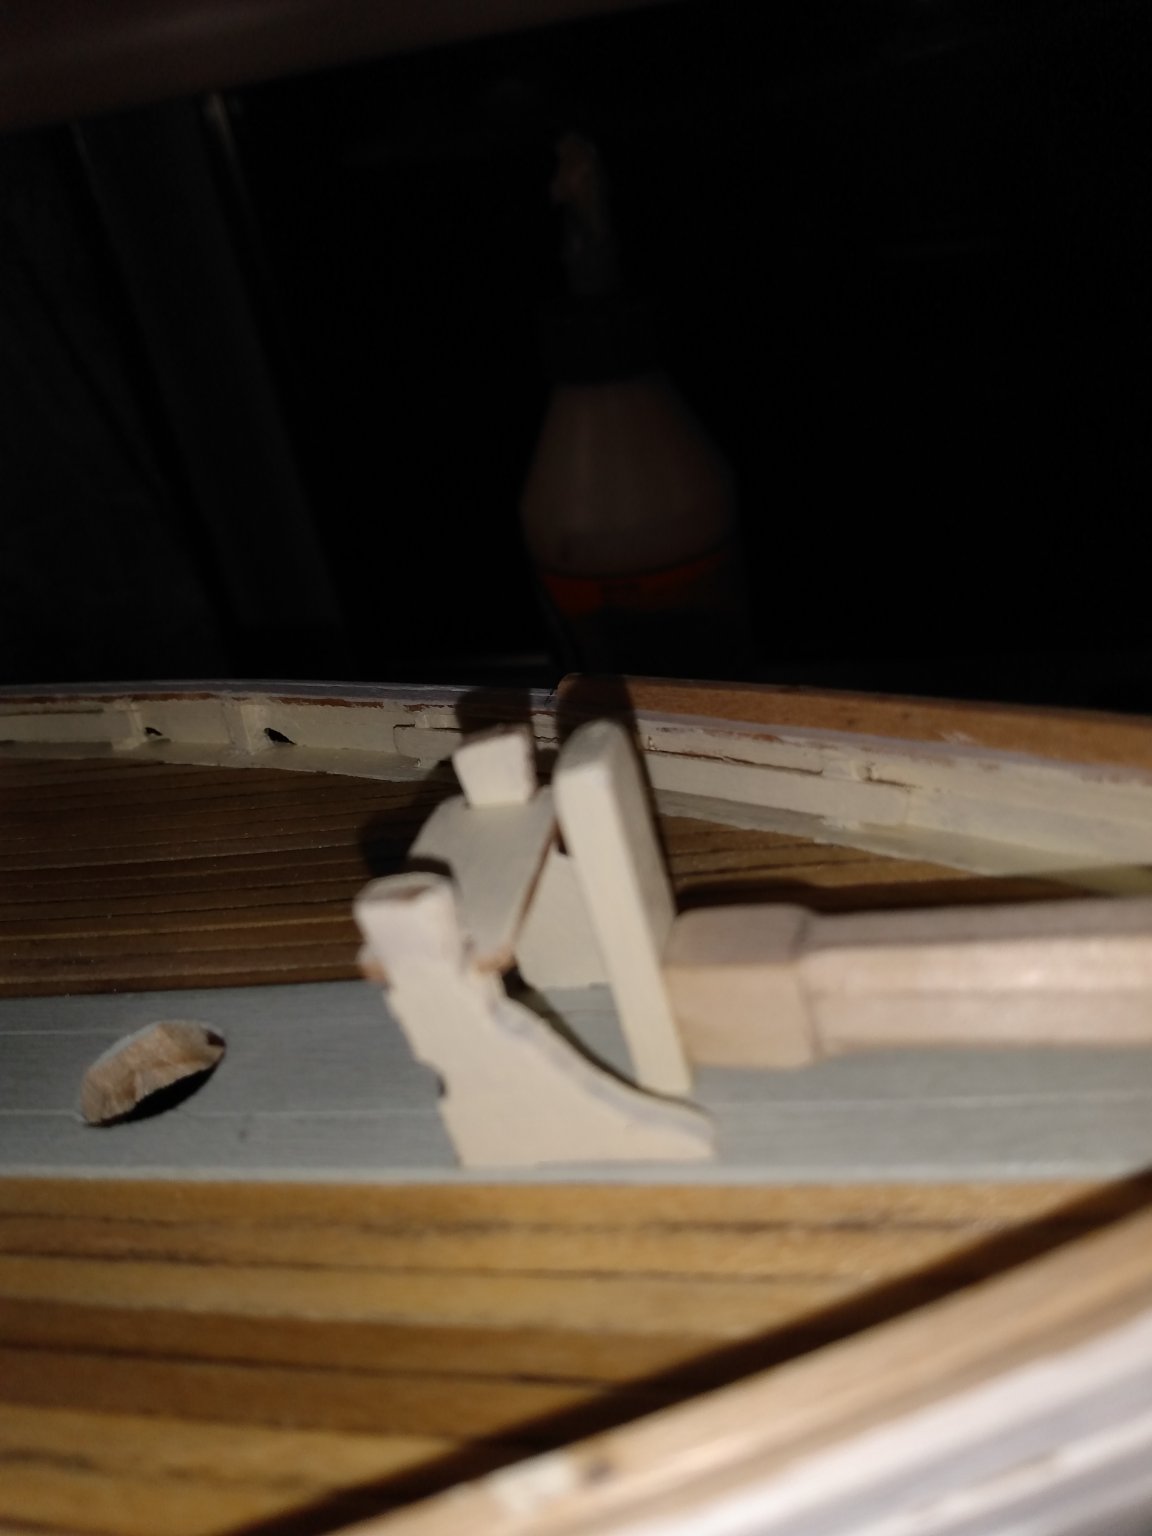
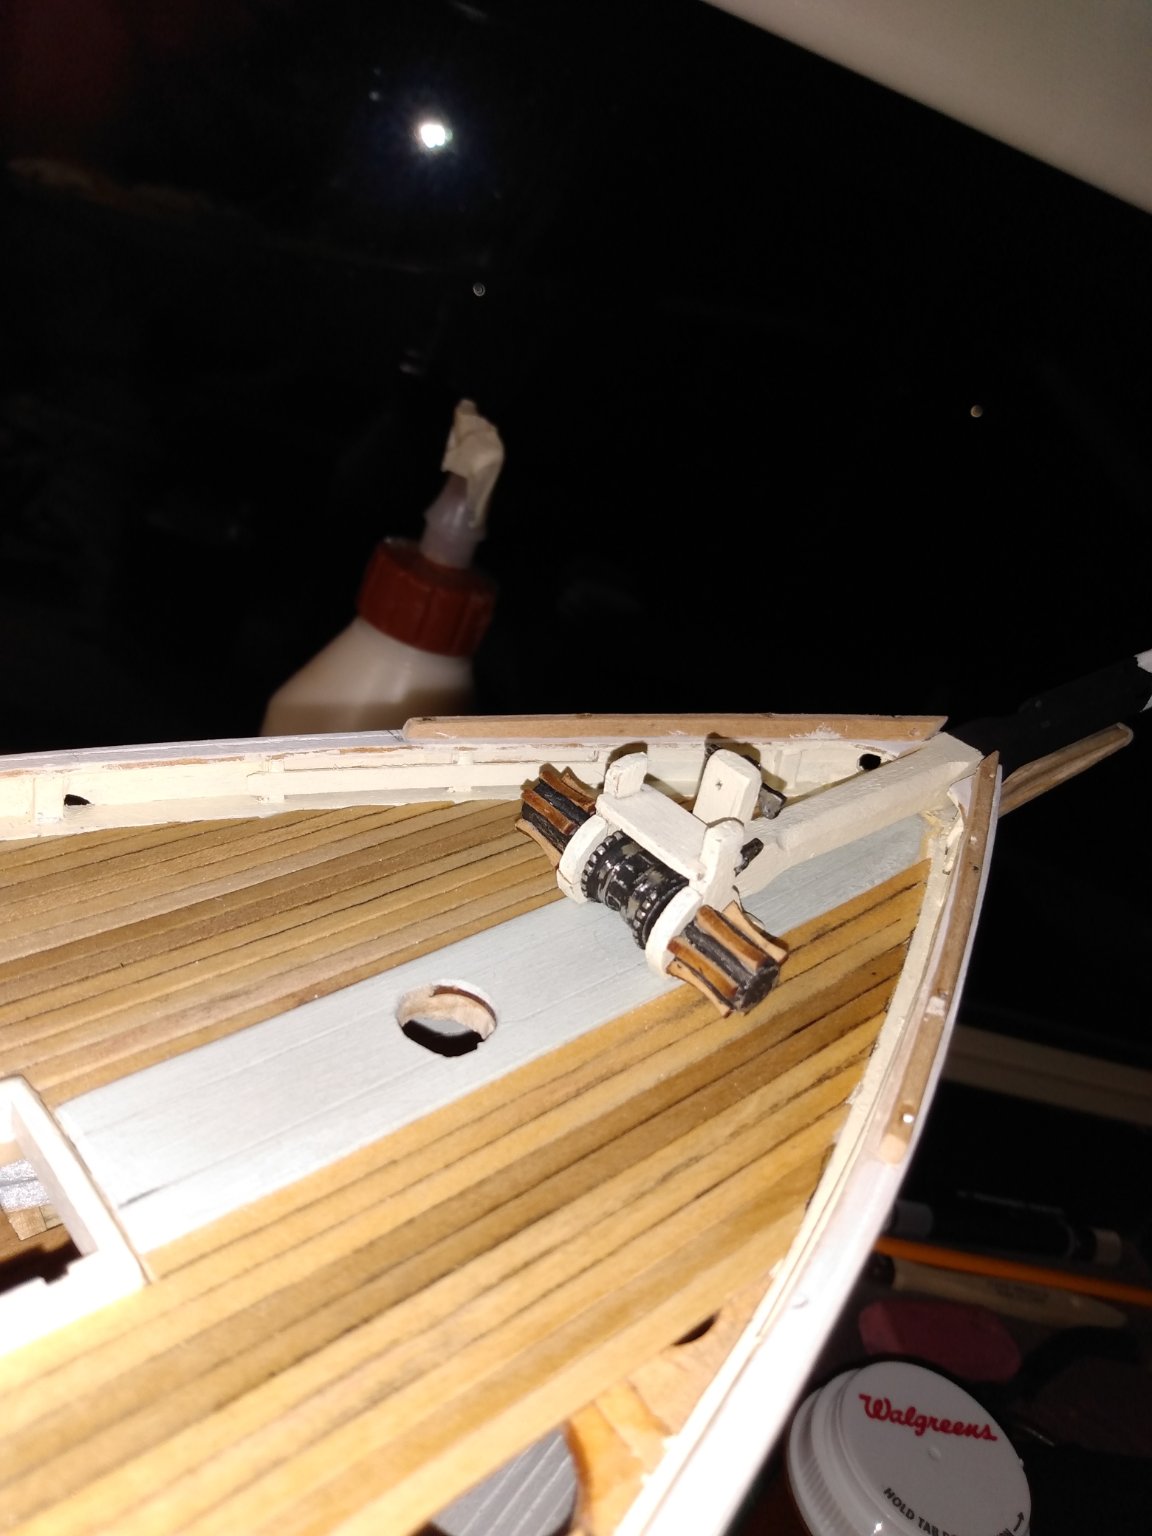
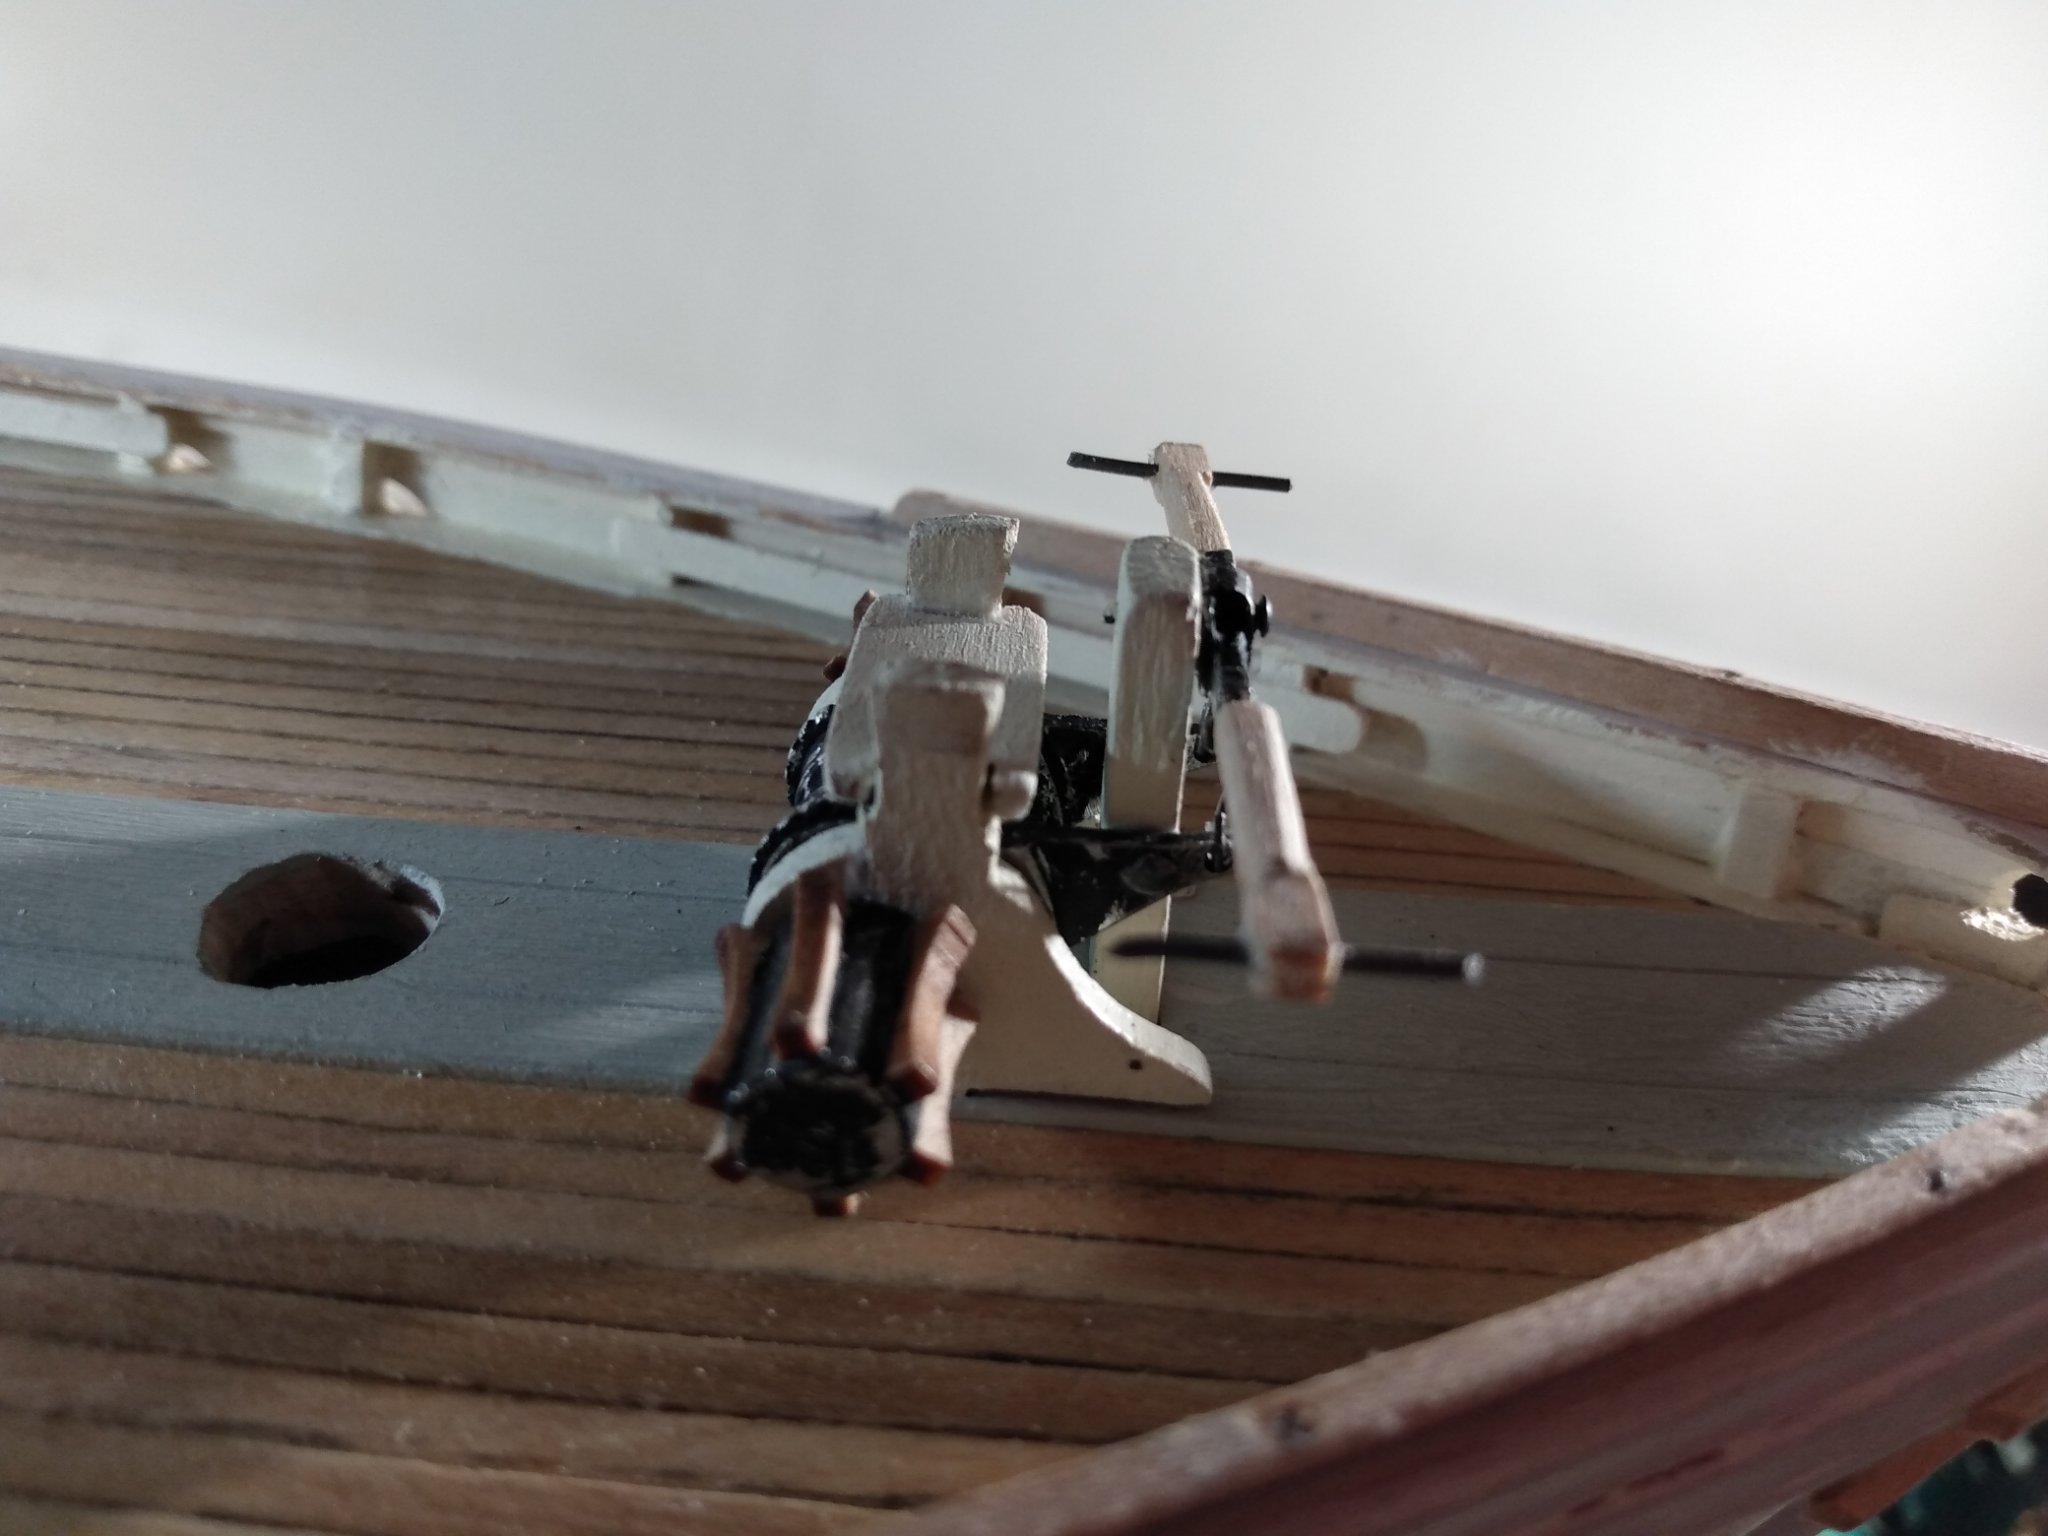
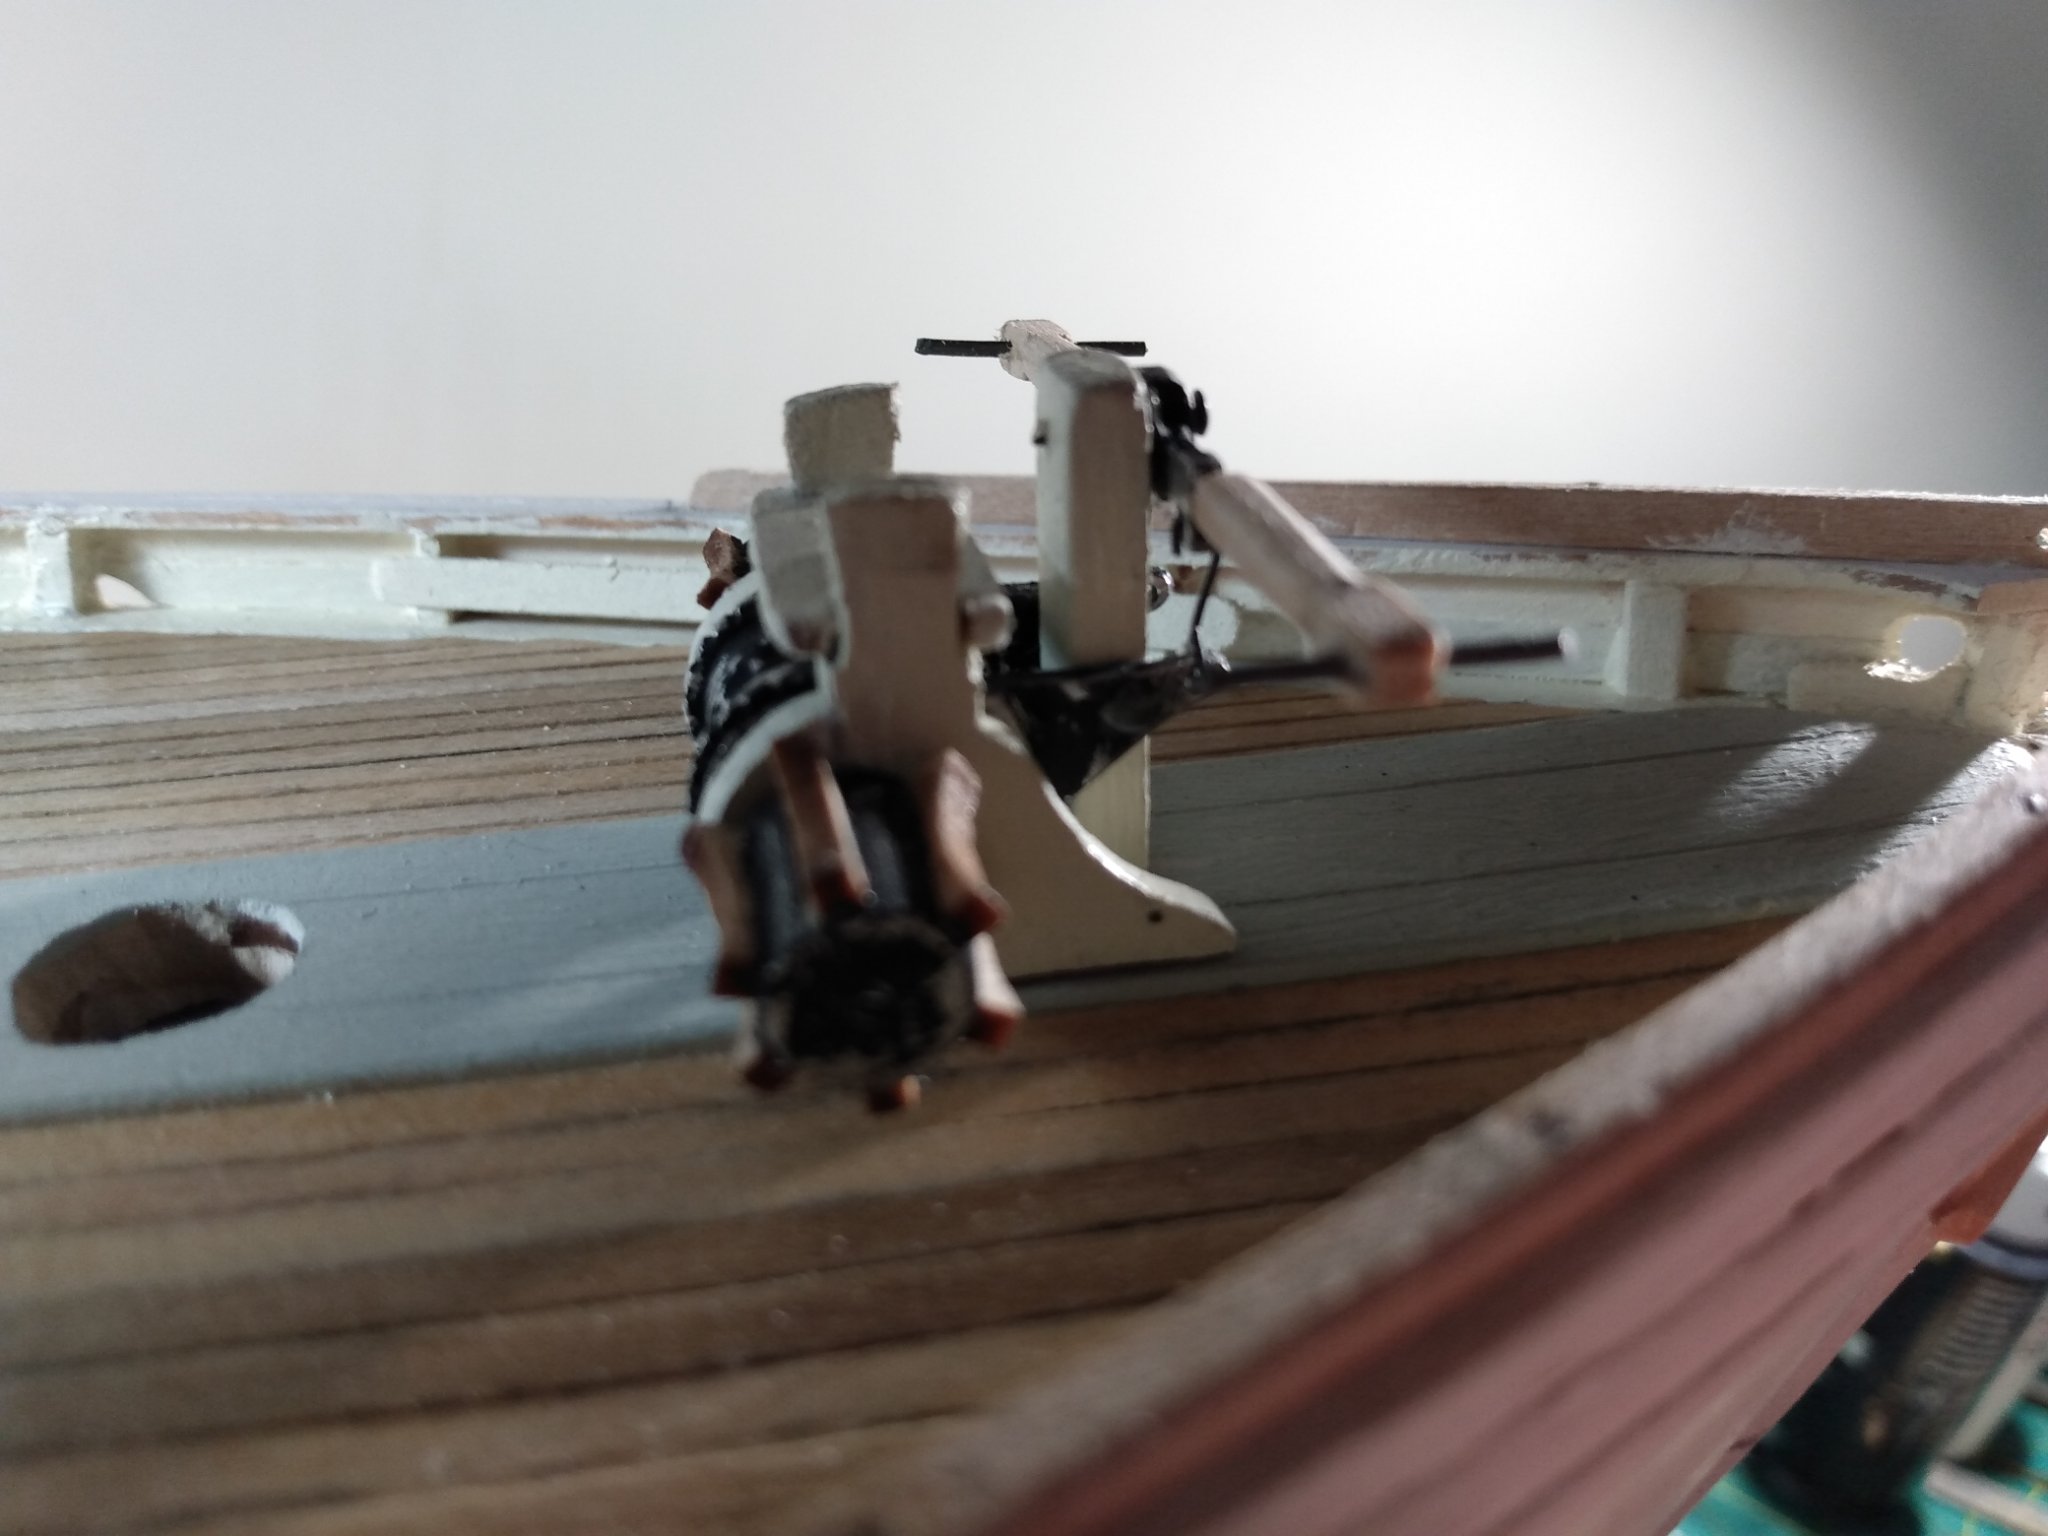
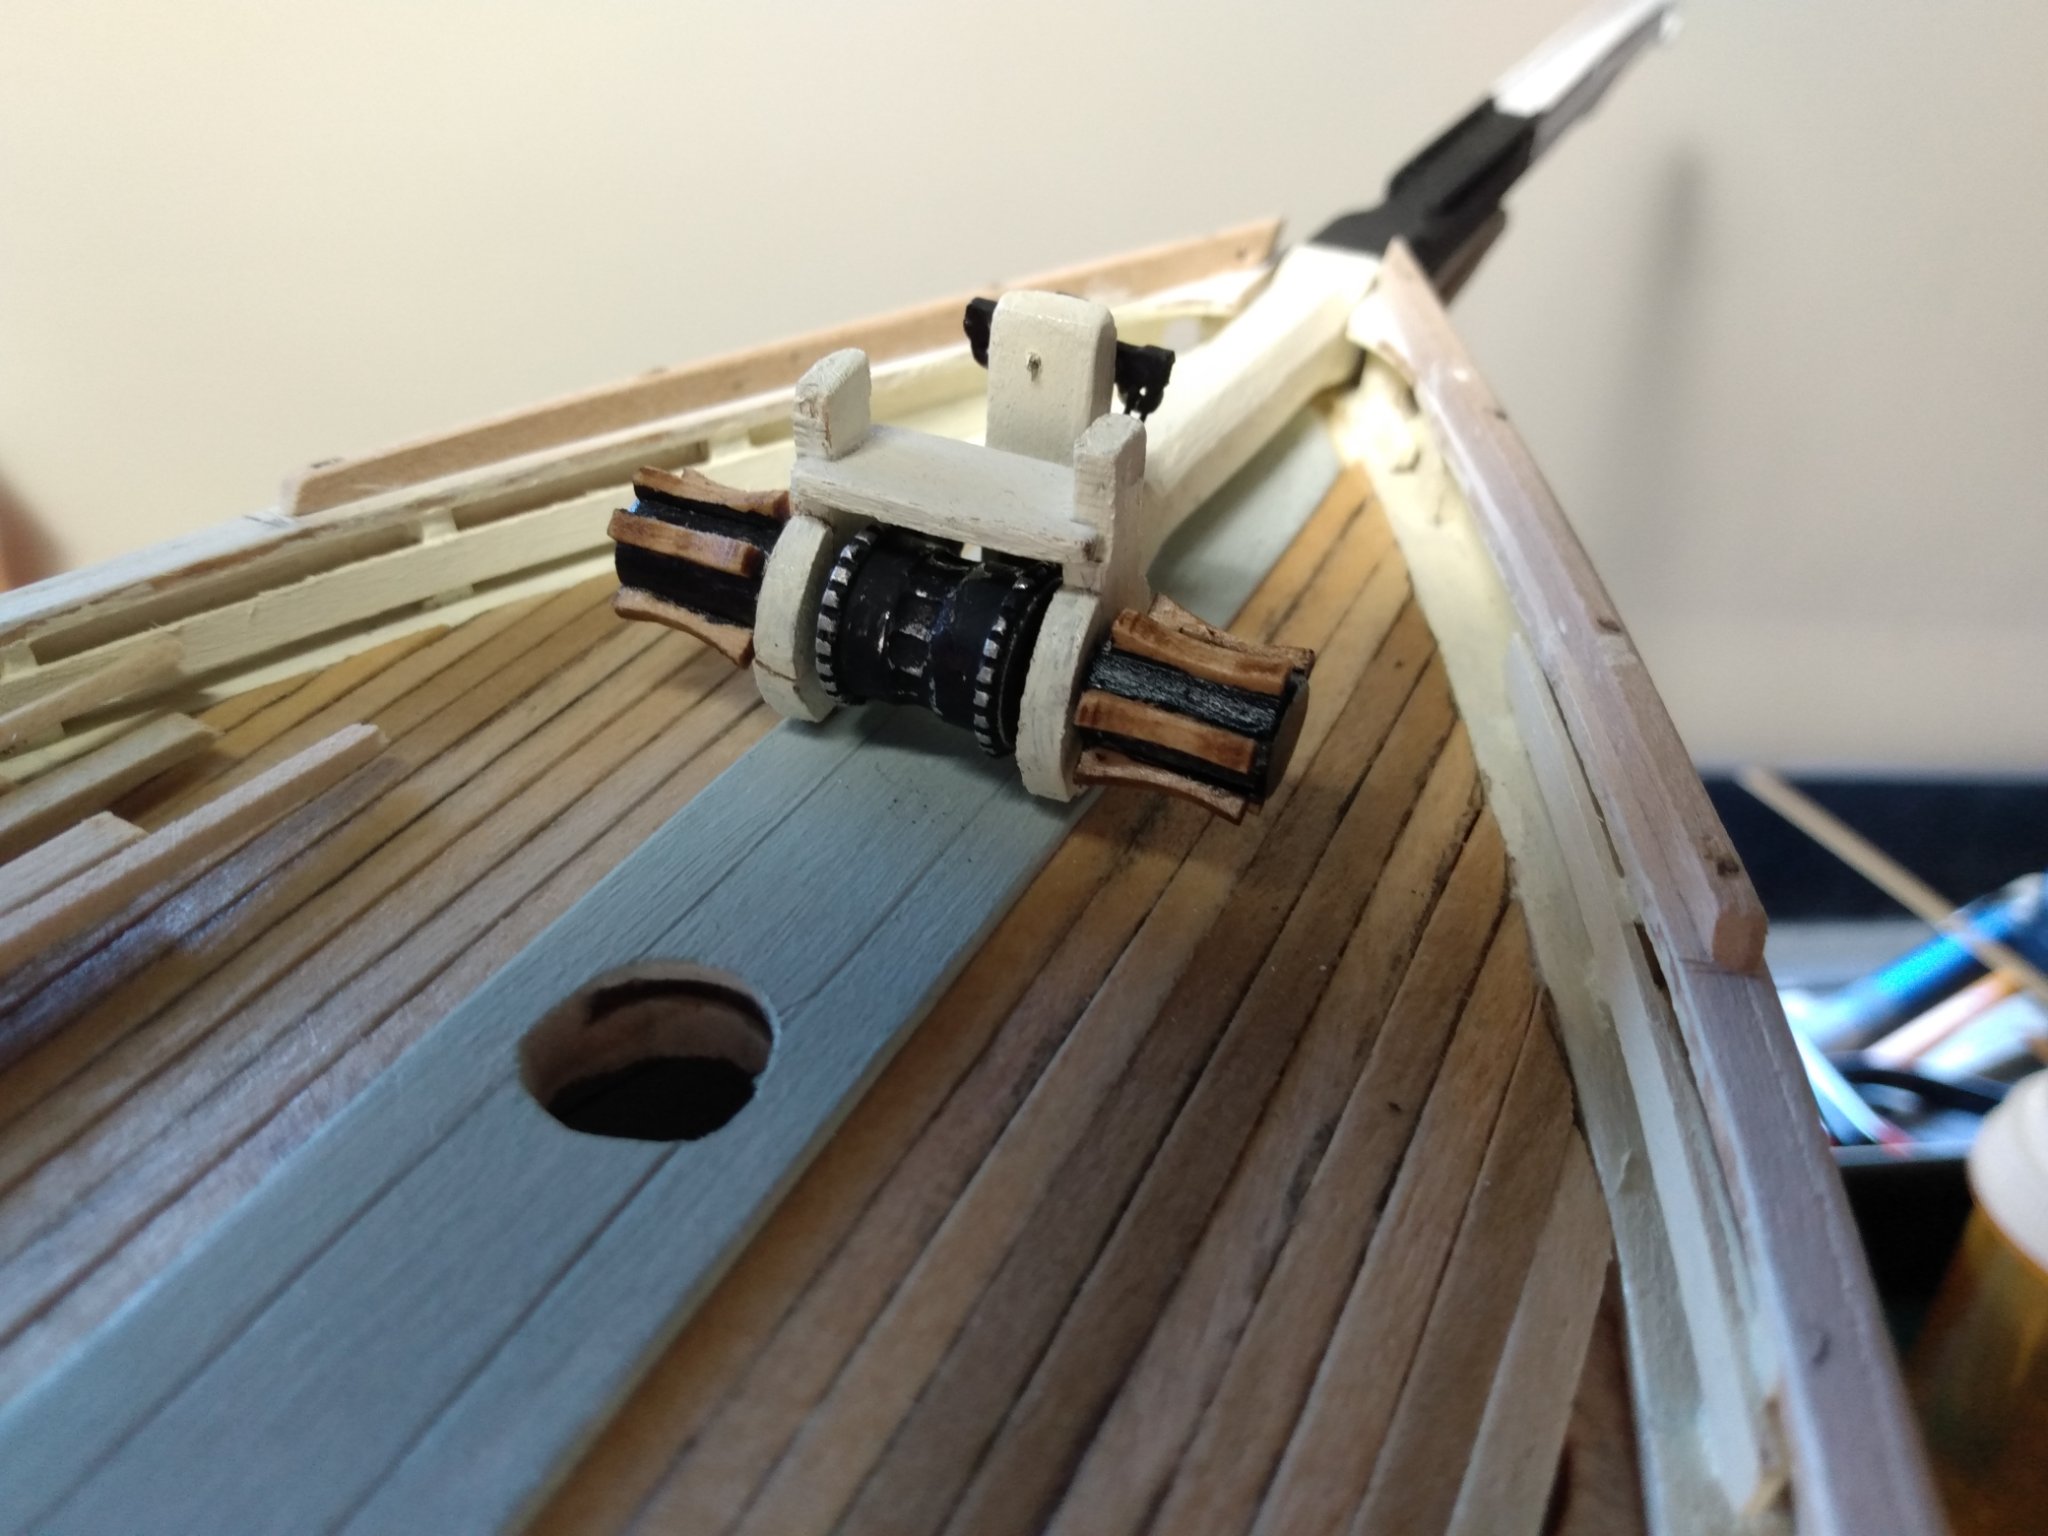
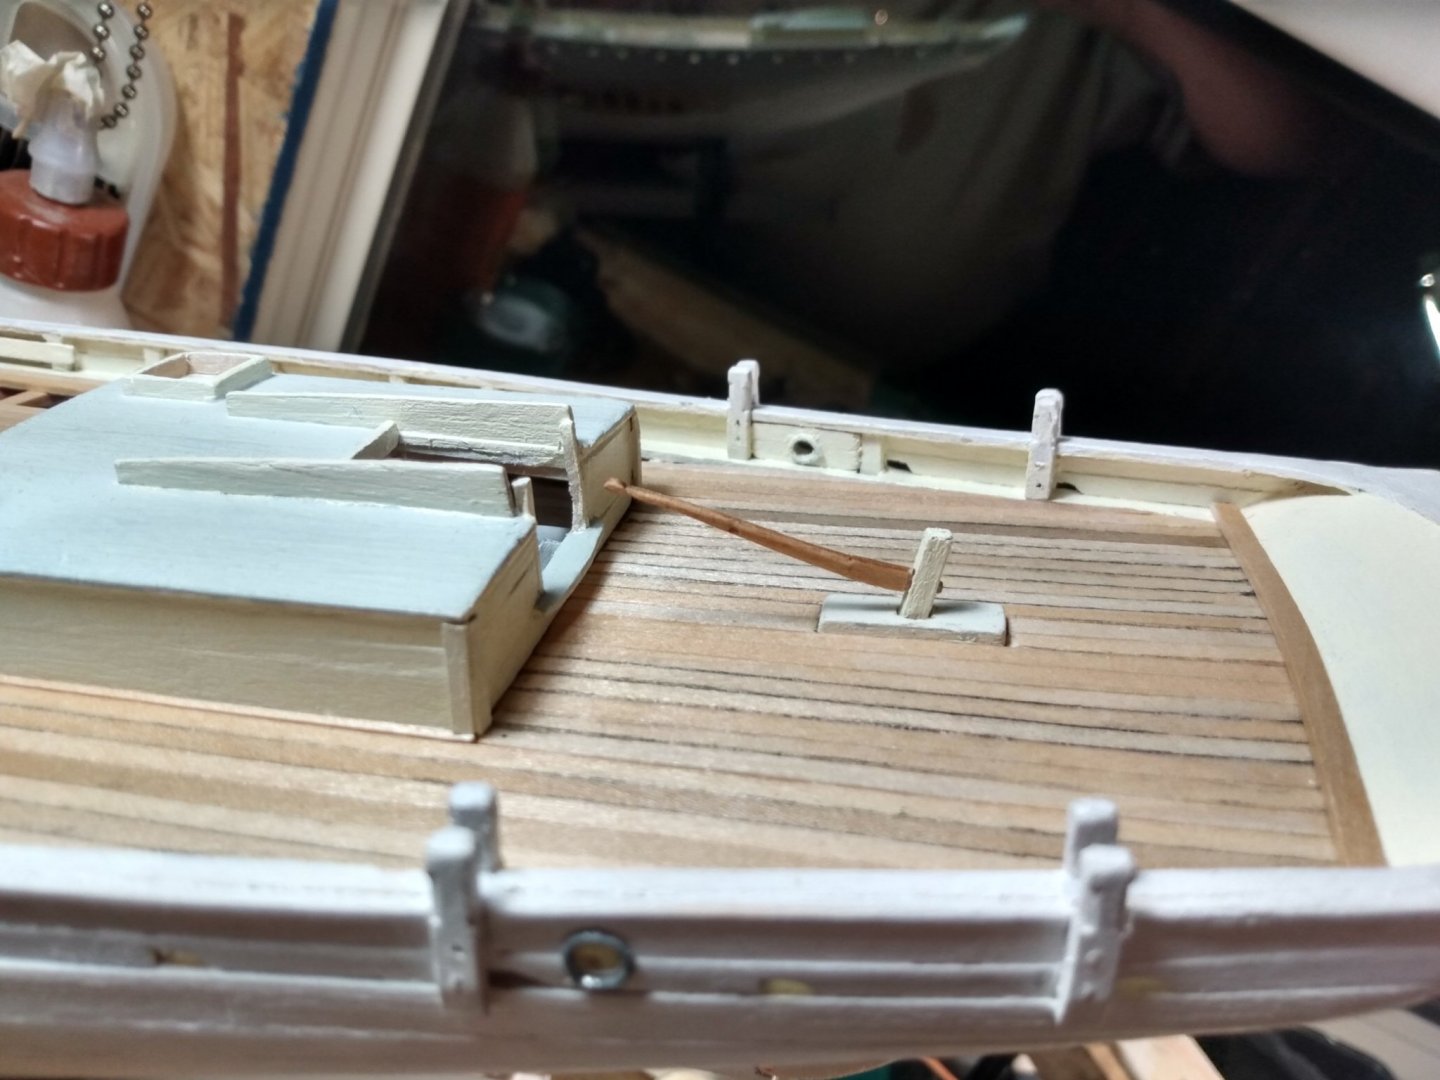
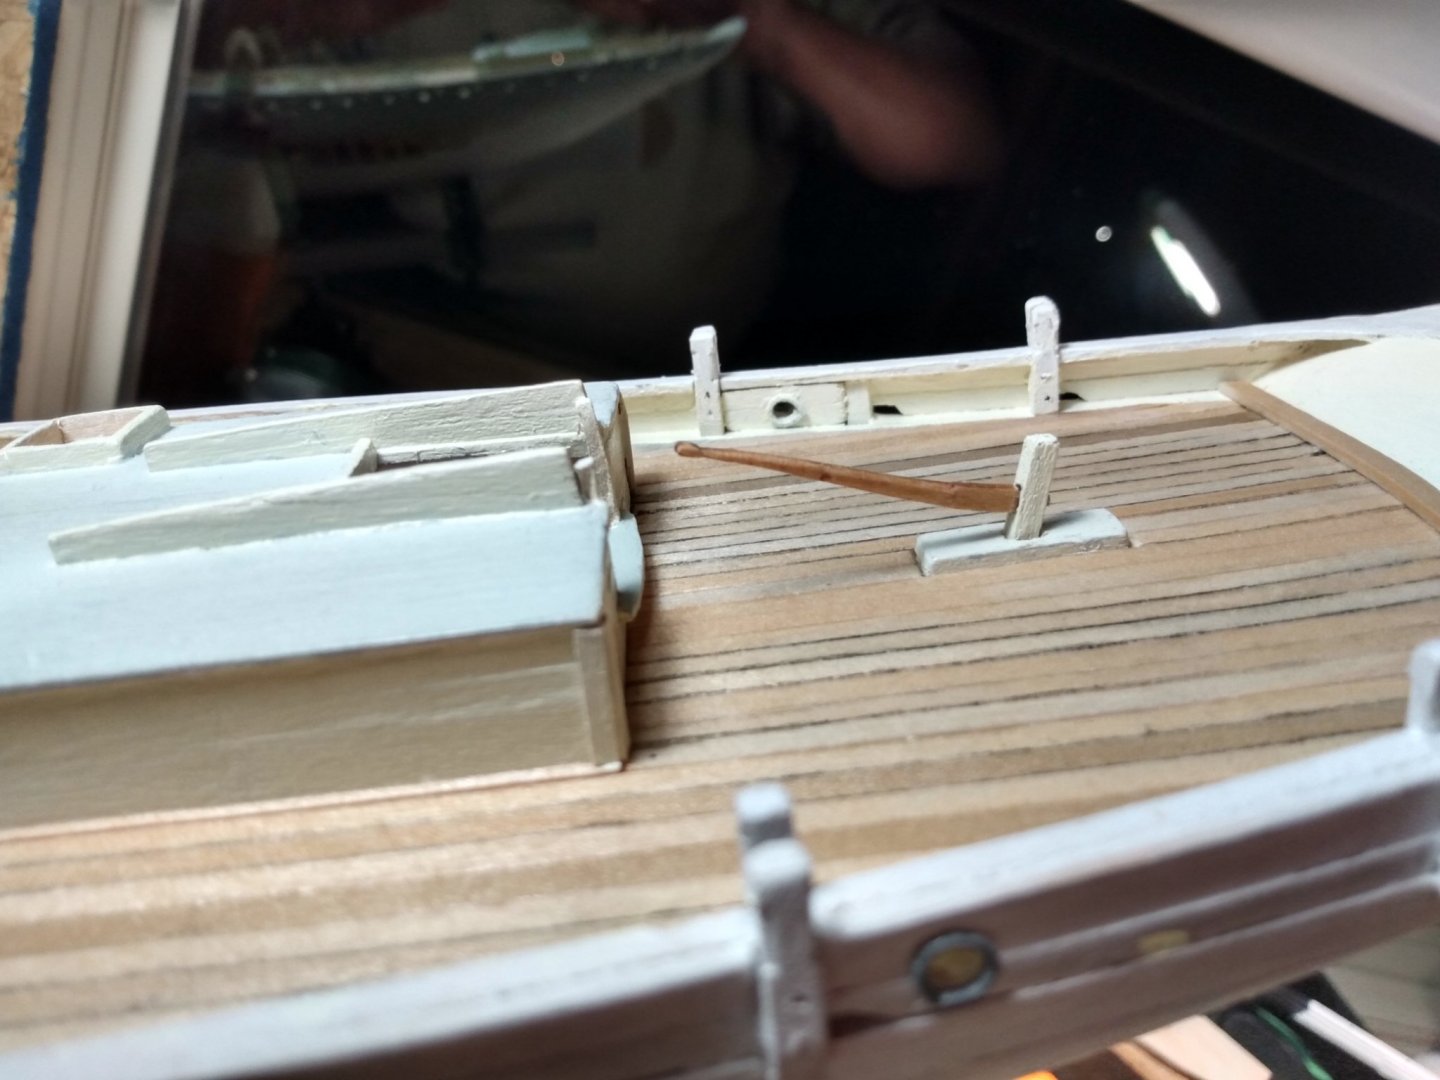
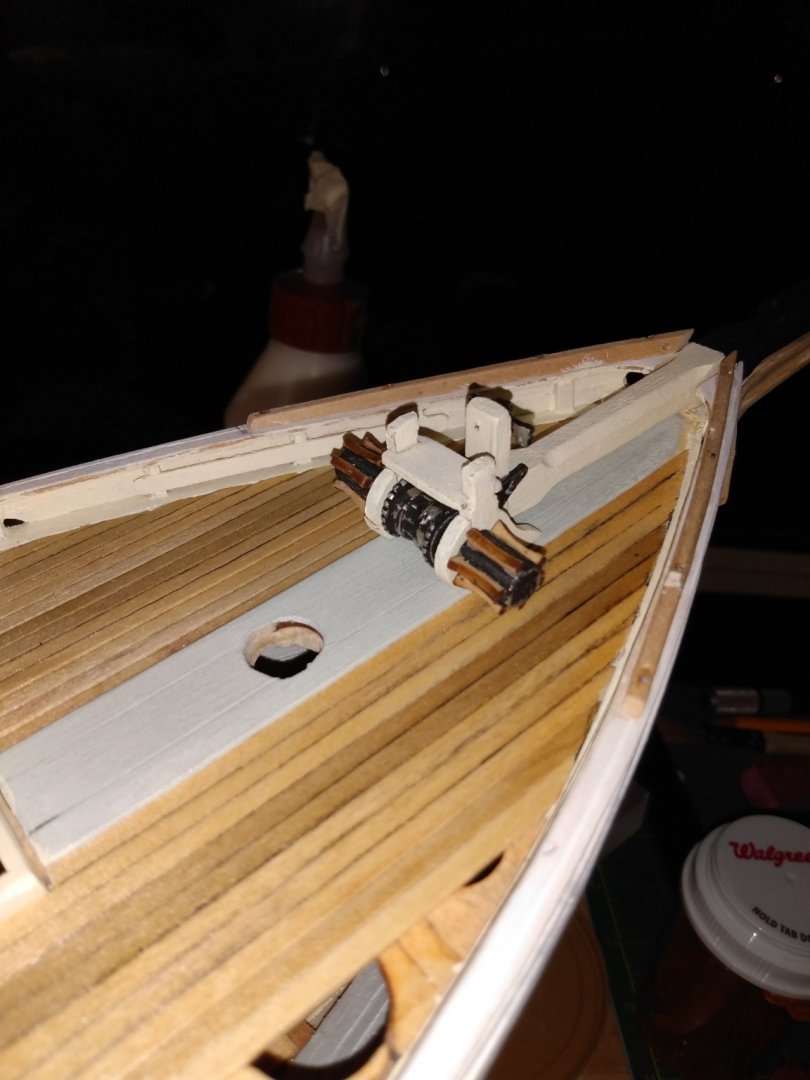
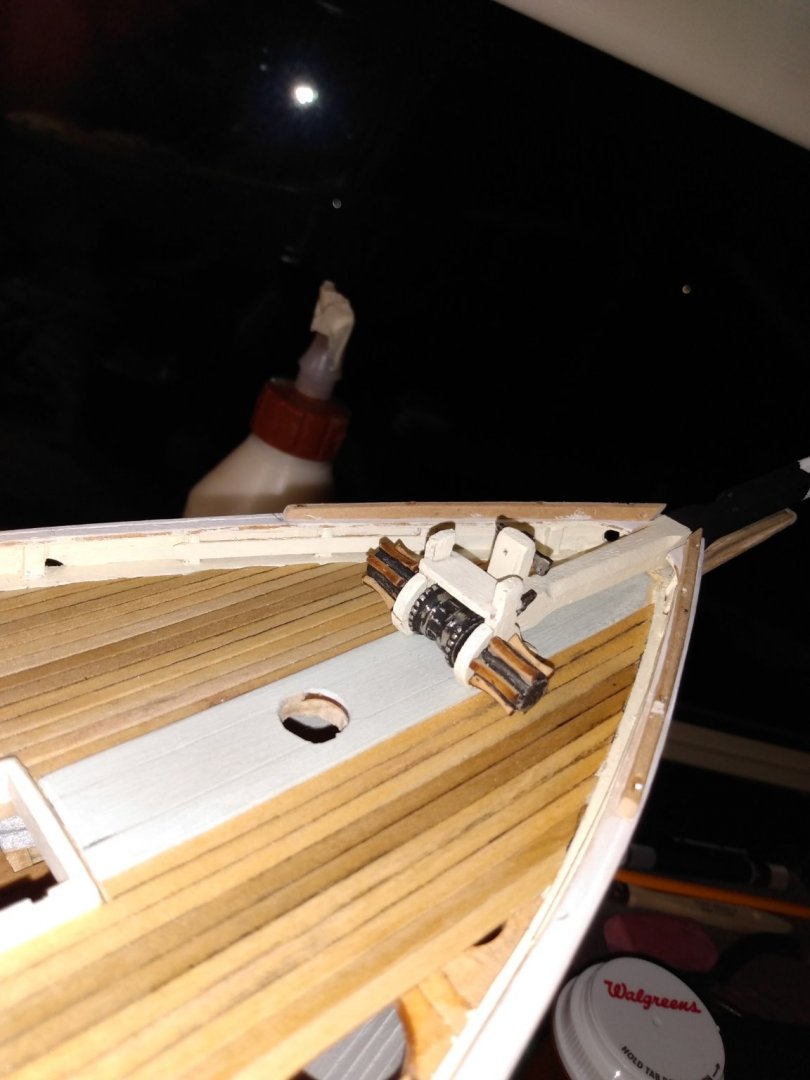
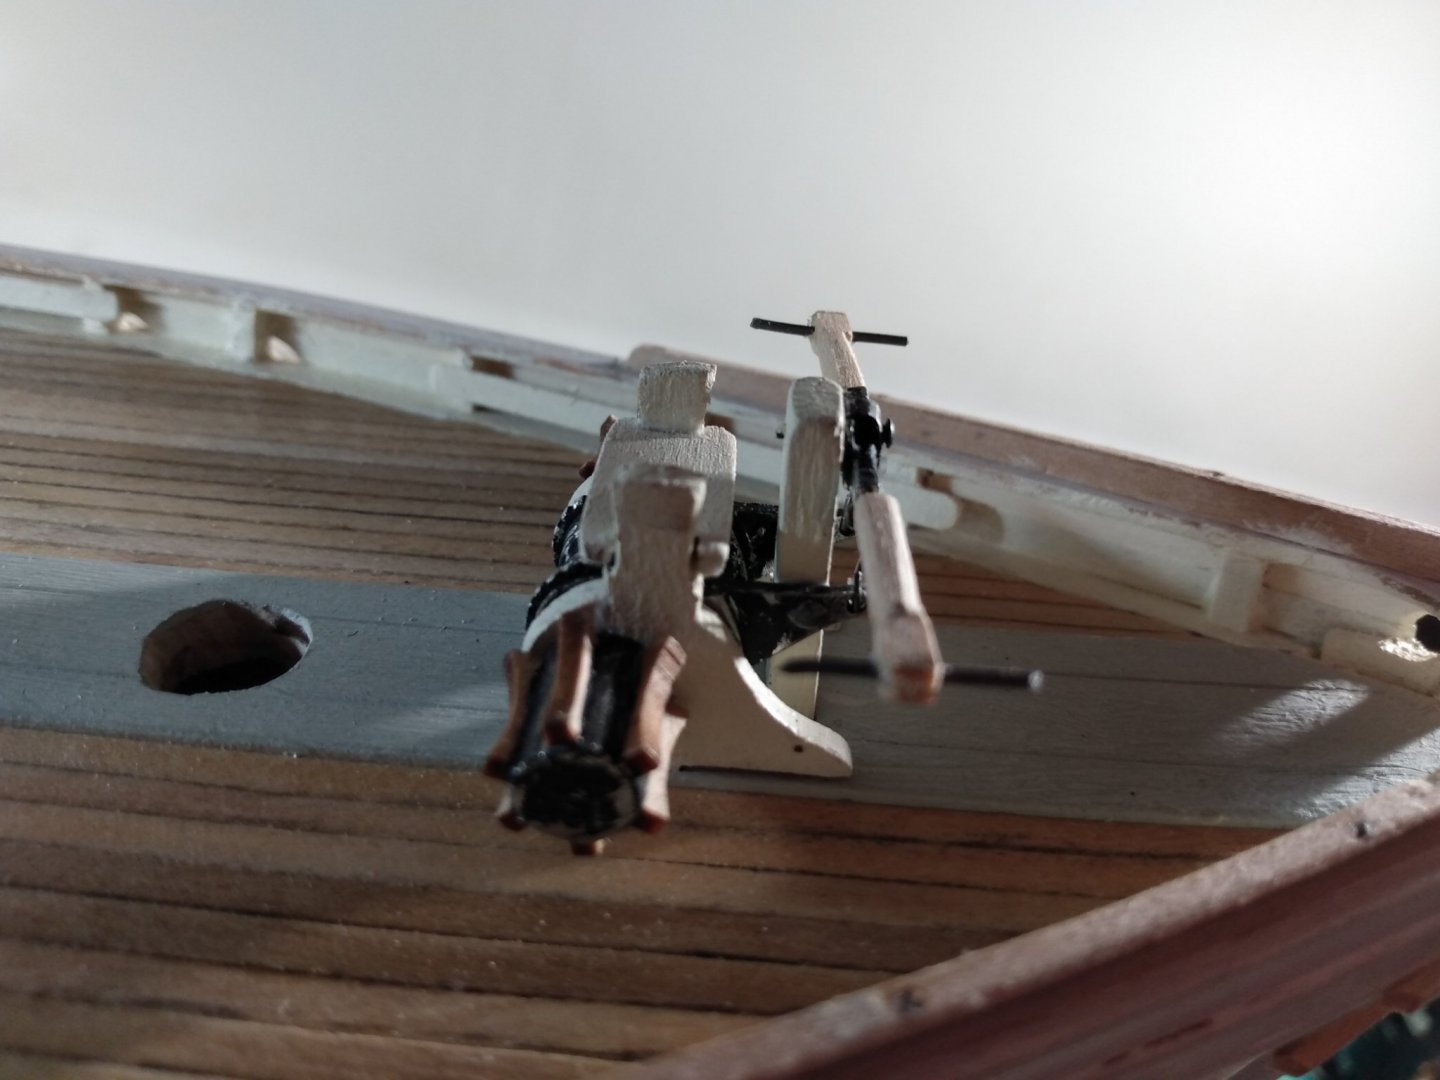
Hey there, thanks for the comments and likes...Got some more progress on the ECB. Finished the bow sprit and then launched onto the windlass. A little tricky due to the small size of some of the parts. The brake handles were a challenge. I made them from strip wood with 22 gauge wire handles. Then pinned them into the bearing box also with pins. Everything was cleaned up and painted before assembly. I removed the brake handles as they are fragile but will permenantly attach them later.


- 101 replies
-
- 3
-
-
- emma c berry
- model shipways
- (and 1 more)
-
Ok, I understand. I had the idea of making the rudder and tiller operable. Where the post joined the top of the rudder, I inserted a pin to join them permenantly. I haven't yet glued eveything together yet as I'm having second thoughts about the structural integrety of this set up. But I'm not going to have to make a decision about this now, I will wait to put this together after the hull is painted and permenantly attached to the "slipway". It may survive if it hides out with the rest of the parts that I have put away until final assembly. I should be posting some pics of my recent work.
-
Looking good... I was also working today on the rudder/tiller set up, as you said, they are very fragile things.
-
Good one to start with... After doing several wooden ship models, I think these smaller scale ones are as hard or even more tricky than larger models. It's just everything is SO small! Good practice though.
-
Very good Mr T. I myself haven't come across a rudder assembly like this before. But still considering myself to be "amateurish" anyway, I welcome different approaches and building styles. I am finishing up on the windlass/ bowsprit end of things then on to the rudder I suppose. Lots of detail on this little ship, but it's very interesting and fun! Look forward to more of your posts and the other ECBs out there.
-
Hello there Mr T. Did you notice on plan sheet #3 that in addition to the metal work you have done on the rudder, there are three straps that attach to each side of the stern post and pass through slots cut through the rudder? Didn't want to let you go too far if there is an oversight, it would be easier to take care of now.
-
Yes, thank you Andrew, I'm glad I didn't attach it yet!
-
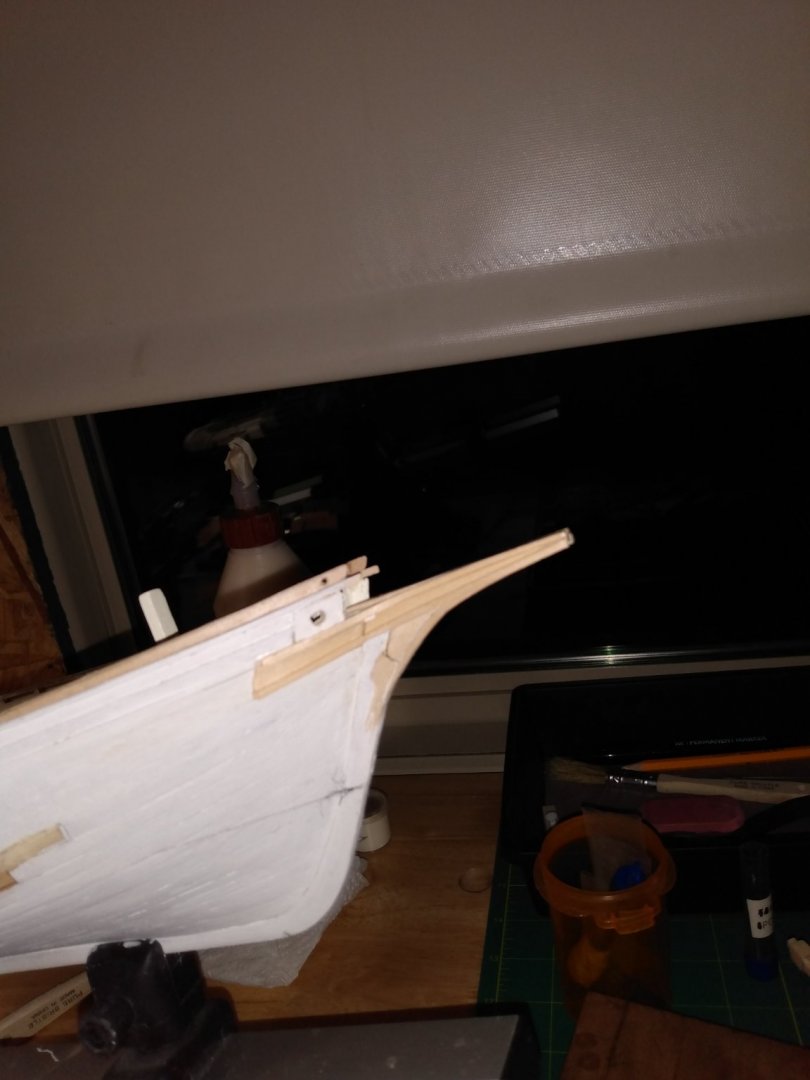
Can I ask you Michael where you saw this detail for the bowsprit? I searched for this on the plans and other build logs and they all seem to lay flat on the cutwater. Maybe someone has seen the actual ECB at Mistic? I don't know, I haven't yet permenently attached the Bowsprit so I'd like to get it right. Looks good either way I suppose. Your trailboard and bowsprit looks great though!
-
Yes Andy, this was one of the issues that I found confusing. I saw that I needed to add a shallow "wedge" on top of the cutwater to raise the bowsprit and put more upward angle to it. I thought that I screwed up somewhere but with all models, it seems that we must do some fudging to get thing right. Your ECB is looking great!
-
Looking good!
-
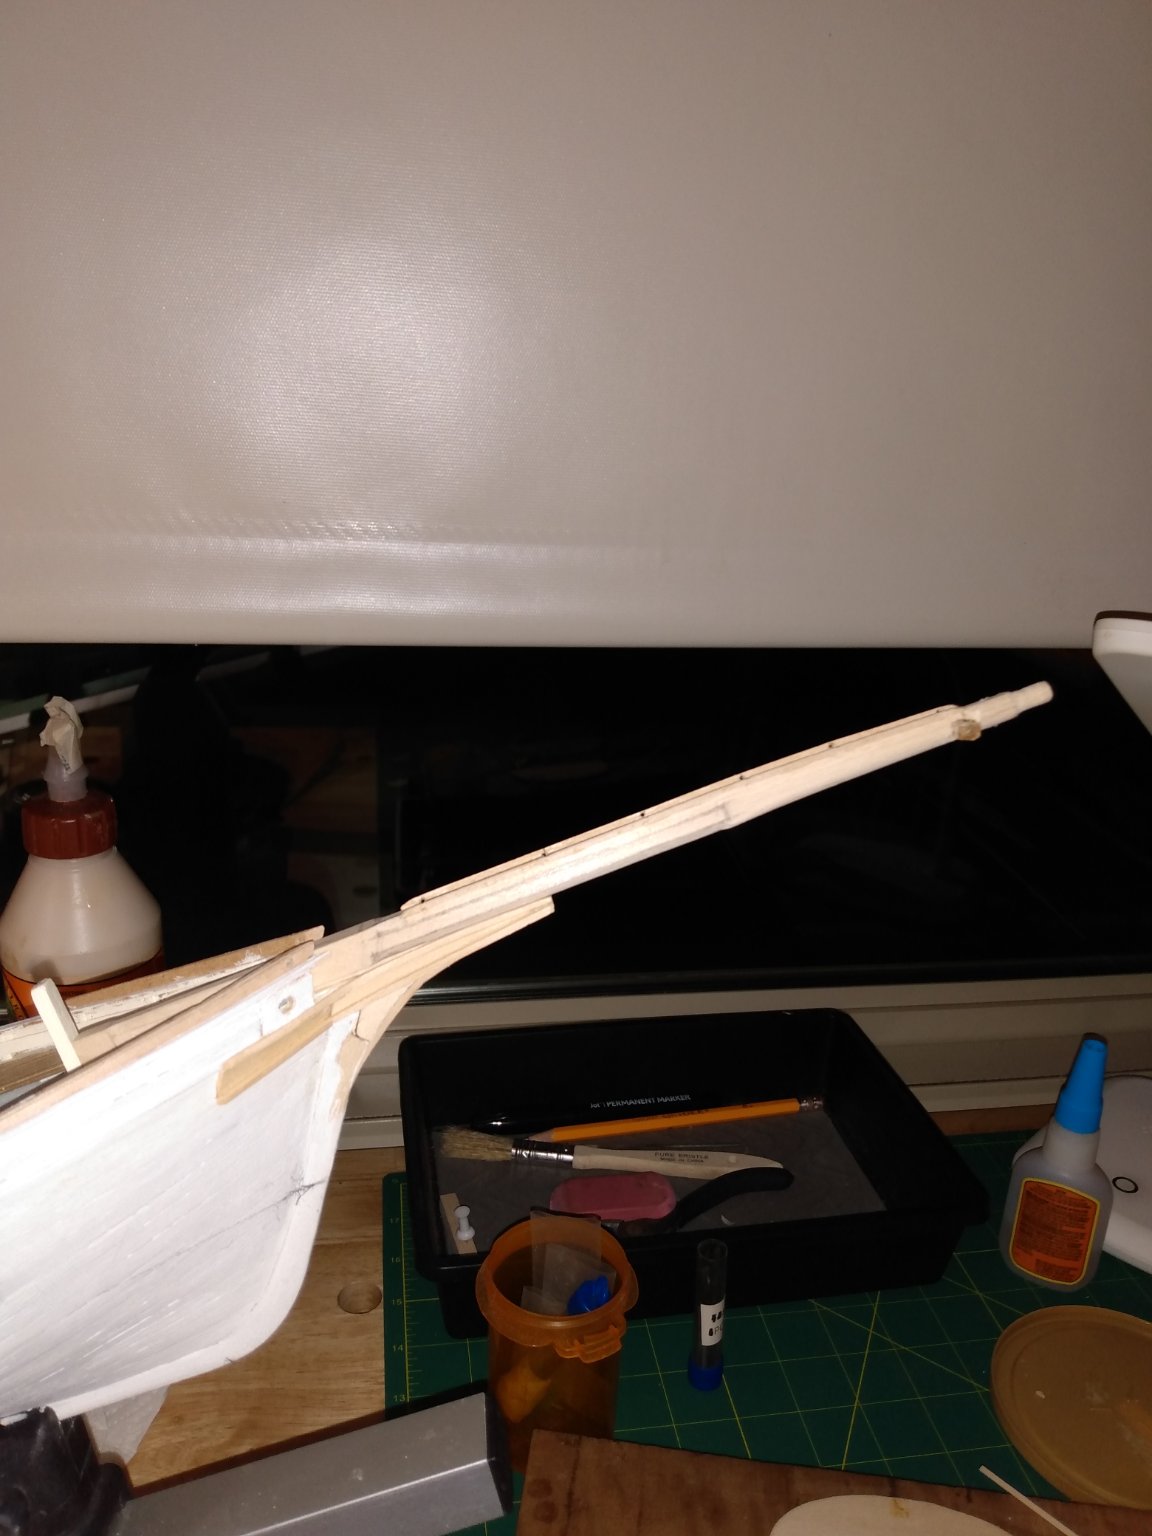
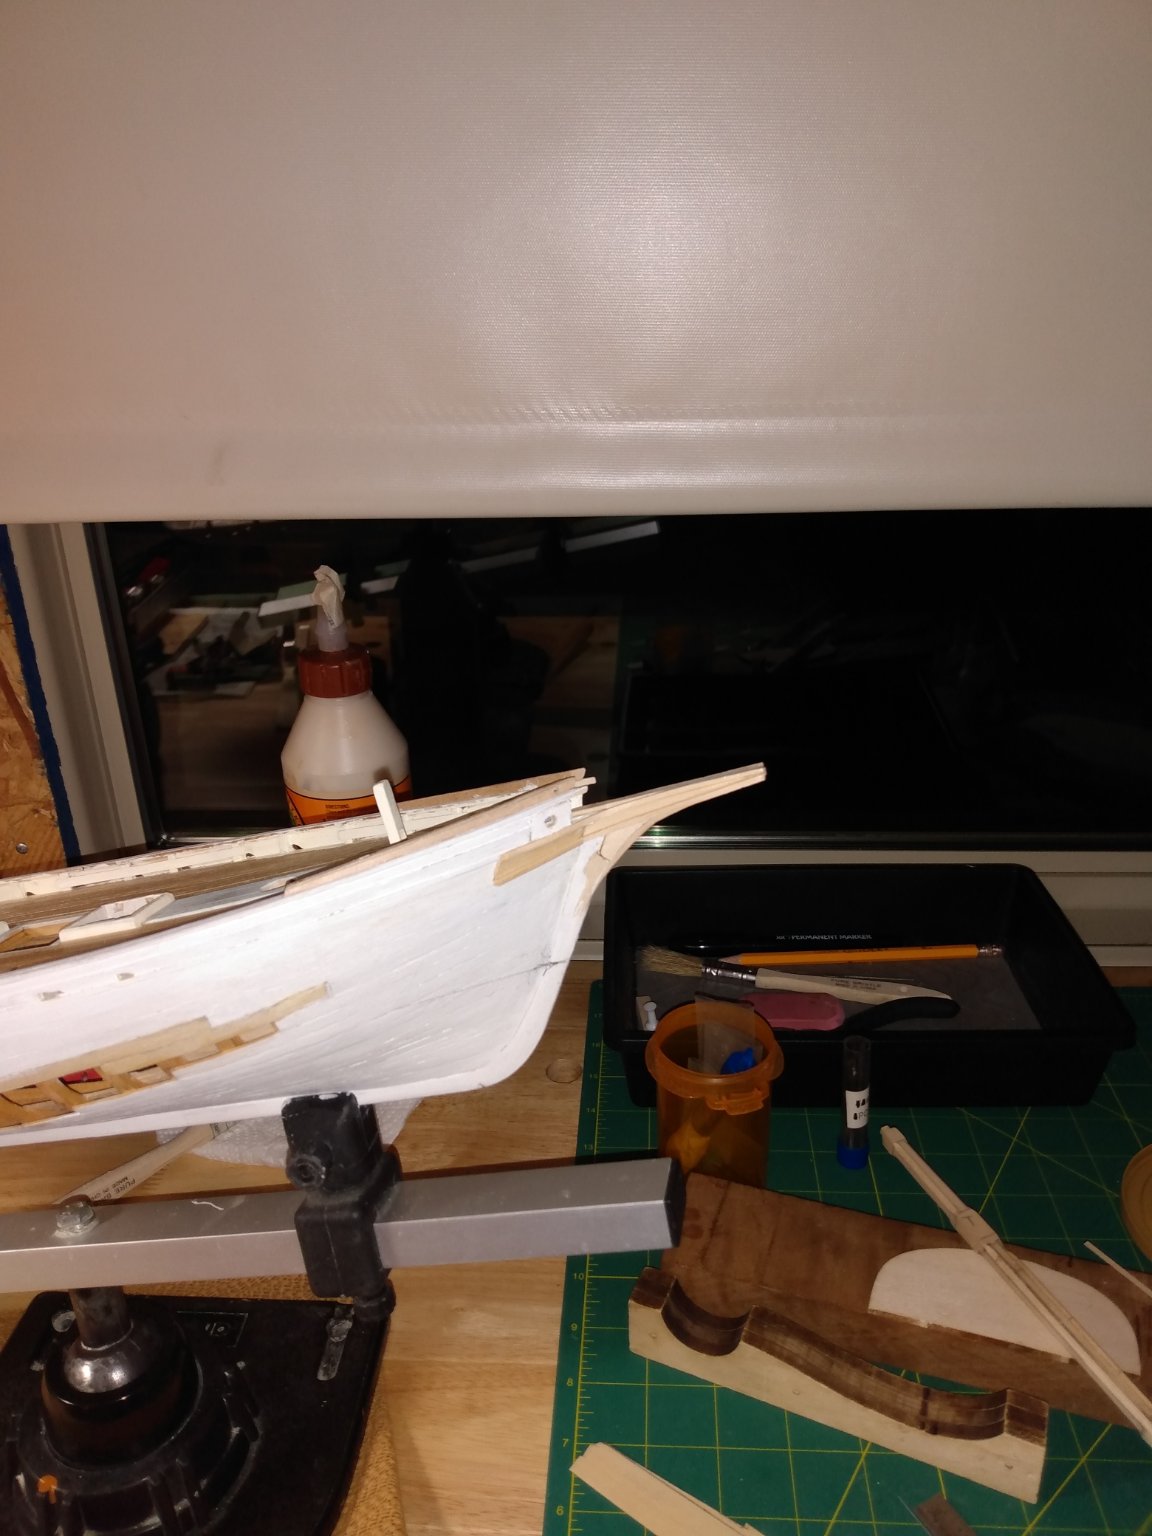
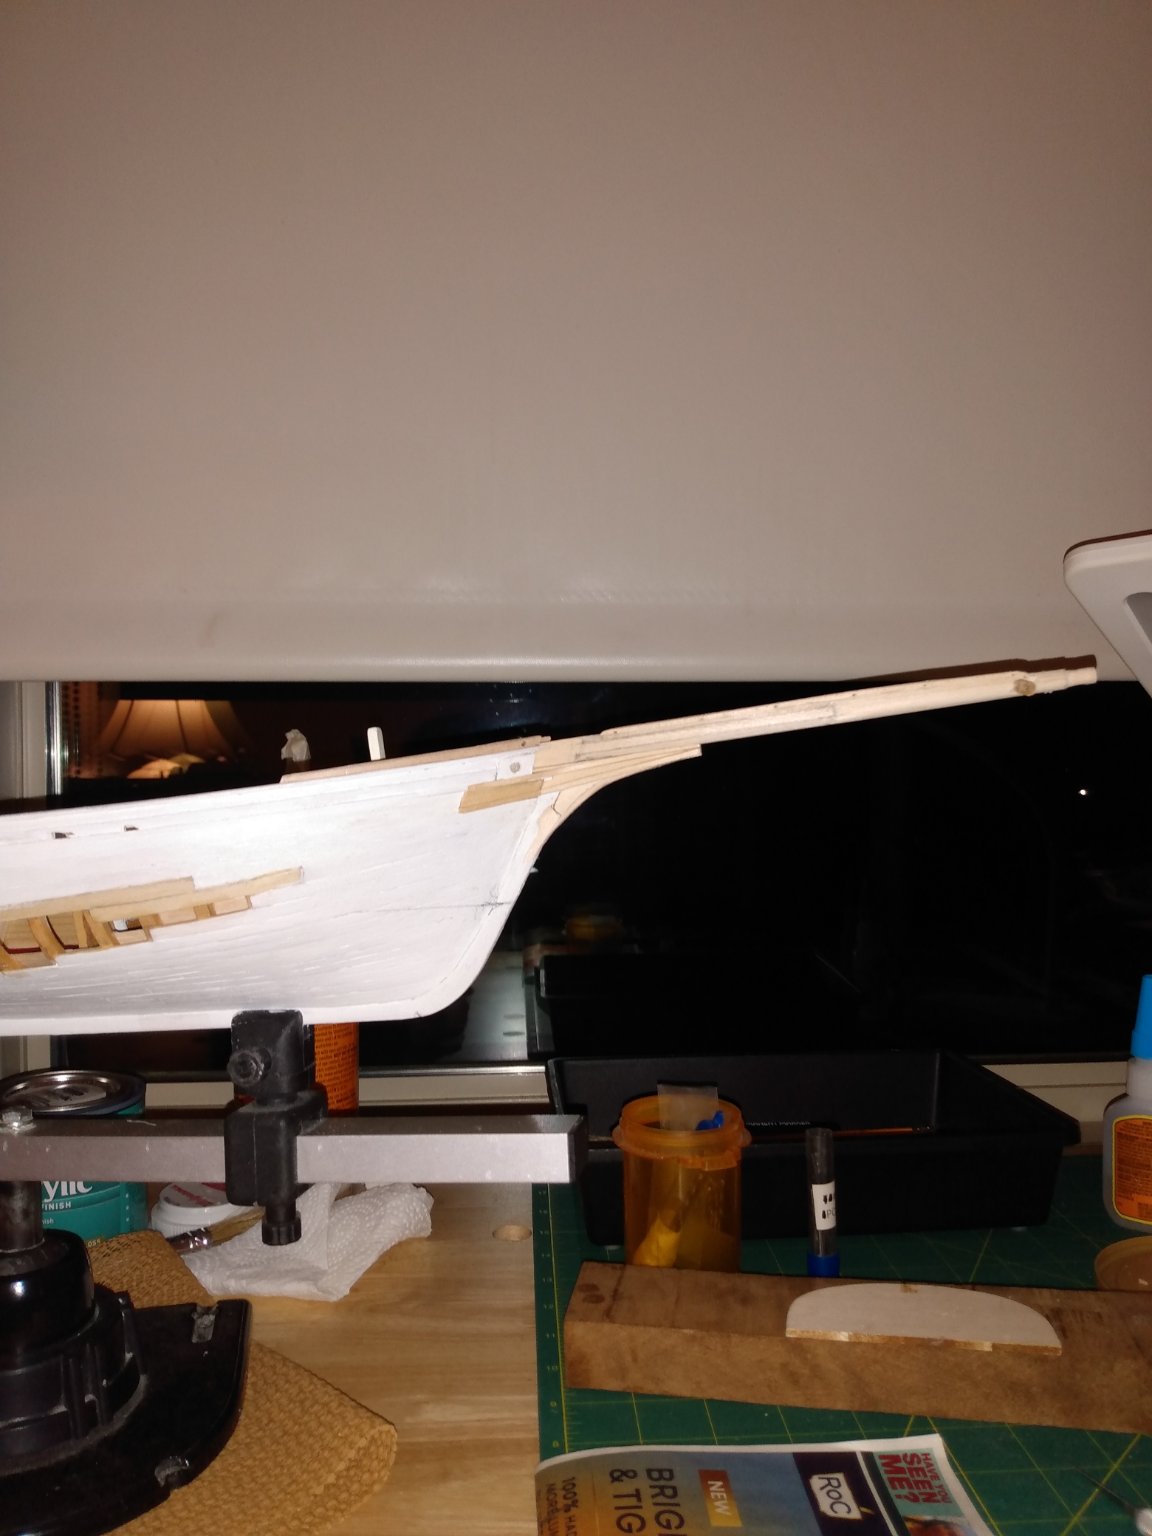
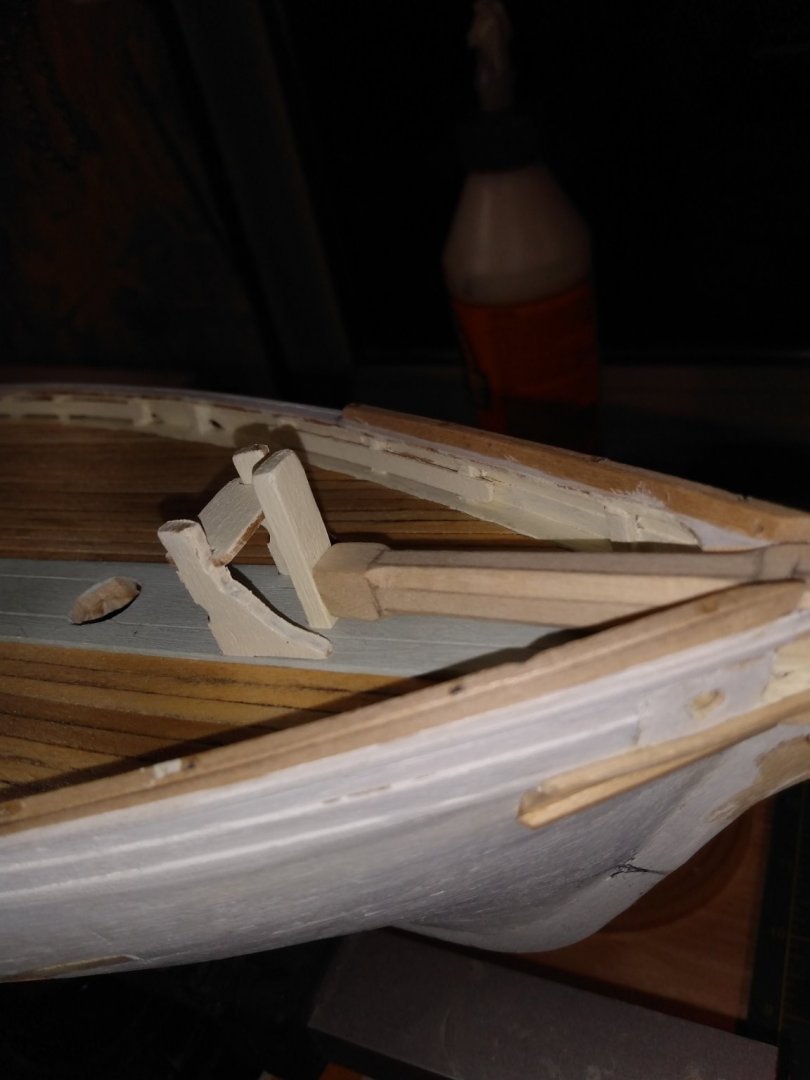
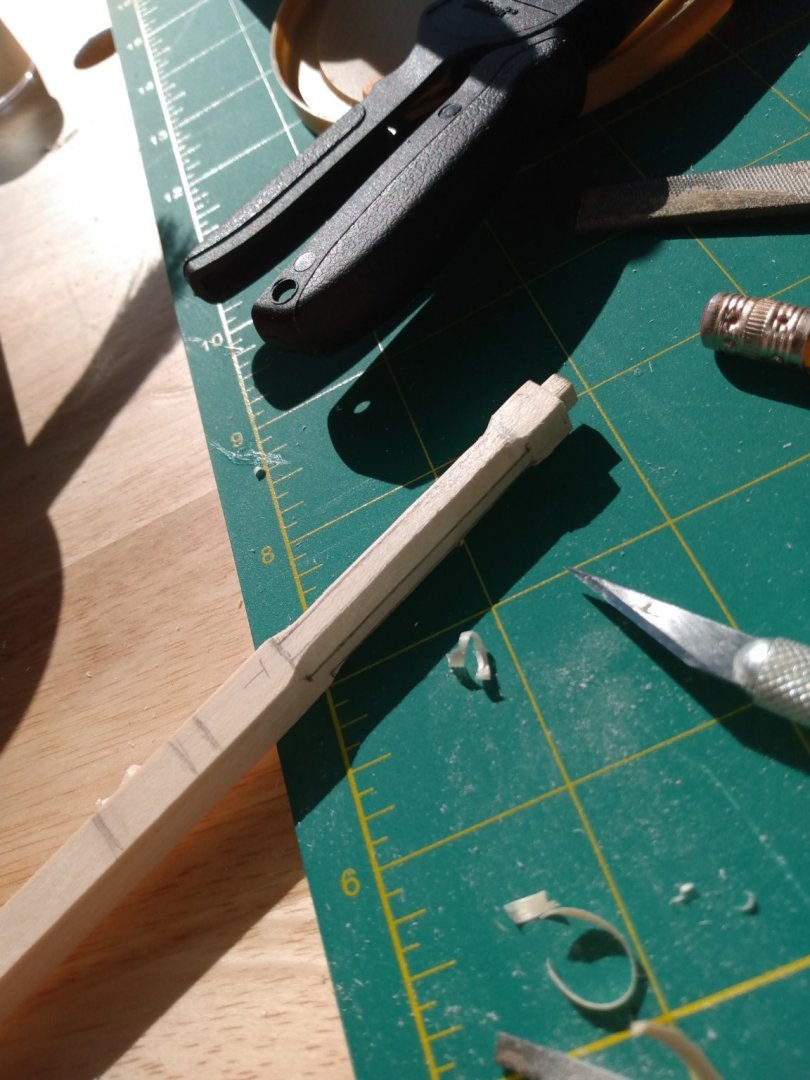
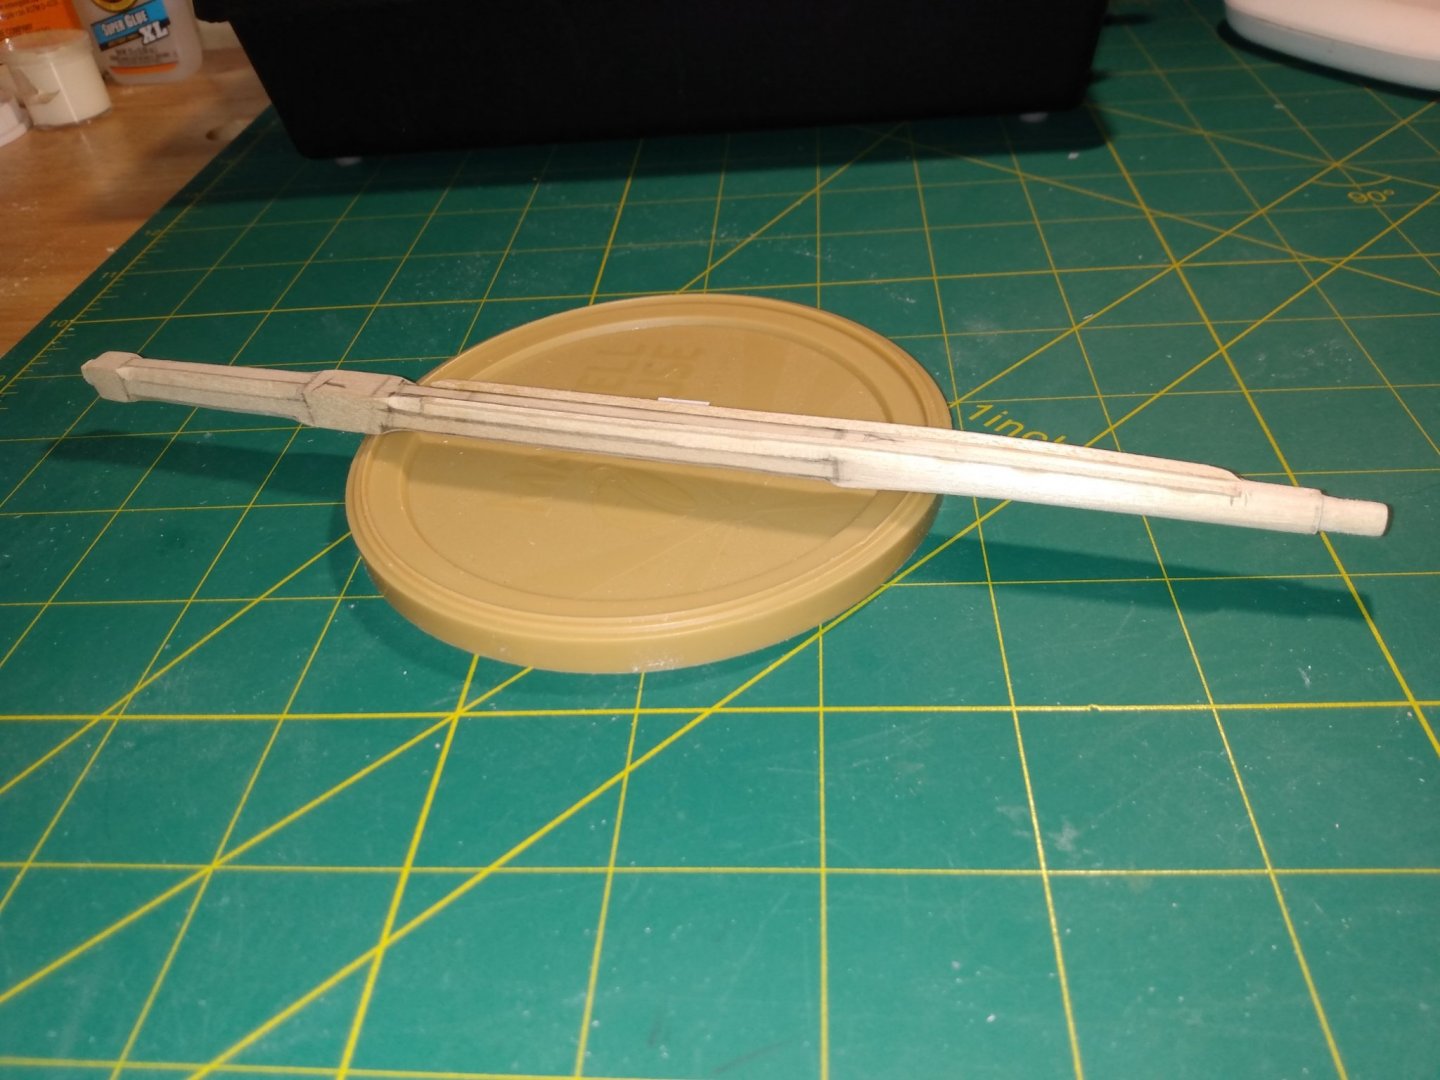
Hello there! Got to work on the bowsprit/trailboards. It was quite enjoyable... The bowsprit is pretty complex, goes from a mortise into the pall to square then eight sides then square again to eight sides again. After the second eight sides it called for sixteen sides to round. I skipped the sixteen side deal as I've tried that before on this small size and it comes out looking round. So eight it is, looks good.Maybe with harder wood the sixteen would show better.But anyways, just some sanding and filing then prime and paint. The paint is also divided into: cream, black then white.


- 101 replies
-
- 5
-
-
- emma c berry
- model shipways
- (and 1 more)
-
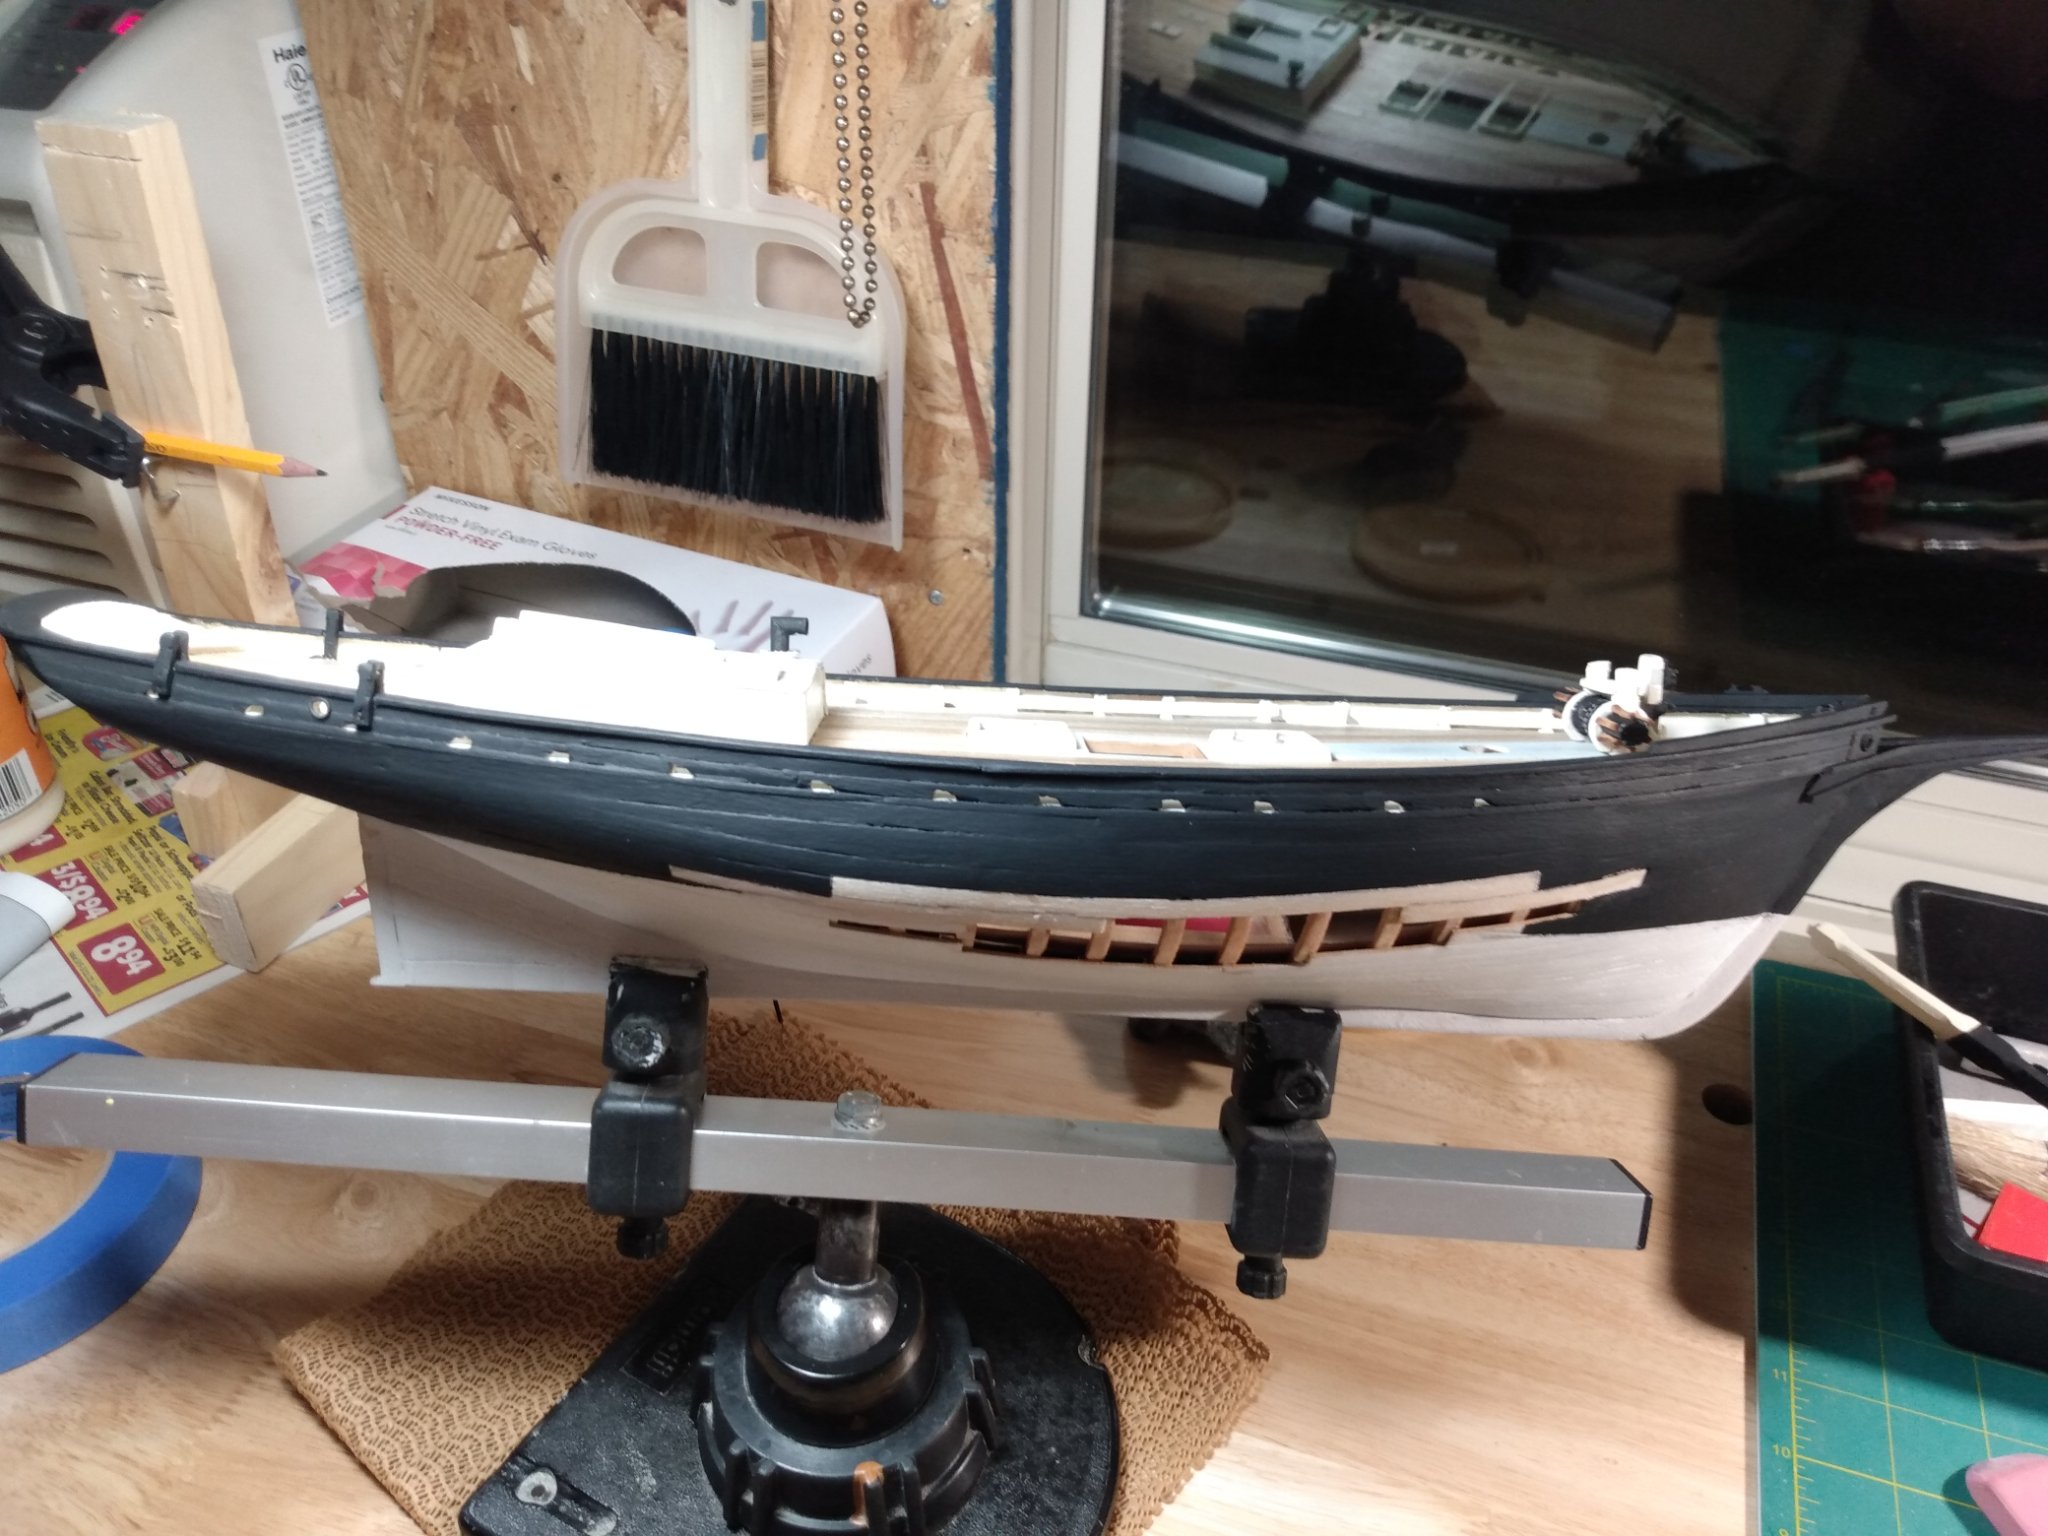
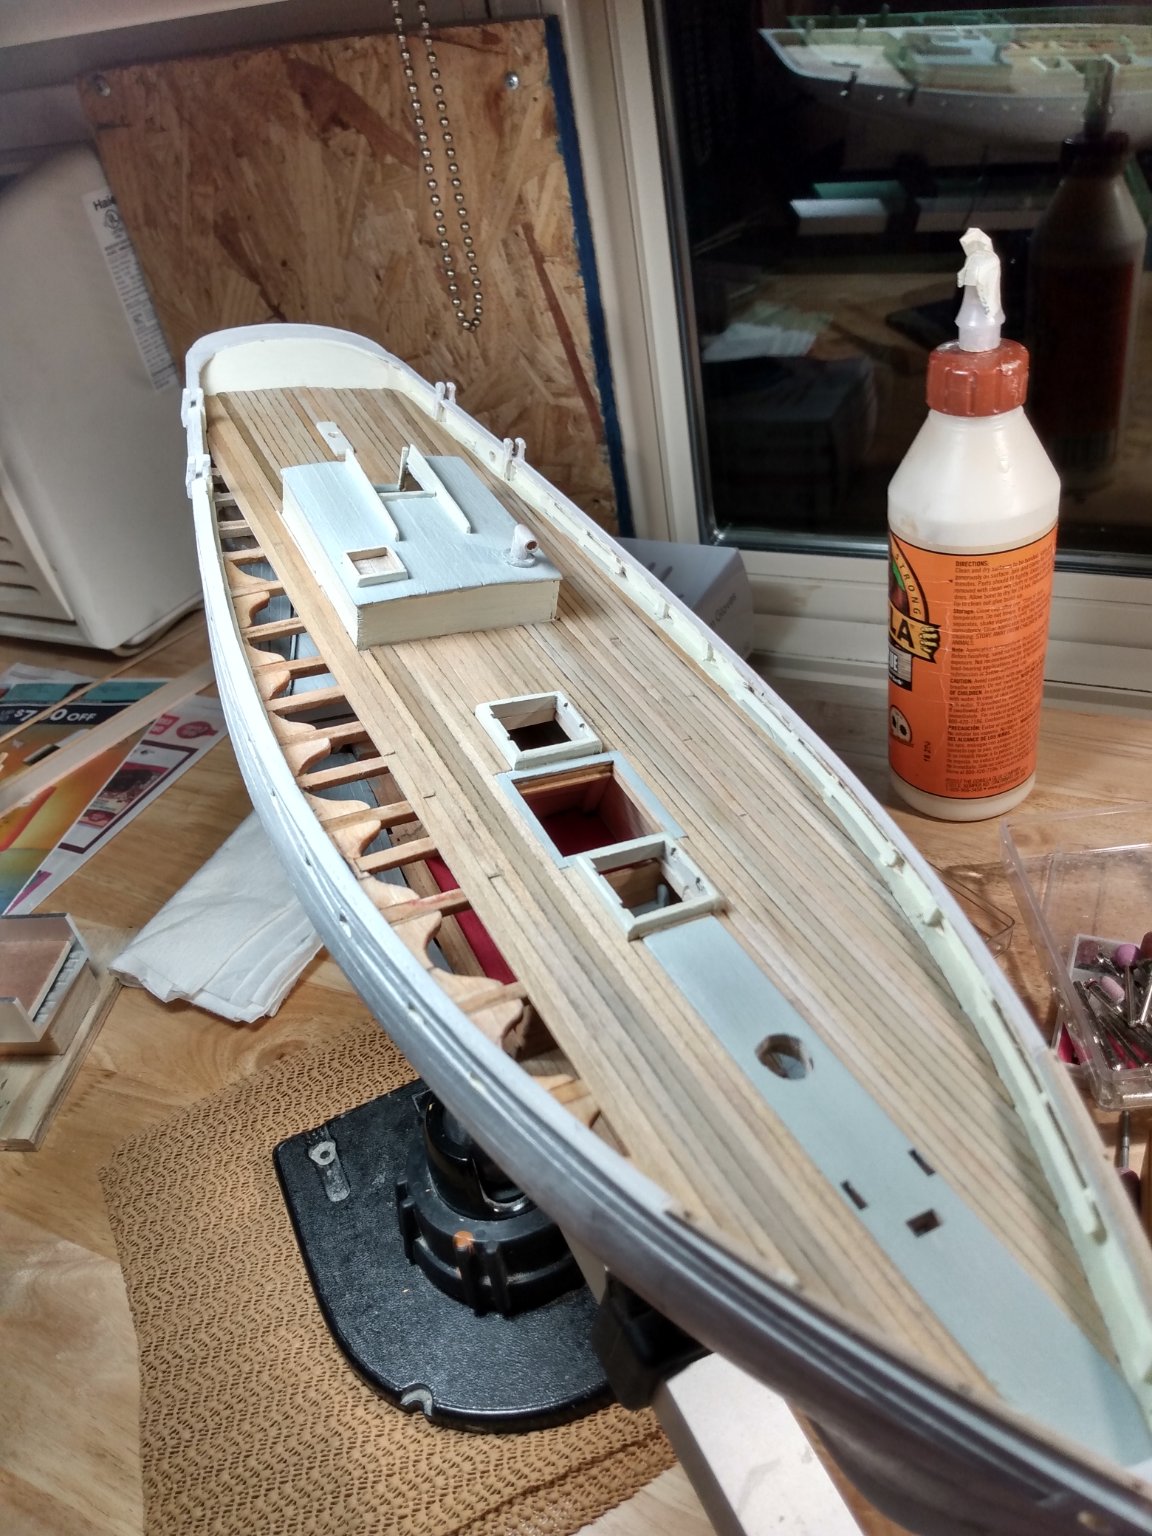
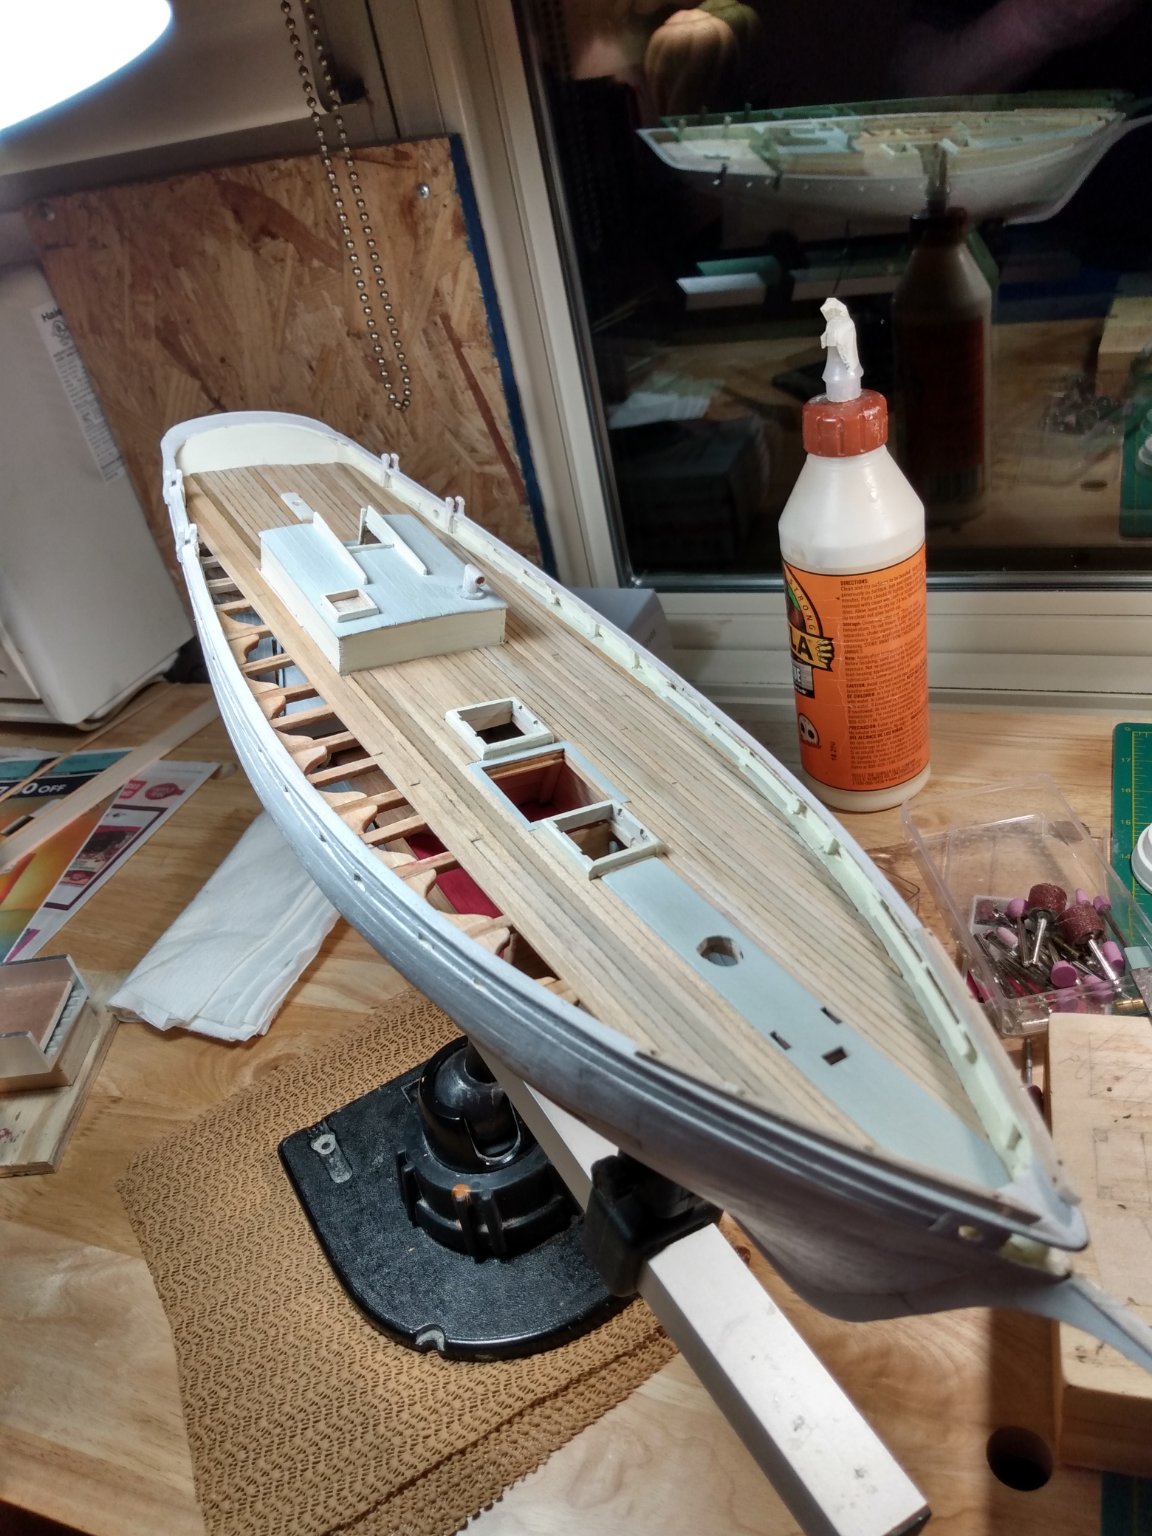
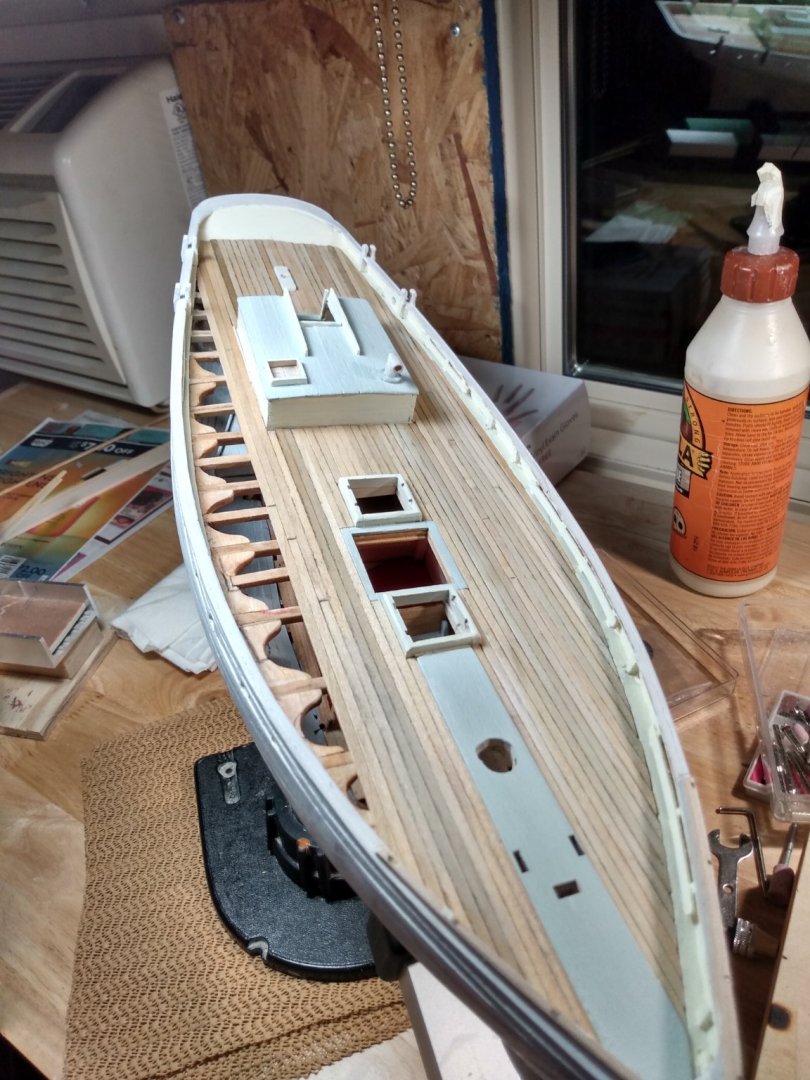
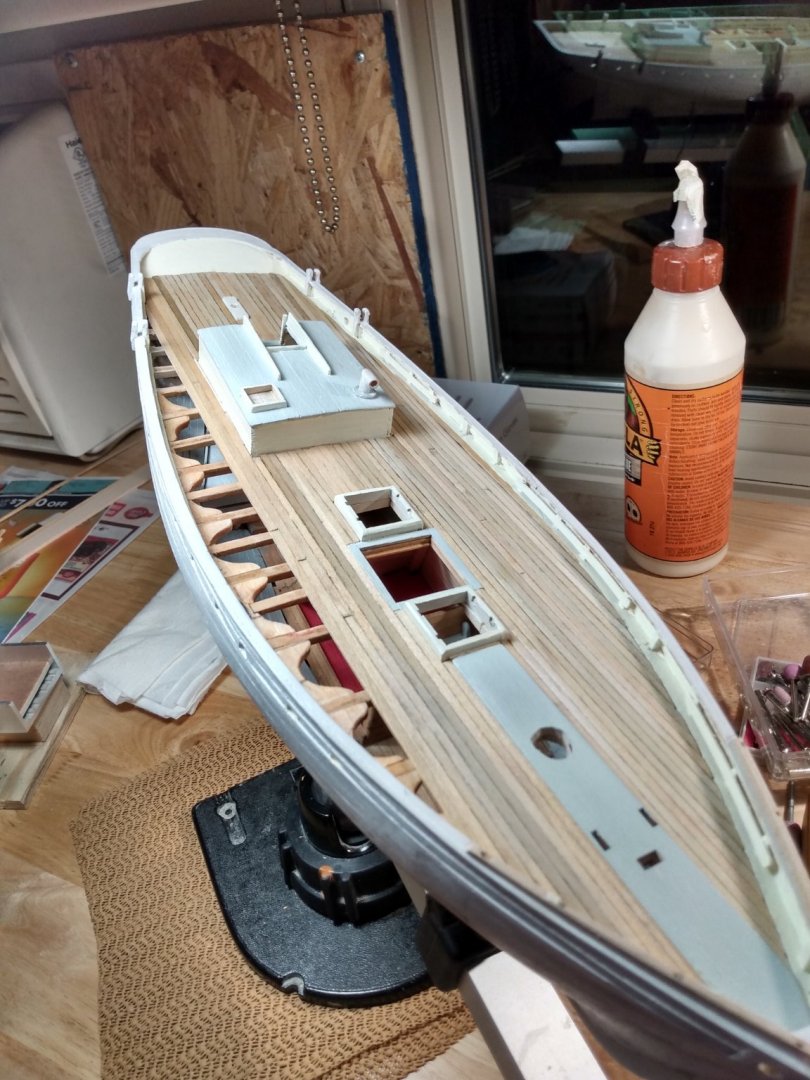
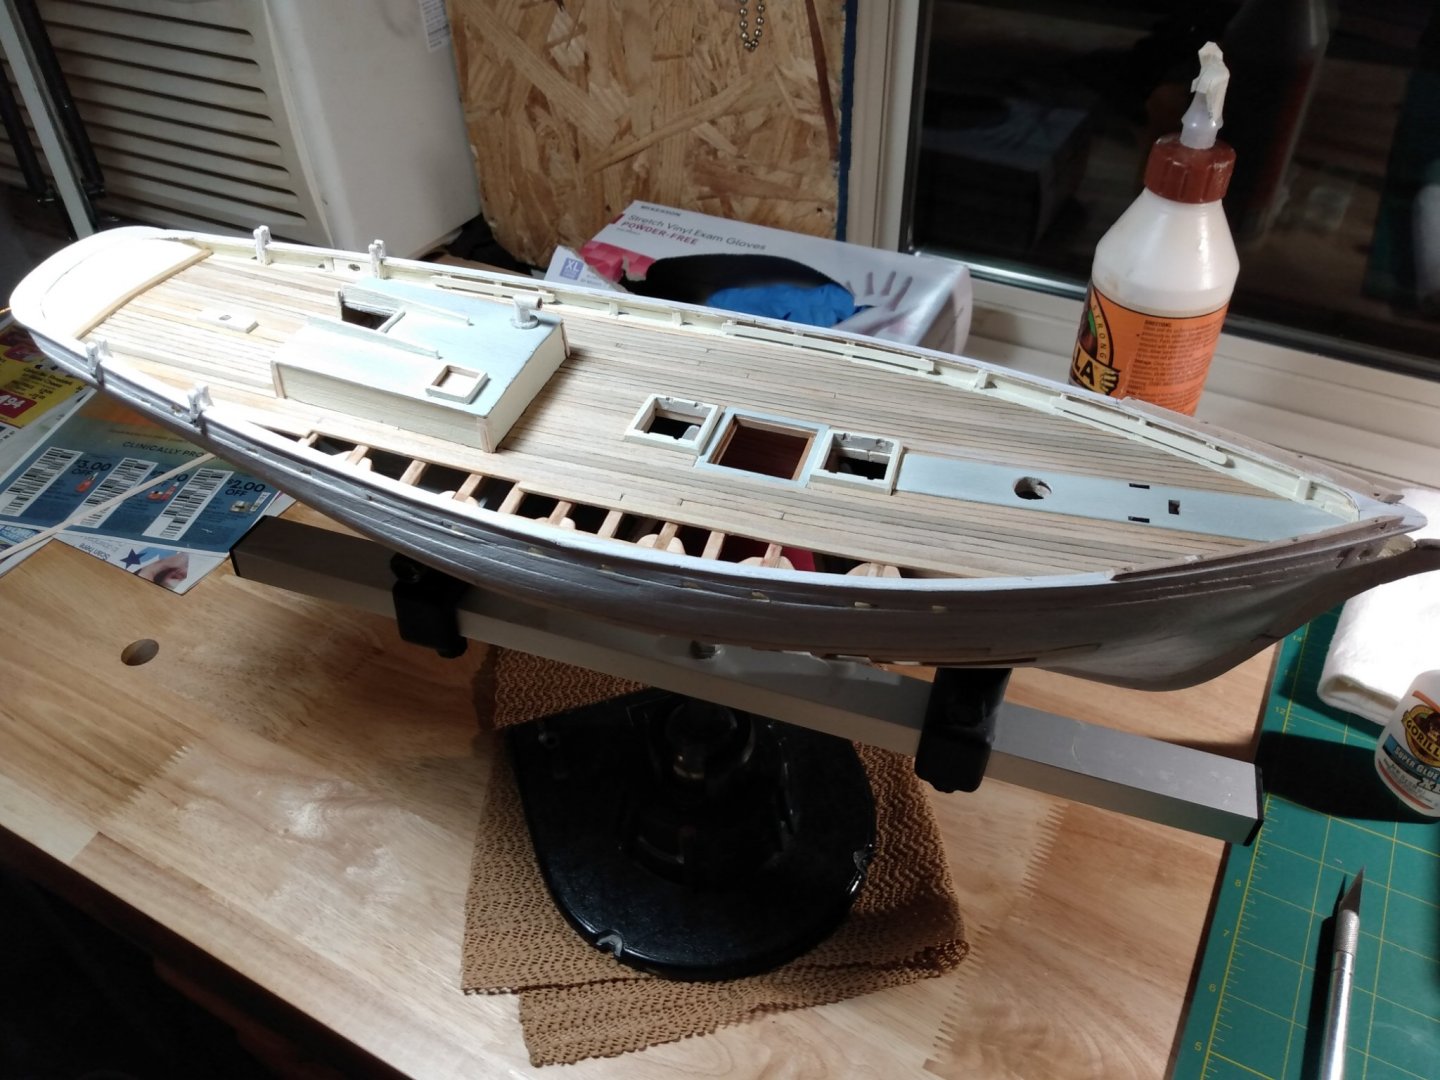
Hello there, thanks for the comments and likes, much appreciated. Been working here and there on getting as much of the inner structure installed and painted so I could get the deck laid down without getting paint all over. So, I'm now at that point and have got the deck all in except for an openning on the starboard side for peeking in. I think it will look decent when the l.e.d. lights are on to view the inner hull. I deviated some from the suggested color scheme. I liked the areas that I've used the "cream" color but I thought a somewhat warm grey for the other areas. It should pop when the black of the hull and pin striping are added. I want to get as much completed as I can before permanently attaching her to the base which will be the simulated slipway as shown on the box. I think next after a little touch up here and there I'll tackle the bowsprit. Well, thanks for looking.

- 101 replies
-
- 8
-
-
- emma c berry
- model shipways
- (and 1 more)
-
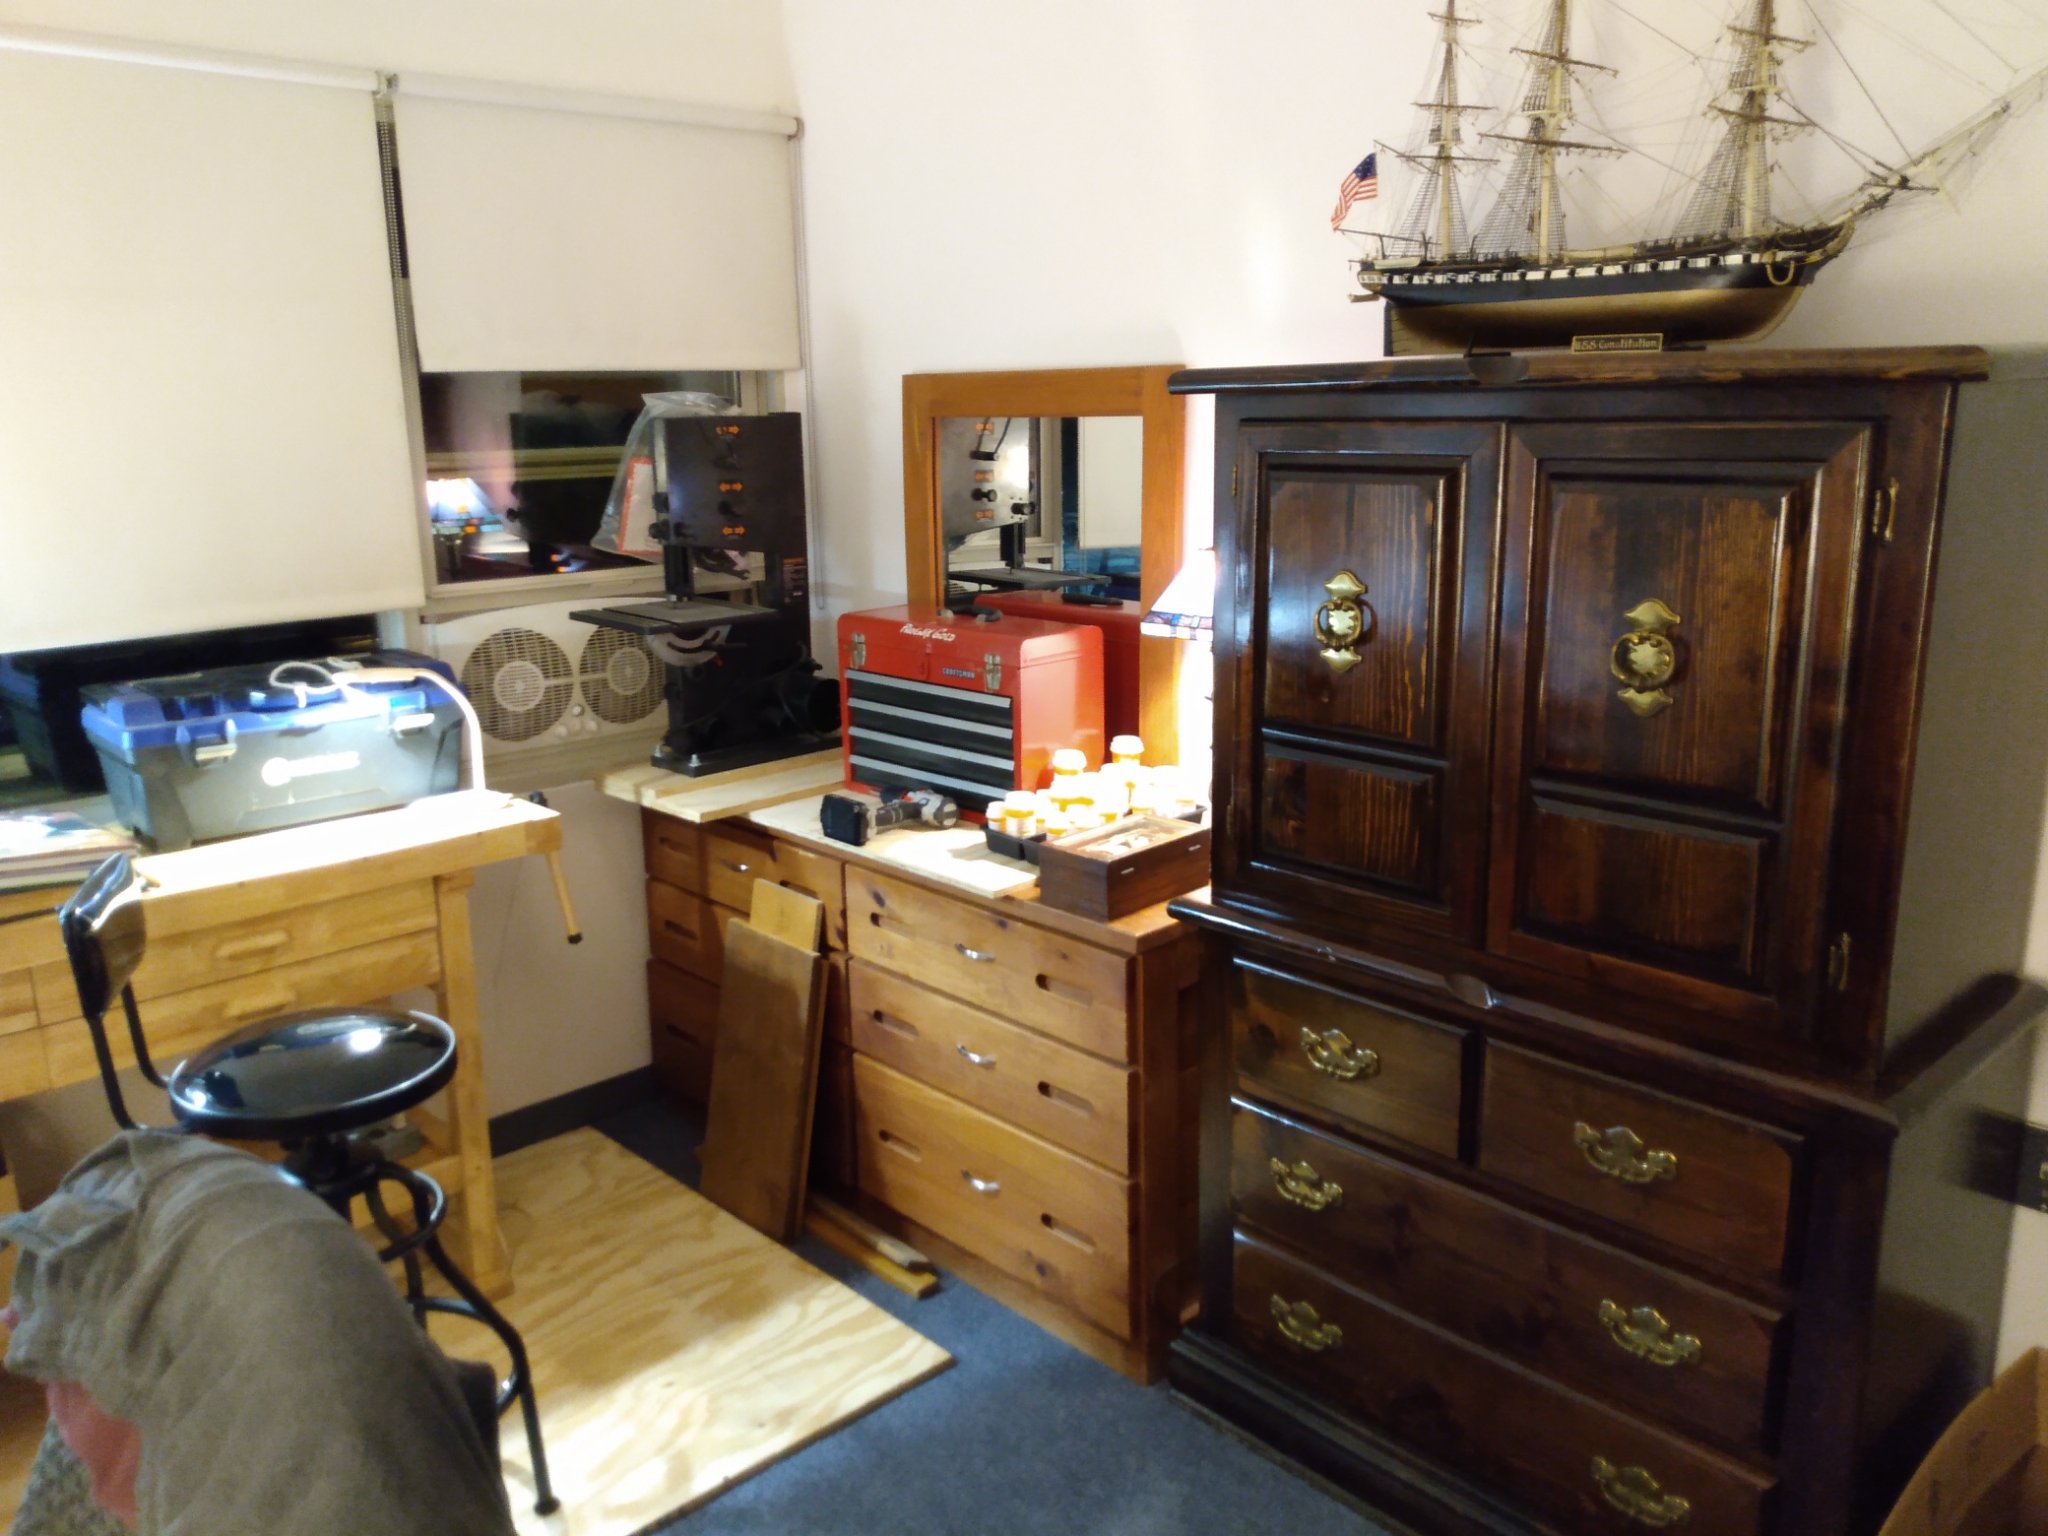
Great work on "Connie". Thanks for the detailed build log also, I know it will be one I use in the future. Sweet tools and shop, Gotta love buying nice tools!
-
No Eric, put it back on the shelf and started on the Emma C. Berry.
-
Looks great, you're doing a tremendous job!
-
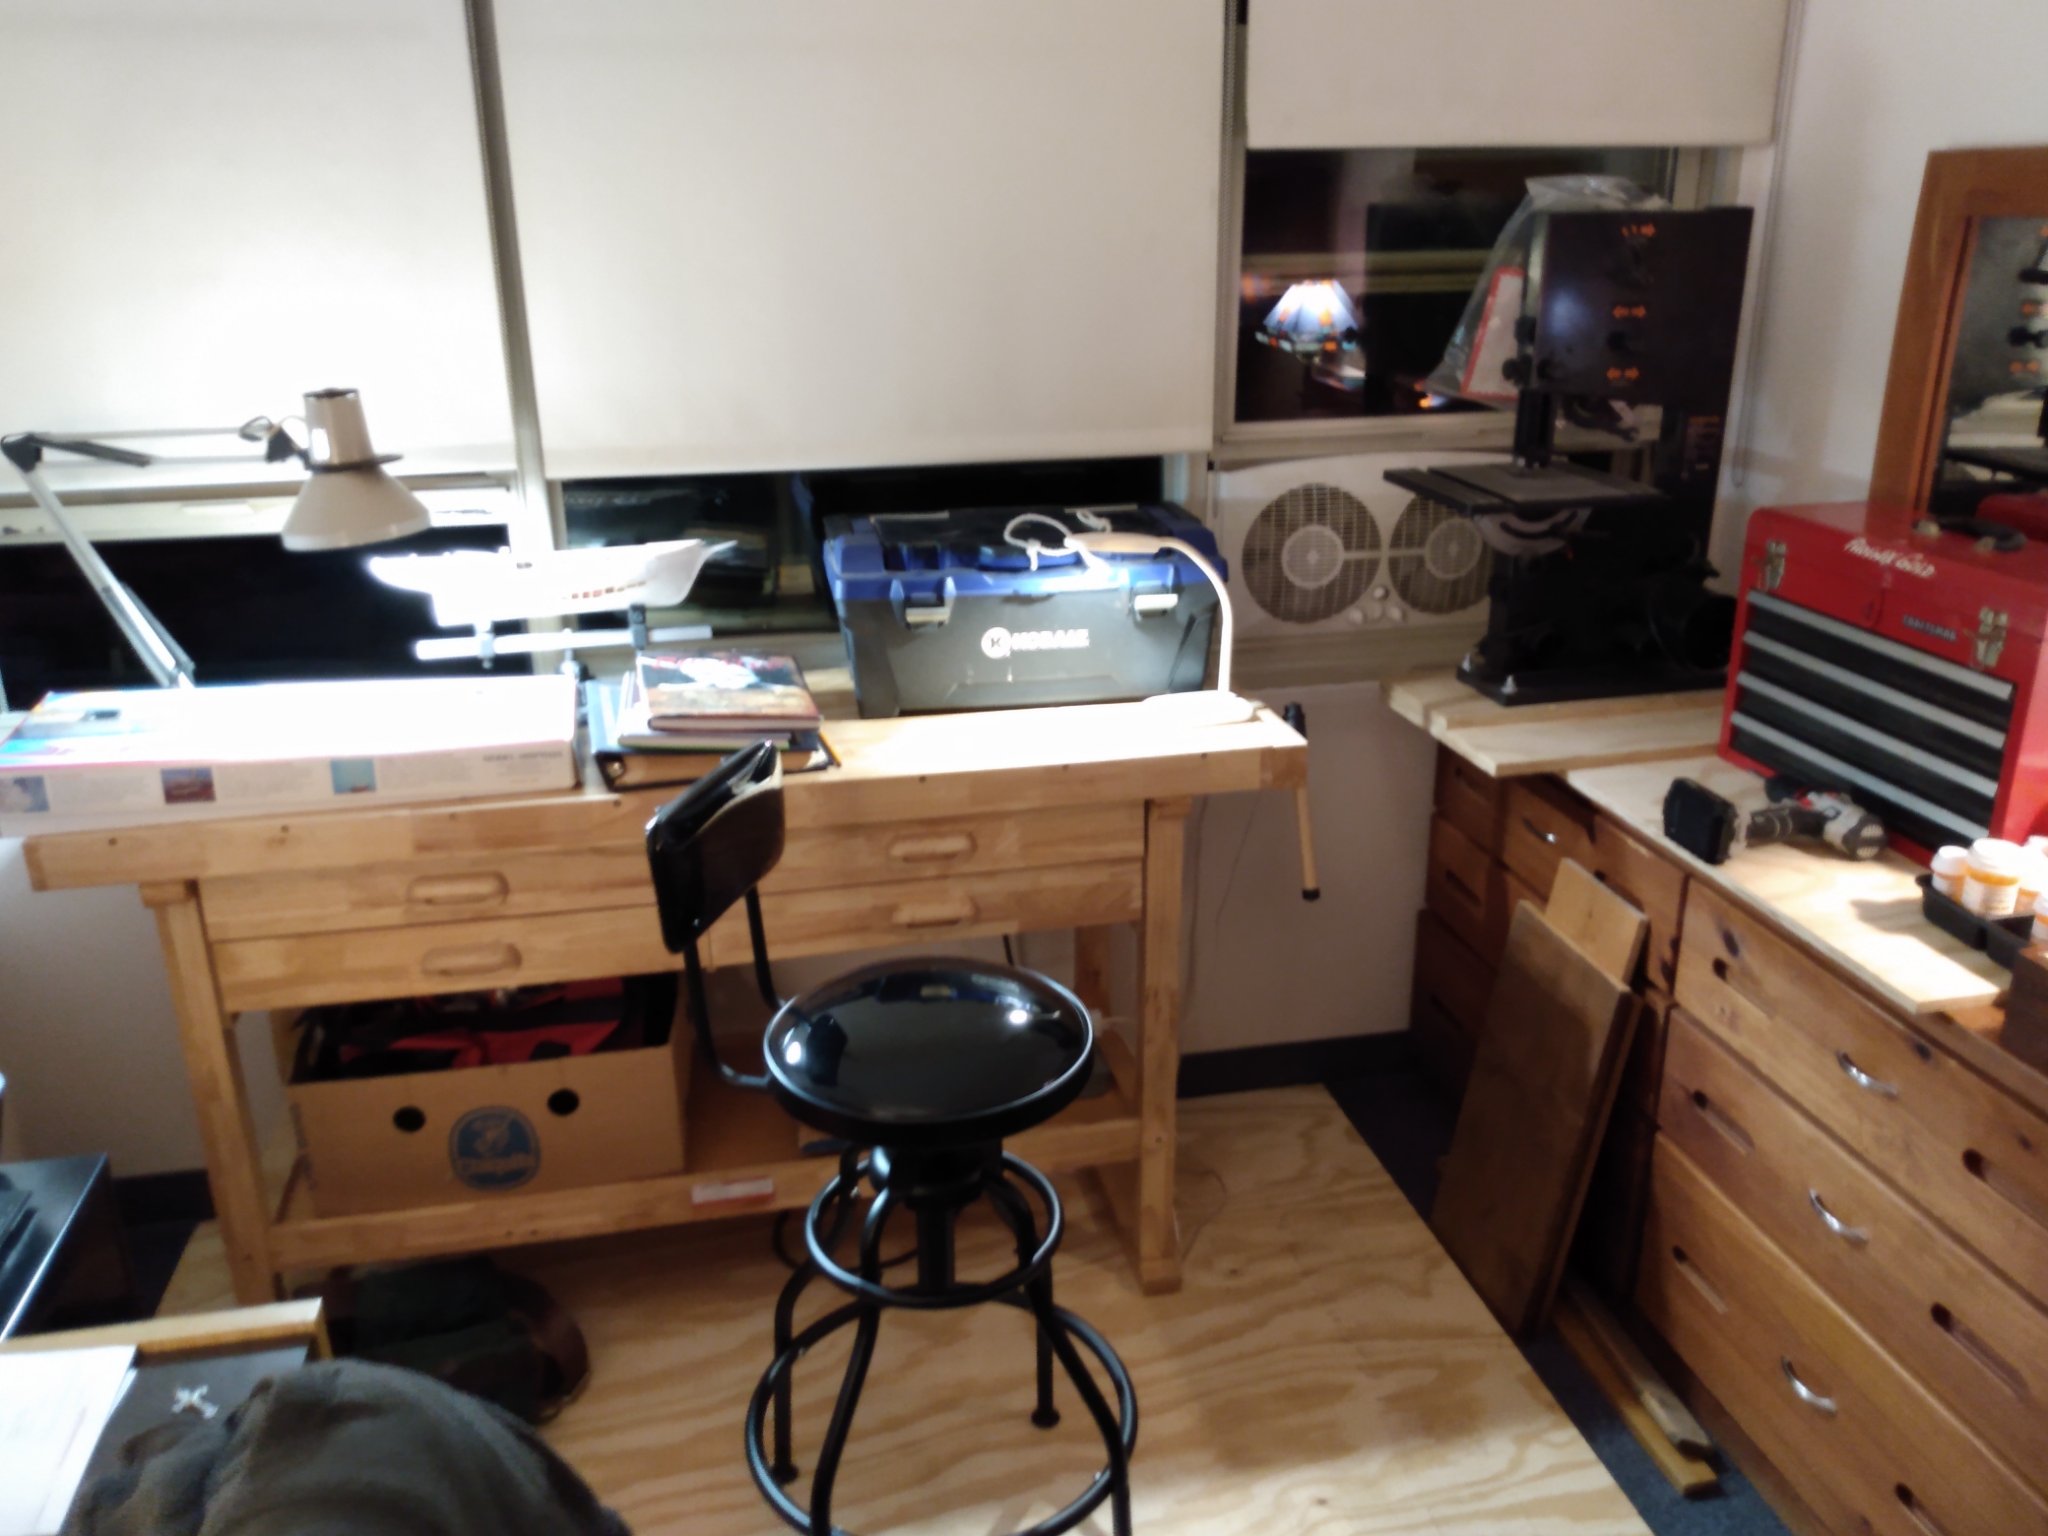
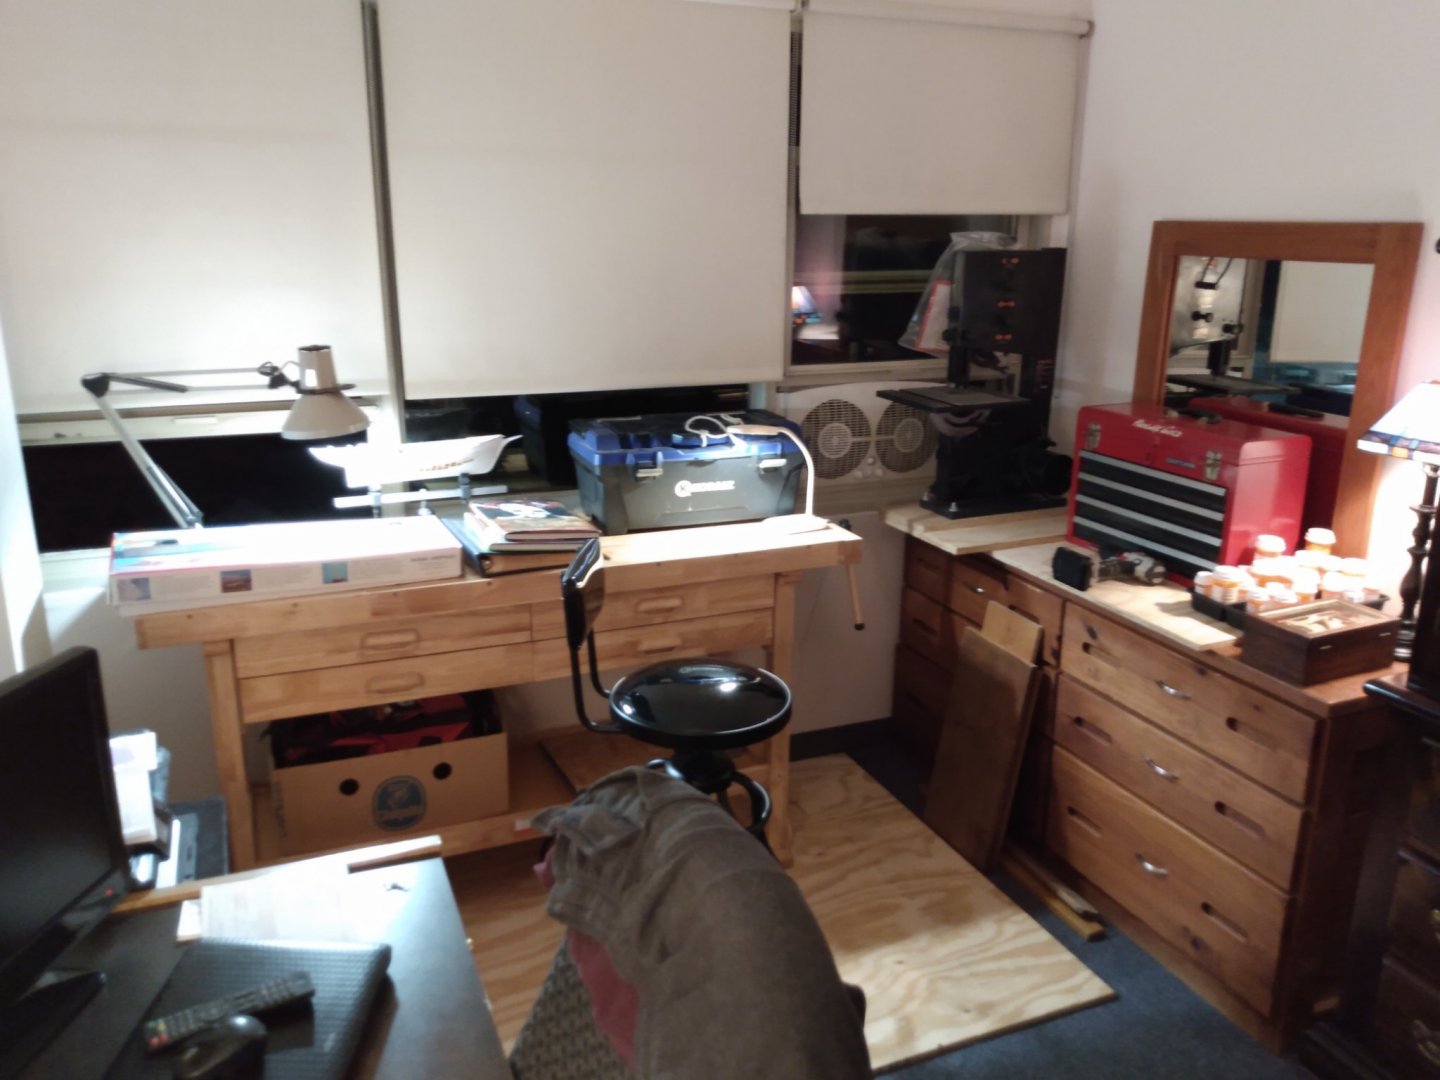
Thanks all for your nice comments ands thumbs ups. Been busy moving for the last few weeks, had to put ECB on the back burner. But all moved in now and have a much nicer work shop/ ship yard! Don't have to use my dining table for my work bench! Have some new equipment and work bench, sweet! Plenty of storage for everything too. Be back to work on ECB soon.


- 101 replies
-
- 8
-

-
-
- emma c berry
- model shipways
- (and 1 more)
-
Looking fantastic! Love the Old Ironsides...
- 104 replies
-
- 2
-
-
- constitution
- BlueJacket Shipcrafters
- (and 1 more)