


VTHokiEE
-
Posts
1,528 -
Joined
-
Last visited
Content Type
Profiles
Forums
Gallery
Events
Everything posted by VTHokiEE
-

backing up a log
VTHokiEE replied to Knocklouder's topic in Using the MSW forum - **NO MODELING CONTENT IN THIS SUB-FORUM**
As a follow-up to your test I downloaded your Sphinx log, the script took a little over 7 minutes to pull all 17 pages down and merge them into a single pdf (mind you the "page" structure still exists - it doesn't look like 1 flowing page if that makes any sense) which was almost 260 MBs in size (the log is around 650 pages - though probably 15-20 are wasted because of the end of pages being joined). I quickly tried some compression algorithms but didn't really save much (which isn't that surprising given that the images are jpegs and the size is somewhat reduced on them already). -
backing up a log
VTHokiEE replied to Knocklouder's topic in Using the MSW forum - **NO MODELING CONTENT IN THIS SUB-FORUM**
I'm currently trying to see if I can pull together a stand alone piece of code that will automatically generate pdfs of logs. After a little tinkering yesterday I currently have a Bash script that will create a PDF of a complete log on MSW. There are probably some tweaks to make the pdf look better but it does work. Ideally this would be turned into a plugin for the forum, but I'm not certain that I will be able to do that so I will see if I can create a standalone program that users can run. You would enter the topic url (for example: https://modelshipworld.com/topic/30186-hm-sloop-echo-1781-cross-section-by-vthokiee-148/) and the program would out output: 30186-hm-sloop-echo-1781-cross-section-by-vthokiee-148.pdf It isn't perfect - smiley faces seem to render incorrectly and sometimes the @ username disappears (like @VTHokiEE vanishes) but hopefully I can get it off the ground and usable for people. -
backing up a log
VTHokiEE replied to Knocklouder's topic in Using the MSW forum - **NO MODELING CONTENT IN THIS SUB-FORUM**
Edit: Deleted - don’t do this, I got myself blocked doh -
More and more I’m learning that I need to make custom holders and jigs with (typically scrap) wood or other things I have lying around to get the job done. I’ve seen some very elaborate home made jigs on the forum as well but it seems like “custom” is often the right way to get it done.
- 43 replies
-
- 1
-

-
- Lowell Grand Banks Dory
- Model Shipways
- (and 2 more)
-
Looks like you’re making good headway. Visualizing how to clamp, create jigs, guides, etc while frustrating can be so rewarding when you finally figure out one of the right ways to do it (for me this is usually right after I finished doing whatever the task was one of many wrong, or maybe better described as more difficult, ways 😁). I hope you’re enjoying yourself - it can be such a fun hobby!
- 43 replies
-
- 2
-
-
- Lowell Grand Banks Dory
- Model Shipways
- (and 2 more)
-
A few thoughts, have you mocked up any cannons to see what they would look like through the ports? Maybe it is possible to cover both inside and out without having a significant issue? Does the kit have port lids? Maybe these ports could be closed to cover the issue as well? Finally, with so many ports these issues will mainly be known to you so I would compose a path that doesn’t significantly impact the rest of the build (you mentioned one path creating issues with the knees later so maybe that is not a good fix). Hopefully there is something of value in these thoughts and good luck!
-
I haven’t built this kit so I can’t say for certain if you’ll need it if not but a small hand drill (or pin vise) with some small bits can be helpful. Also you may find some small “squares” useful, but these can potentially be found around the house - I have seen many people use LEGO blocks to keep parts square while they are clamped for the glue to dry.
- 11 replies
-
- 2
-
-
- Lowell Grand Banks Dory
- dory
- (and 2 more)
-
Nice job; I’m excited to see how the simulated weaving looks.
- 28 replies
-
- 1
-
-
- Nave Egizia
- Amati
- (and 1 more)
-
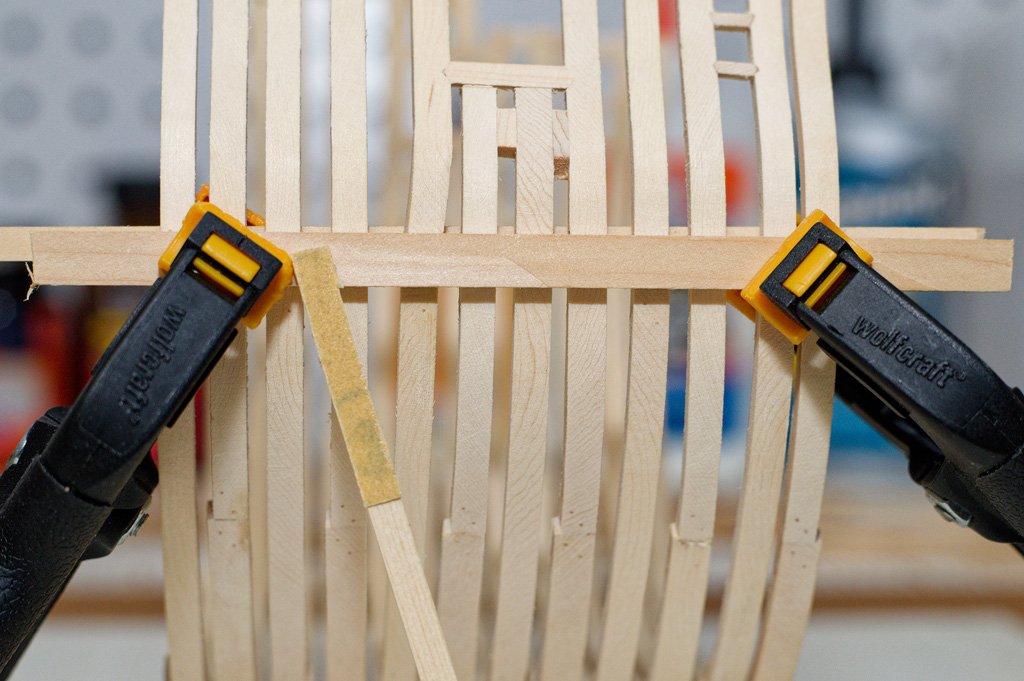
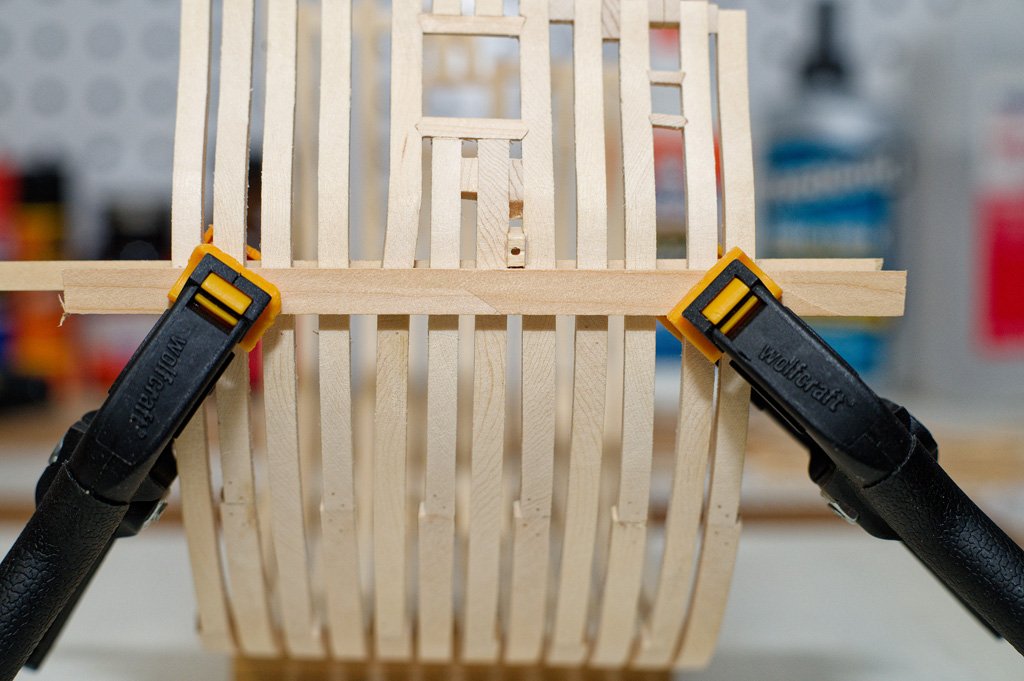
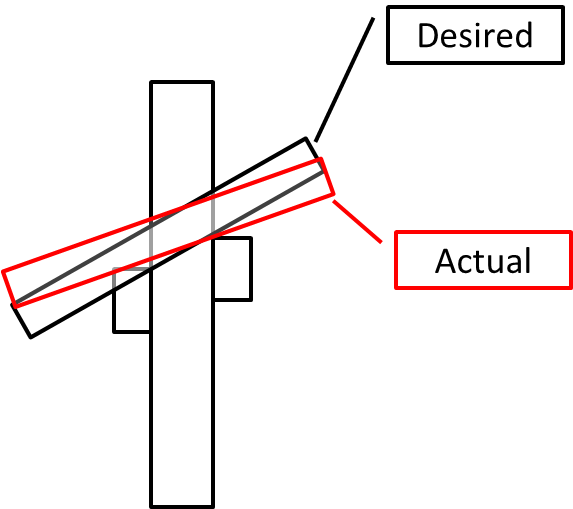
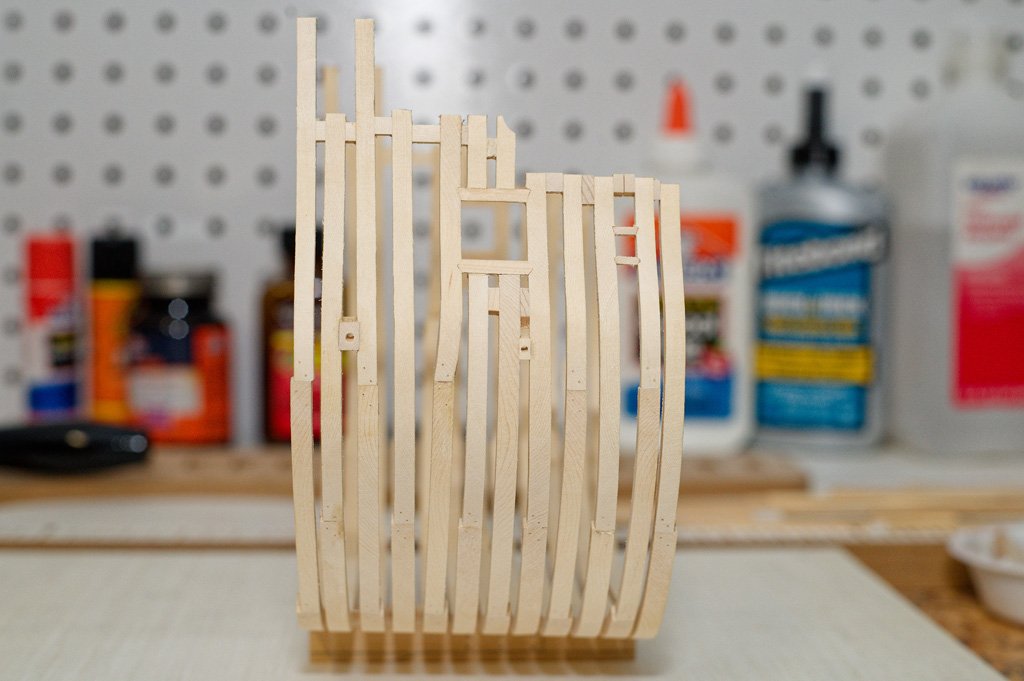
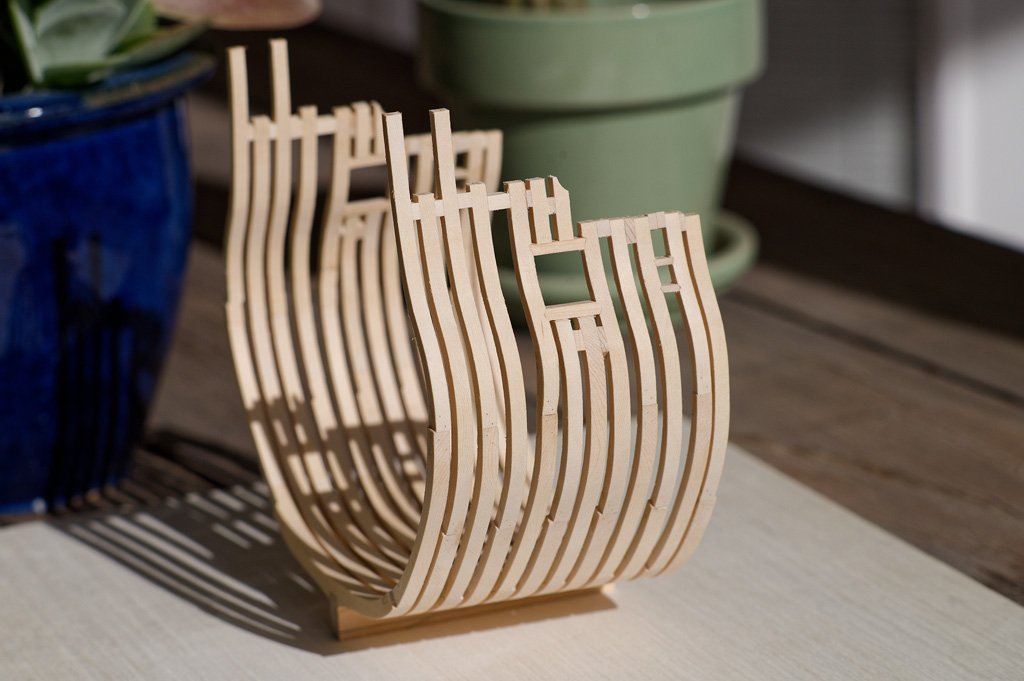
I surprised myself with a last post of the year; I had assumed my previous post would be, but as luck would have it I had a lightbulb moment and decided how I was going to proceed and install the scupper ports (the angle was giving me pause). I decided to sand in the angles for the ports by clamping battens to set the angle as shown below and then using a sanding stick cut to the same height at the block. Everything seemed to be going great until I added the second scupper tube and it looked slightly higher than I intended. It was at that point that I realized that I failed to account for the thickness of the batten which raised the front of the sanding stick resulting in a less inclined angle for the scuppers. I tried to draw this to help people see what I accidentally did and to correct for it if you try to duplicate my guides. I should have lowered the "low" batter to account for this offset. In the end I think it turned out well regardless (though these photos have me casting a sideways glance at the lower sill of the sweep port). I'm not certain if I can level that out or if I'll make things worse by trying 🤔. I'll consider it as I taper aft frame 4 and 5. Happy New Years!
-
Thanks @Old Collingwood Appreciate it @glbarlow - when are you going to do a scratch build? I could use a detailed log from you to avoid my pitfalls 😁.
-
Thanks for the tip @tlevine and the advice to wait; I’ll do that. I did realize that I need to sand the top Timbers of the tall frames to make an angle of sorts as well.
-
Thanks everyone for the likes and comments. I made it through fairing and boy was it a learning experience regarding pencil lines and most importantly "leave extra wood on the frames" I will say that I'm starting to feel much more comfortable with telling when fairing is "done." However I was quite disheartened as I faired this section as I sanded basically down to the chocks in a spot (or two 😬) and in an extended moment of disappointment almost decided that after framing I would be done and not continue on. However, in the morning cooler heads prevailed - how can I learn from my mistakes during the fitting out process if I don't make them now 😁? I buckled down and made the upper top timbers that sit on sill, faired them and added the curve from the plans to each side. I used a very slow RPM rotary tool with a small sanding drum to achieve the curve. I'm currently in the process of adding the scuppers for the unplanked side (which is shown below). I added some extra wood on the opposite side to help with fairing but that means it has to be covered - and another reason to press onwards. One question remains as I wrap up framing - what are good ways to cut down the frame tops to make them even (I should have left a touch more there as well on a few frames)? Finally, I've been reading and re-reading the fitting out document as I near the end of framing and I'm slowing becoming concerned about making the "column" components as I have no lathe and considering how to get through those steps once I get there. Happy New Years all!
-
What type of wood was the kit made up of? You can find basswood pretty easily at many hobby stores depending on where you are. Alternatively, there are two lumber sponsors (one in the US and one in the EU) if you want different lumber.
-
Very curious if you have any updates - this seems like quite a beautiful build!
-
I don’t have any first hand experience to offer but have you looked at the following build log at all: Your query made me think of it as the builder went out of their way to find a specific version due to the decorations. If you’re concerned about the decorations maybe see if there are any models on shapeways (or maybe thingiverse?) that might work for either kit. Good luck!
-
Very interesting build; I’ve been long fascinated by ancient vessels. It looks like you’re moving along quite well. What do you think of the kit so far? Eventually I have a MarisStella monoreme to build but I’m curious about the quality of these other kits that you somewhat rarely see being built. I have acquired a few Egyptian vessel plans and books where I may consider a small scratch build of one someday. Back to the kit though, you mentioned that all the planks are laser cut, correct? I can’t help but notice that the plank end (towards the middle) in the first picture doesn’t seem to align to the hole for it. Not a terrible gap to fill/fix but interesting to note. Have you done any test stains on some of the sheet scrap? Personally staining makes me nervous because I’m not certain that I could do it well. Have you considered an oil or even wipe on poly finish that some here prefer? I’m looking forward to the rest of your build.
-
I personally use a mini travel iron to apply heat for bending my planks. I have seen alternate ideas/methods (kettle with steam to heat the wood for the bend) but so far for me, applying a little bit of water and then ironing the plank worked.
-
Band Saw Recommendations
VTHokiEE replied to ChrisLBren's topic in Modeling tools and Workshop Equipment
Am I reading the tea leaves correctly and if I want to resaw for myself I should focus on 14” saws? Space is at a premium unfortunately. -
You’re absolutely right @druxey, thank you for the proper perspective.
-
Thanks @tlevine and @No Idea, I’ve been making some good progress on fairing but having to fair significantly more than I thought and unfortunately the frames will be thinner than planned. I suppose this is a warning to other first timers but my first frames were not build to the same standard as the final ones and across the board I didn’t sand them to the same “line.” It would’ve benefitted me greatly to leave more of to account for my “workmanship.” I think it will be fine in the end but the frames are thinner than they should be. A little frustrated with myself (hence the post to let the frustration go) but still enjoying the build. Have a Merry Christmas everyone - thank you for all the comments, likes and support. Hopefully, I’ll have a faired cross section to post pictures of in the not to distant future (maybe by new years if I can find the time).
-
I believe you are referring to a pin vise - simply spin the entire tool. Looks like you’re off to a good start!
-
Oh no, does this mean I should stop holding my breathe for a one off ancient vessel? (PS - No matter the answer I will indeed continue to hold my breathe 😉) From the number of Vanguard kits on the forum it seems like you’re reading the room pretty well. Keep up the good work! Someday I’ll pick up another kit - you make them faster than I can build them by a long shot.
-
Knowing that I’m in a minority, I’d vote the same. I’d love an ancient vessel (something like the Nave Romana would be incredible).
