
HOLIDAY DONATION DRIVE - SUPPORT MSW - DO YOUR PART TO KEEP THIS GREAT FORUM GOING! (89 donations so far out of 49,000 members - C'mon guys!)
×


VTHokiEE
-
Posts
1,528 -
Joined
-
Last visited
Content Type
Profiles
Forums
Gallery
Events
Everything posted by VTHokiEE
-
 Really appreciate the commentary on this post. Especially how you adapted to allow the least amount of future impacts. It was relatively small, but quite eye-opening for me - thank you! PS - Beautiful work by the way
- 642 replies
-
- 2
-

-
- winchelsea
- Syren Ship Model Company
- (and 1 more)
-
Depending on how much you need to manipulate the cap rail while the glue is drying you might be able to get away with blue painter’s tape as a clamp, just a thought. Looking good so far! Keep at it!
-
Awesome job! It looks great! Unfortunately I have no idea about the scale of the anchor and such
- 100 replies
-
- 2
-
-
- pauline
- BlueJacket Shipcrafters
- (and 1 more)
-
I have this exact kit! I’ll be very excited to follow along; I think it’ll be my next build. Looking good so far!
-
Have you considered reaching out to https://hobbymill.eu/en? Also, if you start getting into improving planking you may want to consider using "real" lengths and then full length planks aren't critical - but if you are painting it may not be worth the added expense.
-
Thank you, I appreciate that. I've found that it works pretty well for me, I tried a method or two similar to your plate and spring method but I wasn't very successful. It looks like your coils in the background are coming along quite nicely so if you have a method that works for you keep at it! Good work on the build so far, enjoying your updates.
-
Rigging the cannons can be really time consuming, but it is all part of the journey. I don’t know if this method will work for you or not but I make my coils on the sticky side of painter’s tape. I coil them by hand and then either use diluted white glue (if cotton rigging) - still trying to determine the best option for synthetic (maybe varnish?) to hold the coil. After they dry I pop them off with a small scrapper and attach them on the model. I think I have some pictures from my Alert build. Let me see if I can track them down… hope it’s useful in some form or fashion. Edit: Found a picture from the prior build:
-
I very much enjoy all of your updates; it’s really impressive work. Someday I aim to do a scratch POF and the quality of your work is definitely a goal of mine to aim at.
-
@dvm27 and @iMustBeCrazy Thank you very much for the picture and the detailed explanation (apparently I learn better from pictures than words - once I saw the picture everything started aligning in my brain). I've been spending some time in TFFM Vol.1 as well to see these chocks. I don't have a tilting vice yet for my mill so I think I will have to take the chisel (or maybe even filing approach).
-
Thanks Mark, I can see that for line 1, but that wouldn’t apply for the dashed line 2 - or would it? I think I’ll do all my fairing later simply because I think this is actually on the reverse side of the frame and I don’t want to make a mistake.
-
Frame 3 is done and dusted and as I move on to the next frame I was wondering if anyone could help me understand what the "extra" lines in frame plans 4 and 5 are (highlighted below on the plan for frame 4) : I read through the framing instructions, power point and several build longs and found the following explanation from Greg on a build log: "The chocked joints become angled as you progress towards the fore and aft hulls. Note the dashed lines in frames 4 & 5 on the plan. Otherwise the fairing process could break through the face of the chock. However, this angle is so slight on the cross-section section we have chosen it's not really an issue." Unfortunately I don't fully understand what I am supposed to do differently when building these 4 frames. I assume I have to do some angled fairing on the aft side? If so would this be more easily accomplished during fairing? Thank you for any help and insight.

-
I have this kit in my stash so I will be watching with interest. Looking good so far!
-
It is 🙂. Glad to hear you’re doing well; I can understand the urgency - the fires, drought, etc. Looking forward to when you eventually get back to it whenever that may be.
-
Thanks Glen; I’m glad to be at it as well. It feels good to be creating again. I think you’re trying to sell yourself short though, from reading through your logs attention to details doesn’t come off as one of your weaknesses :-).
-
Hey Bob, just thought I’d check in and see if you re-opened the shipyard at all? Mine has been closed as well but finally have started making progress again. I hope all is well with you!
-
Thank you @No Idea and @druxey! I’m going slow and keeping the parts on the left and right to do my best to avoid making identical parts. Now that I’ve said that I’ve pretty much jinxed myself into making identical parts 😁.
-
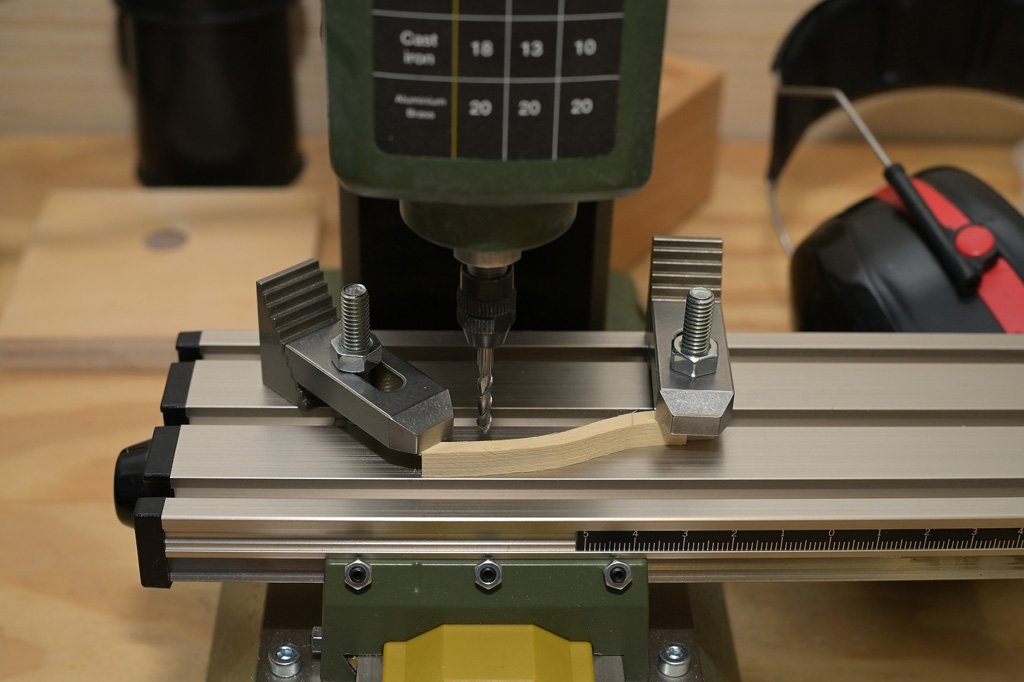
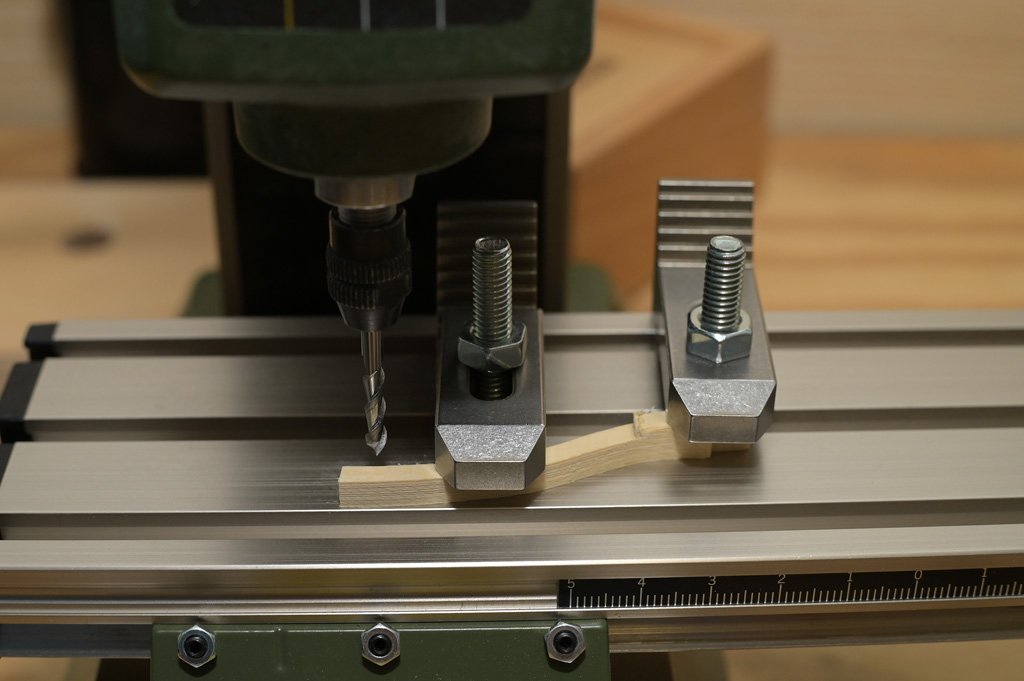
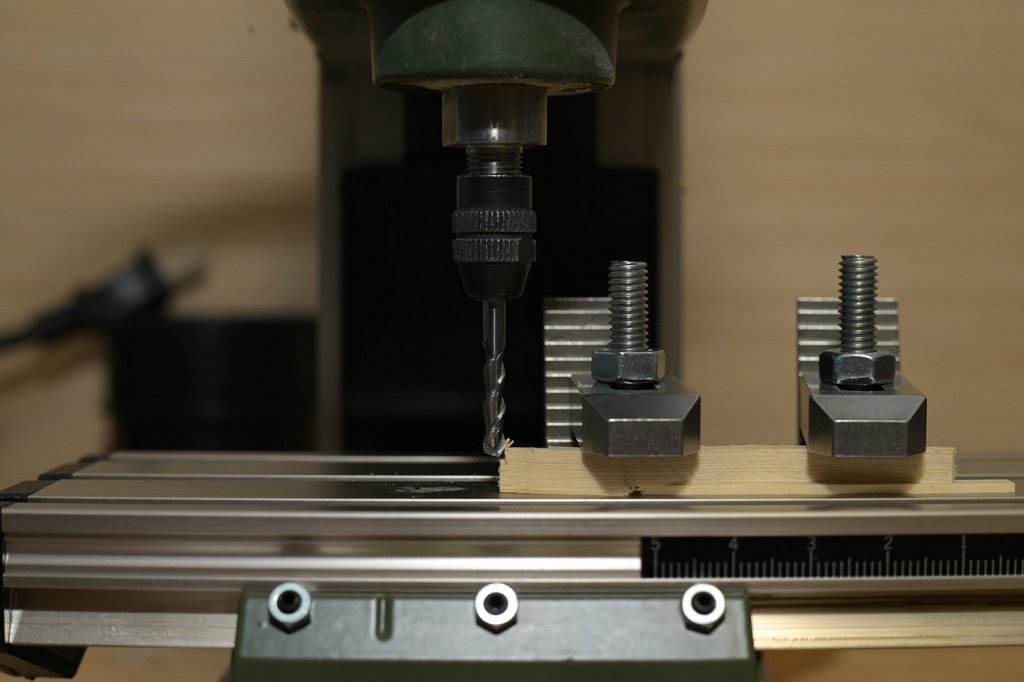
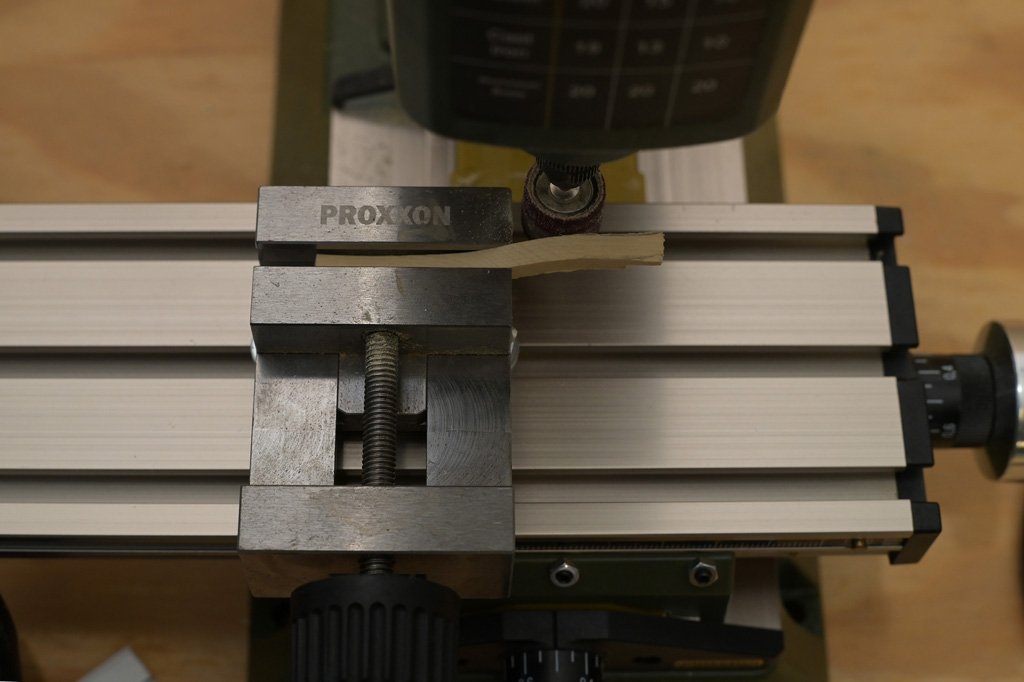
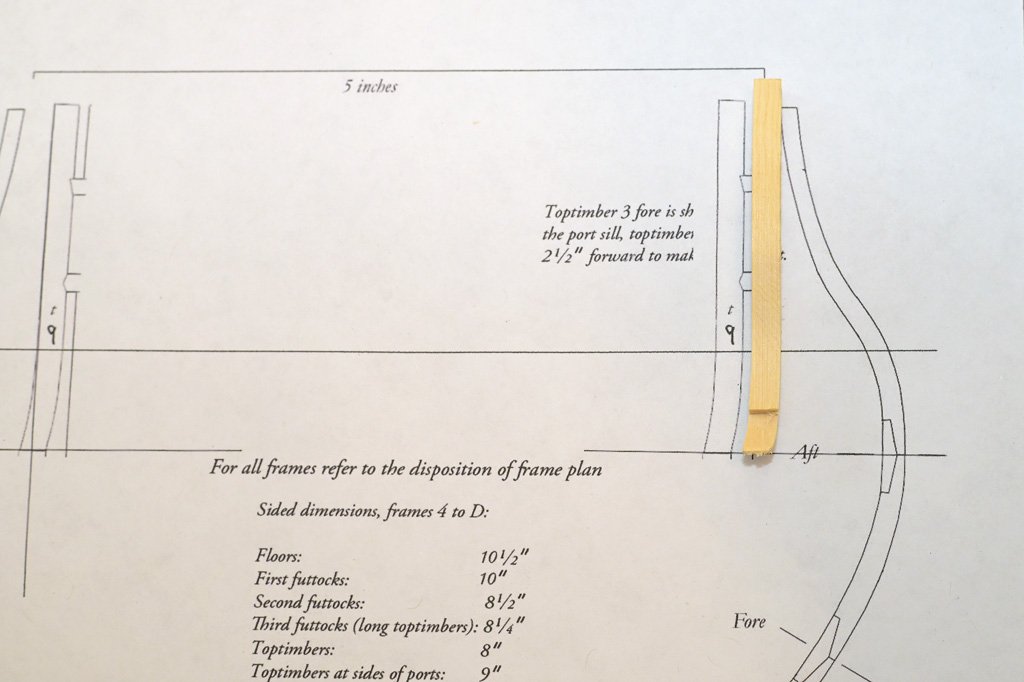
Thank you everyone that has helped me so far on this build I can't express my gratitude enough. Without it I would've certainly given up by now, but here I am with a touch of progress. I finally conquered my fear and tackled one of the top timbers on frame 3 aft. I'll go through my process in case it is of help to anyone (I can guarantee there are better ways but this made sense in my head. I first cut the piece out of a thicker piece of AYC to account for the cast (11.5" to account for the 2.5" cast on the 9" frame). I then used my micro mill to cut out the mostly straight portion of the forward cast (I did some editing of the frames and sided dimensions in photoshop to determine approximately where this line would be. I then flipped the piece over to create a notch at 8.5" to help with the curved section. As an aside I used my Byrnes table saw and NRG thin strip jig (still trying to figure out the best way to set this up, but I got there) to cut a strip at 2.5" to help hold everything in the right place when I'm working and eventually clamping and gluing the piece to the frame. Finally I drew the curve in, and rough sanded it out. It isn't perfect (I unfortunately took a little chip out where the timbers meet - see below) but I'm pretty happy and proud that I was able to get here. Of course now to do the second one but the garage is so hot I need to hydrate and eat lunch. Thanks for following along!
-
Beginner looking to start building, In the USA
VTHokiEE replied to lstmysock11's topic in Wood ship model kits
Unfortunately I don't know of a wooden kit (I think they are or were some plastic kits and maybe even a paper model kit), but there is a scratch build currently ongoing that I think you might enjoy looking through. -
What type of rope are you using? I found that moving to polyester rope for me helped solve this problem (there are disadvantages to it as well, some that I'm probably not even aware of), but polyester has a stretch to it so you can make it tighter. I never found a great way to keep all my cotton lines taunt and it bugs me a little bit on an earlier build of mine.
- 100 replies
-
- 1
-
-
- pauline
- BlueJacket Shipcrafters
- (and 1 more)
-
Beginner looking to start building, In the USA
VTHokiEE replied to lstmysock11's topic in Wood ship model kits
Hi Andrew - Welcome to MSW! I see that you're considering the Columbu ships or WW2 but I would toss Vanguard models (https://vanguardmodels.co.uk/product-category/vanguard-model-kits/) into the mix. These are unfortunately a little more expensive than you probably were thinking for an initial kit, but makes some great kits (I built the Alert kit) and would heartily recommend them as a manufacturer. The fishing vessels would probably be a good first kit to start with. FYI - Ages of Sail (https://www.agesofsail.com/ecommerce/new-vanguard-models.html?limit=36) is a US distributor for them. I apologize for suggesting something that doesn't exactly meet your thread (inexpensive and Columbus/WWII) but I think there's a high chance of success with these kits which might be worth a peek. -
I really like your dioramas, would love to make one some day (it seems quite tricky to do well). Quite intrigued by your sail-making technique - do you have any idea how to get a copy of this article? I looked all through the NRG website but it appears that the purchasable digital archive stops around 60 and I didn't see it in the individual articles or available back issues.
- 542 replies
-
- 1
-
-
- Sphinx
- Vanguard Models
- (and 3 more)
-
Thanks @tlevine your build images really cleared it up. I think I can continue on my merry way (🤞).

