DONATION DRIVE - SUPPORT MSW - DO YOUR PART TO KEEP THIS GREAT FORUM GOING!
×

.jpg.01e54eff8de6be562e7bc1146f40d40a.jpg)
Matt D
-
Posts
629 -
Joined
-
Last visited
Content Type
Profiles
Forums
Gallery
Events
Everything posted by Matt D
-
.thumb.jpg.6d6ee4bdbfaac2c58ecc77e7b80ae374.jpg) Nicely done, Peter! You’re really making good use of 3D printing technology.
Nicely done, Peter! You’re really making good use of 3D printing technology. -
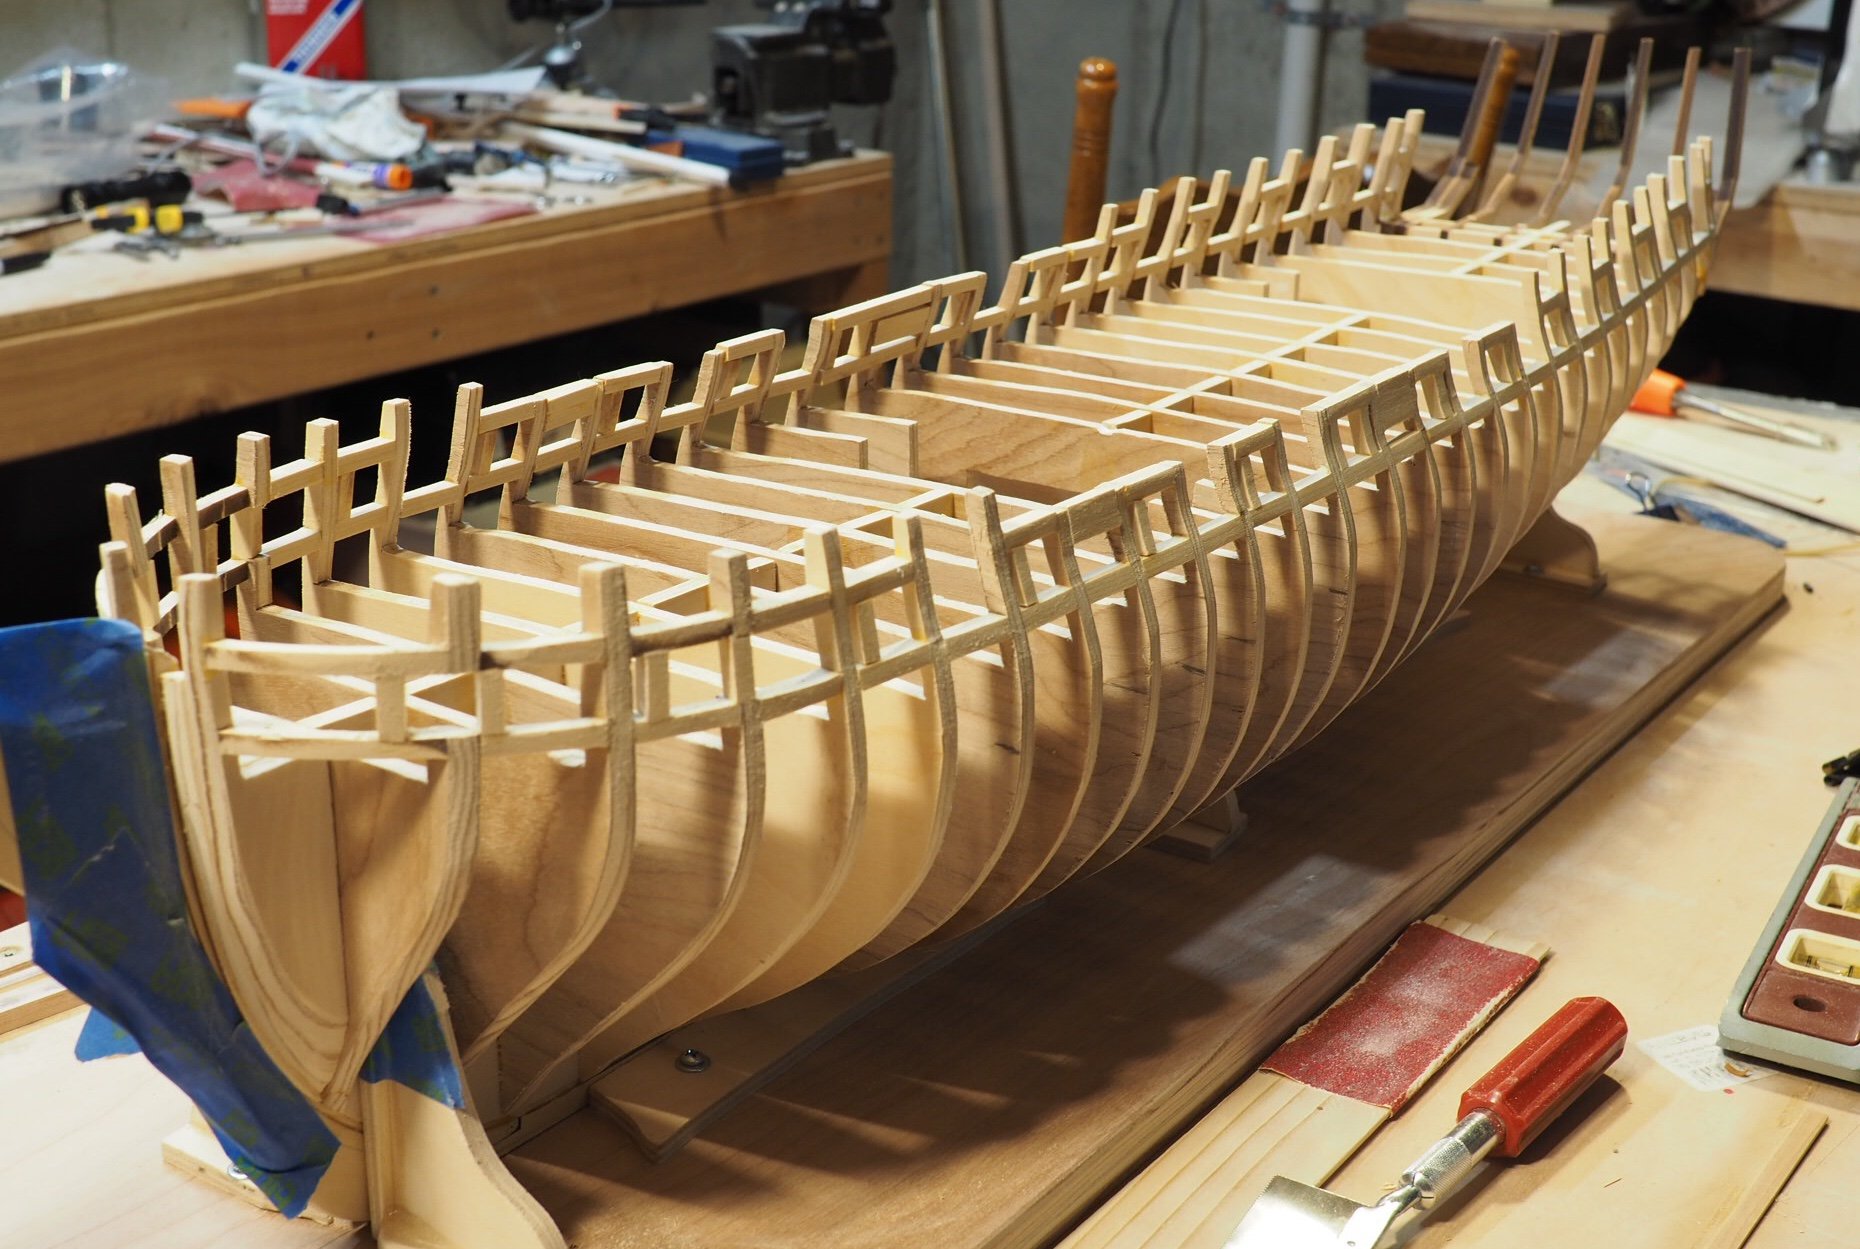
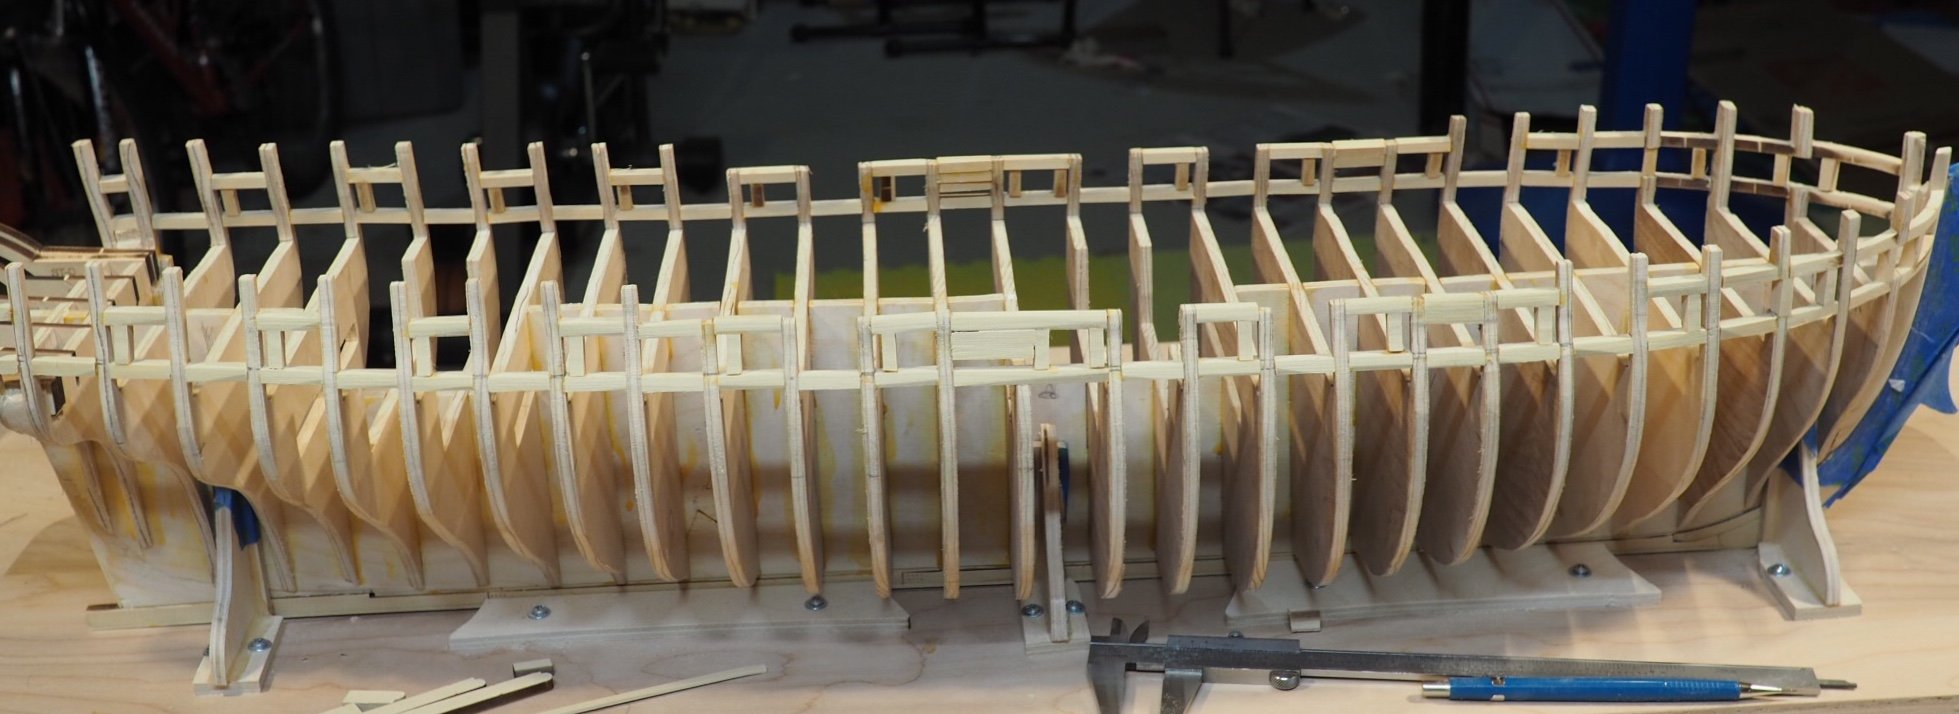
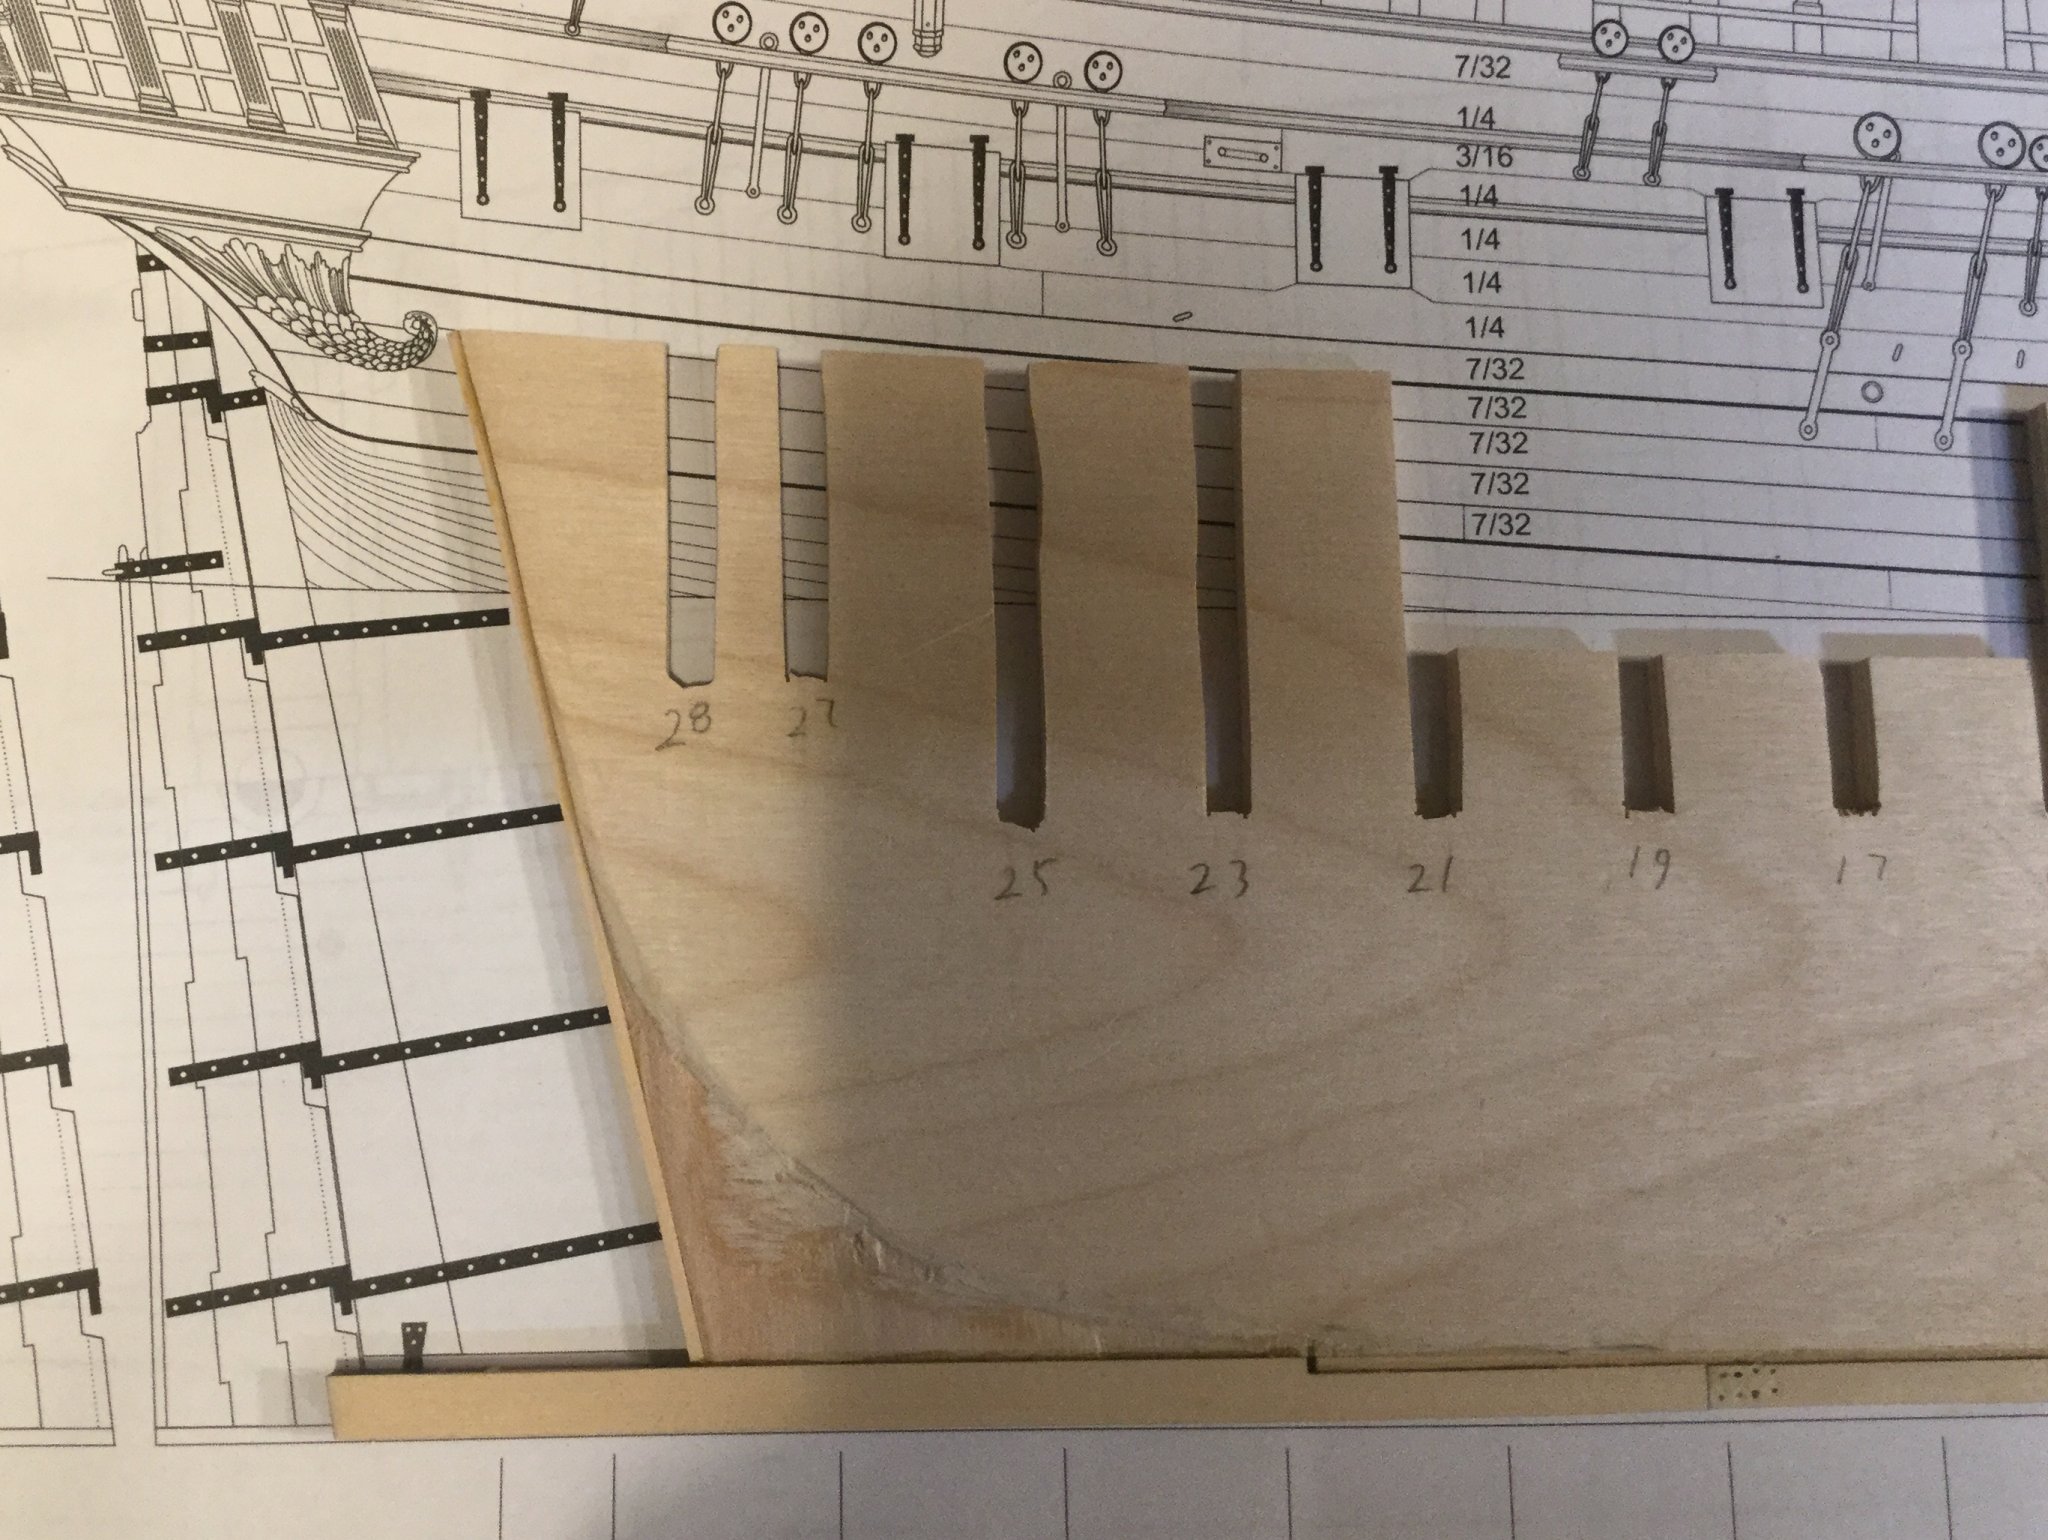
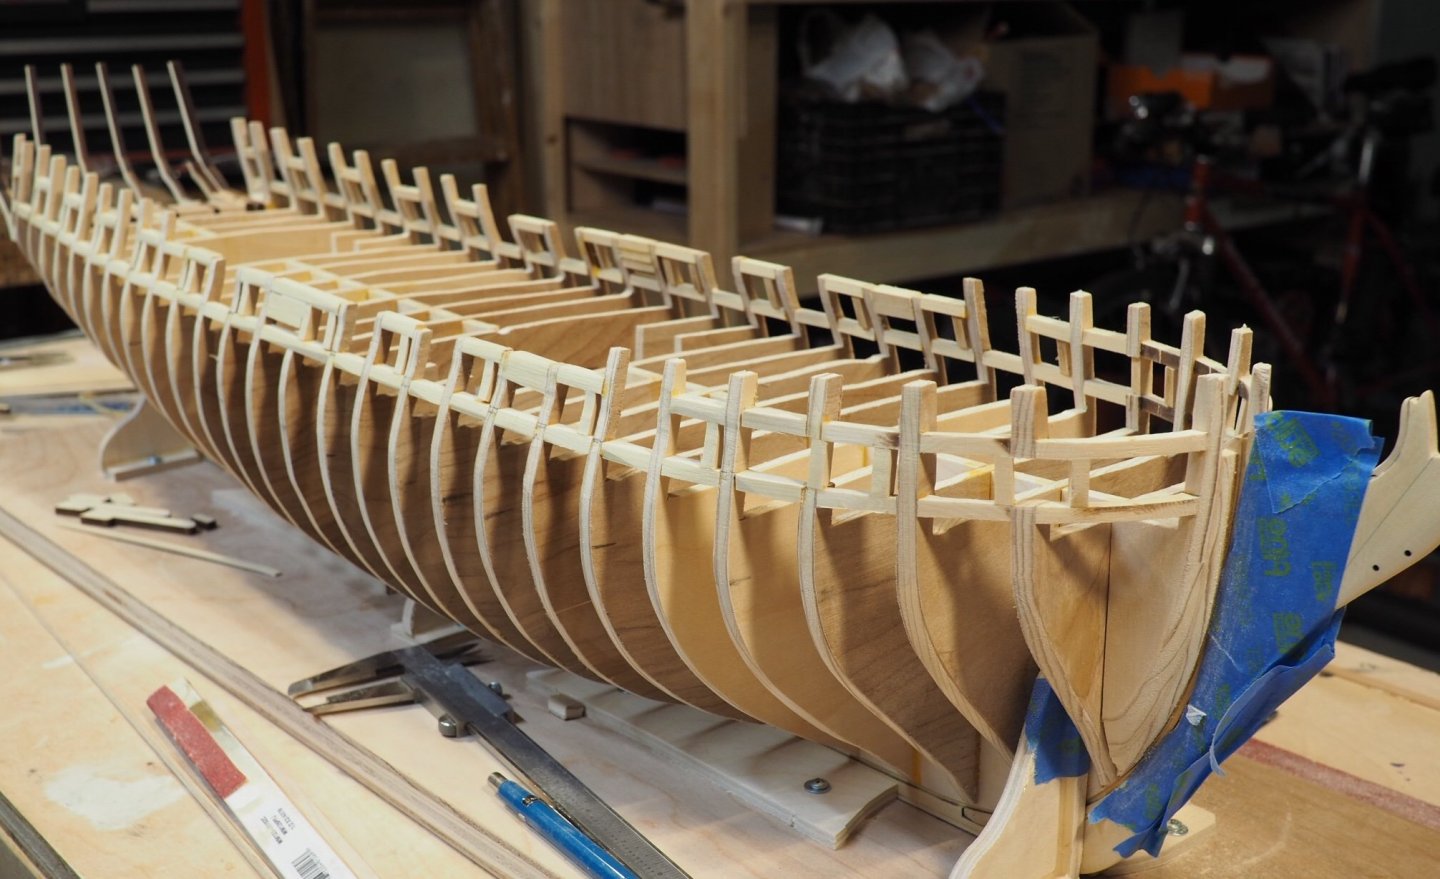
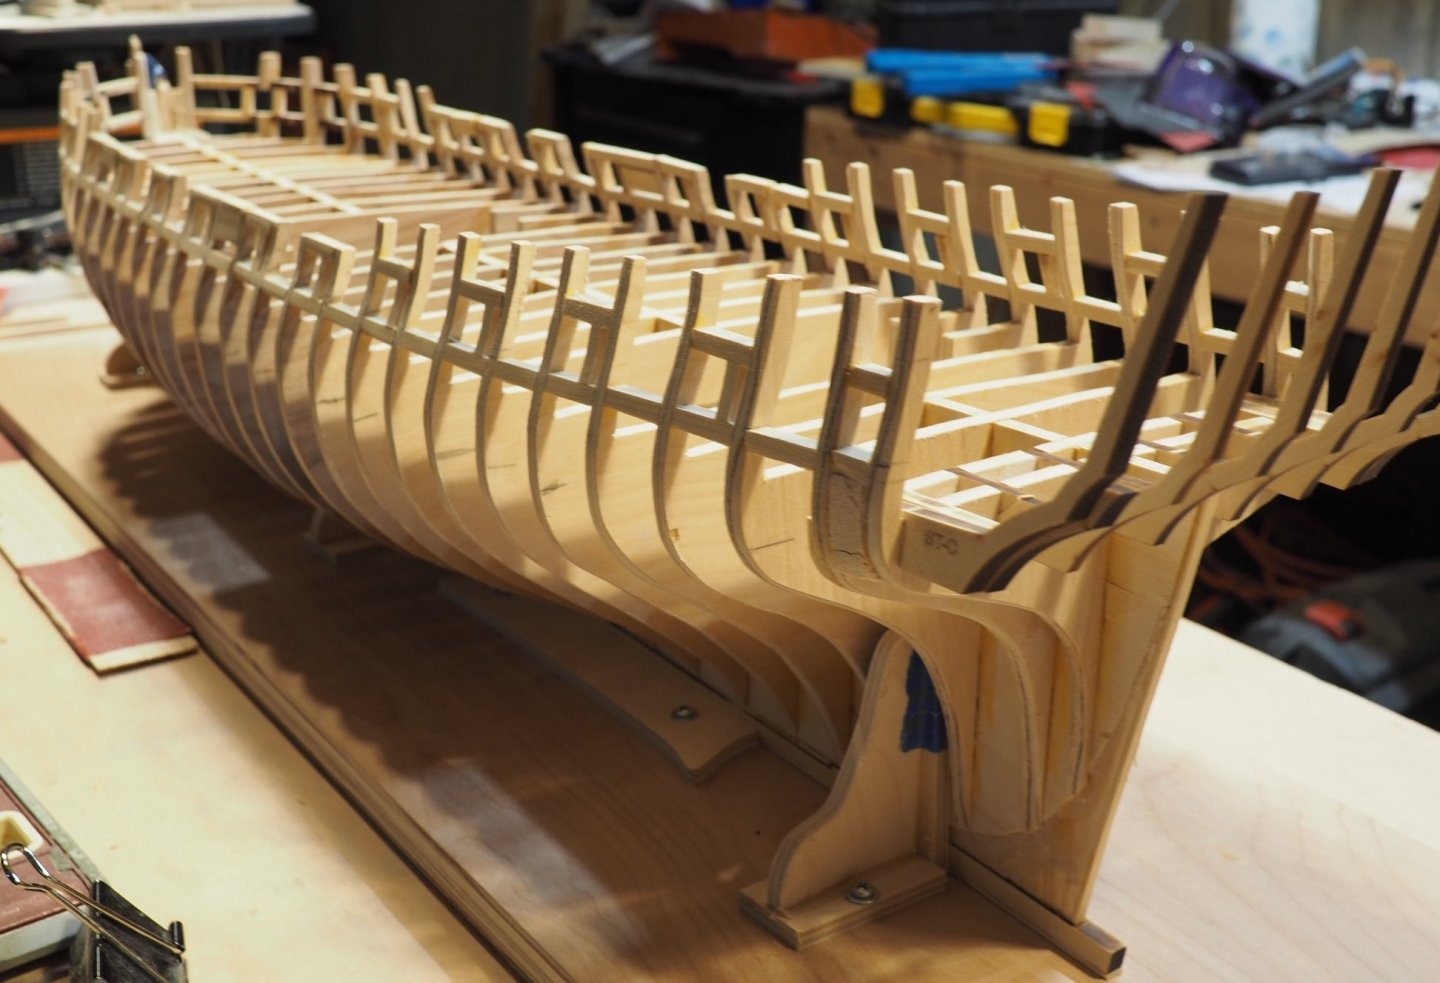
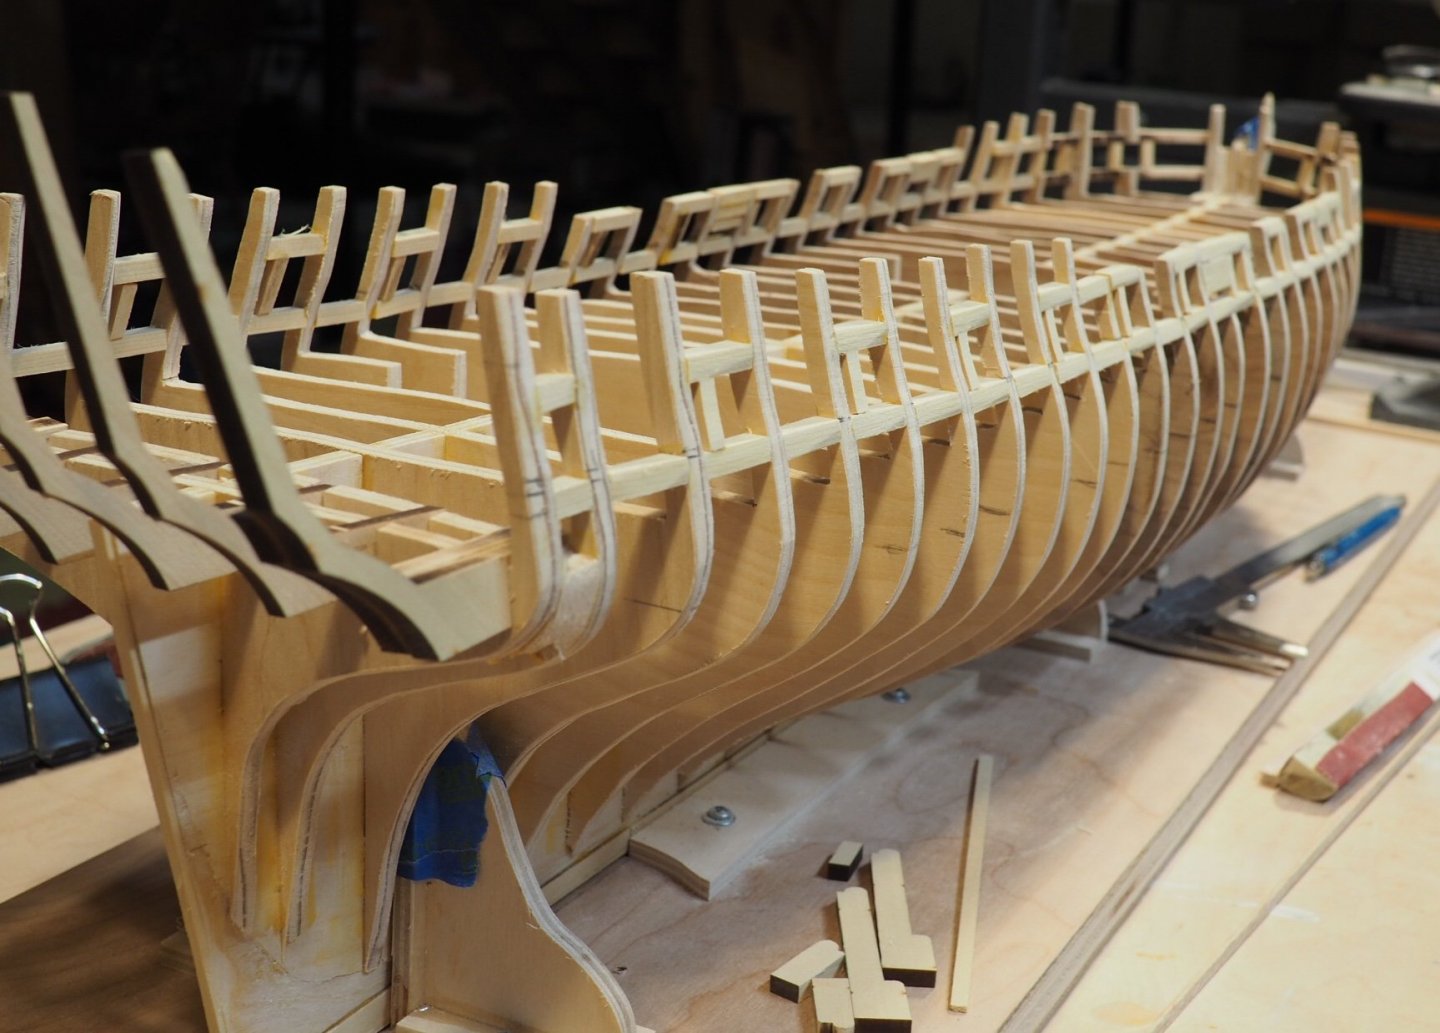
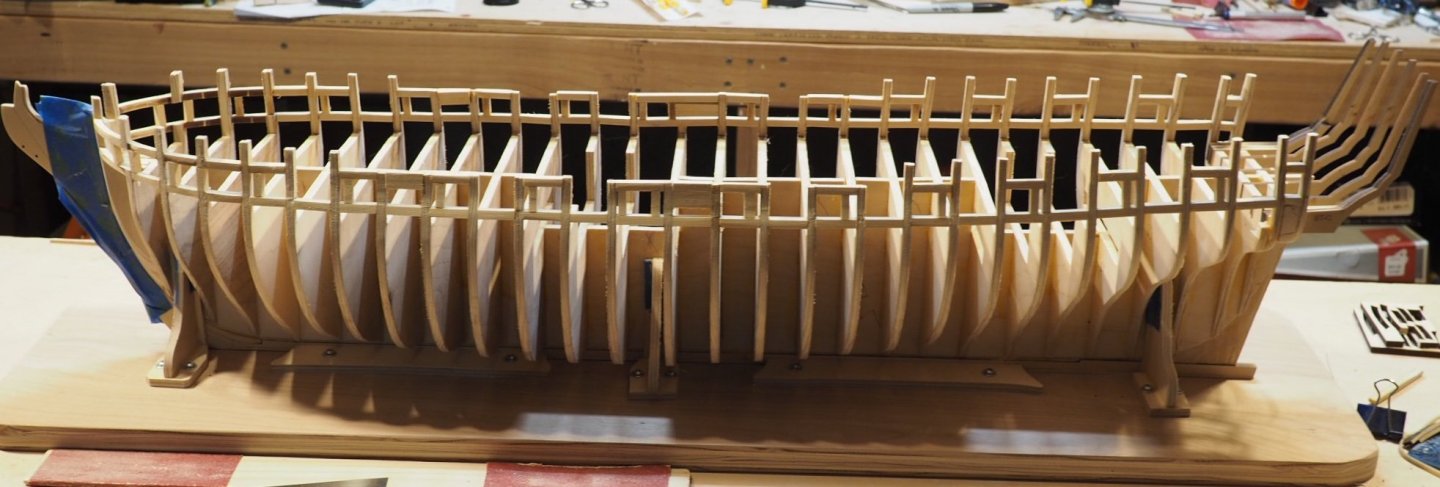
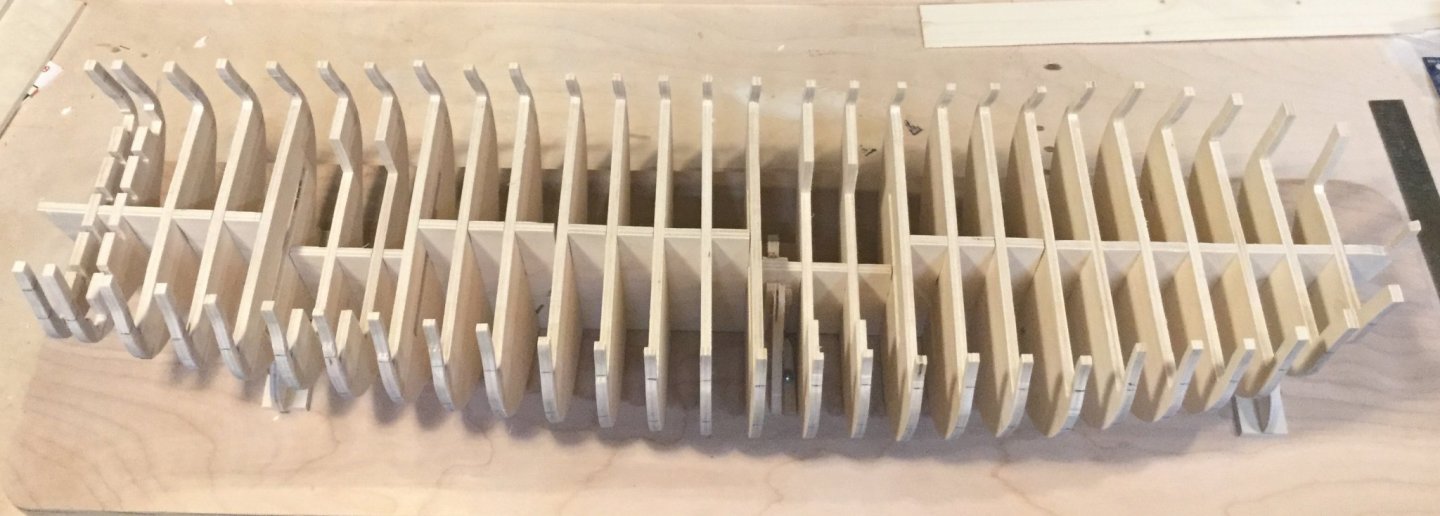
My gun ports are all framed in and faring is pretty close to complete. I’ve taken my time and had to fix a few problems. I broke both sides of bulkheads 25 and 27 early on. That mainly happened because I messed up the installation of 25 and had it off center by about 1/16th. It did look bad until I started sanding and could really see it proud on one side and recessed on the other. I was trying to cut it free and broke one upright. It all turned to crap as I tried fixing it and ended up with a new pass through the scroll saw. As you can see, I did some reinforcing on the new ones. I also broke the starboard upright on A and fixed it with a bridge. In these pictures, the stern frames are just dry fit so I could see how they look.


-
Model Shipways Fair American vs Syren US Brig
Matt D replied to WalrusGuy's topic in Wood ship model kits
Dave, babies sleep through way more than you might think. Especially if you condition them by not trying to keep the house quiet all the time. I learned this with twins who have now survived to the age of 12. The hard part is that you have to get the baby's mother out of the house! Walrusguy, interestingly enough, my first build was AL Virginia 1819 and I have Fair American sitting on the shelf in the shipyard. It was supposed to be my next build. But I've been distracted from starting it because I couldn't resist Chuck's Winchelsea group project. It will probably take me about a century to complete, so I have no idea when I'll get around to Fair American. -
Thank you, Chuck, Mark, and the likes. It felt good to make some new progress again!
-
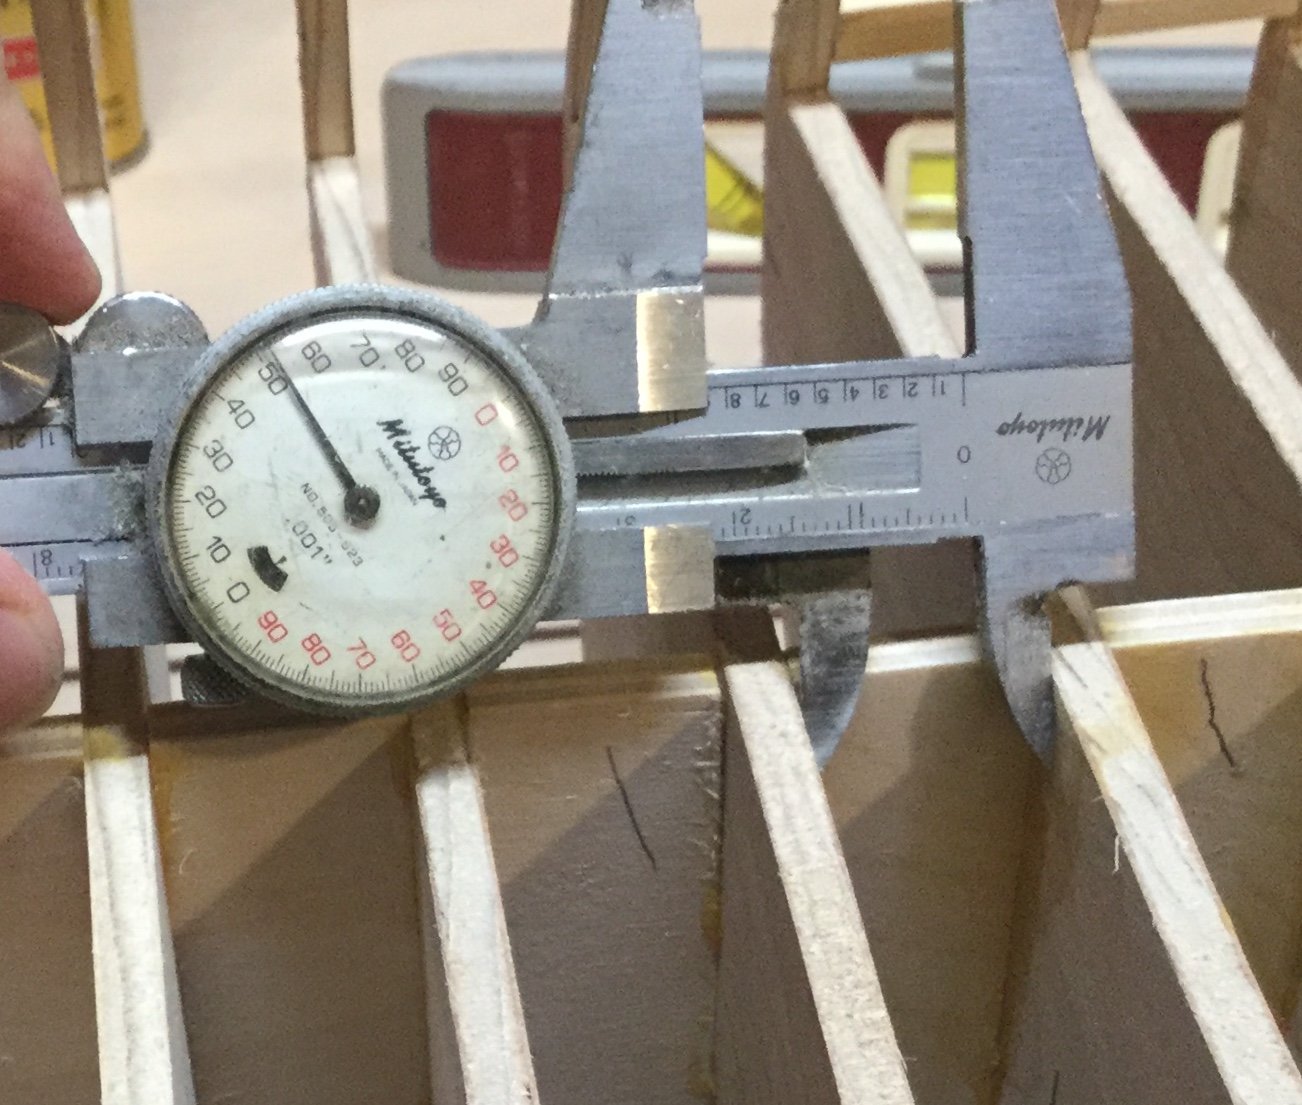
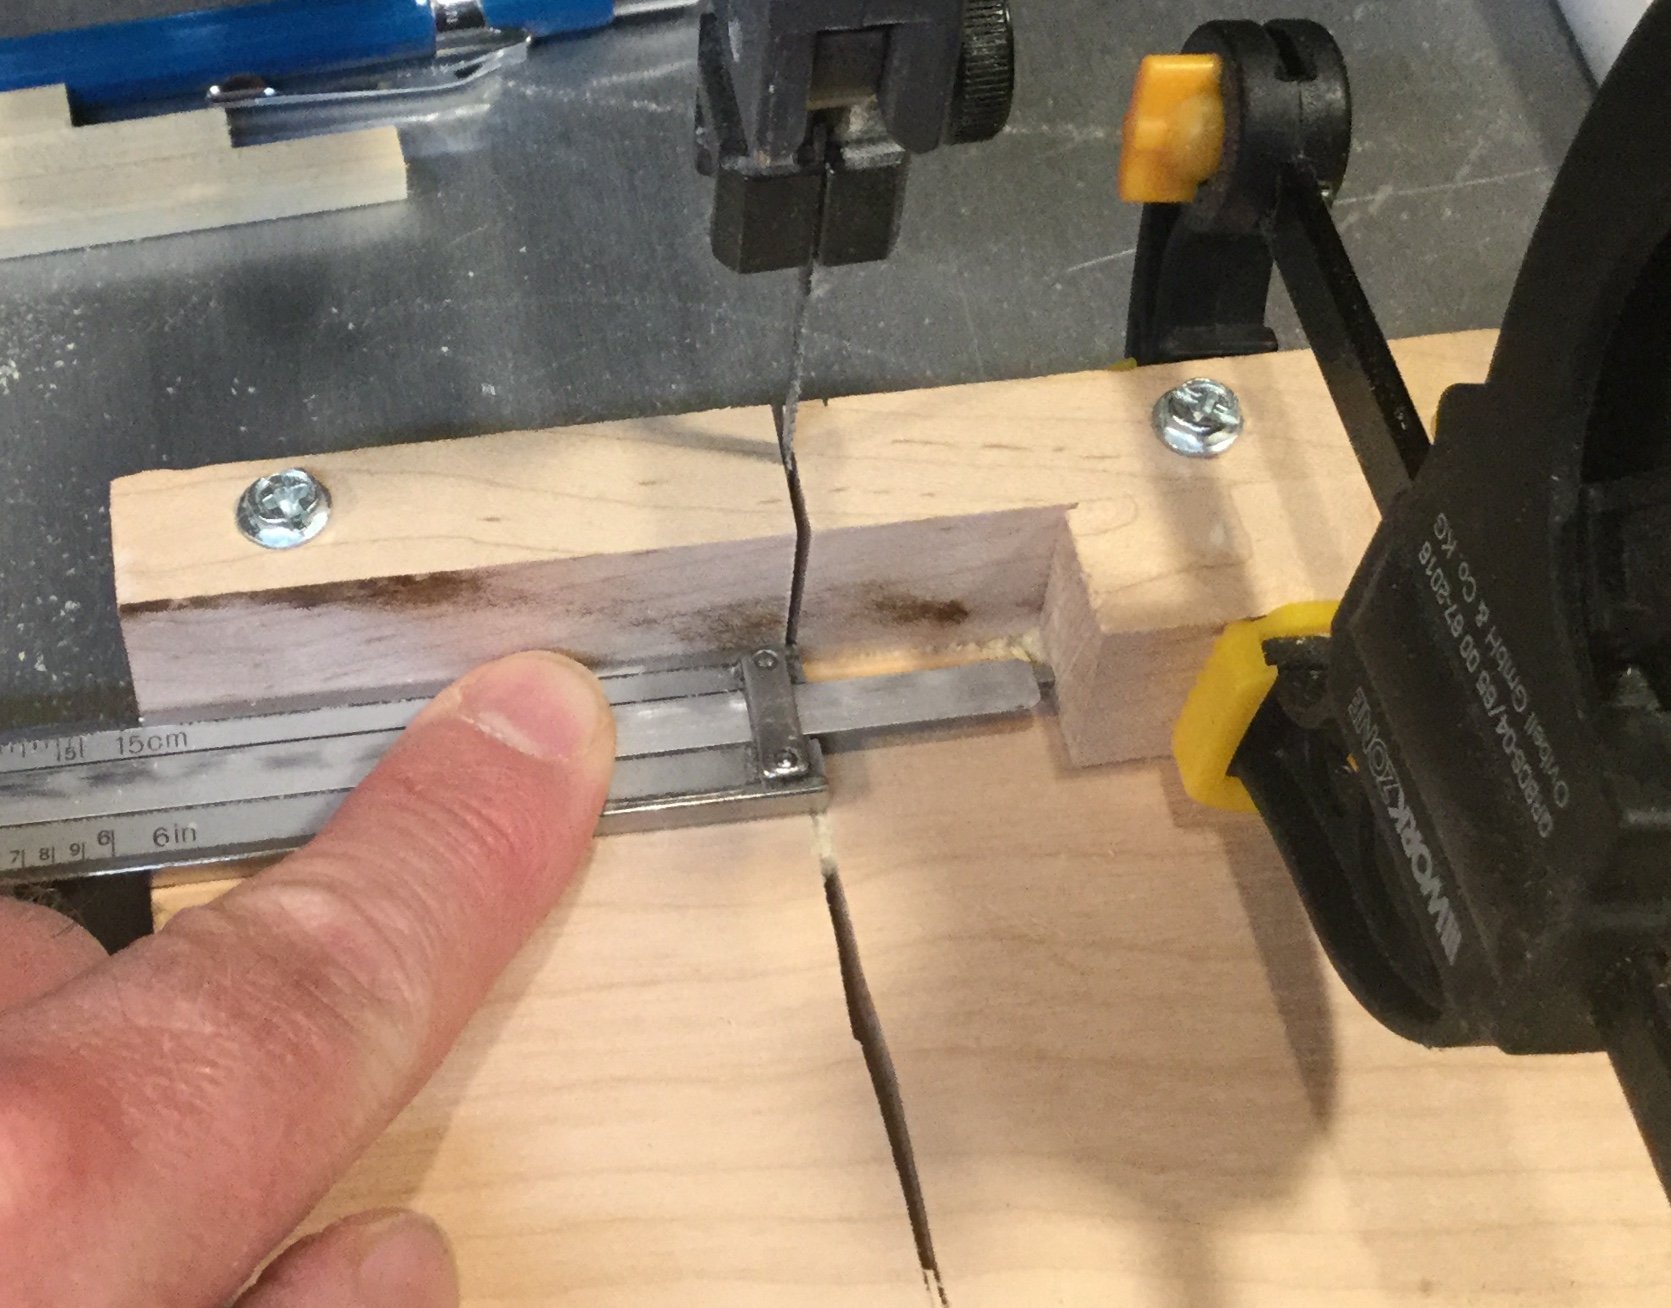
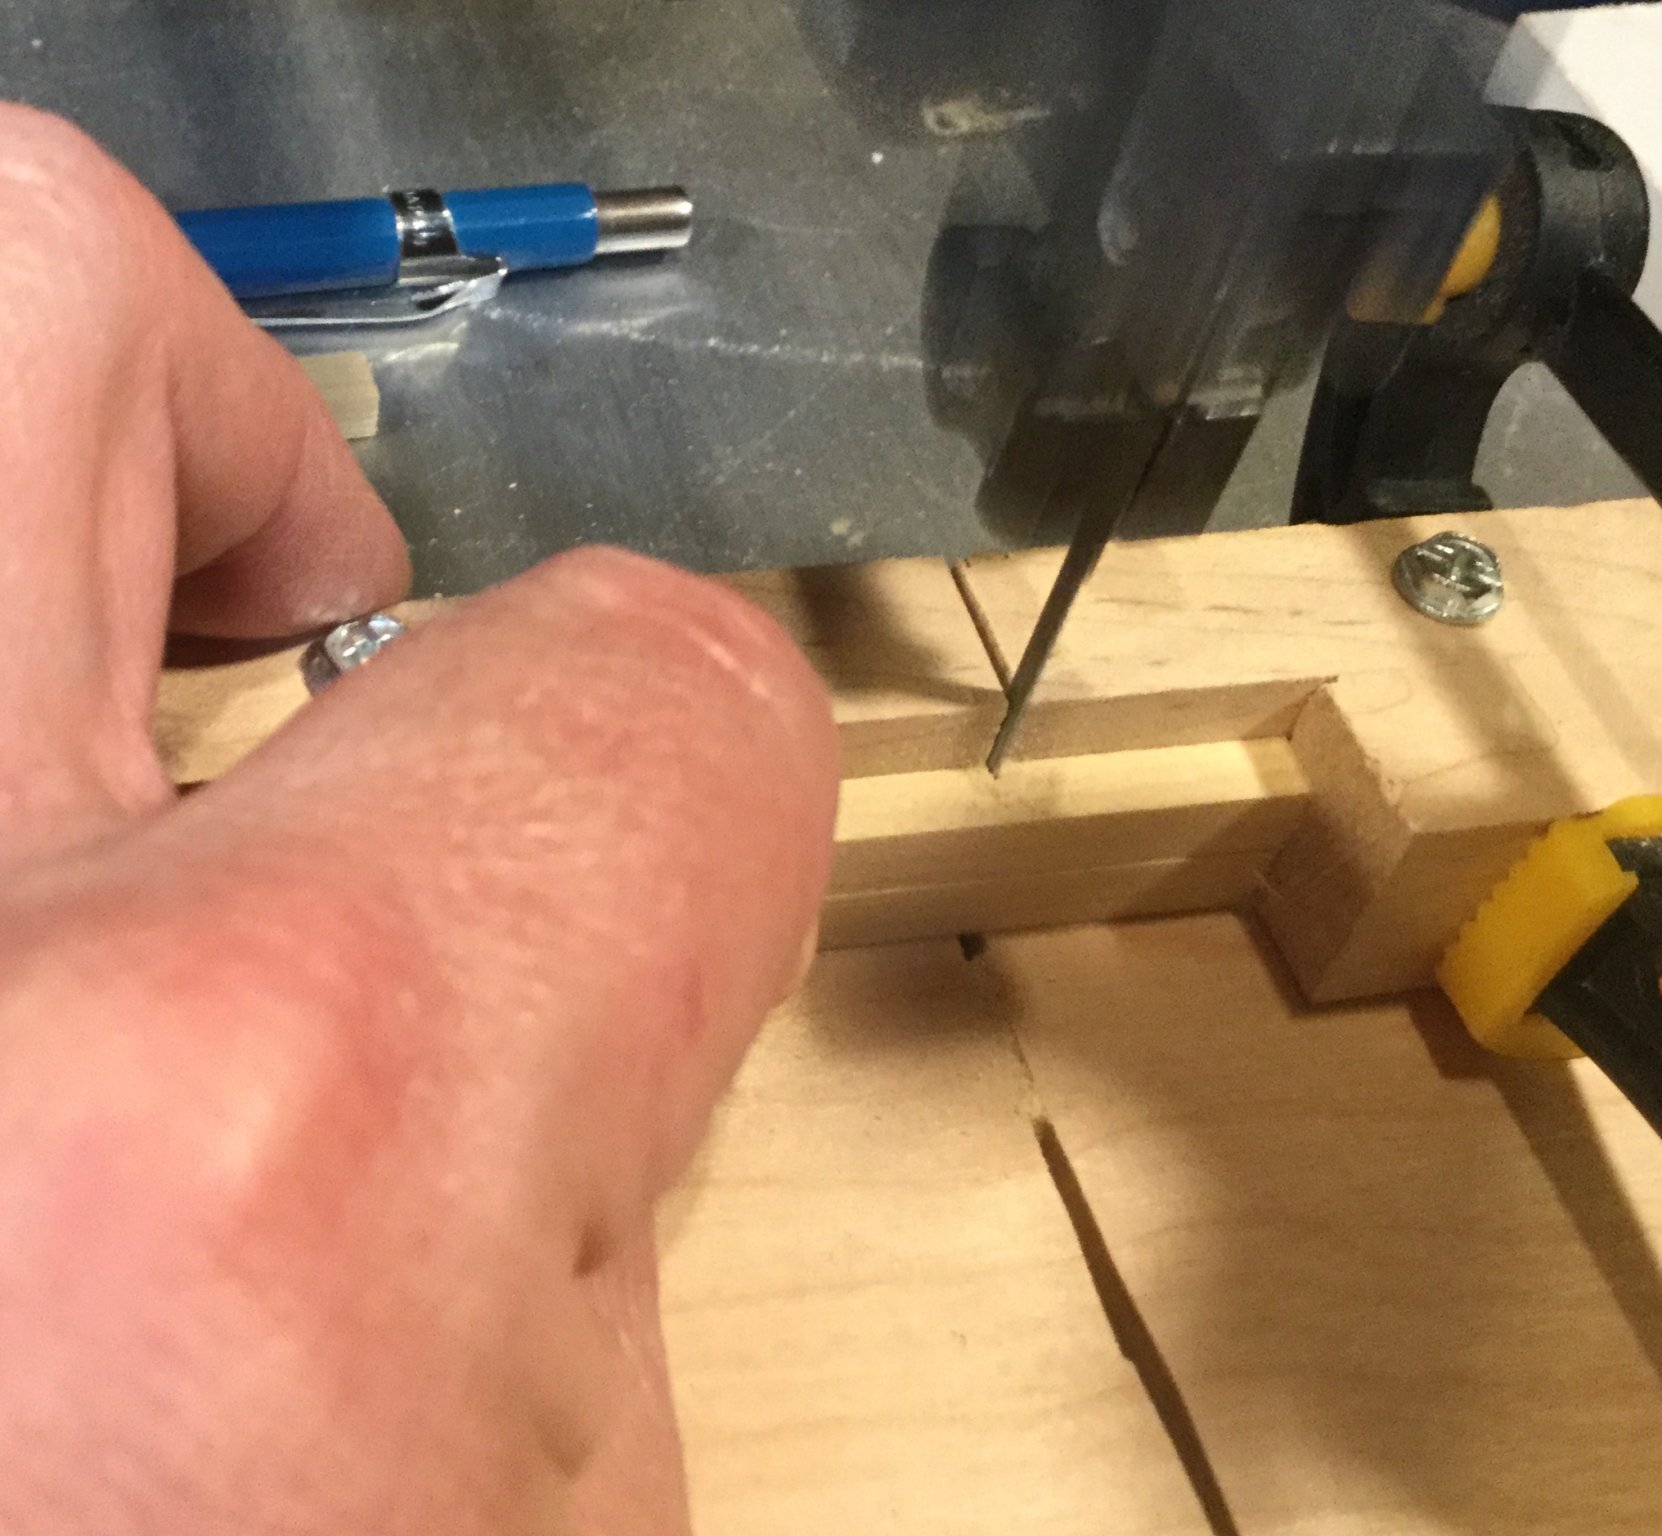
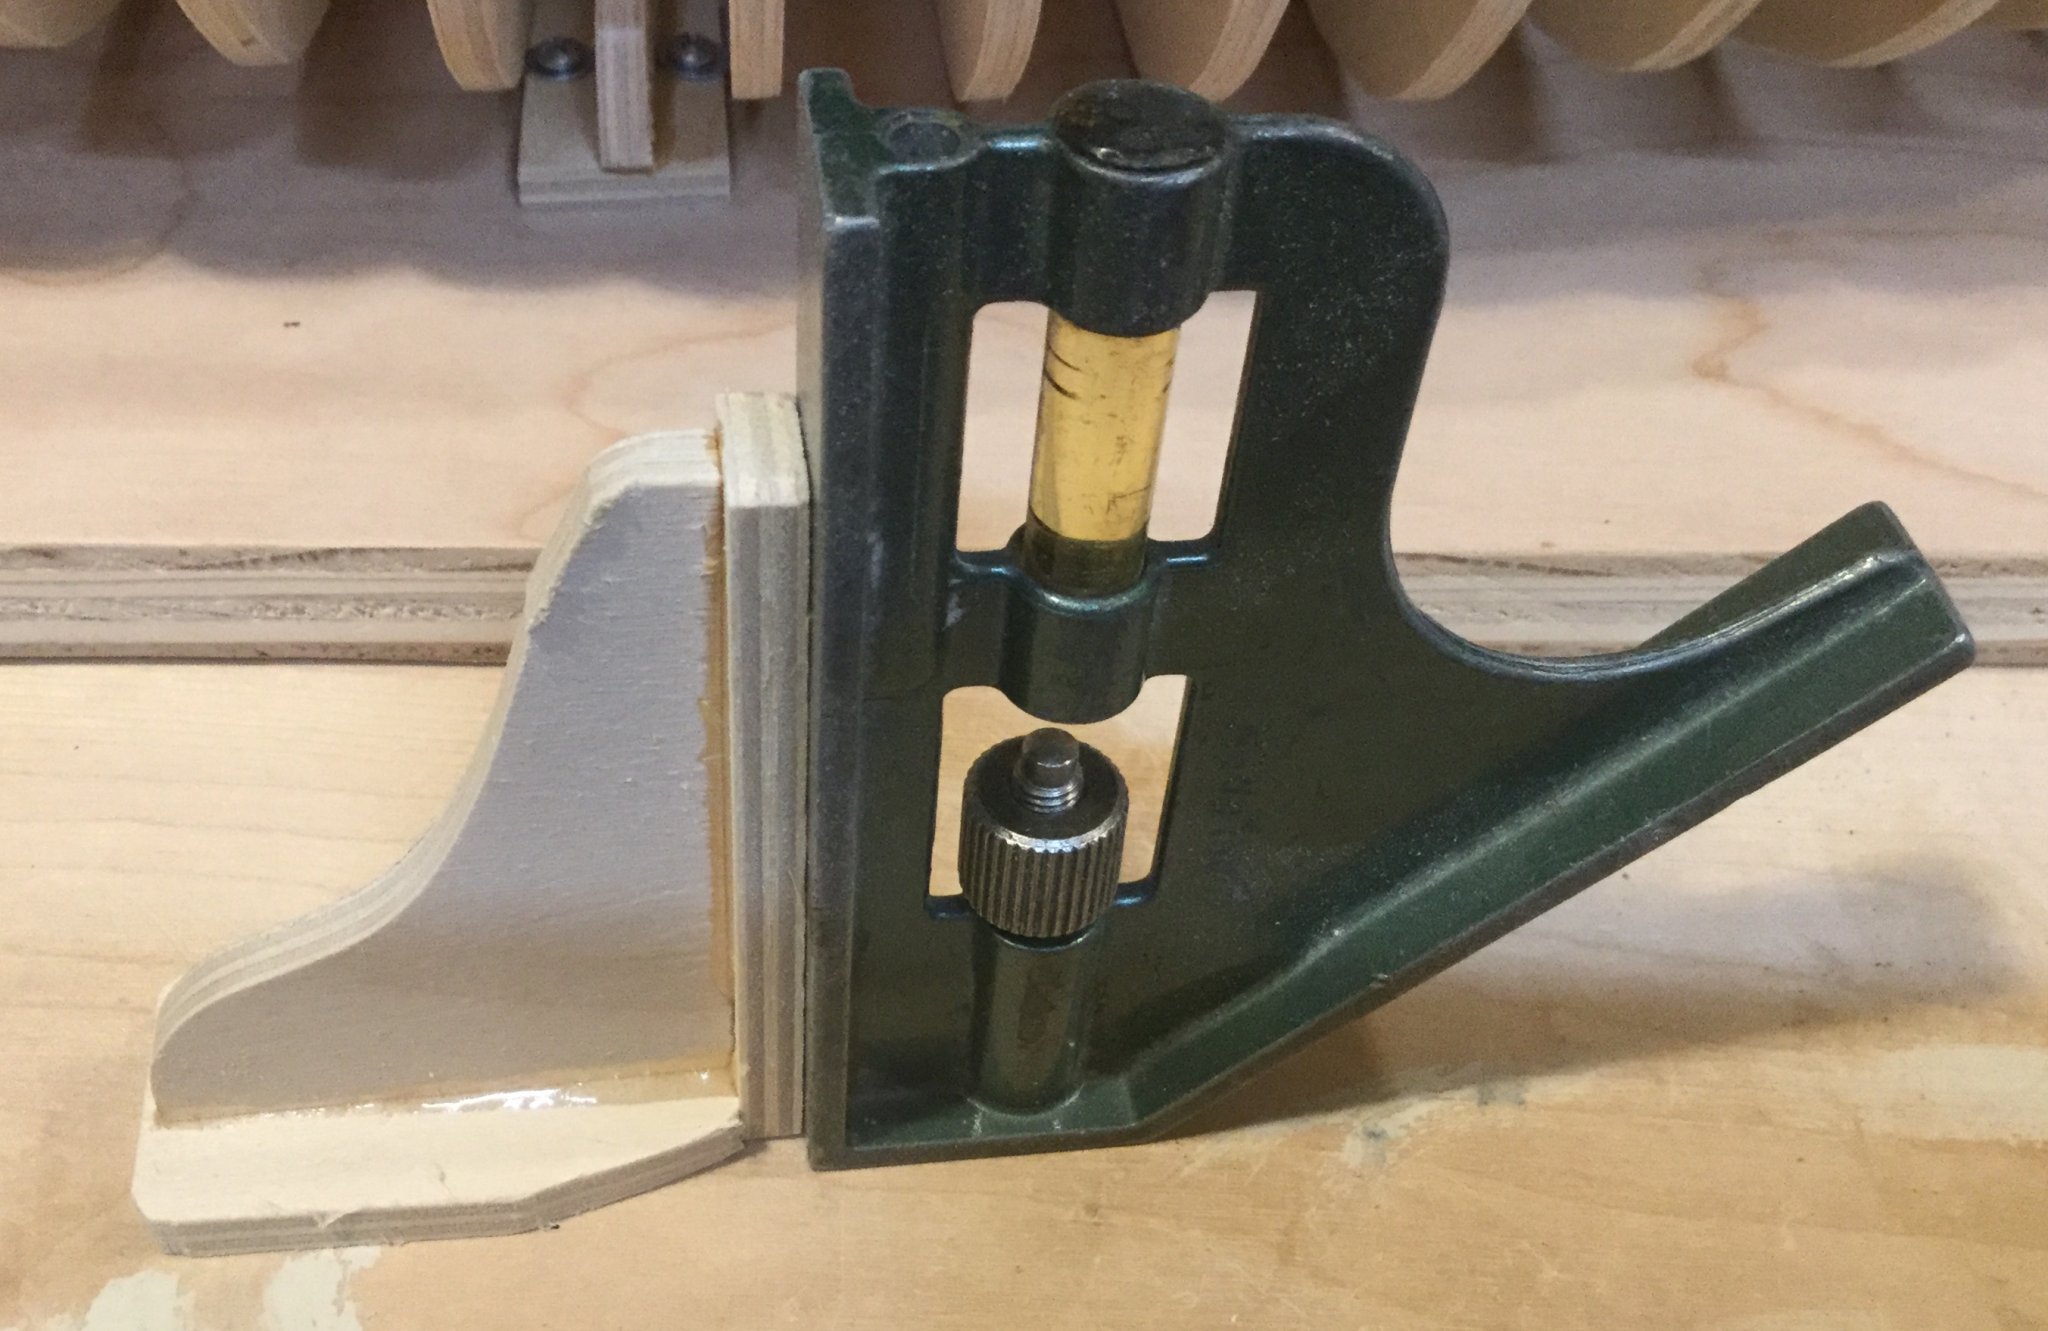
I am getting the gun port sills and lintels ready. I cut them all out using my calipers to find the lengths and then using my home made scroll saw crosscut sled. That setup lets me accurately cut both sides at the same time. First, I measured the gap at the bulkhead former. Then transfer that length to the crosscut sled stop Then cut two sills or lintels at once. I still had to sand a little to get a good fit, but I did that together as well to ensure the same length on port and starboard.


-
Rusty, your gun port frames look terrific! Nice job!
- 642 replies
-
- 1
-

-
- winchelsea
- Syren Ship Model Company
- (and 1 more)
-
Thank you, sir. I’m having fun building her, but there’s no way I could take on such a challenge outside of a group project. I’m very thankful to have my MSW friends.
-
Happy Birthday! This is the kit that first got me interested in ship models. I have it on the shelf right now. I’m going to pull up a chair and watch your build. It looks great so far.
-
Beautiful work, Bob. Thank you for posting such excellent pictures of it, too.
-
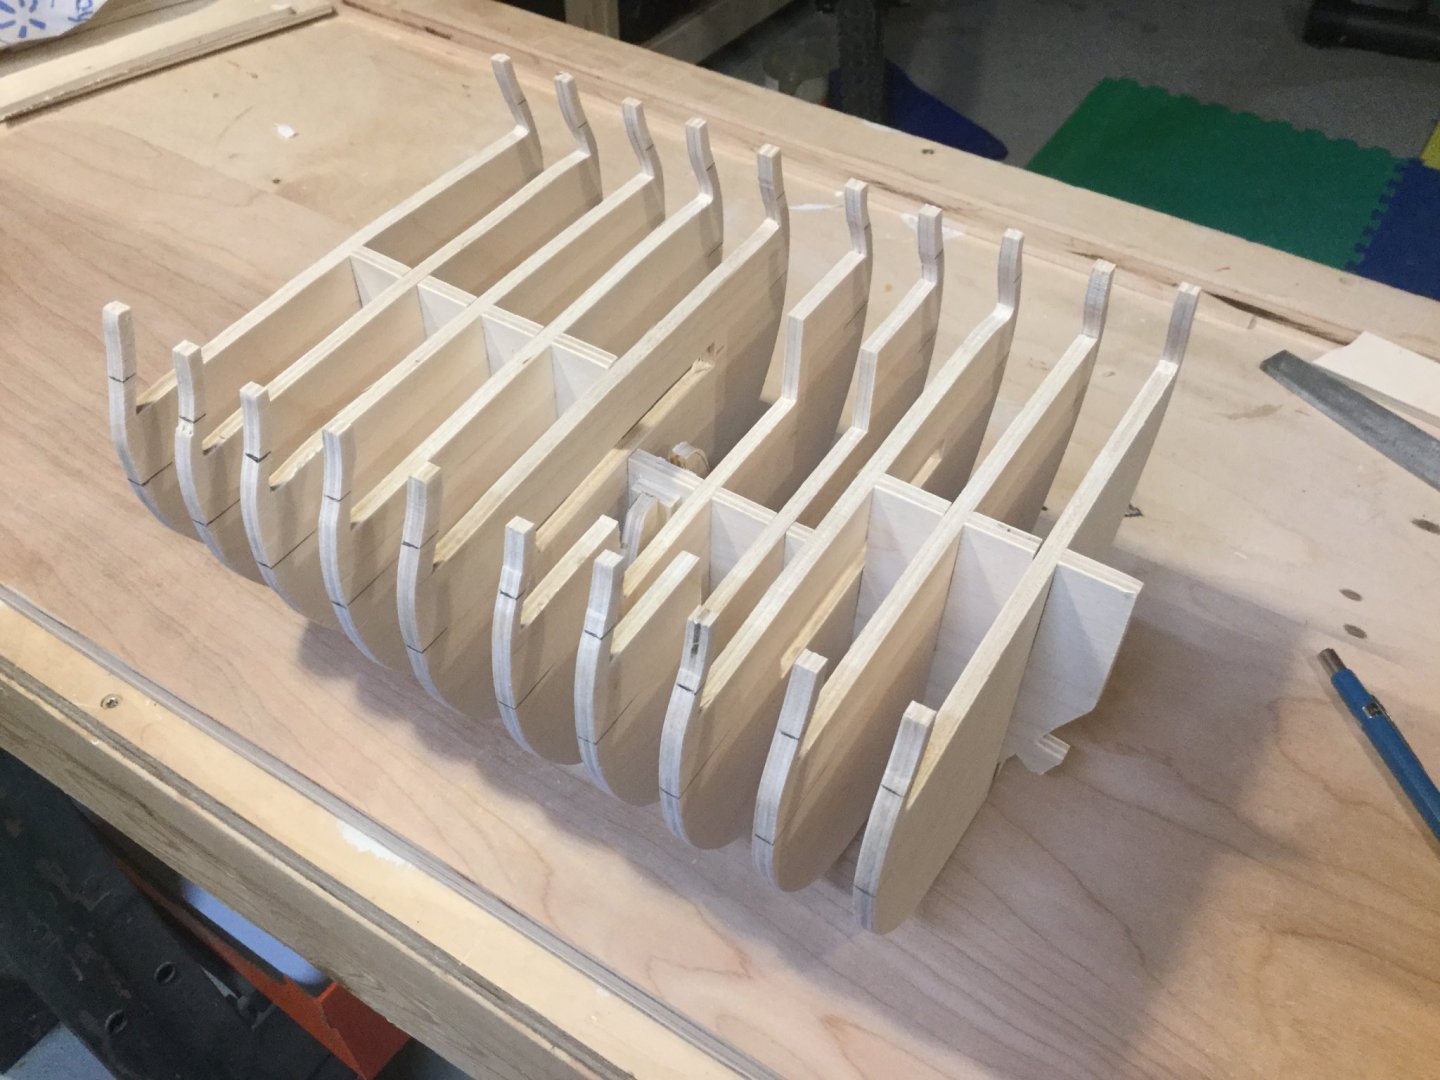
I’ve now fully recovered from my scaling error and am ready to move on. One upside is that I used a softer plywood for the bulkheads this time. I was using 5-ply Baltic birch. My former is still made of that, but the bulkheads are now Home Depot grade birch plywood, which is filled with something much softer and lighter than 5-ply Baltic birch. That should make fairing much easier. I’m now ready to start gluing bulkheads into position and fairing the hull.
-
You’re still getting in on the ground floor, Rusty. As far as I can tell, no one is done with chapter one yet and several of us have had to back up a step or two. I think you’re starting at a perfect time. I really like that there are so many of us to share this build with. Welcome aboard, mate!
- 642 replies
-
- 2
-
-
- winchelsea
- Syren Ship Model Company
- (and 1 more)
-
Jack and Chuck, these are so beautiful. I can't wait to get them! Please put me down for a set in boxwood. I aspire to build a model worthy of that investment. Is it my imagination or is the woman in these carvings MUCH prettier than the one on the contemporary model? FYI: this is not a complaint!
-
I learned a nice little printer hack for the bulkheads yesterday. I was desperate the get the bulkhead formers printed and my printer only does 8-1/2", so it won't make the 11x17 prints for the mid and aft pages (1 and 2). I was playing with settings in the print set-up and found that those two pieces would fit on 8-1/2x14 legal size sheets with the size set to 100%. I don't keep legal size paper around because it's generally useless to me. But I dug around and found a 20 year old mortgage package in my filing cabinet. It's a half inch thick packet of legal size pages printed single sided with one staple that was easy to remove. I sold that house nine years ago so I don't think I really need that mortgage package anymore - at least not the last two pages of boilerplate. Into the printer and onto my plywood!
-
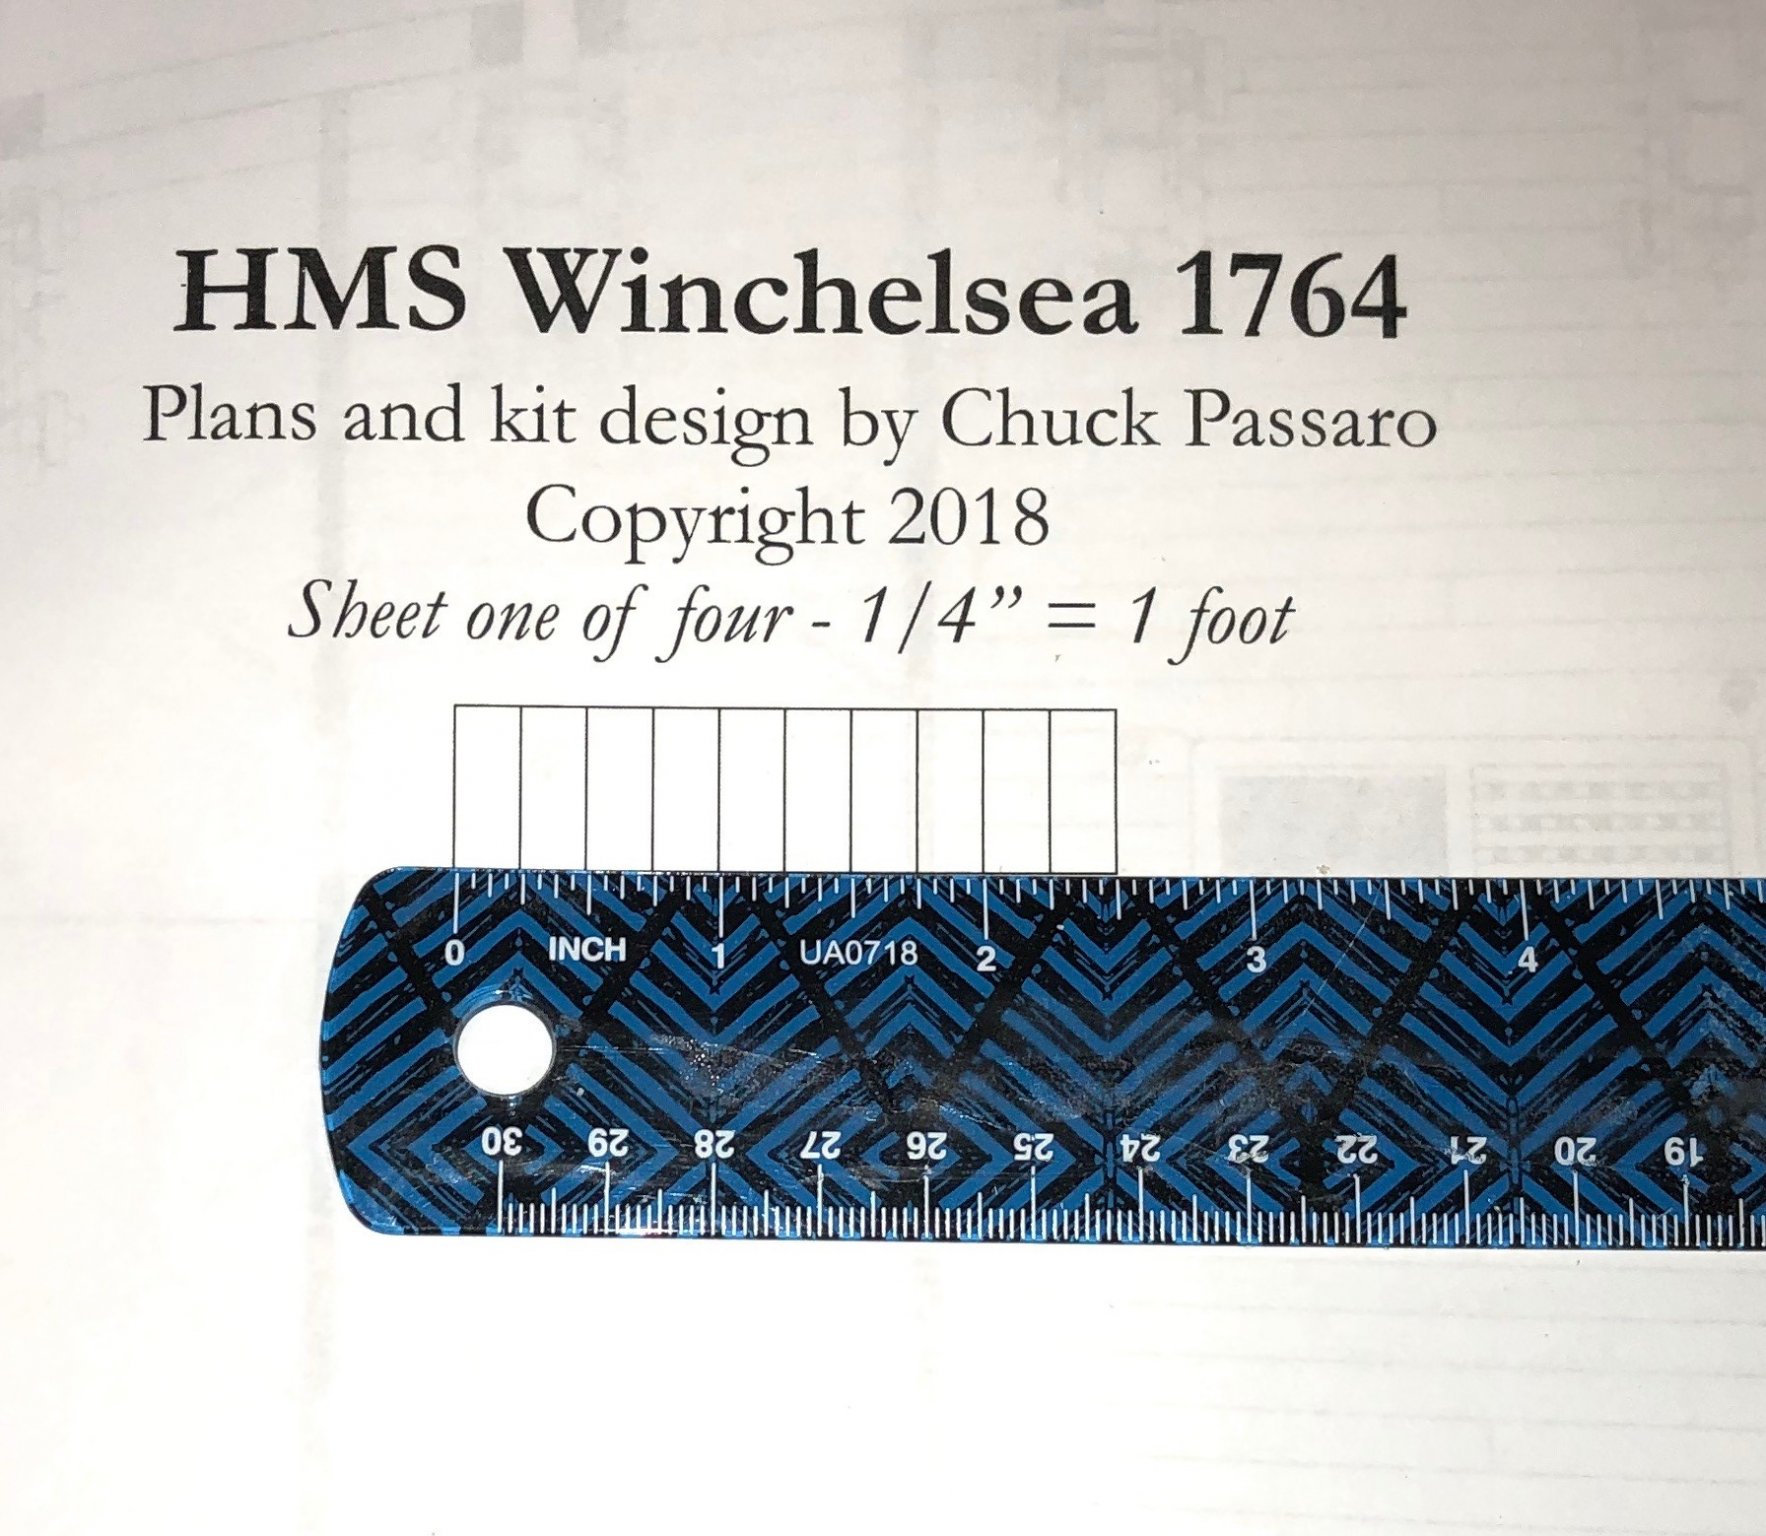
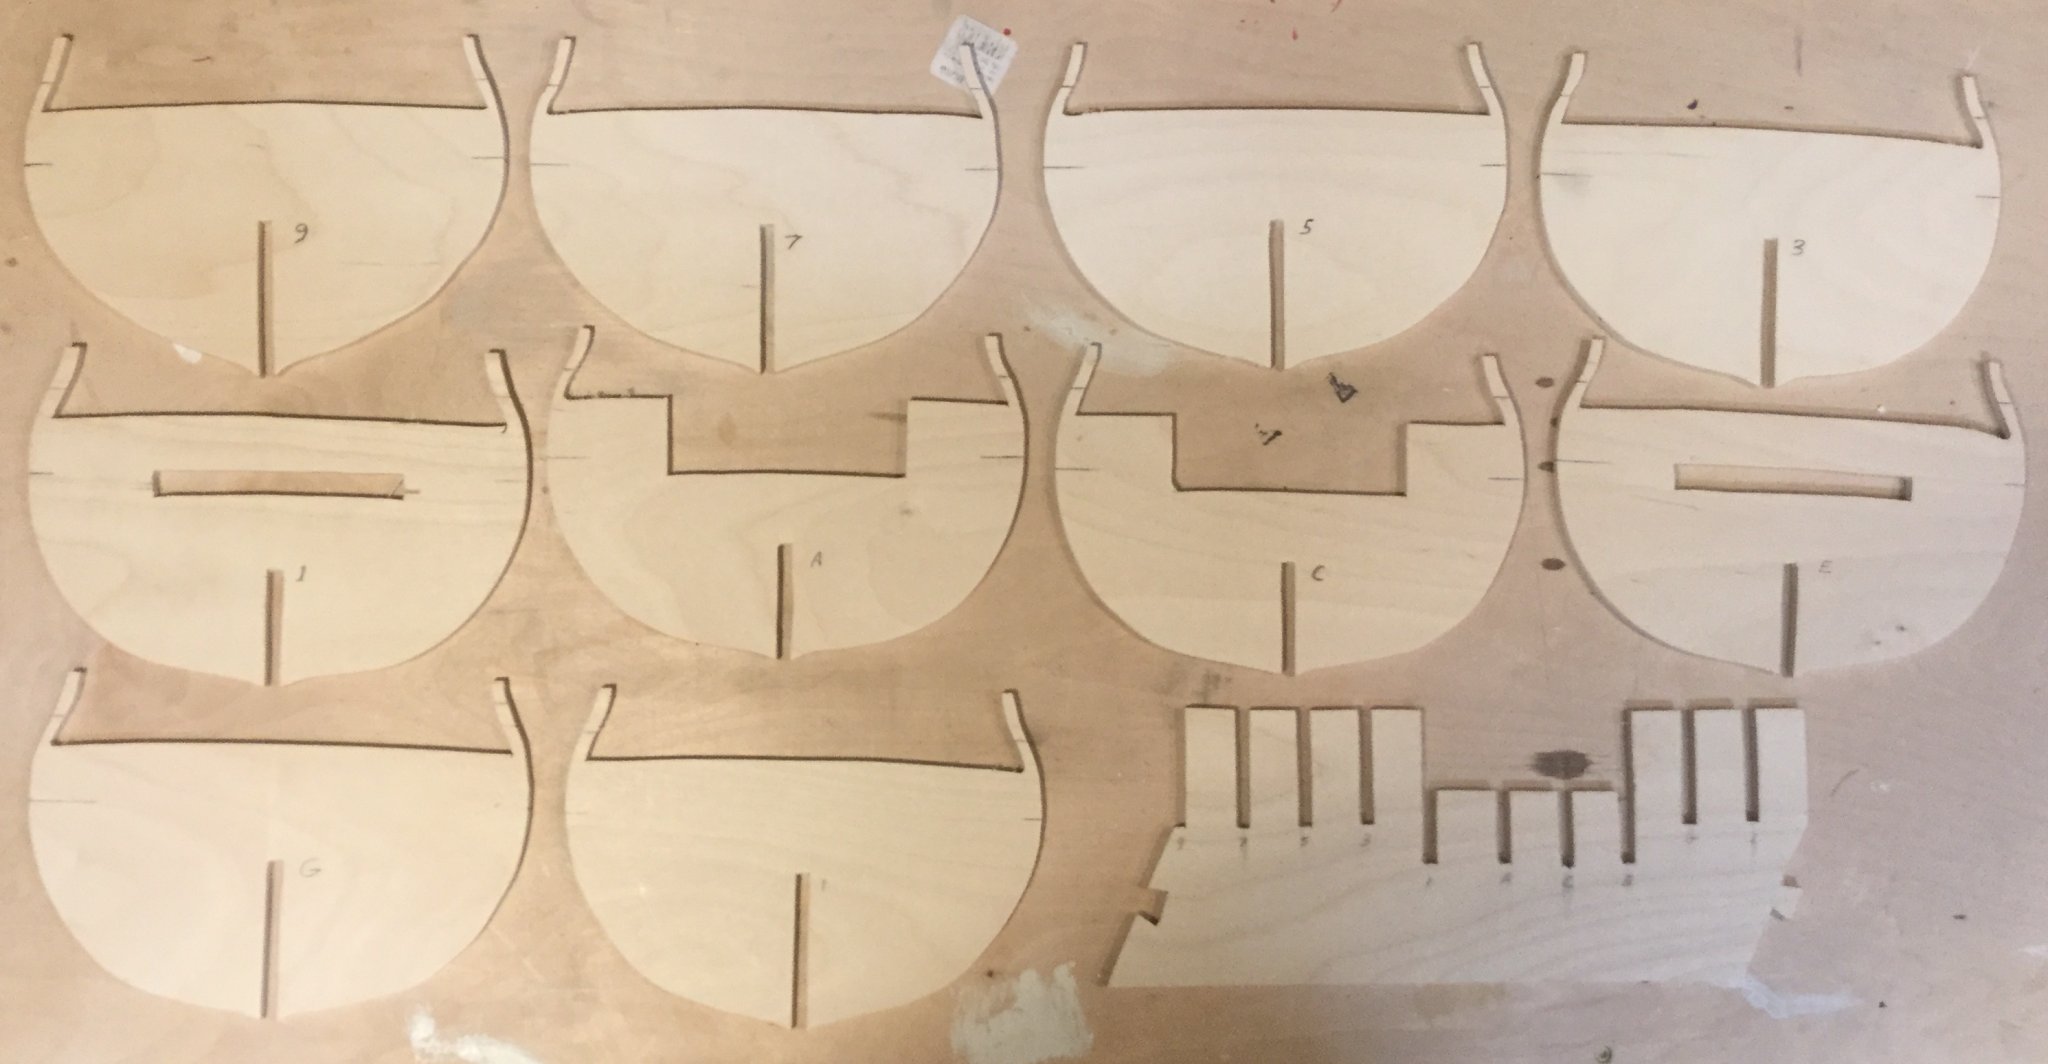
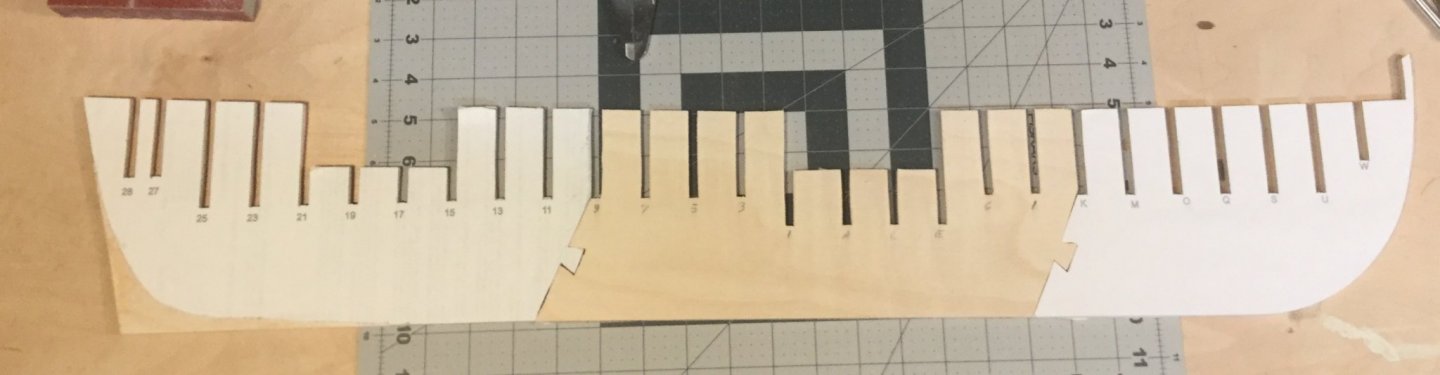
Hi Boyd: The step I skipped was to verify the scale on the print-outs. If you lay your scale on it, you should be able to confirm that the prints are the right size. Here is a picture of what it looks like. Good luck with your sheets - I hope they came out the correct size. The good part for me is that the second set of frames is coming out much better than the first. Apparently, I needed an extra ten or twelve hours of practice on my scroll saw!

-
Thank you guys for all the nice words of encouragement. And thanks for the likes. I’m leaping right back to work on Winnie frame V2.0. Luckily, I had enough Baltic Birch 5 ply to make the bulkhead former and I have plywood for the bulkheads as well. So I’m taking advantage of the fact that the admiral is at work today and I’m at home.
-
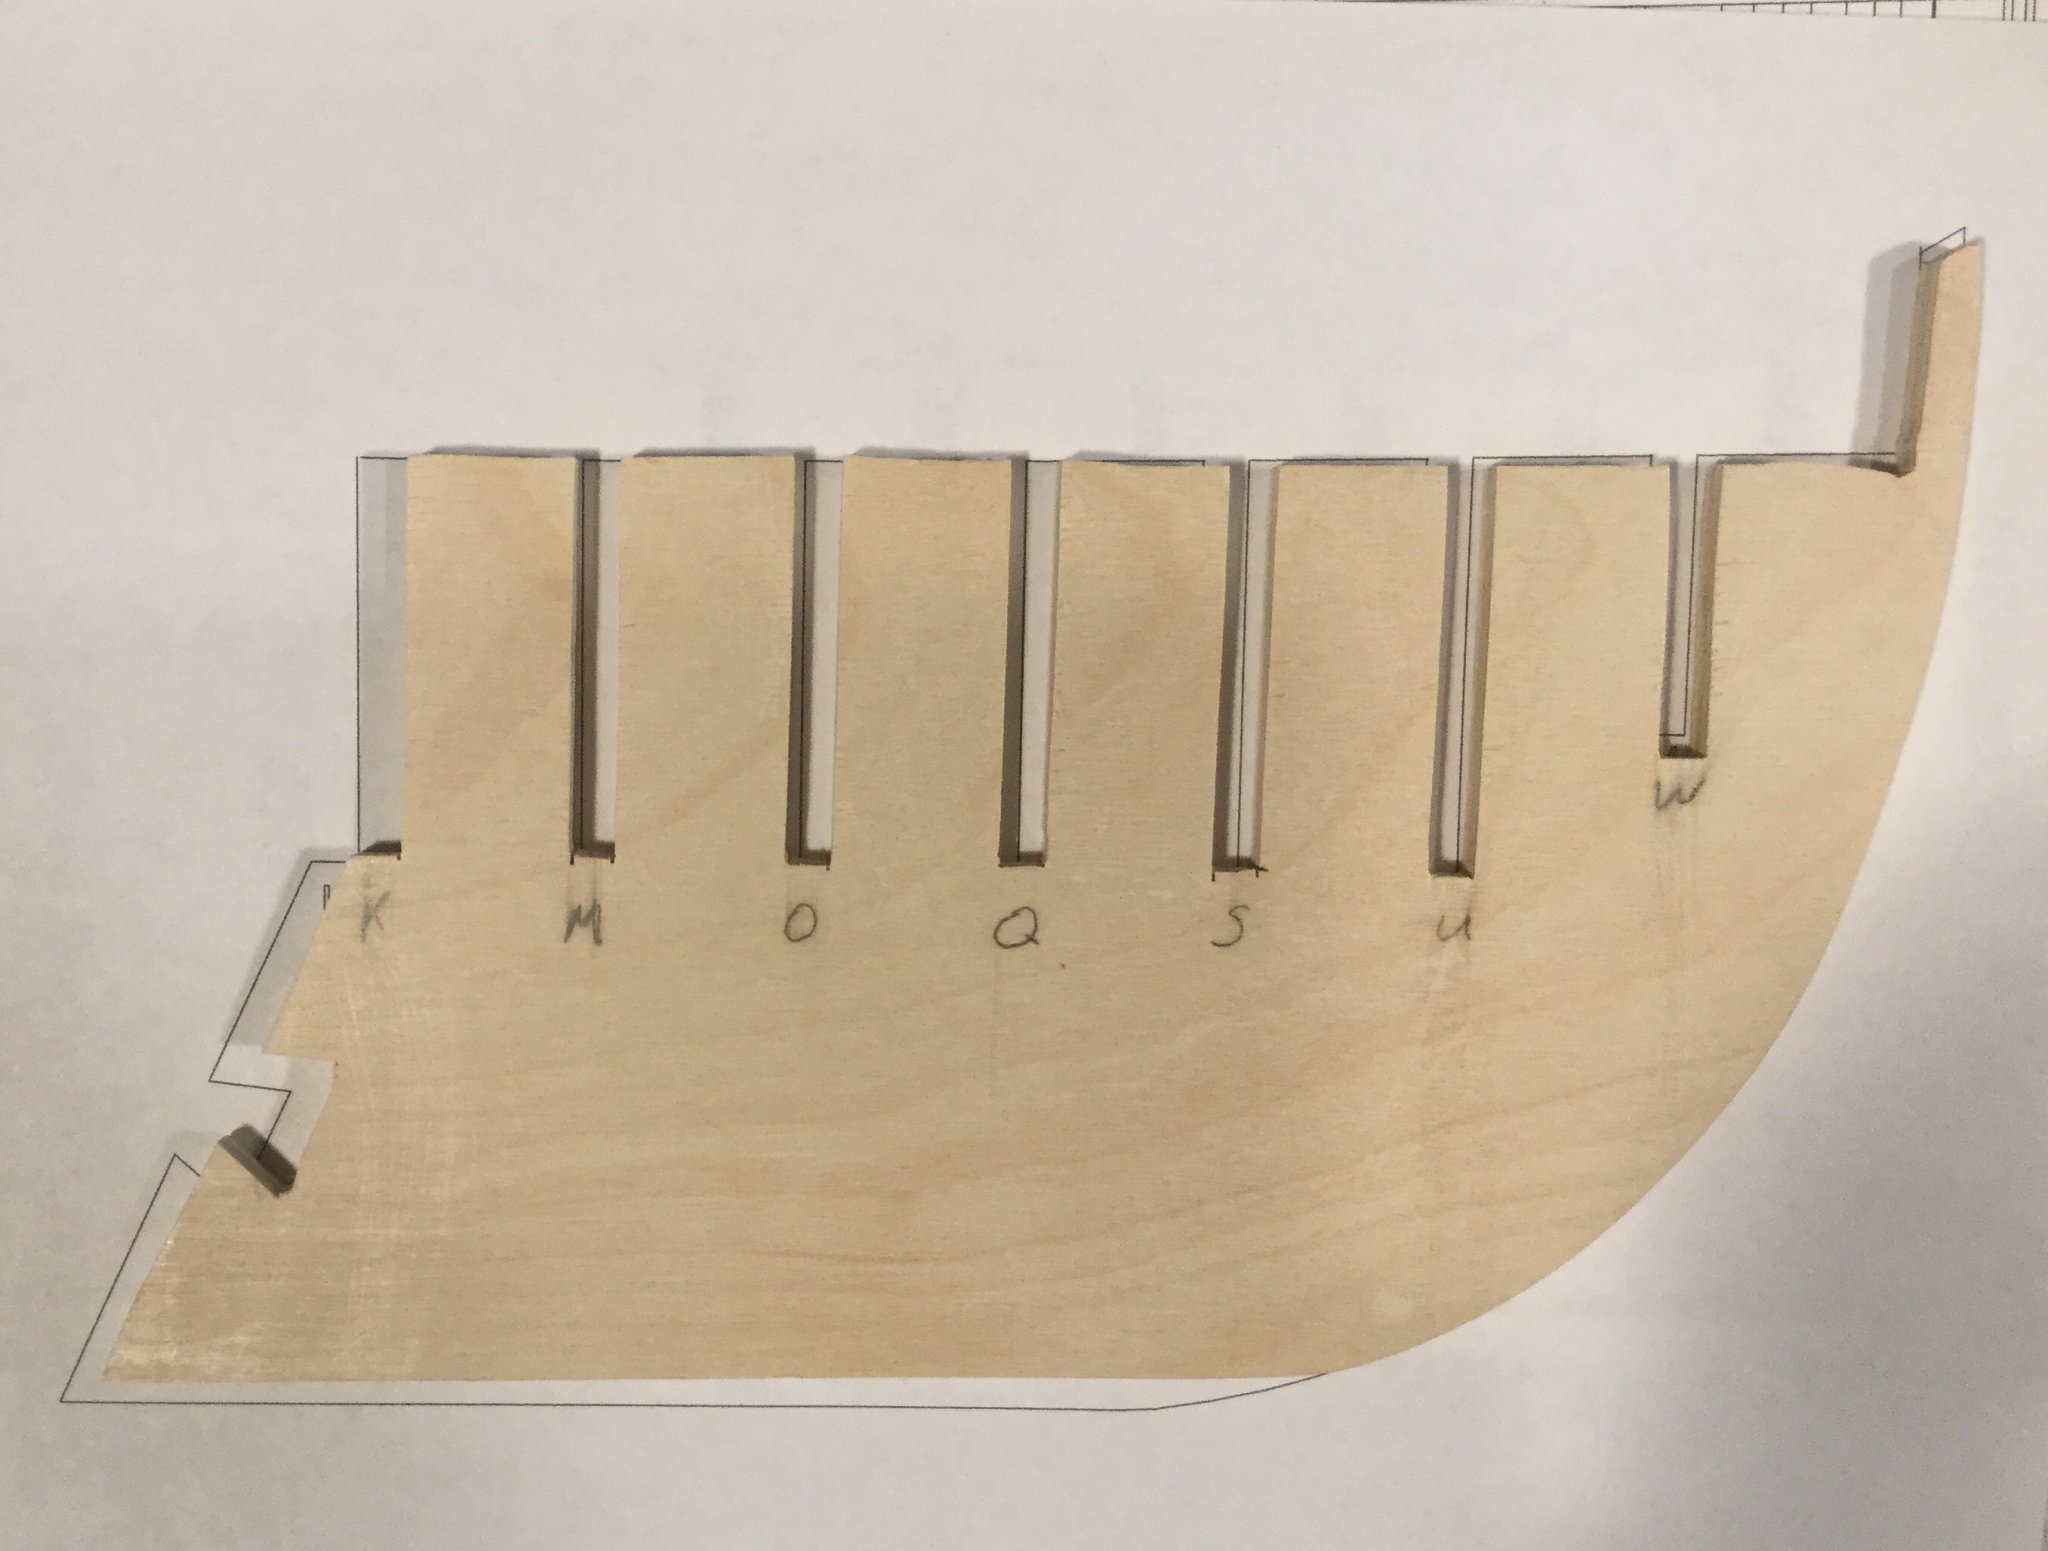
I have suffered a major setback on my Winnie project. I had thought that my large sheets were a little oversized because I printed them on a 34x44 plotter. But I had it set to 100% scale. Apparently, those sheets are right and my bulkhead sheets were printed a little small. I found out when I put the keel on and then laid it on the full size sheet. The keel goes exactly to the end on the sheet and my false keel comes up short. I did a little more testing and determined that every plywood piece is small. I have to cut the whole thing out again. Luckily, I think I can salvage the keel and stem using my #11 ungluer.


-
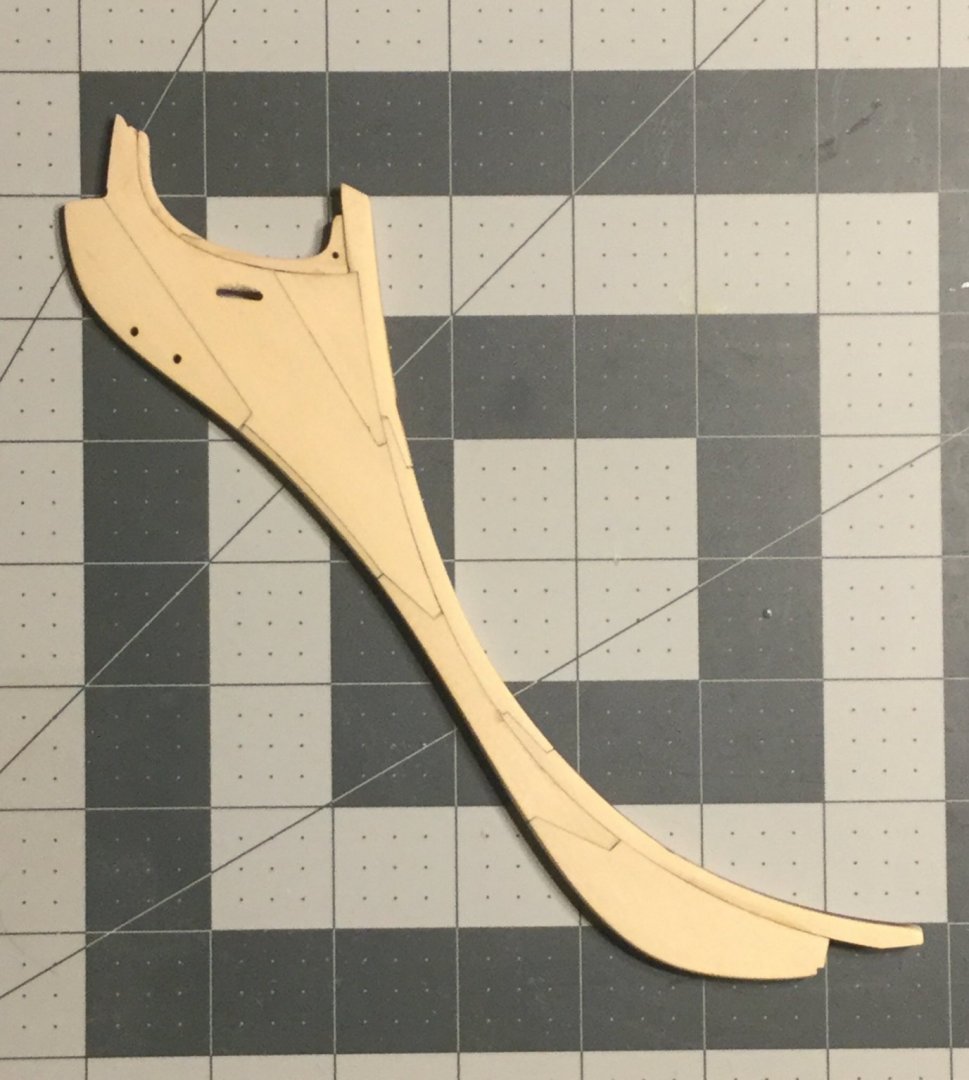
I received my chapter 1 parts just before leaving town for work. So I couldn’t get much done for a couple of weeks. I’ve assembled, tapered, and installed the stem pieces along with the rabbet. Now, I’m working on the keel. Chuck, I’m struggling in my mind with the false keel. According to the parts list, there is one piece that is 1/4 x 5/64 and 15 inches long. And that’s what is in my chapter 1 set. That piece won’t cover the full length of the keel. Is there another piece that I’ve overlooked?
-
It looks like you're doing an excellent job on her. I like your use of two standard mini-vises in lieu of a purpose-build keel vise. I like the Constitution as a subject because it's a ship you can still go see today.
- 55 replies
-
- 1
-
-
- constitution
- model shipways
- (and 1 more)
-
Of that, I am certain! Plus, this model will be on the build board for a long time because there's a ton of work to do before planking! I suspect that I will need to build a hull contoured cradle for it to sit in at that point, and that replace the 90° stands with cradle pieces. Chuck, it's a long ways down the road, but I thought I read in your log that there will be a longboat for Winnie. Is that true? If so, I'm really looking forward to it.
-
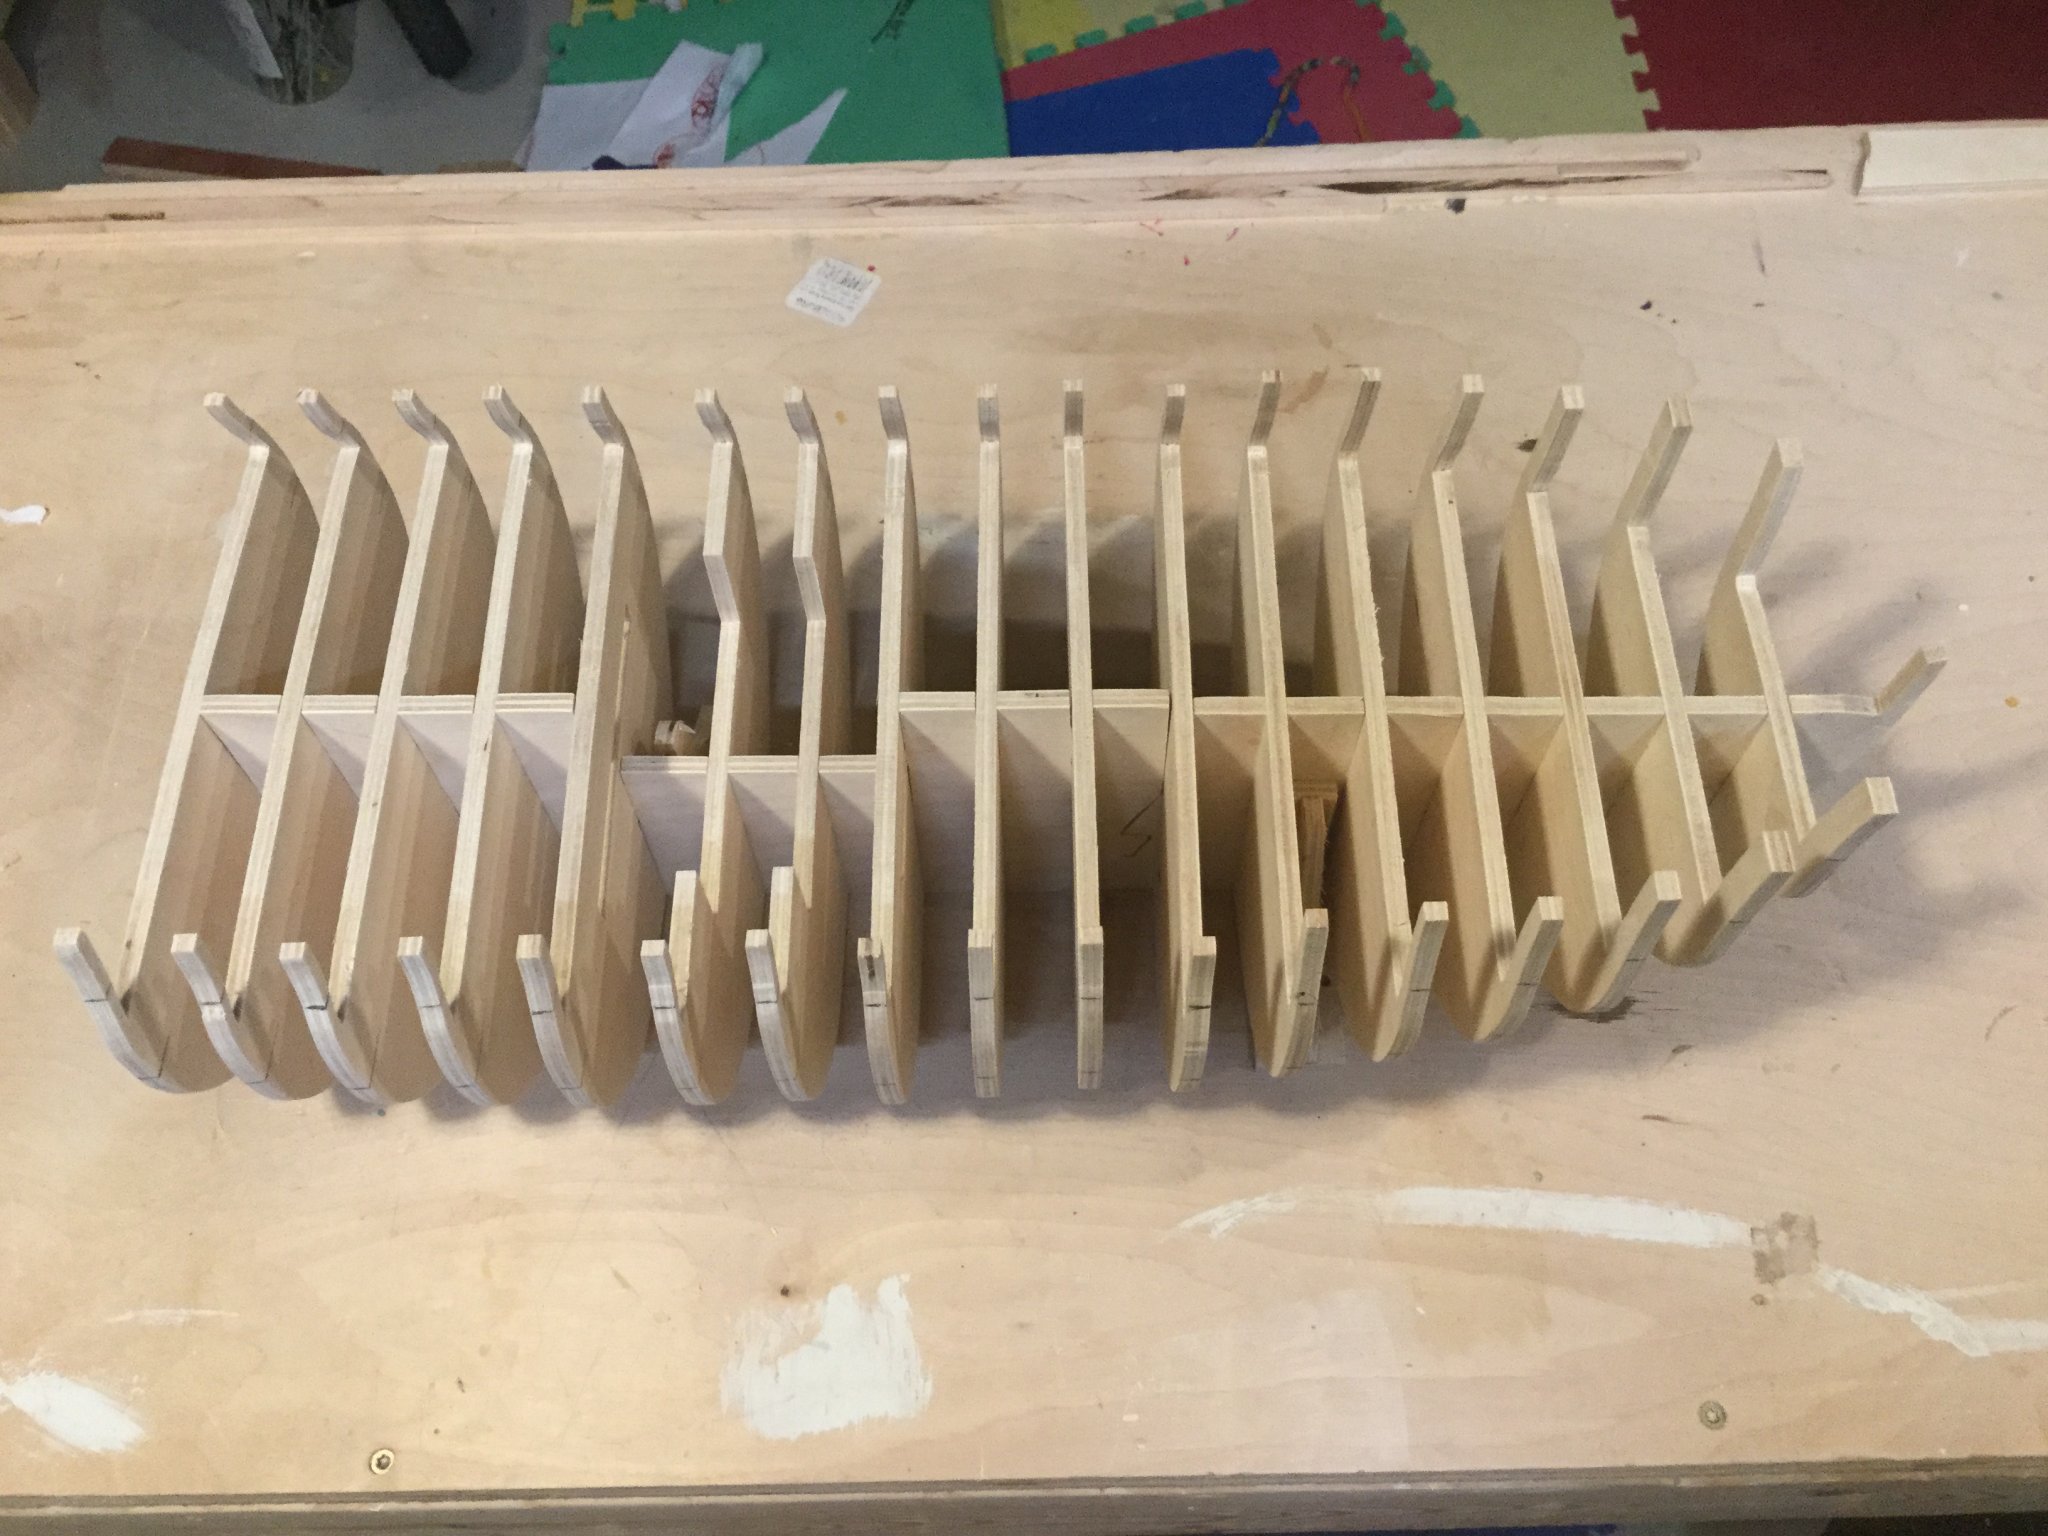
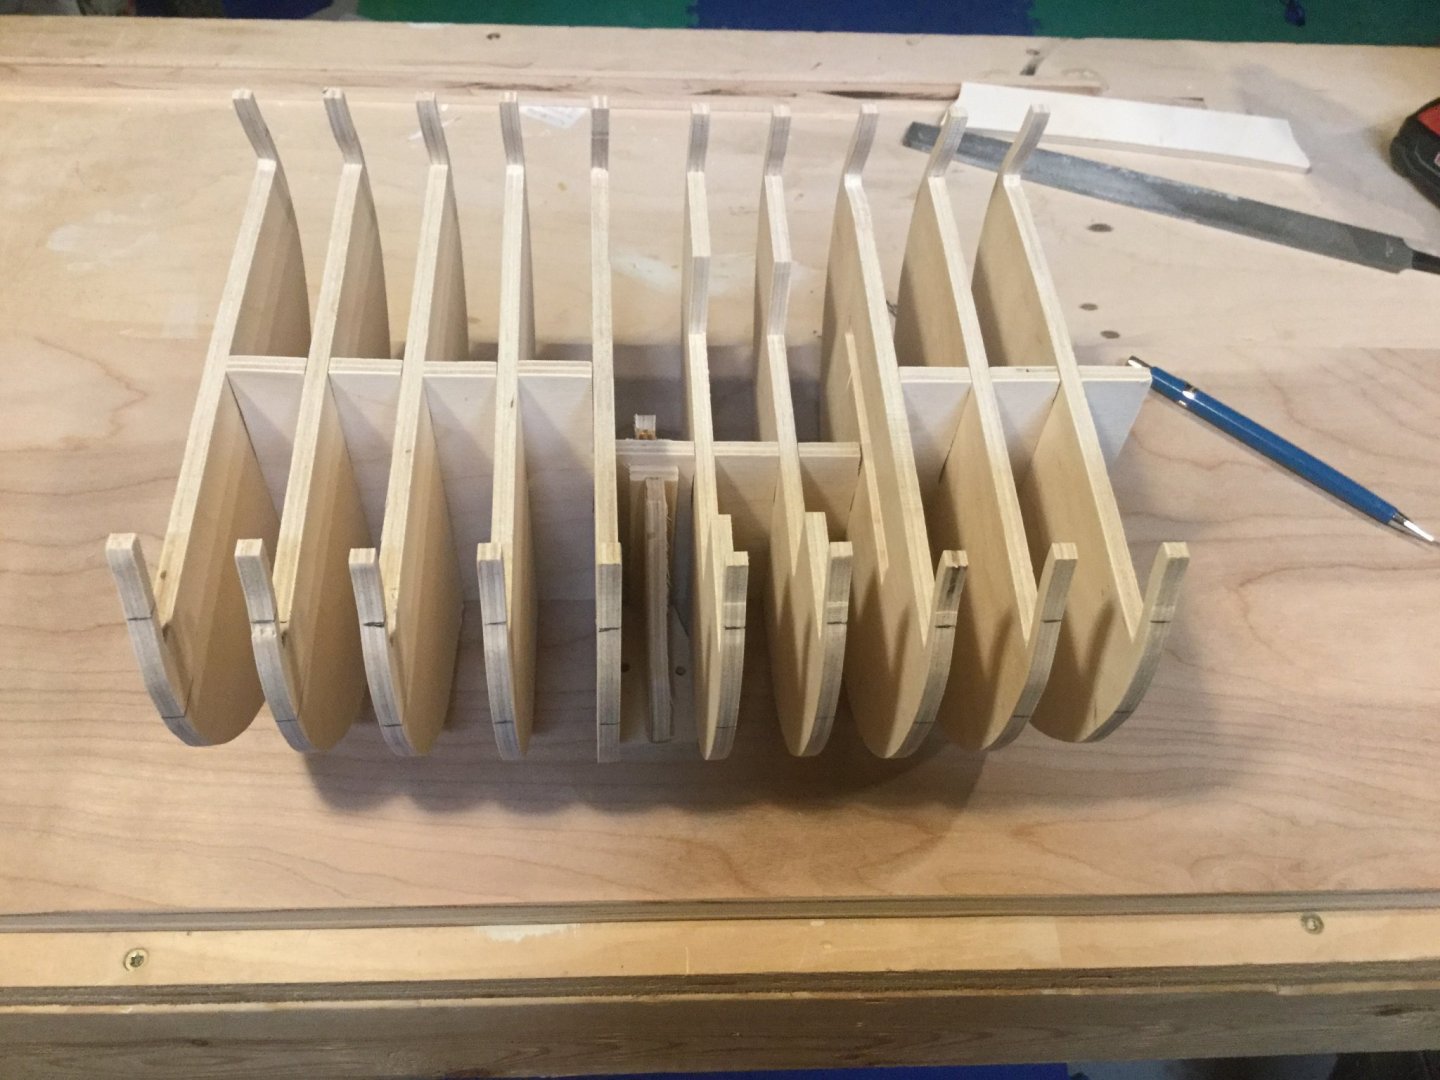
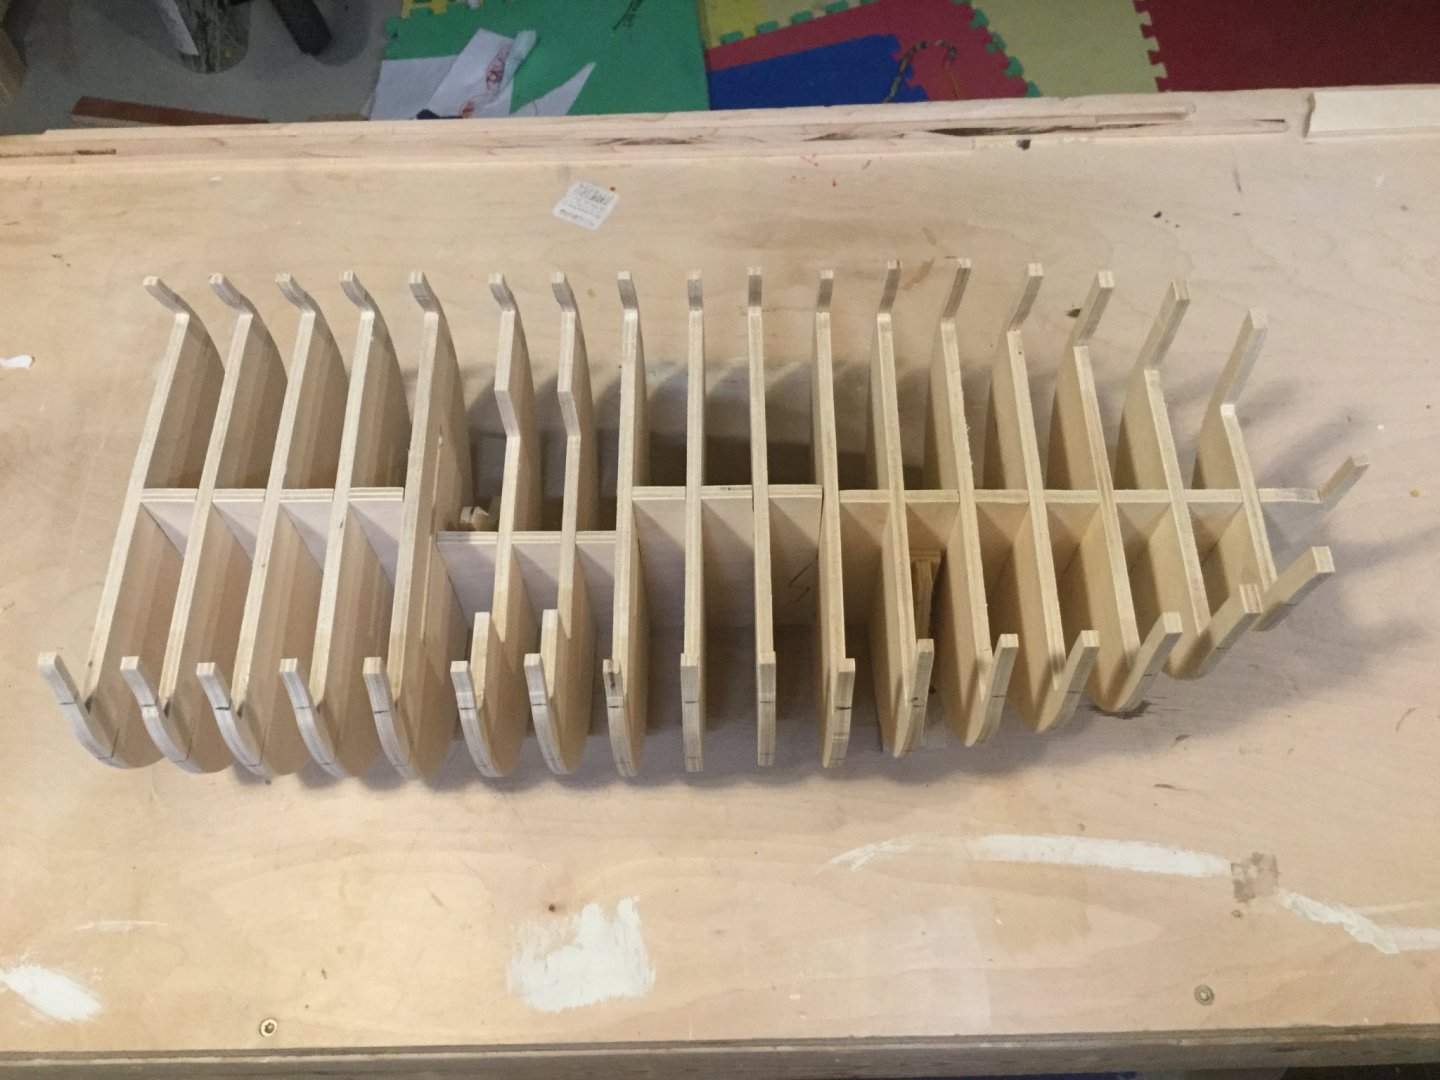
I made the build board and test fit the frame assembly in it. The right angle brackets are made from scraps and held together with epoxy. I used factory corners from my plywood to ensure that they are accurately 90 degrees. The one in the picture below is the best one of the bunch.

-
Thanks, Chuck. Your picture and direction help a lot.
-
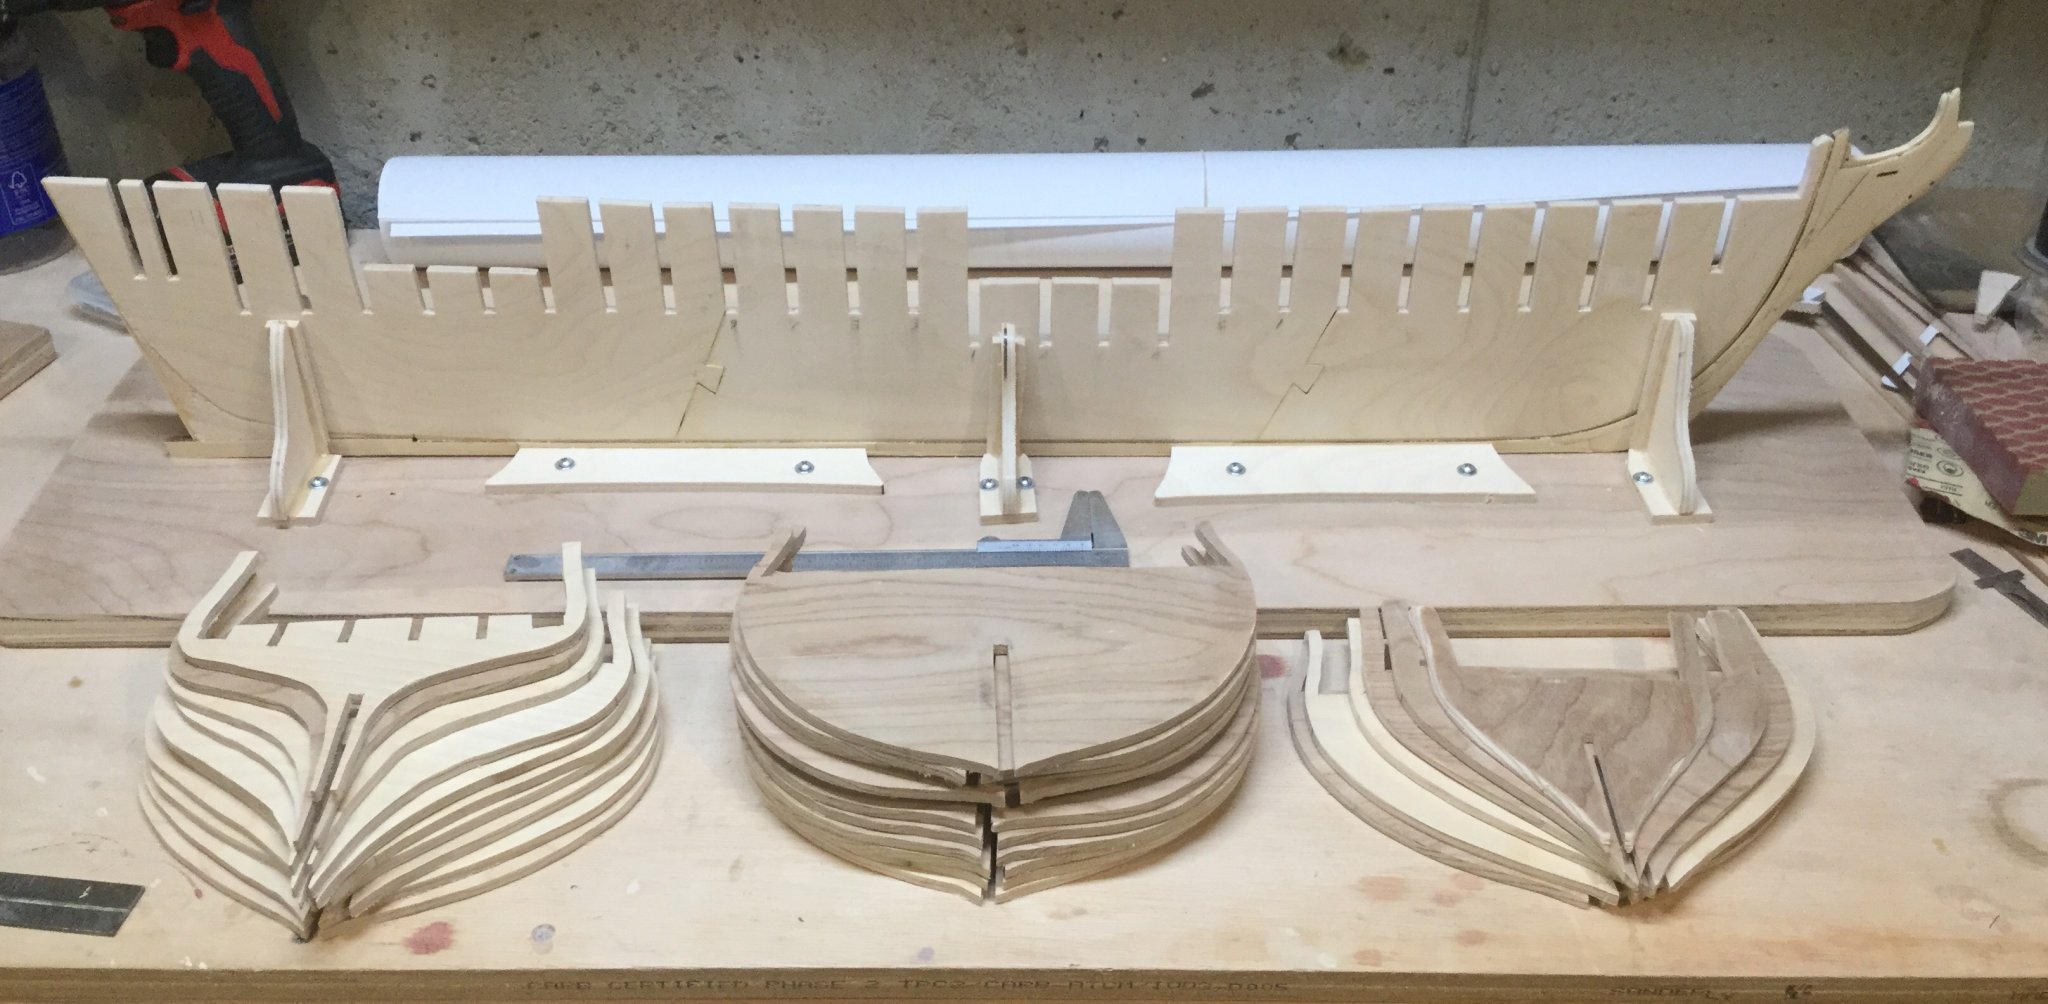
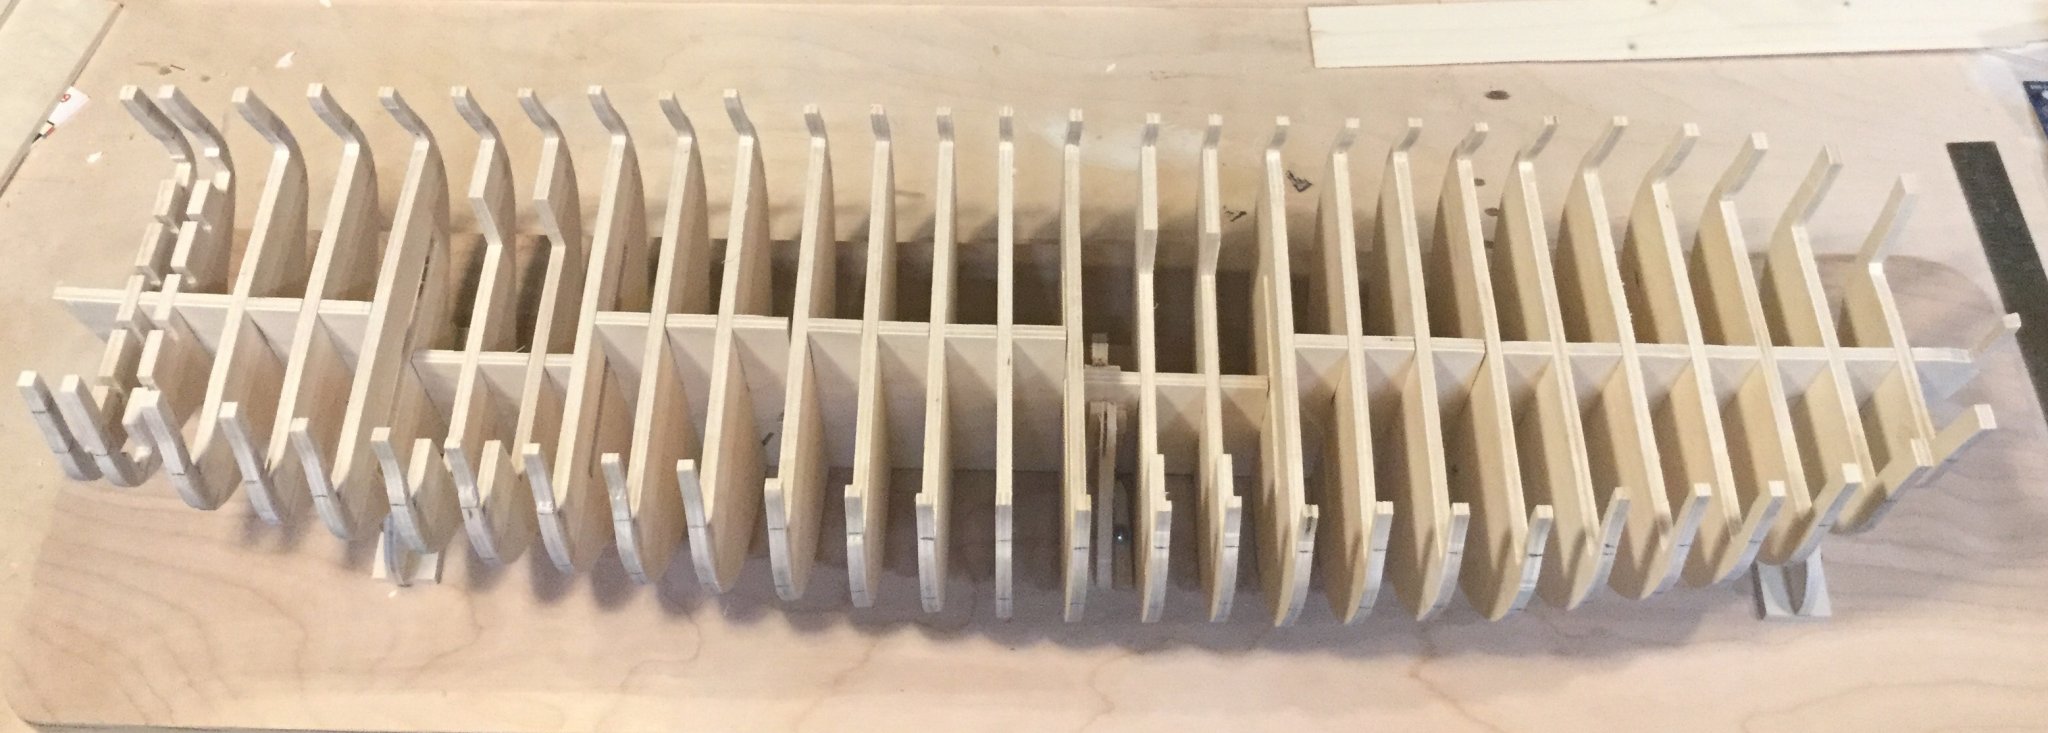
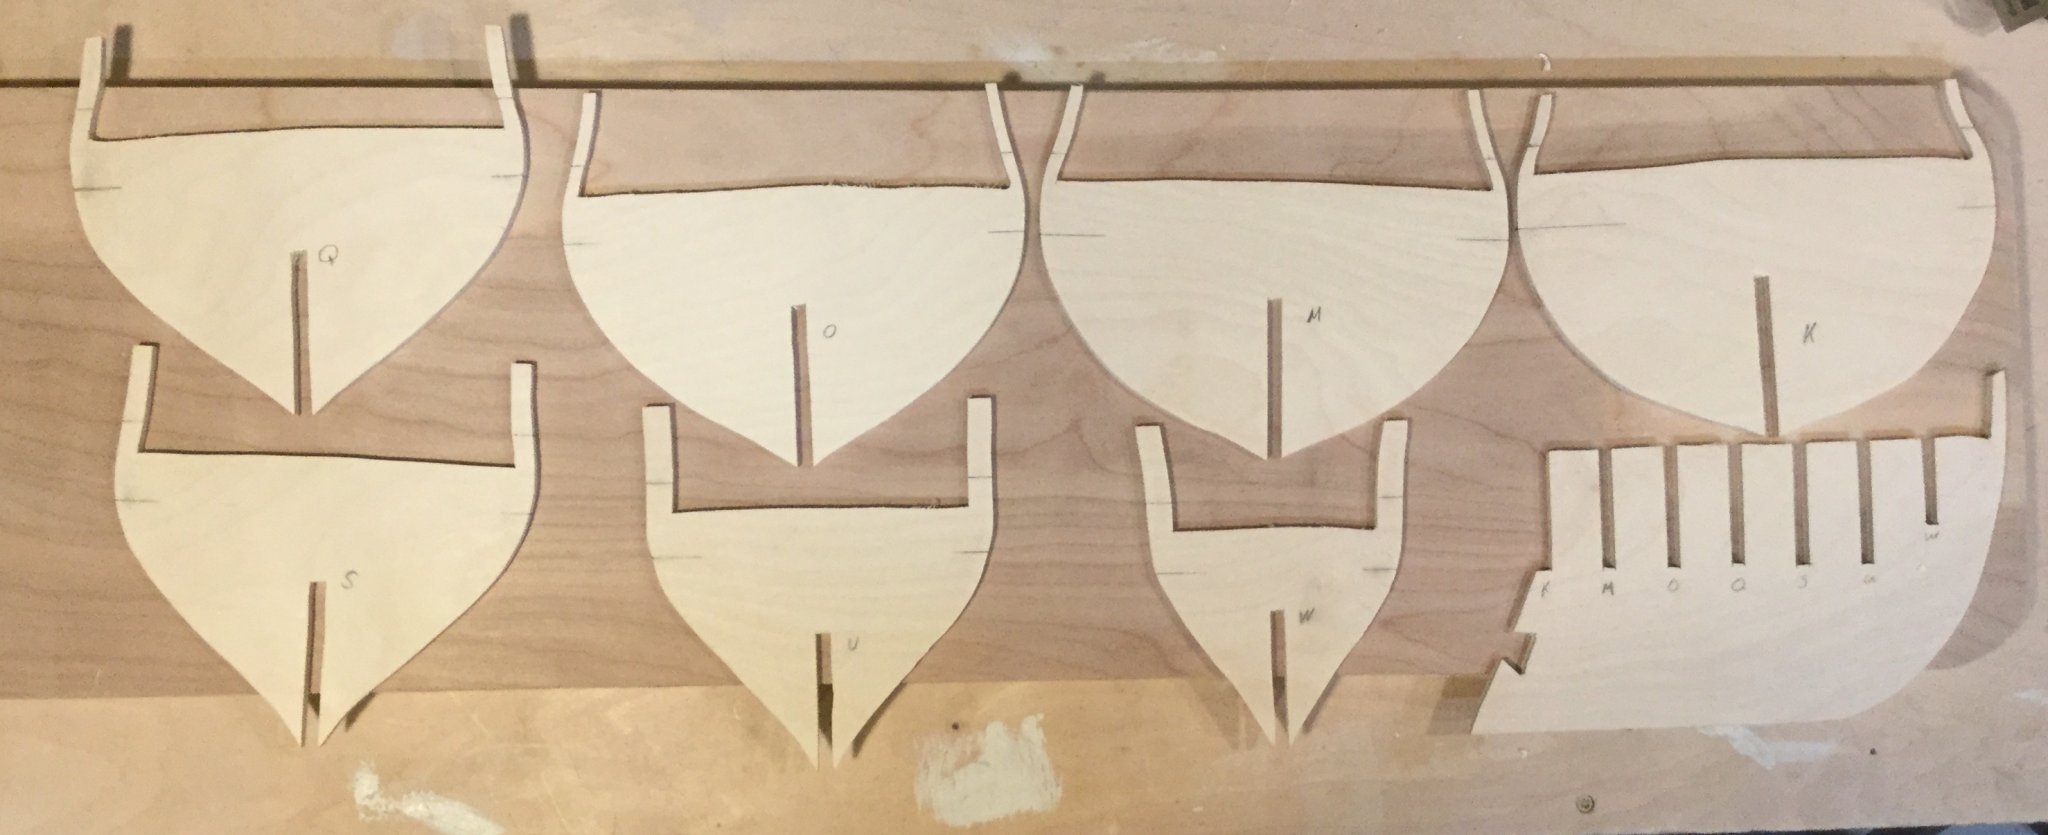
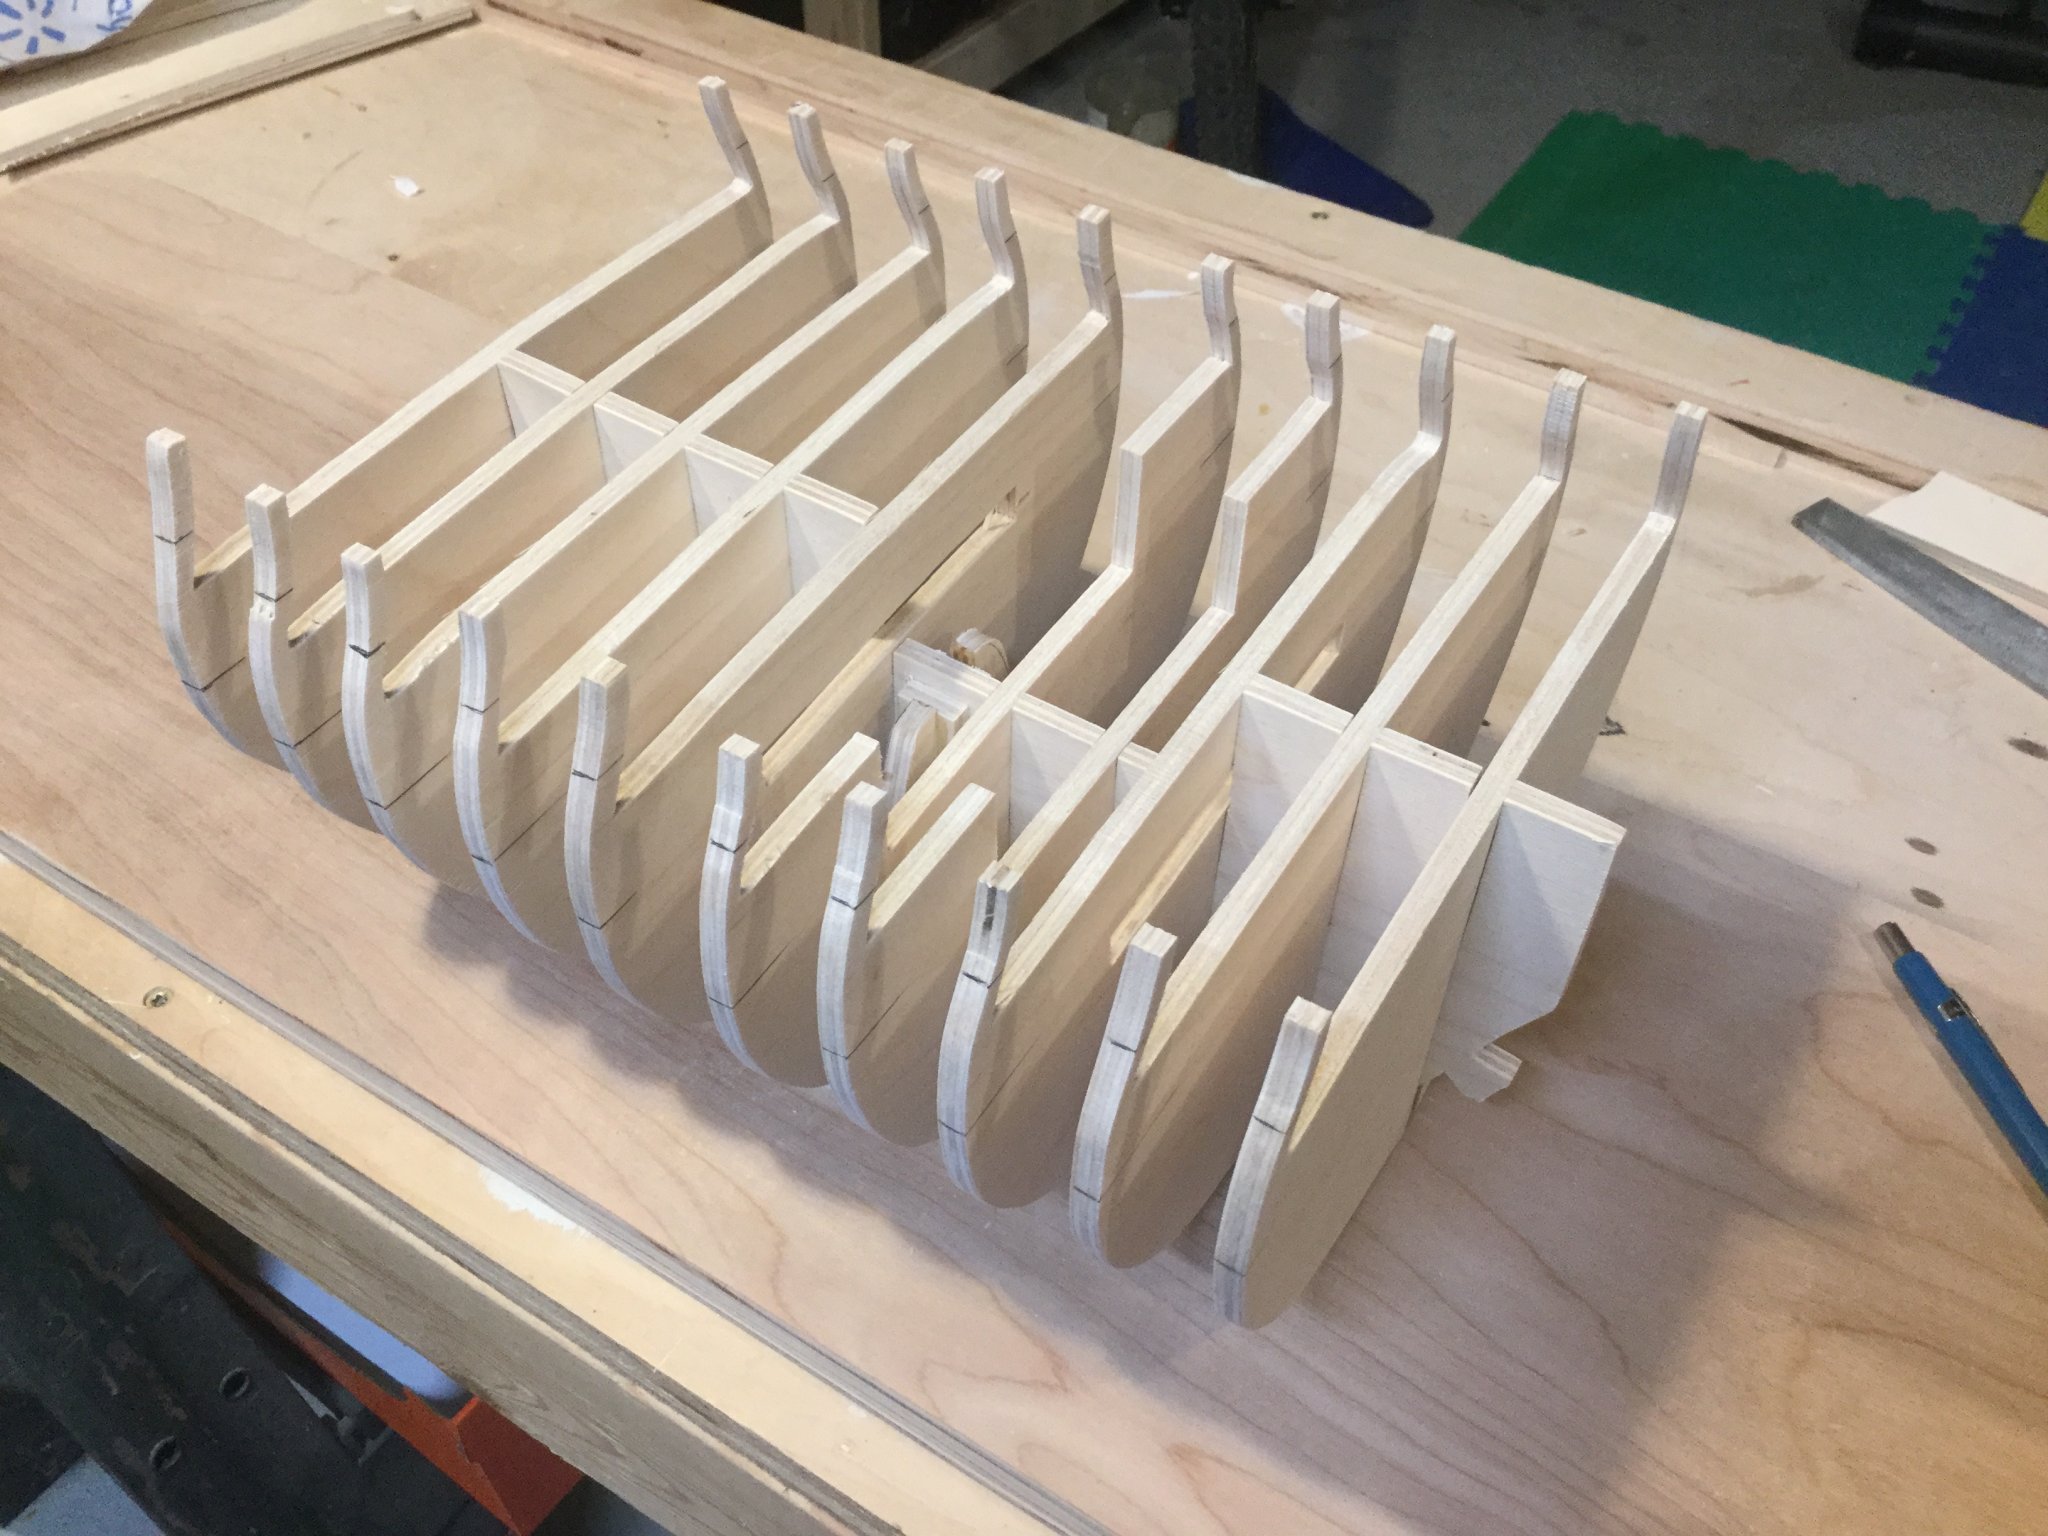
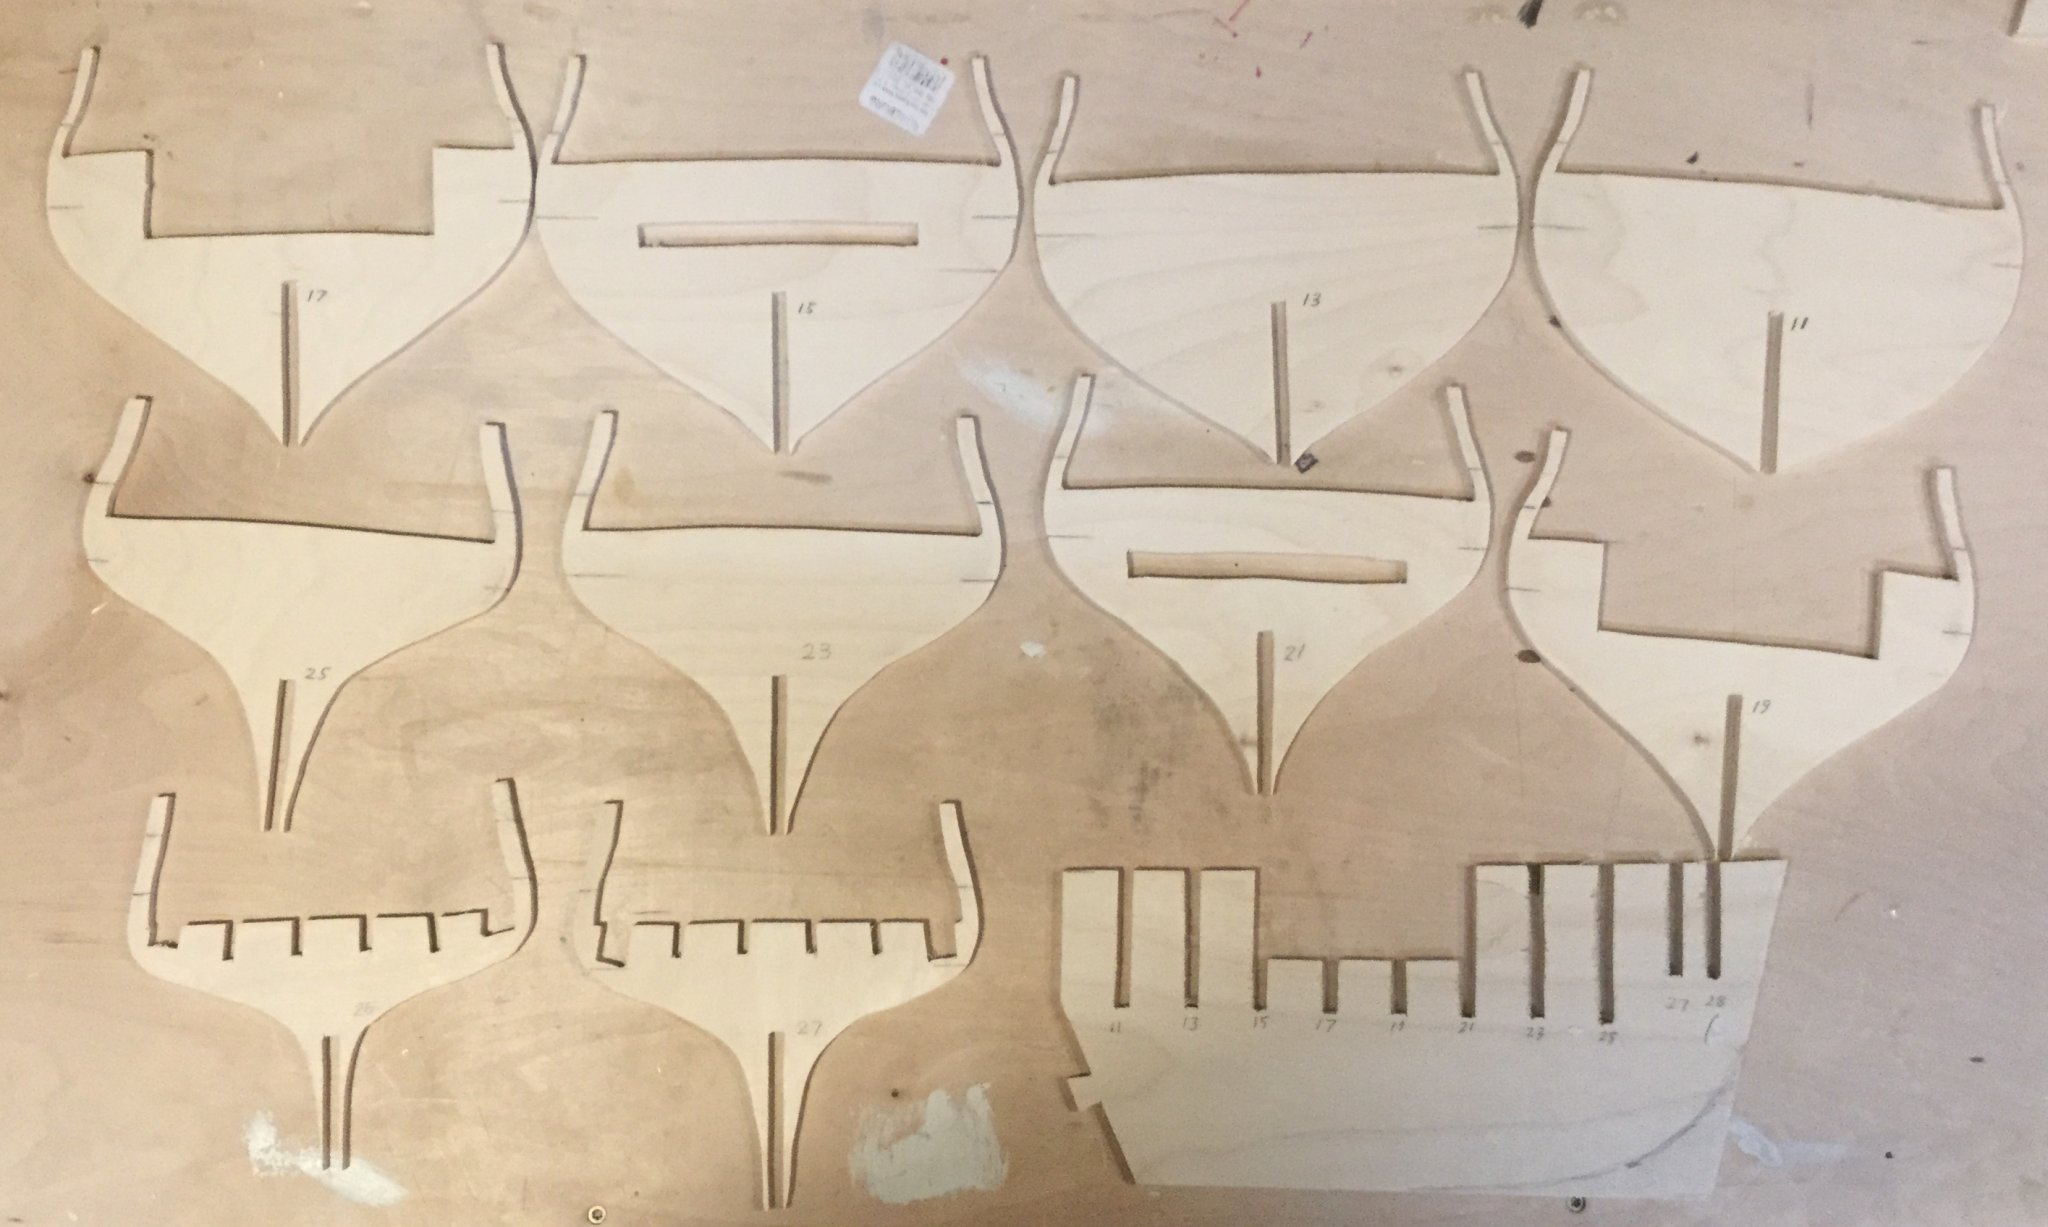
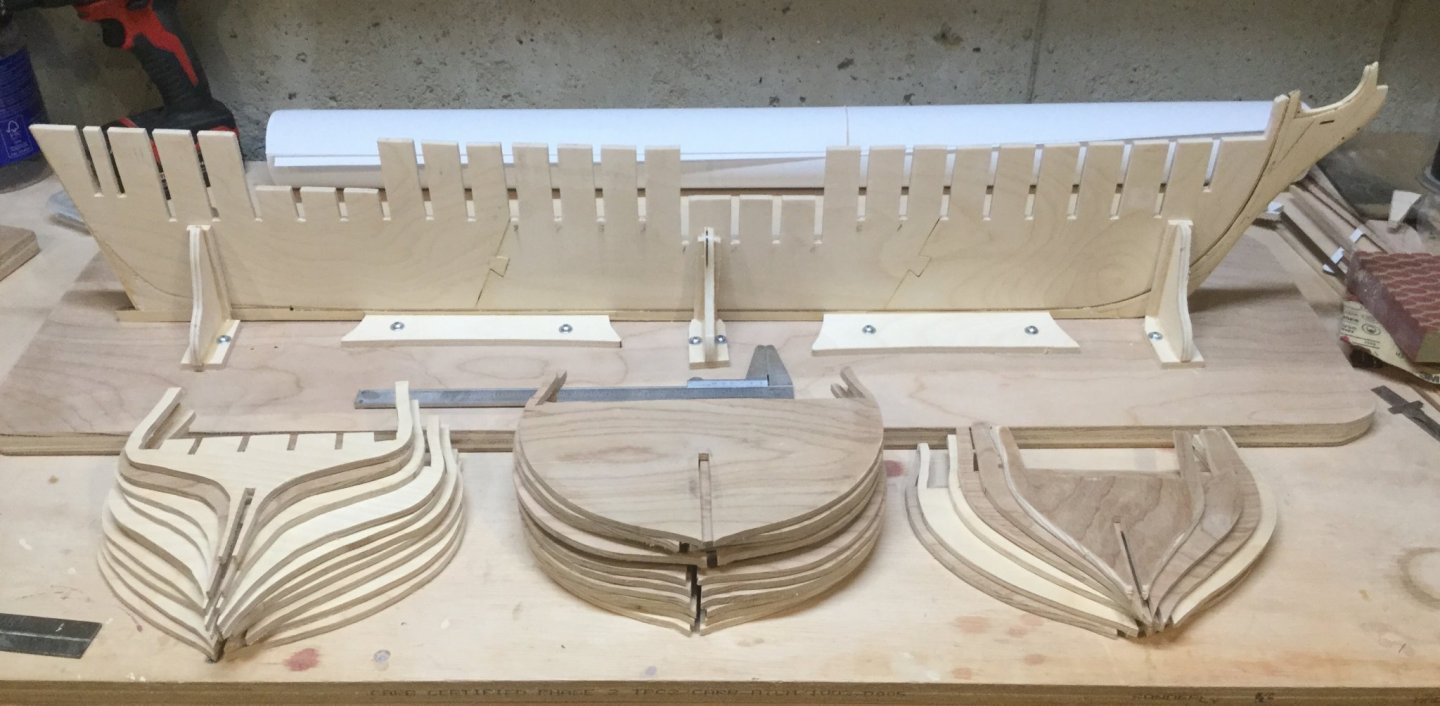
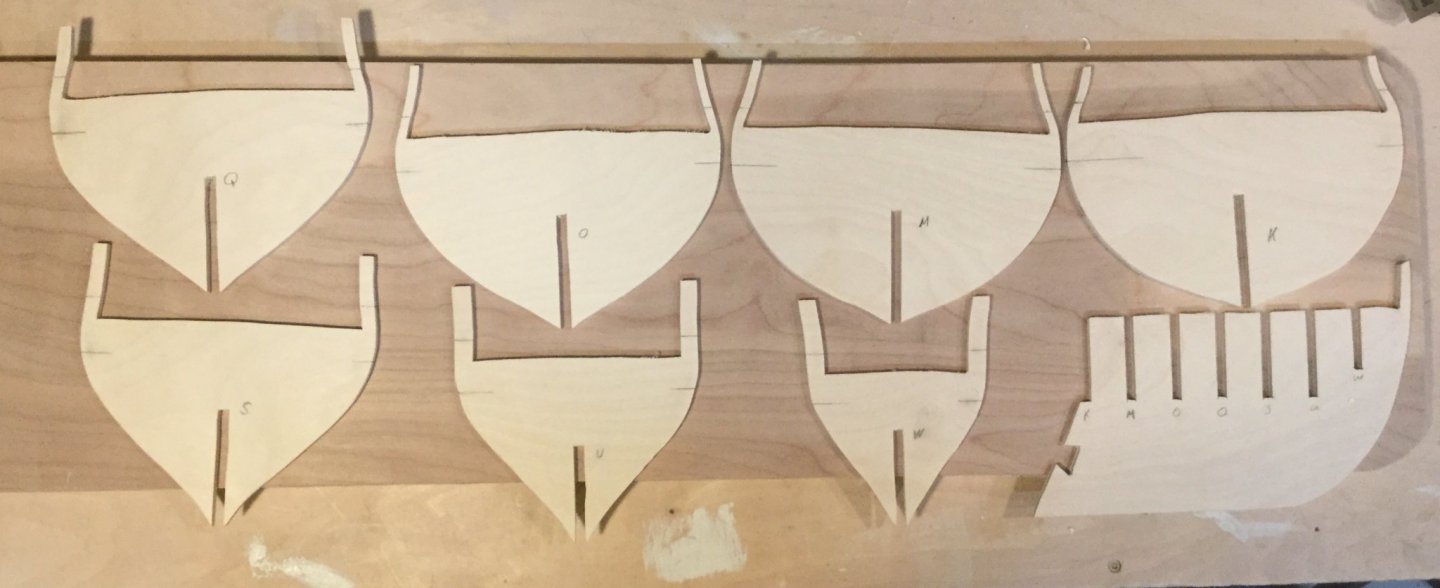
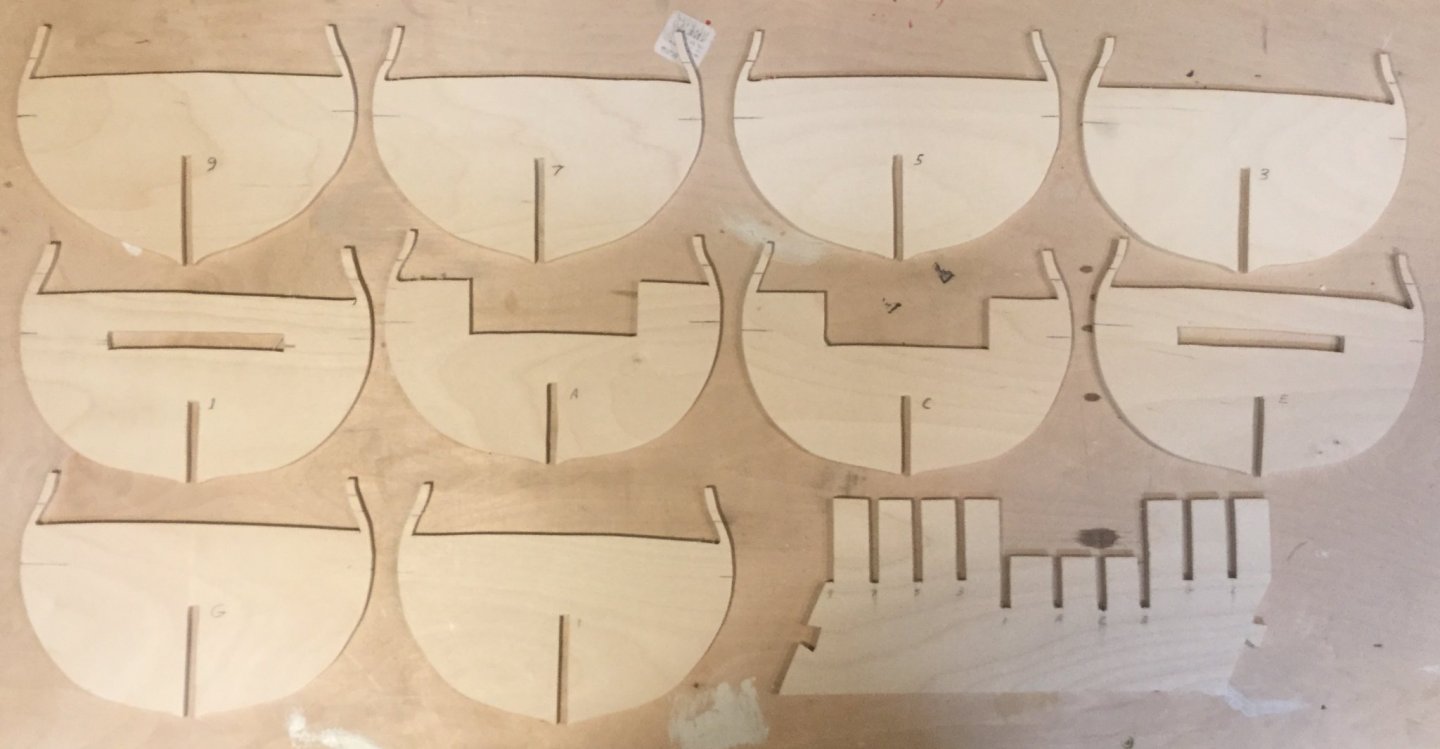
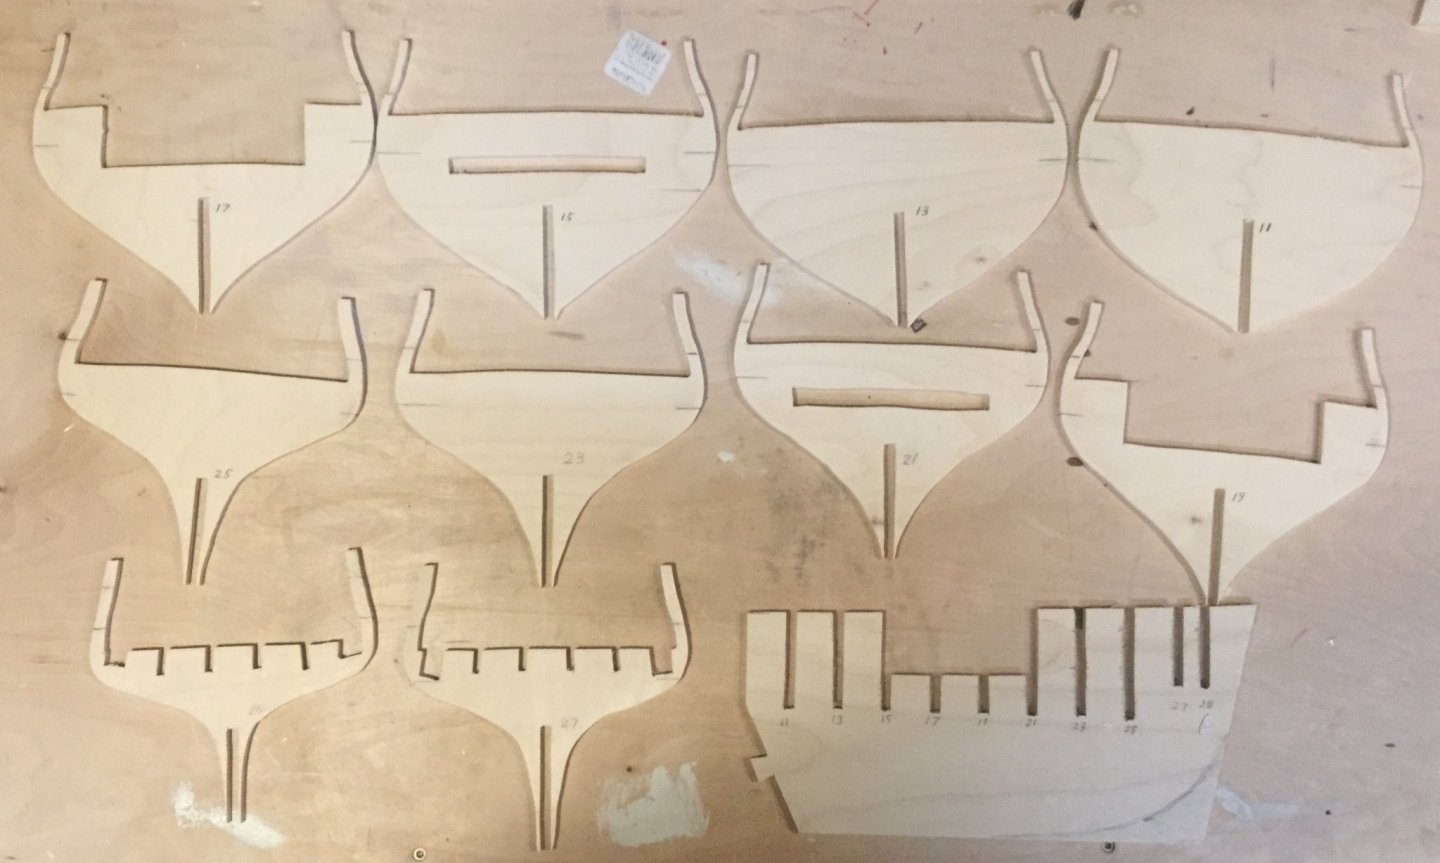
I have cut out all of the bulkheads and dry fitted them to the false keel. It’s very gratifying to see this frame set coming together. Bow section parts bow section assembled Mid ship section assembly Mid-ship parts Here is the bow and midsection just loose fit together This is the aft section parts This is the aft section assembly. next, I’ll built the build board. I’ve made the right angle stands and cut out the board. I just need to assemble the pieces.


-
Hi Alec. I don't know if you can do anything about it, but if you look at post #80 in my Virginia build log, you'll see that the foremast is pitched too far back. It's on page 3 of the log and you can link to it from my signature below. That caused me to have to shorten the gaff on that mast. I think some other builders have had the same problem, which leads me to believe it's an error in the false keel. You might want to push your masts in and lay the model on the plan as I show in my picture to see where you are there. You can still get to the false keel if you need to file a little away and fill it in on the other side. It might be easier to fix now than it would be down the road.