


src
-
Posts
2,300 -
Joined
-
Last visited
Content Type
Profiles
Forums
Gallery
Events
Posts posted by src
-
-
Jo,
this is my whispering voice, we are a gentle bunch here, we will never yell at you.
Carl is right (he does that from time to time😂😂) a good rasp should take that down with no problem. Just take your time. When you get within about a millimeter switch to some sand paper on a stick or one of those emery boards you ladies use to make your Niall’s nice.
-
Lou, hadnt thought of that at all. Must be getting tunnel visioned as I try to finish this!! Its been 10 years this month..........😳😳
Sam
-
Gregory, that is my fall back position. My schedule is always a bit erratic so at the moment I am looking at off the shelf items. I do like your idea of the dremmel as apposed to the drill motor I was considering. THat would eliminate the crushing of the lower portion of the pins by the jaws of the chuck I think.
BTW, it ALL about the hokey pokey!!
")
Sam
-
I wish I could give two thumbs up to Marks comment, but I am limited to one.
So sorry for the distraction Captain. I will defer to you judgement on the quantity of seeds.
Samson (as opposed to Son-O- Sam)
- CaptainSteve, Canute and mtaylor
-
 3
3
-
Mark thanks for the thought. That was more me thinking out loud rather than asking you if you can see across 500 miles of the US and measure my pin rails. 😀
I ordered some 8 and 12 mm brass pins from Model Expo. We will see what happens when they arrive. If I really have to I can throw the kit parts in a drill and try to sand them down to a more reasonable diameter.
Sam
-
Mark, Vossie, I will check those out.
I kind of bleeped over the metal pins at Model expo. The big question is will they fit in my pre drilled rails.
Sam
-
Nicely done. You will thank yourself later for installing the fairlead. I neglected to do mine and paid the price with some additional unneeded adapting and improvising.
Sam
-
Well done Captain! Scrapers and sweepers and Moldings, Oh My!
Although Me-thinks you need to go back and re-count your seeds. After careful study of your picture it appears you miscounted, there are precisely 73 billion 456 gazillion five hundred and one.
Sam
- mtaylor, CaptainSteve and Canute
-
3
-
Vossie - or anybody else out therre, I was just looking through the links here and didnt see anything better than what I have. Any thoughts on where to go?
Sam
- lmagna, mtaylor and popeye the sailor
-
3
-
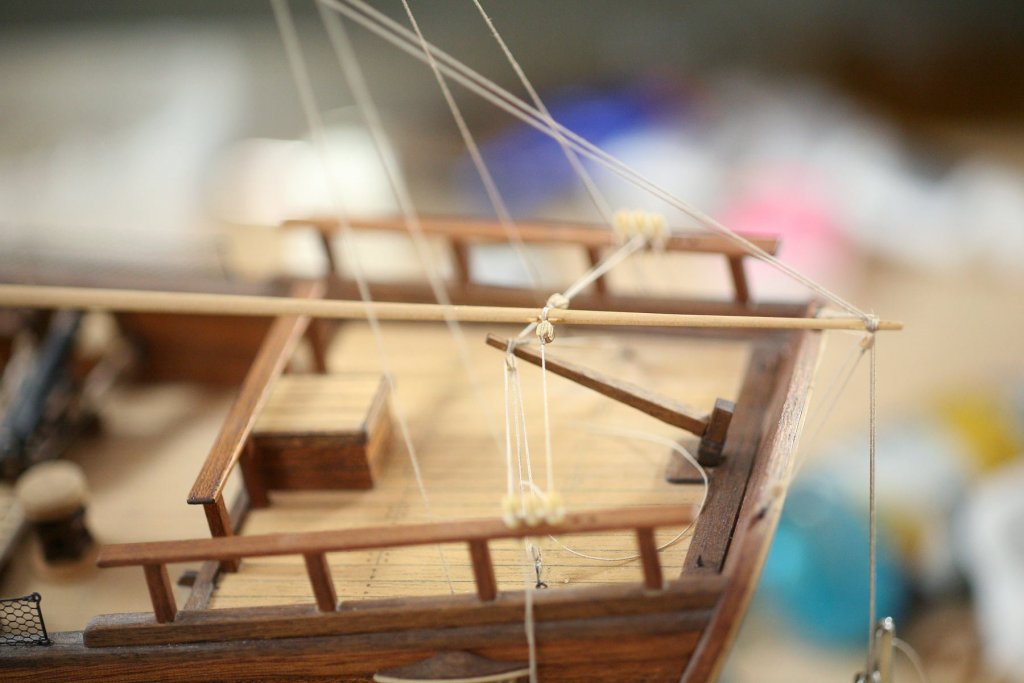
Got a bit of build time in this week. Between comments here and some PM time I got the driver boom figured out, thanks to all.
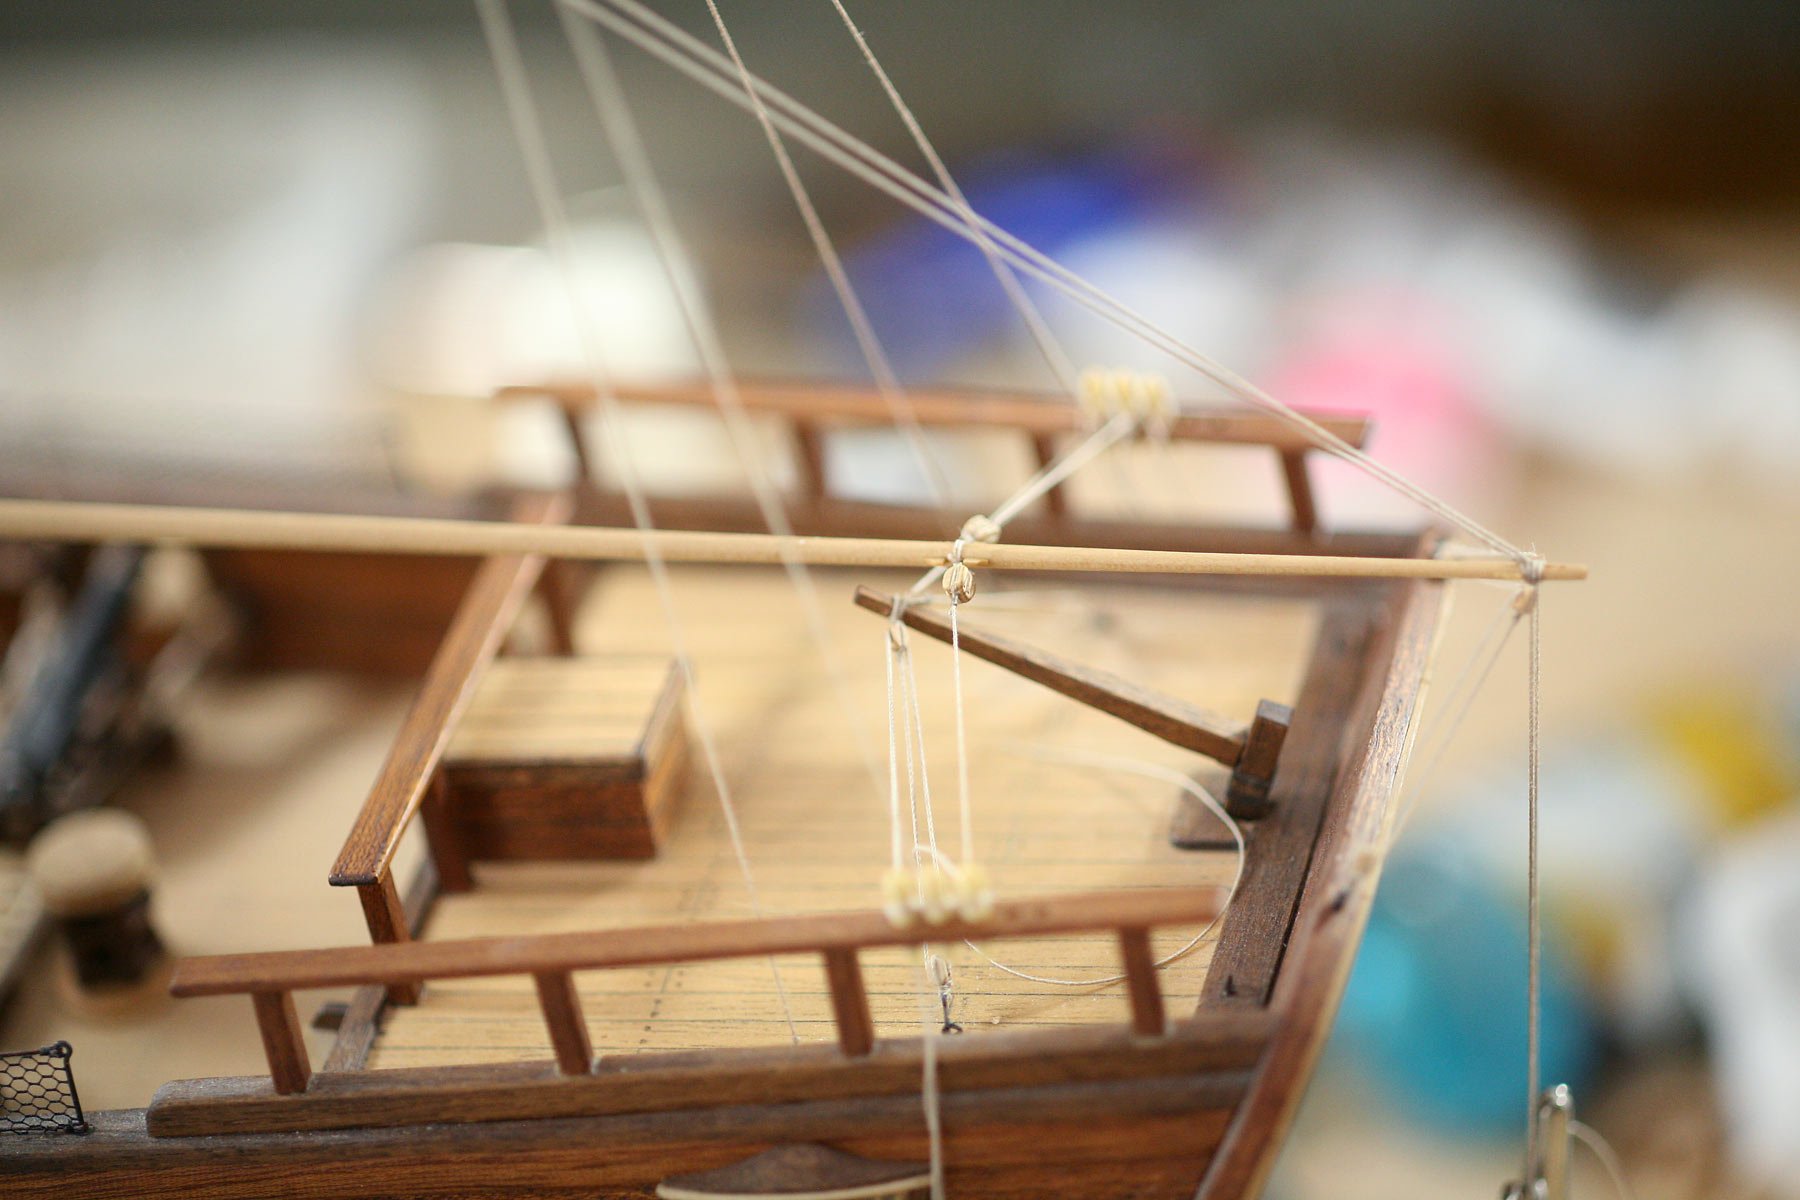
I found some stain that closely approximates the finish on the mahogany planks. They still need a bit of oil rubbed on them. The color is not perfect but by the time I get some rope coils on them you will never notice. I didnt take pictures of that yet. tomorrow or the next time I update. I think this weekend is going to entail re-tensioning my back stays, they flop around when the AC is on and my Main and Fore Stays have developed a slight sag. Very mild tension on both top masts at the heads relieves the sag but introduces additional sag in the back stays. It shouldn't take to long but will be easier now than later.
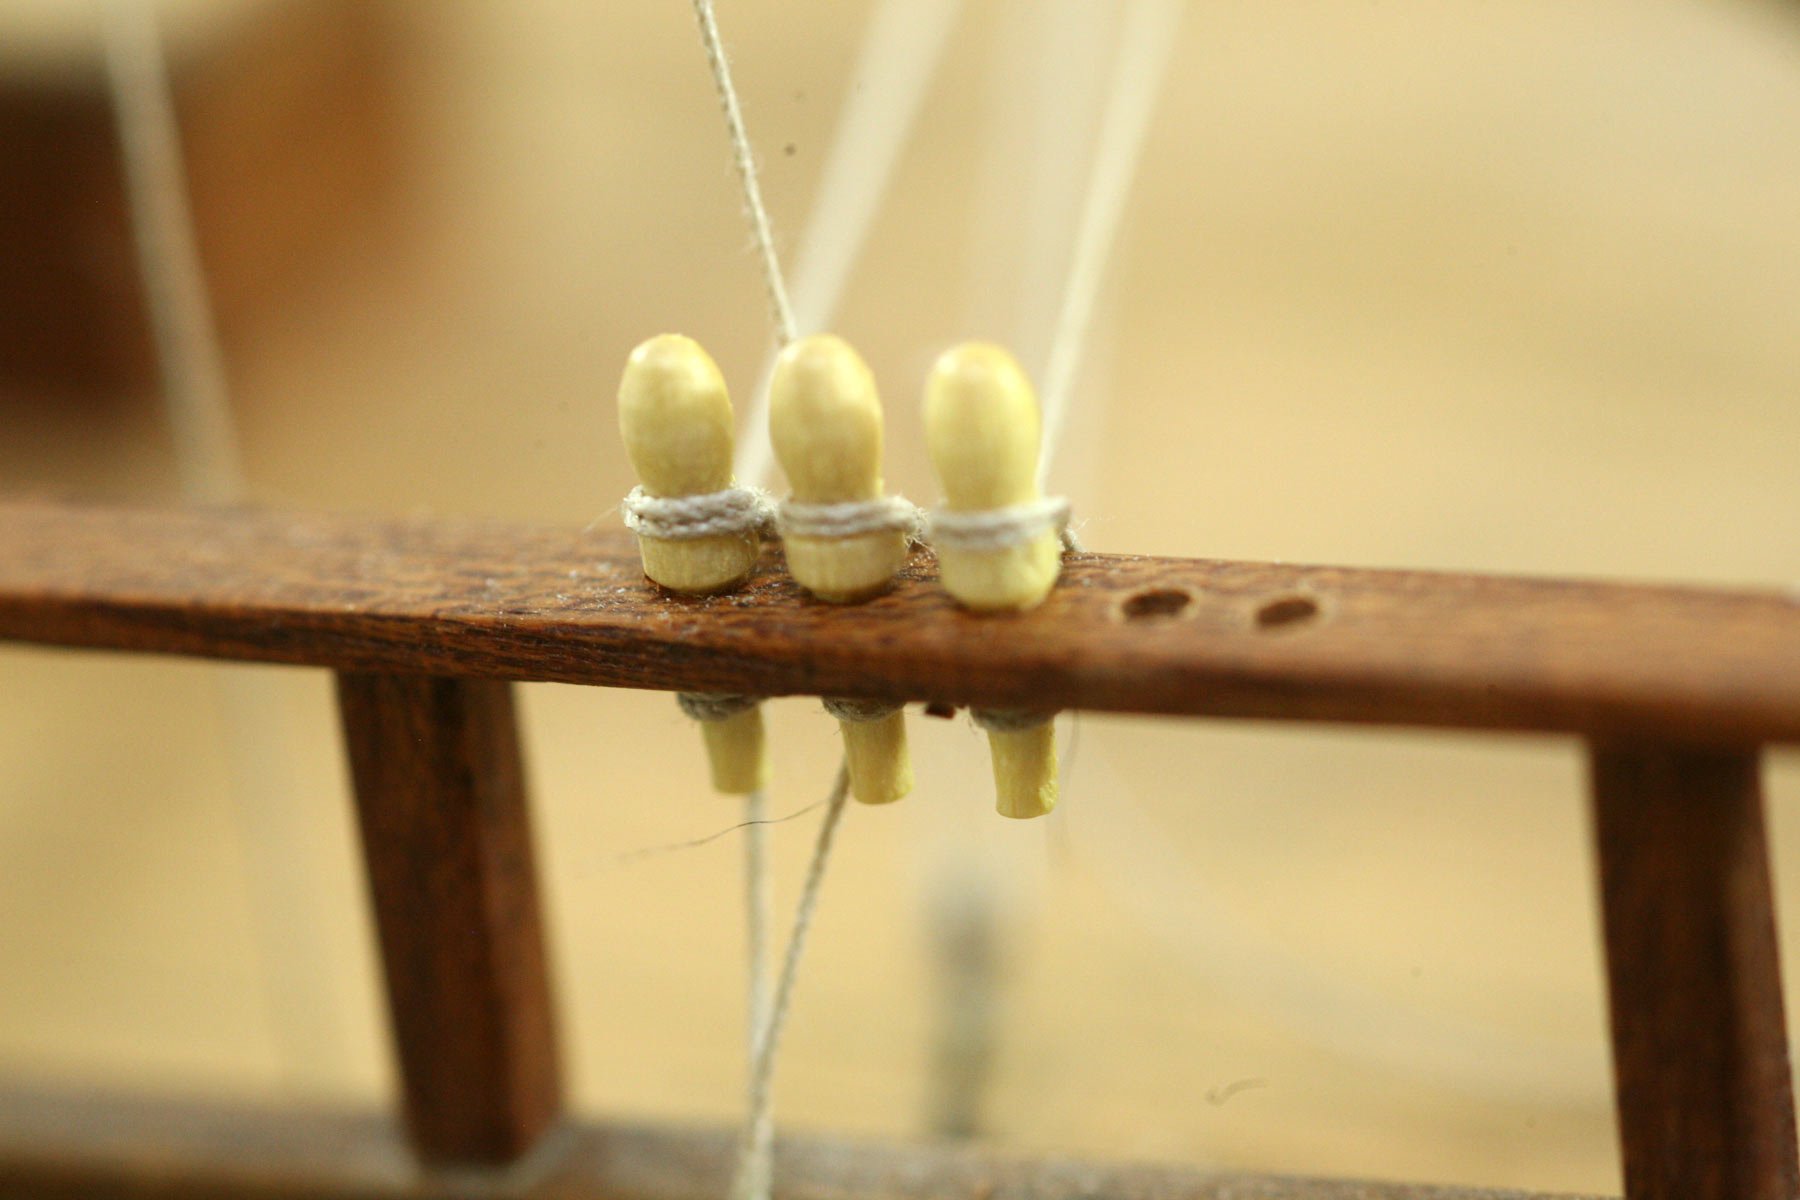
I think also I may look into some different belay pins, the ones Construco provided just look out of scale to me. I think the length may be ok but the thickness seems overly fat. They scale out at 20" O.A. with about 11" above the pin rail. The fattest part though is about 4.75" thick. I may have spaced them to closely, nothing to do about that now though.

Pictures or it didnt happen!

- lmagna, mtaylor, CaptainSteve and 4 others
-
7
-
1 hour ago, SHIPSCAT said:
Hello vossiewulf
I just tried sanding the frames and I am going to take your advice and put balsa wood in.
Jo.
At least the first and last 3 bulkheads Jo. It will make fitting your planks so much easier.
Sam
-
Pulling up a chair, I actually got in at the ground level. Whoo Hoo!
12 hours ago, popeye the sailor said:I promise to stay busy
Come on Dennis, we all know you dont sleep, or if you do yo build in your sleep. How else could you juggle so many builds at one time.😀😀
Sam
-
Rich, once you download the instructions Gunther referenced you’ll see how easy they are to assemble. Each sheet of 21 parts makes 7 deadeyes.
I found that it is possible to reverse a face and get the relief slots reversed.
A dot of wood glue is all you need. I did find I had to clean glue out from the holes before I could run my lanyards. A reamer from micro mark worked wonders without splitting the deadeye.
Sam
-
Dennis,
How about some brass tube for your tail pipe and muffler?
sam
-
A beautiful couple, much happiness to you both. Will you wife be joining us in a build?
Sam
- Ryland Craze, cog, mtaylor and 4 others
-
7
-
Jo,
Nothing to be sorry about. That was a great place to learn. It will never be seen. Is this the same material you will use on the hull? Most of us who stain do a work up on scrap to see what color we want and how the the wood will react with the stain.Dont stress over it, its on the inside, its going to be dark and lots more going on deck to draw the eye away.
When you get ready to sand and stain the hull pop over to the finishing forums and spend some time there researching staining.
It looks like you didnt get all the glue off before you stained. Also if that is bass wood, it is notorious for splotching. Some pre stain conditioner will help there.
A much more friendly finish for the new finisher is Danish Oil. Here in the States a common brand is Watco. It is extremely easy to apply and on a splotch prone wood like Bass Wood or Cherry it can be a real bonus. A lot of builders here like wipe on poly, I think you can get that with a colorant also, you will need to check, or I am sure a wipe-on fan will chime in. What you wont get the above finishes is a "3 foot deep" finish like you get with a stain/clear coat film finish. Take a look at this article to get a feel for the different finishes. FYI my Enterprise is an oil finish albeit with several steps before the final oil and wax. https://www.woodmagazine.com/materials-guide/finishes/choosing-best-wood-finish
We are here for you, we've all had a project go south on us. This is where the "Adapt and Overcome" parts of Adapt, Improvise and overcome come into play. You can do this.
Khyber Pass??? I've been on the Donner Pass before, now those people had a rough time of it.
edit One other thing, I cant recommend strongly enough, do a test on some scrap before you stain your hull.
Best,
Sam
-
-
LOL, Thats a lot words.
Sam
-
We've all done it Mark. Although I was having visions similar to that scene in Space Balls where they are "combing" the dessert. Our Hero, Mark the Gallant, jousting with his build, 12 foot tweezers in hand.
Either way the boat looks great.
Sam
- popeye the sailor, mtaylor, cog and 4 others
-
7
-
50 minutes ago, mtaylor said:
This boat is 'big' one, Sam and is about 6' long.
6 FEET?? How big are the tweezers? 😀😀
Sam
-
Well done Mark, those tweezers give a good idea of how small that boat is.
Sam
- Omega1234, CDW, CaptainSteve and 4 others
-
7
-
😳😂
You have just proven what I always suspected. Men and women speak TOTALLY different languages. Translation please?
-
Well done Jo. This is a good place to learn a bit about planking and wood work as it will hardly be seen when done. Vossie and Mark beat me to it on the pre-sanding and scraping.
Sam
-
JO, you have the beginnings of a hull! Woo Hoo! AS the others said the decking will help strengthen the hull. I am not an engineer, but I believe what you are creating is a truss by planking the lower deck. If you have some scrap when you finish with the stringers on the upper deck you could also add some additional stringers between the bulkheads. Just measure the distance between the bulkheads at the keel and cut and glue them on right about the deck/bulkhead transition. just make sure they wont interfere with the decking or the bulwarks later. Depending on whether the interior gets planked also you could add additional stringer at the tips of the bulkheads. I am not familiar with your ship, another member may see a reason not to do that. I have no doubt they will jump in and correct me. Then we will both learn something.
Sam

IL Leudo by SHIPSCAT (Jolene) - Mamoli - scale 1:34
in - Kit build logs for subjects built from 1851 - 1900
Posted
👍😎
as you have seen Carl and I poke good natured fun at each other.
also you are fairing (not faring) you Hull now. Be sure to spend some time in the help forums on the best way to do that.
Sam