Edwardkenway
-
Posts
3,047 -
Joined
-
Last visited
Content Type
Profiles
Forums
Gallery
Events
Everything posted by Edwardkenway
-
 Yep, they were the ones sent down in line by Silly Billy (Crown Prince of Orange). Apparently, because he'd agreed to ally himself and his Dutch and Belgian troops to Wellington, he demanded some veteran Regiments to command and was given these Hanoverians. The ranks must be swelling now OC! Anticipating another glimpse of the battleground with even more troops on😉
 -
F-86F-30 Sabre by Egilman - Kinetic - 1/32nd scale
Edwardkenway replied to Egilman's topic in Non-ship/categorised builds
I'm with Mark on that news, I hope everything goes well for you brother 🙏 -
It may help to cut a jig with the curve of the stern and clamp it at the top of the frames whilst in position, I did this after fitting the fillers with white glue, getting the frames sitting near as dammit, then tweaking them as the white glue allowed some movement.
-
An absolutely stunning hull!! Beautiful planking job Glenn, now its onwards to Chapter 3, have fun, I know I thoroughly enjoyed it after the initial reservations. I look forward to your interpretation of the stern and galleries.
- 840 replies
-
- 4
-

-
- winchelsea
- Syren Ship Model Company
- (and 1 more)
-
Scratch Builders Reply
Edwardkenway replied to Dave_E's topic in Modeling tools and Workshop Equipment
Dave, my first attempt at a wooden ship scratch build was the Triton Cross Section, all done with hand tools, cutting the frame components with a coping saw. So as lots of the replies state, you can get by without power tools, but they do make things quicker and easier. My first purchase was a 2nd hand scroll saw, the a proxxon table saw and and small cheap and cheerful rotary tool. Good luck with your quest and be sure to let us know what your first scratch build will be😉 -
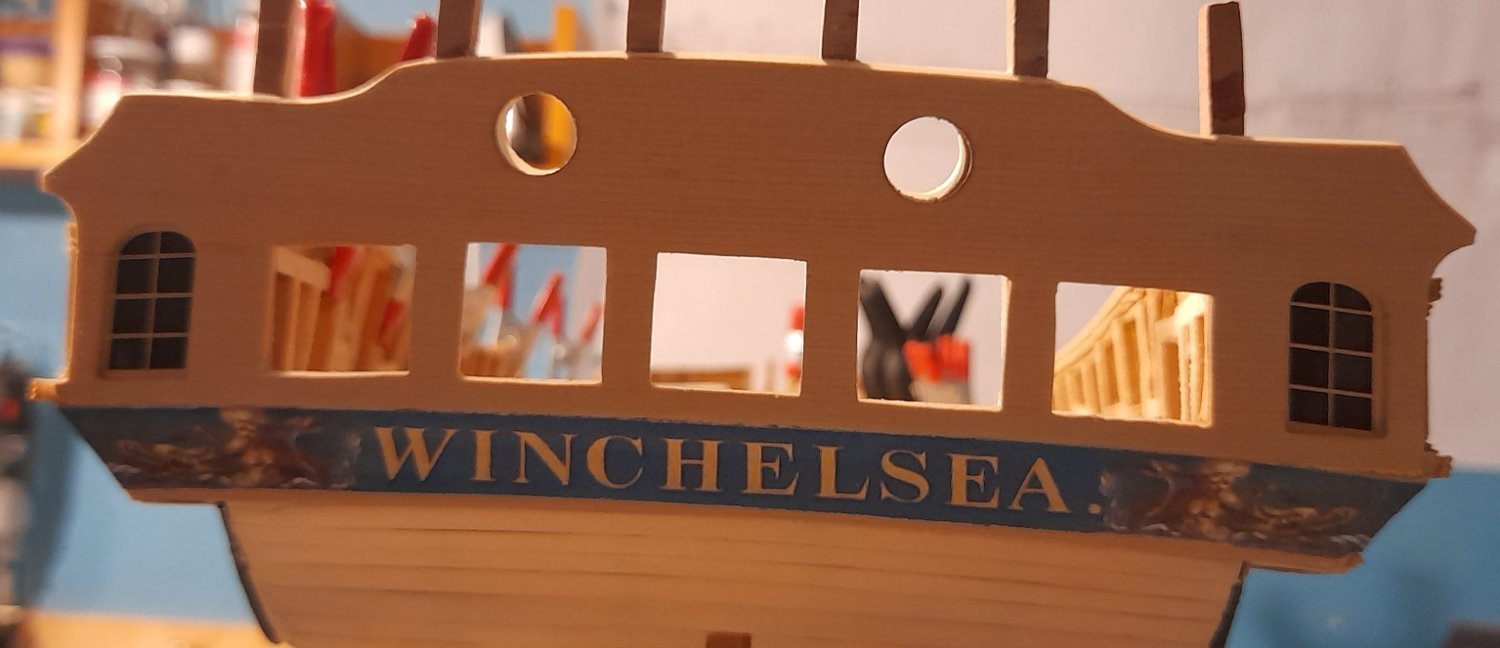
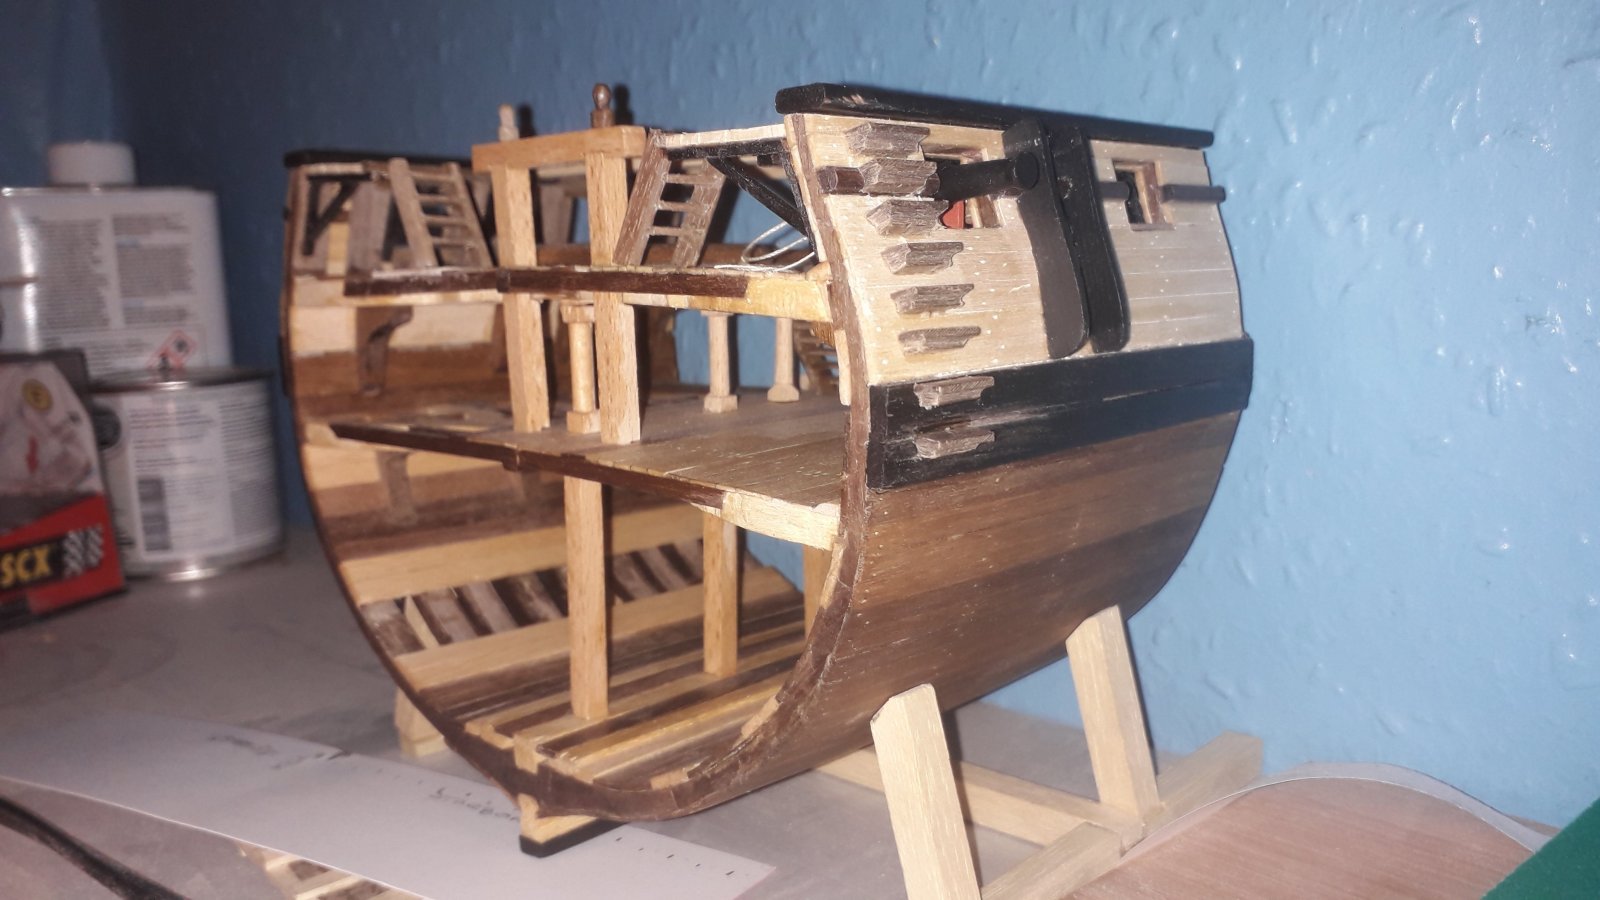
Thanks to everyone for the encouraging comments! It's really appreciated 🙂 I think I've done with chapter 3 and with hindsight I find I was wrong to feel nervous about it! With Chuck's instructions and the amazing laser cut parts, even I have a decent looking stern and quarter galleries! Unfortunately at the moment my budget has no spare for the beautiful carvings but they are definitely on the list near the top. The sternpost still has to be fitted. I'm going to be taking a break from Winnie for a while and do some more work on my lifeboat. Also I'm wondering wether to purchase chapter 4 or try my hand at making them myself. As always thankyou for the likes, comments and having a look. Cheers


-
welcome to MSW
-
Good morning from the banks of the Ohio River
Edwardkenway replied to Mike James's topic in New member Introductions
welcome to MSW -
Welcome to MSW For a scratch build, this probably the best advice, if you don't try you'll never learn. And don't worry about making mistakes, everyone does, you'll more than likely learn most from them! Above all, have fun!
-
Coming into ship modelling from a unusual angle
Edwardkenway replied to von_bednar's topic in New member Introductions
and welcome to MSW -
Greeting from Pennsylvania
Edwardkenway replied to New England Captain's topic in New member Introductions
welcome to MSW -
M3 Lee Tank by CDW - Miniart - 1:35 Scale - FINISHED
Edwardkenway replied to CDW's topic in Non-ship/categorised builds
wow! Stunning paintwork, complimenting an amazing build, Craig! -
Nicely done, Dave! Echoing @Blue Ensign, cutters are beautiful little craft. I'm looking forward to your Rattlesnake build.
- 362 replies
-
- 2
-

-
-
- Amati
- Lady Nelson
- (and 2 more)
-
welcome to MSW
-
Exceptional!! Nothing more to be said.
- 840 replies
-
- 4
-
-
- winchelsea
- Syren Ship Model Company
- (and 1 more)
-
New to modeling - wish I found this site earlier
Edwardkenway replied to flutlo6180's topic in New member Introductions
welcome to MSW -
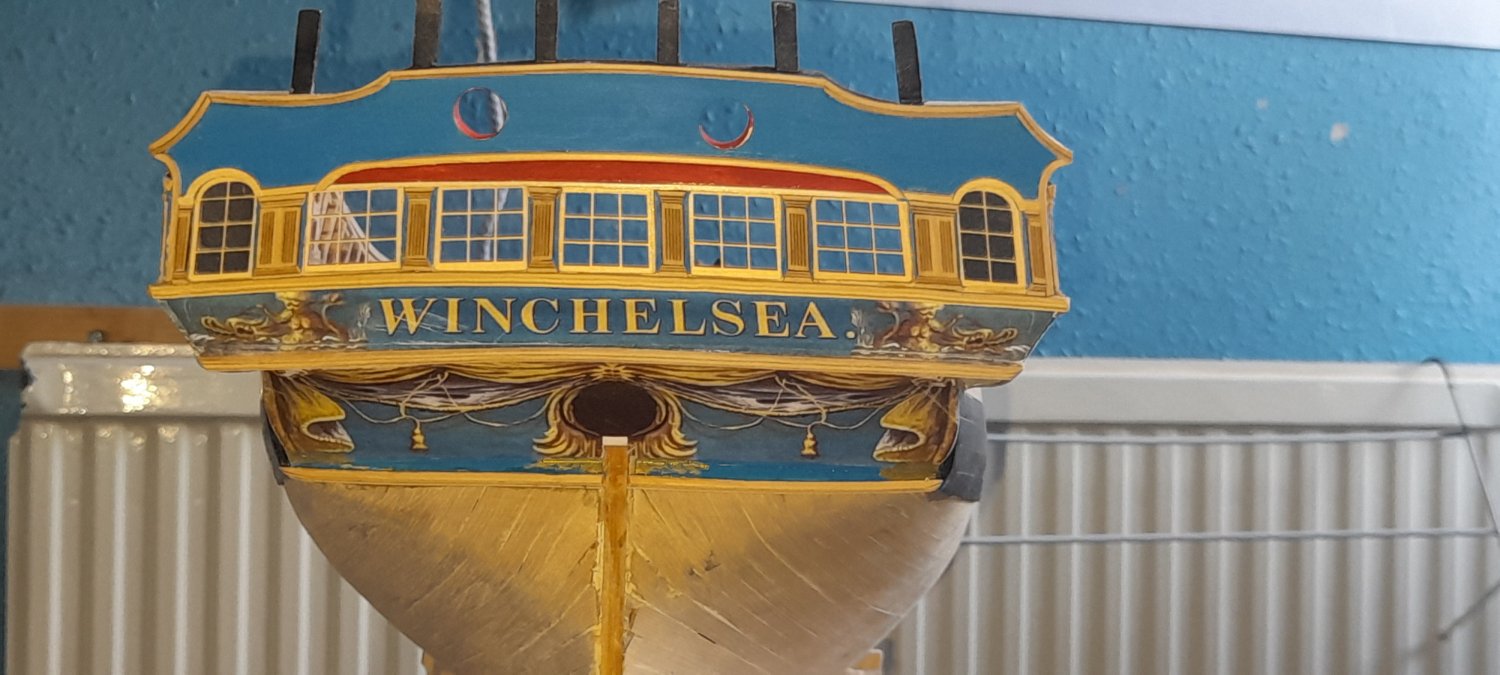
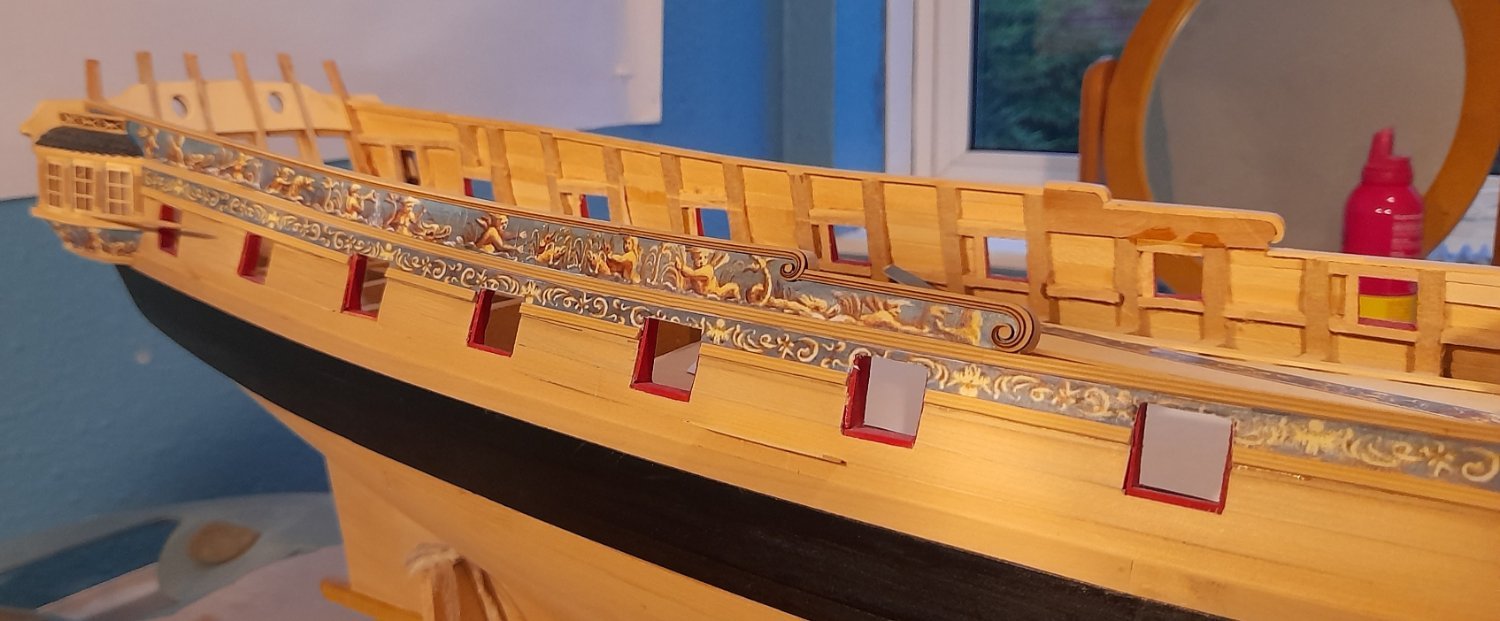
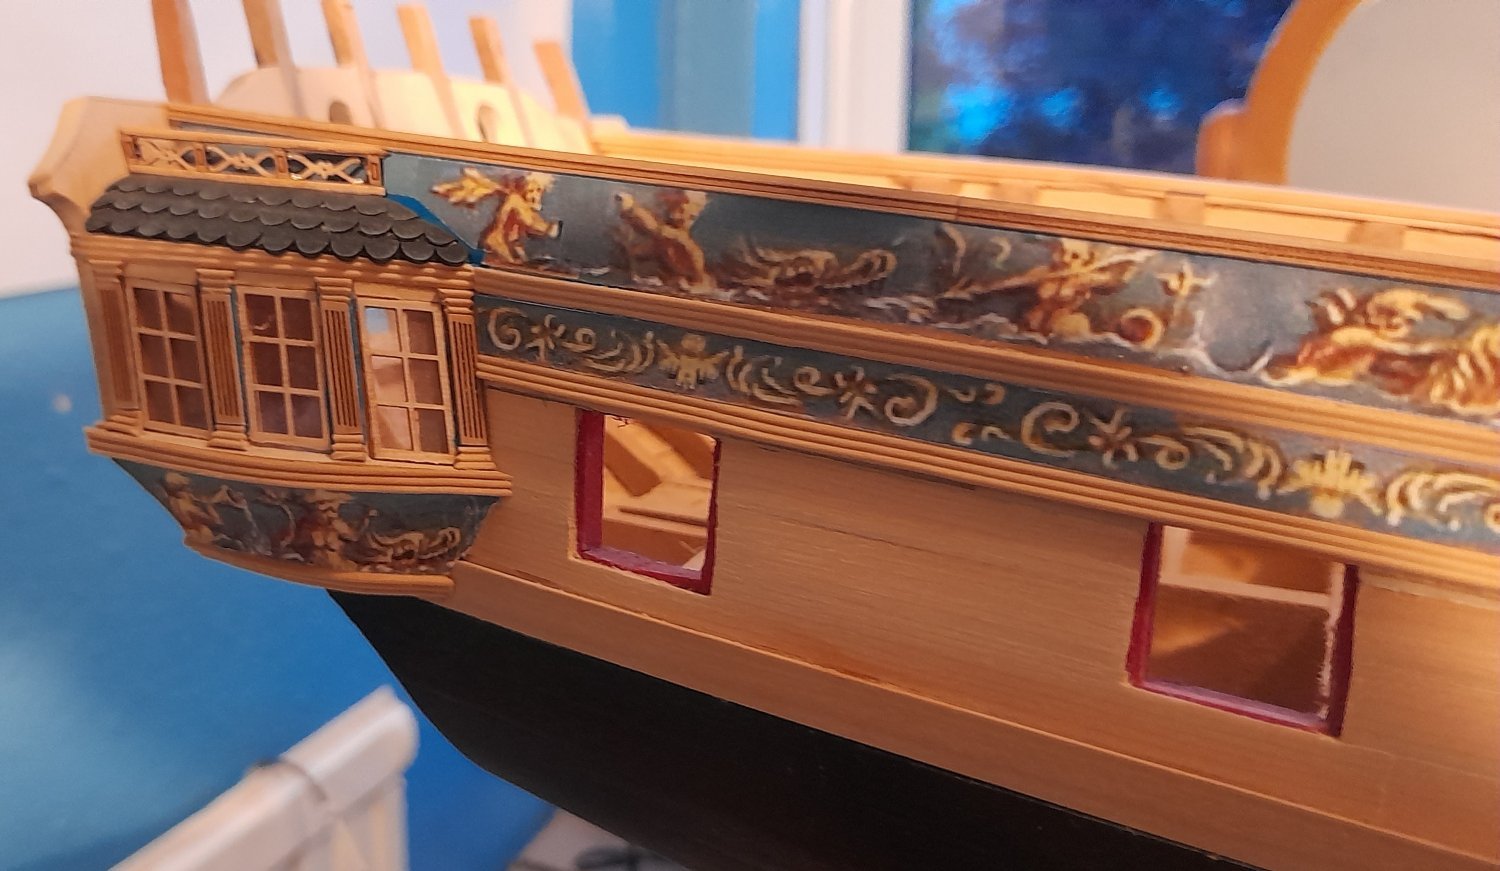
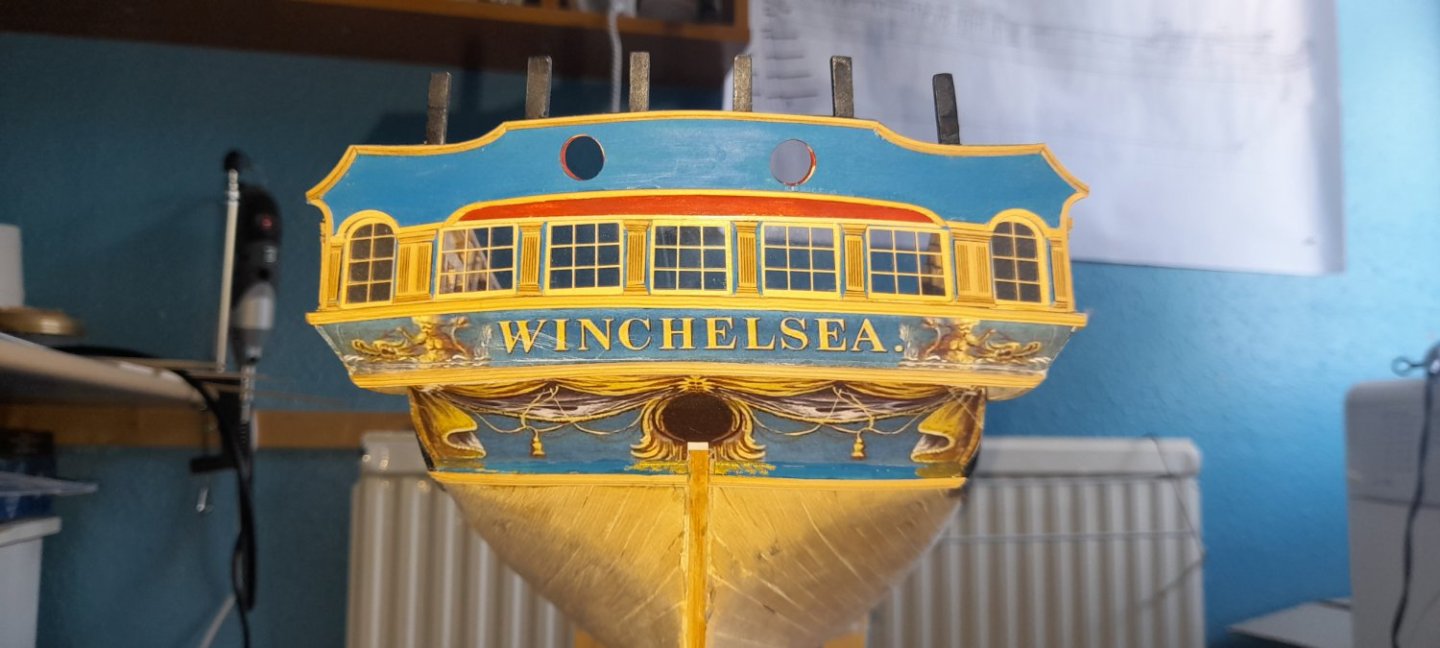
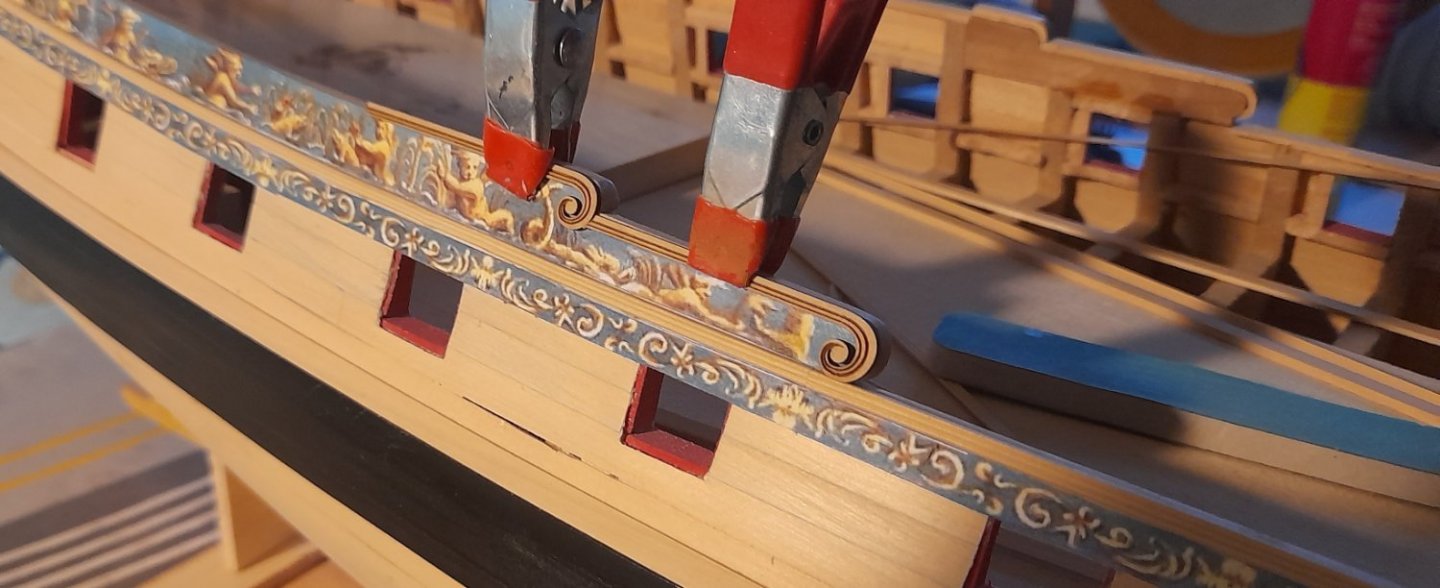
The starboard frieze is on, with the moldings and as Chuck said, it makes a real difference to the model! And she's got a name! Time to do the port side, then on to the stern. As always, thanks for the likes, comments or just having a looksie😁 Cheers


-
I think it was common practice to dock cavalry mounts tails in this period. This is from www.britishempire.co.uk The horses were also black but so were the horses of all the cavalry regiments. At this time the tails of the horses were docked. The reasoning behind this unsightly practice was that when a horse's tail became wet and muddy it would flick dirt onto the riders.
-
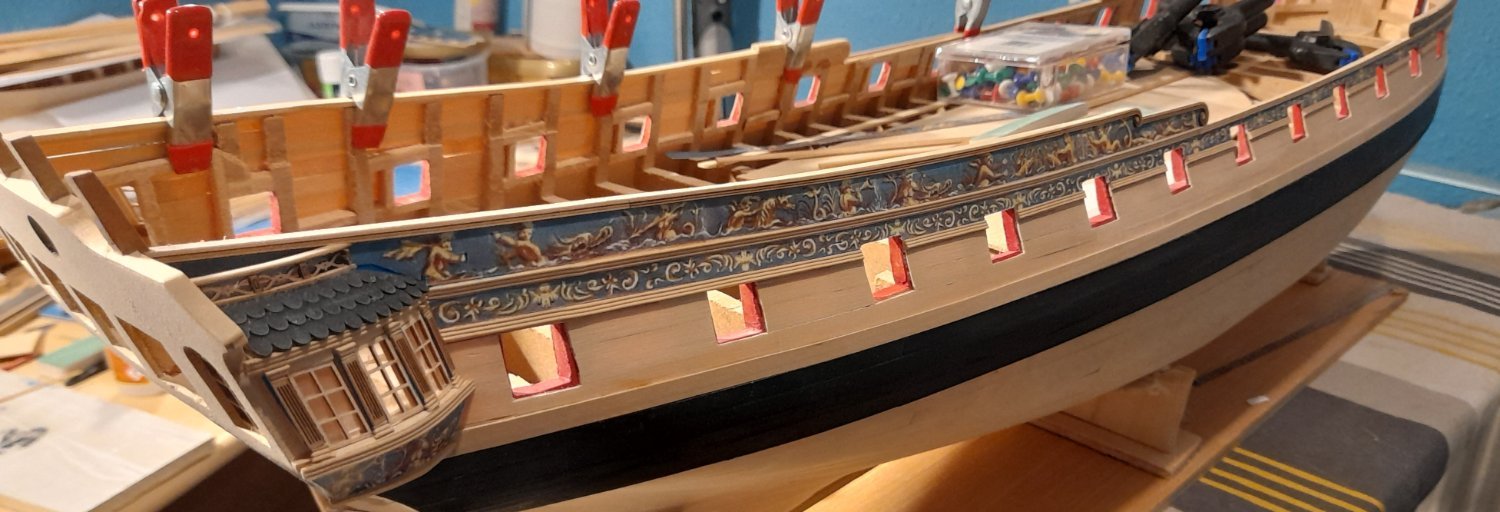
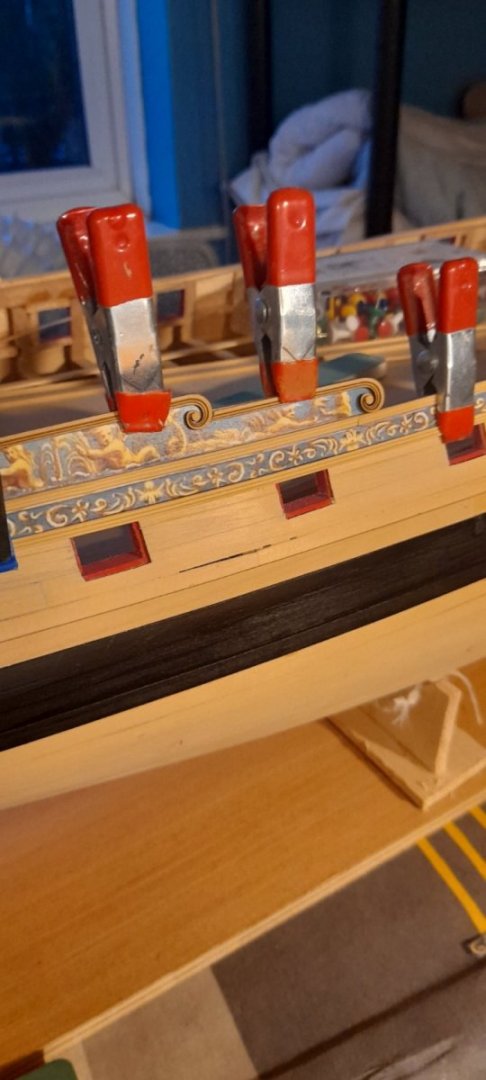
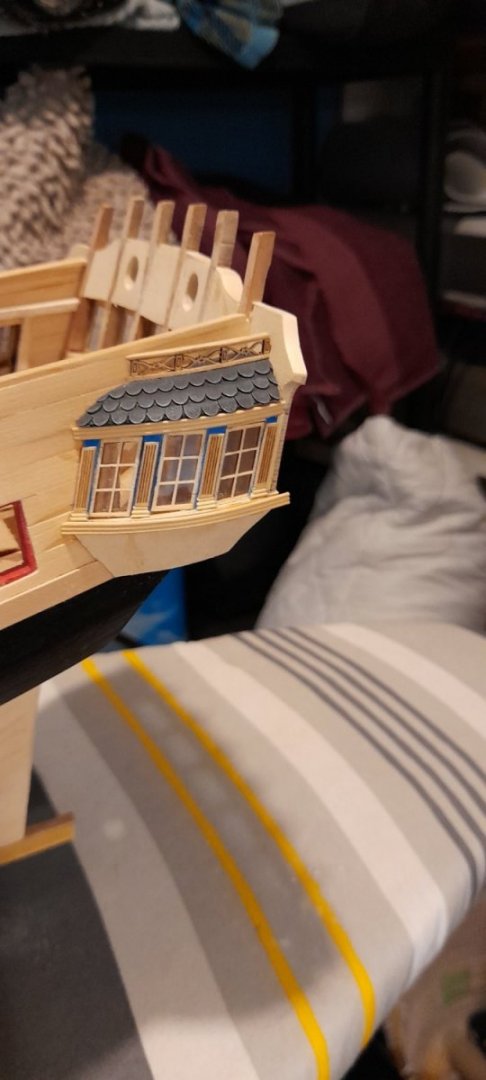
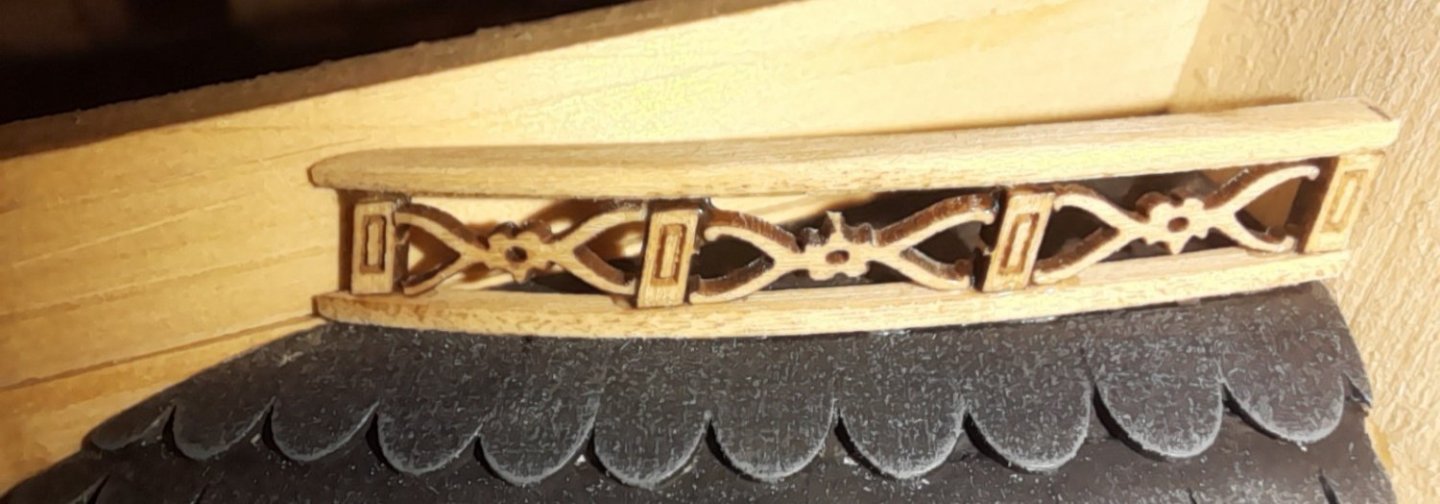
To carry on with the QG's, I needed the frieze printed, my printer seems to shrink them, not by much but enough for them to not fit. So off to my local library and got 3 copies of each for the princely sum of £1(about $1:20) the first dry fit, the lower frieze is tacked on with tiny bits of blu-tak. just to see what it looks like with the lower molding on. I also have done the very fiddly and frustrating job of the fancy rail on top of the gallery roof I think I must have taken extra care placing the decorative inserts as the spares Chuck provides are still on their fret. as per instructions the roof is not glued down yet. Thanks for the likes, looking in and comments, all encouragement is appreciated. Cheers.

-
A quick search of YouTube has lots of 18th century battle sounds, drums ,guns and bugles. Wether you could have one on a repeat loop, but I have no idea as how to do that. One of the many followers may be of more help.
-
Landlubber from a landlocked country
Edwardkenway replied to UMH's topic in New member Introductions
welcome to MSW -
Ditto!! Are you going to put a soundtrack to it? Popping muskets, rifle cracks, drums, bugles and such😊😉😇
-
and welcome to MSW Gizmo.