

The Lazy Saint
-
Posts
264 -
Joined
-
Last visited
Content Type
Profiles
Forums
Gallery
Events
Posts posted by The Lazy Saint
-
-
Hi all,
I hope you all had a great Christmas and enjoyed your New Year celebrations. I would also like to take this opportunity to wish you all a wonderful 2020.
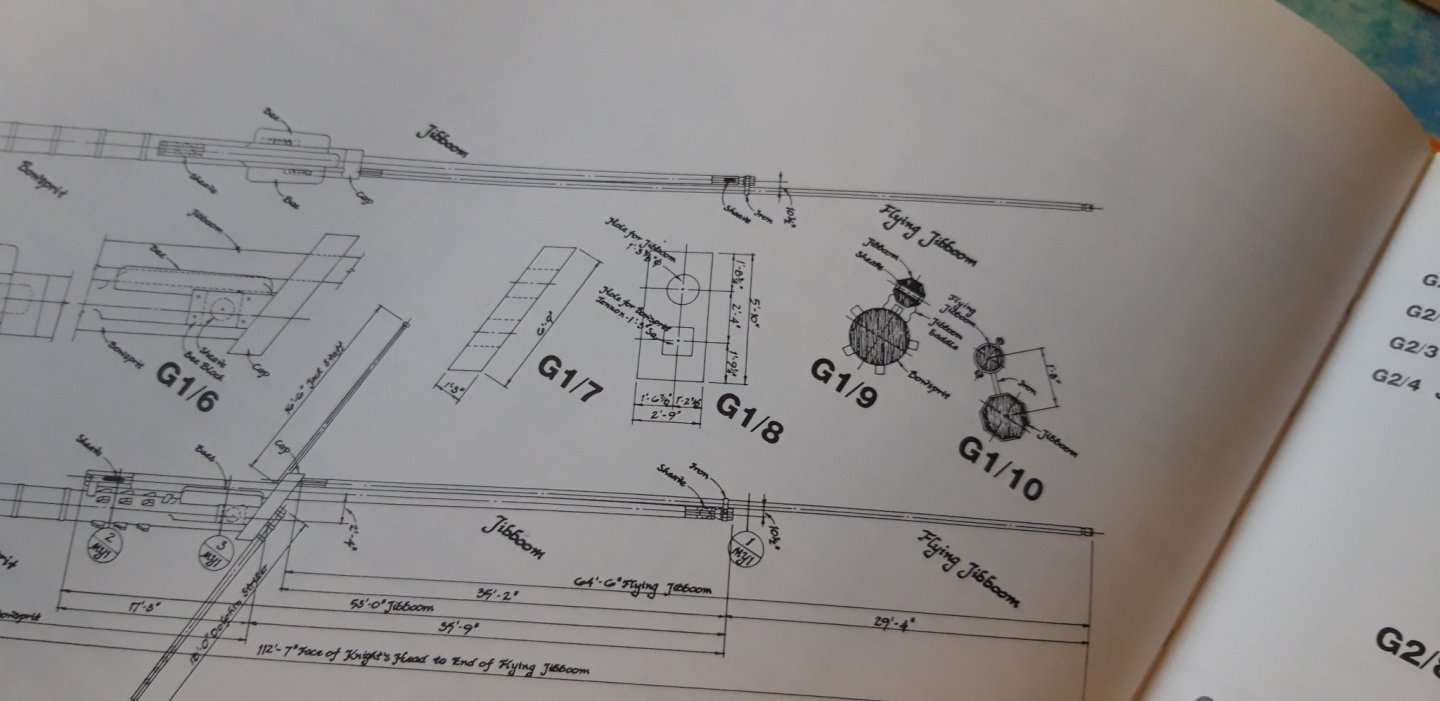
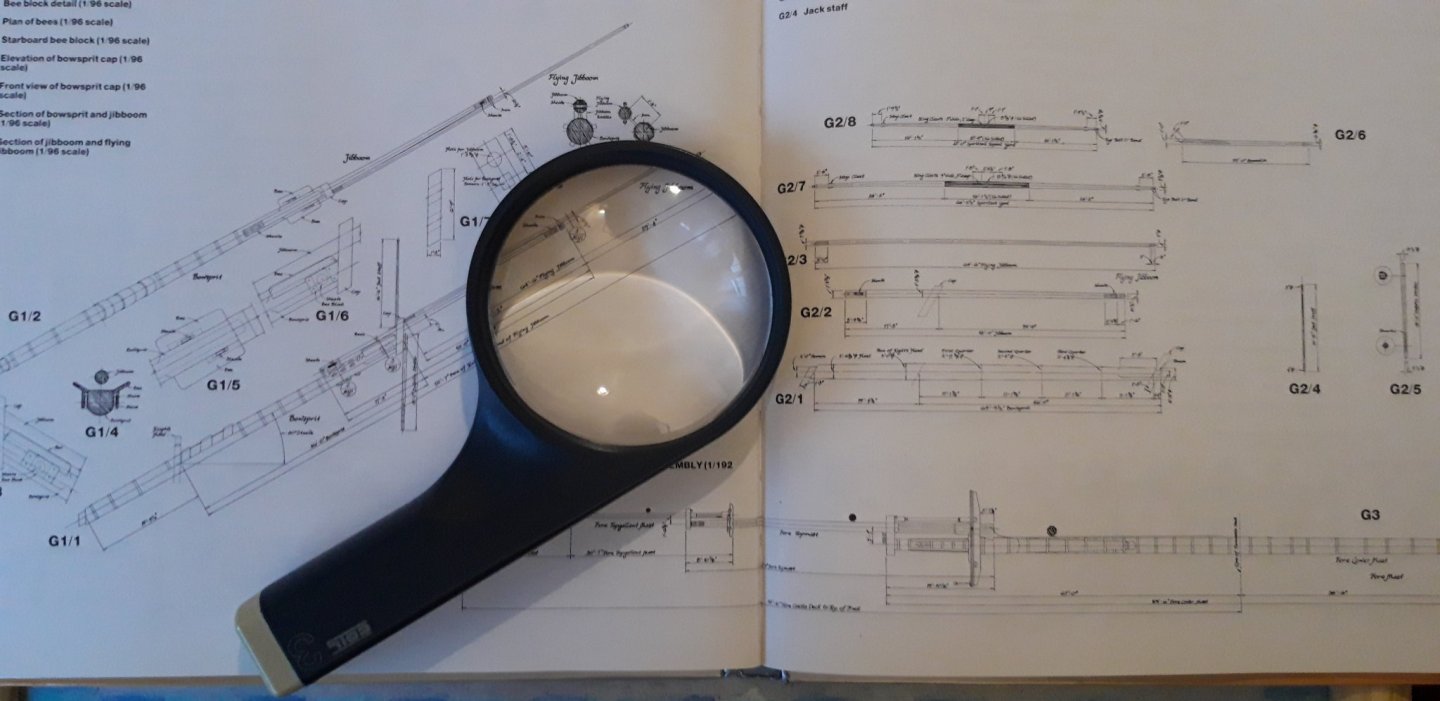
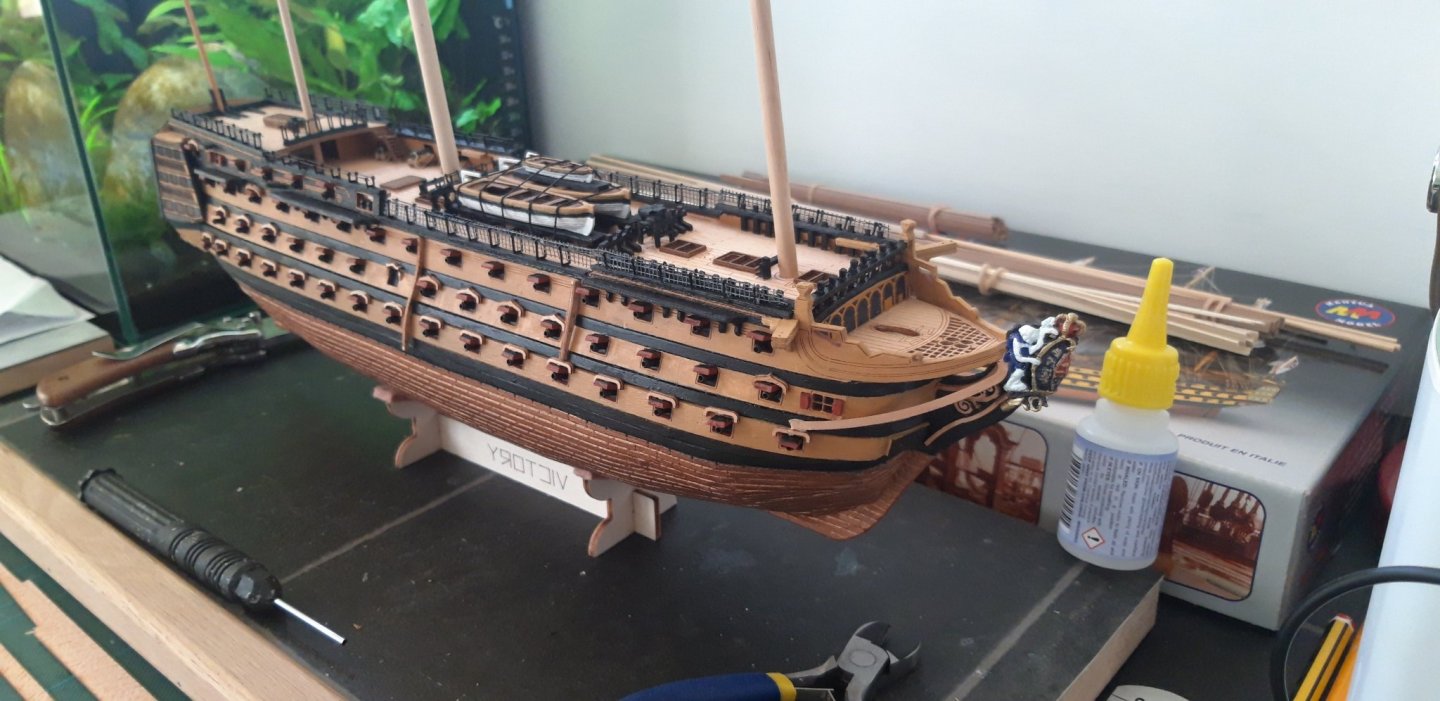
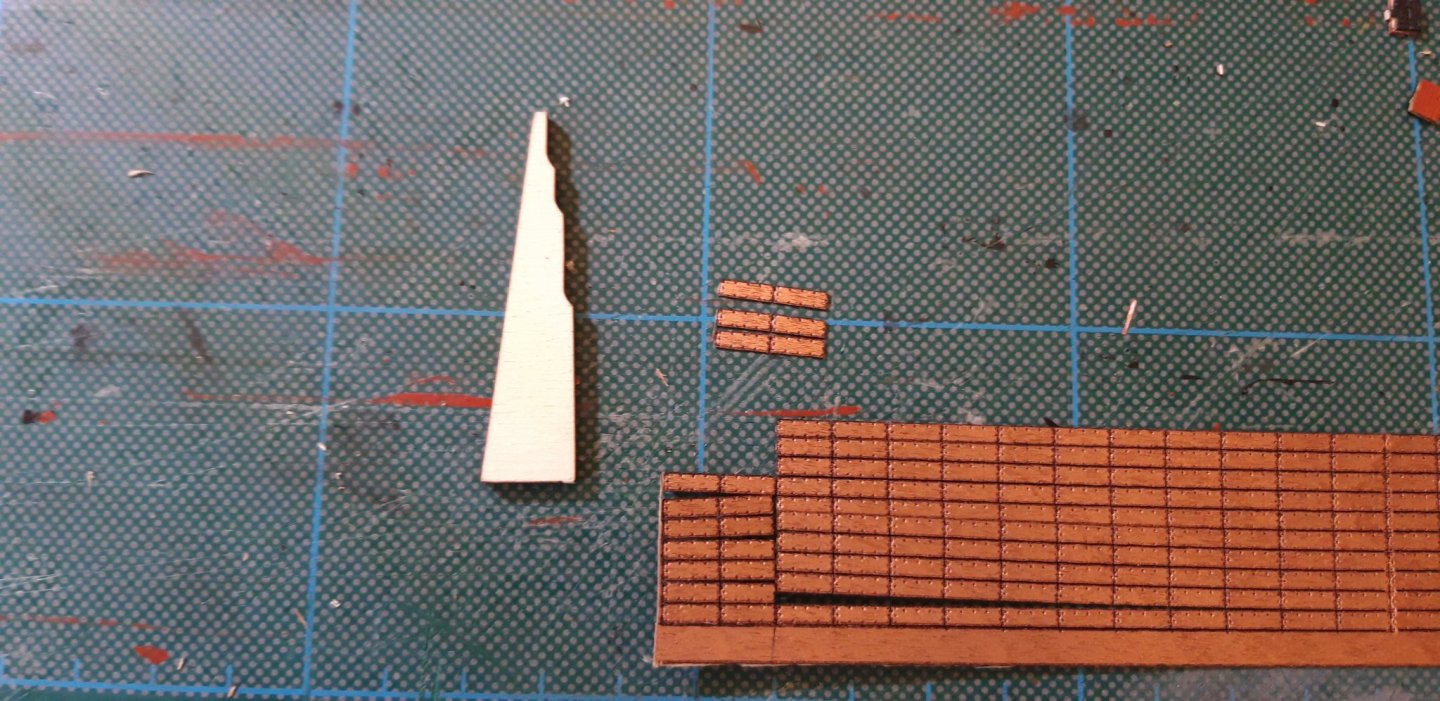
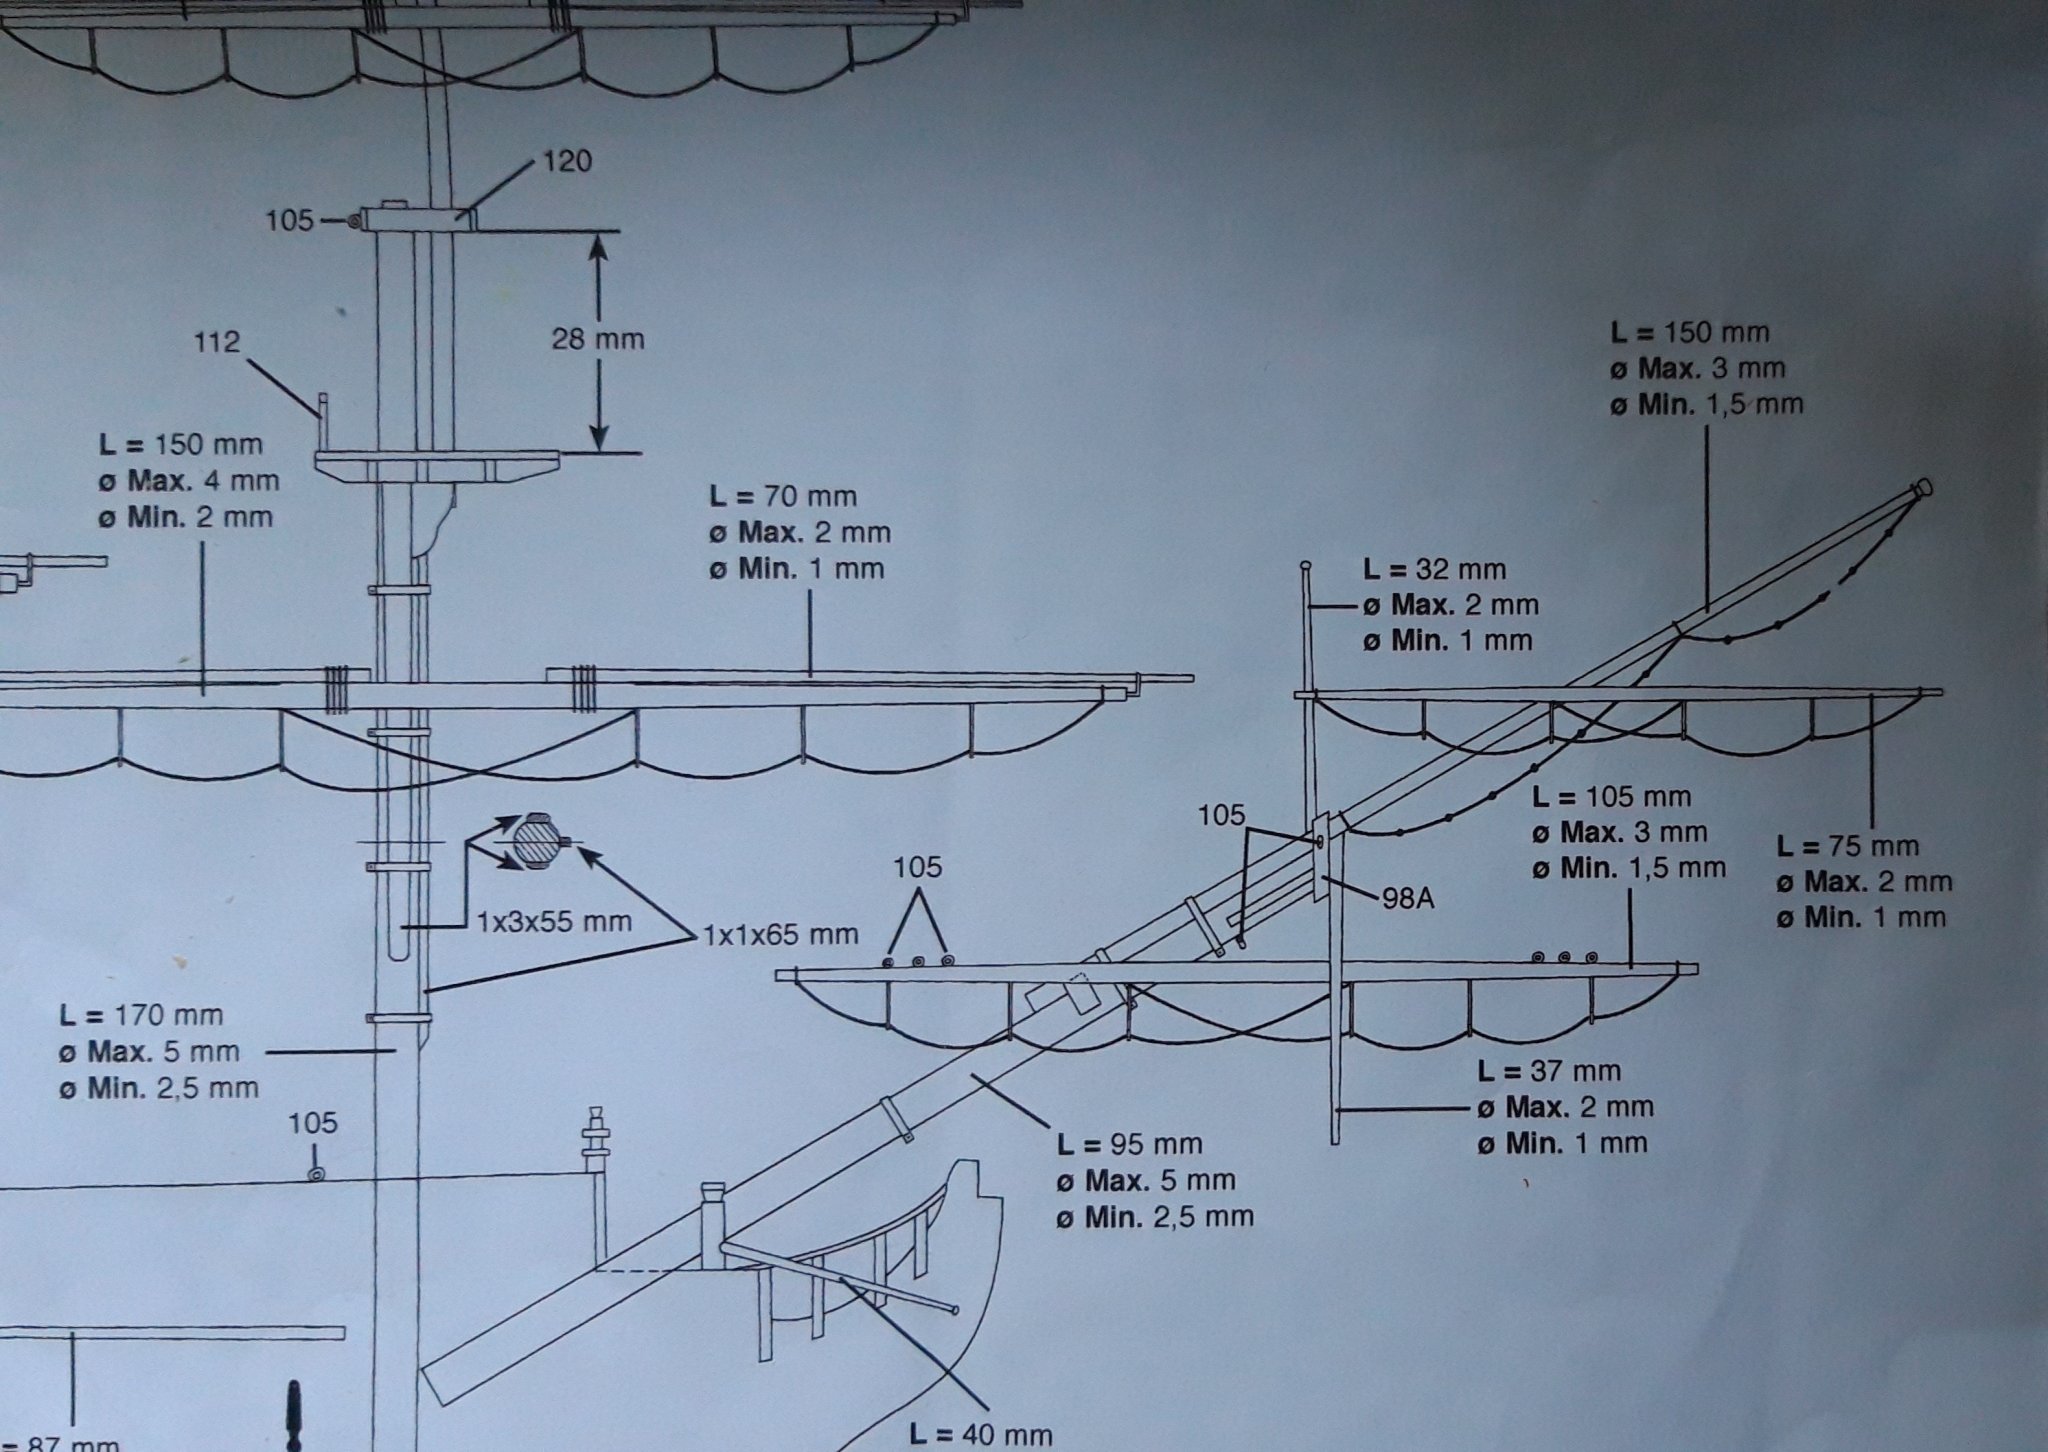
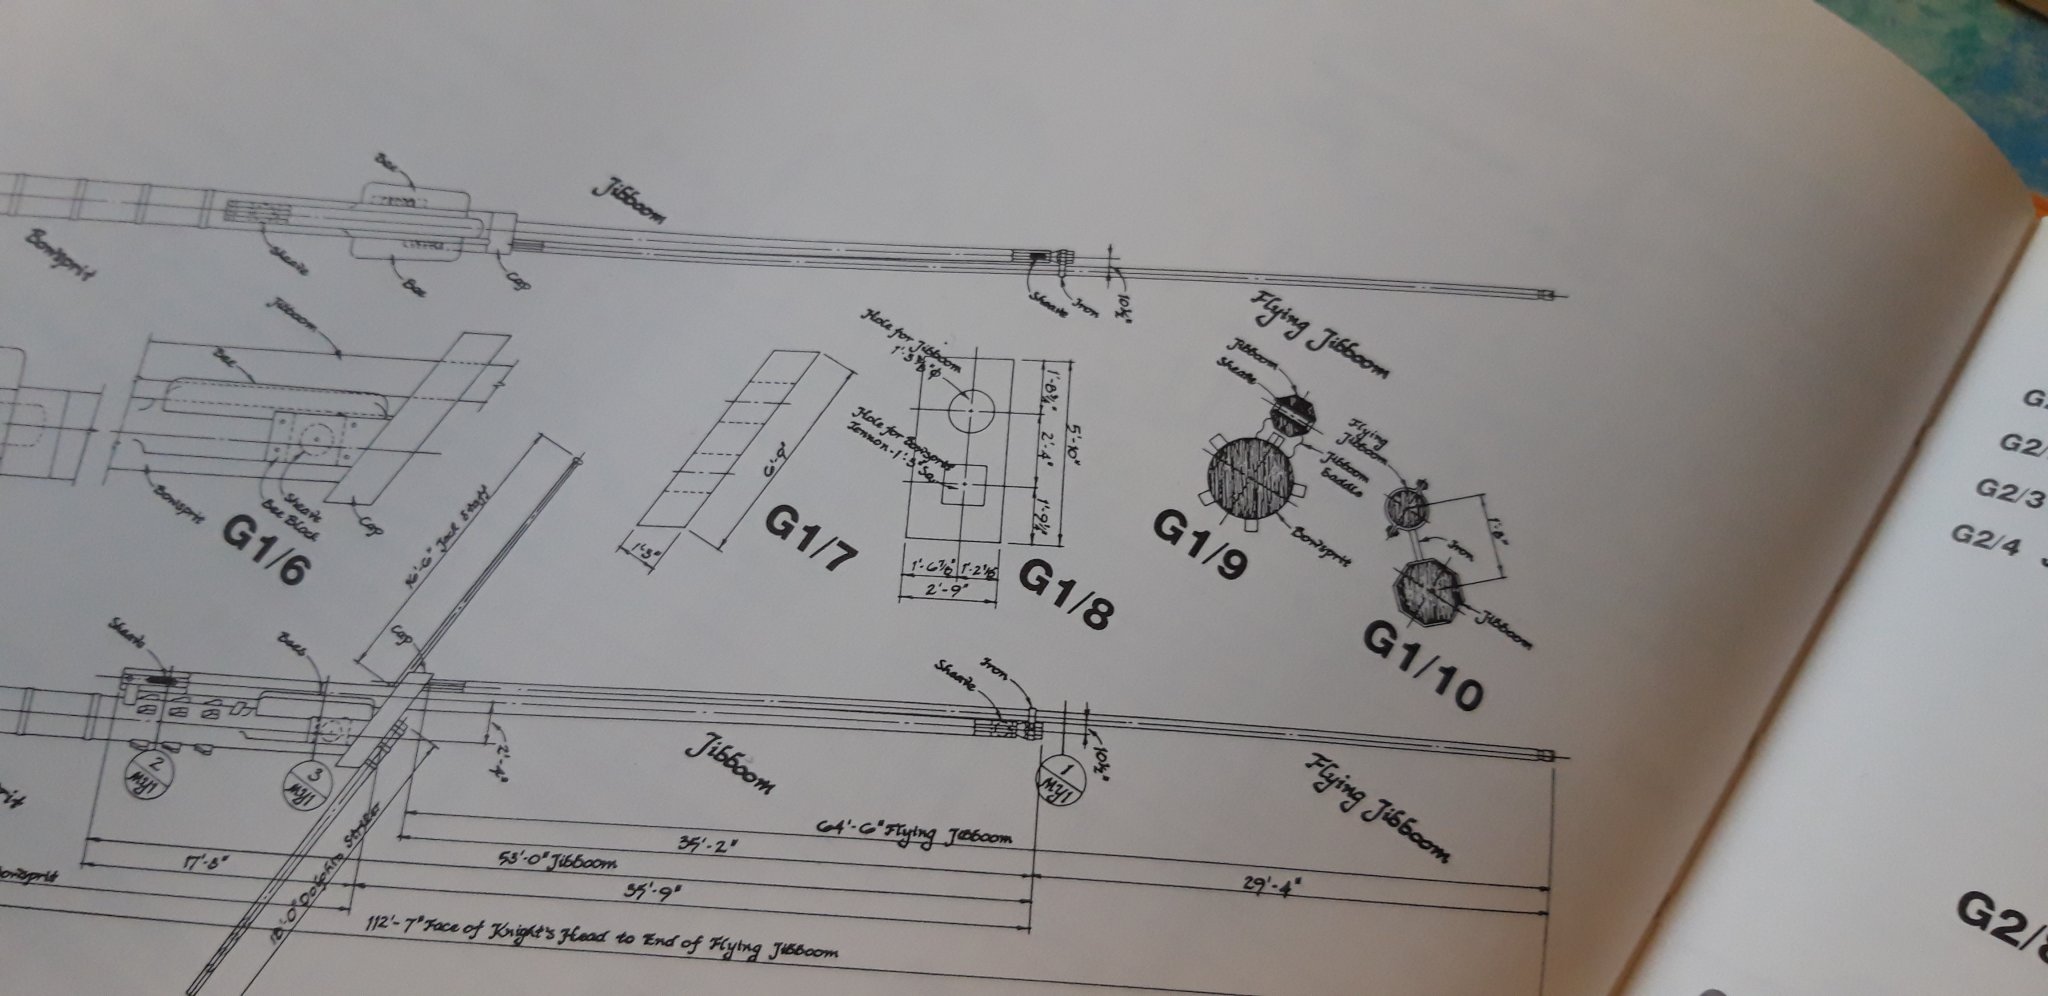
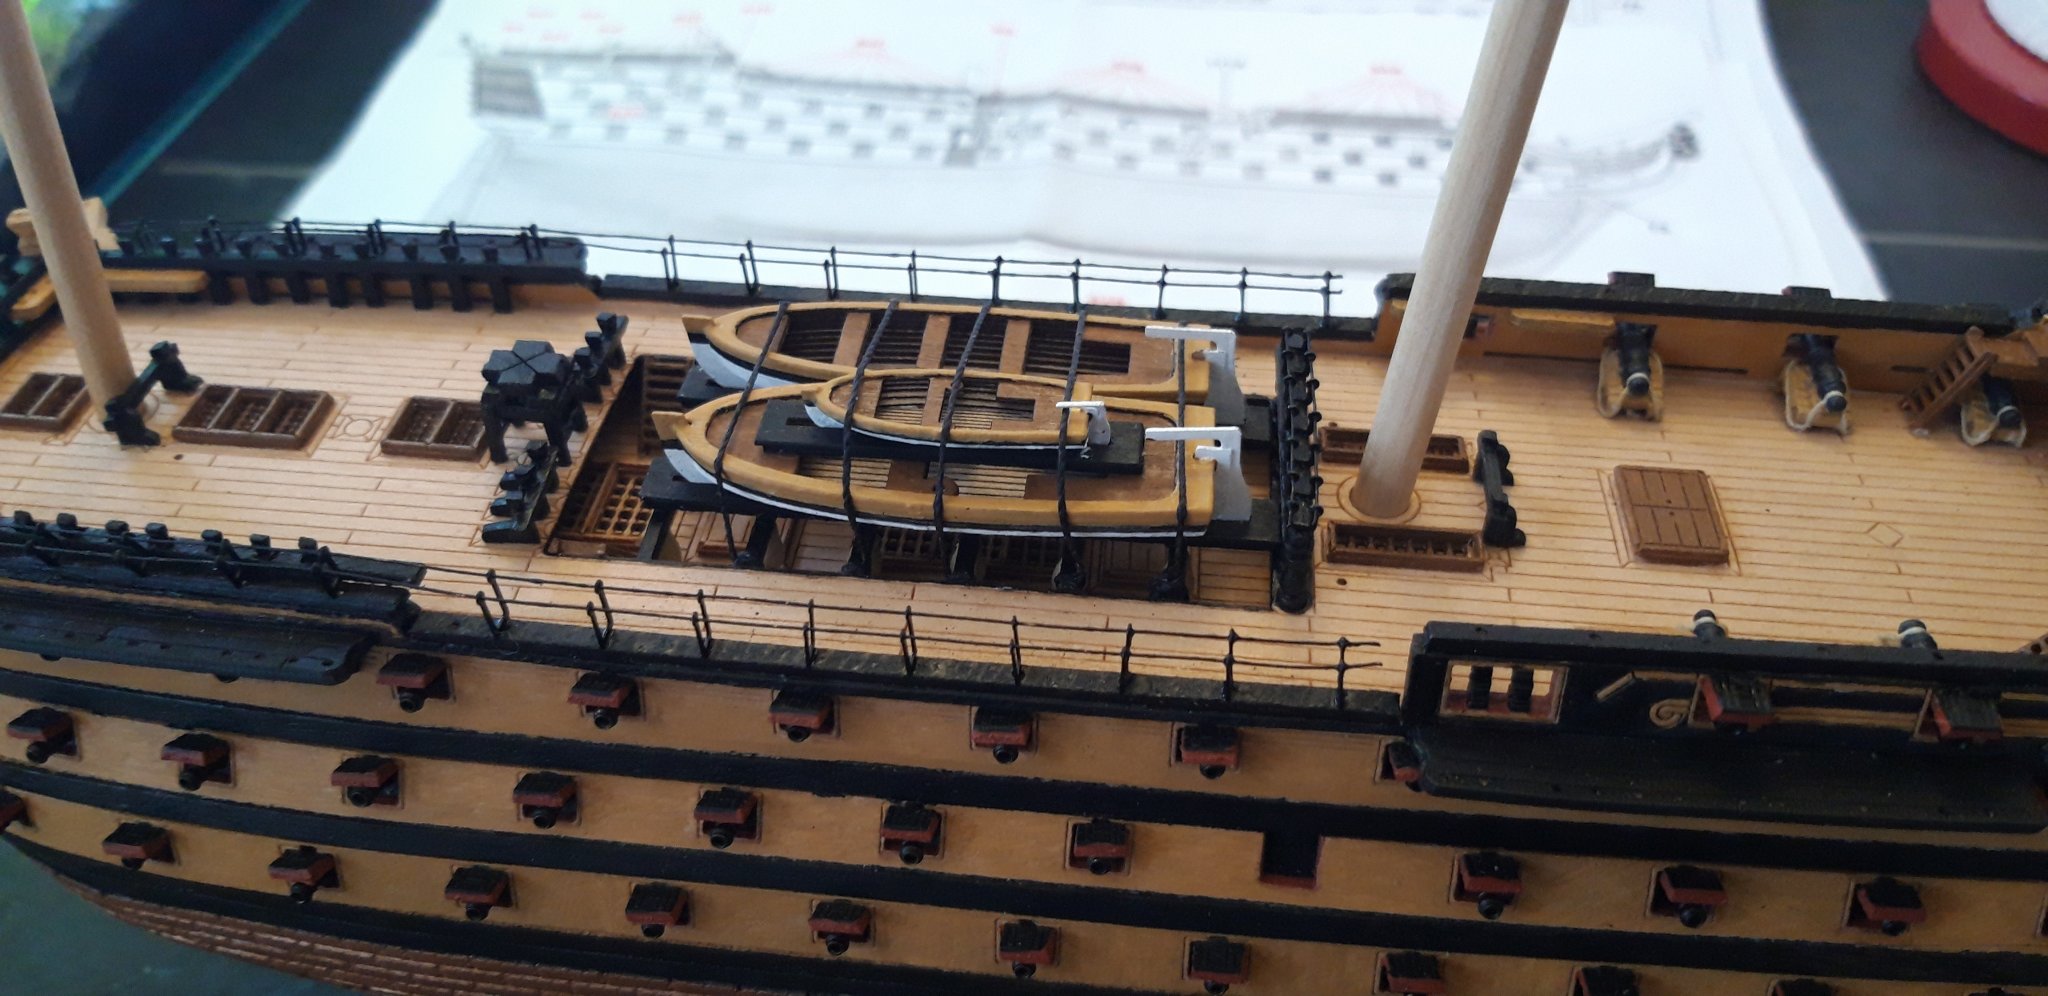
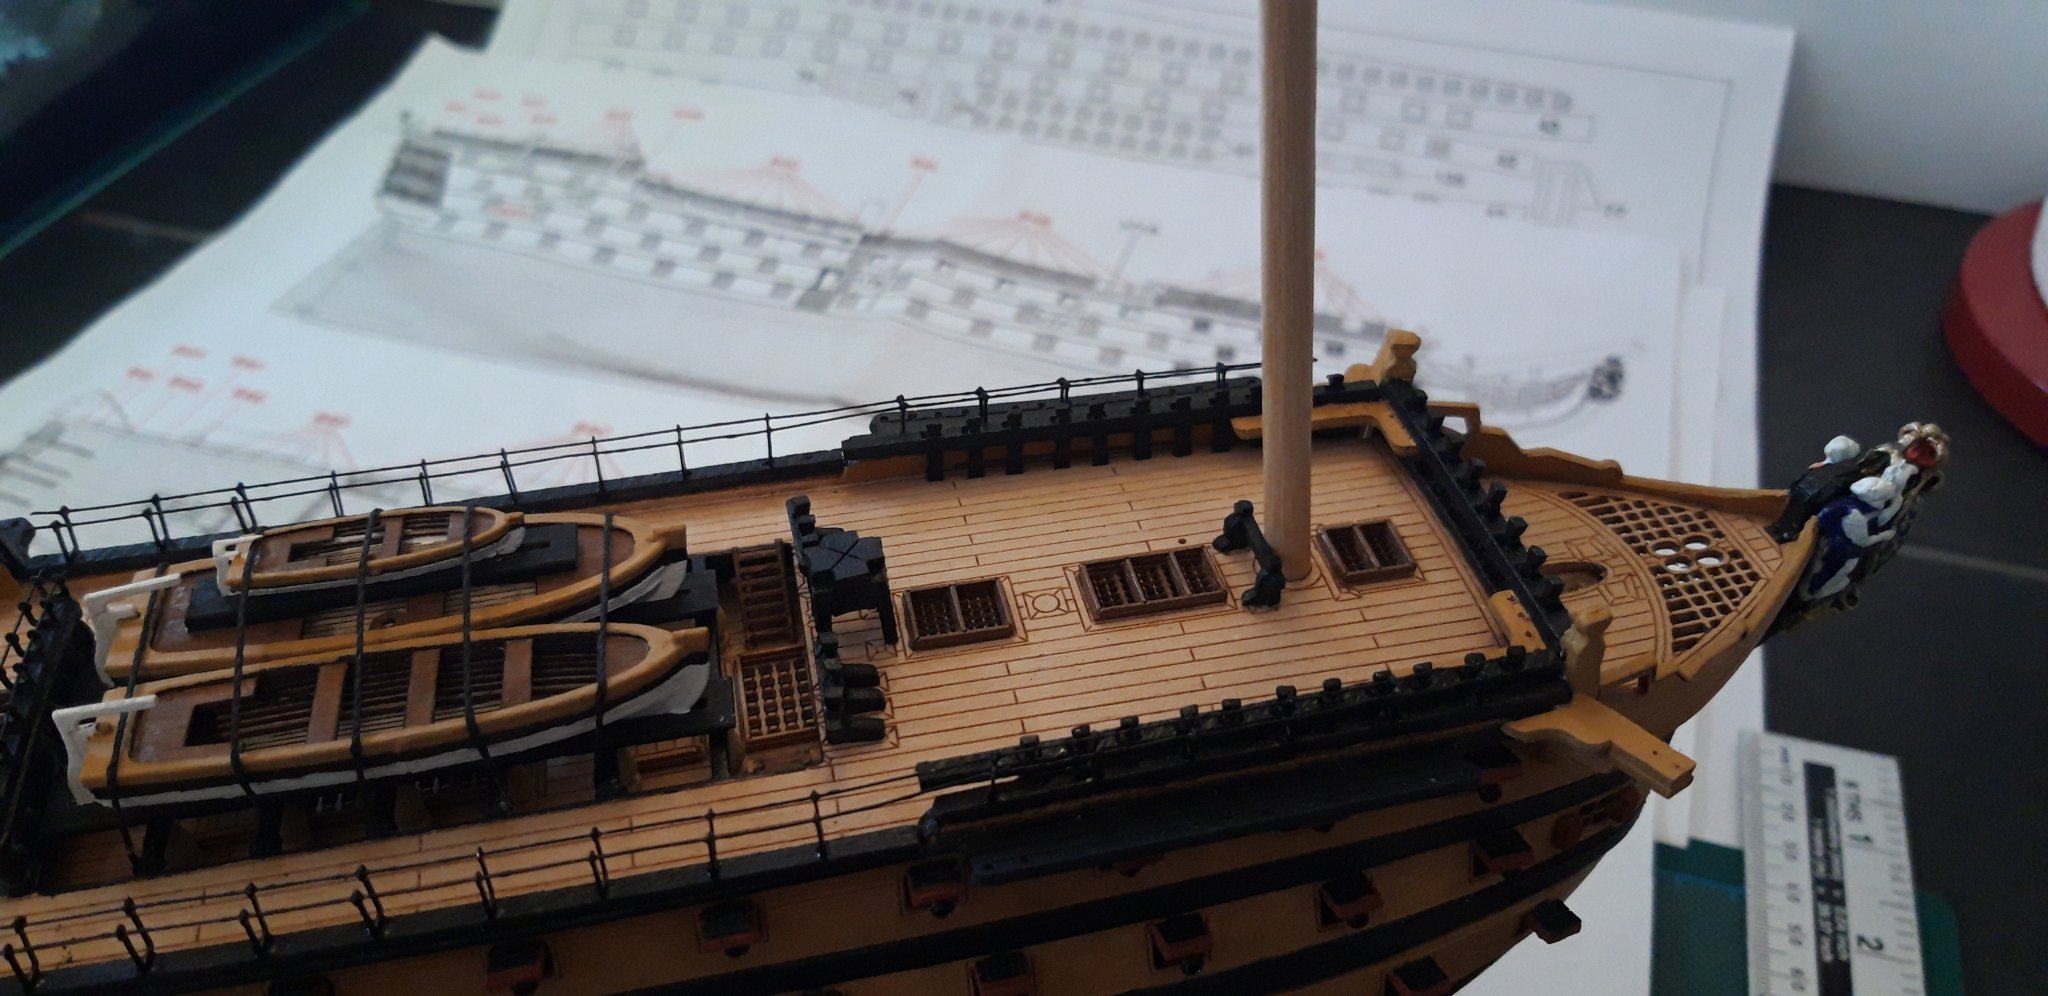
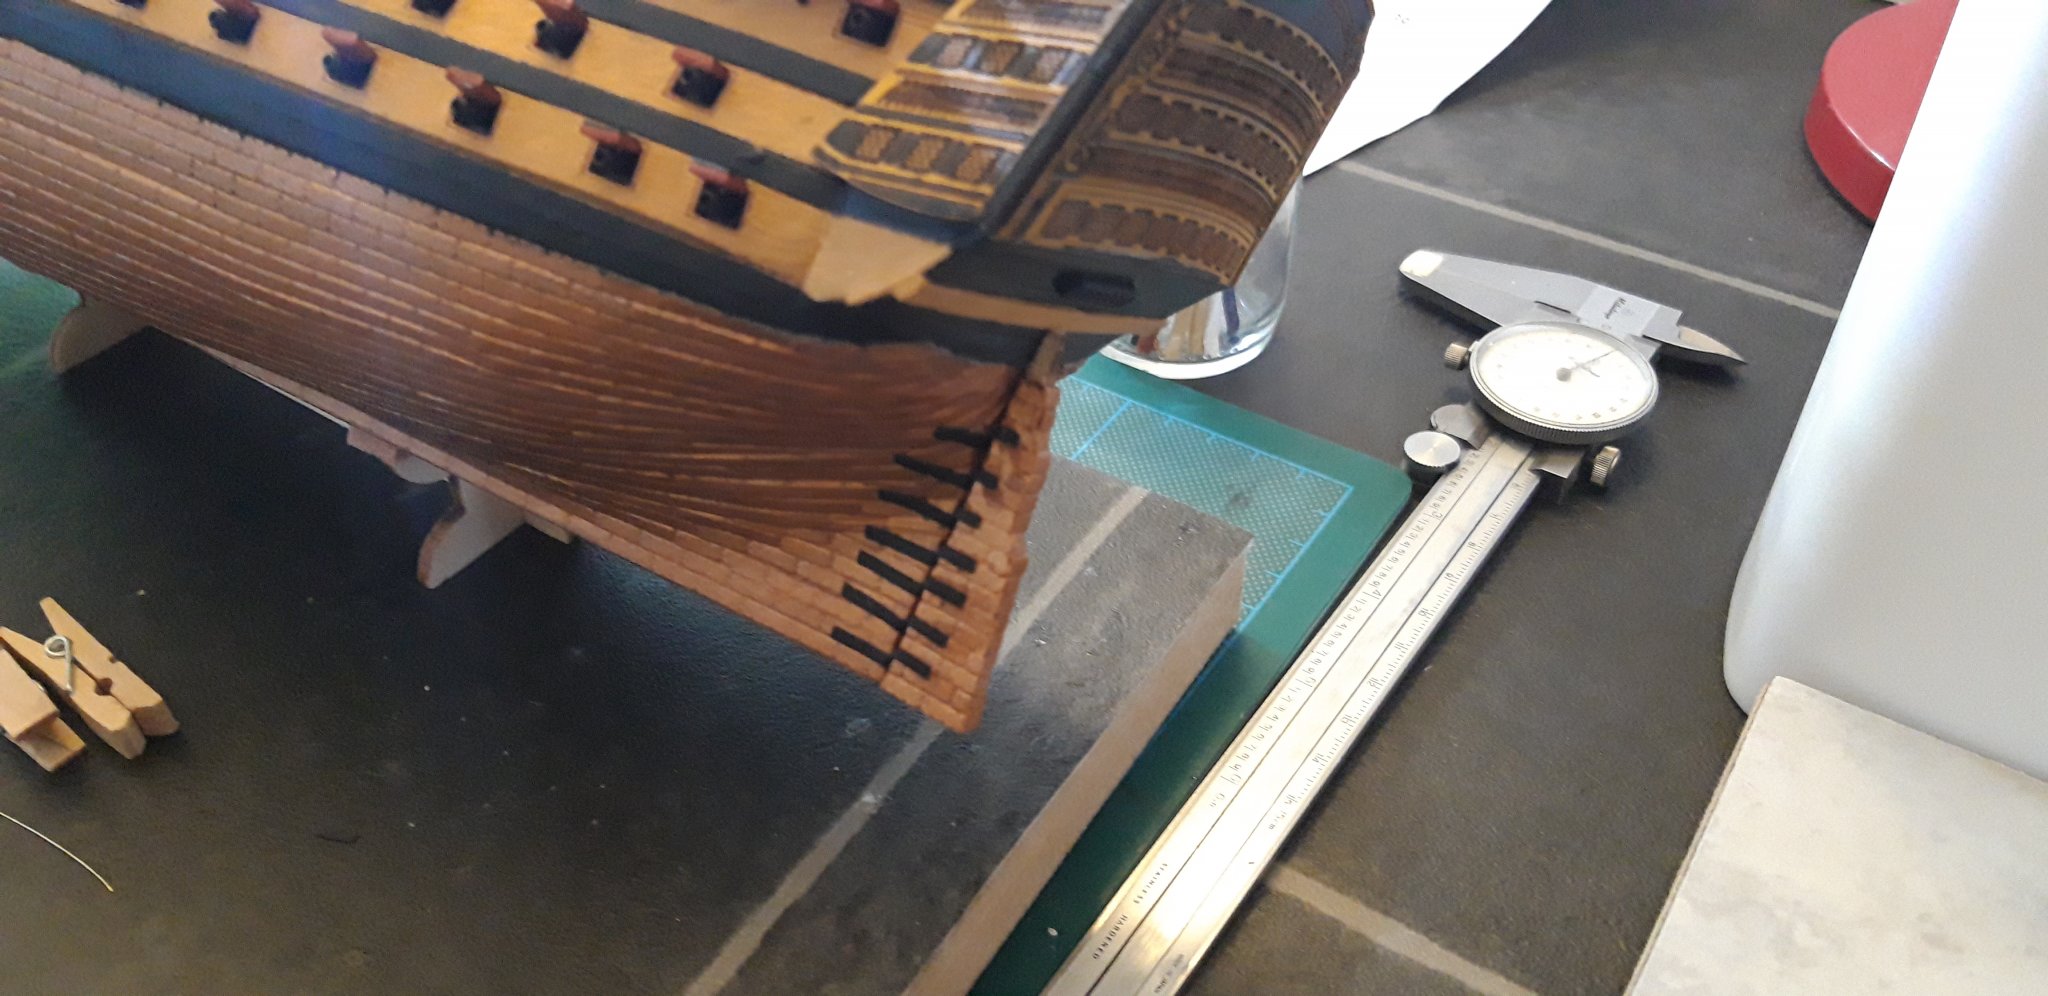
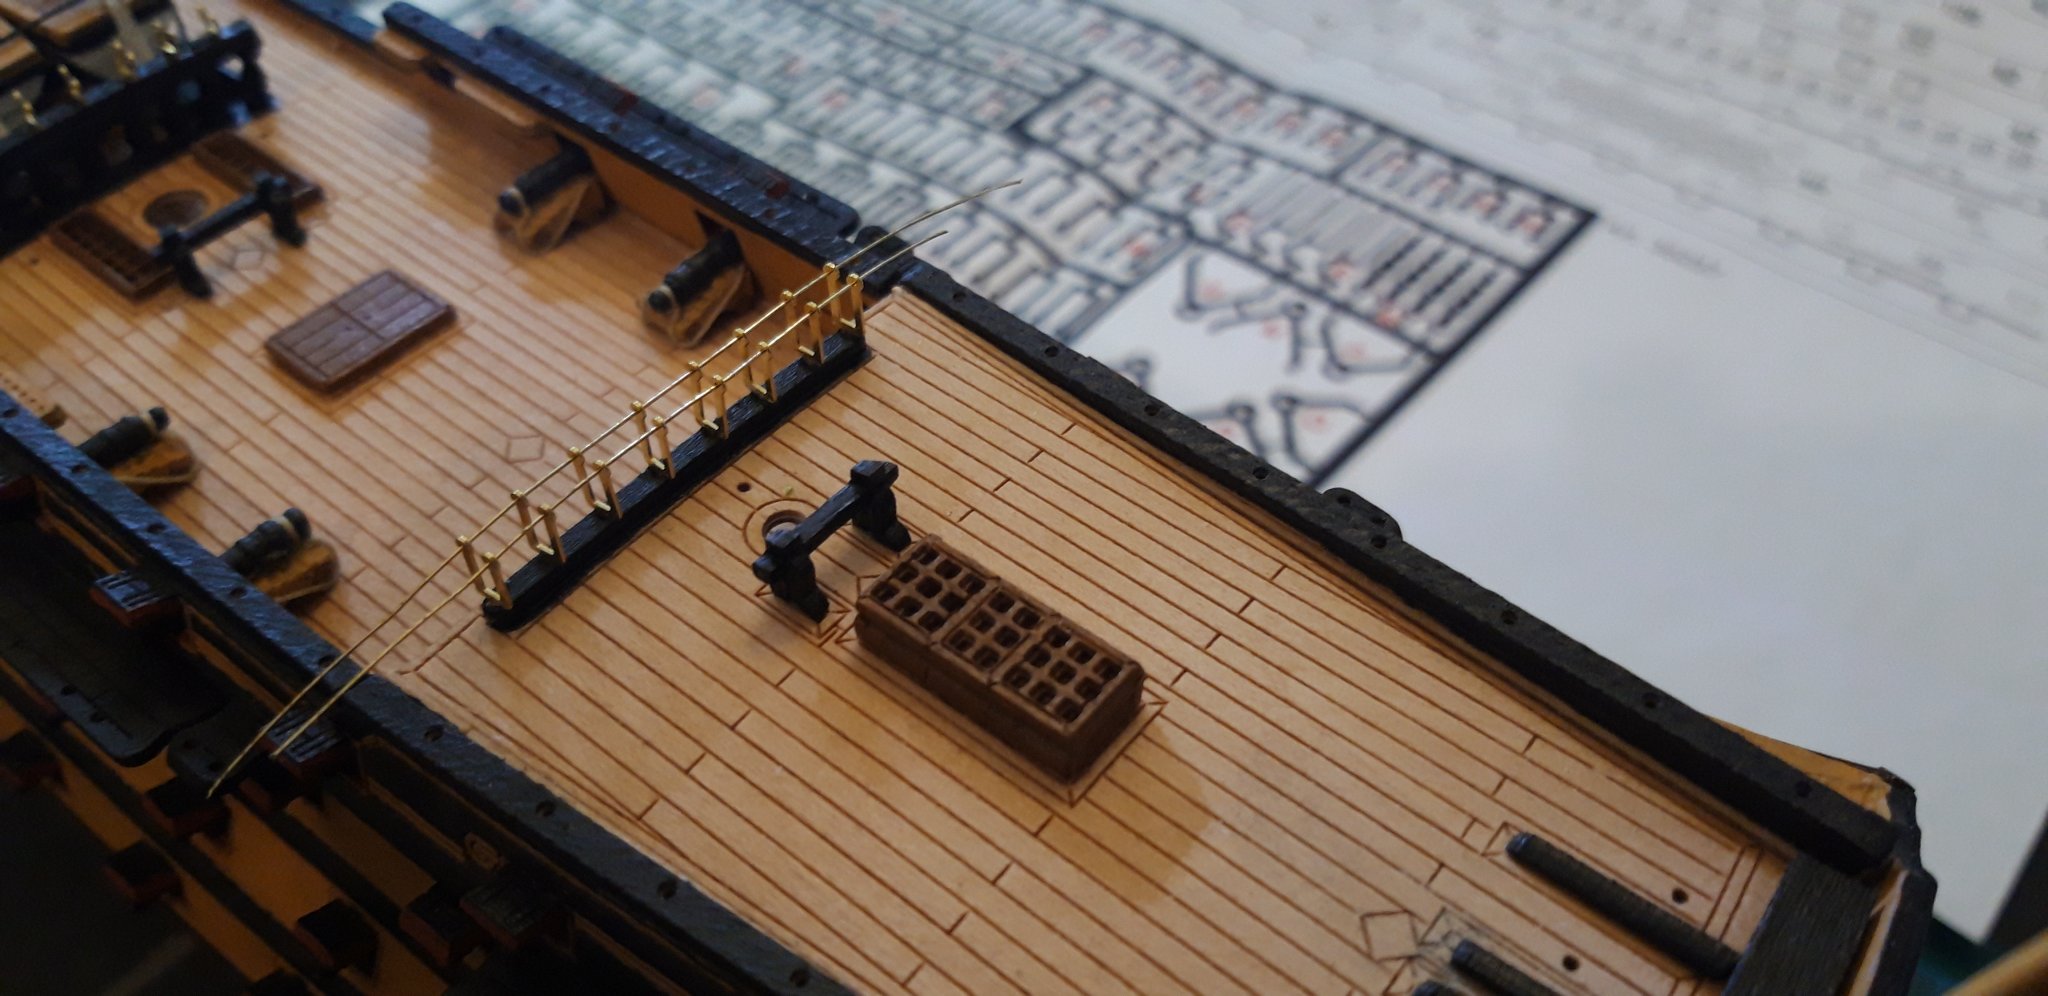
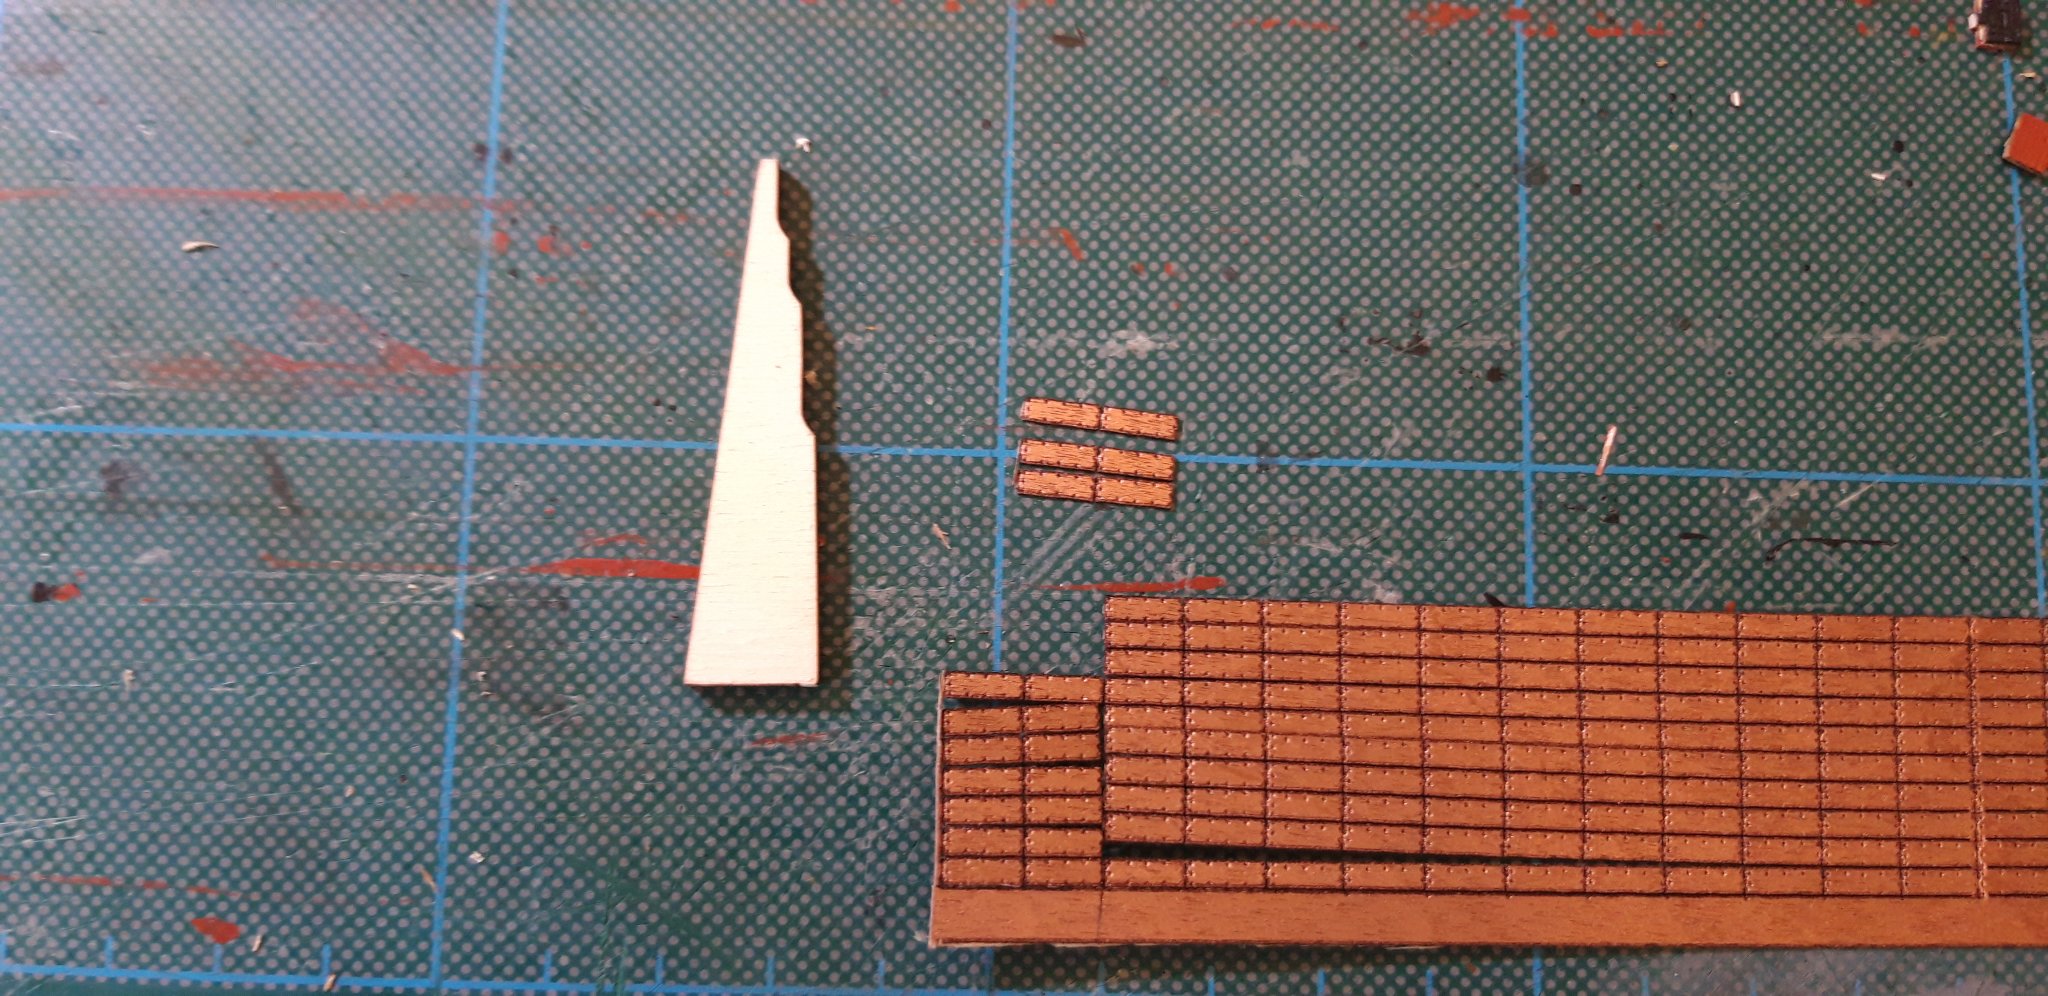
I have spent a bit of time today looking at the masts and rigging and, as l expected, the main challenge is ahead of me. The instructions are very sketchy but l have my AOTS book to hand which l hope will help no end. I am working on the Bowsprit Assembly at the moment and have met my first problem, there's no mention of the Flying Jibboom in the instructions but clearly l need one. I will use the kit instructions as a guide and scale measurements, but will use the AOTS book for the finer details.
These are the kit instructions.

l have cut each part as shown to the correct dimensions, but not shaped.
Bowsprit, Jibboom, Bees and Beeblock.
The Jack Staff and Dolphin Striker.
Spiritsail Yard, Spiritsail Topsail Yard and Boomkins. (I have named the parts for my own future reference as they are not shown in the instructions)

Quite clearly shown in the AOTS book, the Flying Jibboom. Why they should have missed this from the instructions is a mystery to me. I shall add this Jibboom but, of course, this will have a knock on effect with the rest of the rigging.
Here is a picture of my most important item of equipment,
During my next session l shall cut the Flying Jibboom and shape, by sanding, all the component parts of the Bowsprit Assembly.
Best wishes as always and, once again, Happy New year to you all.
The Lazy Saint.
Session. Time. Total.
39. 1 hrs. 129 hrs
- Edwardkenway, Dubz, Duanelaker and 2 others
-
 5
5
-
Happy Christmas all,
I have only managed an hour today as l am having to entertain the Admiral, (well, it is Christmas) however, that is all l needed to paint the Wriggles.


Next up will be the Masts.
Wishing you all a merry Christmas and a happy new year.
Best wishes as always,
The Lazy Saint.
Session. Time. Total.
38. 1 hrs. 128 hrs
- Jonesey, Duanelaker, Edwardkenway and 3 others
-
6
-
Hi Emmet
12 hours ago, Emmet said:I am a newbie and will be starting one similar to you. so I am trying to learn as much as possible from this great crowd on MSW. Thanks for your thoughts. Have a Merry Christmas
I am glad you like it here at MSW, l am also a relative newcomer and l too think this site is great, there are many inspiring builds/builders here at every level of skill.
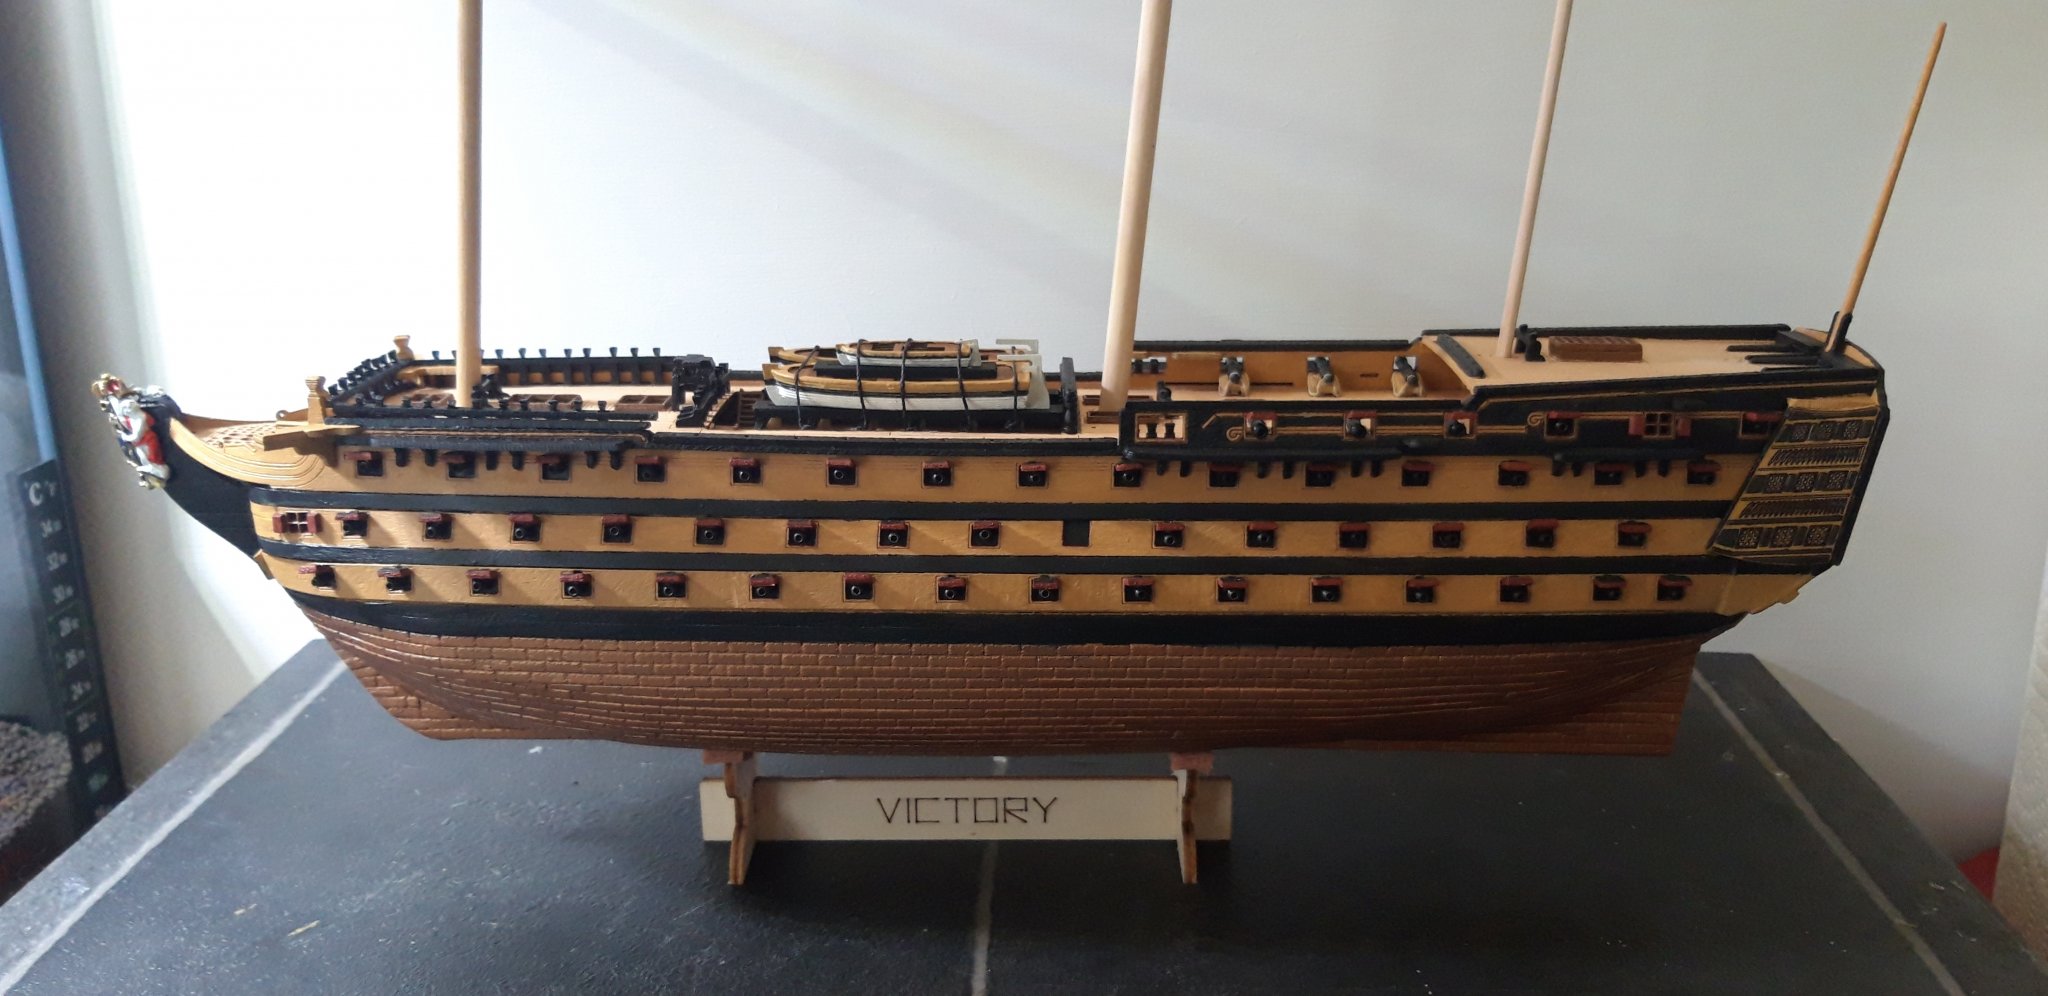
If l may be so bold as to say that if you are tackling a wooden ship for the first time you are best advised to look at something in 1:64 scale as, personaly speaking, this 1:200 scale Victory is very challenging indeed. Without the experience l gained in my first two ships (Caldercrafts Ballahoo and Sherbourne) l think l may have given up or put it aside to do at a later date. Have a look at the Mugje Pickle build (if you haven't already done so) that is a great example to follow, along with the instructions, it was also his first build.
Whatever you choose, l shall be interested in watching your progress.
Best wishes (and good luck) as always,
The Lazy Saint.
-
Well Phil, using card on the bow worked well didn't it. Perhaps using card again is the way to go.
Best wishes as always,
The Lazy Saint.
-
Hi all,
19 hours ago, Emmet said:Would love to see the pic between the planking above and the finished below.
Have a great holiday!
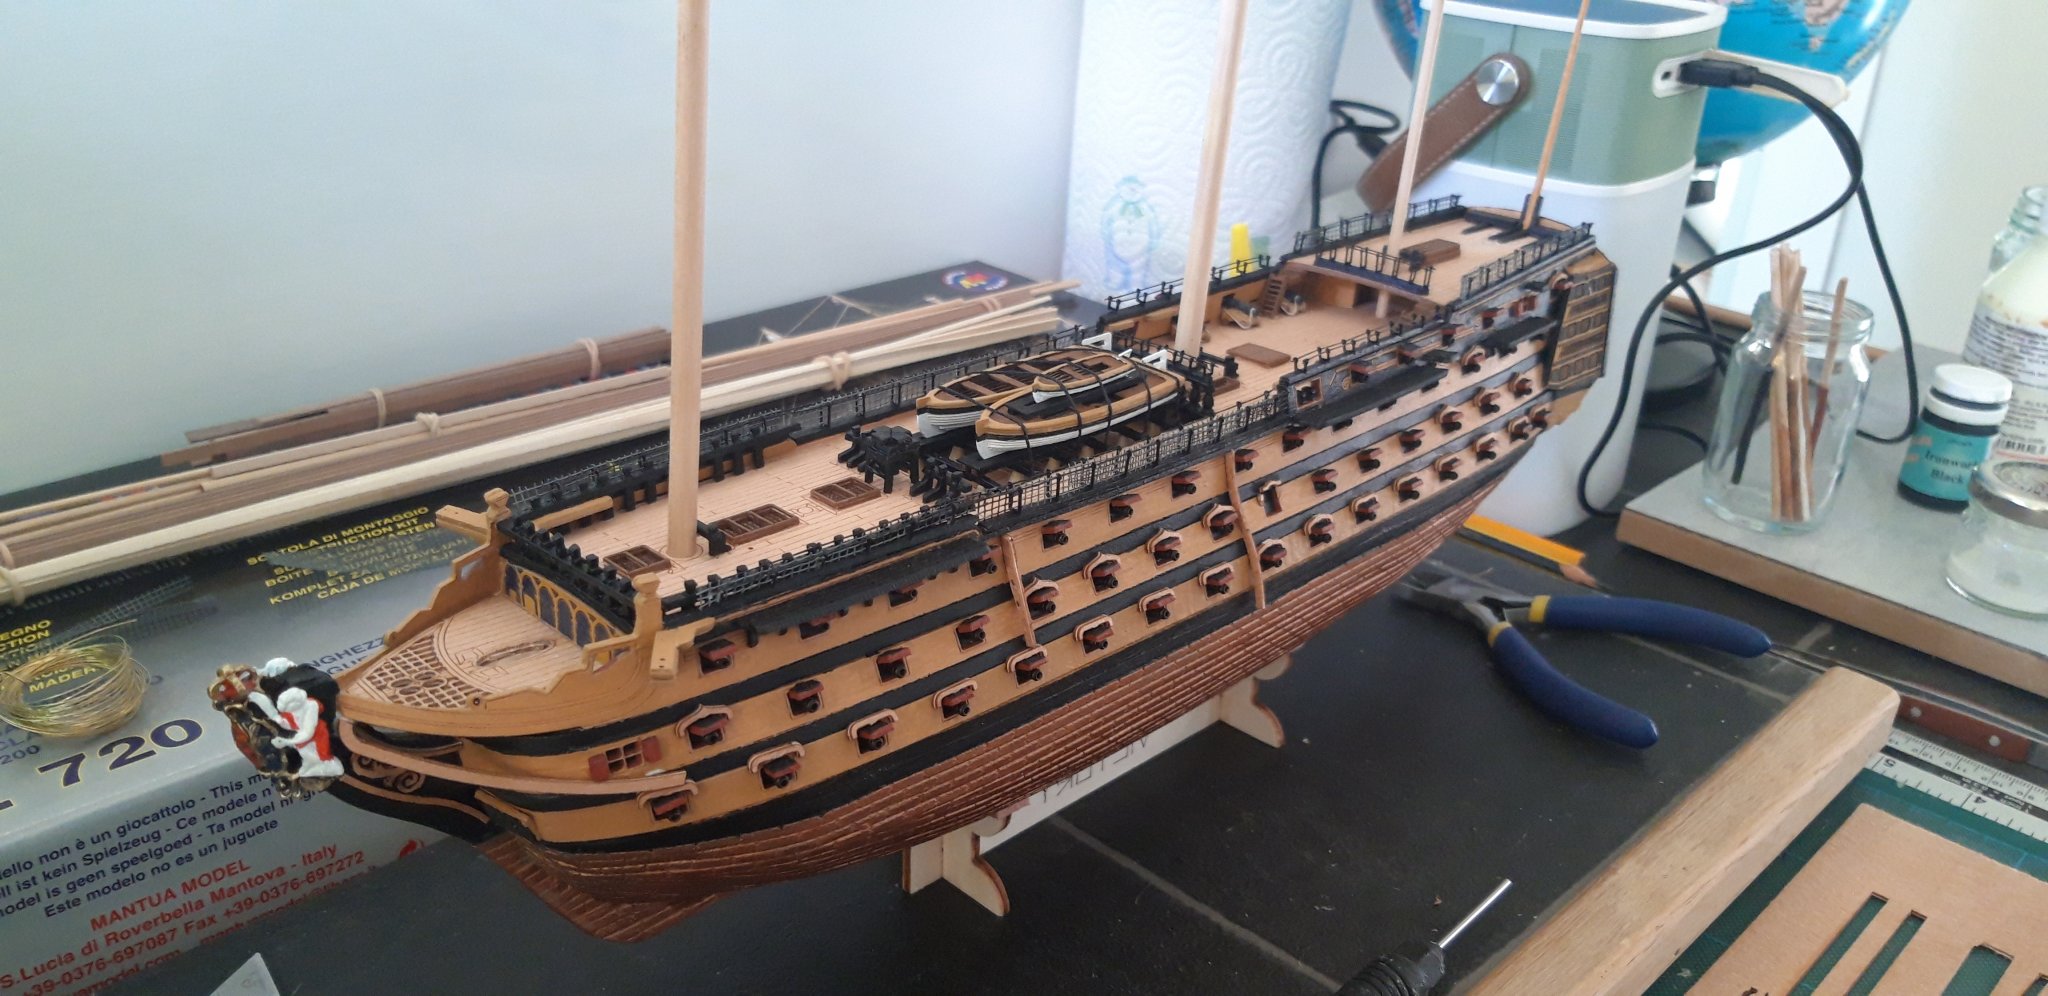
I am afraid that the only pictures l have are the ones I posted Emmet. I did find it hard going, but got there in the end.
Thanks for the kind words Edward, and to you also Richard. Indeed, thanks to all who liked my posts to date, appreciated as always.
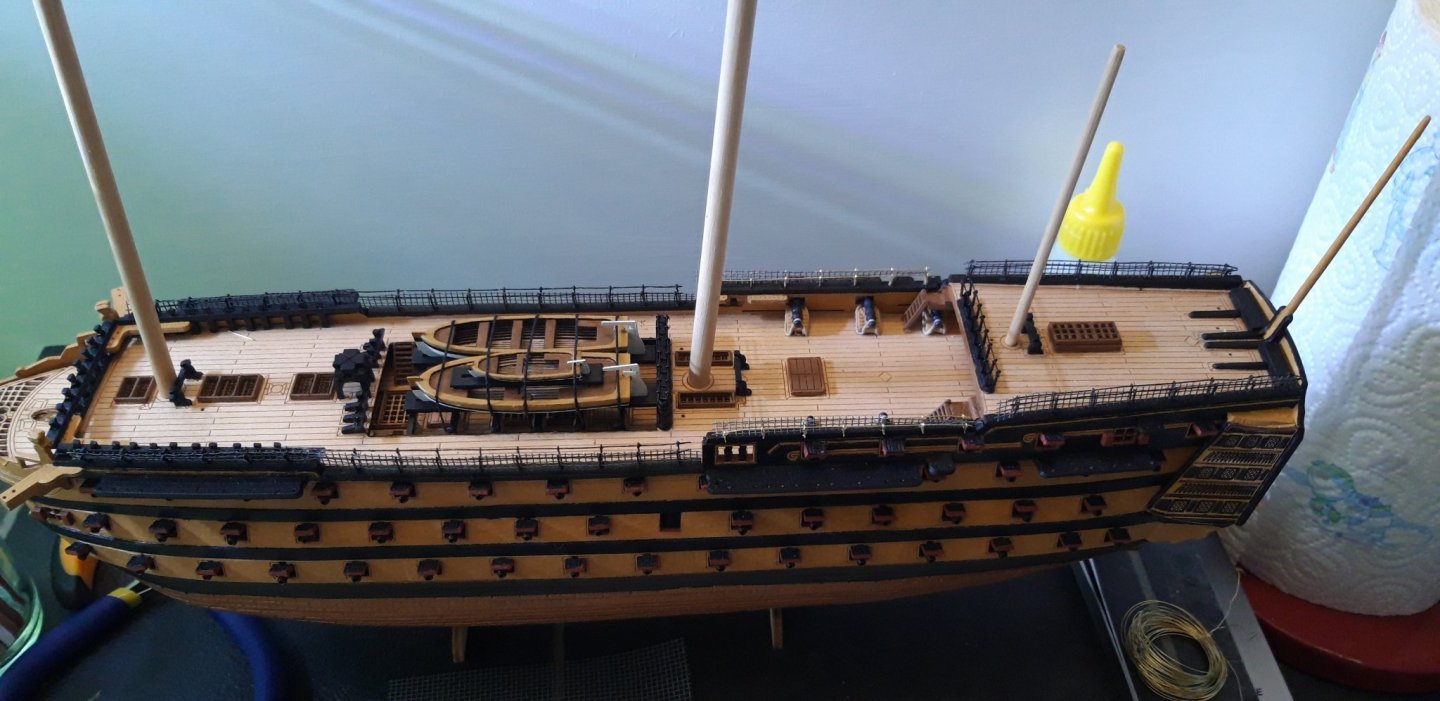
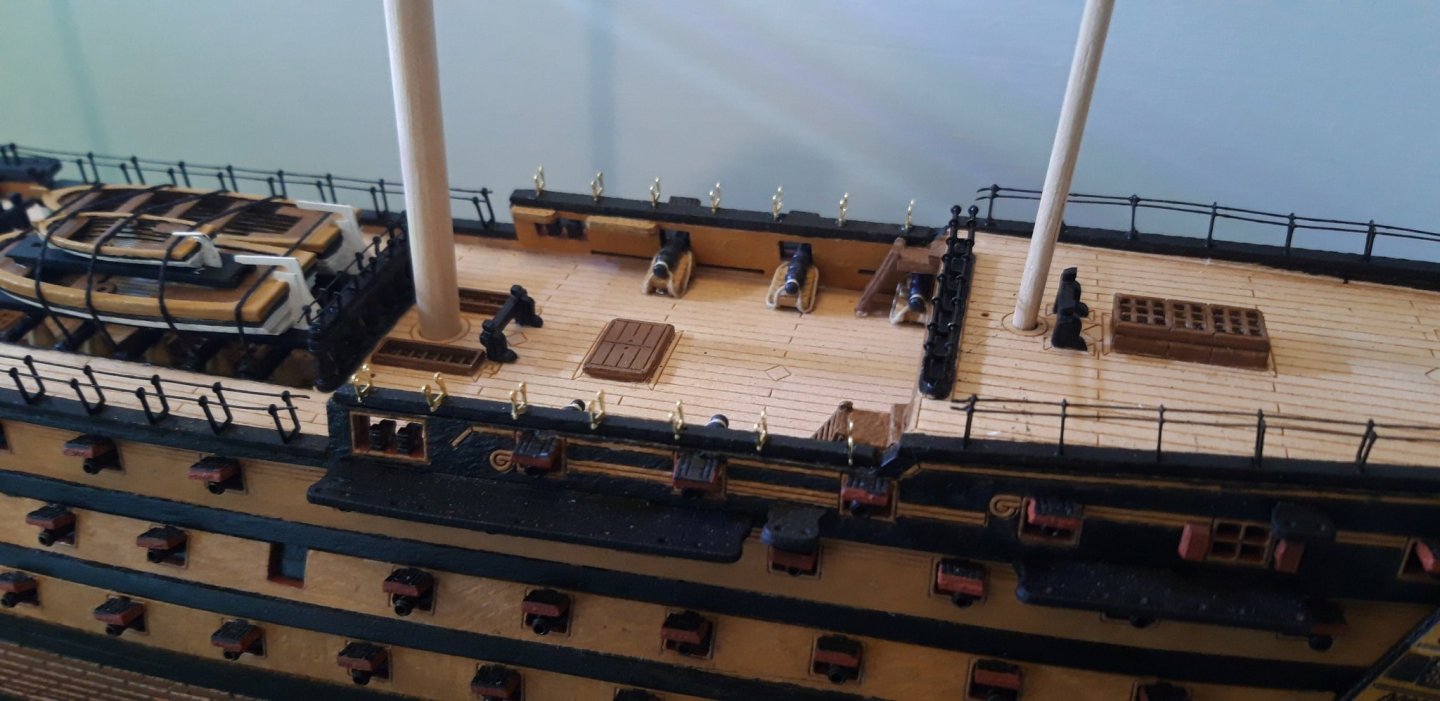
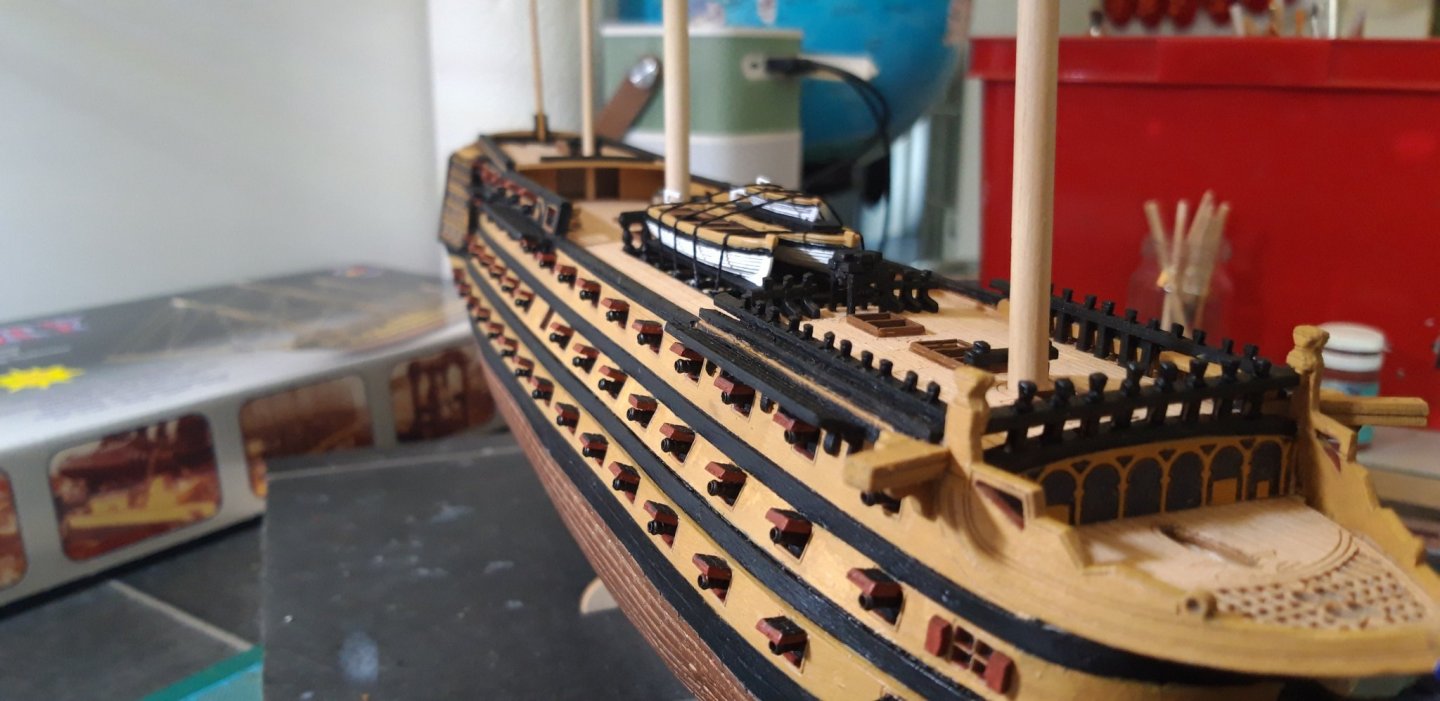
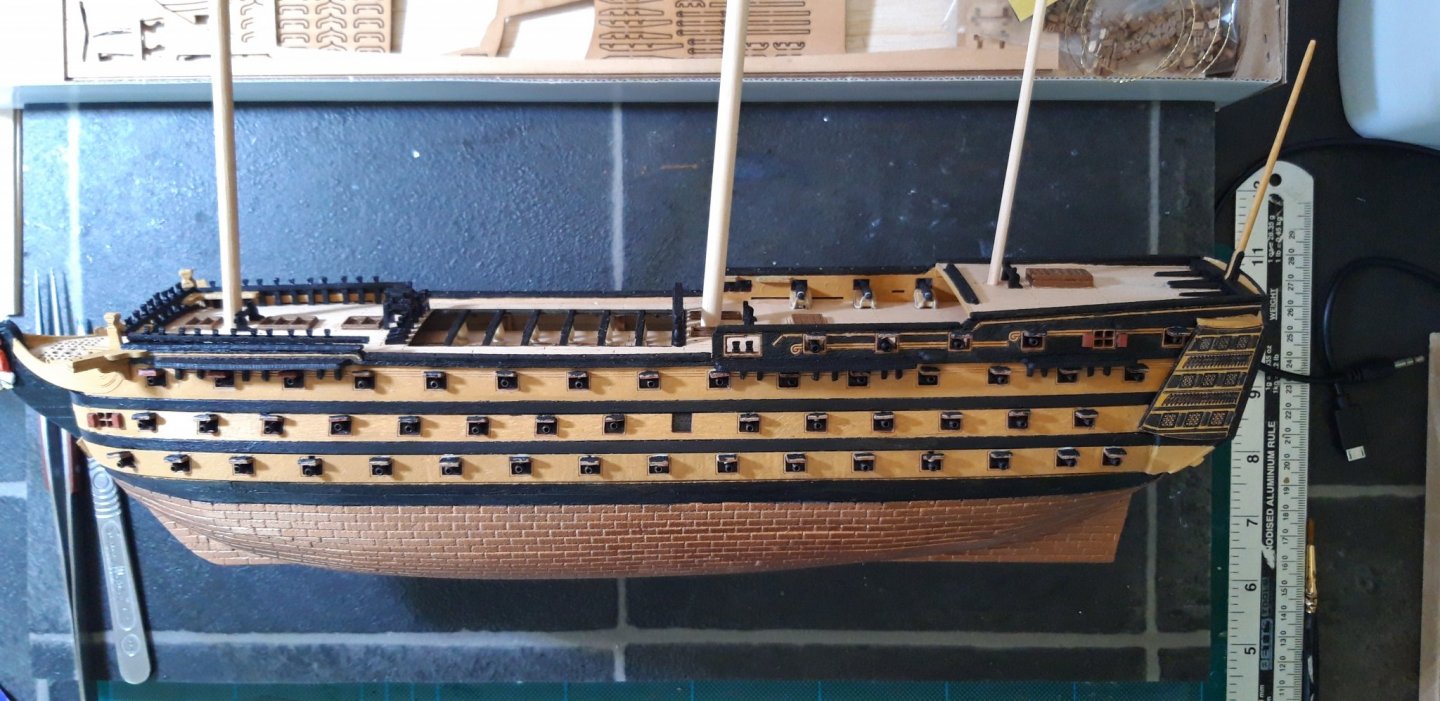
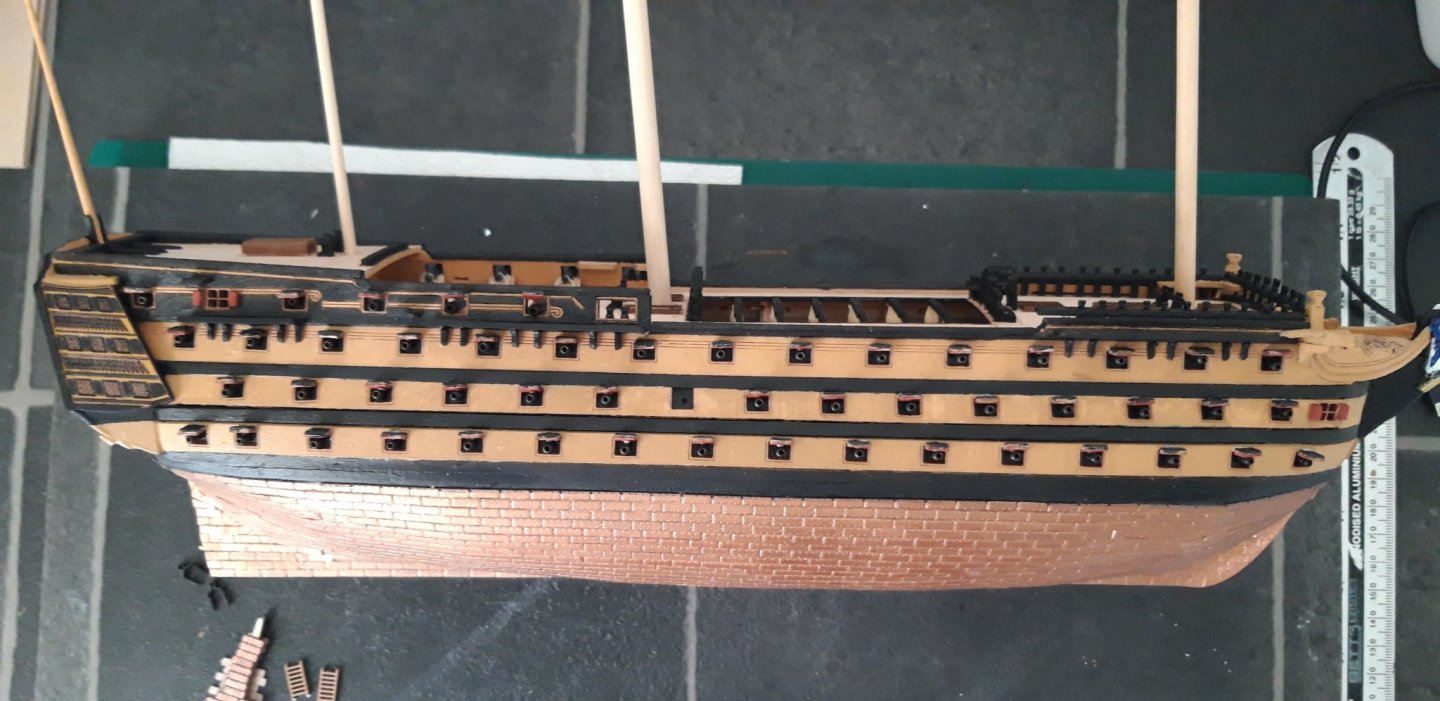
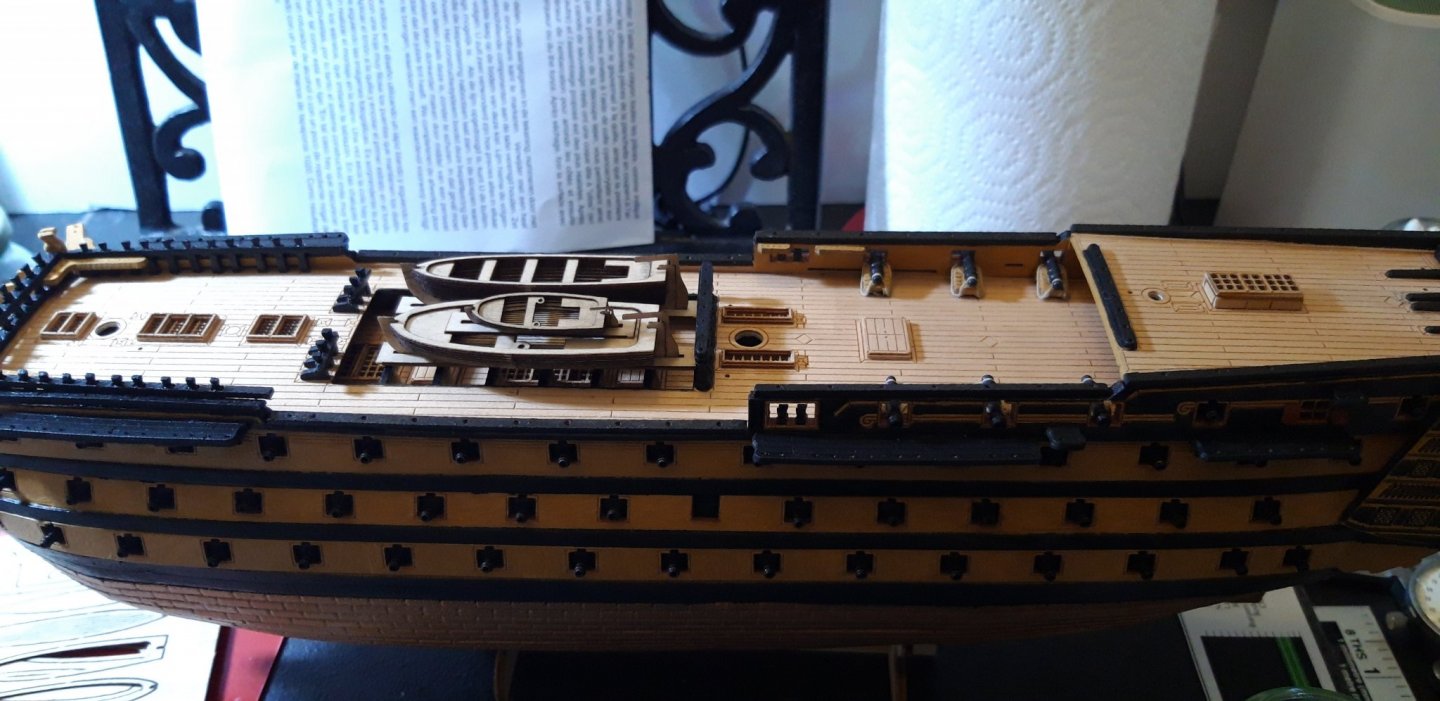
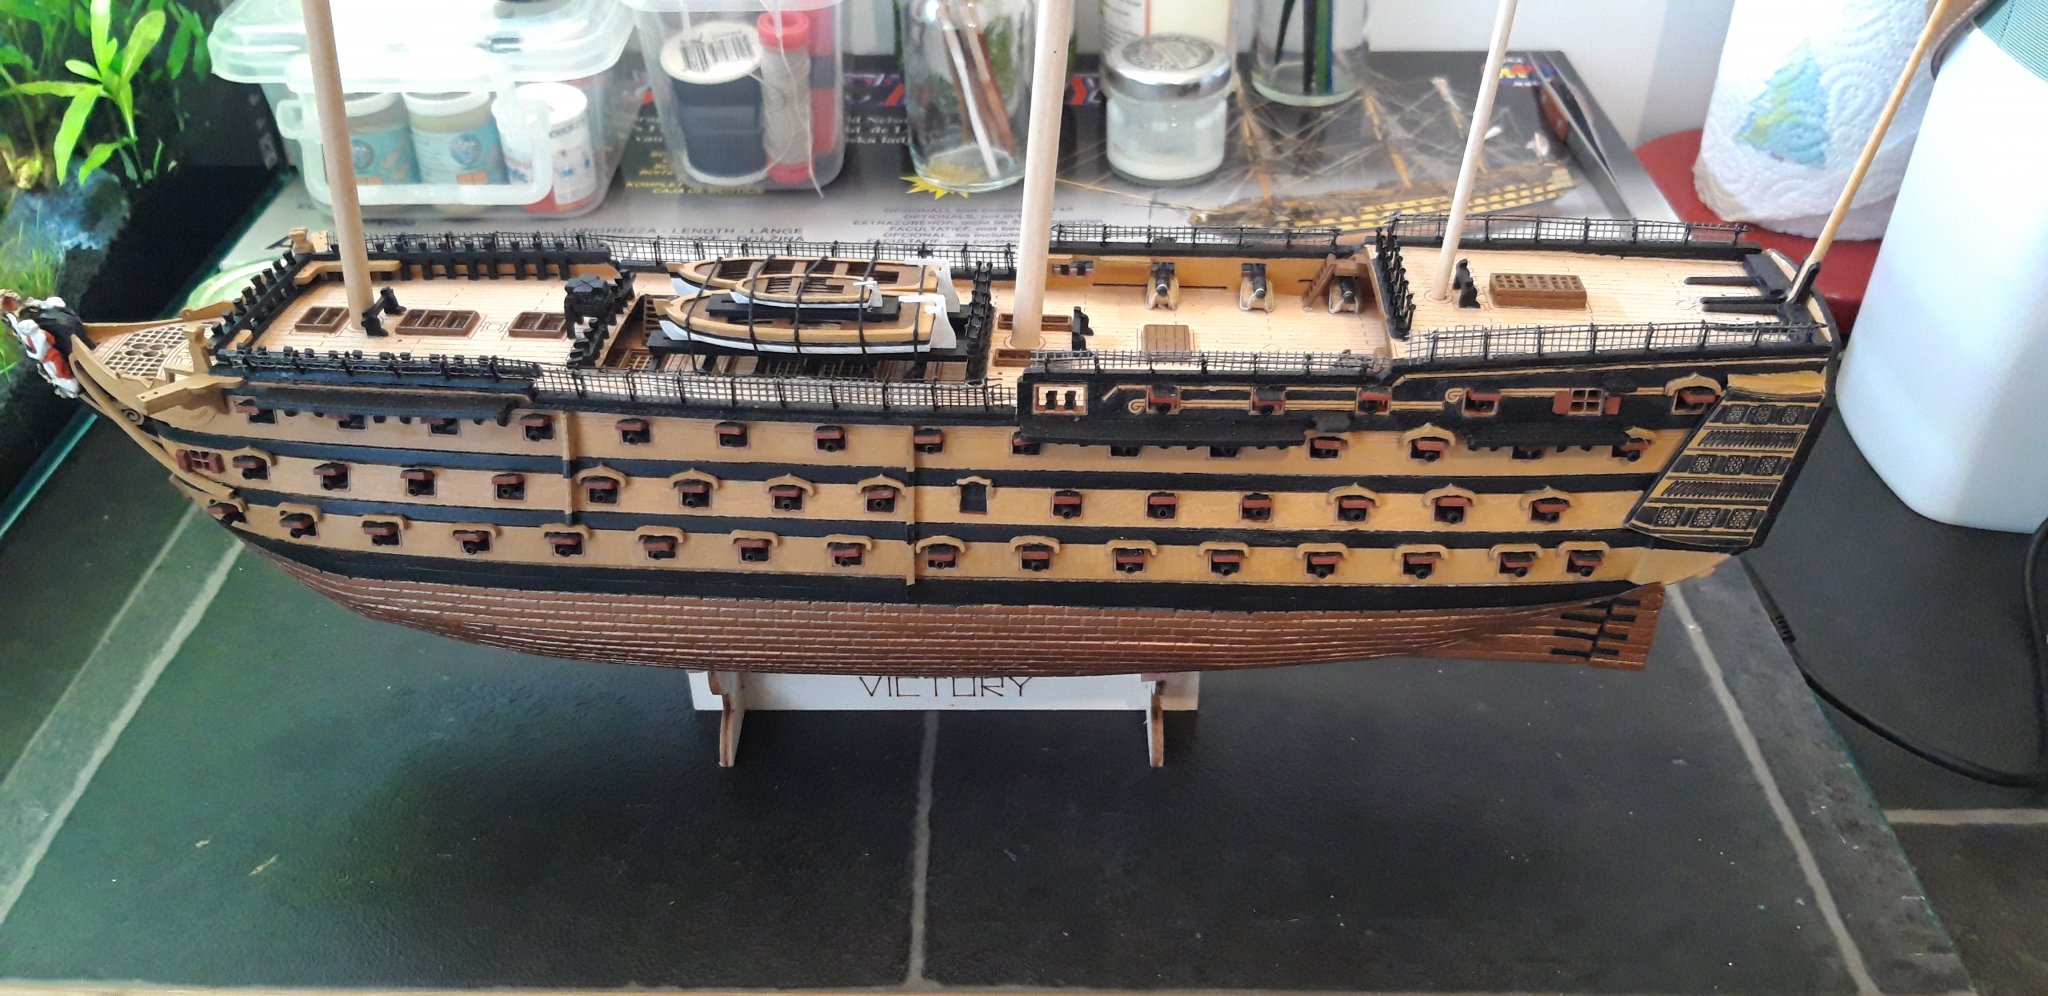
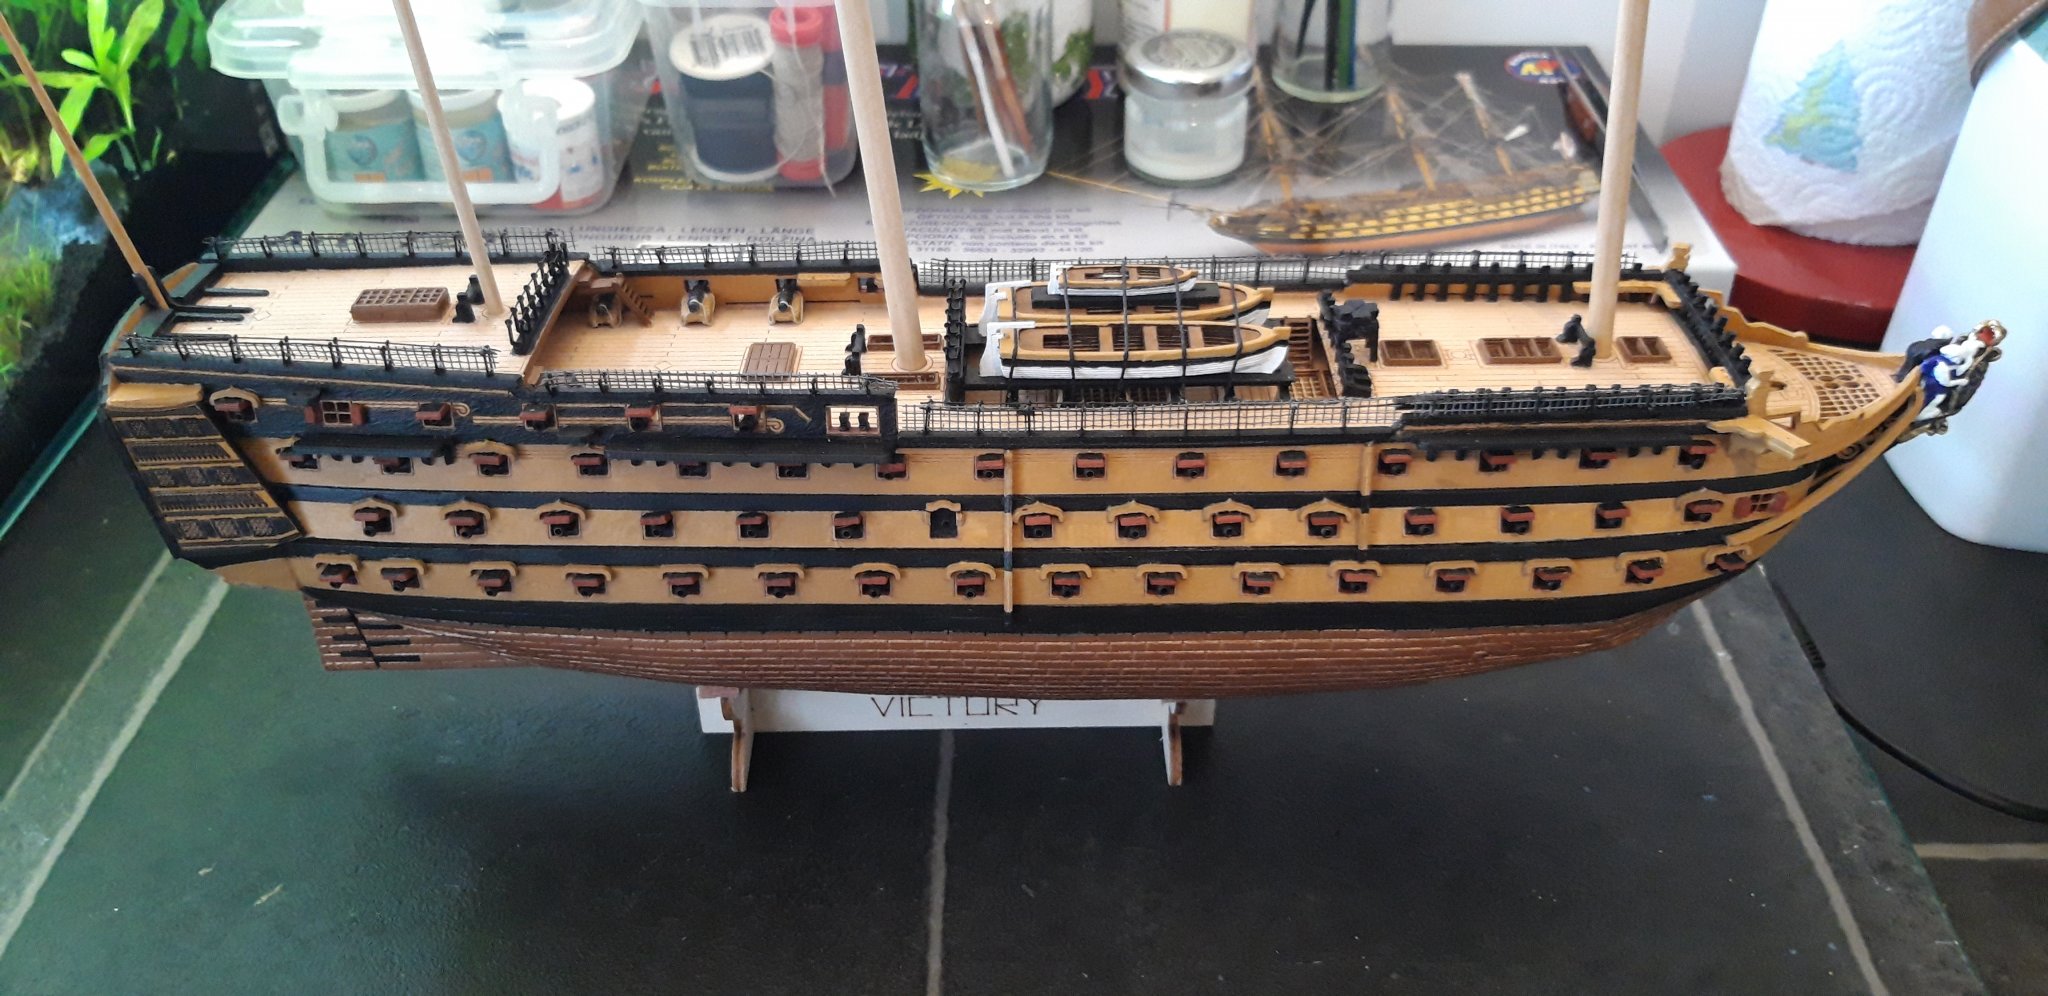
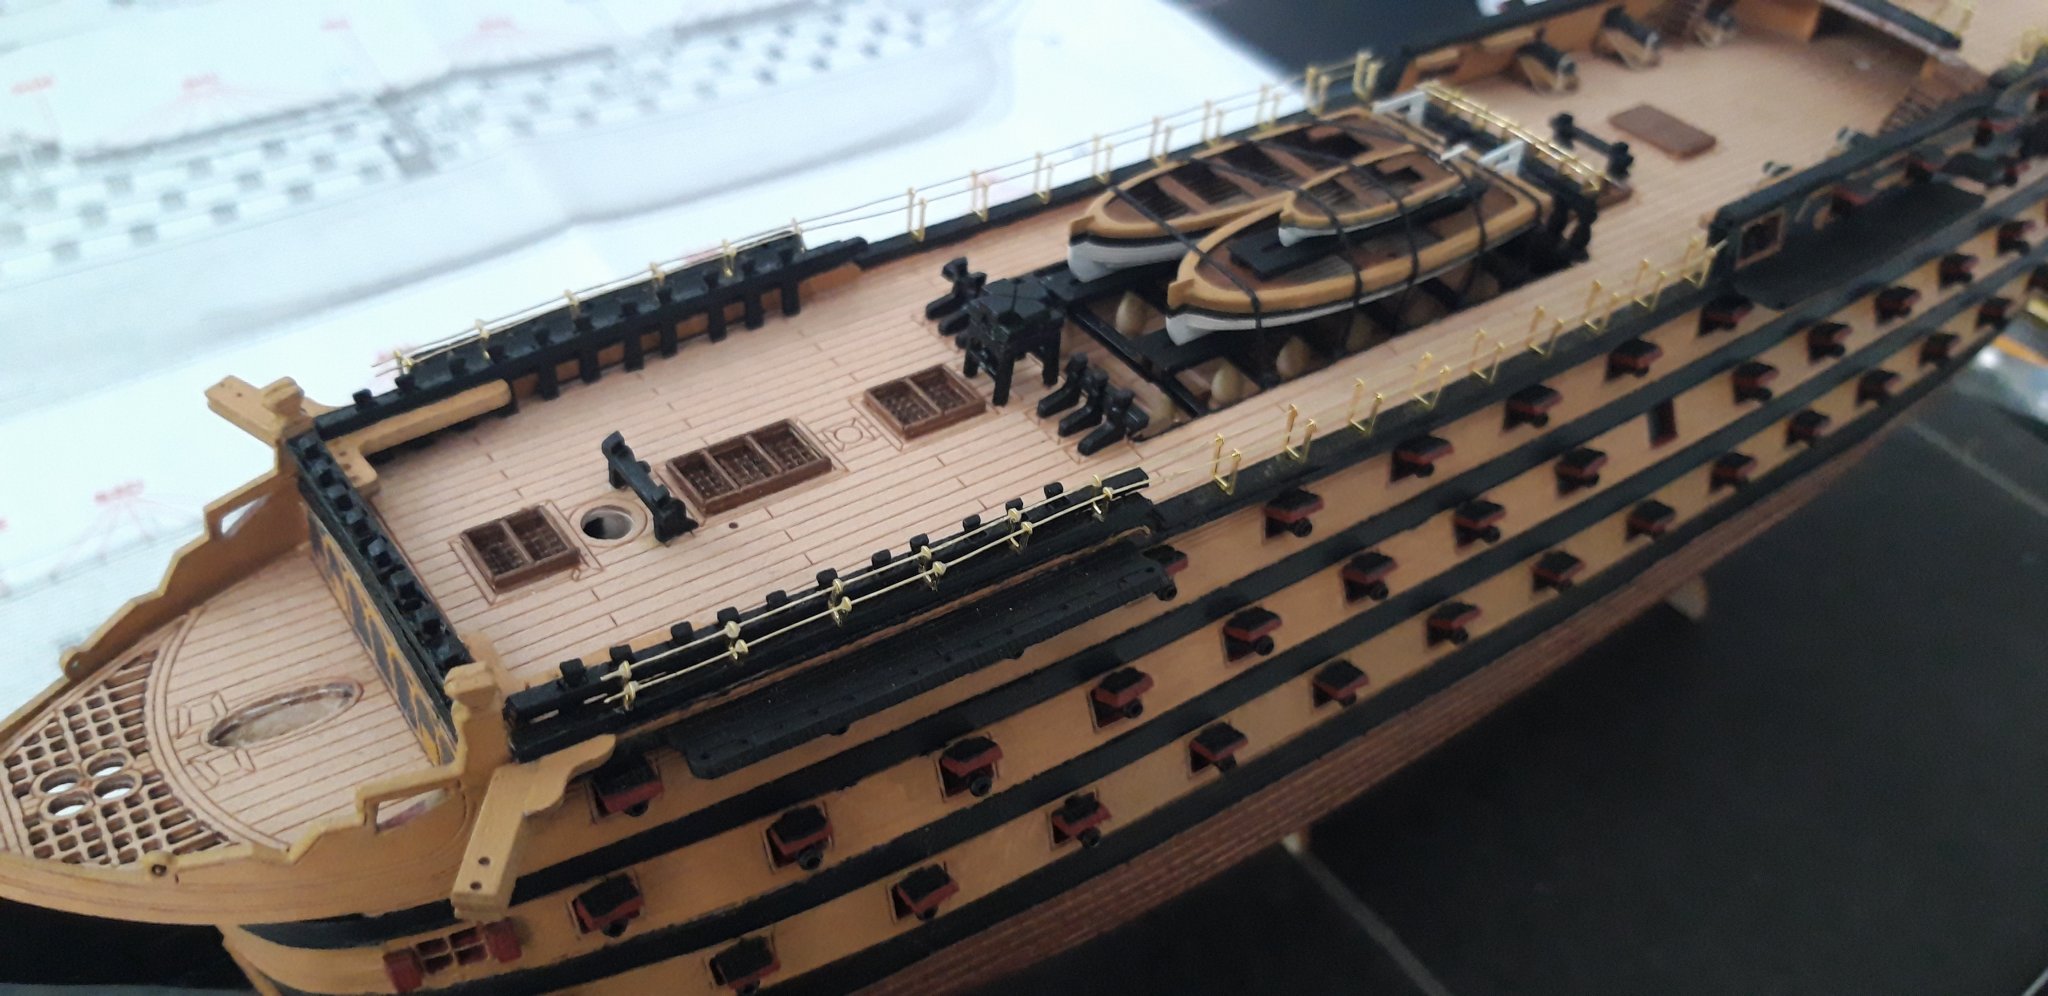
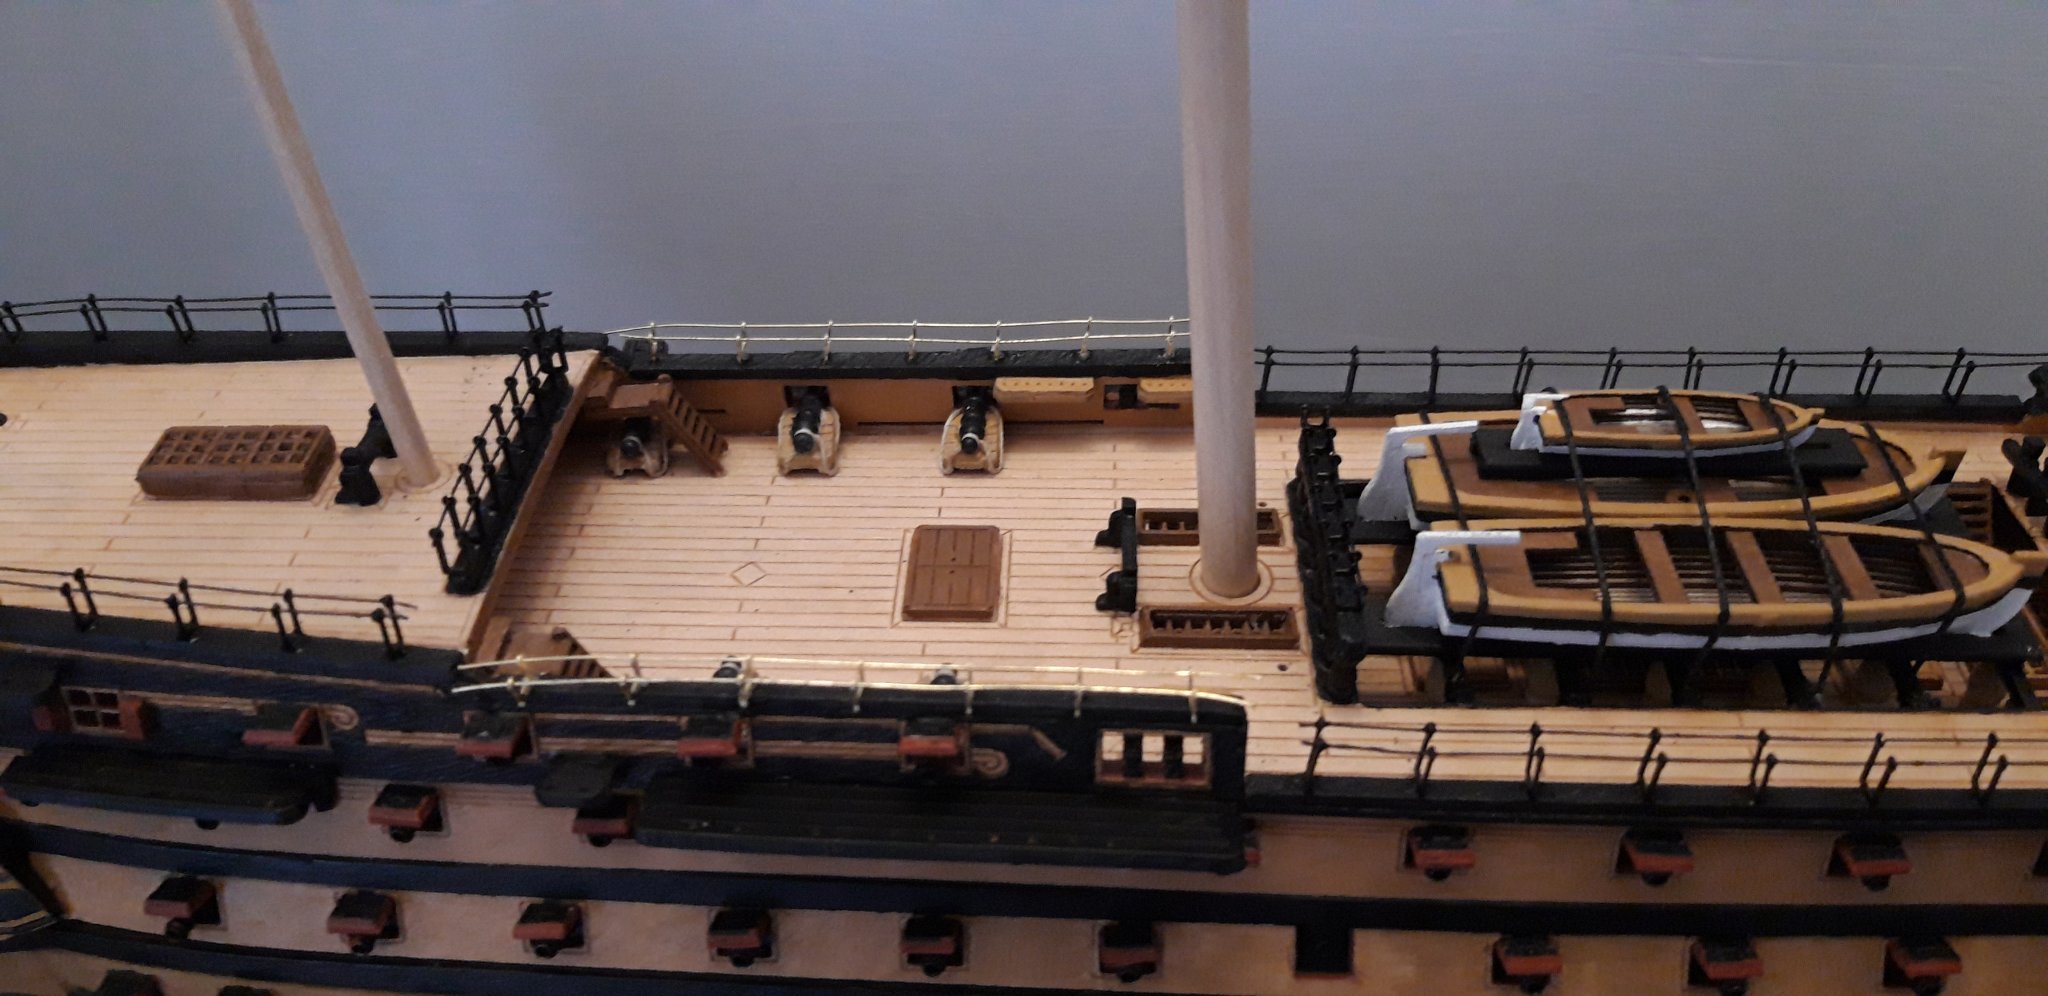
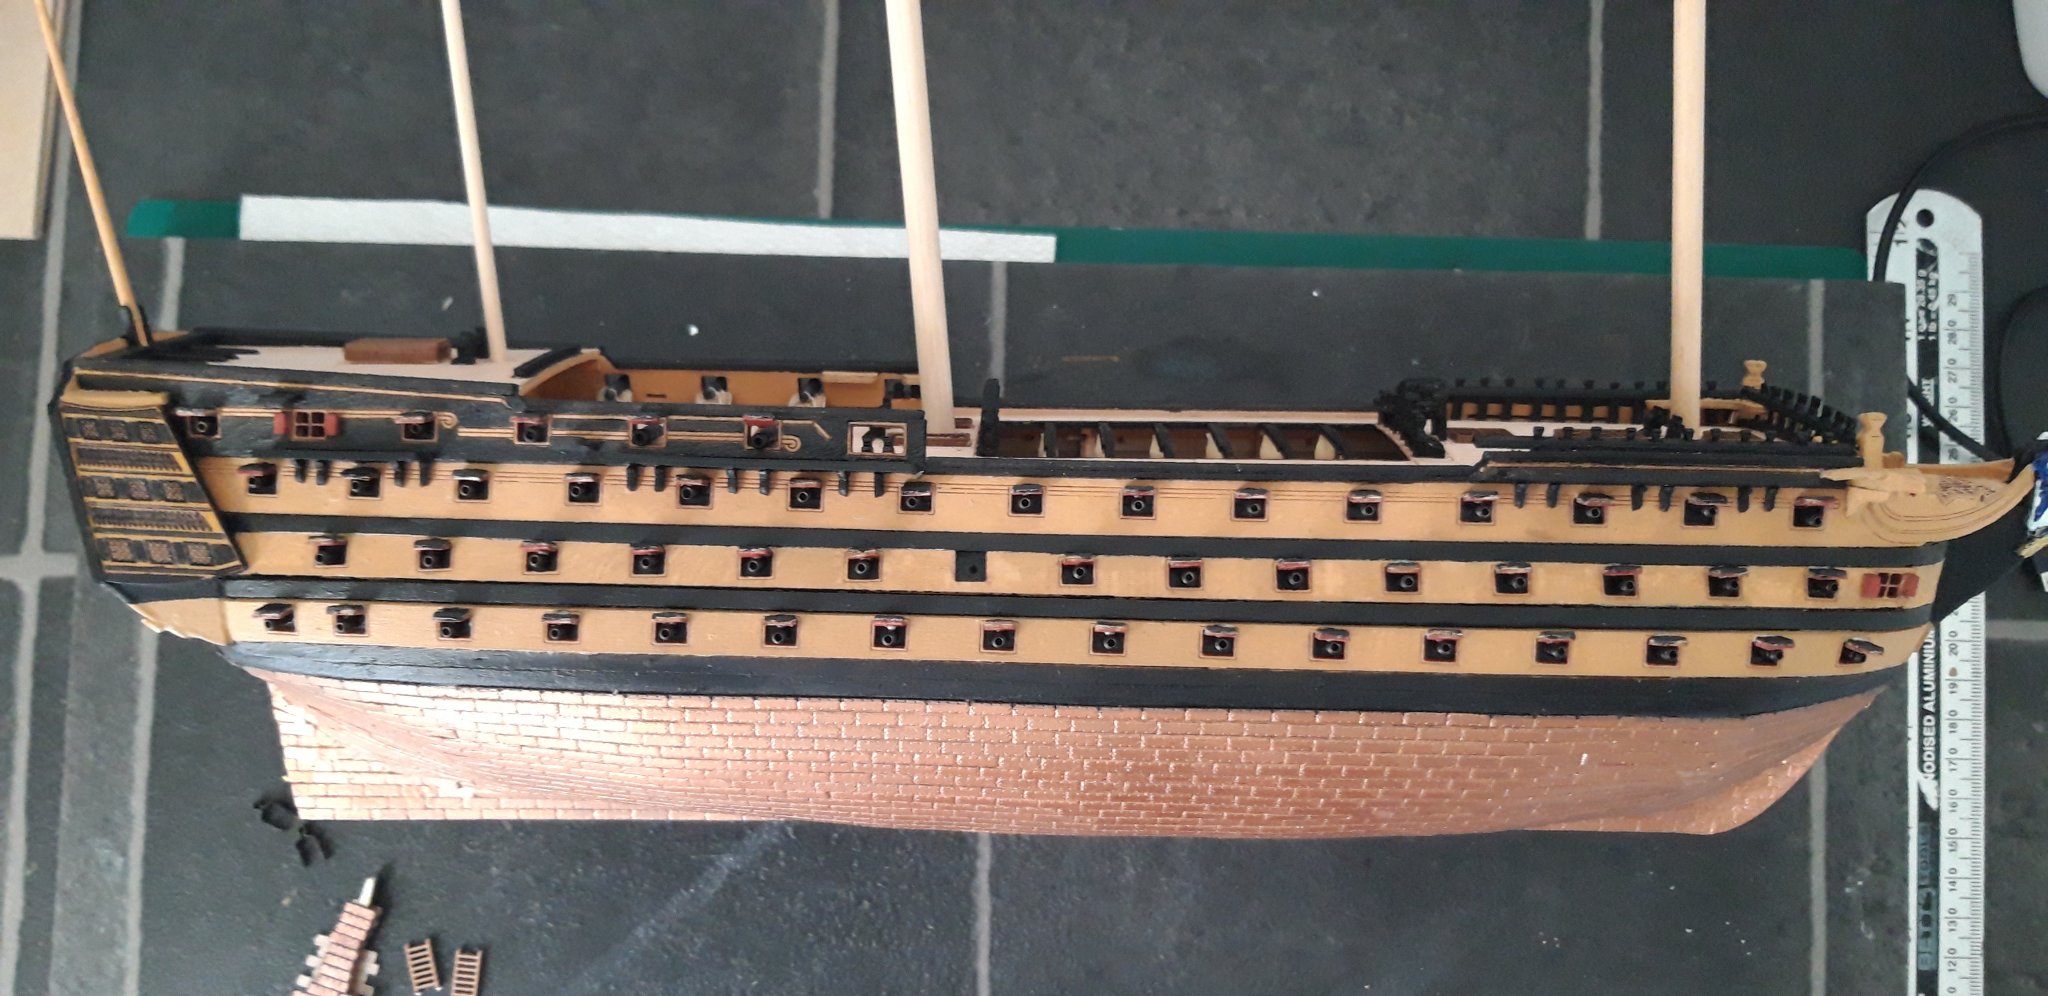
This morning l managed to fit the Wriggles, add a bit more of the Bow detailing and paint the final stretch of Railings (although still have a small section of netting to do) l am now just waiting for the glue to dry.
Here are the pictures.

.thumb.jpg.53ff050b3c0d8c7a5118c7fa5a128364.jpg)
My next session (this evening with any luck) will involve painting the details applied this morning and fitting the last bit of netting.
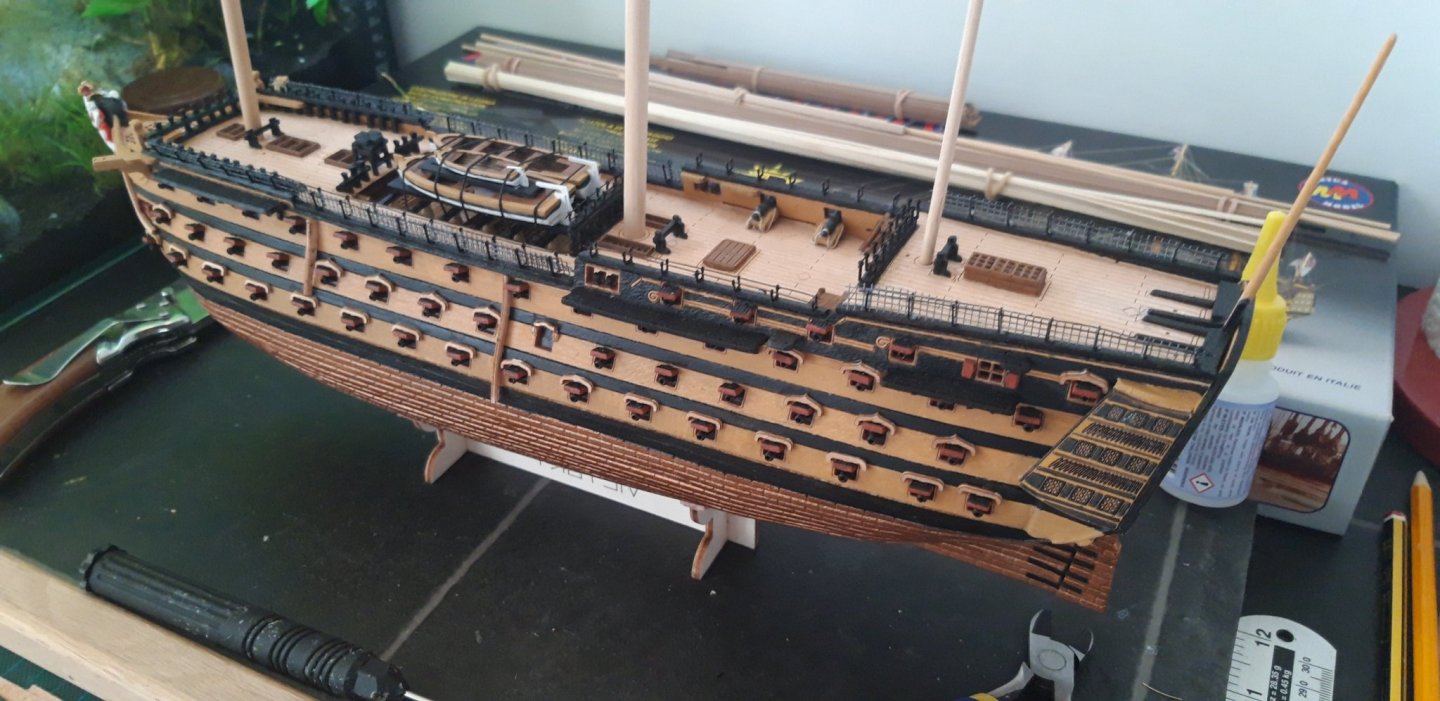
I have almost completed the Hull and Deck Fittings so will be on to the masts and rigging. I anticipate things will become a little more difficult from here on in.
Best wishes as always,
The Lazy Saint.
Session. Time. Total.
37. 3 hrs. 127 hrs.
- Duanelaker, GrandpaPhil, Jonesey and 5 others
-
8
-
Good job Phil, well done. Keep up the good work.
Best wishes as always,
The Lazy Saint.
-
Hi all,
I managed a short session this morning, this time of year we must grab every opportunity we get. We are now waiting for two of the Grandchildren to descend on us. 🤣
A bit more work on the Rails.

My next session, whenever that may be, should see the completion of the Rails and netting.
Best wishes as always,
The Lazy Saint.
Session. Time. Total.
36. 1 hrs. 124 hrs.
- Retired guy, GrandpaPhil, BenD and 2 others
-
5
-
Hi all,
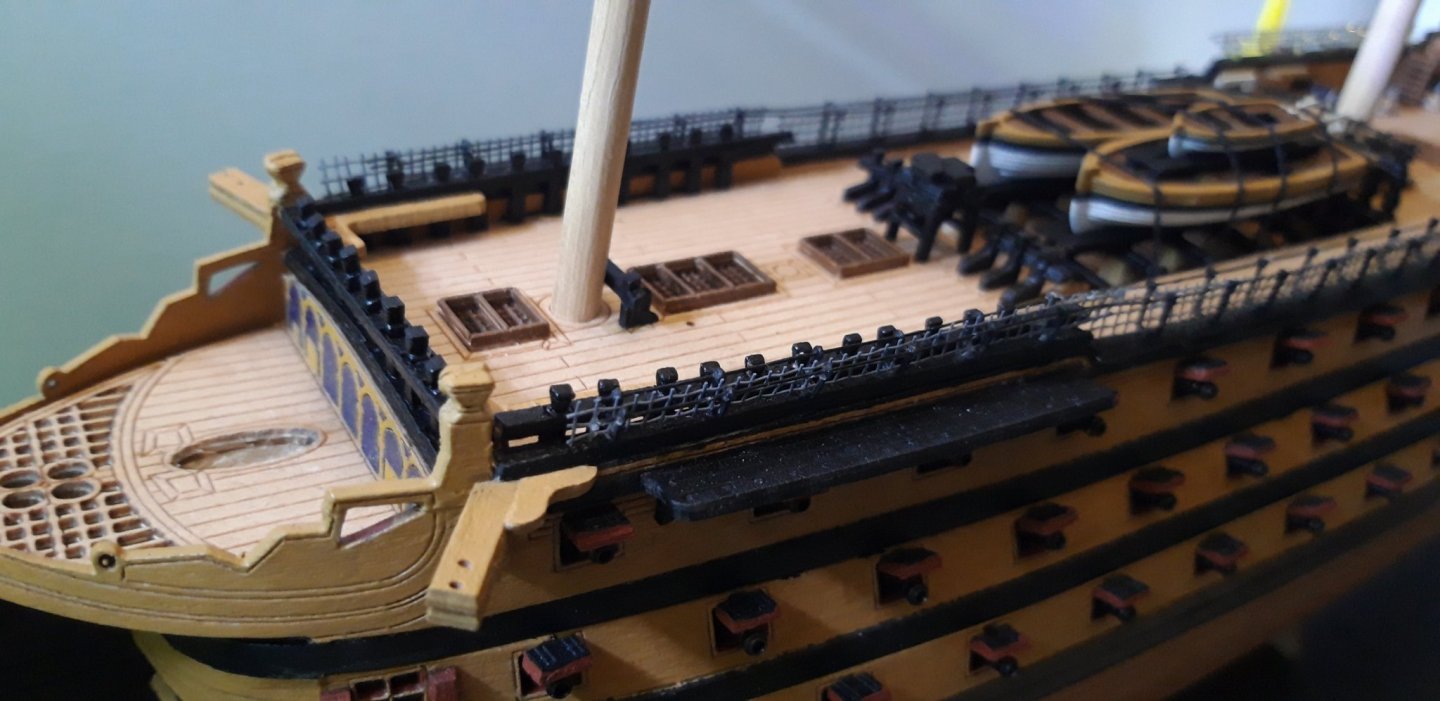
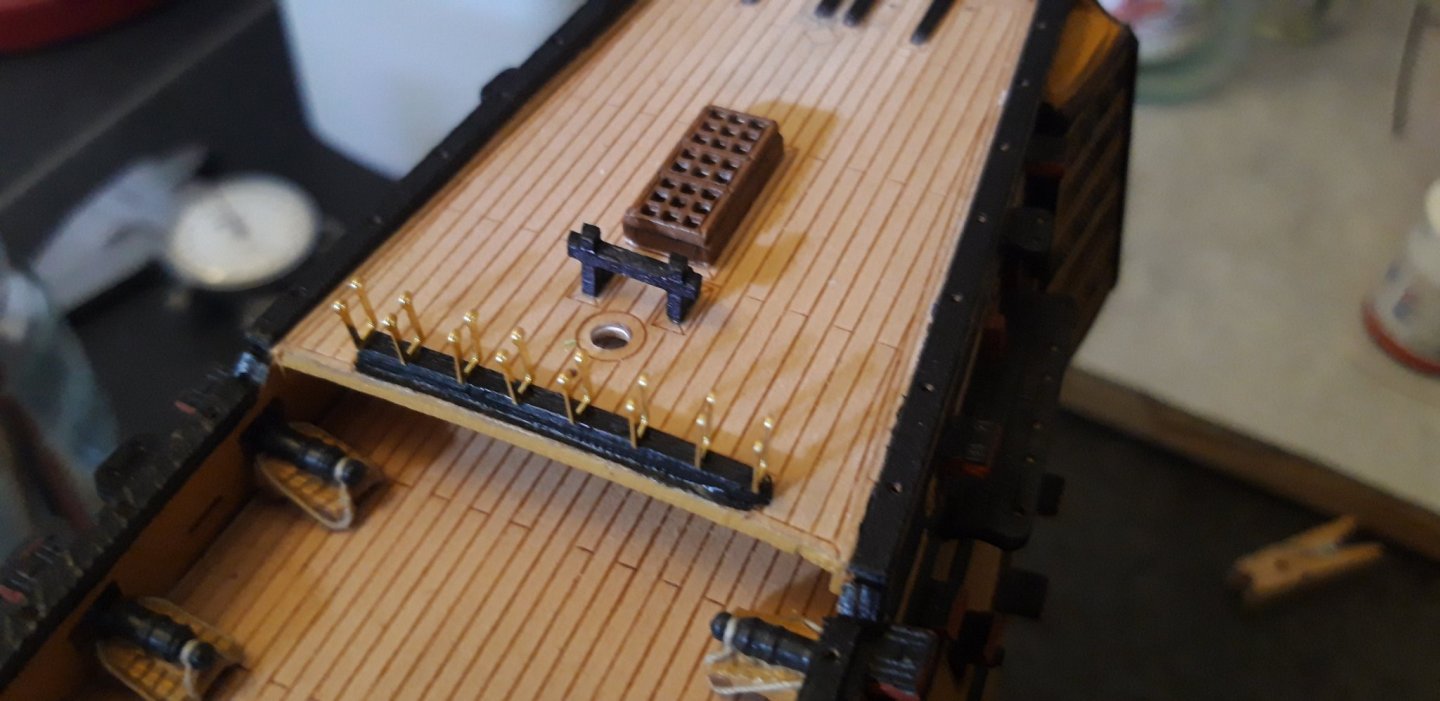
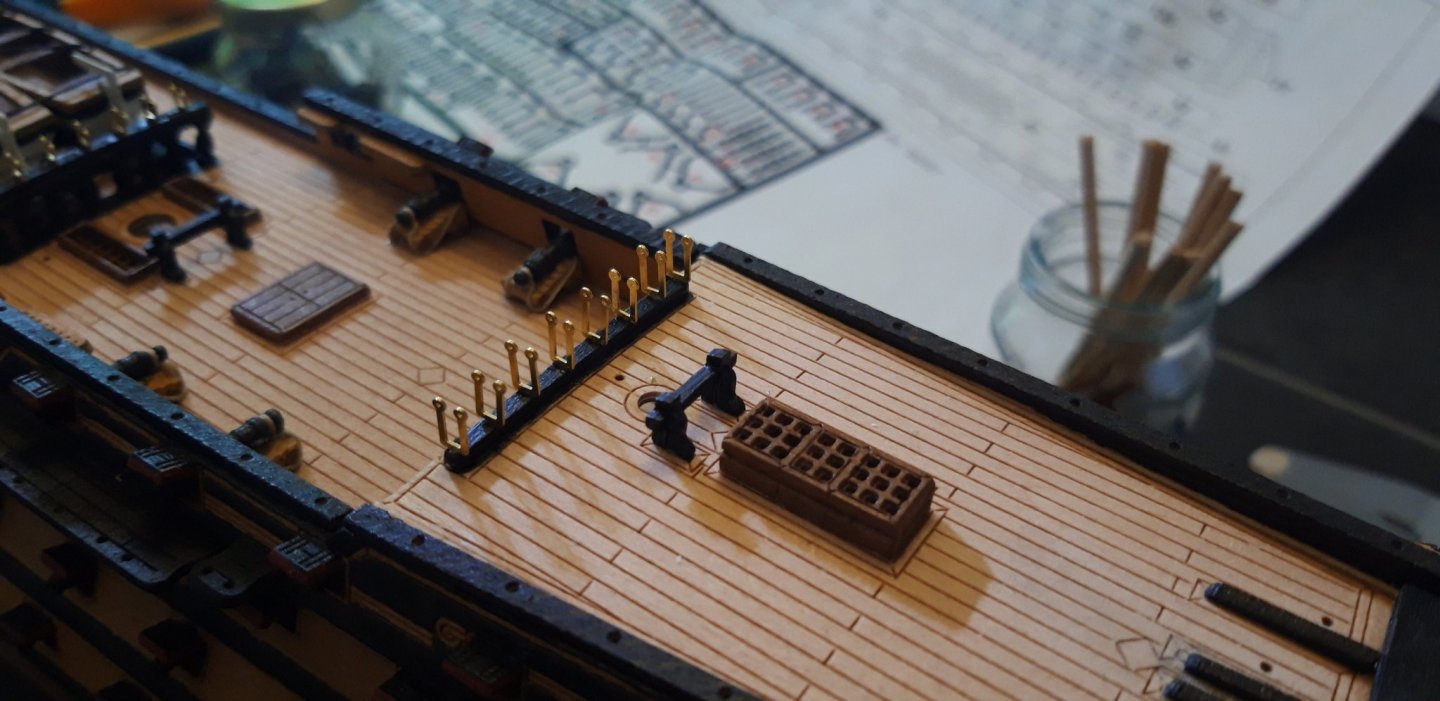
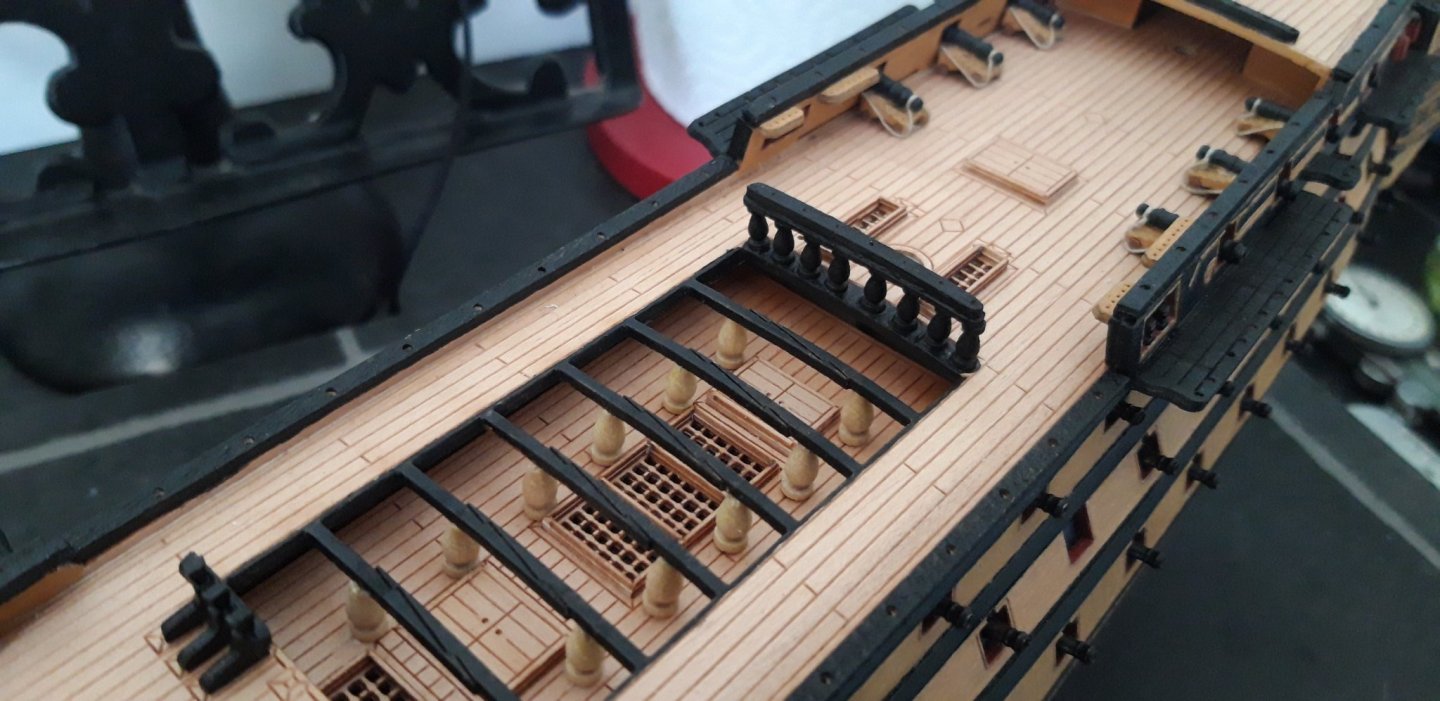
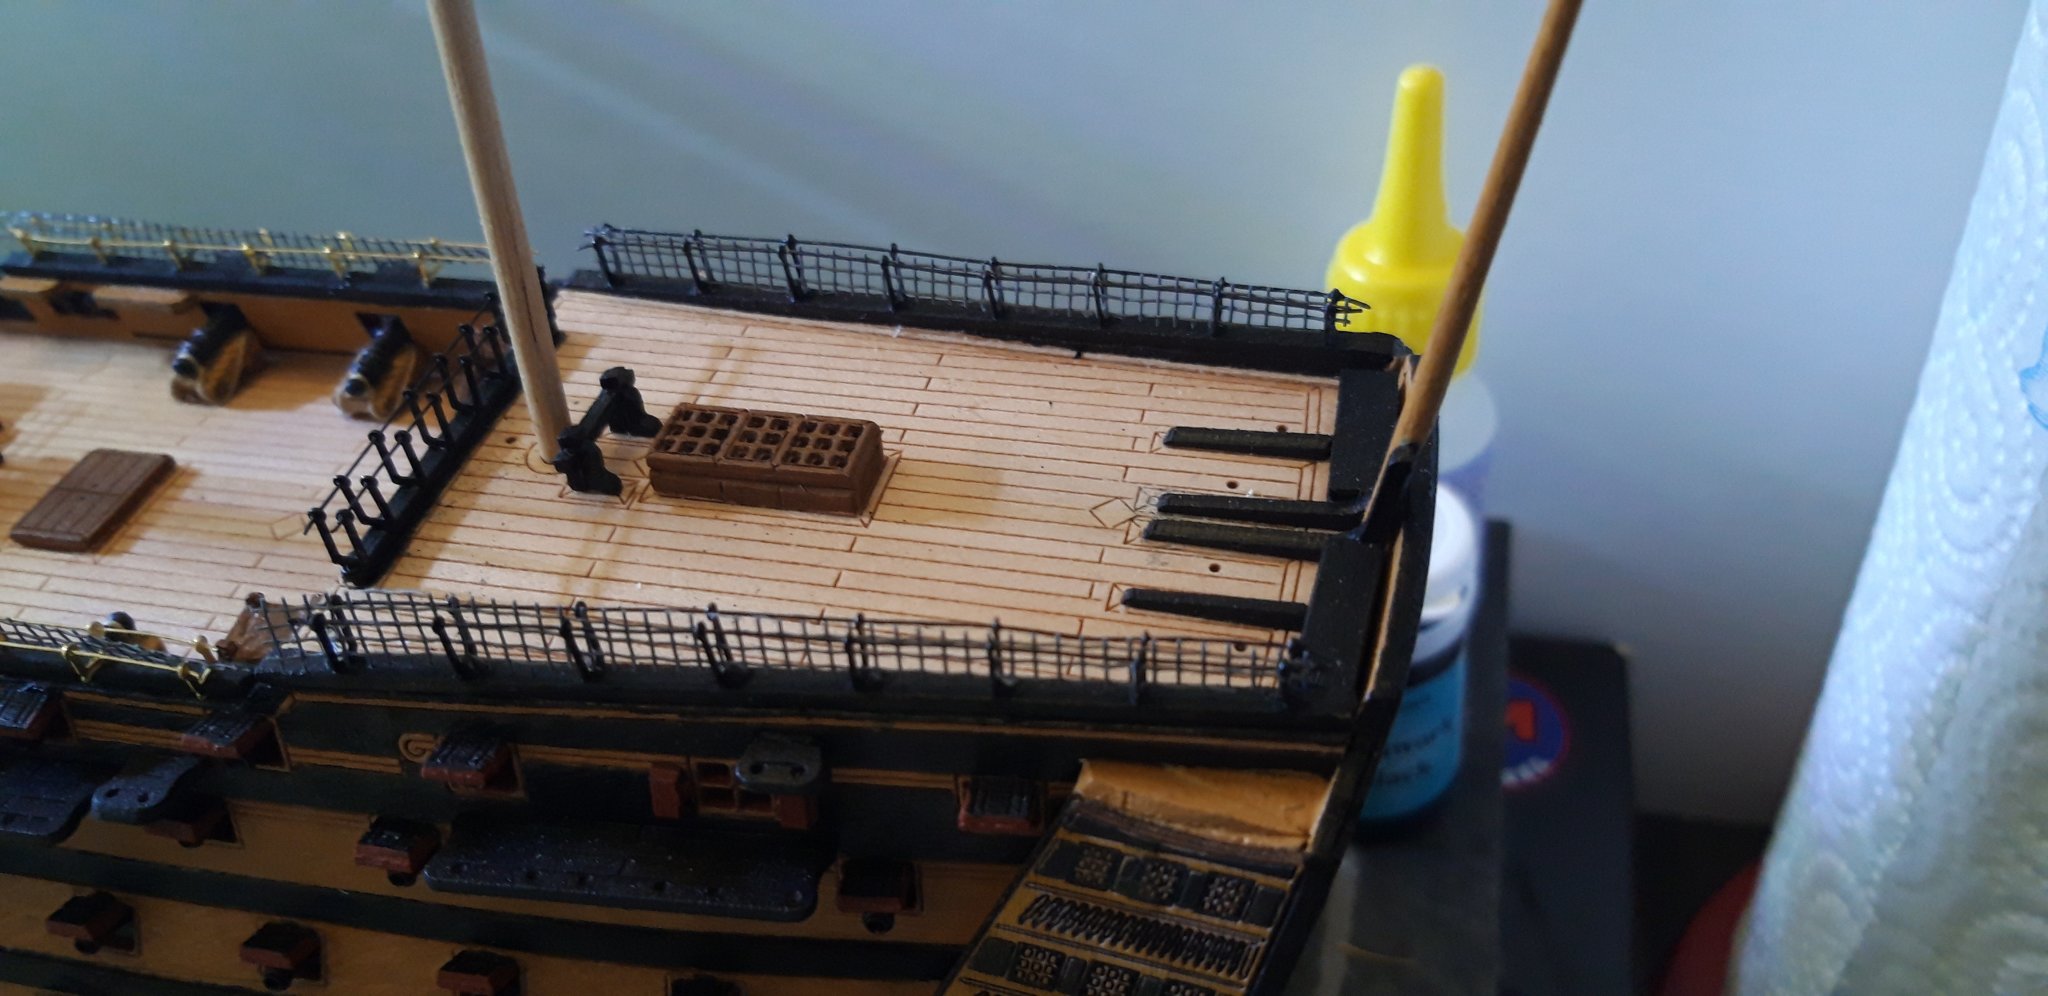
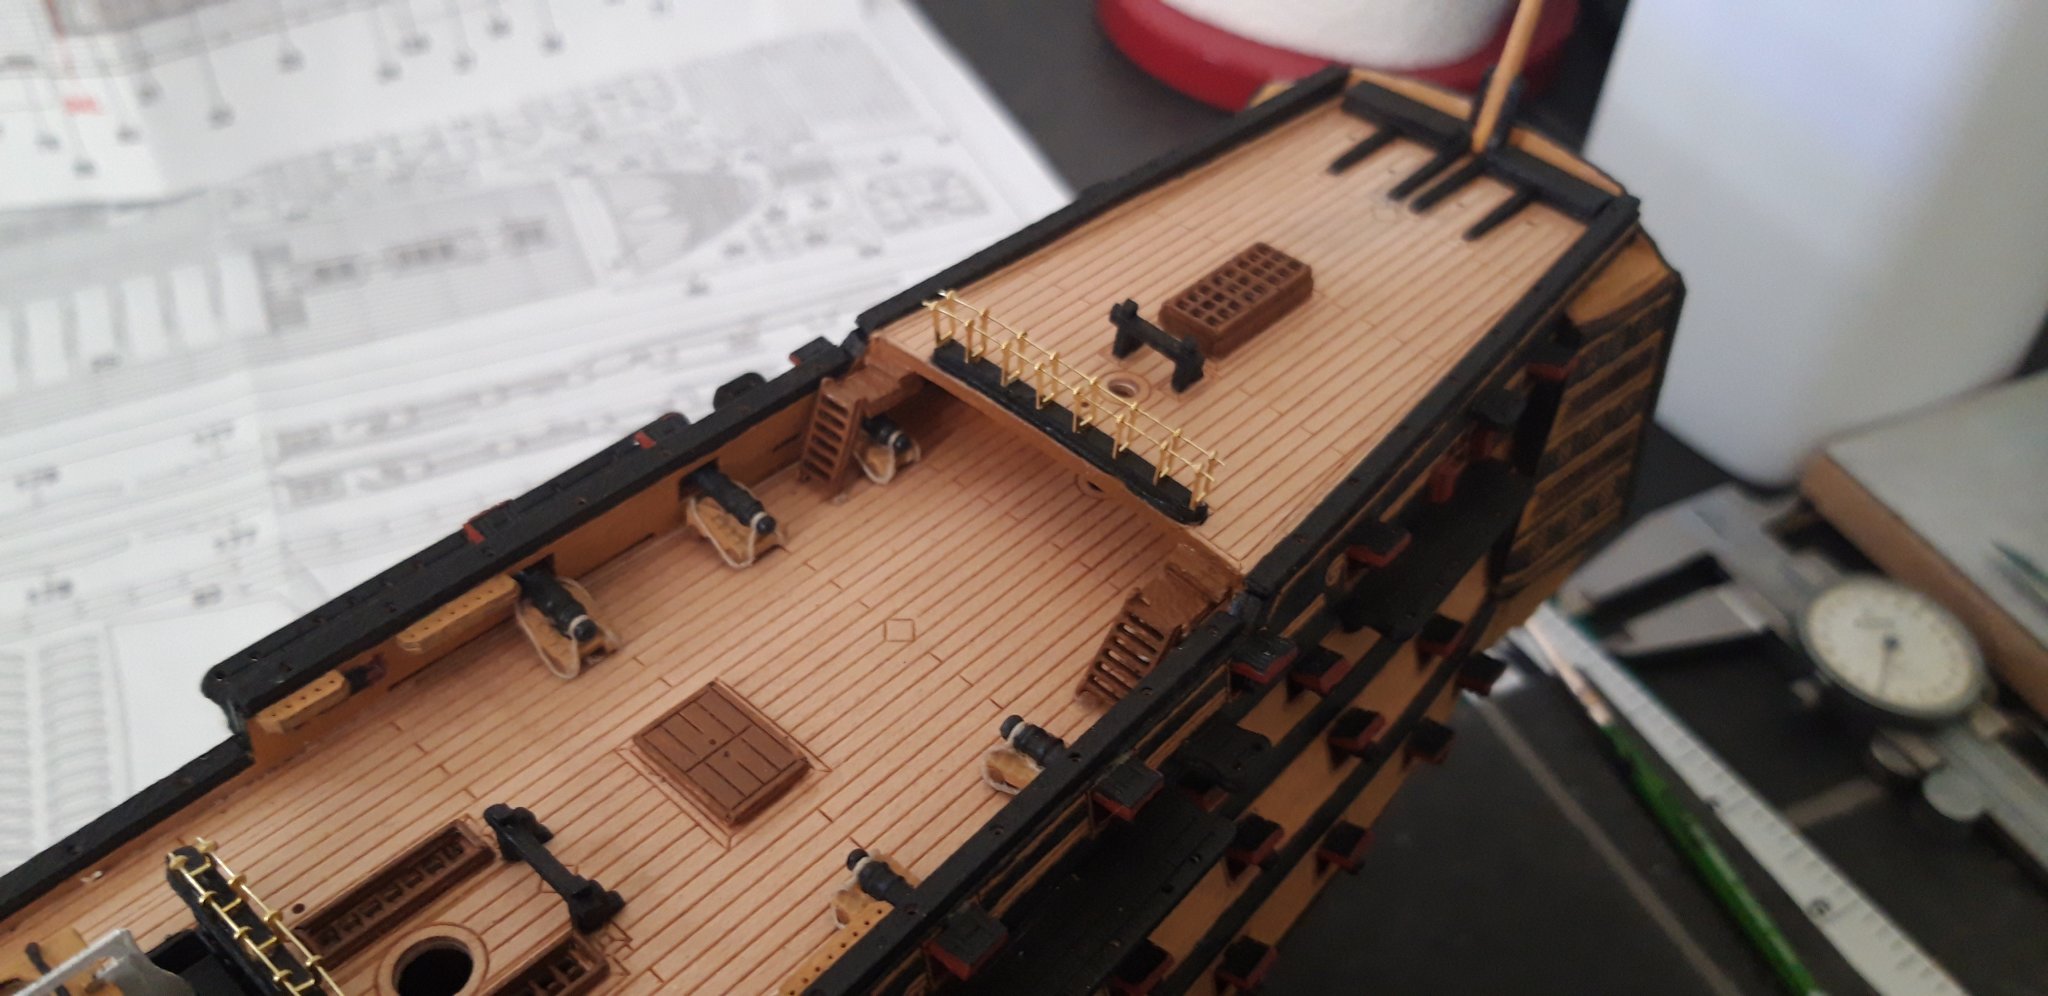
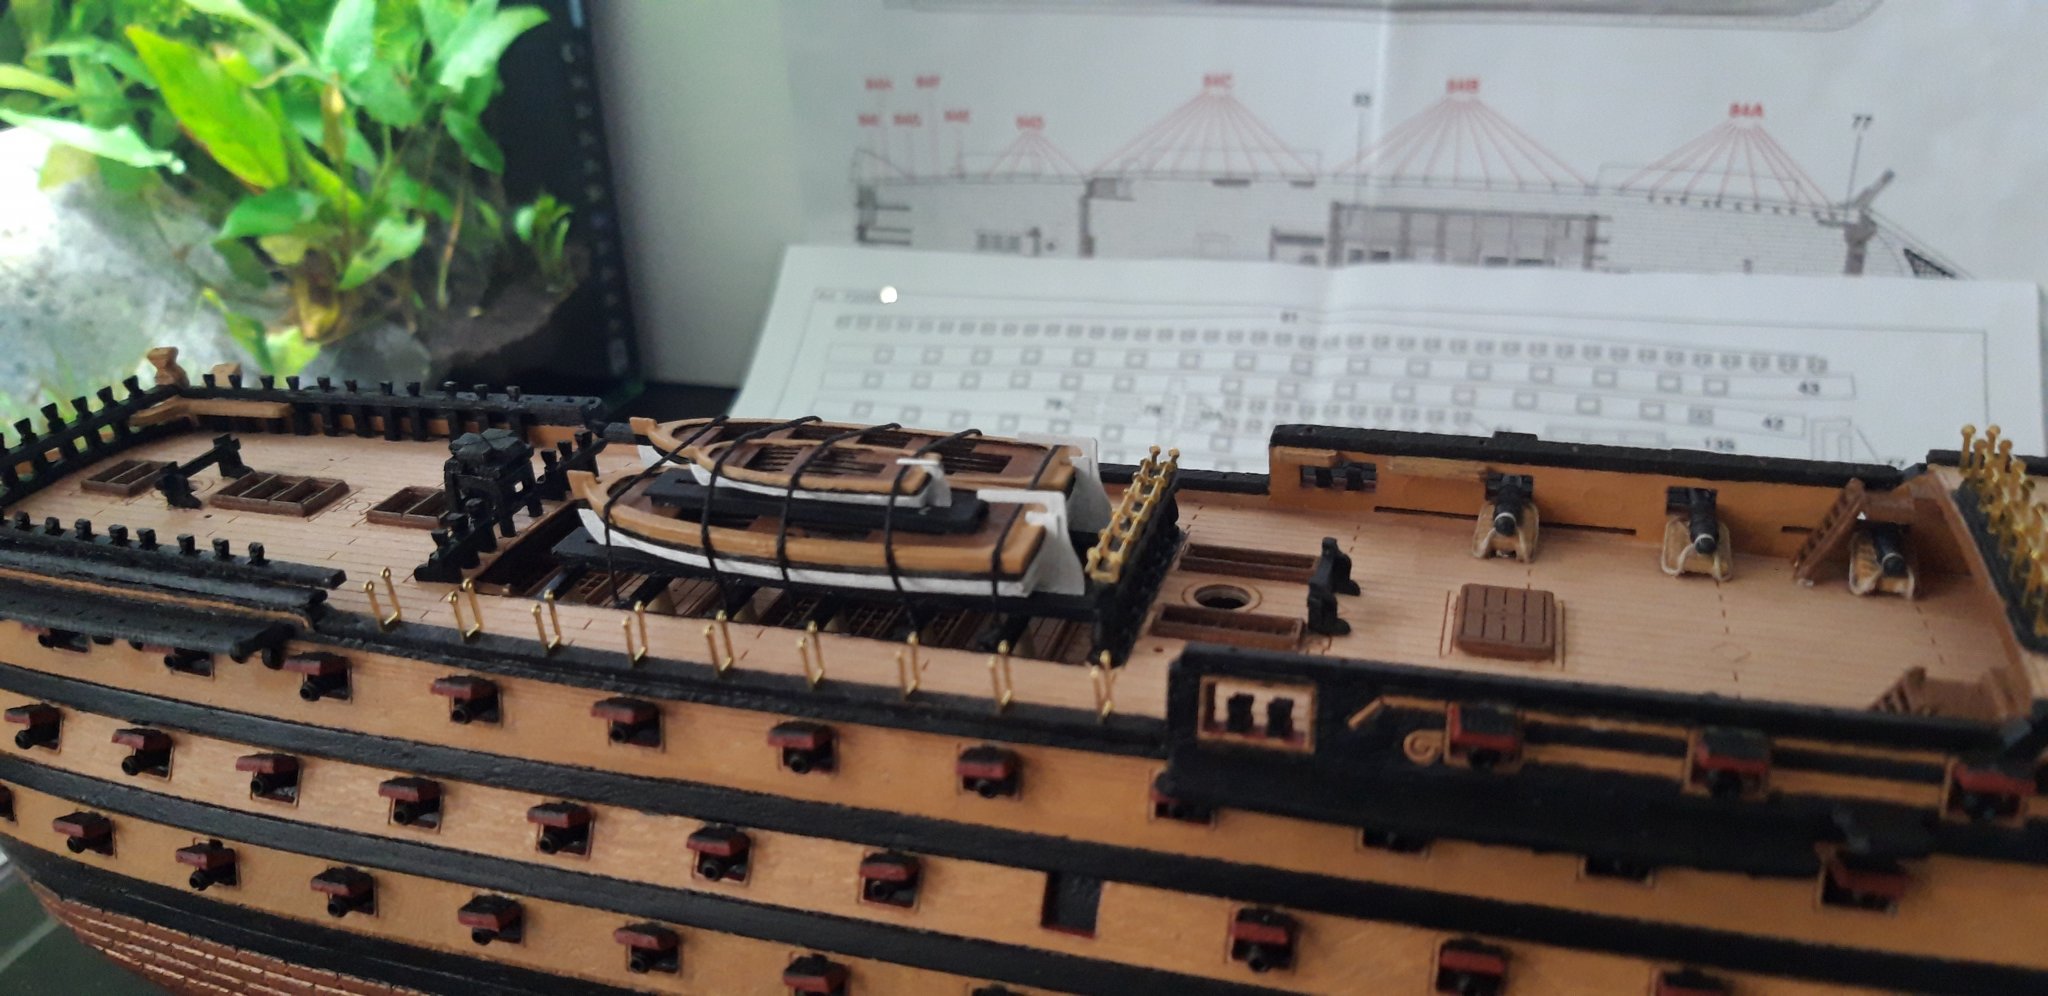
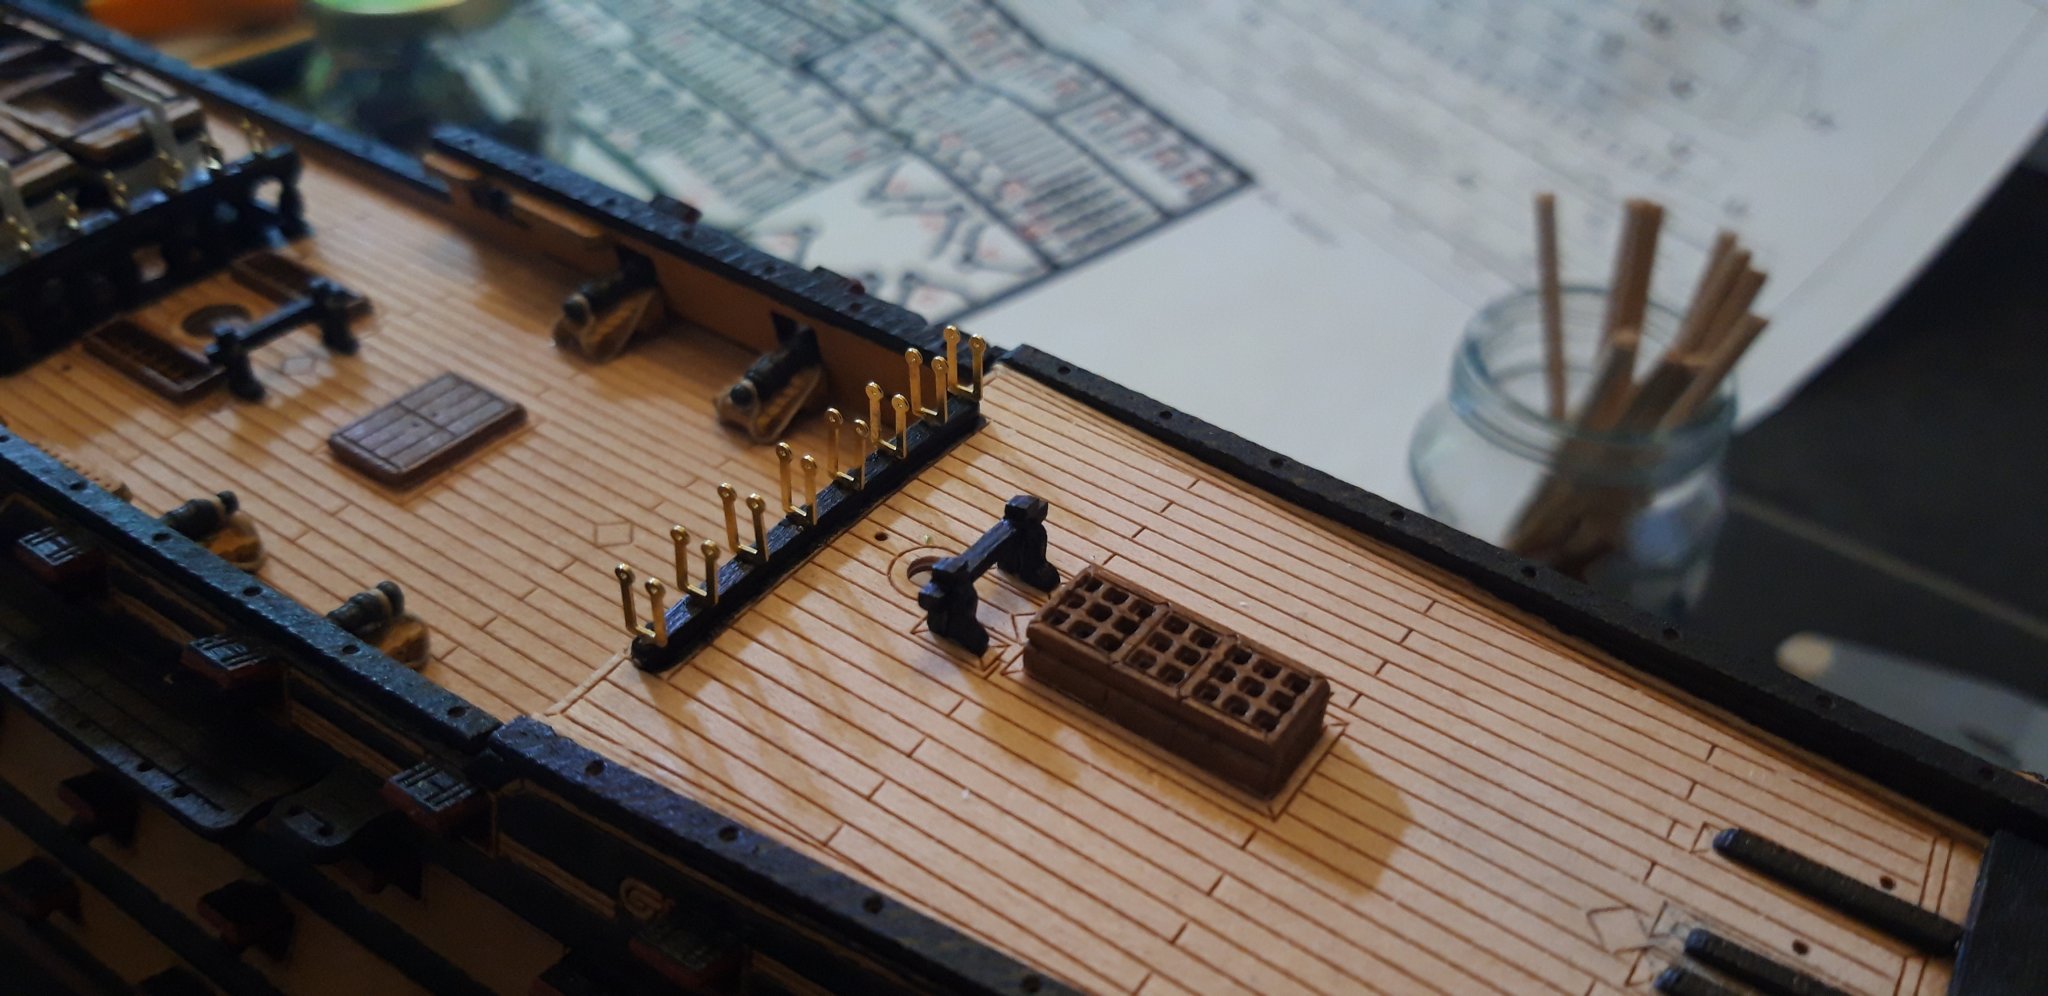
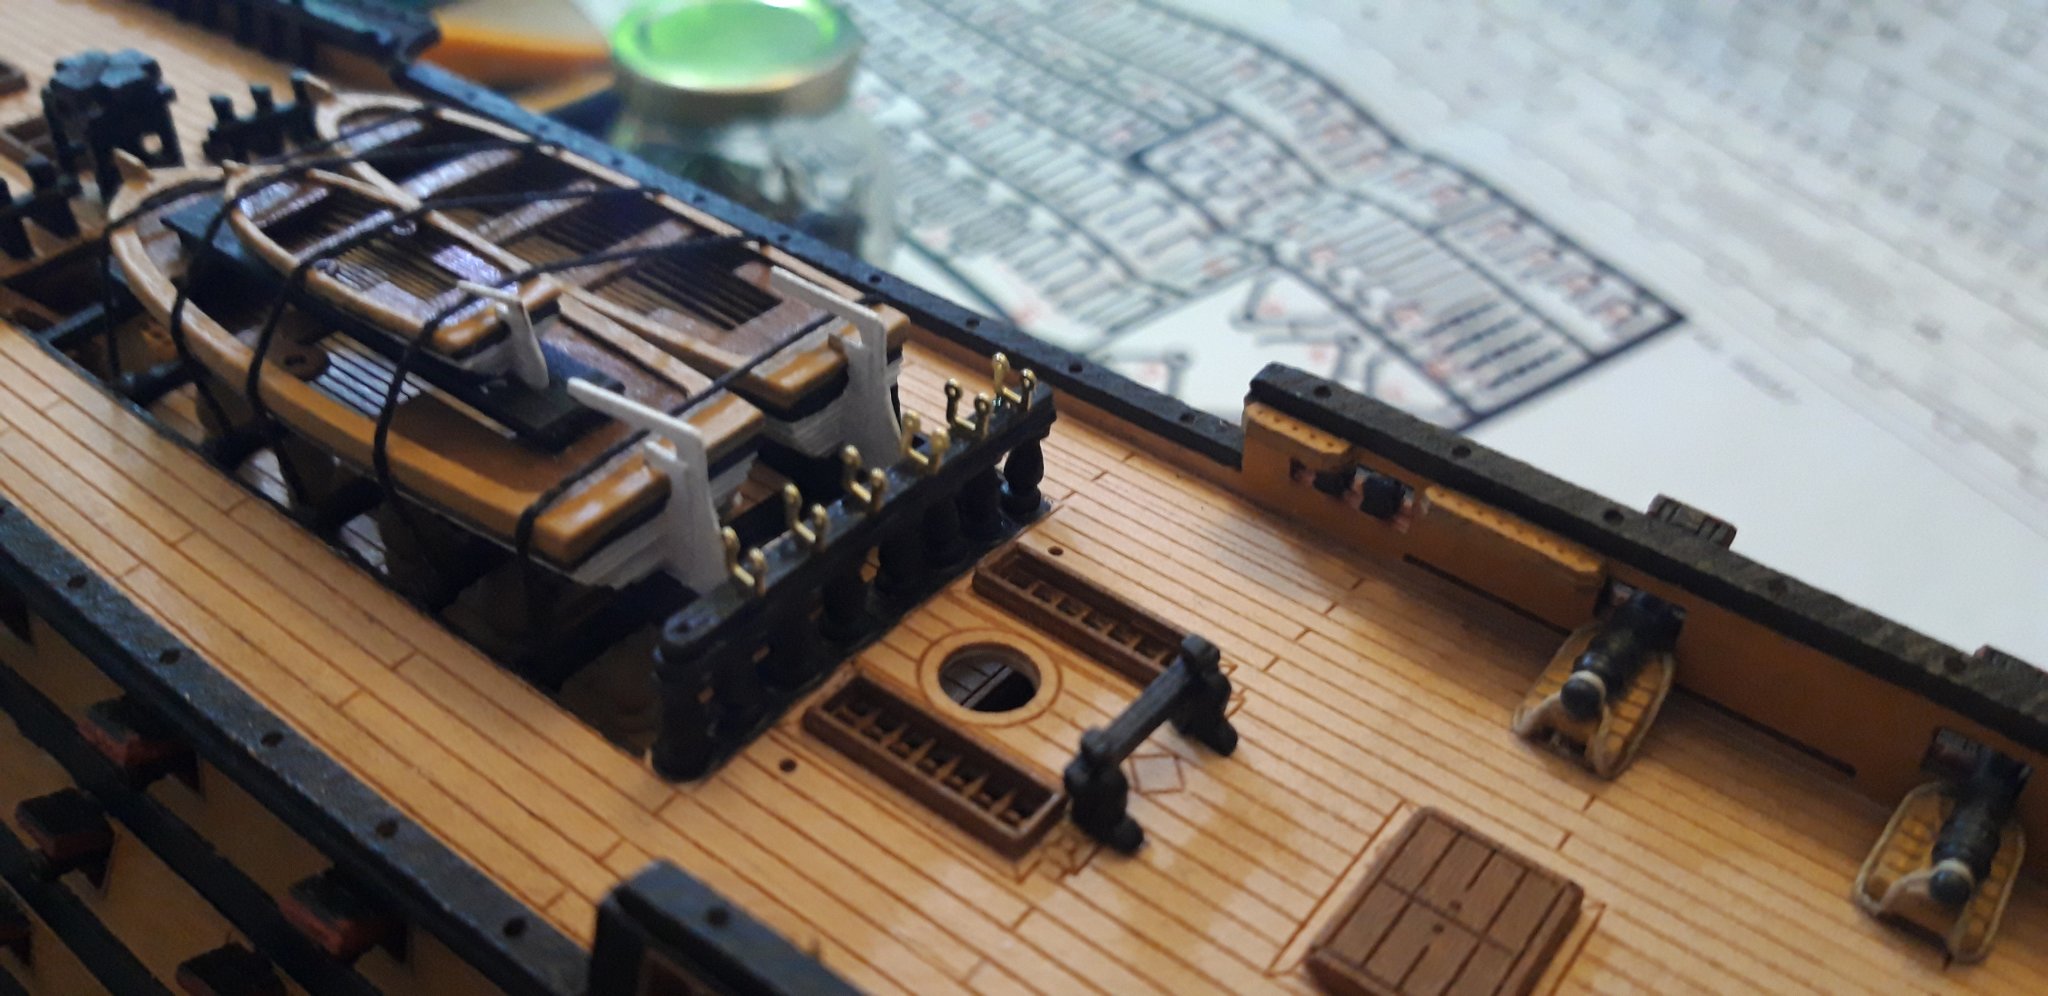
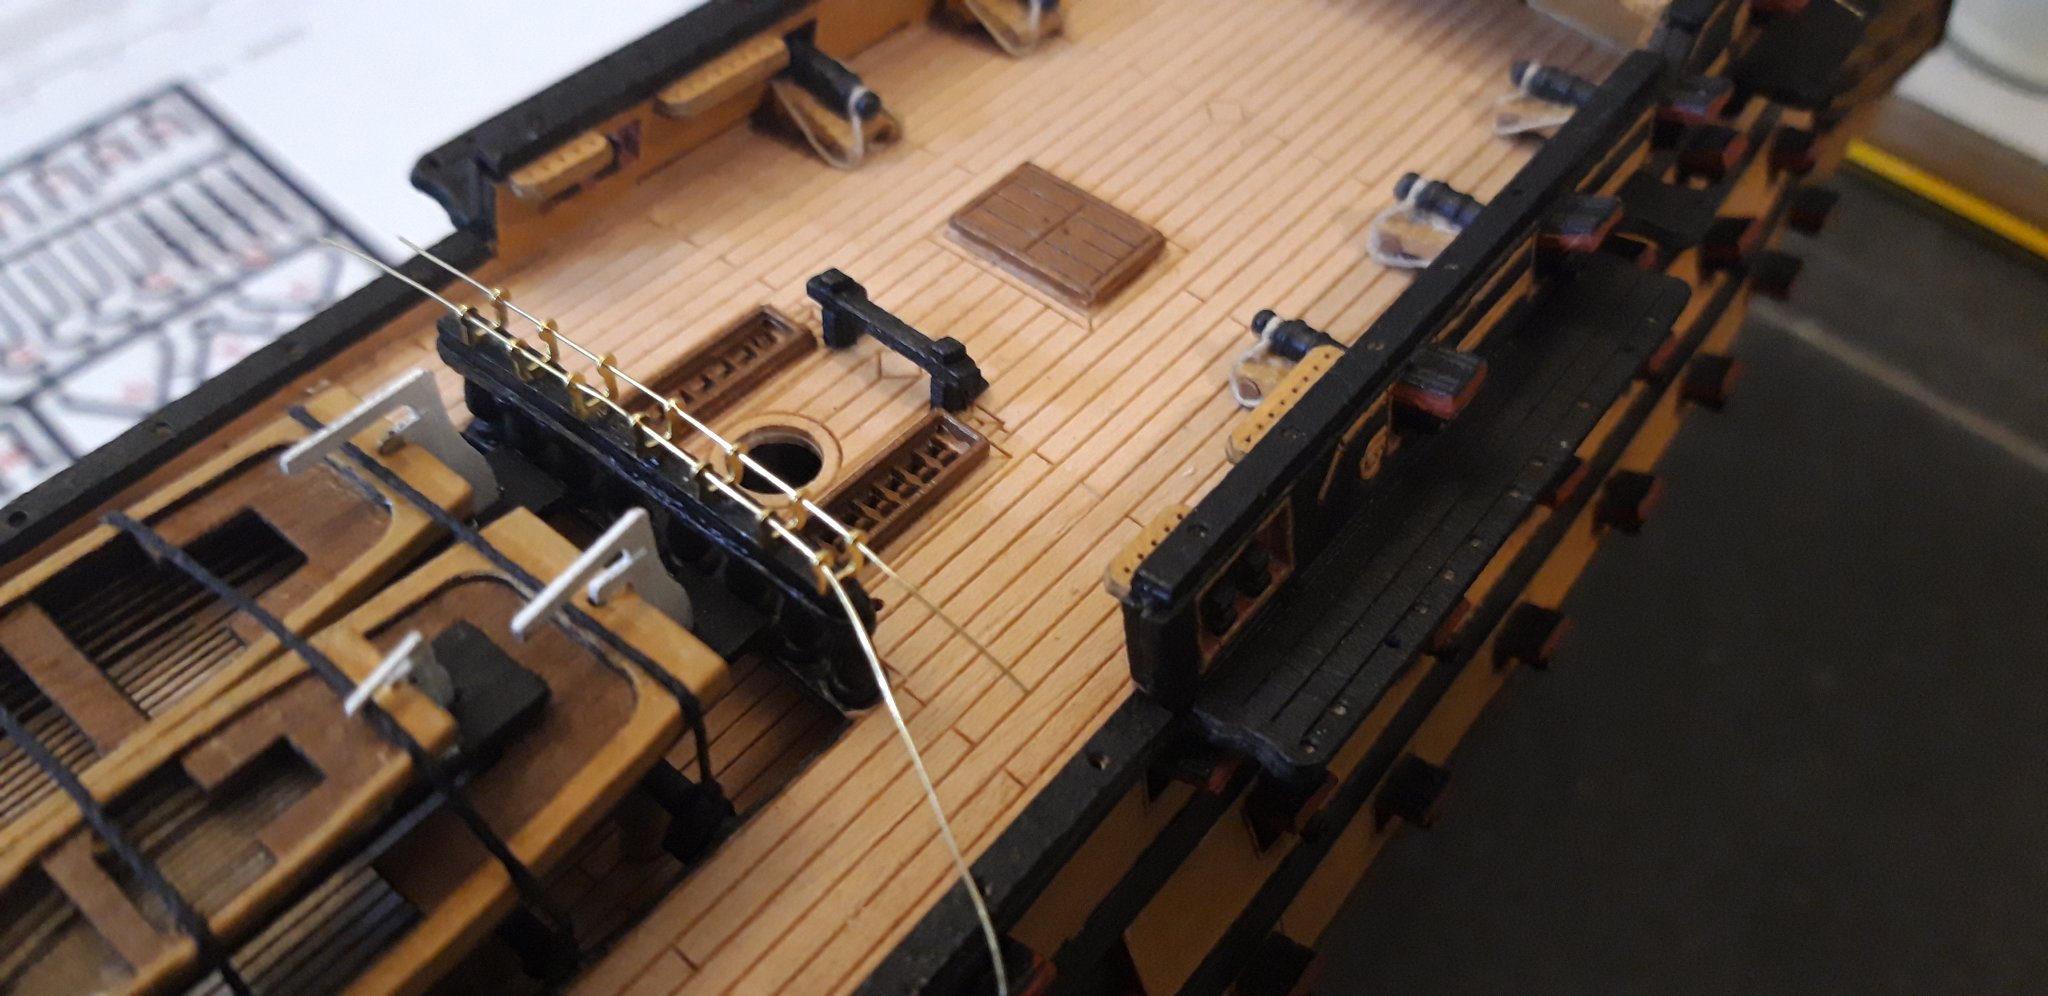
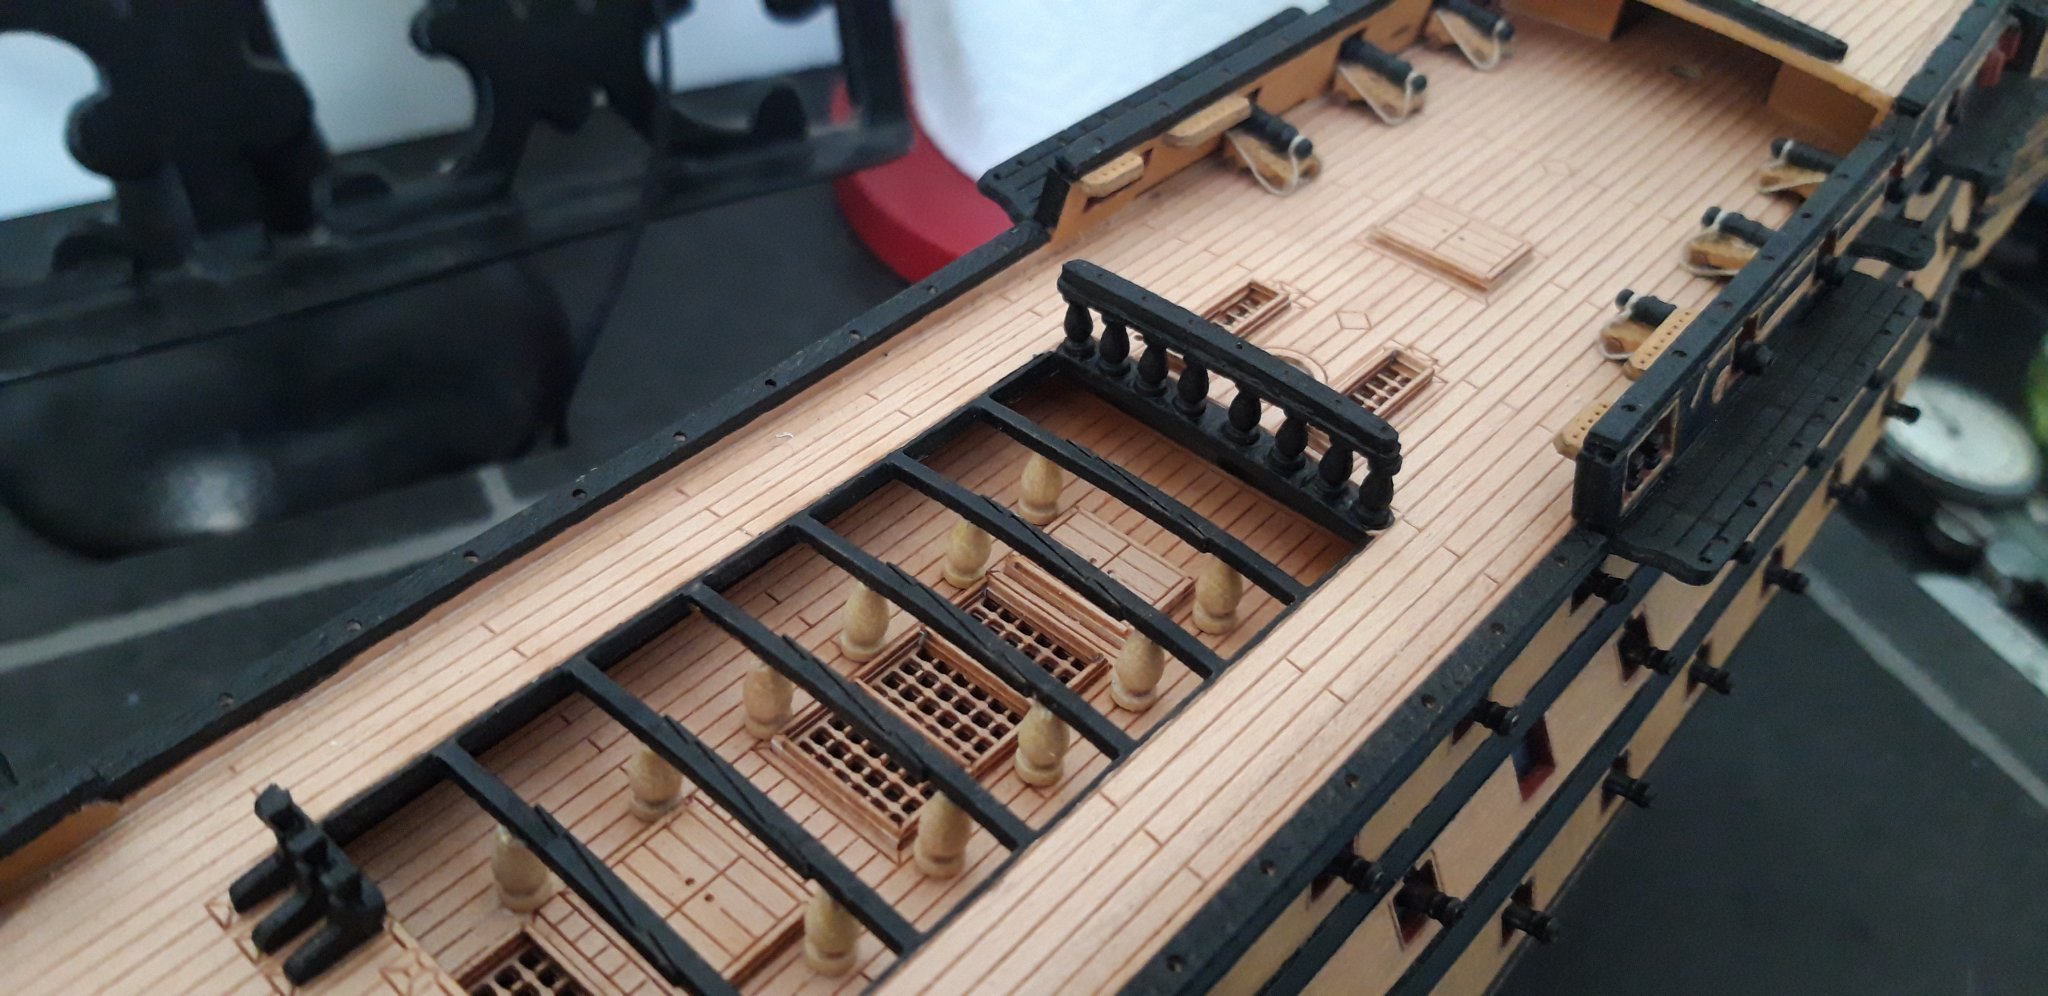
A little bit more work done again today. First off, the ladders from the Quarter Deck to the Poop Deck.
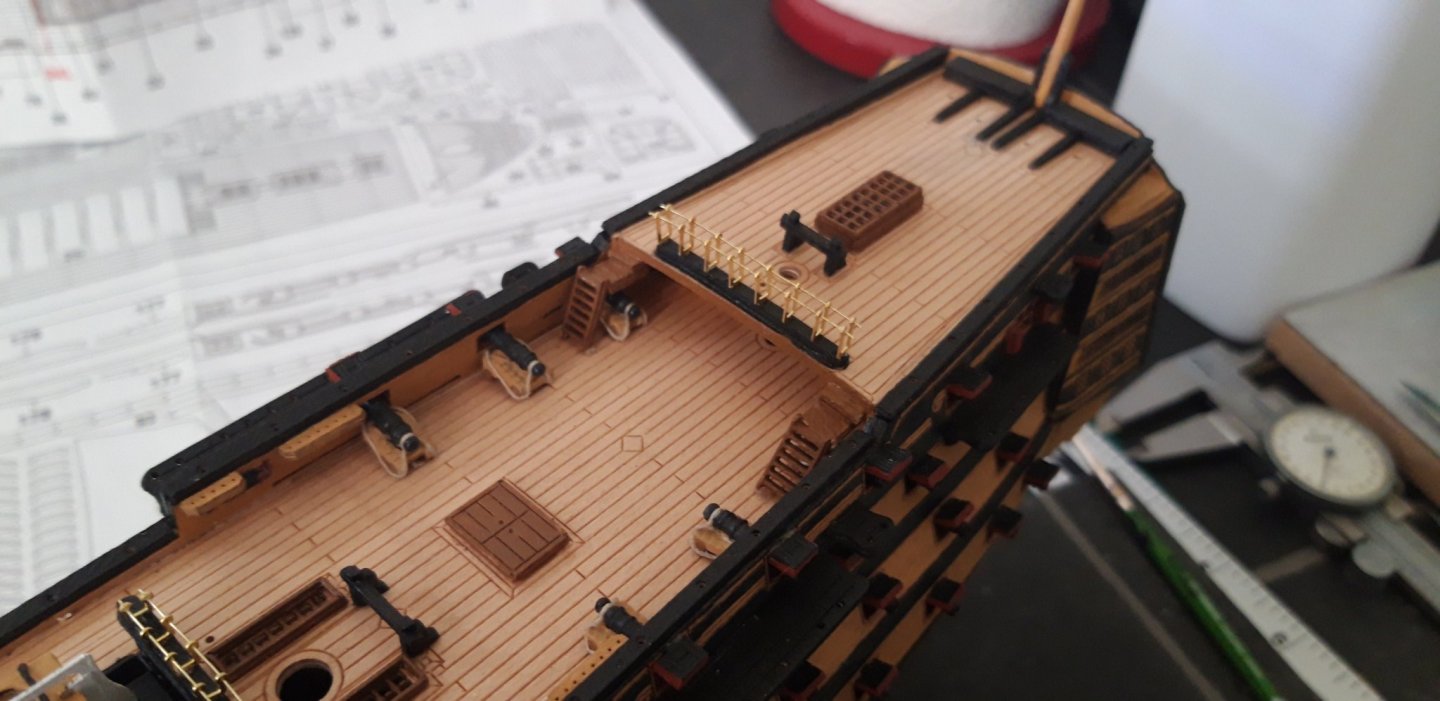
Followed by more Rails, these are situated around the ship and will, eventually, hold the netting. The next picture shows the first row of posts being fitted.

This is another of those jobs that get easier as you go on.

The next run of shots shows, from various angles, the Rails painted.


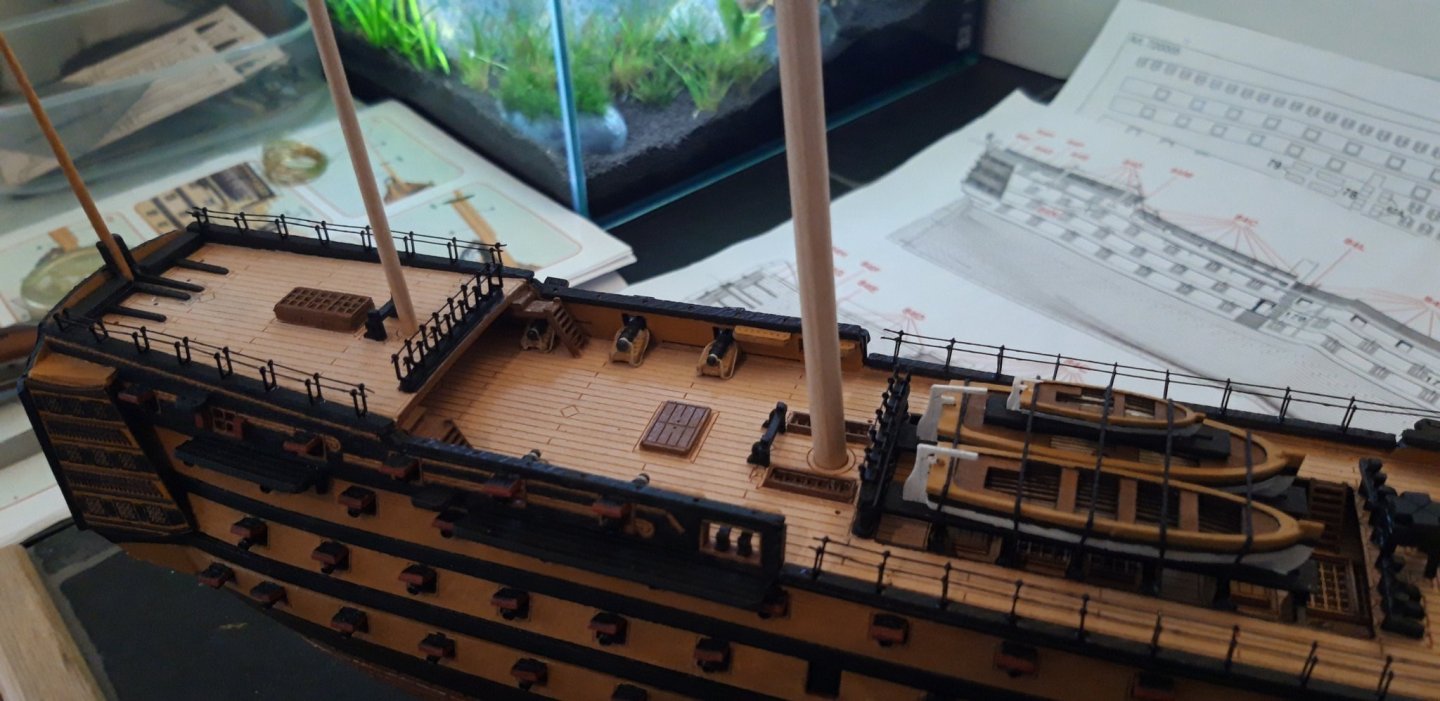
Here is the last pair being fitted. I left them until last as their method of attachment differed from the rest. Why it was different is a mystery to me but so are the instructions in general.
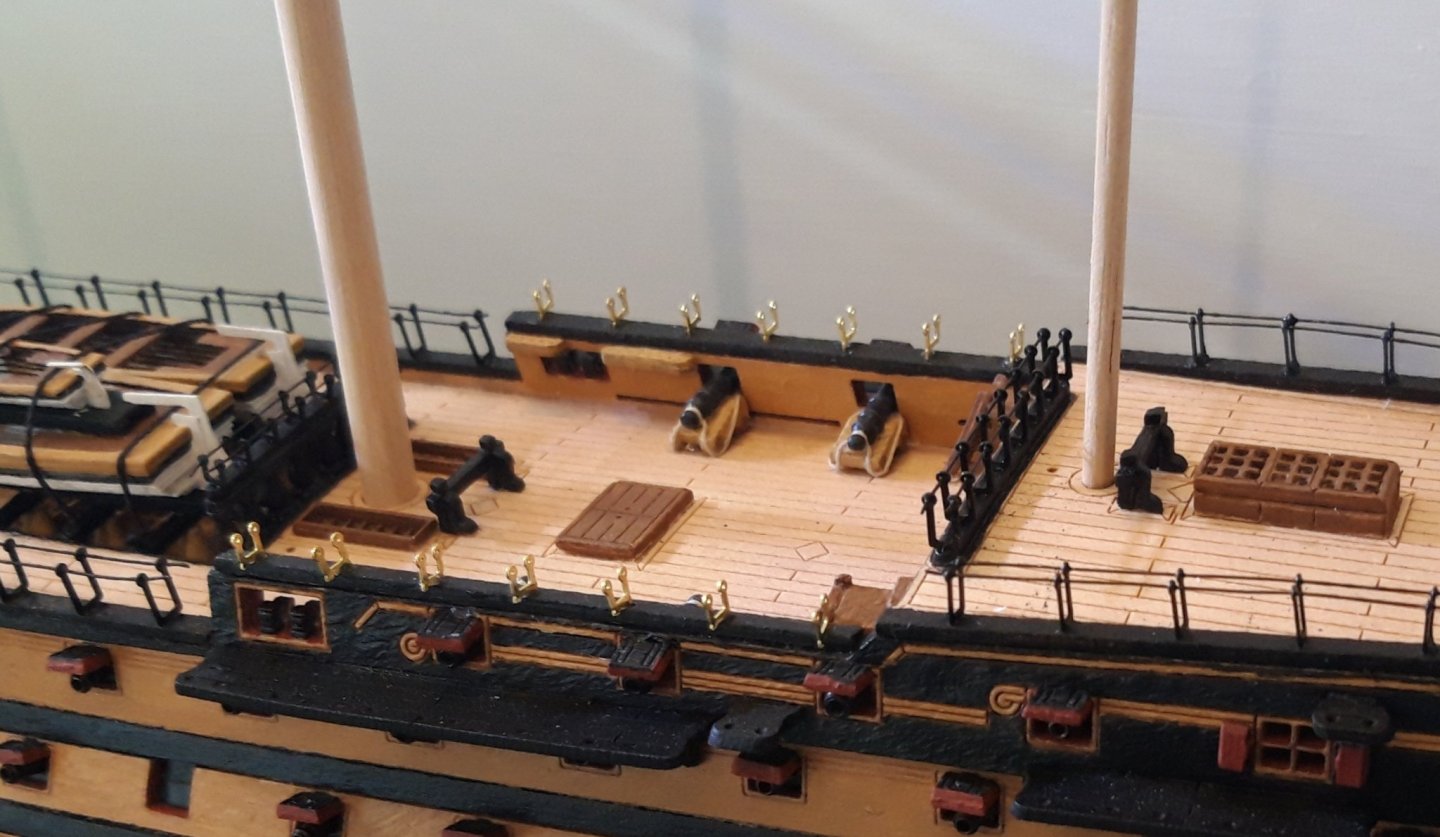
A little bit more head scratching and they are on. I have threaded the Rails onto the posts but have run out of time to paint.

on my next session l shall complete the task by painting.
Best wishes as always,
The Lazy Saint.
Session. Time. Total.
35. 5 hrs. 123 hrs.
- GrandpaPhil, Blue Pilot, Dubz and 3 others
-
6
-
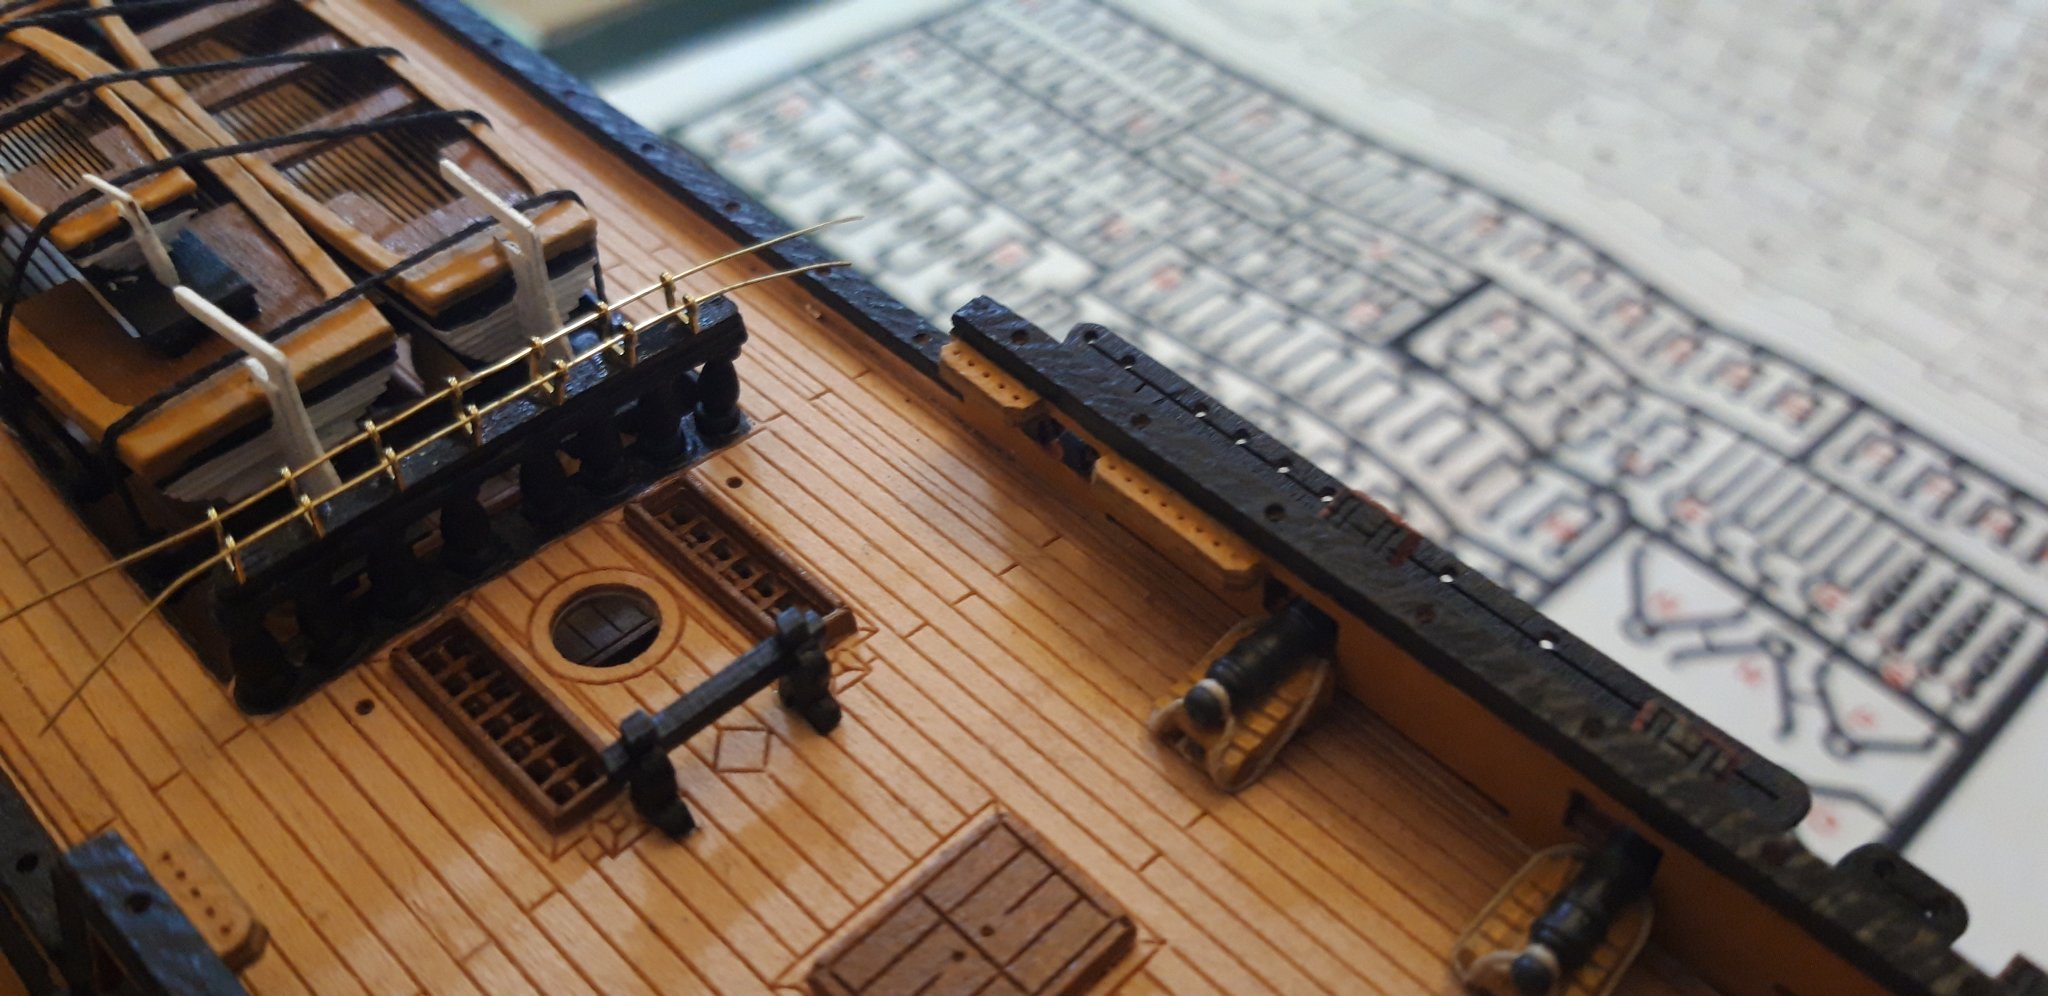
Hi all,
Today l tackled the Rudder and started work on the Rails.
Here you can see the Rudder fitted. I have tried to attach it as realistically as possible using real pictures and my AOTS book. The method of attachment in the instruction book is very toy like.

l think the iron bands are a little wide but otherwise ok.
The Rails are certainly fiddly and l was, at first, a little concerned l may not be able to manage them but they were ok in the end.
The next two shots are of the Poop Deck posts.
and the next two are on the Quarter Deck.

l was very pleased with the results although I was, at this stage, still a little concerned about my ability to thread the very thin Rails through the tiny holes in the posts.
My fears were unfounded.


l am now quite confident in my ability to manage all the Rails around the ship.
Tomorrow l shall cut to the correct length and then paint. I think l will also have a look at the entry port canopies, the Gunport Wriggles and the side ladders.
Best wishes as always,
The Lazy Saint.
Session. Time. Total.
34. 4 hrs. 118 hrs.
- Retired guy, Blue Pilot, Dubz and 3 others
-
6
-
On 12/11/2019 at 4:20 PM, Emmet said:
Hi! Does this book contain the AOTS plans?
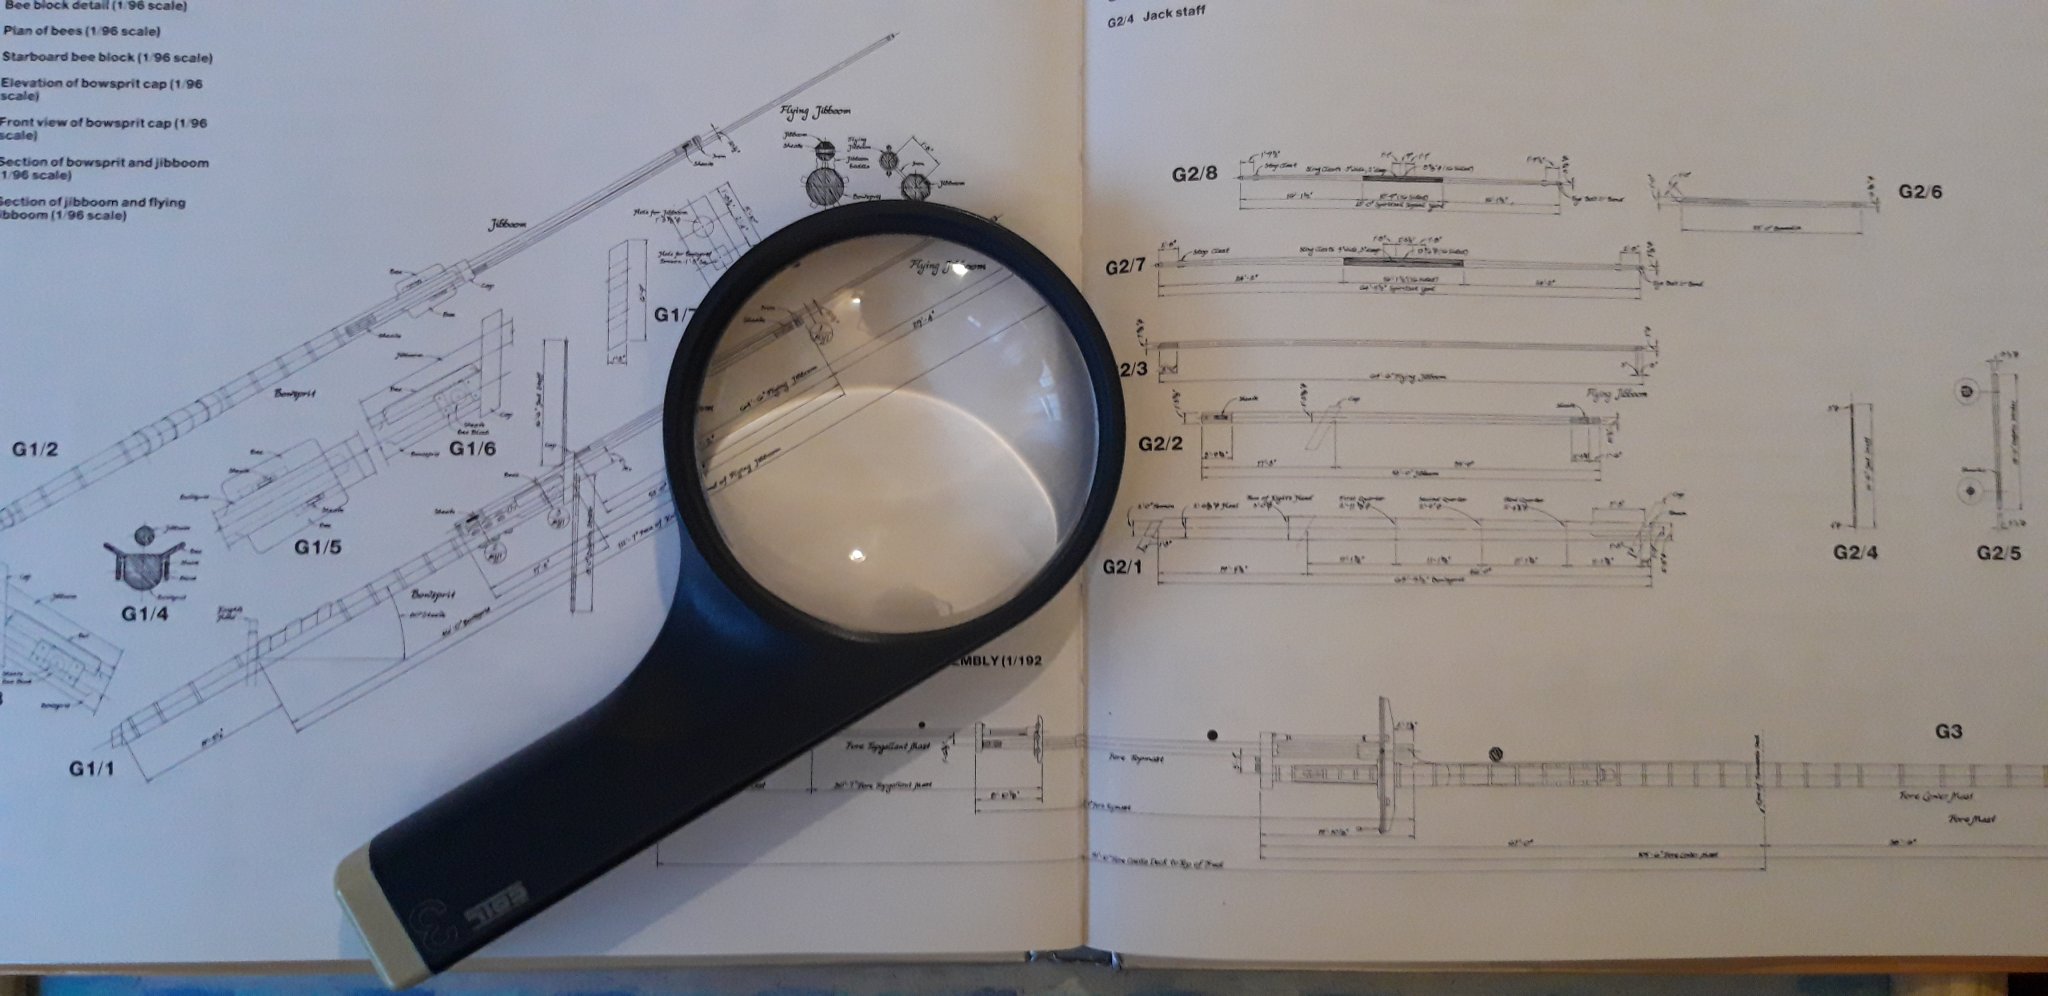
Hi Emmet,
Here is the contents page. I think there should be a 1/192 scale plan but in my copy it is missing.
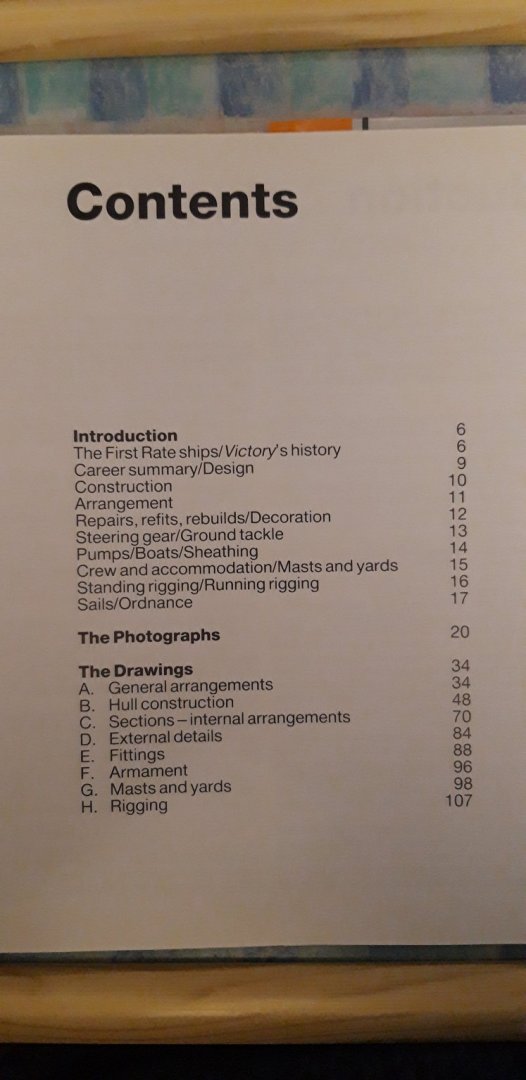
I obtained my copy from a second hand store. I bought it so l could use the correct name for all the various components, the drawings are particularly good.
Perhaps someone else can help you regarding the plans.
Best wishes as always,
The Lazy Saint.
-
Hi Robert.
l can't help really other than say l don't think you are missing anything. I was as puzzled as you when l was faced with the same problem. I was at a loss as there doesn't seem to be a definitive answer so decided to make my own. On my Ballahoo l used .05mm wire which was reasonably successful but on my Sherbourne l used 1mm rigging cord and tied them on which I thought more successful.
Hope this helps.
Best wishes as always,
The Lazy Saint.
-
-
Hi all,
Thanks very much for your kind words Edward and, as always, they are much appreciated.
I managed a quick hour in the den before lunch and managed to paint the edges of the Gunports. I wanted to do that job asp because it looked quite tatty in my last post. Now, l think, it looks a little more trim.


With any luck l may get the rudder completed after lunch.
Best wishes as always,
The Lazy Saint.
Session. Time. Total.
33. 1 hrs. 114 hrs.
- Blue Pilot, Edwardkenway, BenD and 2 others
-
5
-
Hi all,
Another short session this evening but sufficient to enable me to fit the access ladders to the upper deck and to secure three of the ships little boats.

Oh, and a bit of work on the rudder.

The next tasks on the agenda are:
1. Complete and attach the rudder.
2. Paint the edges of the Gunports.
Until then,
Best wishes as always,
The Lazy Saint
Session. Time. Total.
32. 3 hrs. 113 hrs.
-
Hi all,
Thanks very much for your kind words Dirk, appreciated as always.
Today l tackled the Gunports, l wasn't much looking forward to this task as l knew the nature of the job would leave me with an aching neck, it did. Having said that, as with most repetitive tasks, they become easier as the job progresses.
All that is required now is for me to paint the edges red and they will look great, although at the moment they are not so hot.
l shall paint the edges next and work on the rudder.
Best wishes as always,
The Lazy Saint.
Session. Time. Total.
31. 3 hrs. 110 hrs
- Retired guy, GrandpaPhil, Dubz and 3 others
-
6
-
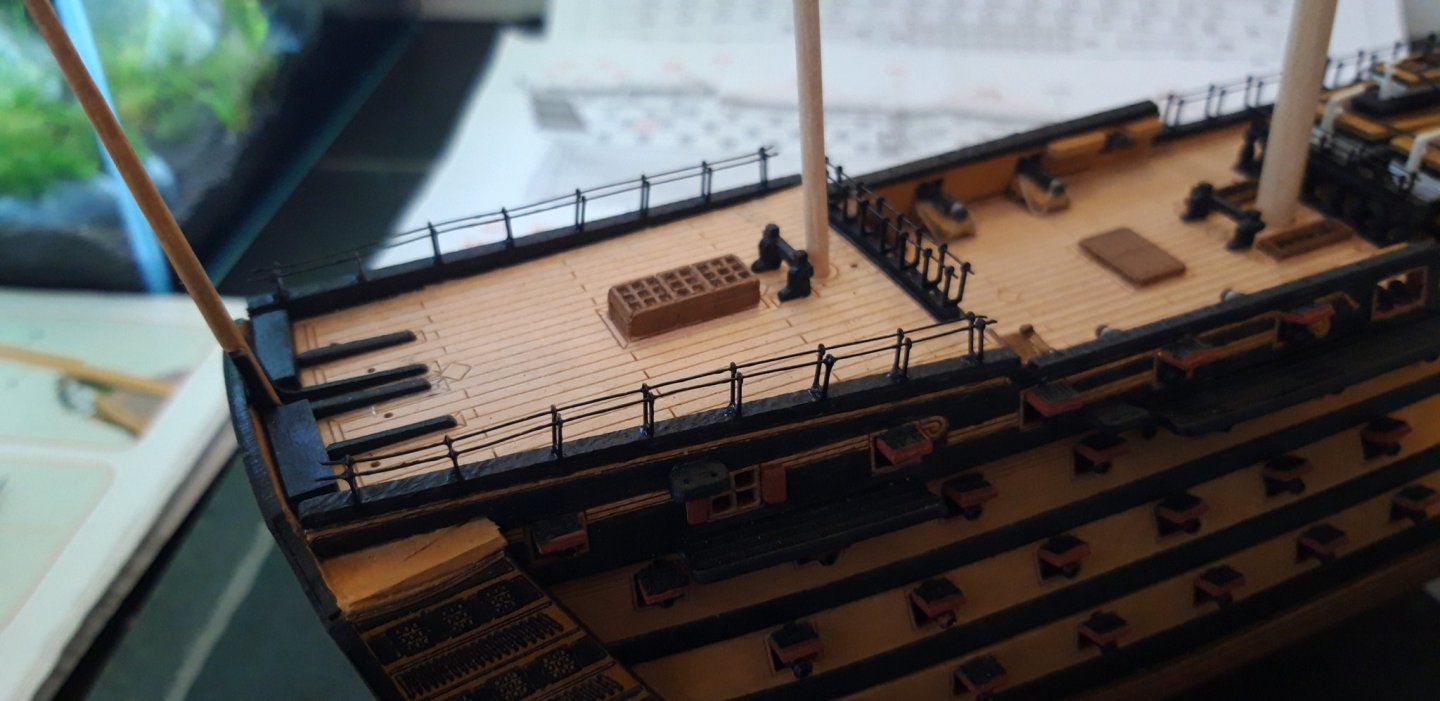
Hi all,
Another painting day today and, l am glad to say, an enjoyable break from the building tasks. All in all l am pleased with my efforts.
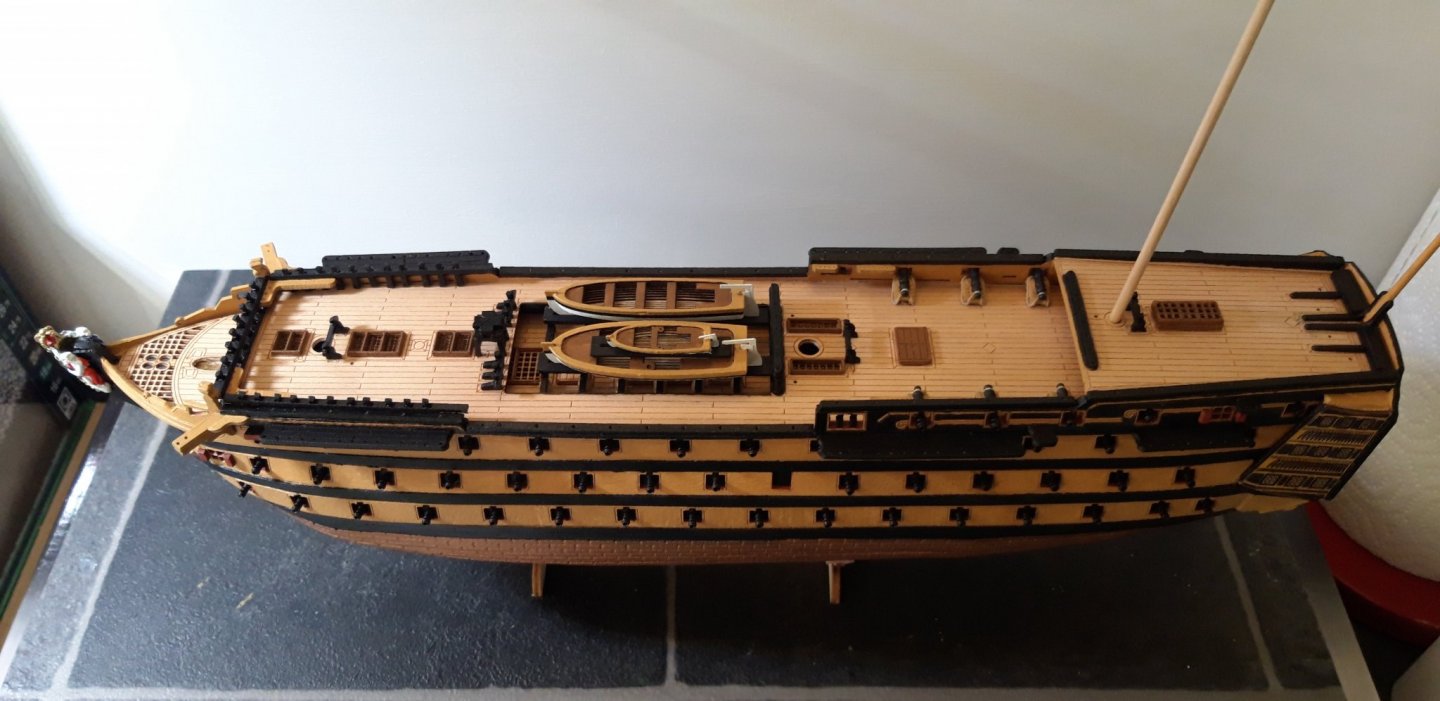
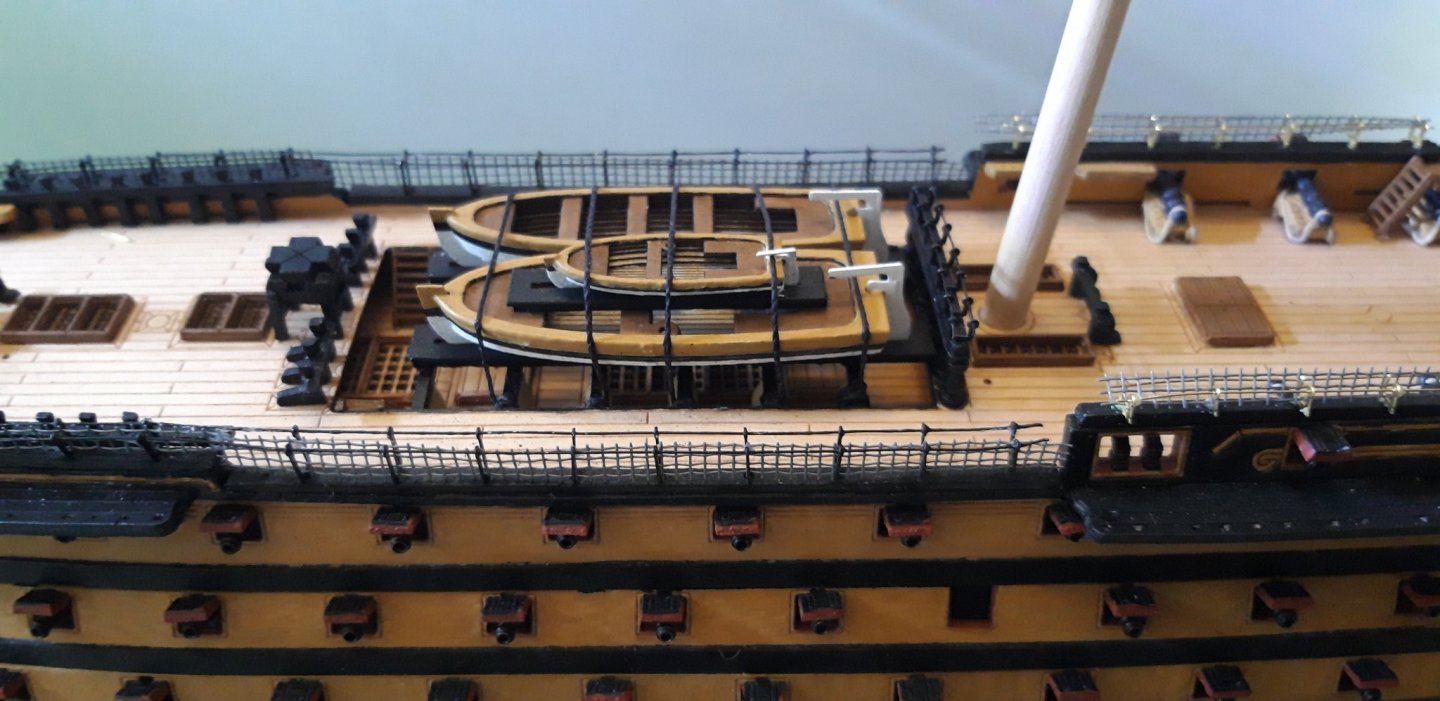
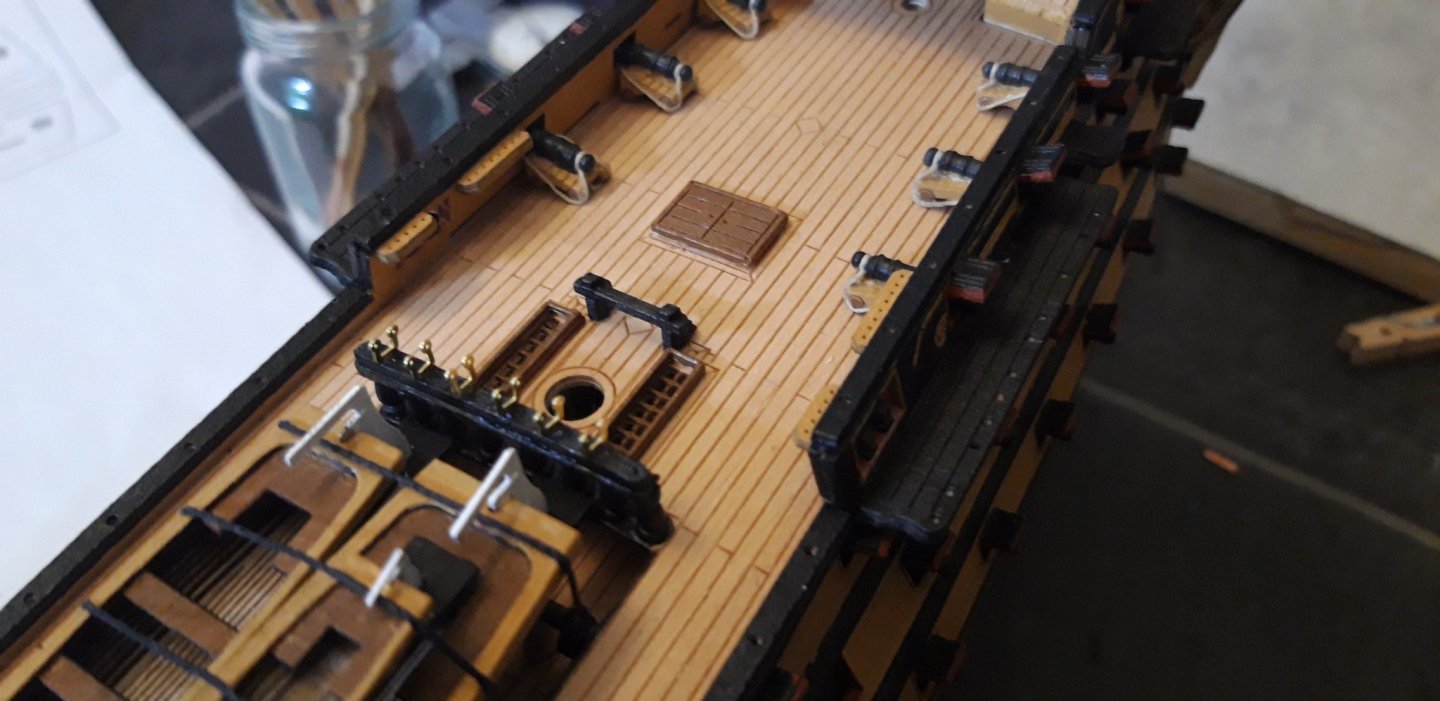
I also fitted and painted the Bitts and Belfry.
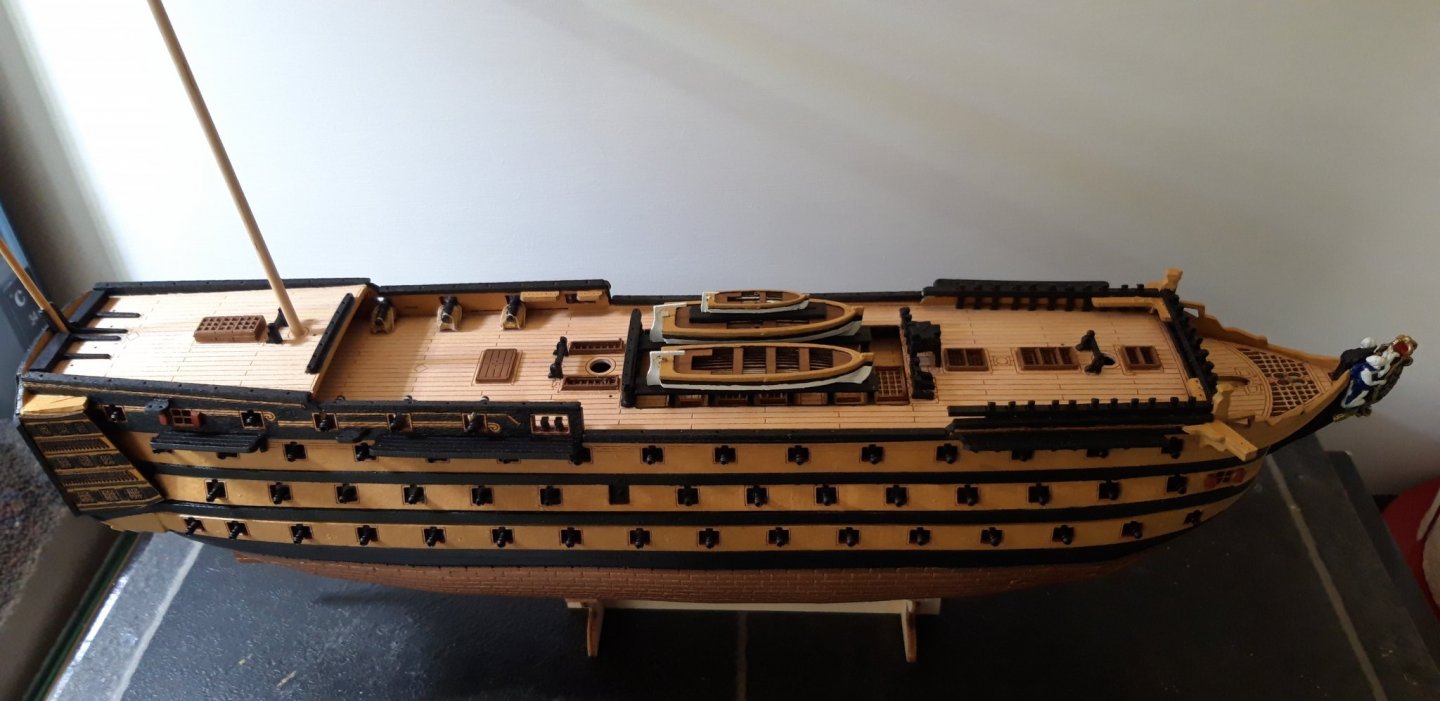
Also painted the grating's and the skylight over the great cabin.


I am pleased l fitted the Supporting pillars for the Skid Beams, they would have collapsed under the weight of all those boats. 🤣
Best wishes as always,
The Lazy Saint.
Session. Time. Total.
30. 3 hrs. 107 hrs.
- GrandpaPhil, Dubz, Jonesey and 4 others
-
7
-
Hi all,
A short session today but l managed the Belfry, the Bitts and a splosh of white paint.

Next session l hope to paint and fit the Belfry and the Bitts and a bit of yellow ochre on the little boats.
Best wishes as always,
The Lazy Saint.
Session. Time. Total.
29. 2 hrs. 104 hrs.
- Blue Pilot, mugje, Edwardkenway and 1 other
-
4
-
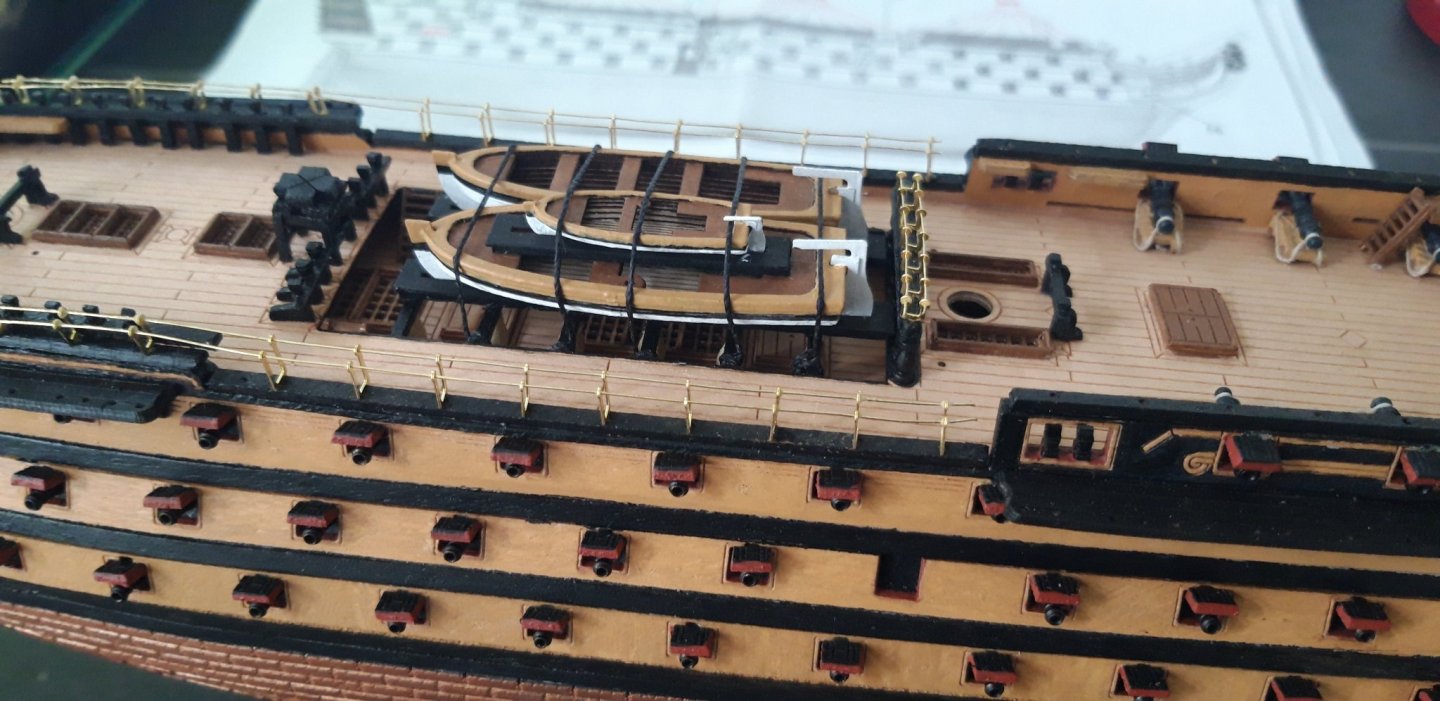
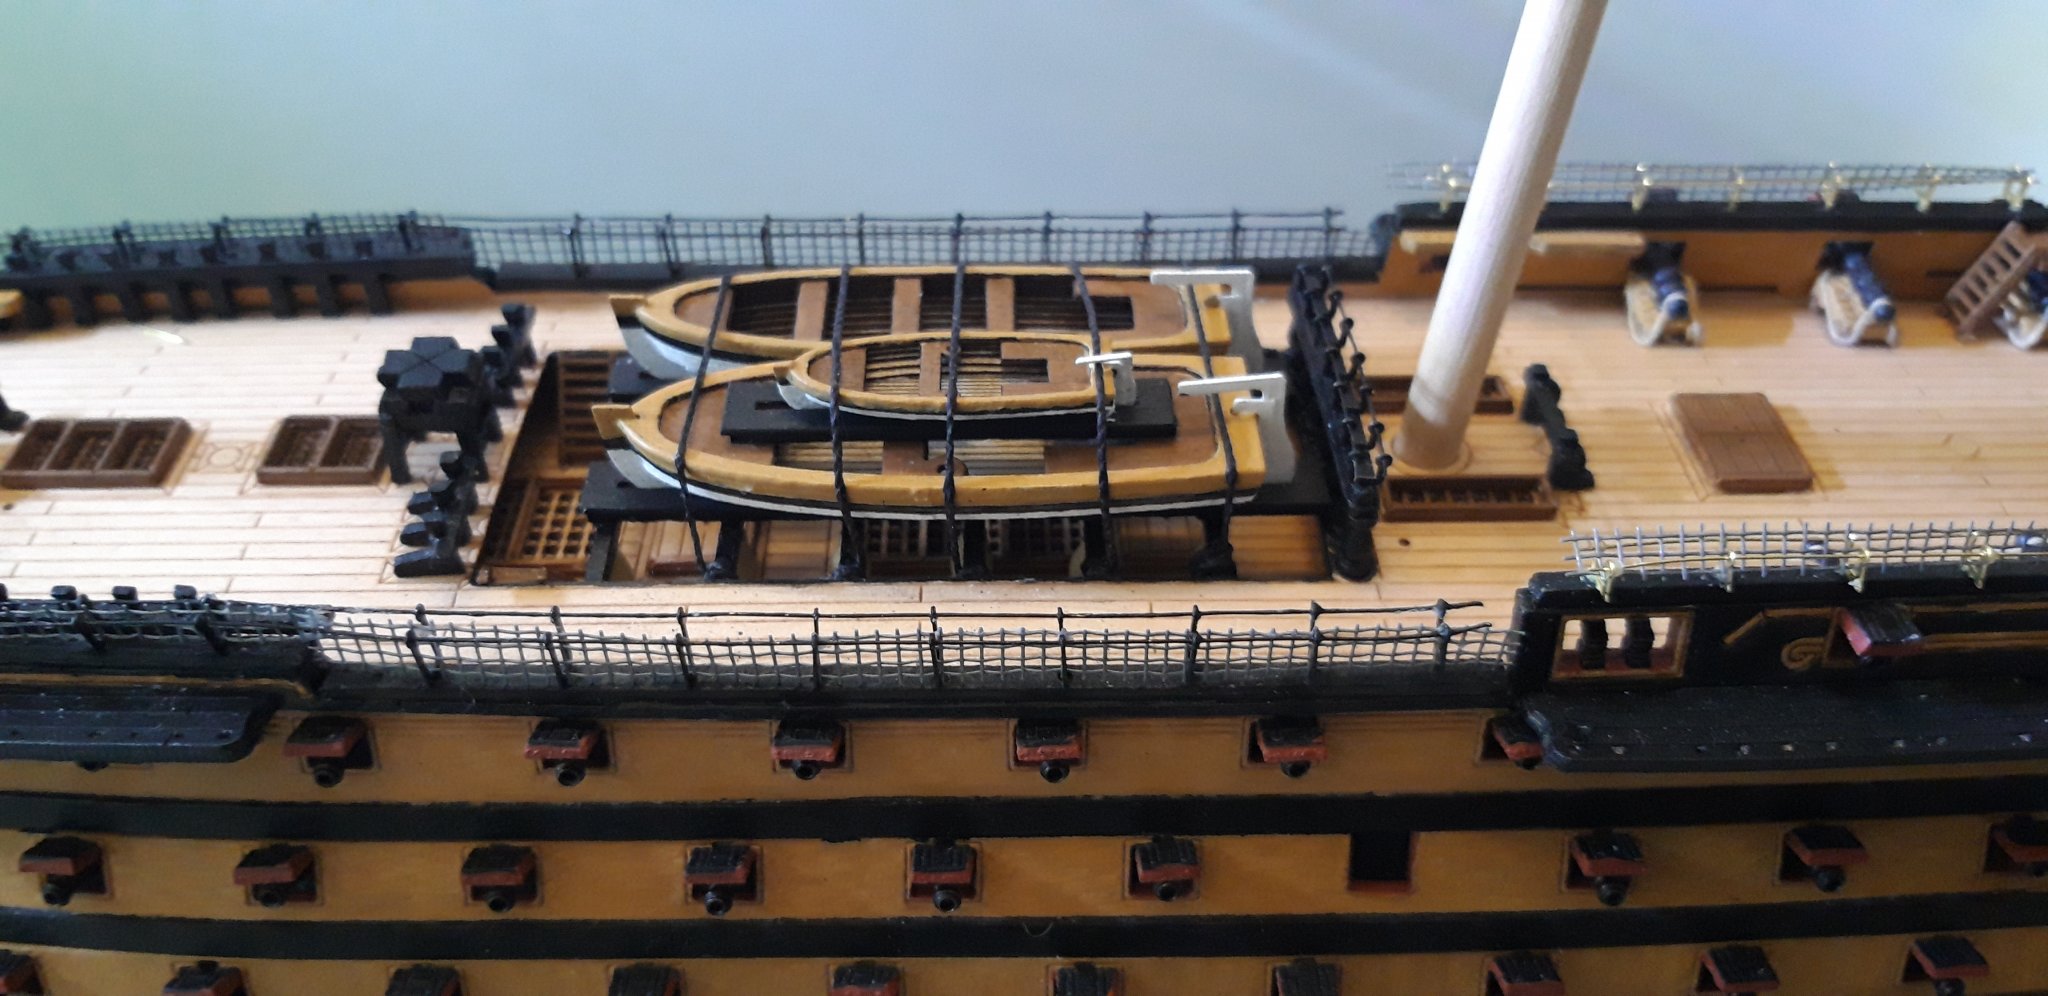
Hi all,
I have been so busy the last two weeks that I haven't had time to look at the Victory let alone work on her. I was so pleased to do a session today and hope to be able to spend more time in the Den again, although with Christmas on the horizon l expect l will be in demand with the Grandchildren (at least l hope so)
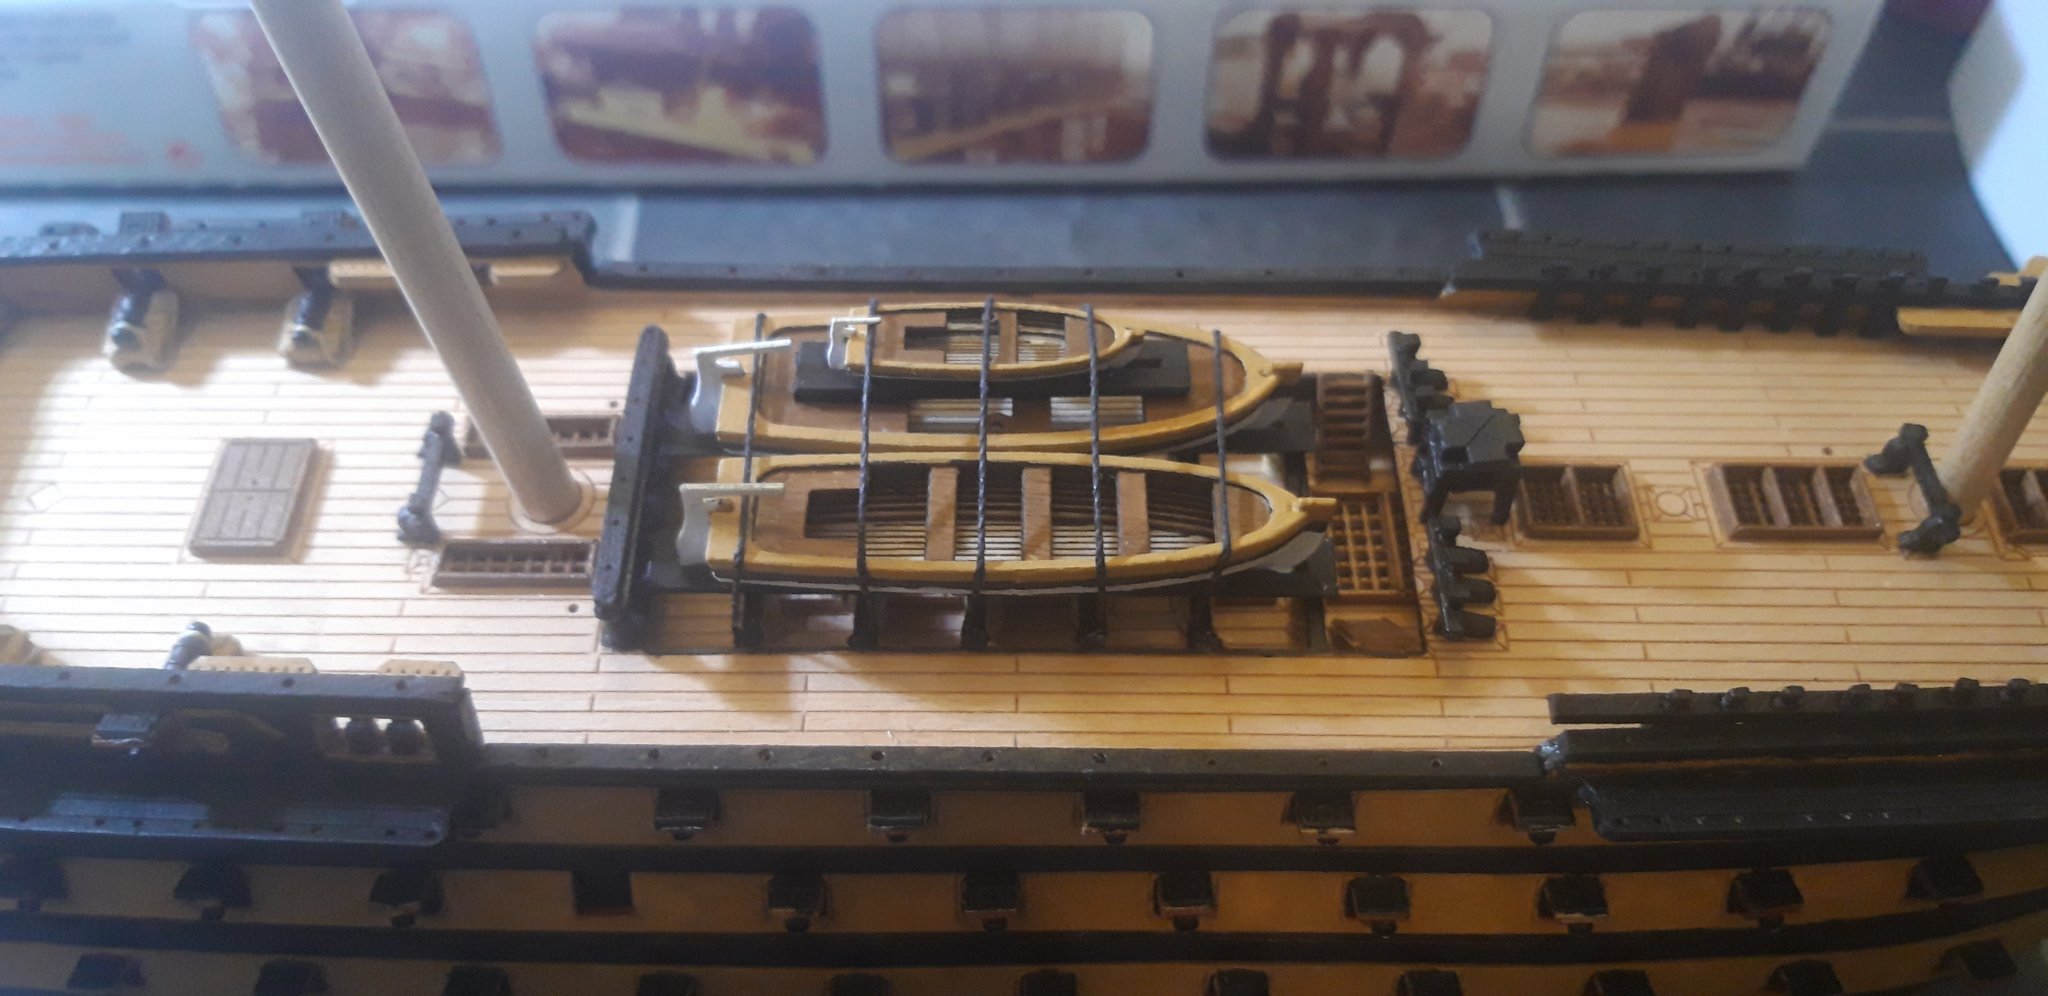
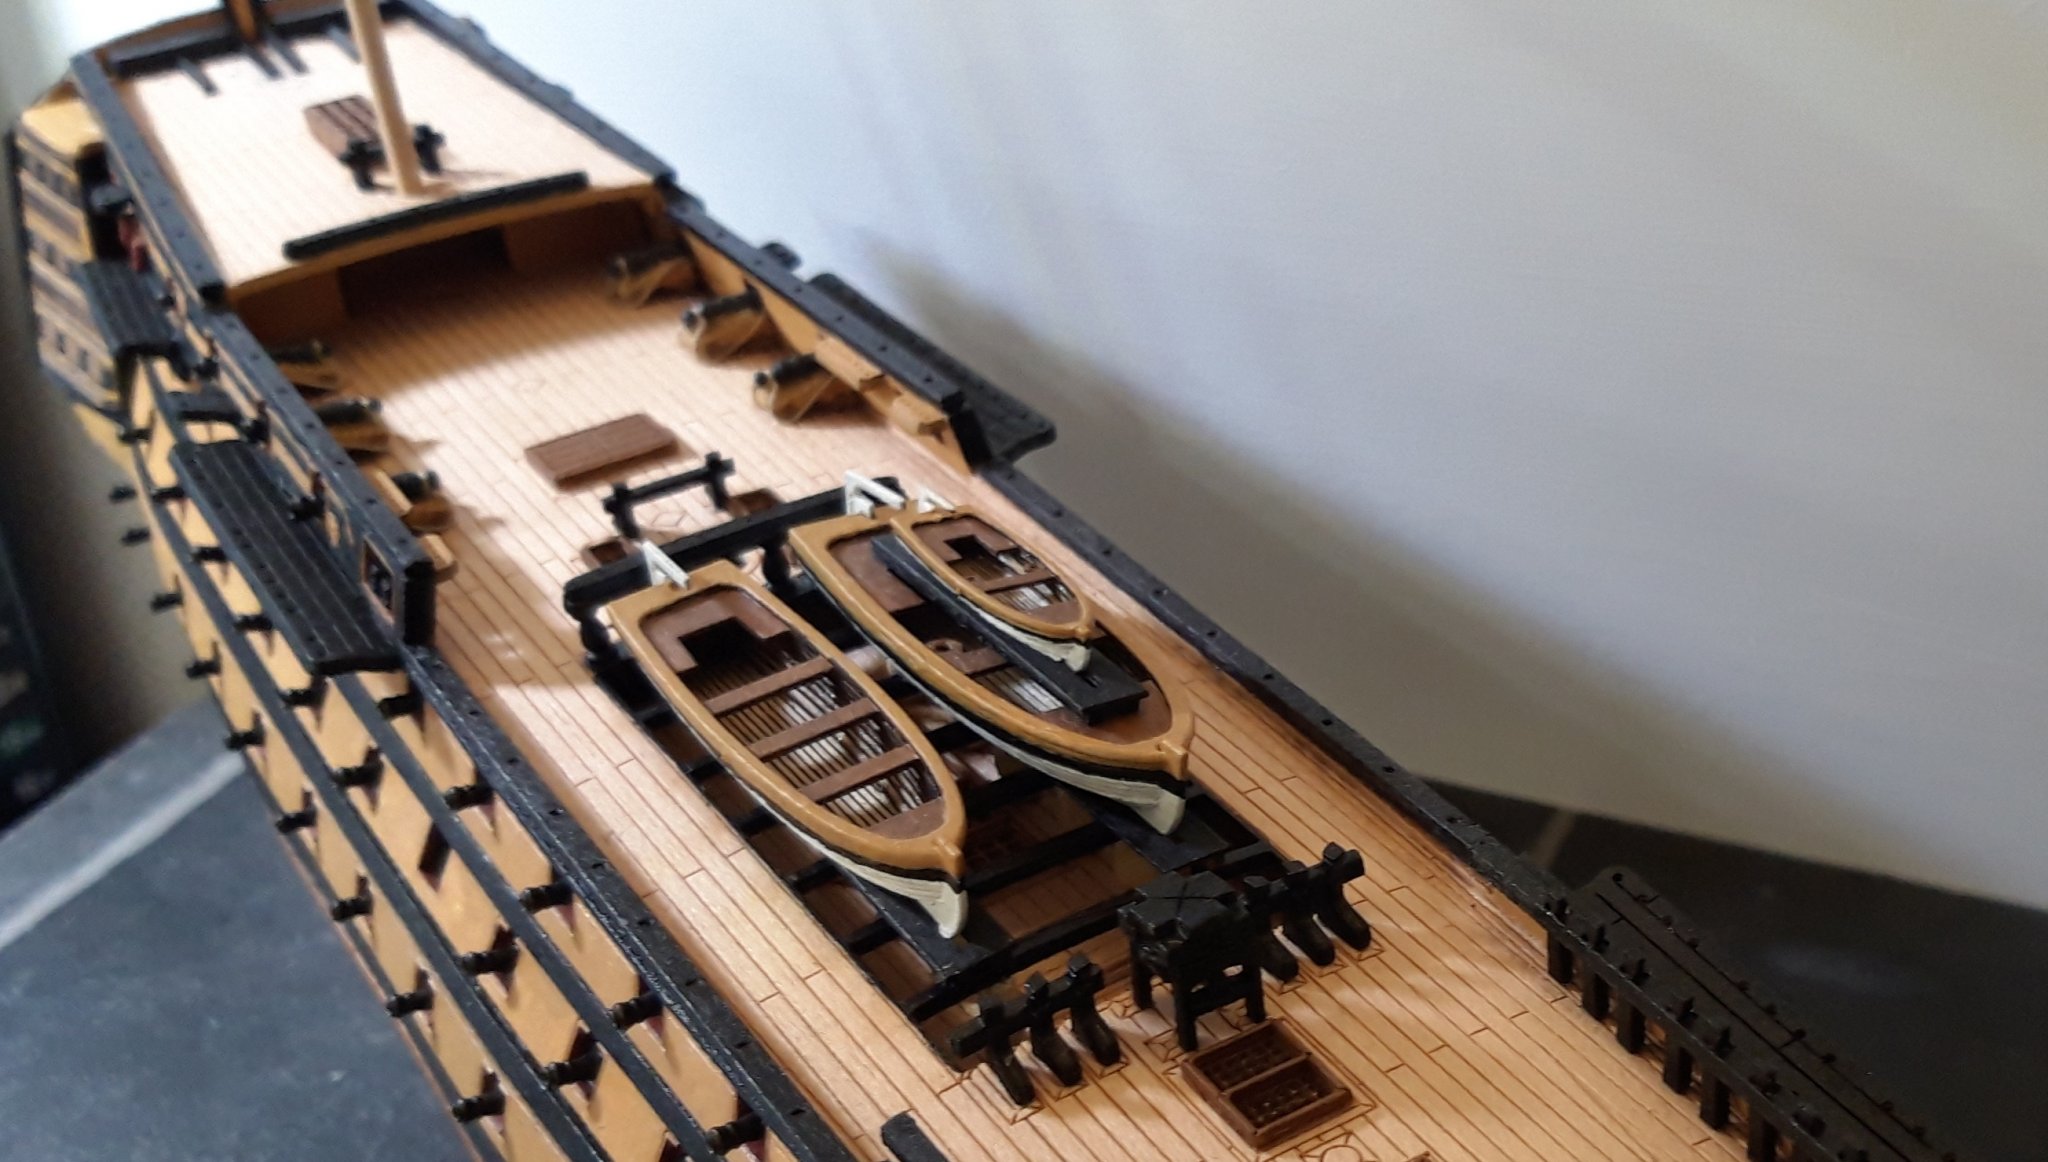
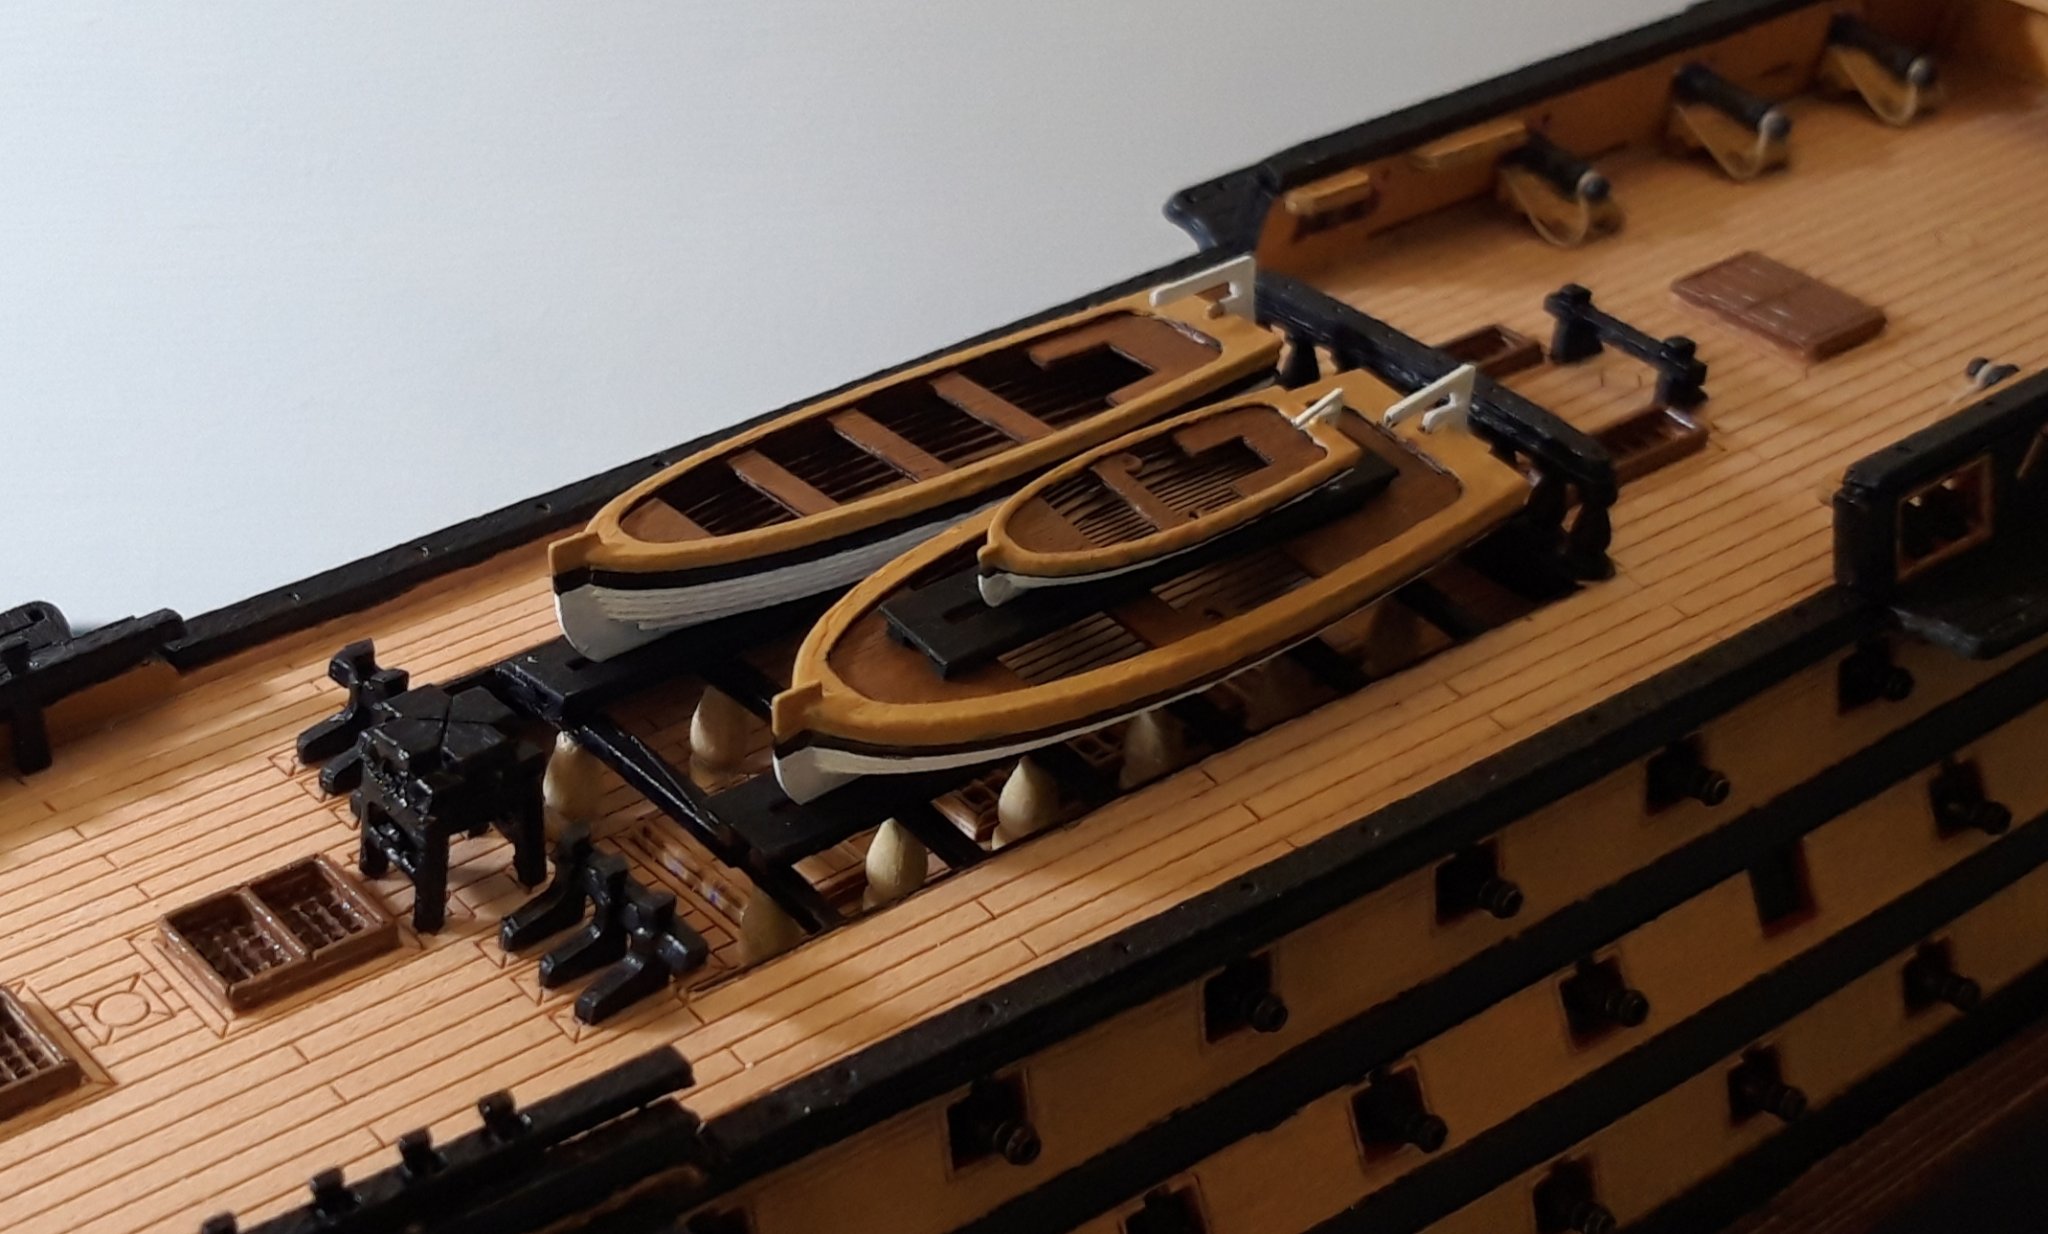
I started the session by fitting the Supporting pillars for the Skid Beams and l have to admit that they were so fiddly l thought (only for a moment) l would leave them out. The old saying "practice makes perfect" proved to be true as by the time I got to the last pair l was an expert. 🤣
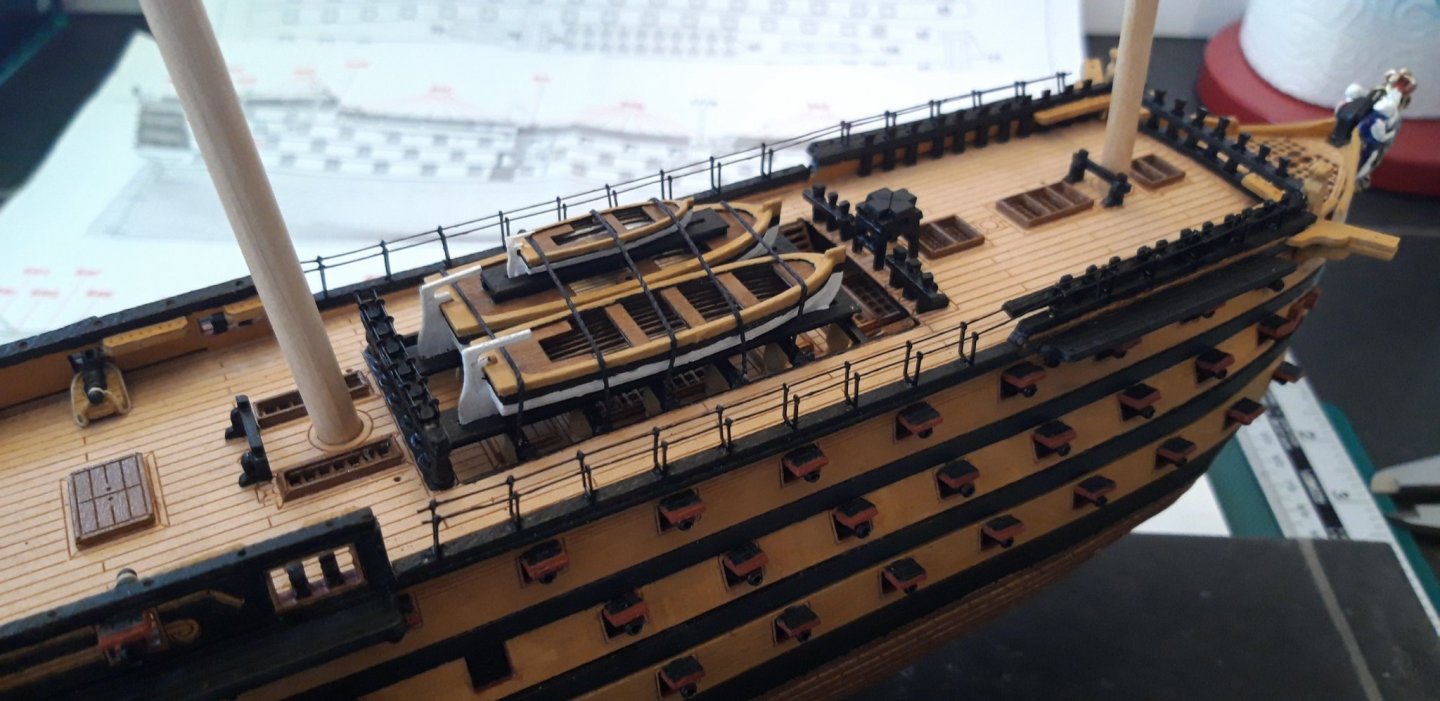
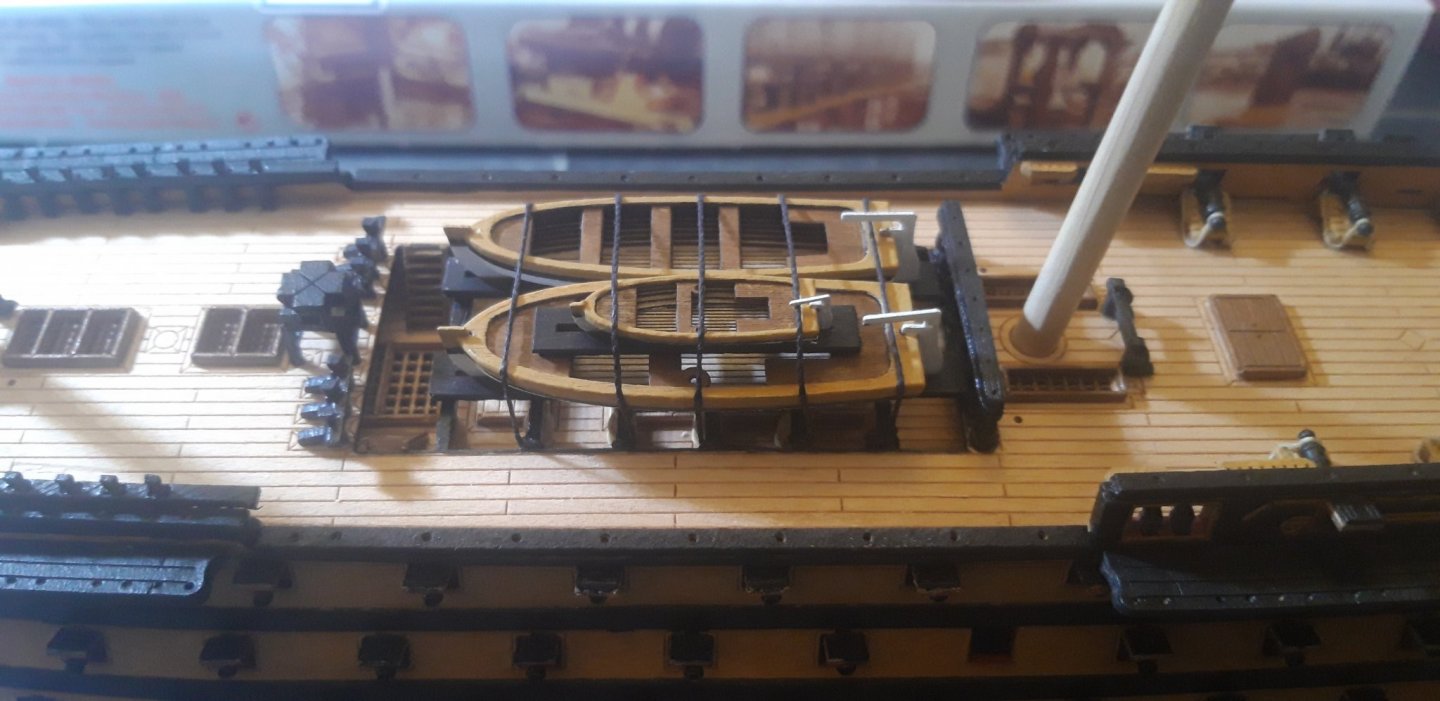
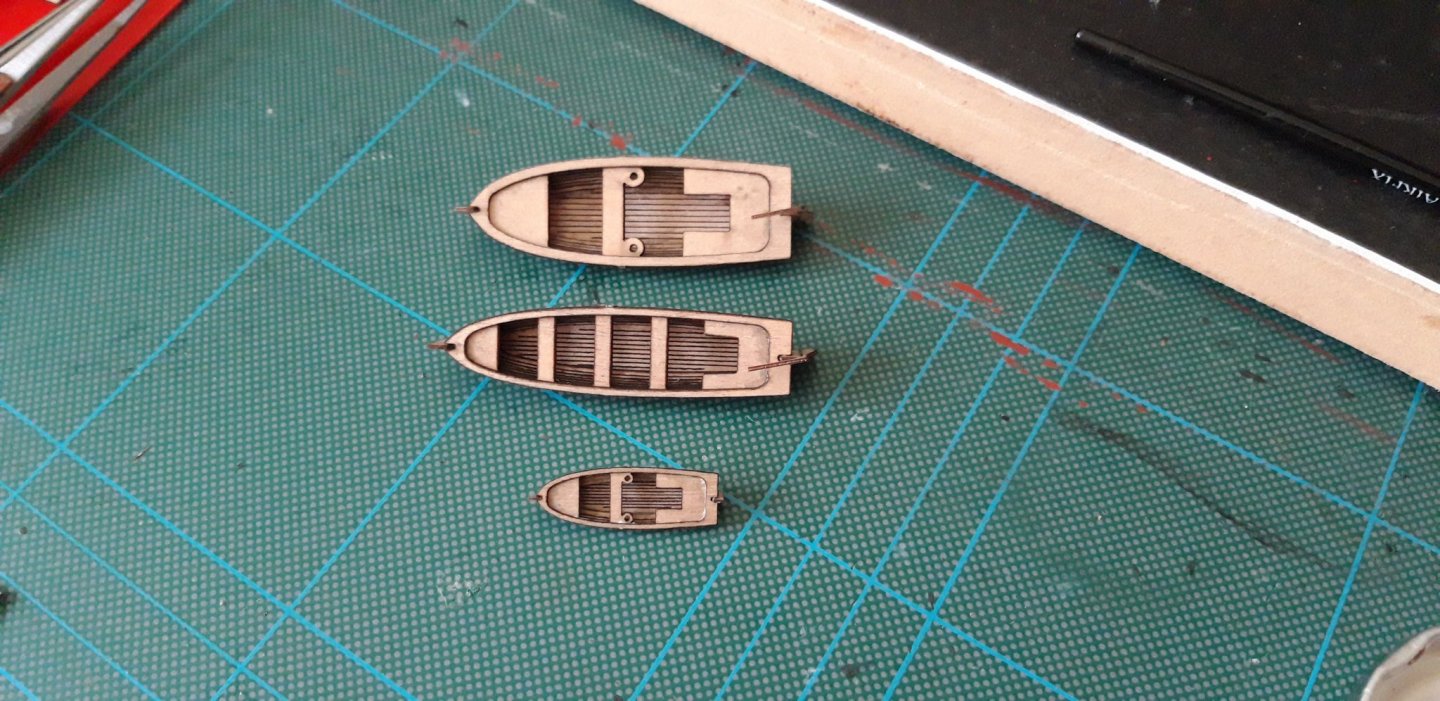
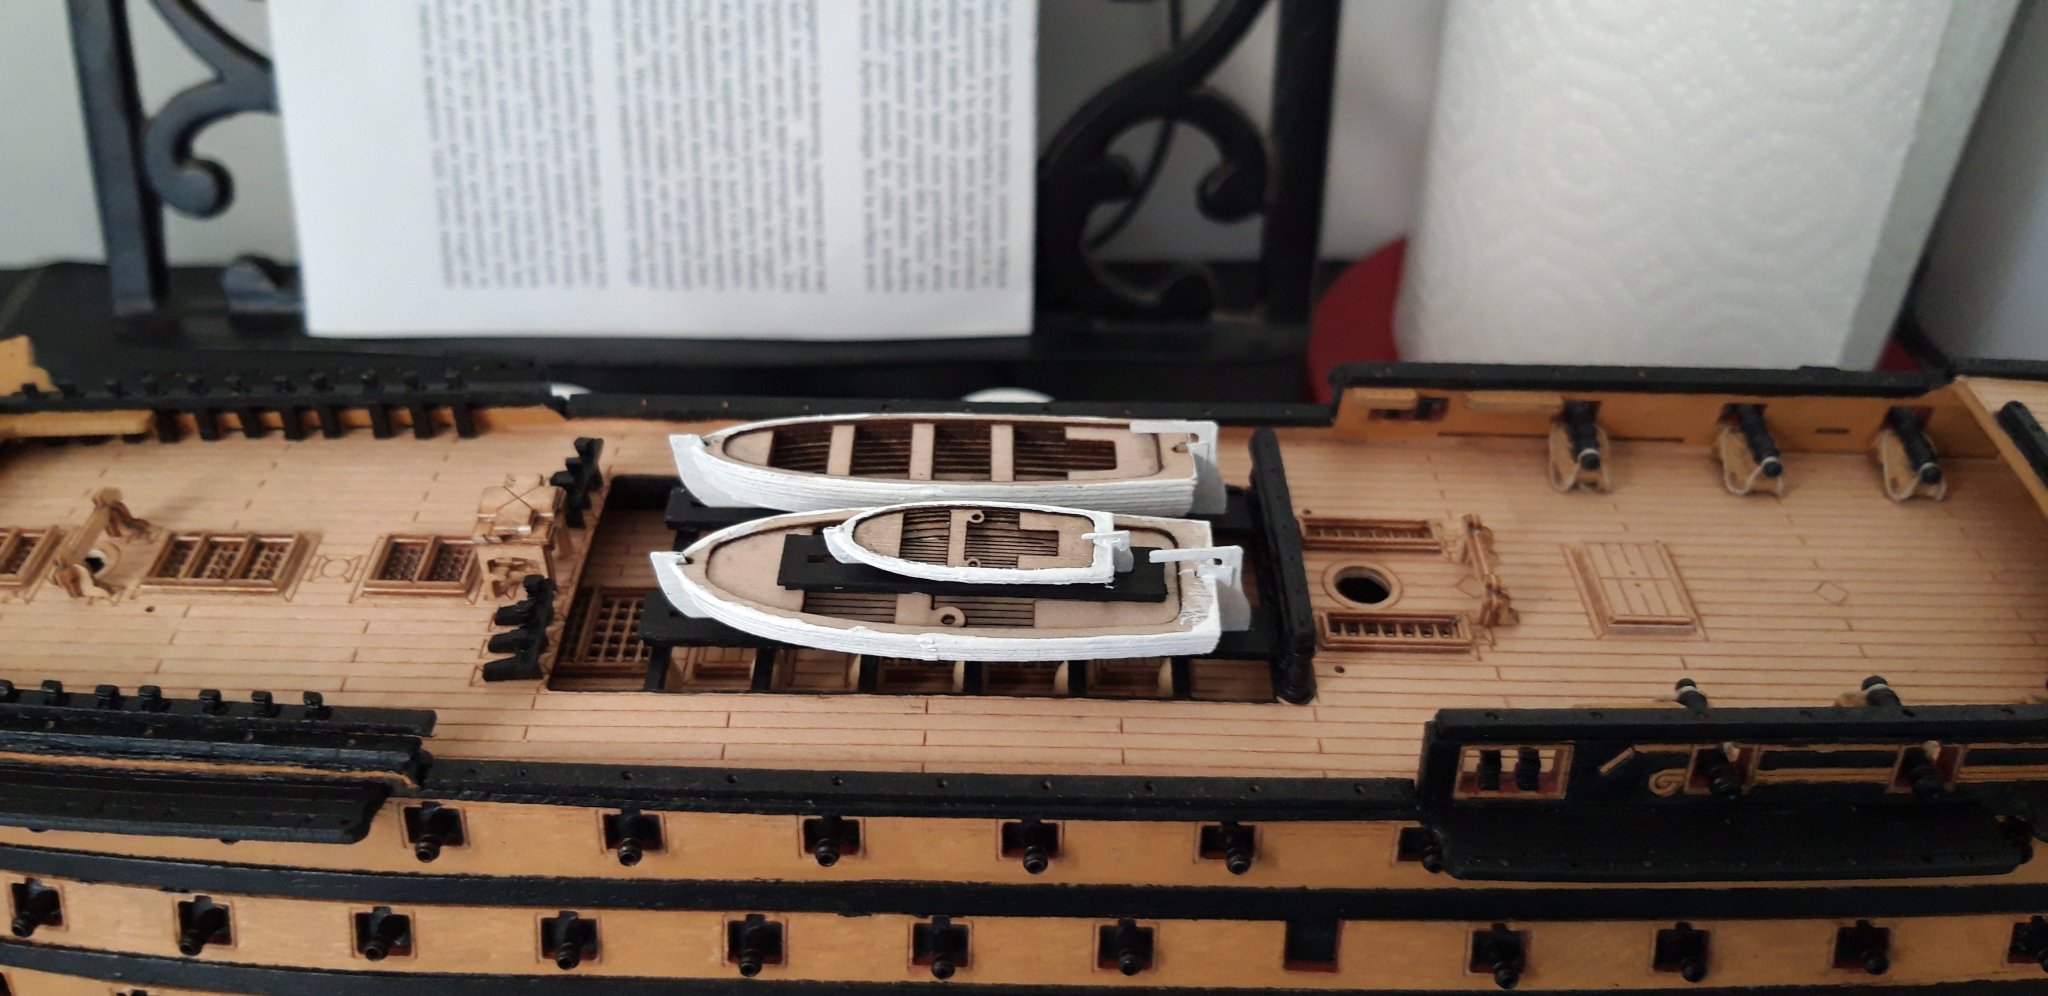
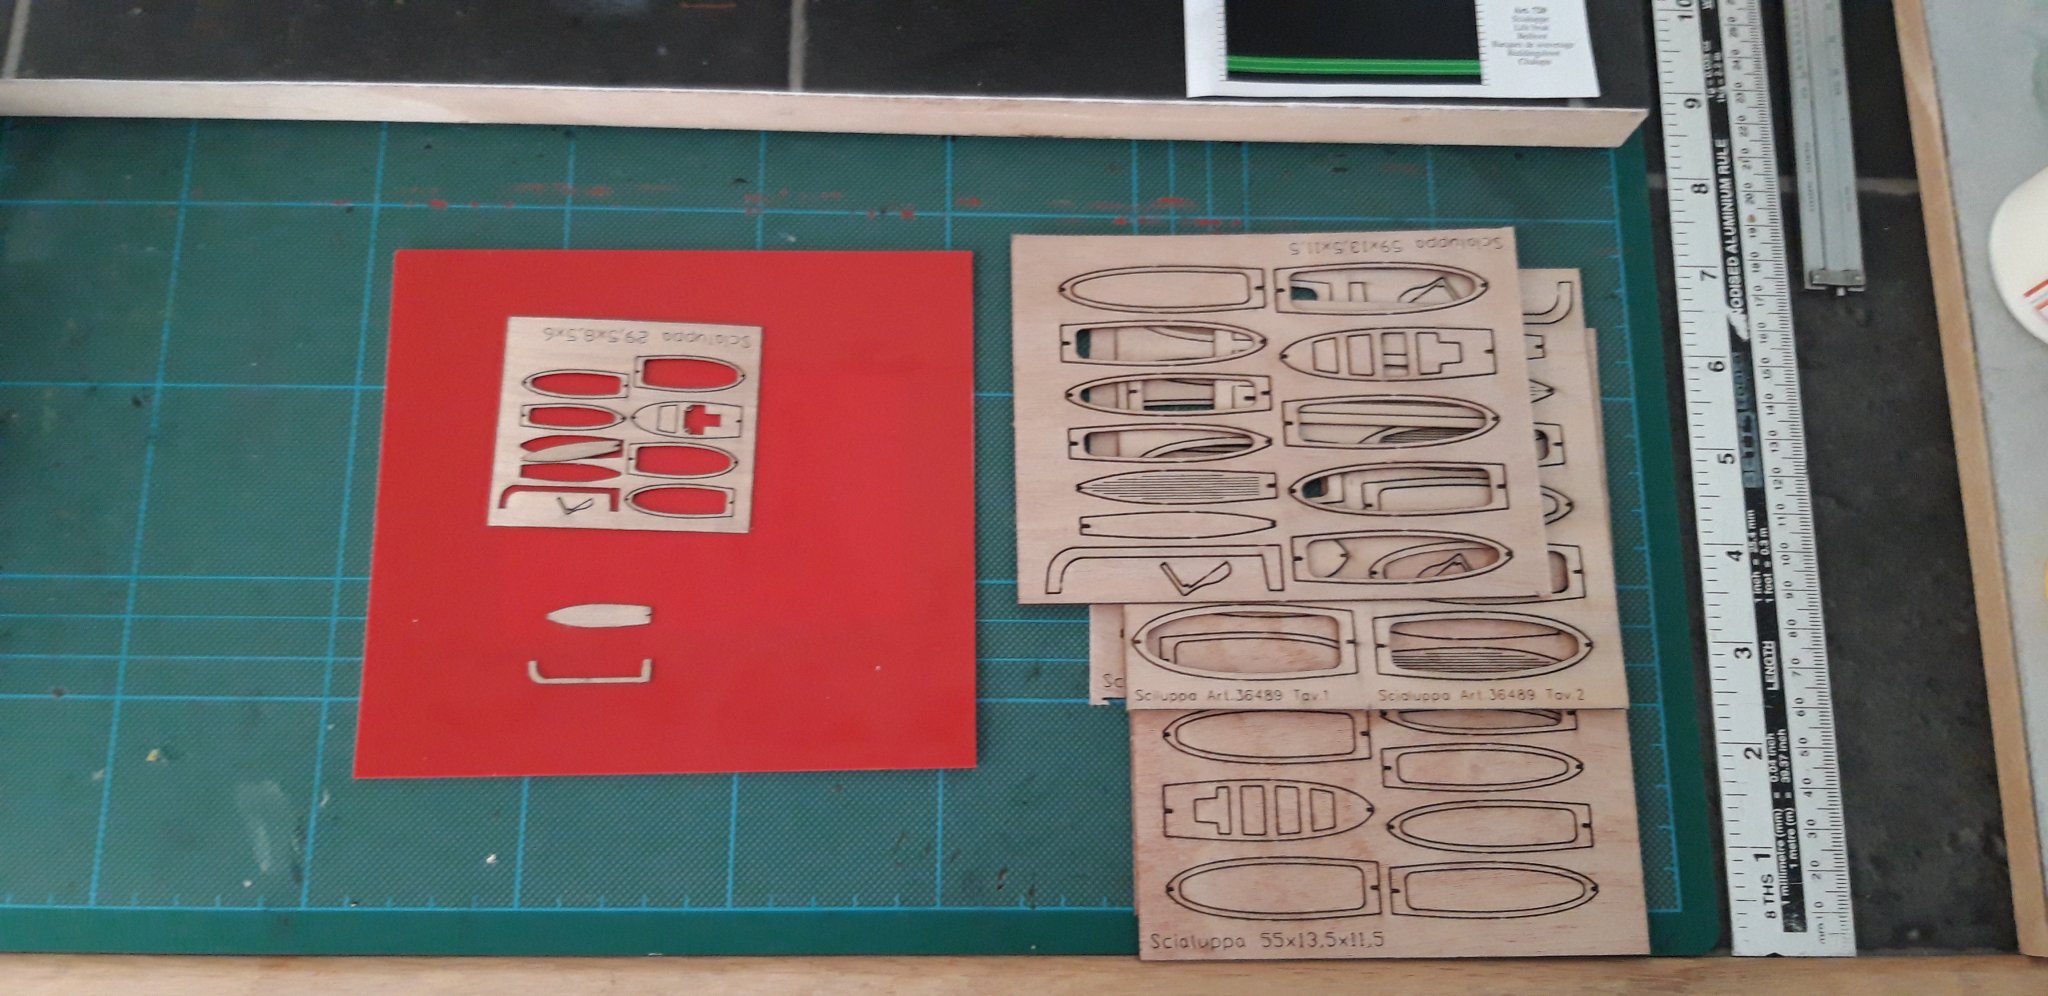
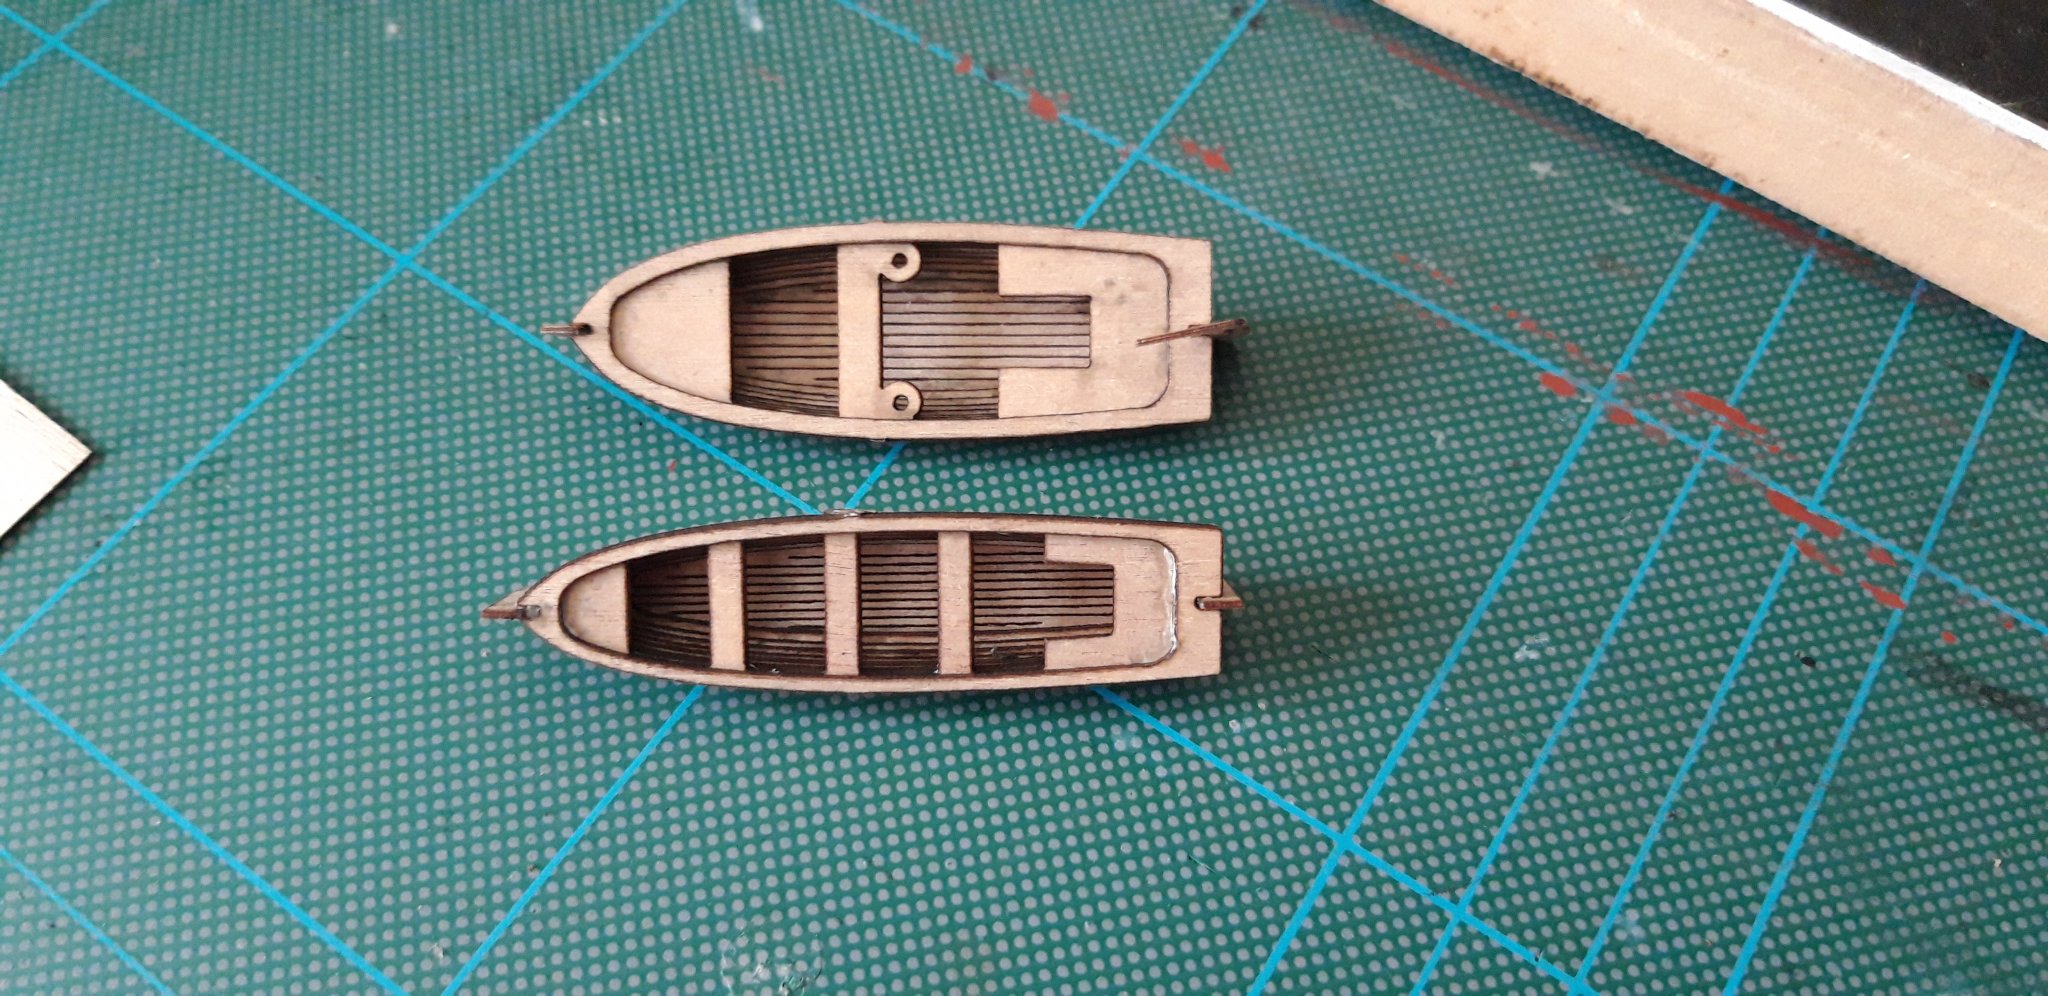
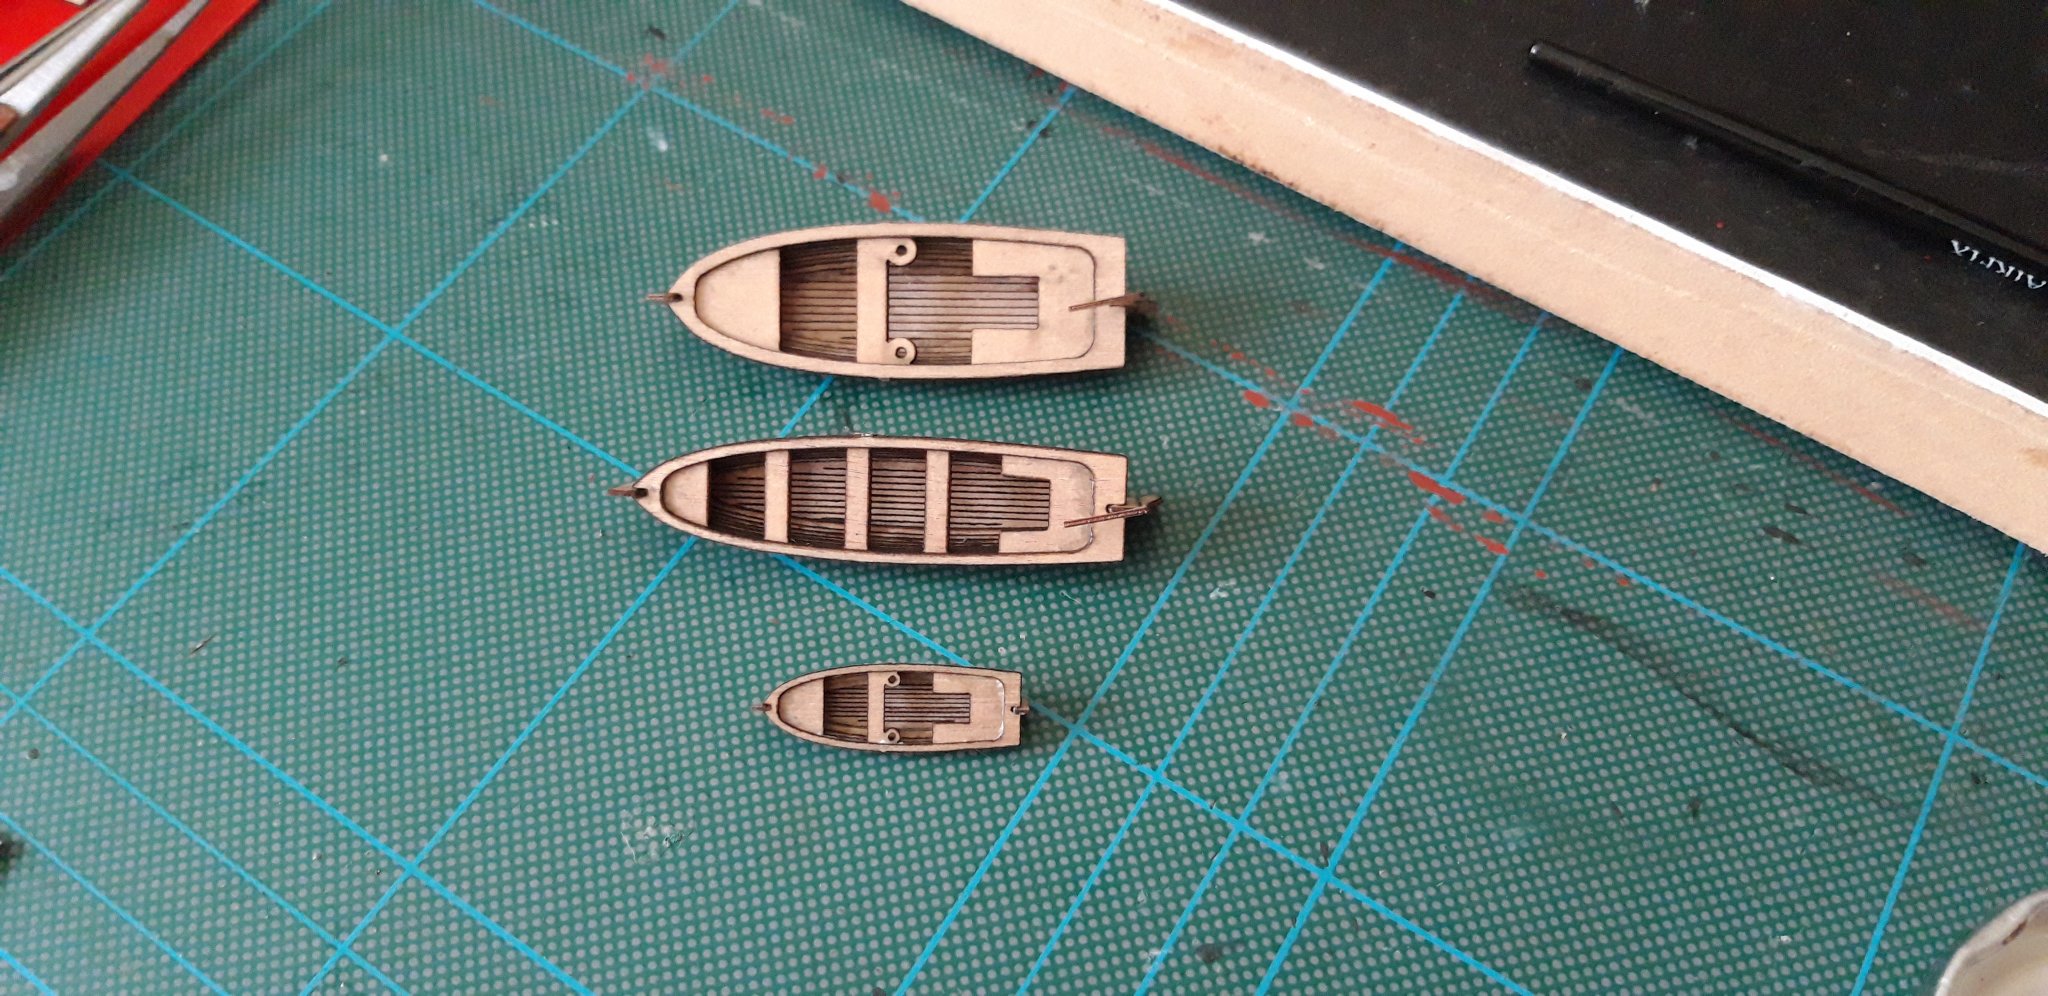
Once they were fitted and secure l thought l would turn my attention to the life boats, barge and launch. They proved to be great fun to build and, l think, have turned out great.
They were well presented and l was very pleased with the laser cutting.
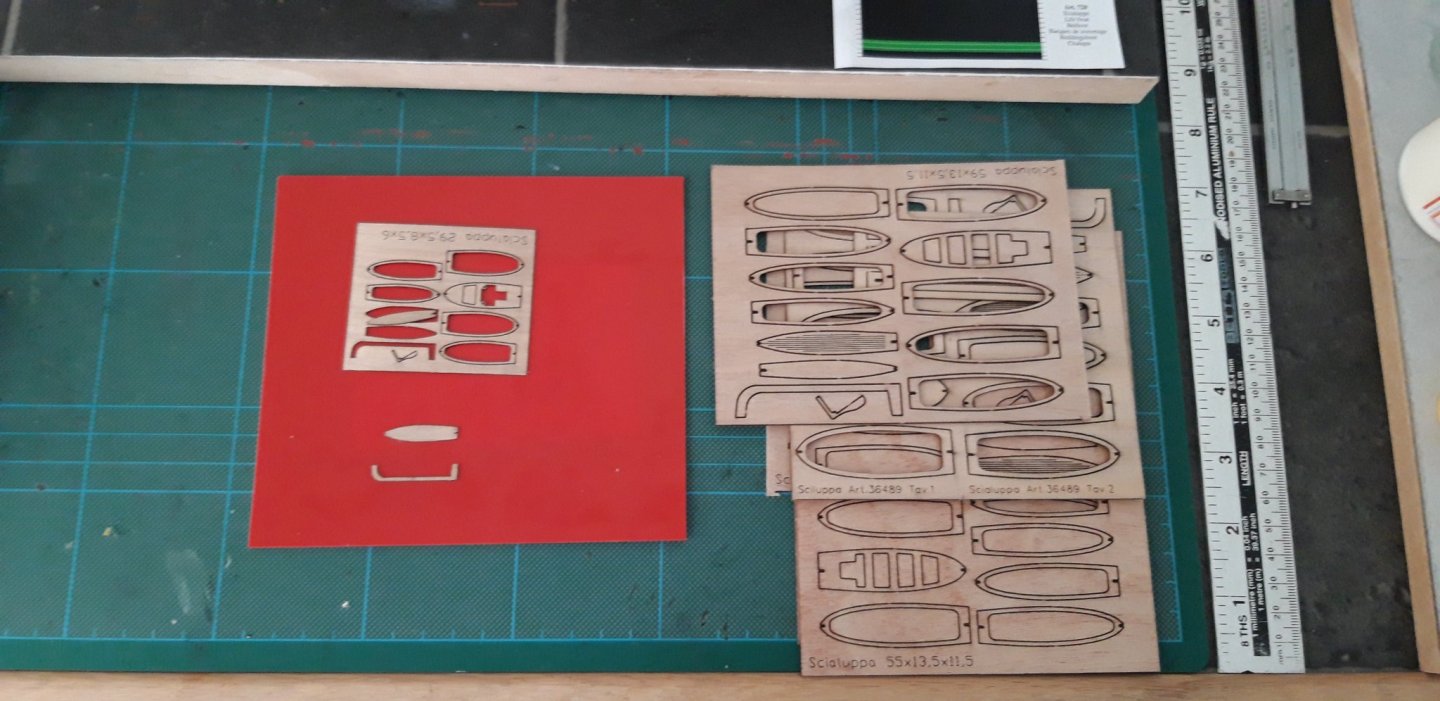
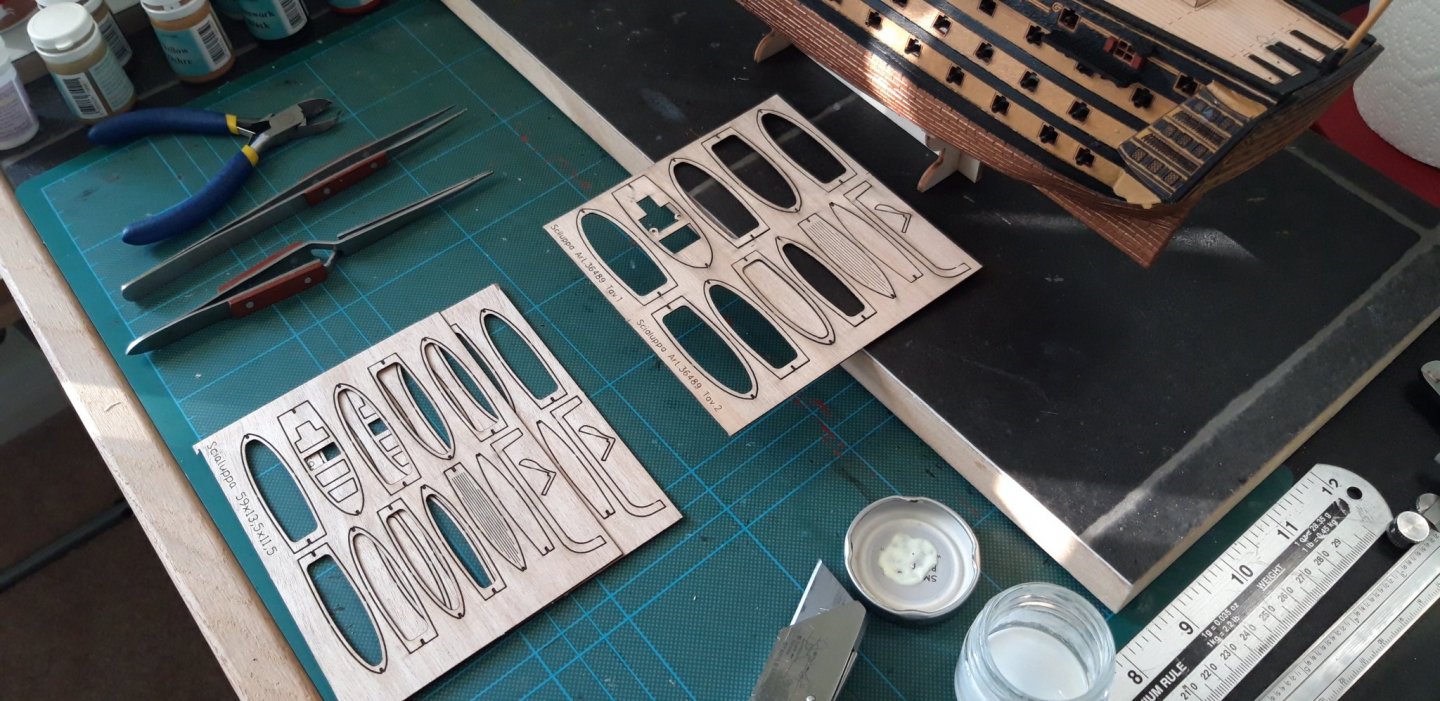
This is the first up, the little Launch, a joy to build. The smallest was a challenge but no less enjoyable.

Number two.

Number three.

I still have three to do but that is a job for another session.

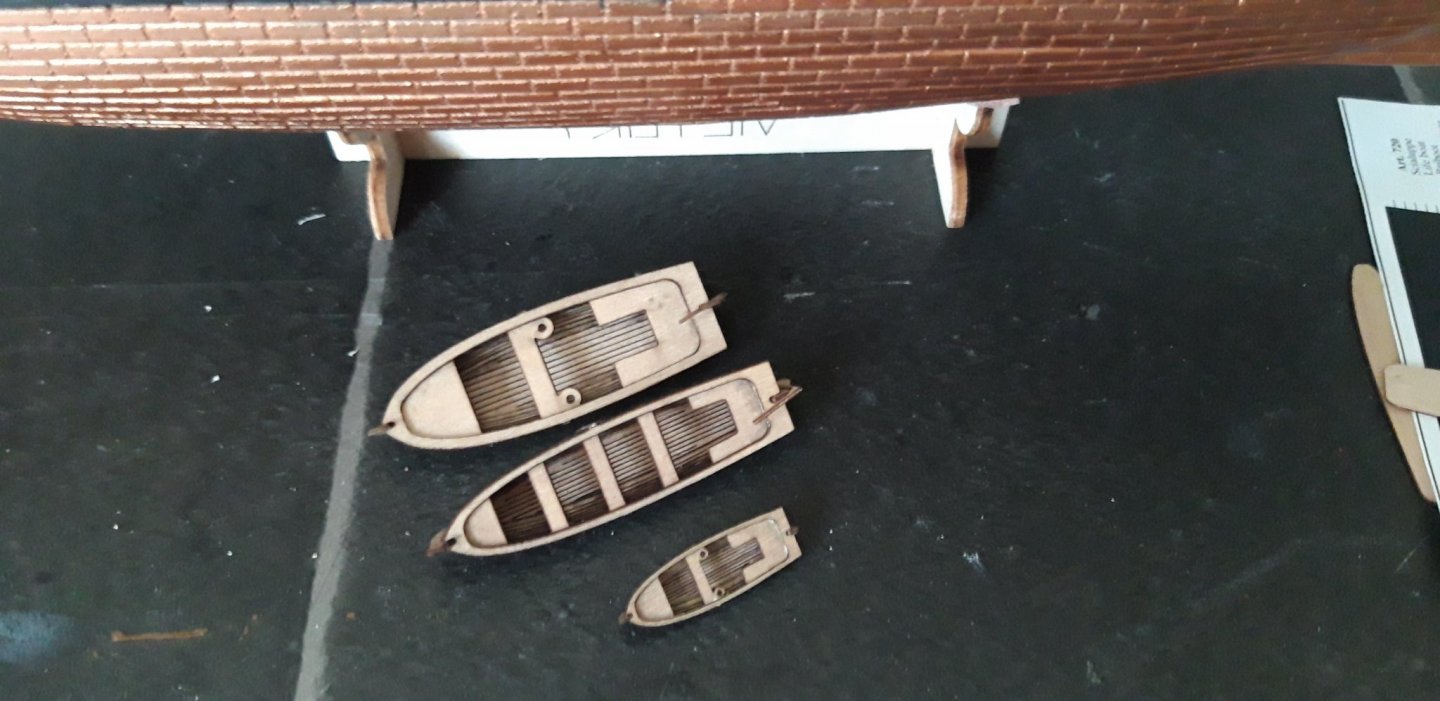
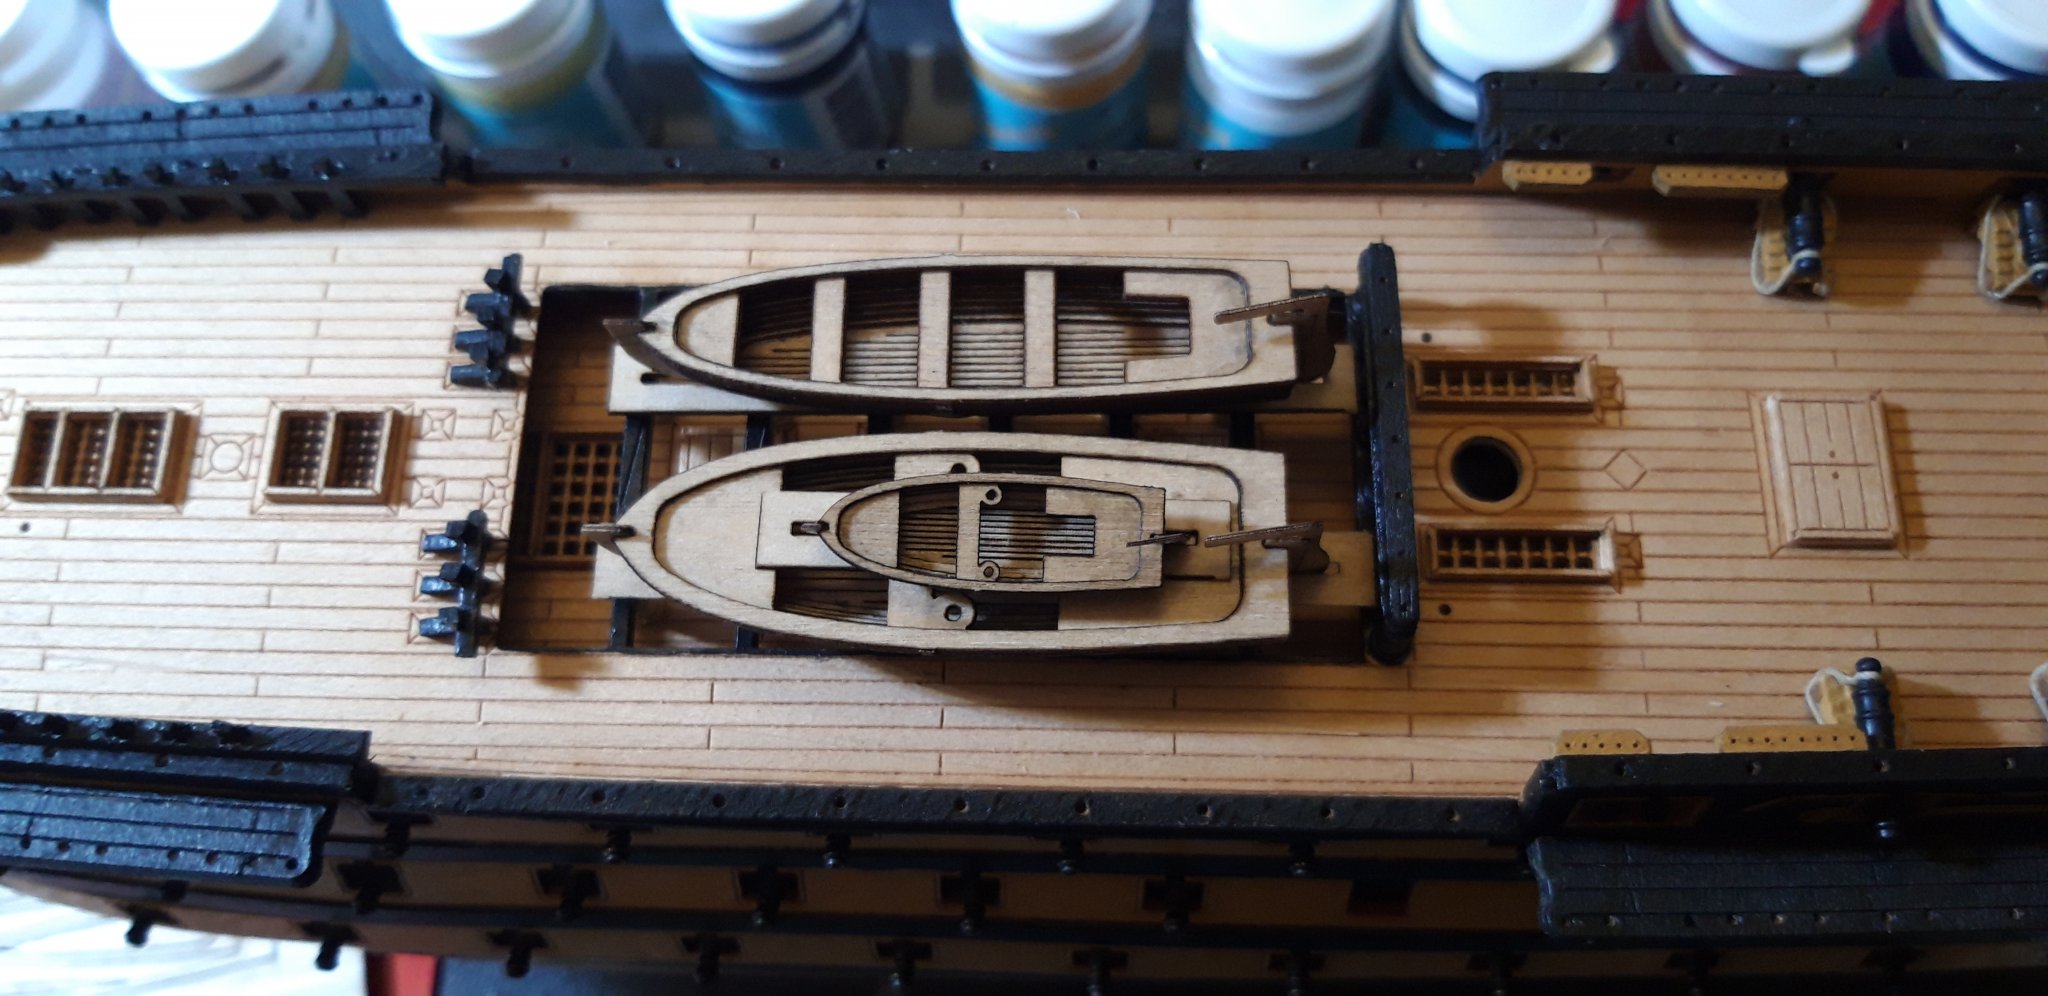
Here they are in their positions, but not yet fitted of course.

l hope to apply a little paint during my next session which always brings them to life, l think.
Best wishes as always,
The Lazy Saint.
Session. Time. Total.
28. 4 hrs. 102 hrs
- Edwardkenway, Dubz, Blue Pilot and 2 others
-
5
-
Hi Edward,
You have made great progress since the last time l looked in and she certainly is looking great. Well done you.
Best wishes as always,
The Lazy Saint.
- Edwardkenway and mtaylor
-
2
-
Great progress and your carving is looking fantastic too, well done you.
Best wishes as always,
The Lazy Saint.
- GrandpaPhil and Retired guy
-
2
-
-
Hi bitter end,
Sorry to hear your news, and will hope for brighter days ahead.
Best wishes as always,
The Lazy Saint.
-
-
It looks a million dollars mugje, fantastic.
Best wishes as always,
The Lazy Saint.
- Old Collingwood and mugje
-
2

.jpg.db50c8ddb0baf6cf64daf12924026af5.jpg)


HMS Victory by The Lazy Saint - Mantua - Scale 1:200 - Third wooden ship
in - Kit build logs for subjects built from 1751 - 1800
Posted
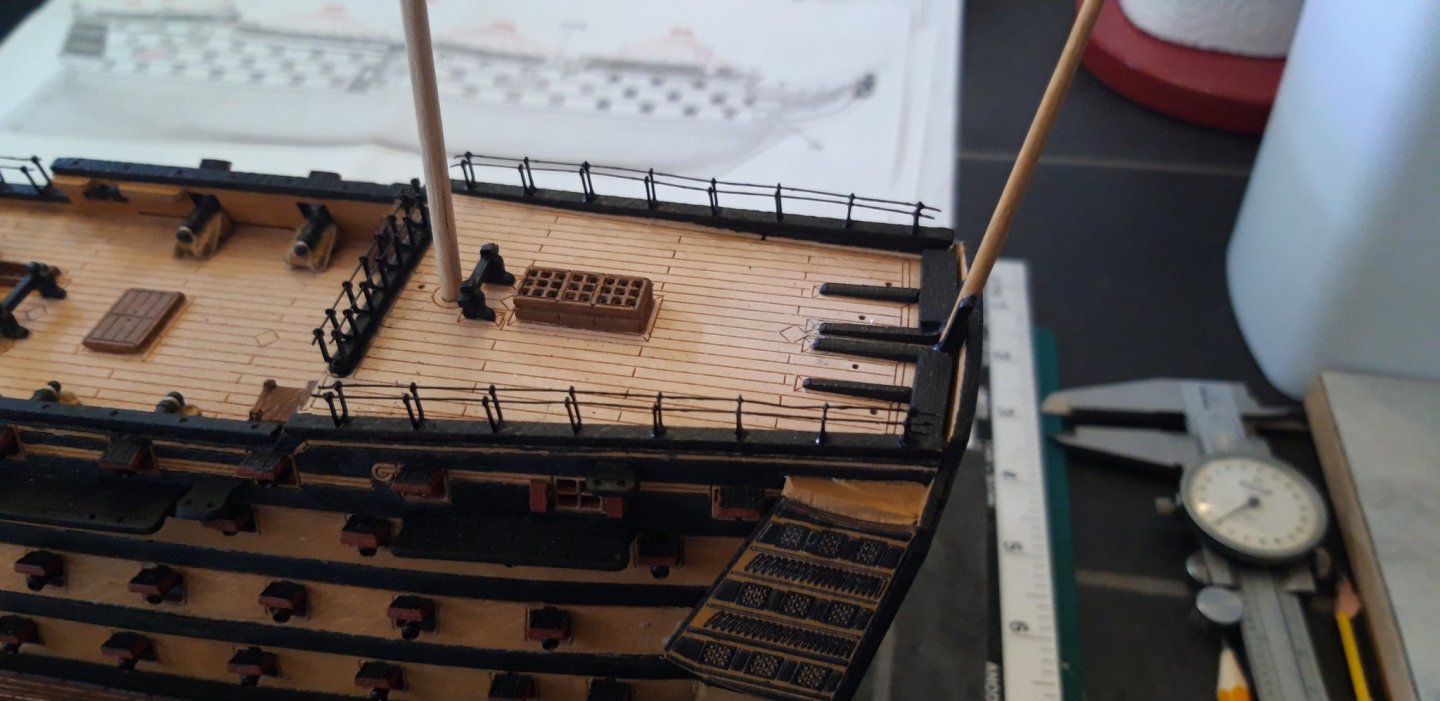
Hi all,
Thanks Emmet and Edward for the best wishes and also thanks Edward for the kind encouragement, it is appreciated.
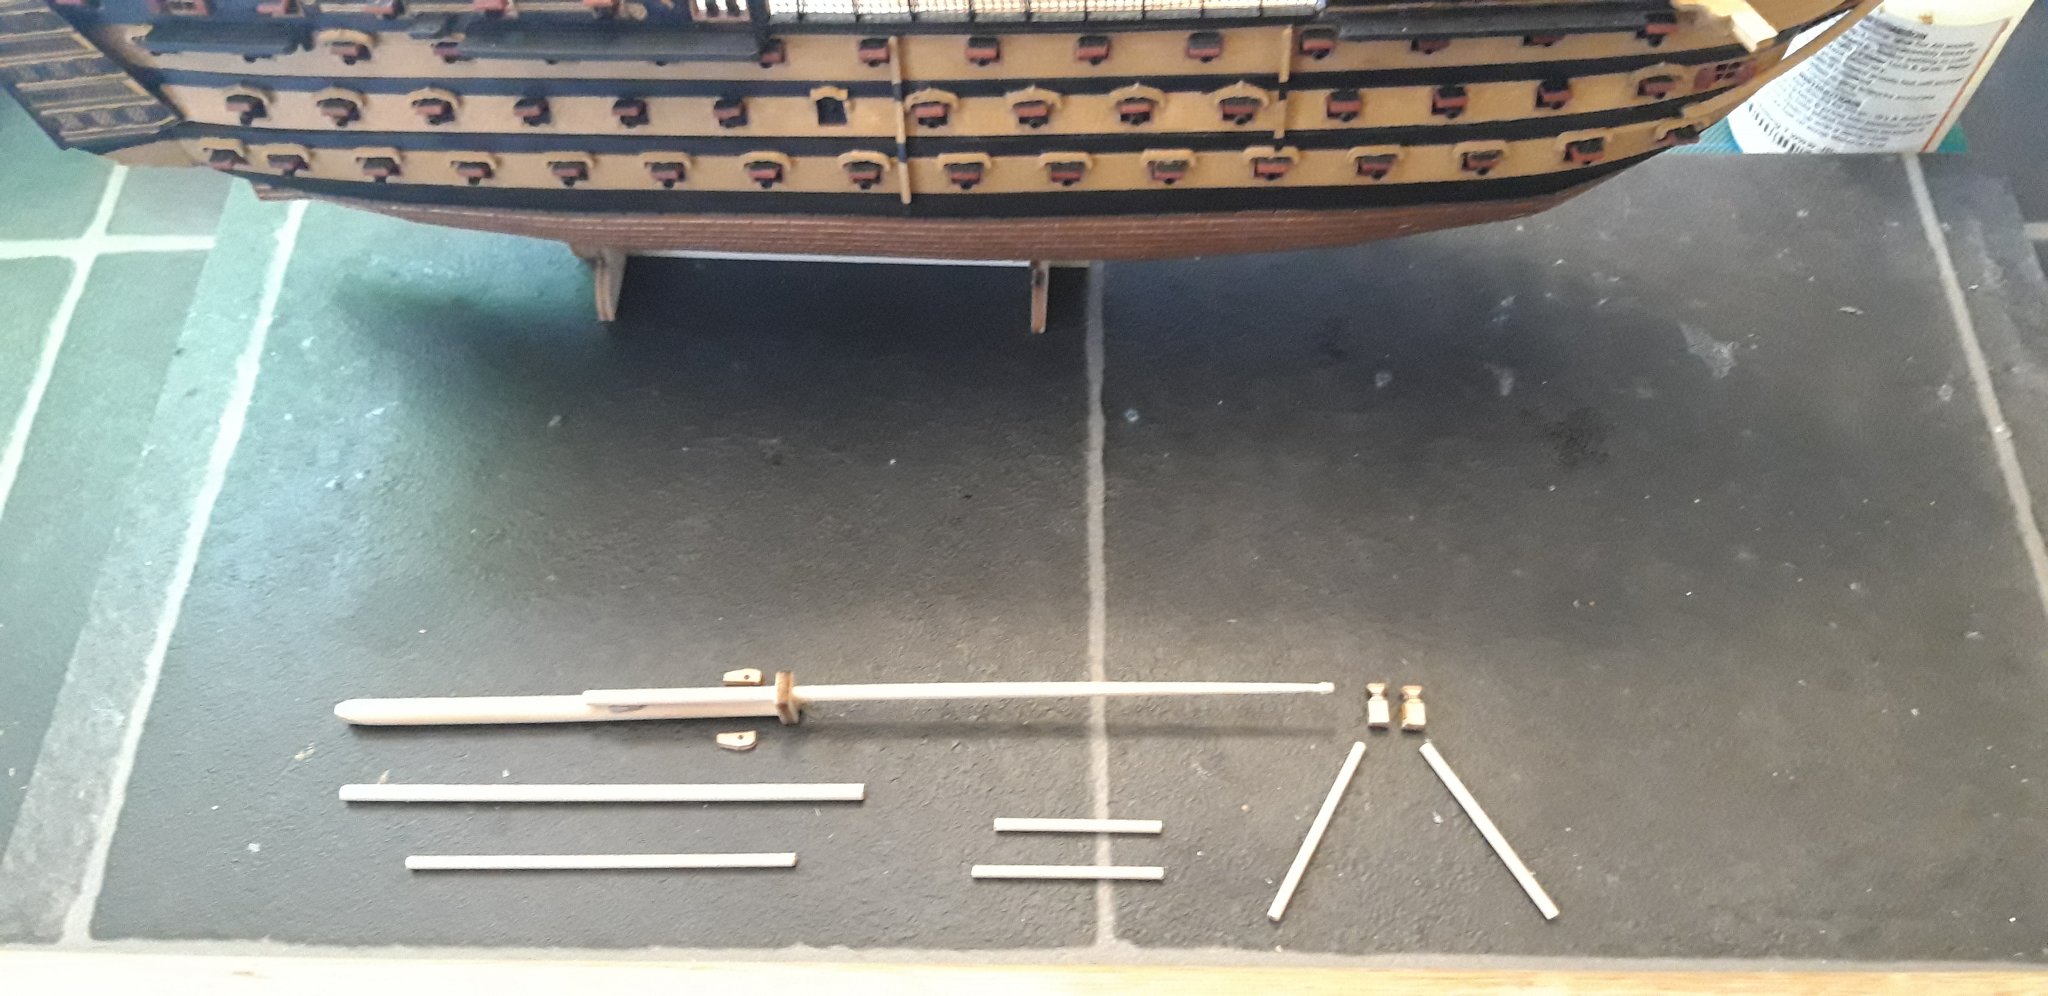
A little bit of Bowsprit construction today, which went quite well l think. I have made the correct decision in using the AOTS plans, l feel this will give me a better chance of completing the model with regards to Masts and rigging. The scale of the kit plans, l think, are over sized. The kit plans are 1:200, the AOTS plans are 1:198 and, therefore, should be very slightly larger (or have l got it wrong, please let me know) however, the kit plans are larger........
Anyway, my plan is to use the kit plans to steer me through the process and the AOTS book for the finer details.
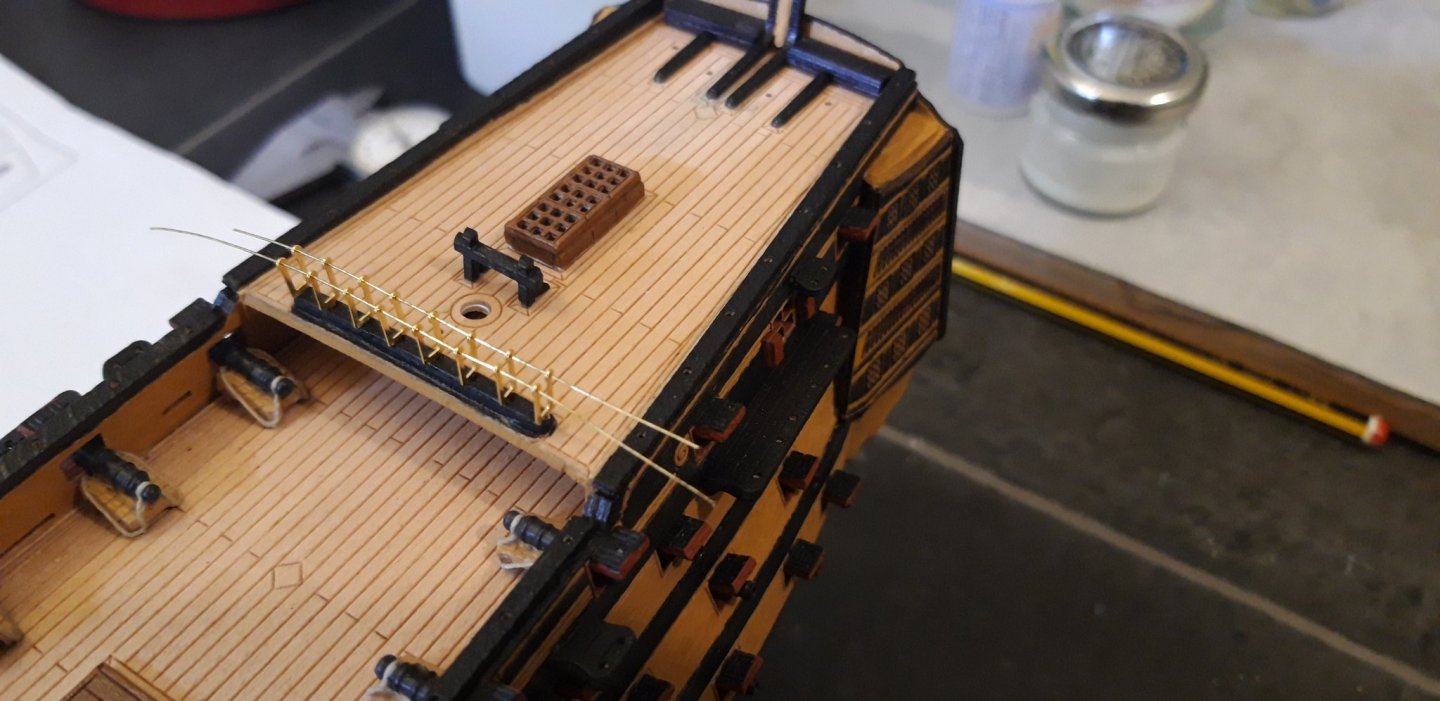
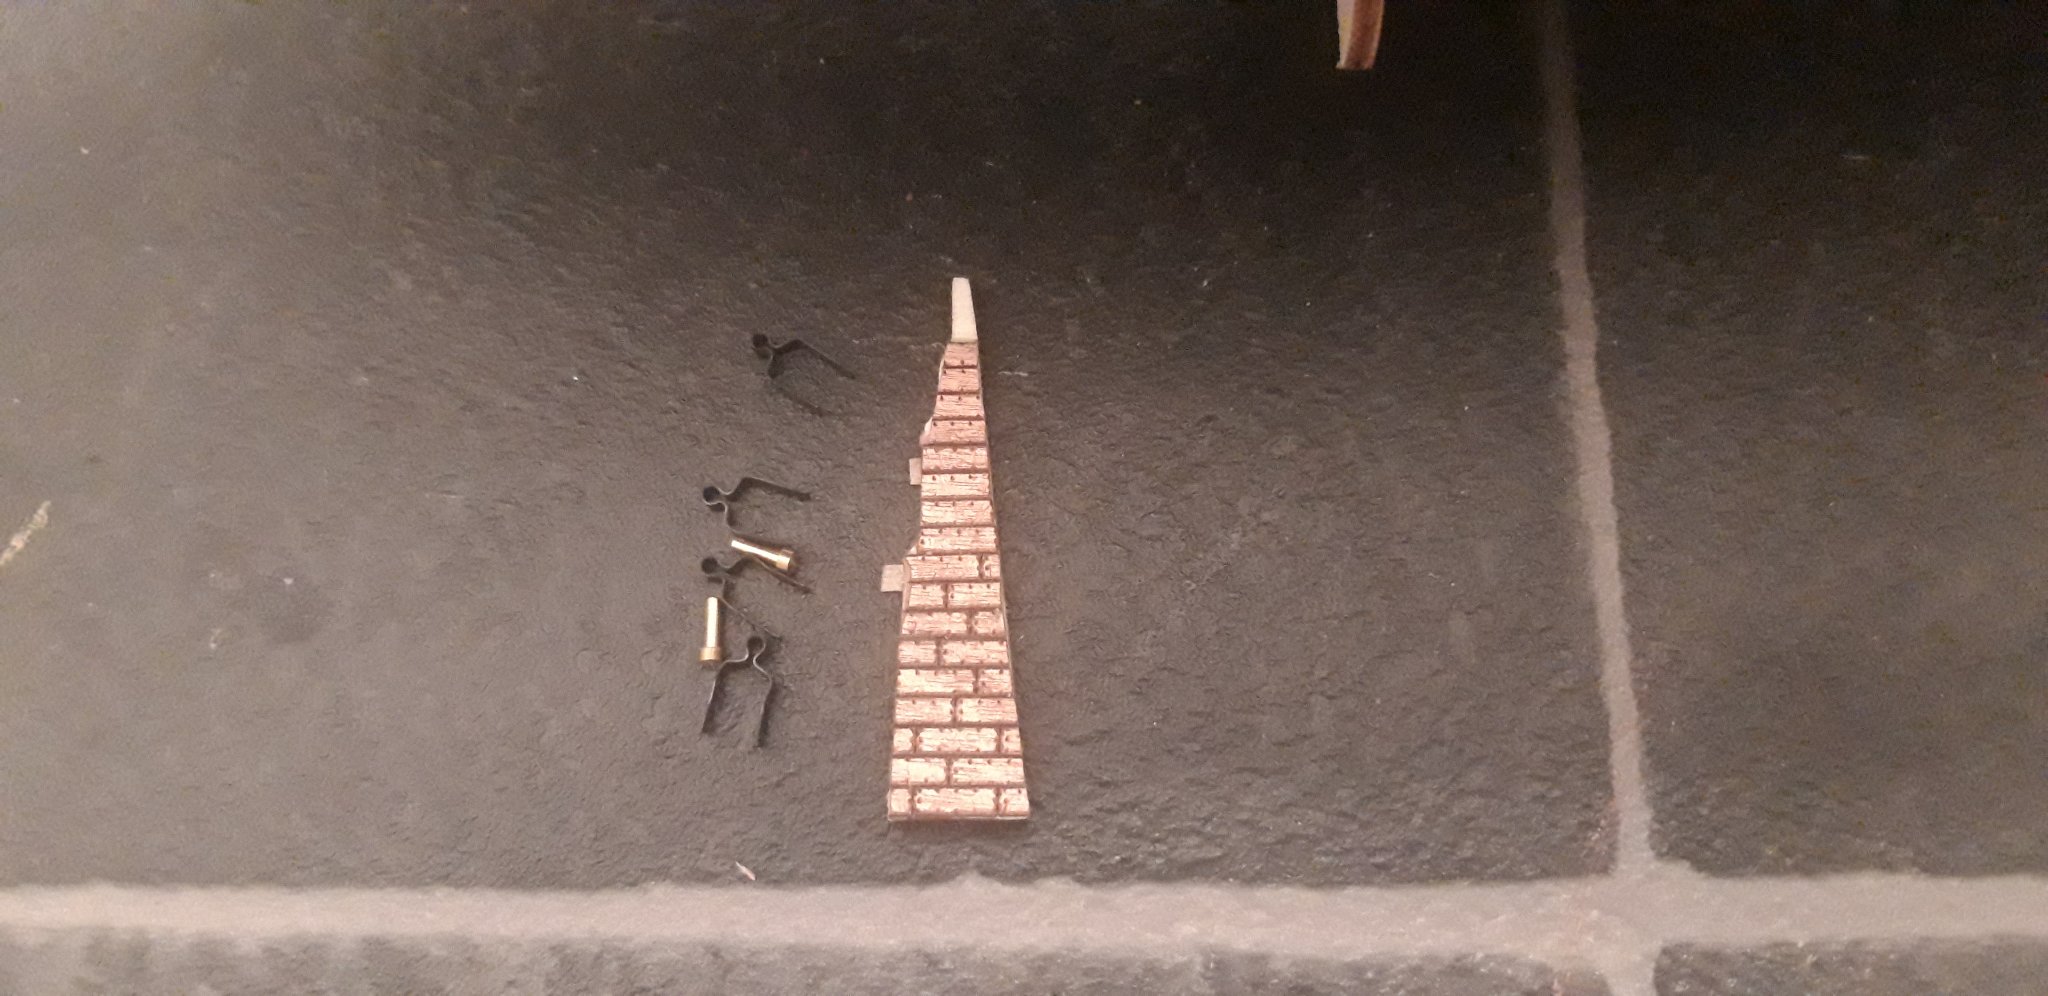
I reduced the length of the Jibboom and added the flying Jibboom
I then added the Jack Staff and Dolphin Striker.
Here is where l am now.
l have cut to length the Fore Mast Assembly. During my next session l shall continue with the shaping.
Best wishes as always,
The Lazy Saint.
Session. Time. Total.
40. 3 hrs. 132.