

The Lazy Saint
-
Posts
264 -
Joined
-
Last visited
Content Type
Profiles
Forums
Gallery
Events
Posts posted by The Lazy Saint
-
-
Hi all,
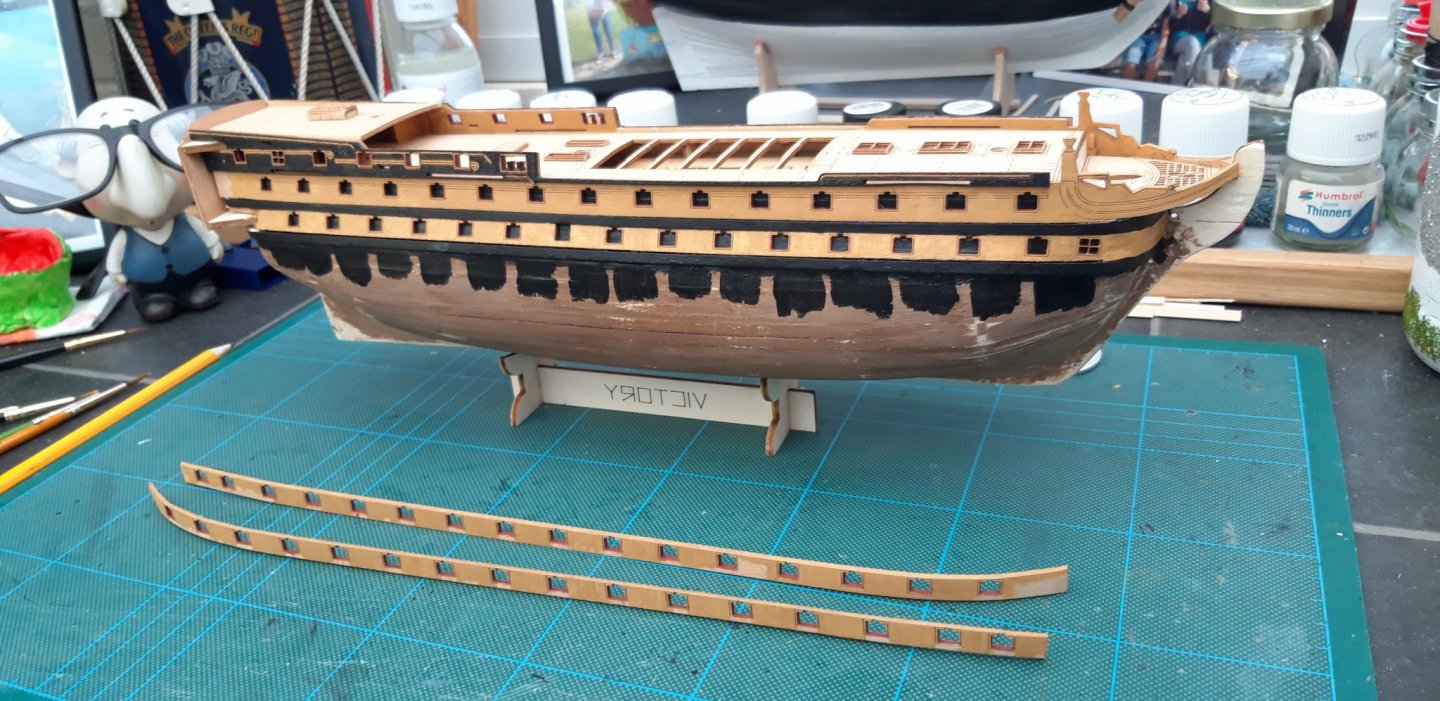
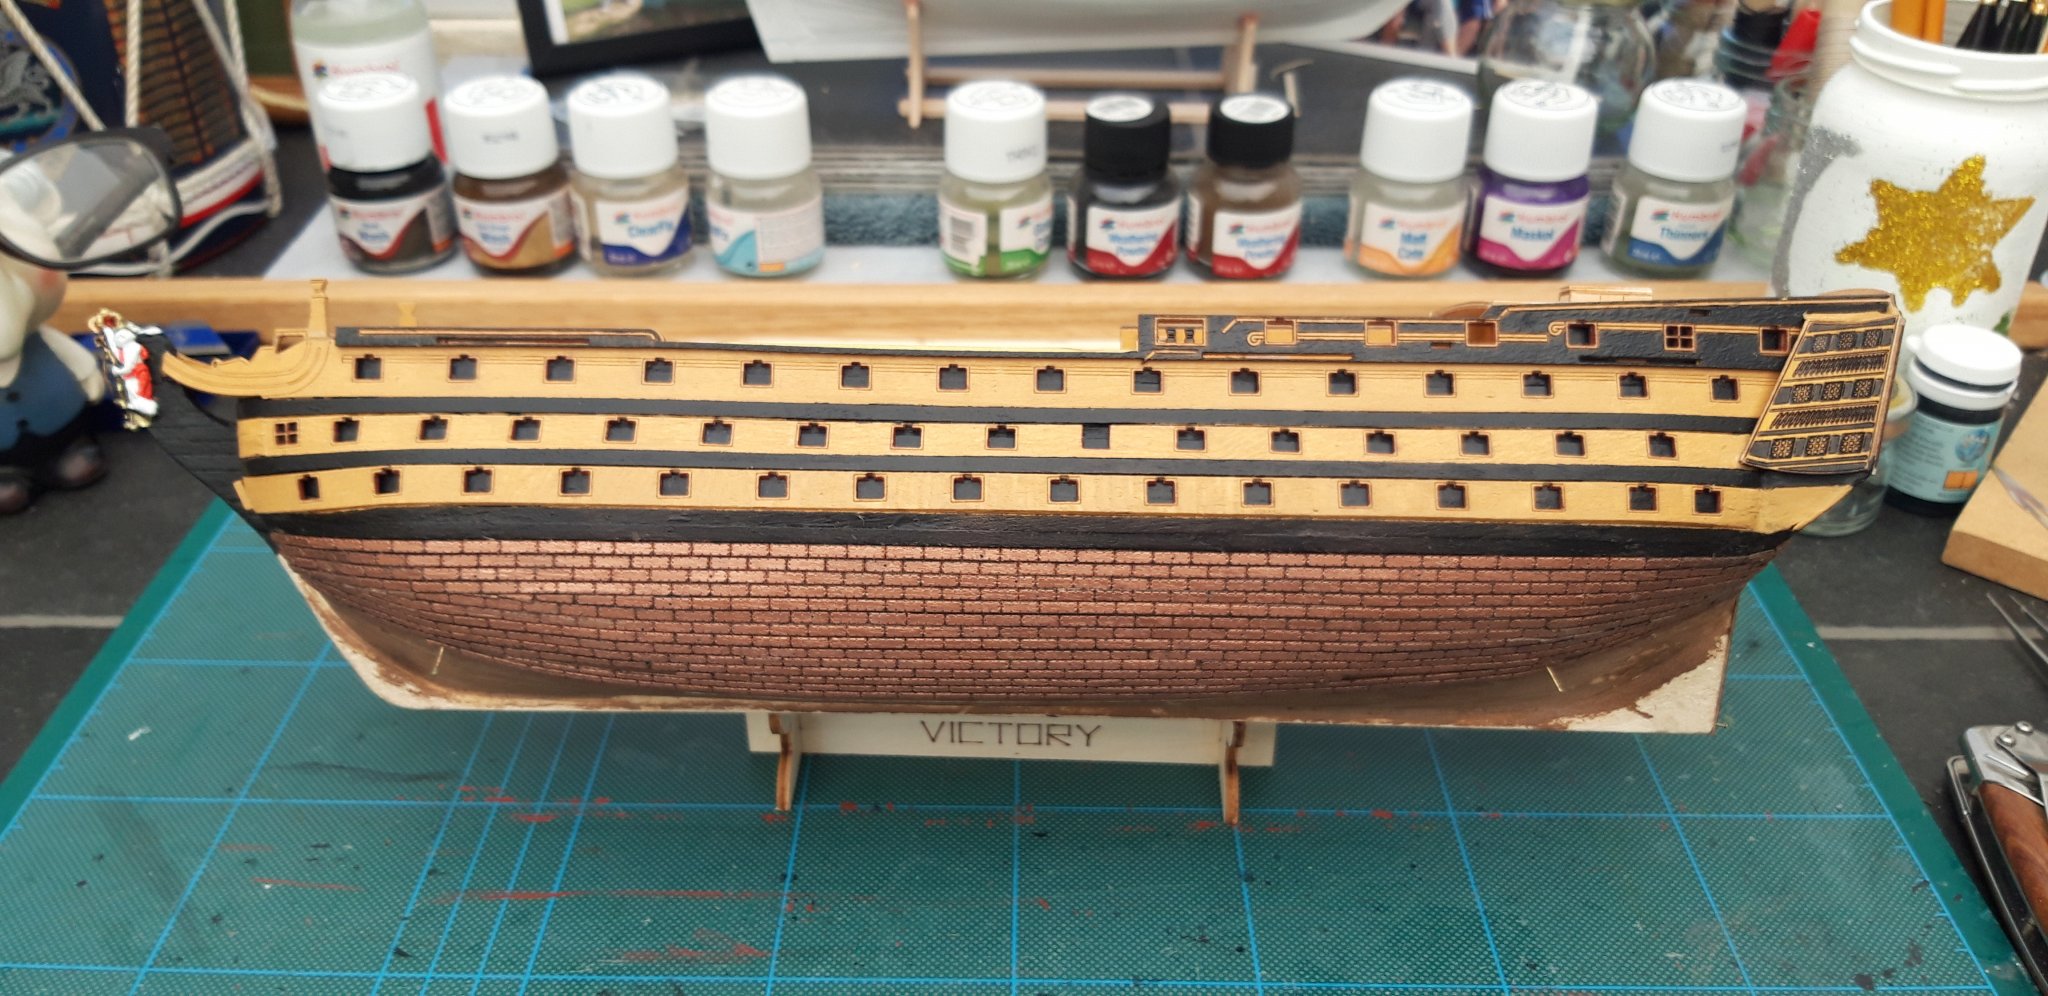
I got straight on to the imitation coppering today and l am glad to be able to say "so far so good". I am having to be very careful with the strips as they are quite delicate and Mantua have been a bit tight on the amount in the pack.
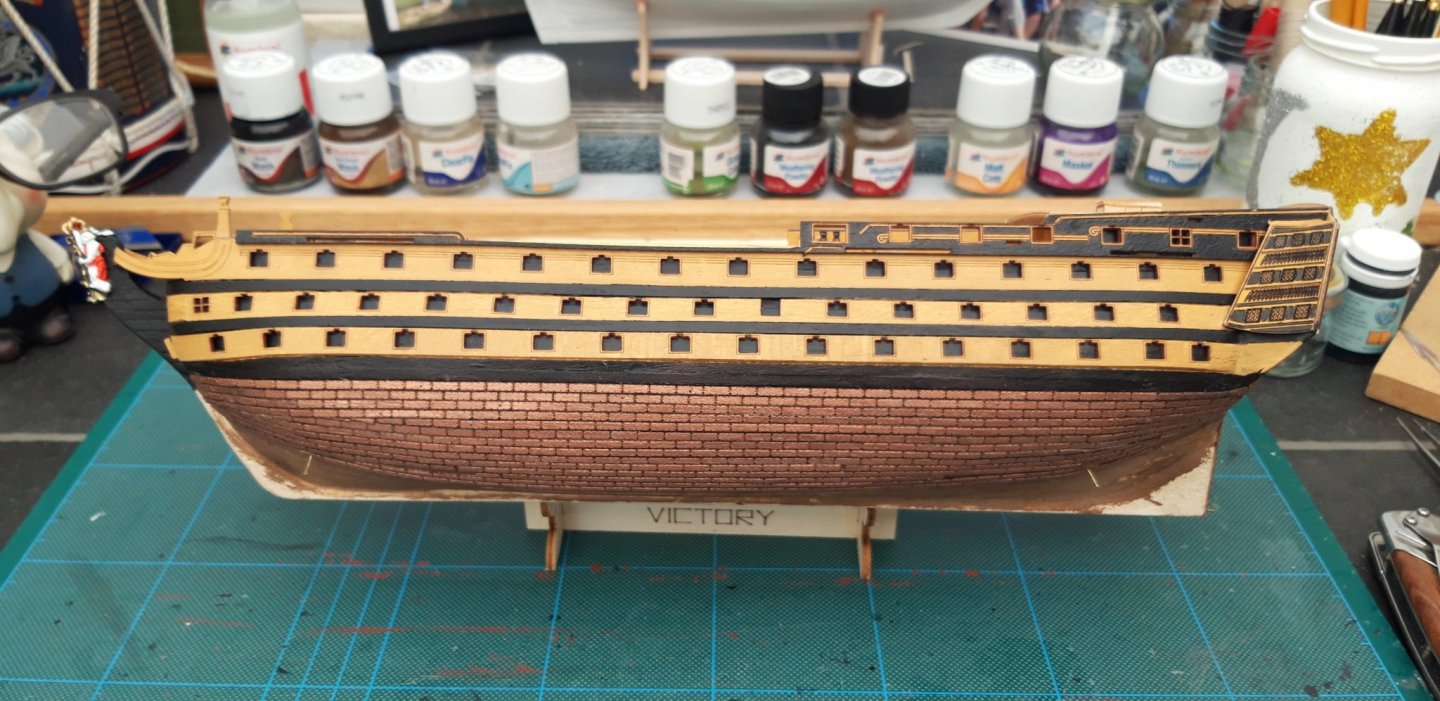
My next session should see the completion of the Port side.
Best wishes as always,
The Lazy Saint.
Session. Time. Total.
16. 4 hrs. 60 hrs.
- GrandpaPhil, Edwardkenway, Dubz and 4 others
-
 7
7
-
Hi all,
Stern Cabins now fitted, it has started to look ok now despite the trouble l found at first.
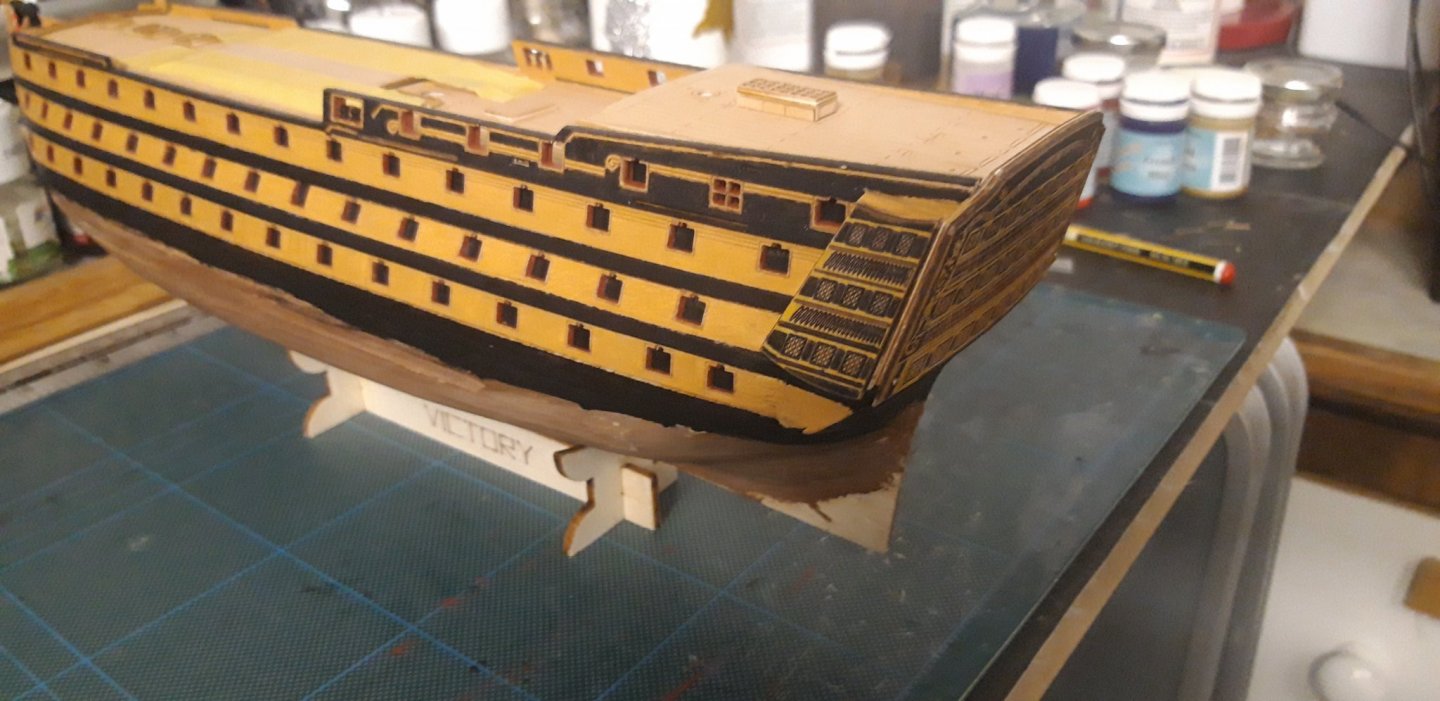
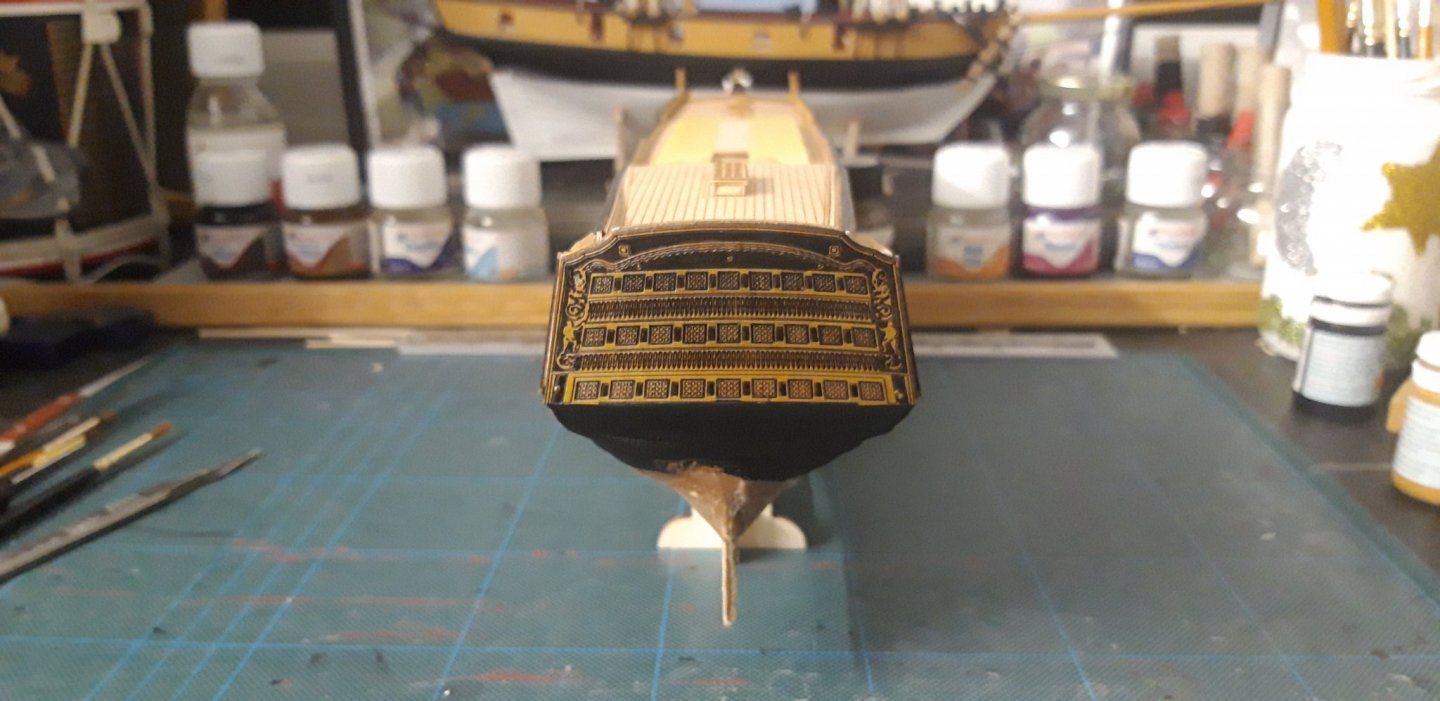
A little touching up at the start of the next session and then on to the simulated coppering.
Best wishes as always,
The Lazy Saint.
Session. Time. Total.
16. 1 hr. 58 hrs.
- Dubz, GrandpaPhil, Edwardkenway and 4 others
-
7
-
Hi Edward,
That wood does look good, l am looking forward to seeing your build take shape.
Best wishes as always,
The Lazy Saint.
- Edwardkenway and mtaylor
-
2
-
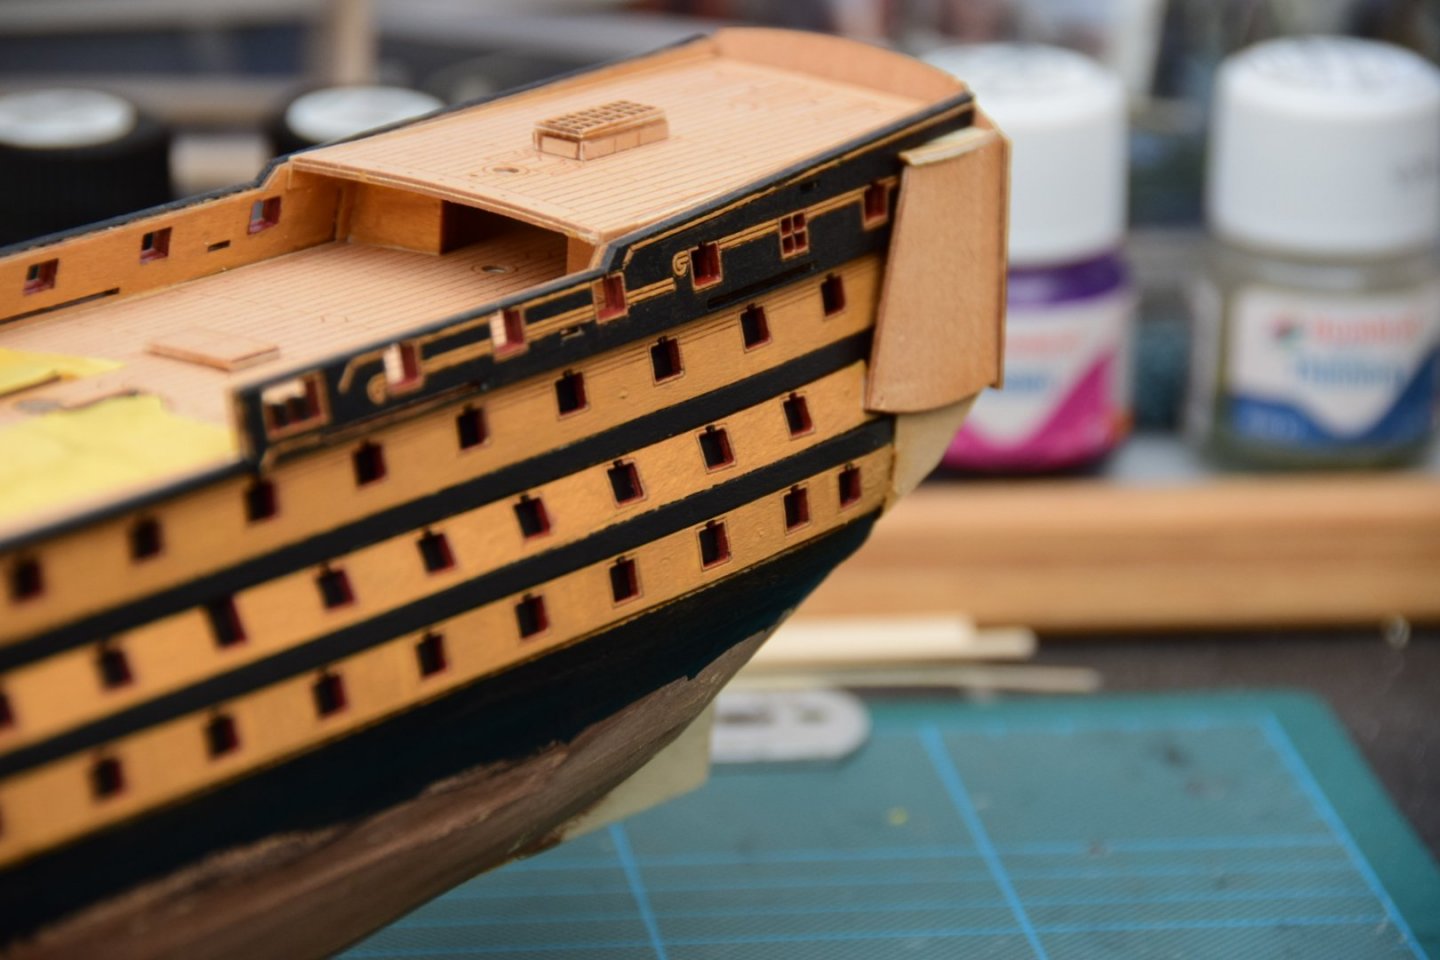
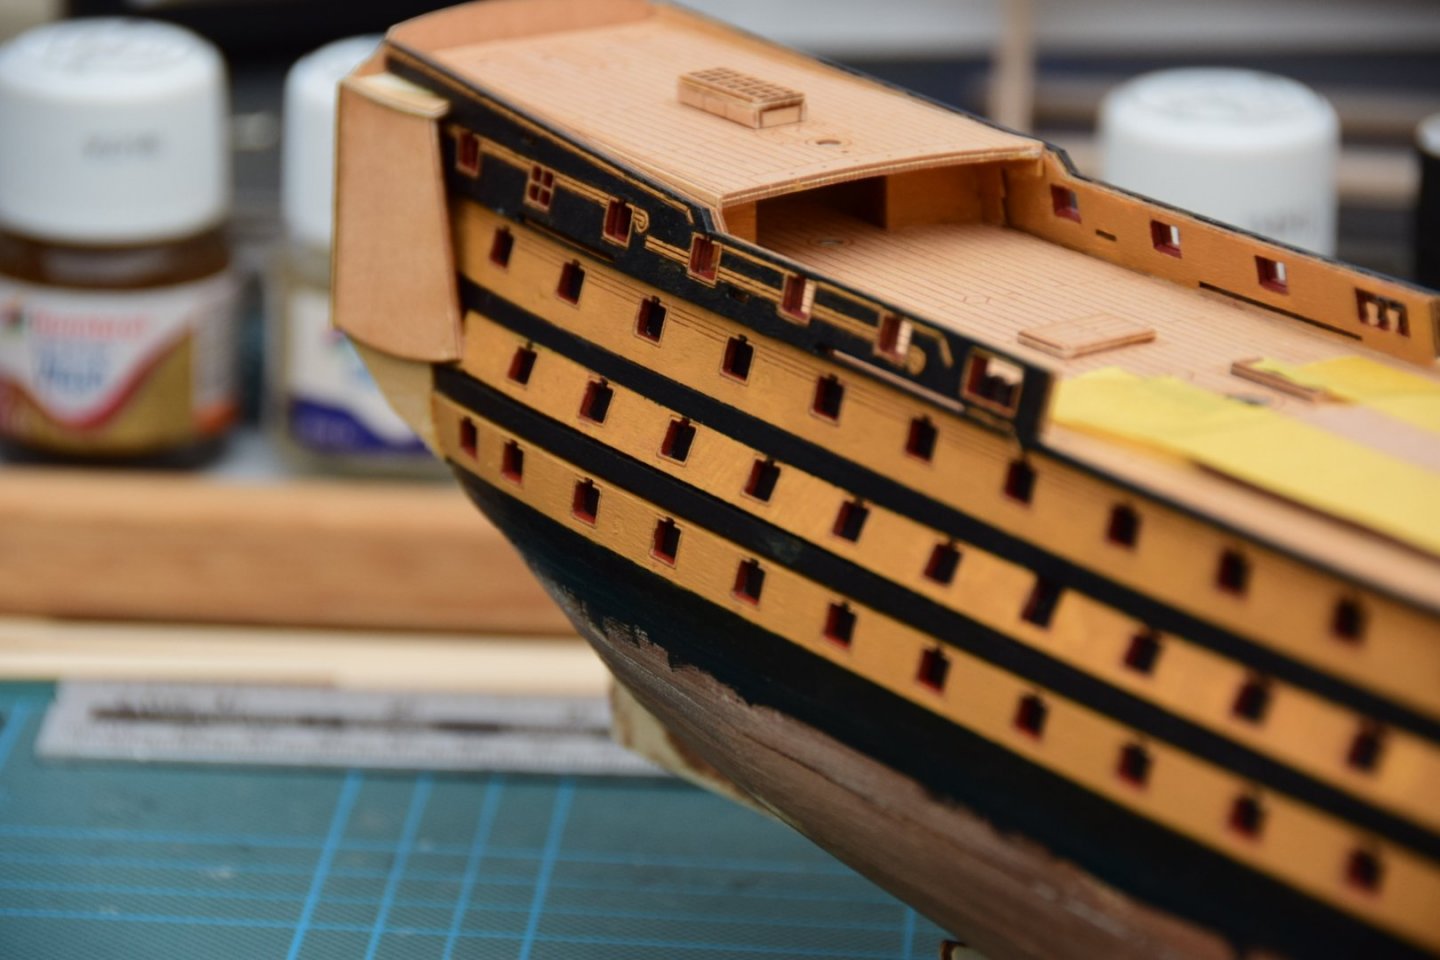
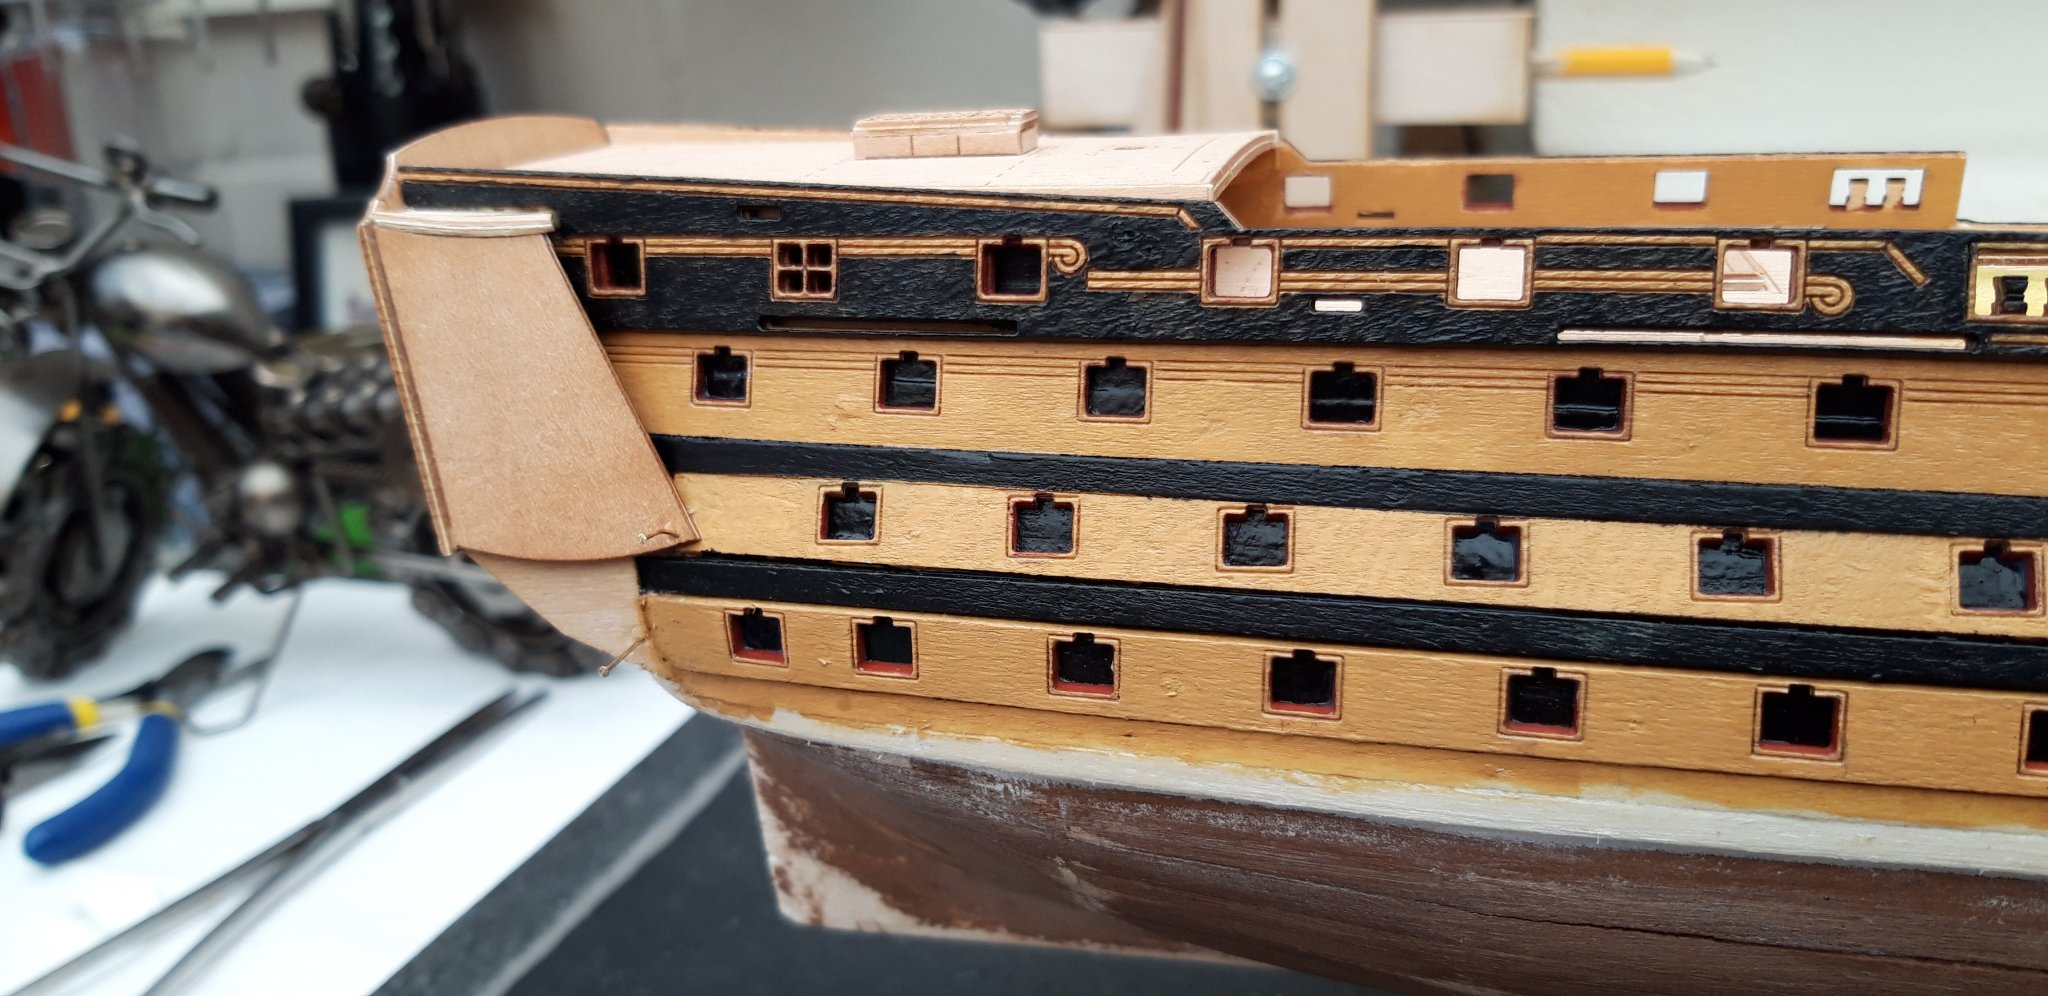
Hi all,
I worked on the Bow and Stern today, the Stern was particularly irksome. I got there in the end but it would take a better builder than me to fathom out the instructions. From here on in it is just pictures.
A splash of paint tomorrow and the Stern should be finished.
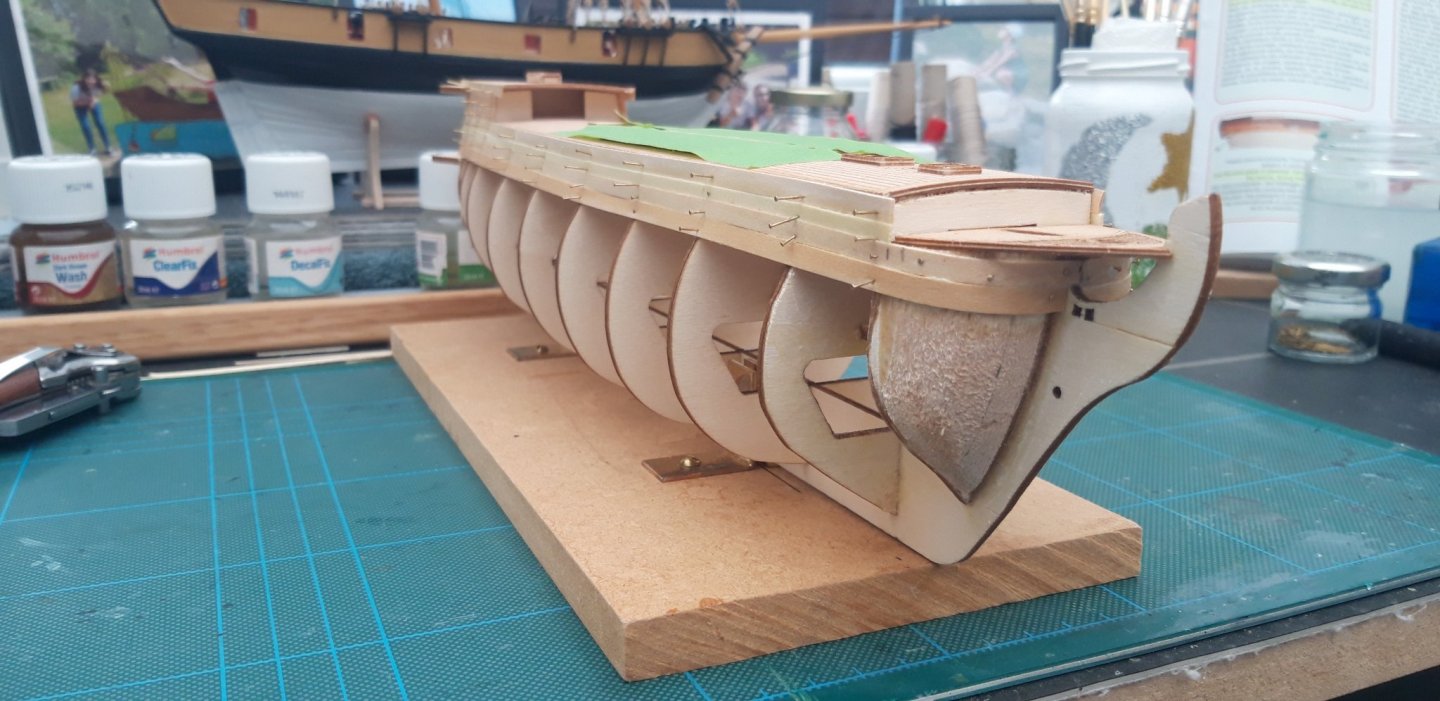
On a brighter note, the Bow looks OK.
Best wishes as always,
The Lazy Saint.
Session. Time. Total.
15. 4 hrs. 57 hrs.
- Edwardkenway, Dubz, Retired guy and 1 other
-
4
-
Hi all,
Only had an hour in the Den today so never managed any work on the Bow and Stern. I did manage to paint my Gun Ports though.
Black for the outside.
Red for the inside.

Best wishes as always,
The Lazy Saint.
Session. Time. Total.
14. 1 hr. 53 hrs.
- Edwardkenway and GrandpaPhil
-
2
-
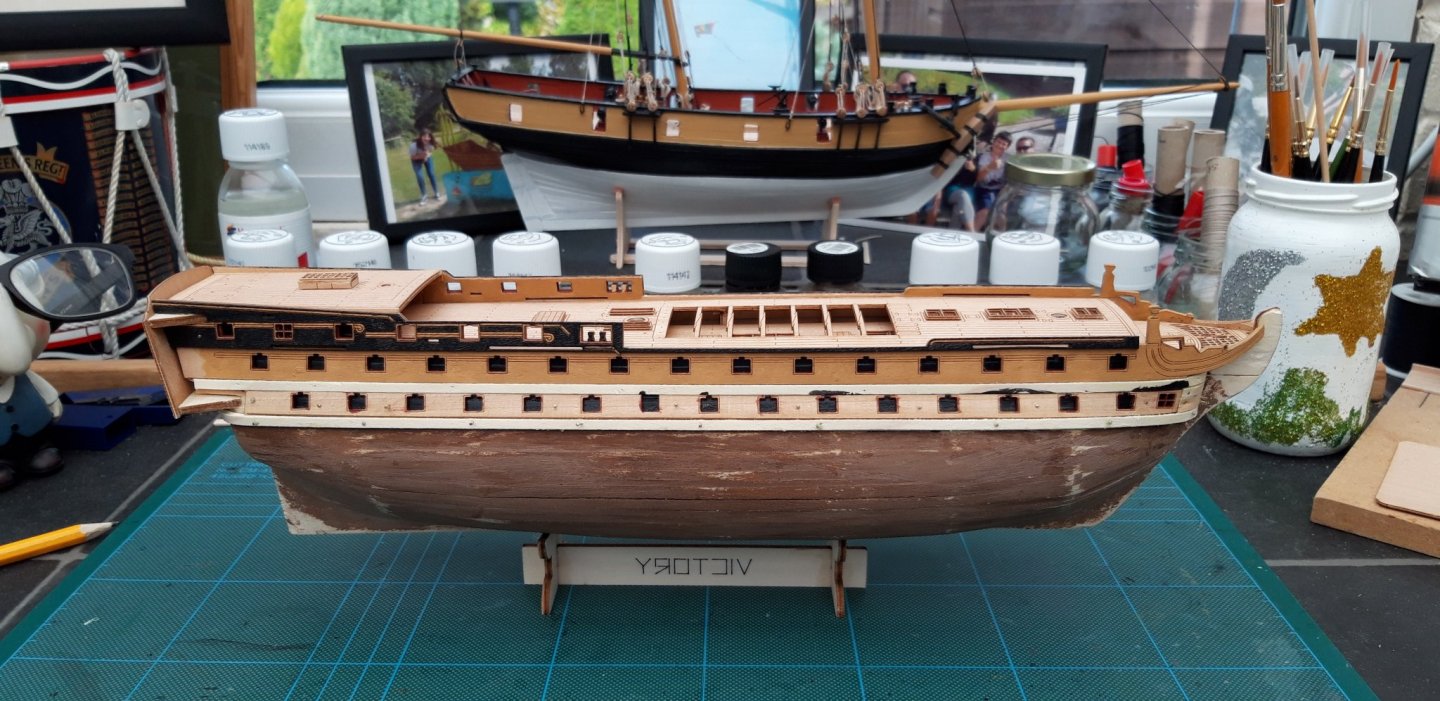
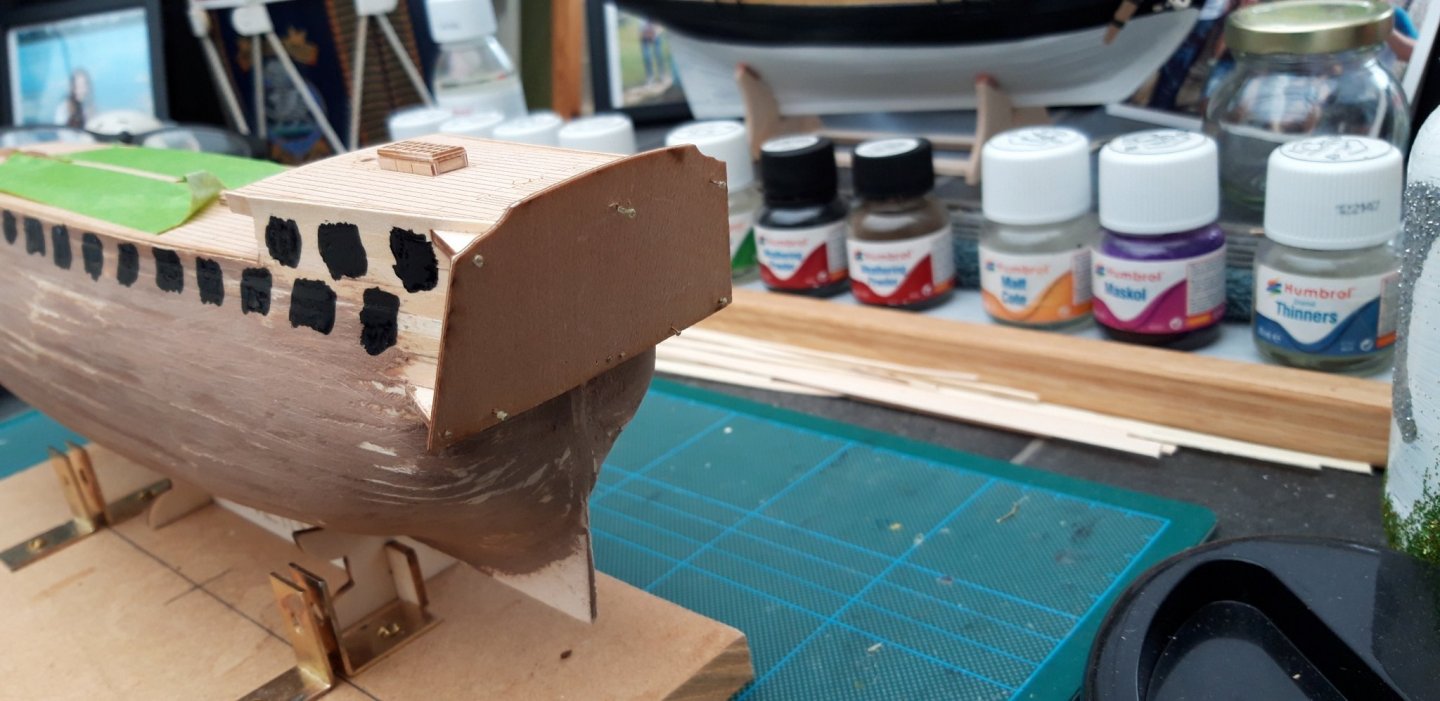
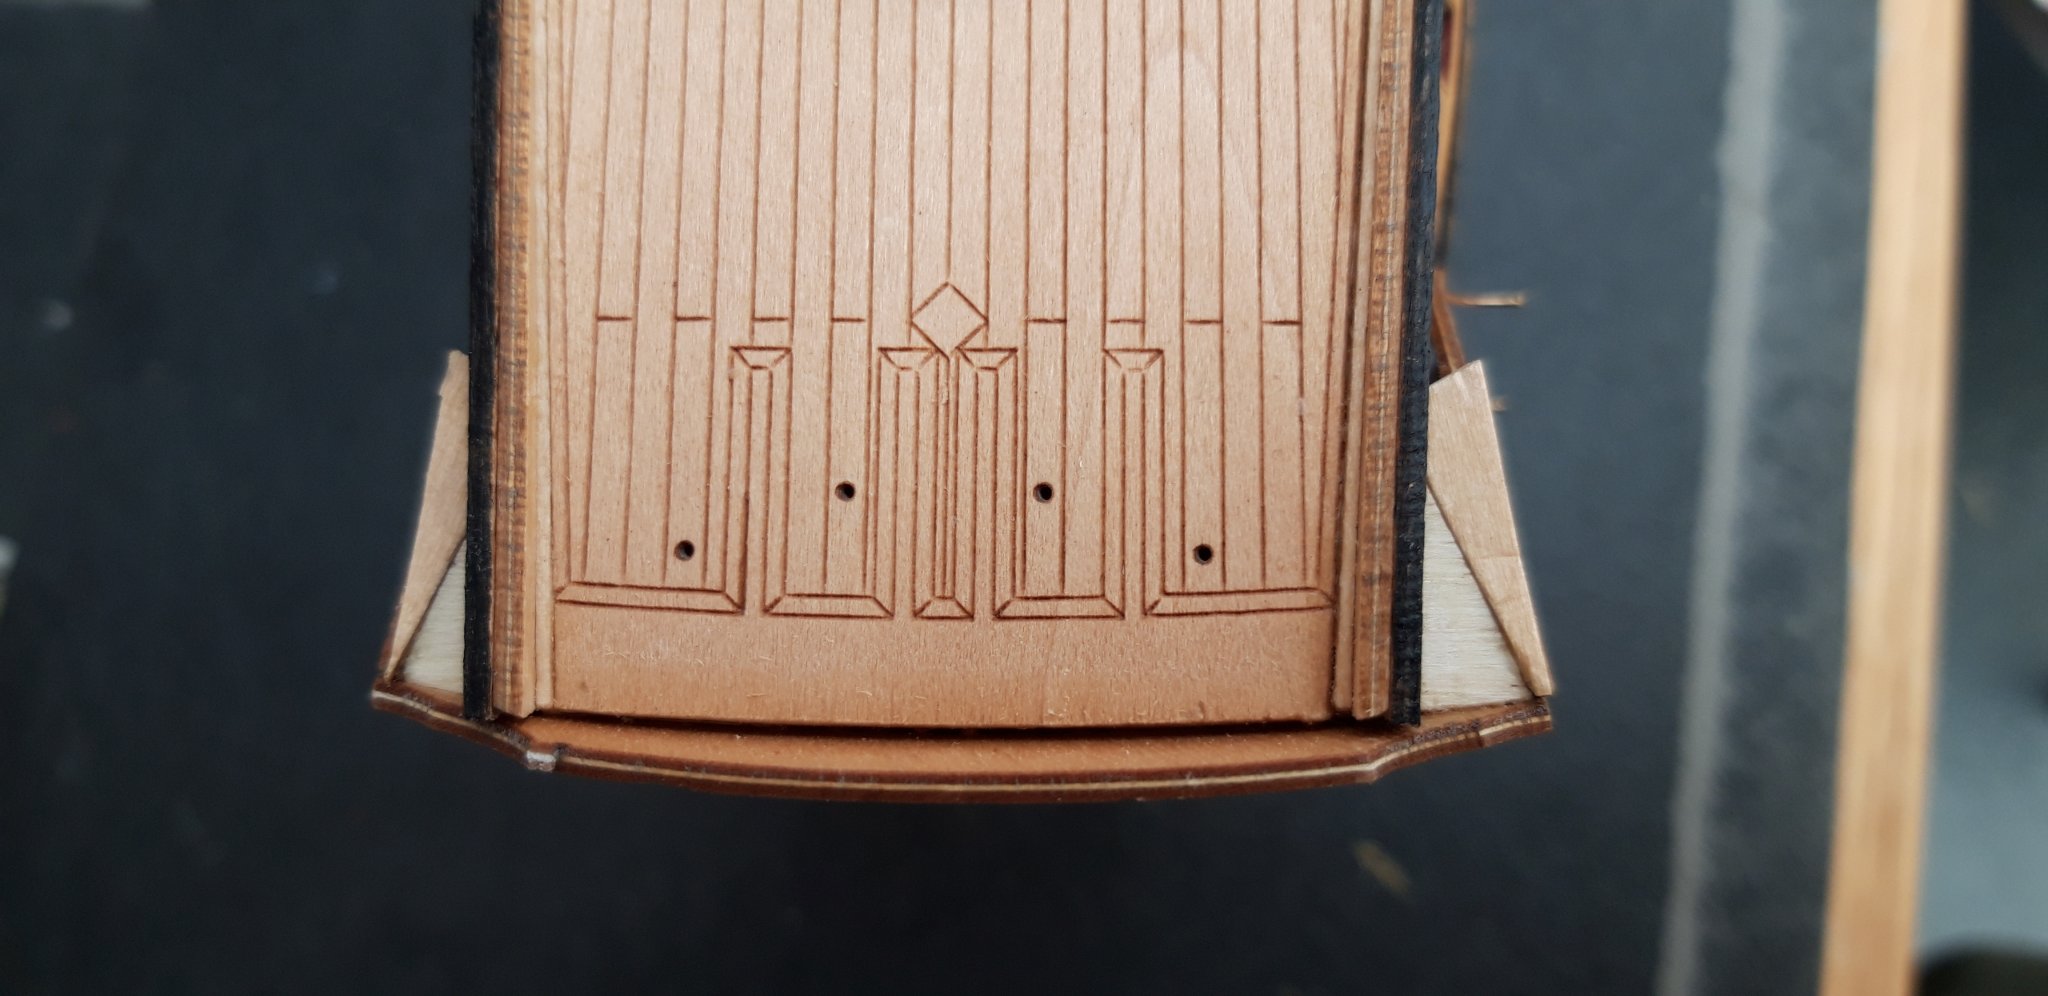
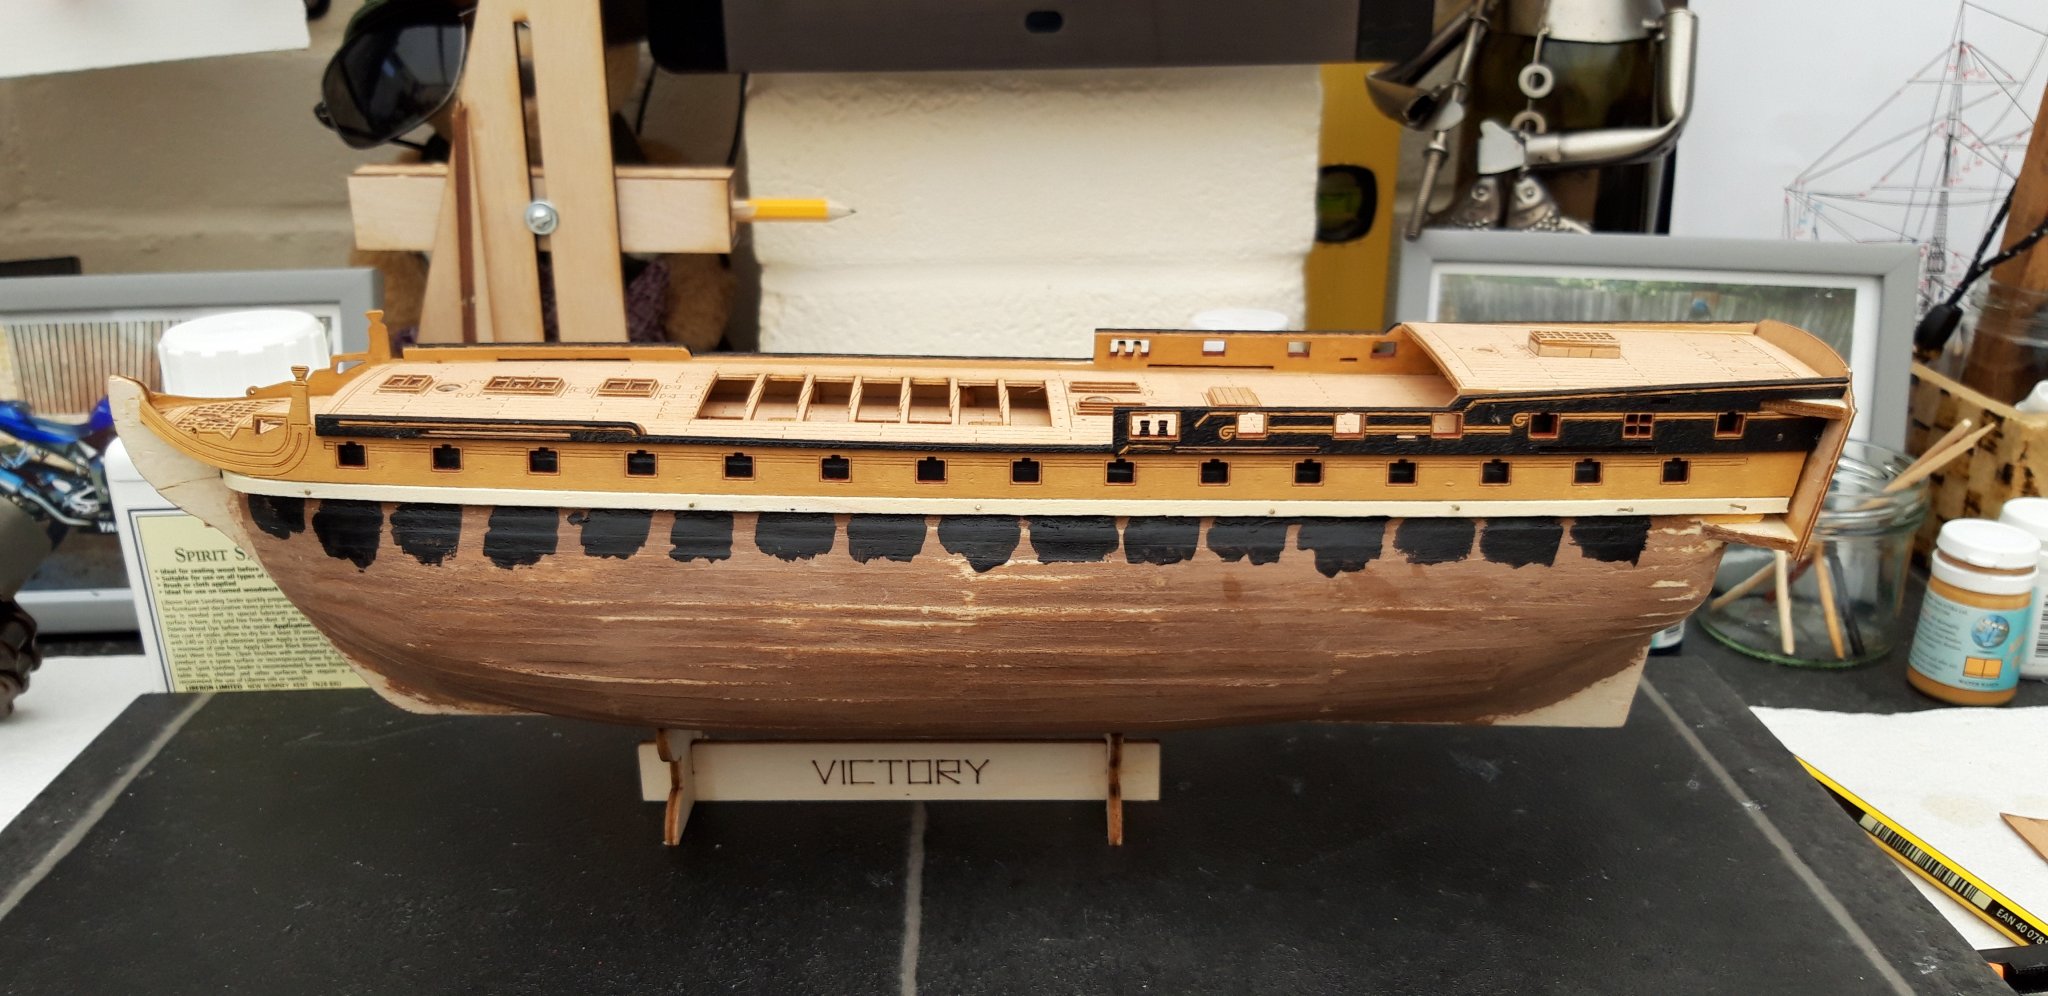
Hi all,
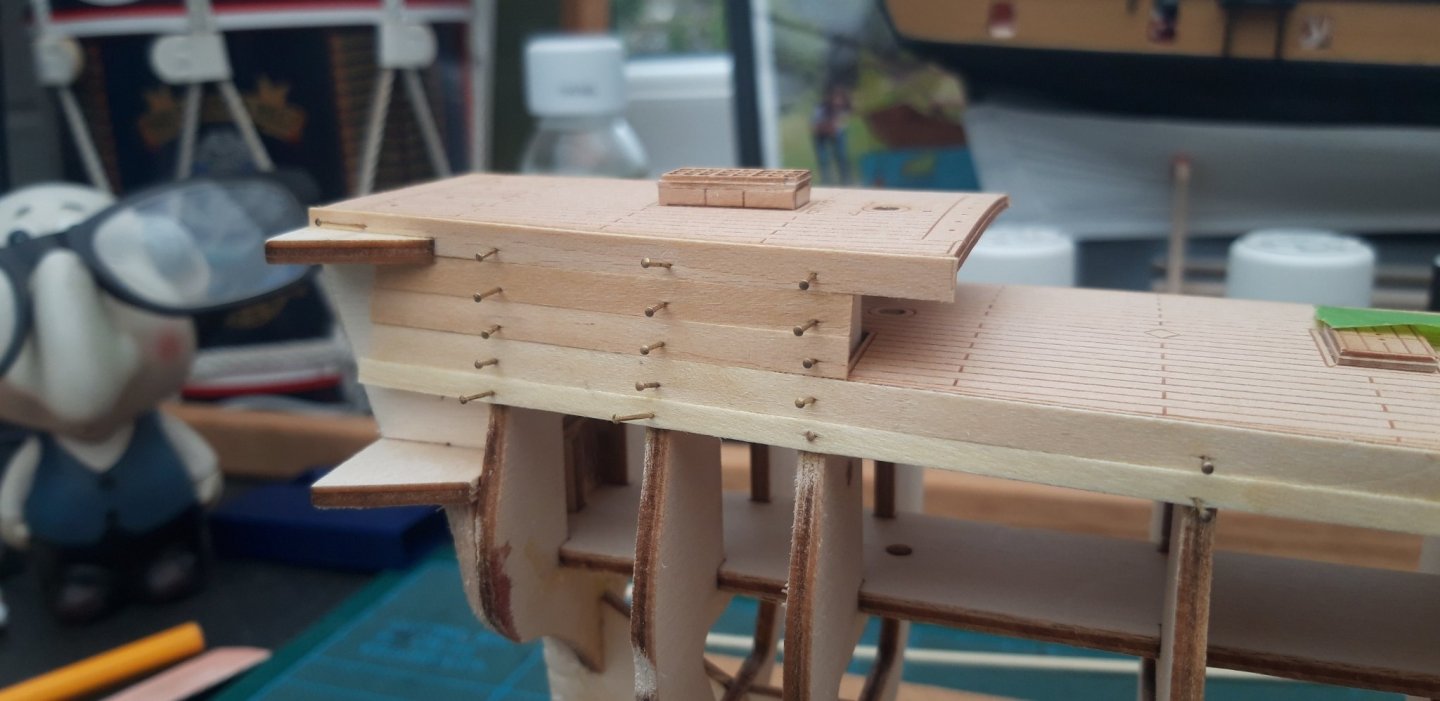
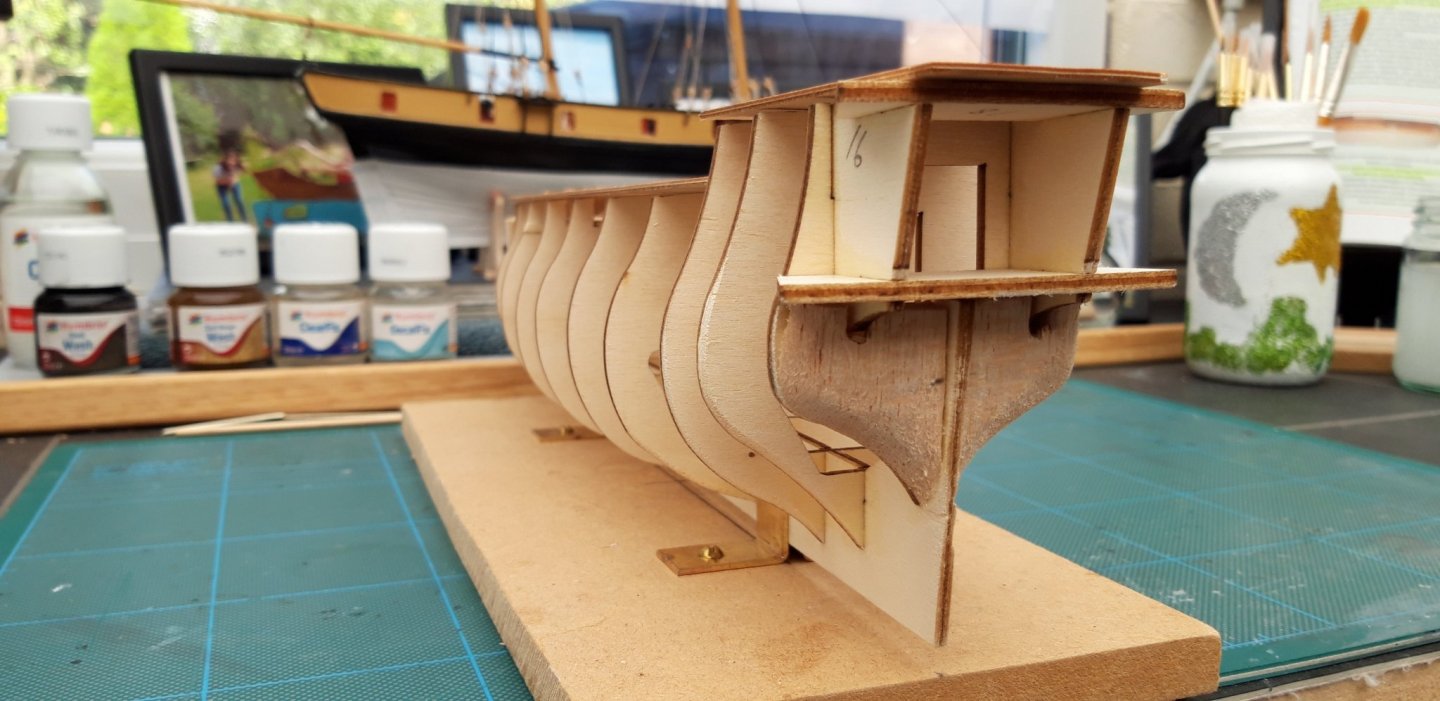
Good session today and, as l said at the end of my last session, this session l will work on the Bow and Stern. Here you can see the Stern Cabins taking shape.
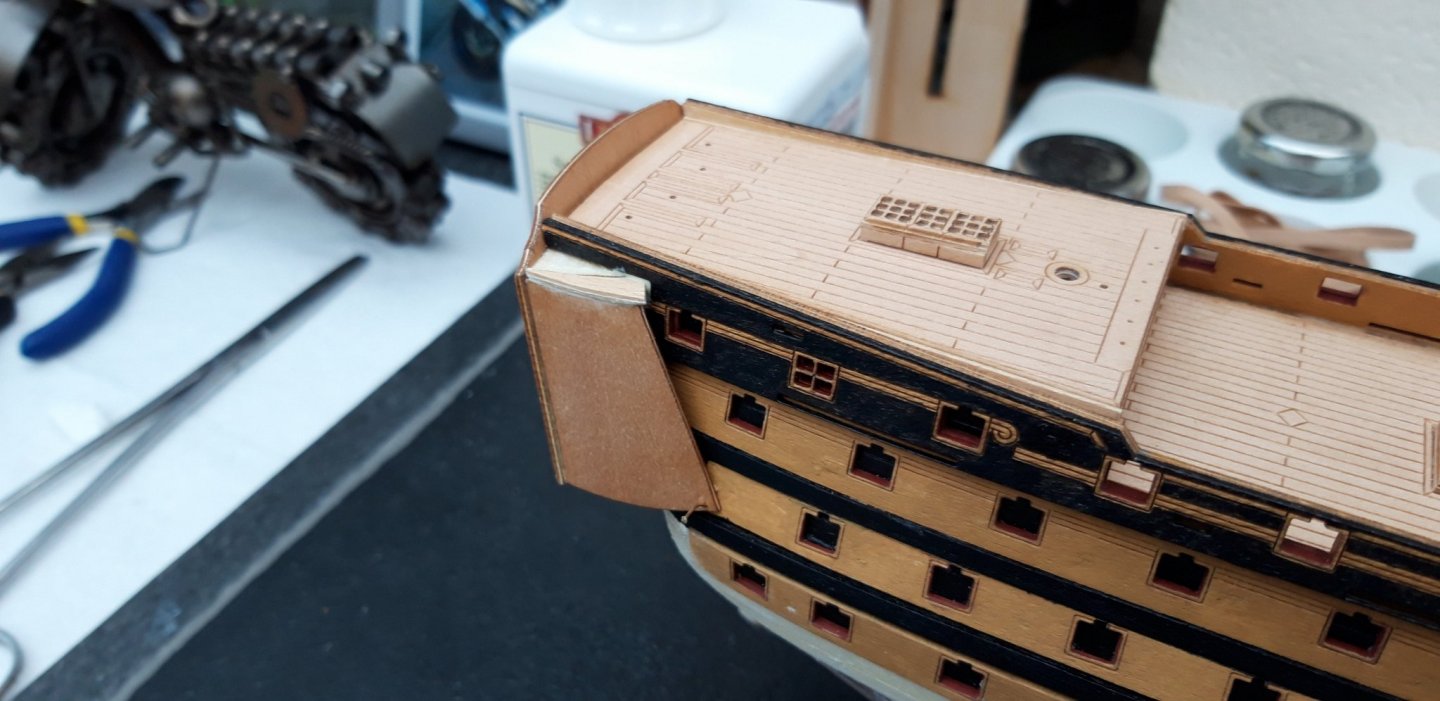
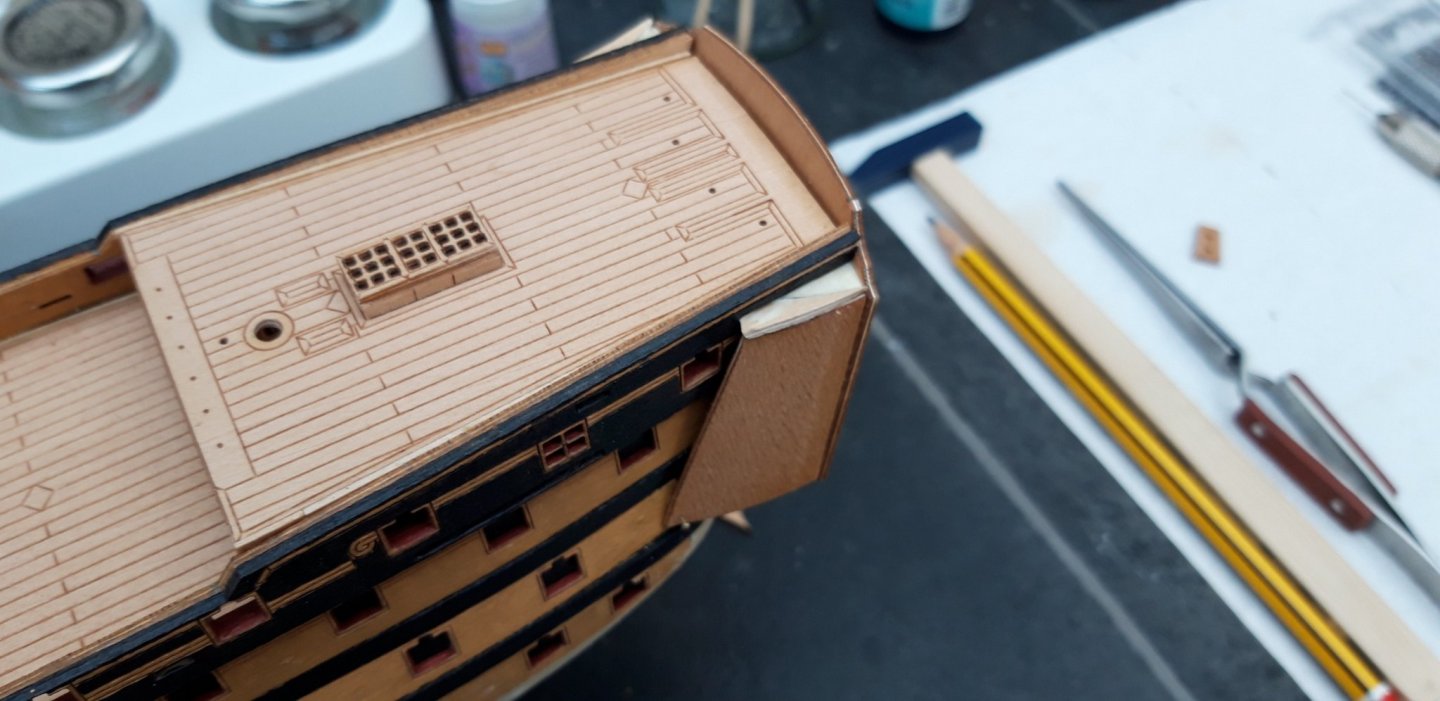
the side pieces wouldn't fit flush unless they were bent to shape, l know that isn't correct so l opted to use a filler board. I shall sand it flush when it has dried.

The next two shots show the Stern Cabins Support struts being fitted. I found these pieces quite bewildering at first, but got there in the end.

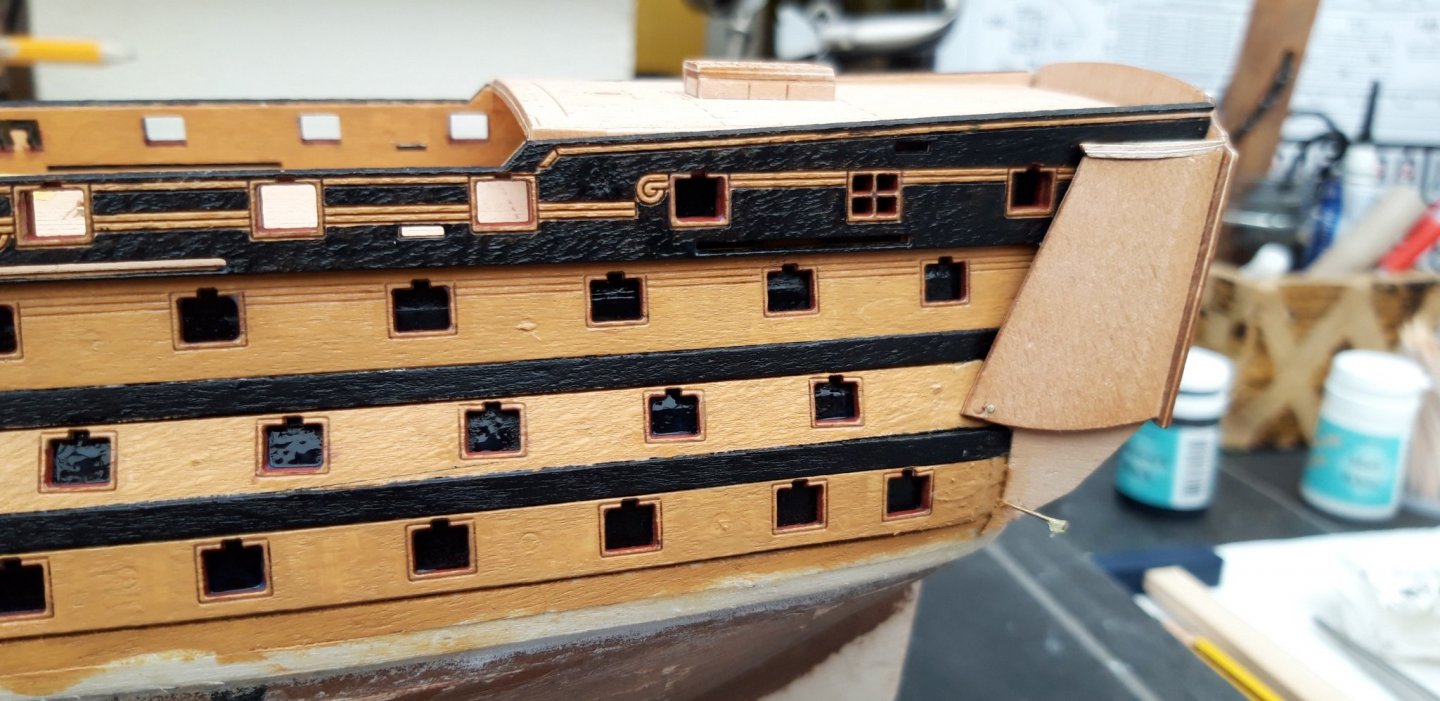
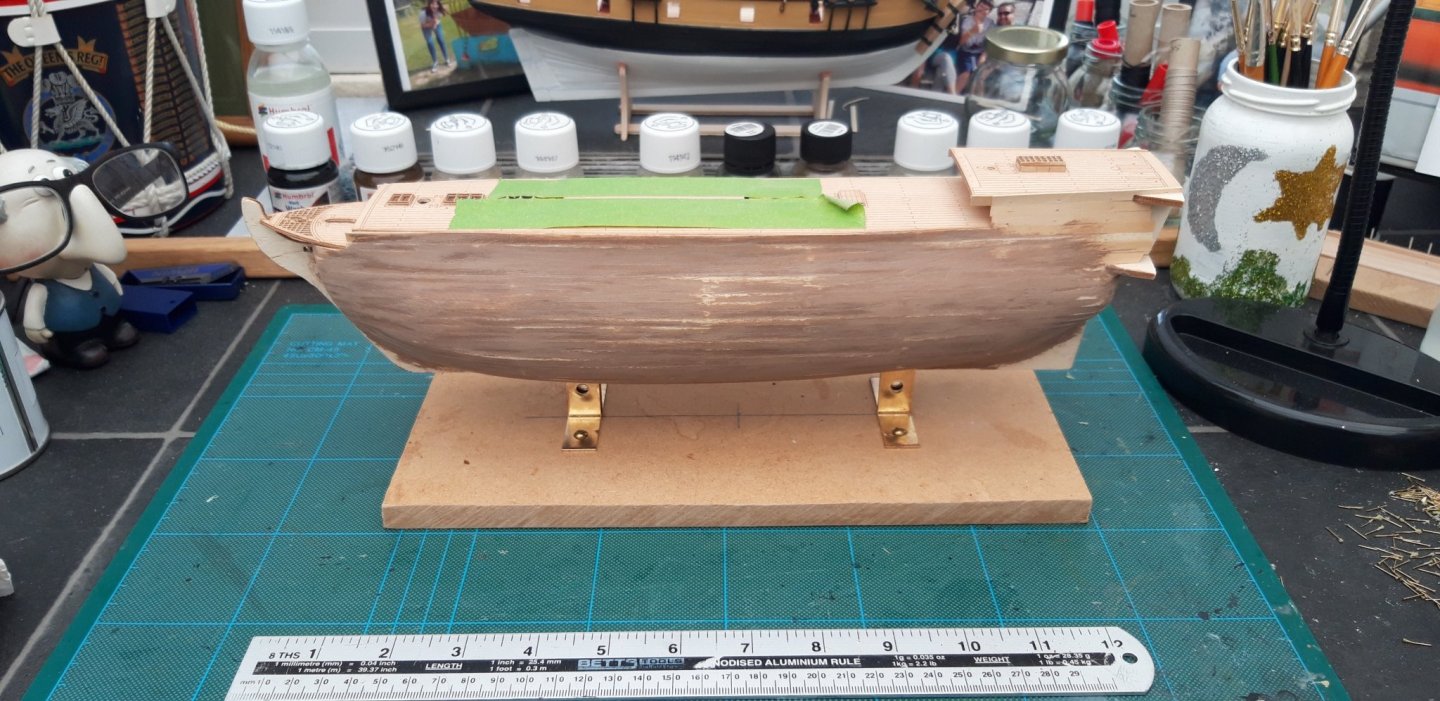
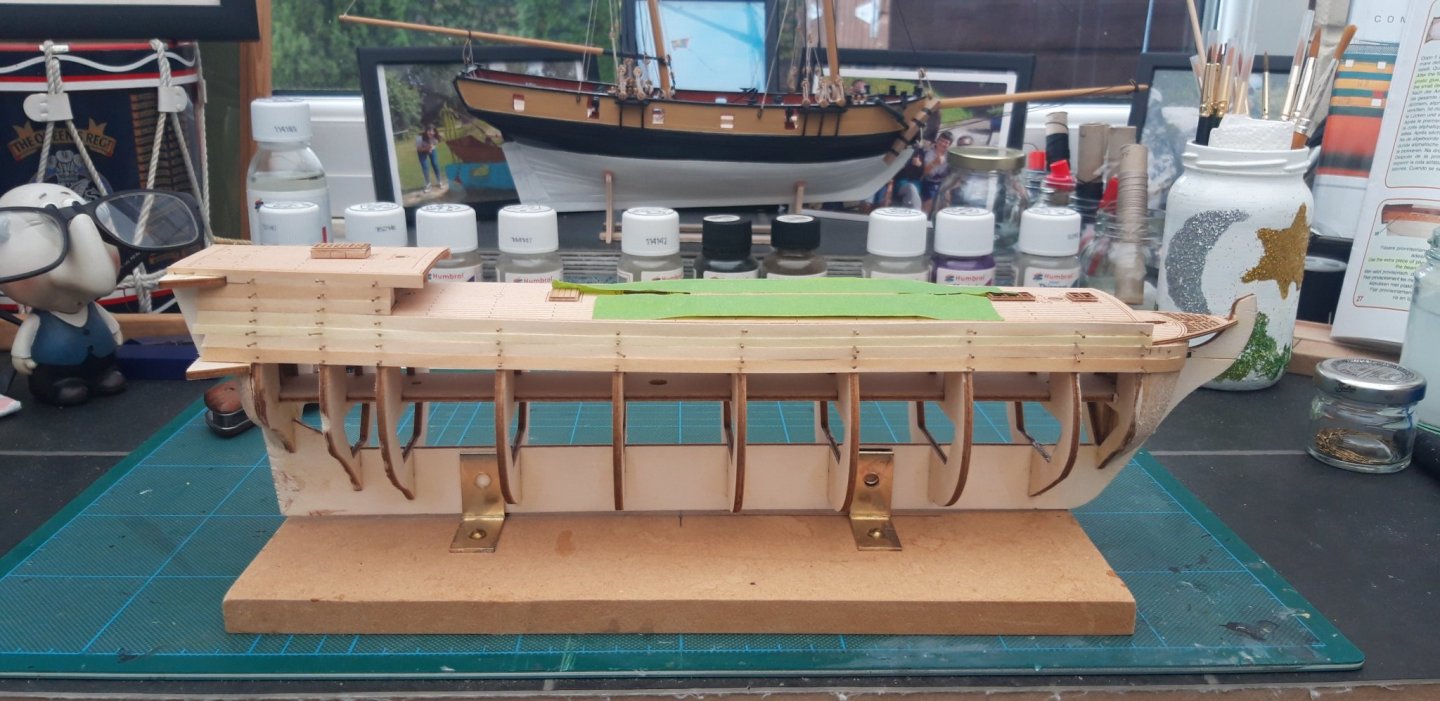
The last of the hull planking is in position now and painted. I have also clad the Bow and painted black.
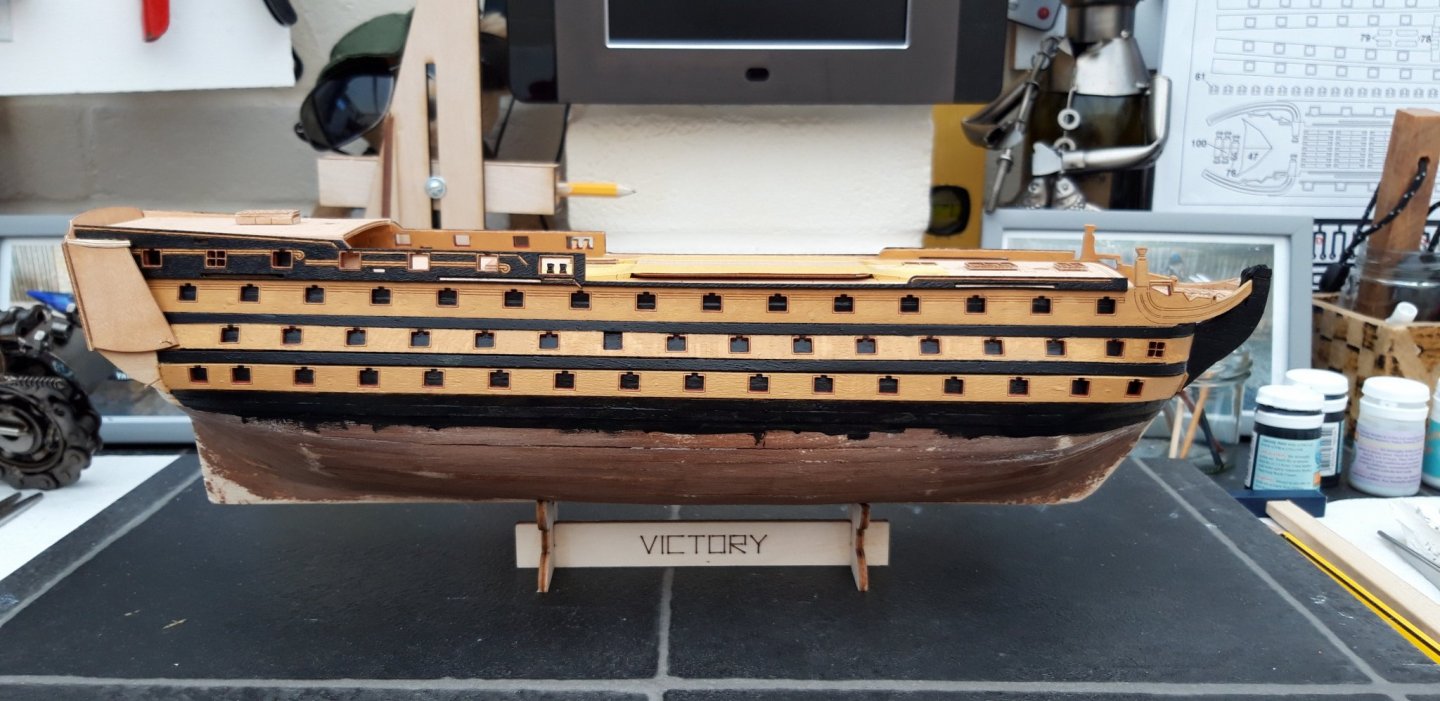
And here is where I am now. All glue has dried, pins removed, holes filled, paint work touched up and all protected under a coat of varnish.

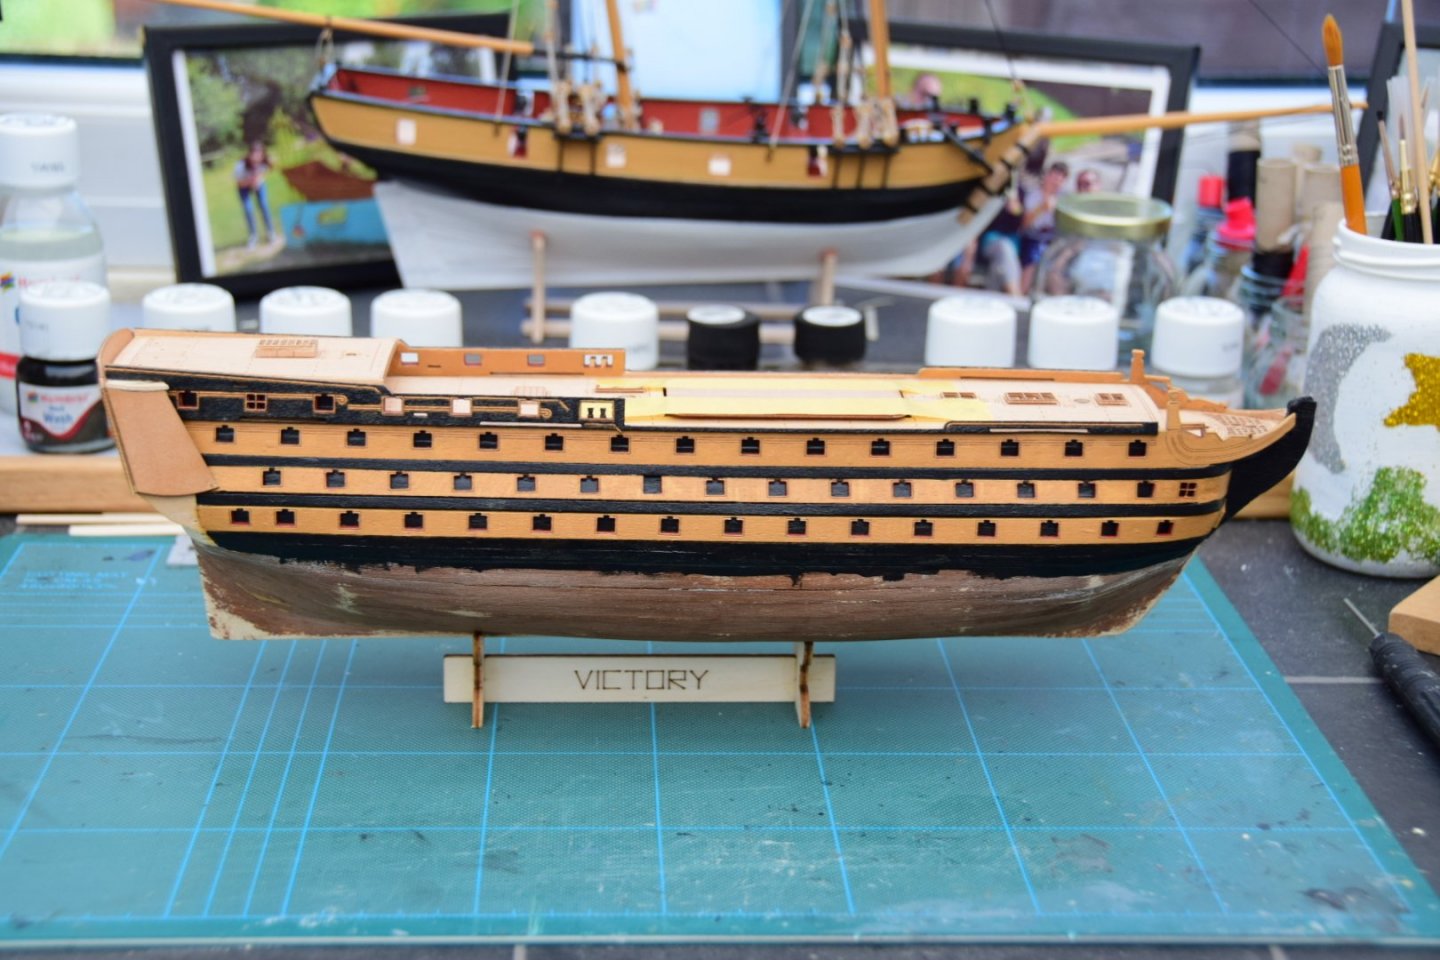
The next session should see the completion of the Stern Cabins and a little more work on the Bow, with any luck.
Best wishes as always,
The Lazy Saint.
Session. Time. Total.
13. 3 hrs. 52 hrs.
- mugje, Retired guy, Edwardkenway and 3 others
-
6
-
Hi David,
I have enjoyed looking through your build log David and she is coming on very nicely.
Best wishes as always,
The Lazy Saint.
-
Hi Richard
Its a lot of fun watching.
Best wishes as always,
The Lazy Saint.
-
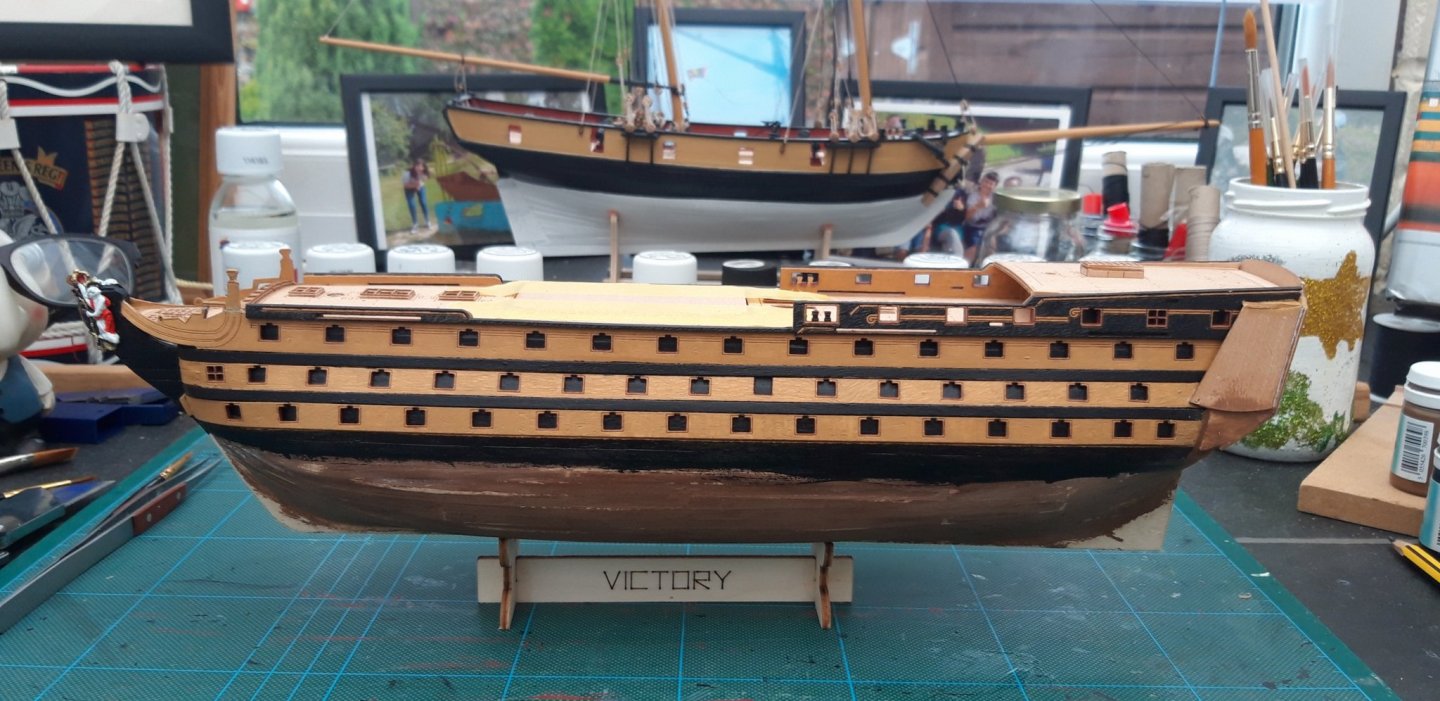
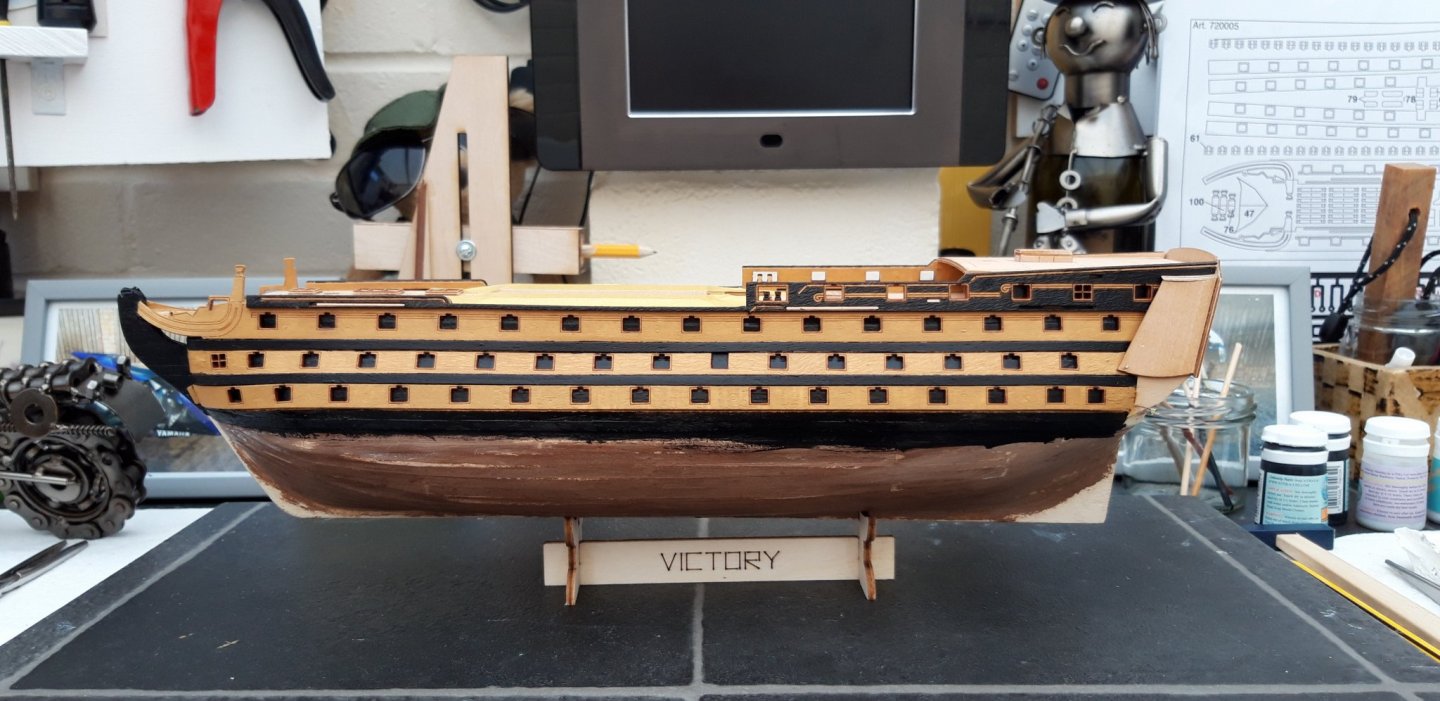
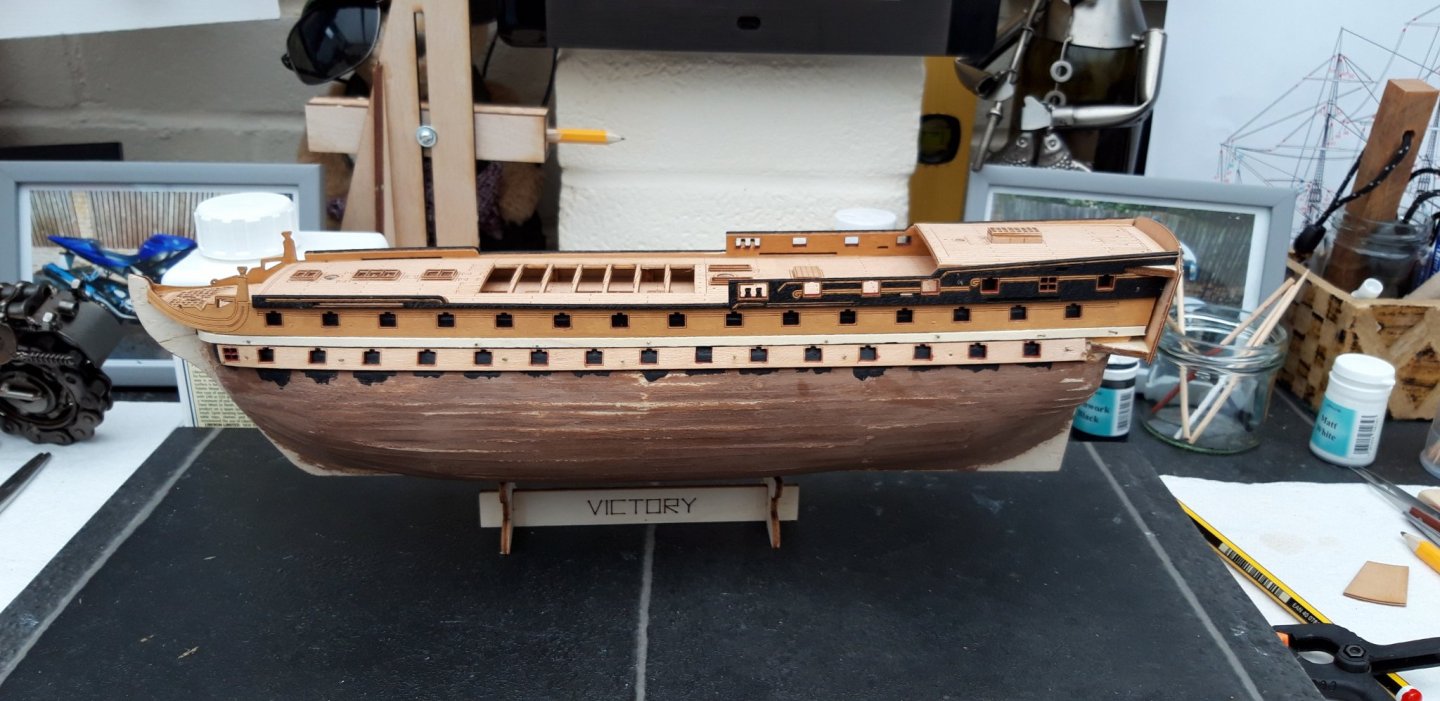
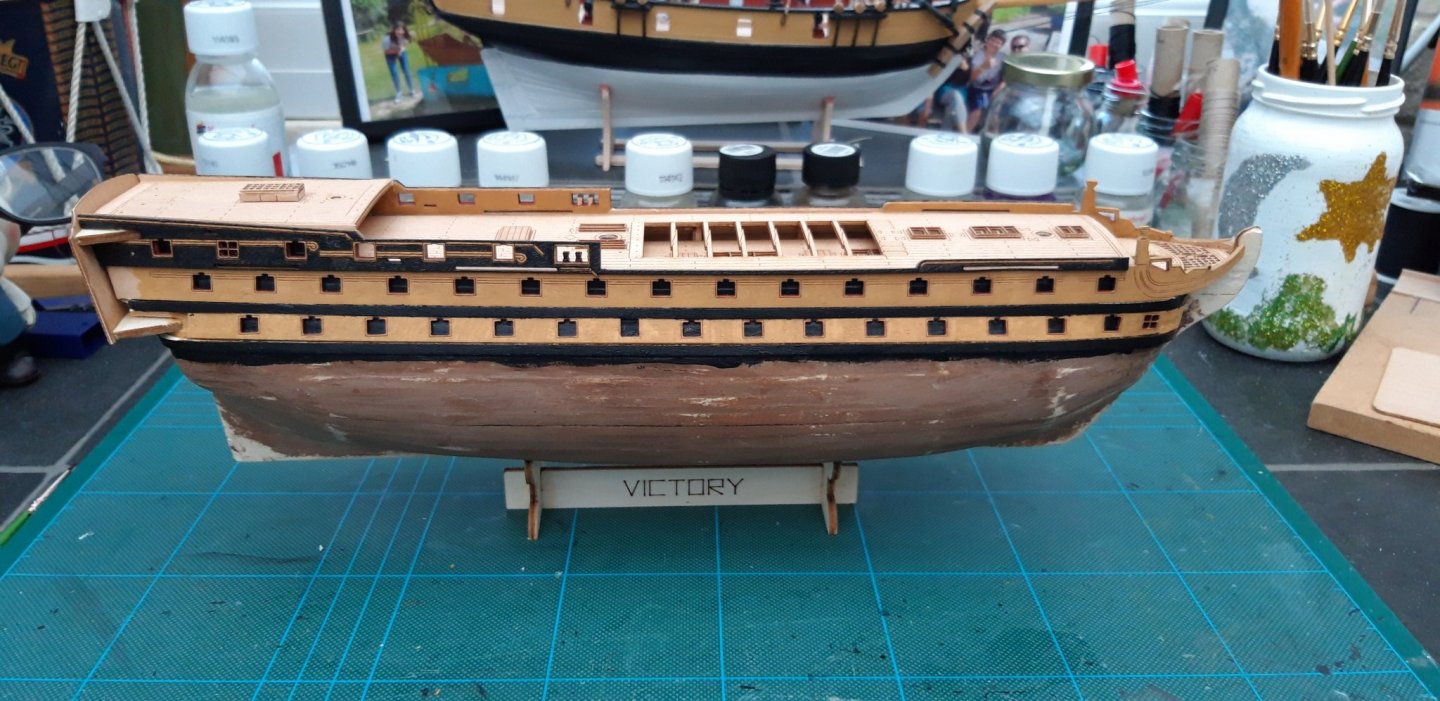
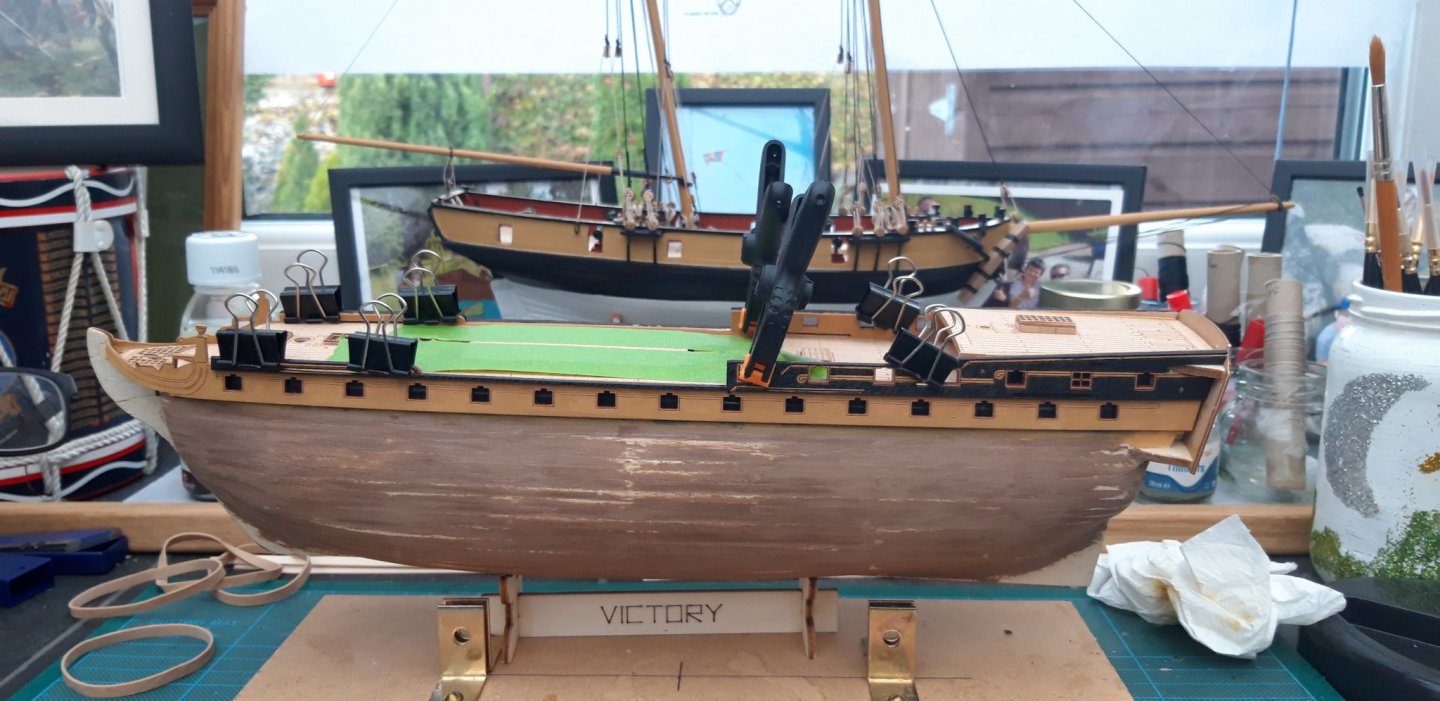
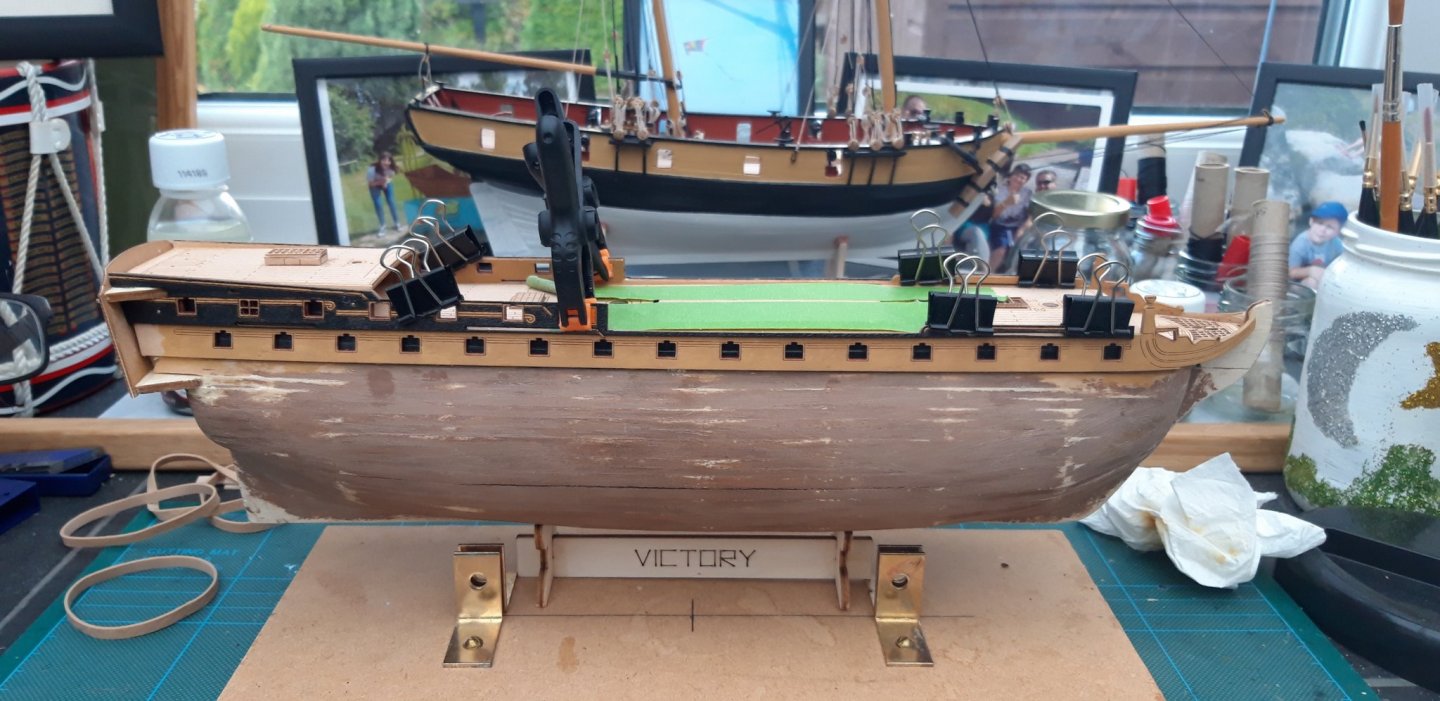
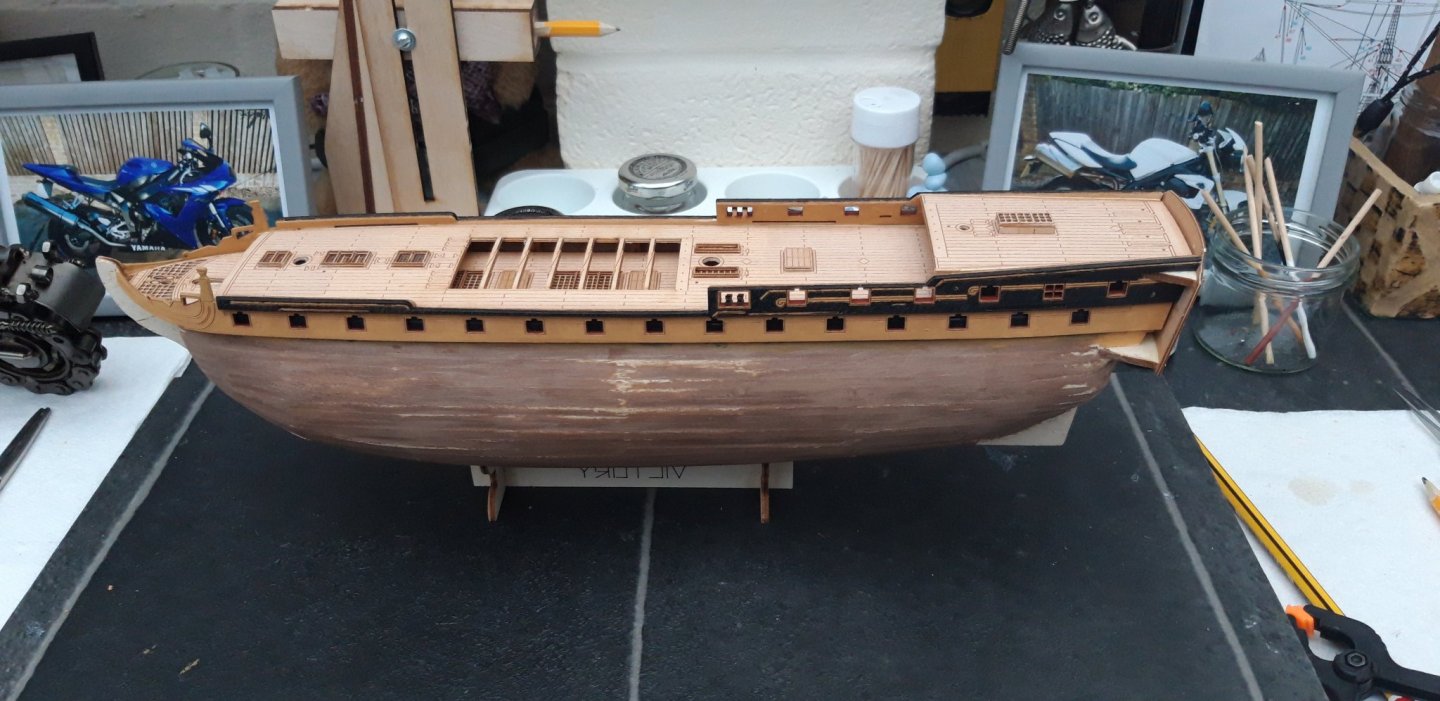
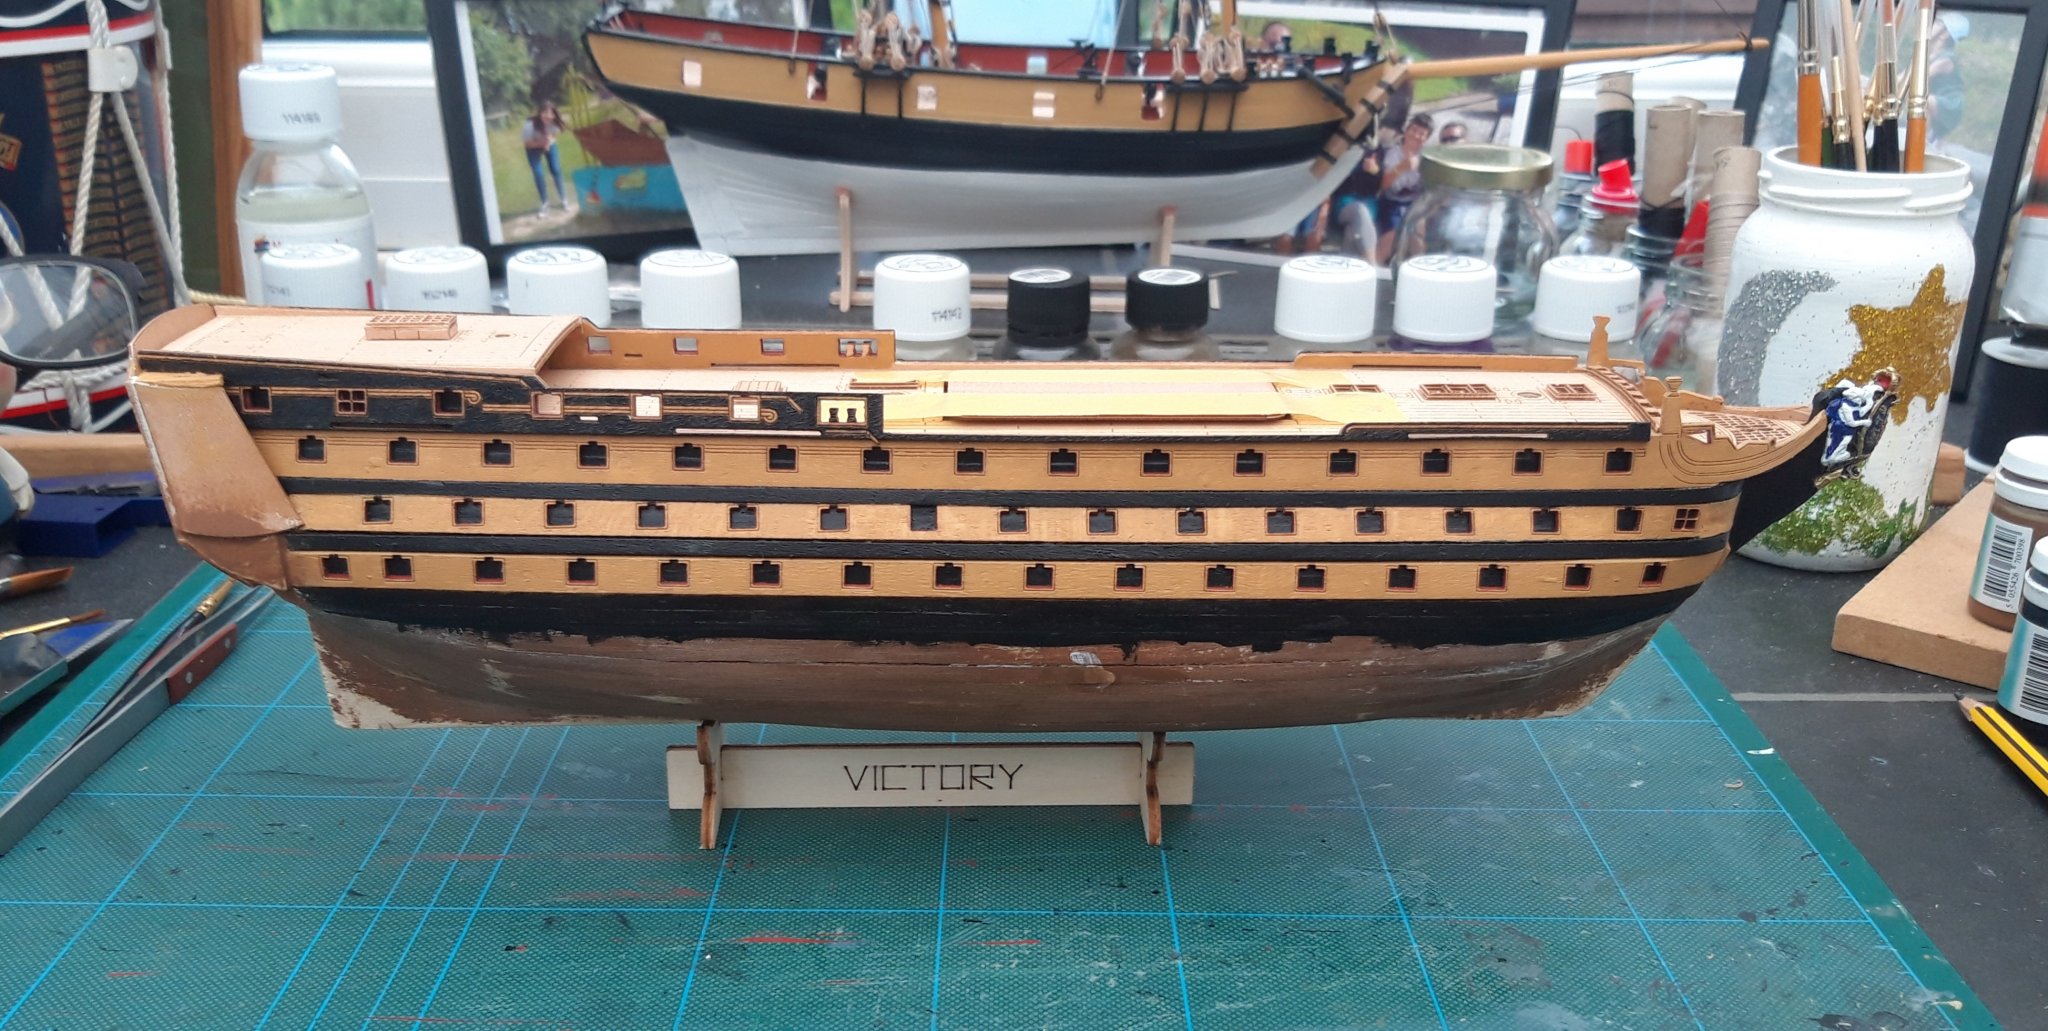
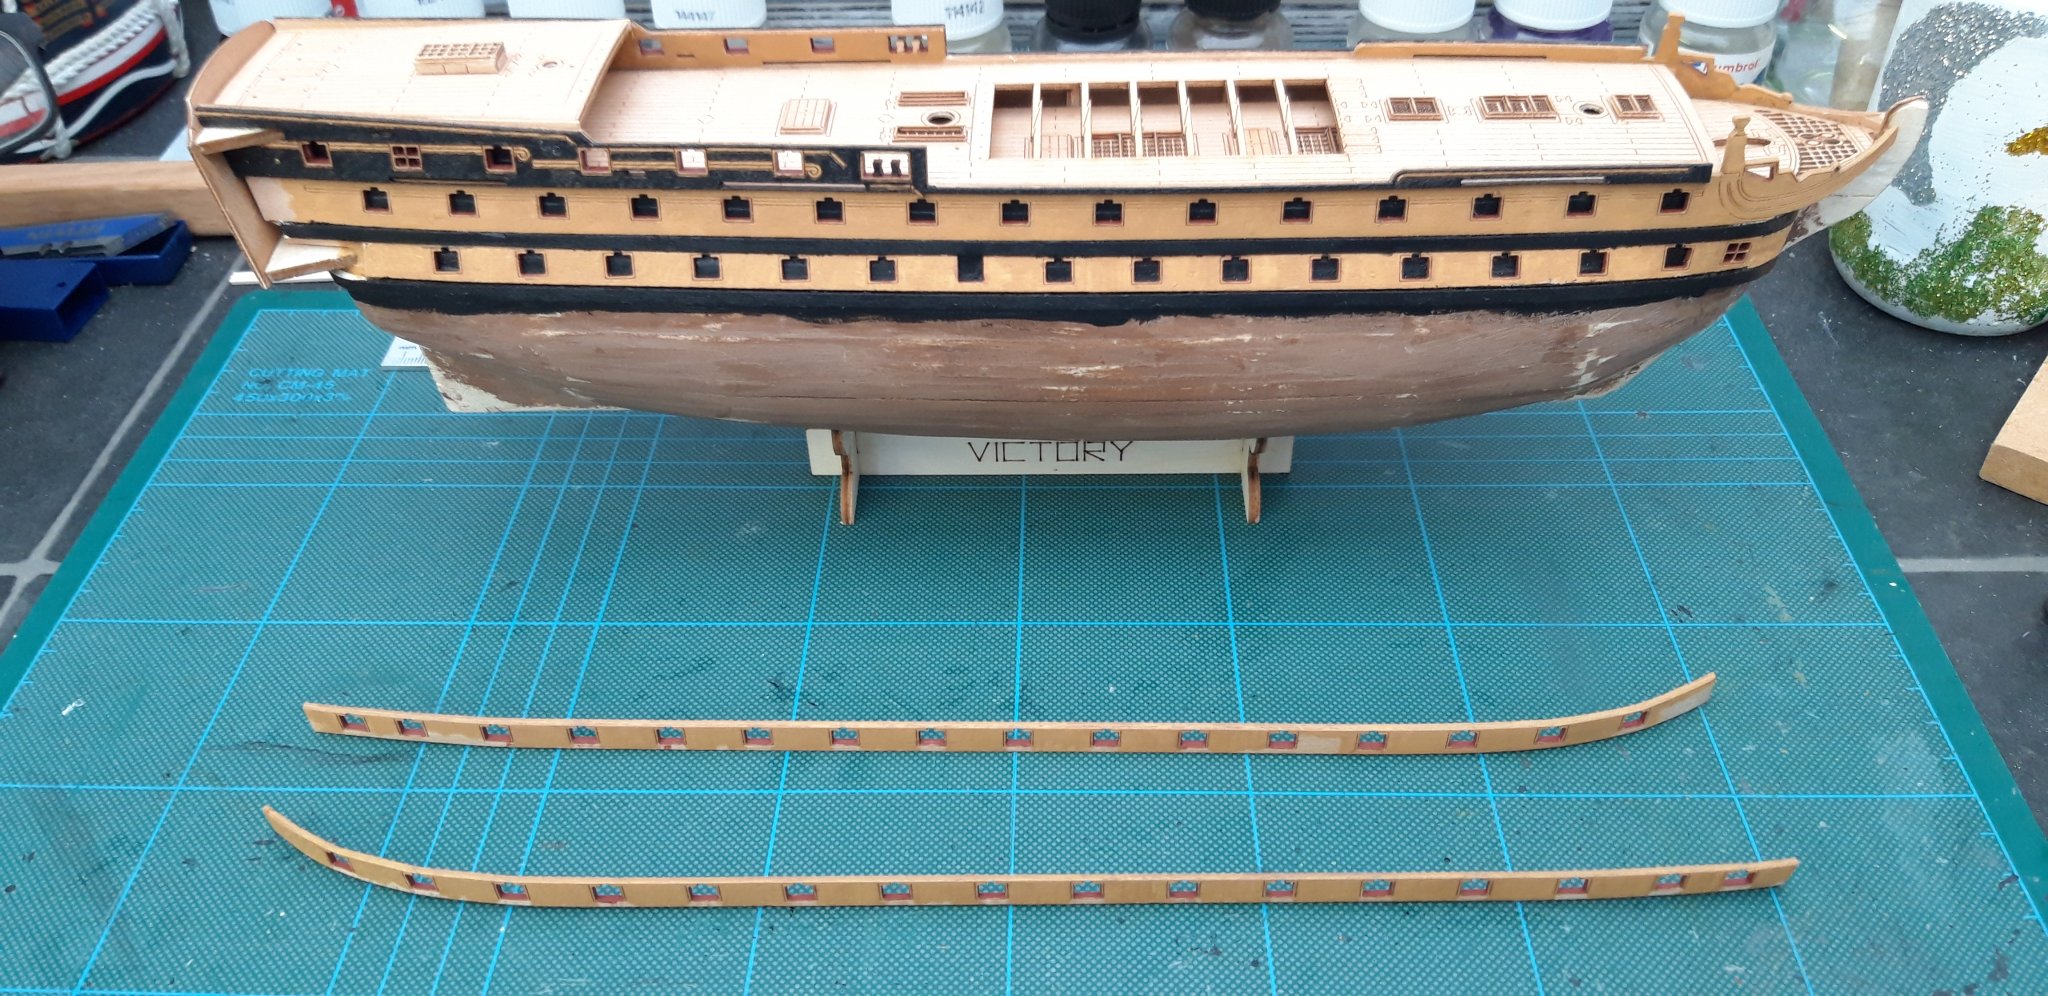
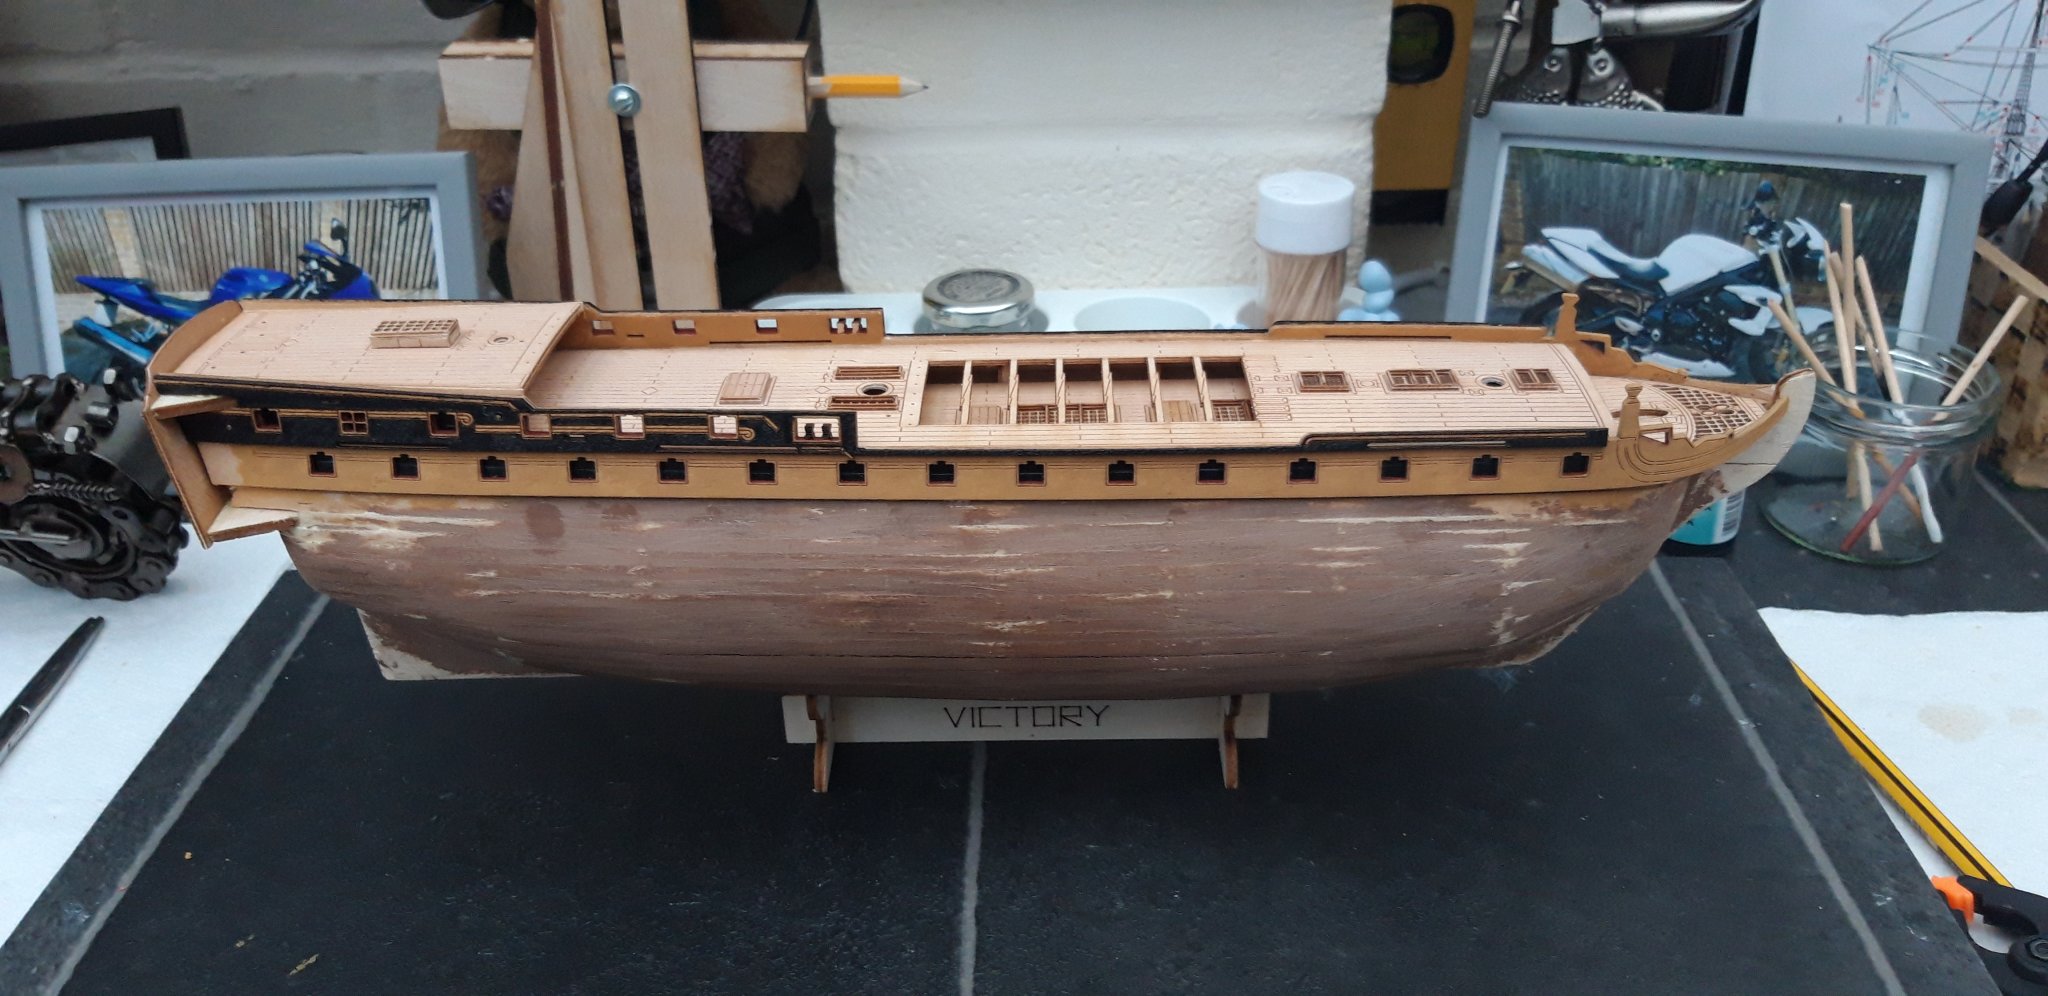
Hi all,
Thank you very much for the kind words Edward, appreciated as always.
A shorter session today but l achieved my aim of fitting the lower Gunports. I painted before fitting today, which is the best choice on this build. I had a bit of touching up to do from yesterday which, to be fair, went ok.
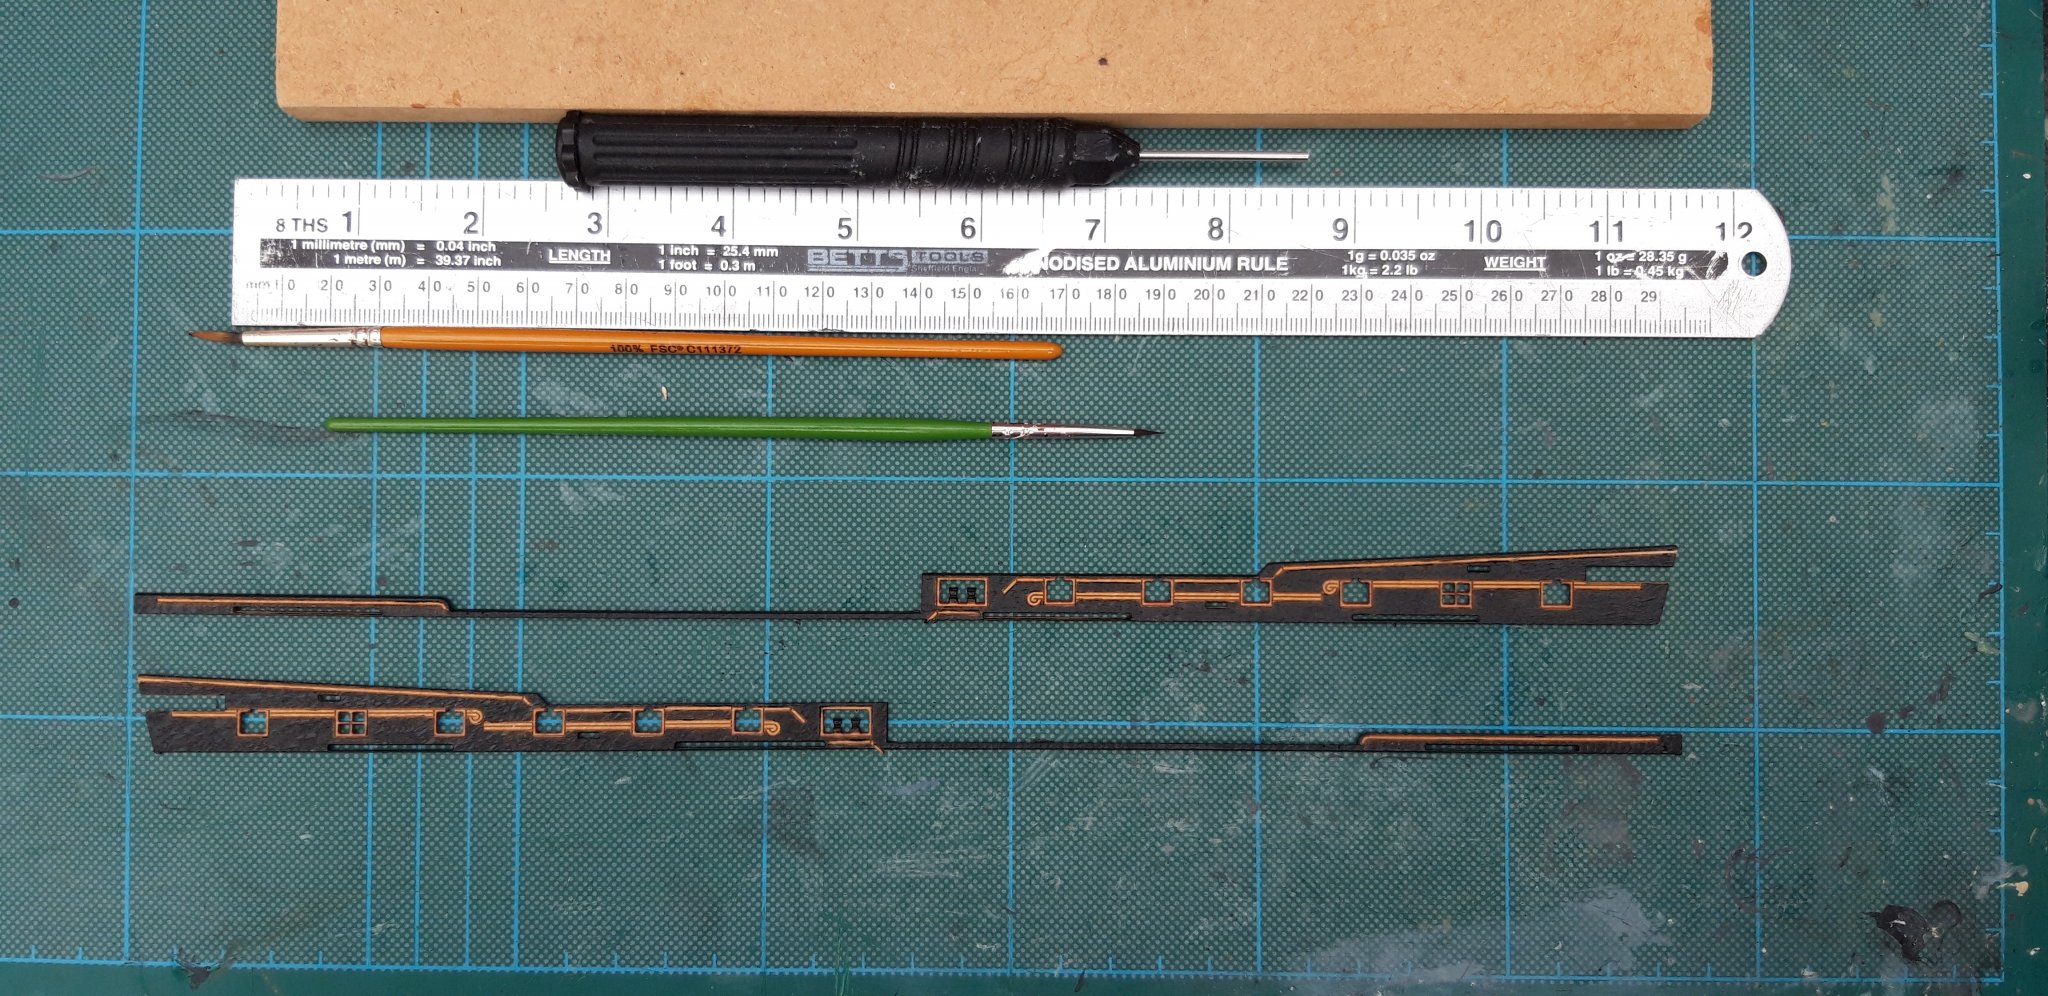
Here are the lower Gunports painted in readiness.

Black squares painted on the Hull, corresponding to the Gunports.
And this is where I am now.
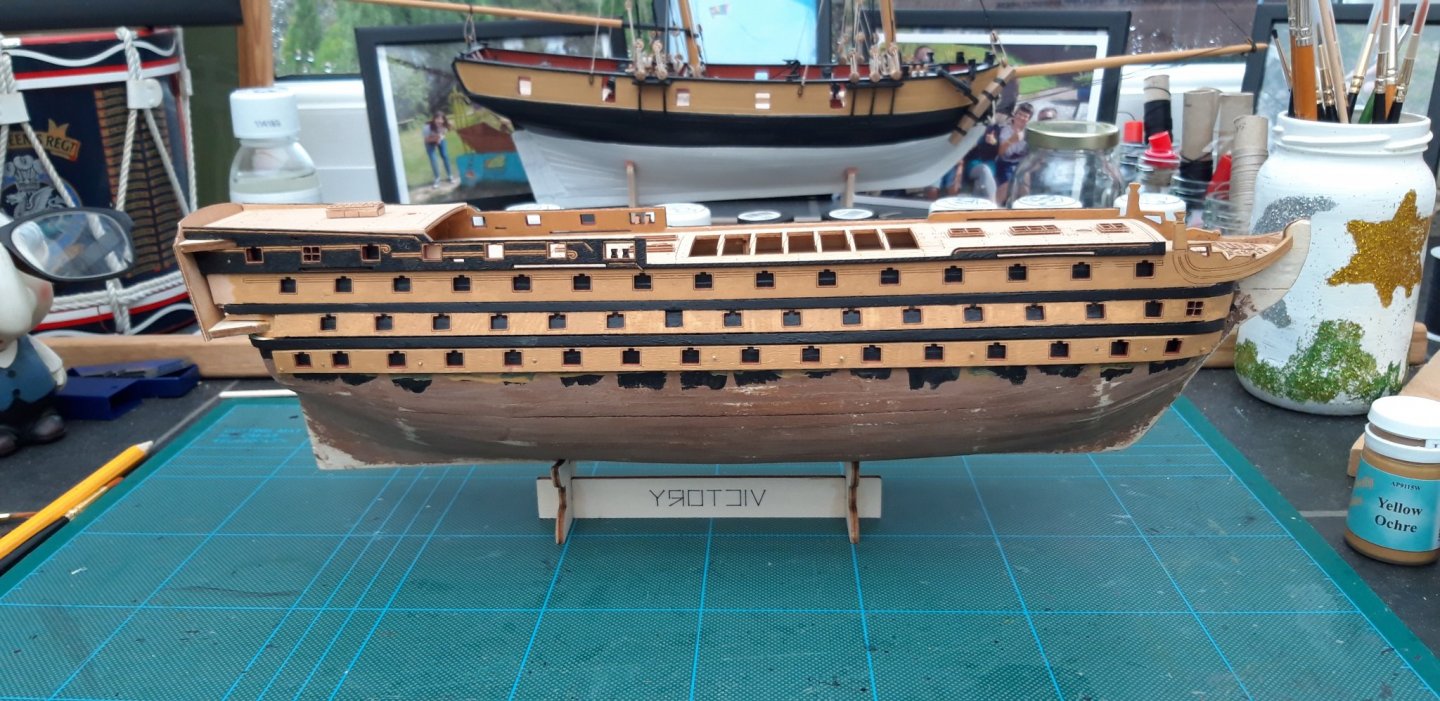
All seems to be going well so far, fingers crossed.
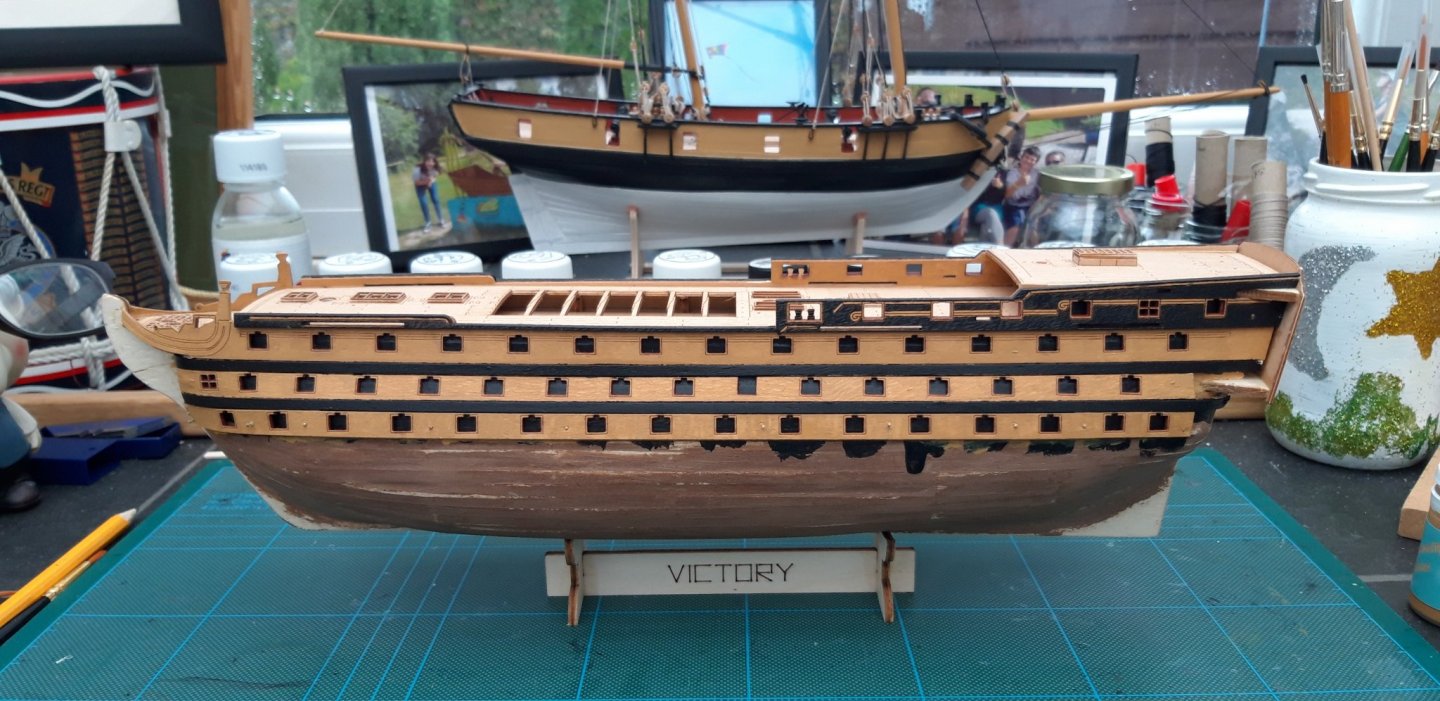
It really has started to look like HMS Victory now. My next session will see me tackling both the Bow and the Stern as both these areas require more planking. It will then be down to the imitation Coppering.
Best wishes as always,
The Lazy Saint.
Session. Time. Total.
12. 4 hrs. 49 hrs.
- Dubz, GrandpaPhil, Retired guy and 2 others
-
5
-
Hi mugje,
They look pretty good to me, infact the whole build is shaping up wonderfully.
Keep up the good work.
Best wishes as always,
The Lazy Saint.
- mugje and Old Collingwood
-
2
-
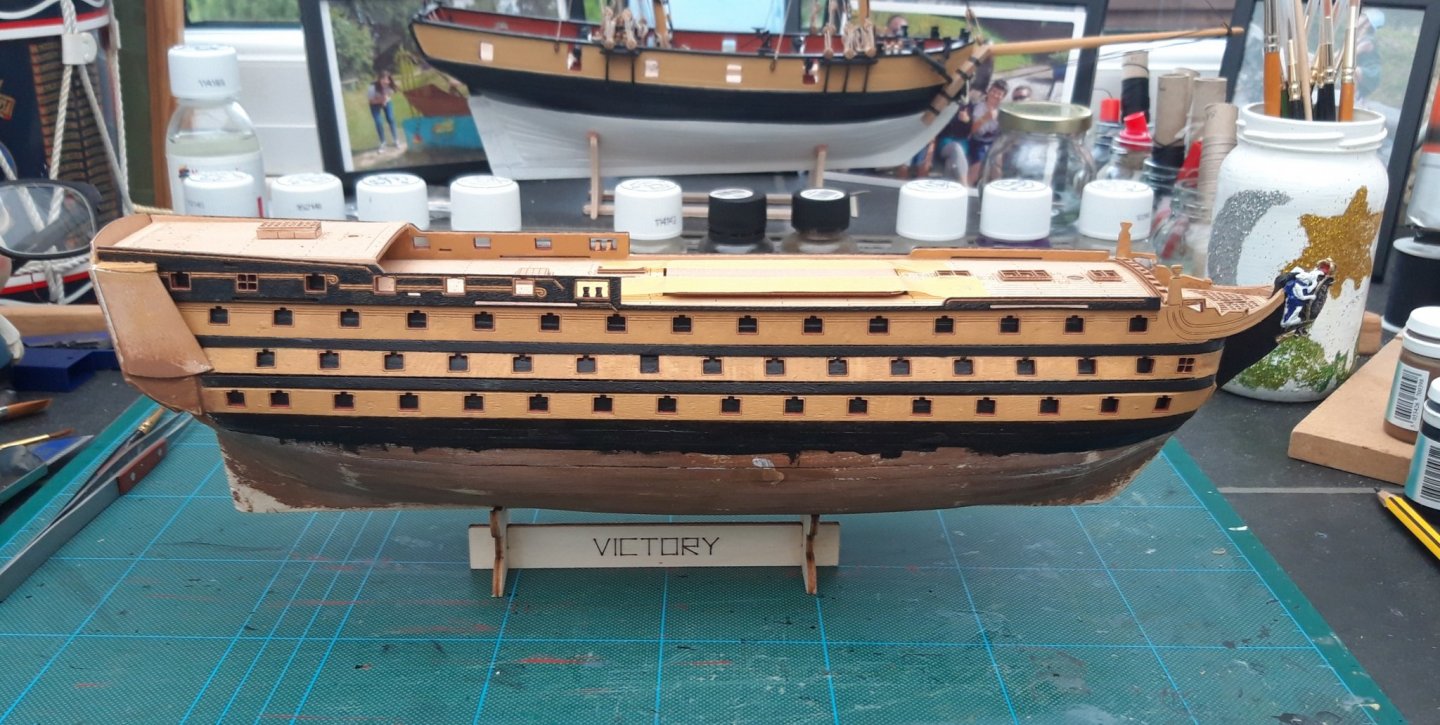
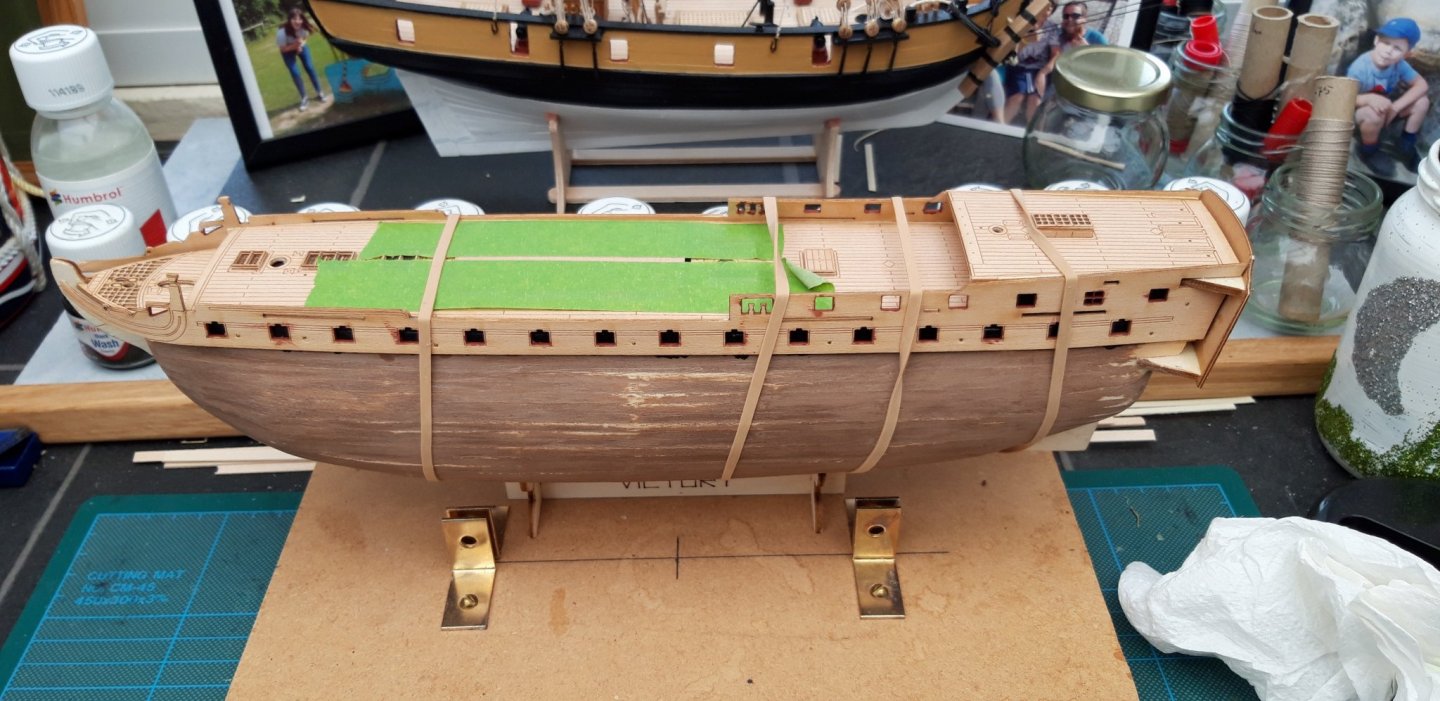
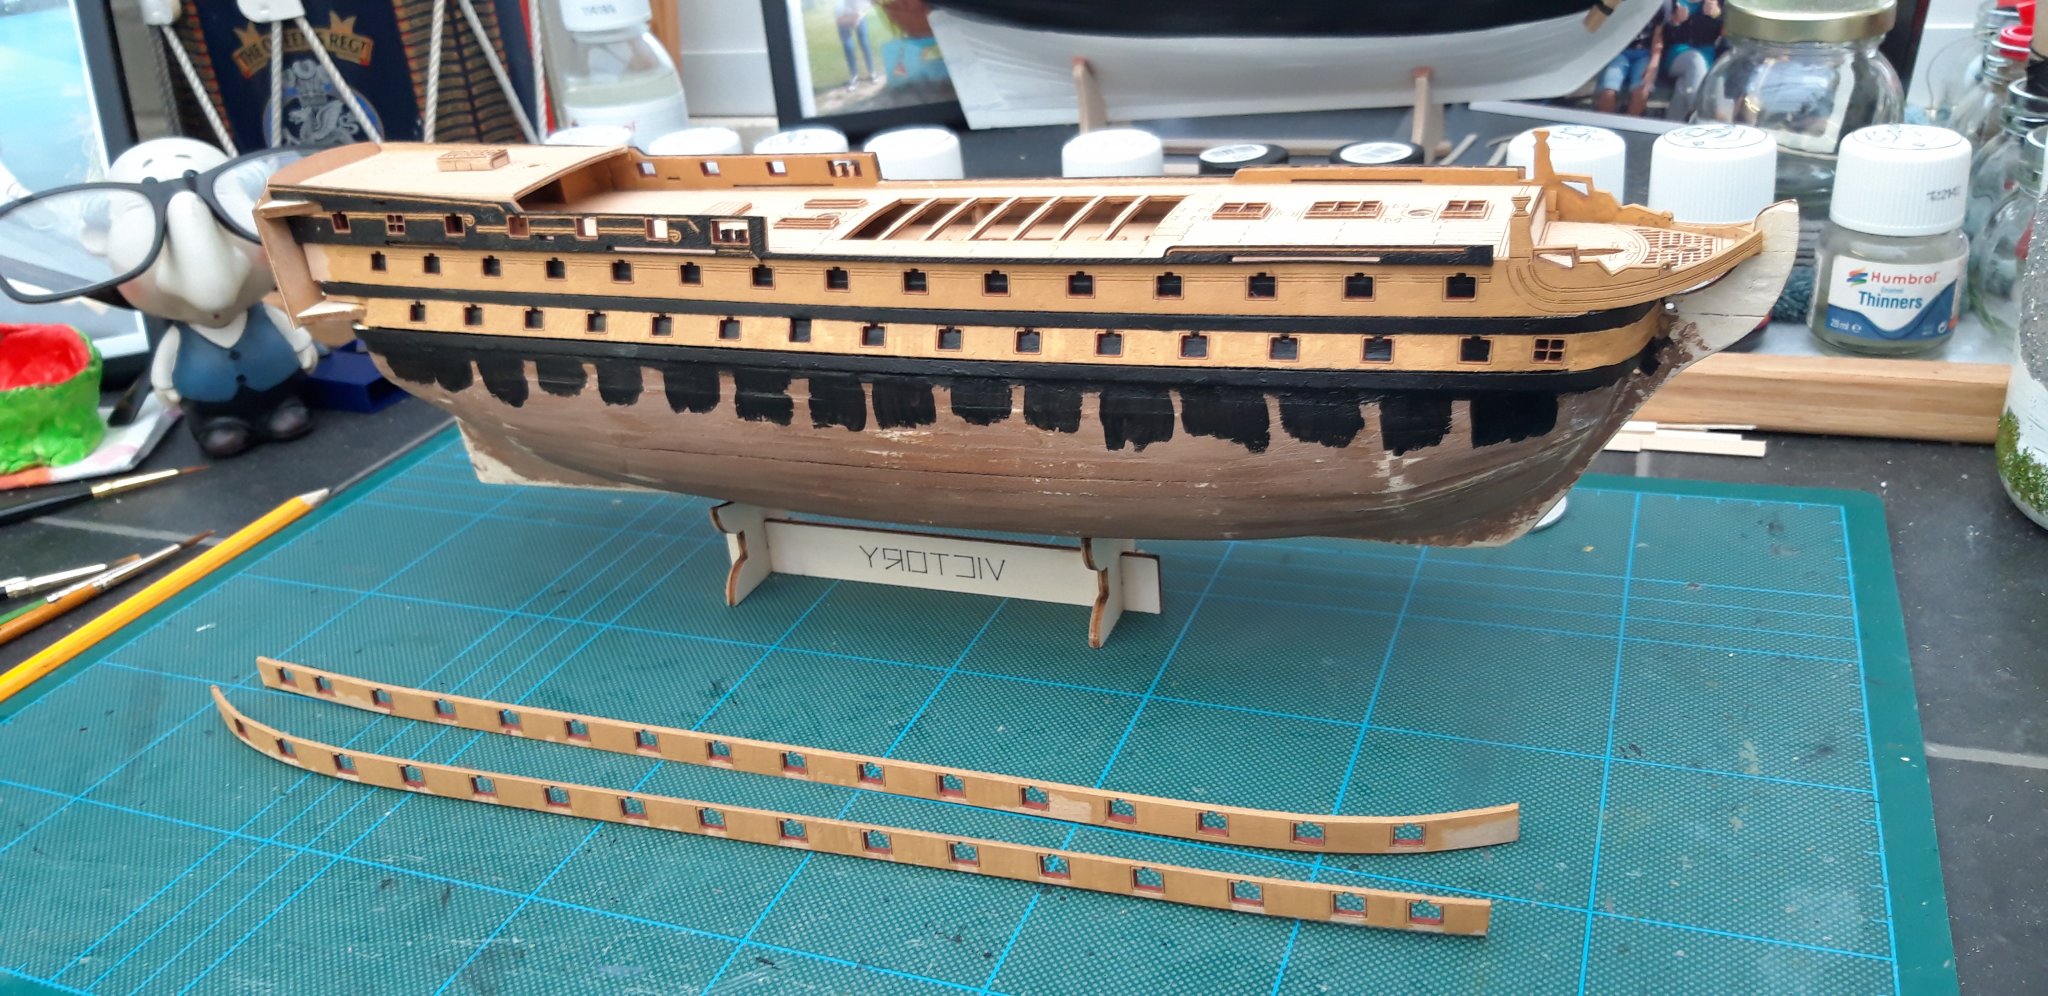
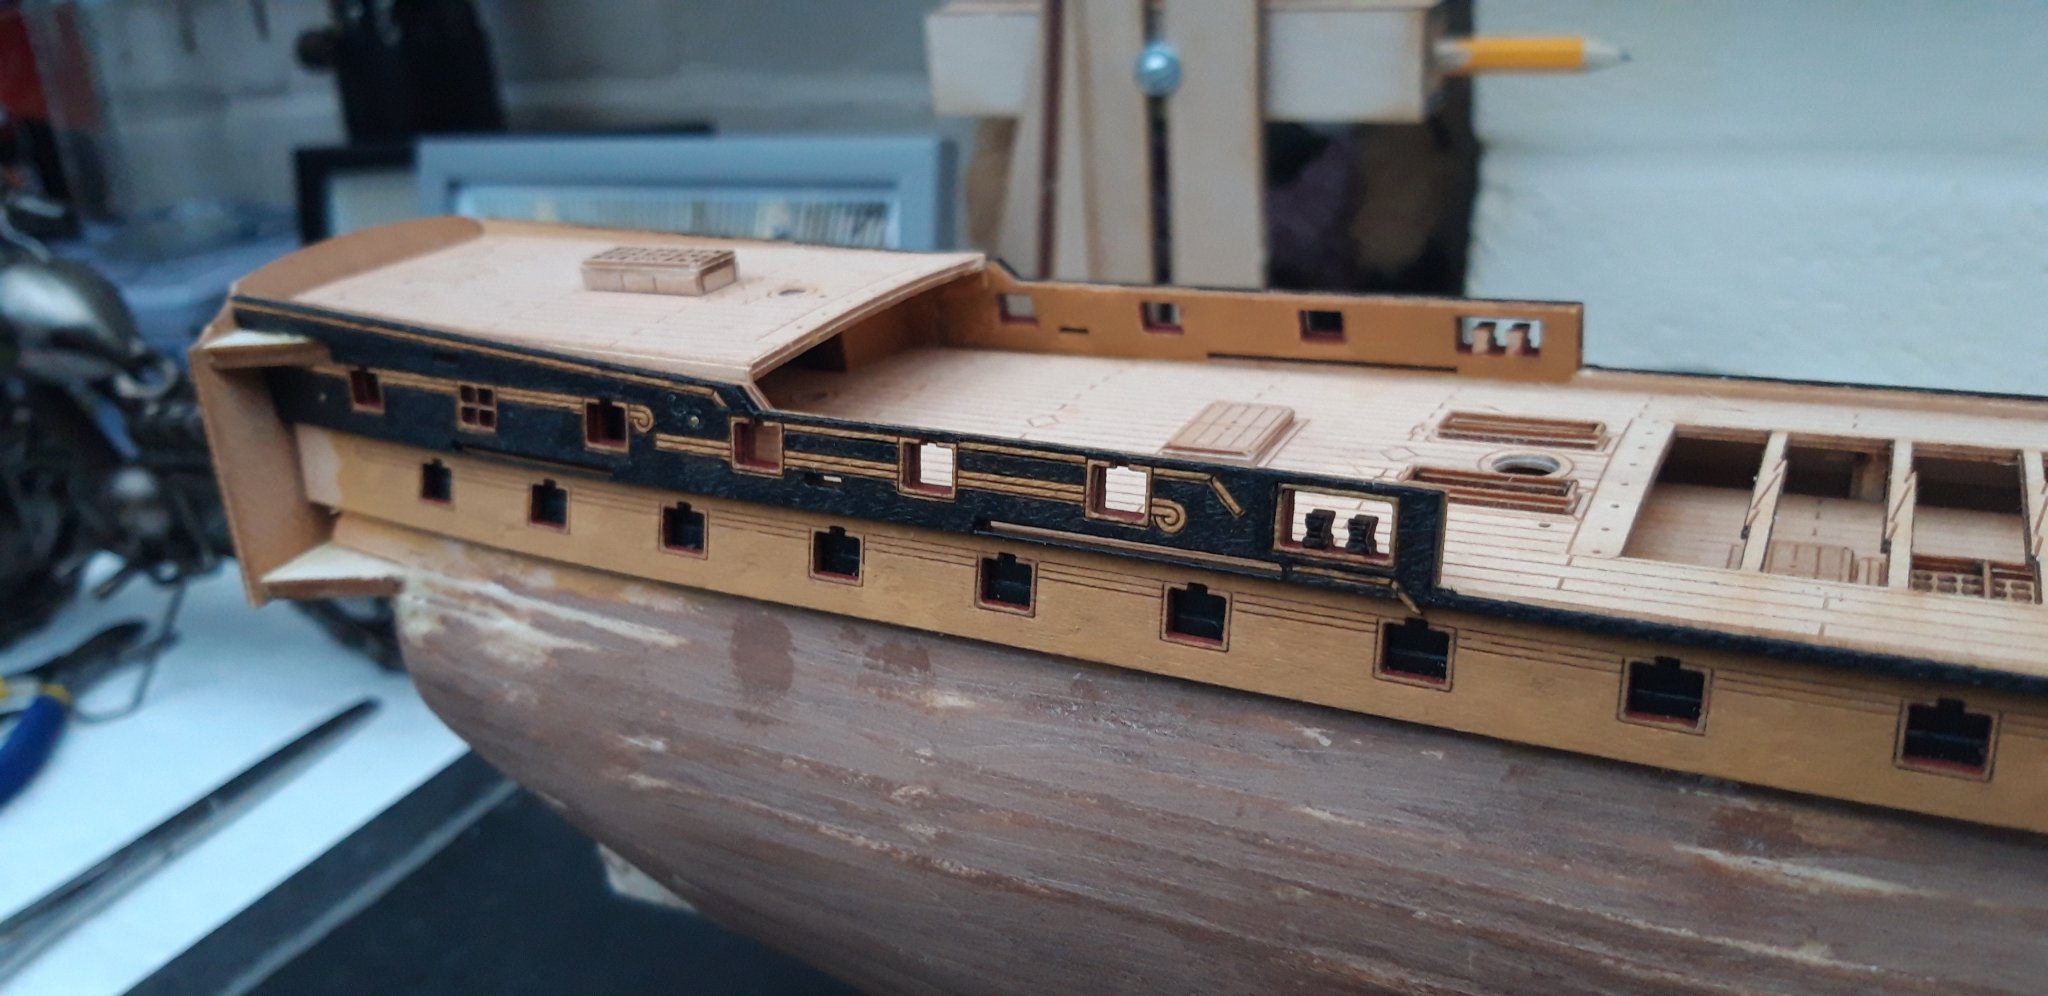
Hi all,
Another full day in the Den today, this Ship Building hobby is getting addictive.
Today saw the fitting of the Middle Deck, and the first coat of paint. There was a certain amount of bleed under the tape so, first task tomorrow will be a bit of a touch up.
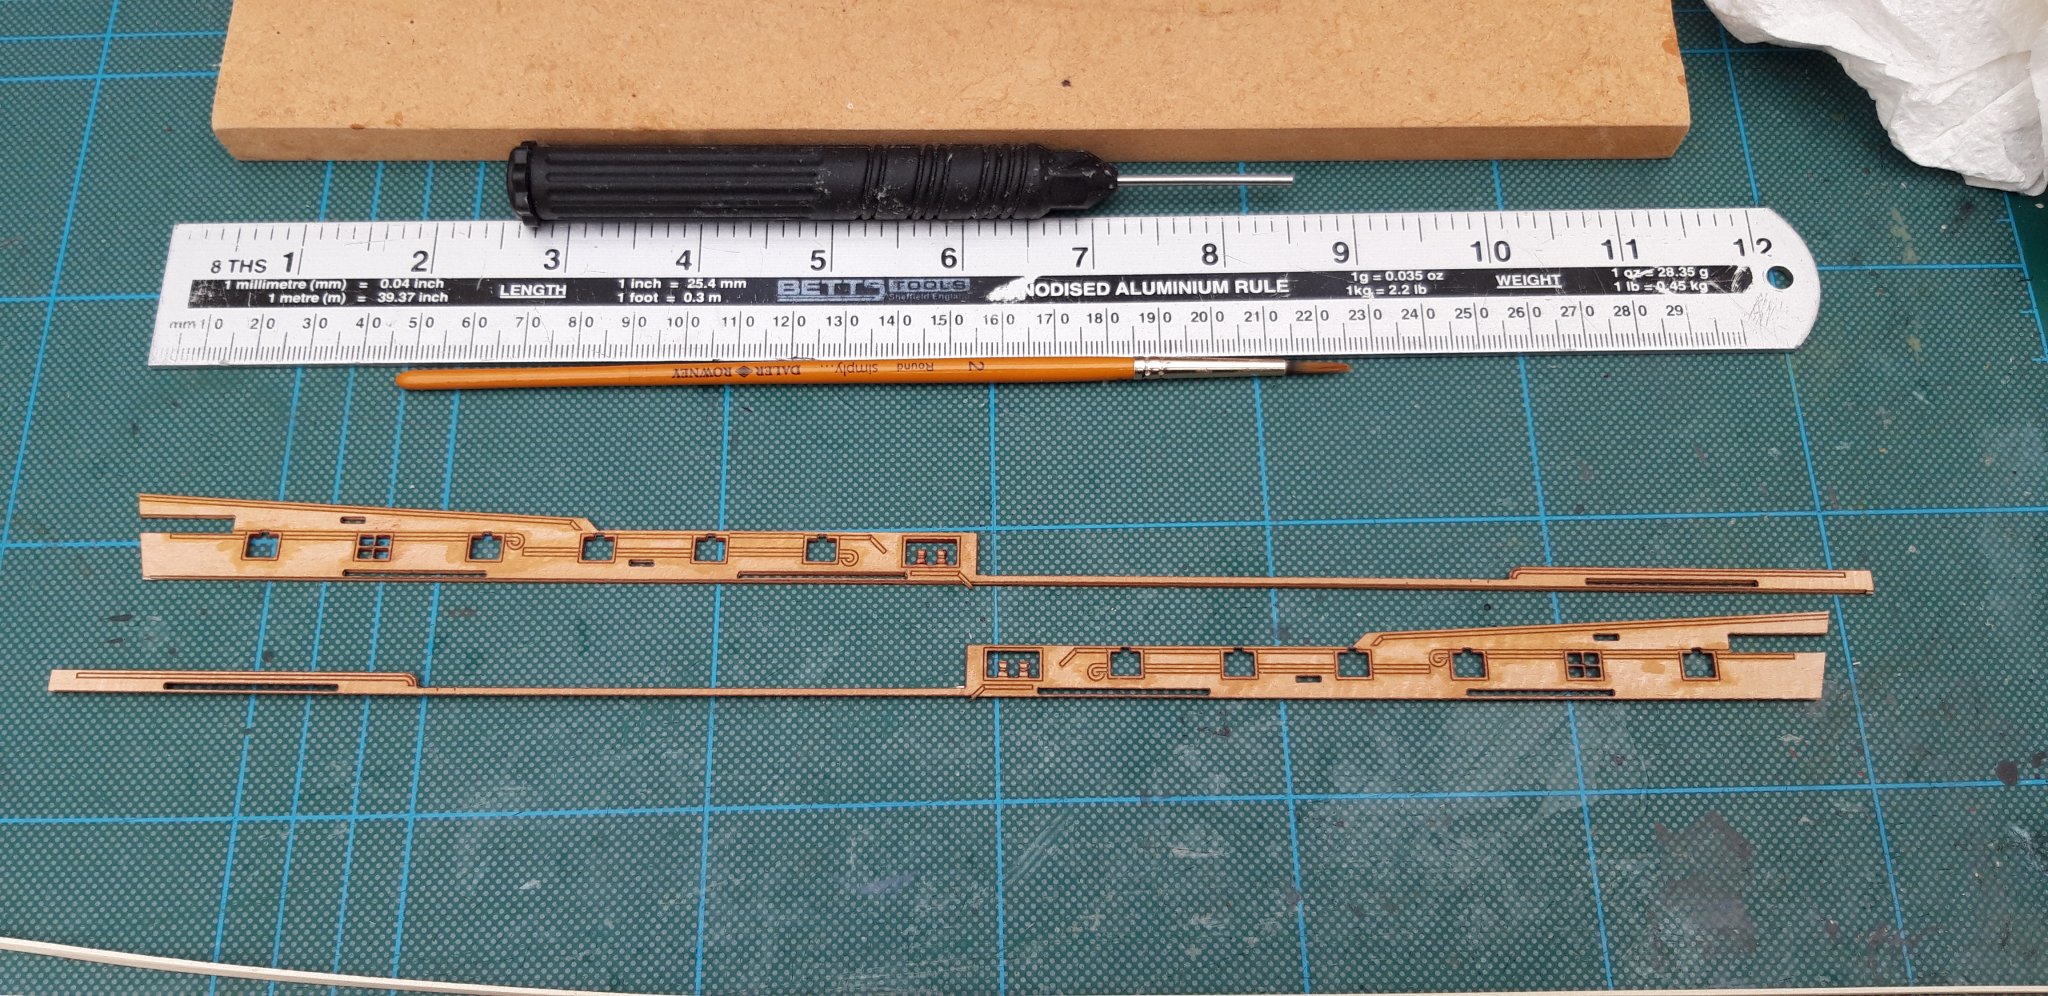
First image shows the 3mm strip fitted and the area of the Middle Deck Gunports painted black.

Middle deck Gunports ready for fitting.
The next series of pictures show the stages of the Gunports being fitted.
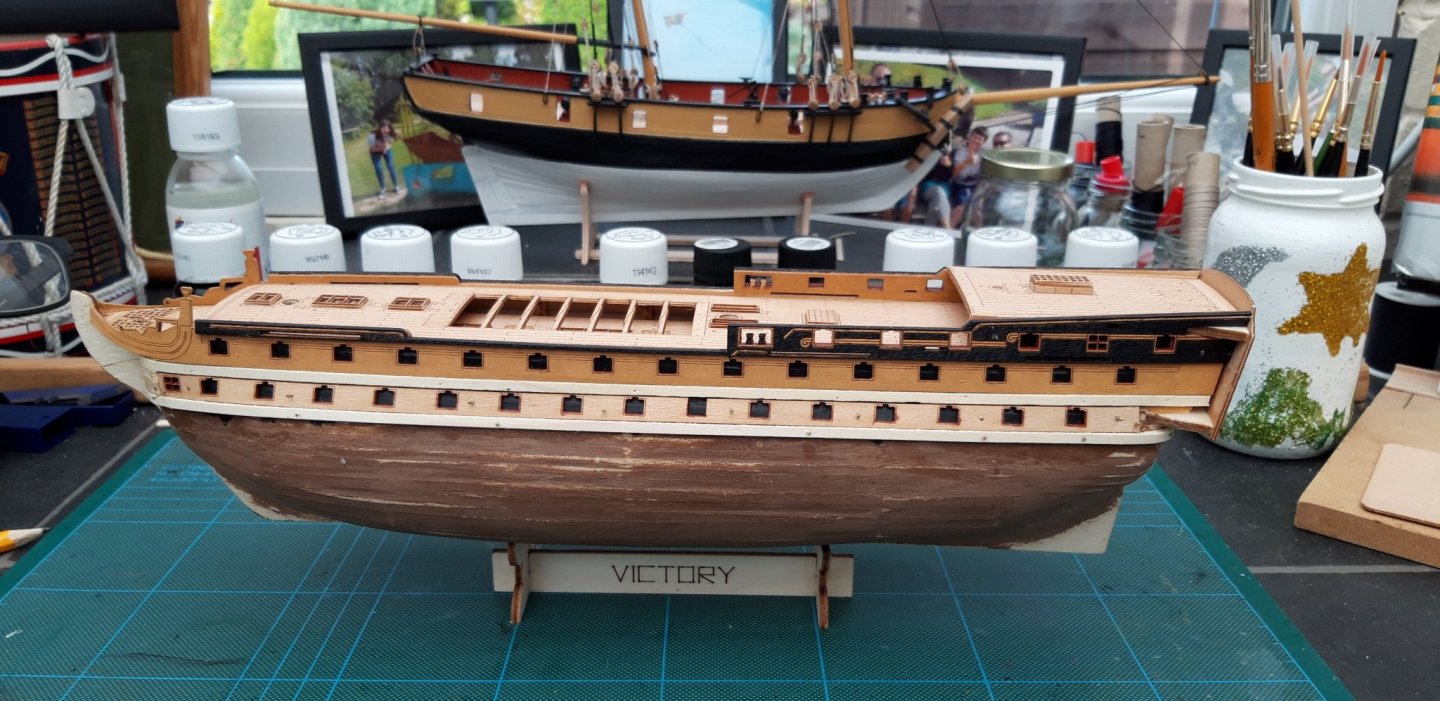
And finaly, where l am now.
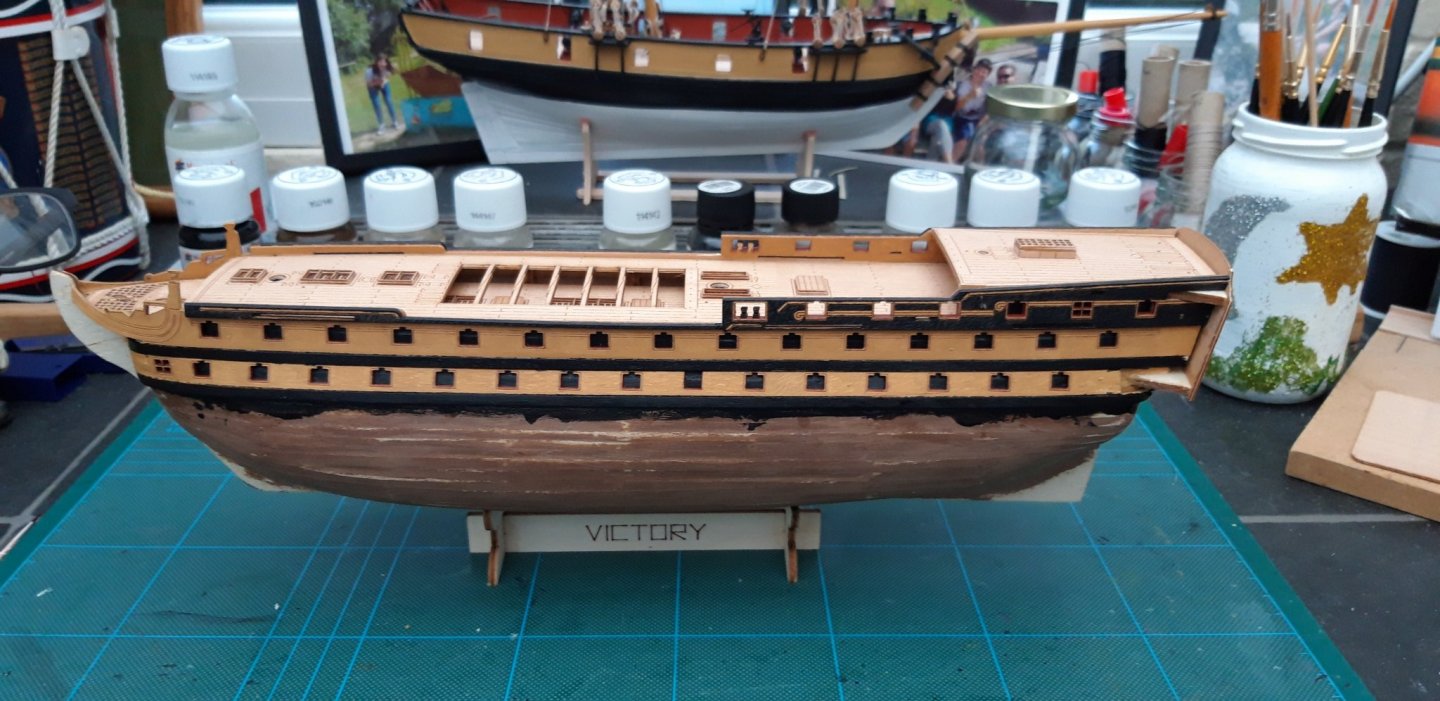
l opted to fit then paint, in hindsight perhaps l should have painted then fitted. I shall try it that way for the lower deck.
Best wishes as always,
The Lazy Saint.
Session. Time. Total.
11. 7 hrs. 45 hrs.
- Edwardkenway, BenD, GrandpaPhil and 3 others
-
6
-
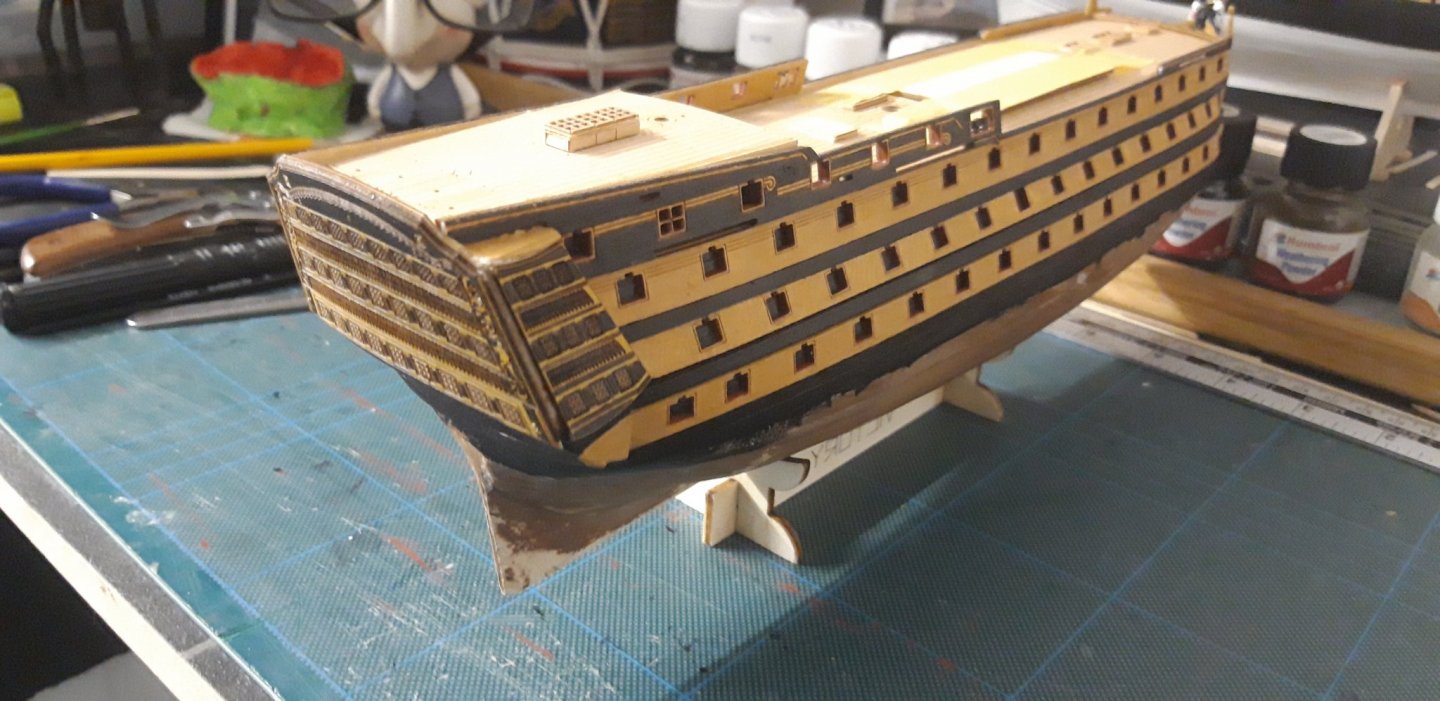
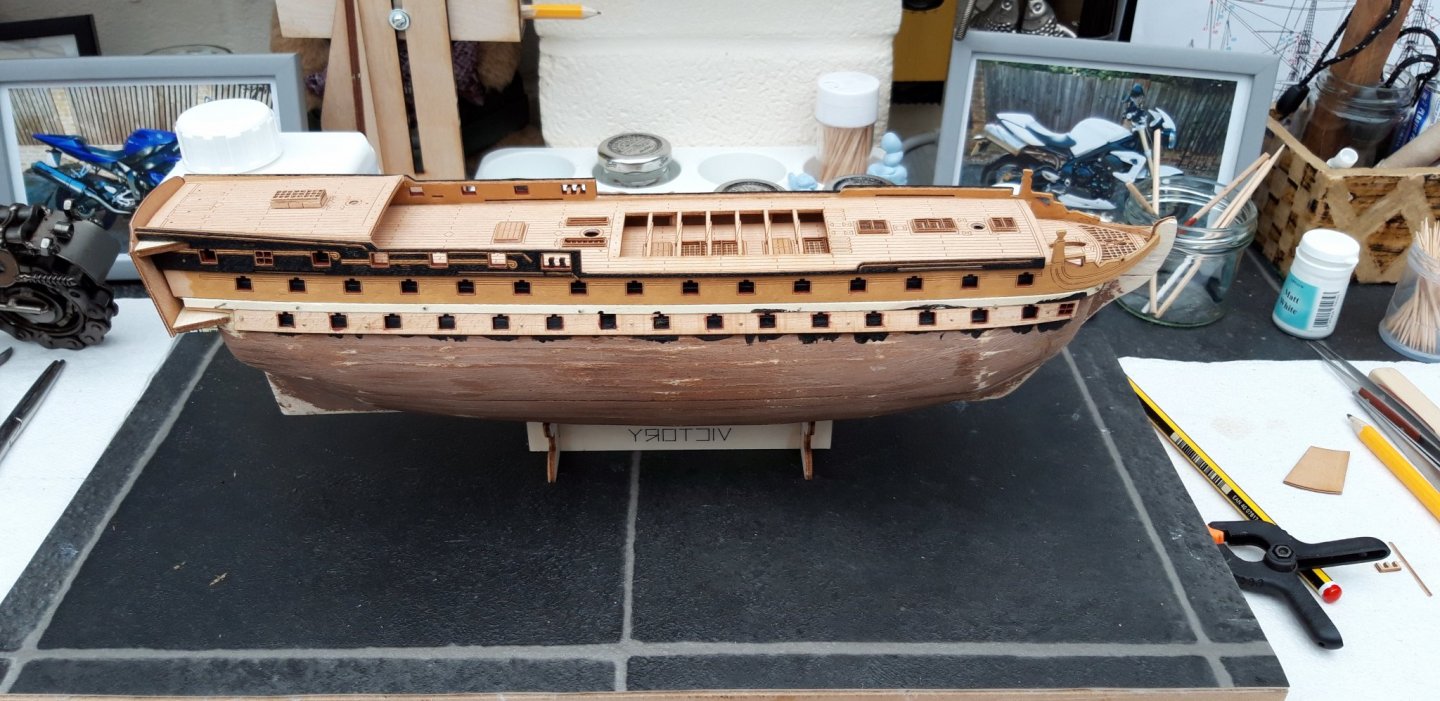
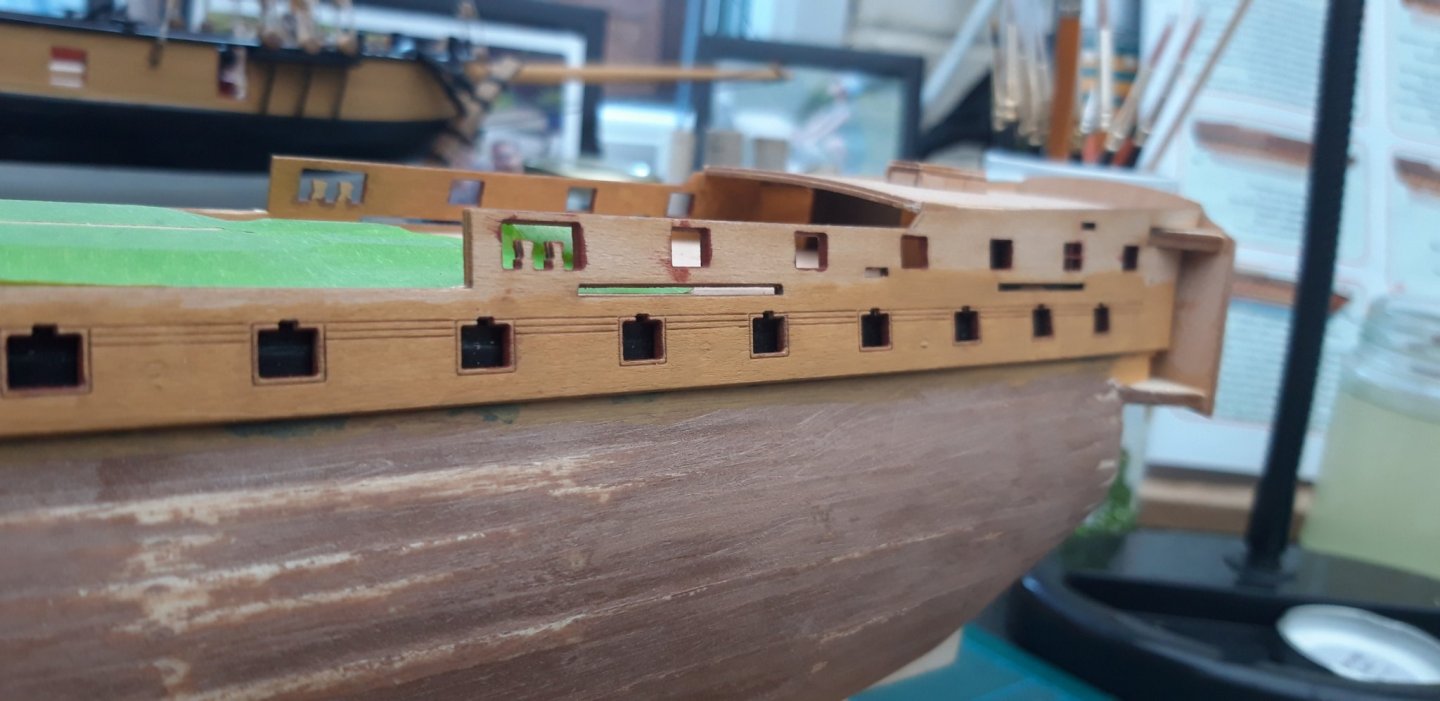
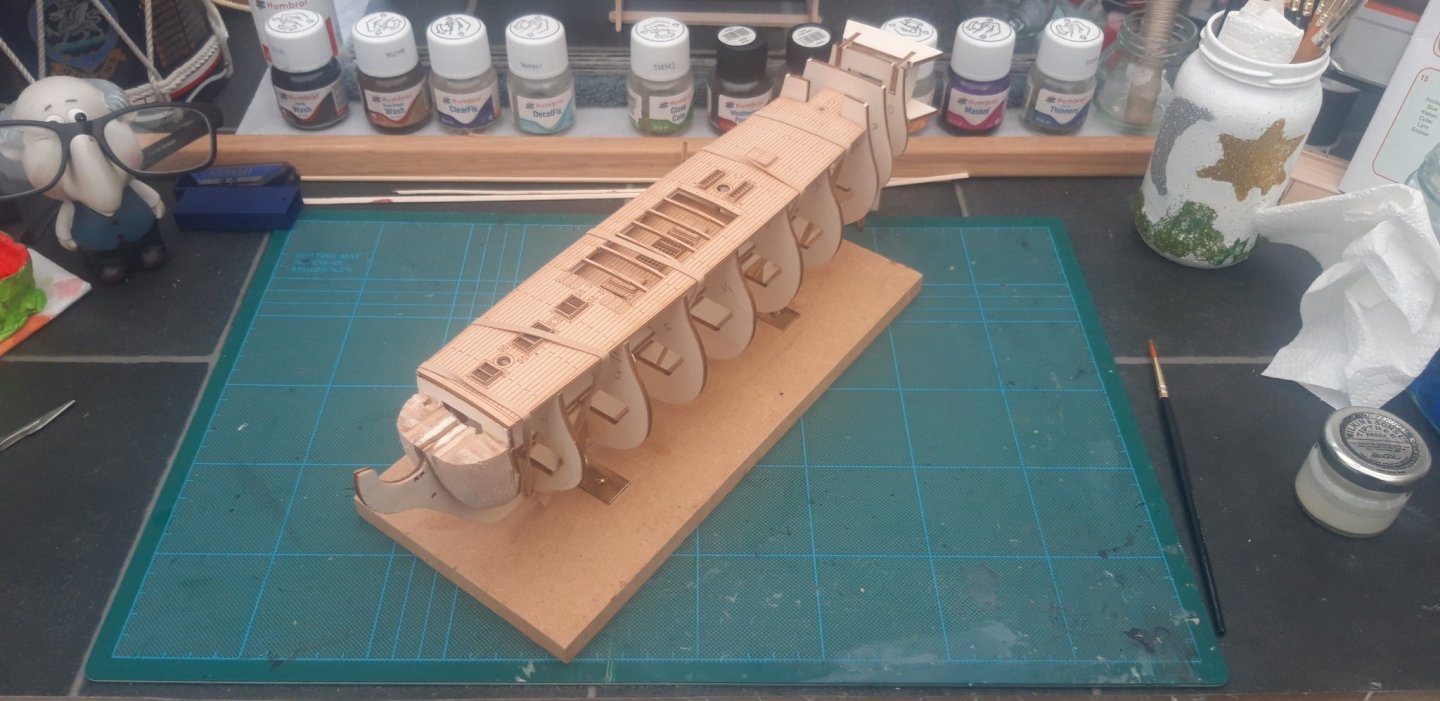
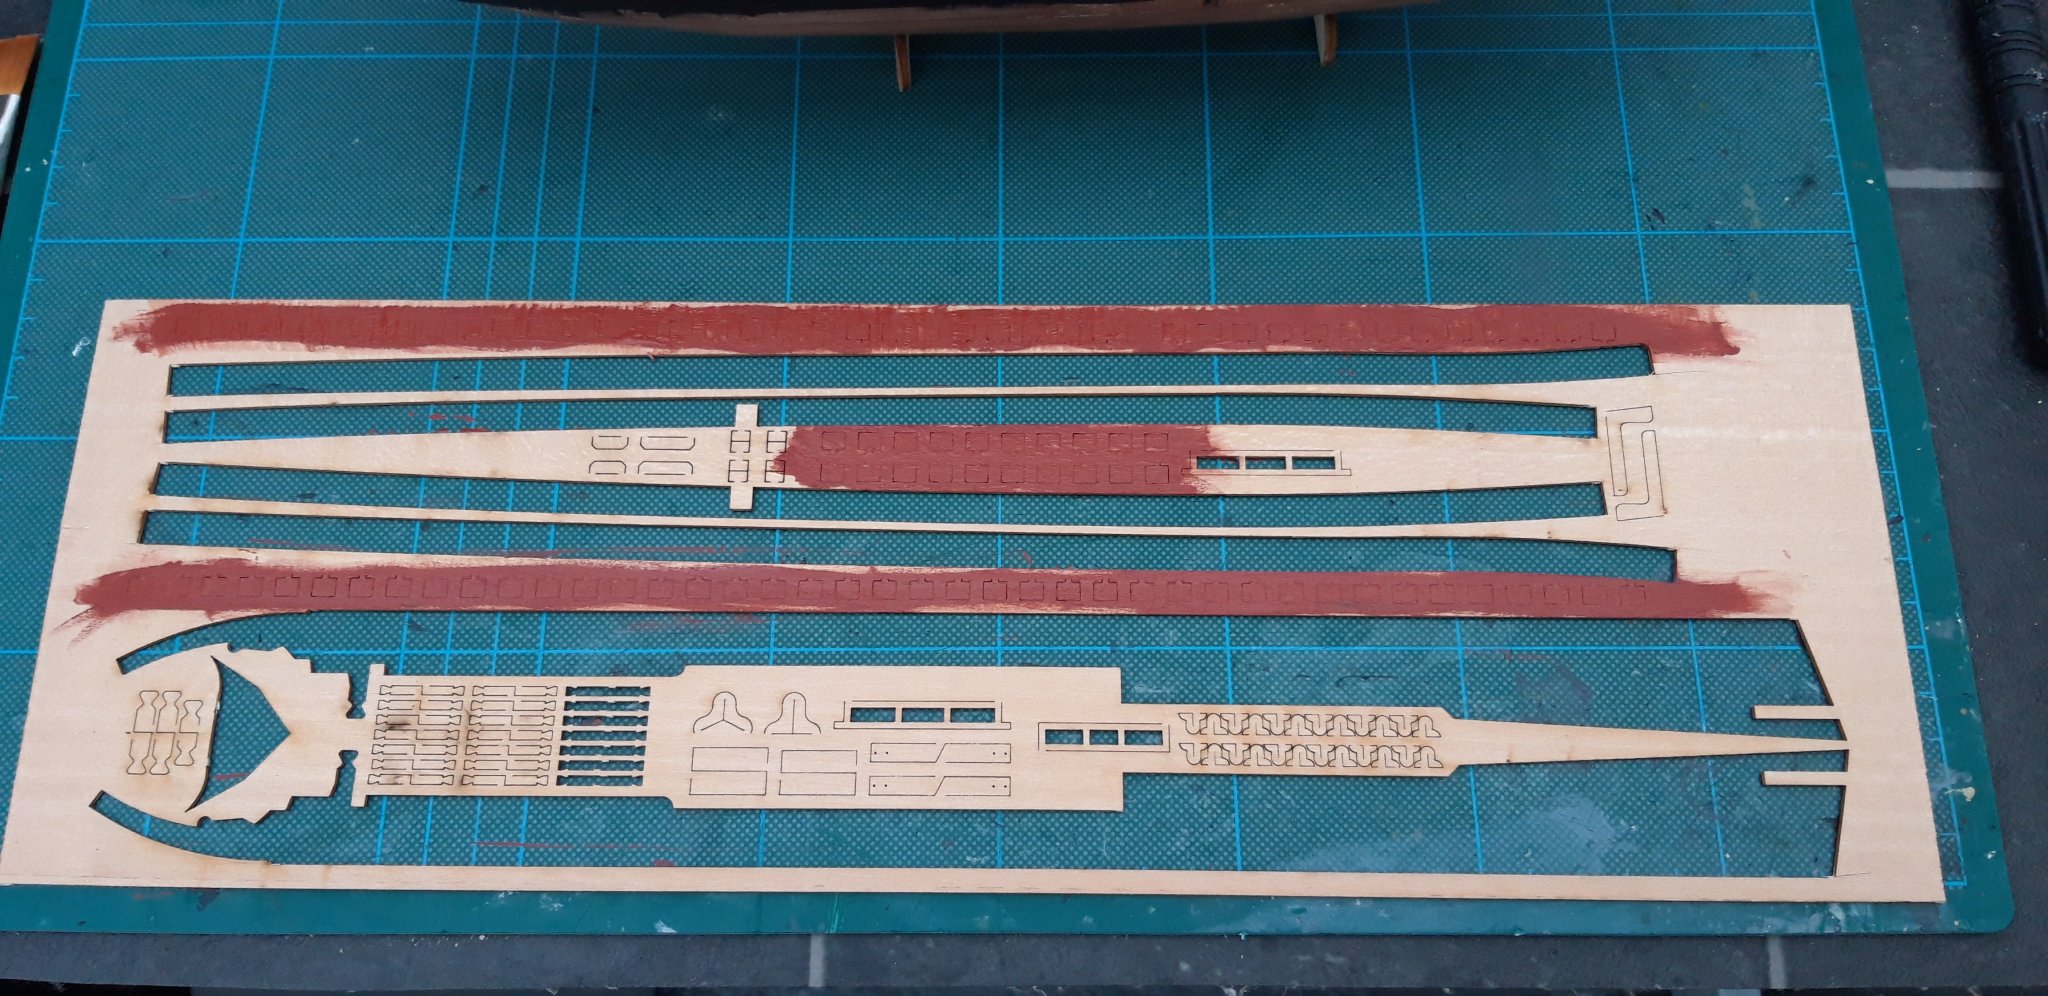
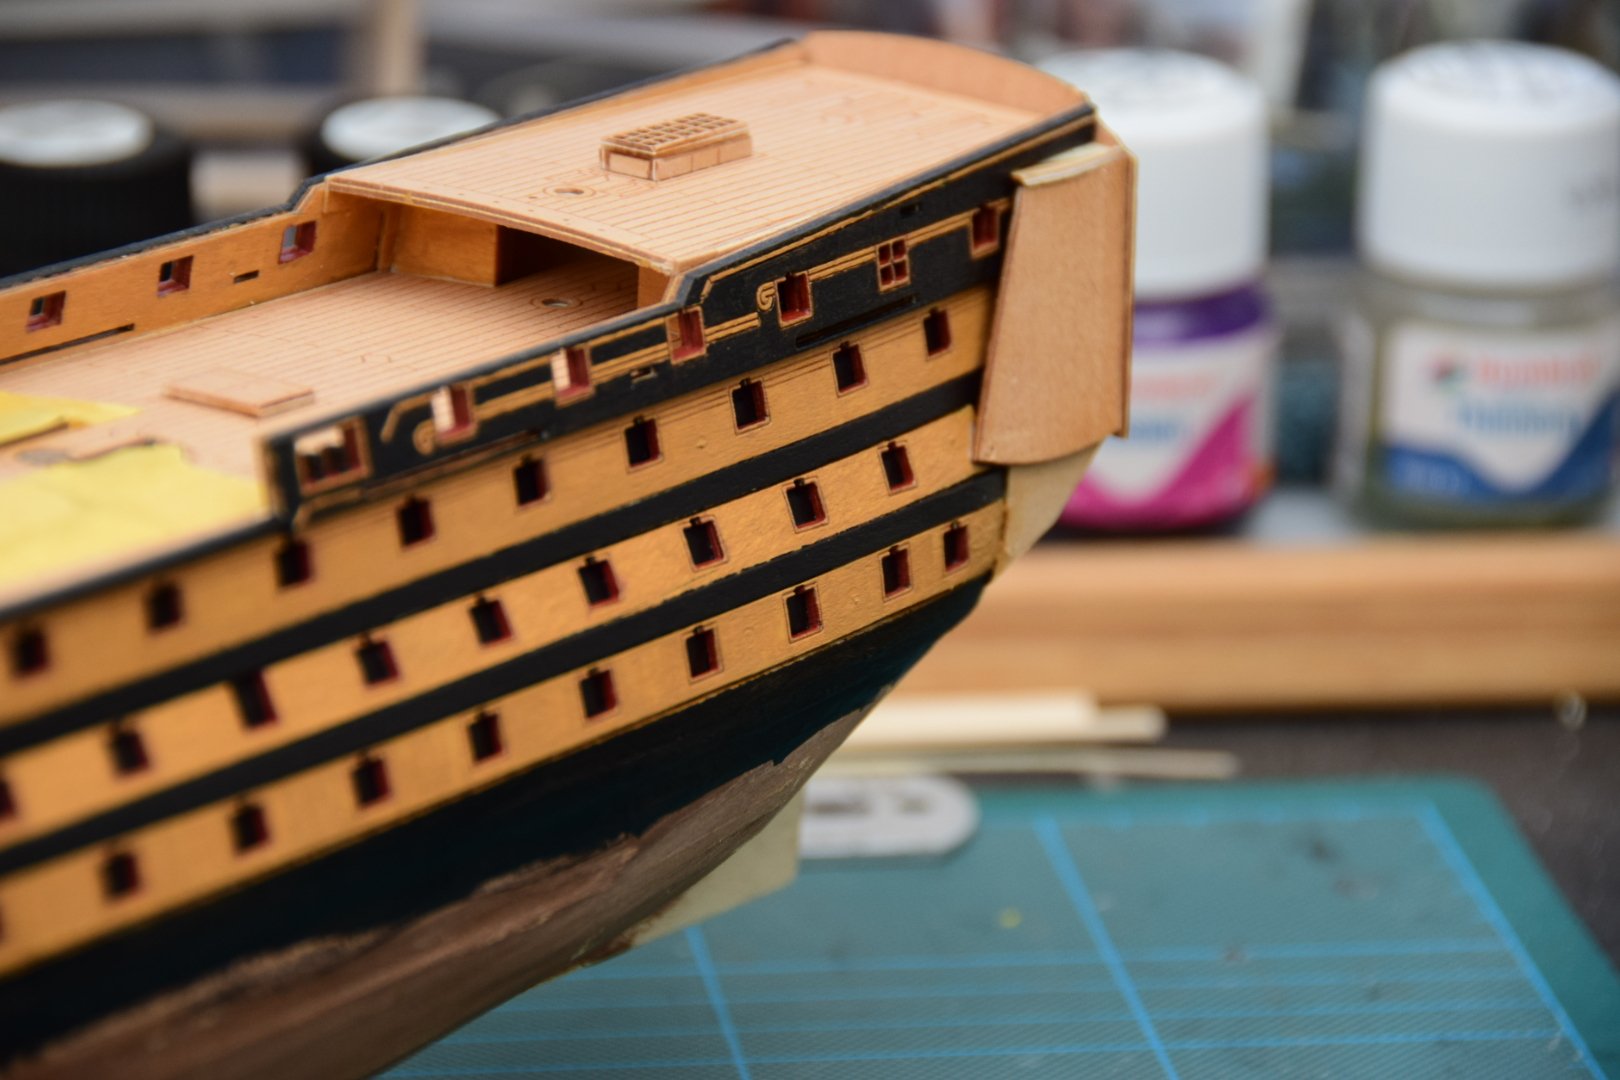
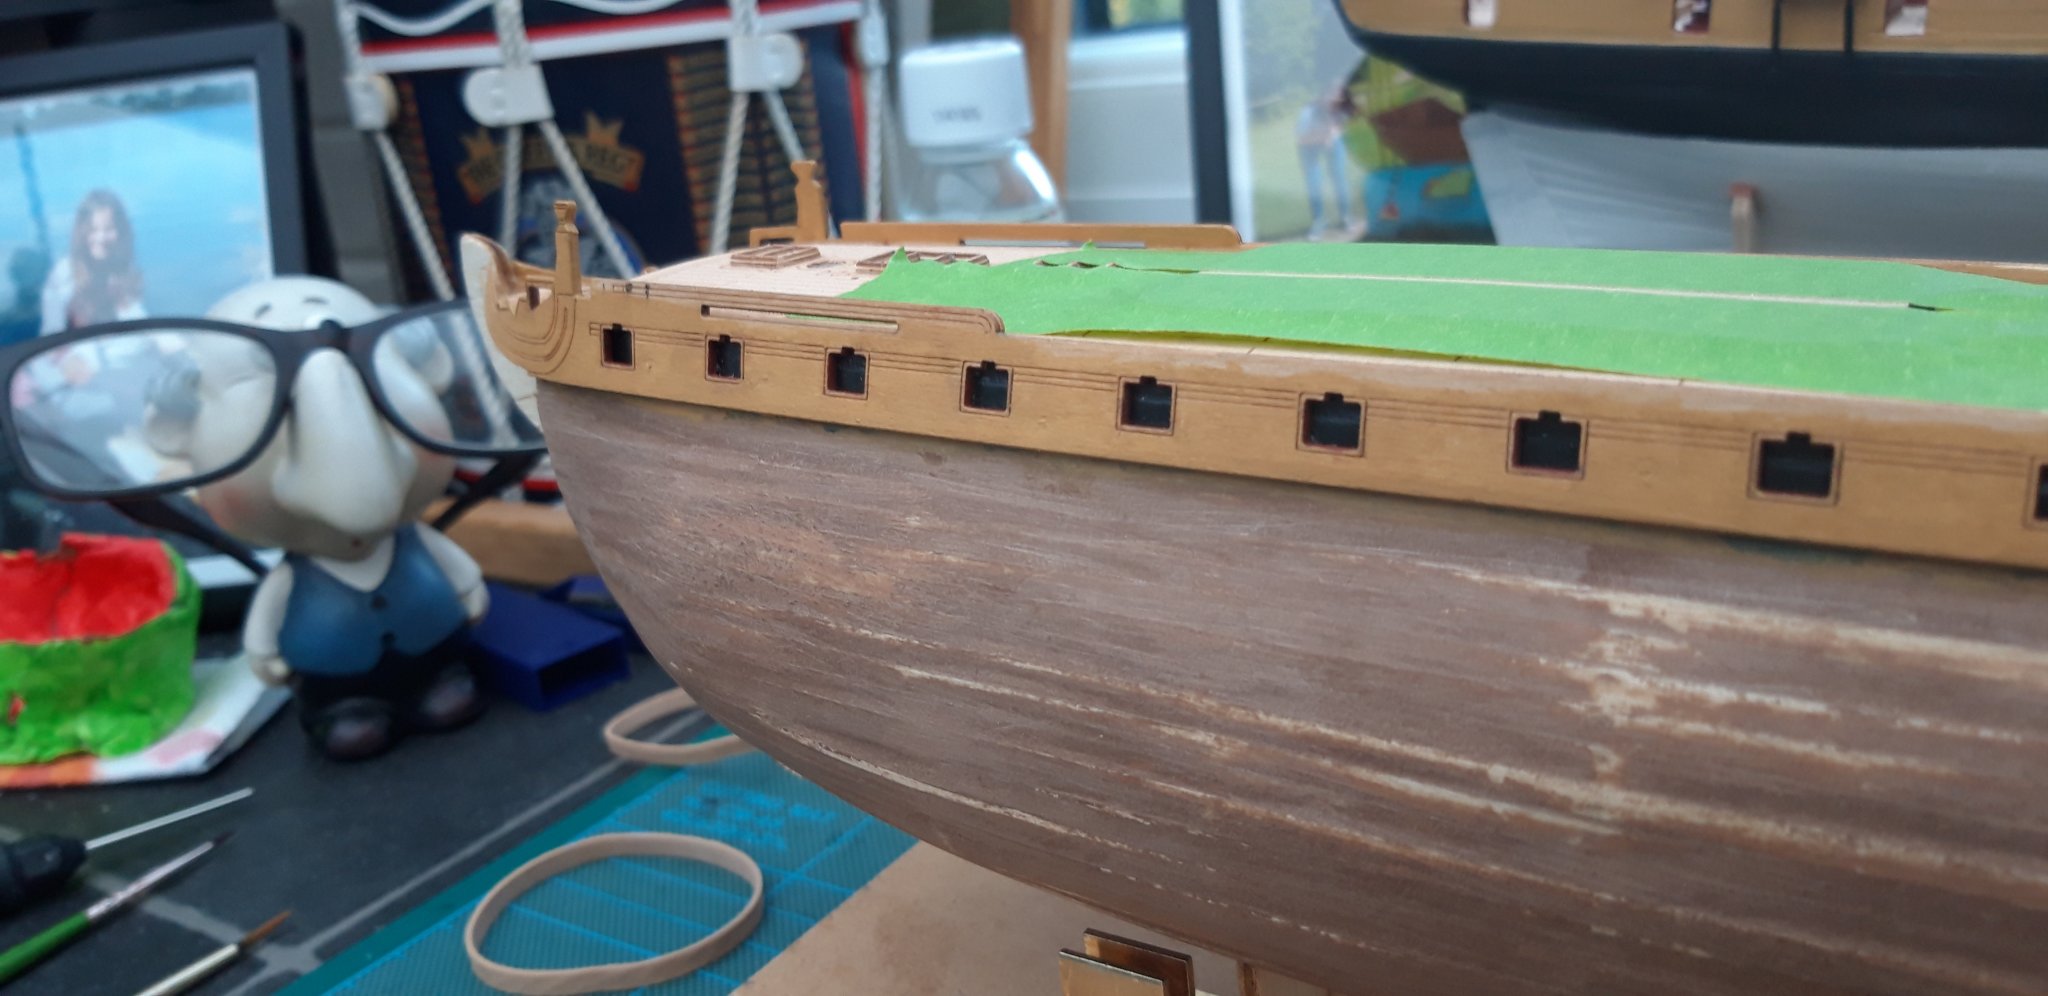
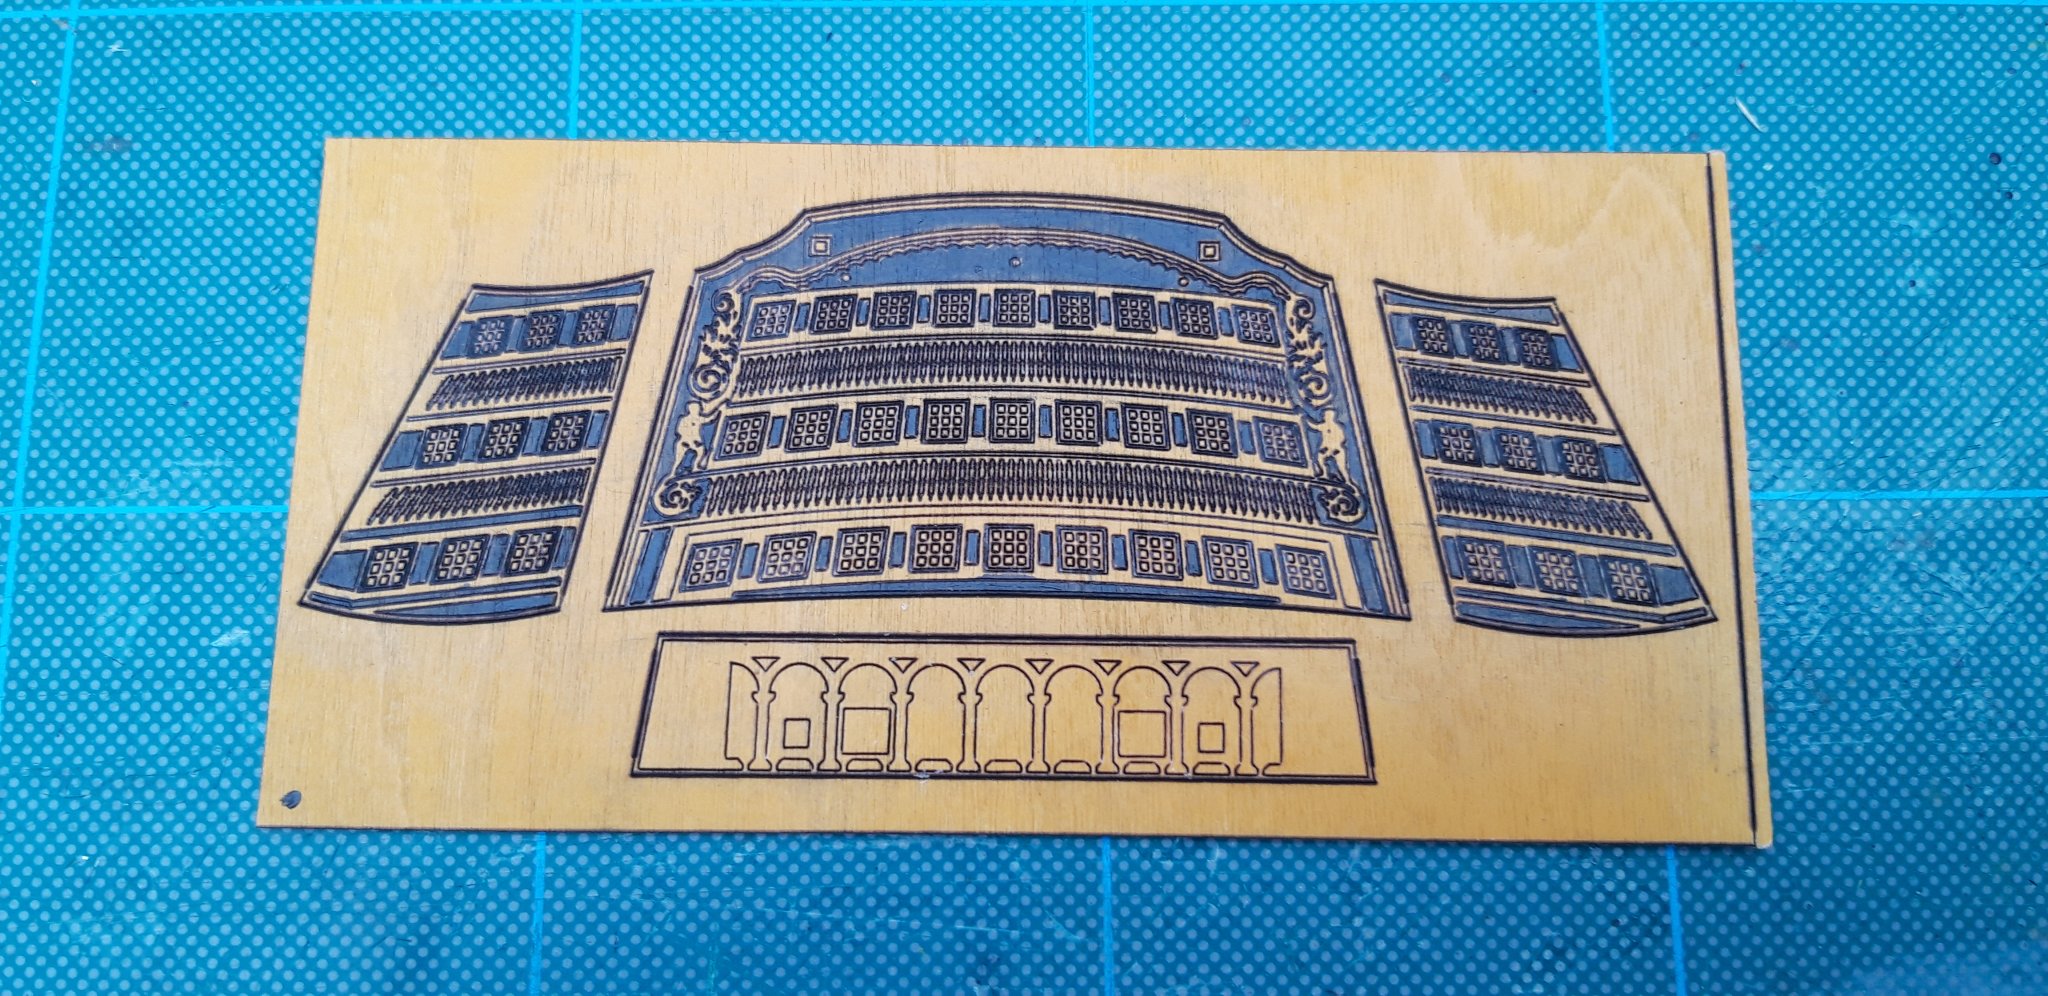
Hi all,
I managed to fit in a mammoth session today as the Admiral was out (Bingo) and l was unhindered by the Powder Monkeys.
The first image is of the Stern pattern in place, easy task, but important to get right.
here you can see that l have established the Gunport positions and applied black paint. Easier to do now rather than when the gunports are in position.
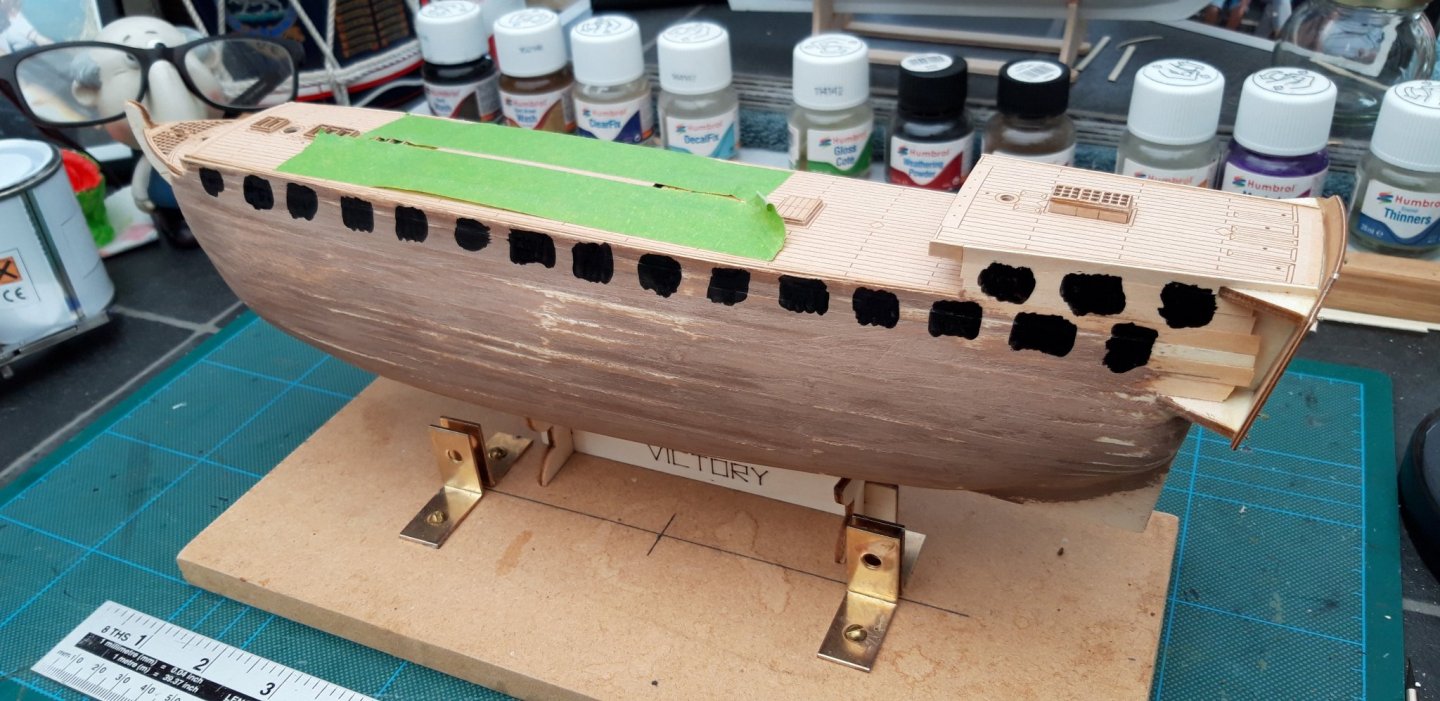
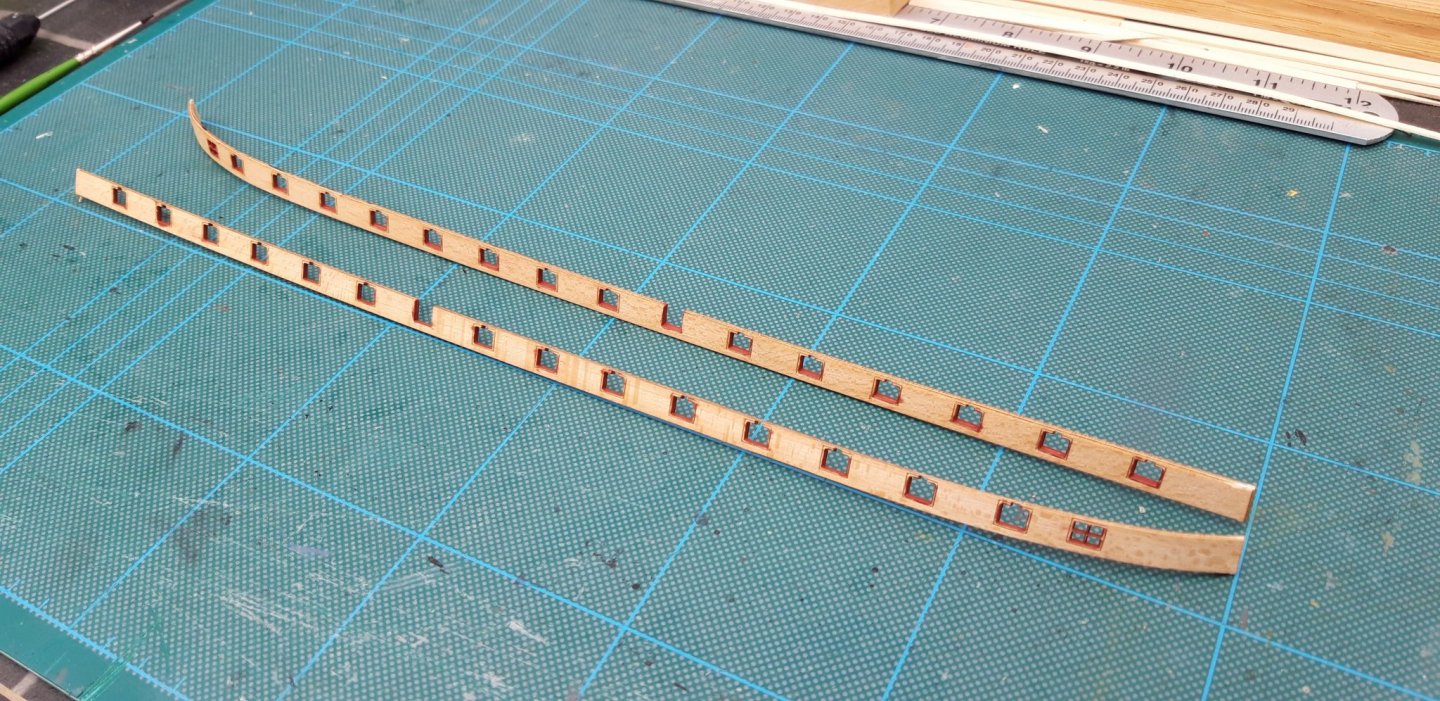
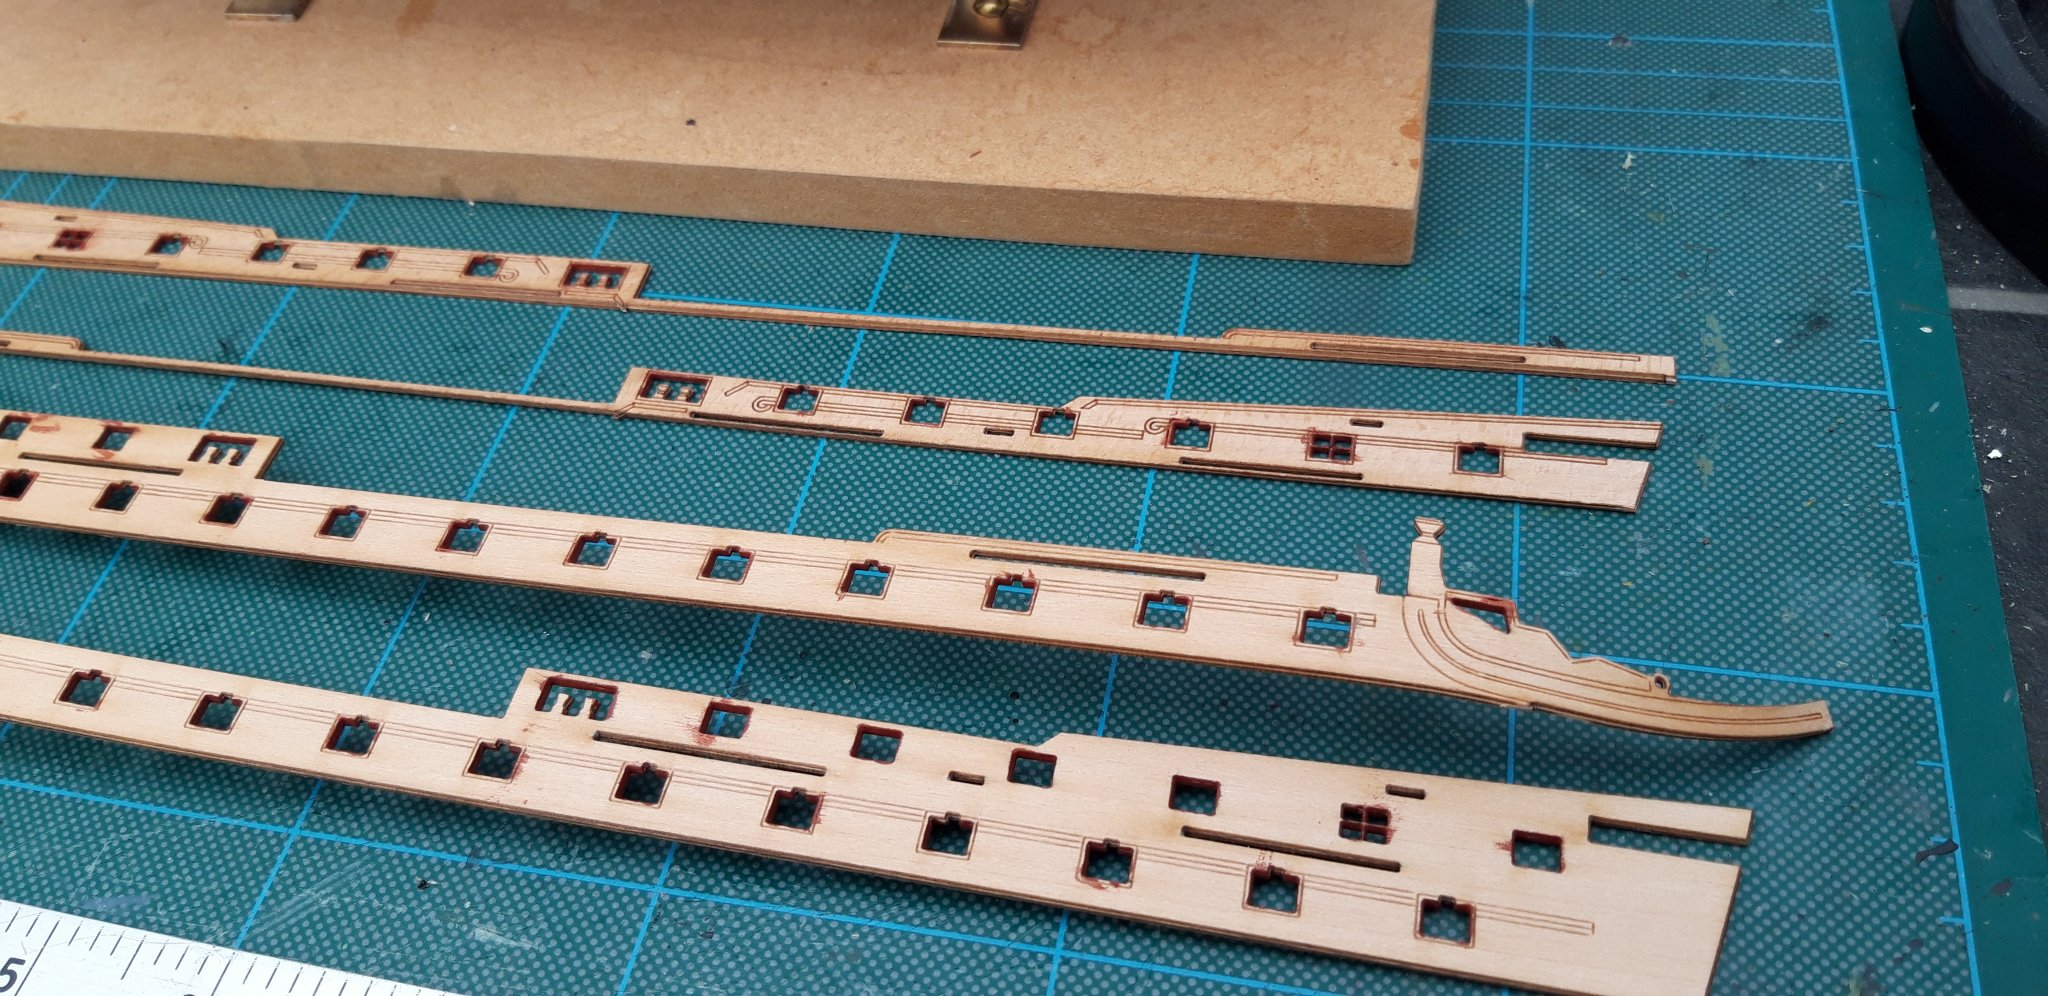
these are the gunports l hope to prepare, paint and fit today. You can see l have put a curve in them to marry up with the Bow and painted the inside edges of each port red ochre.

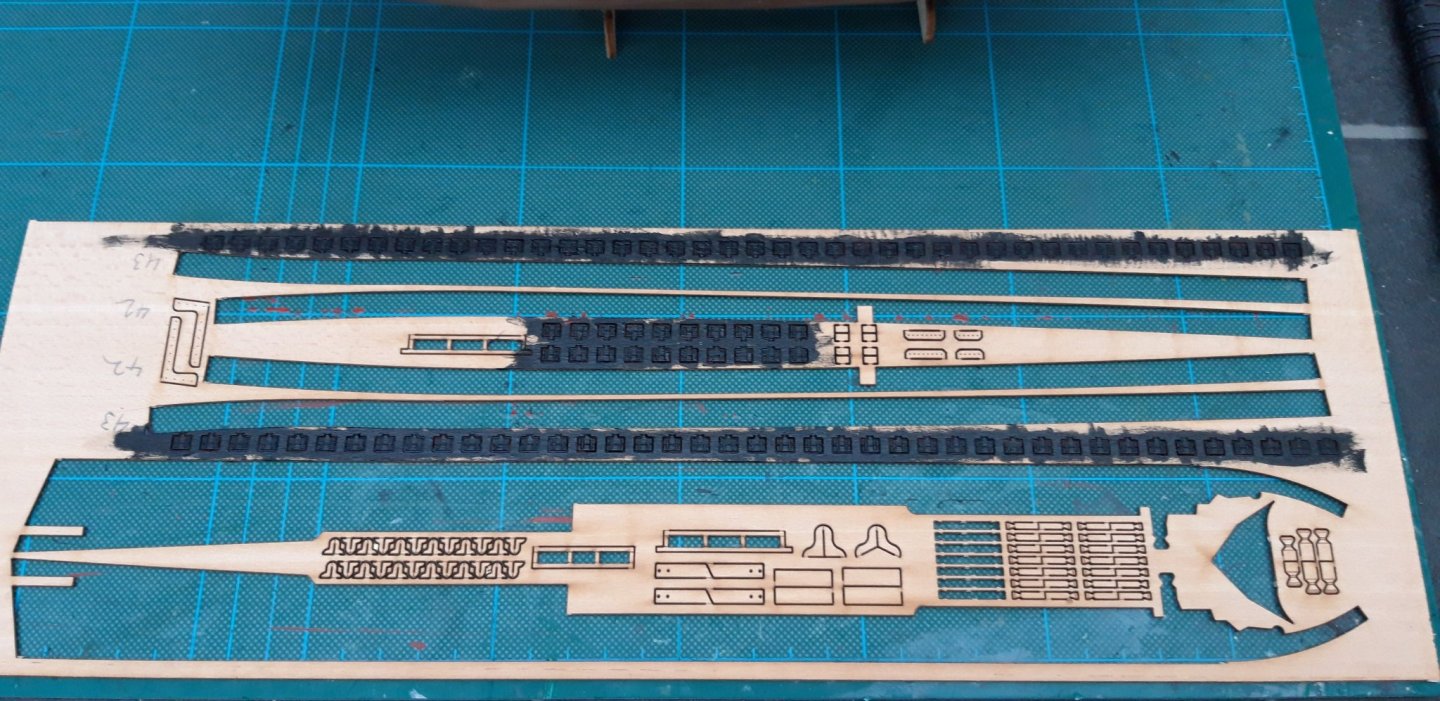
These are the Quarter Deck Gunports. You can see l have picked out the detailing in yellow ochre.

This next picture shows the upper Gunports being fitted. No problems as yet, but l will keep my fingers crossed.
Back to the Quarter deck ports, this time adding the black which makes the yellow ochre detailing stand out nicely.

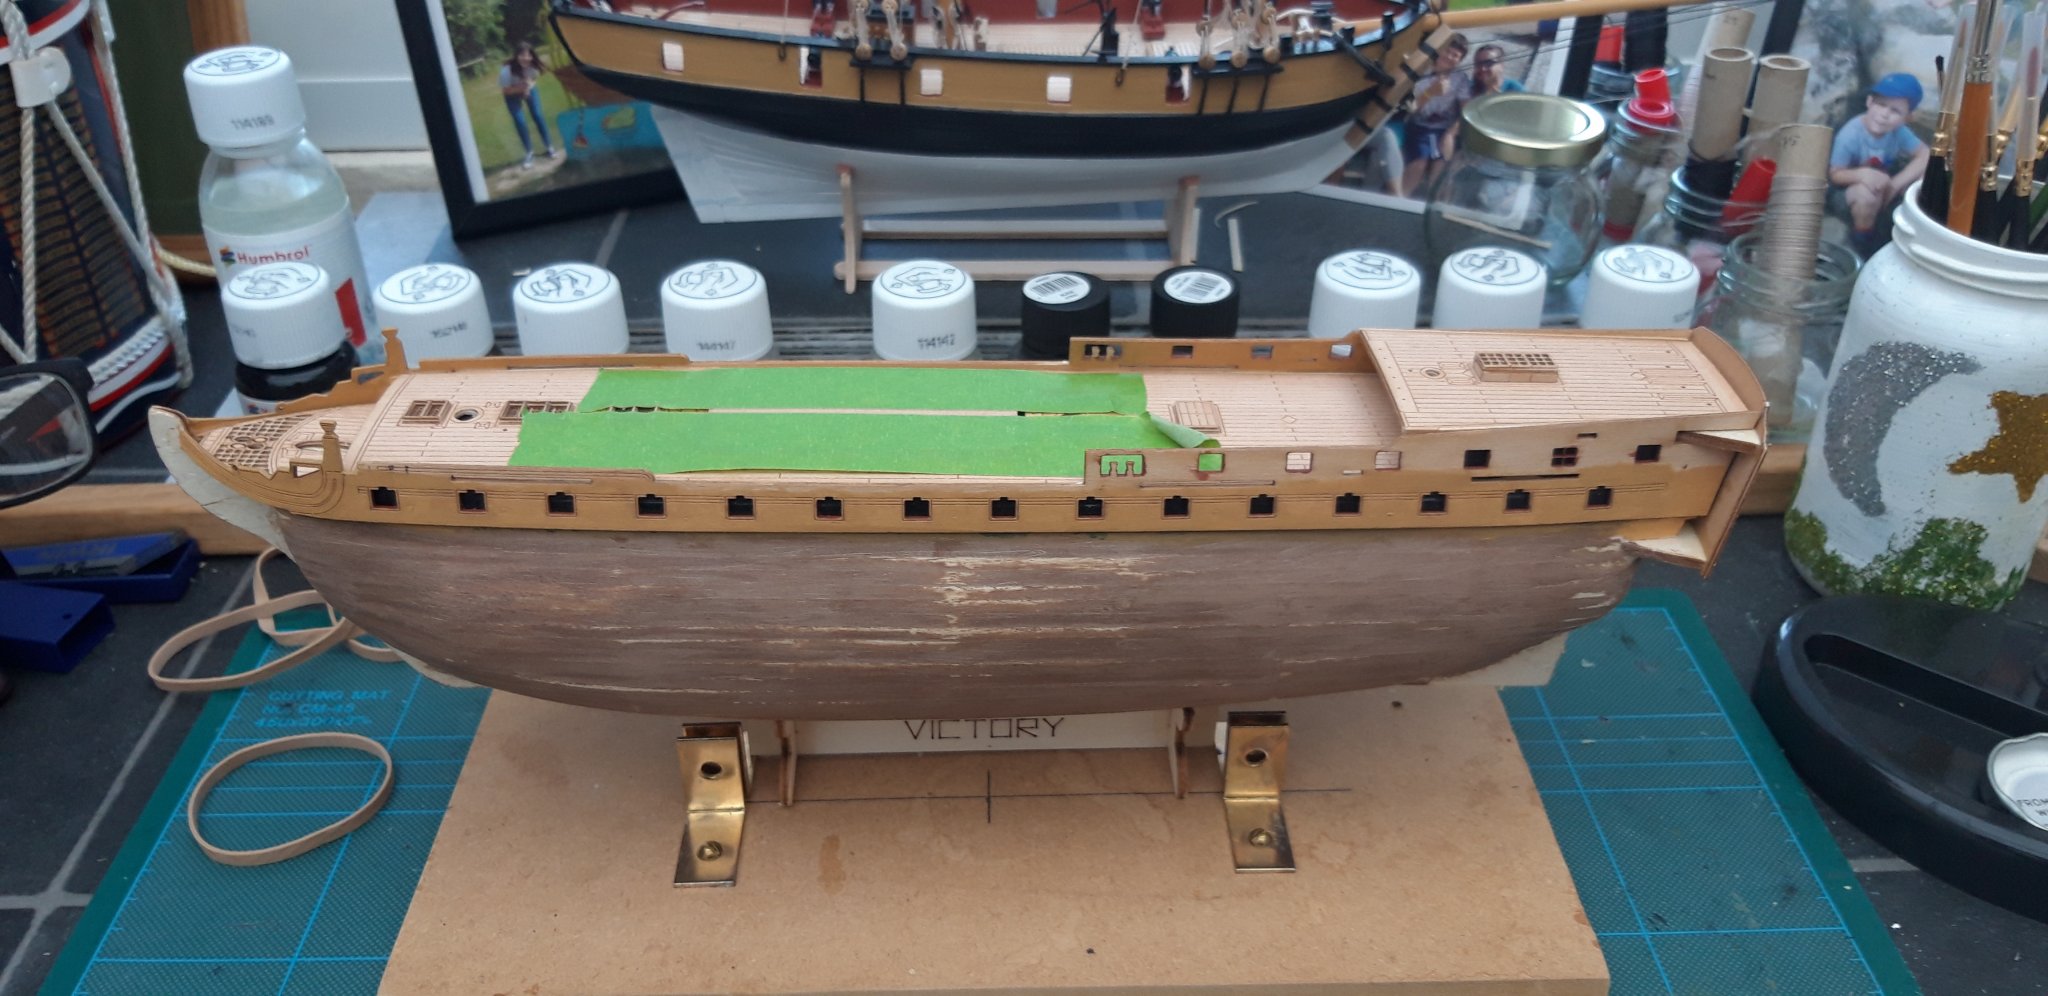
Upper Deck Gunports in position and painted yellow ochre. They are now prepared and ready for the Quarter Deck ports.


Last bit of gluing for the day. I have started to flag now, so l had best stop or l will start making errors.
The following pictures show where l am now. I am quite happy with the result of my efforts

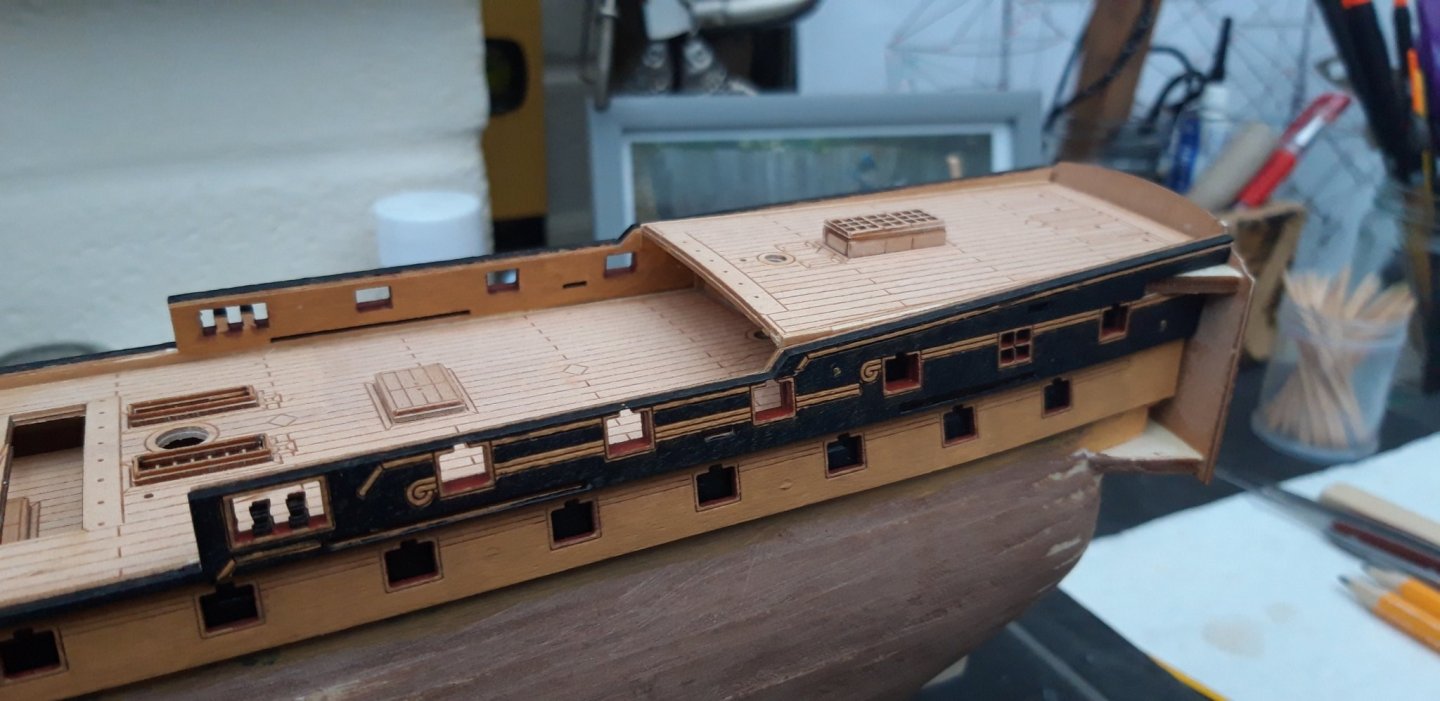
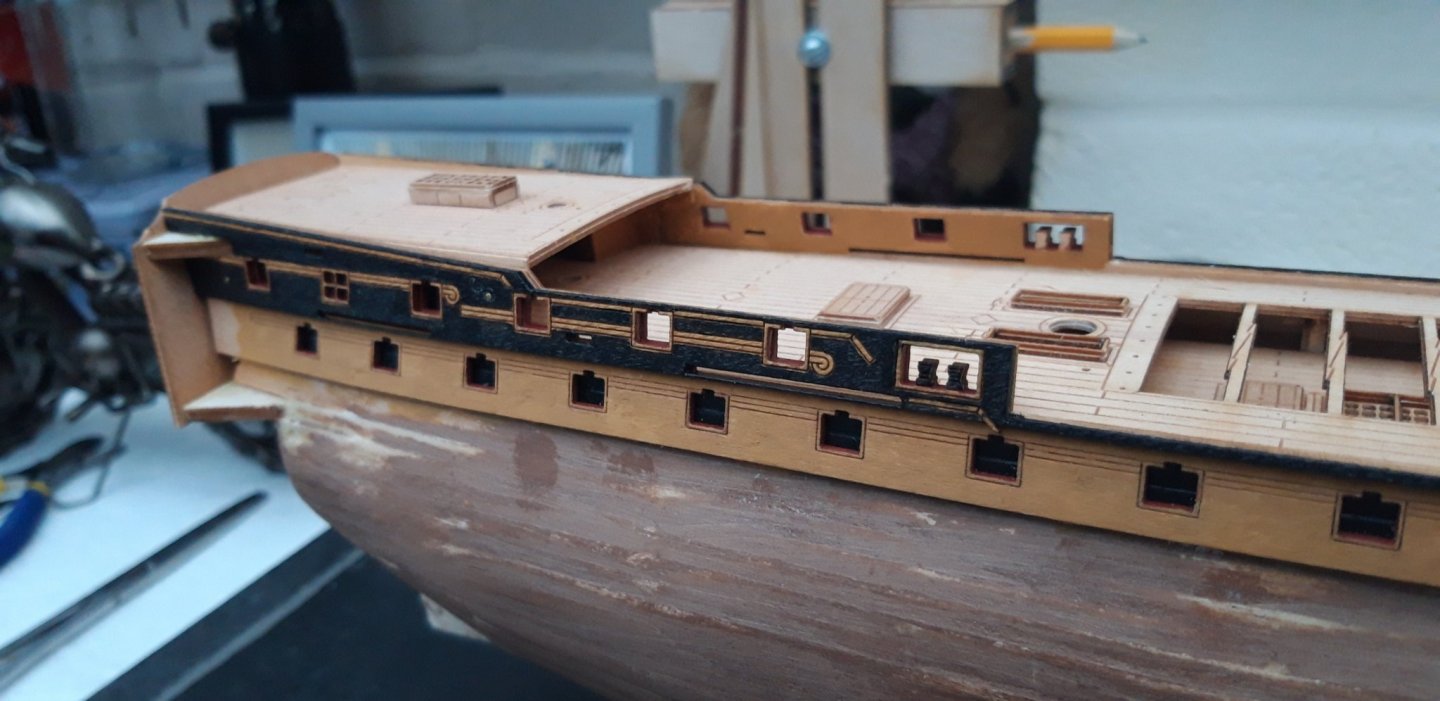
I must admit it is a relief to be off the planking and onto the next stage, l did find the planking on this build a little tough.
Roll on tomorrow.
Best wishes as always,
The Lazy Saint.
Session. Time. Total.
10. 7 hrs. 38 hrs.
-
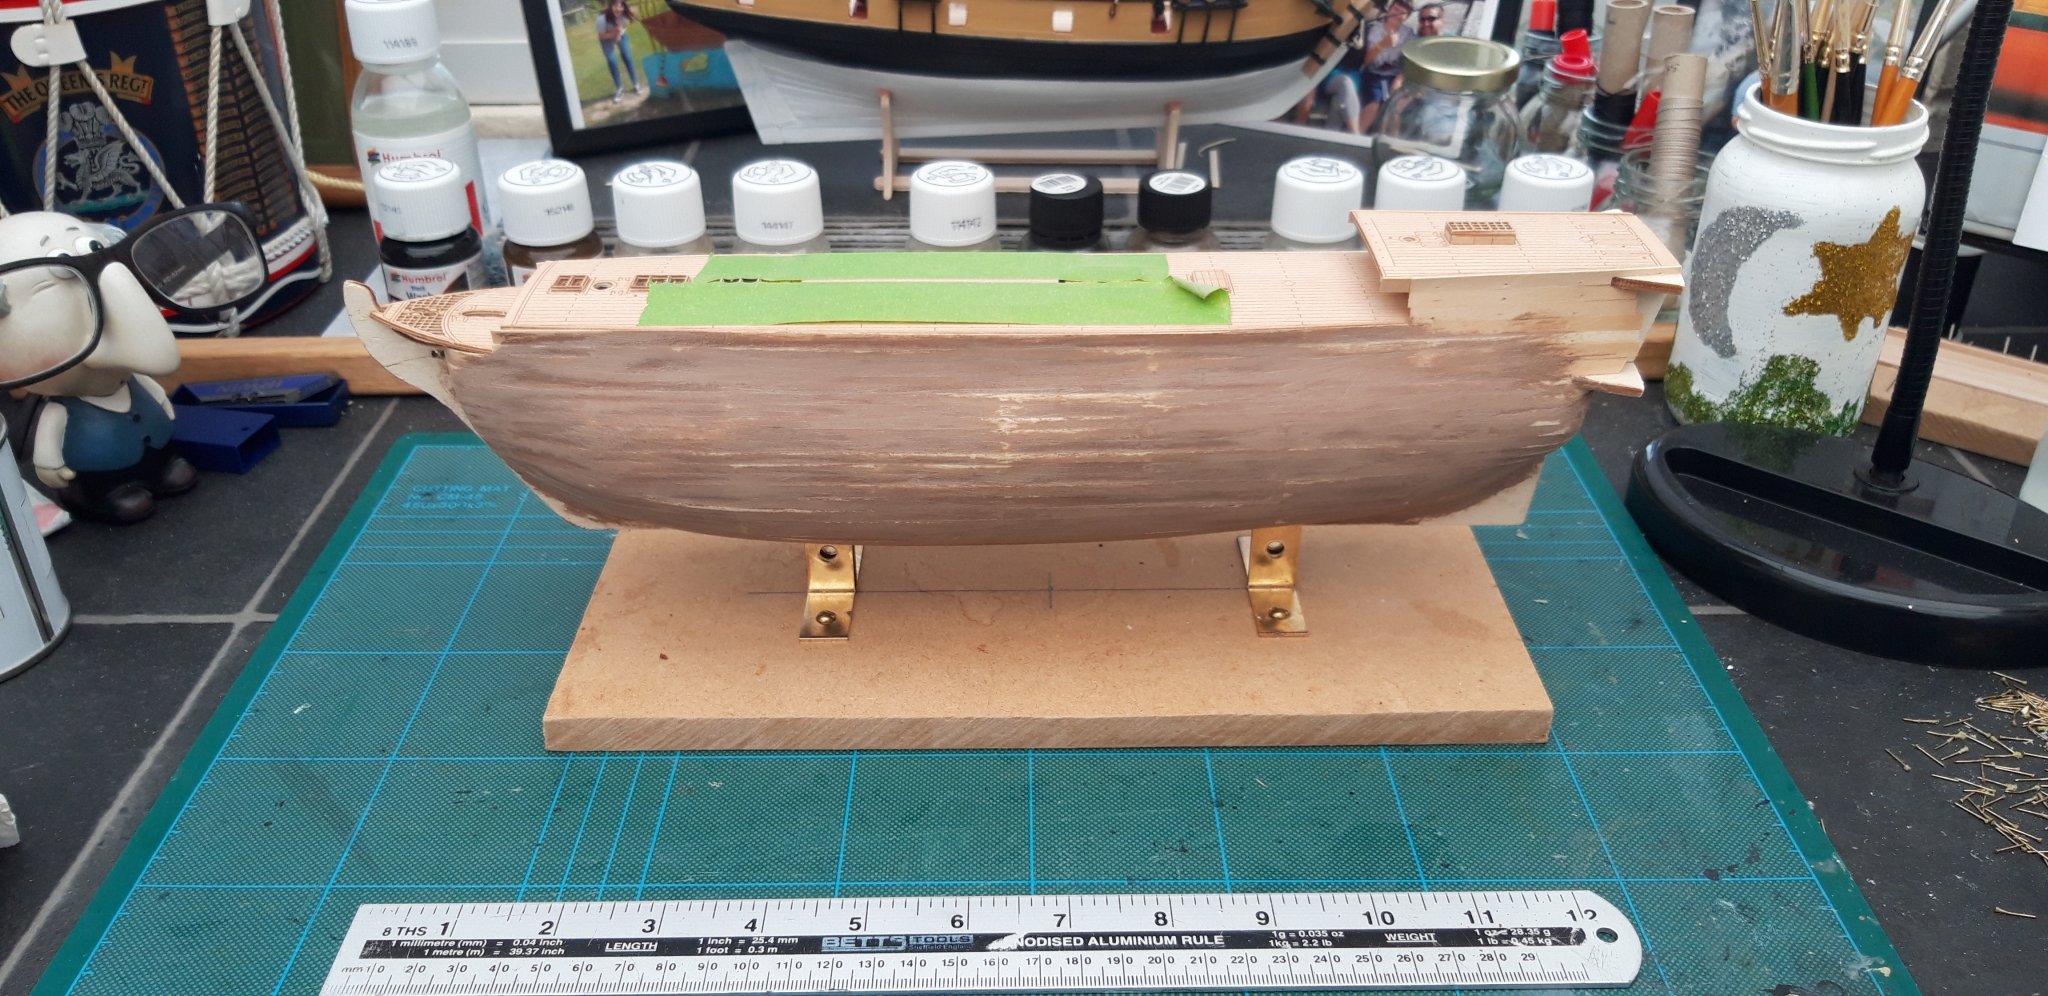
Hi all,
I managed to complete the first planking during this session. It was much more difficult than my previous two builds and l must confess that, if this were my first build, l may well have failed. If l were to build this again would make more use of filler blocks, the more the merrier l think.
I have also experimented with a different wood filler. I have been using a soft white filler, which is easy to use, but l found it to be very fragile and flaky when dry.
This time l have used Ronseal dark oak, it seemed like a good idea at the time, as did spreading a very fine even coat over the Hull.
It dried much quicker than l anticipated and l was expecting to brush most of it off. However, It seems easy to sand so l hope to be able to complete the sanding tomorrow.
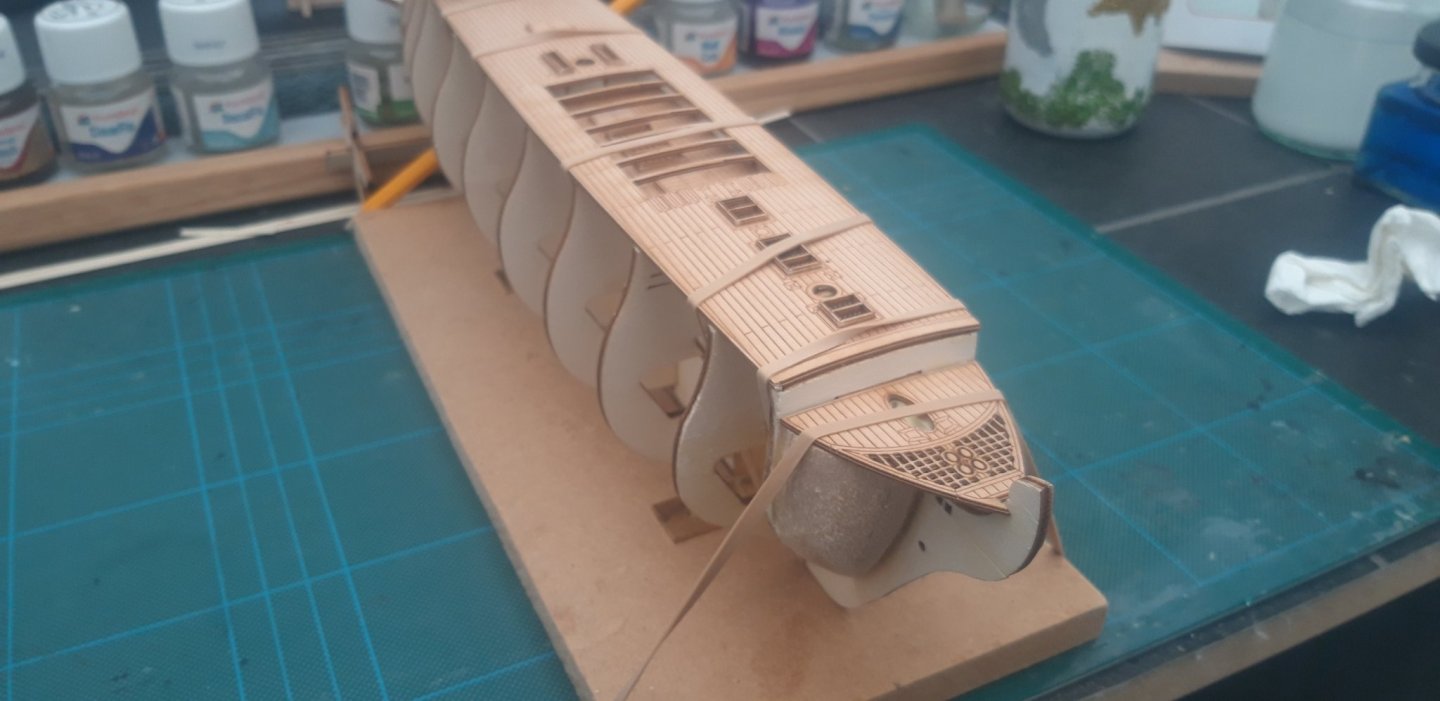
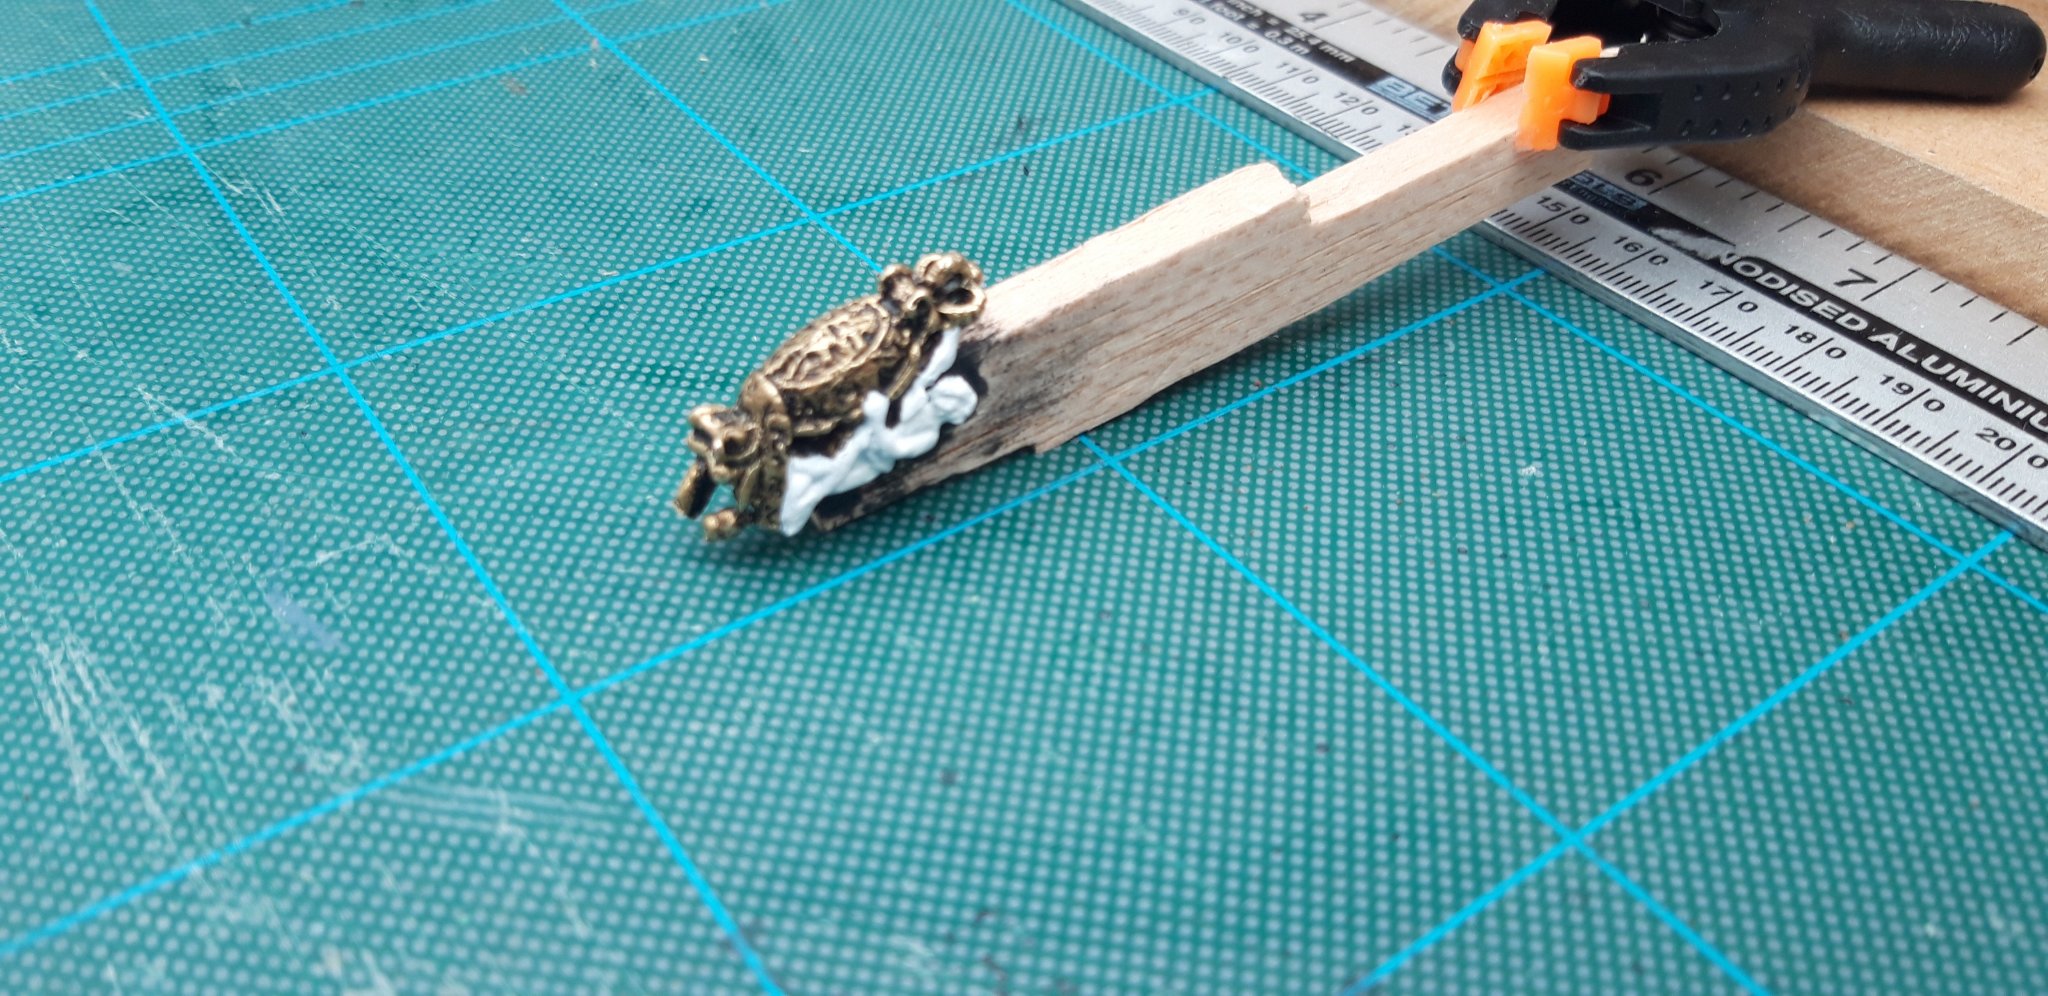
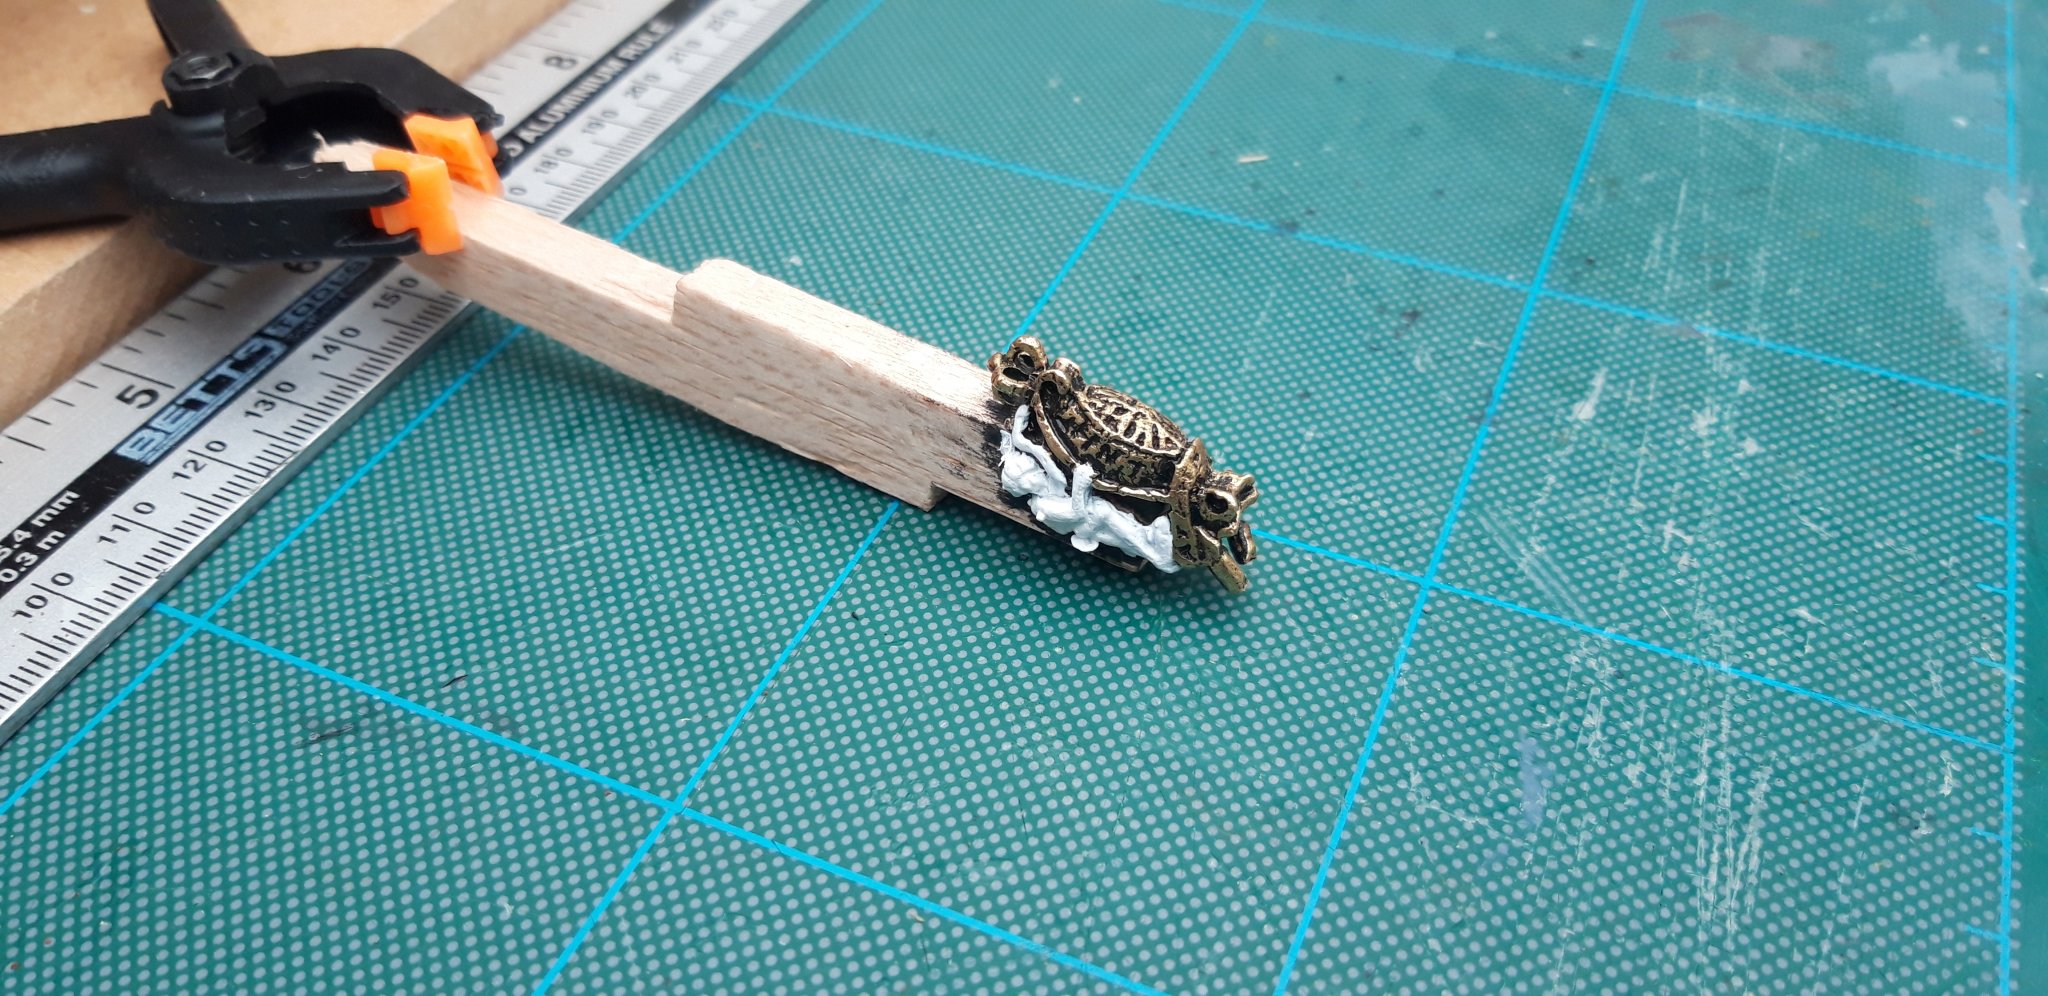
I also managed a little bit of painting.

The windows at the Stern and........


the Figure Head.
I hope to complete the sanding tomorrow and, perhaps, look at starting the second planking.
Best wishes as always,
The Lazy Saint.
Session. Time. Total.
09. 5 hrs. 31 hrs.
- GrandpaPhil, Retired guy, BenD and 2 others
-
5
-
Hi all,
Another day of planking, it seems to be going ok. I am not managing as well as my first two builds and l wish l had used one or two more filler blocks at either end.
Never mind, it is to late for me but if anyone happens to read this, and is planning to build this model, take note and make more use of filler blocks.
Best wishes as always,
The Lazy Saint.
Session. Time. Total.
08. 5 hrs. 26 hrs.
-
-
Very very good, it is hard to believe that it is made of card. It makes one want to rush out and buy a kit at the next opportunity. Sadly, like most mortals, l would never be able to reproduce work like this. I can, however, draw inspiration from it and indeed l shall. Thank you for sharing your work with us.
Best wishes as always,
The Lazy Saint.
-
Hi all,
Another day of planking for me today and my next session will be the same. I expect another two 3hr sessions, one tomorrow and one Friday. This estimation is, of course, subject to a smooth, problem free passage.

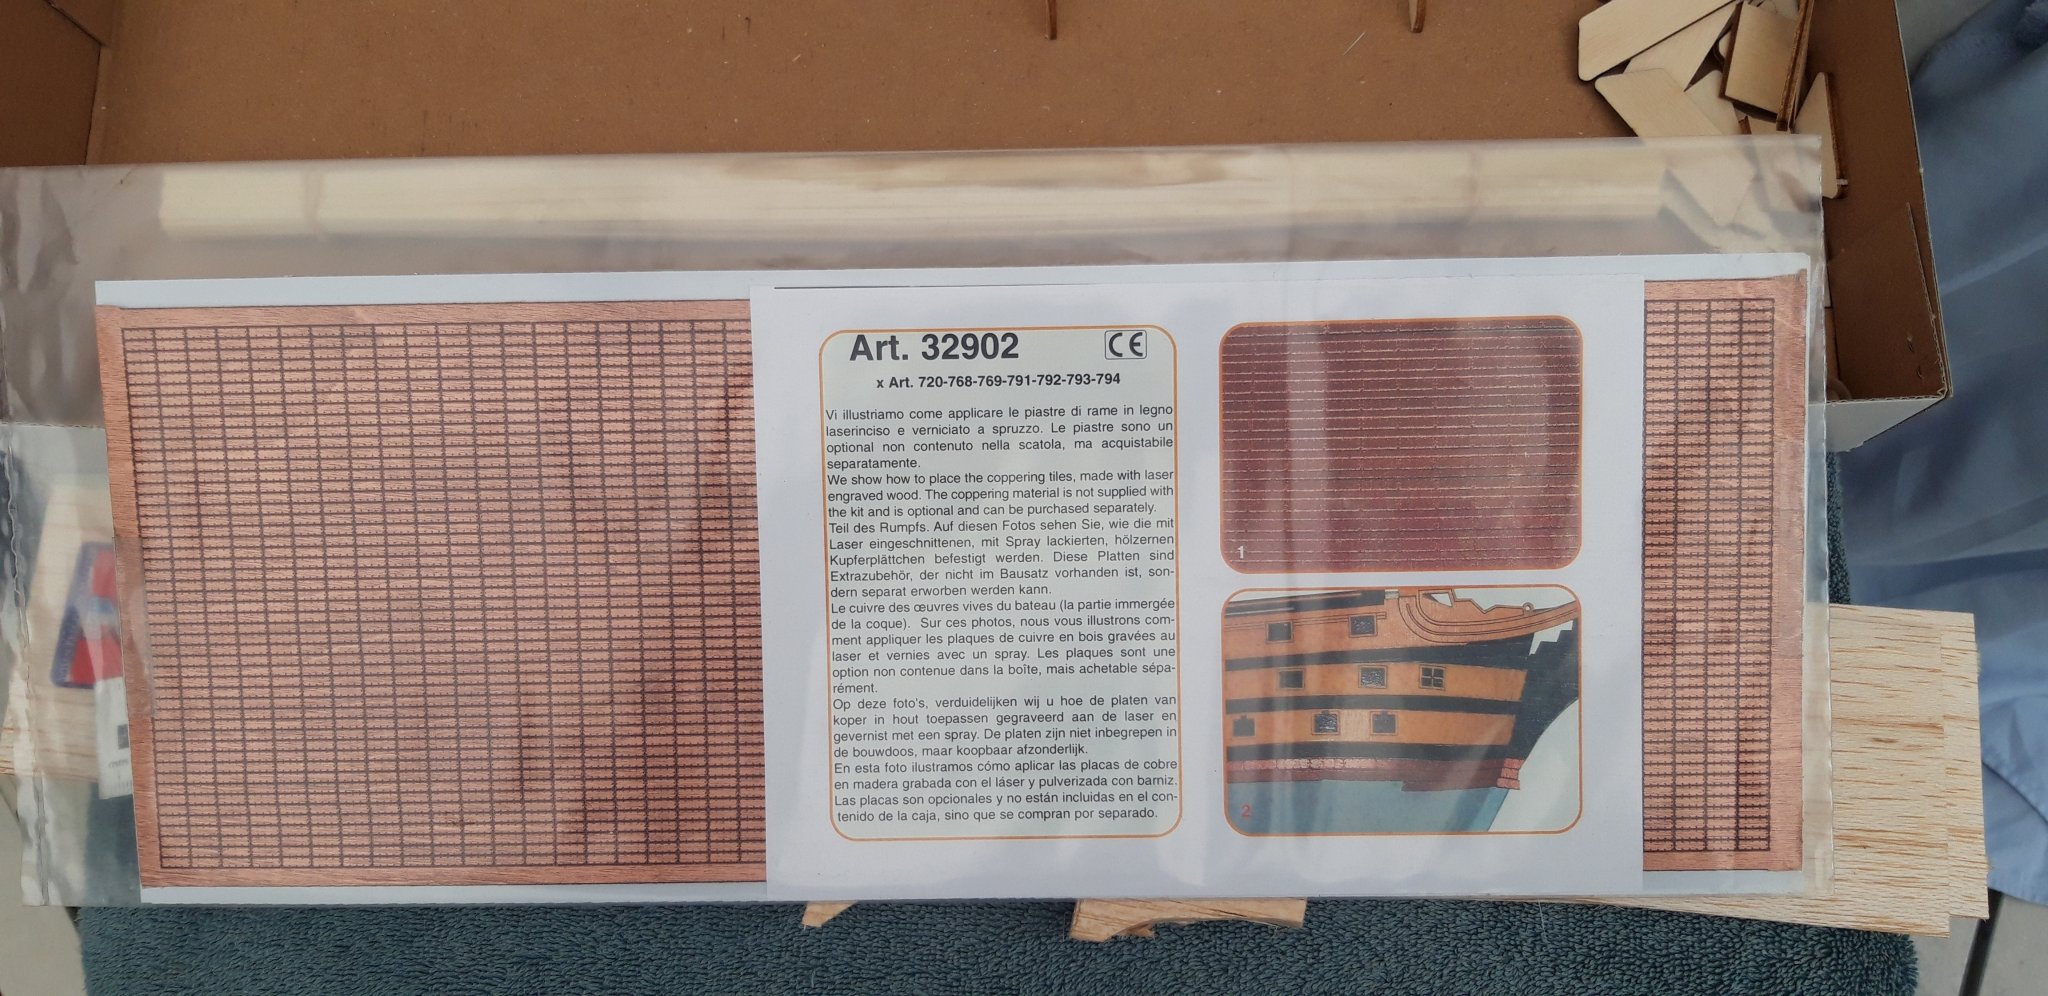
When I first started this build l had expected to paint the Hull below the waterline copper, however, as the laser cut wood supplied was quite good l thought the same may be true of the simulated copper plates. I ordered a pack yesterday morning and it came today. On first inspection they do seem good.
l have laid the Garboard Strake plus one each side, which l am quite happy with.
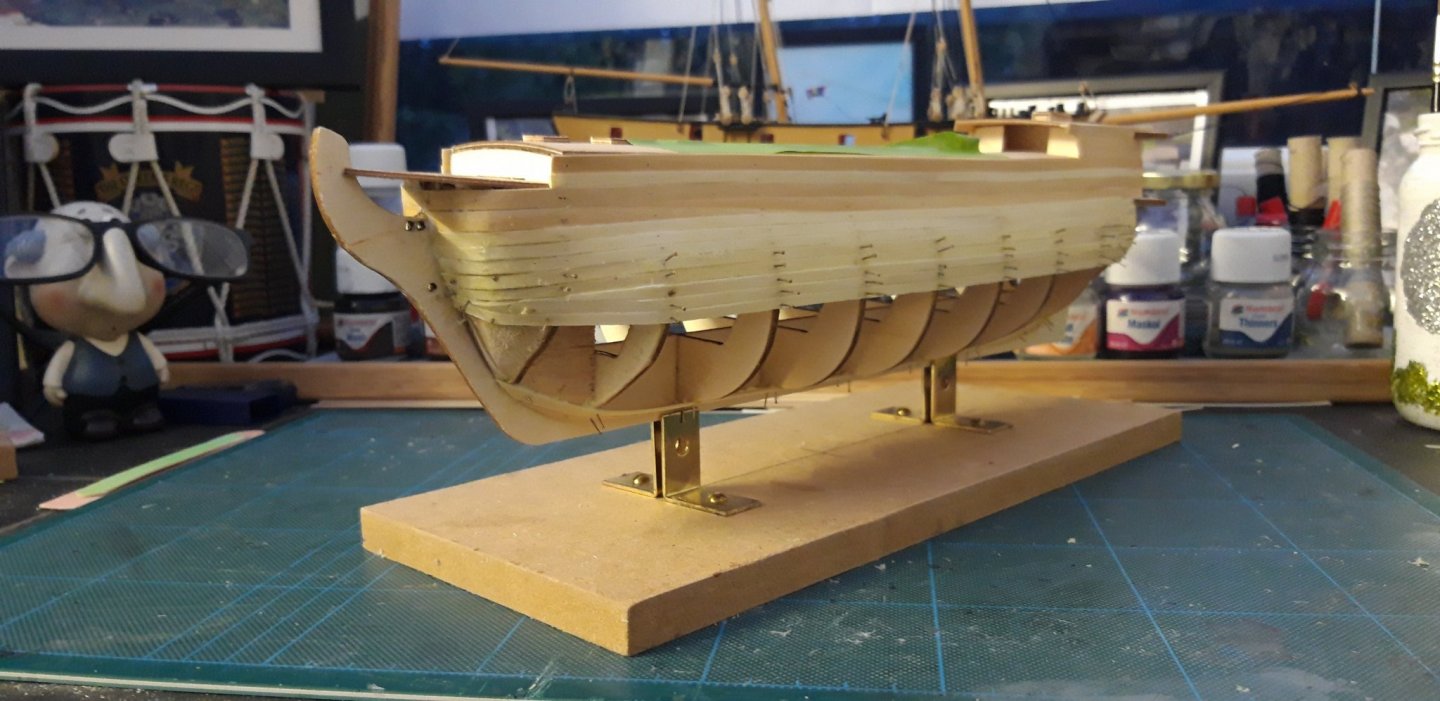
I have also managed five Strakes on the port side and....

five on the Starboard side. These l am not so pleased with. I have achieved the correct profile but left myself with a bit more filling and sanding than l would have liked.
Best wishes as always,
The Lazy Saint
Session. Time. Total.
07. 4 hrs. 21 hrs.
- Ryland Craze, Retired guy, VTHokiEE and 2 others
-
5
-
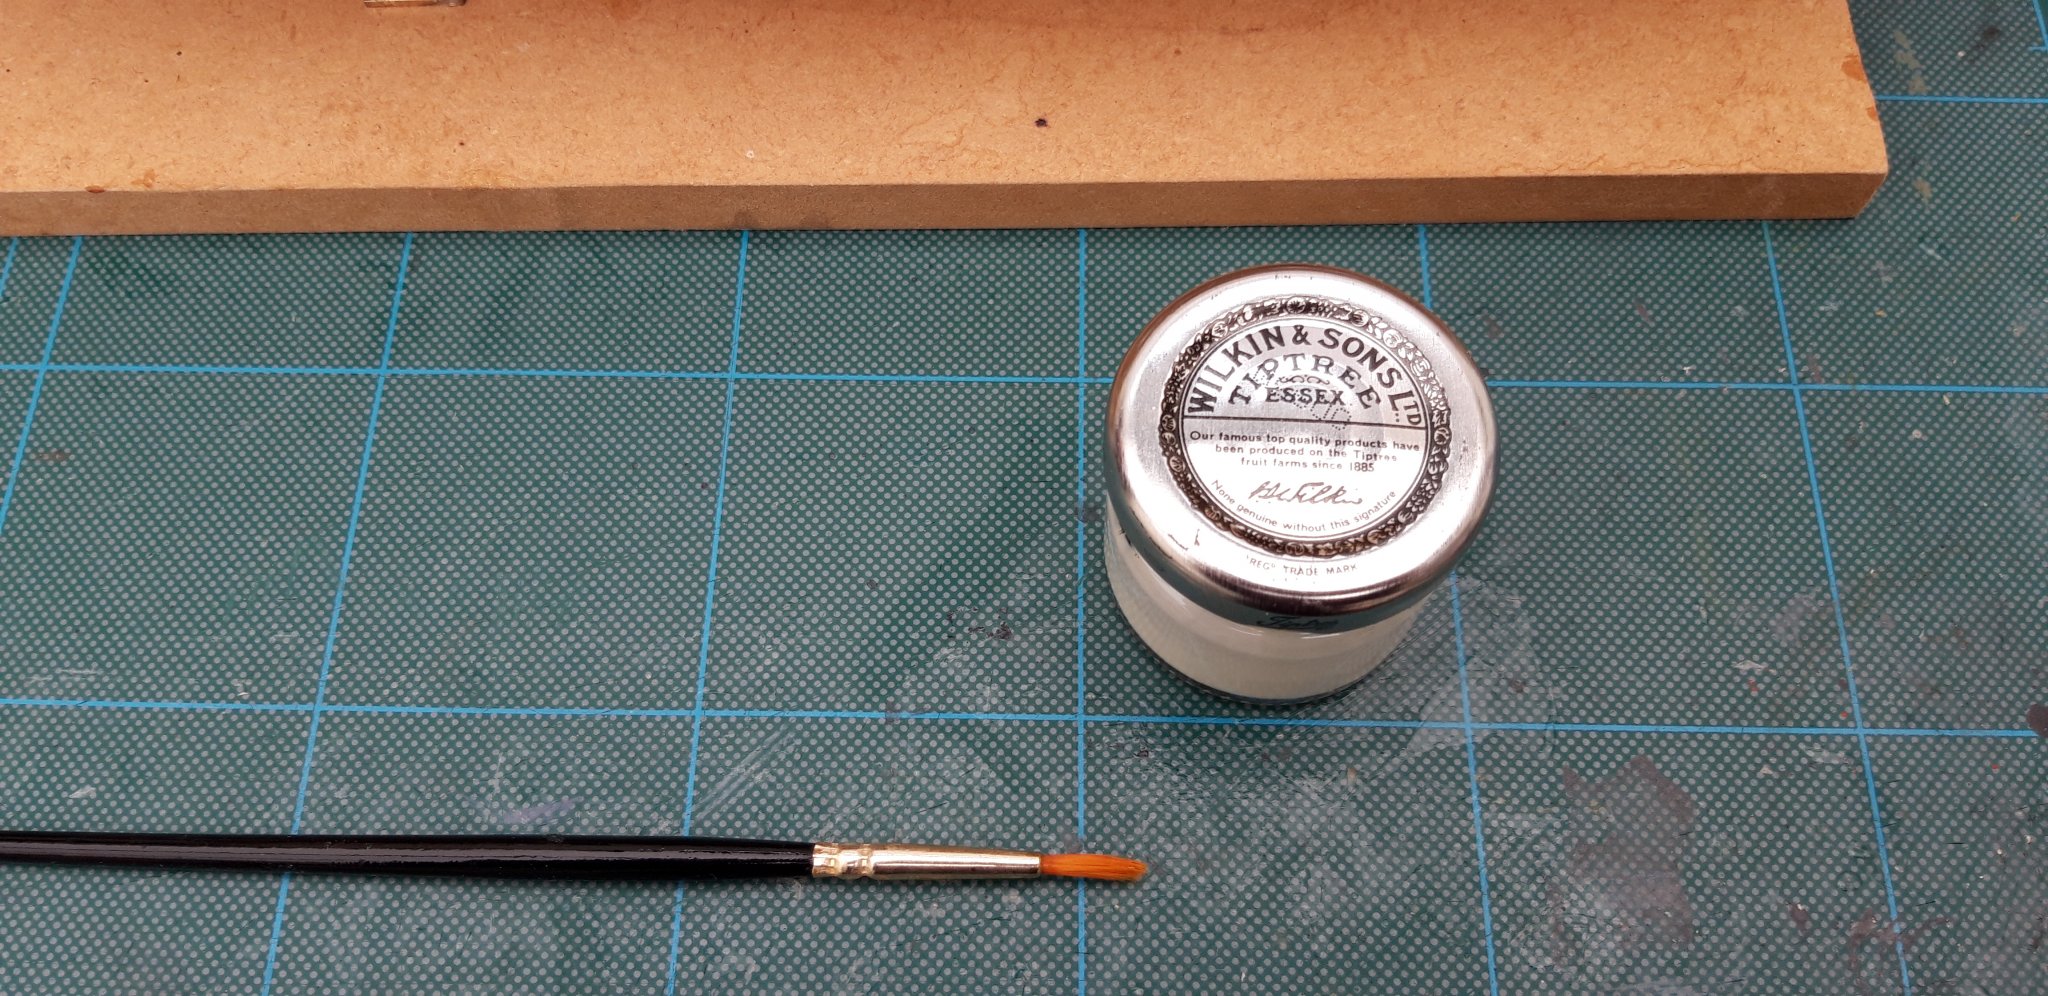
Hi mugje,
I have a small Jam Jar that l use. In the jar itself l have my diluted glue, l assess this each time l use it, maybe adding a little water if it has started to thicken. In the lid l have a little neat glue and l use a brush to apply both thick and thinned glue.
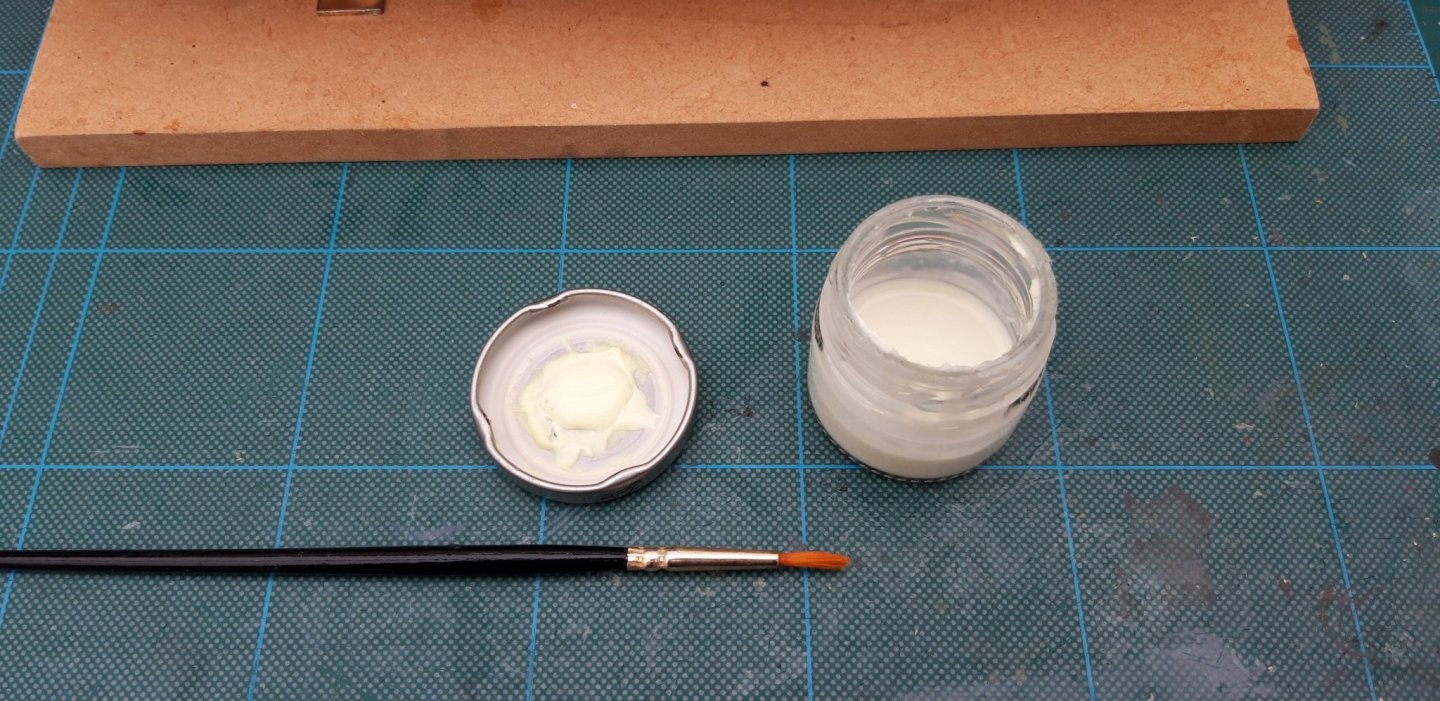
When l have finished the gluing job l have done l put the lid on and it keeps fresh.

Hope this helps.
Best wishes as always,
The Lazy Saint.
-
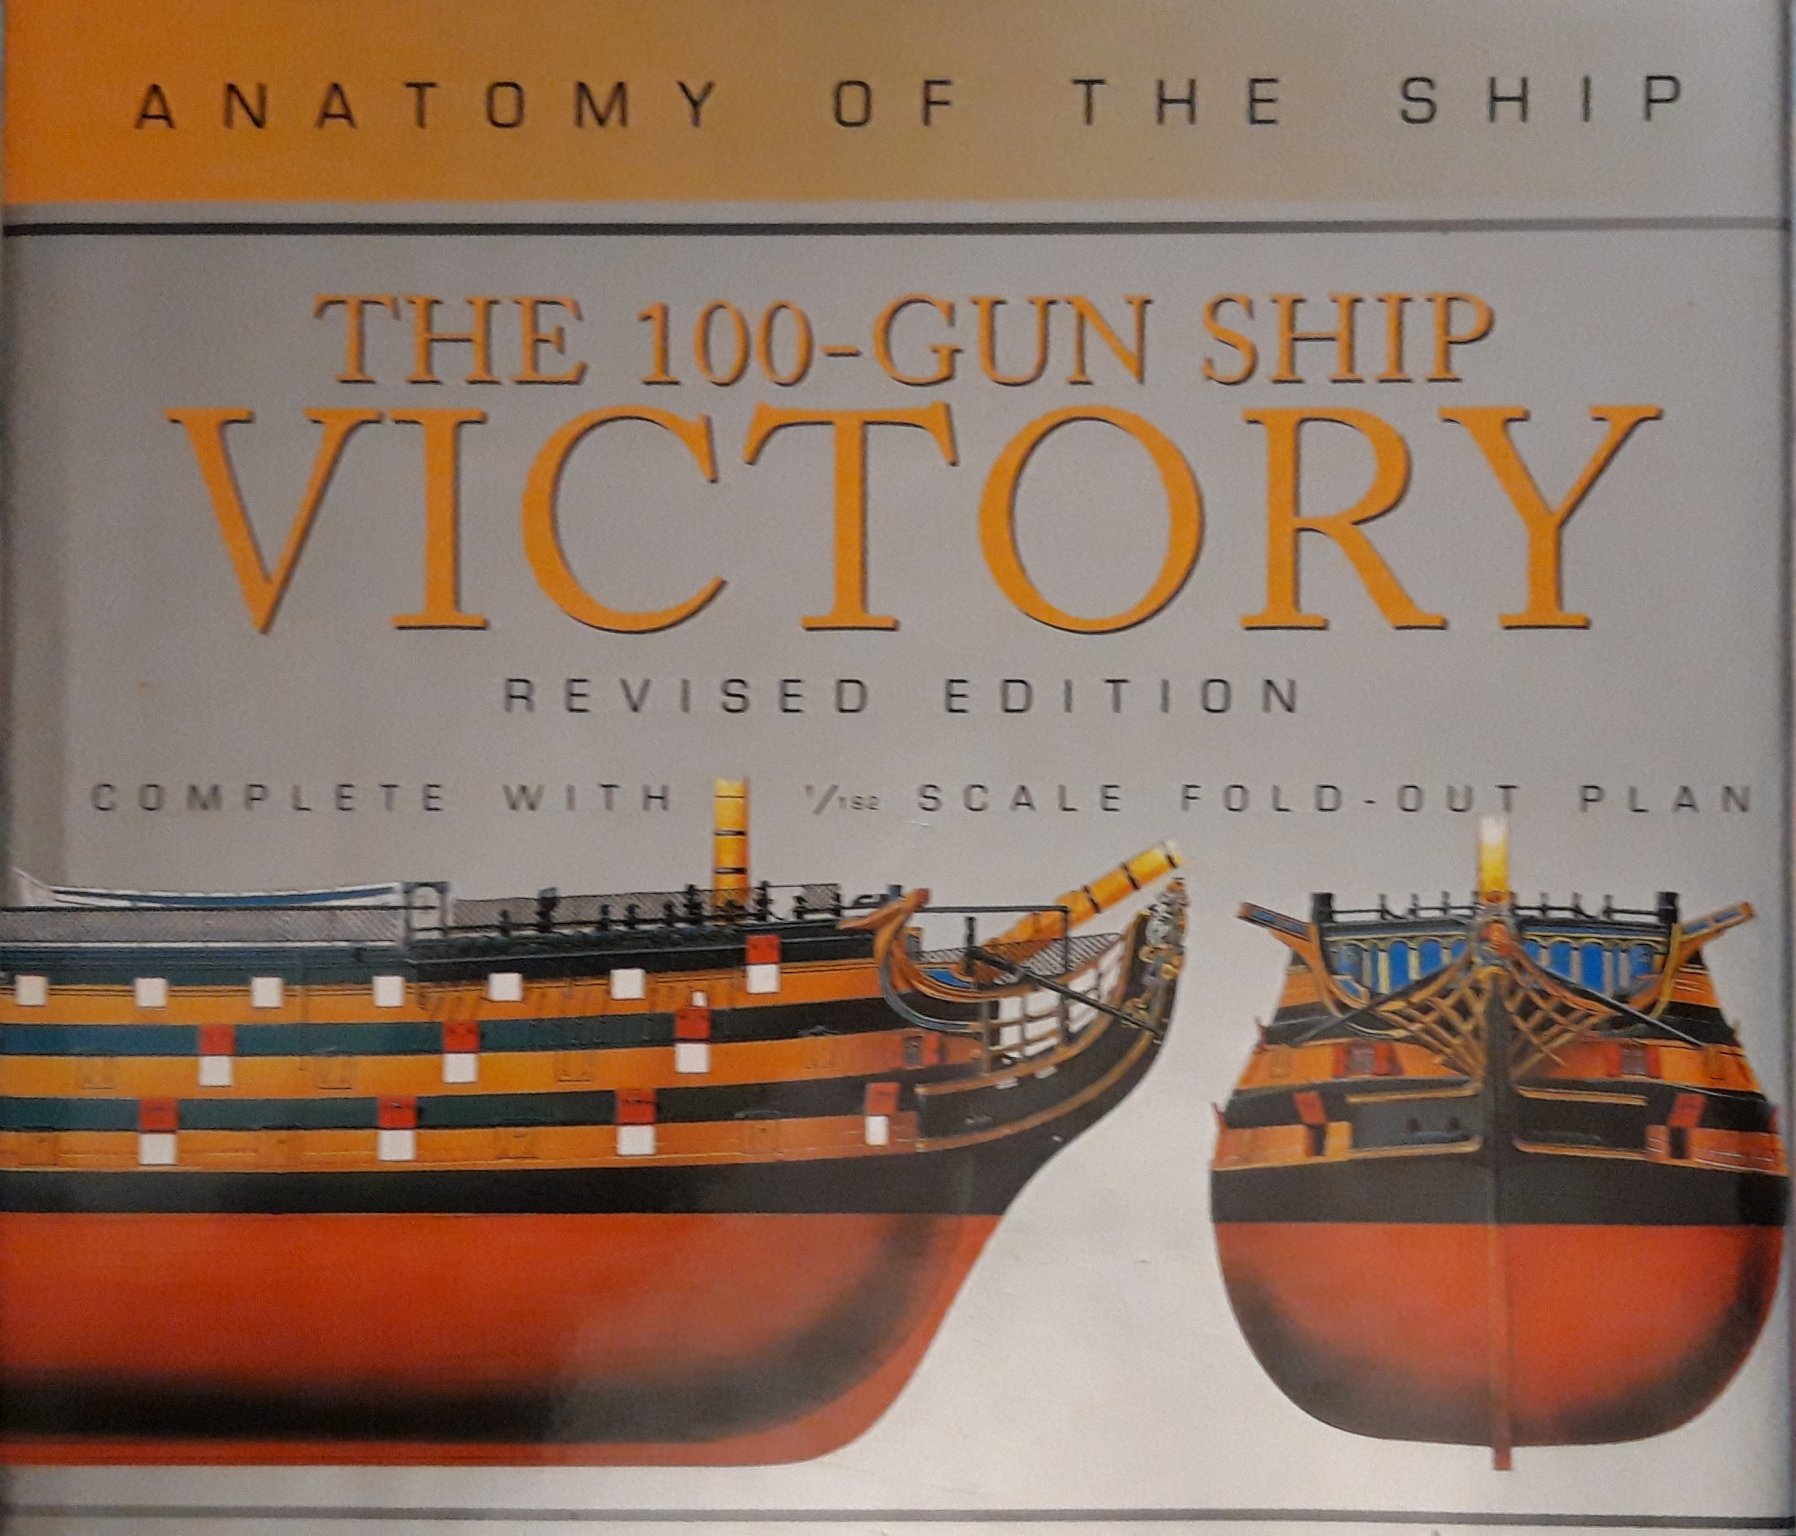
Hi all,
Yes indeed GrandpaPhil it is a great help, a marvellous reference book.
Today l managed six more Strakes, three each side, and as expected, its a slow process.
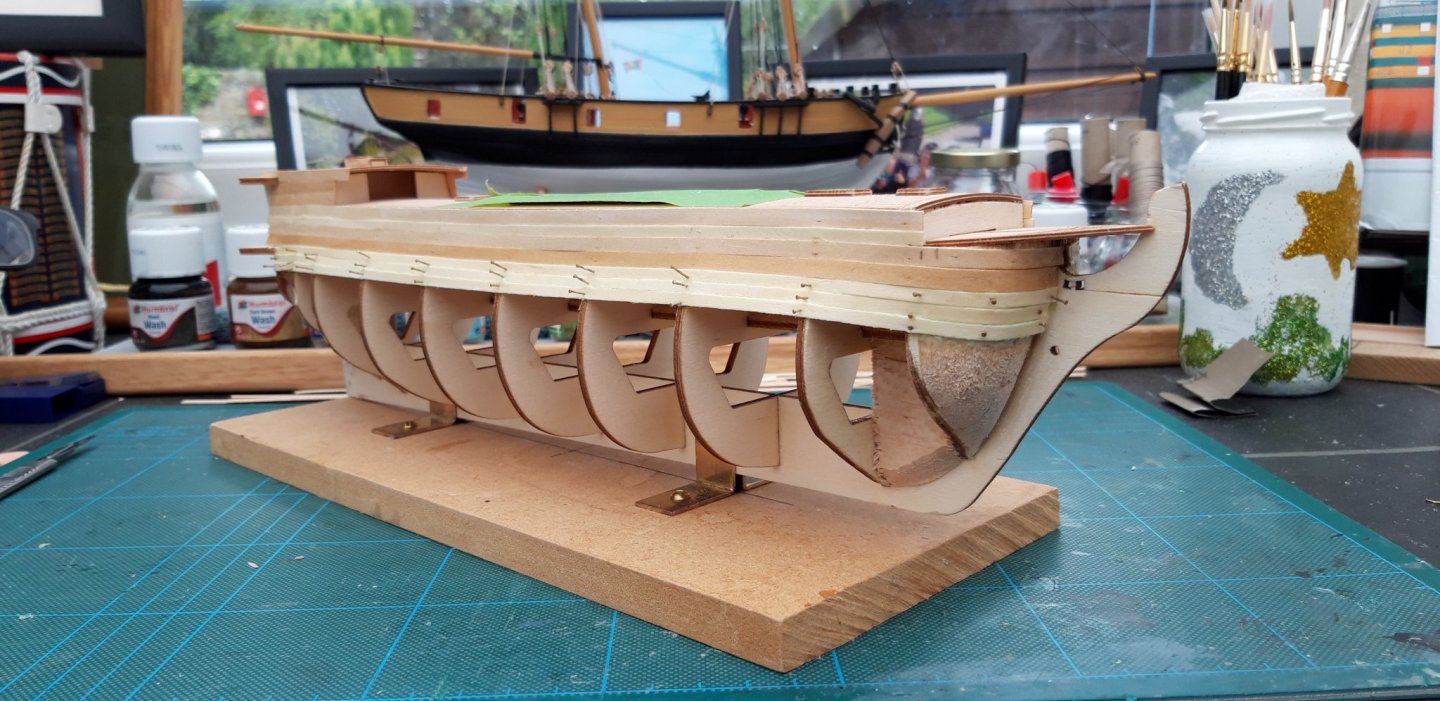
You will notice that l have added other filler blocks either side both Bow and Stern. After some thought l decided it was important for attaching the Garboard planking.
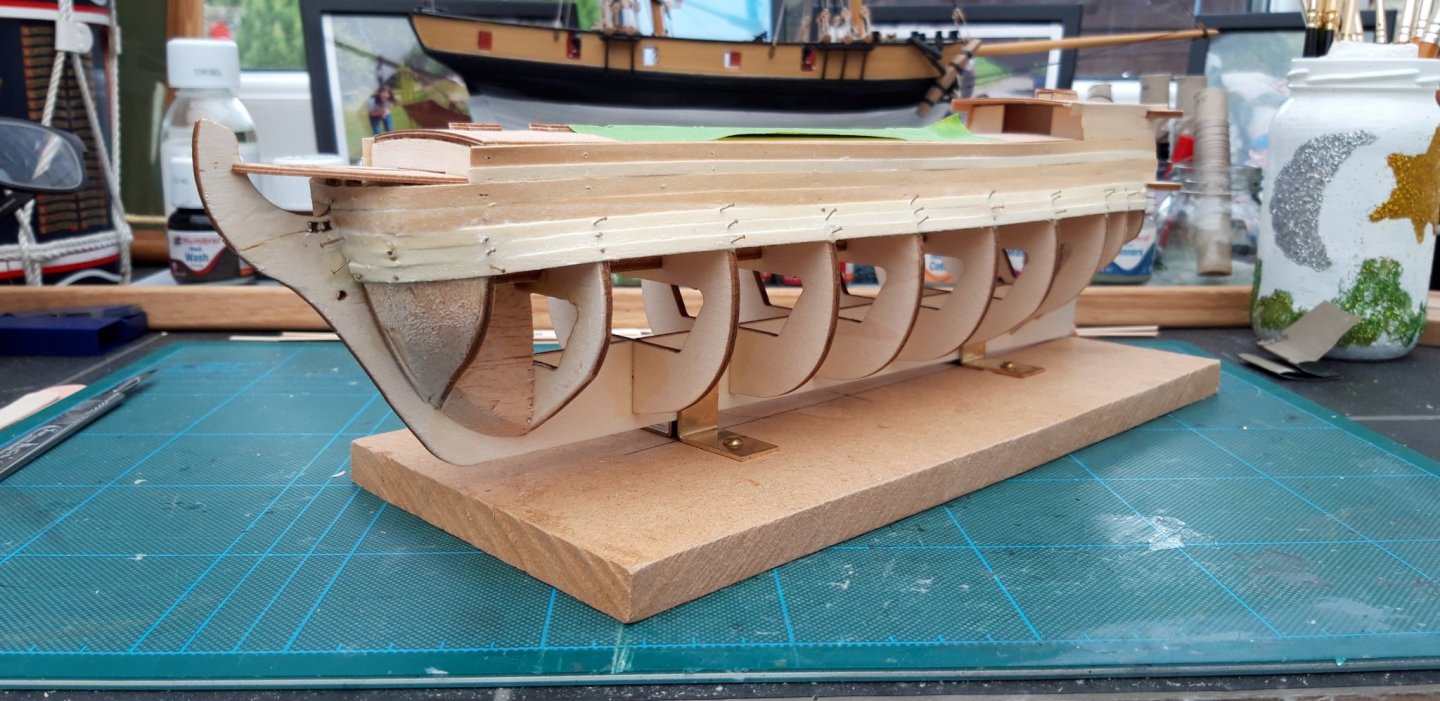
There is a slight dip appearing along the lateral line at the Bow, l must look at addressing this issue during my next session.
I am pleased with the lay of the Stern planking.

It is, of course, vital to soak the planks well before attempting such a radical bend.
Best wishes as always,
The Lazy Saint.
Session. Time. Total.
06. 3 hrs. 17 hrs.
-
-
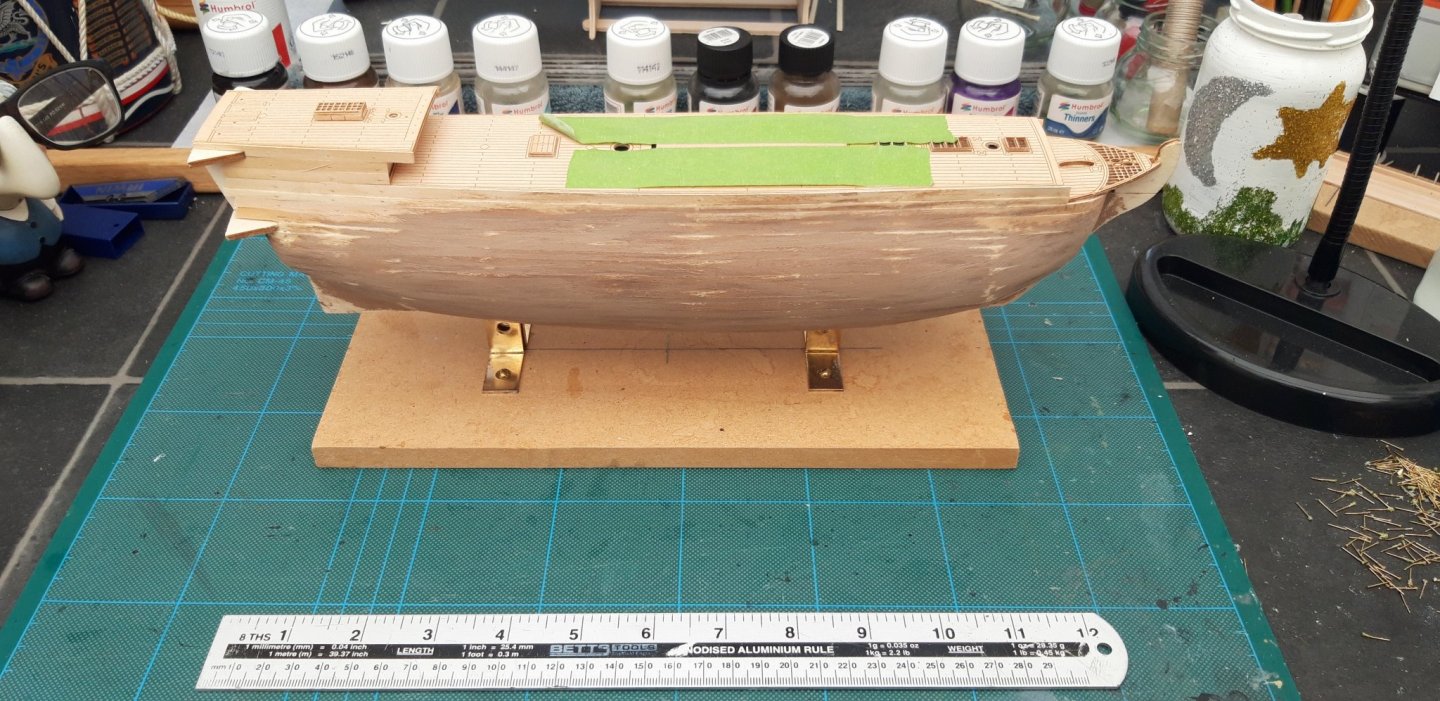
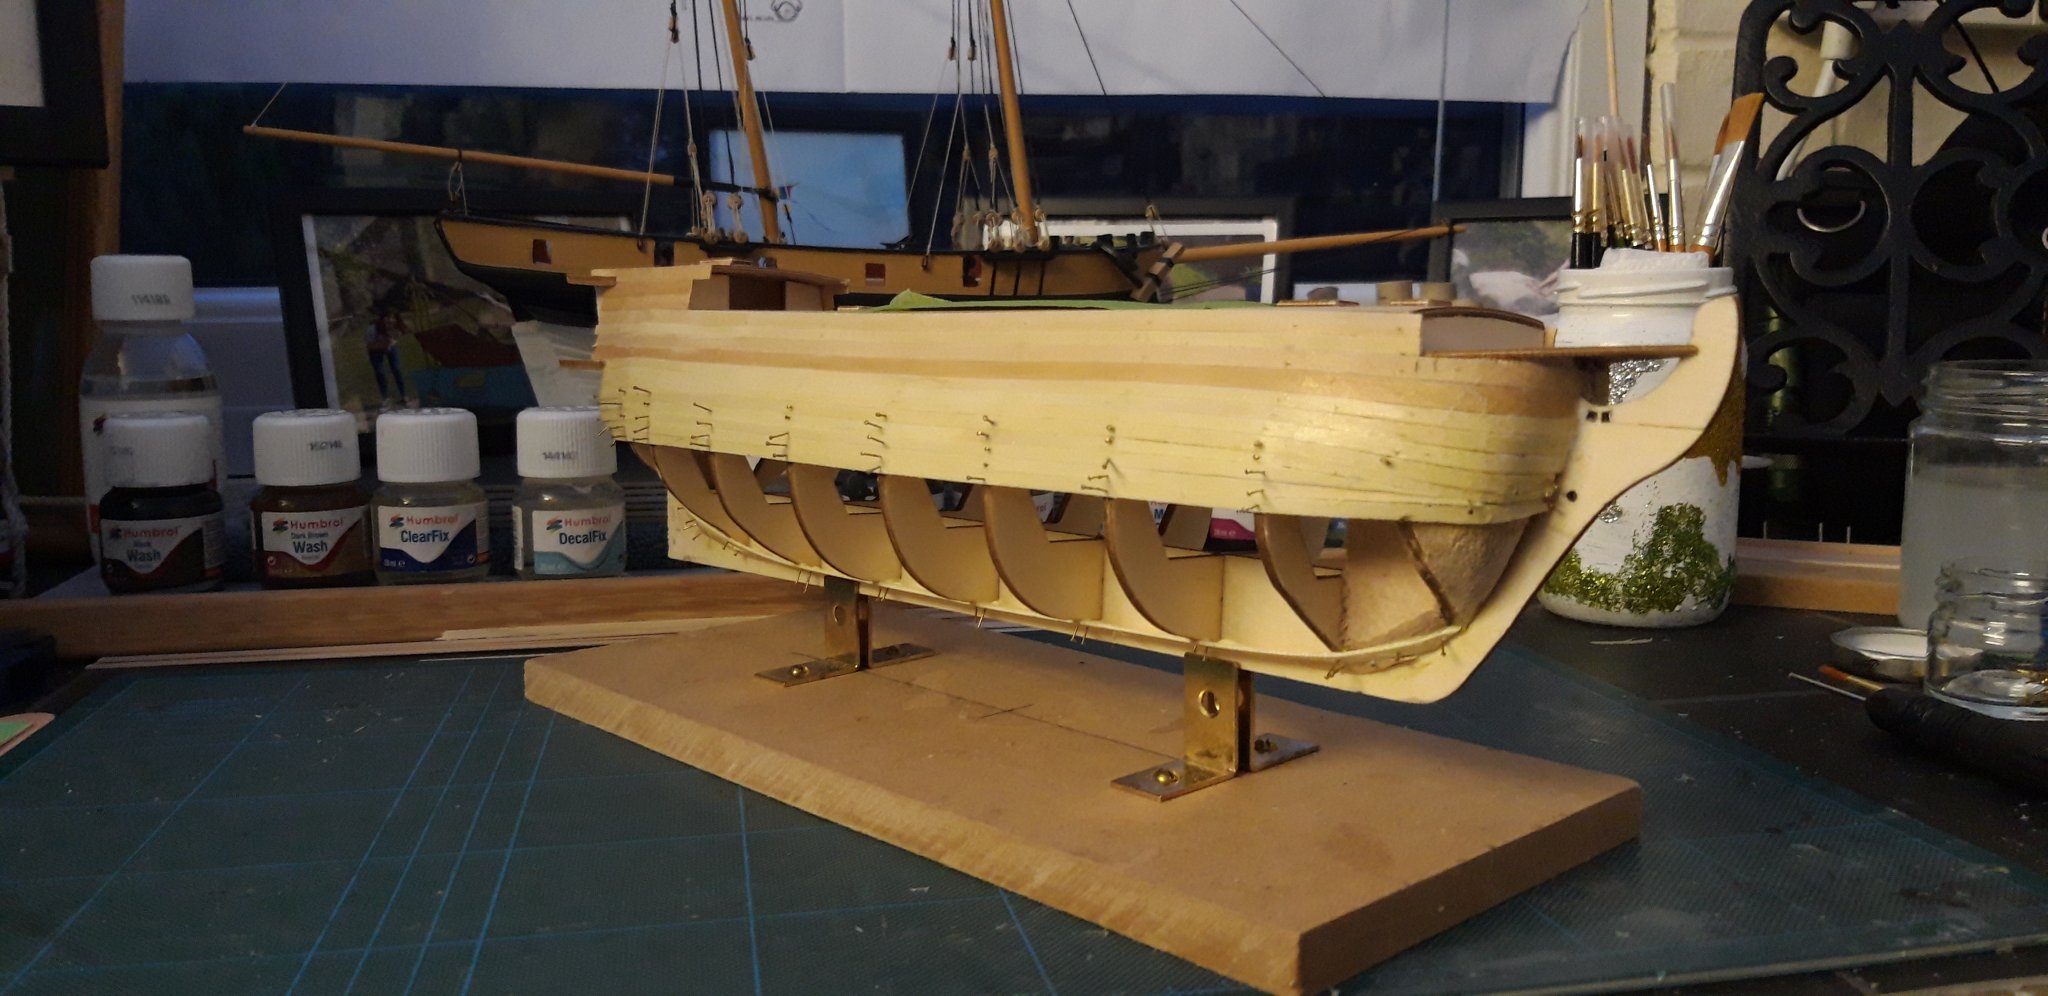
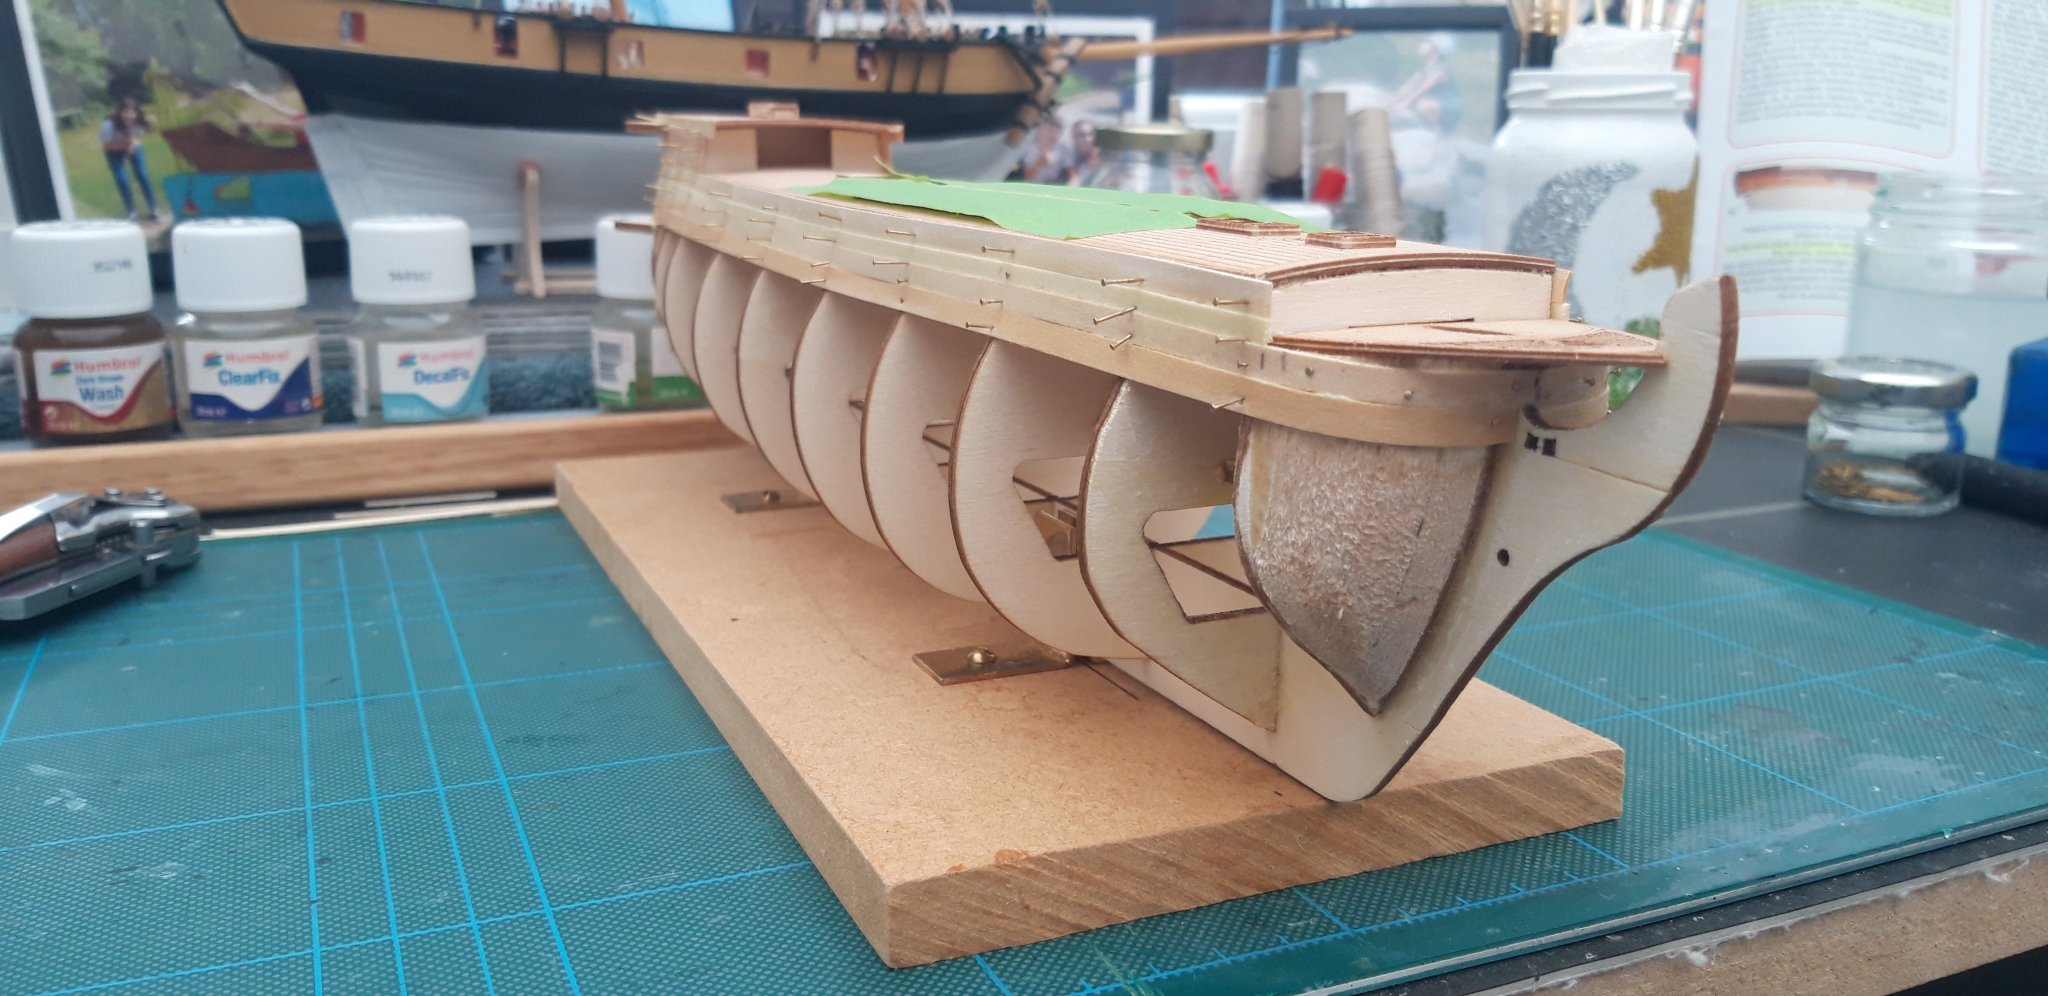
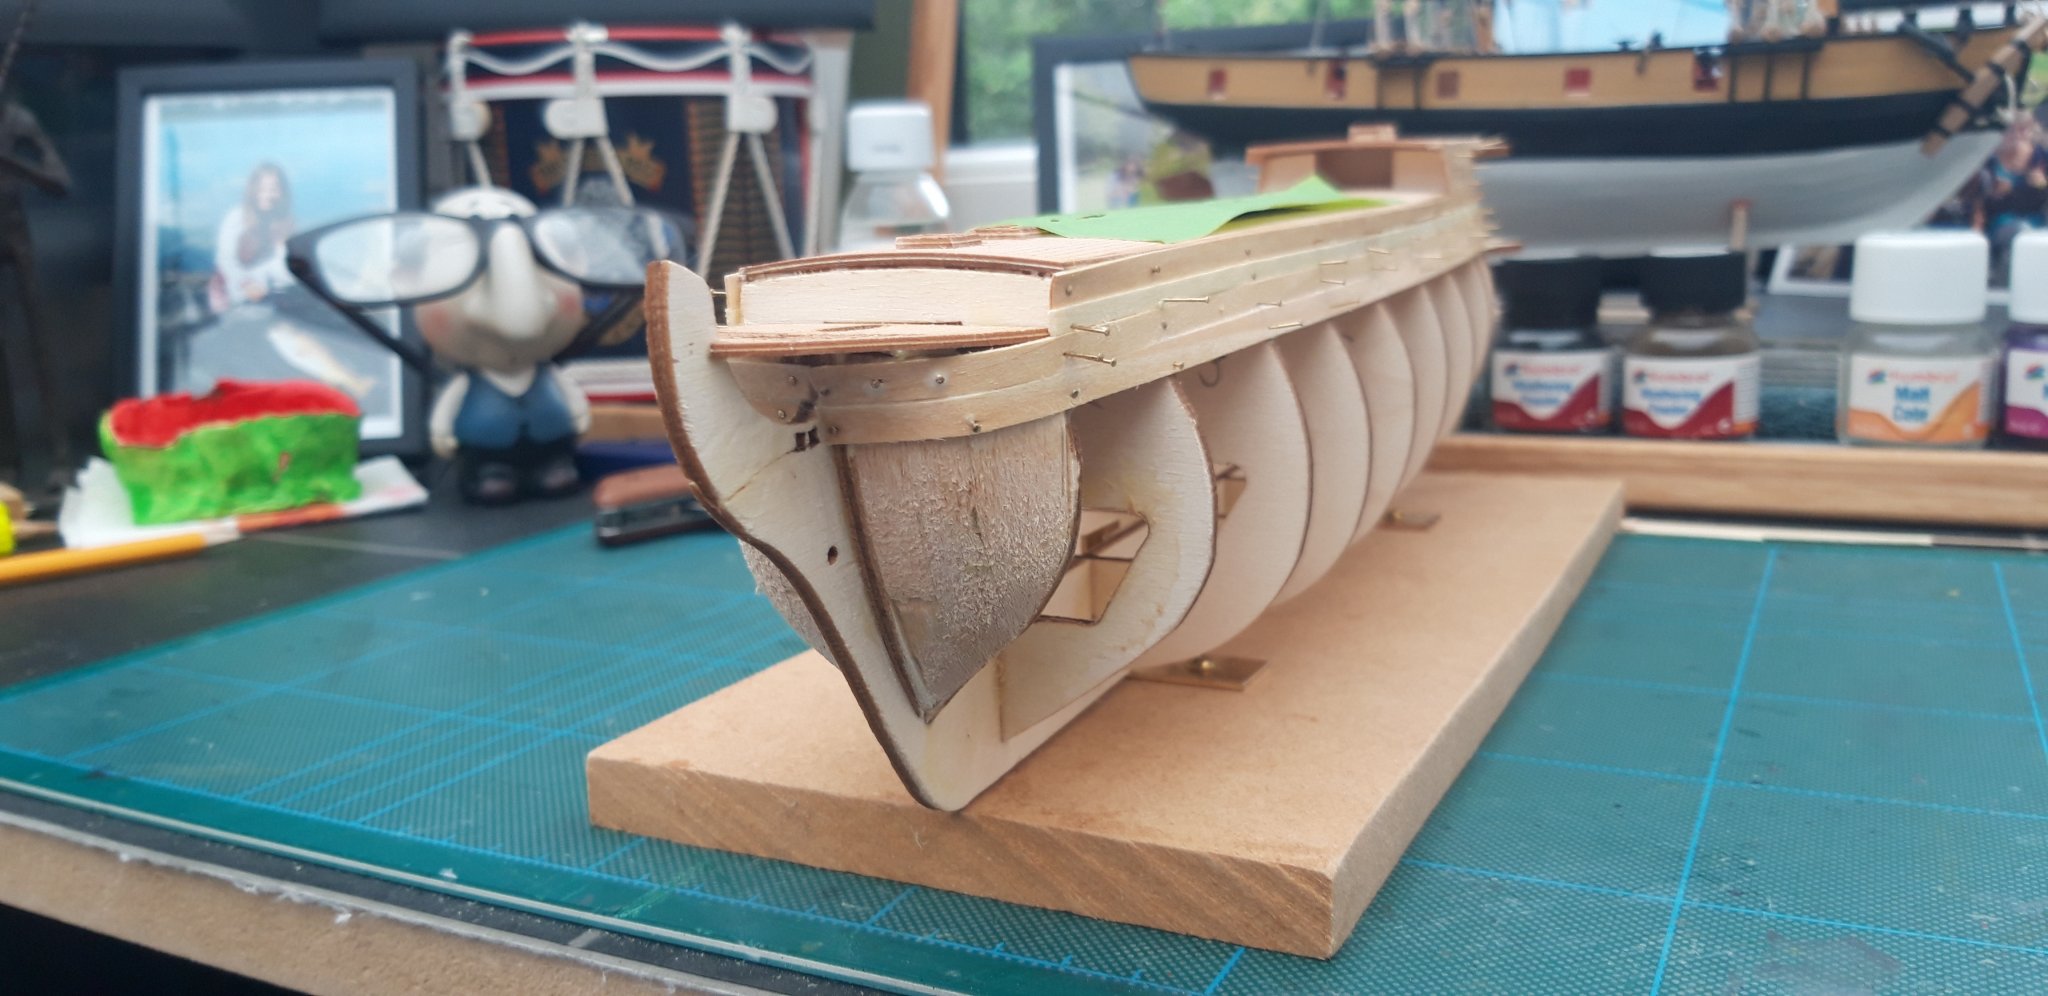
Hi all,
Thanks very much for the kind words mugje, appreciated. I hope you are right in your prediction, it is a challenge but l am enjoying it.
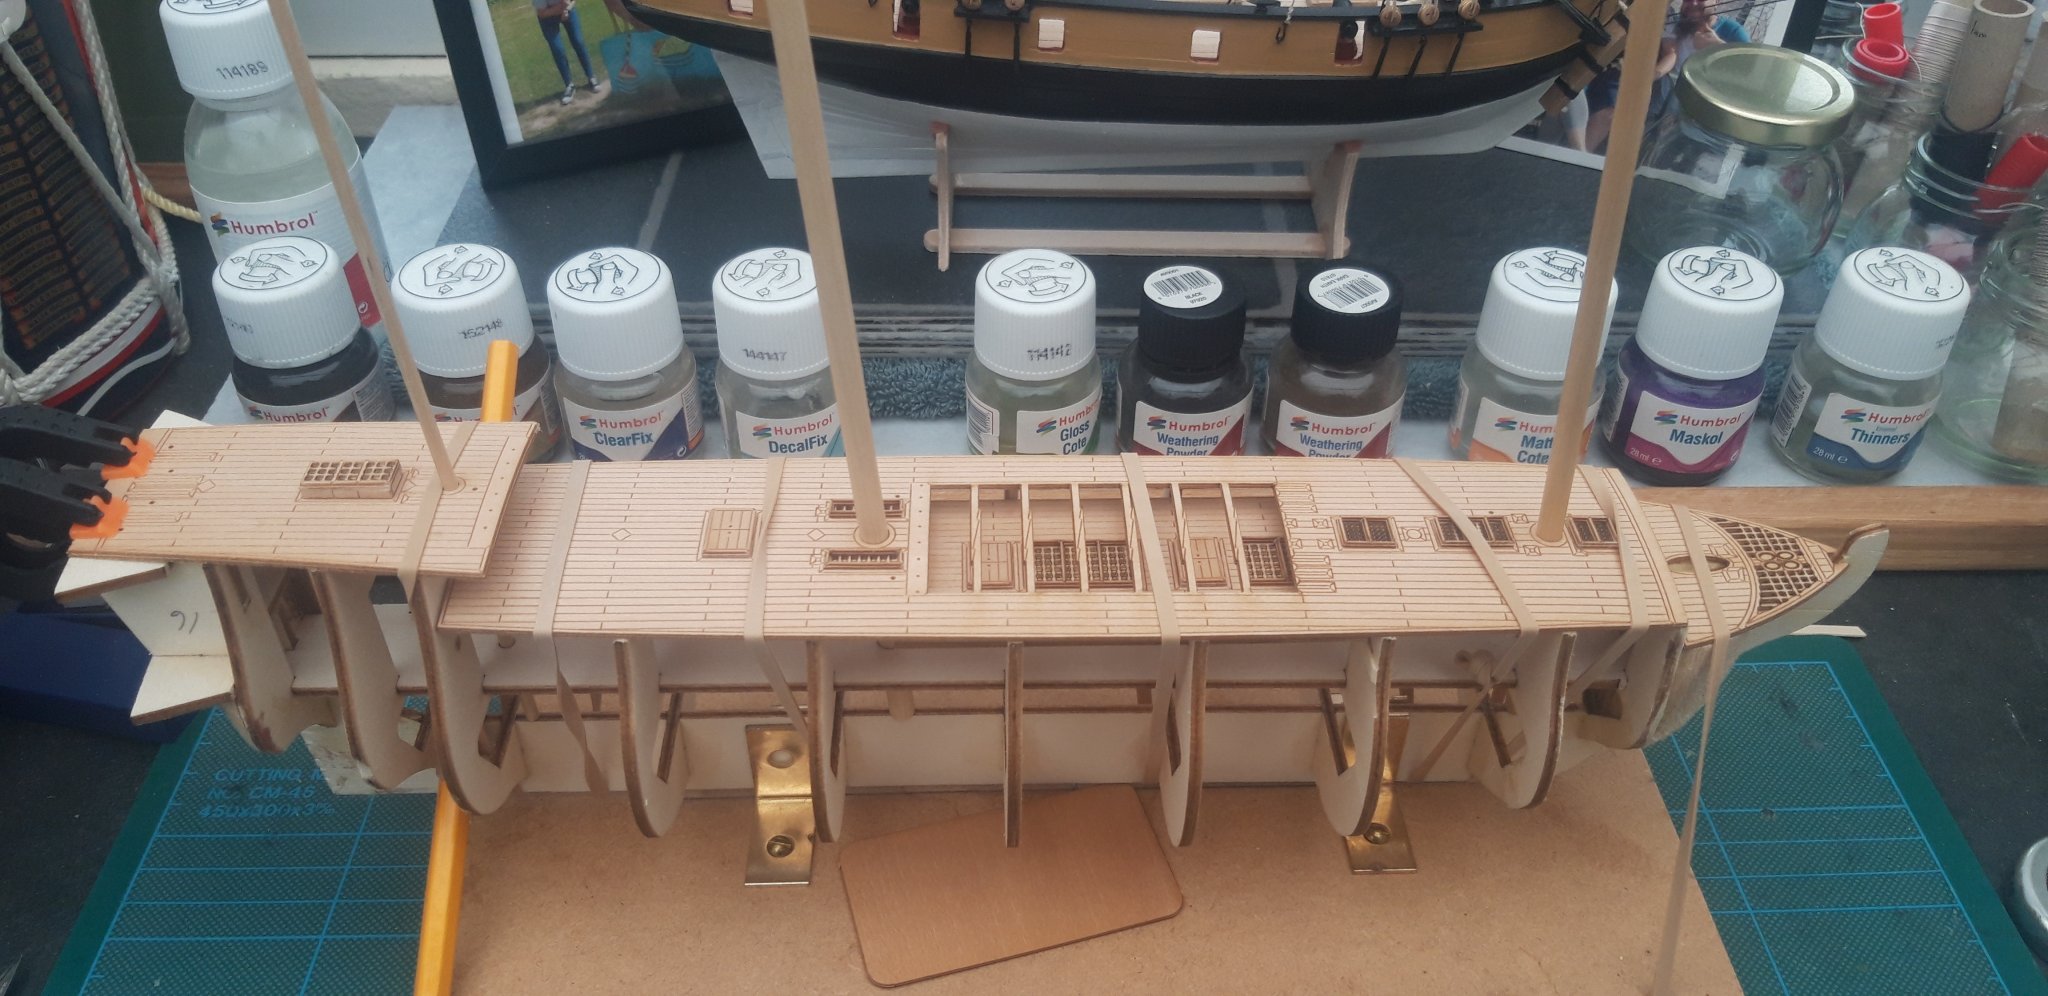
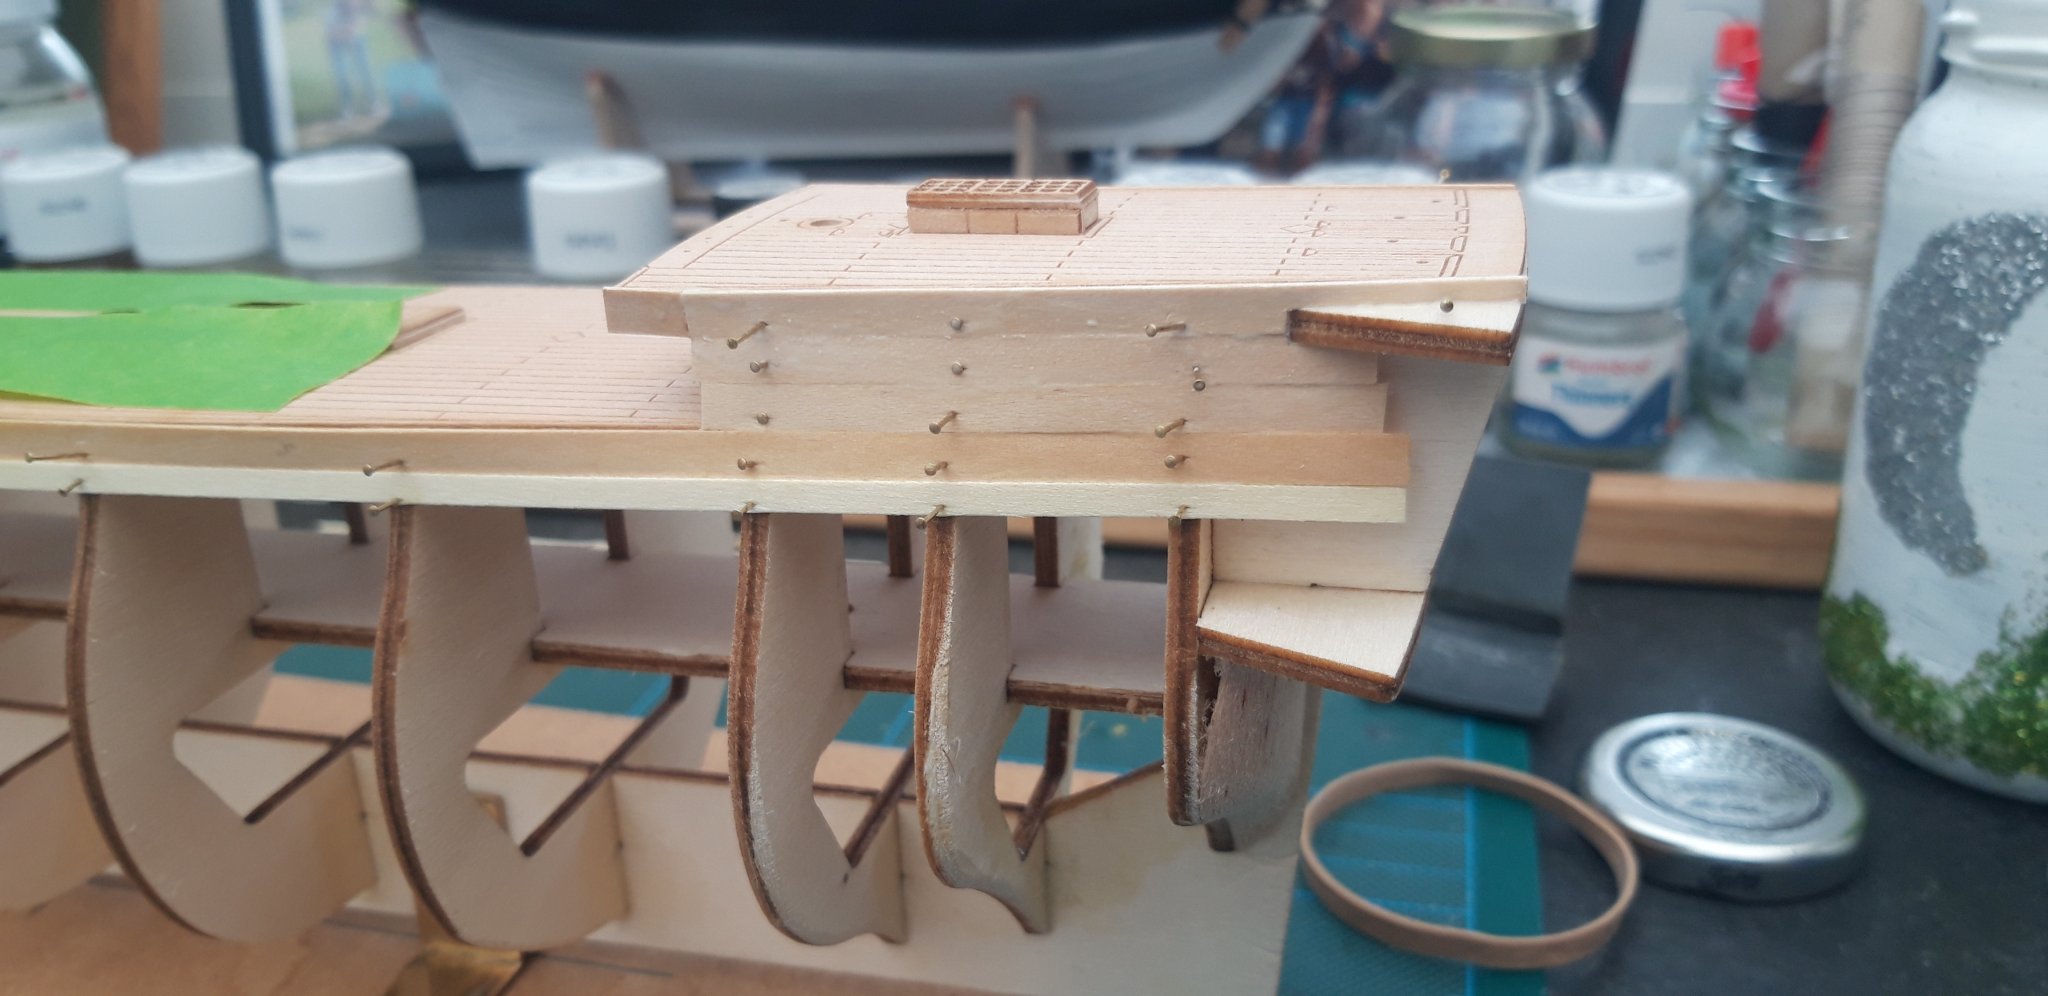
I have (l believe) made great progress today.
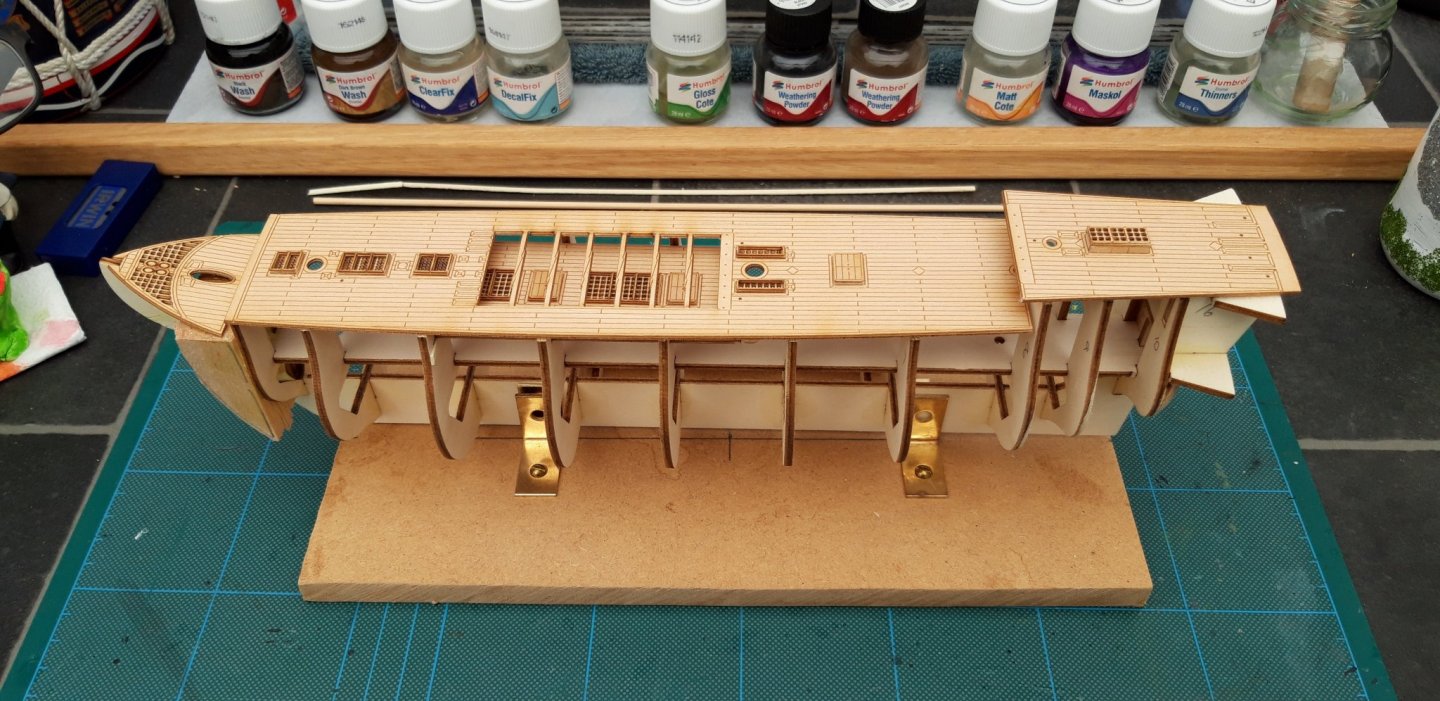
I first fitted the decks, a simple task, but care must be taken to ensure the holes for the masts line up.
The Upper Deck (or at least the little bit you can see) drops in first,

followed by the Quarter Deck.
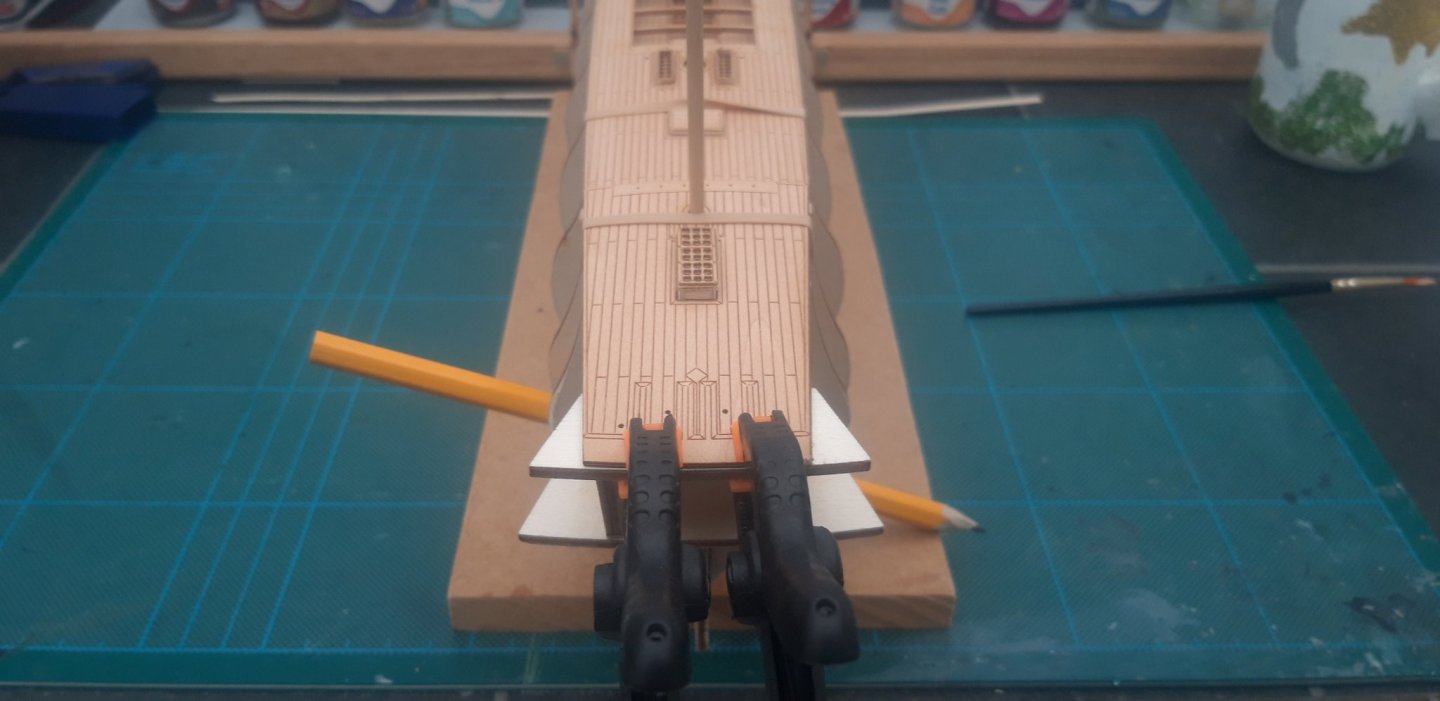
it is important when fitting the Poop Deck that the Mizzen Mast is correctly positioned as it passes through both Poop and Quarter Decks. Once seated correctly frame No 18, which is attached to the last bulkhead, can be lined up with the Poop Deck and clamped.

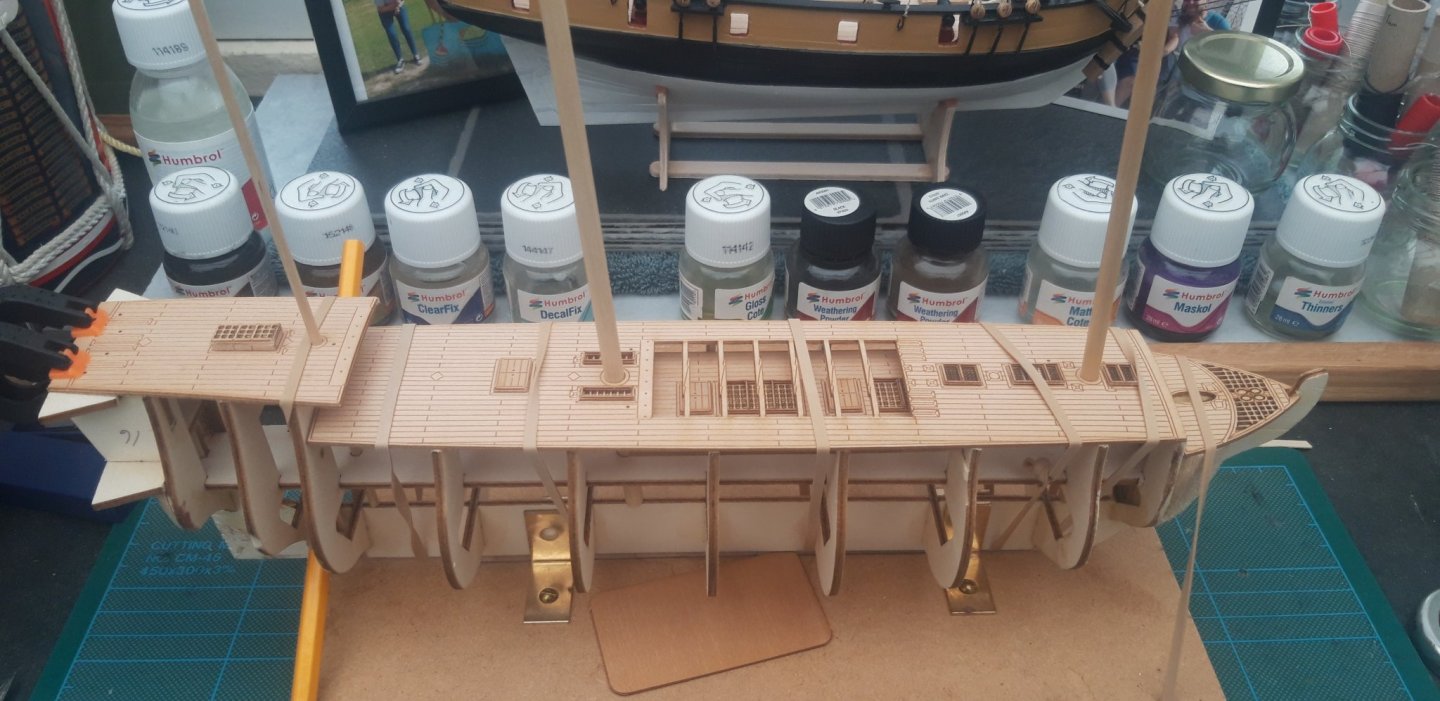
Here you can see all three masts in position, Mizzen, Main and Fore. The Fore Masts entry was partially blocked by a bulkhead and a certain amount of filing was required.

The green tape is securing a piece of plywood which, in turn, is protecting the Skid beams spanning the Quarter Deck.

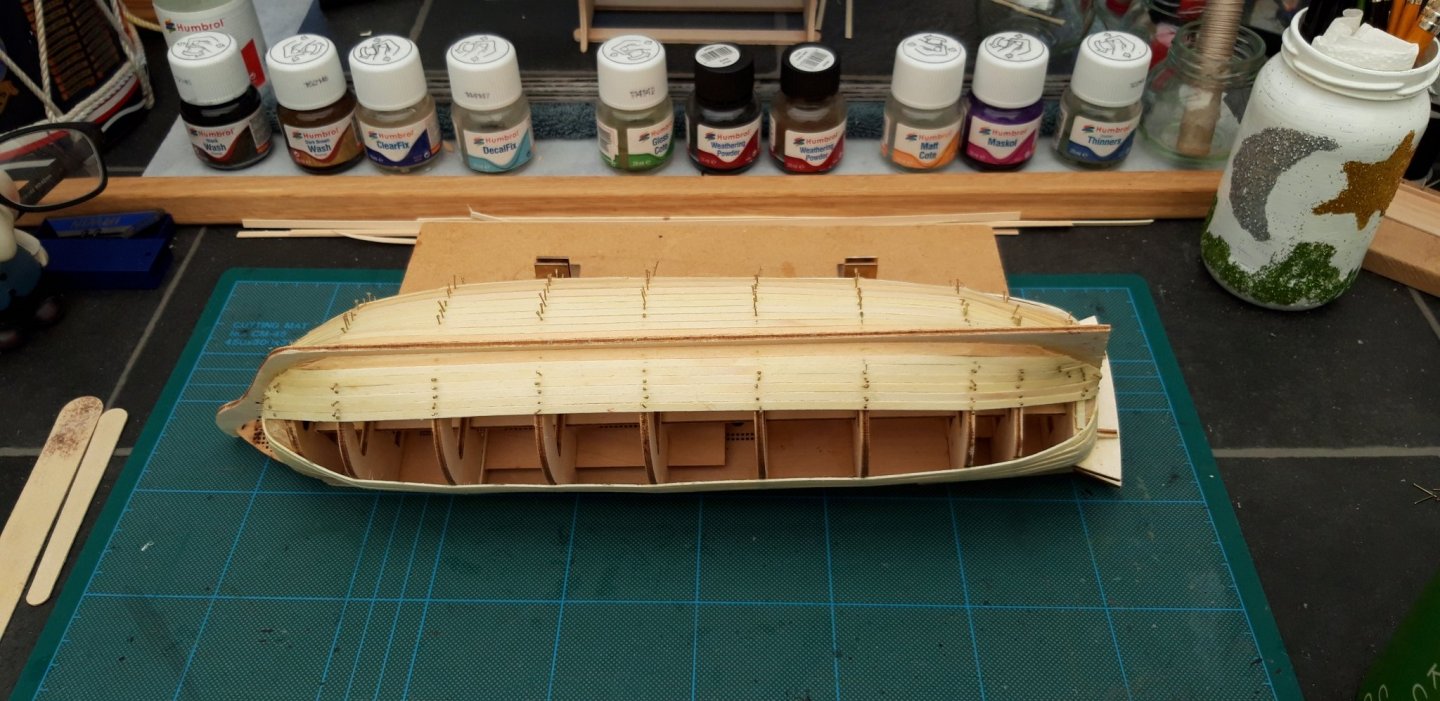
Once again l am using the trusty pin pusher to attach the planks until the glue dries.

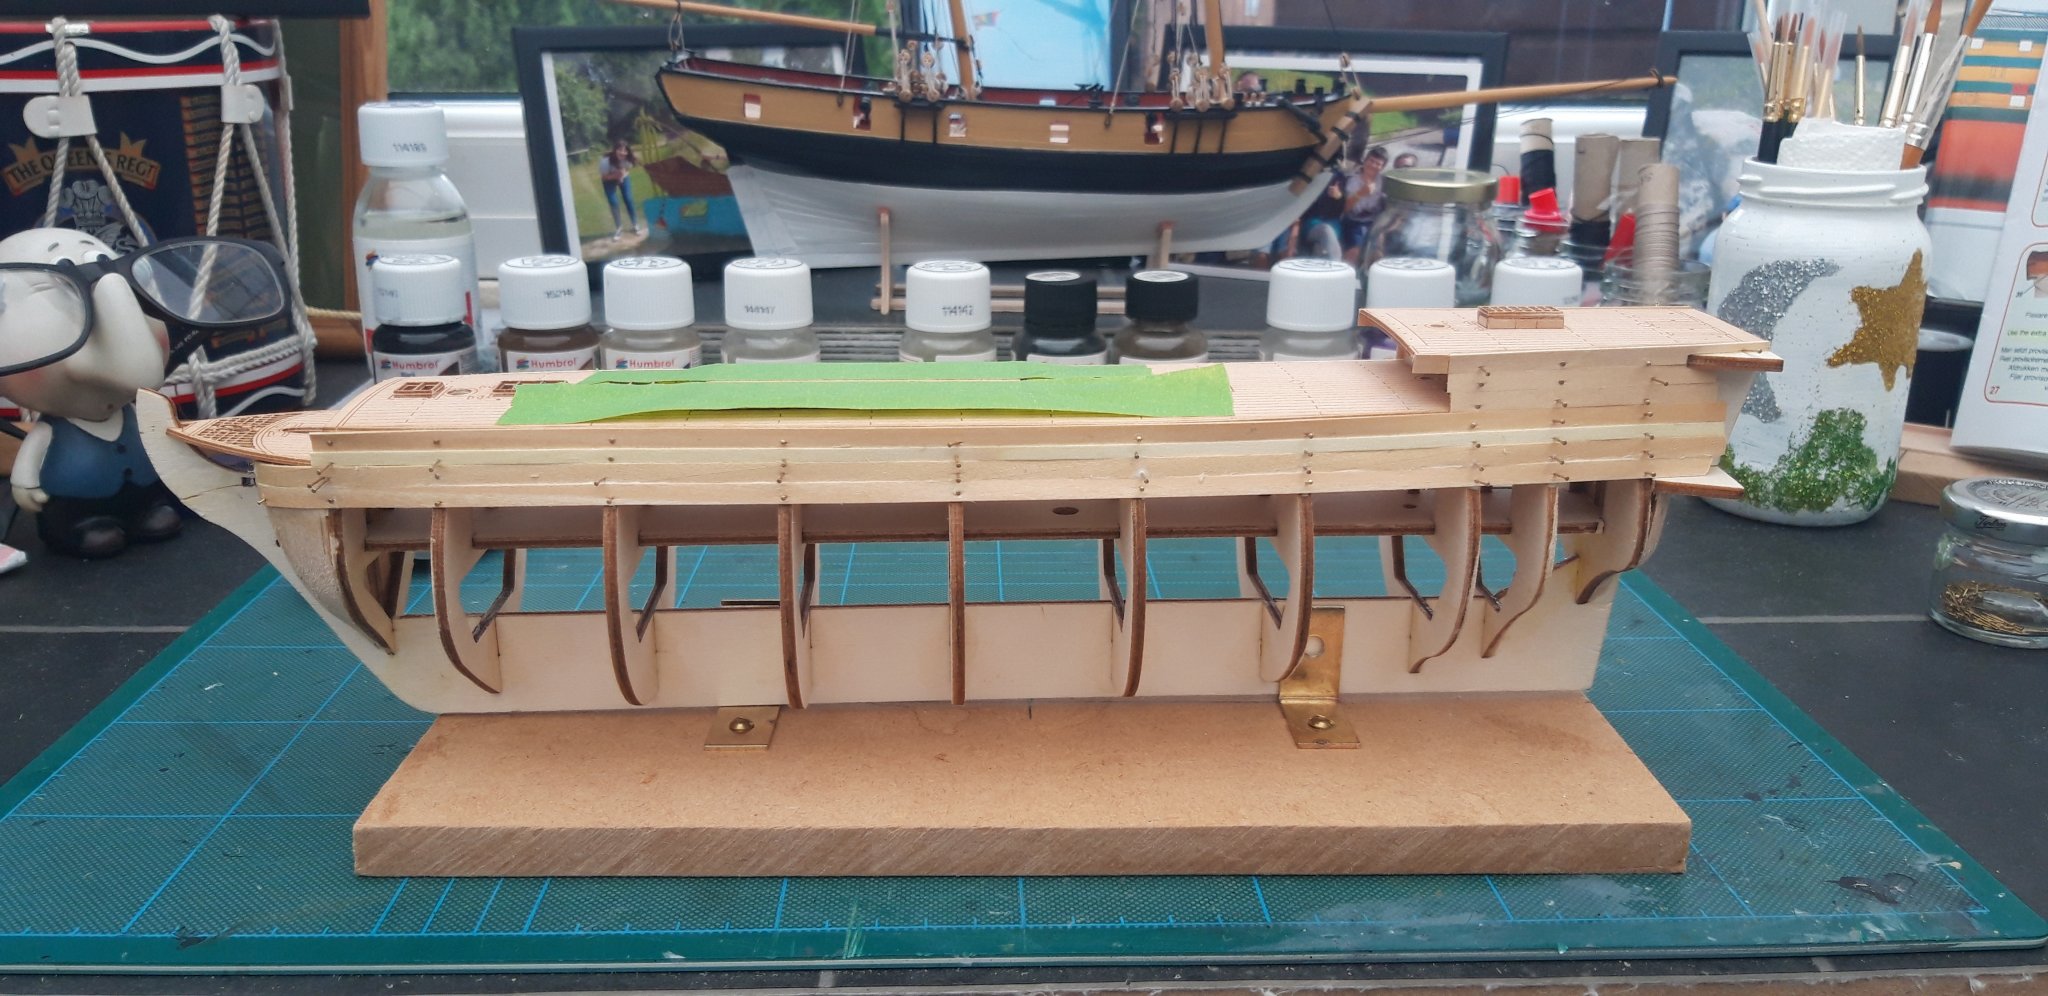
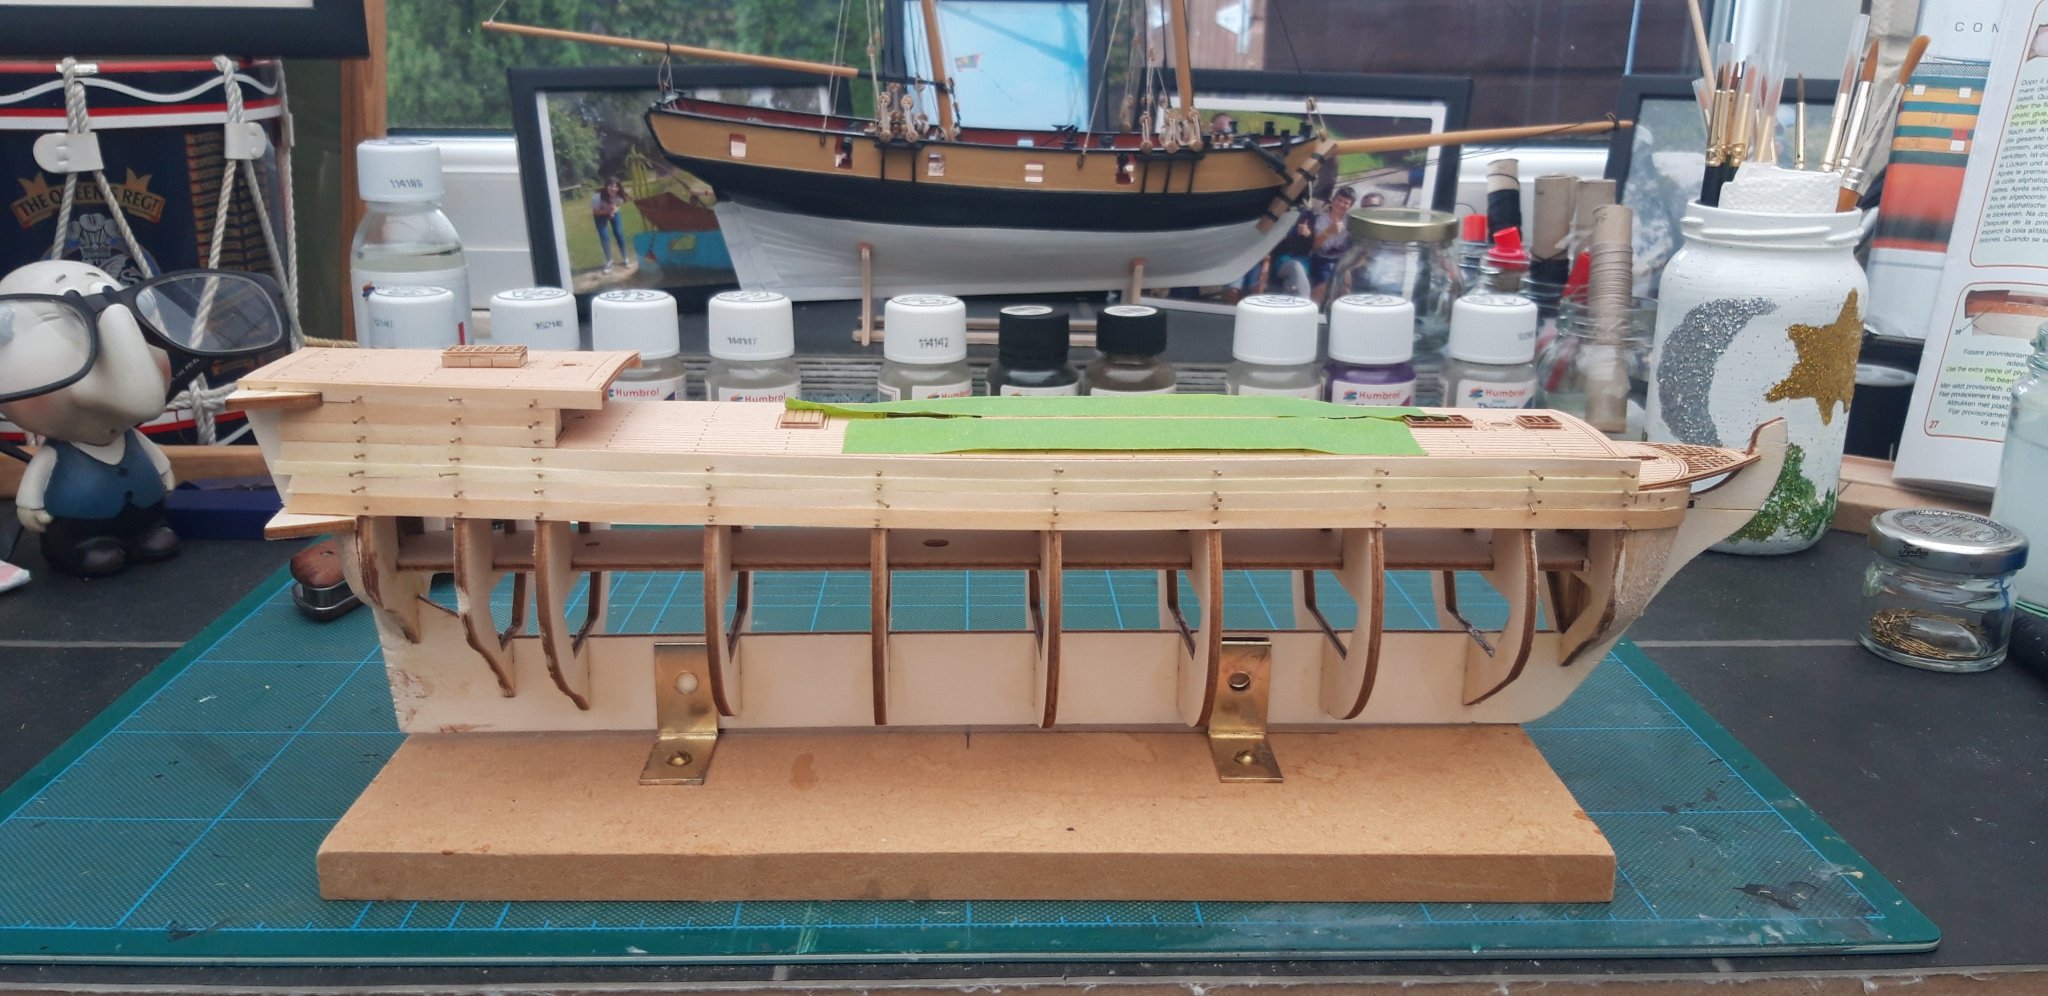
Here you can see the first planking completed down to what would be the bottom of the Wardroom at the stern of the Ship.
So far so good and, although l am aware that this is the easiest part, l hope the rest goes as smoothly.
The filler blocks are enabling me to achieve that difficult bend at the Bow.

At this stage l believe l have achieved that all important symmetry.
My next session will see me continuing with the planking, l expect it to take several shorter sessions.
Best wishes as always,
The Lazy Saint.
Session. Time. Total.
05. 6 hrs. 14 hrs
- Dubz, Ryland Craze, GrandpaPhil and 3 others
-
6
-
Hi all,
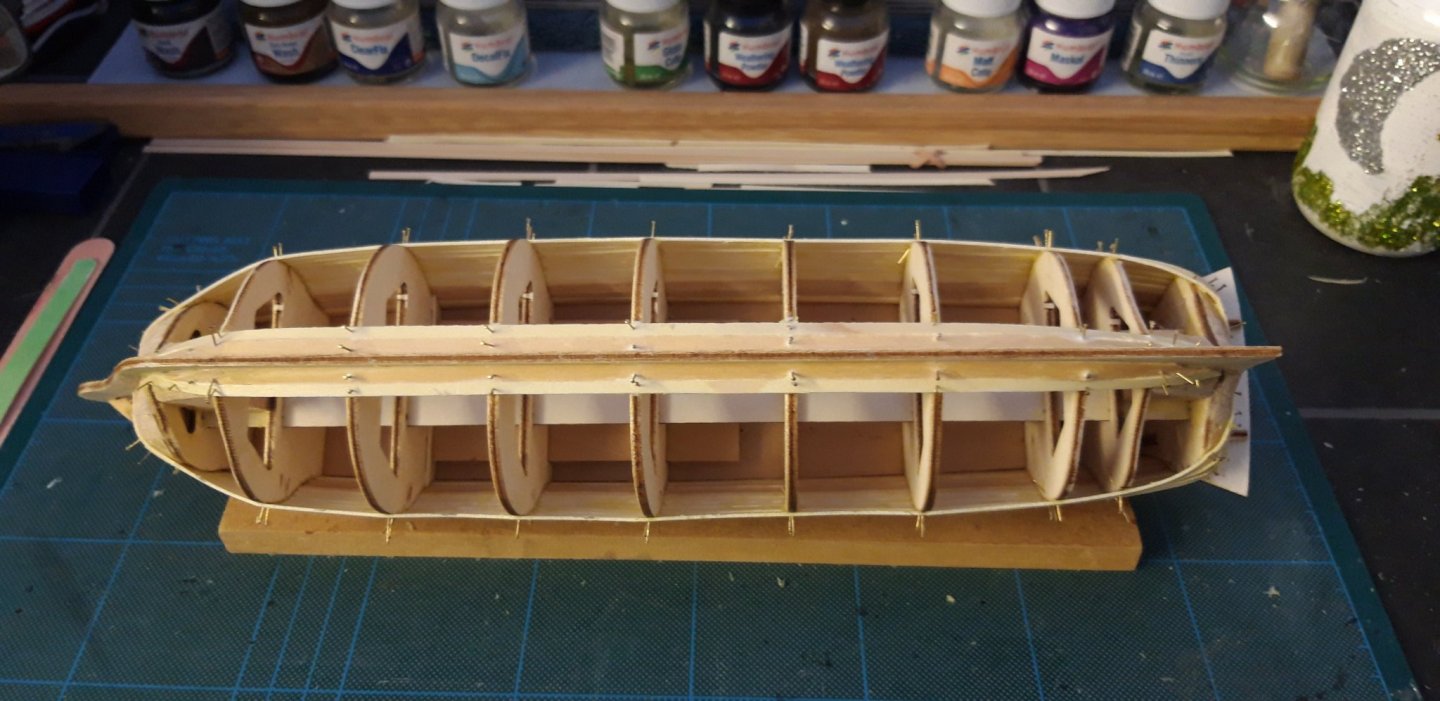
I only managed an hour in the Den today but did get the filler blocks in shape.

A little bit of titervating tomorrow and l will be ready for the decks and planking.
This evening l am going to be studying my new book, hopefully l will now know my Davits from my Deadeyes and my Mizzens from my Mains.

Best wishes as always,
The Lazy Saint.
Session. Time. Total.
04. 1 hrs. 8 hrs.
- GrandpaPhil, BLACK VIKING, hexnut and 4 others
-
7
-
-
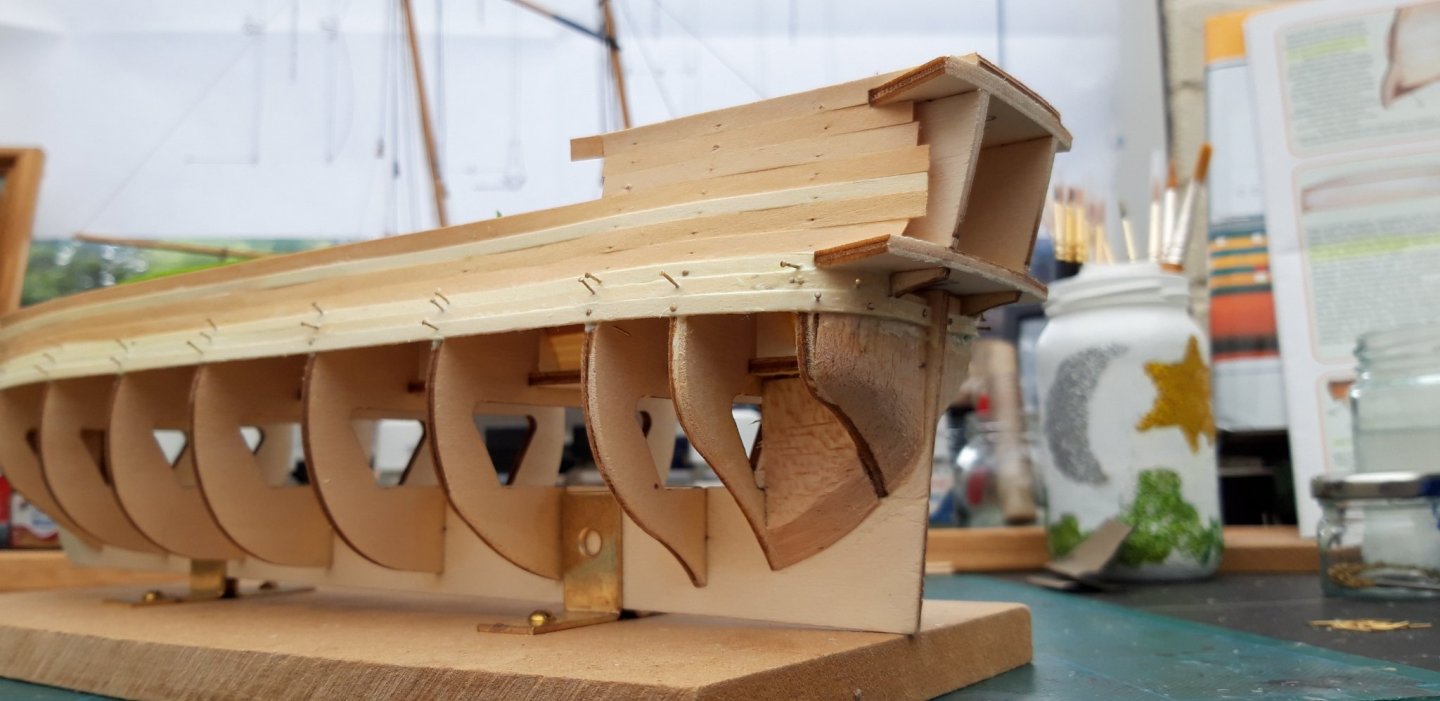
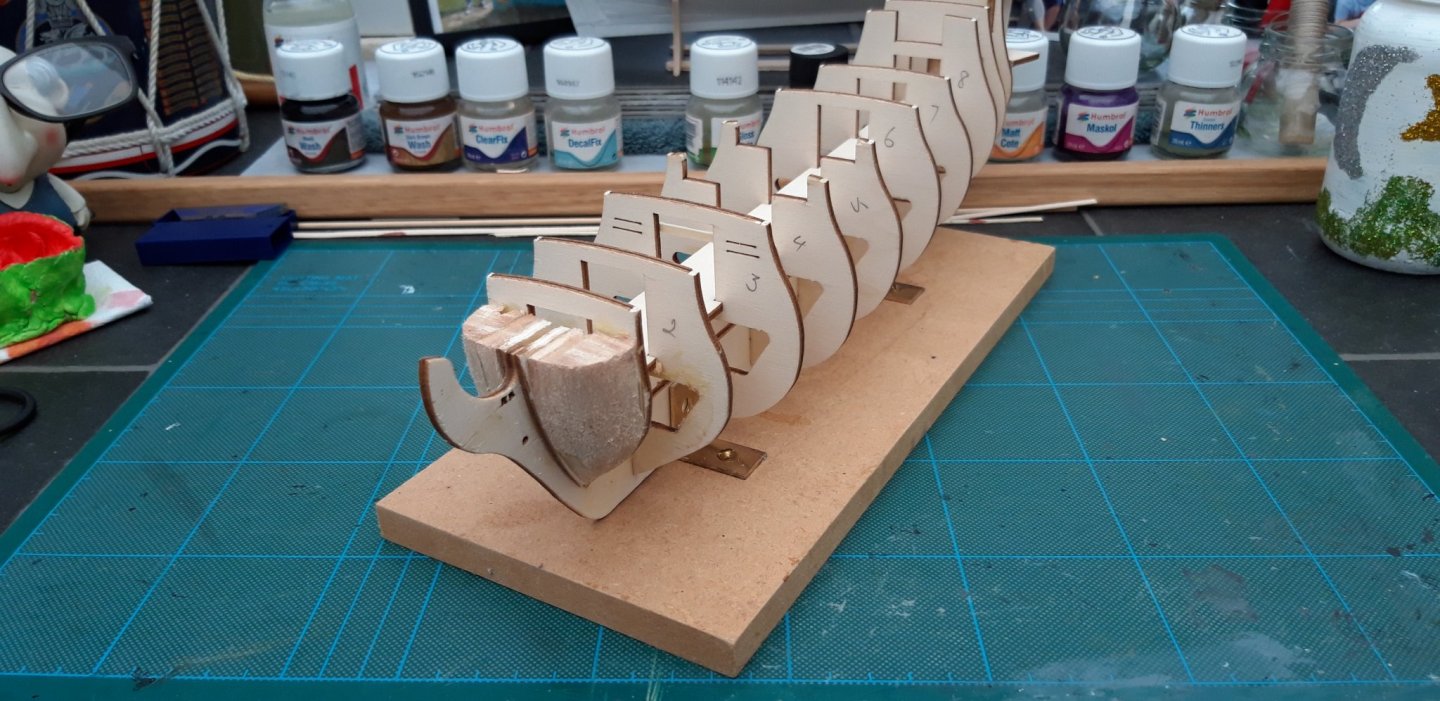
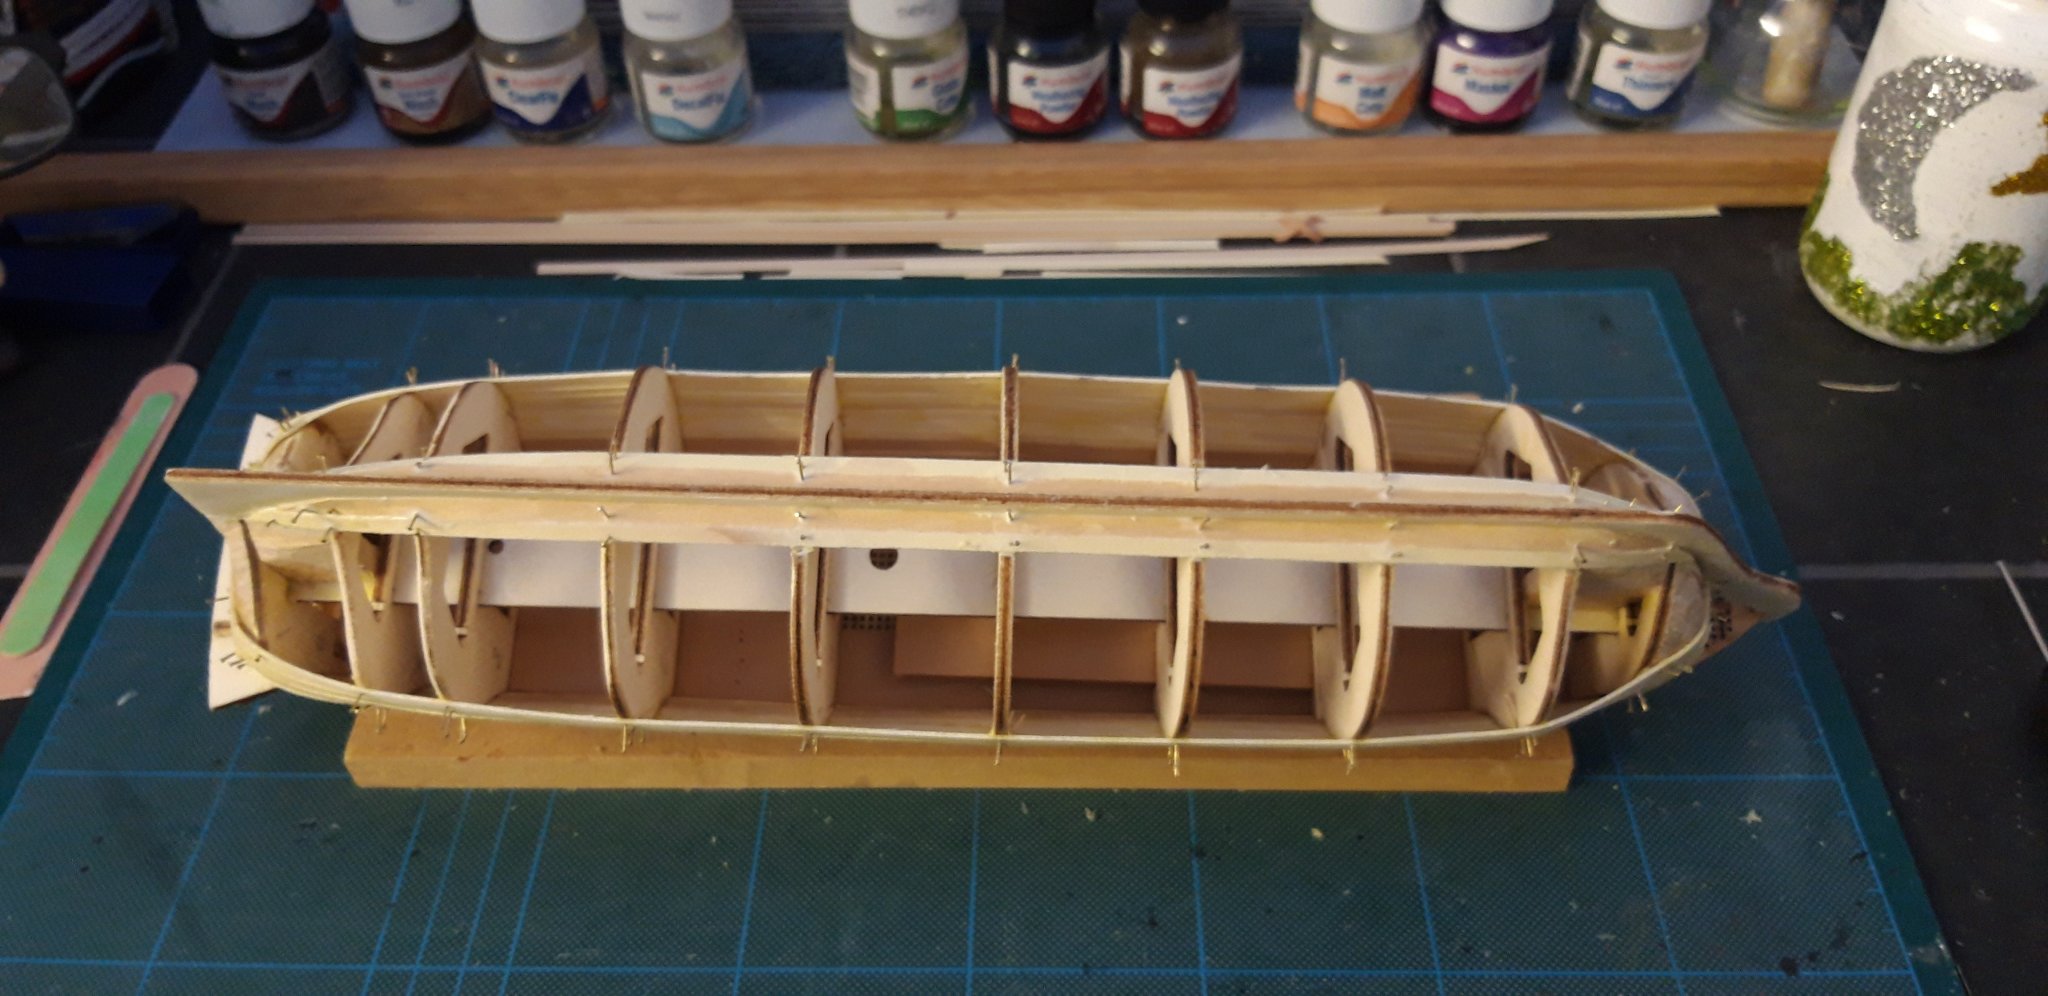
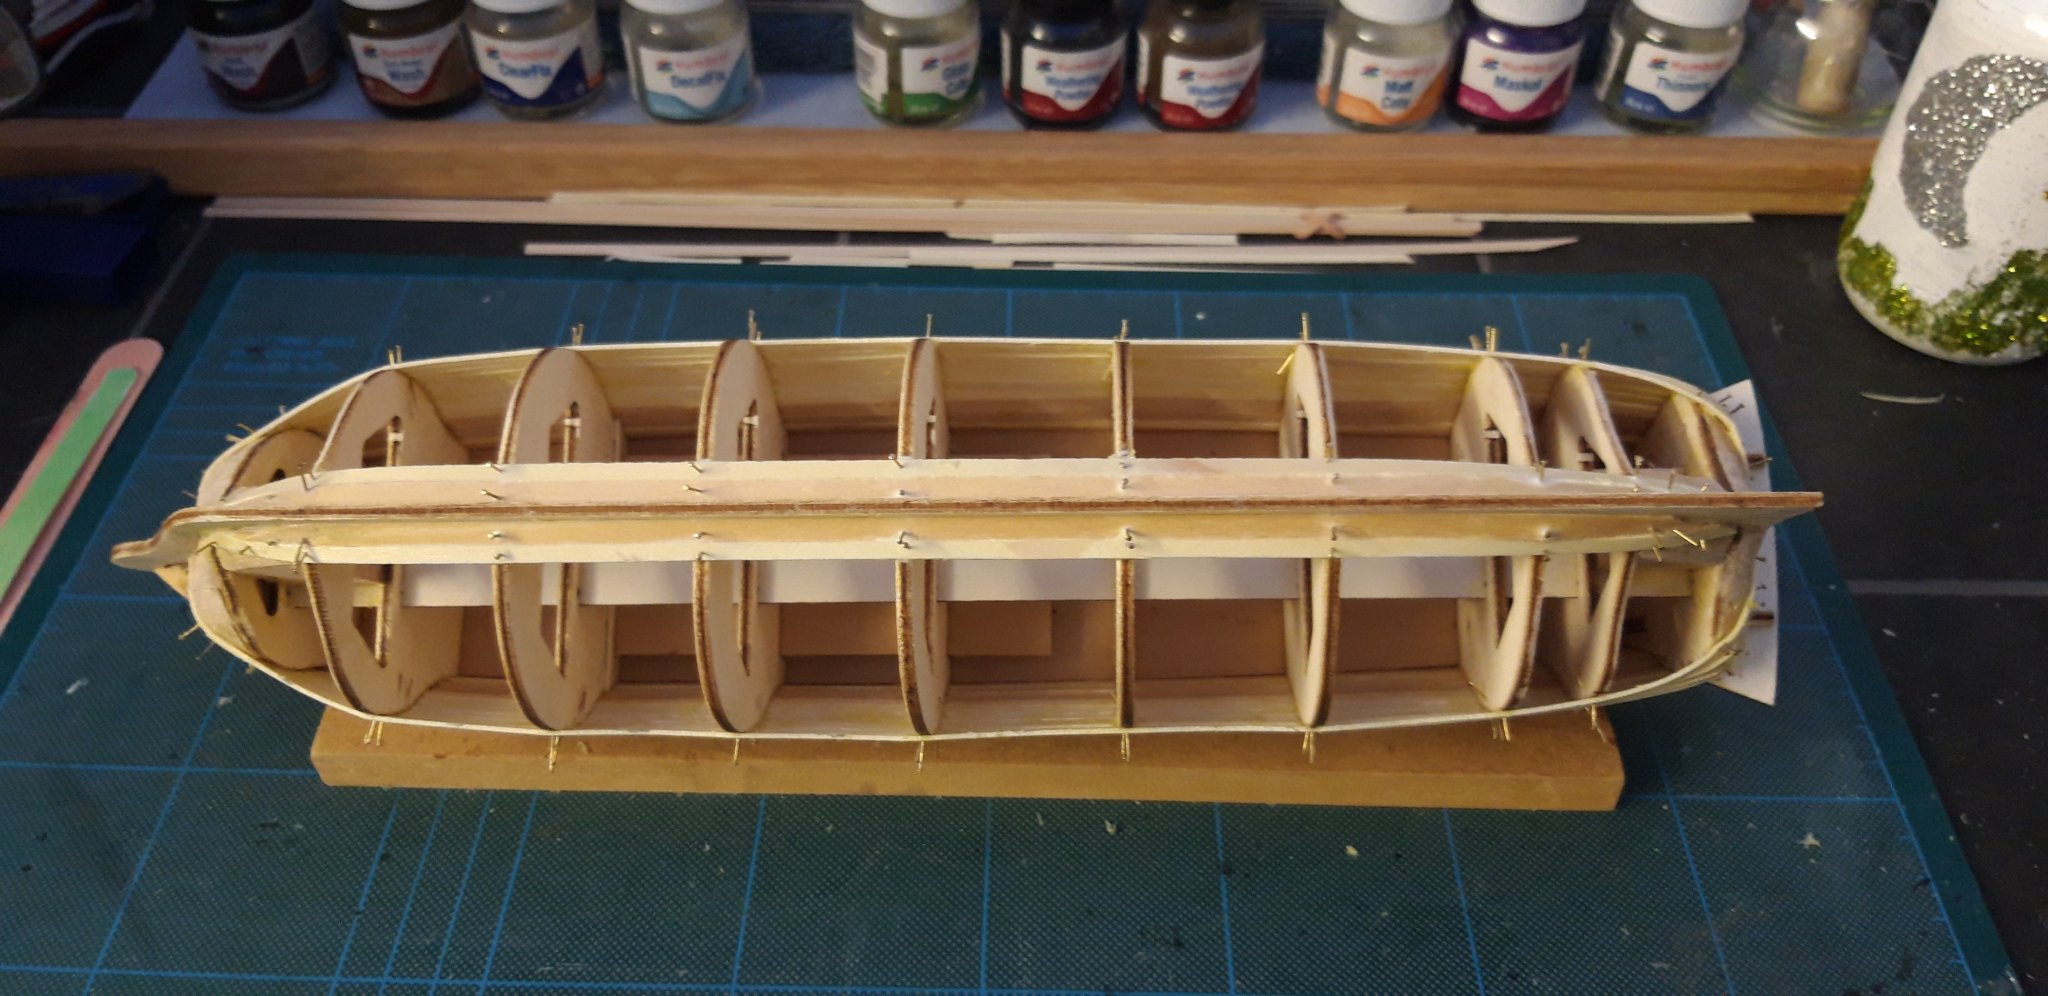
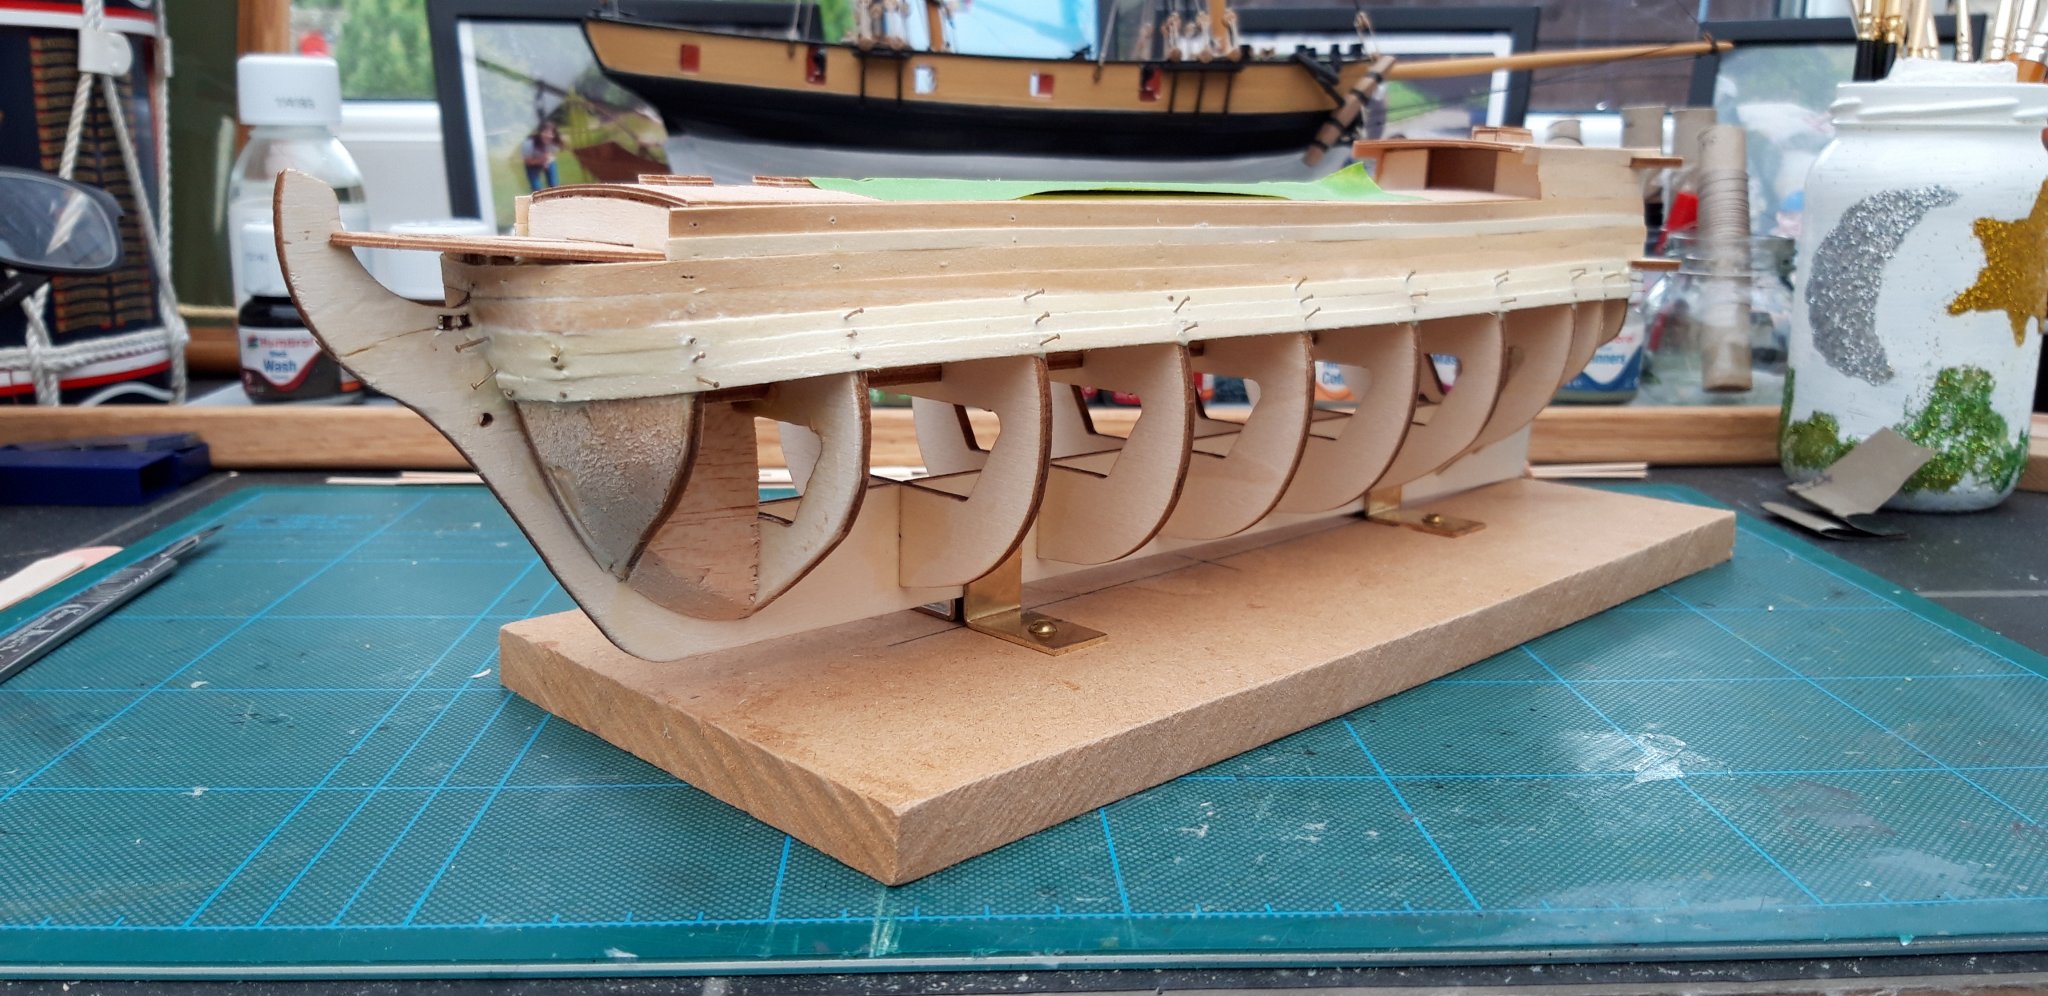
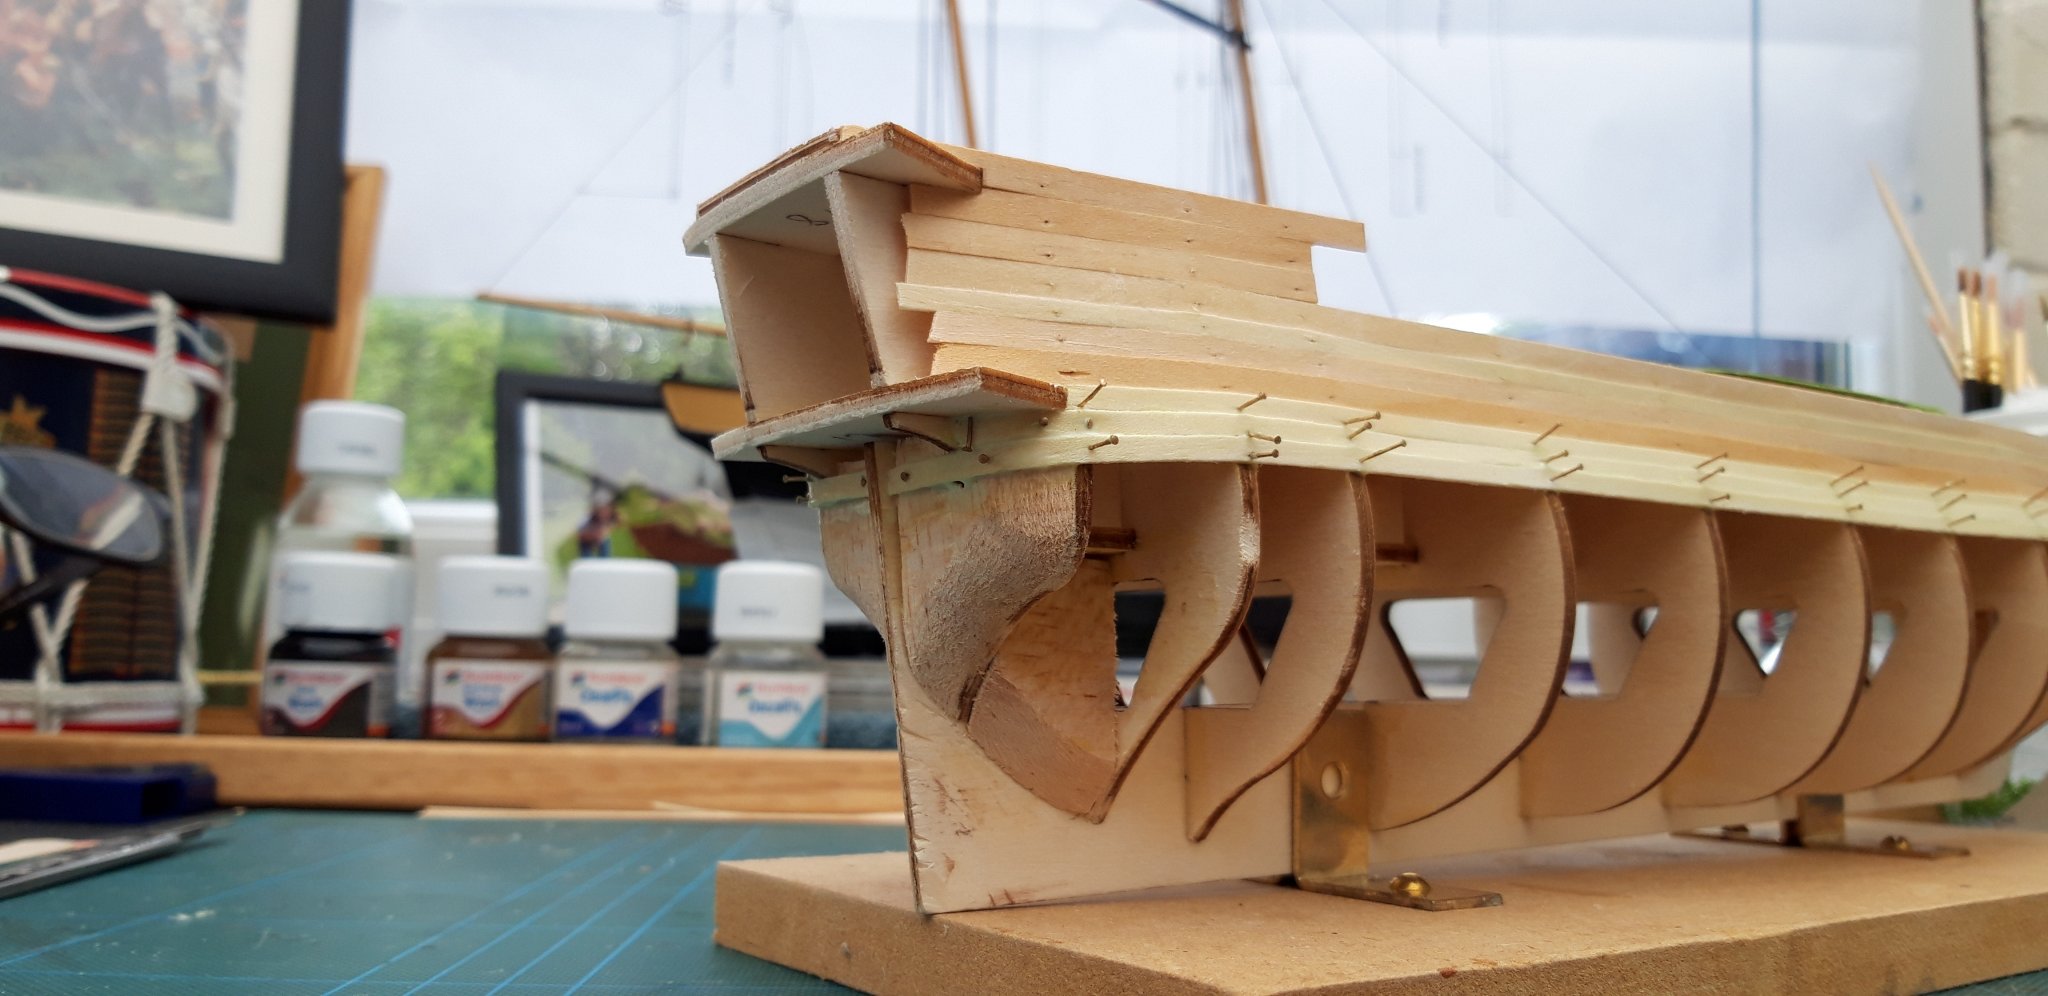
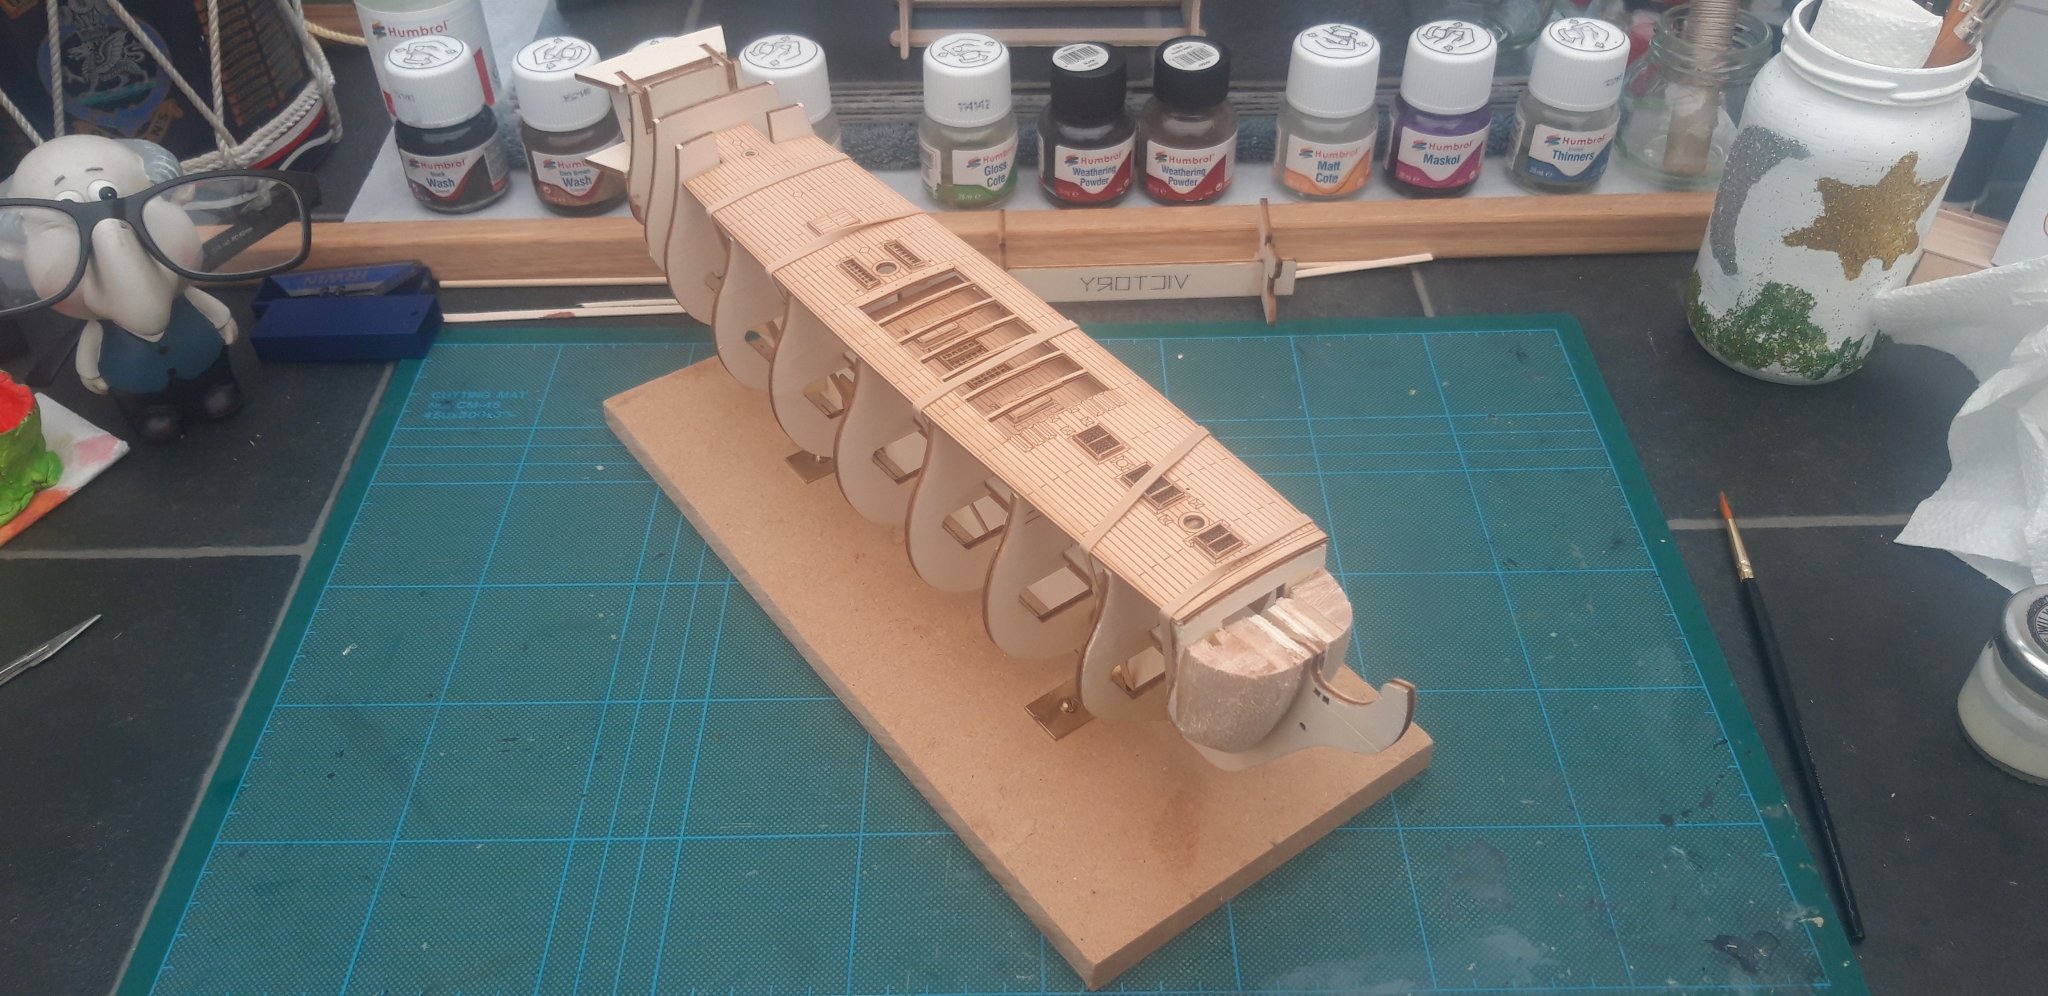
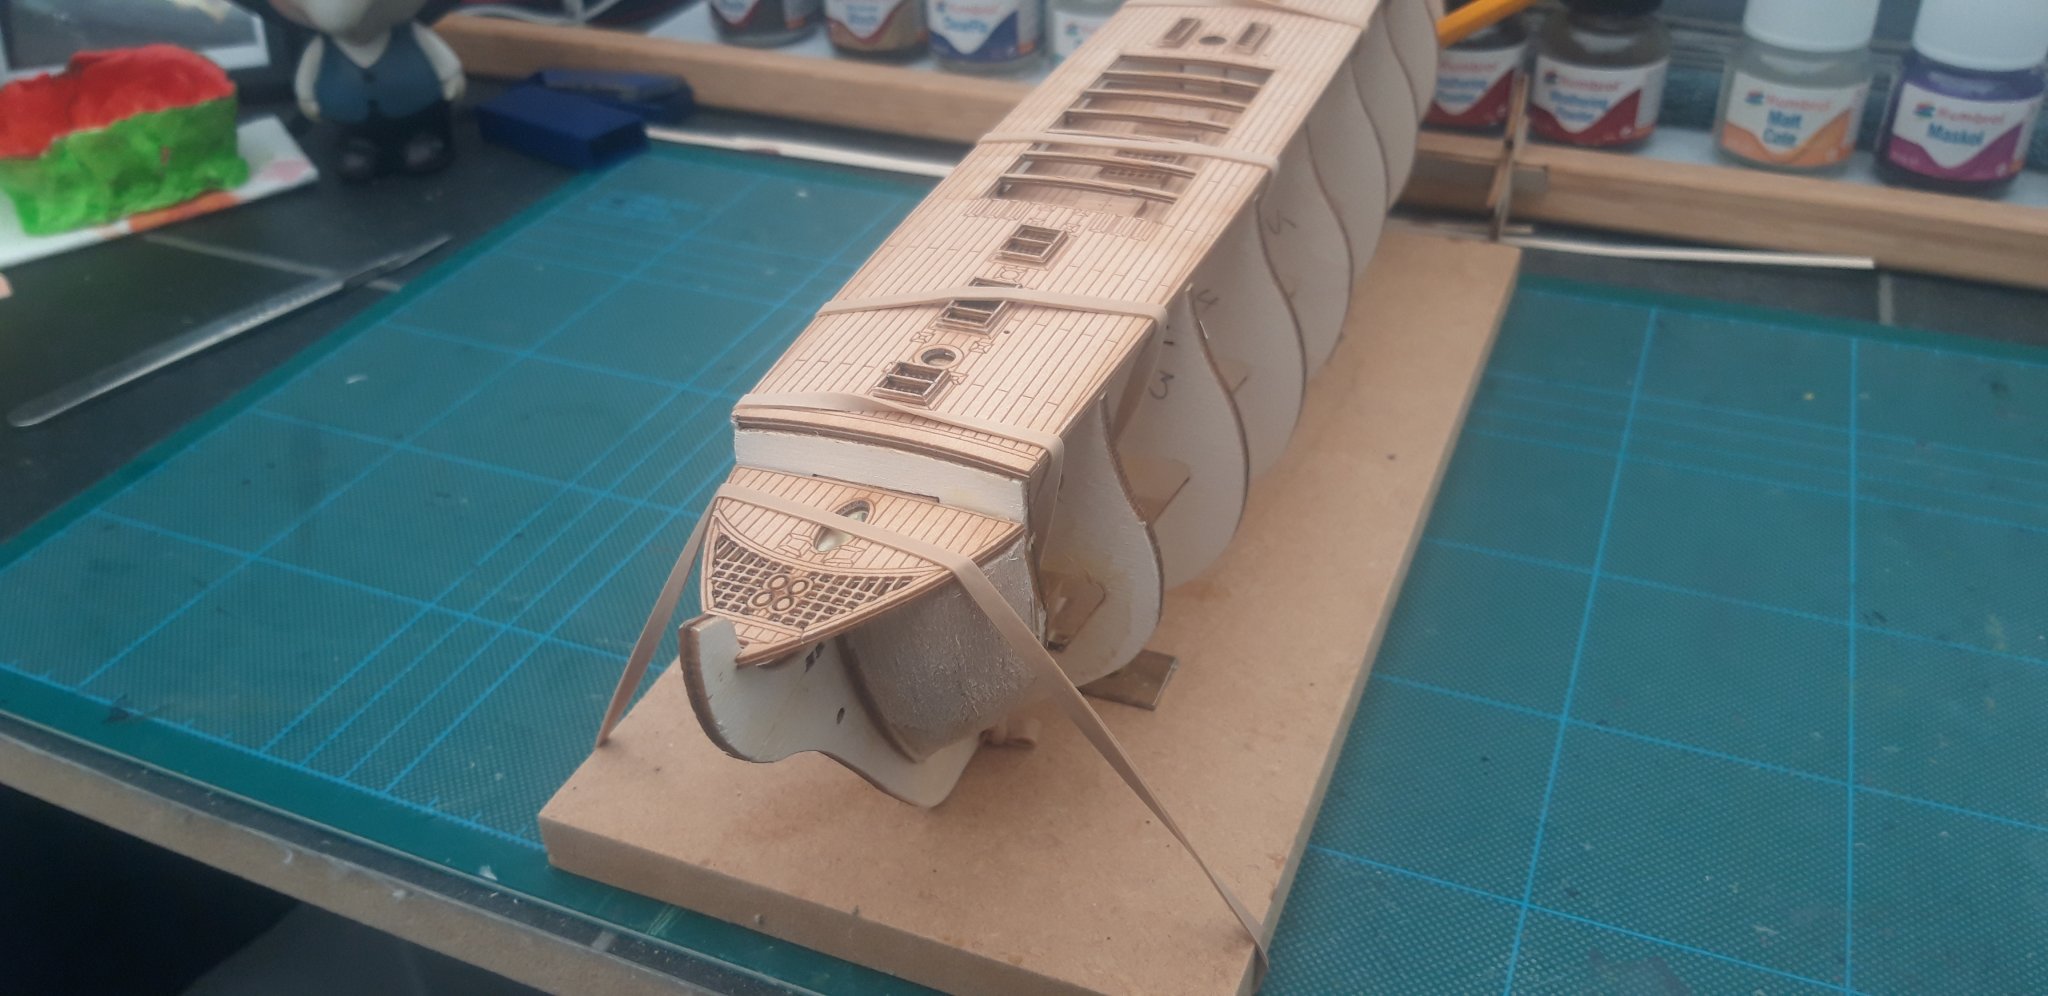
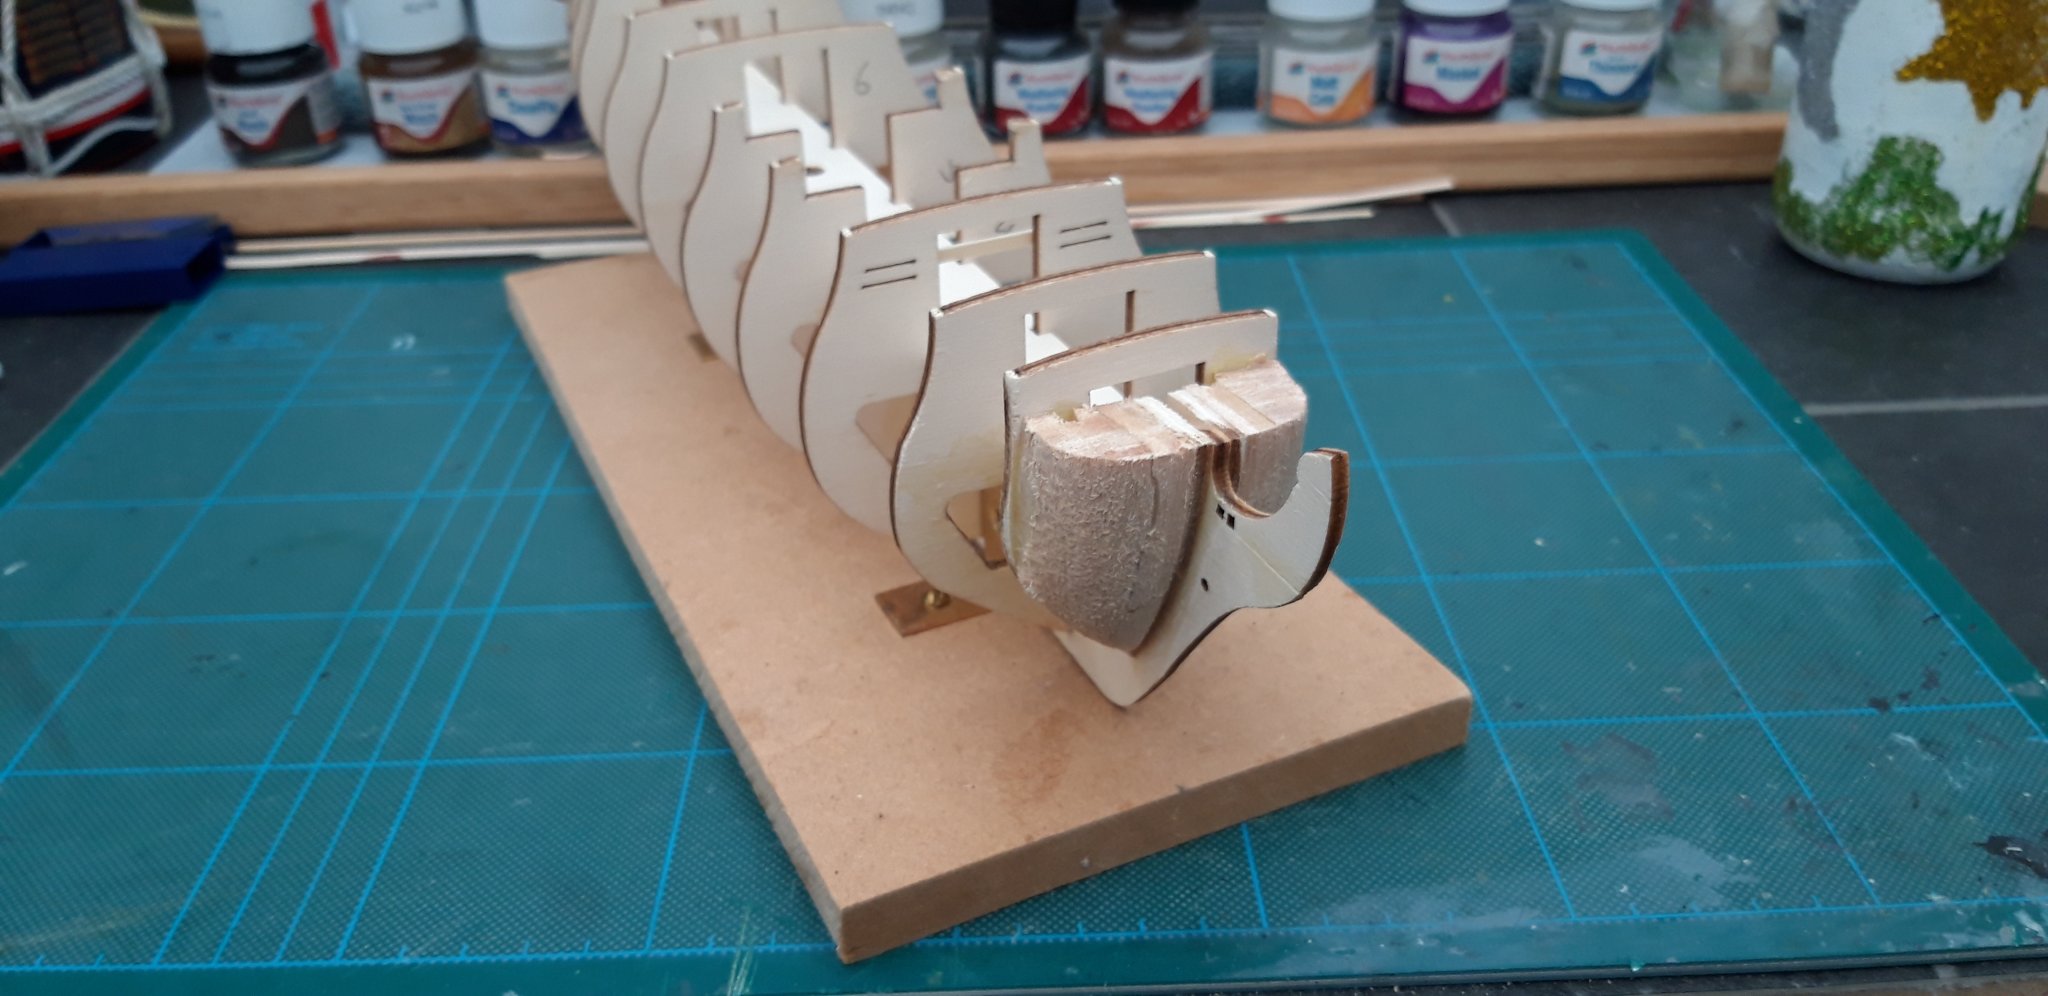
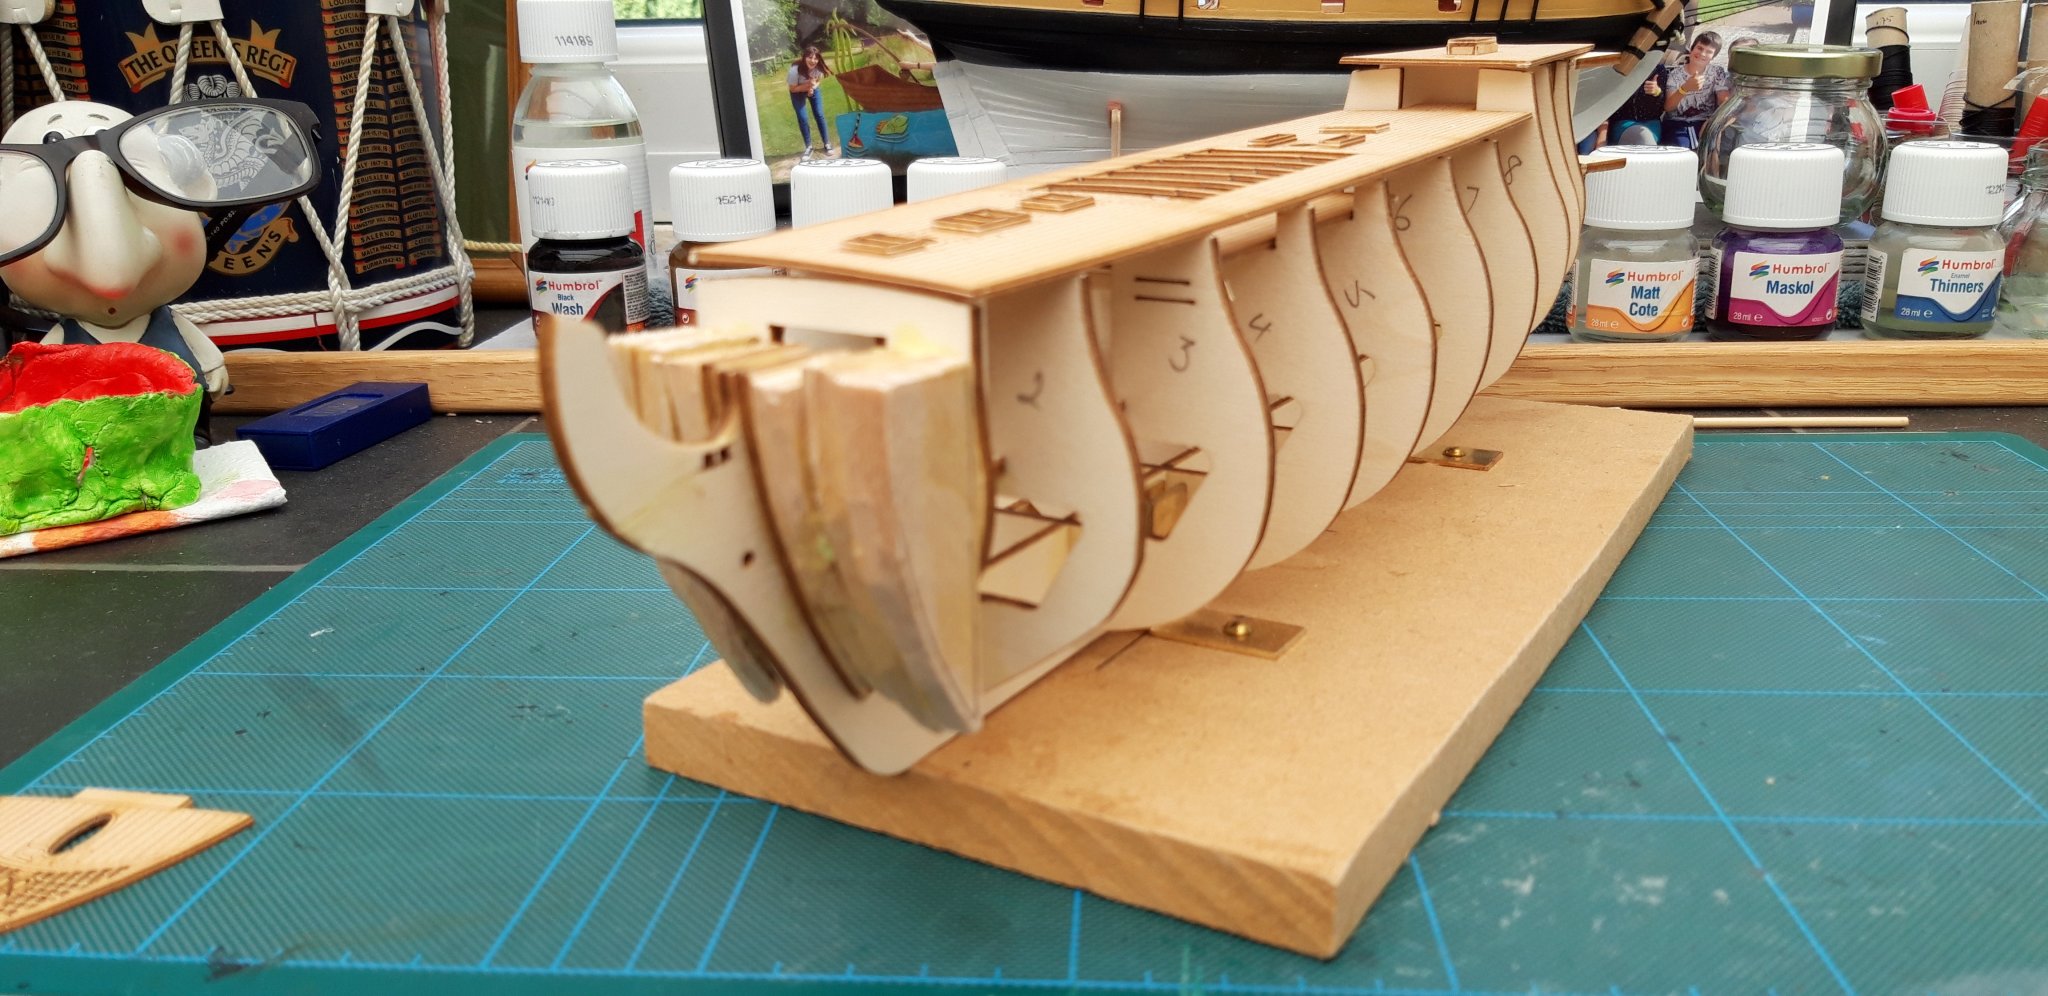
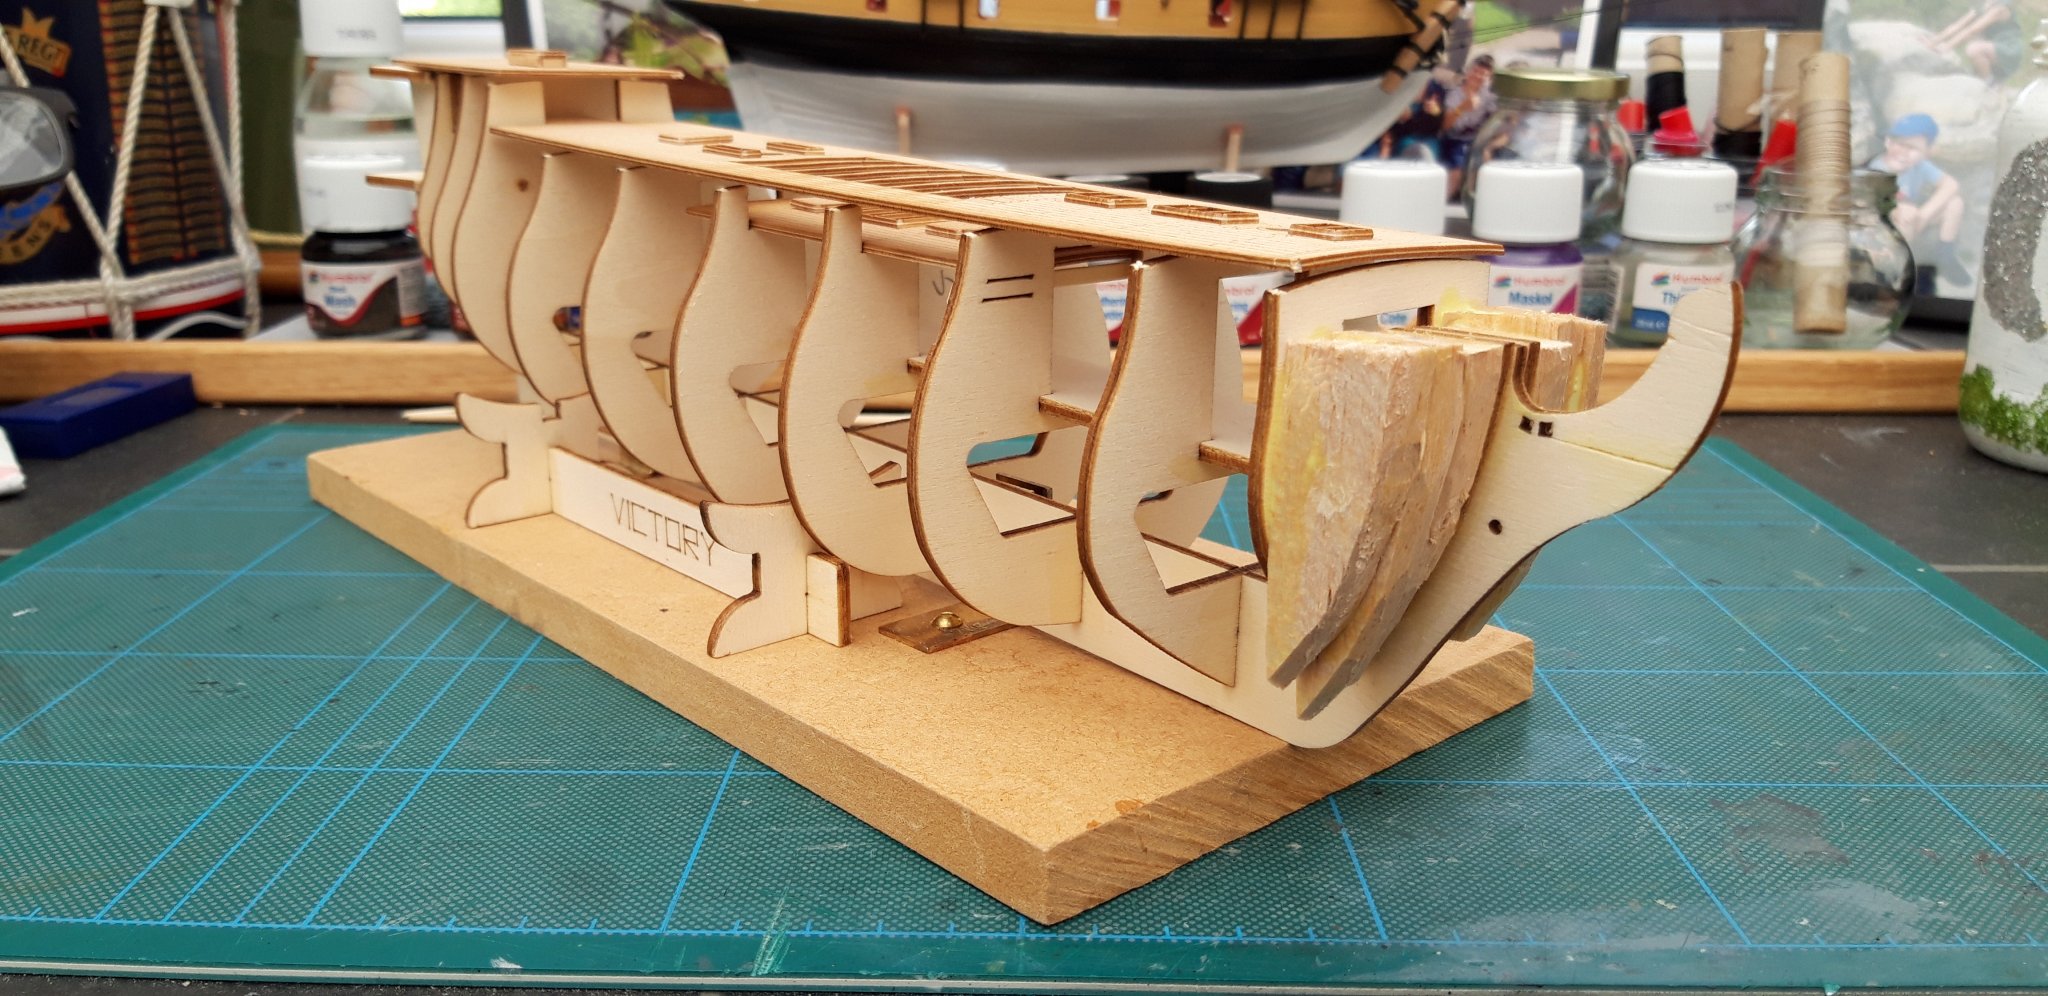
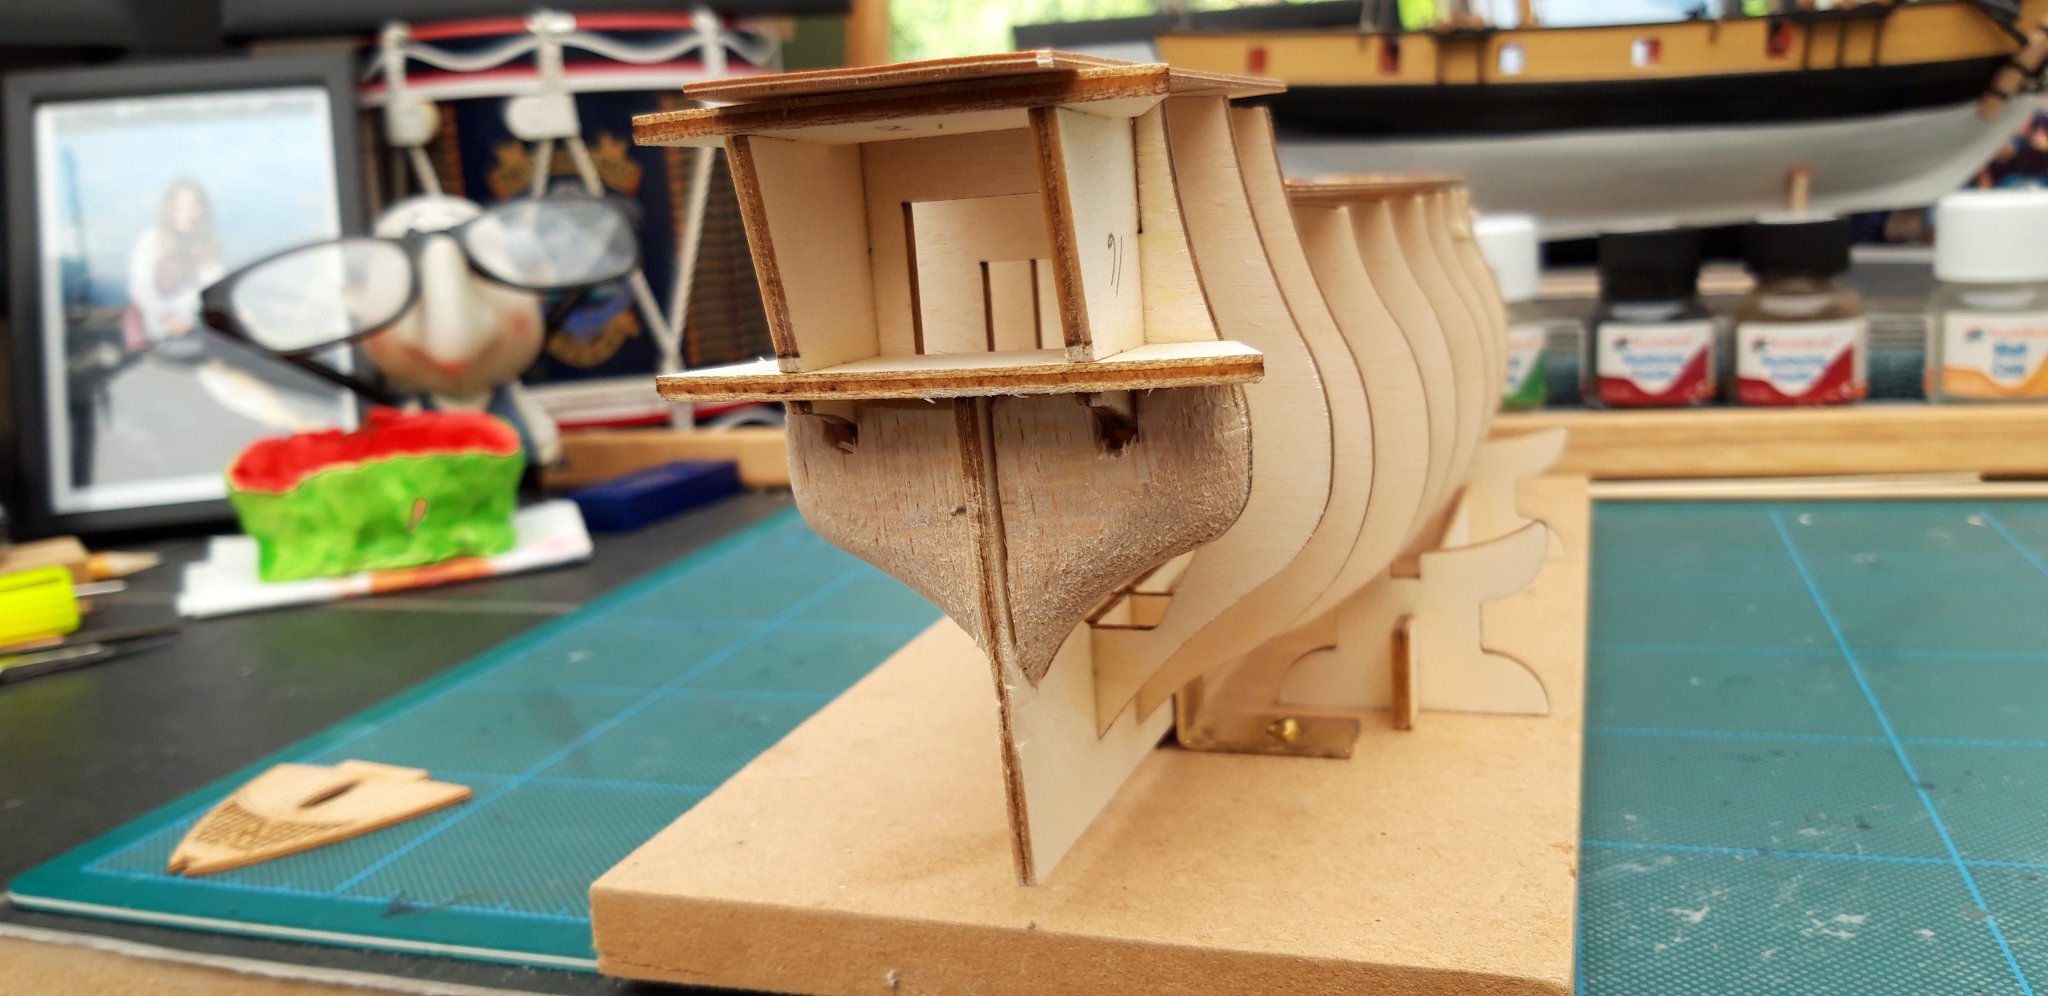
Hi all,
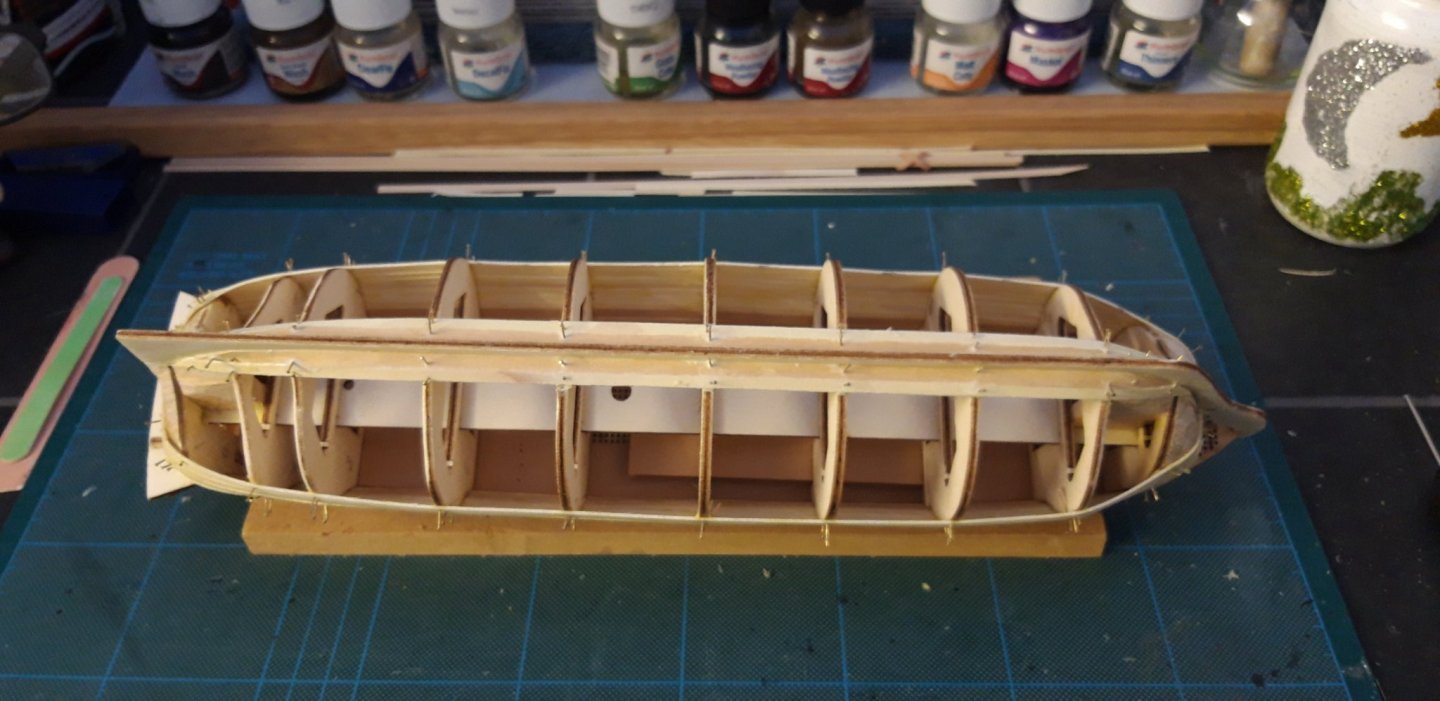
This afternoon l managed the Gratings on the Decks and the filler blocks on the Bow and Stern.
The Decks are not fitted yet of course and won't be until l am happy that the bulkheads and filler blocks are correctly tapered/shaped and ready for the planking.

Here you can see the bow filler blocks, waiting for the glue to dry.

Once the glue has dried l will carve to the approximate shape and then sand. This will give a good bed for the planks to lay on.
I have started the Stern fillers as you can see in the picture, still a little more work to do on these but nearly there.

I know some builder don't see the need for filler blocks but l think they are vital in obtaining a good lay when planking.
Just my opinion of course.
Best wishes as always,
The Lazy Saint.
Session. Time. Total.
03. 3 hrs. 7 hrs.
- RickyGene, GrandpaPhil, Dubz and 5 others
-
8


Bluenose by Retired guy - Model Shipways - scale 1:64
in - Kit build logs for subjects built from 1901 - Present Day
Posted
I agree, it's a beauty that's for sure. Thanks for sharing.
Best wishes as always,
The Lazy Saint.