

The Lazy Saint
-
Posts
264 -
Joined
-
Last visited
Content Type
Profiles
Forums
Gallery
Events
Posts posted by The Lazy Saint
-
-
15 hours ago, Edwardkenway said:
the stern frame that I fitted yesterday has been removed today as it was too high and the counter would not have finished at the level of the main wale,
Hi Edward,
It's sad you had to remove some of your hard work but very pleased you noticed before it got too painful.
Your progress is great and l am enjoying the build, thanks for sharing.
Best wishes as always,
The Lazy Saint.
-
5 hours ago, VTHokiEE said:
Do you use a specific type of paint?
During my three wooden ship builds l have been using paints from the Admiralty range and am very happy with them, but, to be quite honest, l am not sure it makes a great deal of difference. I prefer not to mix different brands during a build but sometimes it is unavoidable. Prior to my ships, l made a number of plastic models and found the Humbrol brand very good. I do prefer water based paints but that is because l find it so much easier cleaning brushes and fining/thining down the paint. The finish with water based paints isn't as tough but to counter this l always use clear mat varnish to protect. I hope this helps.
Best wishes as always,
The Lazy Saint.
-
On 11/15/2019 at 8:59 PM, VTHokiEE said:
May I ask what your method is to paint over the brass? I haven’t had much luck (but I haven’t don’t much experimenting either).
Hi,
There is, l believe, a chemical method which gives very good results and ensures all the details are retained. I am not able to advise on that method having never used it, l expect details can be found in the technical sections of this forum. Experts like Dirk (Dubz) will l am sure know and use this method and l am sure he would explain if asked. The method l use l feel is perfectly adequate, it certainly is for me especially on a 1/200 scale build.
I wash all metal parts in warm soapy water and dry with a paper towel. Don't try to paint with one coat, you will definitely loose details by doing this. Apply a thin coat and when dry apply a second thin coat. This should be ok, although in some cases a third, thin coat may be required. Once dry l like to apply a thin protective coat of clear mat varnish. I hope this helps.
Best wishes as always,
The Lazy Saint.
-
Very nice indeed.
Best wishes as always,
The Lazy Saint.
- mugje, Old Collingwood and J11
-
 3
3
-
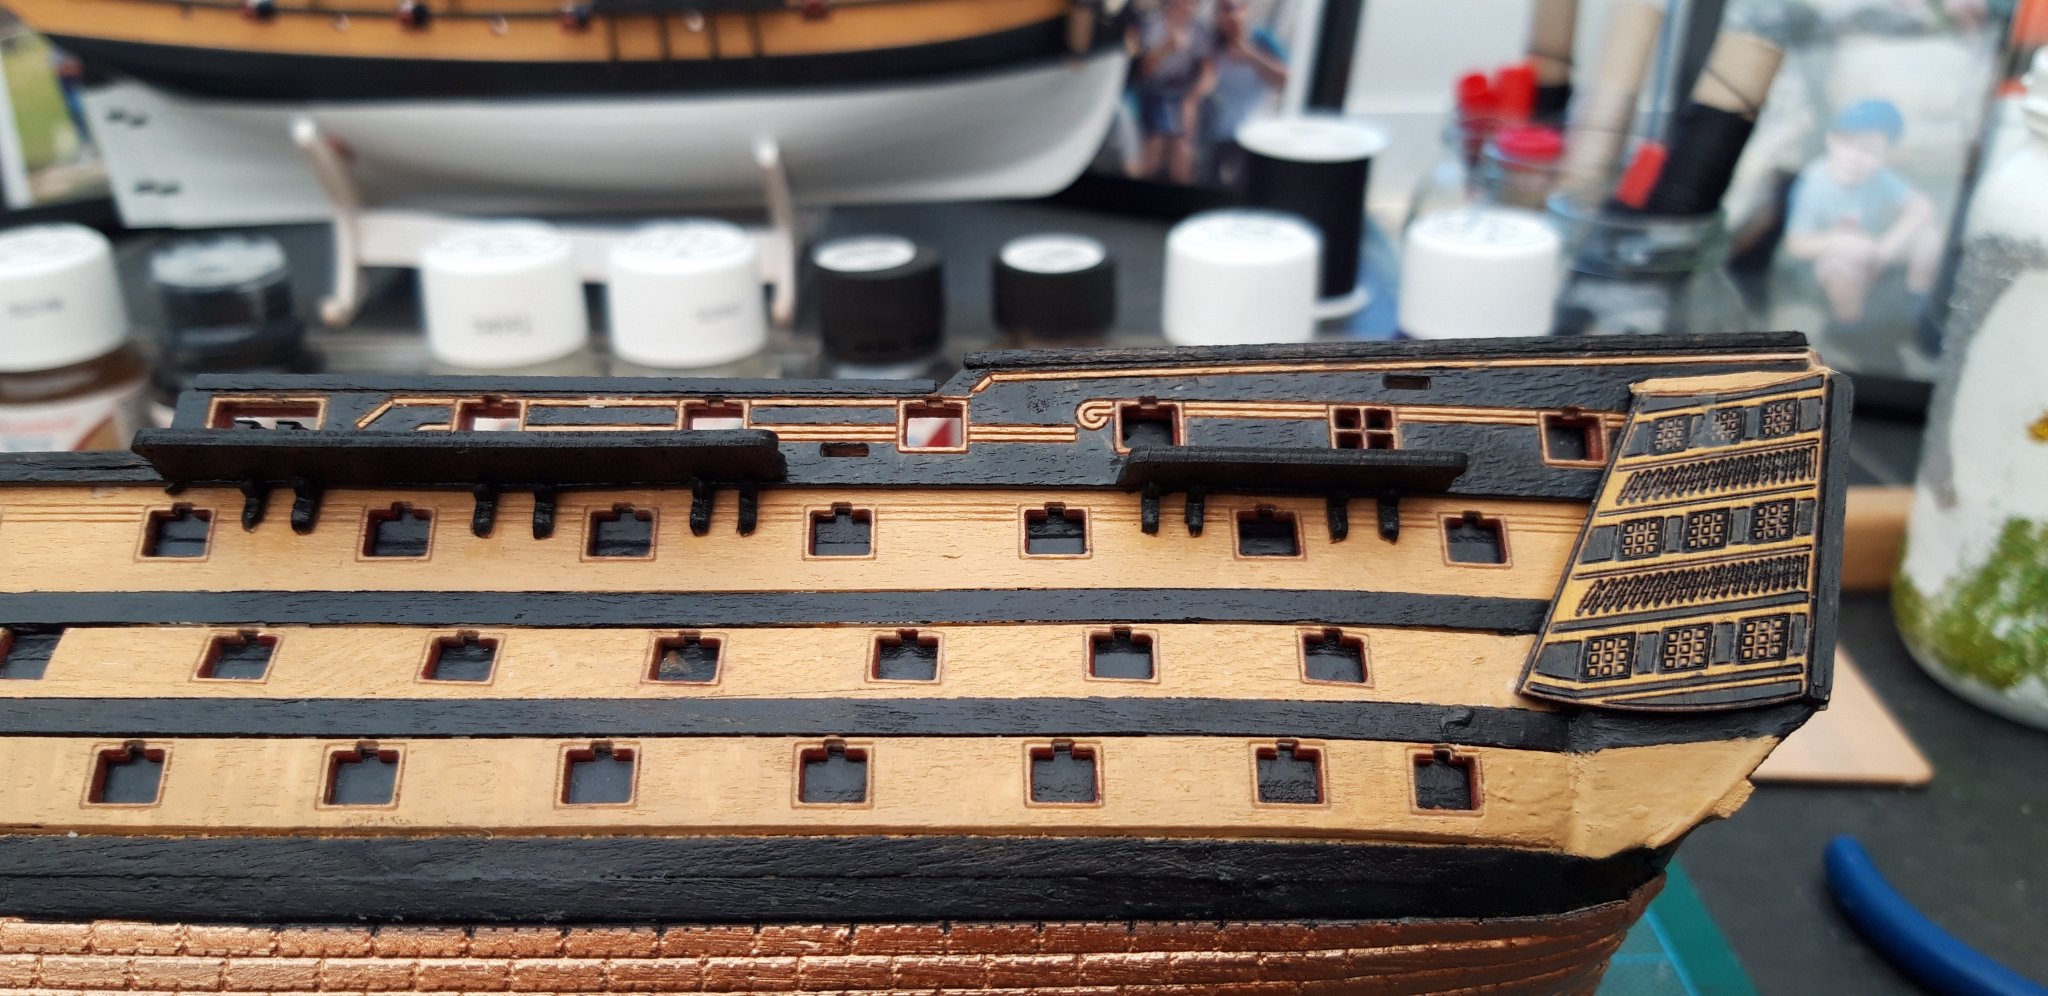
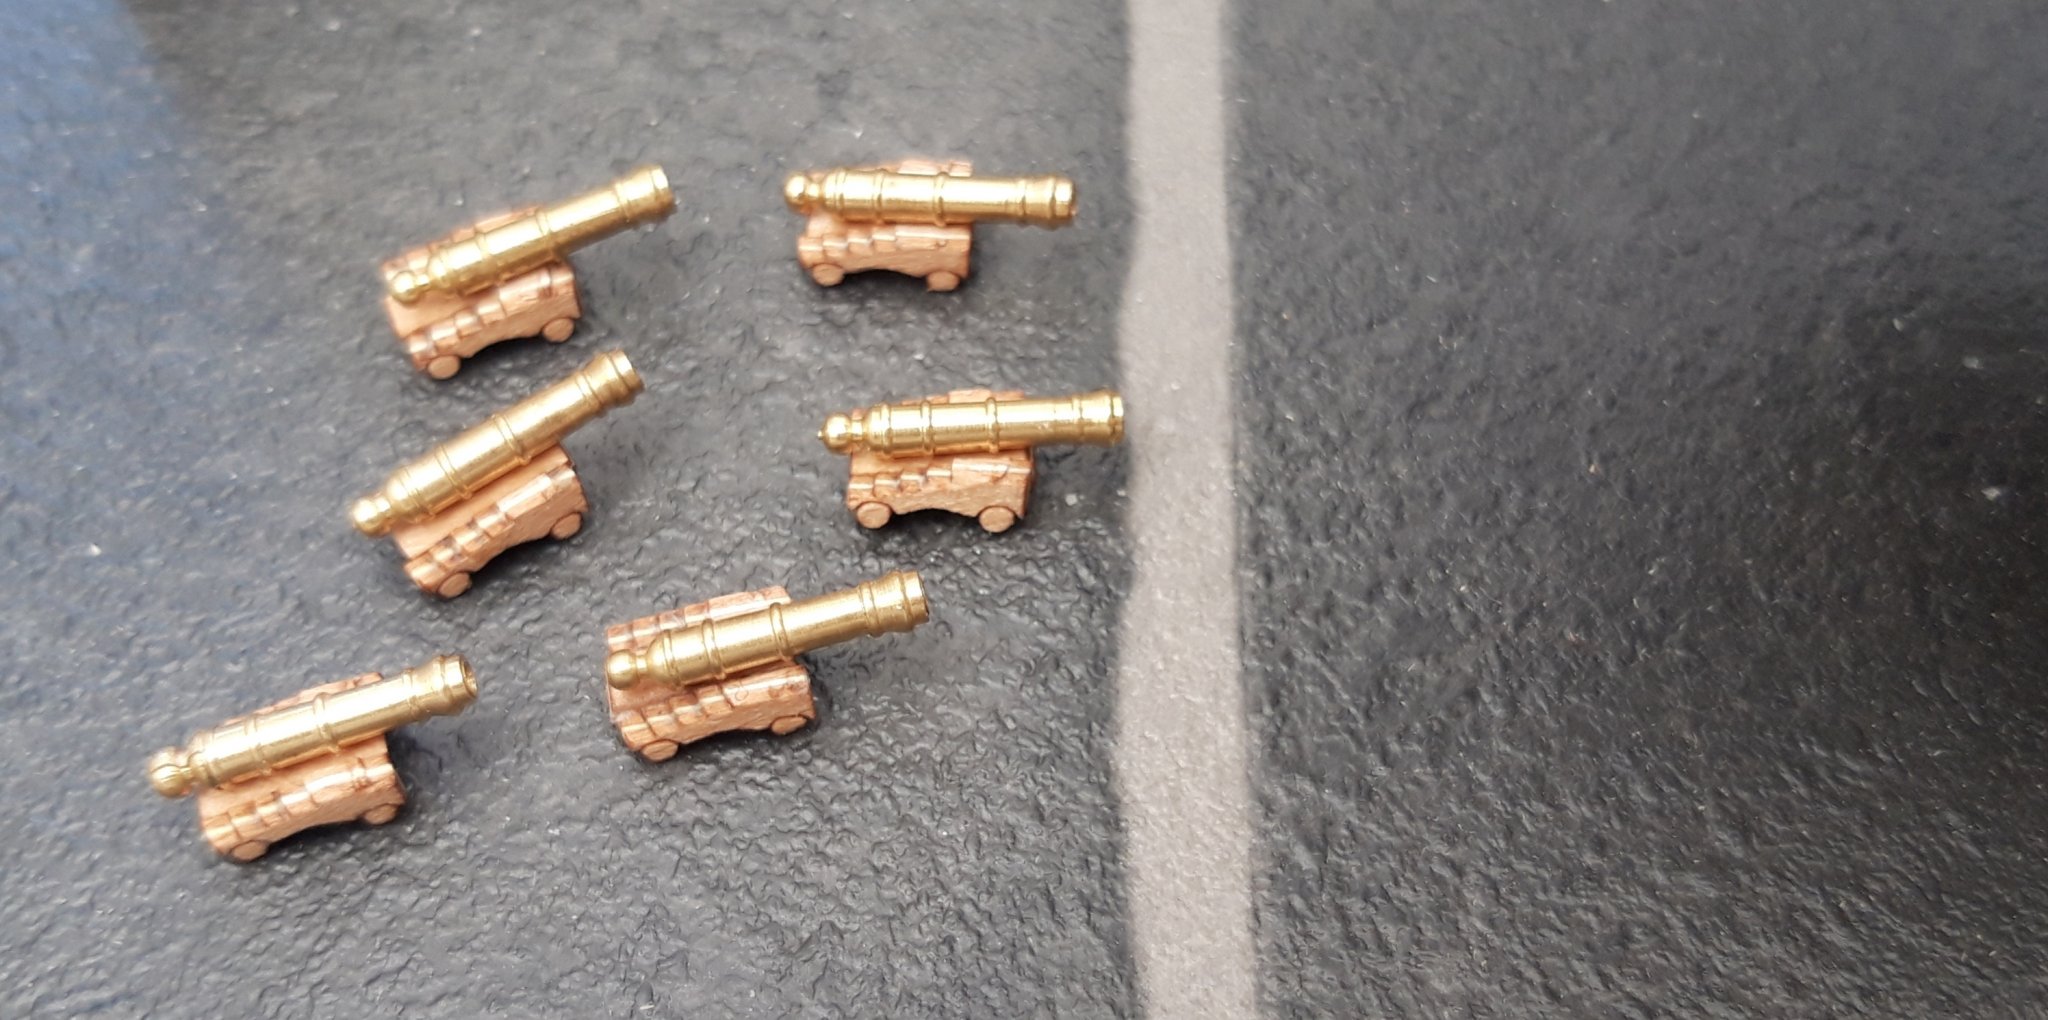
Hi all,
Thanks very much for your input Retired guy, they look great brass but l know the right answer is black so that is what l shall be doing on my next session.
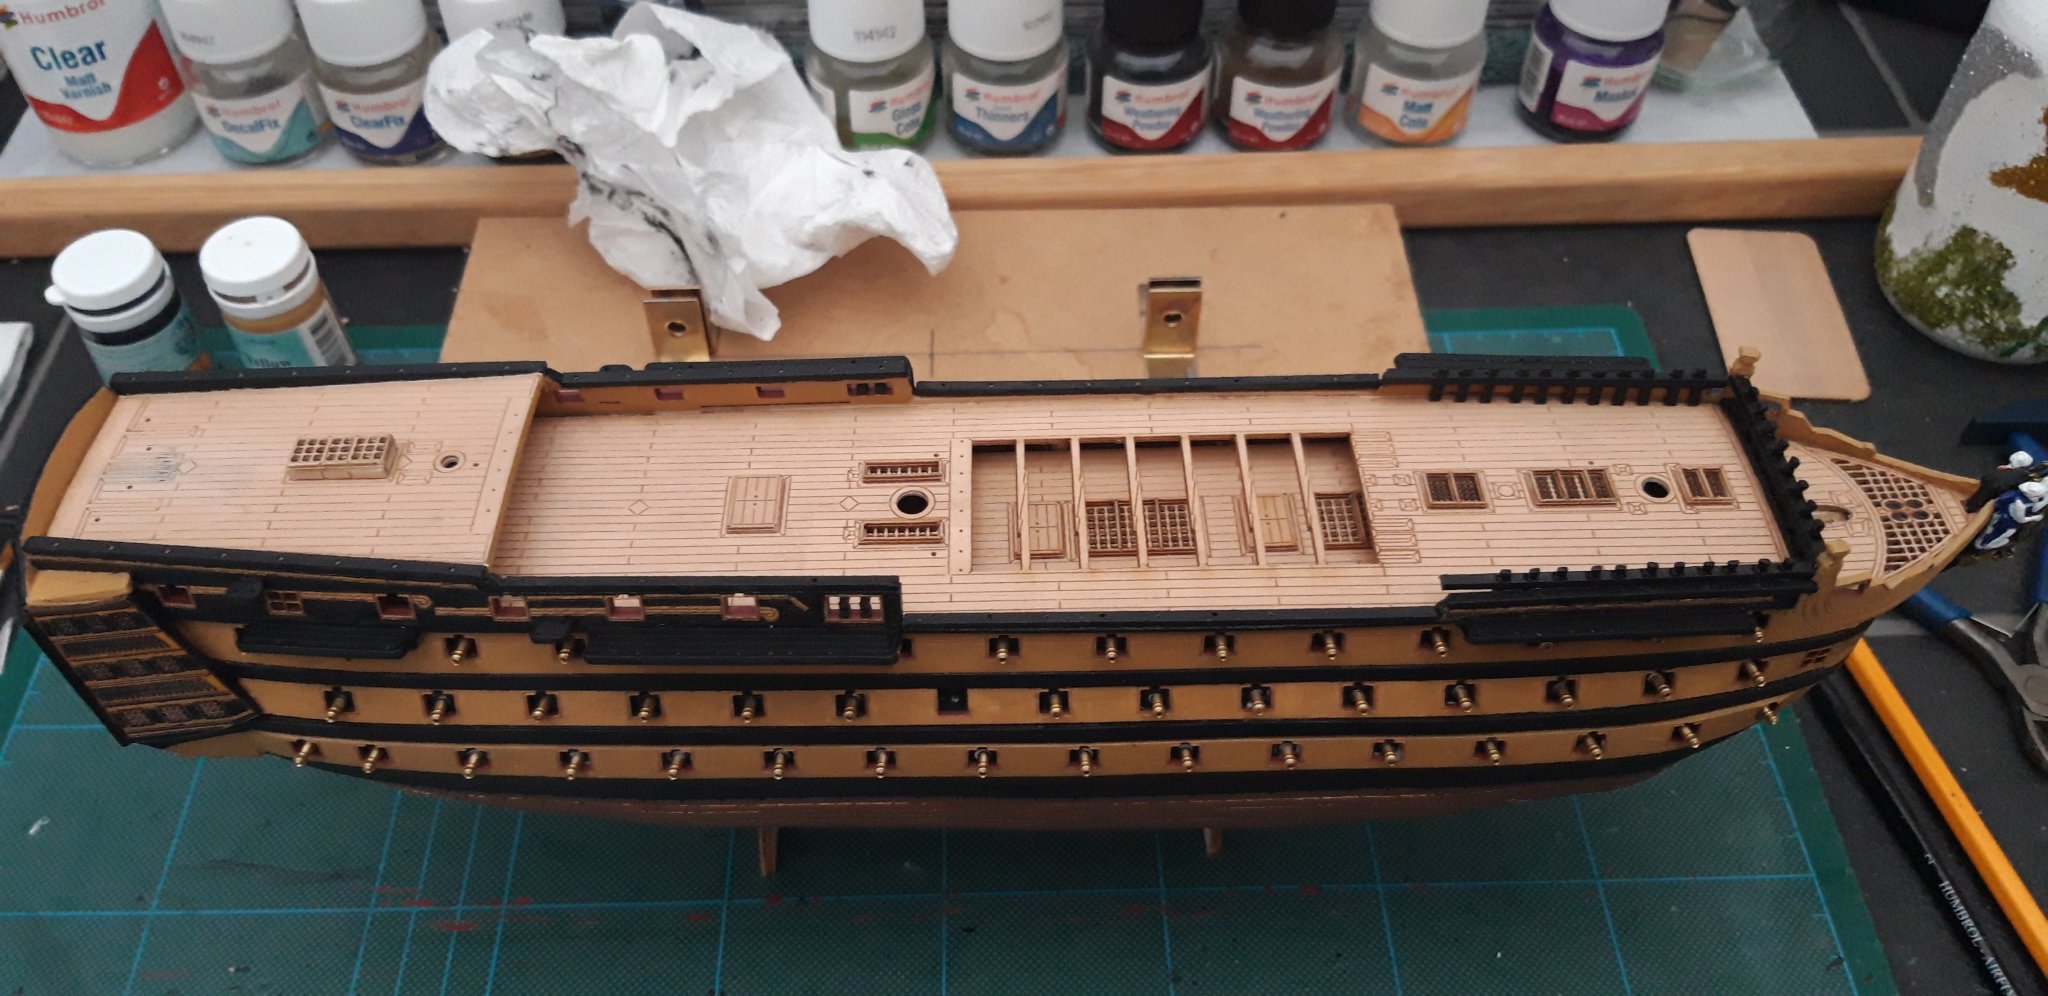
Today l carried out the following tasks.
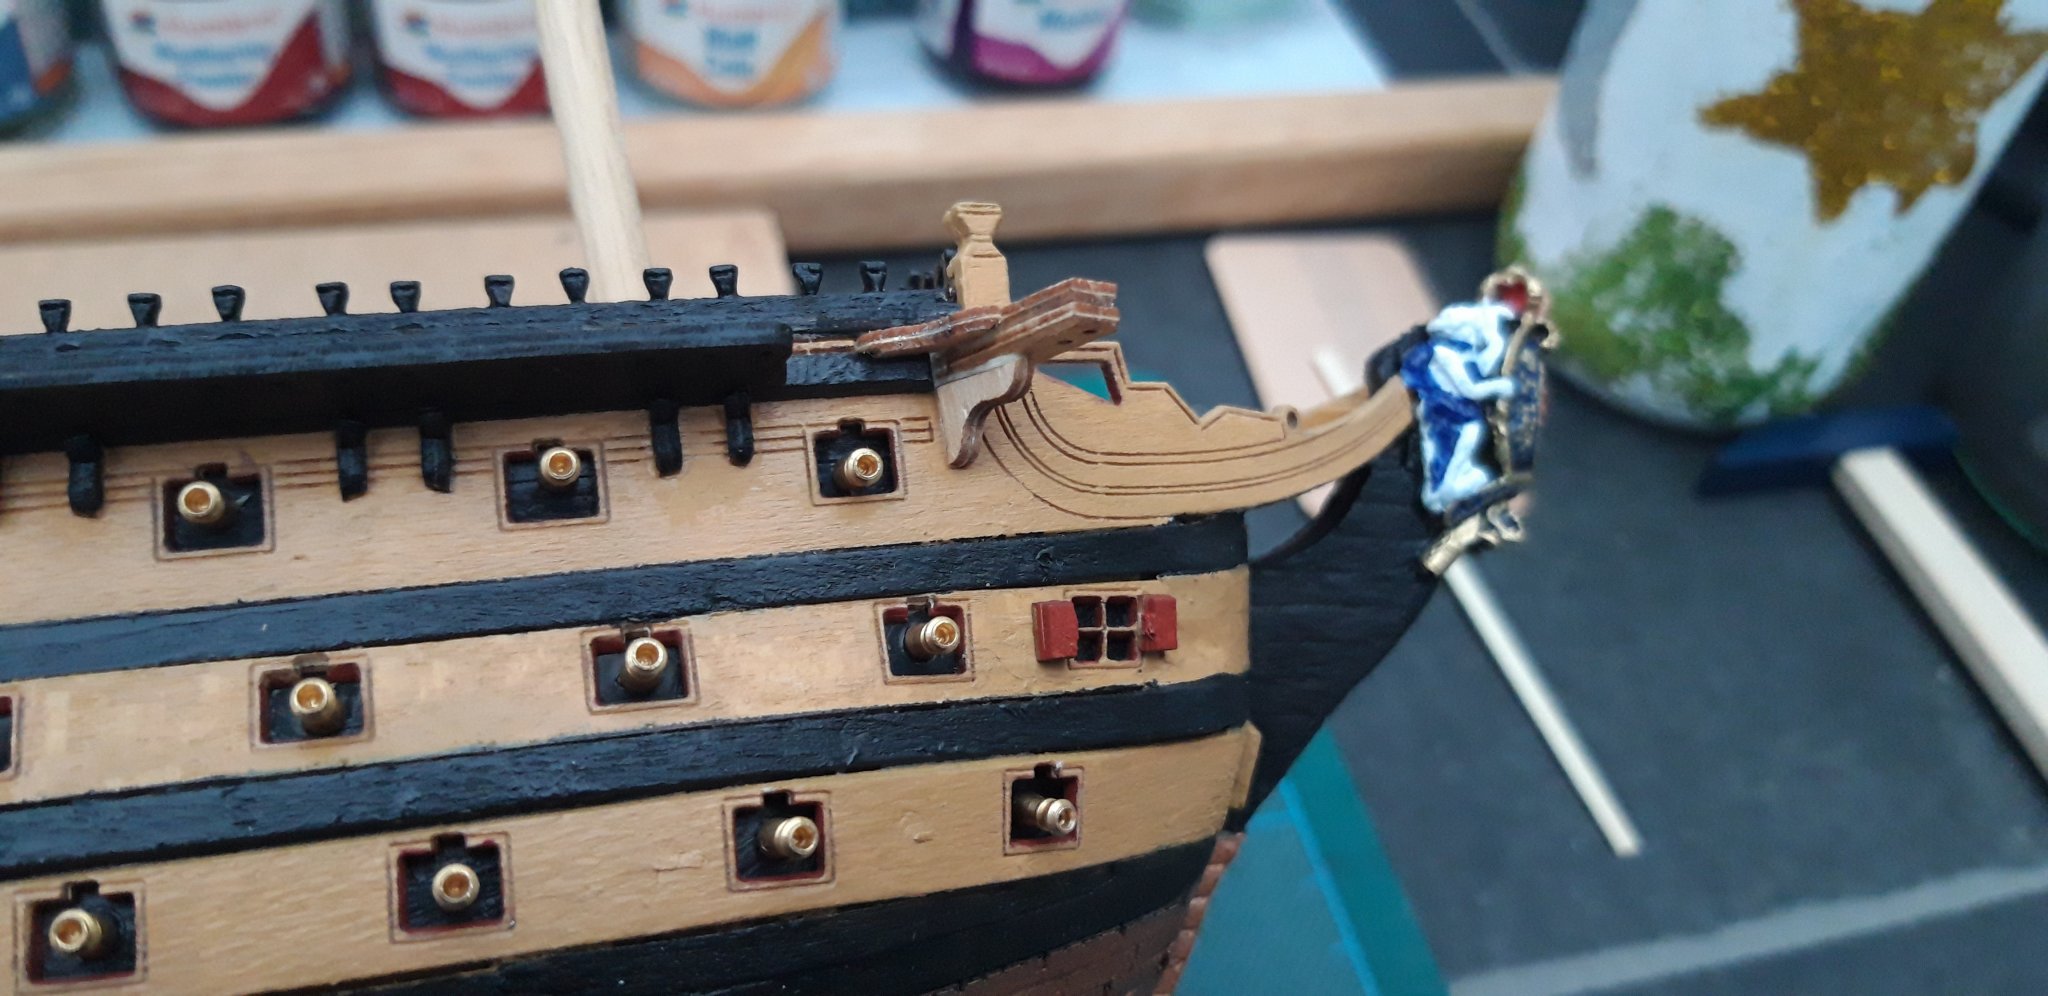
I fitted the second Cathead, this time l drilled a hole into the rear of the Cathead and fitted a bracket which supported from within, this saved the balancing act l performed yesterday. I then removed the first one and refitted in the same way.
Which of course is what l should have done in the first place.
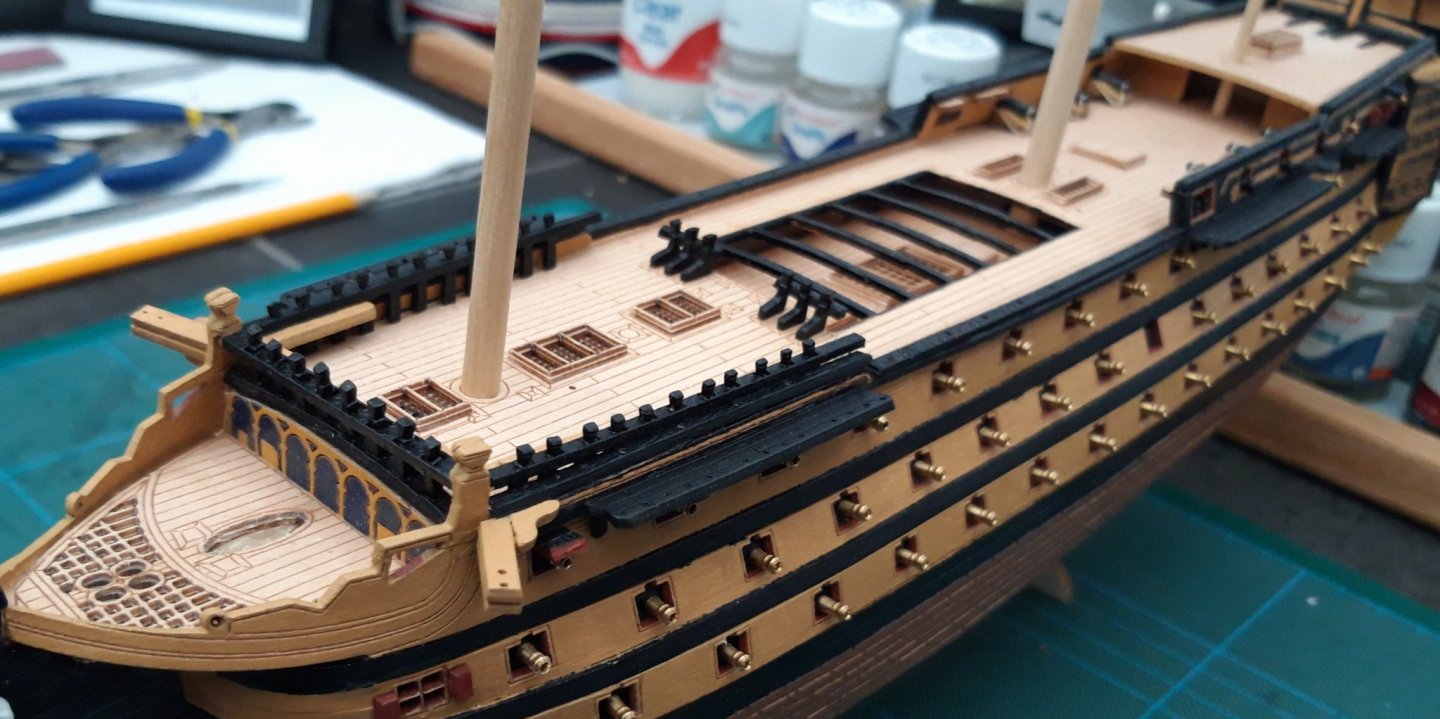
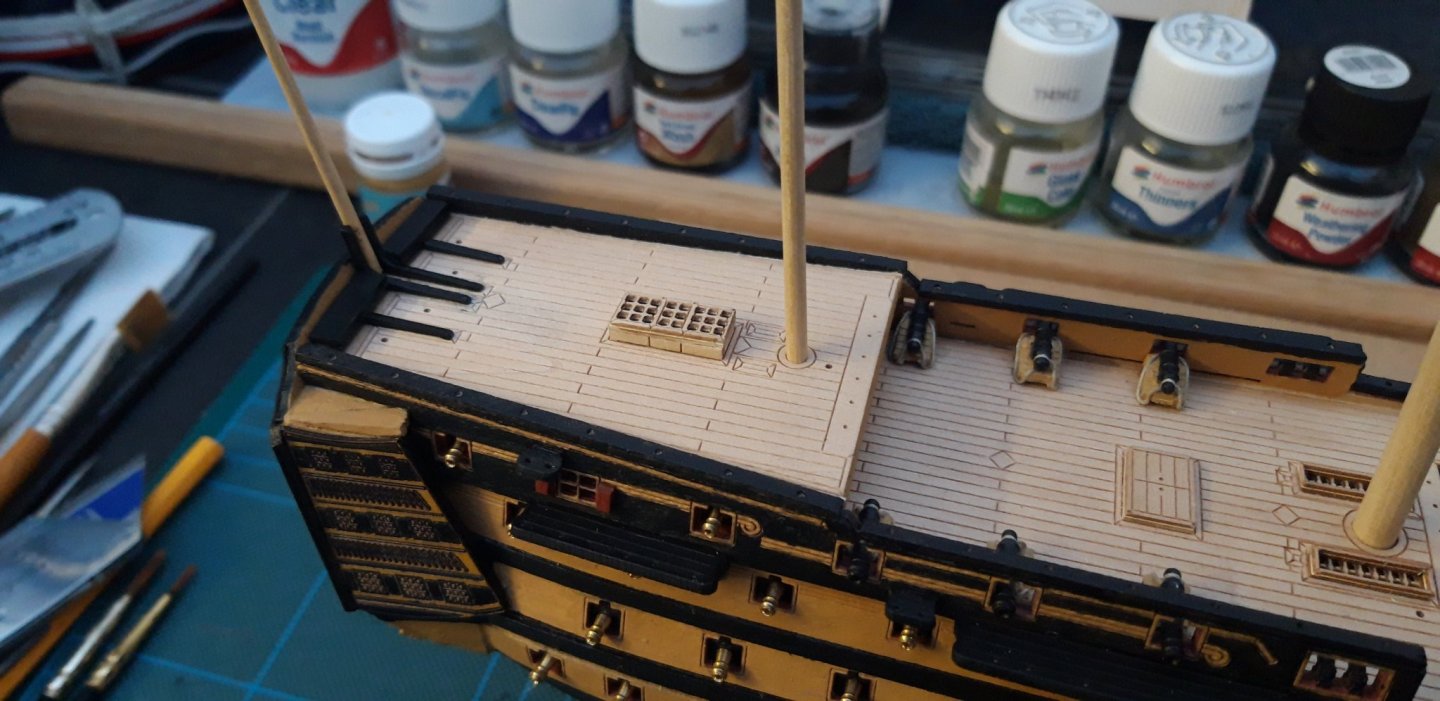
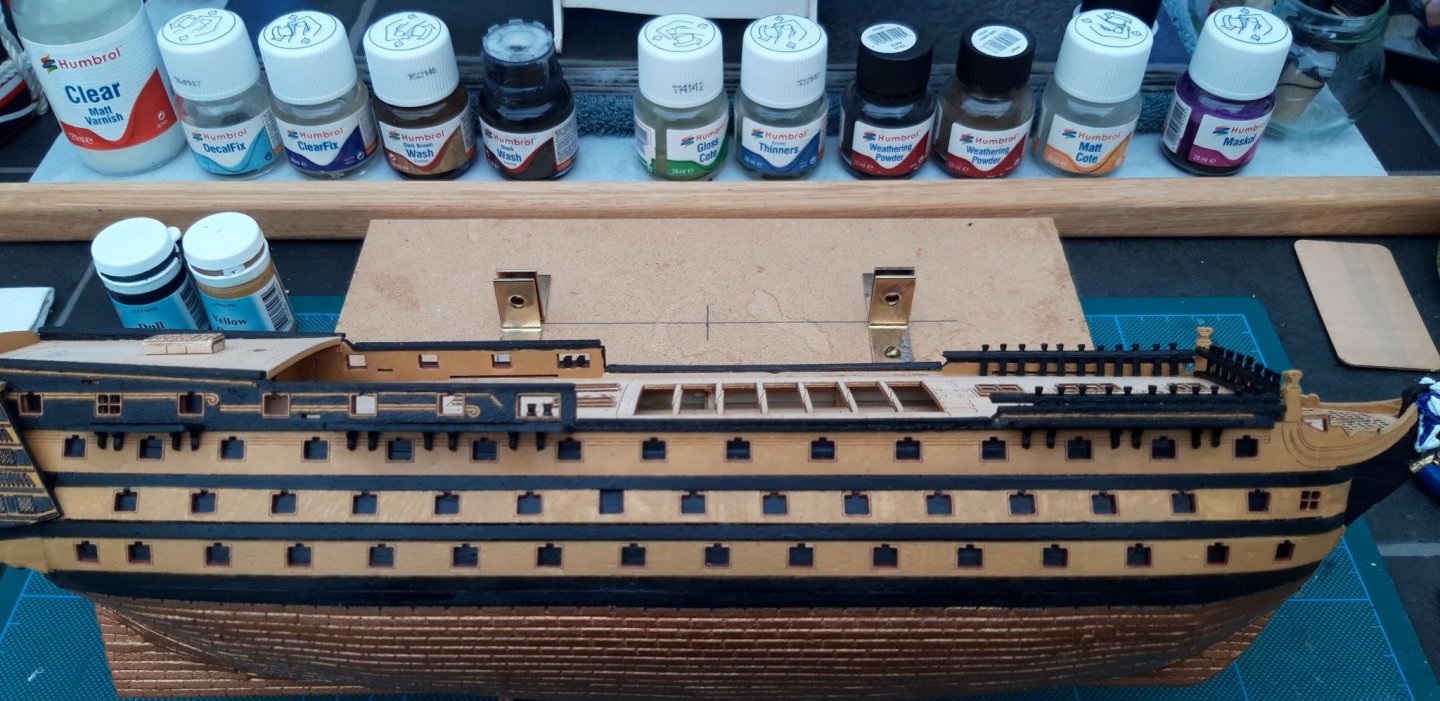
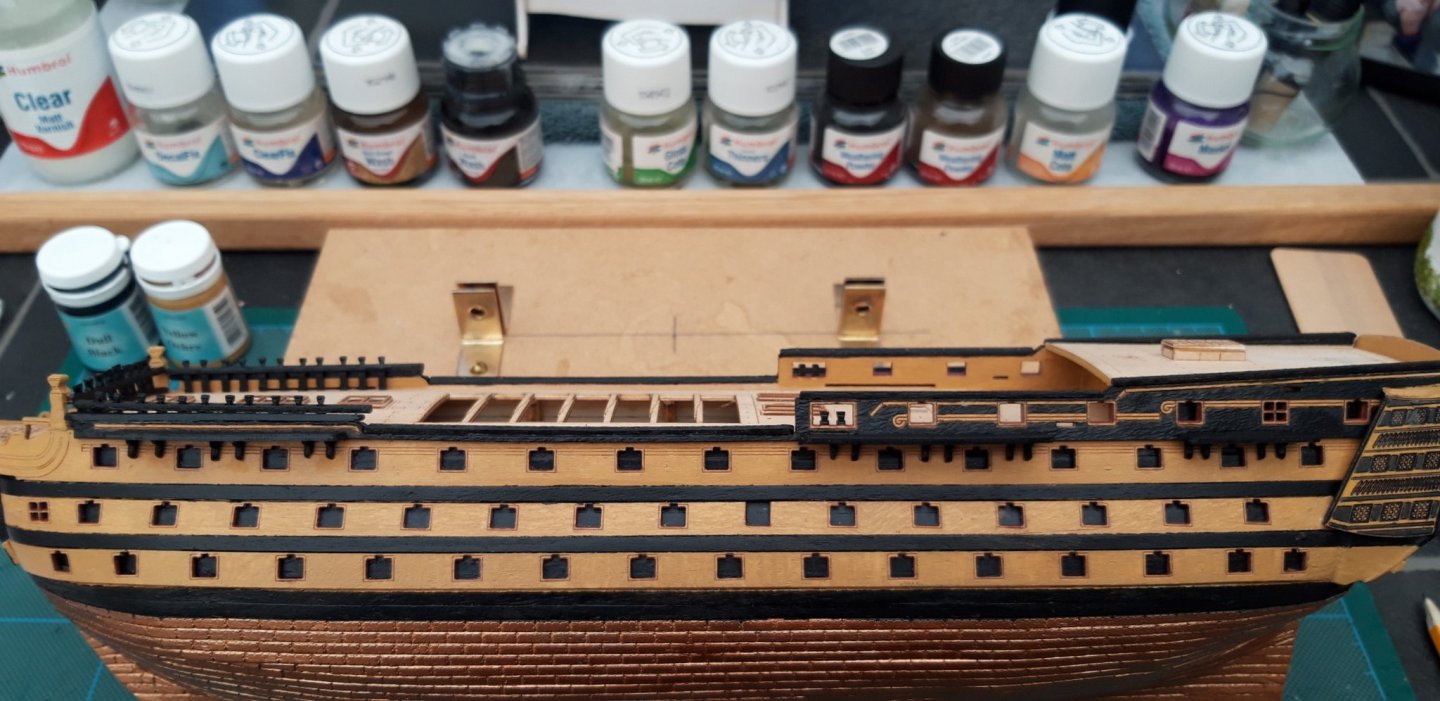
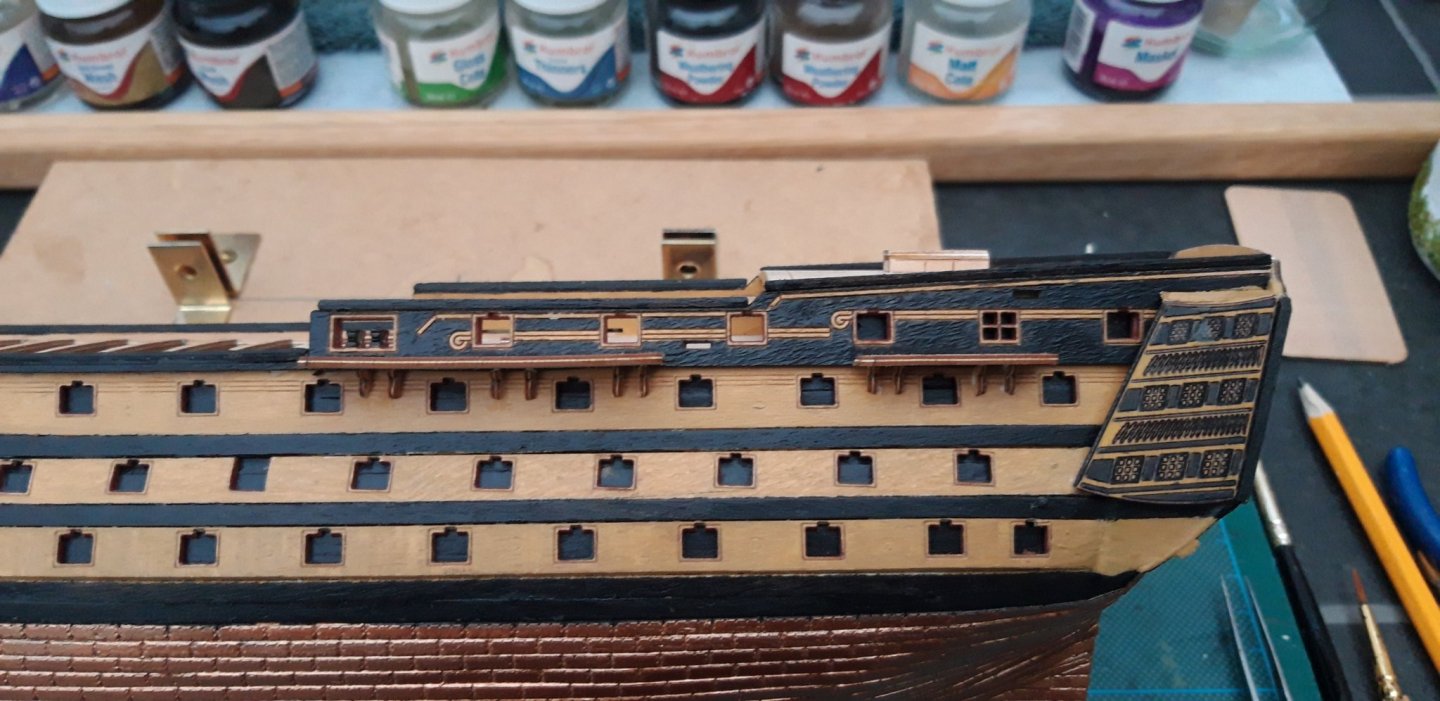
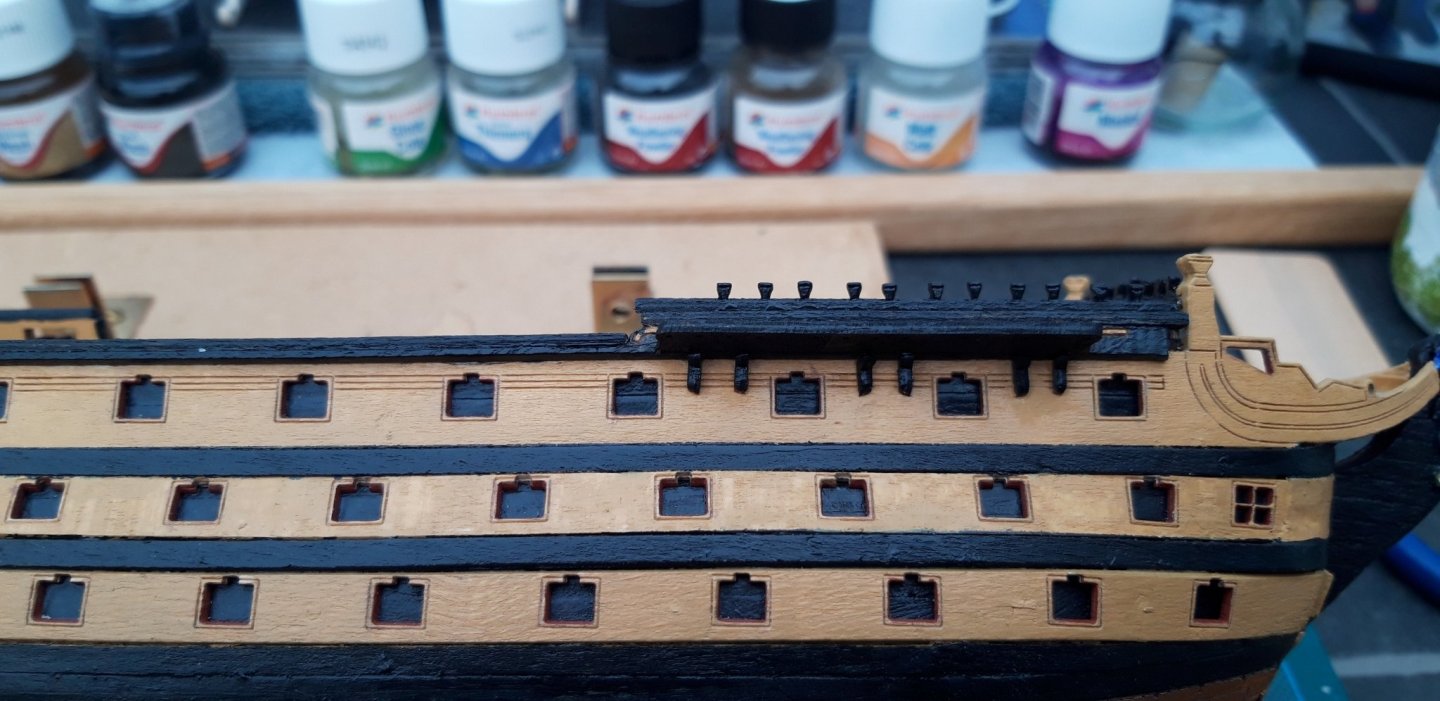
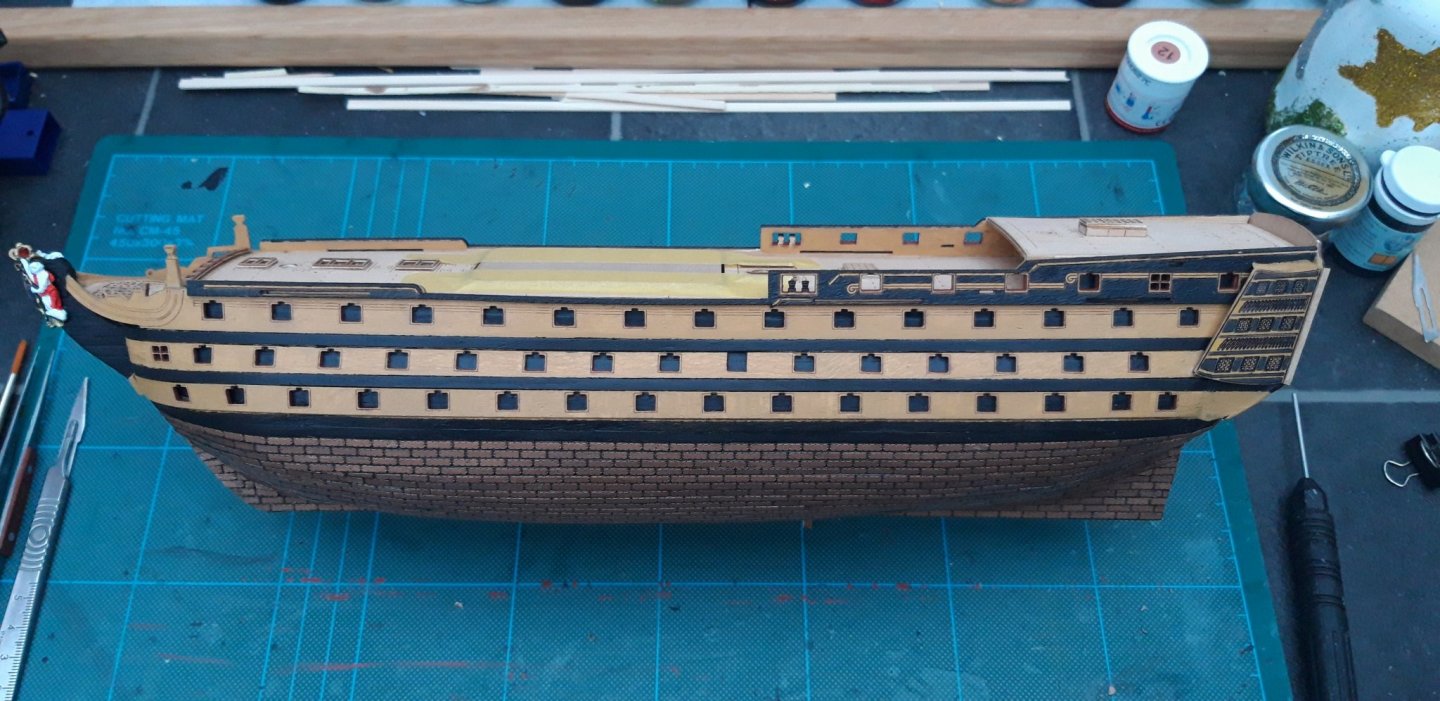
I fitted the rail supports and painted black. I also painted the Skid Beams black.
Pinrails also fitted, but not painted yet

And a bit more work on the anchors.

This is where I am at now. Only a small amount today, but enjoyable.
My next session will be all about cannons, and yet more black paint.
Best wishes as always,
The Lazy Saint.
Session. Time. Total.
26. 3 hrs. 96 hrs.
- Retired guy, Edwardkenway, Jonesey and 3 others
-
6
-
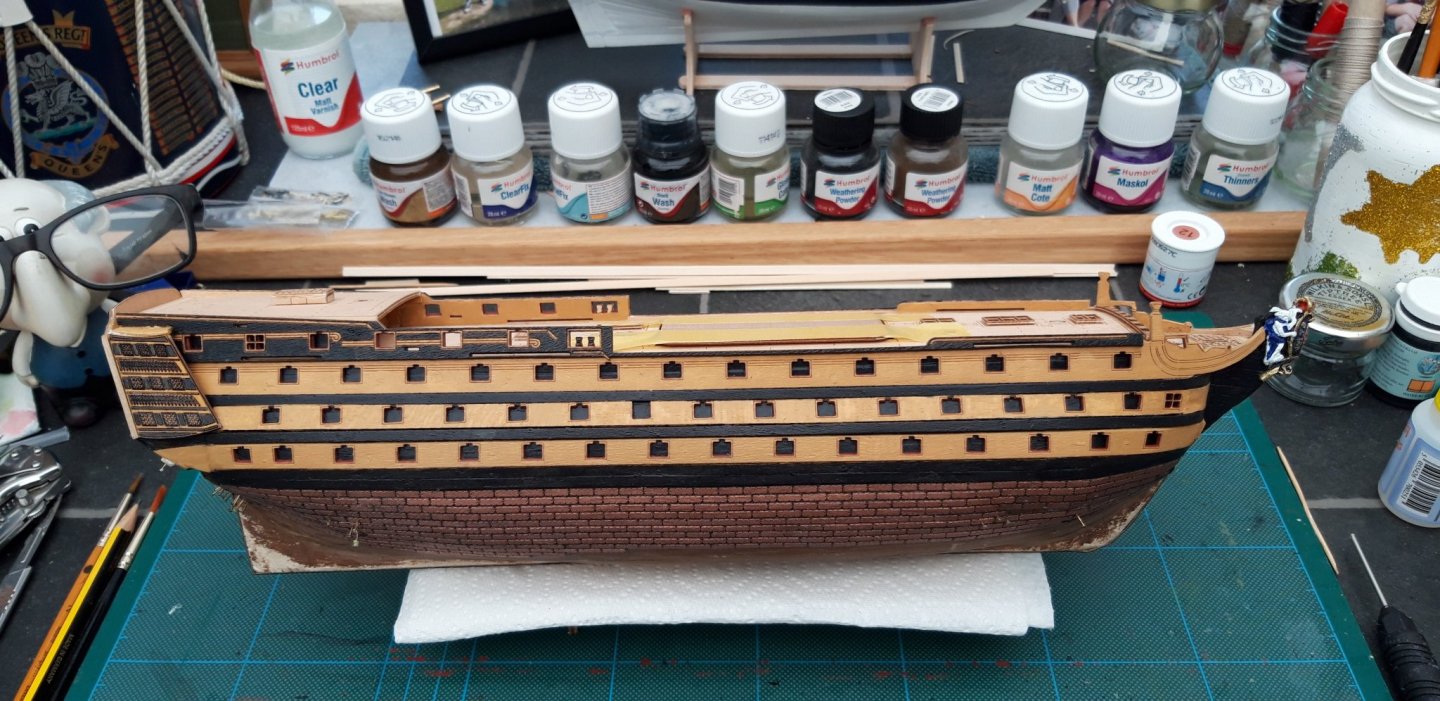
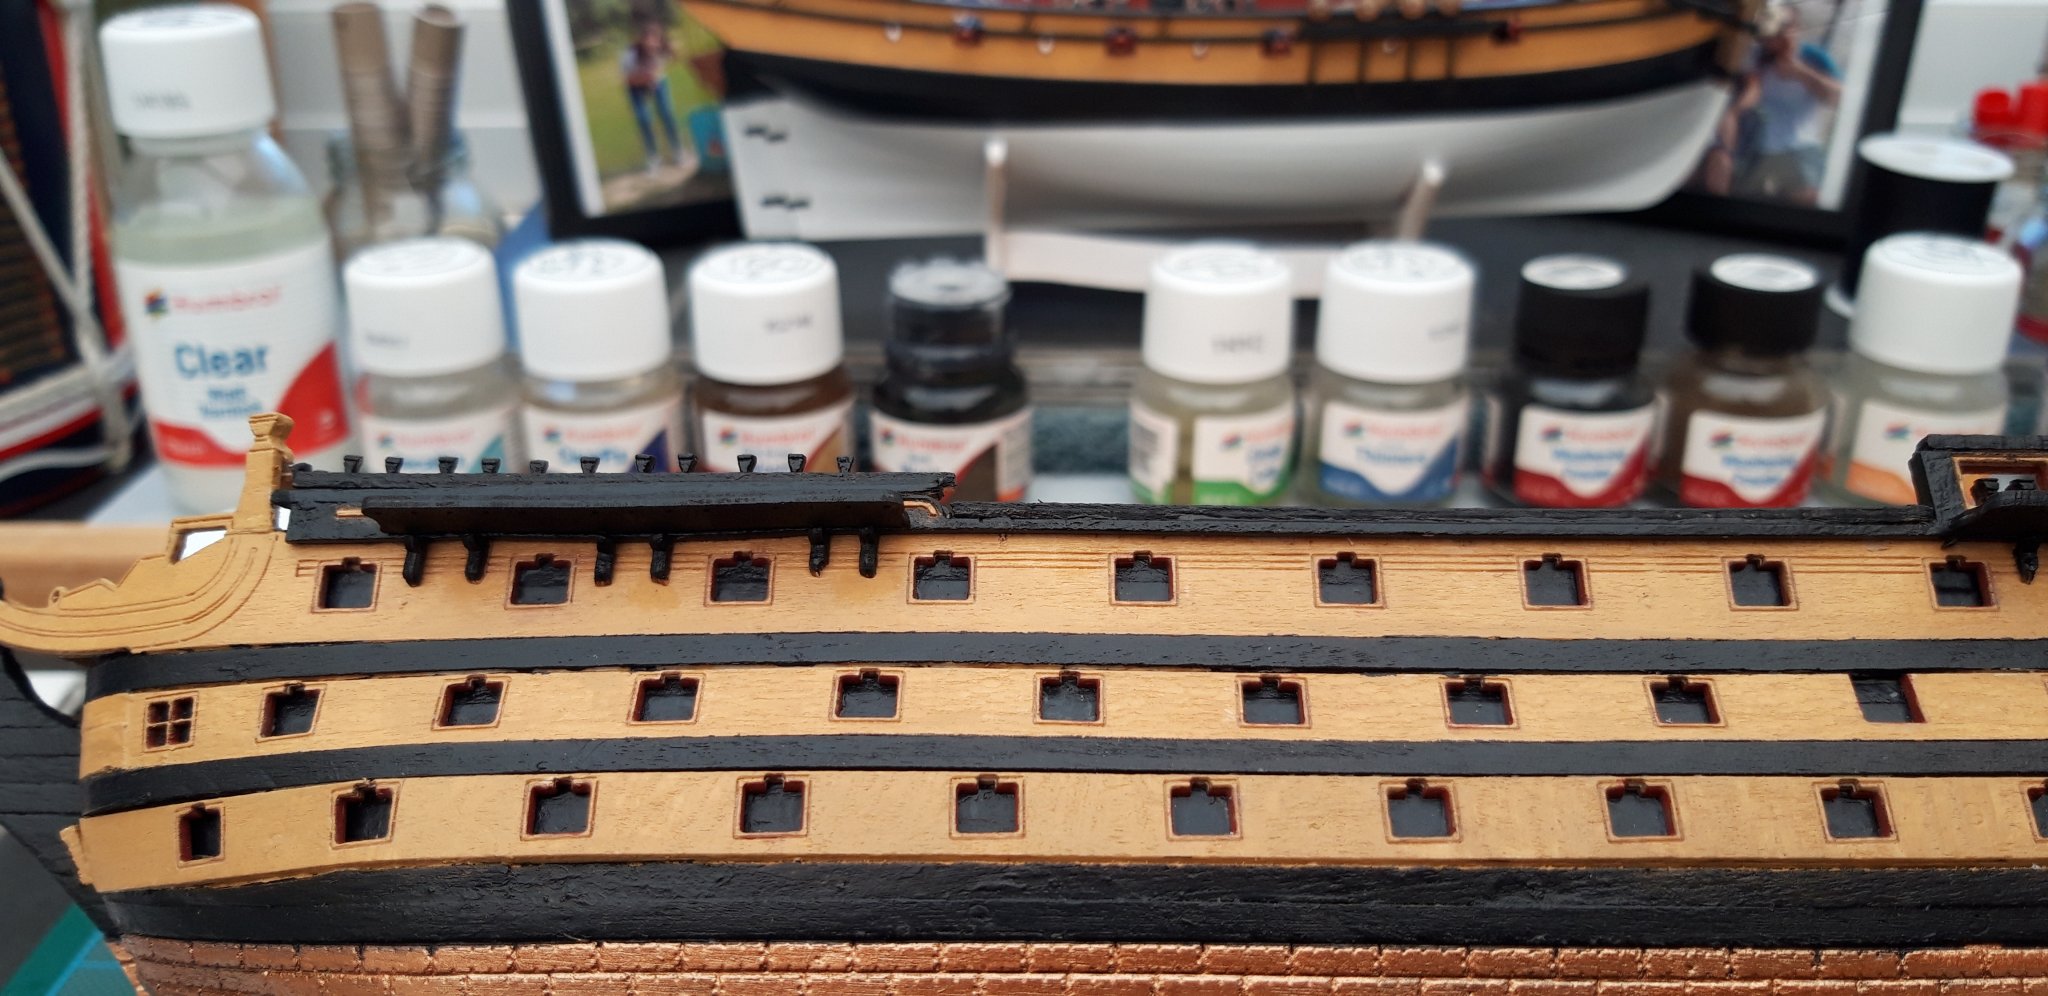
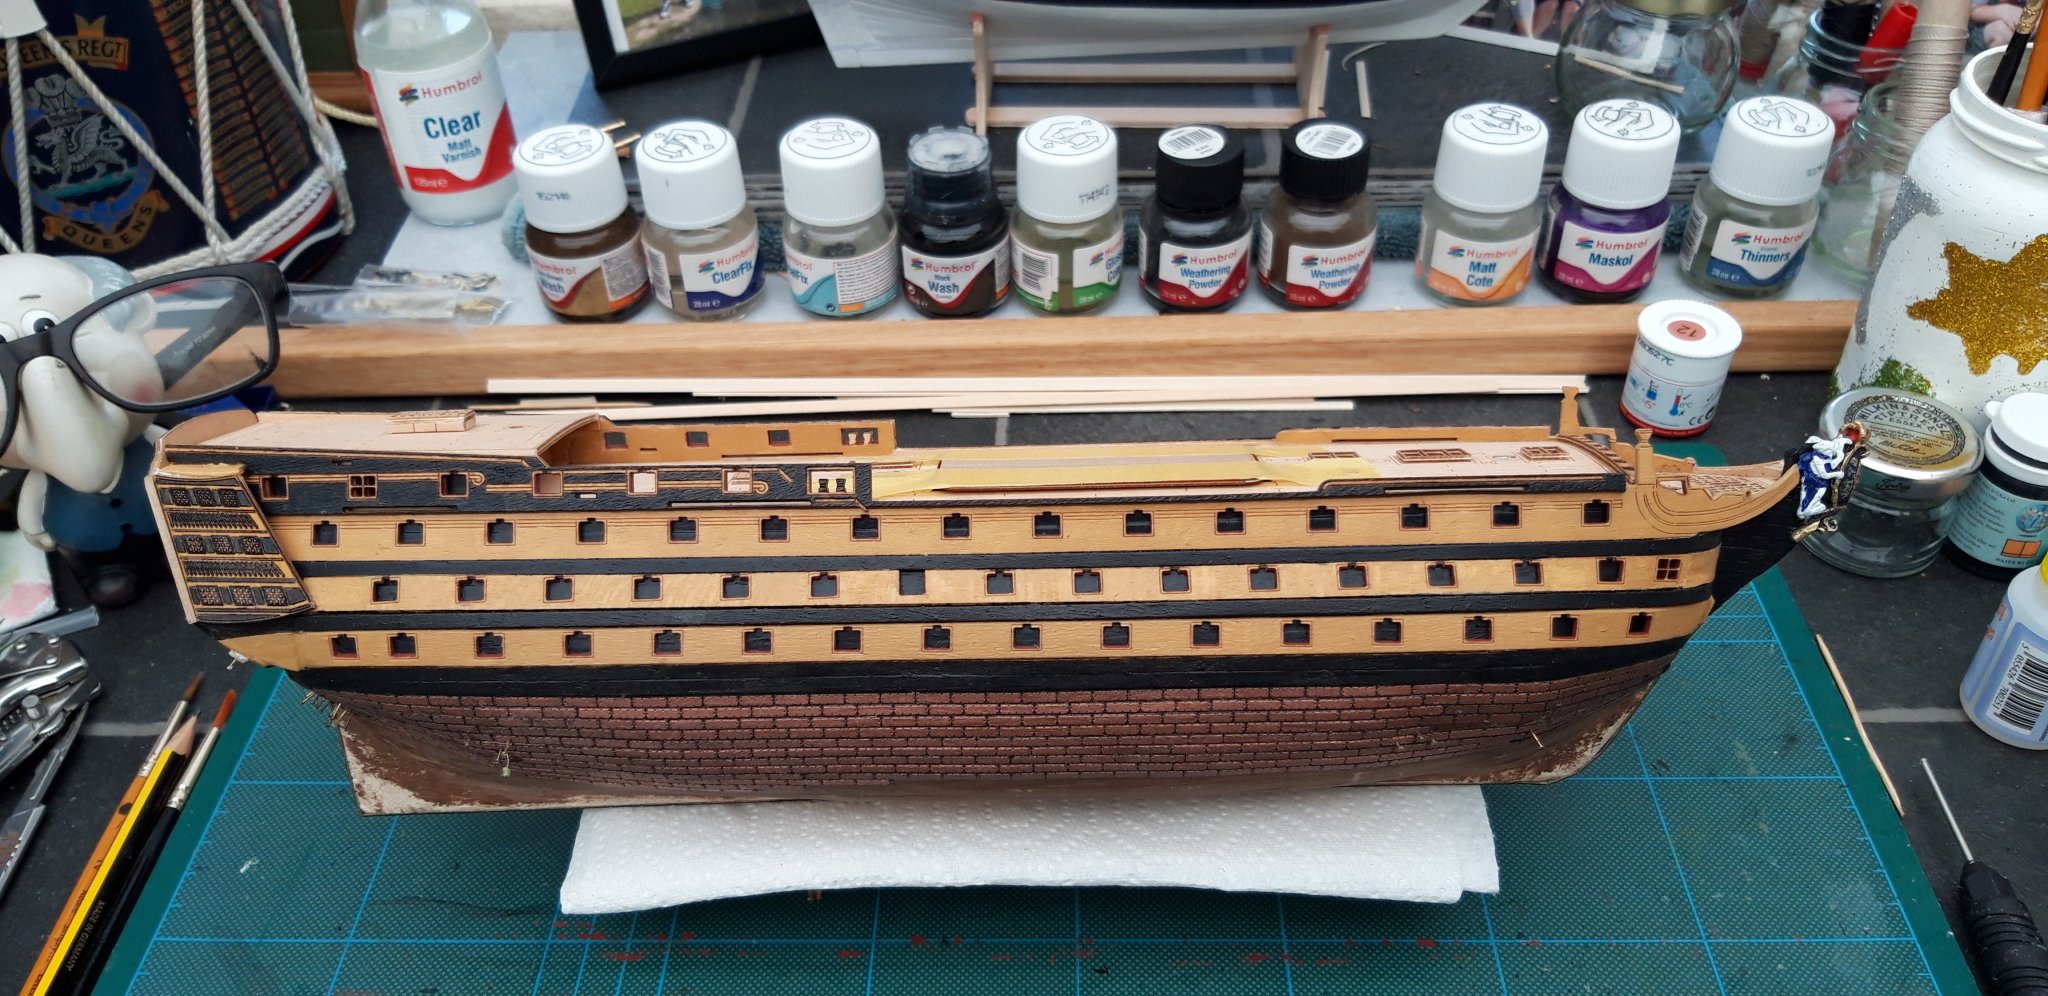
Hi all,
Another session where l spent more time pondering than building. I tried to post last night but was unable to for reasons l am unsure of at the moment.
Anyway a bit more progress was made as follows.
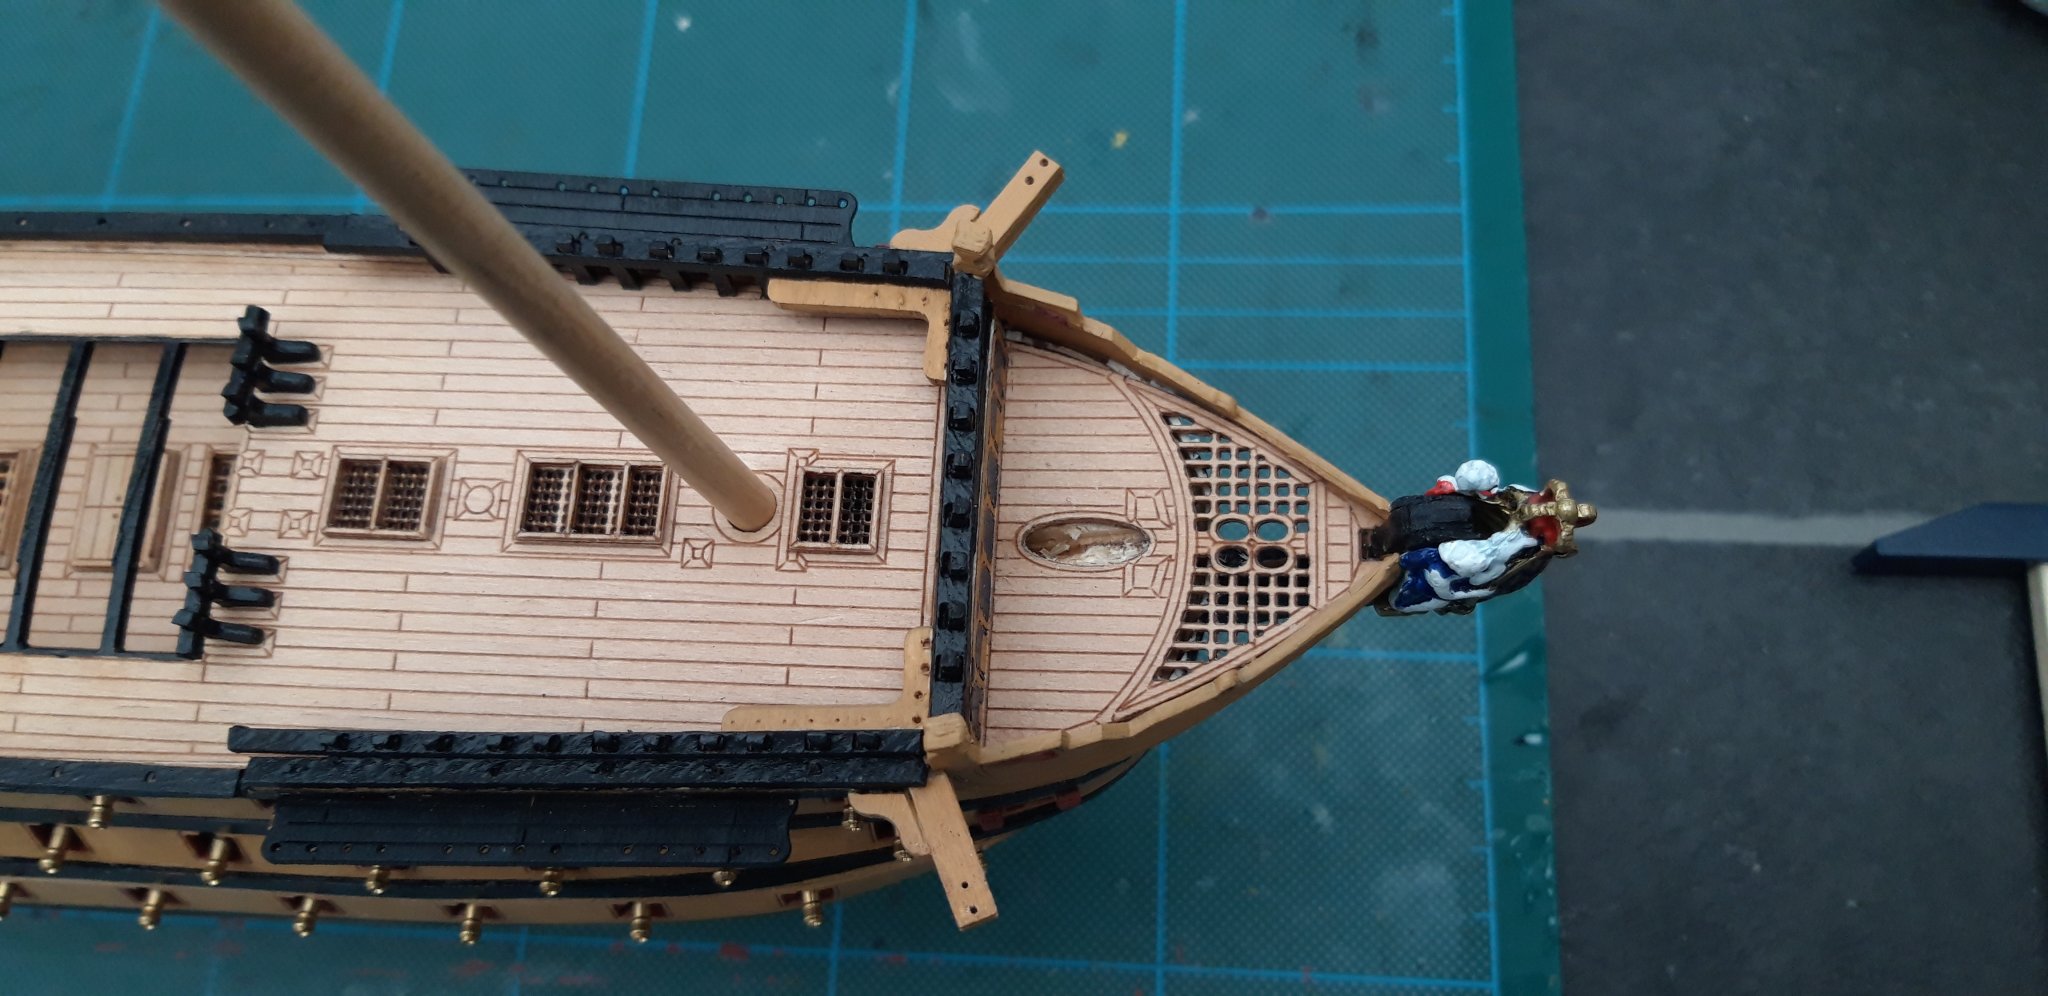
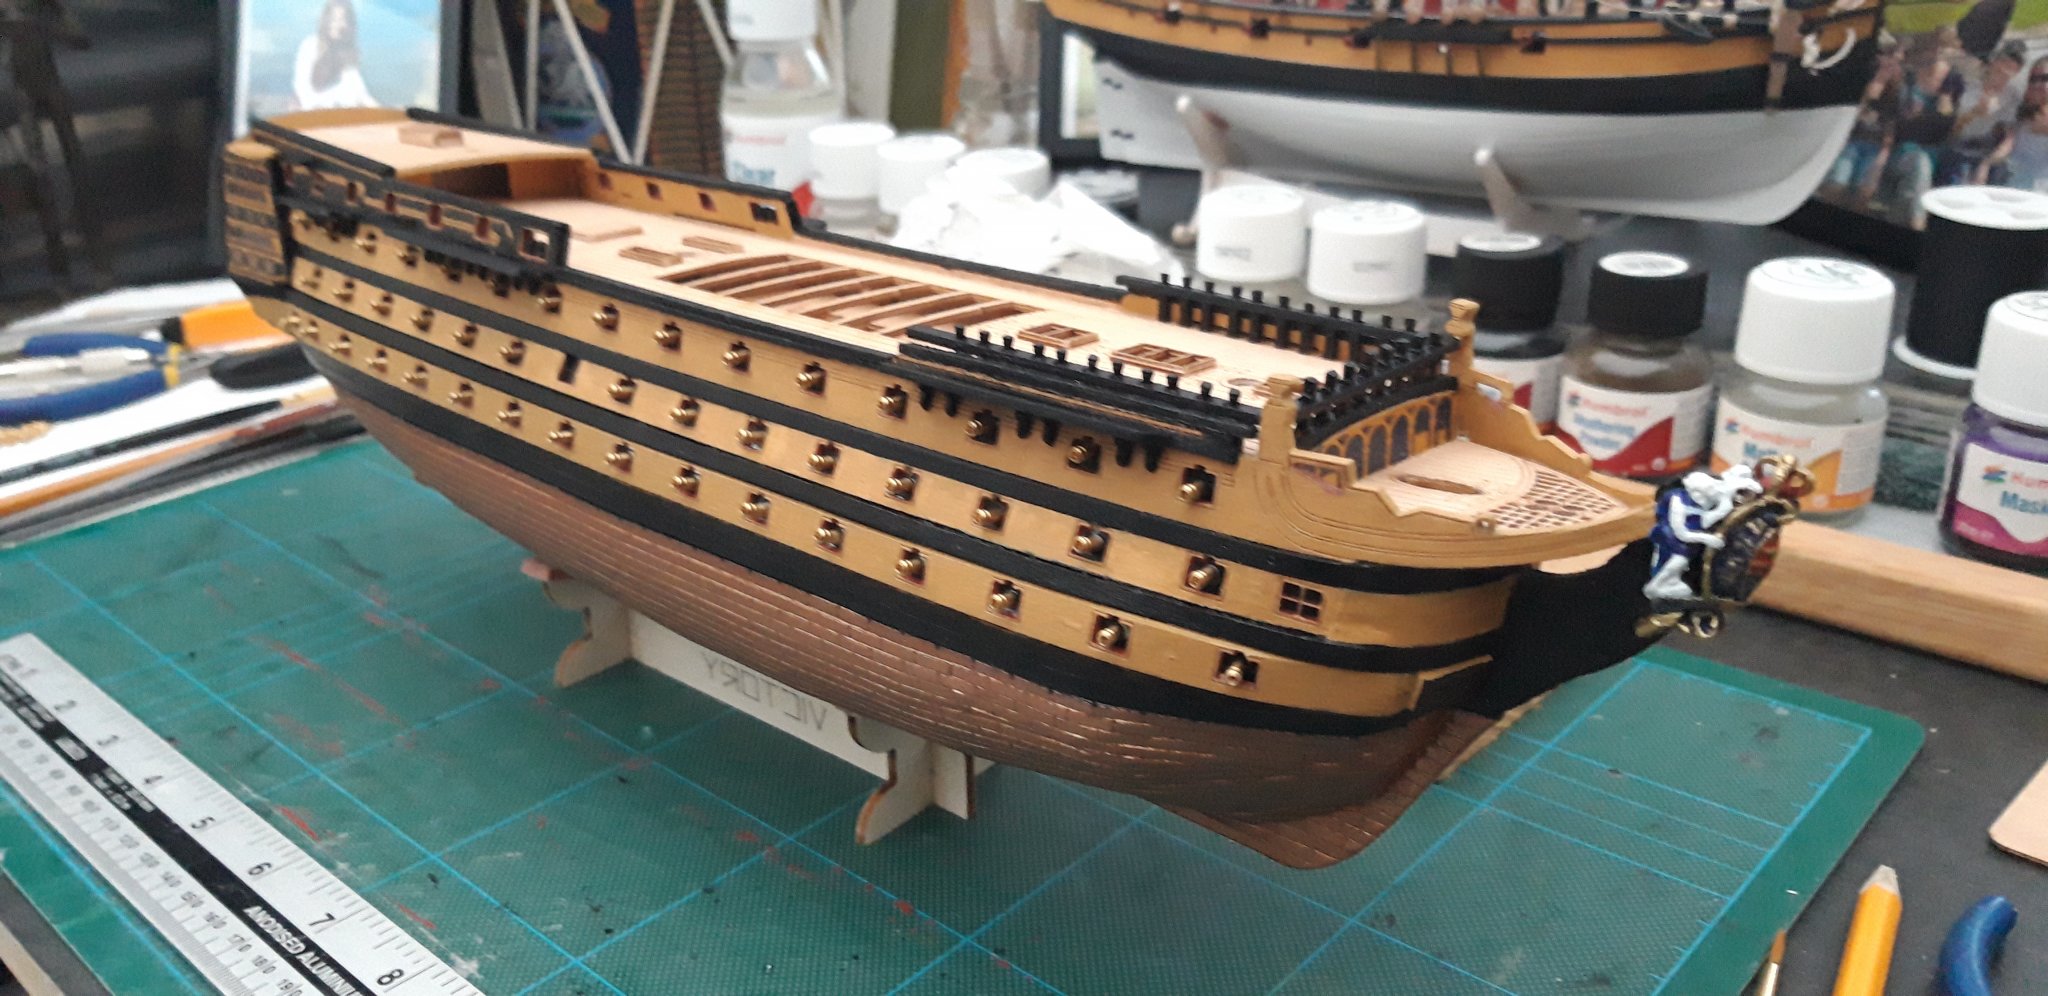
The Starboard side Cathead has been fitted. I decided to do one side at a time as it was the Devil's own job trying to get it exactly right. There was no way of pinning/clamping until dry. I used gravity/balanced and was very watchful until the glue set.

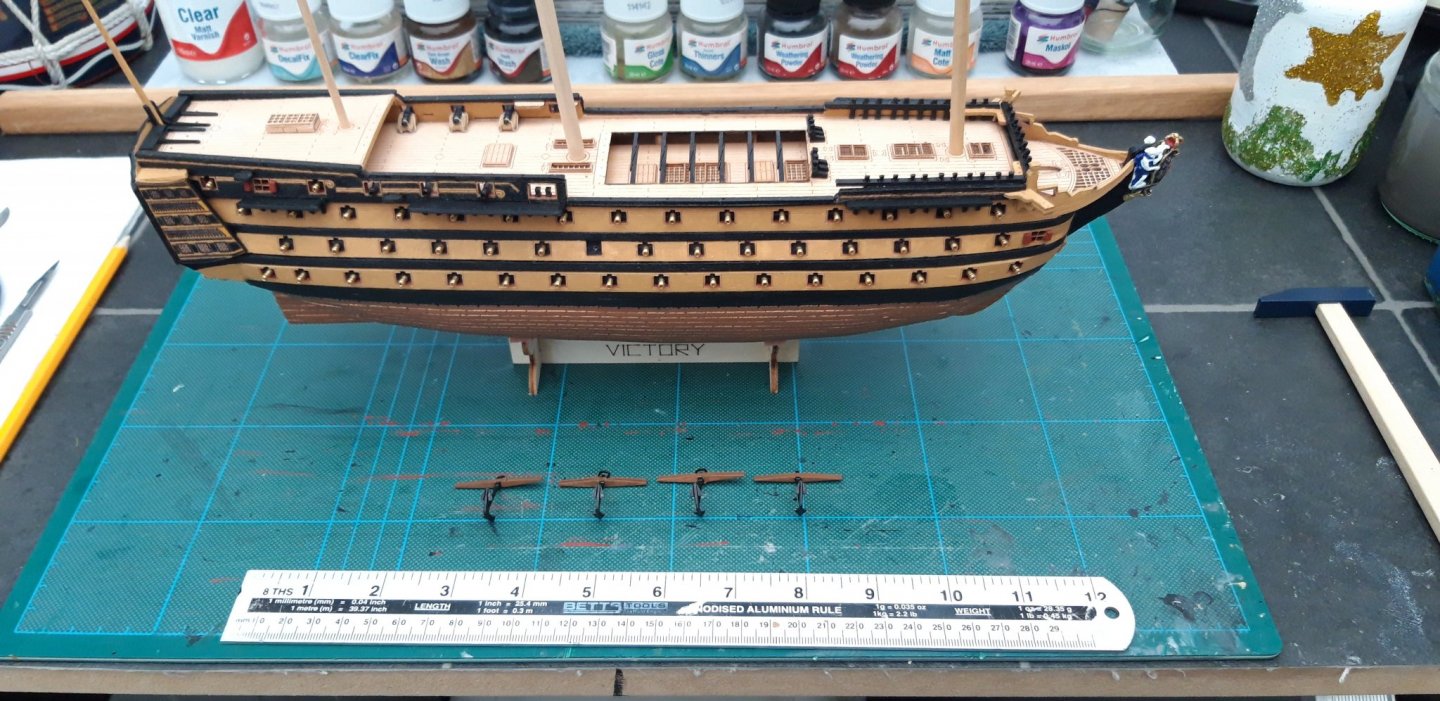
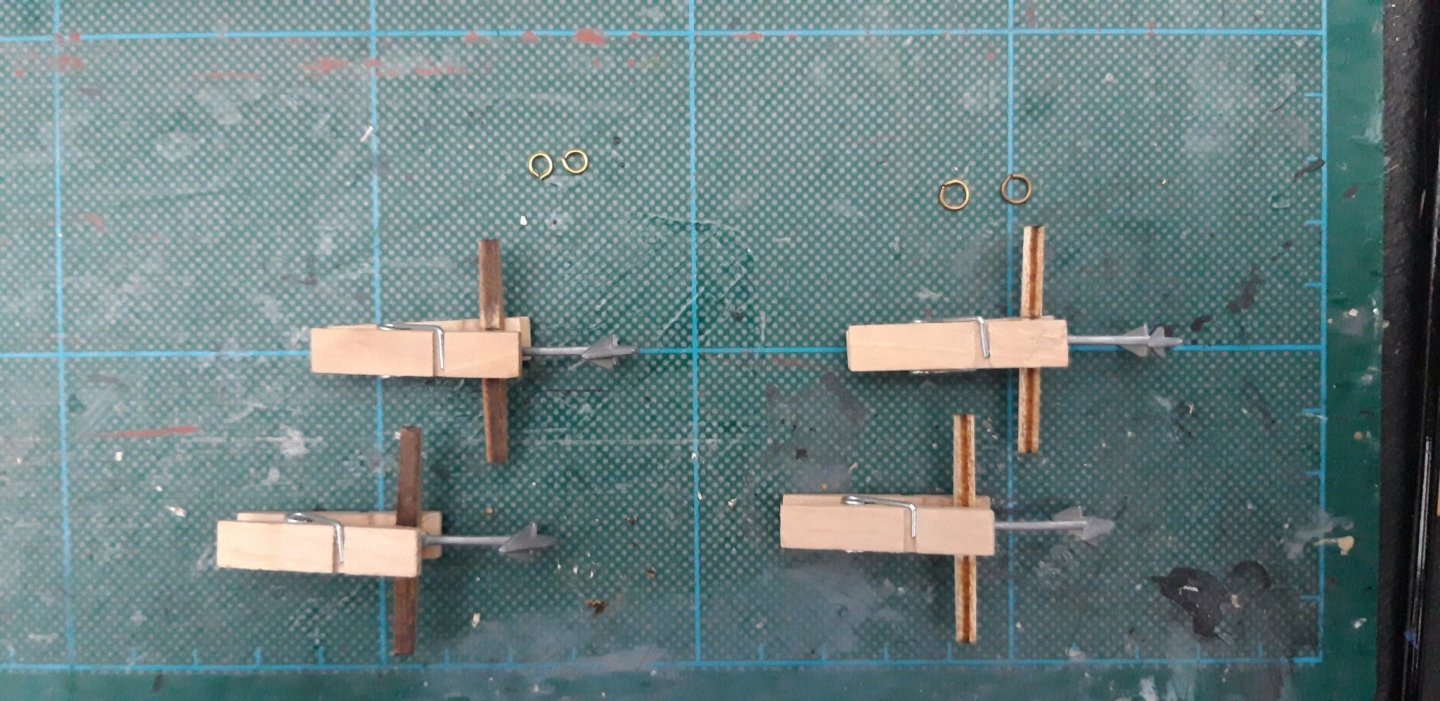
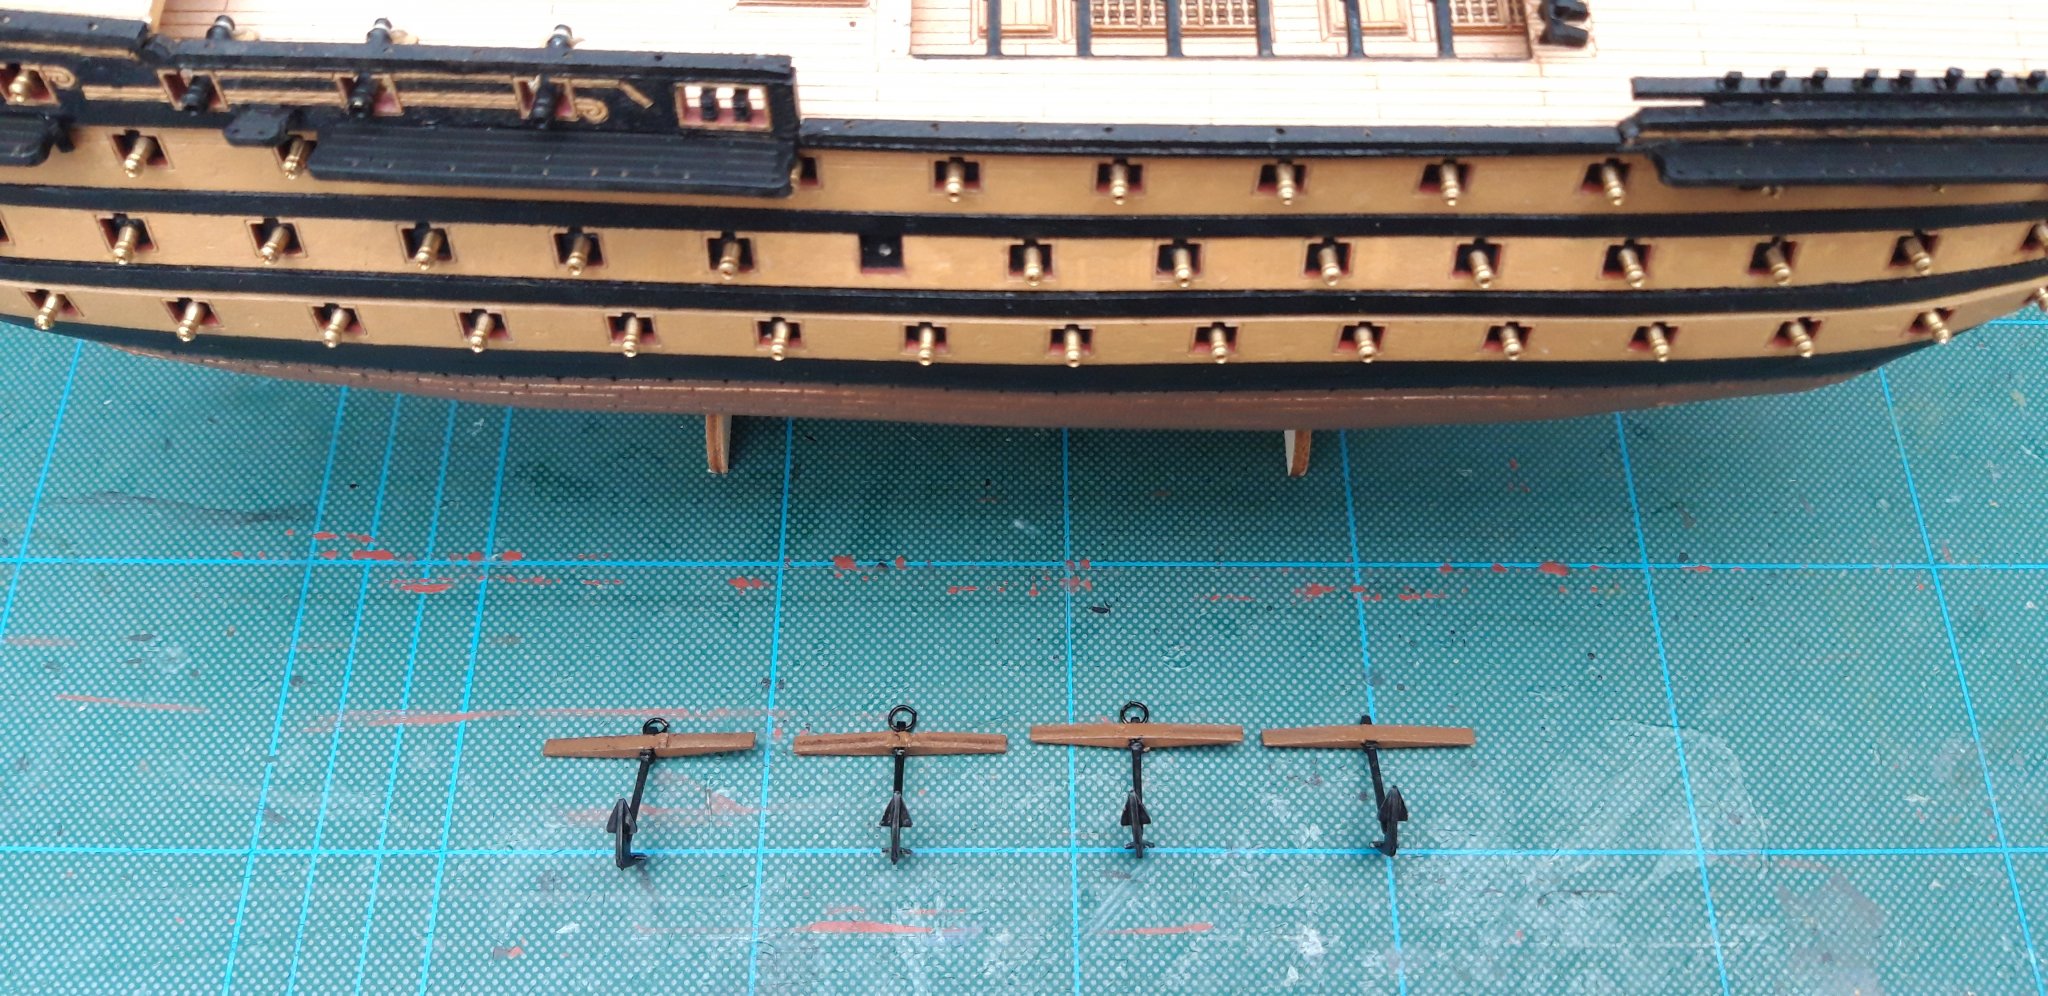
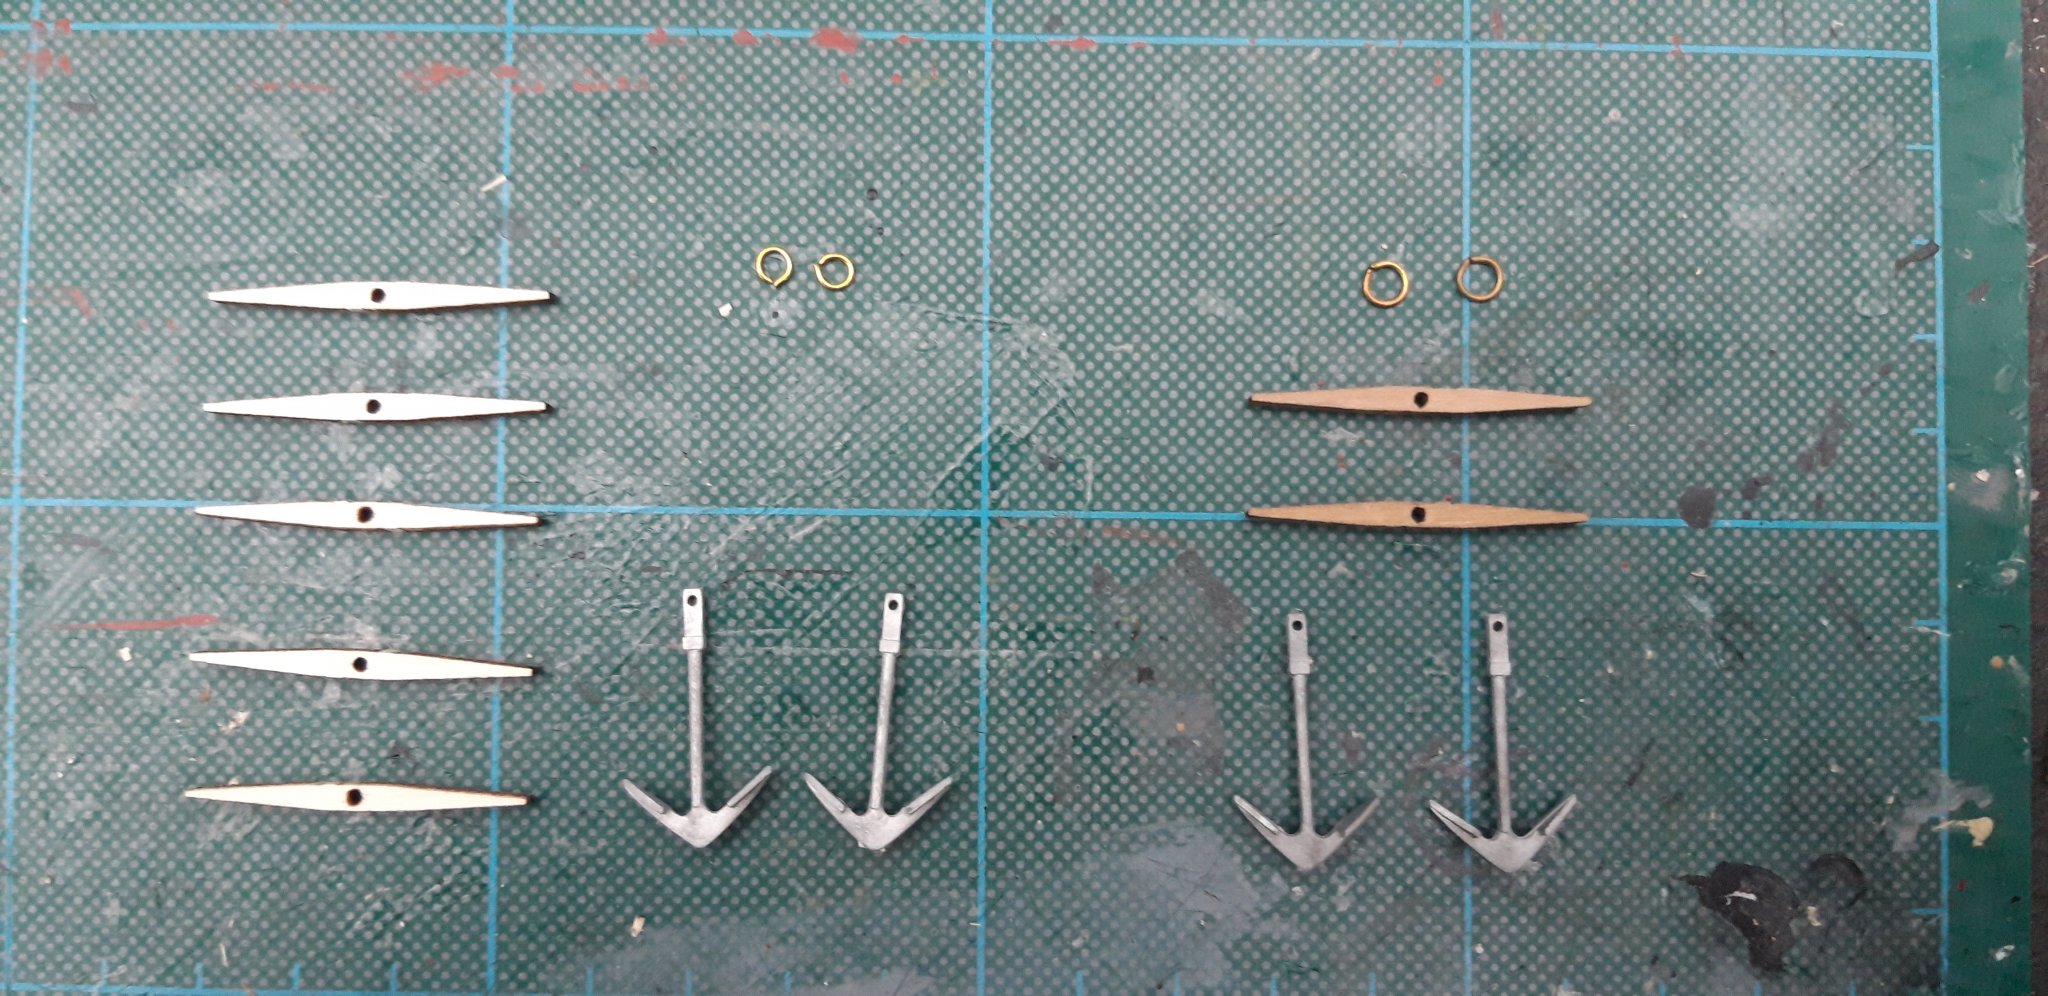
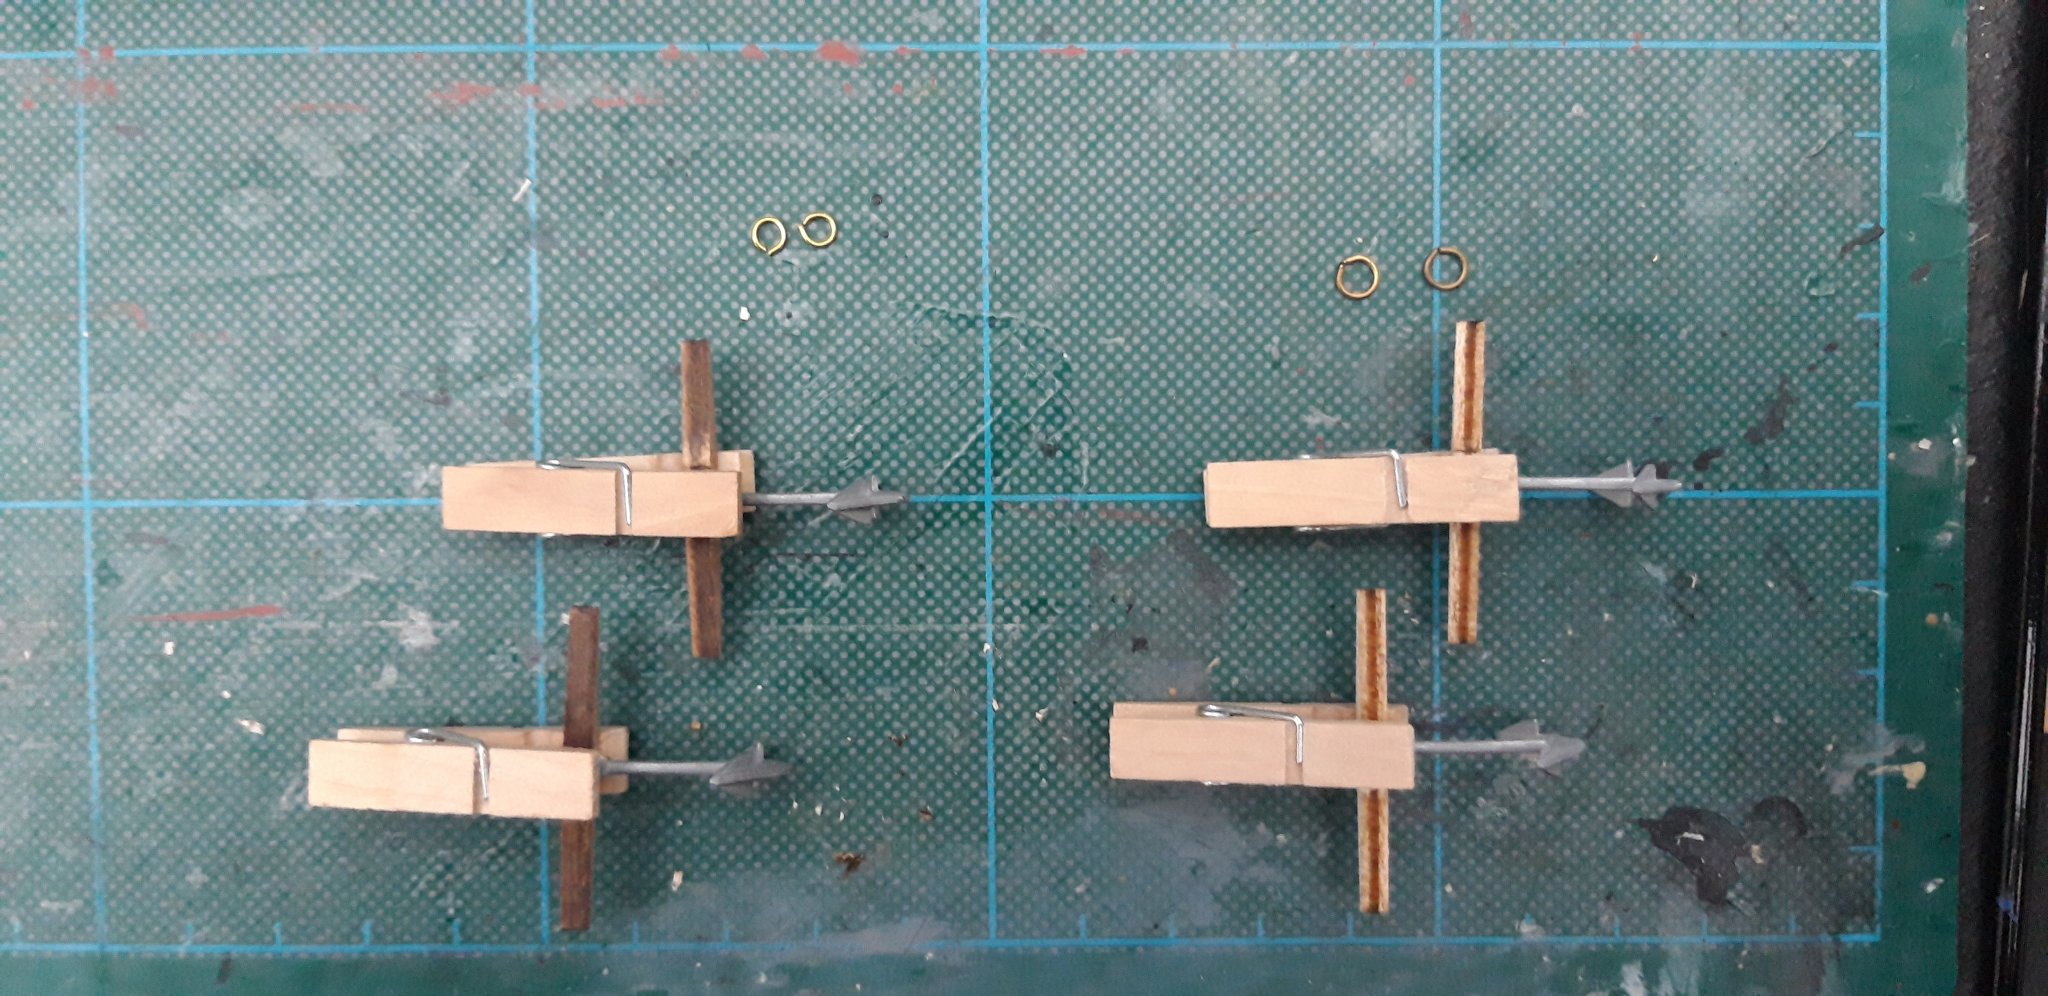
I also worked on the anchors, the left hand pair came with the kit, the right l purchased as extra as l think l will want four on the finished build.

Impossible to fit the anchors through the pre drilled holes so l opened them up and inserted them from the side. Should be fine but only time will tell.
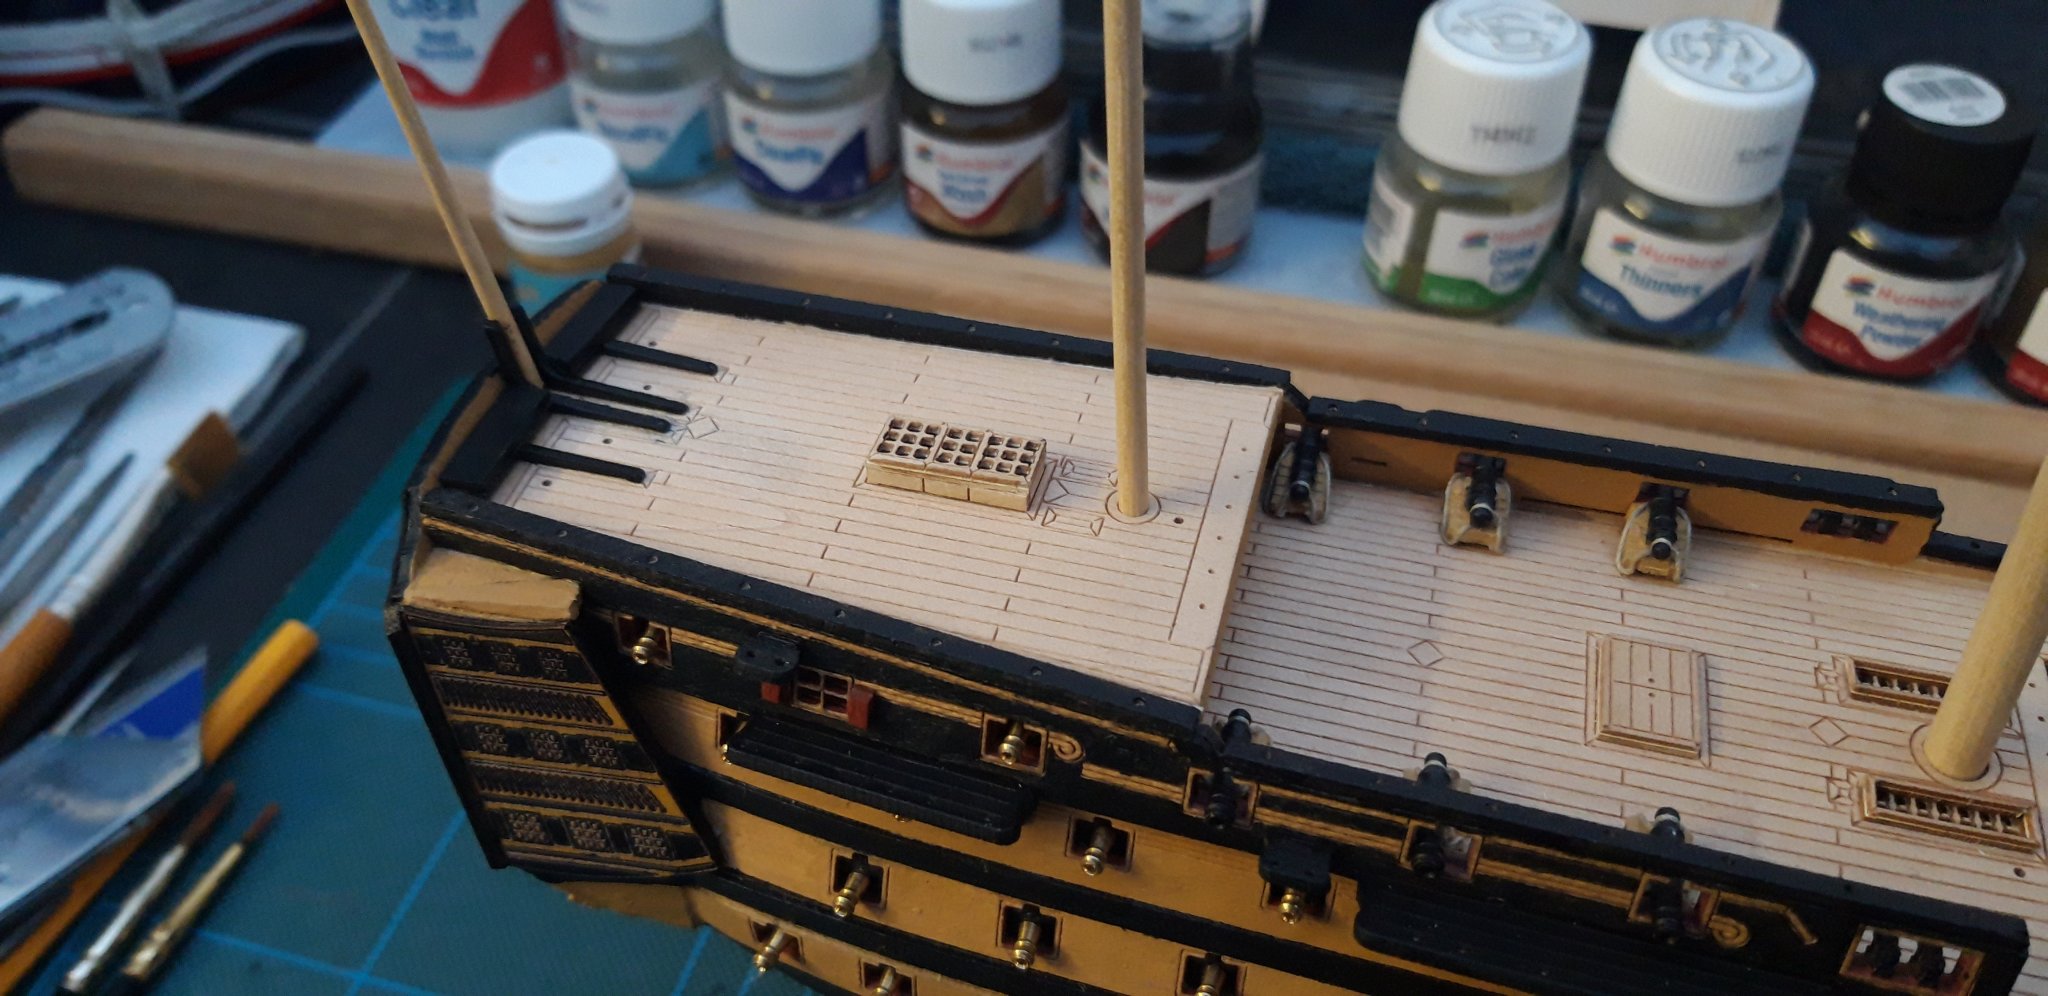
A little more work on the Stern which l think went quite well. I am now at the stage where my natural clumsiness could cause me serious problems.
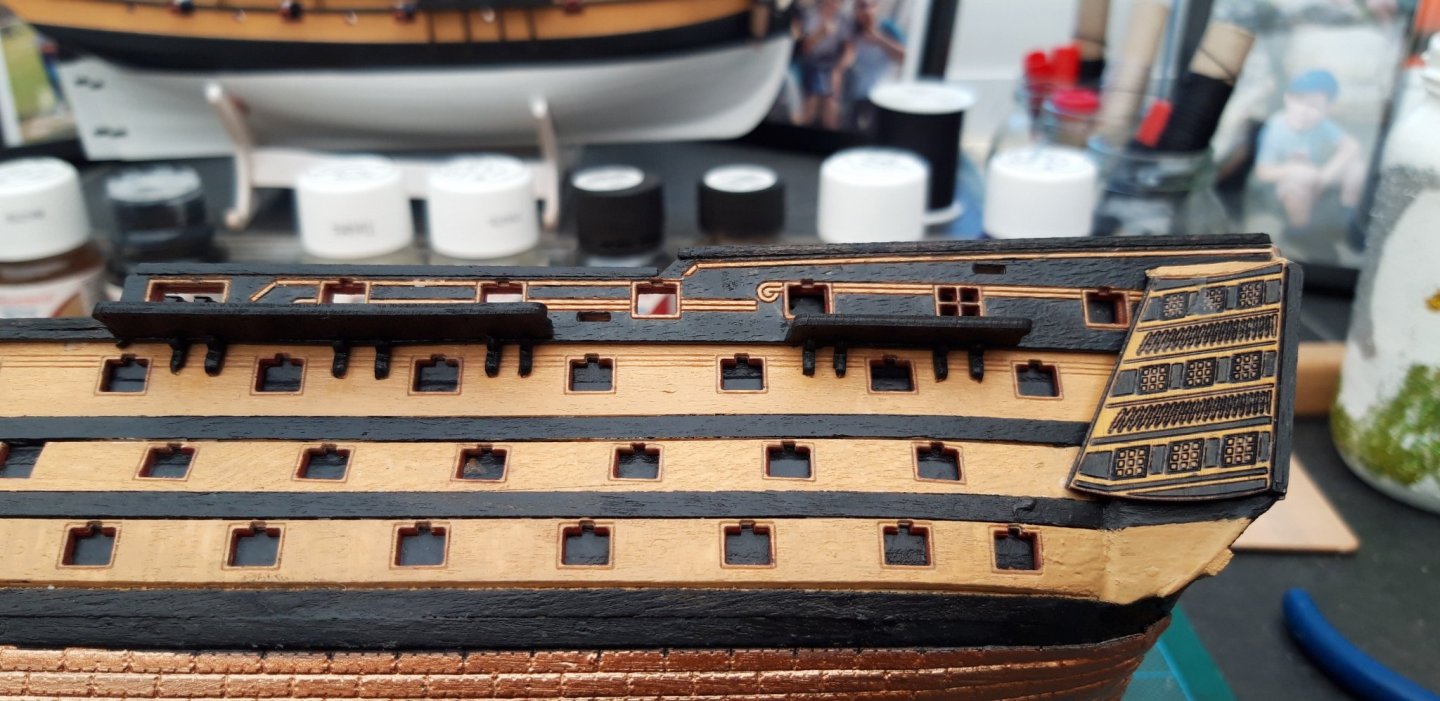
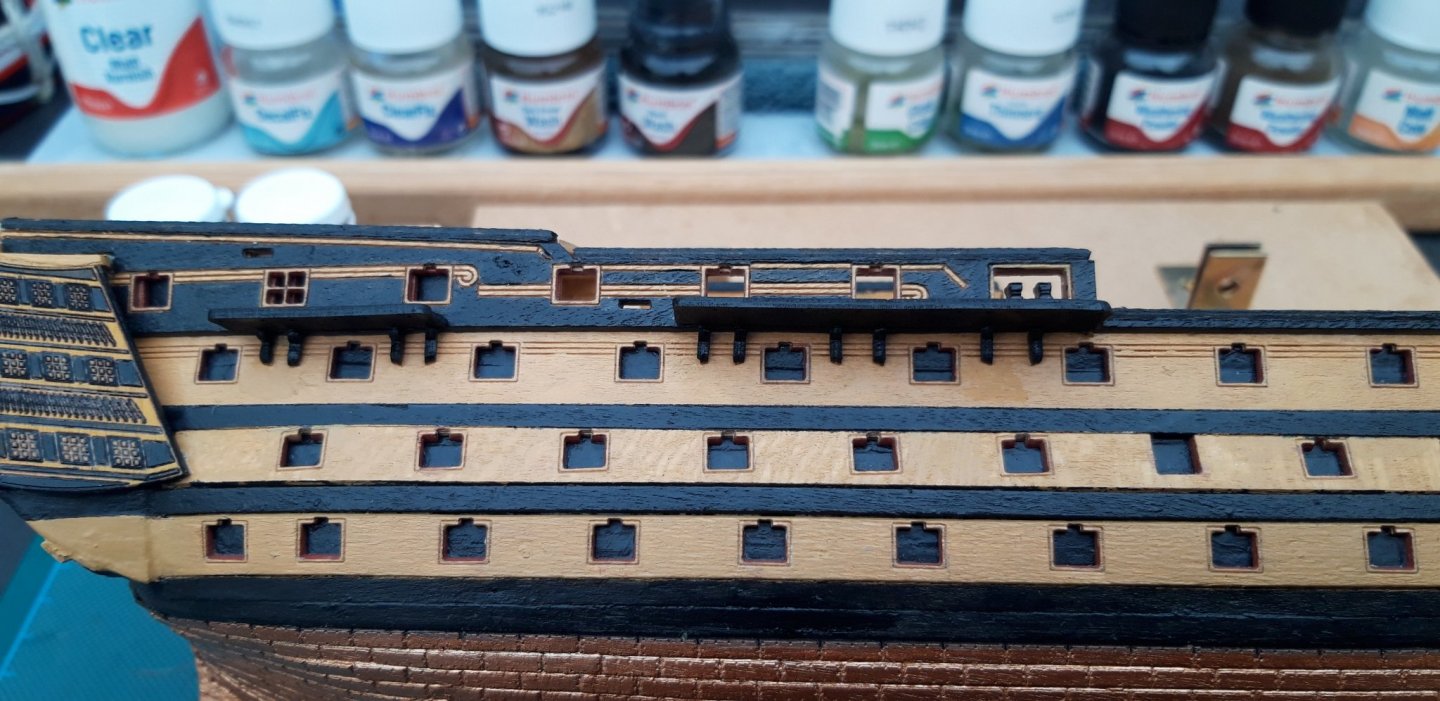
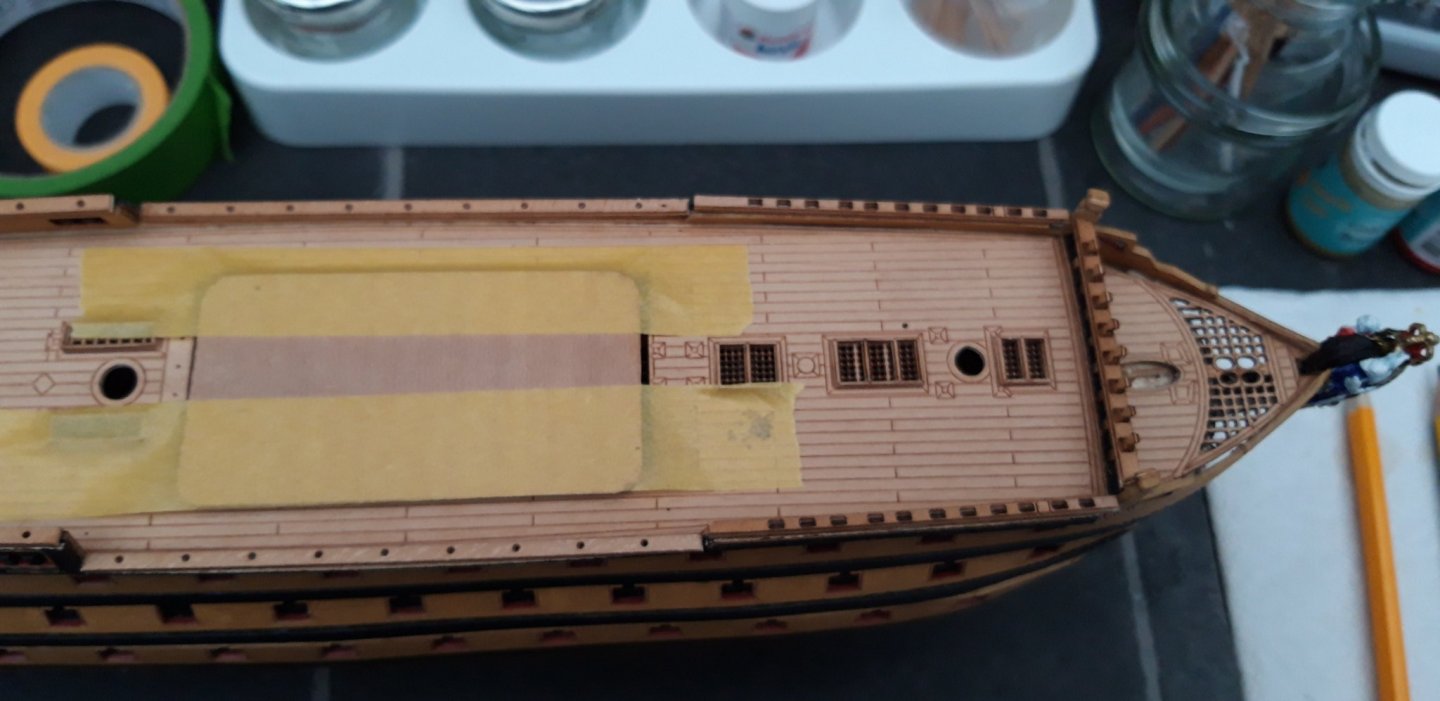
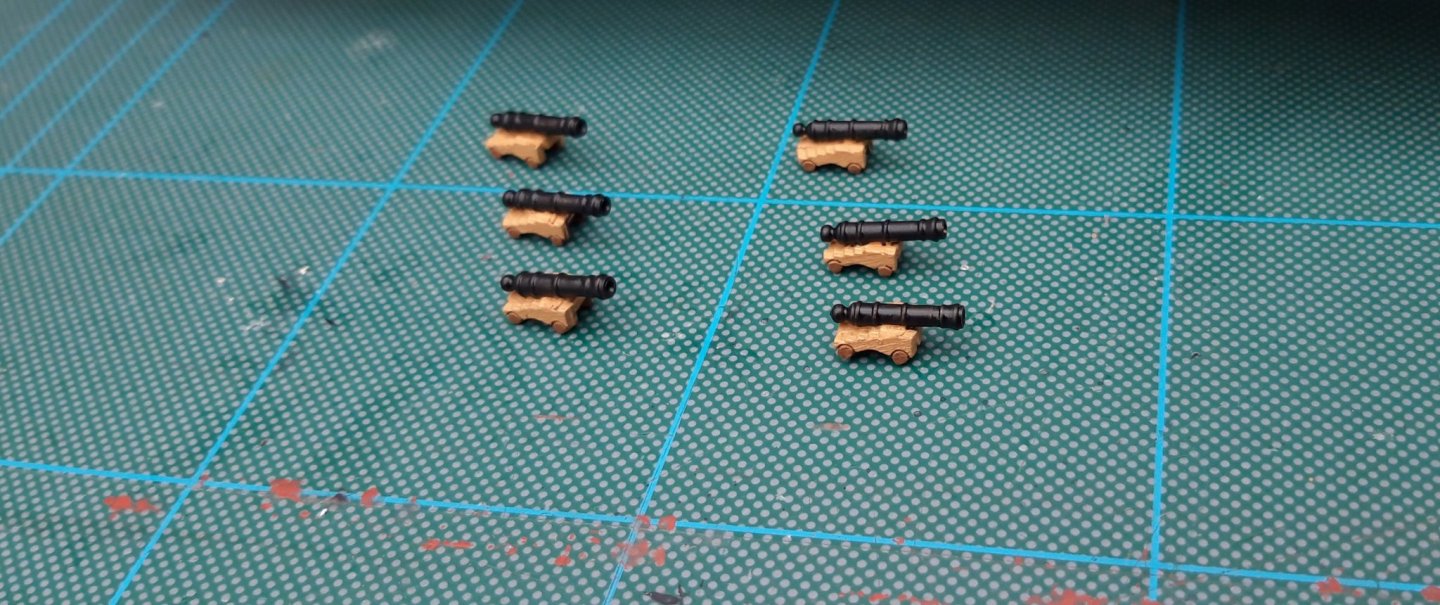
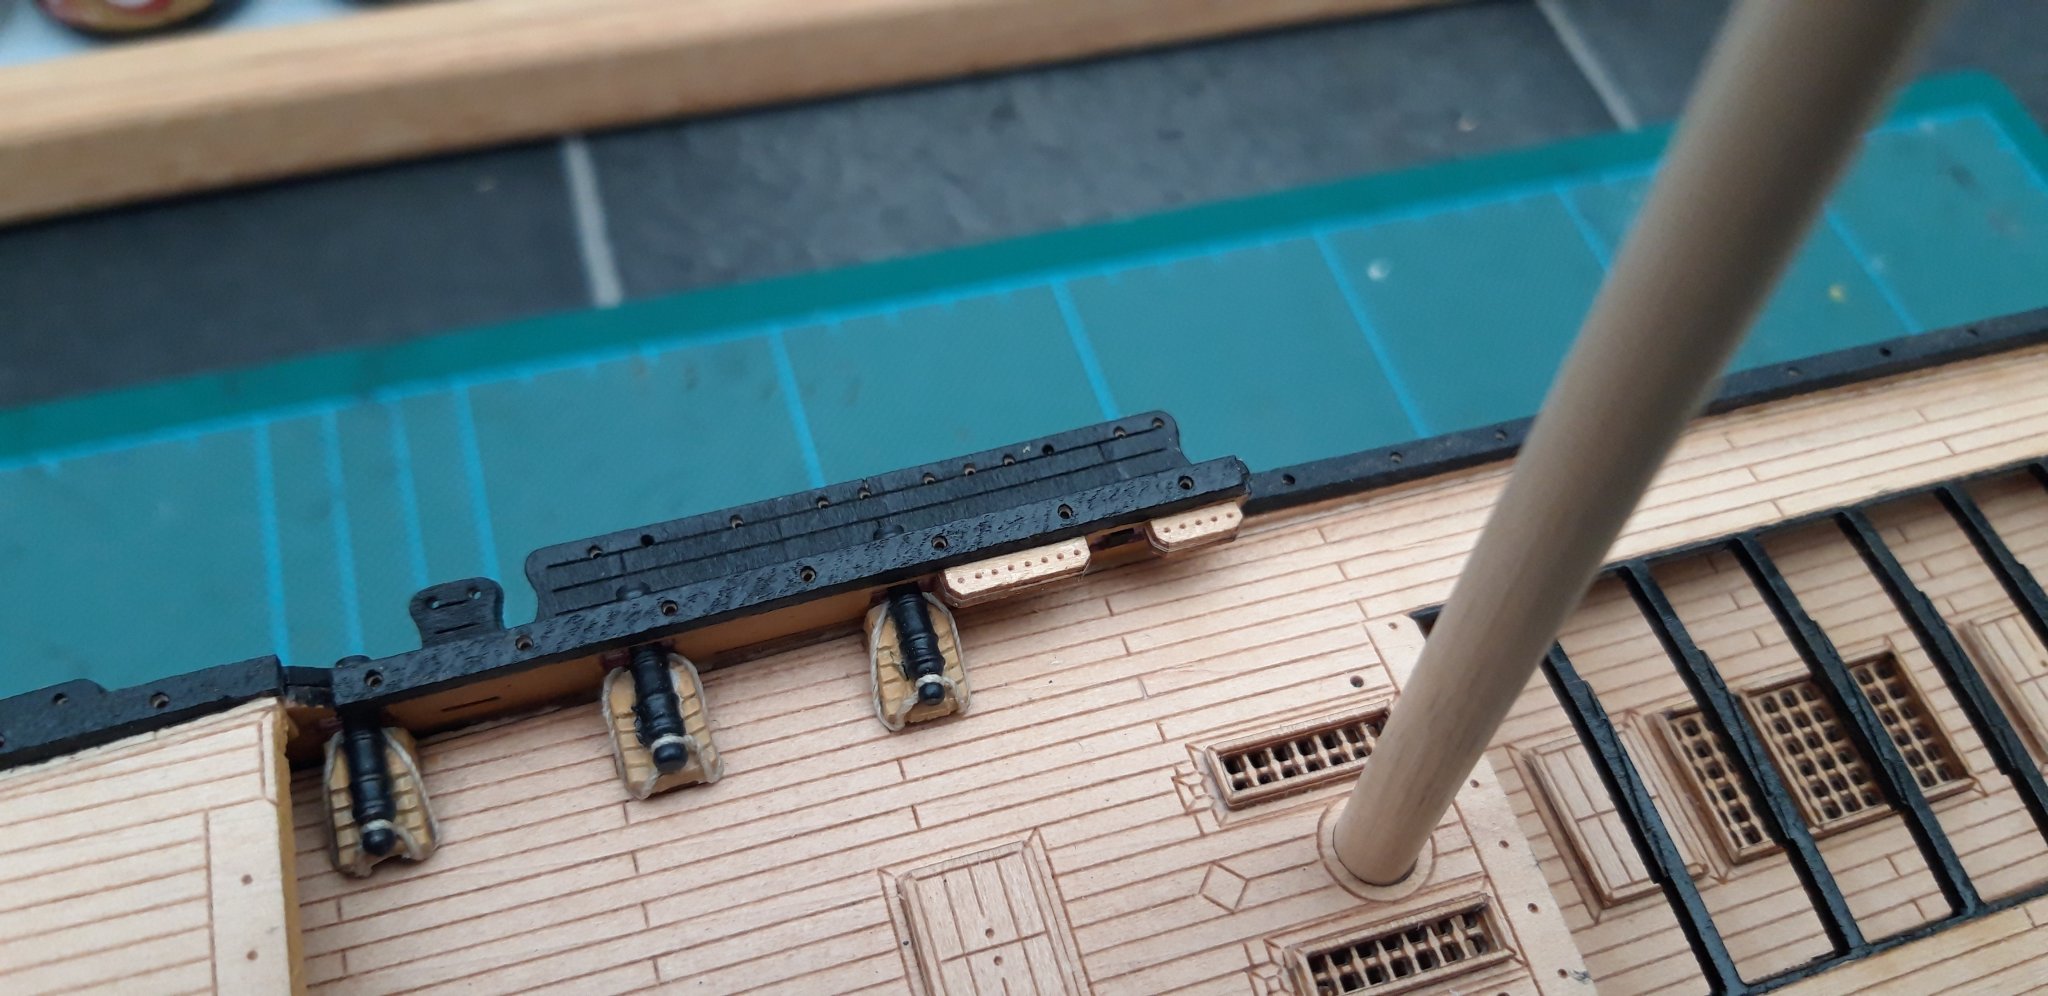
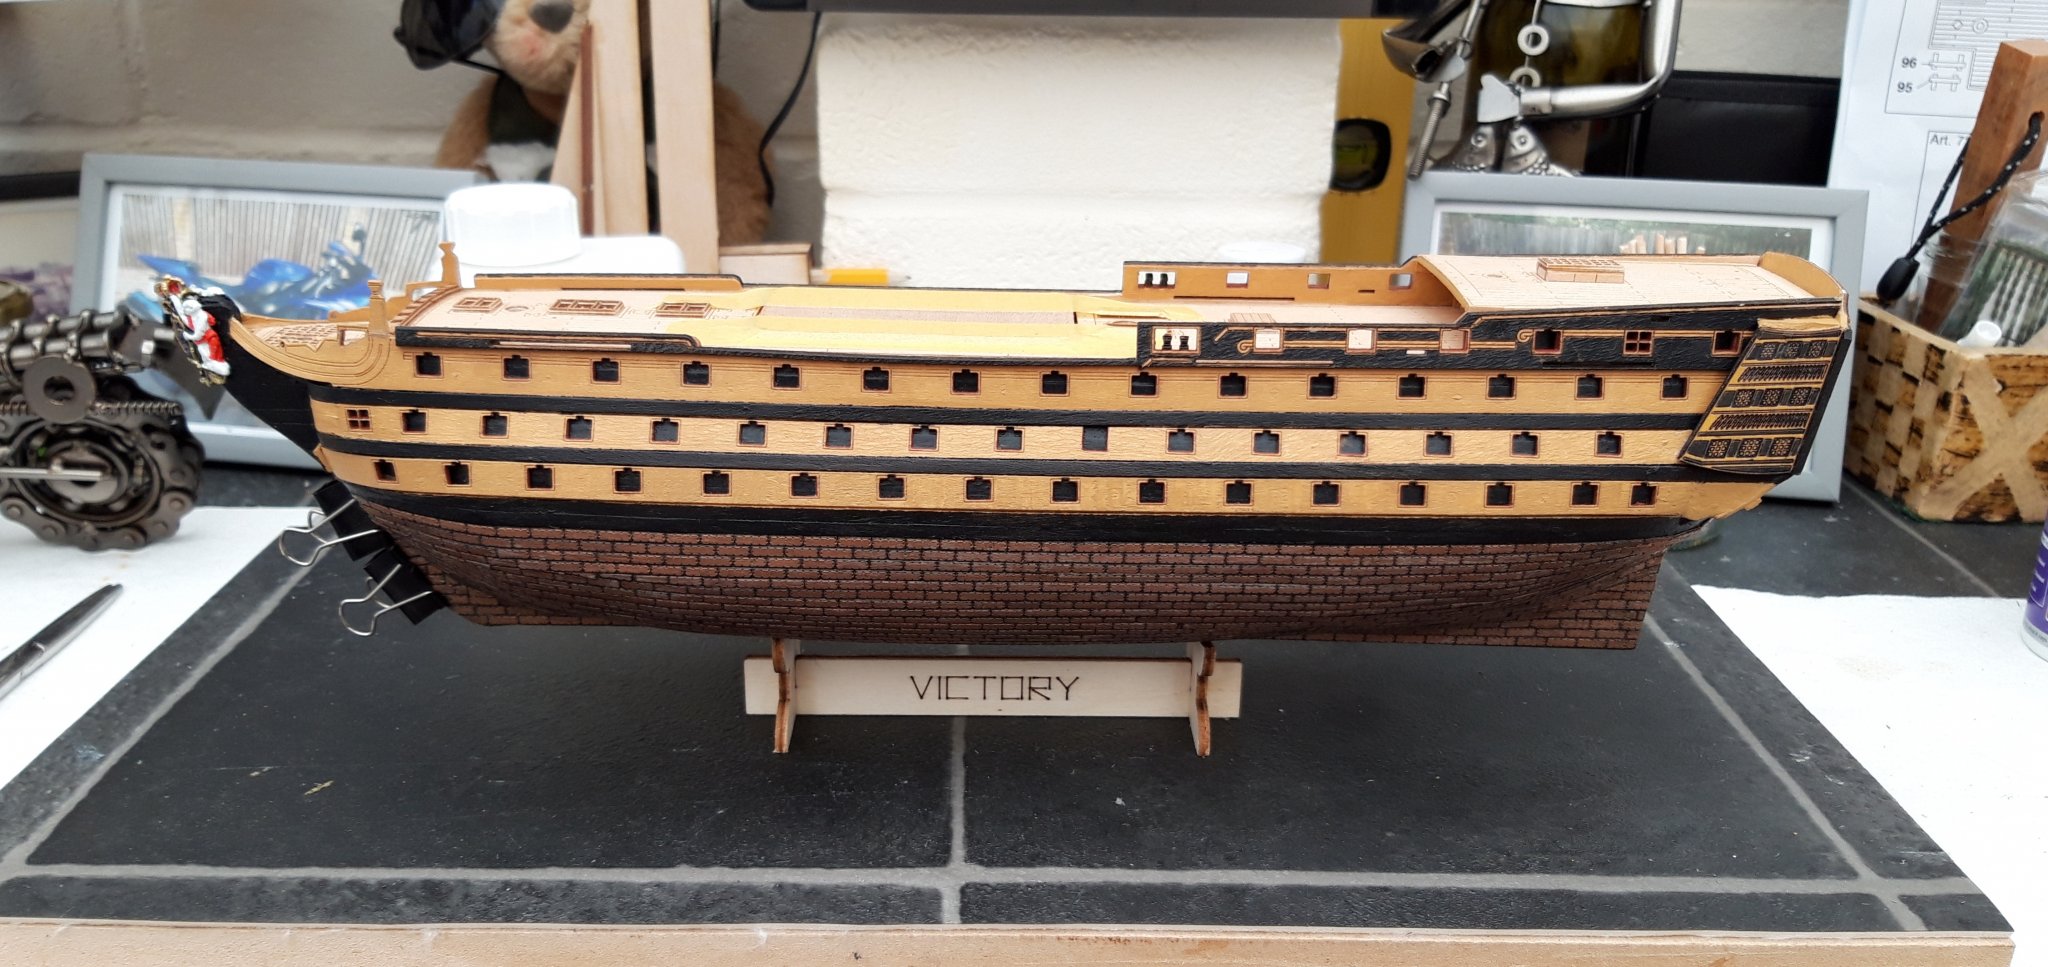
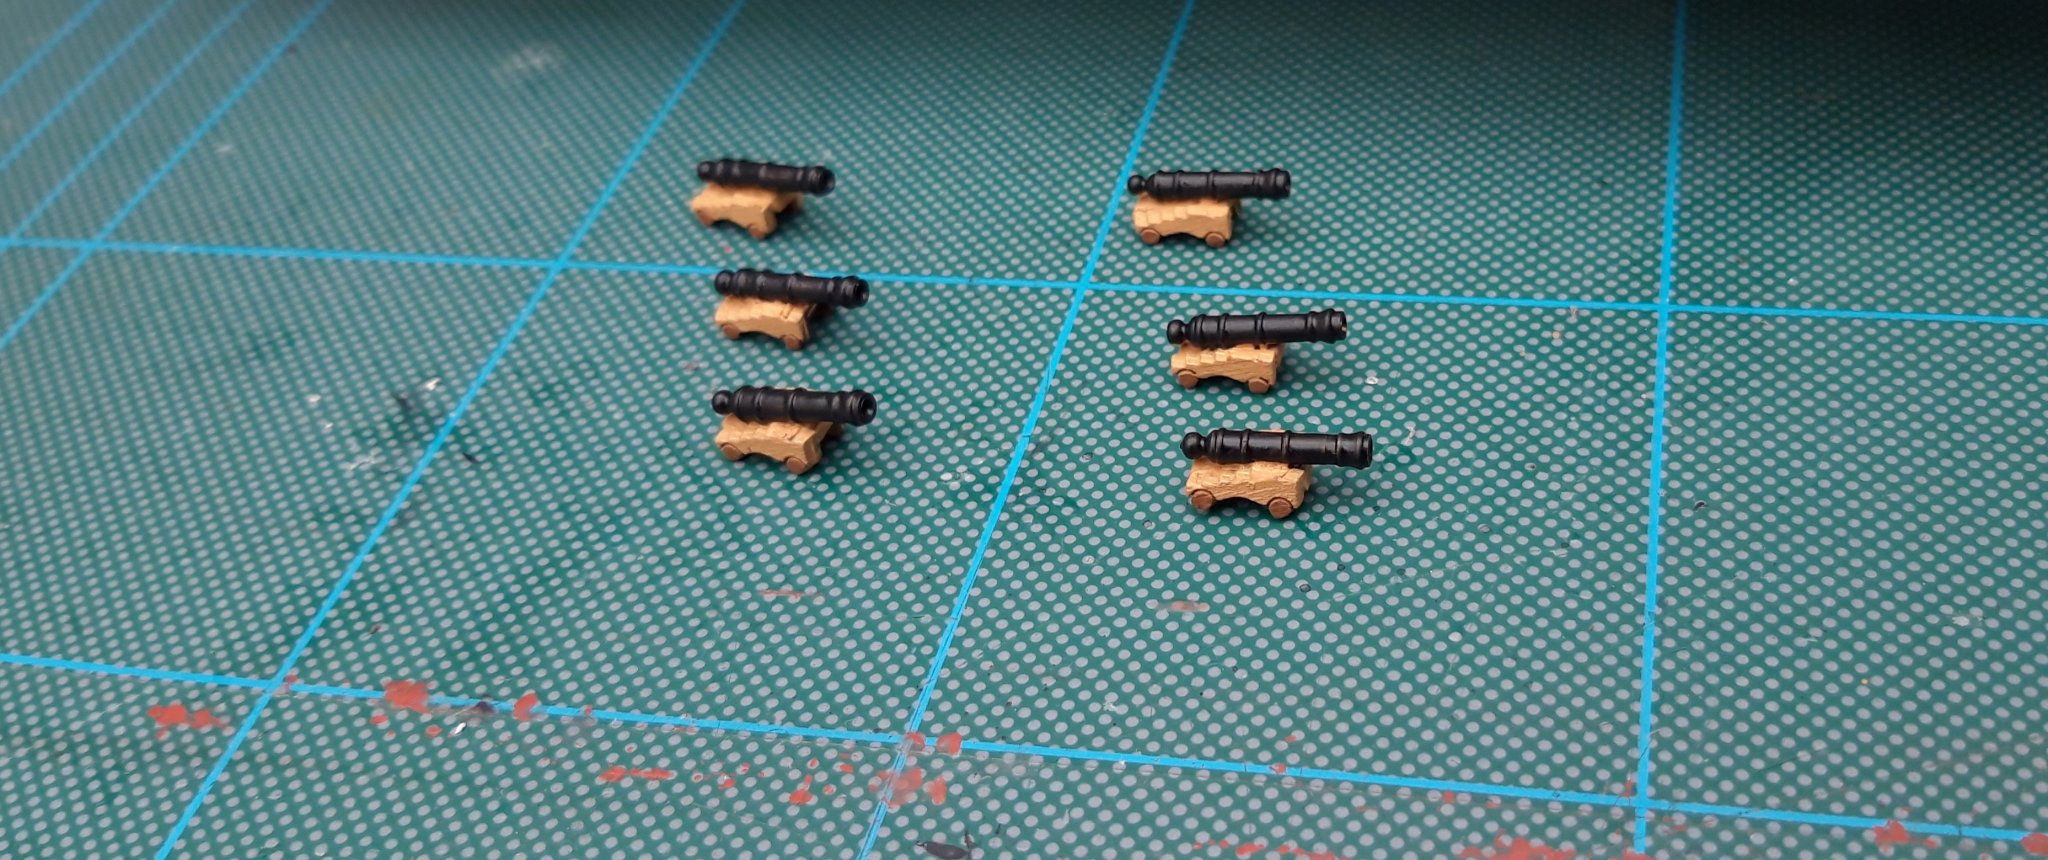
And here we are at my conundrum, do l paint the cannons black or leave them as is (just black down the barrels) l think they look great as is however, l have already painted the cannons on the Quarter deck black..... l am not sure.
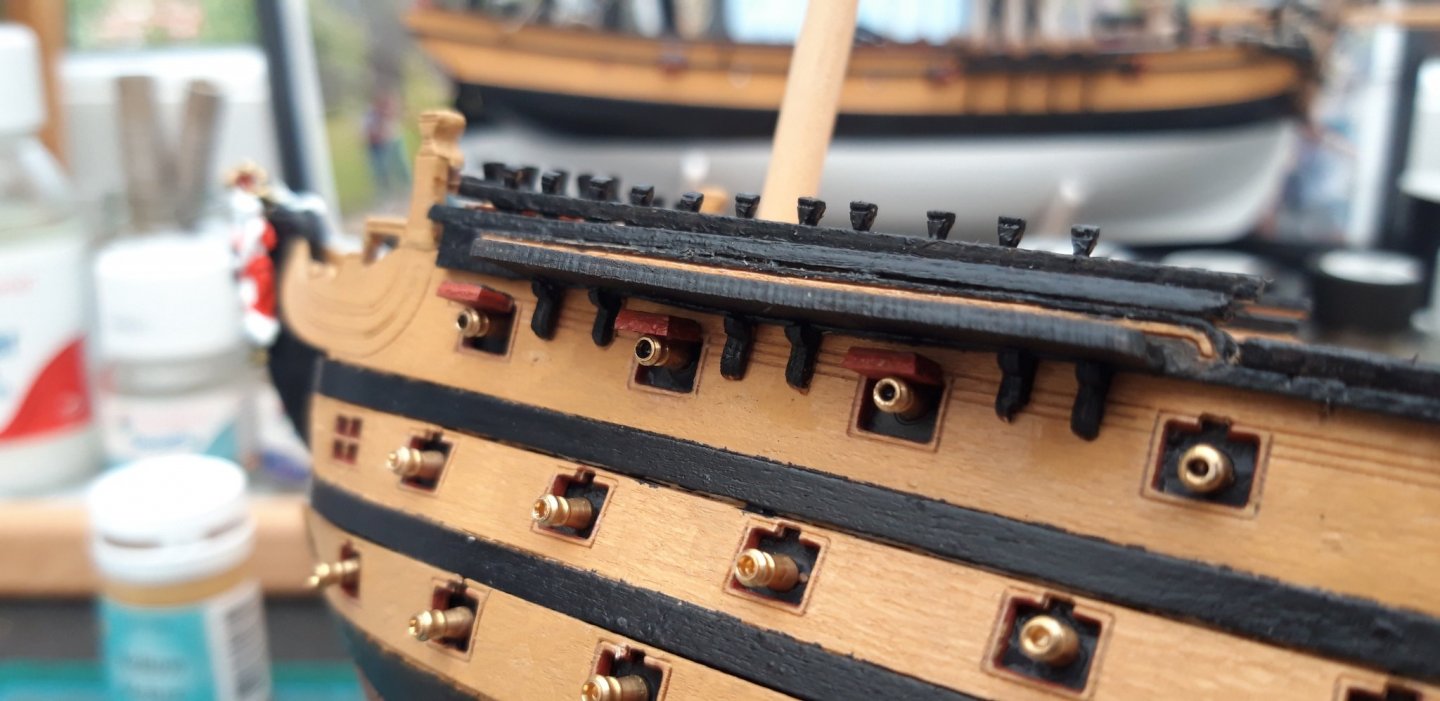
I have done 3 to see what they are like as is, l must make a decision before l can progress,
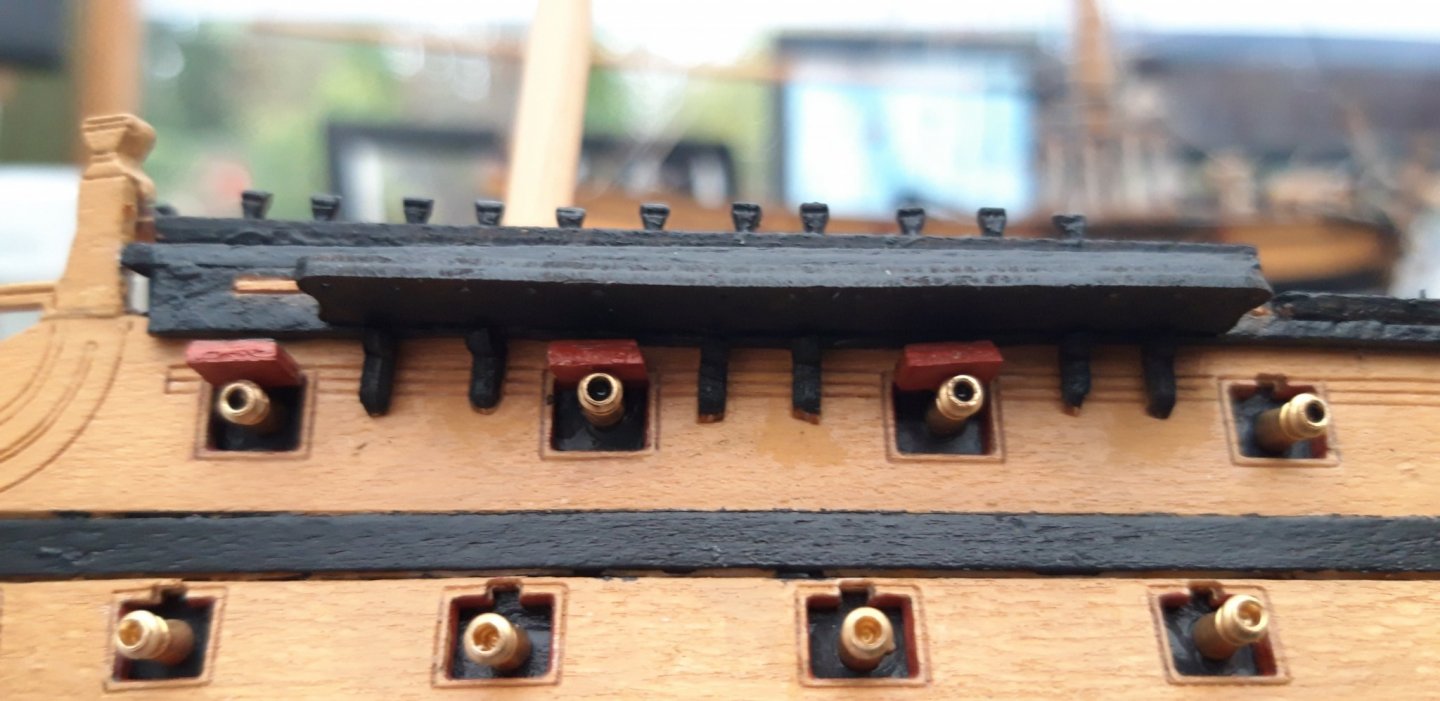
as l don't want to paint the cannons after all the hatches are fitted.

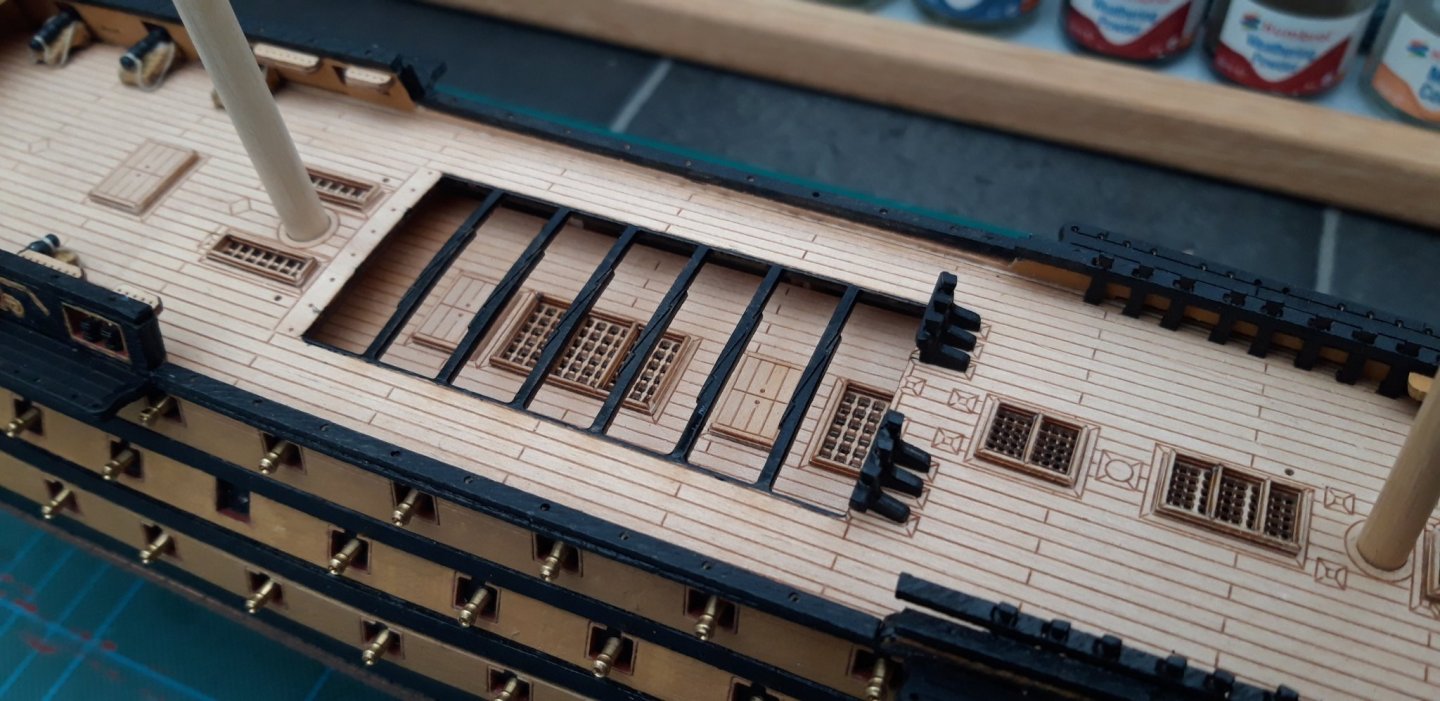
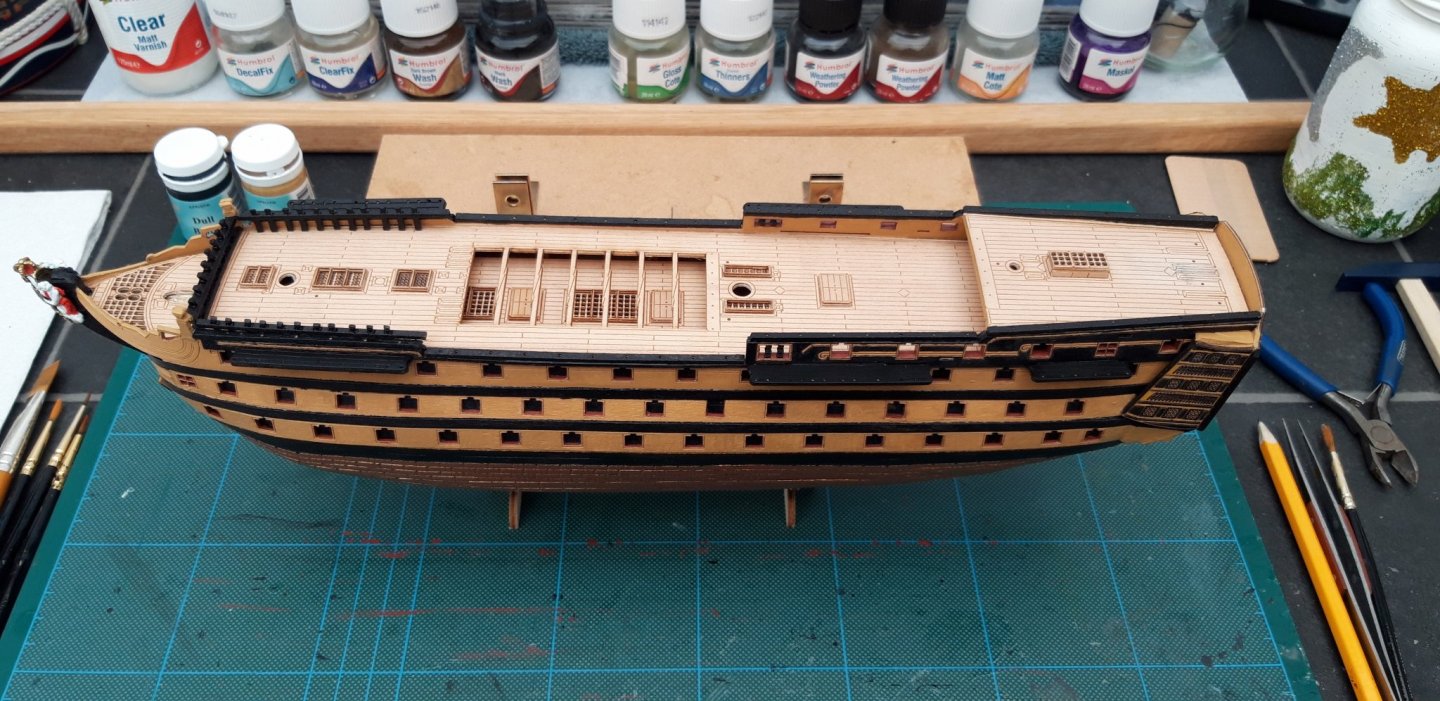
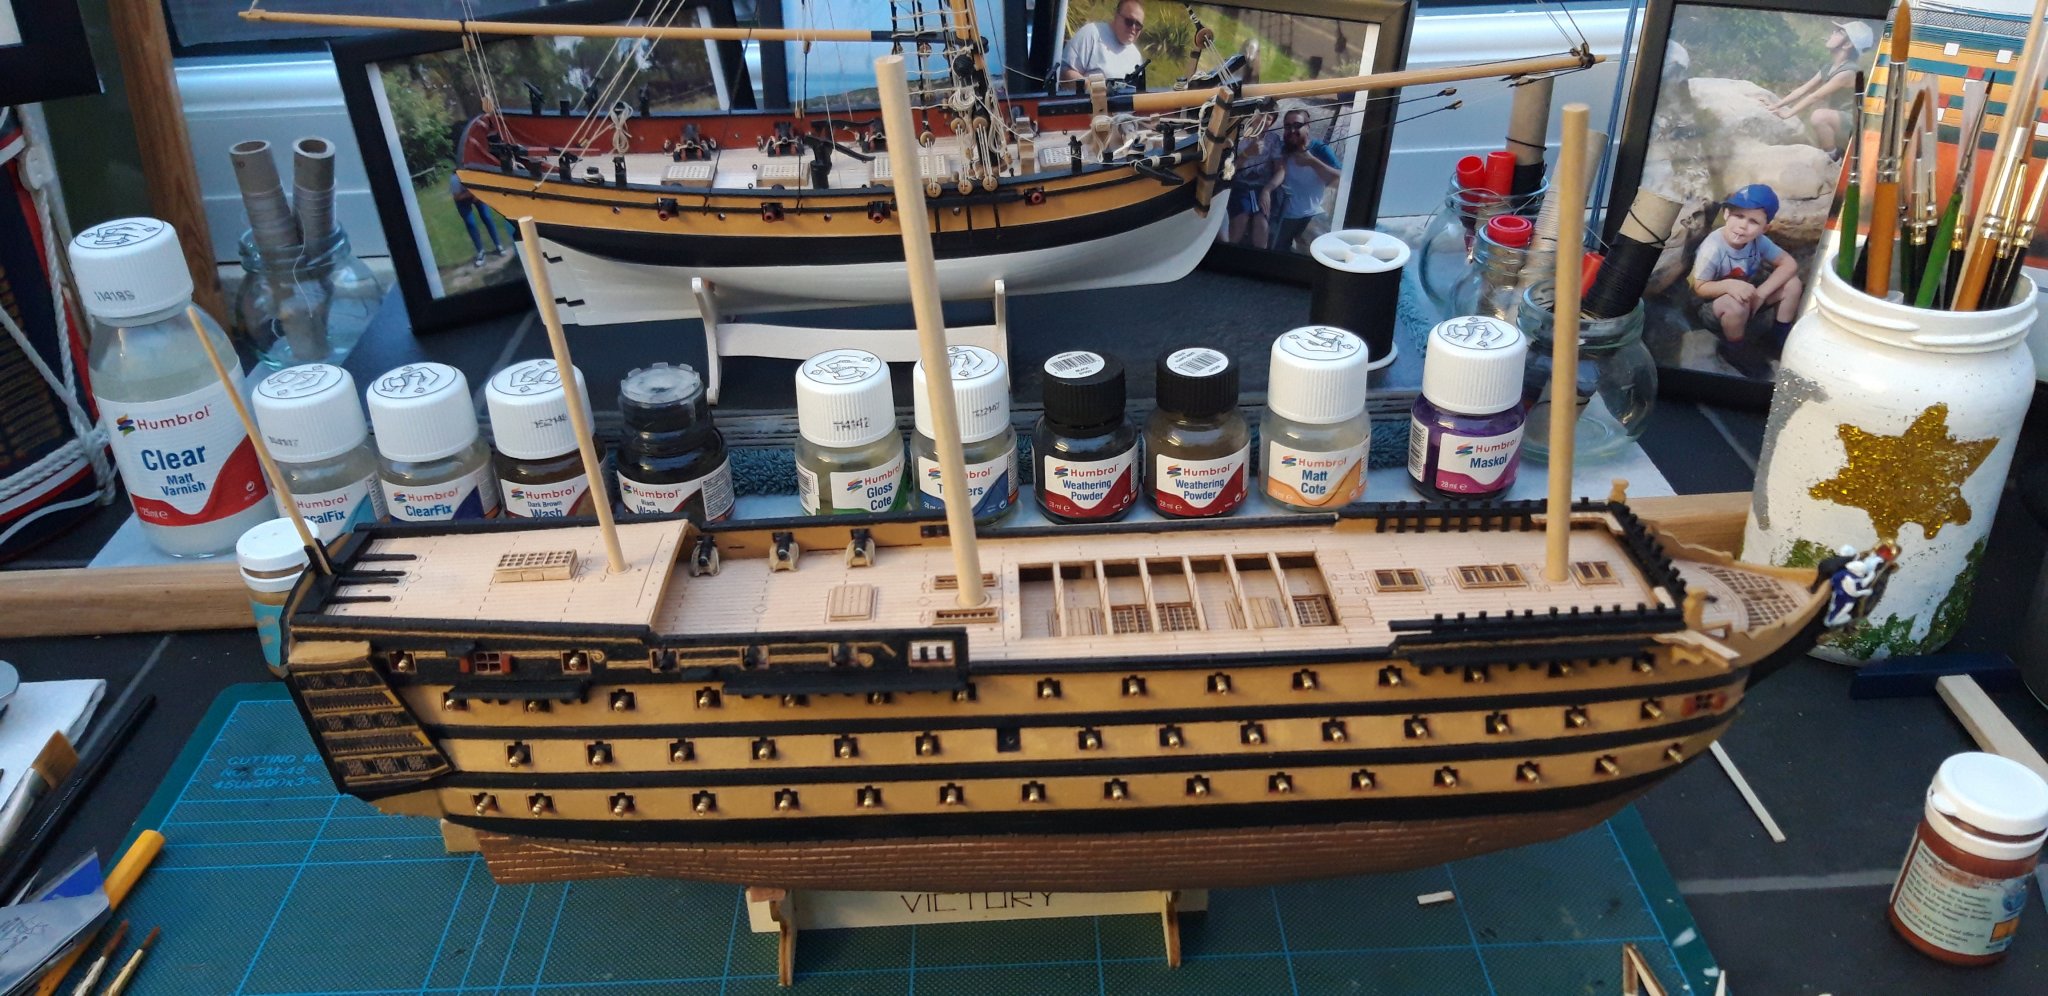
Here is where I am now, the masts are dry fitted. They are cut to length but not yet shaped/tapered.

l think that on my next session l shall continue with the deck fittings and ponder over the problem.
Best wishes as always,
The Lazy Saint.
Session. Time. Total.
25. 4 hrs. 93 hrs.
- GrandpaPhil, Retired guy, Dubz and 1 other
-
4
-
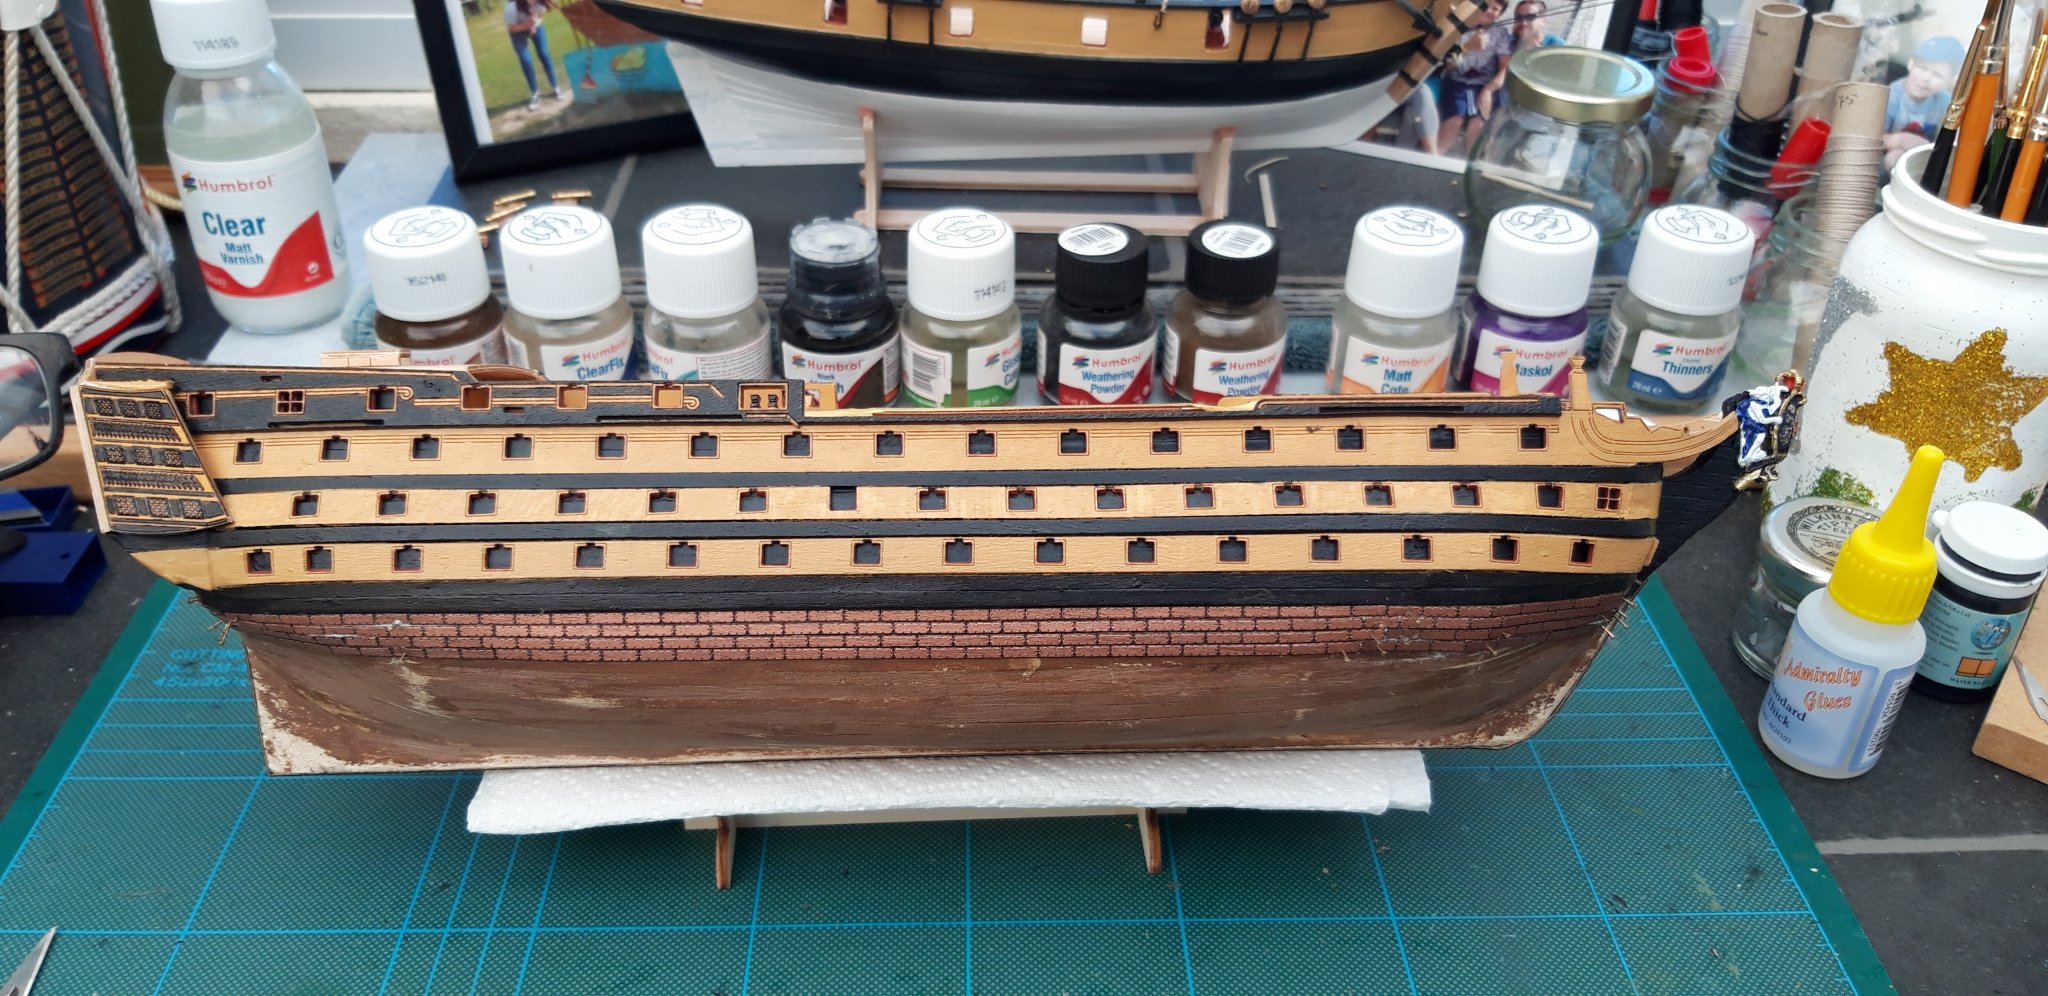
Hi all,
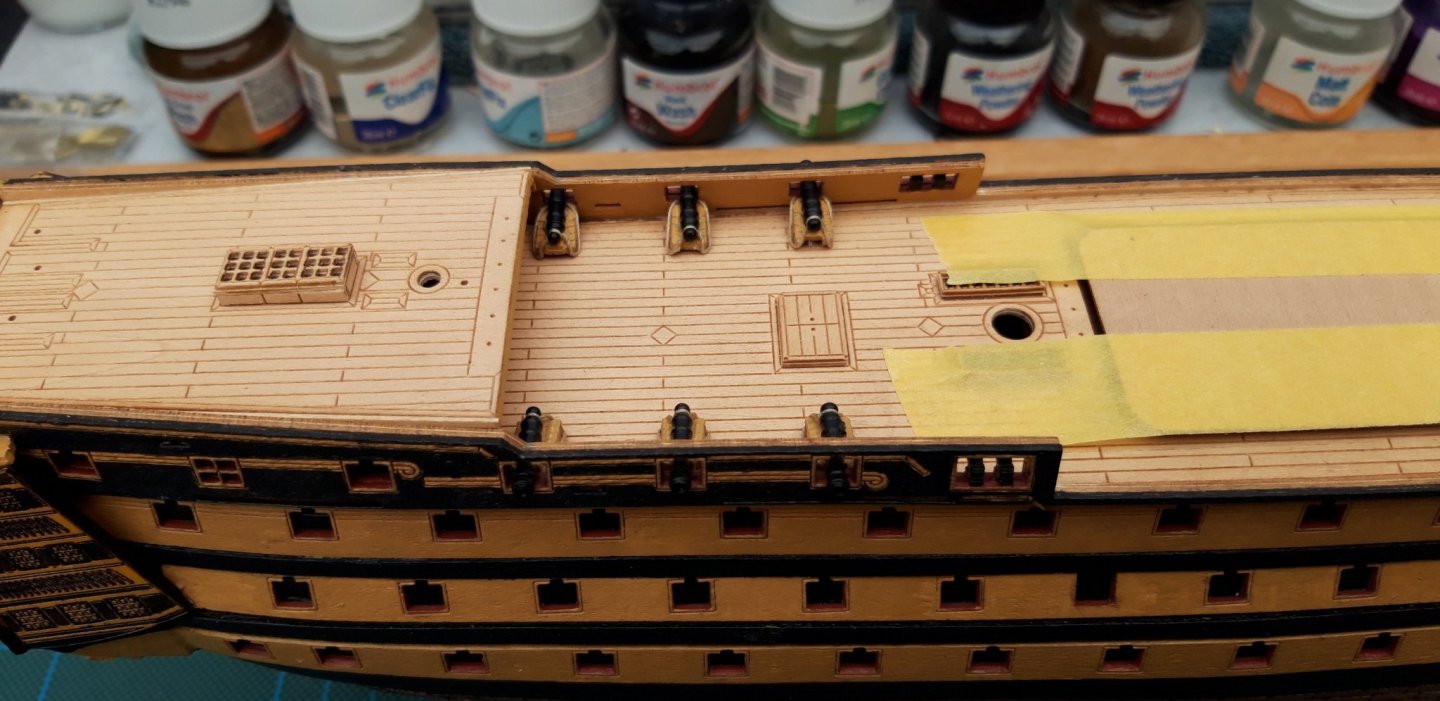
Just a short session this morning. I fitted the Port side guns and coated my copper with mat varnish.

Best wishes as always,
The Lazy Saint.
Session. Time. Total.
24. 2 hrs. 89 hrs.
- Jonesey, Retired guy, Edwardkenway and 2 others
-
5
-
Wow, you have been busy since I last popped by. Very nice work indeed, well done you.
Best wishes as always,
The Lazy Saint.
- GrandpaPhil and J11
-
2
-
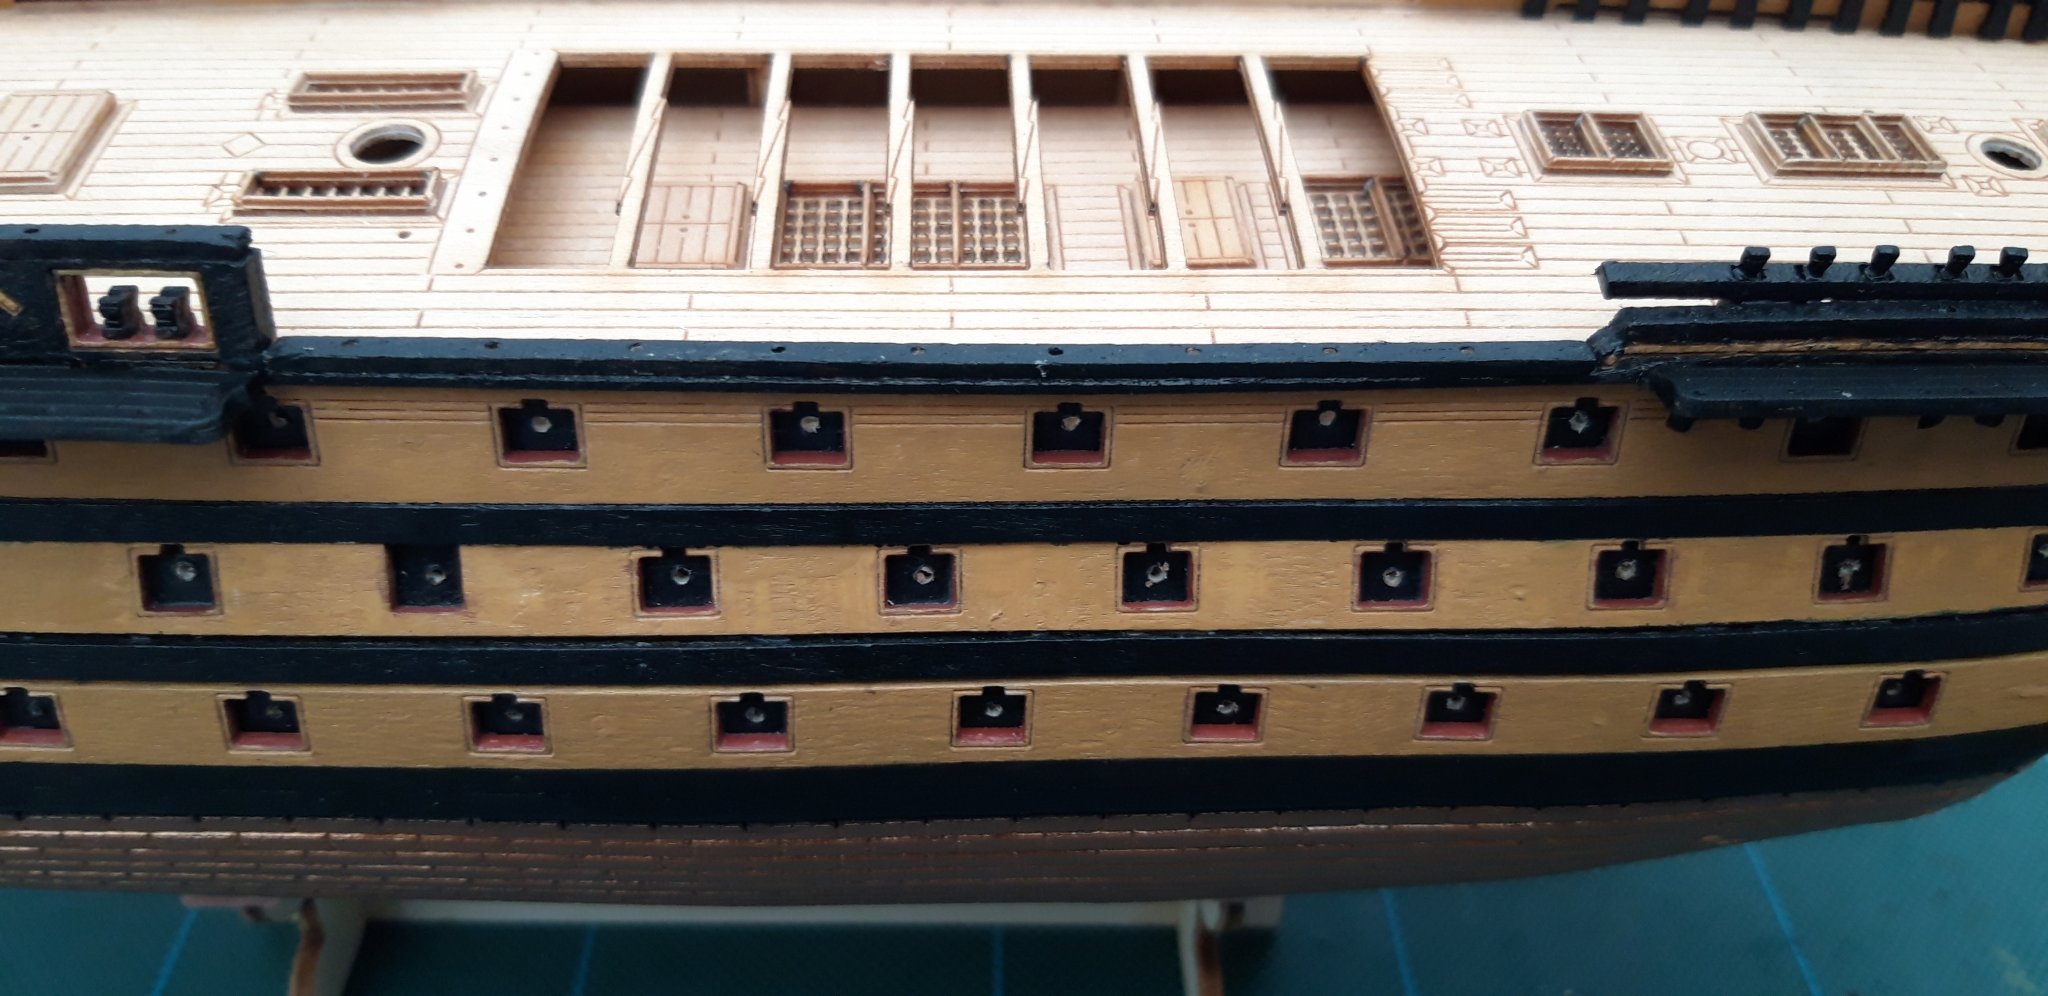
Hi all,
Thank you very much for the kind and encouraging words you guy's, it is really appreciated as always.
I have been having trouble with my internet connection the last few days so l will now cover my last two session in this post. I have seen good progress and am pleased with the way she is taking shape. The instructions are beginning to get more challenging than they were before, l am doing as much head scratching as building at the moment.
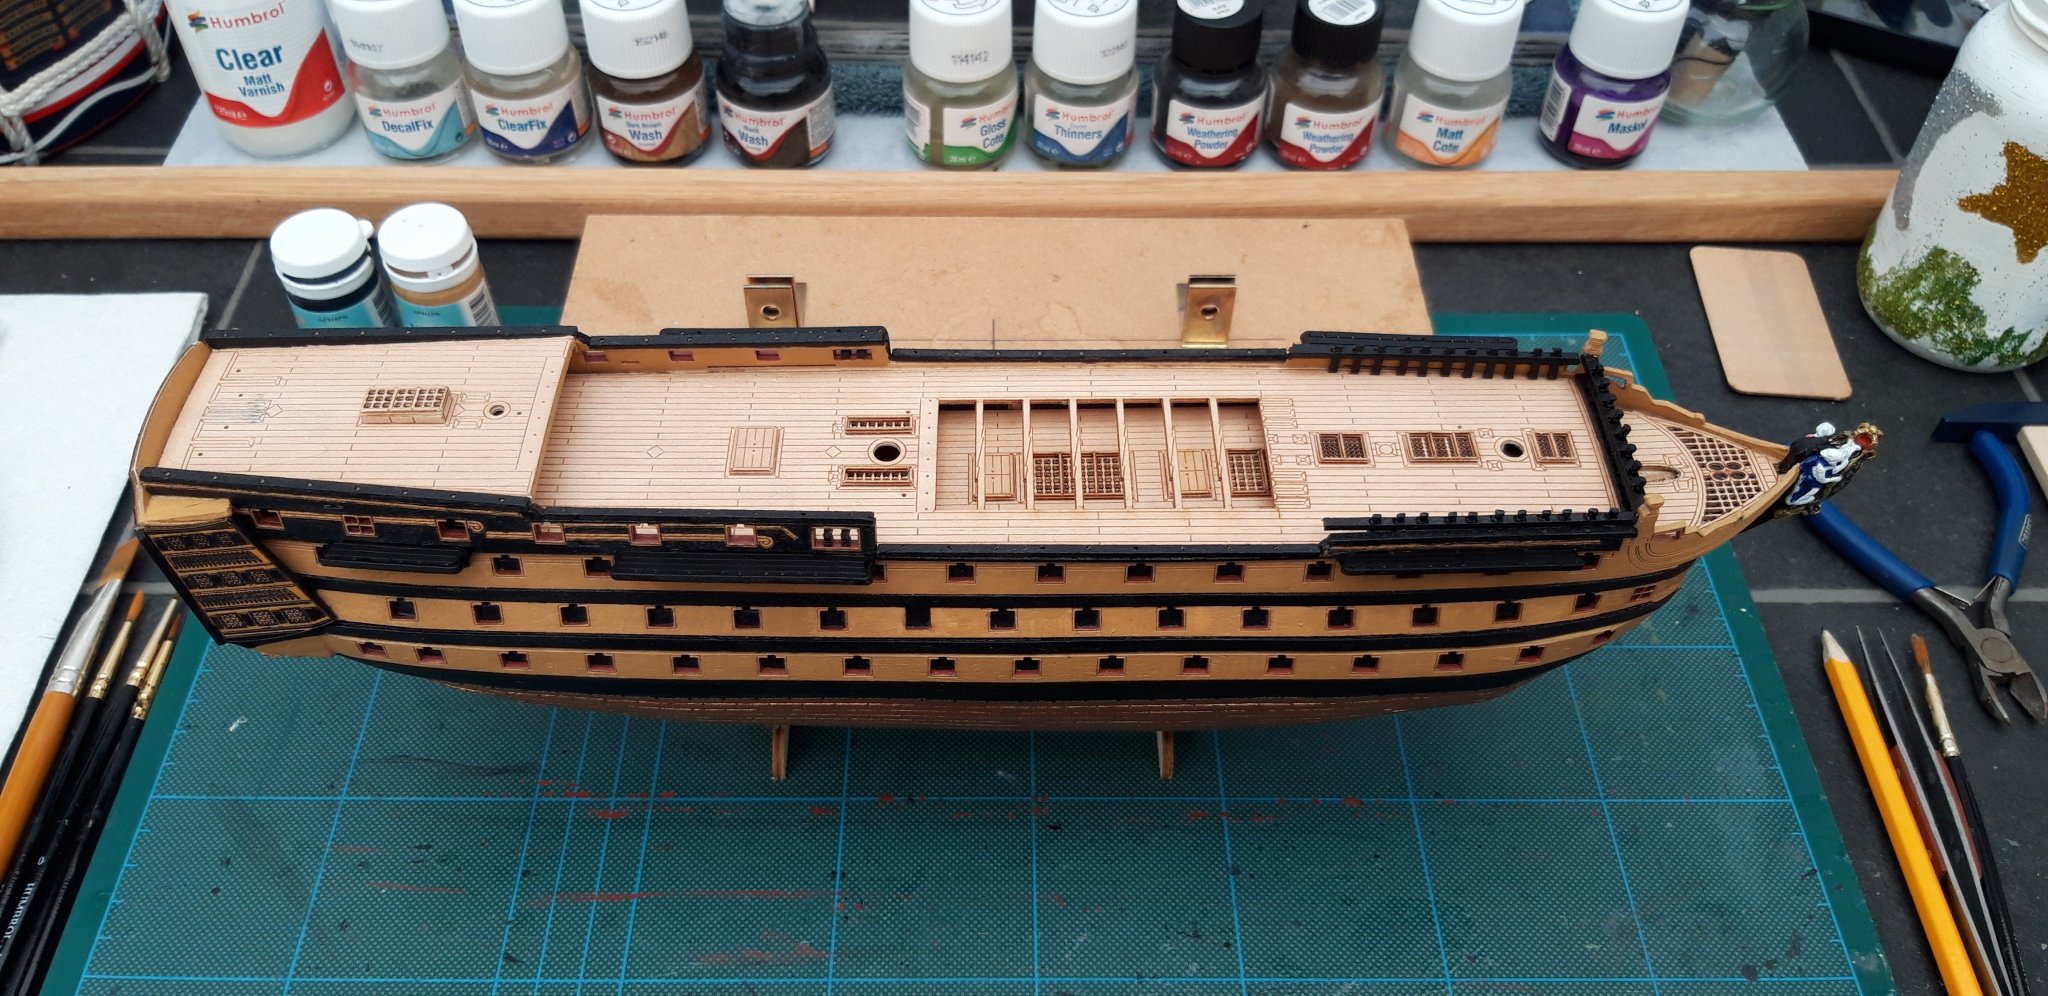
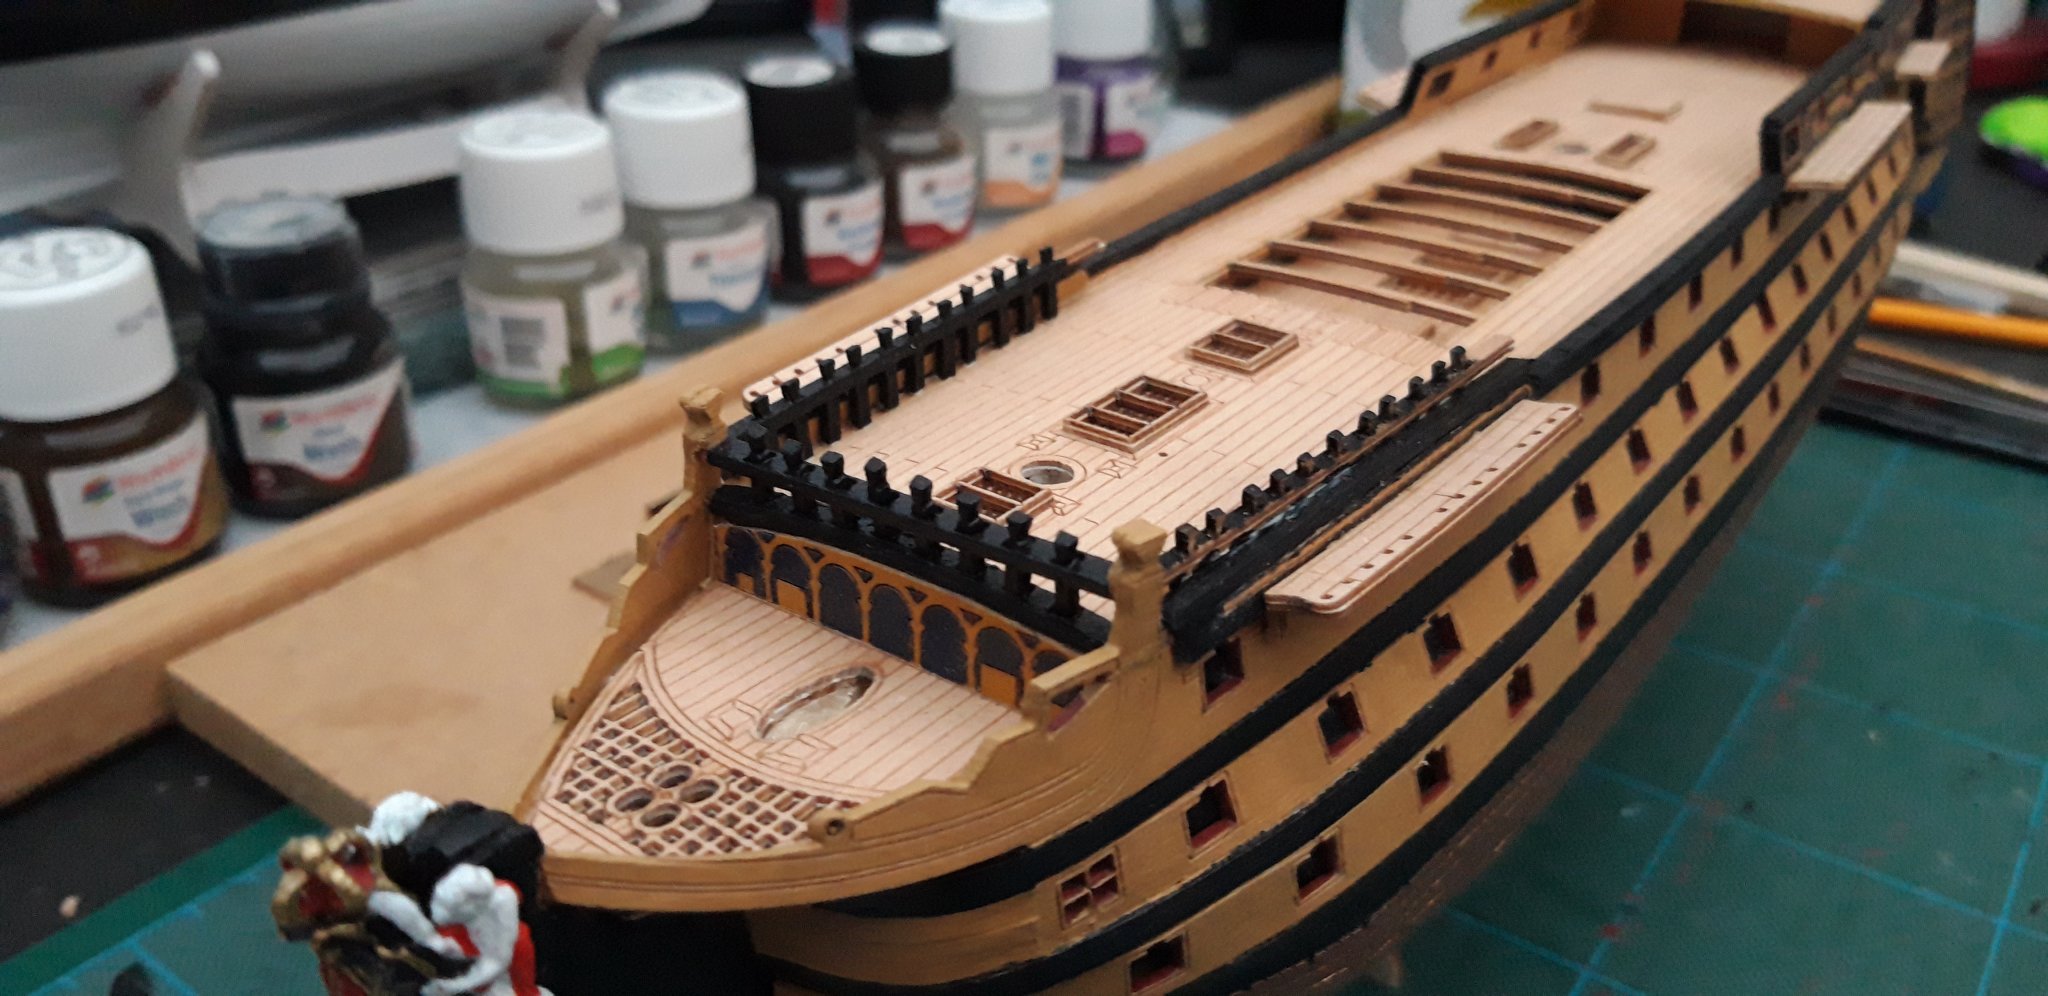
These shots show the timberheads fitted and painted.

The Channel's have also been fitted and are awaiting their black paint.


Black paint applied to the Channel's,

and a touch up around the timberheads.
At this angle you can see the Channel Supporting Brackets, very fiddly but look good.
I have studied the AOTS book and l am not sure they were fitted on the actual ship, is this a case of "poetic license" by Mantua, l wonder.

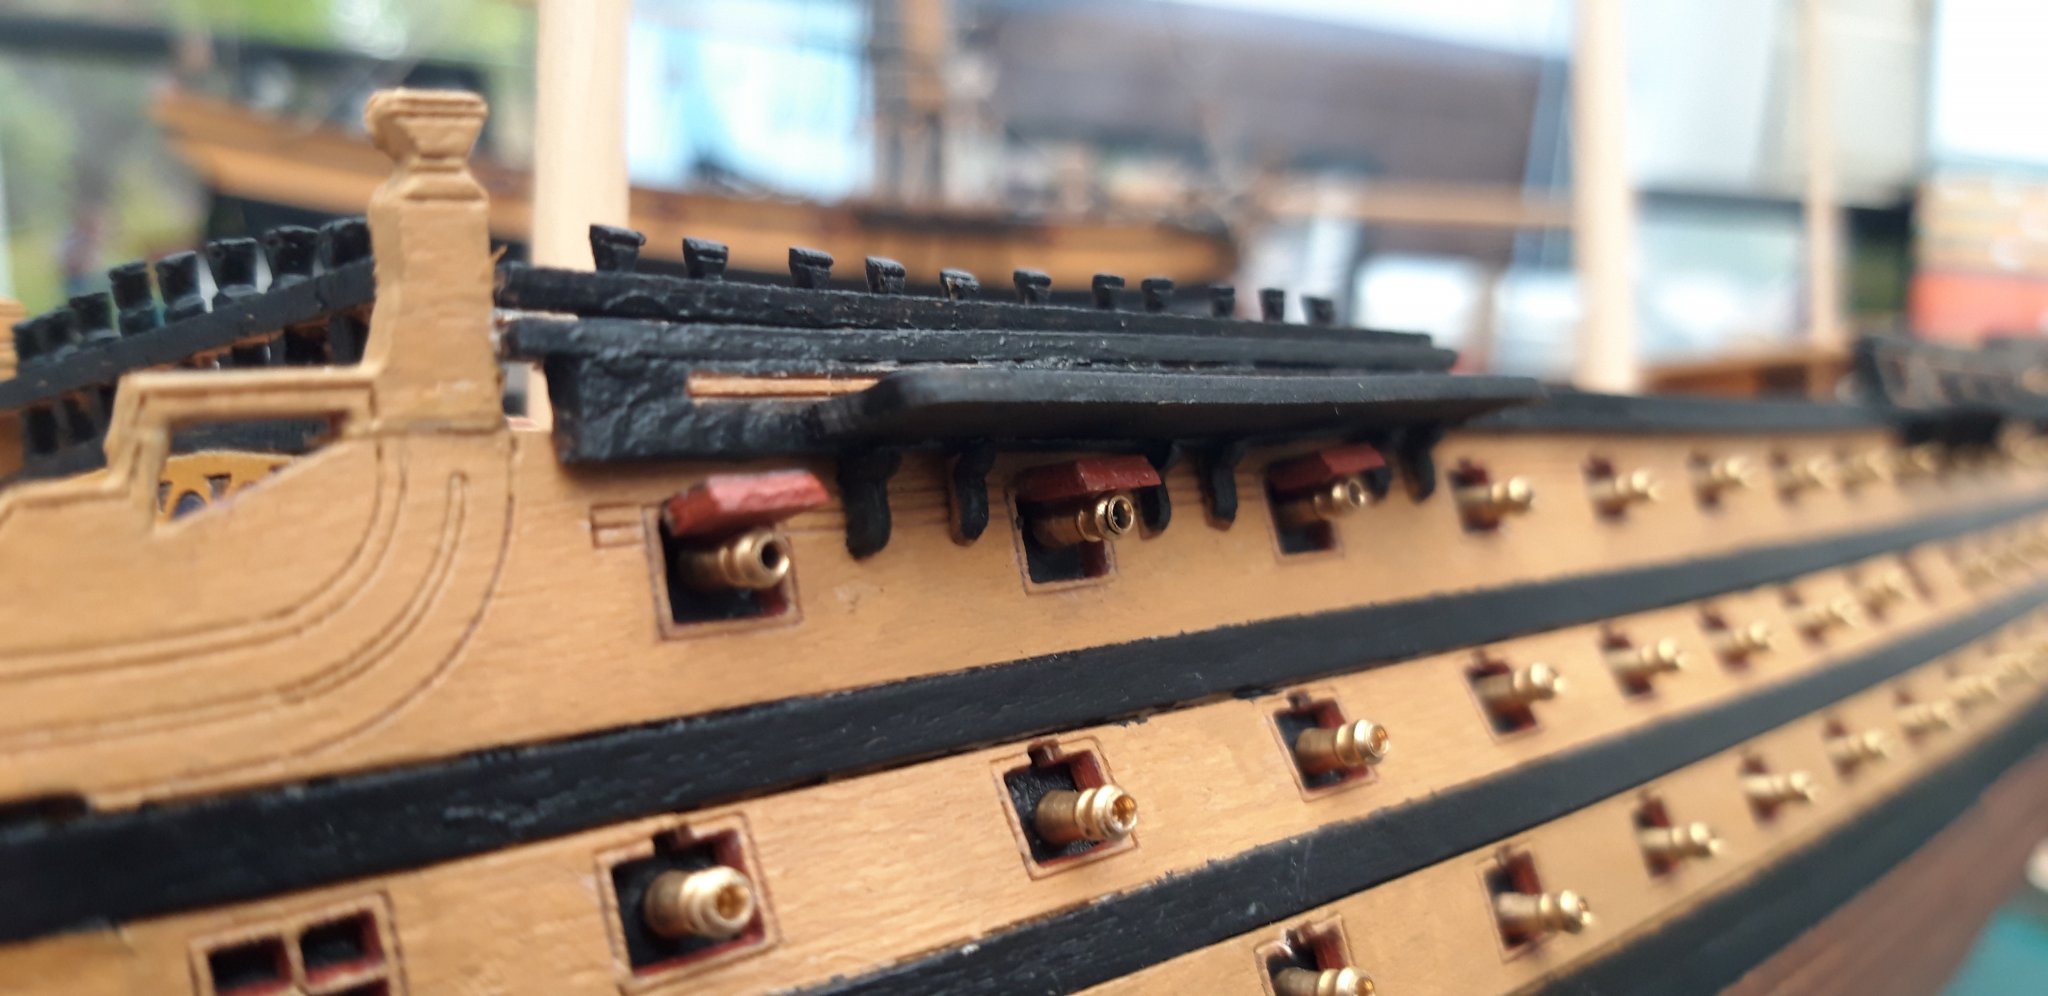
The next task was the drilling of dozens and dozens of holes. Obviously it is vital to get them exactly central and Mantua supply a little jig to assist in this task.
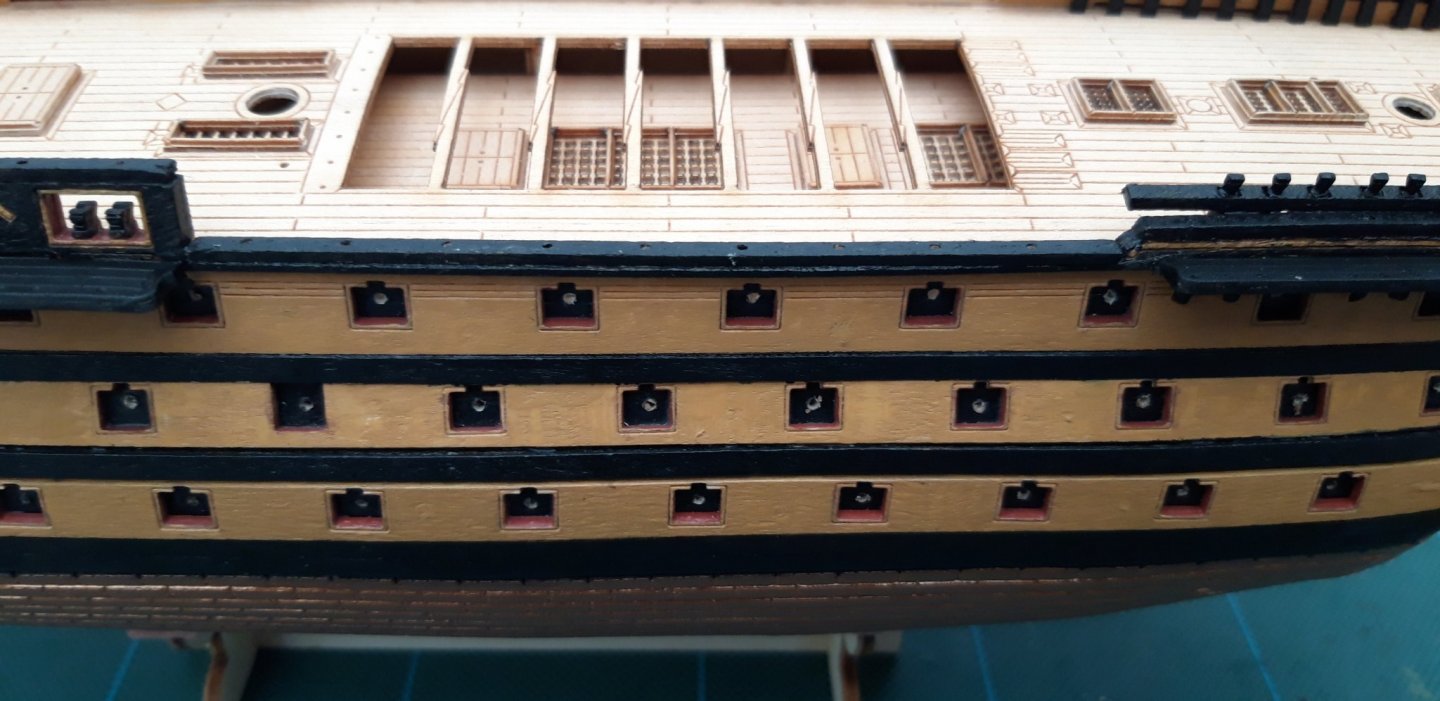
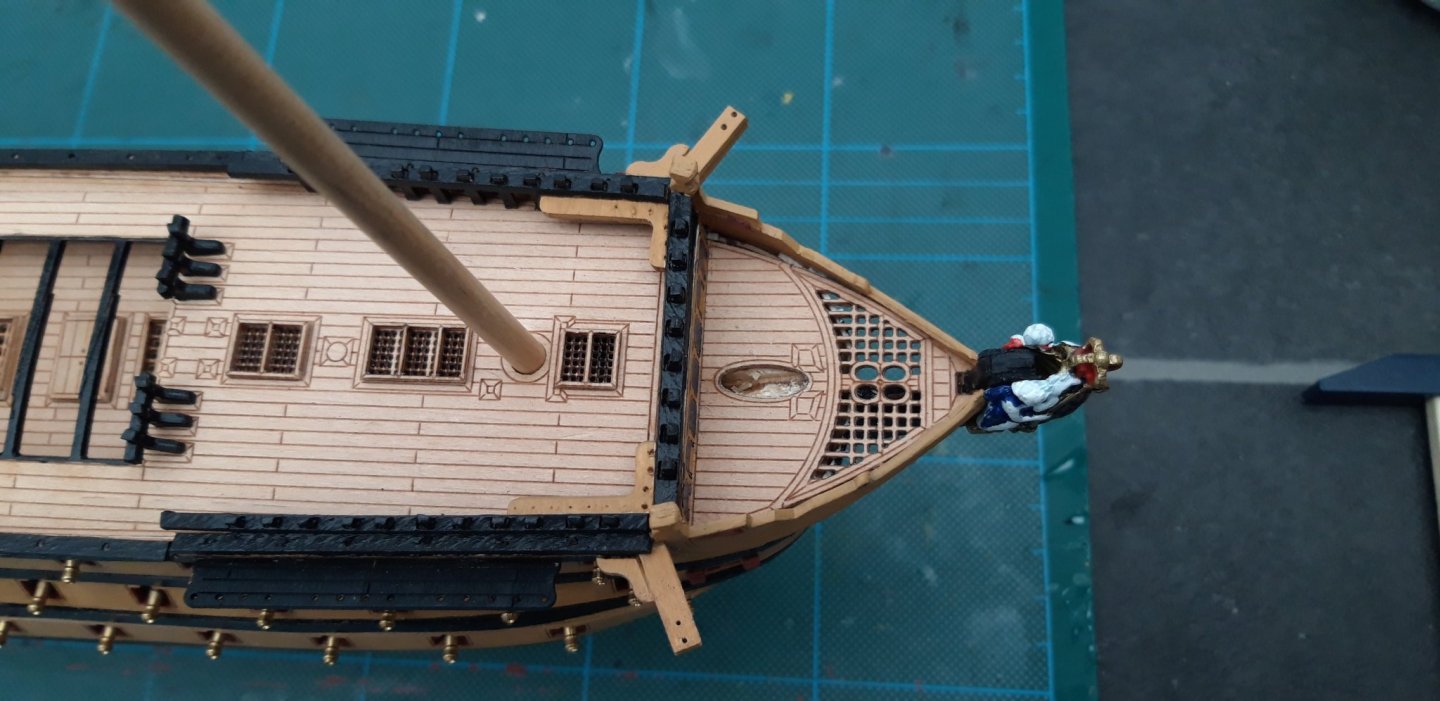
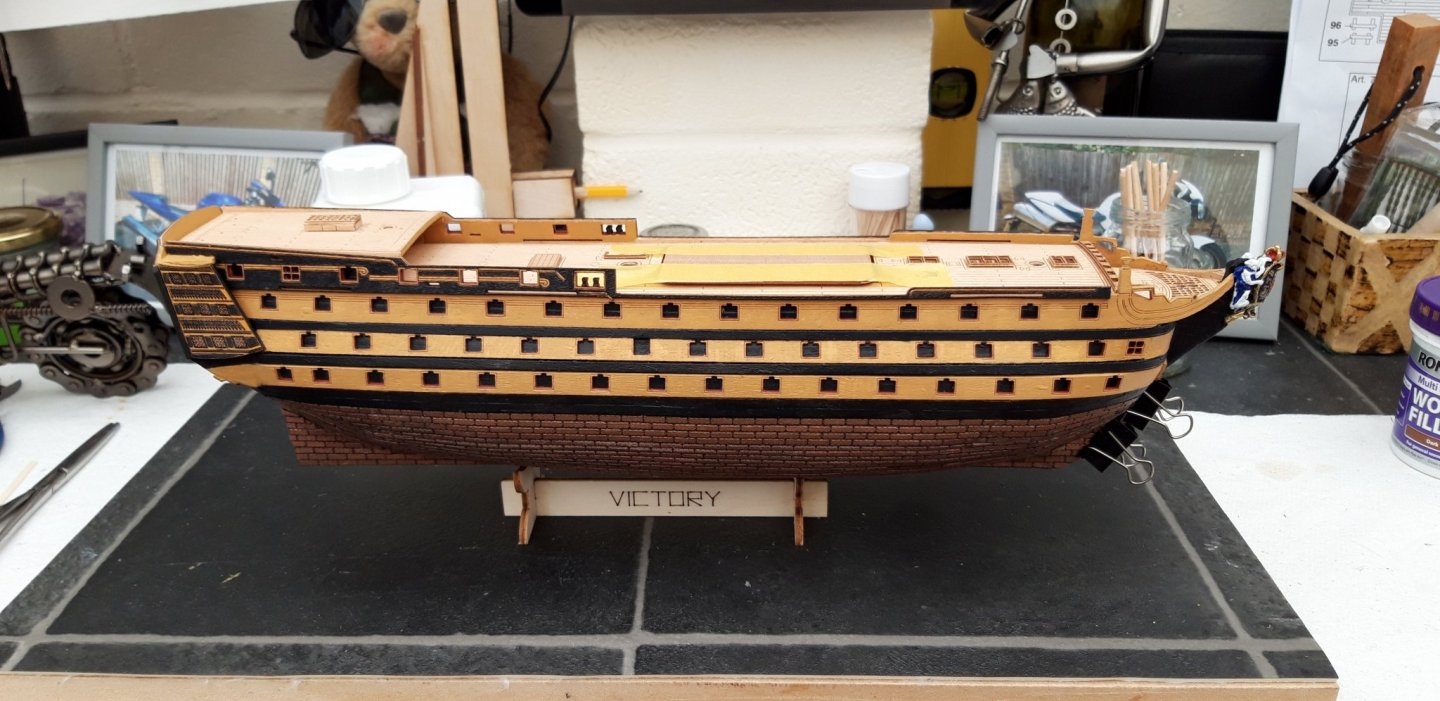
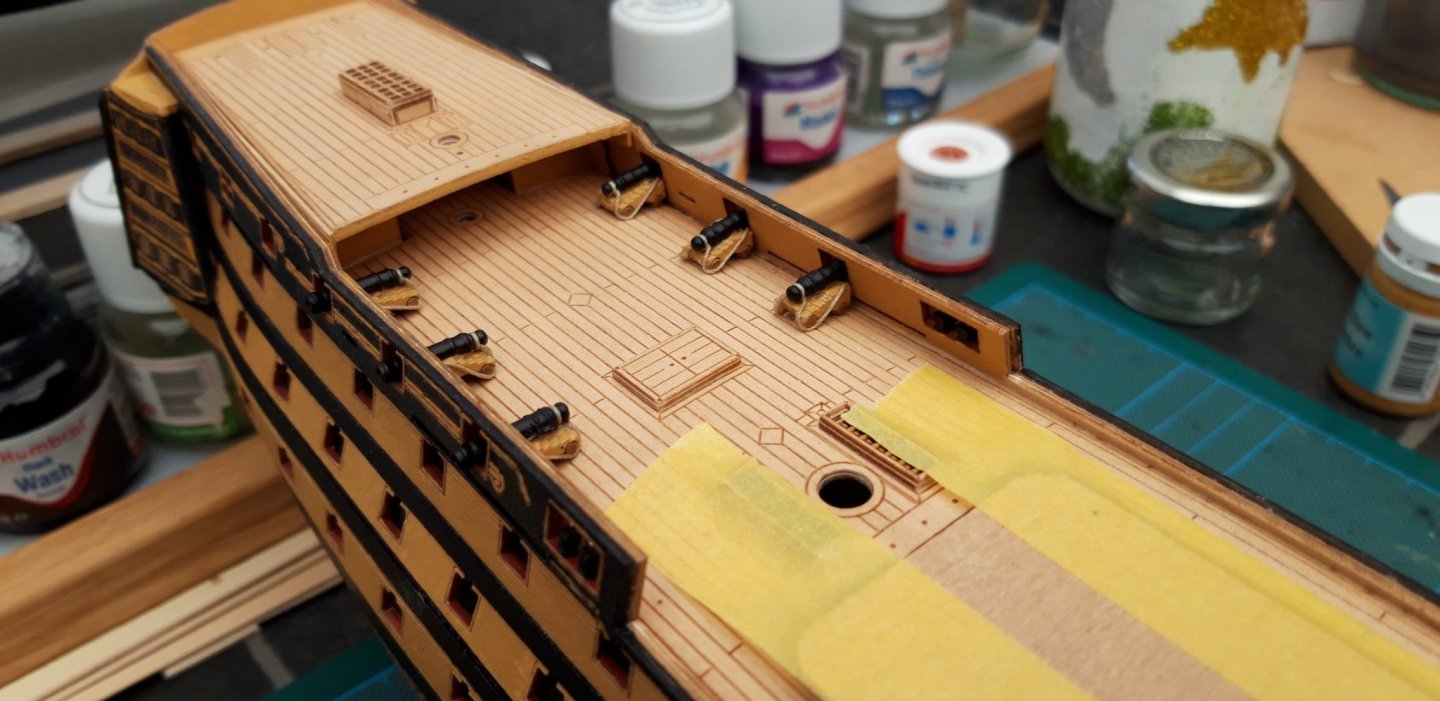
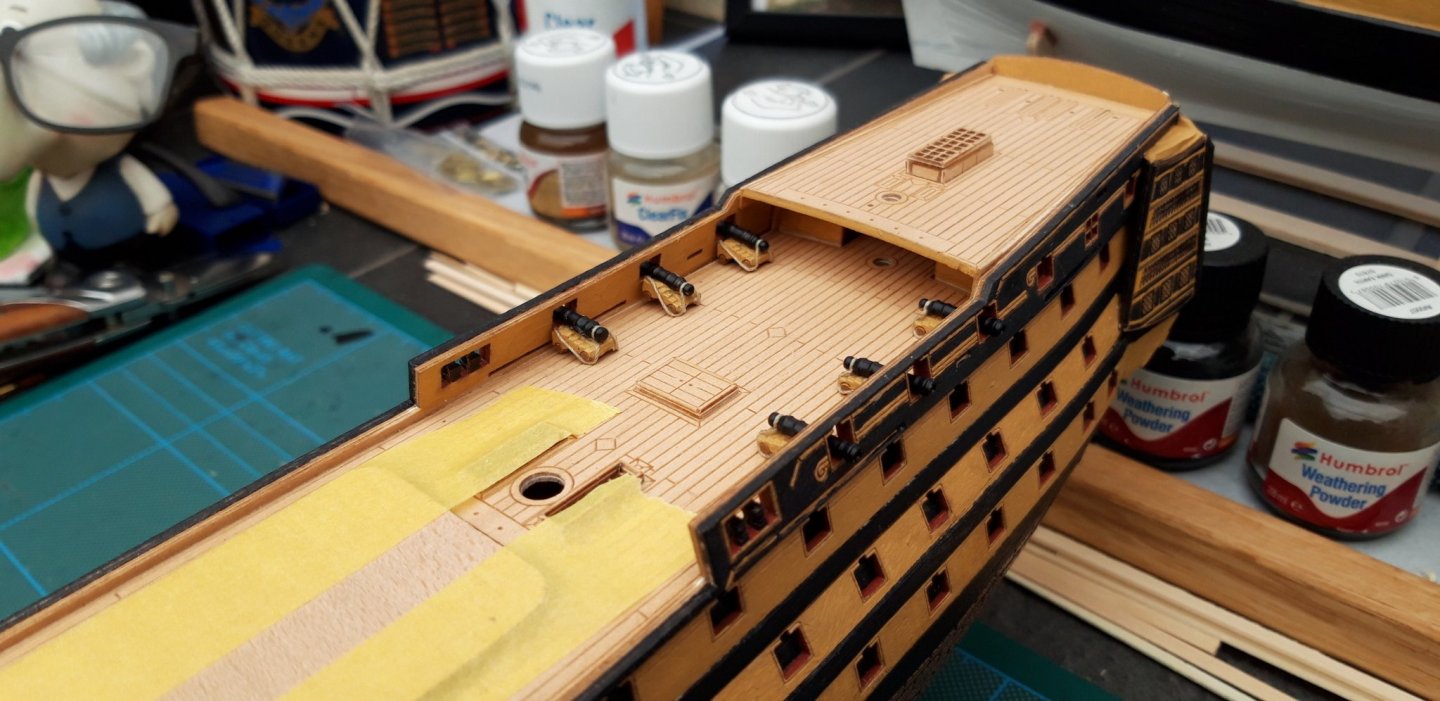
And here is the first (Starboard) side fitted out with her guns.

I am reasonably pleased with the outcome, they all look pretty straight to me.

My next job, of course, will be to fit the port side and then a bit more paint.

The coppering looks very bright an shiny at the moment so l will apply some mat varnish at the end of my next session.
Best wishes as always,
The Lazy Saint.
Session. Time. Total.
22. 4 hrs. 81 hrs.
Session. Time. Total.
23. 6 hrs. 87 hrs.


- Dubz, GrandpaPhil, Retired guy and 6 others
-
9
-
Hi all,
At last, today l have been able to tuck myself away in my Den. It seems to me that just recently everyone wants a piece of me.
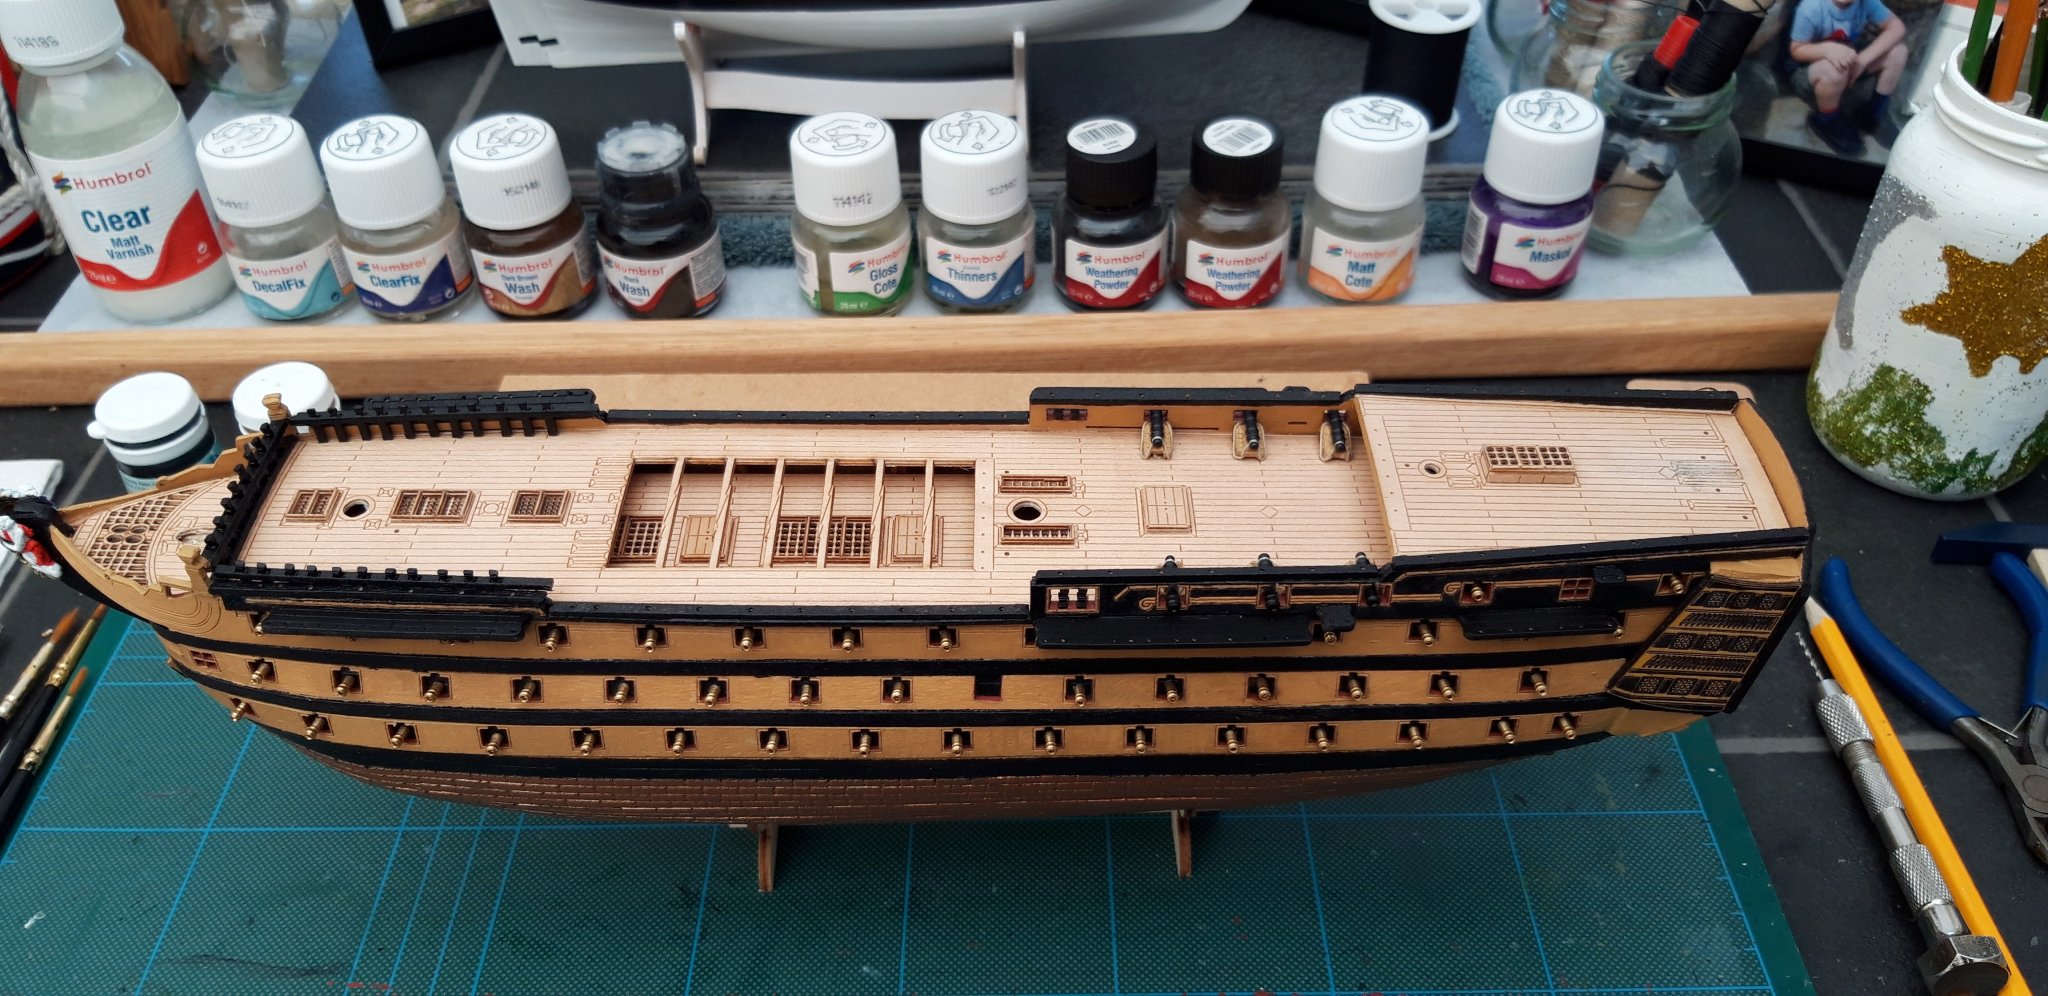
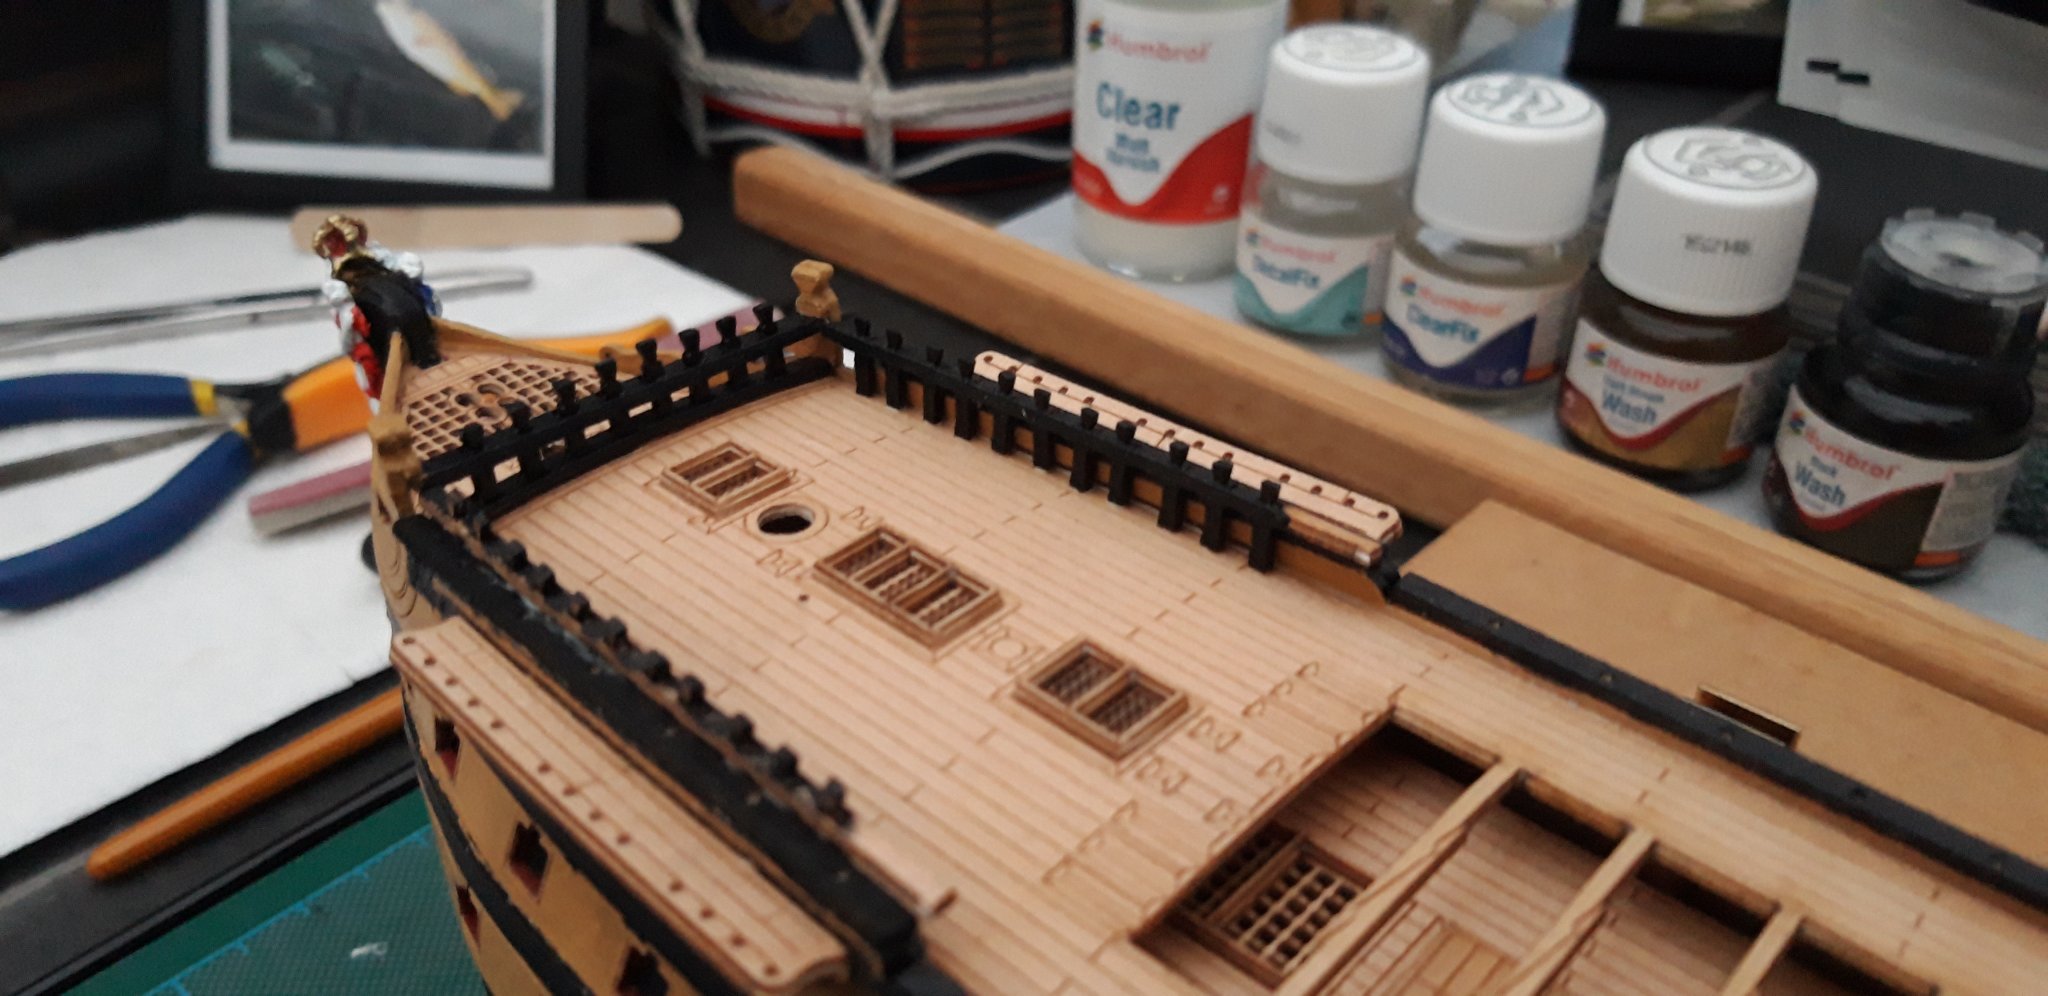
Today l managed to complete the imitation coppering, that was no easy task l can say, and l have started on the Deck fittings. These deck fittings are quite fiddly so we take some time l would think.

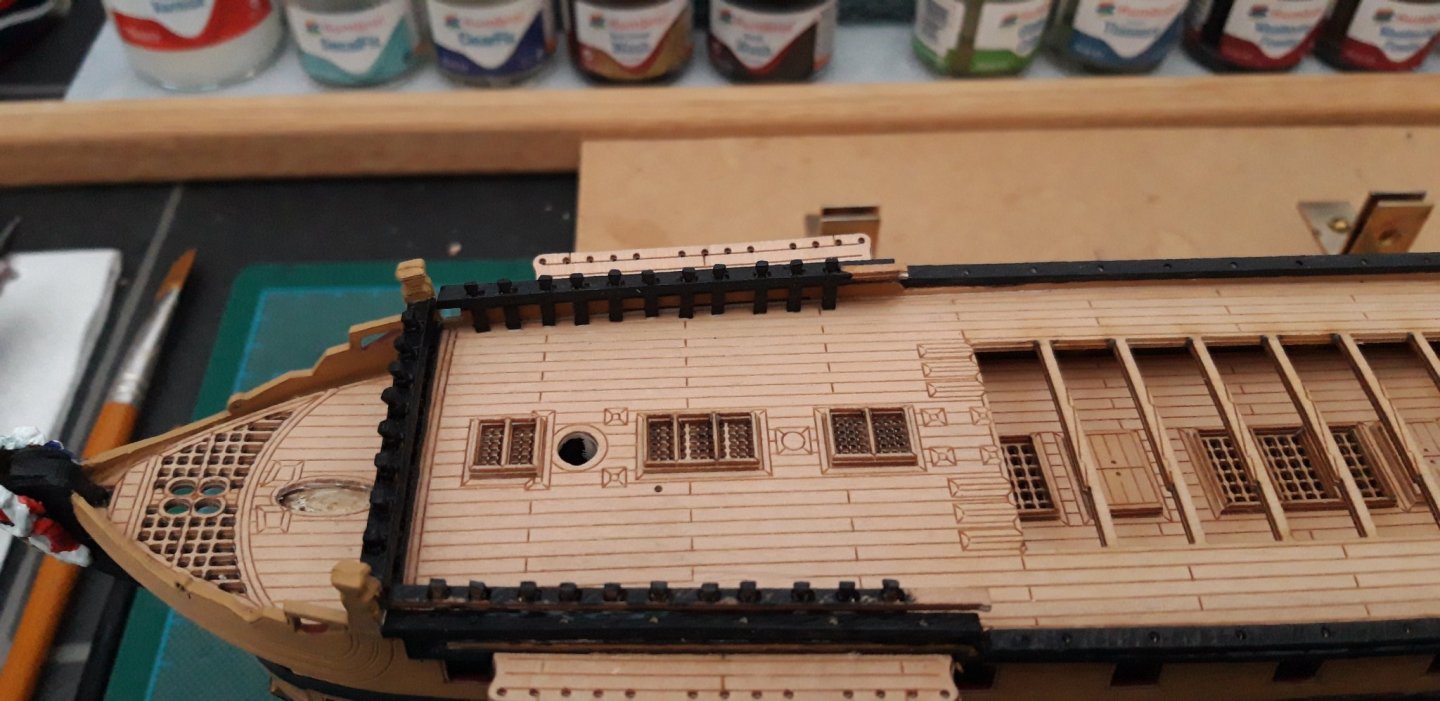
These are the moldings that will hold the railings and netting.
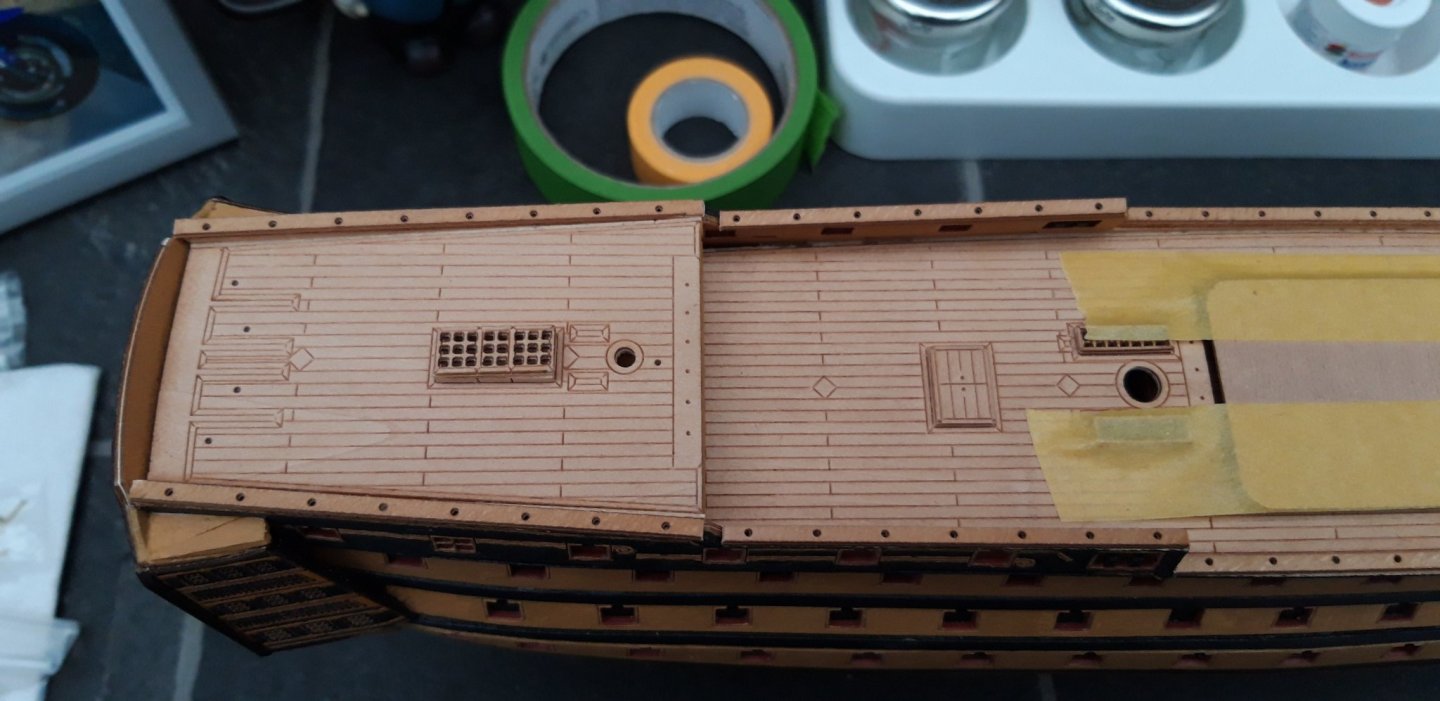
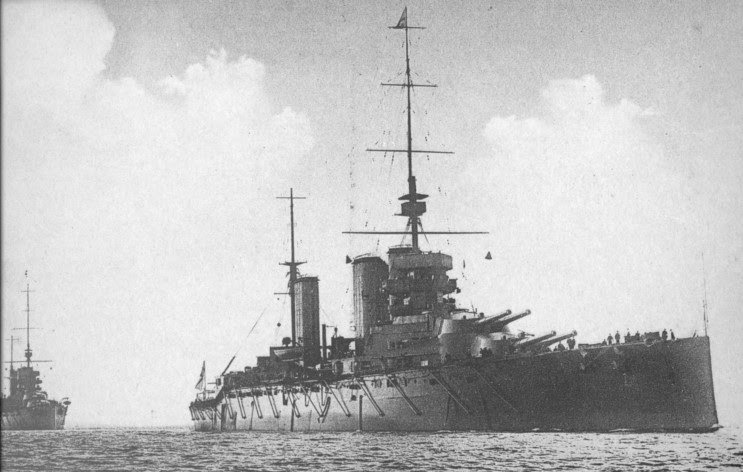
And the next image shows the Timberheads at the Bow over the Beakhead Bulkhead.
As mentioned before, my next session will, l hope, see me progress through the Deck fittings.
Best wishes as always,
The Lazy Saint.
Session. Time. Total.
21. 6 hrs. 77 hrs.
- GrandpaPhil, Edwardkenway, Dubz and 1 other
-
4
-
-
Hi Edward,
A great start on the planking, well done.
Best wishes as always,
The Lazy Saint.
-
Great bit of carving, well done to you.
Keep up the good work.
Best wishes as always,
The Lazy Saint.
-
Well l think you have done a super job of the first planking, it looks great. As for your questions:
1. I think you should sand it back further to accommodate the second planking.
2. Any wood filler should be ok but l wouldn't worry to much about pin holes, it is, after all, only the first planking.
I only have limited experience myself so if any one with more experience contradicts me then they probably know best.
Keep up the great work.
Best wishes as always,
The Lazy Saint.
-
They look a million dollars, well done to you.
Best wishes as always,
The Lazy Saint.
- Old Collingwood and mugje
-
2
-
Hi Edward,
She's looking good so far. As for the filler blocks, (and please forgive me if I am over simplifying the issue) can you lay a test plank against the Stern and, in the same way you check the fairing of the bulkheads, check the profile of the filler block. If the filler block won't allow a correct lay you need to sand more off. If there are gaps you have sanded of too much and require padding out.
I hope this helps but if l have misunderstood you and stated the obvious, please forgive me.
Keep up the great work.
Best wishes as always,
The Lazy Saint.
-
Looking great now, l am looking forward to seeing the colour applied.
Best wishes as always,
The Lazy Saint.
- SIDEWAYS SAM, GrandpaPhil and J11
-
3
-
Hi Edward,
Those strengthening pieces will certainly do the job. Are you putting filler blocks at both Bow and stern?
Best wishes as always,
The Lazy Saint.
- mtaylor and Edwardkenway
-
2
-
Hi all,
This morning l managed a couple of rows of coppering but the main work was spent on the cannons. Having said that l think most of my time was spent pondering over the next stages. As with all builds, it is key to look forward and anticipate any problems. This may be my excuse for sitting back and listening to my audiobook. Ha ha.
Thay have not been permanently fitted, l shall do that when l have completed the Hull.

Next session should see the completion of the coppering.
Best wishes as always,
The Lazy Saint.
Session. Time. Total.
20. 3 hrs. 71 hrs.
-
Hi all,
This afternoon's session went as planned. Progress made with the Coppering and Cannons painted.
Best wishes as always,
The Lazy Saint.
Session. Time. Total.
19. 3 hrs. 68 hrs.
-
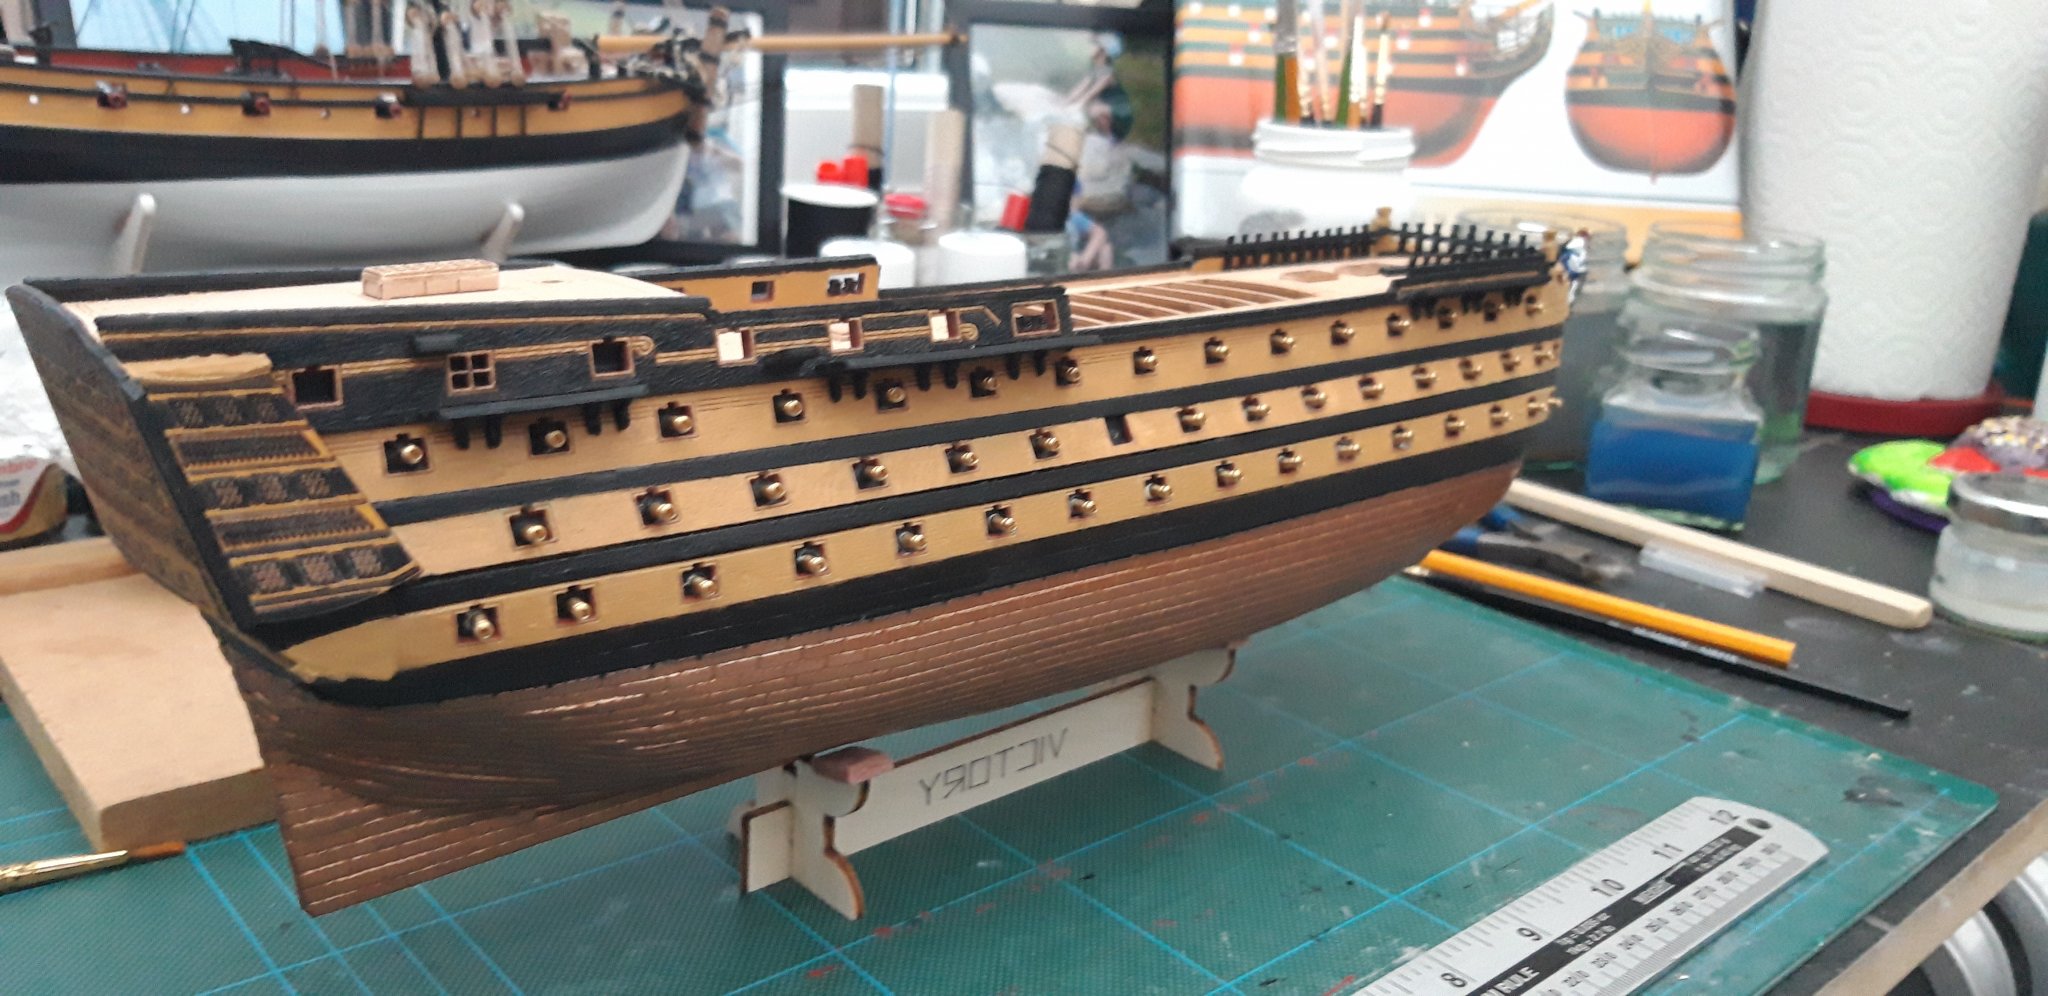
Hi all,
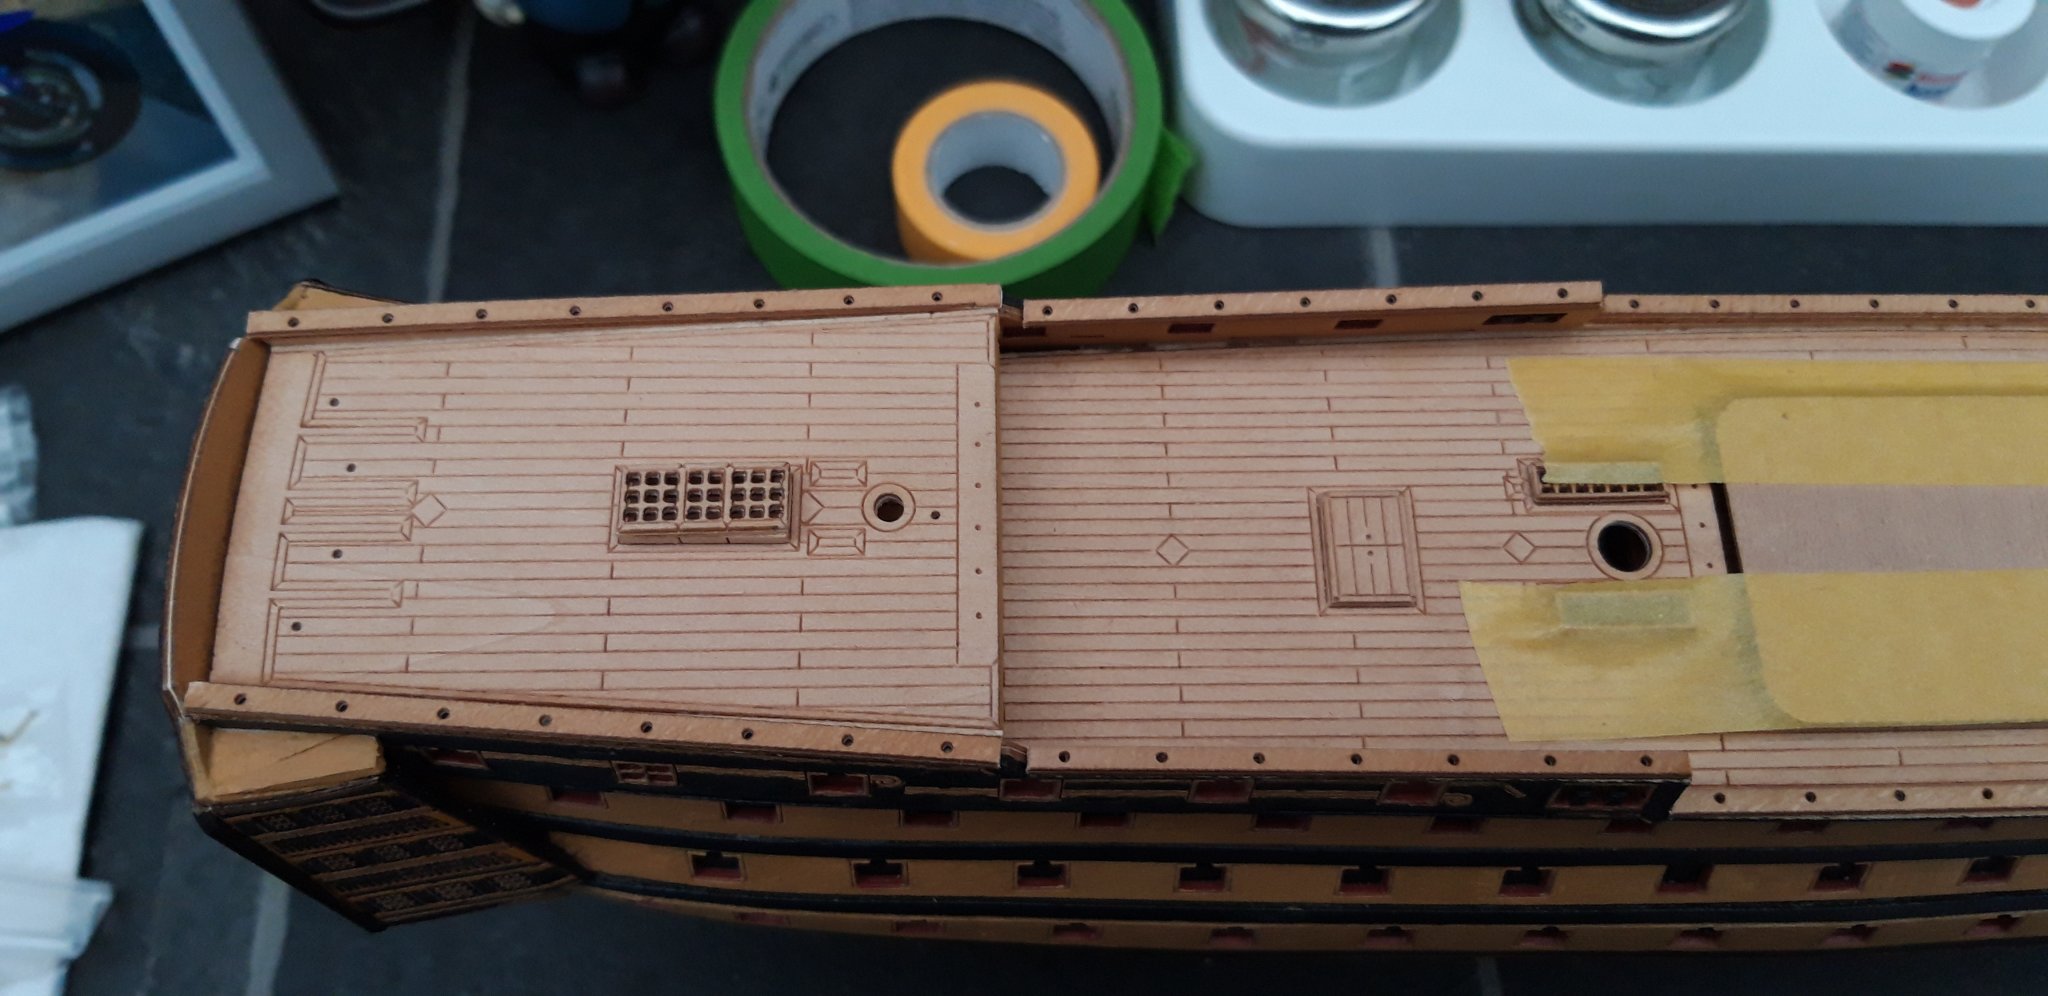
Three hours this morning saw the start of the Starboard side, regarding the coppering, and l also put together the six gun carriages that will sit on the Quarter deck.
Here are the gun carriages being glued together, not as easy as it looks, very fiddly indeed (especially if you have sausages for fingers)

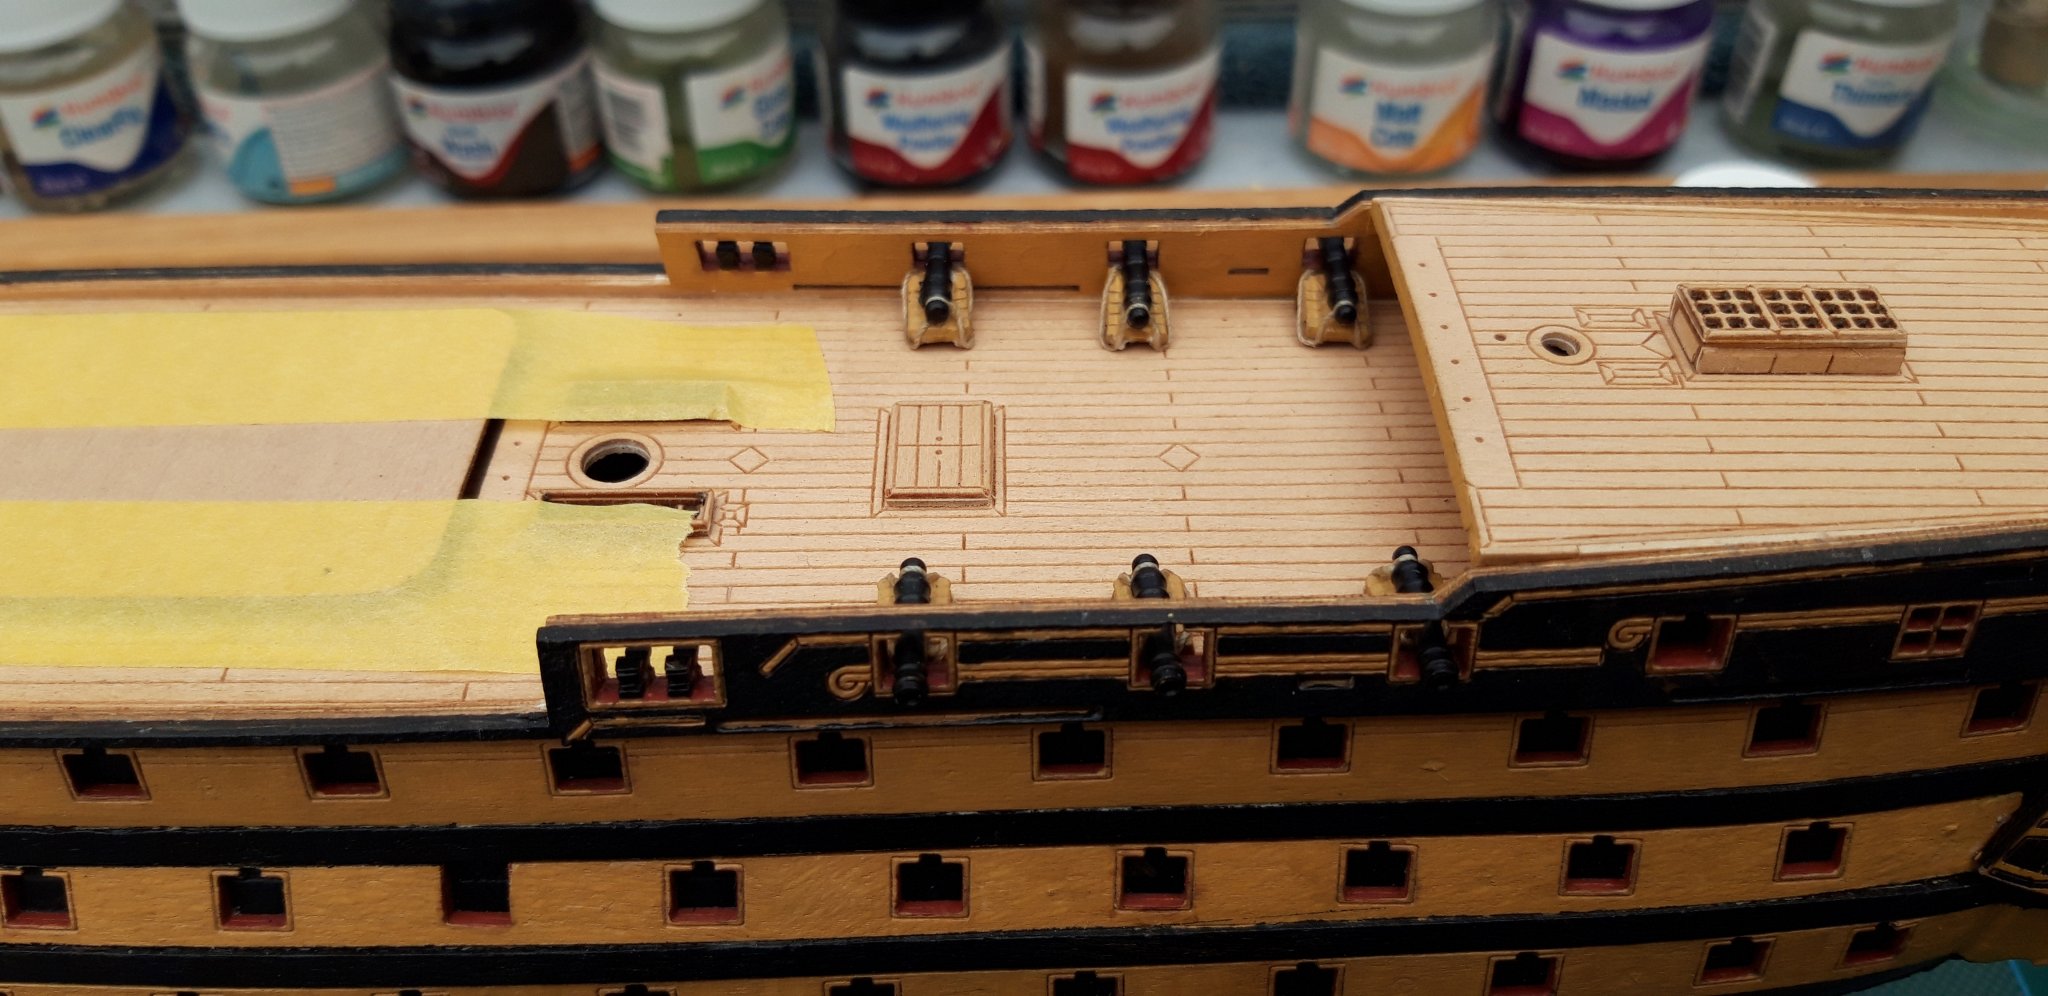
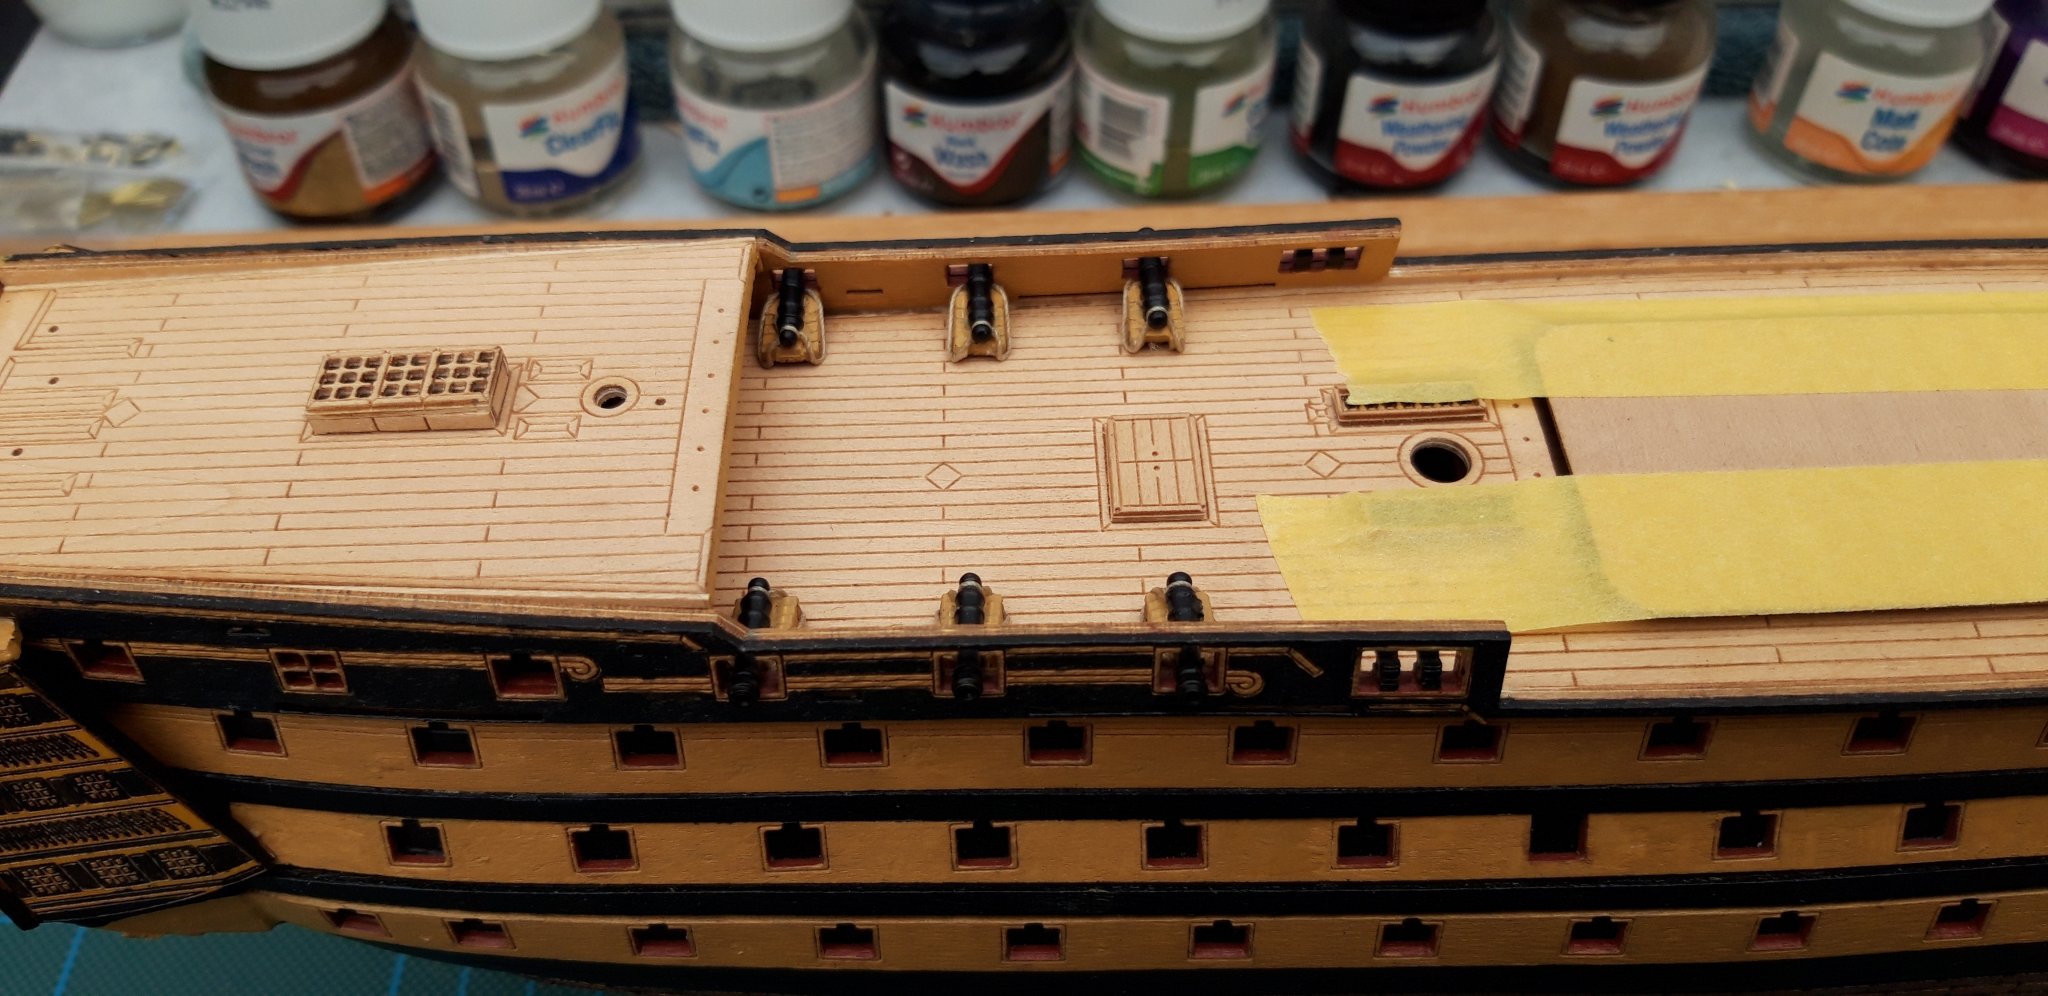
Here you can see them "in position" They sit quite well on the Deck and l am happy the barrels will fit through the Gunports.
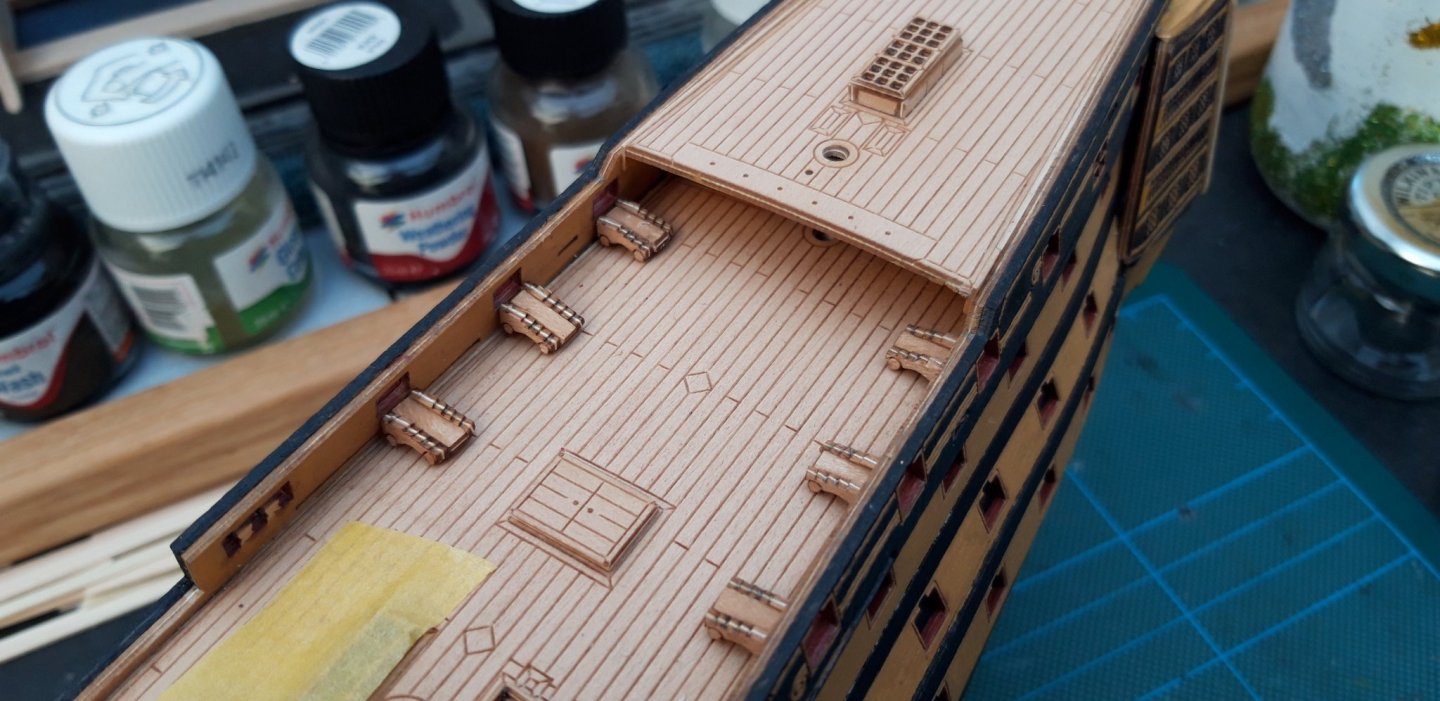
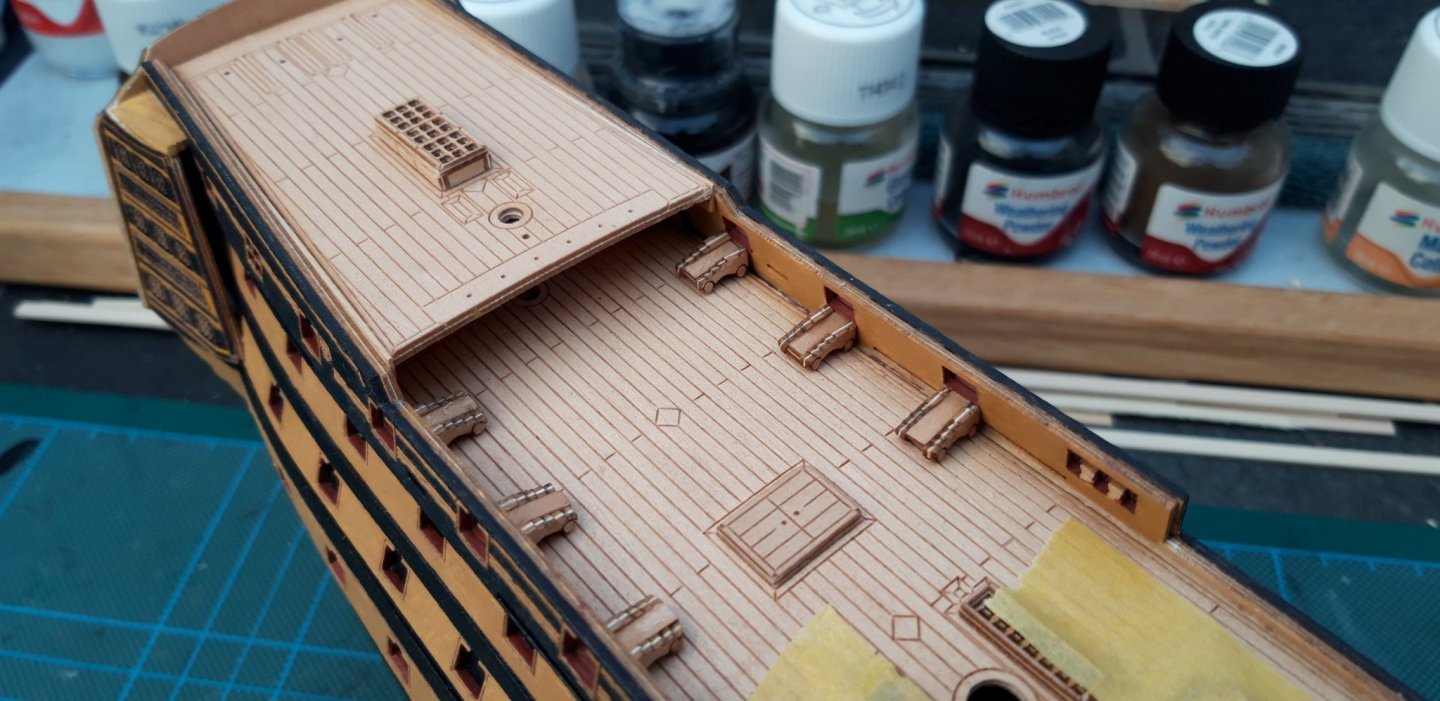
l will paint before fixing the barrels in place but here is a shot of them pre painting. I think they will look grand.

Final picture showing the coppering so far on the Starboard side.

During my next session l will add to my coppering and perhaps apply some paint to the cannons.
Best wishes as always,
The Lazy Saint.
Session. Time. Total.
18. 3 hrs. 65 hrs.
-
Hi all,
Thanks very much for the encouragement Richard, appreciated as always.
I have now finished the first side and am quite pleased with the result. I had planned to paint the imitation plates Copper, but l am not so sure now, l will see how the Starboard sides turns out before l make a final decision.
Best wishes as always,
The Lazy Saint.
Session. Time. Total.
17. 2 hrs. 62 hrs.
- Edwardkenway, Dubz, GrandpaPhil and 1 other
-
4
-
You are making a beautiful job of this Richard, l really must try this build myself next. It is certainly on my short list.
Best wishes as always,
The Lazy Saint.
-
Looking good Edward, l hope everything is true and Square, it would be a shame if you had to dismantle those timbers. I am sure it will be fine.
Best wishes as always,
The Lazy Saint.
- mtaylor and Edwardkenway
-
2


HMS Victory by The Lazy Saint - Mantua - Scale 1:200 - Third wooden ship
in - Kit build logs for subjects built from 1751 - 1800
Posted
Hi all,
Once again thanks for the encouragement Edward, and for the likes, appreciated as ever.
First coat of black on the cannons and it has taken quite well.
On my next session l will touch up where necessary and apply a coat of varnish.
Best wishes as always,
The Lazy Saint.
Session. Time. Total.
27. 2 hrs. 98 hrs.