

The Lazy Saint
-
Posts
264 -
Joined
-
Last visited
Content Type
Profiles
Forums
Gallery
Events
Posts posted by The Lazy Saint
-
-
What a stunning job you are doing on this build. I, and l am sure many others, will be inspired by you and your example.
Keep up the great work.
Best wishes as always,
The Lazy Saint.
- md1400cs, EJ_L, BLACK VIKING and 2 others
-
 5
5
-
Well done Richard, you are making a fantastic job of you Bluenose, it is very inspiring indeed. Thanks for sharing it with us.
Best wishes as always,
The Lazy Saint.
-
Wow, what a stunning job you are making of this build Johnny D, incredible. I have decided on a slightly different approach to your good self in that l am building all Masts first then Rigging. I do however, appreciate your point about the "working room" so am hedging my bets. I shall build all Masts but not permanently fit them.
Keep up the great work.
Best wishes as always,
The Lazy Saint.
-
Hi all,
Thanks for the kind words Edward, appreciated as always.
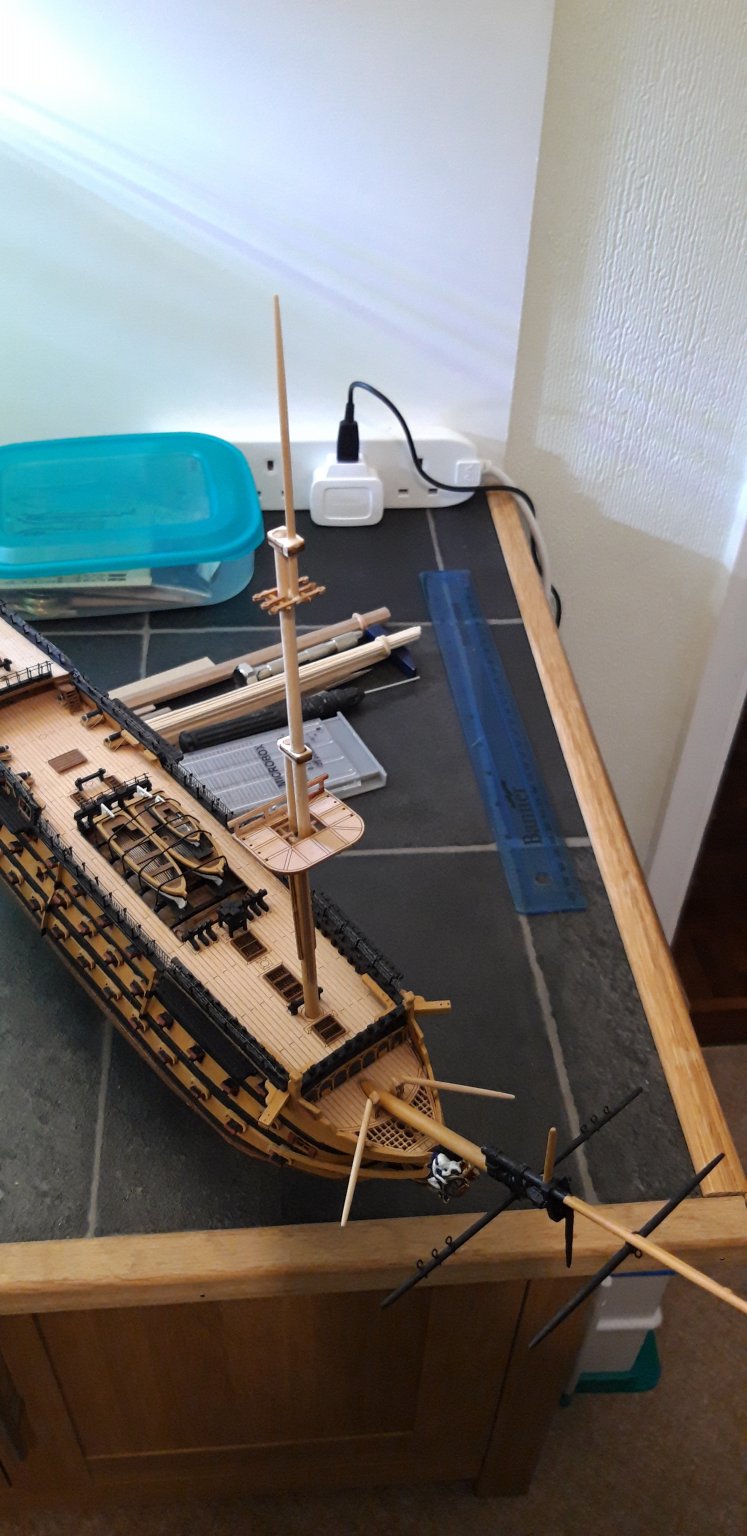
I changed my mind overnight and, rather than work on the Yards l opted to work on the Main Mast.
The first shot is of the underside of the Fore Mast, from yesterday's work.
Shot two, the Main Lower Mast and the Main Top.
Here you can see the Main Top mast fitted.
And shot two of the same.

The final sections fitted, the Main Topgallant and Pole Mast, again fitted as one piece, and the Main Top Mast Top.
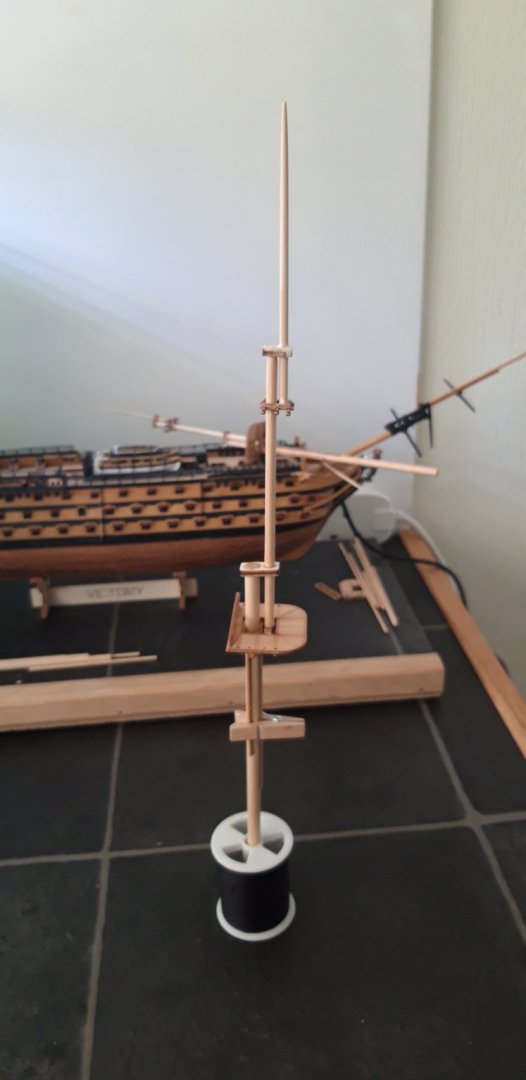
Once again, a second shot of the same.

Here is a shot from bellow, unfortunately the right hand Tressle Tree has warped to the right slightly. I will have to re do that as my first task of my next session.
And here is where I am now. They are nice and straight and even, well, apart from that Tressle Tree.

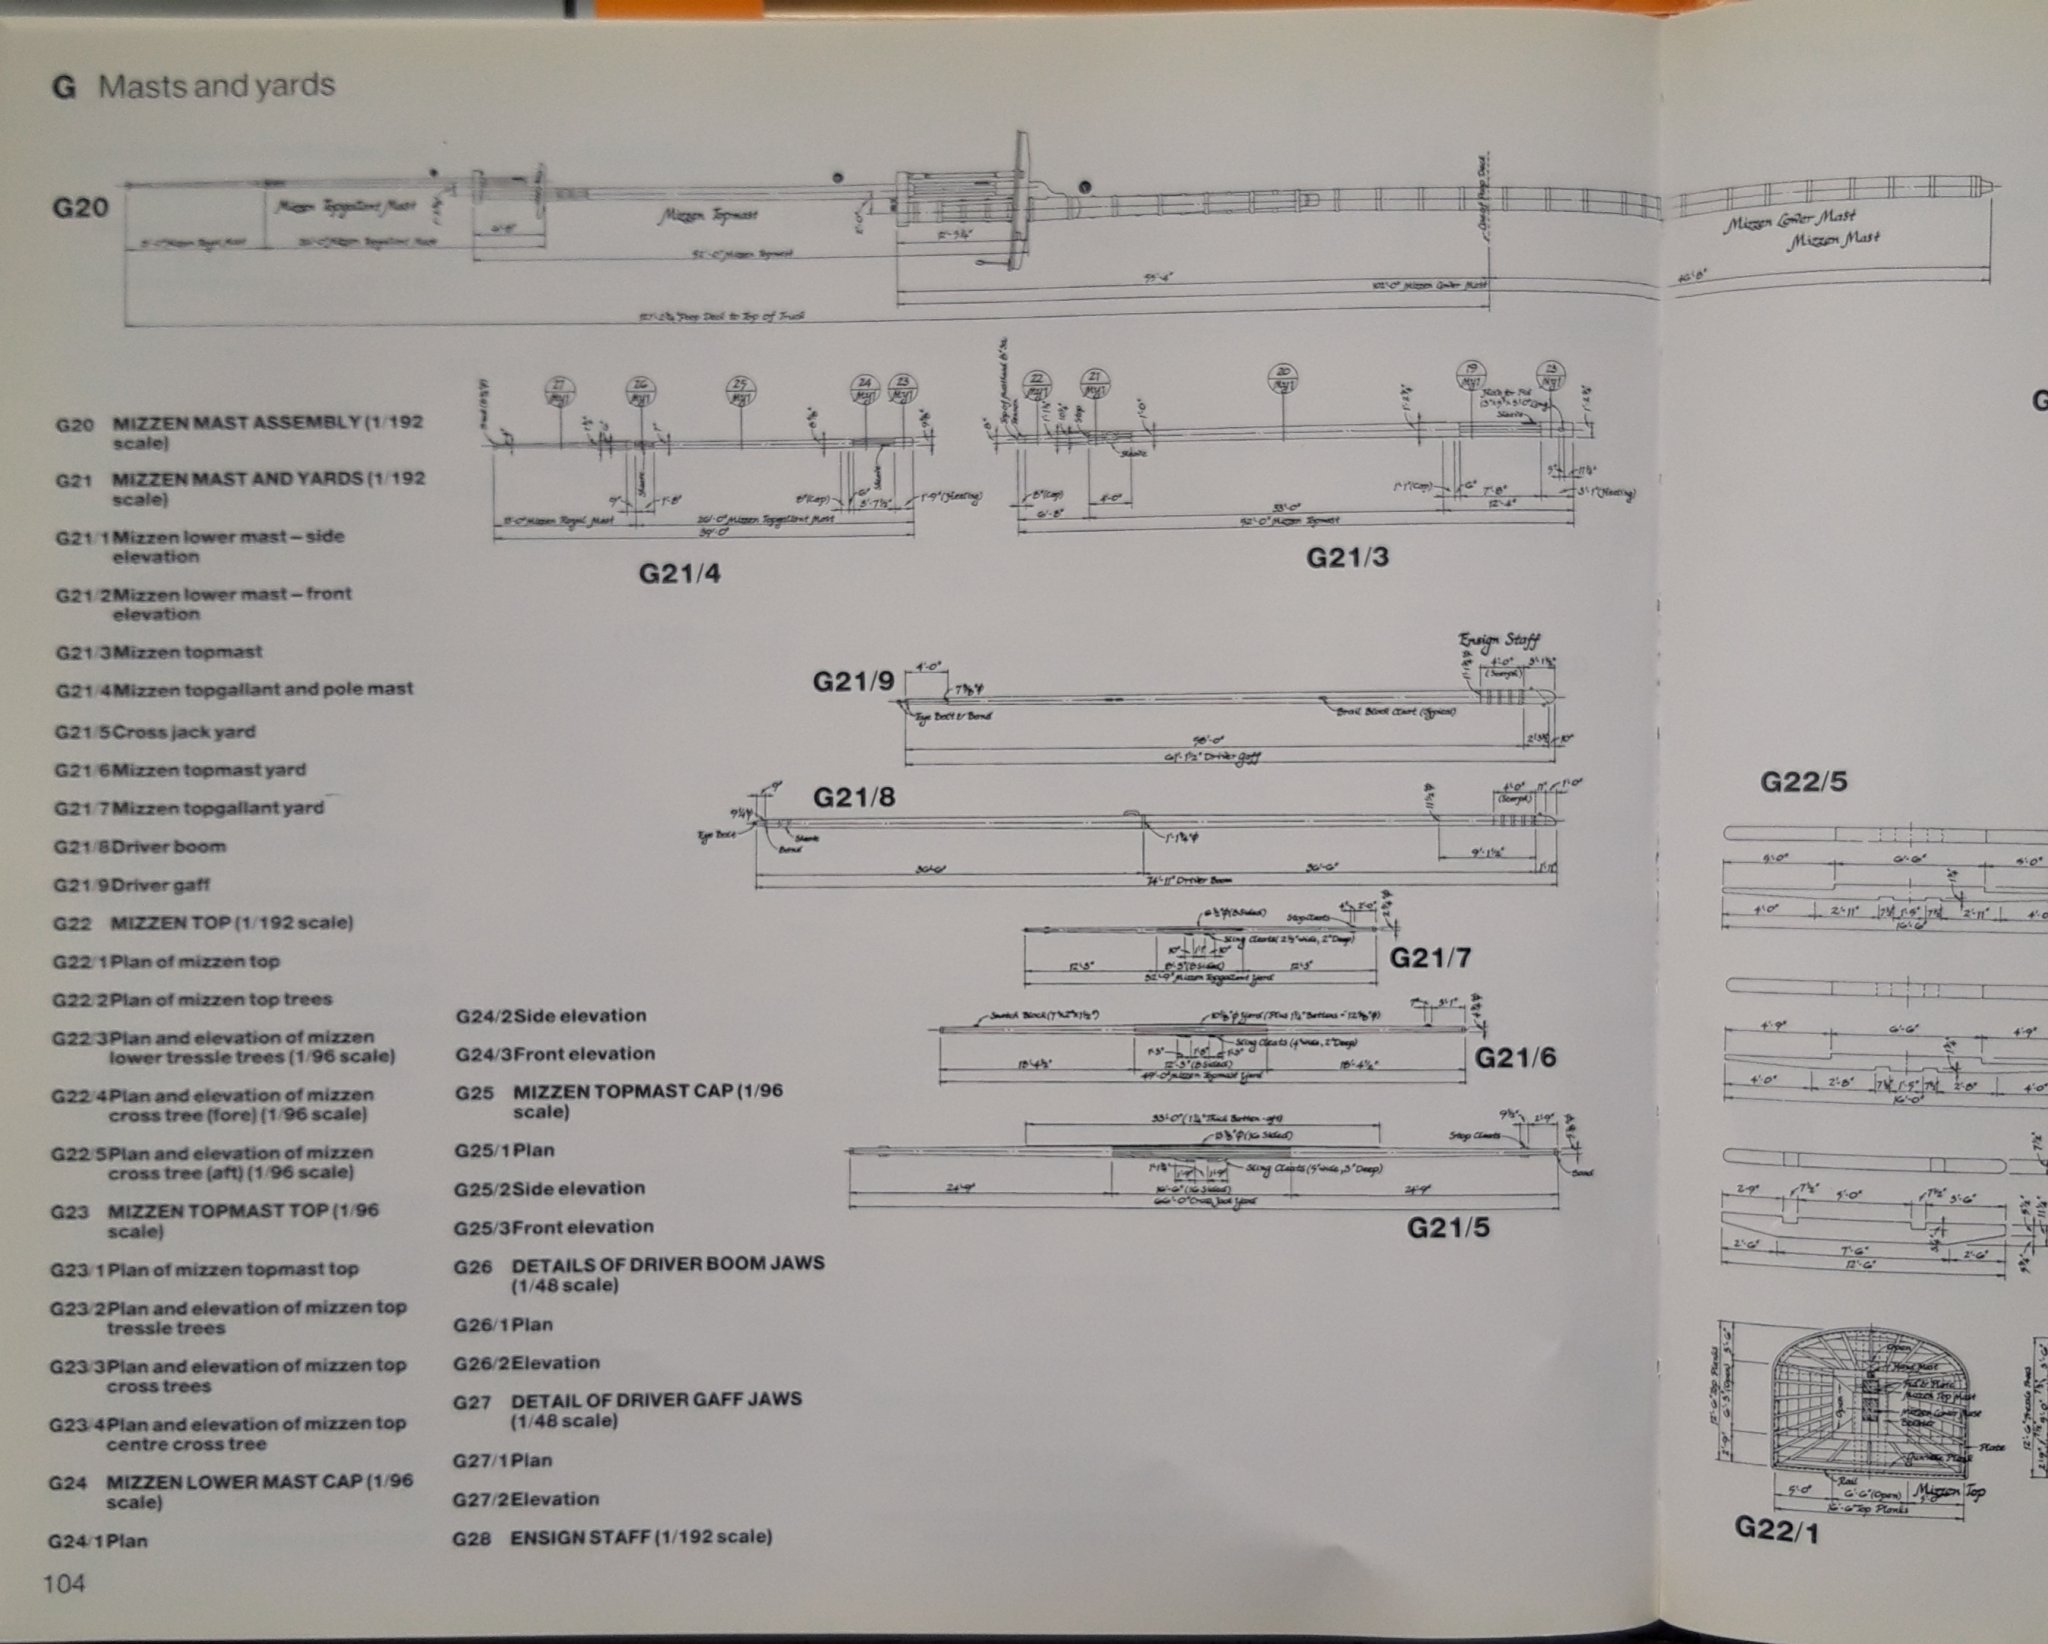
During my next session l hope to be able to complete the Mizzen Mast Assembly.
Best wishes as always,
The Lazy Saint.
Session. Time. Total.
45. 5 hrs. 152.
- JayCub, Edwardkenway, DelF and 3 others
-
6
-
Hi all,
Johnny D, that is a very detailed and well laid out explanation of the method you have used. It certainly is worth doing for anyone who would like to achieve the superbly re modelled Stern that you have produced. Please may l suggest that you also copy and post the full details on your own build log. There will be, in the future, others following in your footsteps who will be wanting to emulate you and your superb build.
I shall be following your build now it is up and running.
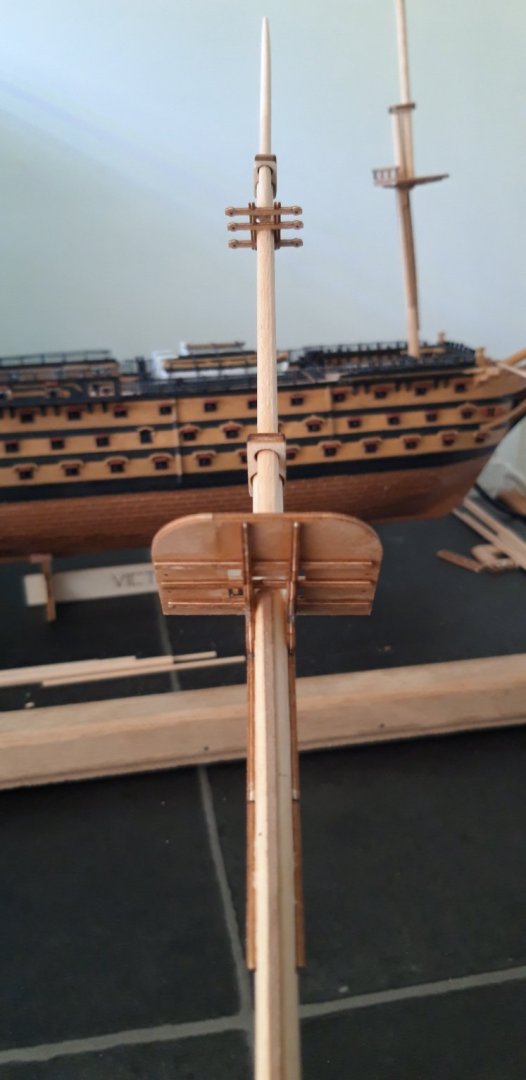
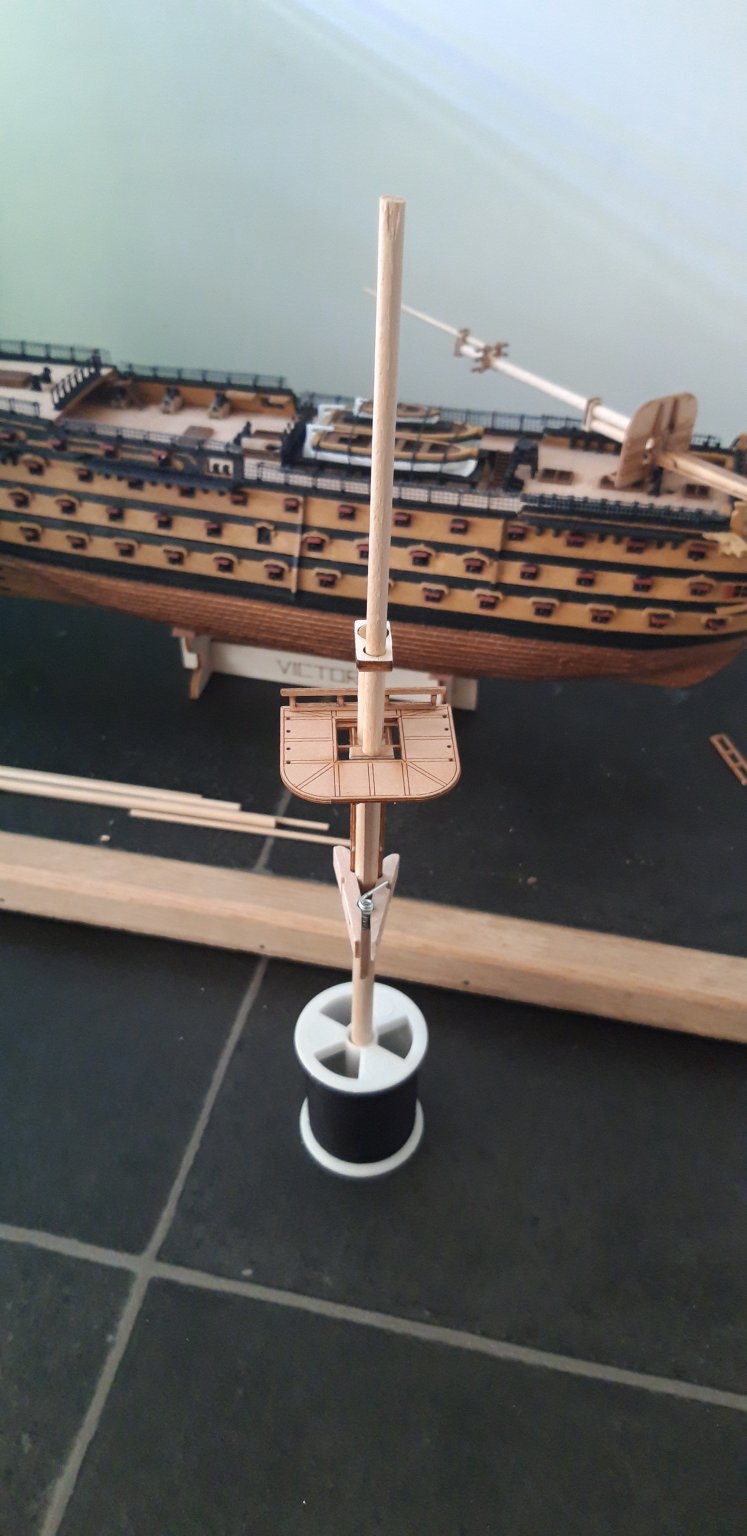
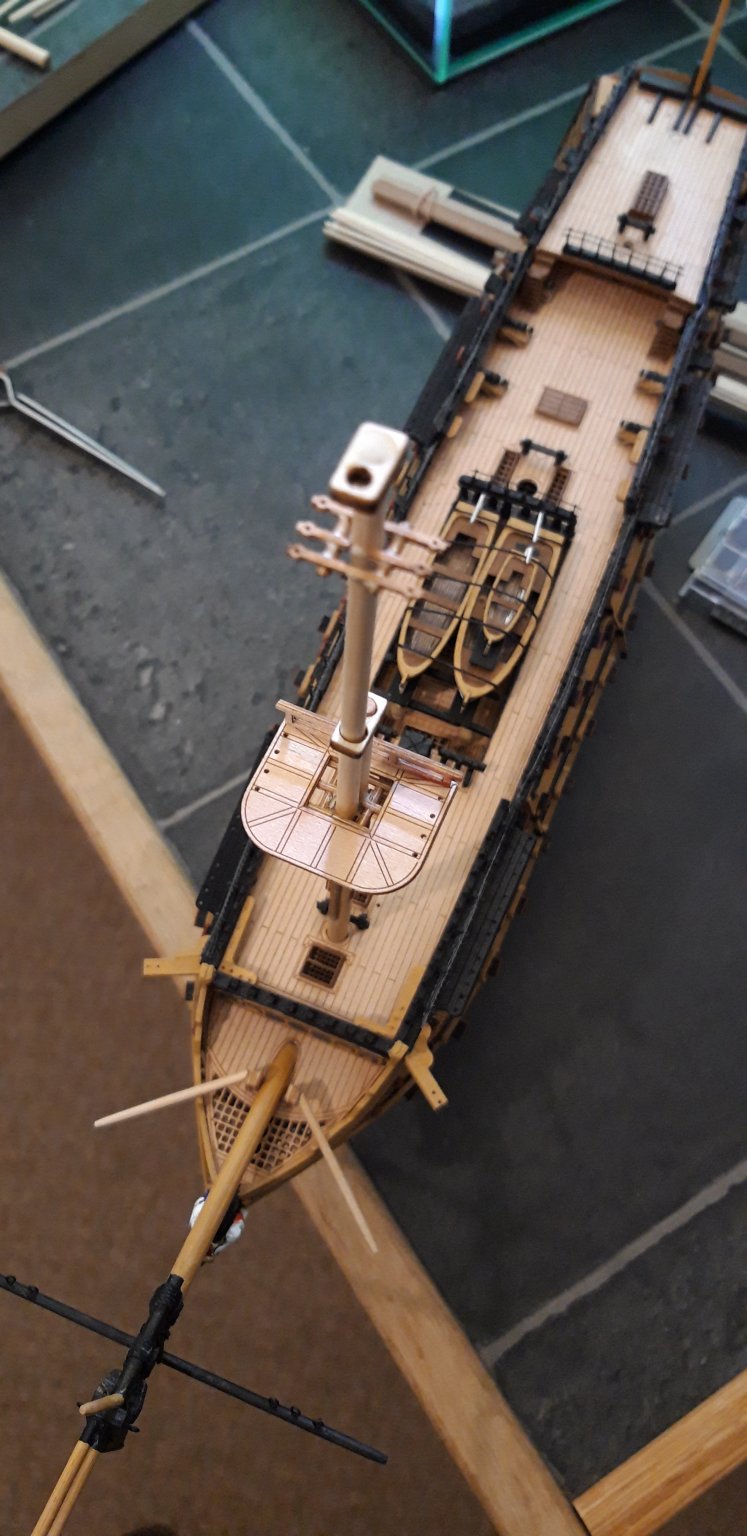
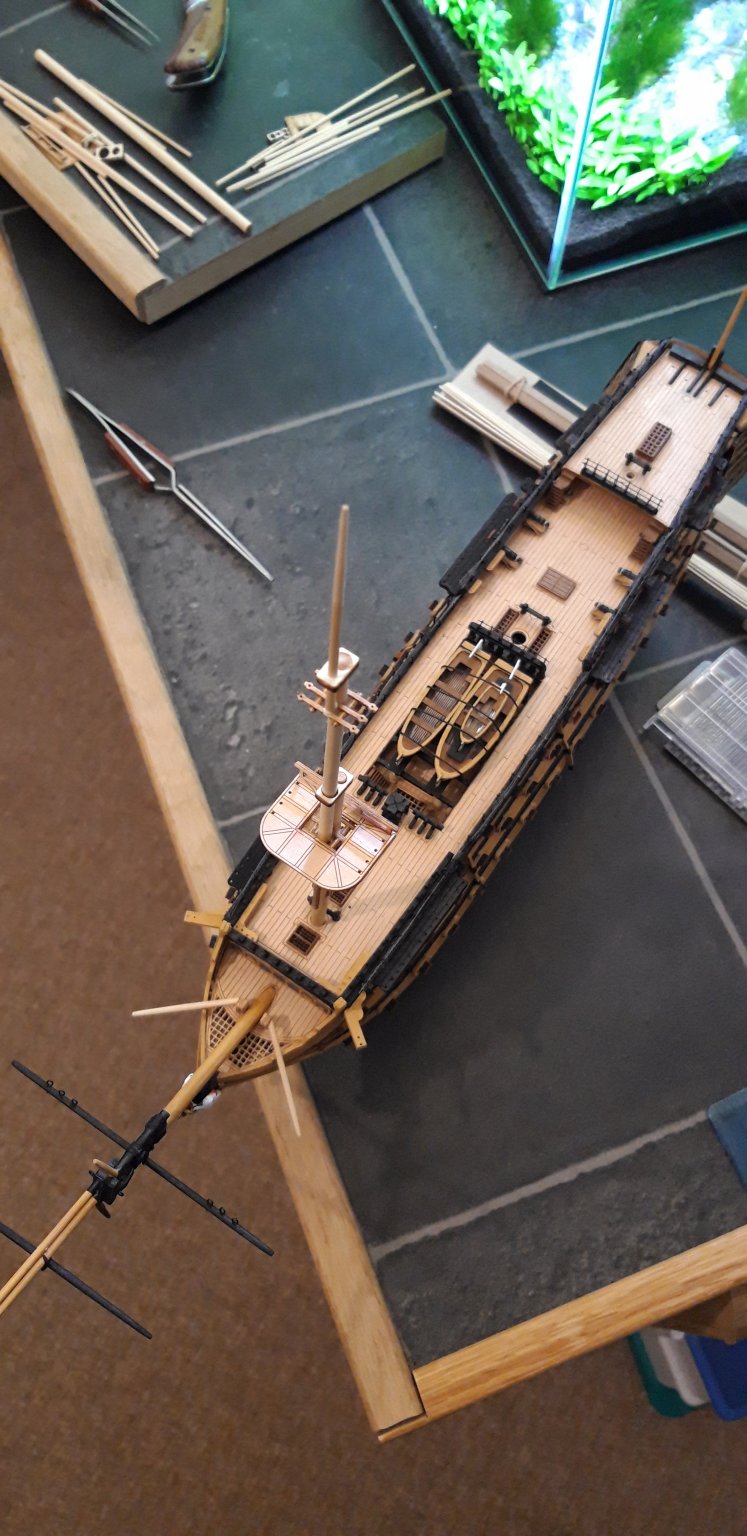
Sometime mid last month l got to the stage where I just could not proceed with my build. I was spending more and more time just scratching my head and pondering over the growing complications of the instructions/plans. In short, l needed a break. I cleared my bench and walked away. Yesterday I decided it was time to take another look. The instructions were just as confusing but the Gremlins were gone so l had a look at the Fore Mast.
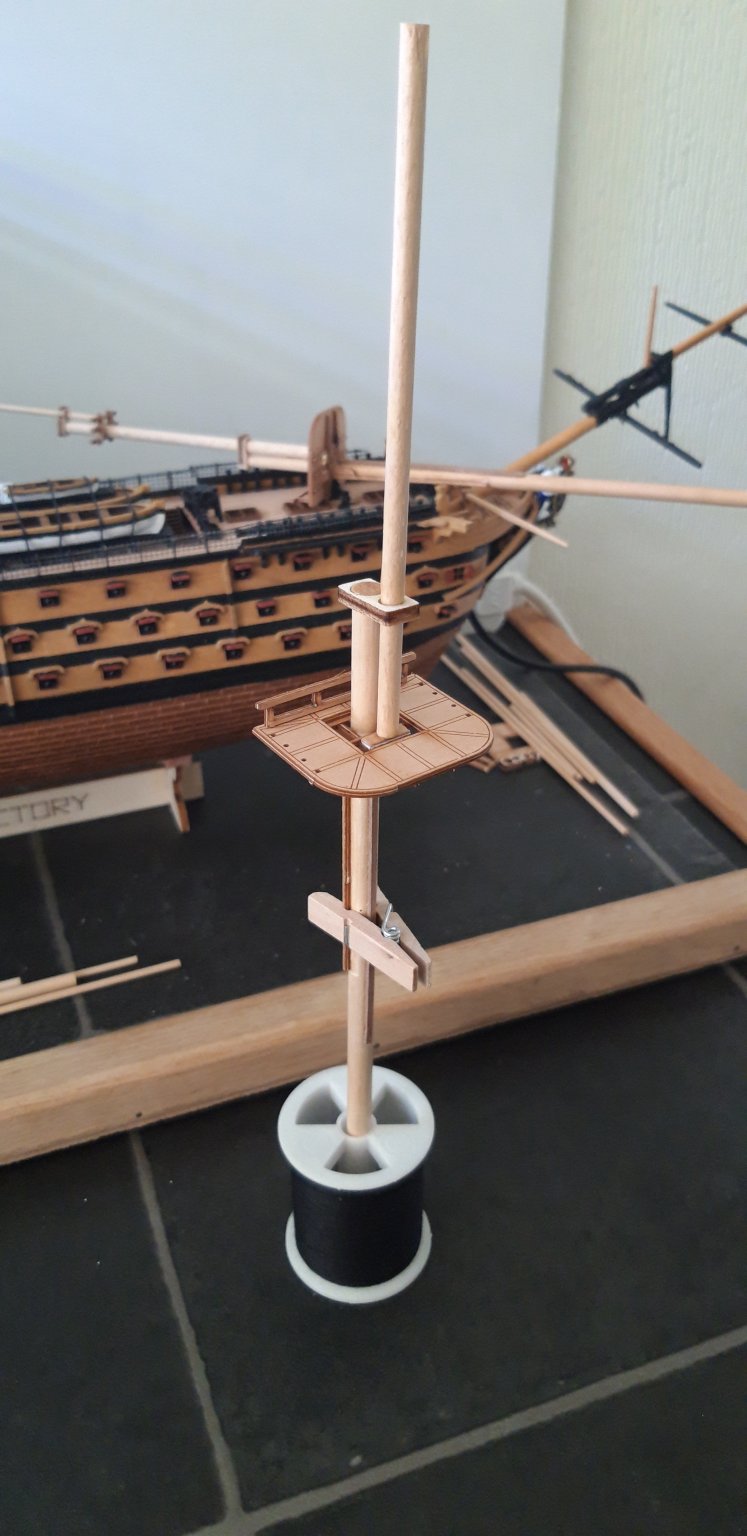
In the first two pictures you can see the For Lower Mast, and the Fore Topmast in position.
You can also see fitted, the Fore Top, the challenge here was the fitting of the Fore Top Trees. Also fitted is the Top Rail.
The next shot shows the Fore Top Mast Top with Tressle and Cross Trees.

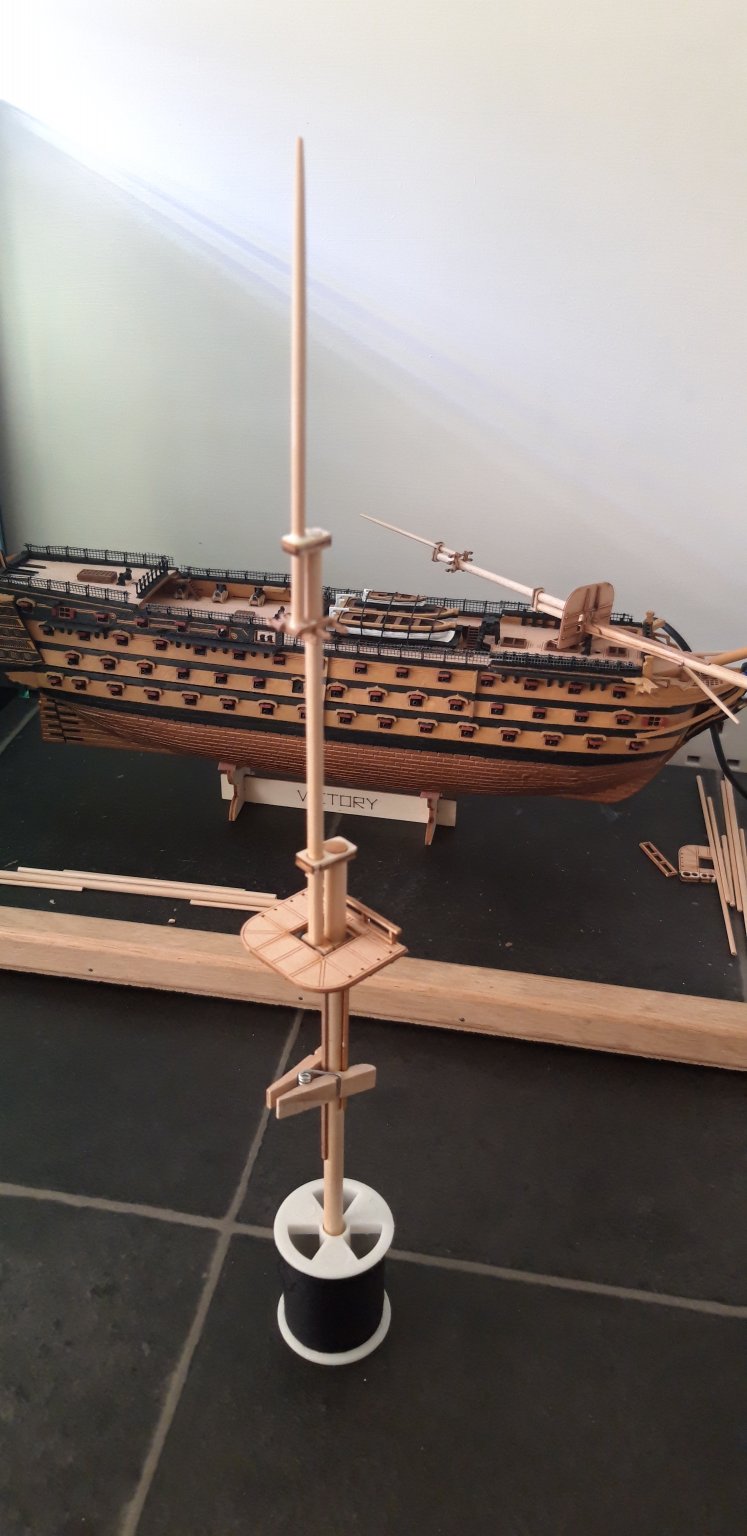
Finaly, the Fore Topgallant and Pole Mast (built as one piece)
Here is where l am now.

During my next session l will fit the yards and, time permitting, slap a bit of paint on.
Best wishes as always,
The Lazy Saint
Session. Time. Total.
44. 6 hrs. 147.
- Edwardkenway, mugje, Sgt_Hoser and 4 others
-
7
-
Hi Johnny D,
What great work, l am very pleased that you have set up a build log and that you are sharing it with us all. Have you any pictures of your re modelled steps? I would be interested in seeing them.
Keep up the good work.
Best wishes as always,
The Lazy Saint.
-
Well done GrandpaPhil, great work and keep it up.
Best wishes as always,
The Lazy Saint.
-
-
Hi Johnny D,
You are right, the photographs we take always tend to highlight faults, unfocused areas of the picture tend to make paintwork look smudged.
You have done a fantastic job on your Stern, did you build it up in layers 🤔 it certainly has made a BIG difference. I would be interested in knowing how you did it. I wonder if l could re model mine.
Thanks for sharing Johnny D.
Best wishes as always.
-
Hi Emmet,
You are carrying out the correct action to quote from another/previous post, however, you are quoting the whole post. It may be better to quote only the part of the post relevant to the subject of your post. For example, you requested information about where you could purchase a pin pusher, a very good and valid question, however, you quoted the entire post in which l mentioned my use of one. That post consisted of some 40 lines of text and 13 pictures.
6 hours ago, Emmet said:Sorry but I did not realize it was a problem
Don't worry, it's not a problem, it's just clearer keeping the quote short and relevant.
Best wishes as always,
The Lazy Saint.
-
Hi DanielD
You planking is fantastic, the work maybe a bit tedious, but it is absolutely perfect.
Thanks for sharing it and keep up the good work
Best wishes as always.
The Lazy Saint.
-
Hi all,
Hello Emmet, please may l respectfully request that when you quote from a previous post that you just highlight the relevant sentence/section and quote that part. At the moment entire posts are being duplicated. As l have no computer and work only from my phone l find it quite confusing when l am required to look back for reference.
Please don't take offence Emmet as non is intended.
Best wishes as always,
6 hours ago, Johnny D said:Thought I should drop in a quick pic of where I am at with the bow sprit.
Thank you so much for the picture Johnny D, it looks fantastic. I am so pleased you posted it as it will help me no end. It's a great help to each other to share work, that is why l am hoping for a build log from you, especially now we are at the rigging stage.
Yes, l see the variation in colour schemes, l was unsure of the path to take on that one but decided to copy, where possible, the real Victory at Portsmouth.
Best wishes as always,
The Lazy Saint.
-
Hi Haiko,
What great progress you have made, it is very impressive indeed. I don't feel in a position to advise you and, infact, you will get far better advise from experienced members of the group. However, l will say l agree with you......
22 minutes ago, The_bitter_end said:5. Whats the deal with coppering? It seems to me that it would be bordering on a sin to copper over this hull
It would be bordering on a sin to copper over your hull, l have to (or white paint) l lack the skill to produce a hull worthy of varnish, but yours looks wonderful. Keep up the great work.
Best wishes as always,
The Lazy Saint.
-
Hi all,
Each session seems to produce less work than expected for the time spent, this is due to the demanding nature of the build. A lot of time is spent in reading ahead to spot any potential problems, consulting/comparing with the AOTS "Bible" and, of course, head scratching.
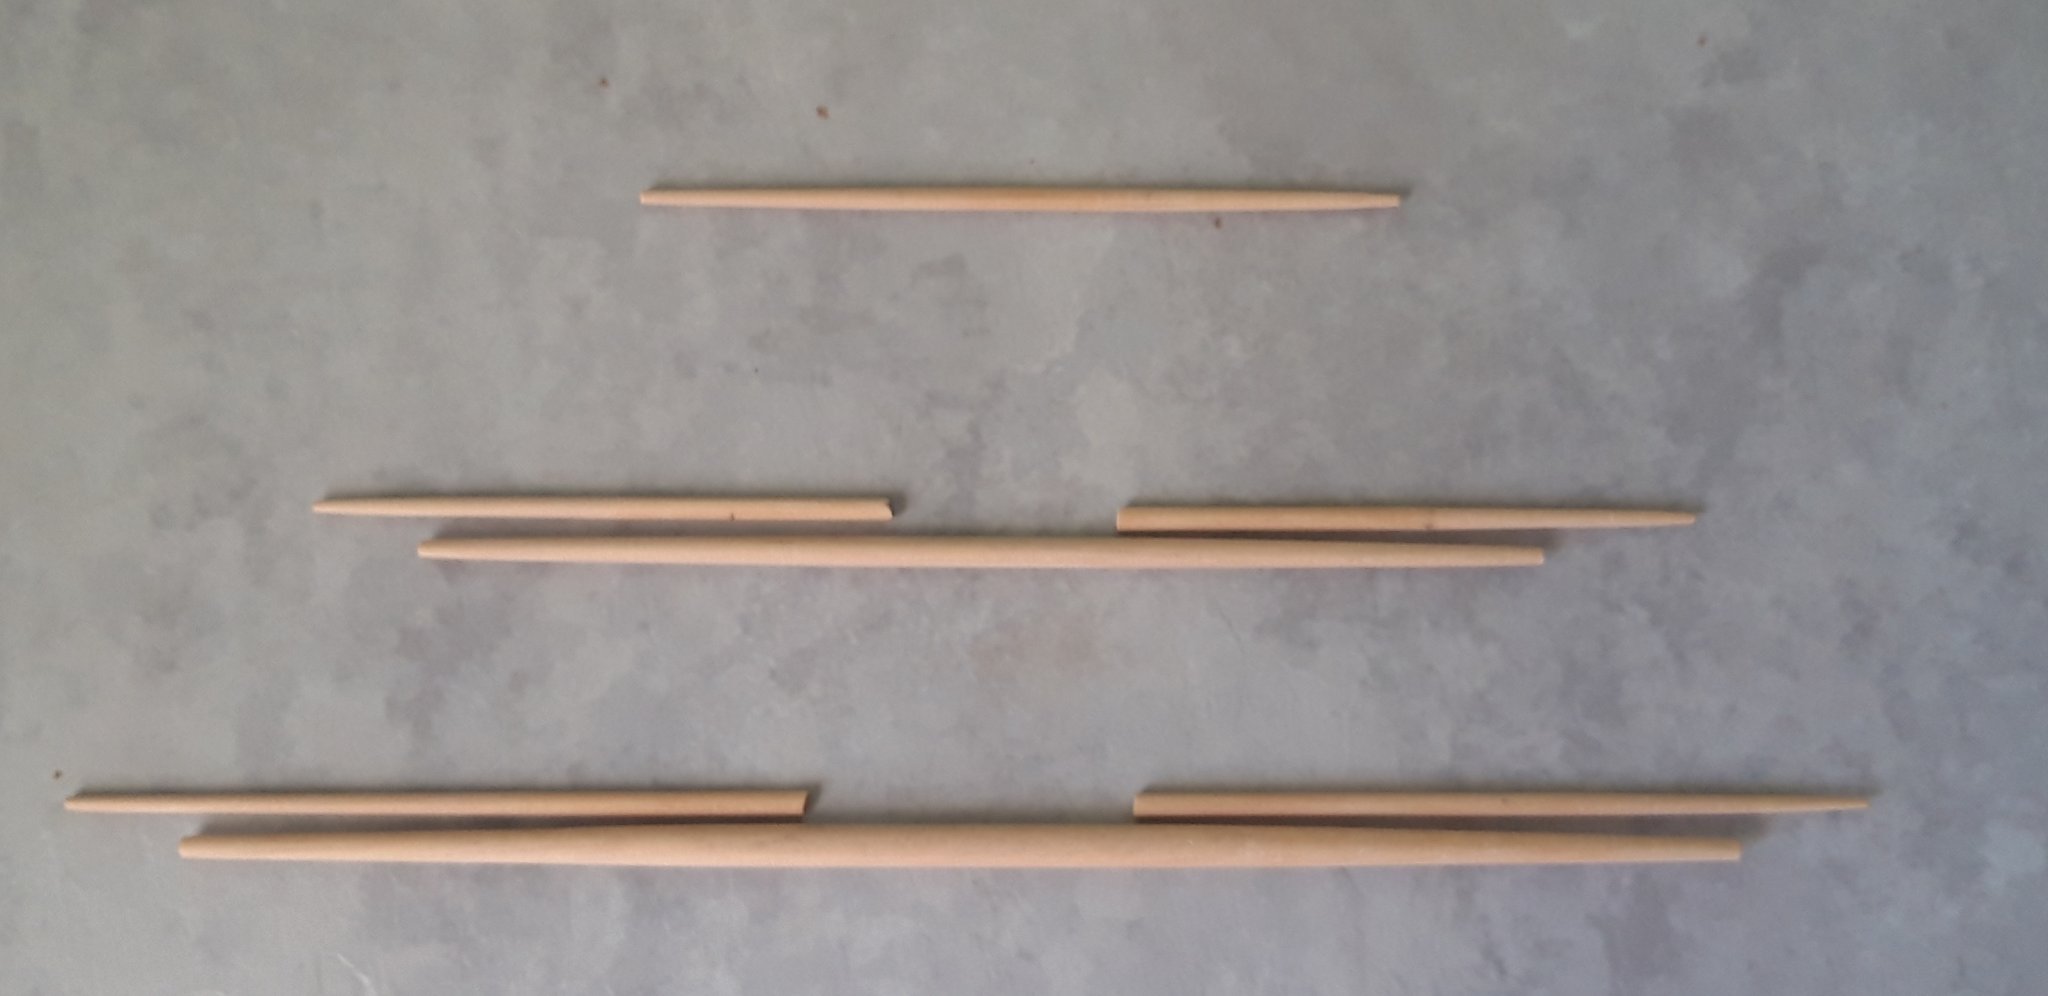
Today l have been working on the For Mast and Yards.
First up is a shot of the yards, from top to bottom:
1. Fore Topgallant Yard
2. Fore Topmast Yard and Studding Sail Boom's
3. Fore Yard and Studding Sail Boom's
Sanding each one to the correct taper is another of those repetitive jobs that gets easier as you go along. I managed to snap one of the yards, just as l was completing it, l said "oh dear" or words to that effect.
The second shot is of all the component parts, cut and sanded. I have also fitted the Studding Sail Boom Irons in readiness for fitting into the end of the yards.
My next challenge will be building the For Top and the Tressle/Cross Trees.
Best wishes as always,
The Lazy Saint.
Session. Time. Total.
43. 3 hrs. 141.
-
Its looking realy good well done, you have made a great job of the Chainplates. They are similar to the one's l made for my Sherbourne (l have to say yours are certainly better than my attempt) what are the ones like that came with the kit 🤔
Best wishes as always,
The Lazy Saint.
-
Well done Phil, they are coming along fine. I have to say your carving is getting very good.
Keep up the good work.
Best wishes as always,
The Lazy Saint.
-
Thanks for sharing your work, it is of the highest quality. I am, as always very, very impressed Richard.
Best wishes as always,
The Lazy Saint.
-
Hi all,
Thanks very much for your kind words Richard and Johnny D, appreciated as always. I hope you enjoy tackling this particular build Johnny D, l also hope you post a log, l would be very interested in seeing how you approach it.
Finding a pin pusher in the US shouldn't pose to great a problem Emmet, have you tried to Google it 🤔 l myself purchased my one from Cornwall Model Boats over here in the UK. I am sorry l can't be much more help on this problem.
I spent 4 hour working on my build today, the time was divided as follows. 1 hour building 3 hours head scratching. That seems out of balance to me, having said that l am finding it a bit of a challenge.
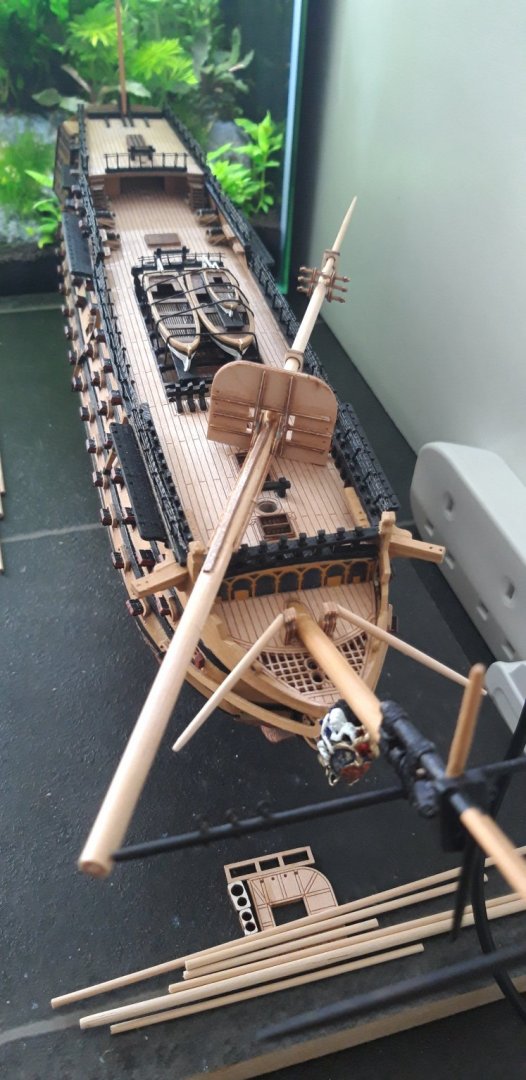
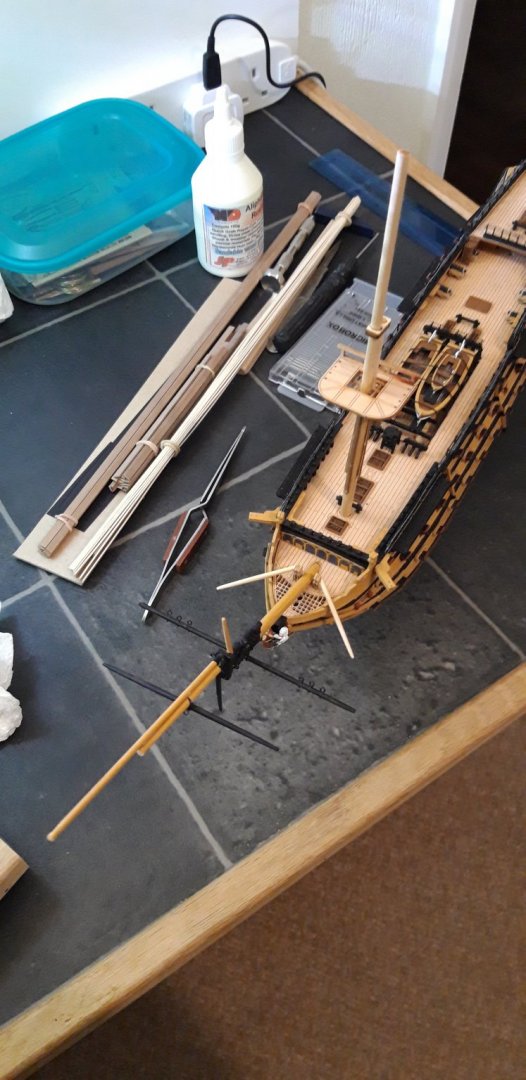
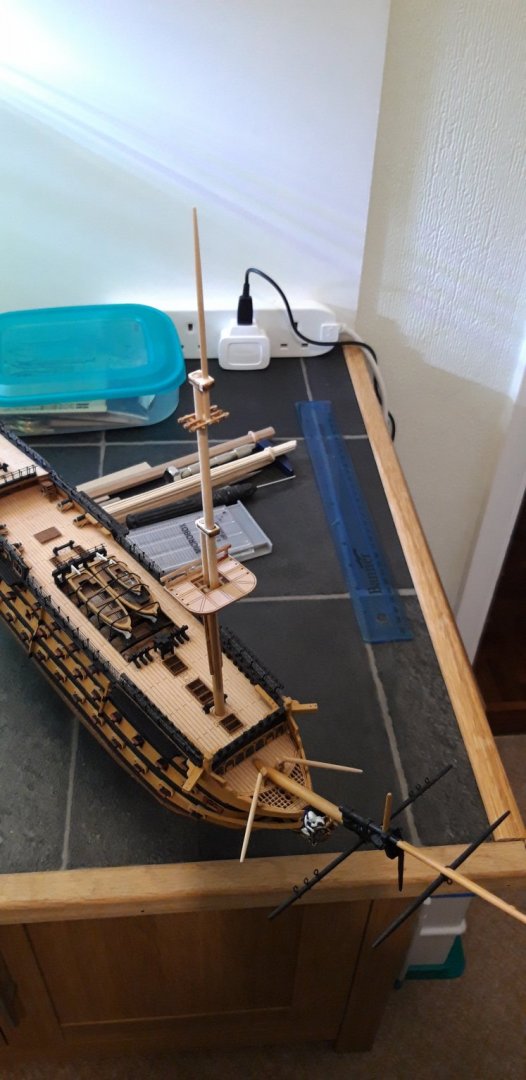
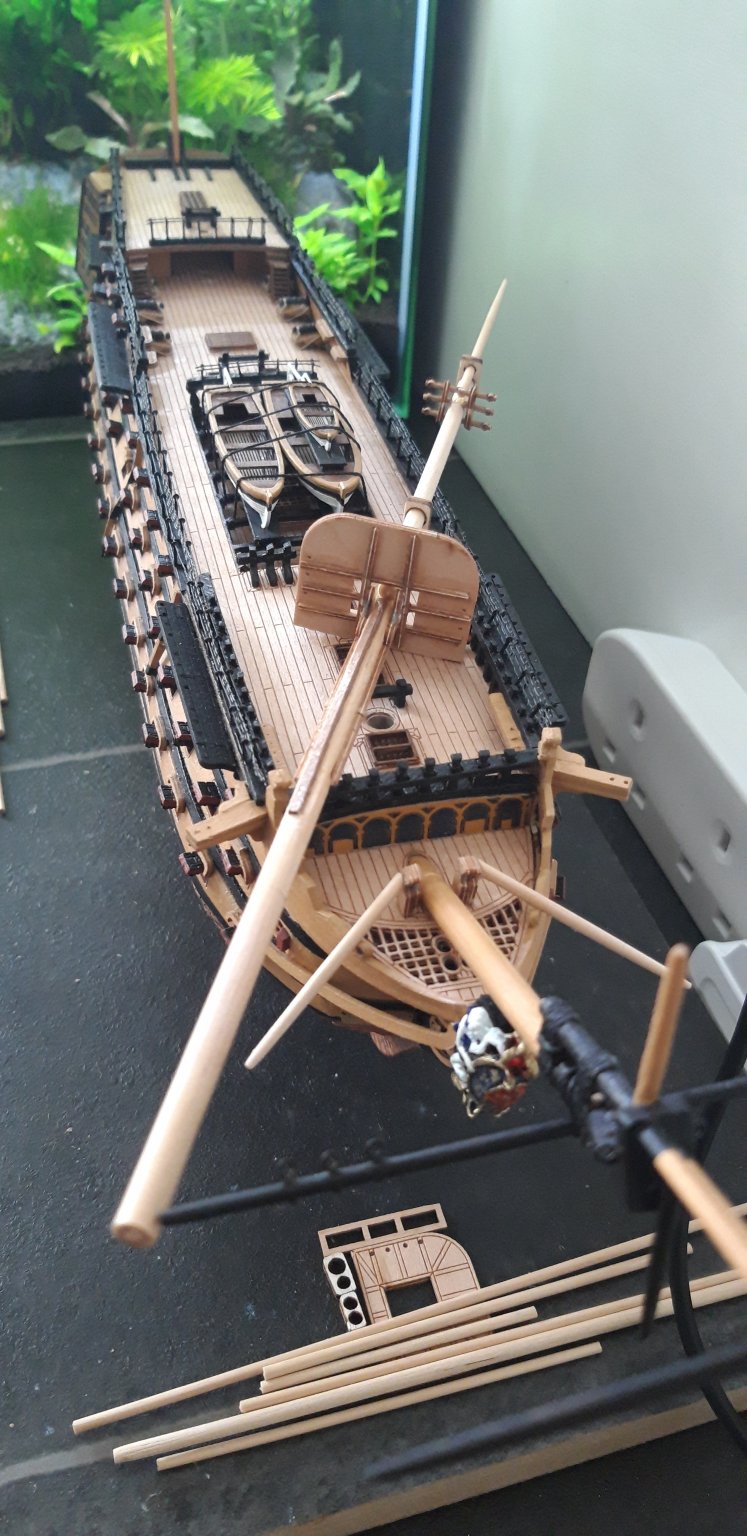
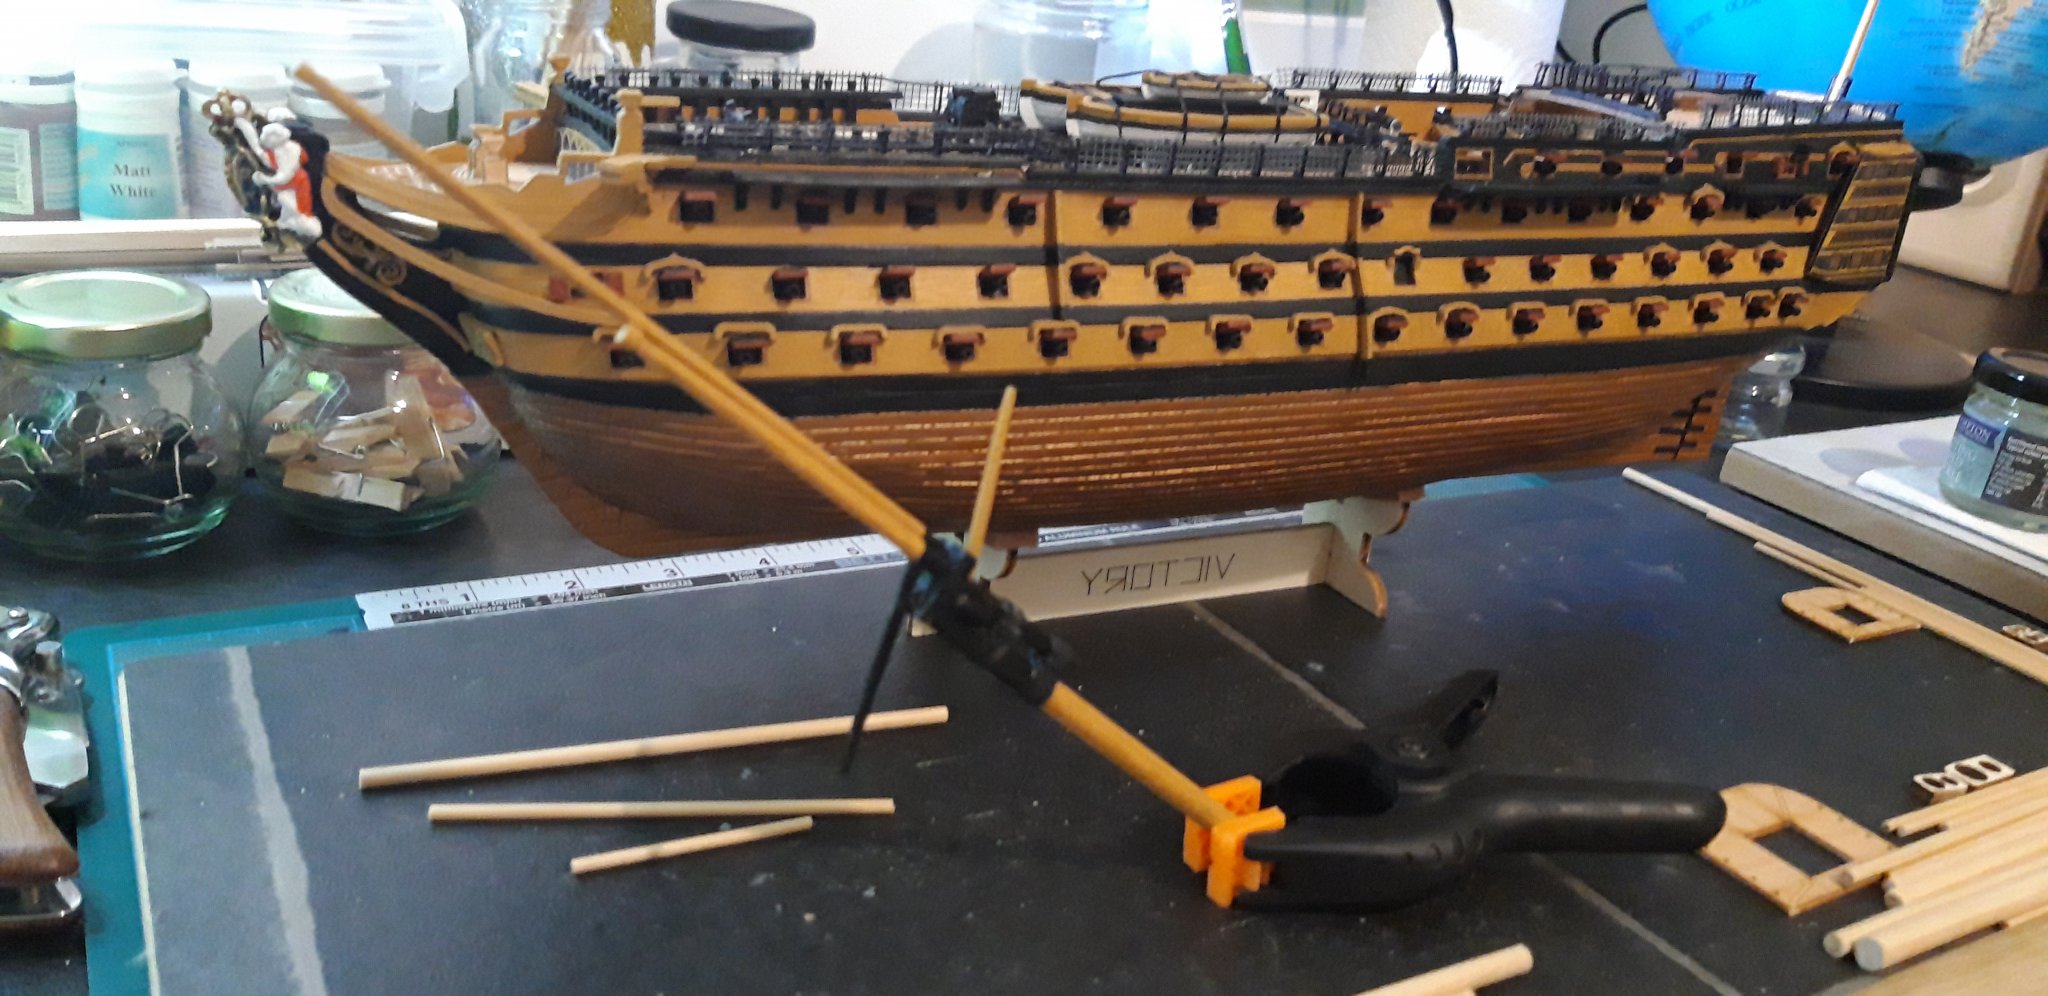
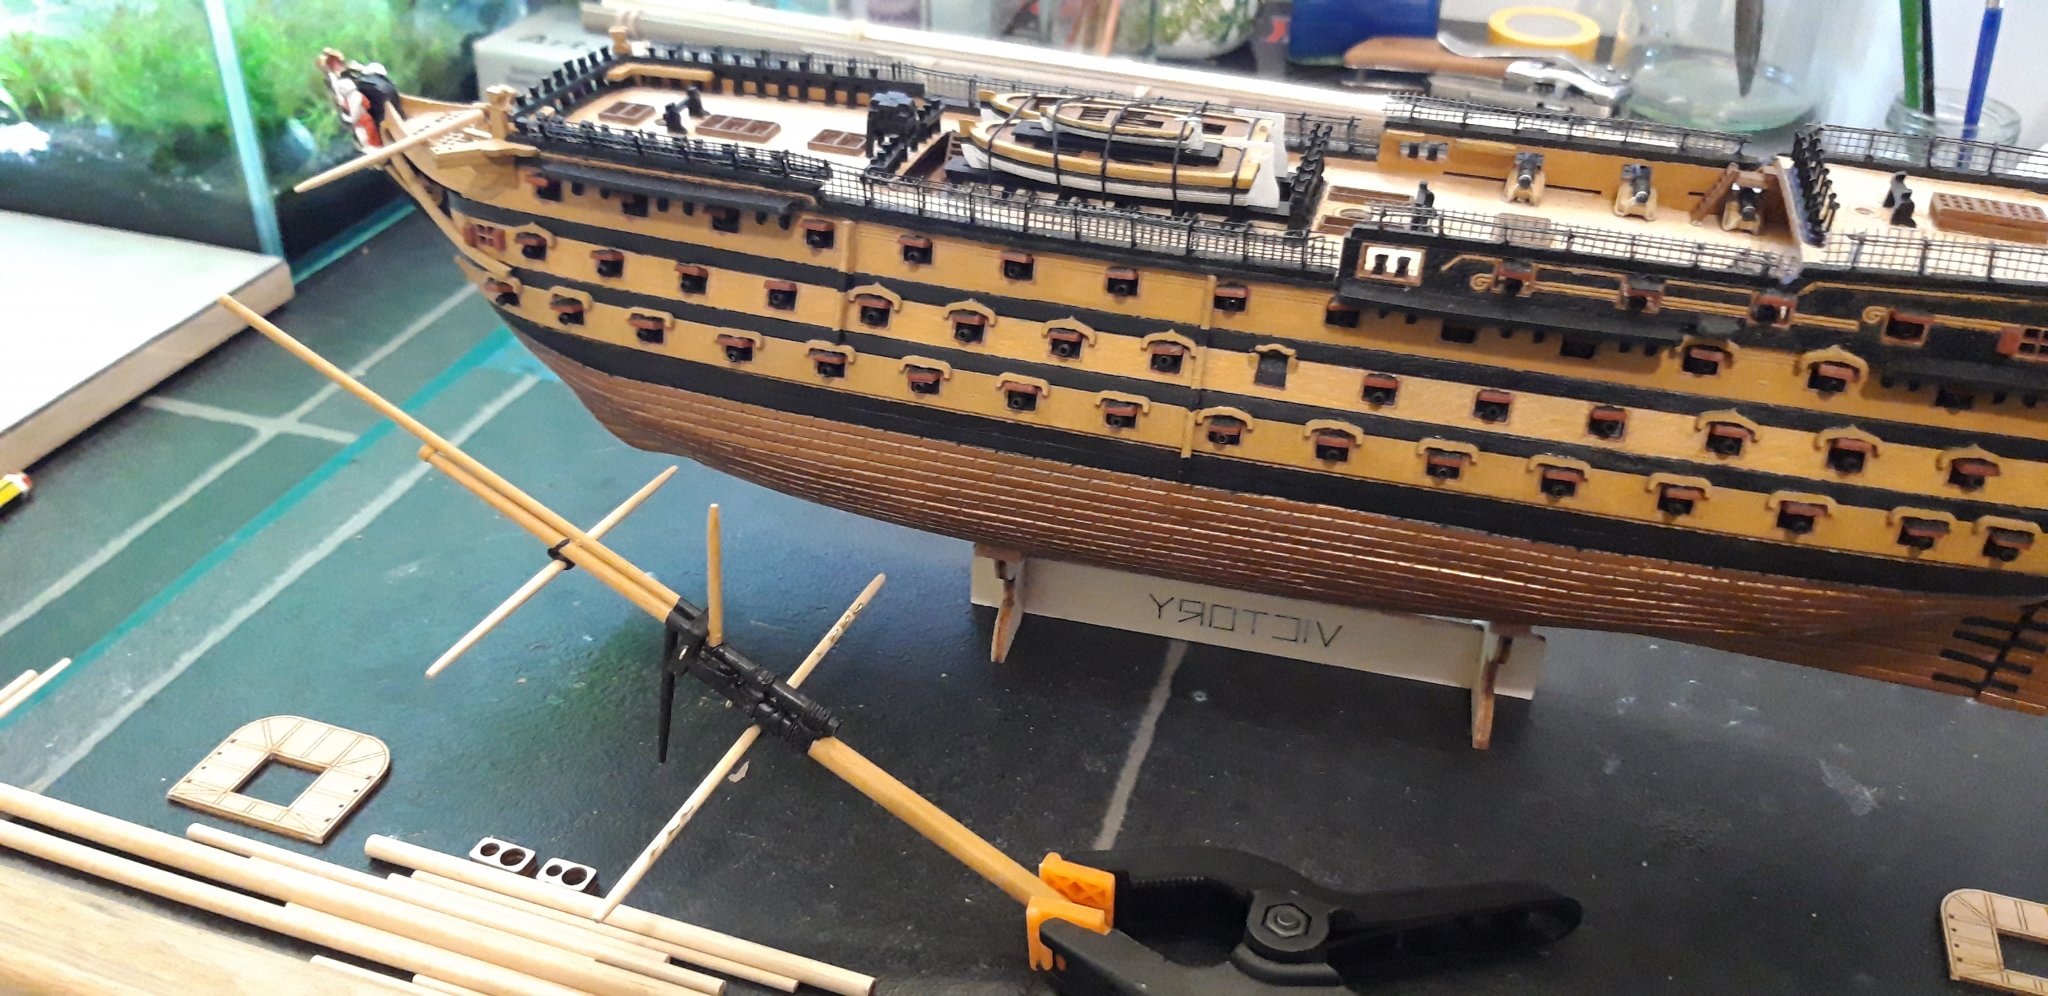
This first image shows the Bowsprit assembly, consisting of the Bowsprit, Jibboom and Flying Jibboom. Also fitted is the Jack Staff and the Dolphin Striker.

Next up is an image showing, at the top, the Spiritsail Topsail Yard and the lower, Spiritsail Yard.........

Eyelets fitted and painted.

The last image is the Bowsprit assembly fitted. I have also fitted, but not painted, the Boomkins.
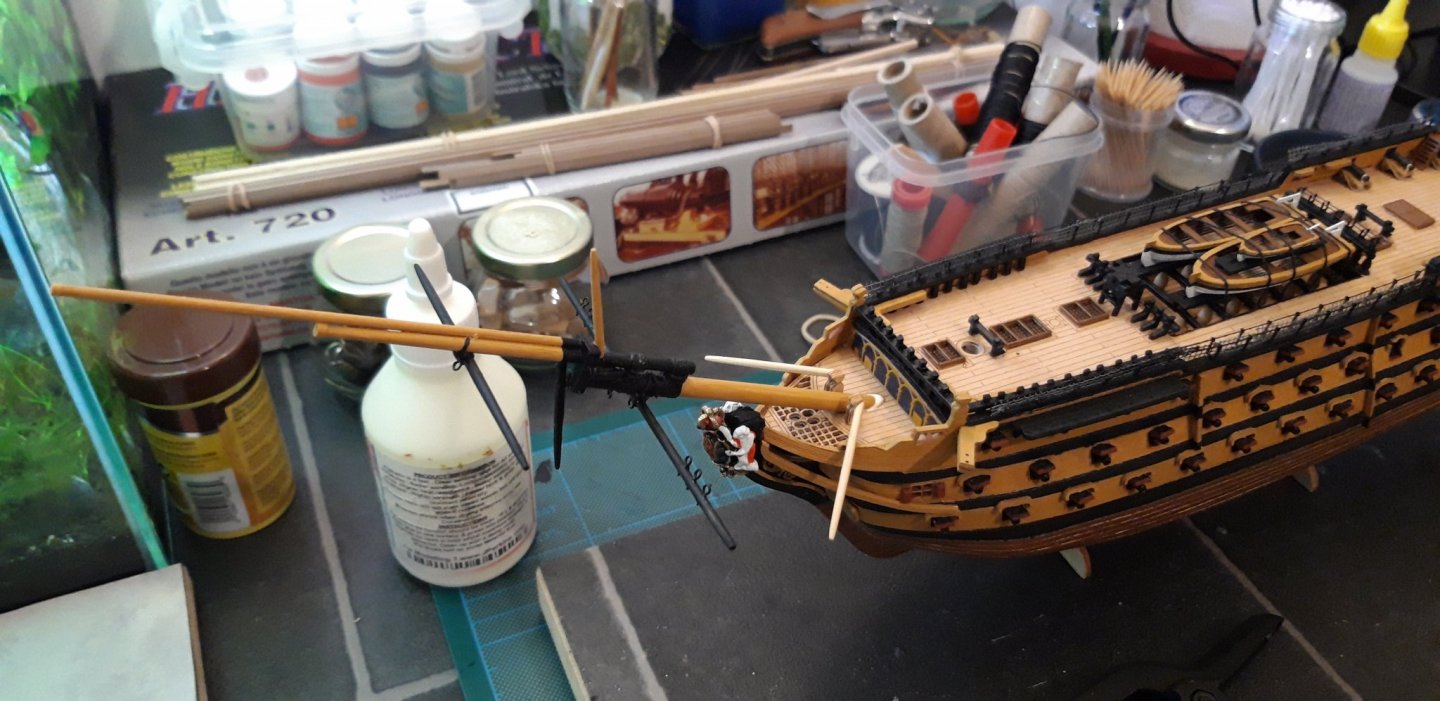
A pleasing, if rather slow, session today. I have a little bit of painting to do at the start of my next session and then it is on to the Formast assembly.
Best wishes as always,
The Lazy Saint.
Session. Time. Total.
42. 4 hrs. 138.
-
-
Hi Phil,
I am looking forward to seeing them, they certainly will look the part and elevate the whole build.
Good luck and keep up the good work.
Best wishes as always,
The Lazy Saint.
-
Hi all,
Thank you all for the likes and kind words they really are appreciated. Dave is your build being logged here on MSW 🤔 l can't find it and would like to see how it is coming on. Thanks for the heads up on your build Emmet, l shall look out for it. 👍 rkwz l am following you now and have to say she is looking great.
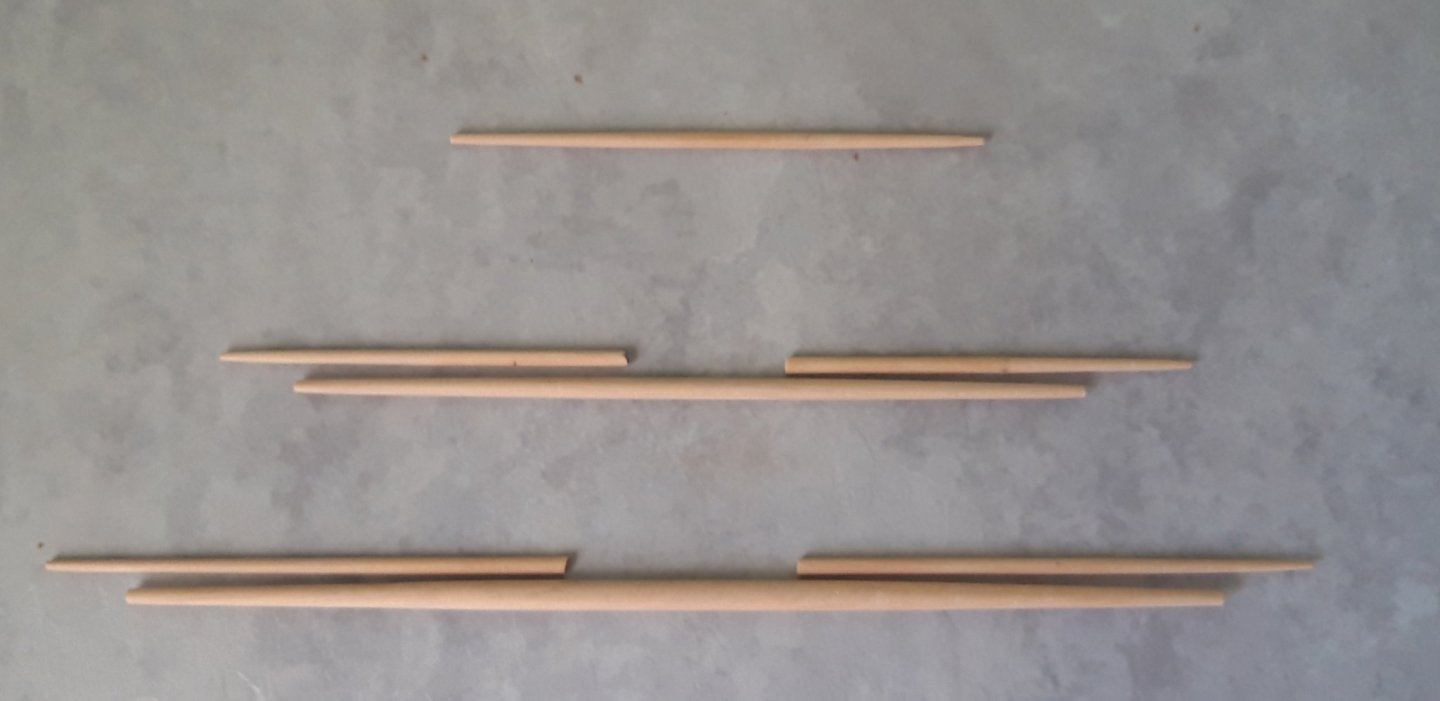
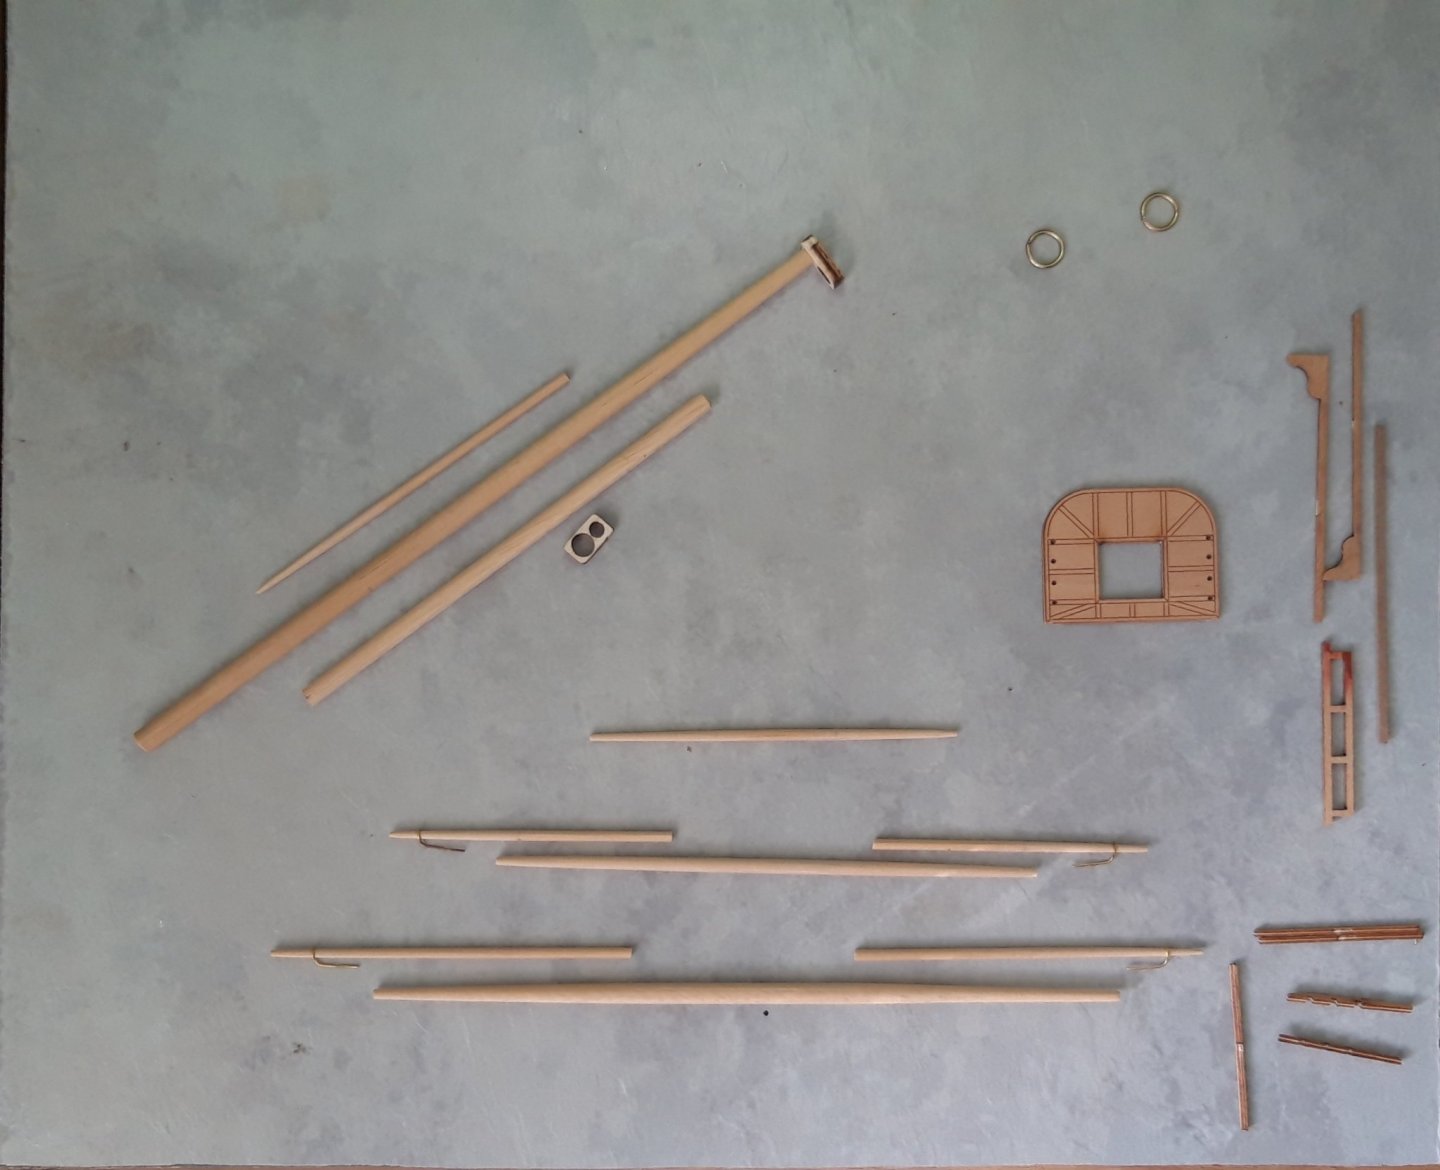
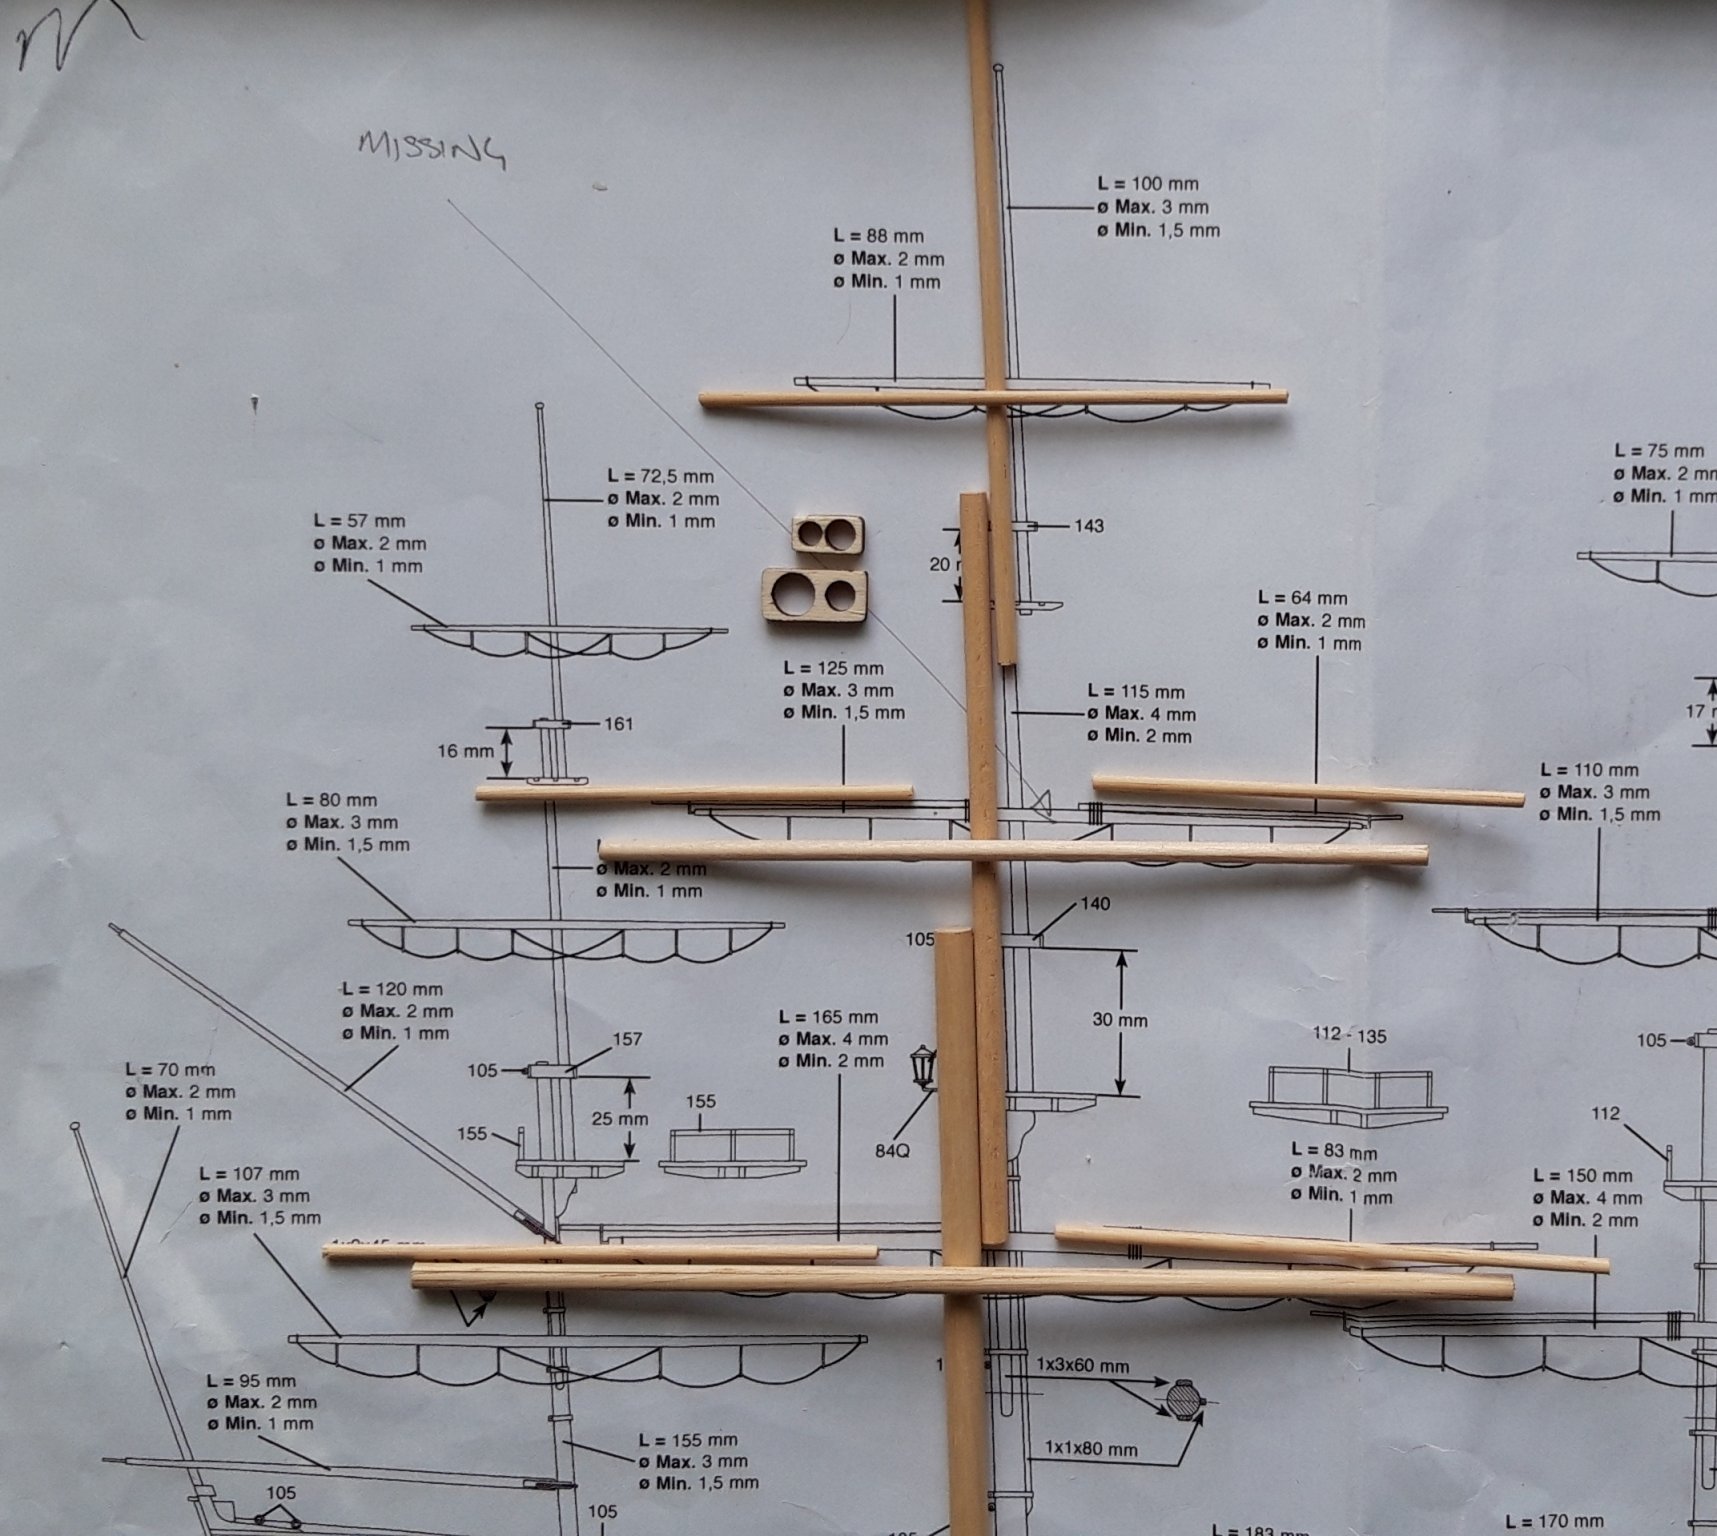
This morning l managed a two hour session and it is surprising how much you can get done in a short period of time. My aims today were: 1. To cut to the correct dimensions the Masts and yards. 2. Identify the discrepancies between the AOTS book/drawings and the kit plans. 3. Start the process of shaping the Masts and Spars.
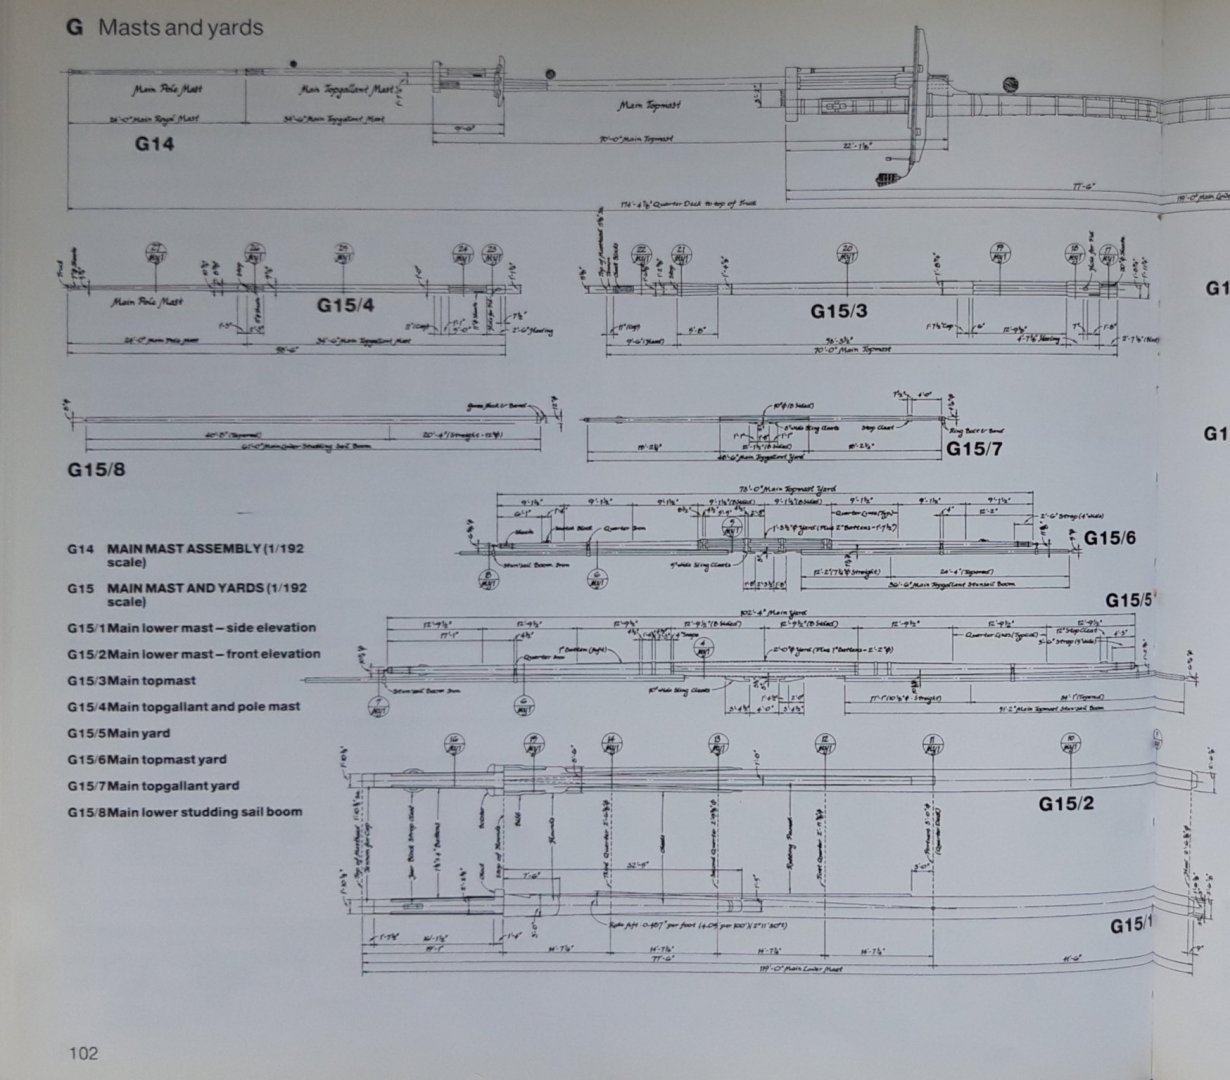
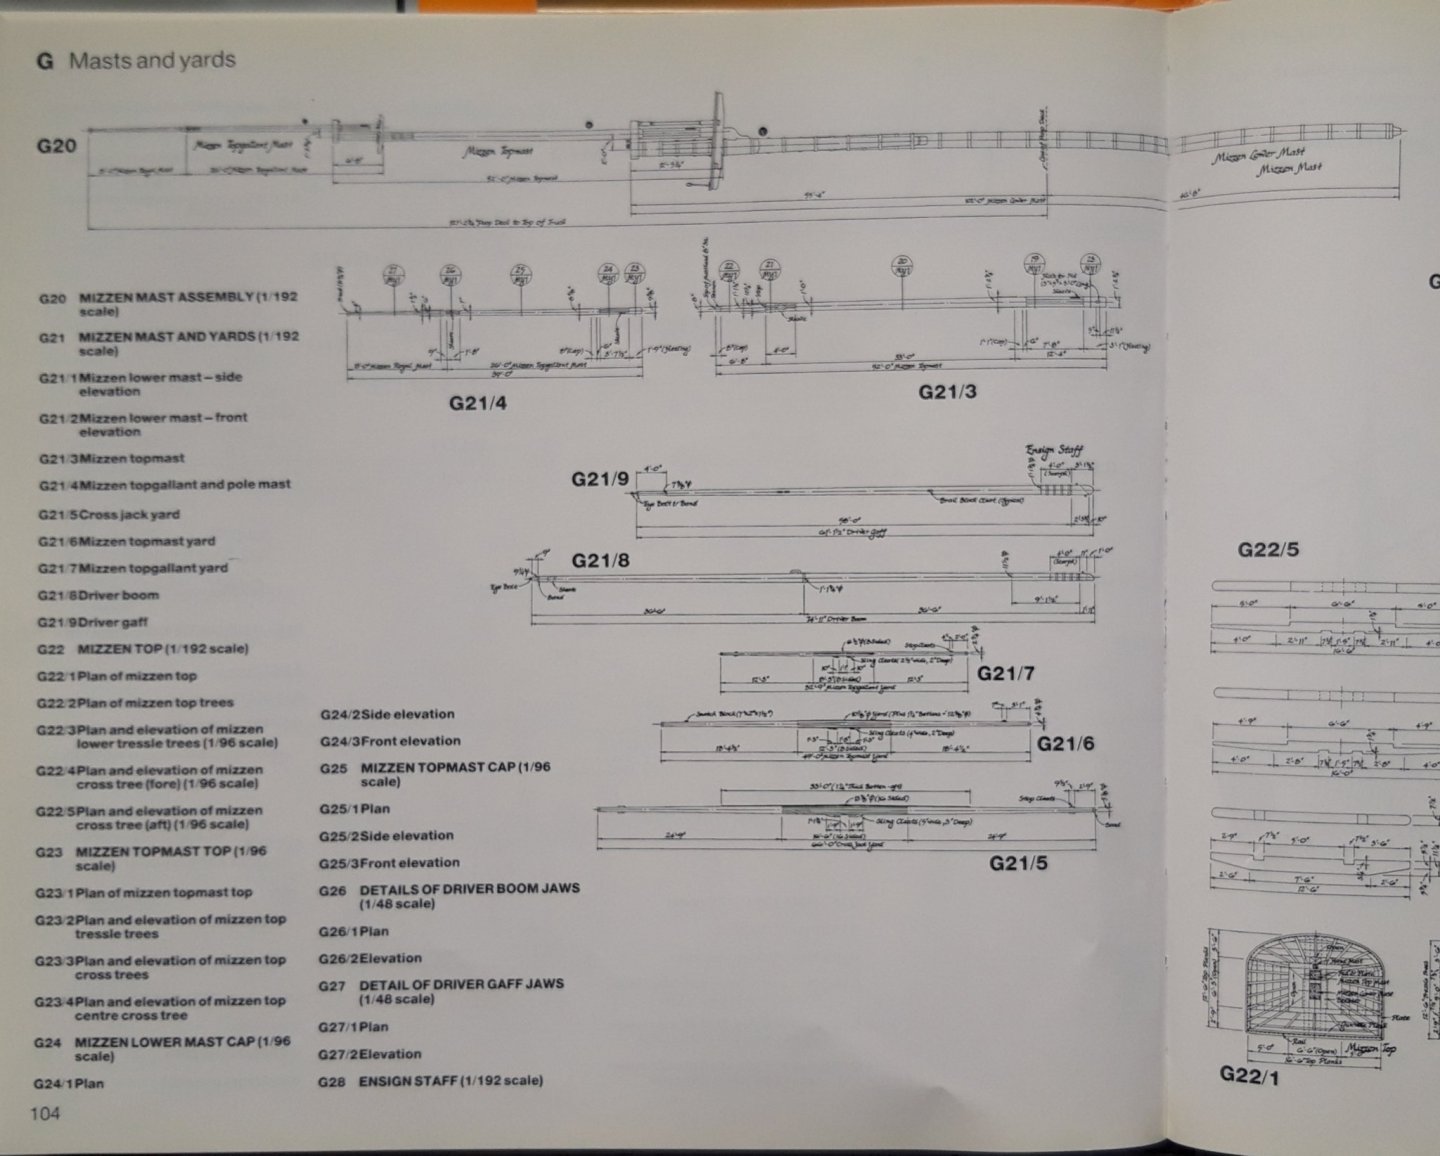
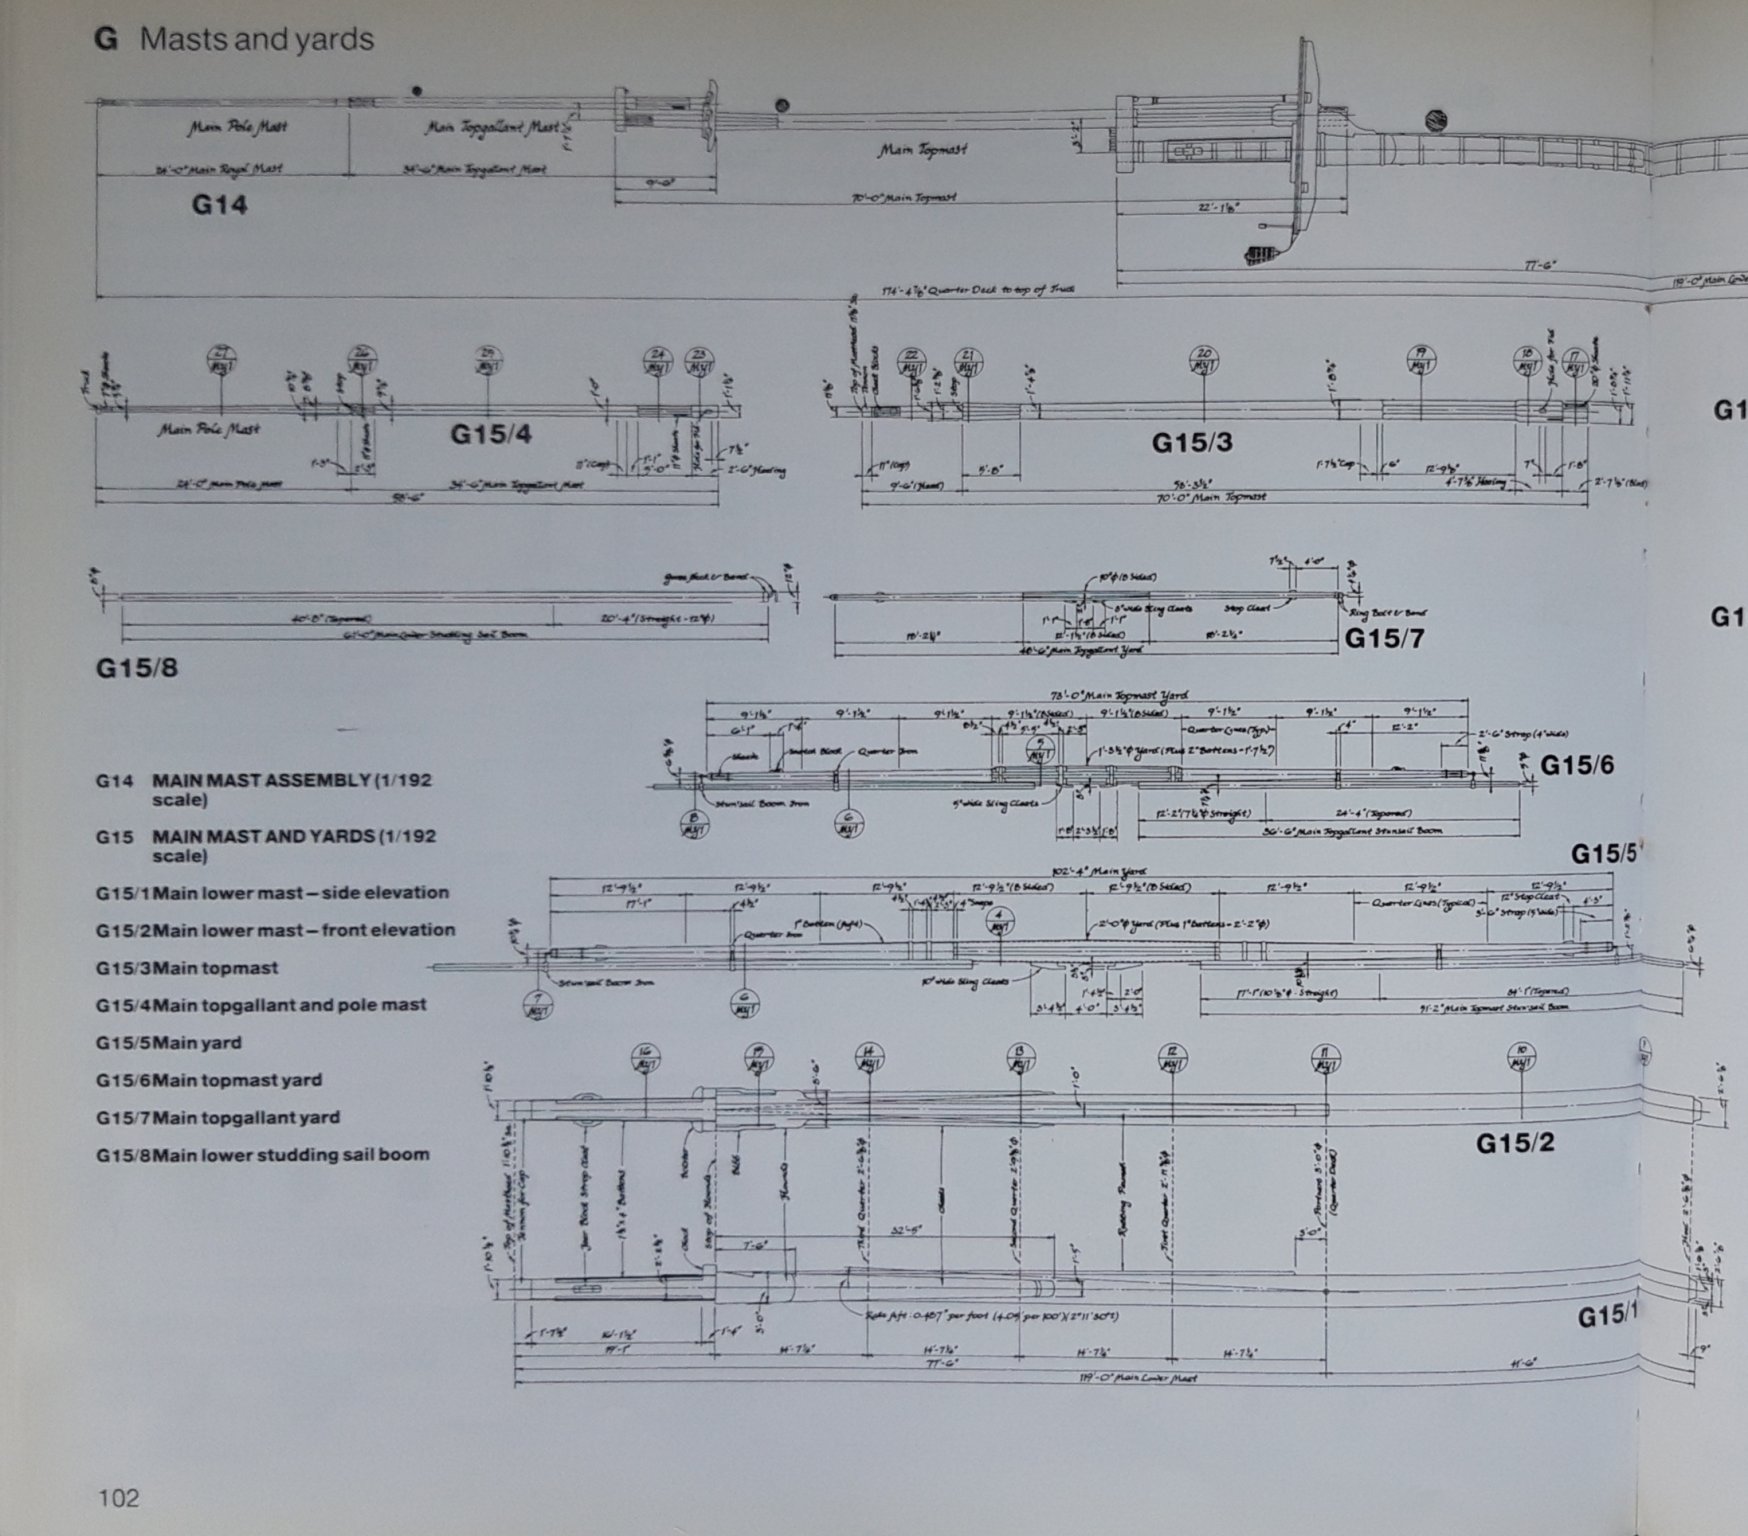
1st up is the Formast and it's Spars, the first image is the AOTS plan/drawing followed by the kit plan and the corresponding cut to size Mast and Spars.
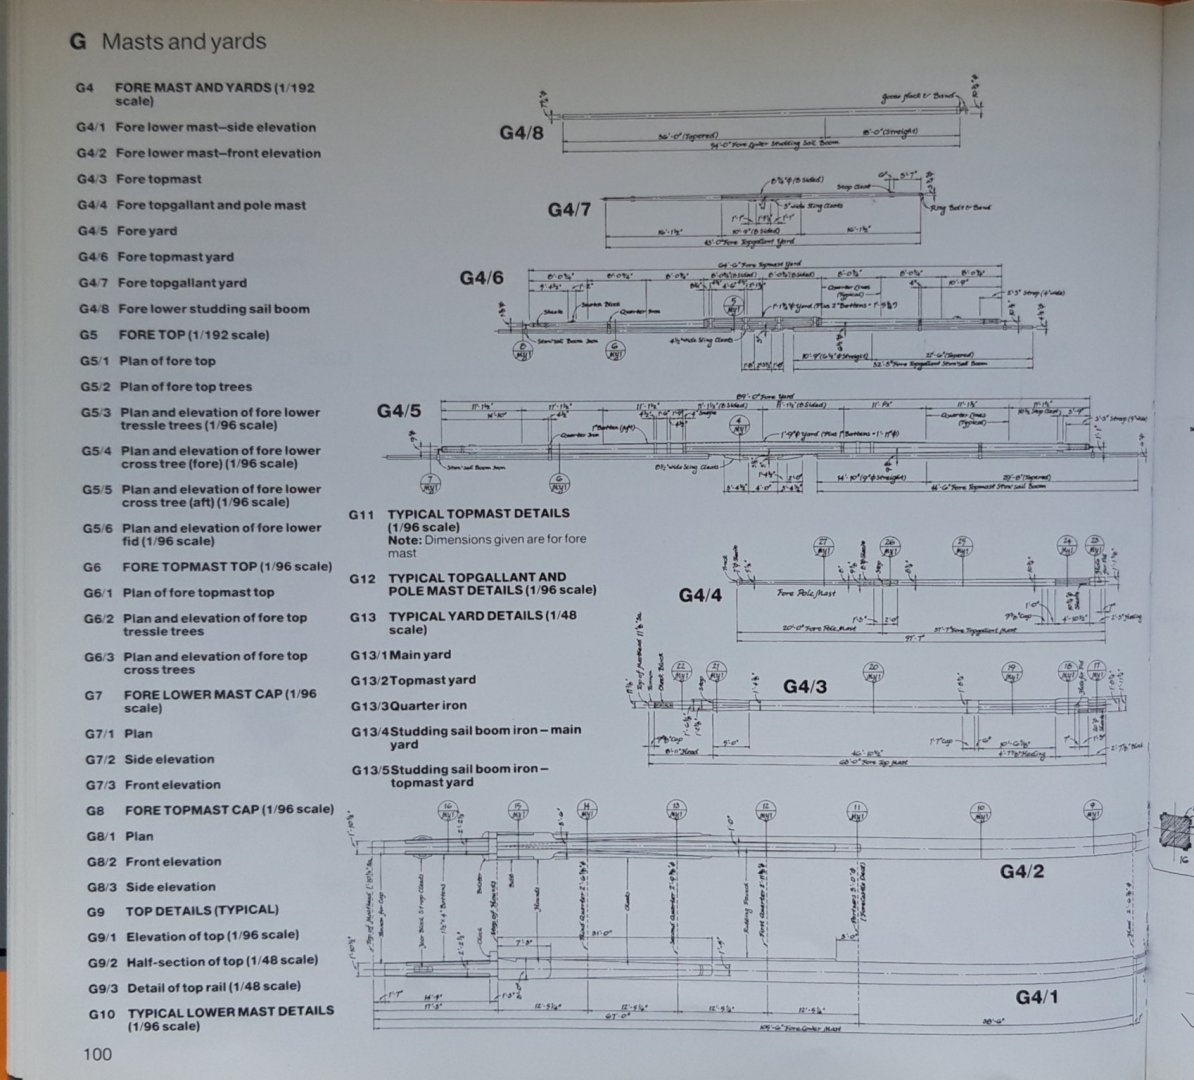
The main discrepancies are the same identified when preparing the Bowsprit, that is to say, the scale (l shall deal with in the same way) and the topgallant and pole mast have been produced as one, understandable considering the scale. I re cut for the Bowsprit because it was glaringly obvious, but l will keep the top two sections of all three masts as one piece as the model designers intended.

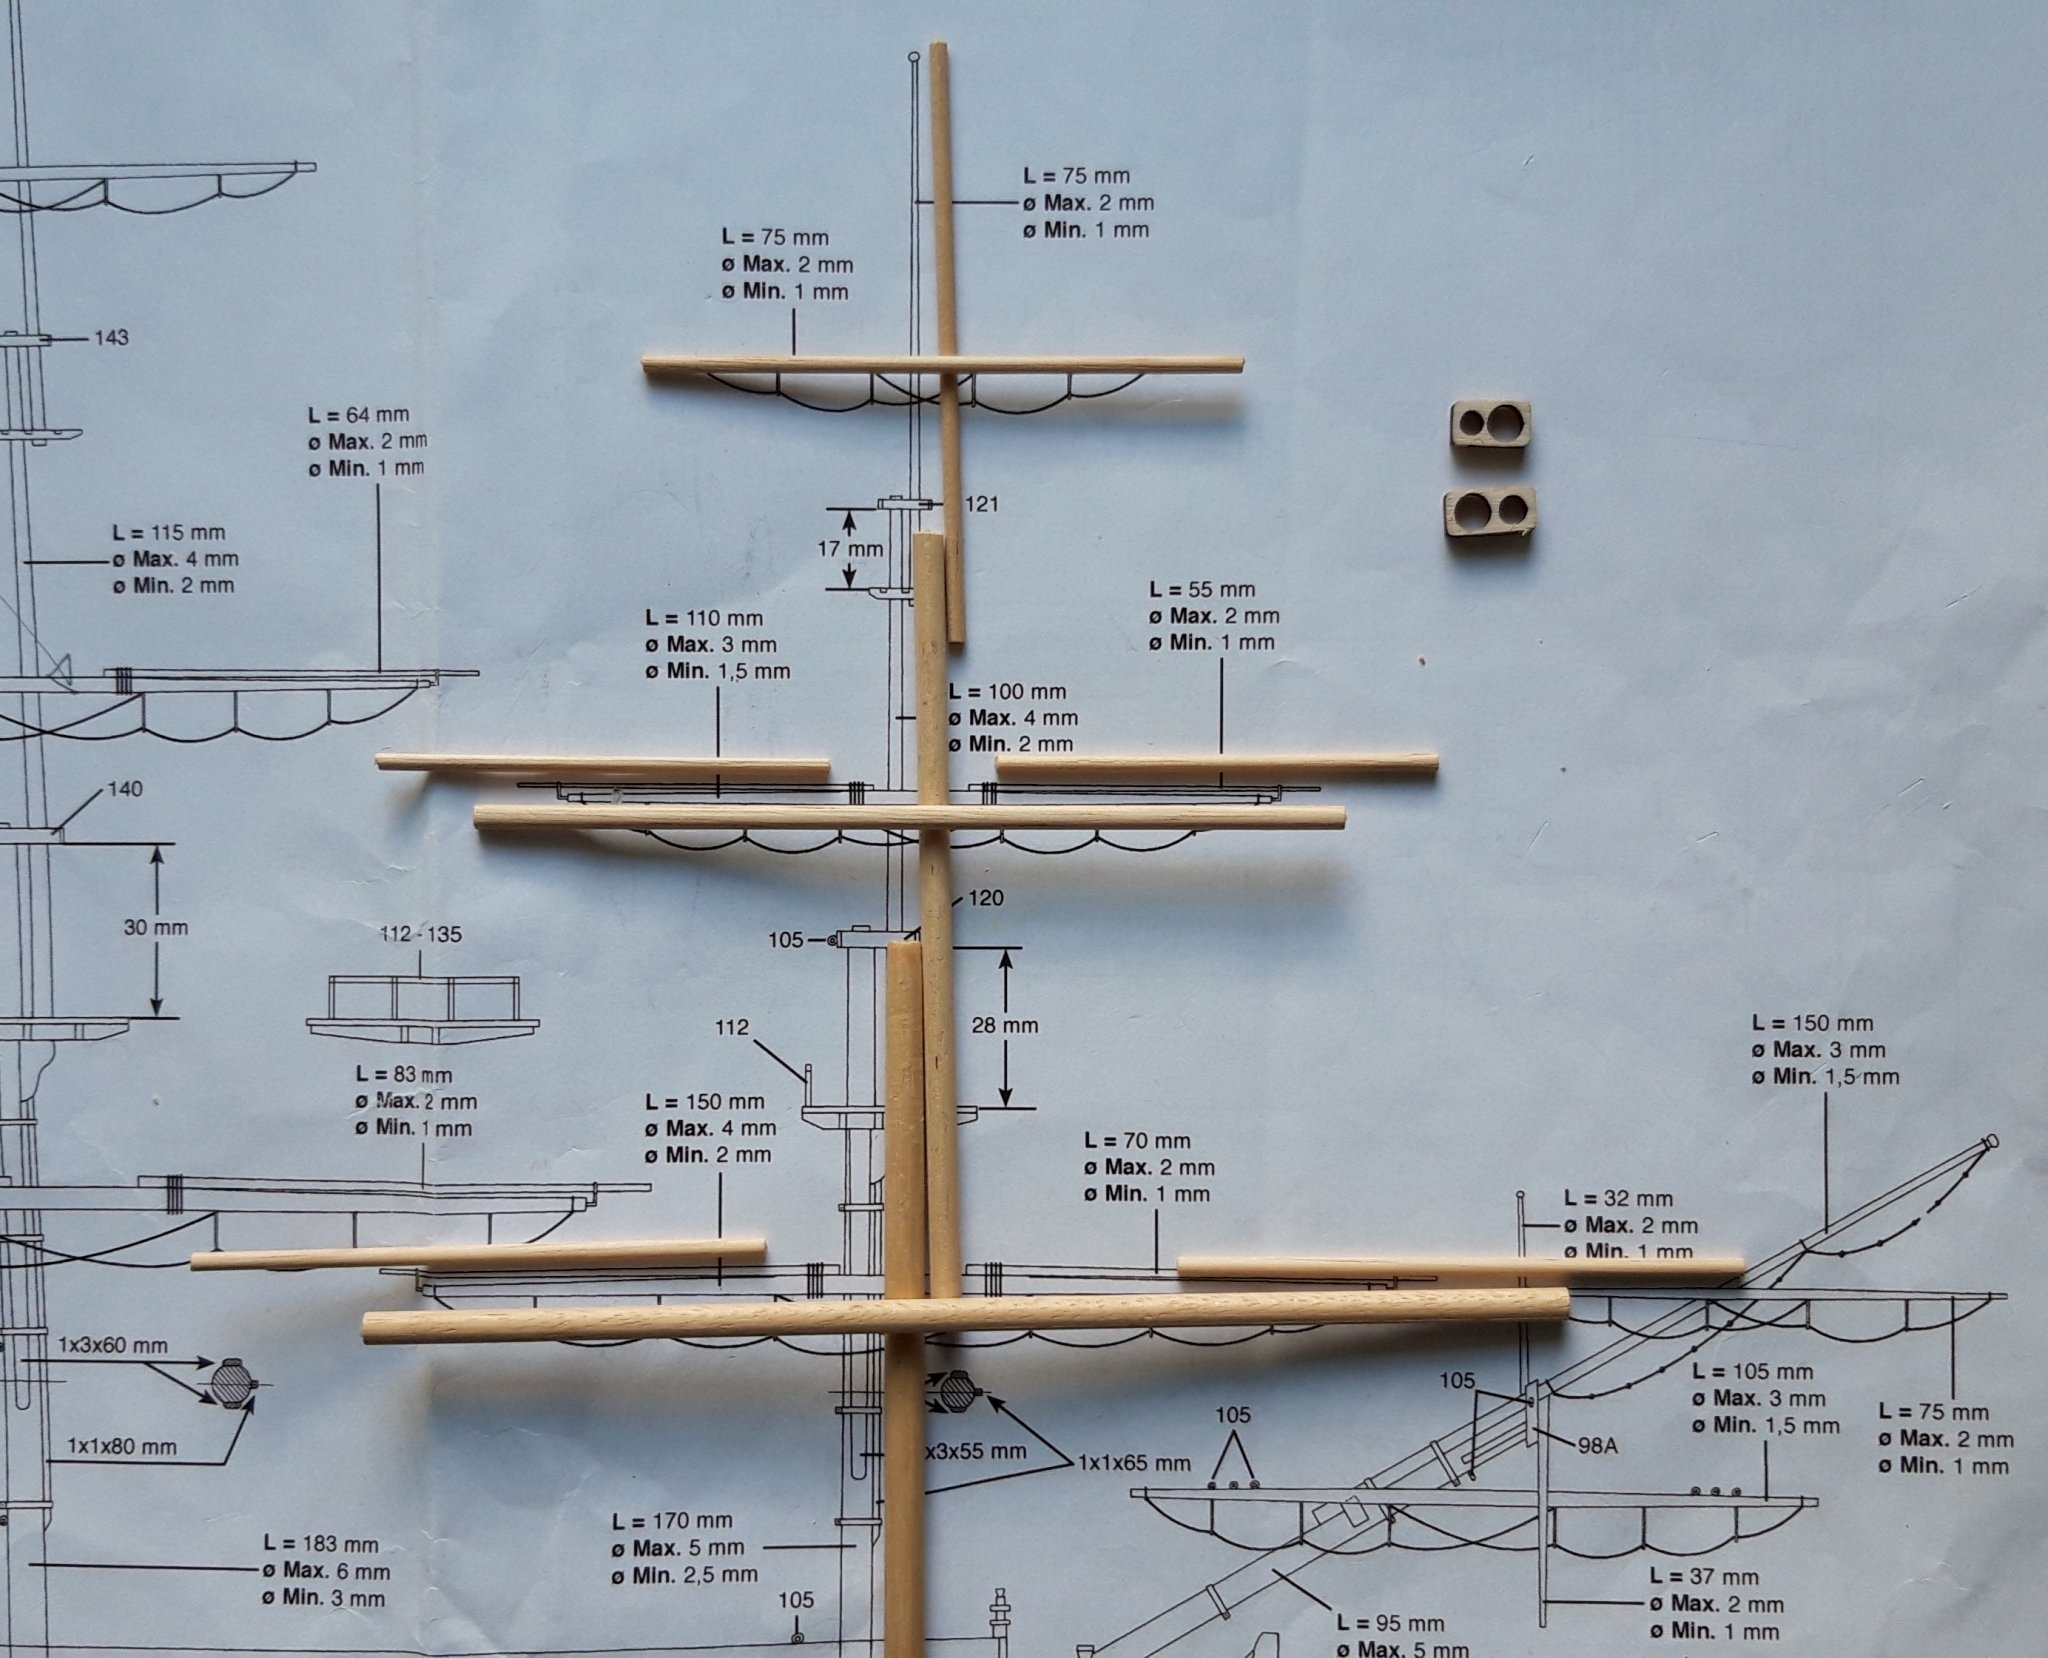
Next up is the Main mast.

Finally, the Mizzen Mast assembly.
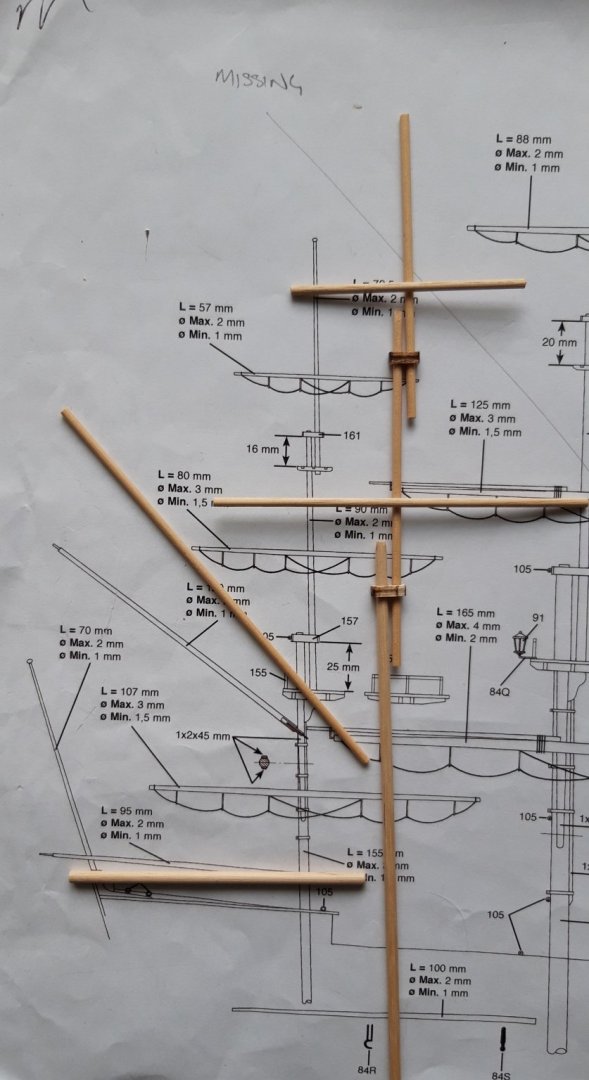
And this is where l am now, a bundle of sticks (of varying diameters and lengths) some sandpaper and a tub of elbow grease. I am now going off to start the sanding and shaping, it will take some time but l will post again when it is completed.

Best wishes as always,
The Lazy Saint.
Session. Time. Total.
41. 2 hrs. 134.
-
I have enjoyed looking through your log. She is coming along very nicely indeed, thanks for sharing. I am looking forward to seeing the rigging taking shape.
Best wishes as always,
The Lazy Saint.
-
On 1/1/2020 at 11:30 PM, GrandpaPhil said:
I used my new contour gauge for the first time to take the contour of the upper hull for the starboard fenders.
Hi Phil,
What a great idea, l never thought of that, l shall get one of those for myself.
Great work on the Victory.
Best wishes as always,
The Lazy Saint.
-
Fantastic work, what a wonderful looking model, thank you so much for sharing with us.
Best wishes as always,
The Lazy Saint.


HMS Victory by The Lazy Saint - Mantua - Scale 1:200 - Third wooden ship
in - Kit build logs for subjects built from 1751 - 1800
Posted
Hi all,
Hi Derek, thanks for looking in and your kind words. I, like you, spend a lot of time "faffing" around and head scratching so l know what you mean. How long ago did you move away 🤔 l don't expect it has changed much.
Too true Richard, l find though the trick is to have a break, but not for too long. 👍
Johnny D, l am very impressed with your rigging, l hope l am able to manage as well as you. You are quite right, it is very complex
A Lazy Saint l hope 🤣🤣🤣
Thanks for your kind words Mugje, it encourages as you know. Your Pickle is a masterpiece, good luck with your next project.
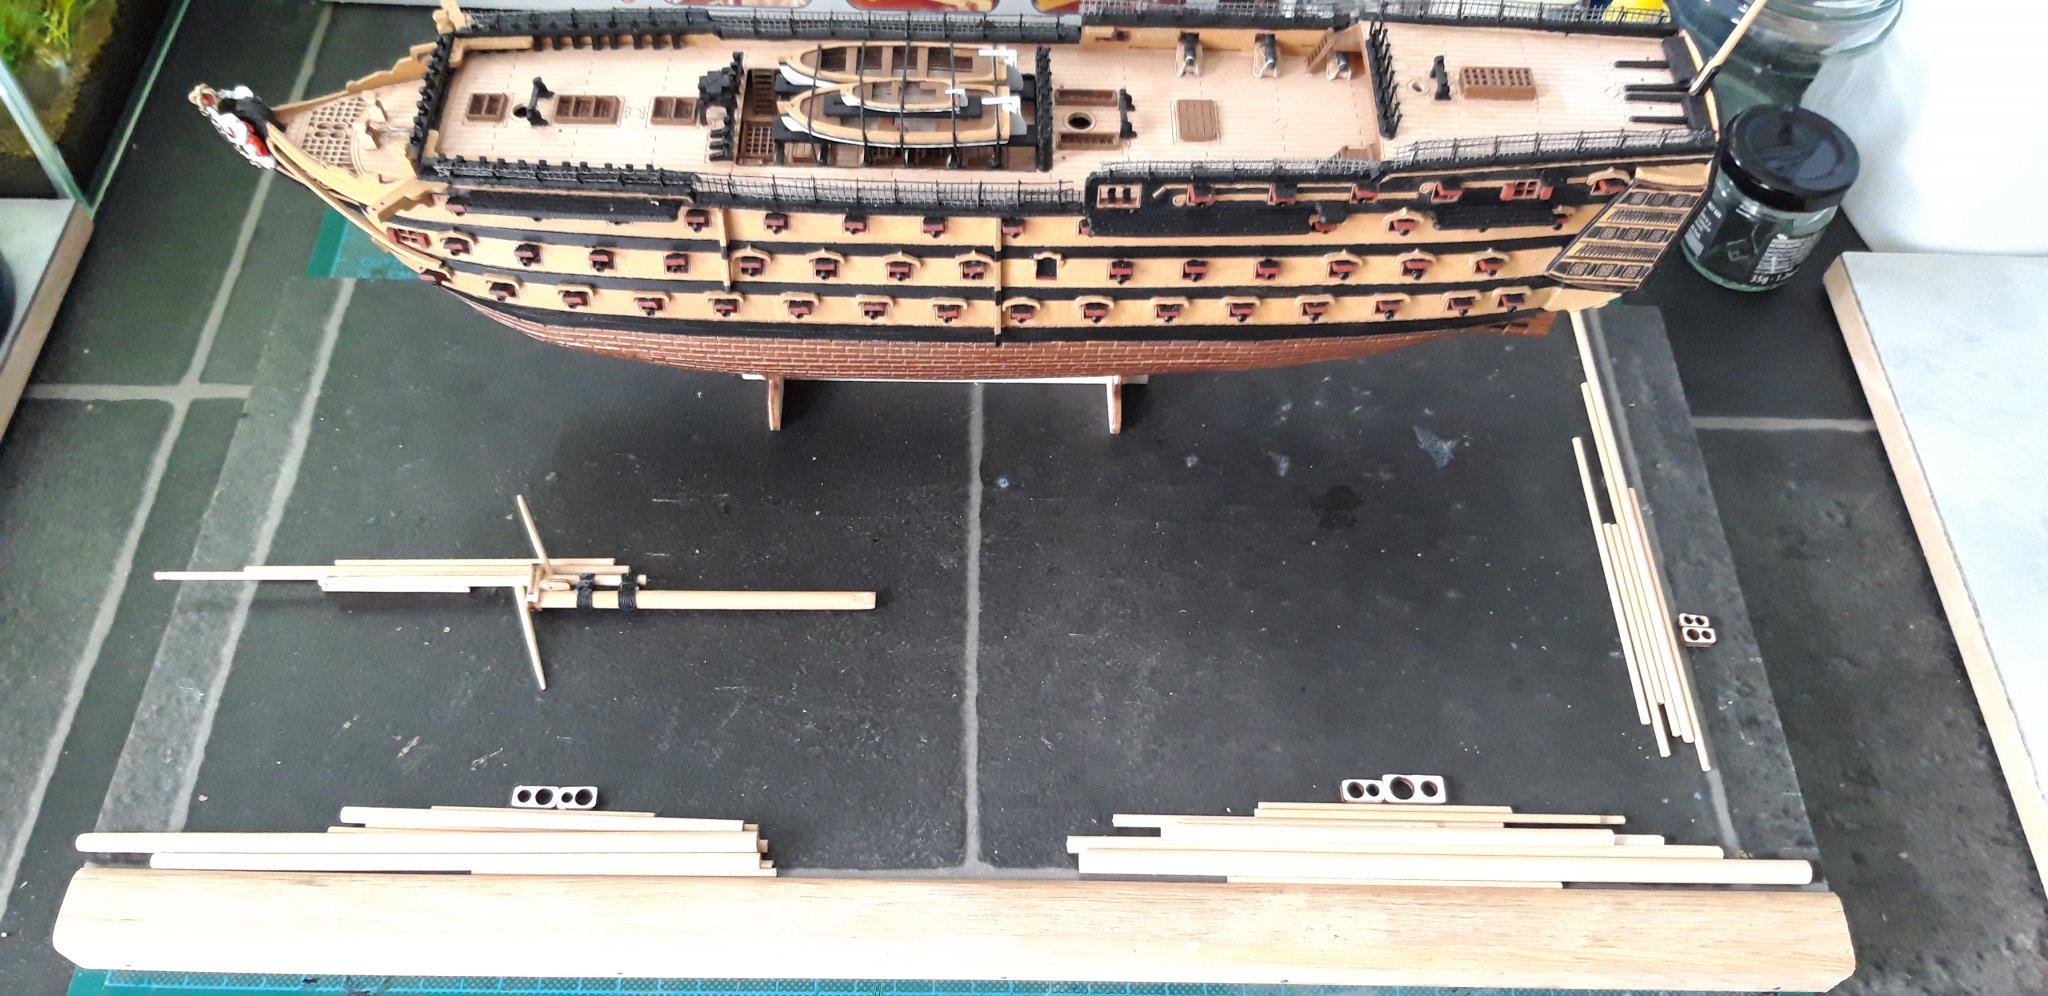
Well, today went as planed for me and l am pleased with the results.
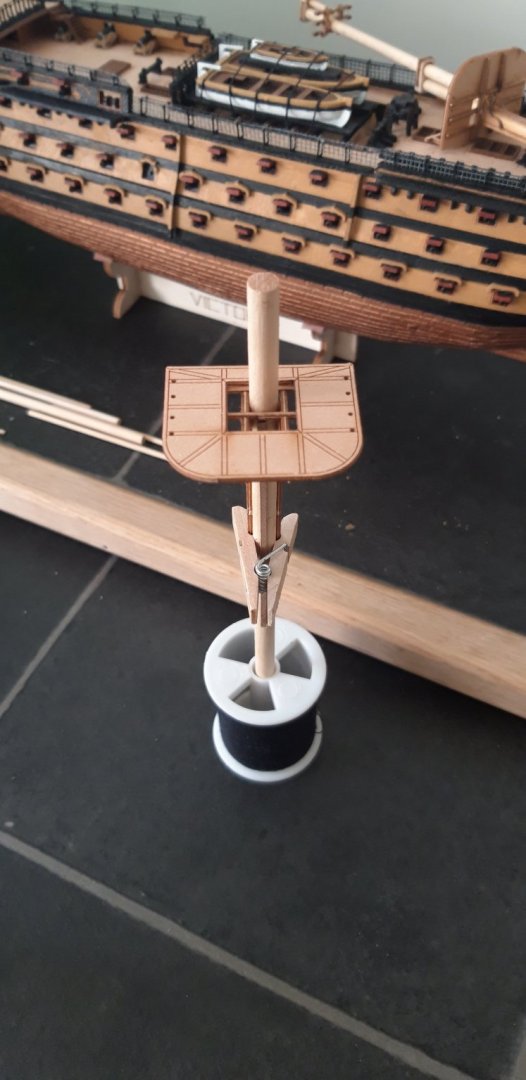
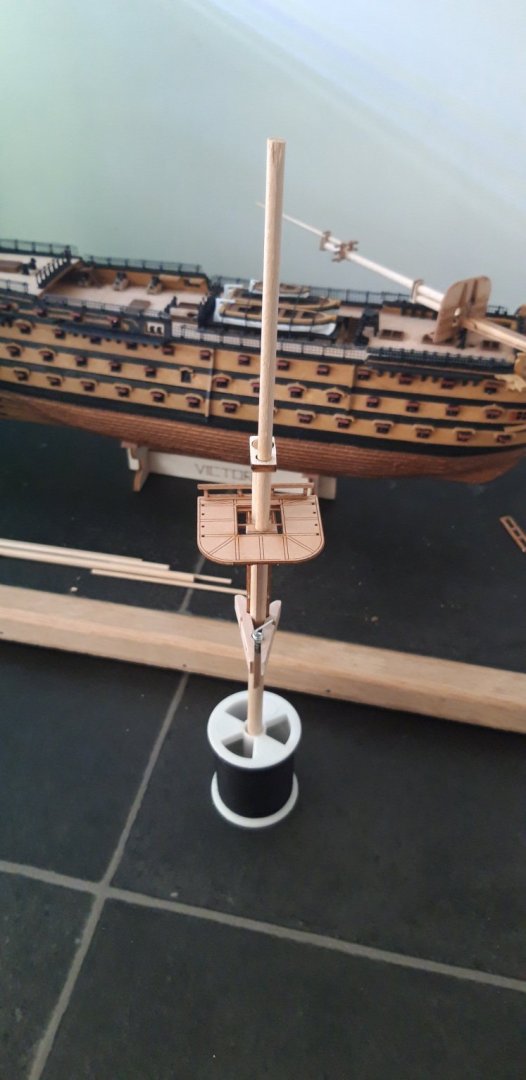
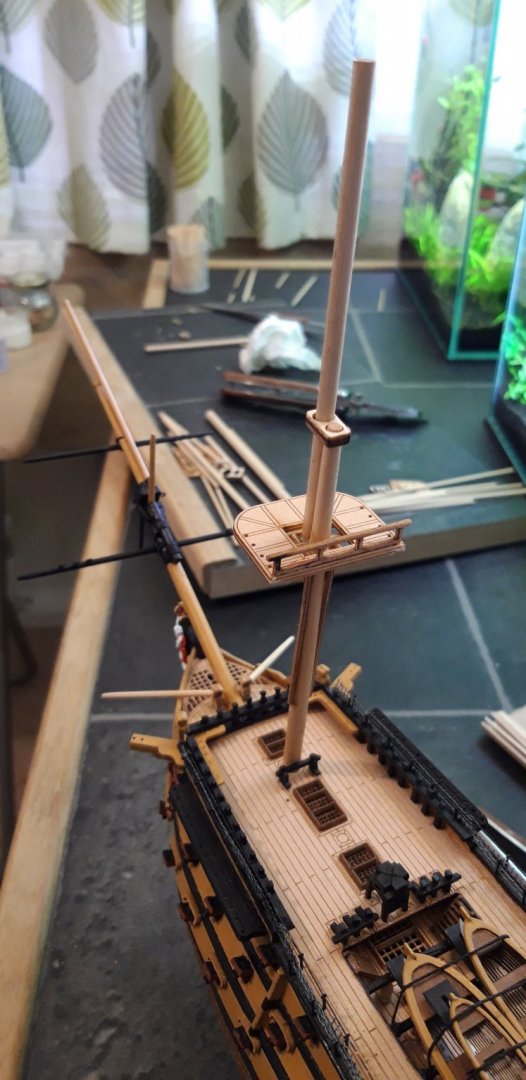
My first task was the building of the Mizzen Mast Assembly and the first shot is of the Mizzen Lower Mast and Mizzen Top Mast plus, of course, the Mizzen Top. Each Mast has been easier to build than the one previous, unsurprising really as each (apart from size) has been identical.
Second shot shows the Mizzen Topgallant and Pole Mast plus the Mizzen Top Mast Top.
I also managed to splash a bit of colour on.
Fore Mast.
Main Mast.
Mizzen Mast.
And here is where I am now
Front favouring Starboard.
Front favouring Port.
My next session will involve sanding the correct tapers to the Yards. I have already completed the Fore Mast Yards so that leaves those of the Main Mast and Mizzen Mast.
Best wishes as always,
The Lazy Saint.
Session. Time. Total.
46. 4 hrs. 156.