

NovaStorm
-
Posts
321 -
Joined
-
Last visited
Content Type
Profiles
Forums
Gallery
Events
Posts posted by NovaStorm
-
-
On 5/20/2020 at 8:59 AM, Gahm said:
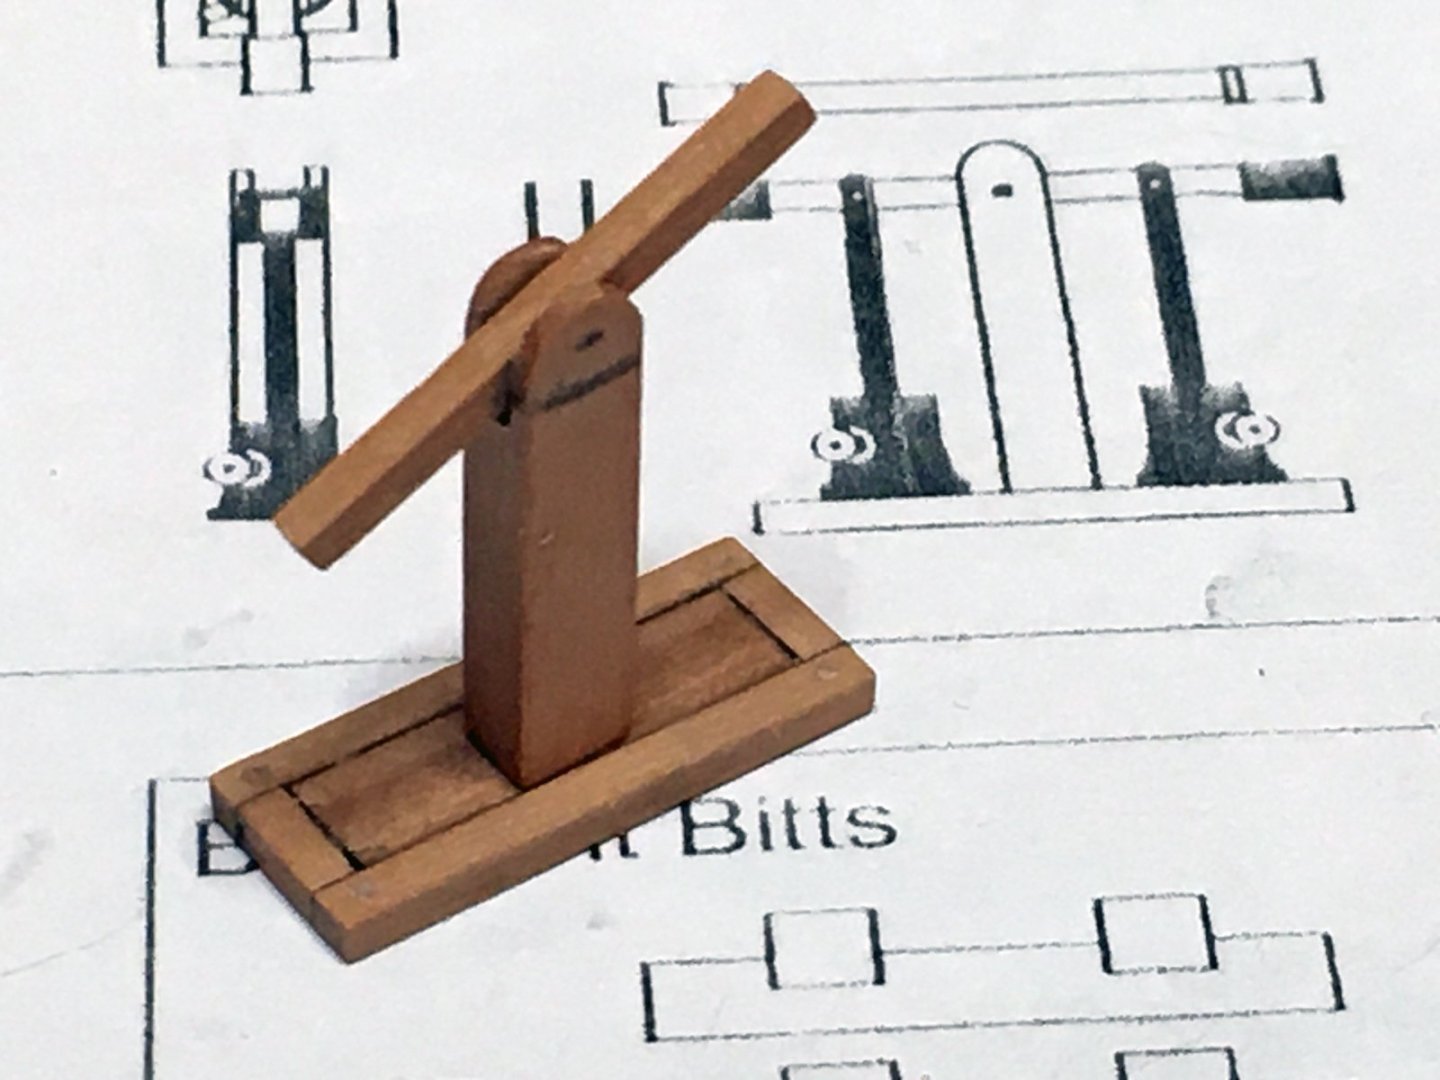
Beautiful deck details! I love your pump!
Thomas
Thomas thank you! Your build is my inspiration, thank you for watching mine
")
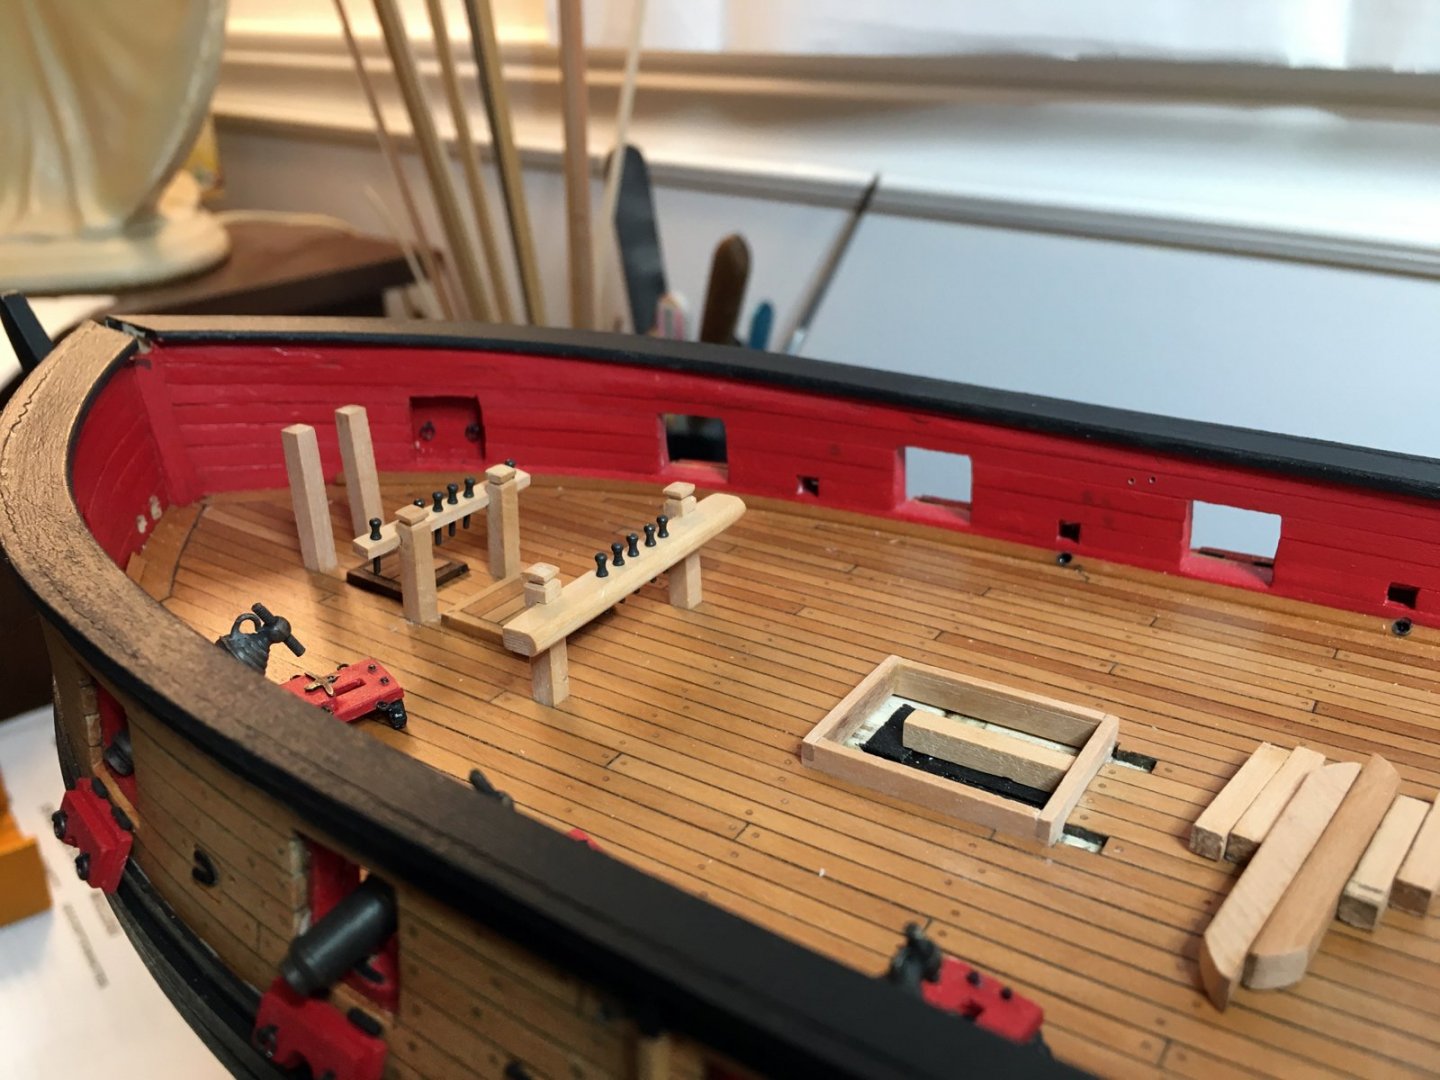
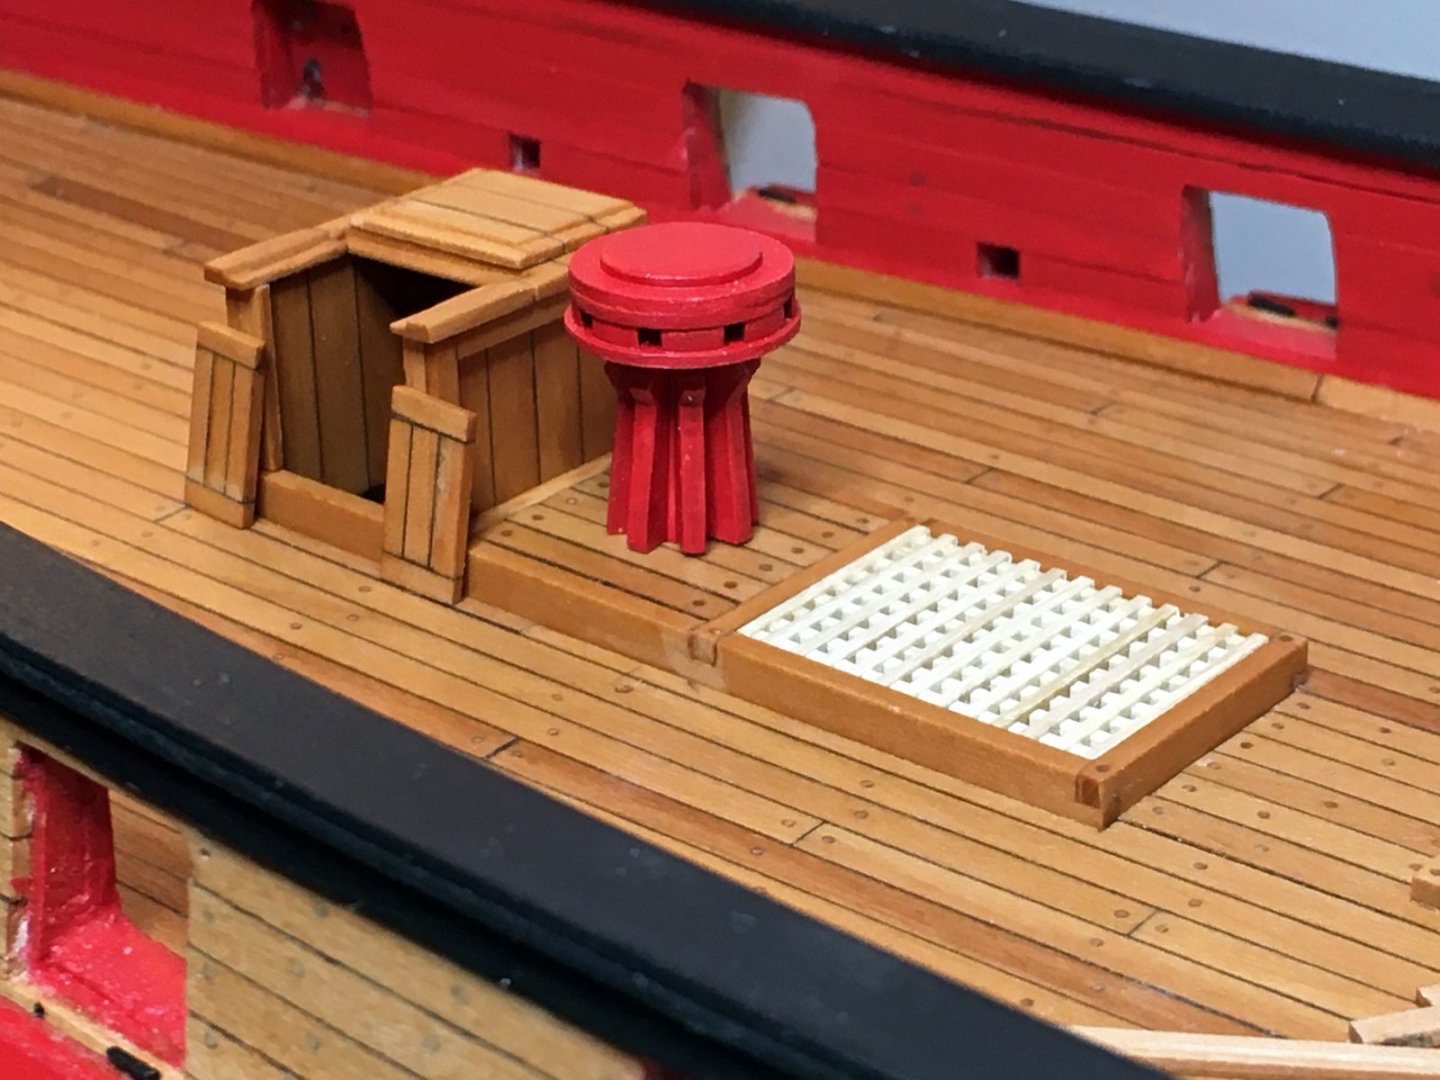
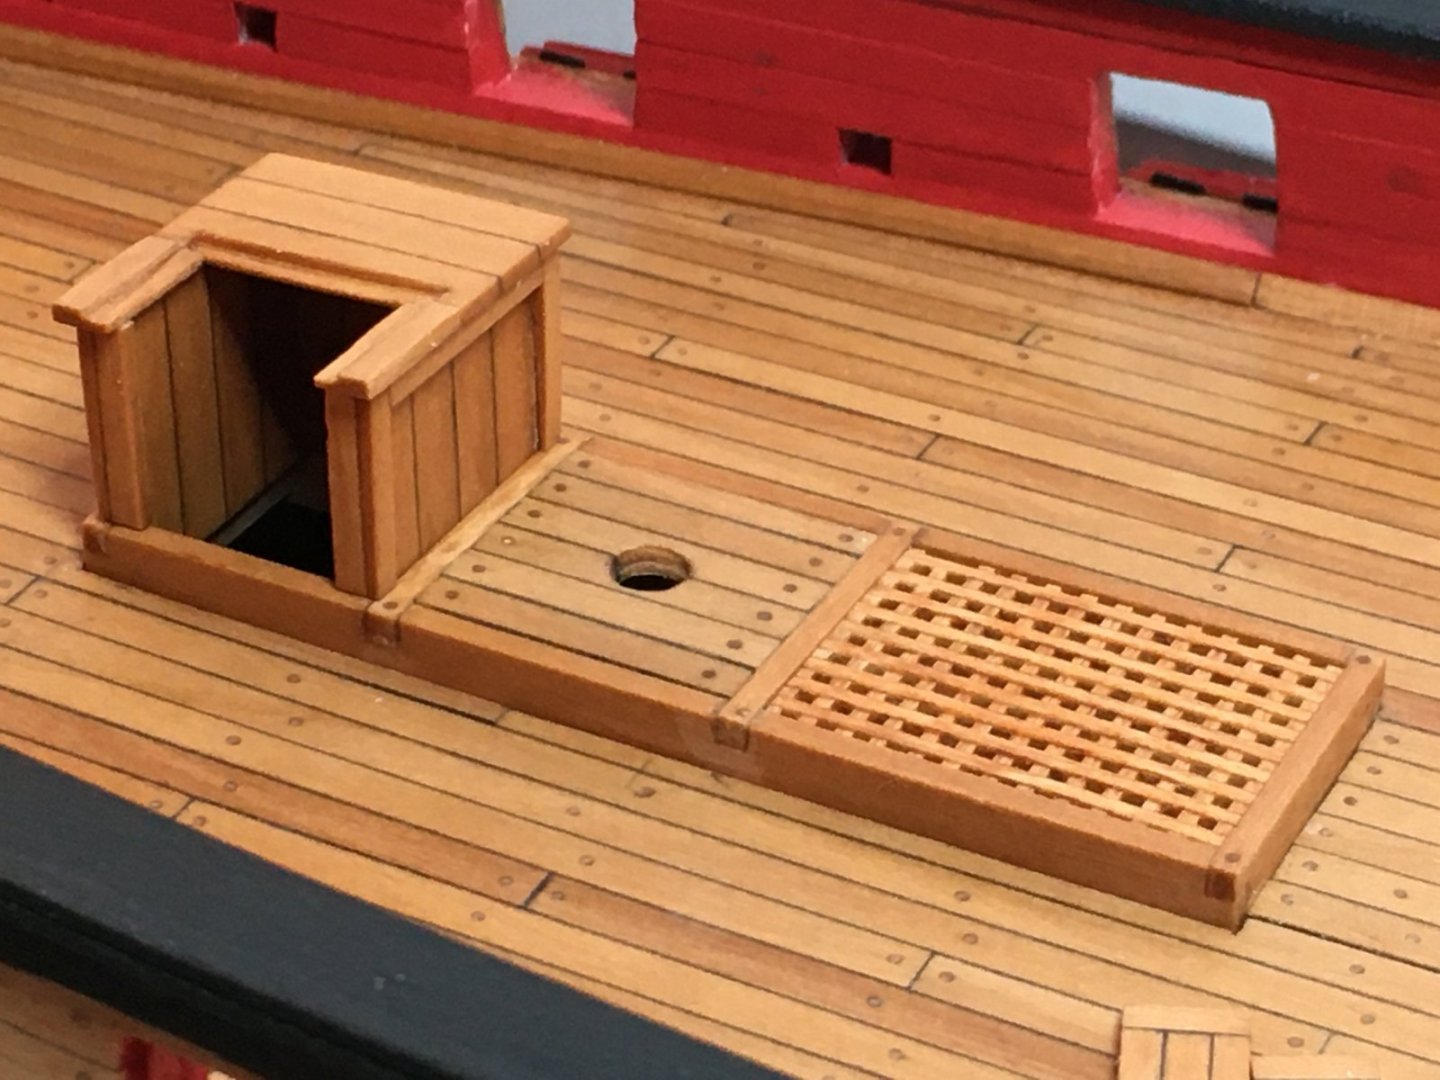
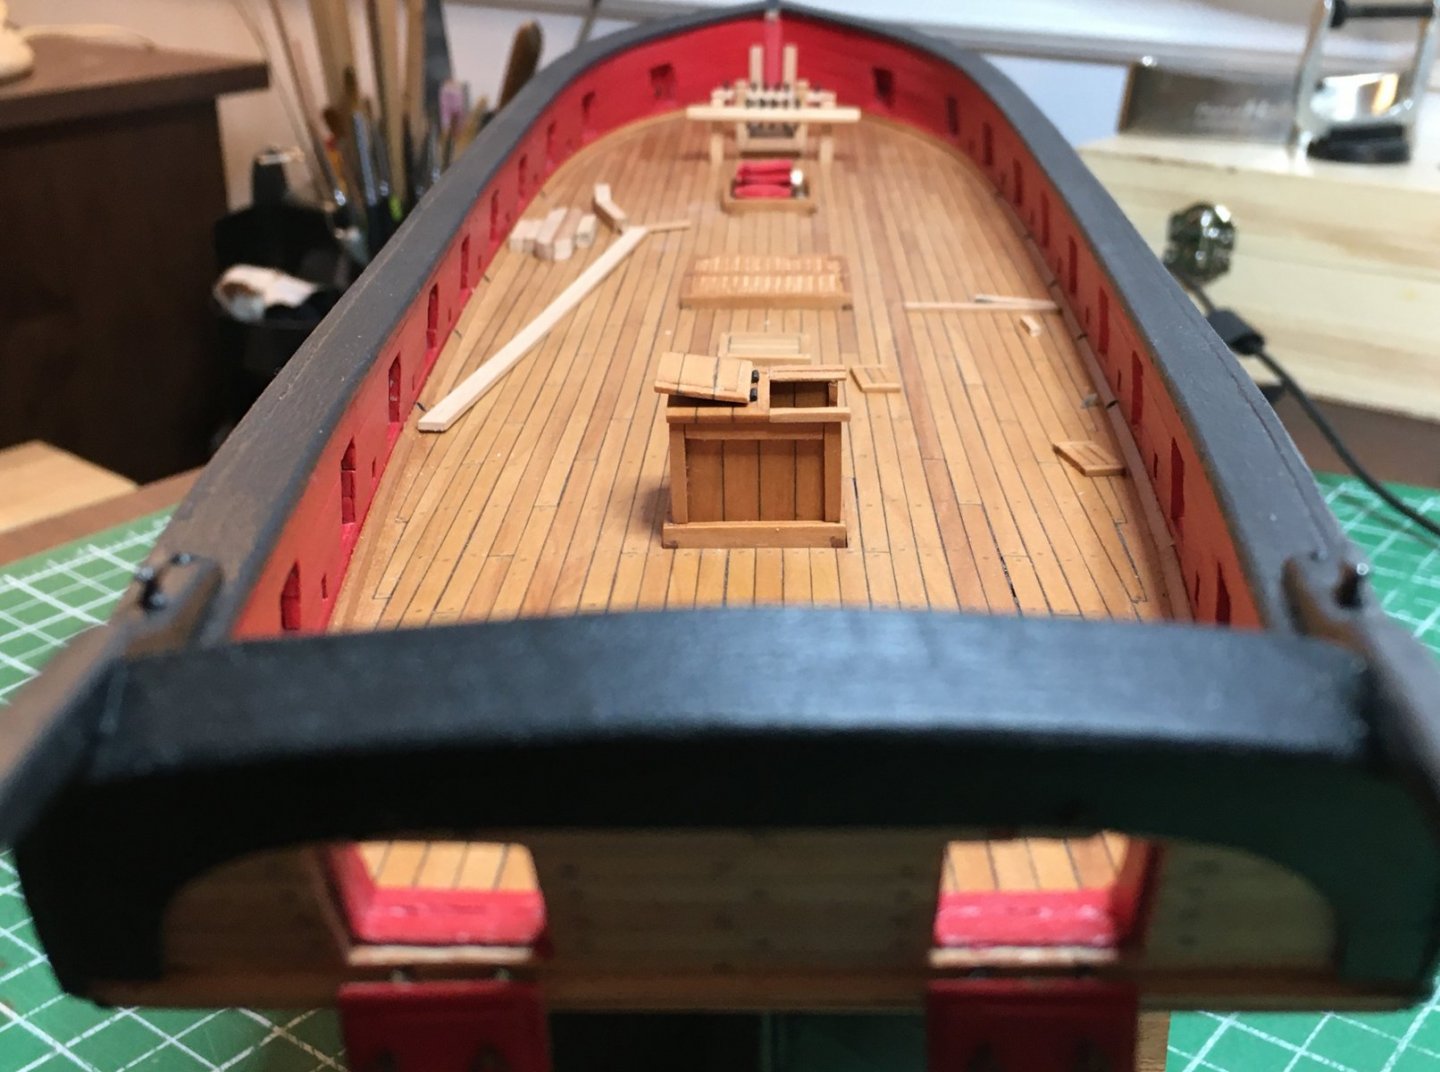
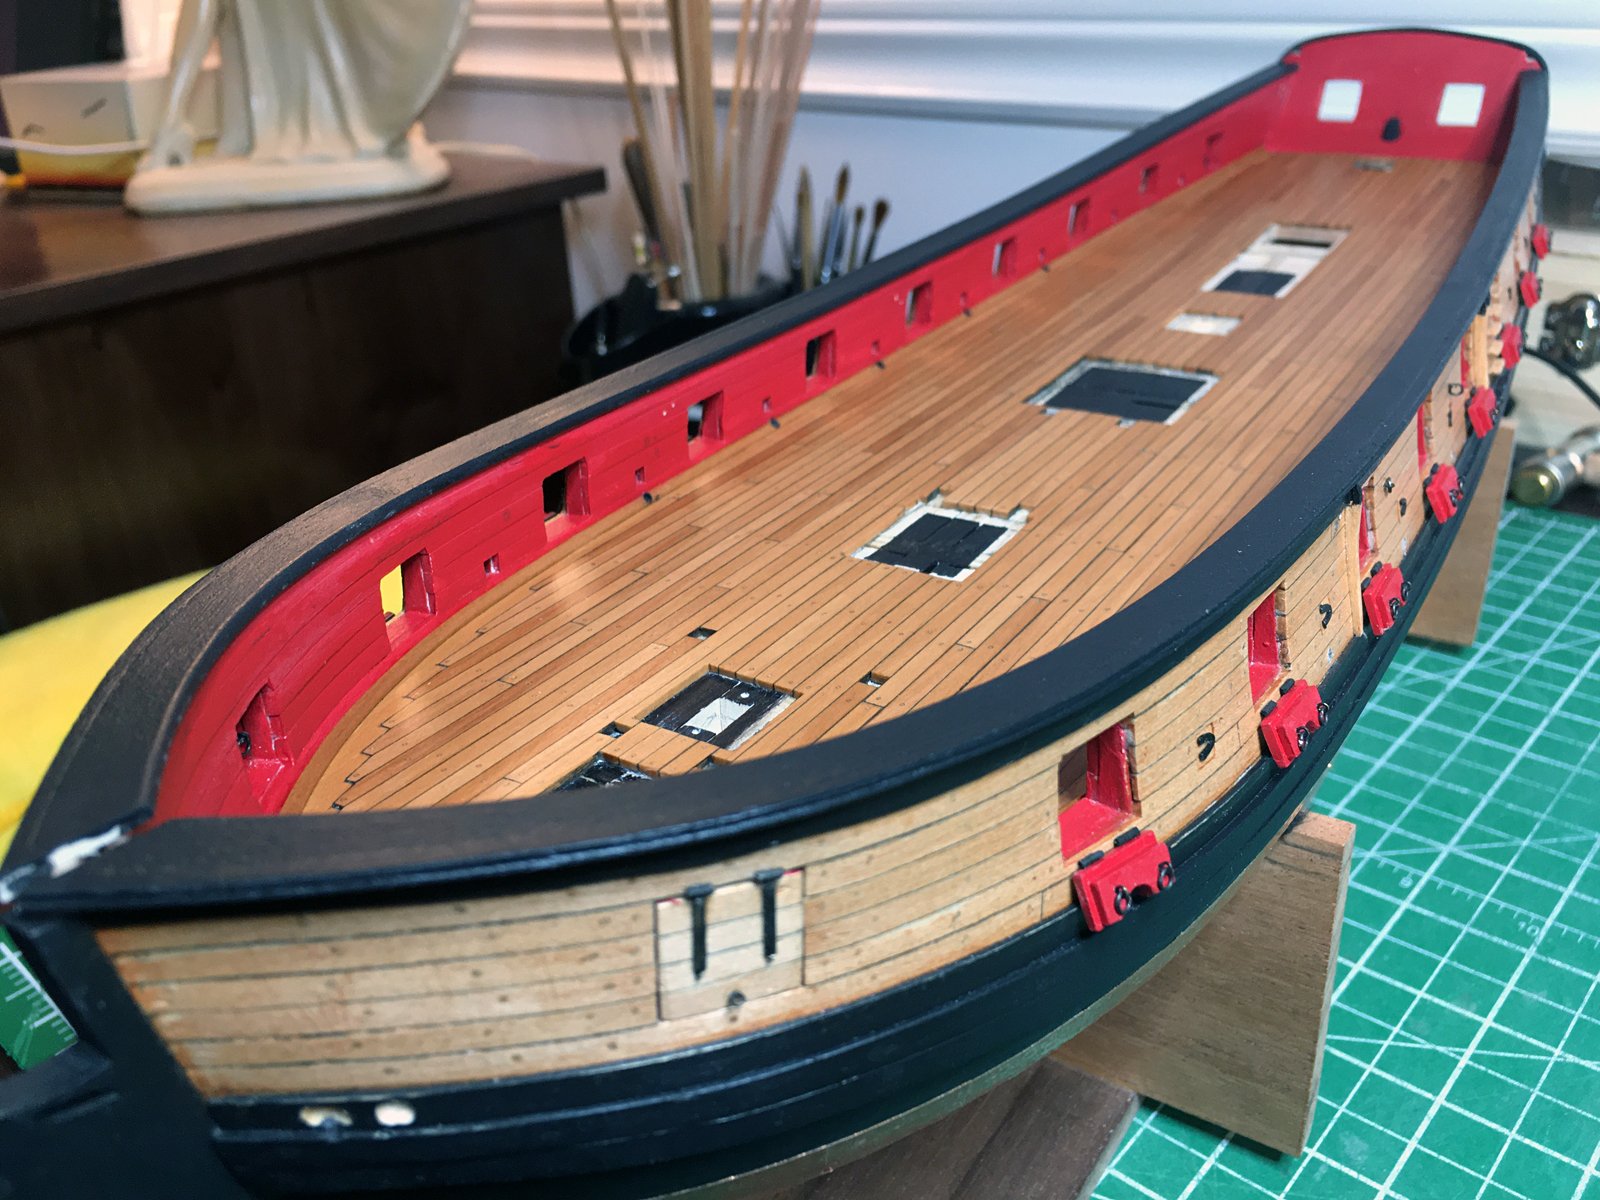
Been working on the companionway, also added the other pin rail at the bow. Couldn't take the stark white grating any longer and stained it with several soaks in a gun stock stain. It's not the best but ...
Take a look, a few picks, haven't added the doors onto the companionway yet just the hatch.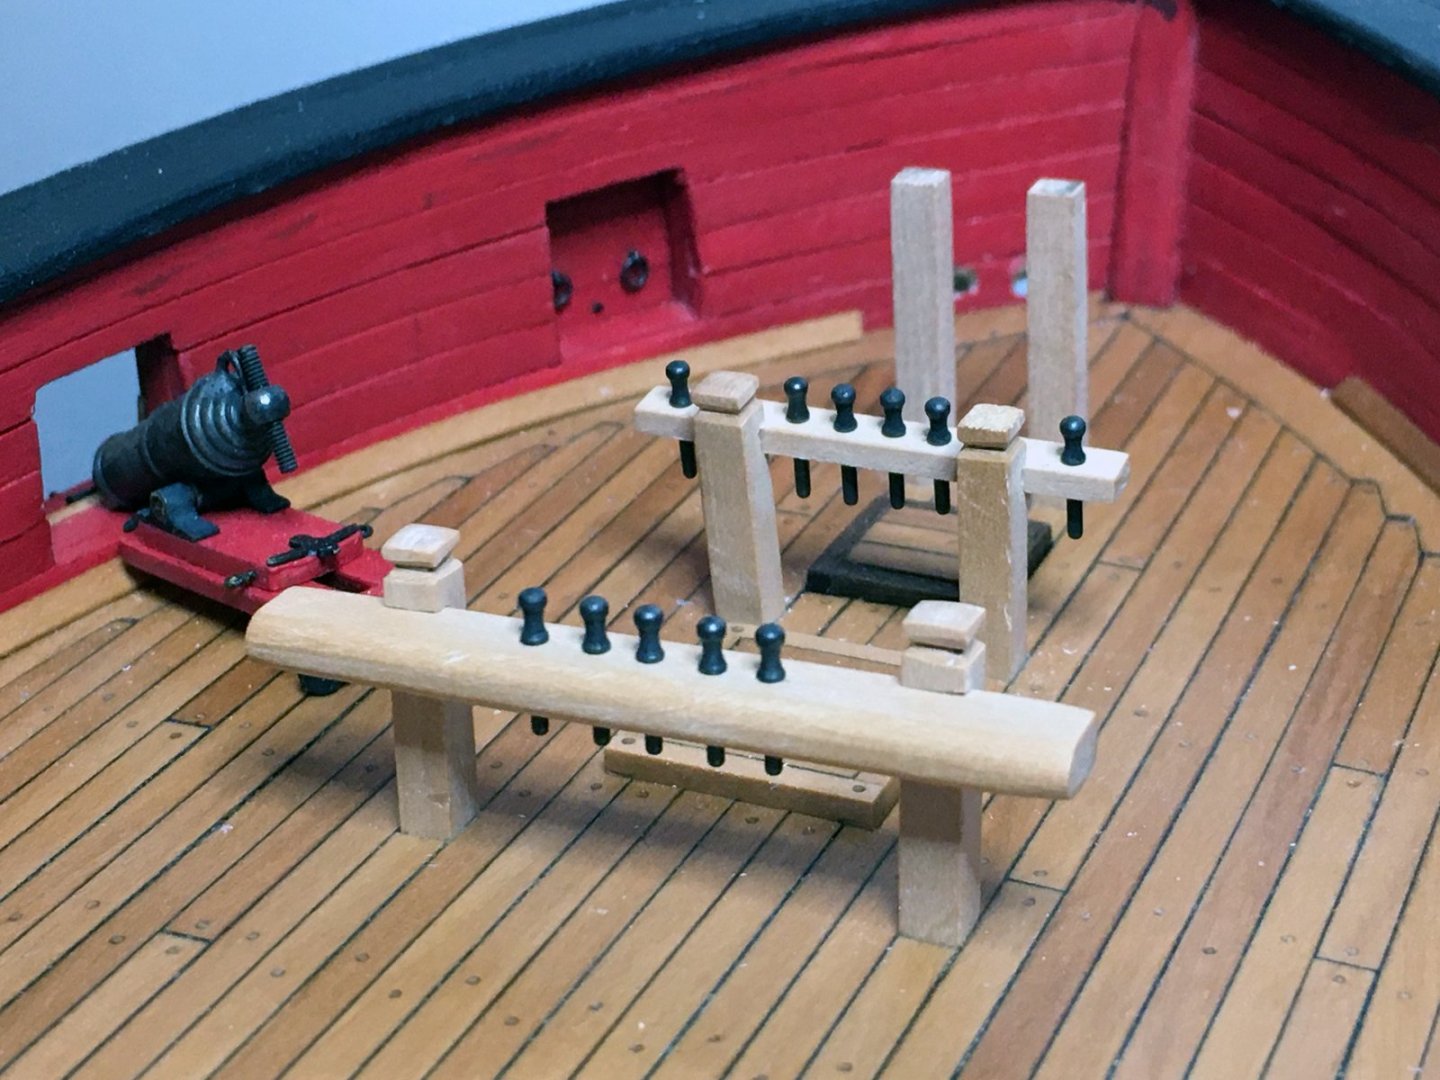

-
-
-
7 hours ago, WalrusGuy said:
Really like this idea for the stanchions! Going to remember it for when the time comes.
4 hours ago, Retired guy said:Very nice update Robin and do like your pump great job my friend
Thanks guys appreciate the comments
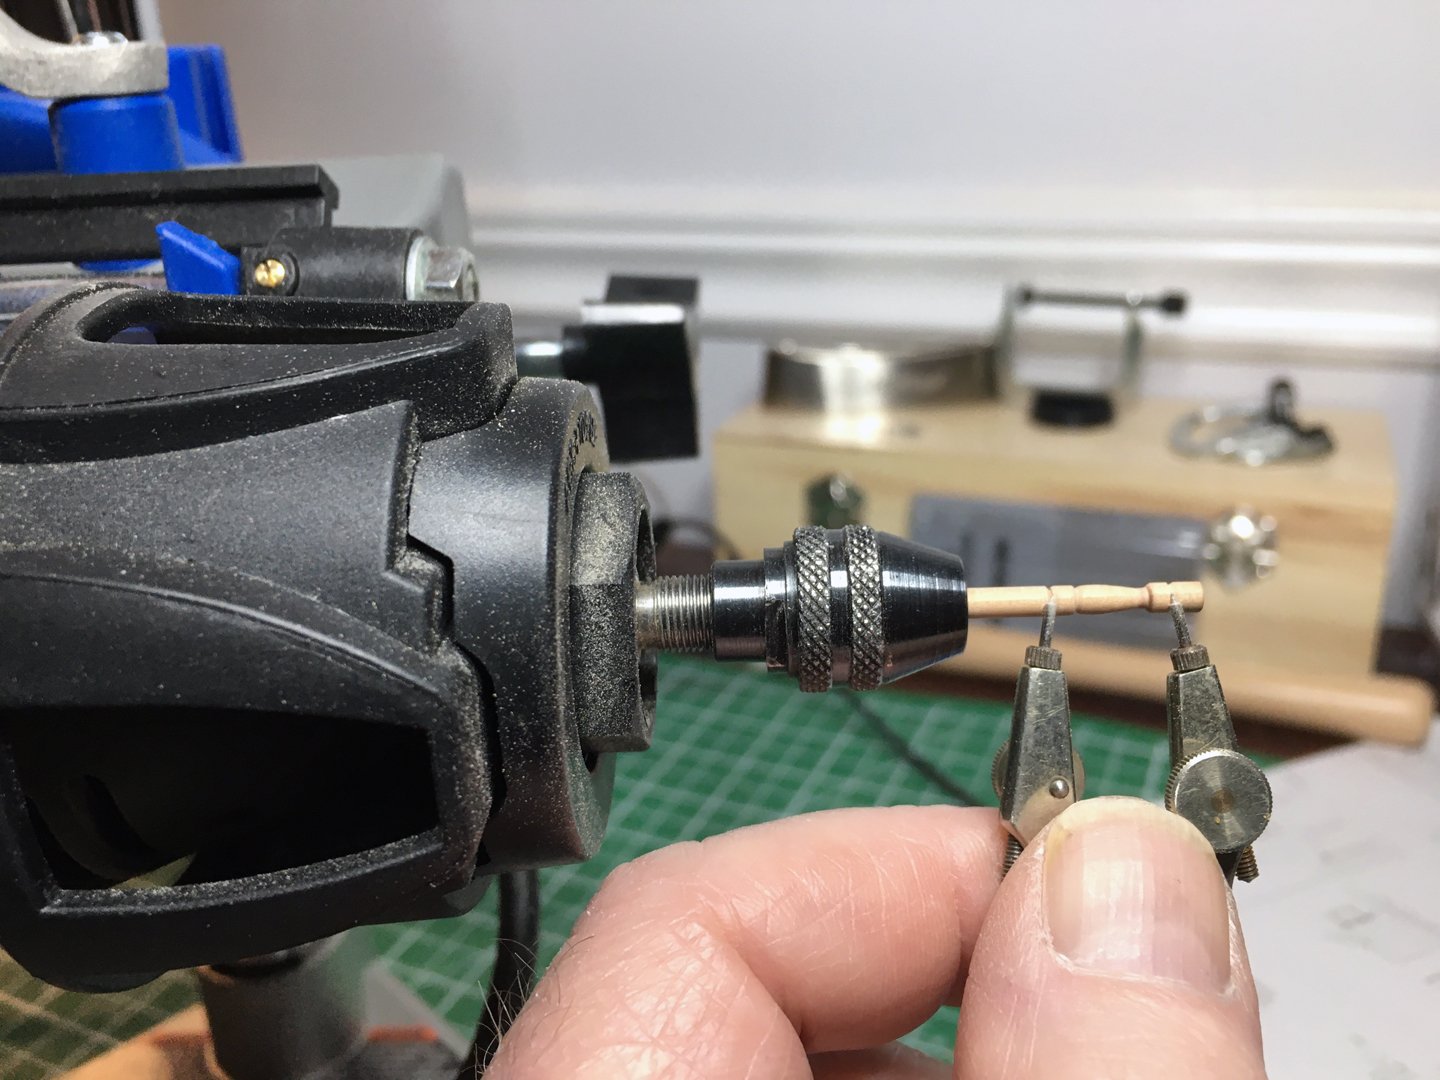
Wally if you haven't got this LINK for your dremel or something better you can use, it was probably the best $55 bucks I've spent in a while. Highly recommend.
Cheers ~
-
Nicely done that decal is tack sharp.
- HardeeHarHar, jwvolz and Retired guy
-
 3
3
-
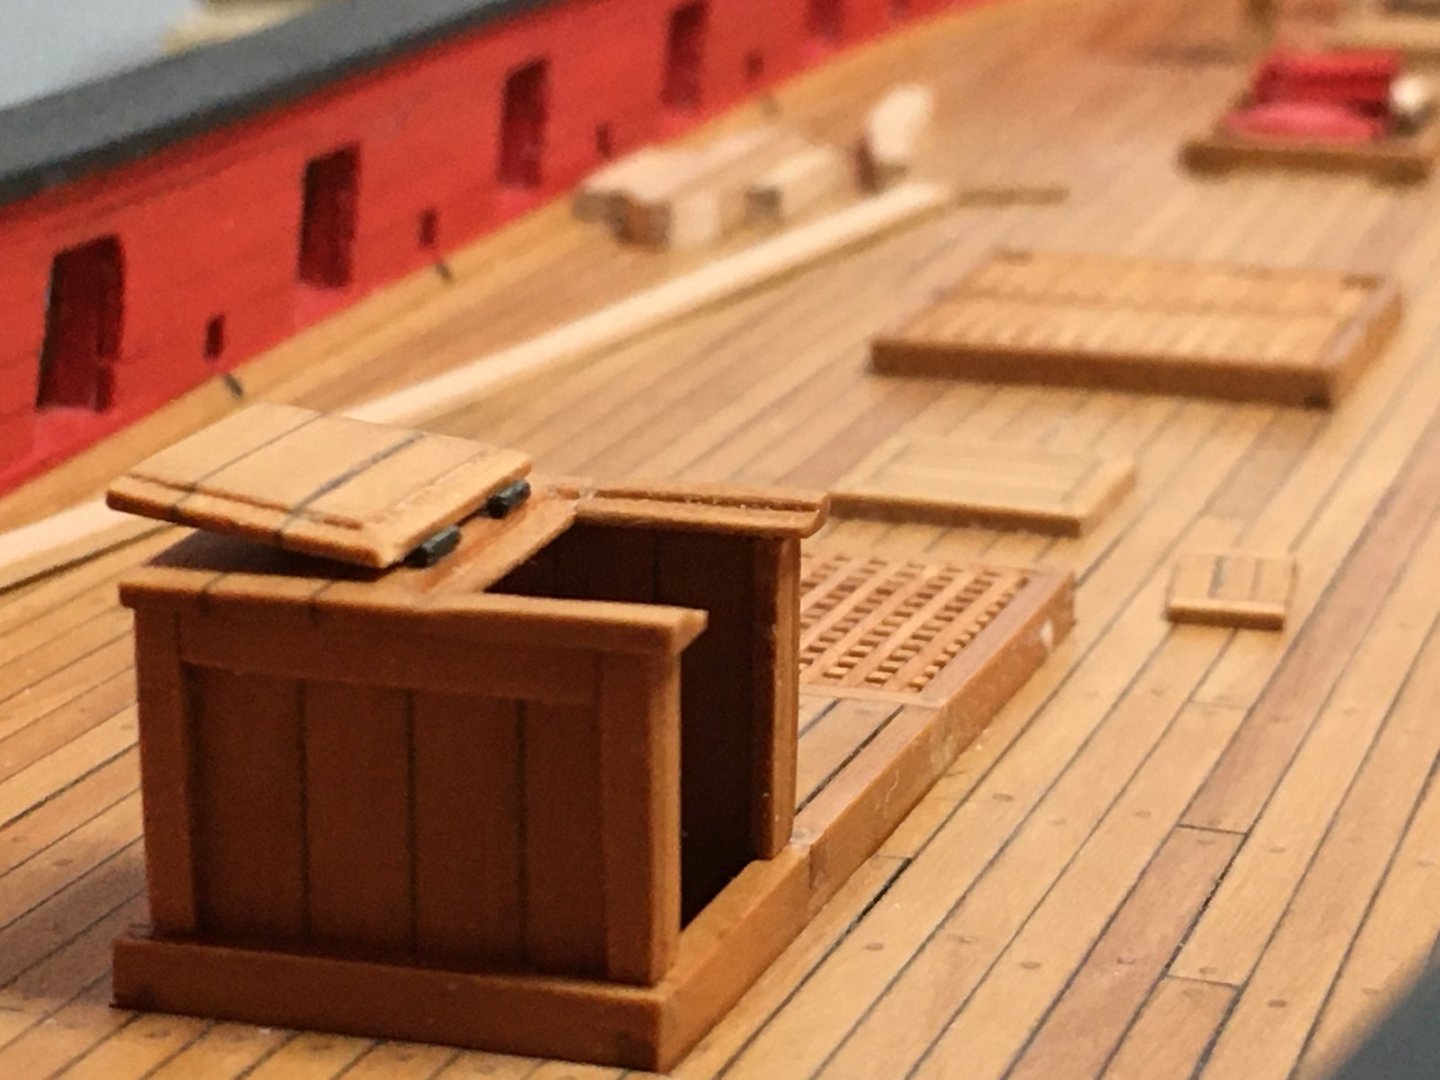
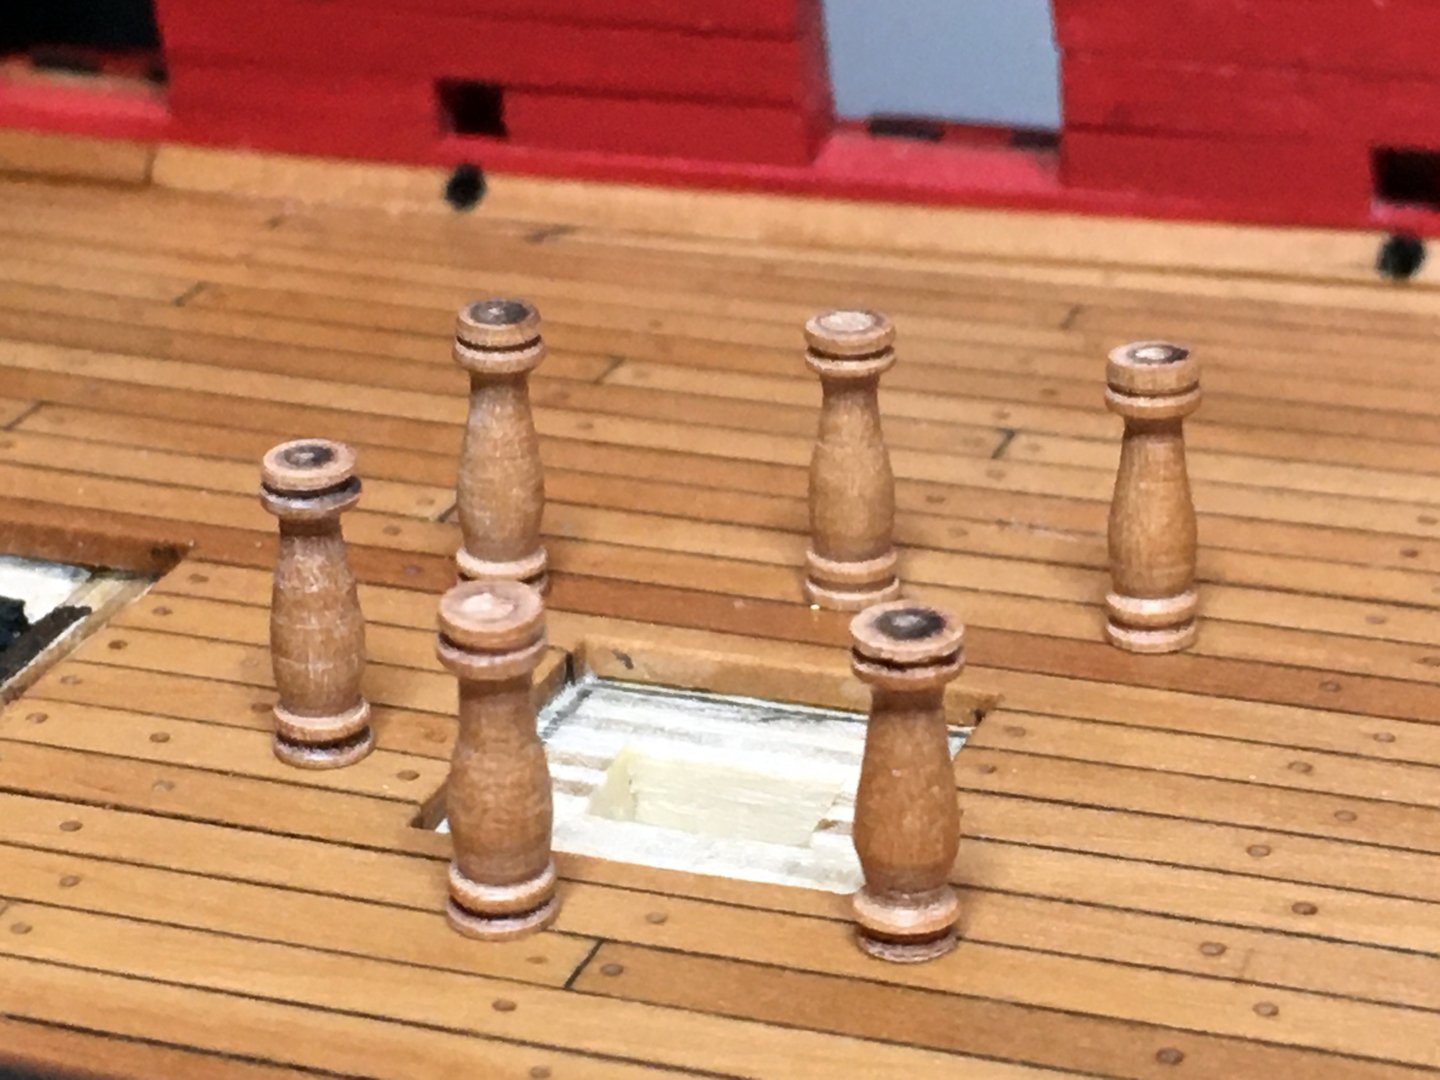
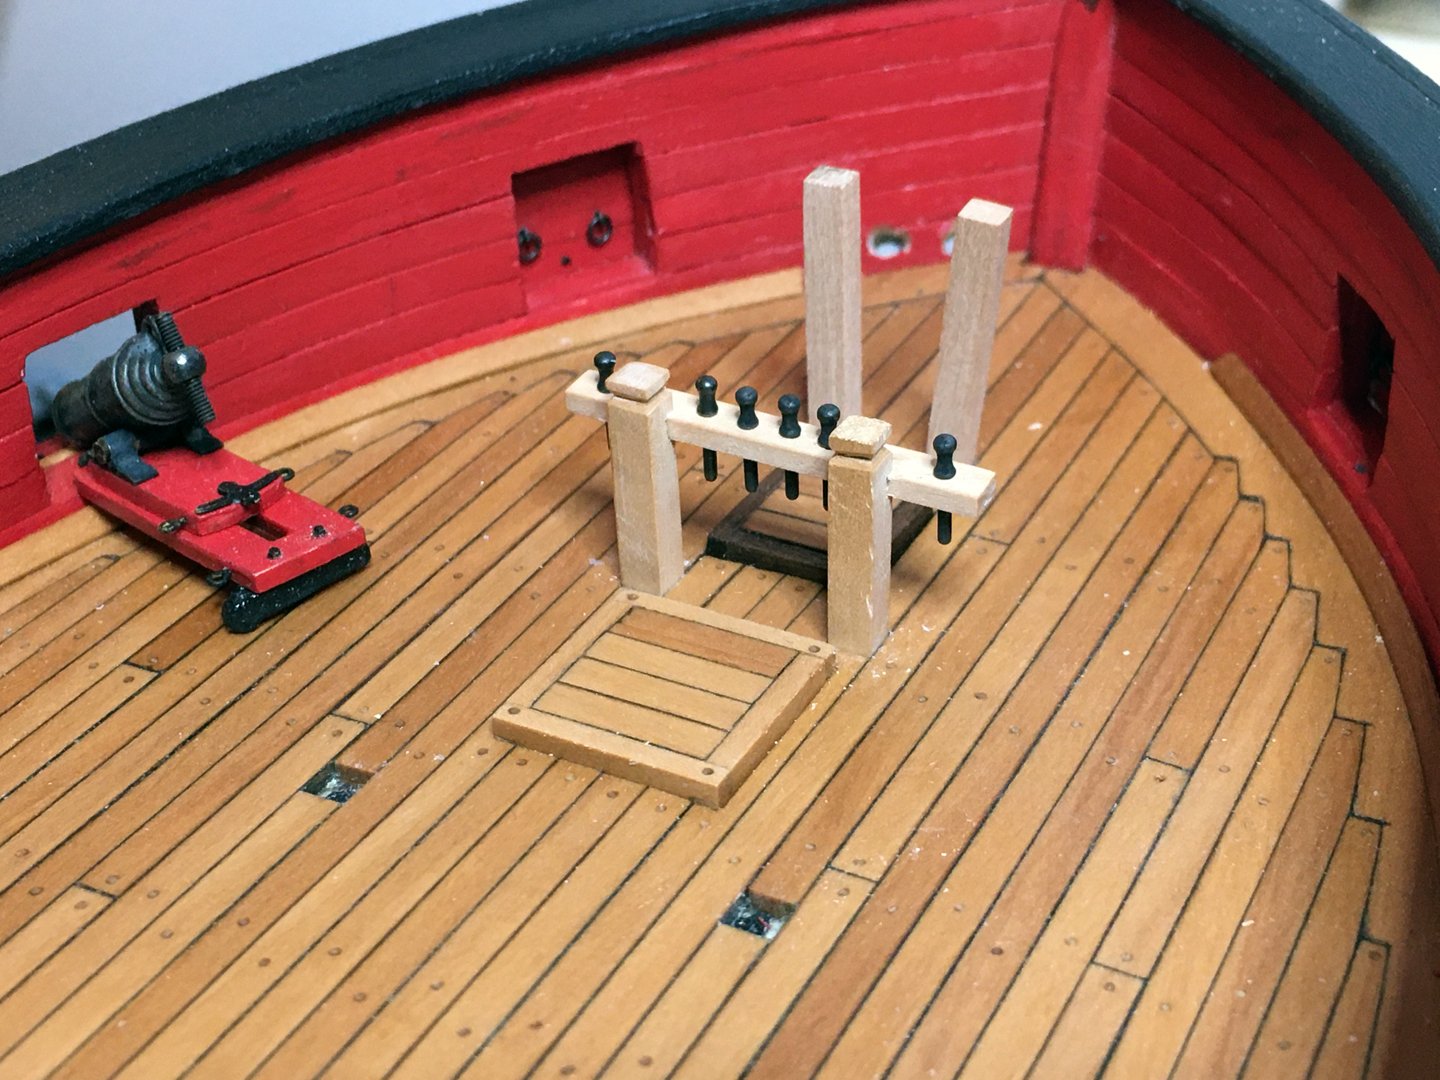
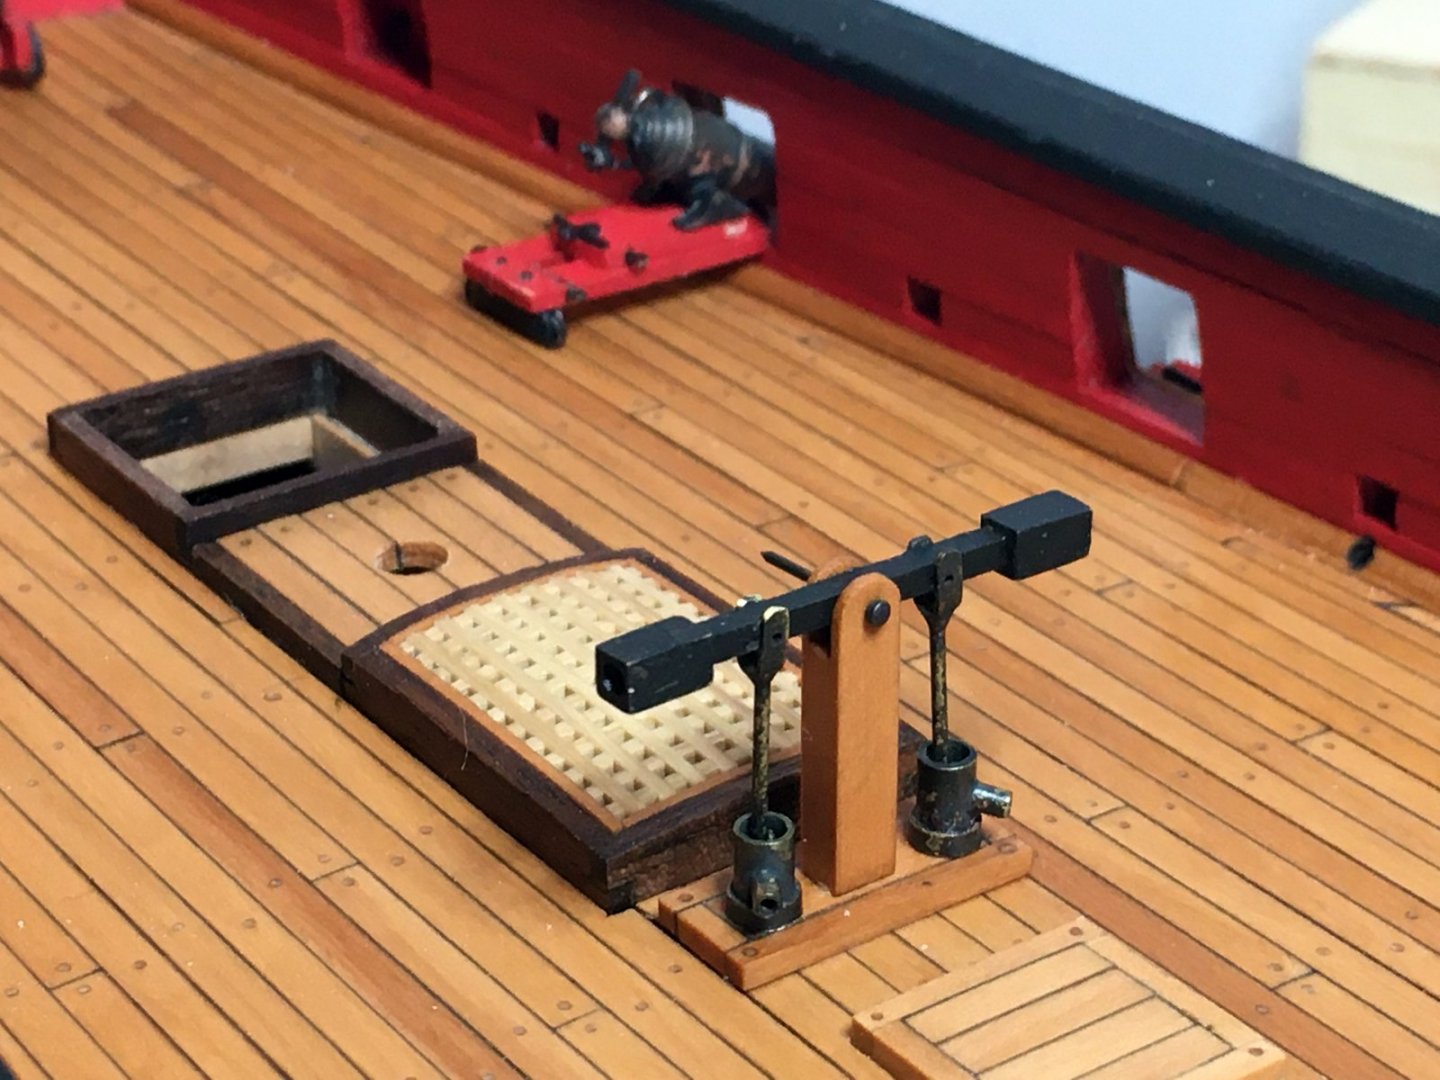
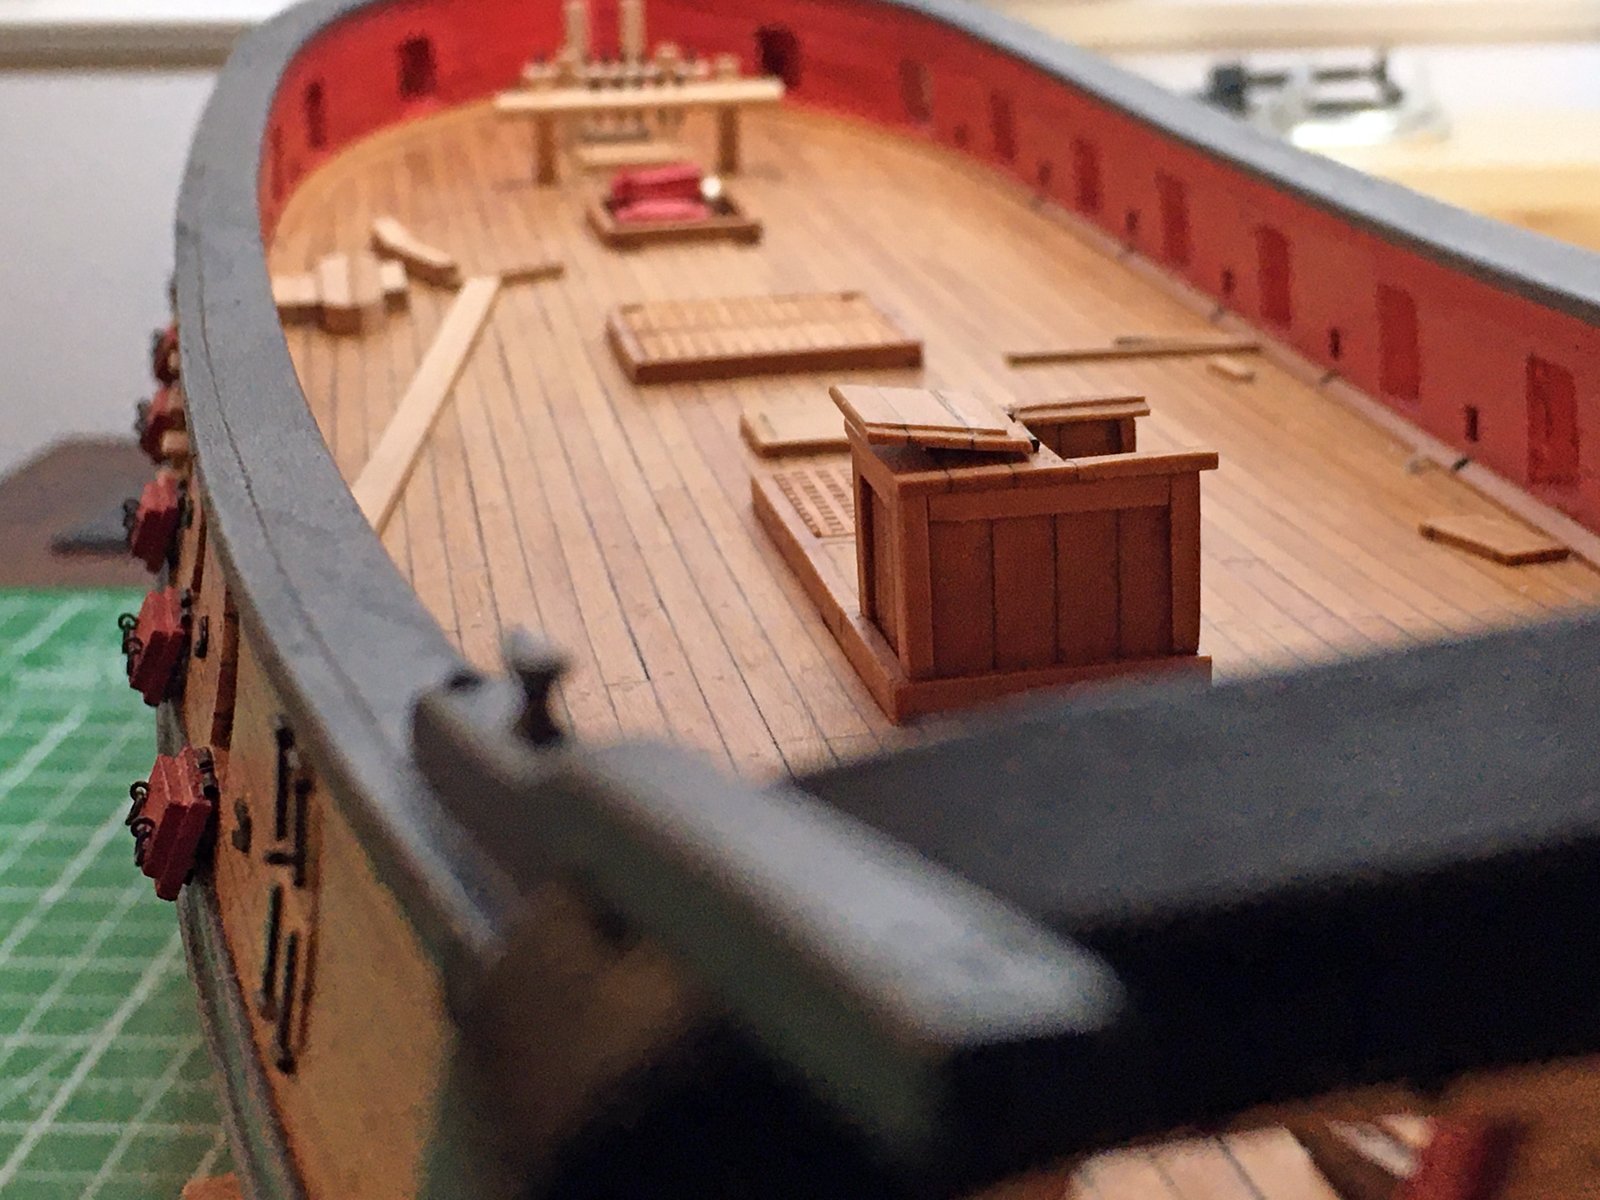
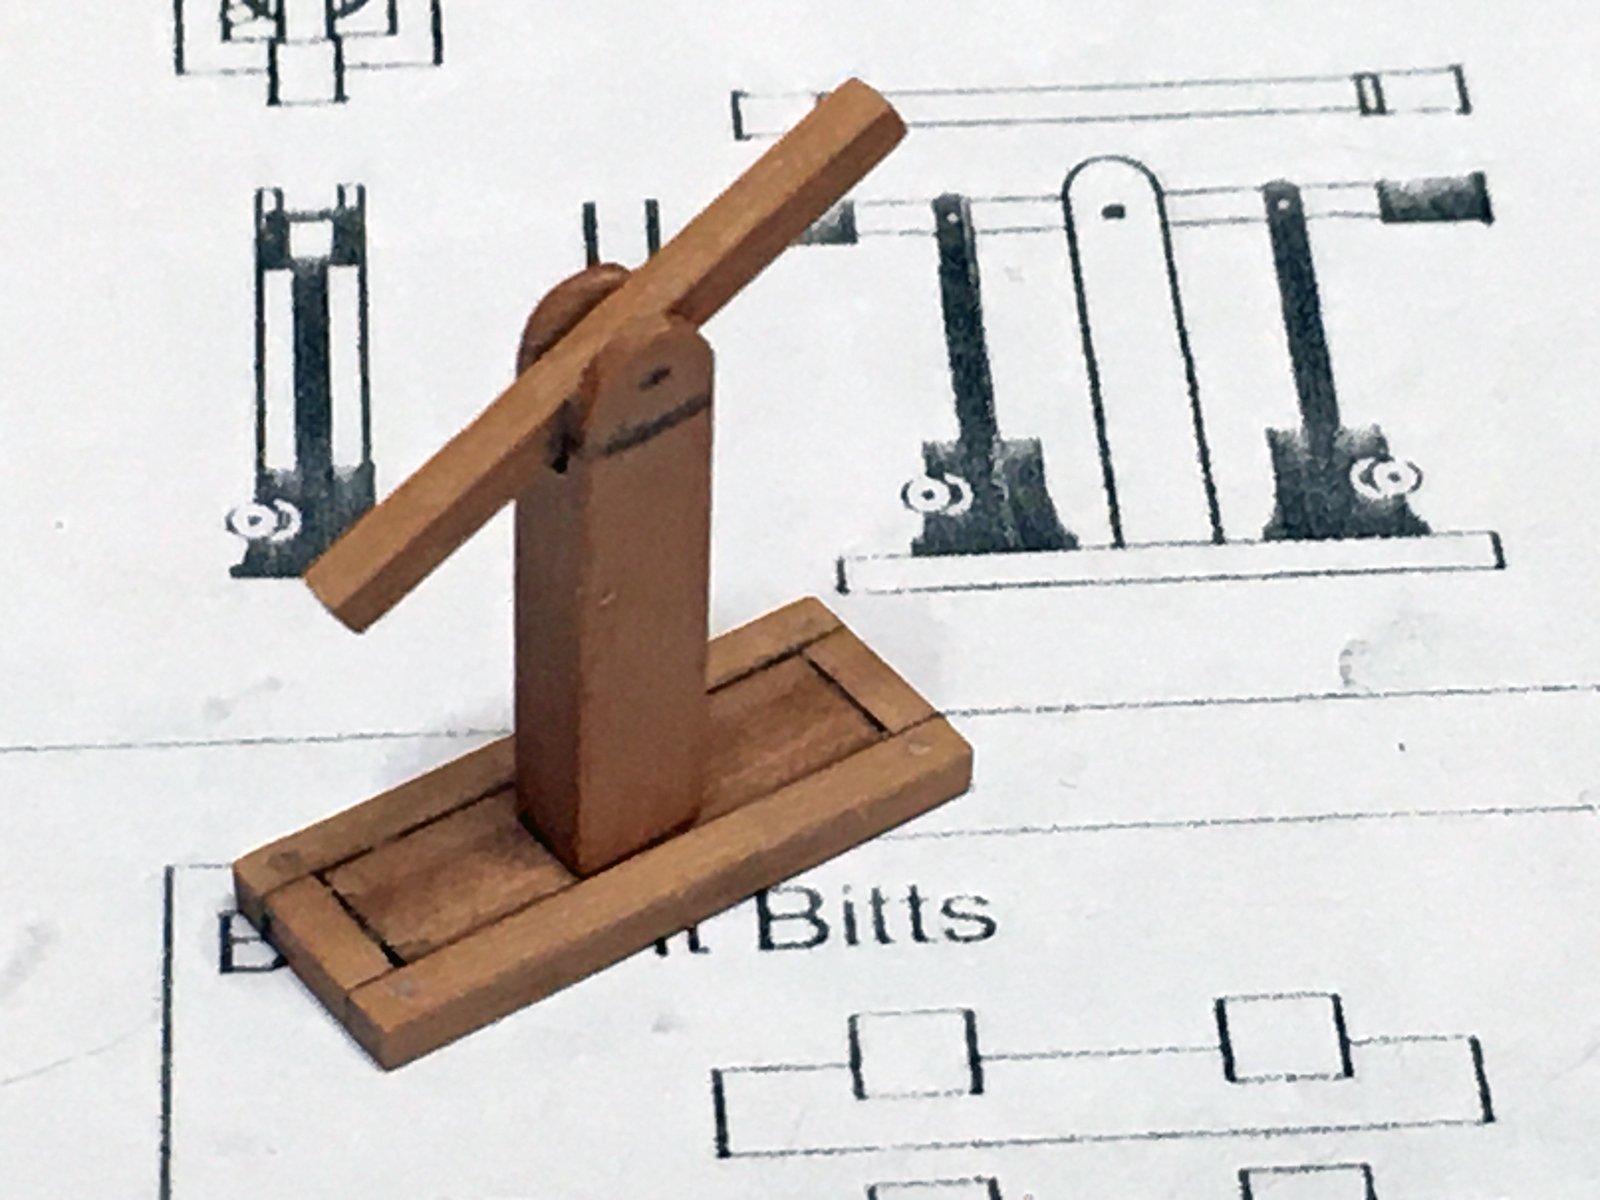
Picking away at the deck furnishings. Switched out the walnut coamings for swiss pear cut on my proxxon fet. Turned the stanchions for the fife rail using a dremel and ruffed out the gallow bits and foreward pin rail bits also in pear.

- Freebird, WalrusGuy, GrandpaPhil and 5 others
-
8
-
-
Wow that looks great way to go!
- Retired guy and WalrusGuy
-
2
-
9 hours ago, WalrusGuy said:
I tried to bend the cap rail onto the top of the transform, but it snapped in half due to the extremely steep curve. I think it was not soaked for long enough. So the strip is going to be soaked overnight, and tomorrow I will soak it in hot water. I hope this helps making it more malleable and resistant to cracking. We'll see. Any tips/suggestions on this part of the build would be more than welcome!
You are going to have to apply heat to do the bend required. What have you got, try an iron, or fat section of a soldering iron if you don't have the plank bender they sell. Try not to fry the wood when doing it.
Also a nice trick for painting sharp edges is to first take the tape and run it down a mirror or piece of glass. Run a straight edge down one side and with a new blade take the edge off. Then apply and paint
Cheers it is looking good what you have done! Keep up the good work... ~
-
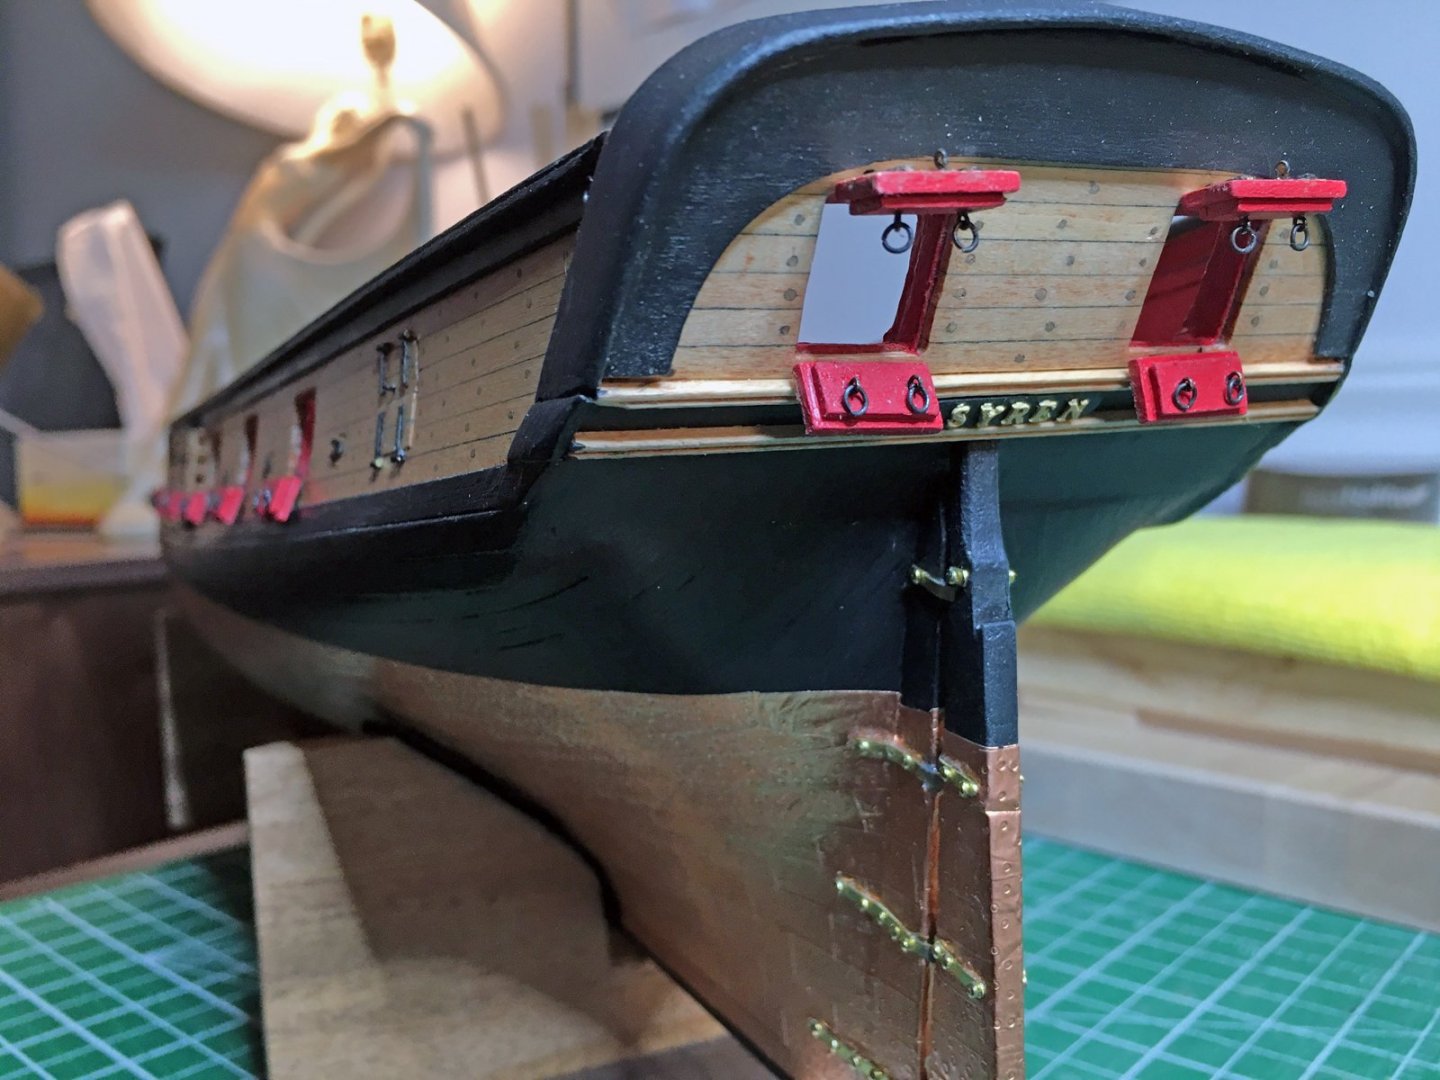
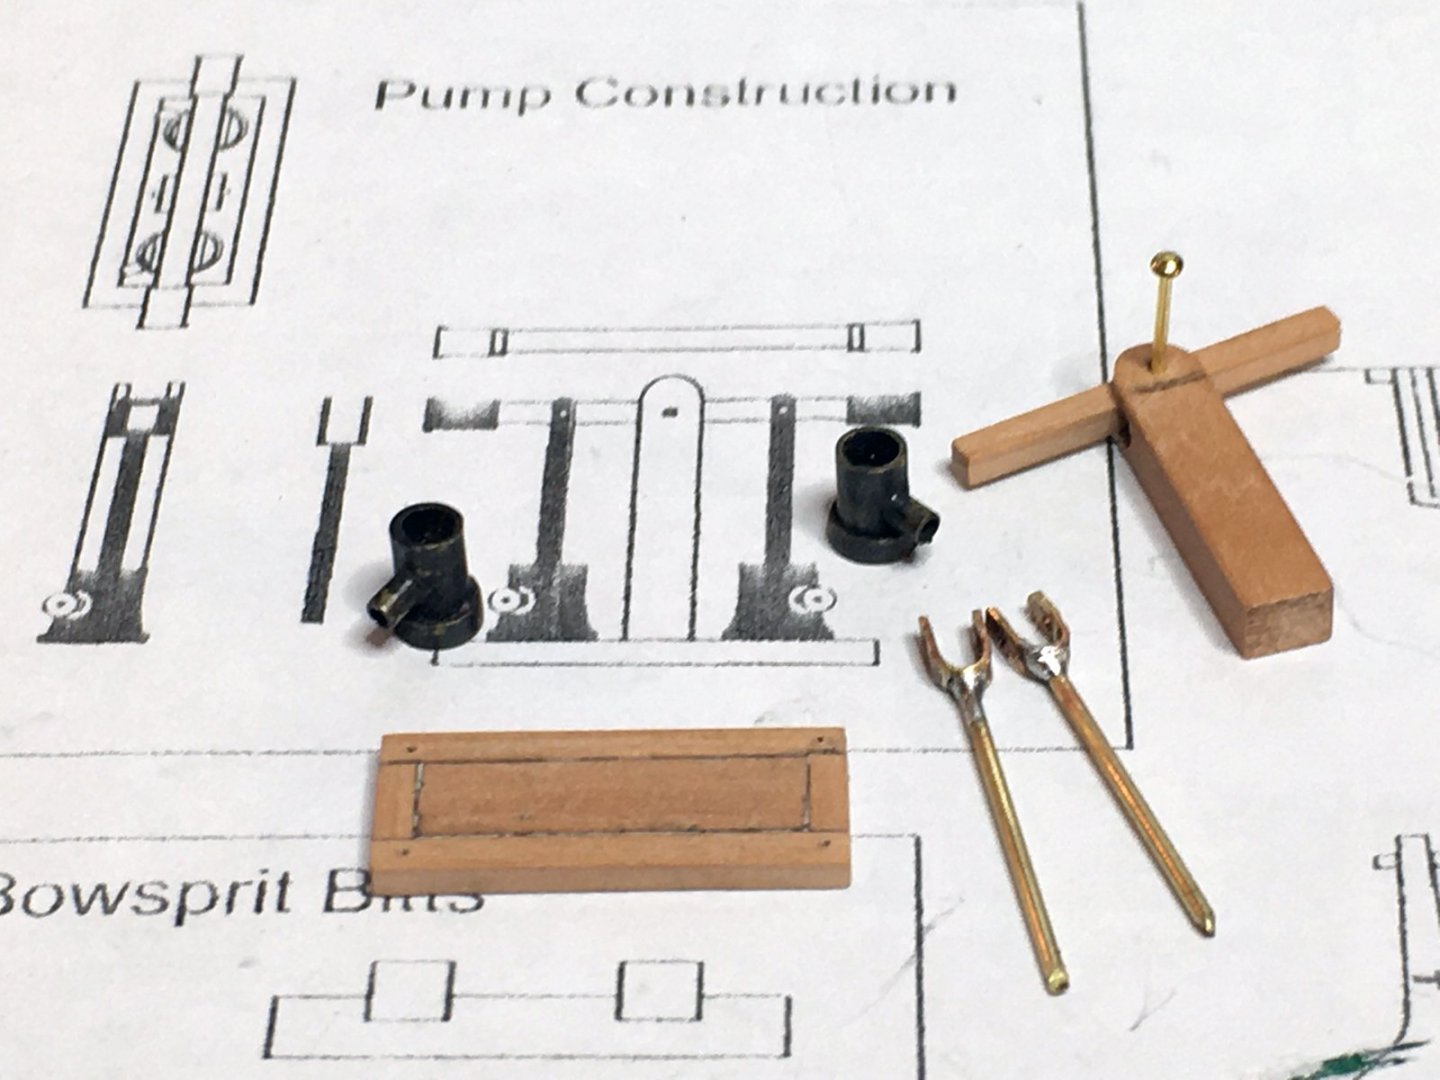
Busy couple of weeks with work but here are some picks of what I've been working at. The stern davits I made out of pear are installed. Tested out the transom post covers. Had a blast making the pumps up which I am pretty pleased with. Added lug nuts to the cannon wheels. Hope you are all well and staying out of trouble!

- Gahm, Edwardkenway, yvesvidal and 5 others
-
8
-
-
-
Your off to a great start. Those port openings did they come like that, they look laser burned on the corners.
-
24 minutes ago, Retired guy said:
Got some of that Birchwood Casey Brass black it works a treat, canons have come out great Robin 👍
Regards
Richard
8 minutes ago, egkb said:Wow .. I keep on coming back to that Deck .. That is magnificent work right there!
All The Best
Eamonn
Thanks for the great comments
I never get bored of looking at the deck Eamonn. Plus I managed to finish the waterway at the stern. So it is complete now.
Richard I was very pleased for my first time out using it. Cheers
- egkb, Retired guy and Edwardkenway
-
3
-
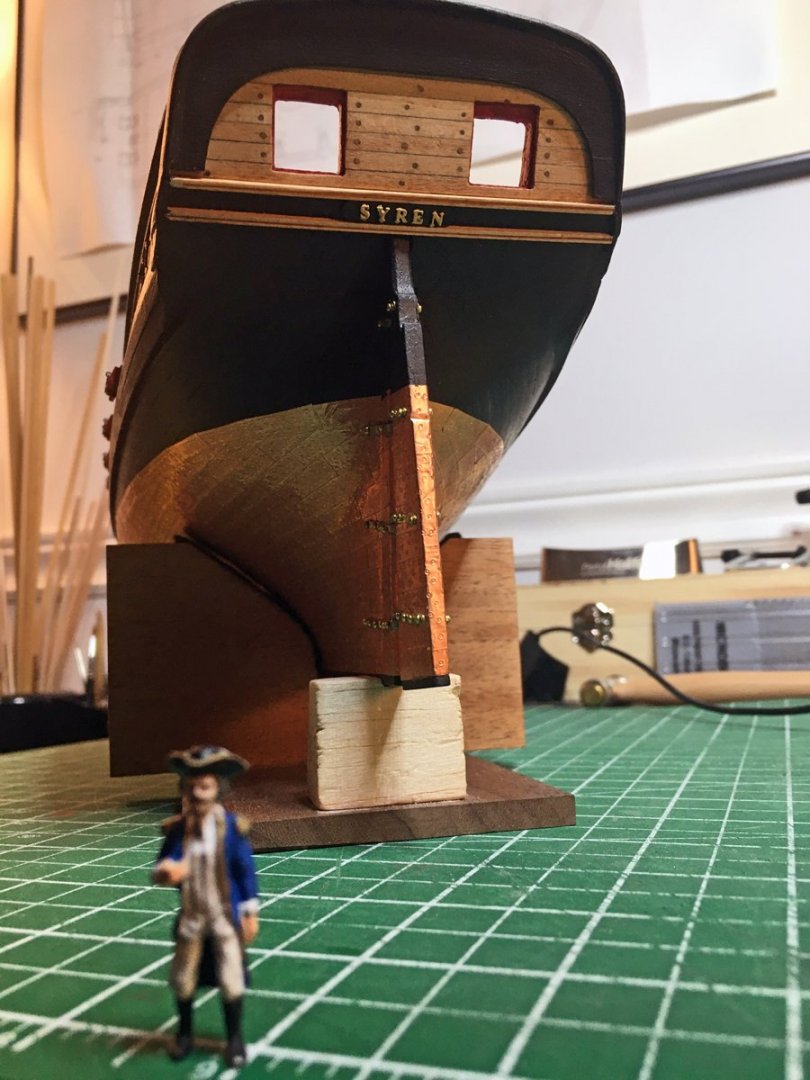
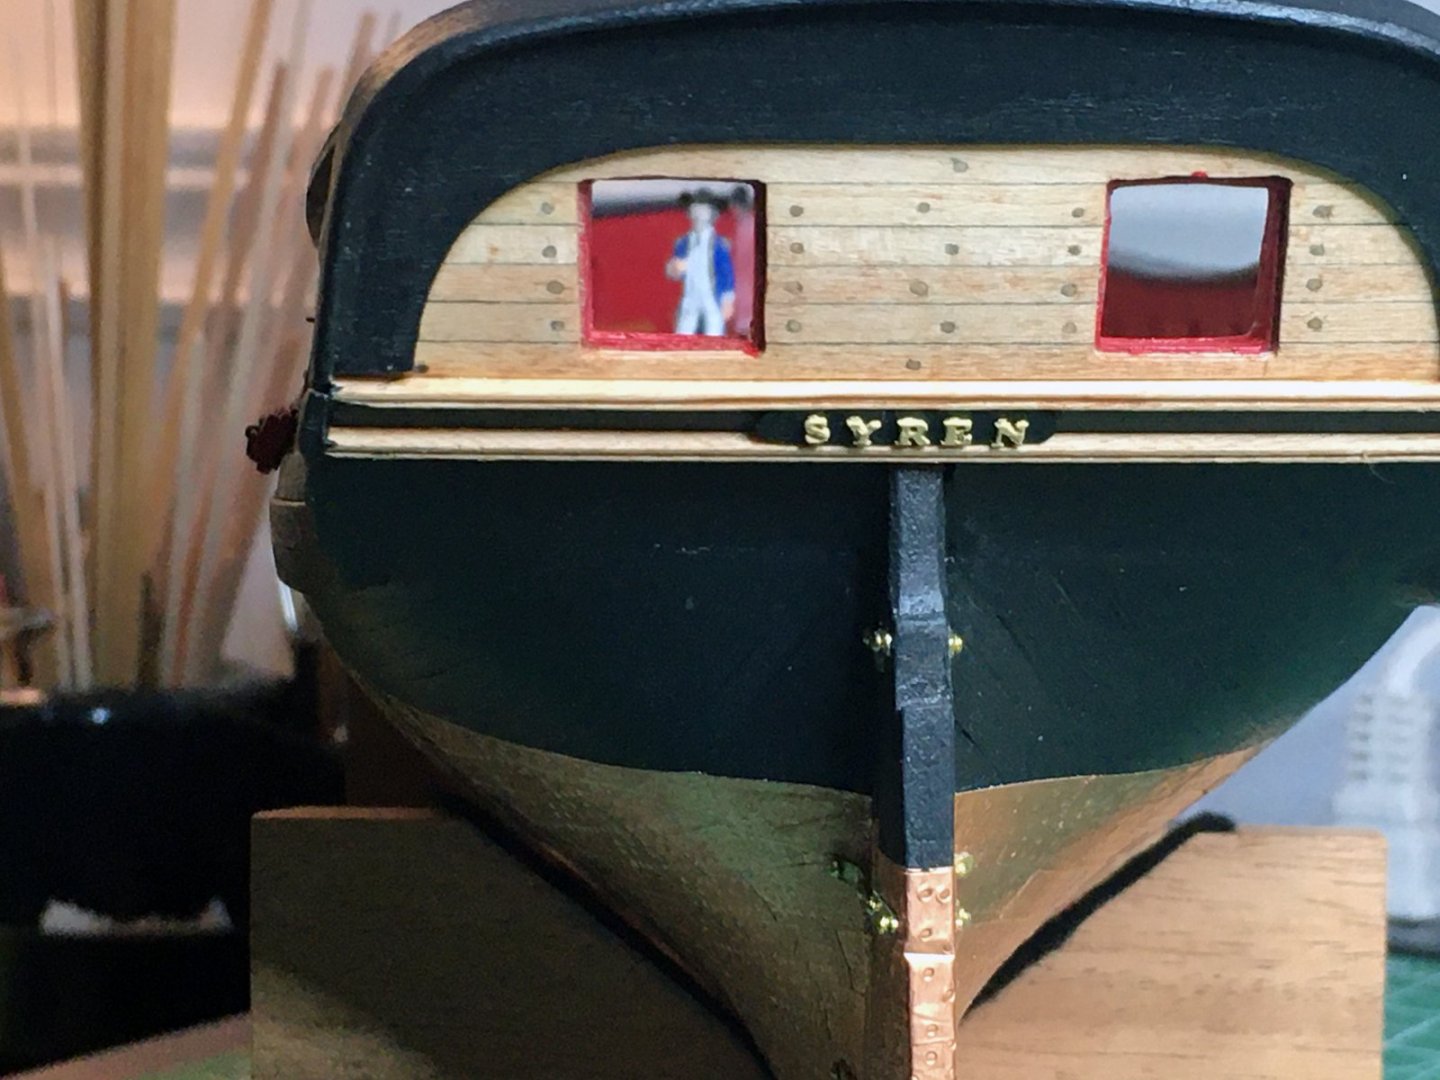
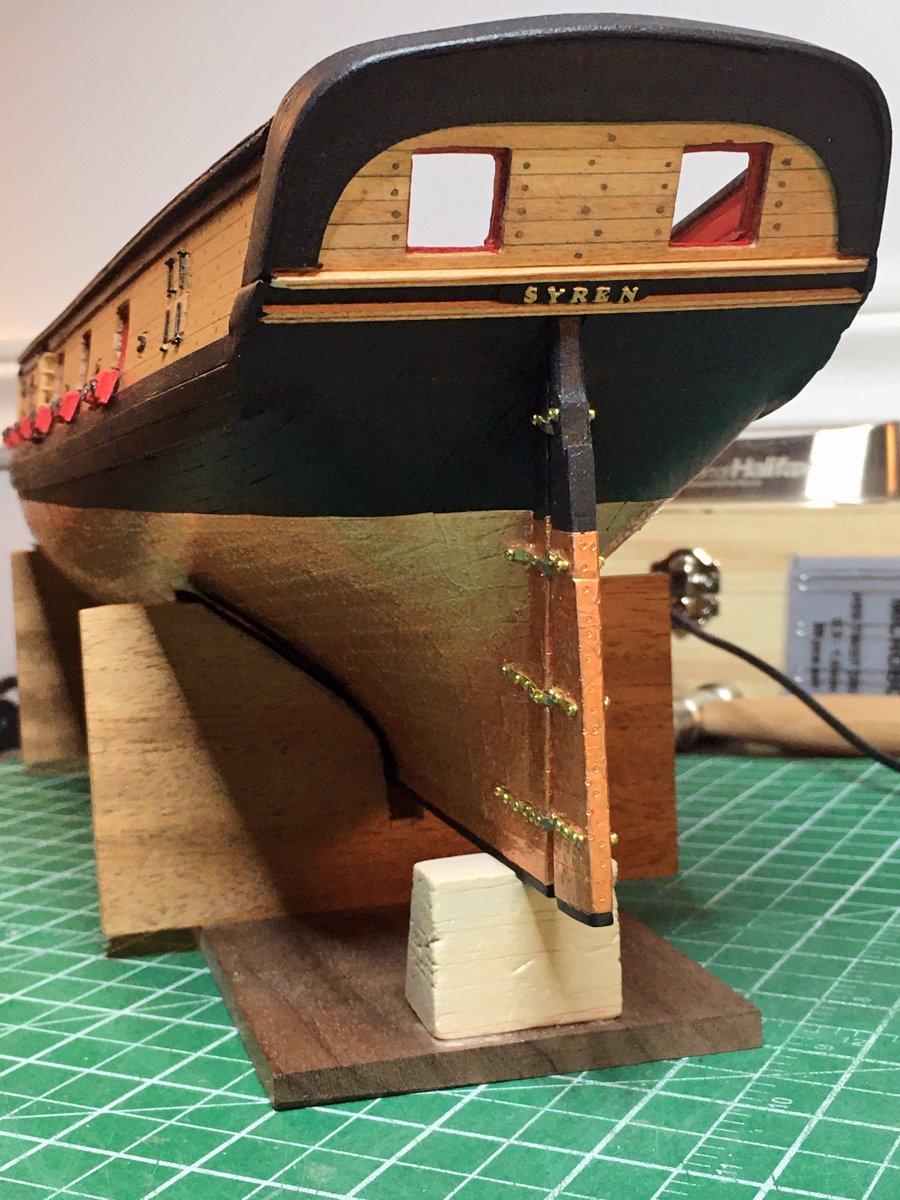
Today I gave er a good cleaning followed by a minor paint touch up! Made up the stern transom port covers, painted waiting to dry. Then I did up a signage proto by mounting ``Syren` onto a thin black board. I kinda like it because now it is more visible with more 3d. This is just a test using 2 sided tape


-
15 minutes ago, Voyageur said:
They look lethal! Well done.
Thanks mission accomplished ~
-
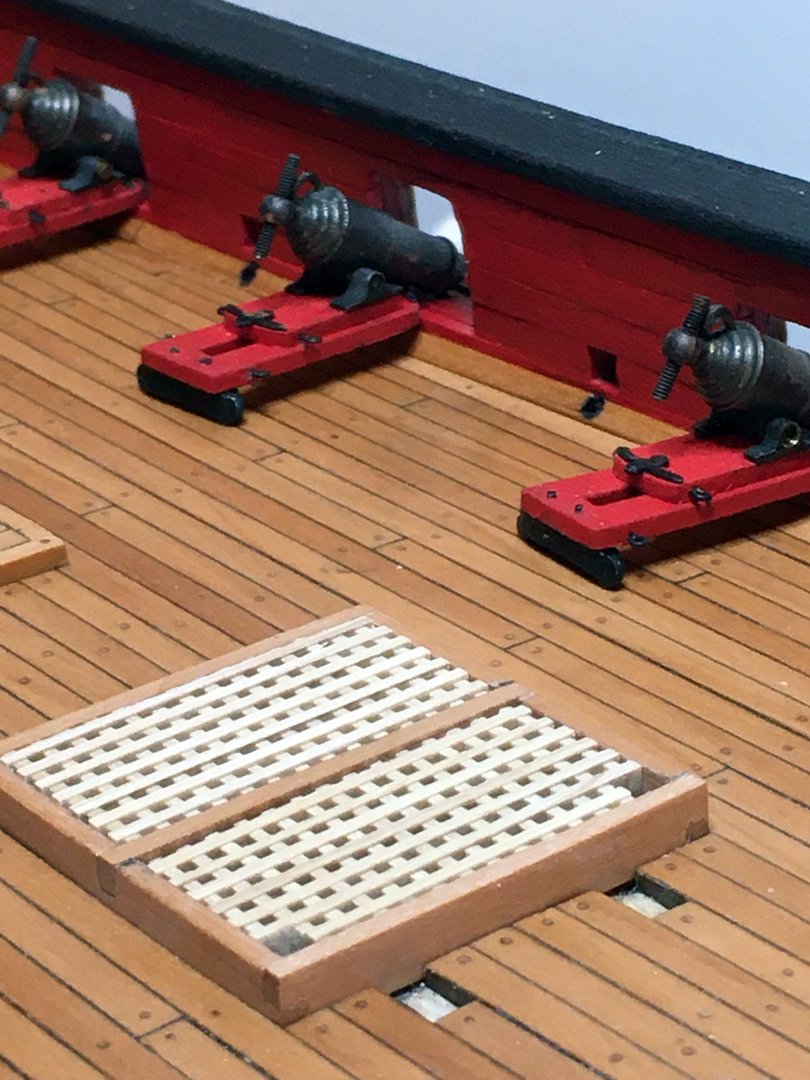
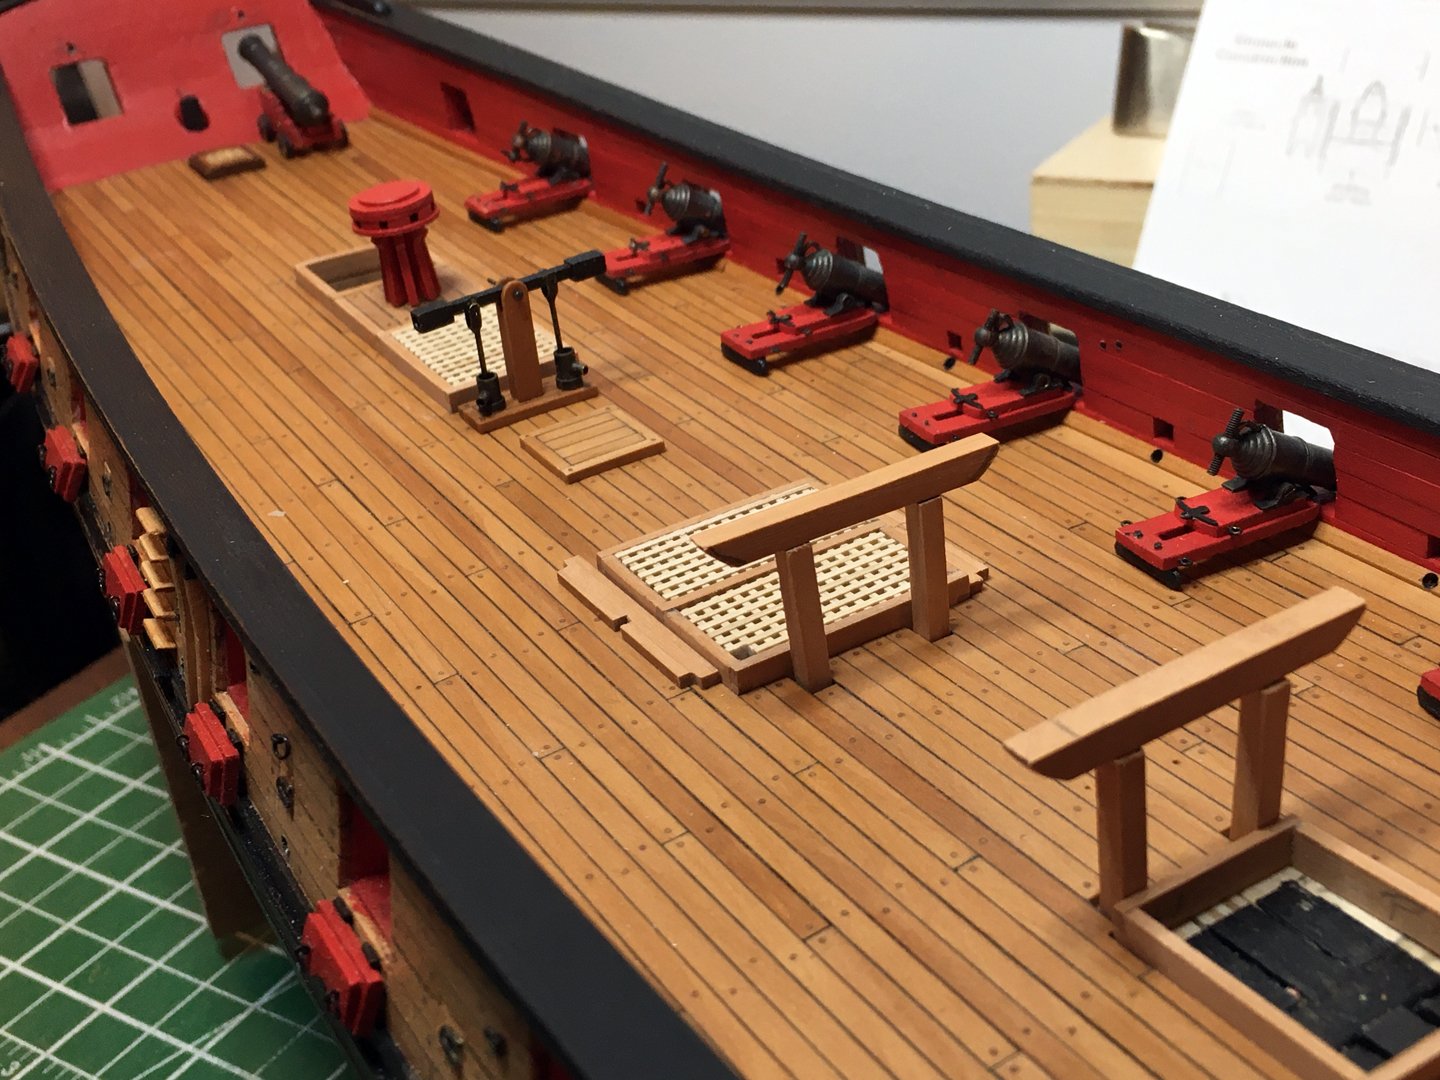
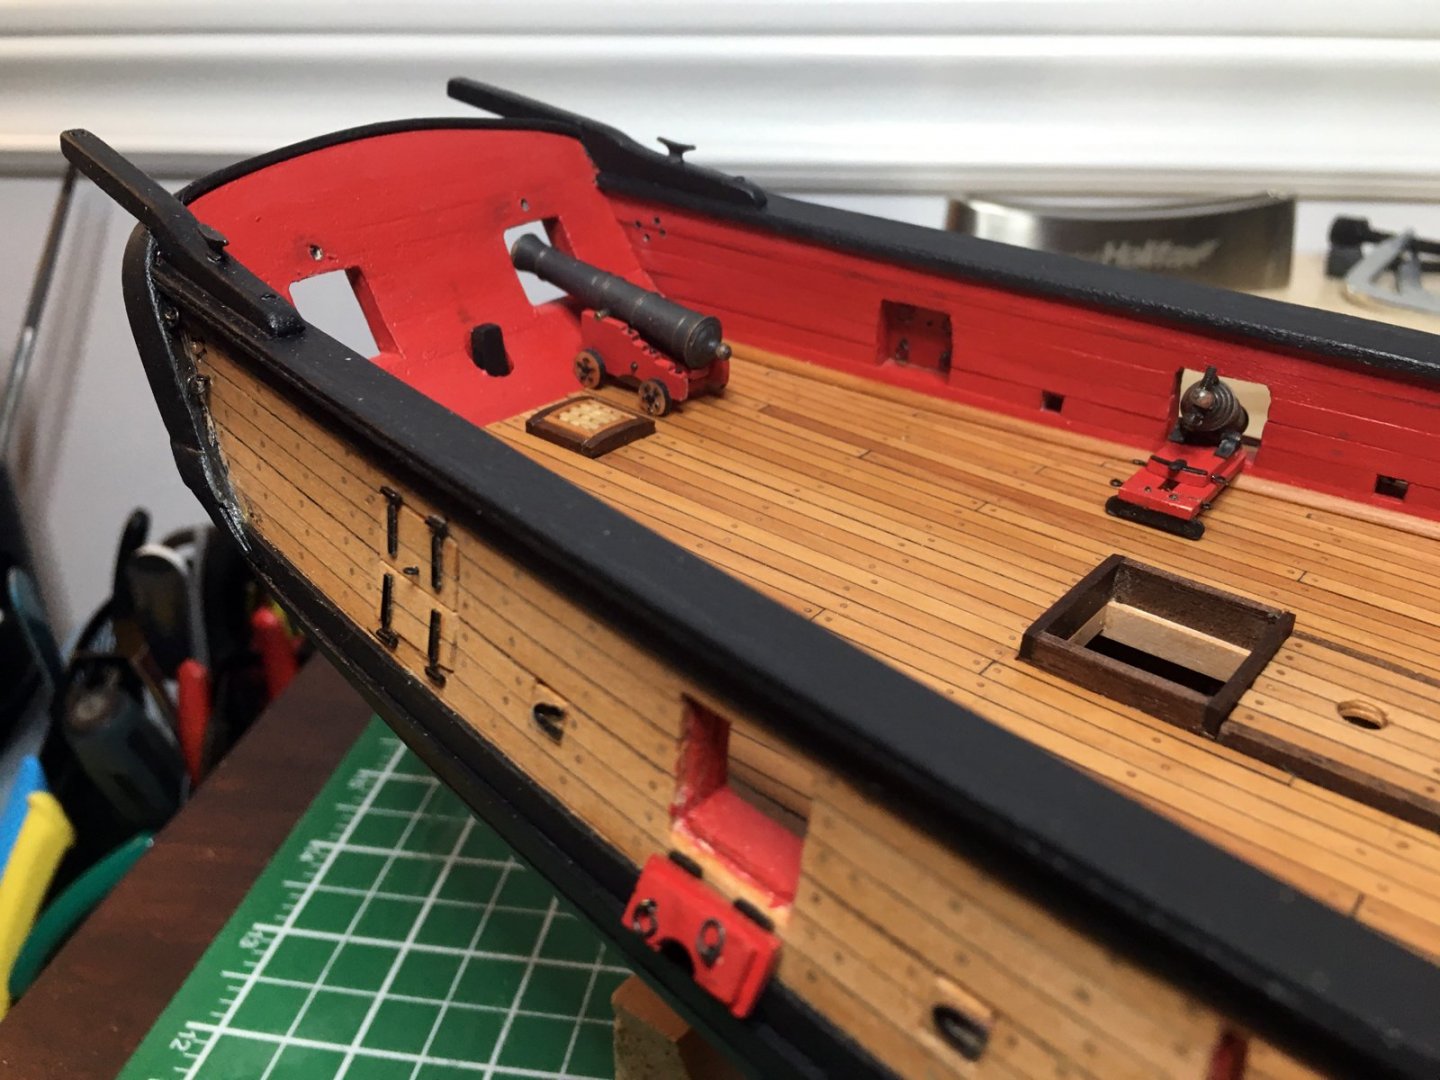
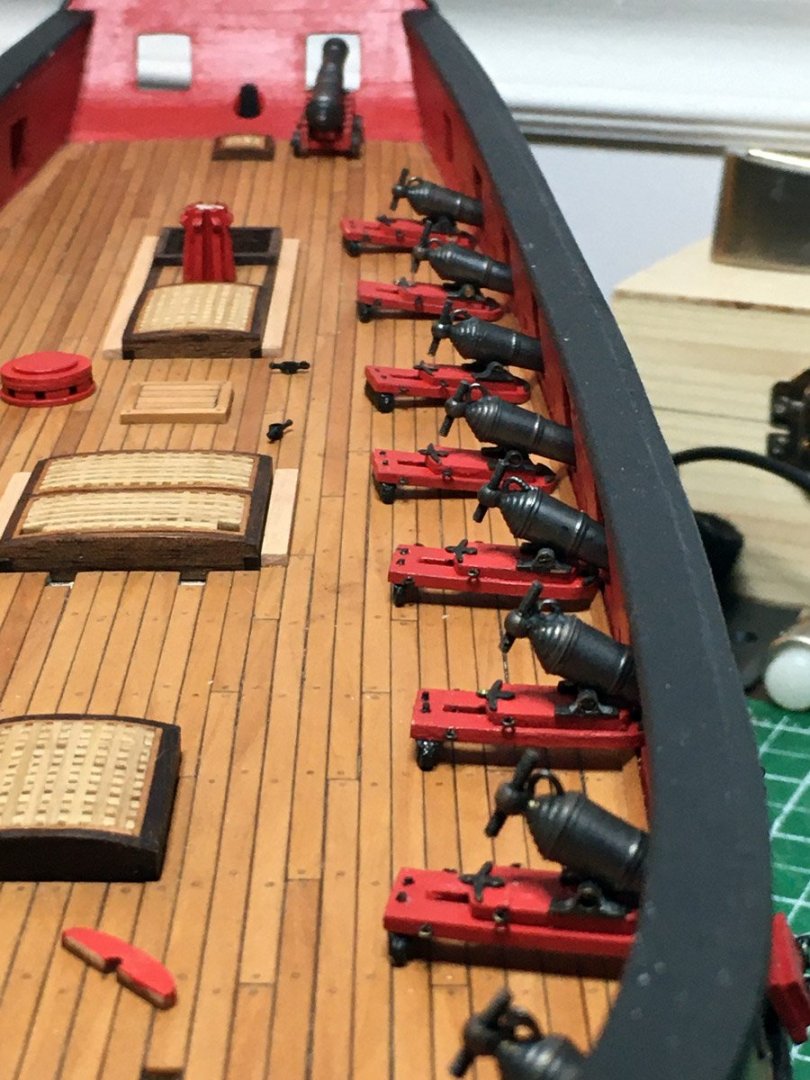
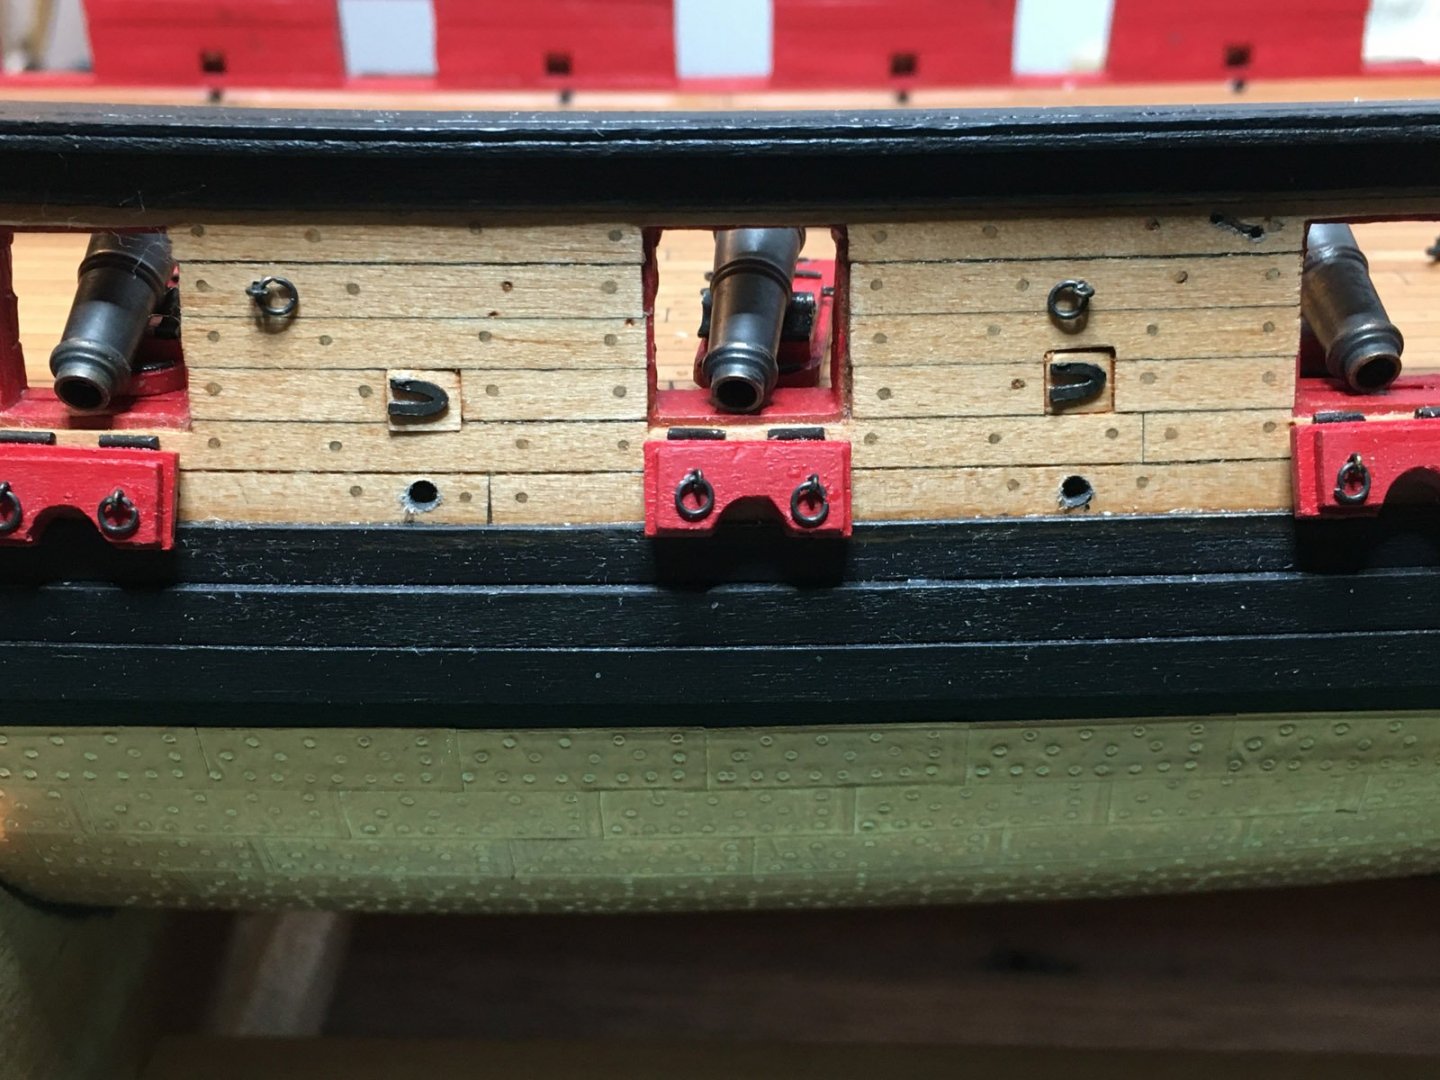
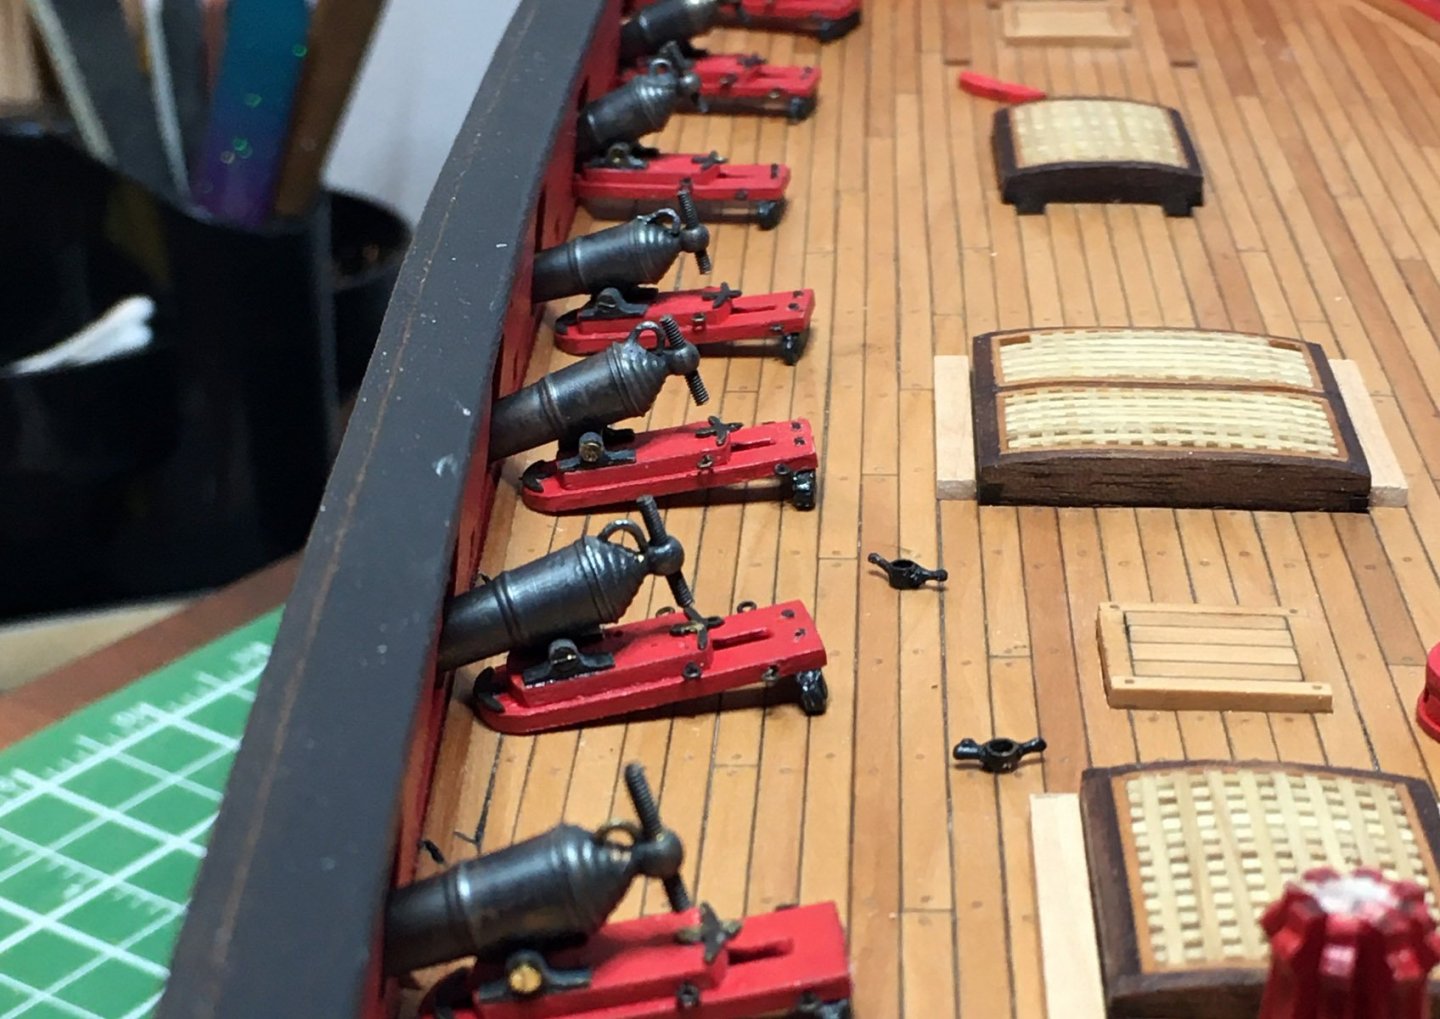
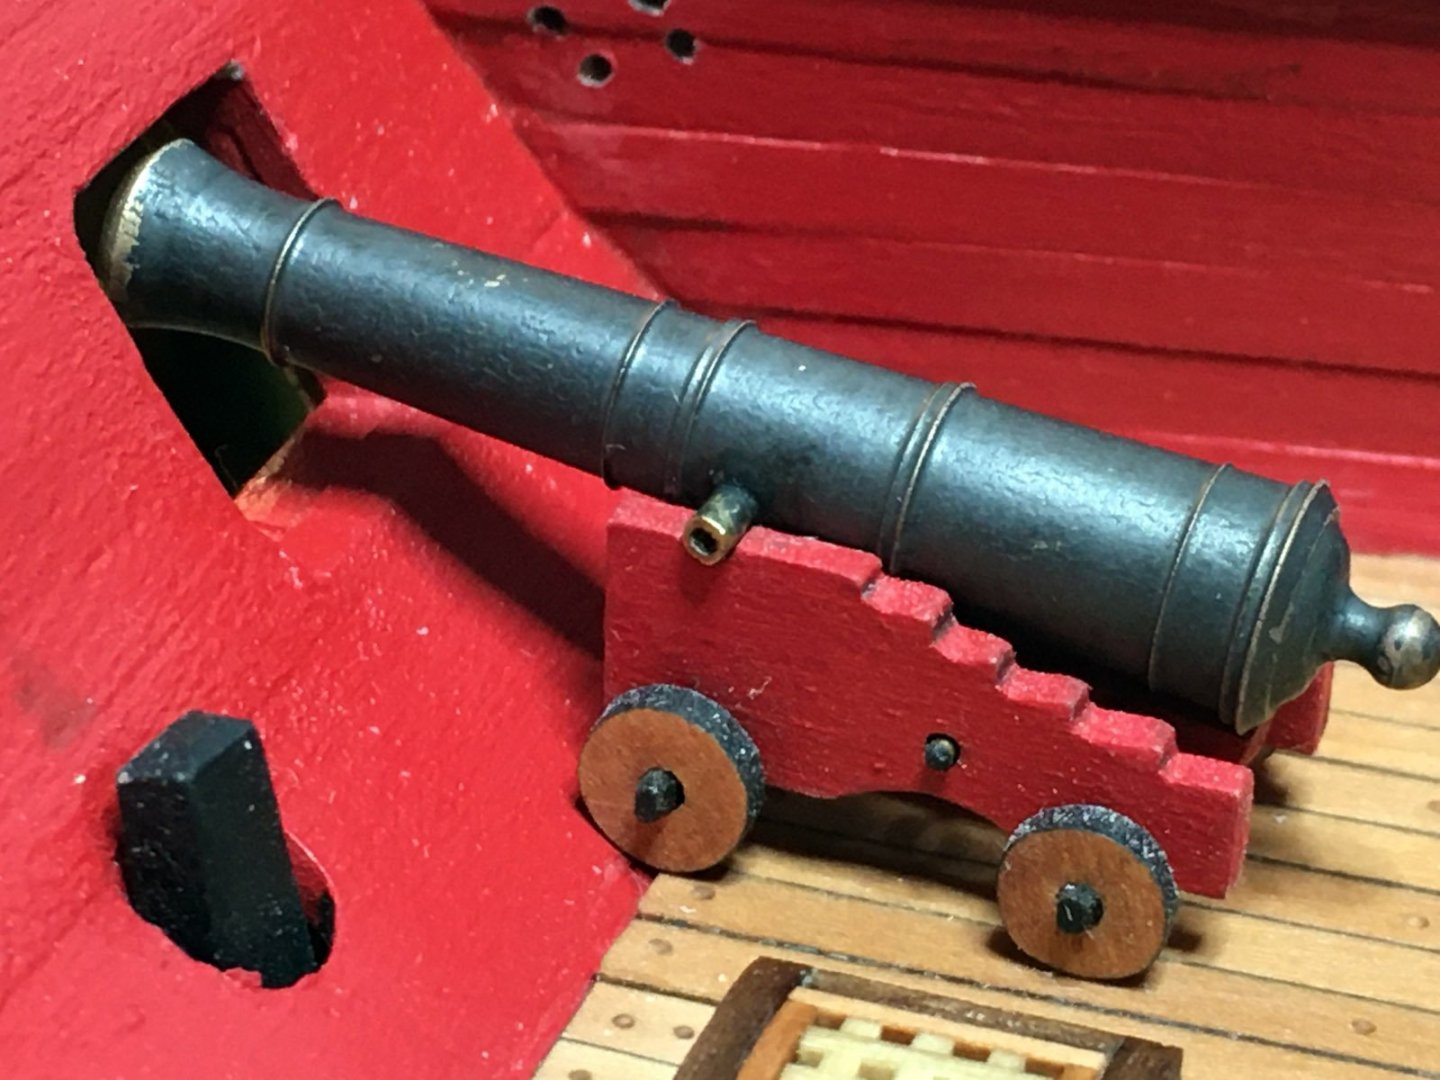
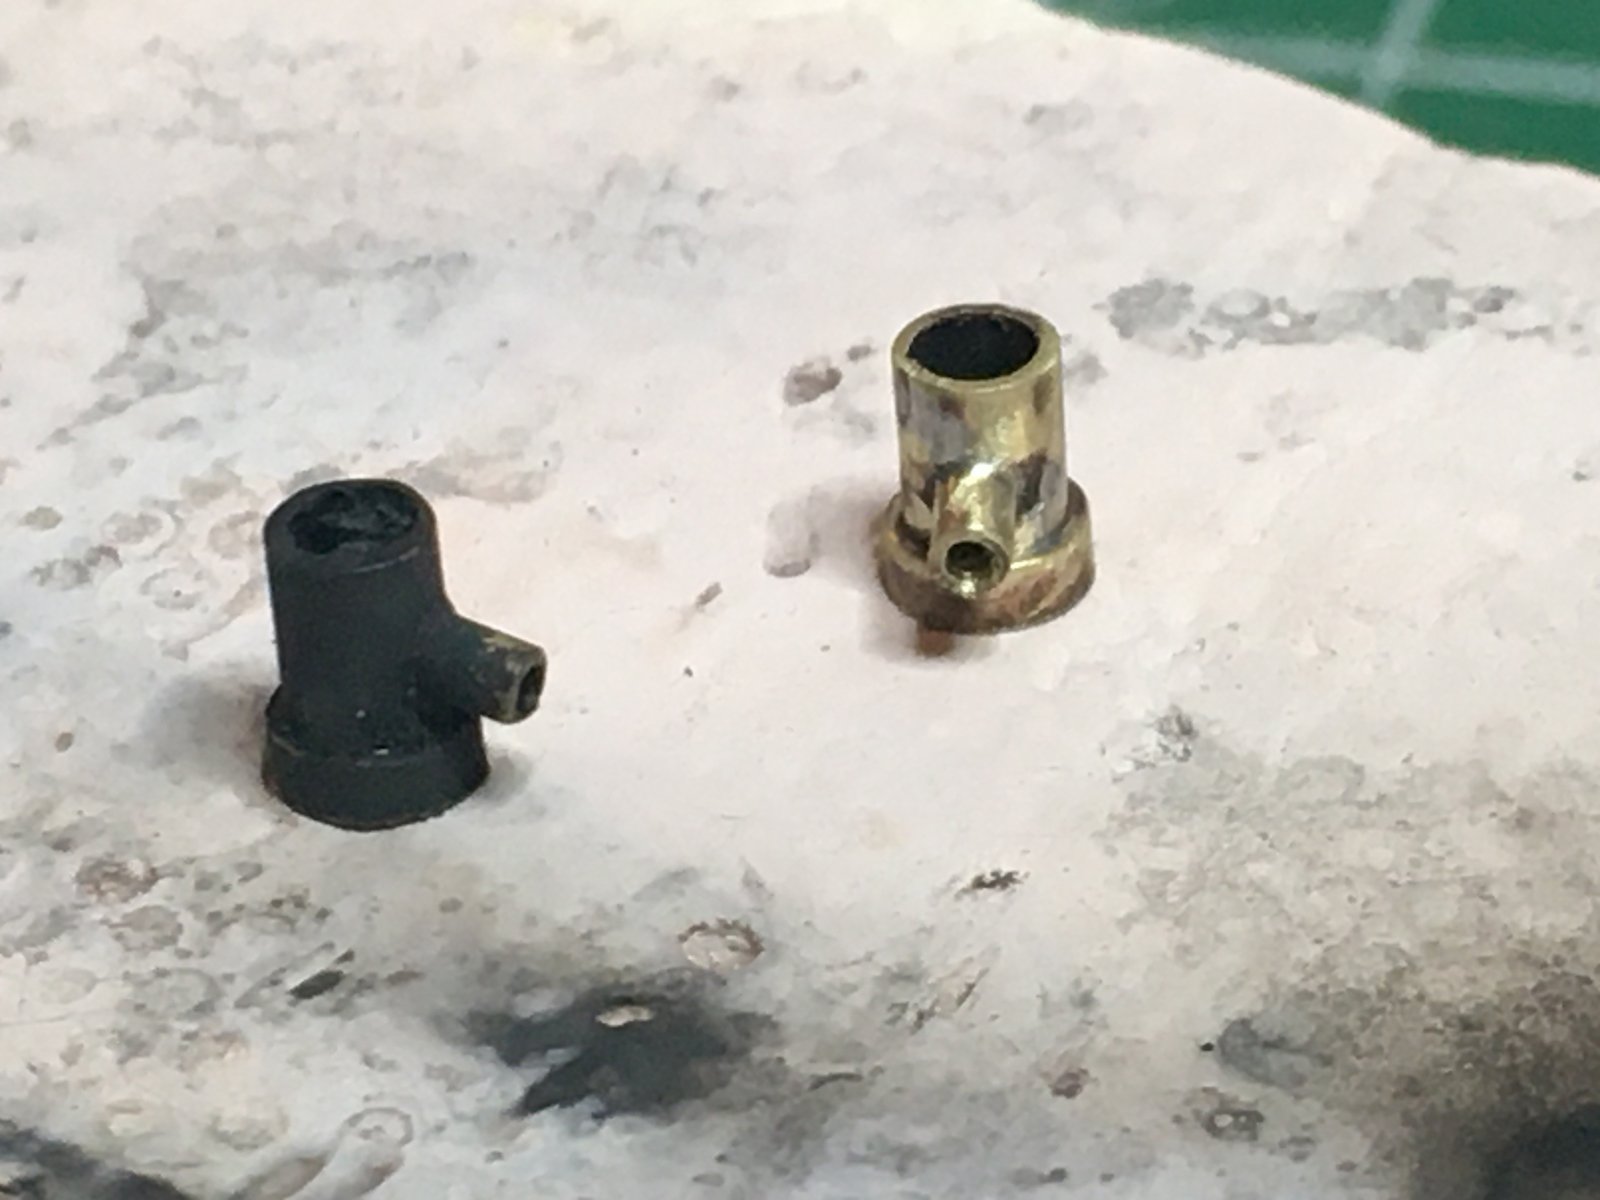
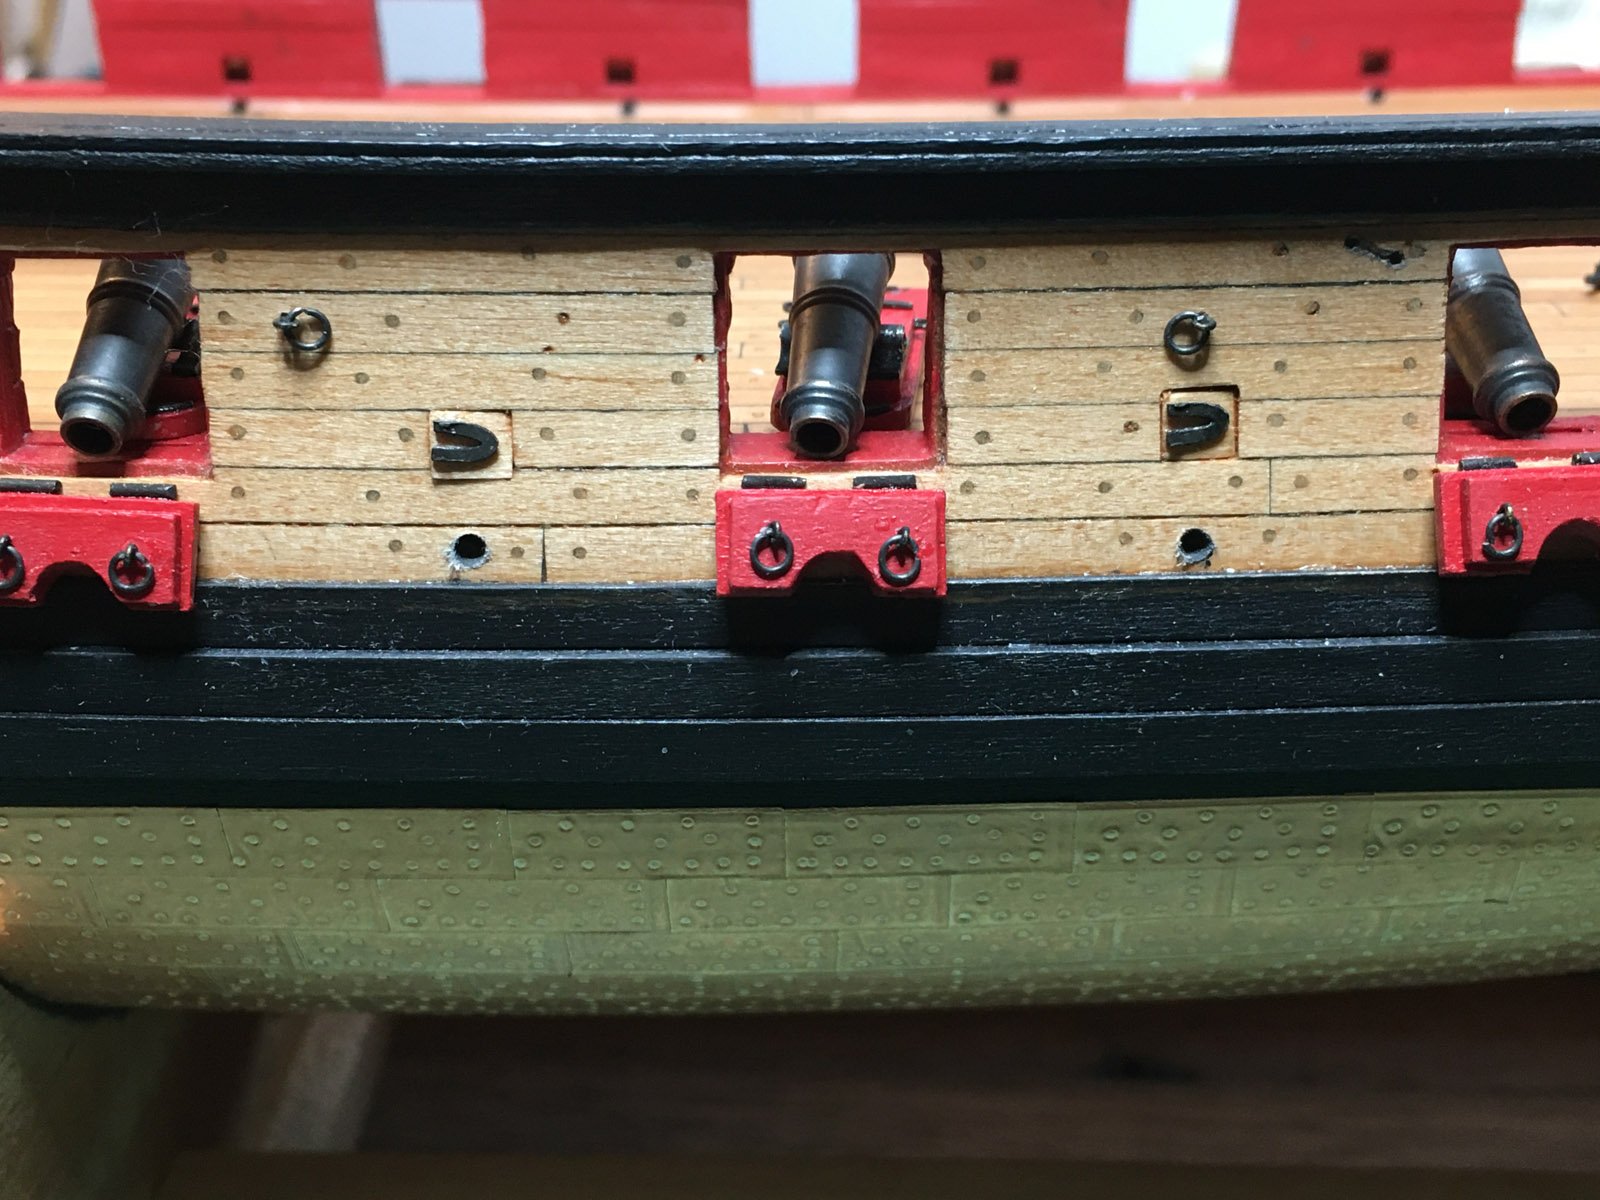
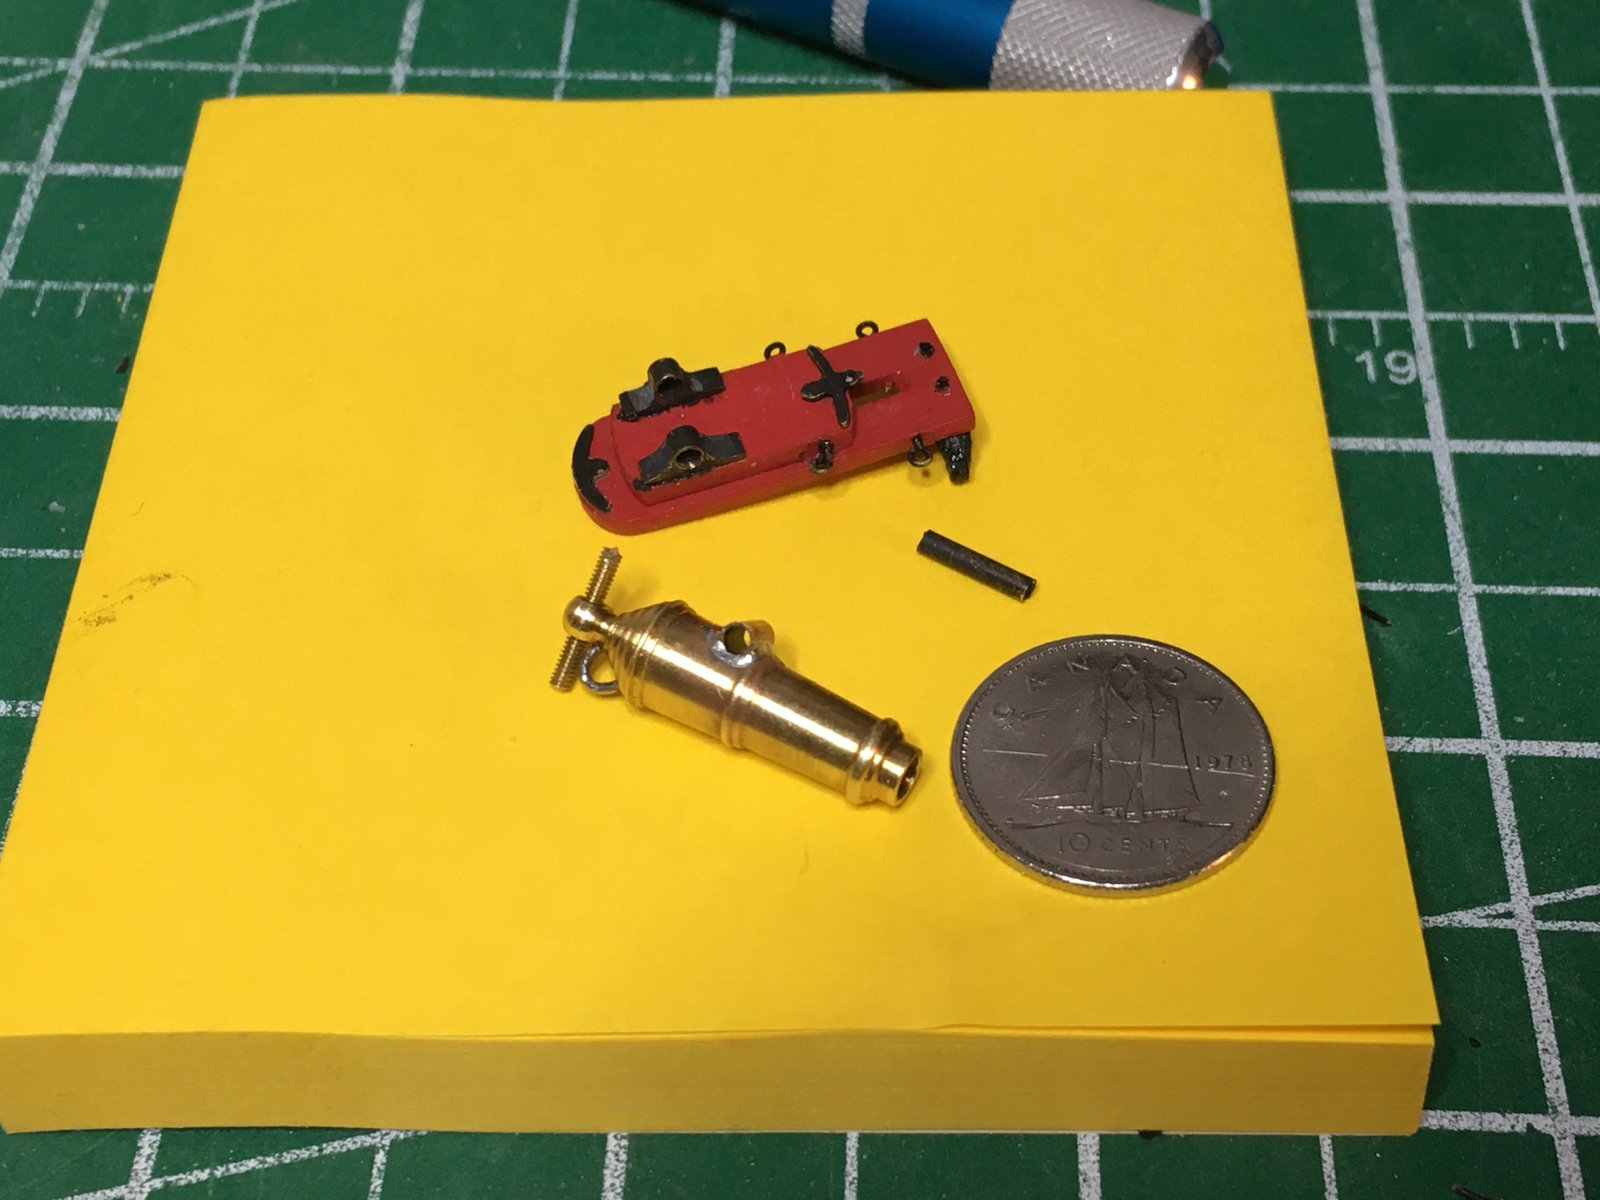
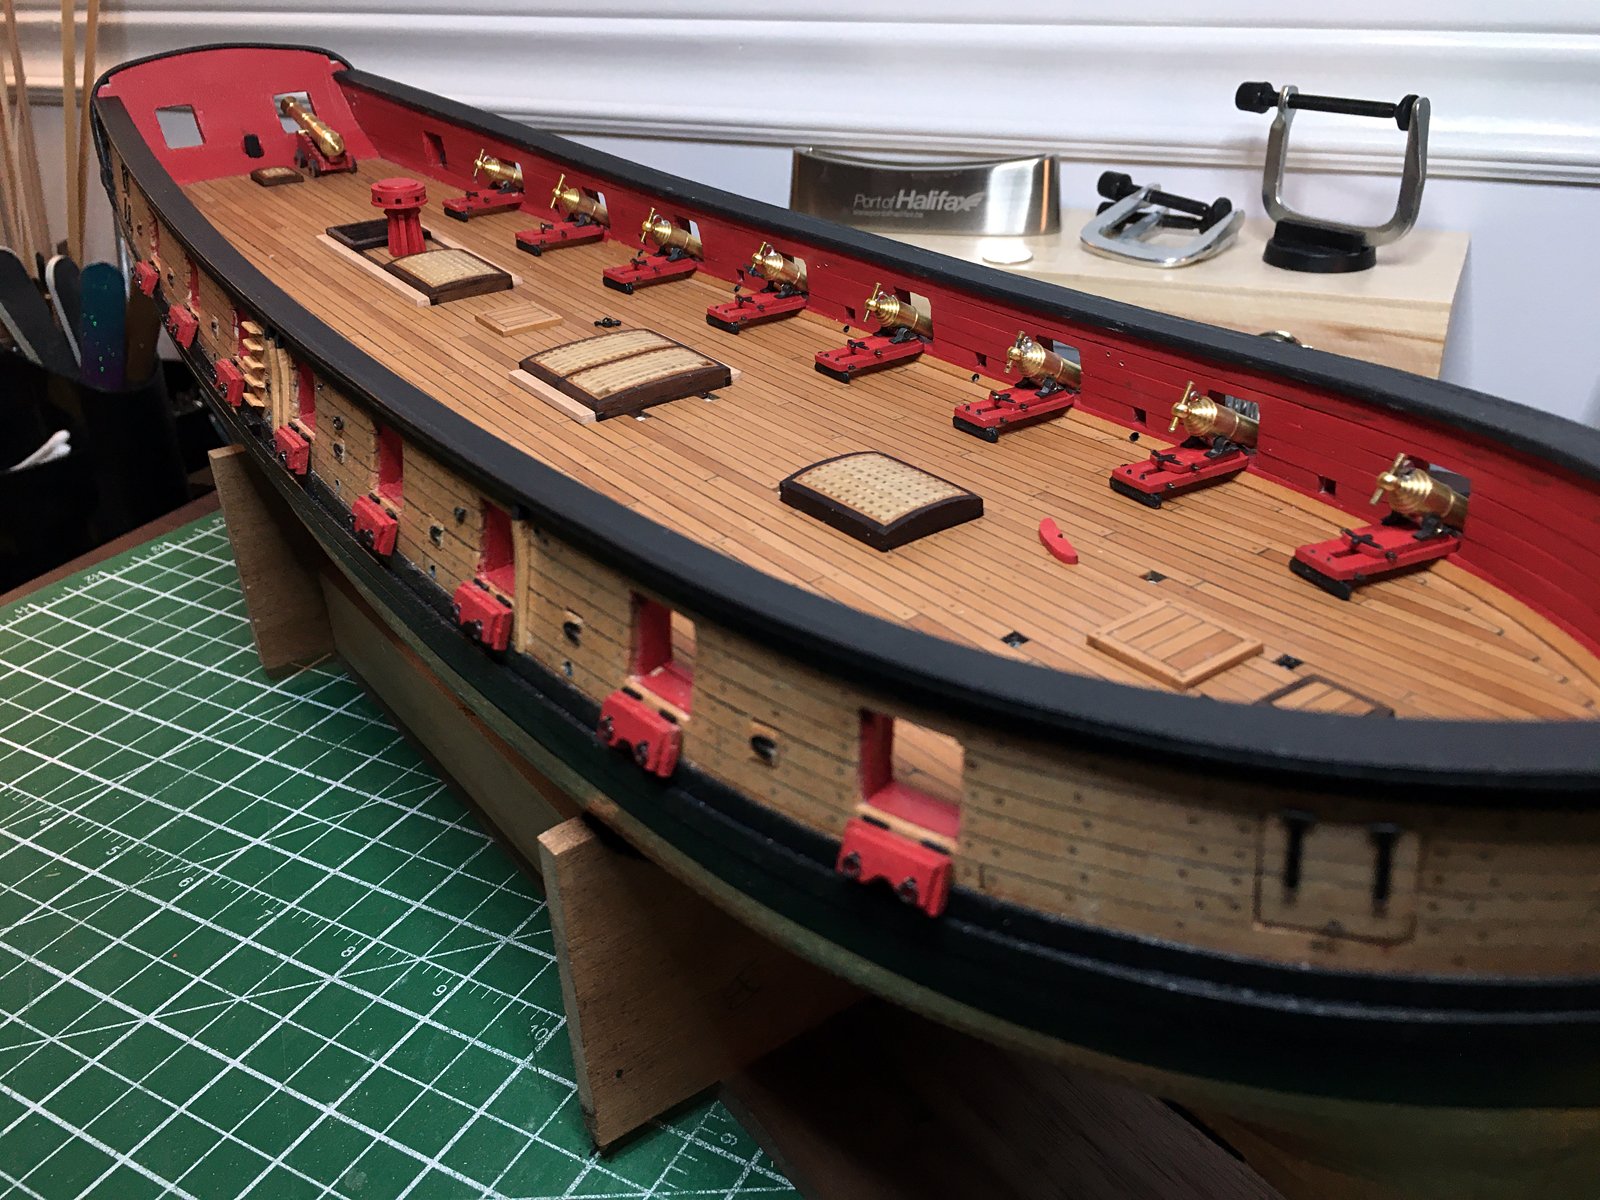
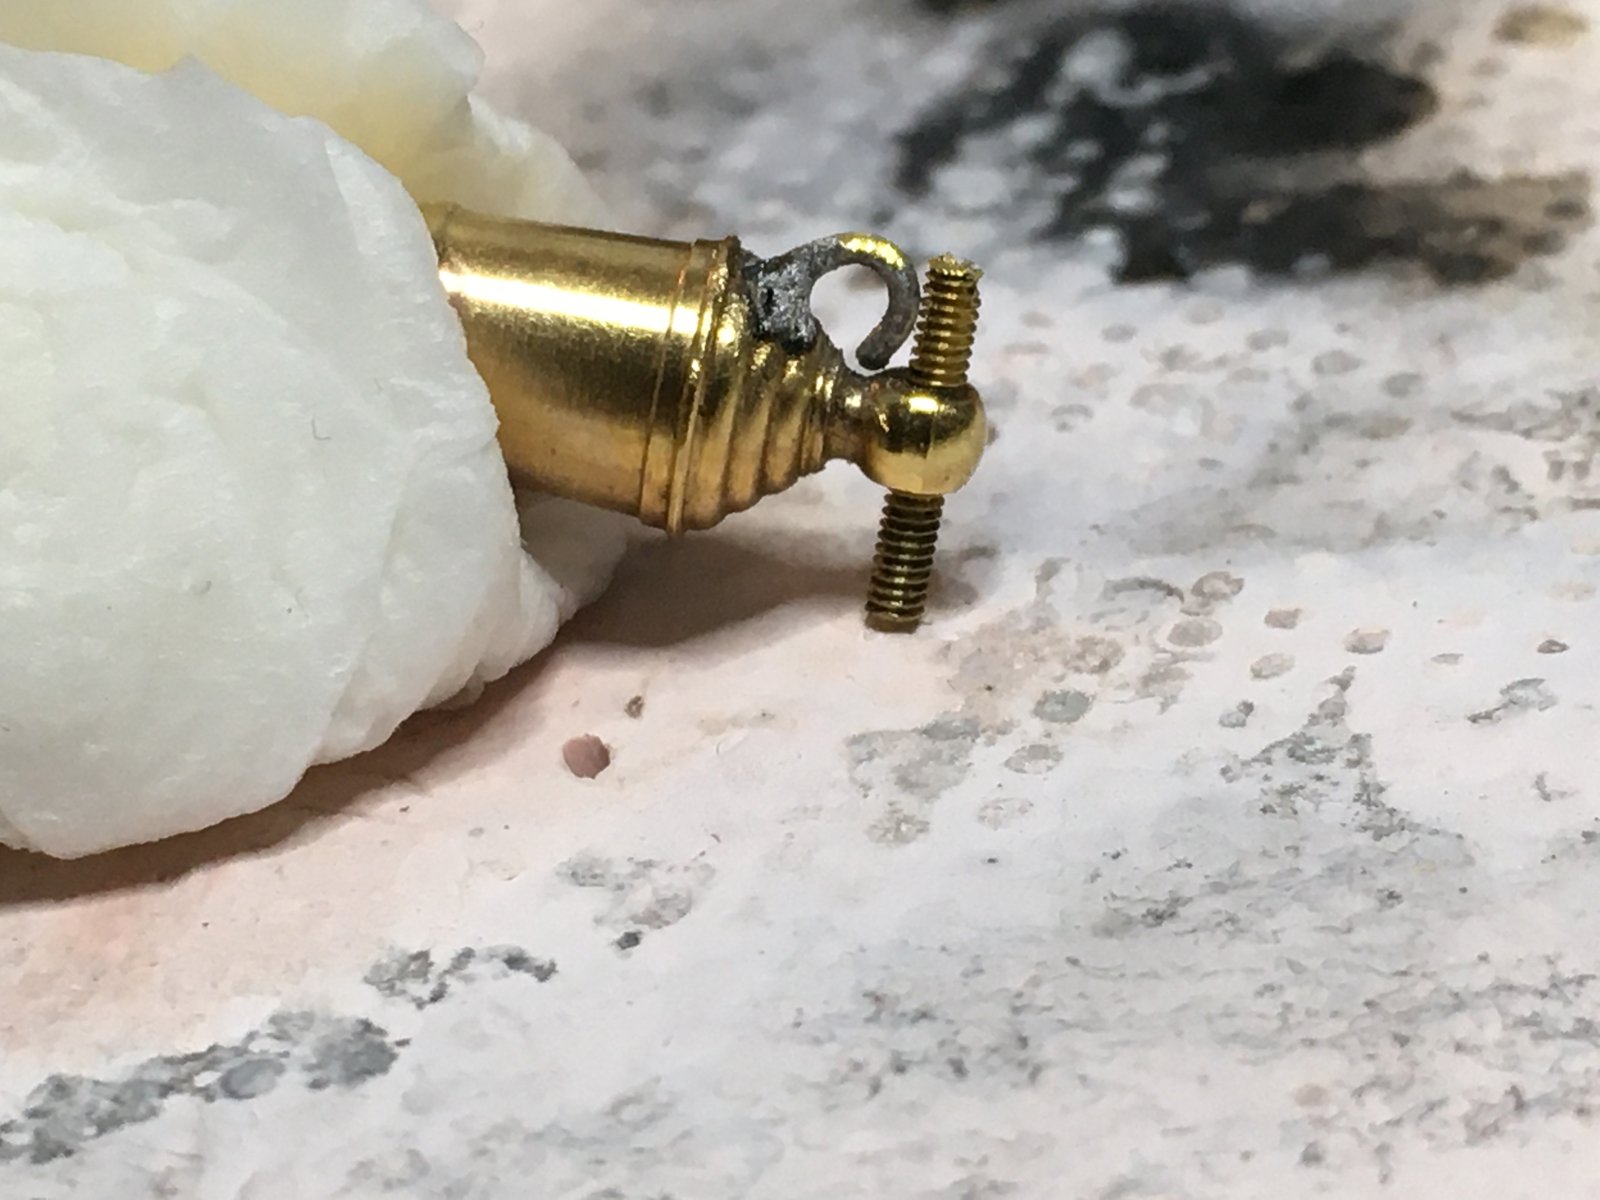
Ok I couldn't take the bling factor on the carronades any longer. Last evening I got into blackening the carronades and one cannon I have done up for the port side. I was pretty nervous given the time spent on them and the sleds, so it was going to be a bit of a do or die moment. Well the results came out fantastic I think. Took a little trial an error to get the results I wanted and I hope you like them as well.
I started out soaking the pieces in a solution of Sparex #2 in a warming pot for about an hour and a half to clean them. Then they were dried and placed into a container of (straight) Casey's brass black for ruffly 3/4 of an hour. I then removed them from the caseys and rubbed them down with a paper towel which cleaned off the excess and produced results that were not where I wanted them. This was fine as I then placed them back in the casey's again for about 1/2 to 3/4 an hour and then removed them a second time and again rub off and polished them with a paper towel to get the final result. Here are some pics of the outcome.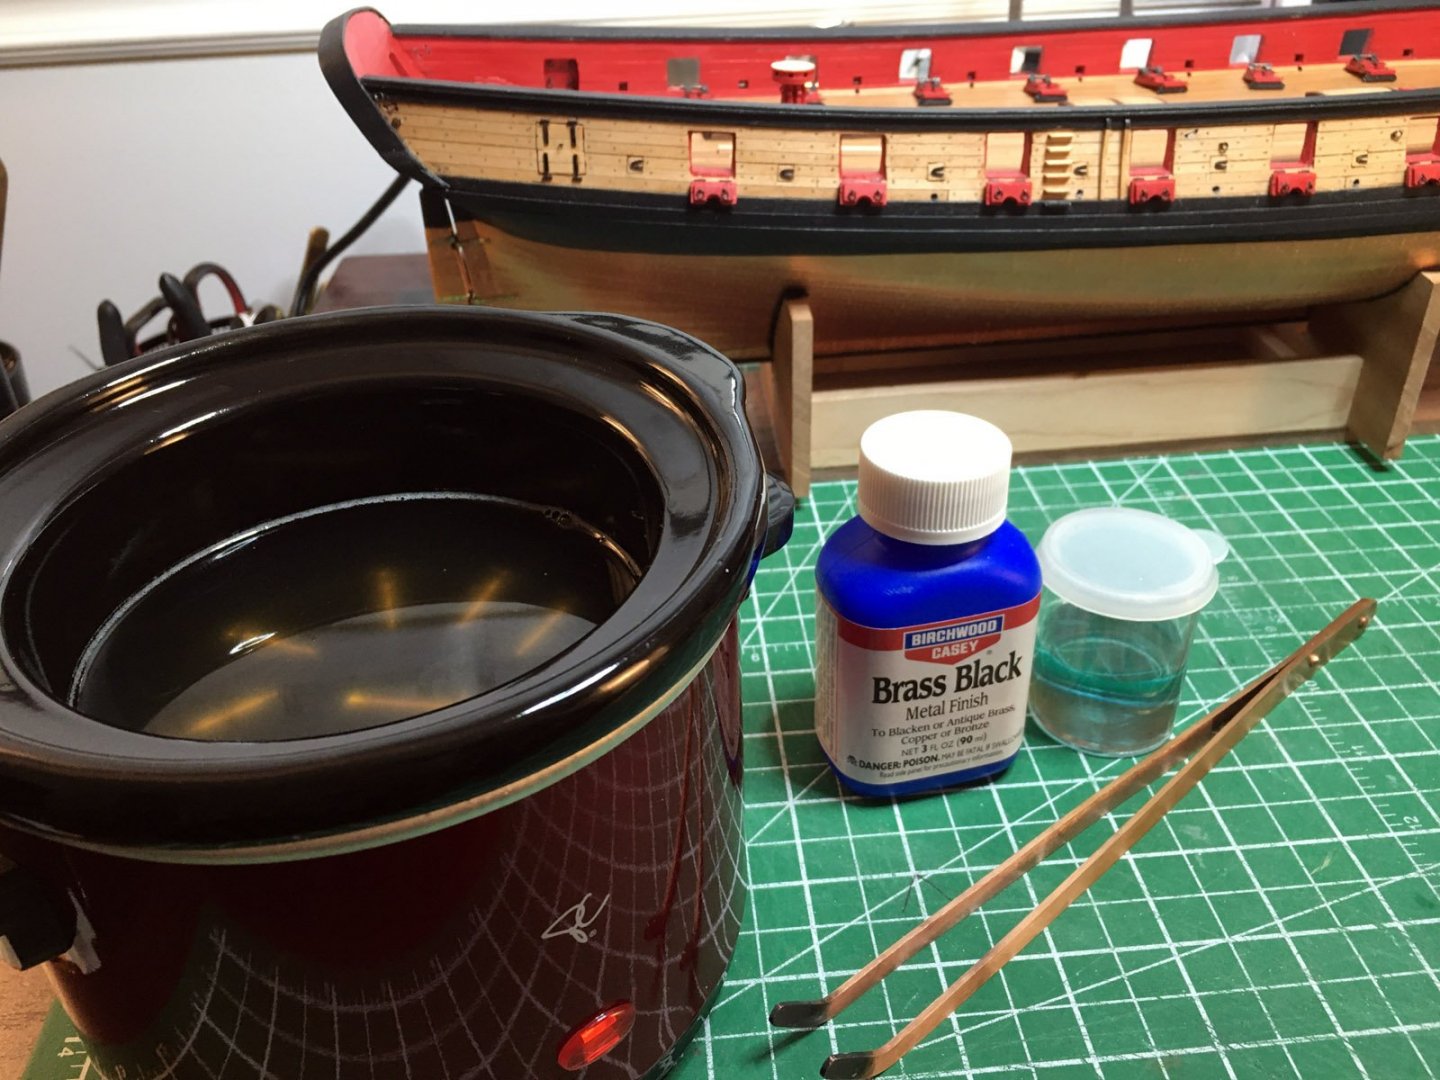
- Retired guy, Wahka_est, JpR62 and 9 others
-
12
-
Now your talking that is really looking like a great way to clamp it. I will remember how you've accomplished it for the next time I am in need of a workable solution. Thanks for sharing, it looks as good as it gets to me
- Edwardkenway, Justin P. and WalrusGuy
-
3
-
1 hour ago, Gahm said:
Getting those carronades detailed is a lot of work! Syren has 16 plus 2 long guns . . . just imagine building a Victory 😉. But your carronades really look good!
Thomas
Thanks Thomas, they are a lot of work and yours are like little individual works of art! I might be missing a couple ring bolts with split rings I think you have on yours. They don't show on chucks plan. I will have to do some more checking... Cheers thanks again for taking the time.
-
10 hours ago, Retired guy said:
Brilliantly done Robin 👍
Regards
Richard
lol thank you my friend. Kinda flying by the seat of my pants here. Tinning the wire for the breach ring really helped with soldering and I managed to get them quite a bit smaller. The one from the first post is the 5th one in from the bow. I am starting a new wish list for a proper pliers set for metal work. The cheap ones I have don't cut it. Only 8 more to go!
-
Yea you gotta get creative with your clamping on the stern area. You need a C type clamp or something like this HERE which is what I used with a rubber eraser between the clamp and plank. The eraser conforms to the bend, protects and holds the wood firmly. When the time comes to start the first garboard plank off the keel rabbet, be sure and follow the instructions carefully and do not start it to far forward, or you will be in for a very hard planking job going forward. Take your time it will pay off
- Edwardkenway, WalrusGuy and egkb
-
3
-
-
You are coming right along, I think the 5/32 plank was to be curved on the top edge to fit the curve on the port cover piece. Not sure tho as I did mine differently because I planked the transom.
- WalrusGuy and Retired guy
-
2
-
On 4/23/2020 at 10:11 PM, Retired guy said:
The second one does looks way better Robin, and love the deck planking as well 👍
On 4/24/2020 at 10:33 AM, Gahm said:The second carronade is as good as it gets. Well done!
Thanks guys, trying to get the hang of it
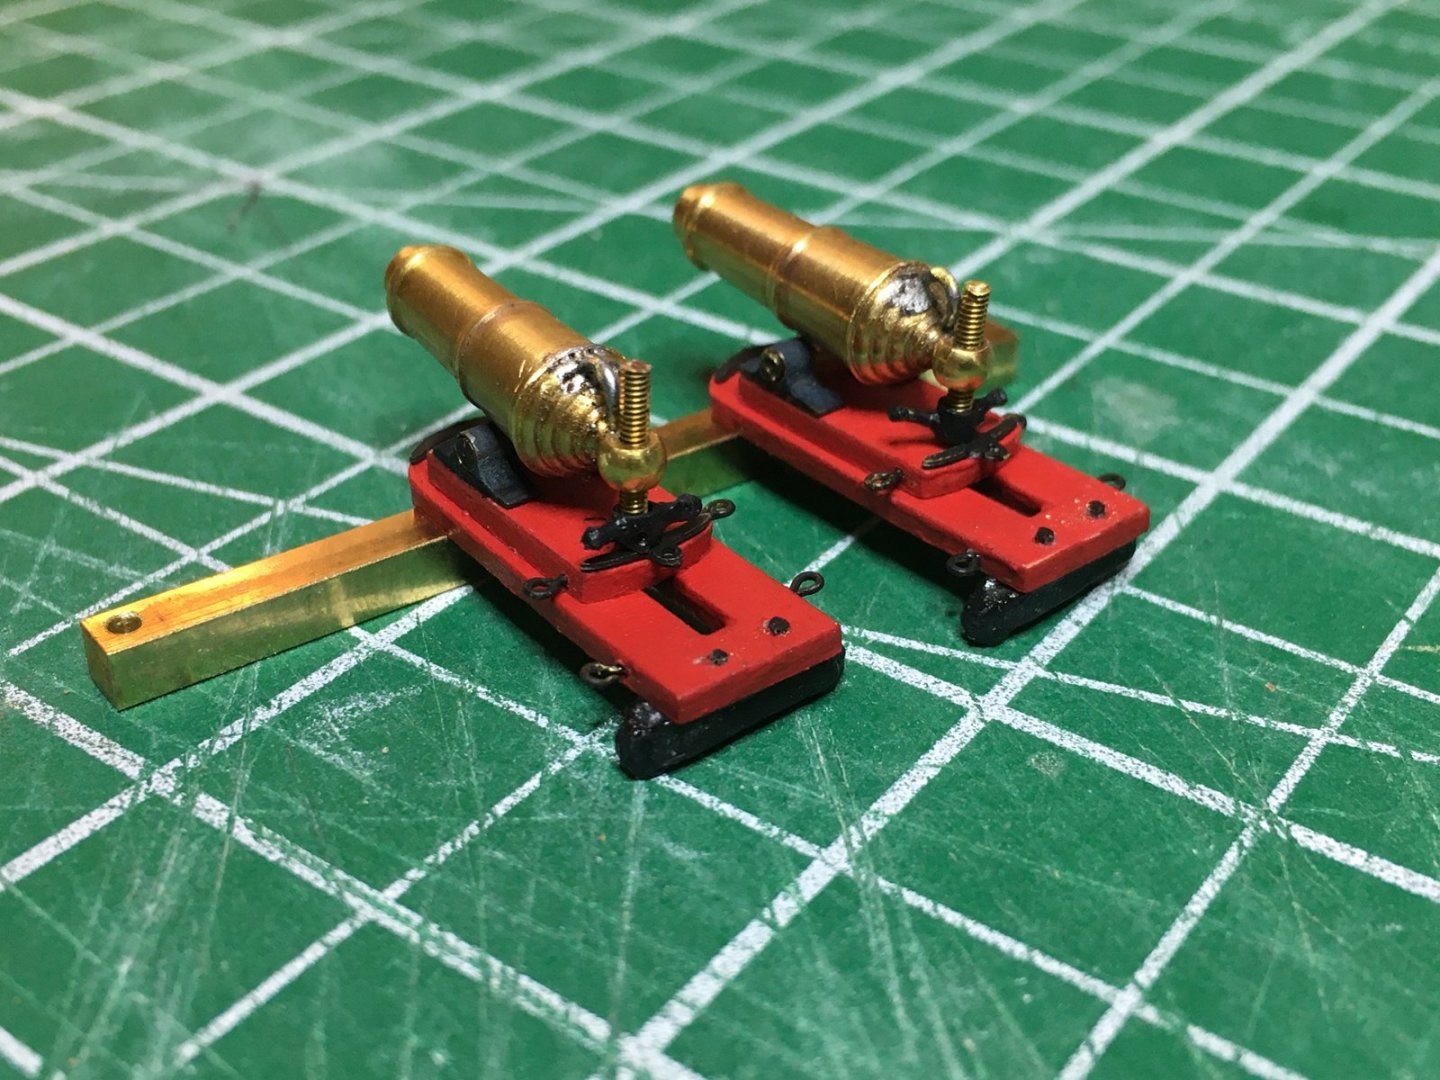
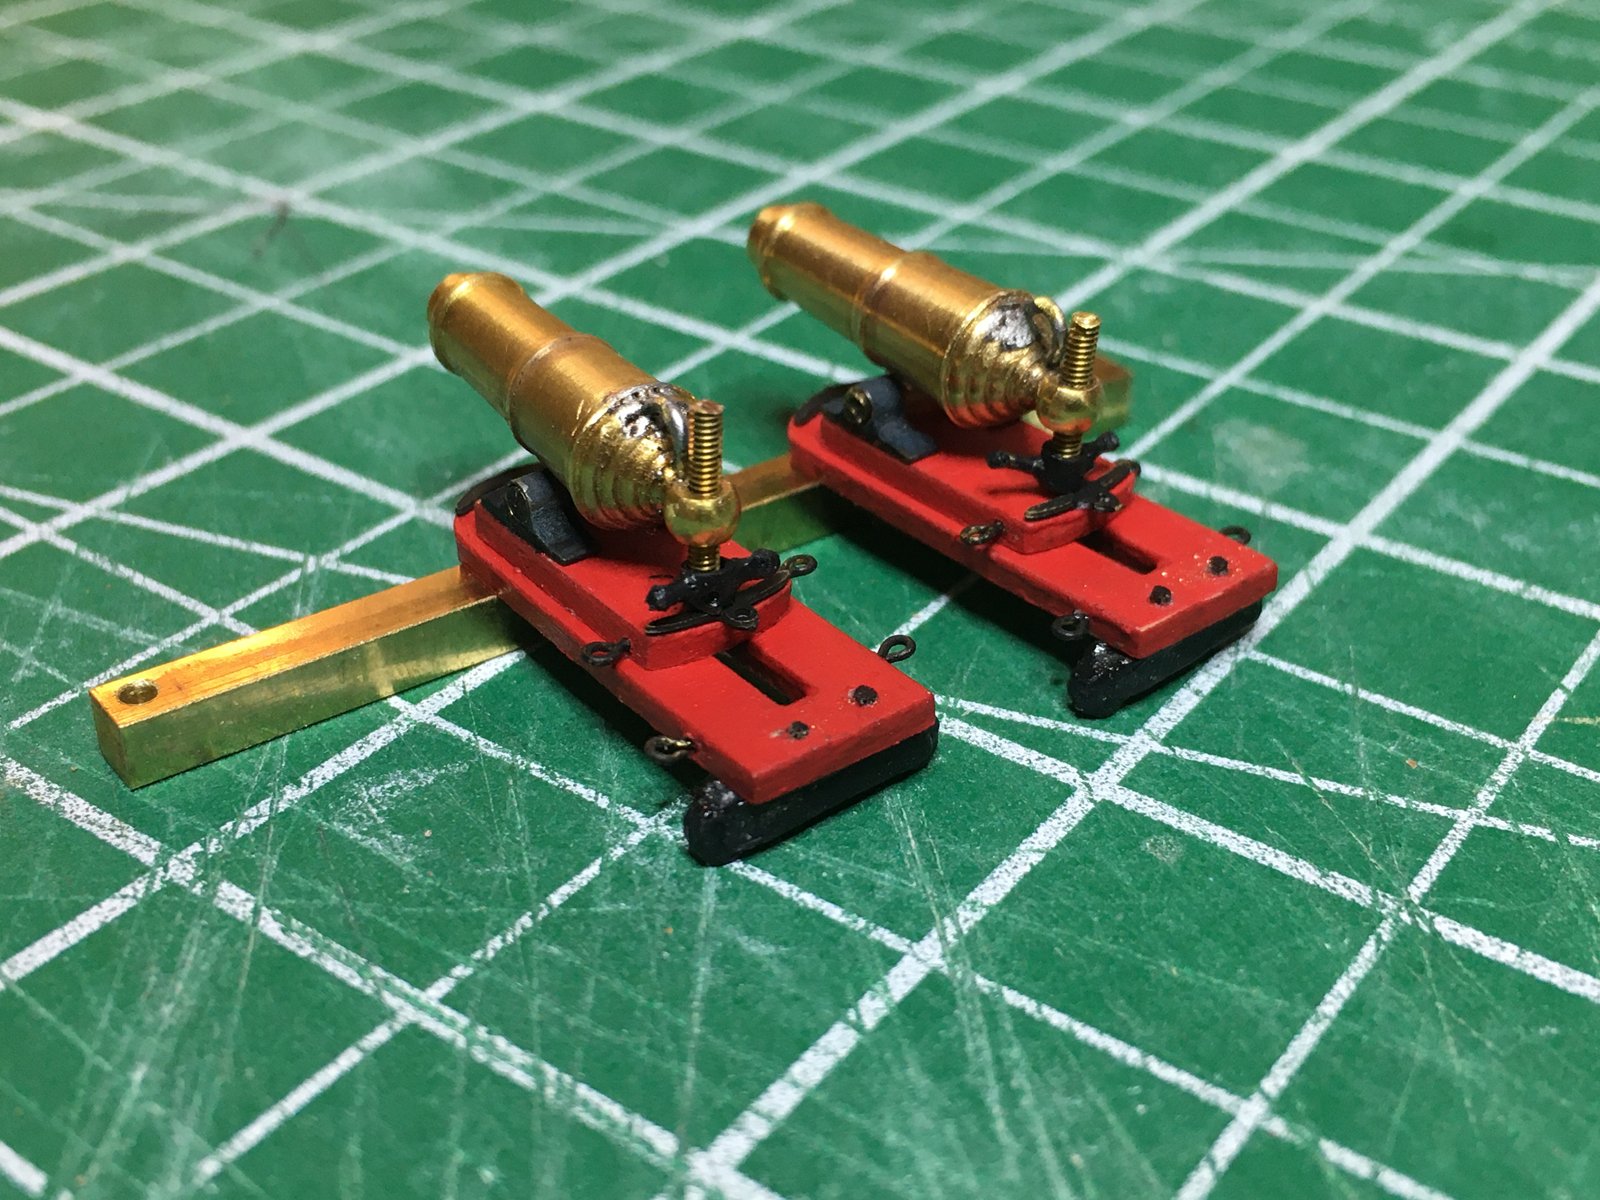
Here are a couple of pics with the breech ring added and the sleds detailed. Soldering the ring could be a little better. Hopefully practice will help lol. I went with a very thin slice of brass tubing, drilled and inserted wire to make the elevation screw handles. Does they look a little heavy maybe?


HMS Terror by Keith S - OcCre - scale 1:75 - as she (dis)appeared on her final mission 1845 - first wooden ship build
in - Kit build logs for subjects built from 1801 - 1850
Posted
Once you paint it that will blend right in Keith. It looks great! Your just seeing all the aluminum bling at the moment.
Just wondering if I ever get around to starting mine, would it be easier to ruff shape out the plating after putting on the first hull planking. Then installing after the second planking and before painting?