


LyleK1
-
Posts
531 -
Joined
-
Last visited
Content Type
Profiles
Forums
Gallery
Events
Posts posted by LyleK1
-
-
On 3/14/2022 at 9:18 AM, TOM G said:
What you did is right....... I read this somewhere, that even so you are building to scale something won't look right. and you have to go off scale to make it look right to the human eye. A good gauge to use for this is a scale figure, in your case a 1:48 can be found on ebay ( o scale figure ) in model railroad trains in toys and hobbies.
I have a scale gauge that I use frequently but a scaled sailor is good idea!
-
On 3/19/2022 at 9:26 AM, allanyed said:
https://www.rmg.co.uk/collections/objects/rmgc-object-68763 shows these on the model at RMG but there are no lines running through them. I thought they might be sheaves for lines to pass around and through the bulwark, but now not so sure.
Allan
I couldn't figure out their use either... left them off my rendition too.
-
Jax Pewter Blackening may work better on the eyelets too.
I have both and find Jax to be a better option.
In addition to the book Keith mentioned, I also have James Lees version.
Both are a “must-have” in my opinion.
- Keith Black and Dave_E
-
 1
1
-
 1
1
-
-
1 hour ago, MaryG said:
Hi Half Hull Planking friends - This is probably a really dumb question - but here goes anyway. Can someone please tell me how to cut the planks straight? I tried holding a metal ruler against the wood but the wood just slipped from beneath it. Arrgh! Getting frustrated…..
Both suggestions are good ones!
Most definitely do not try to cut in one pass!
-
Excellent news!
And the maker of my current build too.
Welcome!
-
Spring is arriving and I find myself outdoors or on the boat a bit more!
A good thing!
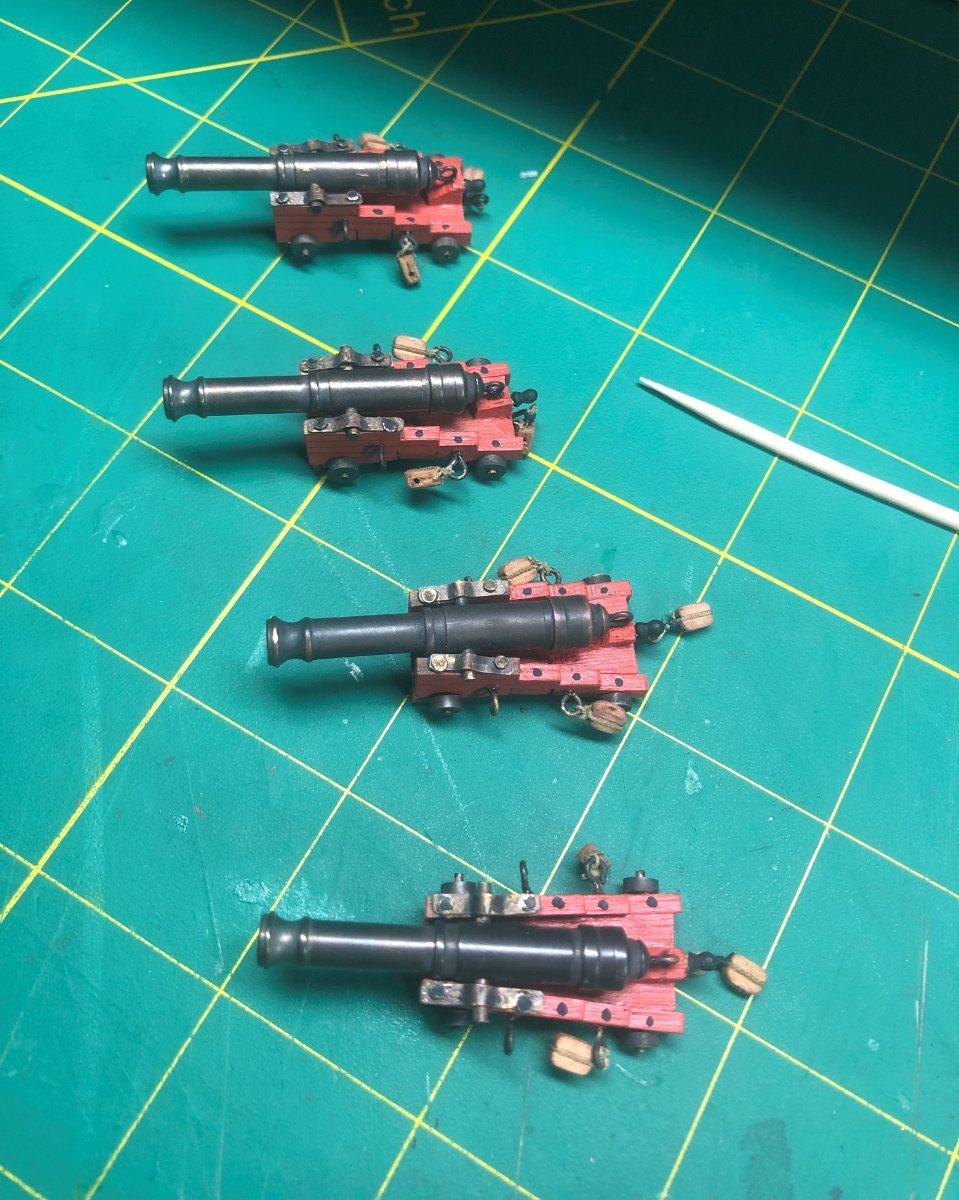
Managed to do some work... tear it apart and do it again only to discover that it's still not right! Or at least, it doesn't look right to me.
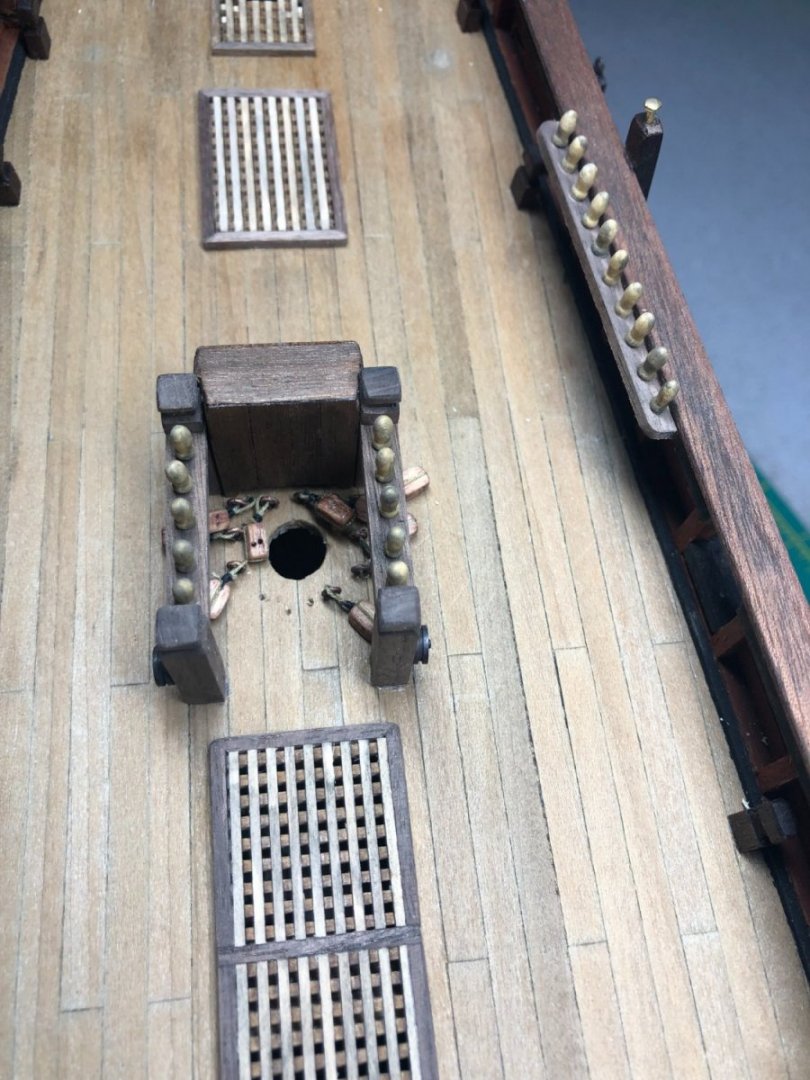
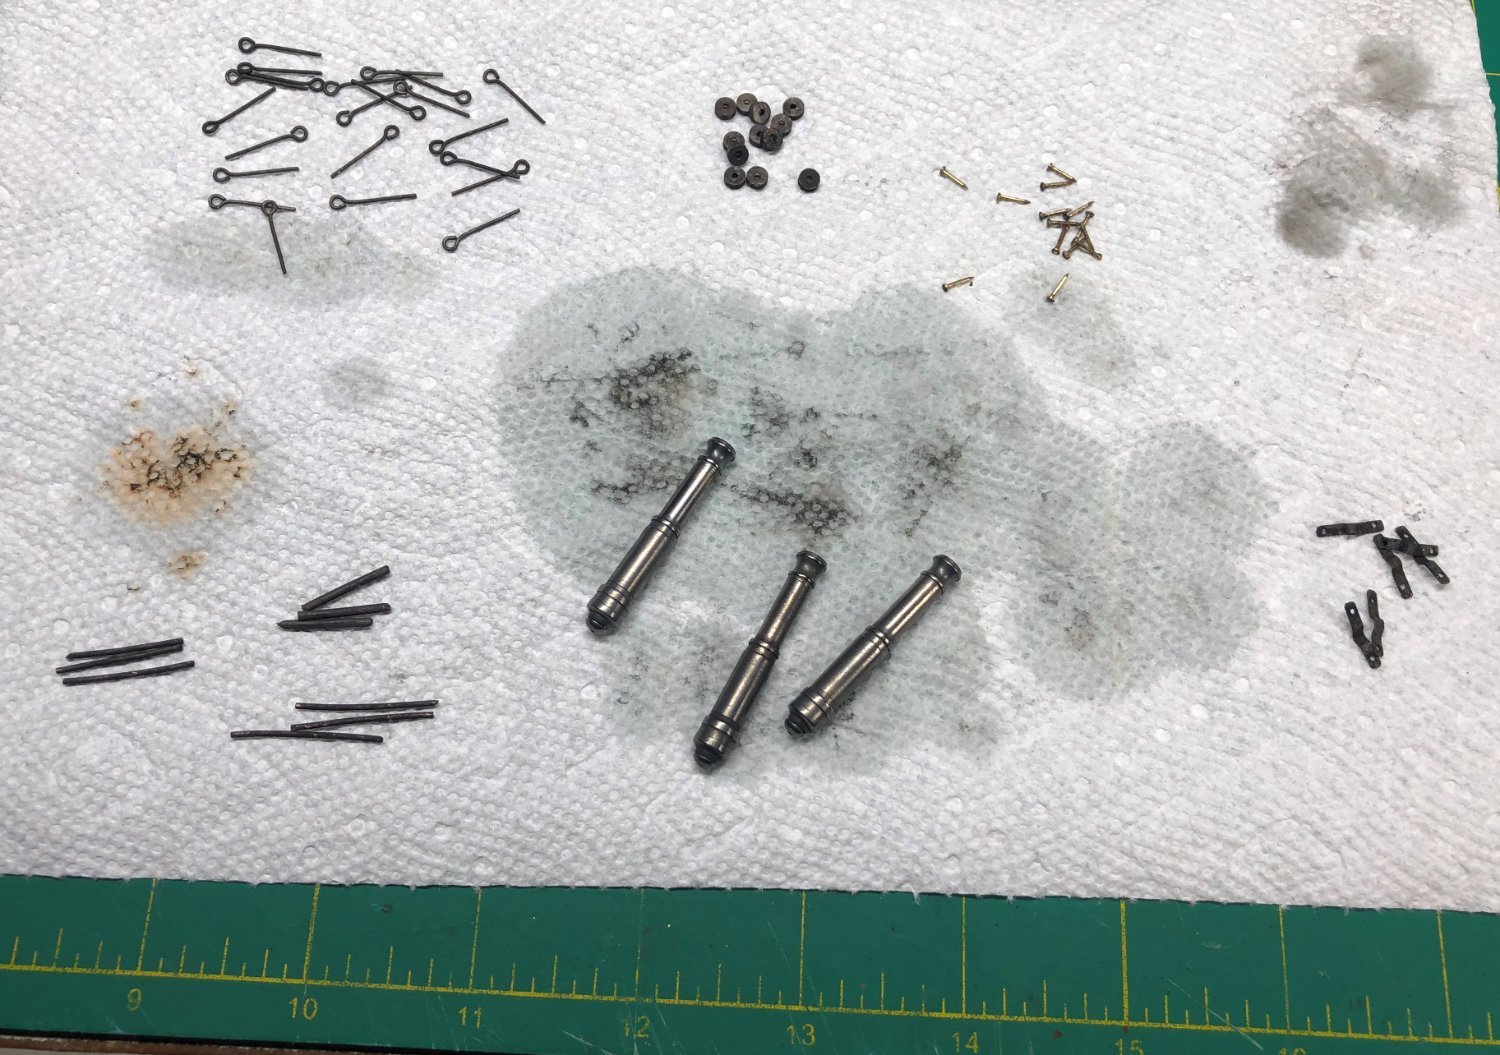
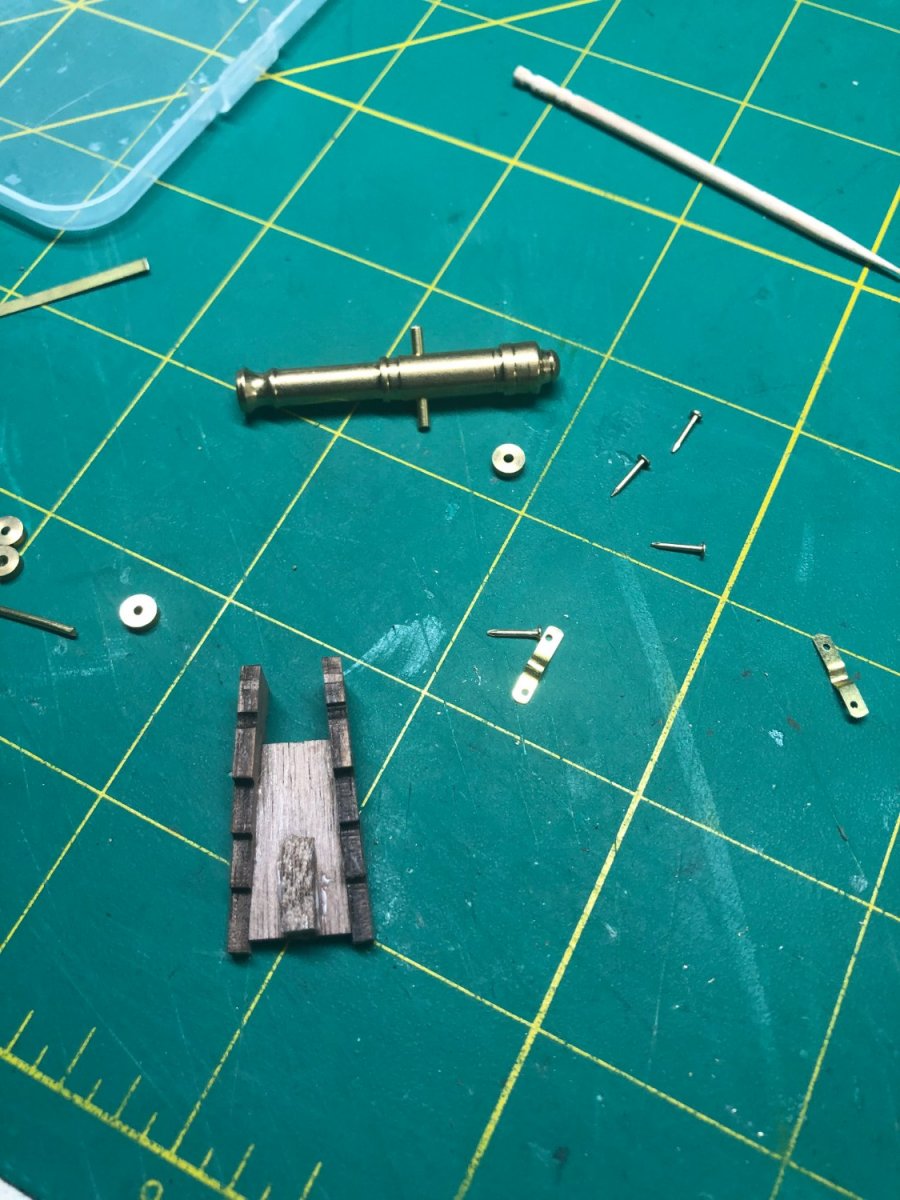
Assembly of the cannons looked to be straightforward until I started researching the guns from that time period:
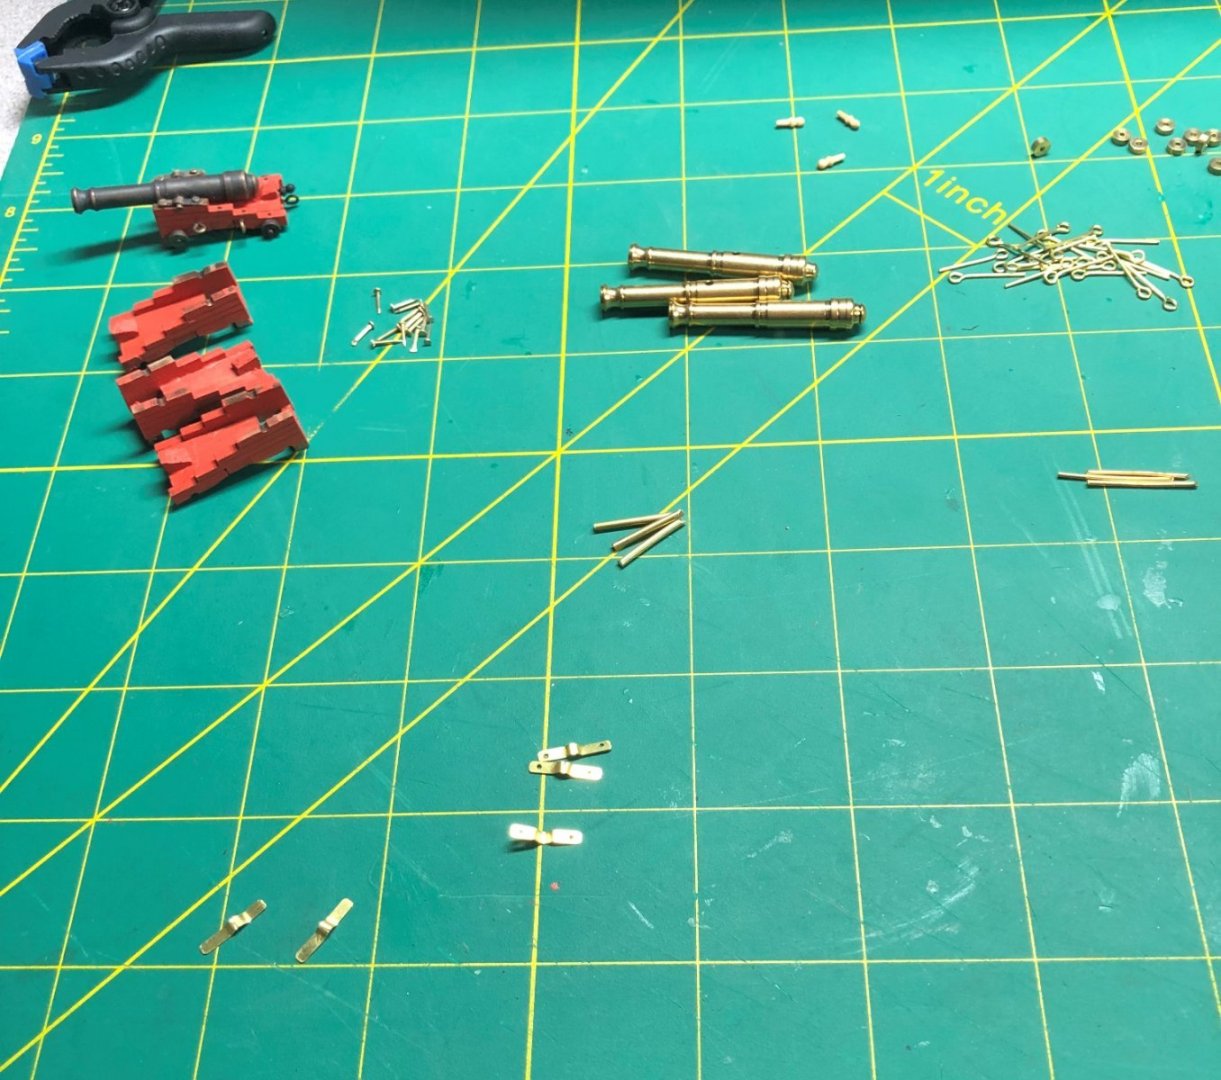
Blackened all the parts:

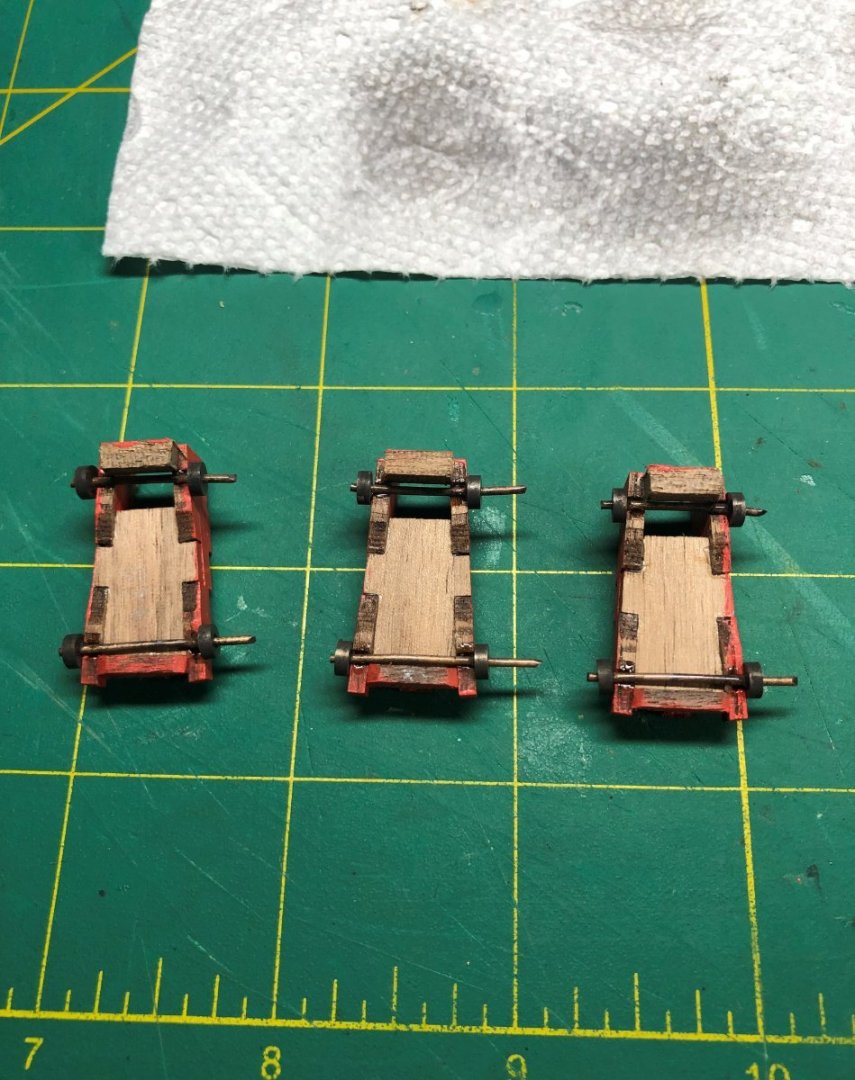
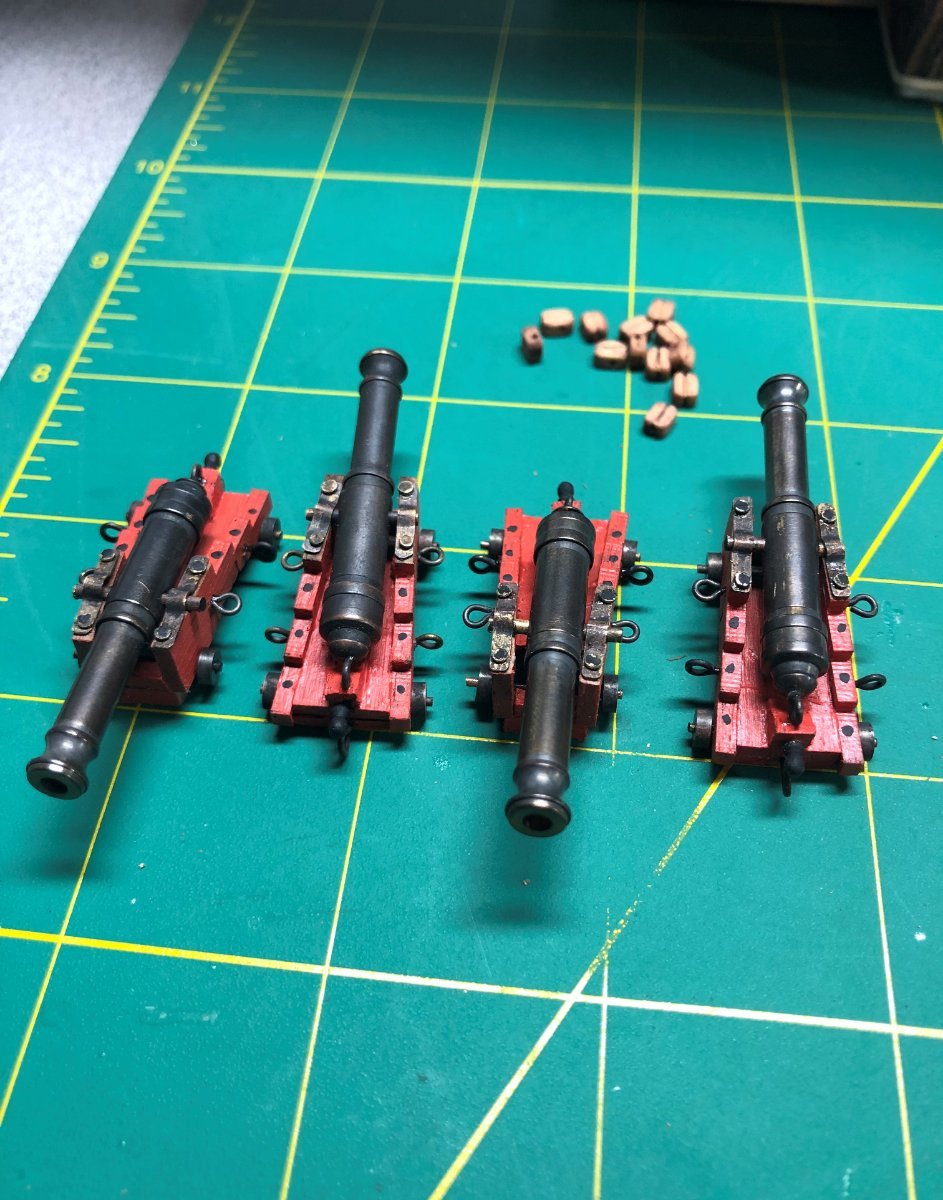
In the Anatomy book, the carriage is close in design but the front wheels are larger. I decided to modify the carriage a bit at the front that lifts the carriage off the deck, slightly. The addition to the underside of the carriage and the lift is not noticeable once installed.
Final assembly (I thought):

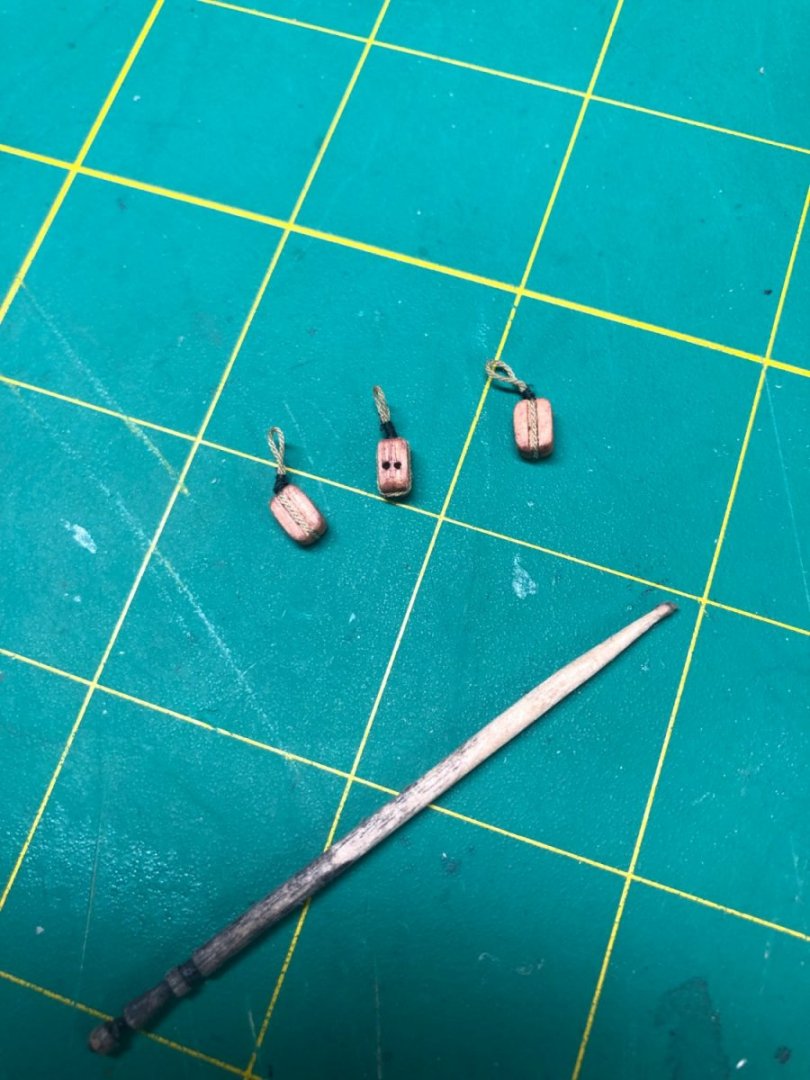
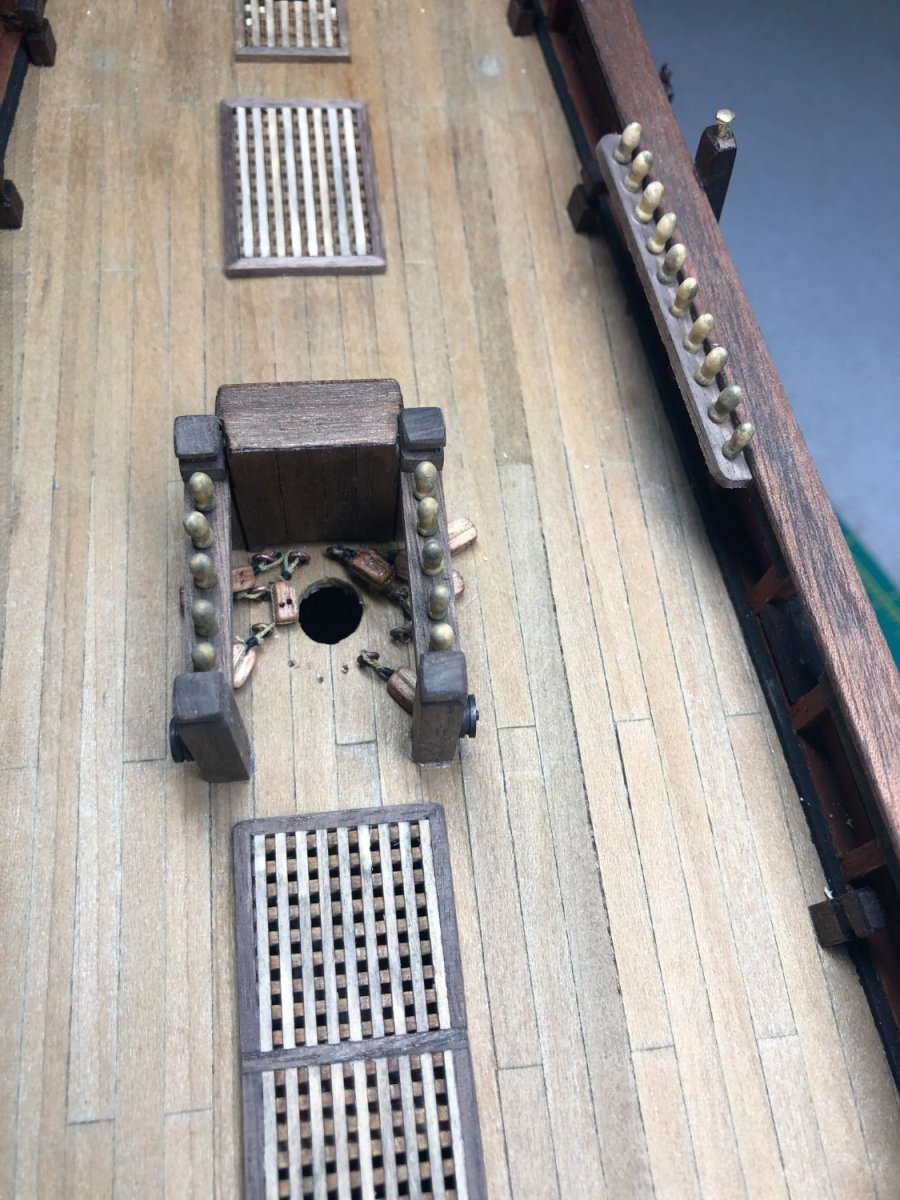
Not too bad looking... I HATE THE LOOPS!
They look huge on the carriages and to add insult to injury...:

The blocks look worse!
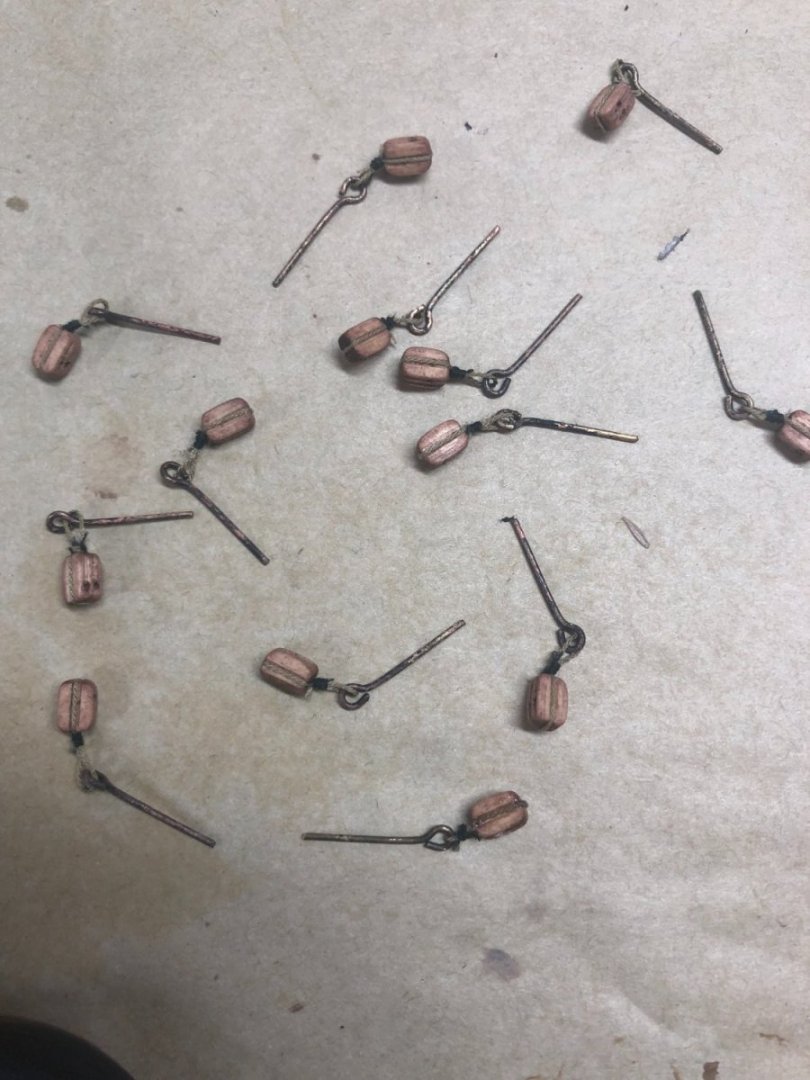
So, after all the work, I decided to remove the loops and make my own. Additionally, I am using a smaller block on the next version.
I've also started building a jig to hold the cannons and the rigging. Hoping to completely rig each one before installing. The Bounty only has 4 cannons... thank God!
I'm off on a boat trip tomorrow and won't be in the shop for a week or so!
Next up date when I get these cannons sorted out!
-
3 hours ago, Trond said:
Finished the handrail and doing some testing if I'm going to use netting.
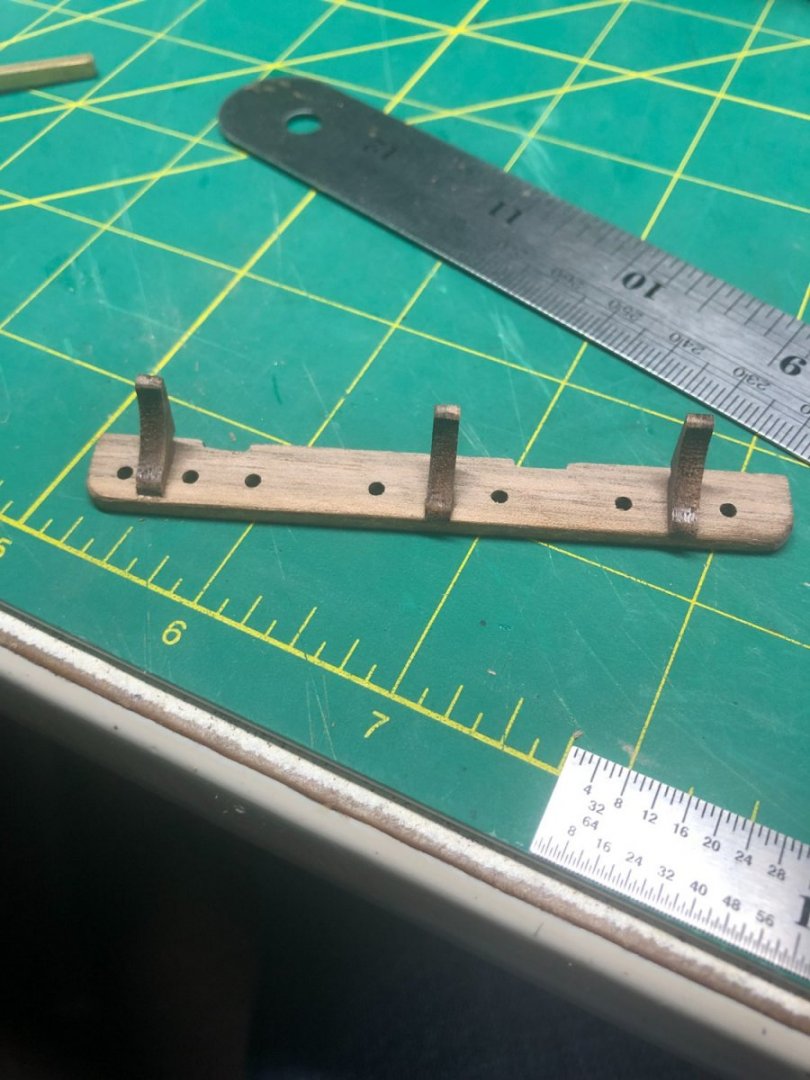
Next is installing the support pillars for the handrail canons. The ones that was in the kit is terible.
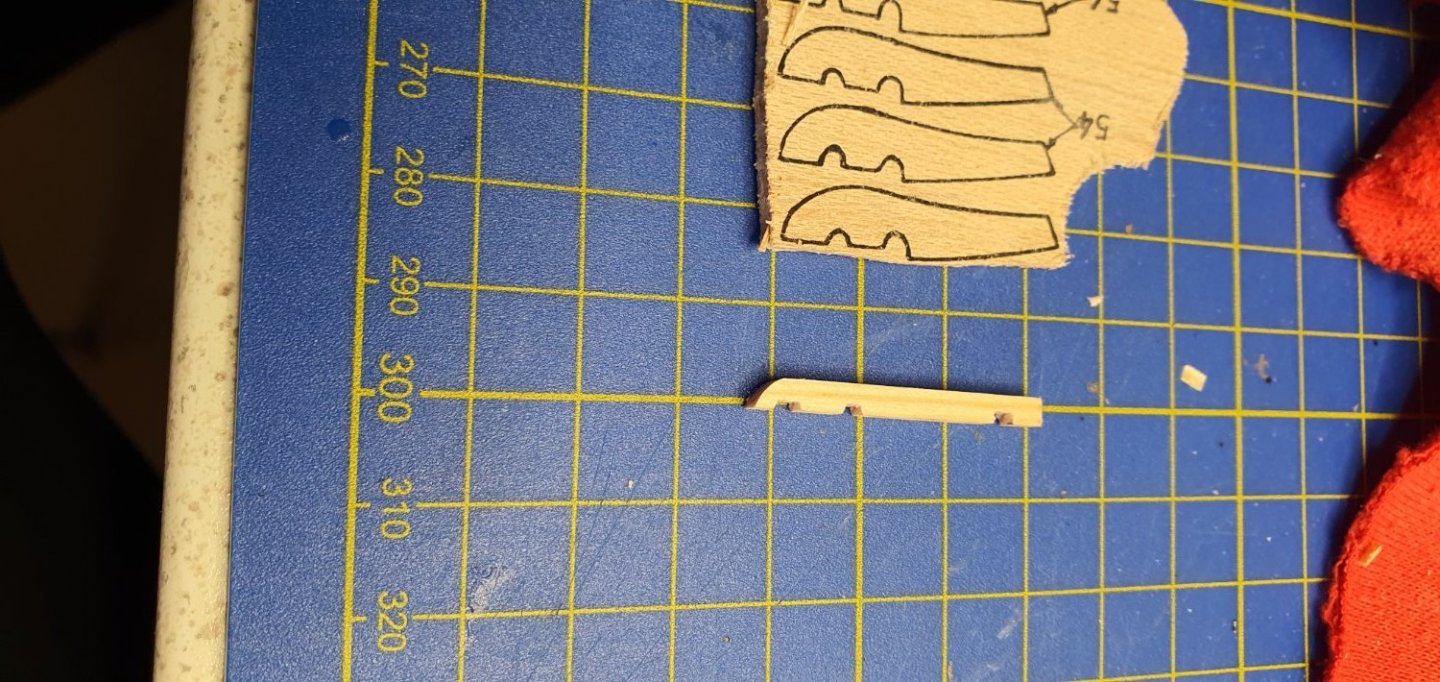
They are to big and wrong shape, so I had to make some new ones.
I'm so glad I have the Bounty book.

Here is the first test of the new pillars.
They turned out nice, but a lot of work adjusting. Done 3 and 3 left.
Are those for the half pounders?
I think there are 10 total. I had to do the same with my kit. Made from 5x5mm stock... the kit ones were pathetic!
- AJohnson and Keith Black
-
2
-
-
Today's work:
200 feet down... a lot to go!
- TOM G, AJohnson, mort stoll and 3 others
-
6
-
If you have a Hobby Town close by, it might have what you need.
Otherwise, I use Micro Mark for a lot of supplies. The problem with them is that it may take a week to arrive.
Another option is Amazon... quicker delivery.
- Dave_E and Keith Black
-
1
-
1
-
4 hours ago, allanyed said:
Dominic
Your post above might come from the following article --> https://www.boatbuilding.xyz/hms-bounty/decoration.html This is not contemporary information so may or may not be accurate.
Allan
Direct quote from the Anatomy book.
-
7 hours ago, fifthace said:
I am not sure where I got this excerpt from, but it is something I came across years ago in my previous build of the Bounty when trying to determine whether or not the Navy Board's copper hull upgrade reached the Bounty before she set sail. I believe the figure head was Blue?

It came from the Anatomy book.
I own a copy of it.
As noted in the text, no colors are mentioned.
So, it’s left open to interpretation… as is the stern decoration.
-
48 minutes ago, Joe100 said:
I know the feeling there. You think you’ve done it right and someone comes along and informs that you’ve made an error. We’re only as good as our research materials in the end I guess. I’ll be the first to admit that the period before 1890 isn’t my strong point. My Bounty will certainly contain errors. In a previous life i consulted on and helped write several books on the Kriegsmarine, and that knowledge has stuck over the years. I often see models of say Bismarck or Tirpitz with pop culture research errors, and I just let them go, unless the specifically ask for my opinion. In those cases the research has been dodgy form the start, repeated over and over until it’s considered fact, even when it isn’t.
Bounty falls in that weird problem area of research, where she’s been written about to death, but the facts about the actual ship are contained in a few contemporary sheets of paper, literally. How could anyone have known that this throw-away mission was going to become one of the most famous stories ever told? If they had, someone might have written down a few details and saved us all this trouble!
Of course I’m loving how this model is turning out. She looks so much more official in that paint scheme too, and I’m glad I’m doing something similar with mine. I may have missed it, but have you settled on a color for the figurehead?
Hi Joe,
Very true... what you've typed.
I don't mind having someone point out an error. After all, I did state that I am looking to do this model as historically accurate as possible!
Somethings can be redone or changed... some can't!
I certainly will be checking things a bit more closely and I am learning quite a lot!
I have not considered colors for the figurehead. Leaning toward a red riding habit similar to the Anatomy book cover... no reason except Bligh stated that the islanders were pleased with the new colors. I think the Tahitians like red! (I have no clue!!)
-
9 hours ago, fifthace said:
Thanks.
I was looking at the AL version, but as it's been a while I went with what I knew. I may do the AL one next...
I try to avoid looking at others' logs as I always end up envious of the sheer skills of some people lol, and I was right, you've done a fab job on that.I certainly wasn't trying to make anyone envious!
I'm always learning, just like you!
Thanks for the kind comment, though.
-
Good luck with the build.
Although I am not building the Caldercraft version of the Bounty, I am building the another version.
Feel free to stop by for a look!
I'll be watching along as you go.
-
-
-
-
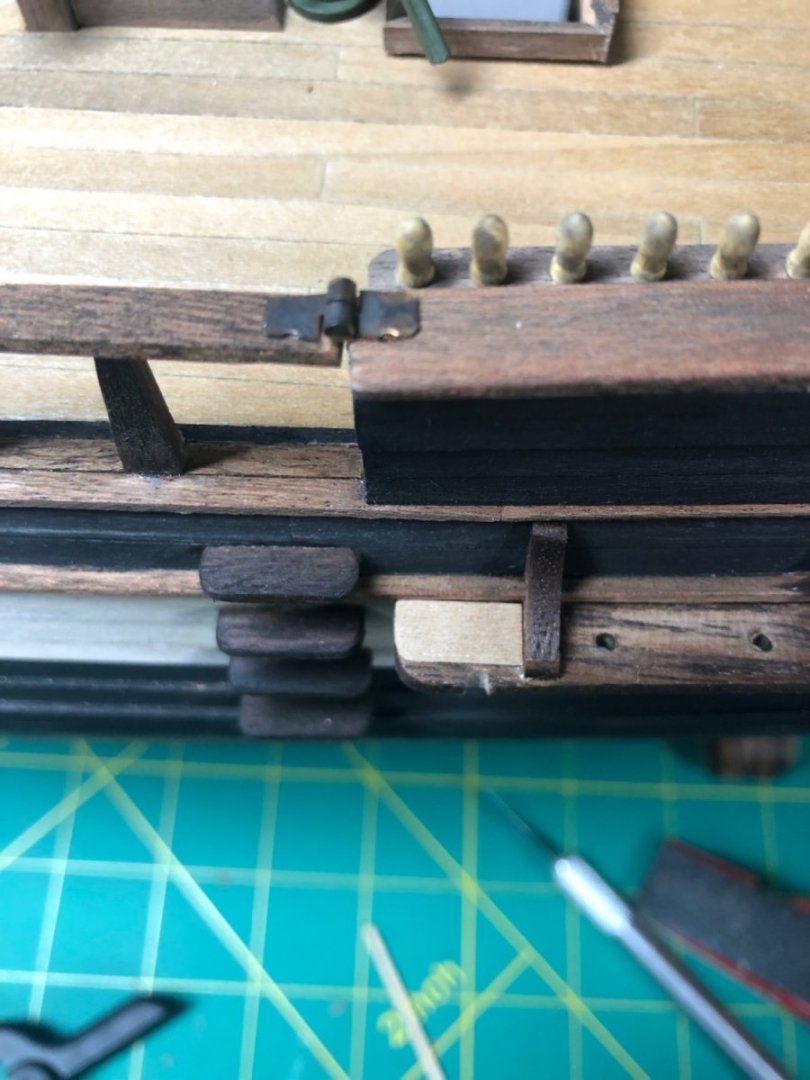
3 minutes ago, Trond said:
Did you make the hinches or was it part of the ship model kit? I need to make two of my own
I kinda sorta made them…
I have some really small hinges from another project.
I cut them down and used them.
-
43 minutes ago, allanyed said:
Hi Lyle,
Thanks for the response. Since posting I too found the date of 1771 in Goodwin's The Construction and Fitting of the English Man of War. Regarding research, good for you taking the time to do so!!!!! Based on the build logs here at MSW I would research every piece in an AL kit before using it as they, like many others, appear to not have done more than a modicum of research on their own for any of their kits.
Allan
Agreed… disappointing but not surprising.
Of course, my own lack of knowledge on period changes and the accepted norms (like the gratings you pointed out earlier) is not helping but I enjoy learning… not necessarily fixing though!!
Here is the direction I’m going in:
Still working on the slot but it’s close. The veneer will be fine once glued down and stained.
Lots of extra work but I think it will work.
Thoughts?
- AJohnson, mort stoll, yvesvidal and 2 others
-
5
-
6 hours ago, allanyed said:
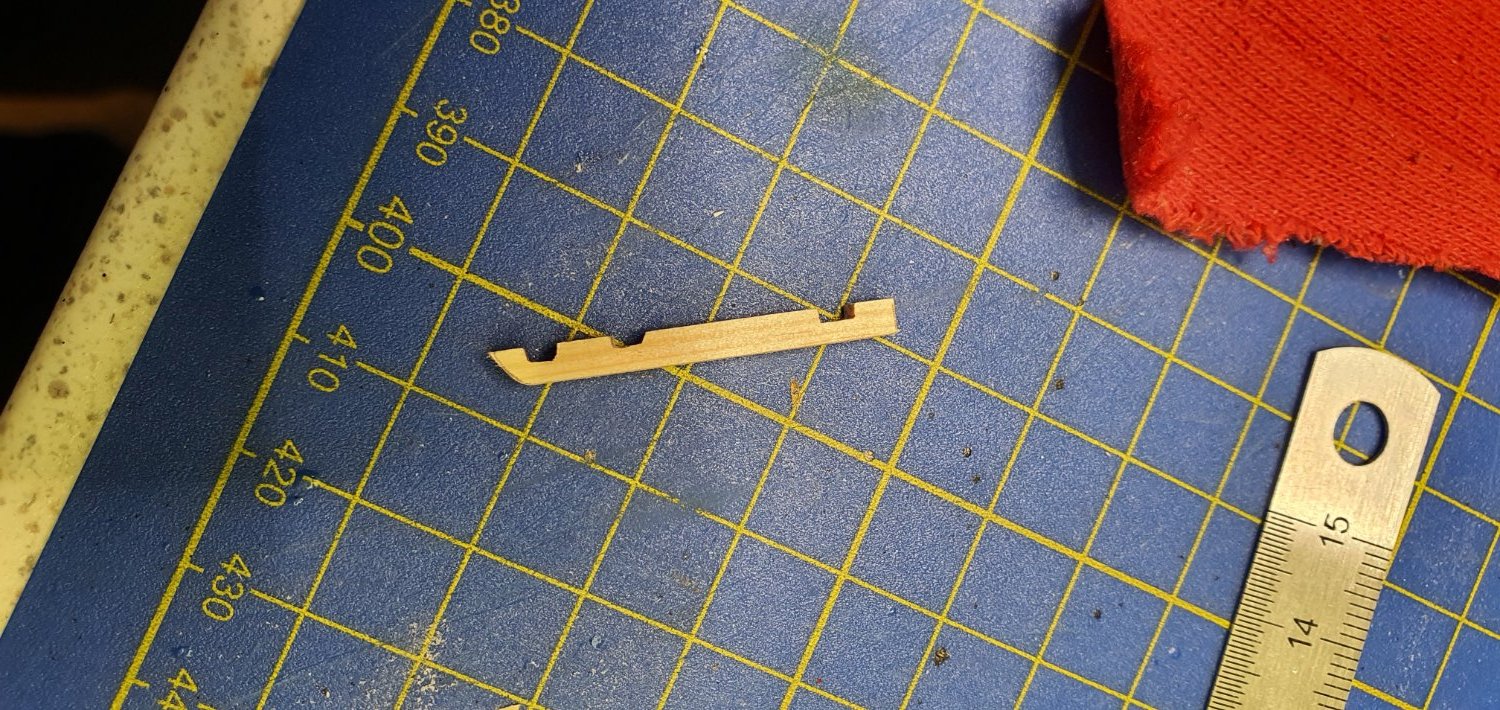
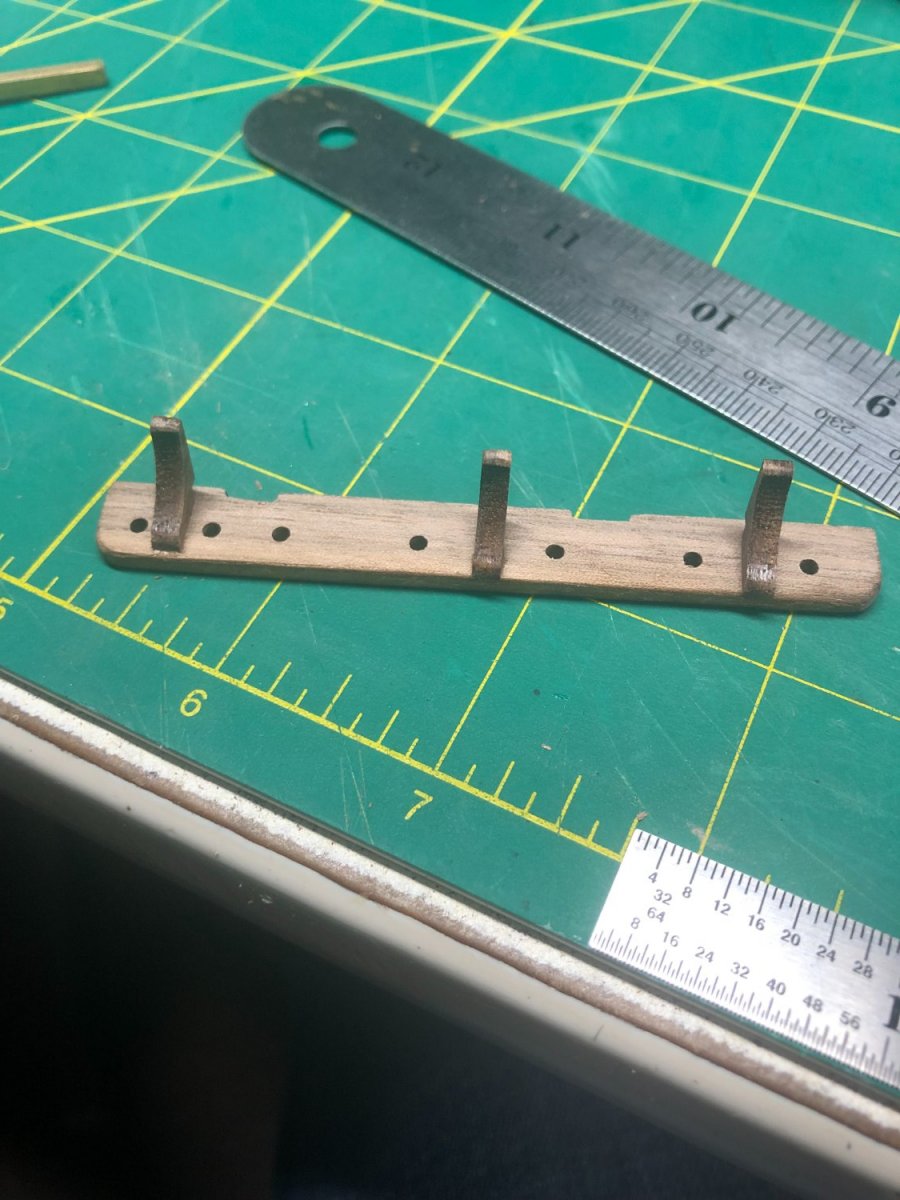
Your channels show holes for the deadeye strops to pass through. I know this was the style used early on, but do you or does anyone know when this was changed to having notches that were then covered with a molding strip once the deadeyes were secured. I think the change was around 1770, about 15 years before Bounty was launched so she would have had the slots and cover molding piece, but I may be off on the year. Sketch of what I mean is below. The slot design was made for ease of putting on and removing the deadeyes as needed and it is easier on the model as well.
Thanks
Allan
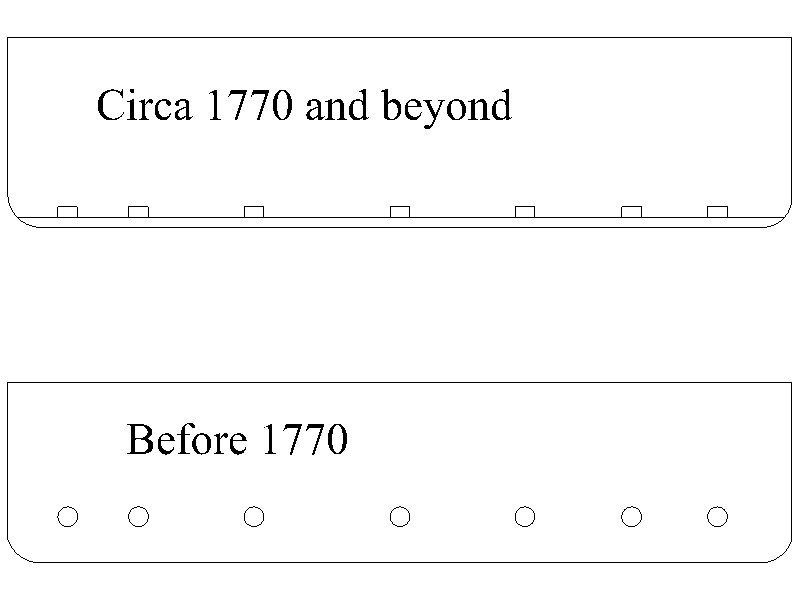
After reading your post and a message from another Bounty builder (Tim M.), I decided to rip through some of the plans, the Anatomy book and the kit plans. I also researched your stated dates and found it to be accurate enough (actually, I found the change to have occurred in 1771 but that's splitting hairs!)
It is widely thought that Bethia's keel was laid in 1783, well after the above stated date. Obviously, I followed the kits plans without researching this particular part as I was not aware of this change. In the Anatomy book there are several drawings of the channels. Although there is no breakdown of the channel itself, there is clearly some differences:
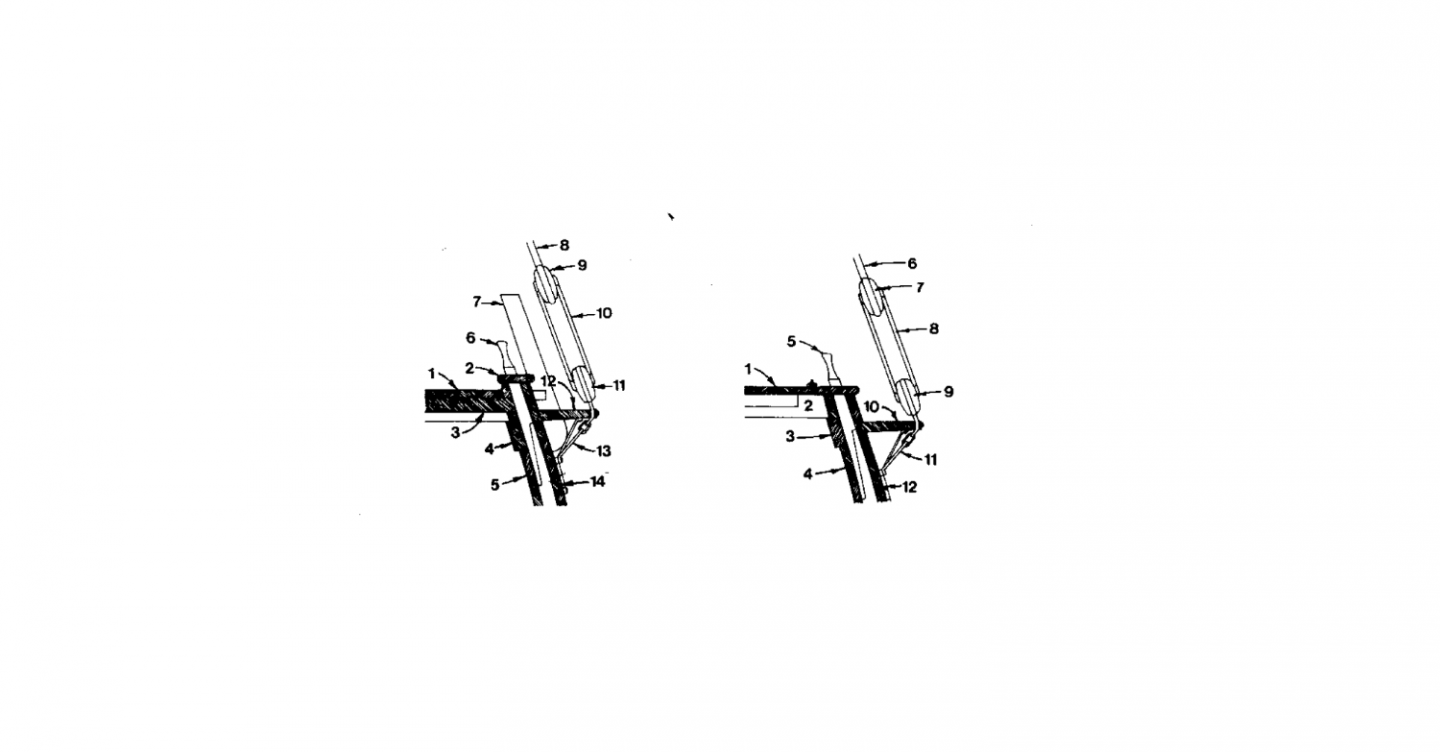
The "slots" appear to be very close to the outer edge of the channel and as you can see, there is no mention of a trim piece or whatever it may be called. I have to think there were slots and a covering piece.
I am going to look over the chains and deadeye linkage to see what needs to be done for a proper fit. I really hate to redo these pieces but I might find a way to modify them while still attached to the model.
The holes a bit too far back to file into slots... what I am considering is cutting the slots into the outer edge of the existing channels and cover it when the deadeye work is done. That leaves me with the holes...! I may consider a cover of some sort, I have some veneer that I might be able to fashion into a cover that will be virtually unnoticeable or I may just redo the pieces. They were a pain in the butt...
I'll post my solution once I figure it out.
Thanks for the info.
-
1 hour ago, michaelpsutton2 said:
I do not know of any documentary information other than "a lady in a riding habit". No color mentioned. "Riding habit" certainly implies more than a bust.
Agreed... I read somewhere that Bligh had her updated to a more colorful scheme when they were in Tahiti. What that means...? I have no clue!
Since my version is depicted with Breadfruit plants, one must assume that the Bounty has been or is, in Tahiti.
... still don't know what I'm gonna do!
-
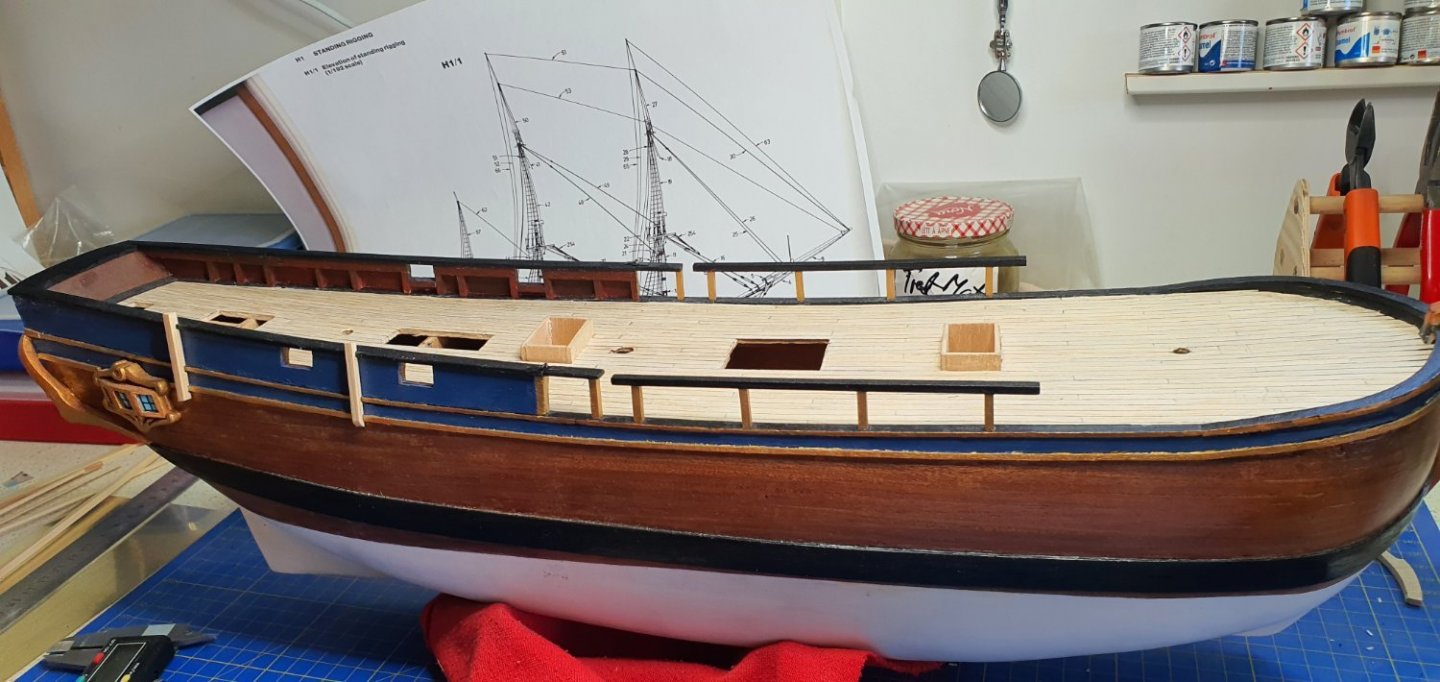
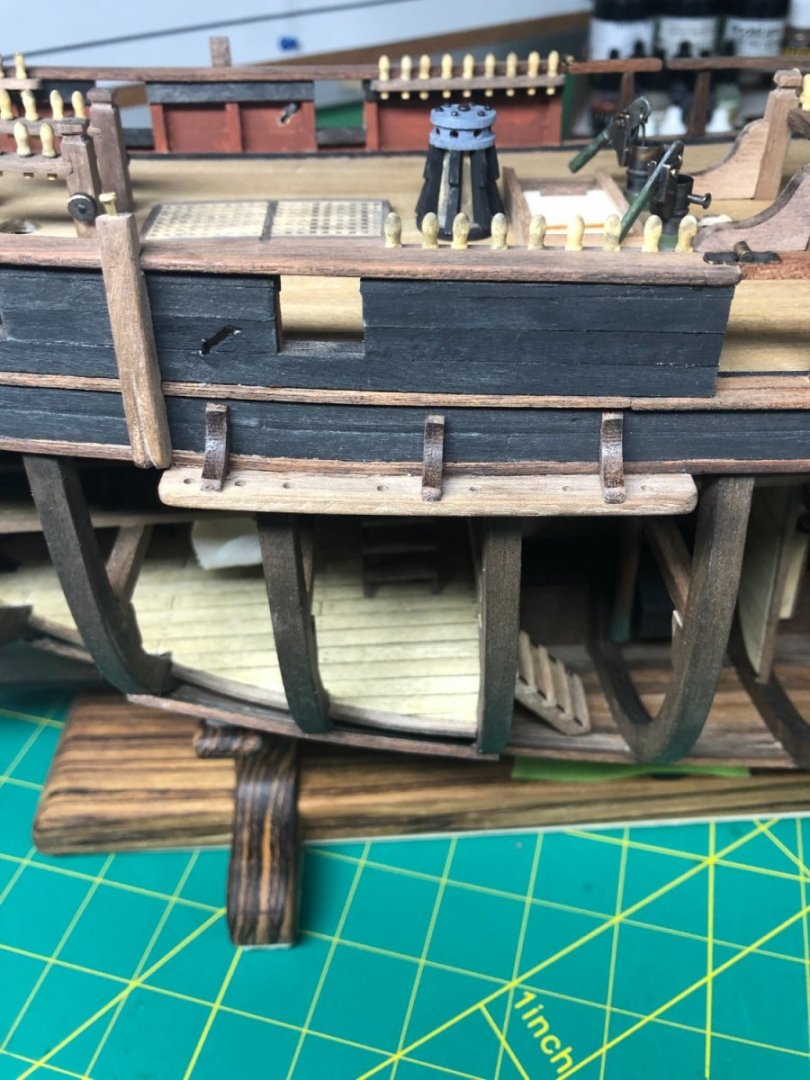
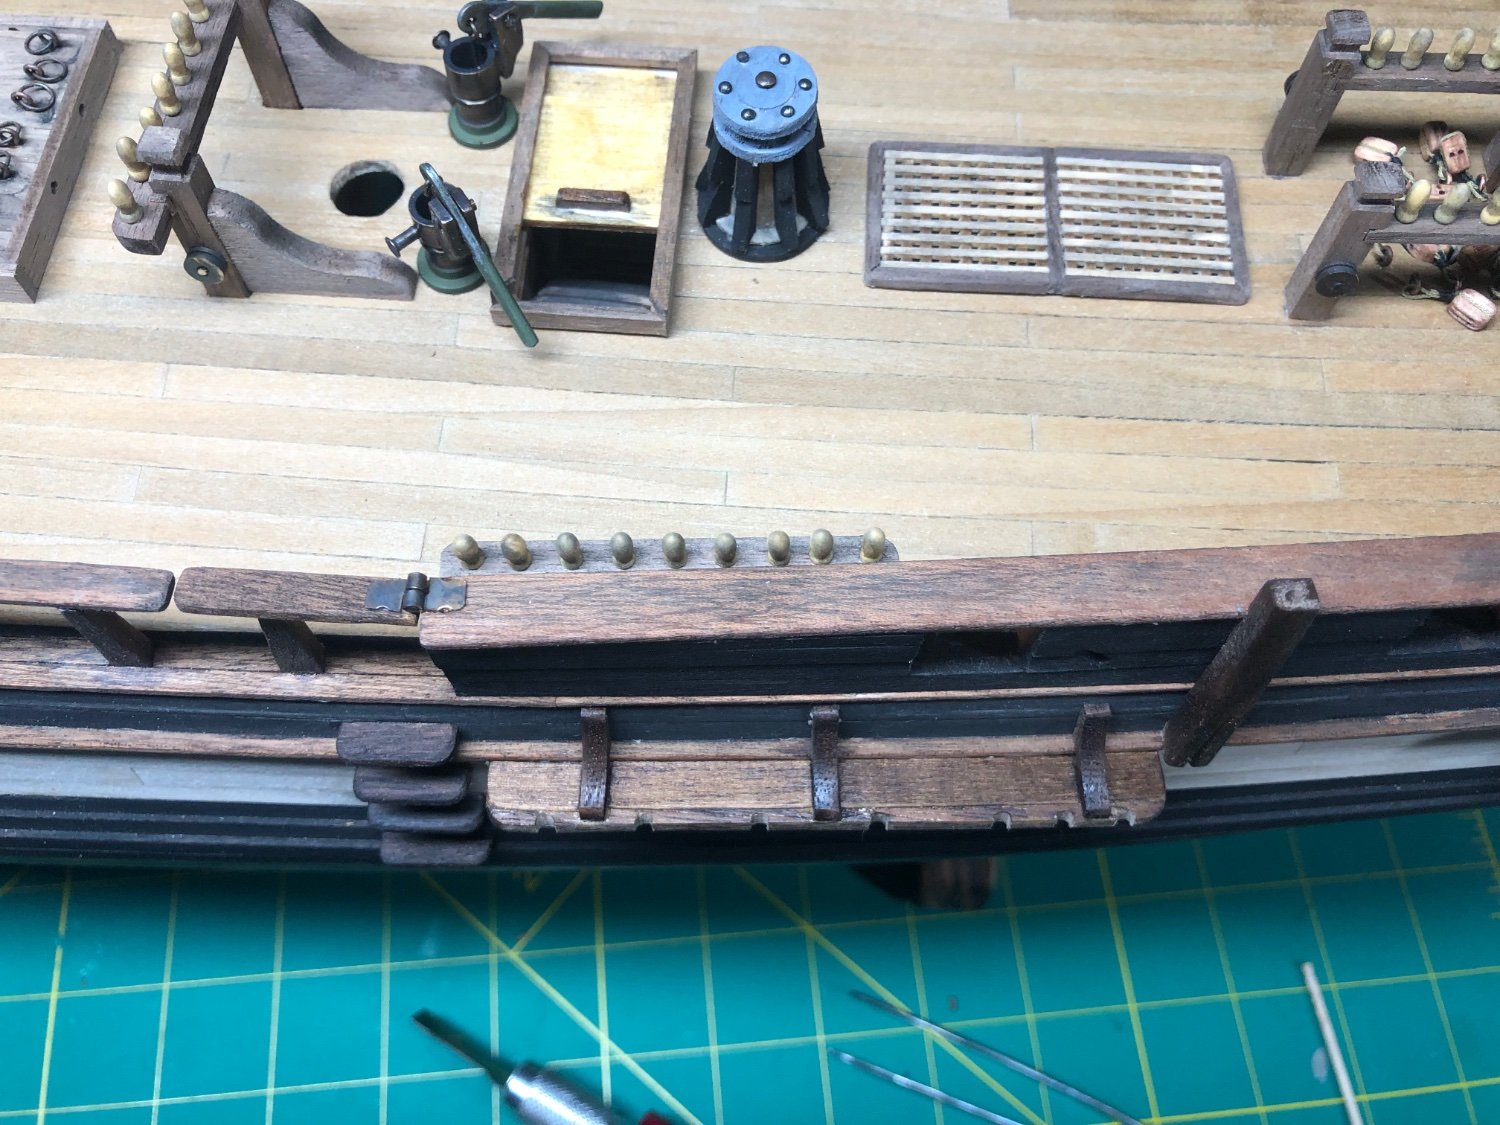
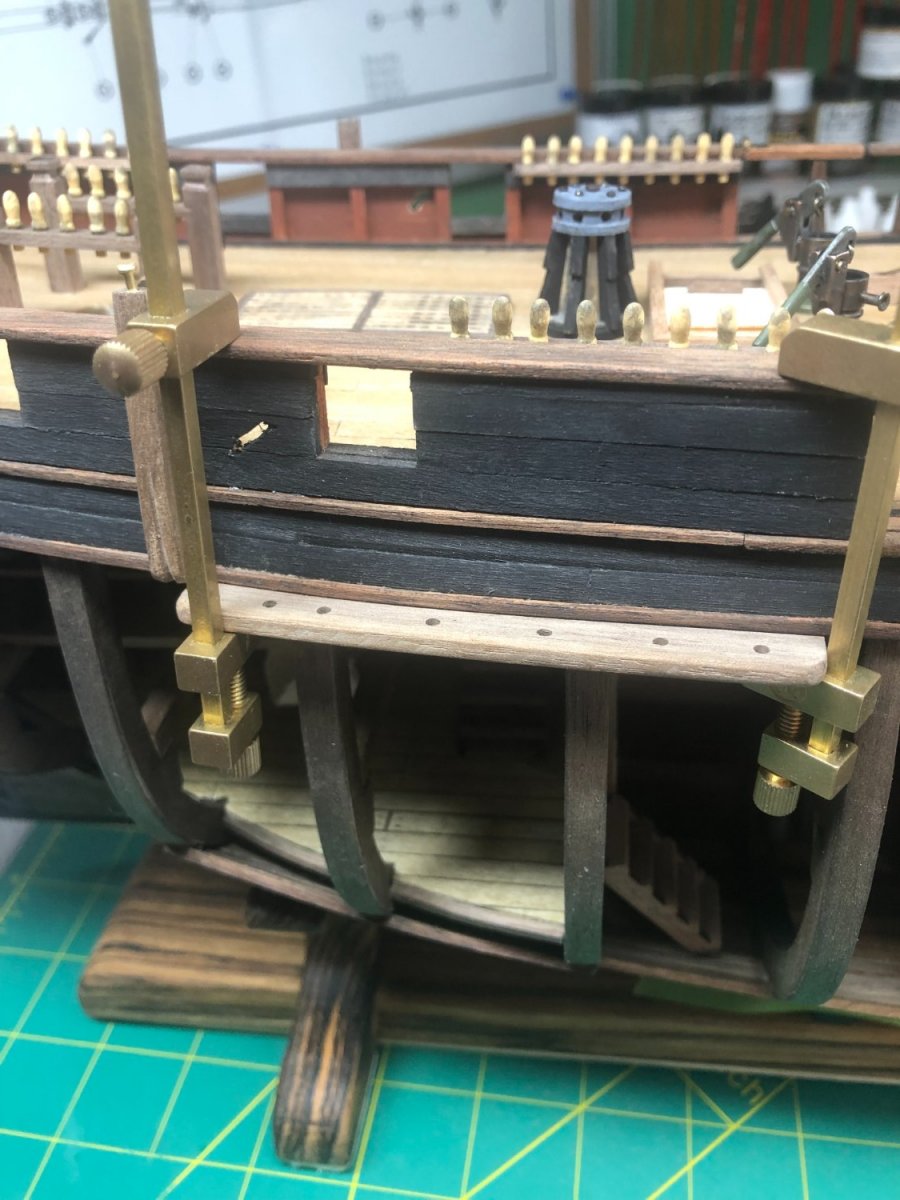
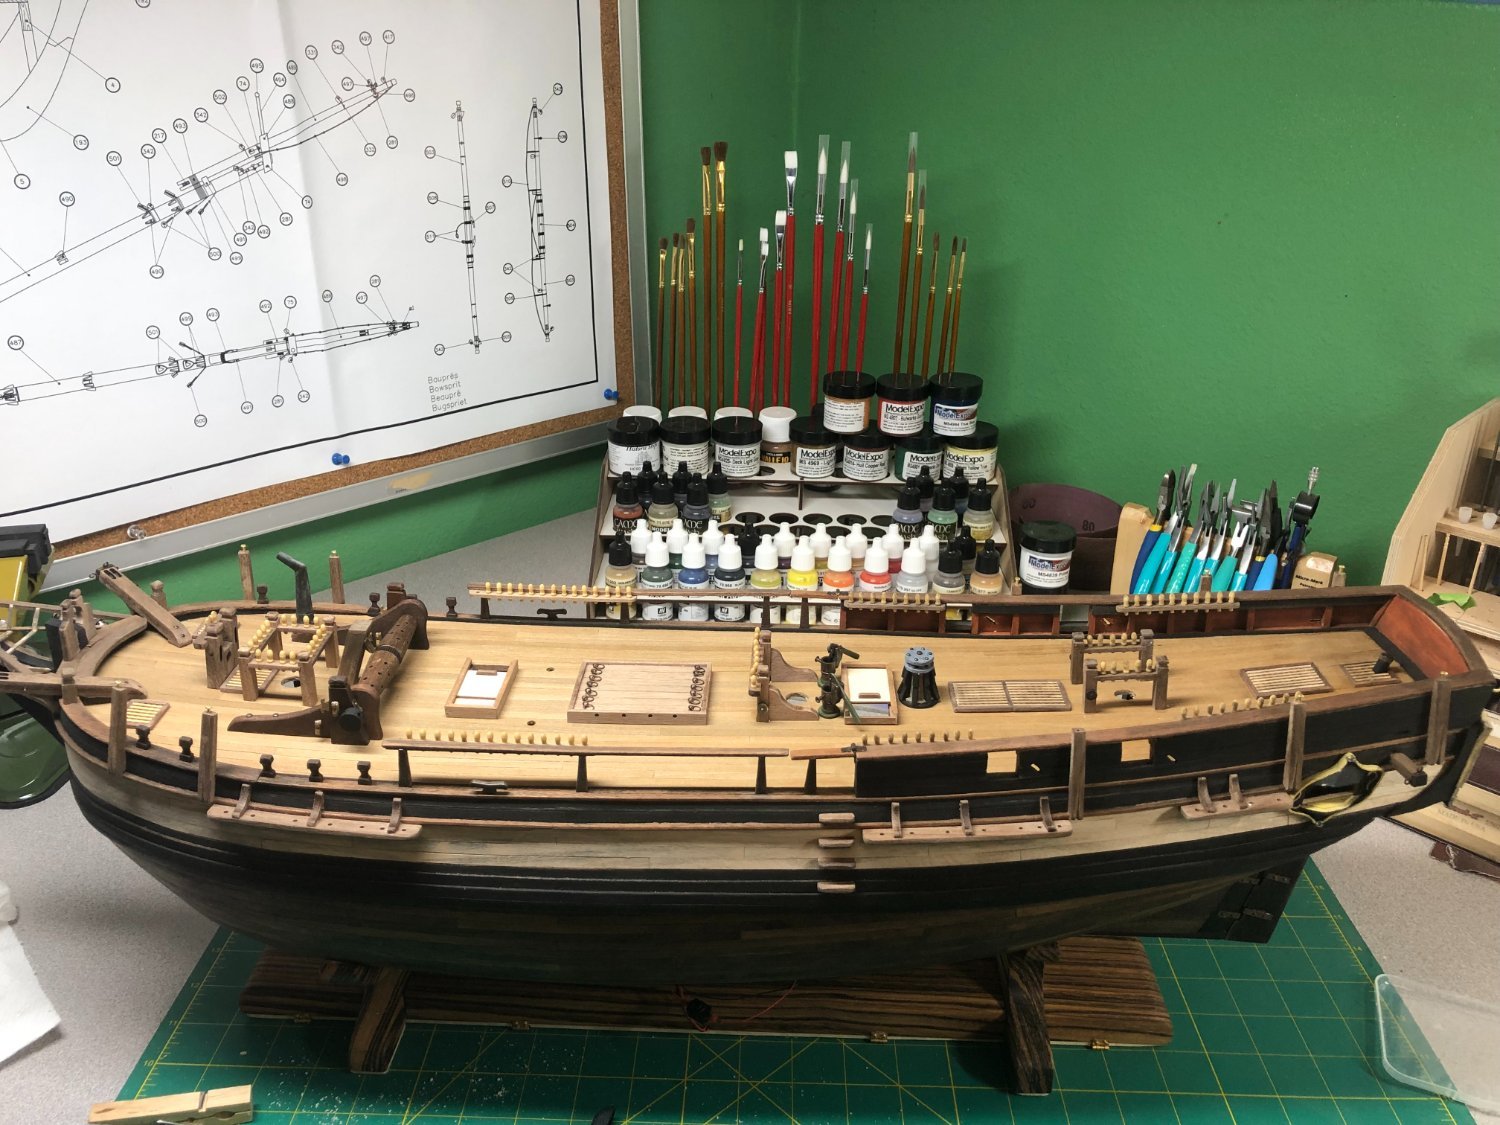
Another long week of work on the Bounty!
The shroud mount rails were a lot tougher than I anticipated and there was some cussing and getting up and walking away a few times! The problem is the area to mount them is minimal and really no good way to clamp in place to allow for drying. I tried these and they worked on the open side of the hull:
But on the other side, I finally figured out that the best way to accomplish a good fit was to glue on the braces, allow them to dry overnight and then install them:
Worked well on both sides... just took me a while to figure that out!
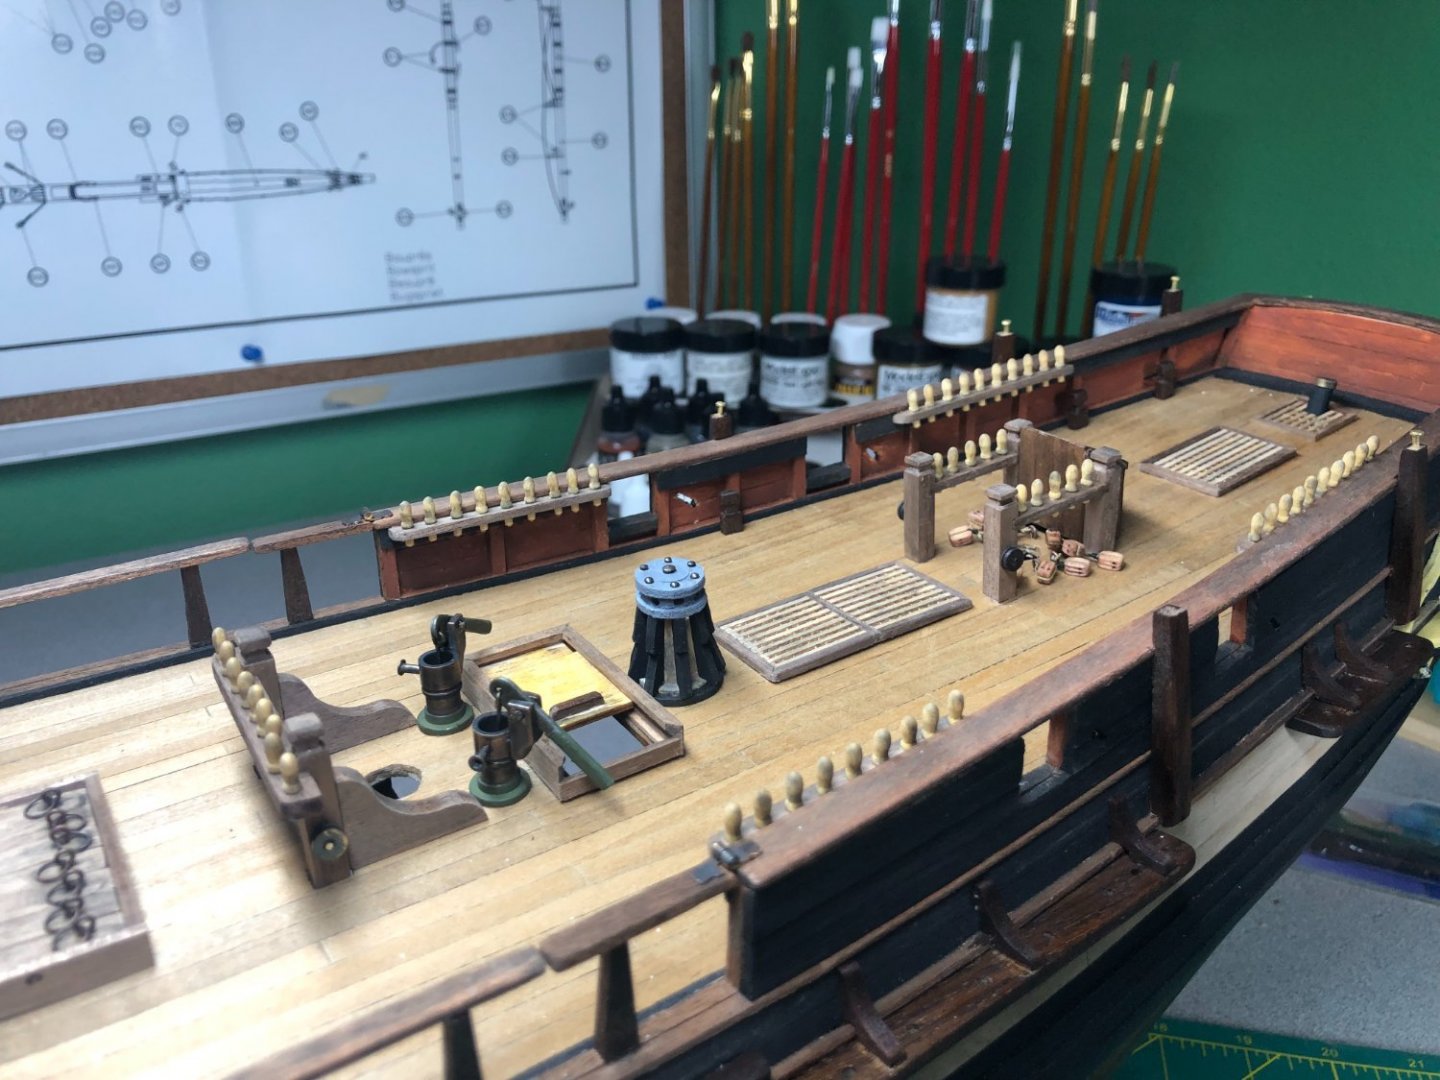
Made up the steps for boarding the ship. The plans called for 8 of them... But looking at the installation, about half would have been below the waterline! I installed 4 steps, down to the wales:


Next, I built the Binnacle and installed it:

A simple build, nothing to add.
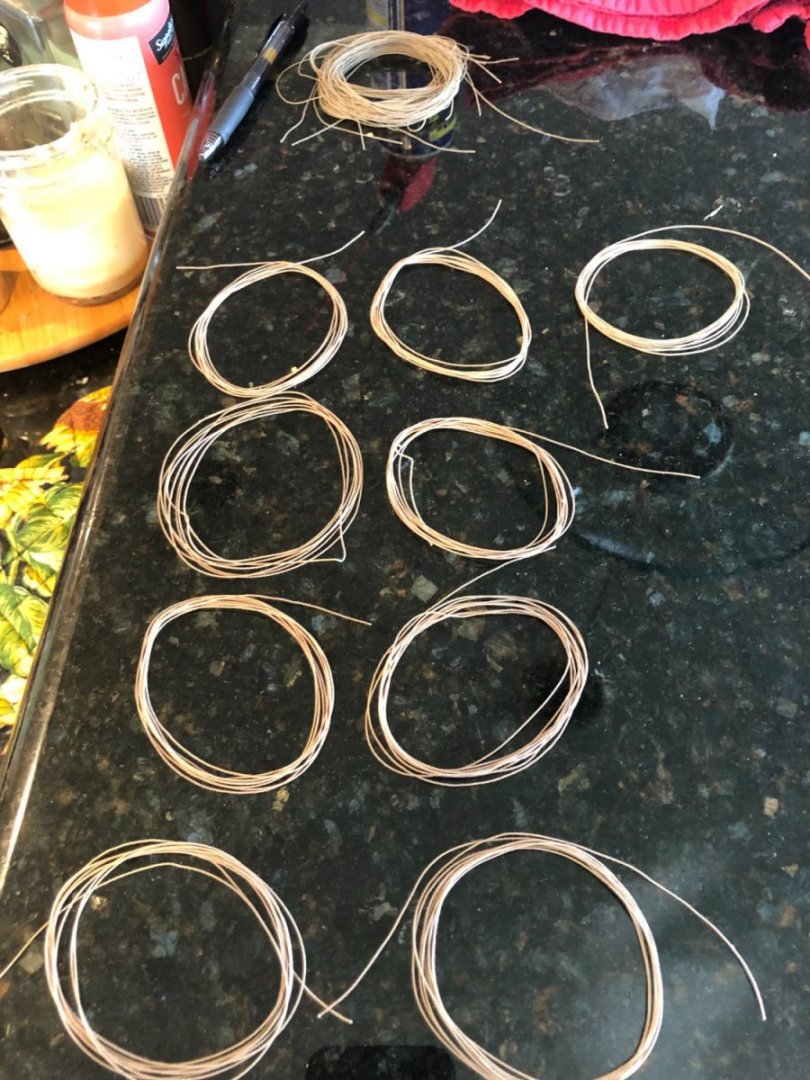
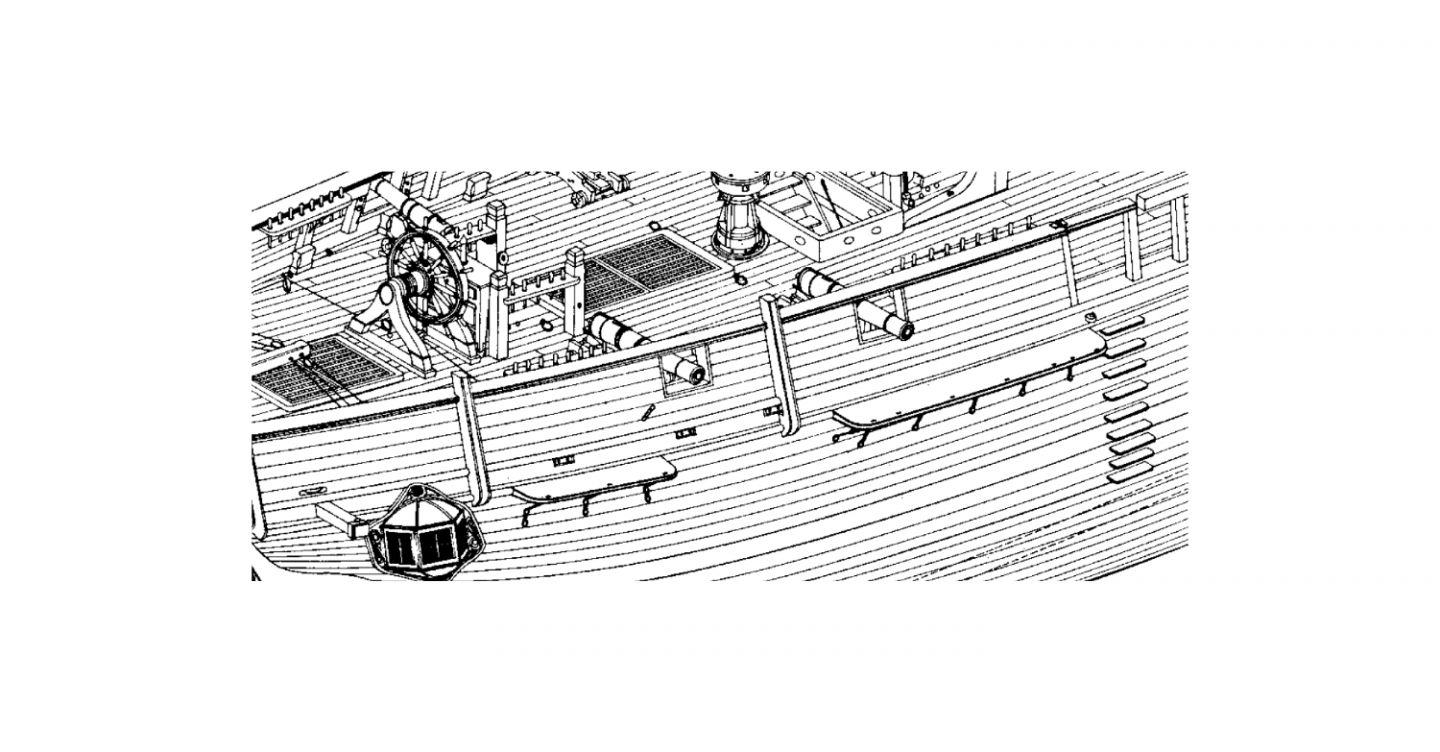
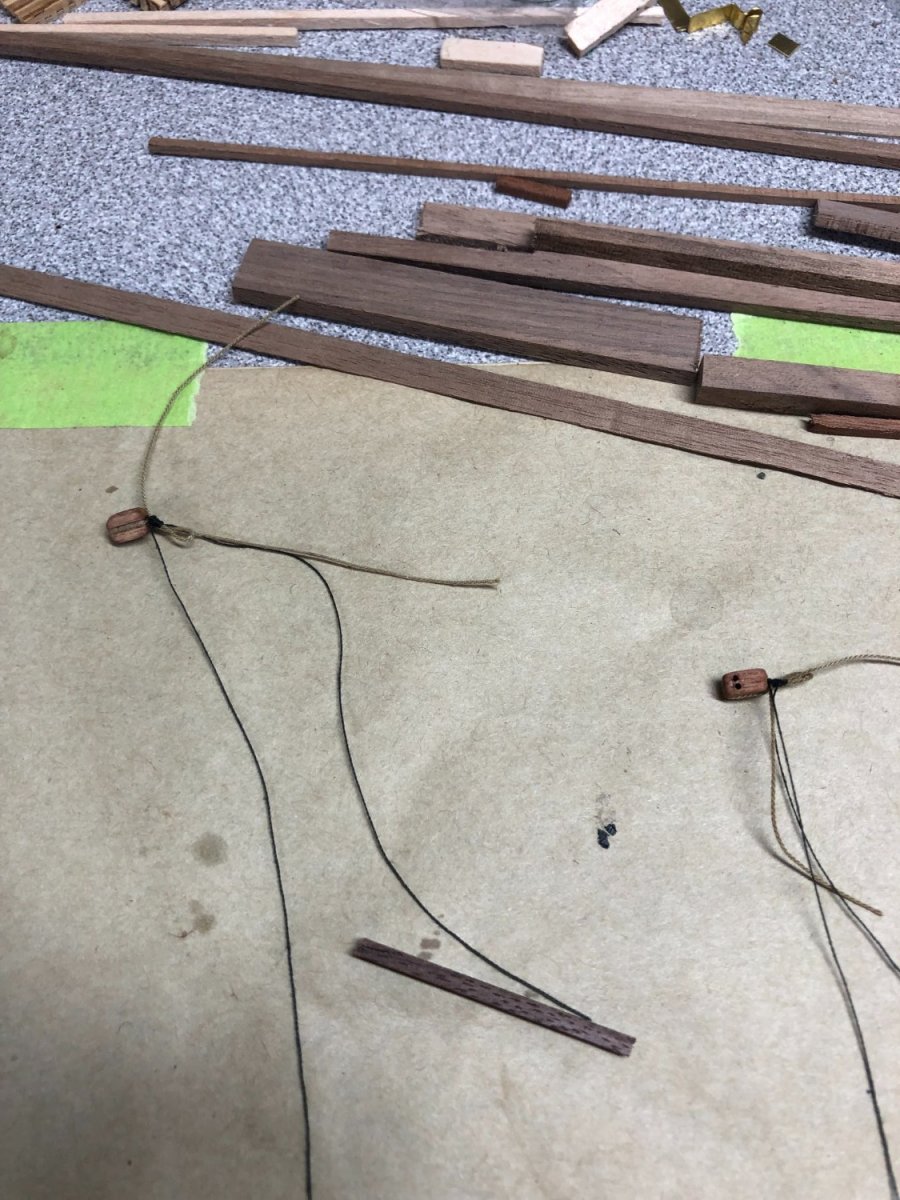
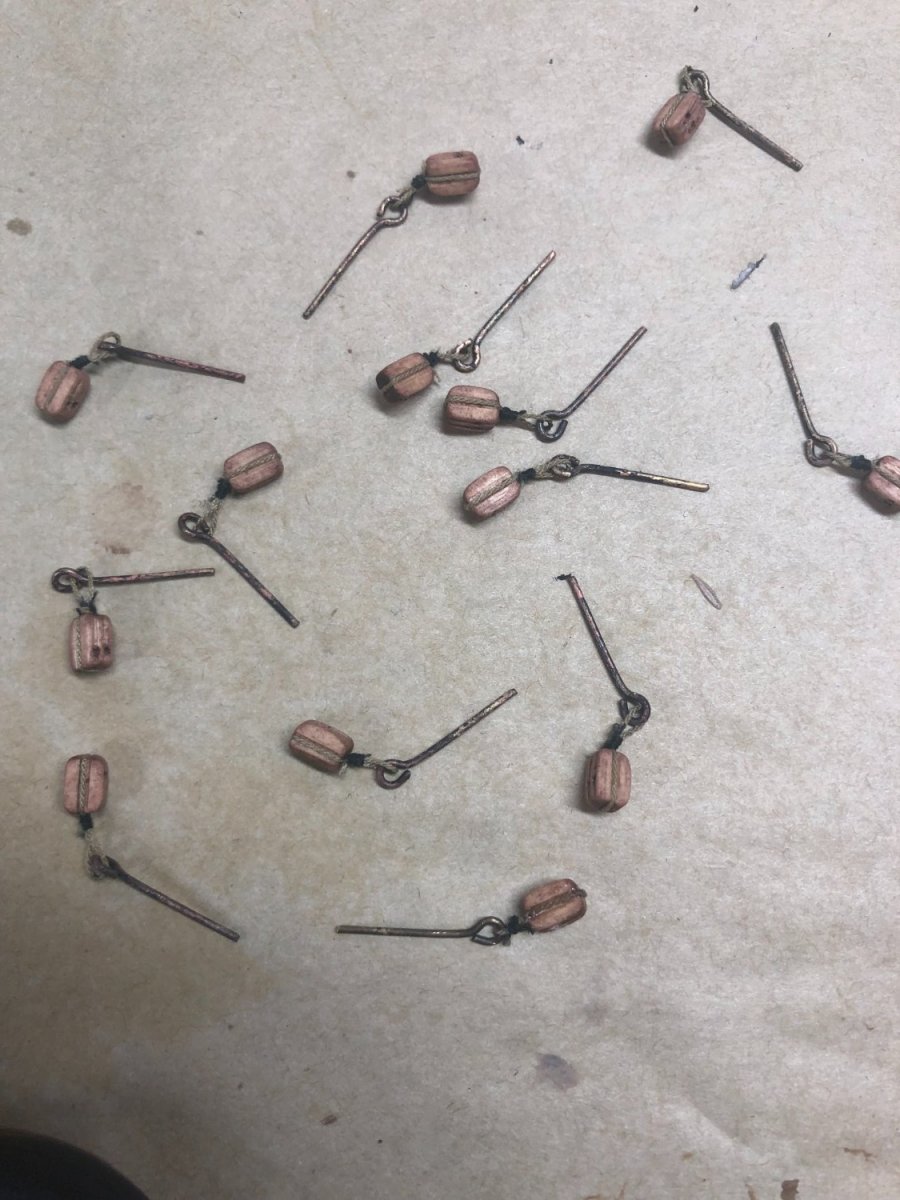
The plans call for several double blocks to be mounted to the deck around each mast. Using the rope I made, I attached a piece to each block and lashed a loop for the hook to attach:
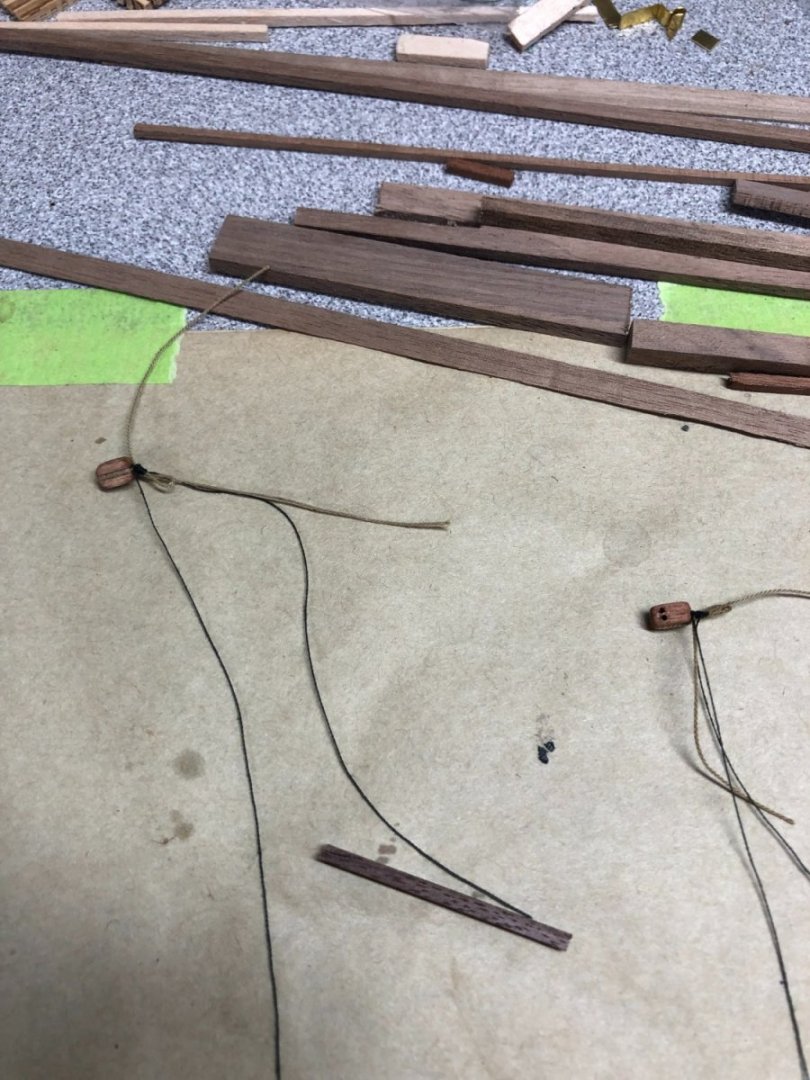
Its been a while since I've done rigging work but I got rolling after tying a few. The hooks were cut down and this first batch were installed around the mizzen mast:
I am not looking forward to threading those when the time comes!
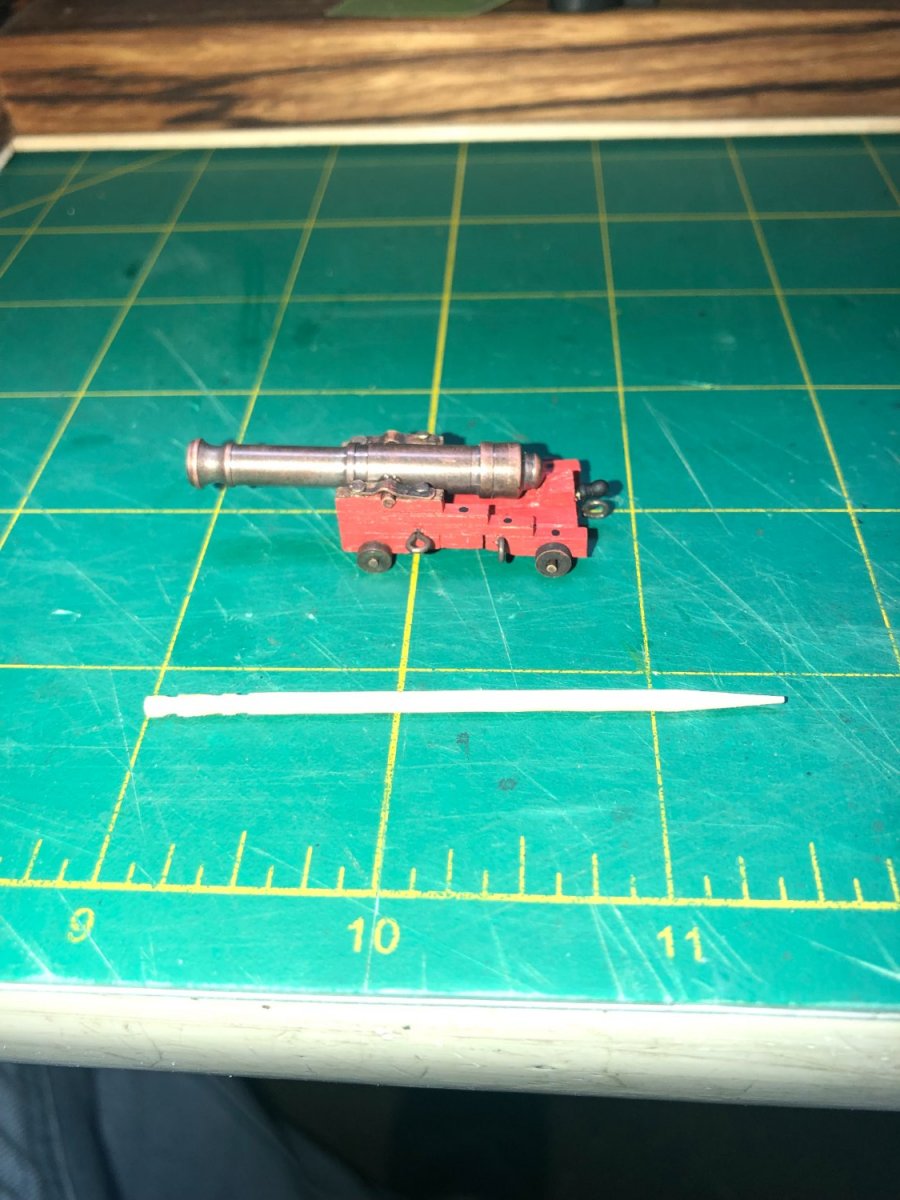
I built the first cannon/carriage using my usual methods for aging the brass:


The flash on the camera makes it look brighter than it really is.
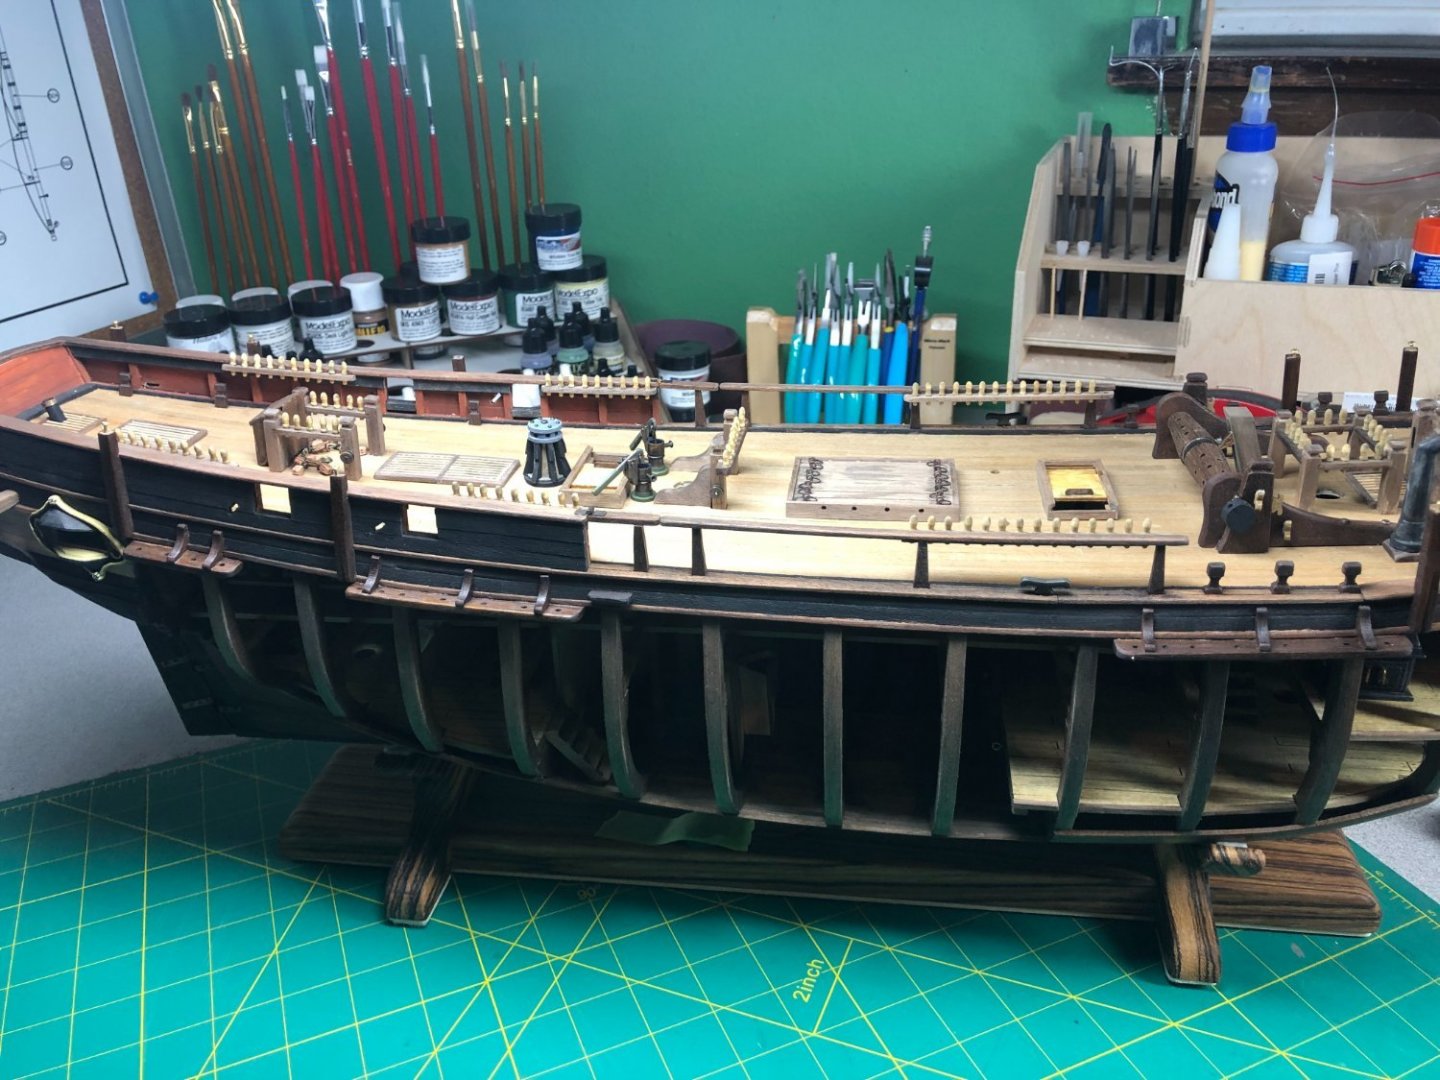
After all of that I did some painting and aging to catch up with all the installations over the last few weeks. Here is an overview of the Bounty after this weeks work:
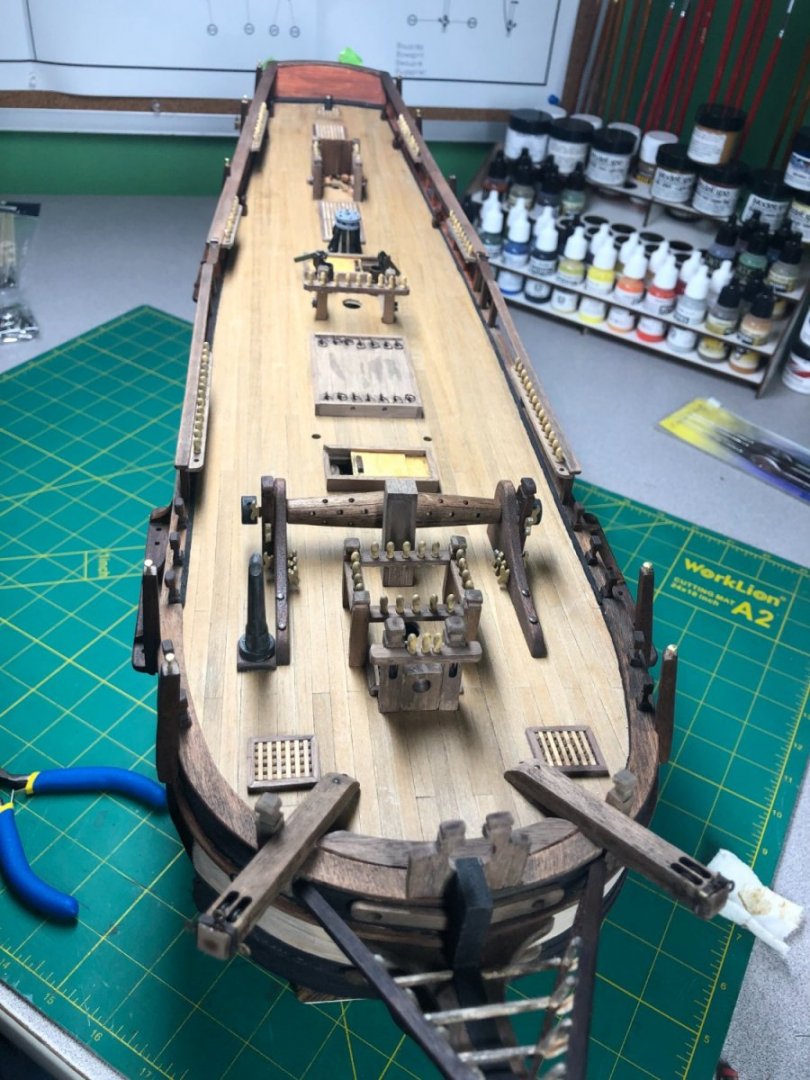

More cannons to assemble and the launch and jolly boats are on the horizon too.
- mort stoll, Dave_E, scrubbyj427 and 4 others
-
7


HMS Bounty by LyleK1 - Artesania Latina - 1:48 scale
in - Kit build logs for subjects built from 1751 - 1800
Posted
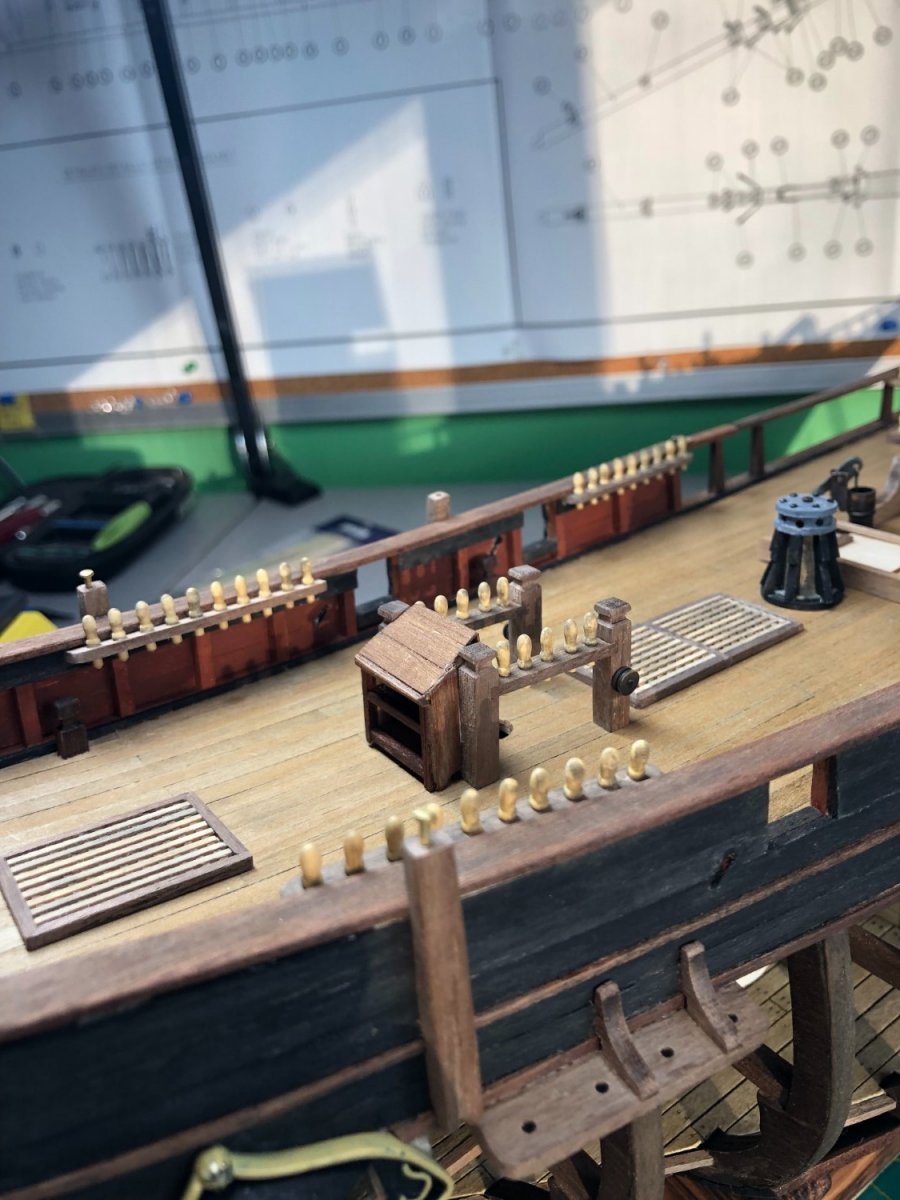
After a bit of a hiatus, I'm back at at it!
I reworked the first cannon... slightly smaller loops that are countersunk into the carriage. They look better!
Additionally, I used smaller blocks. Overall, I like the look much better.
The cannon is shown in a jig I built to hold the cannon while rigging it... needs some work but a good start:
Doing a bunch of these must be an exercise in patience! Glad I'm only doing four on this model!
More to come in a few days.