


LyleK1
-
Posts
531 -
Joined
-
Last visited
Content Type
Profiles
Forums
Gallery
Events
Posts posted by LyleK1
-
-
Finished already!!?
She looks beautiful!
Well done, Bob!
- mtaylor, Knocklouder, Keith Black and 1 other
-
 3
3
-
 1
1
-
Well done, Bob!
Looking very smart!
- Glen McGuire, mtaylor and Keith Black
-
3
-
It took a little finessing to get mine off the strong back but ultimately, it did come off without any damage!
Hope yours does too.
- mtaylor, Keith Black, Knocklouder and 1 other
-
3
-
1
-
-
-
Looking good!
Now the fun begins. Take your time with the next few planks... it progressively gets tougher to bend and twist them. The better the joint, the less sanding later!
There are spots on my build that were mighty thin!
Have fun!
- mtaylor, Glen McGuire, HardeeHarHar and 2 others
-
4
-
1
-
-
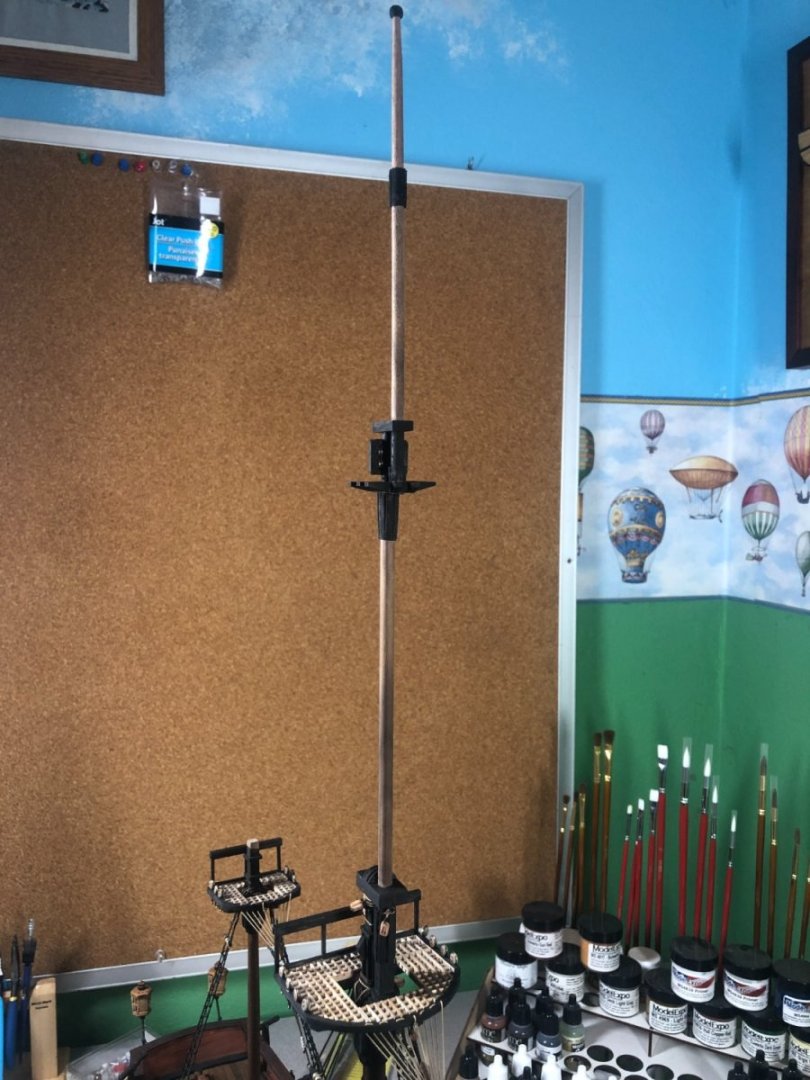
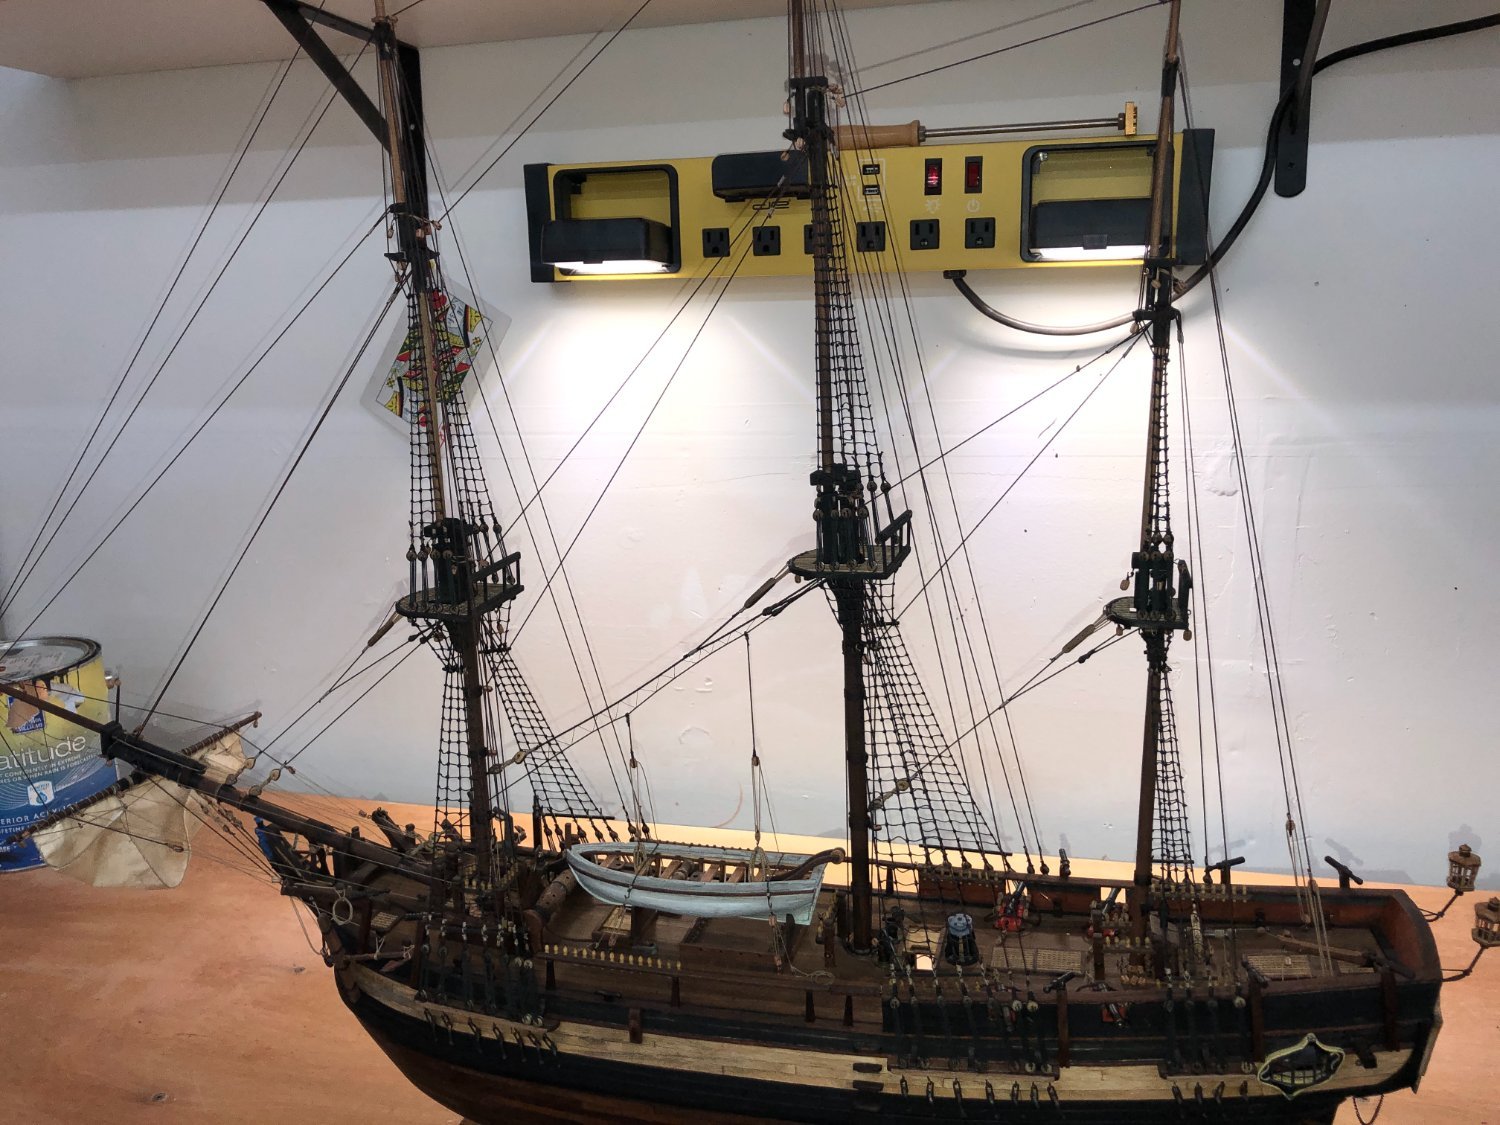
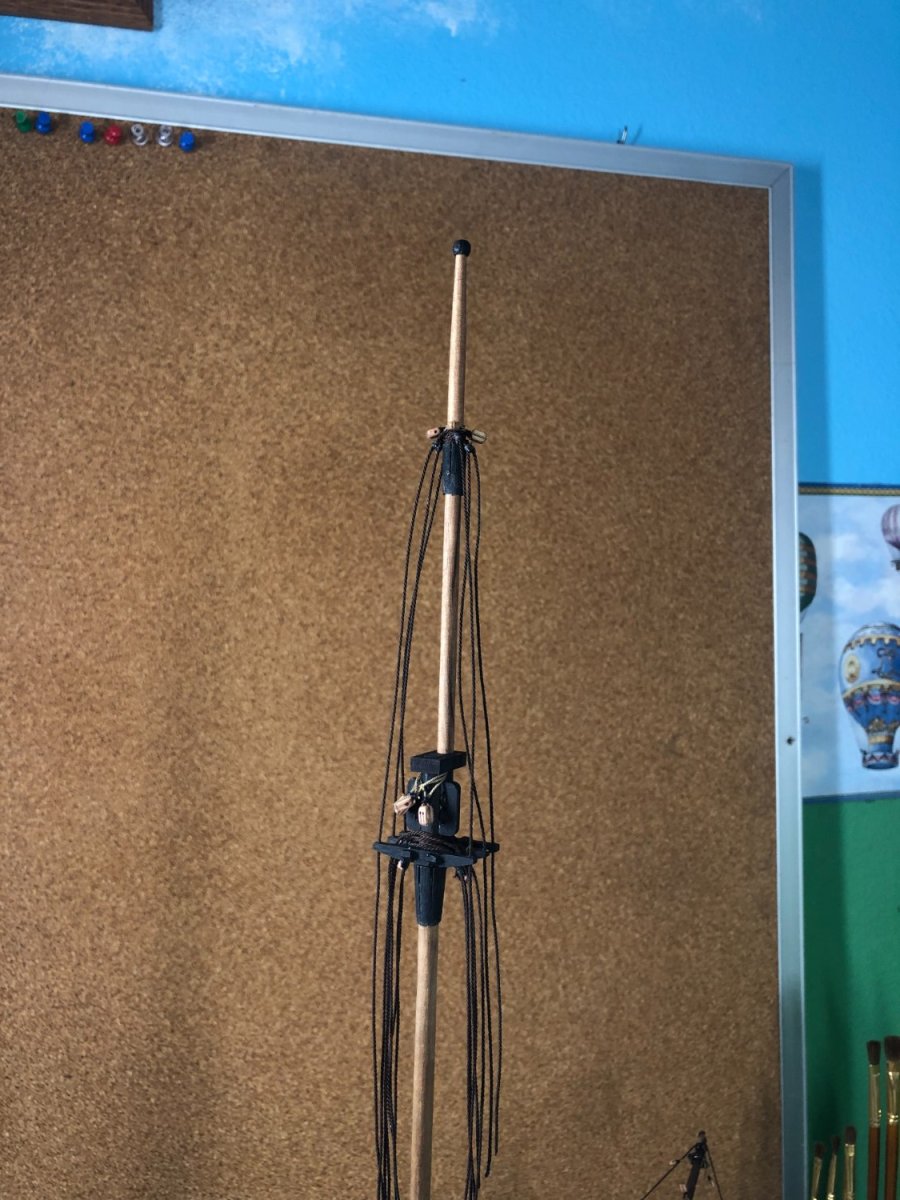
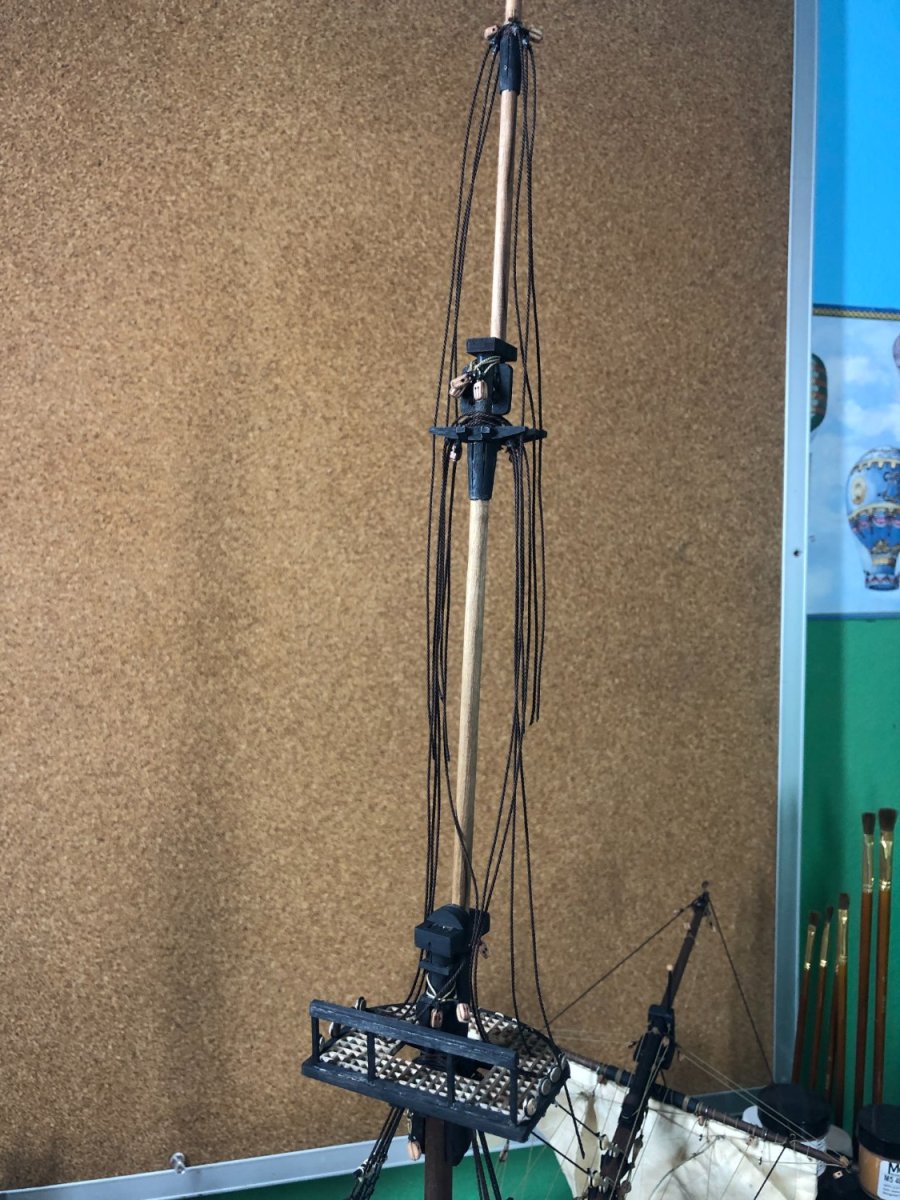
Fore mast yards done!
Work is ongoing on the remaining yards for the main mast.
Spring has sprung in my neck of the woods which means I've got a lot going on. Progress will be slow but I'll update the log as work gets completed.
- mort stoll, Montaigne, AJohnson and 4 others
-
7
-
Good luck!
It was a fun build. You can access my log to the same build below, if you're interested.
I'll be pulling up a chair to watch!
- Bryan Woods, Keith Black, mtaylor and 2 others
-
5
-
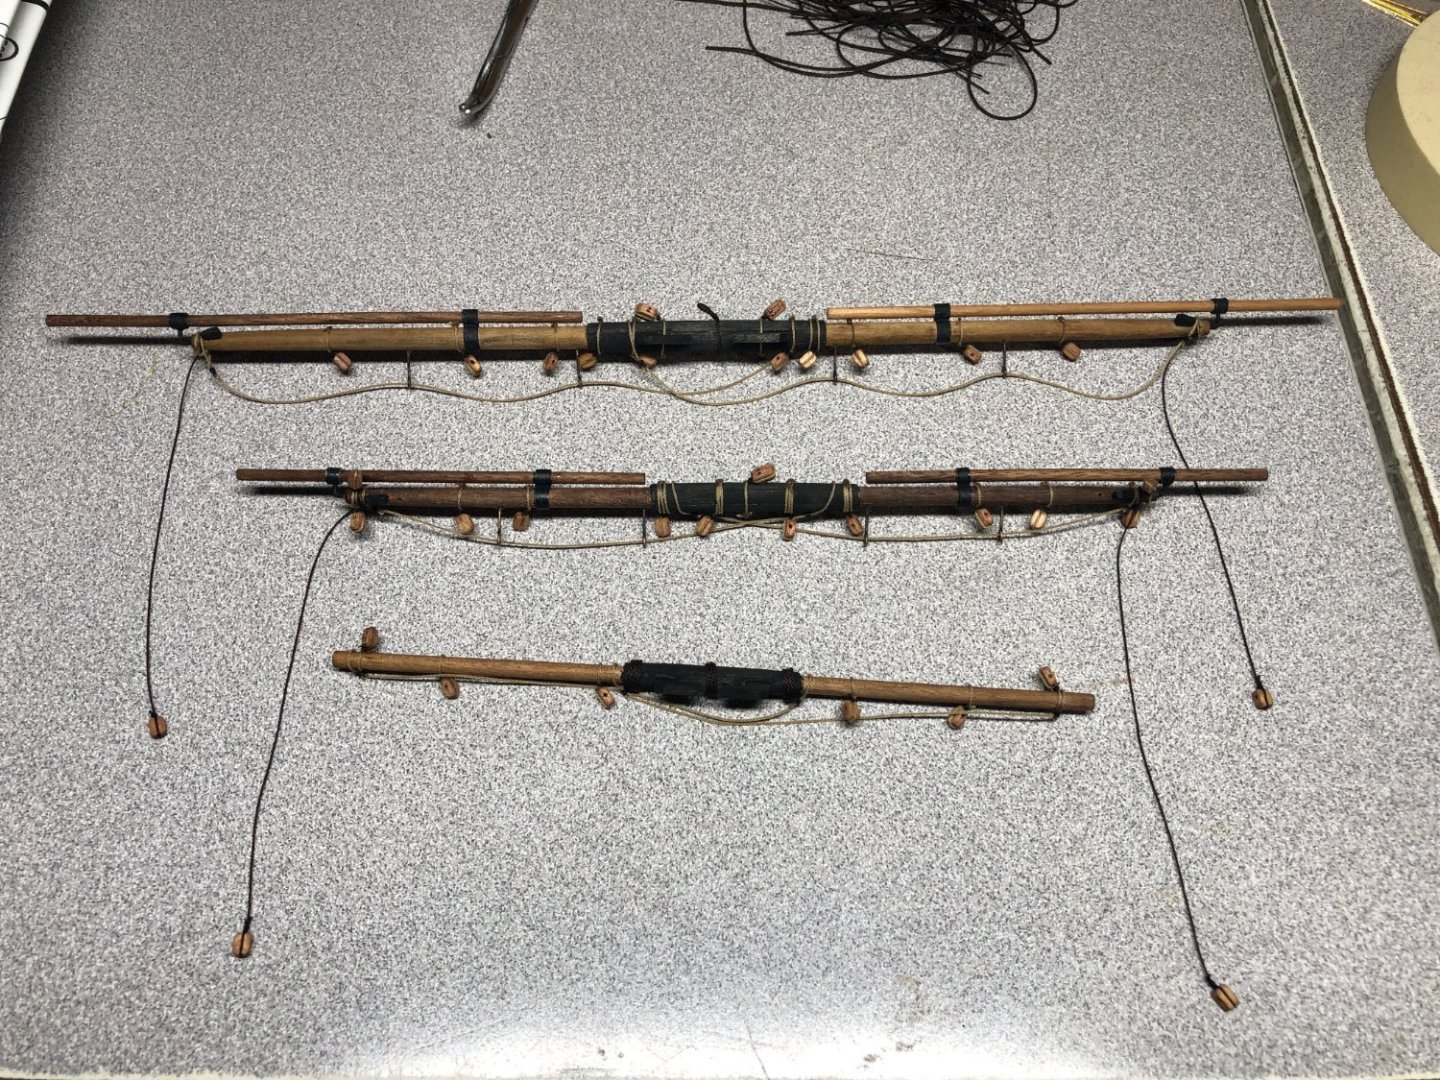
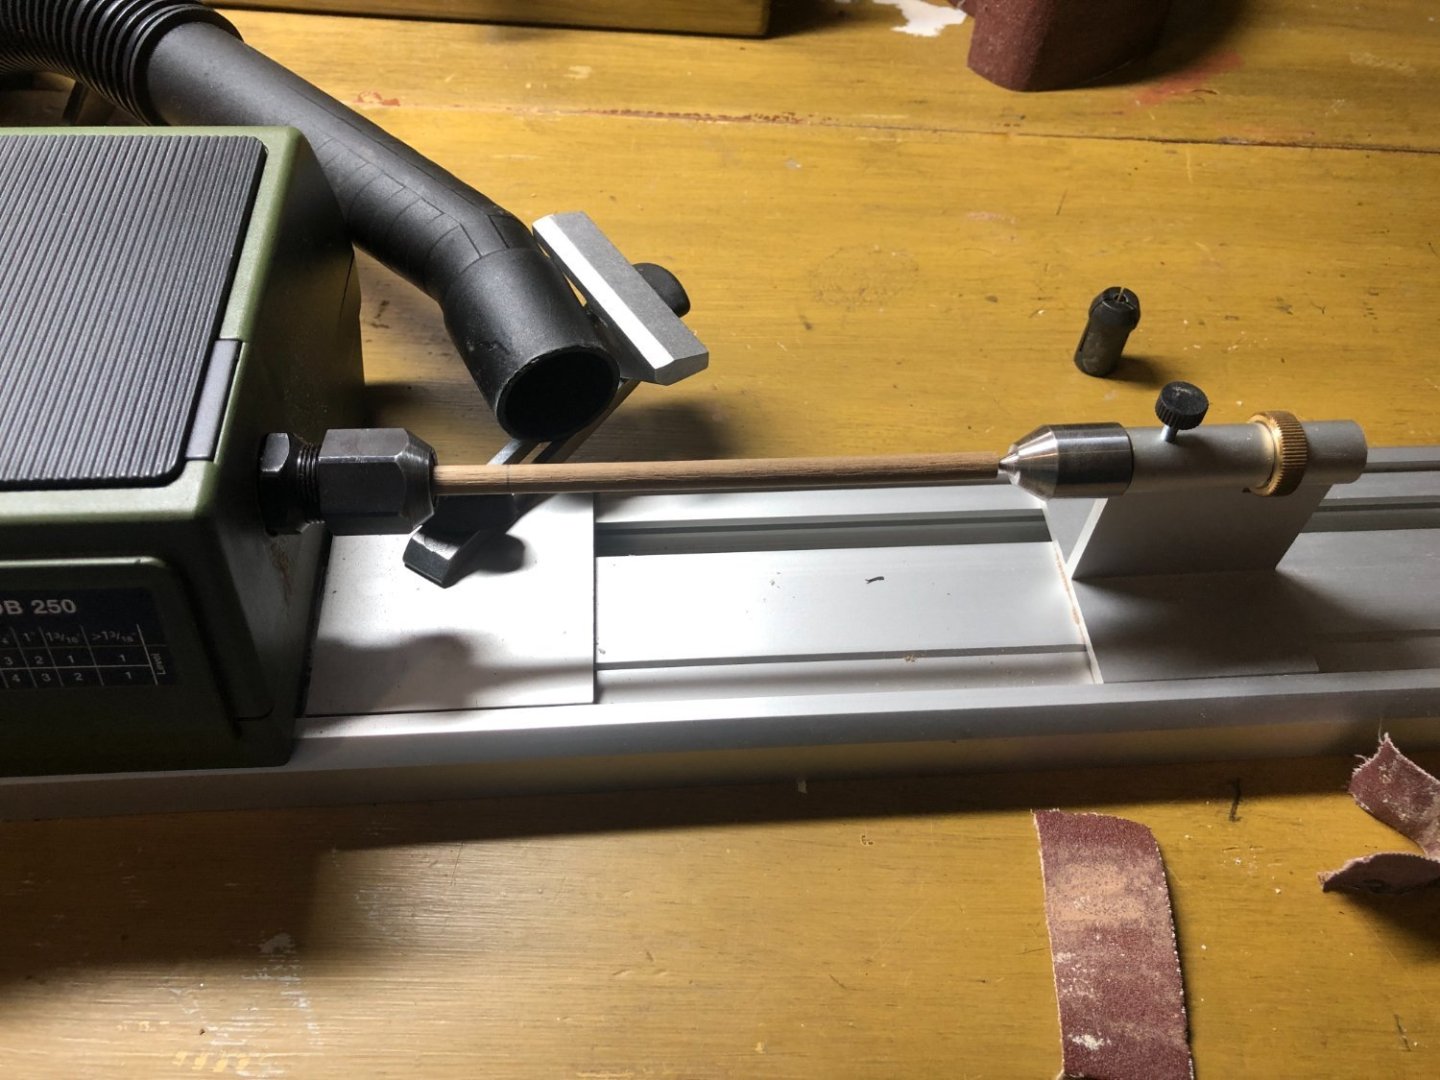
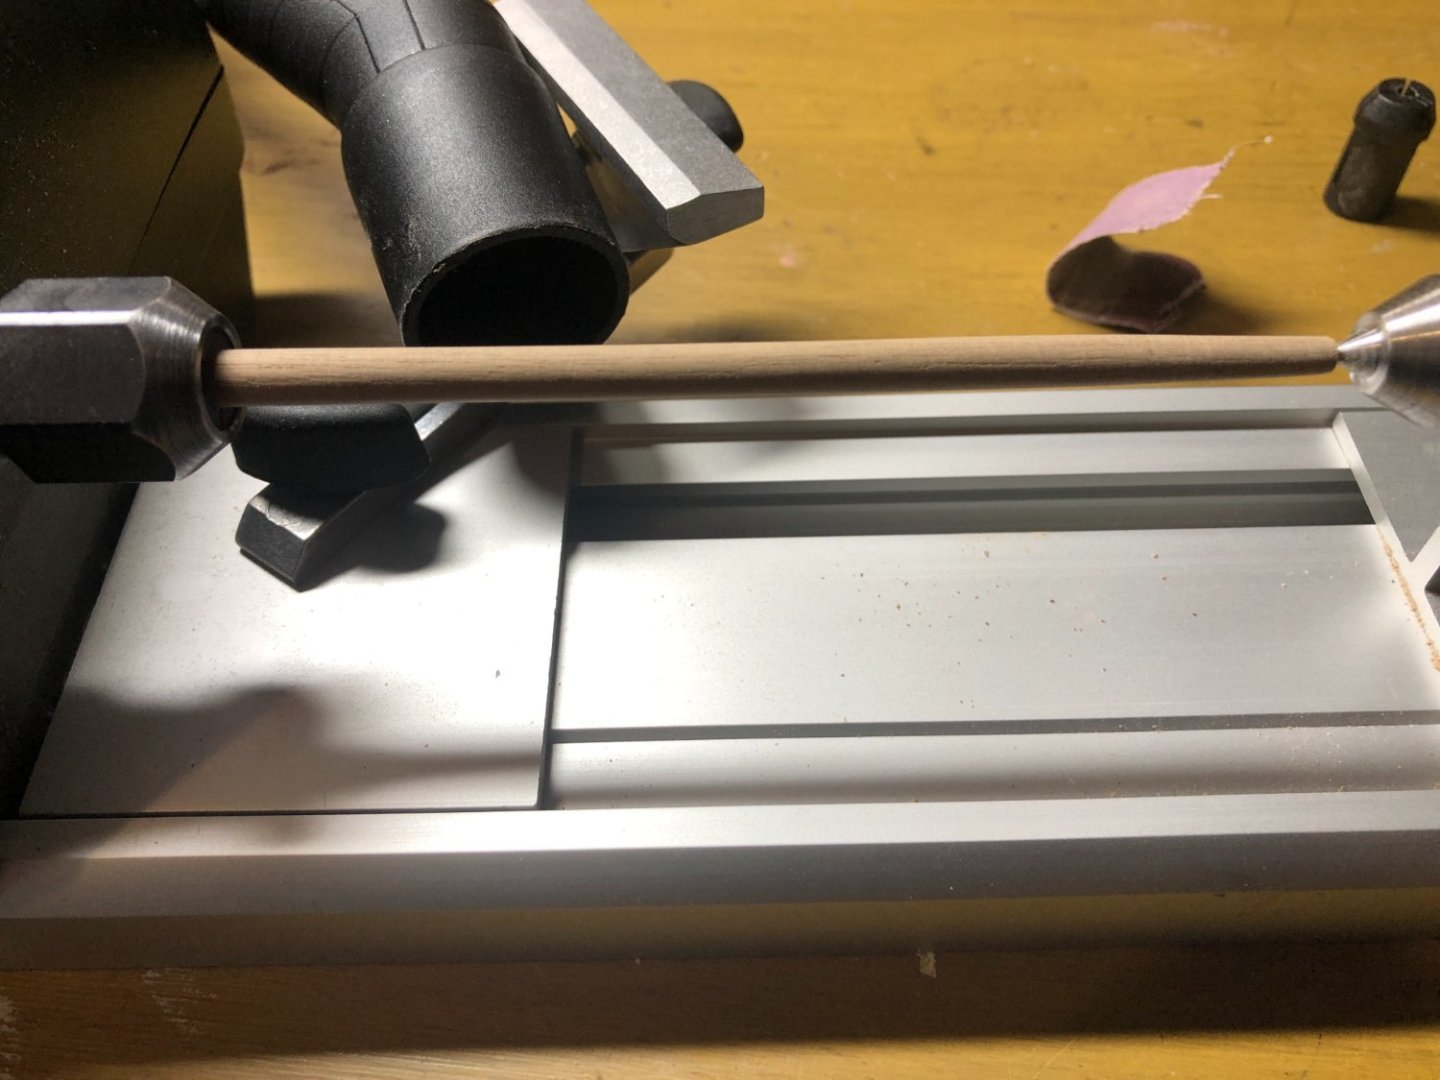
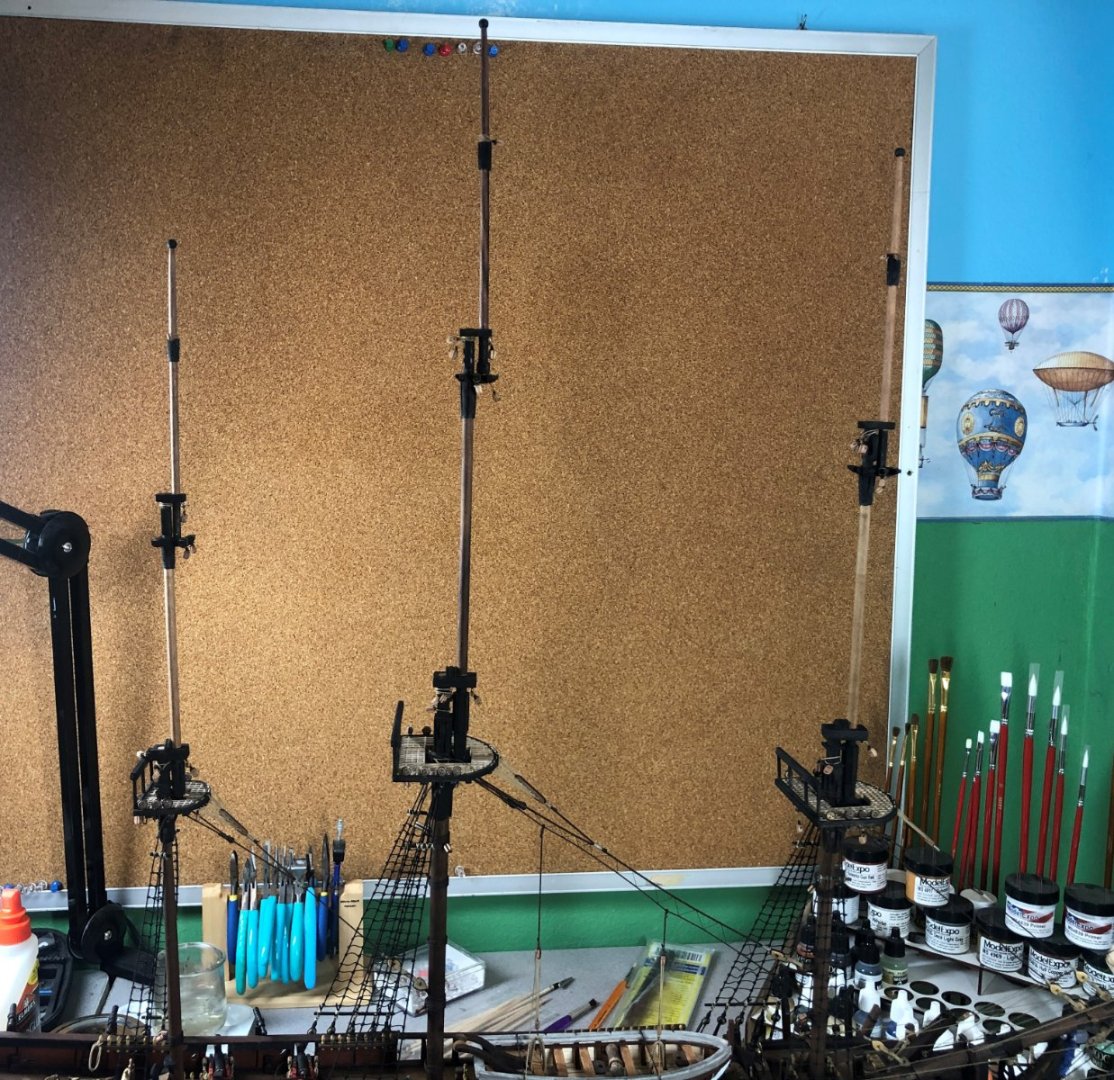
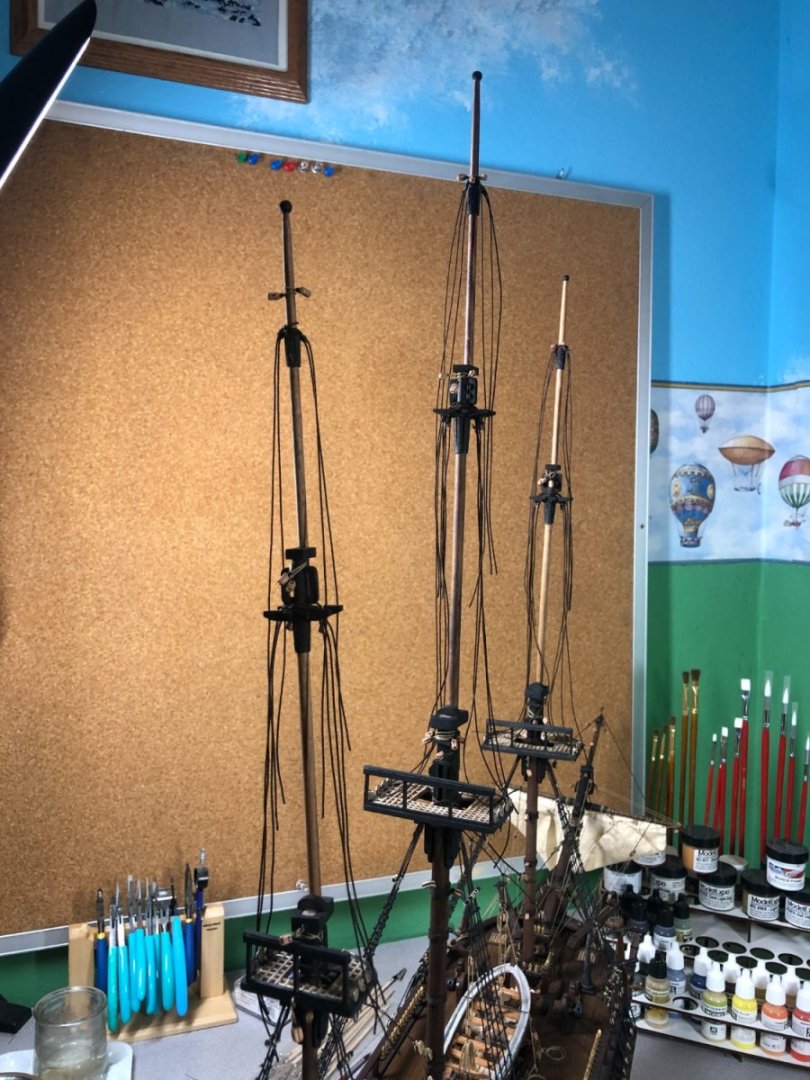
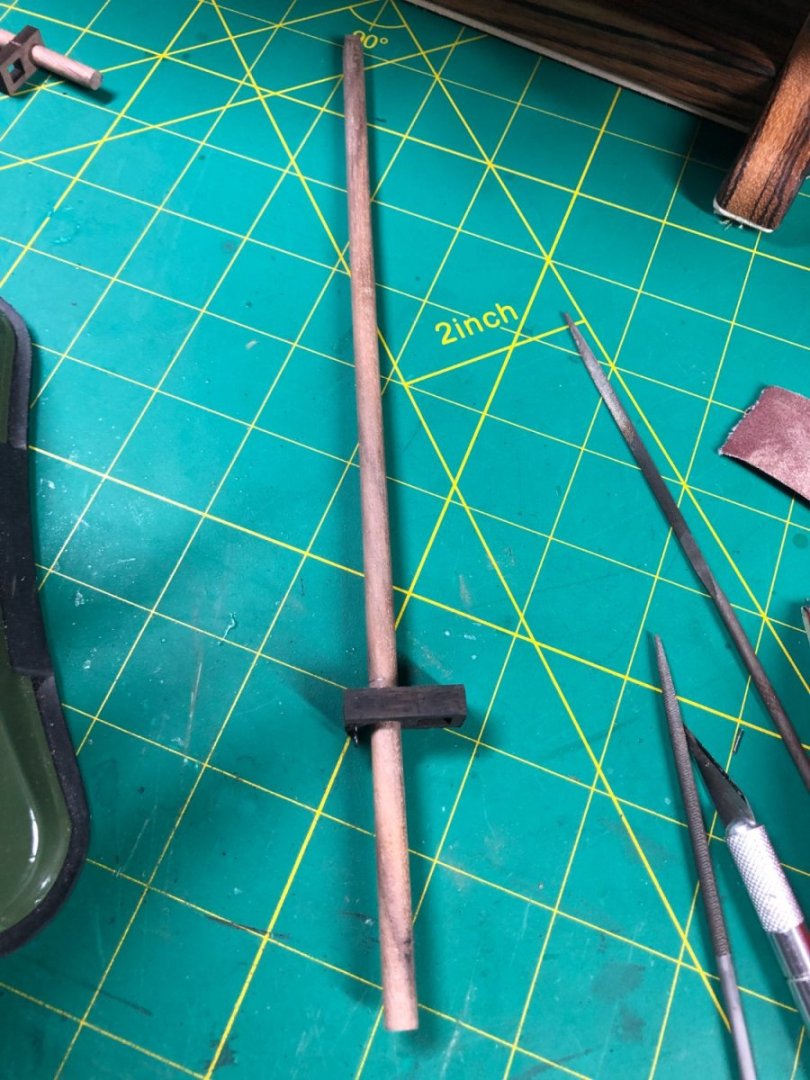
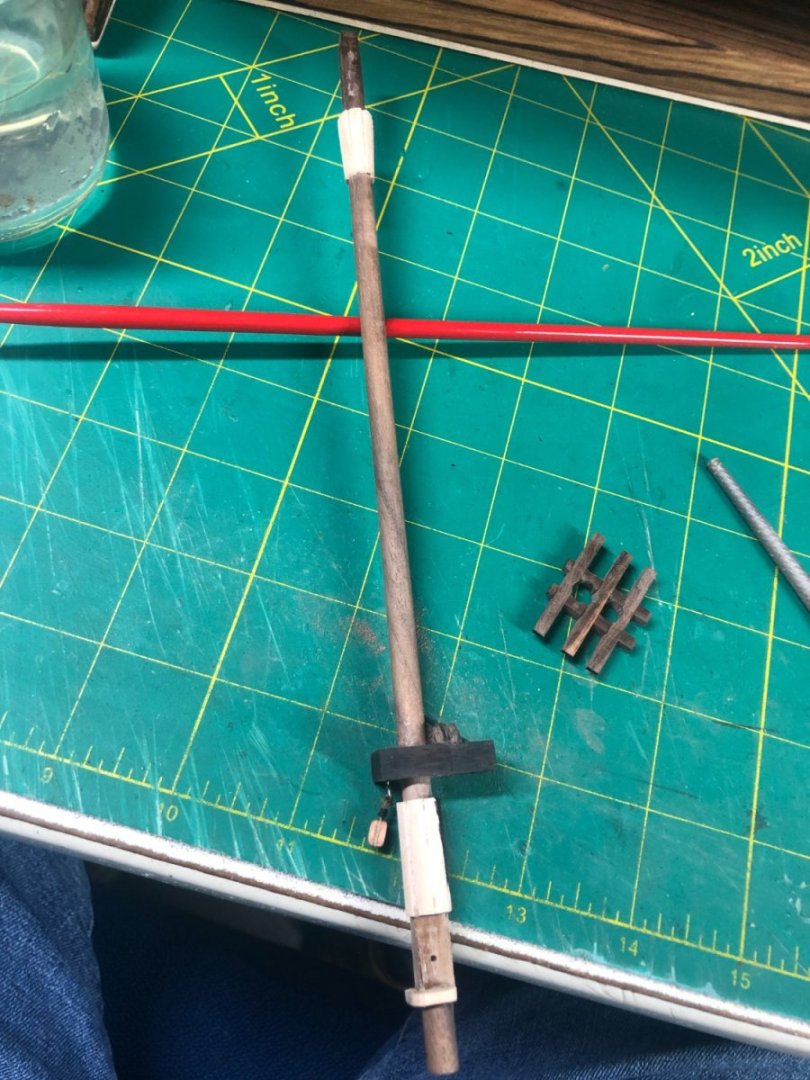
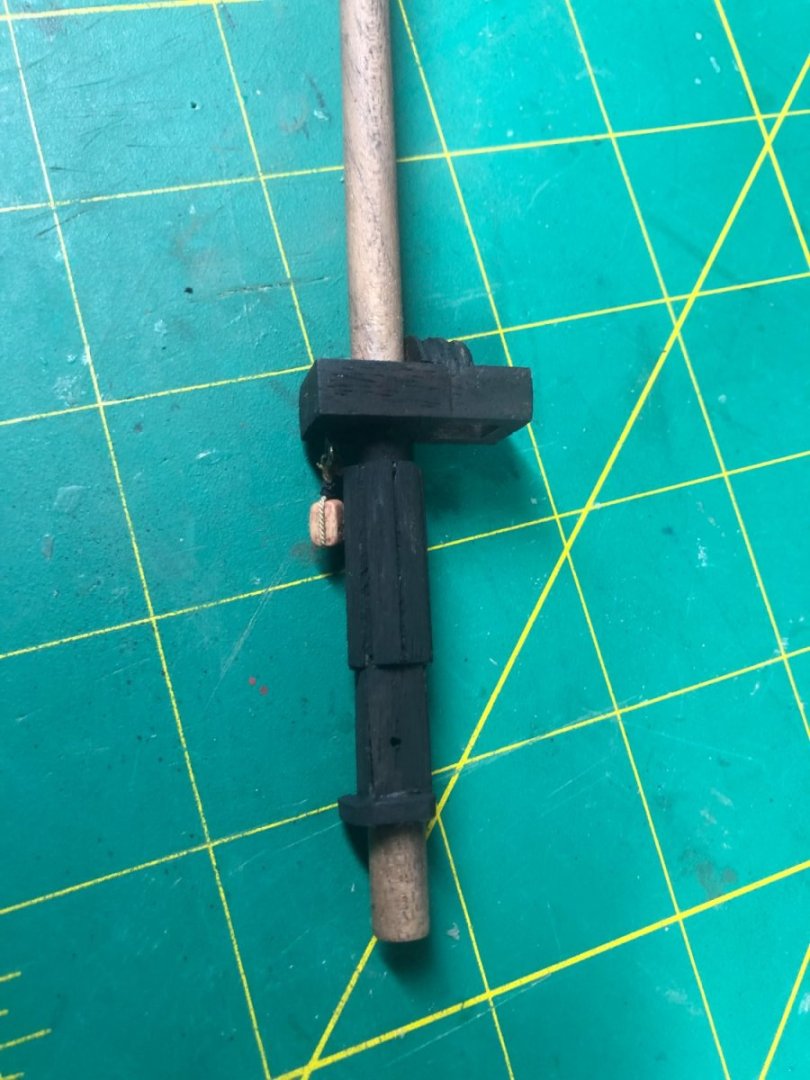
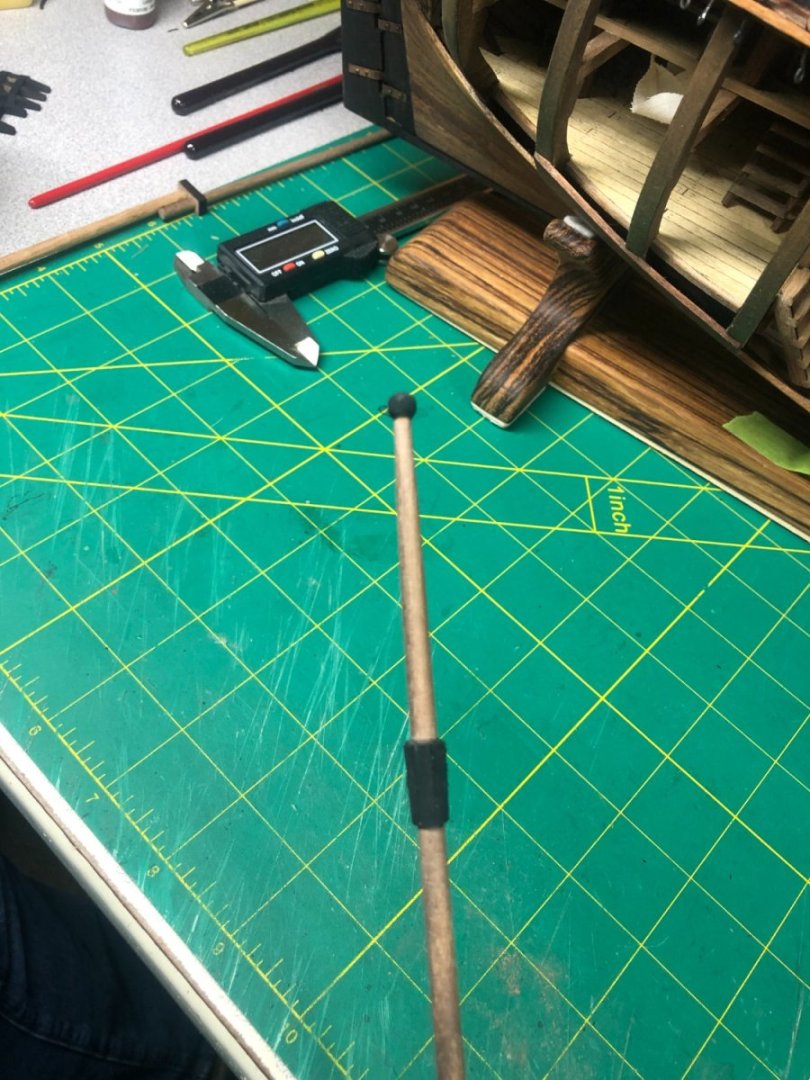
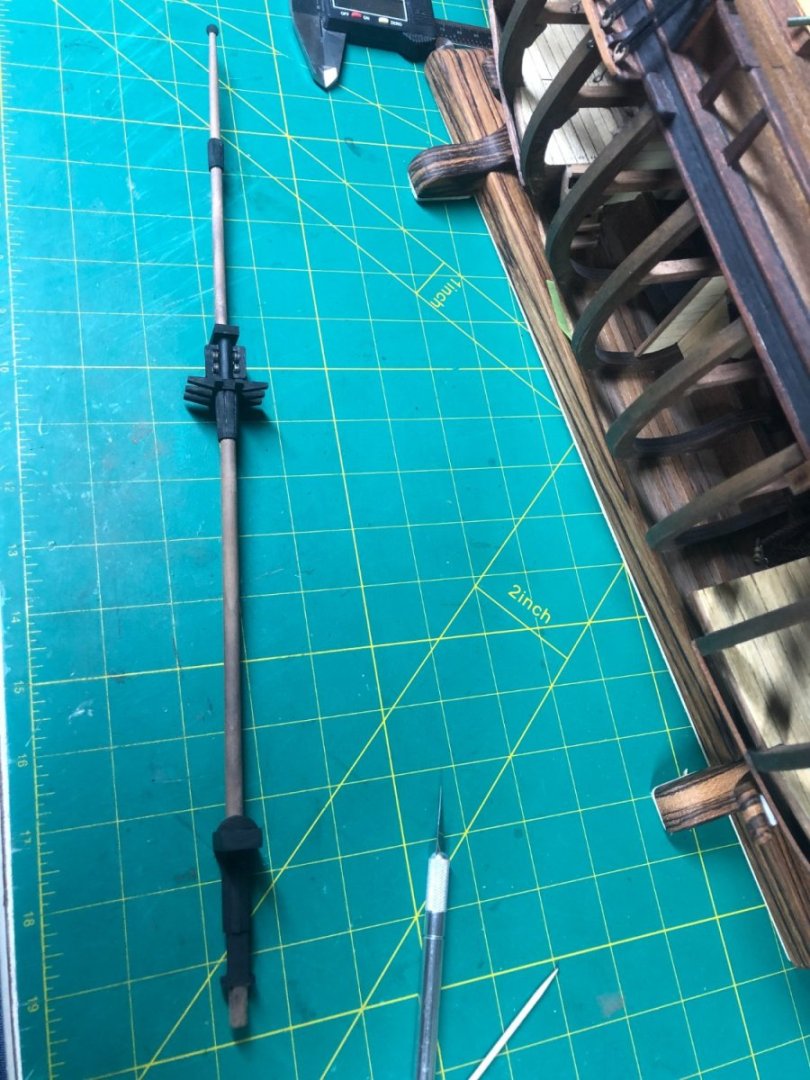
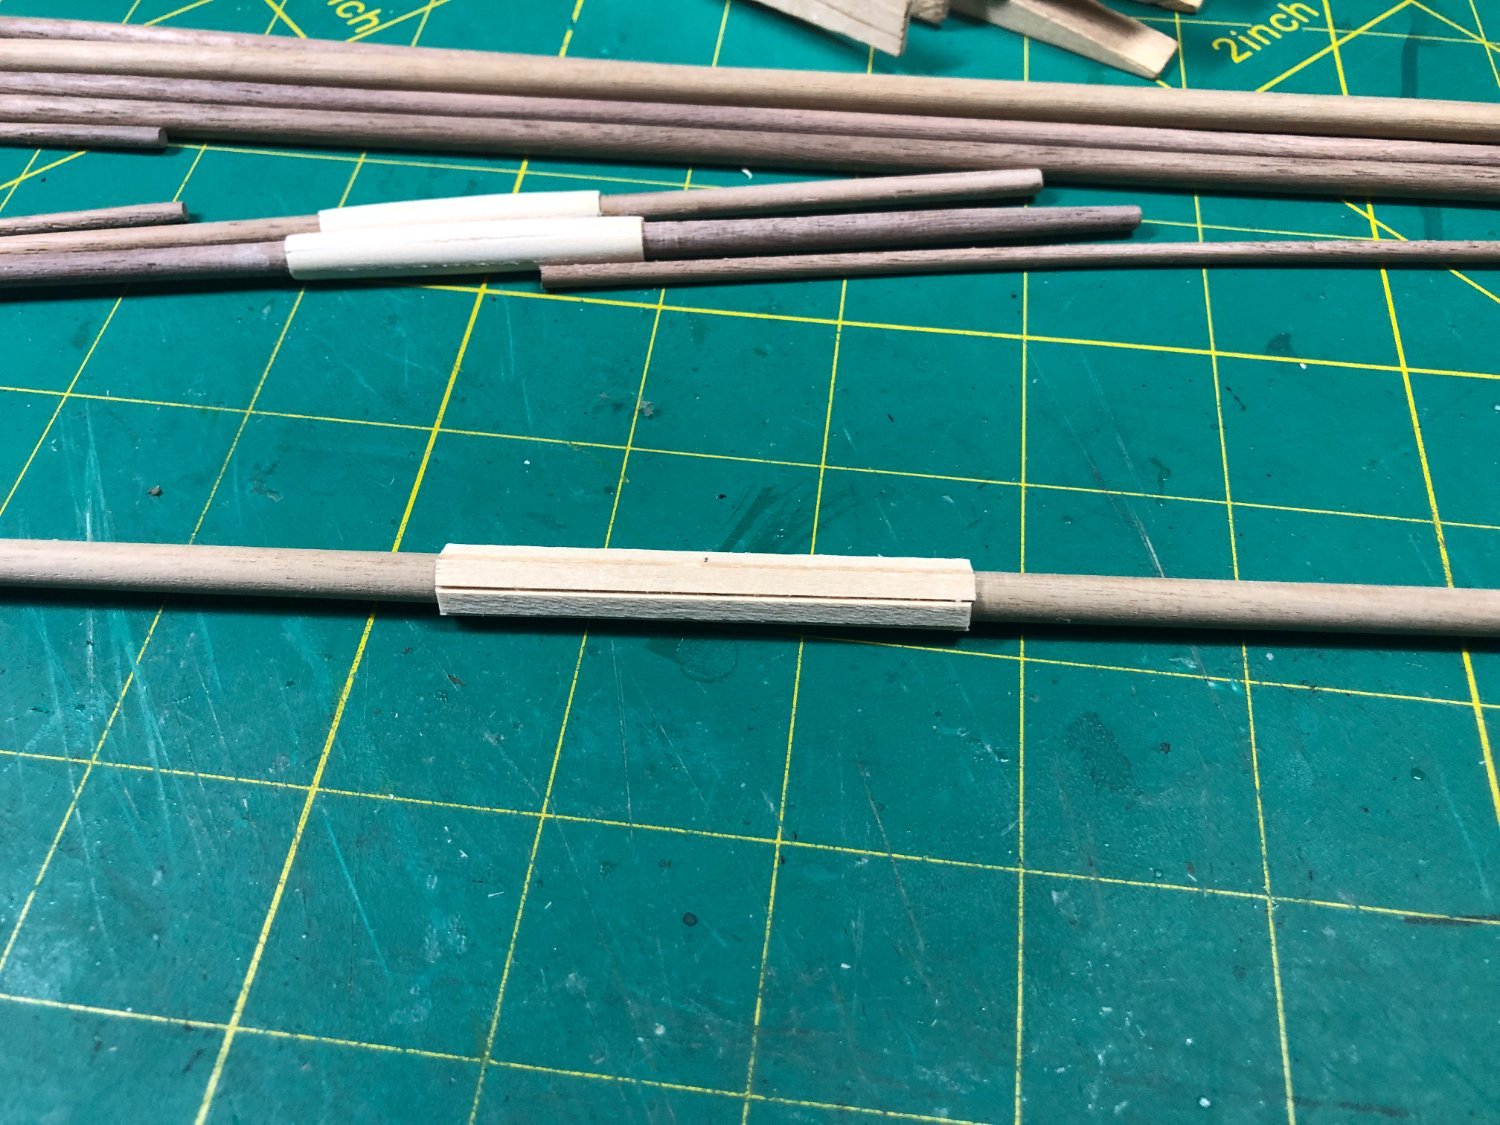
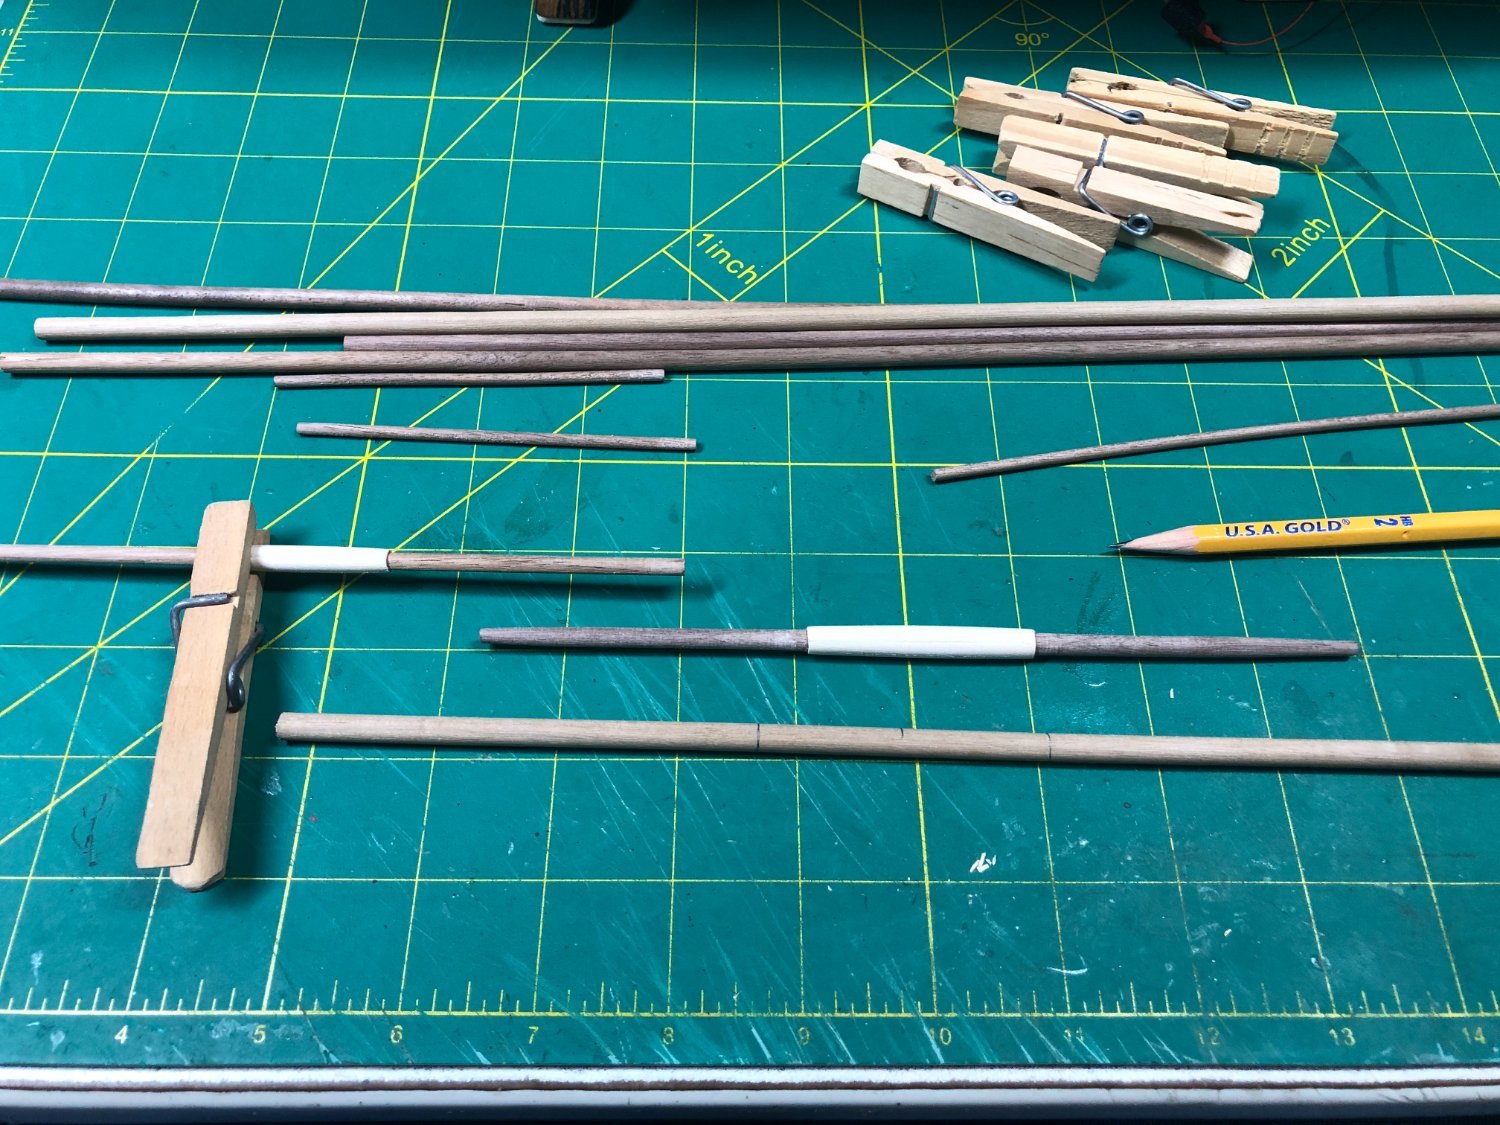
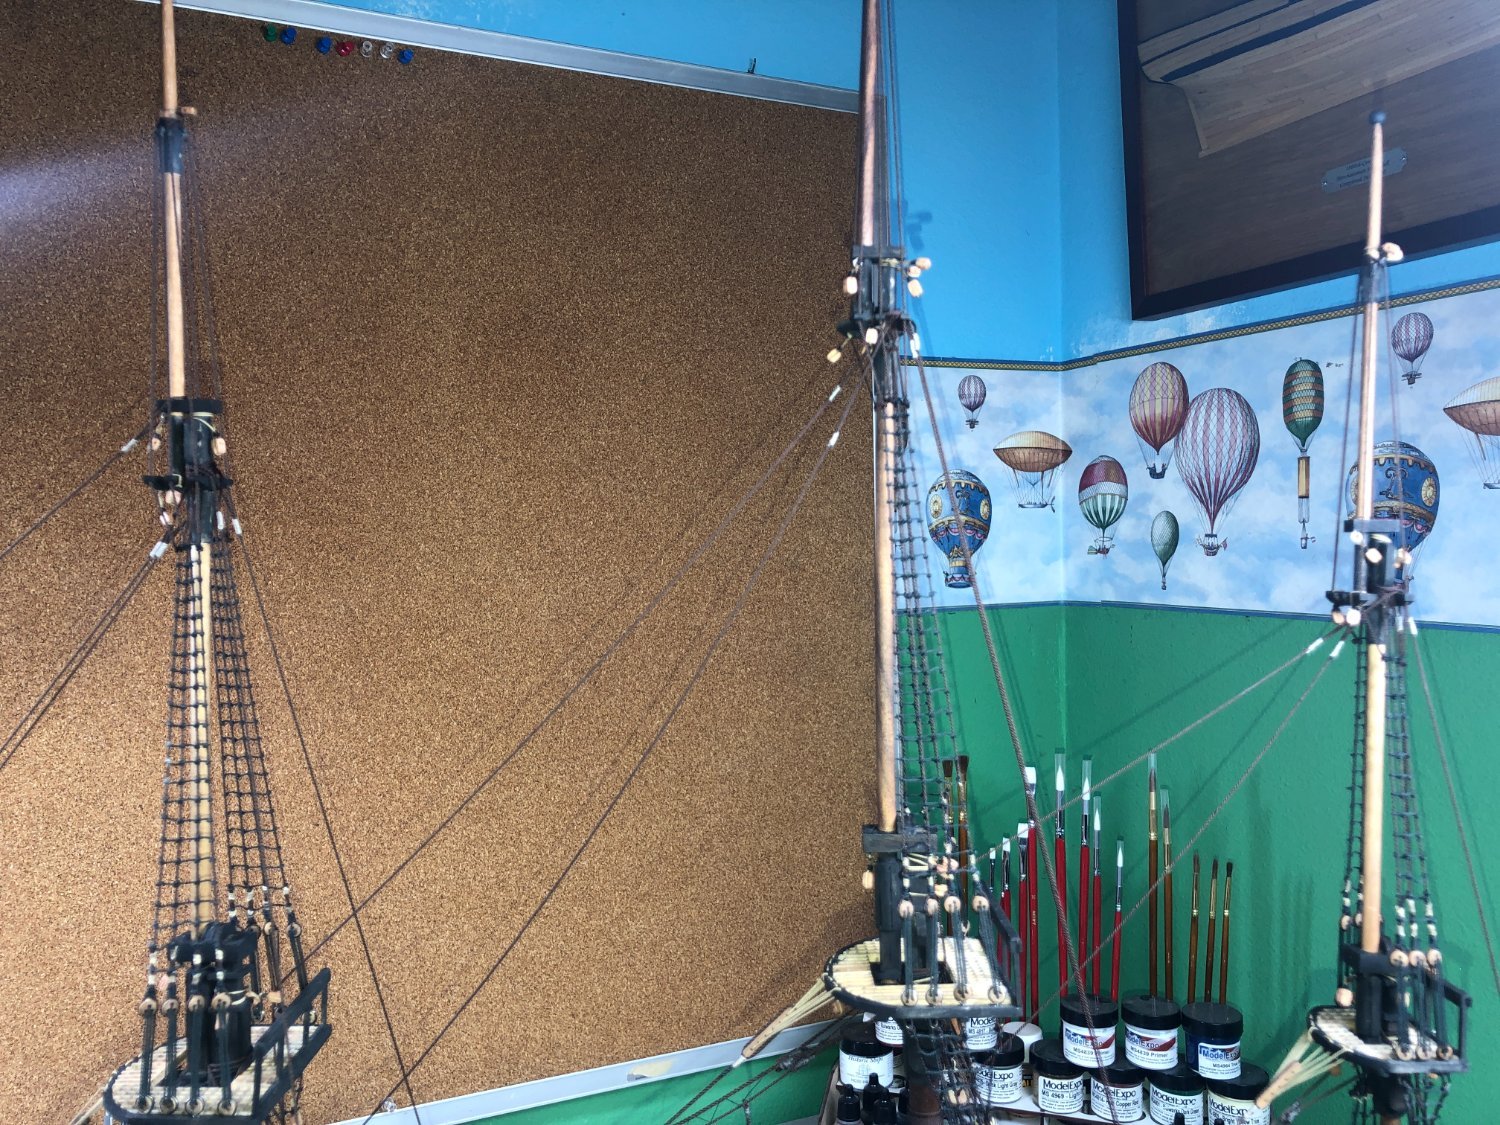
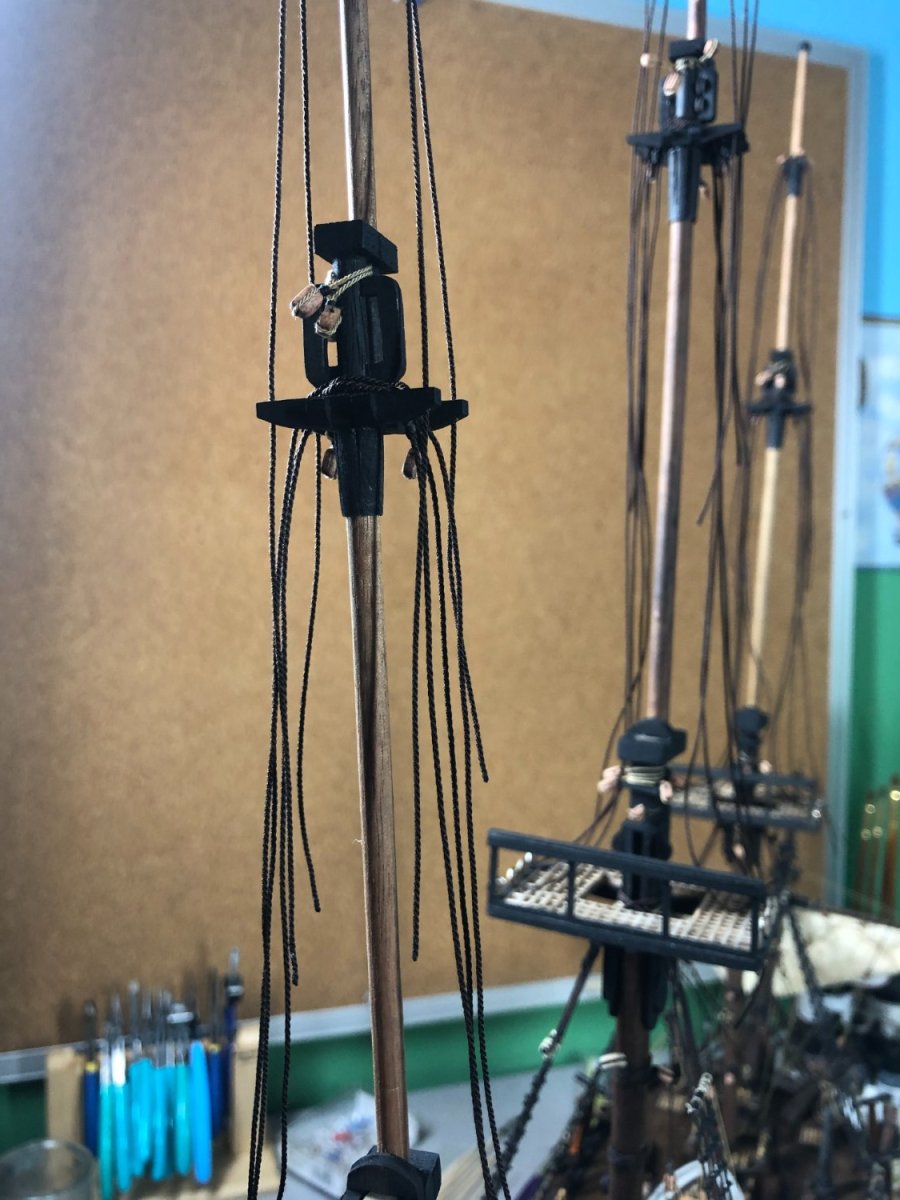
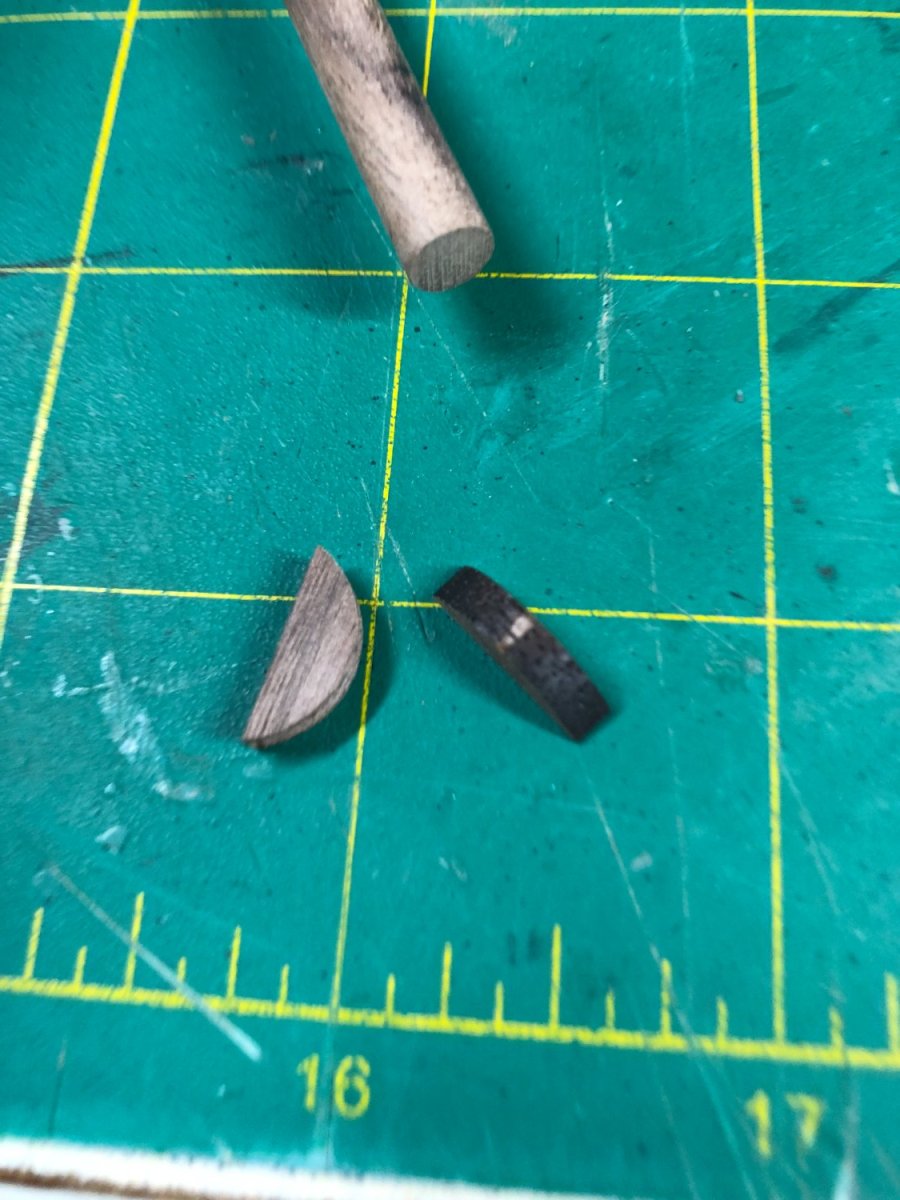
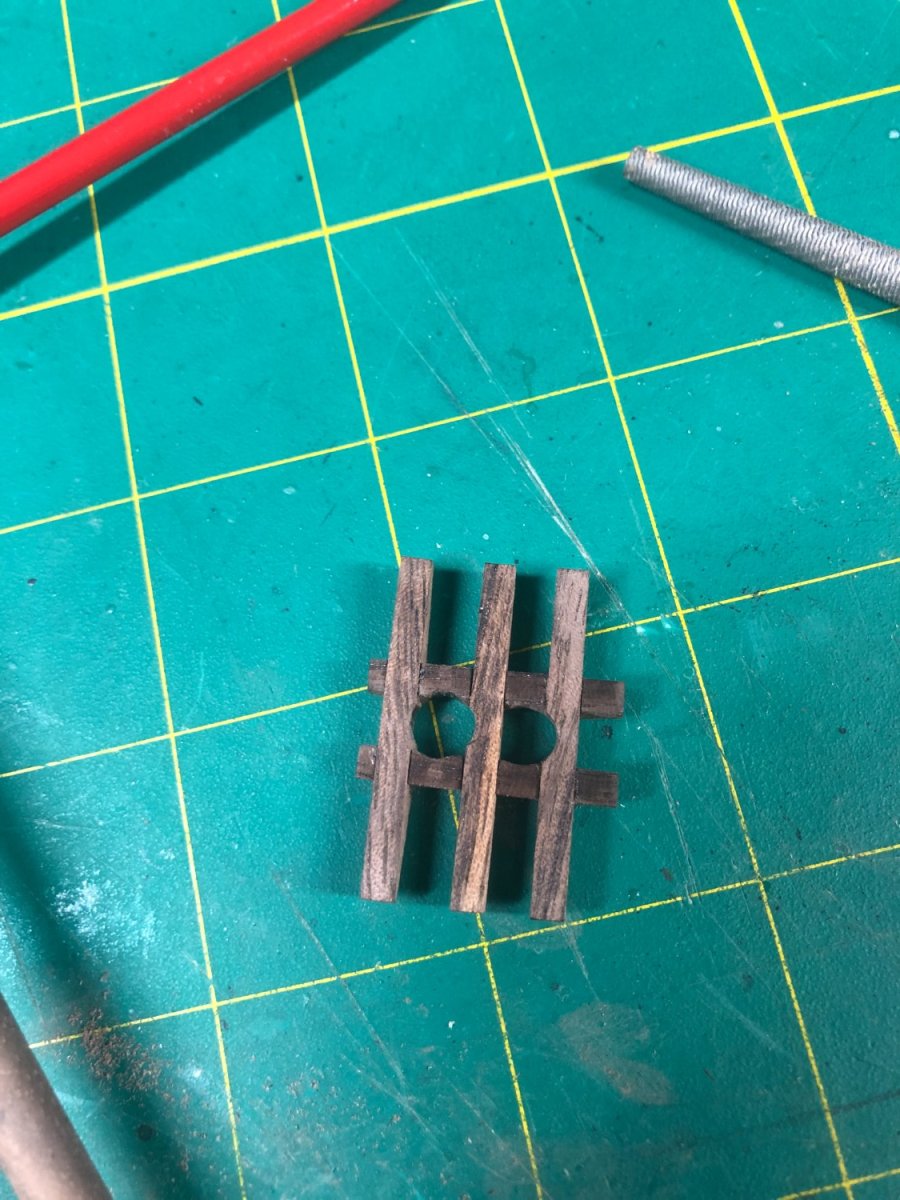
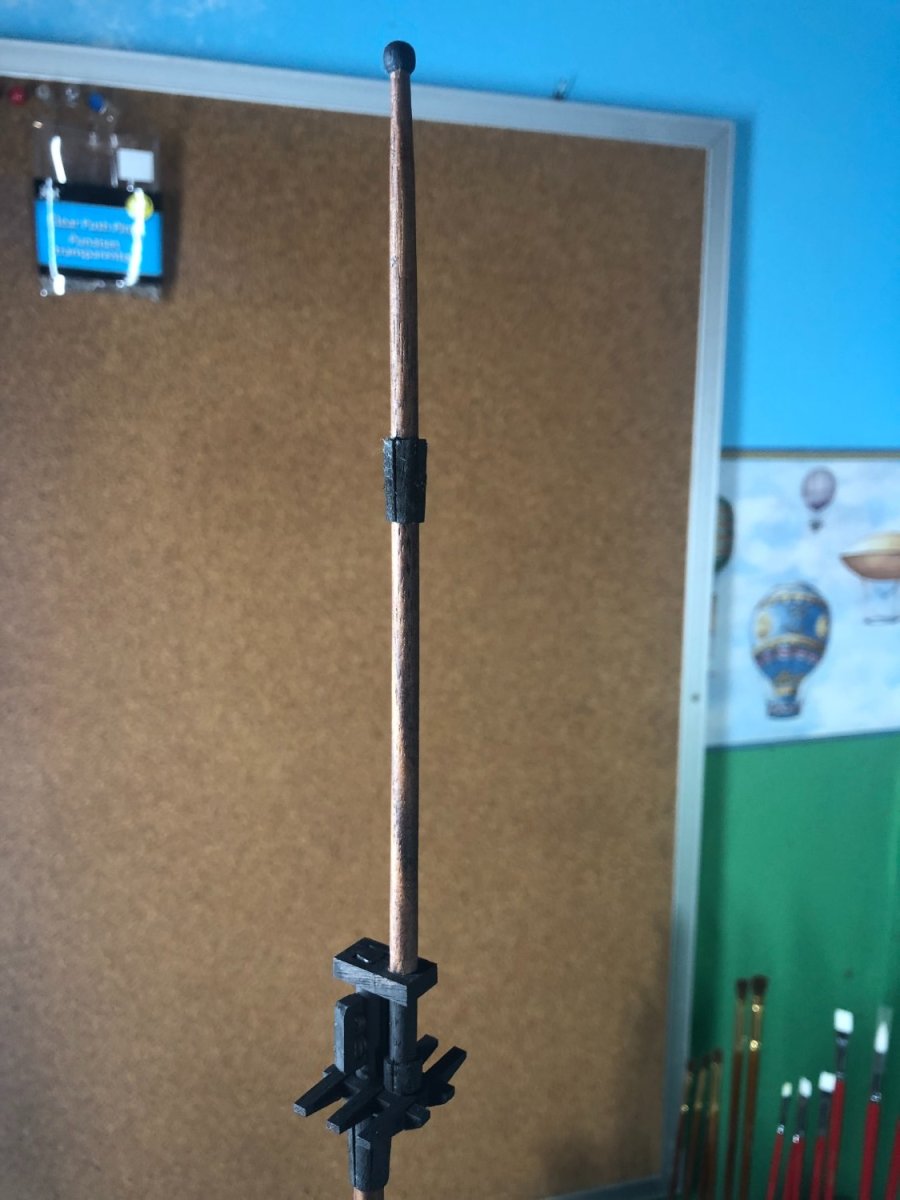
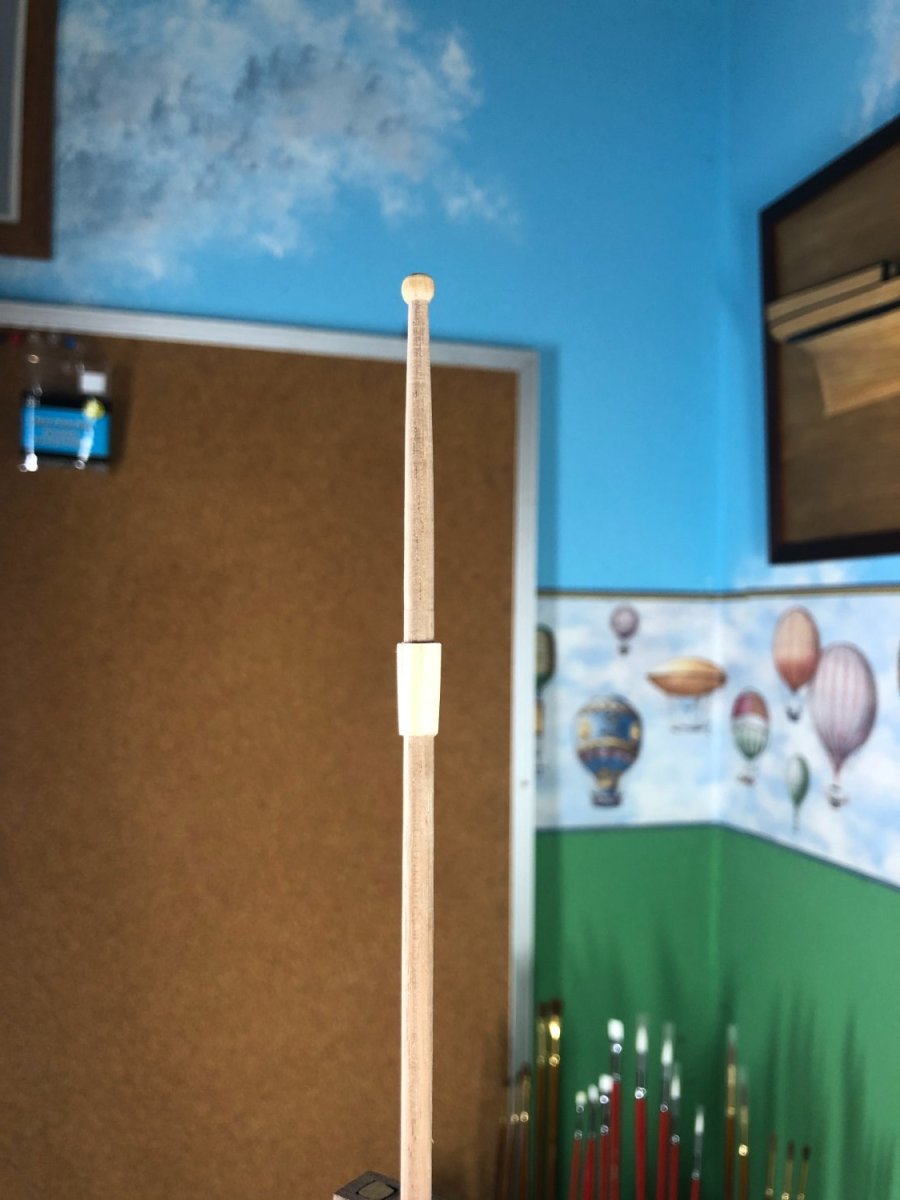
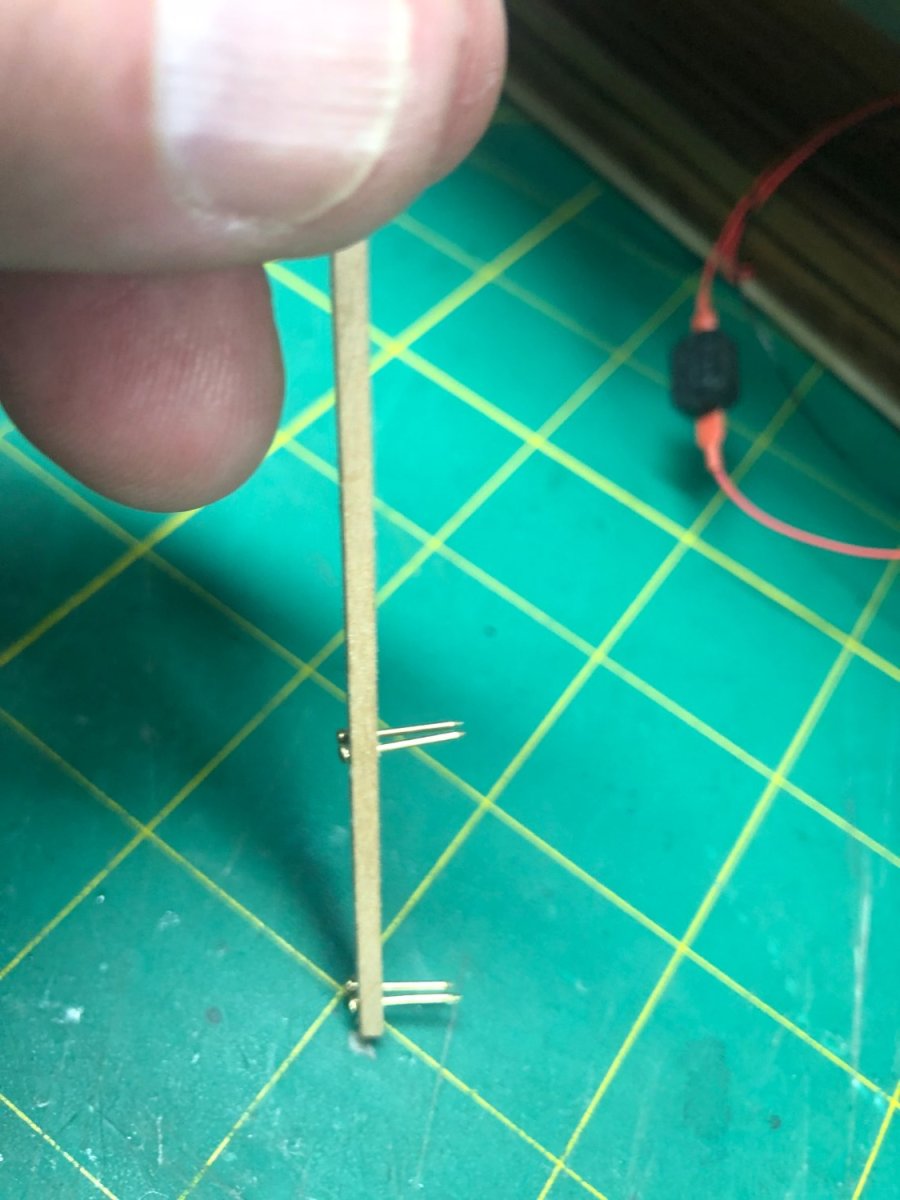
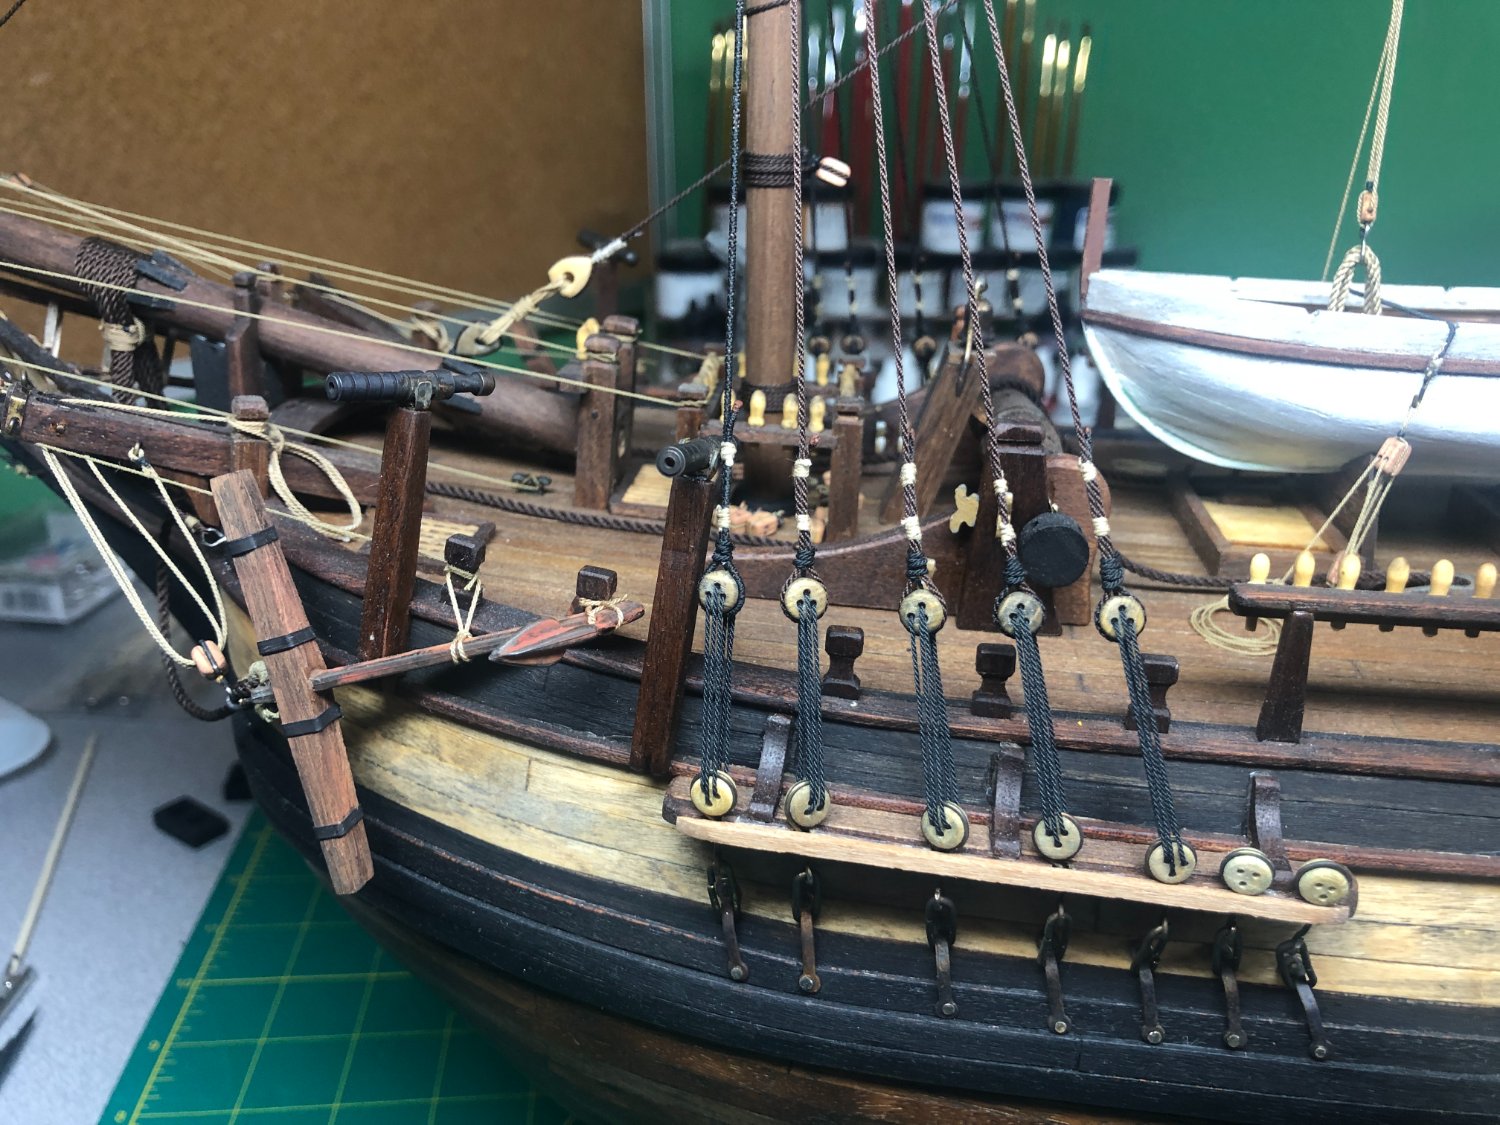
Off I go on the yards and associated hardware.
To start, I used my mini lathe to taper the yards to the sizes shown on the plans:
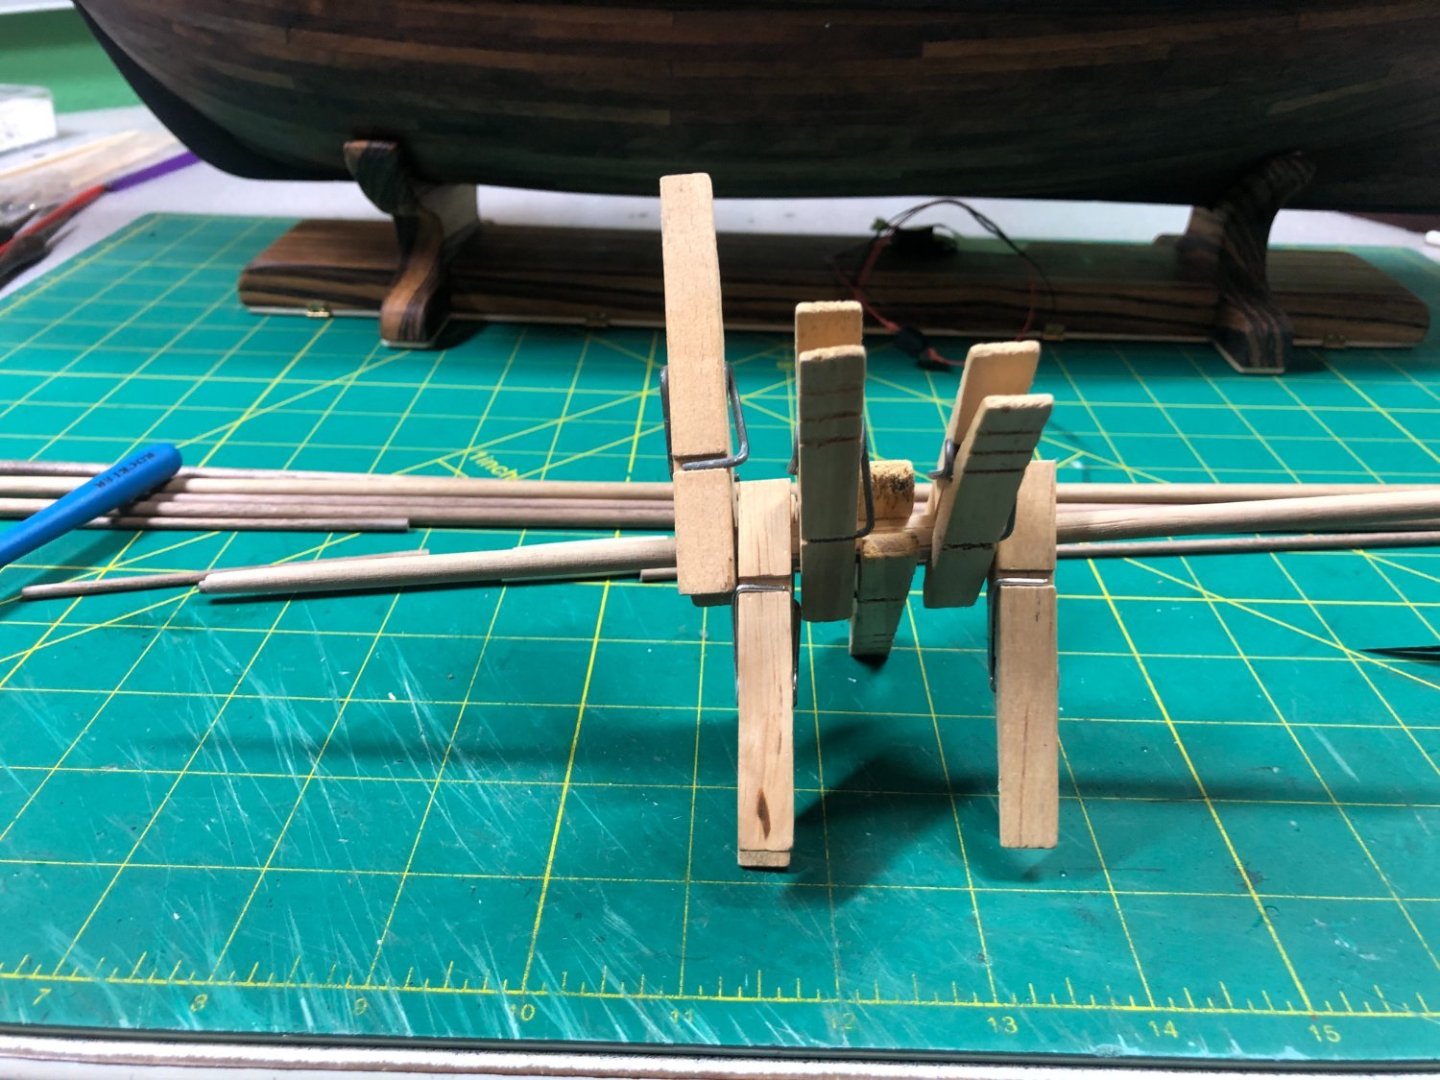
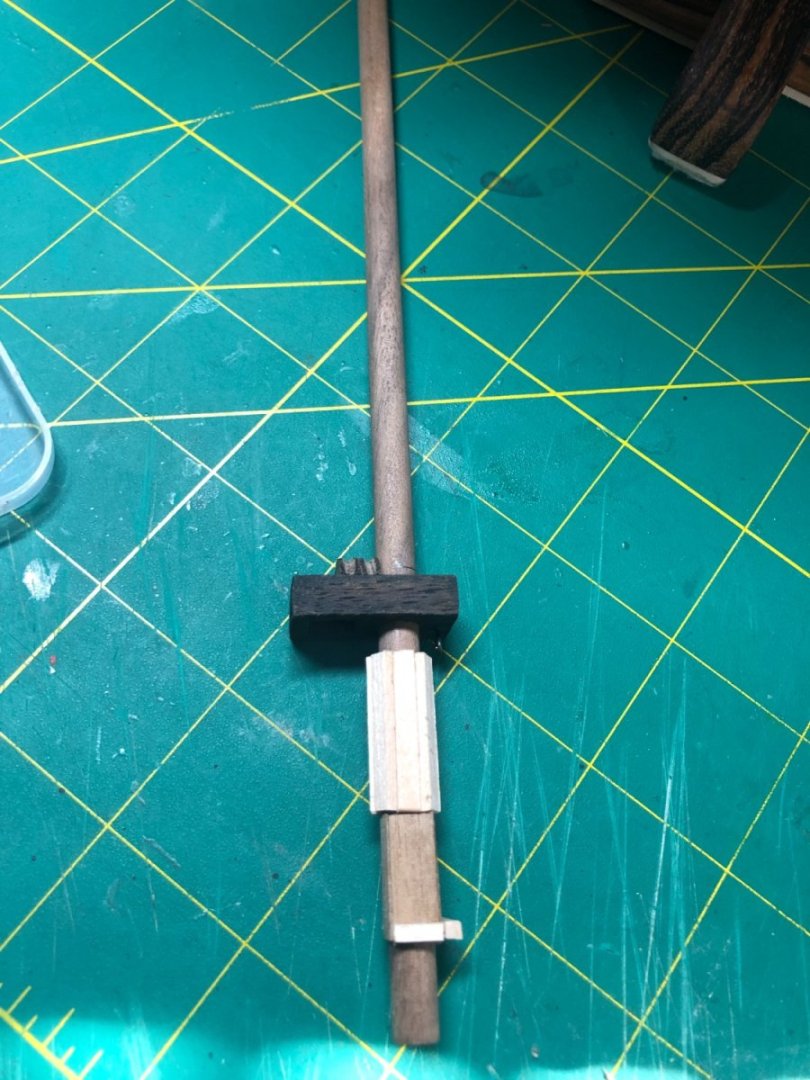
Once they are tapered, the reinforcements were added. I used clothes pins to hold the pieces while the glue dried:

And then sanded:

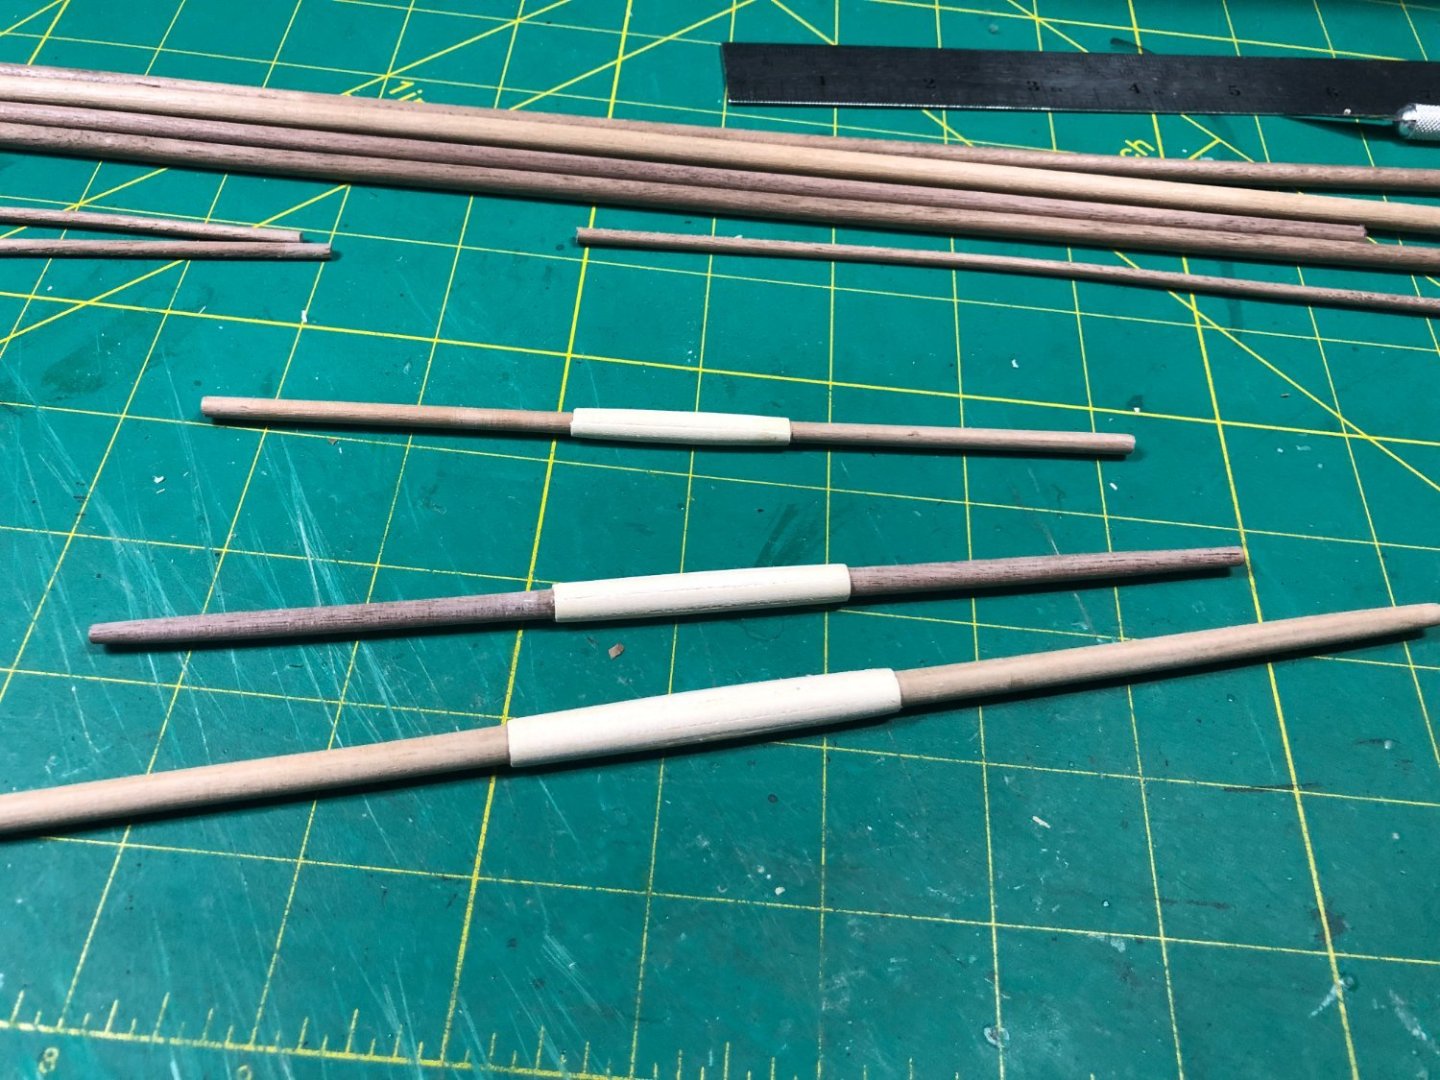
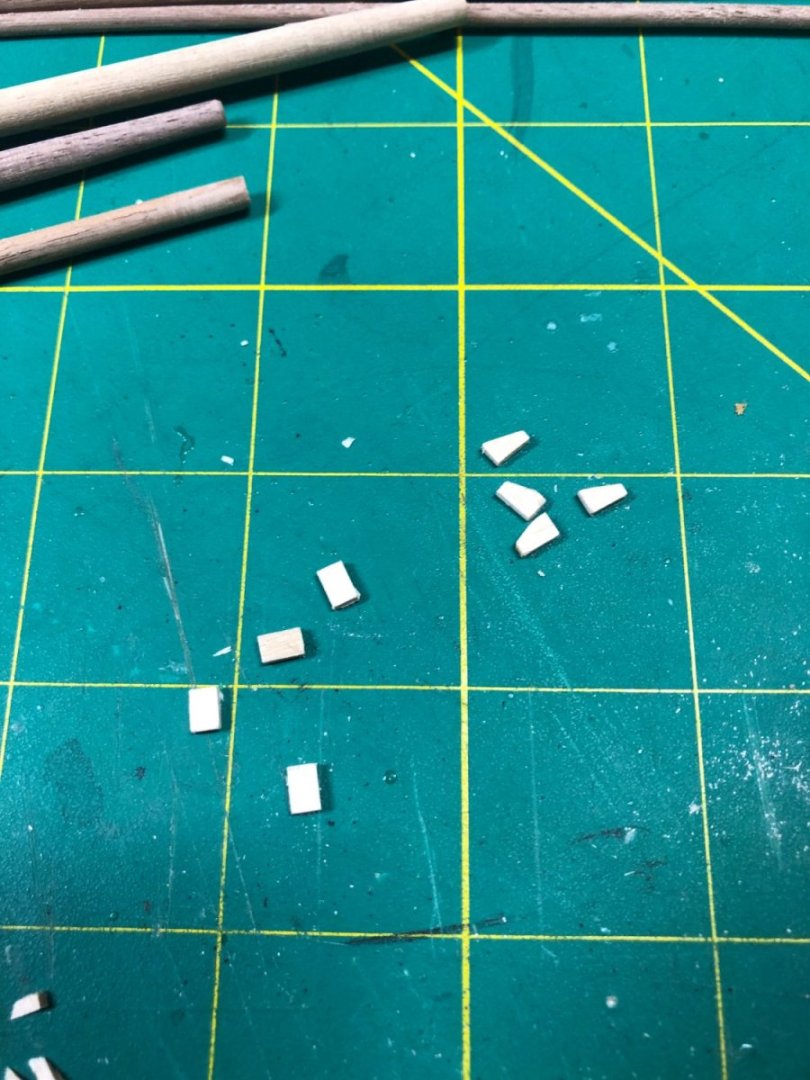
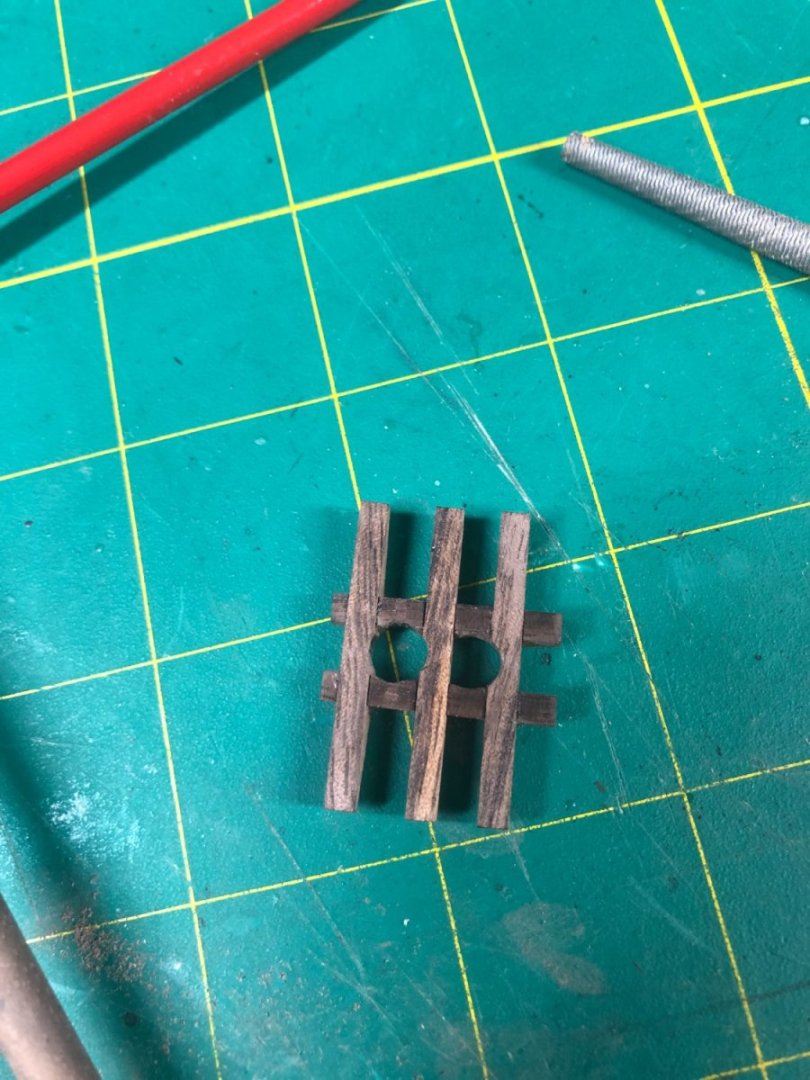
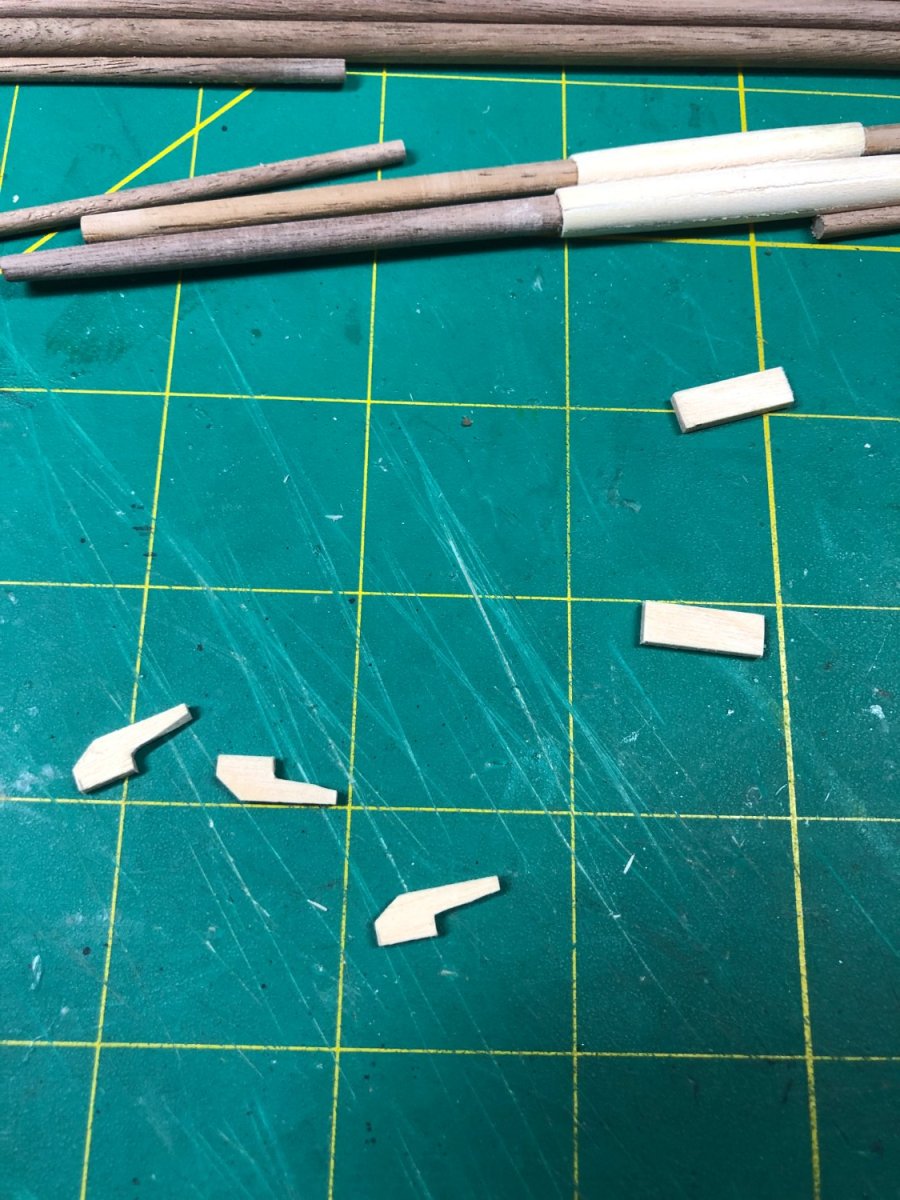
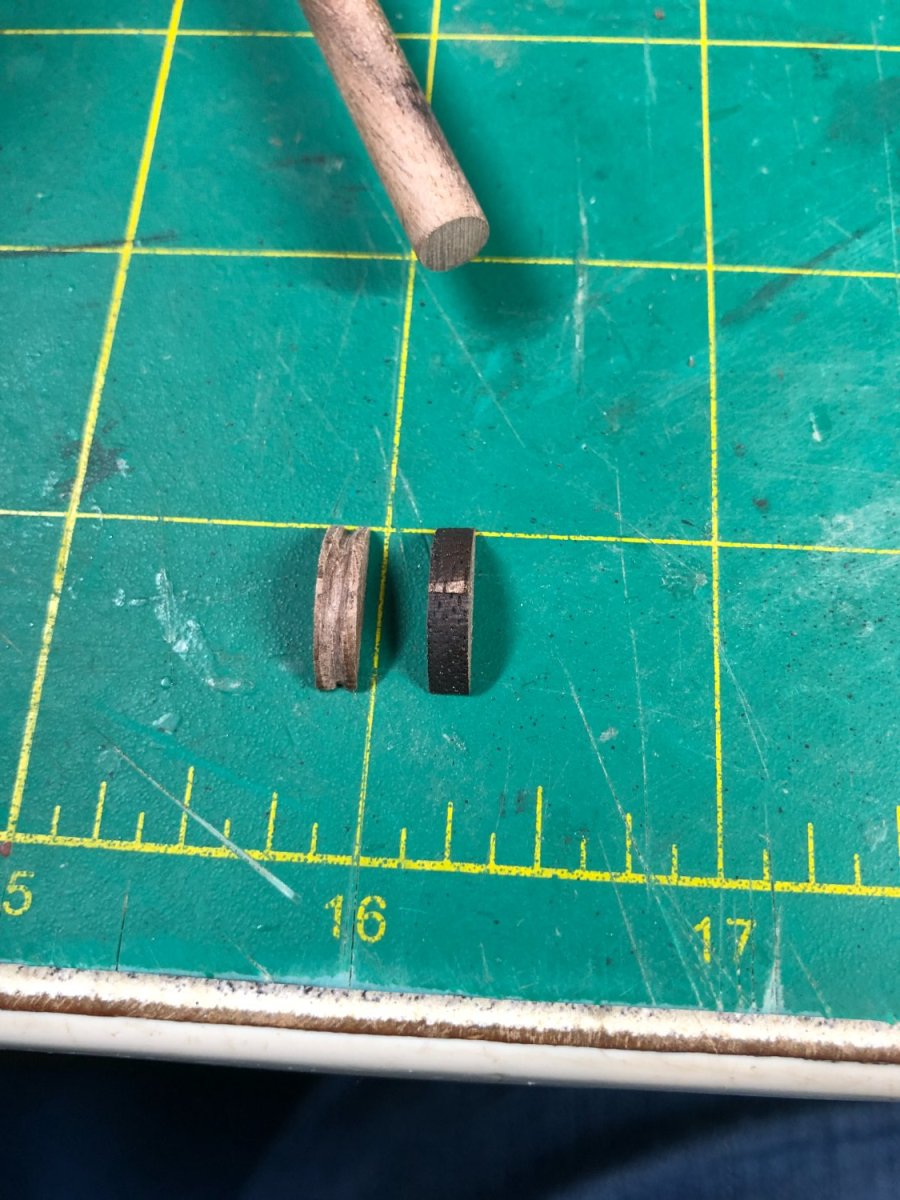
The cleats were cut and sanded:
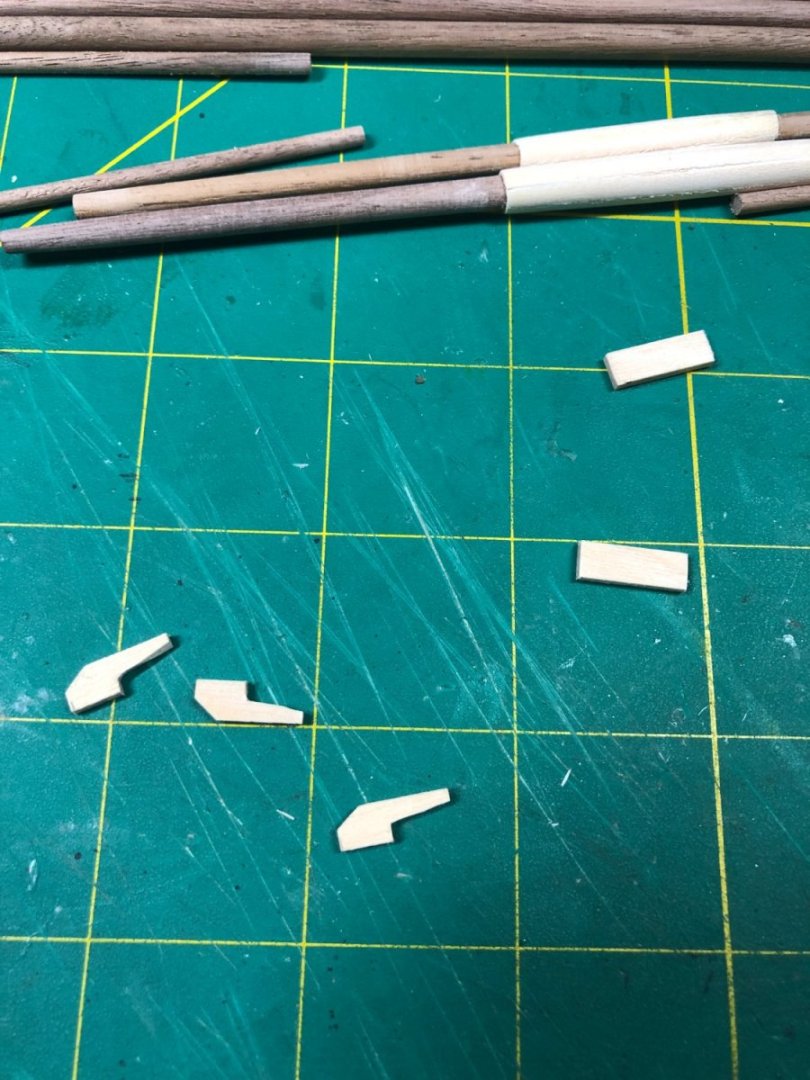
And installed per the plans:
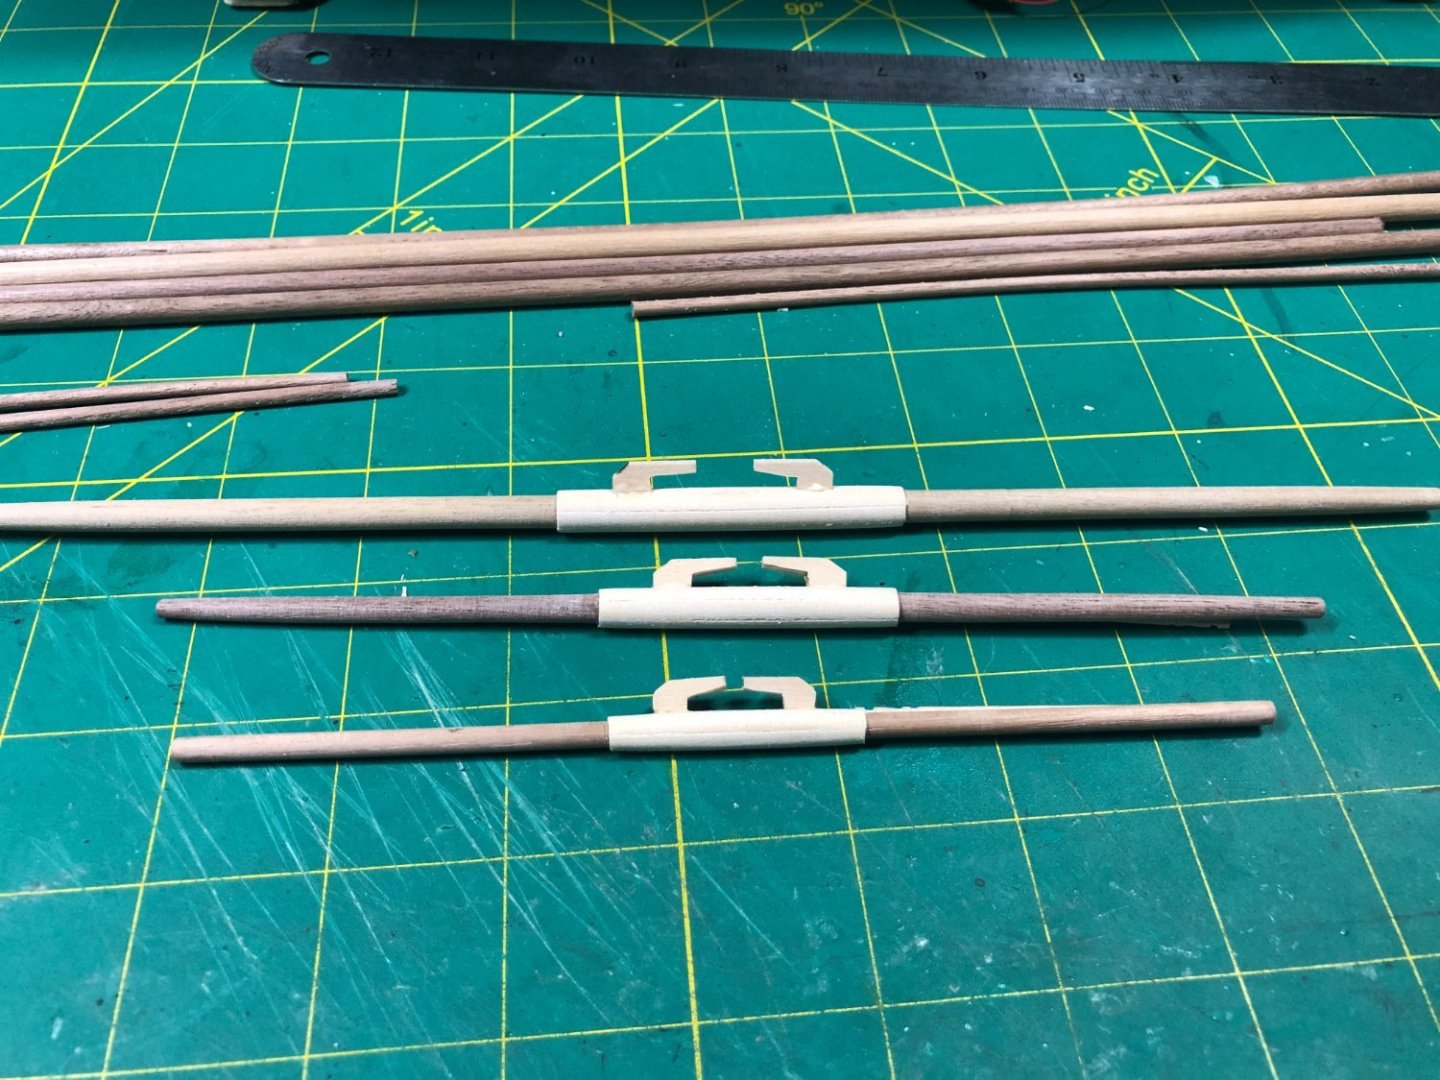
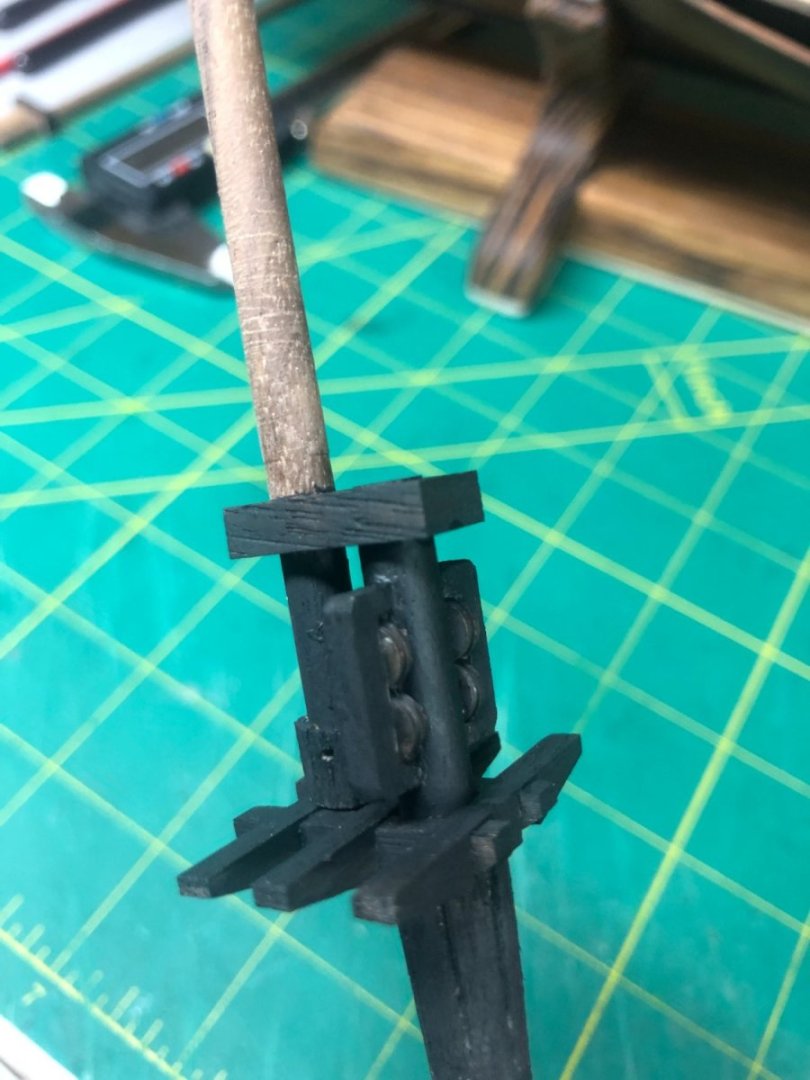
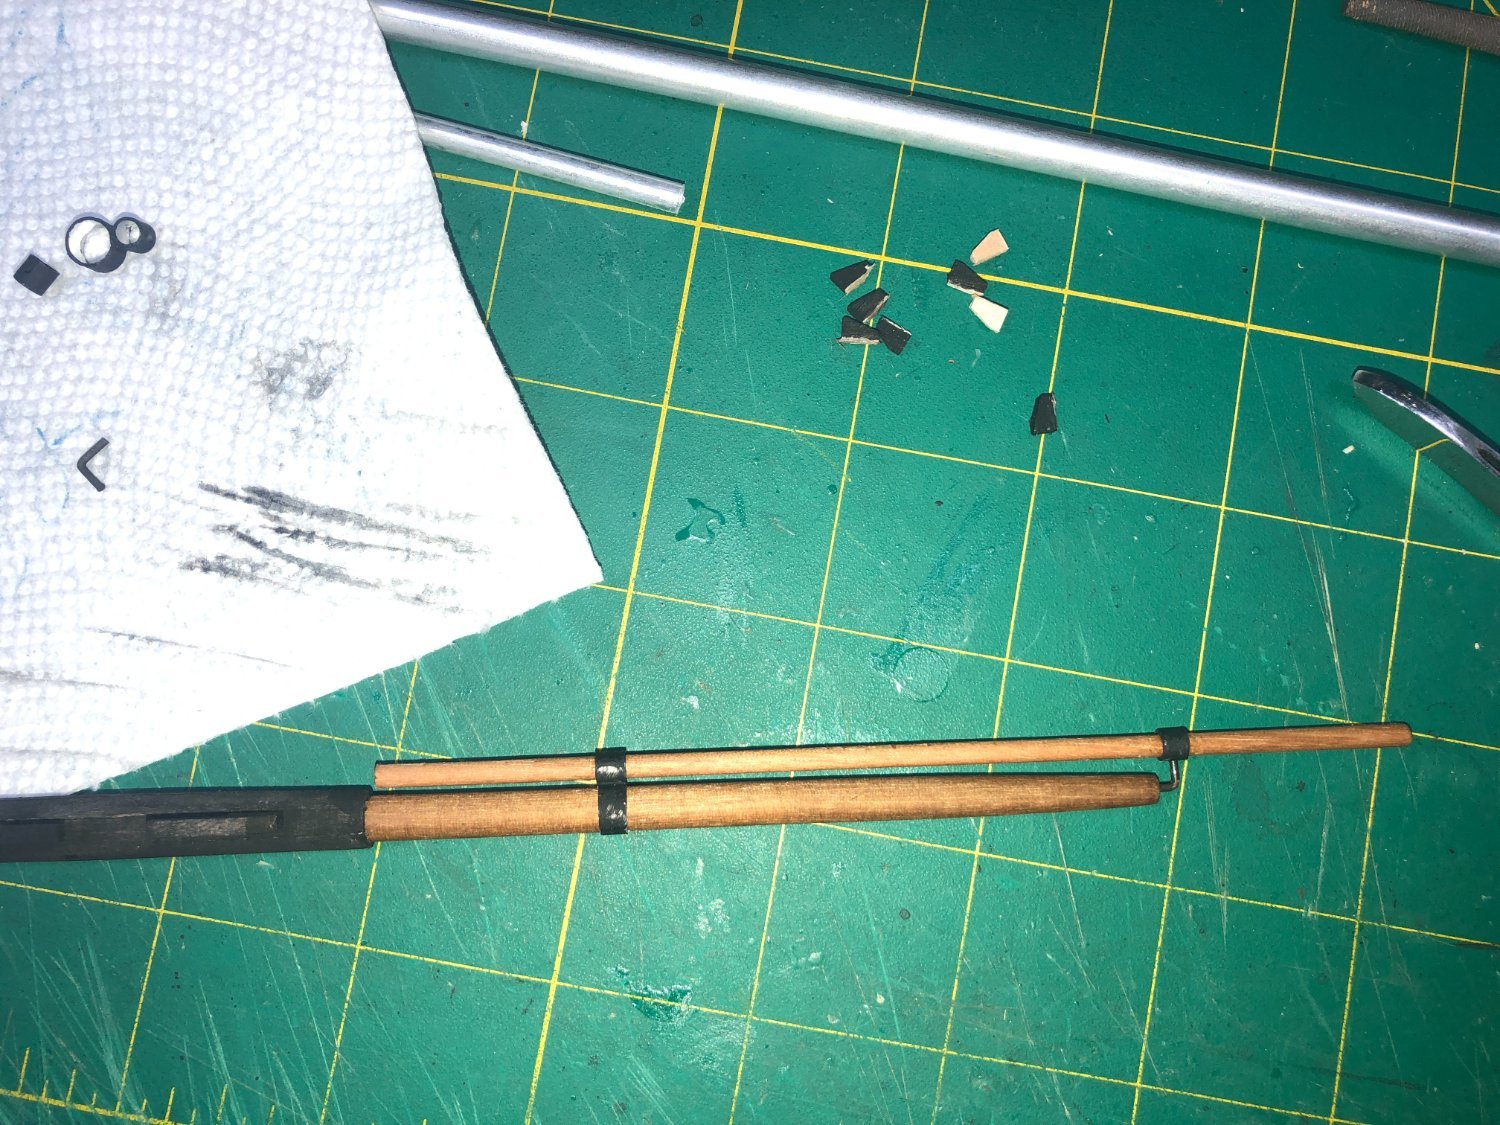
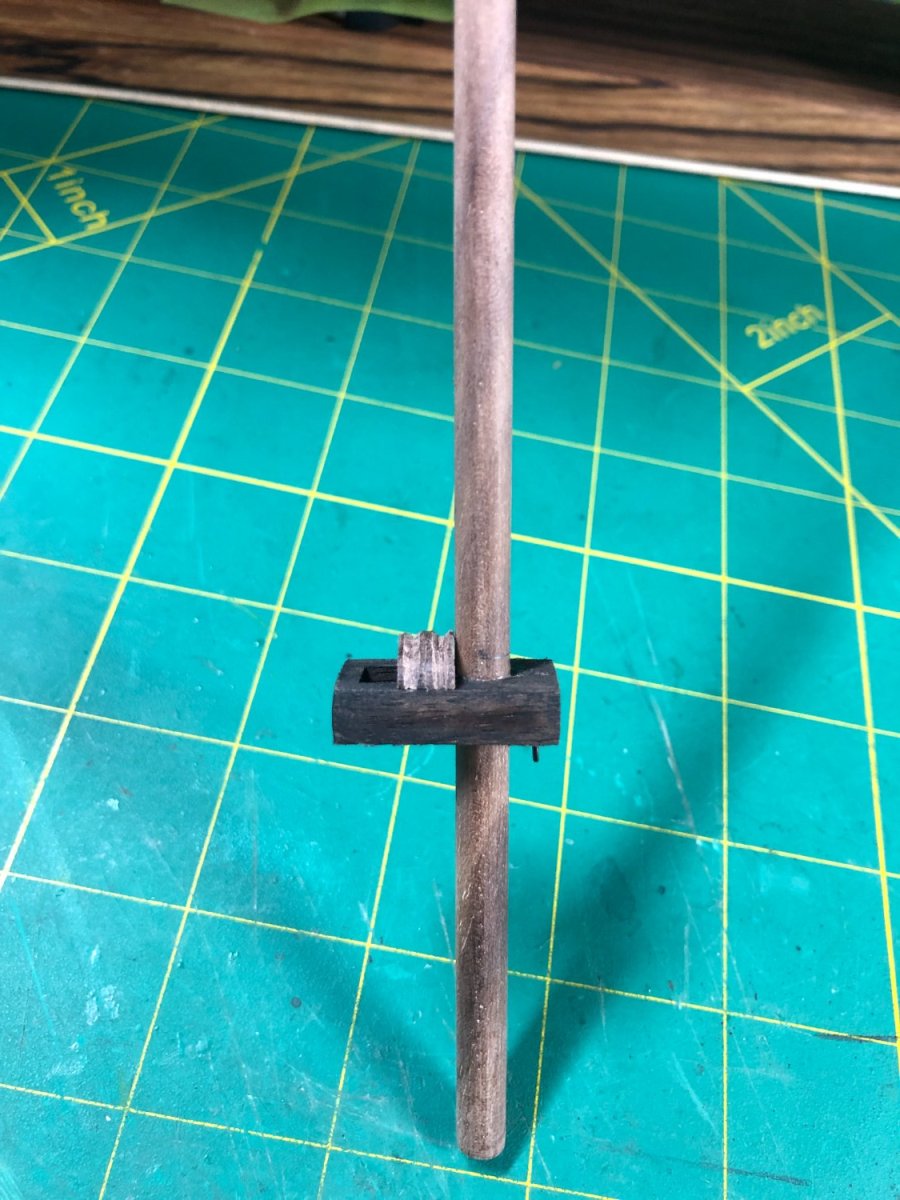
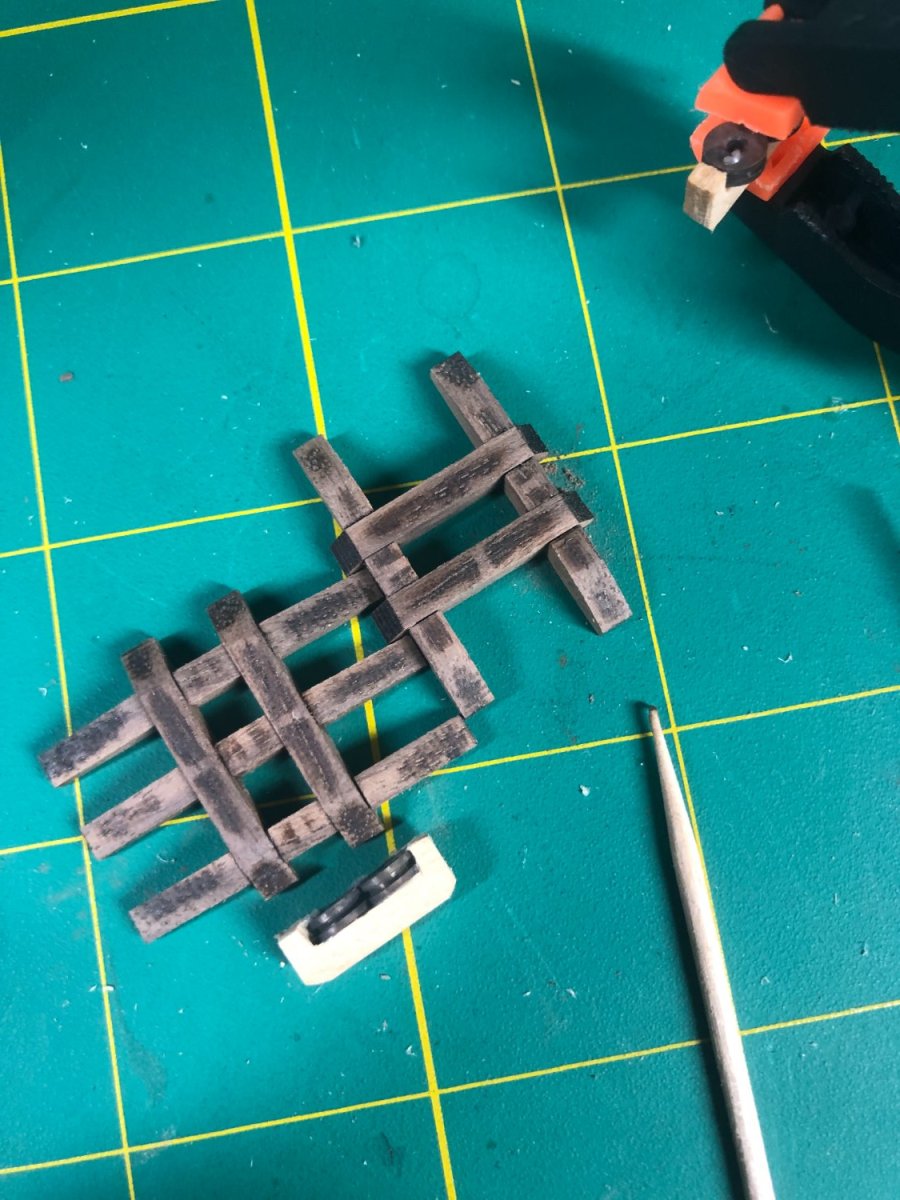
The booms were a bit of conundrum. The kit provided brass wire and flat strips to make the the mounting hardware... what a joke!
I attempted to make a set and they turned out looking like... well, lets just say, they did not look good!
While doing some research, I was going through Tim Moore's log on his Bounty (I use it a lot!) and "borrowed" his method!
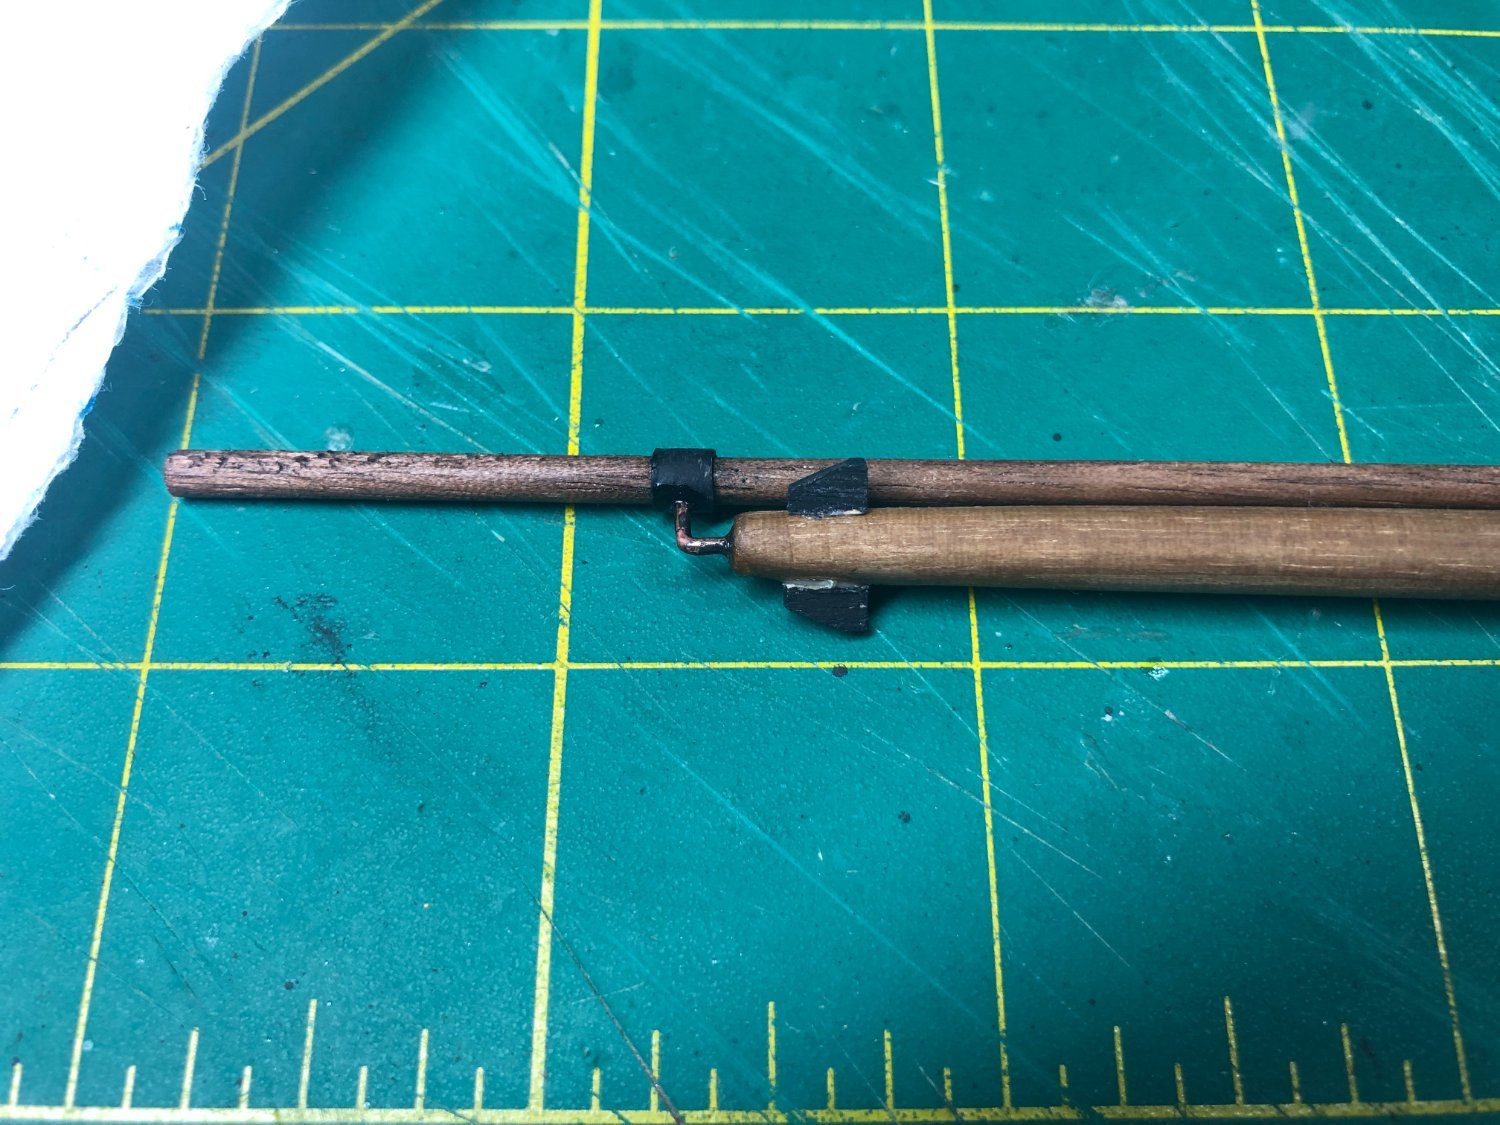
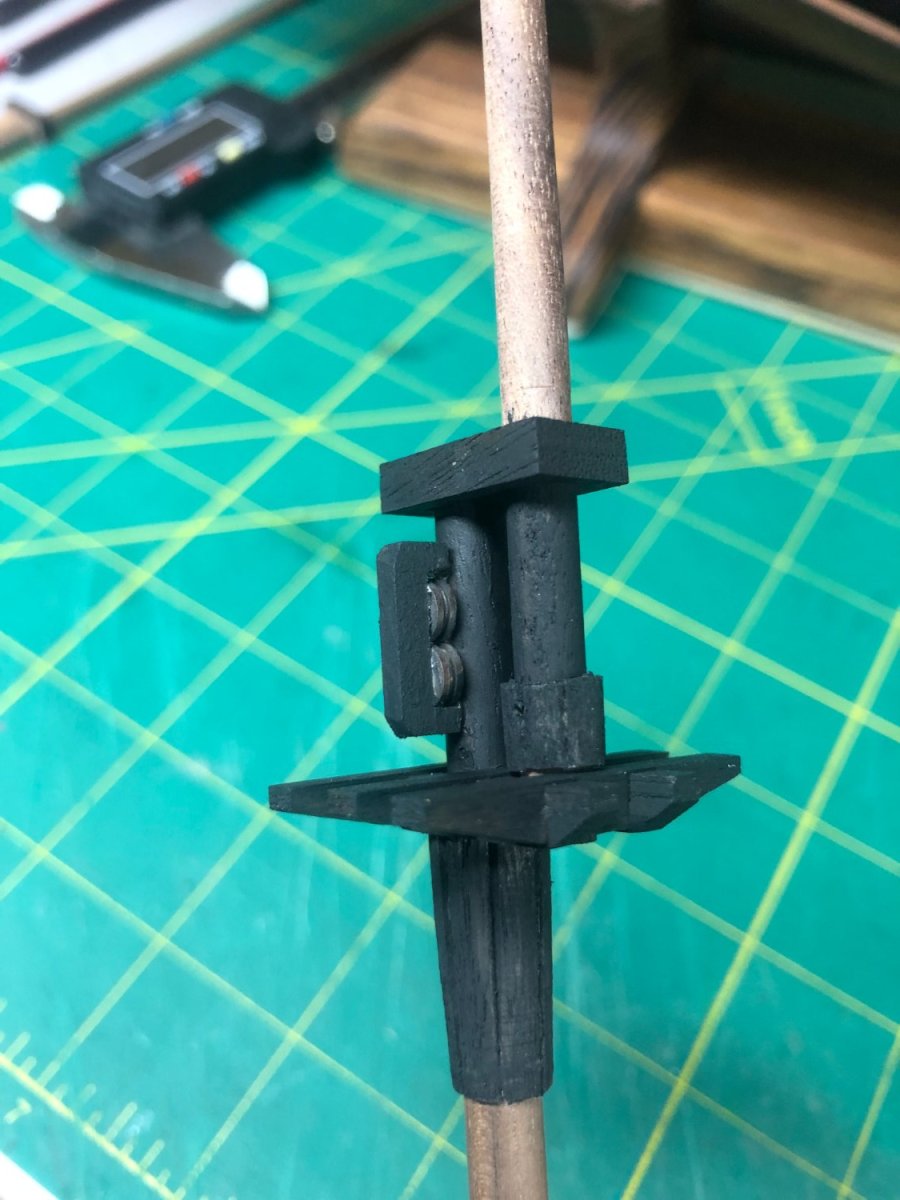
I purchased some small aluminum tubing with I.D.'s similar to the O.D.'s of the yards and booms. Using a miter and handsaw, I cut pieces to size and used CA glue to join them as needed. Additionally, I used the brass wire for the end mount by drilling a small hole in the tube and the yard:
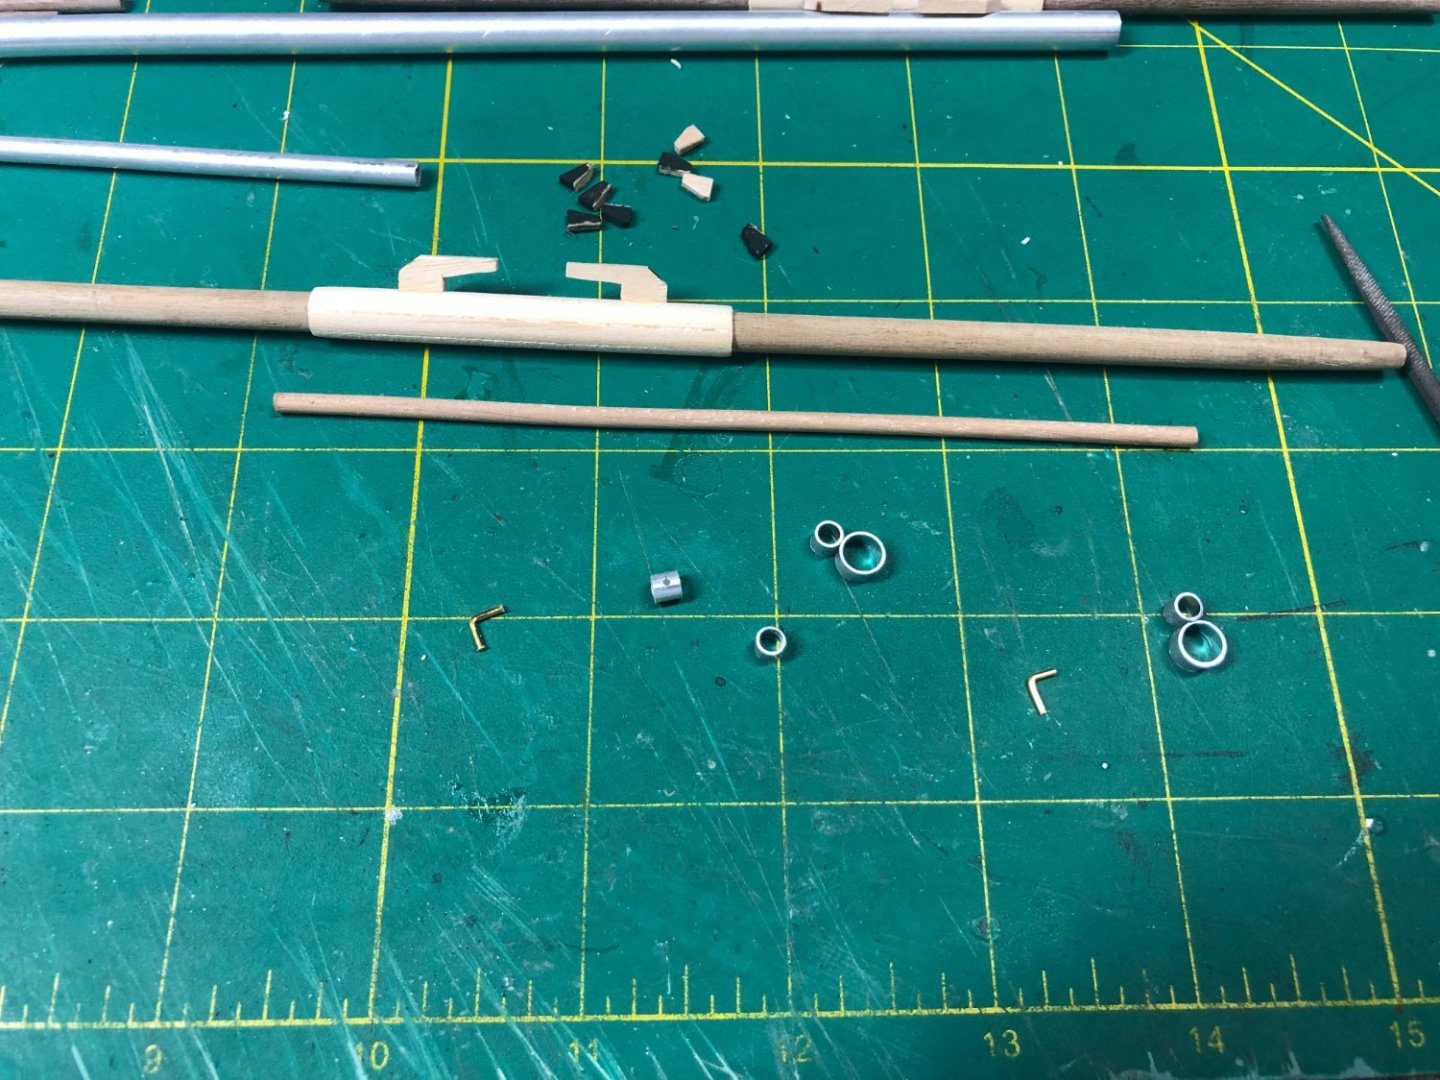
It took some time to figure out a system but in the end, I got a good result. Unfortunately, painting the aluminum is not working out as the paint just wipes off! I'll be touching the pieces up as needed. For future yards, I purchased Jax Aluminum Blackener to solve this problem. I'll have it in time for the next set.

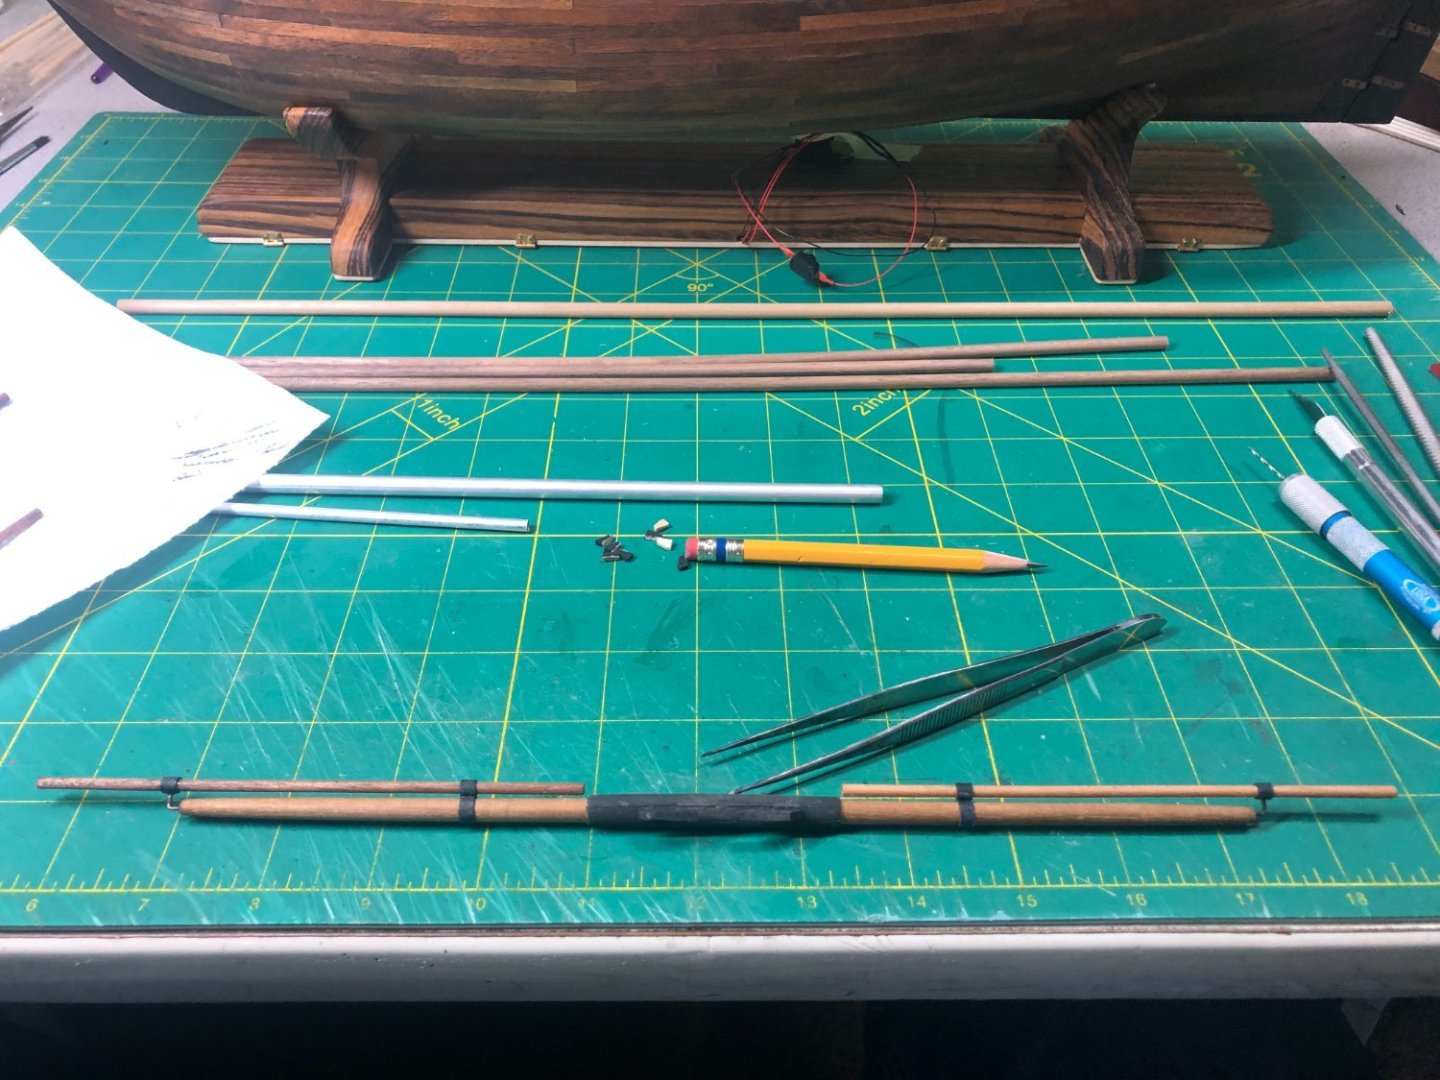
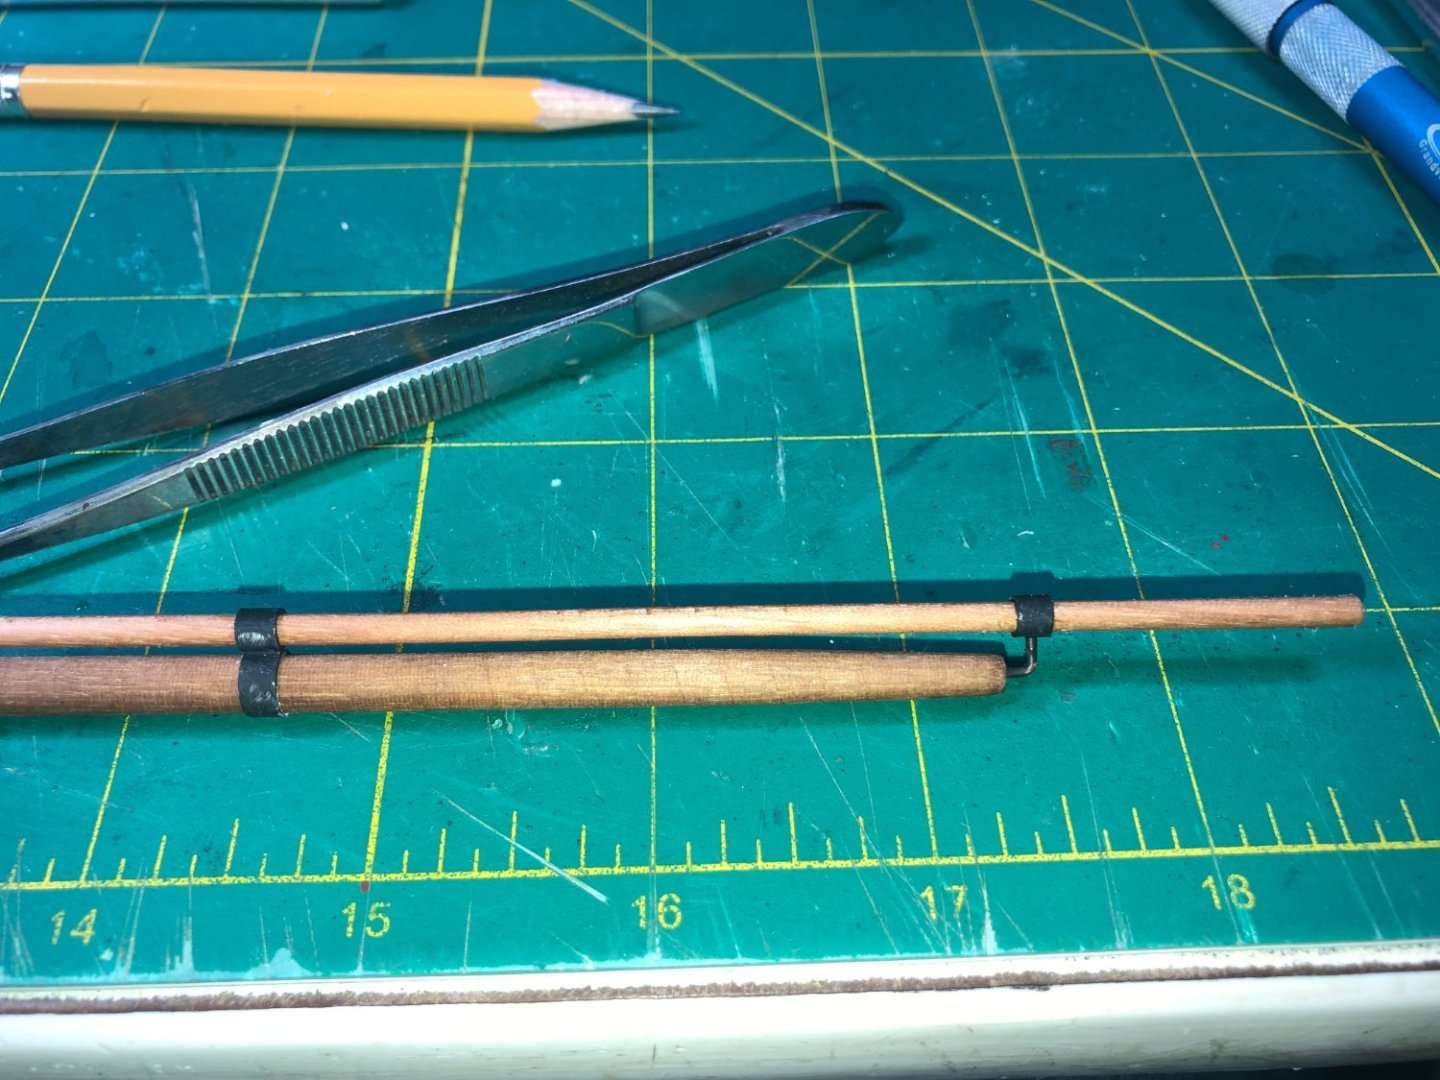
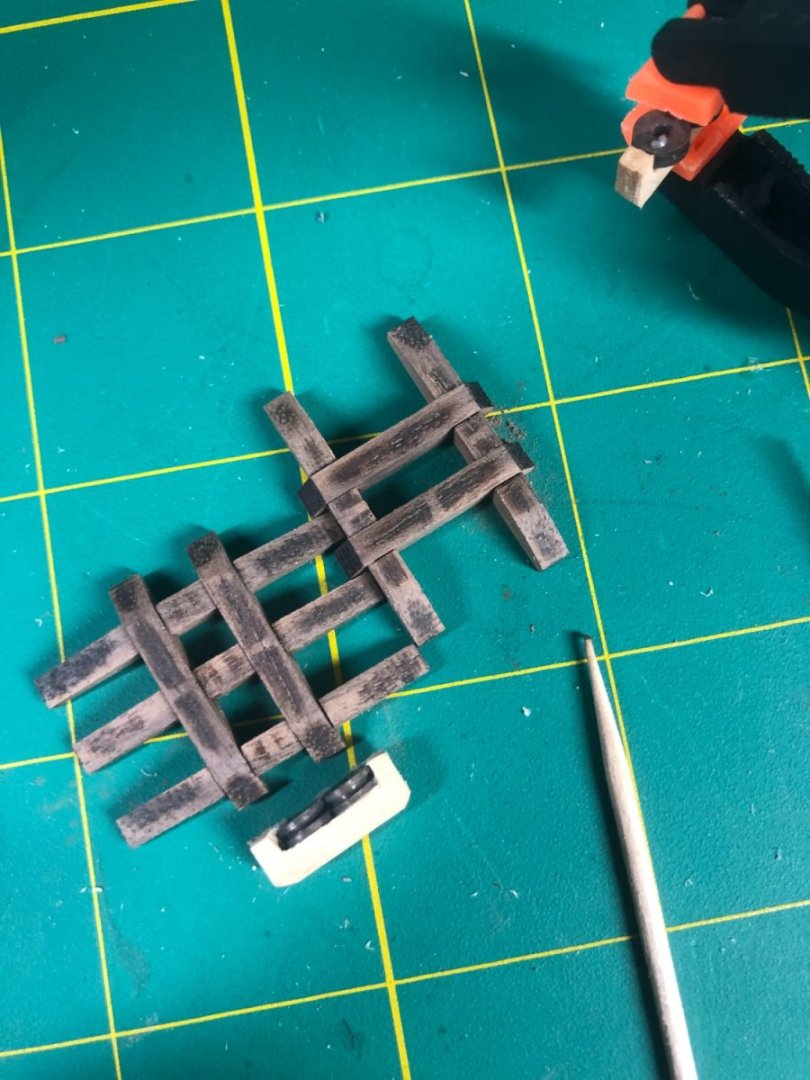
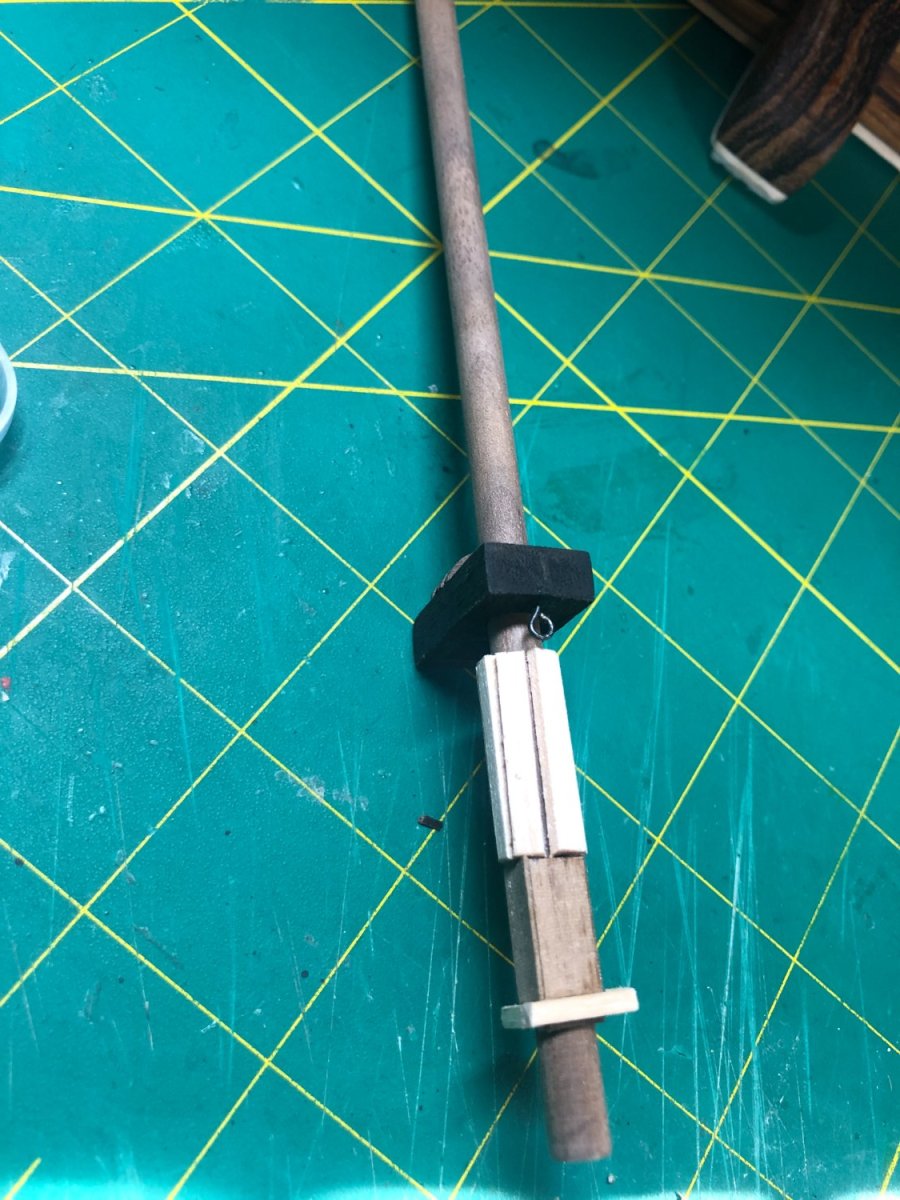
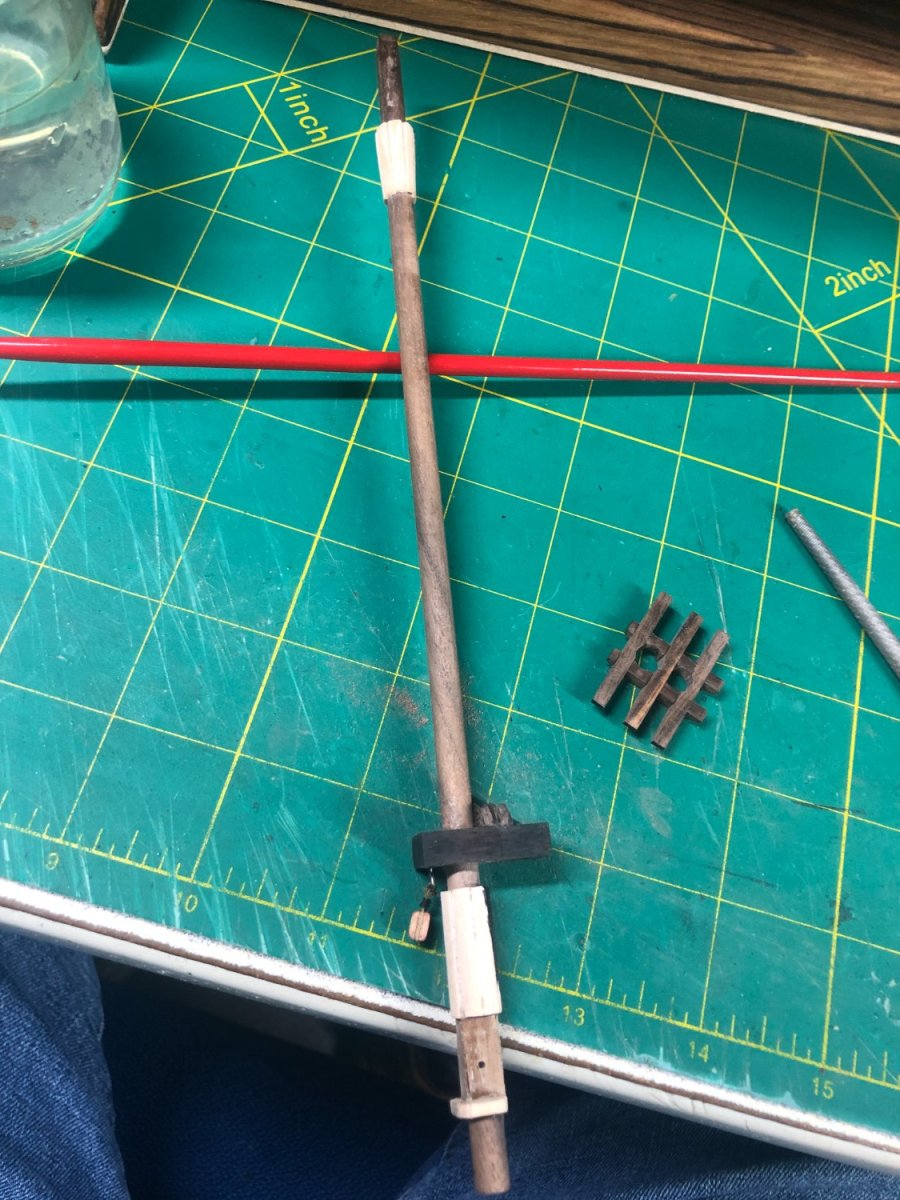
Then the end cleats were made and installed:

Yards assembled for the fore mast:
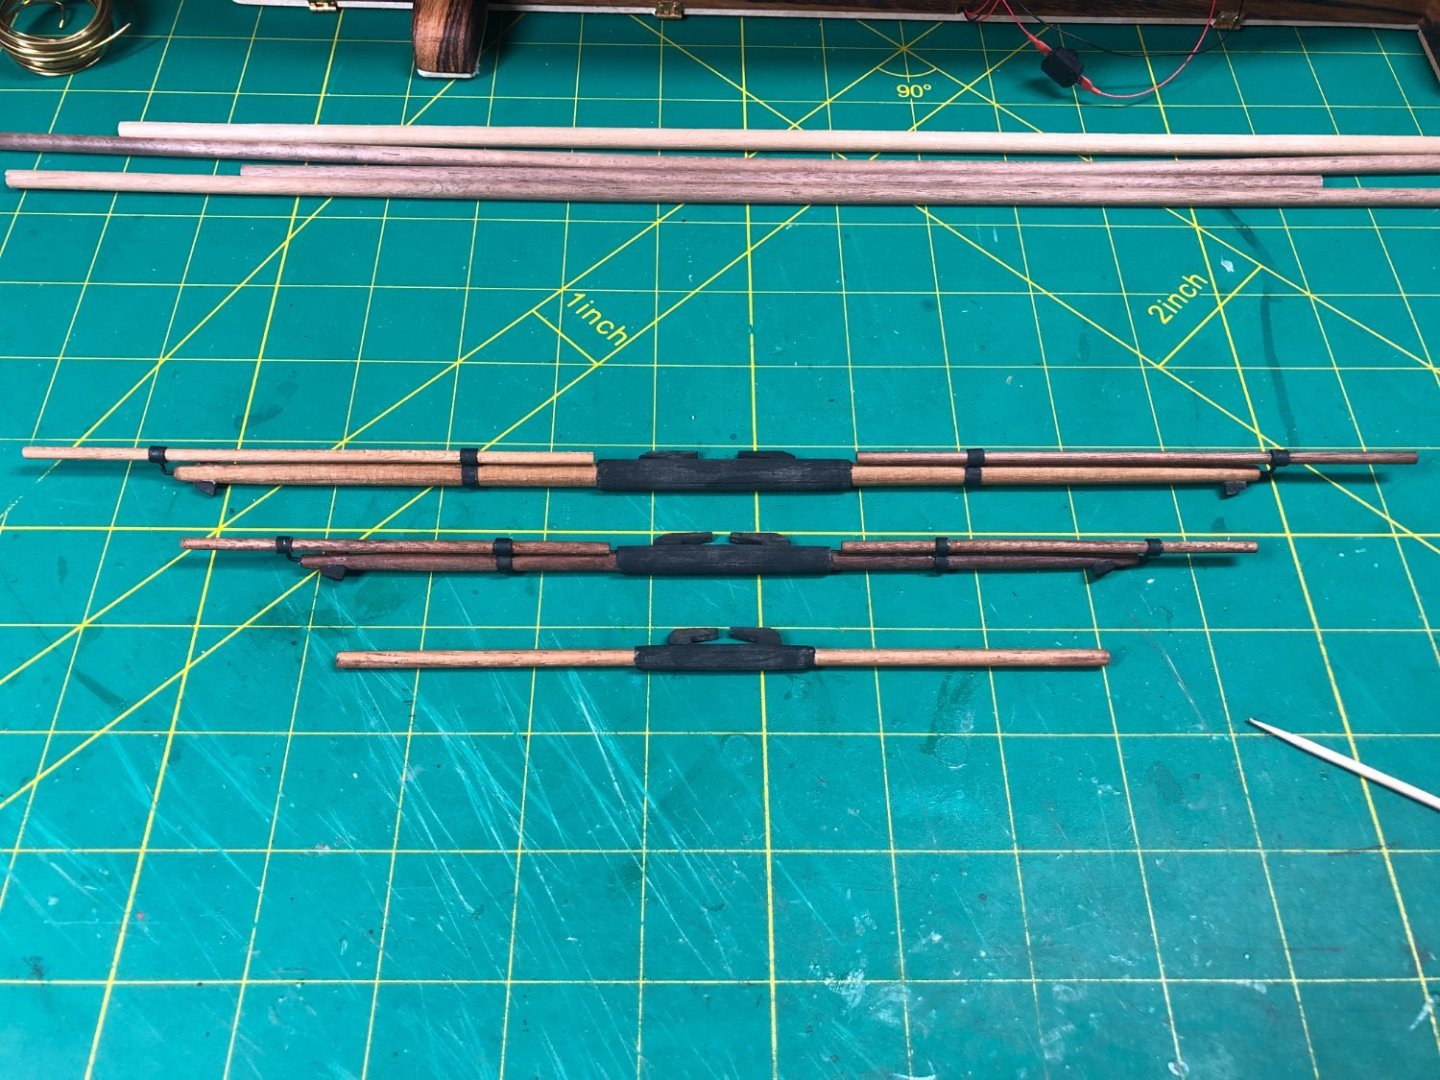
Footropes and the beginnings of the blocks and tackle in progress:
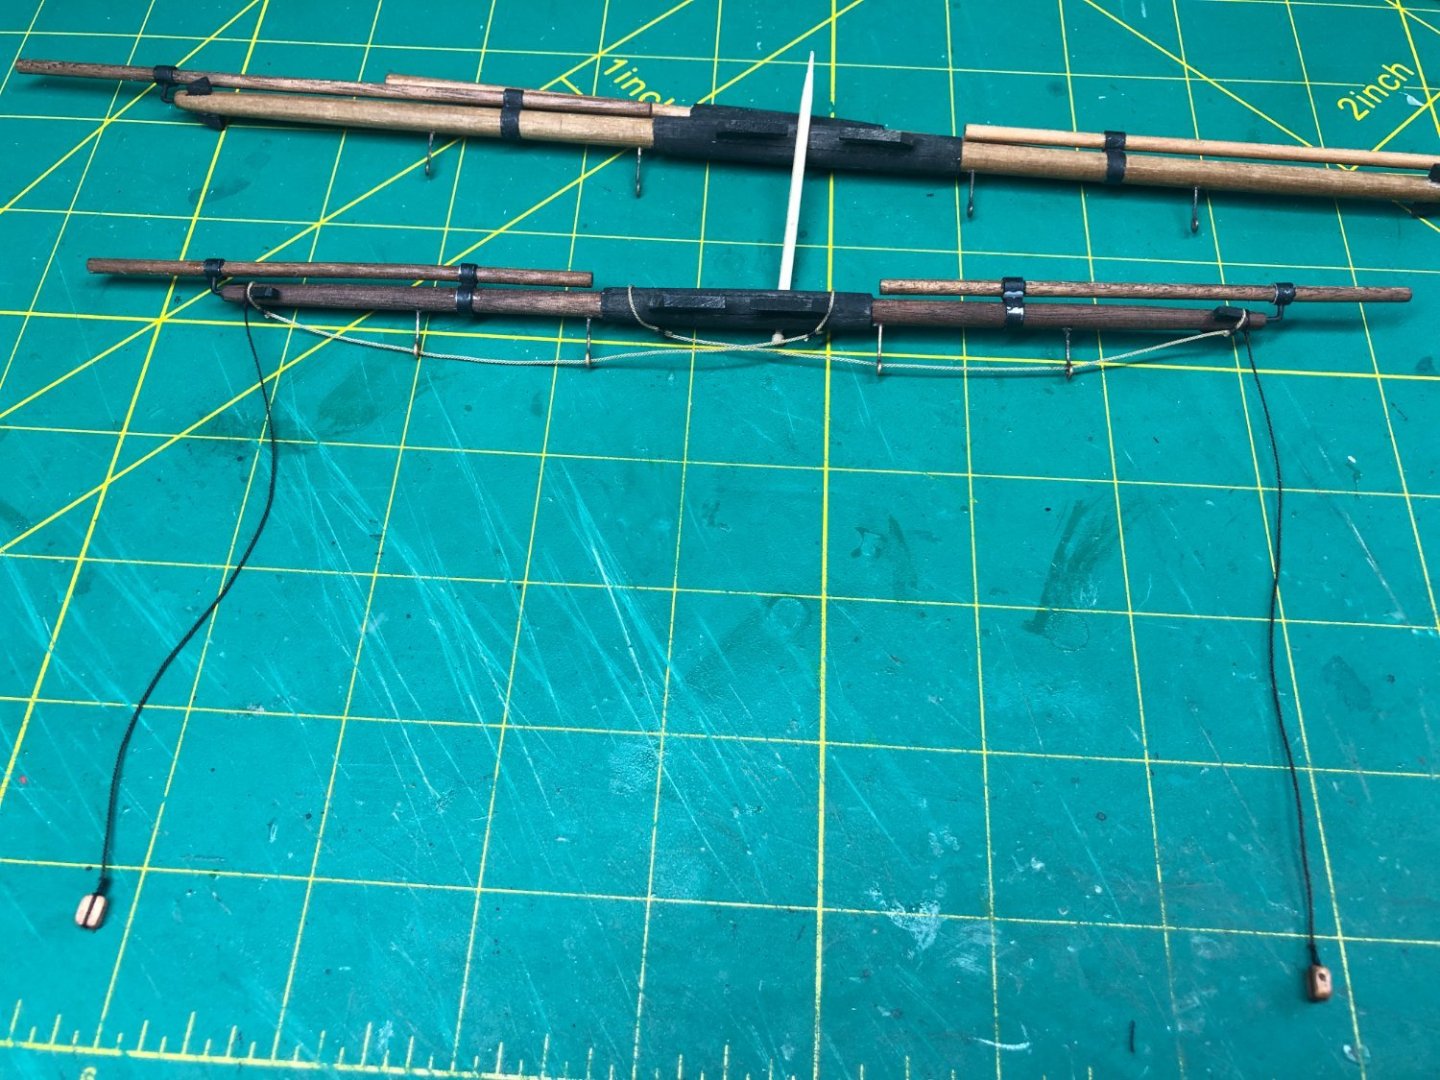
I'll post a few more pictures once the yards are done for the fore mast. The process is identical for the main mast and I'll not bore you by showing the process all over again! Once I get started on the mizzen mast, I'll post more details.
- Knocklouder, Dave_E, mort stoll and 4 others
-
7
-
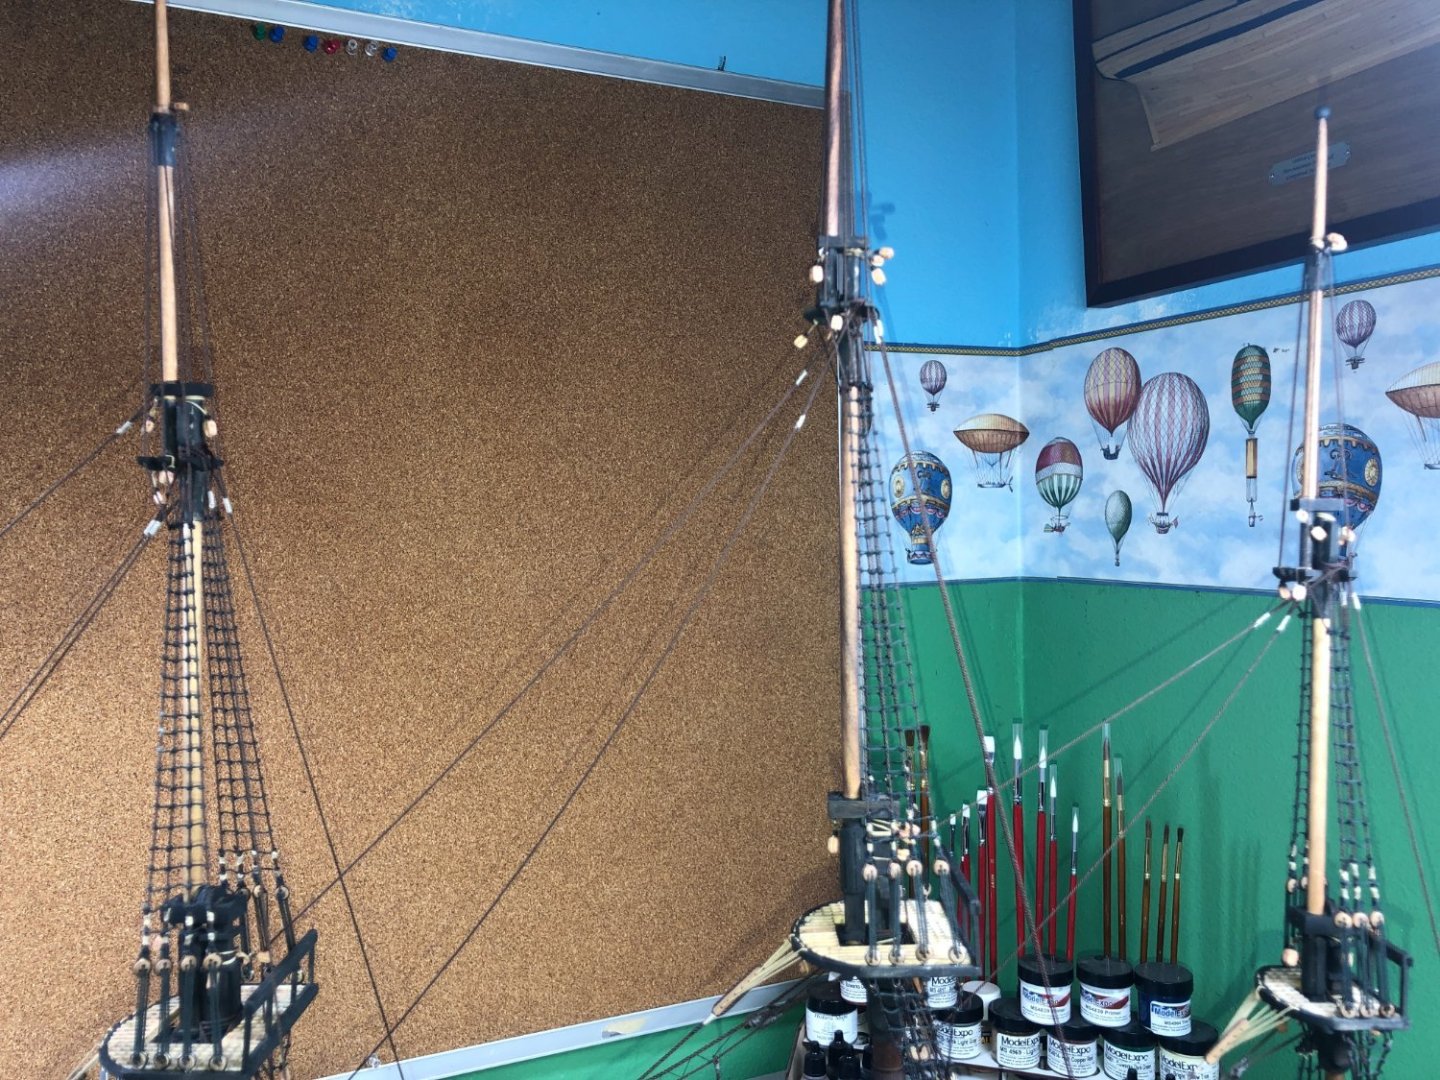
Standing rigging completed!
Some odd things with this kit on the location of the backstay tie offs... took a while to figure out but that's the norm for this kit!


I'll start on the yards next. Also, I'll get some better pictures of the standing rigging in a few days. Not really a lot to talk about as the rigging was pretty straightforward. Especially, using the books mentioned further up the log!
Next up date during the yard construction.
-
Thanks Dave and Andrew. Appreciate the comments... getting close, was hoping to complete her before boating season gets going. Not gonna make it but can't rush these things!
22 drawings that breakdown the rigging and I'm only on the sixth!
Plus, I still need to make all of the yards!
-
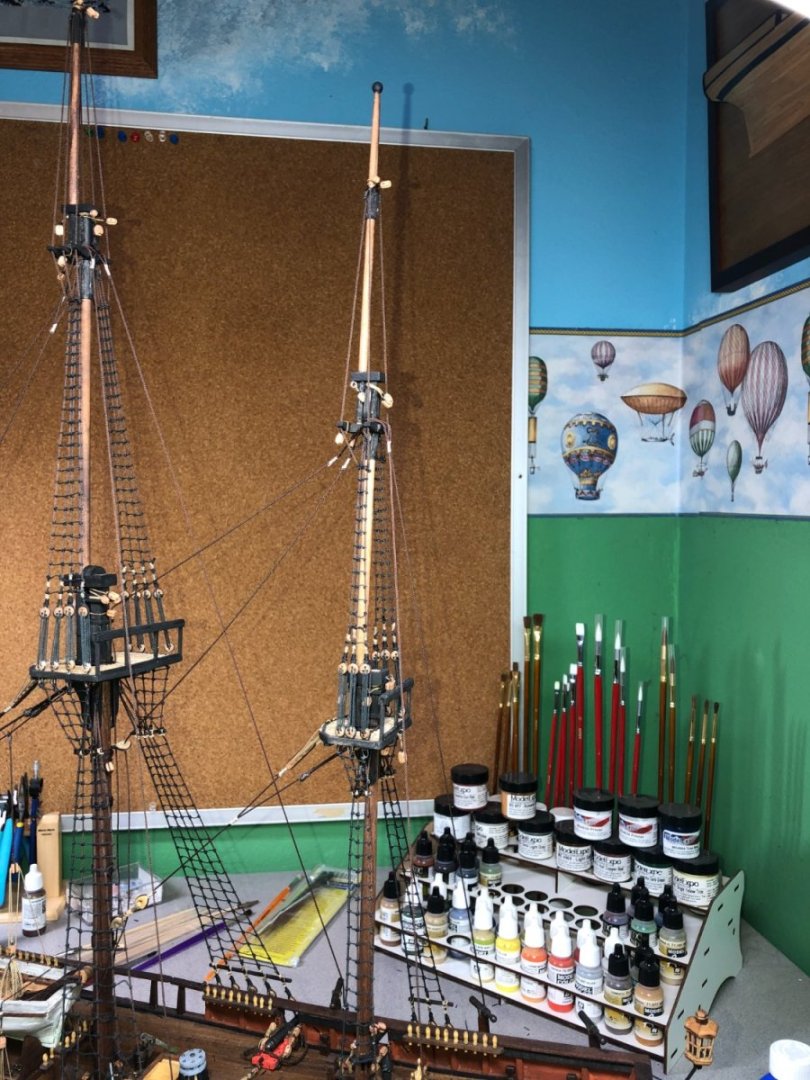
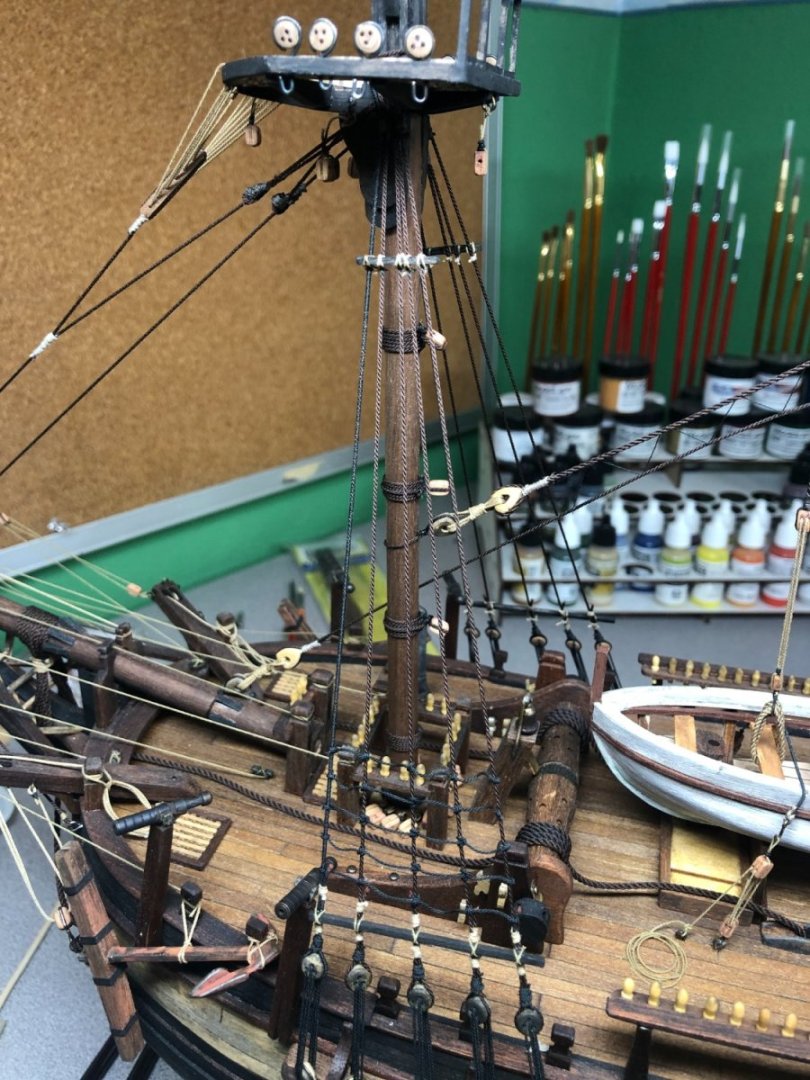
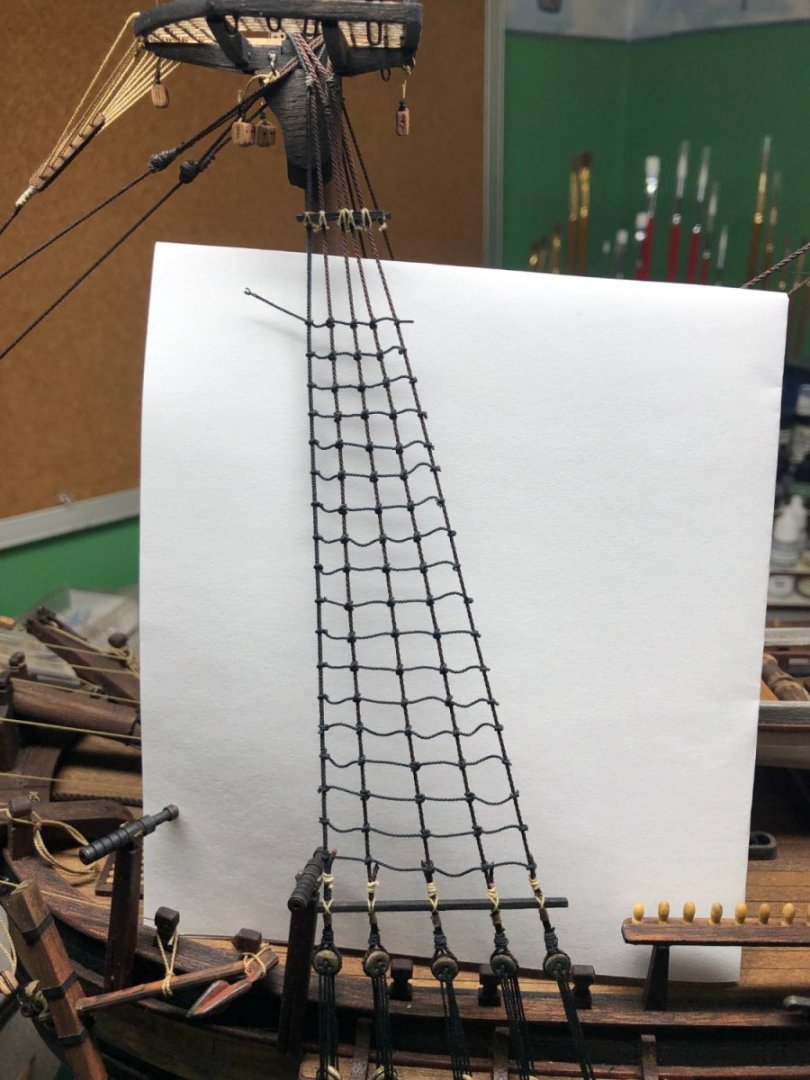
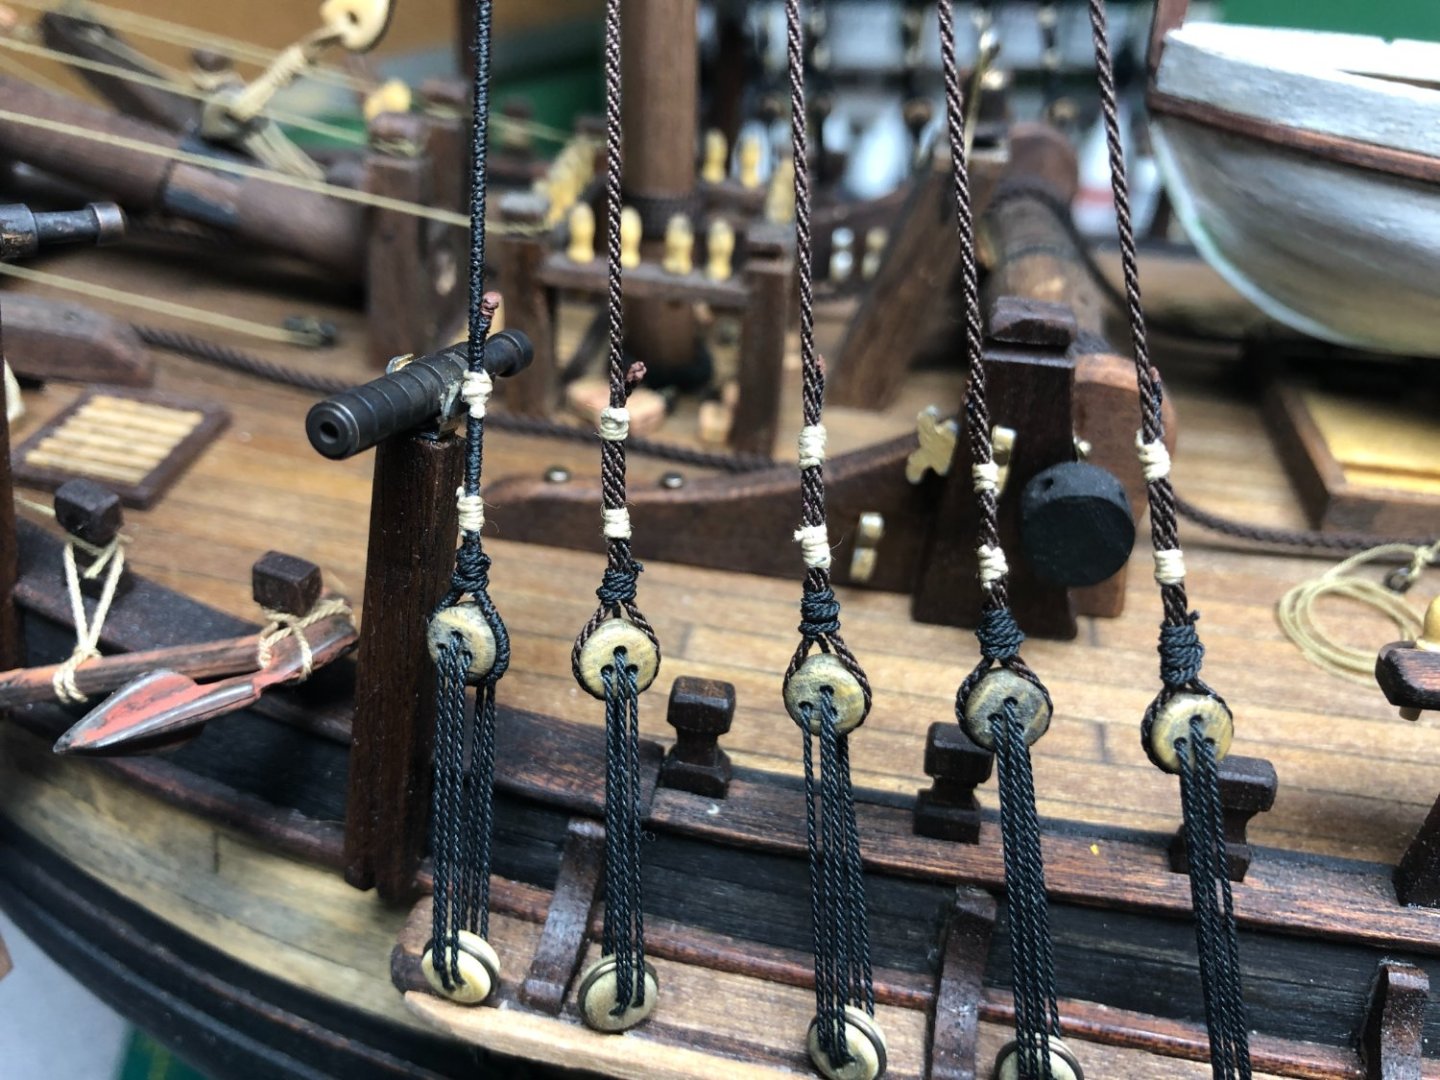
After 925+ knots, the ratlines are complete!!
The shrouds are completed and a good portion of the standing rigging is in place ready to be tied-down.
Not much commentary for the below pictures... just a LOT of clove hitches!


- AJohnson, TOM G, mort stoll and 1 other
-
4
-
On 3/11/2023 at 10:59 AM, LER said:
What a great build I curious though, where did you get the balusters for the railings around the stair wells?
Ha!
Thanks for the comment!
I laugh because most have not noticed or bothered to mention them!
Those are "Fancy toothpicks" purchased at the grocery store... worked out pretty well!
Thanks for stopping in and commenting.
I am currently working on the shrouds and ratlines... port side is done, starboard side in progress.
An update coming soon!
- scrubbyj427 and Dave_E
-
2
-
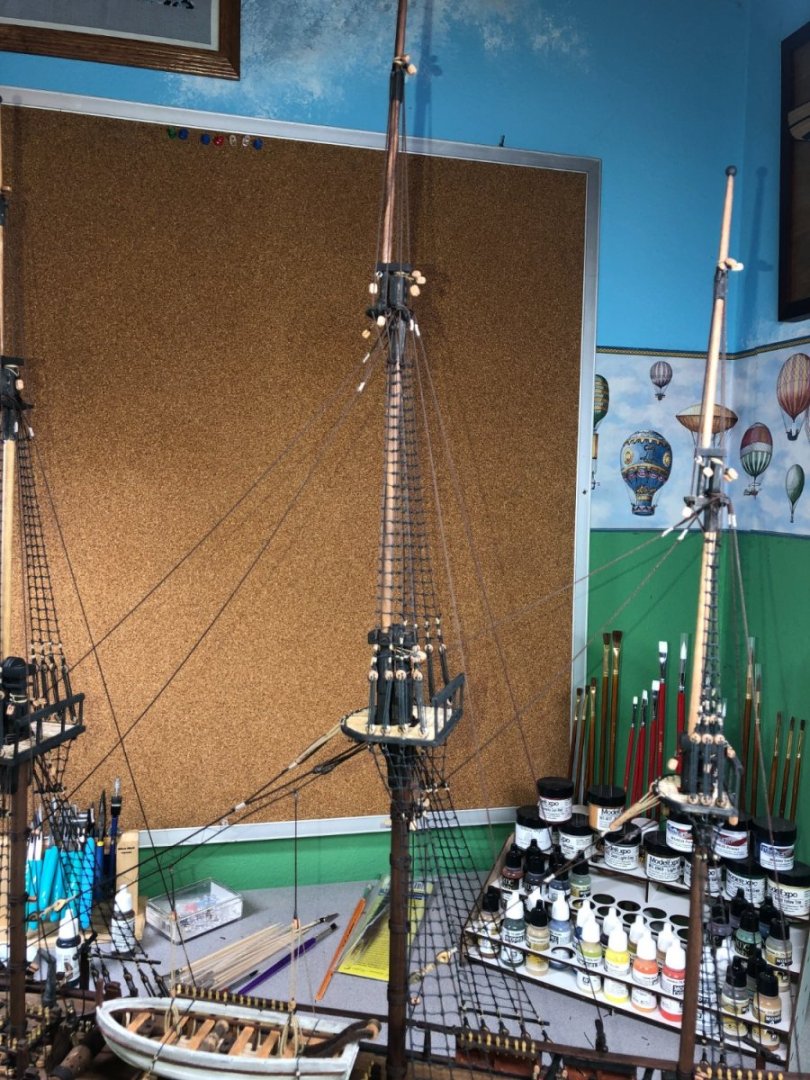
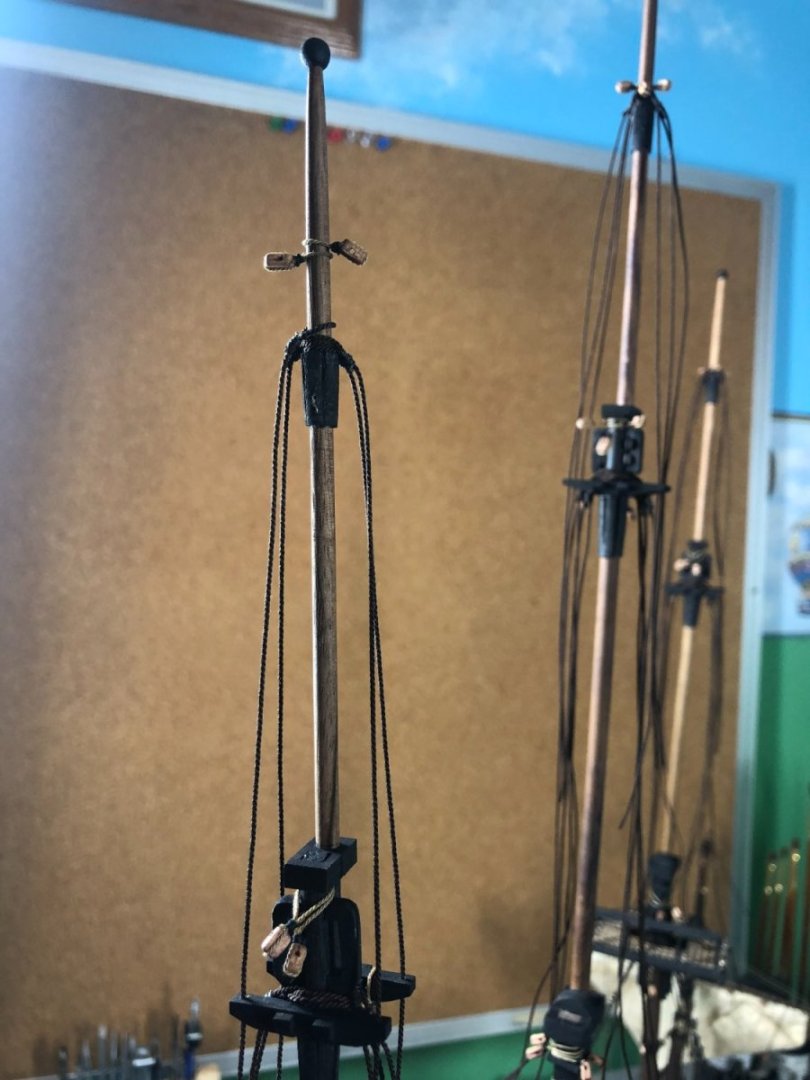
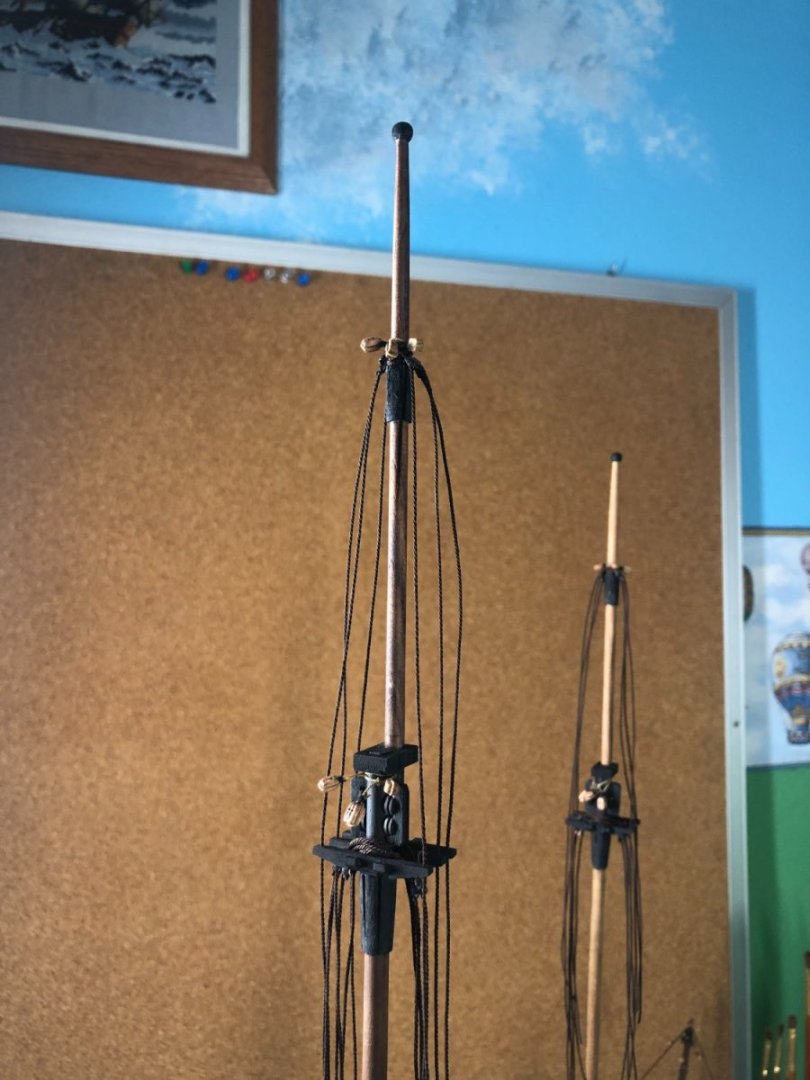
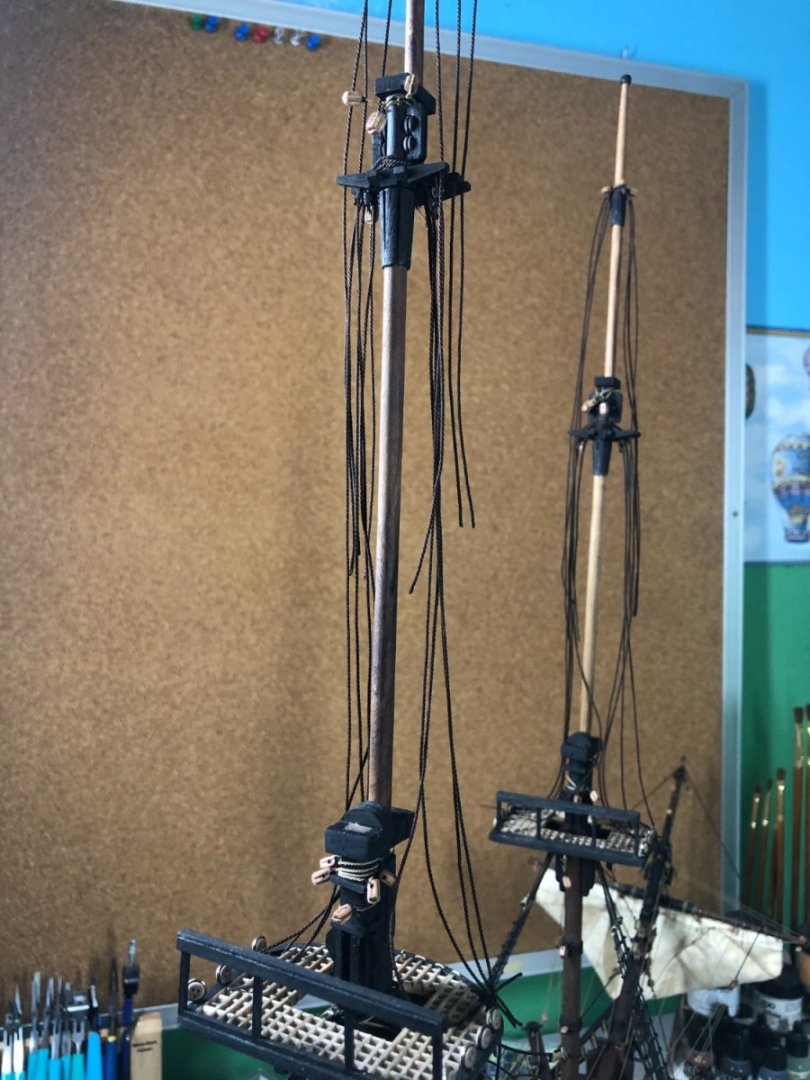
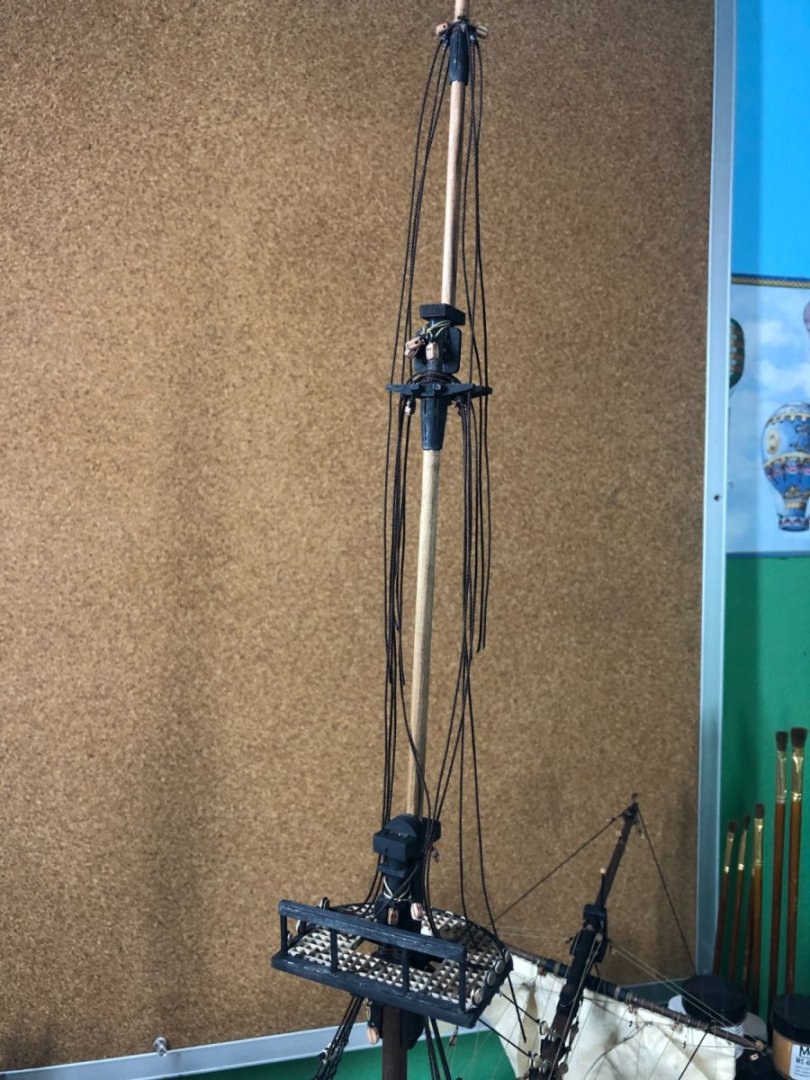
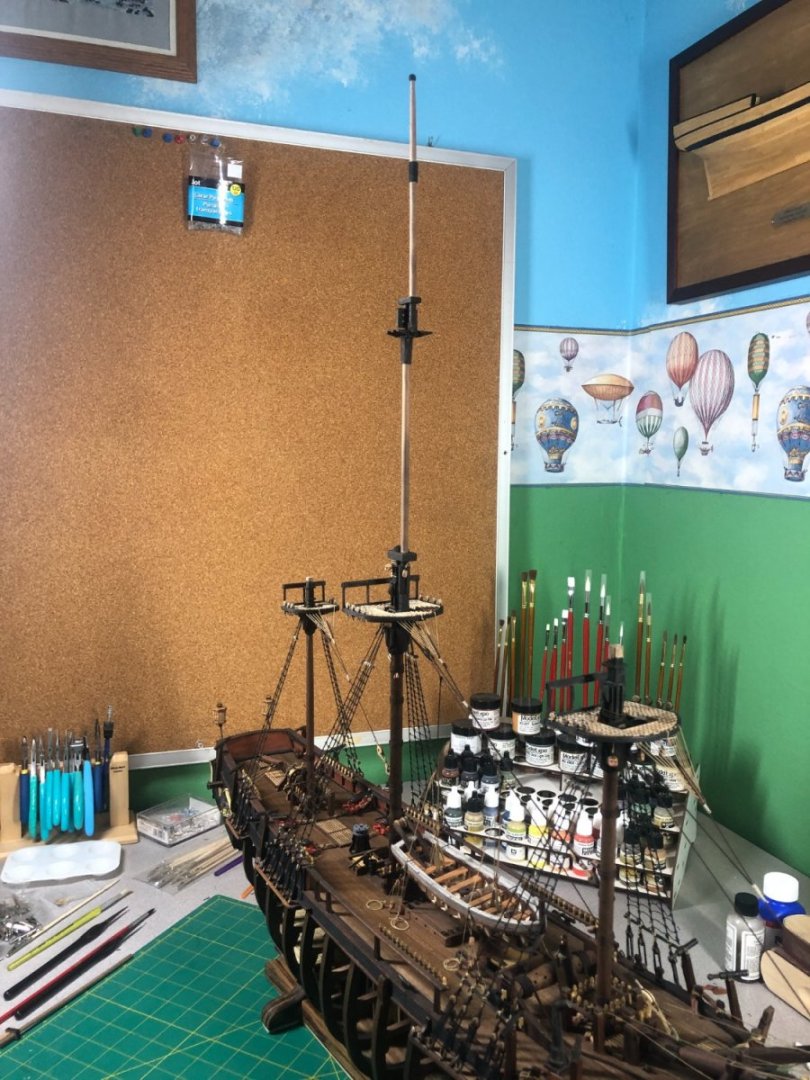
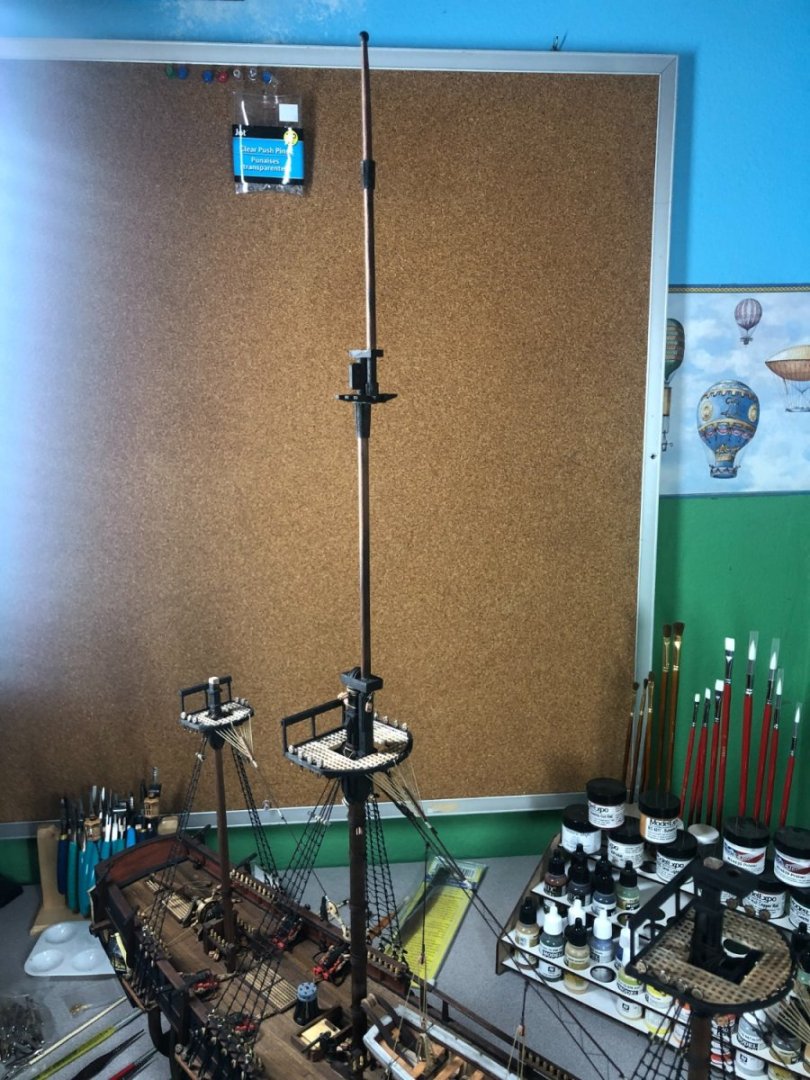
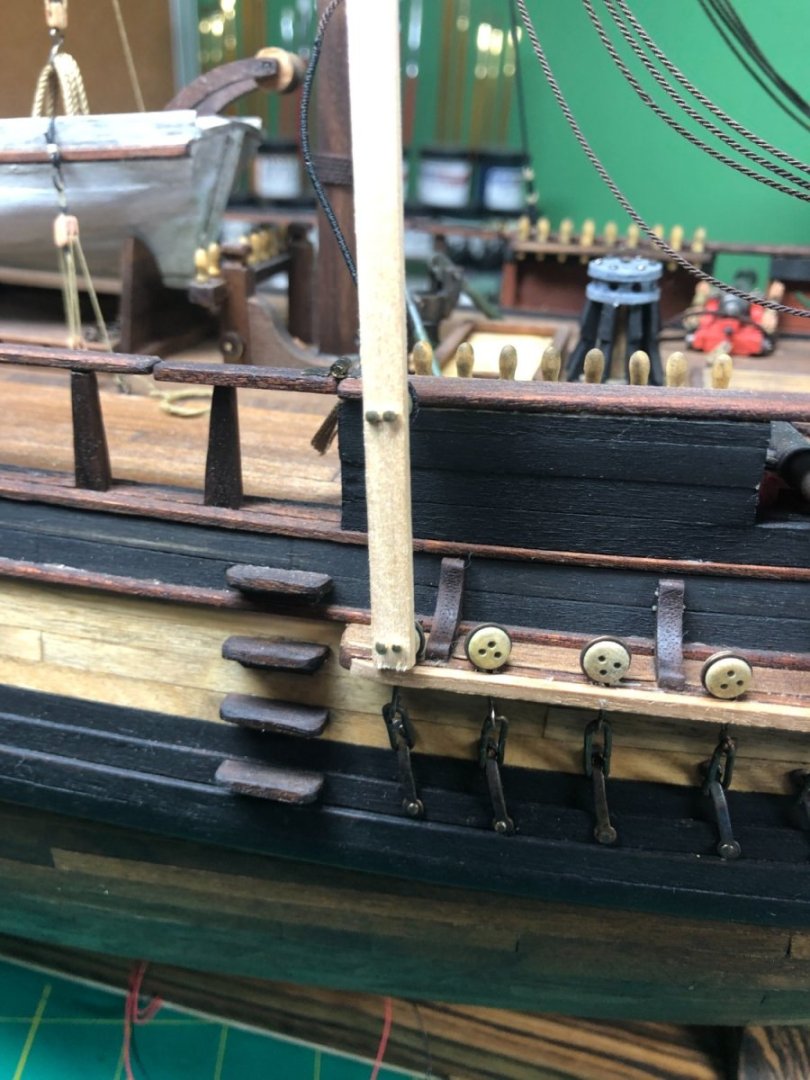
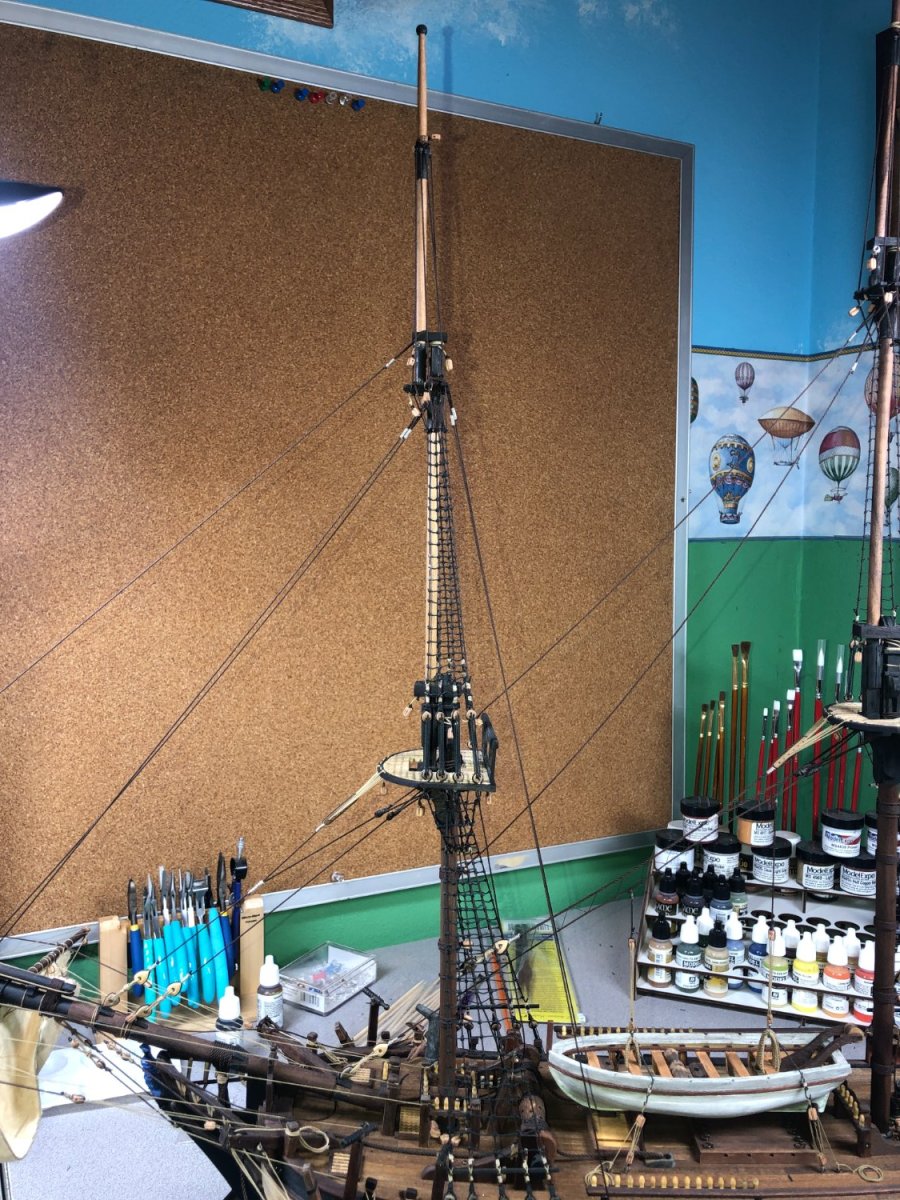
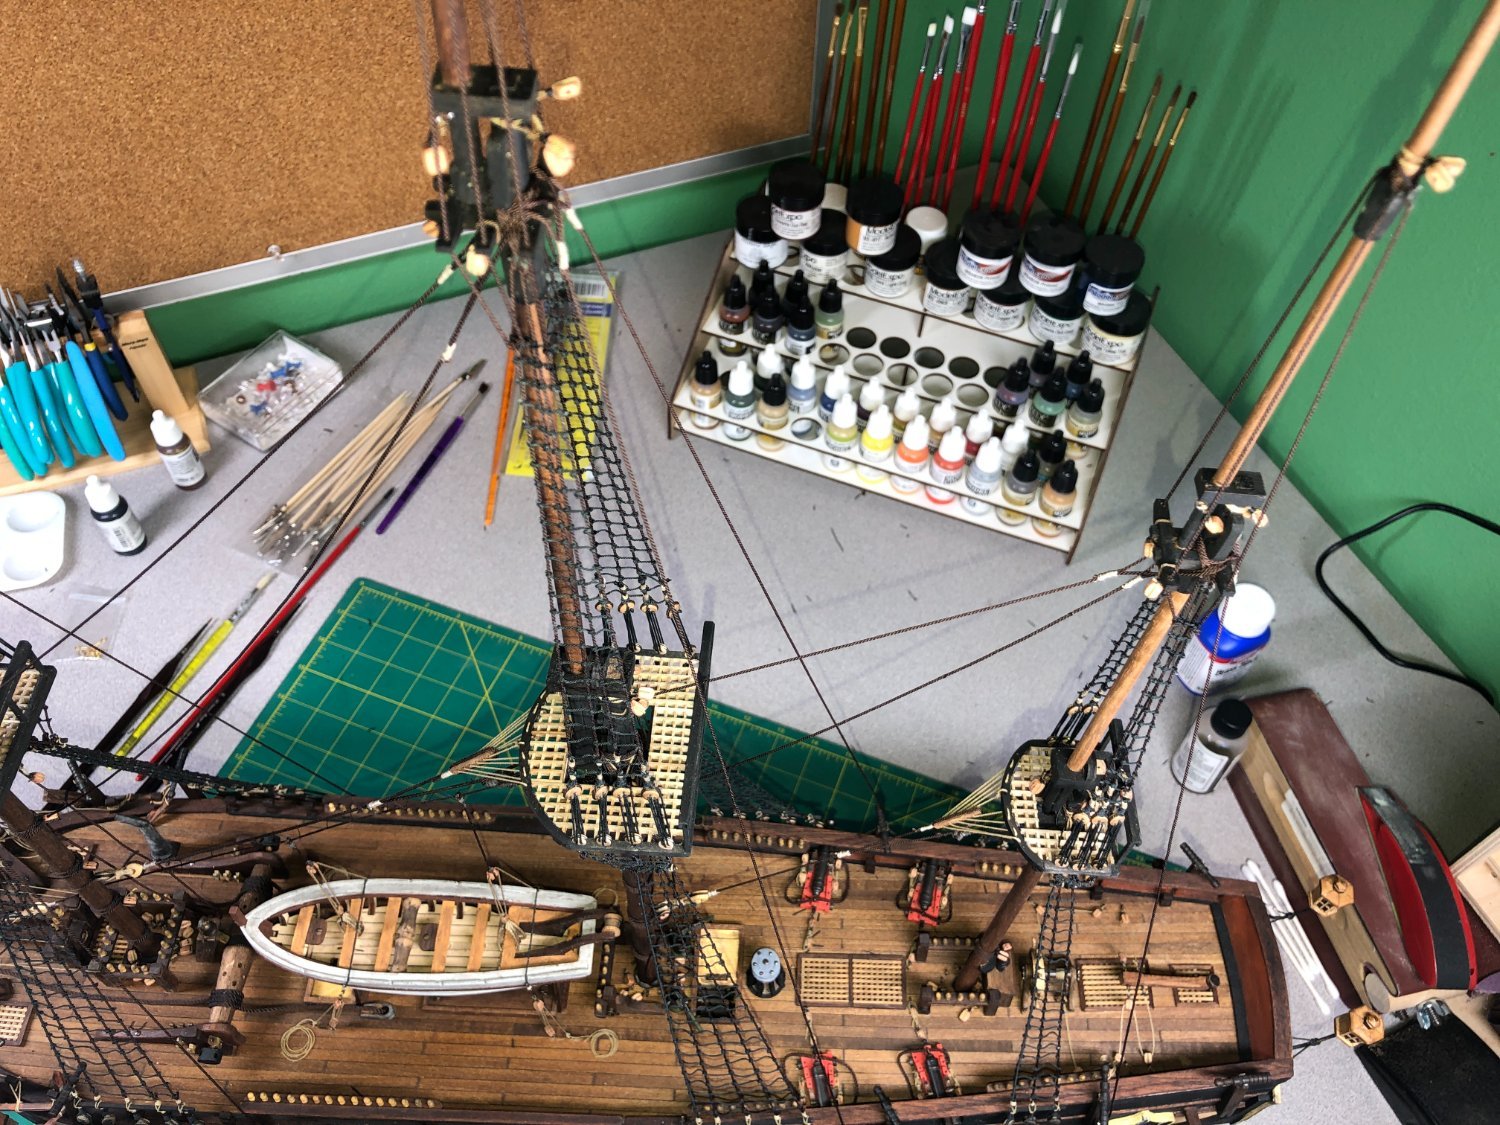
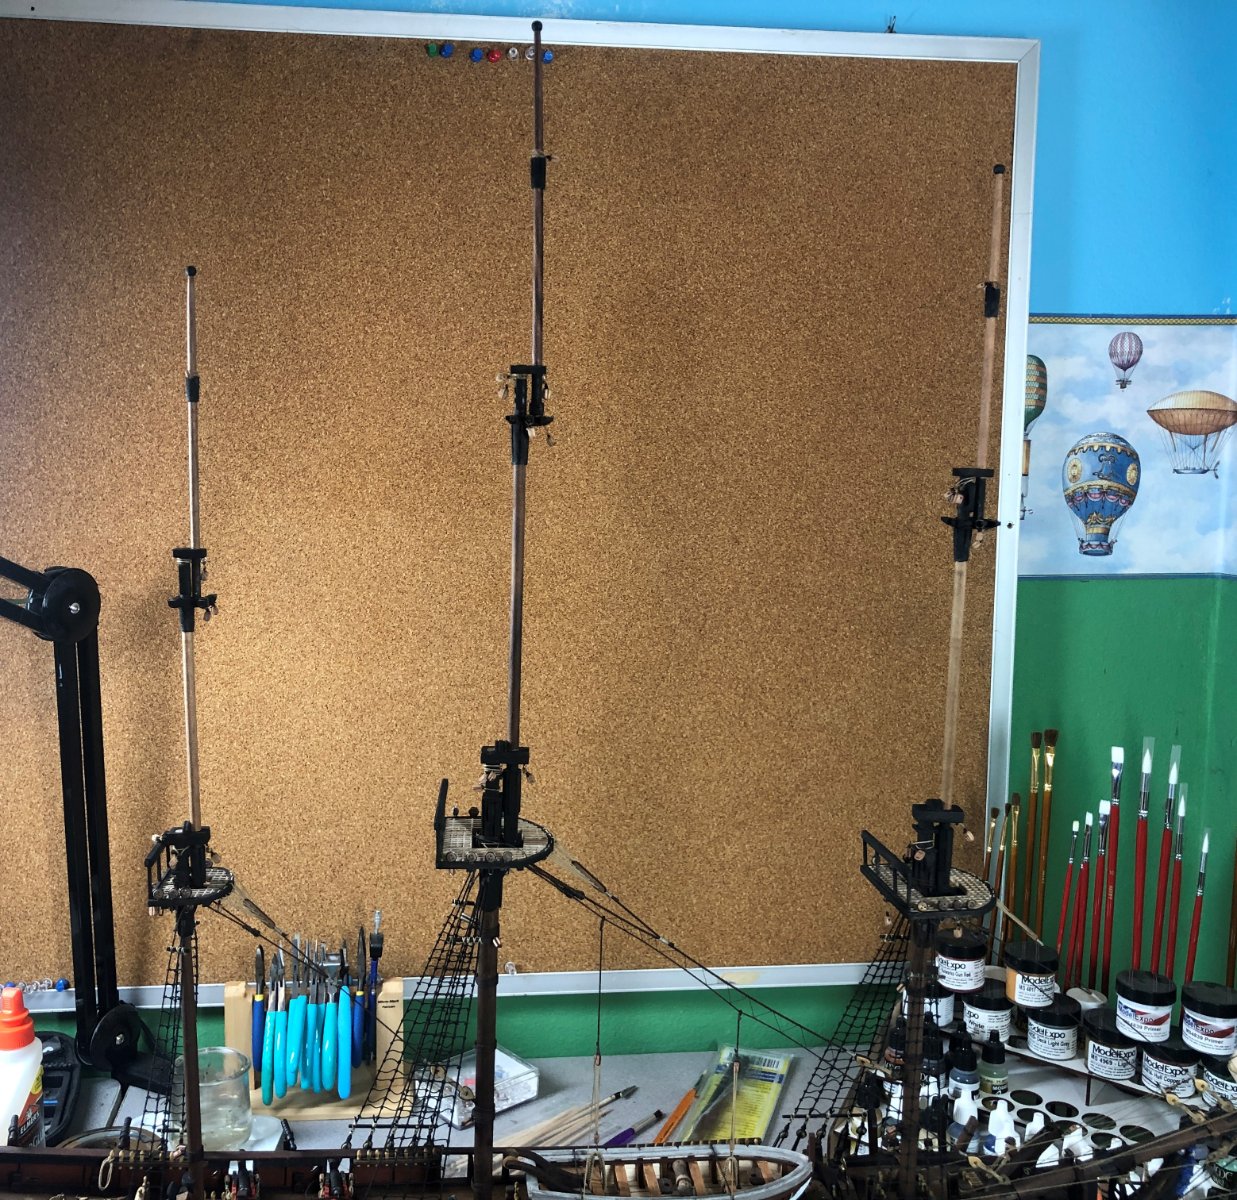
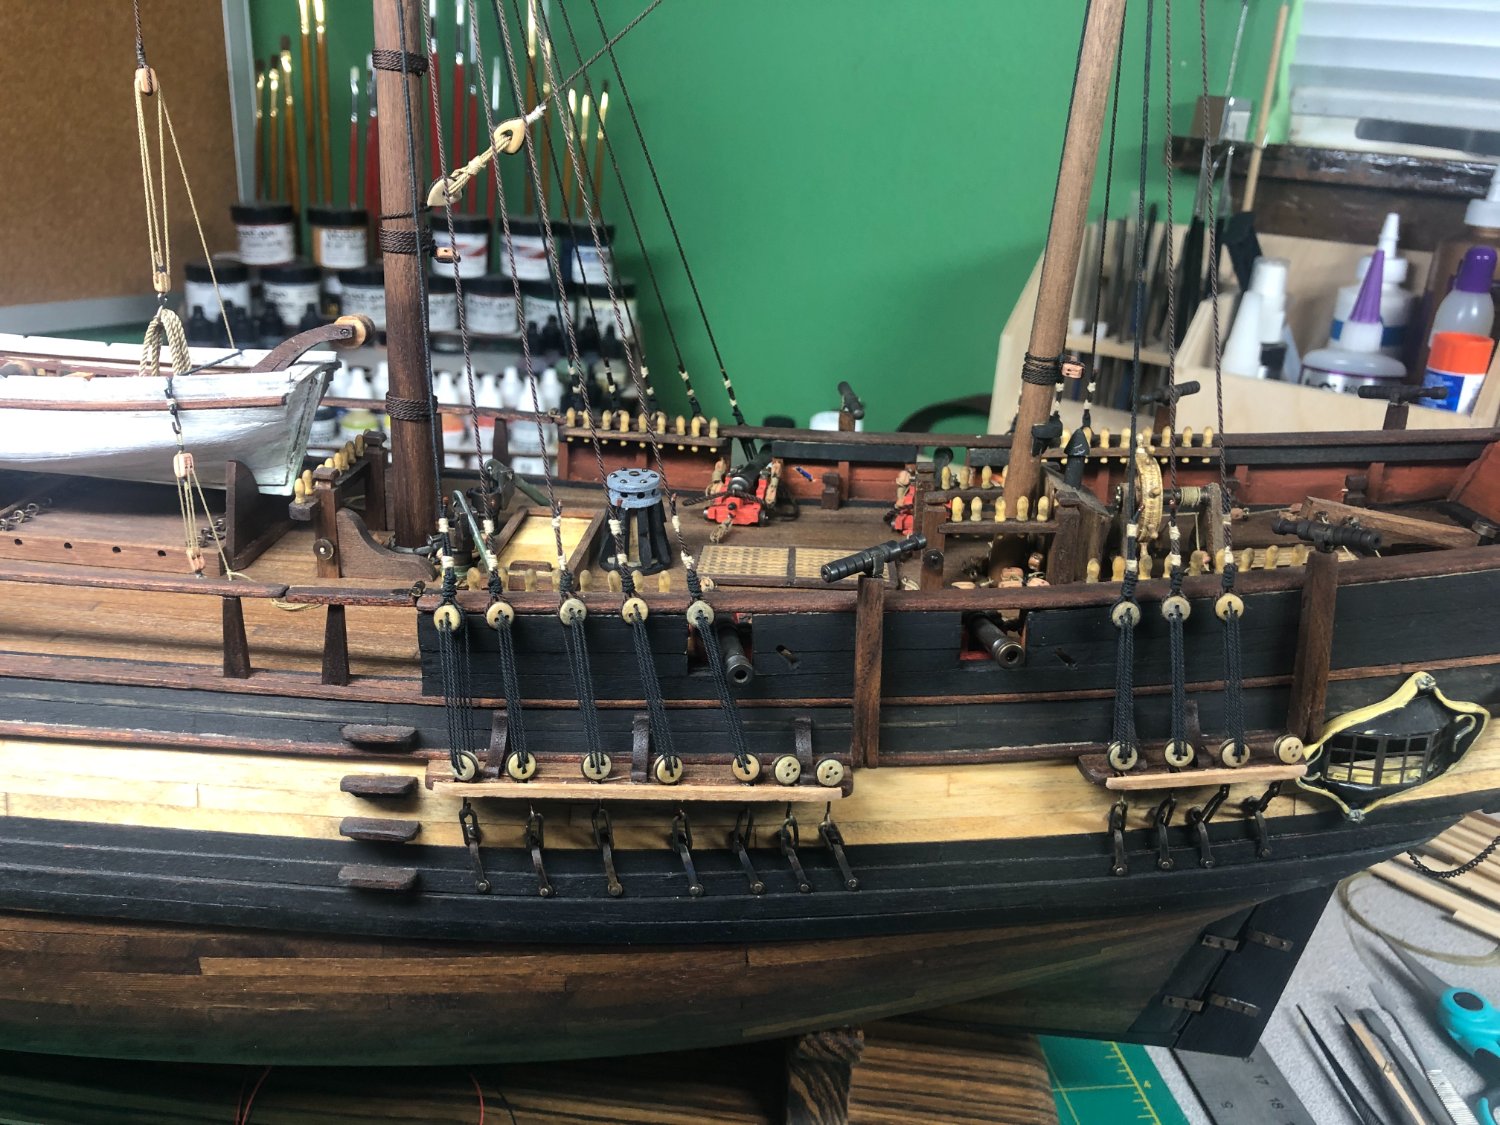
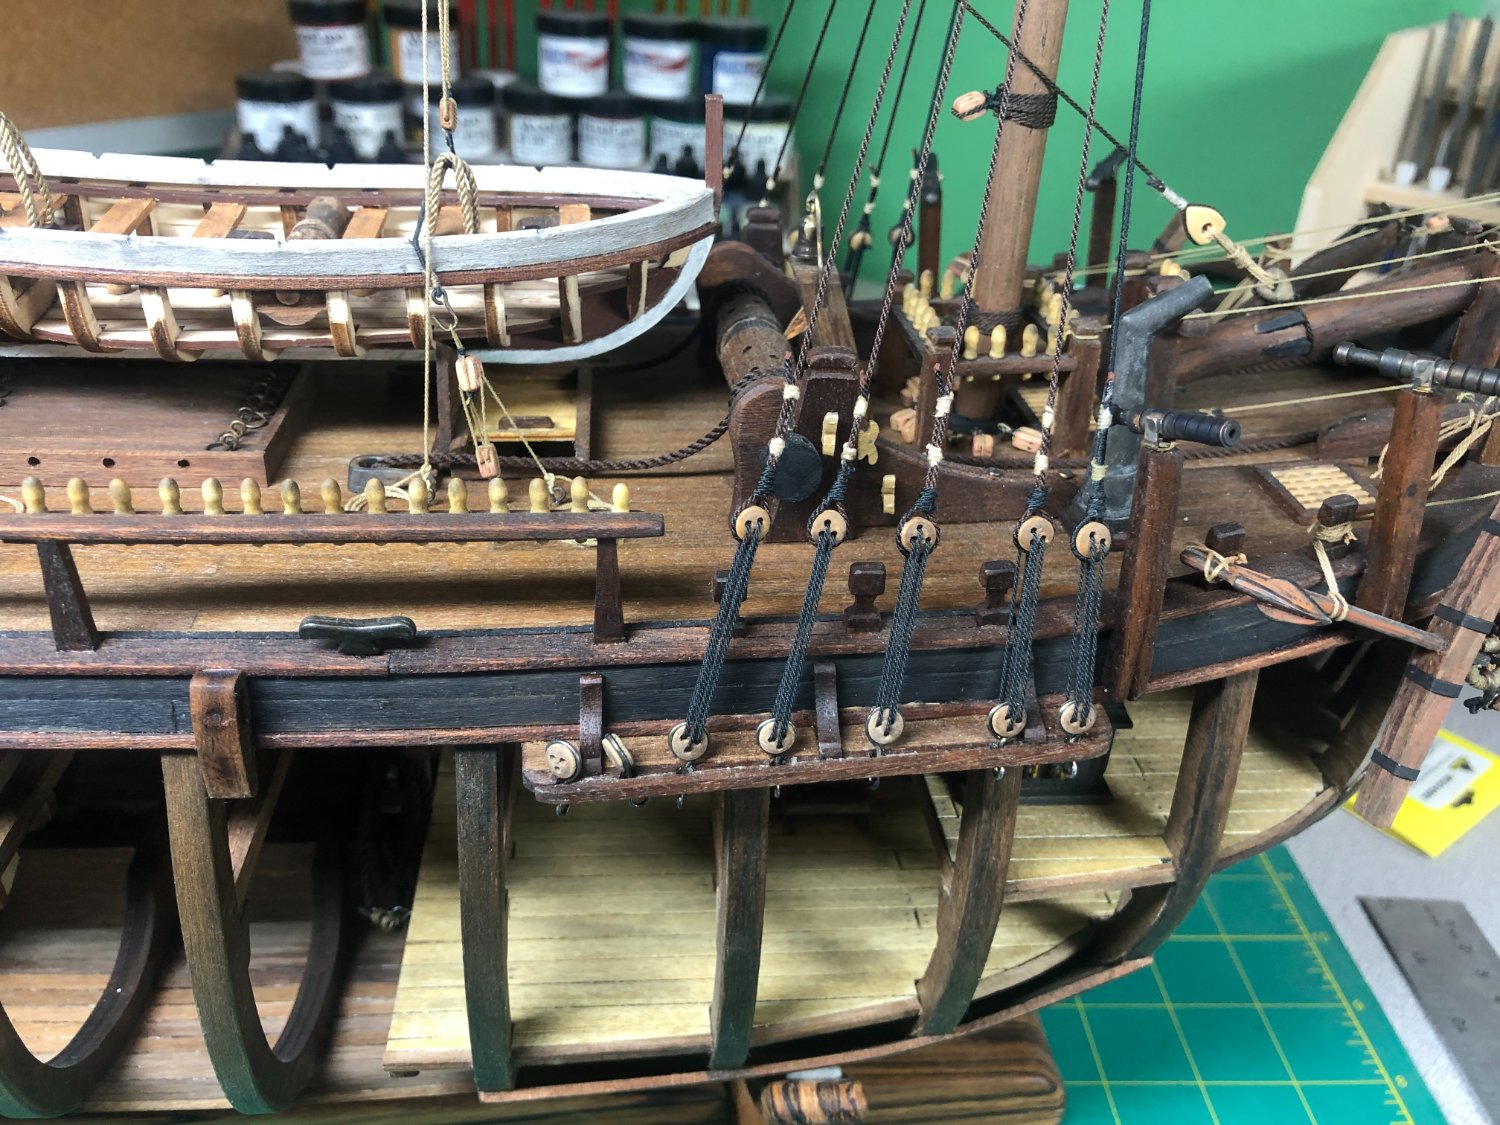
Masts done... the only wood work left are the yards!
A number of pictures to help future builders...
The blocks are all in place too.
As I noted in my previous post, I glued the main mast into place before adding the standing rigging lines. That made adding them a bit tricky but I managed:

All the shrouds are ready to be completed but I still need to add the stays, etc.
See the spaghetti below!


I made a major (to me) blunder when I accidently bumped one of the stern lanterns knocking it loose and severing the wire to the lamp. Unfortunately, I don't see a way to fix the wire, the lamp is repairable. I was pretty upset as I've been really careful for two years and all it took was a little bump from my sleeve to do the damage.
Nothing I can do.... but move on.
Standing rigging lines will be added. Then the masts will be glued into place and the shrouds attached... Oh boy! More knots!!
An update will follow.
- scrubbyj427, AJohnson, Dave_E and 4 others
-
7
-
Lots of pictures today... Making up for the lack of instructions and pictures in the kit!
The plans are fairly good and with the help of other build logs, I've managed to get the foremast and main mast completed, short of some paint and mounting the blocks.
So, let's get to some pictures... First up was the main mast as I found out that I was short on walnut round stock for the foremast by 2cm. I ordered some and it arrived quickly.
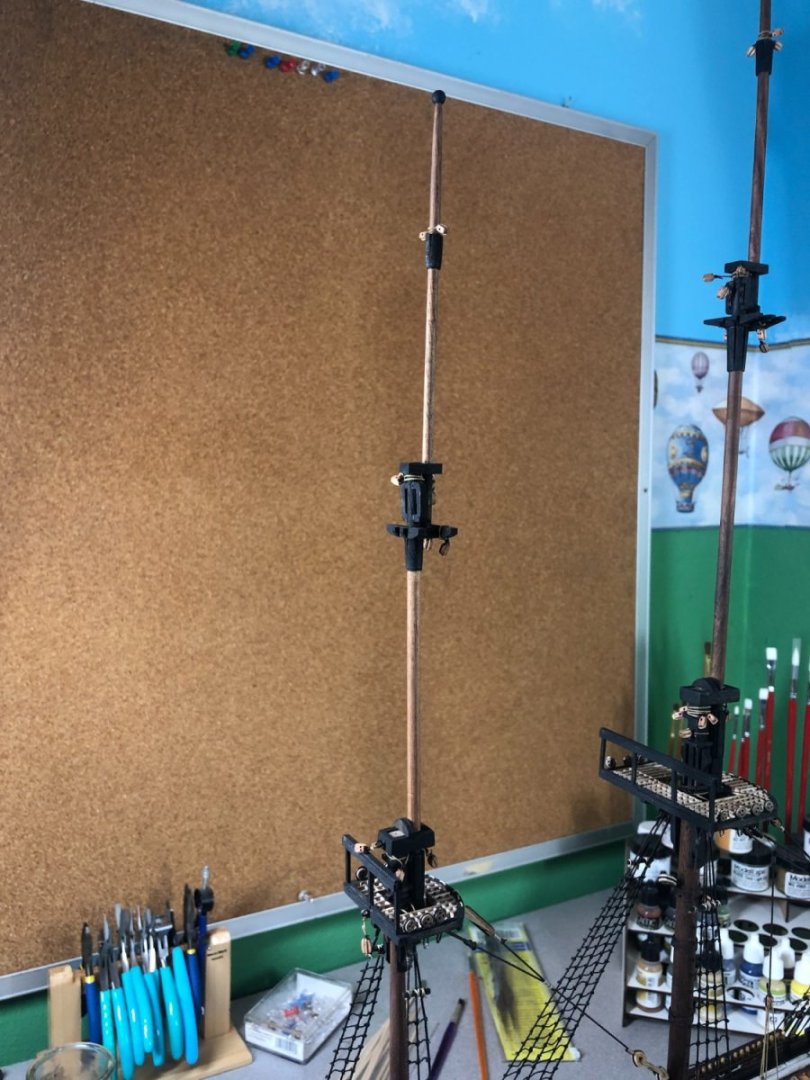
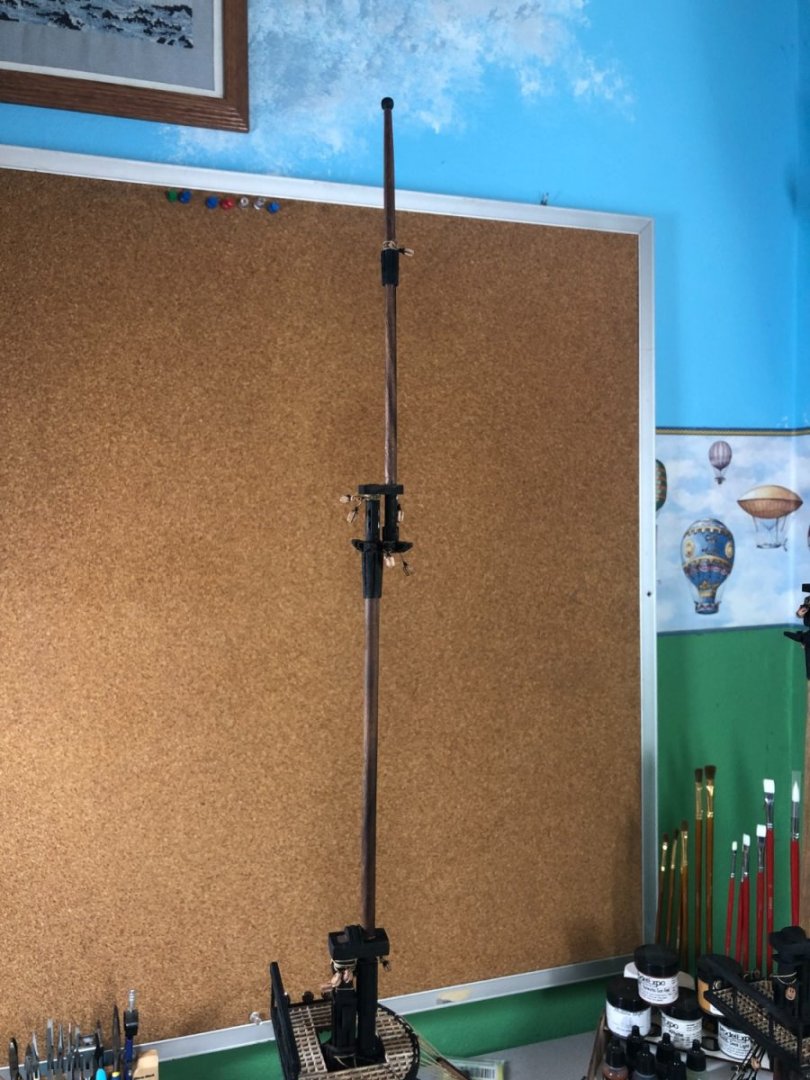
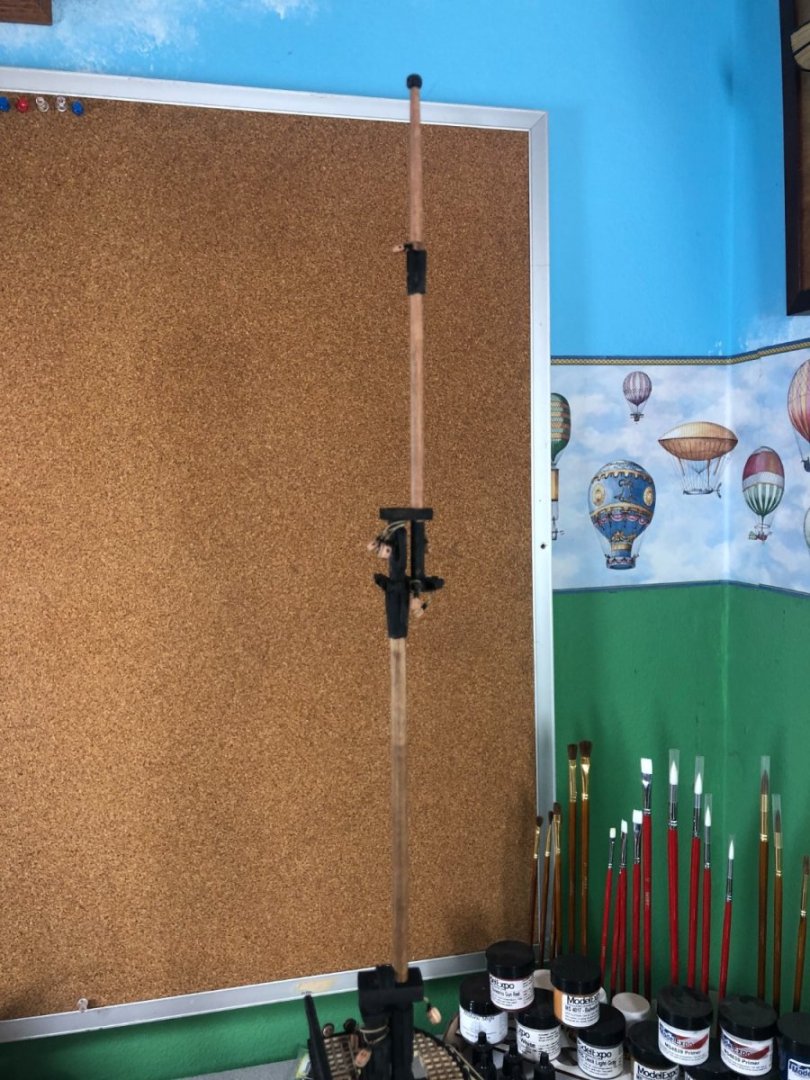
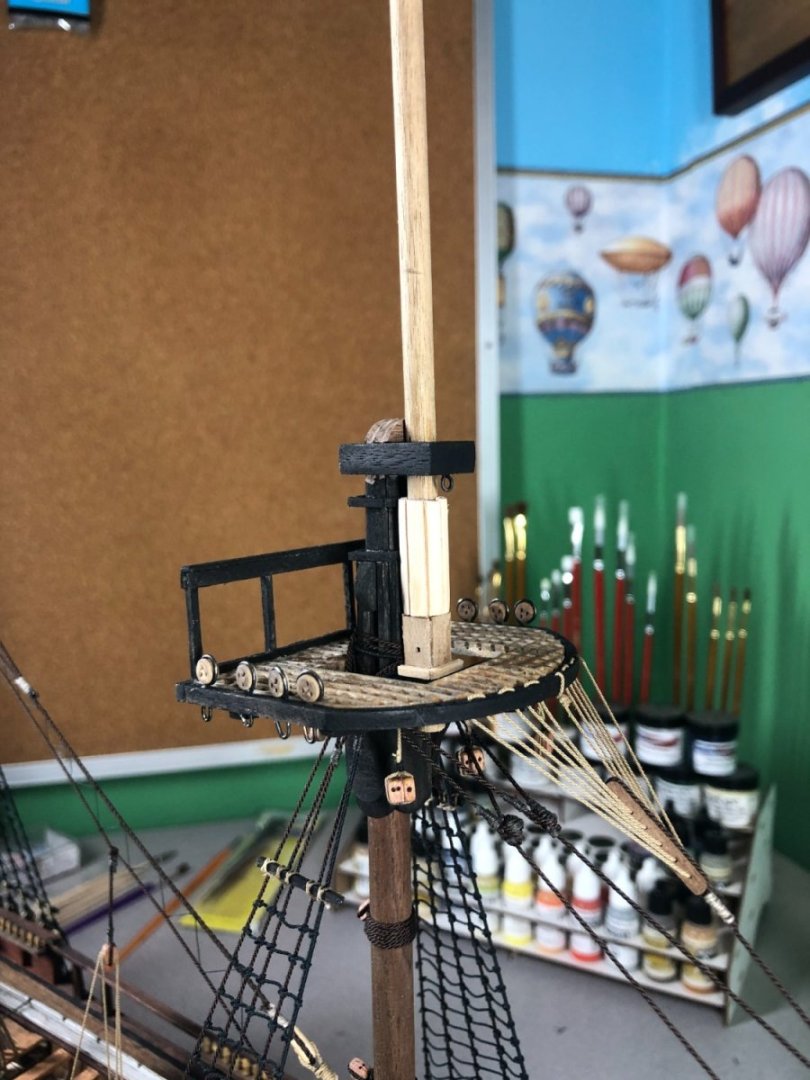
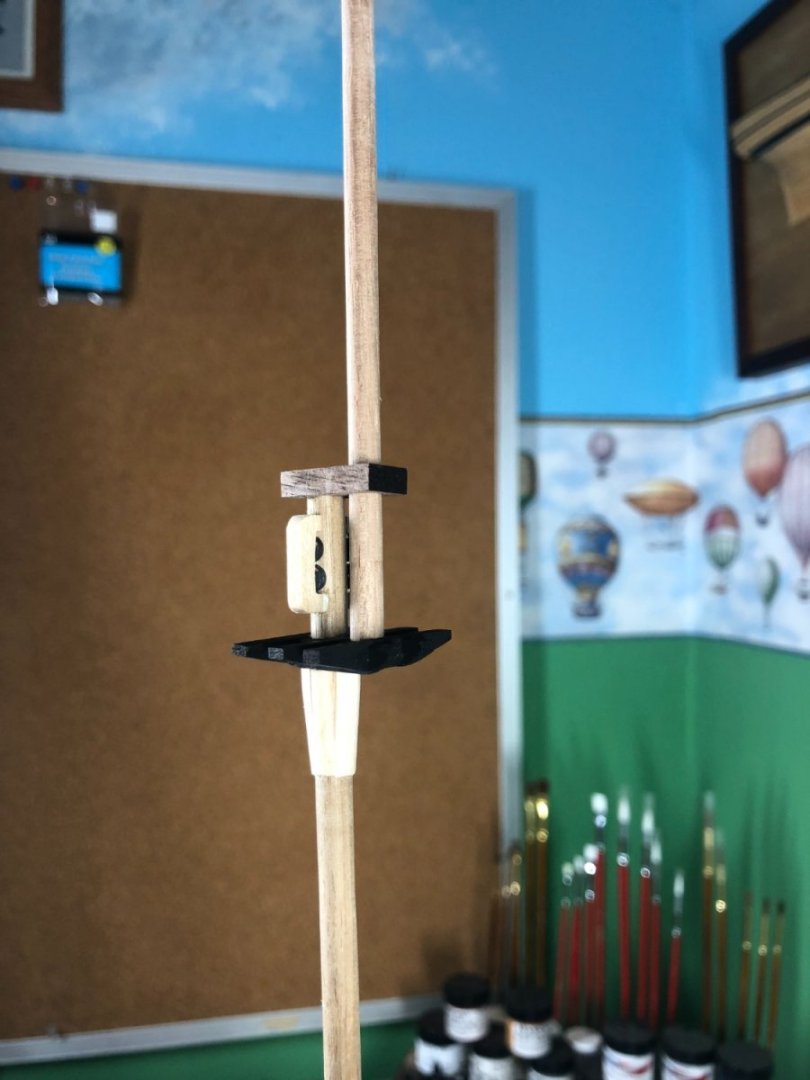
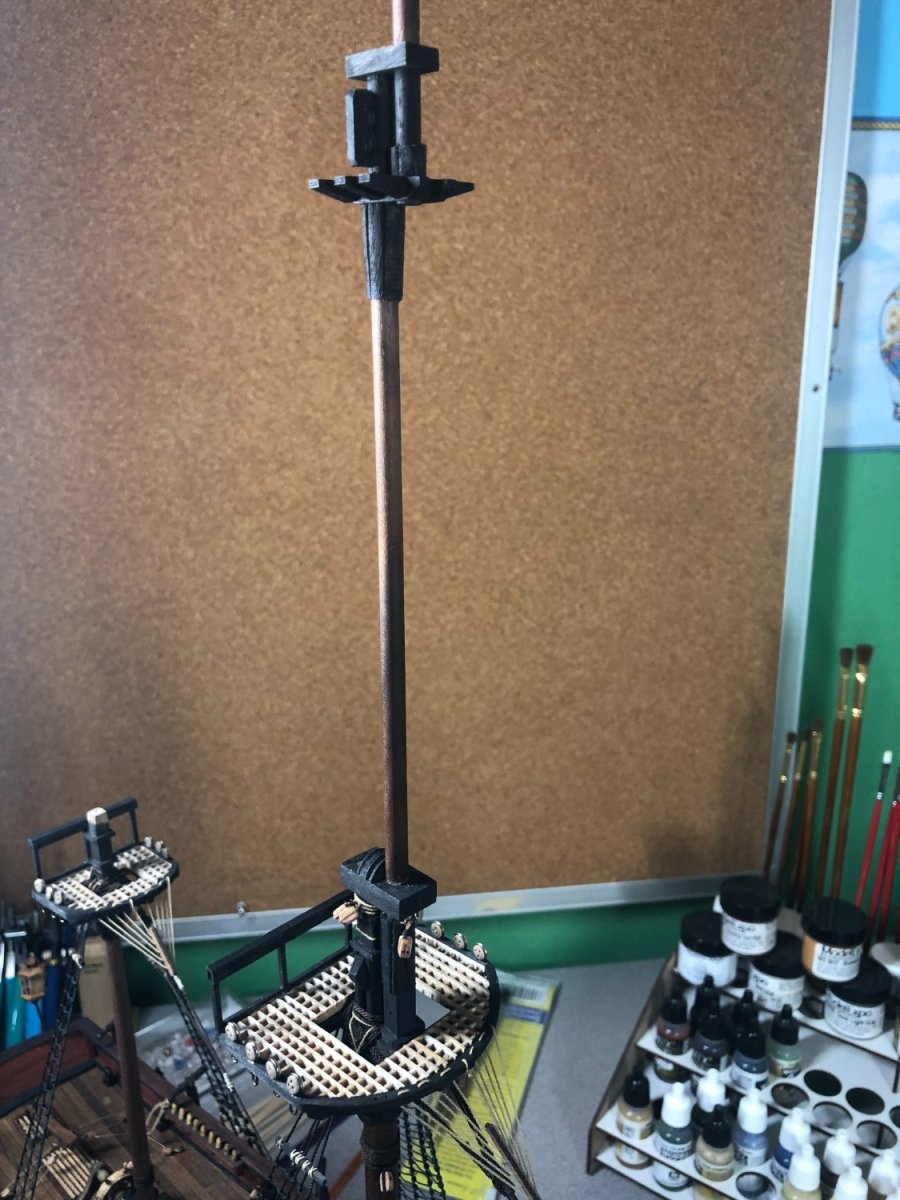
The mast head was reamed out and fitted onto the mast:
I should point out that the fore and main masts are similar in construction with the main difference being the total length.
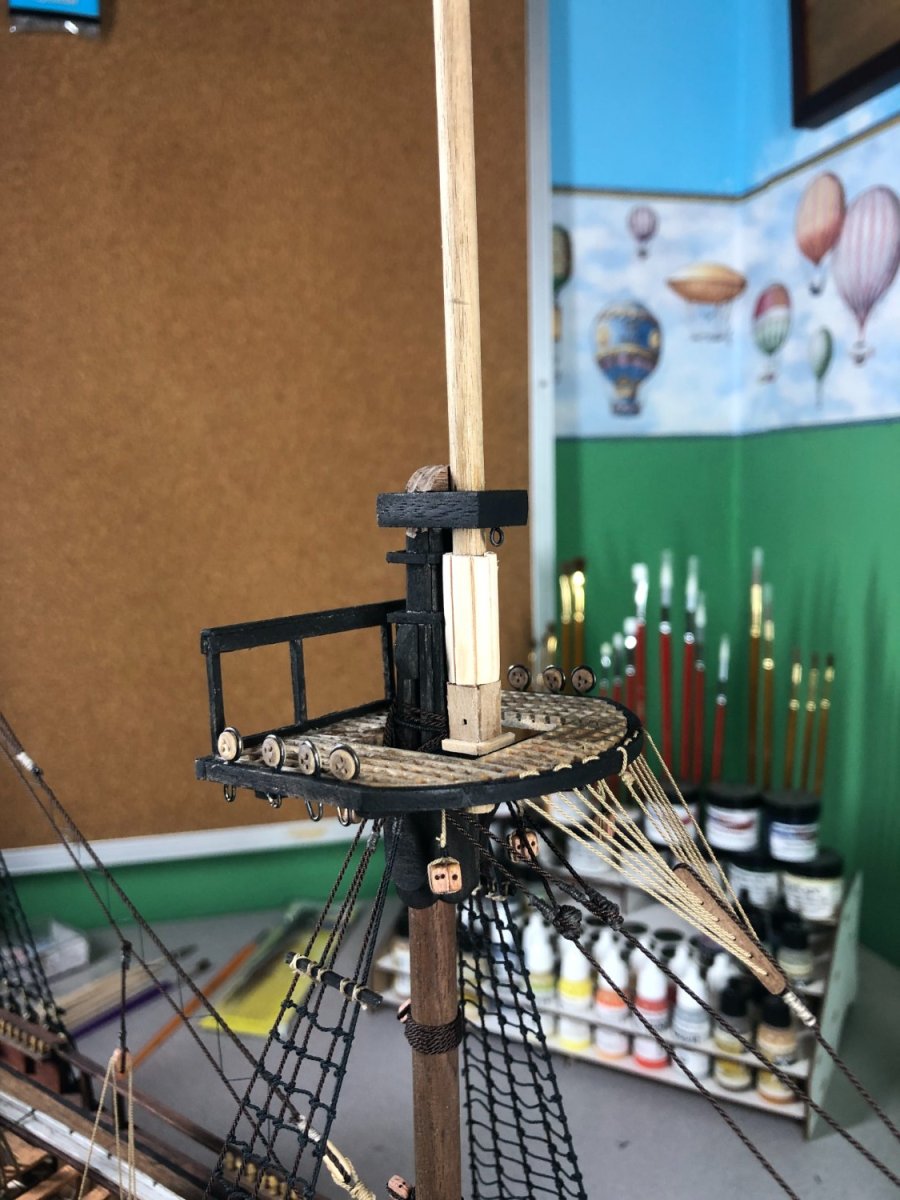
The mast caps were shaped with a rattail file and glued into place on the mast head:


The mast stiffeners were glued into place and then sanded to shape:

A hole was drilled as per the plans and the mast placed for reference:
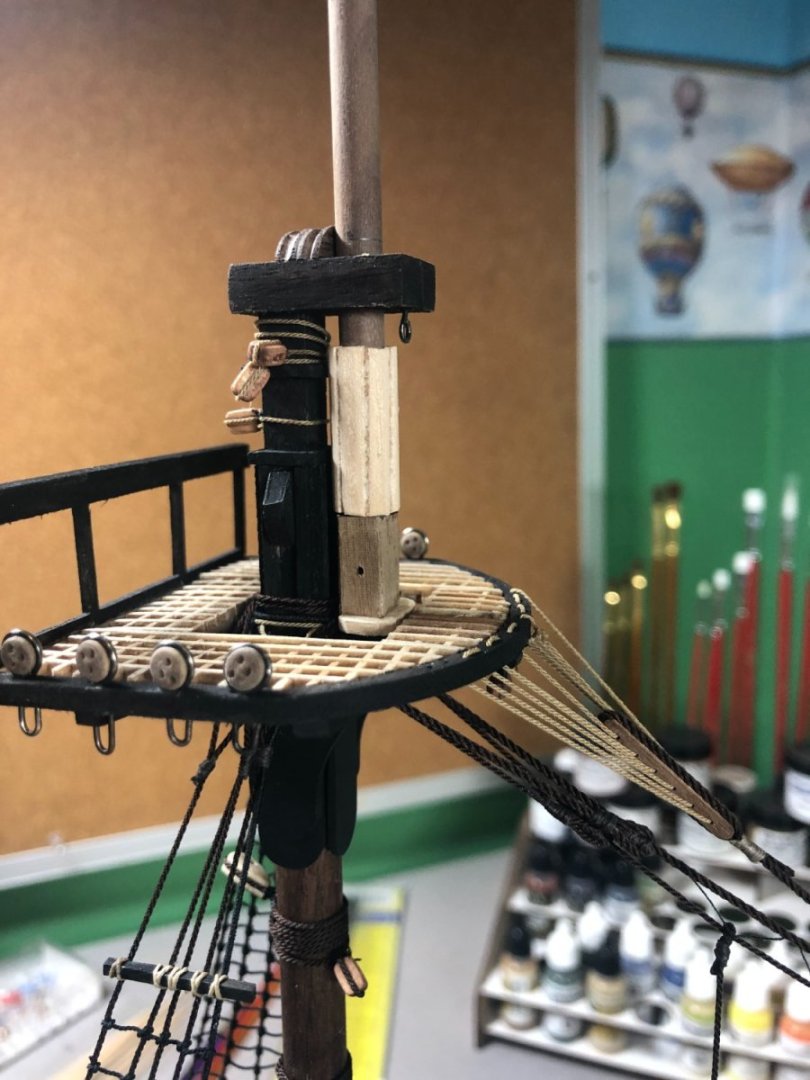
Next, I added more mast stiffeners and sanded to shape:

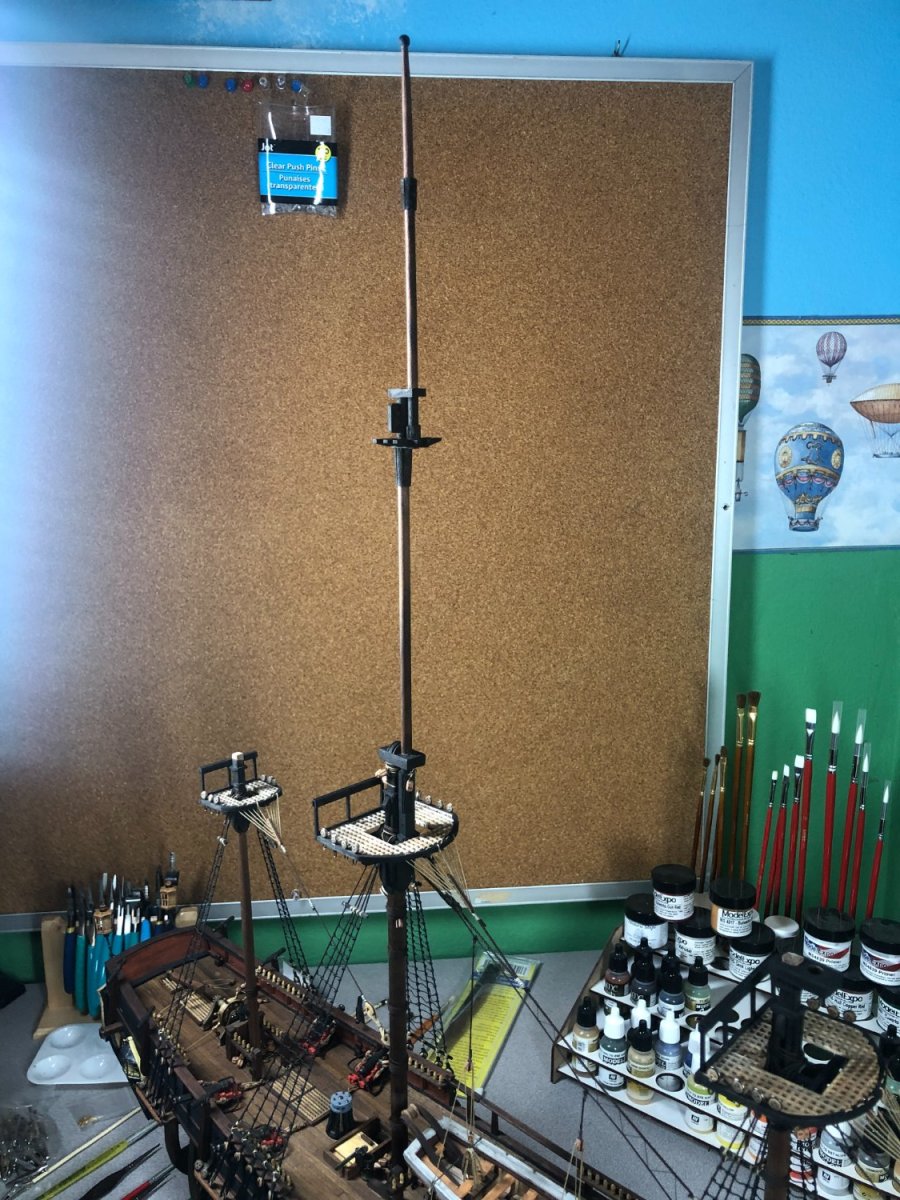
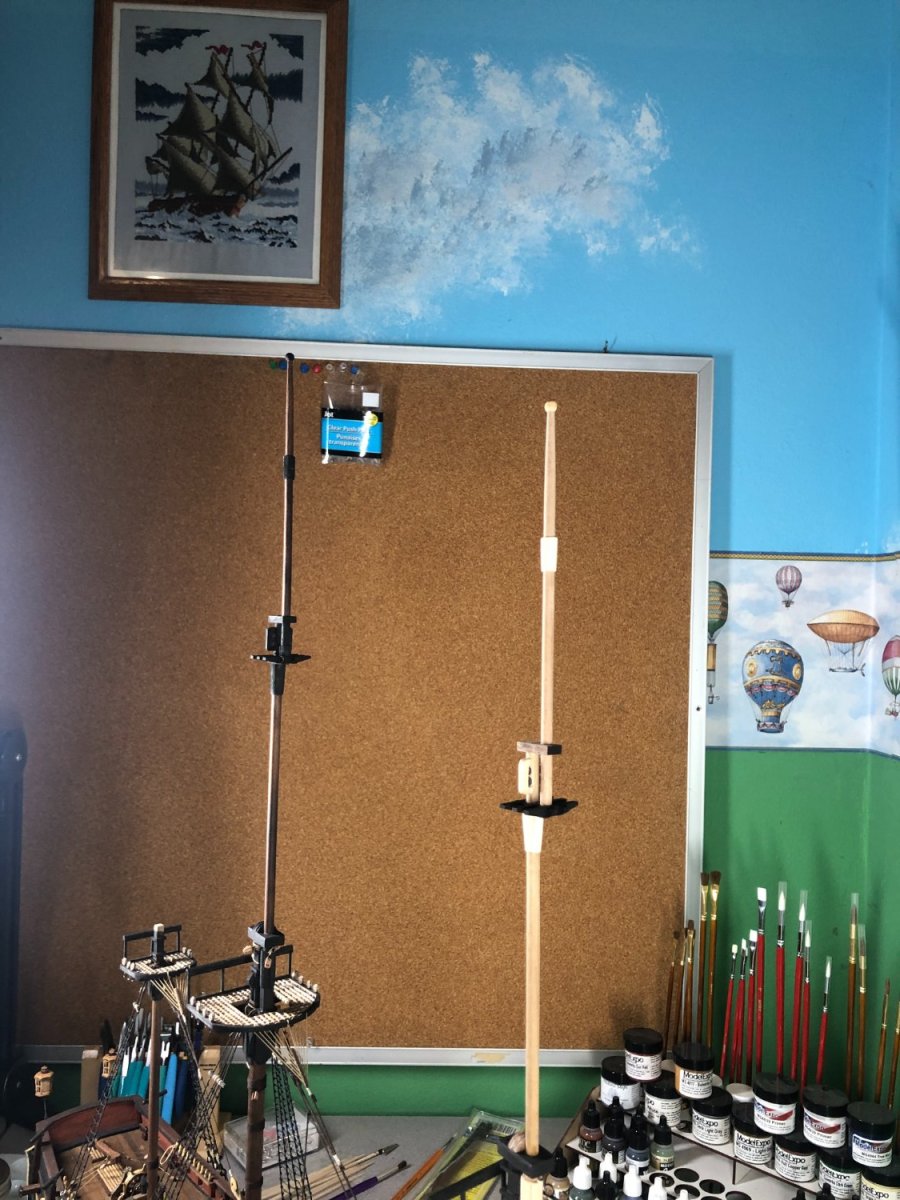
Assembled the platforms and bees for all three masts:
Glued the bees into place along with paint and weathering:

I got a little ahead of myself by mounting the mast and gluing into place by not adding the blocks and not treating the mast with boiled linseed oil... Oops! It'll just mean a little extra work with the blocks, in particular, as I'll need to do the work standing up! I guess I was a little excited to get it in place!
Getting the masts straight from side to side and fore and aft was a bit difficult but ultimately, turned out close to perfect:
Note that I show the foremast in place but it hasn't been glued yet as I need to add the blocks, paint and oil!


I'll finish these up over the next day or two and get the mizzen mast in place before moving on to the standing rigging for the upper masts.
See you all soon!
-
-
Tying the lower wooden ratlines and the futtock staves:

Final look:

Ratlines on the port side are done... starboard side up next!
- scrubbyj427, Dave_E, Mr Whippy and 6 others
-
9
-
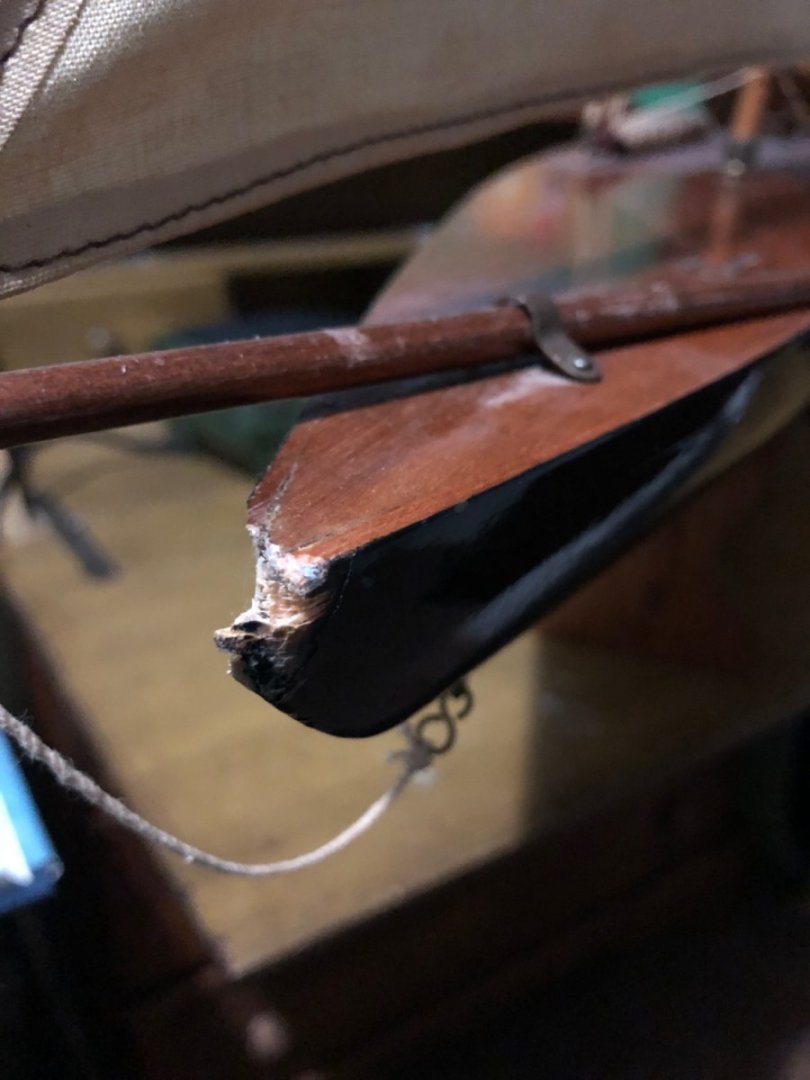
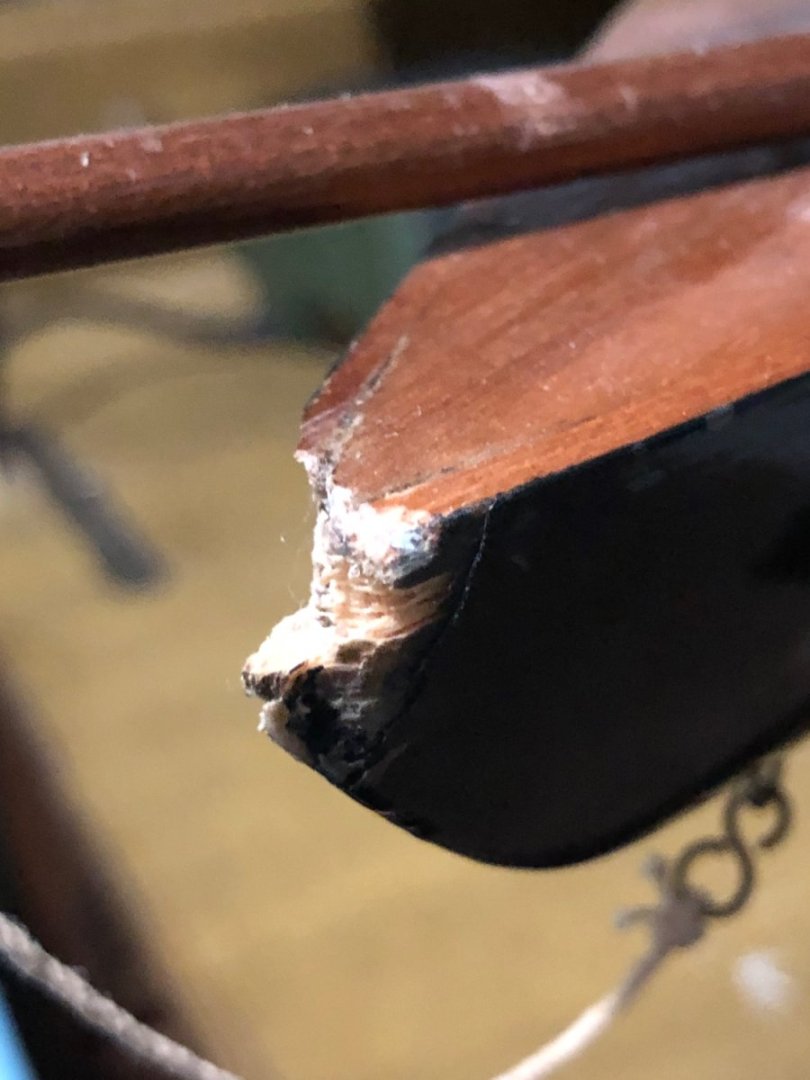
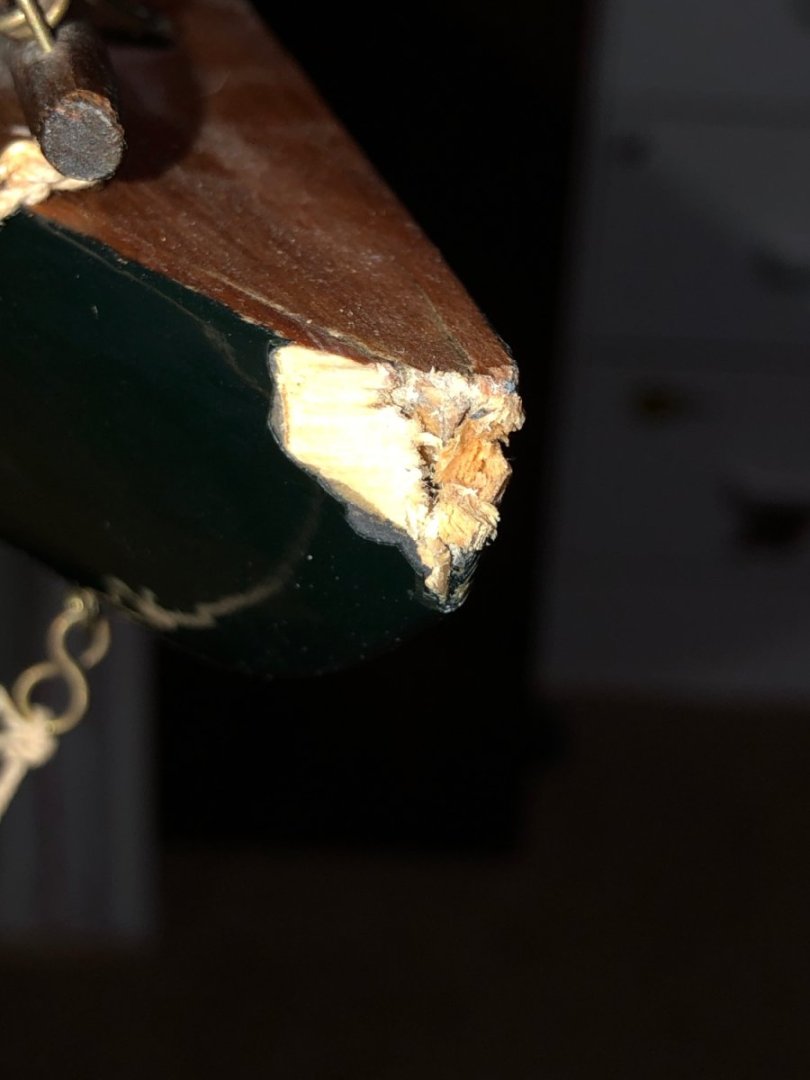
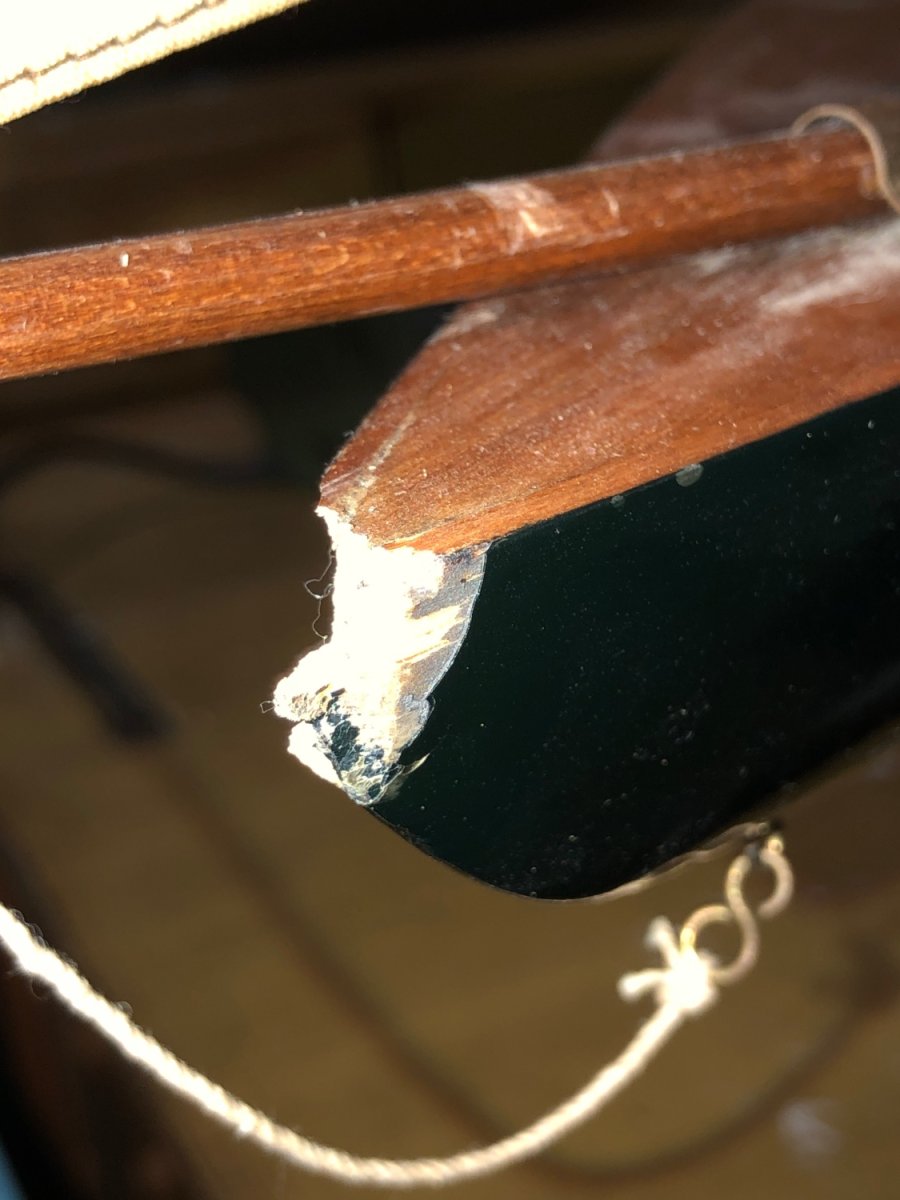
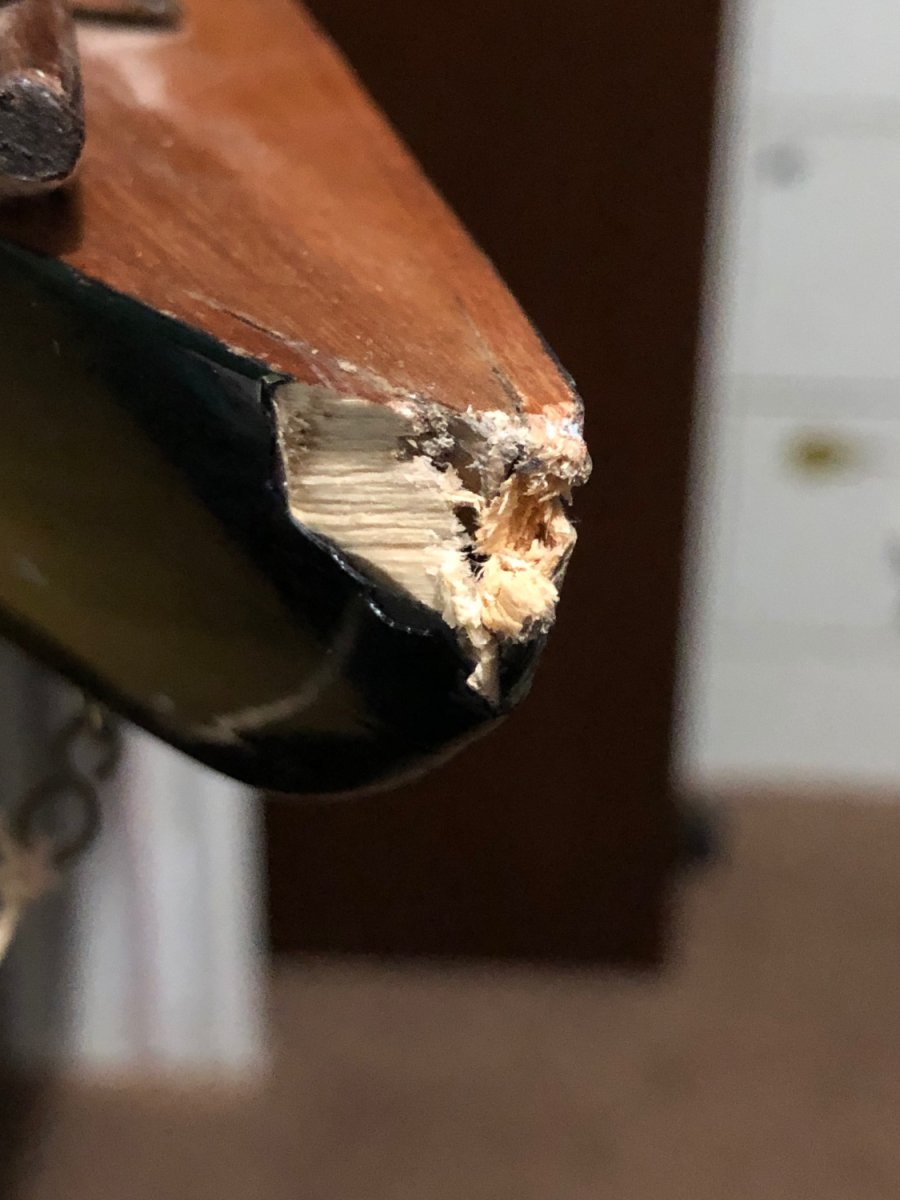
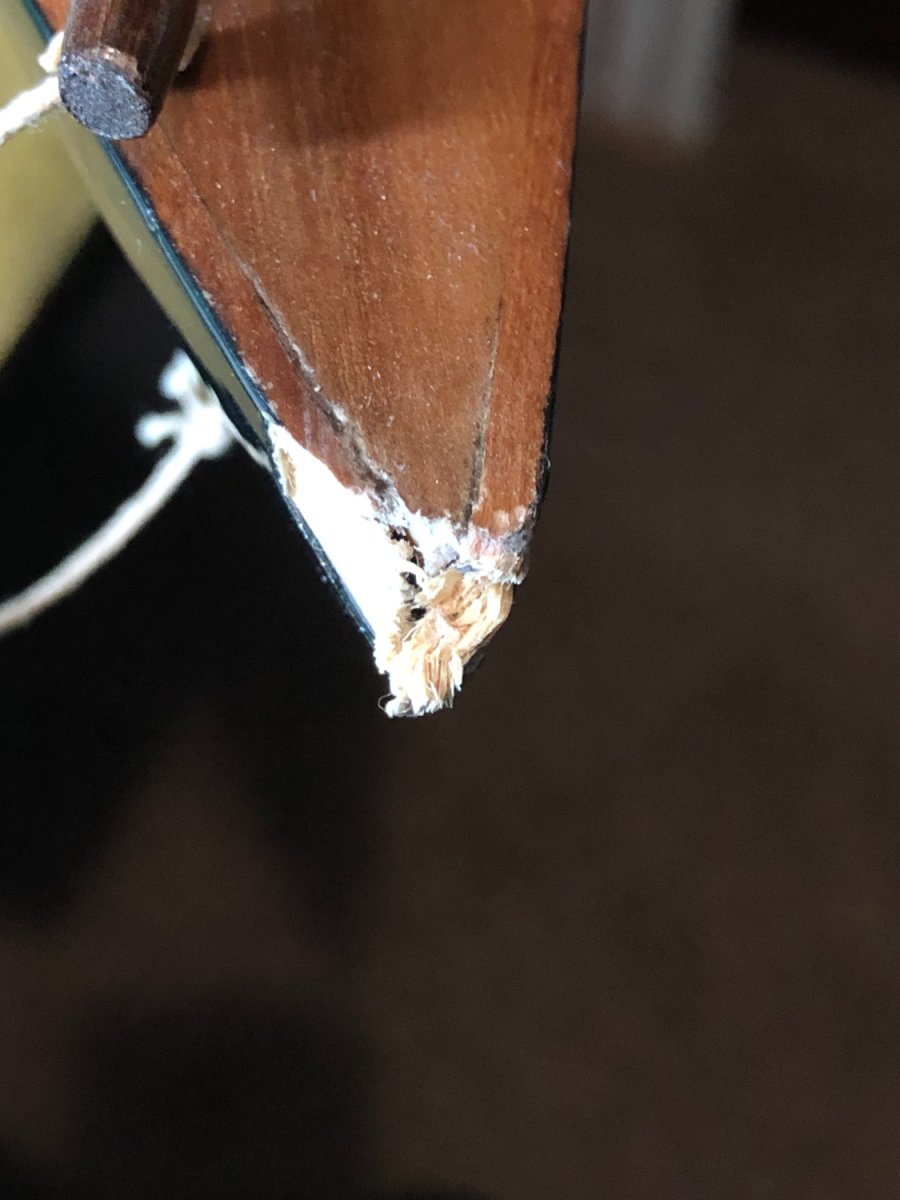
A difficult repair!
Matching the coating (some type of plastic) was nearly impossible. Especially, trying to get it as glossy as the rest of the hull.
Turned out ok... I made several other repairs to the bowsprit, mast and replaced some of the missing or damaged rigging. Re-glued some of the loose hardware and cleaned her up!
Looks good... going back to the clubhouse on Tuesday.
Thanks again for the help and comments.
.thumb.JPG.ac7983e09e0c4353715e669fea517a5c.JPG)
- allanyed, Joseph Schmidt, druxey and 2 others
-
5
-
As stated the march of progress goes on...
I have a couple of e-books related to the subject of model ship building. In every case, I have ended up buying the book!
I find the book easier to have next to me when I'm using it as a reference.
But I do wish you well.
-
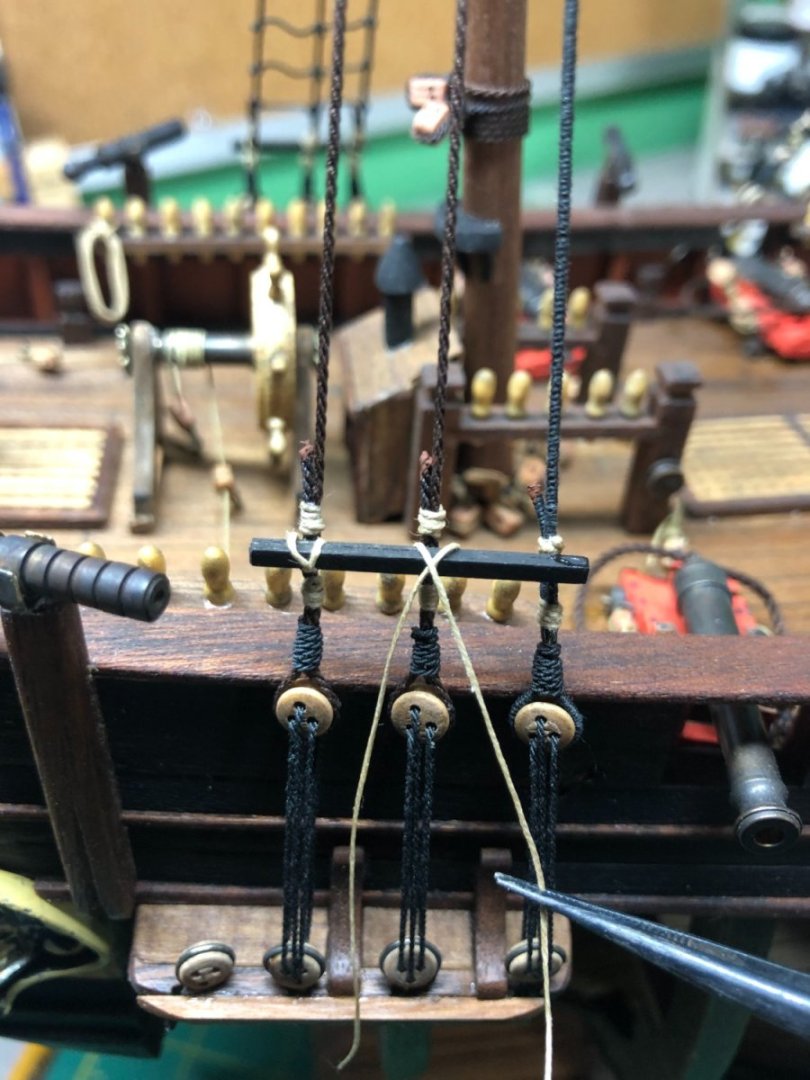
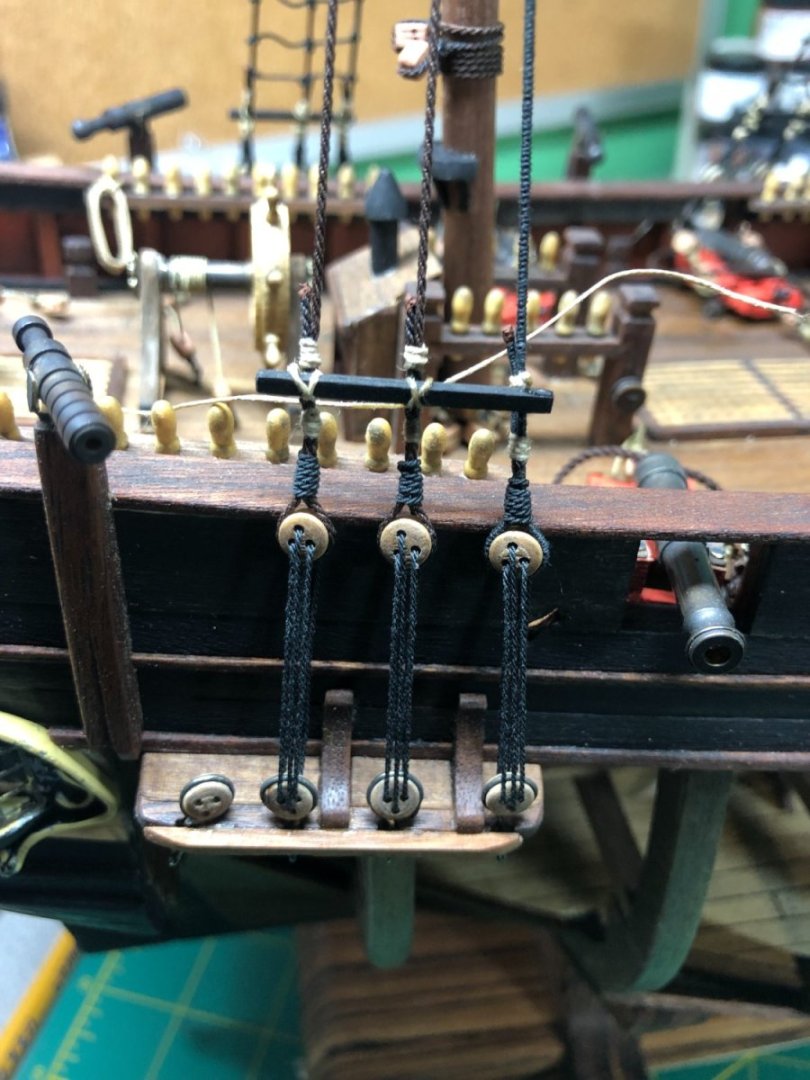
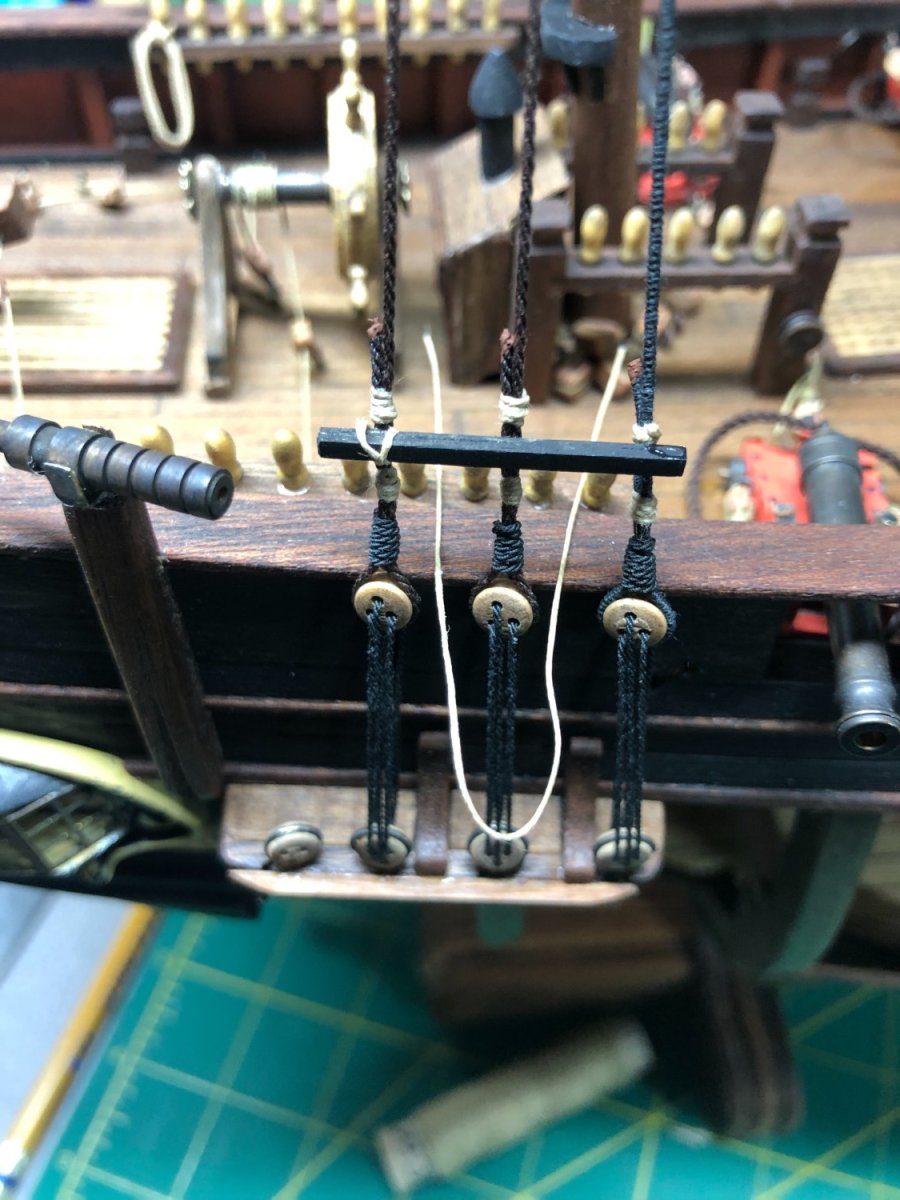
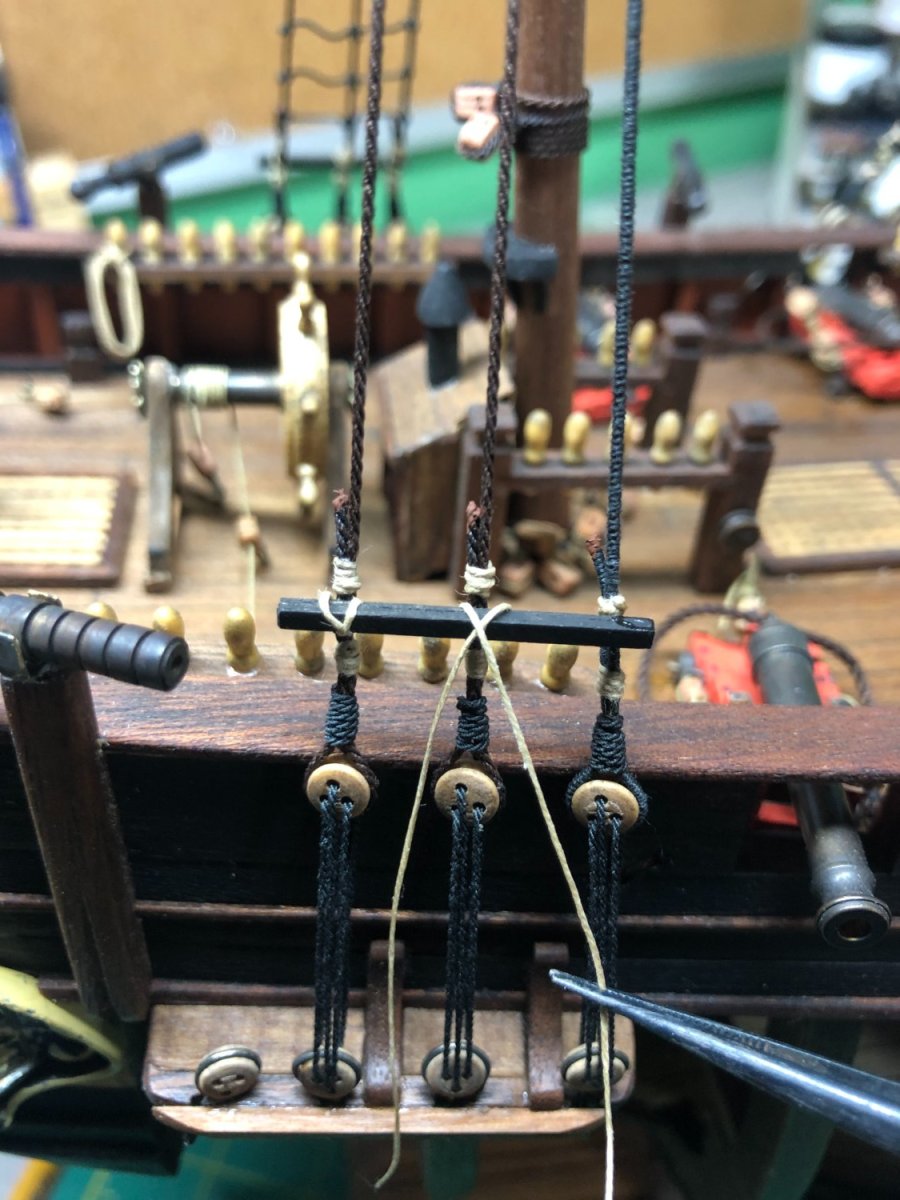
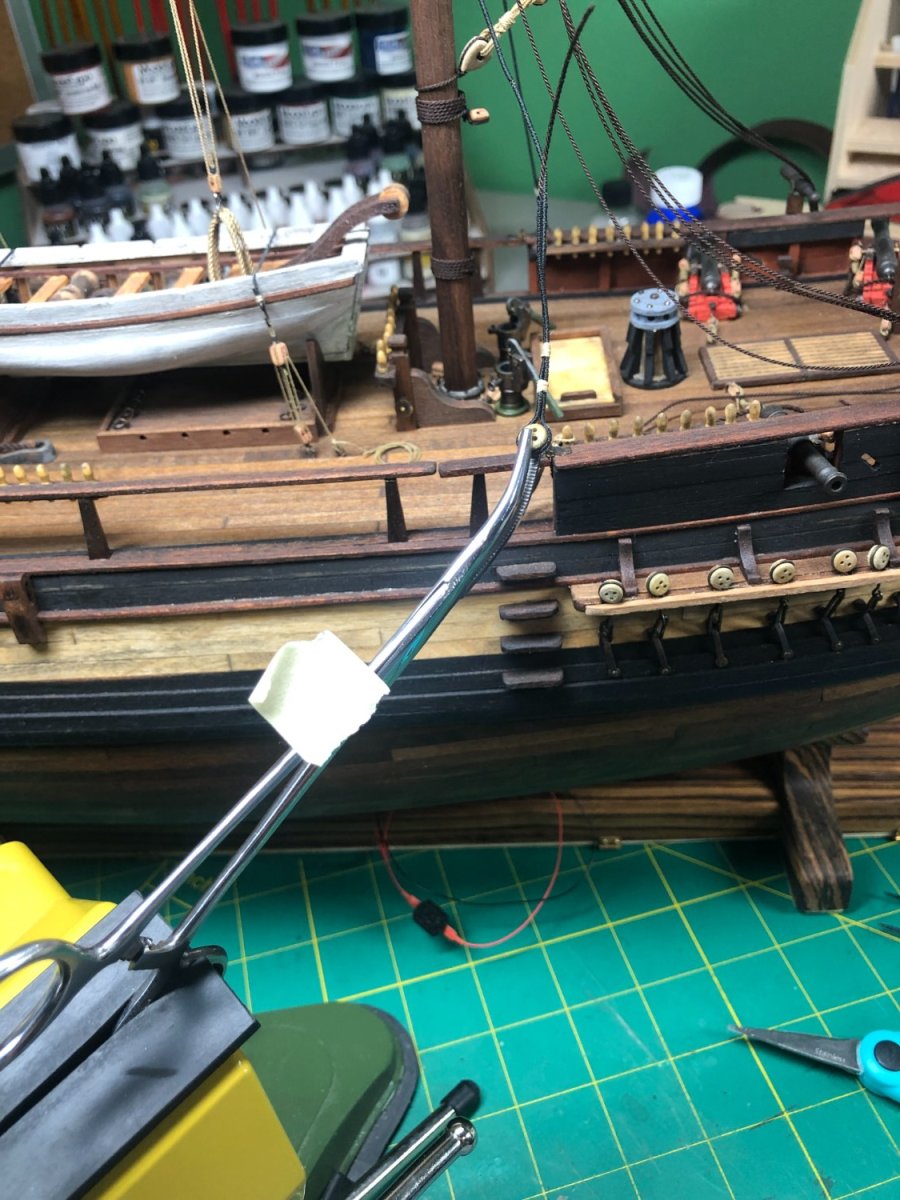
The lower mast shrouds are done.
I tried to stay historically accurate with a few minor tweaks.
The process I used is outlined below.
In the previous post, I mentioned that the seizing was too bright for my taste... I changed the color to a more "hemp" color but I'm getting ahead of myself.
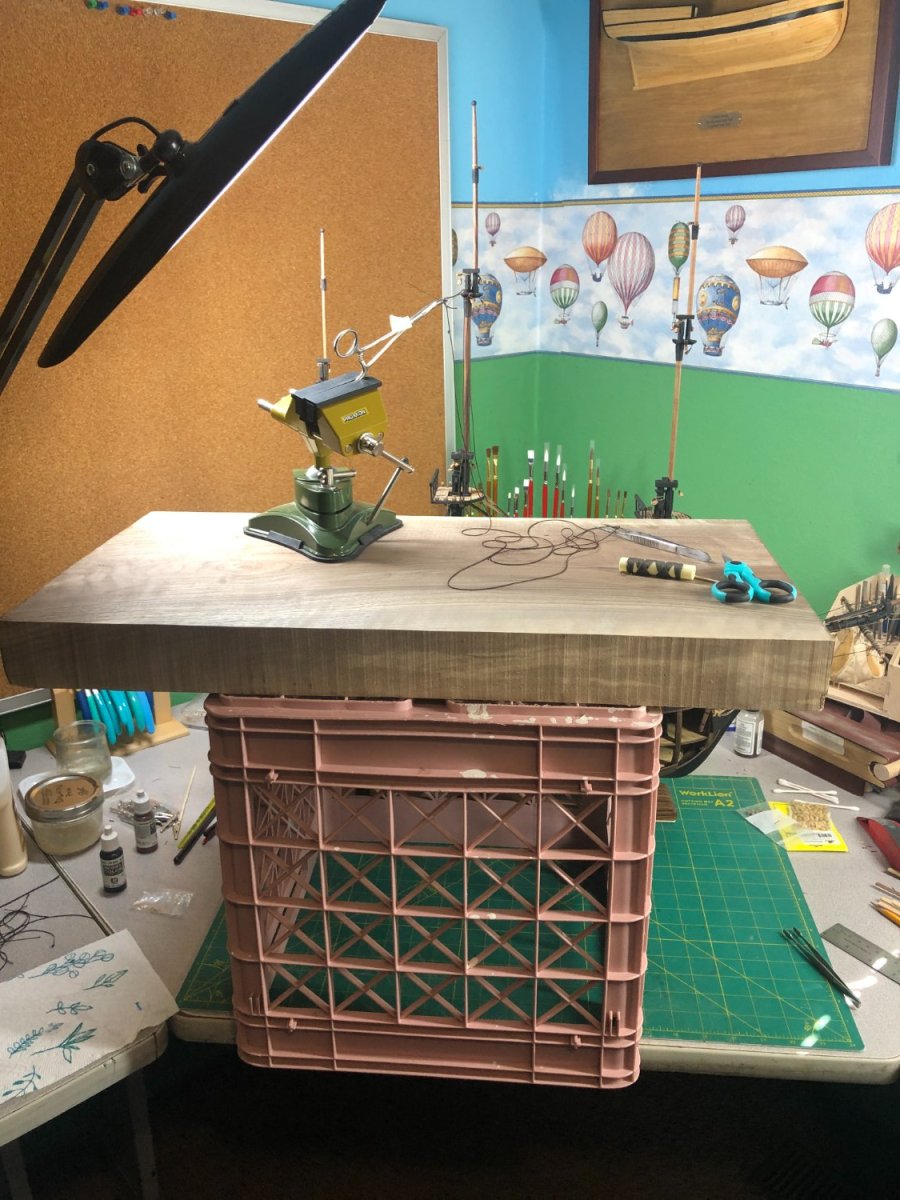
I made a small tool to try to keep the deadeyes even as they were being mounted:

Pretty self-explanatory and it served two purpose... keeping the spacing even and keep the deadeyes turned properly.
Once I had the deadeye in position, I use a drop of very thin CA glue on the bottom of the deadeye to hold the shroud in position while moving on to the next steps:
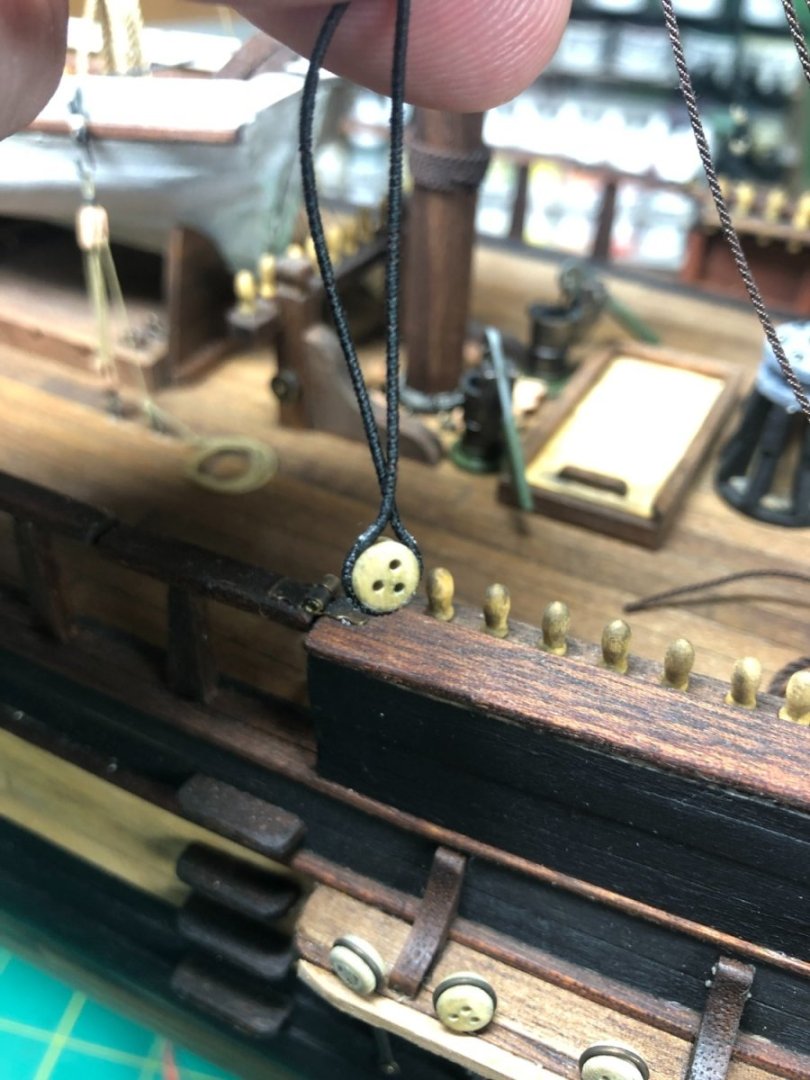
Using a pair of forceps and a moveable vice, I tied the two seizing's to secure the deadeye to the shroud. I used (as mentioned above) a thread that was more of a hemp color, waxed it and tied it:

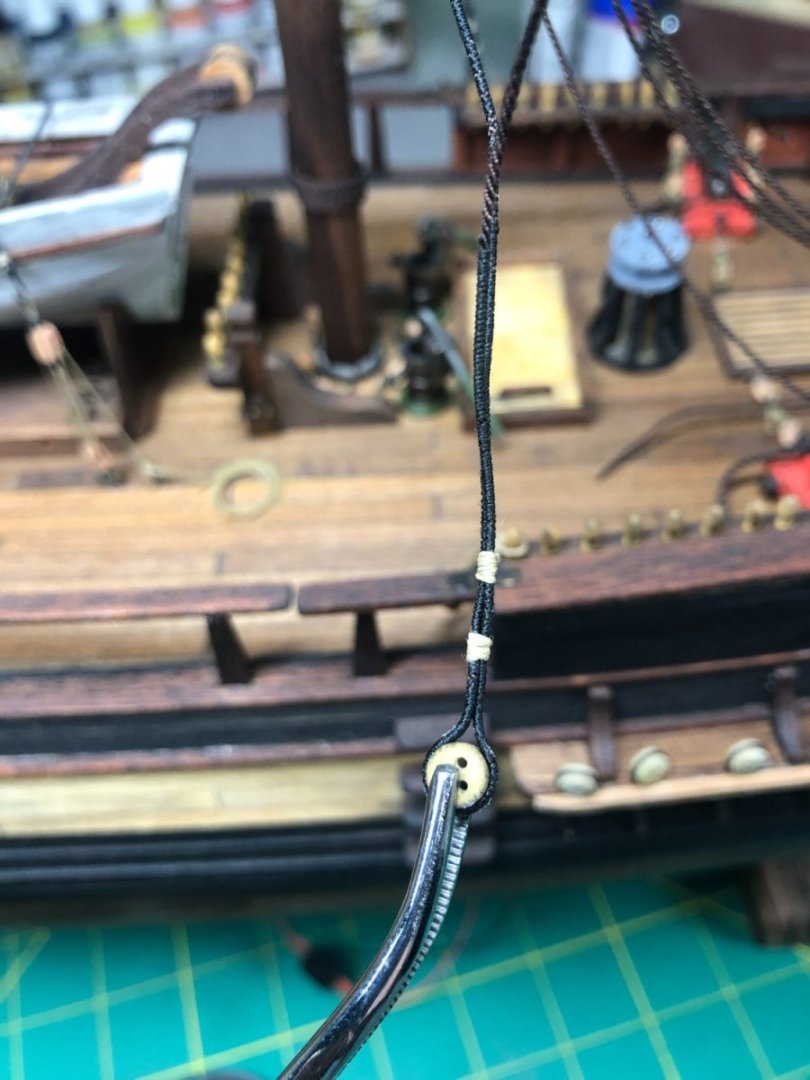
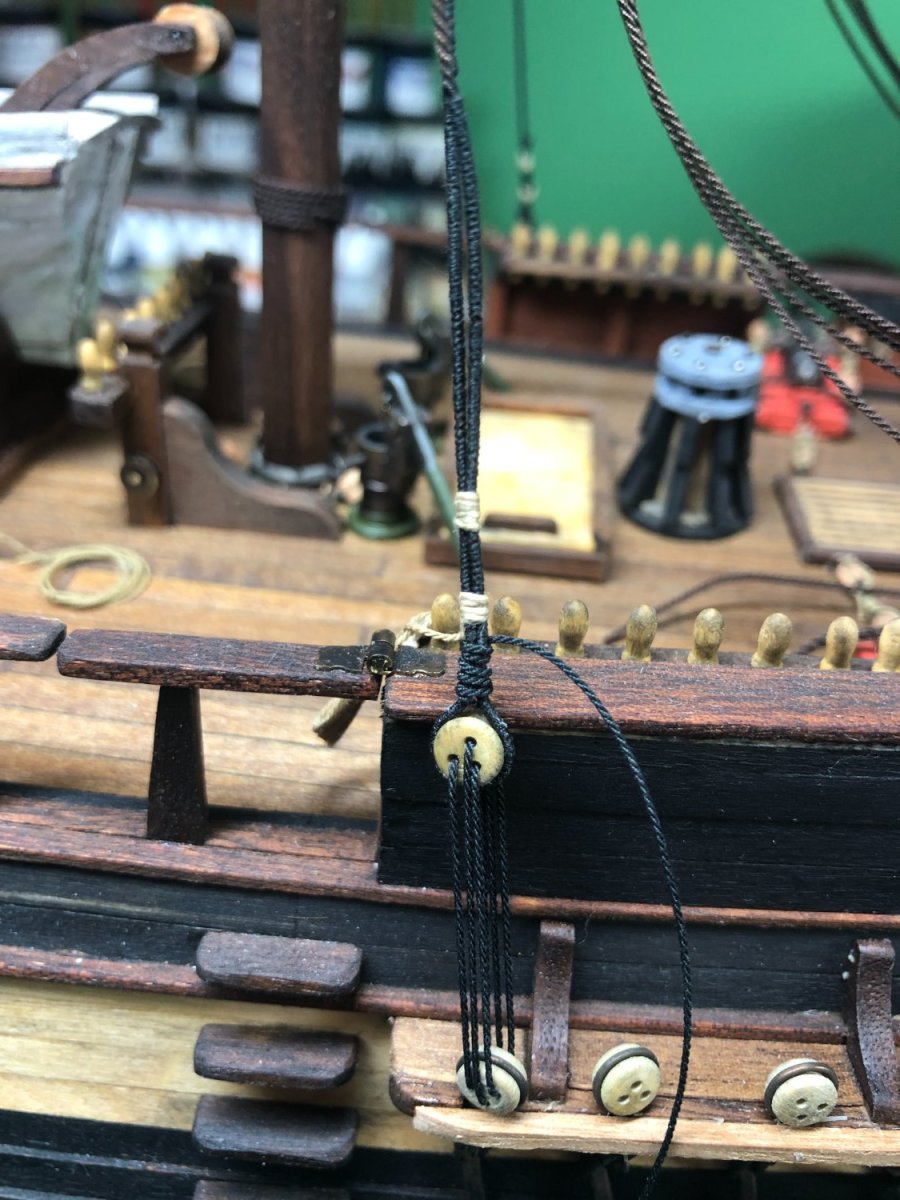
Doing my research, I decided that the lanyards needed to be a dark brown or black due the rope being coated in a pitch/tar substance to protect the lanyard from the elements. Using the appropriate pattern, the lanyard is threaded through the upper and lower deadeyes:

Finally, the lanyard is tightened evenly and looped around the shroud (this is where I went off track, historically, a little) several times and tied off with a simple knot and a dot of CA to hold the knot. Historically, the lanyard would be seized to the shroud. I found this to be very difficult and visually unnecessary. The shroud completed except for snipping off the lanyard and shroud:

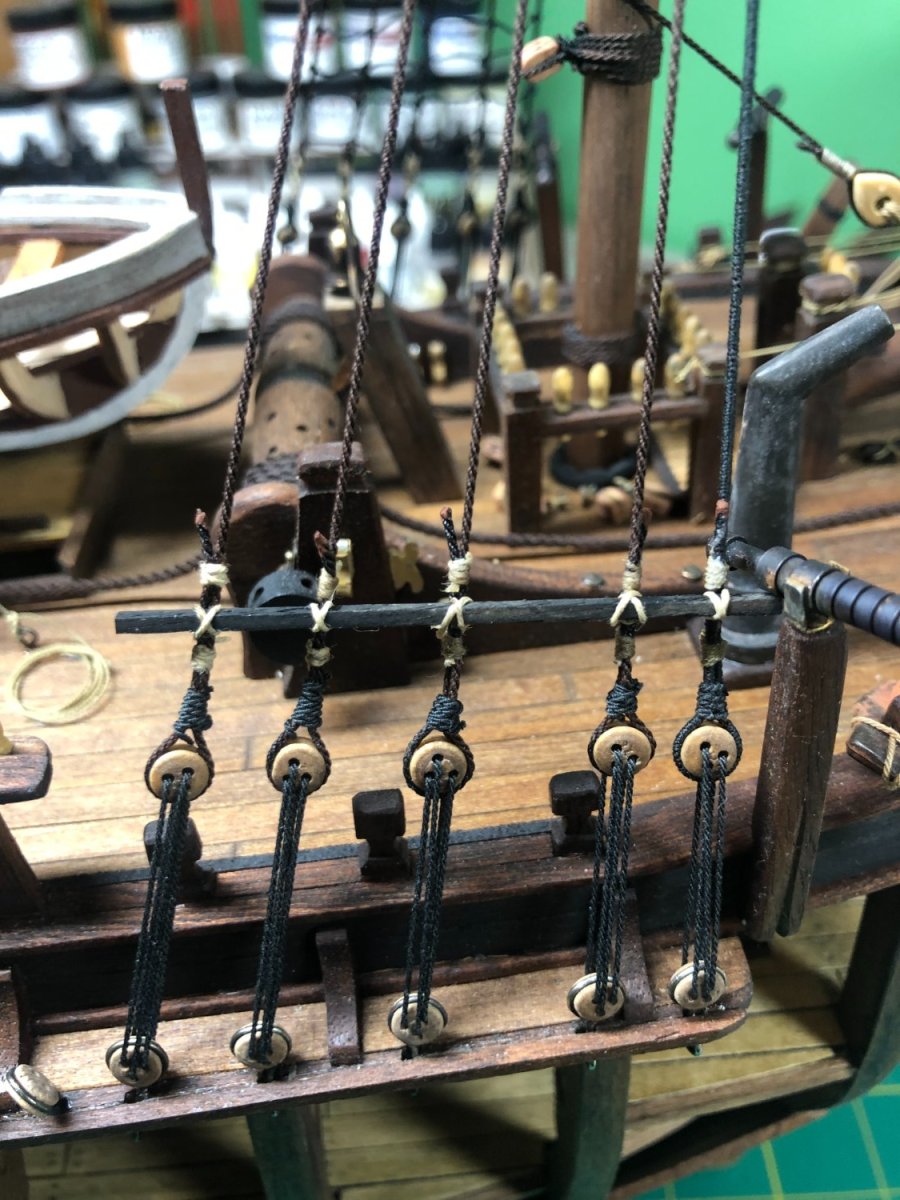
13 shrouds on each side. It should be noted that I alternated from one side to the other to keep the masts straight and square to the deck. On the lower masts, it's probably not necessary as the masts are quite stout but a good practice because it will make a difference on the upper masts. Also, I painted the ends of the cut shrouds with a brown paint to simulate the leather cap usually used to protect the shrouds from the elements:
The camera is quite good at showing things from much closer than the eye can see... so you get to see the good, bad and the ugly!
In the pictures below, I took from a more reasonable distance and the work looks good, overall!


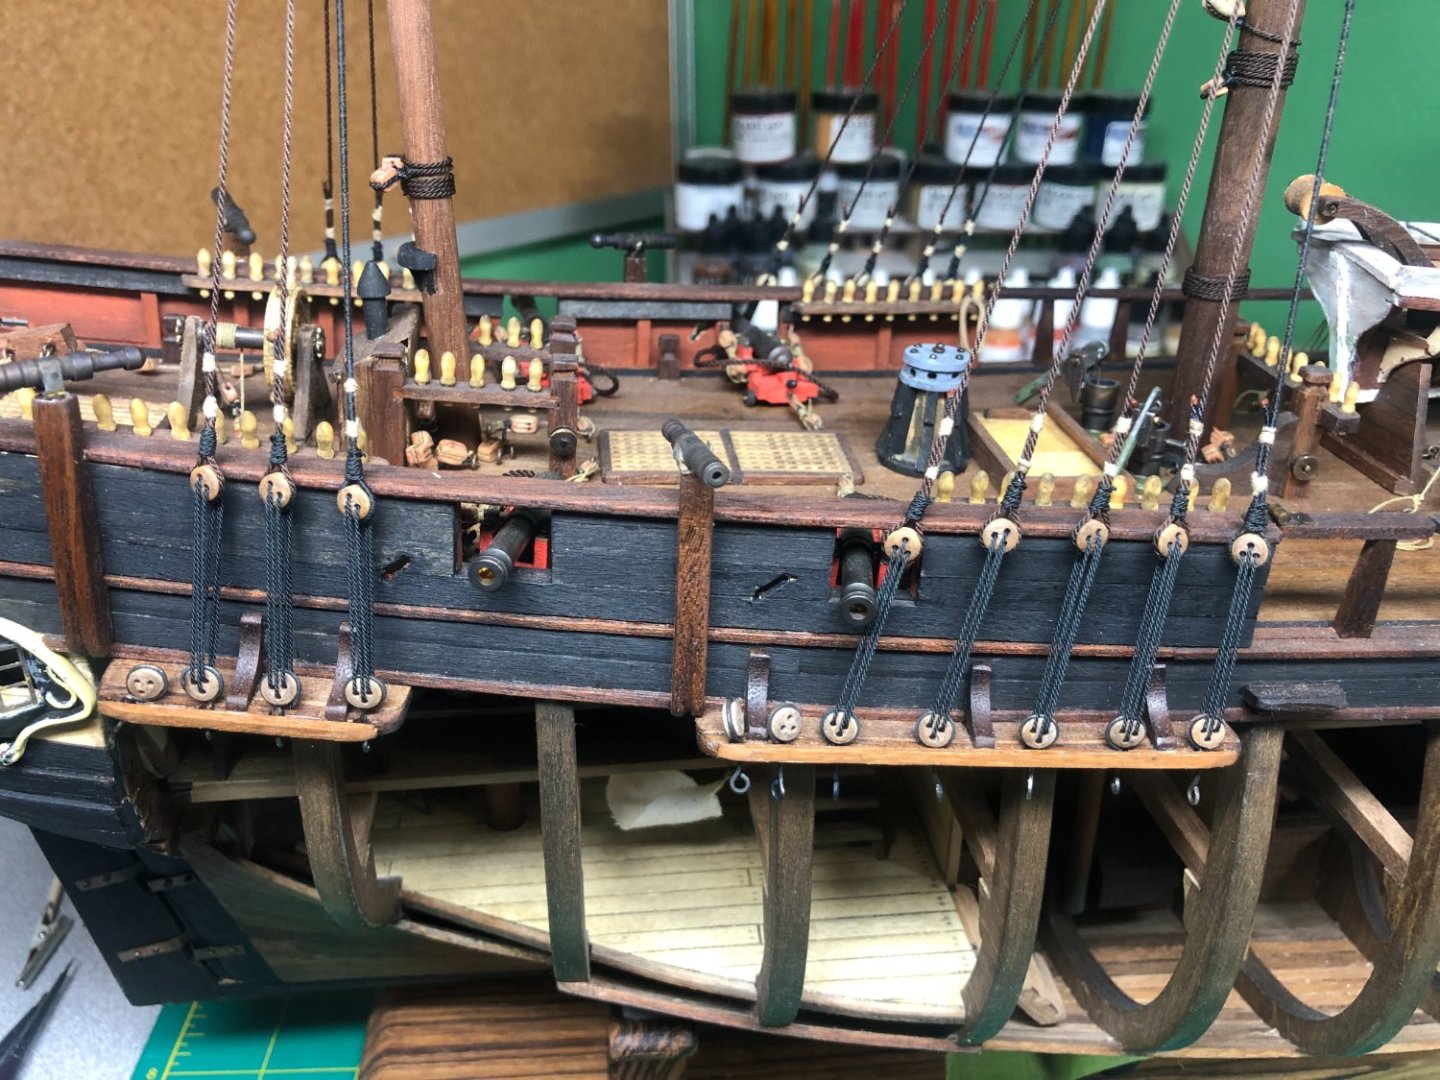


To finish this step, I need to install the wooden ratlines at the bottom of each set of the shrouds, futtock staves at the top and then the ratlines... a measly 625 knots!
But who's counting!!?
-
John and Roger,
I like your ideas and will work toward that as a solution...
We update the post when I have made some progress.
Thanks!
- druxey, mtaylor and Roger Pellett
-
3
-
7 minutes ago, amateur said:
Did someone take a bottle of real-life black boatlacquer home to paint his model?
It does nog have the looks of just black paint: it's very high gloss and a rather thick layer. Almost llike the real thing.
Do you know the age of the model? That might help to identify what was used.
I was wondering whether a putty-repair should be done, or a repair in wood. Some kinds of putty contract differently to moisture-variations than real wood. In that case, you will have a crackline were wood and putty meet rather soon. On the other hand: the dammage is a rather messy one, so just adding a pieco of wood, is not straightforward either.....
Jan
No idea on the age but someone may know…
I agree on the repair problems but really don’t know of any other options.
-
John,
The shape of the bow shouldn’t be too tough to replicate just by following the lines of the hull and deck. There wasn’t anything special on the bow except the bowsprit which is damaged but intact.
10 hours ago, mtaylor said:Are you sure that's black plastic? Add a few more pics from various angles of the damaged area.
I agree with what John said. Maybe up at the damaged area a bit of scraping could be done to determine if it's paint or plastic. Given the shape, I wouldn't be so sure of plastic.
I’m adding more pictures… no, I’m not sure if it’s plastic or ???
The pictures show it pretty well…


- GrandpaPhil and mtaylor
-
2


.JPG.7661ecc4cc3c4a07783474555c9e62fc.JPG)


HMS Bounty by LyleK1 - Artesania Latina - 1:48 scale
in - Kit build logs for subjects built from 1751 - 1800
Posted
Sorry about the long delay... spring and summer activities are in full swing!
Didn't work on the Bounty this month at all except today!
As promised a few months back, here is the procedure I use for weathering/aging my sails:
Gather up your sails, a bowl of water and tea bags or in my case, tea cups (you'll see!). Also a few rubber bands are needed.
1. Wet the sail... make sure it is completely soaked and then the excess squeezed out.
You can see the "cups" I used but tea bags work just fine too.
2. Sprinkle the tea particles very heavily around the edges of the sail. Be liberal with the tea on the edges.
Add more tea particles to the center portion, randomly making heavier spots.
3. Press the tea particles into the sail with your fingers/hand. They won't all stay in place but enough will. Fold over the sail and ball it up real tight. Wrap a rubber band or two around the sail to keep it balled up.
4. Dip them into the water very quickly and remove. Let the sails set for at least 1-1.5 hours. The longer left, the darker the color. So, be careful not to go too far!
5. Remove the rubber bands and unfold the sail. Using a stiff brush, removing as much of the tea particles as possible.
6. Using a hair dryer (or you can just let them dry naturally), dry the sails and remove the remaining tea particles.
The sails will lighten up a bit as they dry. The following pictures are wet sails:
And here are the same sails dried and ready to be worked:
The sails are weathered, splotchy and dingy around the edges... perfect for an aged model.
Hope this answers some of the questions I received about ageing the sails!