


LyleK1
-
Posts
531 -
Joined
-
Last visited
Content Type
Profiles
Forums
Gallery
Events
Posts posted by LyleK1
-
-
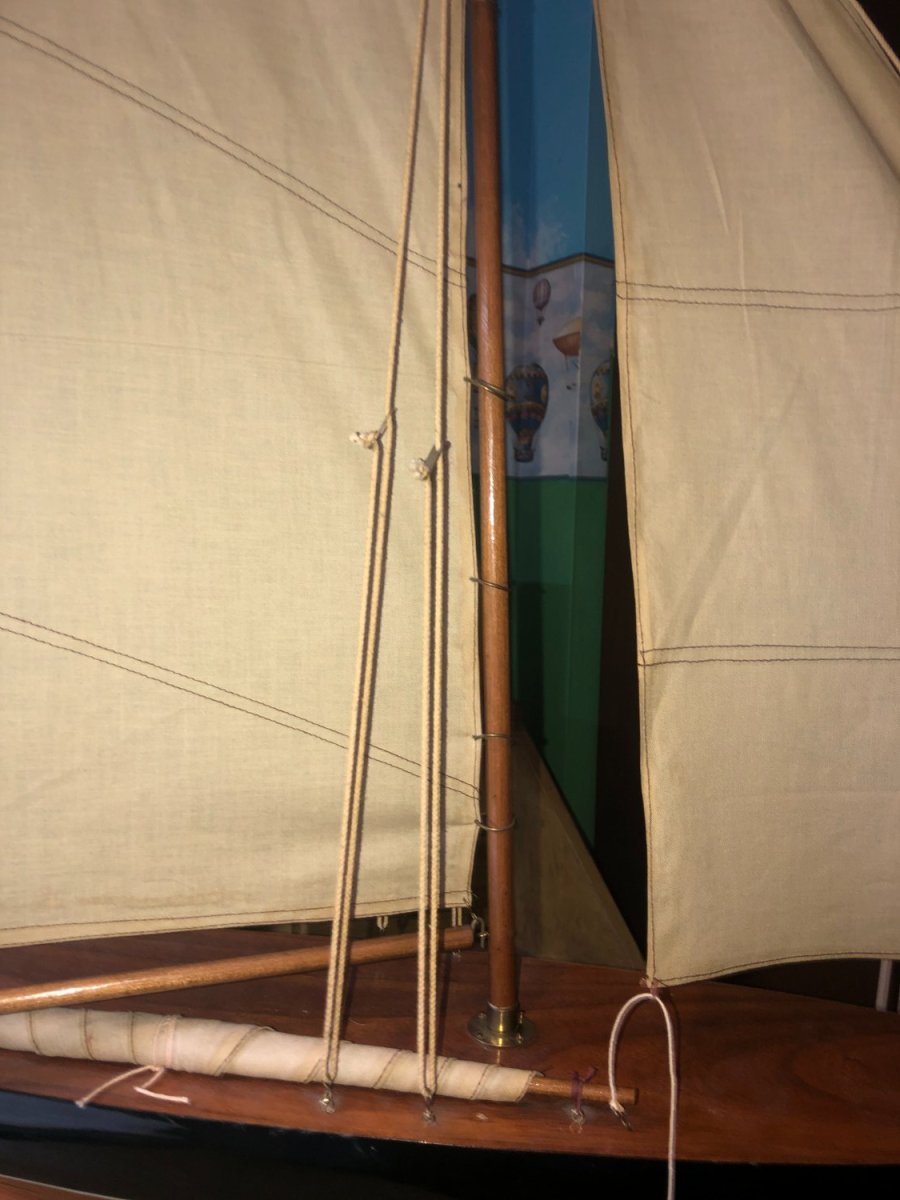
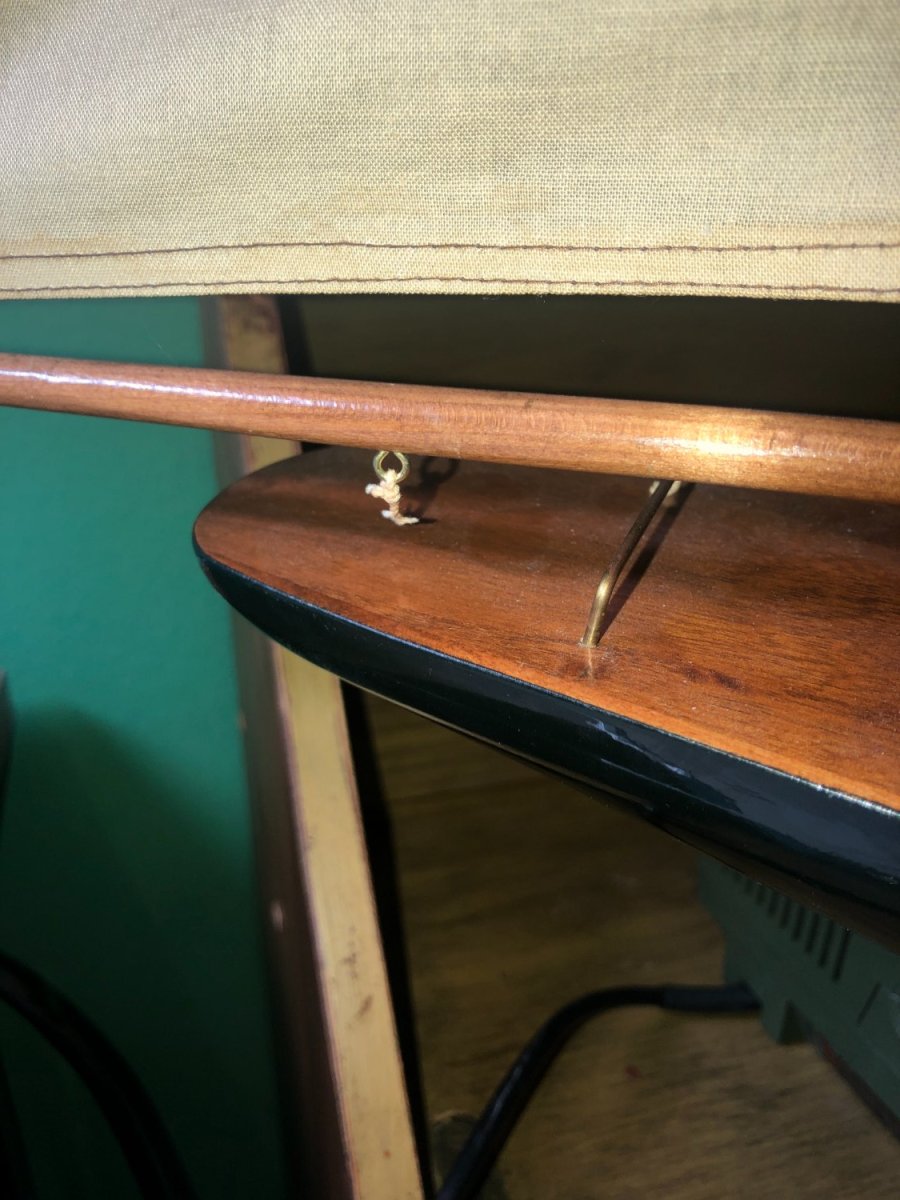
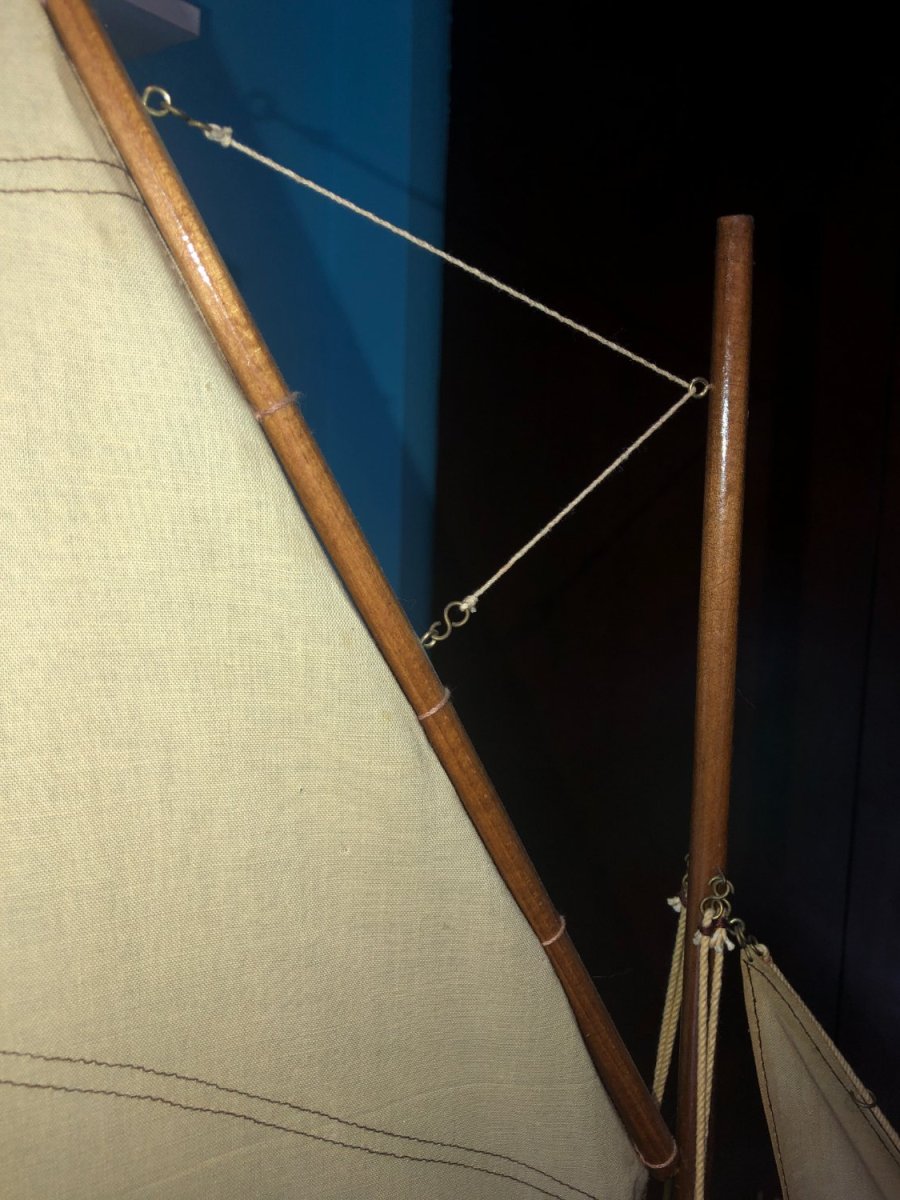
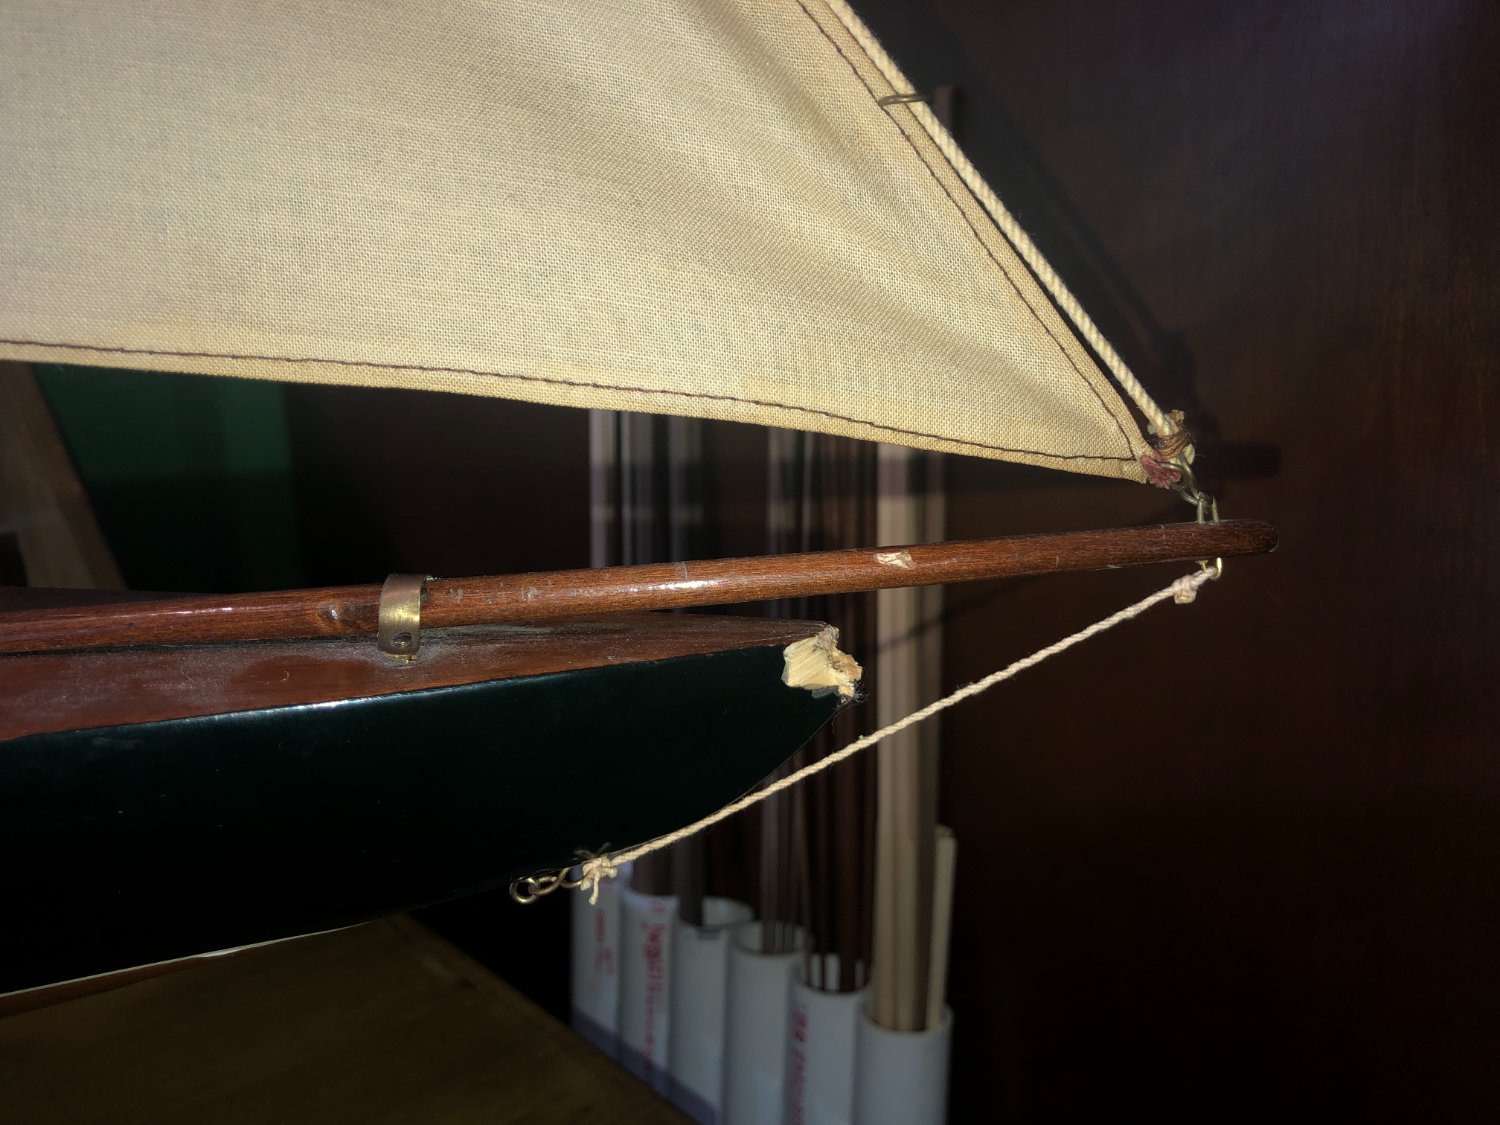
I was recently asked by my yacht club if I could repair a model sailing boat that has been in the clubhouse for many years.
Most of the work needed is cosmetic and cleaning... However, the bow has been badly damaged from being dropped (I'm guessing) and I'm not 100% sure how to go about fixing it.
I can clean it up and re shape it with wood putty or some thing similar but the plastic black coating is not something that can be fixed easily, if at all. Short of doing the repair and painting it gloss black, I have no other ideas.
Any suggestions, ideas?
Pictures below if the model and the bow:

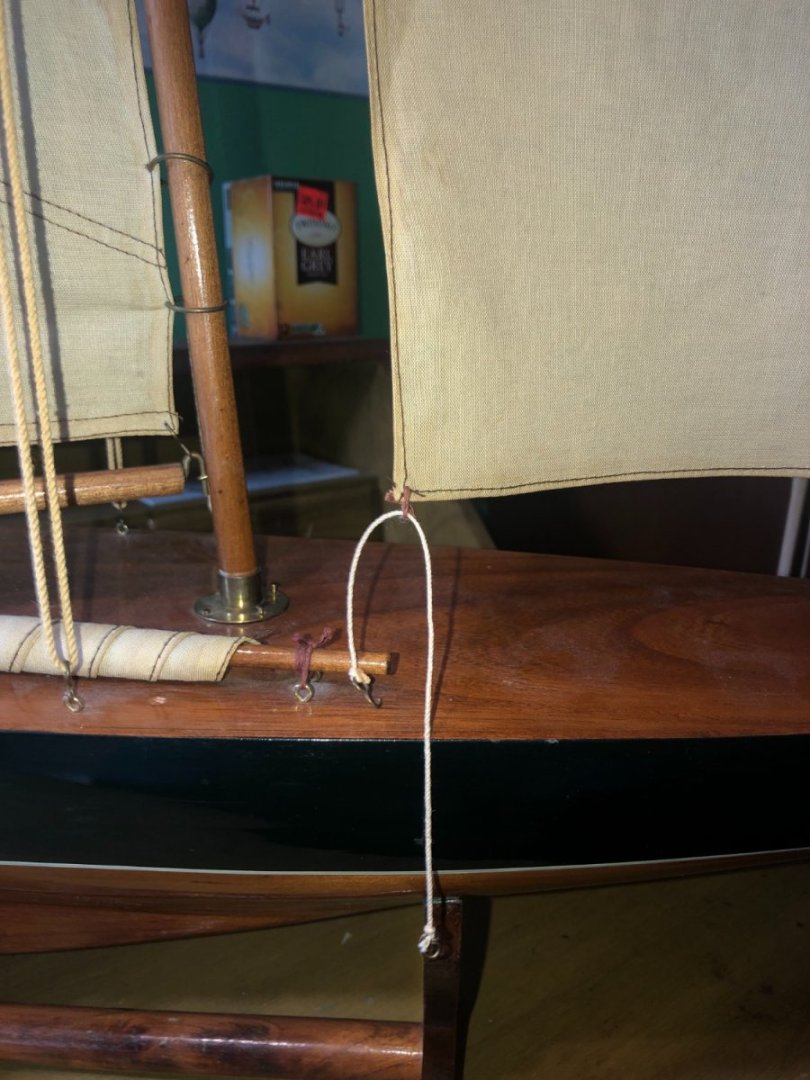
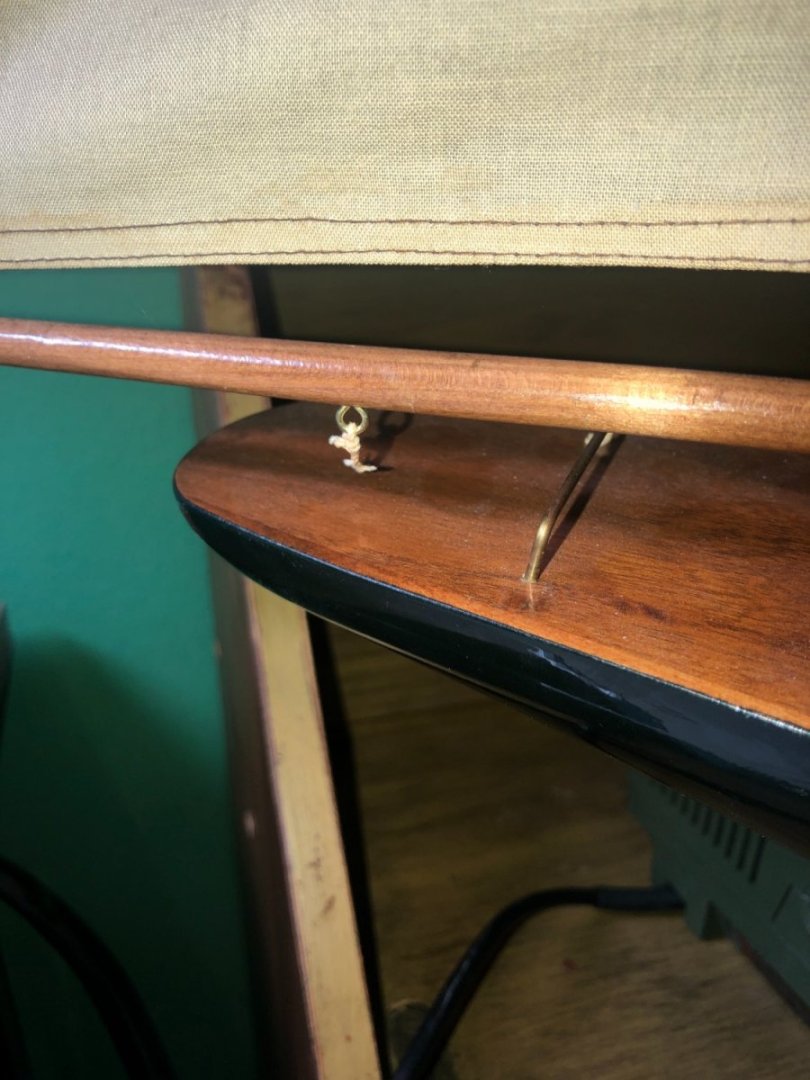

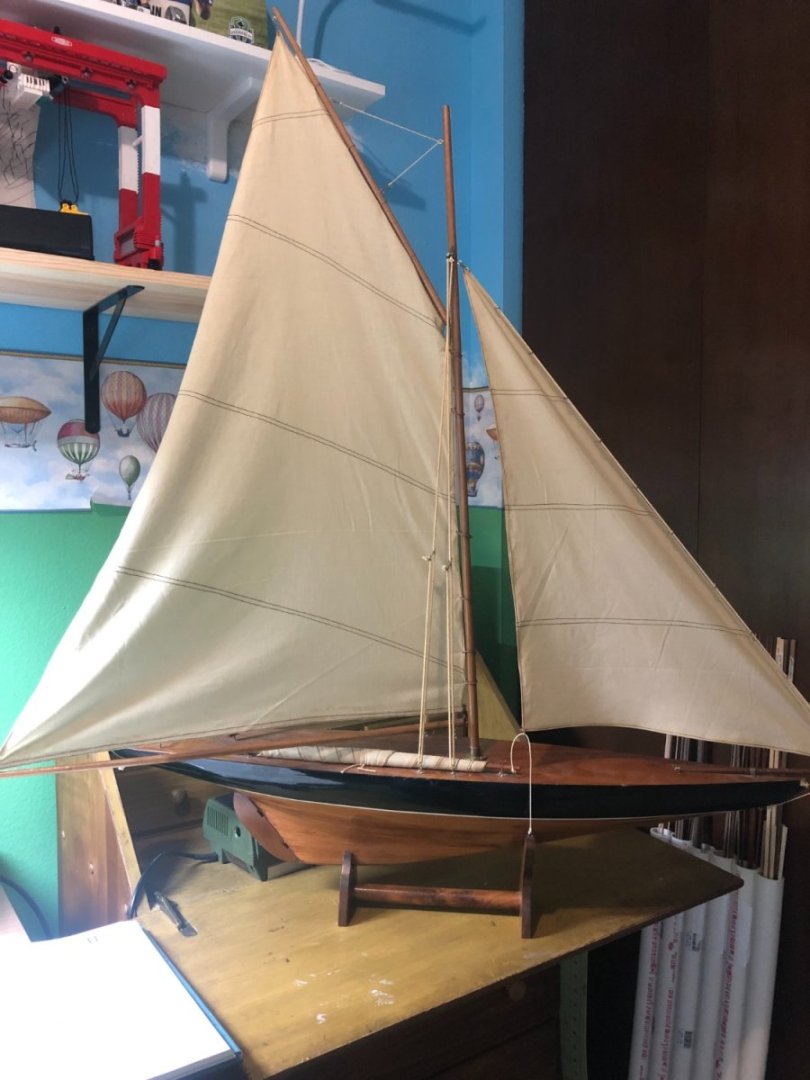
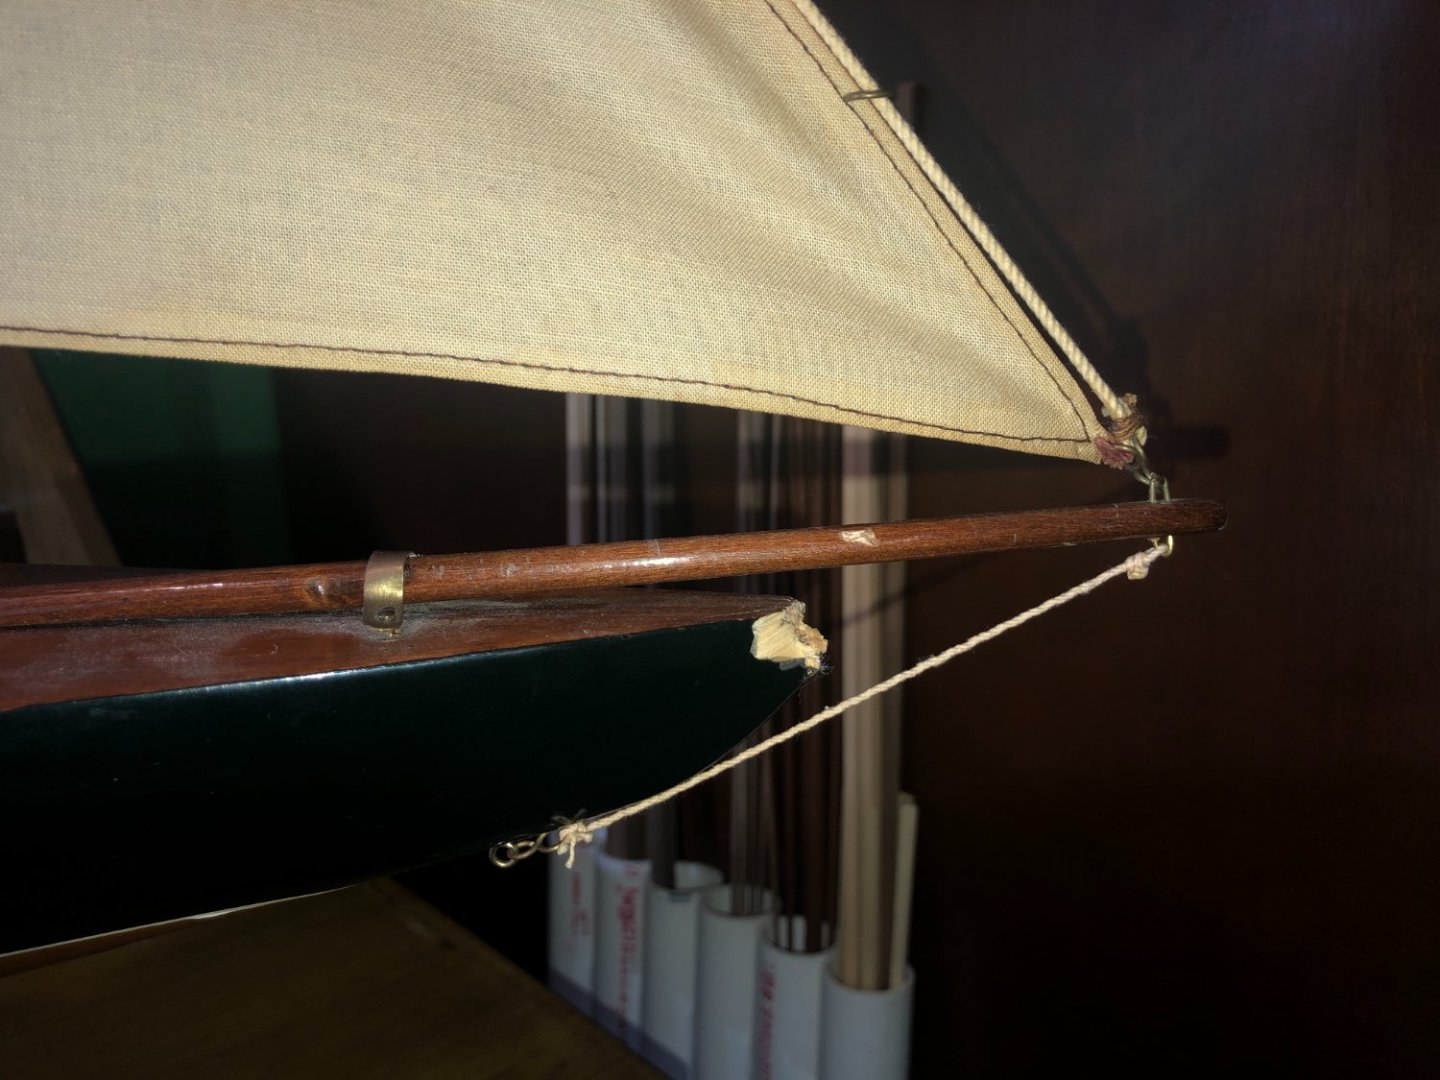
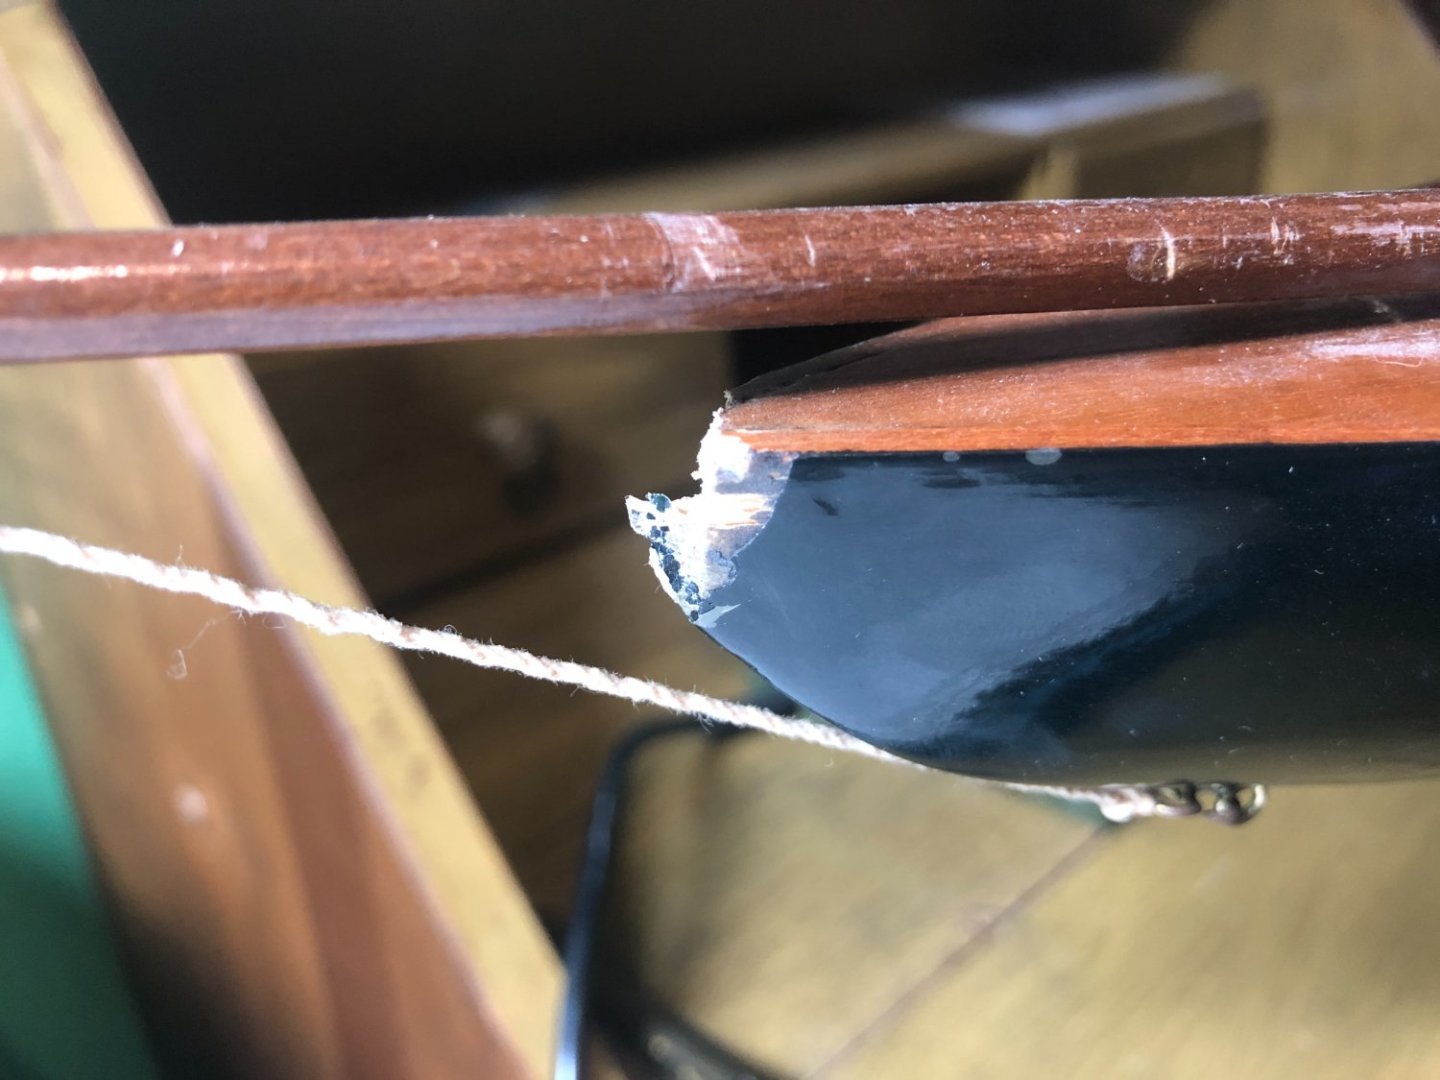
Anybody that knows what this particular model is and can steer toward a picture(s) that show the original bow shape would be helpful too!
Thanks!
-
::Rant::
I thought when I retired (over a year ago) that I would have tons of time to work on the models I chose to build.
Boy, was I wrong! I have to fight for every minute!
I'm far busier than when I worked fulltime!
::Rant over::
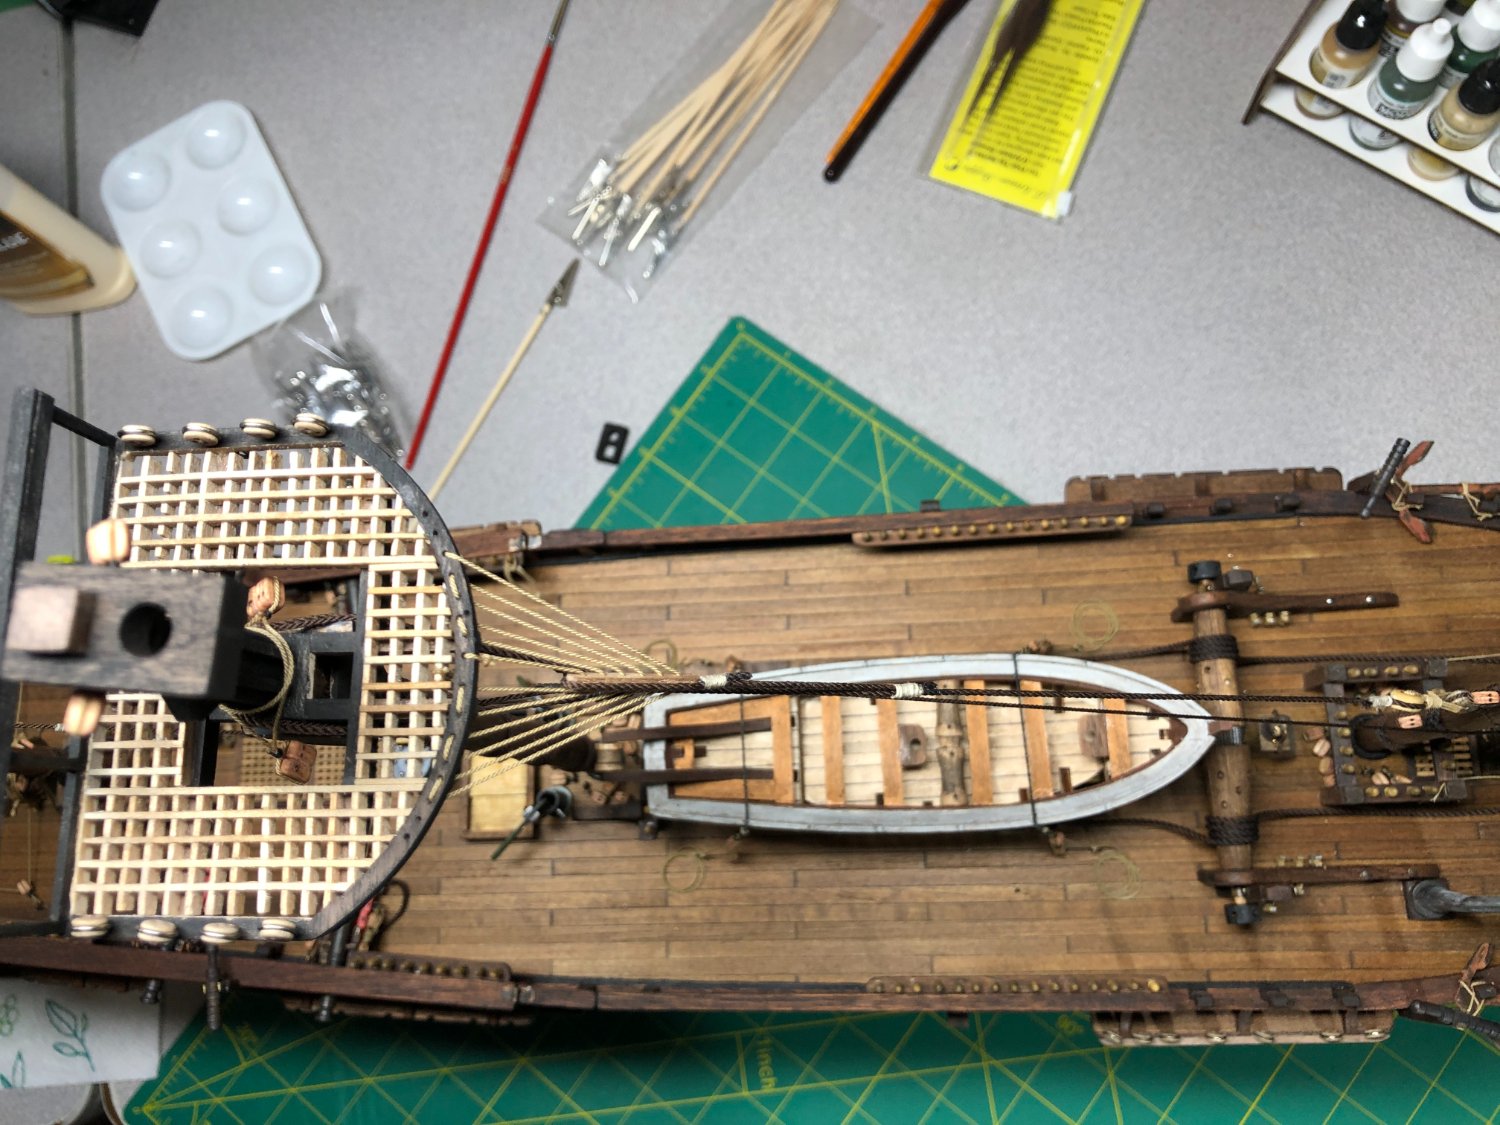
I finally got all the lower shrouds laid out and installed:

The foremost shrouds on all three masts are served as noted in many of the books I'm using for reference.
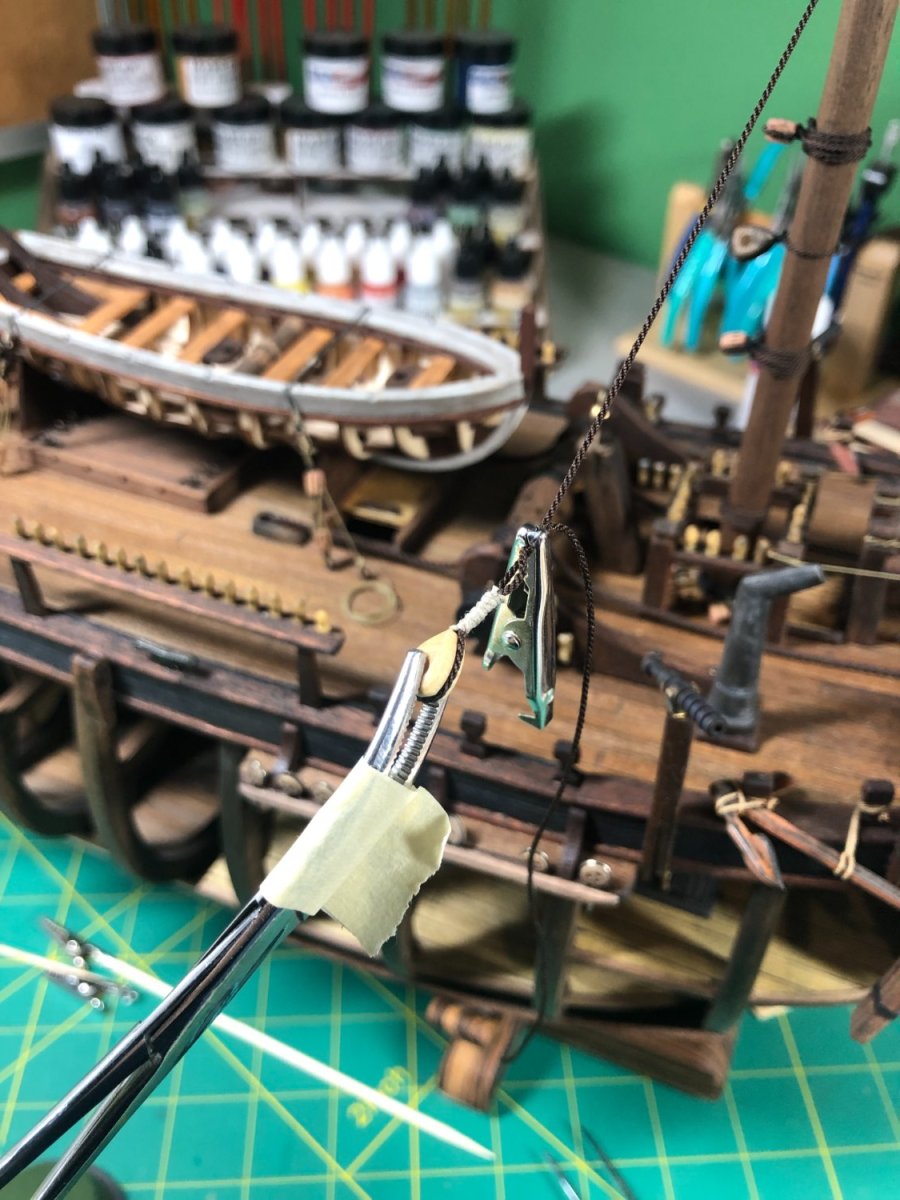
I started installing the upper deadeyes and finished one (which I'll need to re-do. The position is too high!) and installed the lanyard to get an idea of positioning and such:
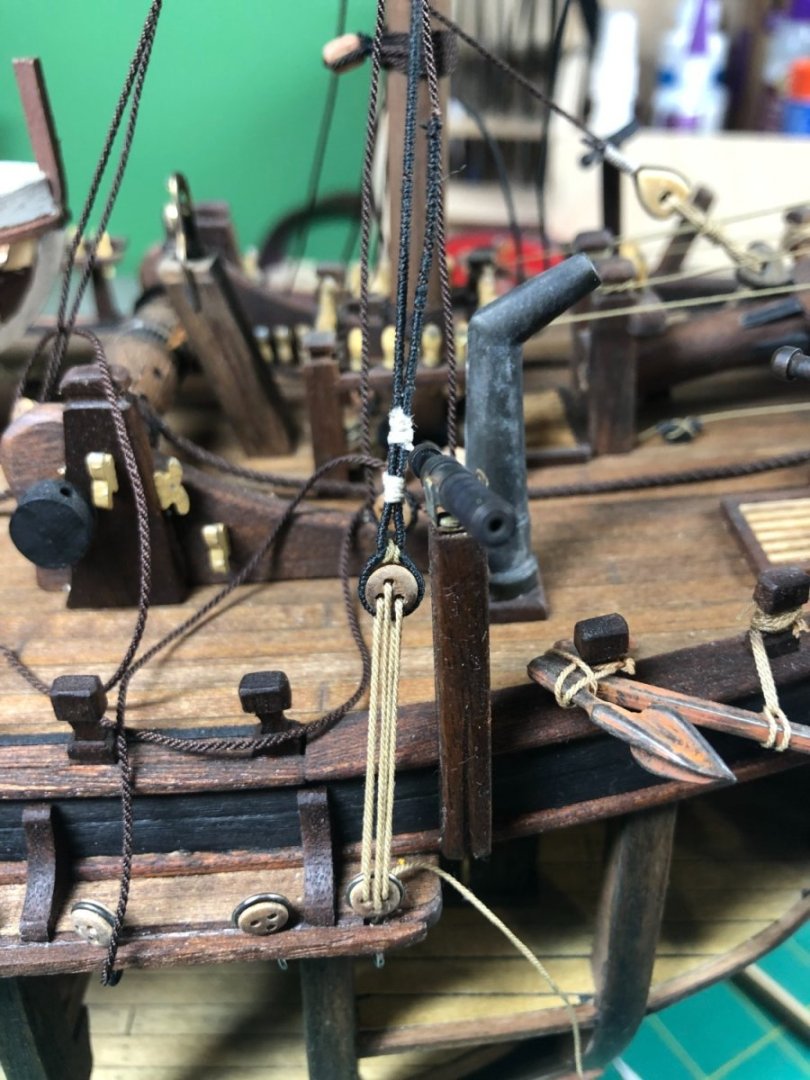
As I noted above, the positioning is too high and I'll be re-doing this one.
However, I would like some feedback on the overall assembly. A couple things that I'd like critiqued:
1. Color of the threads used, except for the lanyard. It will be black. The one in the photo was for testing only. I think the seizing is too bright of a color.
2. Position of the seizing's and the size of them (too big or too small).
3. (Not shown) Once the shroud is cut, what color should the canvas/leather cap be? It will be painted or maybe left off?
4. Anything that I should have done differently or added/subtracted to the overall assembly?
Looking forward to your critiques before moving on with all the lower shrouds.
- scrubbyj427, TOM G, mort stoll and 3 others
-
 6
6
-
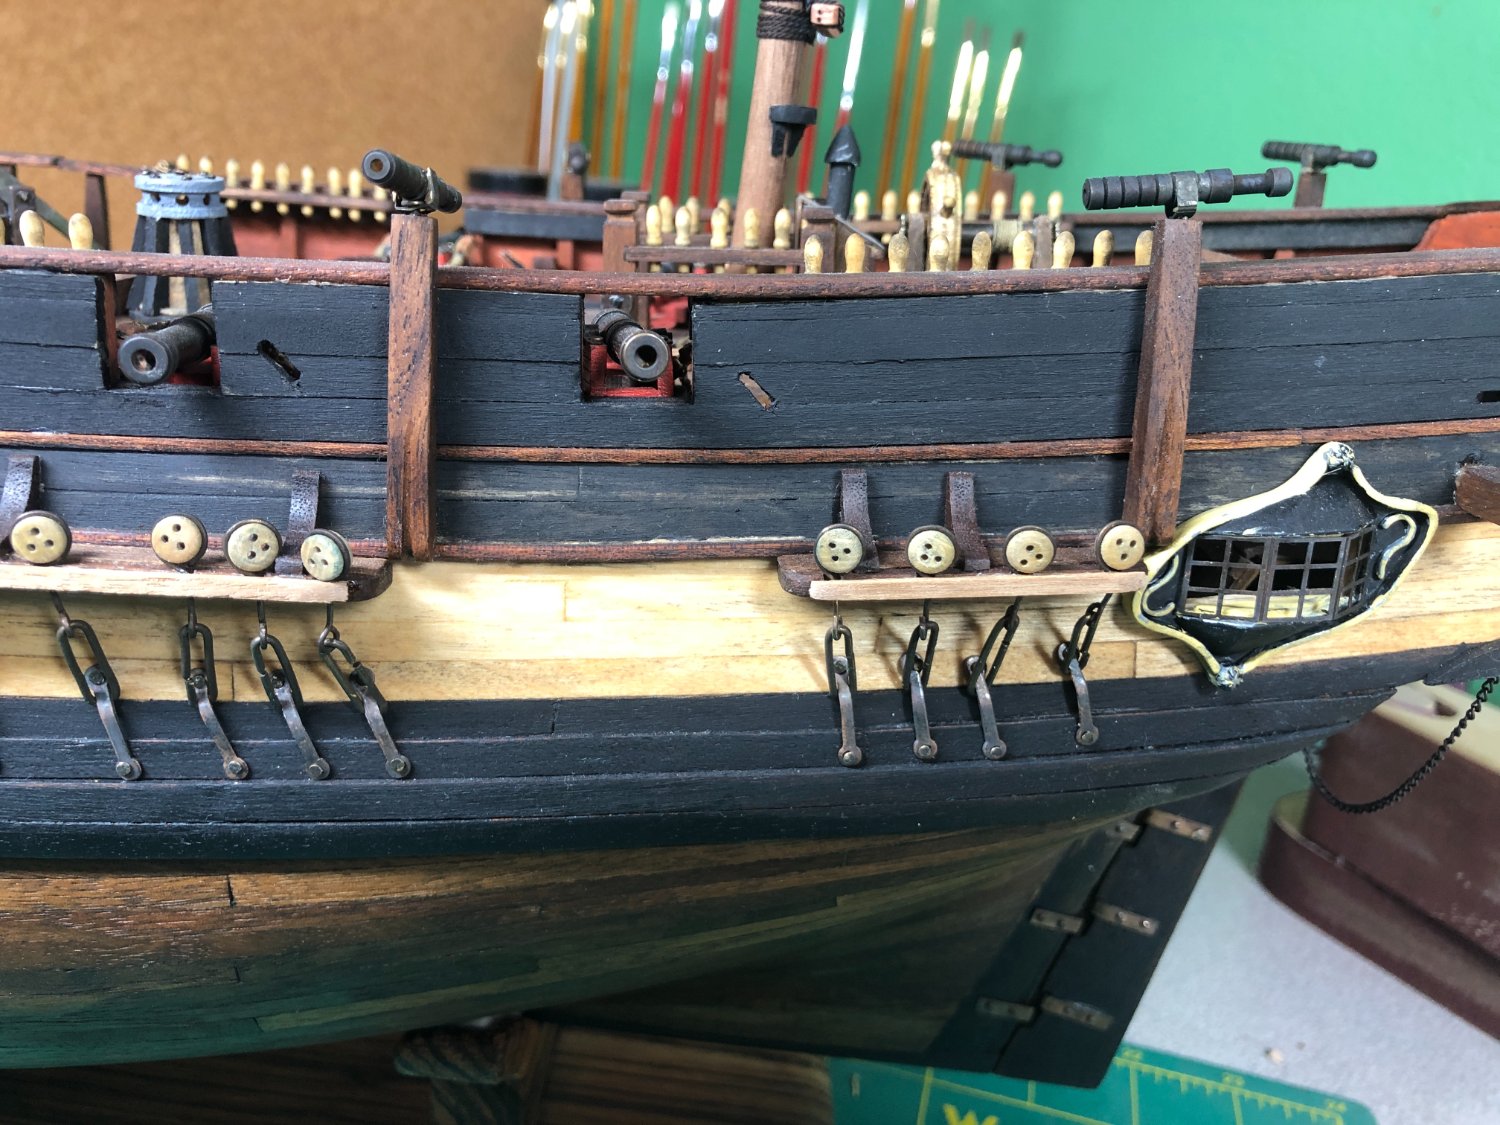
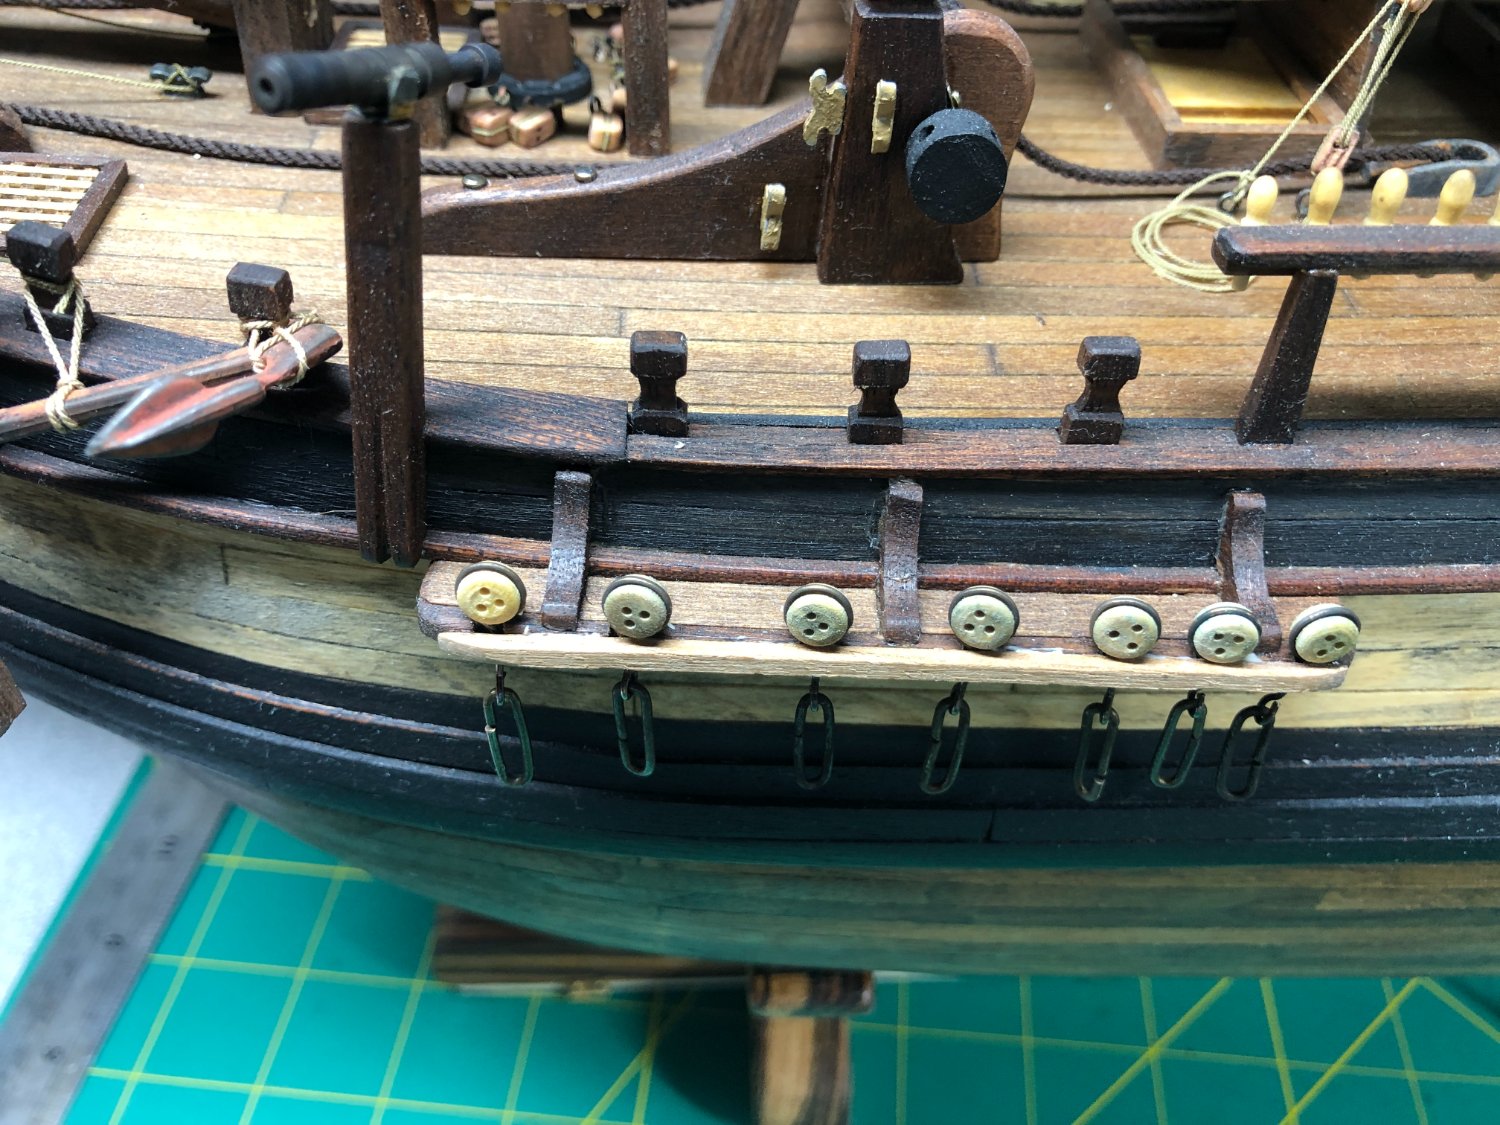
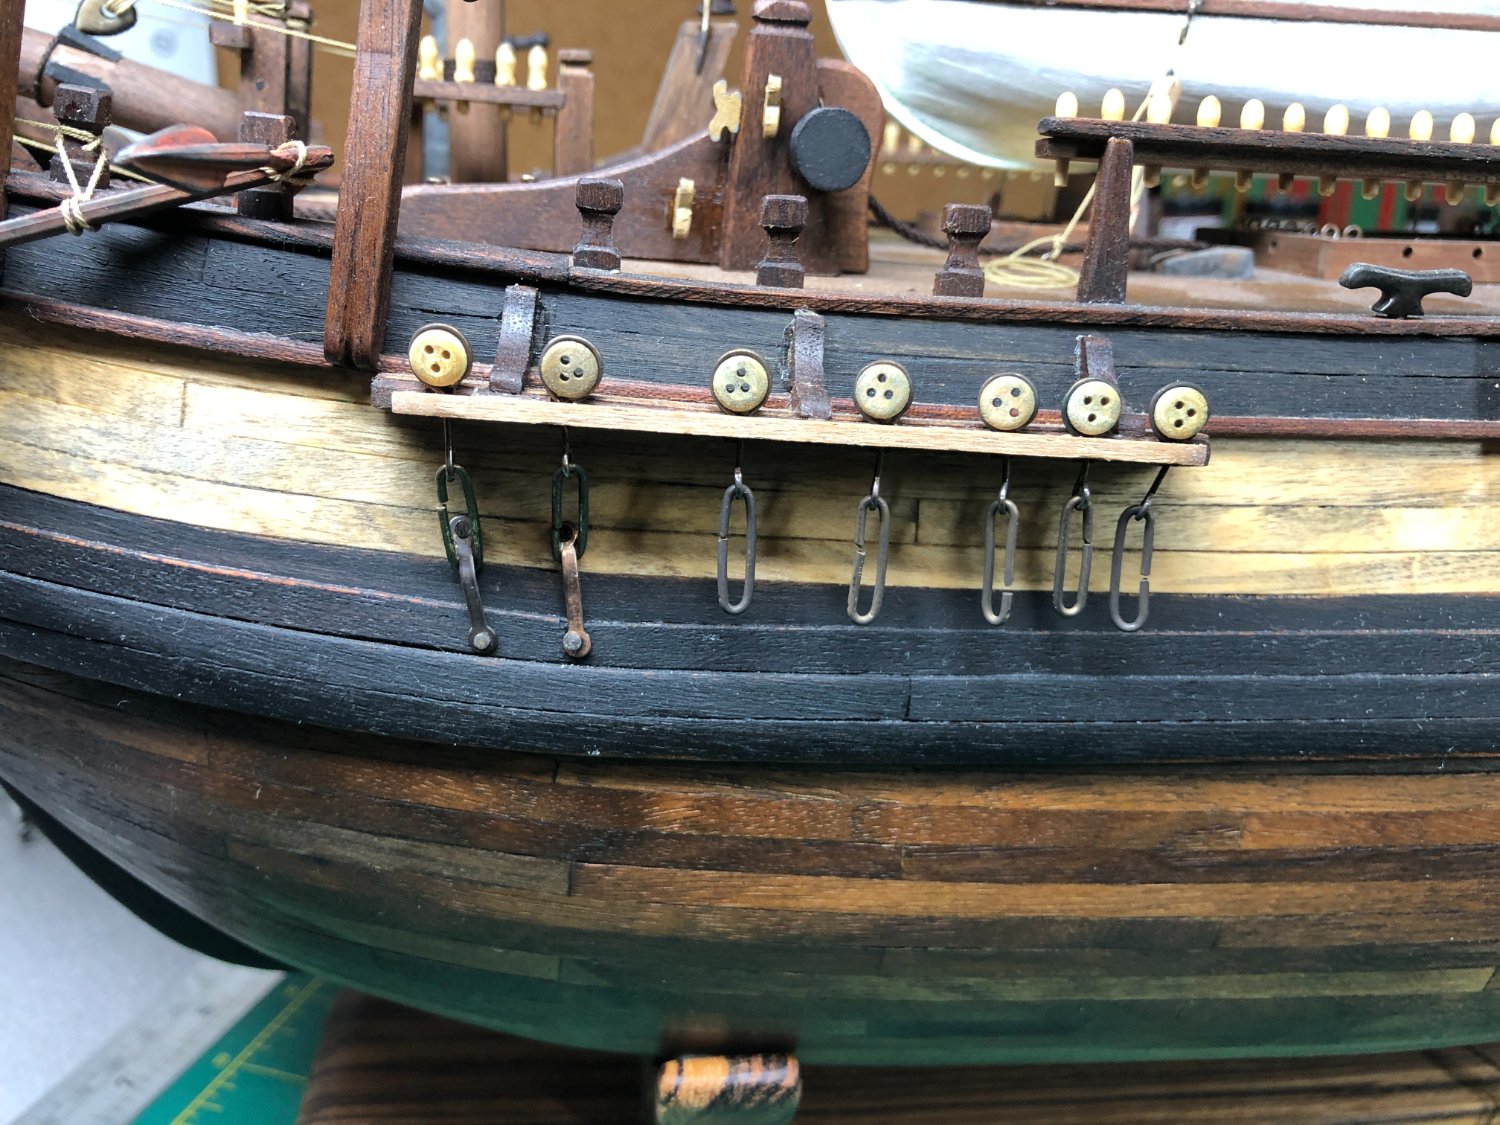
Chain plates completed:
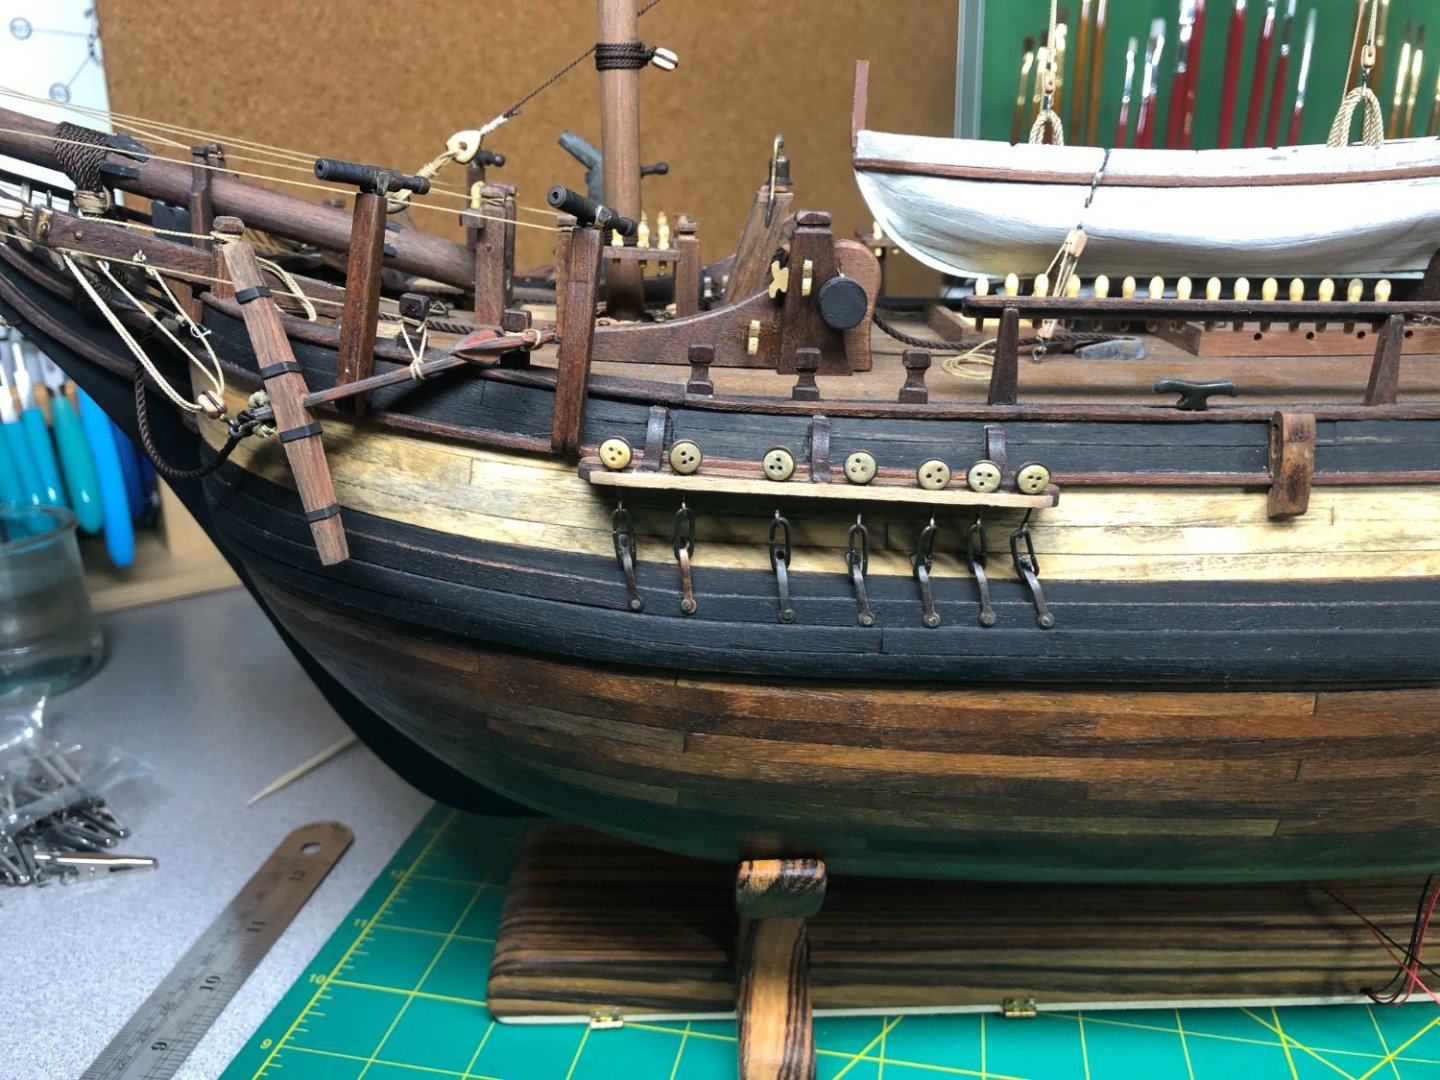


I'm doing some research on the shrouds. The Eighteenth Century Rigs and Rigging book and Lee's book both state that the foremost shroud on the masts are wormed and served. The remaining shrouds are only served where they go around the mast. Additionally, there is a pattern to how the are rigged.
I won't be worming the lines but I will serve them. So, my next update will be after I serve up some lines!
- mort stoll, TOM G, AJohnson and 1 other
-
4
-
Looking real good!
Option 3 is my vote!
-
-
Tim,
As usual, your work is impeccable.
Looking forward to seeing the finished battleship.
The Sierra West website is very interesting and reminds me of my fathers work on his railroad diorama's that he assembled throughout my childhood! I'd be curious to know how these kits are assembled.
I just finished my second year on the Bounty and am working on the masting and rigging.
Happy holidays to you and your family!
The weather here is dreadful as well... but improving!
- Keith Black, Canute and mtaylor
-
3
-
Two years have passed since I started the Bounty! I have approximately 970 hours into the build!
I have started on the deadeyes and chain plates. On the open side of the ship, there will not be any chain plates and will only have the deadeye and attaching hardware. The other side is slightly different than the kit and most of the other models I've seen as I tried to replicate the "Anatomy drawings" to a degree. Hopefully, still keeping it period correct!
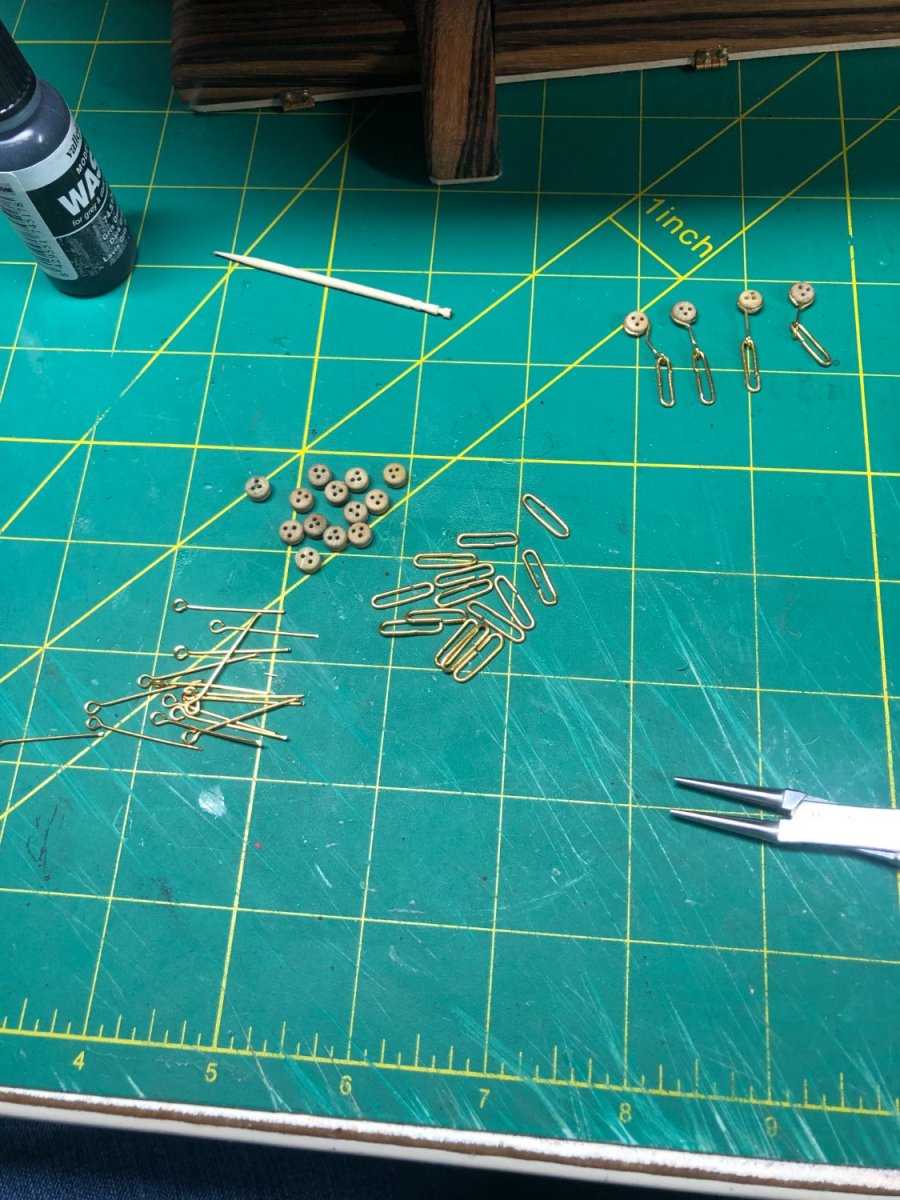
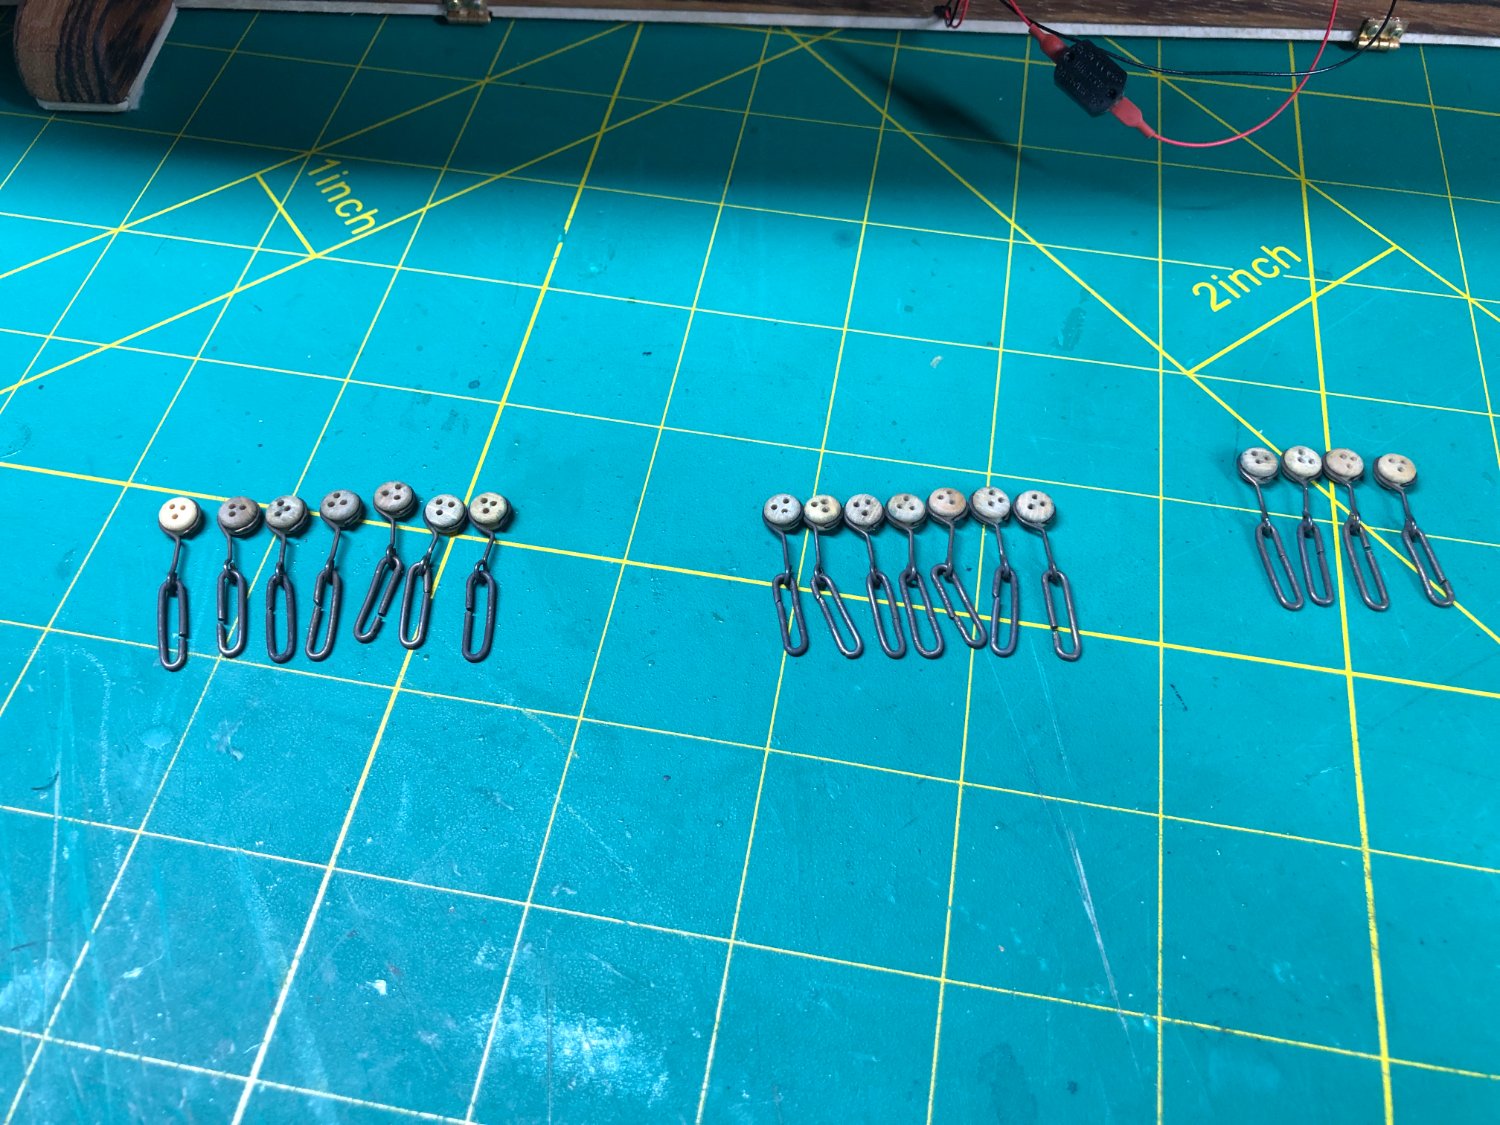
I started by assembling the deadeyes:

Once assembled, I blacken them for the weathered effect:
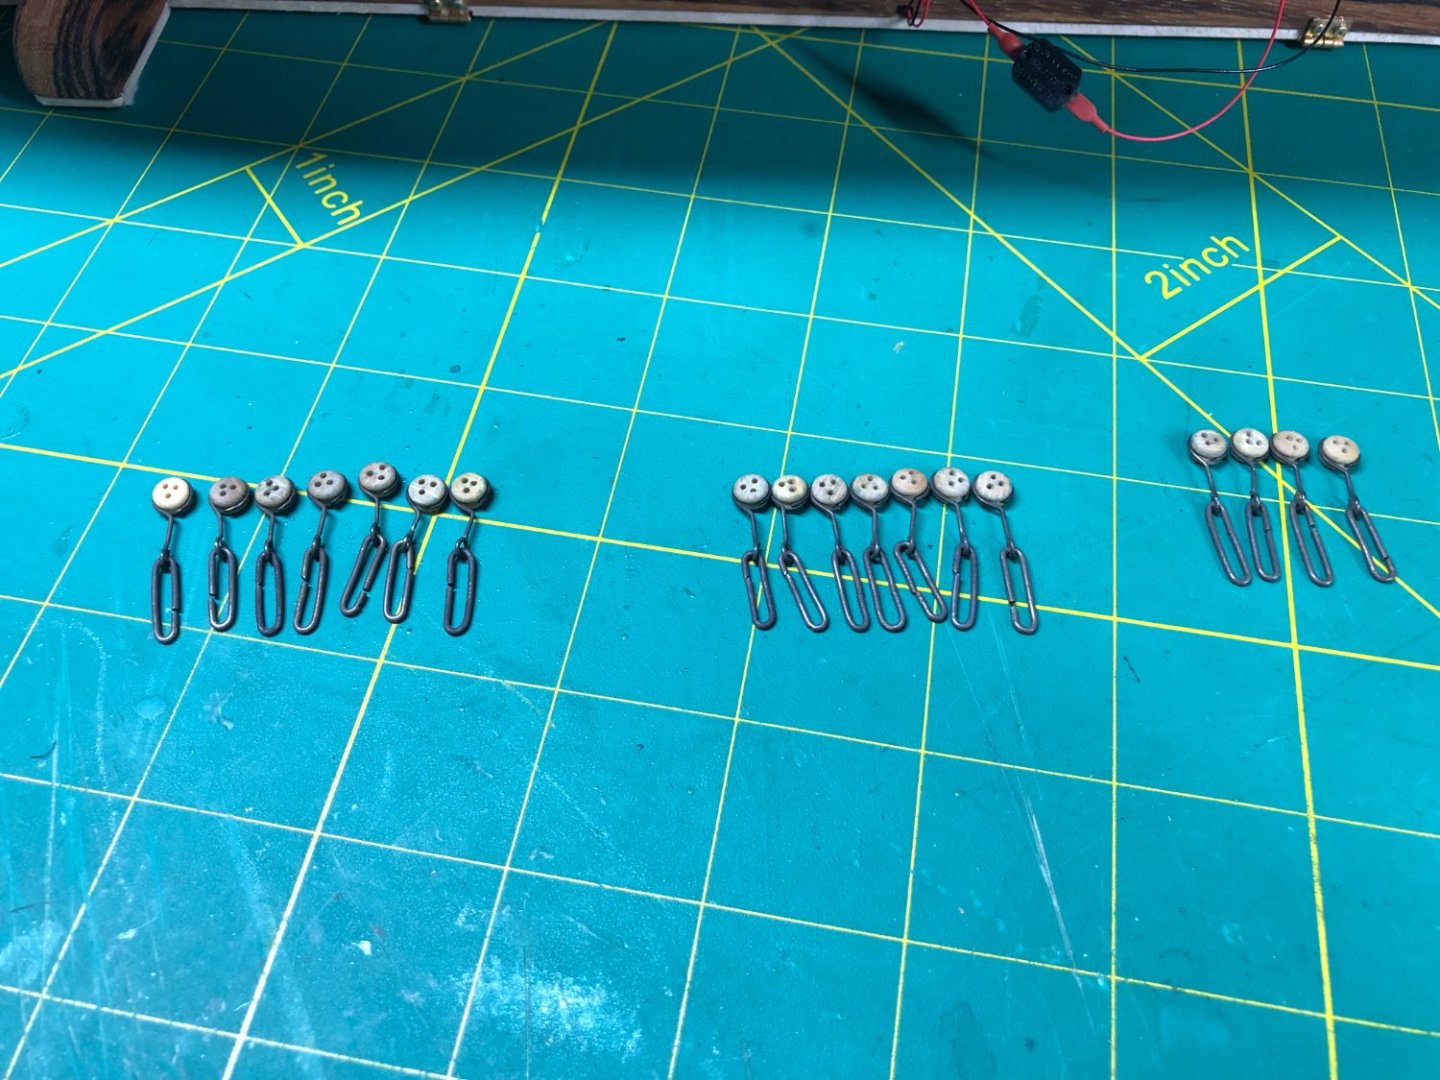
I still need to darken the deadeyes but that will be done as a finishing touch much later on.
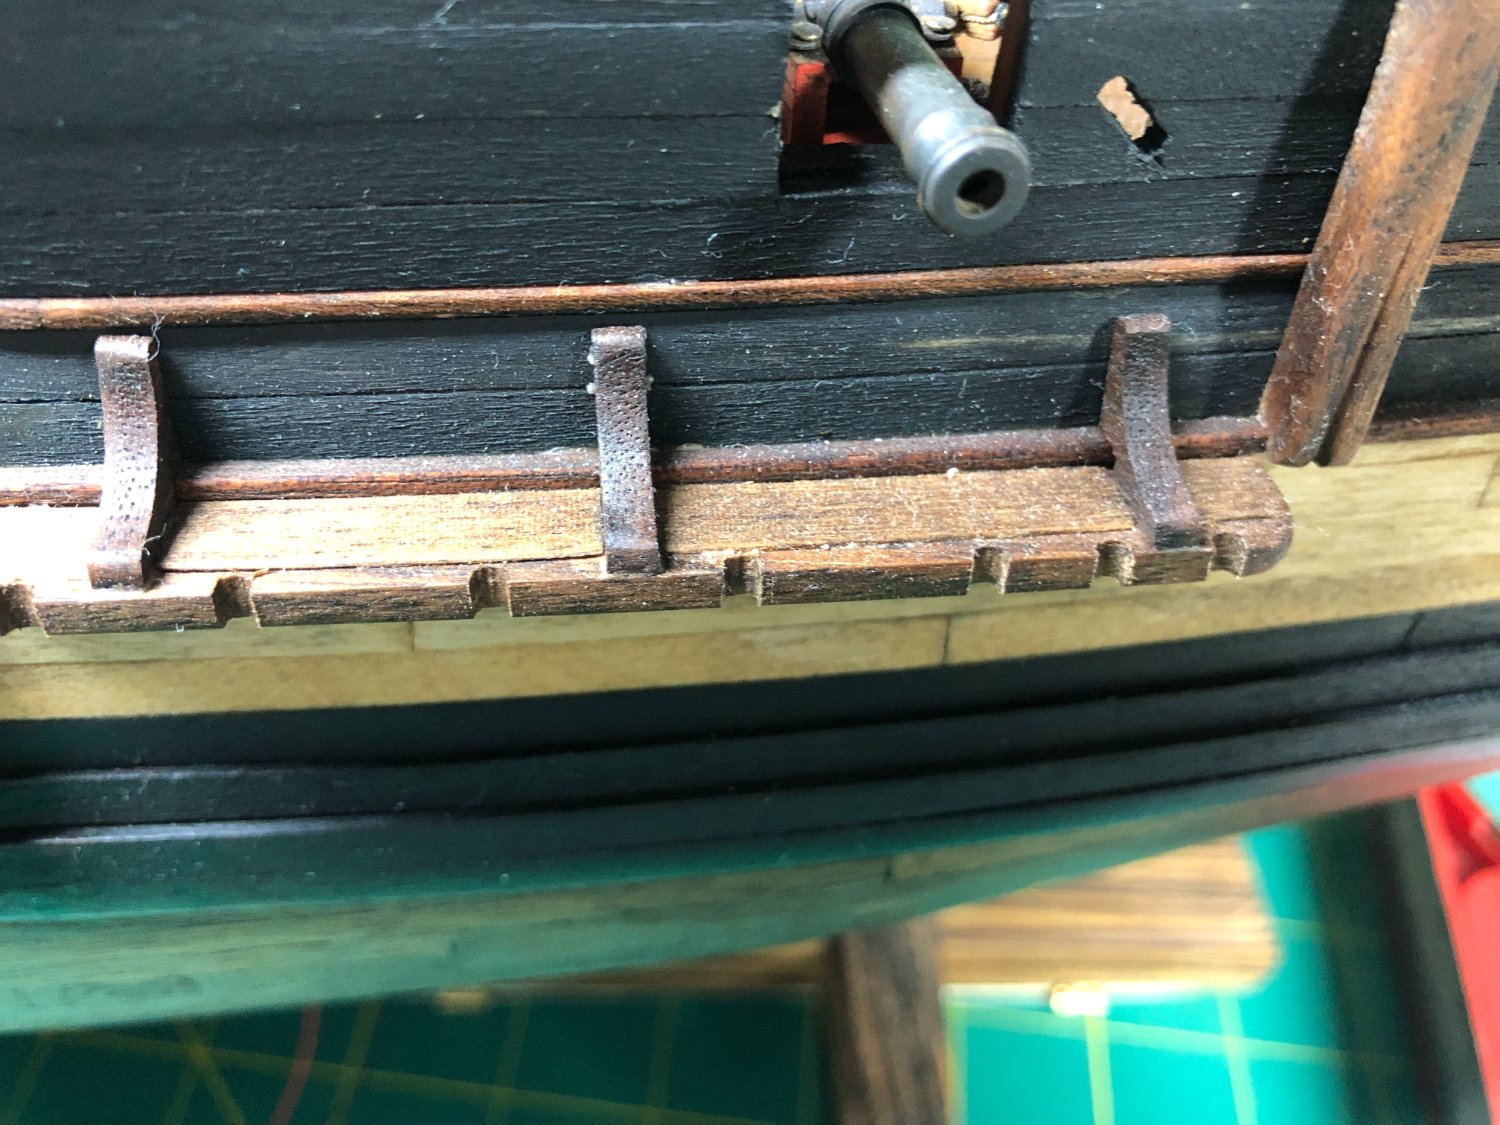
The deadeye assemblies were added and the channel cover glued into place:

Boiled linseed oil will be added to the covers once the glue is dry but in the interim, the first two chainplates are completed. Not an easy task and it took me a couple of hours to come up with a system that seems to work...so far!

Hopefully, the remaining 16 will go a bit quicker! I've started serving some line for the first few shrouds and will begin to add those next.
More to come soon.
- Dave_E, mort stoll and AJohnson
-
3
-
-
-
-
36 minutes ago, oakheart said:
Thanks for the welcome Edward and Keith
I already have a couple of questions
Is there anyway to get notifications of replies to posts?
How do I find out how to post photos?Tim
There are a couple of ways to get notifications… if you start a topic, you should get notified of responses automatically. In other posts there is a button at the top right side of the post that states “follow”. The button gives options of the type of notification you can receive.
Adding photos is easy too.
Whfn adding a post there is an area at the bottom to drag and drop your photos!
Good luck and welcome!
- Dave_E, Edwardkenway, Keith Black and 3 others
-
6
-
I might also suggest the half hull project from NRG's store.
It's inexpensive and is a great teaching tool specifically geared toward planking.
Having said all of that, as others have expressed, it's a learning experience and I've found you get better with time and experience.
I think the work you've shown is decent!
Keep after it!
-
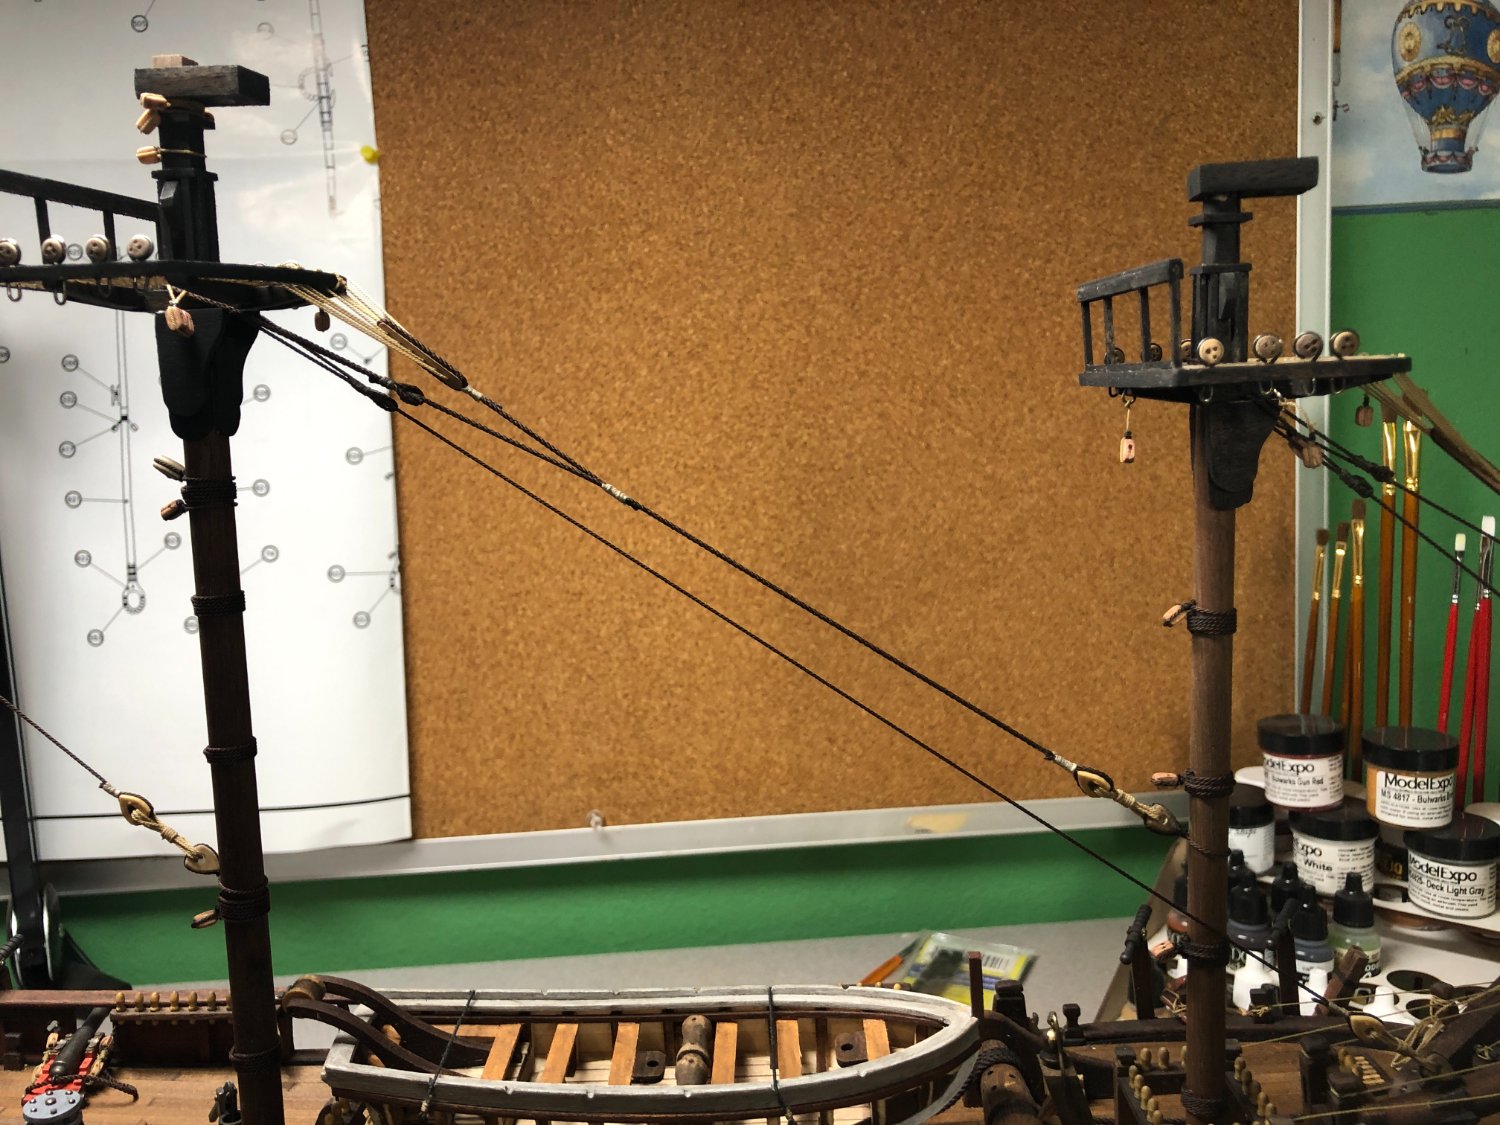
The main stays and the mizzen stays are completed:


A while back in my log, I mentioned experimenting with different methods of ensuring knots stay tied... I have been using a Liquitex product (see picture). It goes on white but dries clear and I have not noticed any signs of it once dried.
Here is the product:
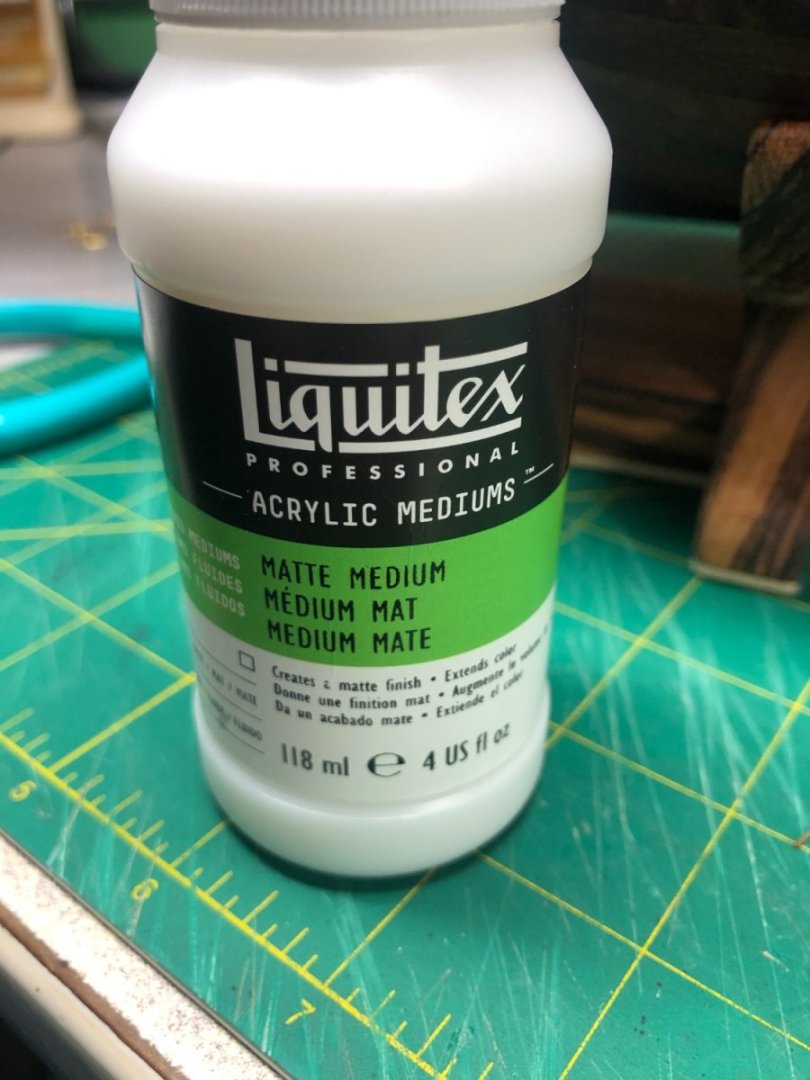
I have to add a couple of blocks on the main stay for lifting the boats and then it's off to installing more deadeyes and the shrouds.
- TOM G, mort stoll, AJohnson and 1 other
-
4
-
On 12/8/2022 at 5:05 PM, LyleK1 said:
Thanks Joe!
Actually, I discovered today that the original drawings in the "Anatomy" book don't show crowsfeet on the Bounty! Oh well!
I've already done the foremast crowsfeet and will continue on but I'll be checking more closely going forward.
I plan to have the sails in a dry set position which will allow most of the rigging to be visible.
You always know what you did and can always point things out to the novice eyes looking at it! Sometimes that good enough.
Appreciate the comments!
Finished the main stays today. I'll post more pictures after my brief trip to LA tomorrow.
BTW, I stopped by your Bounty build log and am absolutely floored... Beautiful work. You must have the patience of Job to work at that scale!
Wrong! The crowsfeet are on the drawings in the Anatomy book. They are not on the other drawings I have... I stand corrected!
-
7 hours ago, Joe100 said:
I spent an age on the crowsfeet and euphroe block on my Bounty, and after the sails were on they were barely visible. The things we do I guess. But it’s there if anyone asks!
I’m really enjoying your progress, she’s really coming together.
Thanks Joe!
Actually, I discovered today that the original drawings in the "Anatomy" book don't show crowsfeet on the Bounty! Oh well!
I've already done the foremast crowsfeet and will continue on but I'll be checking more closely going forward.
I plan to have the sails in a dry set position which will allow most of the rigging to be visible.
You always know what you did and can always point things out to the novice eyes looking at it! Sometimes that good enough.
Appreciate the comments!
Finished the main stays today. I'll post more pictures after my brief trip to LA tomorrow.
BTW, I stopped by your Bounty build log and am absolutely floored... Beautiful work. You must have the patience of Job to work at that scale!
-
-
-
-
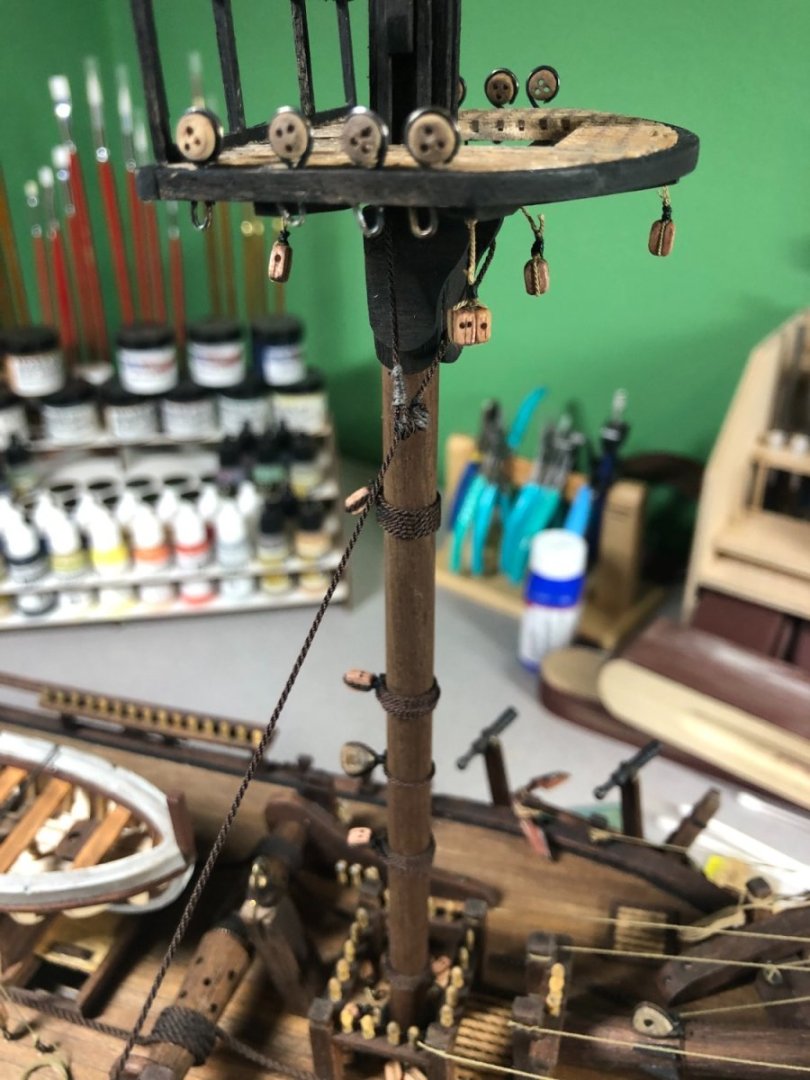
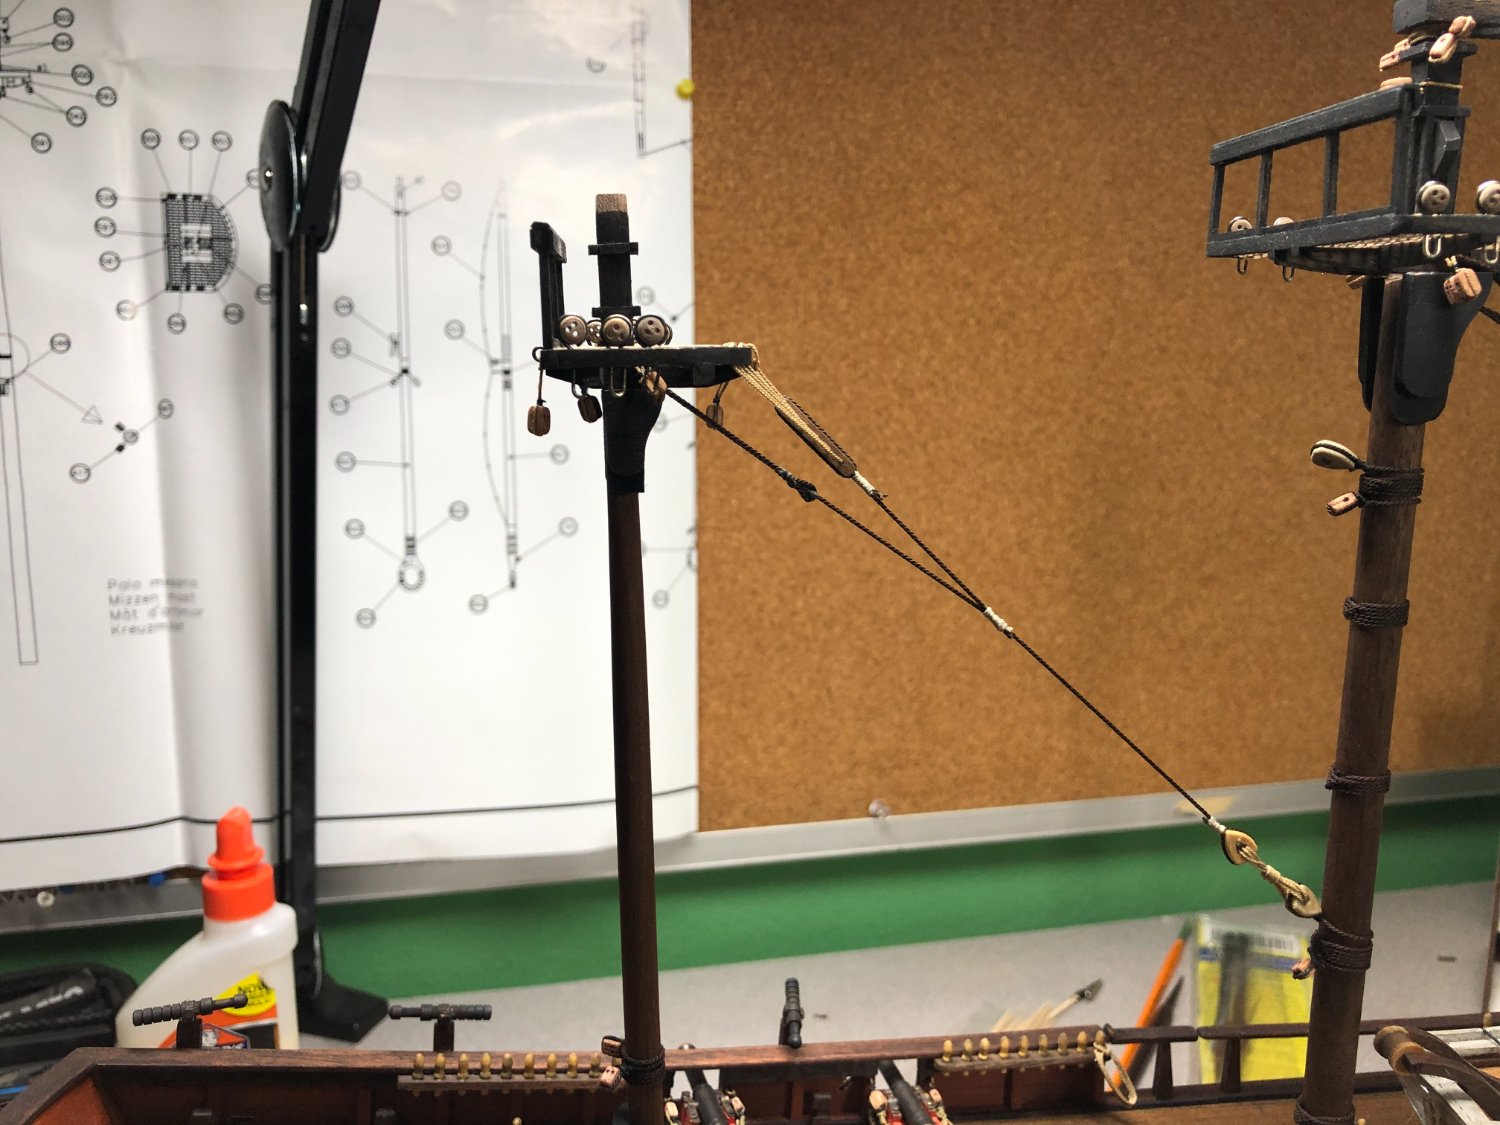
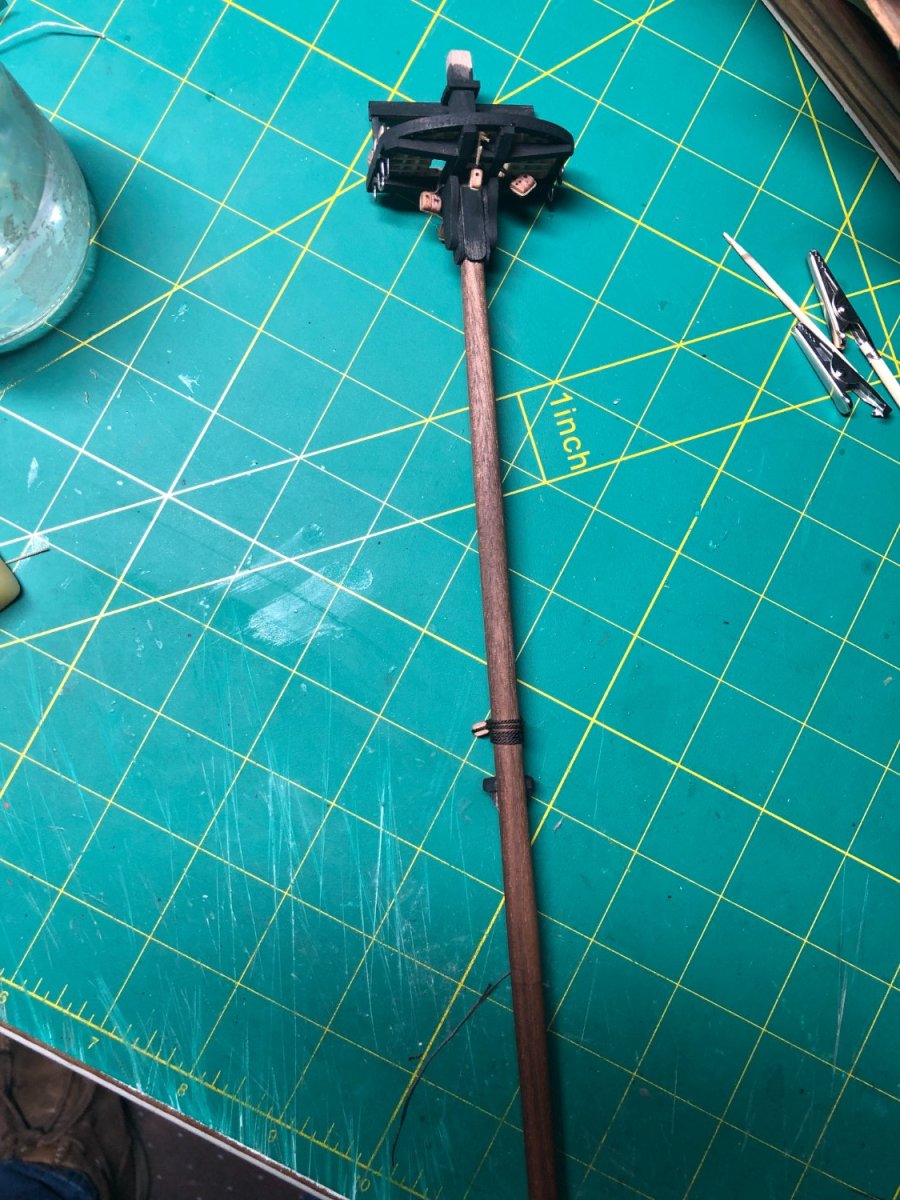
Lower mizzen mast completed:


There are a couple more blocks to be added at the masthead... The plans have an optical mistake, showing the placement of the blocks different in the side view. All sorted out with the help of several but in particular, Tim Moore (again!).
Onward!
Next up, the fore stay and preventer. Also, the crowsfoot (crowsfeet?) for the foremast.Both stays are looped around the mast. I installed a "mouse" by tying a couple of knots and then covering the knot with seizing. A loop was installed on the end and the stay threaded through the loop and tightened against the "mouse".
Then a heart block was added at the bowsprit end after making it the appropriate length. To keep the heart block in place while tied it, I used a very small spot of CA glue on the block and wrapped my line onto it and seized it:

Then lashed it to the bowsprit heart block:
The preventer was done exactly the same way.
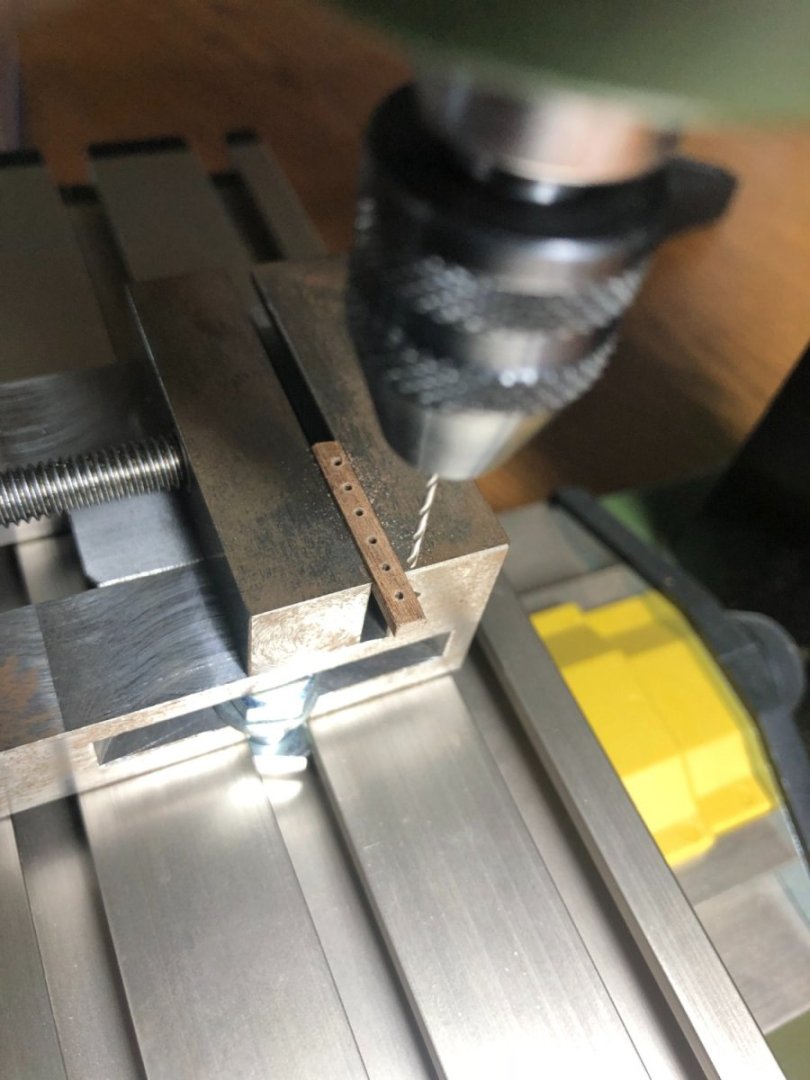
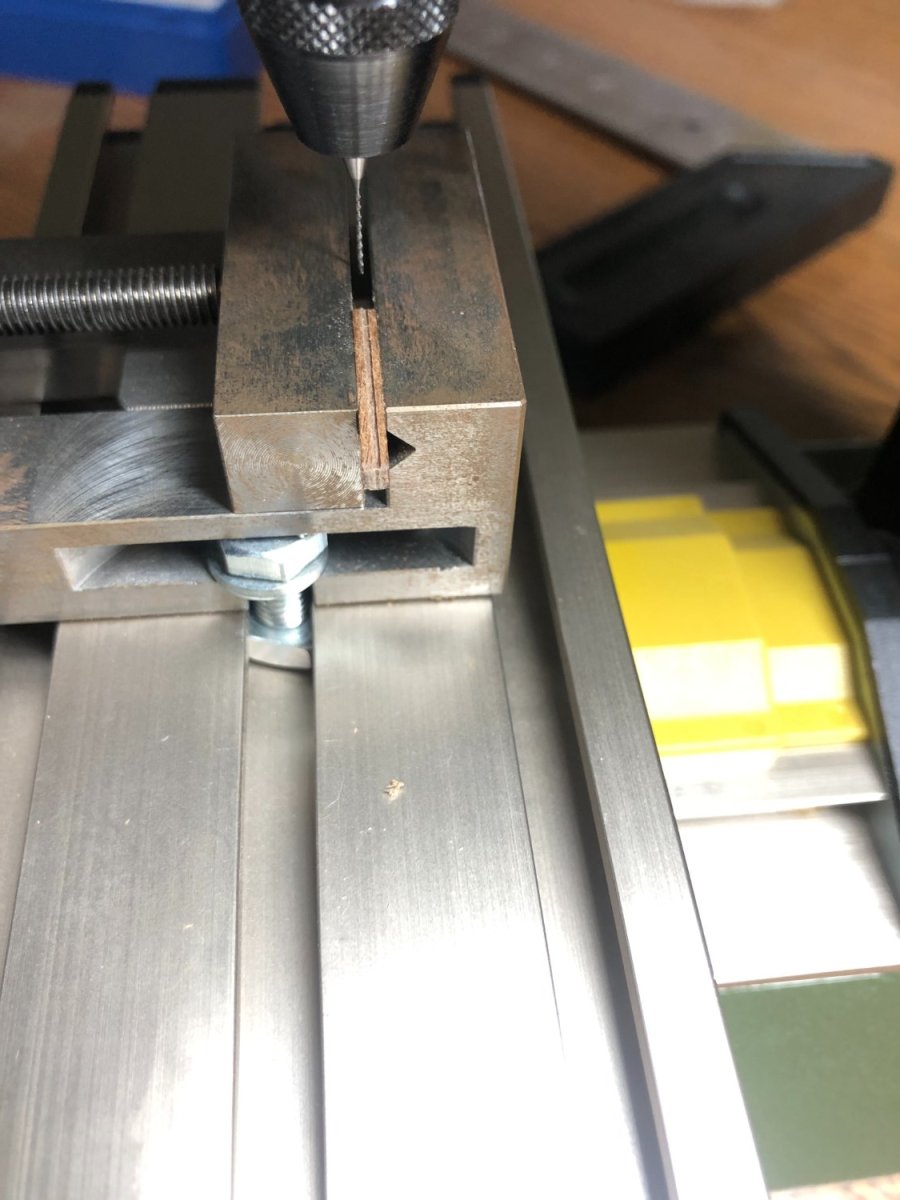
The crowsfoot looked daunting but really was fairly straightforward. I started by making the Euphroe block.
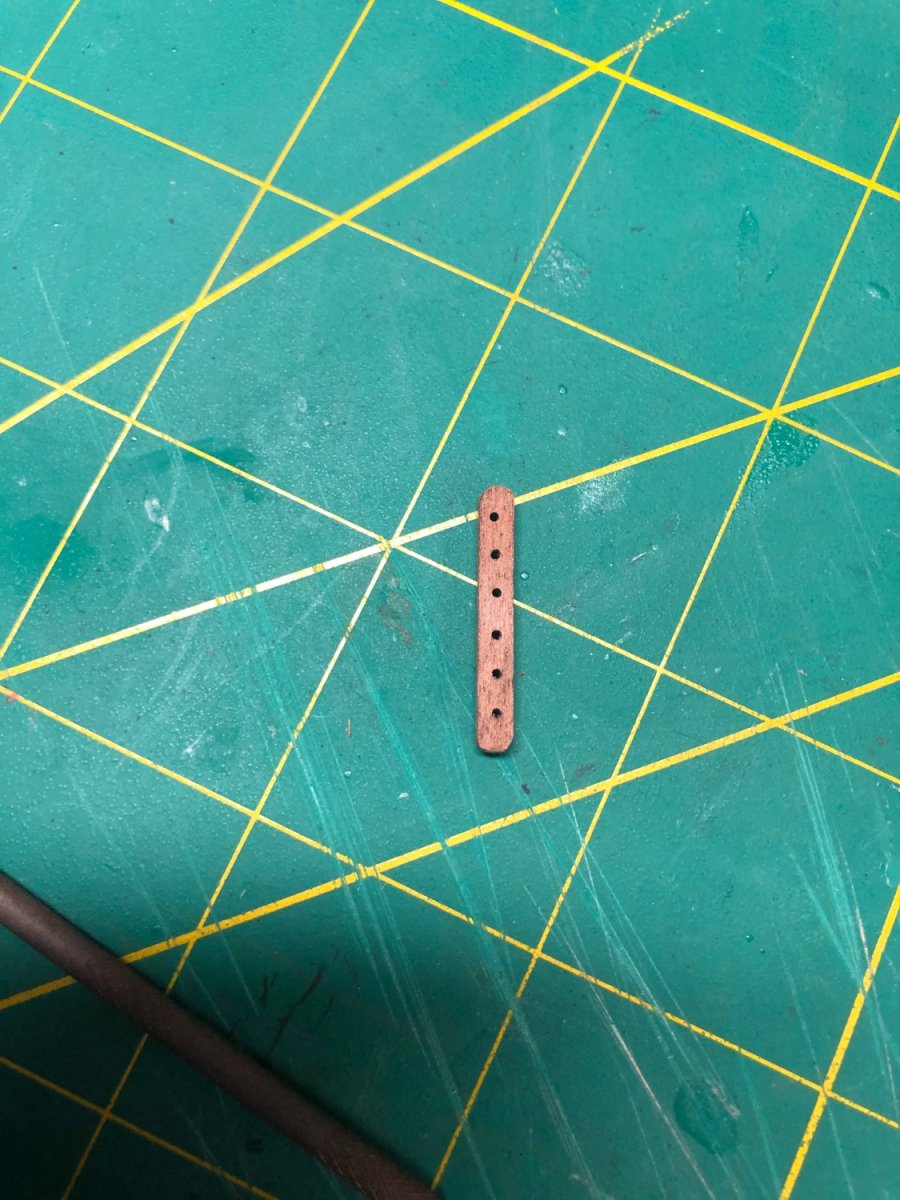
Using my mill, I cut a groove all the way around the block for the line to sit in and then drilled the holes:

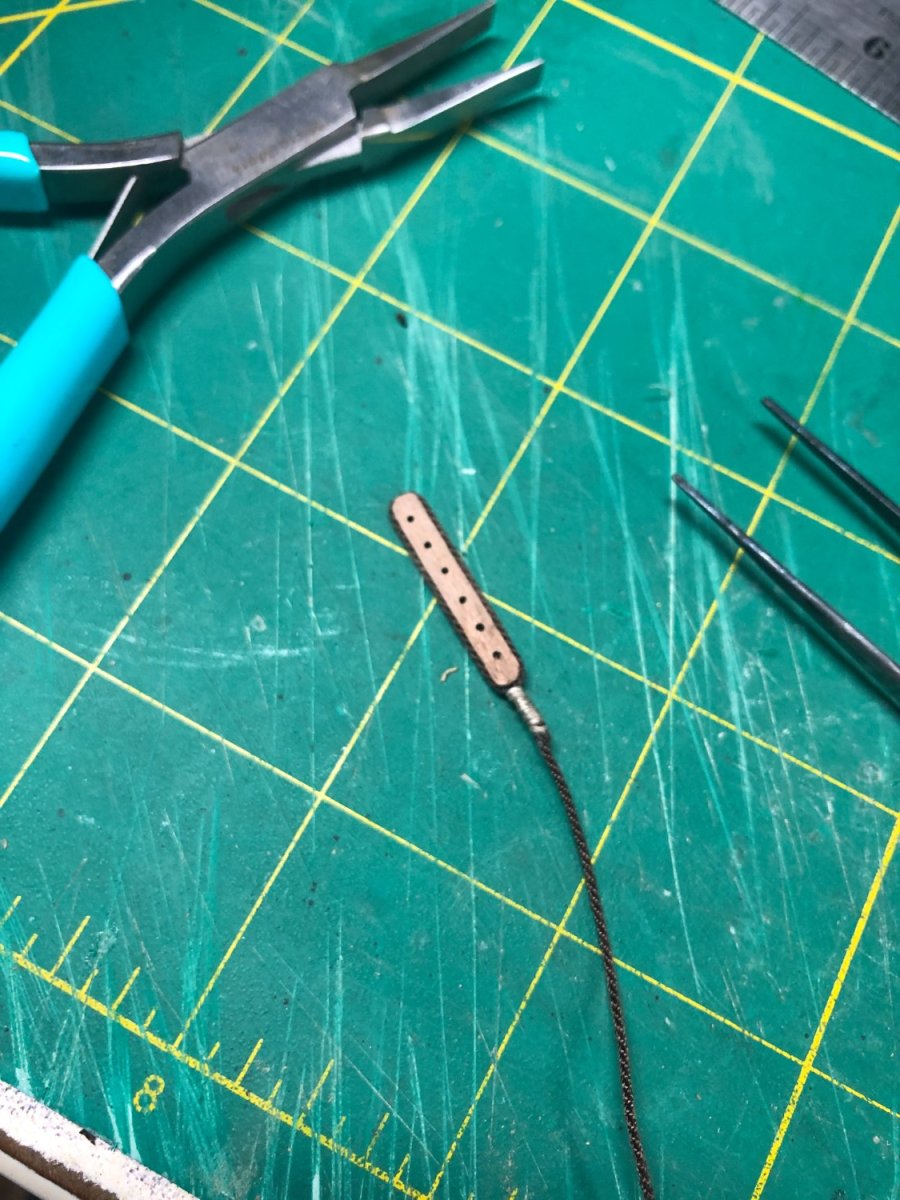
Some light sanding done:
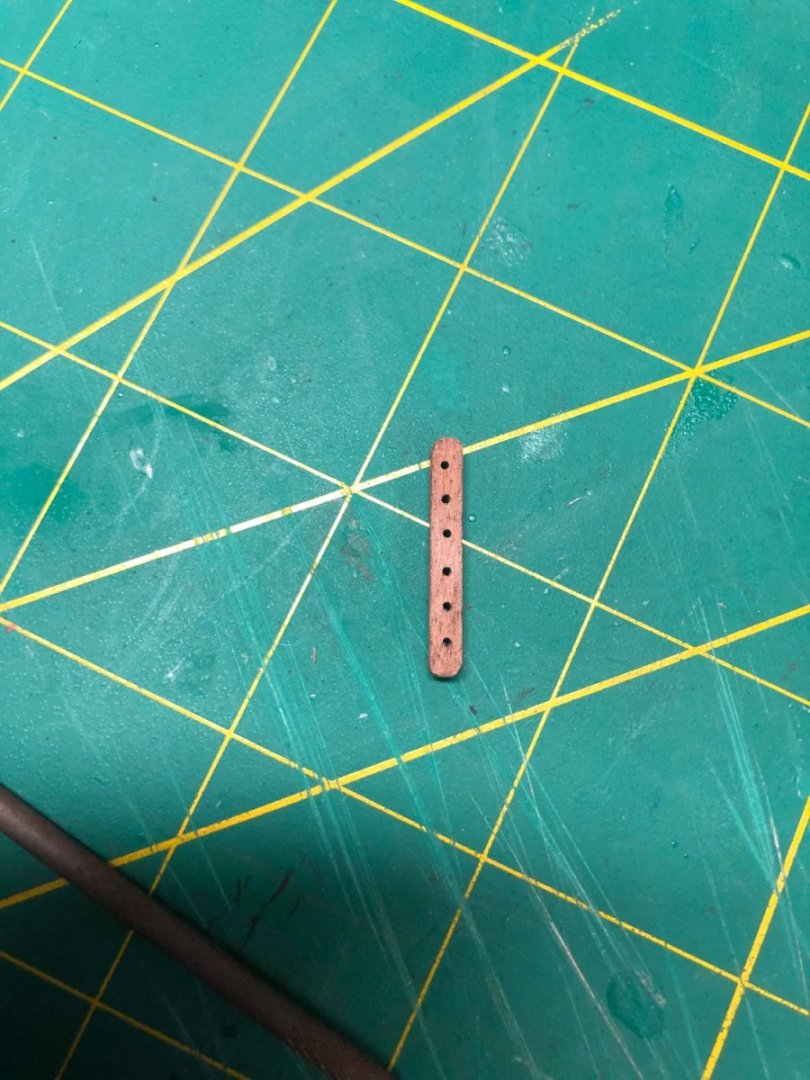
And a line is stropped to it:

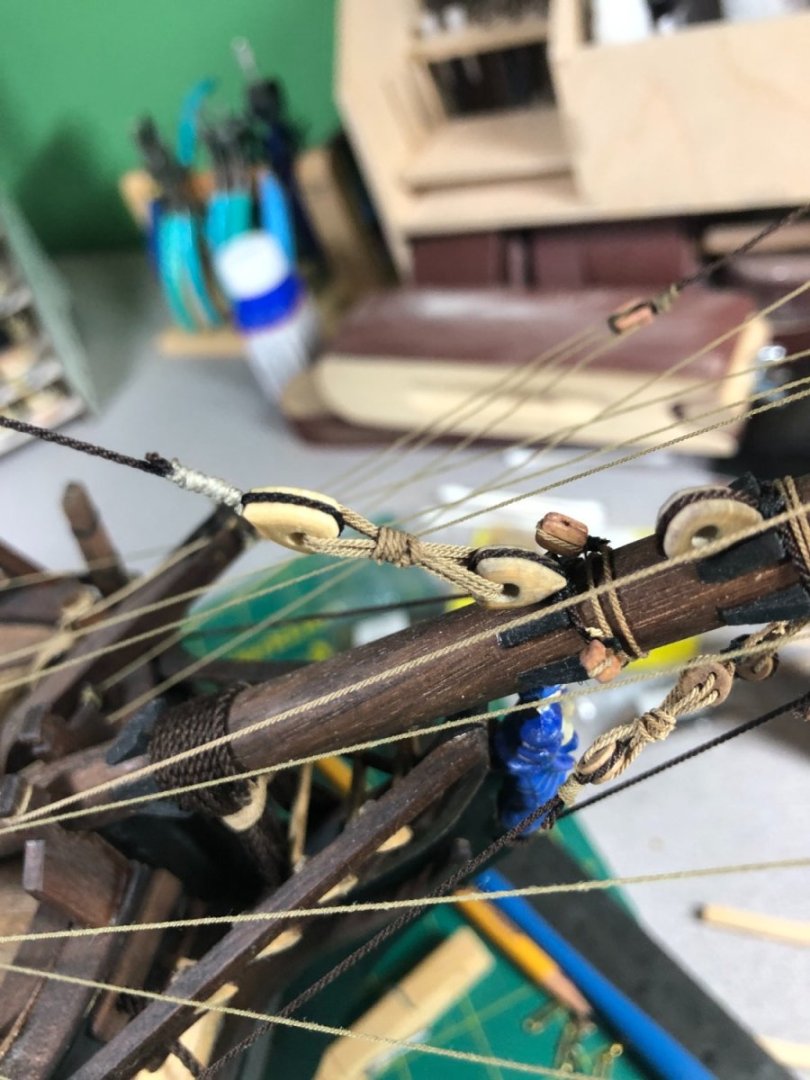
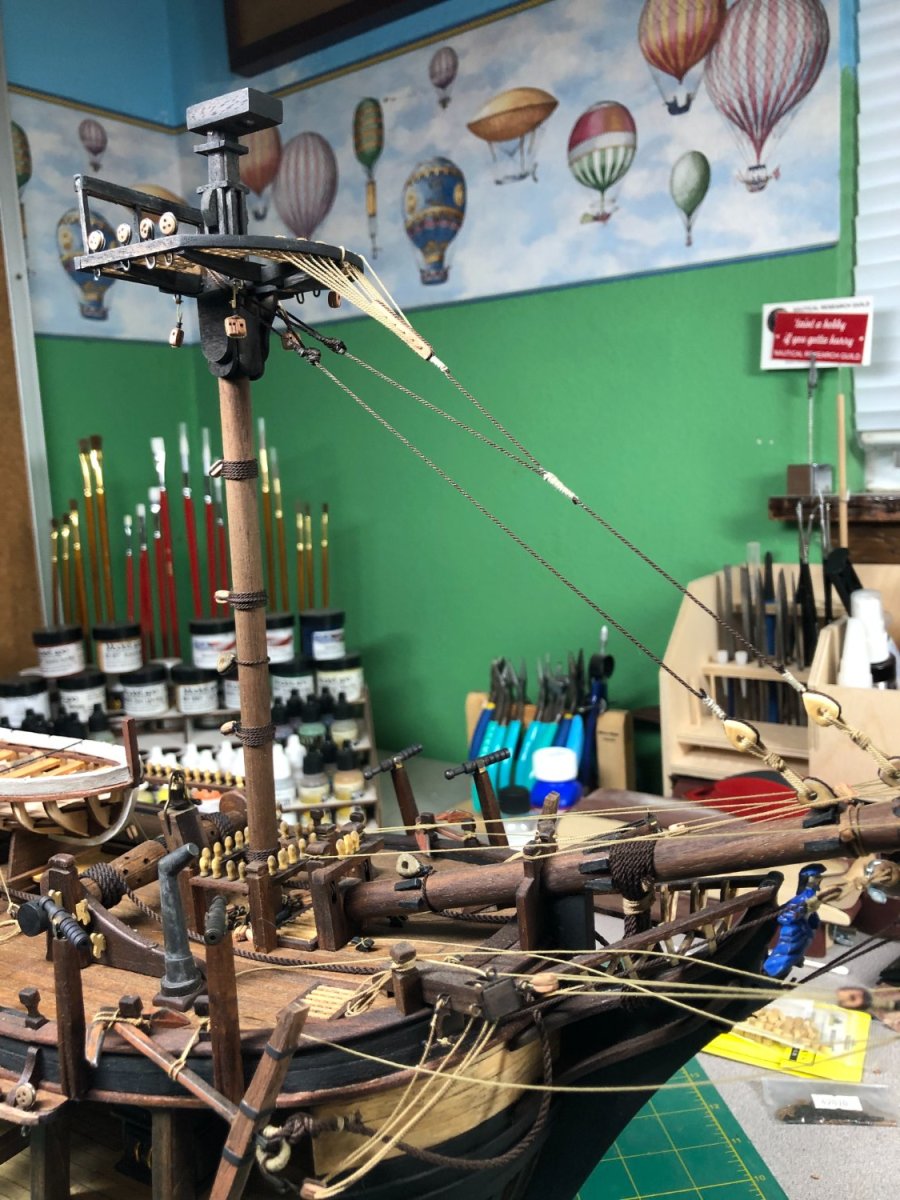
The euphroe block is seized to the preventer and then following the pattern in Petersson's excellent rigging book, I ran the line and tightened up:


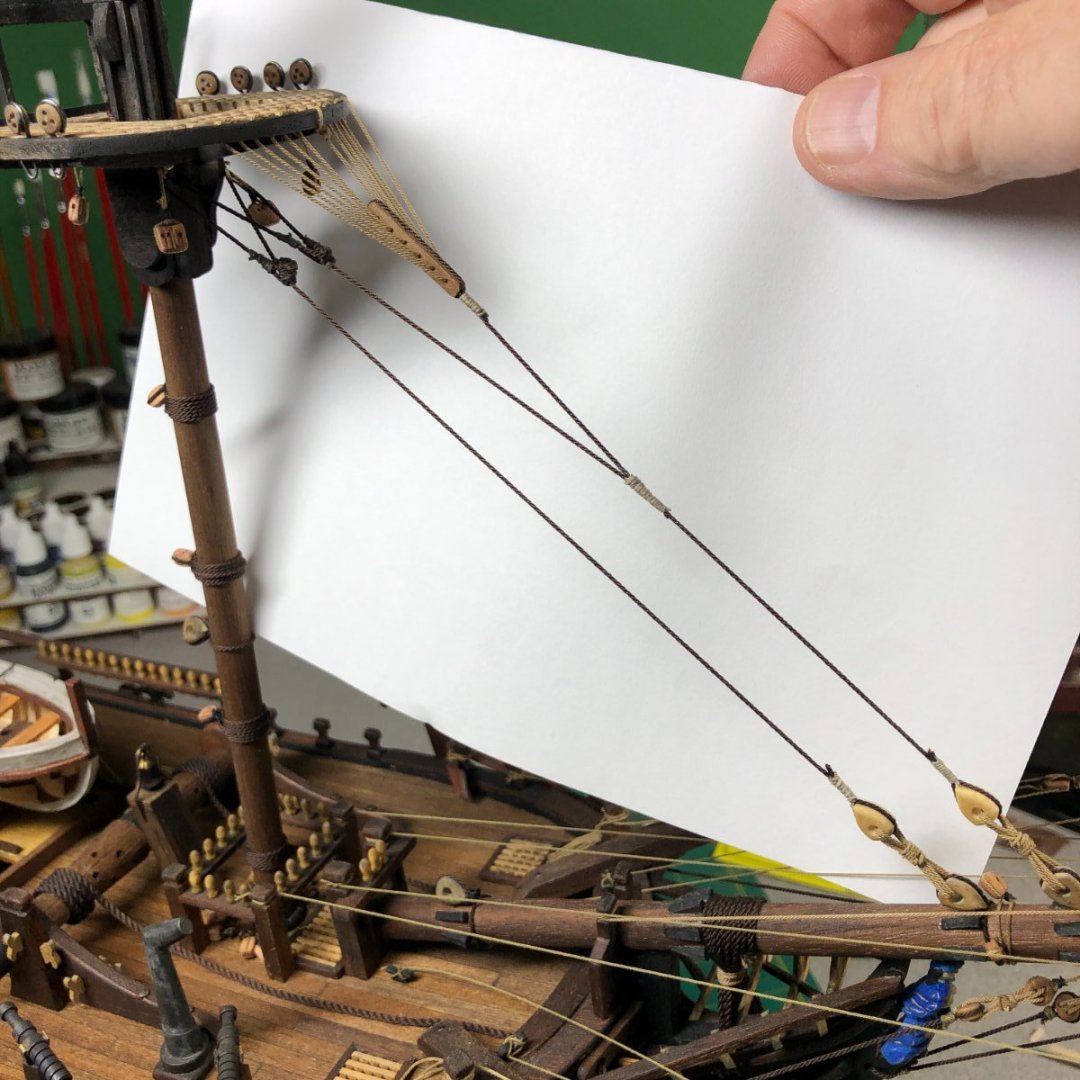
On to the main mast stays!
-
5 hours ago, Tim Moore said:
Hope this helps. If not, you could sail on up to Vancouver Island and pick me up to discuss this summer, I should be there by then.
Tim
Thanks Tim... it's as I thought. When it comes to putting the blocks on, if not done now, it can become a nightmare, as I'm sure you know!
Glad to have that resolved! Didn't want to wait until summer!
The offer is most definitely on the table, would enjoy meeting you. When you get settled, let me know and we can talk further. It's fairly certain that we will pass through Nanaimo next summer, probably twice.
Hope your battleship is going well.
-
3 hours ago, Tim Moore said:
Lyle - I will look at my Bounty today and try to summarize the block attachments on the mizzen I used. Took a quick look through my photo archive but nothing is that helpful on that specific area. There were a couple of mast plan omissions I recall where I needed to use the rigging diagram to determine every block necessary.
Thx is Tim!
I’ve looked over your pictures (thankful for them!) and the rigging diagrams and as mentioned above came that conclusion.
I’ve got plenty to do and will wait to hear back!
-
-
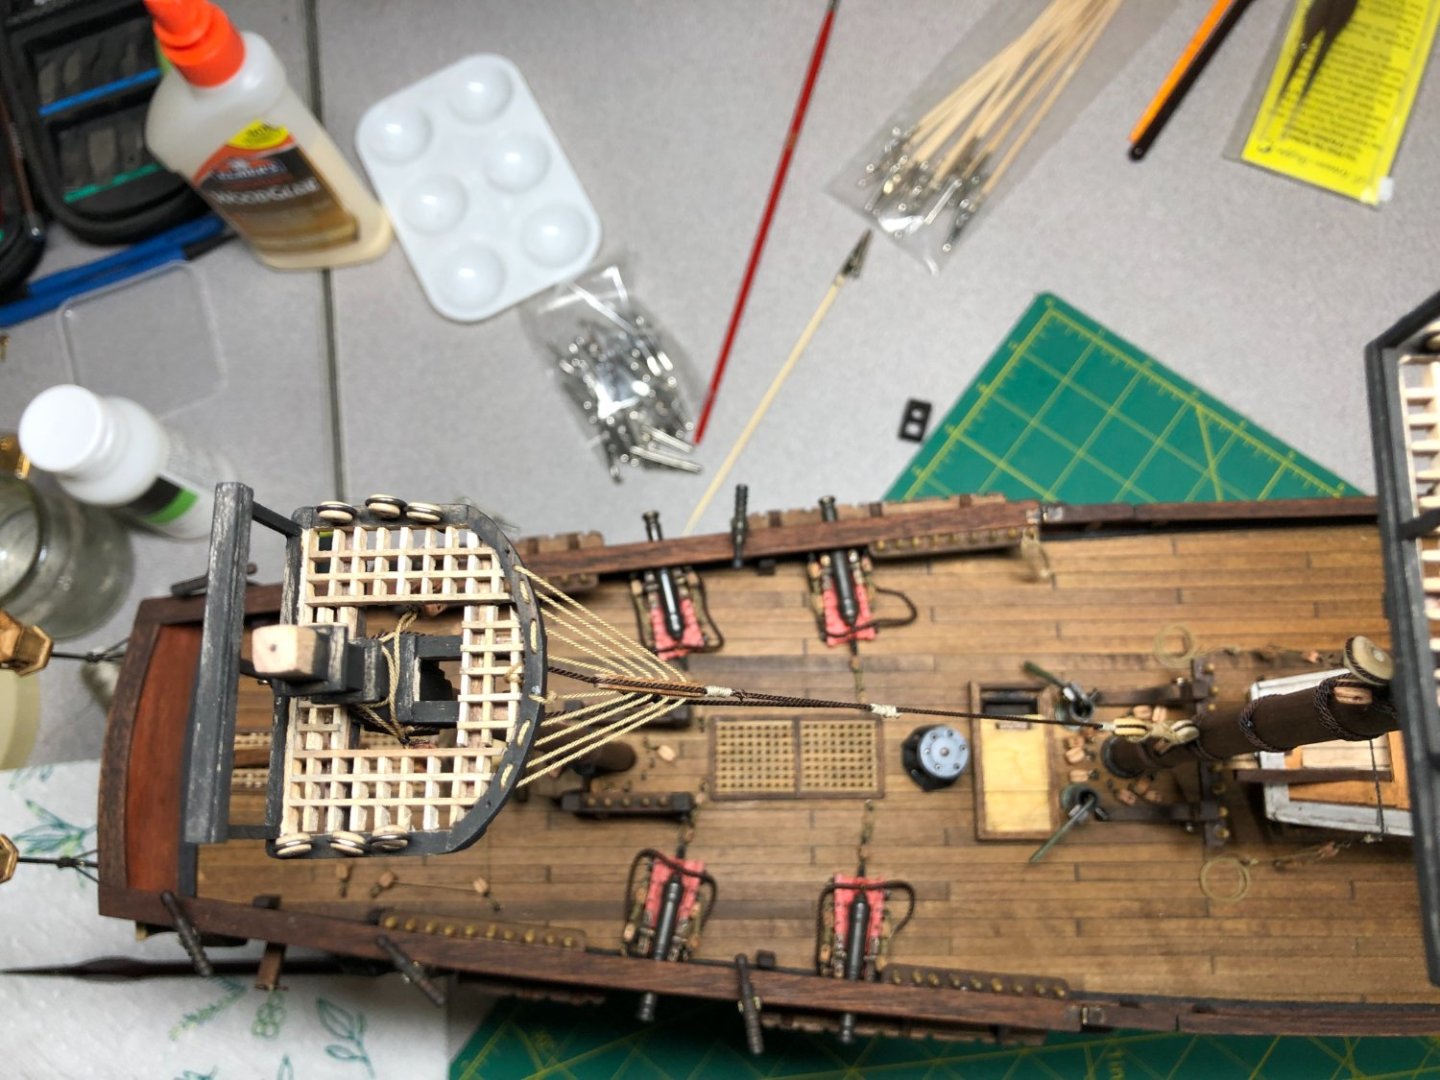
Well, I feel kinda dumb!
I have two of the books mentioned above by Gregory. Lee's book, as detailed as it is, it is very hard to follow (for me, anyway) but still a good source normally. I didn't find what I was looking for in it.
However, I do have Petersson's book too... Unfortunately, it's a Kindle edition and I forgot that I had it until it was mentioned by Gregory.
I'm gonna have to find a hard copy because it is definitely a better source for locations of lines and some of the equipment used (blocks, etc.).
Just a quick look and I was able to answer the above questions:
The red circles on the pictures above should show one block set up on both sides.
The green circles appear to be the same blocks but incorrectly shown and doubled up on the starboard side.
Build logs for the AL Bounty are abundant but not many made it to this stage. I use Tim Moore's version for refence quite a bit but his pictures were inconclusive and I hadn't reached out to him yet.
I should look at other build logs of the Bounty for reference.
Thanks for kicking in my memory and the suggestions!
-
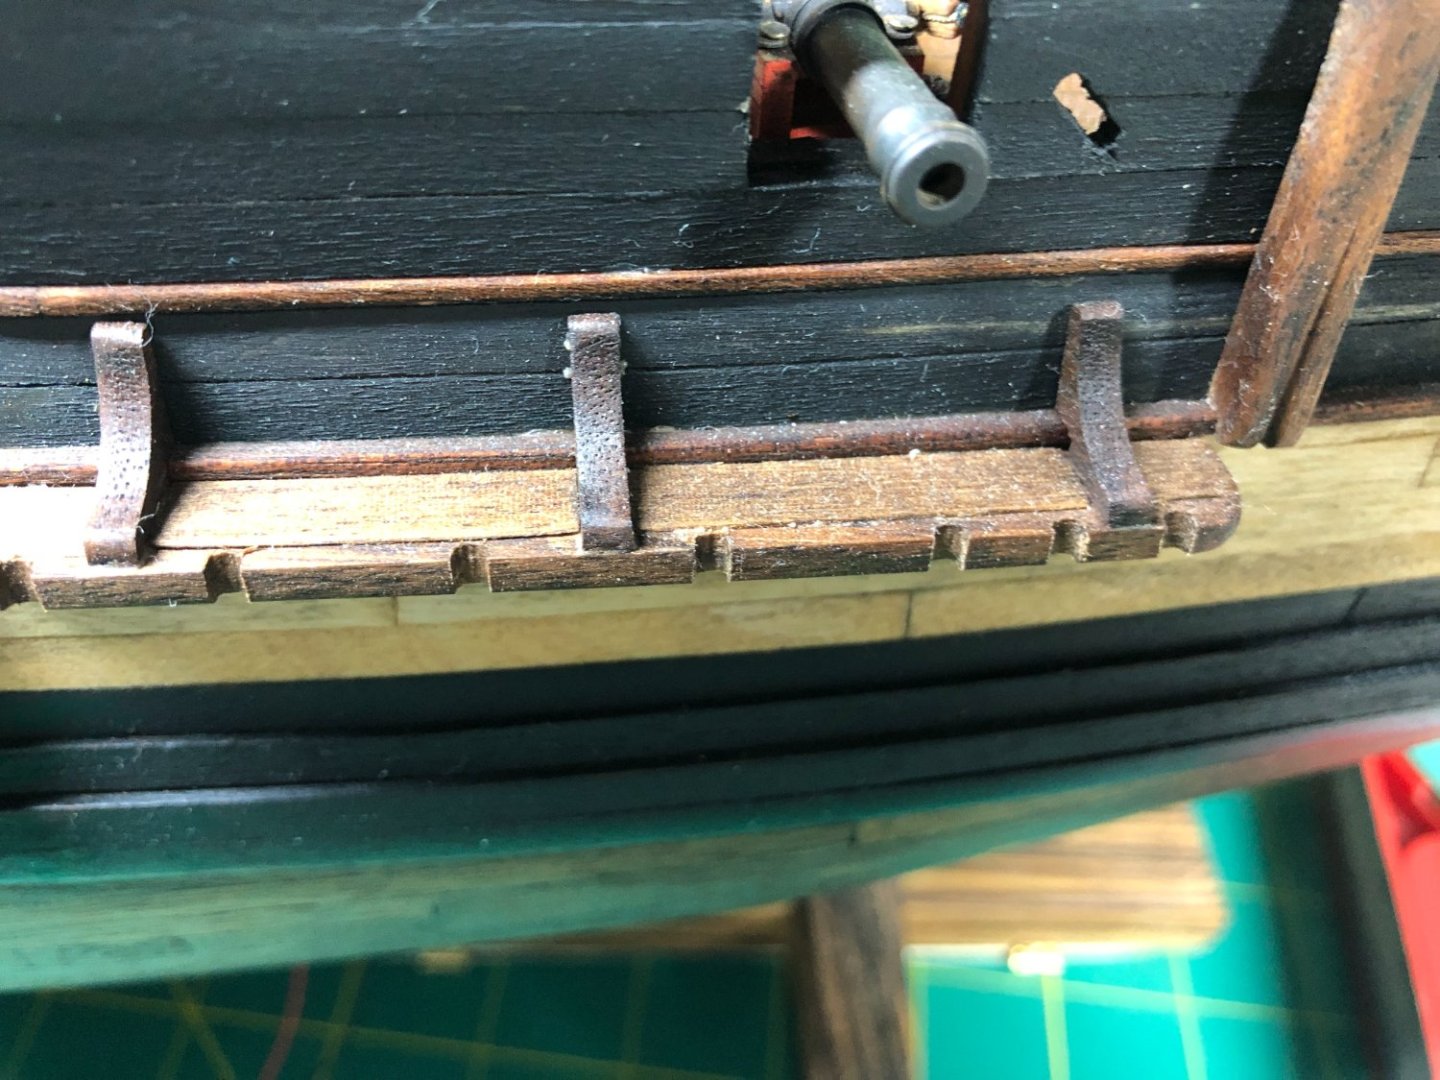
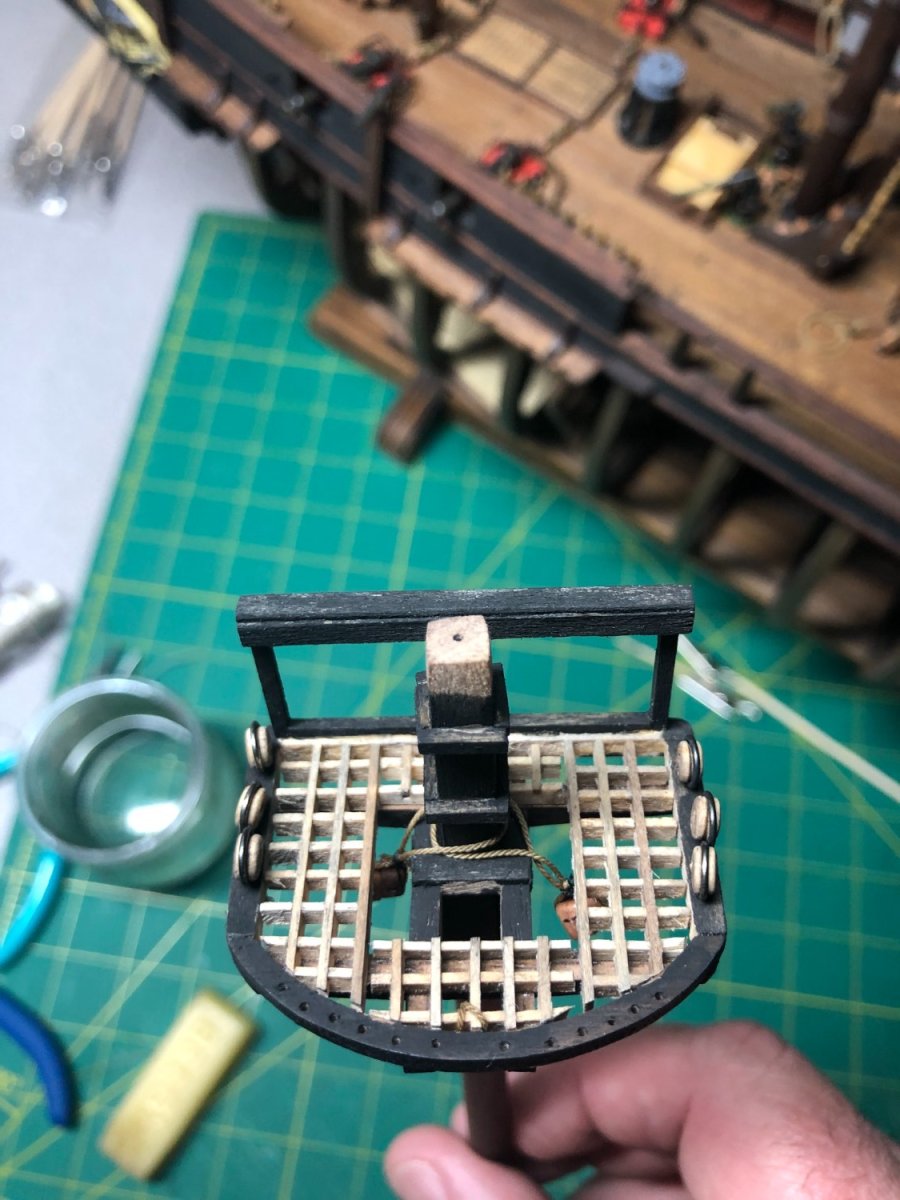
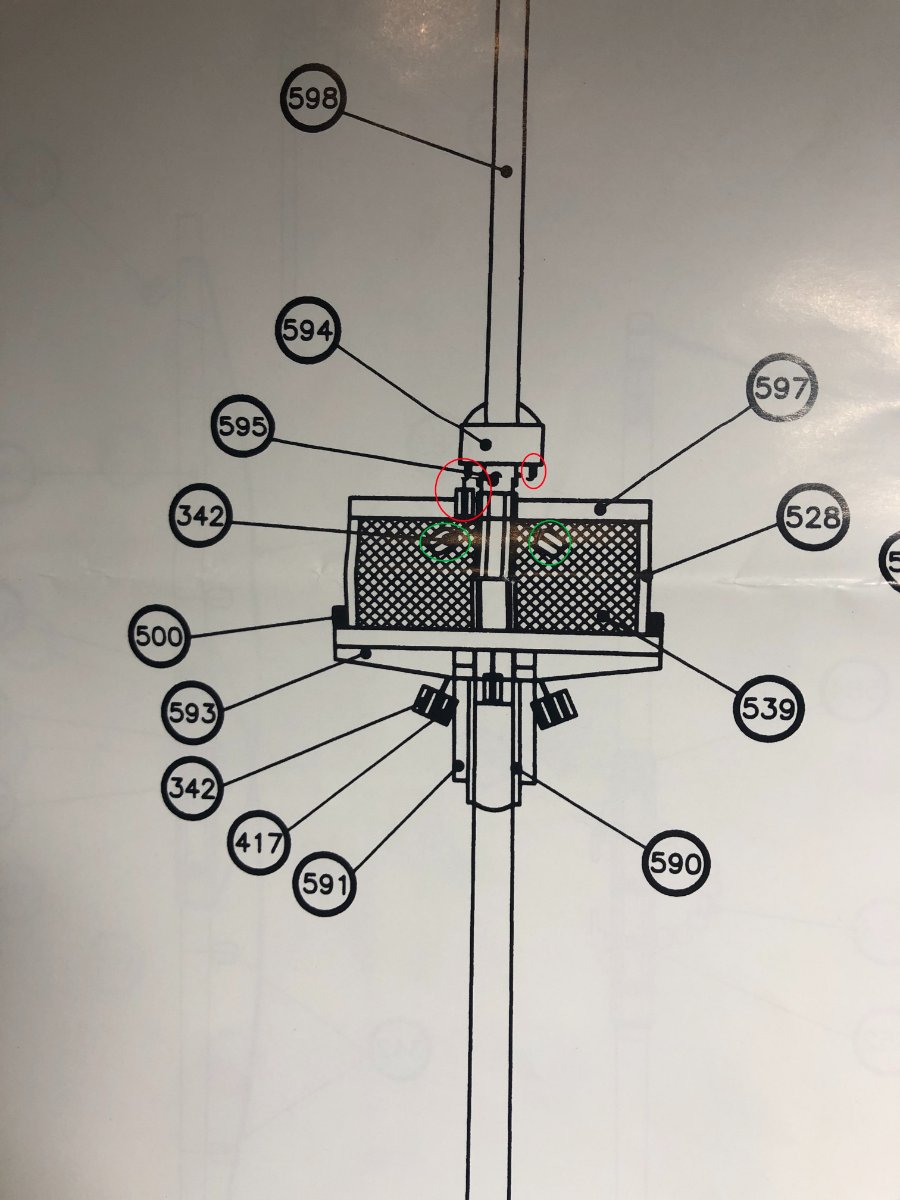
The plans for the AL Bounty leave a lot to be desired!
I am trying to figure out how many blocks are actually located on the mizzen mast at the platform.
The plans are not conclusive and are a bit confusing in that it appears on one that there are blocks but on the other (side view) they don't show.
Here are the examples:
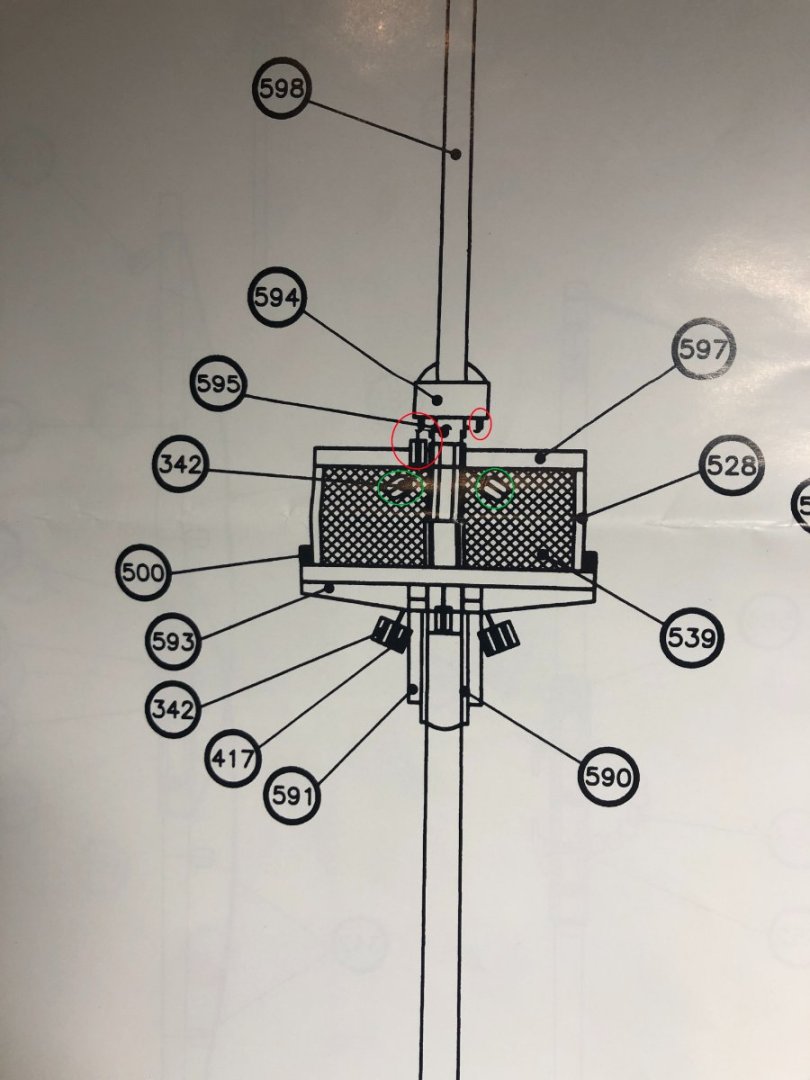
In the picture above, the green circles show two blocks appearing to be tied to the mast and the red circle shows one block tied to starboard side of the mast head block but nothing on the other side except some type of protrusion.
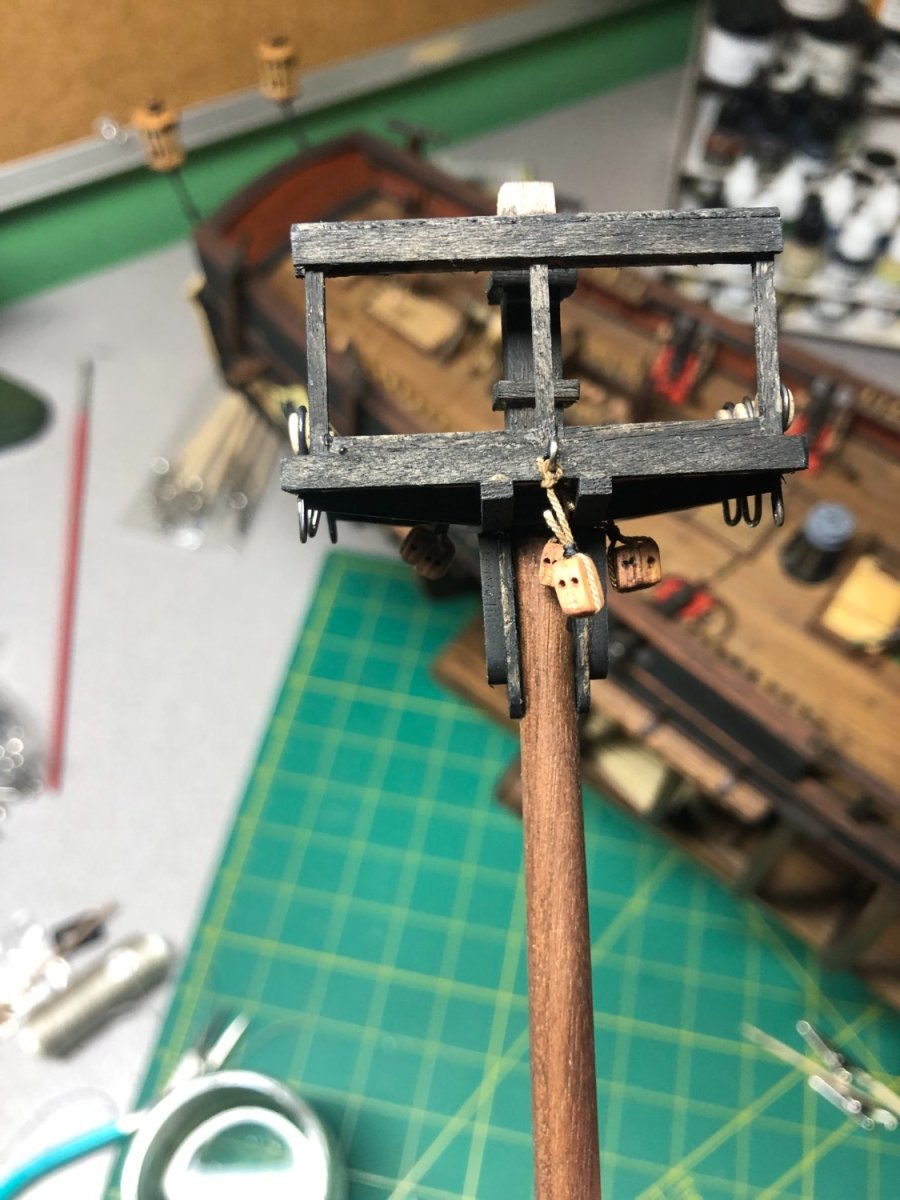
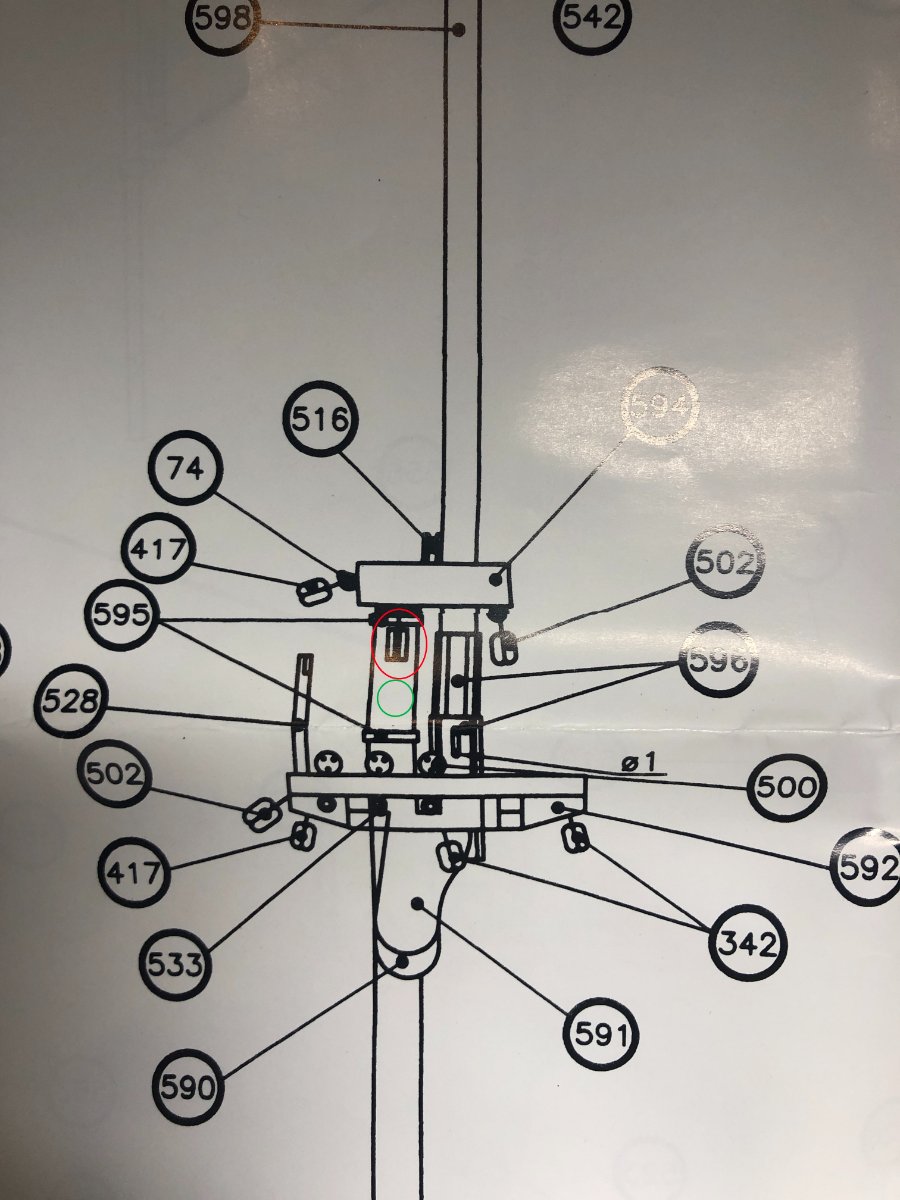
This is the same area but a side view:
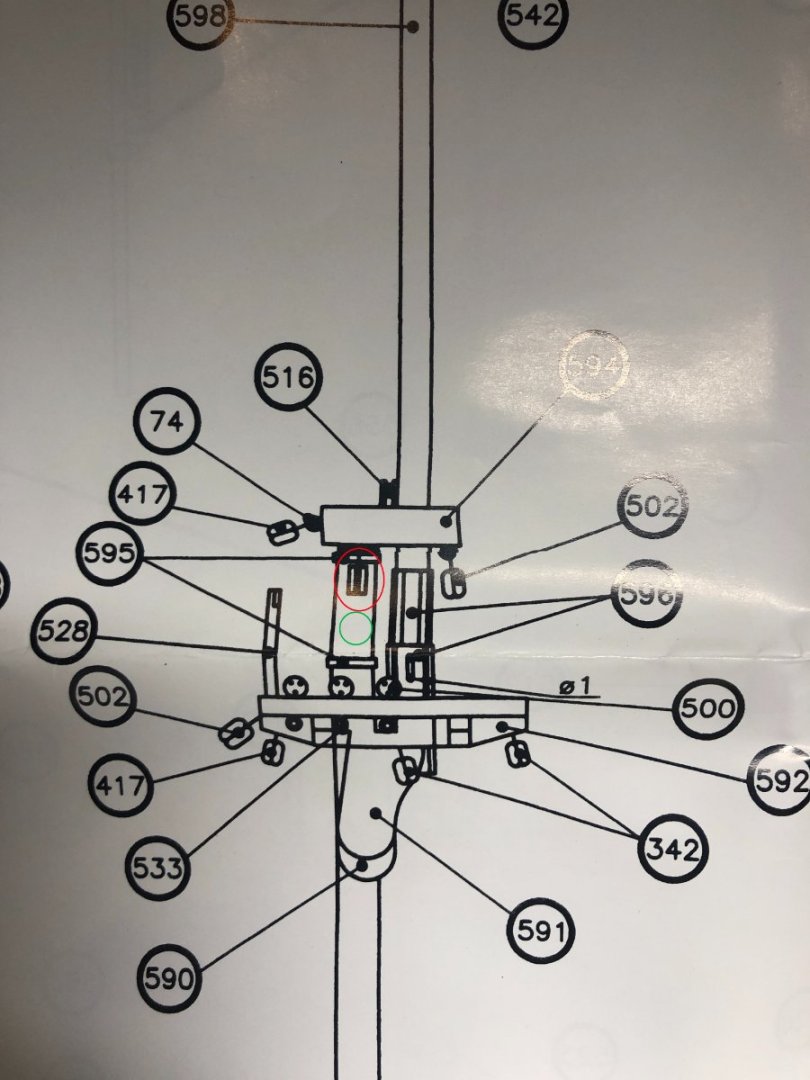
The red circle shows the starboard side block but no block at the green circle.
So, are there two blocks tied to the mast or not?
And, is there supposed to be a block on the port side of the mast head block or not?
I've looked at pictures of other builds and spent hours going over the rigging diagrams (also, very poor) trying to sort this out but have had little luck.
Artesania Latina needs to do better with their diagrams and plans... so much time lost scratching my head because of poor plans.
Any thoughts?


Sergal HMS Bounty.
in Building, Framing, Planking and plating a ships hull and deck
Posted
Hi Mark,
I, too, am building the Bounty but mine is made by Artesania Latina.
If I can offer any assistance on your build, please feel free to ask or visit my build log (see the link below in my signature area).
As many have mentioned, for a first time build, this is a tough one... you can become easily discouraged! So, don't hesitate to ask for help!
Good luck!