


LyleK1
-
Posts
531 -
Joined
-
Last visited
Content Type
Profiles
Forums
Gallery
Events
Posts posted by LyleK1
-
-
Just got caught up on your progress... some very impressive work. Especially the ship's wheel!
Your kit seems to rival mine in the lack of instructions, material and drawings. The AL instructions are non-existent once the main deck is done. The masting and rigging is all drawings... not great ones!
I'm enjoying your log.
-
-
Nice to see your progress since we last spoke!
Love the details you've added and your workmanship has been good... keep it up!
-
-
Last update for a while... off on the boat soon!
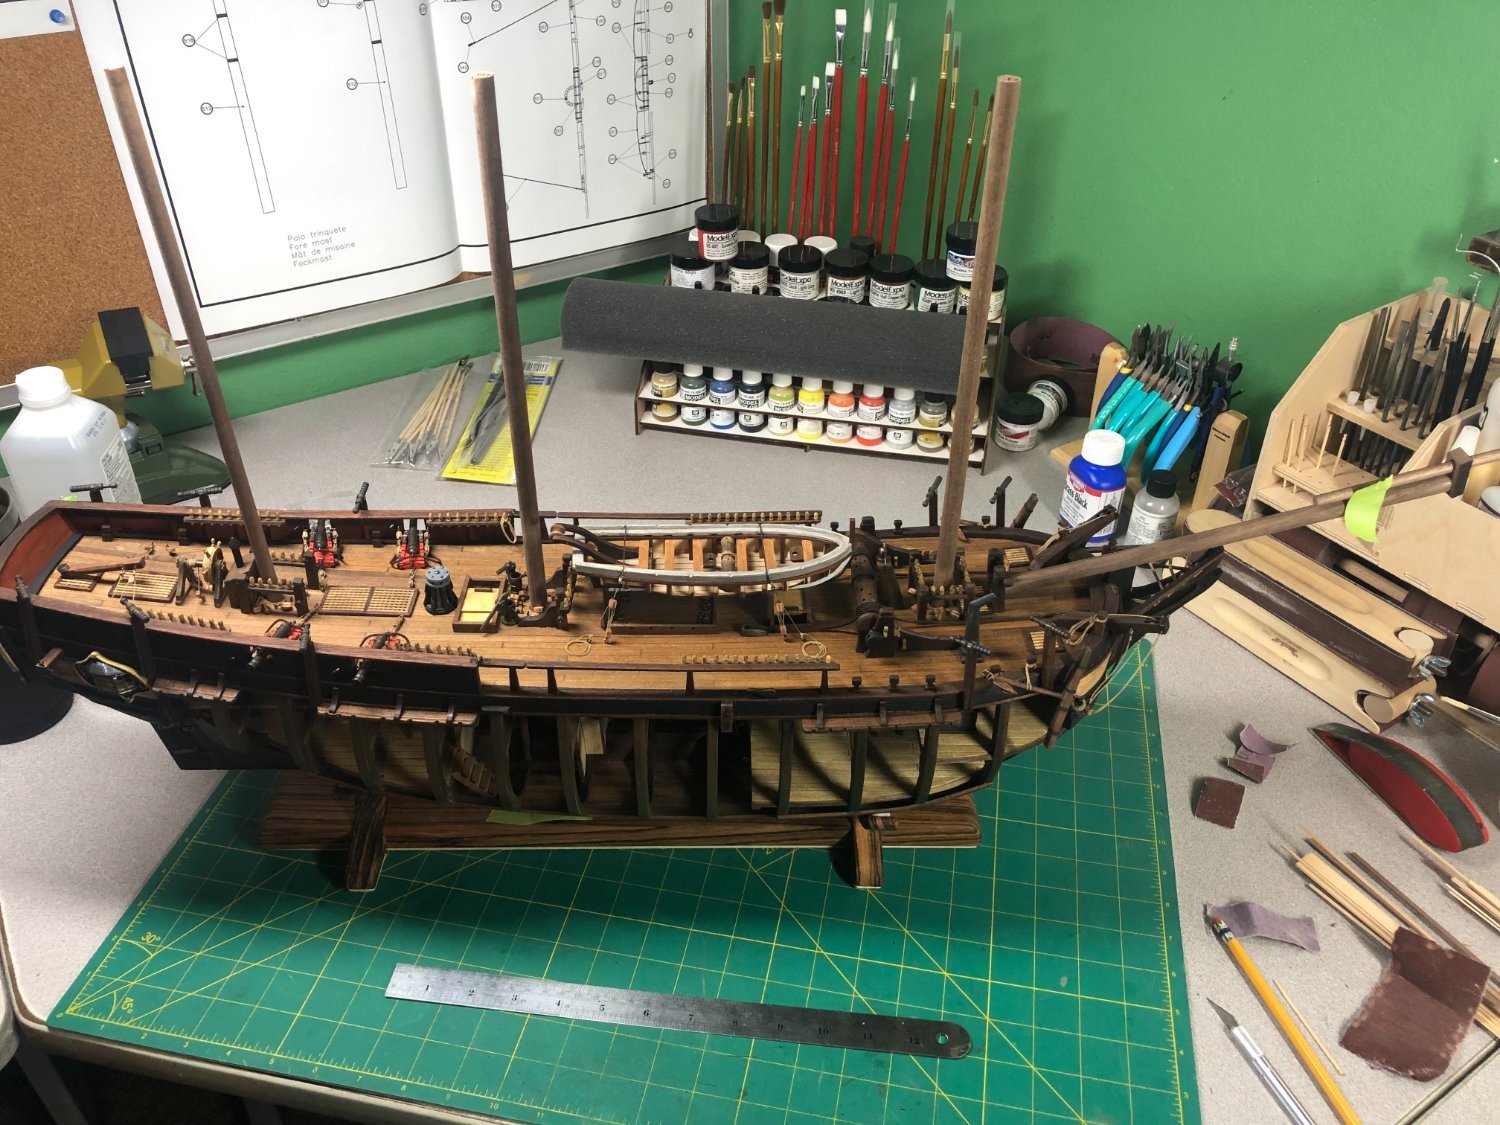
Fitted the bowsprit and masts... alignment is good! Just need to add the details before final placement.


Have a great summer!
- Trond, Scholzy, GrandpaPhil and 2 others
-
 5
5
-
Just a quick update... I'm between boat trips with the big one coming in less than a month!
I worked on rope hanks and rope coils. If you're interested in the details of products used and the process, check out this link:
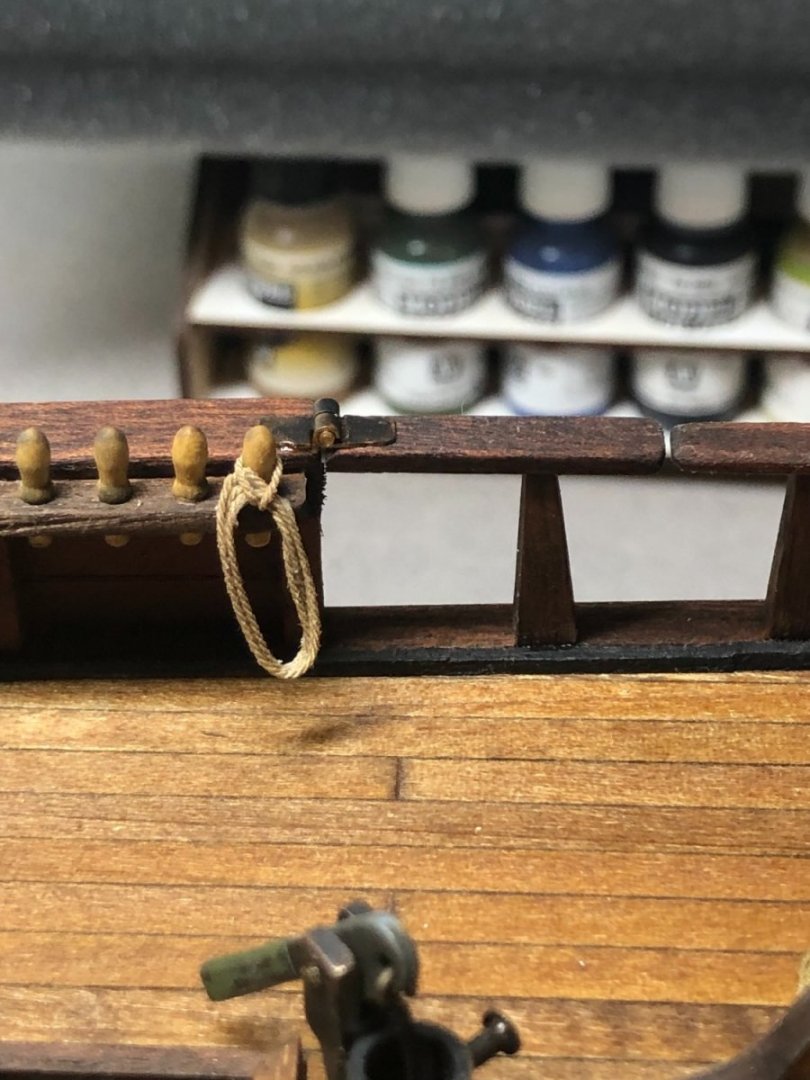
Rope hanks installed (temporarily on the belaying pin), I'll do a couple more smaller ones for the anchor tie-downs and will then mass produce a bunch for later use!
Rope coils made too:

Starting making measurements on the bowsprit and immediately found a pretty large difference between the parts listing and the drawings... a difference of 10mm in two cases. WIll ask for some help and do some checking with other plans.
More when I can!


-
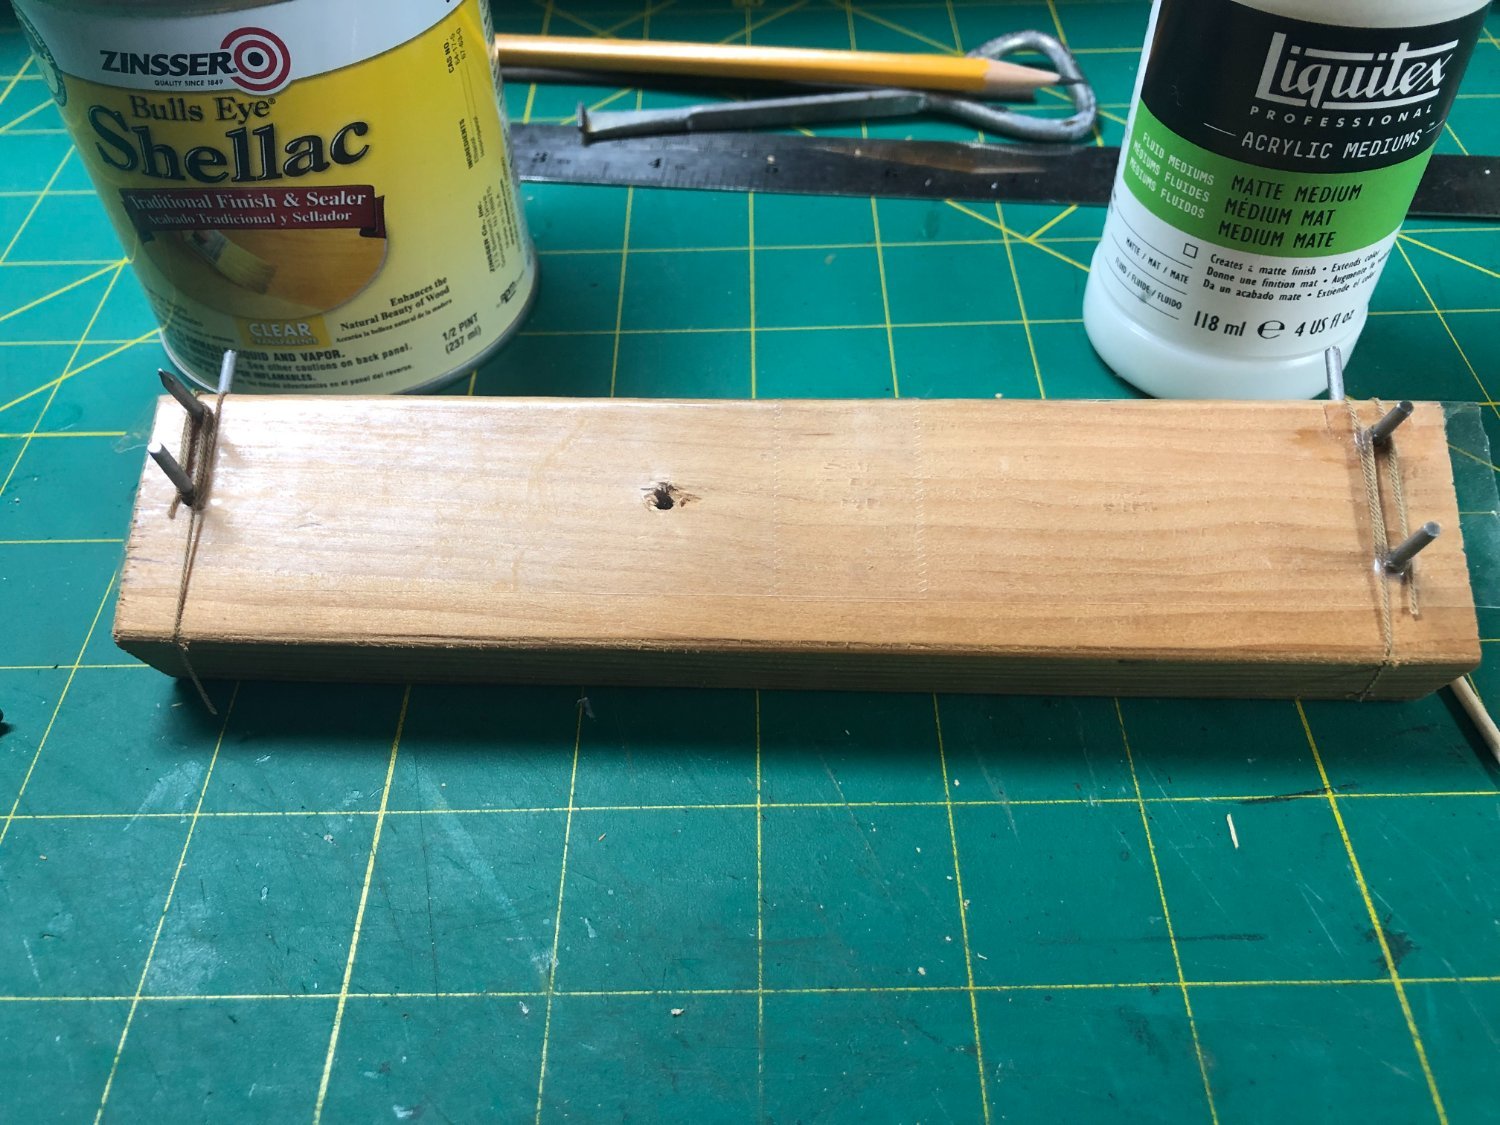
So, as I posted above I decided to try clear shellac and Liquitex Matte Medium.
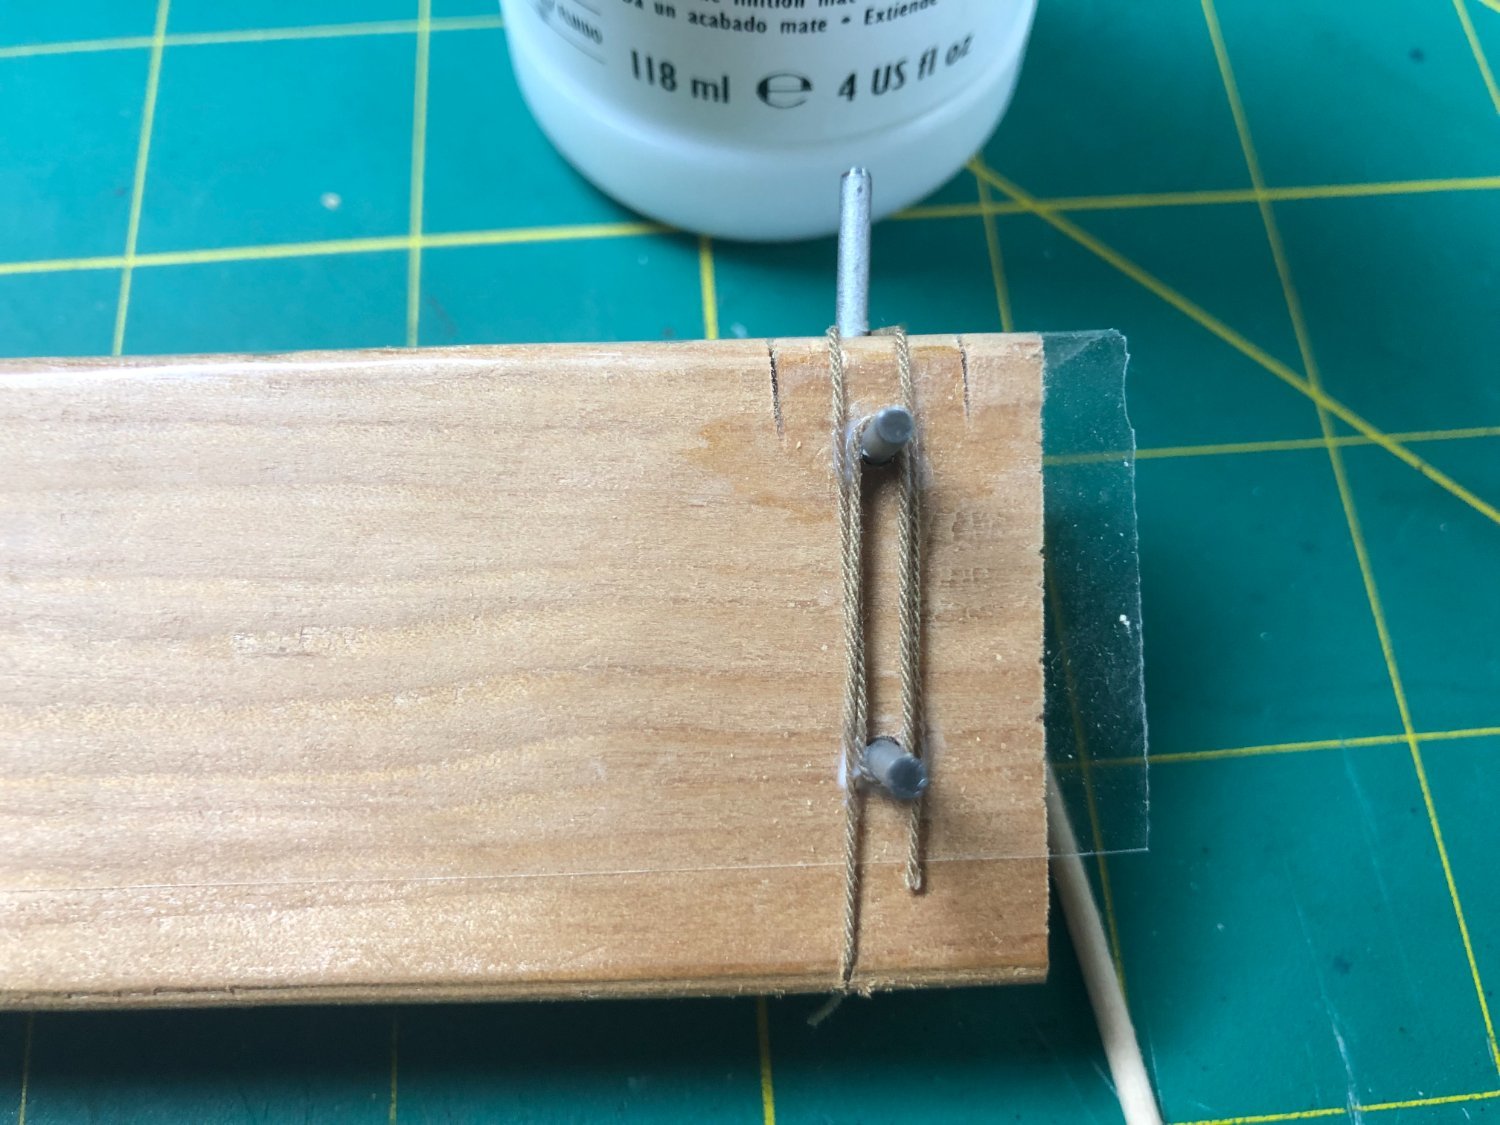
I made a jig to help with making the rope hanks... some trial and error to get the size(s) that I wanted:

As can be seen, on the left is the hank made using clear shellac and on the right is the Liquitex.
After making the necessary winds on each hank, I dabbed the tops and bottoms of the loops with the product nearest to it.
The first time, I did not allow it to dry enough and had to restart.
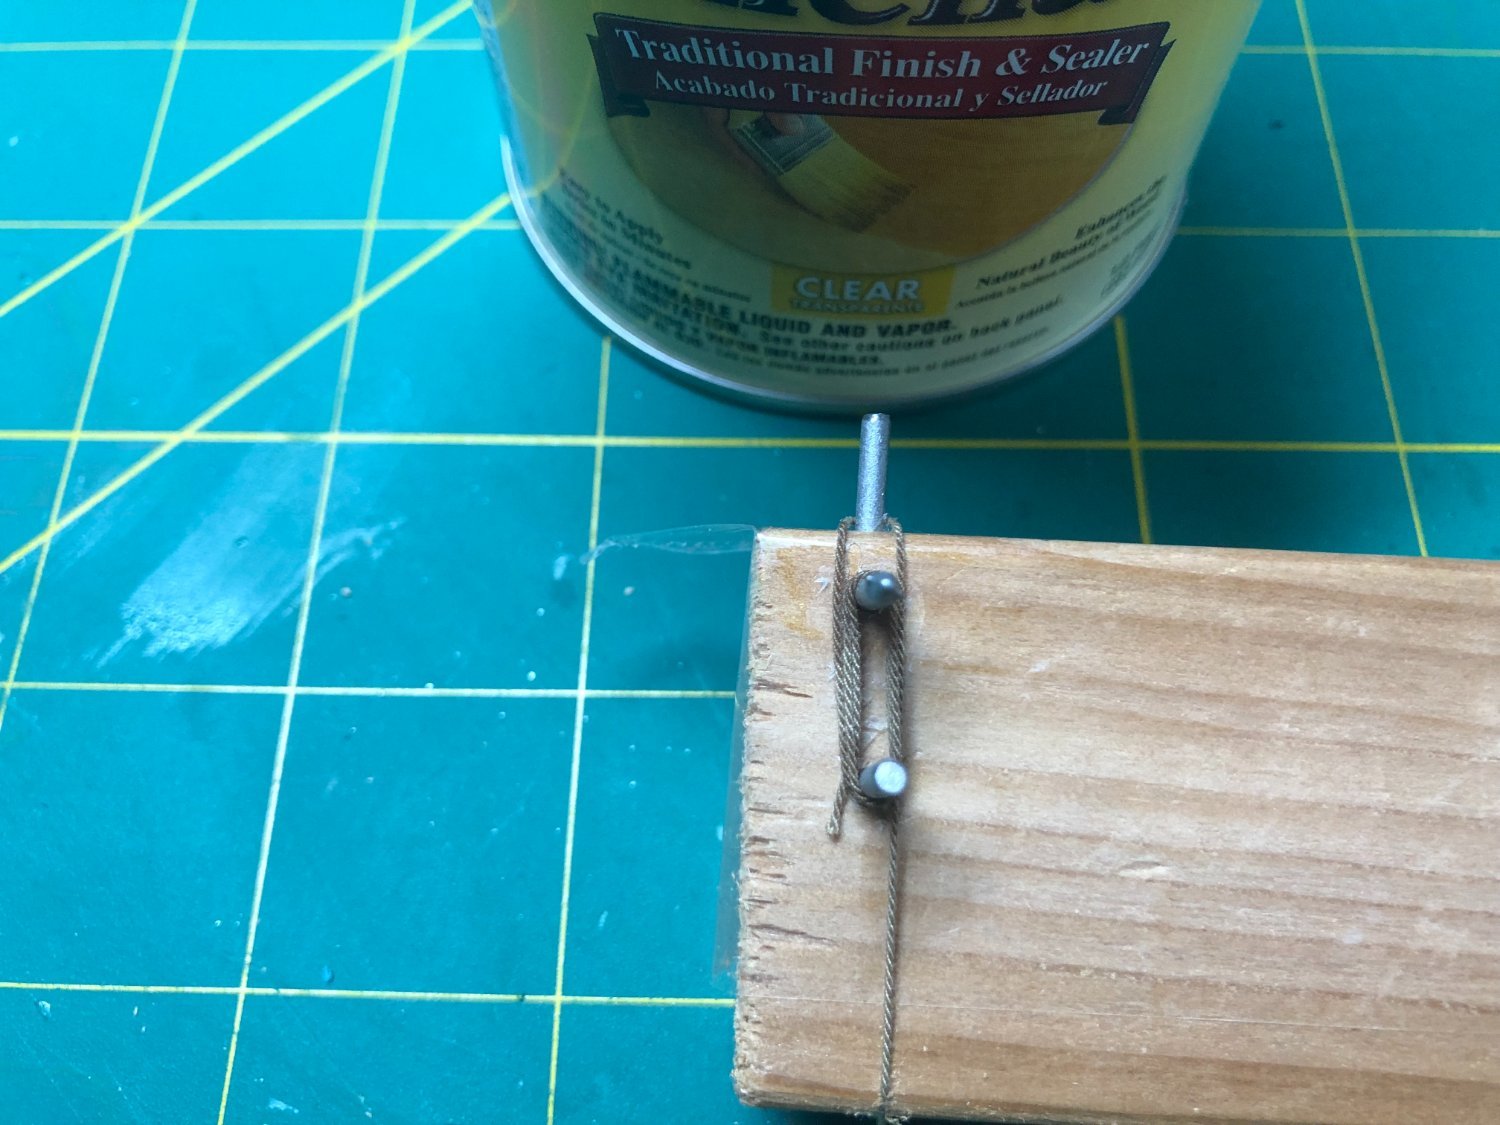
On the second attempt, I let both dry several hours. However, after about an hour, I did return and twisted the nails to keep the hanks from sticking. I also have packing tape on the wood to prevent adhesion:


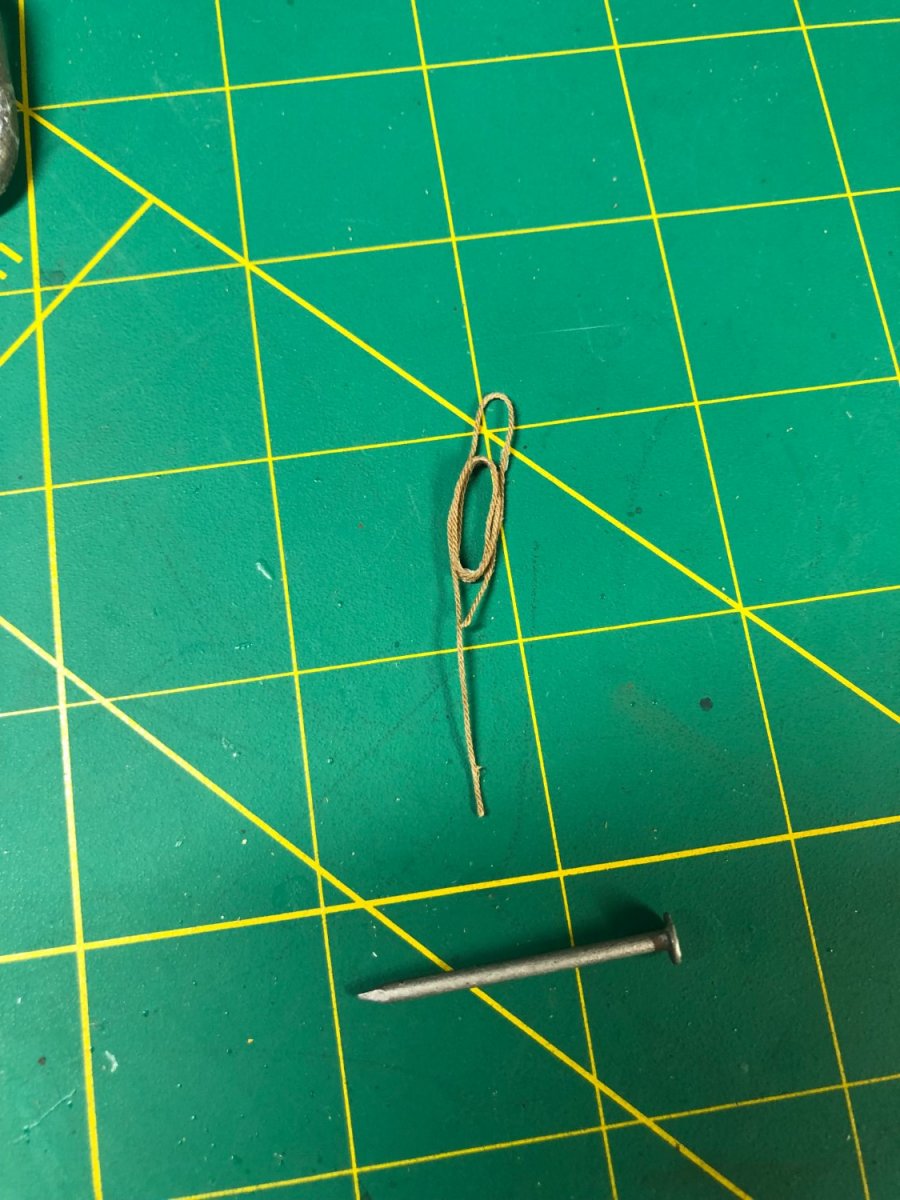
After a few hours, I used an Exacto-knife to remove loops:

The hank with the shellac was very fragile and came apart too easily. Both attempts yielded the same results. However, the hanks maybe a bit more realistic looking... more on that in a bit.
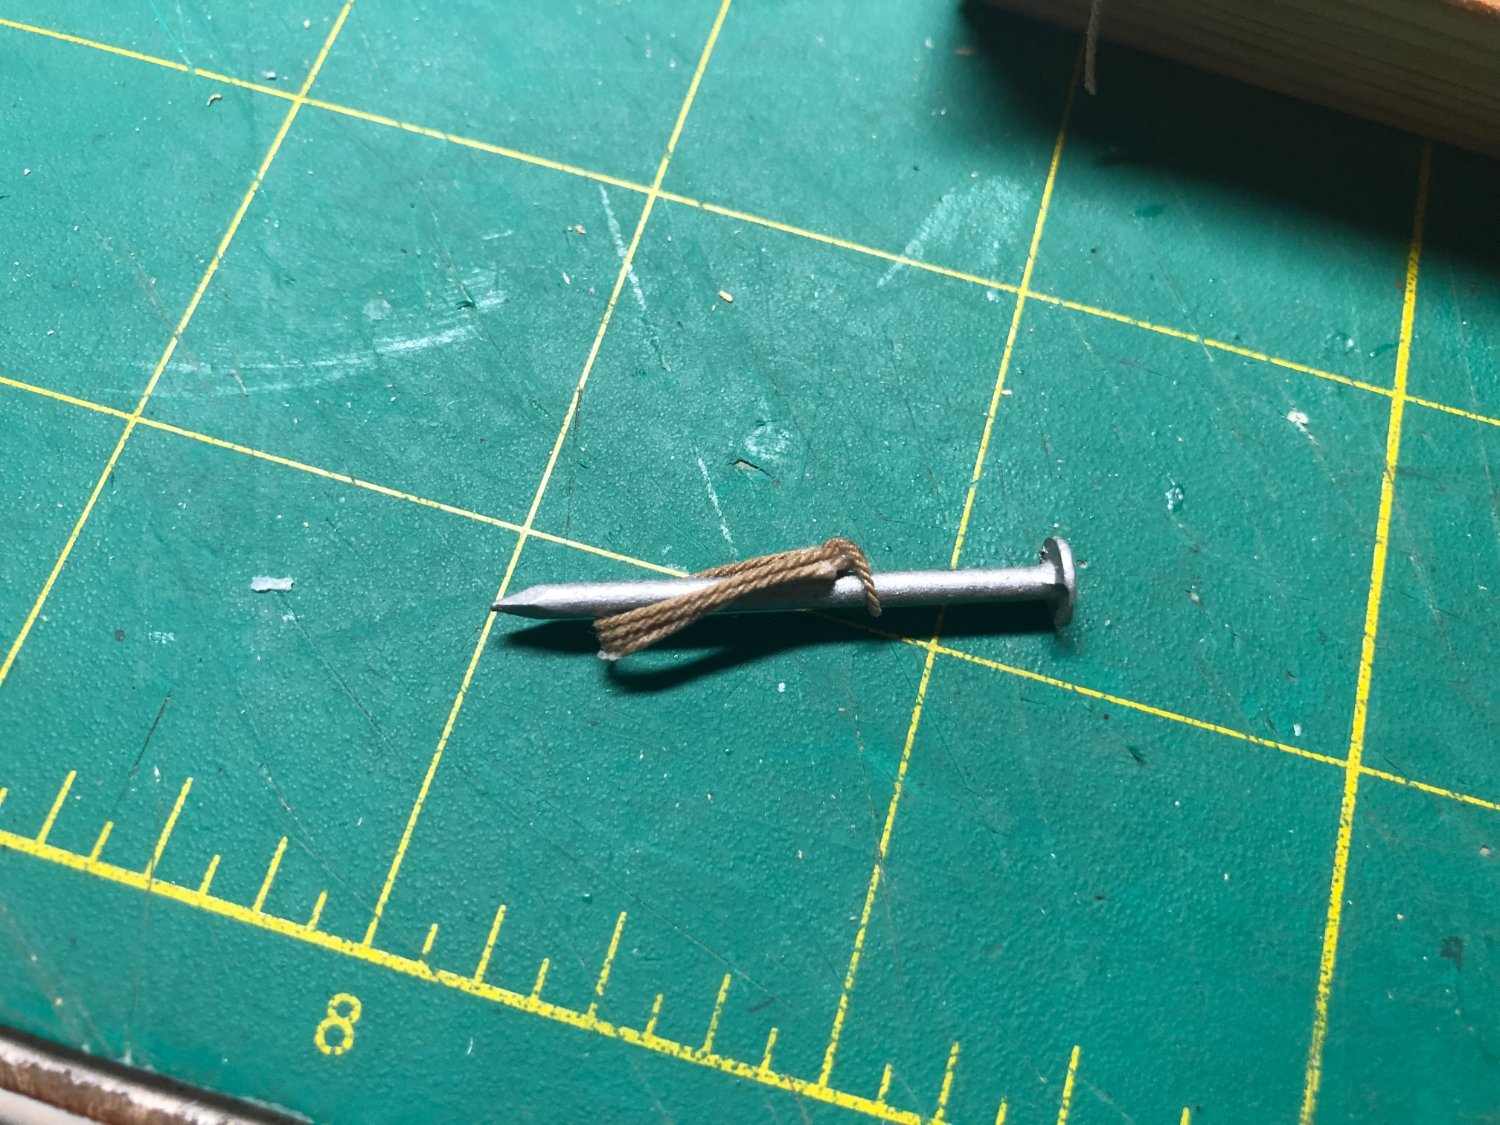
The hank pictured above is assembled with the Liquitex. The Liquitex consistently did a better job of adhering the rope. But it does have issues too. The biggest issue is the residue it left.
Look closely at the next photo:

The residue may be solved by either, using less product or possibly, diluting it just a bit.
As I do more hanks, I'll try to refine my process.
For me, the Liquitex is the better choice but... I still want to try the shellac on knots!
Here's a couple photos of my first few completed and temporarily placed:

Liquitex version above

Shellac version - I think it looks a little more realistic. The Liquitex are almost too close to perfect.

Liquitex version
I also produced one rope coil (loosely rolled) using the Liquitex:
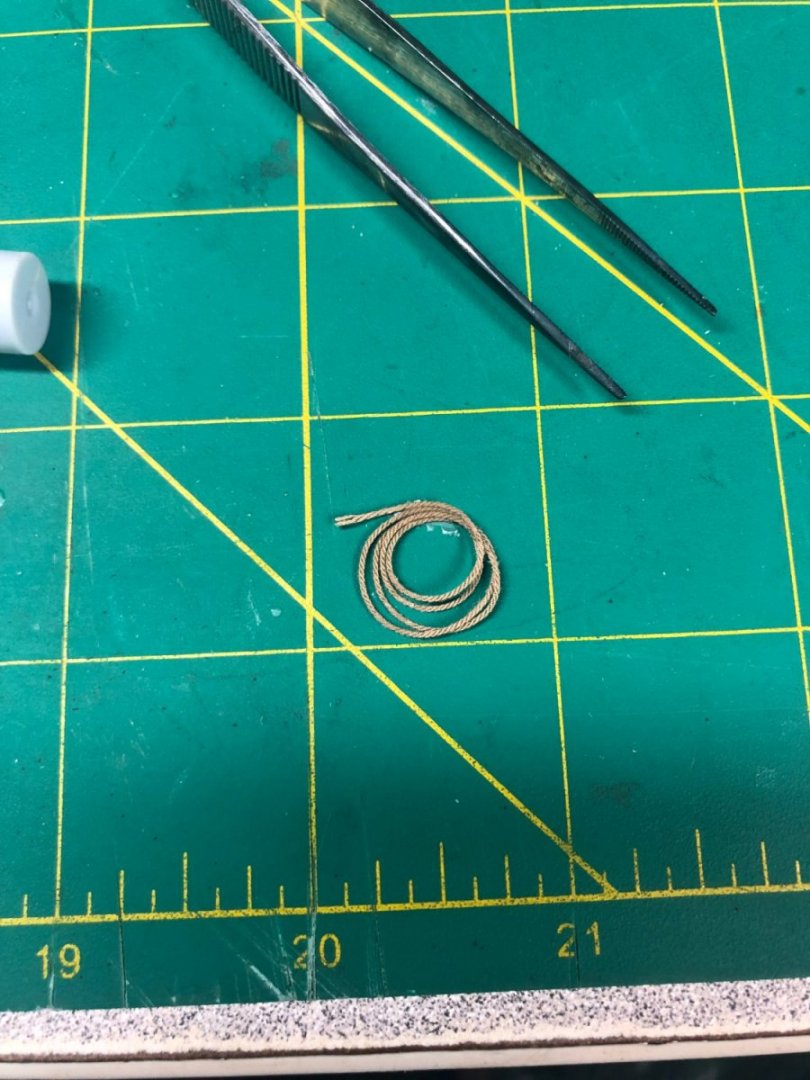
Although certainly not conclusive, for me, I have my answer and will use the Liquitex for the hanks and coils. The jury is still out on the shellac for knots, etc. I'll update the group when I have a chance to try it. It might be a bit as I am headed out on a boat trip soon... be back in the late summer or early fall!
- JpR62, Dave_E, Oldsalt1950 and 5 others
-
8
-
-
15 hours ago, k-mart said:
- Used this tool (don't know the name of it) to get the proper curves off the hull where the headrails meet the bow.
It’s called a contour gauge!
Good idea!
-
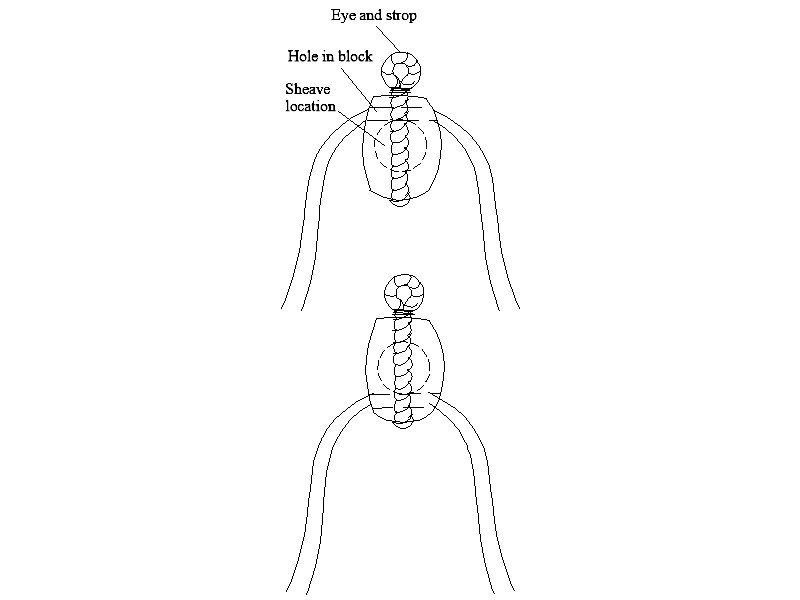
On 5/16/2022 at 8:01 AM, allanyed said:
Yes they should if you want to. The line will cover where the other holes would be so not very noticeable. The first sketch shows where there would be a sheave if it were a full sized block and where the line passes through the block.
The second sketch shows how you have some of the lines going.
Hope this makes sense and helps
Allan
Got it!
Thanks Allan!
-
23 minutes ago, Dave_E said:
After using it as a sealer… can acrylic paint be applied? Can shellac be stored in a squeeze bottle? Thought about how to store it in smaller quantities. Sounds like a pain to open and close a qt can every time you need to use it. 😑
The nail polish is attractive for rigging, but I can’t take the fumes. Thinned white glue is ok, except your always remaking your concoction because it sets up so fast. Can you thin PVA glue and then store it in a small squeeze bottle? I’ve been using CA with a needle point, however as mentioned, your left with little shiny spots, but it is darn convenient.
Think I’ll have a go with the shellac to see how I like it.
You cannot store it in a squeeze bottle... it evaporates very fast. You can buy it in smaller quantities but still have to open the can!
- mtaylor and thibaultron
-
2
-
1 hour ago, Gregory said:
I use about 50% water for knots, and 75-80% for coils
Maybe my solution was diluted too much?
My coils just came apart and the served line unraveled completely.
I soak both and let them dry overnight too.
- thibaultron, mtaylor and Gregory
-
3
-
5 hours ago, allanyed said:
One small comment for the future. The holes in the blocks should be reverse of what you show in a couple places. Picture and a 1000 words, etc. below
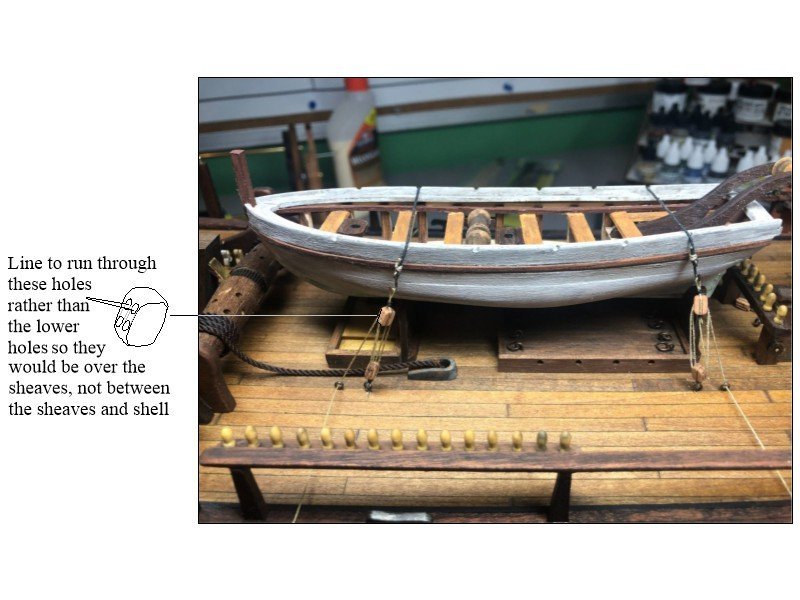
Hmmmm…. These blocks only have two holes in them.
So, should the blocks be reversed?
-
2 hours ago, Dee_Dee said:
With 50+ years of sewing experience, 'Beacon Fabri-Tac' is the best fabric / fiber glue I have used.
>>NOT to be confused with 'Aleene's Tacky Glue' or other glues with similar names.<<
Beacon Fabri-Tac is the glue fashion designers use to glue sequins / trim to wedding gowns, movie / theater costumes, dance wear and more.
The glue does not flow or discolor and the fabric / fibers remain flexible.
As with all glues, experiment to find the right amount of glue to apply.
https://www.beaconadhesives.com/product/fabri-tac/
Another option to try...
I've already purchased the other two products. If they are not up to standards, I'll try this one next.
Thanks for the tip Dee-Dee.
- mtaylor and thibaultron
-
2
-
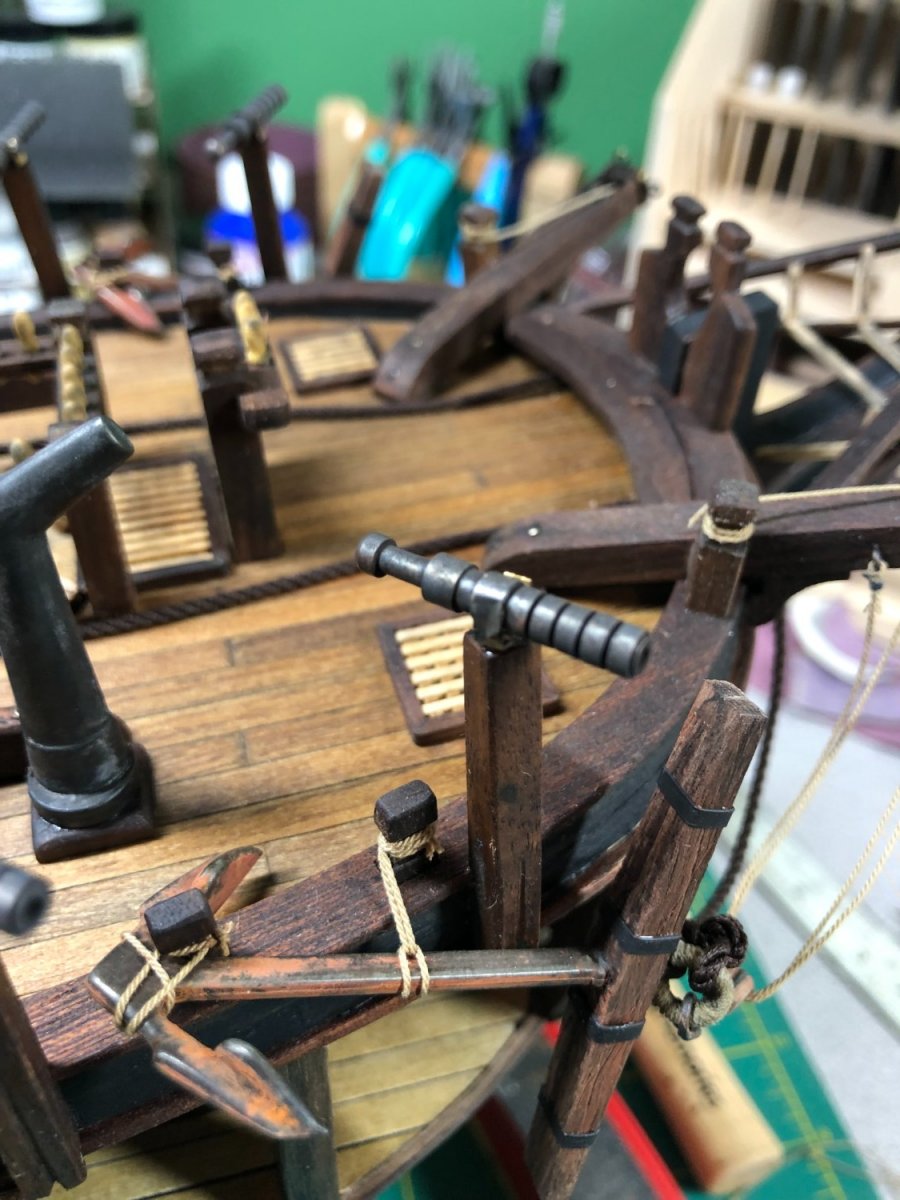
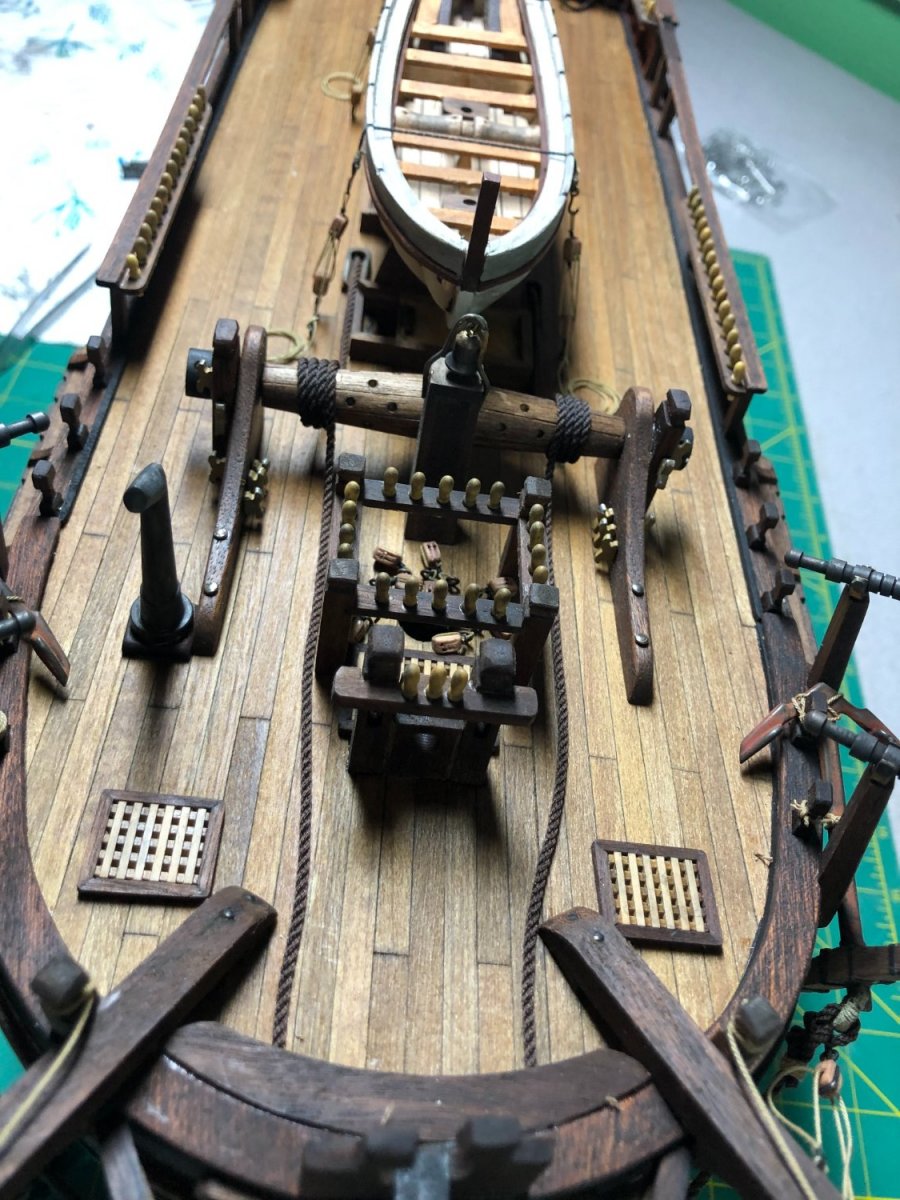
With the exception of the stern lanterns and a few rope hanks (more on this later in the post), the deck work is done!
The last few steps took a little longer than I anticipated... shocking, I know!
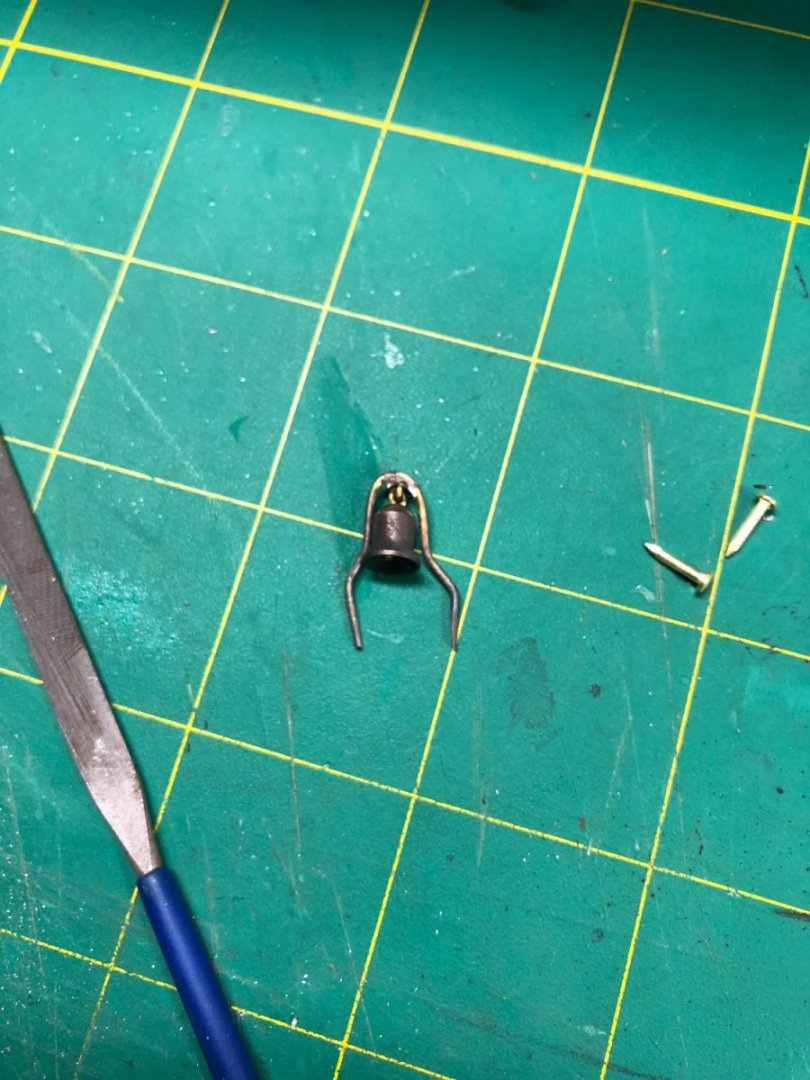
The ship's bell was a challenging assembly. Bending the brass wire wasn't too bad but soldering the hook to the wire took some practice as I hadn't soldered in quite some time. In the end, I got it looking decent and then did some blackening to give it that aged look:
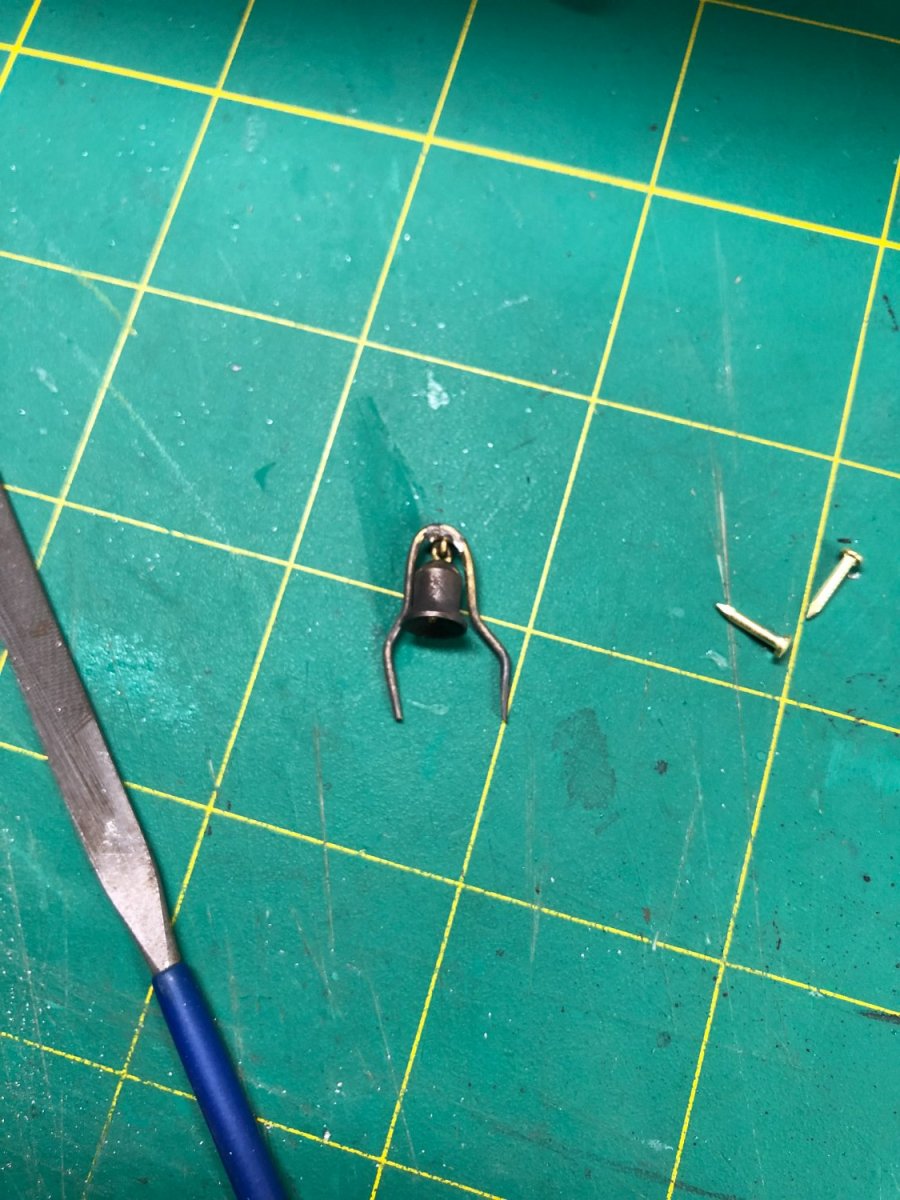
The half-pounder cannons were equally challenging as the assembly really wasn't thought out very well by the kit manufacturer (IMHO).
First, after doing some research, I could not find a single image of a cannon that was bent at about a 75 degree angle... all of them were straight, front to back. Based on that, I did not bend mine. Second, the brass wire used to hold the cannon to the bracket was so small that it would just slide out... more soldering! I soldered the wire to the brackets and blackened the entire assembly before installing them:

The bell installed:


The cannons installed:

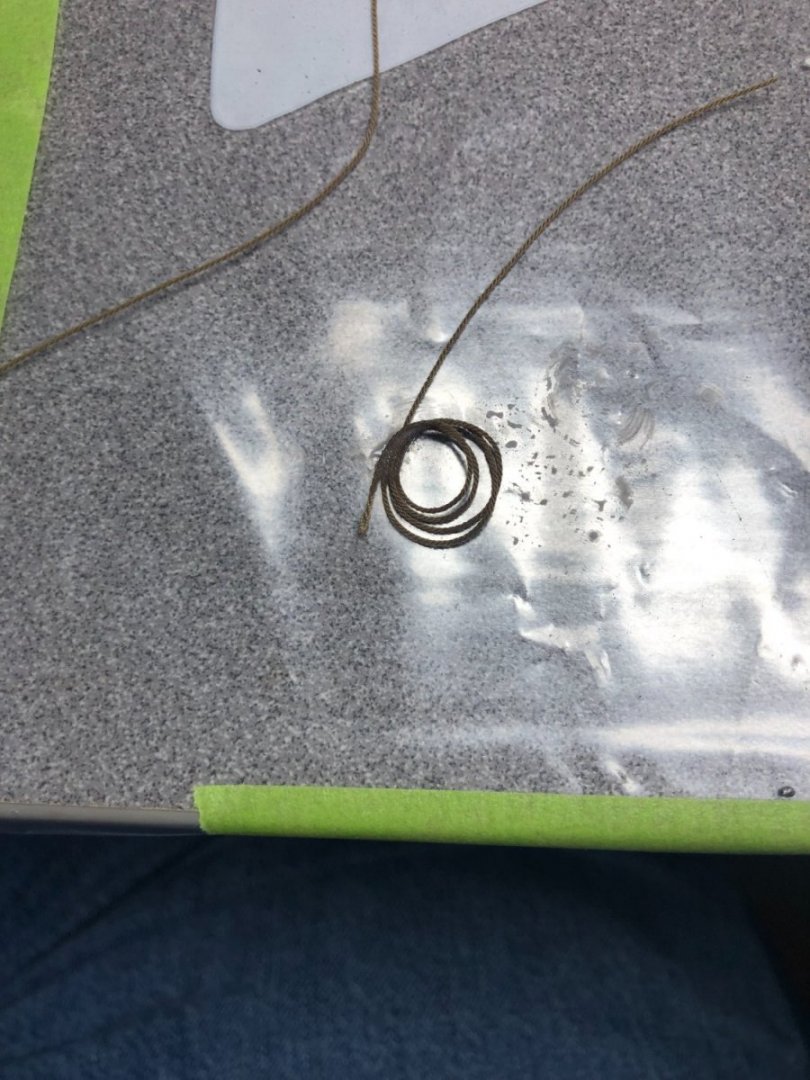
Rope coils, hanks and served lines were a bigger problem than I thought.
As I've mentioned, I make my own rope and I use a poly material rather than cotton. Poly has a longer life and does not have that annoying "fuzz".
What I didn't know is that diluted PVA IS NOT a good adhesive to use on poly rope!
I have another thread in the masting and rigging section about this problem and got some good help from the more knowledgeable members. After reading through their comments and suggestions, I have decided to try 3 different methods to solve the problem.
1. Use clear shellac
2. Use Liquitex Matte Medium
3. Use Downy fabric softener (this for the hanks only)
Once, I have completed my experiments, I'll report back here and on the previously mentioned thread.
In the meantime, I did do a couple of loose coils for the Launch using diluted PVA (which was a struggle and began my search for another method):
The next update may be a bit as our first long boat trip starts later in the week. We'll talk again when I have more to report.
- TOM G, GrandpaPhil, mort stoll and 3 others
-
6
-
3 hours ago, Bob Cleek said:
Add my vote for clear shellac. I've used thinned PVA, which has a drying time longer than I prefer and is very difficult to undo once it's dried if a mistake is made in the rigging. I also used thinned nail polish, but it also is somewhat difficult to reverse if one wishes to do so. Thin CA spreads everywhere and is not easily undone once cured. It also can conflict with other coatings with which it comes in contact.
I've found thinned white (clear) shellac has the following advantages over the other options:
1. Low cost and universal availability.
2. Also a universal sealer for wood which hardens the surface and permits sanding without bringing up any "fuzz" in softer woods (e.g. basswoood,) making it great for topcoats of both solvent and water-based varnish or paint. This means one less specialty product container on the shelf.
3. Non-toxic. Although prepared shellac is undoubtedly thinned with denatured alcohol, you're safe so long as you don't drink it. The alcohol fumes are nontoxic and less flammable than acetone fumes from nail polish. Shellac itself is actually edible and when produced in "food grade" form is used for imparting a shine to jelly beans, among other things. (Sorry if I spoiled anybody's love of jelly beans by revealing that they're coated with beetle excretion!)
4. Thinned shellac is very viscous and penetrates very well. When the alcohol evaporates, the shellac creates a hard matrix between the fibers of the thread that binds the knots and holds the shape intended. As the alcohol evaporates and the shellac "thickens," lines can be easily formed into any shape desired, which will take a hard set when the shellac is fully "dry." It takes a matter of a few minutes for the alcohol to entirely evaporate, so there's no inconvenient delay waiting for it to set, but enough working time to form shapes desired.
5. Thinned shellac does not leave a glossy finish. If a thick coat of shellac dries glossy, it is easily wiped down with alcohol to remove the glossy excess.
6. Shellac is easily reversed by liberal applications of alcohol blotted up with a bit of paper towel or a cotton swab. When softened with the alcohol, previously shellacked knots can be untied while the shellac is "wet" and soft if you wish to redo the work or adjust the tension on a line.
7. Shellac is very easily cleaned up with alcohol, so you can use whatever size brush suits your fancy and easily clean it.
8. Shellac has been proved over thousands of years to be archivally stable.
Thanks Bob!
Clearly and concisely answered any questions I had...
I've decided to get some clear shellac and Liquitex Matte Medium to experiment with on my ropes.
Once I have both one hand, I'll try out a few different coils, hanks and served lines.
I'll report back here on my findings and conclusions.
-
6 hours ago, allanyed said:
Hi Lyle,
Have you tried matte finish clear nail lacquer?
Allan
I have not…
Leaning toward trying clear shellac.
But not opposed to trying the lacquer too.
The “Downy” method is intriguing too… but need more info on it.
- thibaultron and mtaylor
-
2
-
I make my own rope using Guttermann poly threads.
Rope coils, hanks and serving a line require an adhesive to retain desired shapes or to prevent unraveling. For cotton, diluted PVA glue is the product of choice... it doesn't work with poly rope.
A spot of CA glue on a knot works great but is not practical for coils, hanks and served lines.
Any suggestions?
- thibaultron and mtaylor
-
2
-
22 hours ago, allanyed said:
Looking forward to your next update Lyle. Have you posted anything about this problem in the General Ship Model Kit Discussions forum so others are made aware?
Allan
It's pretty commonly known that Artesania Latina's instructions are a bit "lacking" at times. There are good diagrams. So, with those and my reference materials, I should be ok.
-
Lee’s is very good too.
Looking real good, Dave!
- Keith Black and Dave_E
-
1
-
 1
1
-
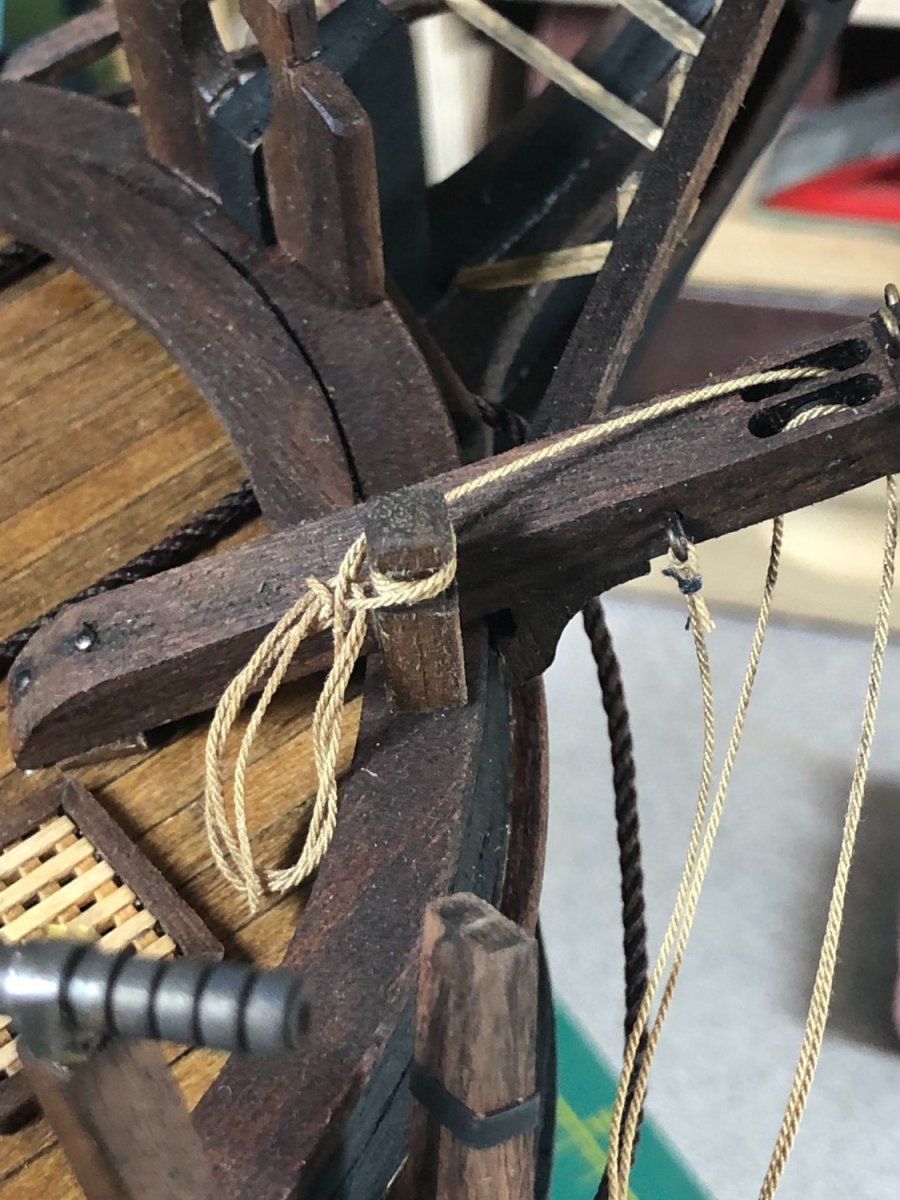
4 hours ago, allanyed said:
Hi Lyle,
Thanks for continuing your log. Your last photo brings up something I have often wondered about. Were the seizing on the blocks noramlly tarred as you show or not? I always thought they were not, but cannot find any information one way or the other. If they were tarred, what was the point of doing so?
Hope one of your followers has info based on a contemporary source.
Allan
Thanks Allan. I pledged at the start of the log that I would keep it going to the completion of the Bounty. There are not many complete logs!
As long as people are patient, I’ll get there.
Your question/comment is an interesting one. I’ve been using the dark thread for seizing without giving it a lot of thought. I guess it doesn’t make much sense for the line to be tarred but the seizing is… for visual contrast, it looks good though.
Something to keep in mind while I move into the rigging phase.
The instructions for the kit are nonexistent and I will be relying on the diagrams and books that I’ve purchased… Lee’s and Petersson in particular.
I’ll be researching each and every line before building it up and installing.
Unfortunately, there was no info on the Launch tie-downs!
Appreciate you comments, Allan. Keep them coming!
-
Back at it, after a week of work AND a week of Covid!
Lucky me!
I can't remember if I mentioned that I am not doing the Jolly boat... The Launch is it for this model.
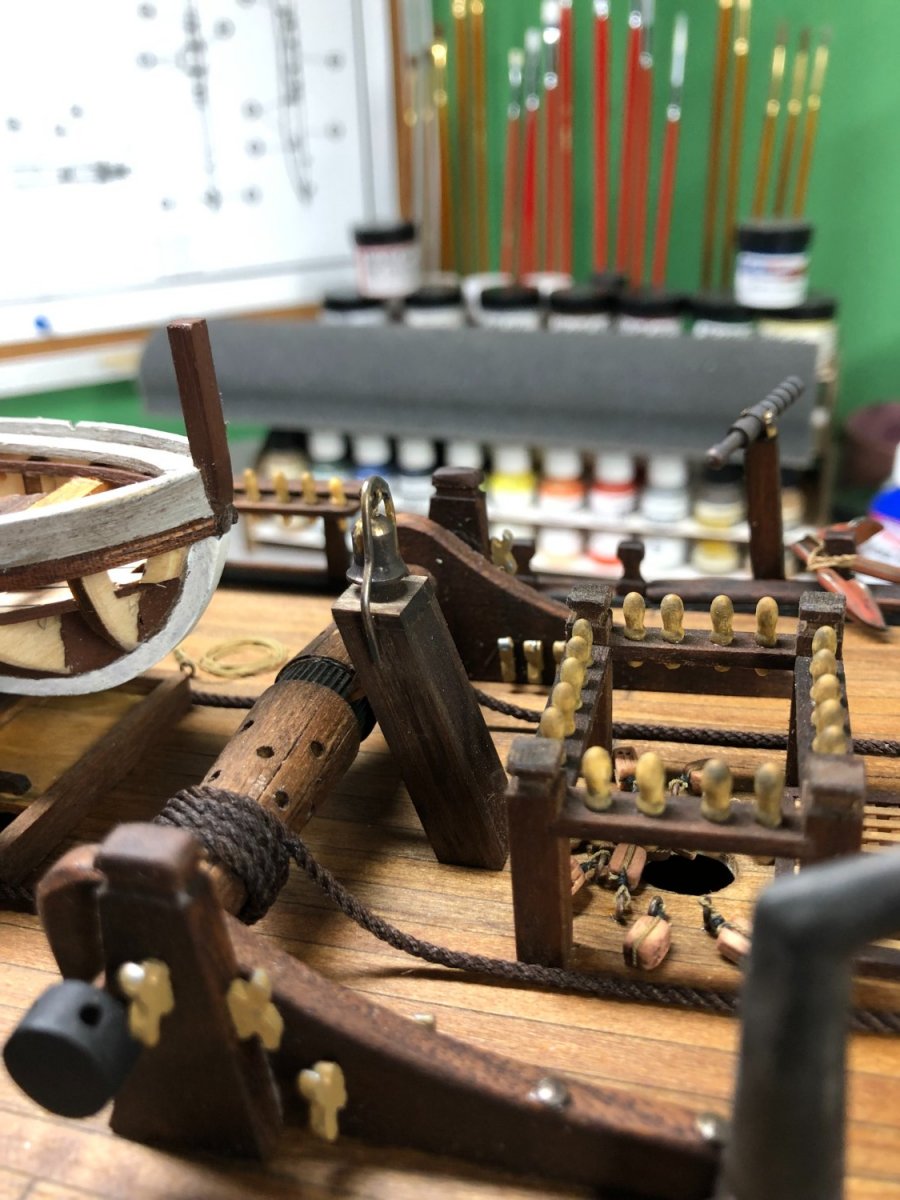
With the Launch done, it needed to be tethered to the deck.
I decided to use a bit of a different method... many methods were used. I used the following for my model:
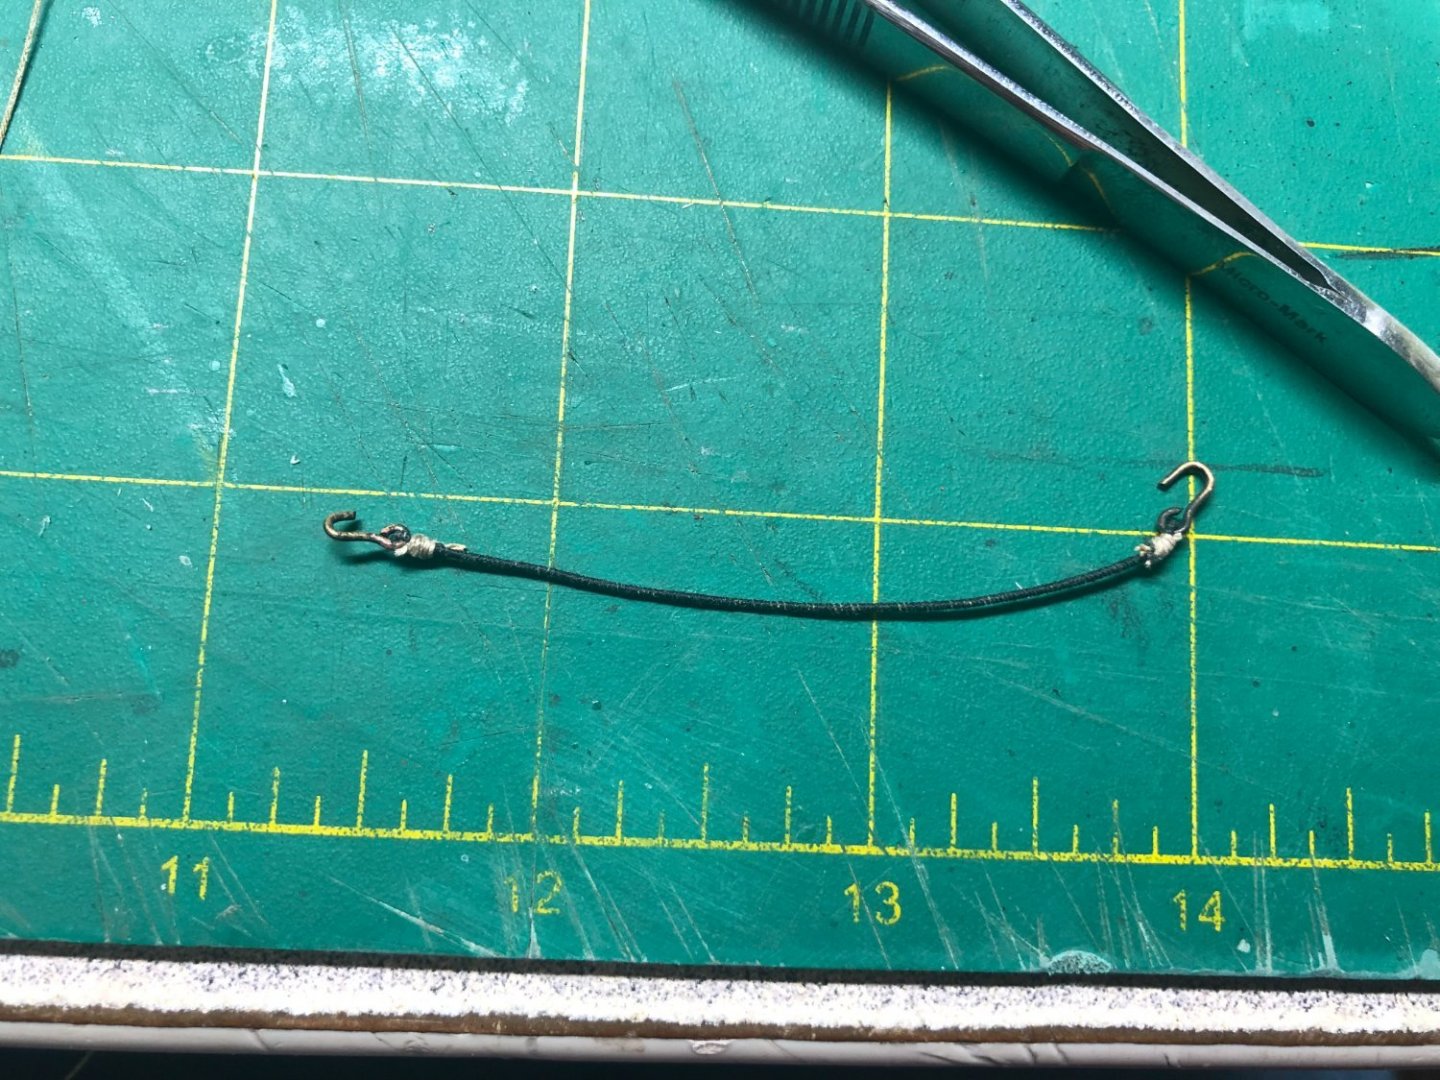
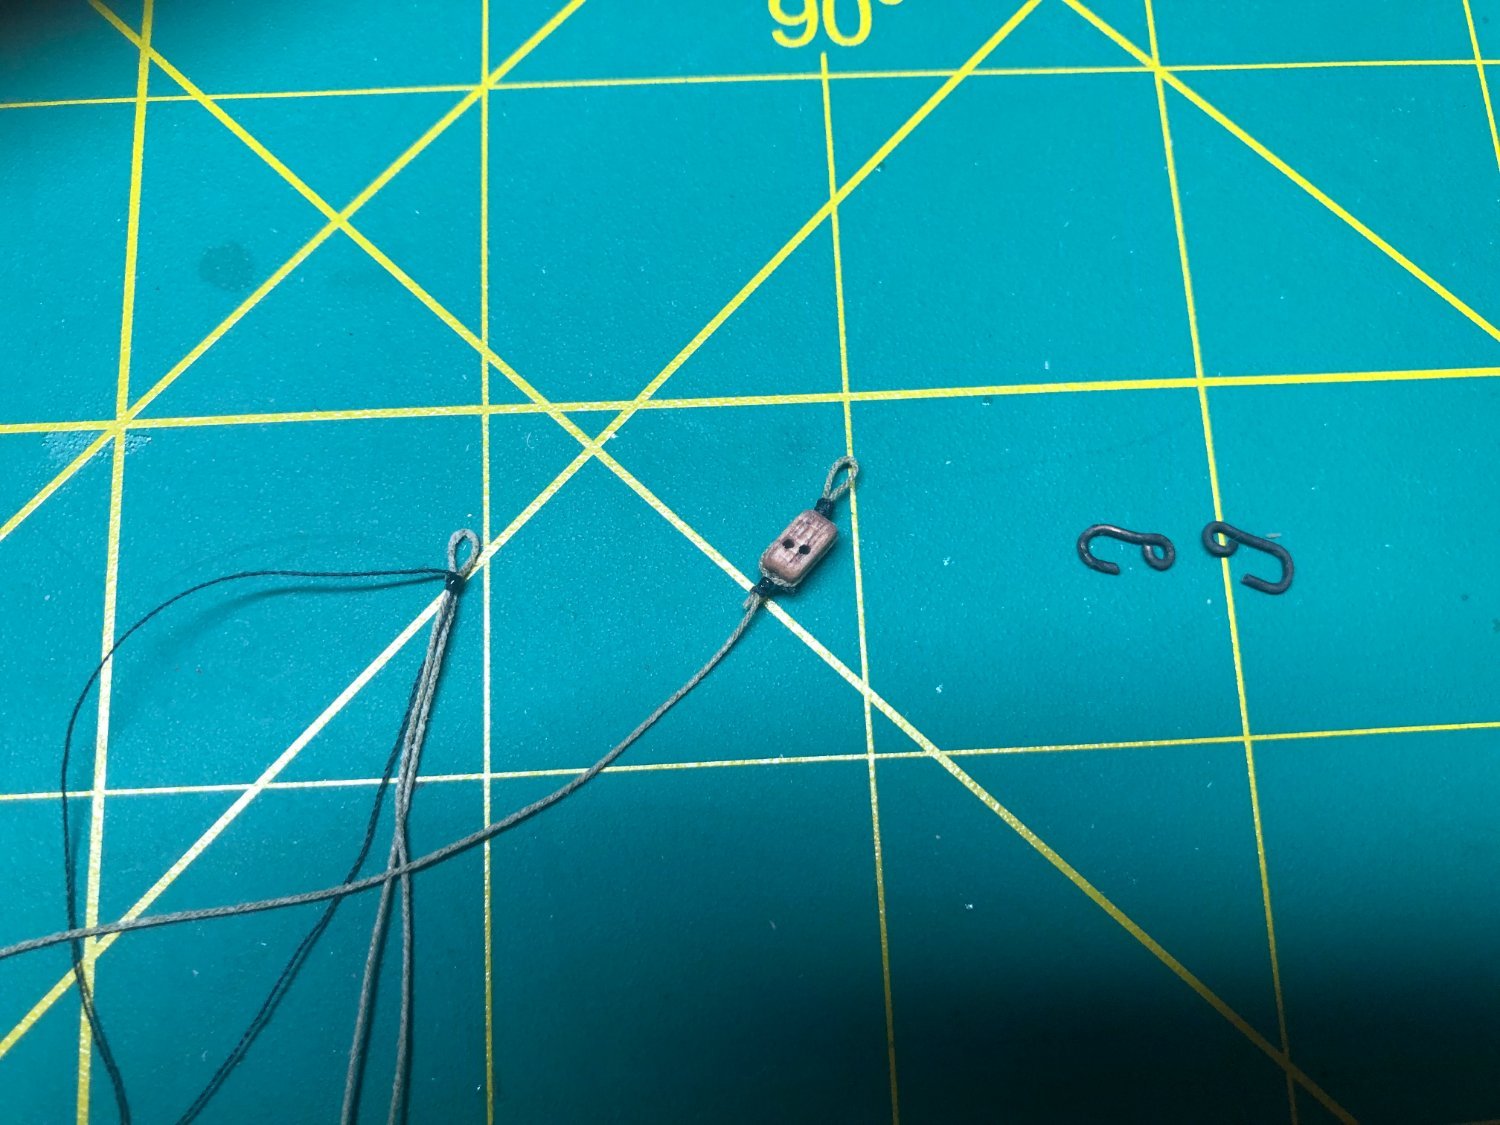
First, I served some line:

I only needed about 8 inches, total. While that was drying (I use diluted white glue to keep the wrap tight), I started on the hooks:
With the served line dry, I cut it to length and used CA glue on the ends to keep the wrap tight. The hooks are added and seized to the line:
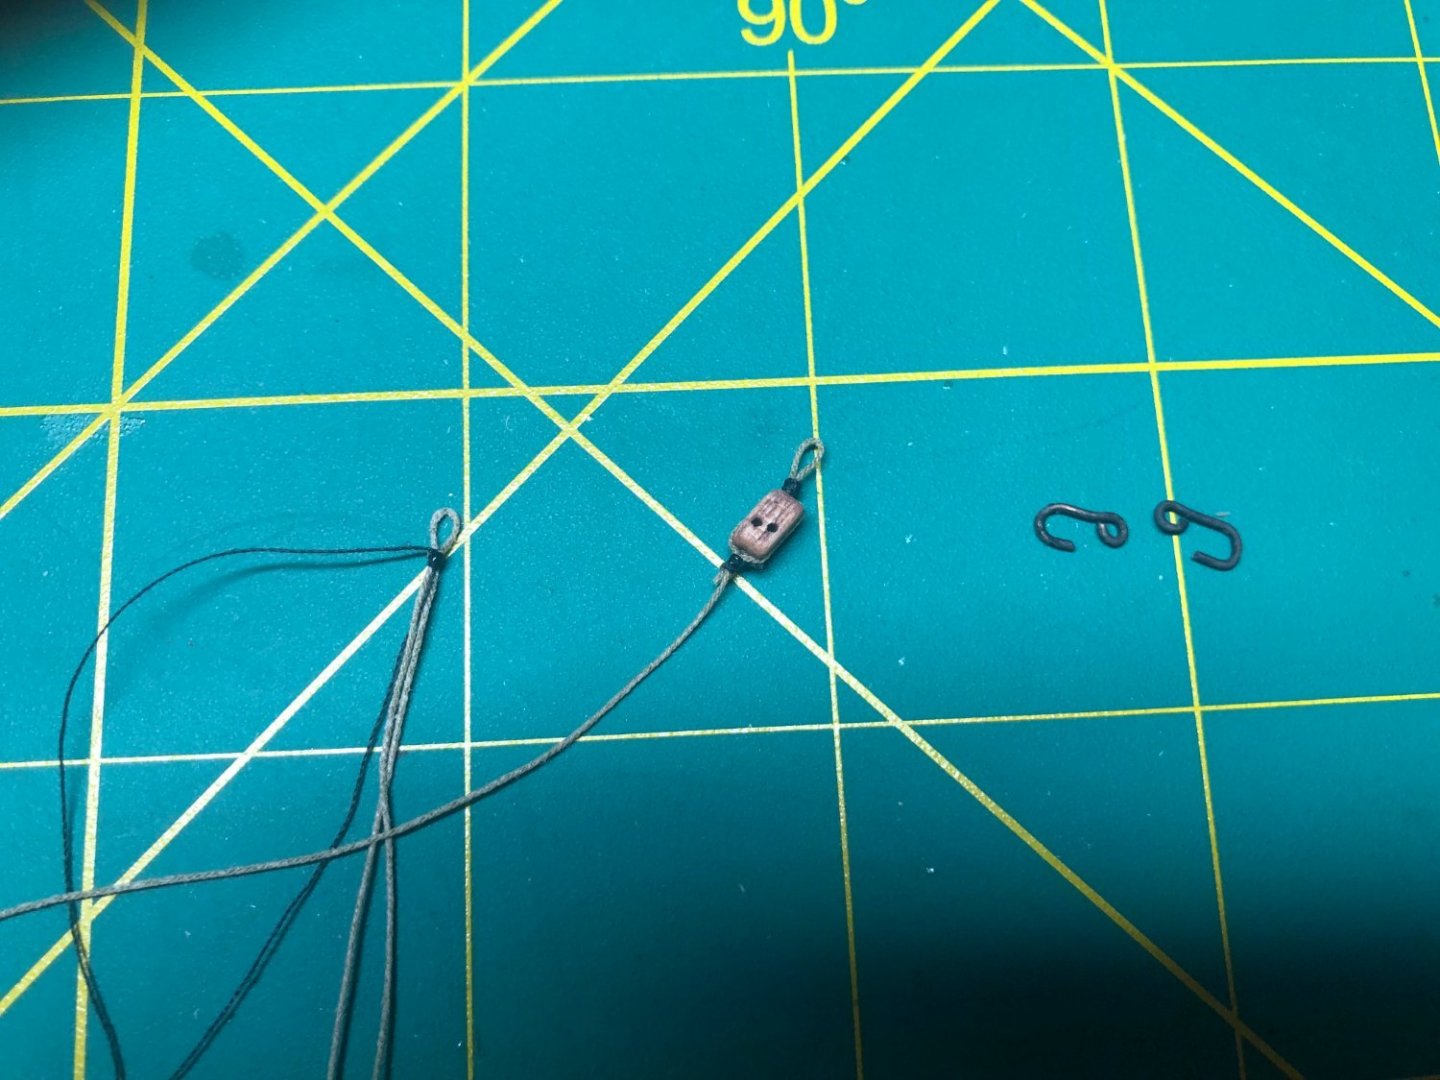
Blocks are assembled with lines and hooks:
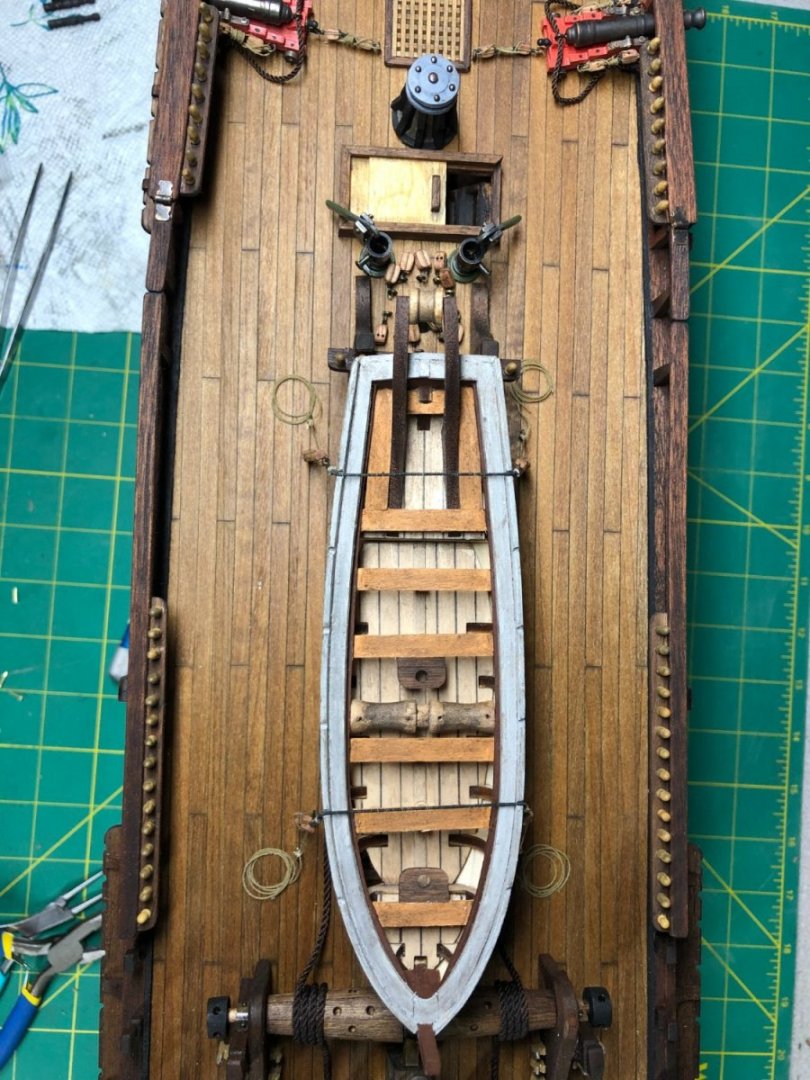
Hooks glued to the deck and blocks threaded and cinched down:


A couple of quick tie-down knots and rope coils and this step is done.
I have one step left to complete the deck work! I'll finish it tomorrow.
Next up is the bowsprit and the rigging will begin in earnest!
Lots of activities over the next few months. So, work on the Bounty and updates will be sporadic.
- mort stoll, DaveBaxt and TOM G
-
3
-
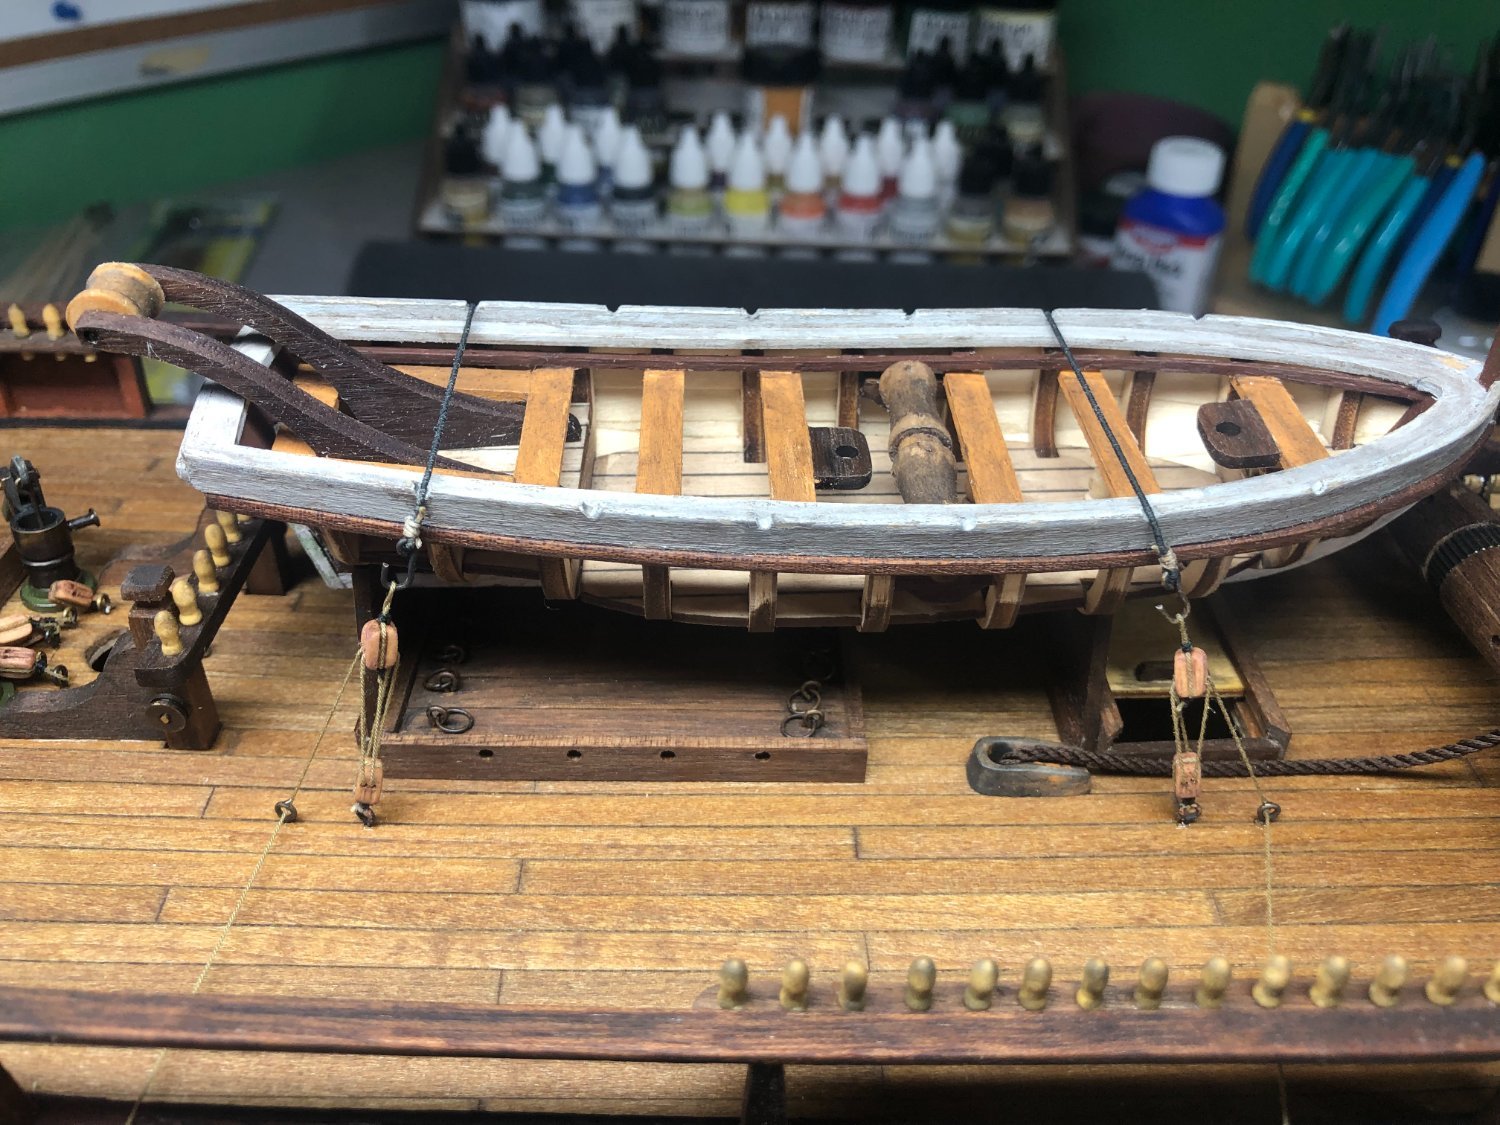
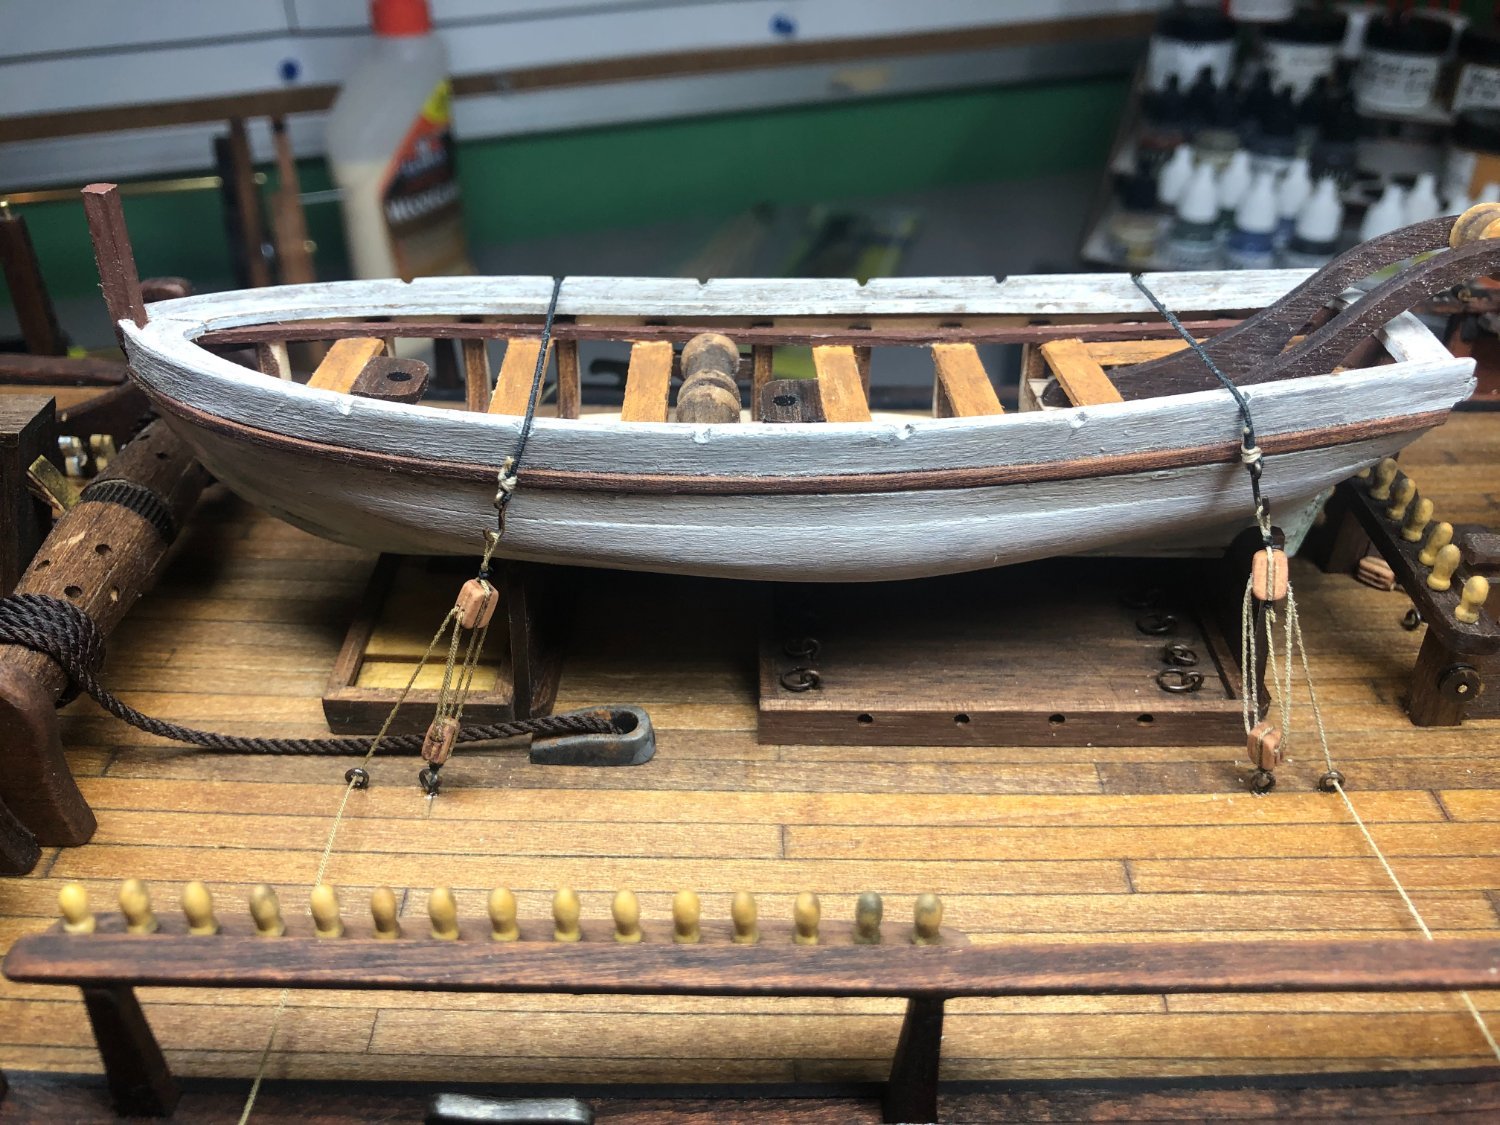
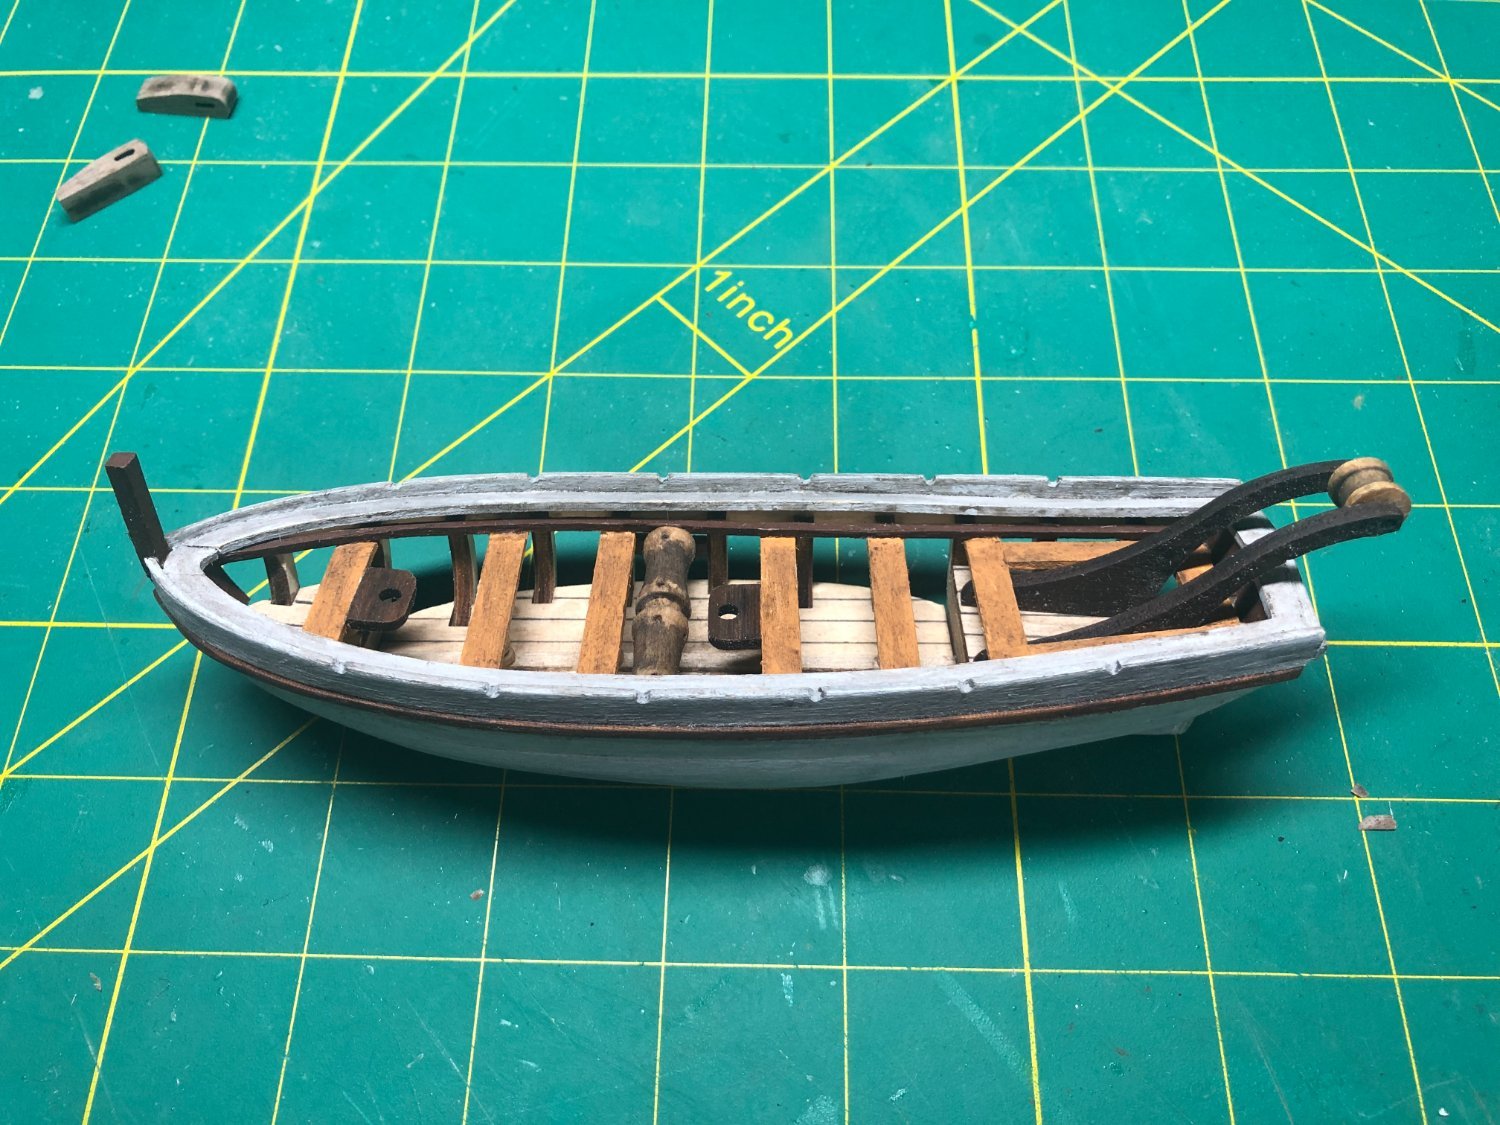
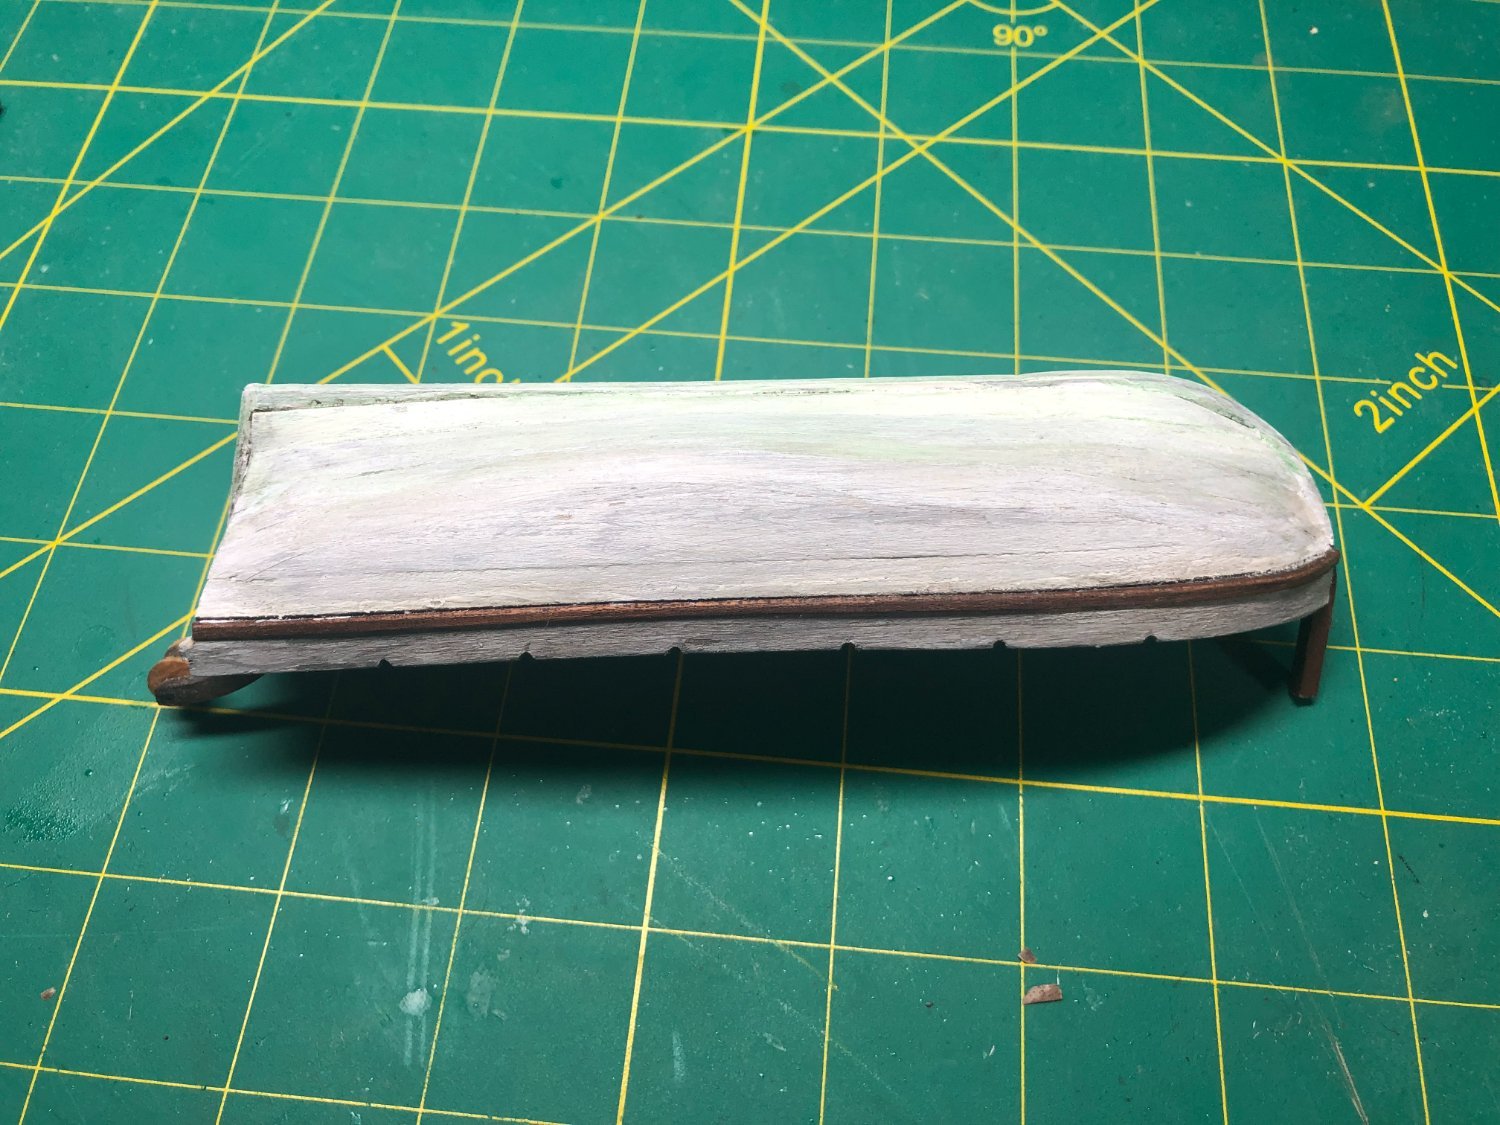
Launch completed and ready to mount.
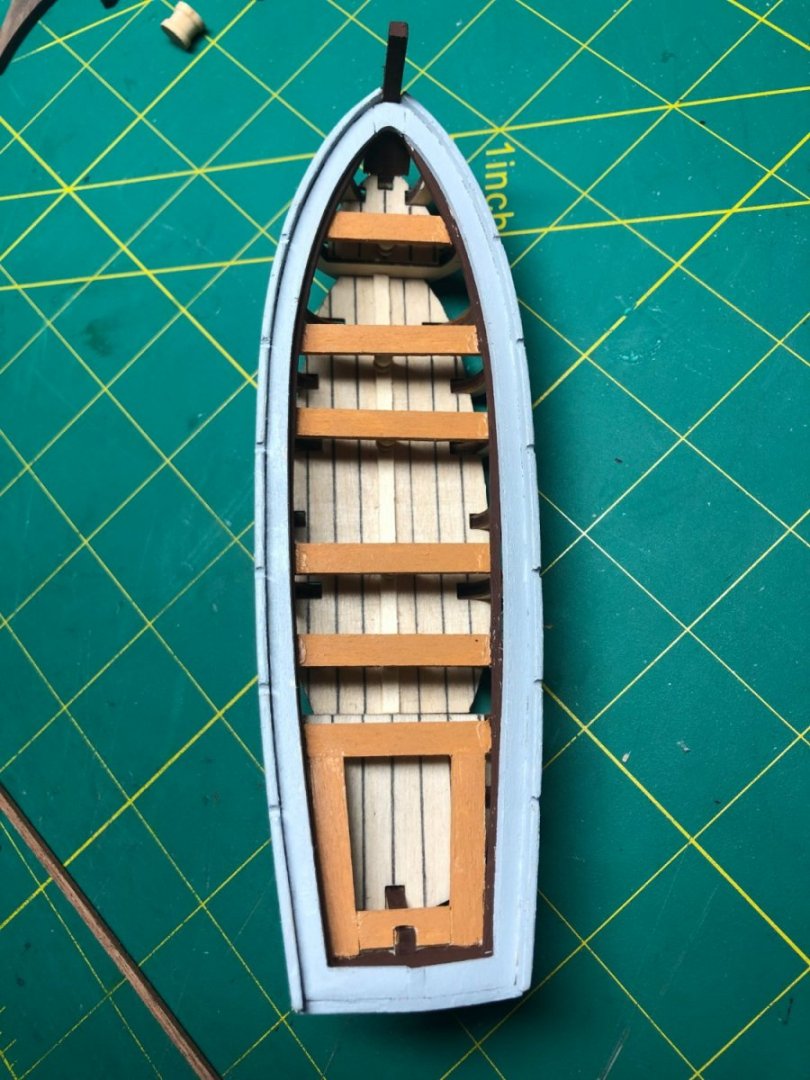
Before planking the port side, I did some weathering and distressing:

The planking was straight forward and since it is being painted, I did not follow my usual method. Once completed and sanded, I primed and painted the hull and distressed it with several washes to give it a used look:
The picture colors are not showing quite right. The top rail is actually gray!
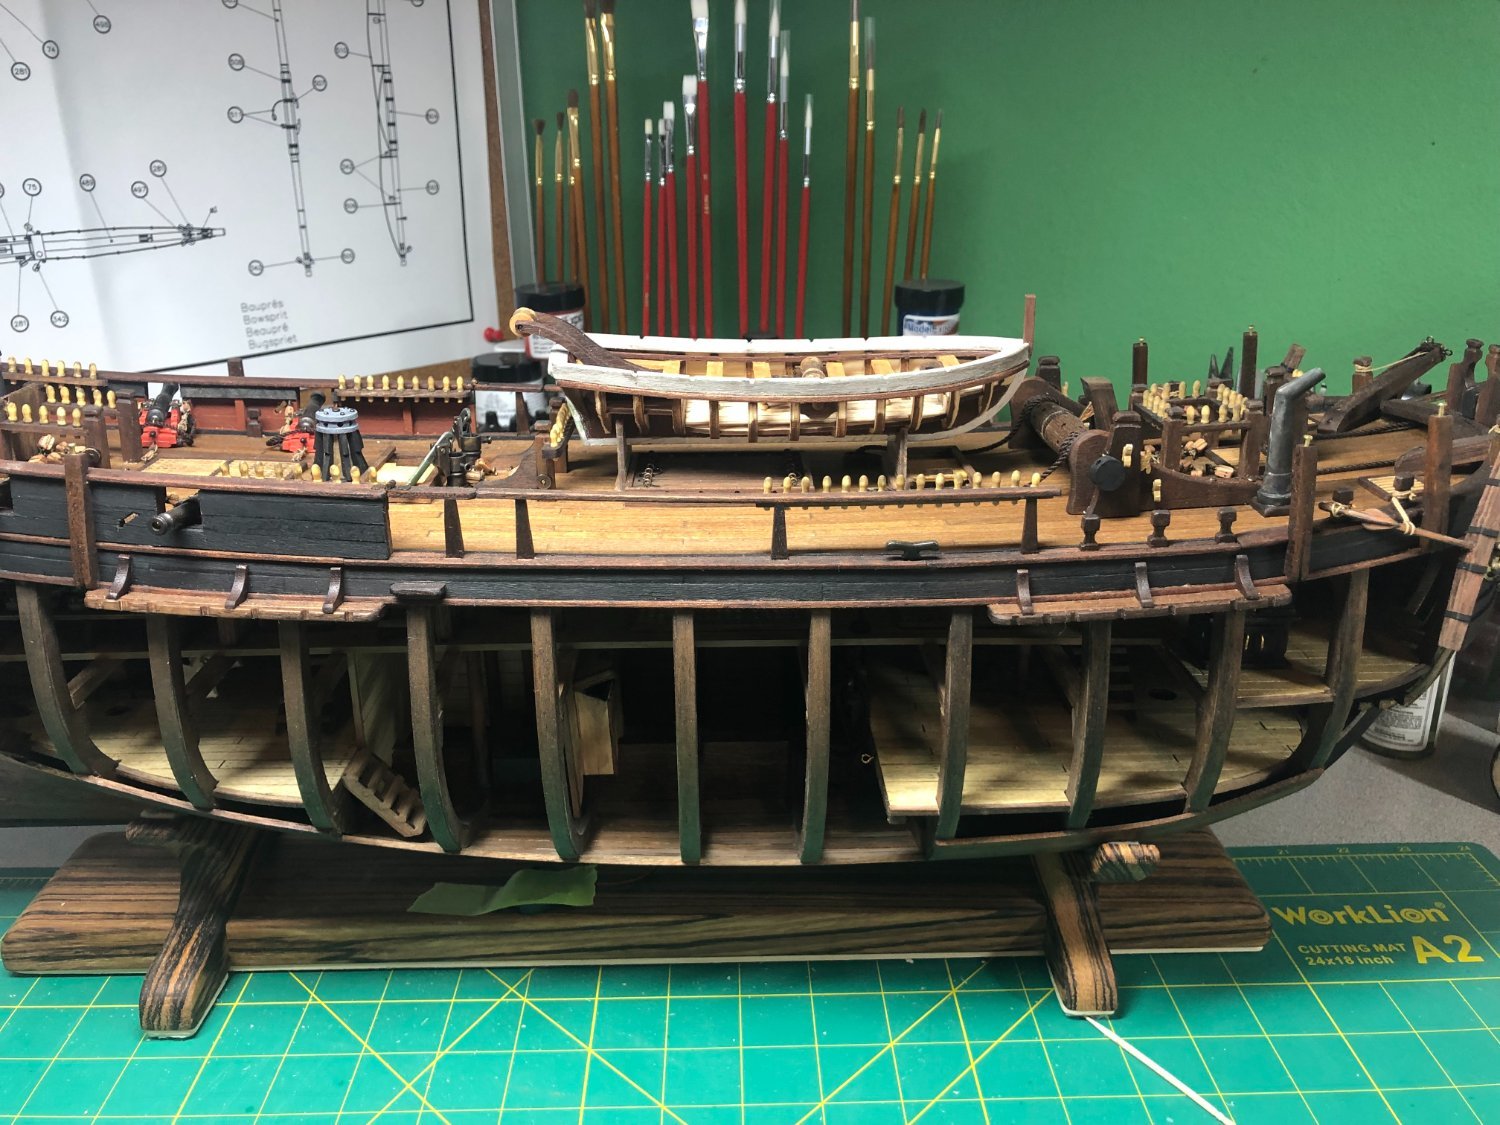
Finally, the launch is sitting in the appropriate spot on the Bounty's deck.

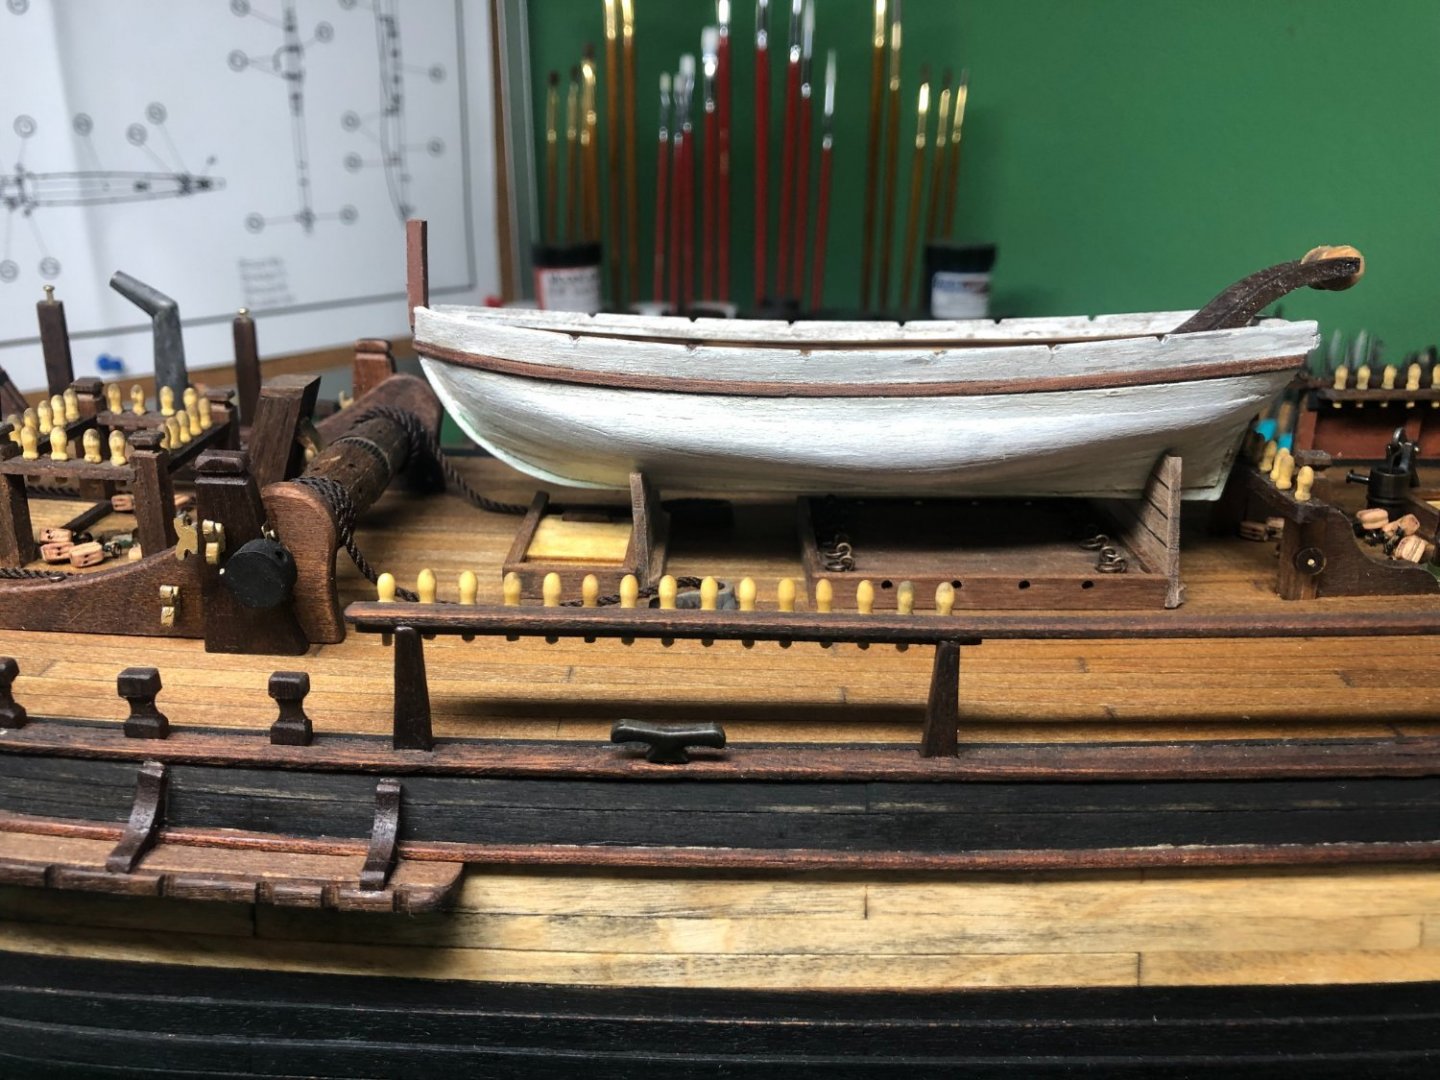 Rigging the Launch to the deck remains before moving on the the half-pounder guns.
I'm off once again... my old employer has re-hired me... for a week, to help with a project. Made it worth my while, so off to Oakland for a week!
-
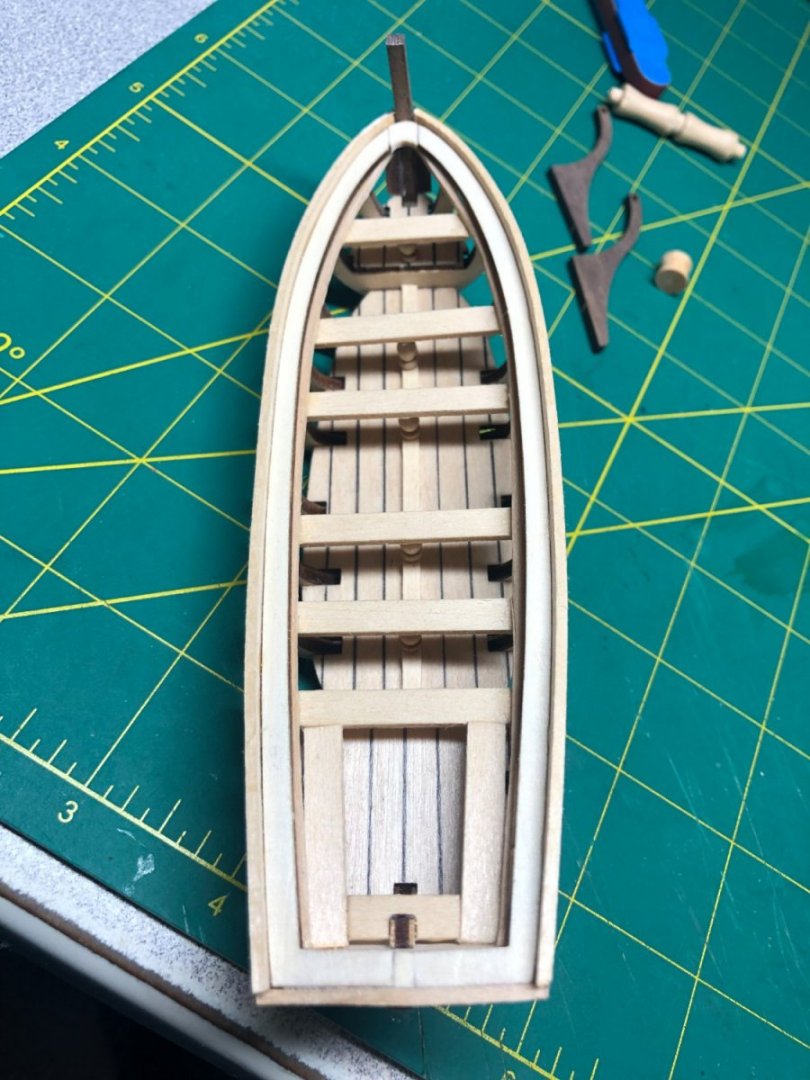
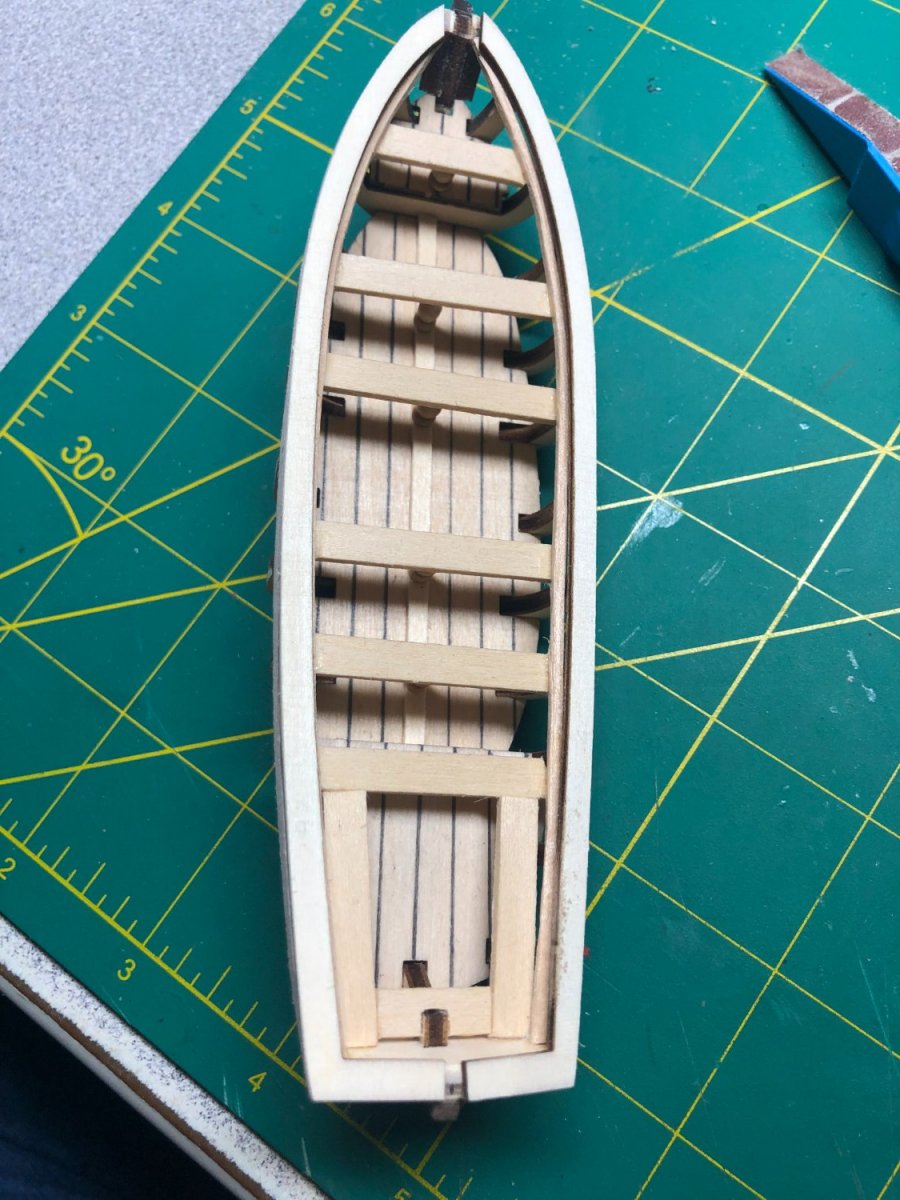
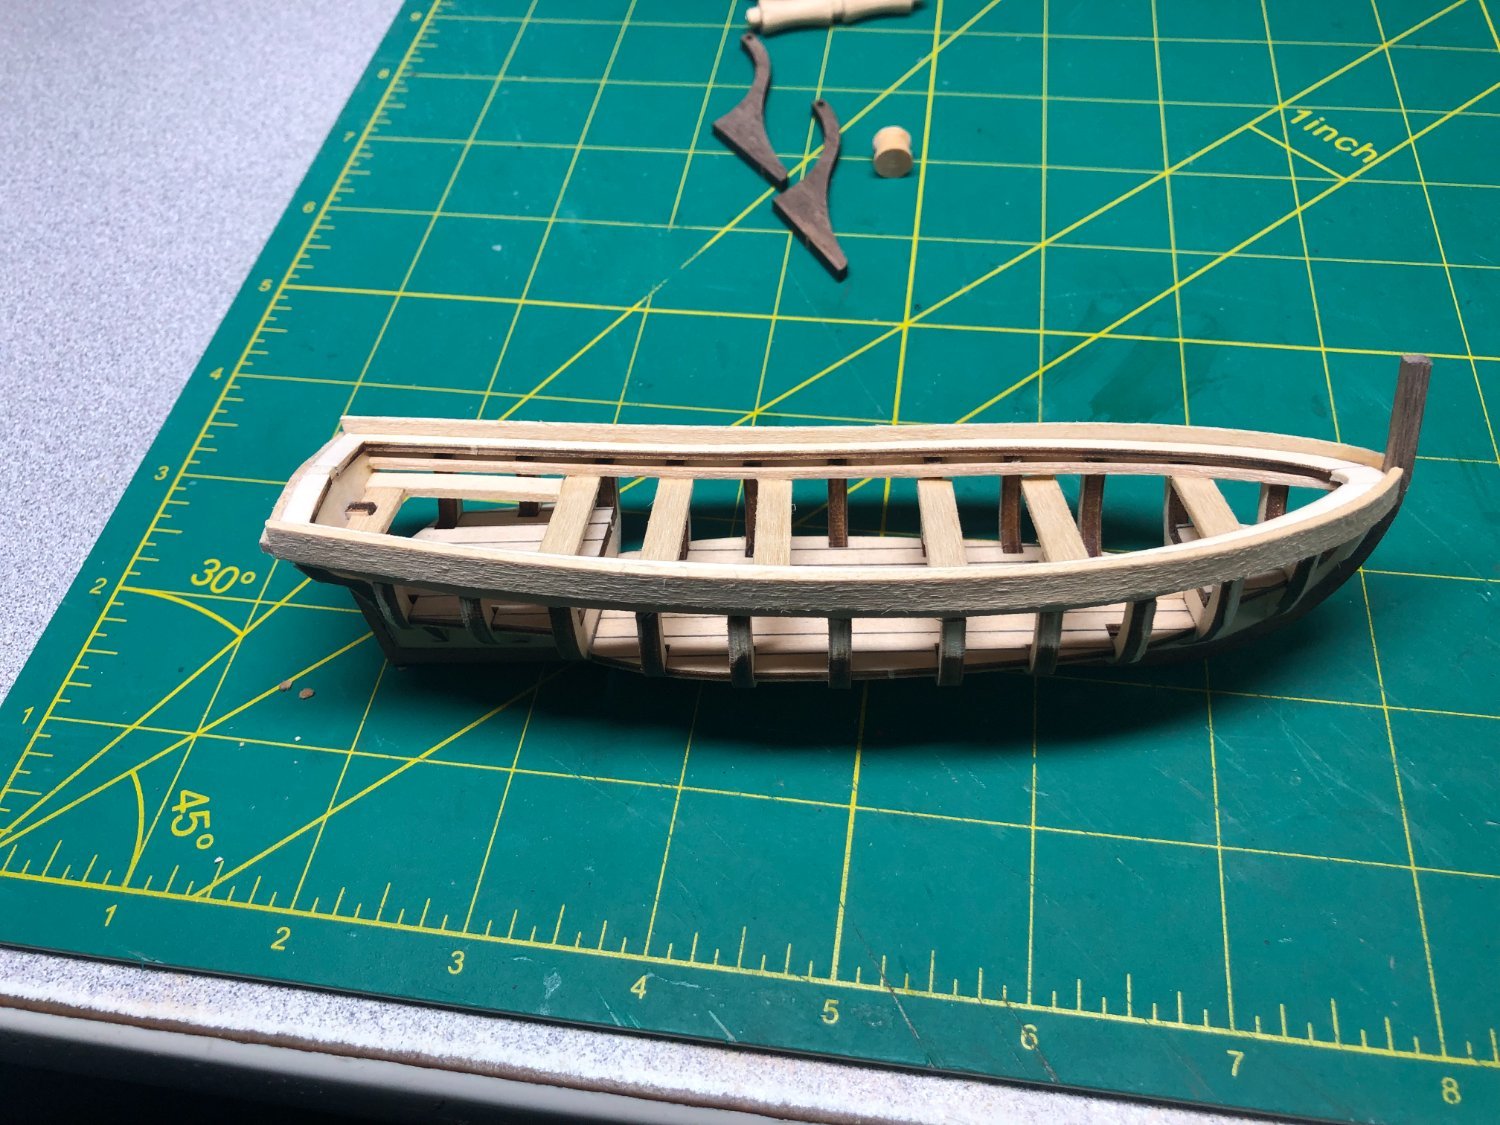
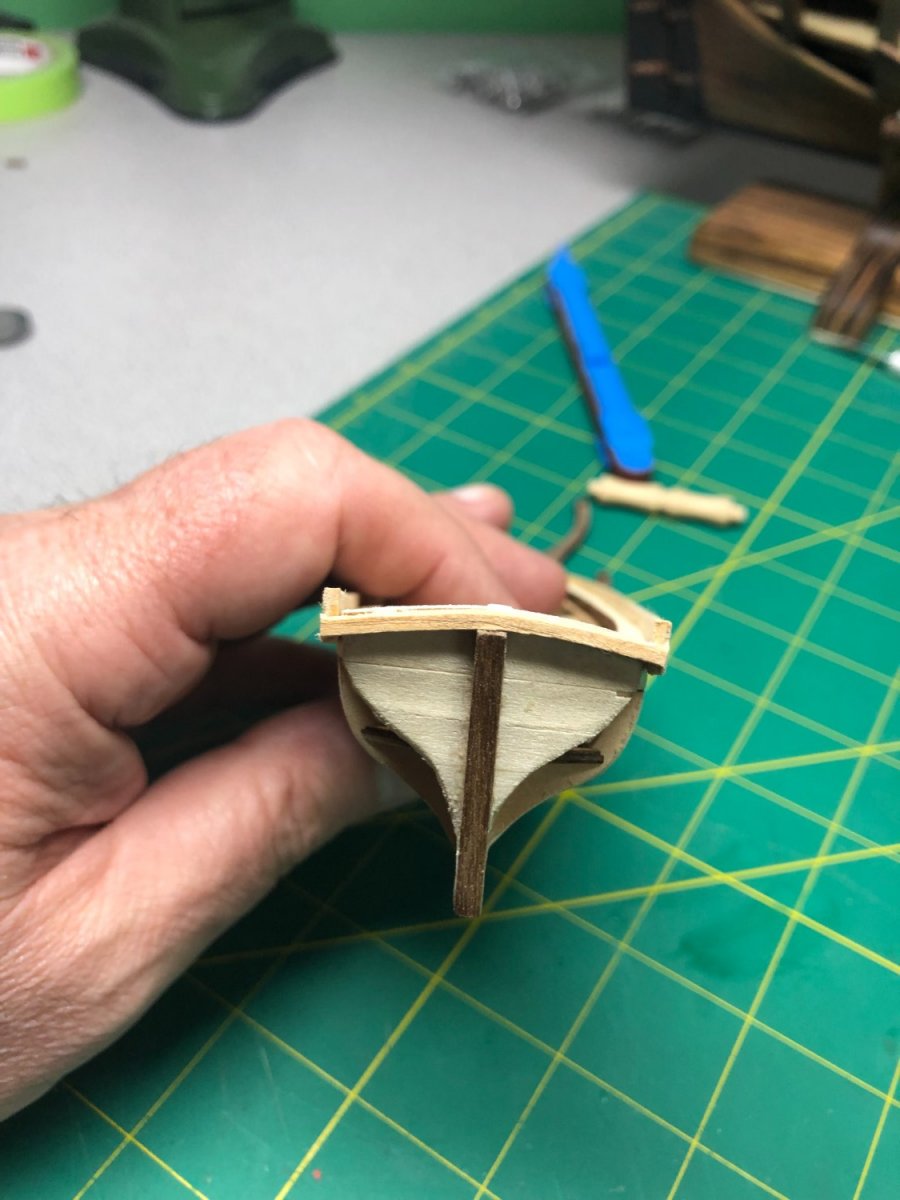
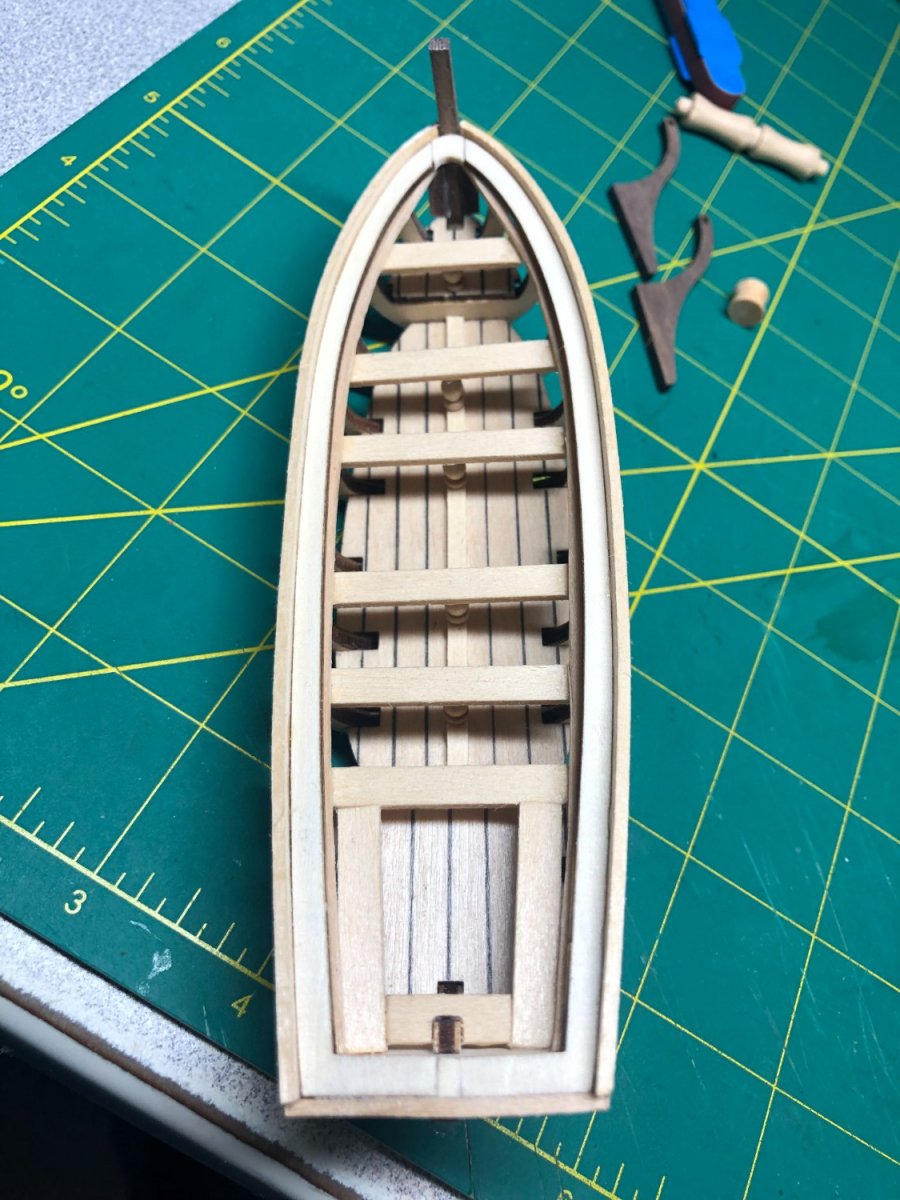
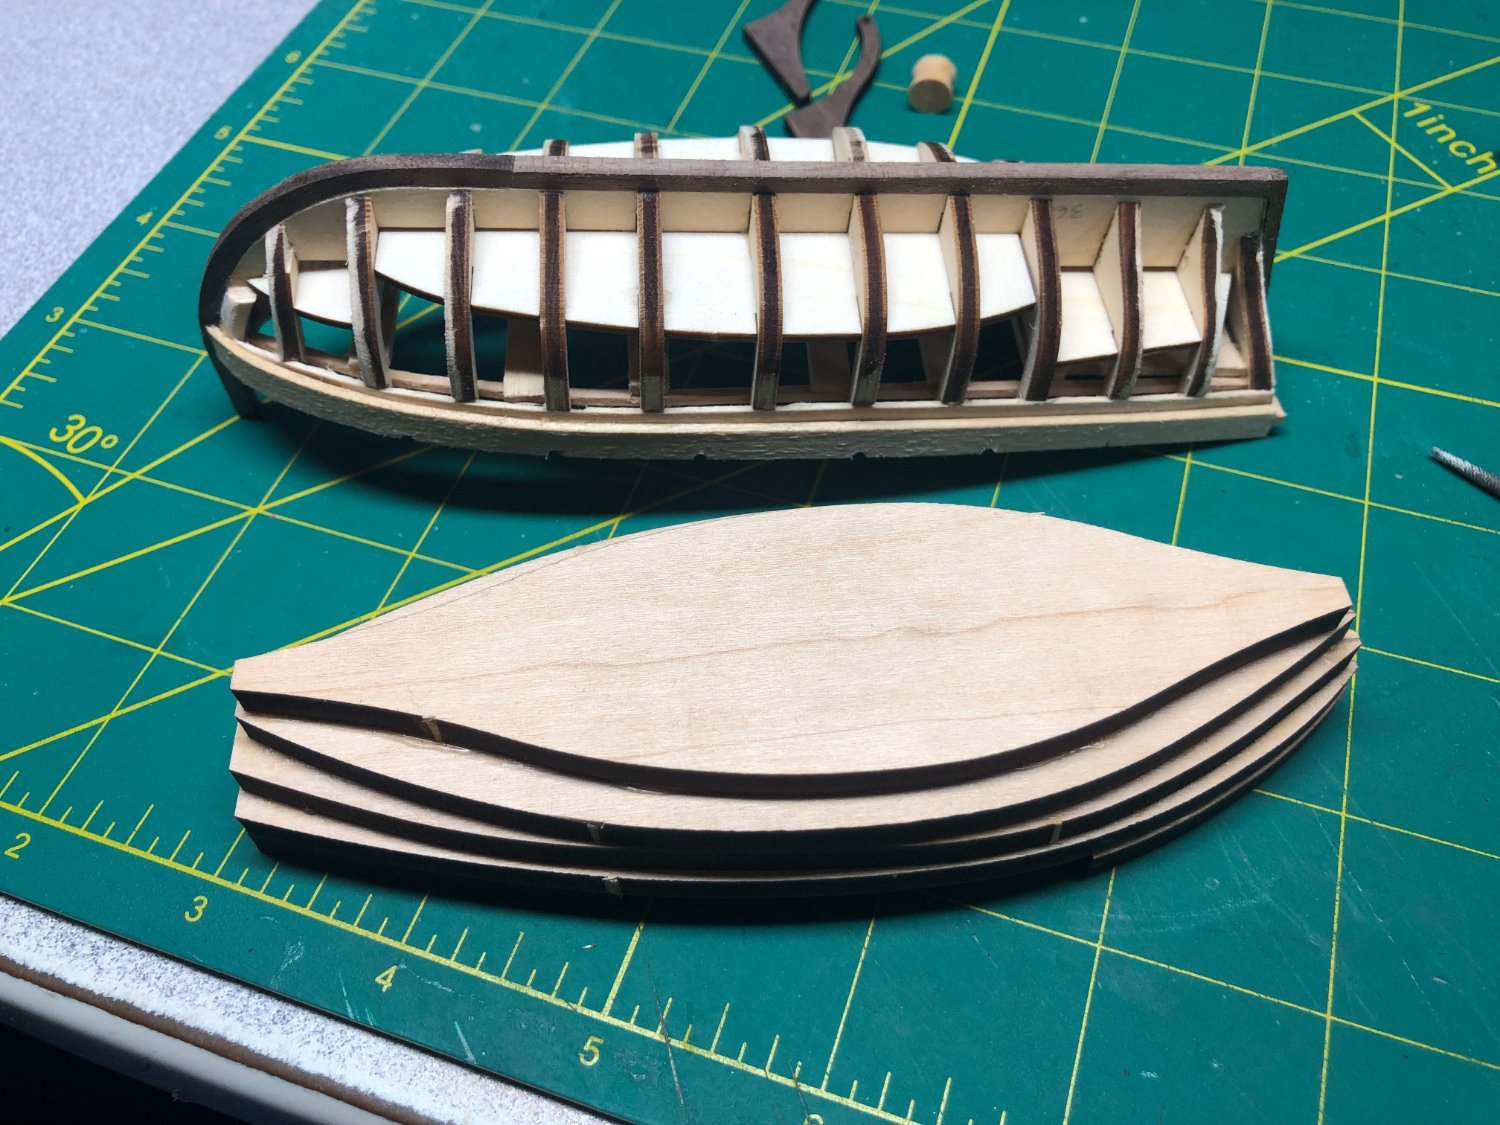
Although not really historically accurate, the Launch is a fun little build.
So, I started on the frame pieces and the interior of the boat:
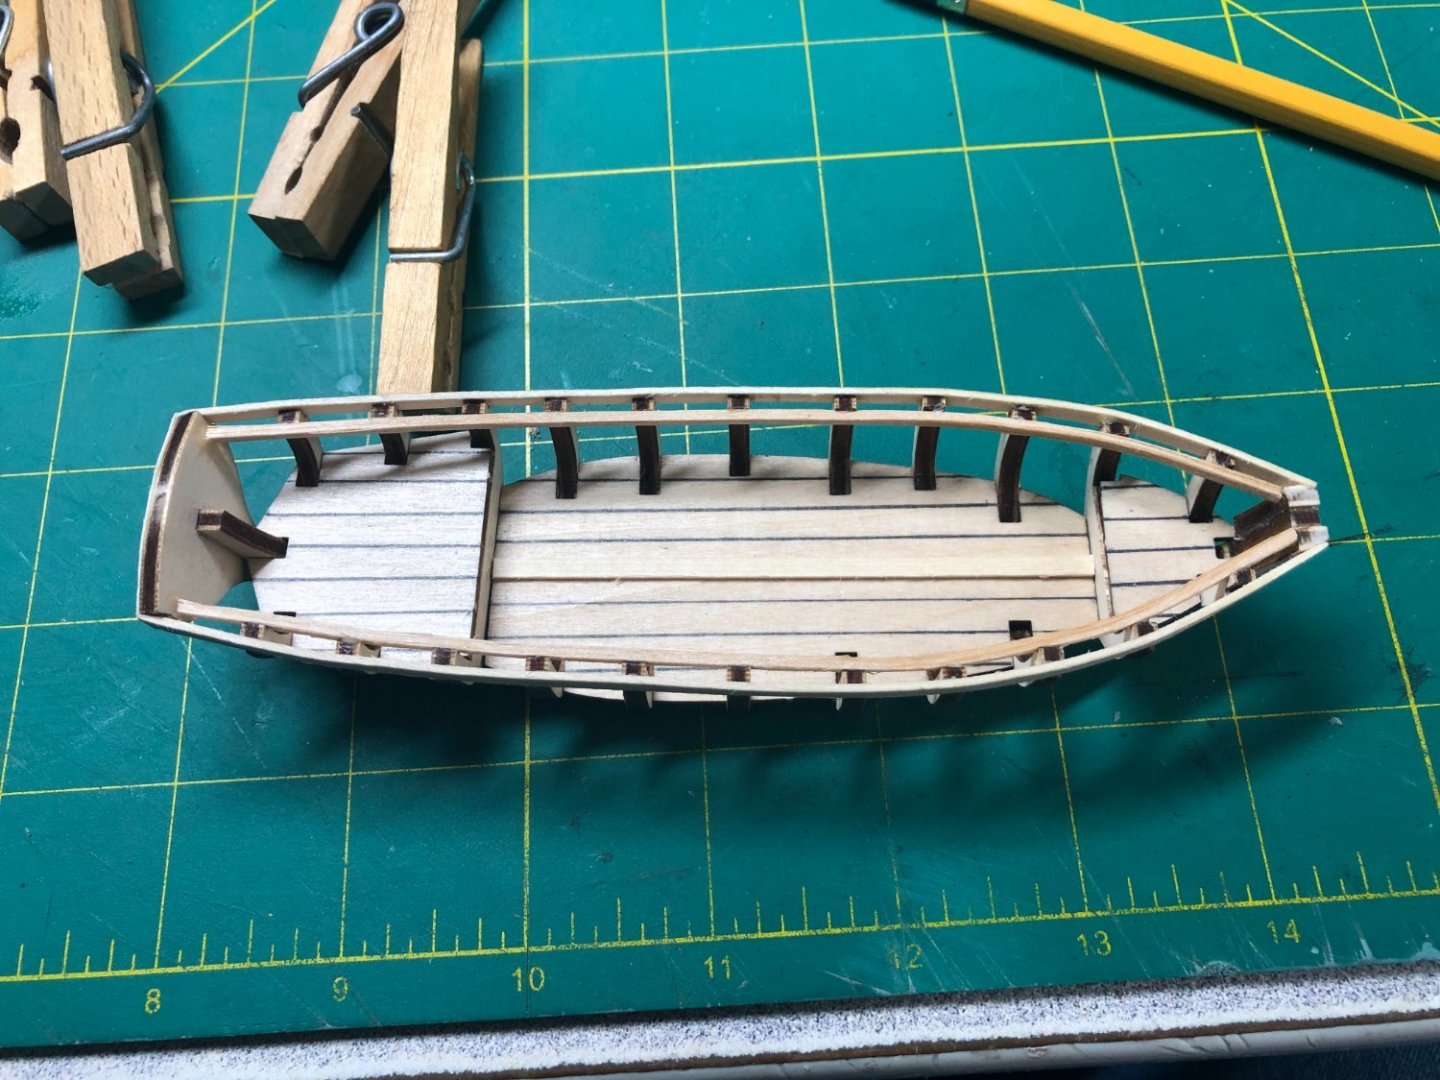


The instructions are minimal but the pictures are good... a fairly simple build but time consuming!
I added the keel and stern post:
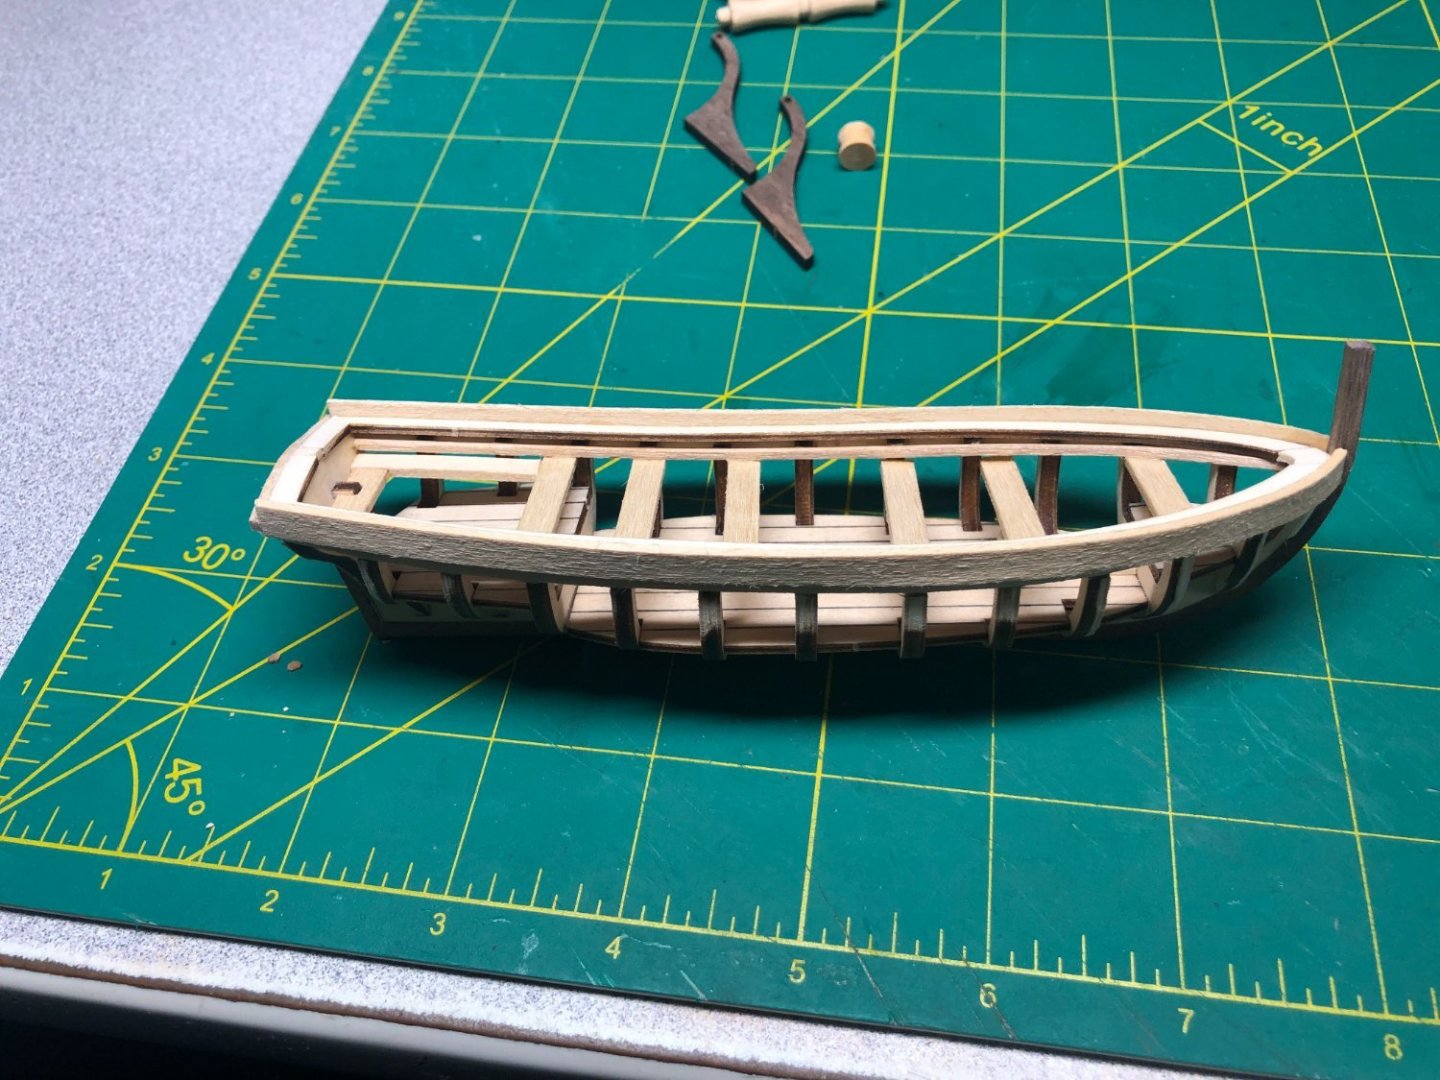
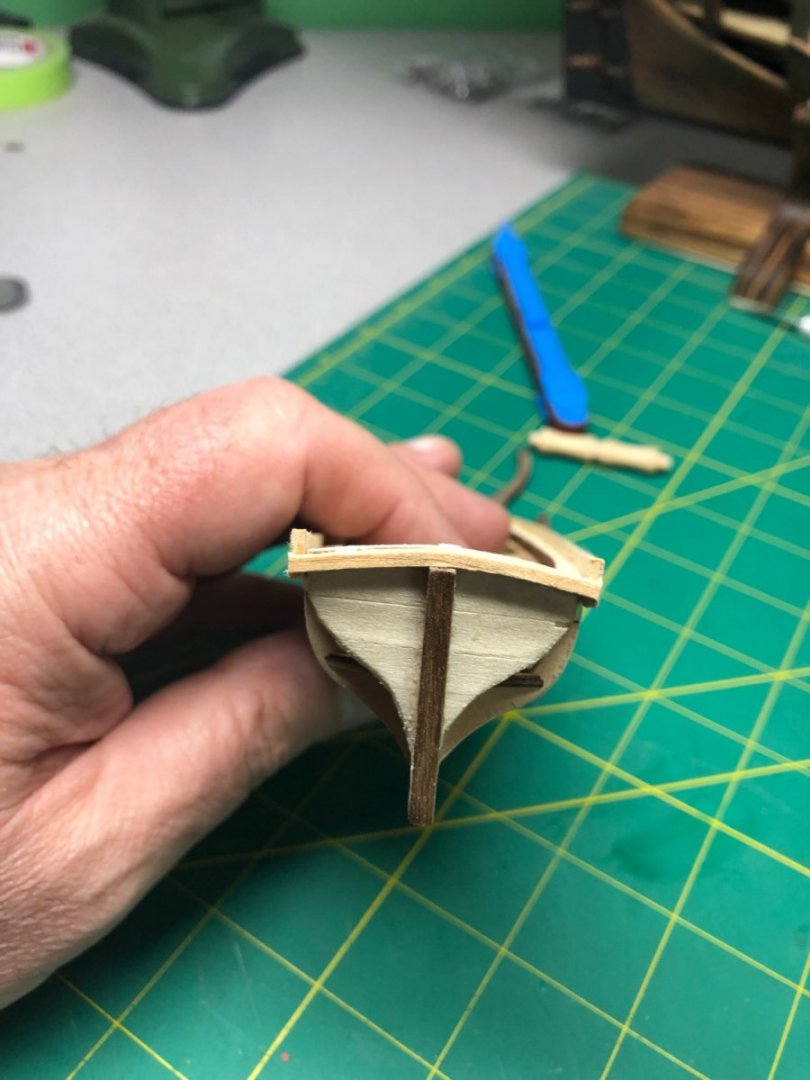
Some light sanding...
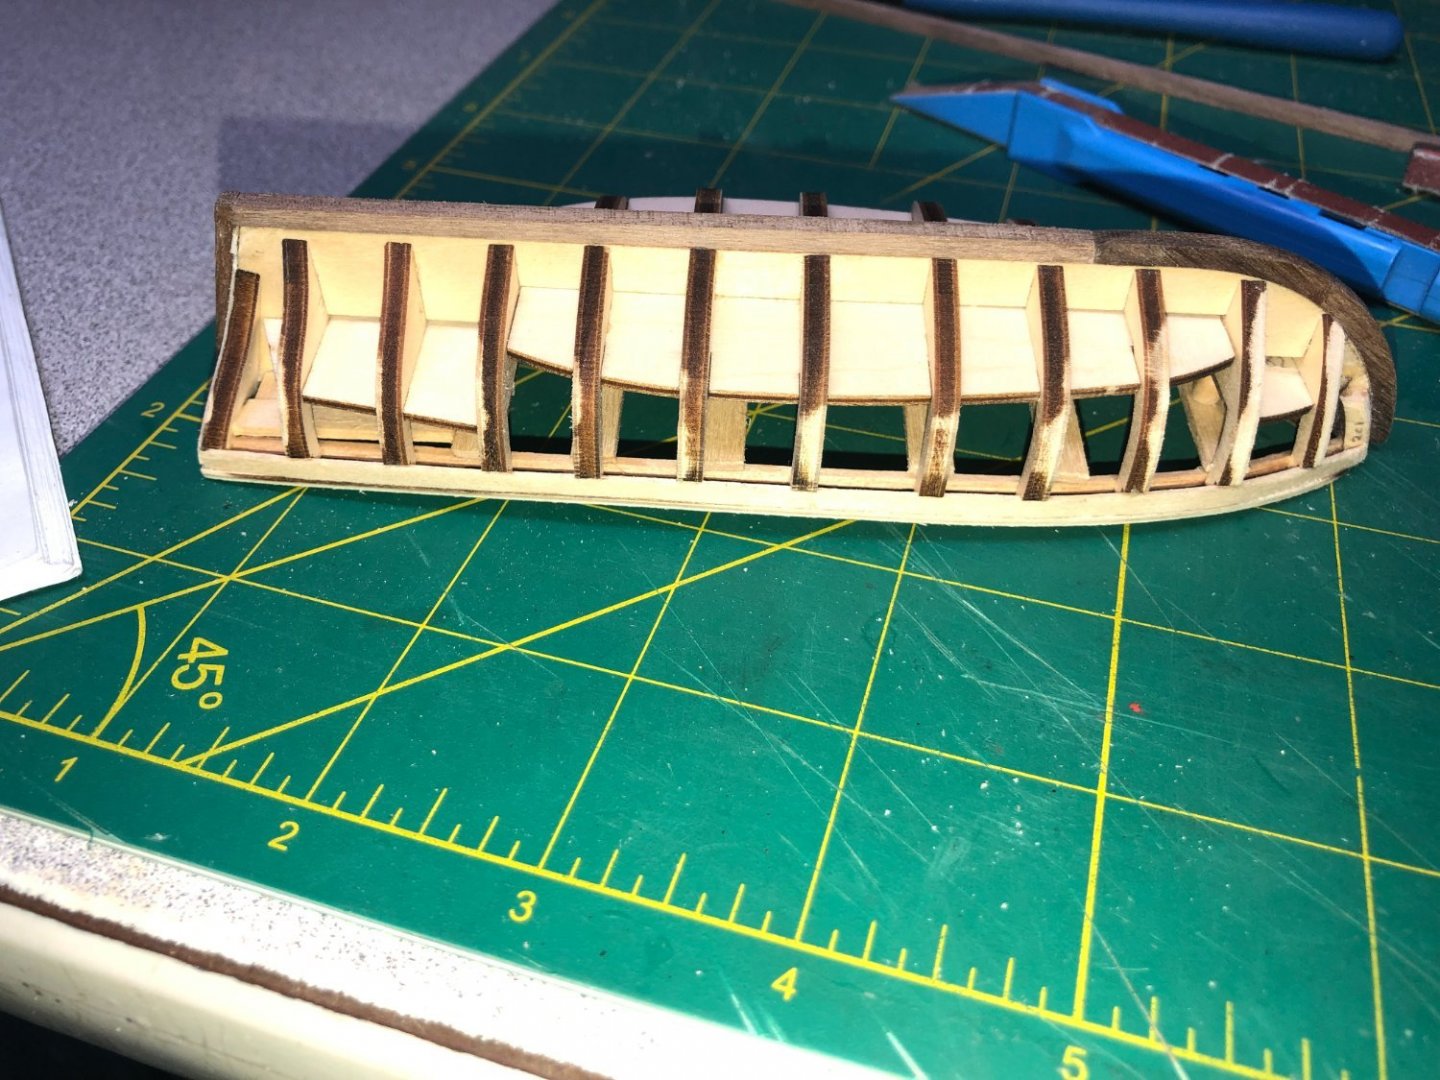
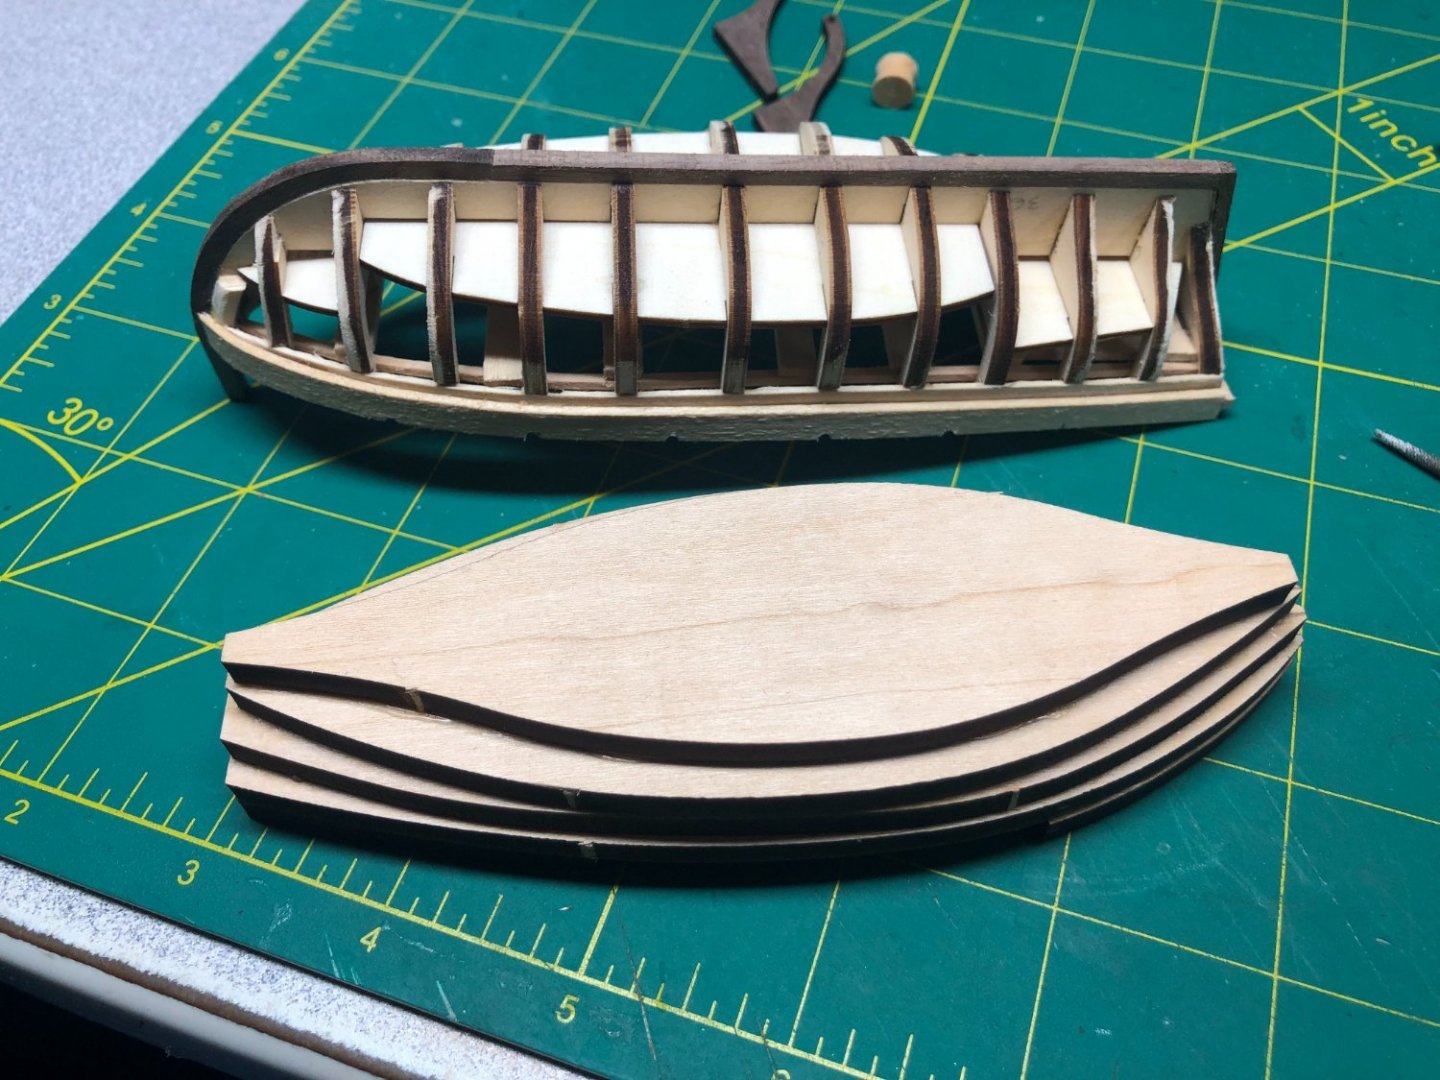
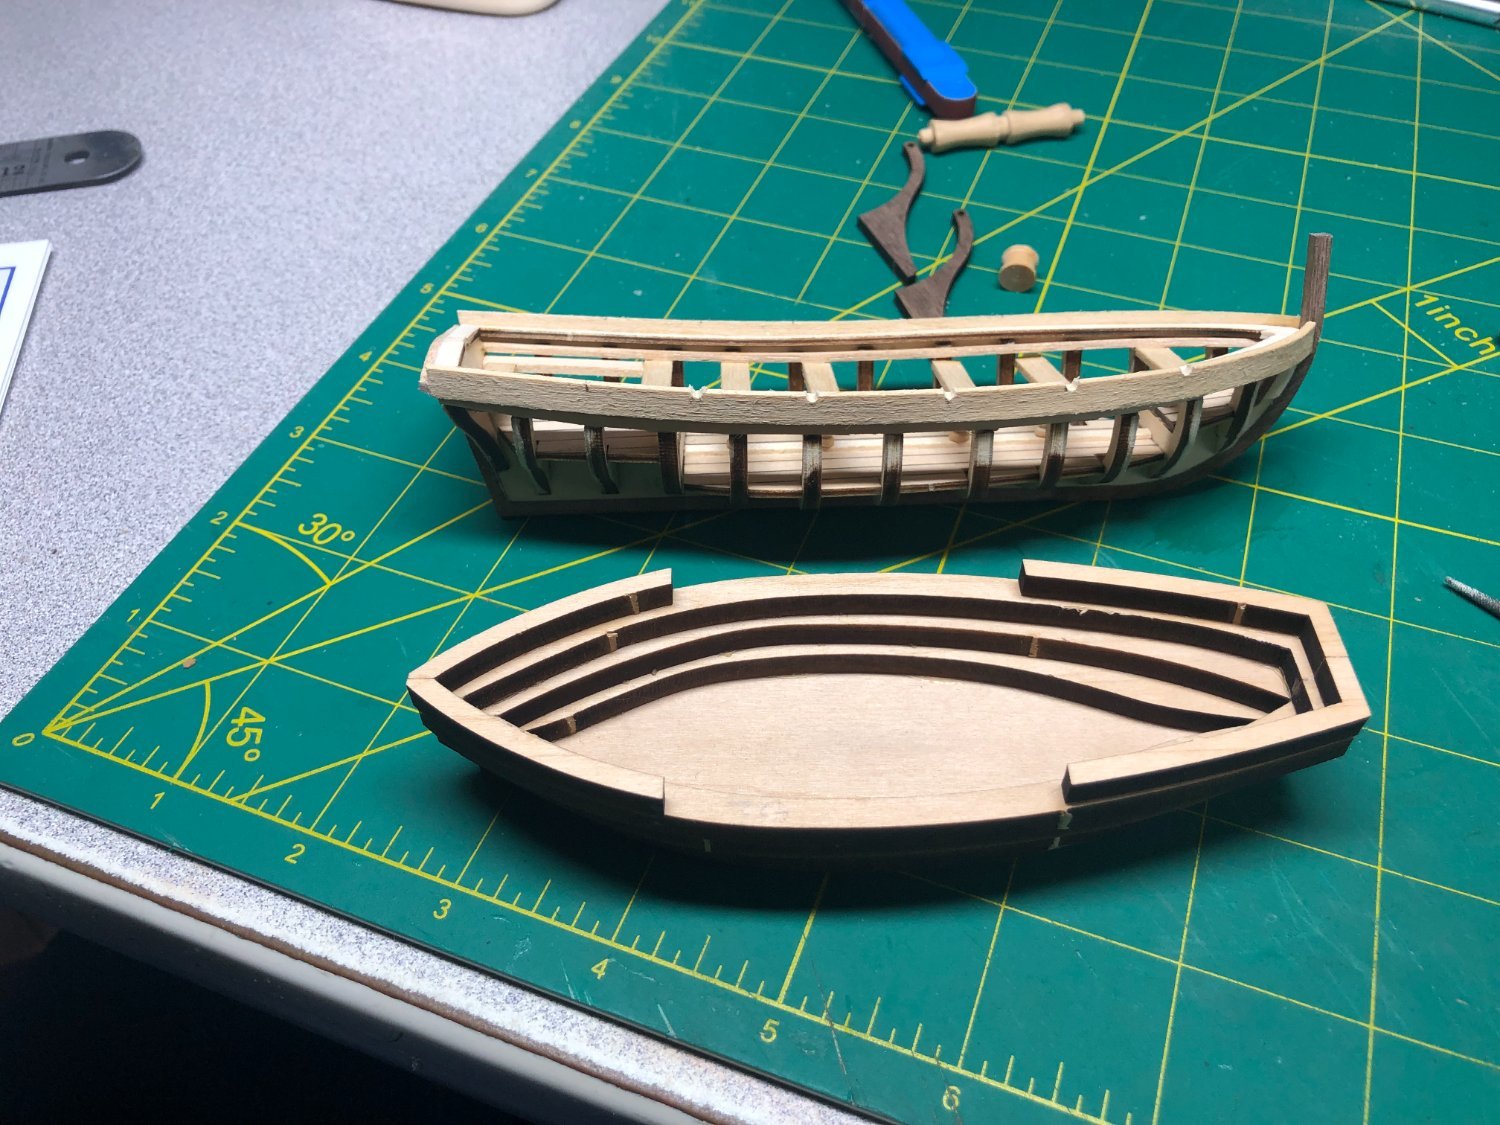
Worked on the Cutter too. Still not sure if it will make the final cut, we'll see how it turns out. An interesting build, using a stacked method with a ton of sanding to shape both the outside and inside:

Before moving on to the planking (port side only, just like the Bounty), I painted the launch interior and upper areas. Still need to distress and weather it though:

More to come soon.
- mort stoll, AJohnson, Dave_E and 3 others
-
6


HMS Bounty by LyleK1 - Artesania Latina - 1:48 scale
in - Kit build logs for subjects built from 1751 - 1800
Posted
Ok...
The rigging plans, drawings and instructions ARE NOT VERY GOOD!
I have to spend a ton of time reading other logs, looking at the two books (Lee's and Petersens's), researching on the internet, etc. before I even start doing the actual work. I suspect that I will need to research just about every standing line and running line which does have advantages... By the time I'm done, I should have a better than working knowledge of the entire rigging system. We' see!
I started with the "Woman in a Riding Habit" figurehead since it is directly below the bowsprit. Good thing I did too. The stem required some alterations to make her fit. Nothing drastic and I used a round file to do most of the work.
Additionally, I painted her:
I did quite a bit of research on figureheads and decide to leave her bare chested... here's an excerpt from one of my sources:
"...such figures, baring one or both breasts, had been popular in both merchant and naval ships. Sailors' superstitions viewed women on board a ship as unlucky but a semi-naked sculpted female form was believed to calm storms at sea."
I don't think it worked too well for Bligh!
After painting, I gave it a "wash" to give it some highlights and once dry, mounted it:
My painting skills look better from a better distance!!
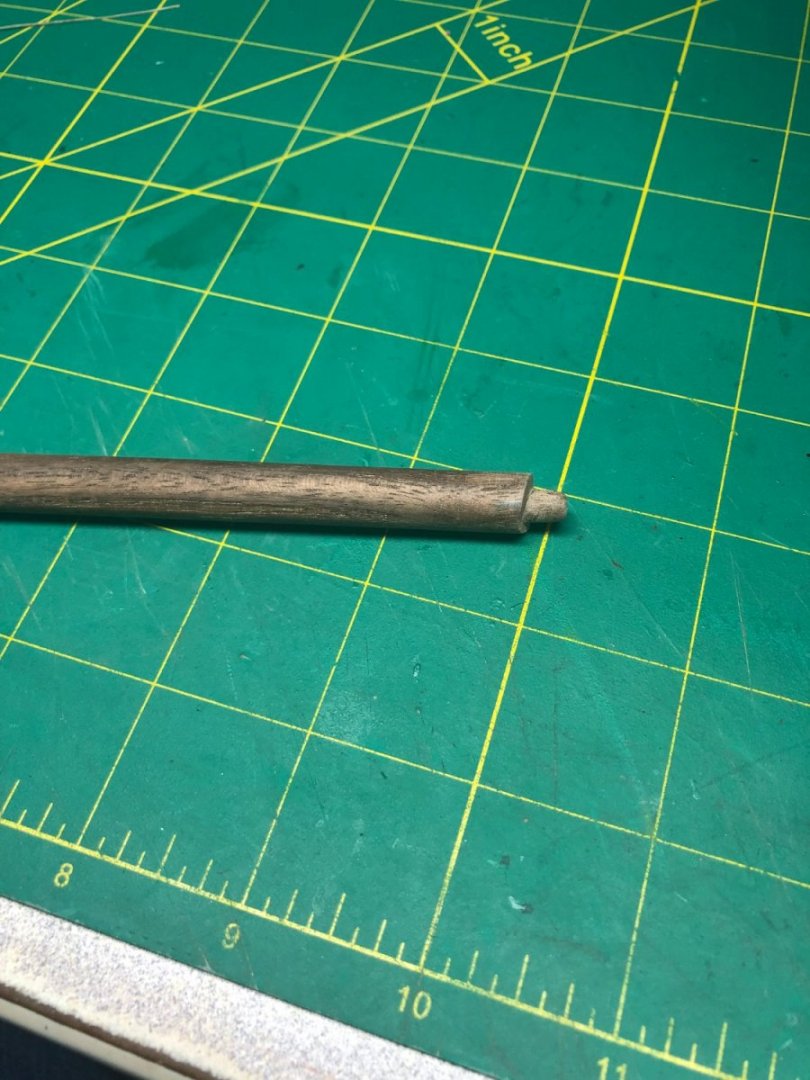
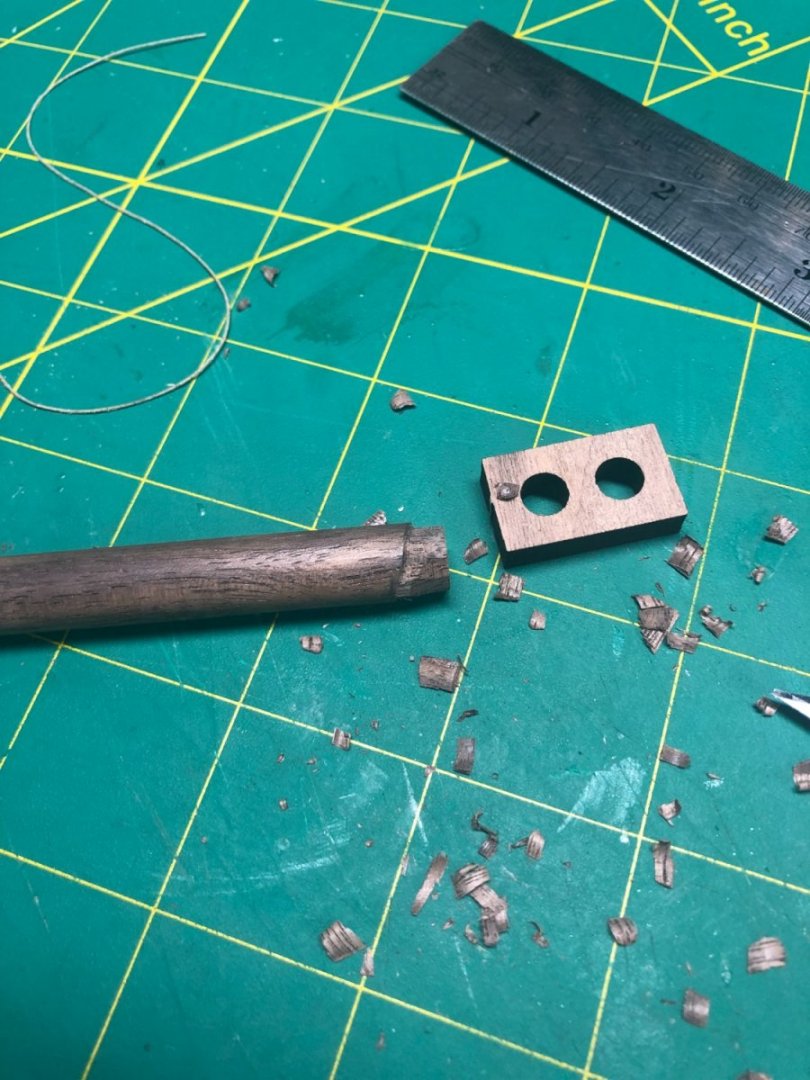
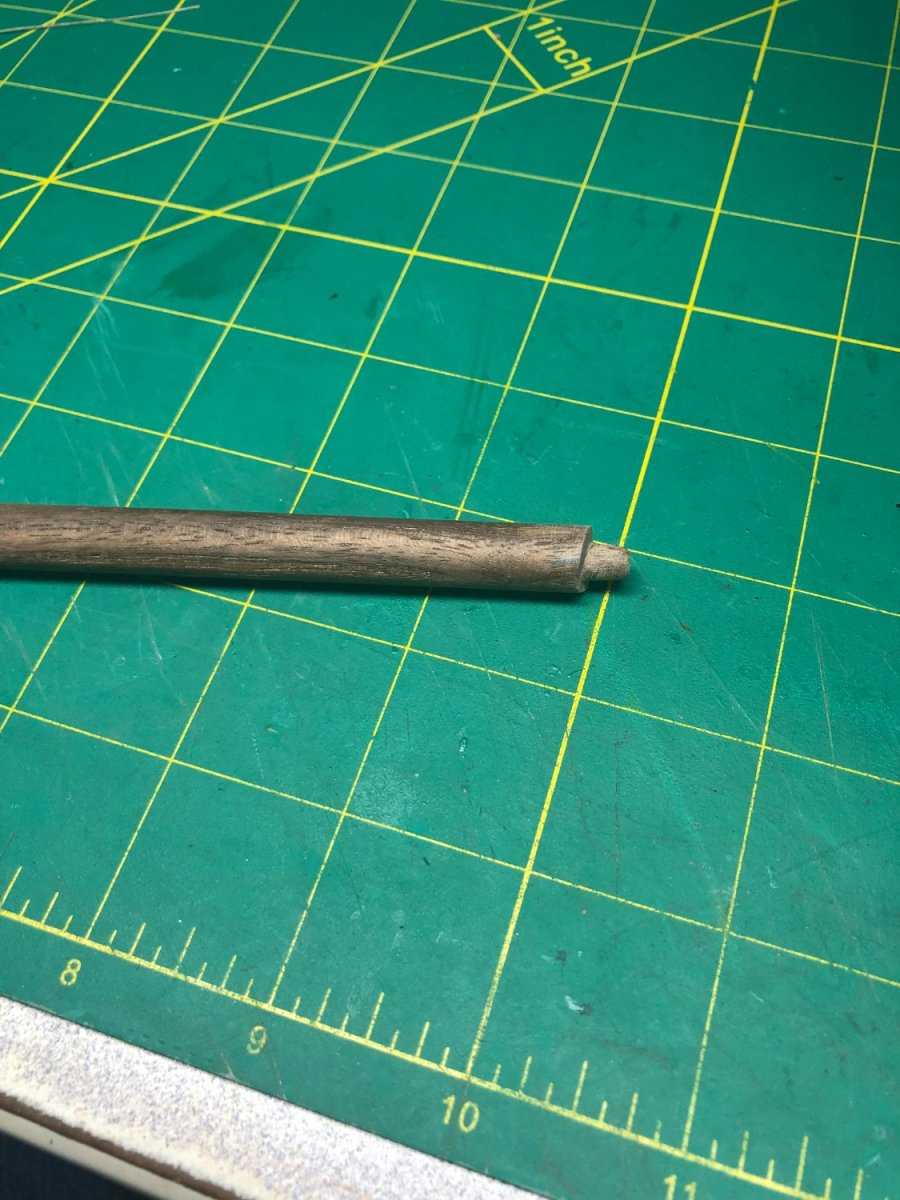
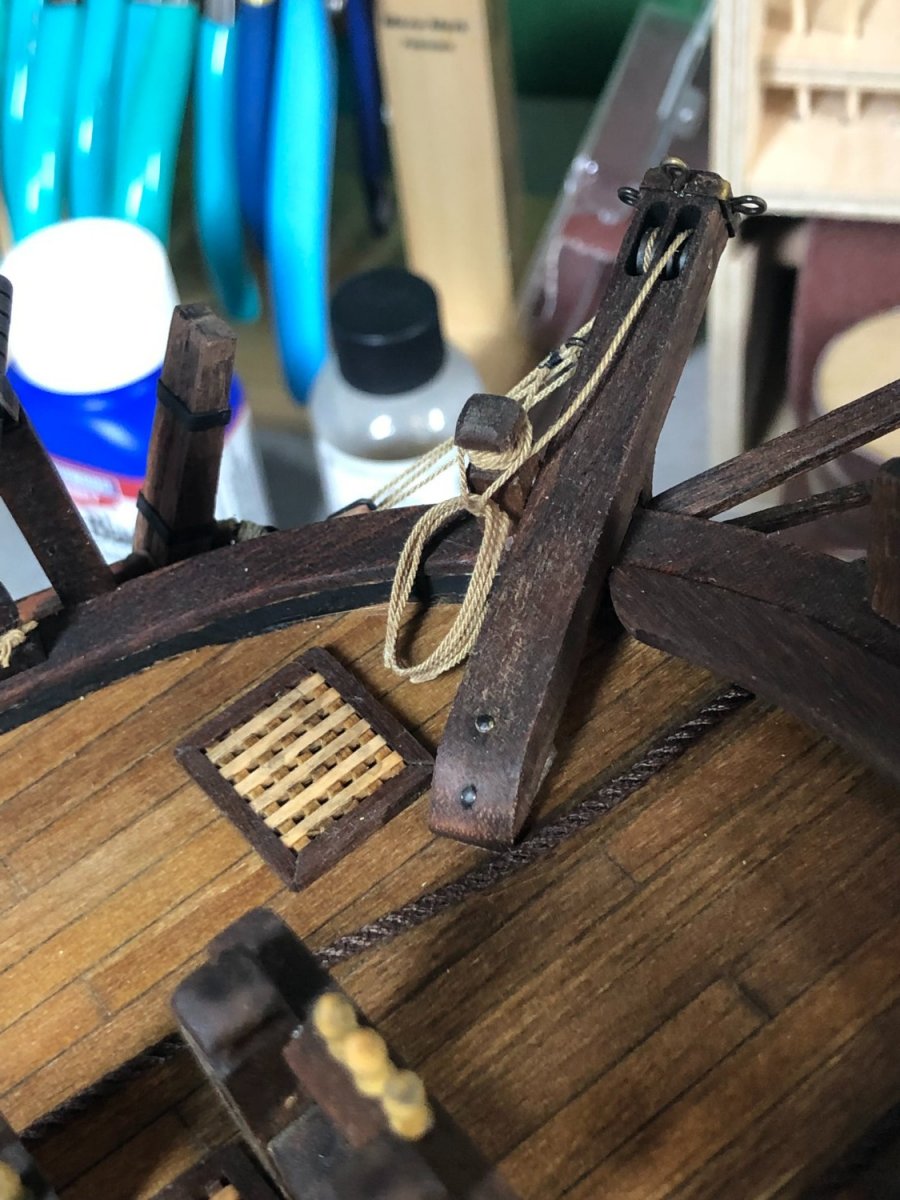
The bowsprit and jib had to be altered some to accommodate mounting and the jib was tapered per the drawings and then joined together using the saddle piece between them:
I also added the sheave at the aft end of the jib. I should add that getting the angle of the bowsprit and jib boom was a lot of work with a file. The block as two round holes (one should be square but I left it) These holes required a lot of round file work.
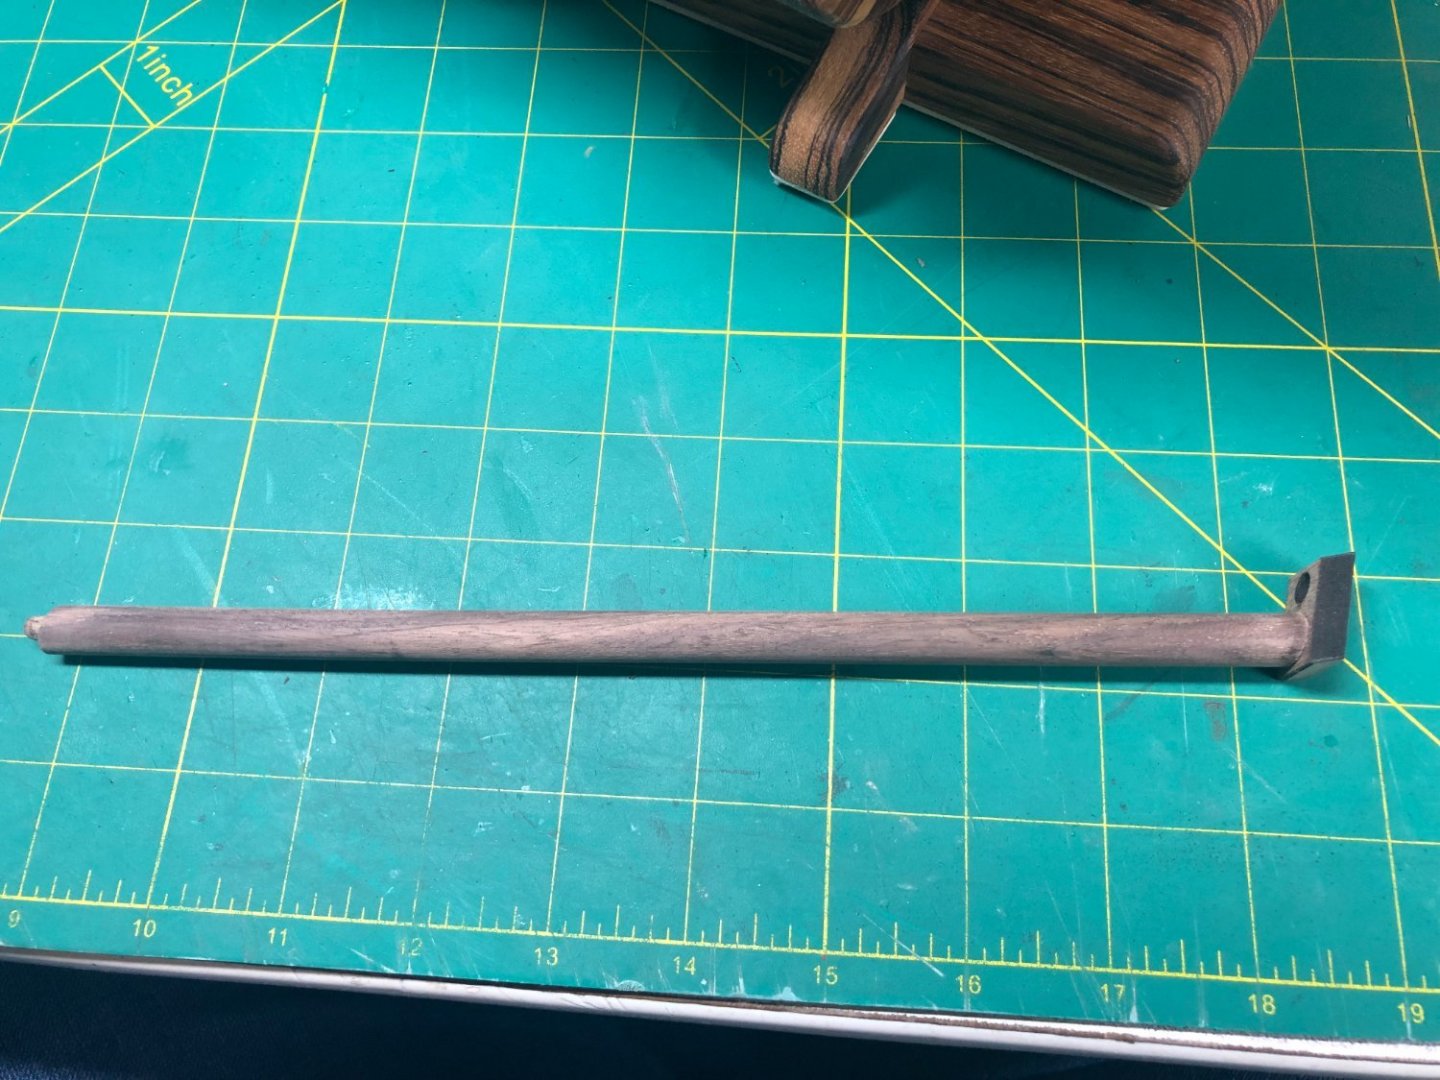
The Bees of the bowsprit were shaped and the sheaves added: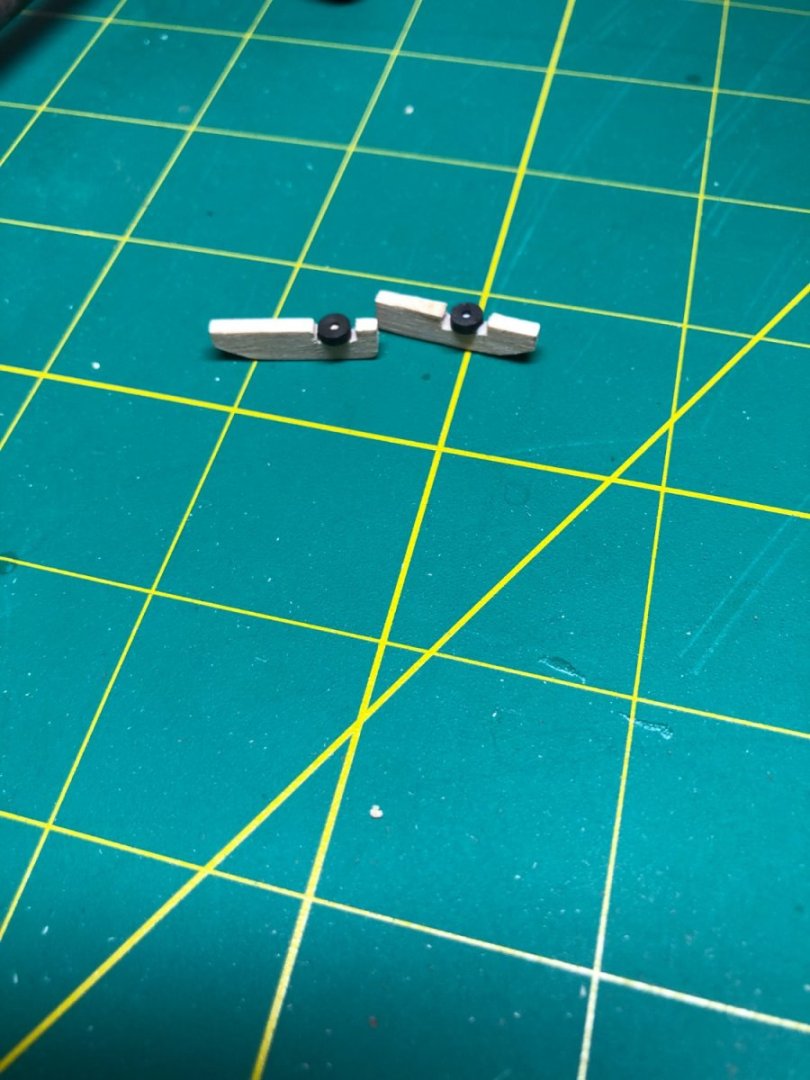
And then installed on the bowsprit: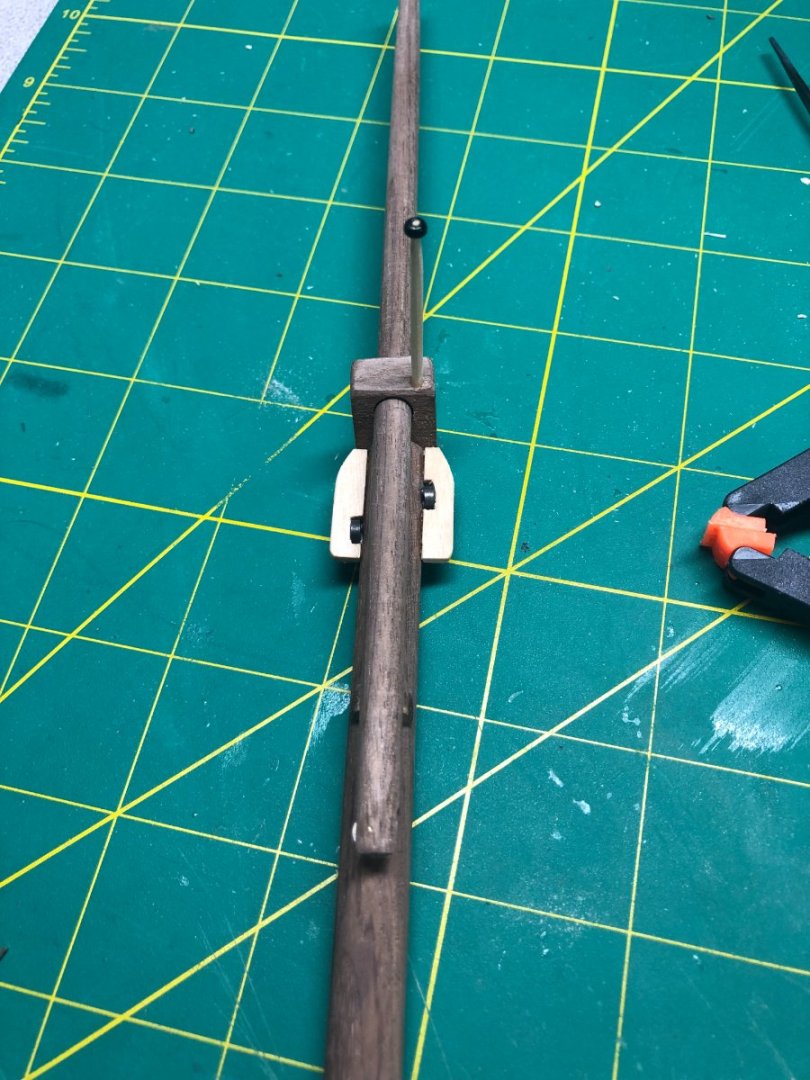
The cleats were all hand cut and then installed. I used tape to mark the position of a row of cleats and then just glued them on:
Also added the Jack Staff... I use a black bead for the tip... which I later changed to a wood knob (it will be in the last few pictures).
And lastly, painted:
You'll notice, I added 3 rings on the starboard side... The plans don't show any on the port side, not sure if that's accurate but they are relatively easy to add later, if needed.
I've spent considerable time researching the "Traveler" and how to make it and have begun attaching the standing and running rigging blocks but as I noted above, I have to research each line to understand how it is attached to the bowsprit or jib boom and what its purpose.
Back in a few days with the finished bowsprit!