HOLIDAY DONATION DRIVE - SUPPORT MSW - DO YOUR PART TO KEEP THIS GREAT FORUM GOING! (89 donations so far out of 49,000 members - C'mon guys!)
×

.jpg.1f80adf1a9b14a937cfcf2ca6af0f0d4.jpg)
WalrusGuy
-
Posts
1,007 -
Joined
-
Last visited
Content Type
Profiles
Forums
Gallery
Events
Everything posted by WalrusGuy
-
.thumb.jpg.62d1d69fed1f32364417cb1f9cdeb009.jpg) Congrats!!! This is such an inspirational build! Thank you for documenting your progress in this log, it has taught me a lot of techniques. Everything is just perfectly executed 🙂
Congrats!!! This is such an inspirational build! Thank you for documenting your progress in this log, it has taught me a lot of techniques. Everything is just perfectly executed 🙂- 433 replies
-
- 6
-

-
- open boat
- small boat
- (and 1 more)
-
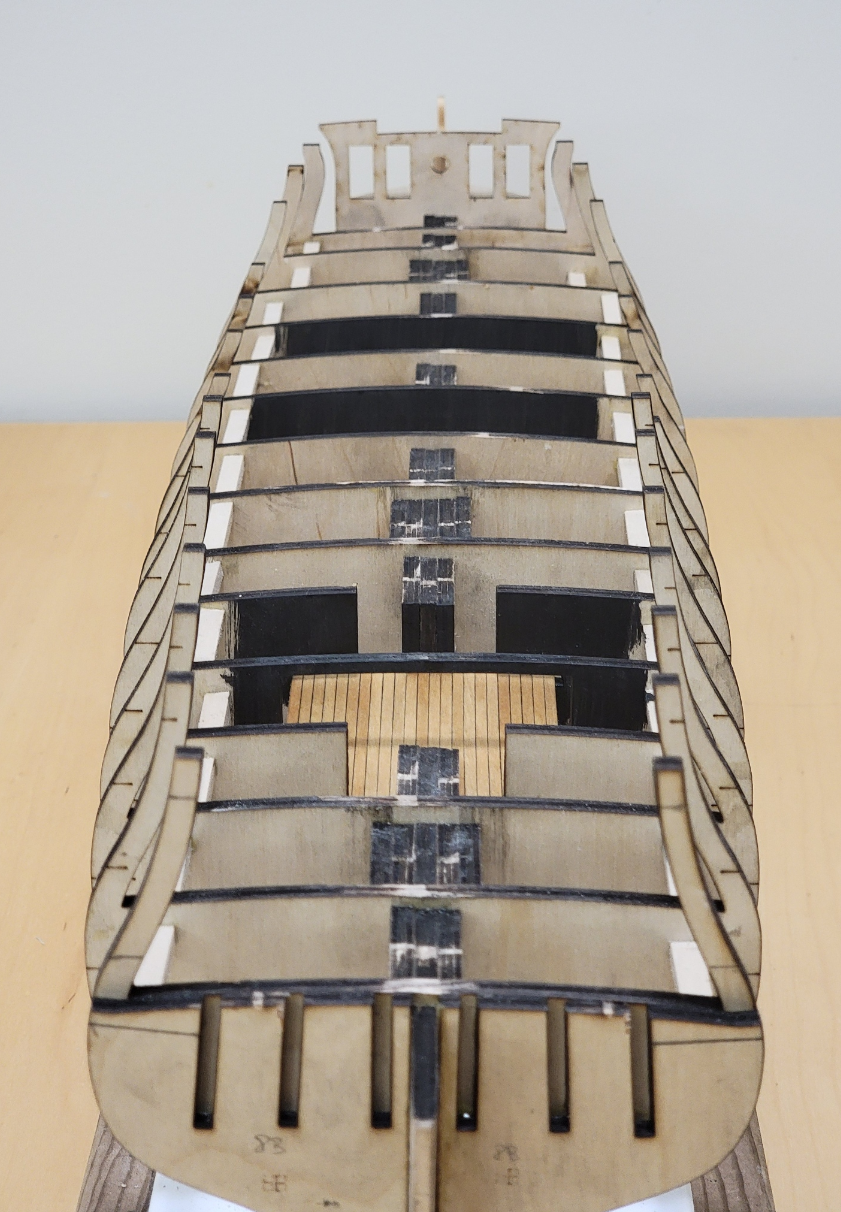
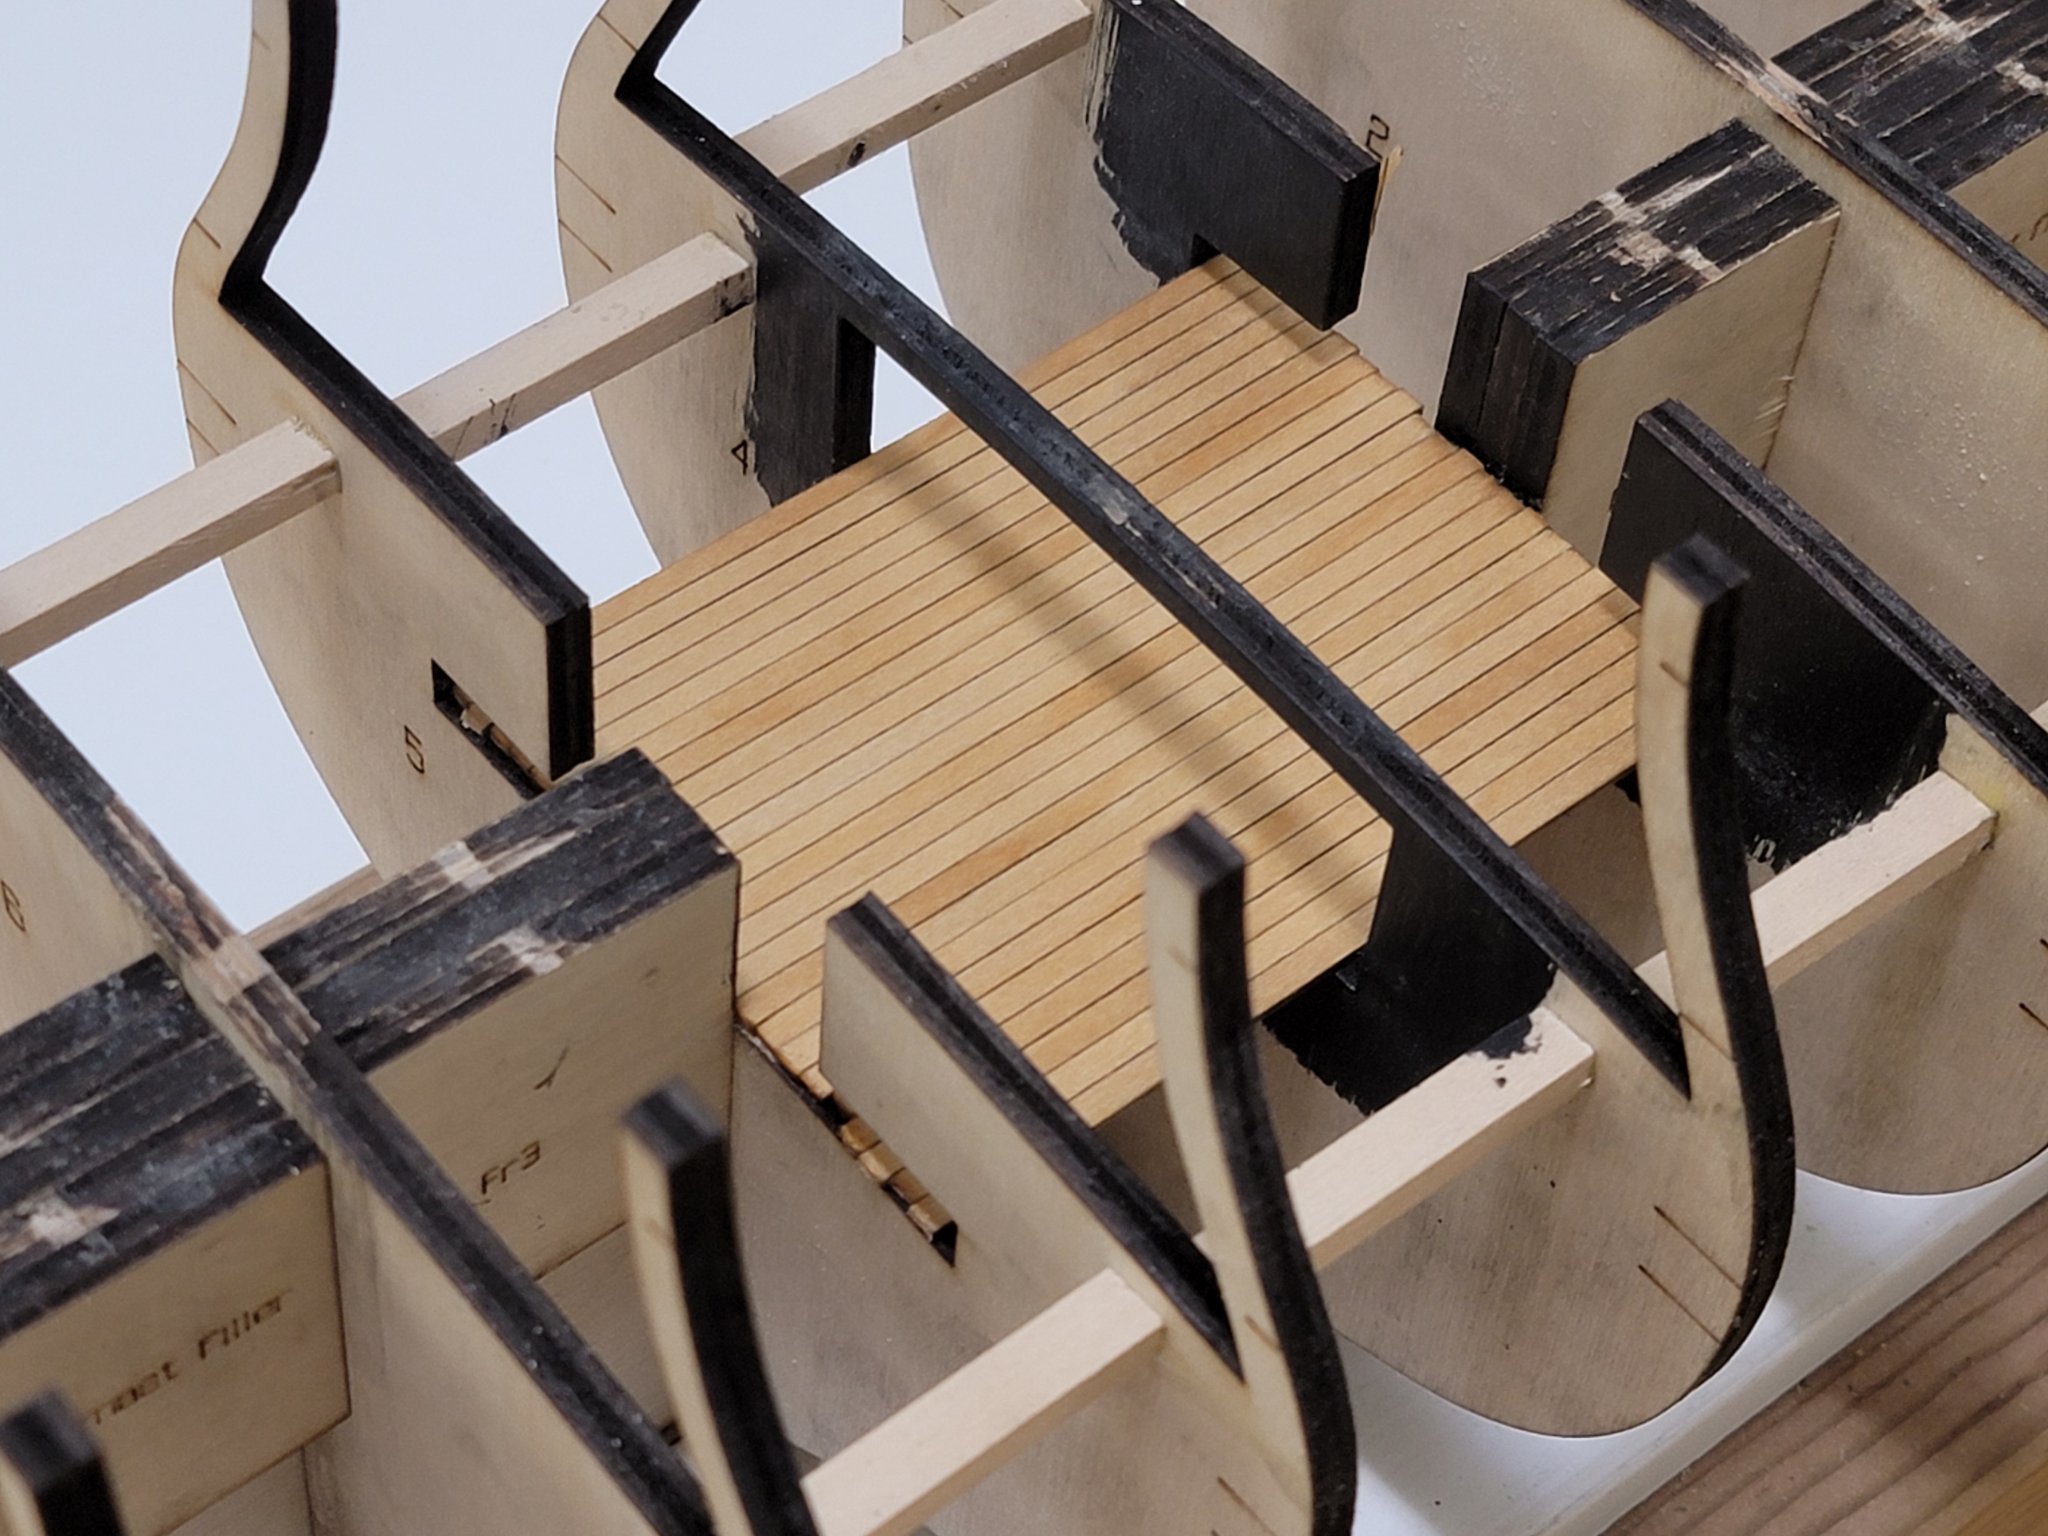
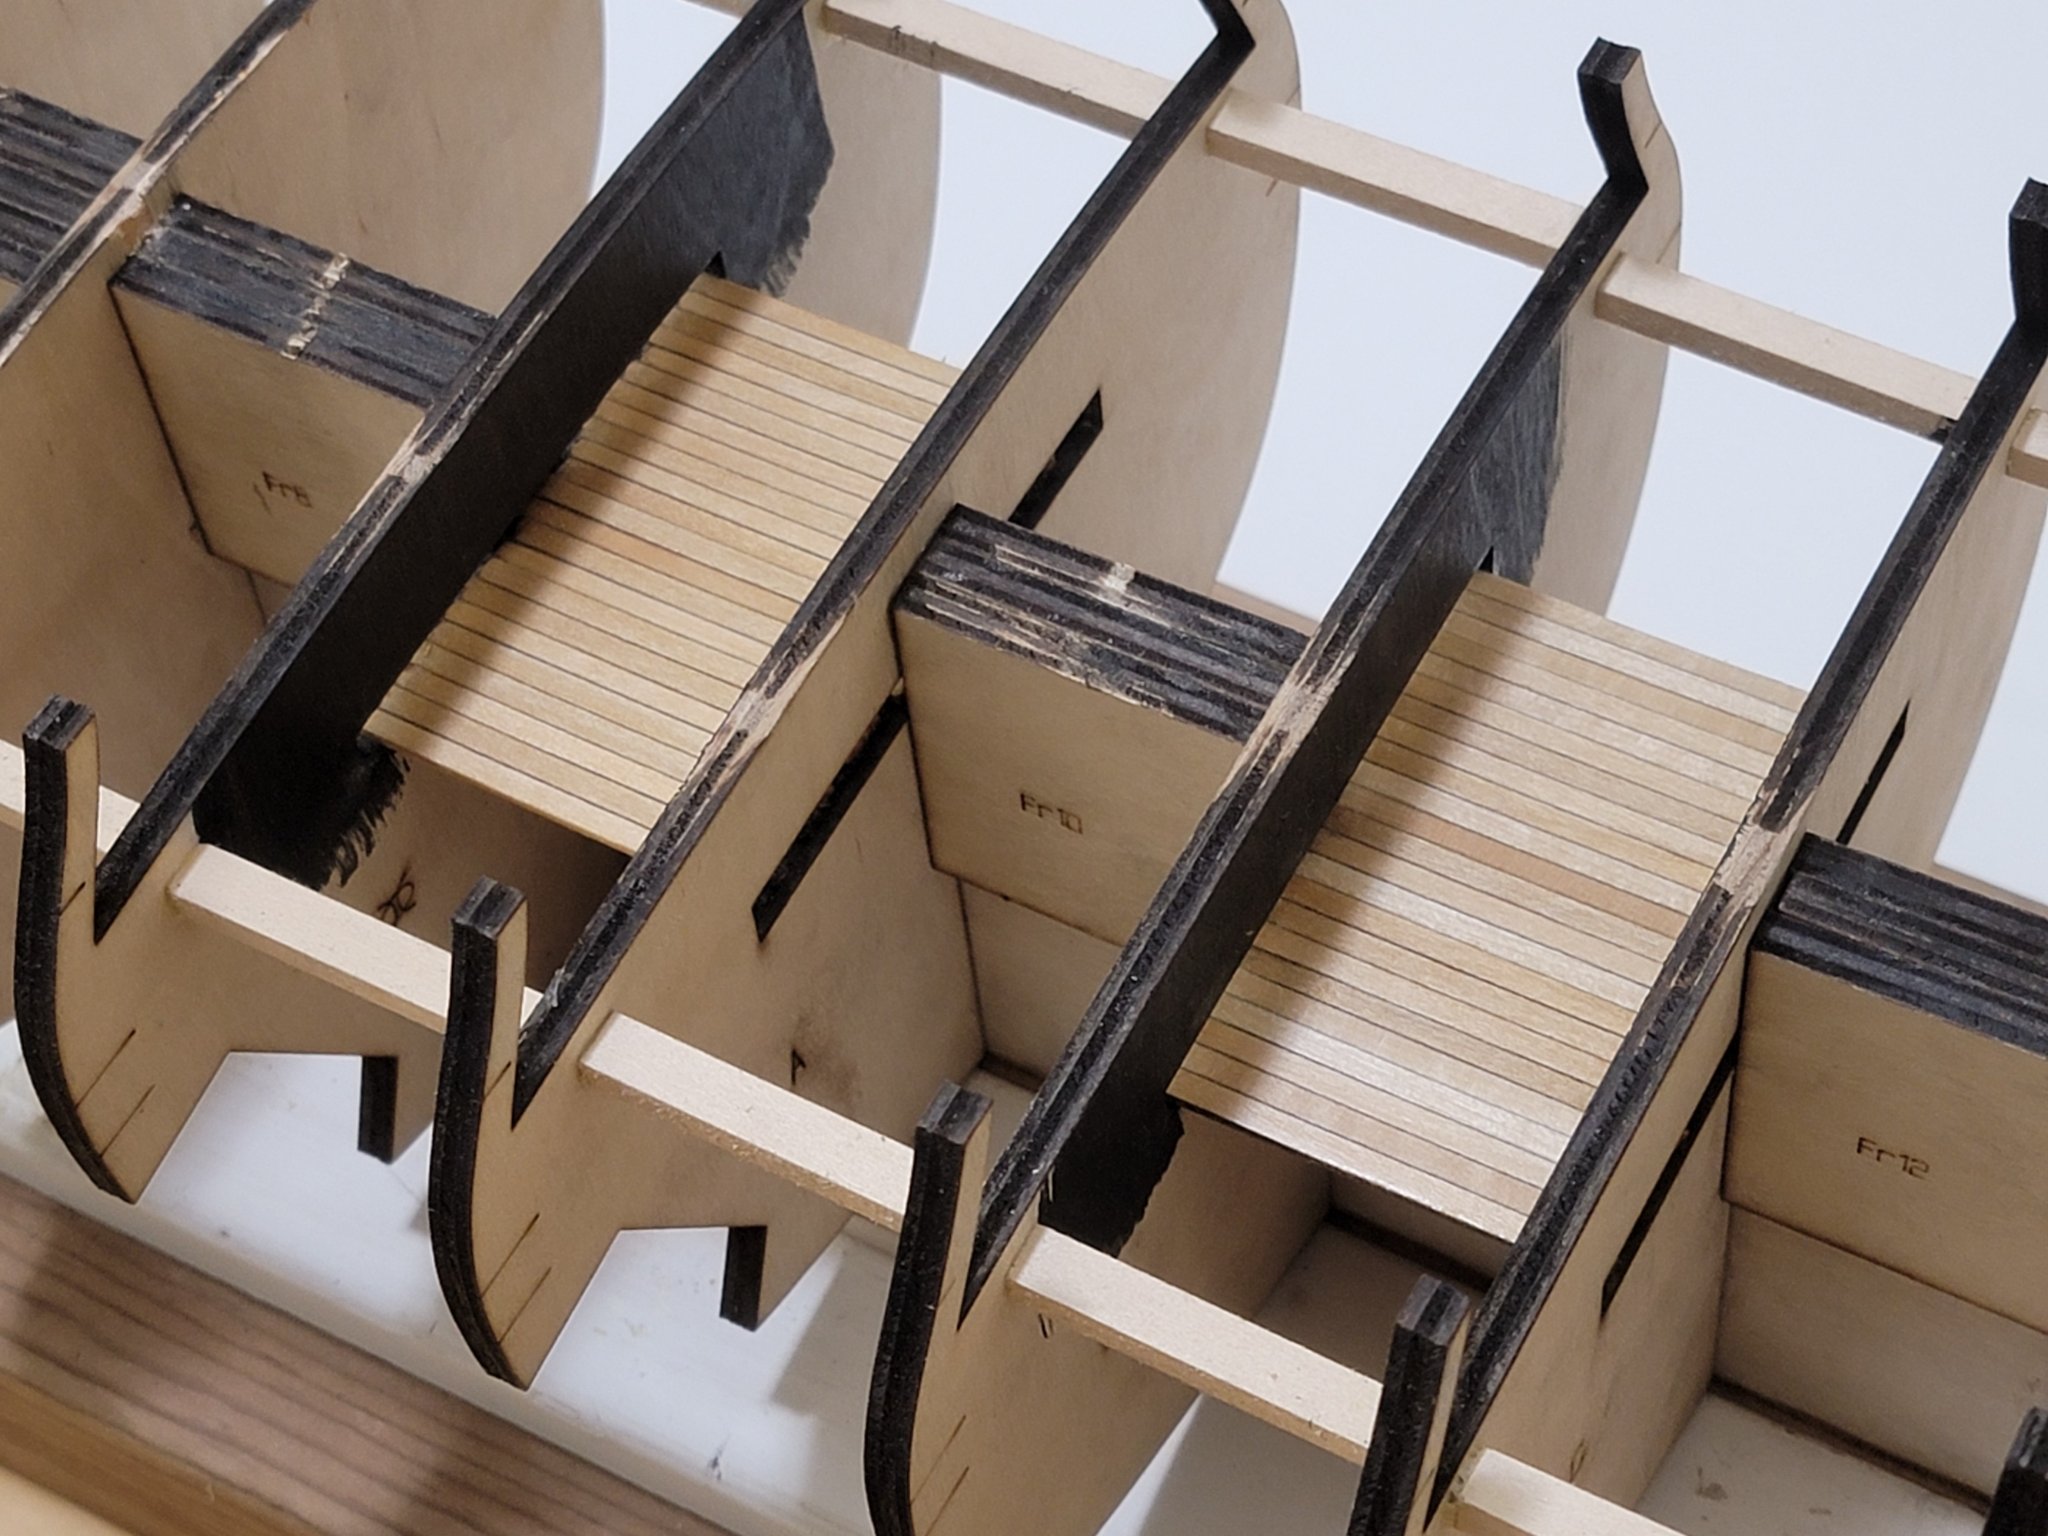
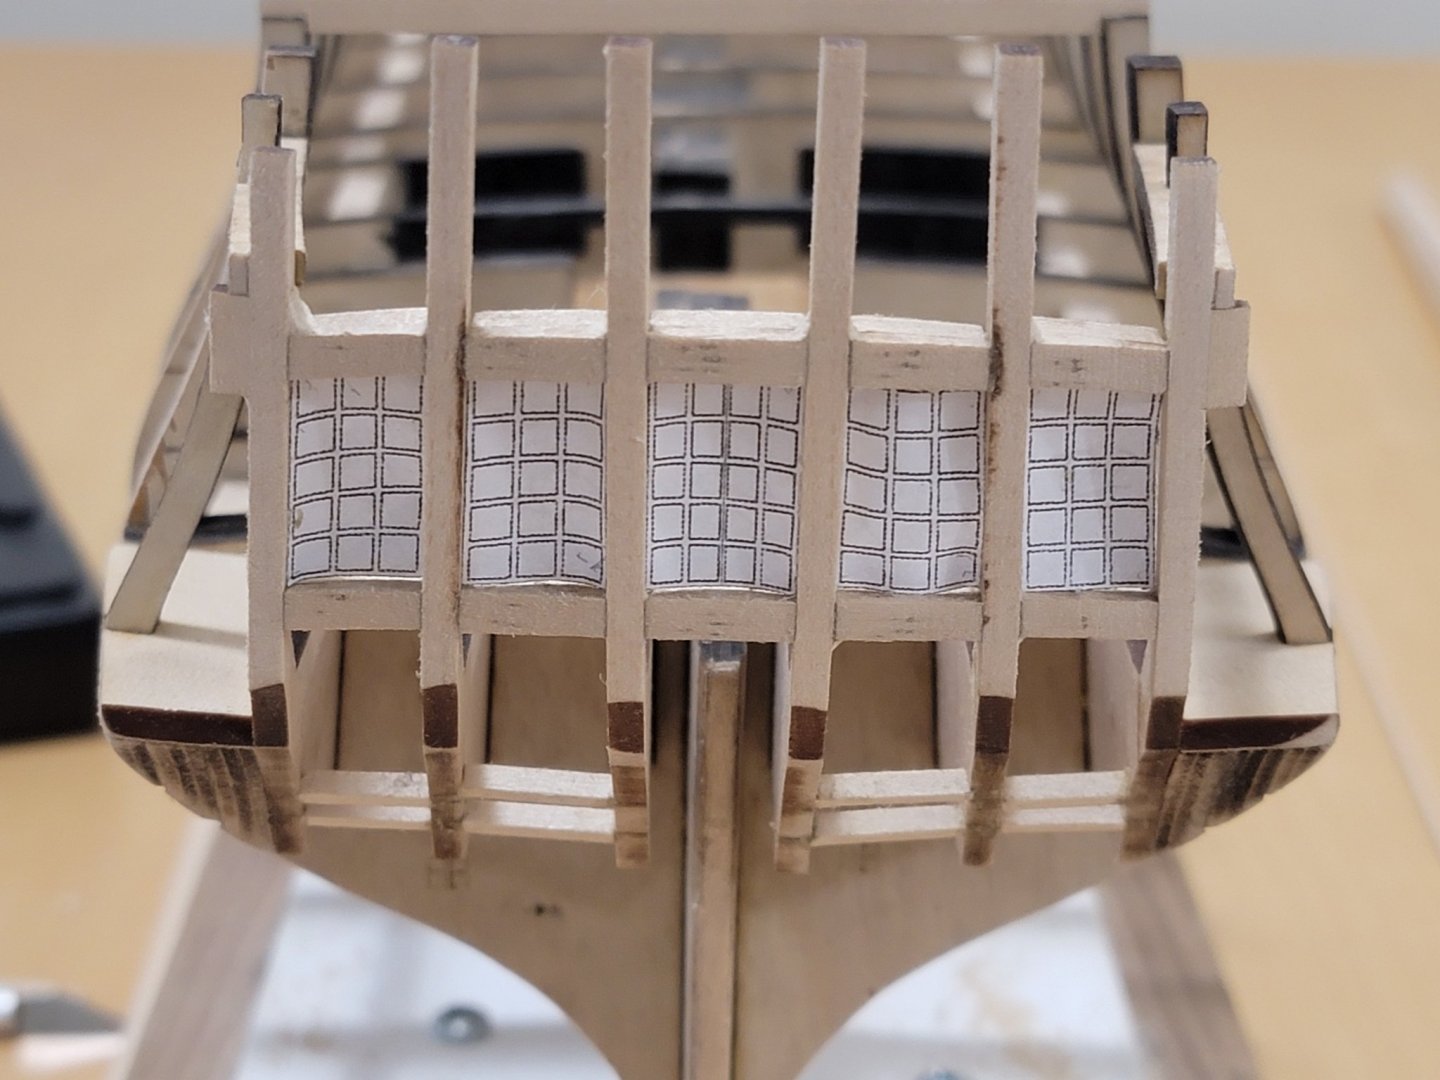
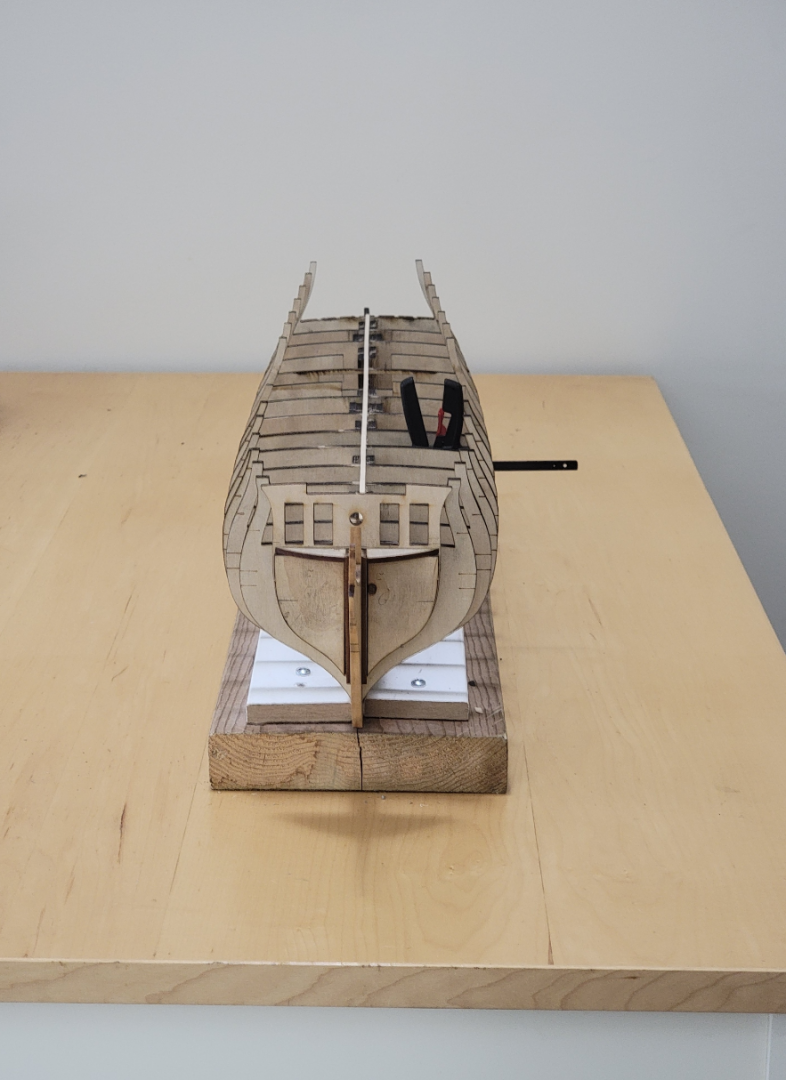
Thank you David! Lots of tweaking was necessary to align the pieces, but also very satisfying! I finished Chapter 2 of the instructions. I realized the smaller gun ports at the stern were not square but rectangular as shown in the plans, so I had to cut out the lintels I glued and change its position slightly. I also glued down the false decking. I just used yellow carpenter's glue to hold down the layer. Before sticking it I first sanded some bulkheads down which were not in level with the others. Also had to widen some notches for the pieces to fit nicely. Here are a few pics of where I am at with the fillers also glued and faired: Next I will build a small deck sample to see how the treenails look, then will start on the planking at the bow section, and then the gun port framing!


-
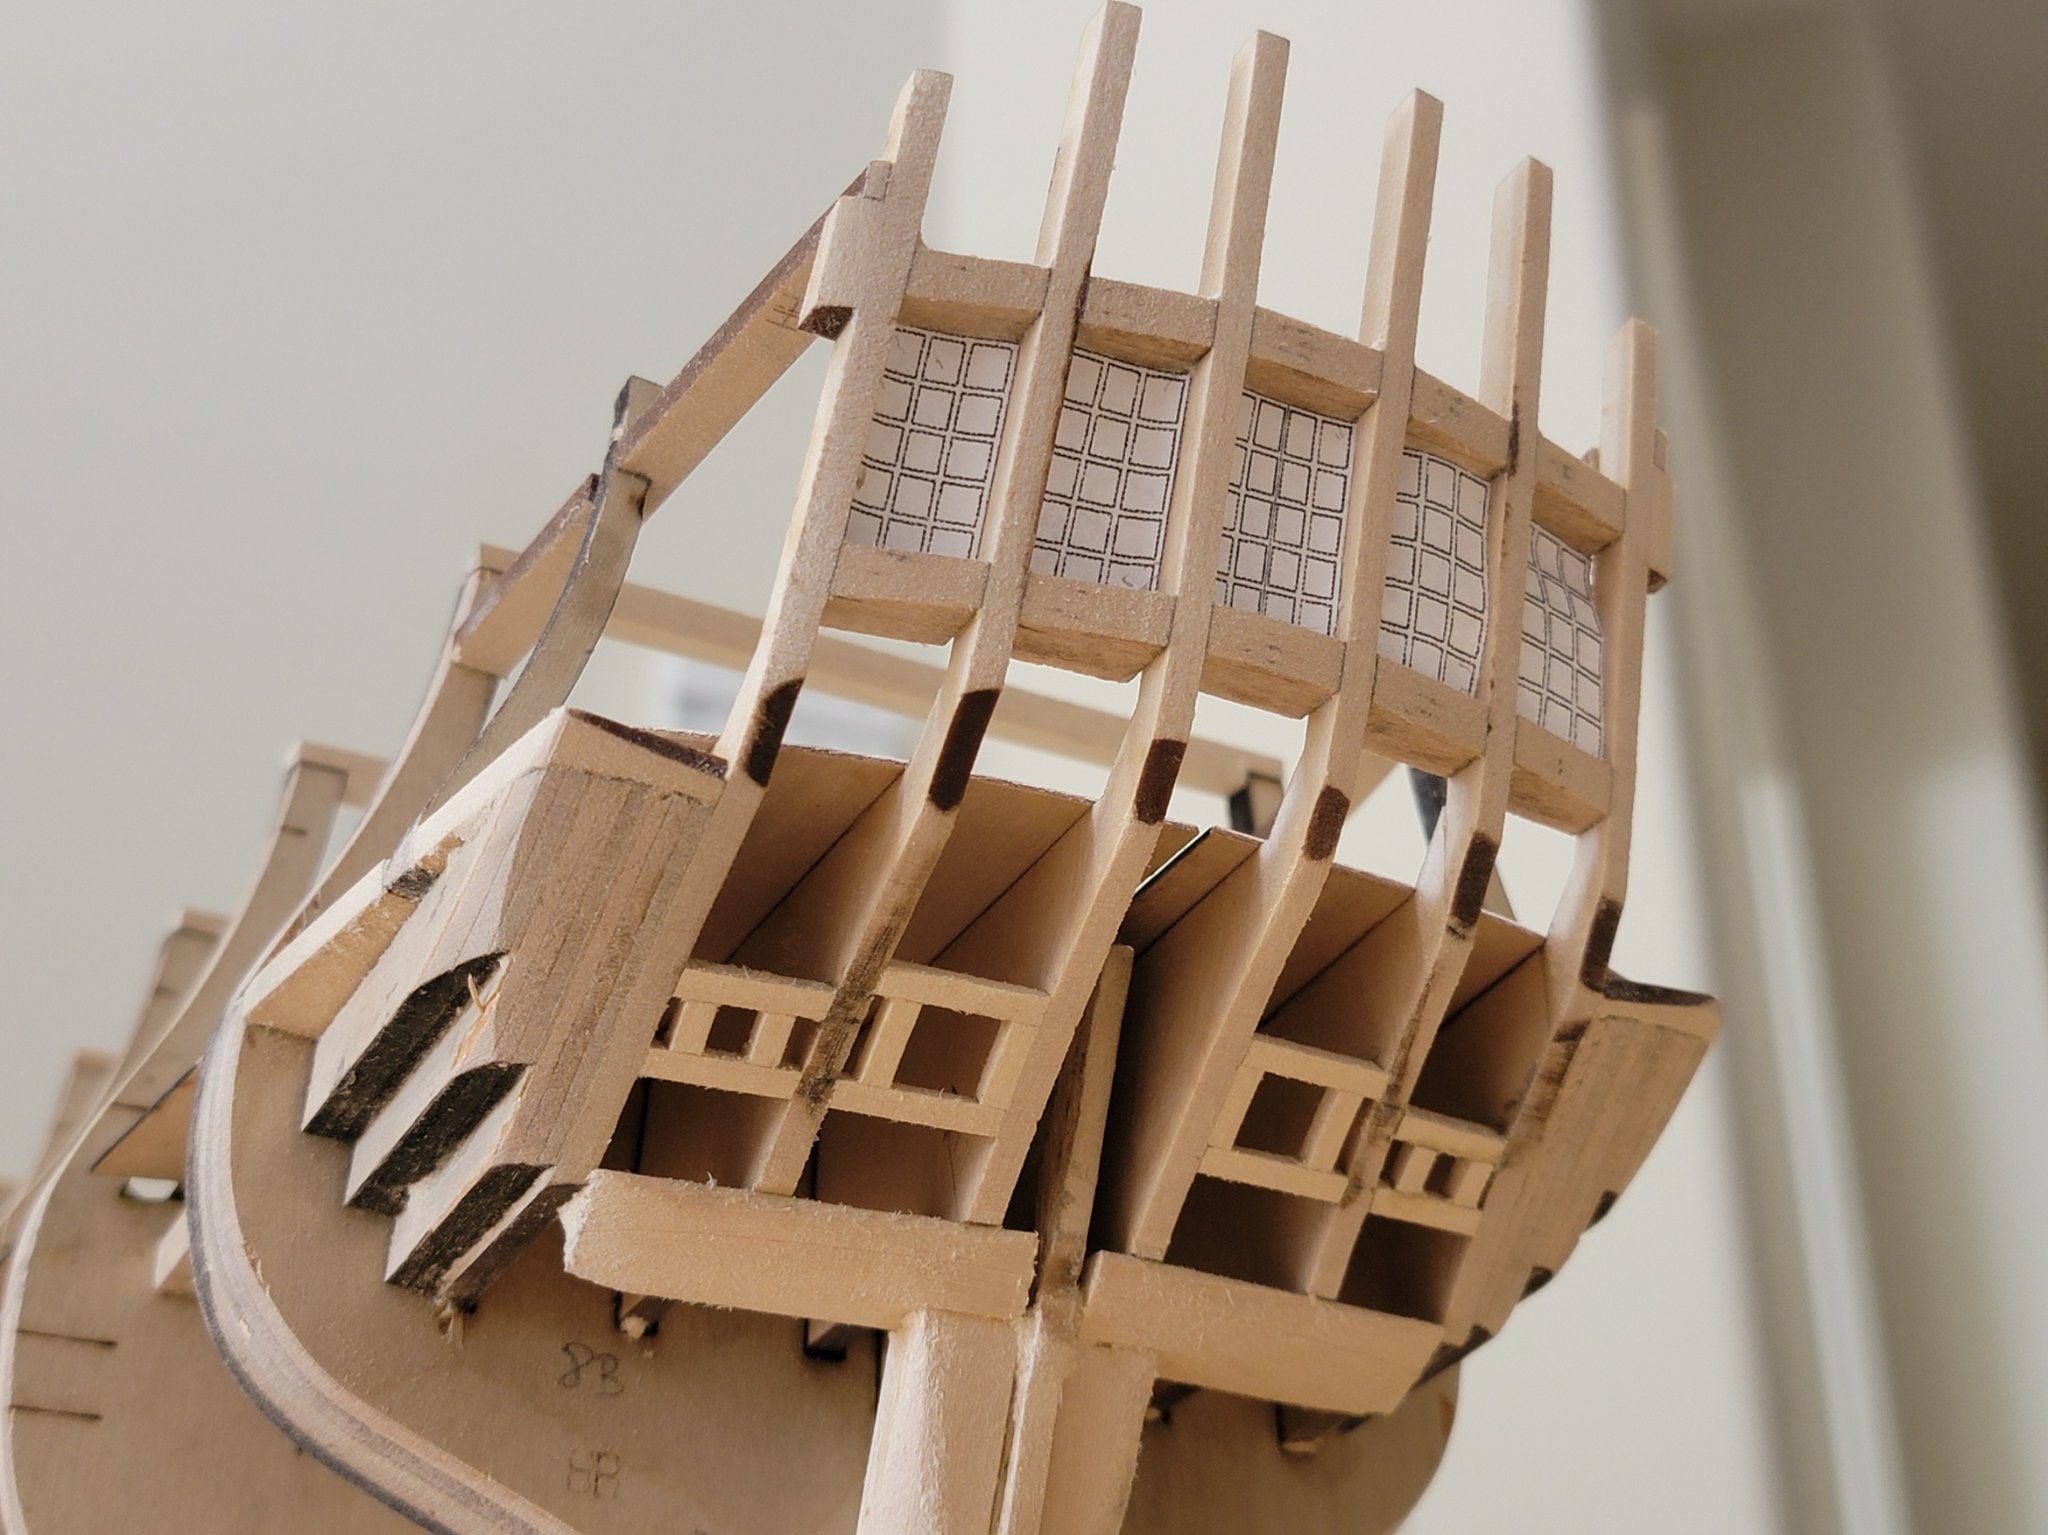
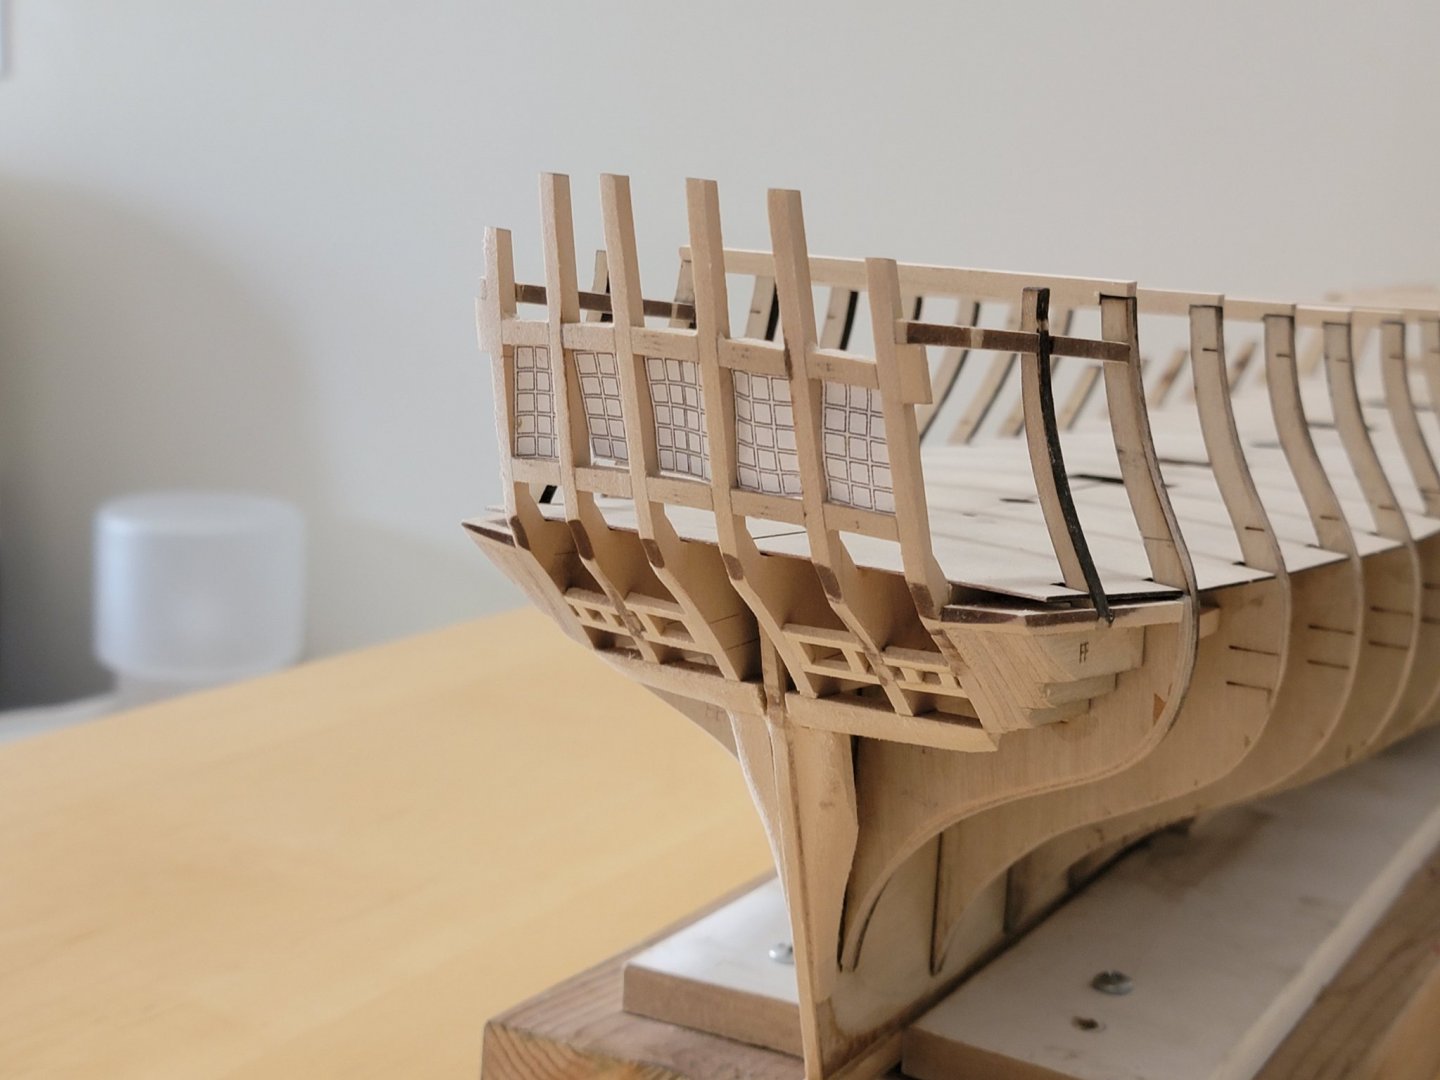
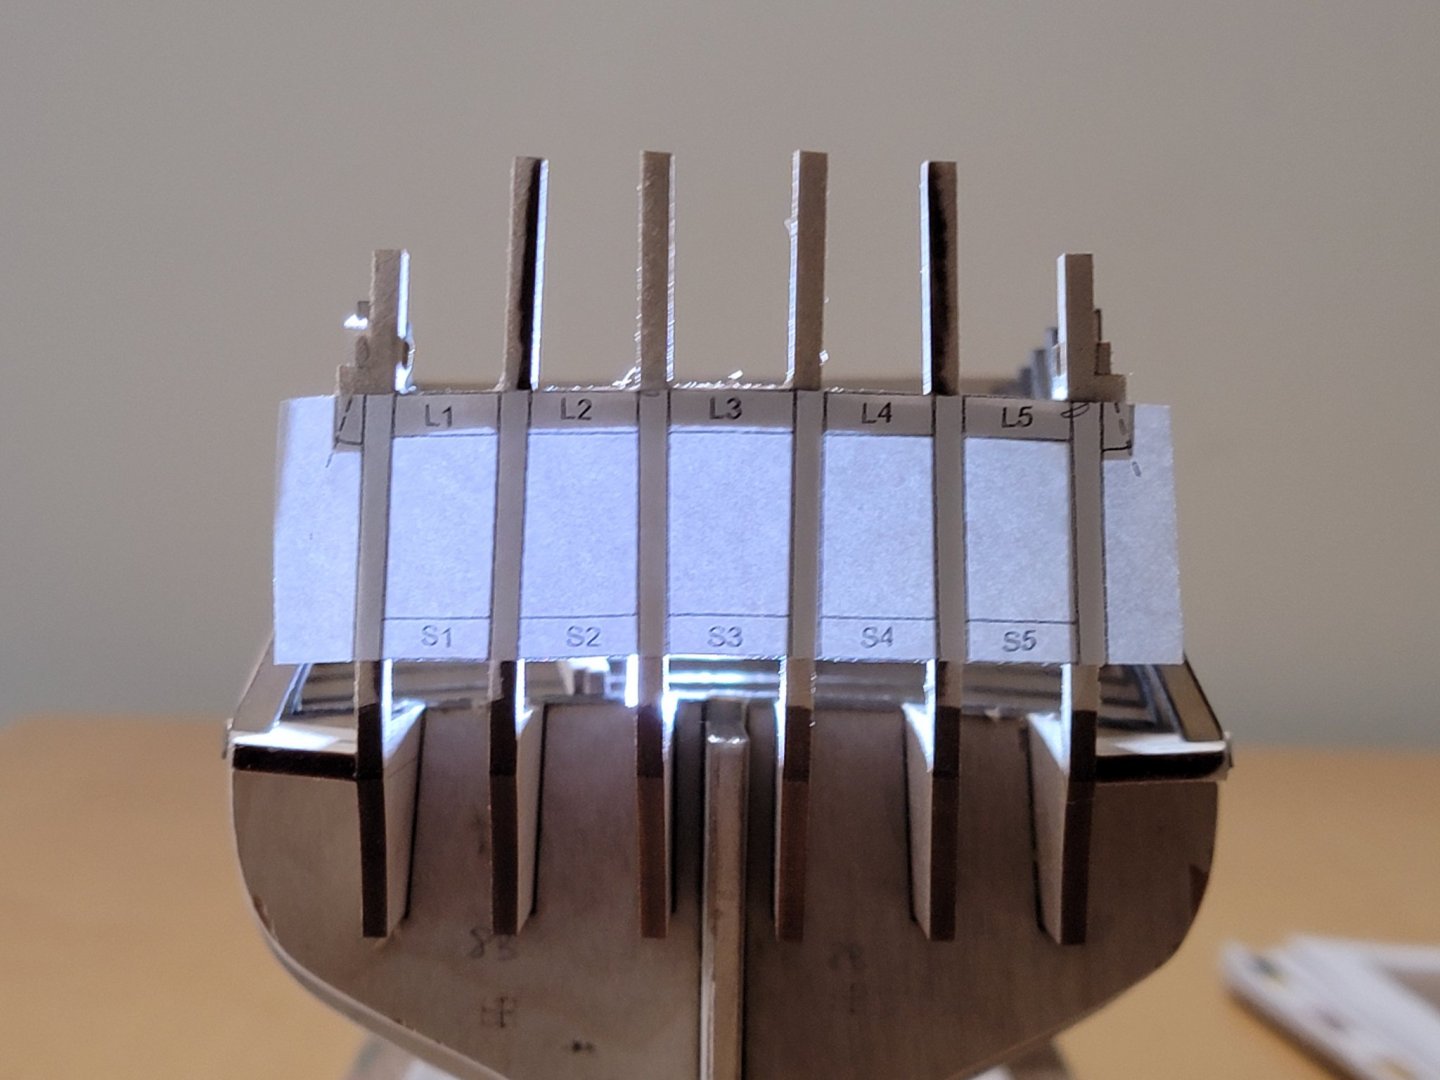
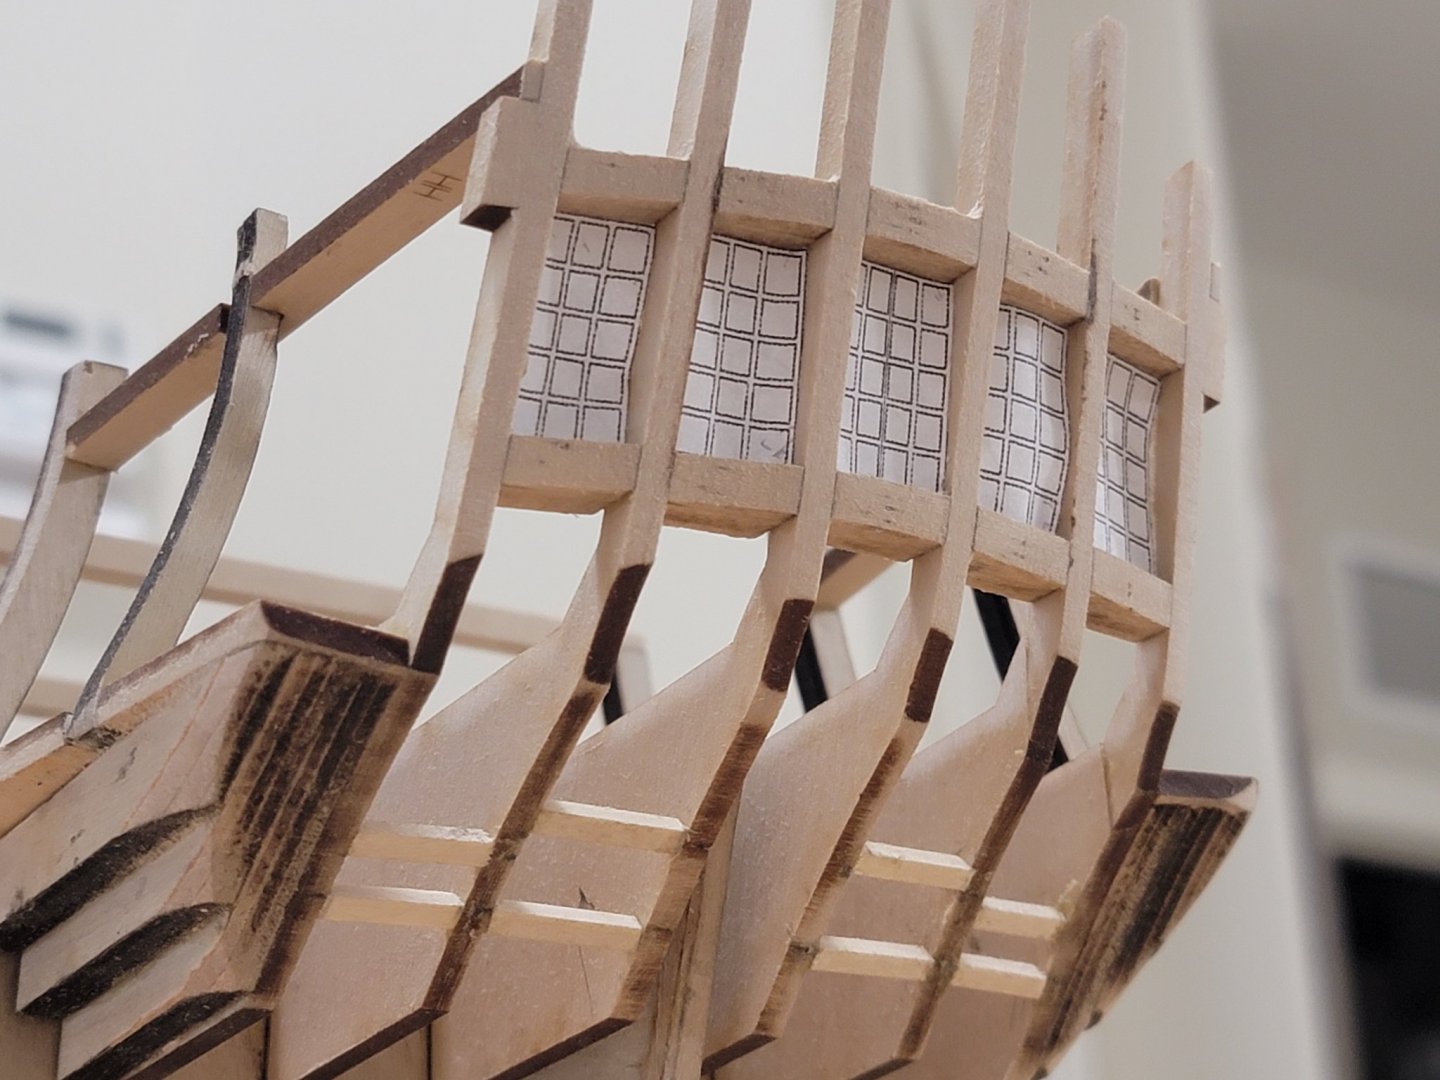
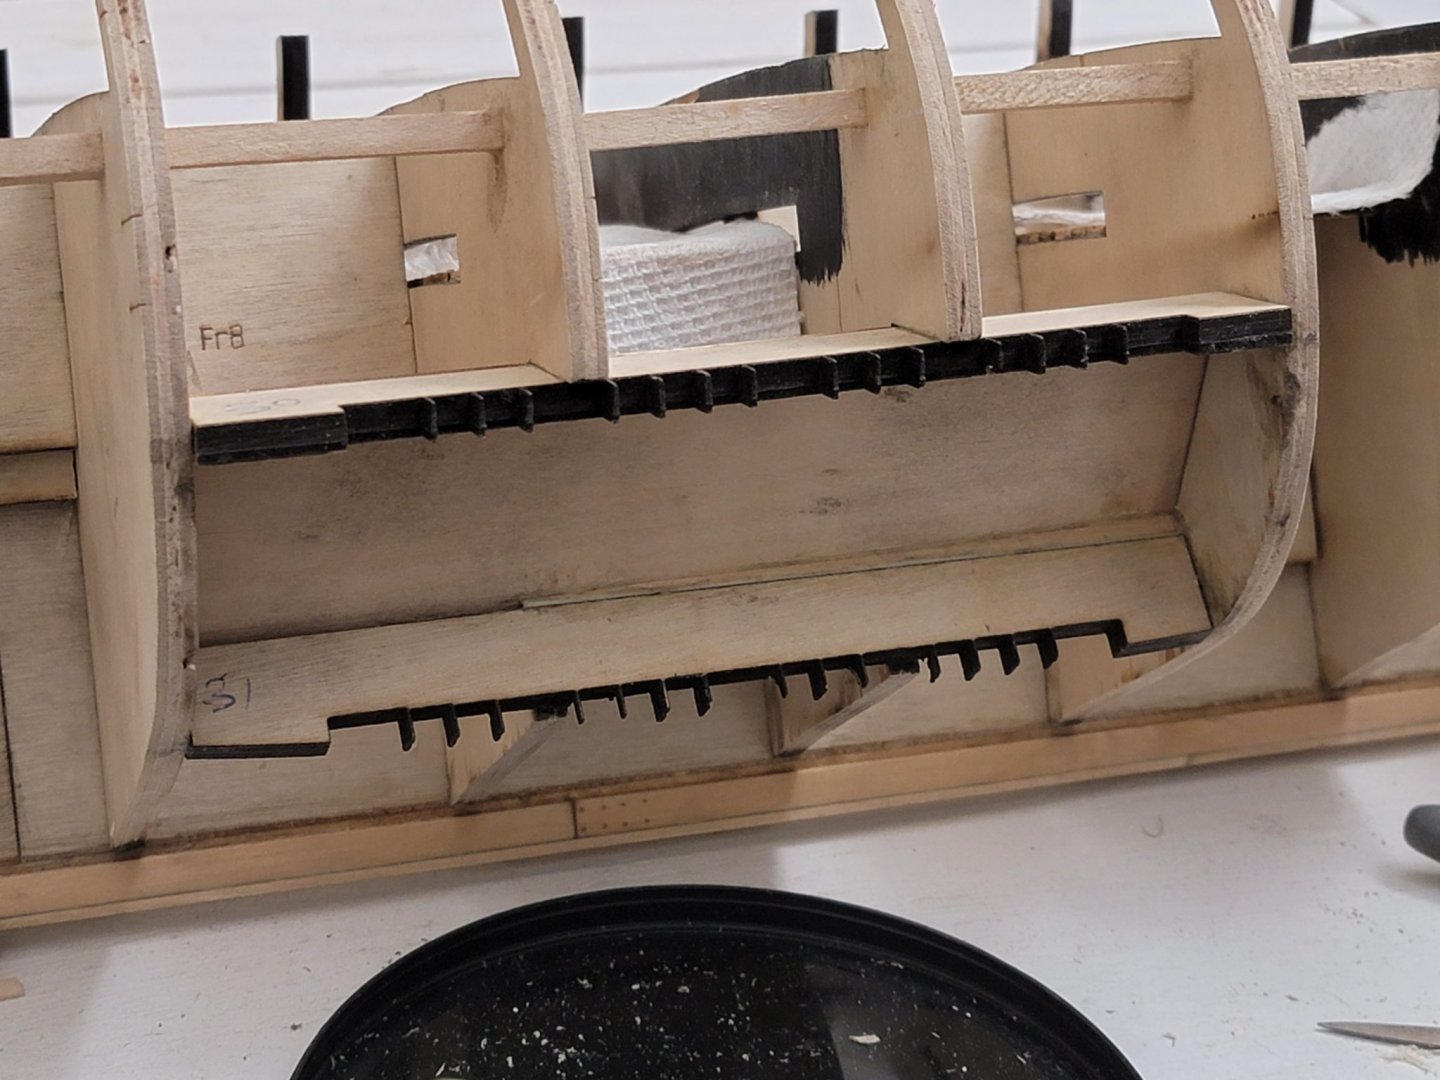
Still slowly progressing on the stern framing. I faired the stern, then installed the sills and faired again. It was not as difficult as I thought (maybe because I fixed the issues with the wood sliver), but I noticed the window cutouts are a bit too snug. I think it's fixable by slightly sanding the windows or the spacing itself. I also started framing the gun ports at the stern.
-
Thank you for the compliments!!! I have already started my next build, it's the USF Confederacy, which I may try to fully rig 😁.
- 950 replies
-
- 2
-
-
- syren
- model shipways
- (and 1 more)
-
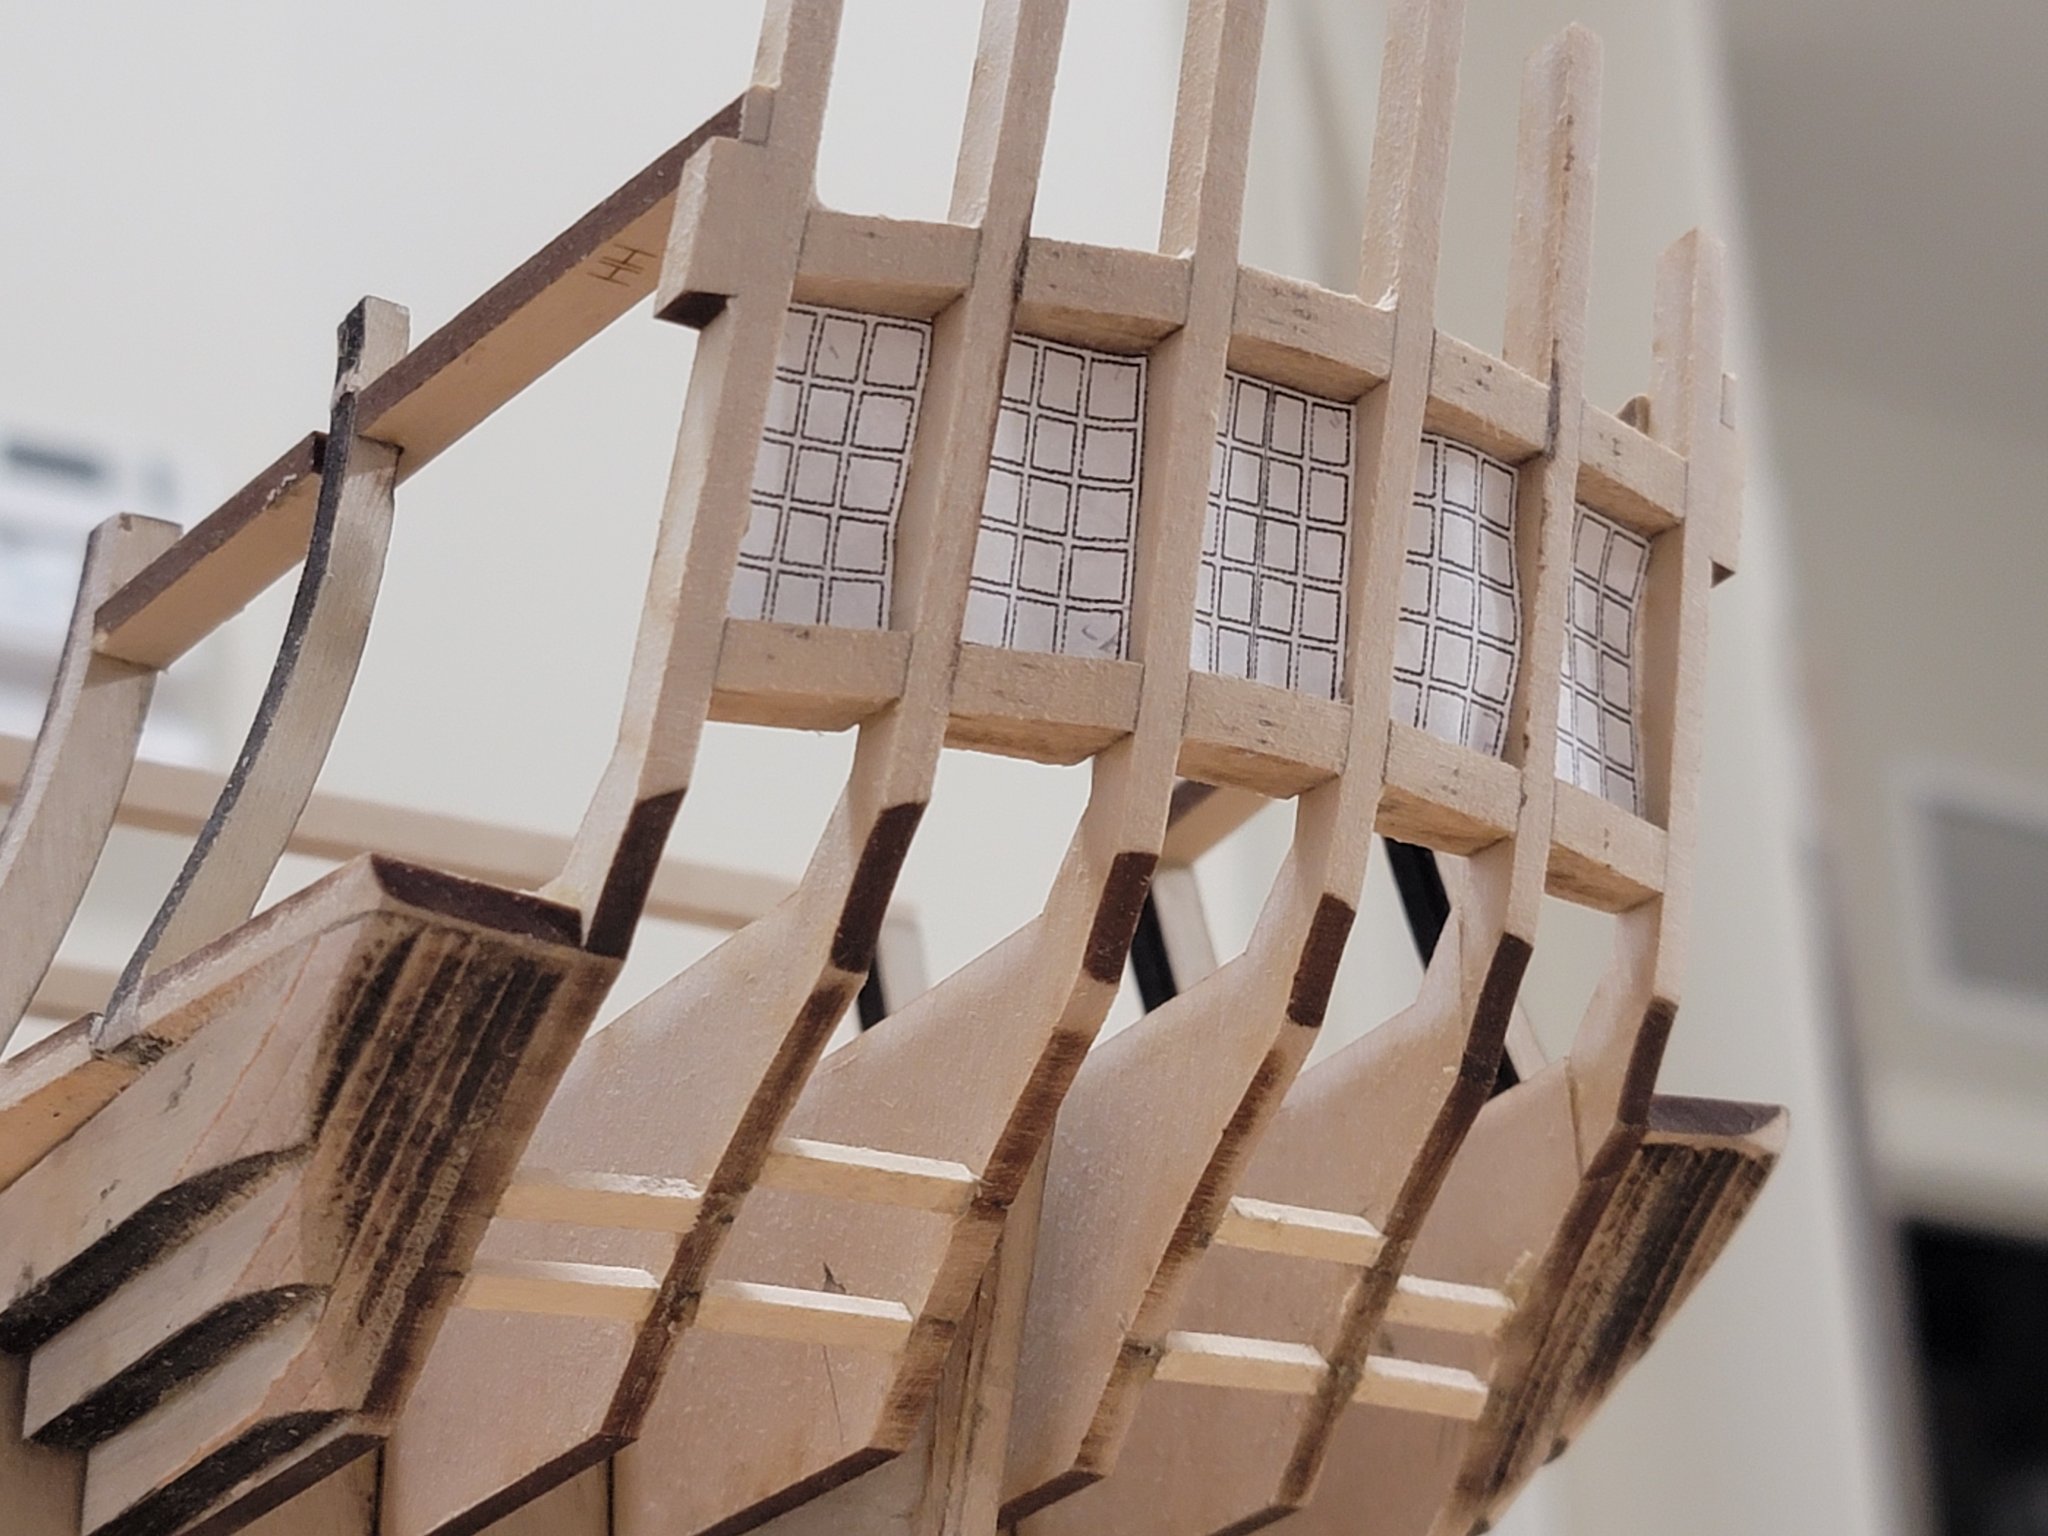
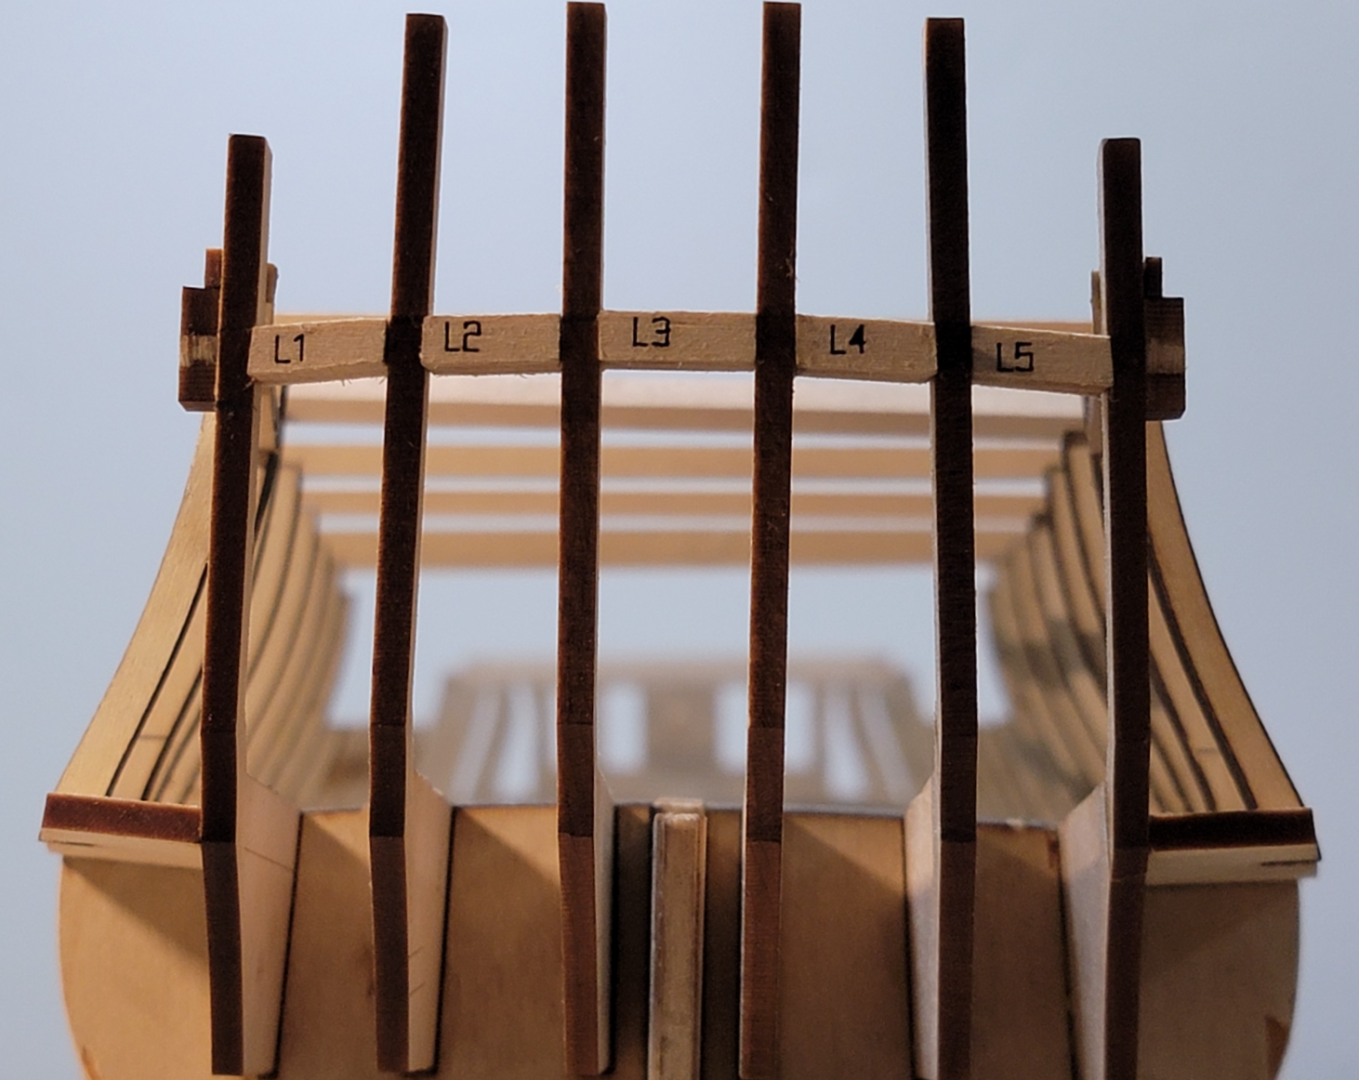
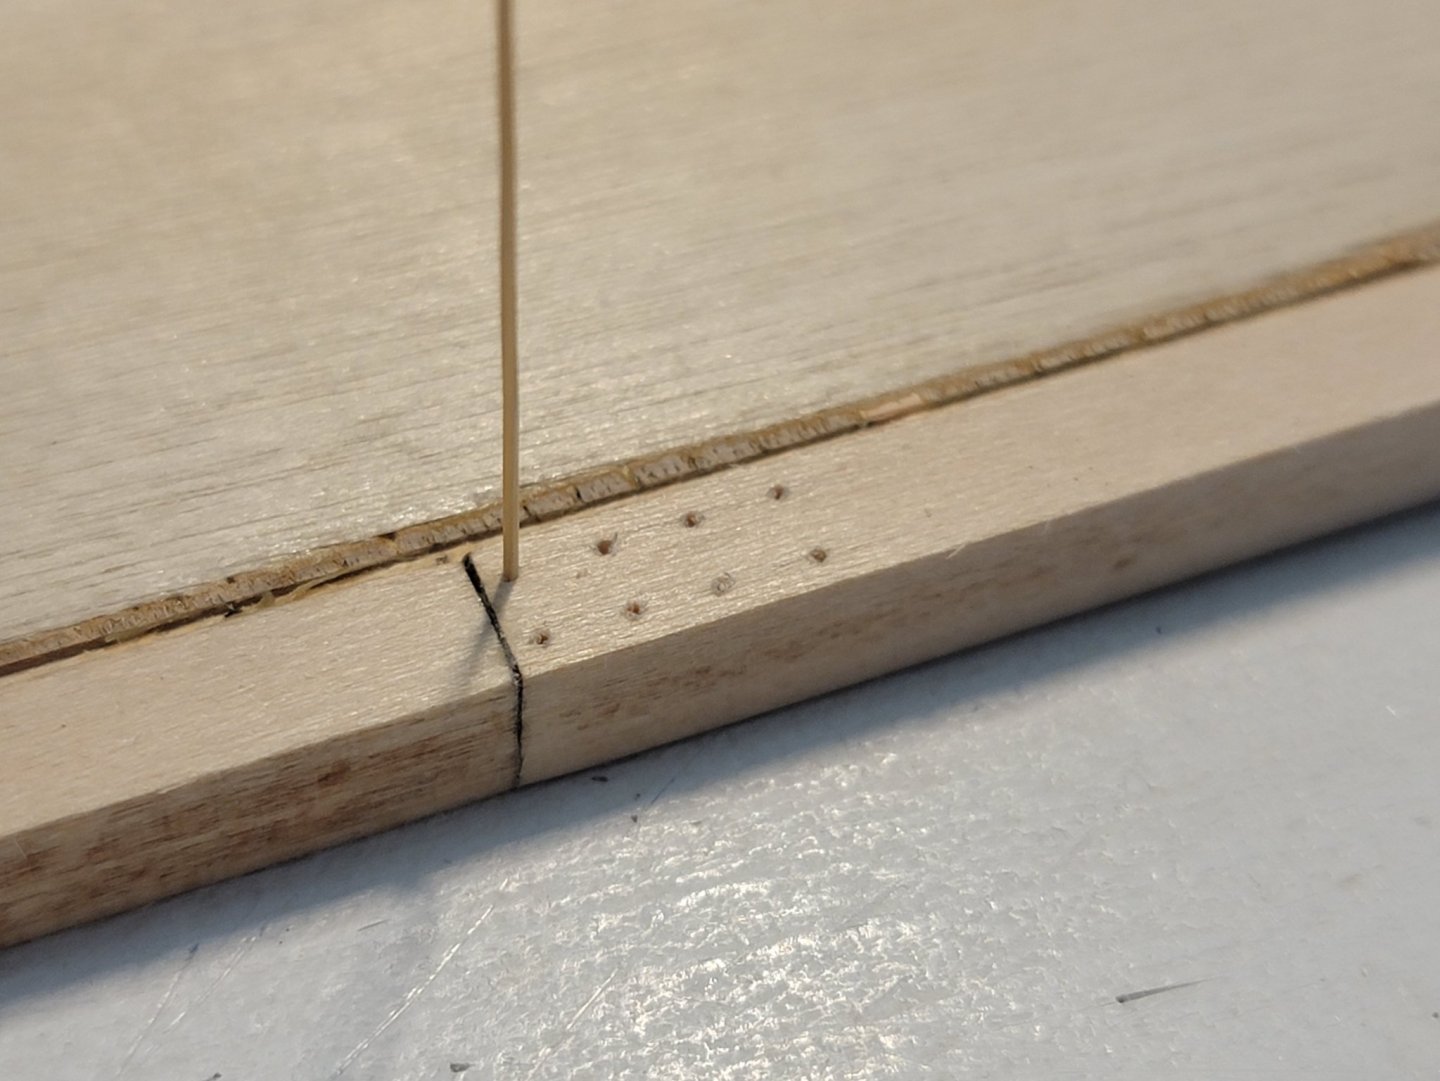
Thanks all for the likes! I installed the lintels. It was fairly straightforward.... but a long process. I went through this part very slowly, measuring 3 times or so before gluing each piece permanently. I measured the distances between the top of the frames to the top of the lintels, and all seem to be symmetric. While the glue set, I placed a toothpick on top and then used the kitchen counter as the background to see if it was completely flat. Next I will be fairing the exterior and then installing the sills.
-
Looks great! Got to love pieces fitting in perfectly without much head scratching 😉
-
The carronades look great, Patrick. I love the look with all of them on the deck!
-
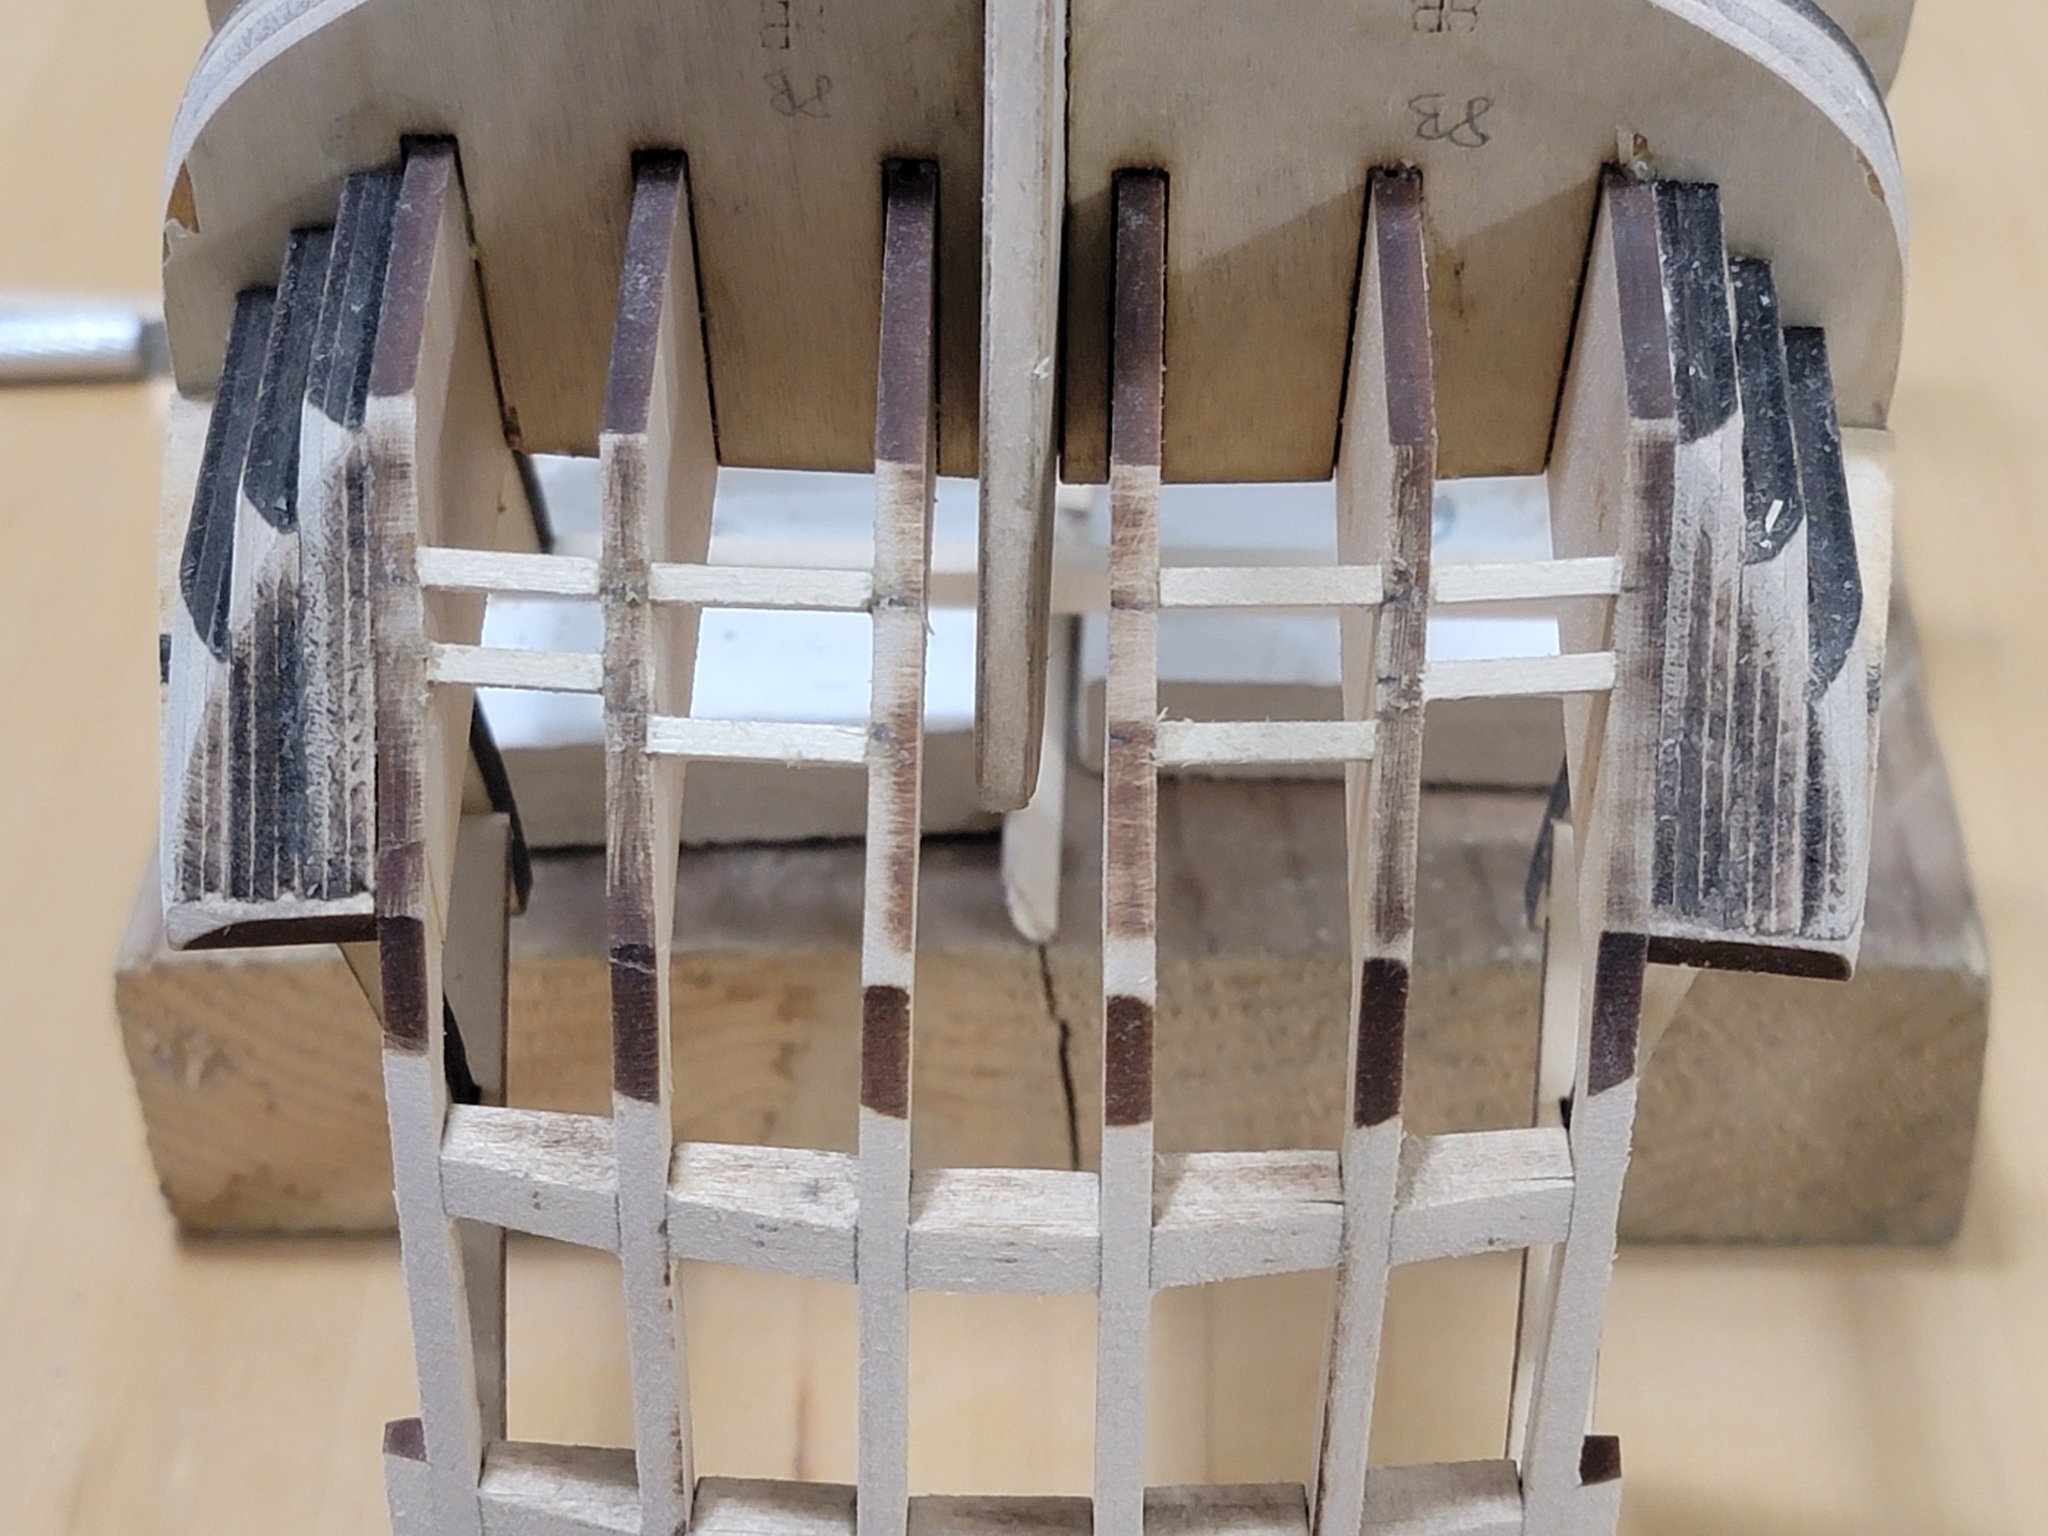
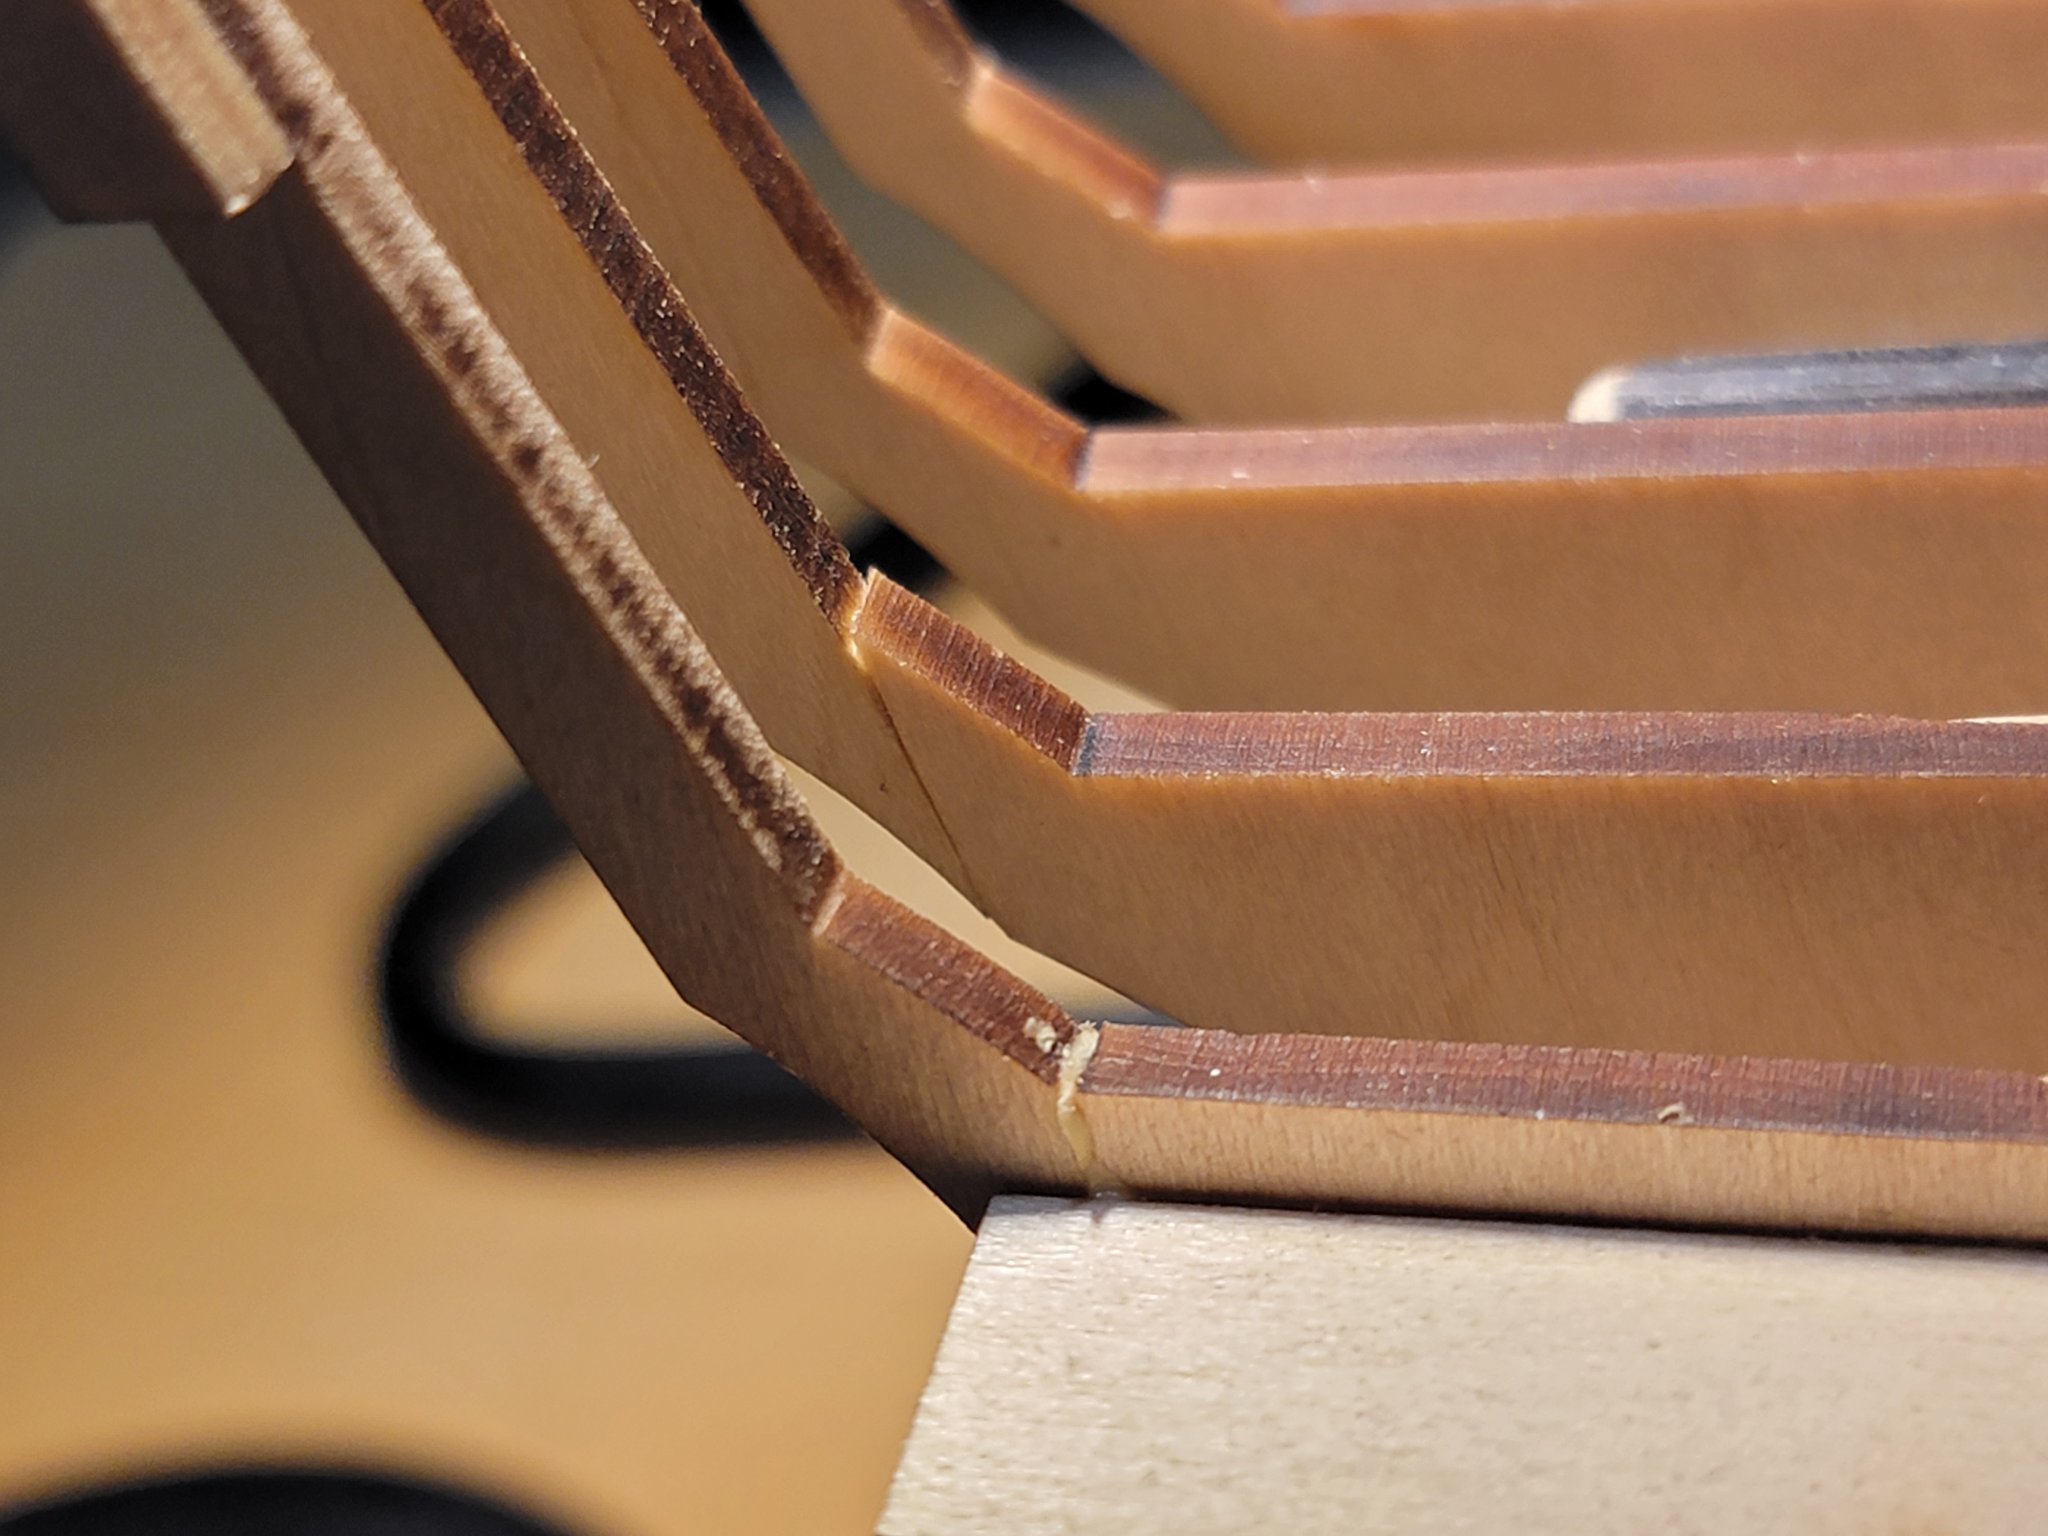
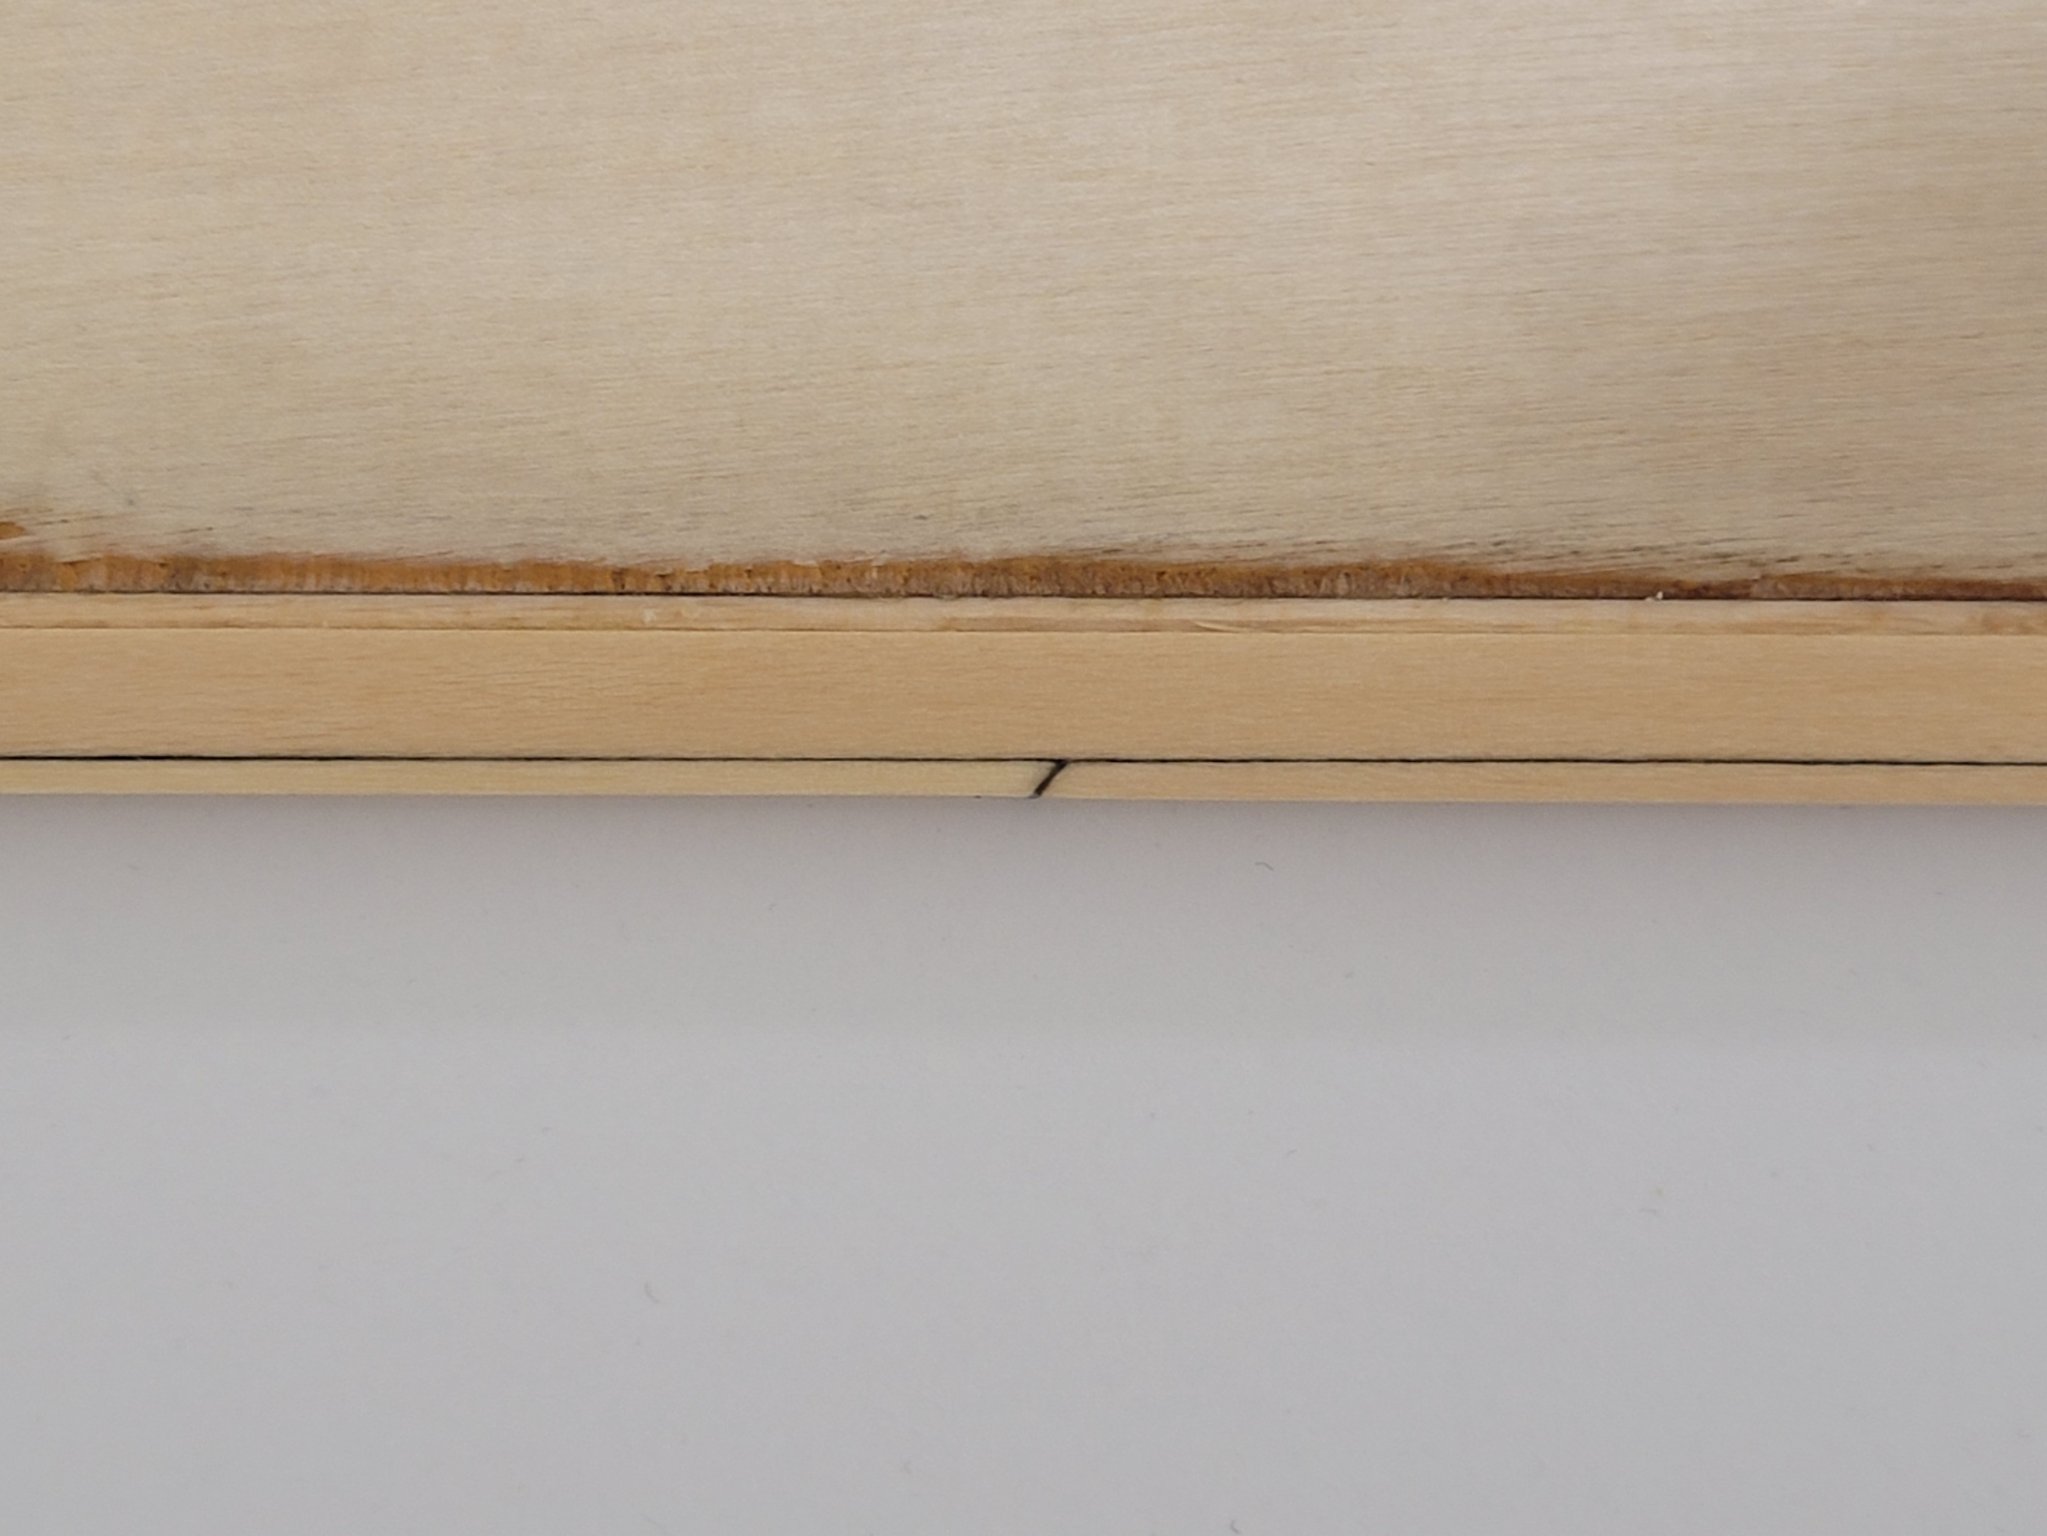
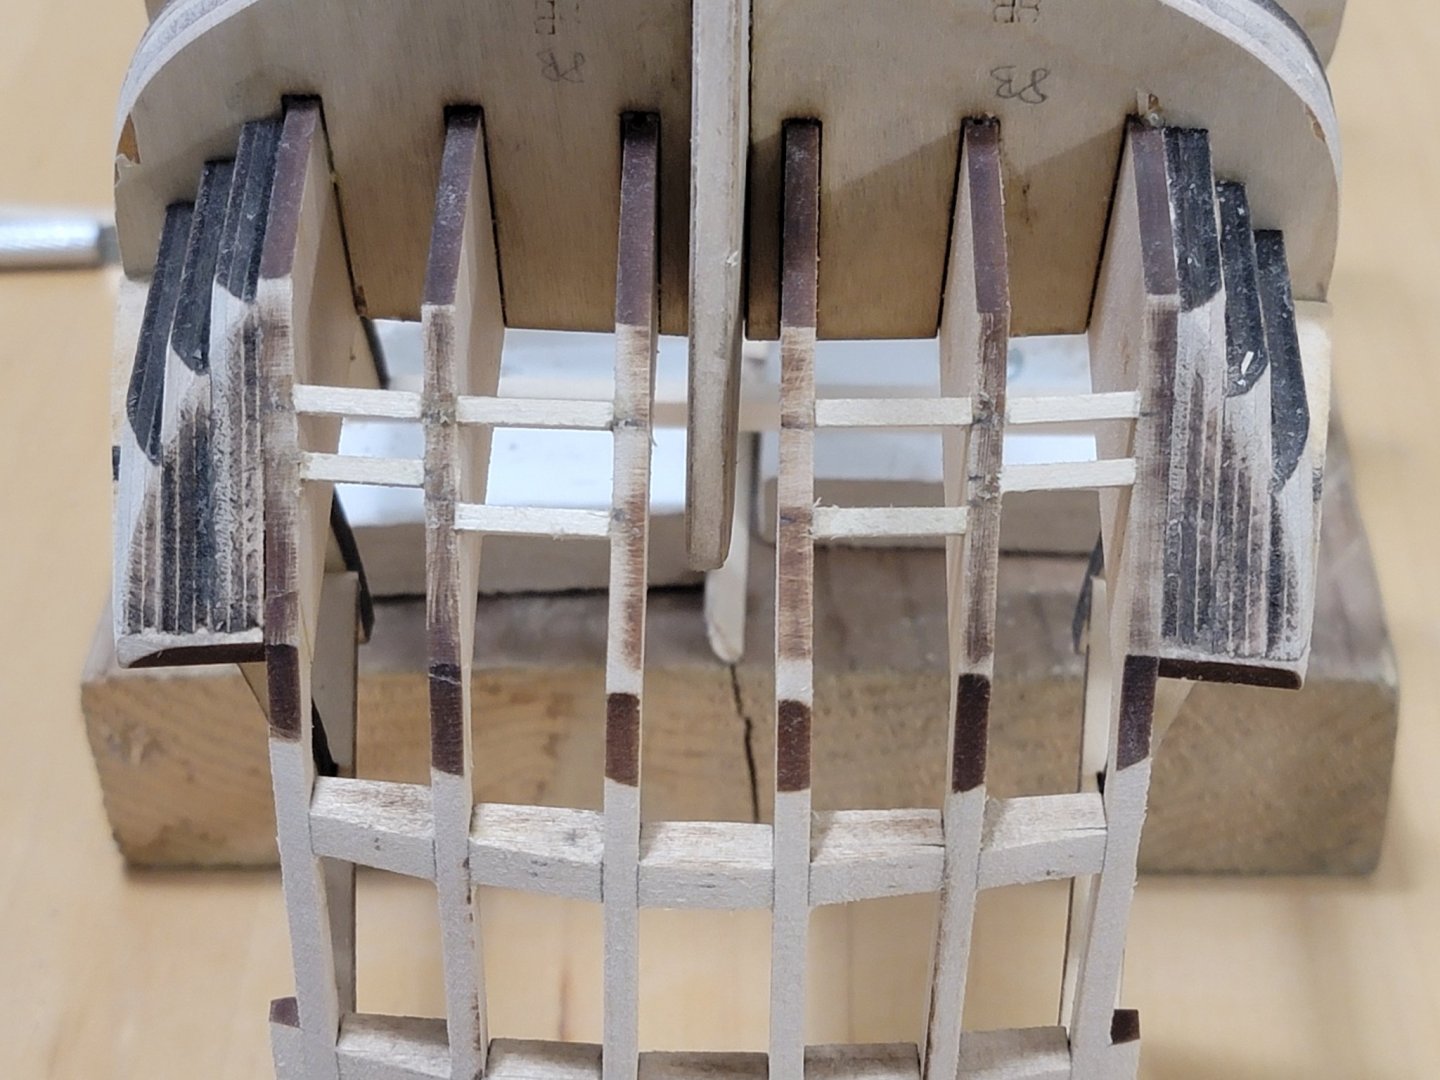
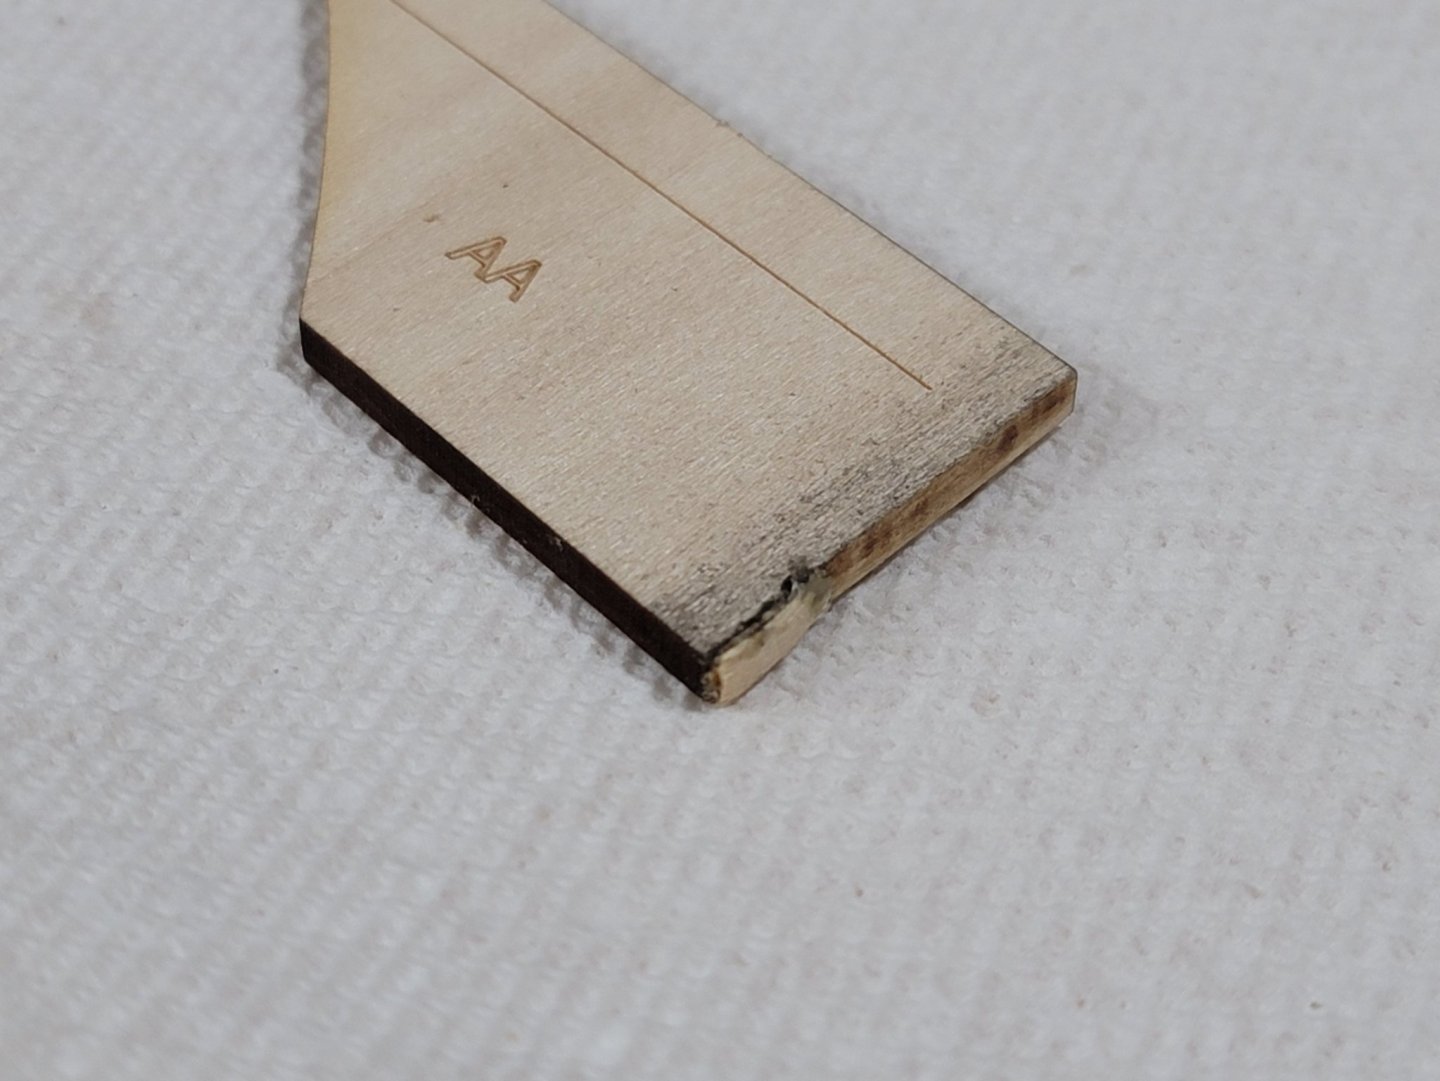
Yes Gary, I'm finding it very challenging, and I'm still at the early stages of the chapter!! When installing the piece HH, I noticed the starboard side did not fit. The portside part fitted ok. I actually needed to cut of about 5mm for the starboard one. Instead of doing that, I snapped off the starboard AA and BB pieces 😬, and glued in a small sliver of wood to fix this deviation. Here is a pic showing what I mean: All the pieces were now identical, the HH piece could fit without cutting a significant portion off, and the rest of the installations were fairly straight forward. When aligning the HH pieces, I spanned a ruler across both beams to make sure they were completely flat. Next I'll be installing the lintels. I have a feeling more problems may arise.....


-
From the pictures, the sills and lintels look much better! Great job!!
-
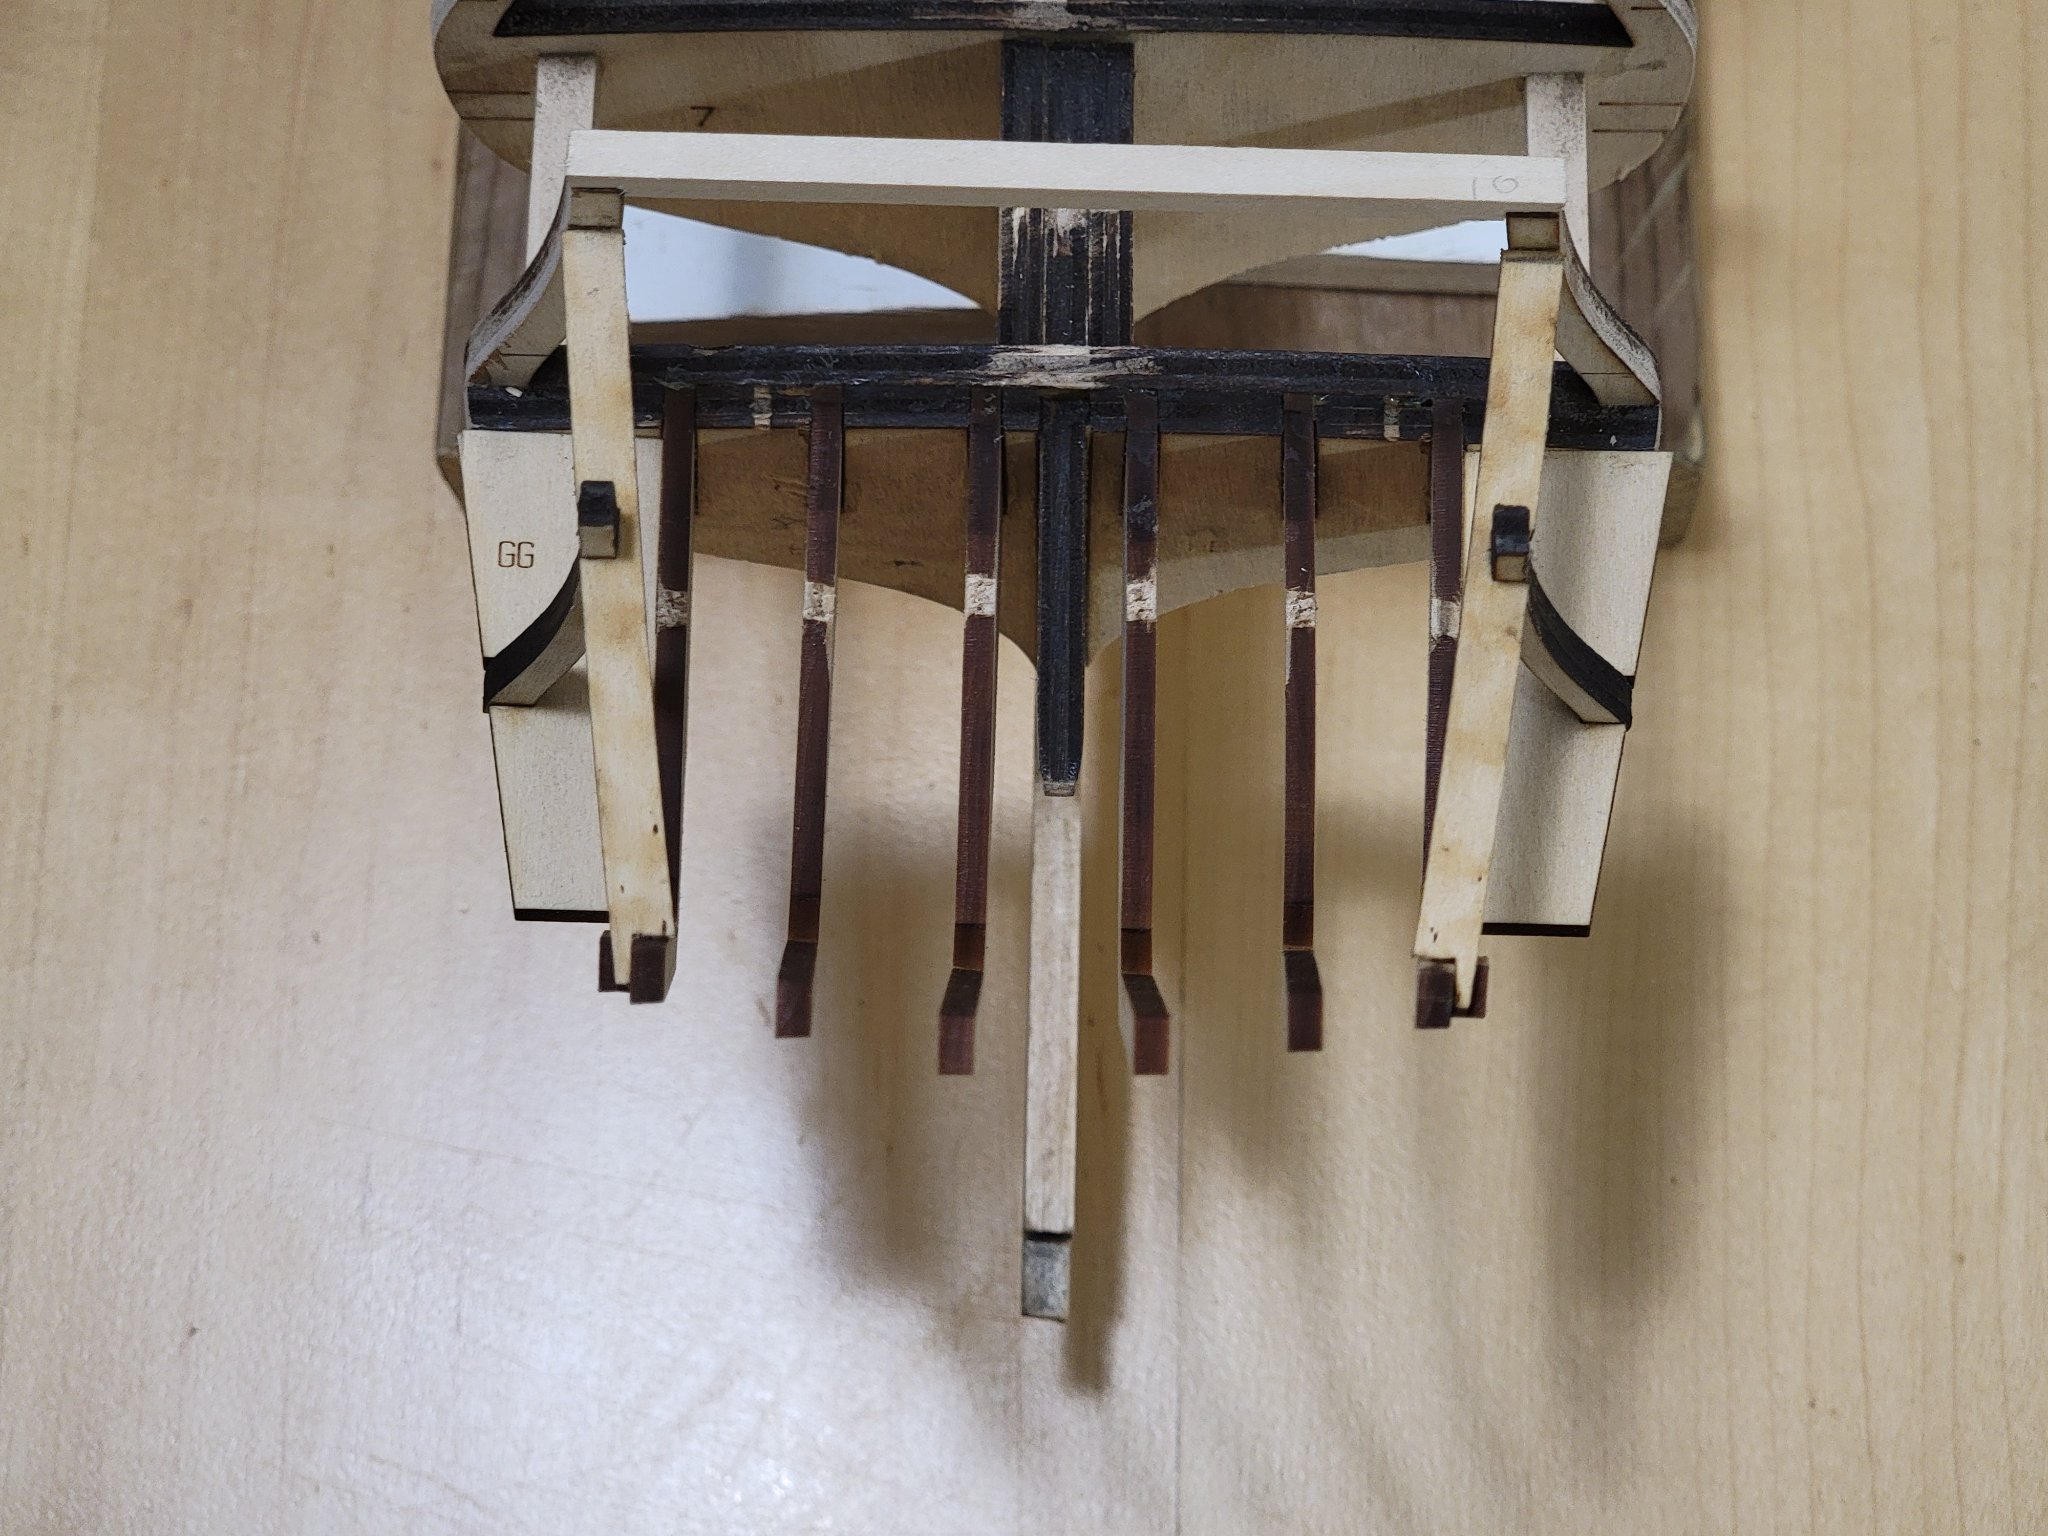
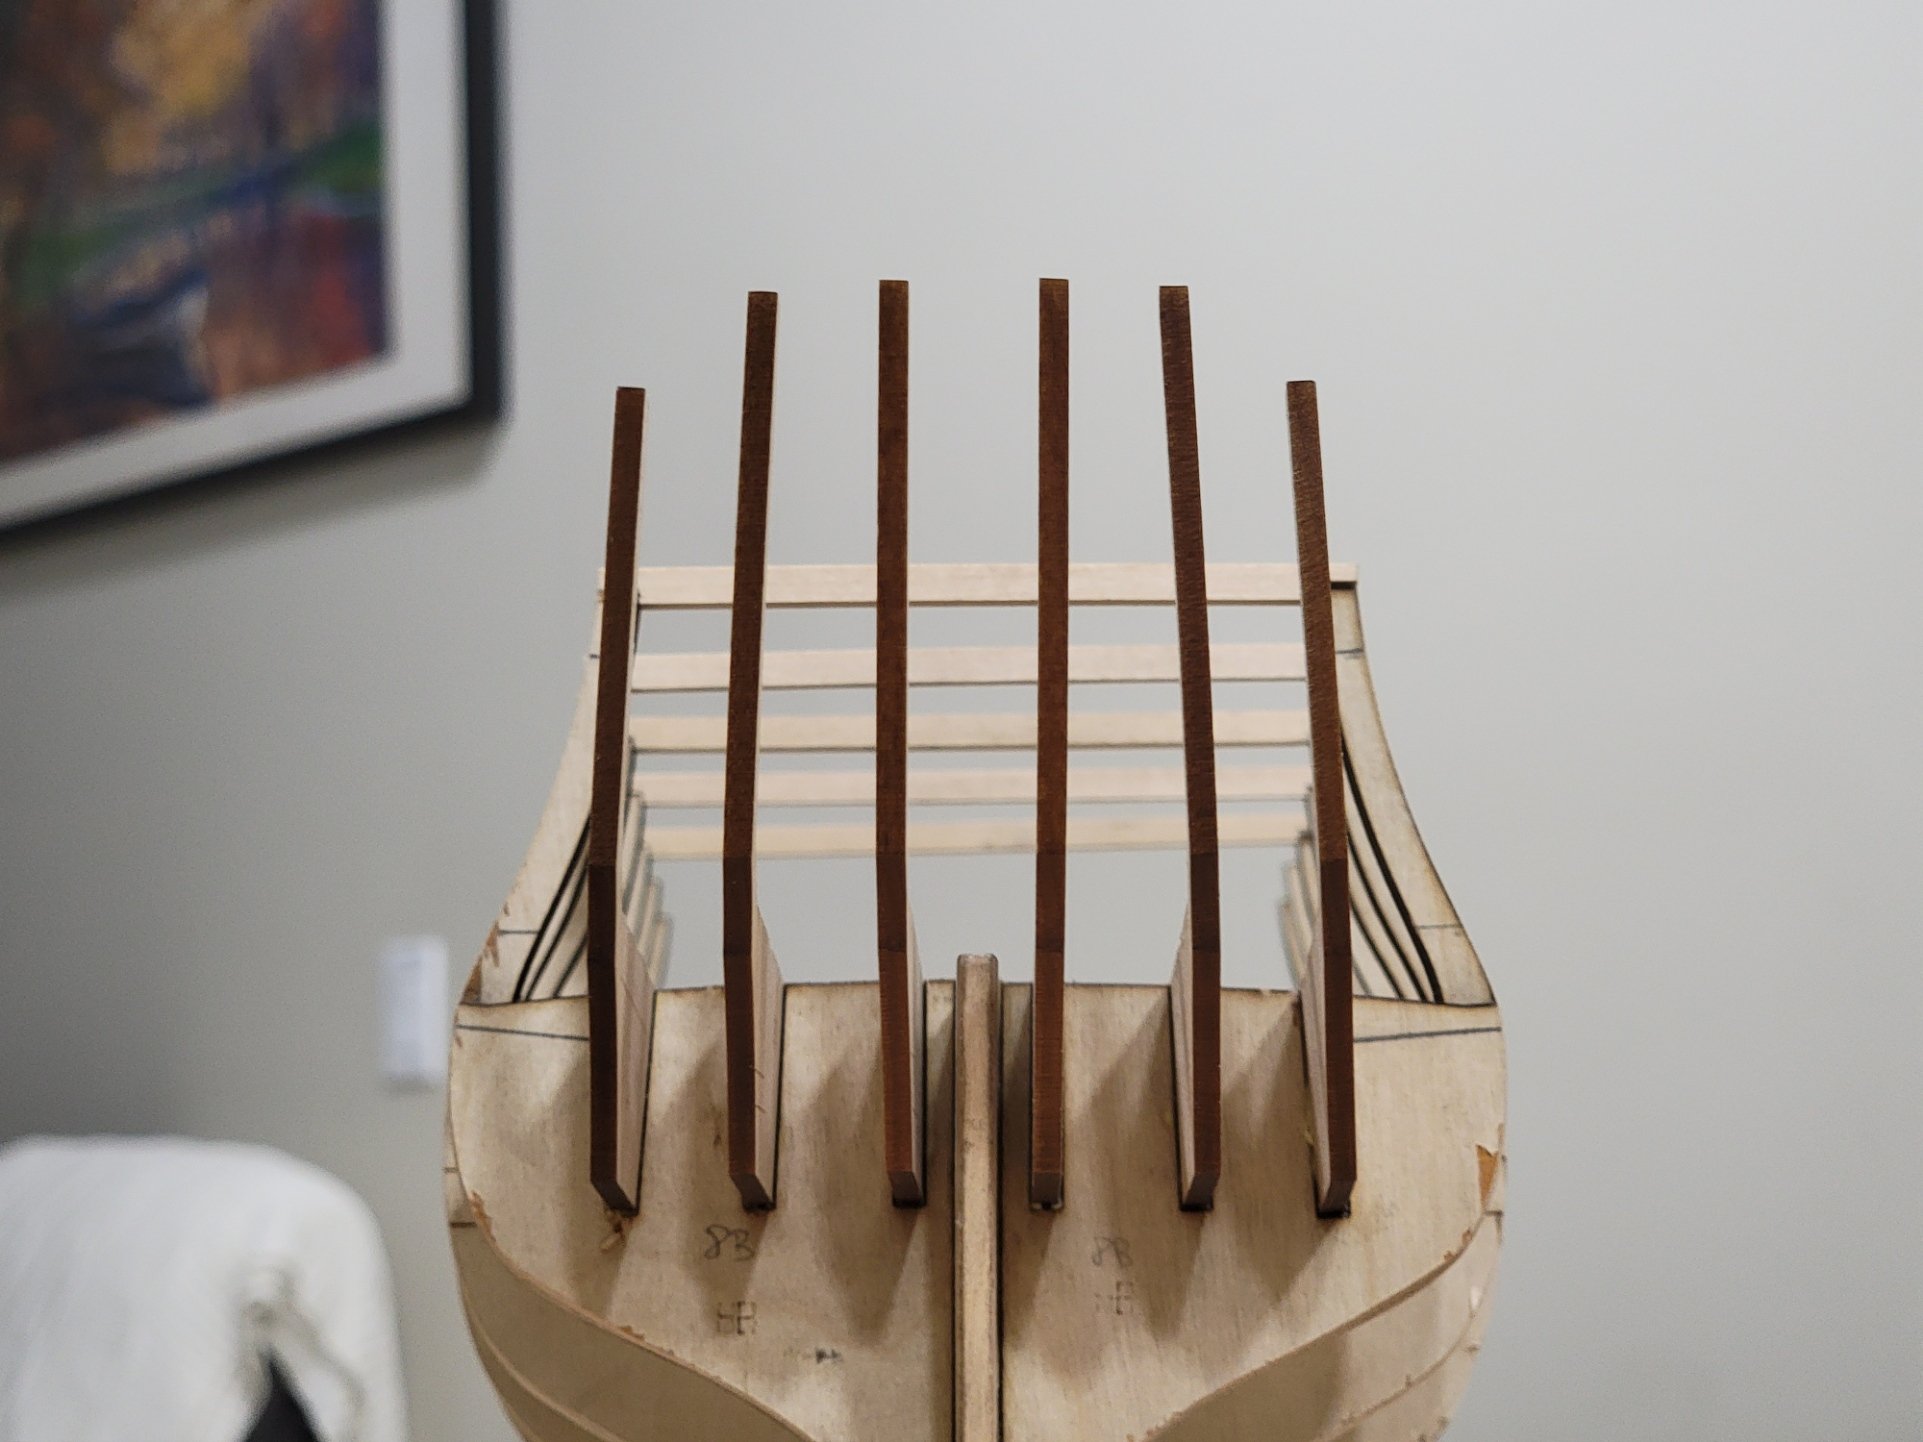
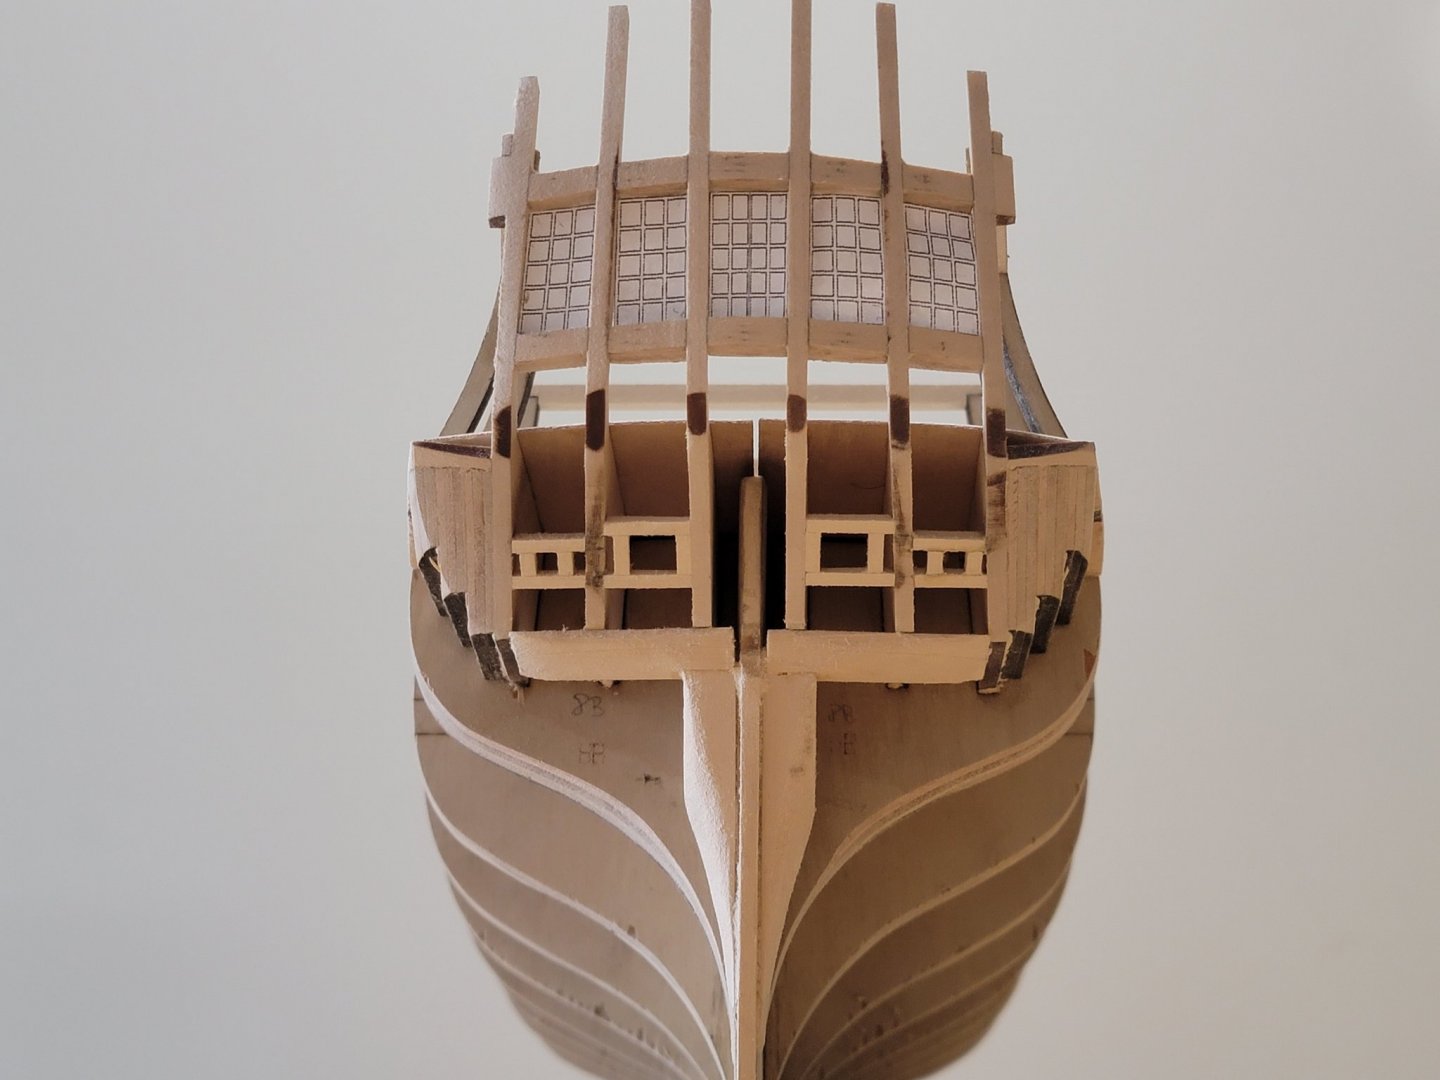
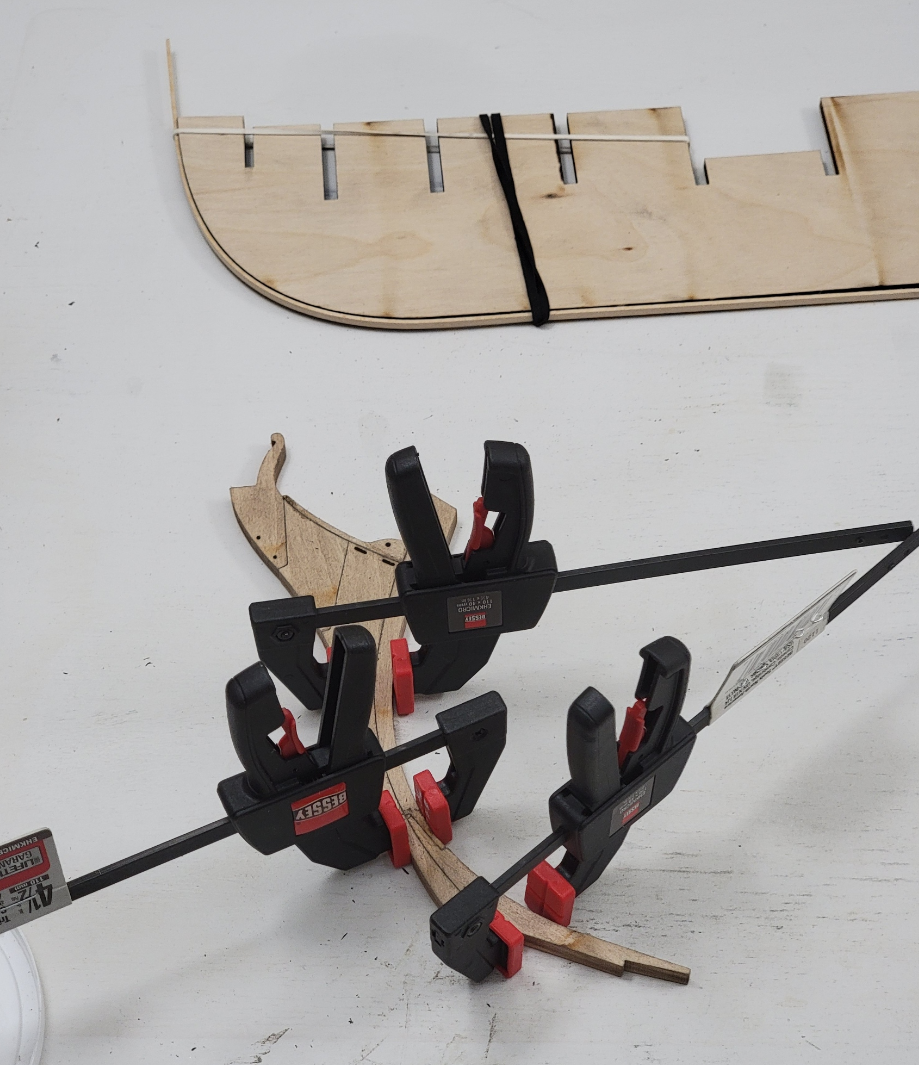
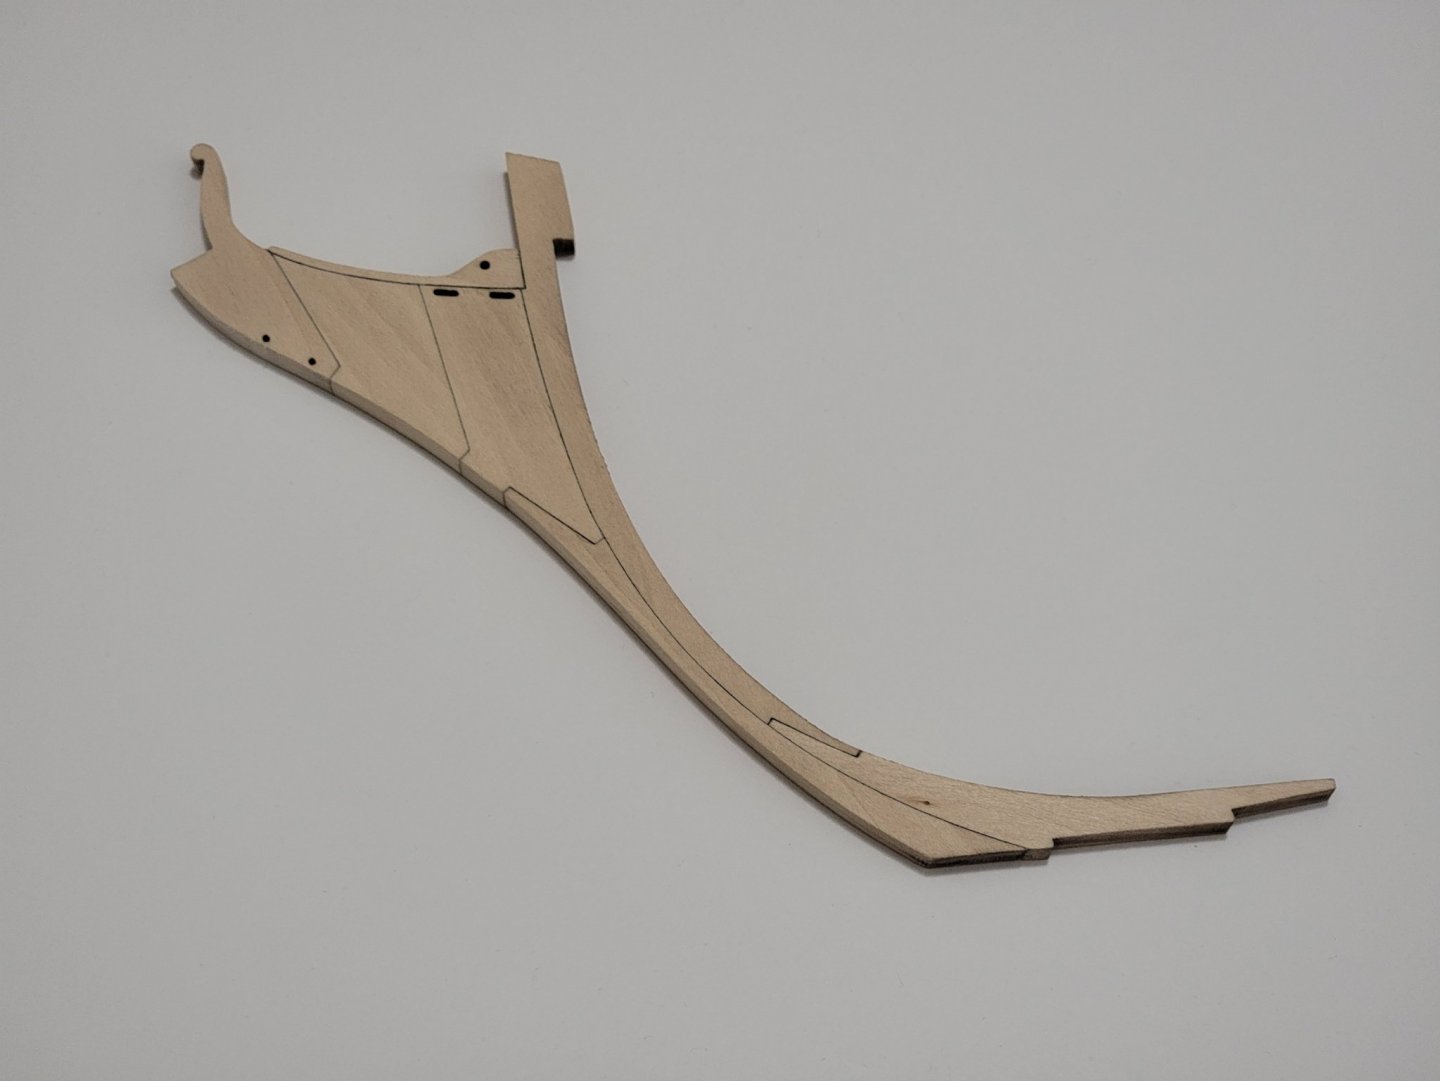
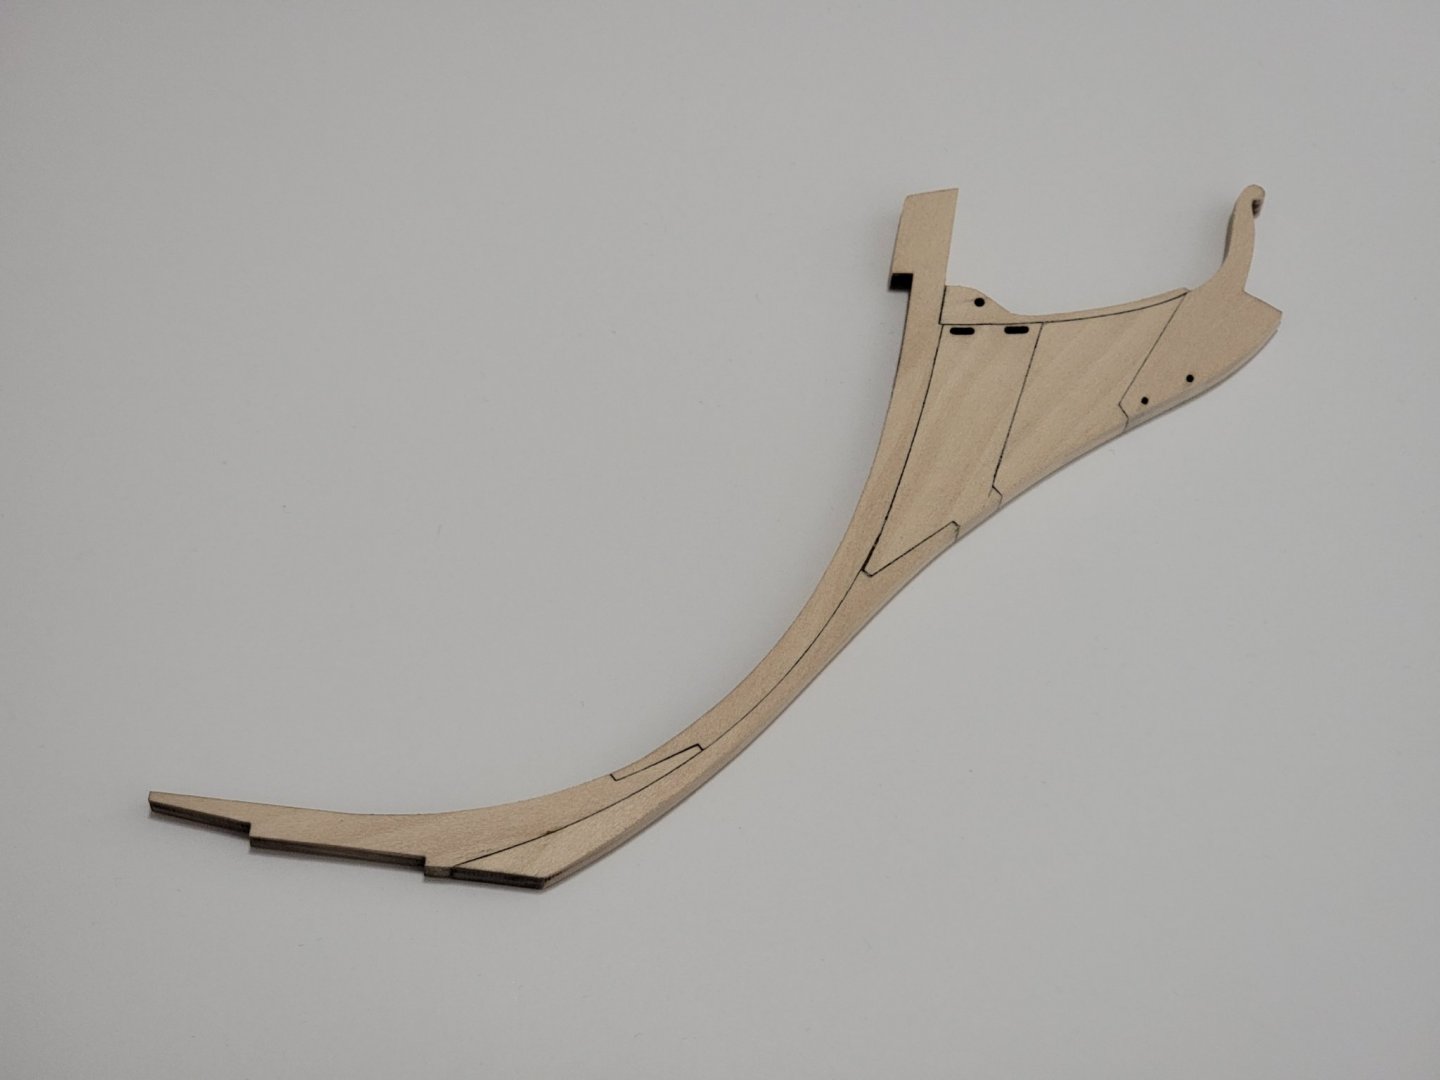
I decided to go ahead and try out the tung oil on the frames, and got a pleasant surprise!! The frames appeared darker than what they were originally, and also darker than the other places I used tung oil on. I think it is because the surface is actually an edge grain transitioning into an end grain through the curve. I also noticed the oil being soaked in the wood like a sponge! I'll be applying one more coat tomorrow. I dry-fitted the stern frame pieces, and noticed a huge gap between the portside and starboard side pieces. After many minutes (maybe even an hour!) of wondering why and measuring everything, I noticed that somehow the starboard piece needed to be angled upwards and not sit flush with bulkhead 8B. So I glued in some rough pieces of wood to achieve the correct angle: I then glued all the pieces in place. I made a photocopy of the stern plans, and made sure all the pieces were oriented correctly while the glue set. I'll continue with the stern framing. What I have seen in other logs, many complications may arise when framing the ports in this section, so I'll be sure to take my time and not rush anything.

-
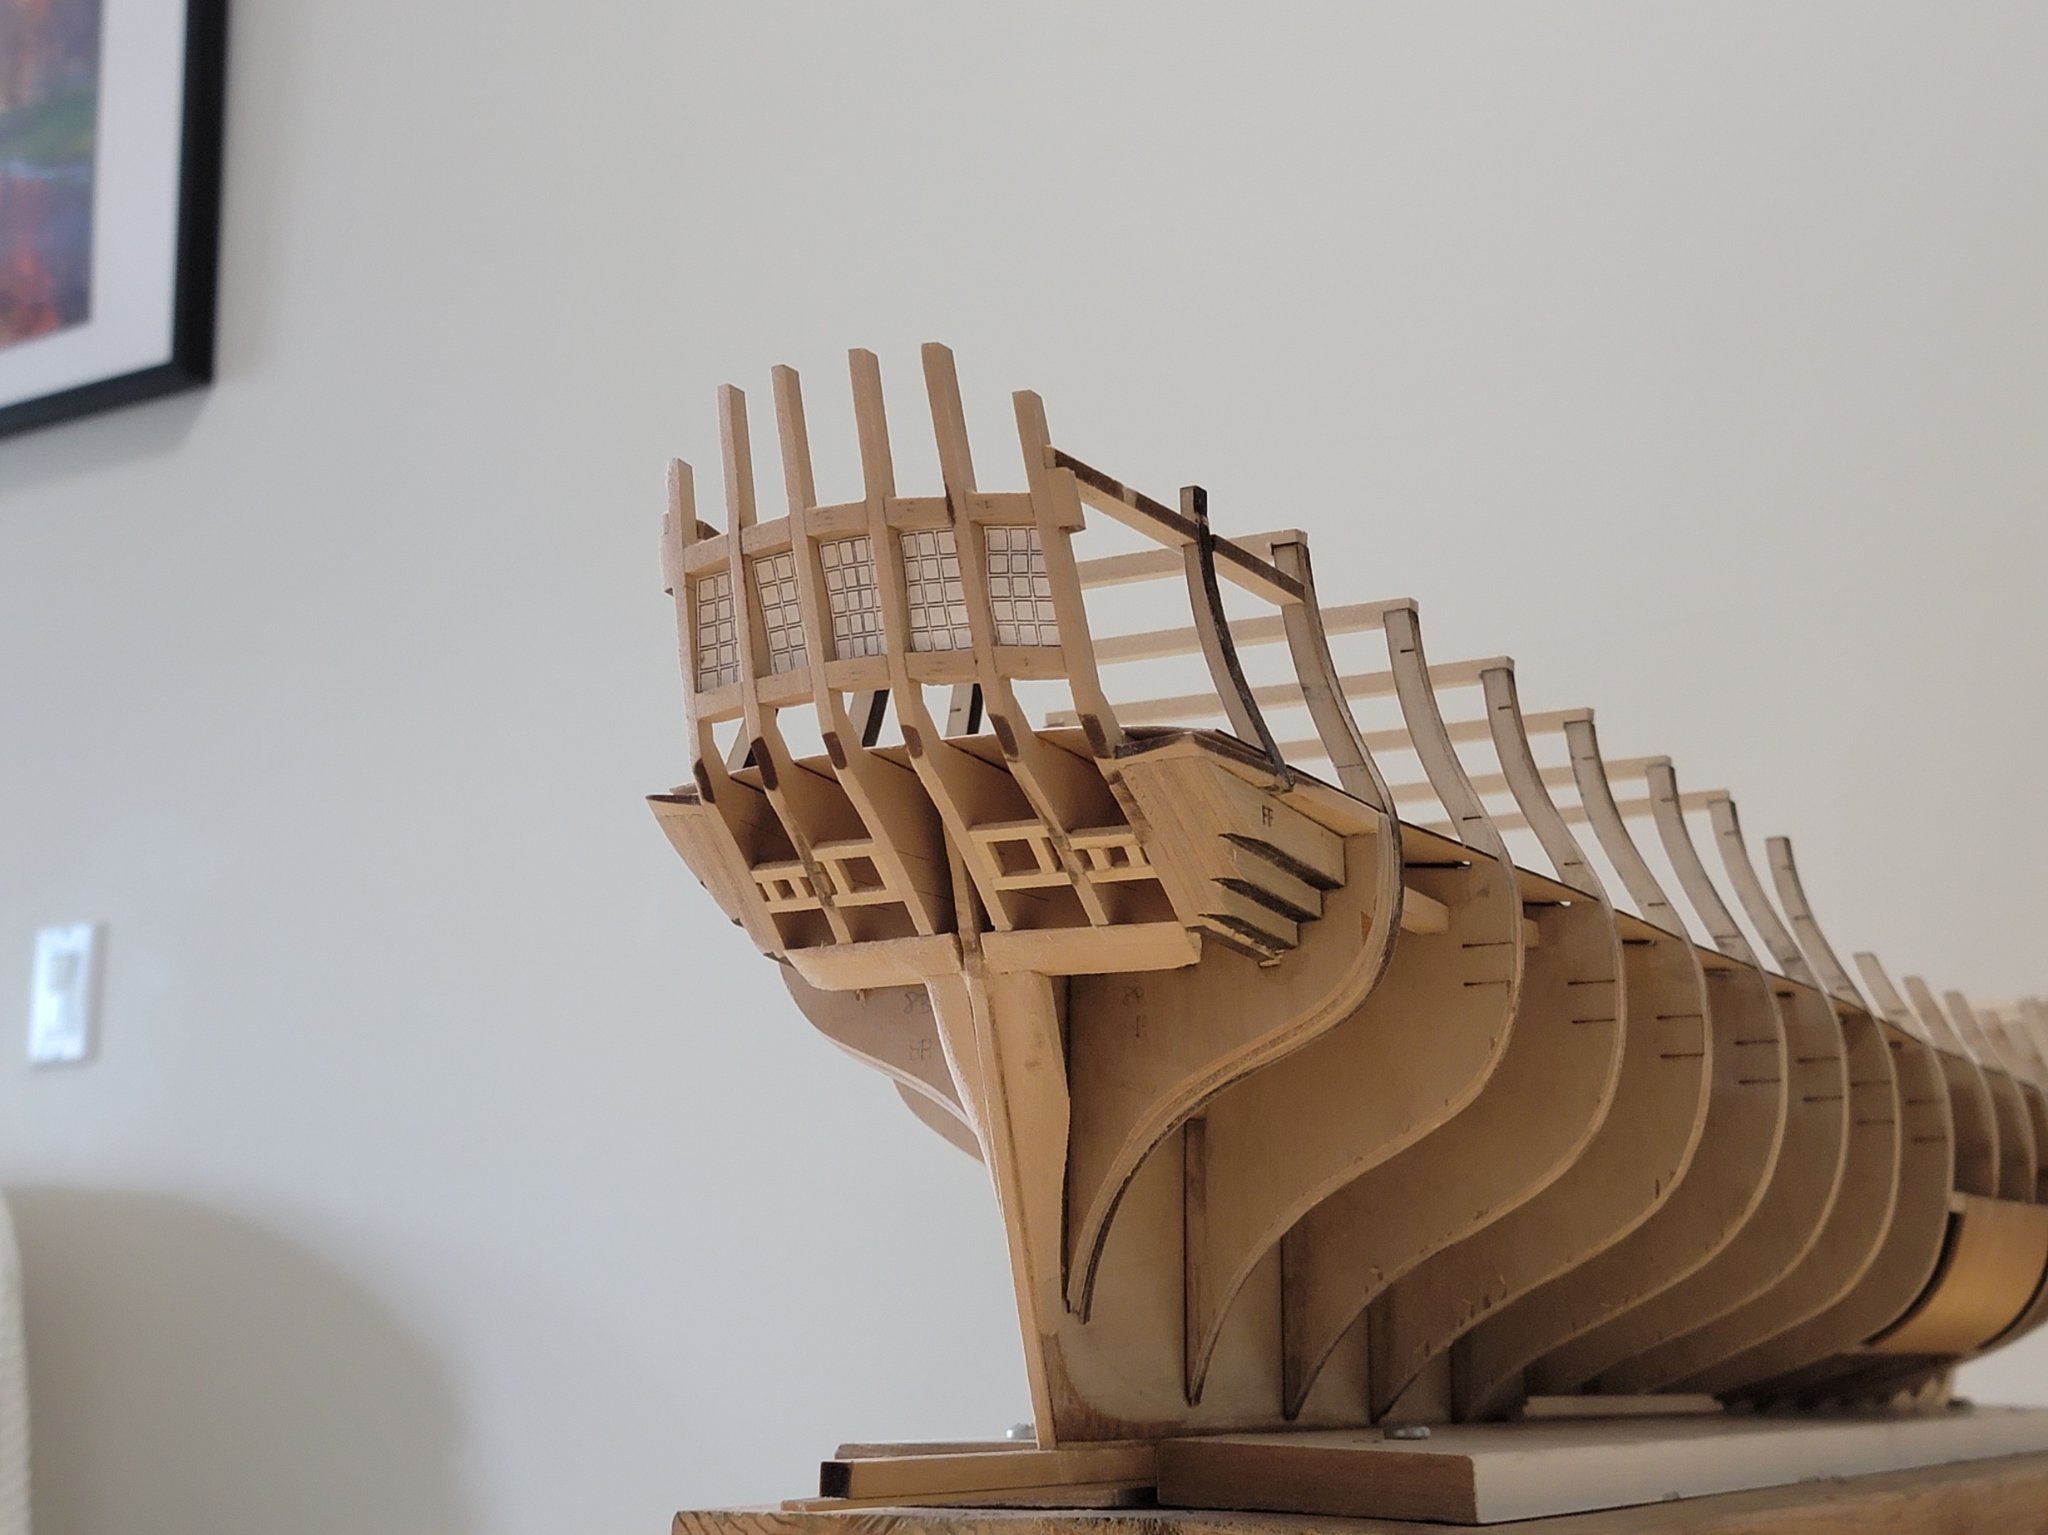
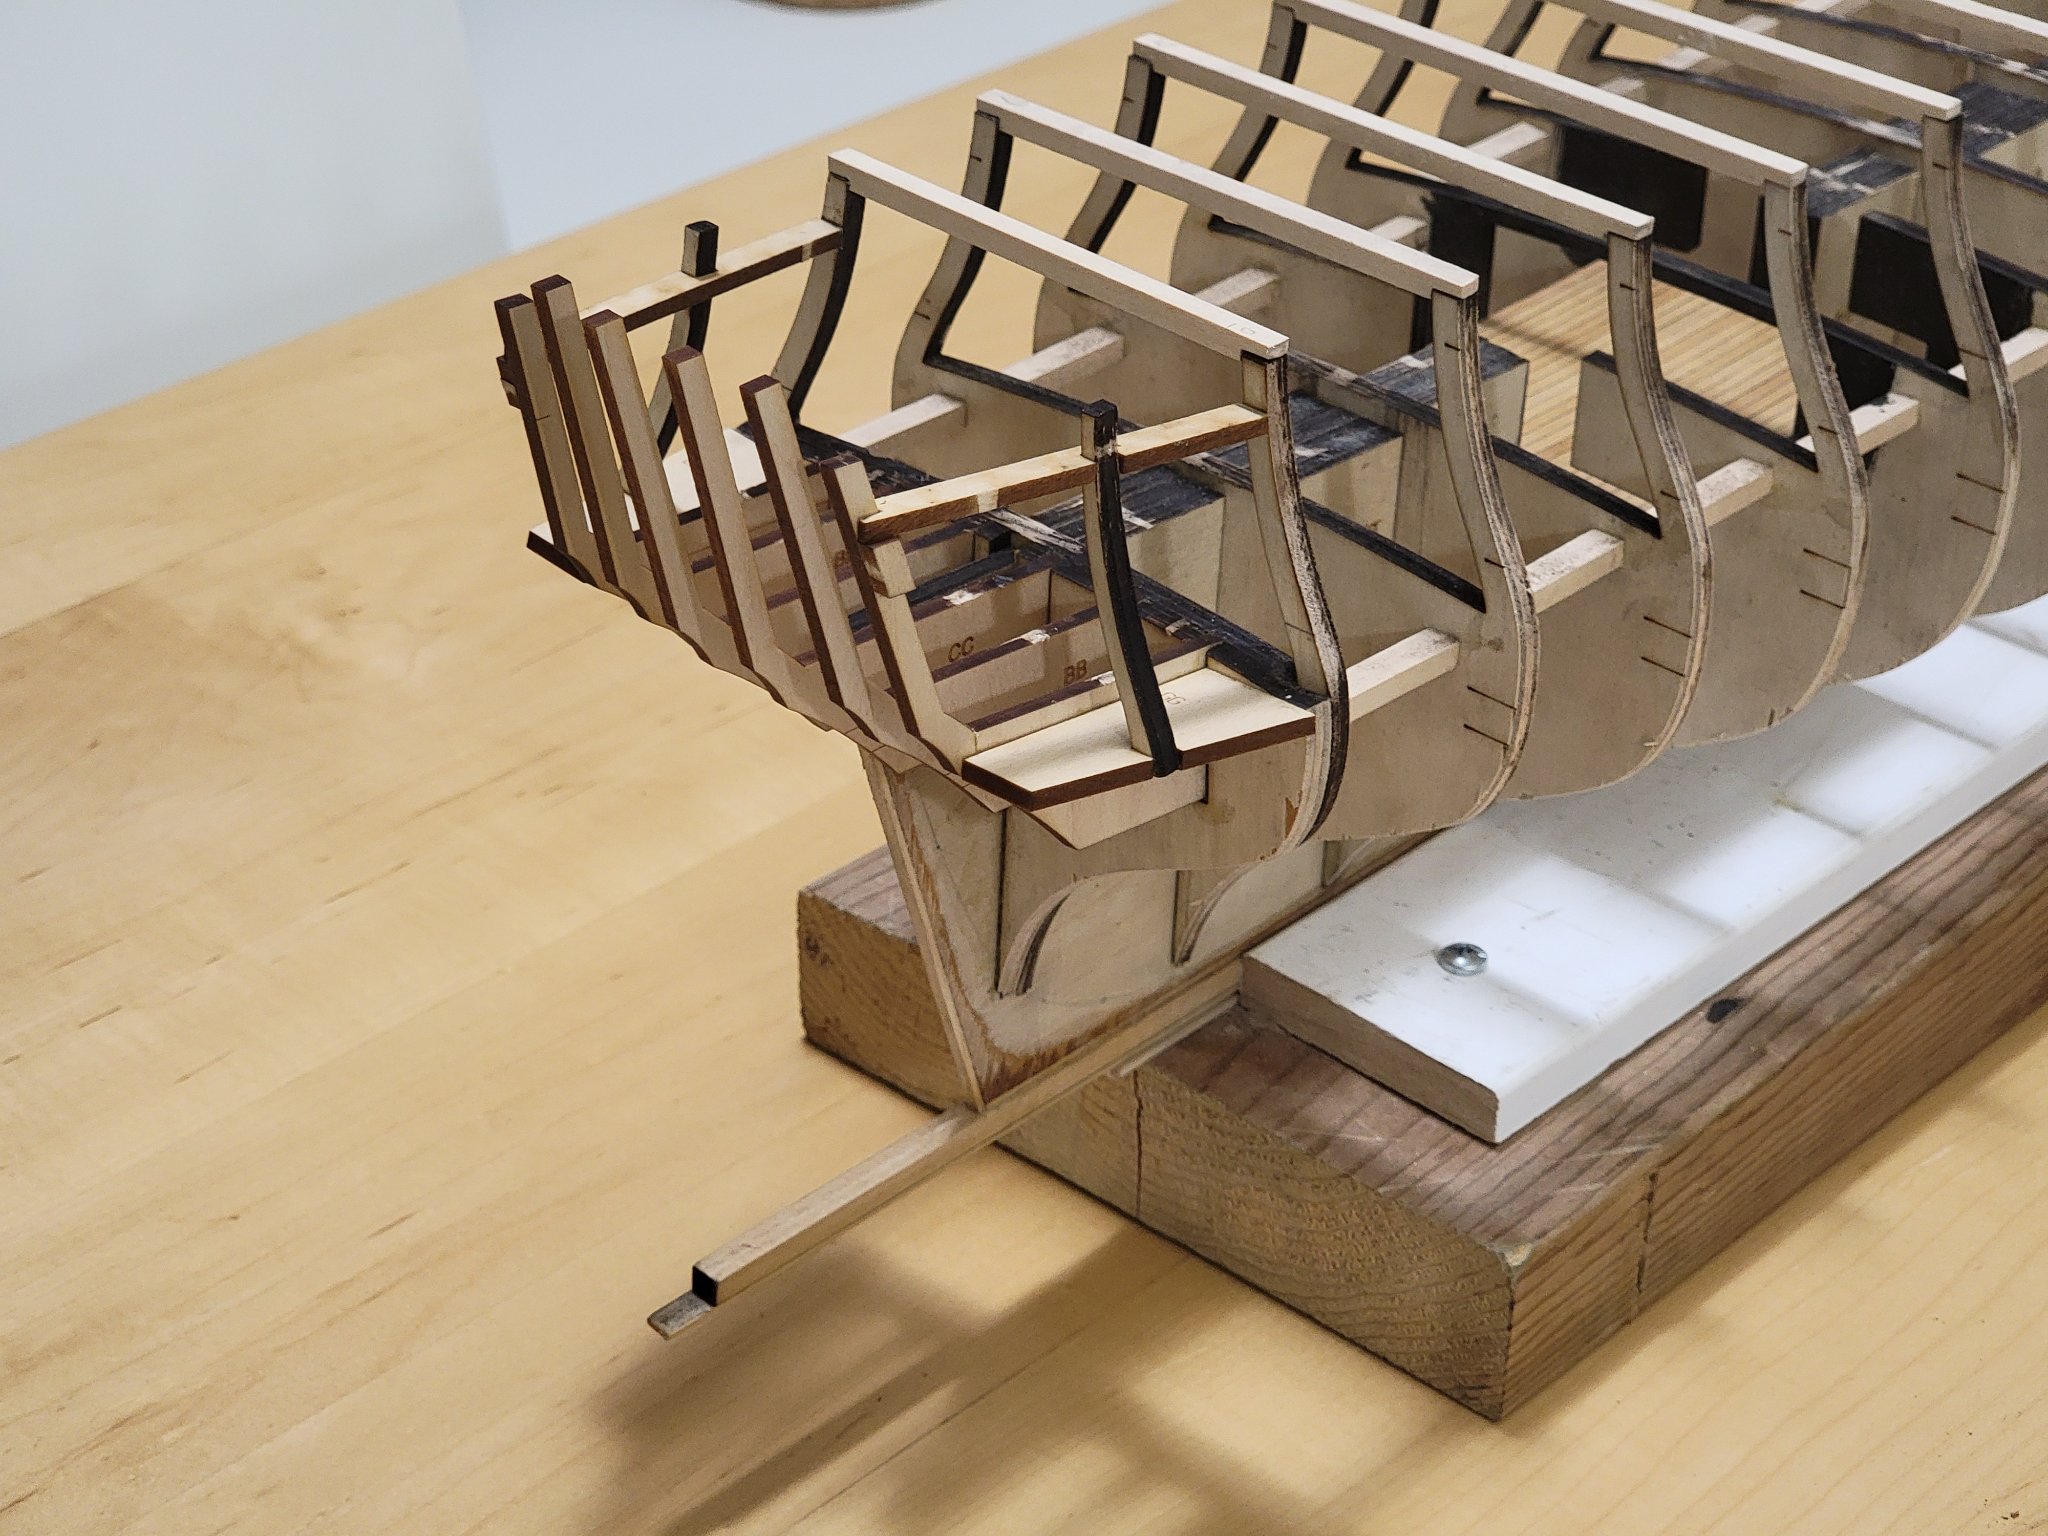
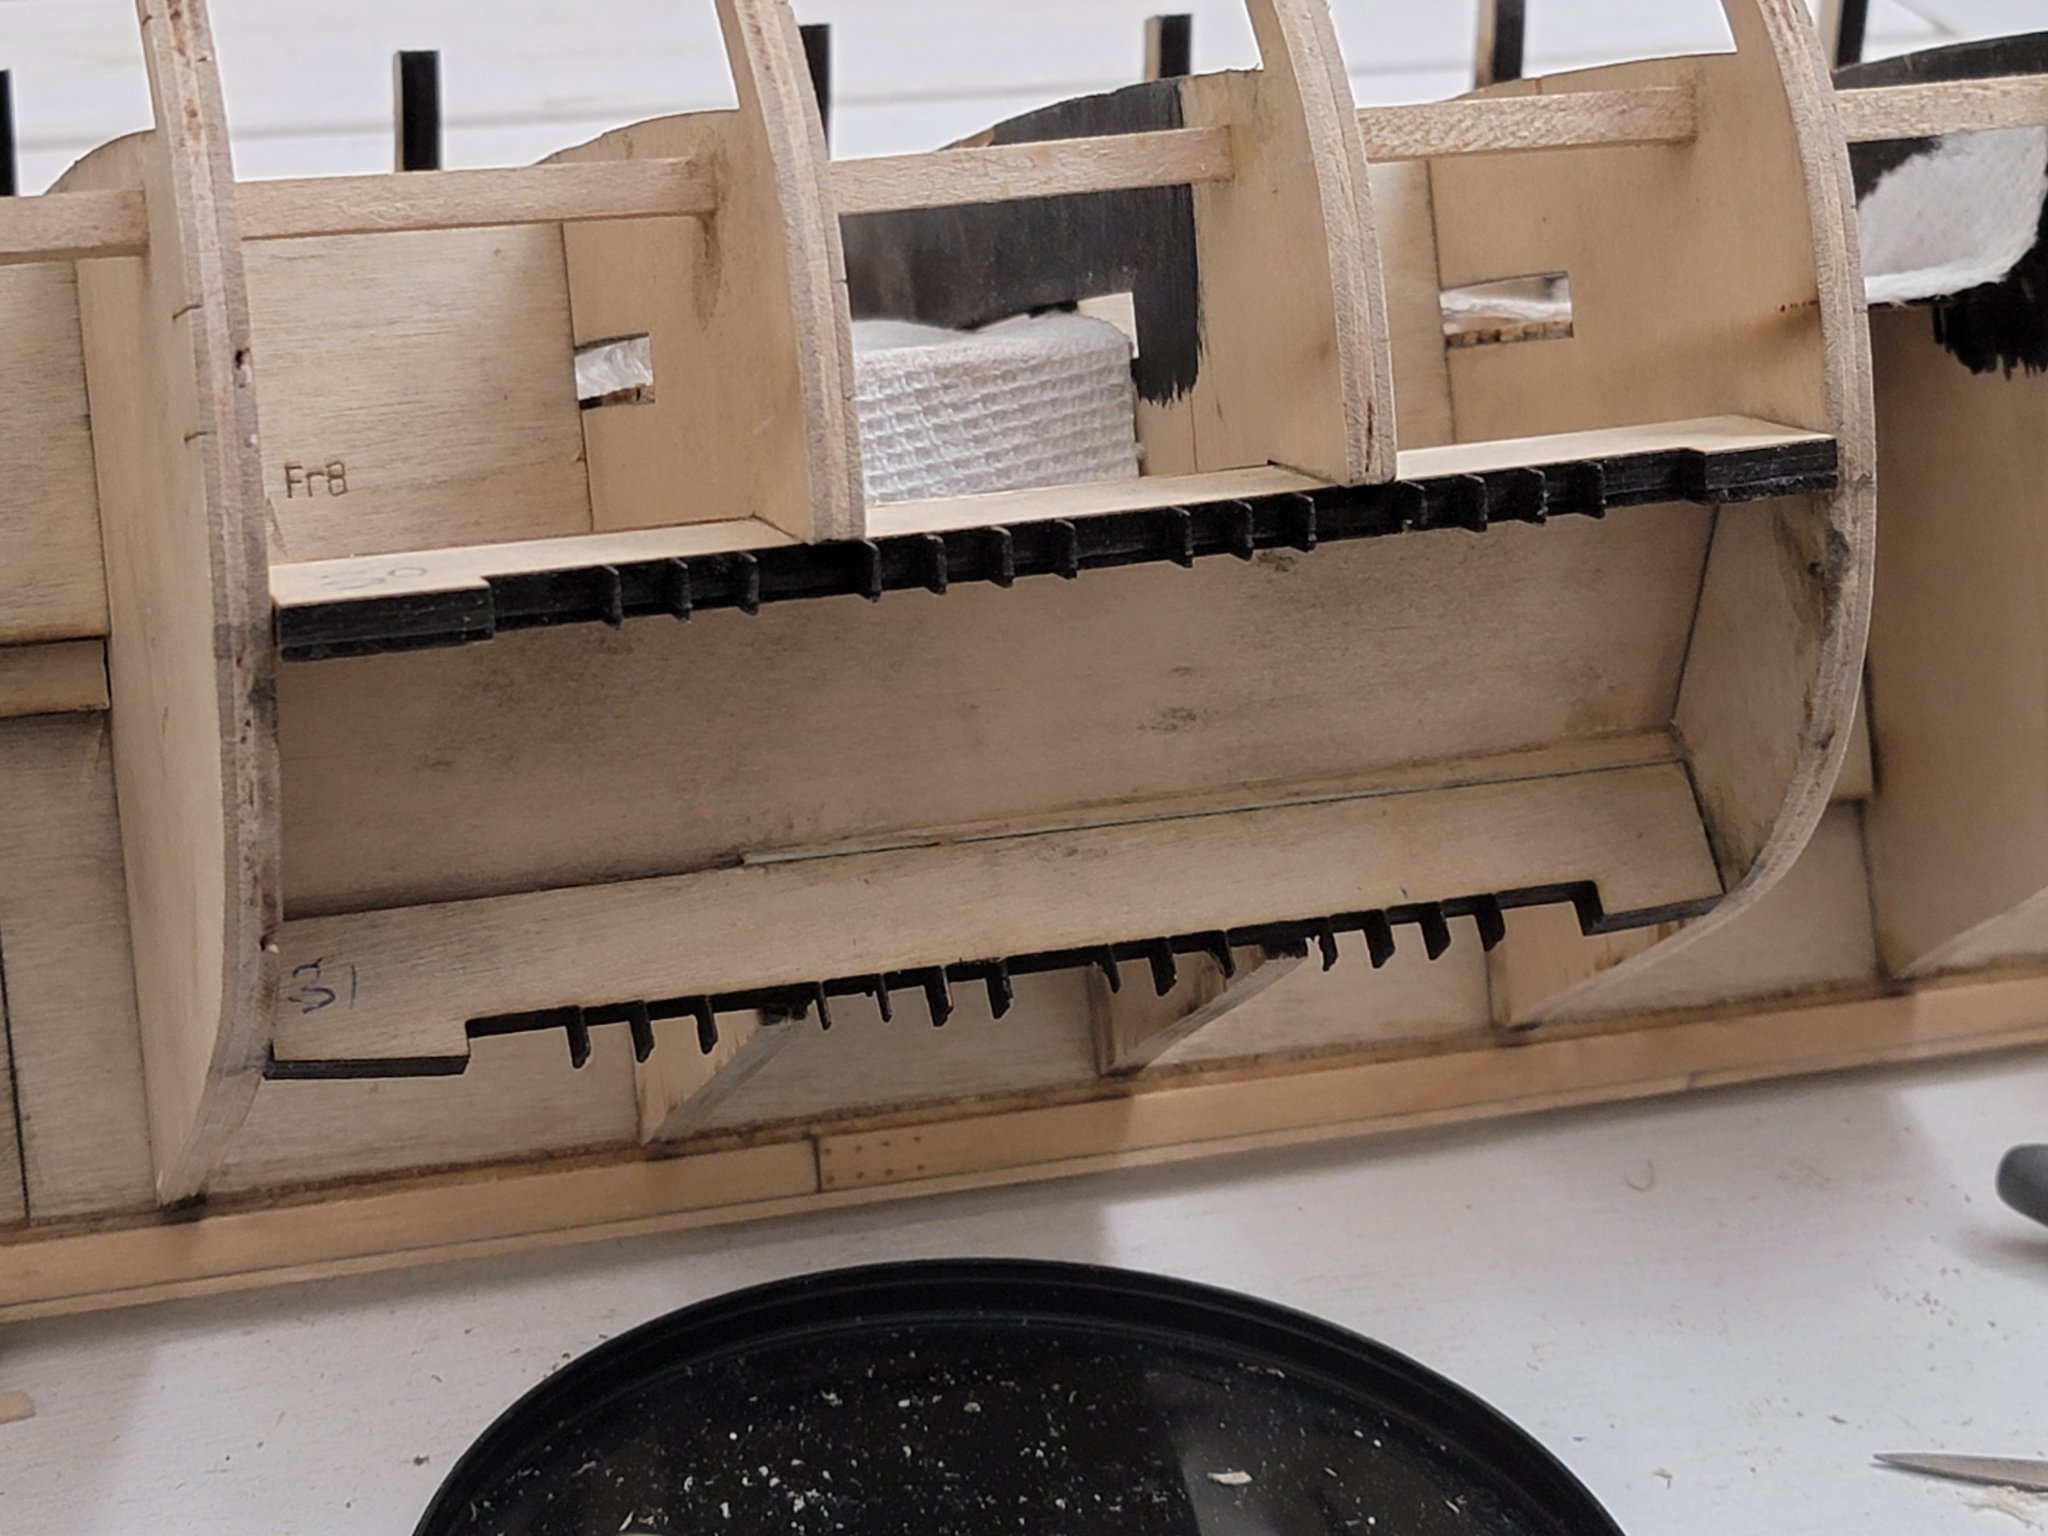
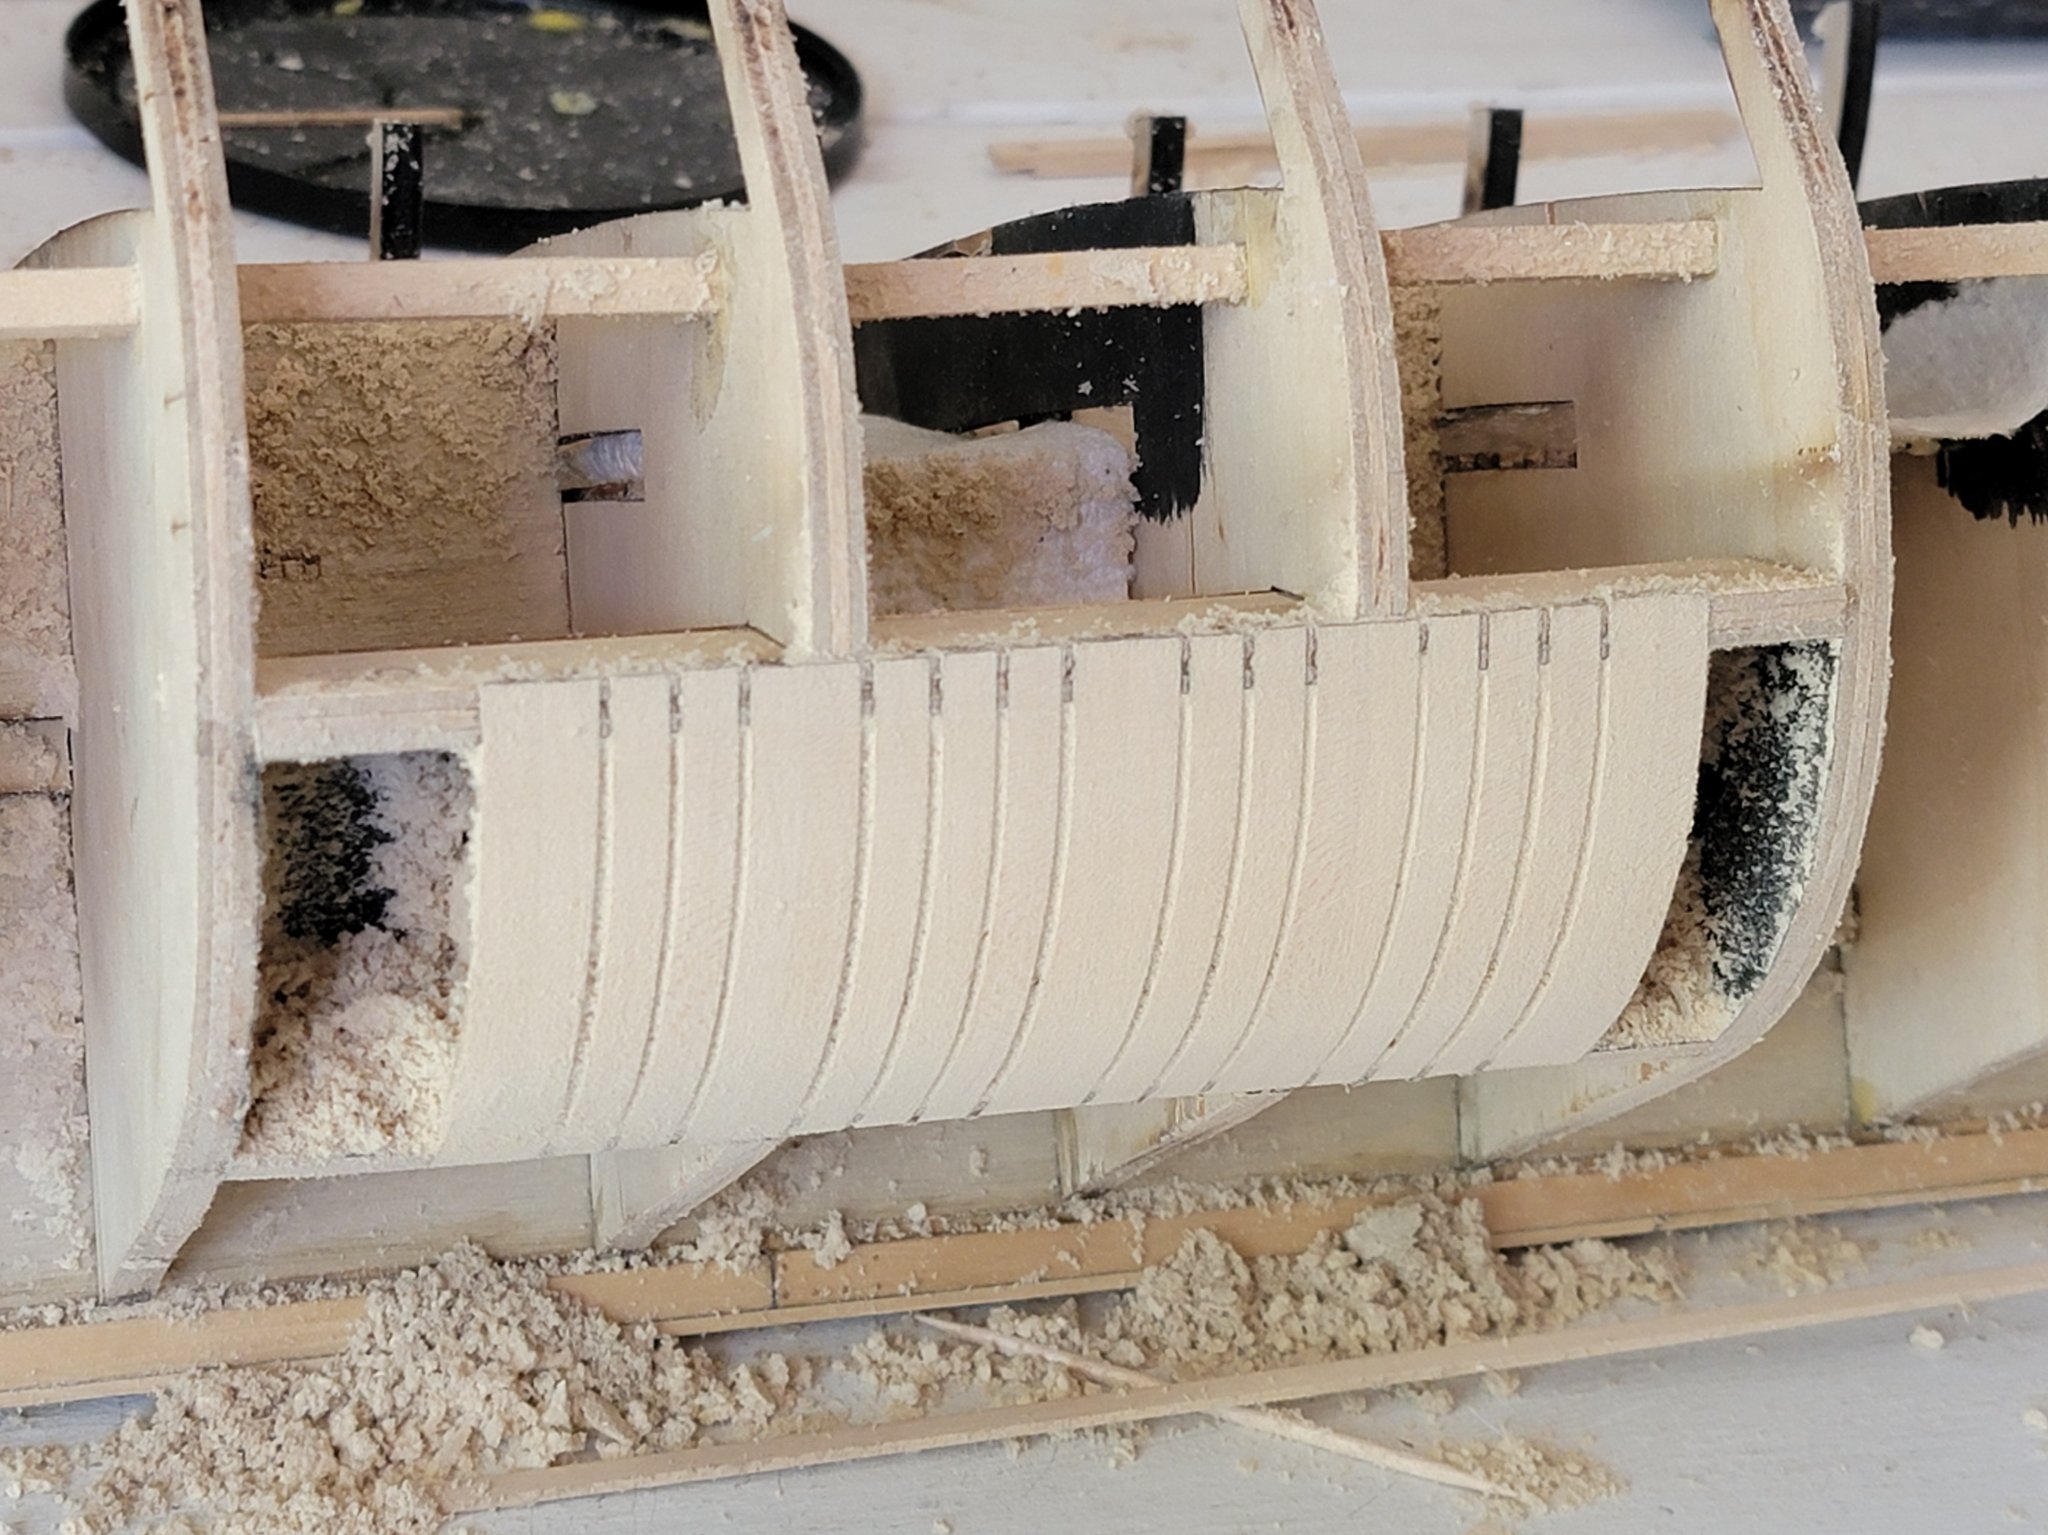
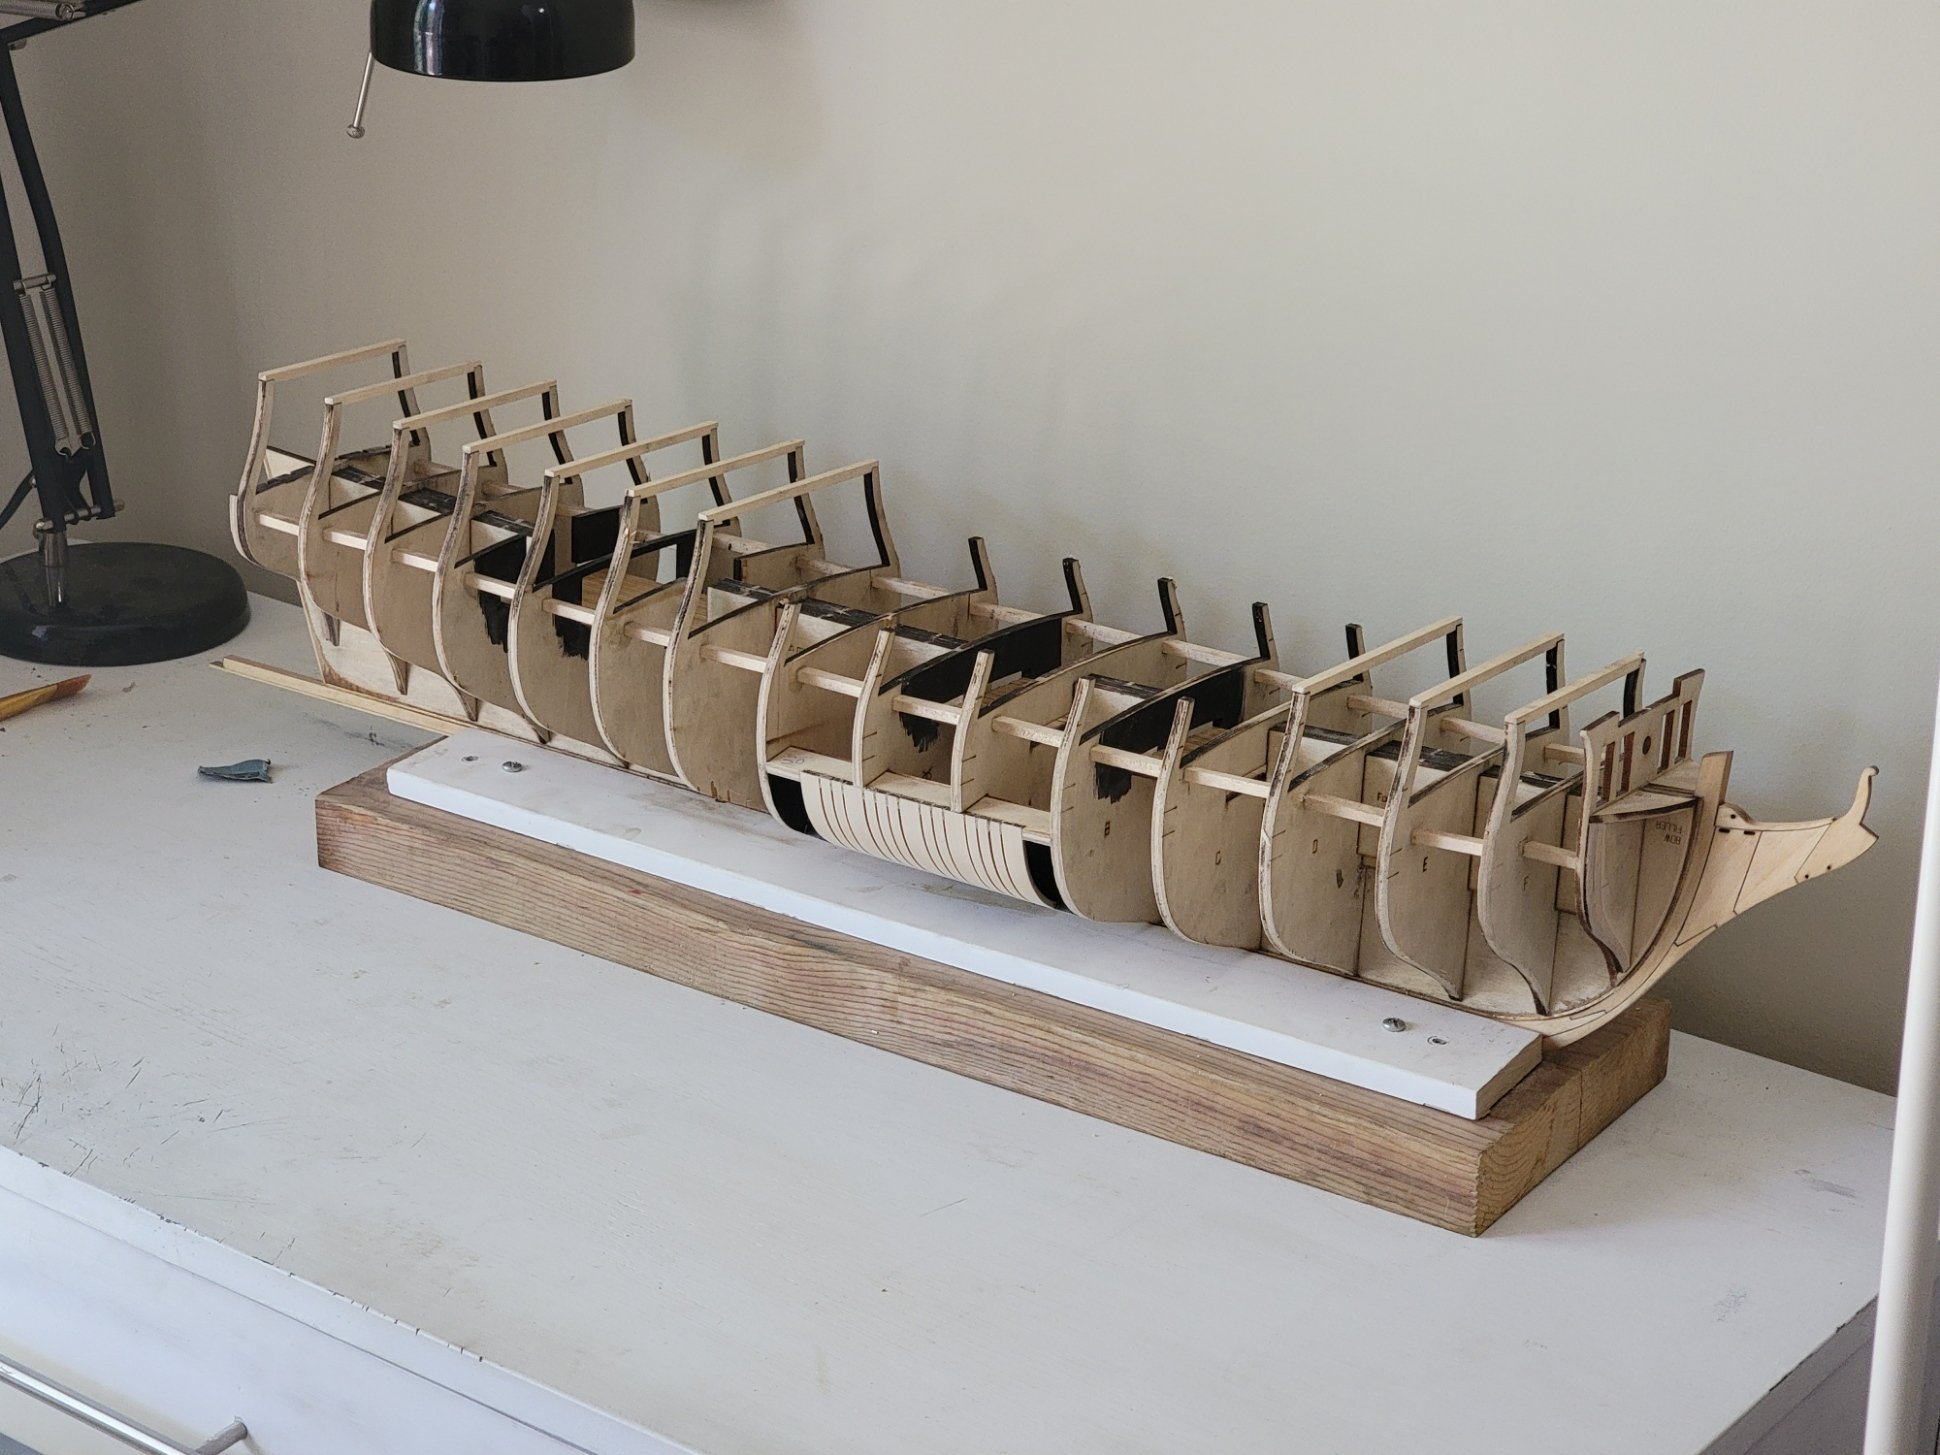
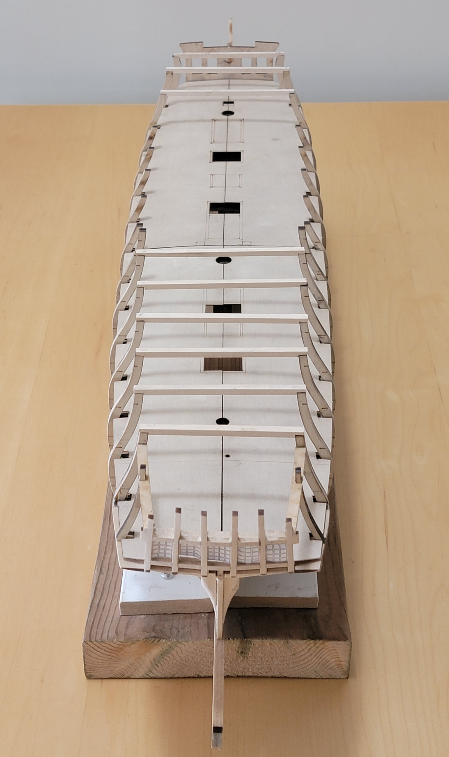
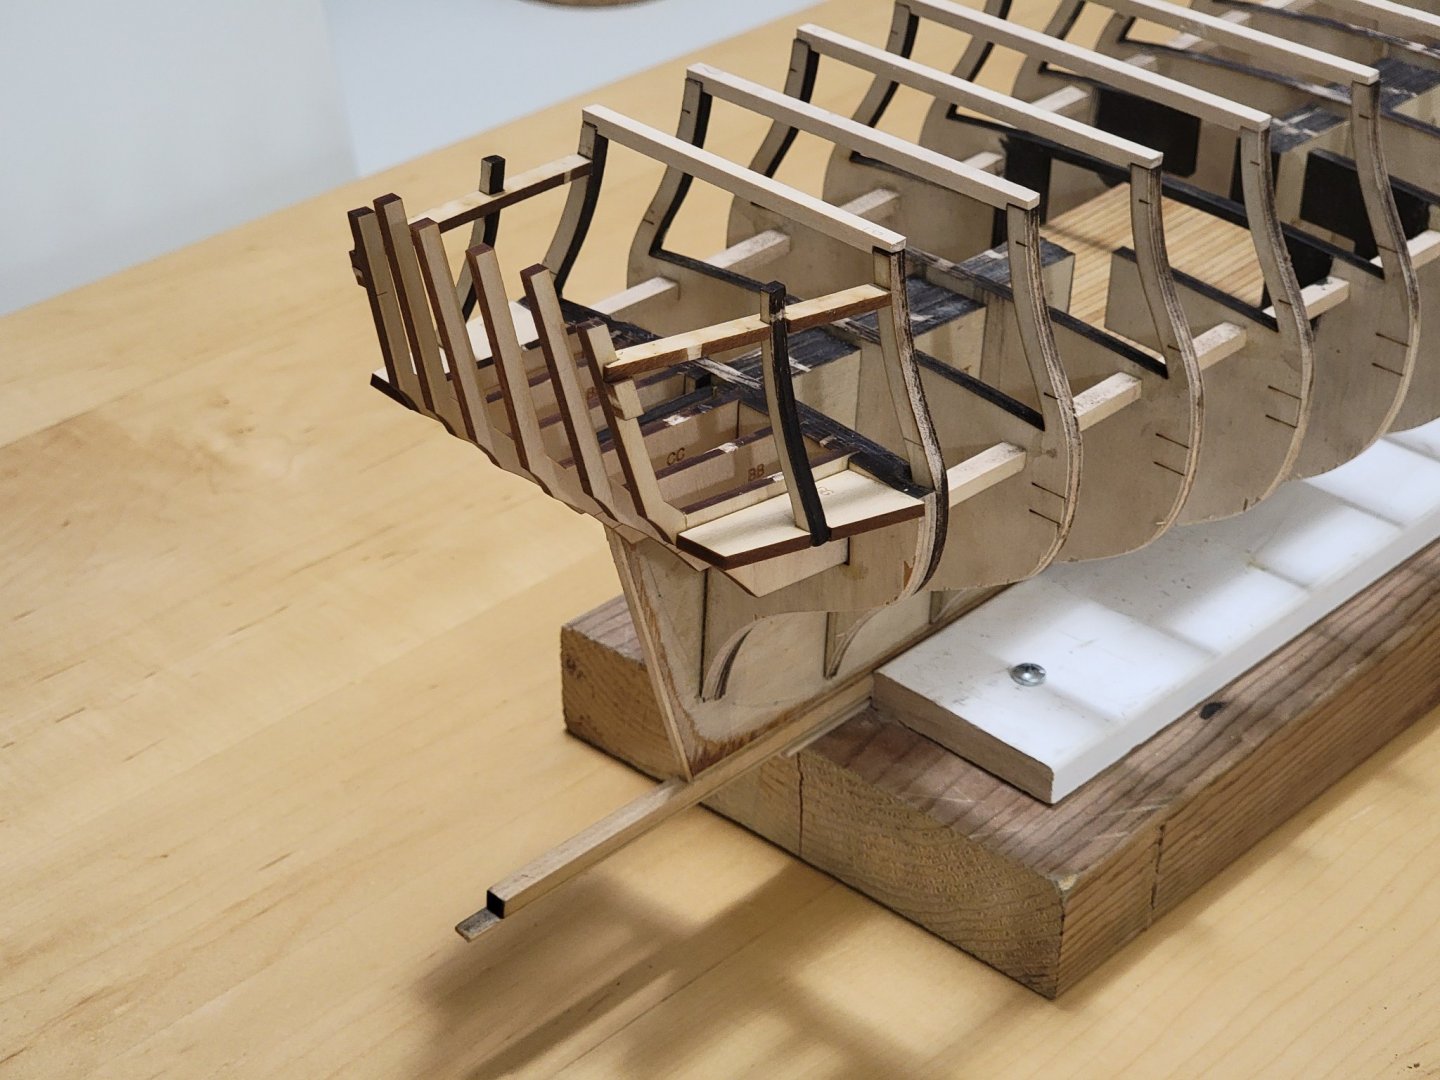
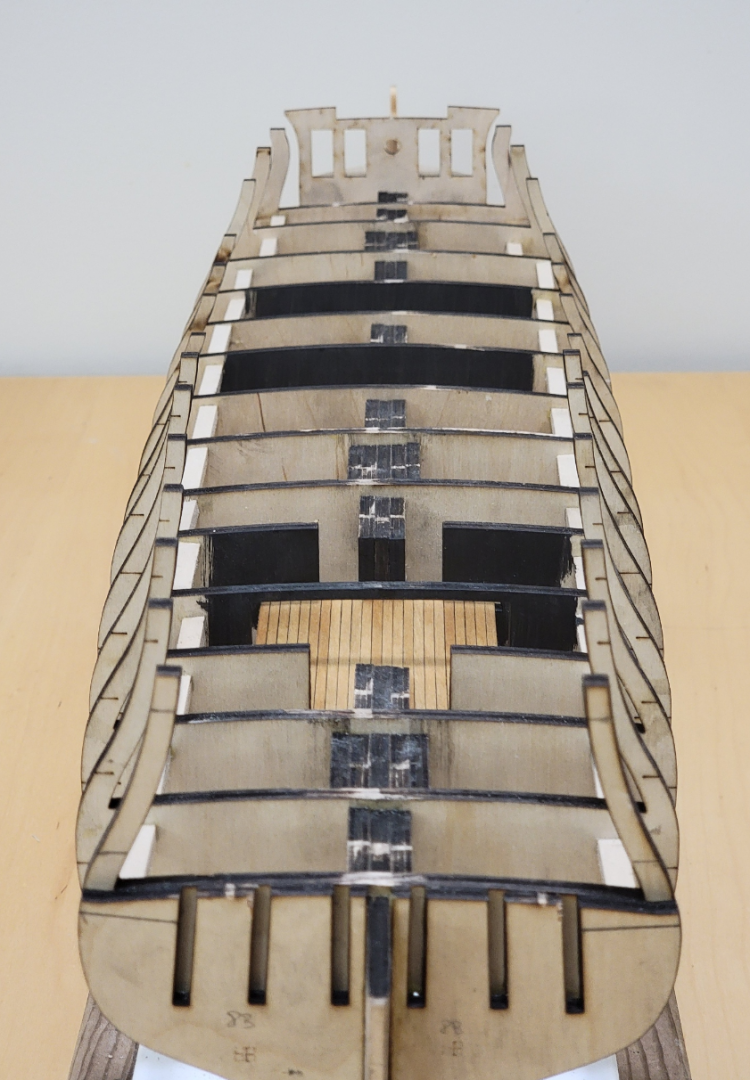
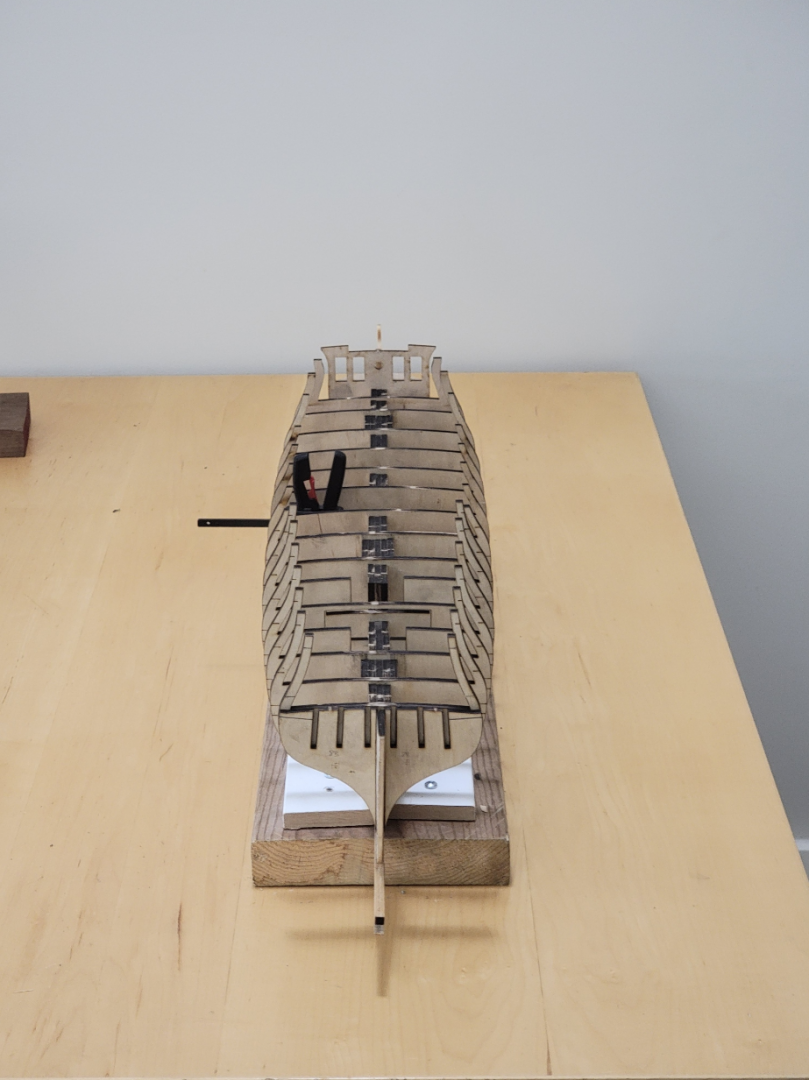
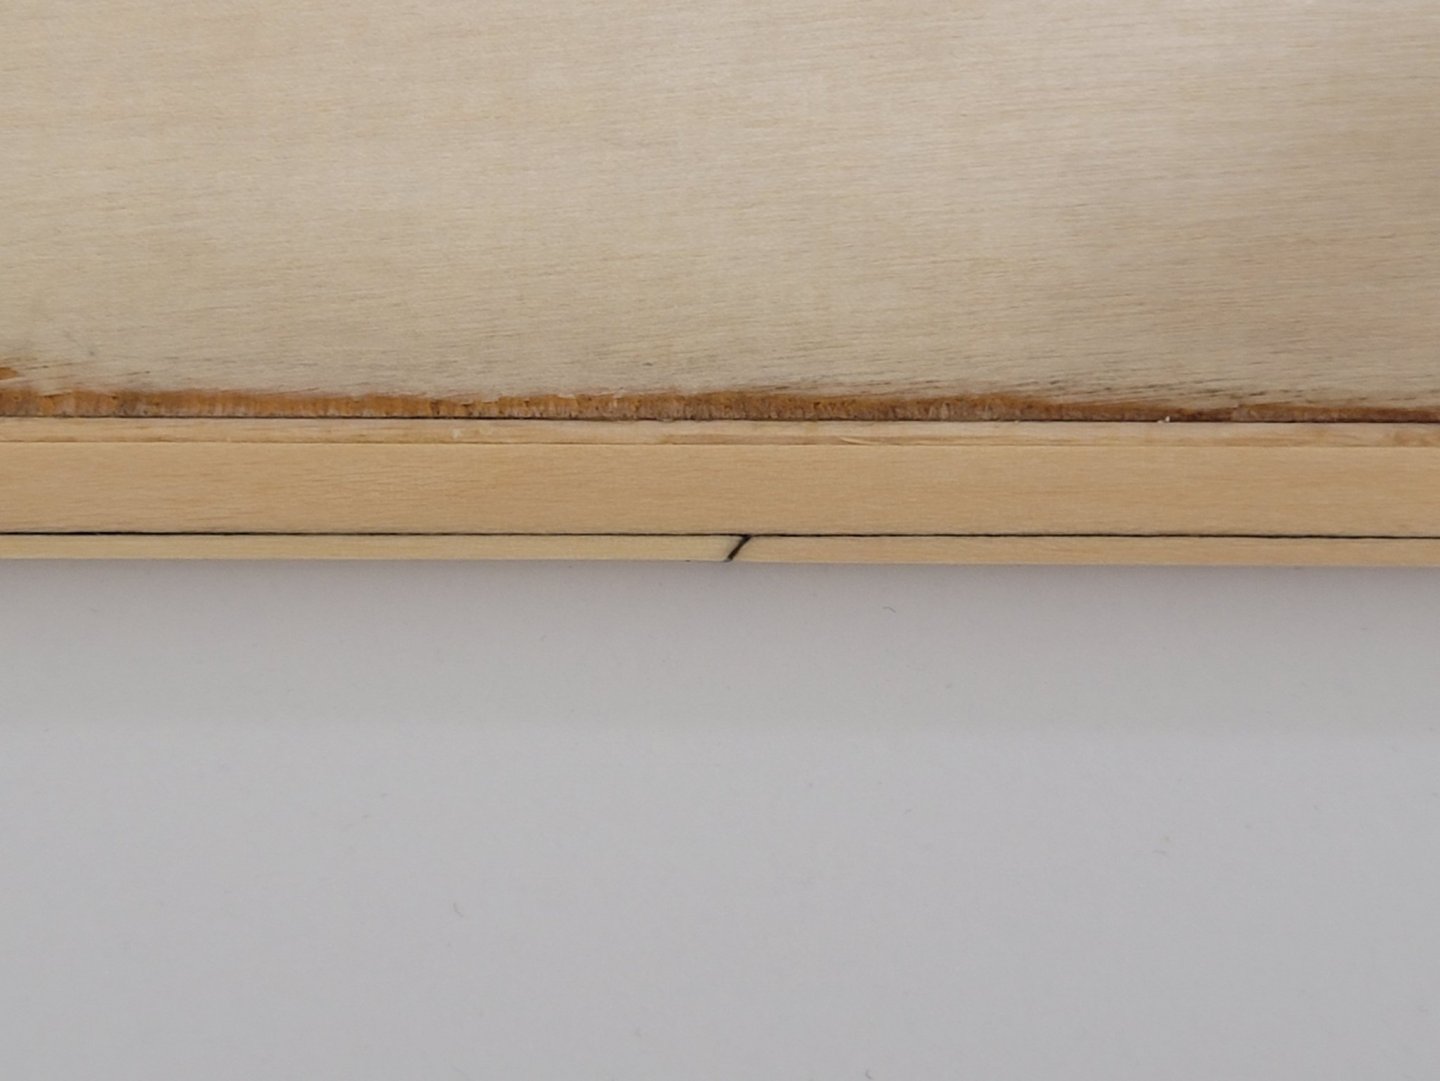
I almost done with Chapter 2. I finished fairing the hull and installed the frames in the cutaway section. When fairing, I placed some tissue over the decking areas so they do not become very dusty and dirty. Talking about fairing the hull... it was very difficult to sand, because of how big it is! I had trouble placing it in a stable spot for me to sand nicely, and I found it was best if the ship faced me so I could sand the places at the extreme curvature. I also found that it was easier to fail when I flipped it upside down. When gluing in the pieces for the cutaway frame, the bottom piece had to be glued away from the backing piece, so I stuck a strip piece of wood to cover the gap: Then I painted the interior black, then started gluing the frames. The thick frames consisted of two of the smaller ones, which I clamped tightly so that the joint was less visible. Then, lots of sanding...... After vacuuming, the lines showed up nicely! Here, you can see how much I had to sand the frames down. They ended up about half the initial thickness (maybe even thinner!) I also made sure to install the safety bars, but they kept slipping out. I may need to find a better way to secure them. Anyways, here is an overall photo of the ship: Next, I will use some dark varnish on sample pieces to see how they turn out. If they look good, I will apply it on the frames to provide some contrast to the surrounding planking. Once that is finished, I will need to make the base more stable by adding some pieces to support the bulkheads, then will start on the stern framing.

-
Thank you Eamonn! I found with Tung oil, the best results come out when the wood is sanded very smooth before applying it. It gives a very nice finish. I look forward to your Sherbourne build 😁
-
Thanks! I experimented with filler for the Syren, but it didn't come out too well, so I opted to use toothpicks then. I may have used the wrong filler type, it blended too well with the wood. Toothpicks worked fairly nicely, but I ended up with slightly different treenail sizes. This time I want to try getting more accurate treenails, so using the bamboo will help. The entire skewer will be drawn to the same diameter, so all the treenails will be the same size. I'll still experiment on some planks later on to see how it will look before finalizing my decision. Also, I may be the rare few who actually likes the process of treenailing, so I don't mind the extra work of using the bamboo 😄
-
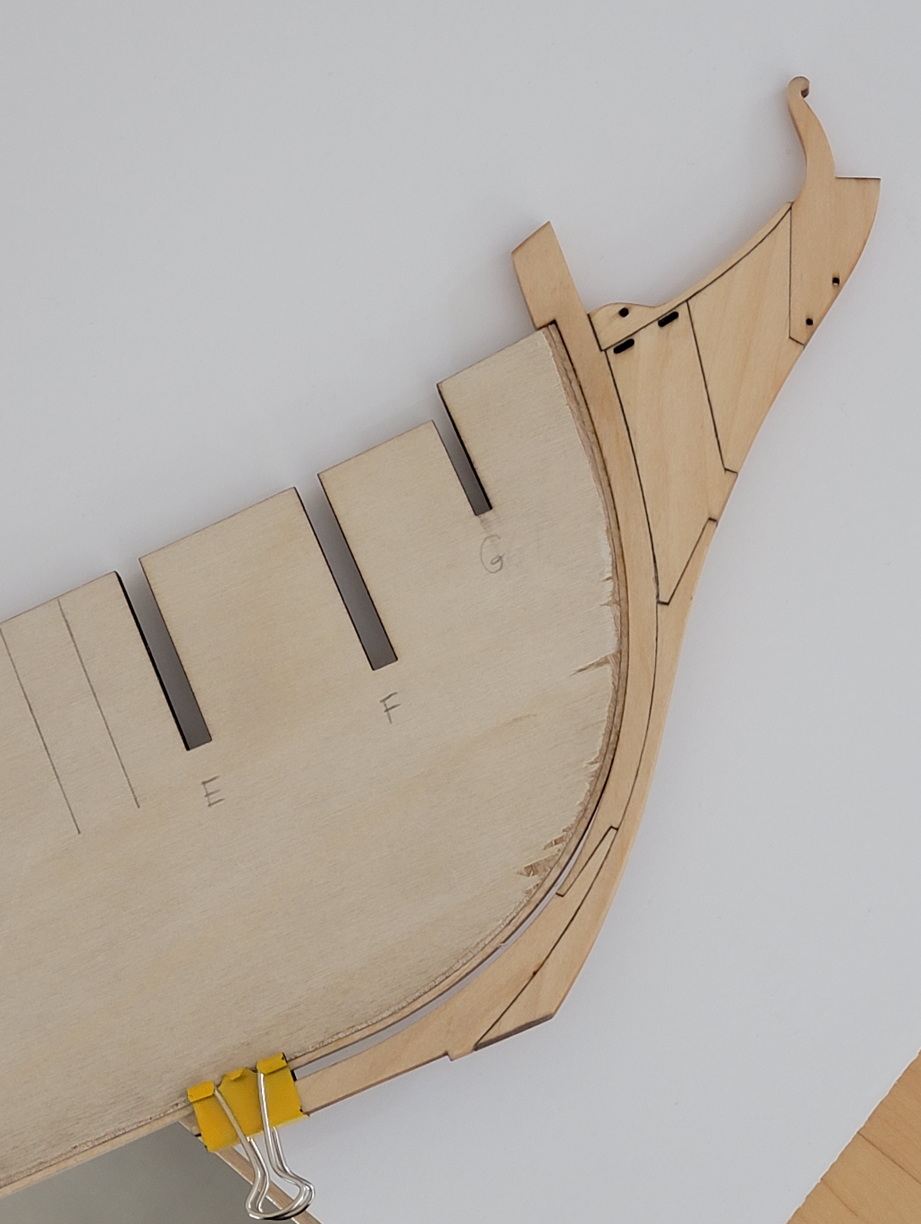
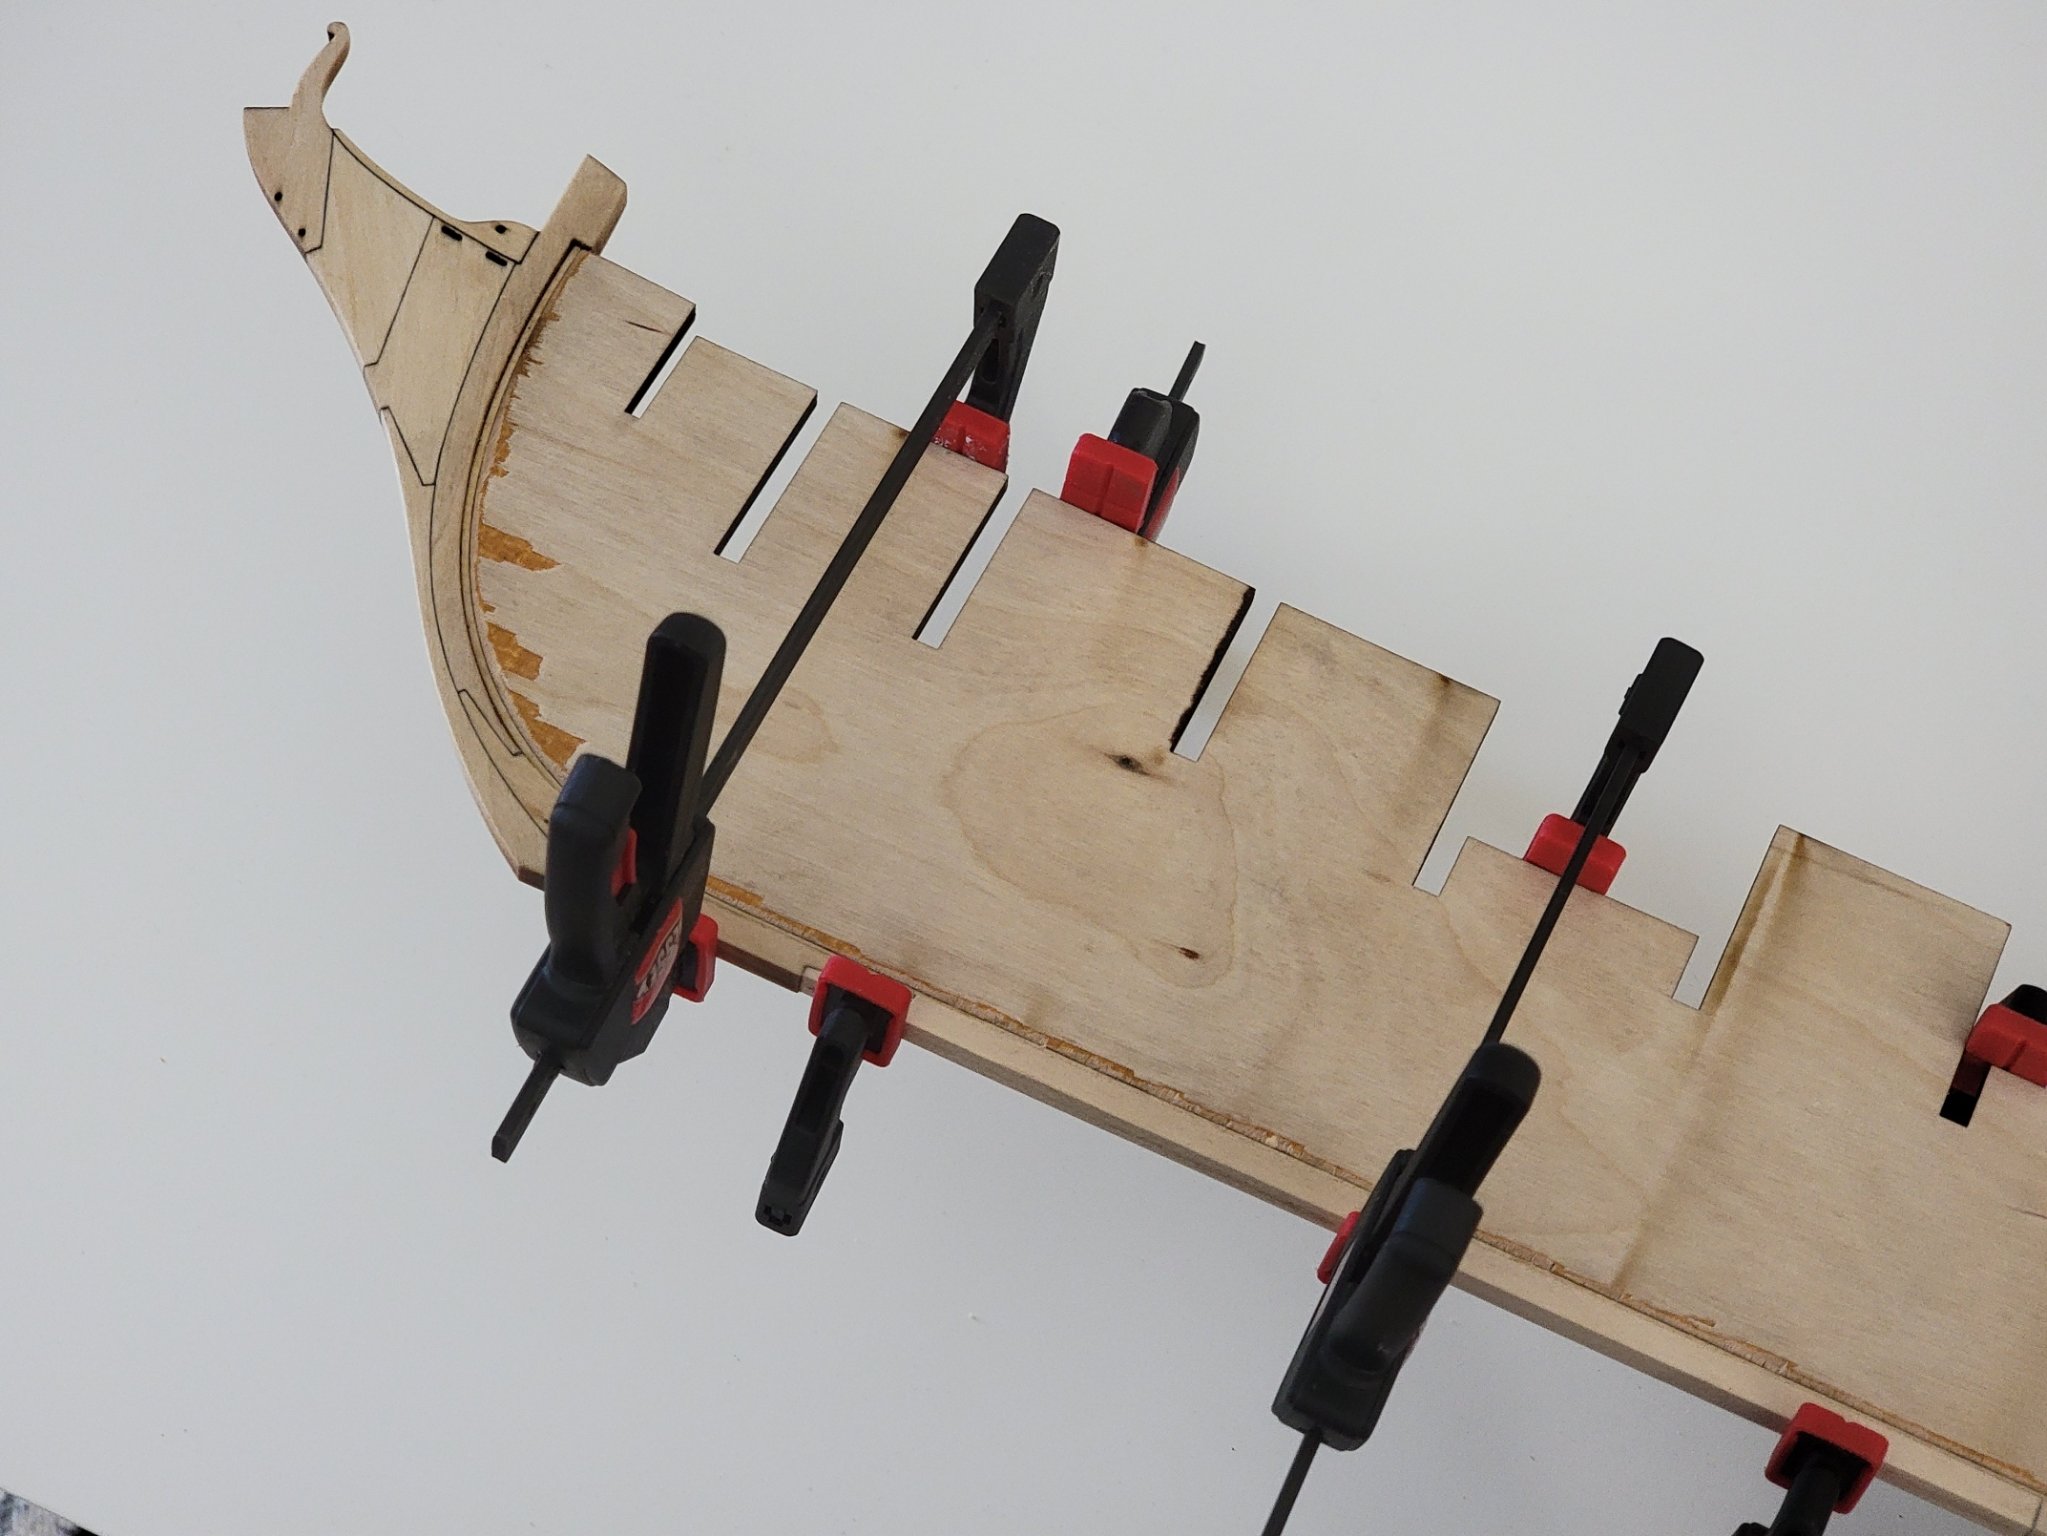
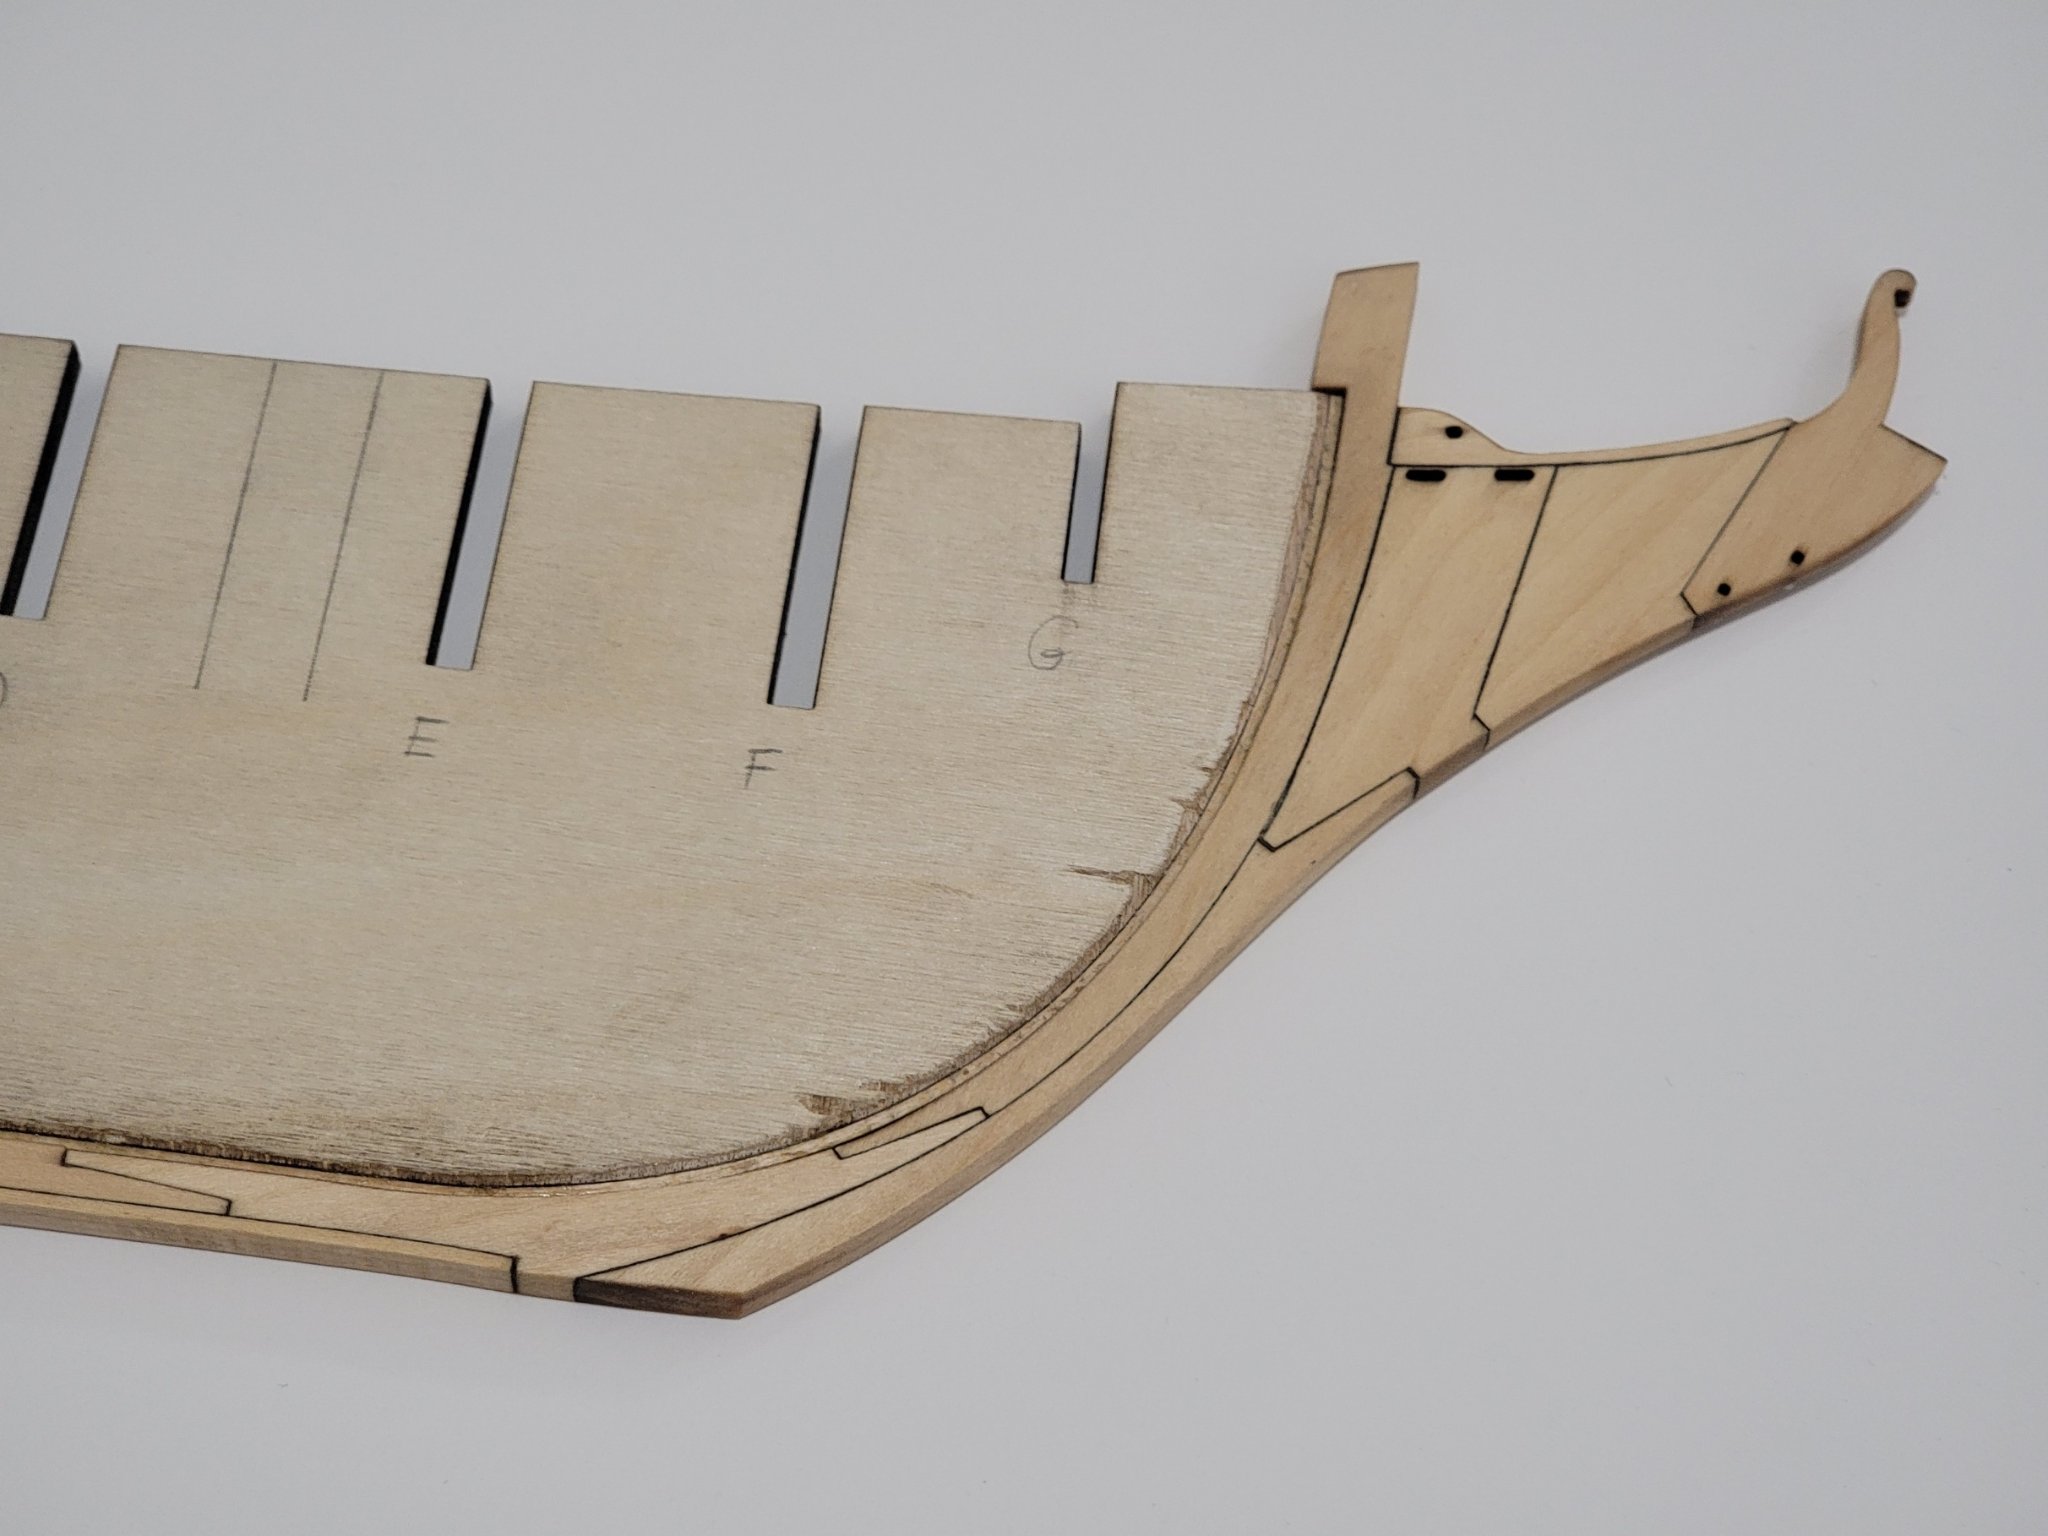
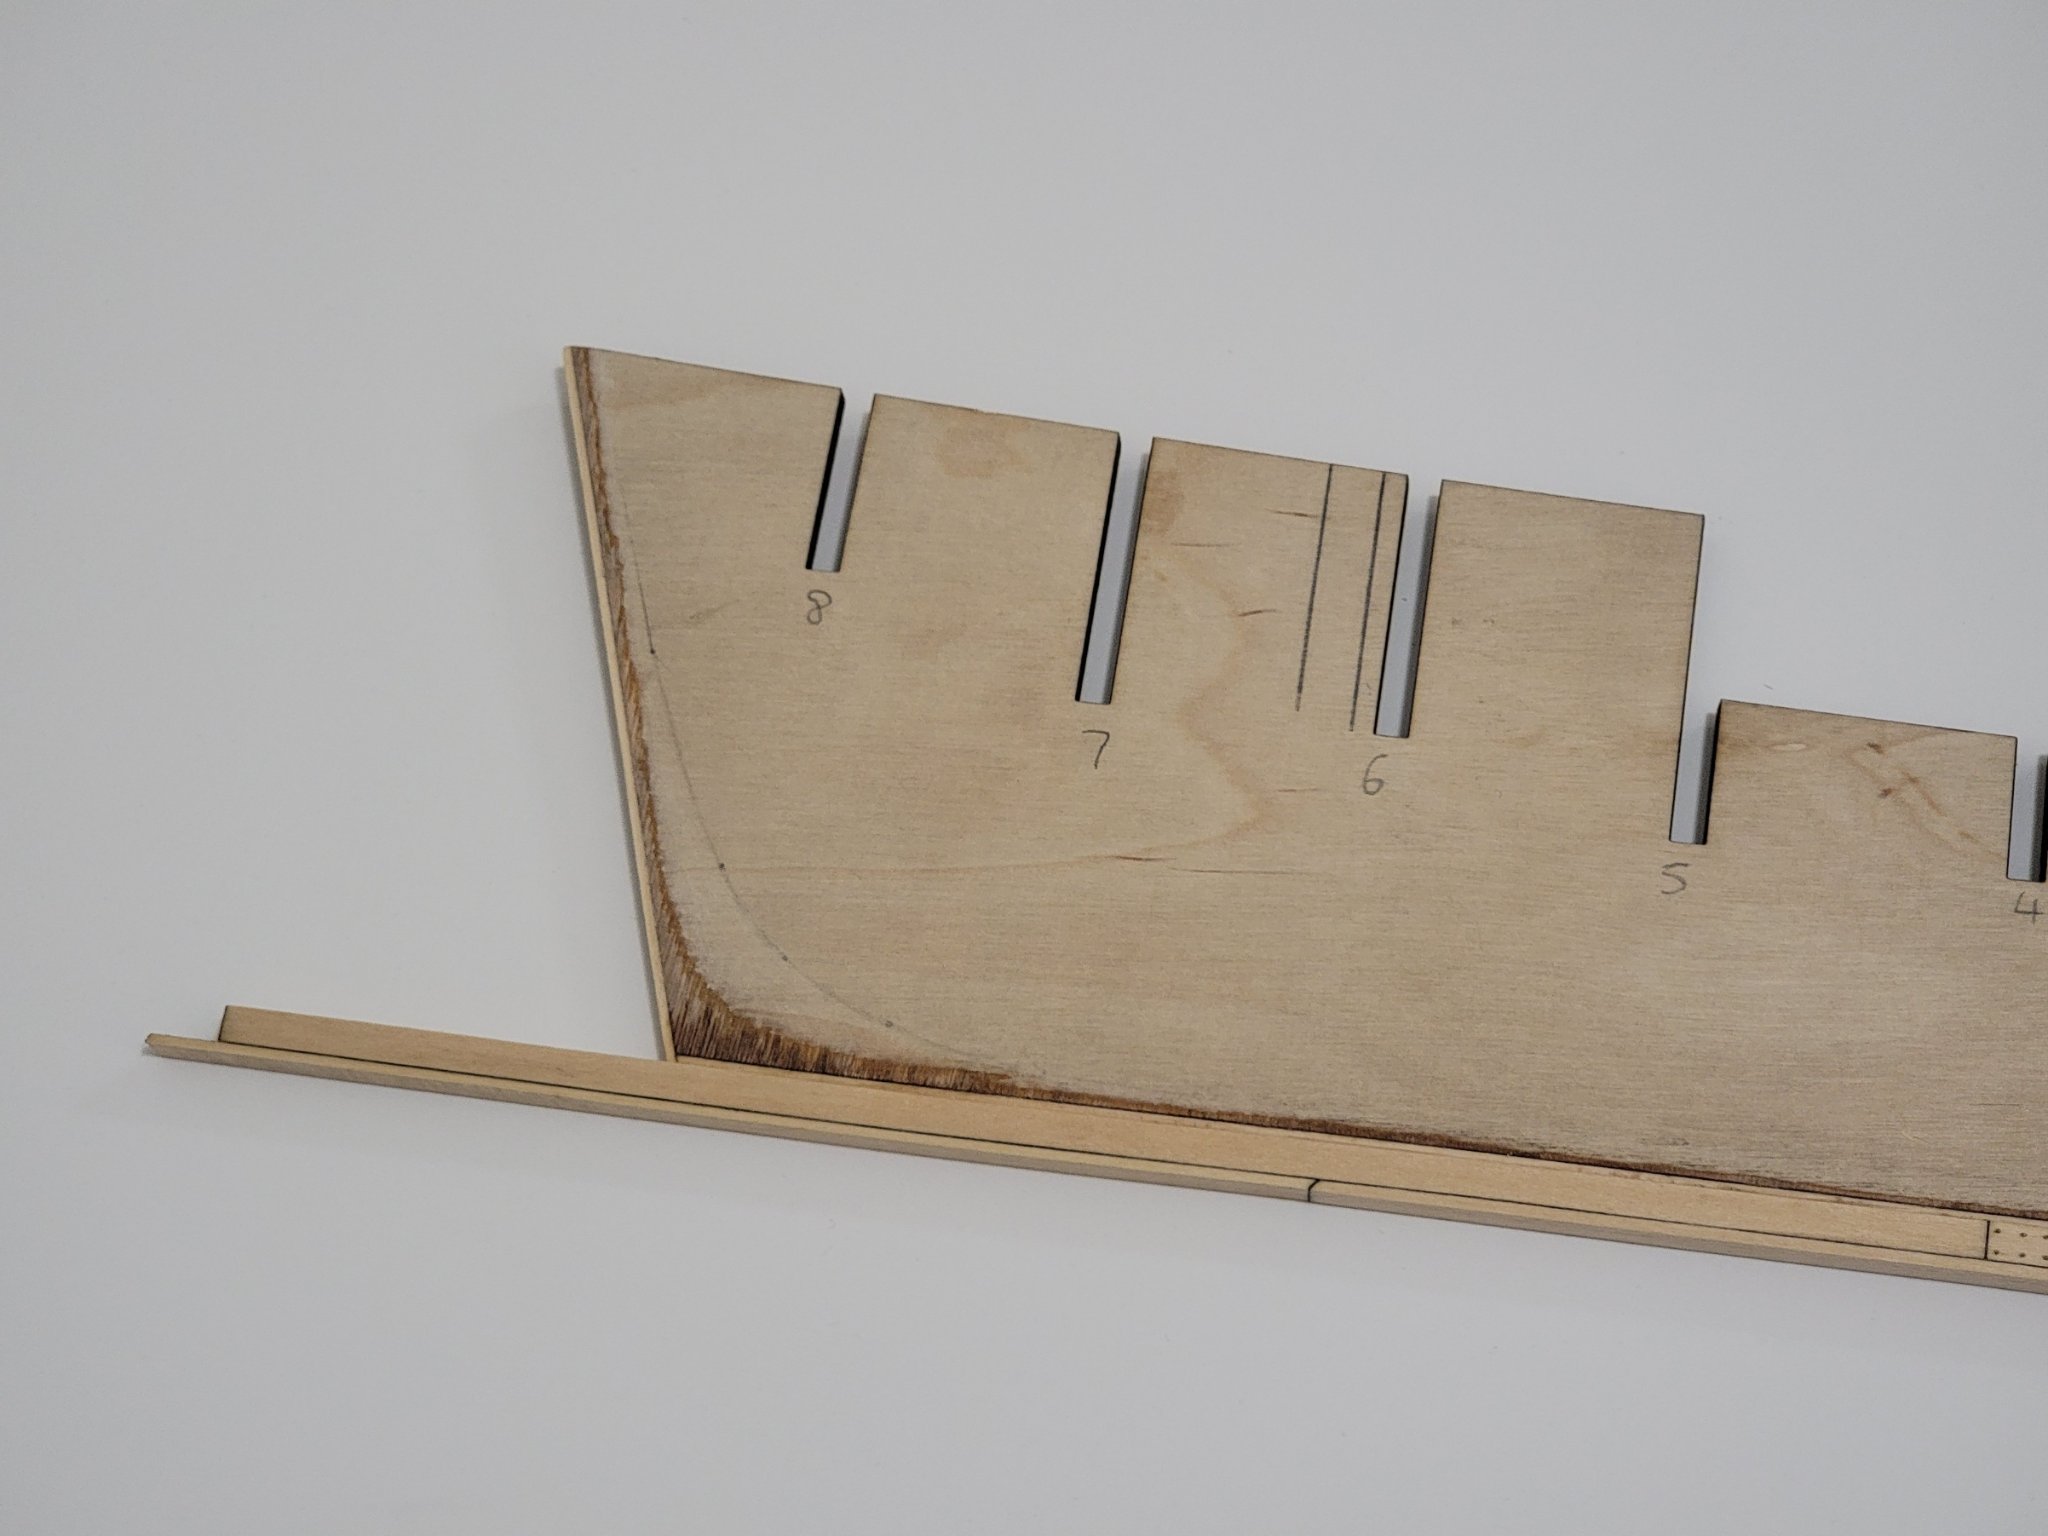
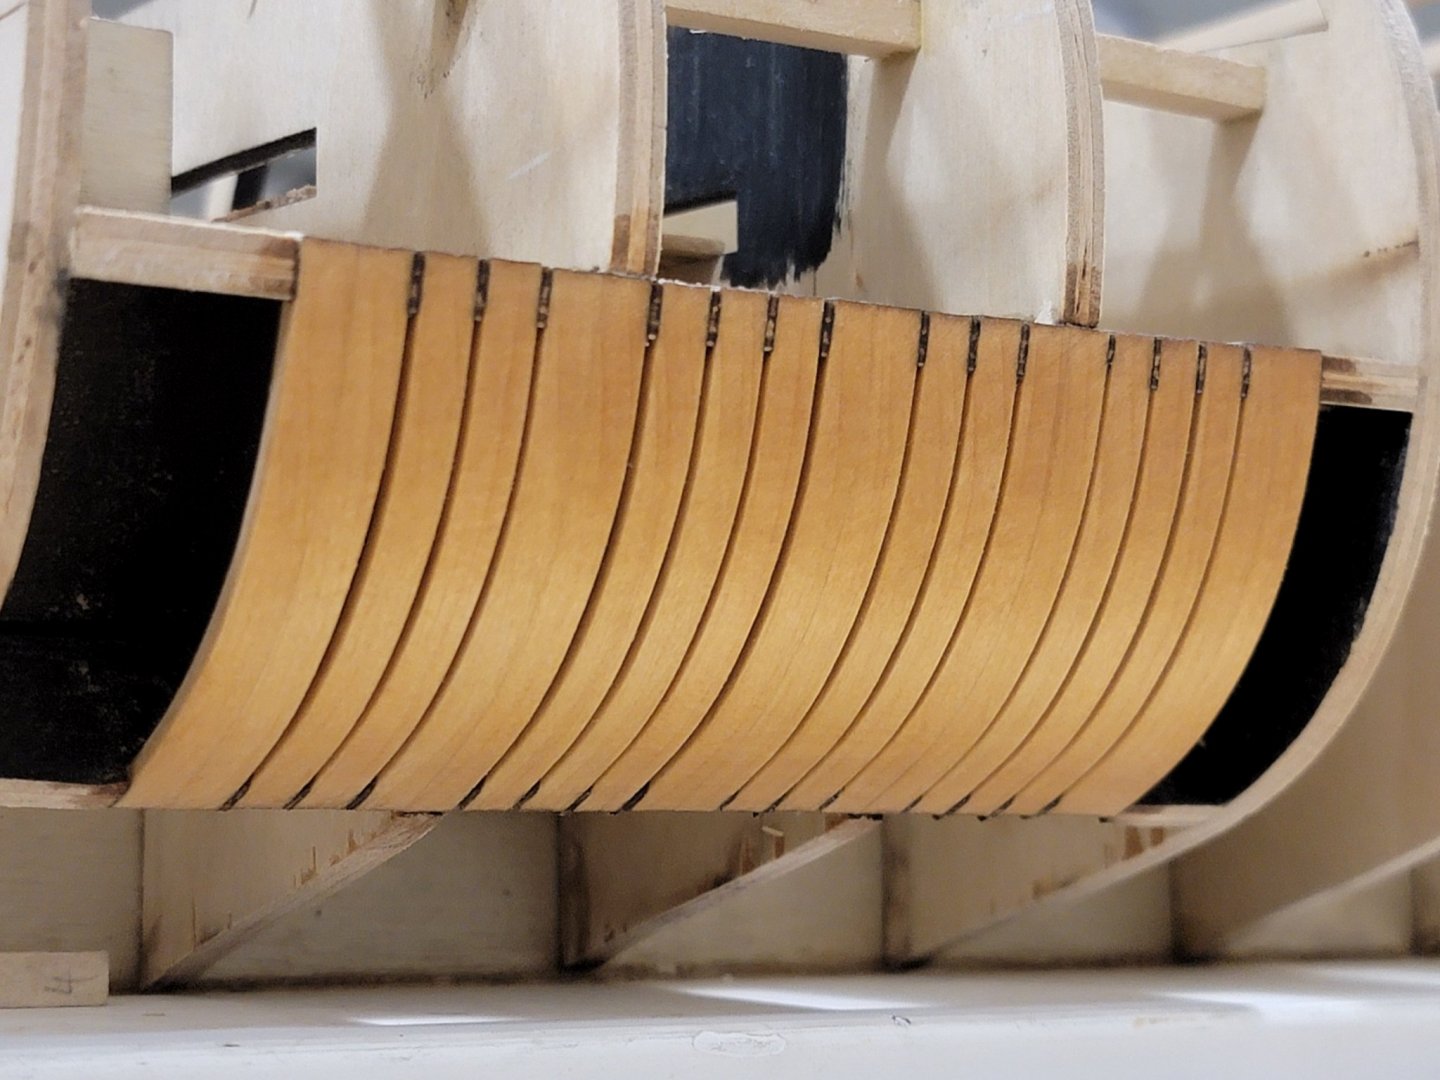
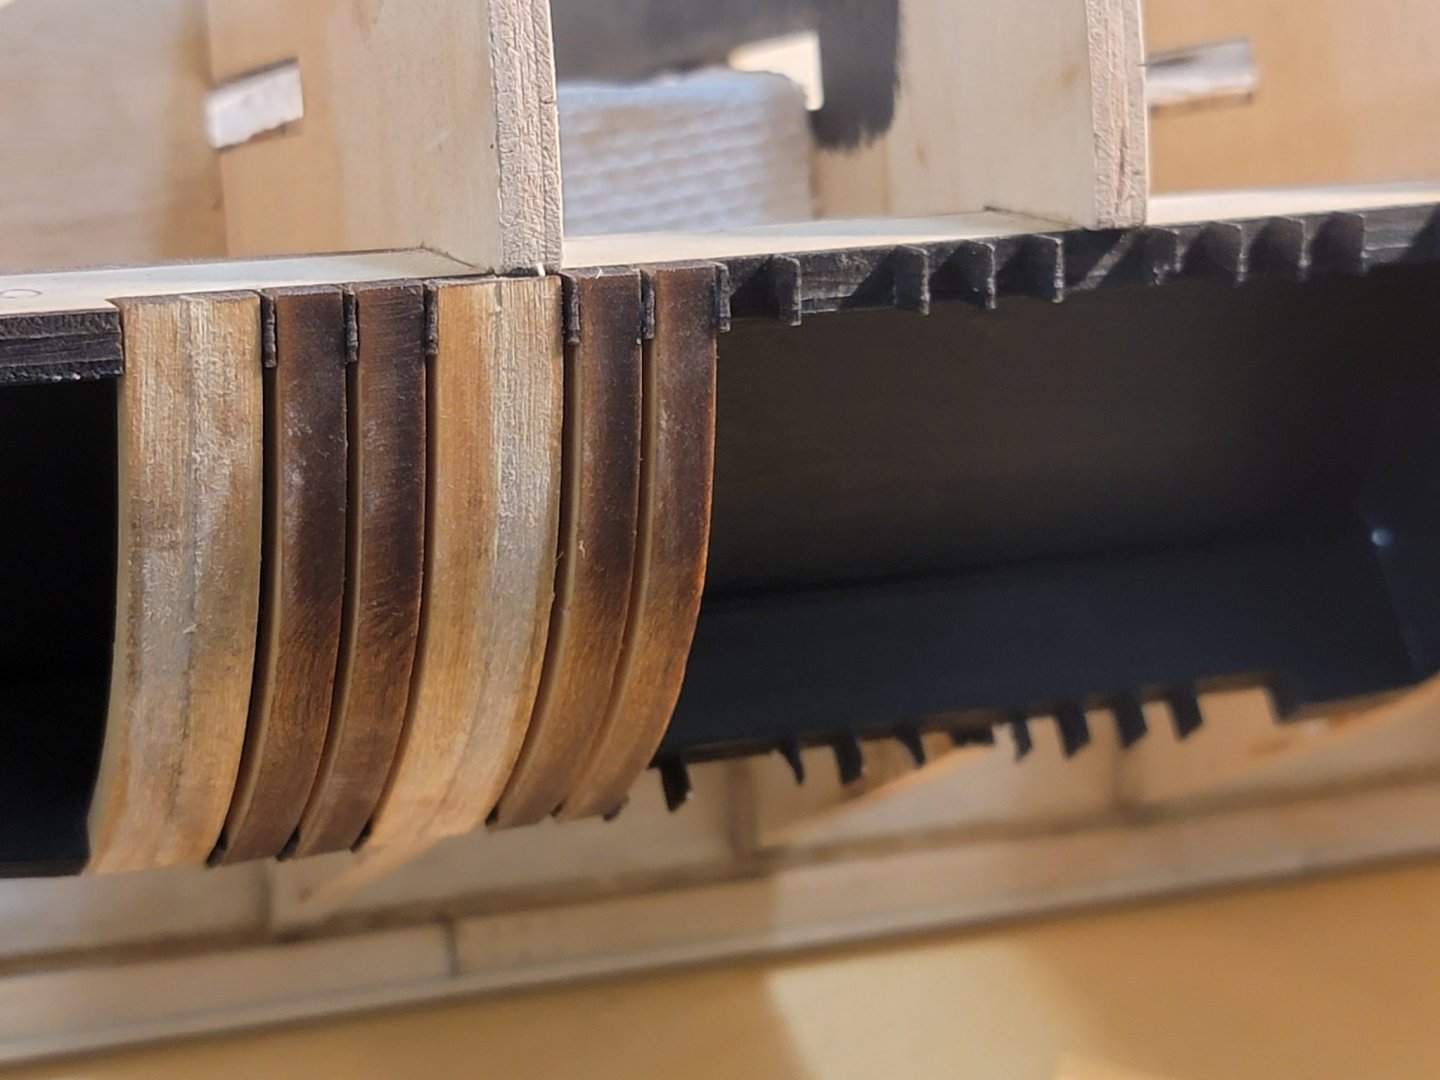
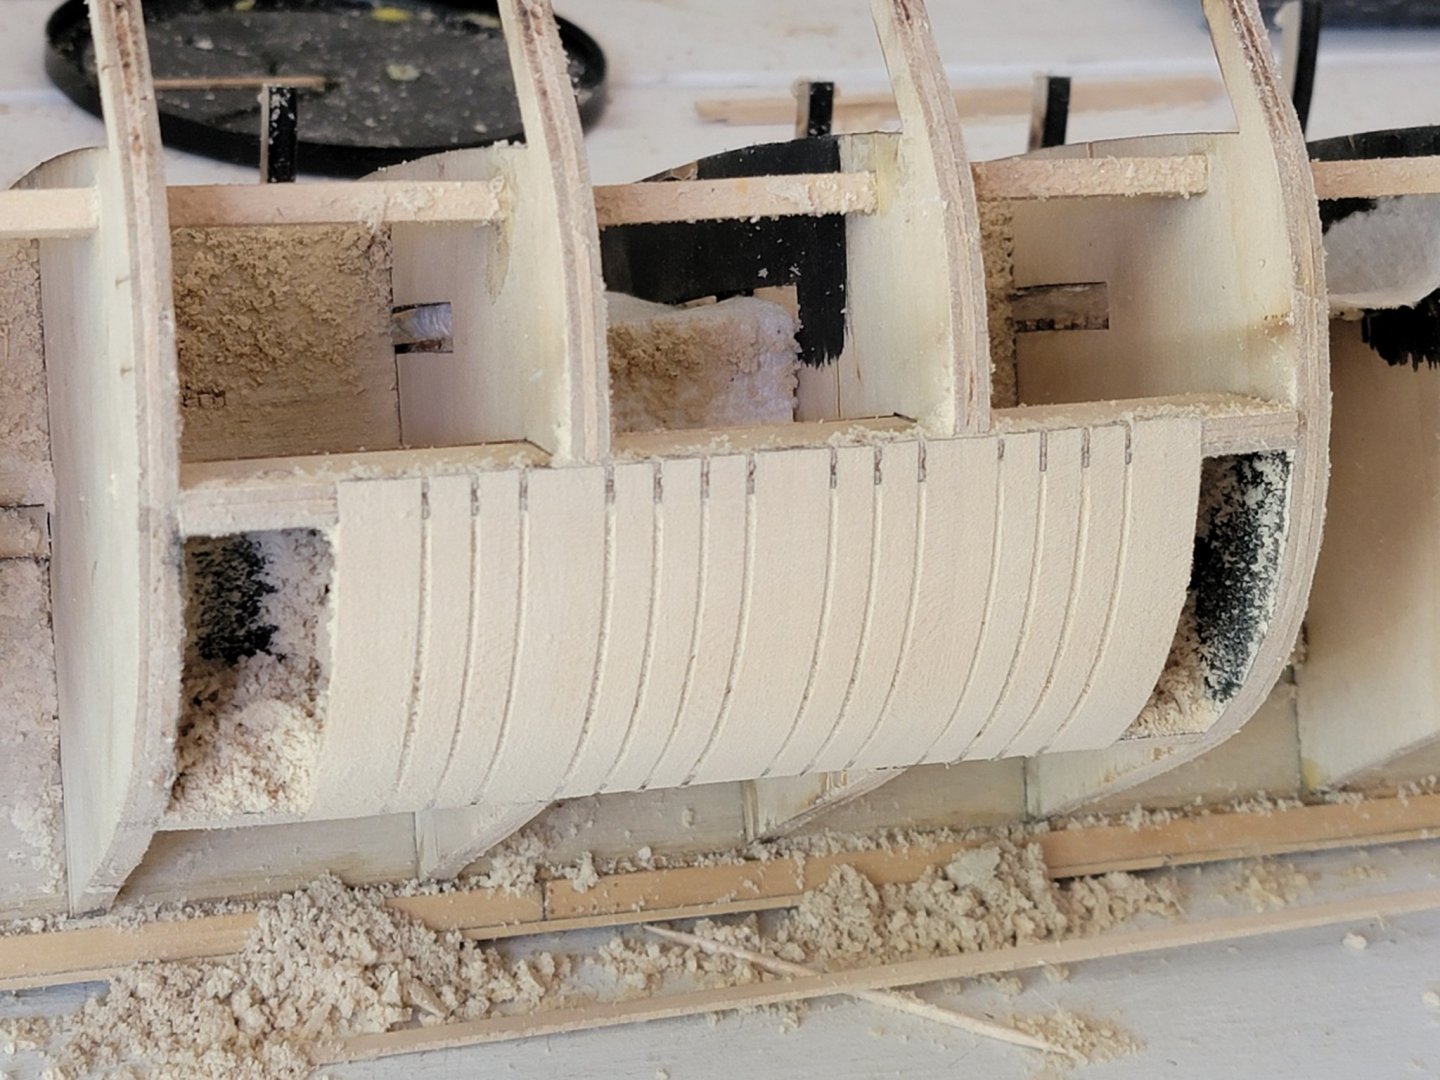
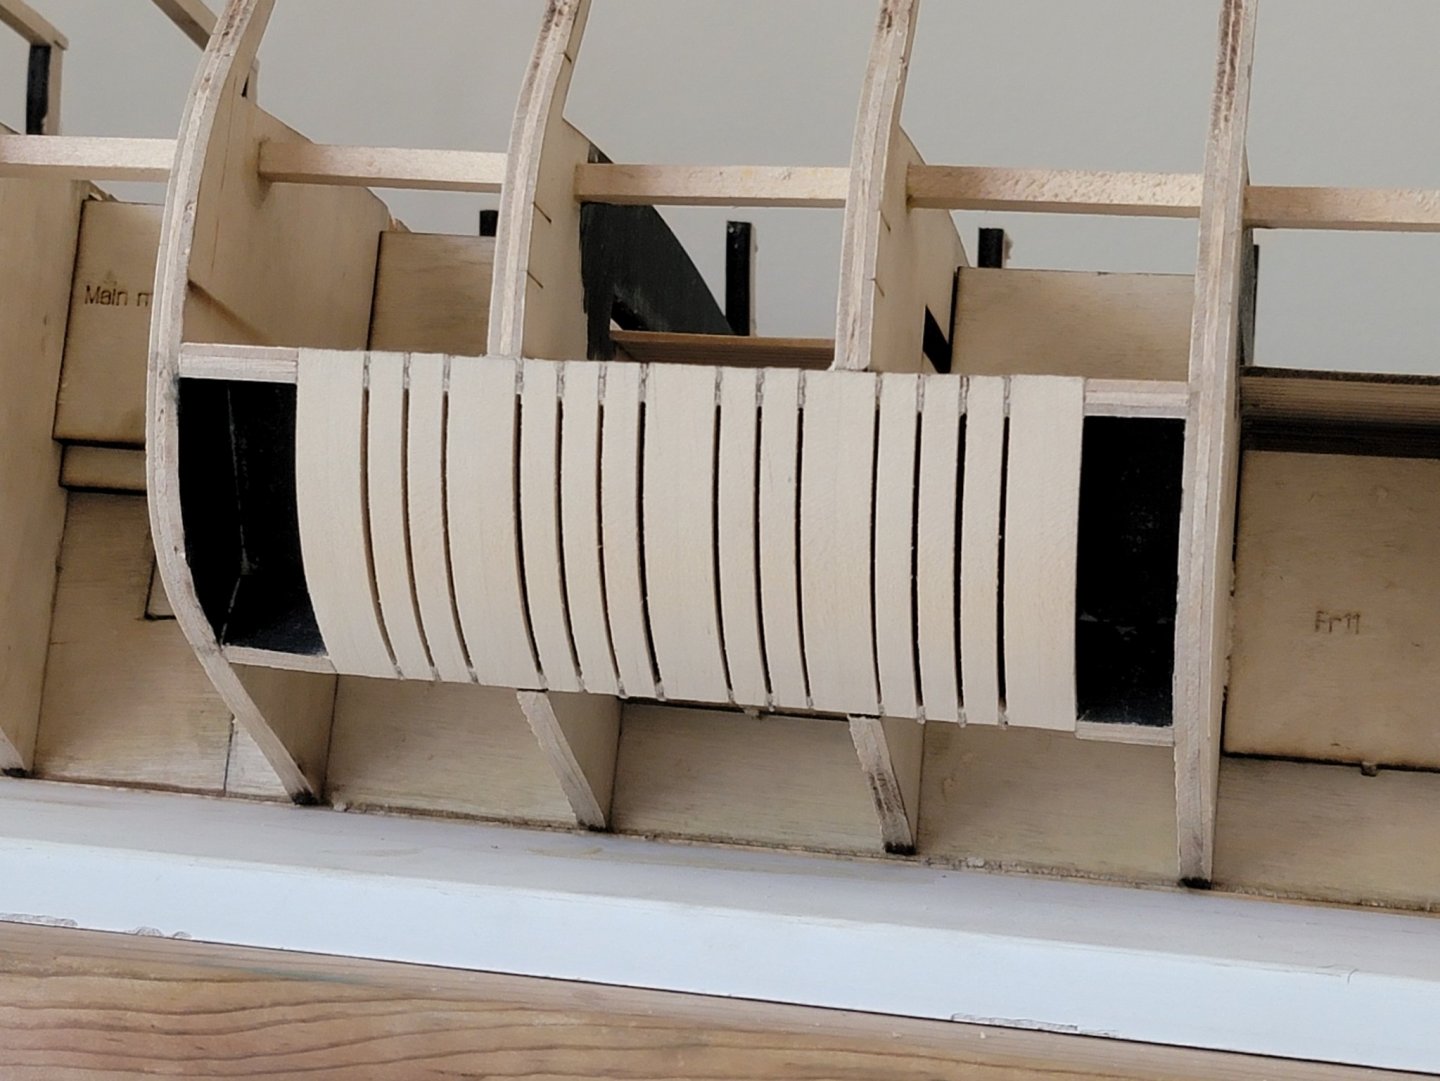
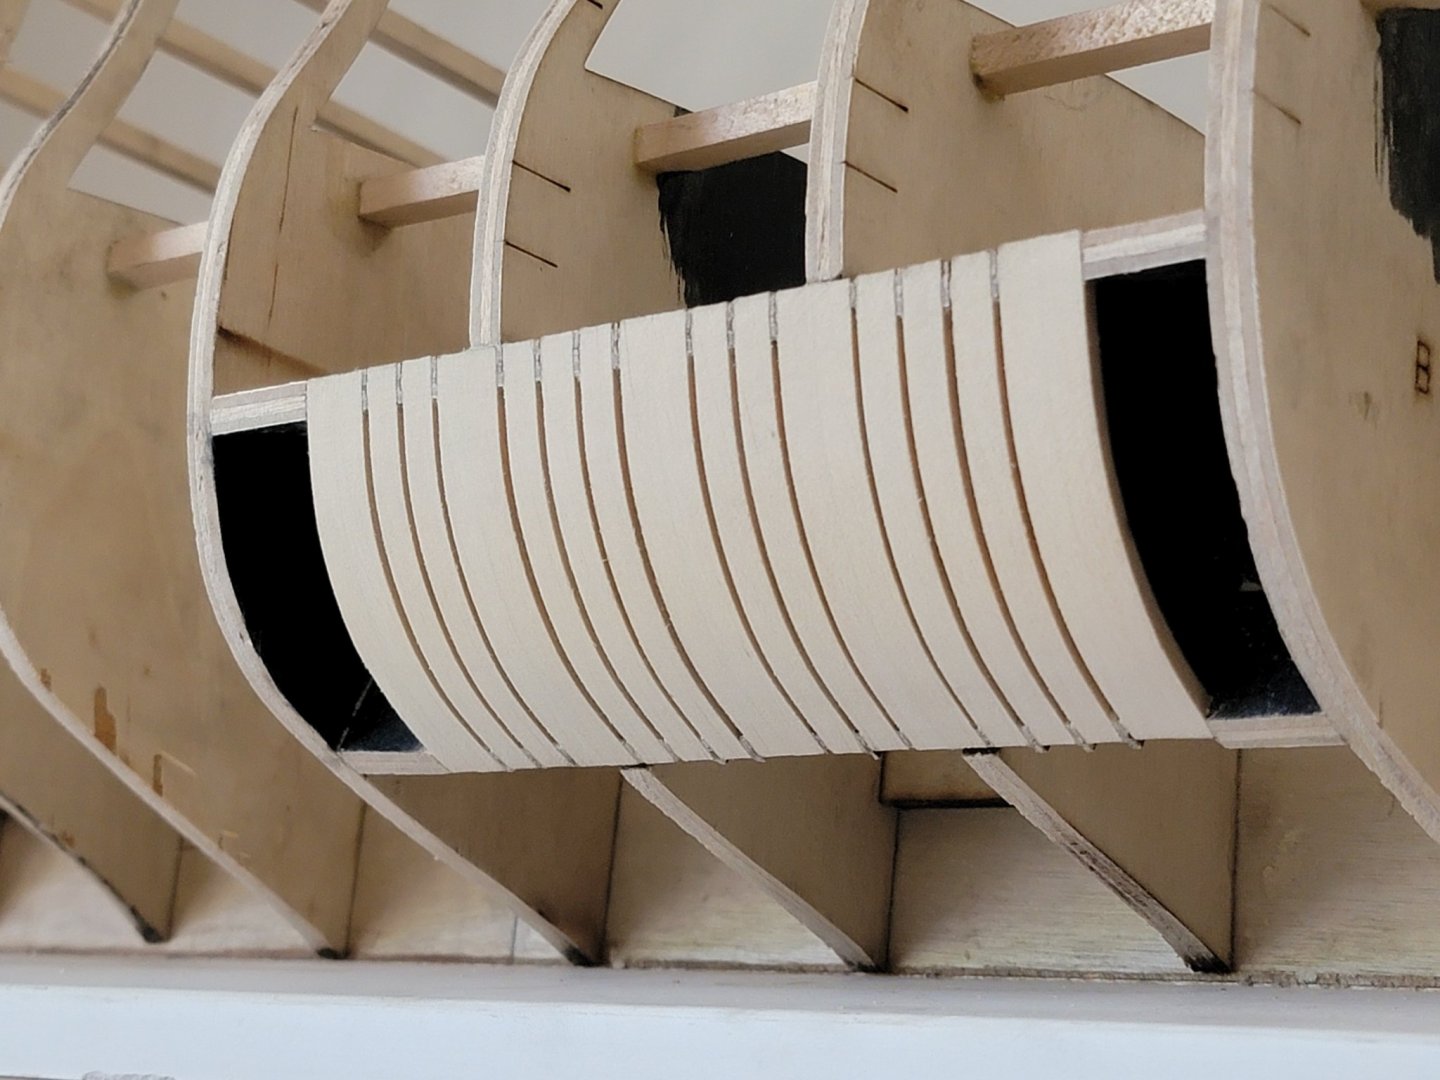
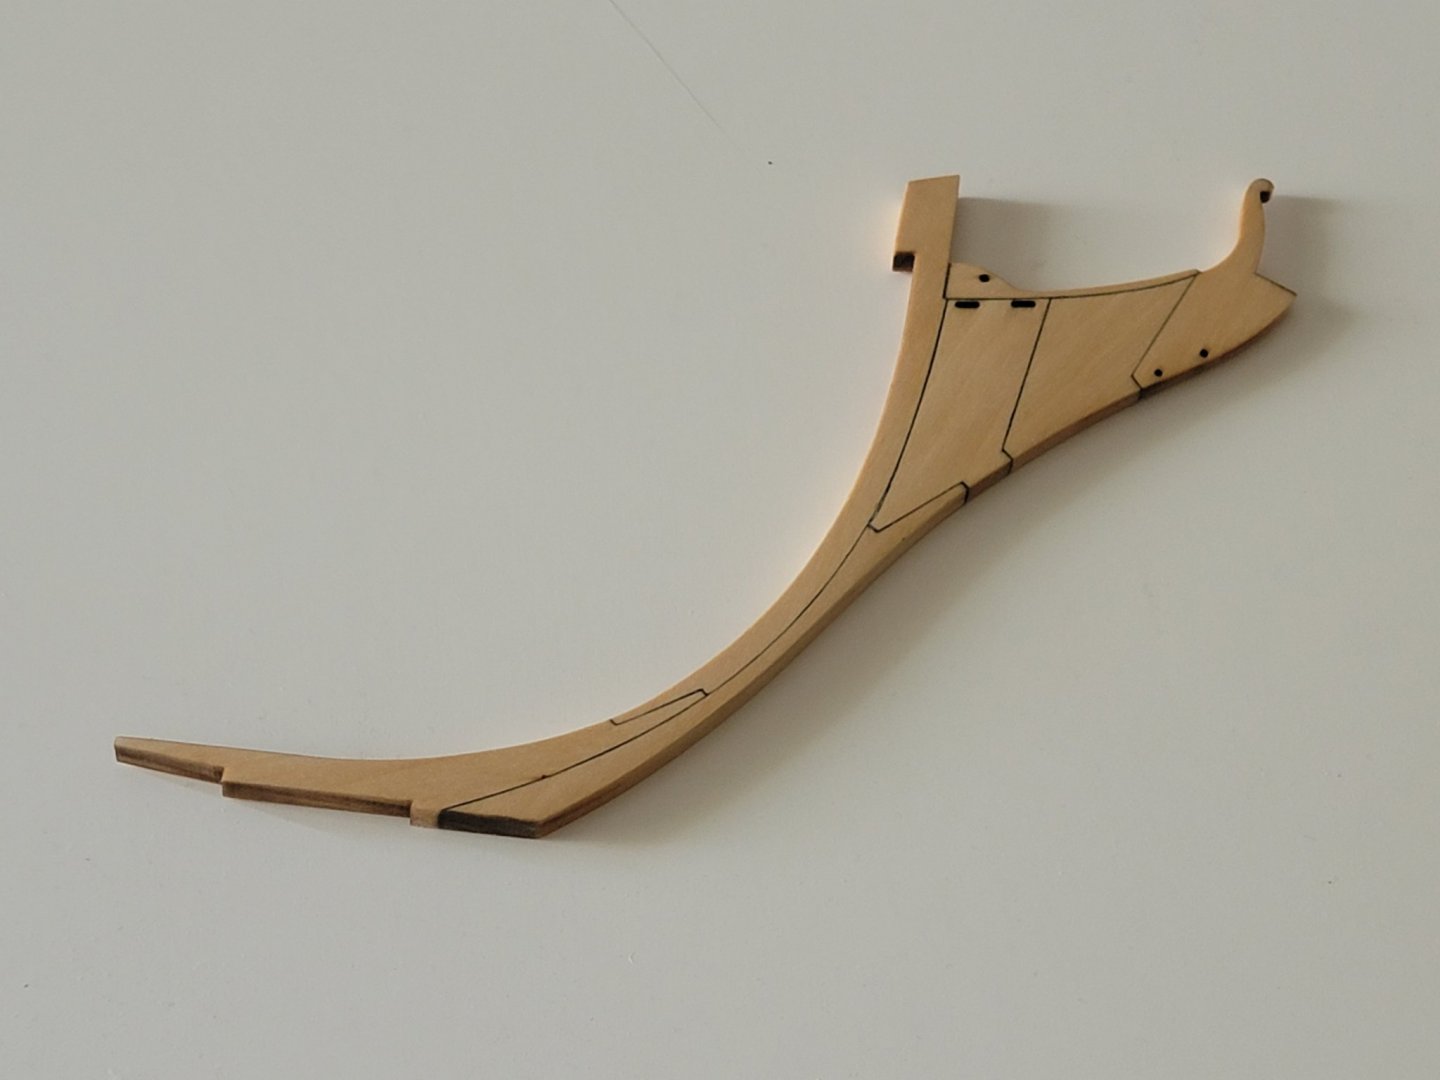
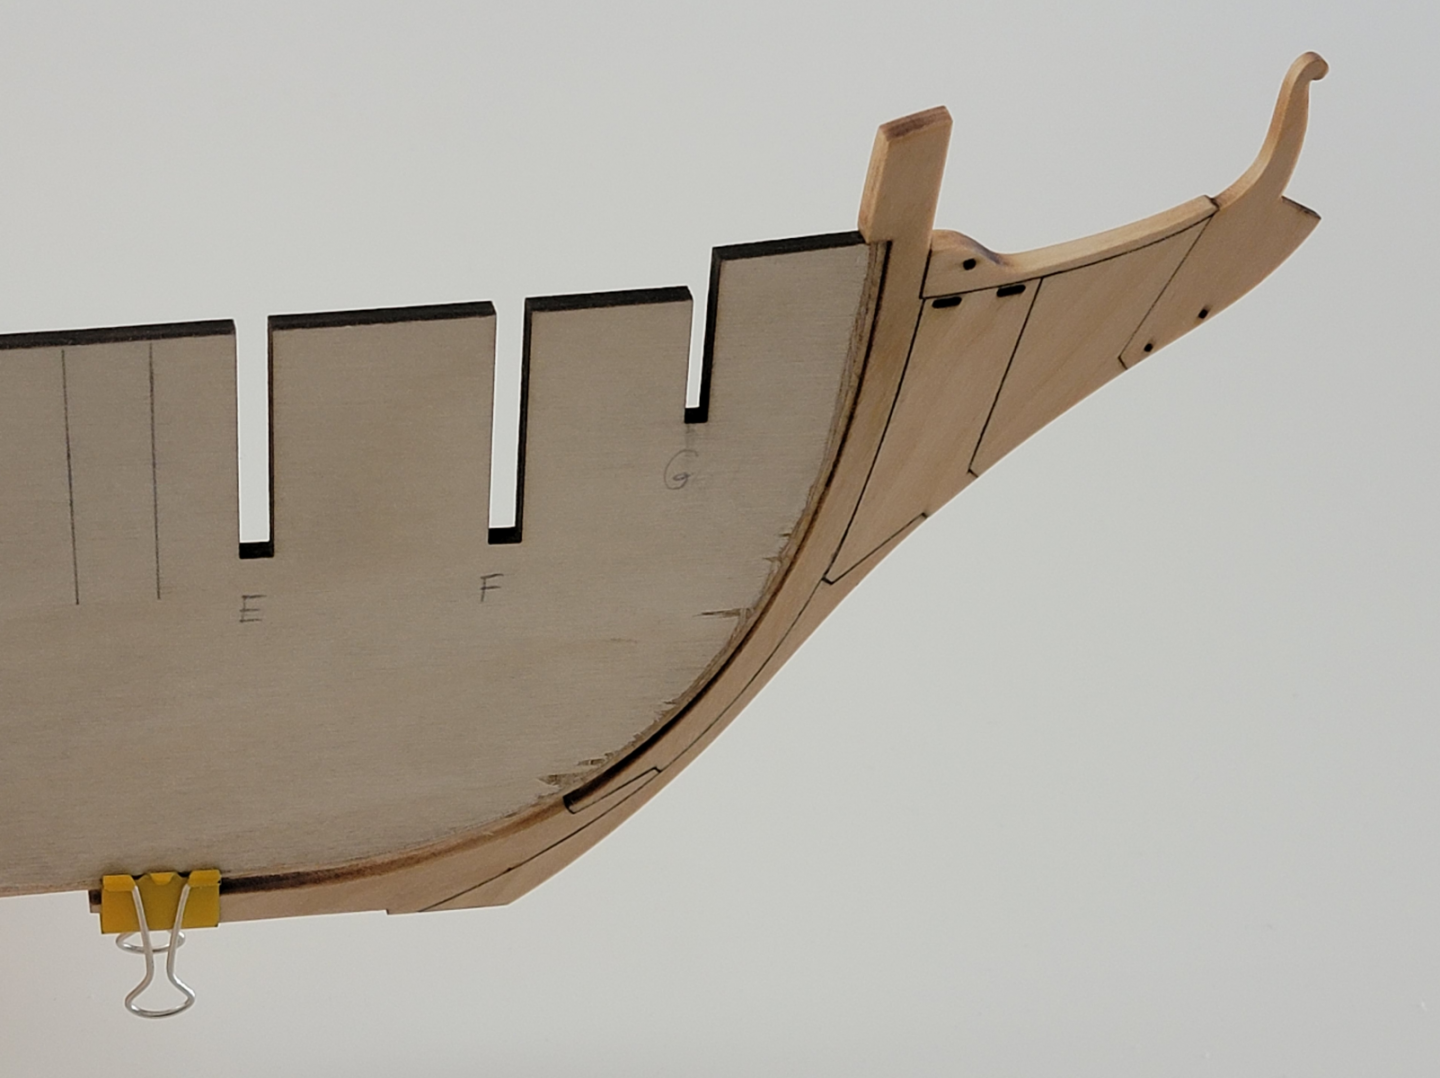
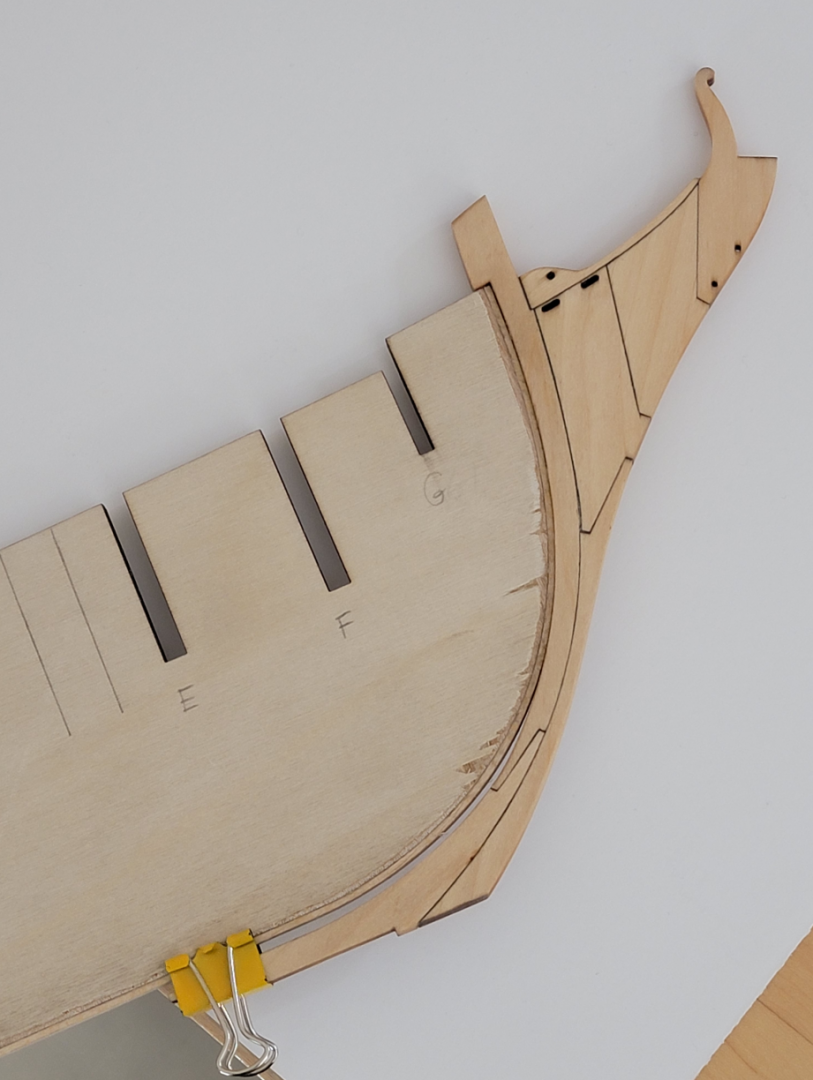
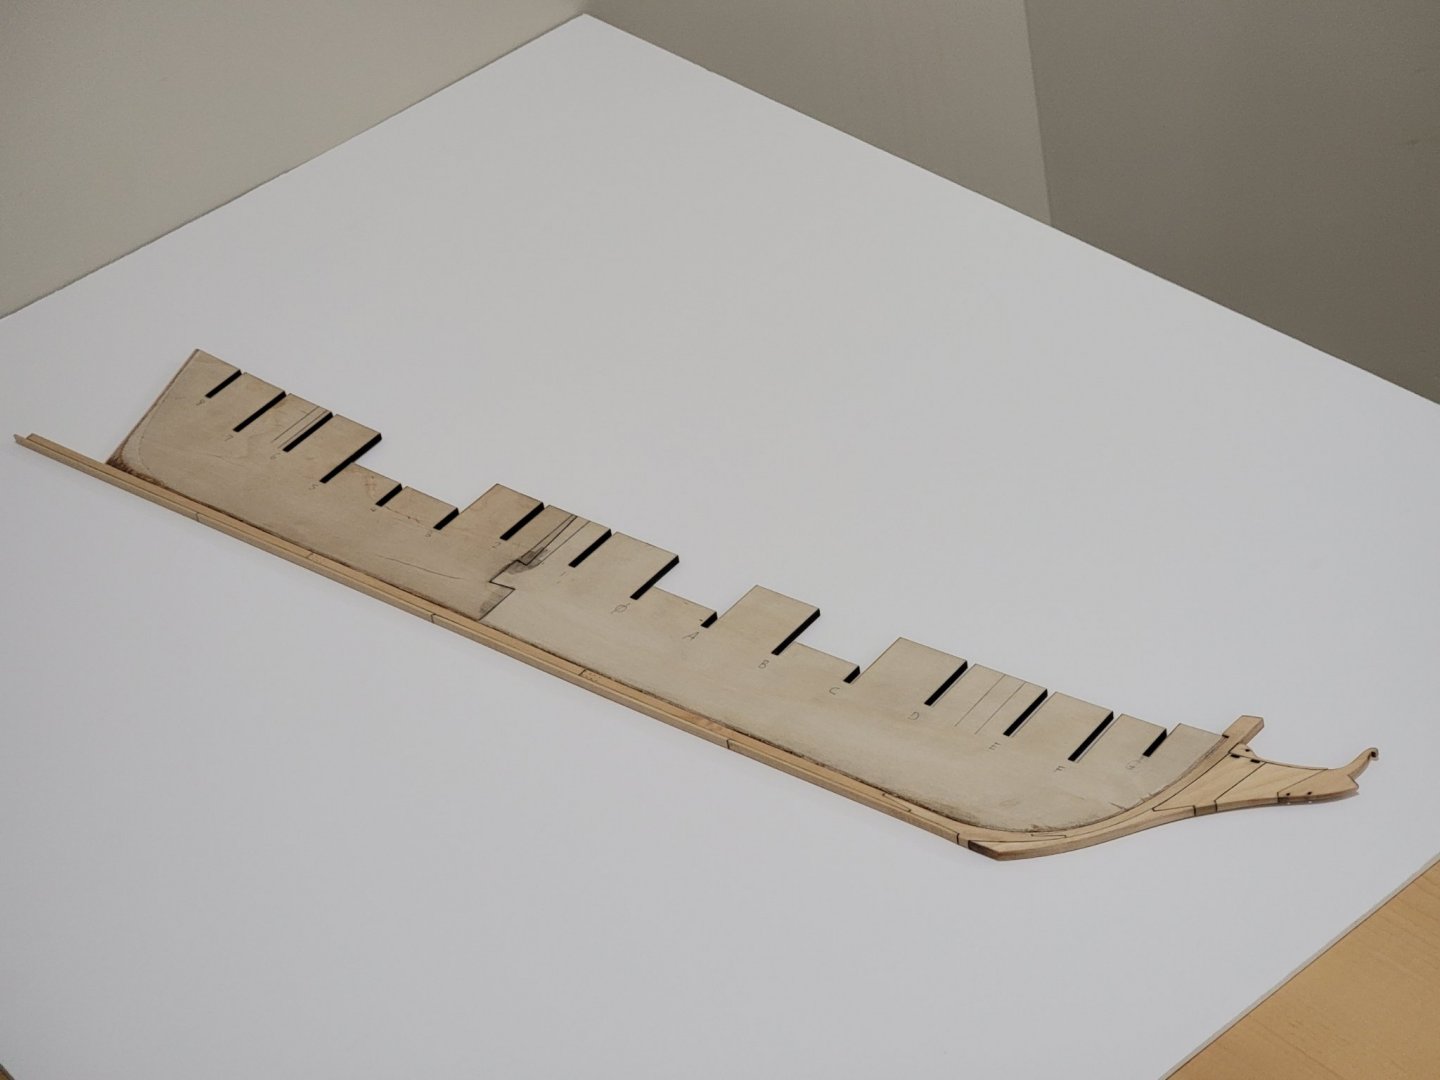
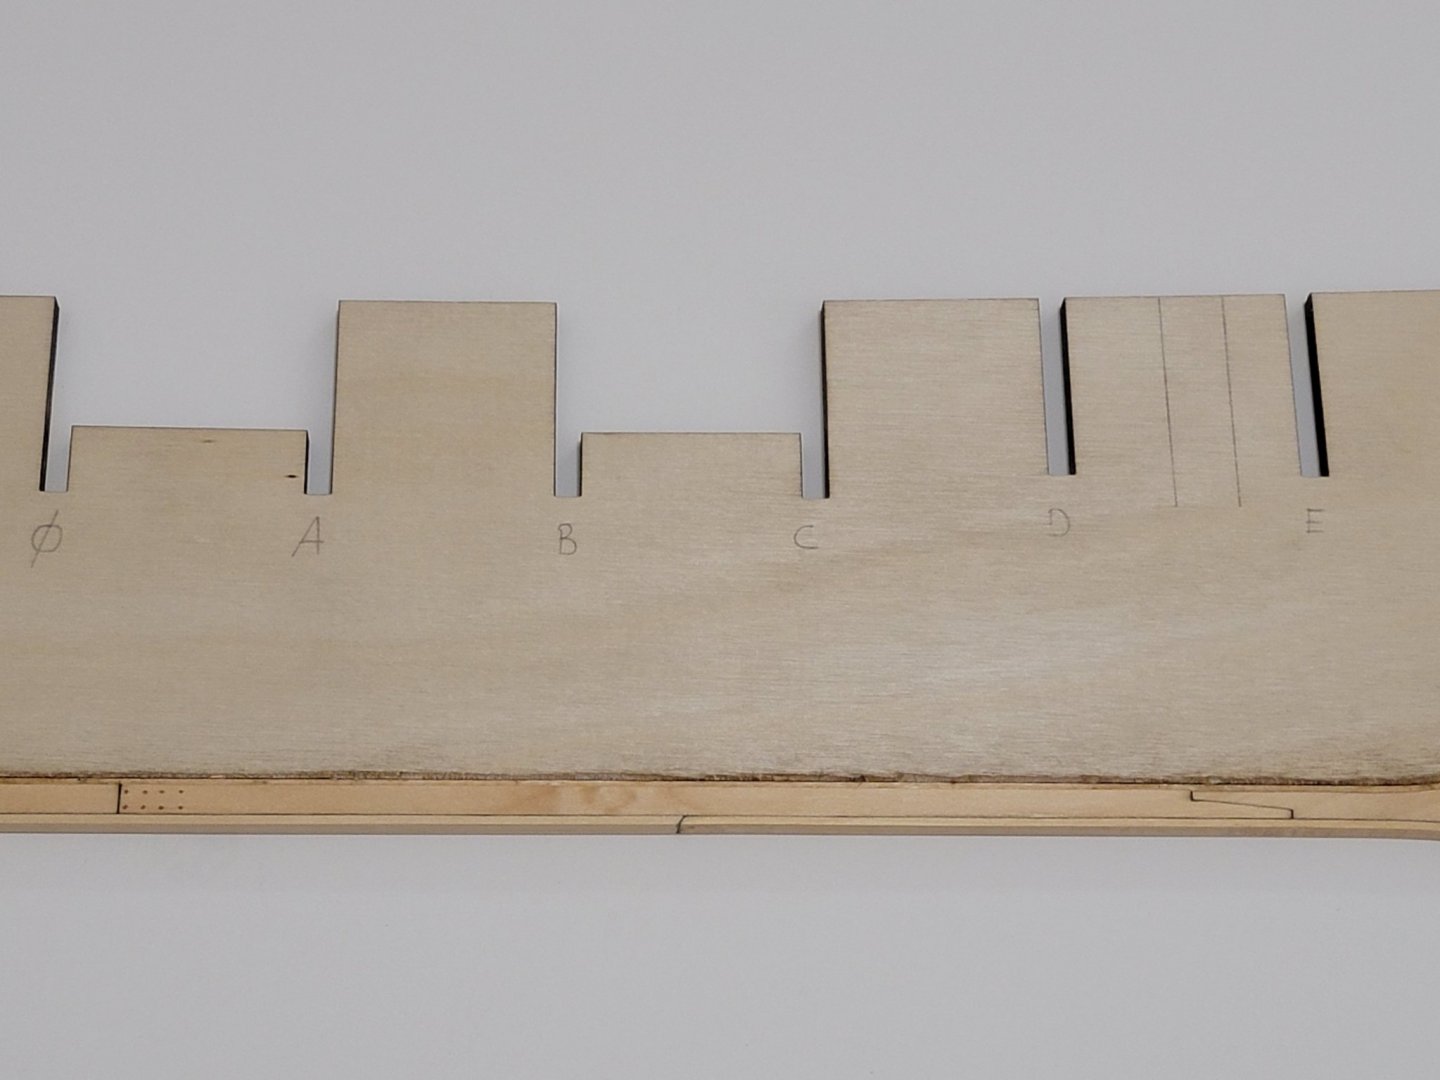
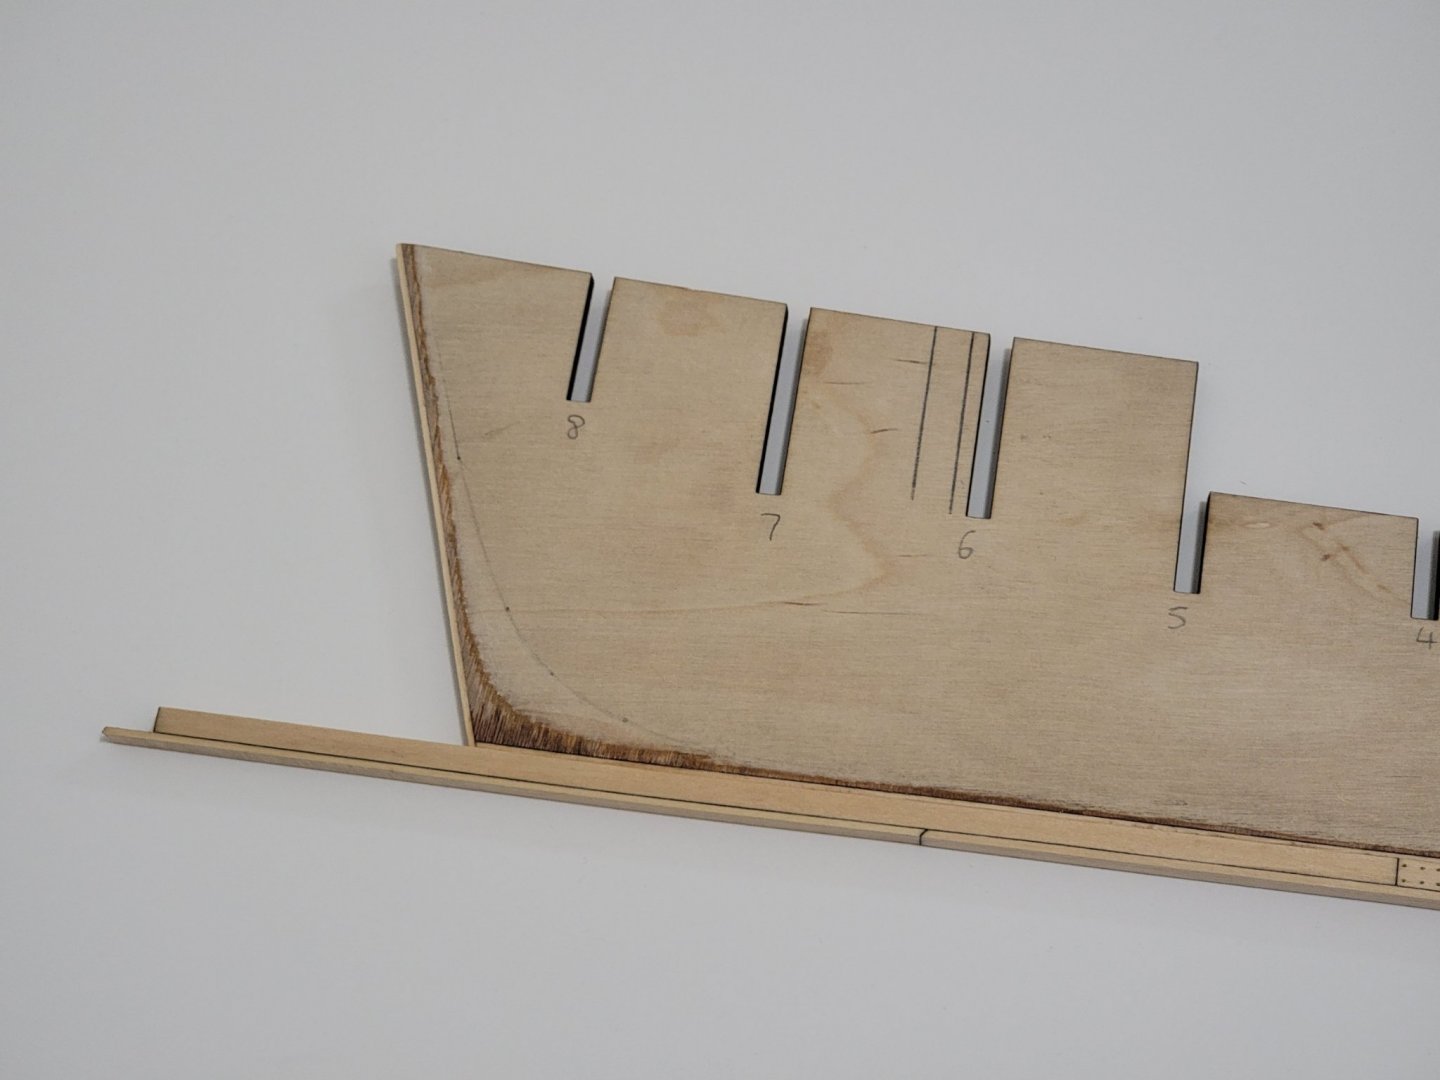
I finished installing all the filler pieces between the bulkheads, and here is a pic showing it straightened out (there is still about 1 degree of curvature, but I think I can live with that!) And I forgot to post a pic of the bow pieces. I had to sand the edges of the top BFD piece and G1 piece at an angle to match the angle of the top of the keel so that all the pieces are flush. I also first glued up the G1 piece before the top BFD piece, and clamped them once I set the location while positioning the BFD piece. Lastly, I painted the bulkheads corresponding to the open slots black, and planked the bottom areas. I used a HB pencil to simulate caulking between the planks. This time, I only shaded one slide of the planks so that it appears a bit lighter. I applied two coats of tung oil after sanding them smooth.


-
Thank you for the kind words, Paul and Hamilton! 🙂
-
Those are some great shots!! The rigging and deck details really stand out with the professional pics! Looking forward to seeing her in the display case 😄
-
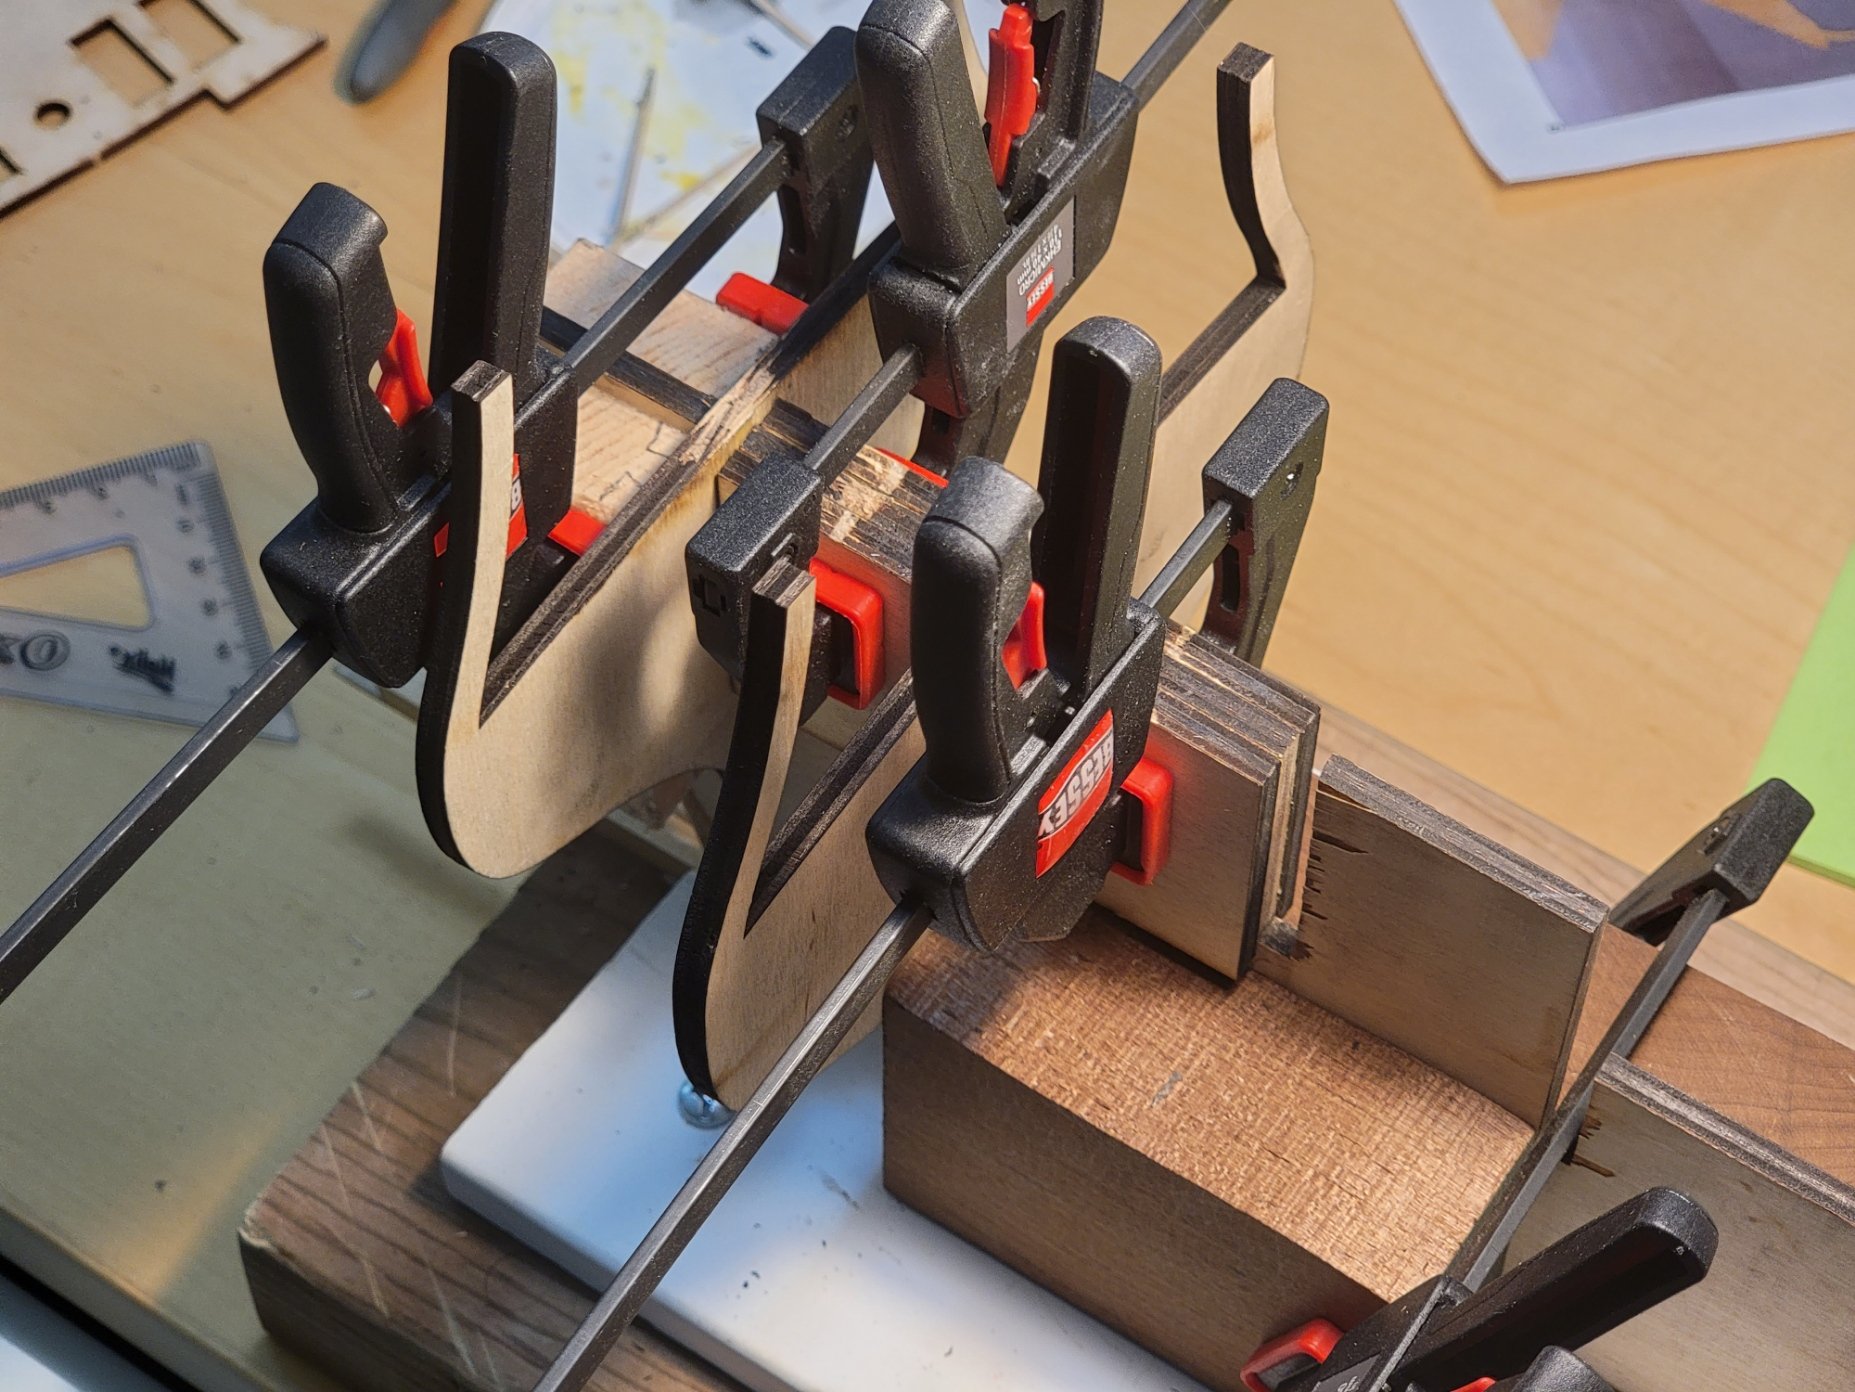
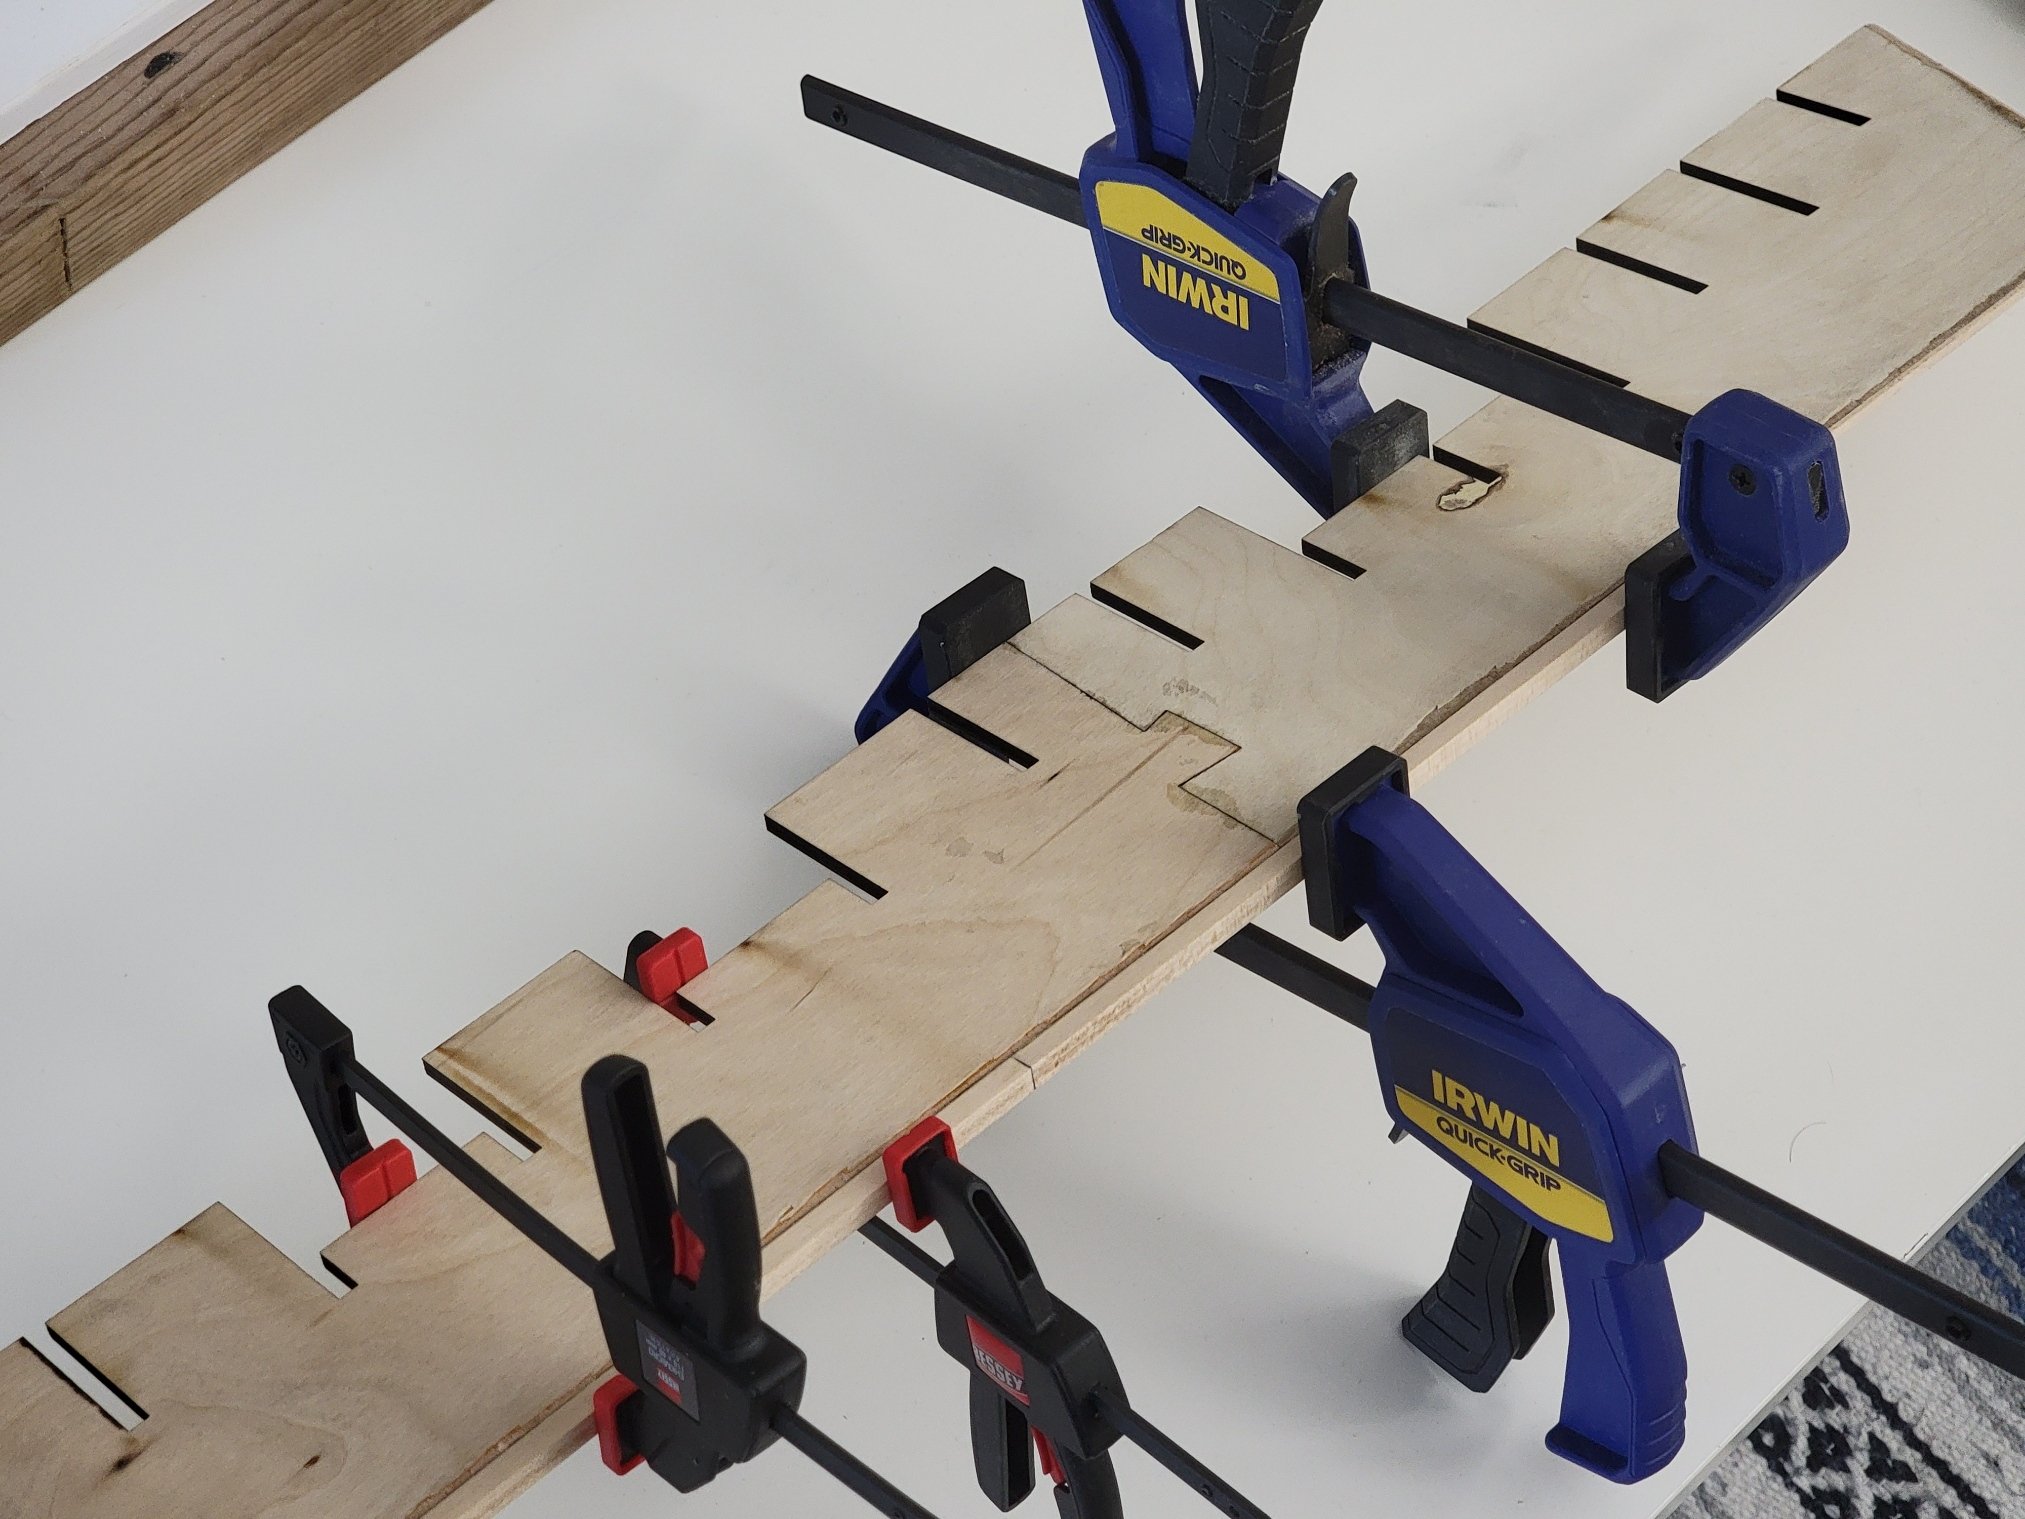
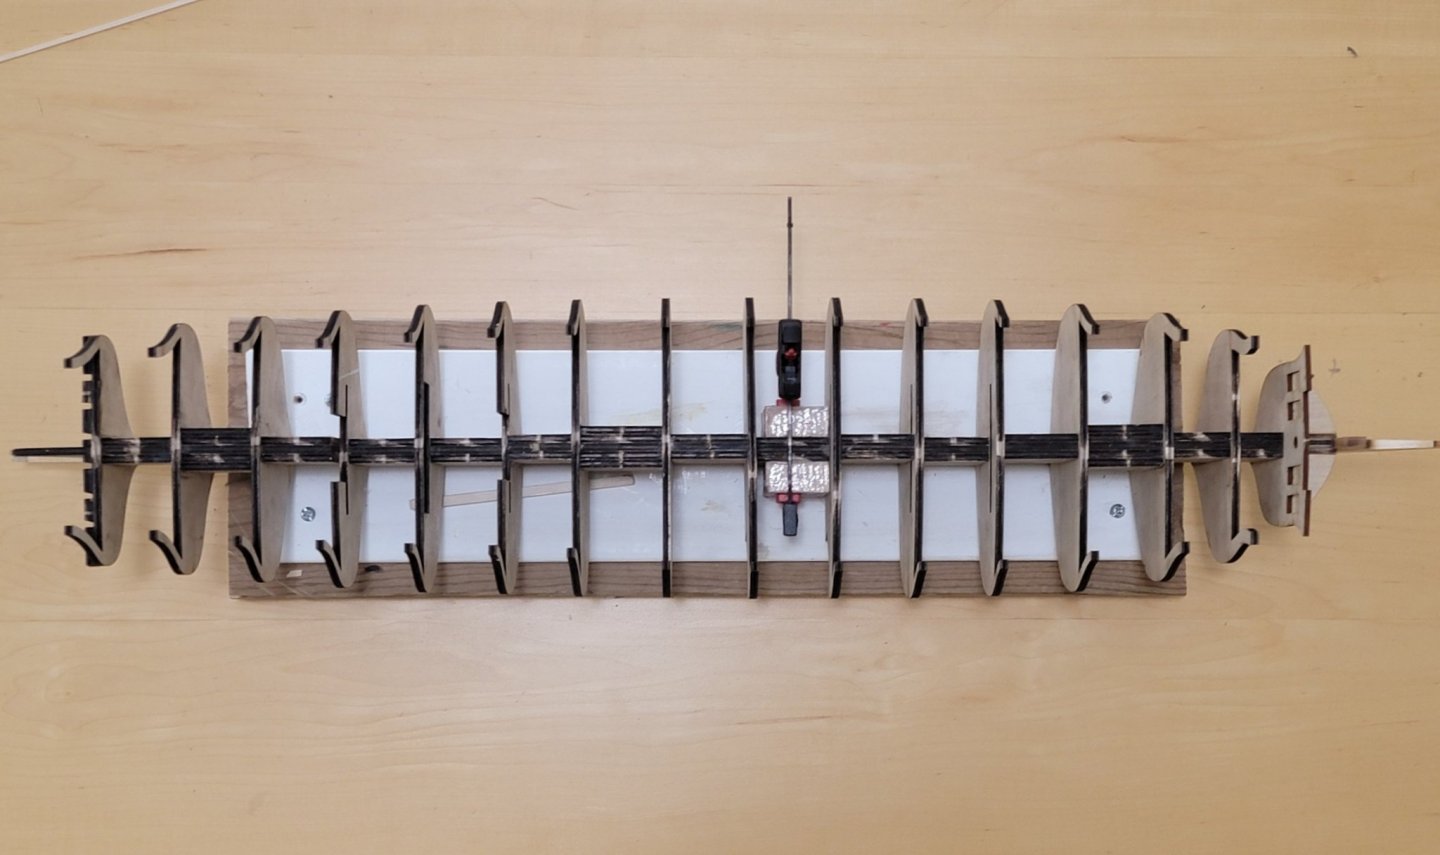
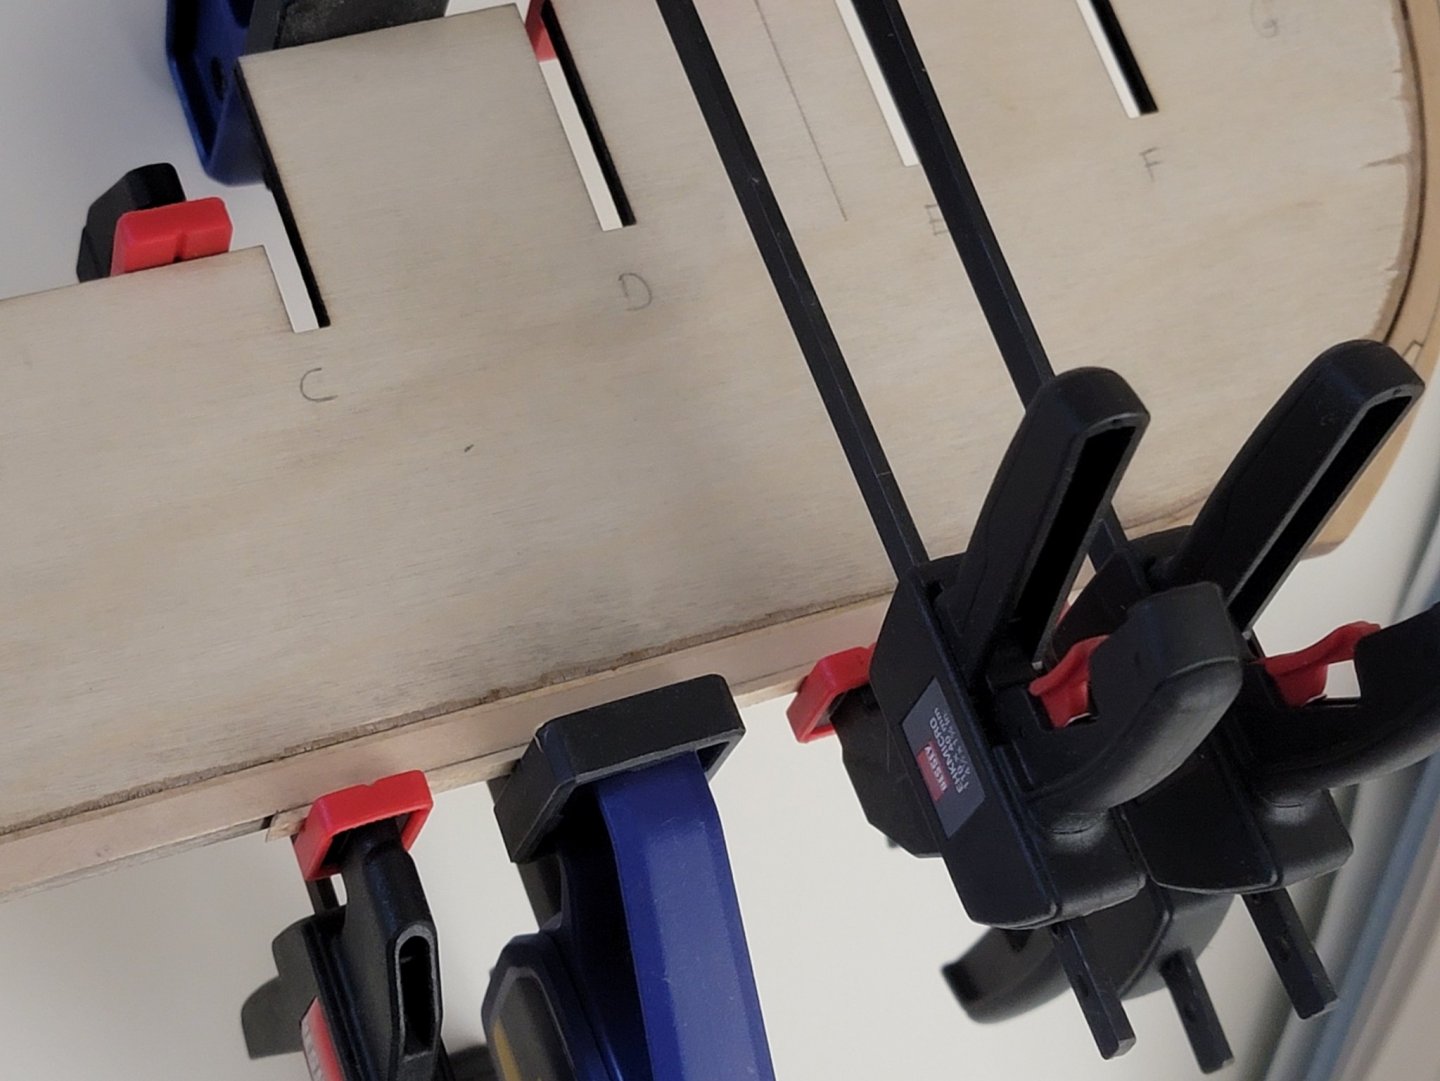
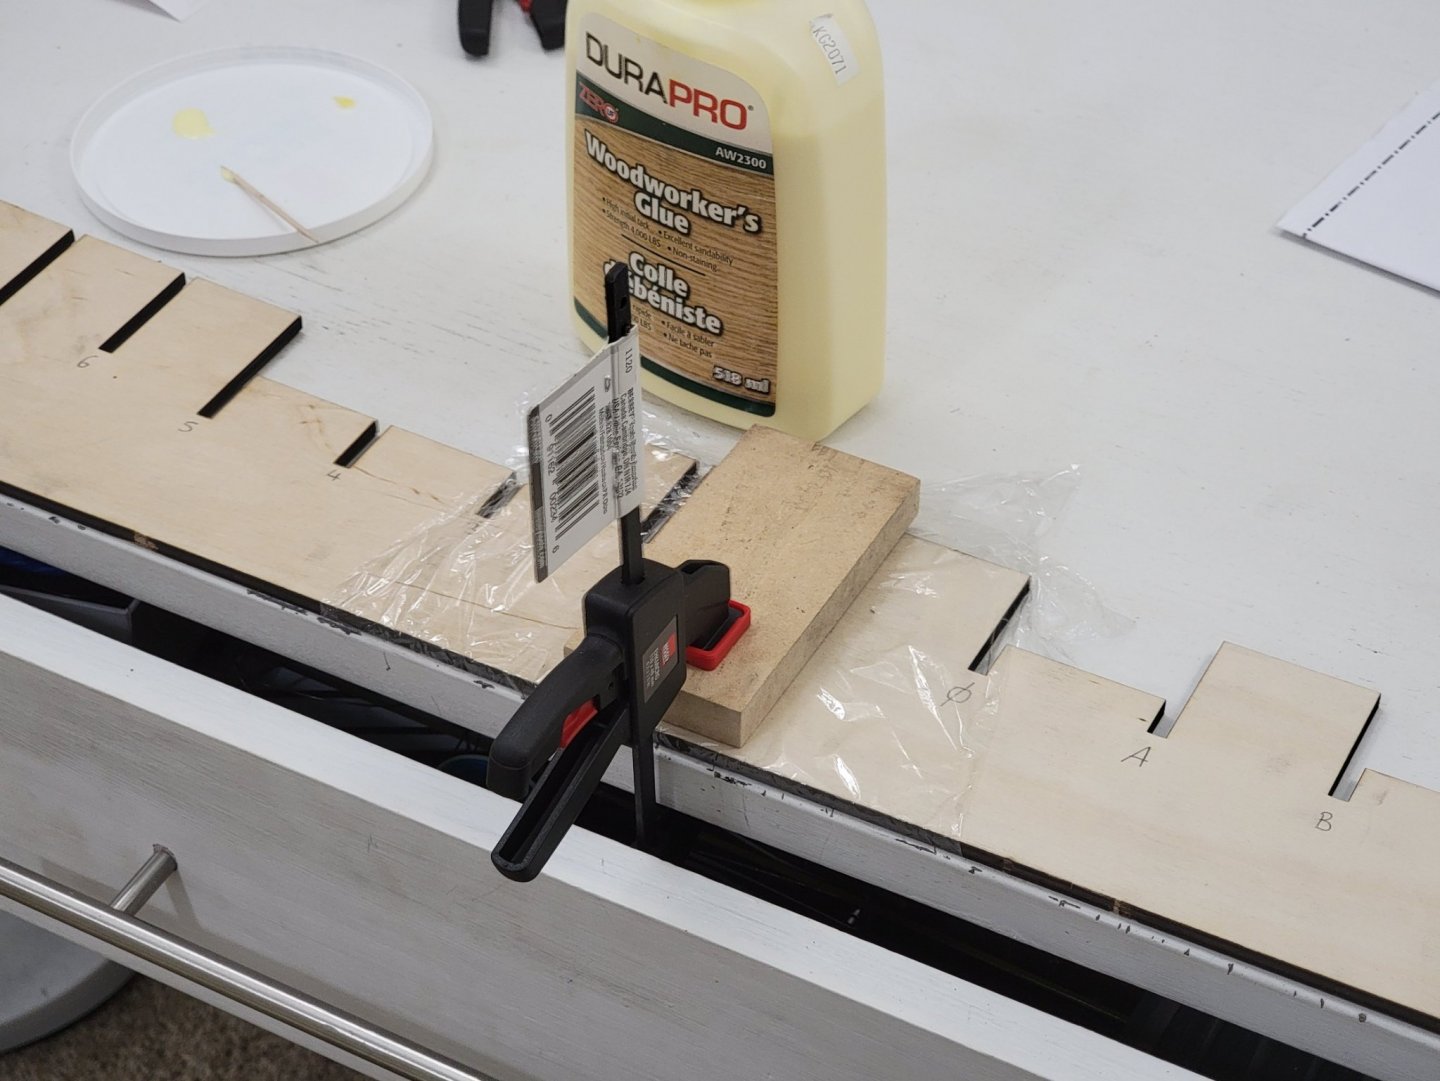
I decided to fix the minor warping issue. Didn't want to encounter major problems down the road 😄 I measured up the distance between the bulkheads in the center, then cut some leftover basswood from the Syren kit to straighten things up. I am still half way up the hull, but can already see everything straightening out! I am making sure the two pieces of wood are identical to 0.05 mm. It is a bit of a lengthy process since I am doing it all using hand tools (miter box and fine kerf razor saw, and files)

-
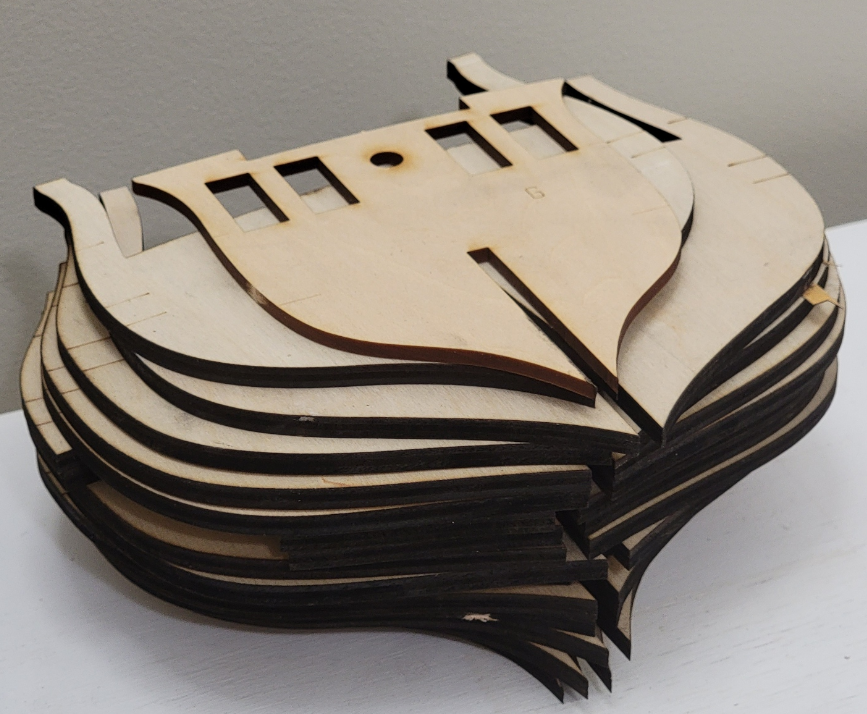
Those laser cut parts look amazing. I currently need to fix up some warping going on with my Confed build because of the plywood. I don't think you'll encounter any of those issues. Looking forward to this build!
-
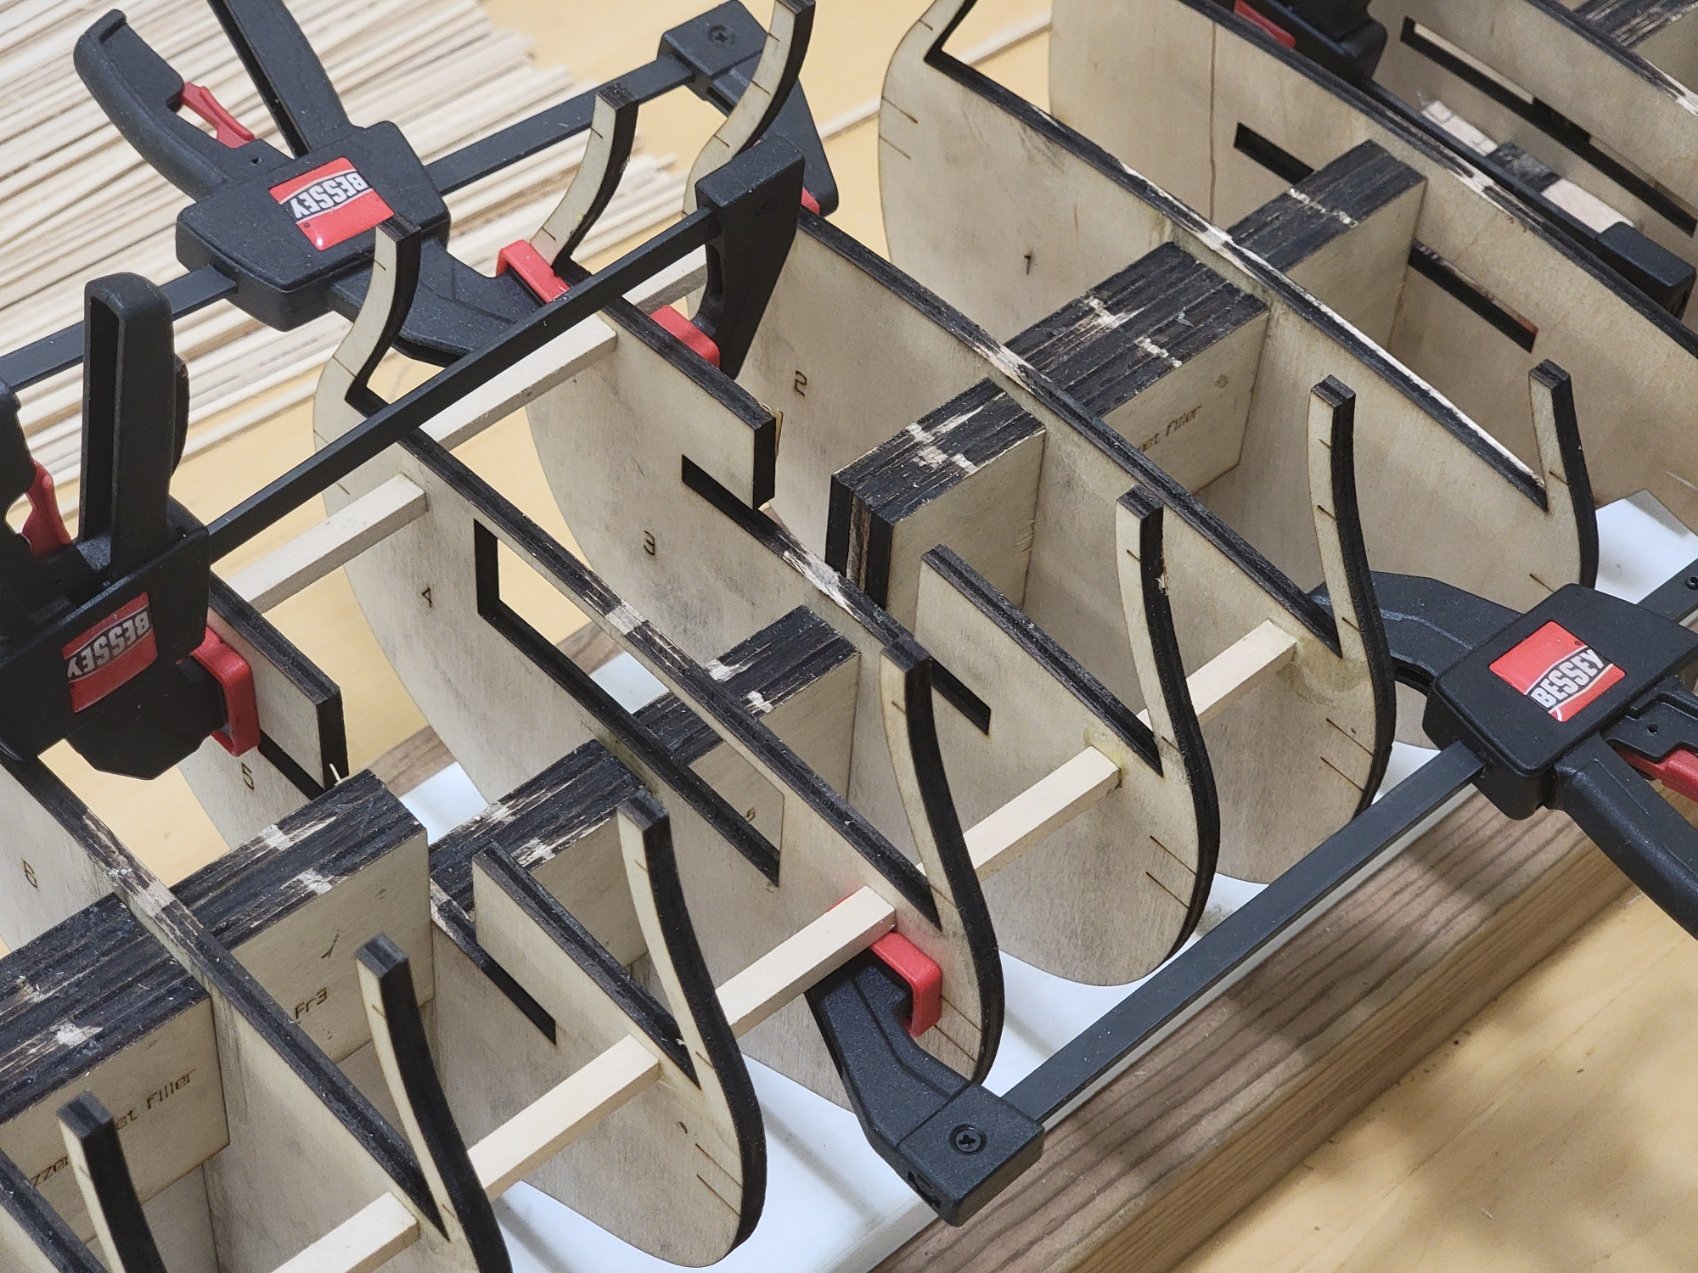
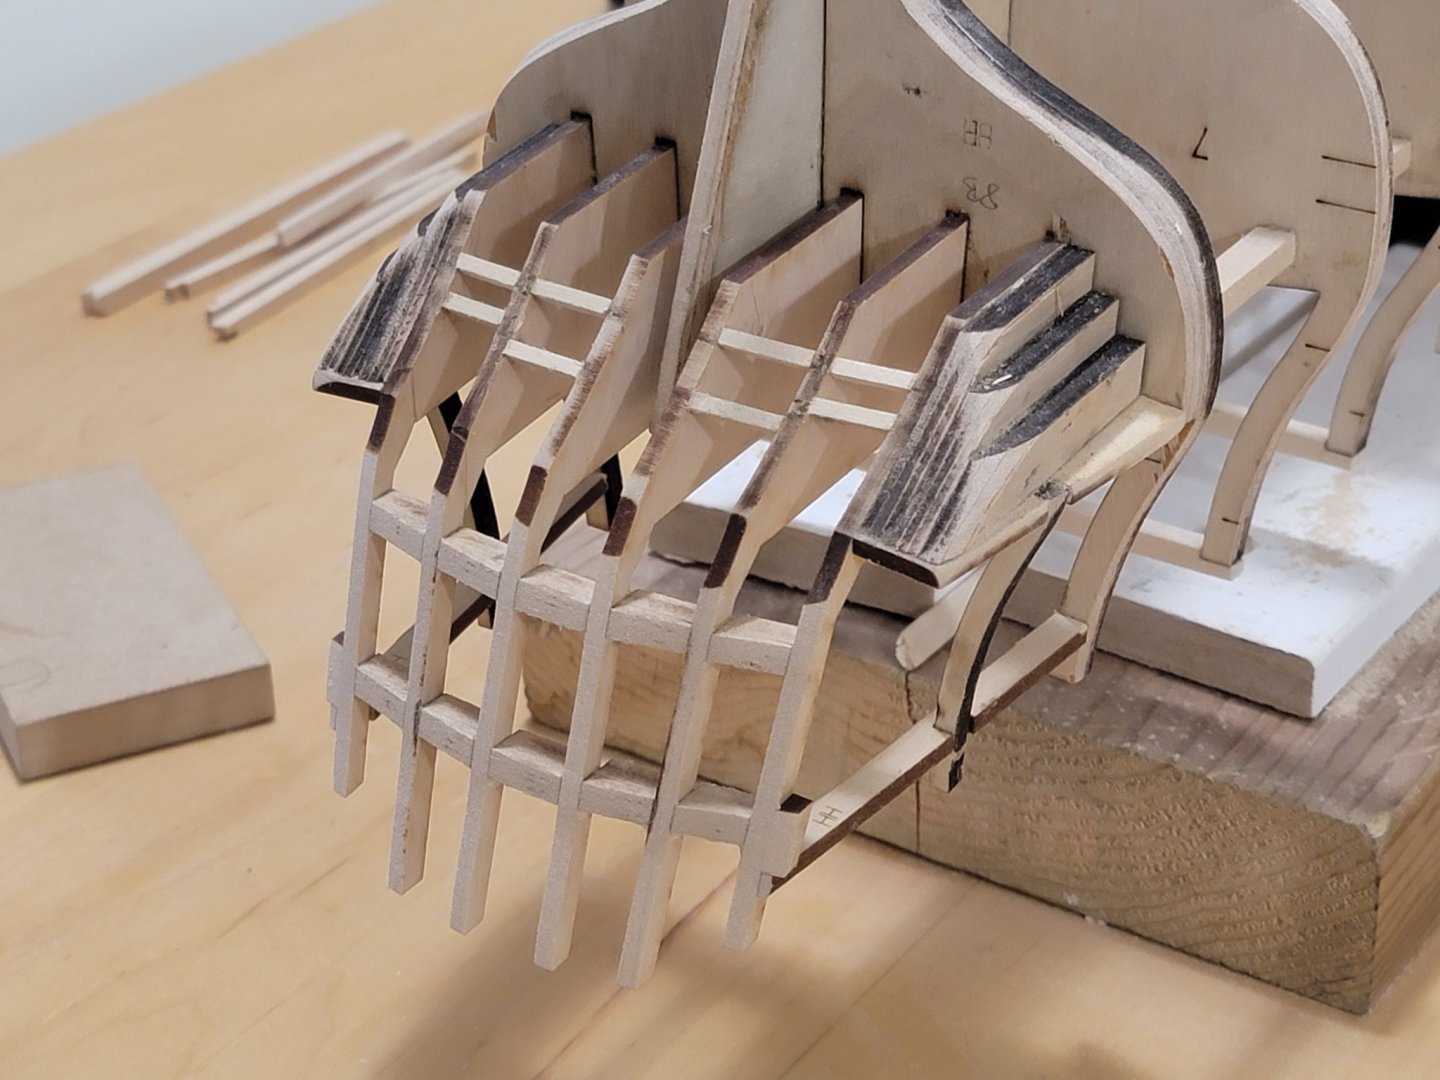
I finished installing all the bulkheads and the respective fillers (including the mast fillers). I installed each bulkhead and filler sequentially as shown below: There is a very very slight twist in the bulkhead former (especially towards the stern). It may be nothing to worry about but I'll see whether it is worth fixing it or not:

-
It takes around 15 minutes for the wood to absorb it, then after a quick wipe, it takes 24 hours to fully dry. I used it for the Syren build, and it makes the wood 'pop' 😁 Thanks Michael! Welcome to this build. This is going to be a very long journey 😄
-
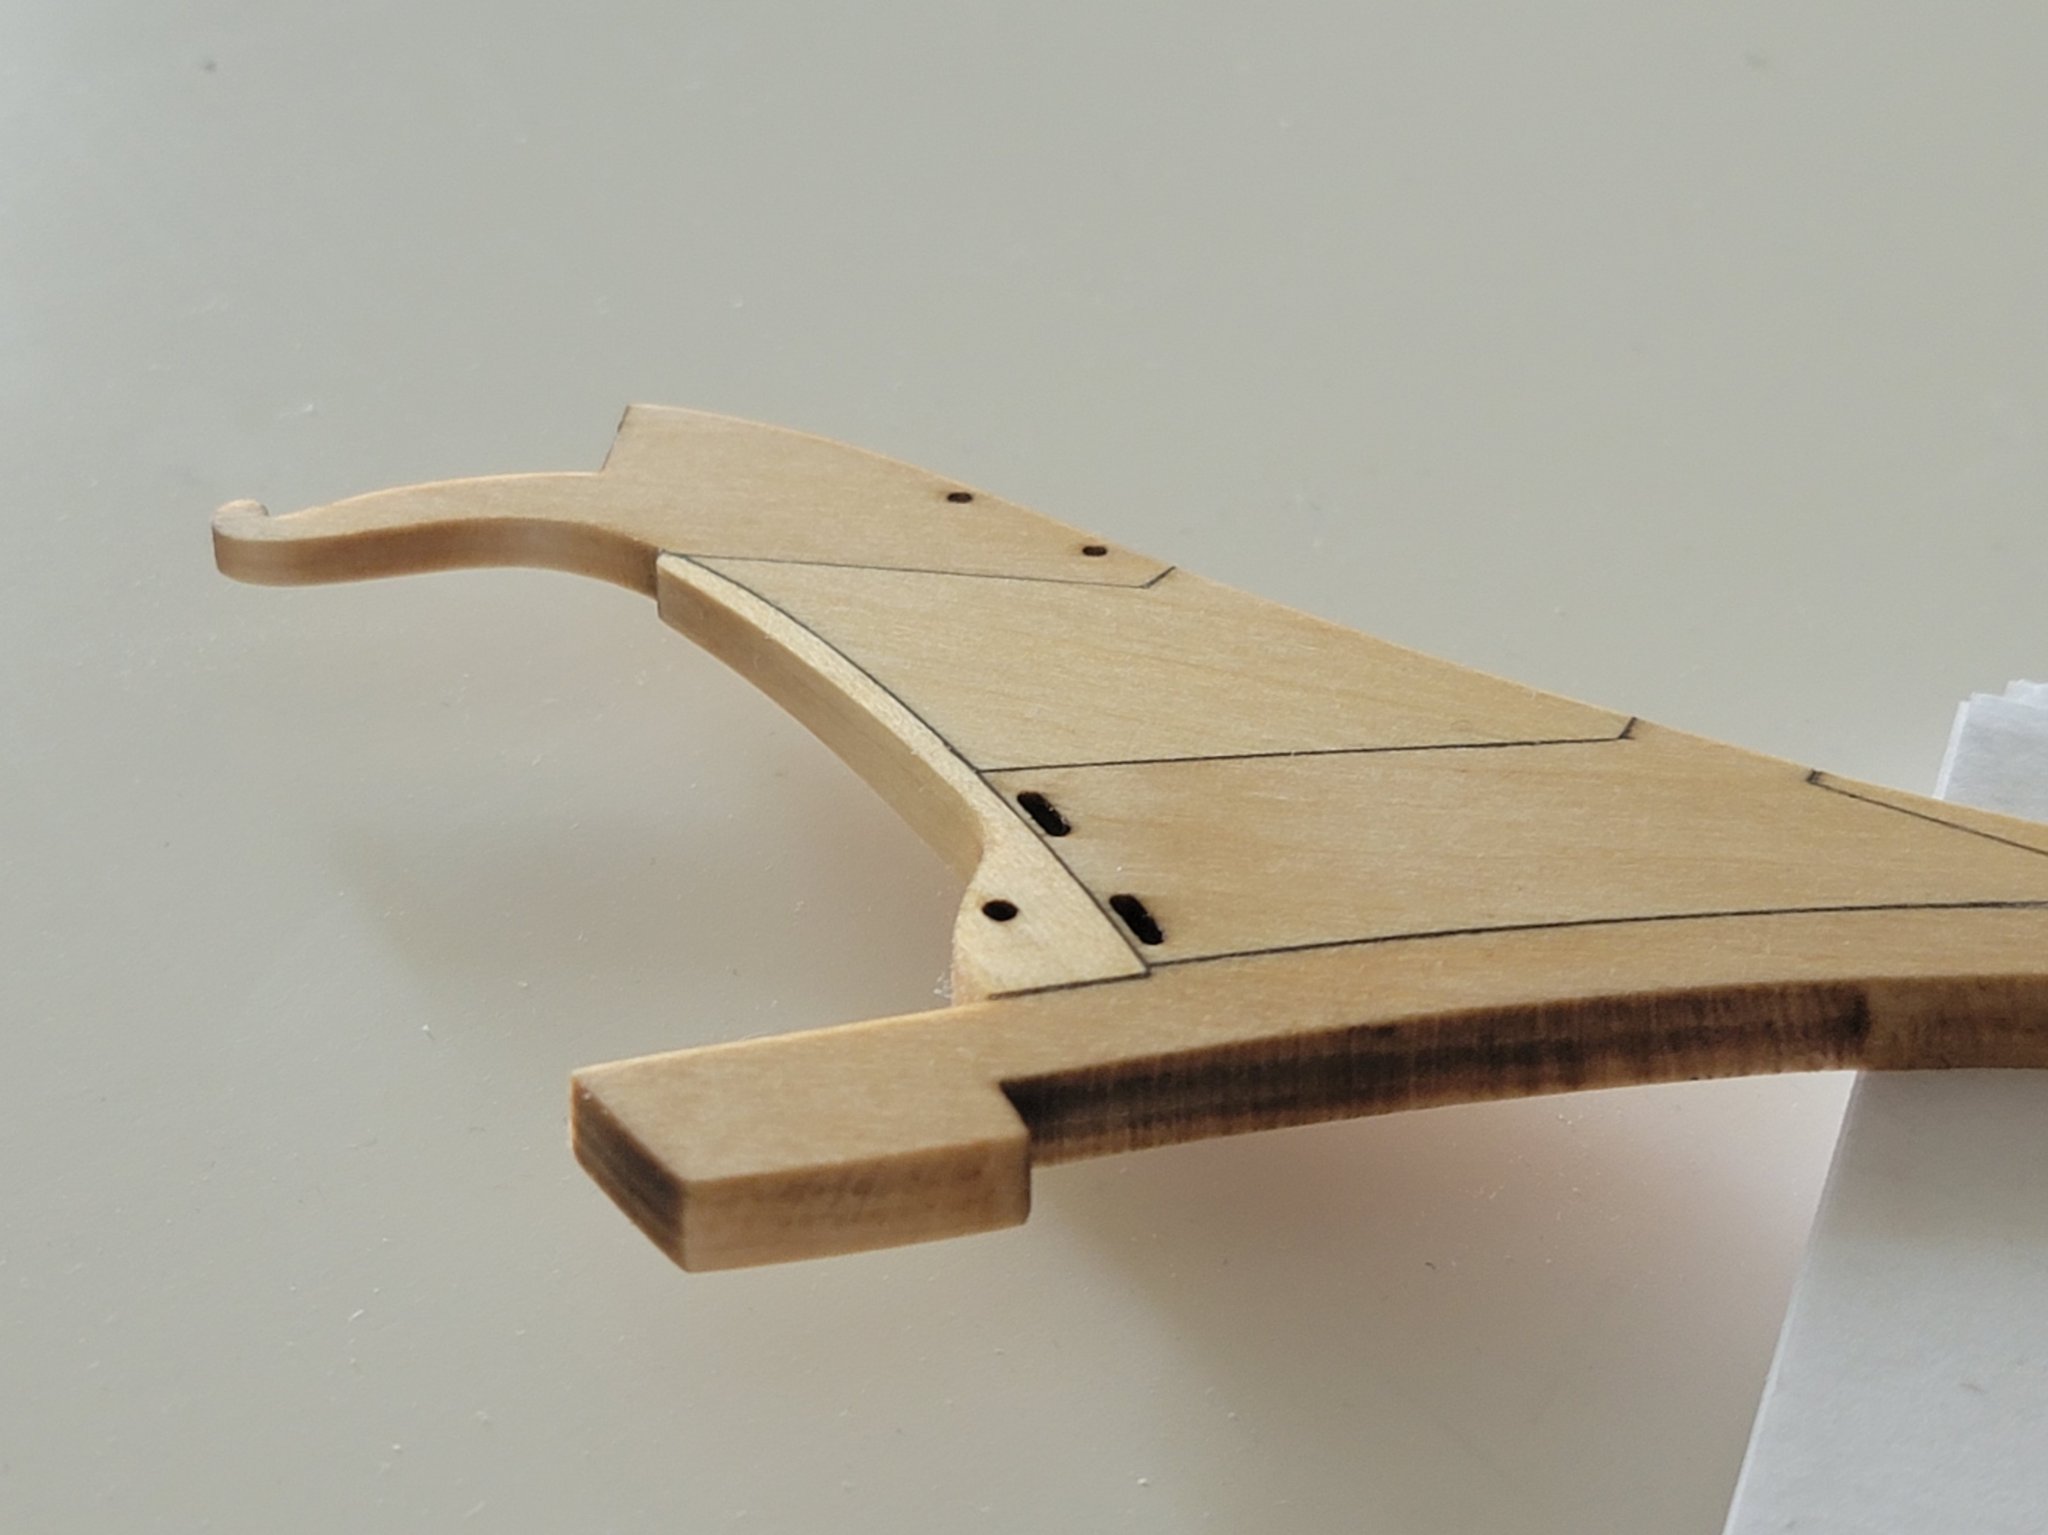
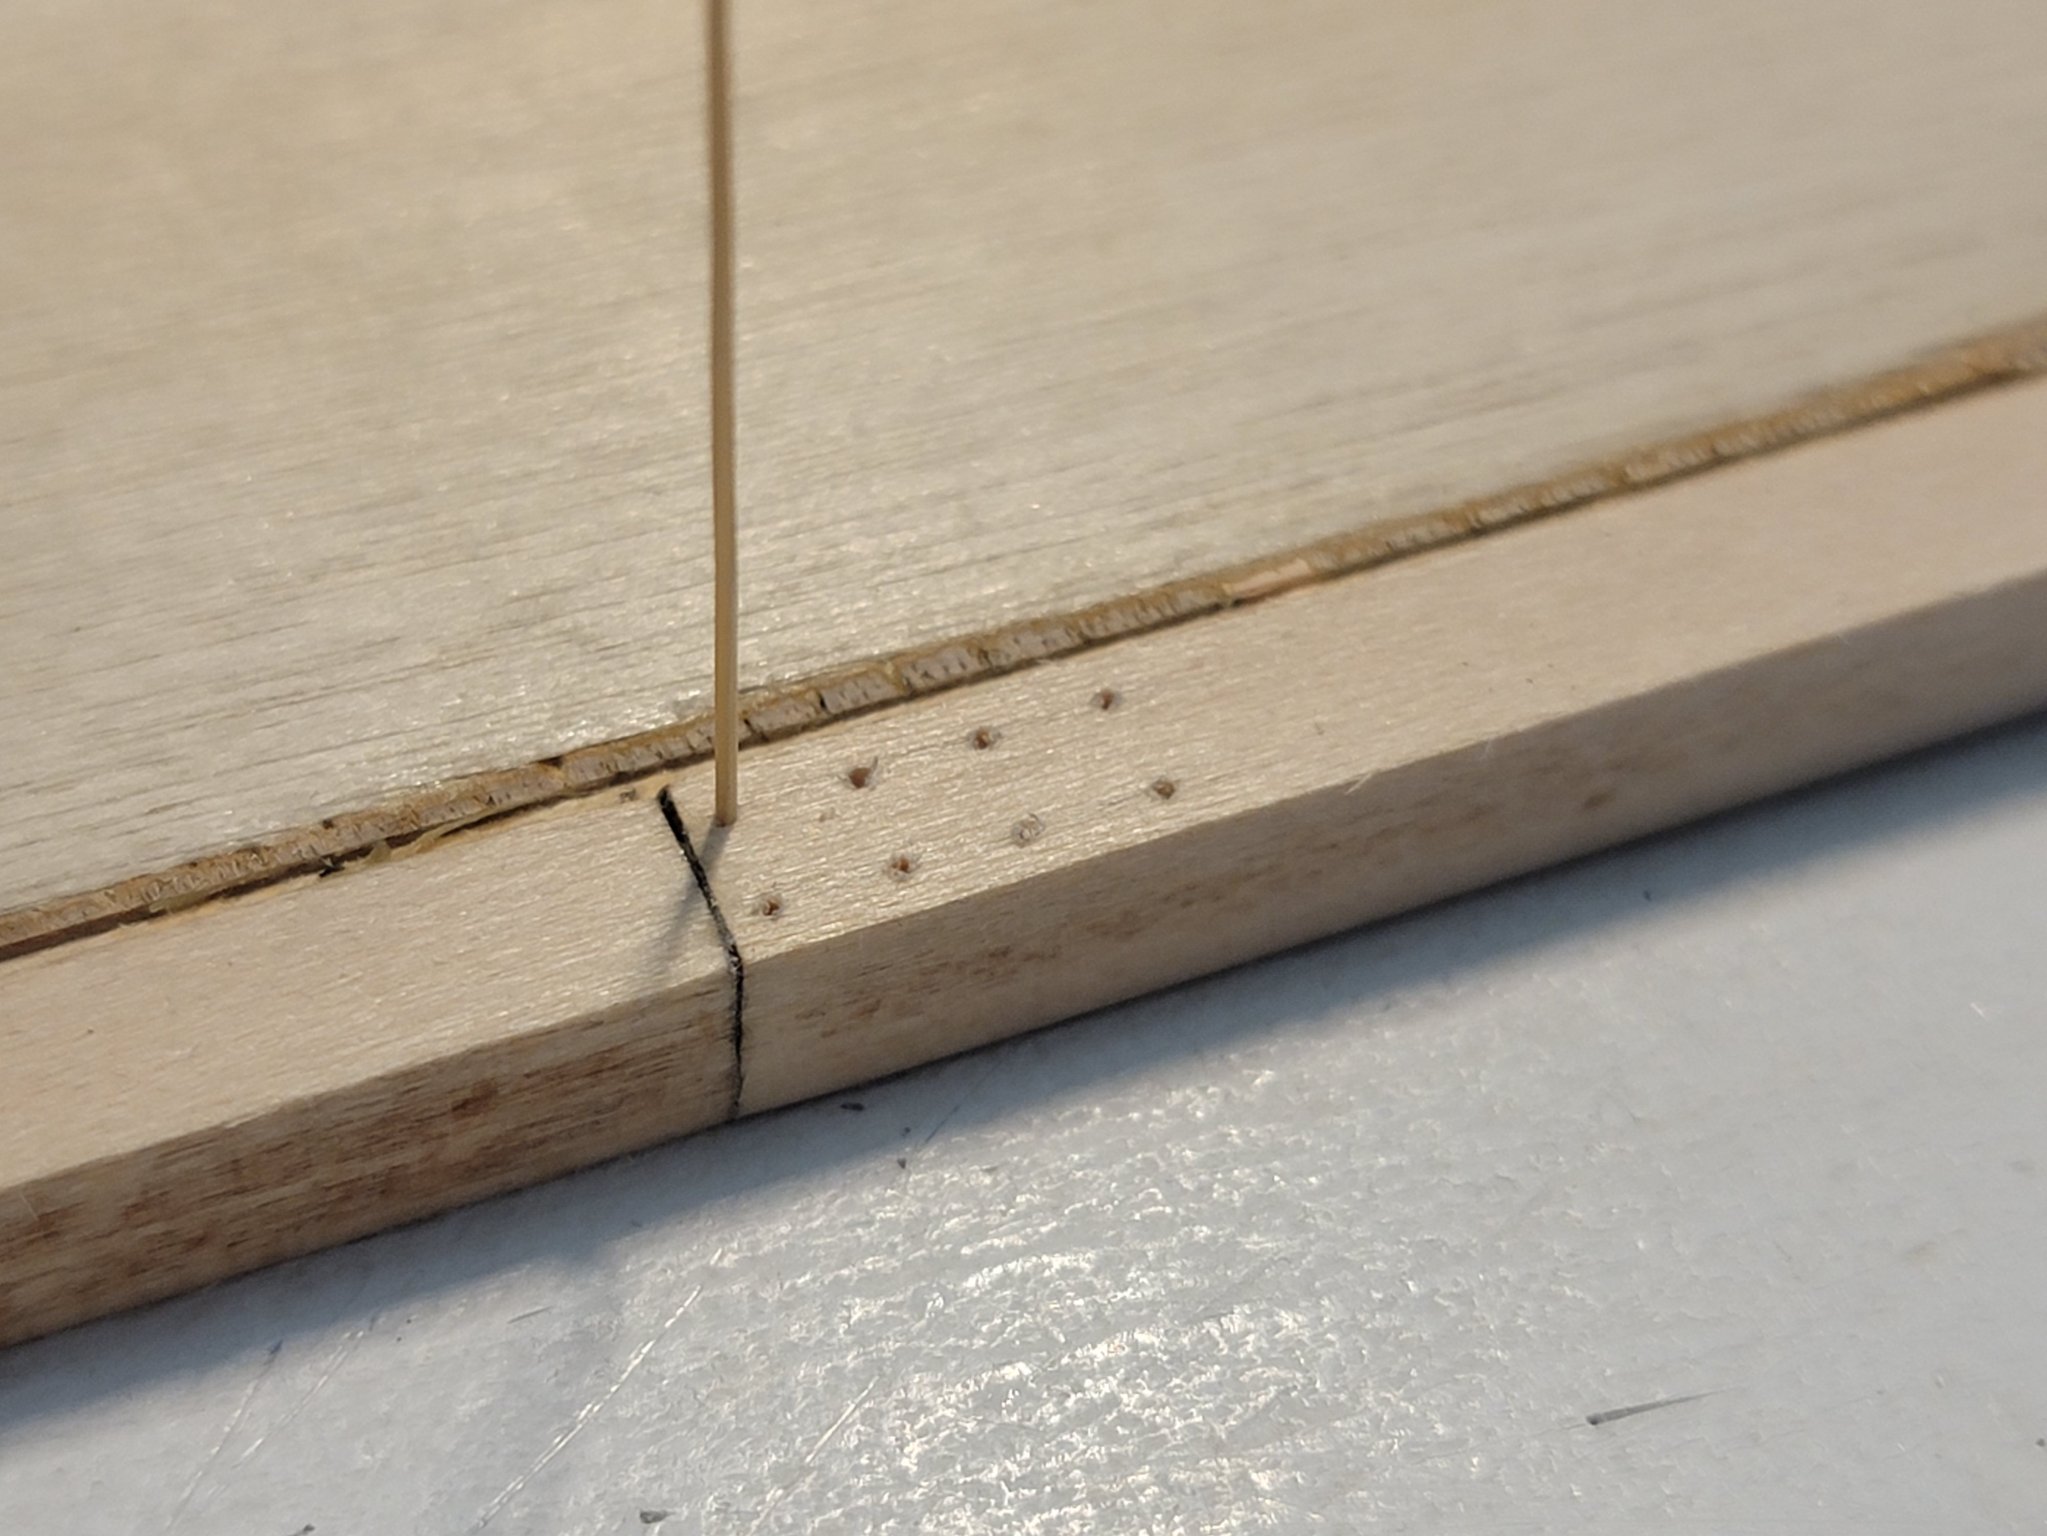
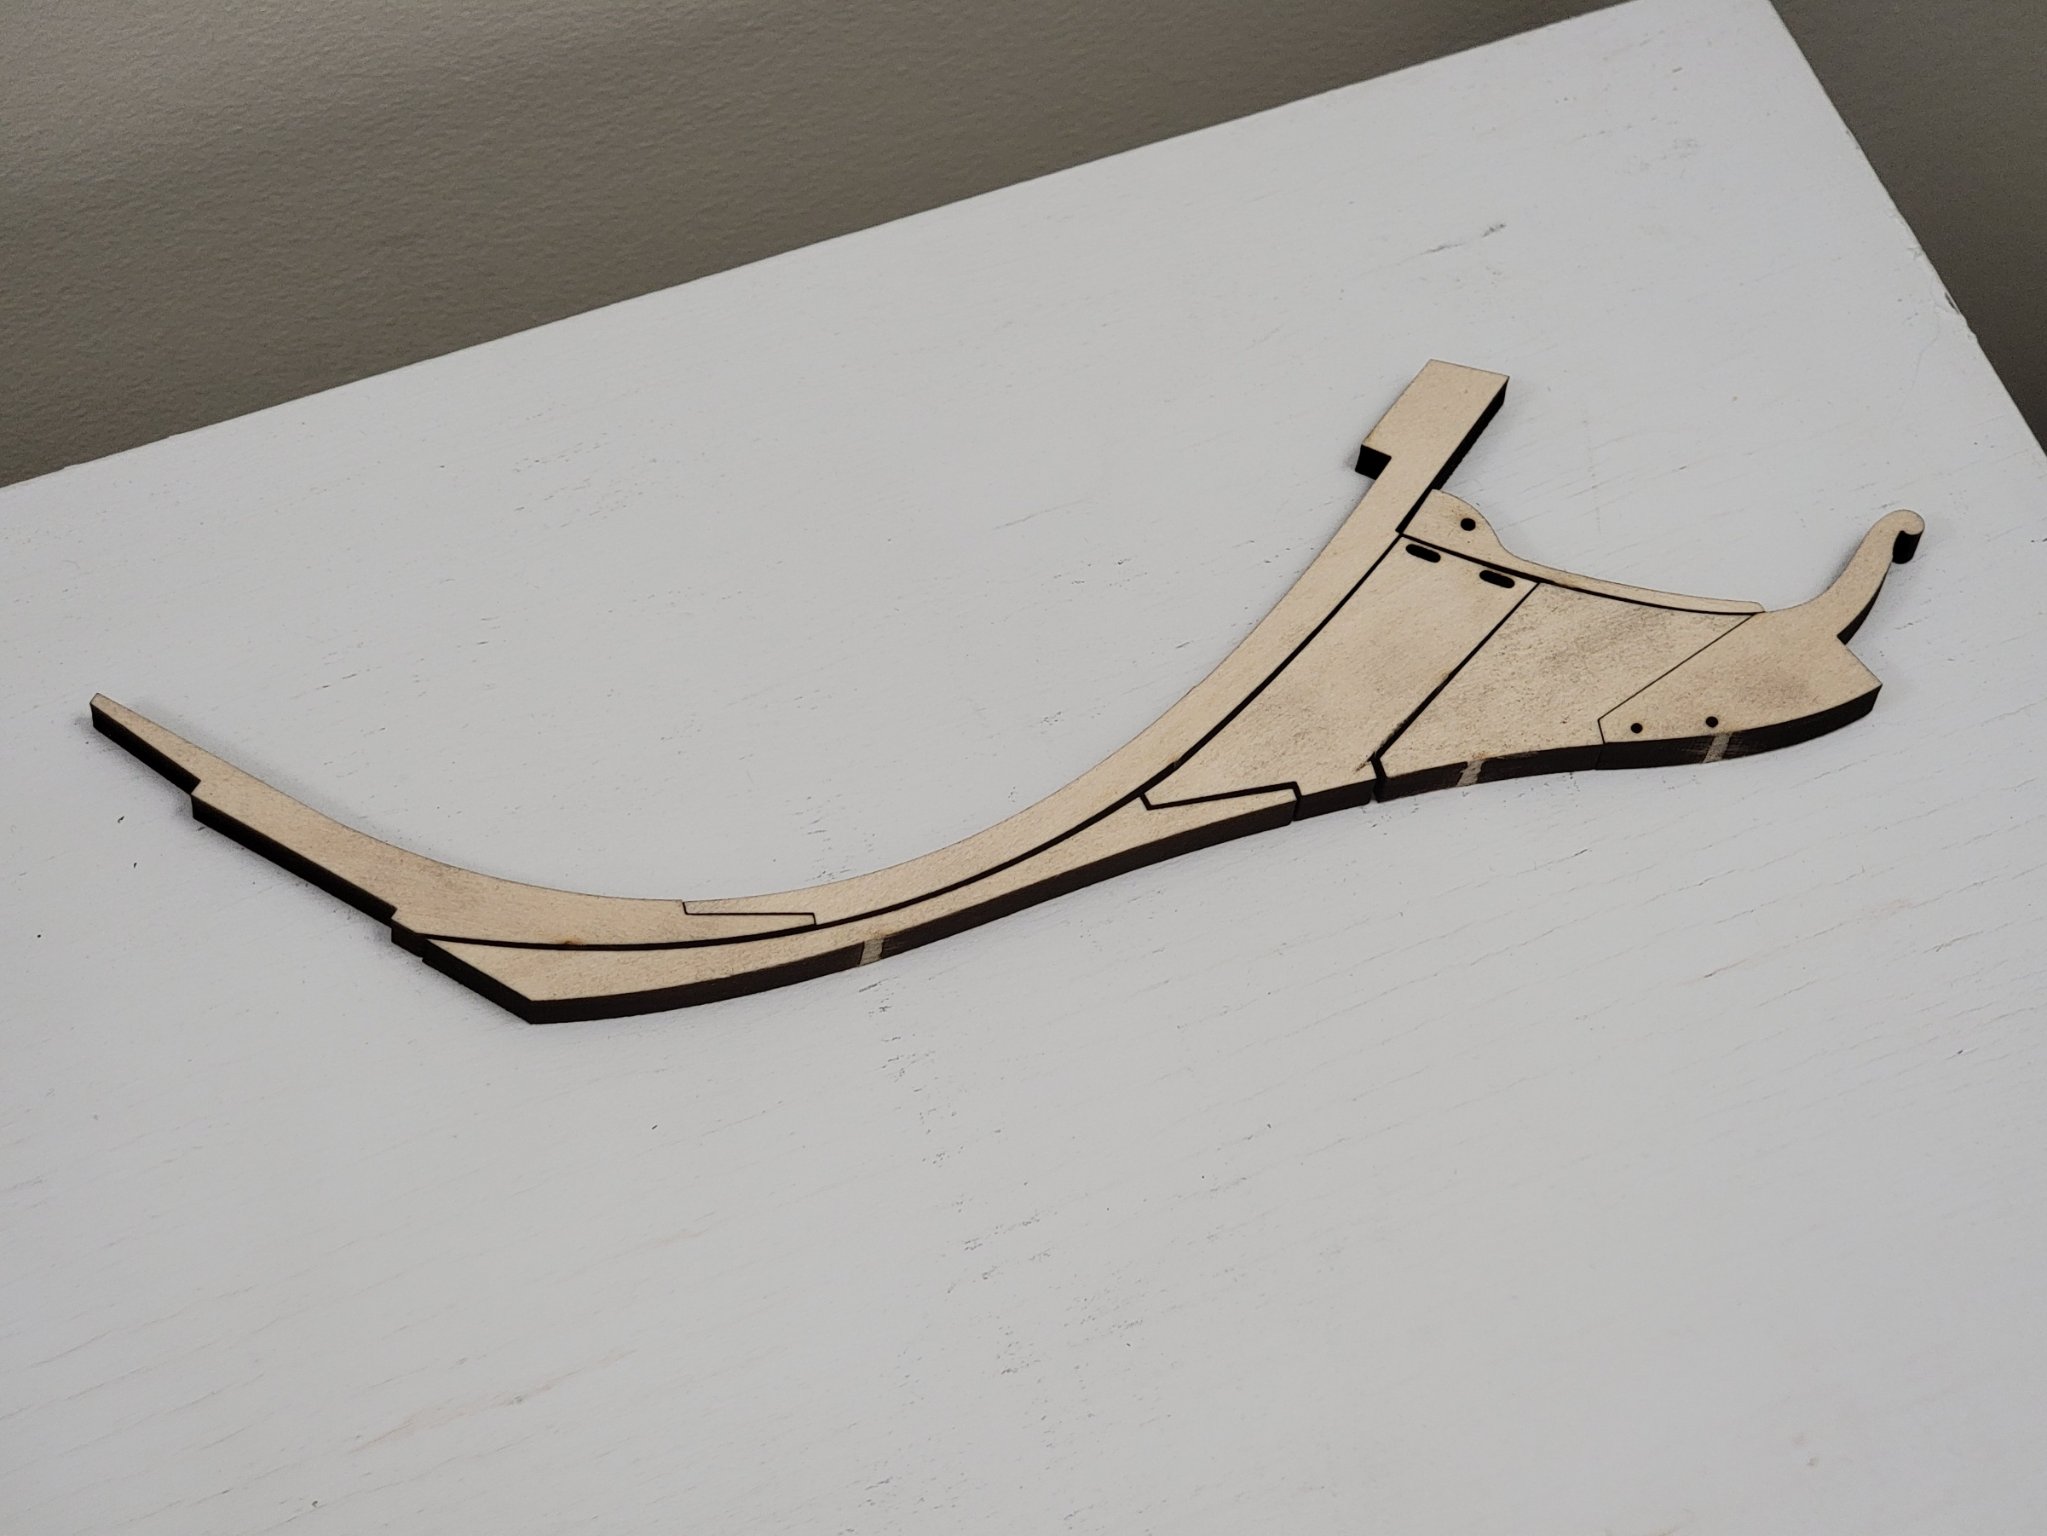
I finished Chapter 1 of the instructions! I used a sanding block to taper the stem. I sanded about 20-30 strokes before I switching to the other side, then repeated and repeated until I got the desired thickness for the figurehead to fit. The stem did not fit perfectly on the bulkhead former, so I first glued the top part of the stem to the BF, then after the glue set, I glued and clamped the bottom side. I also glued the first part of the keel to provide some extra strength: Then continued on gluing the other parts of the keel: Next, to simulate the treenails, I tried using bamboo skewers (my first time trying this technique). I first roughly thinned down the skewer so that it fits the largest hole in the Byrnes drawplate. The drawplate was clamped on a table, then I used pliers to pull the skewer to thin it. I reduced the diameter all the way to 0.020" (#31 on the drawplate). I then dipped the skewer into dilute white glue, and inserted it into a predrilled 0.022" hole: The final part of the chapter was to add the false keel. I followed the guidelines from TFFM Vol 1 to angle the joints (purpose of this is if the false keel were to break, it is supposed to slip away and not affect the neighboring false keel section). I also used pencil here to simulate the tarred flannel between the keel and false keel. Once they were all glued in, I applied tung oil: I just need to apply one more coat of the oil, then will start installing all the bulkheads.


-
Welcome aboard Steven and David! I was very eager to start this build ever since I got the kit some time last year... so I jumped right in! 😁
-
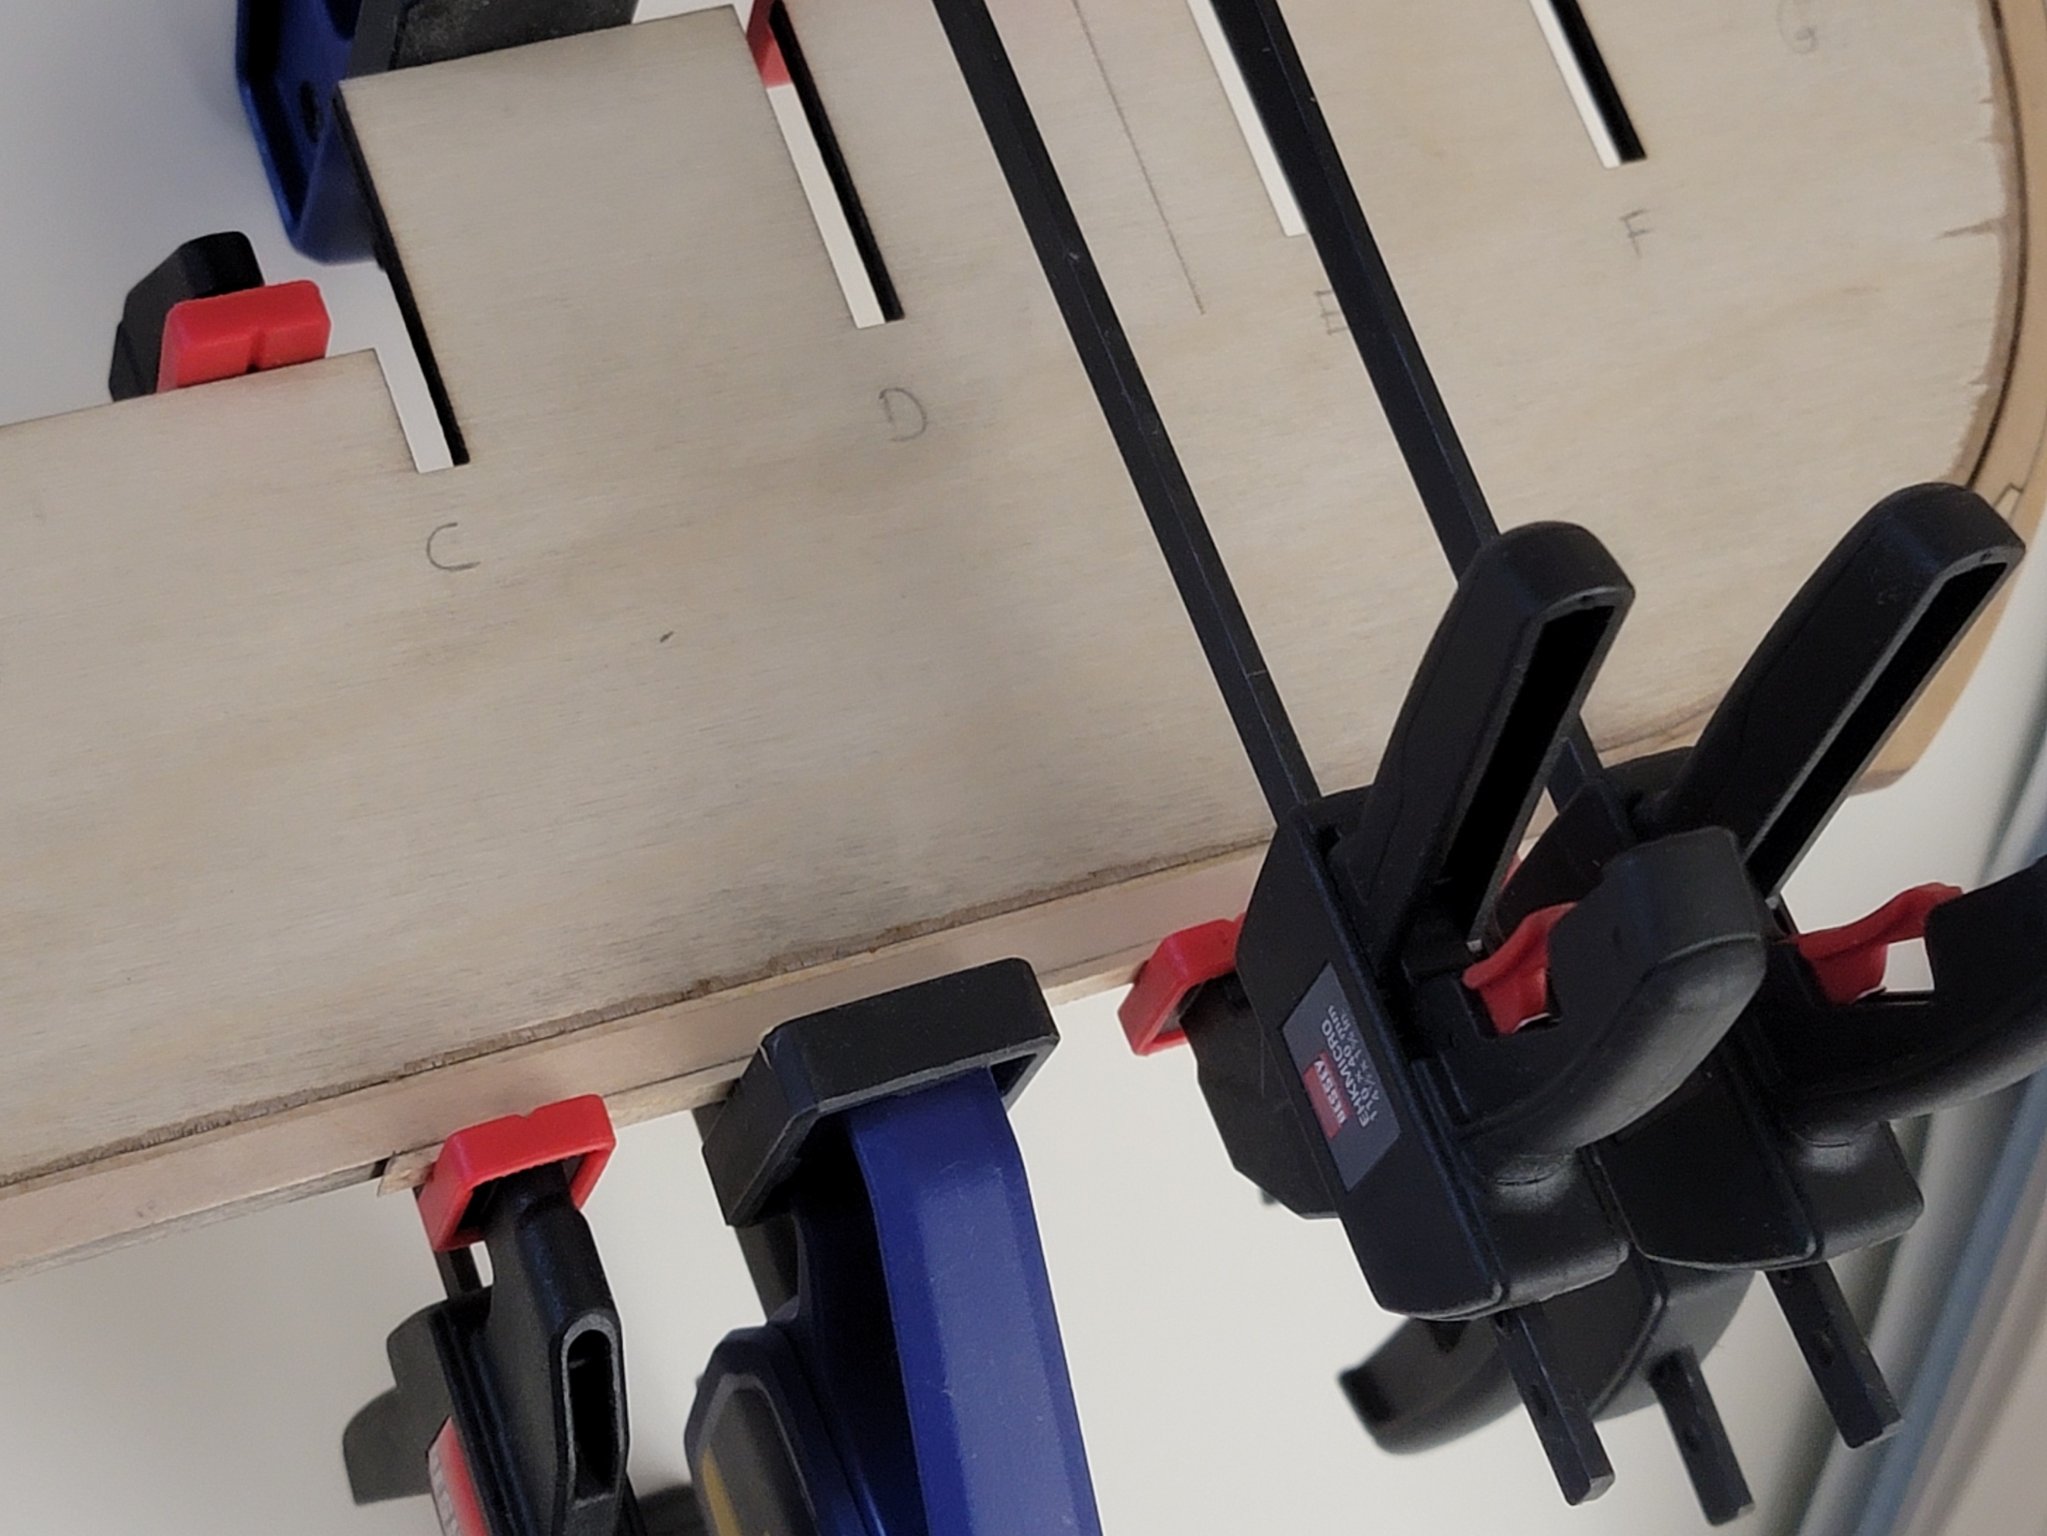
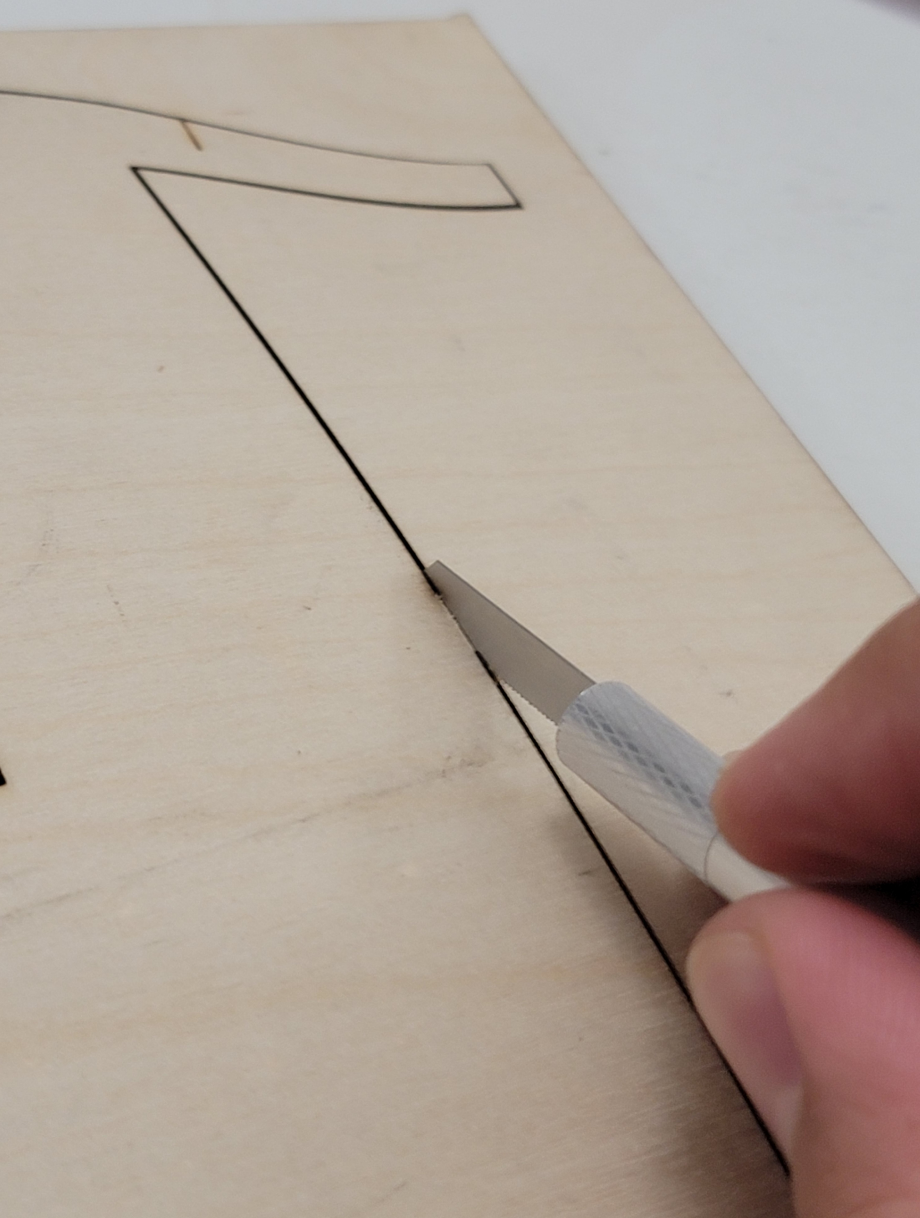
I finally made a start in the build! I first glued the the two halves of the bulkhead former. I clamped it as shown to ensure it would be completely flat. I used a saw blade to cut out the pieces from the sheets. I found it to be much quicker than using a #11 blade. I did the same for the stem pieces: Next I shaped the rabbet strip. Before gluing the pieces of the stem, I sanded off the laser cut char marks on the edges, and darkened the seams with an HB pencil. I gave it a quick sand to clean it up a bit: I still need to taper the stem, finish up with tung oil, and glue in the rabbet strip on the bulkhead former.


-
Thank you Chris and Edward for the great comments! 😀
- 950 replies
-
- 1
-
-
- syren
- model shipways
- (and 1 more)