.jpg.1f80adf1a9b14a937cfcf2ca6af0f0d4.jpg)
WalrusGuy
-
Posts
1,011 -
Joined
-
Last visited
Content Type
Profiles
Forums
Gallery
Events
Everything posted by WalrusGuy
-
.thumb.jpg.62d1d69fed1f32364417cb1f9cdeb009.jpg) Thanks so much for the nice words, Thomas!
Thanks so much for the nice words, Thomas! -
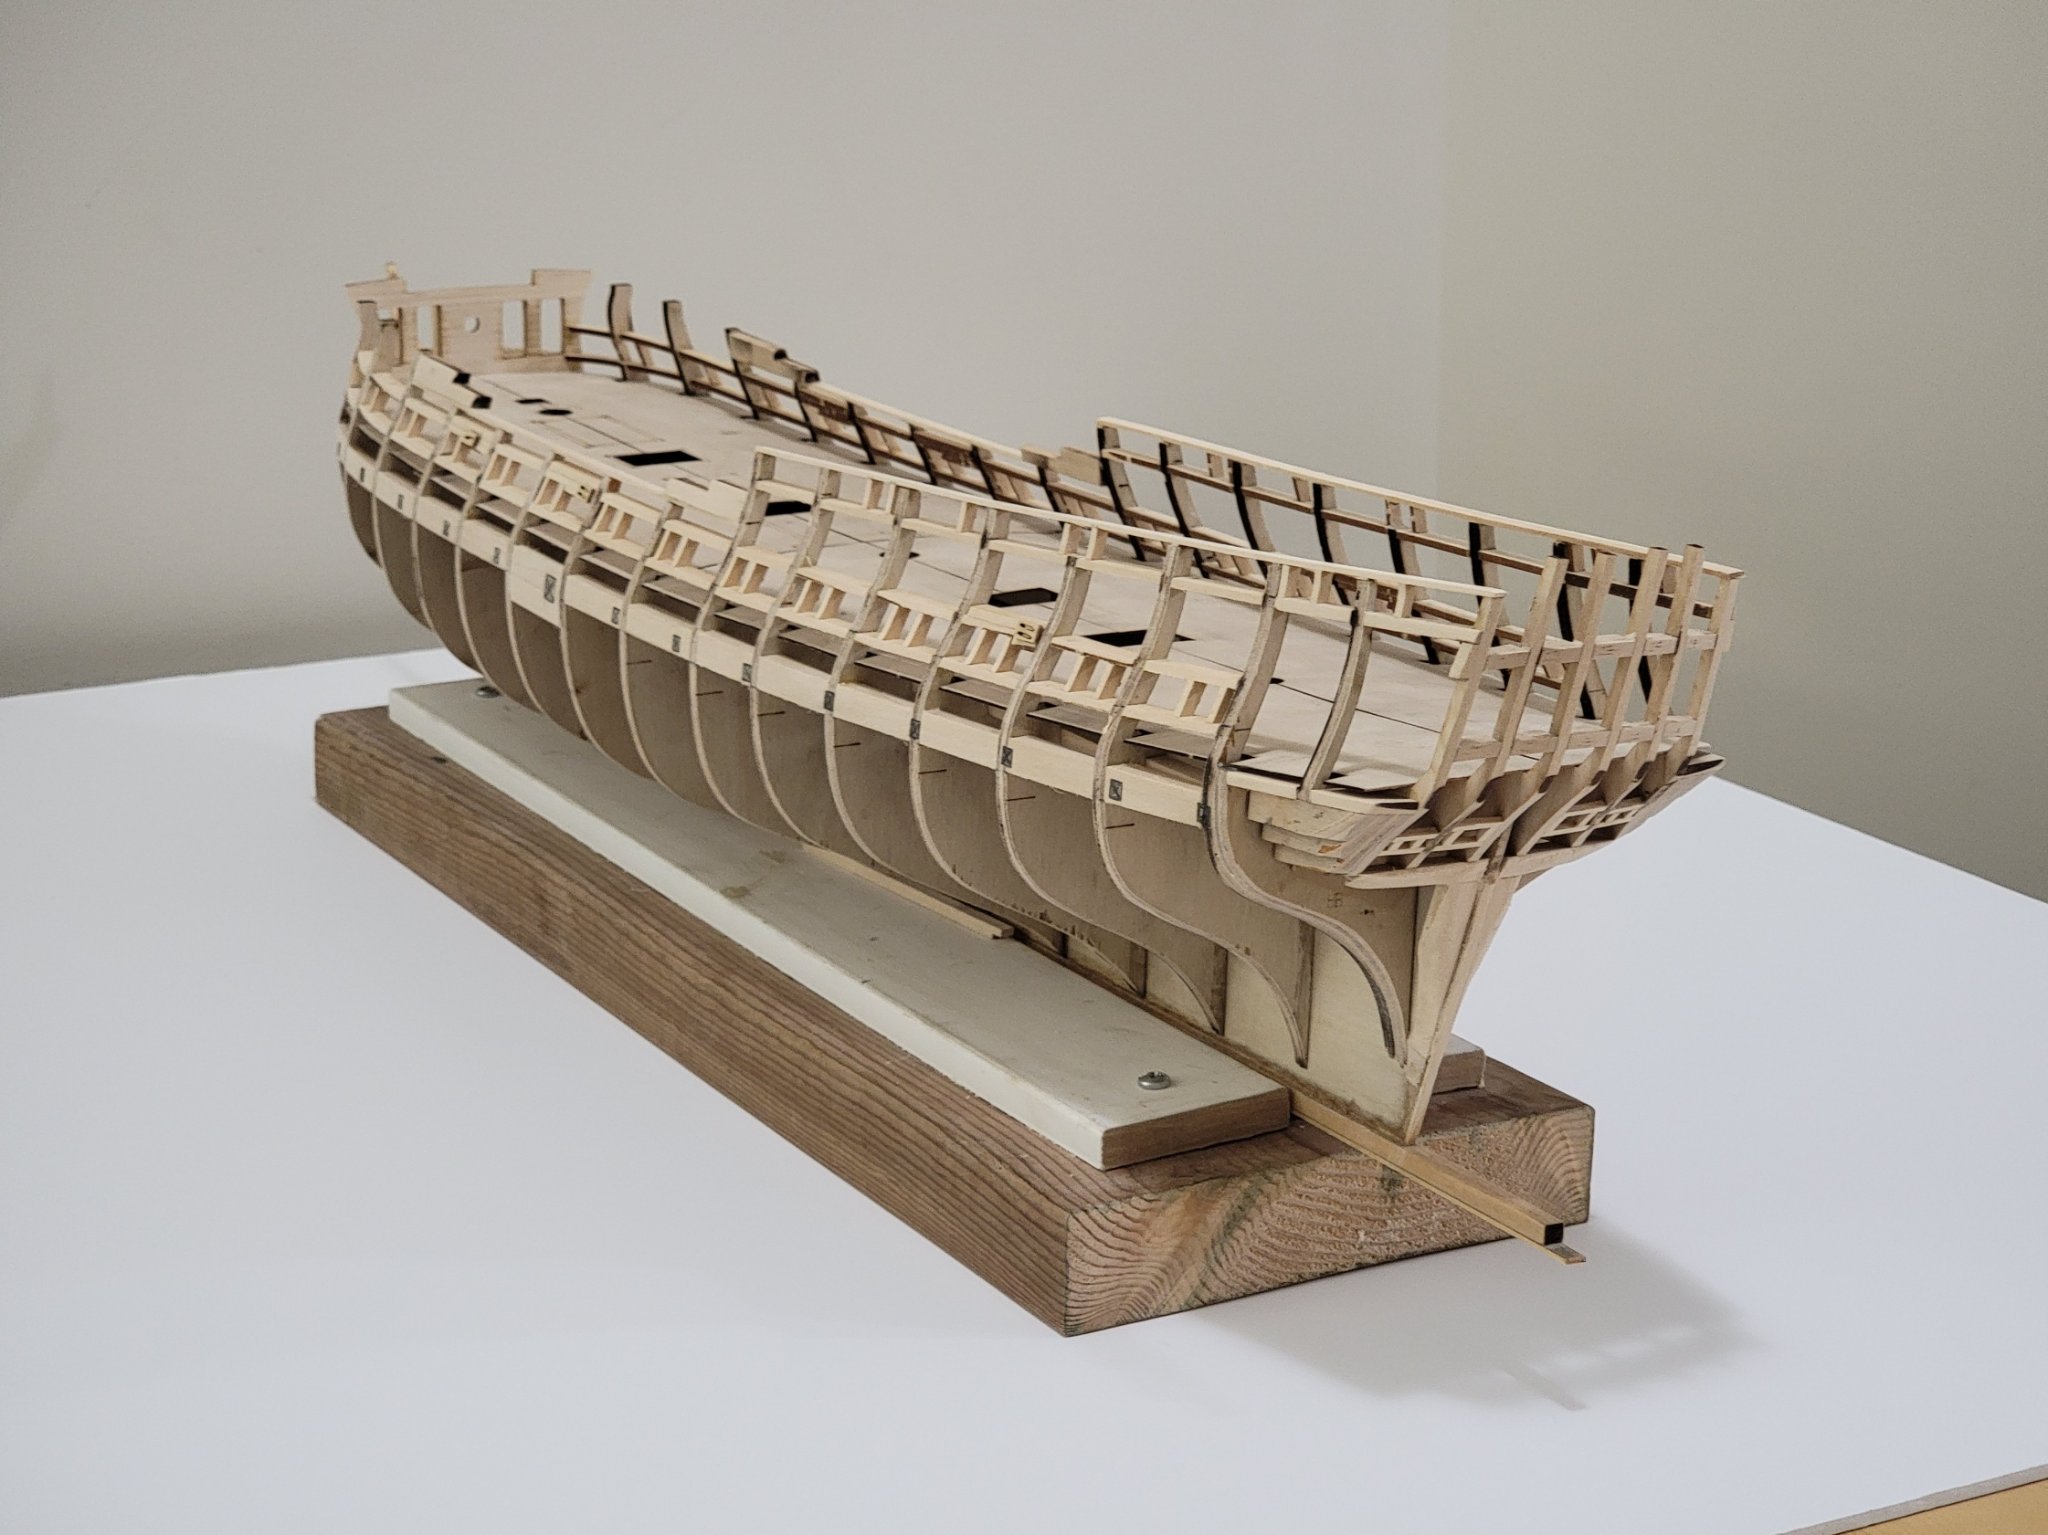
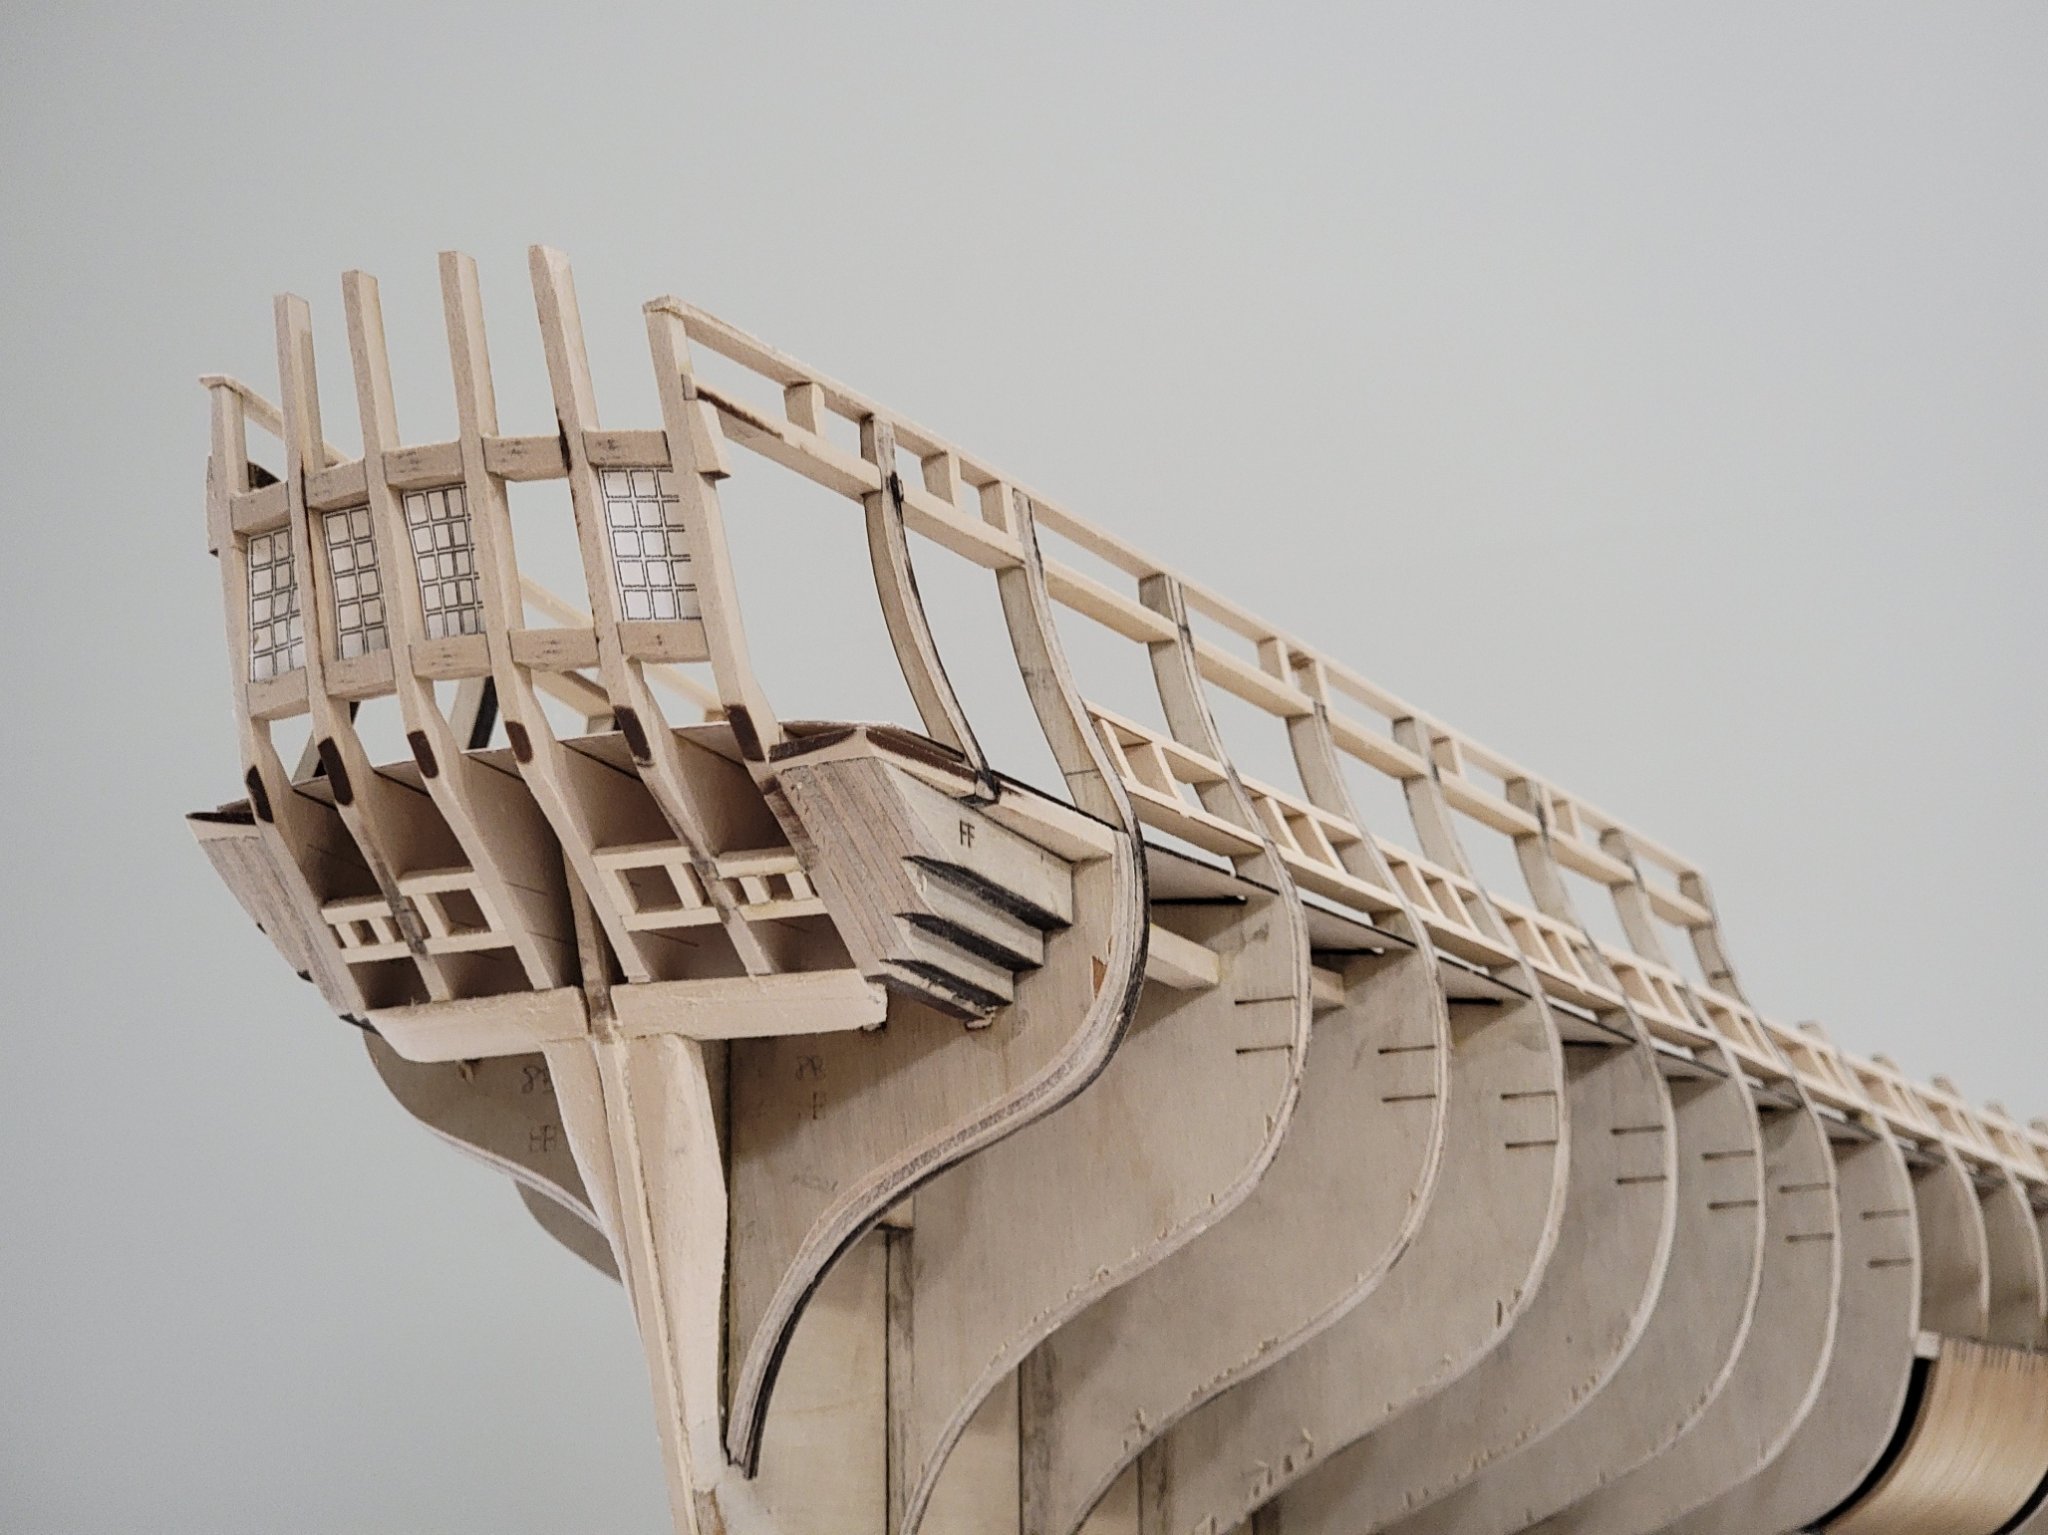
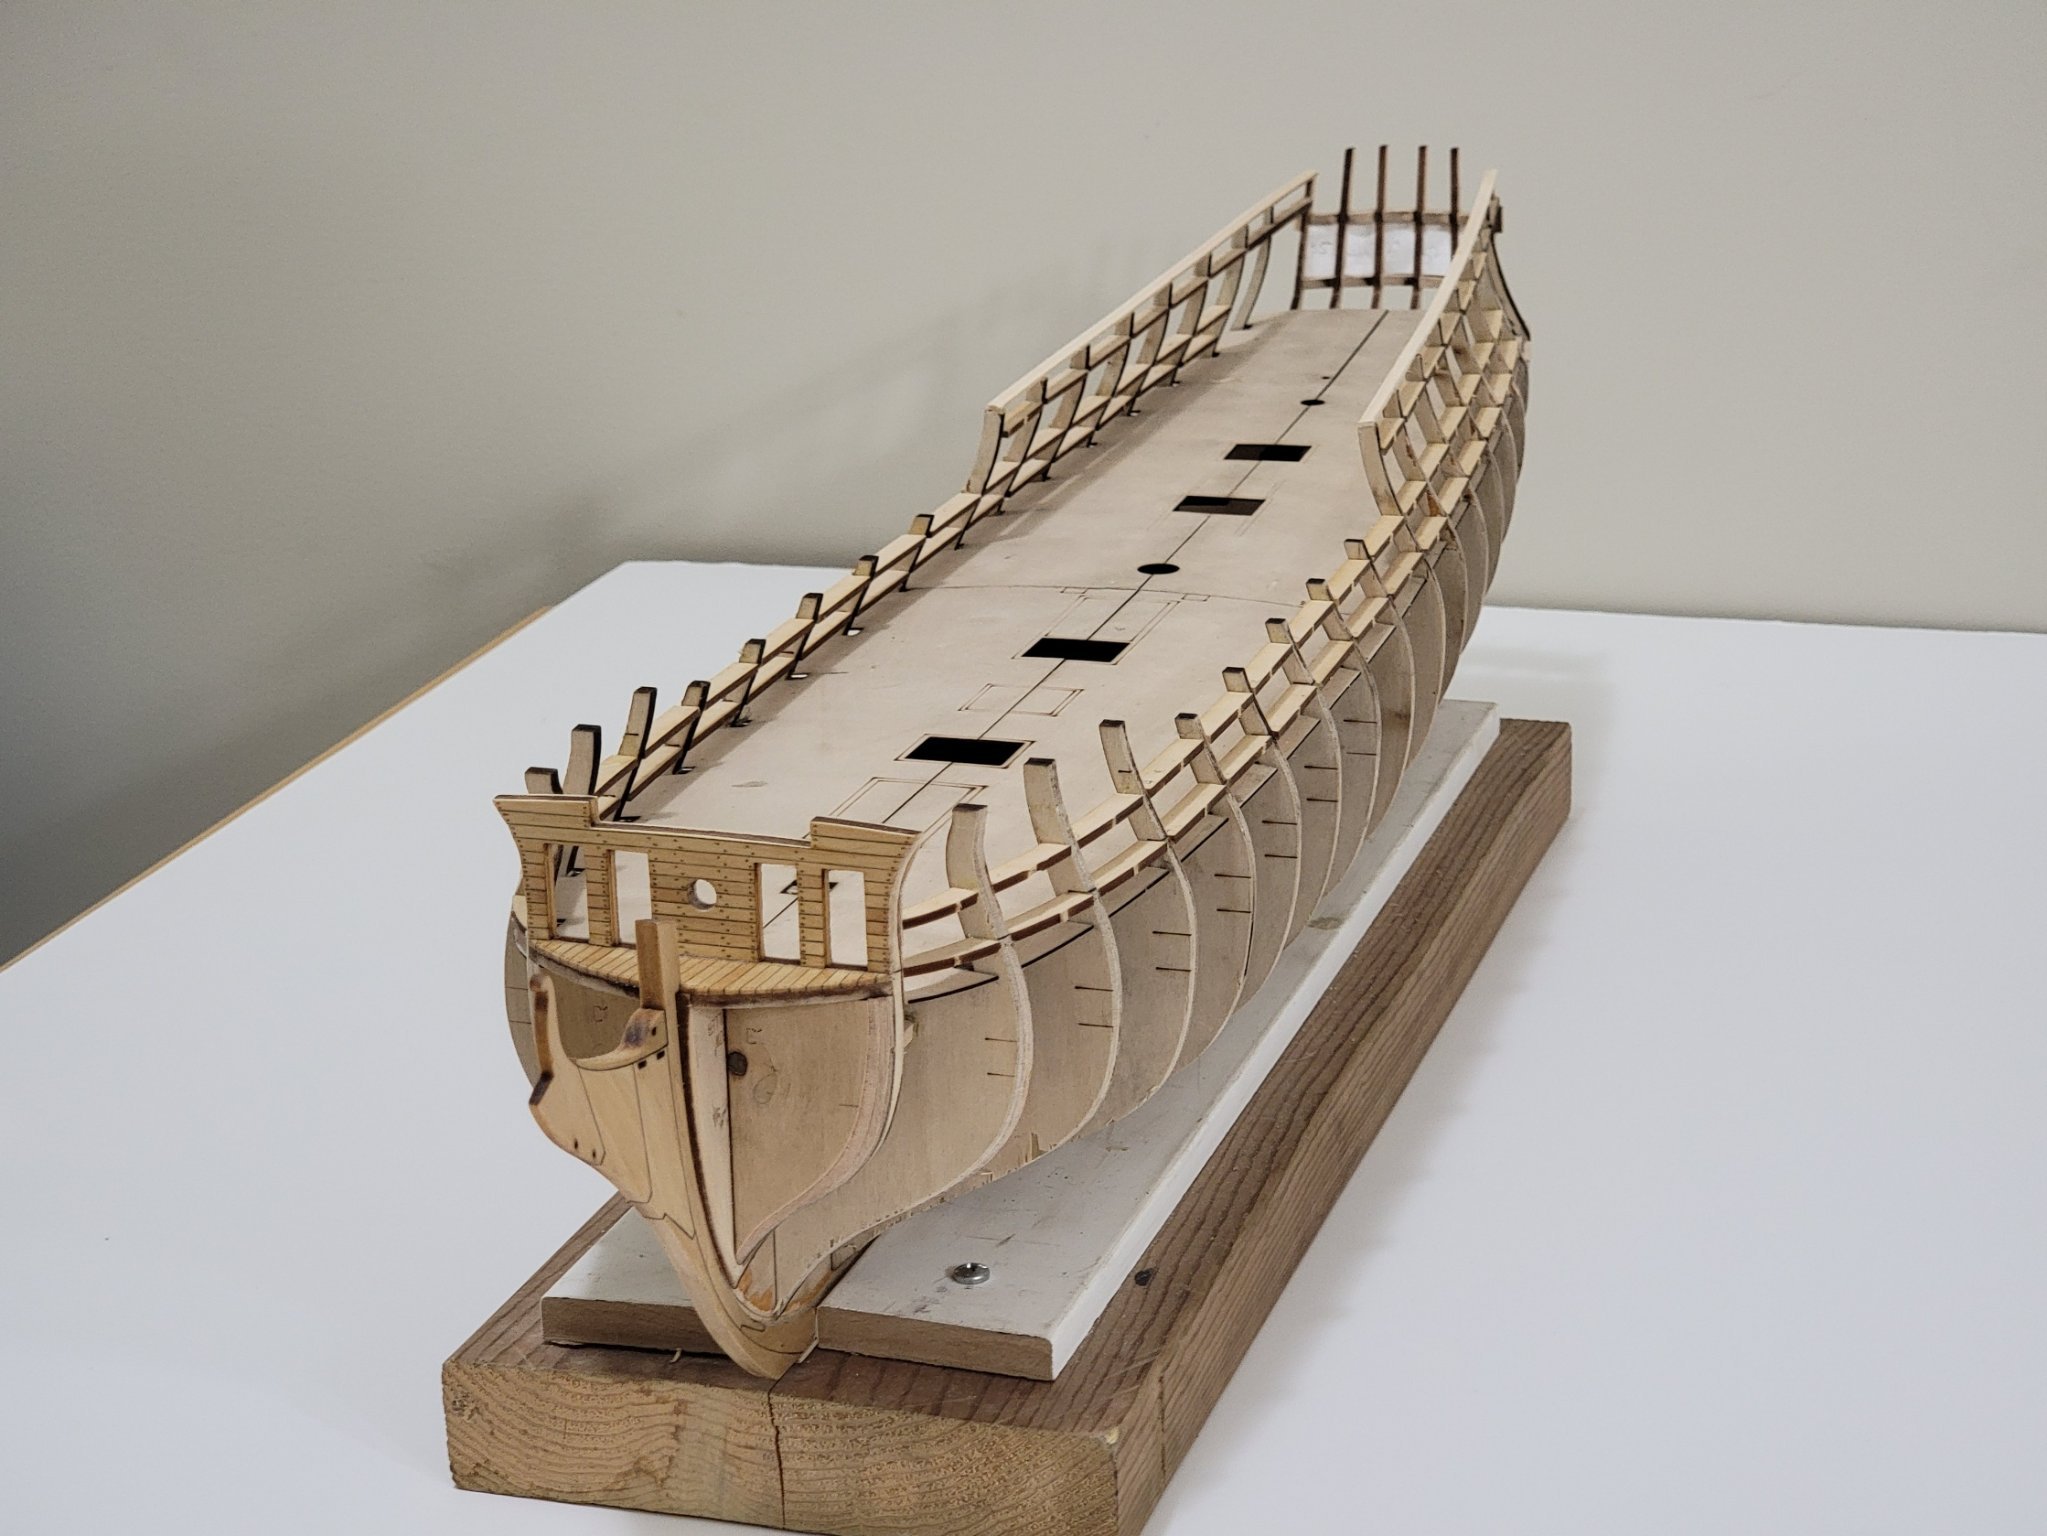
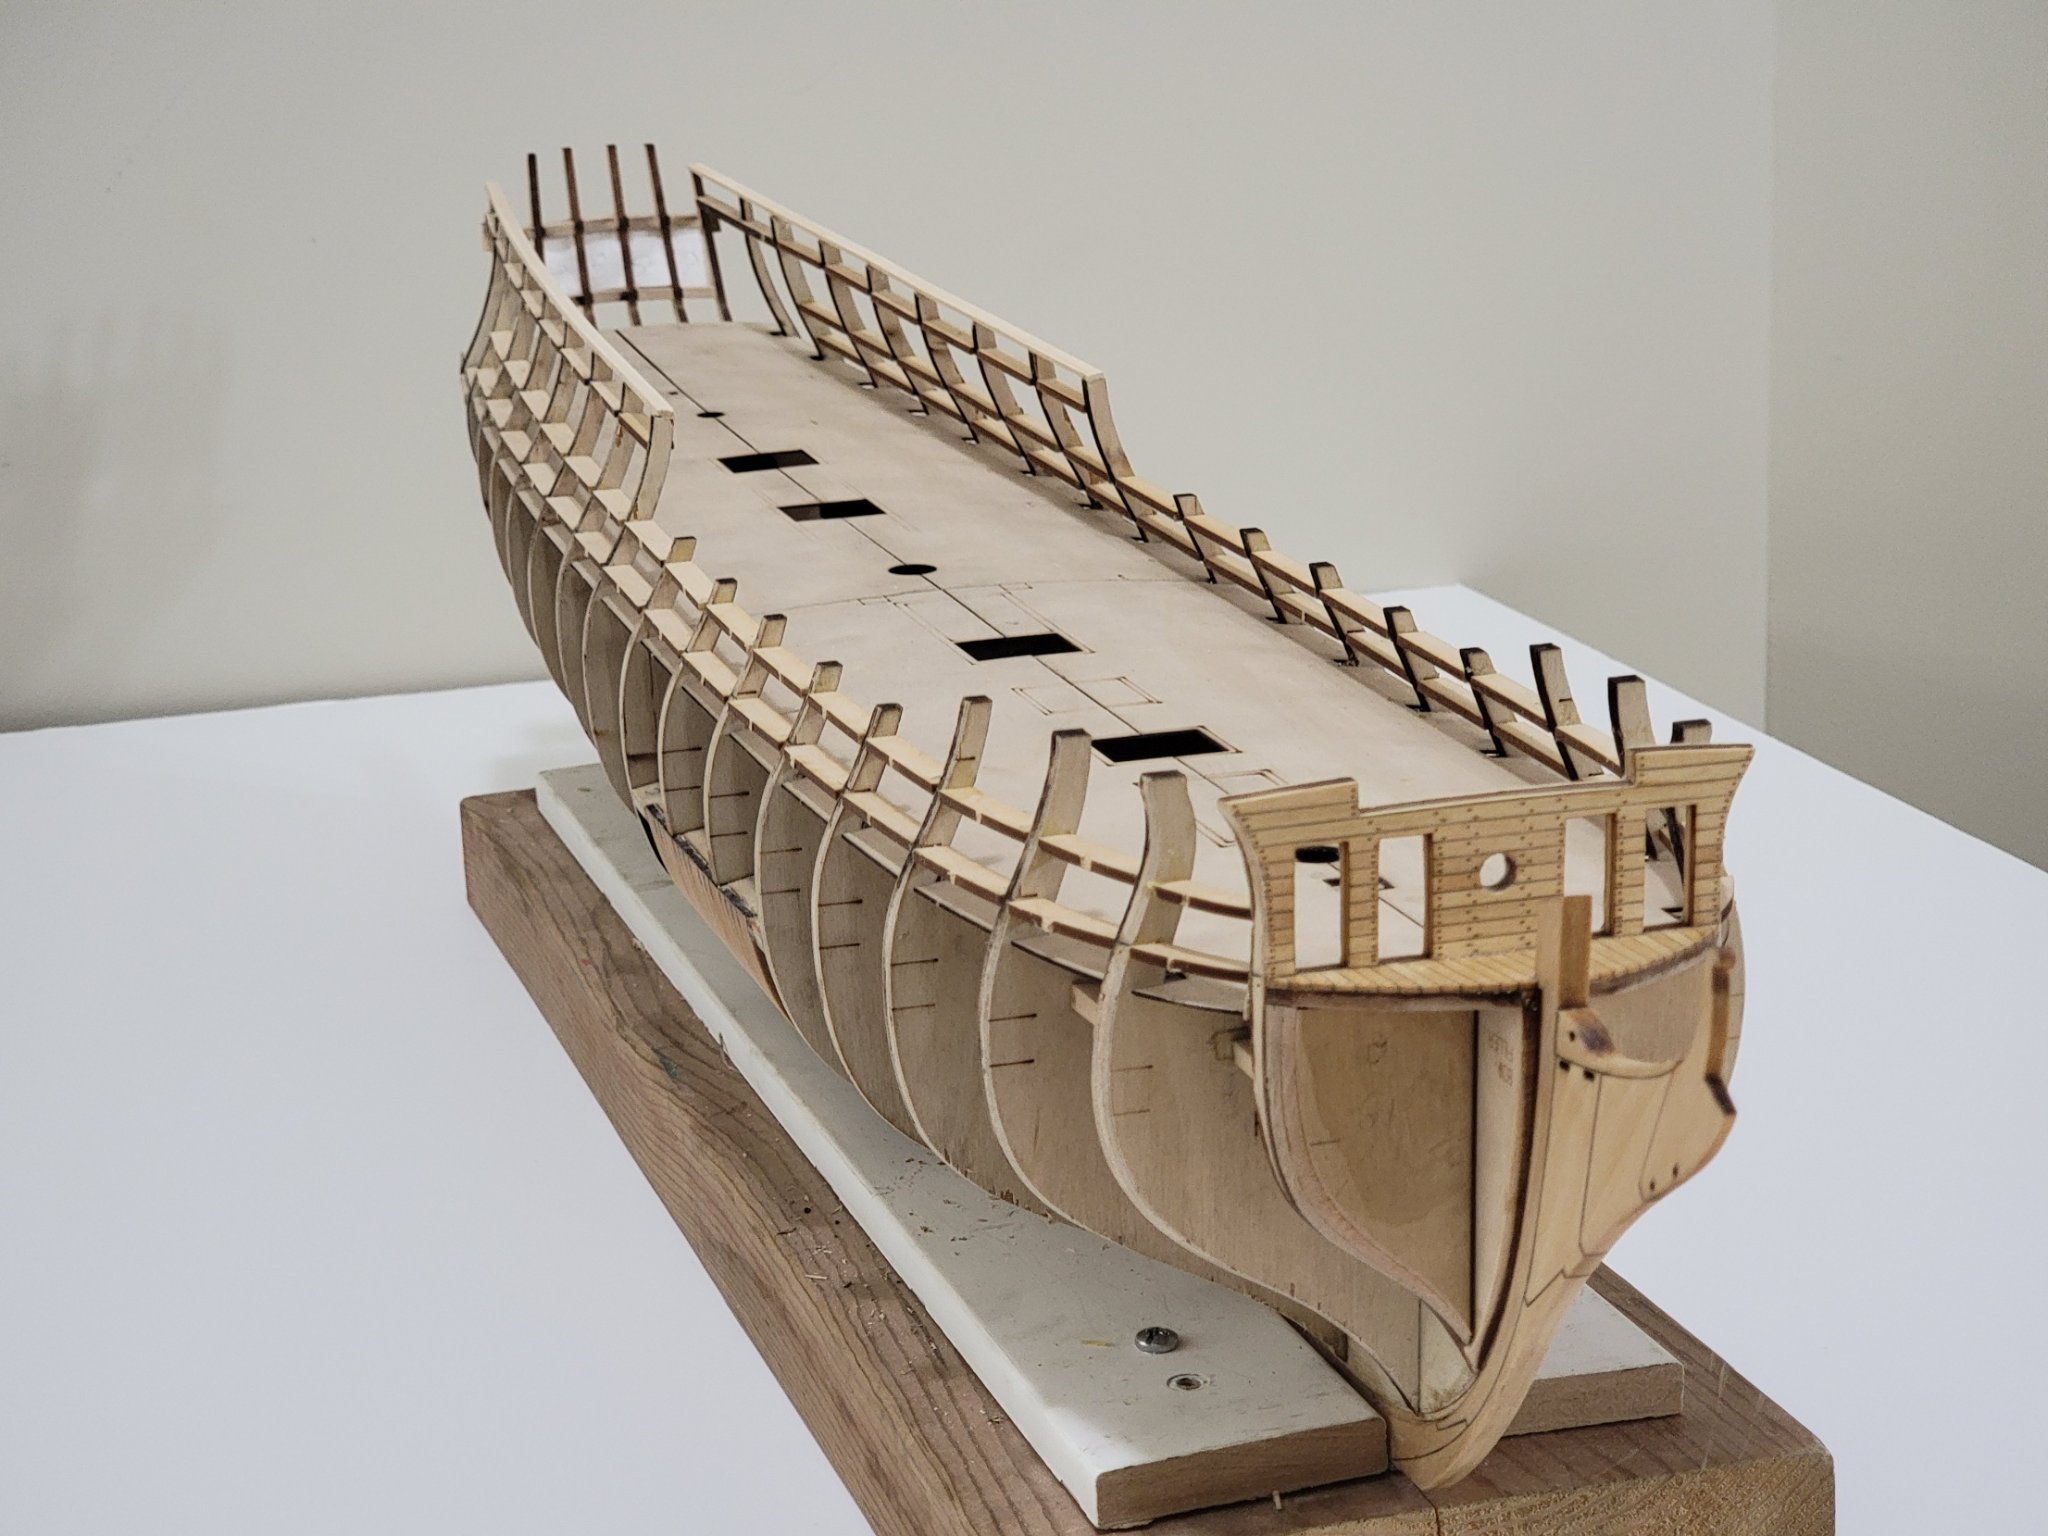
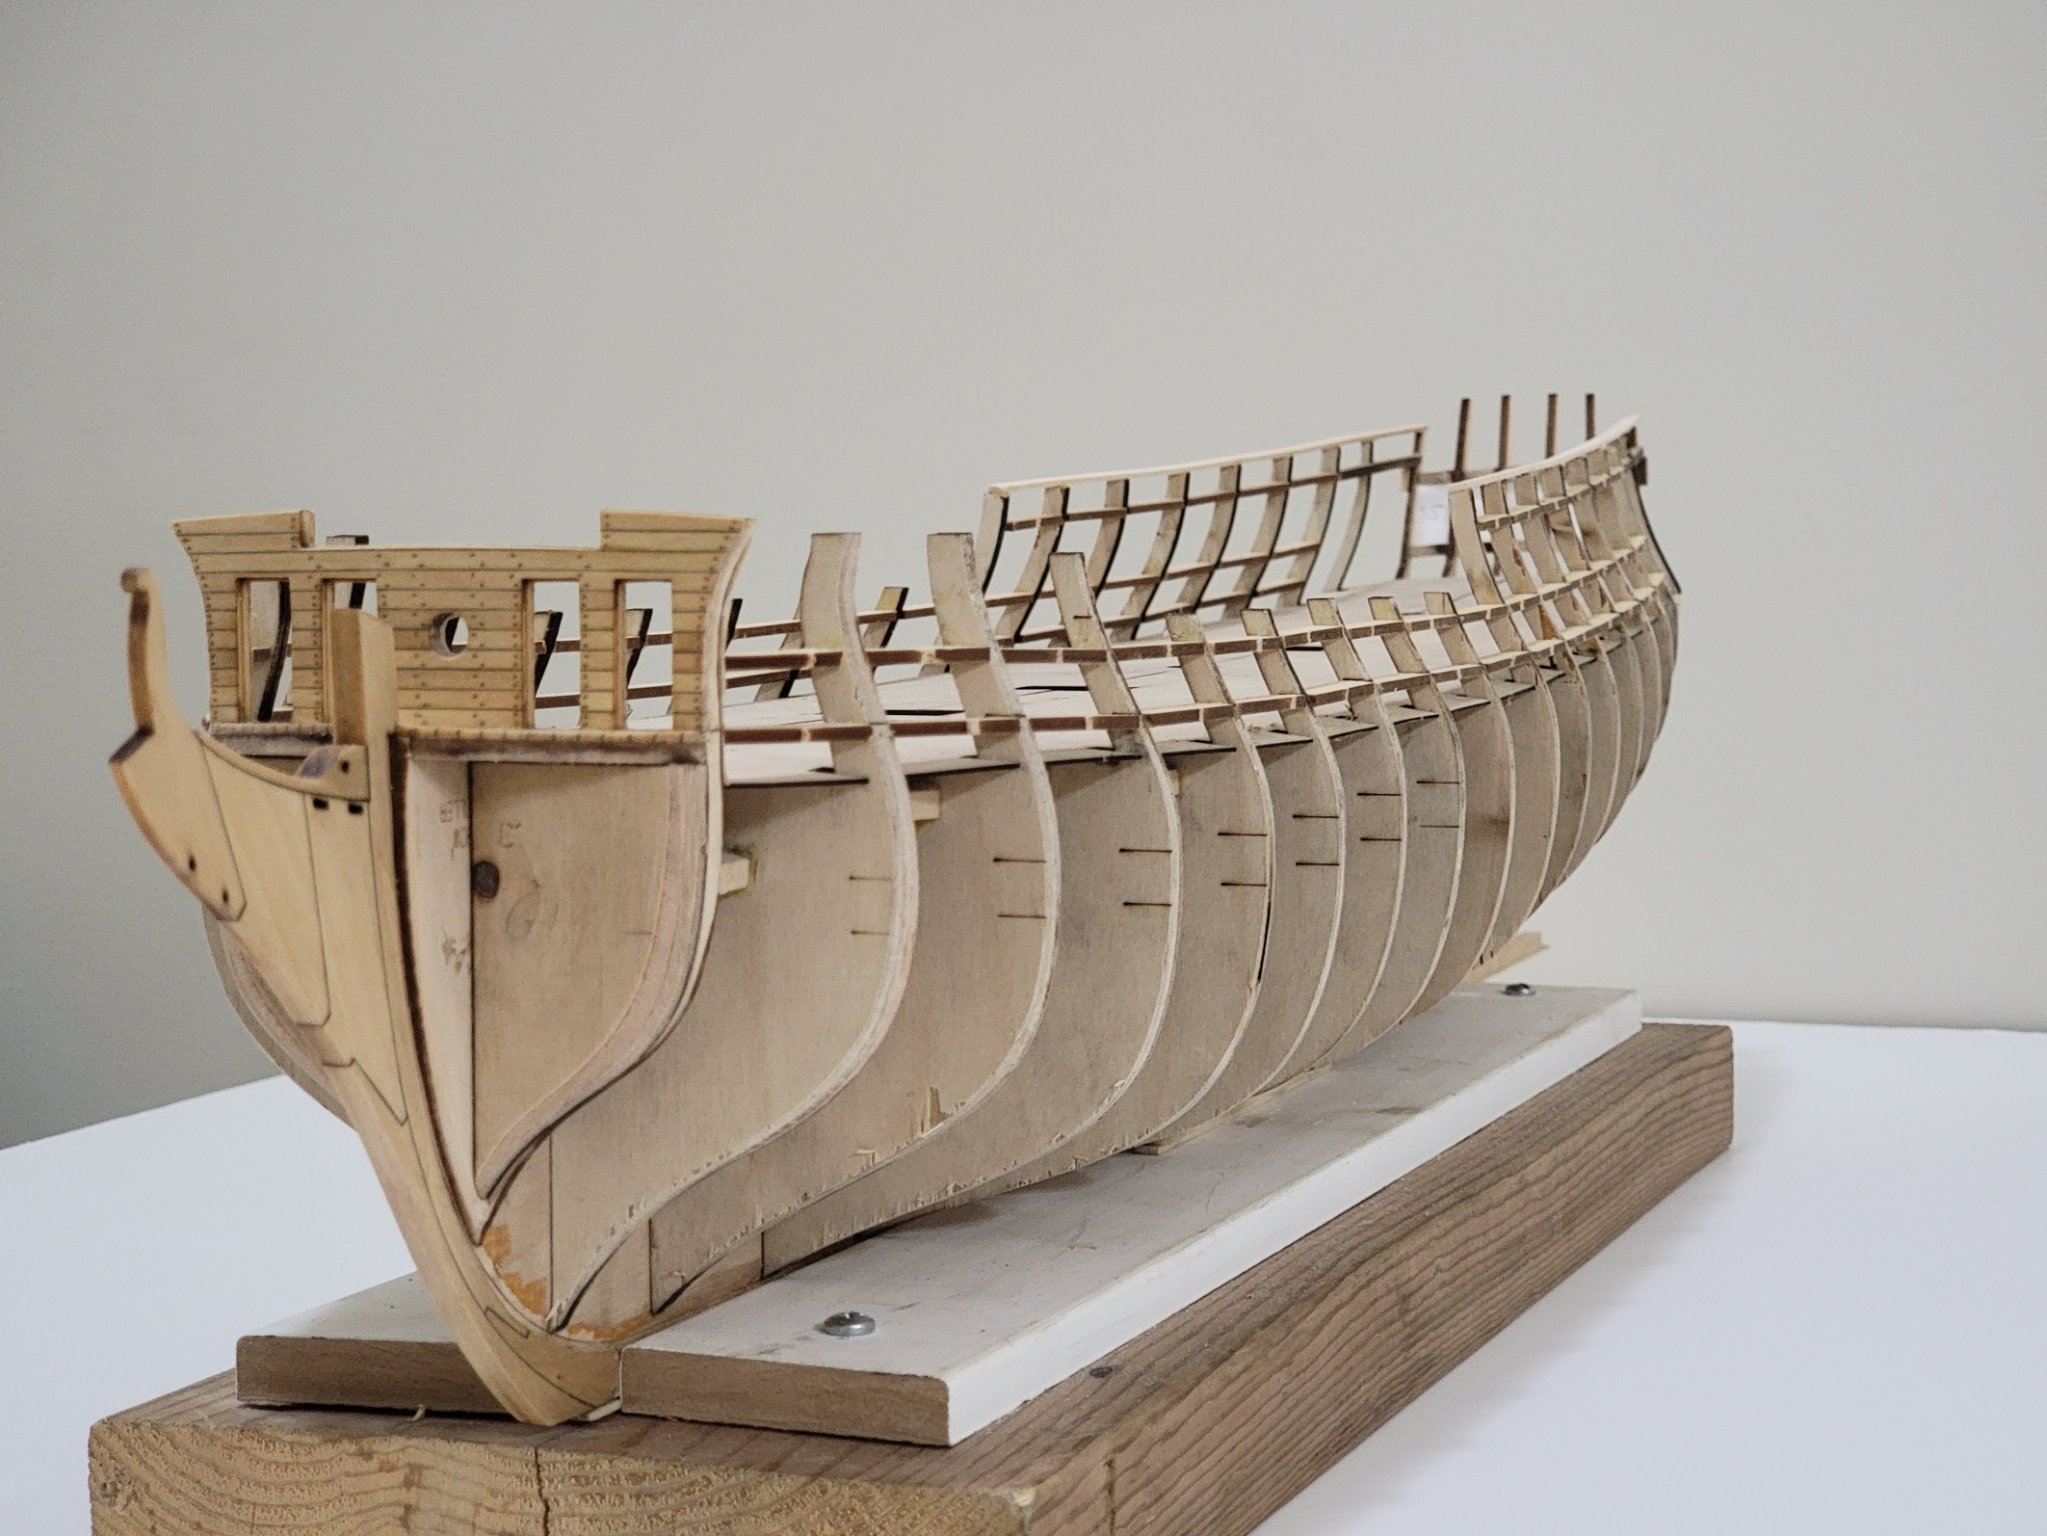
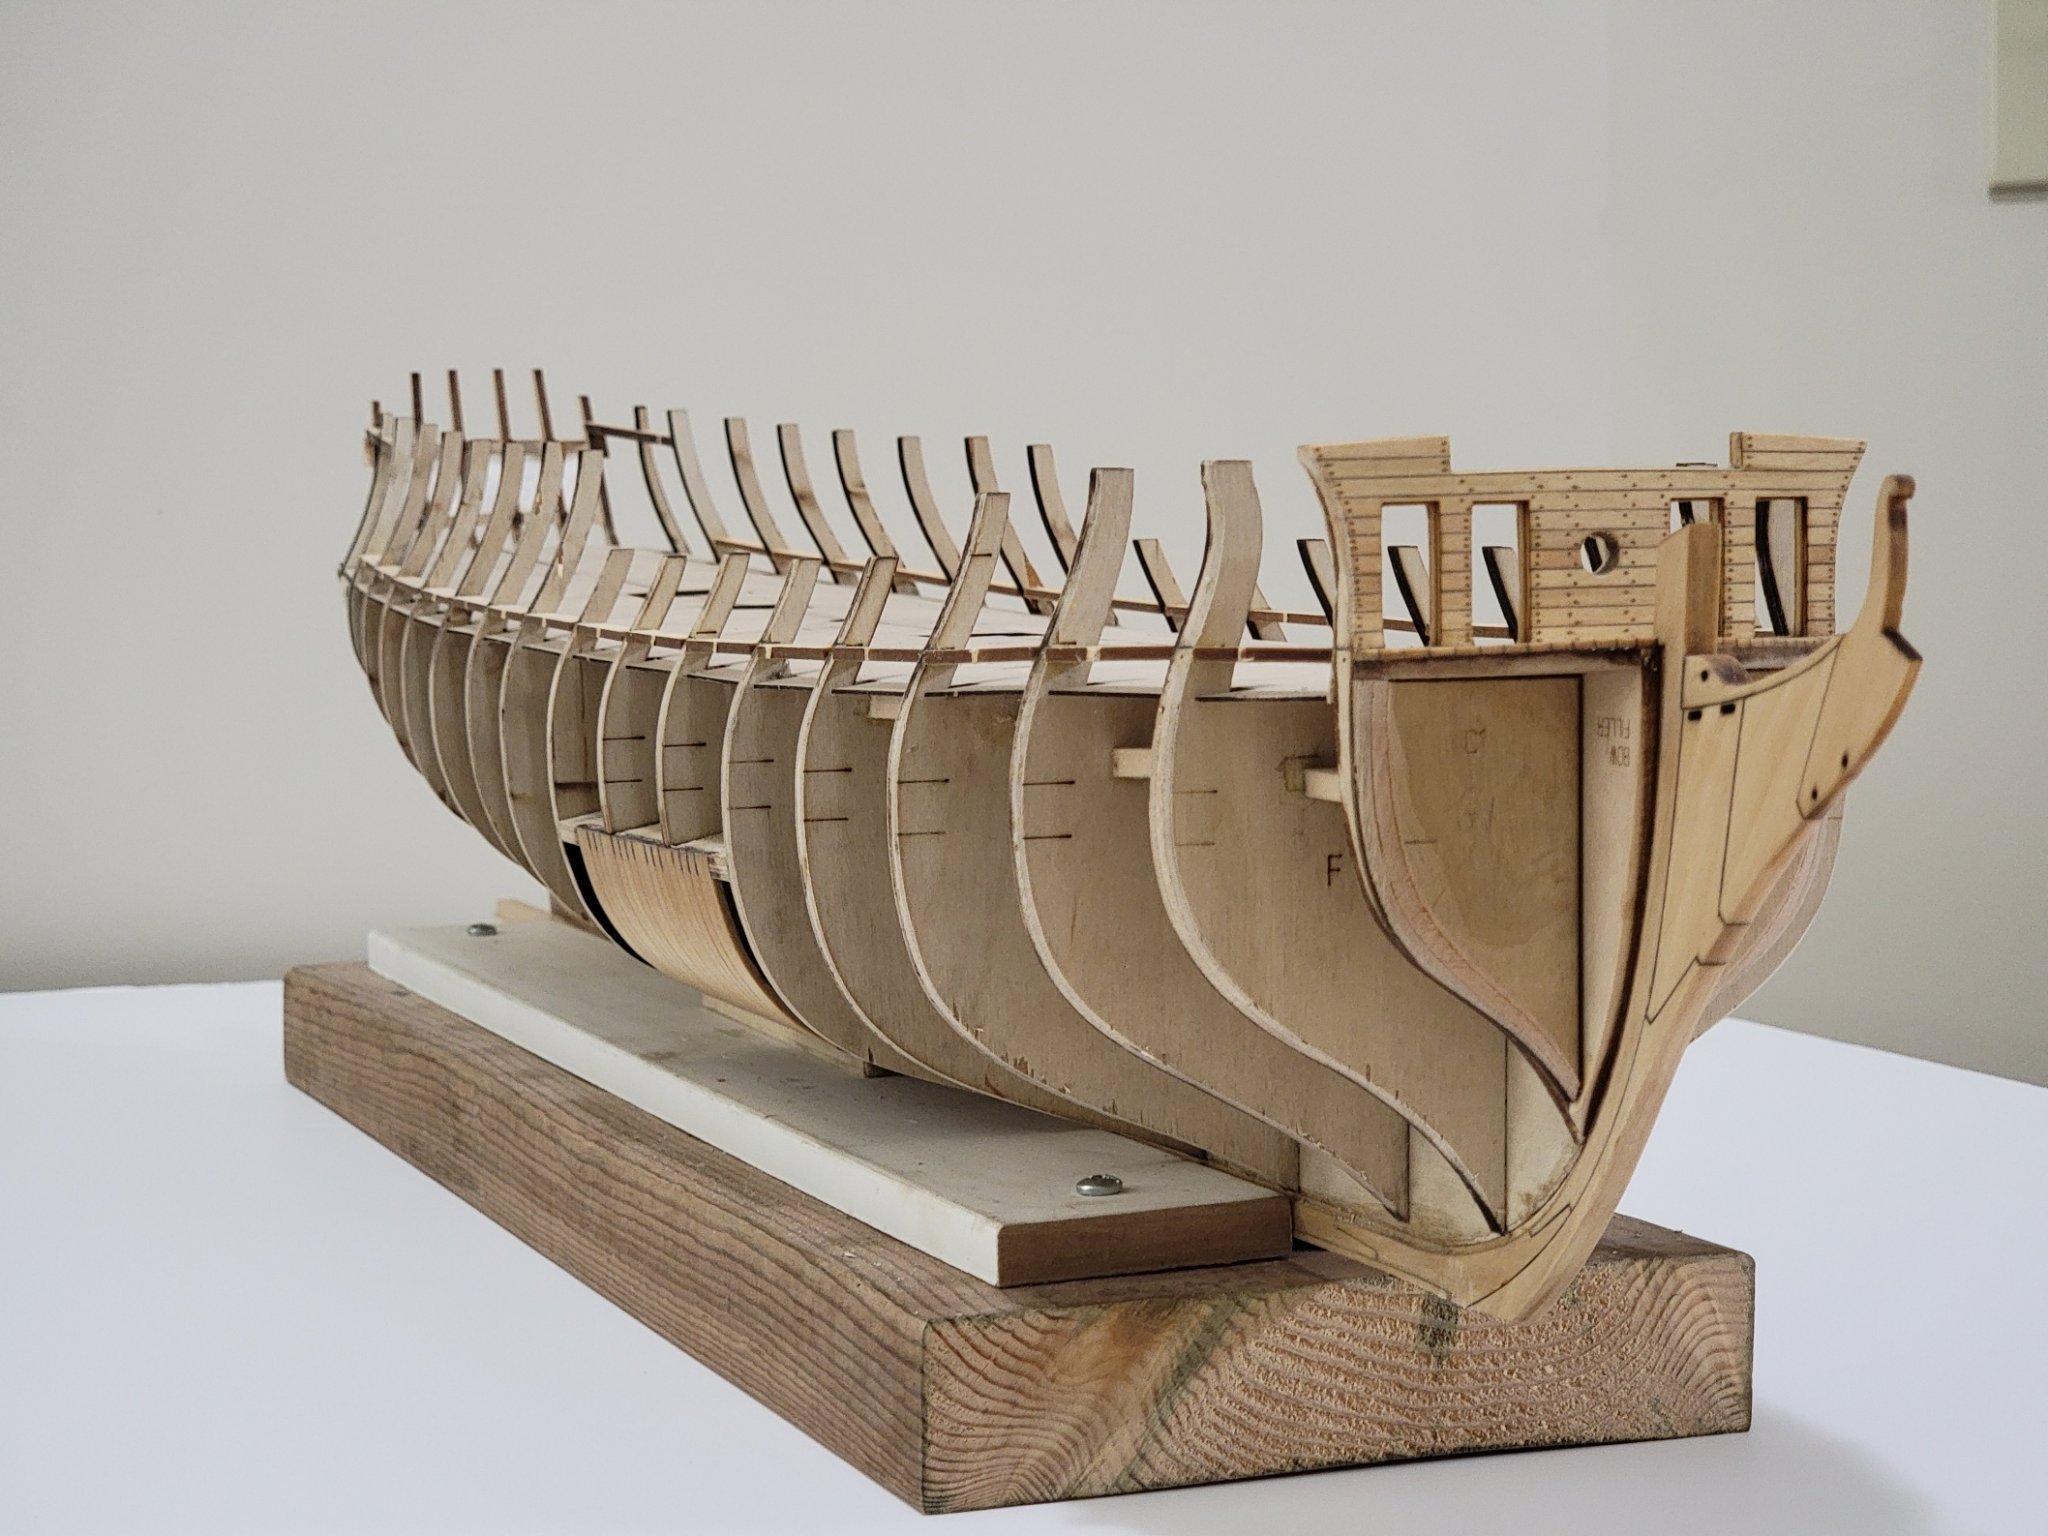
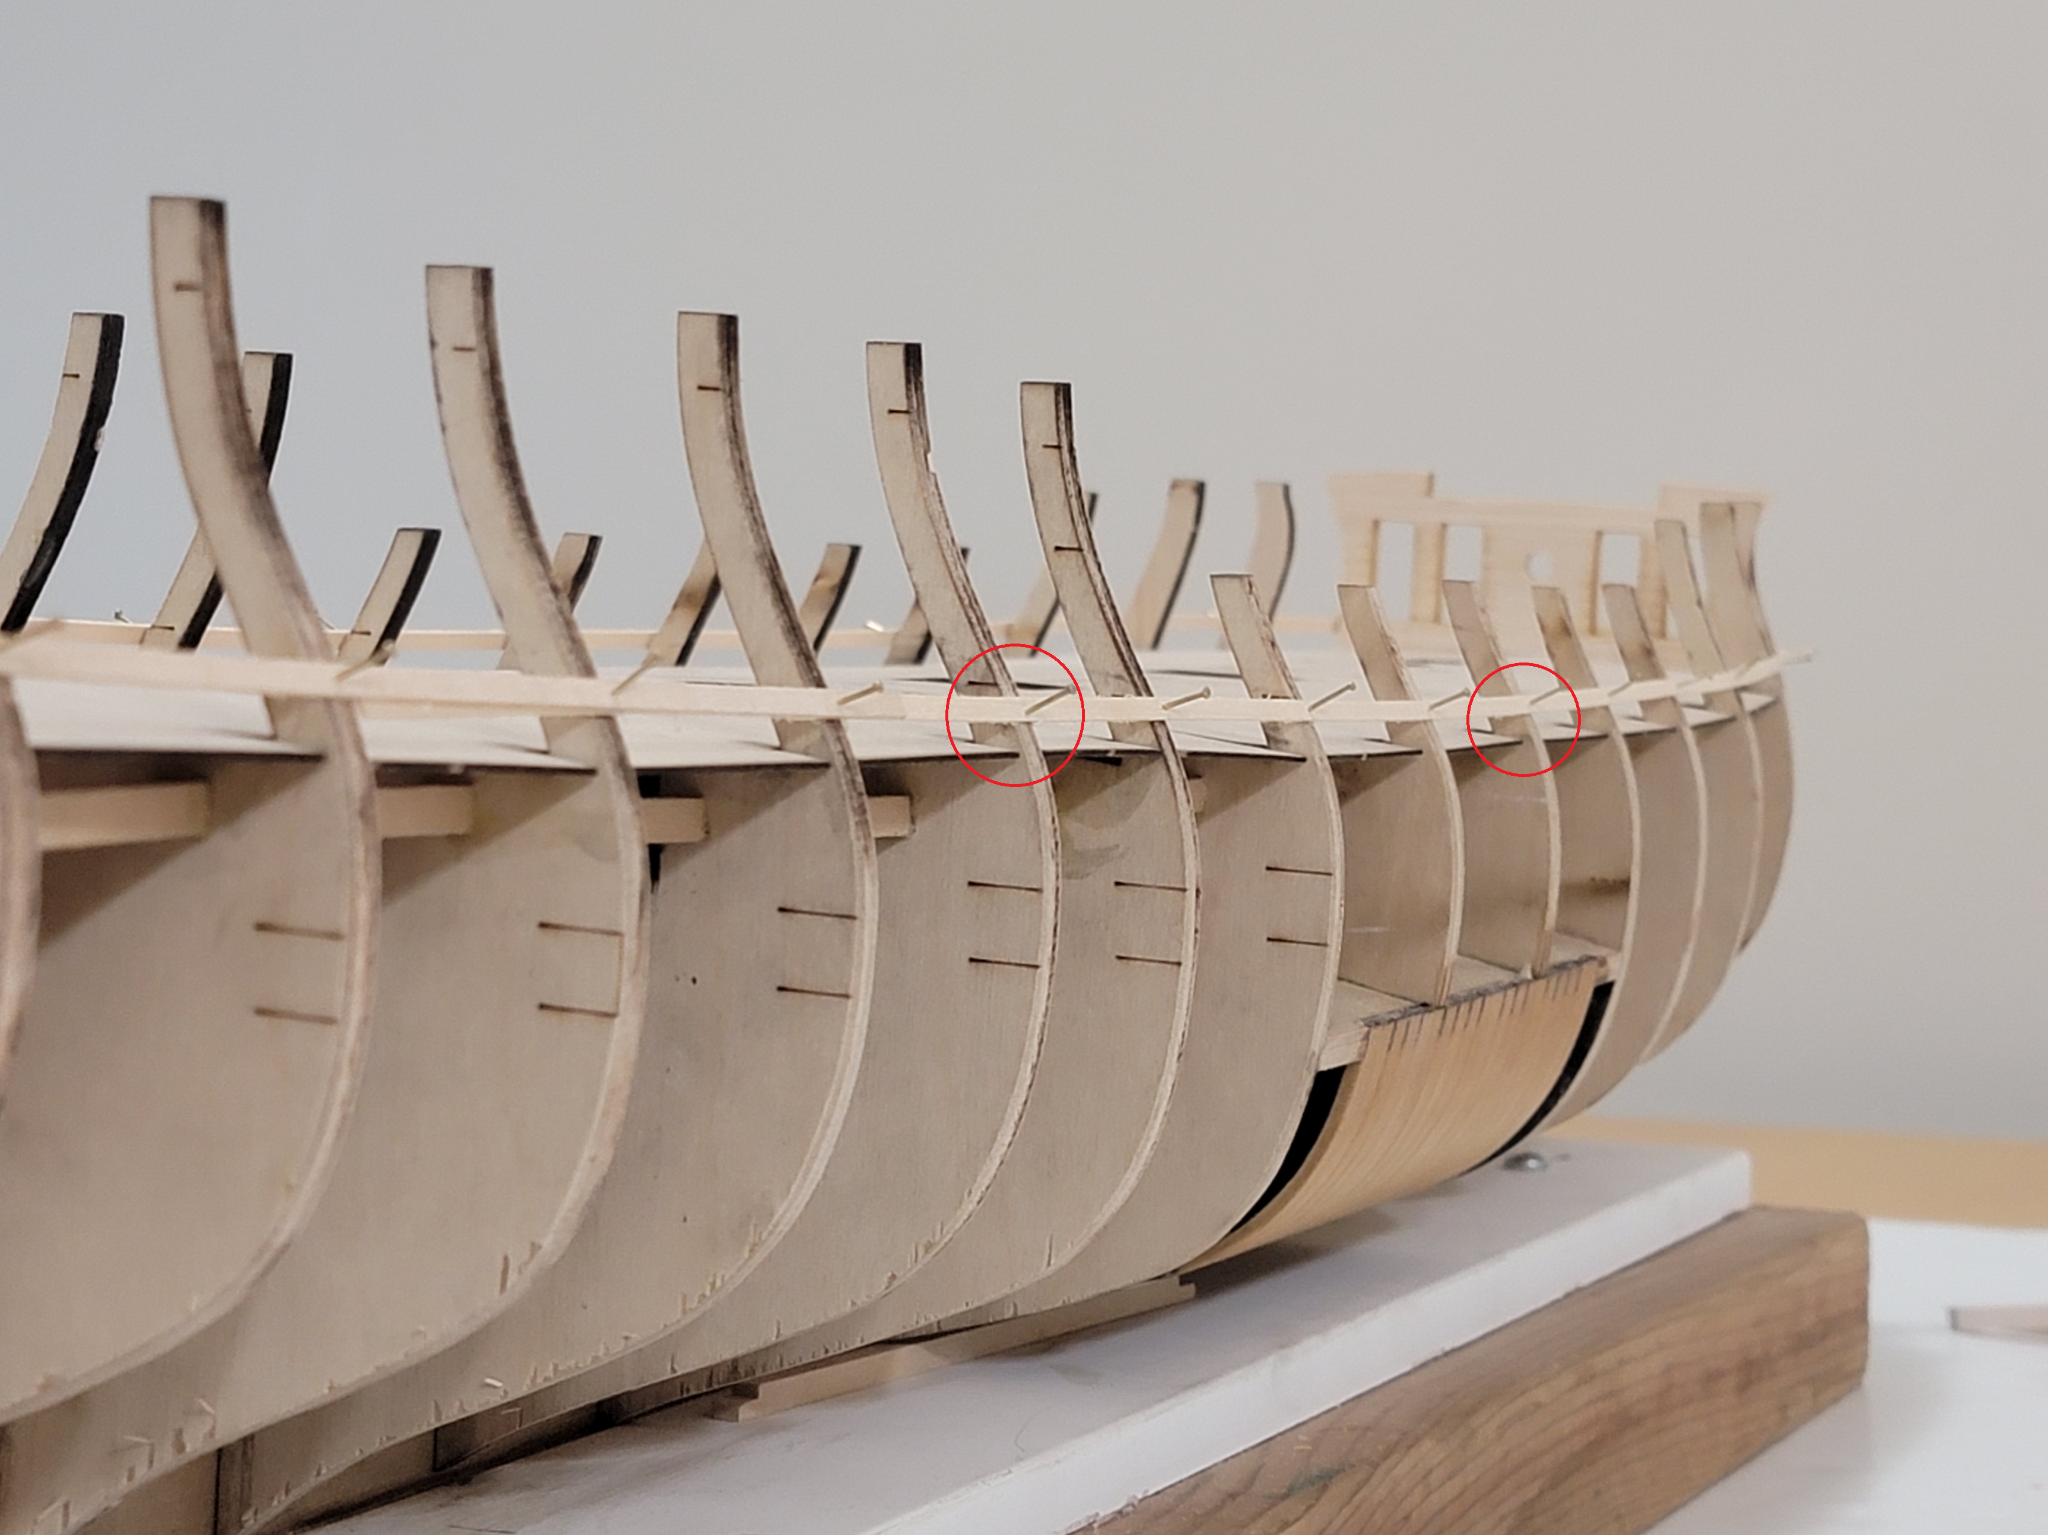
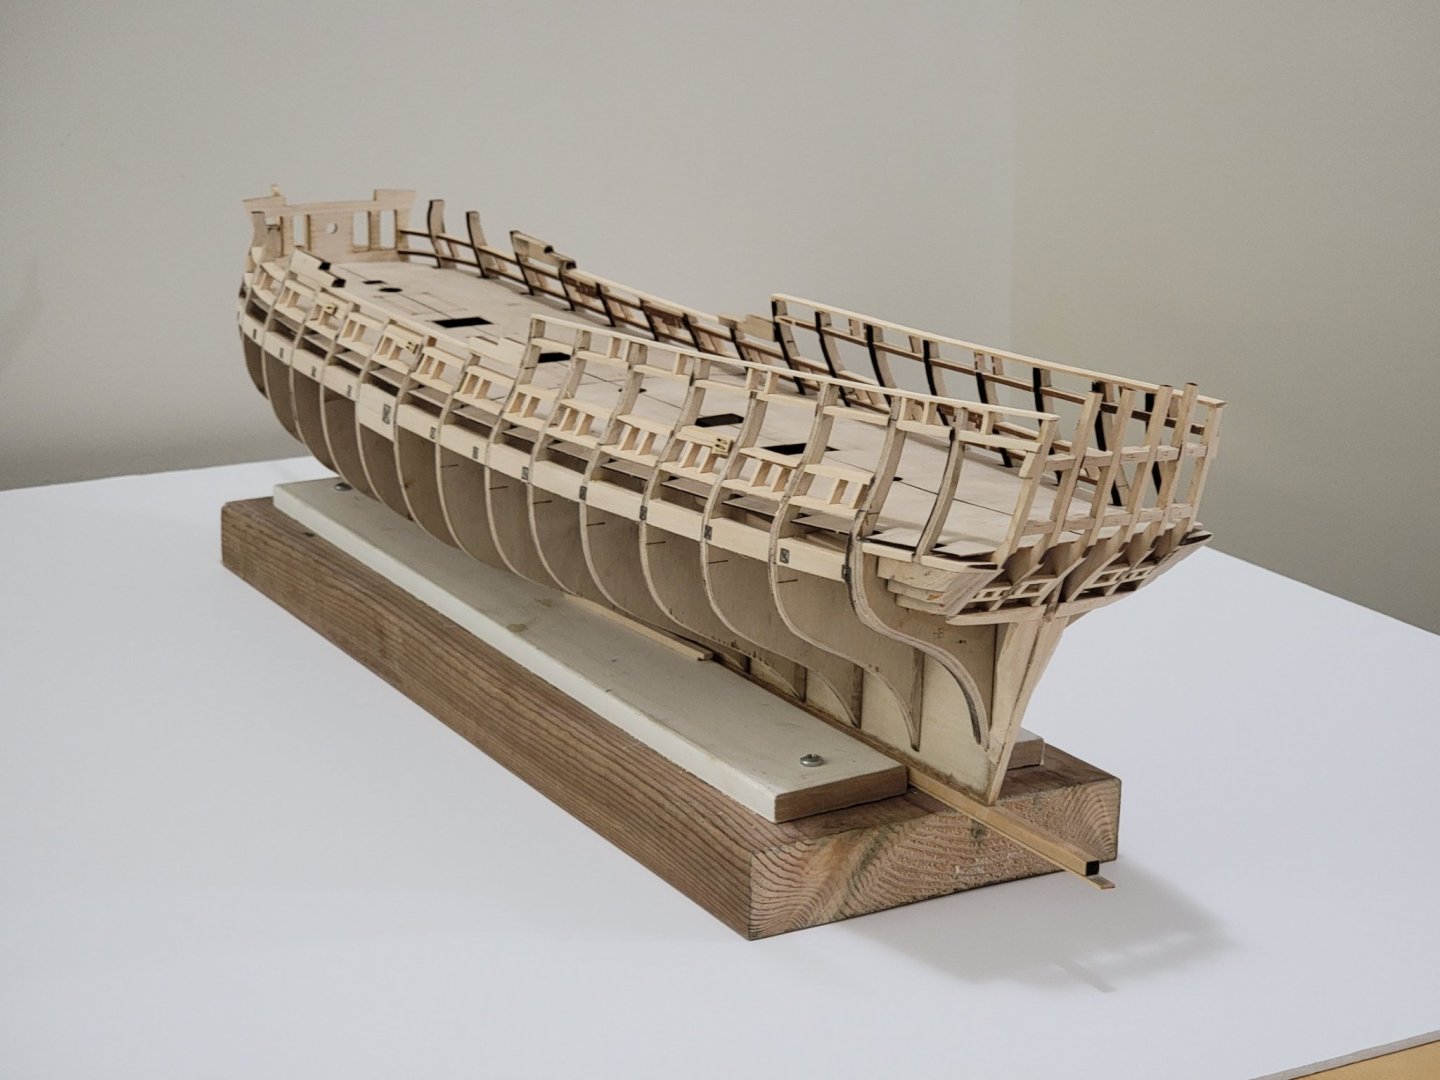
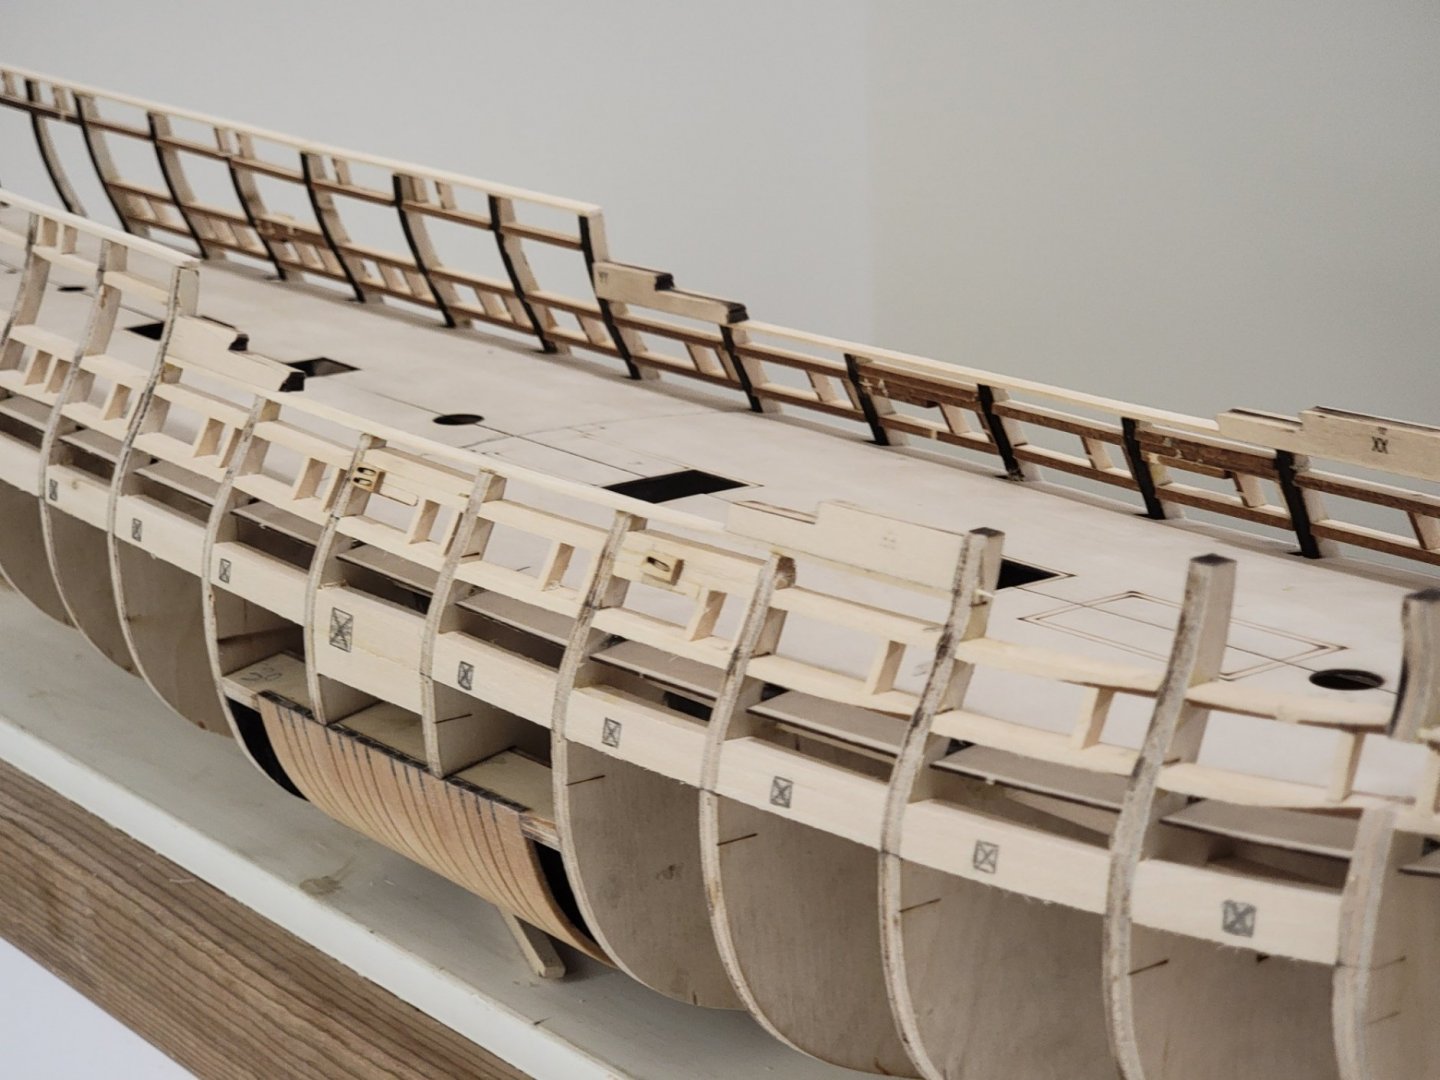
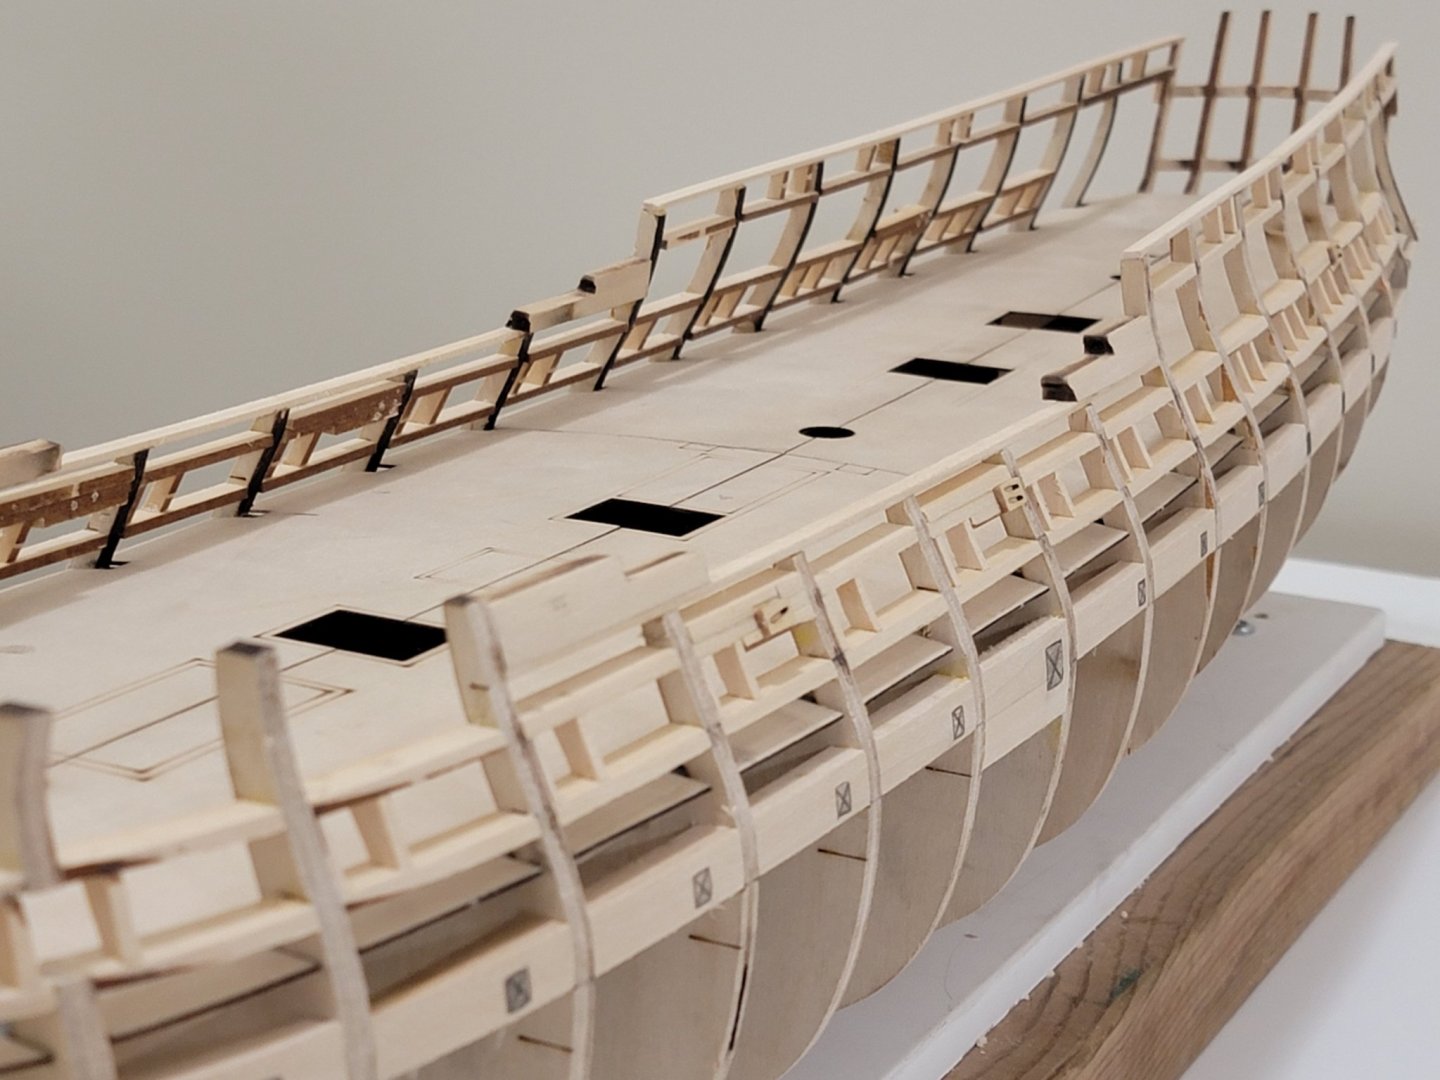
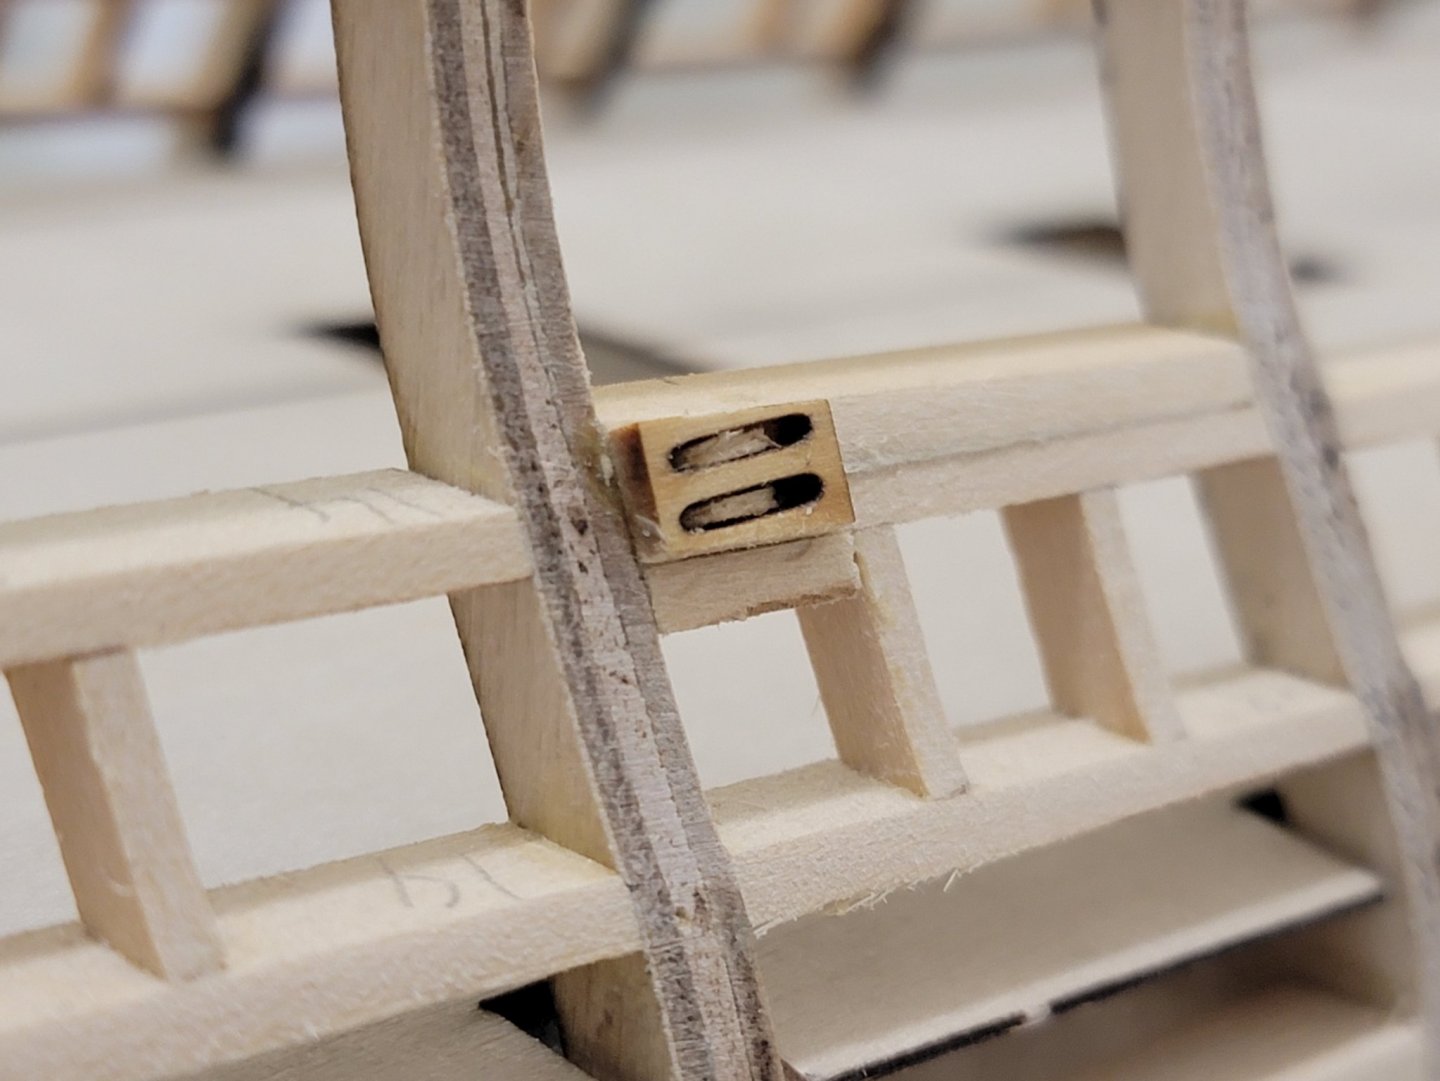
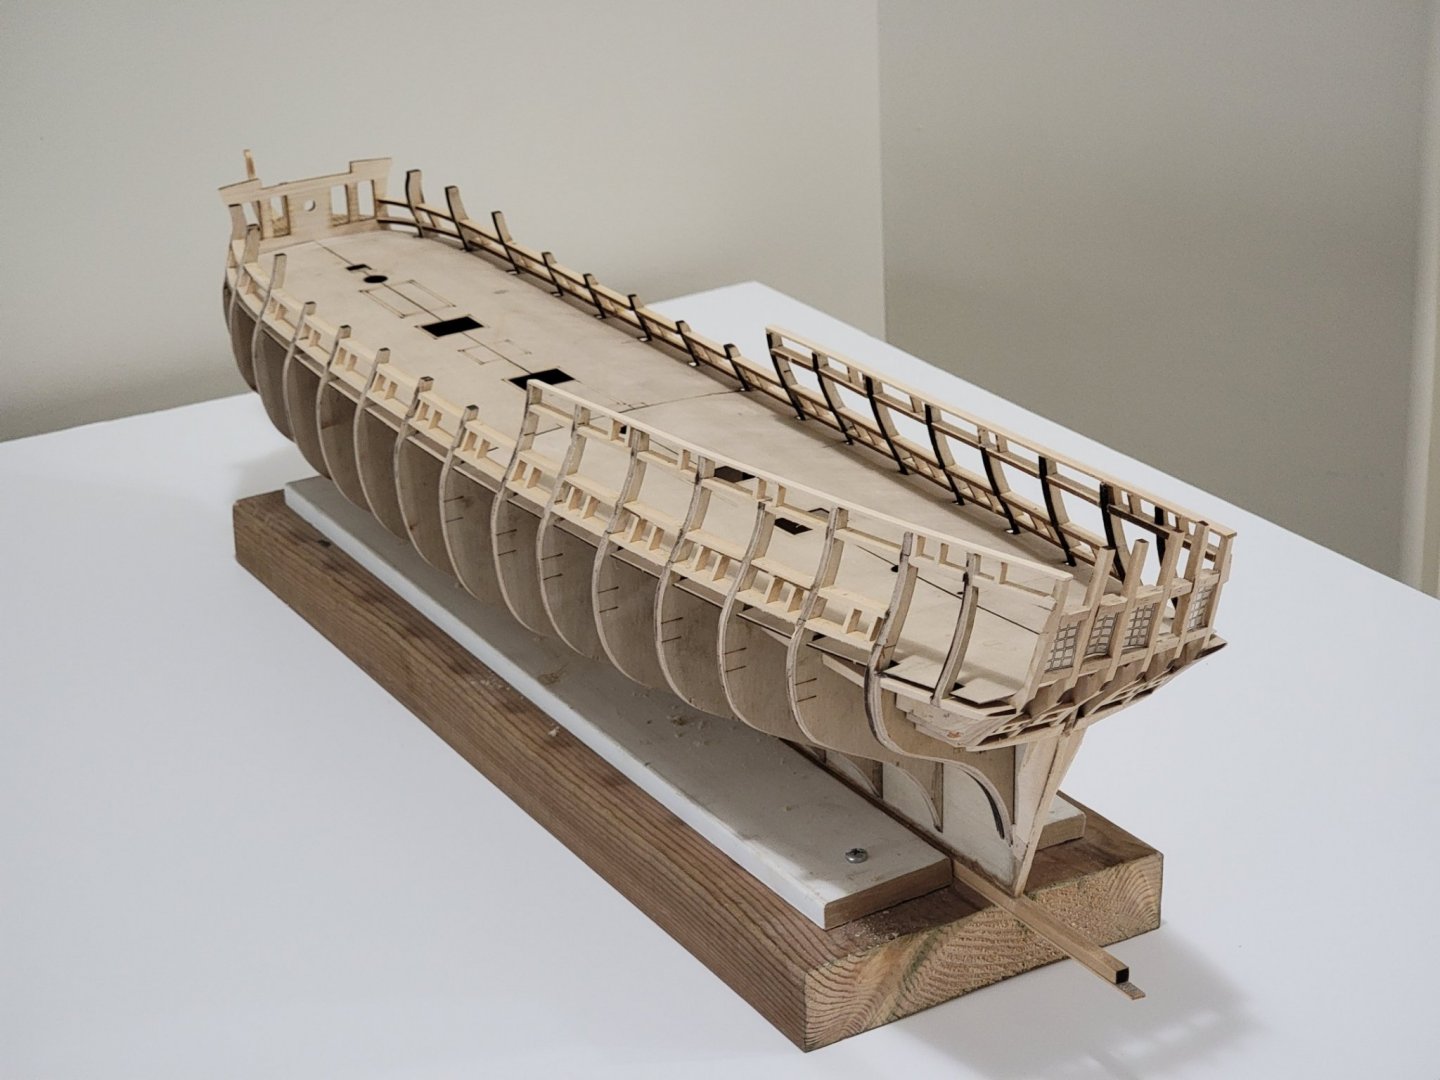
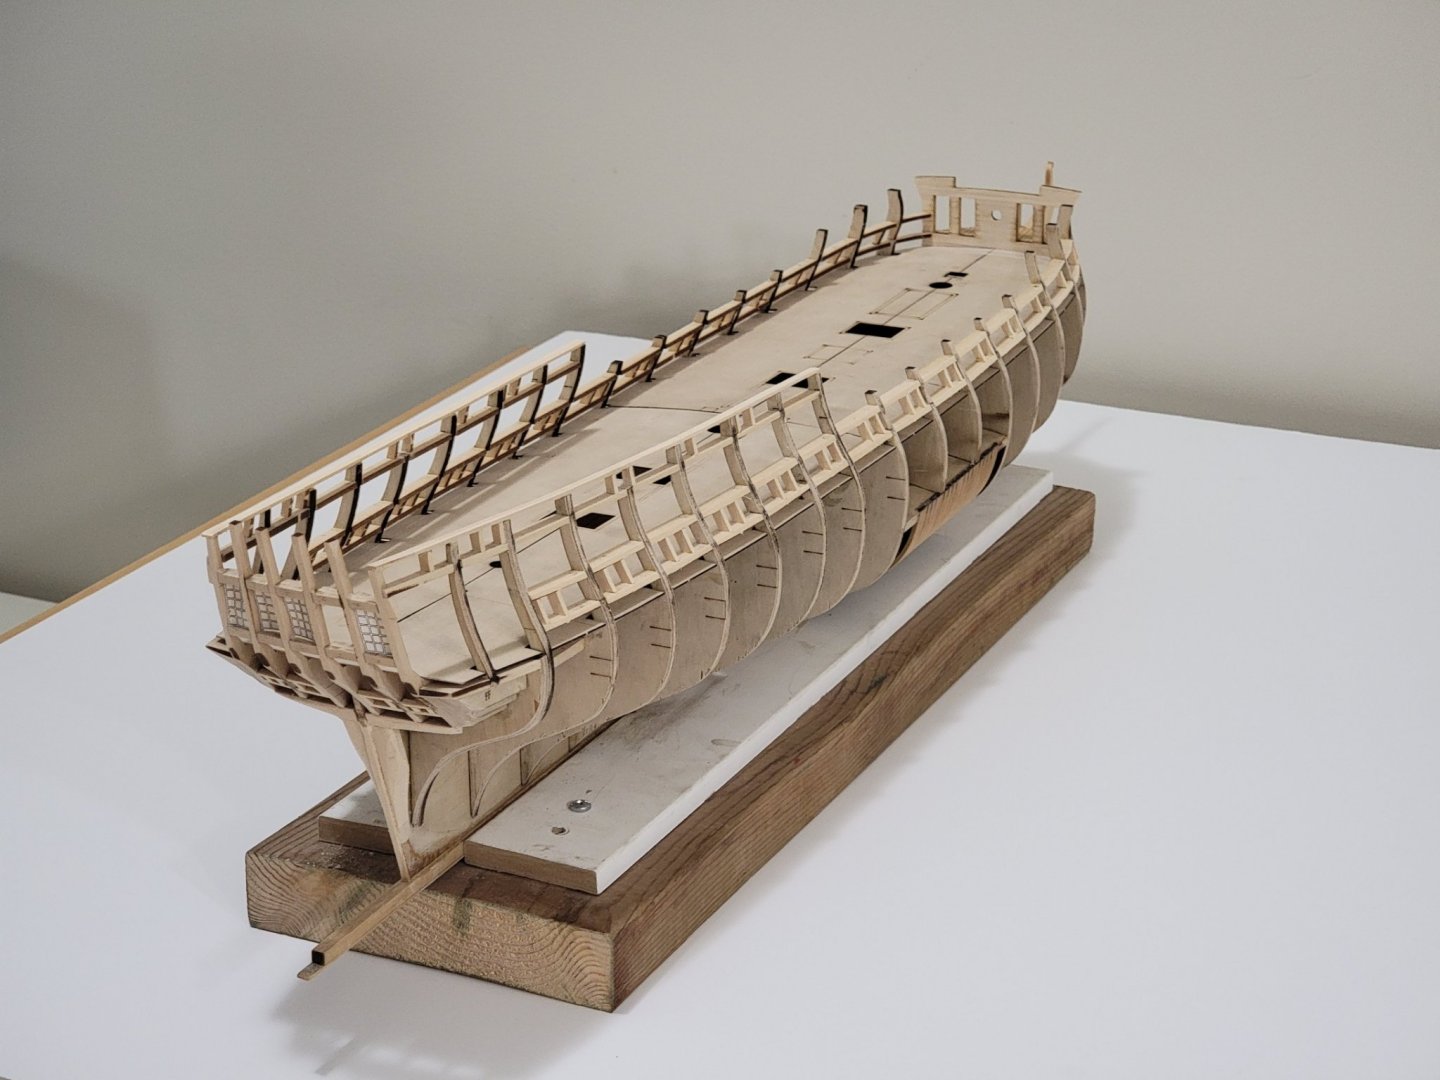
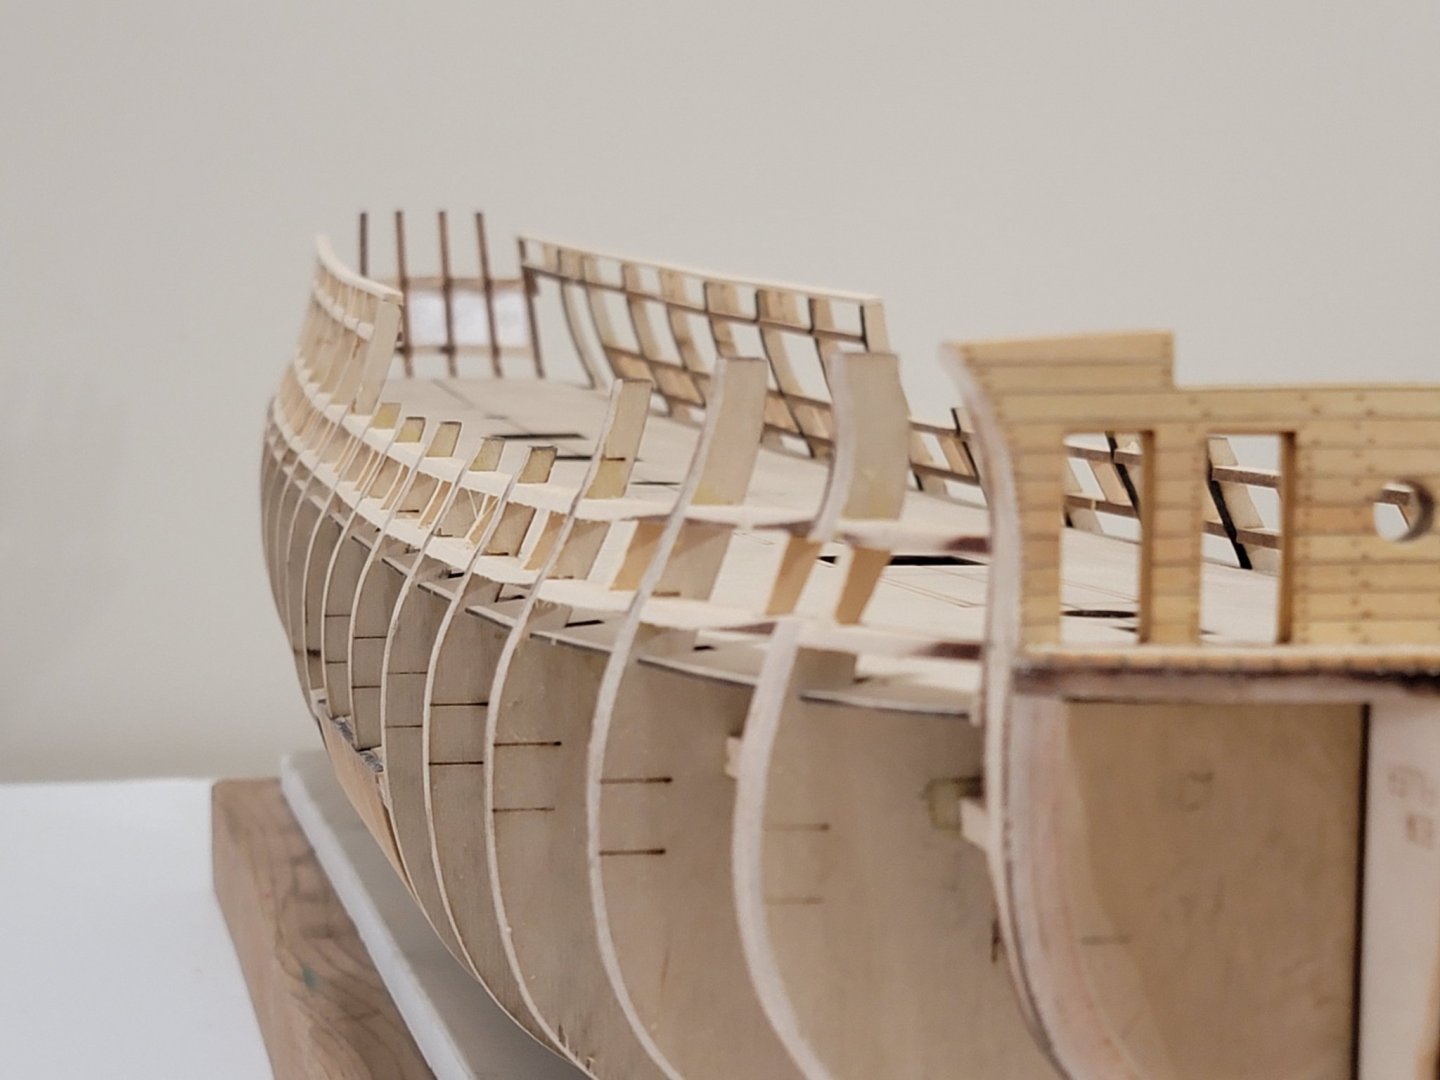
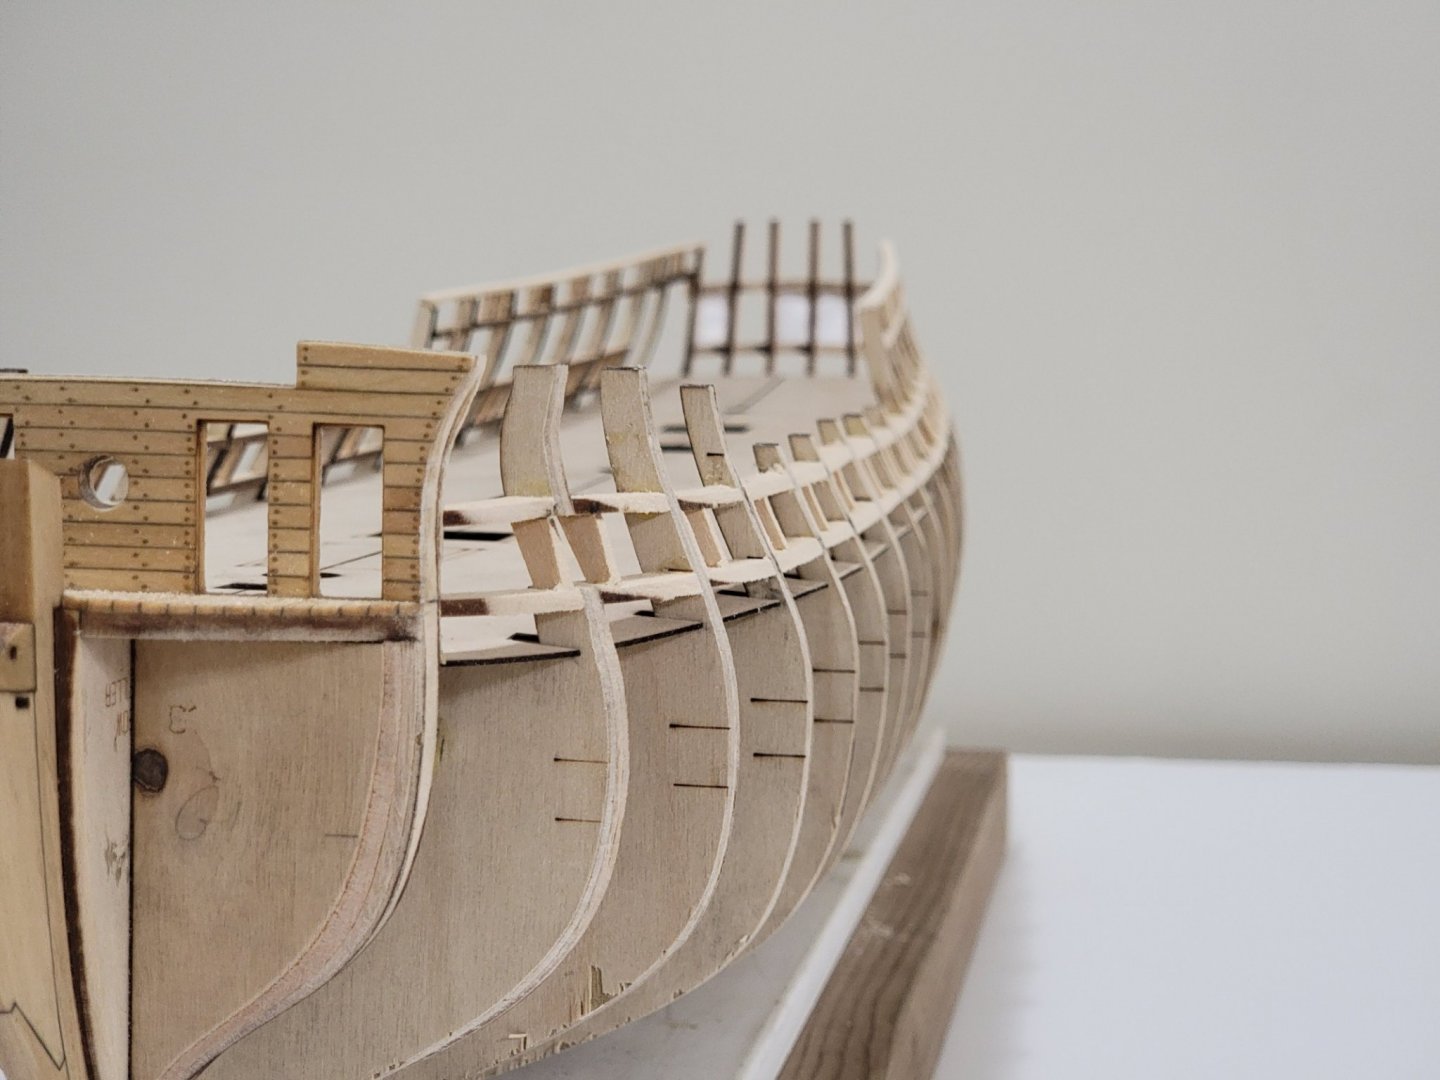
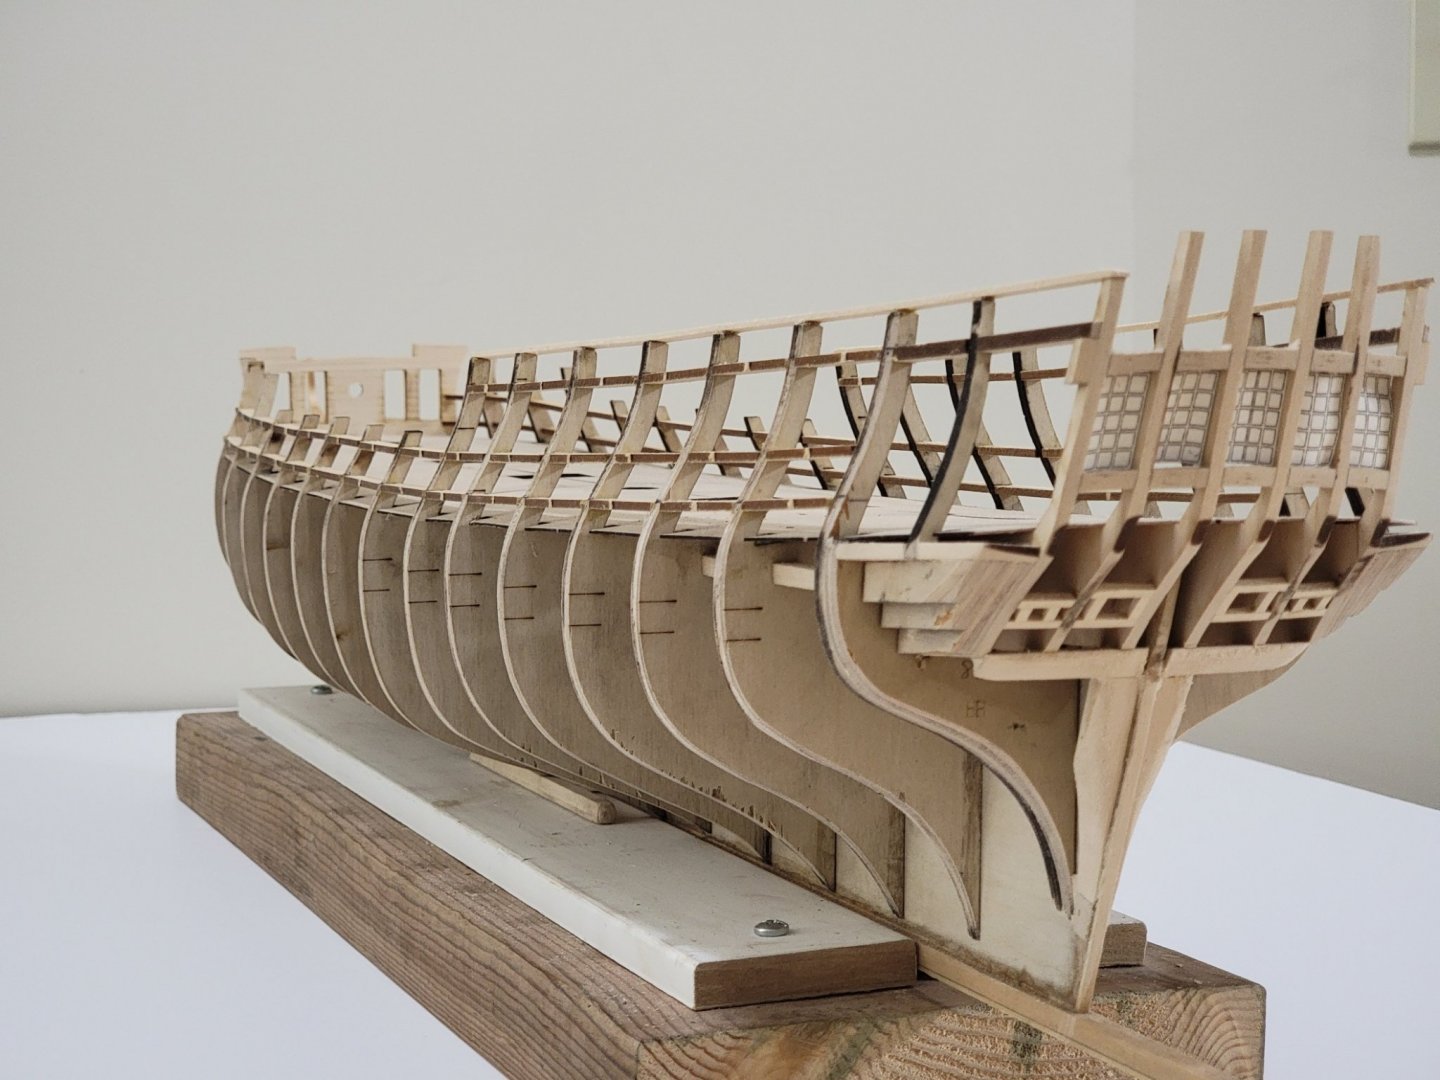
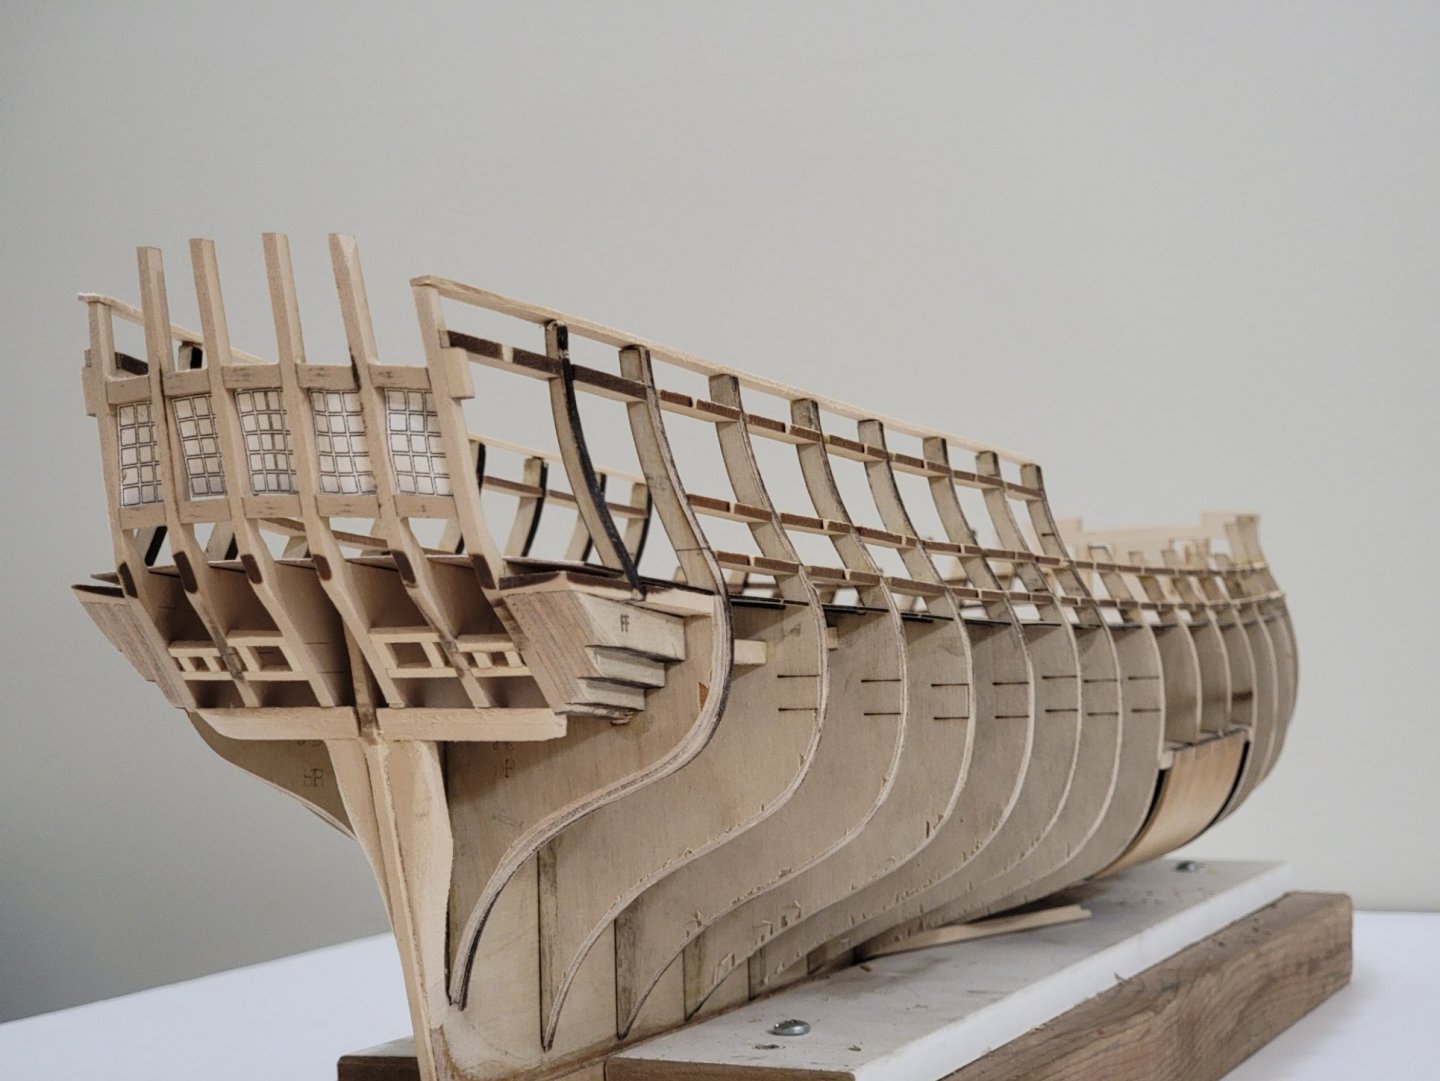
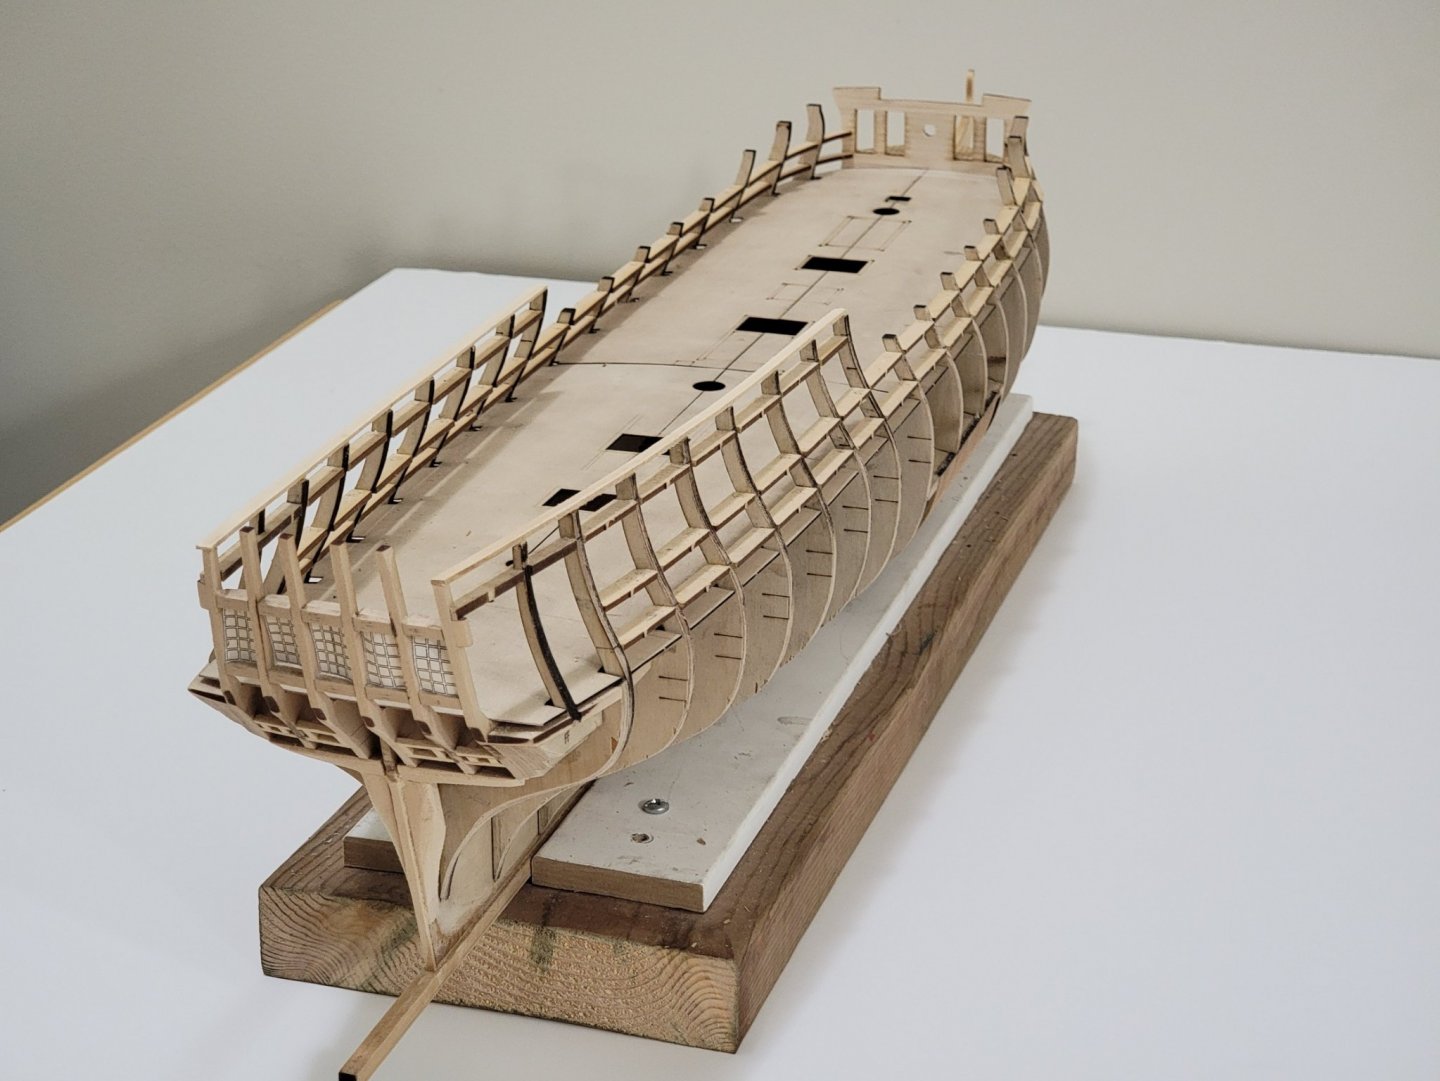
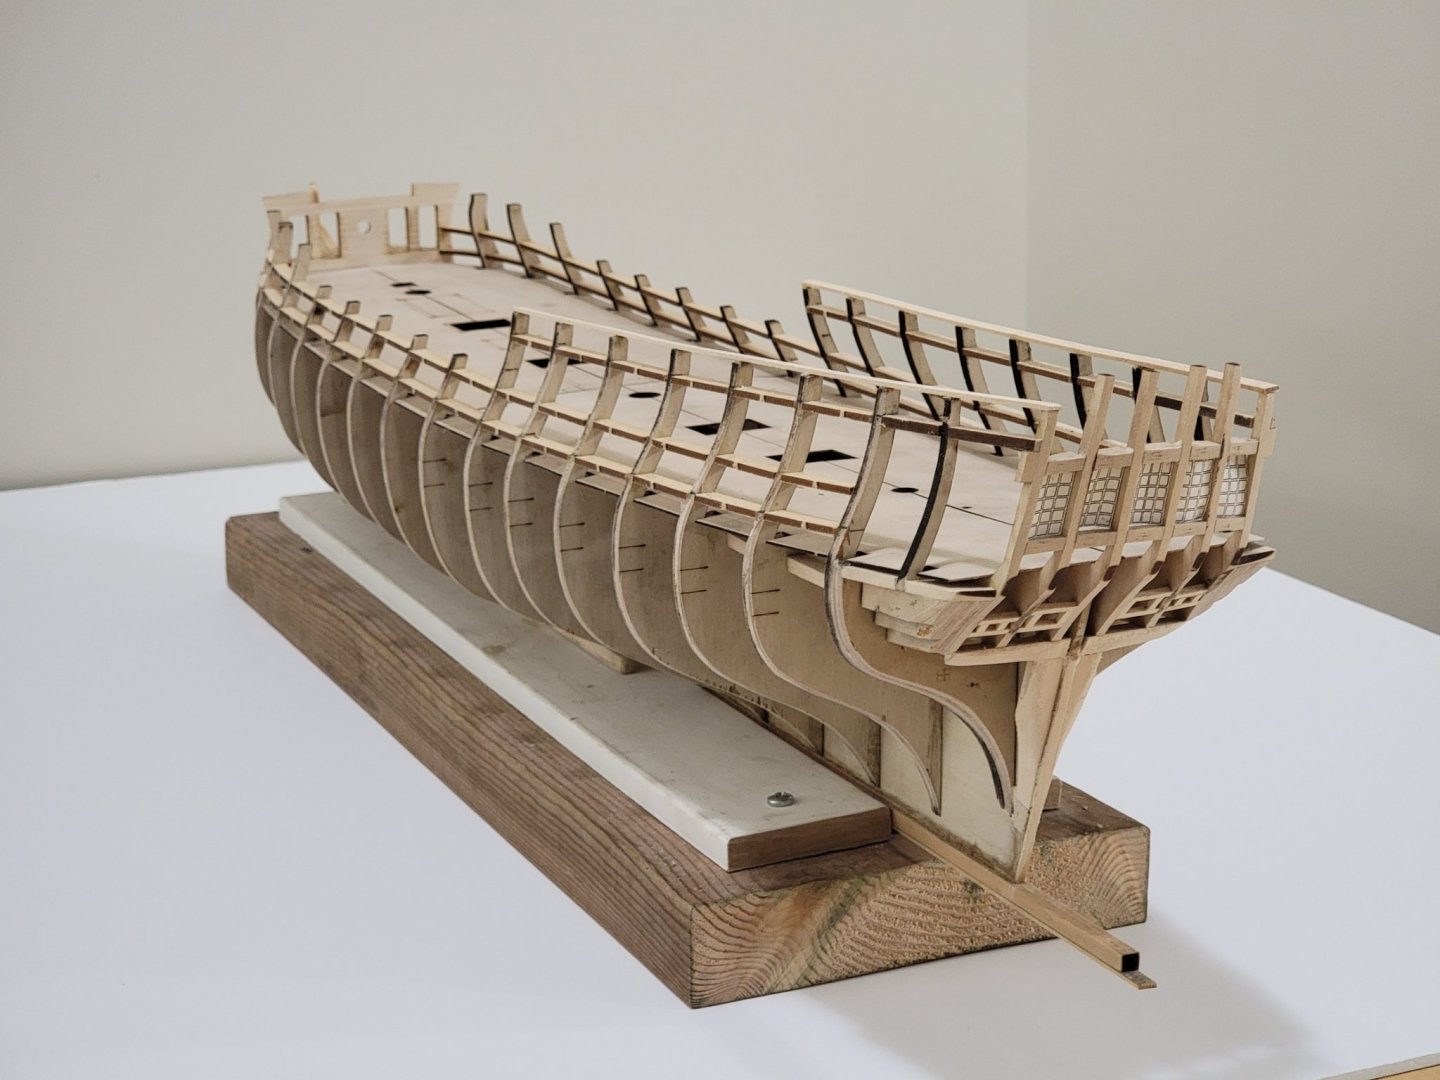
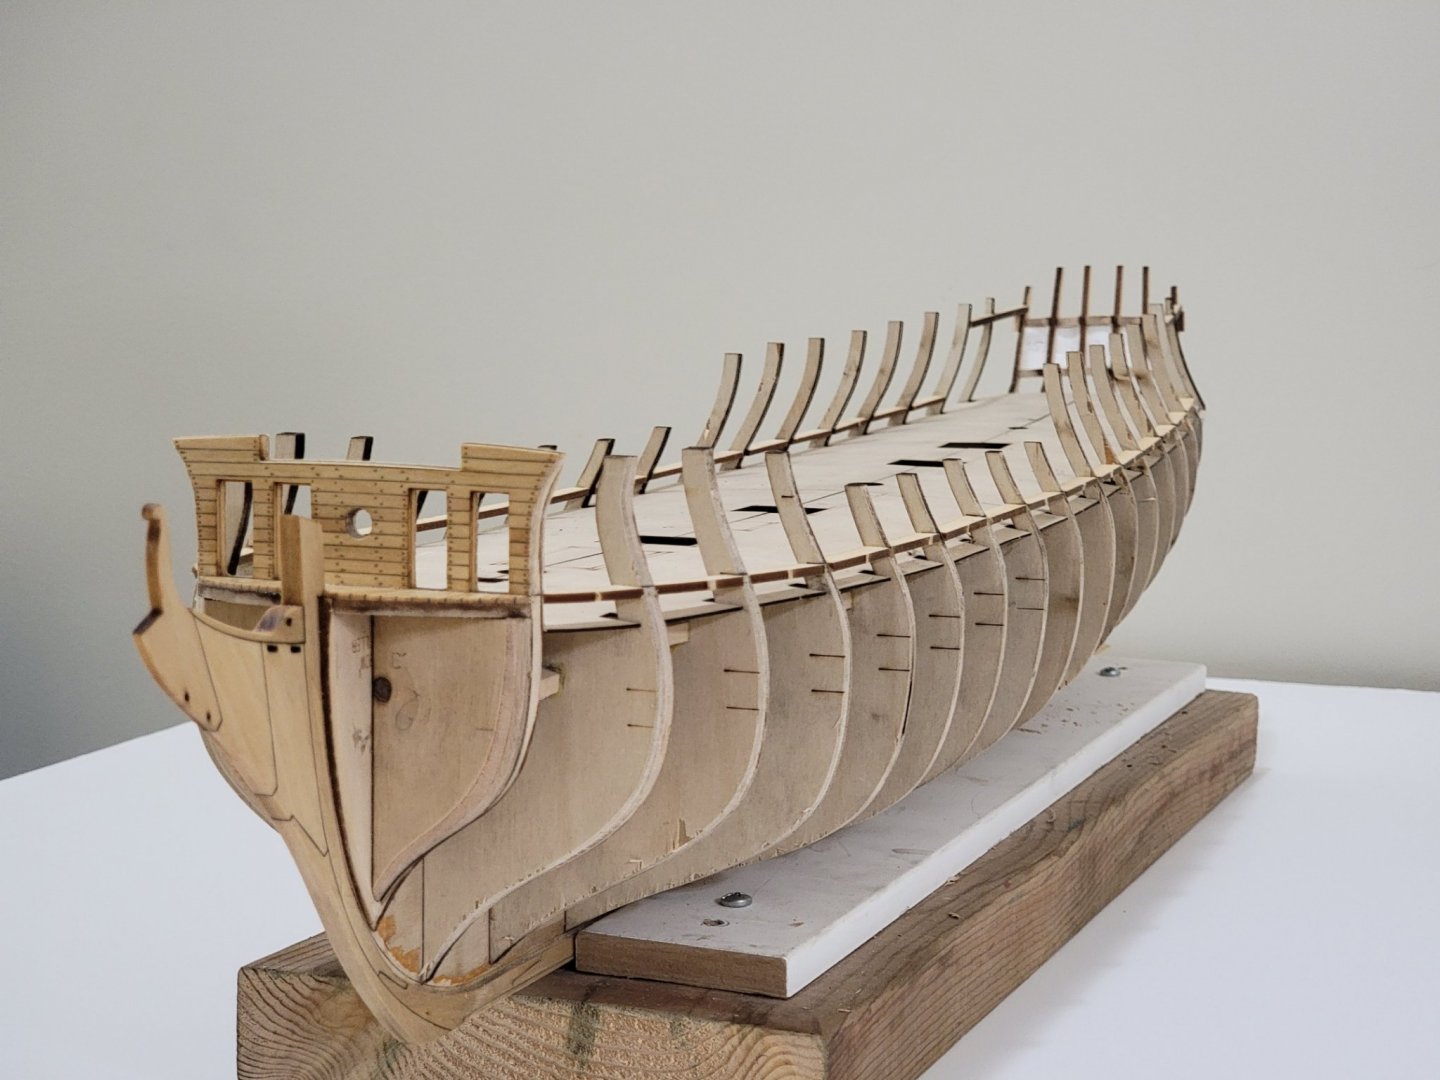
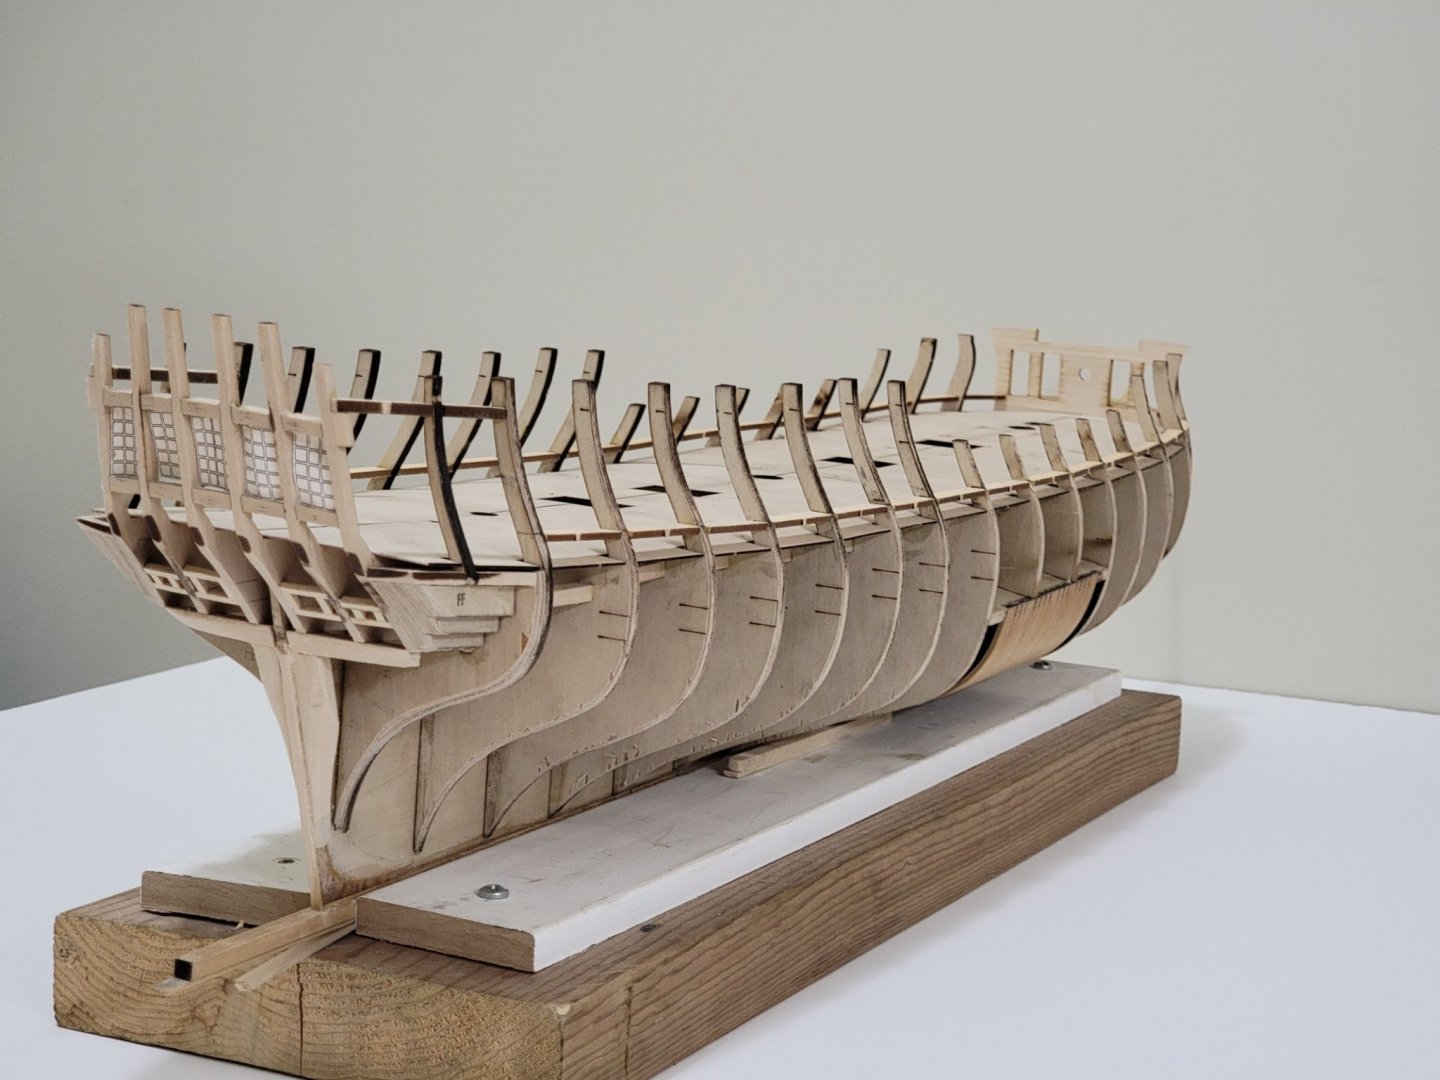
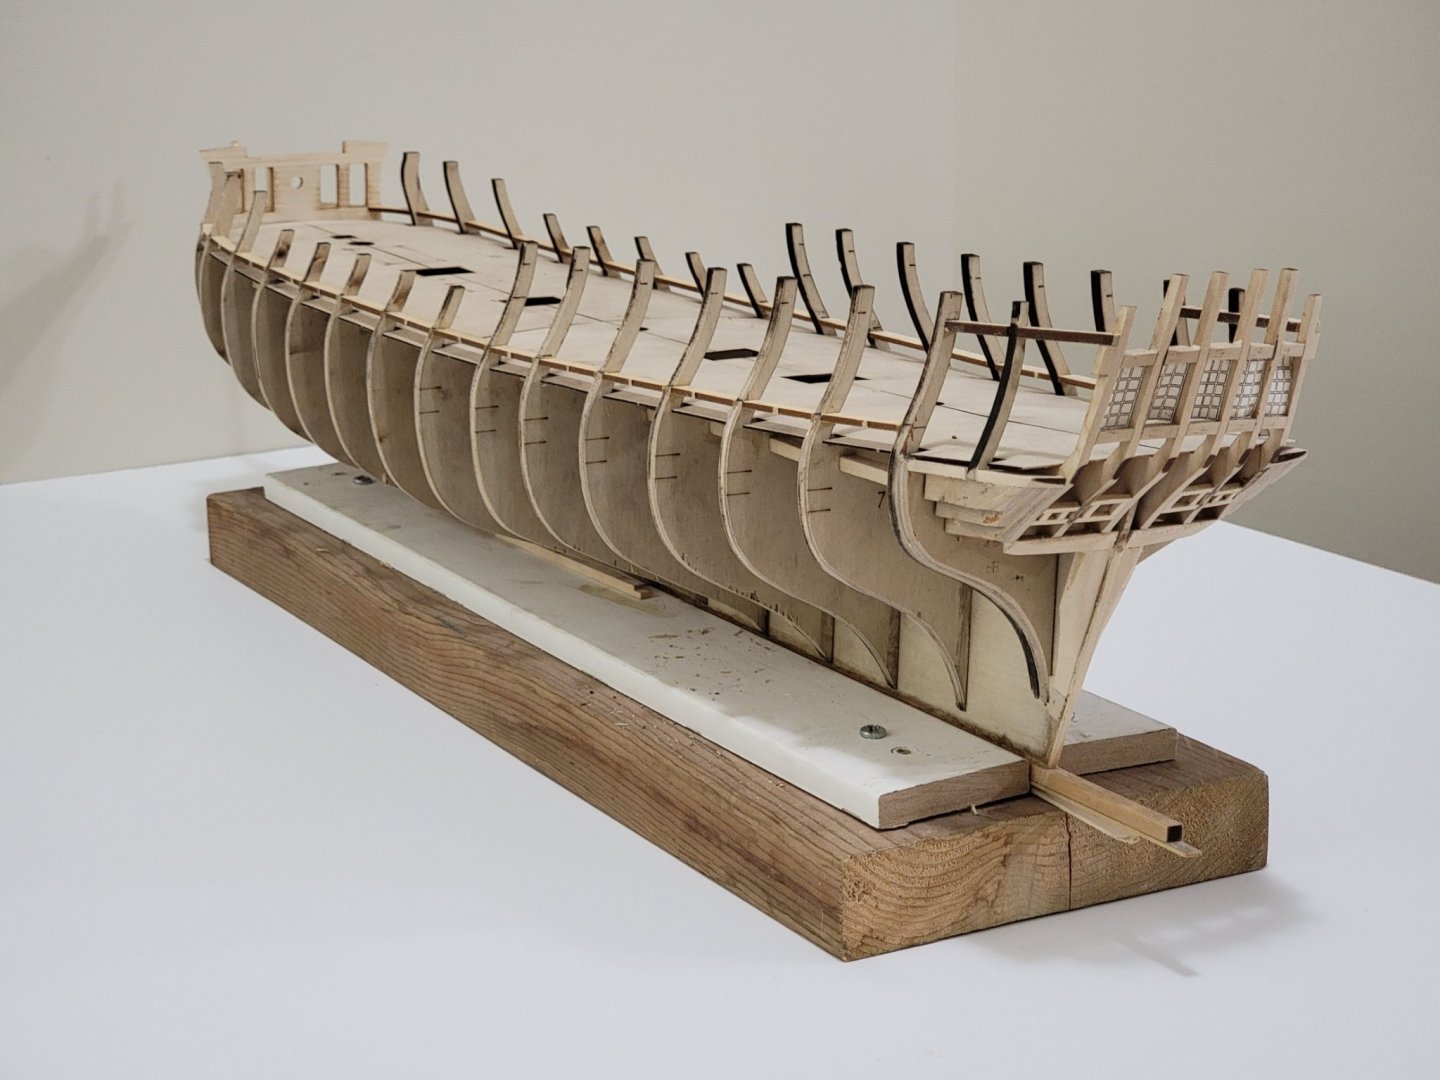
Thanks all for the likes!!! 🙂 I finished up all the framing and skeleton work. Drilling the holes for the sheaves was a bit tricky, but I basically measured where the holes were supposed to be on both sides of the bulwark, then drilled from both sides till the holes combined. Next up I will fill in any gaps of the gun port framing, sand the insides smooth, then paint them red. Then, I can finally start planking! 😁

-
Thanks for the great words Ryland and Will!! And thanks all for the likes. There are some amazing models being entered for the contest, so let's see what happens 🙂 Will, I'm glad my log could be useful. I just checked out your progress and it's looking fantastic!
- 950 replies
-
- 2
-

-
- syren
- model shipways
- (and 1 more)
-
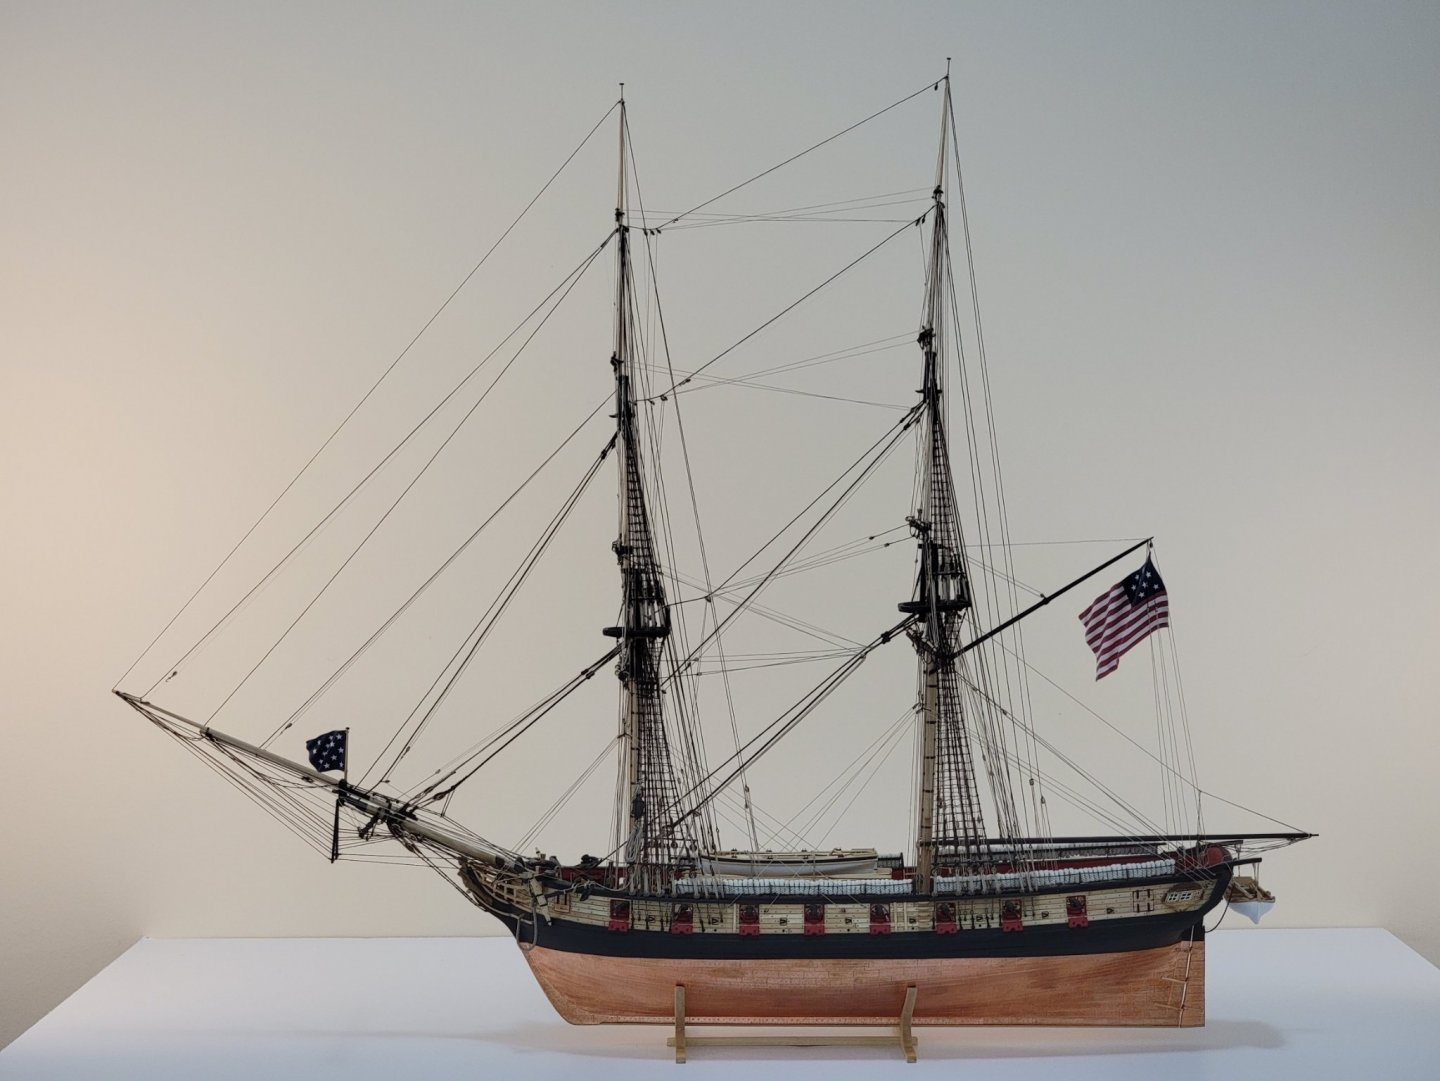
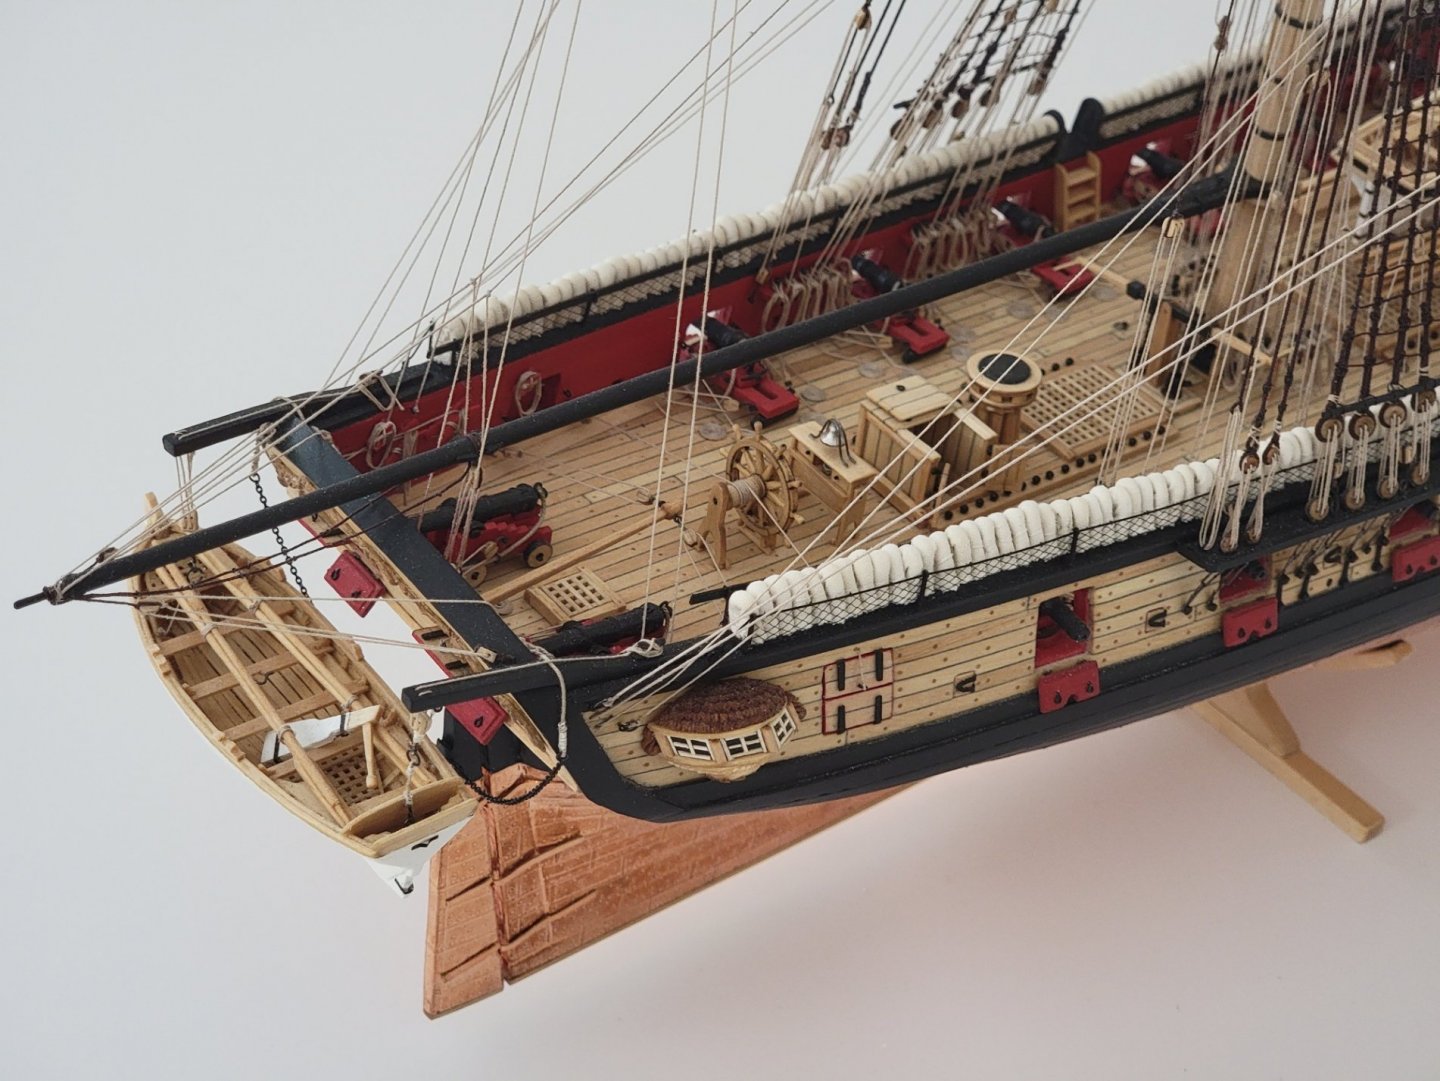
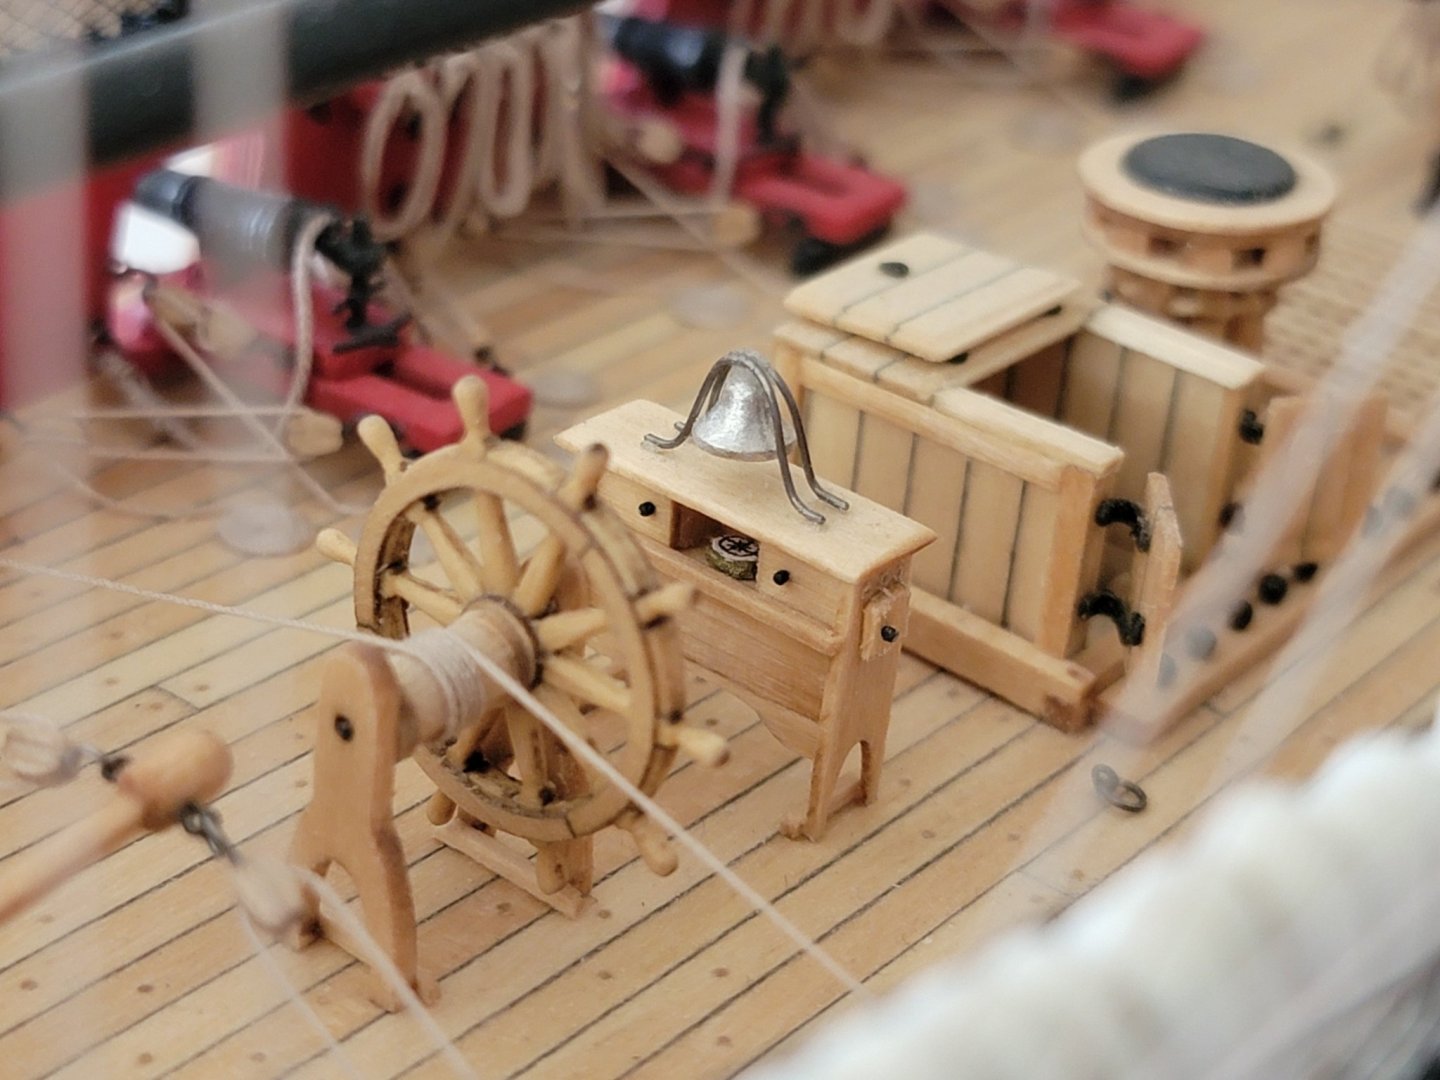
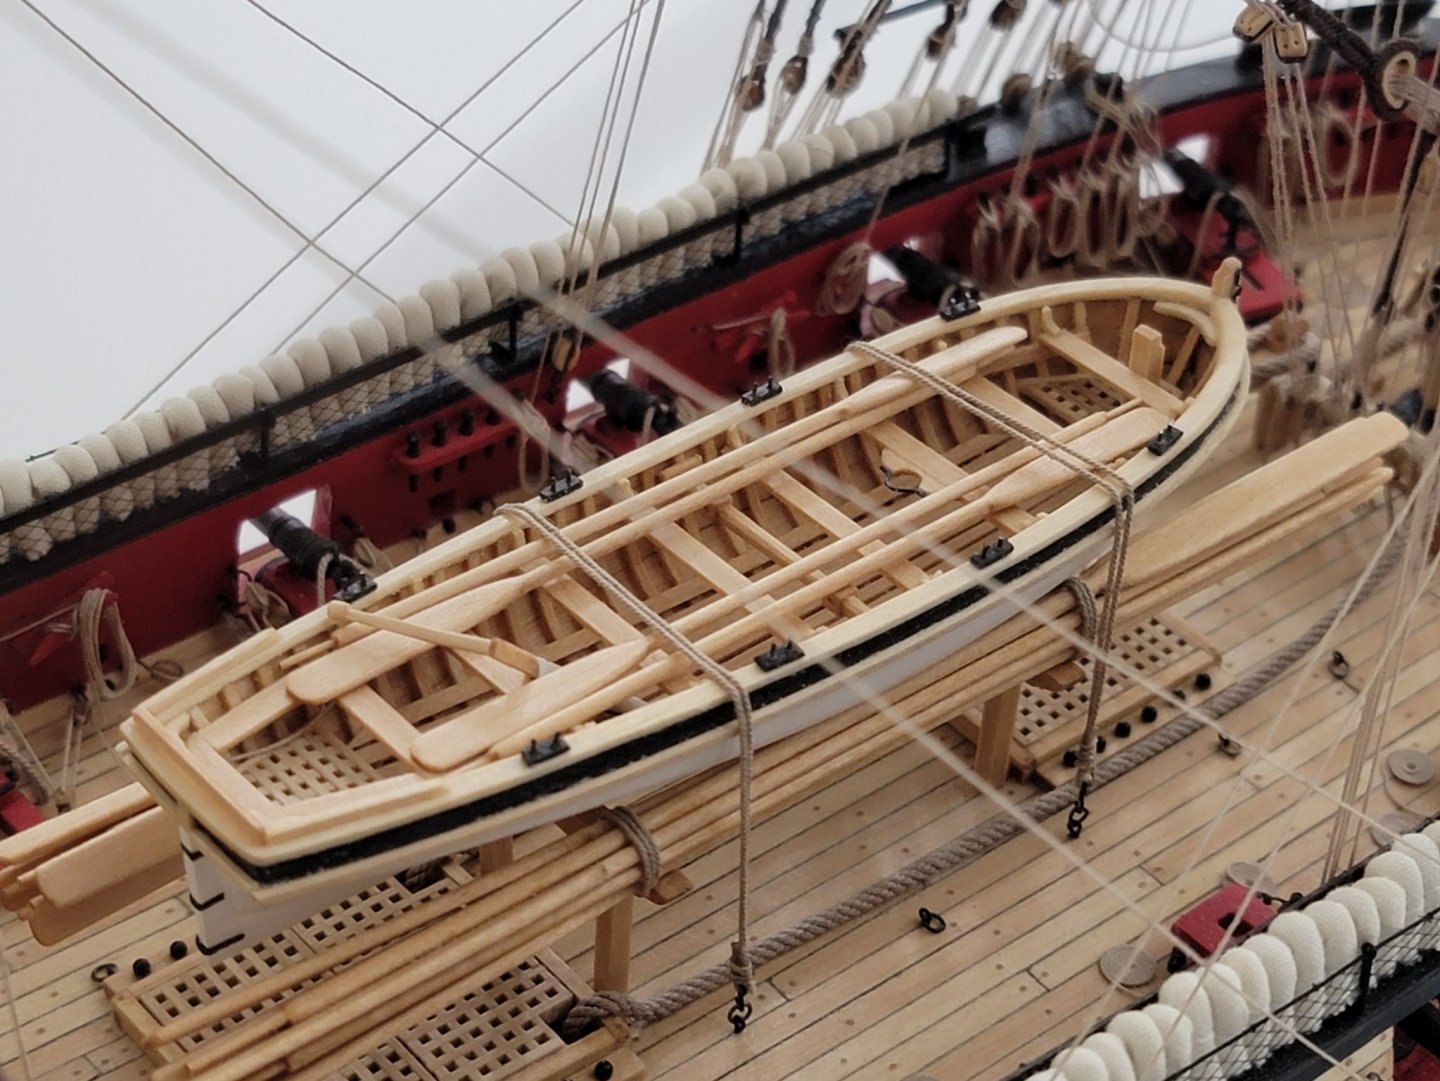
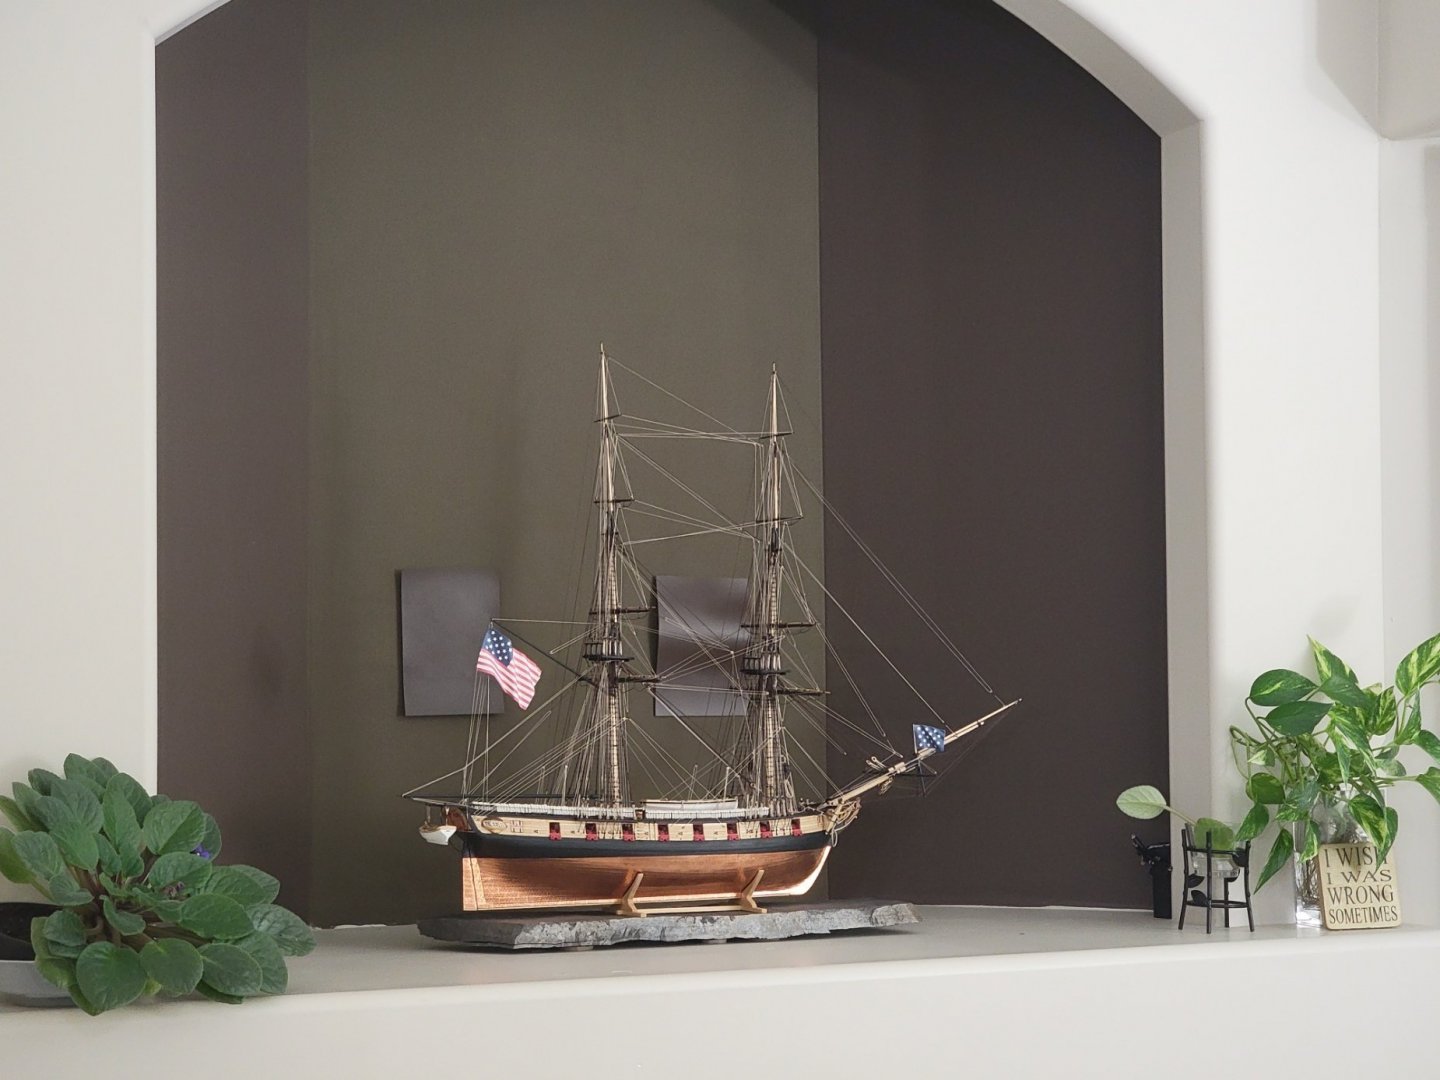
Thought I'd share some of the pictures I submitted to the NRG photo contest. It was lots of fun taking photos of the ship!! I did not edit any of the photos, I just played around with the lighting and used the Samsung S21 ultra's camera. Here are the photos of the various angles required for the contest: And here are the bonus photos I also submitted (I played around with the lighting a bit to make it look like it was in the water with sort of a sunset at the back 😁) The ship currently rests above the fireplace. I have not built a display case of yet, but the spot it is resting now seems to be out of harms way and also minimum dust accumulation. If I see some dust starting to accumulate I will probably get one acrylic sheet and put it over the alcove. Those square paint swabs were placed to hide the horrendous white electrical cover plates. It is a lot less noticeable in person than in the photo, so I can live with it 😄. Looking at this ship again brings back so many memories... I will always remember her as the one that got me hooked in this awesome hobby!


- 950 replies
-
- 17
-
-

-

-
- syren
- model shipways
- (and 1 more)
-
Those are some great shots, Eric! I really enjoyed looking at them, thanks for sharing them and also for writing up the excellent build log on this cool vessel 🙂.
-
She's looking great Will!! You can also order from ModelExpo, they have an excellent replacement policy!
-
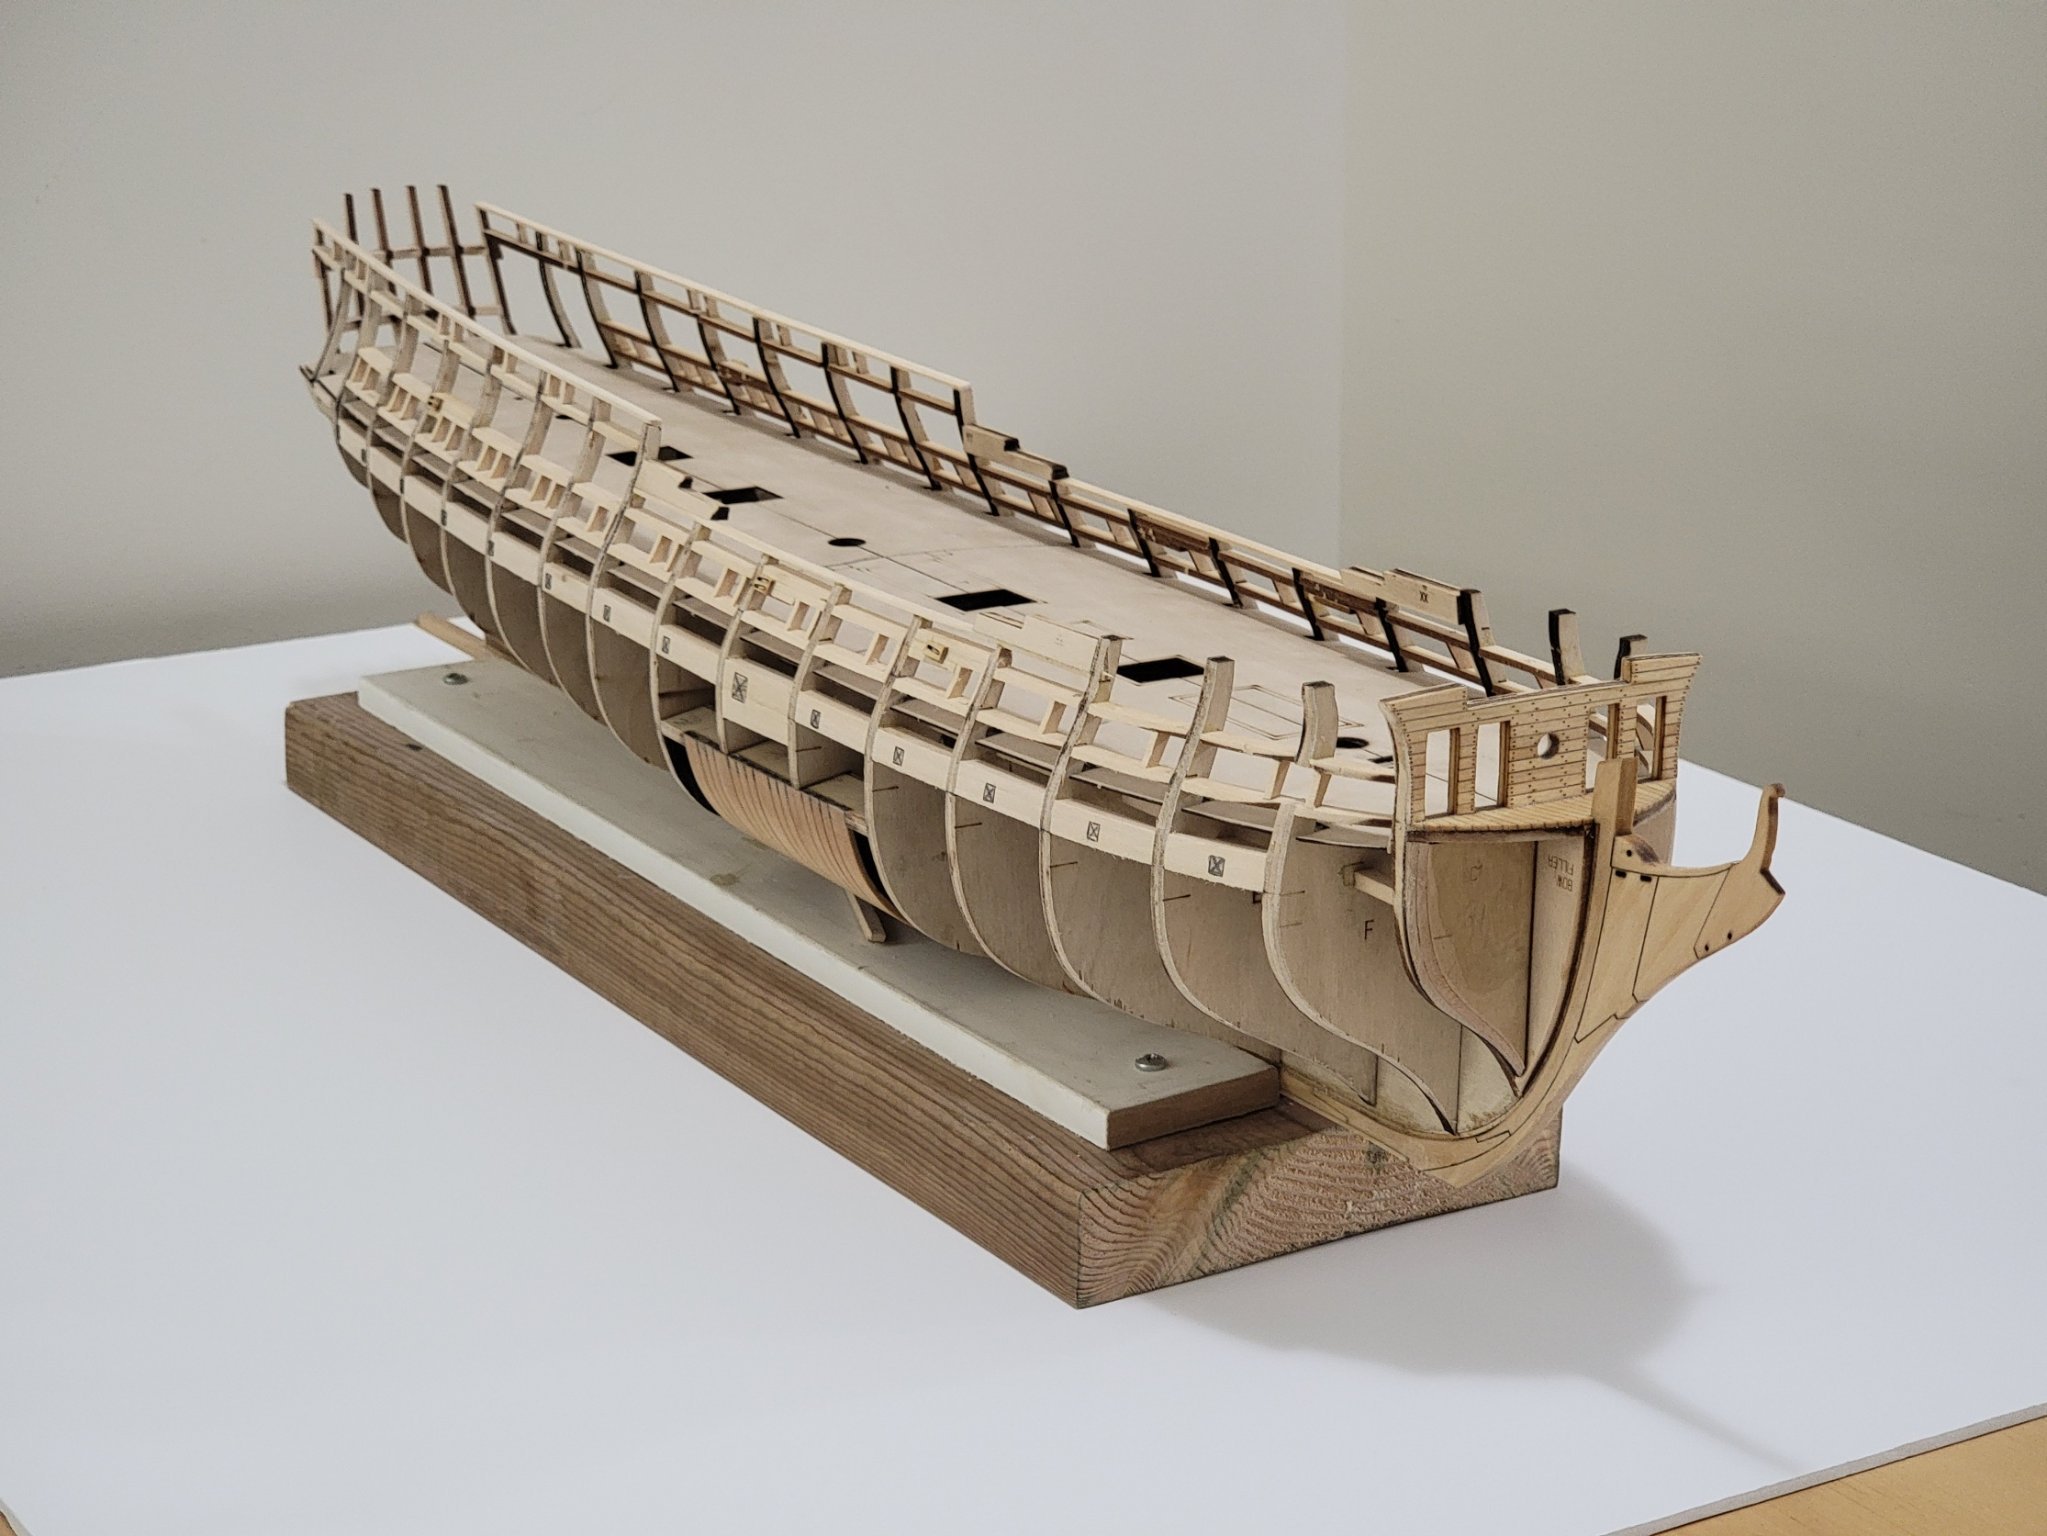
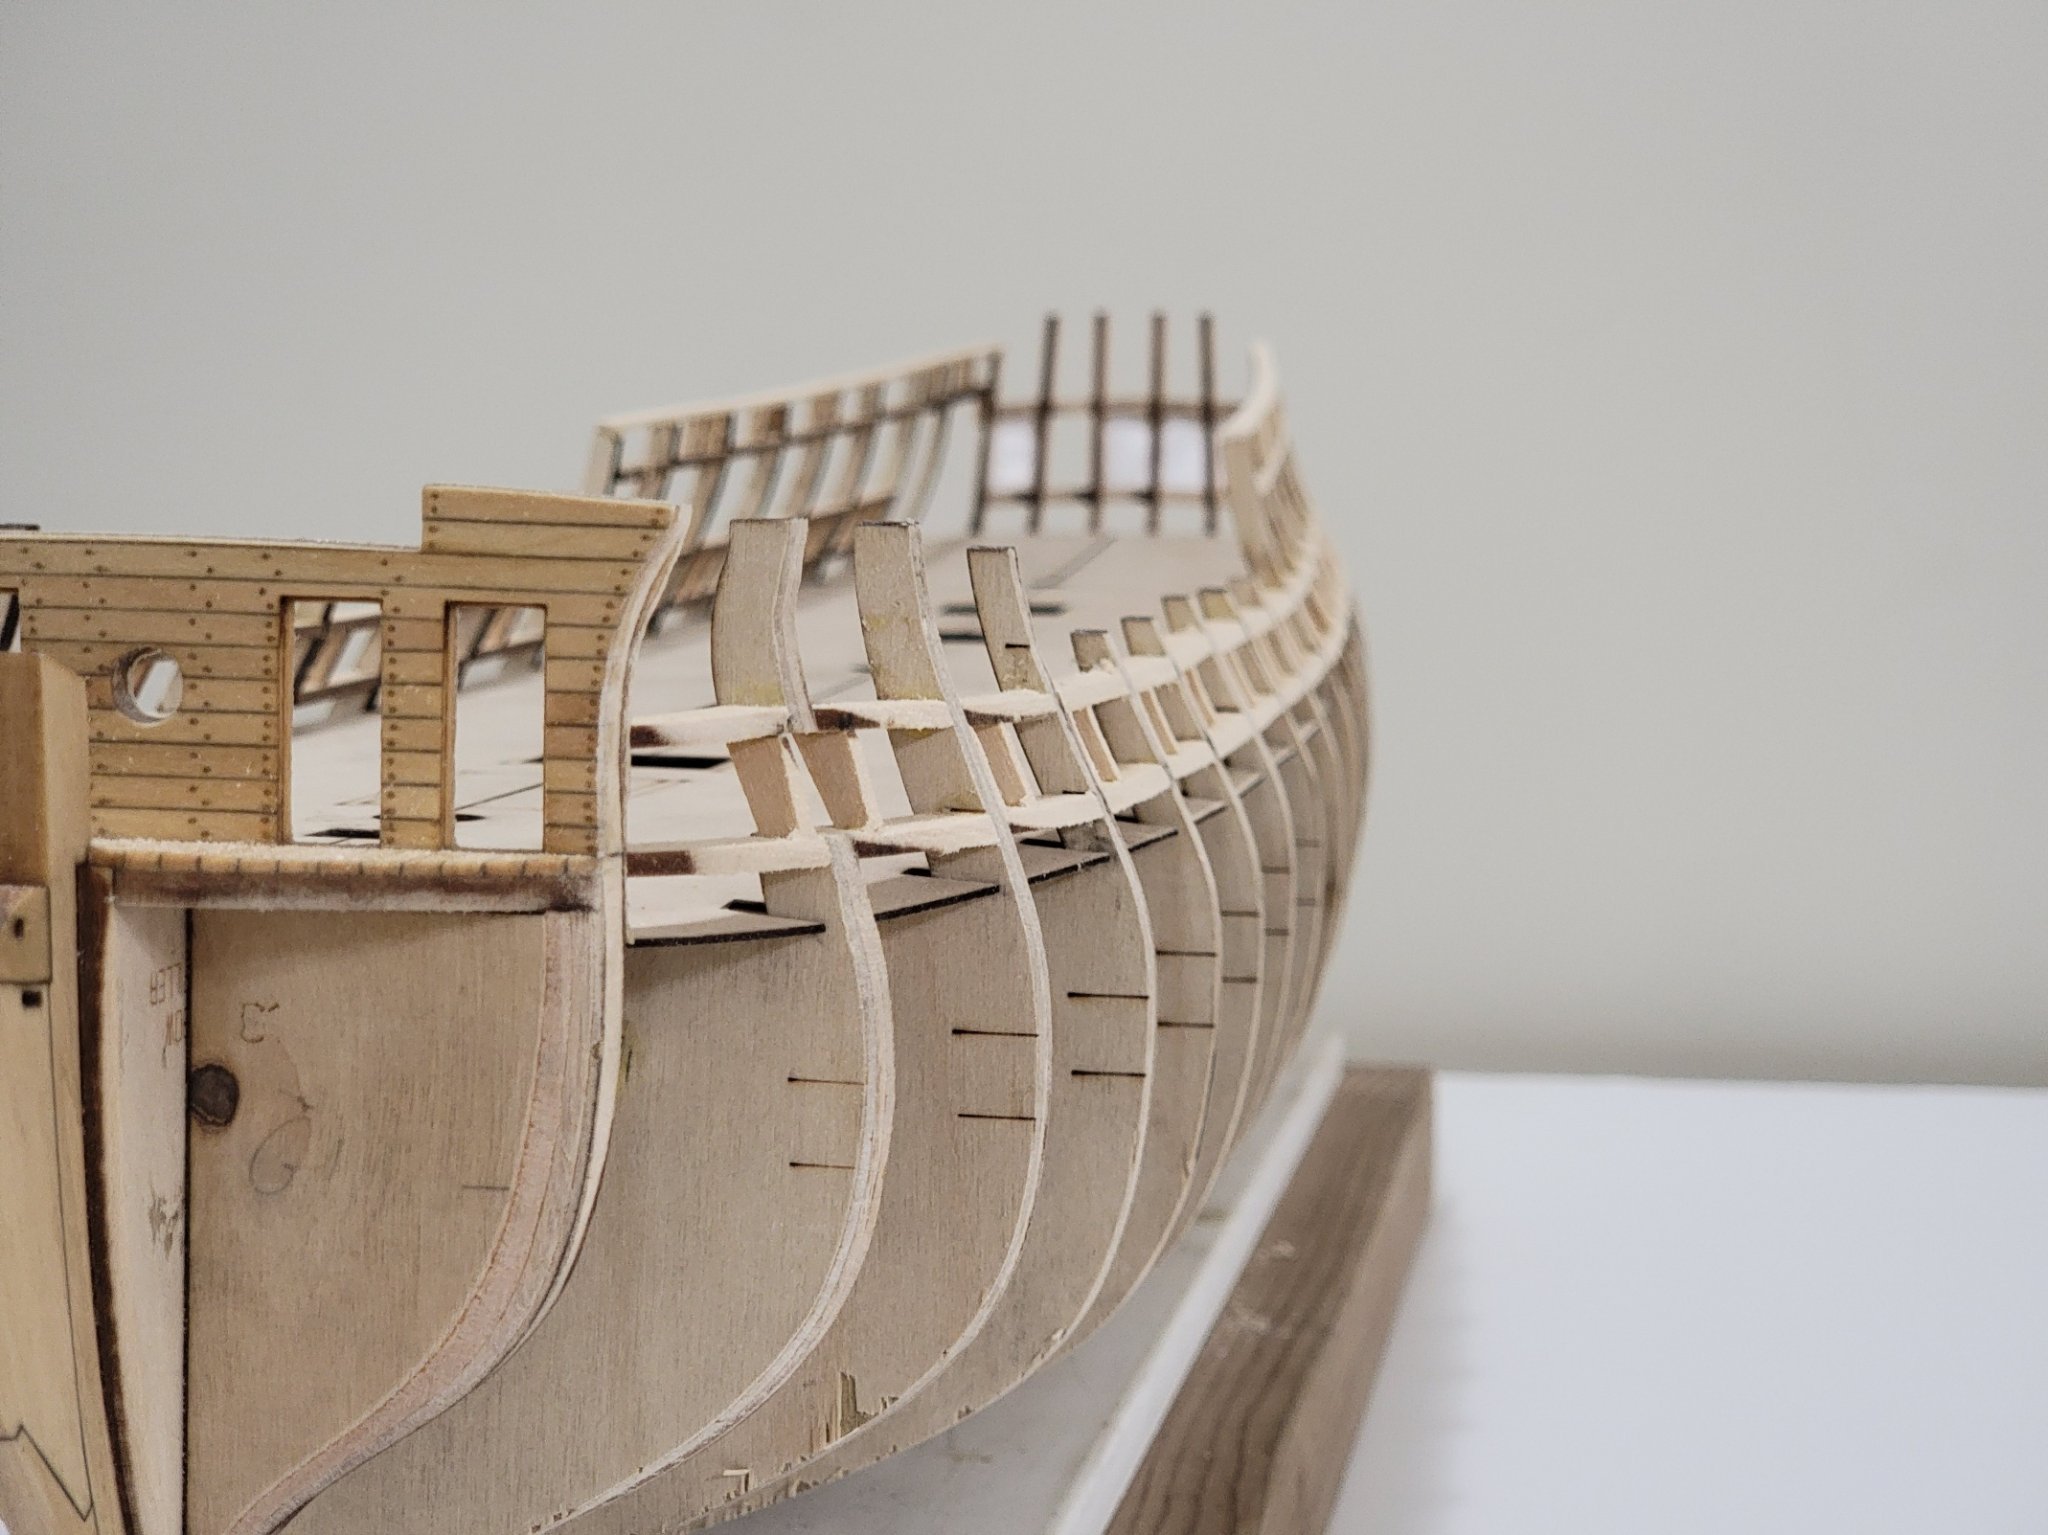
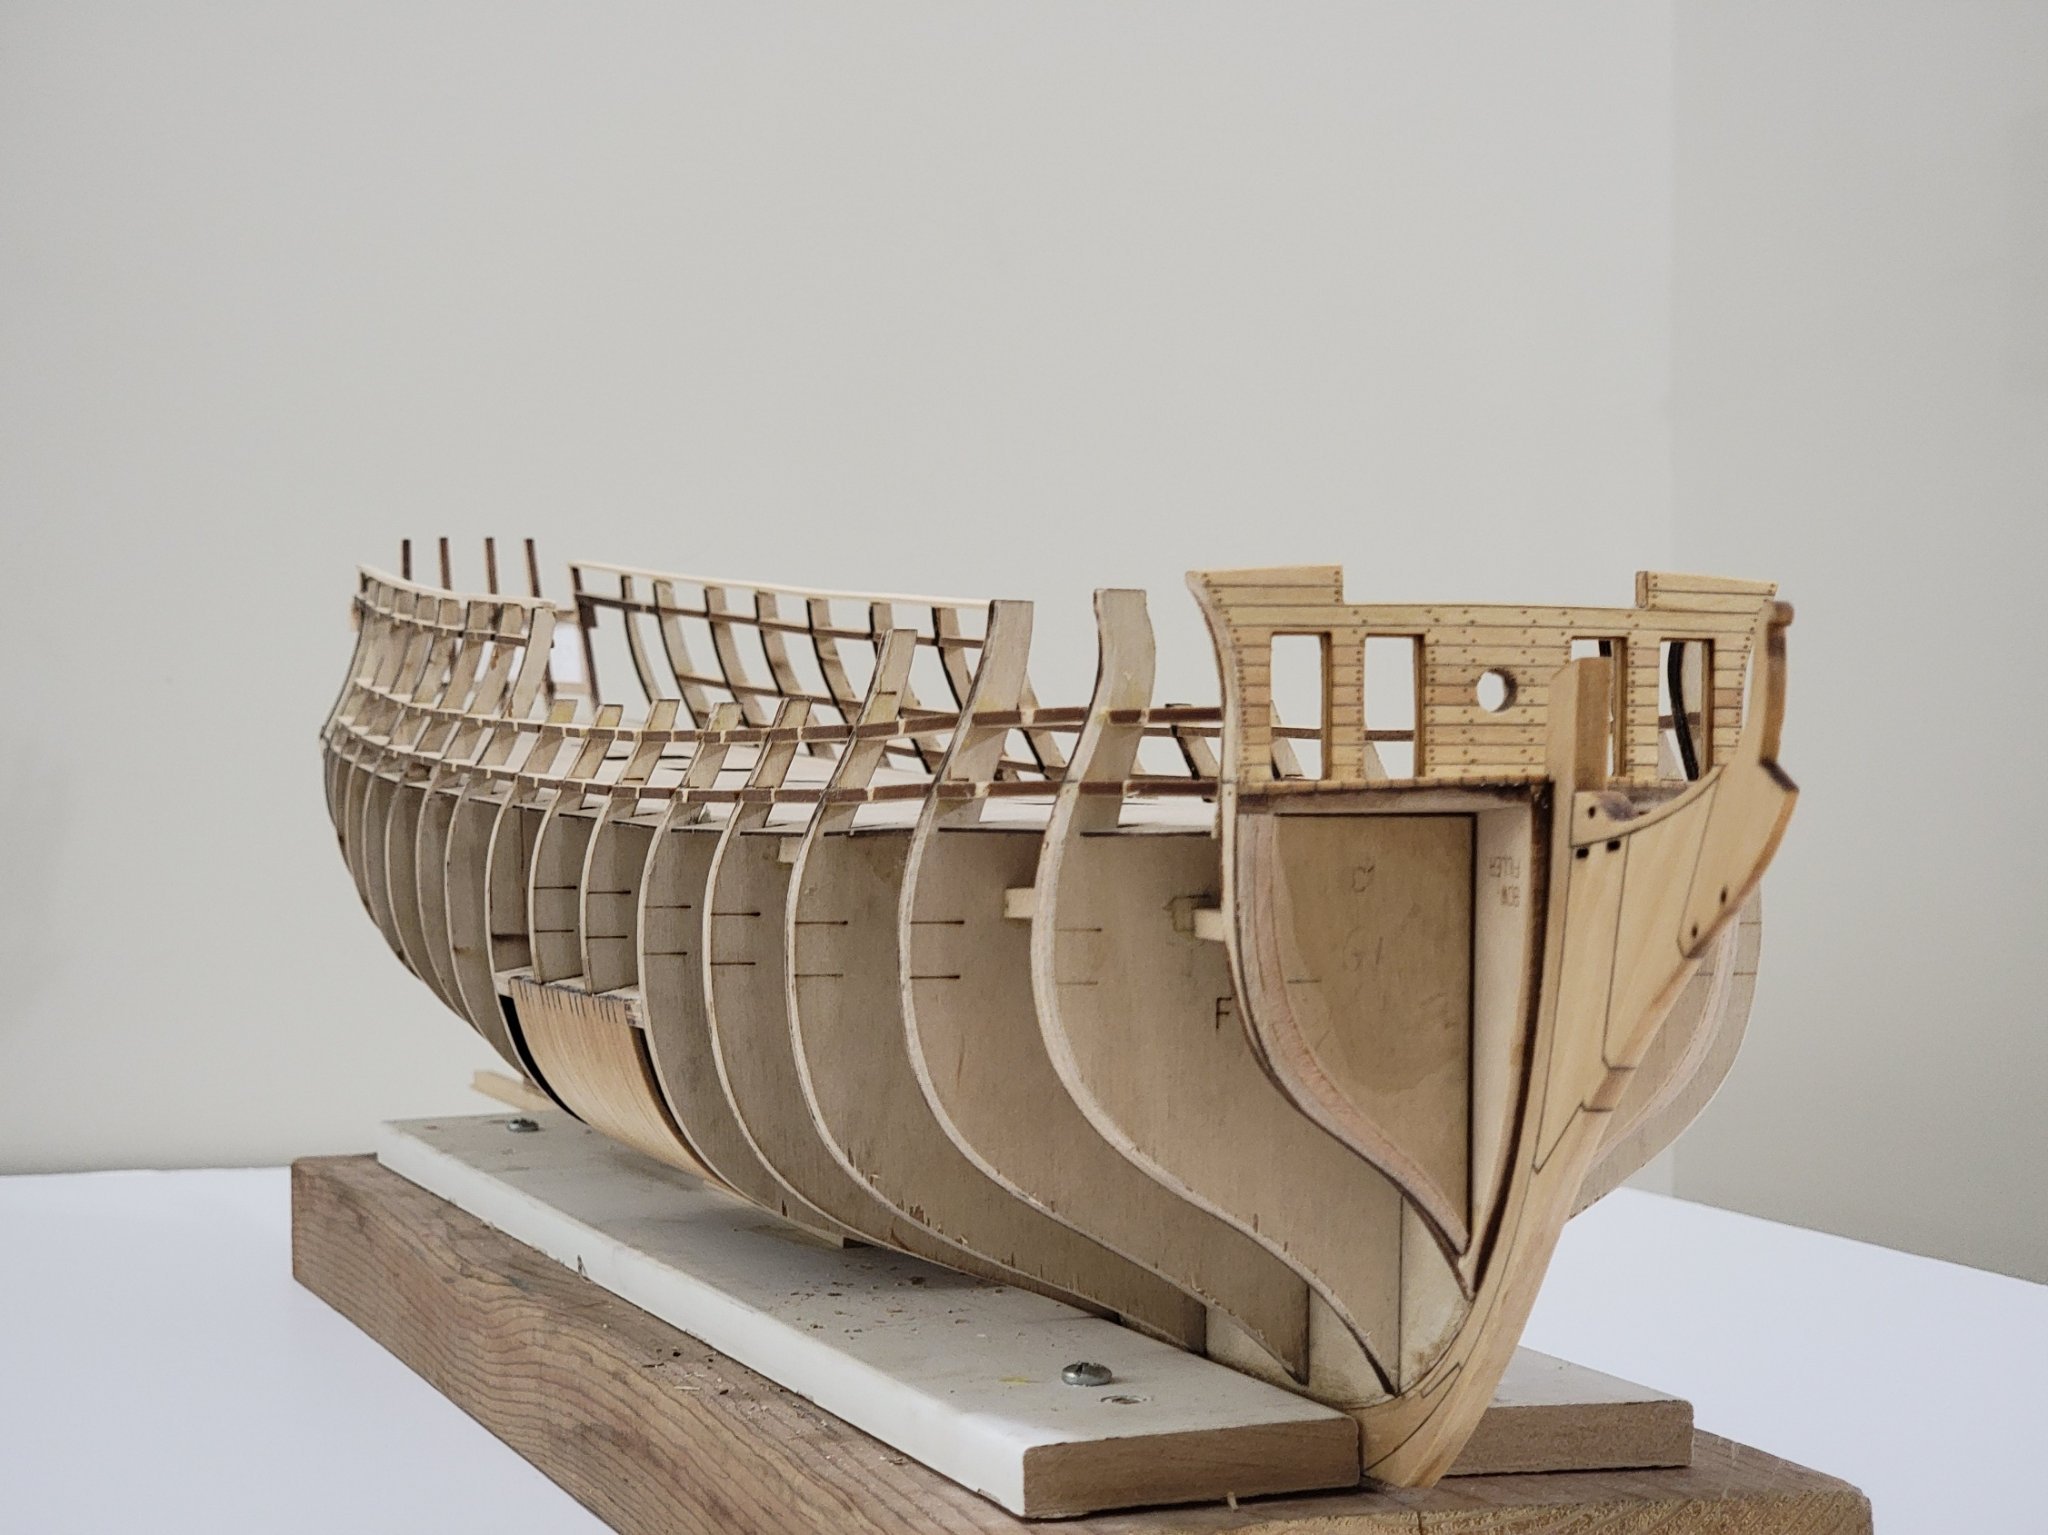
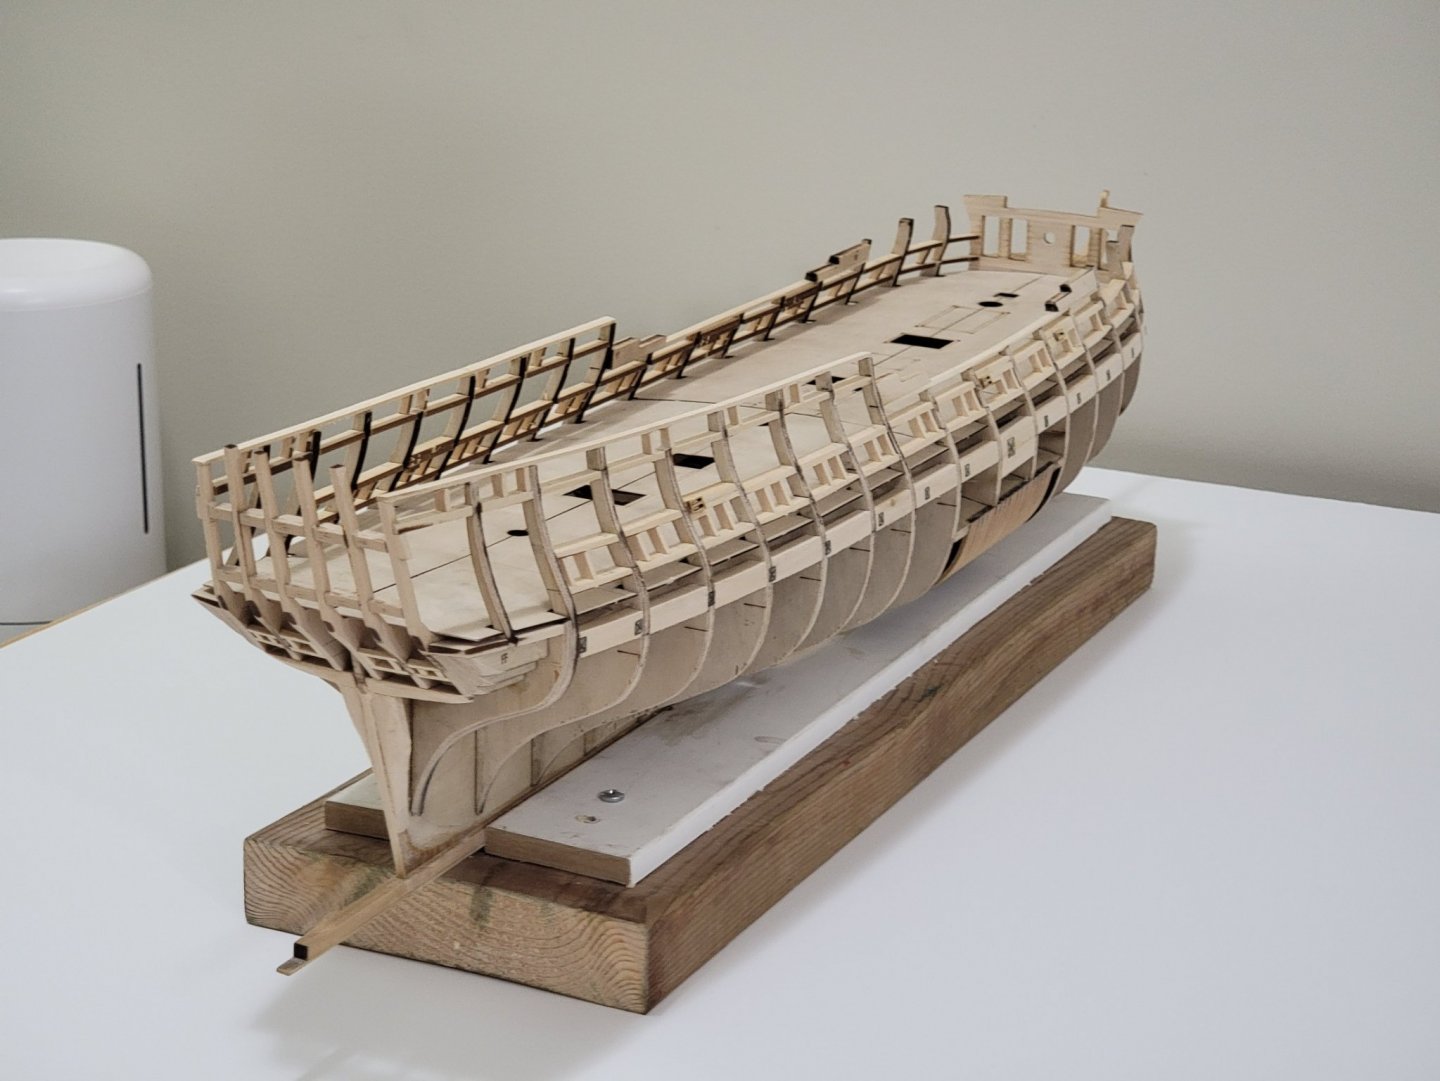
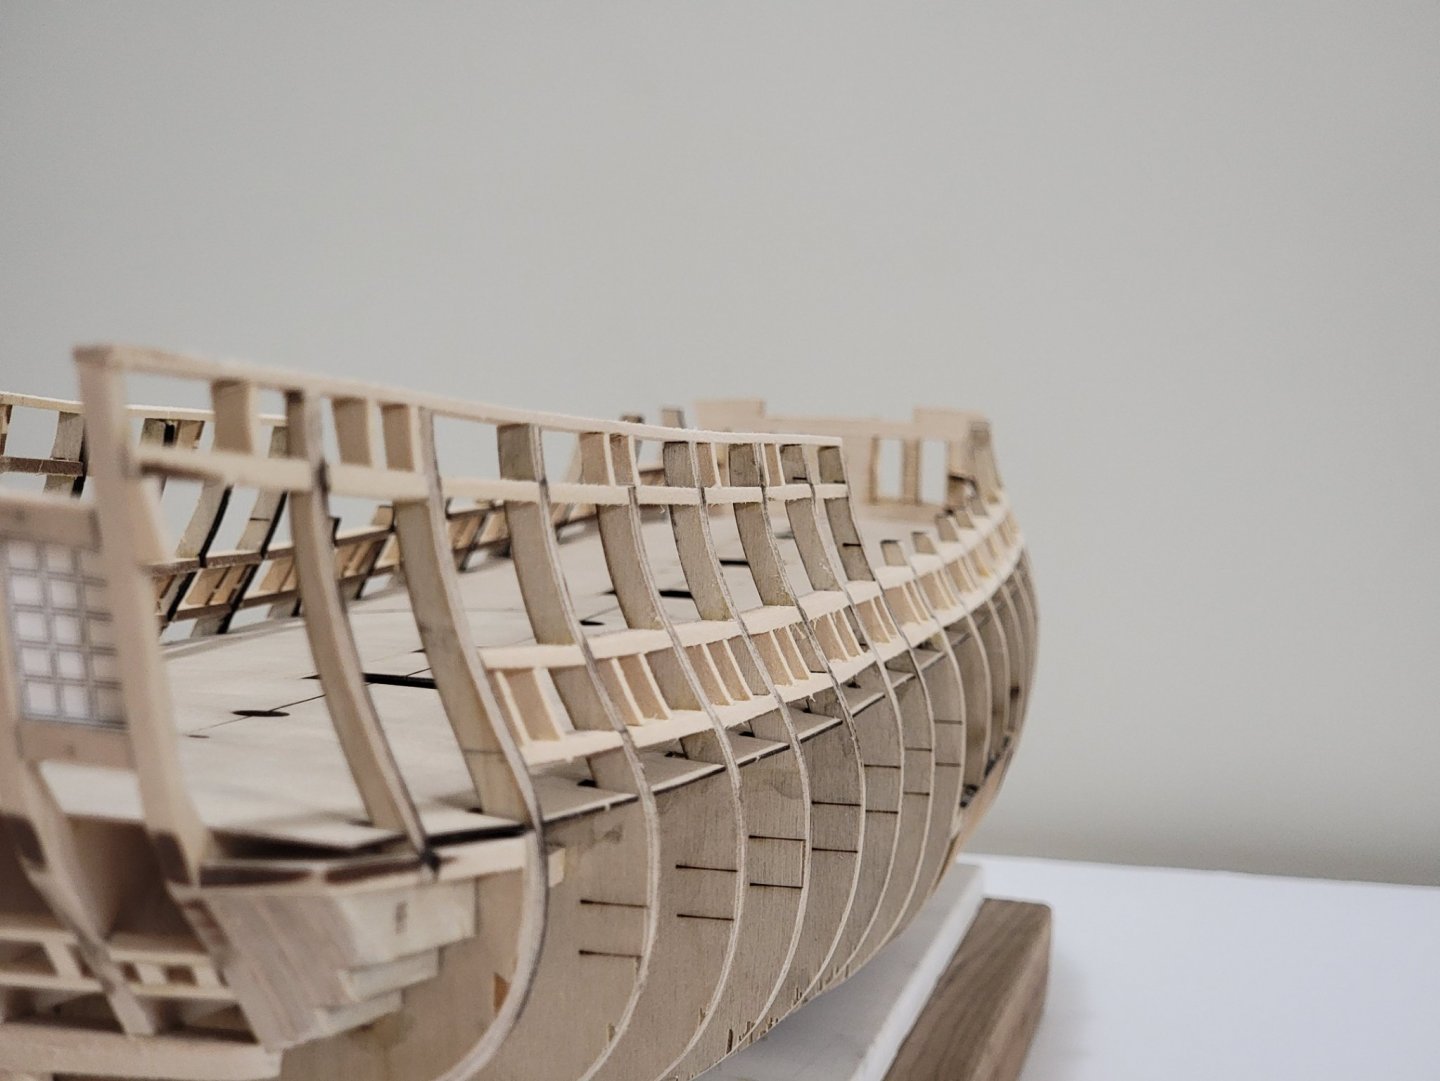
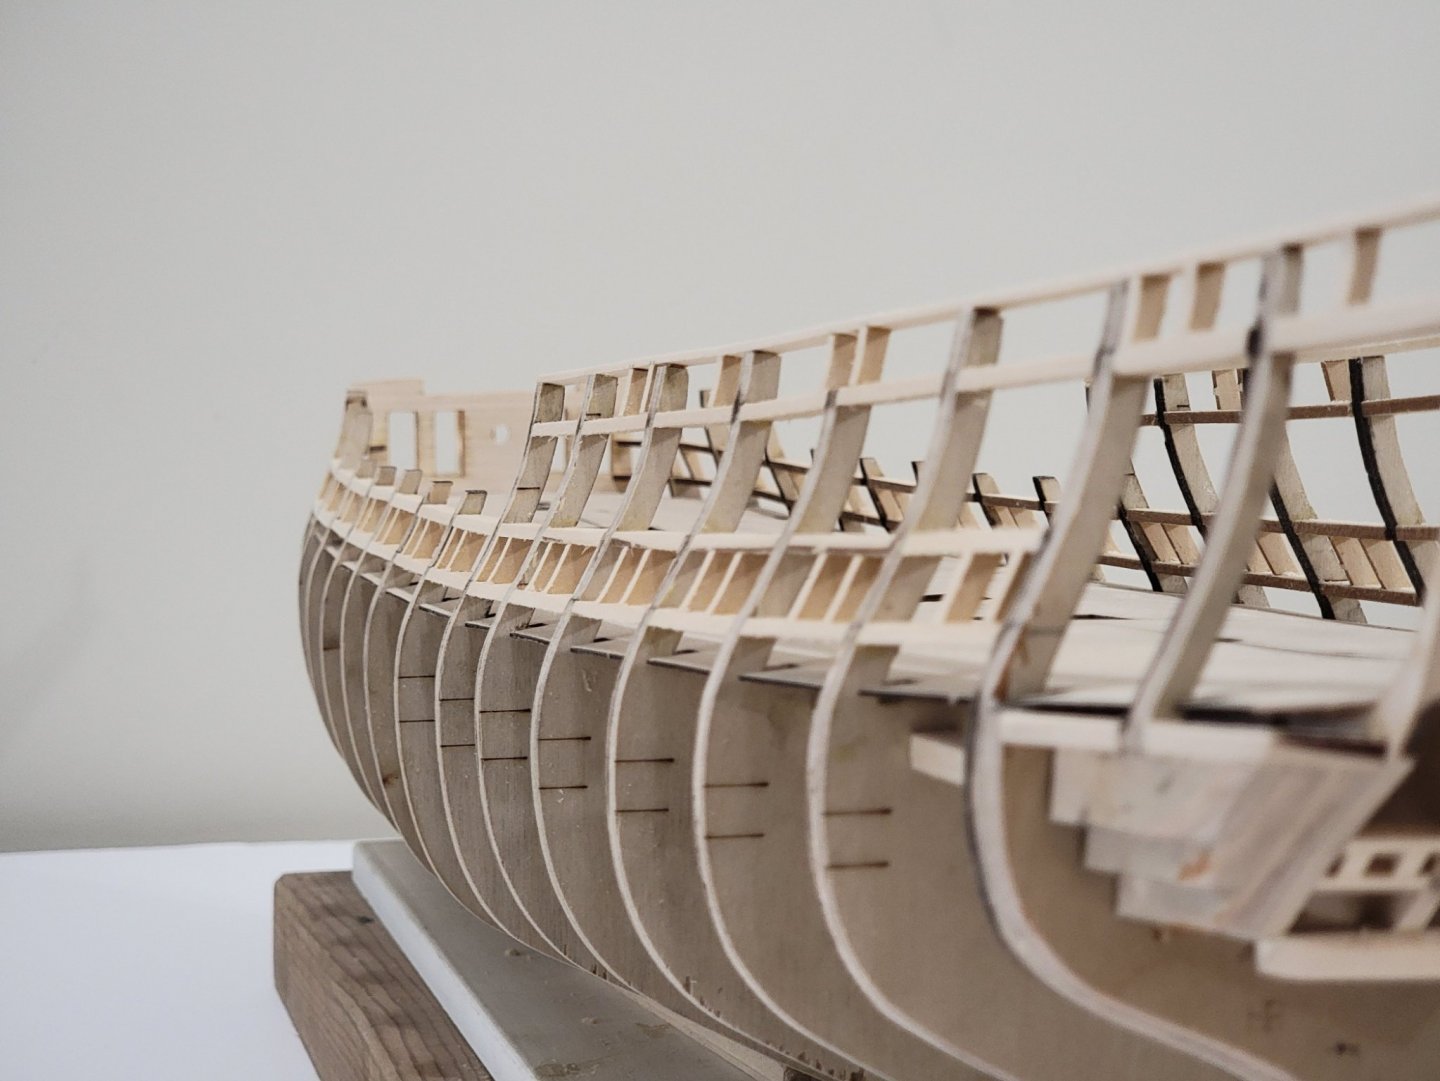
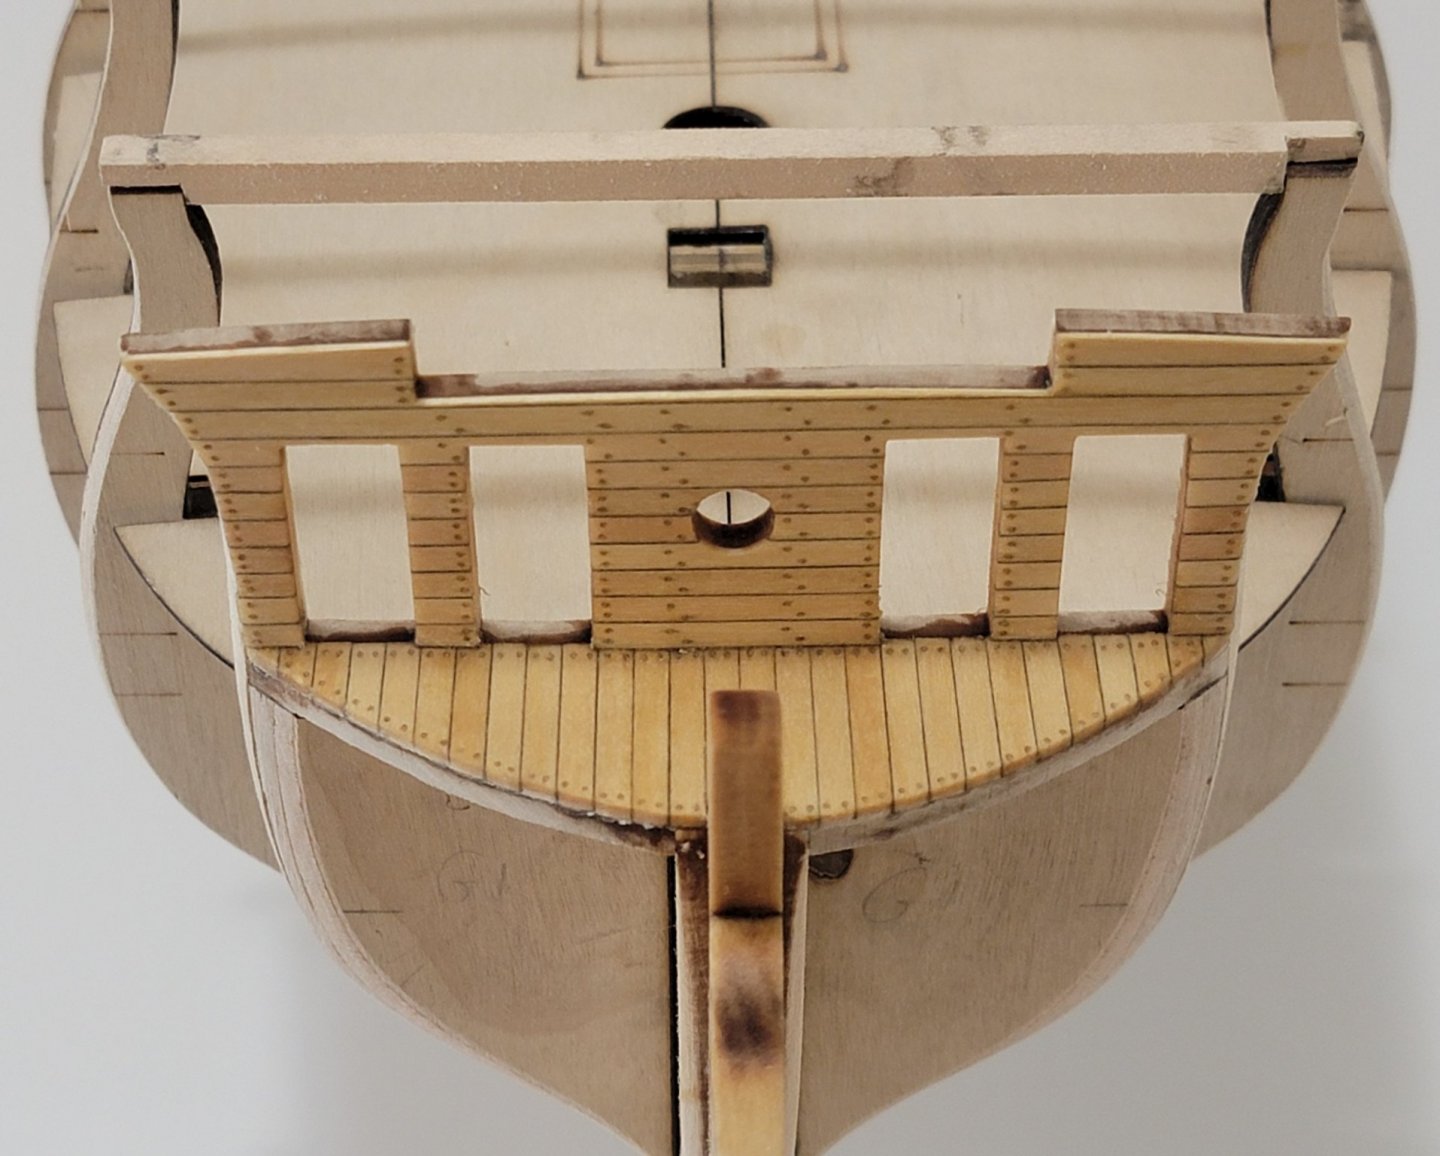
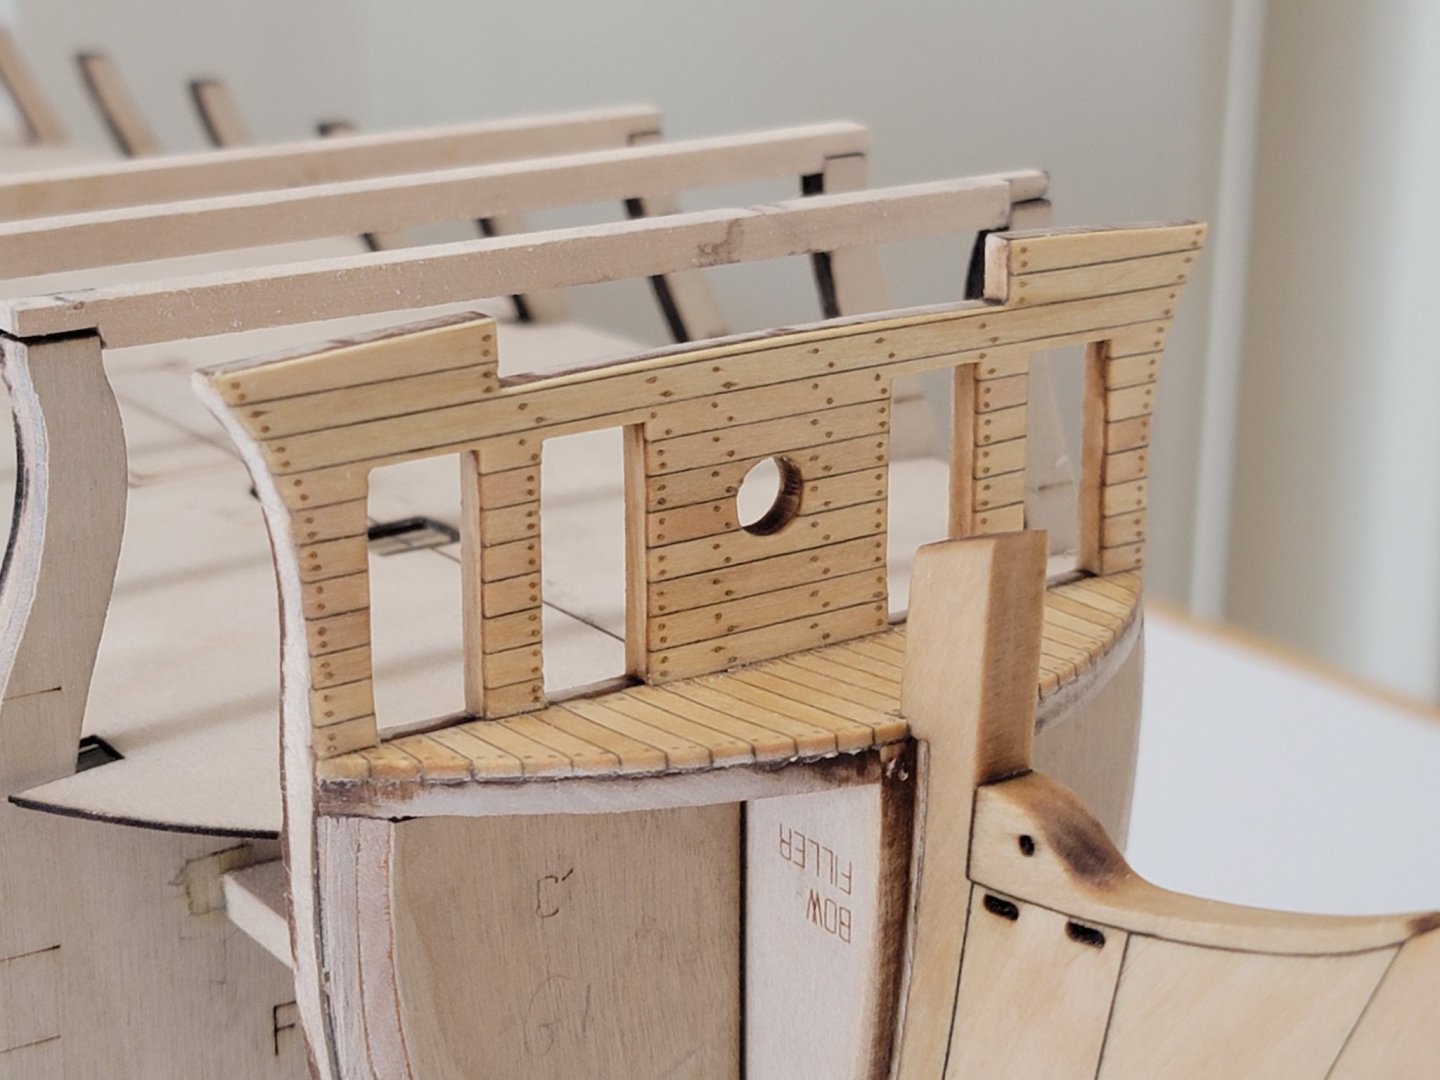
The sides of the gun ports have now been framed and faired. It was very satisfying vacuuming the area revealing the smooth lines! There were some areas where the bulkheads were not truly perpendicular to the keel, so I had to glue some extra pieces so that the framed sides are symmetrical between both sides. Anyways, here are the photos!


-
Thank you Captain Hook and David! 🙂
-
Thank you! A couple of mine also came out, so will need to put some extra glue, but I think the vertical pieces will help with making it more secure 😄
-
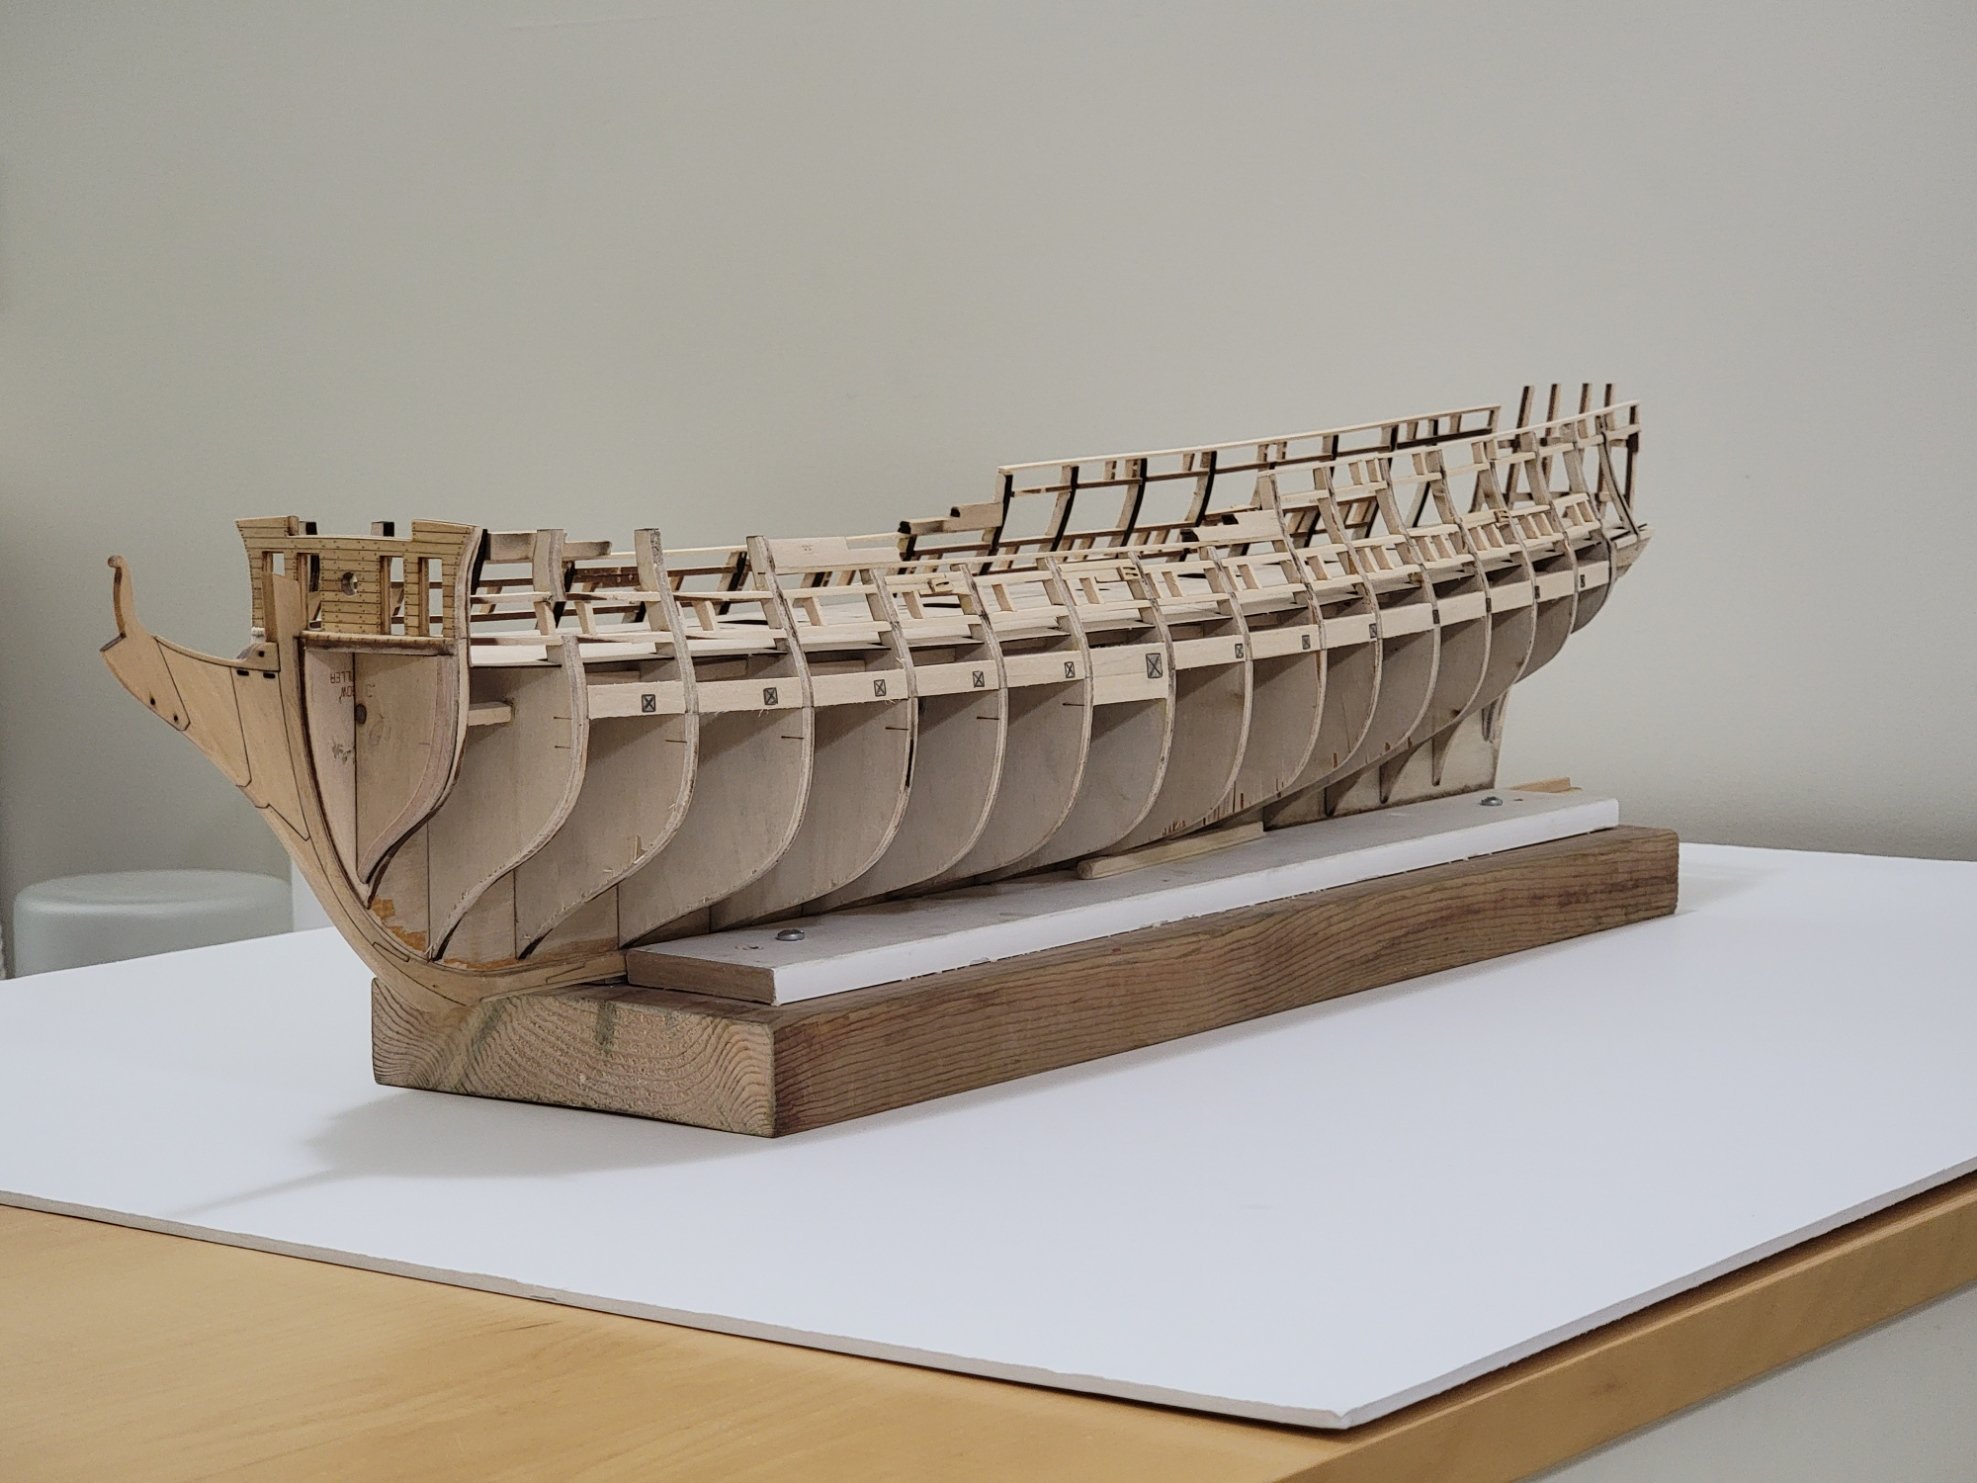
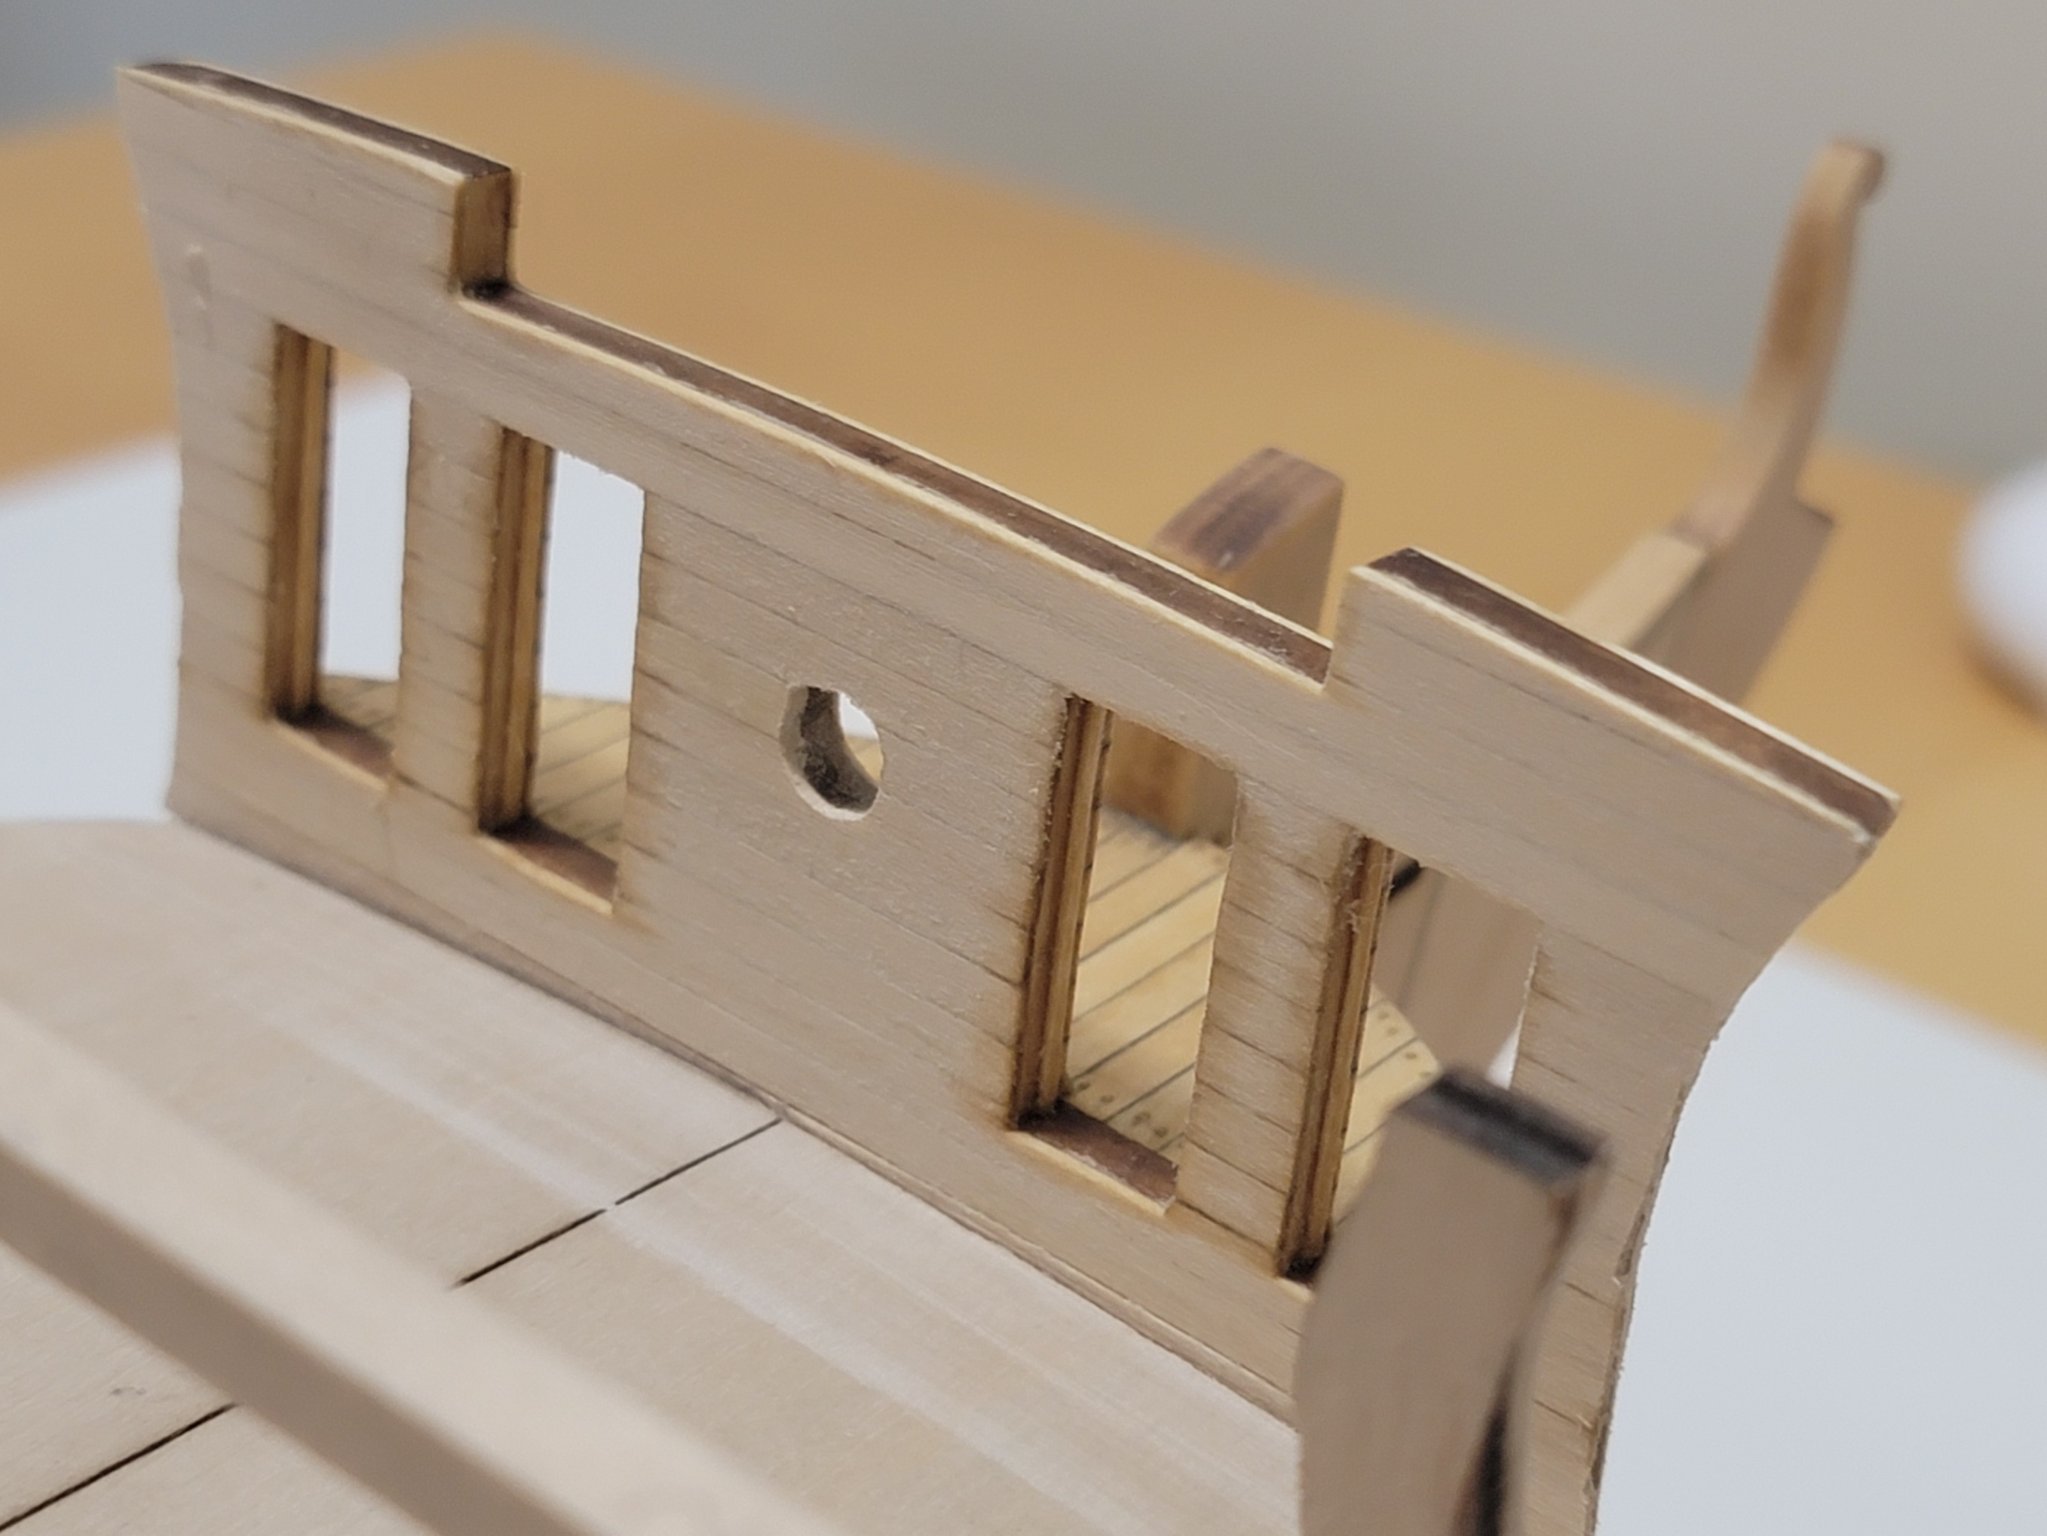
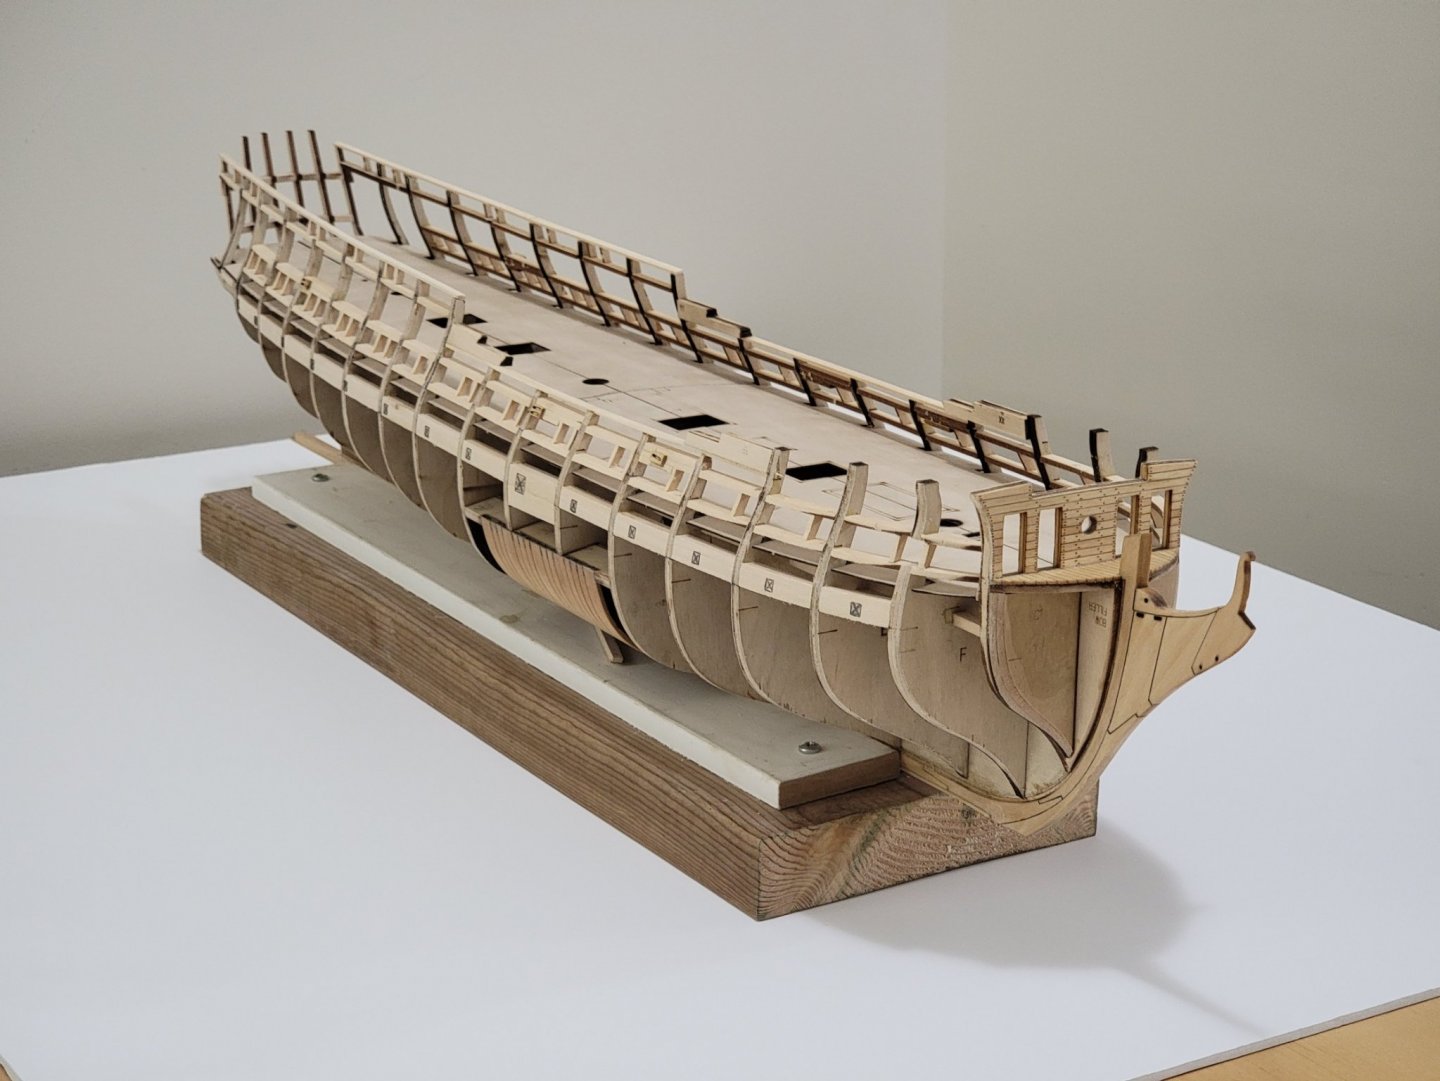
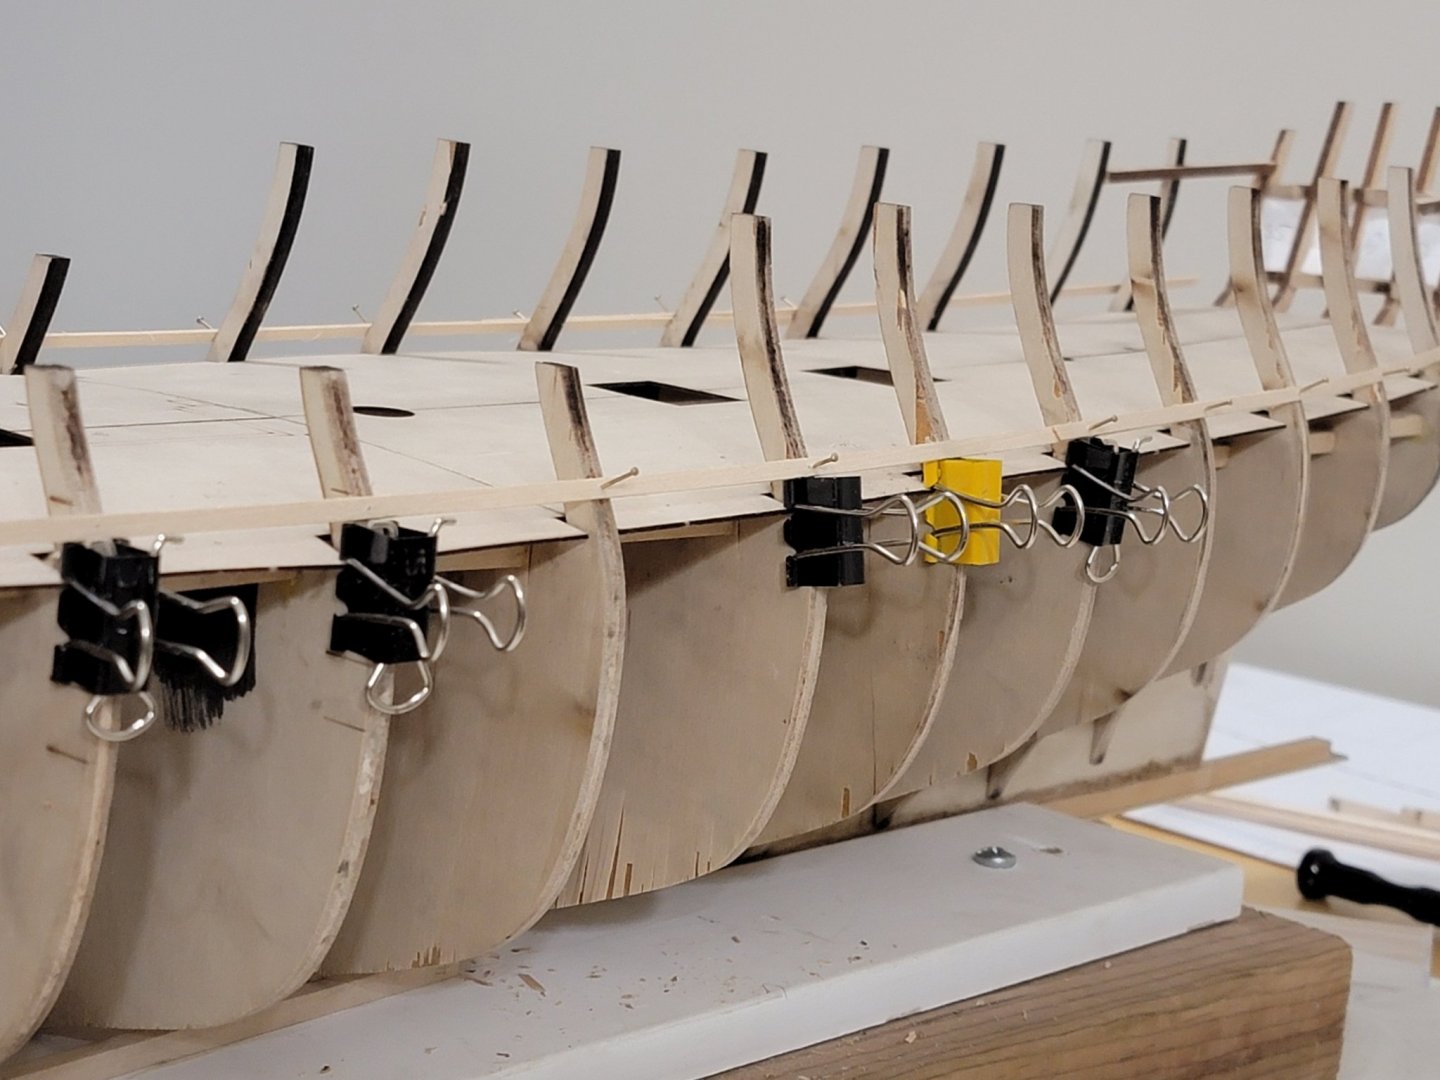
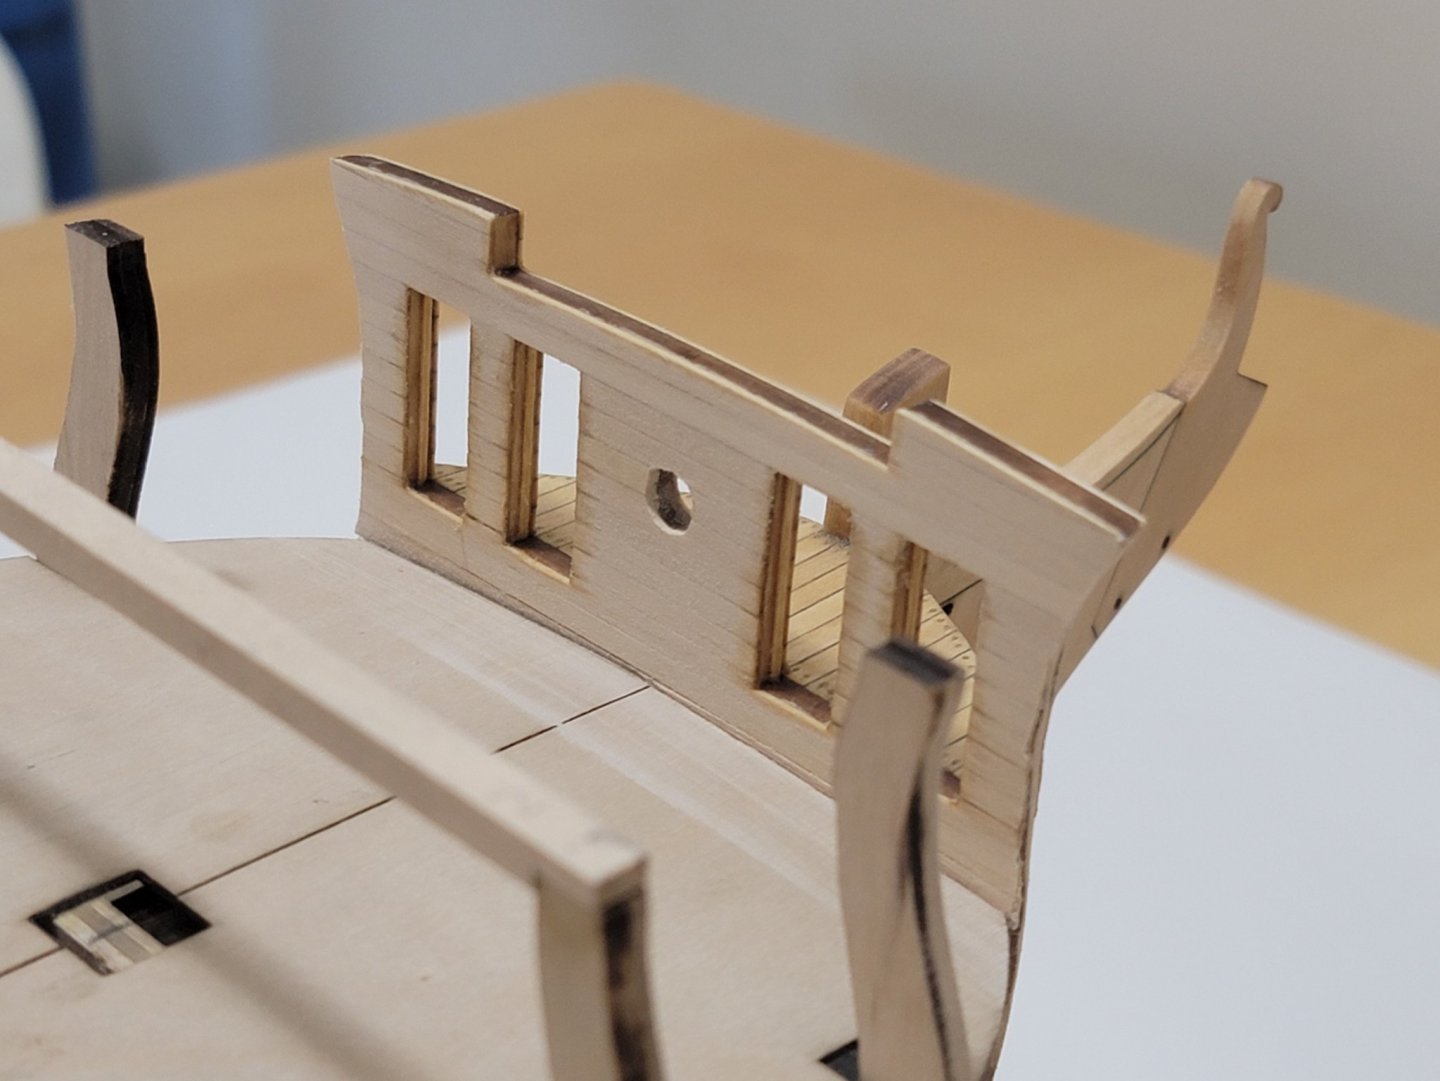
Moving along at a slow but steady state. The lintels and sills are now all glued permanently. For the lintel of the quarter deck, I used binder clips to hold the slight curve in position while the glue dried. Here are a few pics before I start the vertical parts of the framing! Also, please do not hesitate to comment if I made any mistakes 🙂.


-
That's some awesome planking and decking! One of the best I've seen. Did you use spacers between the planks? The putty caulking looks awesome. I'll remember that for next time
-
Correct me if I am wrong but this is the section where there is no cavity in the ship (like at the stern). The planking is looking great btw! Can't wait to see the entire hull covered up 😁
-
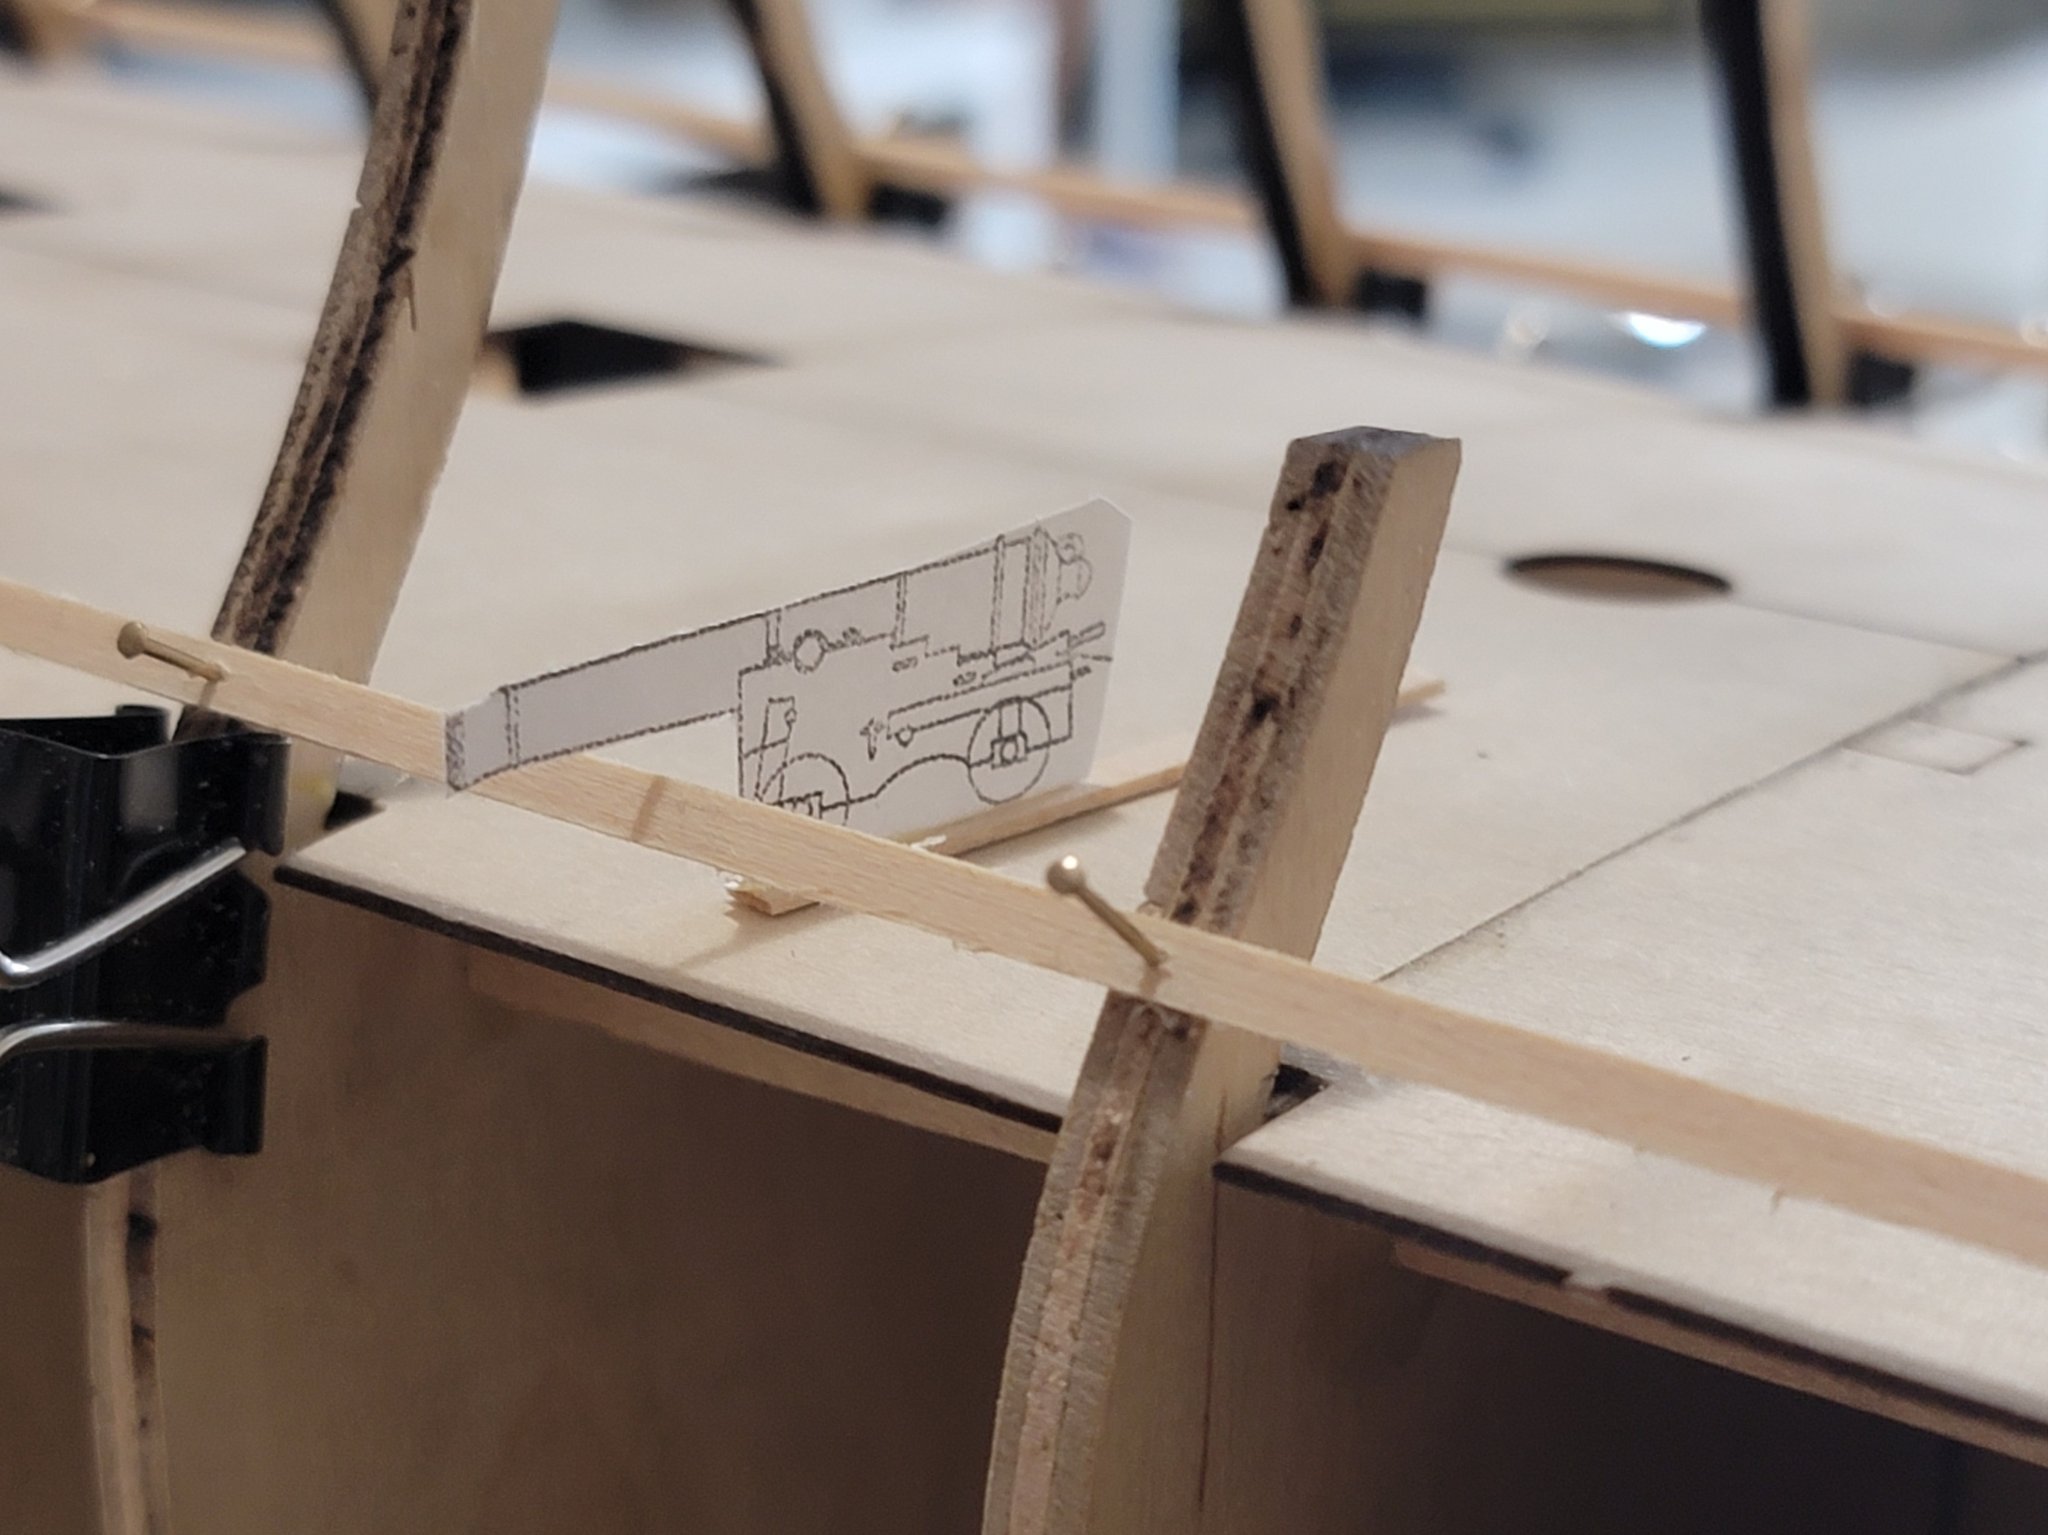
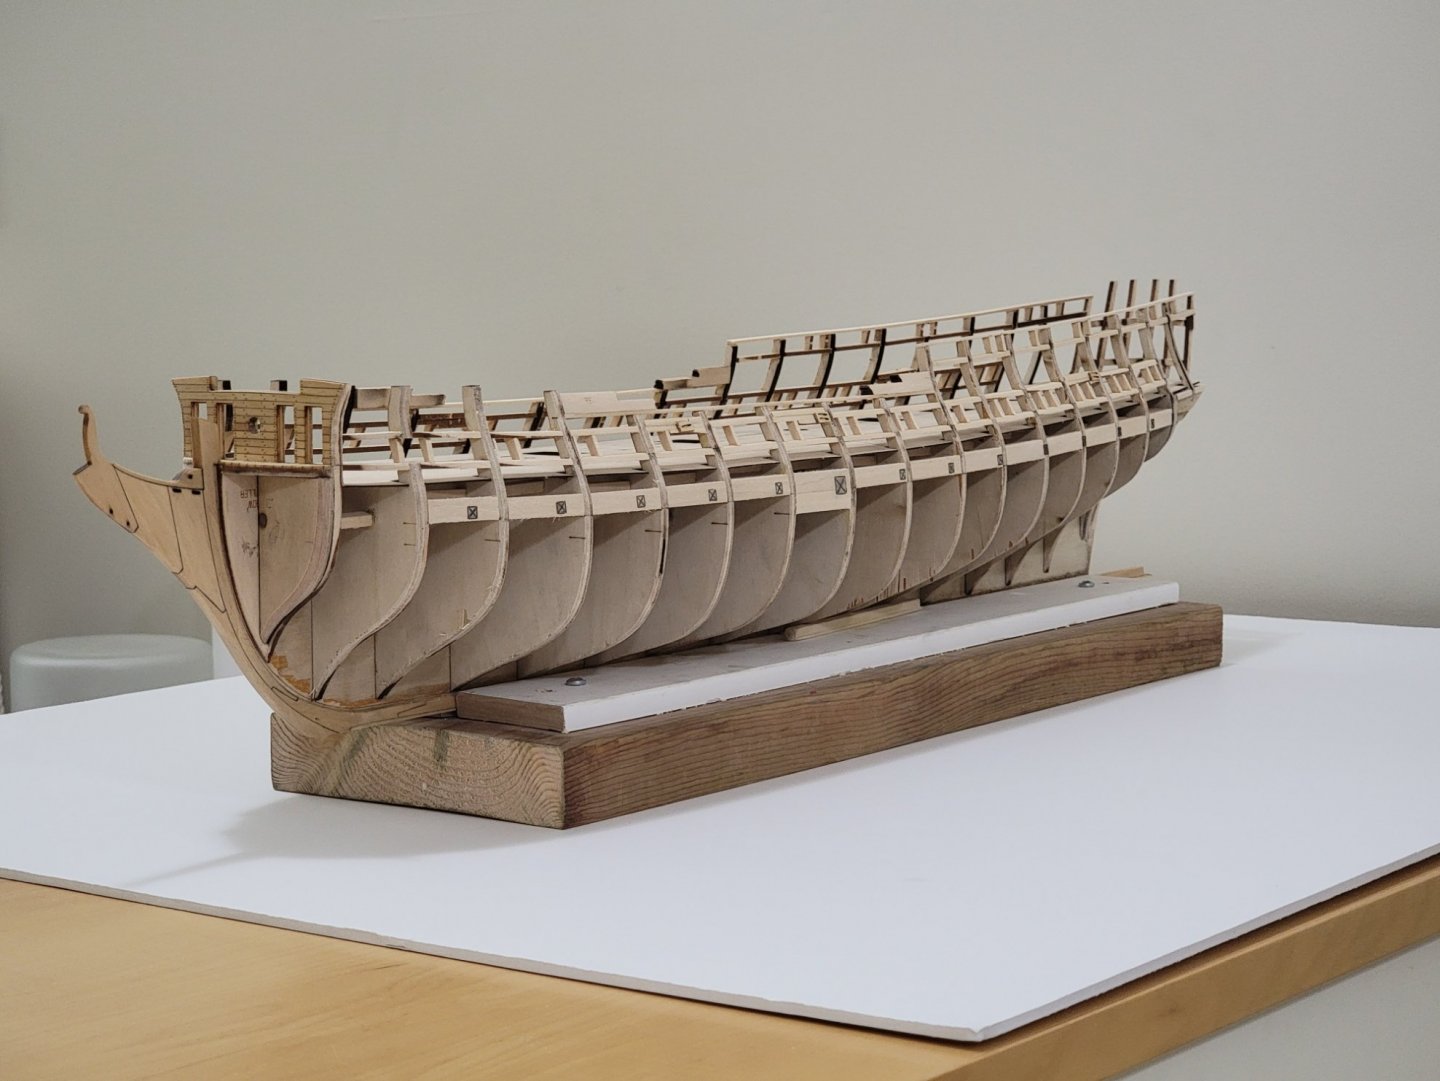
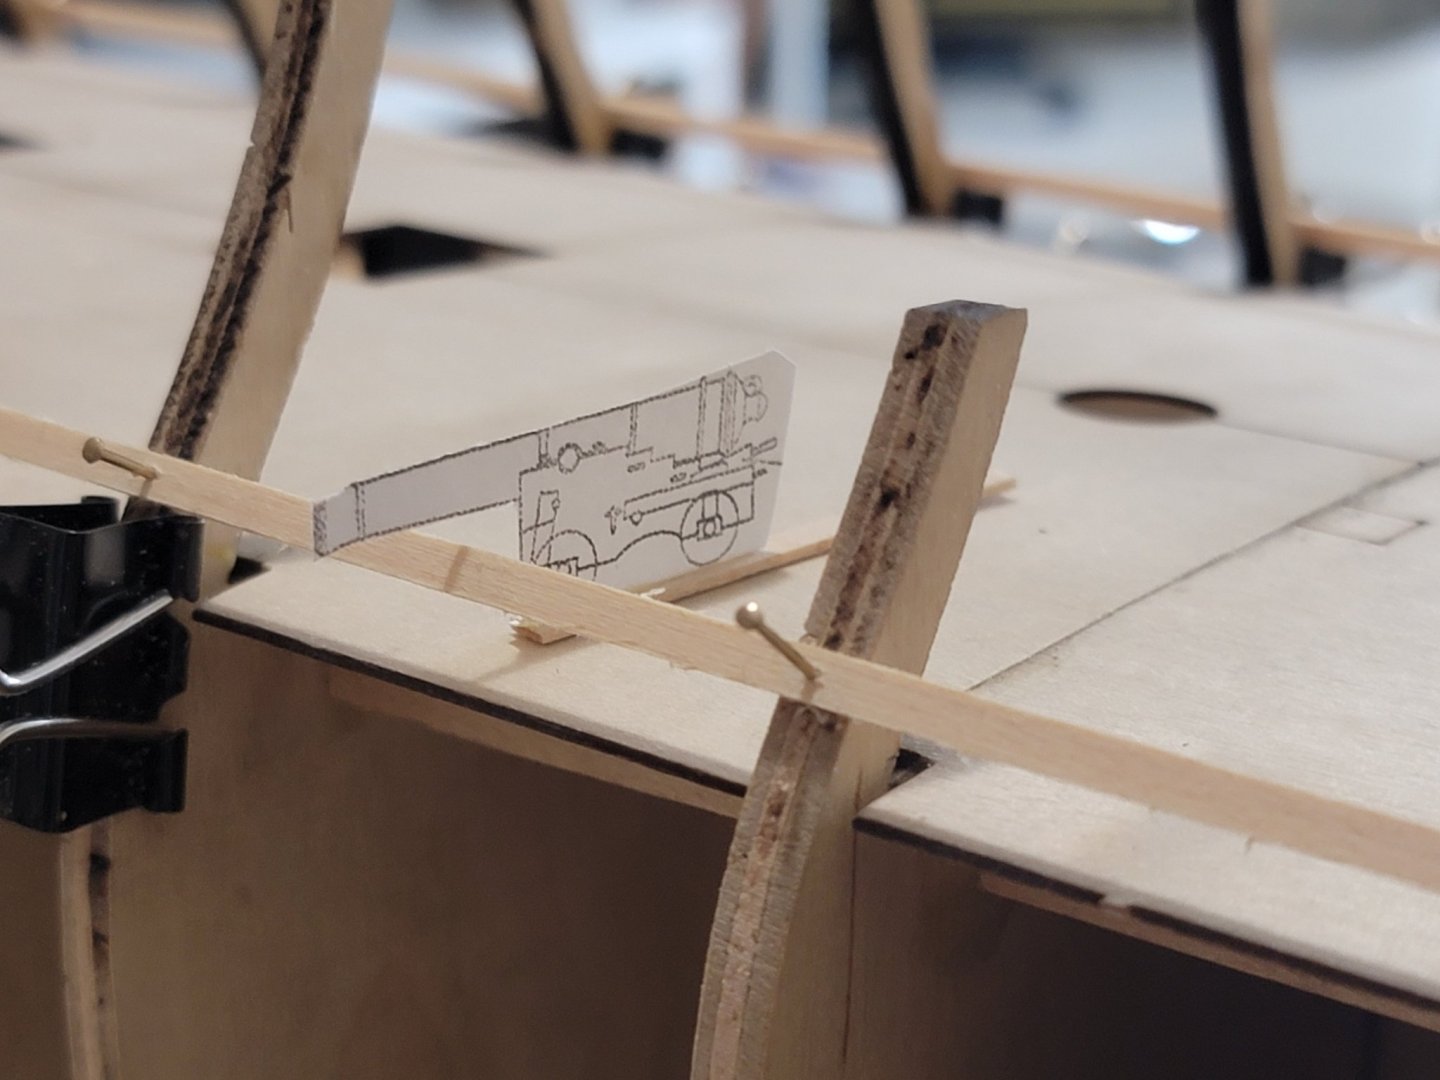
Thank you Steven! I made the small jig of the canon, and it seemed to clear the batten at all locations by the same distance: I then started gluing in the sills. First, to cut them I lined them up at the bulkhead, used a sharp #11 blade to mark the location of the cut, then used the hand saw to cut them out. This resulted in most of the pieces fitting nicely in the first go. I then glued pairs from both sides together to make sure they are completely horizontal. This was done by resting a ruler on them to make sure they were flat. Here are a few pics showing where I am at: Next up are the lintels. These should be a bit easier than the sills as I will use a strip of wood to act as a spacer, so no need to adjust each piece very carefully.

-
I hope you continue working on the model. I'm loving the progress you've made. The photos are like eye candy!
- 322 replies
-
- 9
-
-
- enterprise
- caf
- (and 1 more)
-
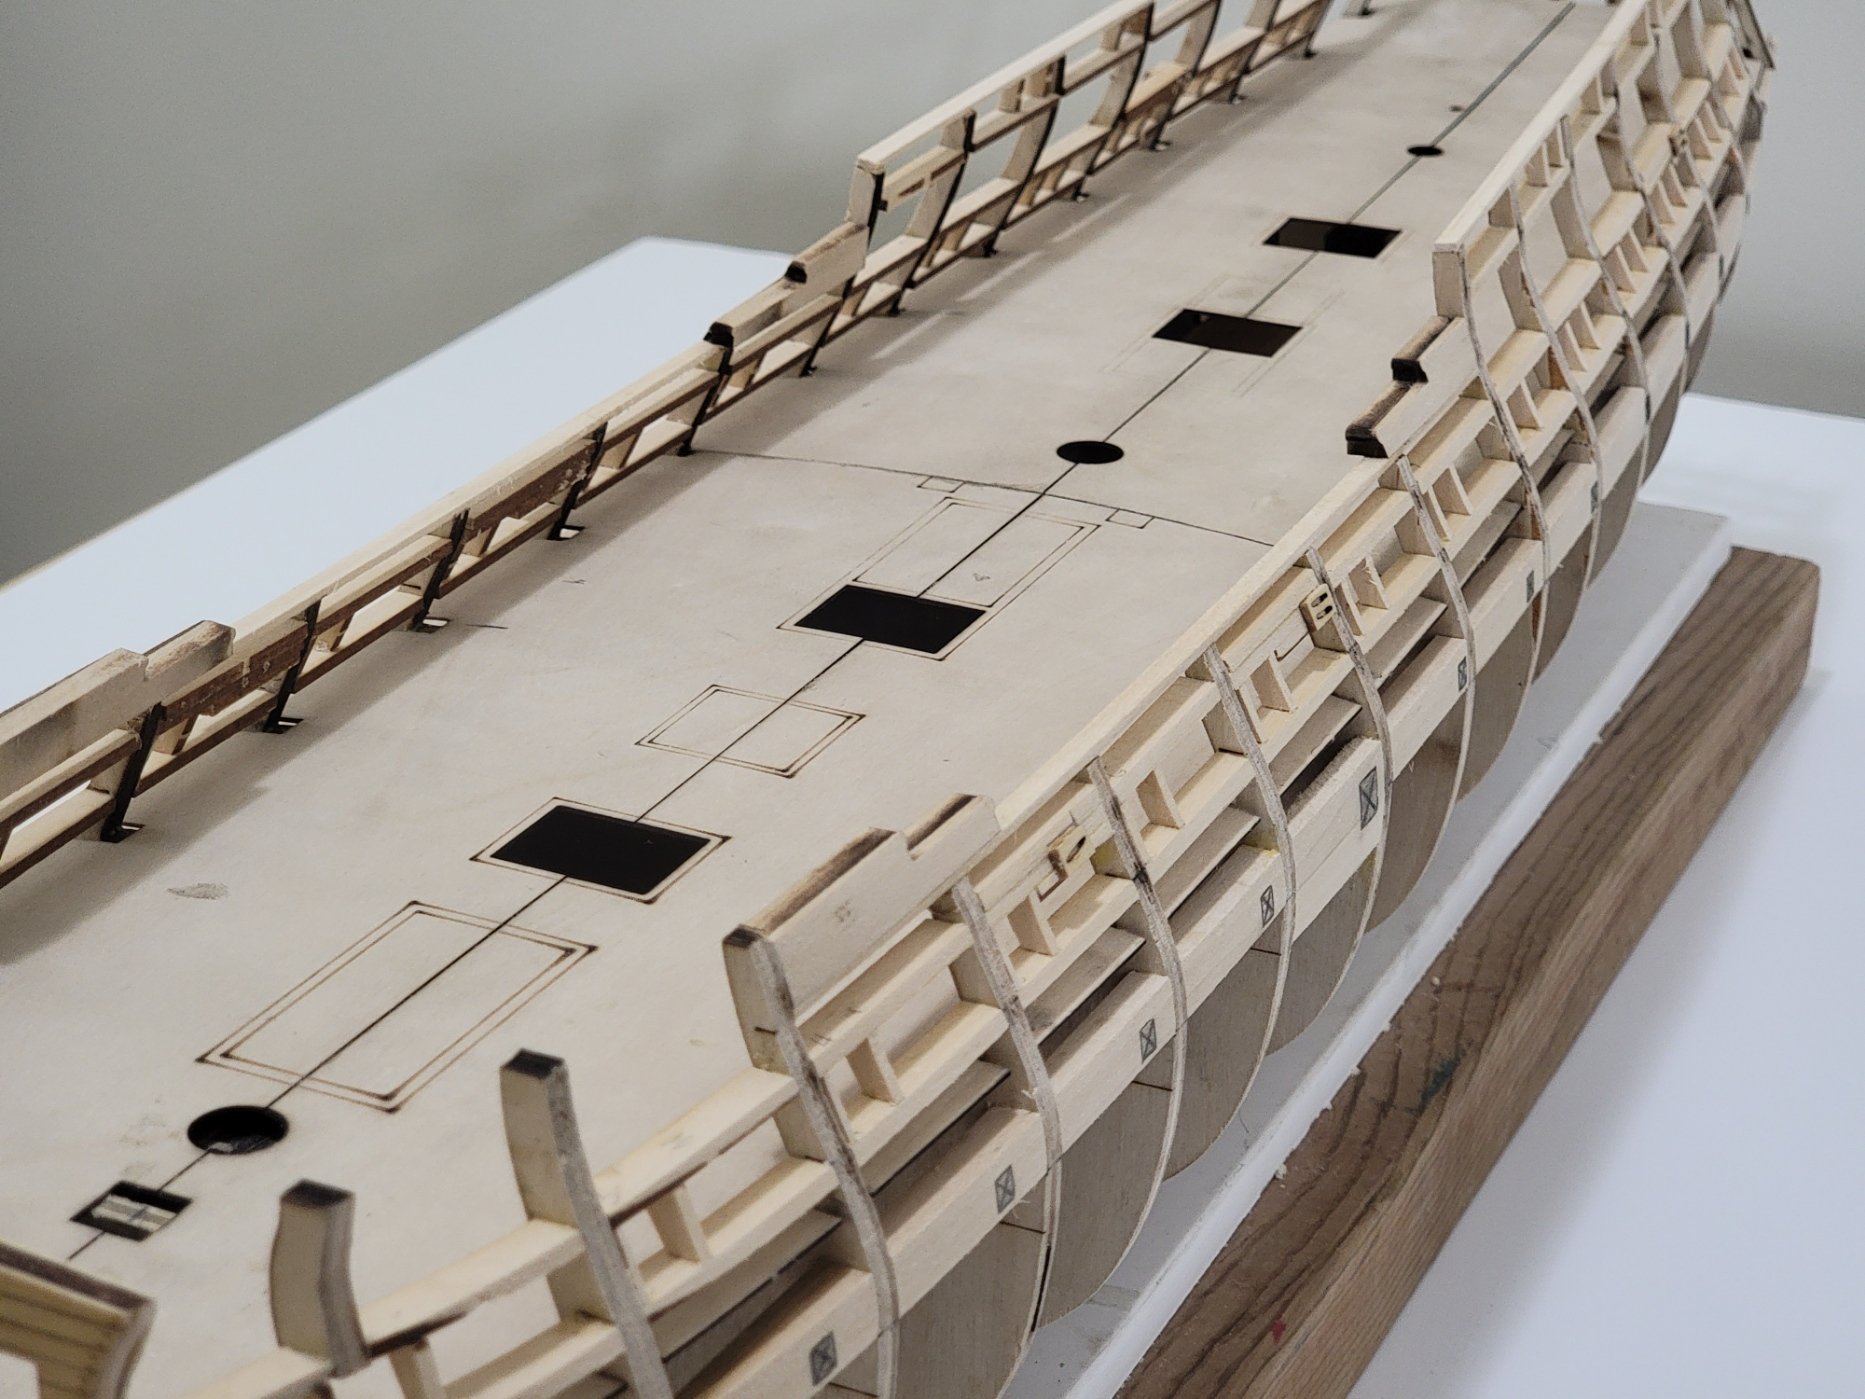
Never mind! I think I fixed it. I used the second option of removing bits and pieces from about 2 cm in to the edge of the bulkhead using a #11 blade. It was very tricky, so I had to be a bit slow and deliberate when removing the excess material. I used these clips to hold the the false deck so I could see if it is level or not. Seems to be good now (or at least much better!). Before permanently assembling the sills, I will make sure the guns can fit nicely using a cutout of the plans. So that will be the next step..
-
I hit a bit of a snag when using the testing batten to see the sills of the gun ports. I noticed I did not completely sand my bulkheads flat before gluing down the false deck. So now there are two spots where the deck is not level at the ends of the bulkhead. Here is a picture that shows this issue: All these issues arose because the two problem bulkheads did not fully enter the slots for them. Only if I had quadruple checked!! To resolve this, I think I have to carefully remove the false deck and sand the tops again to be level with each other. Another (tricky) way would be to remove bits and pieces of the bulkhead below the false deck until it remains flat. I will probably spend a day or two deciding what to do... If anyone has any idea I am all ears! I was also considering asking for replacement parts from ModelExpo and start the thing again, but I will try fixing this before I go that route.

-
I hope I remember this for my Confed build. The decking is looking great!!! 😀
- 99 replies
-
- 2
-
-
- winchelsea
- Syren Ship Model Company
- (and 1 more)
-
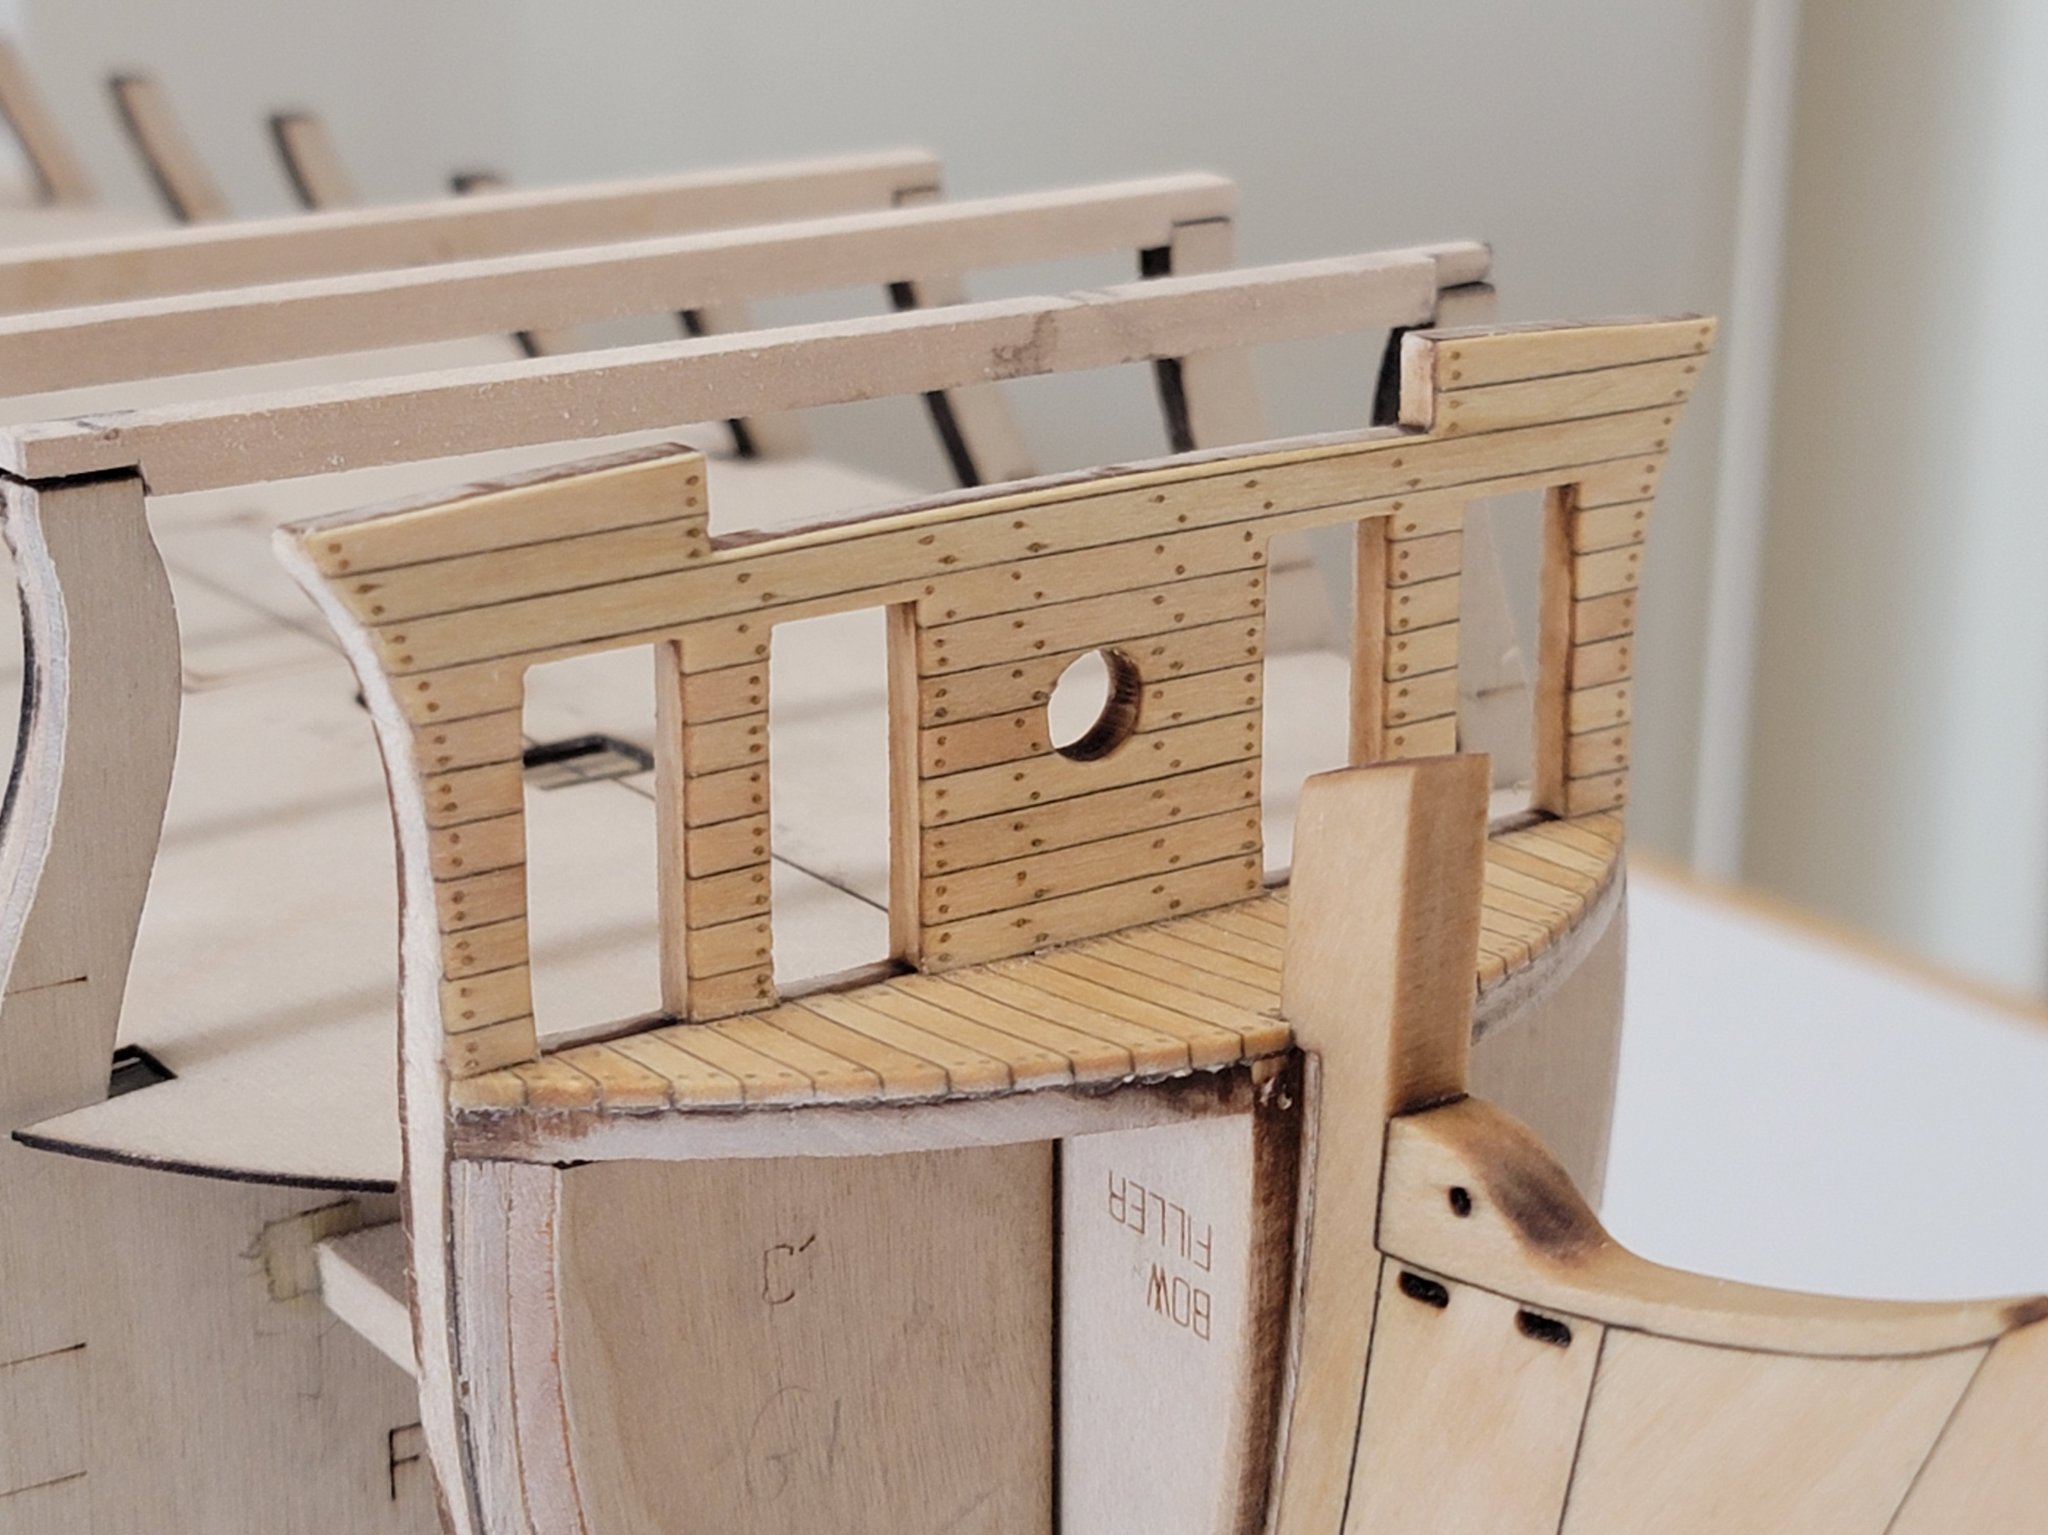
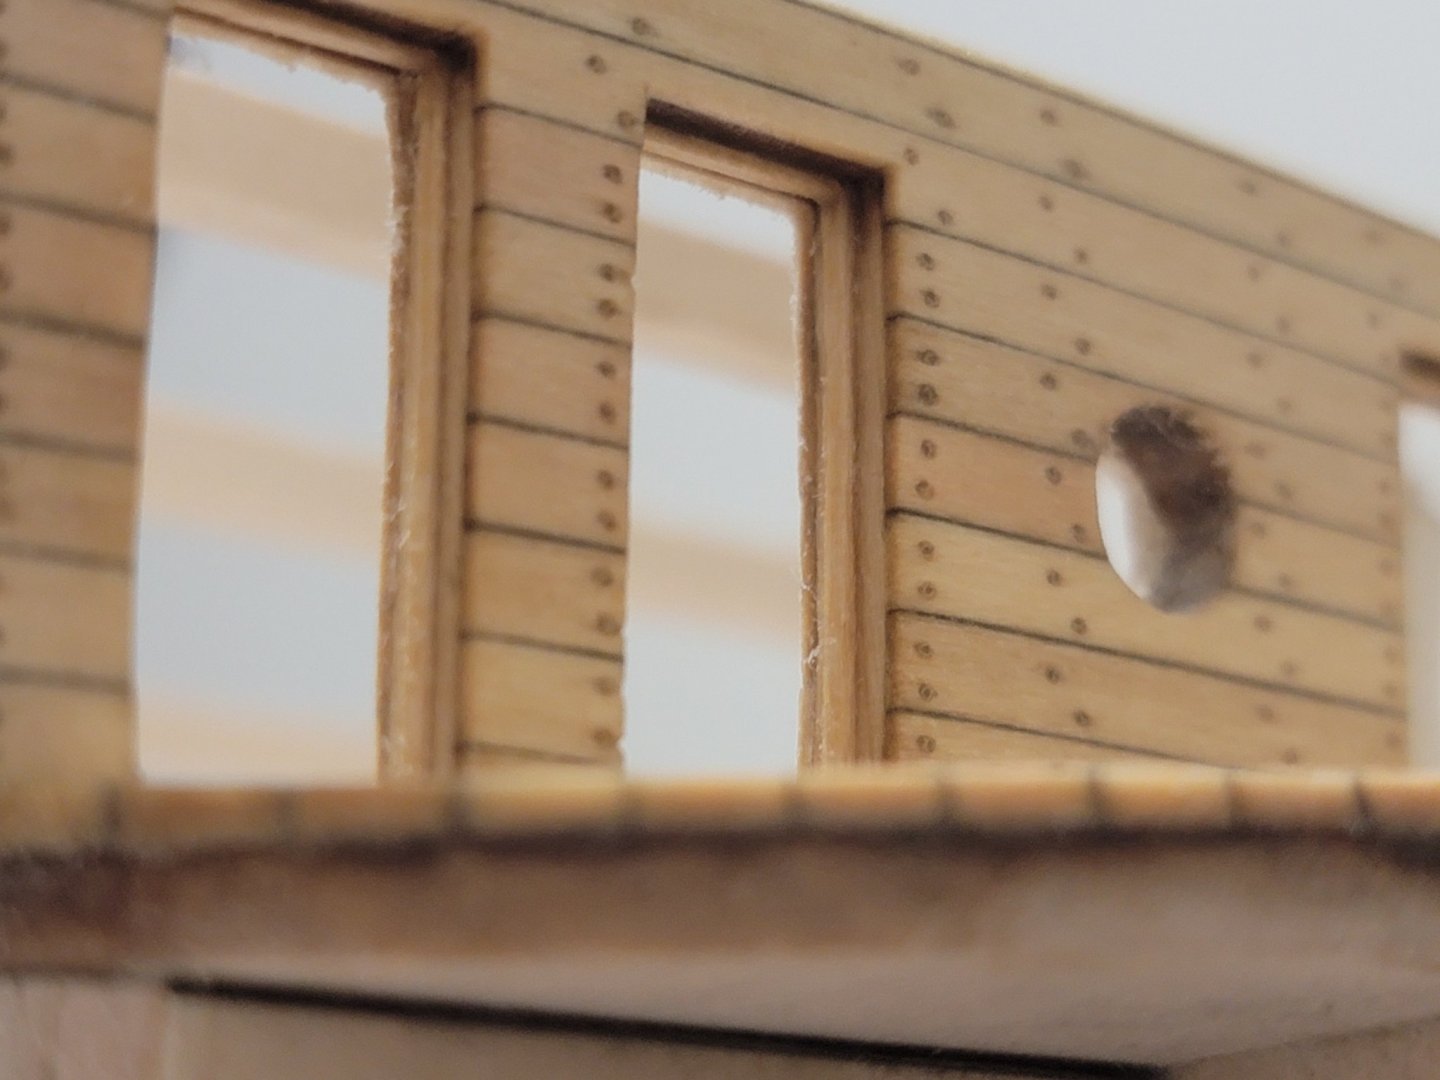
The aft side of the bulkhead is now planked. I installed the door jambs first which was not too great of an idea. I should have planked it first so I could file the edges more easily. I managed to cut the planks to shape, so it was not too bad, just took a bit longer. Here are some pics: Next up is the gun port framing. This ship has lots of guns, so this will take a while 😄

-
Everything is looking top notch!
-
No worries! I am really enjoying your progress and how you are improving what the kit offers. The realistic sheaves look awesome!
-
Thank you for the compliments! I may try some other finishings later down the road if I feel inspired. But for now, tung oil is a pretty safe bet! 😉
-
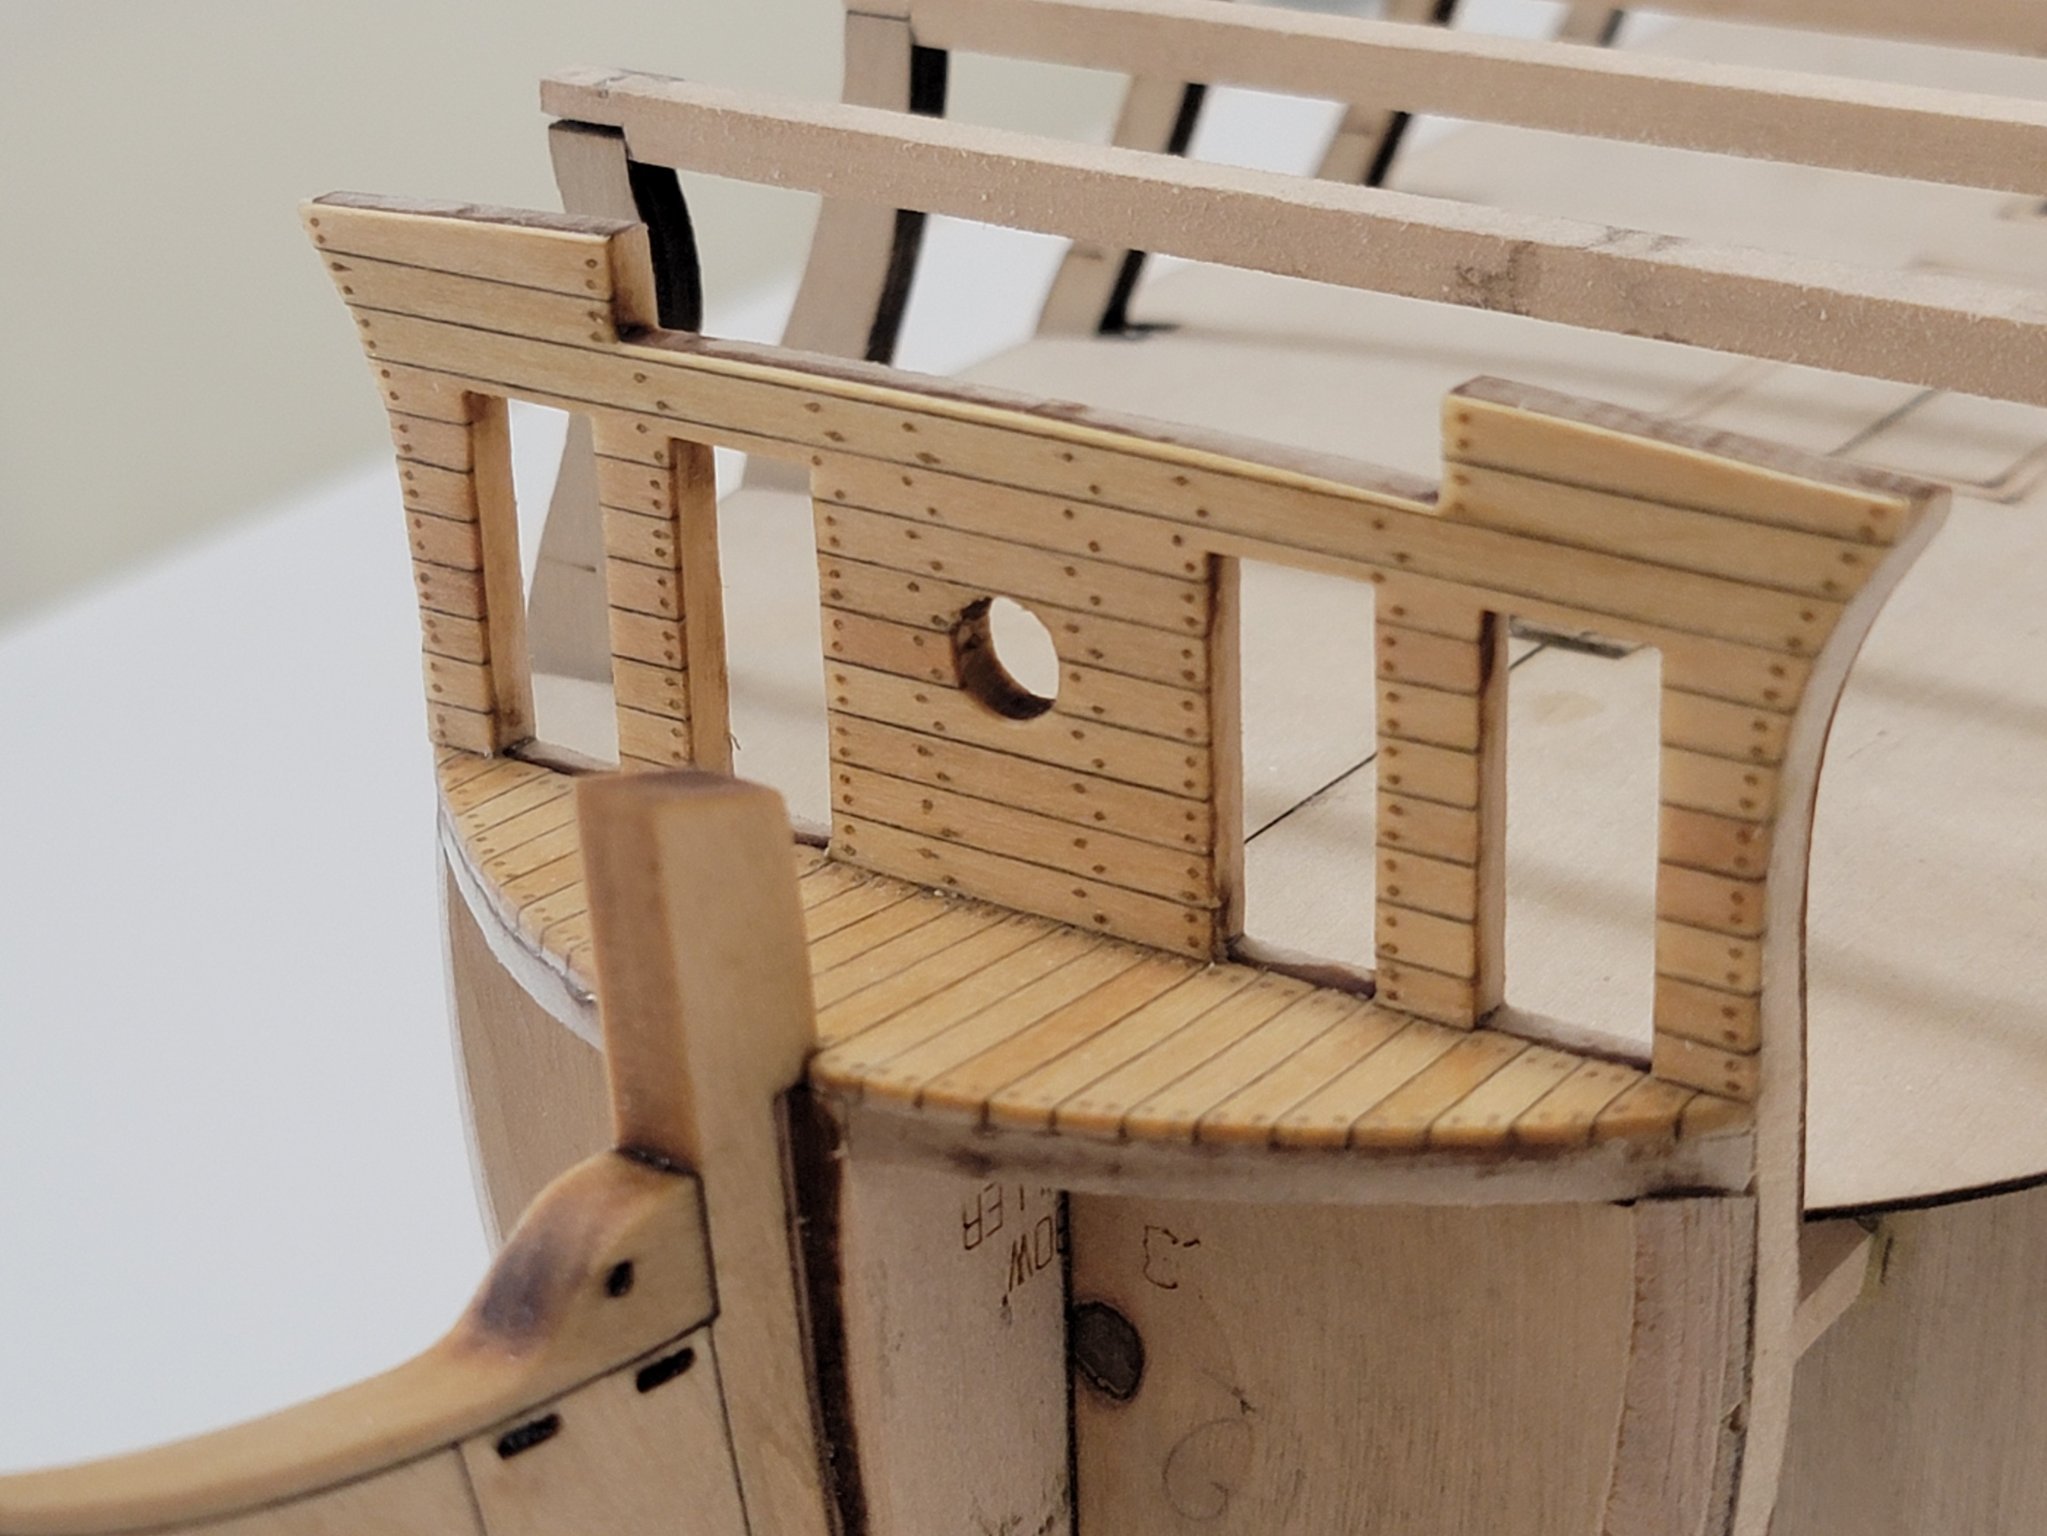
I finished planking and treenailing the vertical section (the bamboo skewers were thinned down to the third last position on the drawplate). After some sanding I applied tung oil: I'll next plank the otherside of the same bulkhead, put in the door jambs, and fix a slight warping issue on the false deck..

-
Hey Chuck, sorry if you have mentioned earlier, but what wood finishing did you use on the deck and hull? Or was it left in the natural state?
- 1,784 replies
-
- 1
-
-
- winchelsea
- Syren Ship Model Company
- (and 1 more)