.jpg.1f80adf1a9b14a937cfcf2ca6af0f0d4.jpg)
WalrusGuy
-
Posts
1,009 -
Joined
-
Last visited
Content Type
Profiles
Forums
Gallery
Events
Everything posted by WalrusGuy
-
.thumb.jpg.62d1d69fed1f32364417cb1f9cdeb009.jpg) I love all the details going into this model! Just curious, how did you make the buoys? They look very realistic
I love all the details going into this model! Just curious, how did you make the buoys? They look very realistic -
Too afraid too even begin counting!!!
-
Yes many many treenails! I had to take a breather after marking them on one side 😄 Oh and speaking of a break, for those interested, I have set up a build log of the HMS Pickle model which I am building using yellow cedar. I plan to switch back and forth between the Confed build and the smaller schooner. This would serve as a nice break between the long modelling sessions of the Confed build:
-
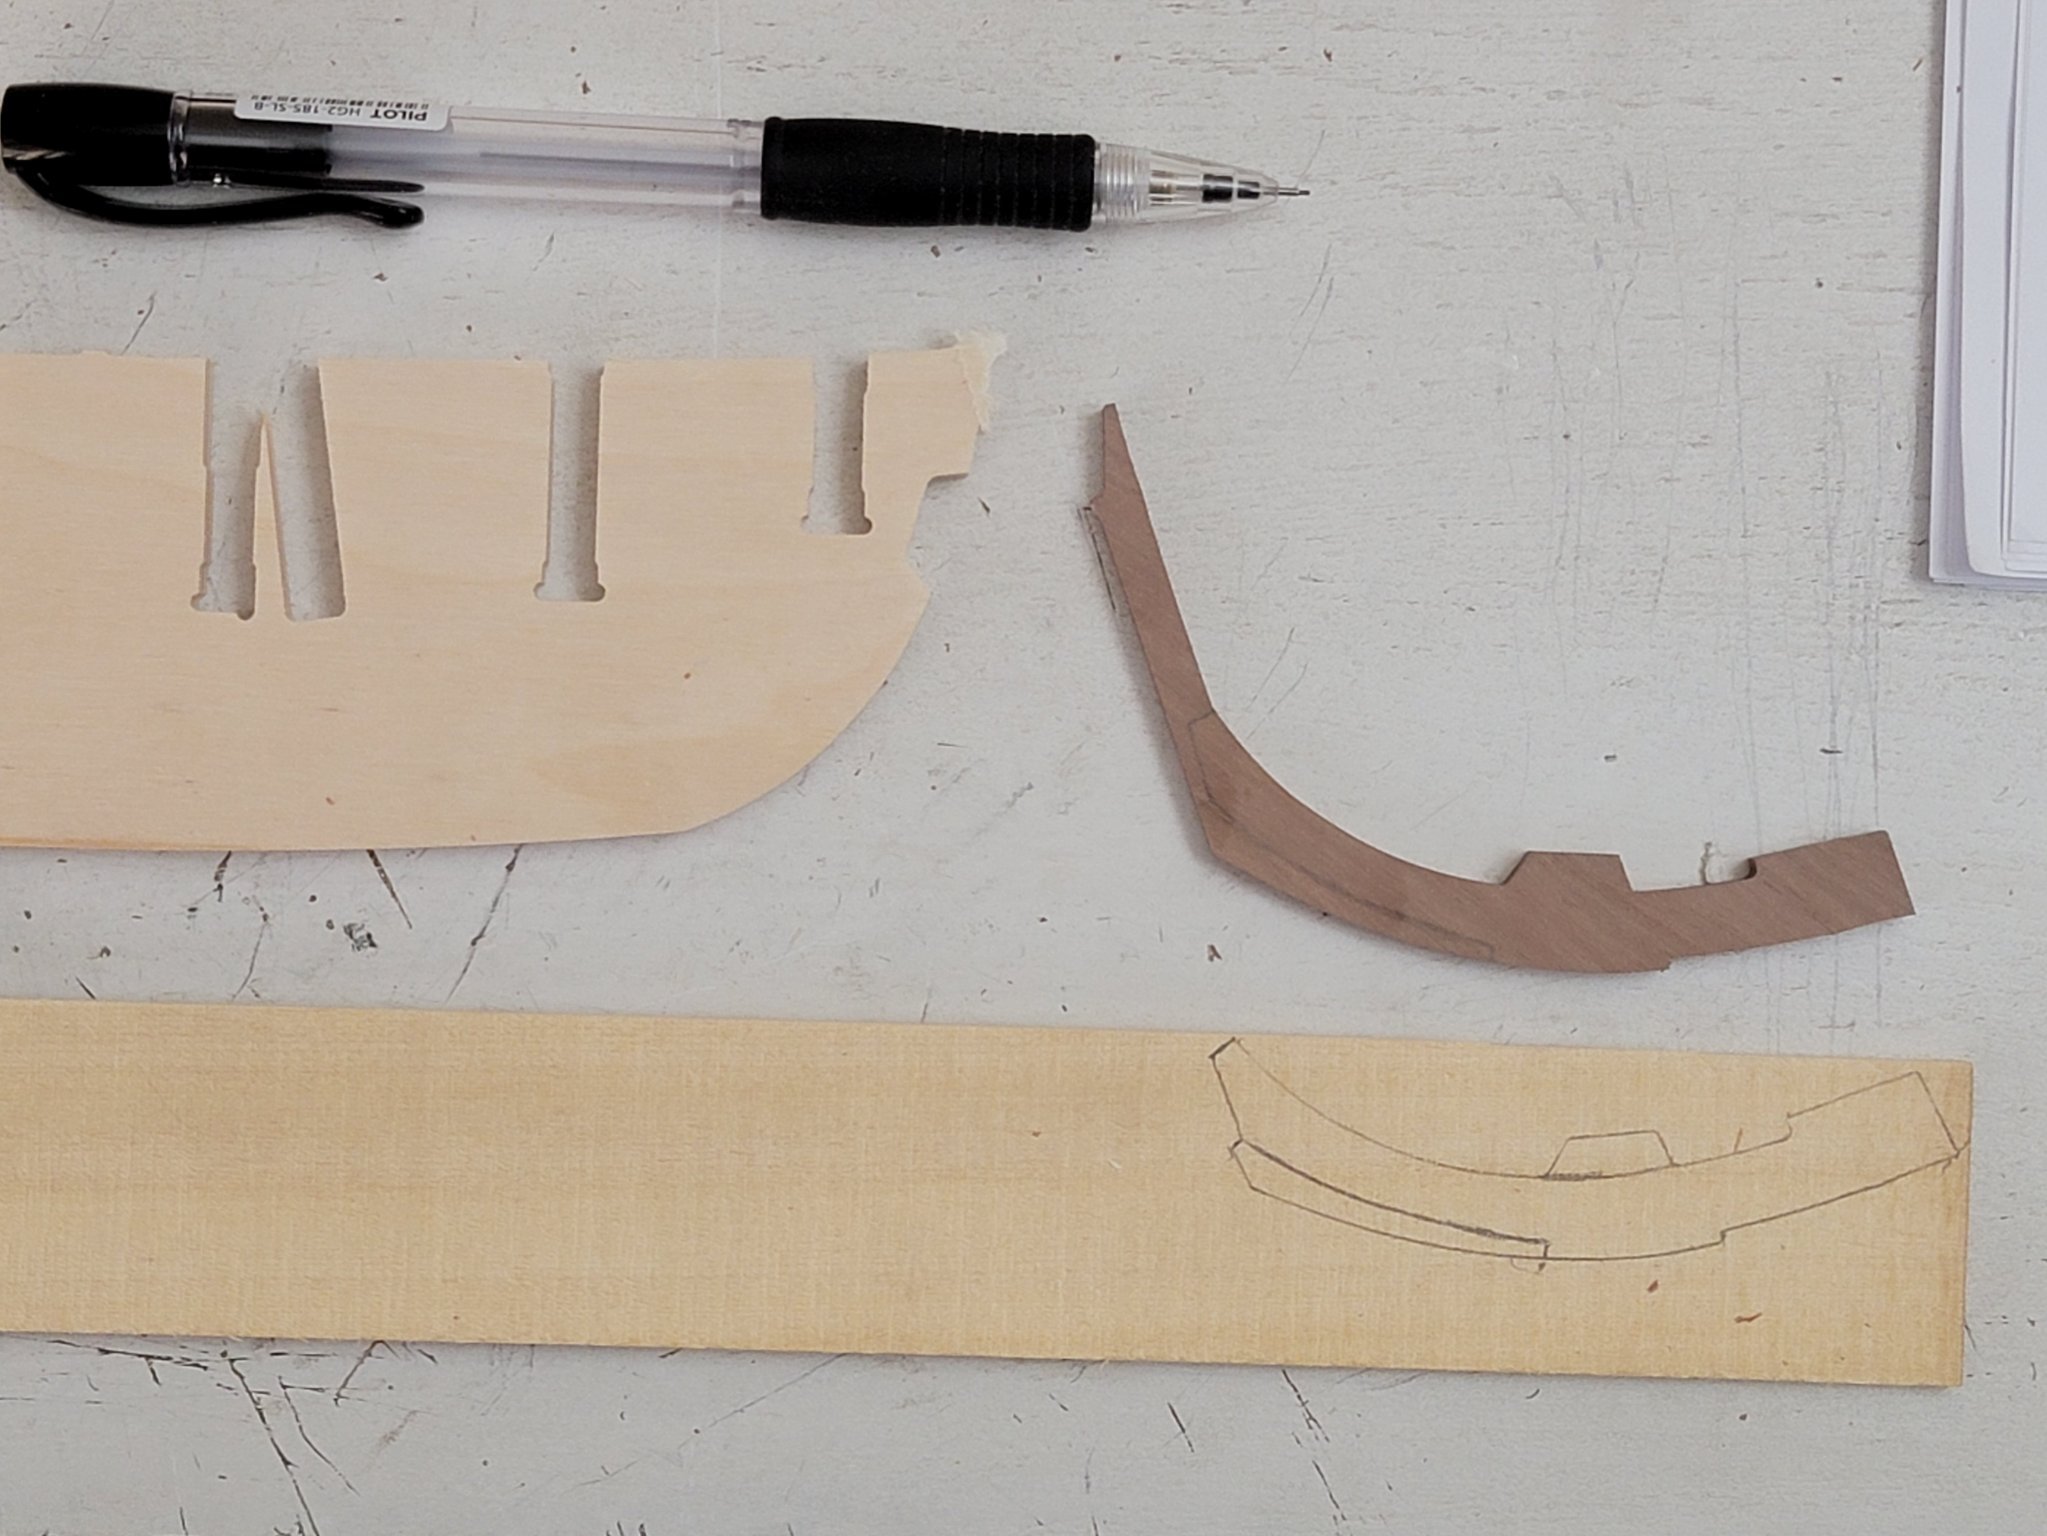
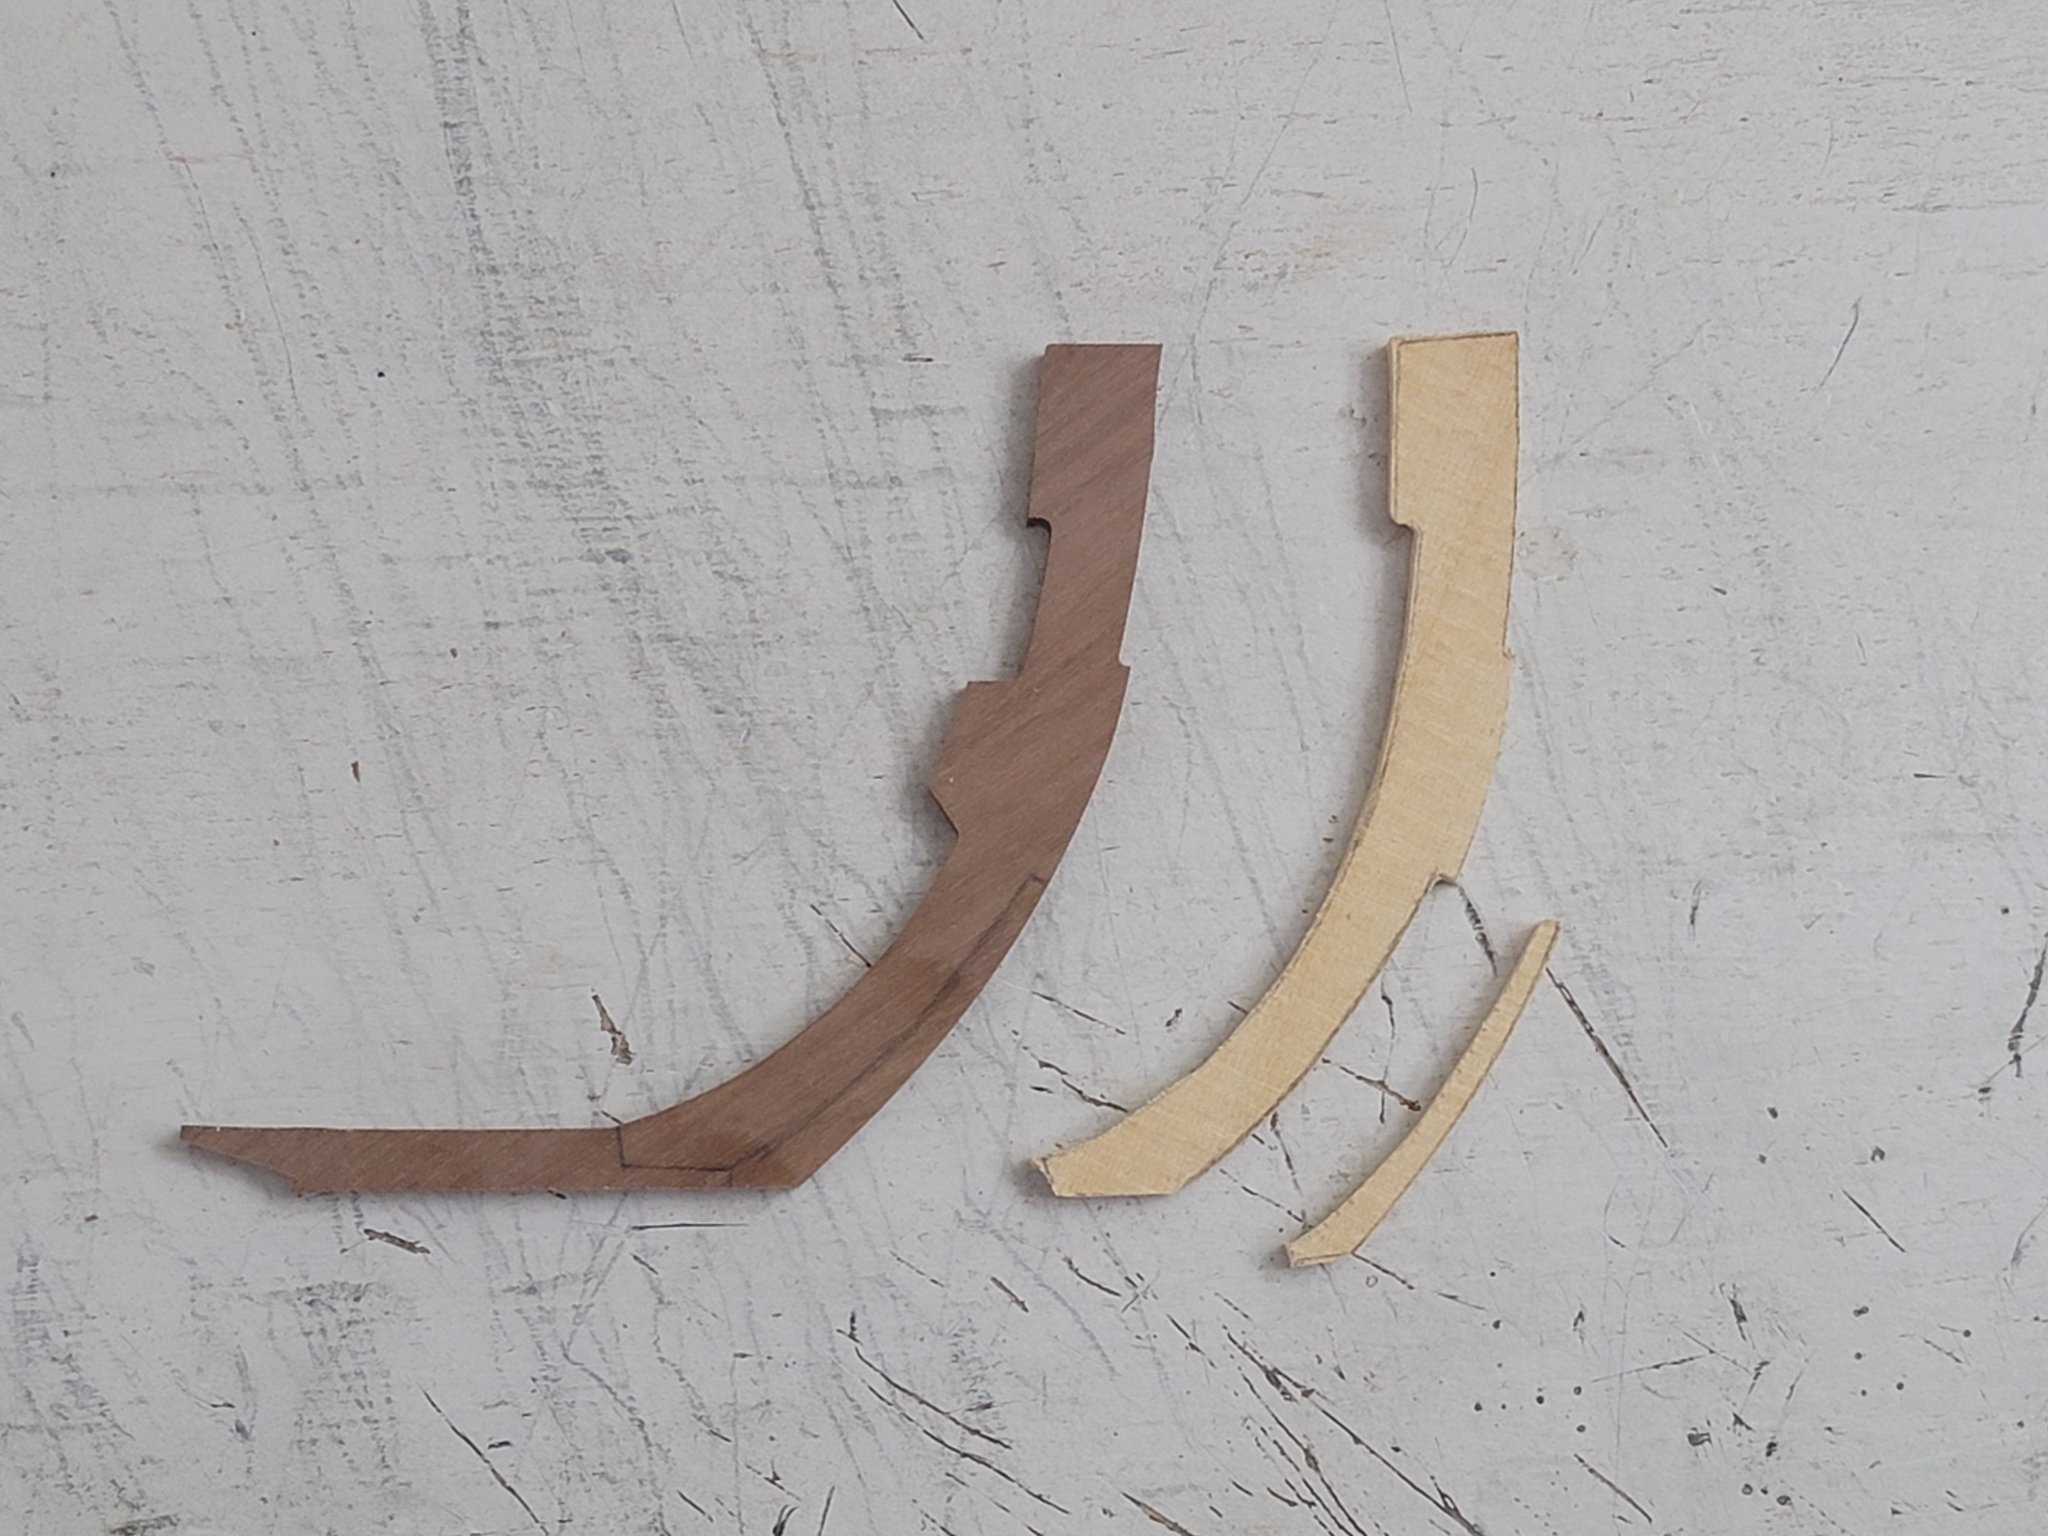
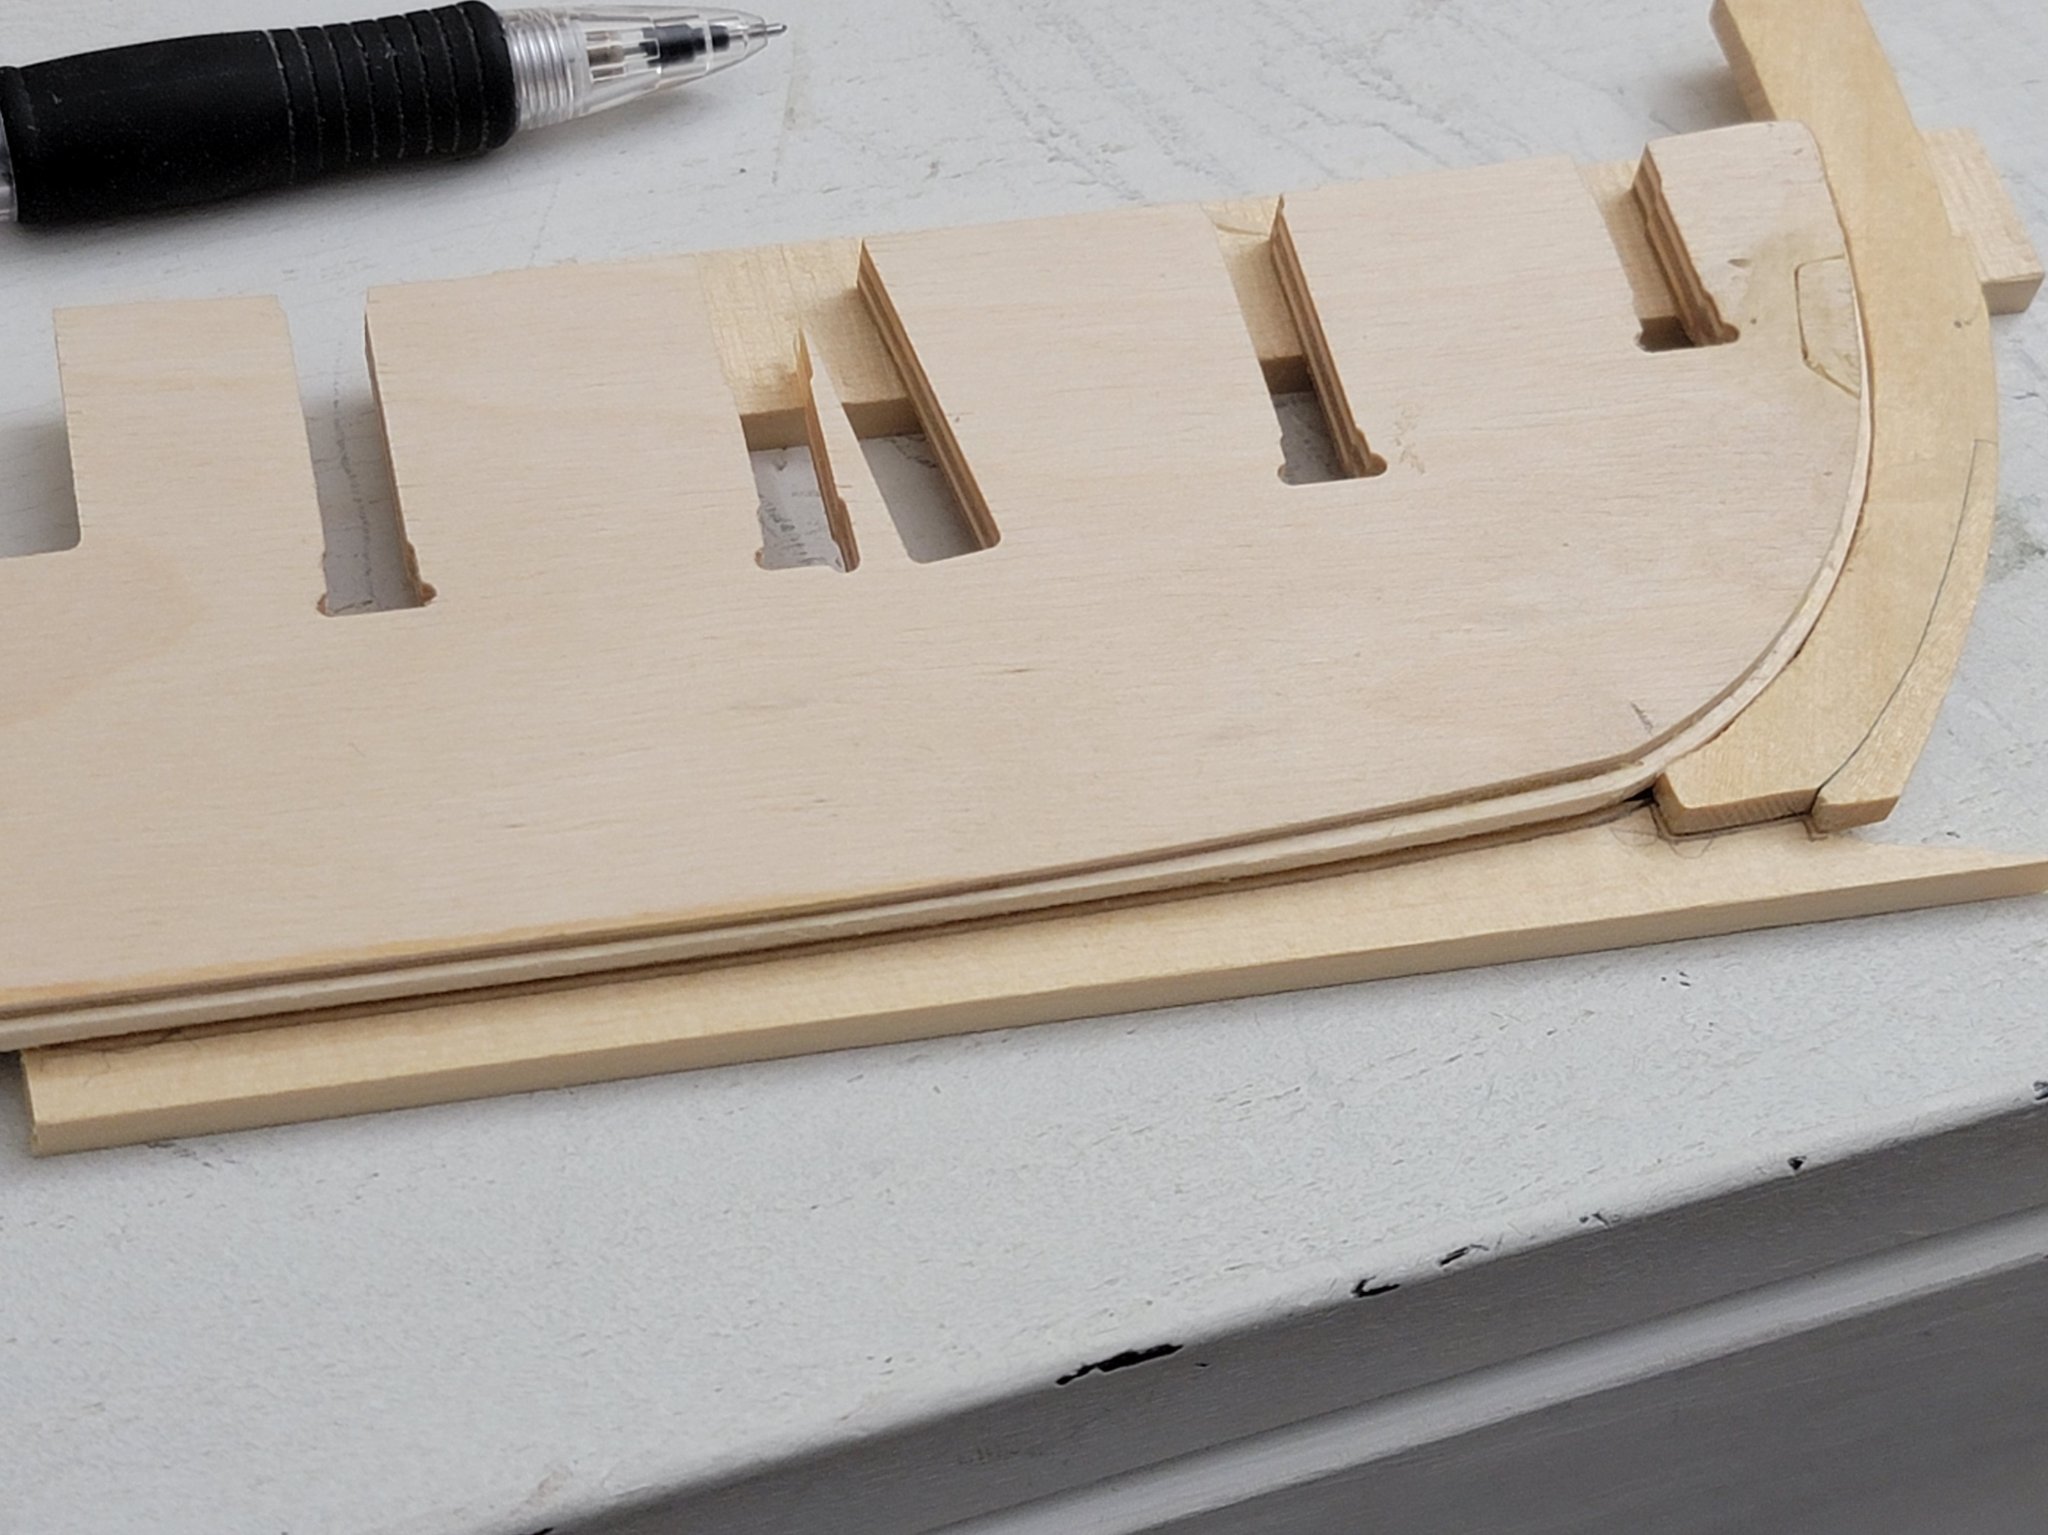
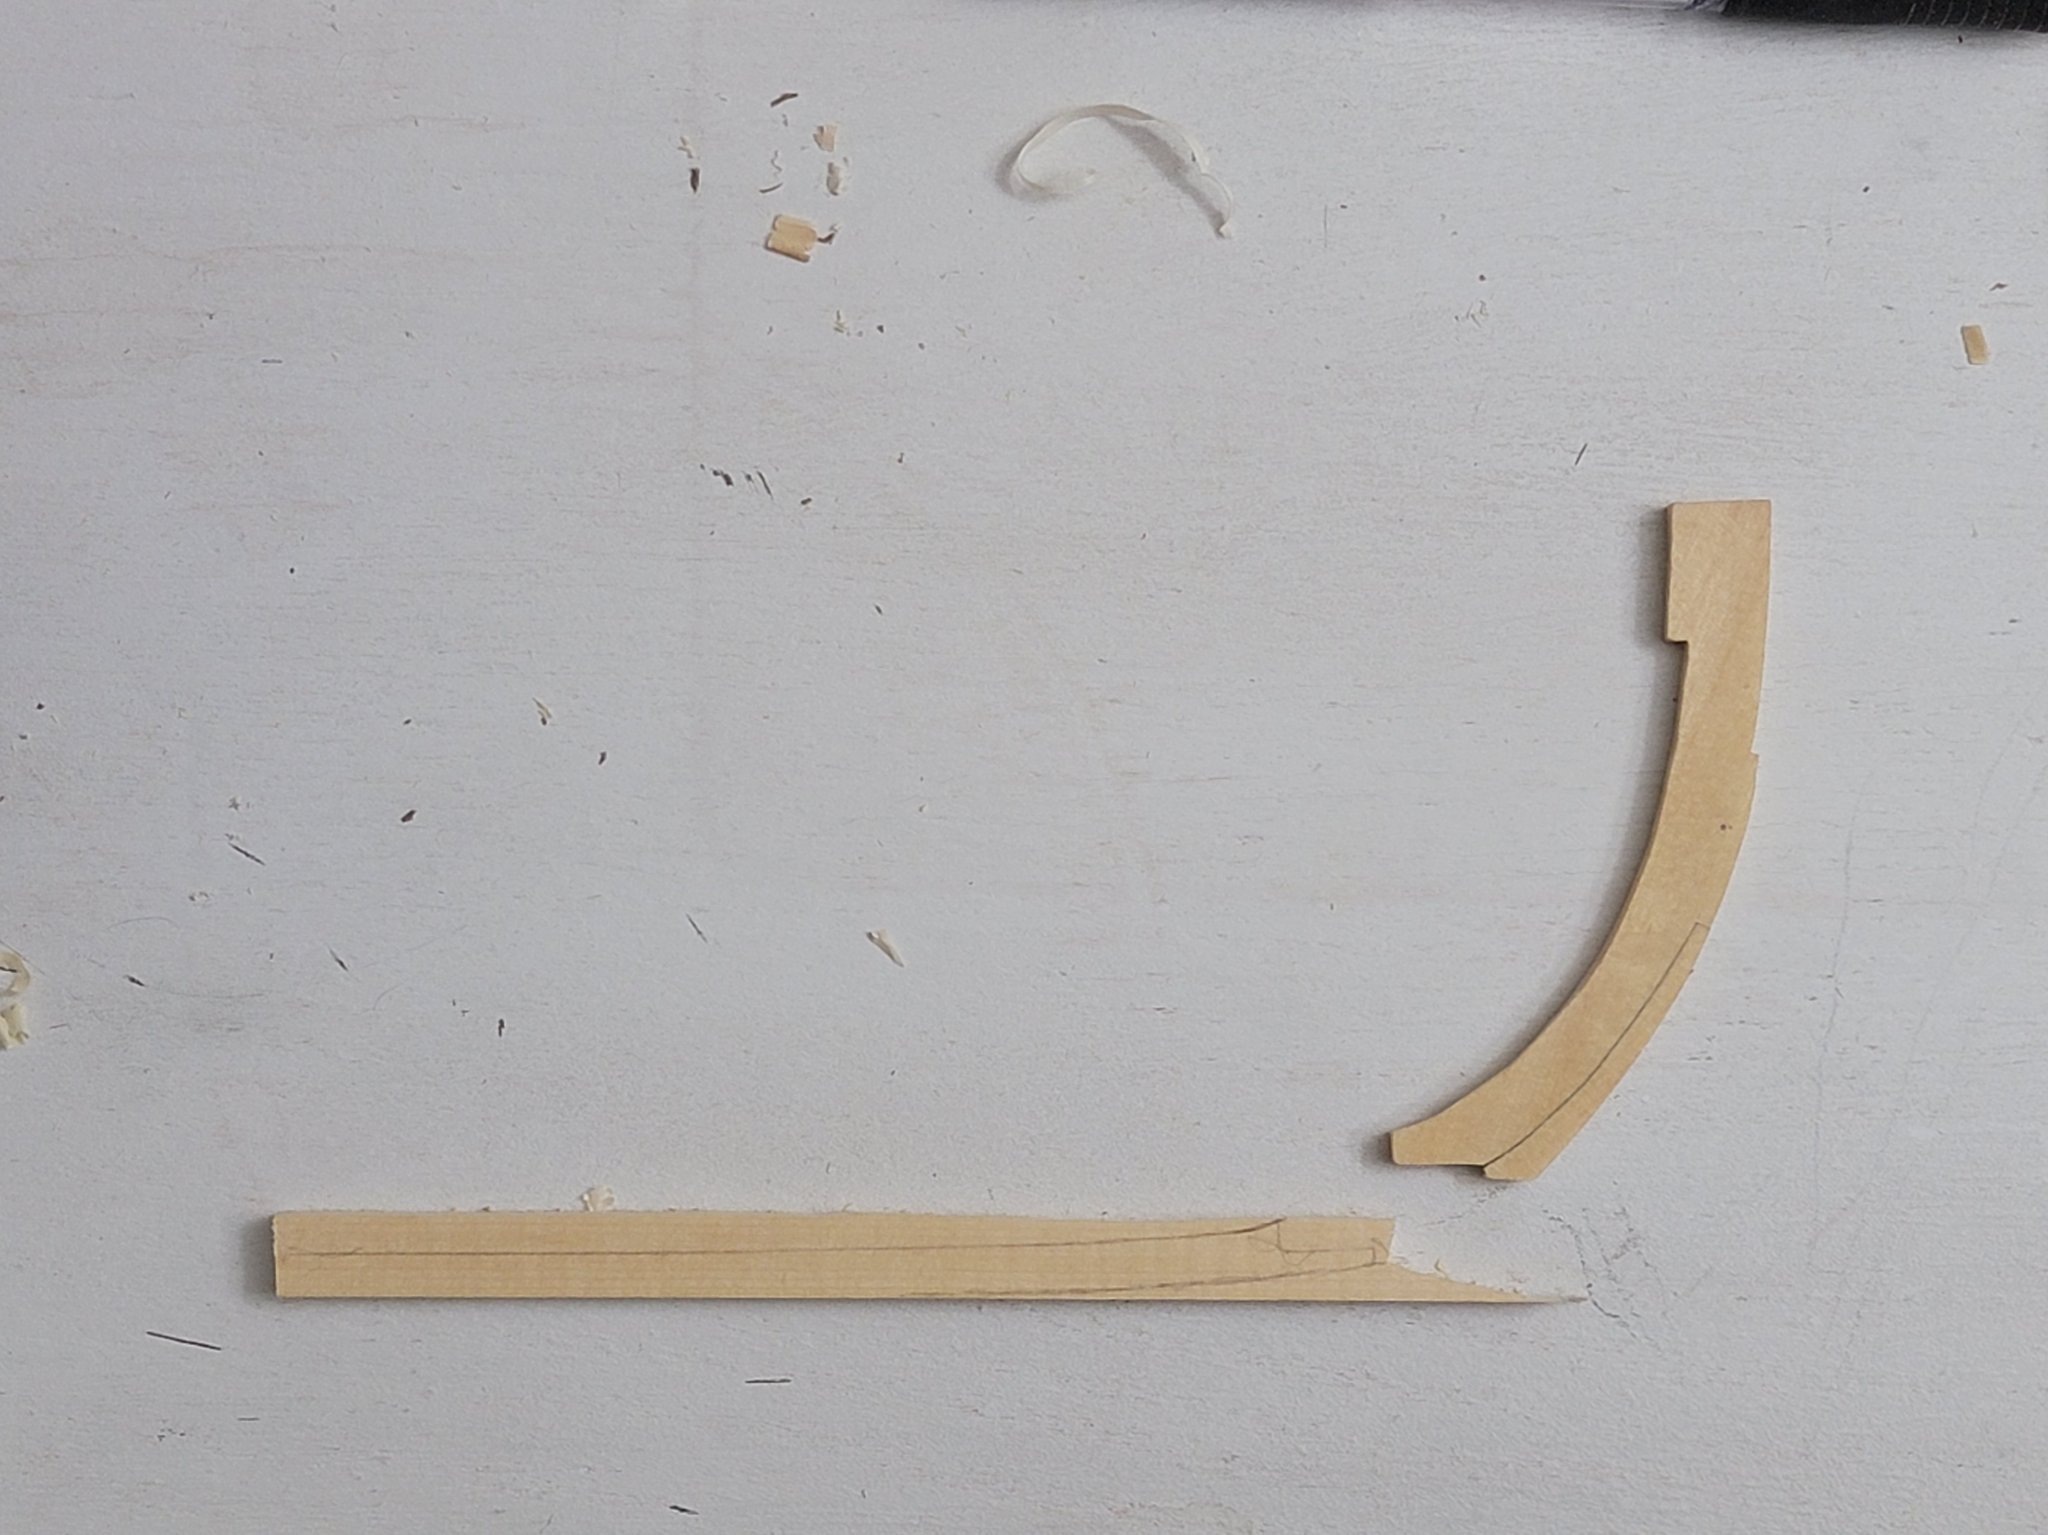
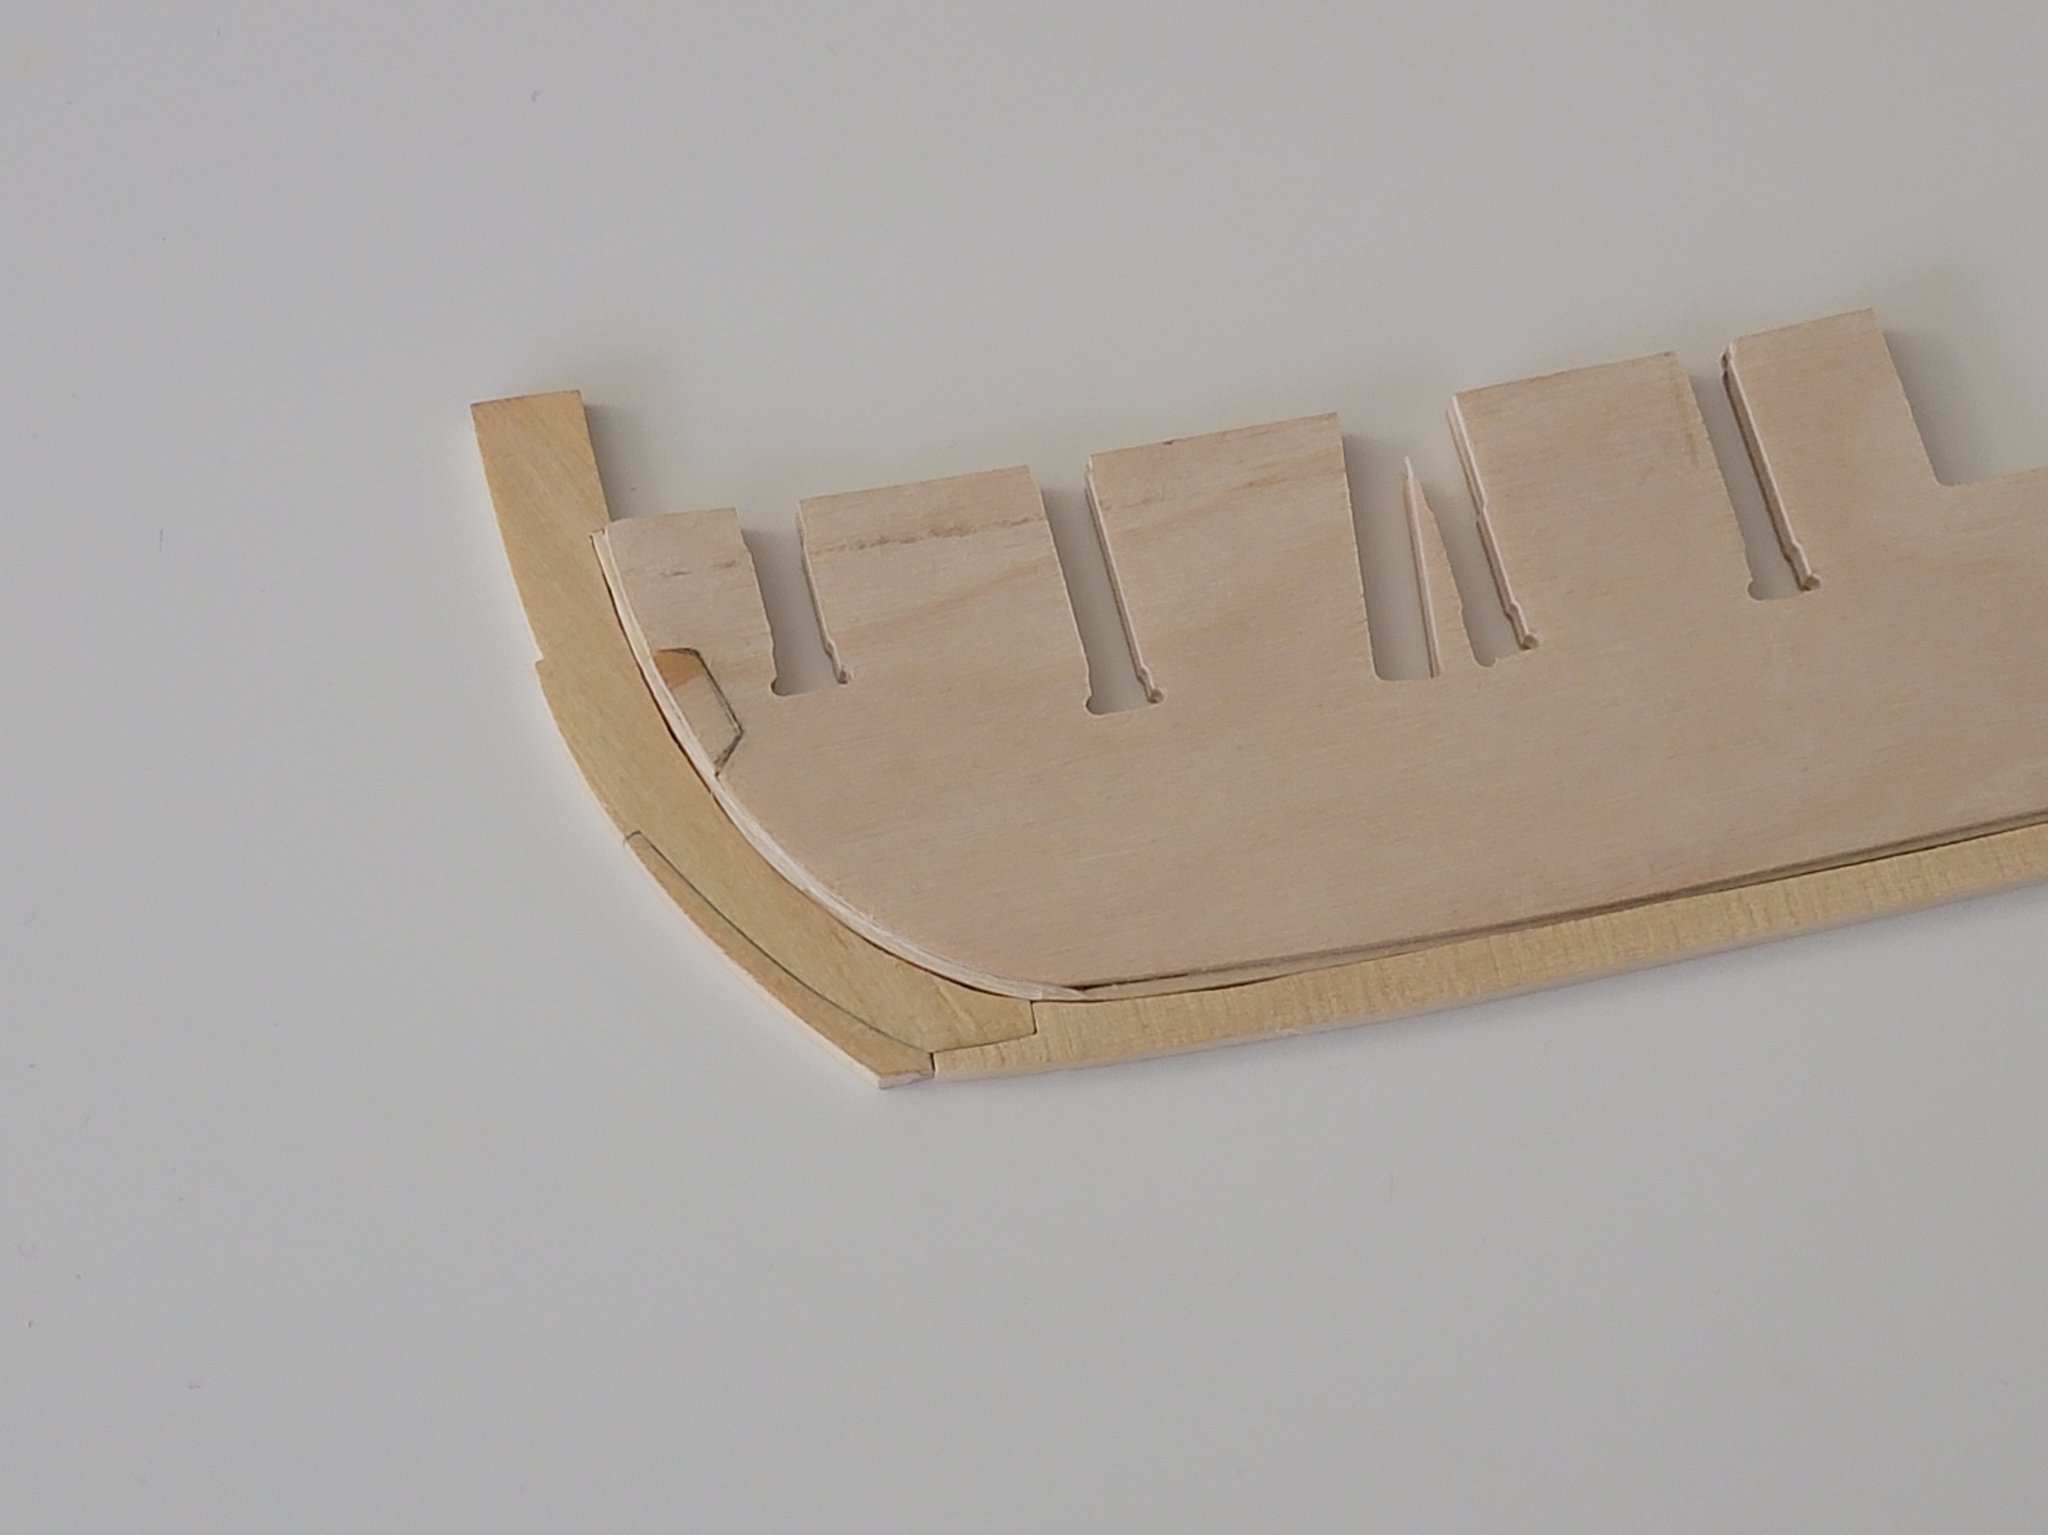
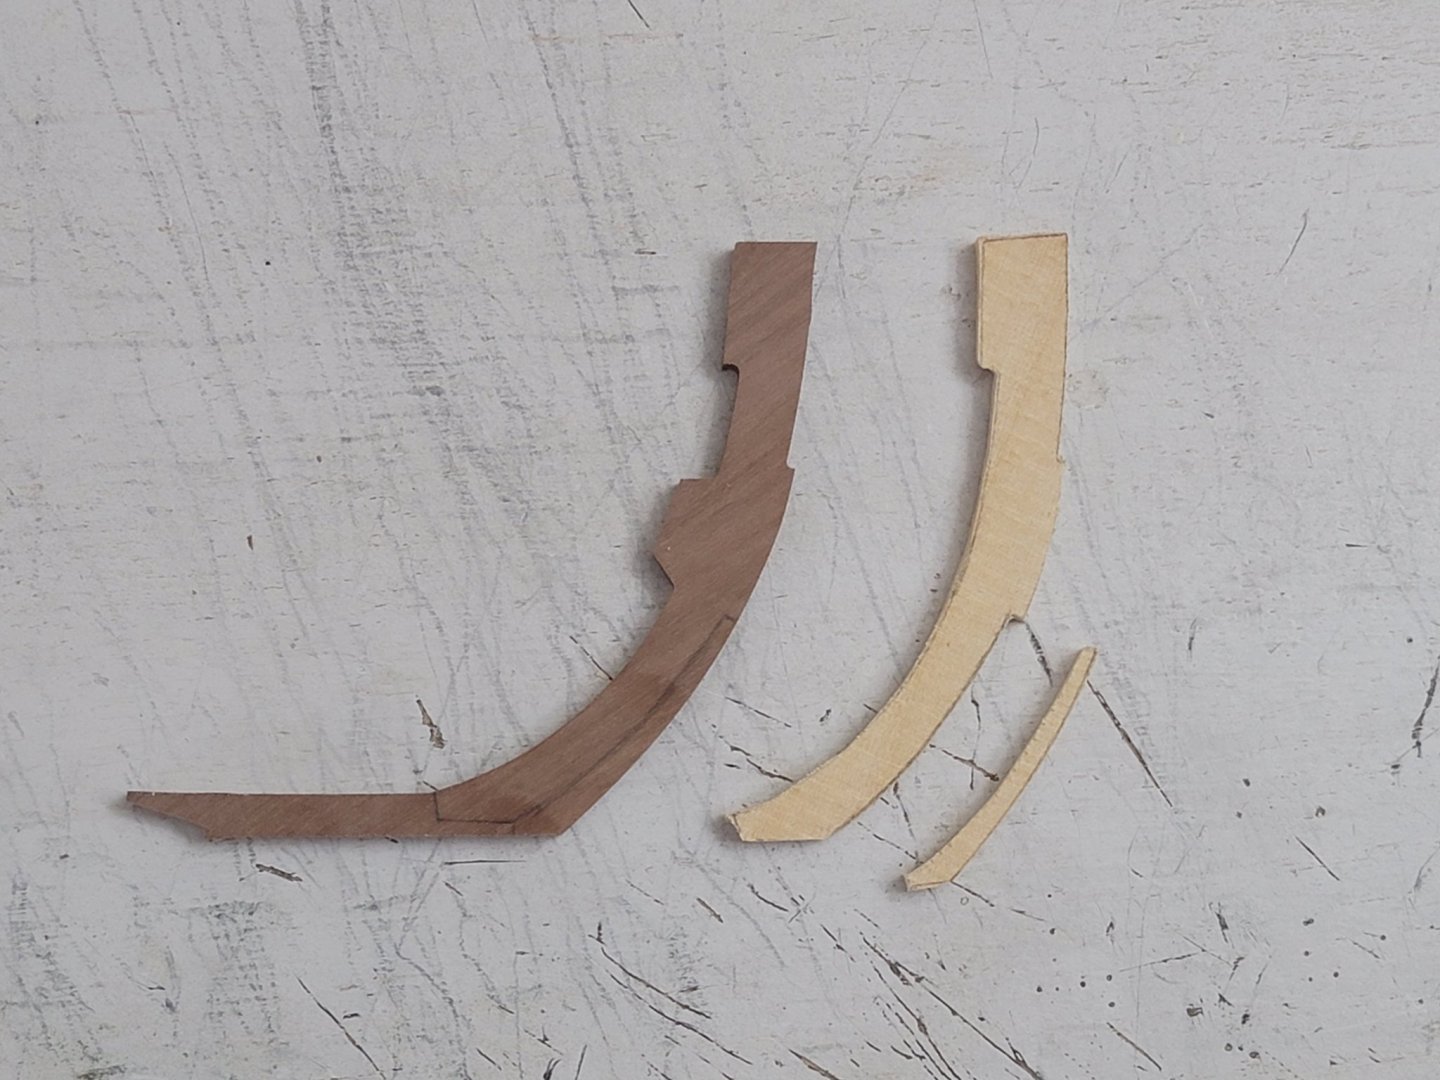
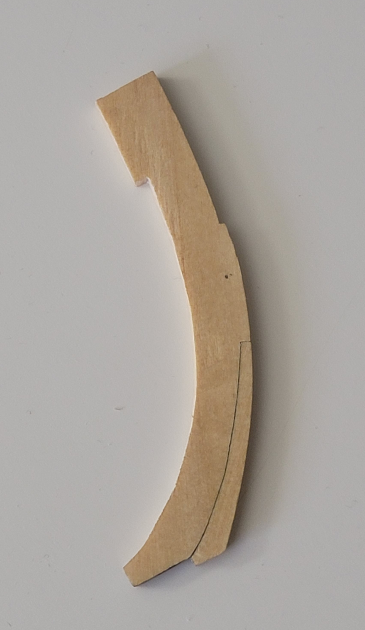
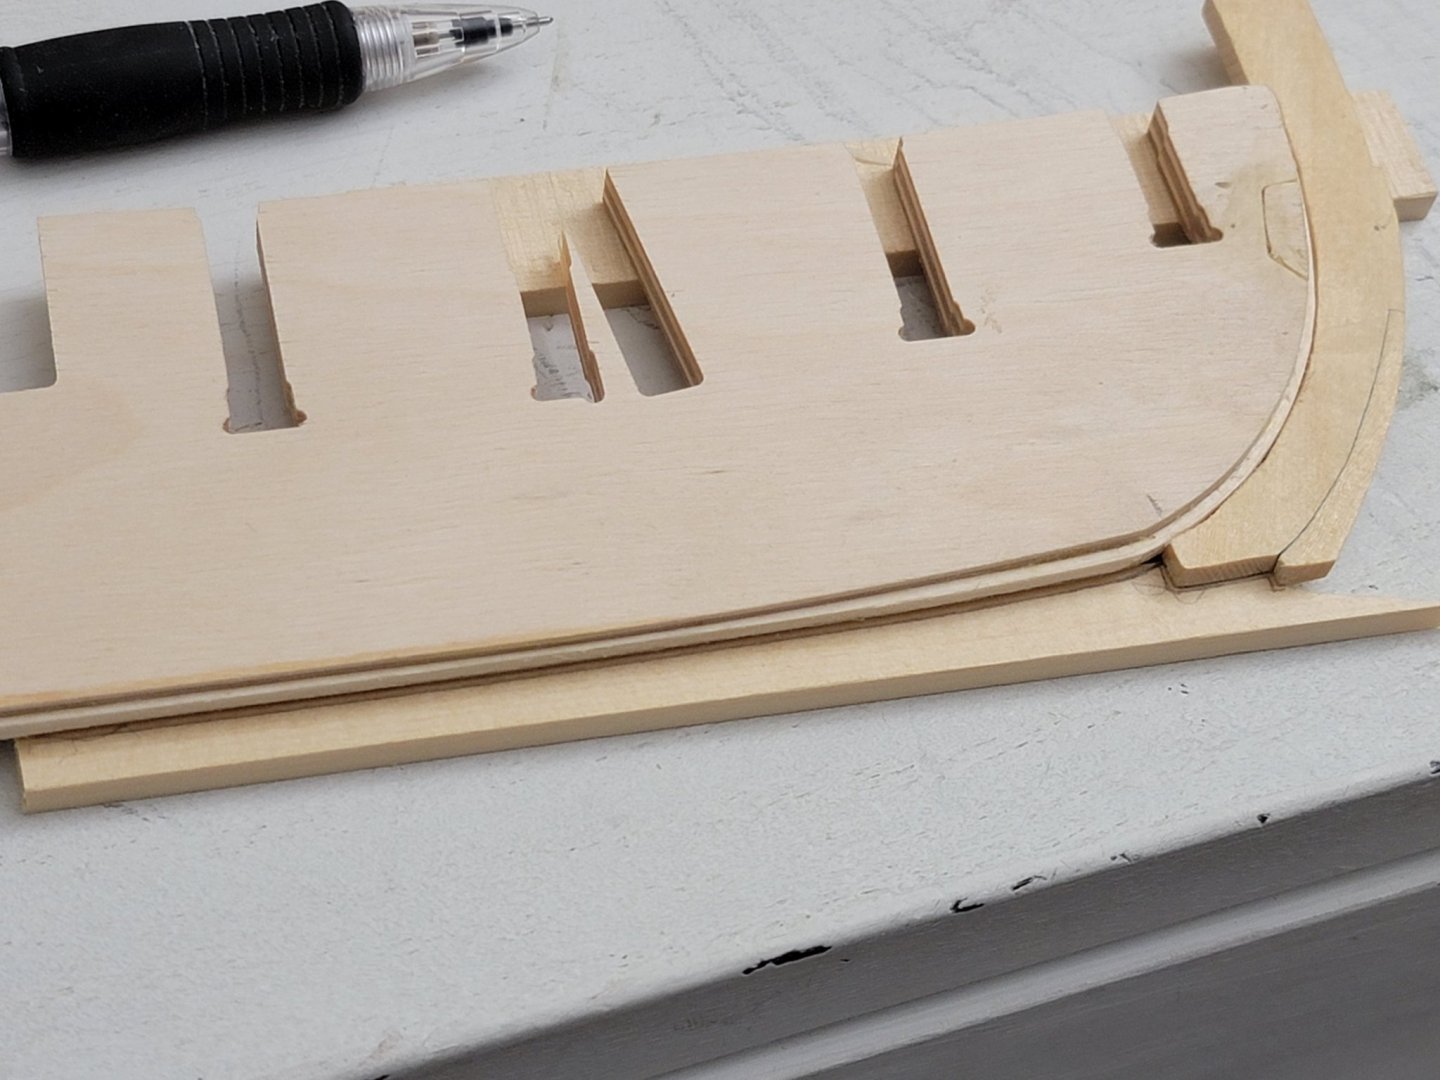
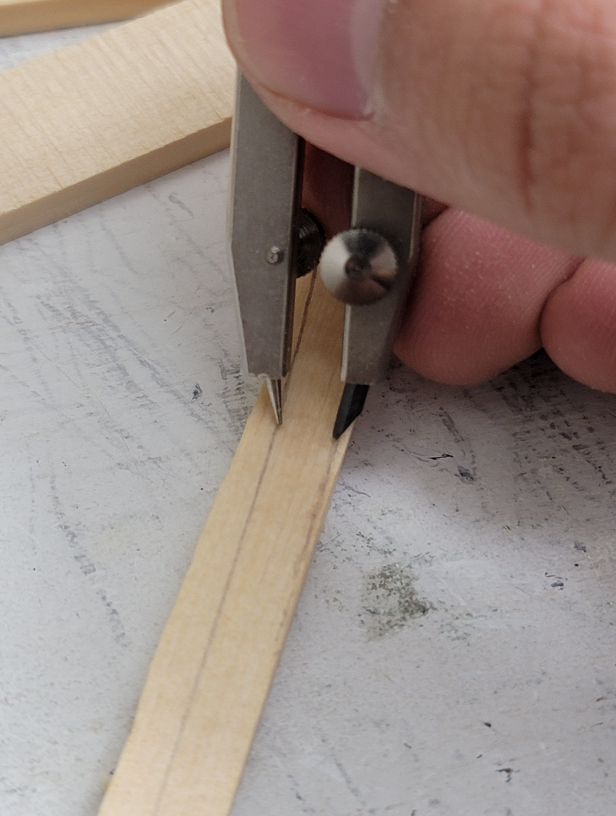
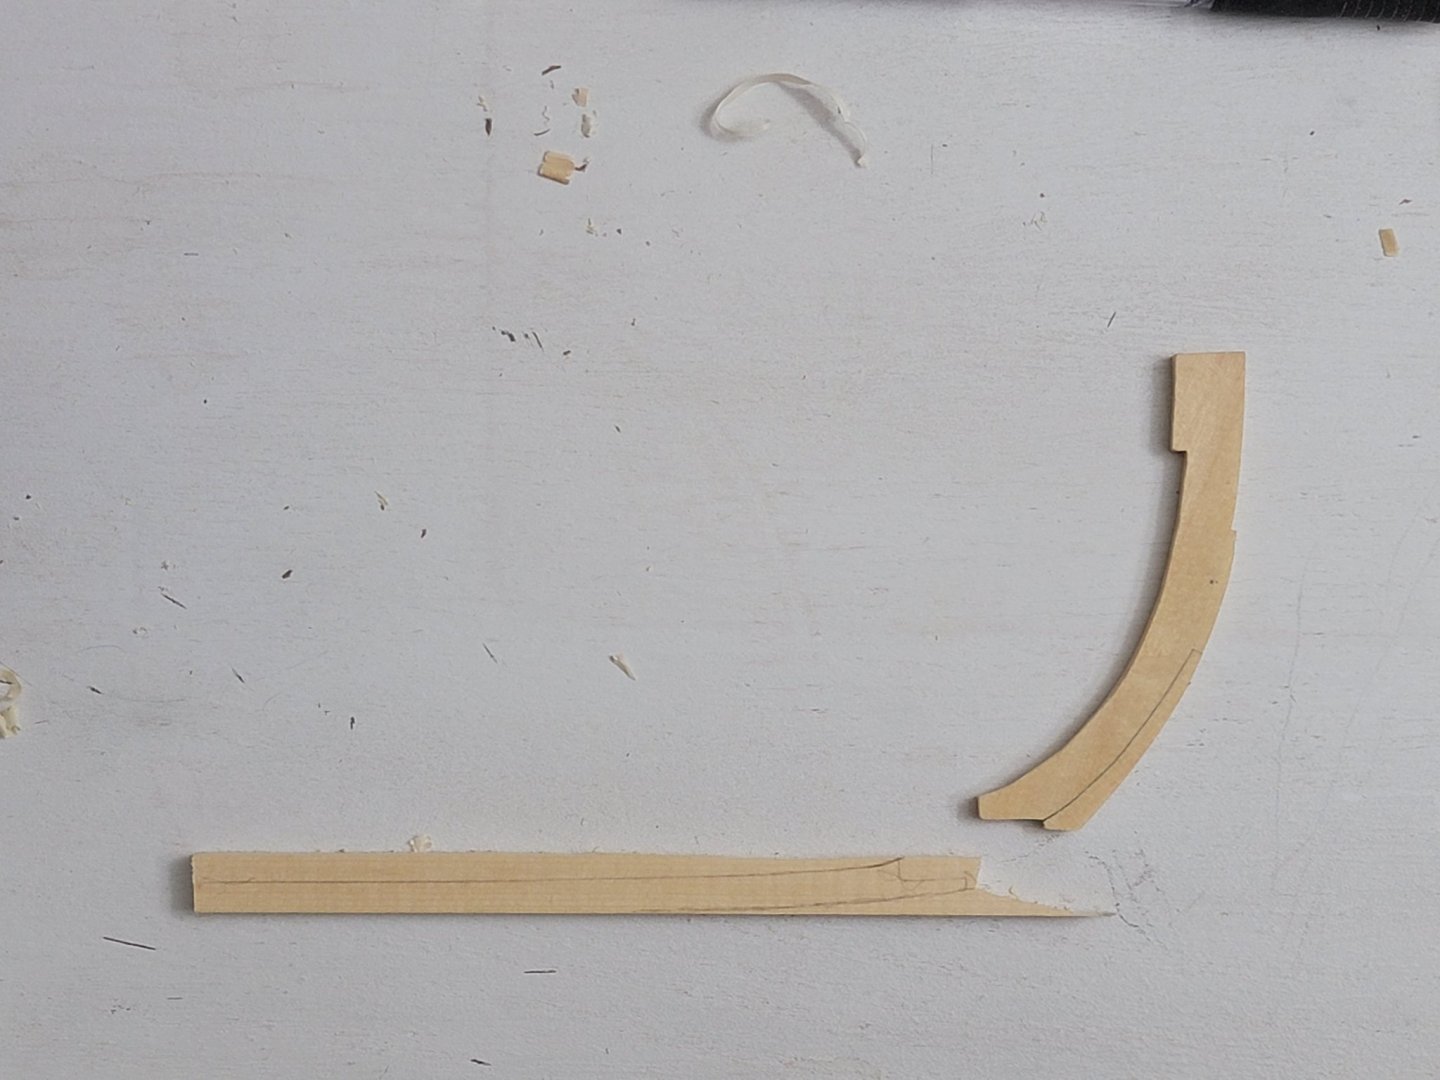
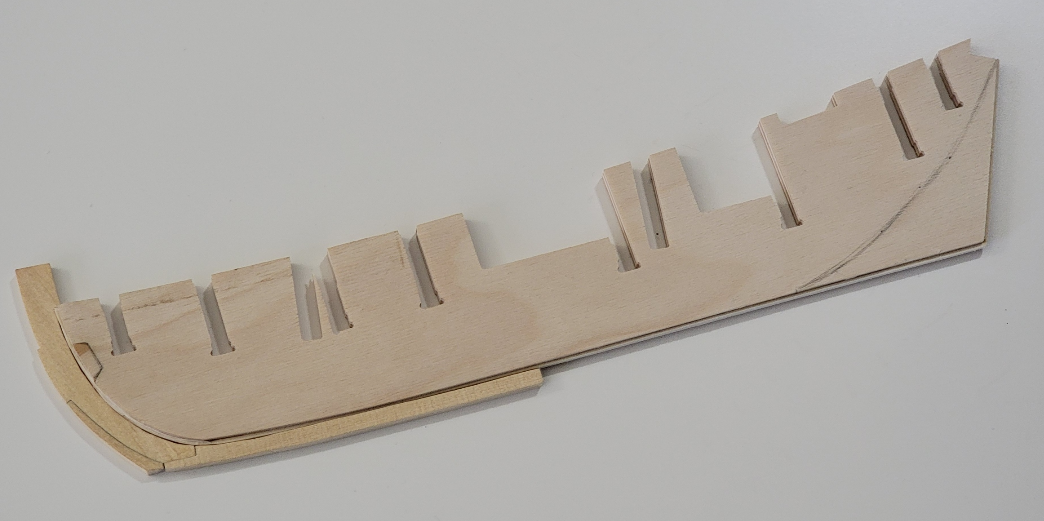
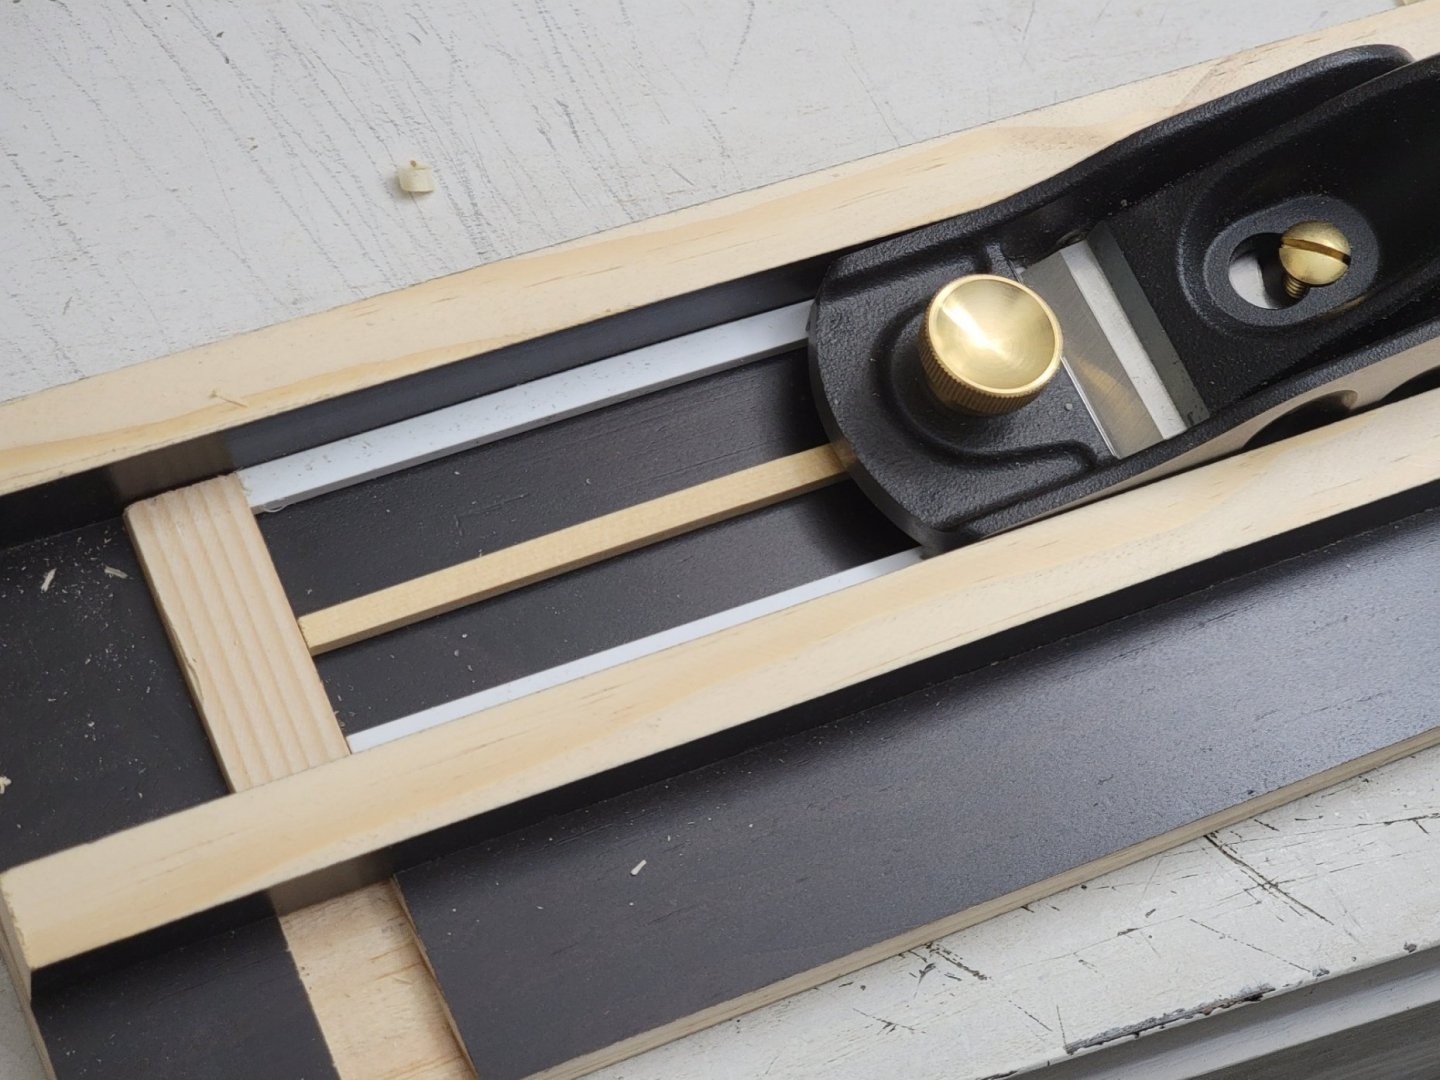
While I slowly progress with my Confederacy build, I decided to make a start with the HMS Pickle. I chose to build this small model as it will serve as a nice break from the big Confed ship. I plan to use Alaskan Yellow Cedar for the Pickle, so this will make it somewhat of a scratch build. I will not be copper plating and will only paint some areas of the ship (depending on how my planking goes!). @michael mott was very kind and generous to provide me with the wood and also took the time to mill the strips for me using his table saw. Not to mention all the invaluable modelling tips he provided which I will share as I progress through this build. I labelled this as an 'experimental build' since it is my first time scratch building a lot of the items, and also will try to experiment by not strictly following the manual and the provided plans. From what I have read on other logs, the plans are not accurate and are instead based on Pickle's sister ship. Also, I could not find accurate plans of the schooner on the National Maritime Museum. Based on this, I will predominantly use Chuck's practicum on the Cheerful and also Dubz's Sherbourne and Dali's Cutter Alert as guides to for this experimental build. I may also purchase the following books as I progress with this build: "The Colonial schooner" by Harold Hahn "Rigging fore-and-aft Craft" by Lennarth Petersson "The cutter Alert" by Peter Goodwin I also plan to frame the gun ports (as Chuck did for his Cheerful) instead of using the provided laser cut sheet. This way, I can have a single layer of planks across the hull and bulwarks. As always, any comments, tips, and guidance will be greatly appreciated! 😁 So now to the build! I made a small start to the ship where I first cut out out the stem piece from a sheet of the cedar. The small second stem piece in the tracing in the figure below was cut out from a different section of the sheet so a different wood grain can be seen. I used HB pencil between the joints (on one side of the joint only) to simulate the caulking: I then planed down the surfaces using a jig that Michael generously made for me (which I have shown later in the post). This made the surface incredibly smooth (much smoother and nicer than what sandpaper would have accomplished). I also marked the location of the bobstay which I will drill when drilling out the holes for the treenails. The first keel piece was then marked and cut out: Now for the planing jig! Instead of using a thickness sander, I used a planer and this jig Michael built for me: The thickness of the wood can be controlled using different widths of white plastic railing, and can be further finetuned by inserting strips of paper beneath the wood. I am fascinated by how accurately I can achieve different thickness of wood using this jig. And each piece is almost as smooth as glass! Next, I will be tapering the bulkhead former, treenailing the stem and keel pieces, and then gluing the whole assembly together.


-
Nothing short of amazing! It can be displayed as a model on its own 😄
-
I have the same set and they have been so helpful! I used them predominantly for tapering dowels for the spars and masts of the Syren. Also, the planking is looking very nice and neat!
-
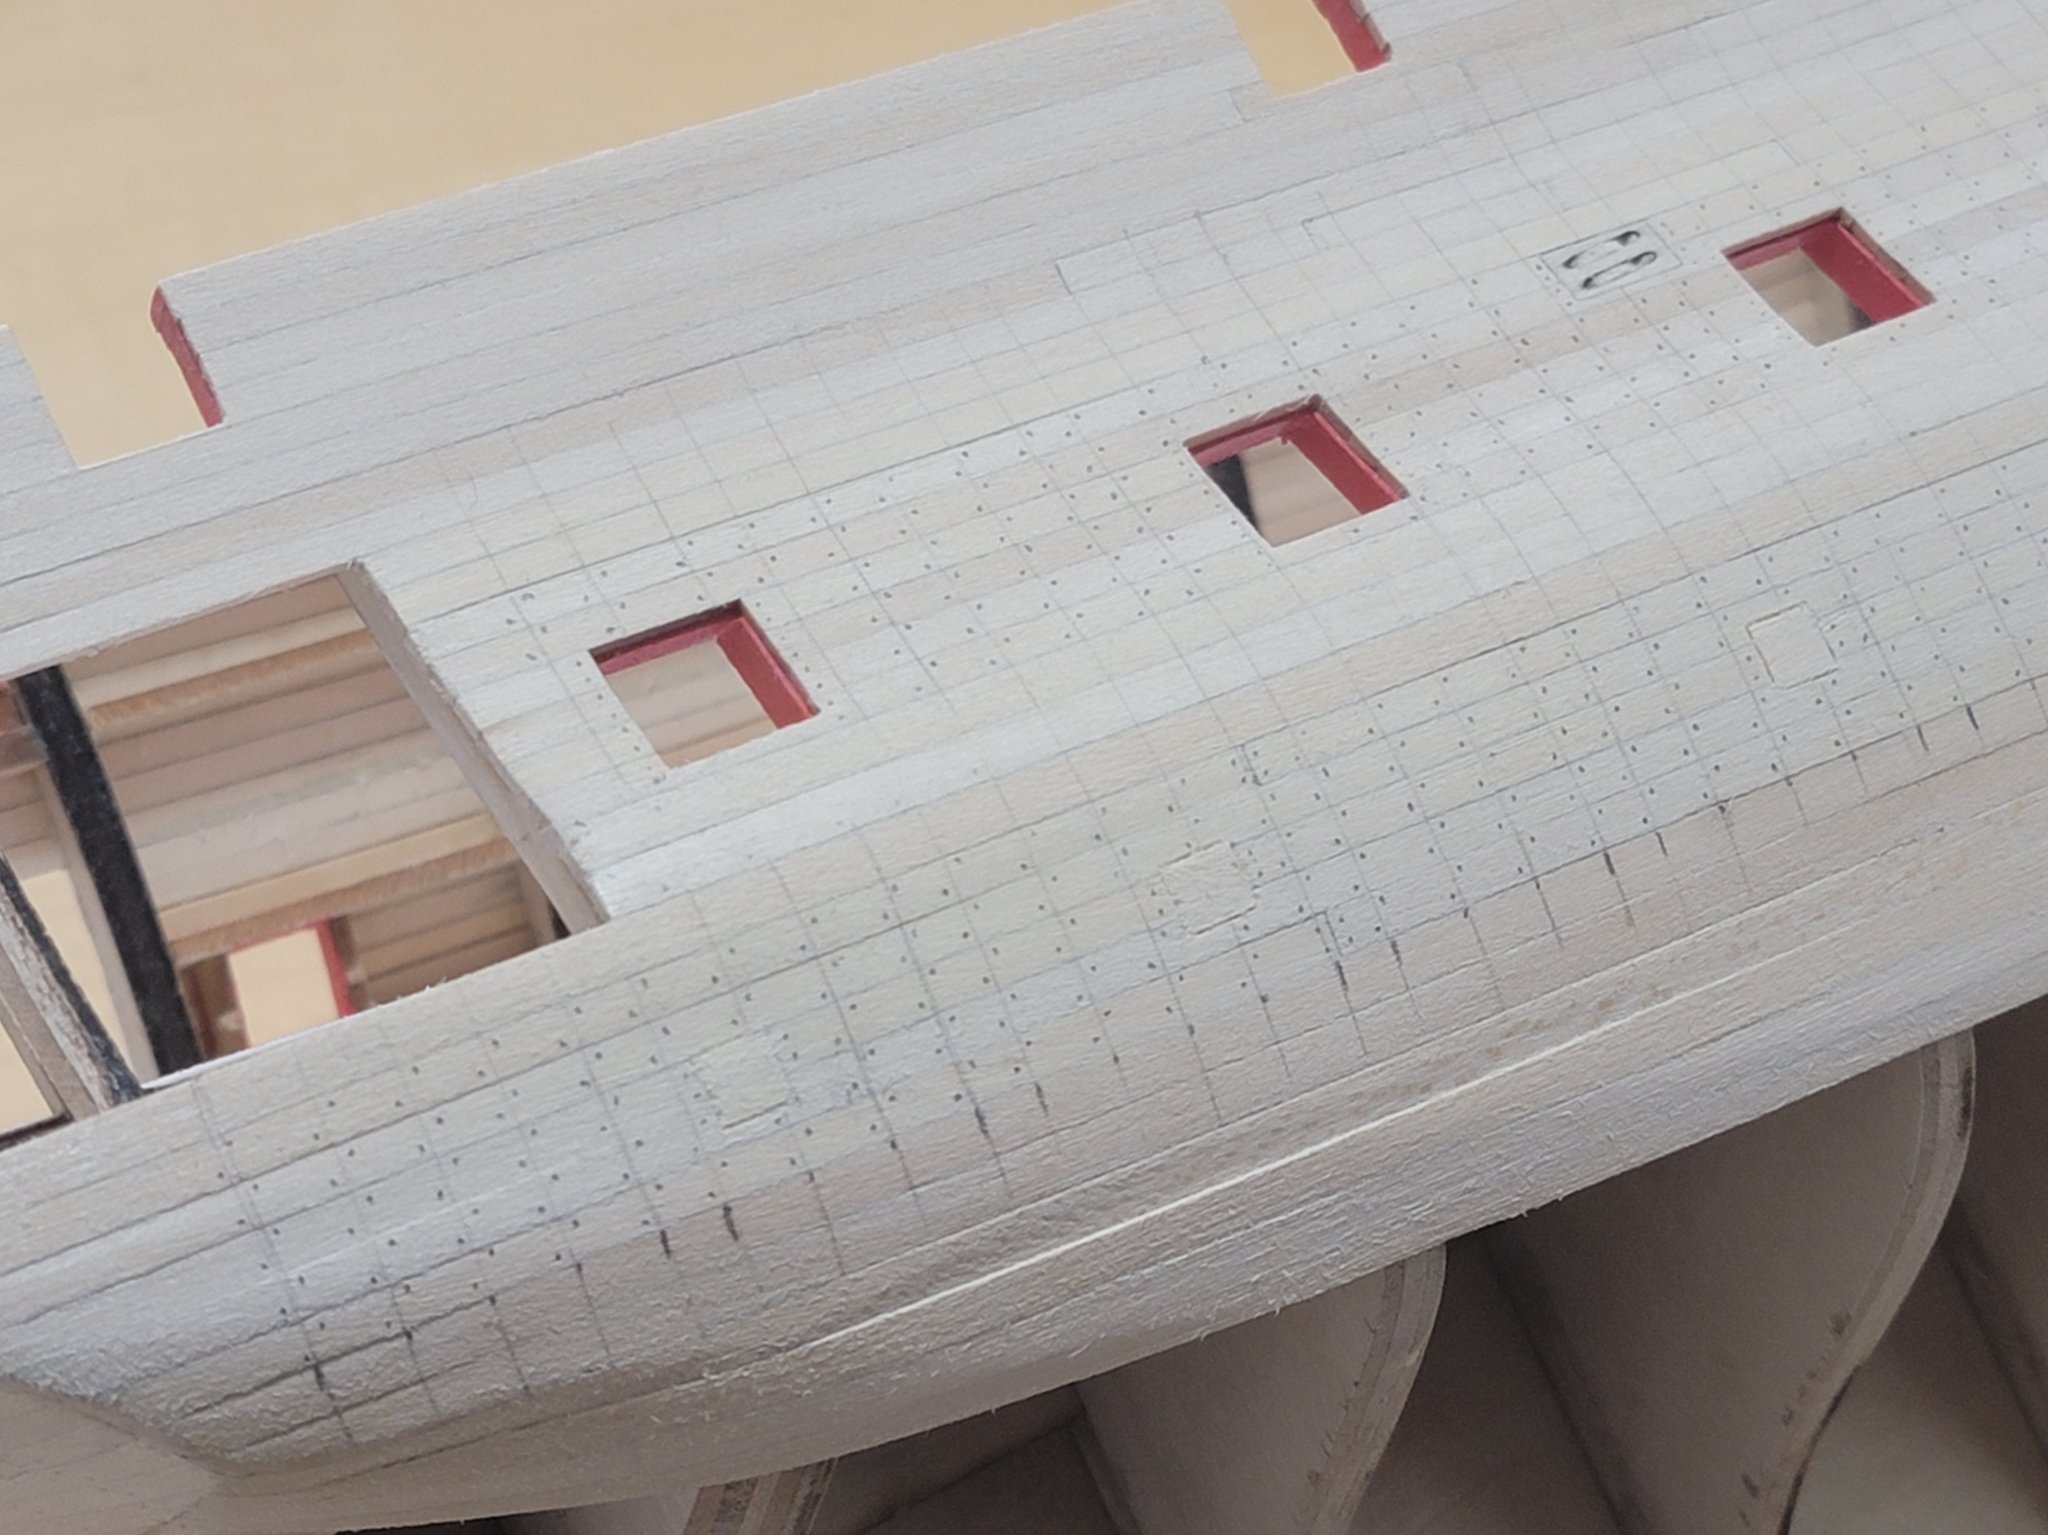
I finished treenailing the stern area. This time I went down to the 2nd smallest hole in the Byrnes drawplate. This way the treenails entered the hole more easily. I will apply the tung oil after all the planking and treenailing is done. When I apply the oil the treenails will show better. I also marked all the locations of the treenails on the starboard side of the ship:

-
Thank you for the nice words, Steven and Hamilton!
-
Amazing!!!! 😀
-
The decking looks incredible!!!
-
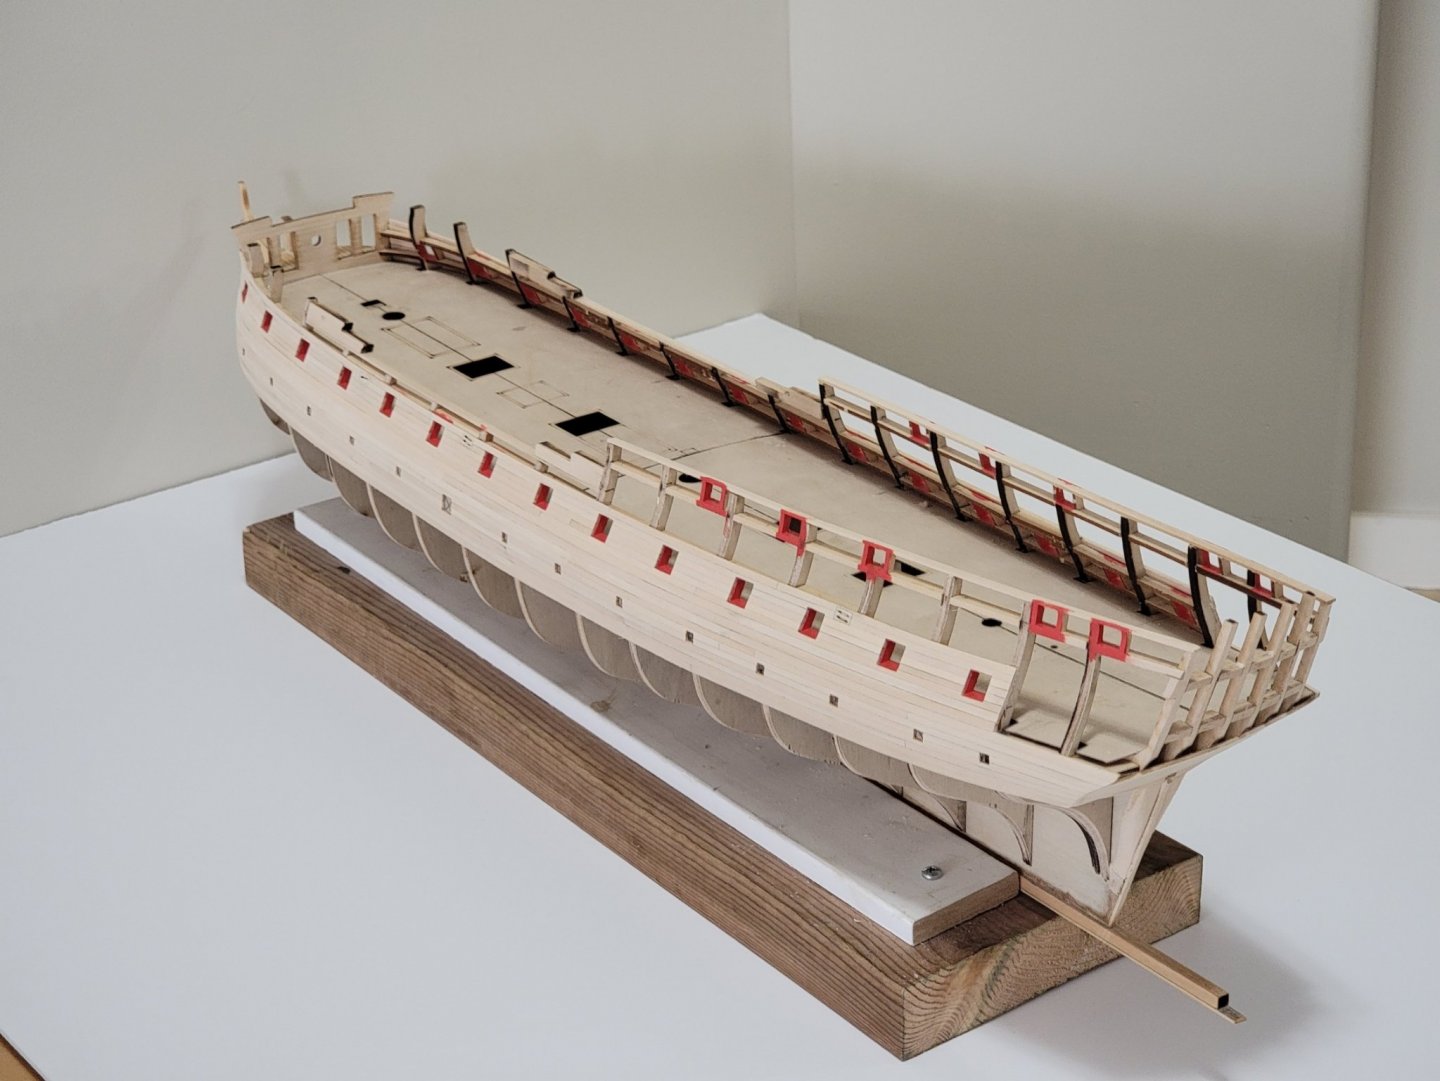
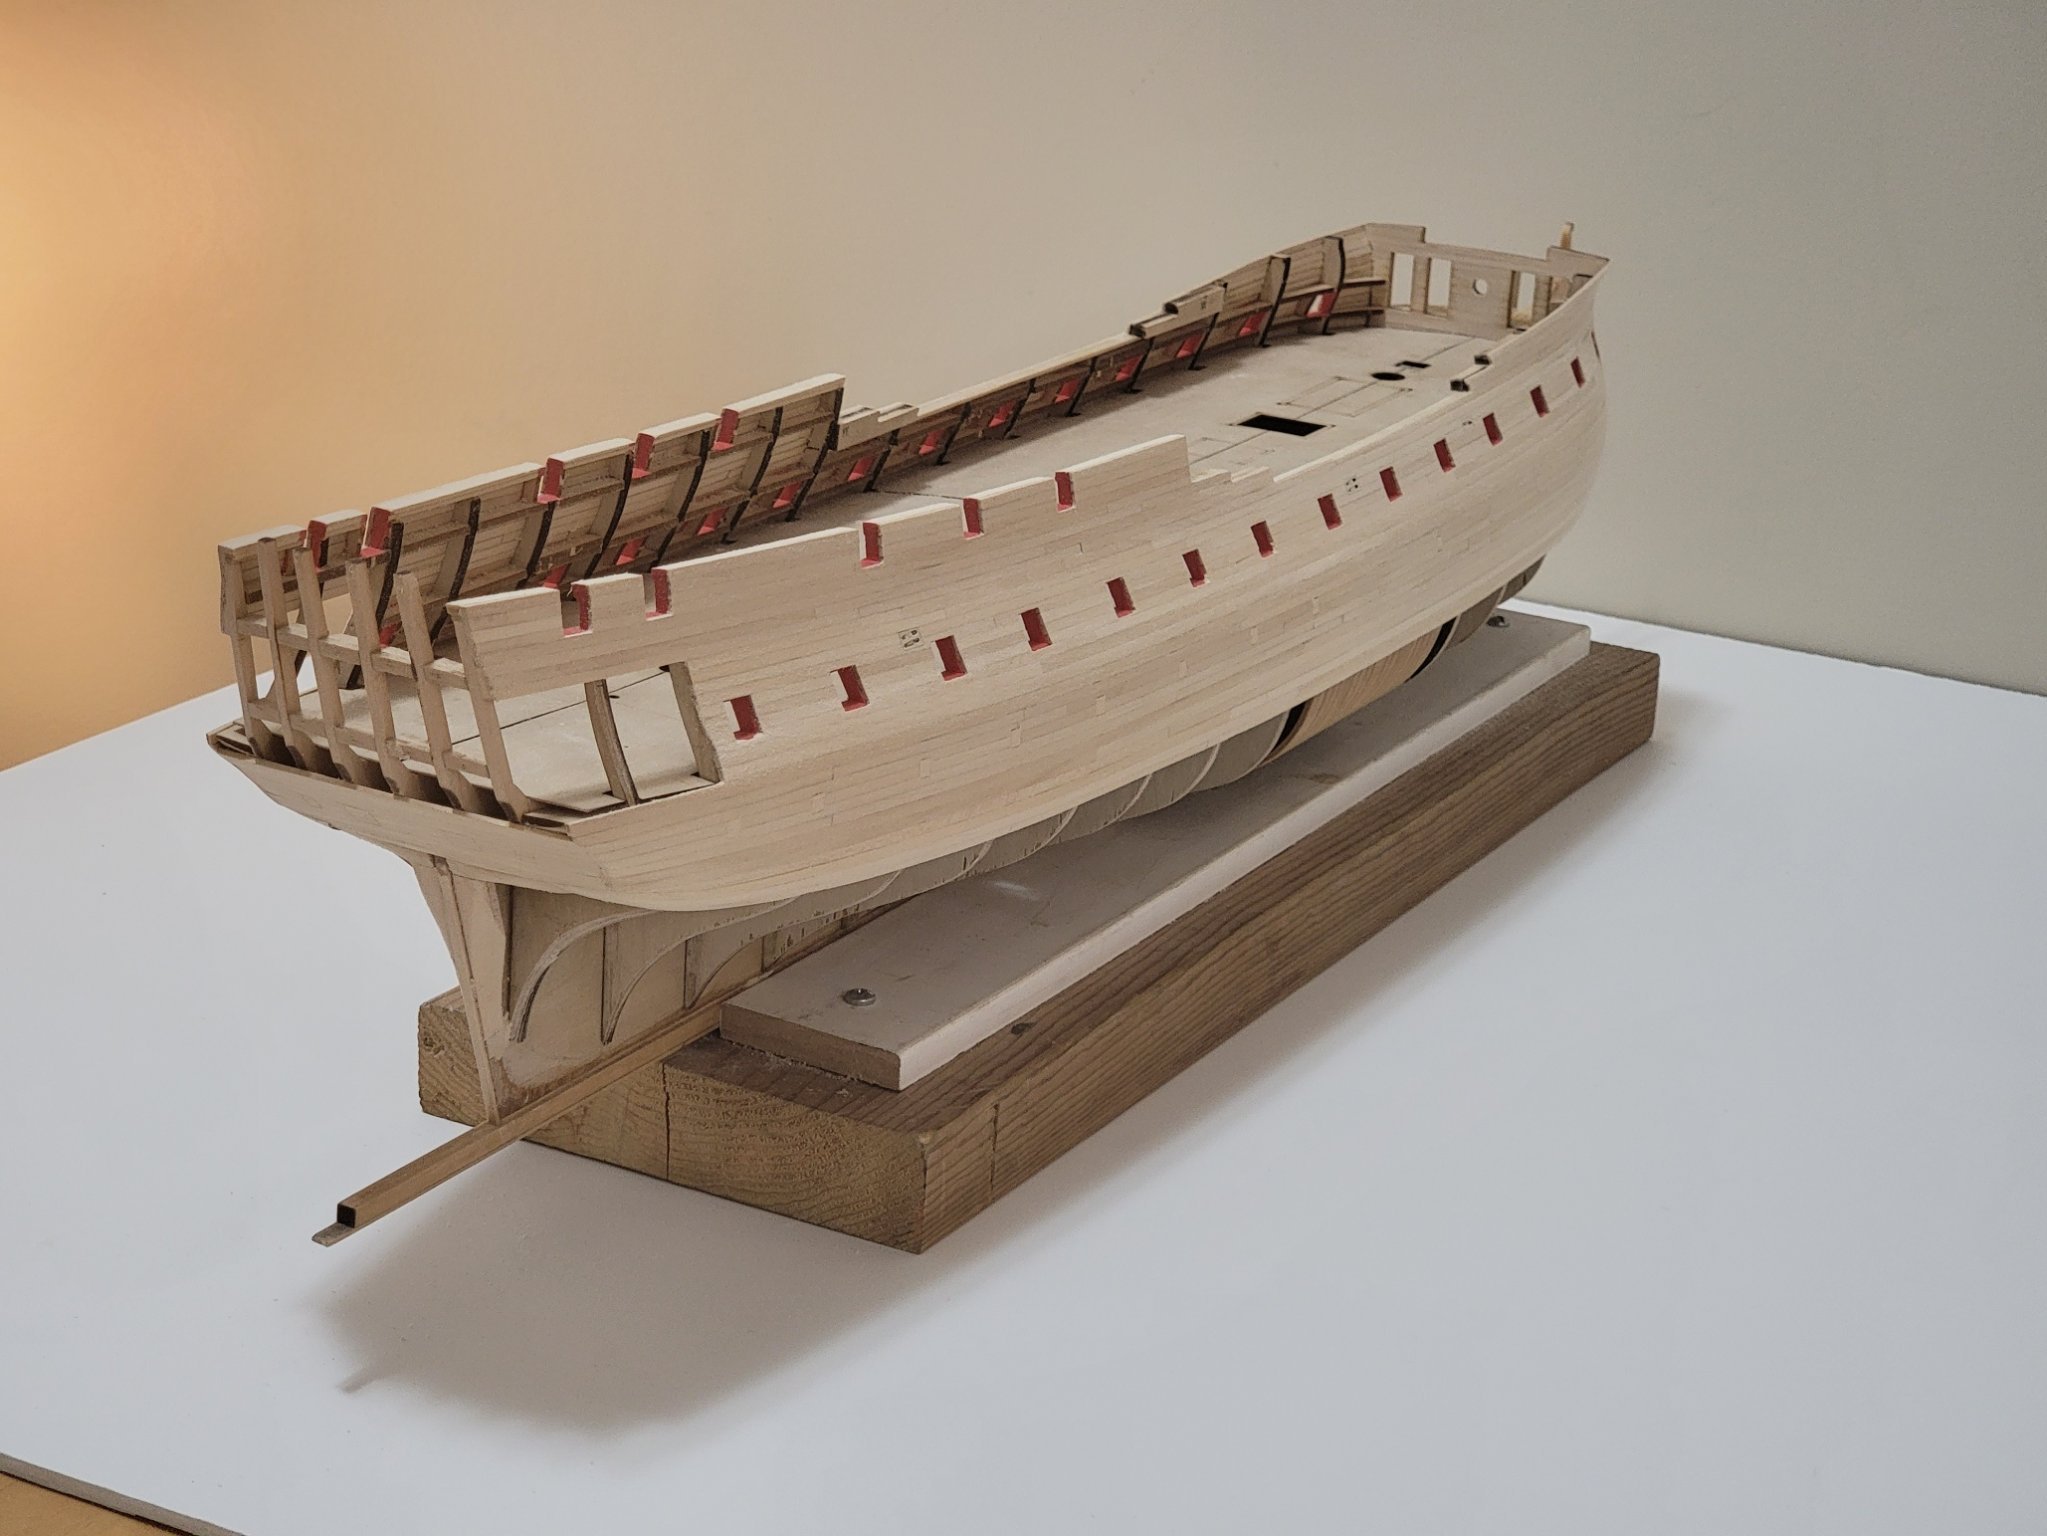
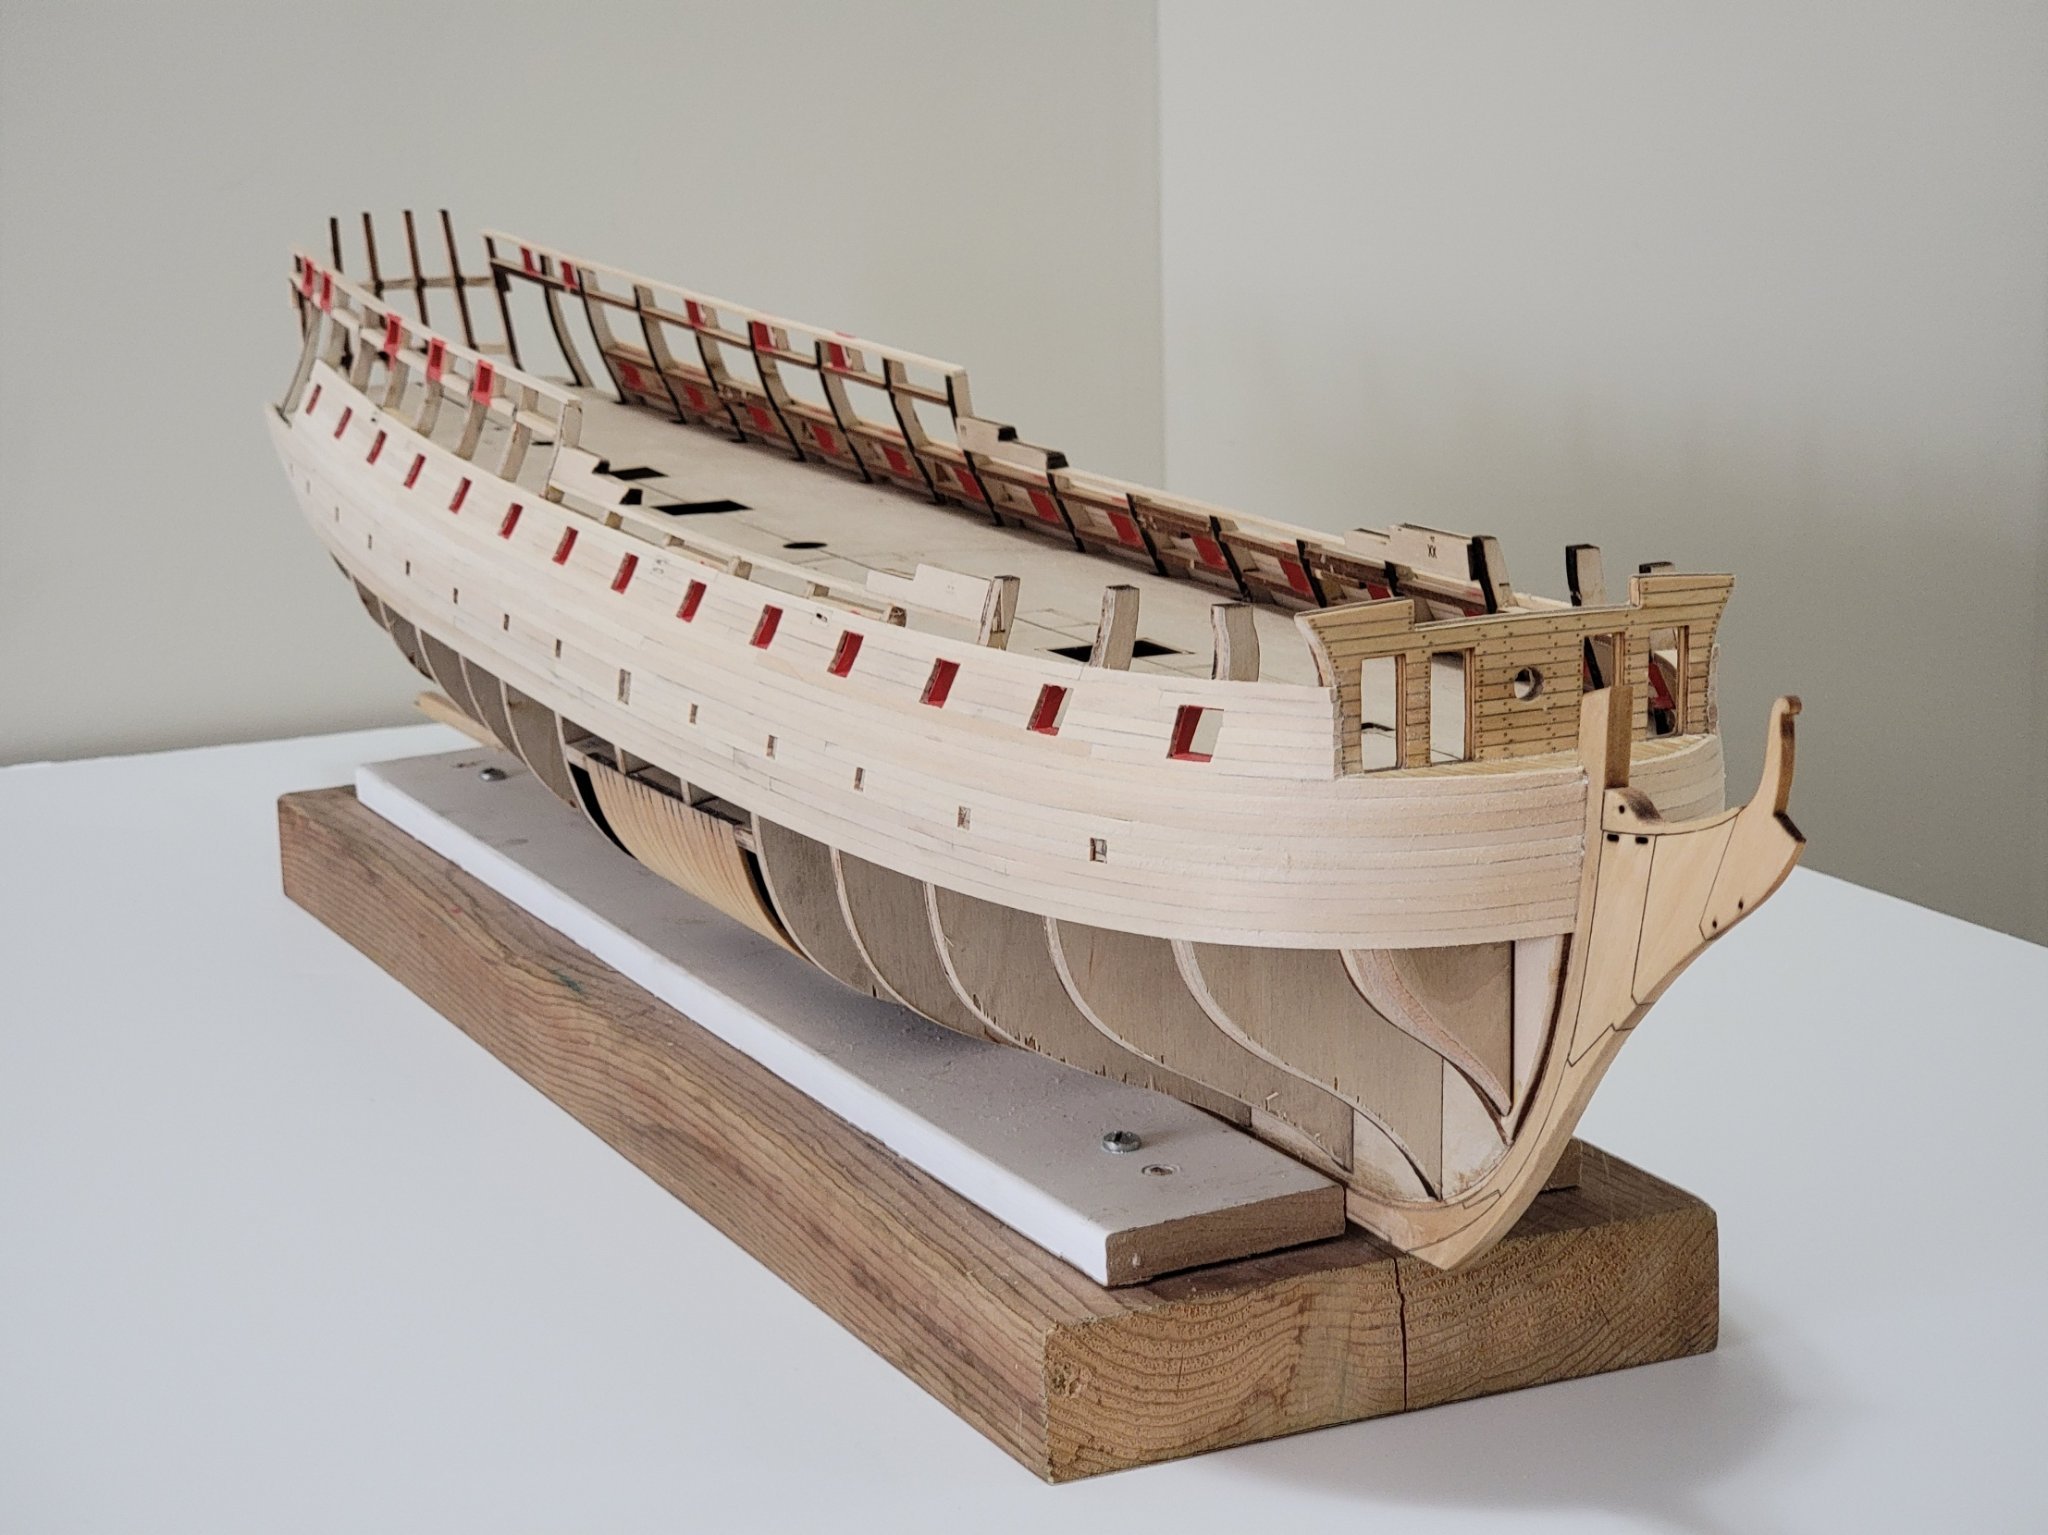
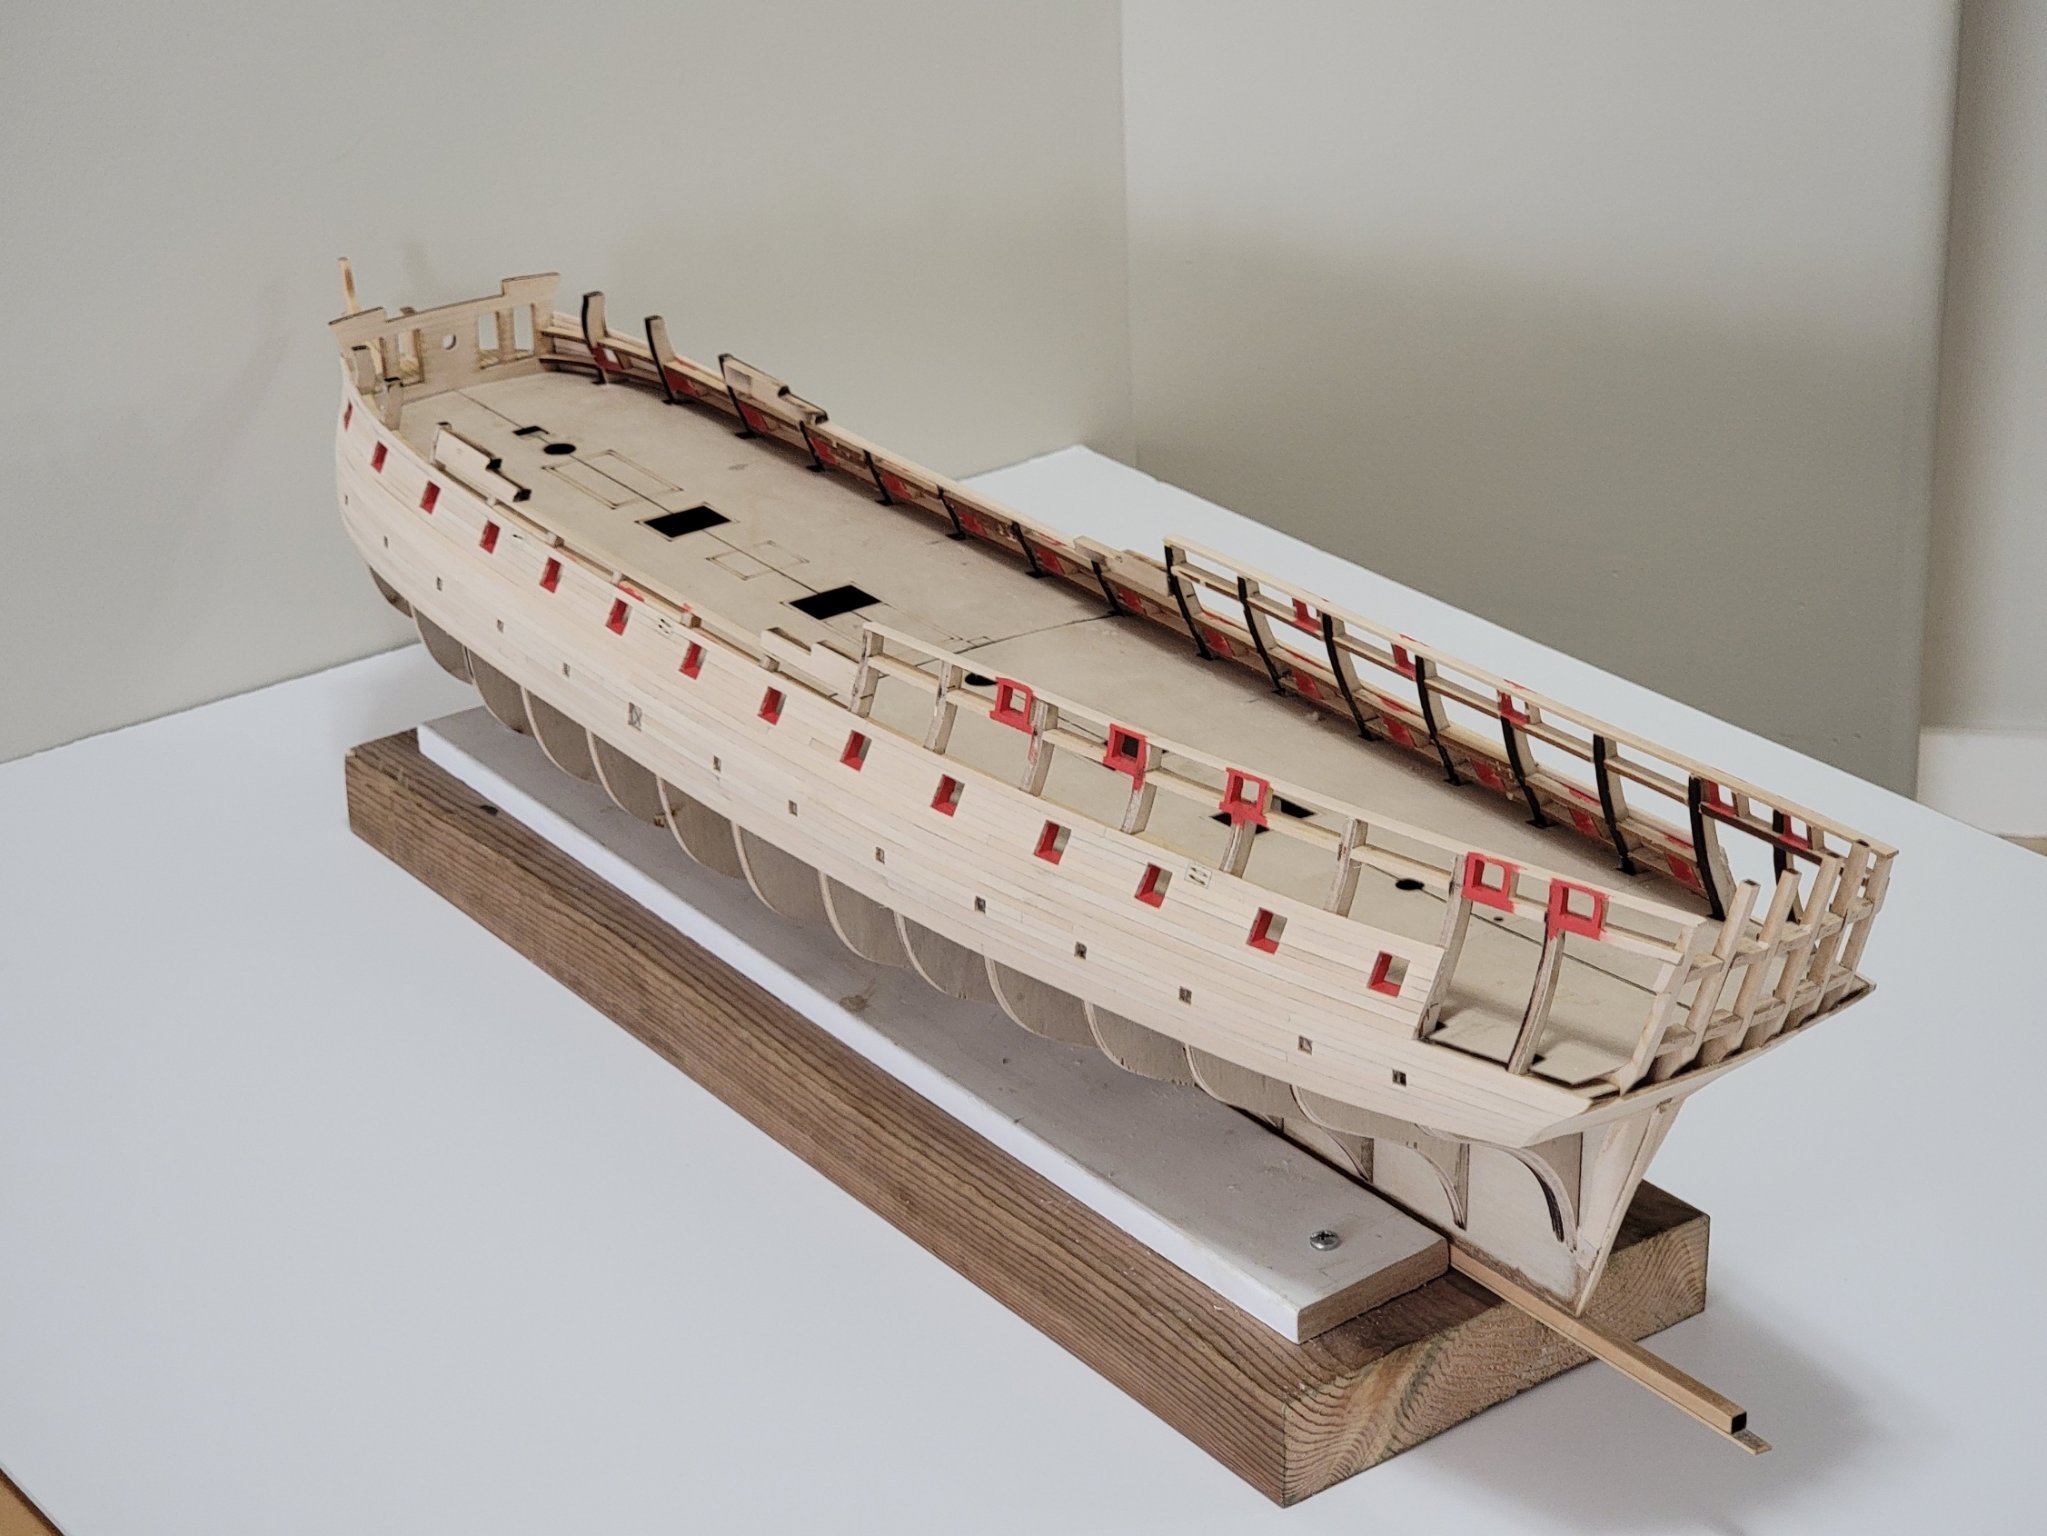
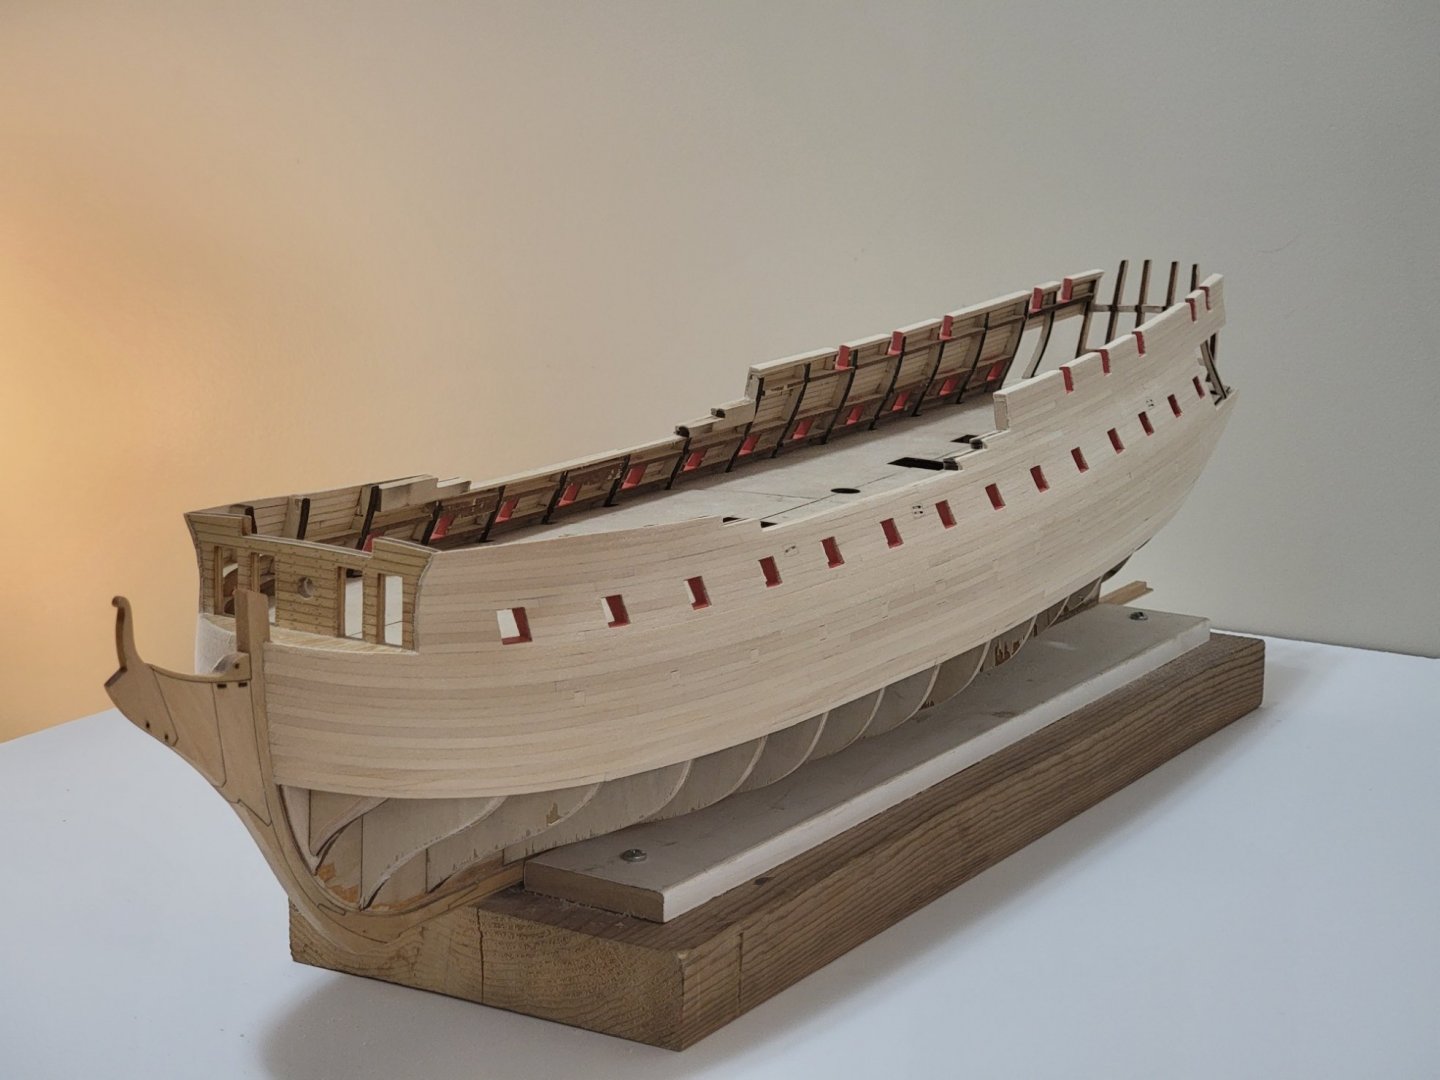
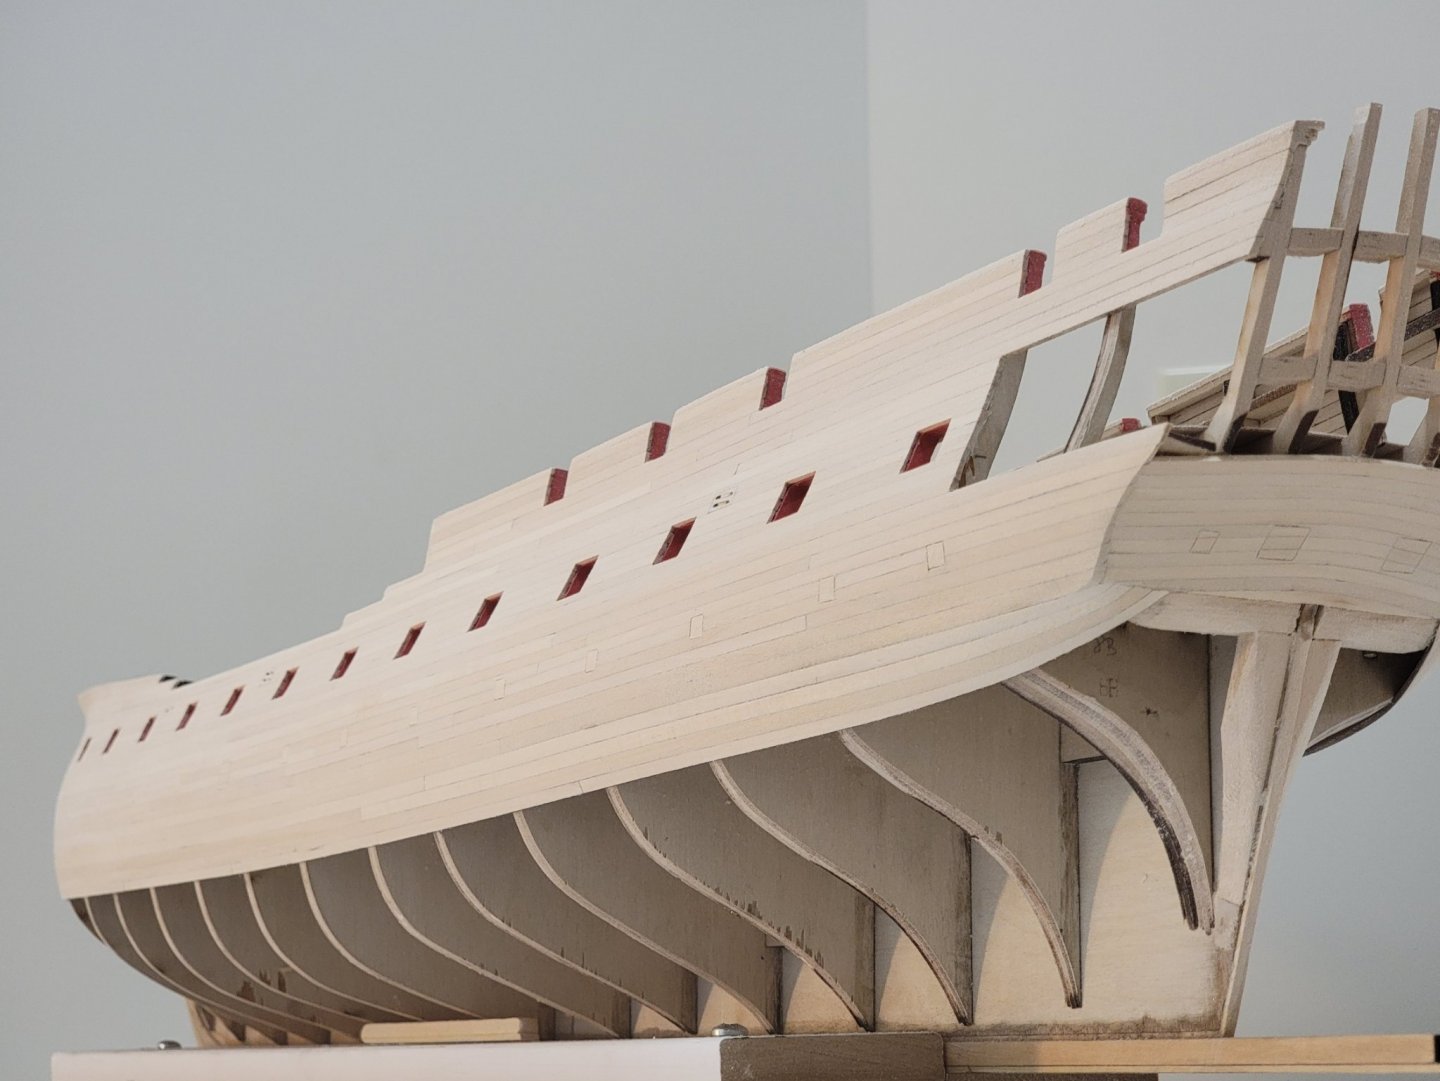
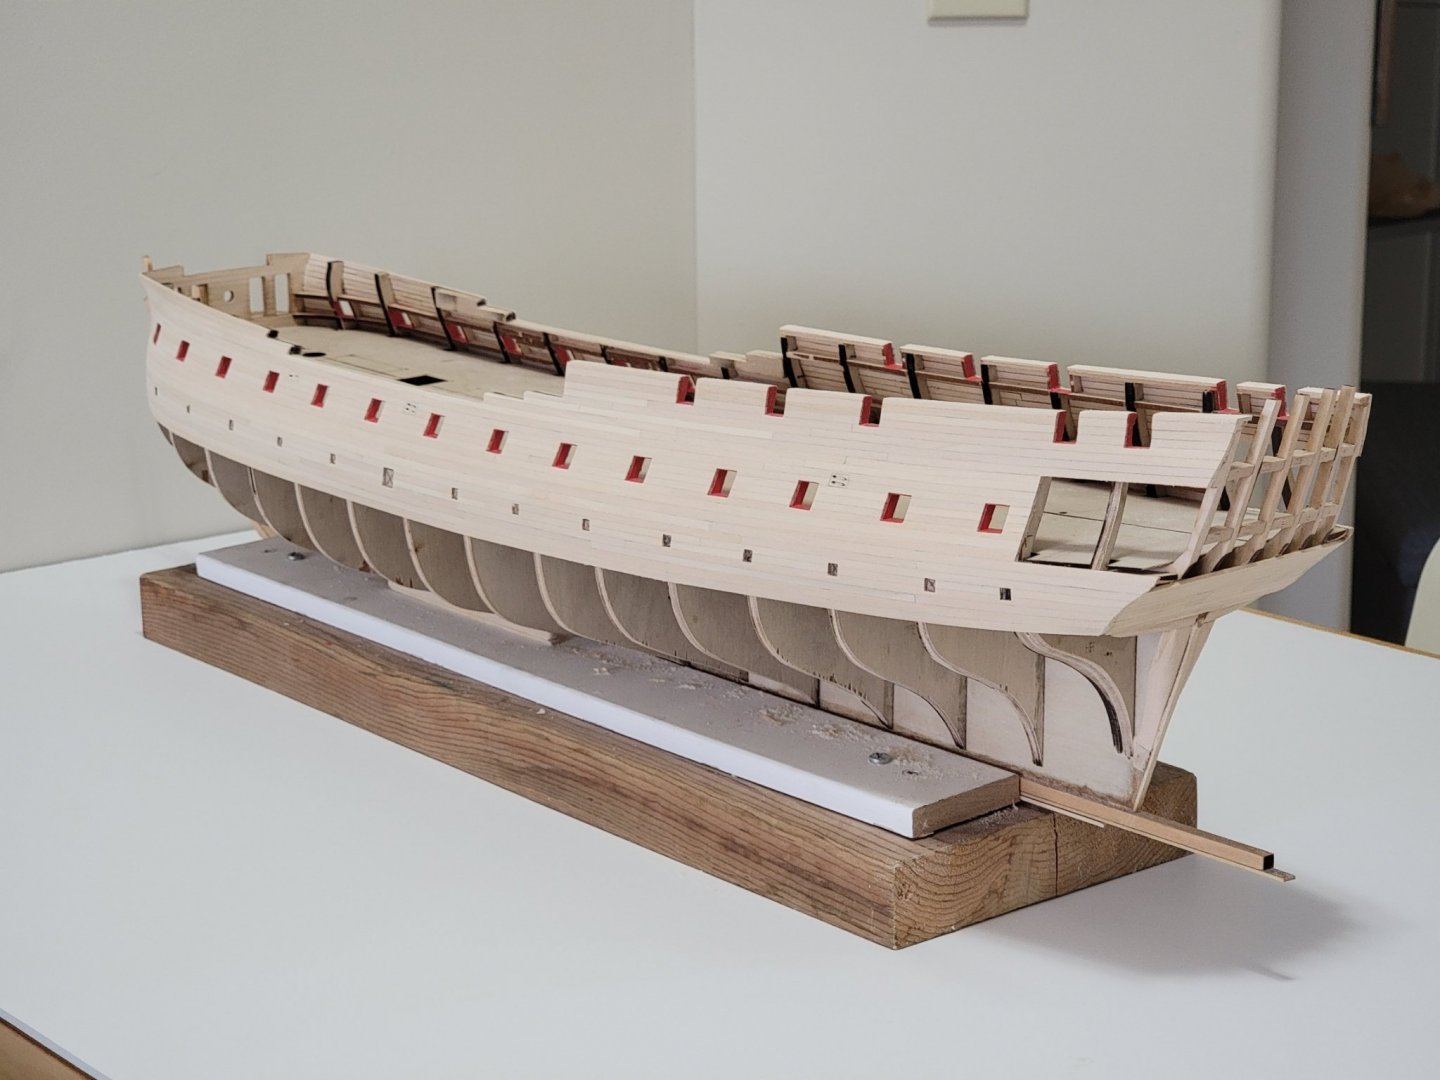
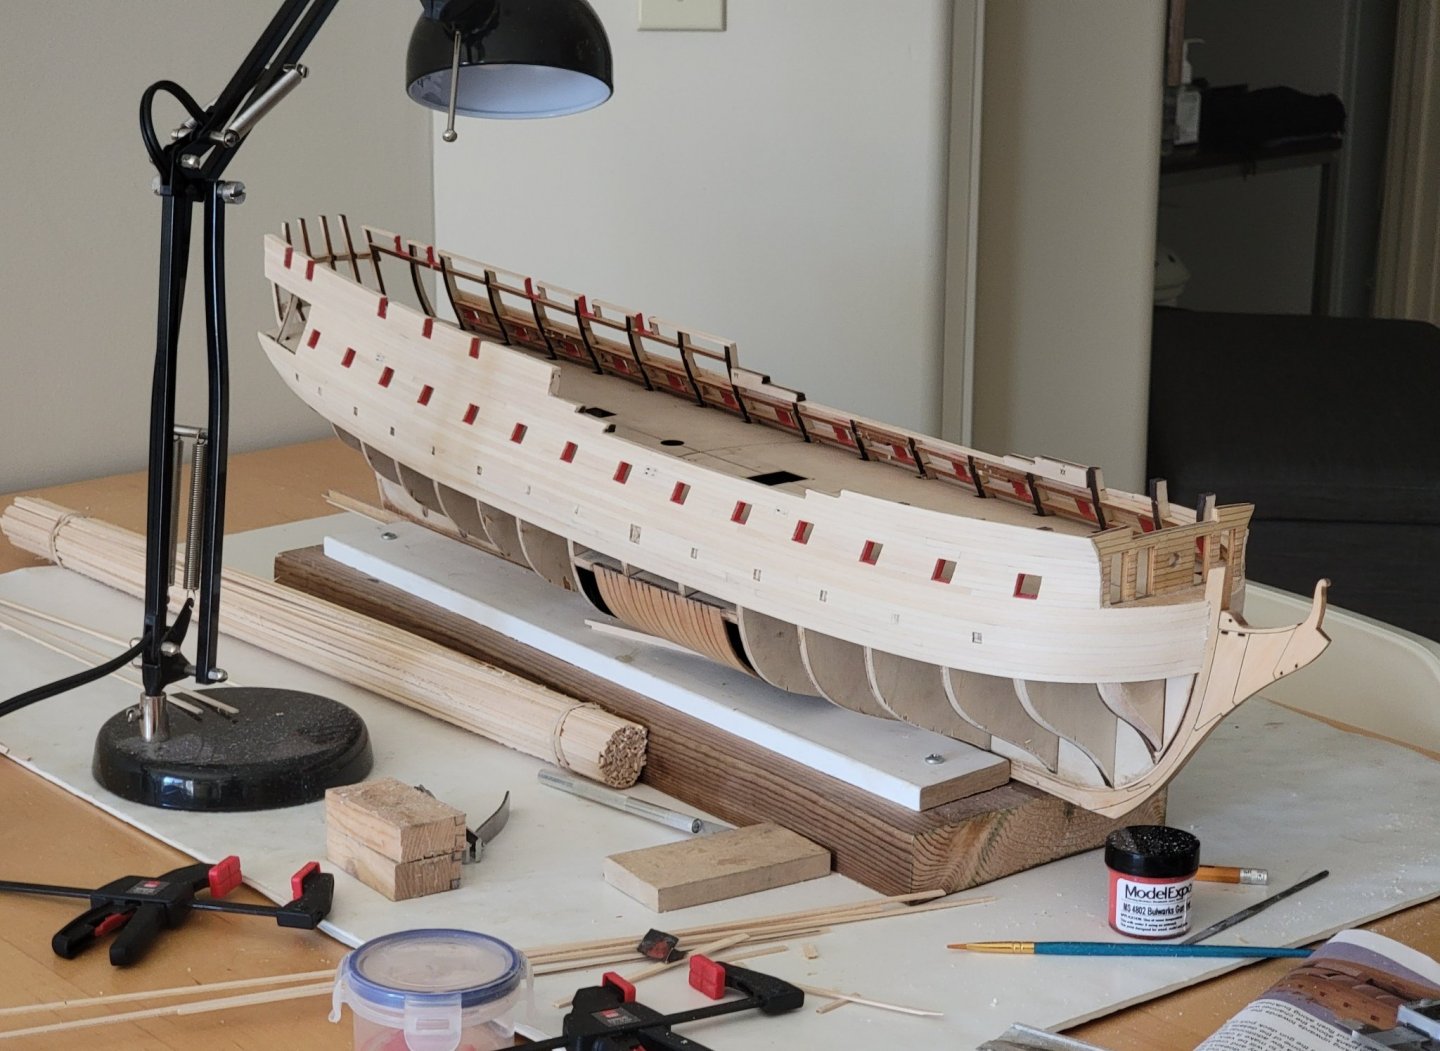
The first layer of main wales have now been planked. I also finished gluing in all the sweep port lids and ballast port lids. Here are some pics of where I am at right now: I will next start working on treenailing the planks before starting to plank beneath the wales (something I am very nervous about!!! 😅)


-
Thank you Michael and Thomas! 🙂
-
Truly a museum quality build!
-
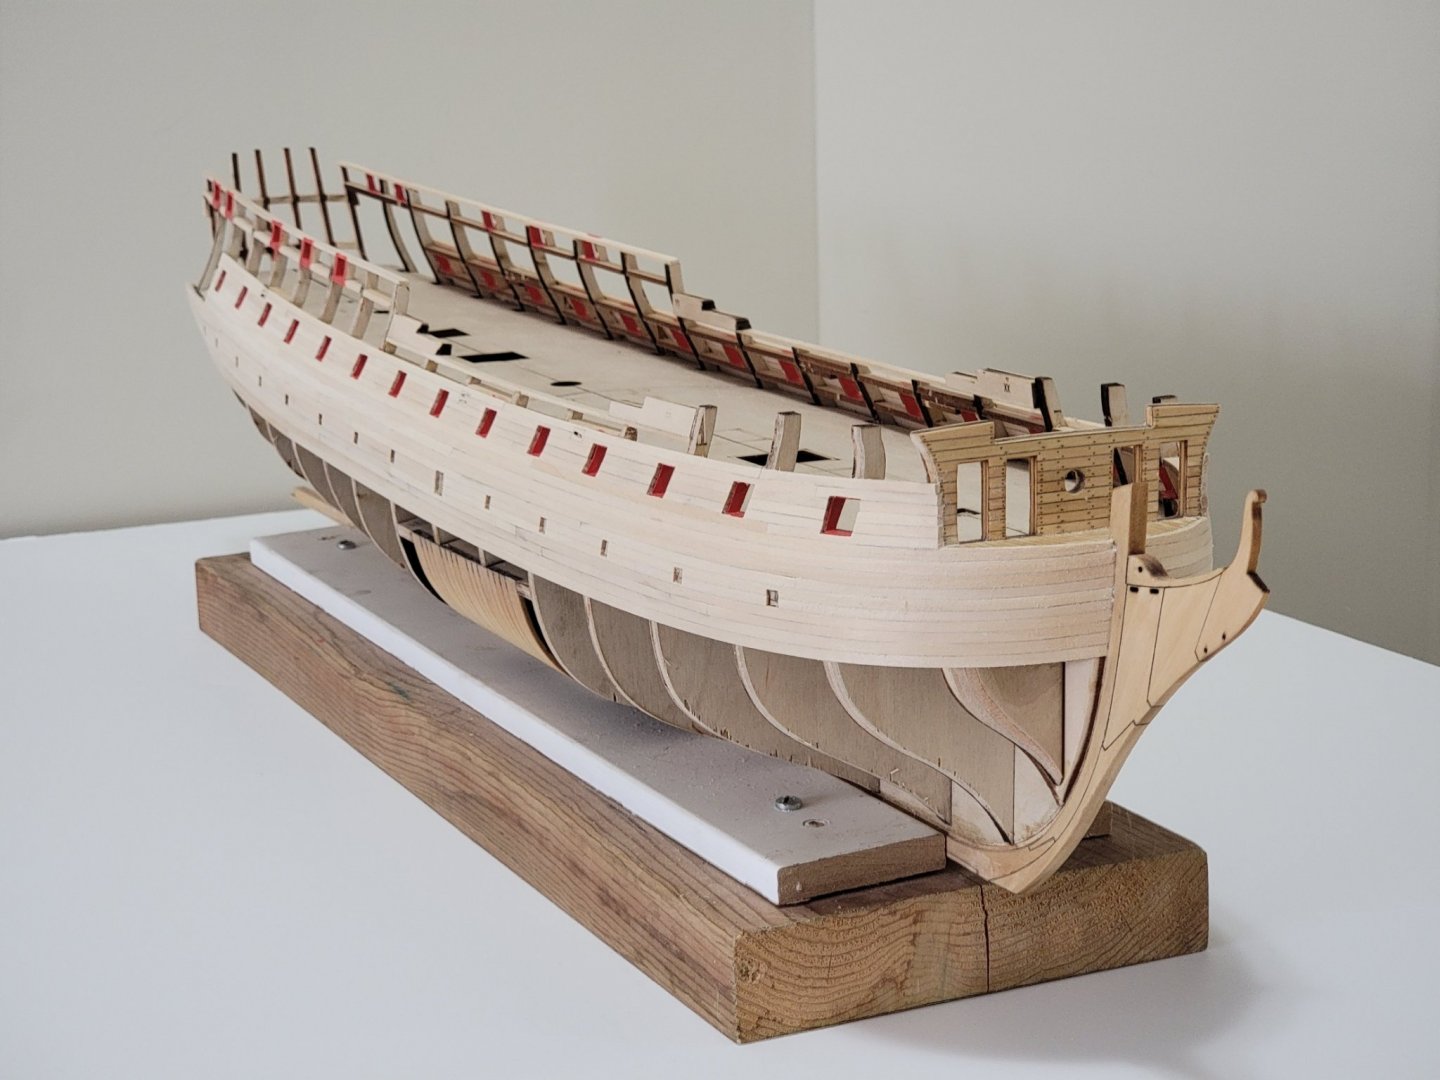
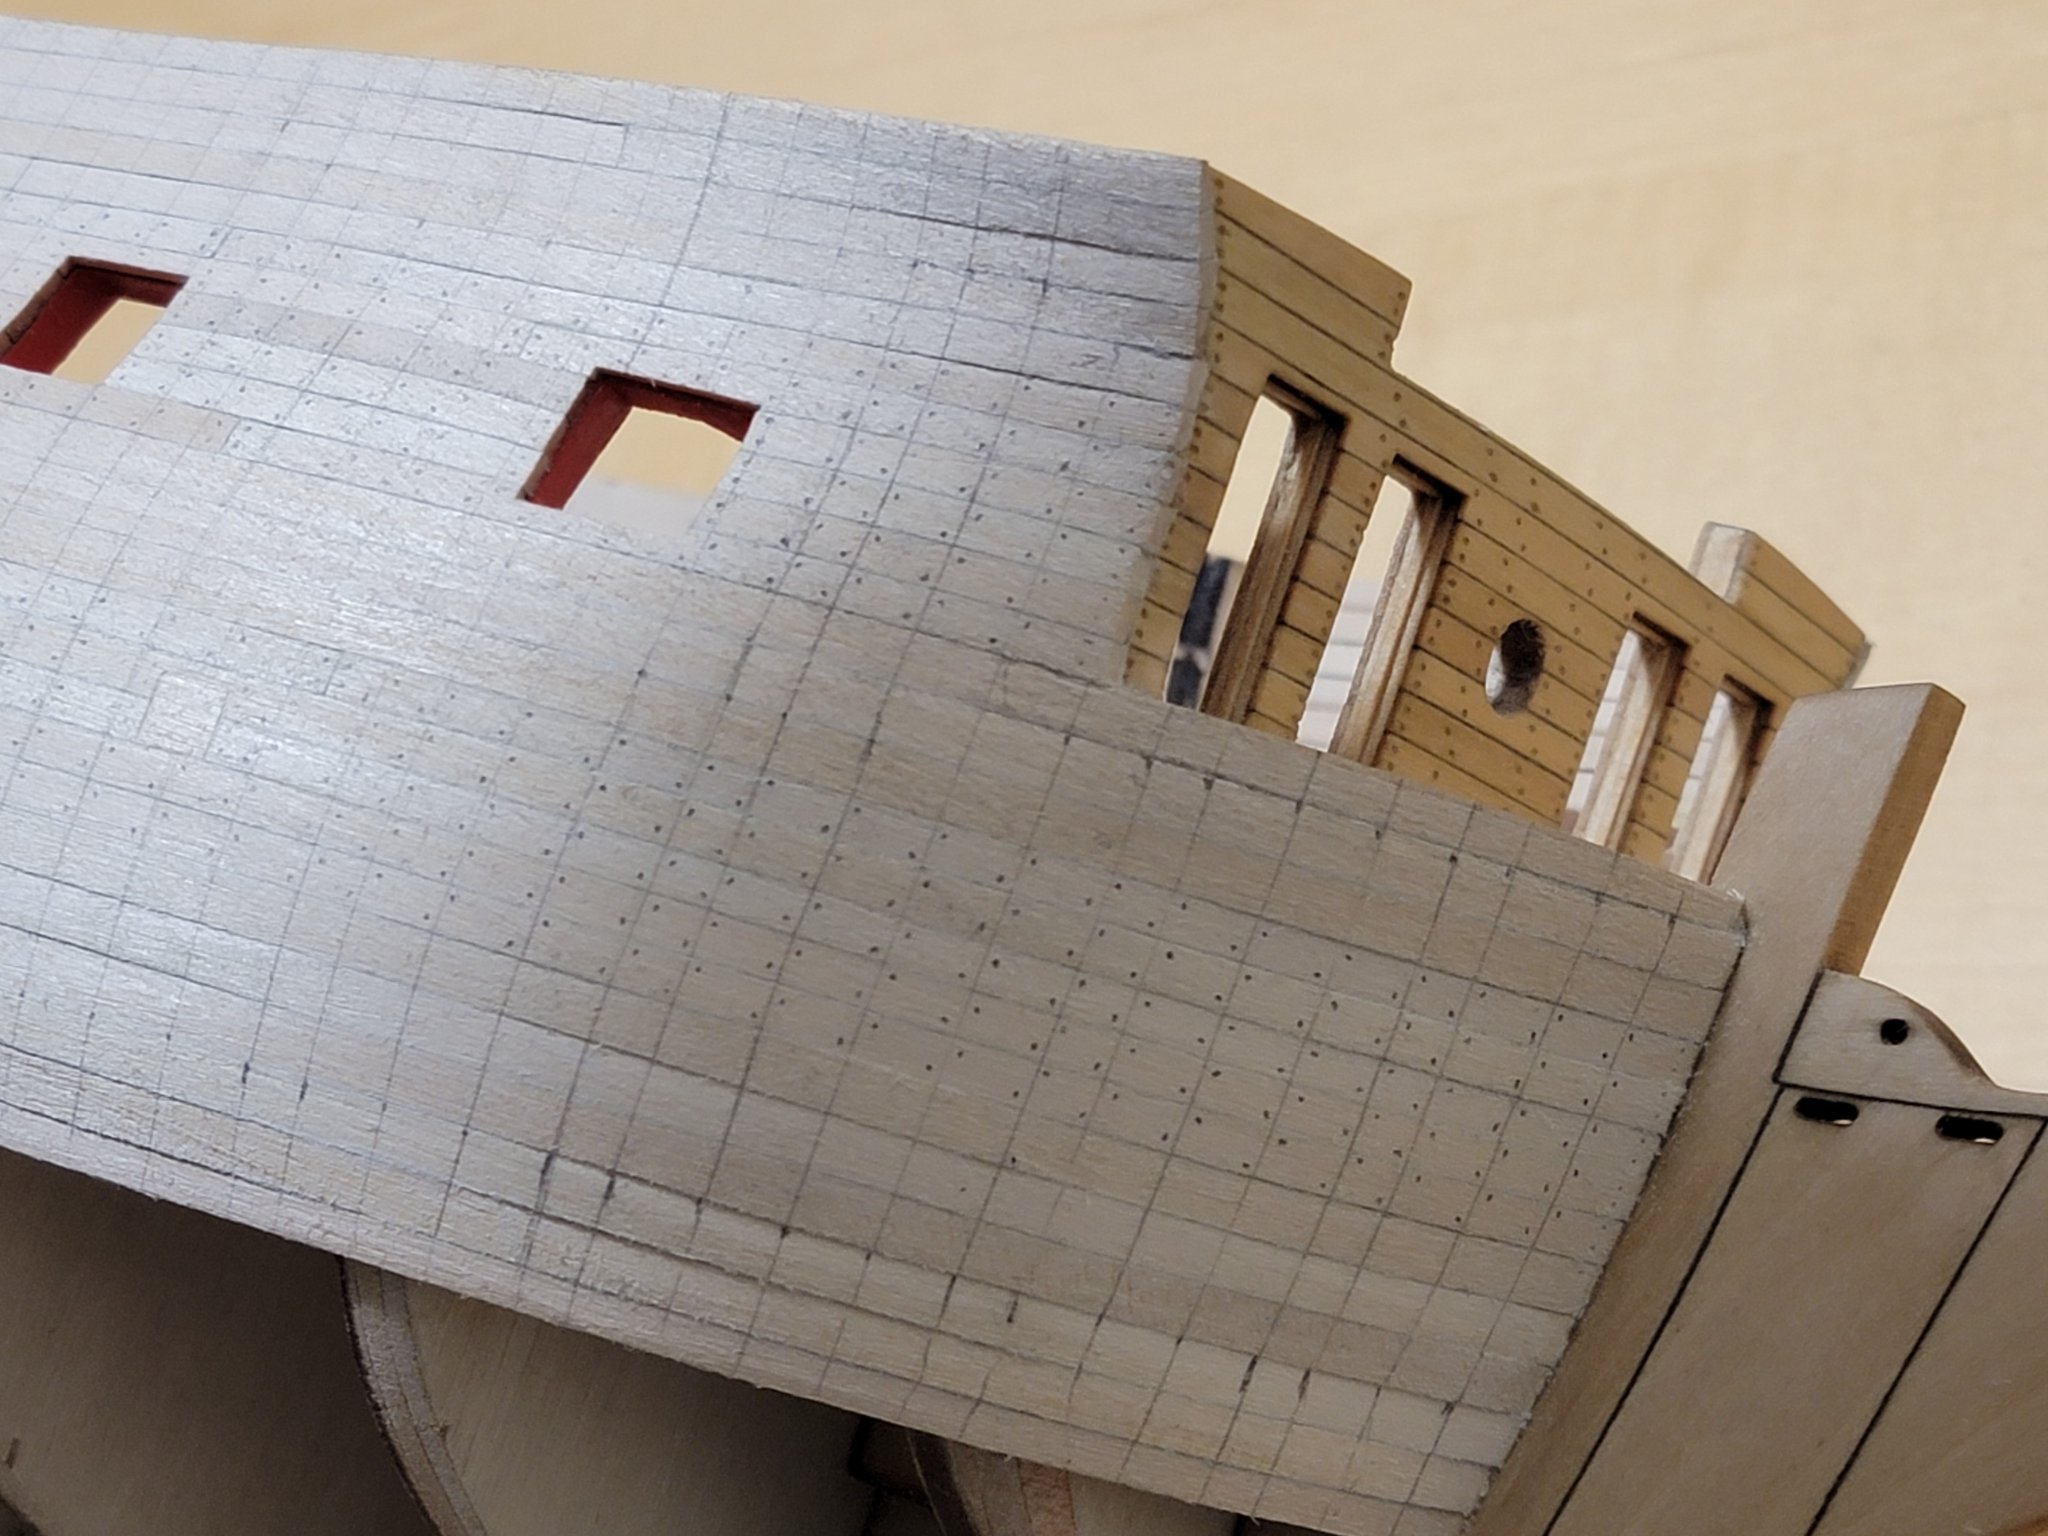
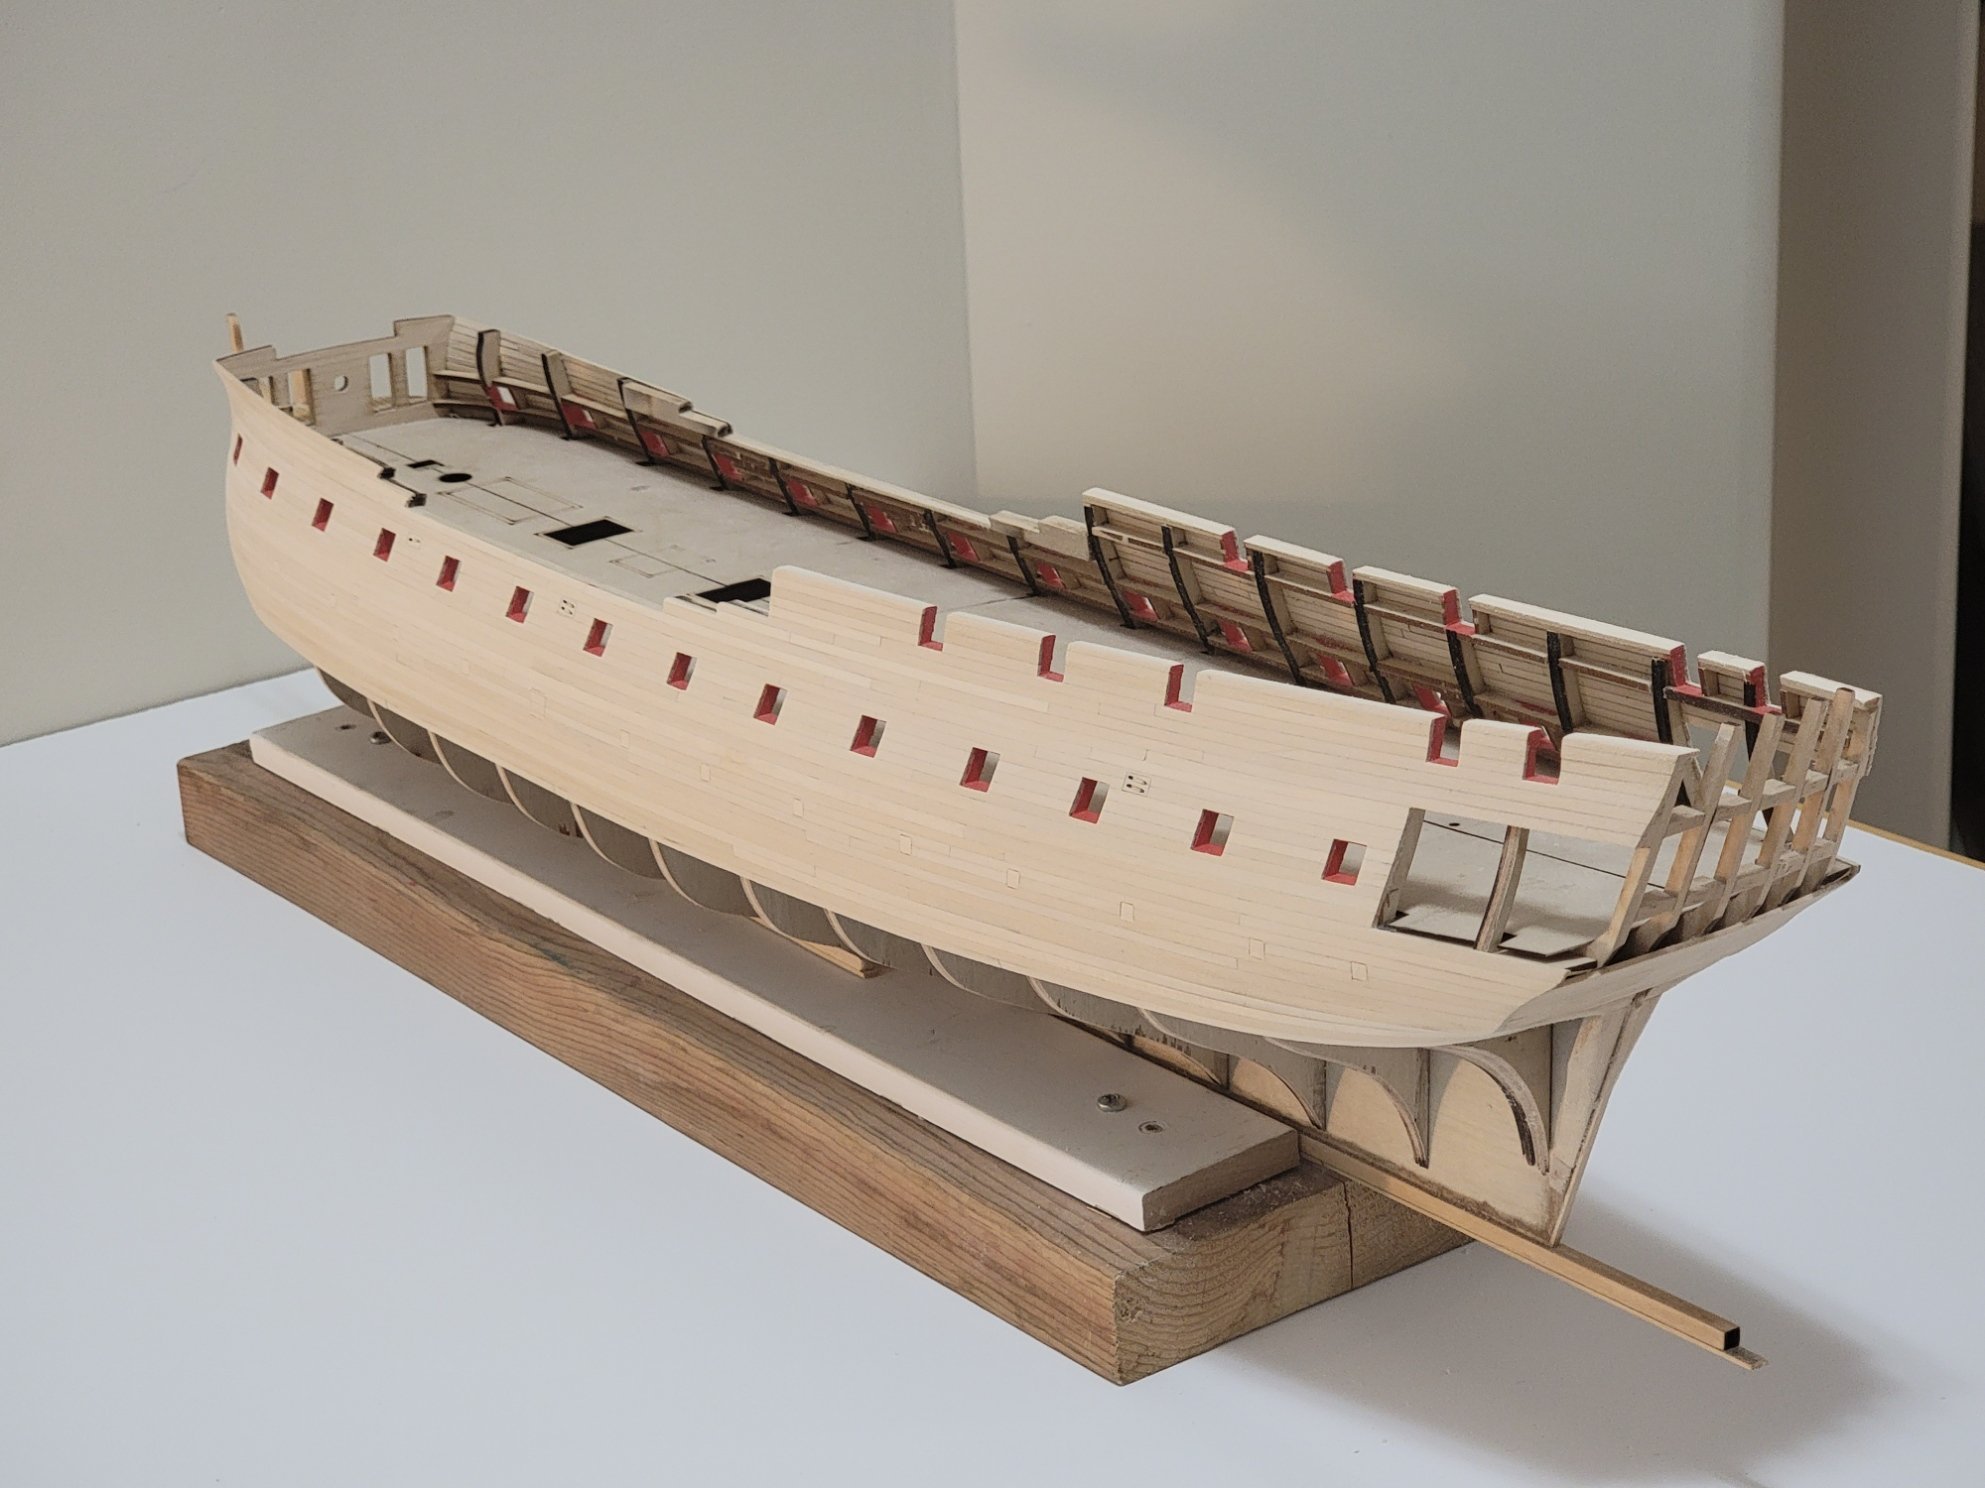
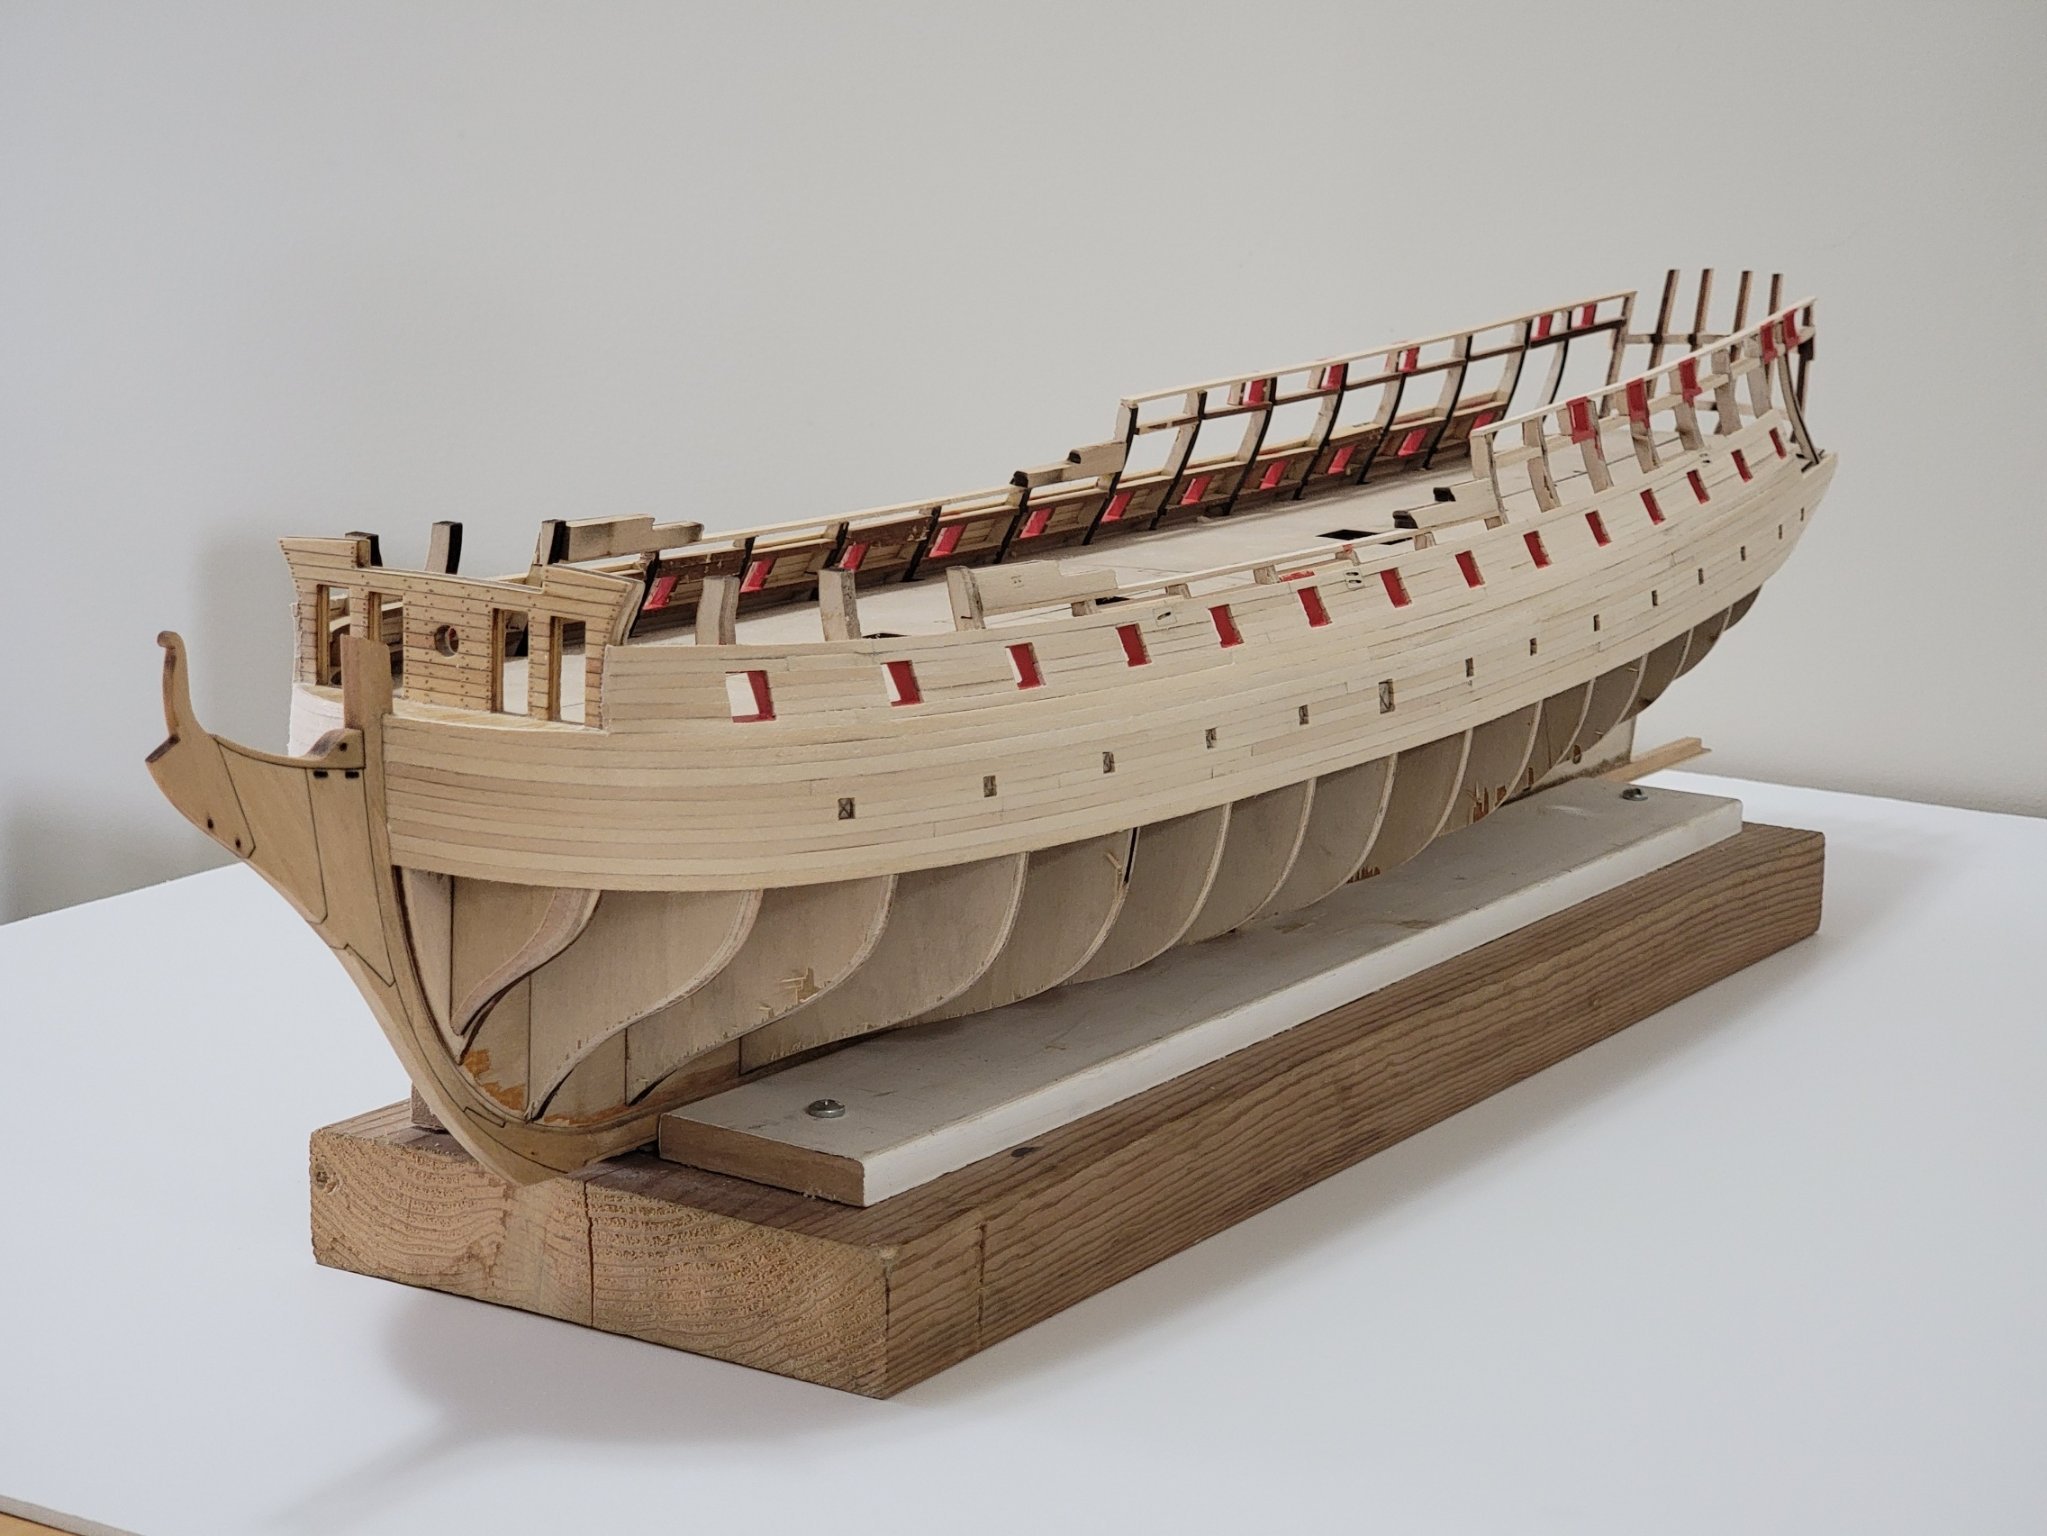
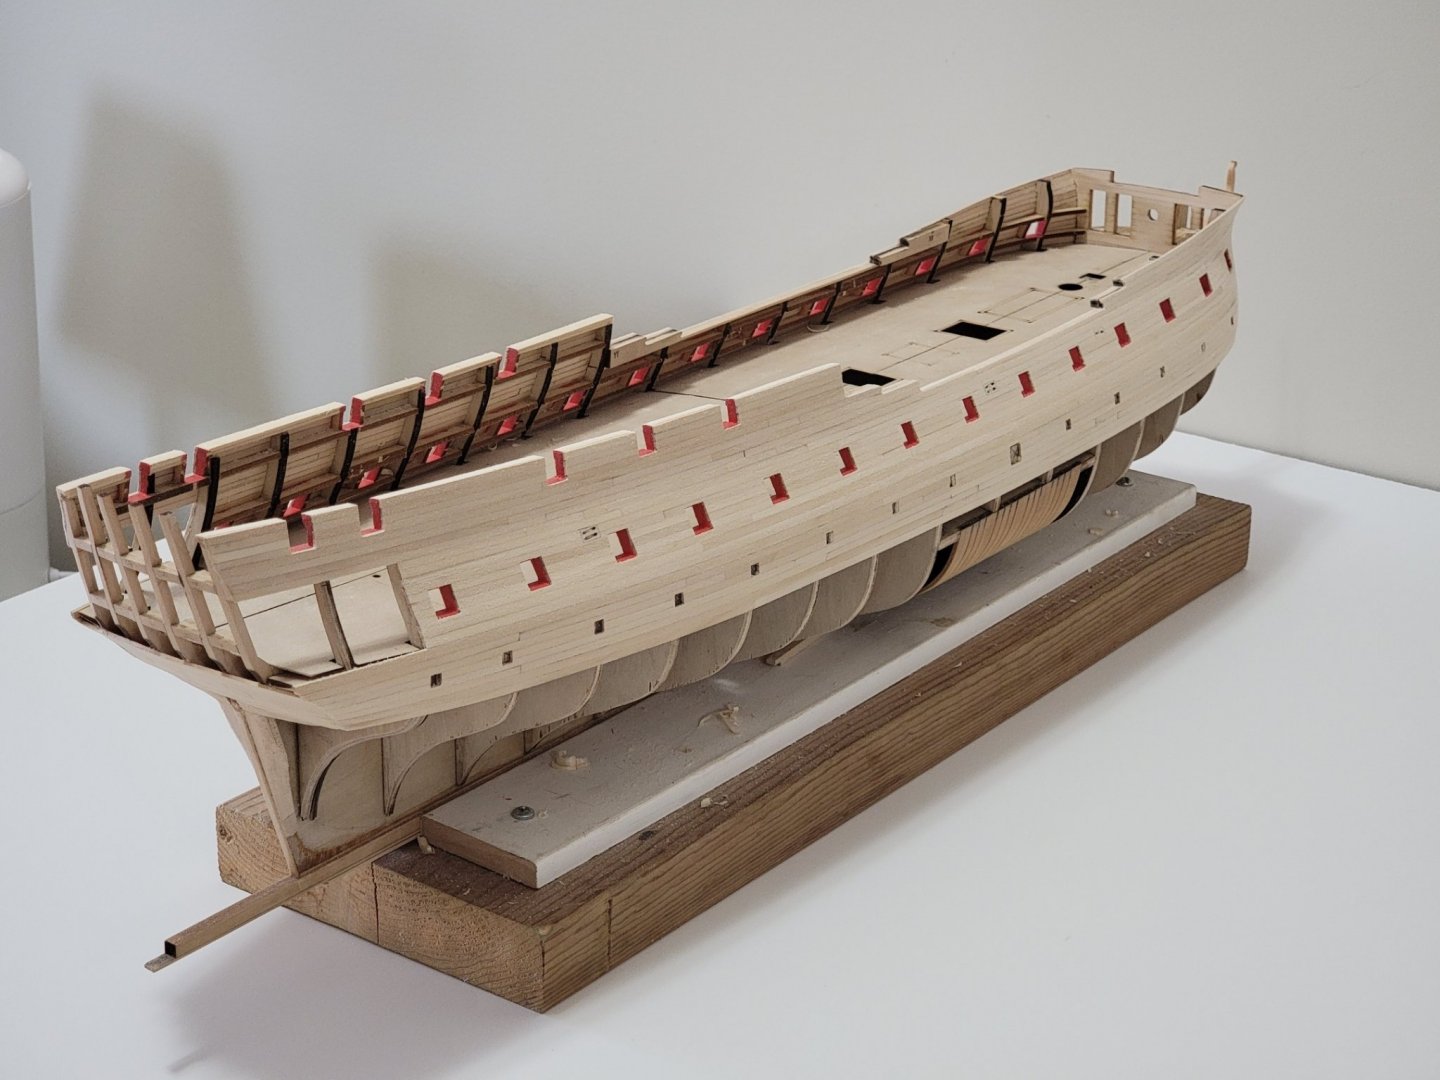
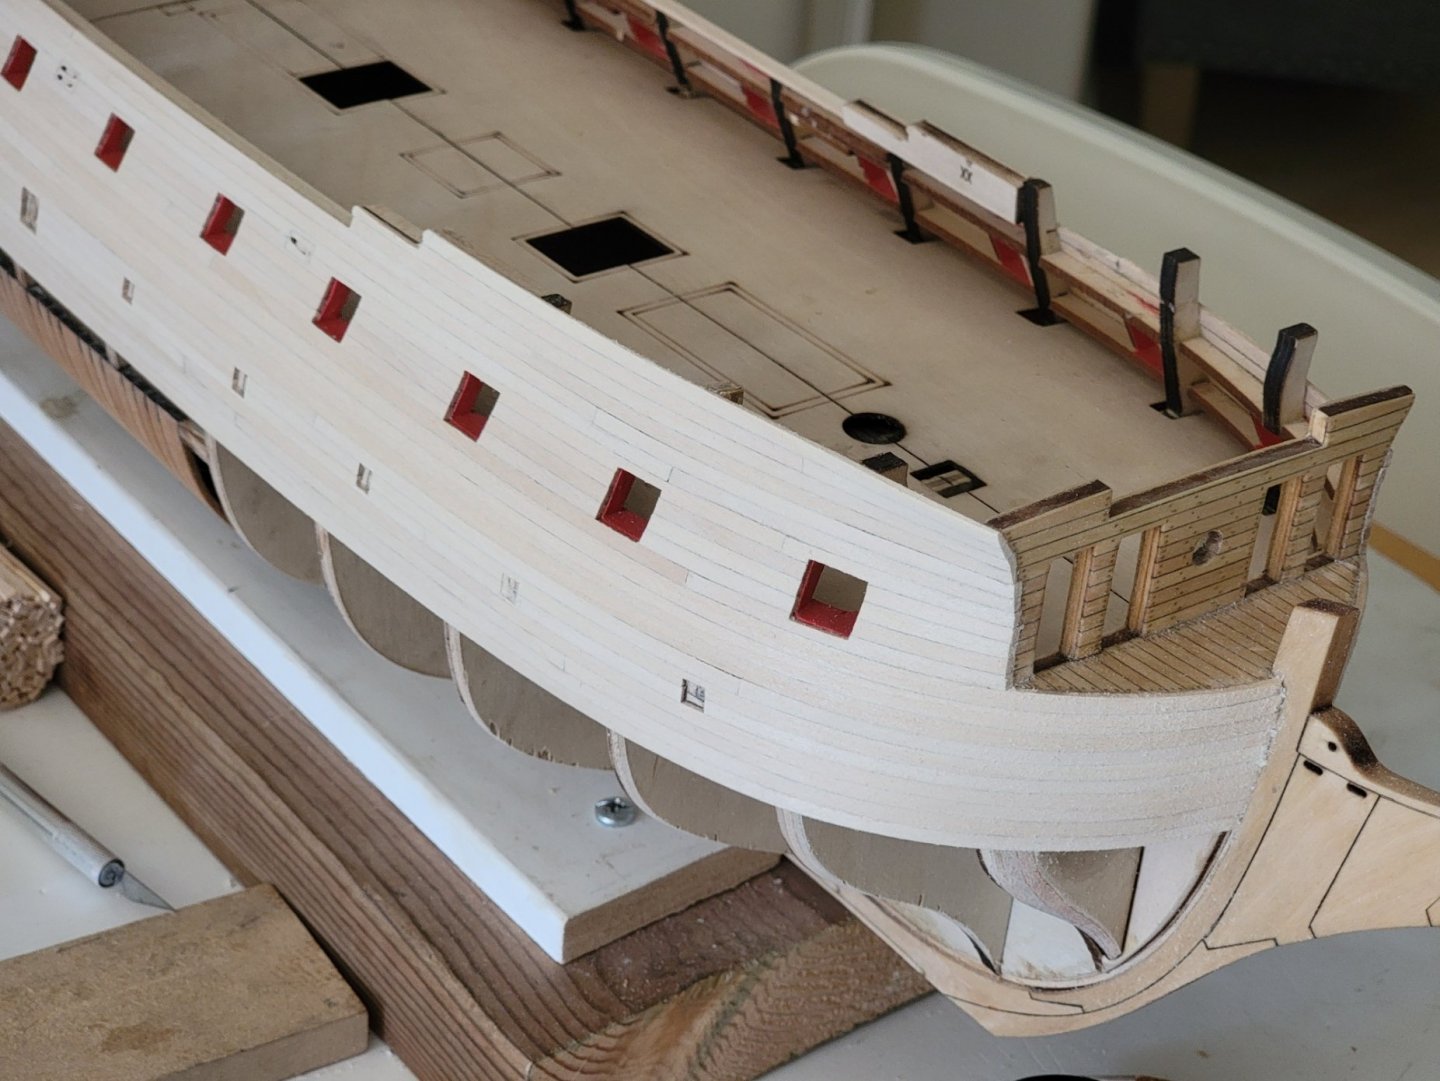
Thanks again everyone for the likes and comments! I finished planking both sides of the ship till the top. Here are a couple of pictures to mark this milestone of the build: I'll next start working on the first layer of main wales, then the sweep ports. I am thinking I should then start treenailing since it will be easier to sand before I install the 2nd layer of the main and channel wales.

-
Thanks Mark! 😁
-
Thank you, Hamilton! Yup it does look a bit crazy looking. I'll look into how to make cradle automaton, looks complex 😄
-
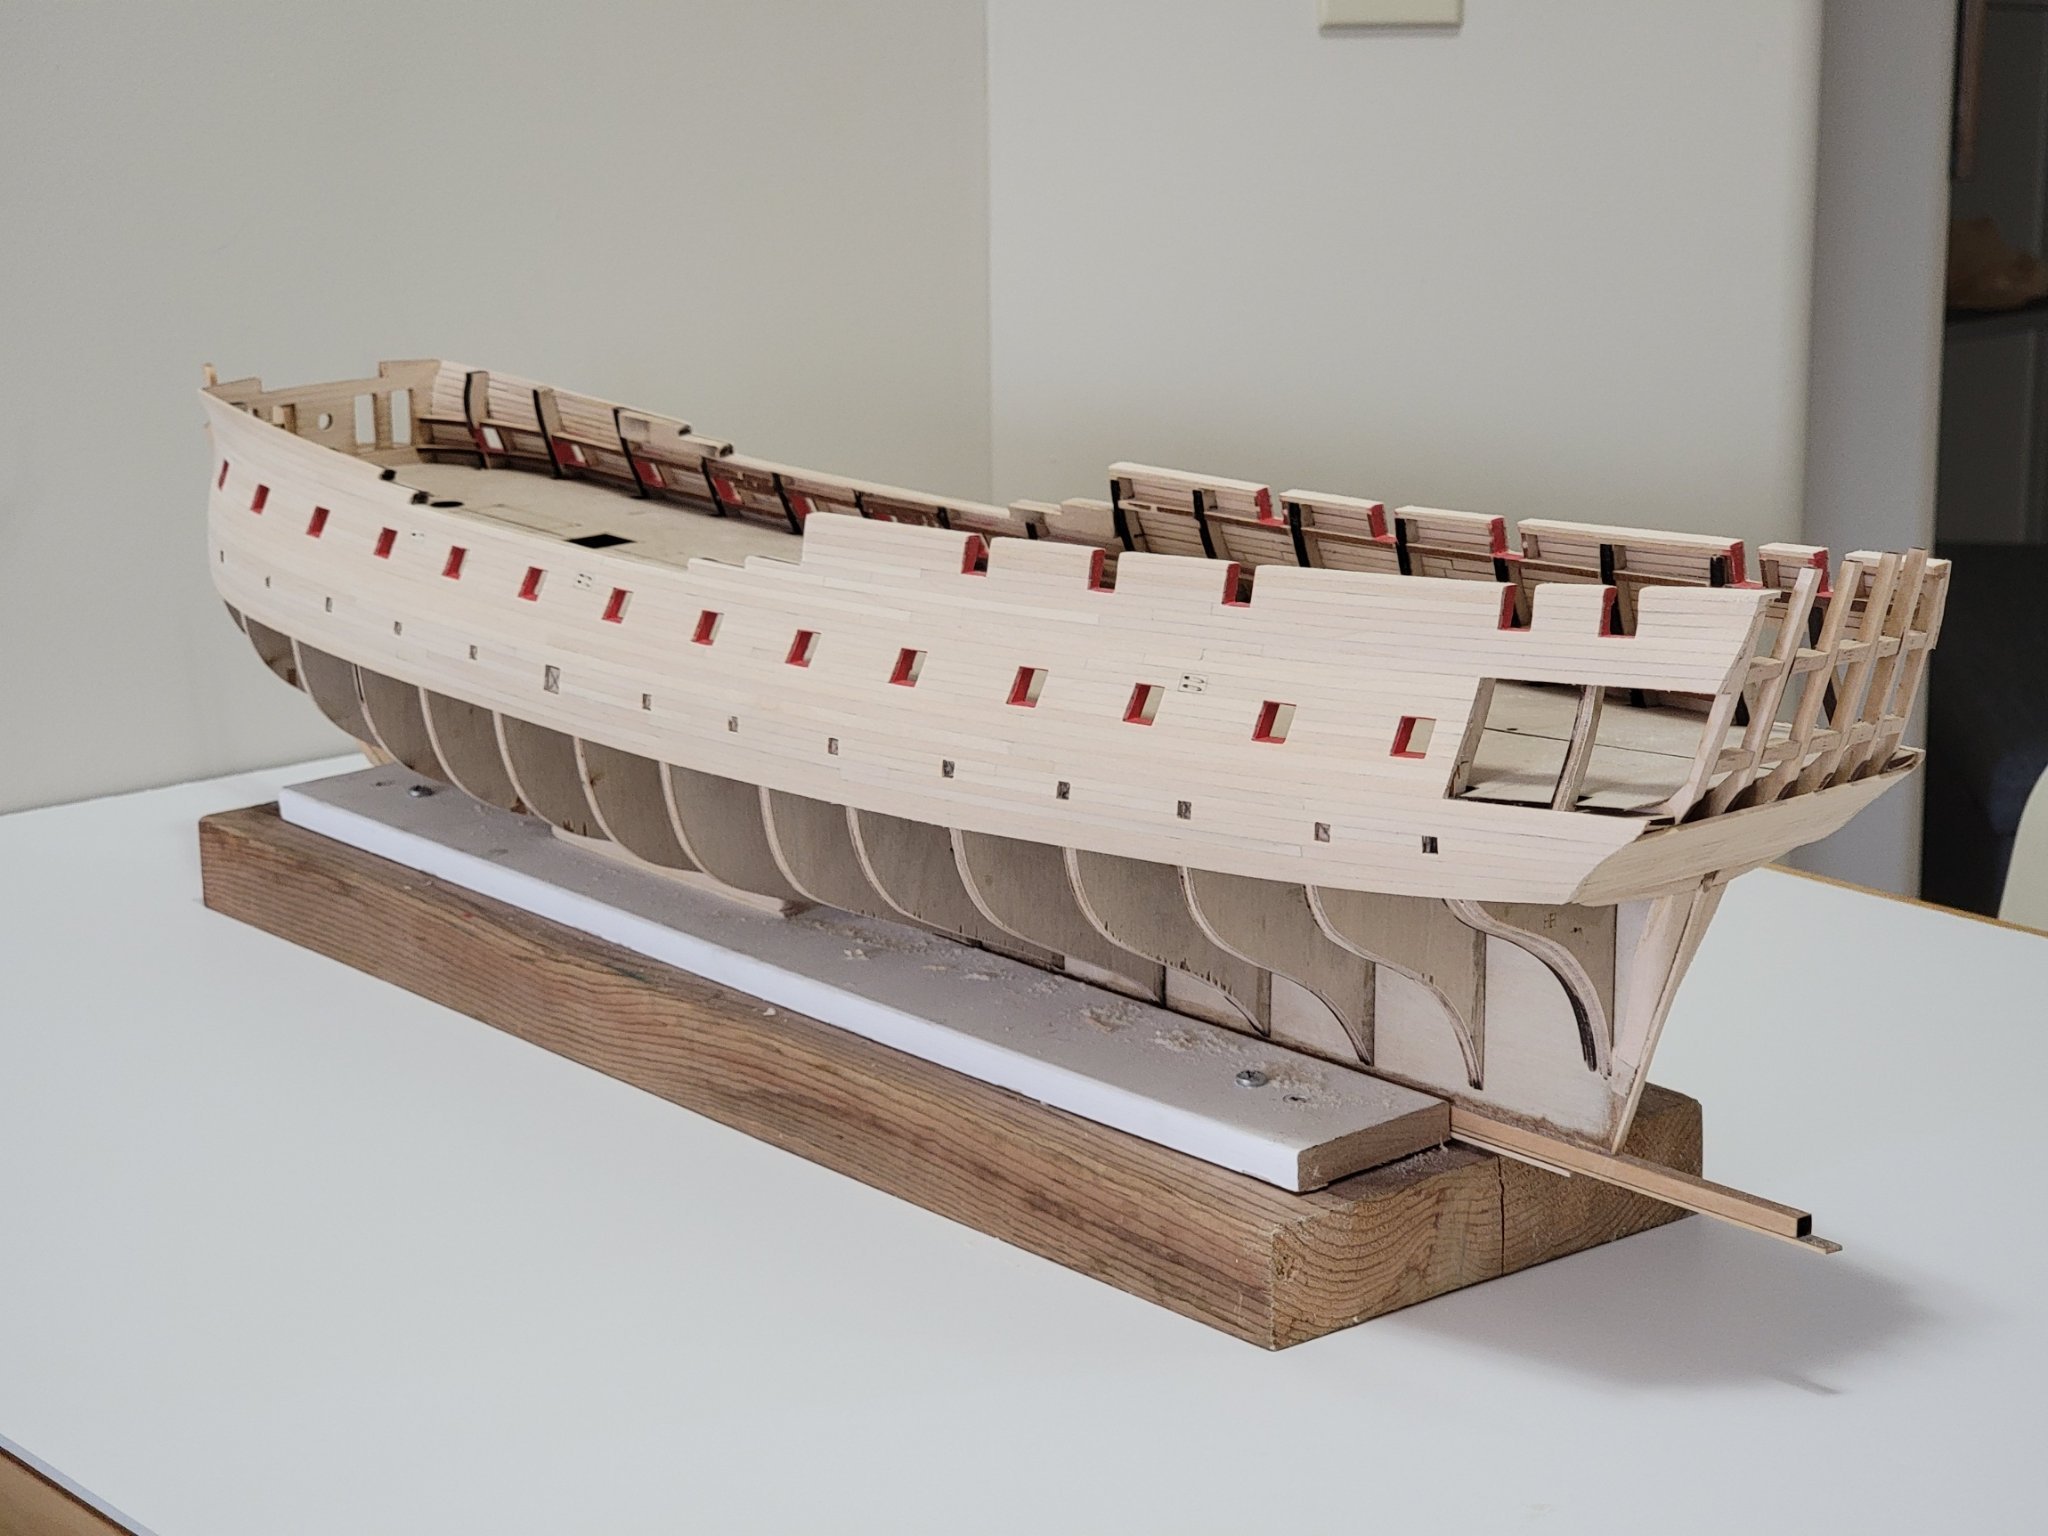
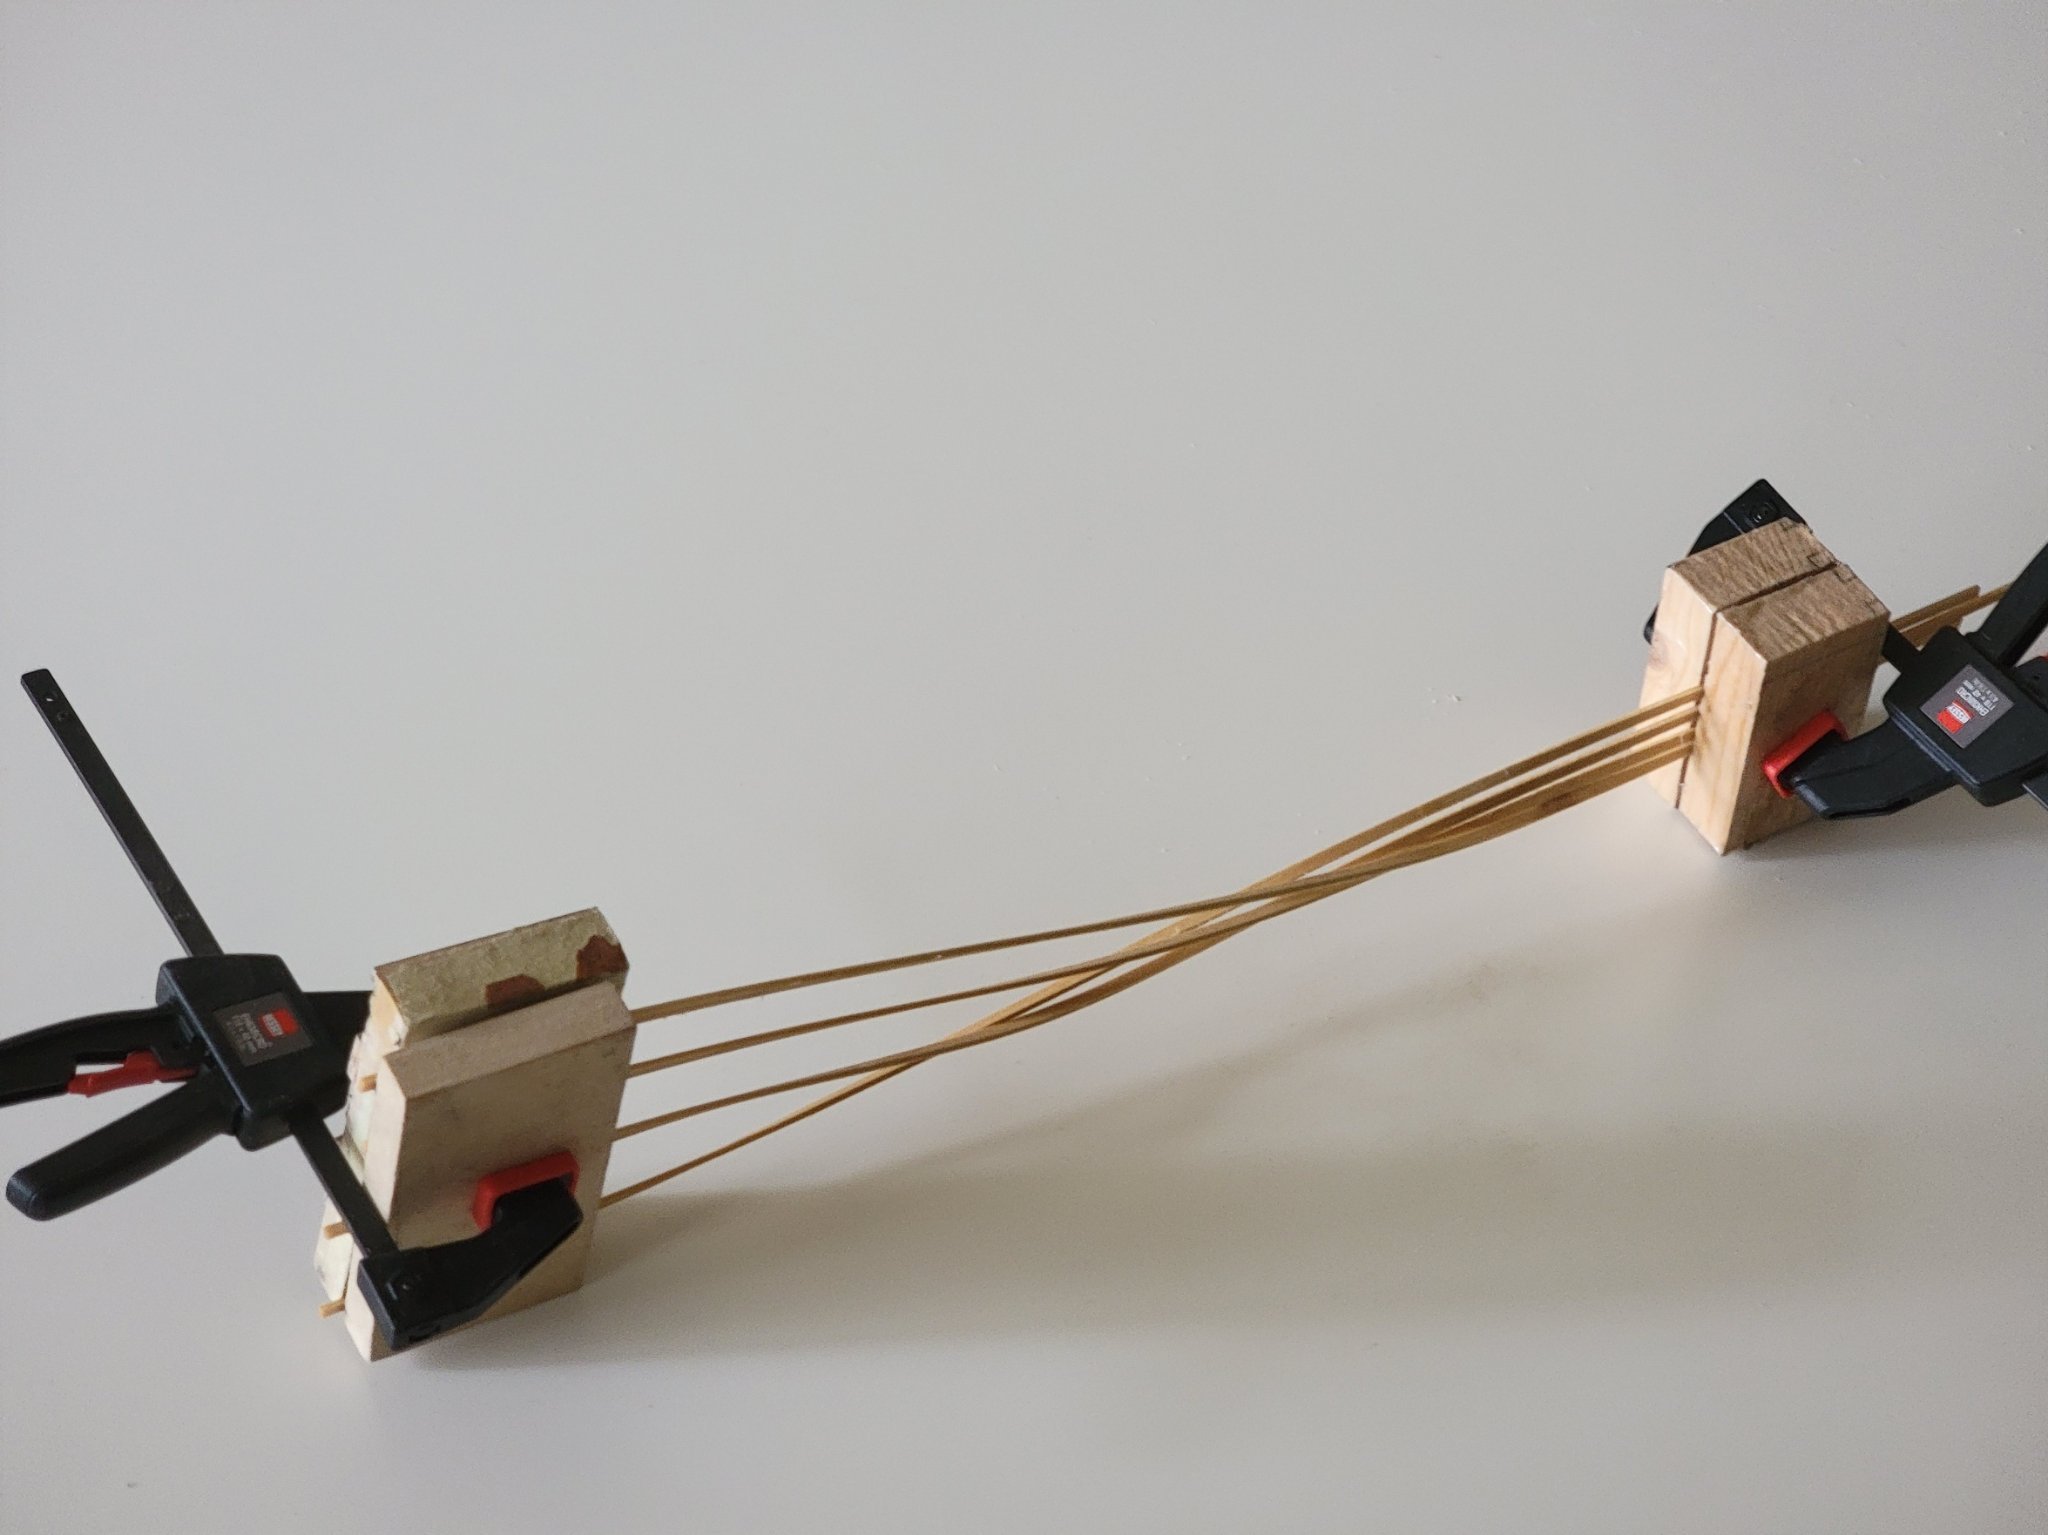
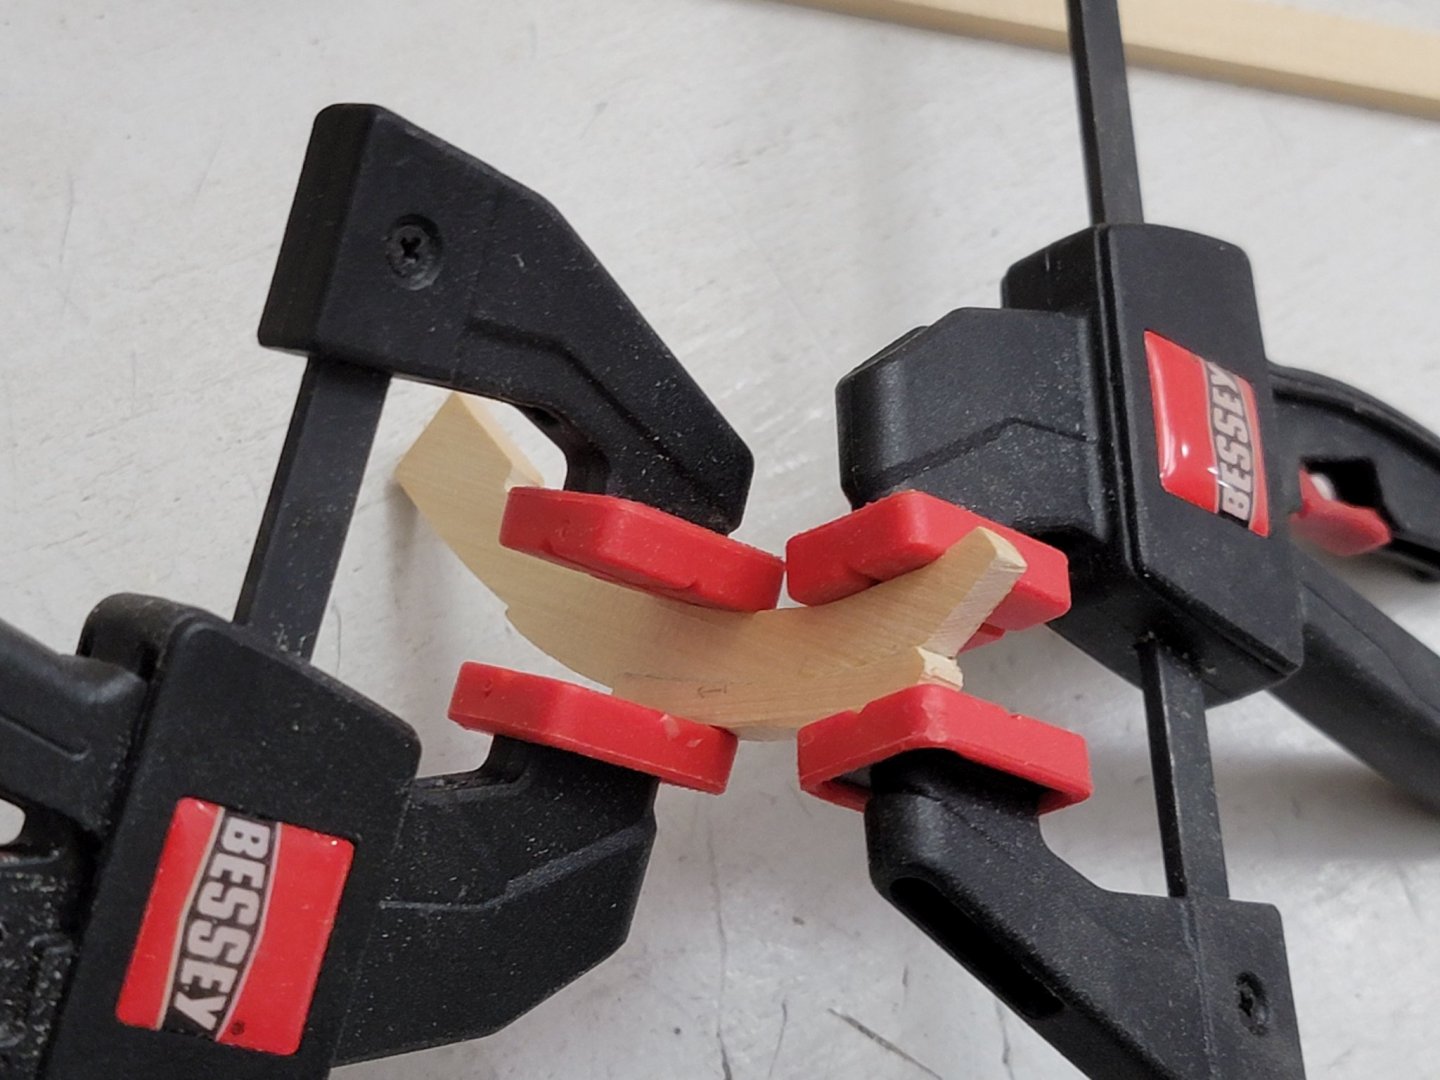
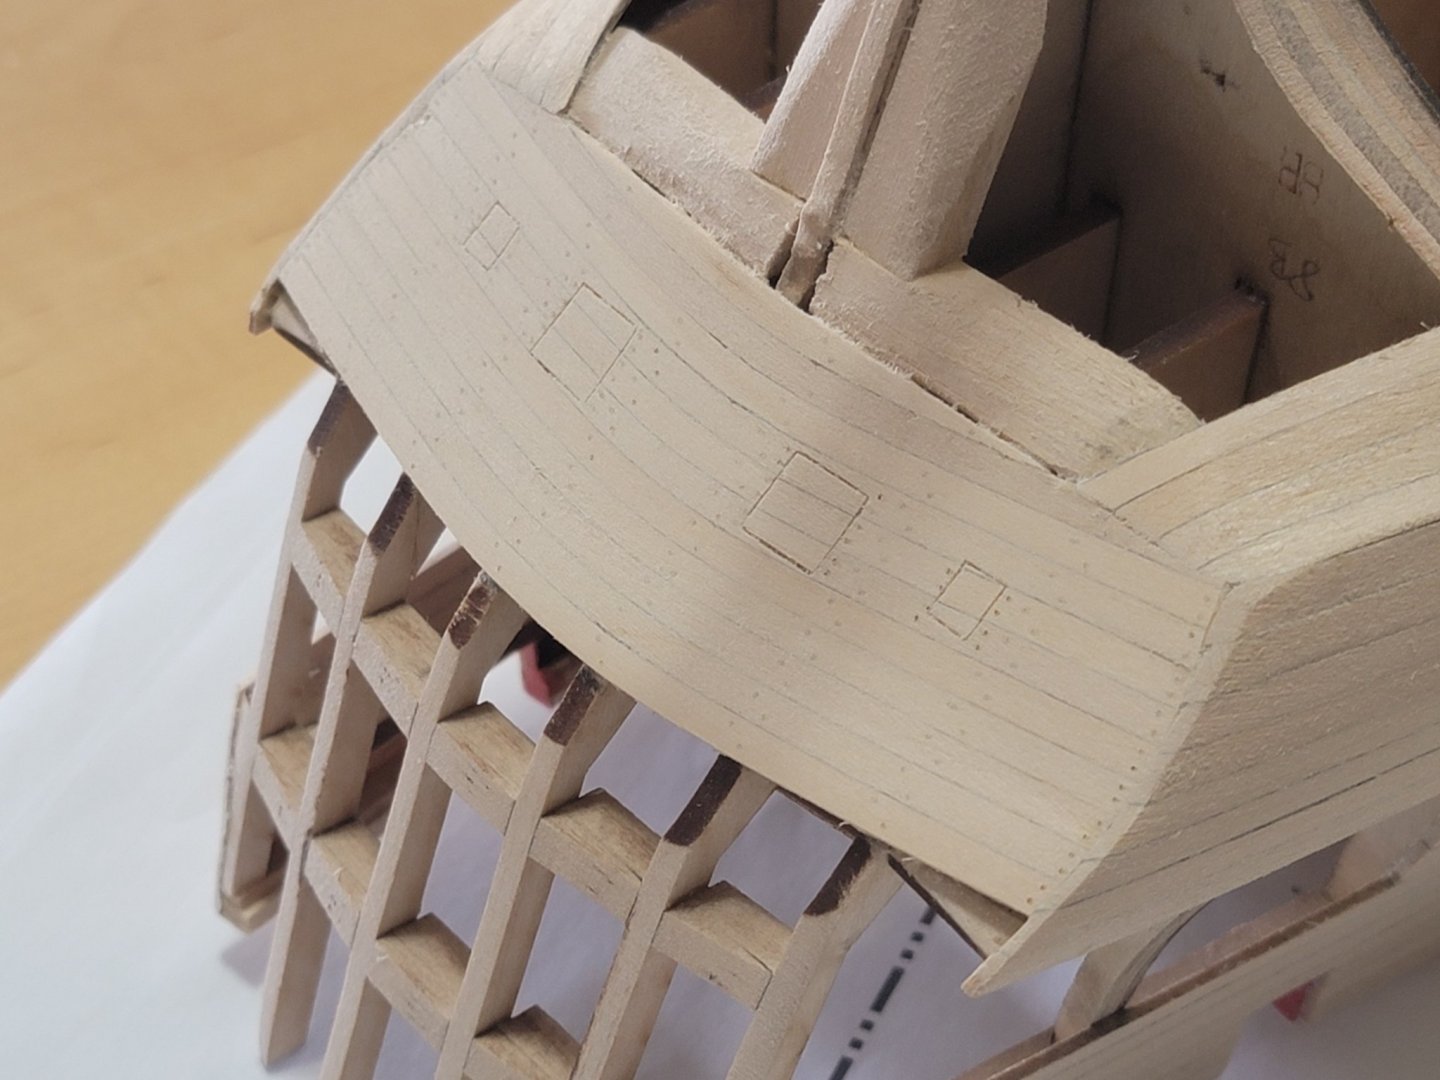
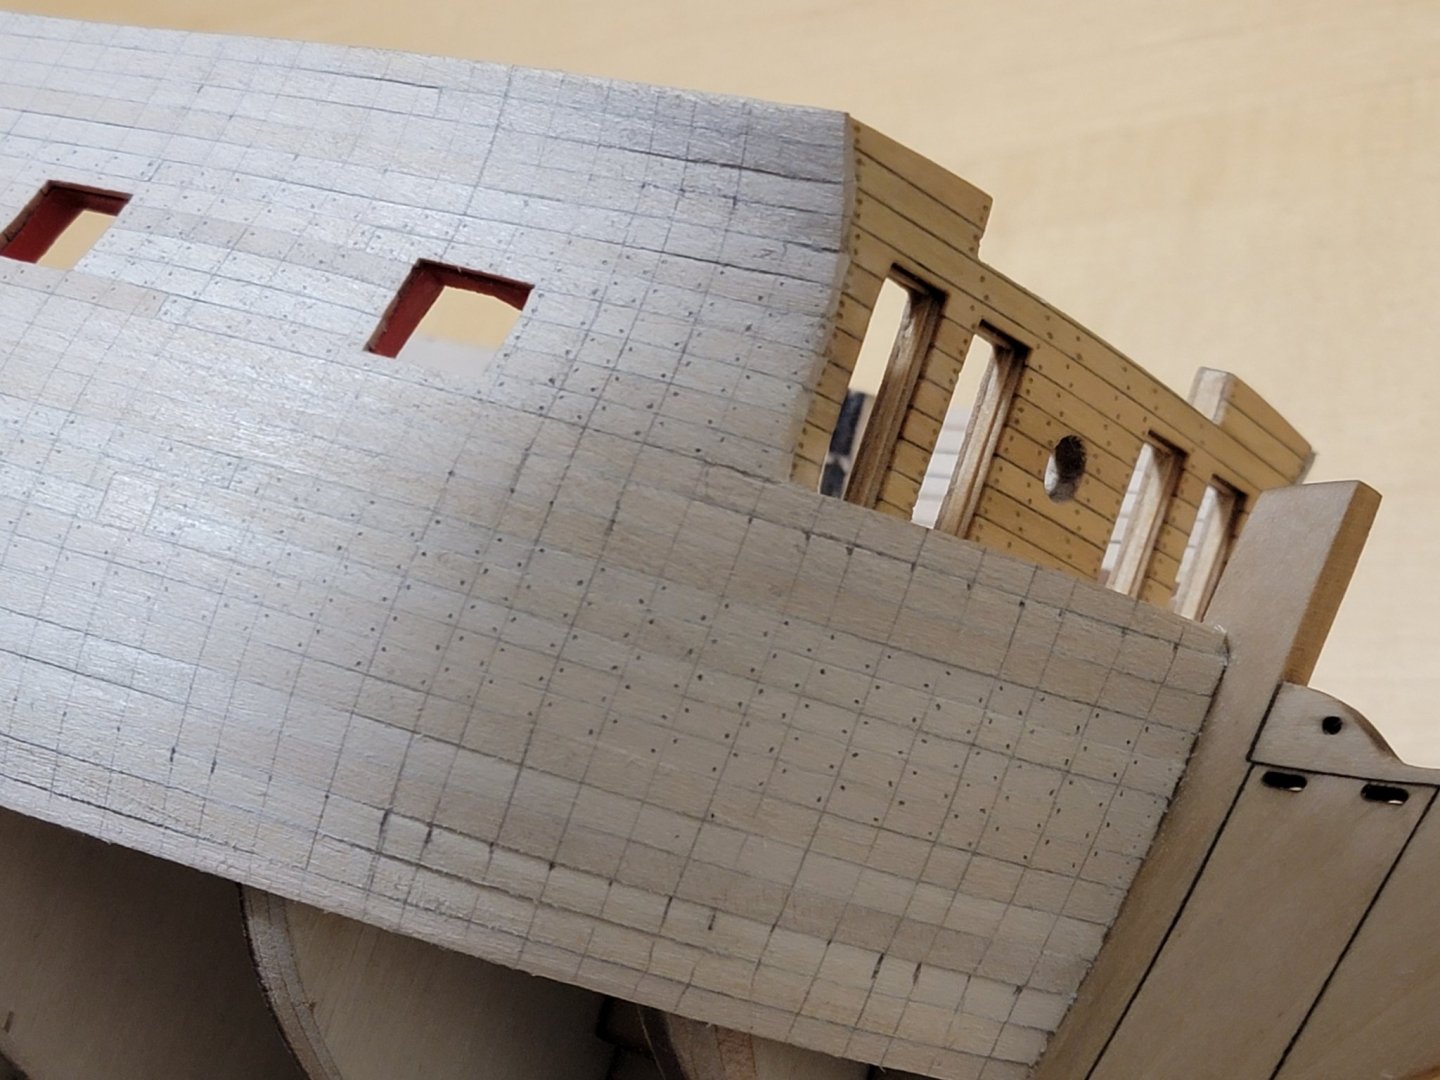
I finished planking one side to the top, so thought I'd share some progress photos together with the messy worktable 😁 Planking near the bow towards the top of the beak bulkhead required some twisting of the planks. So here was my workaround for that. I soaked some strips in water then used clamps and some wood to twist them: It made it easier to glue without holding the planks for a long time for the glue to set: I had to deviate from the instructions here and needed to add one more strip before the one that extends to the end of the ship. This was needed for a more natural fit and I saw others did the same in their logs. I cut the lintels (for the top row gun ports) before planking till the top since it made it easier to paint the gun ports without planks coming on the way. Once I finish planking the other side, I'll take better photos with a cleaner table!

-
Thanks so much David! Hi Vahur, many thanks for checking in! I got a bit busy with school/work so I took a bit of a break from the ship. I got a bit of time again so will continue. I'll post once I finish planking above the wales which is halfway done from my last post 😁
-
That's great news, Michael! Really nice to hear. Wishing you a speedy recovery!
-
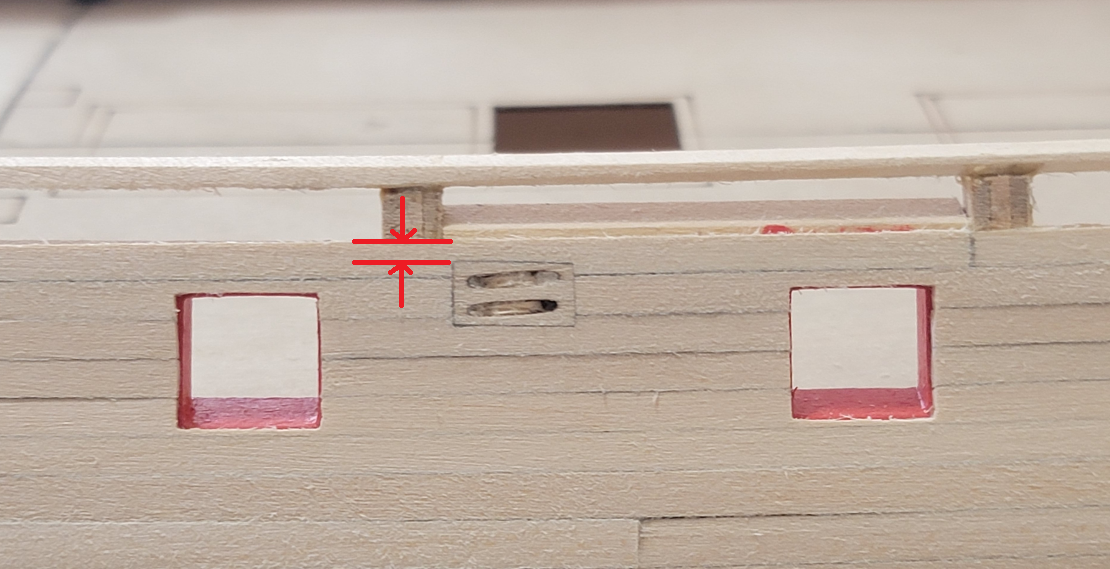
Thank you for the words of confidence, Thomas and Michael. I'll carry on with the build without worrying about this discrepancy.
-
Thank you for showing us the tank model, Thomas. She's amazing!! If that's still under construction, I can't even imagine what it will look like when finished. Please do share more photos when she's done 😀
-
Thank you Mark, and welcome! I have been following your Rochefort build for a few months now, and am amazed at how perfect your work is. It's great to have you on board! Ahhh thanks Vahur! I feel relieved now that it should not matter if they are not completely symmetric. I found using a sharp X-acto blade helps in cutting out the notches neatly. Just wished the tolerances were nicer for the wood. Some of the strips are completely different in terms of sizing and color. I did not think about planking around glued hatches, but was wondering maybe it is better to glue them in after (since we can align the planks nicely to the neighboring planks)? I will make the sweep port hatches once I finish planking till the top. And thanks again for the compliments!
-
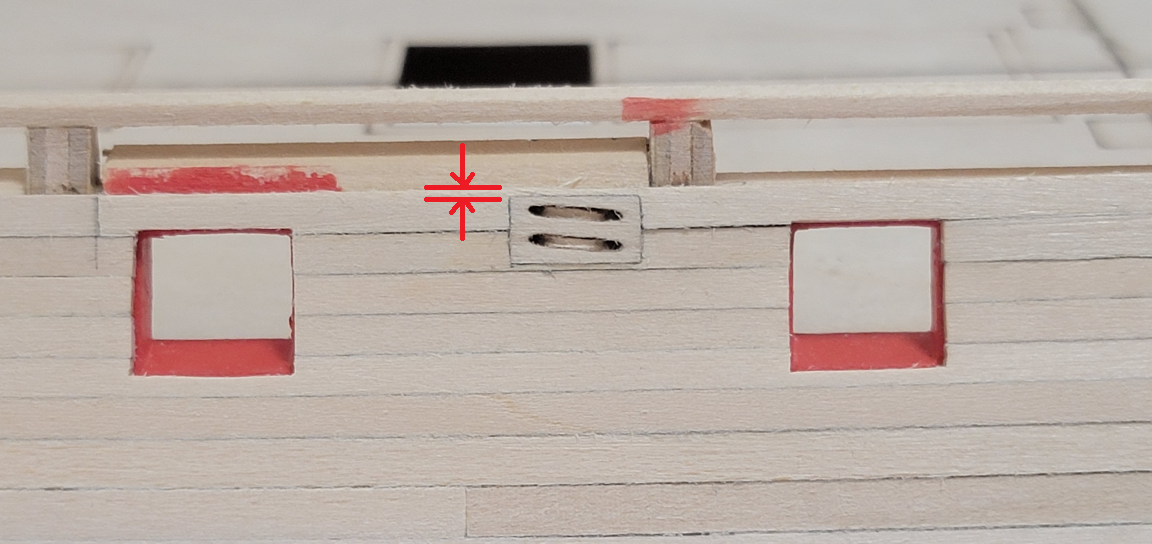
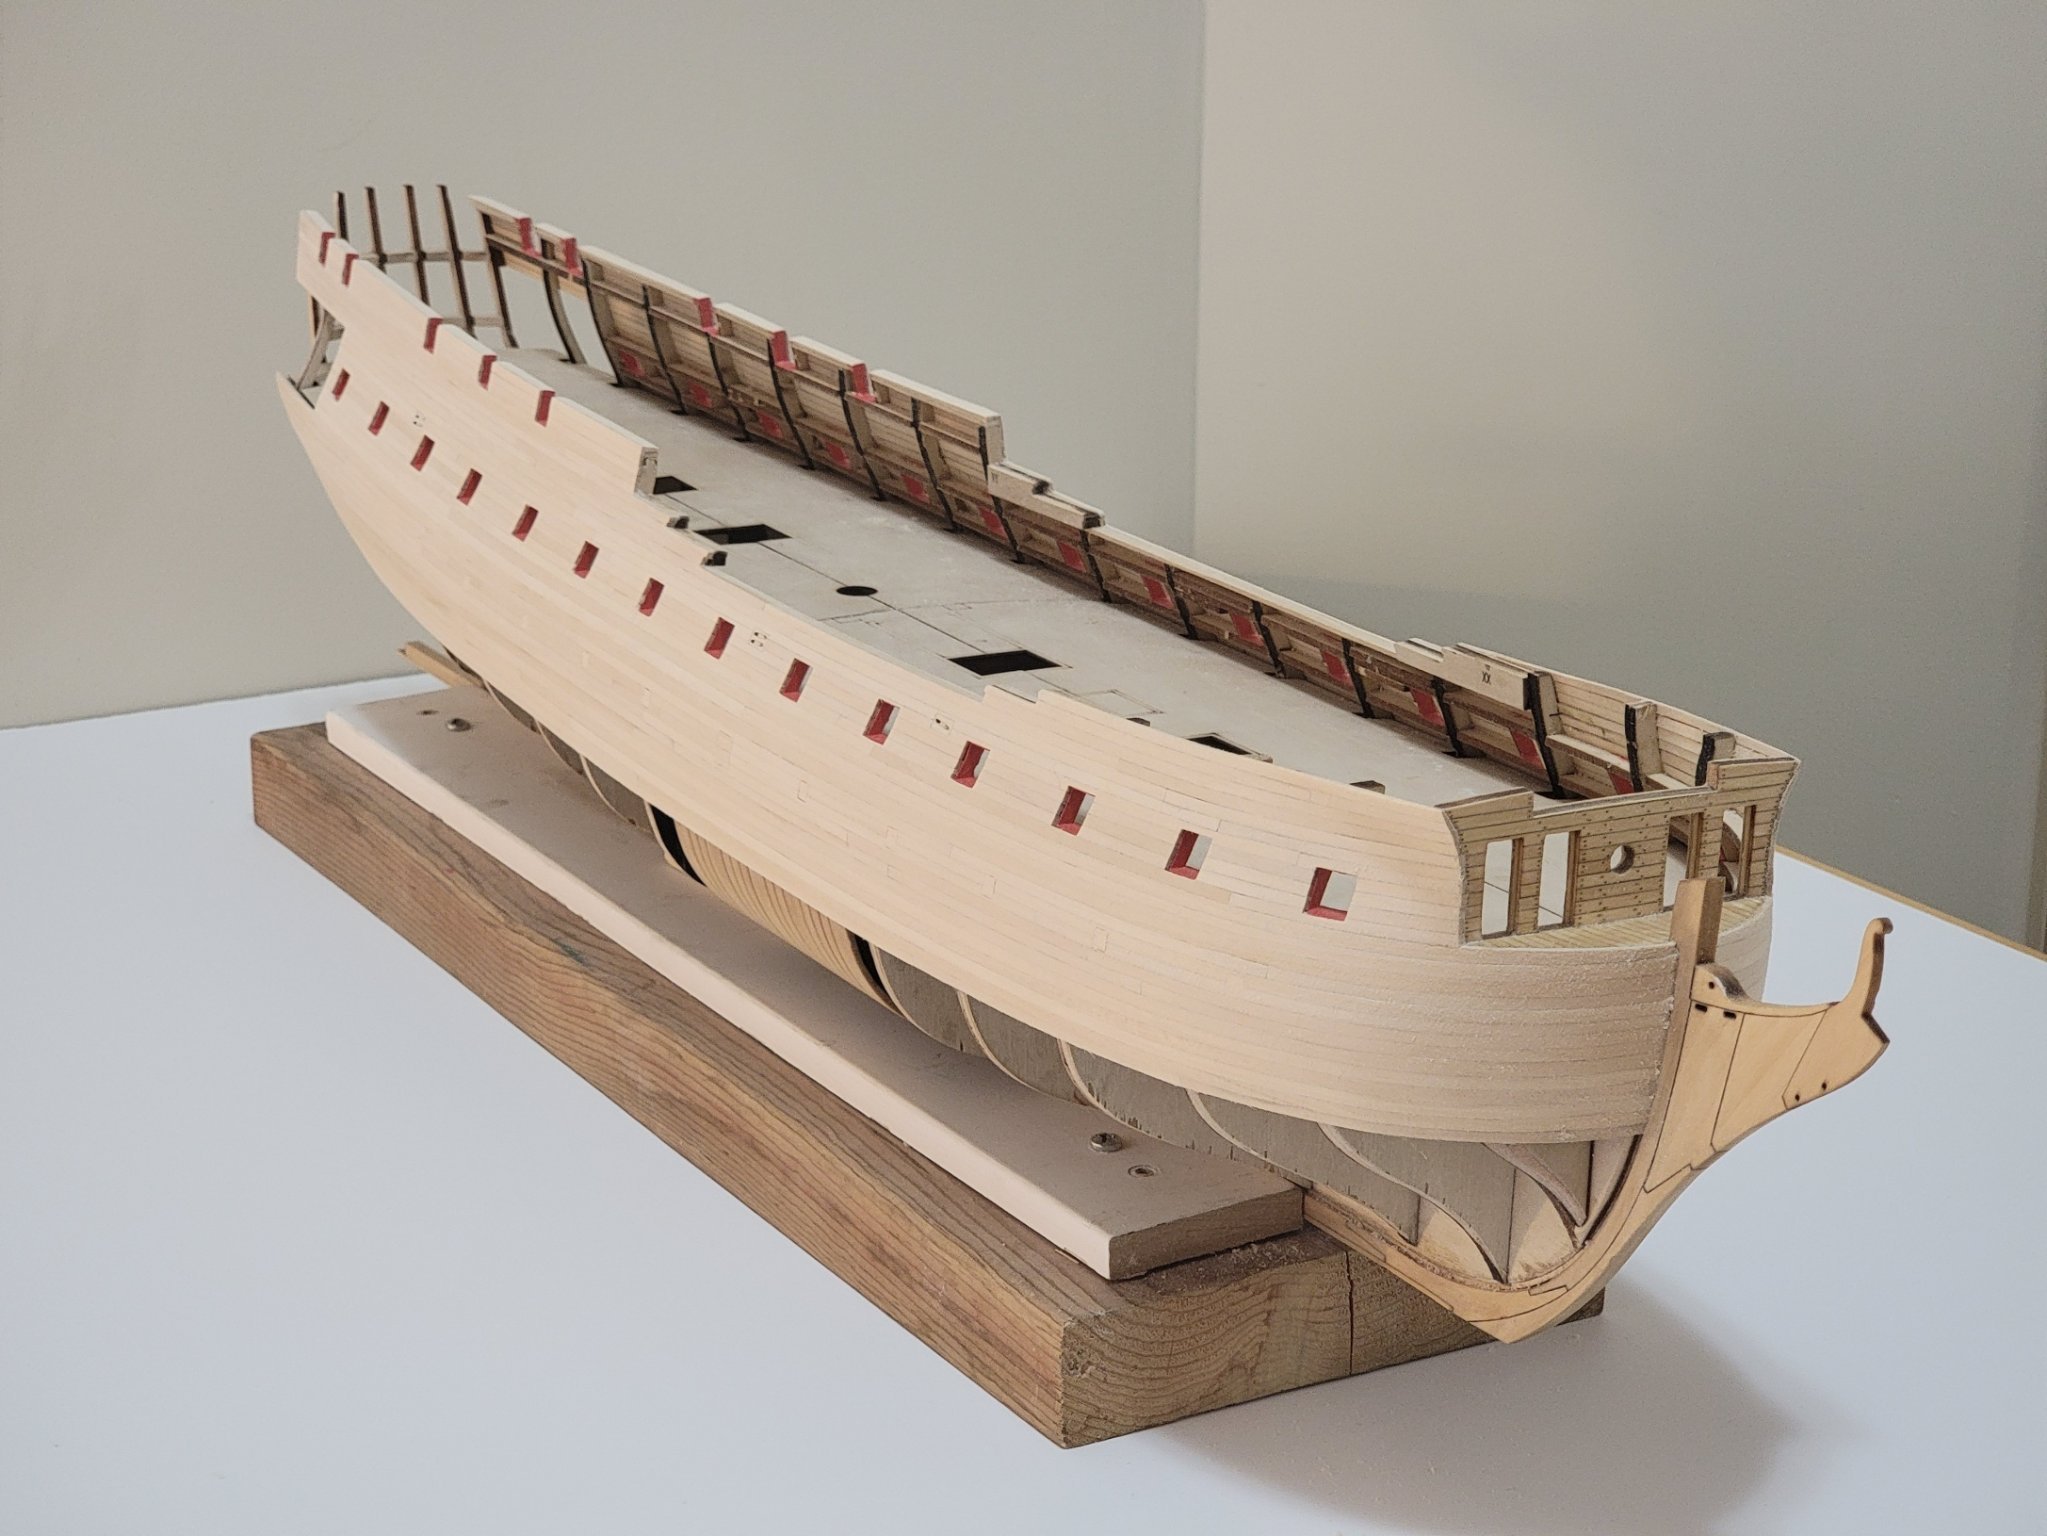
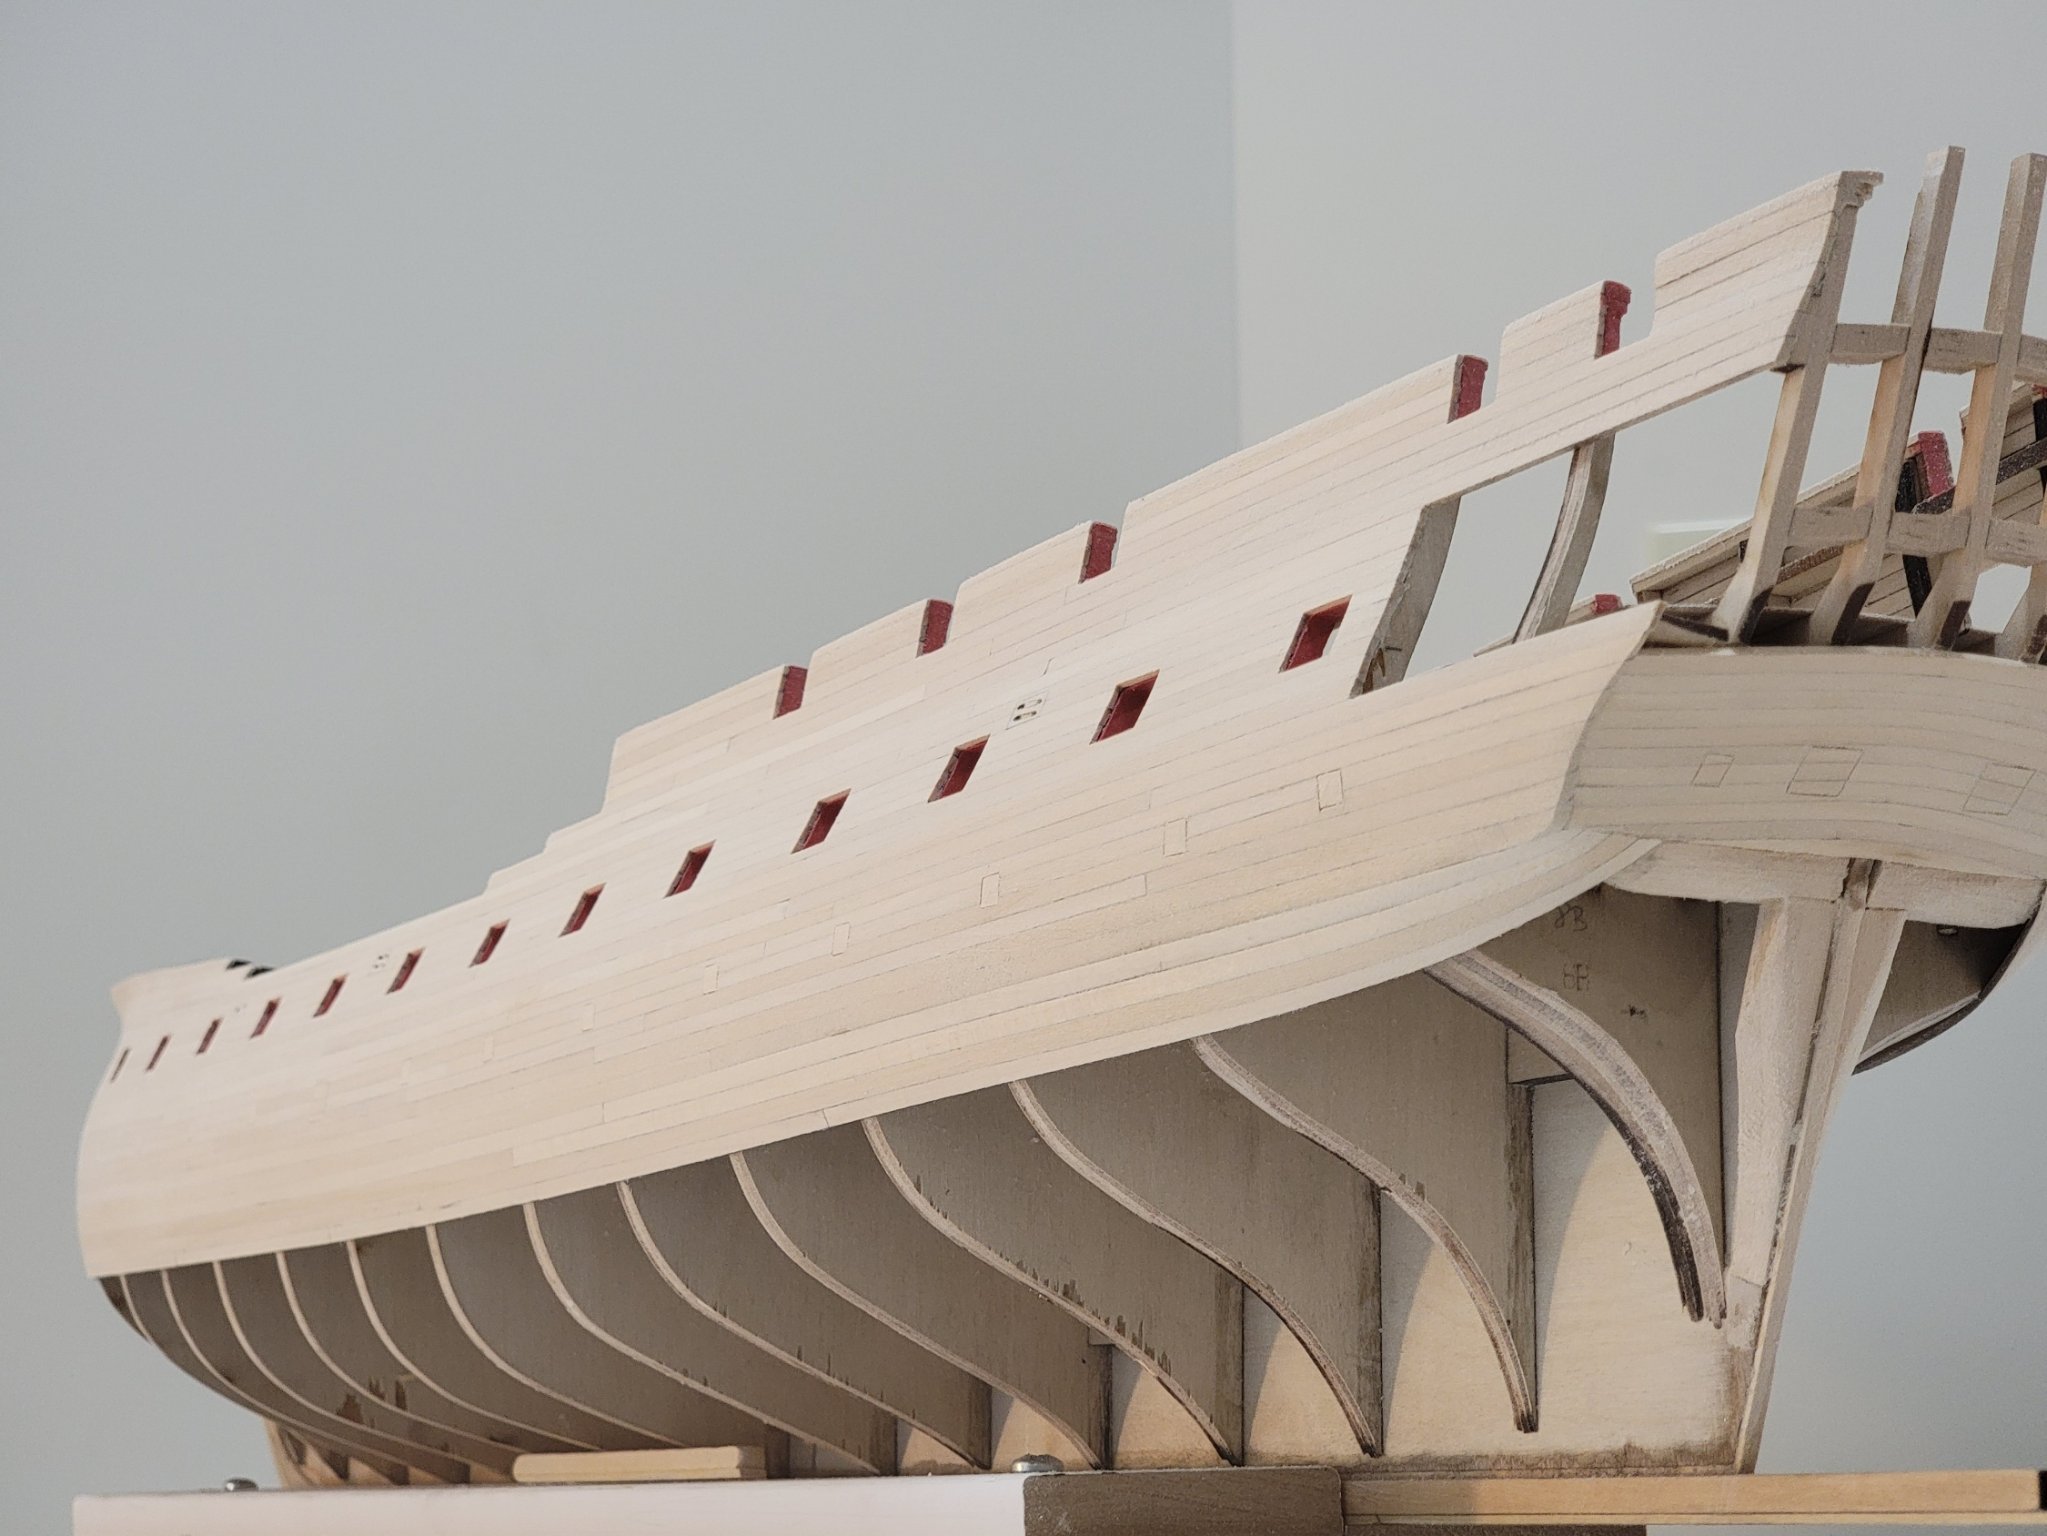
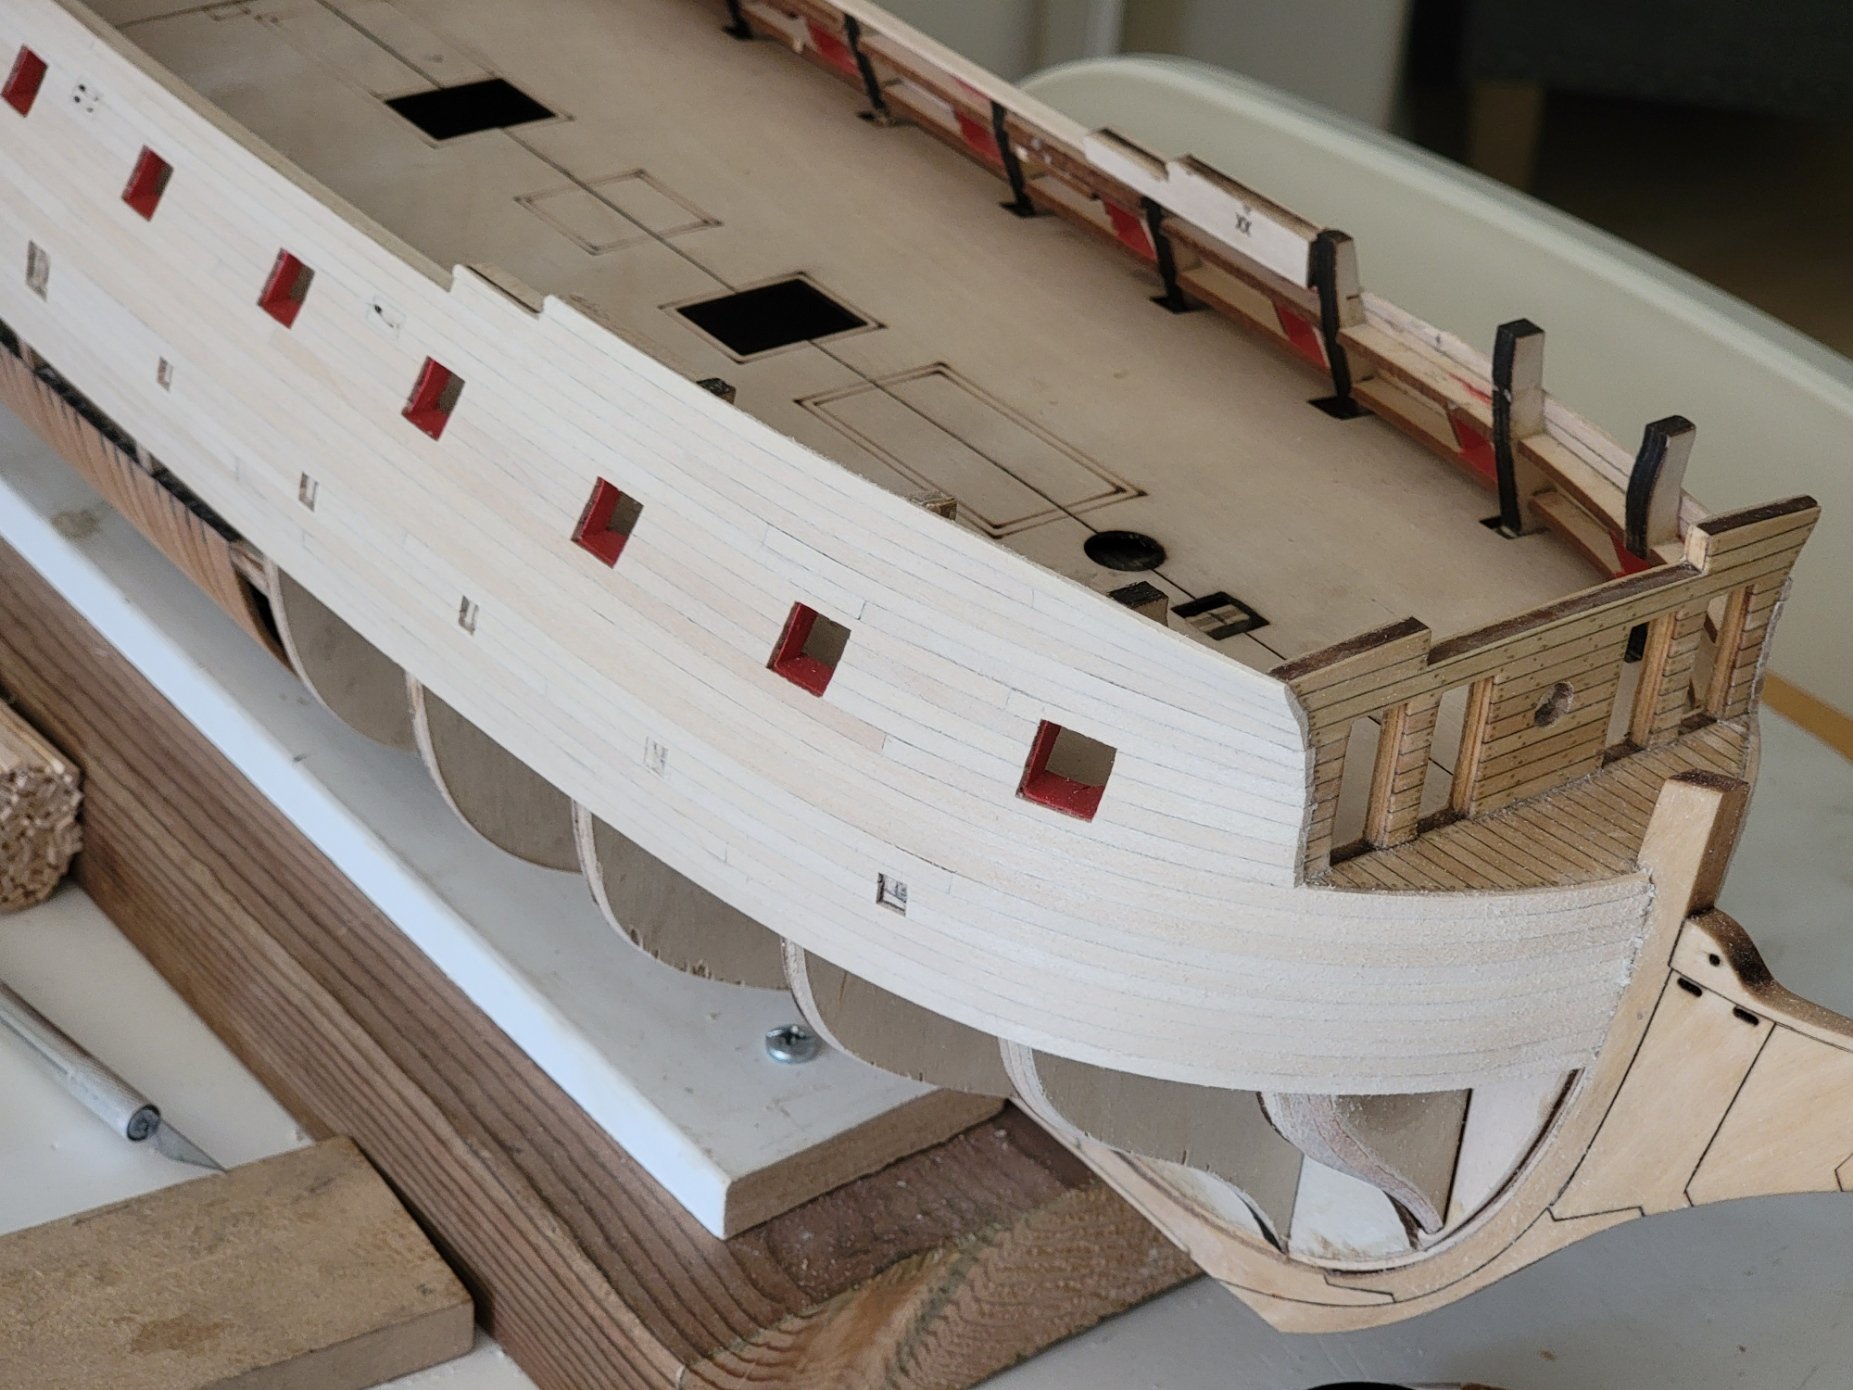
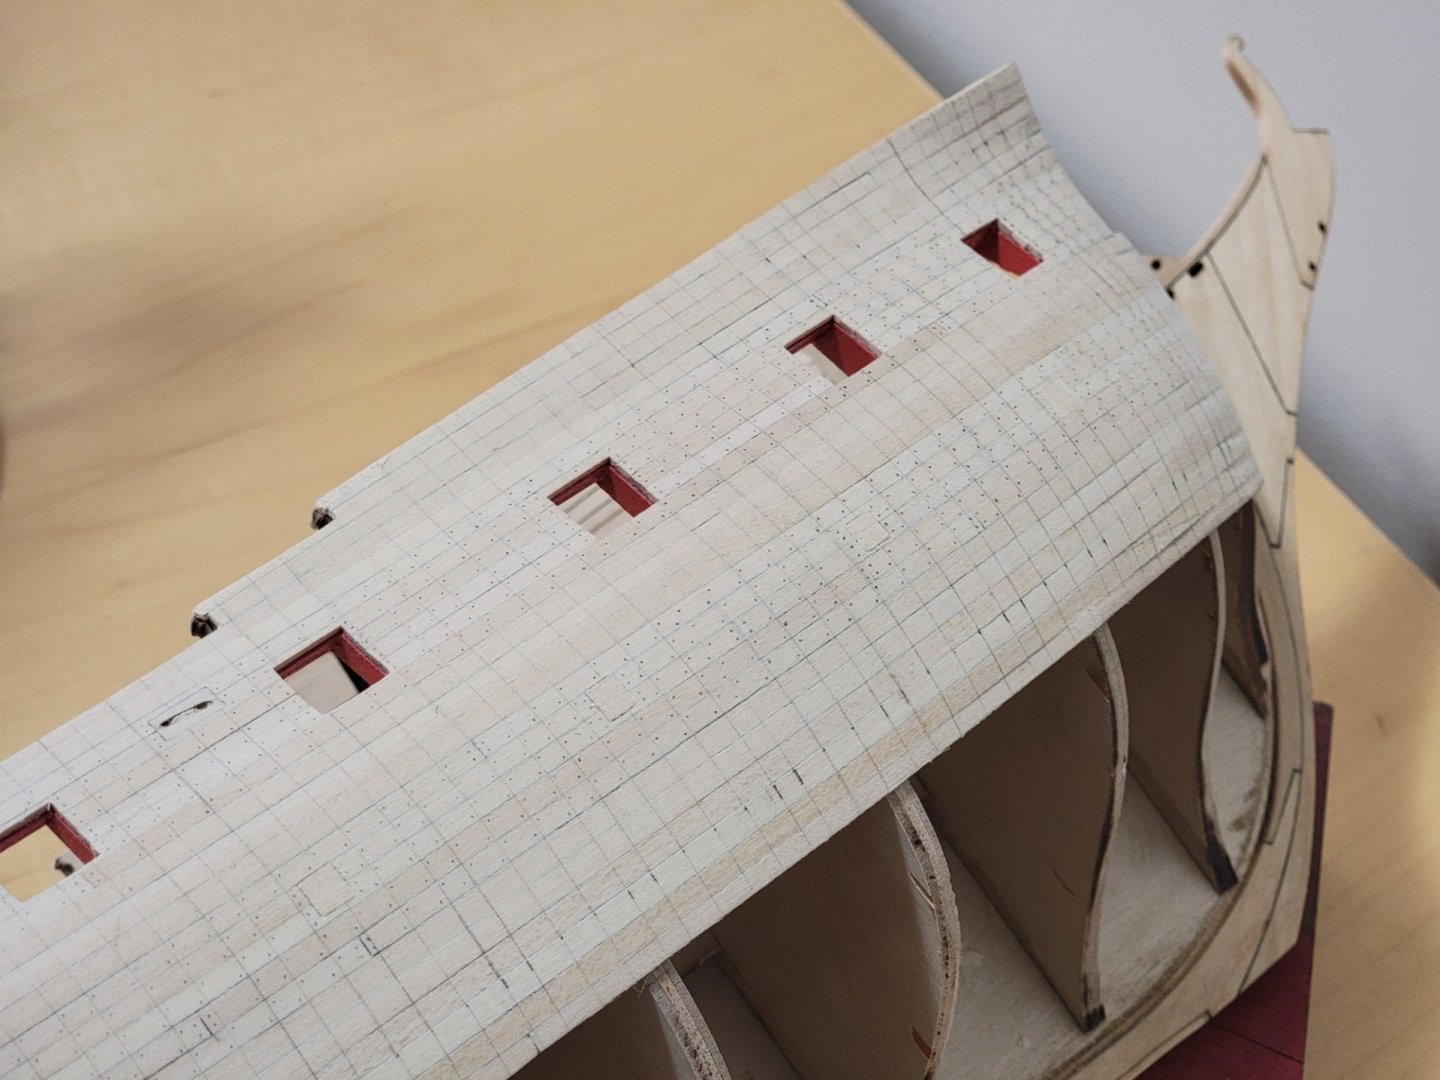
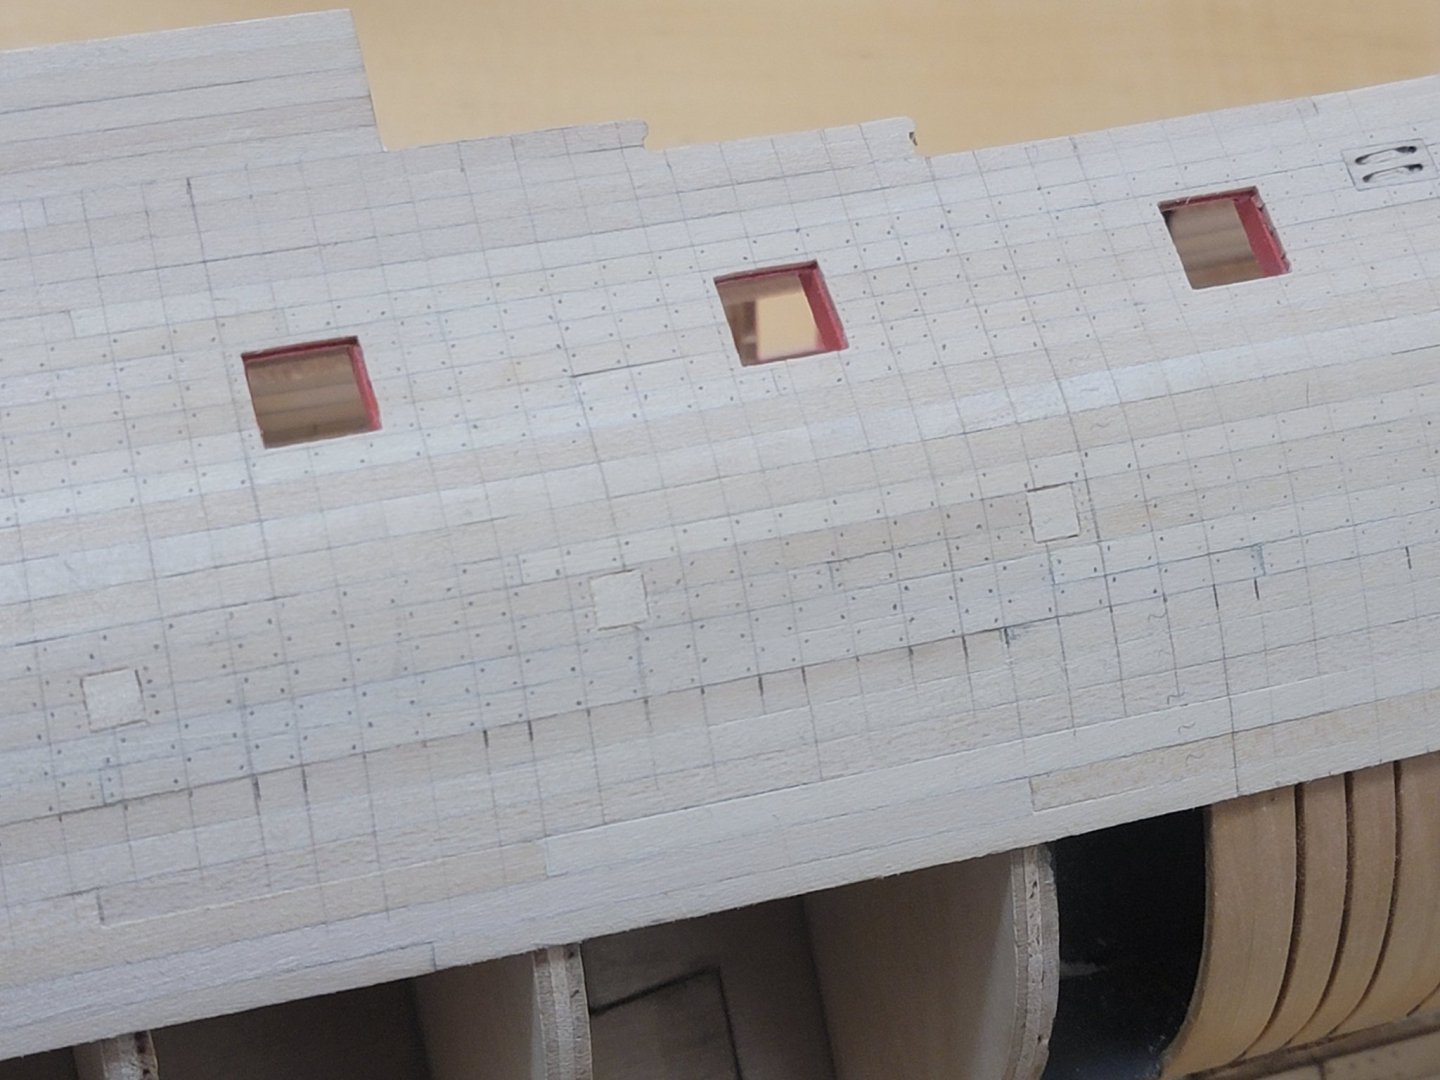
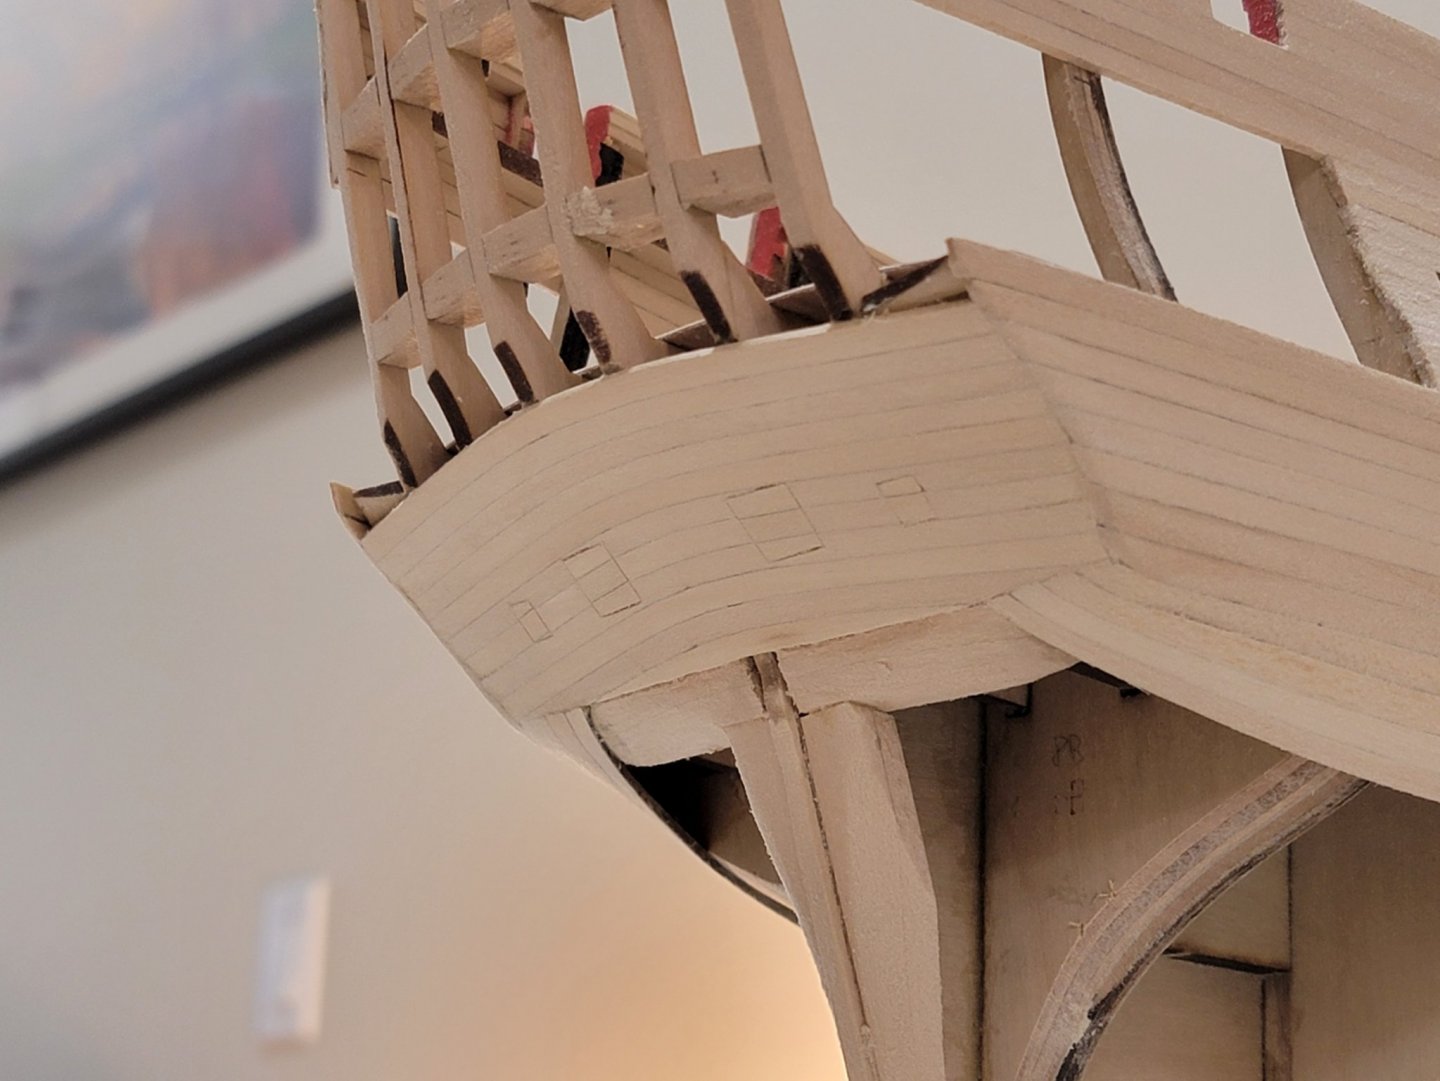
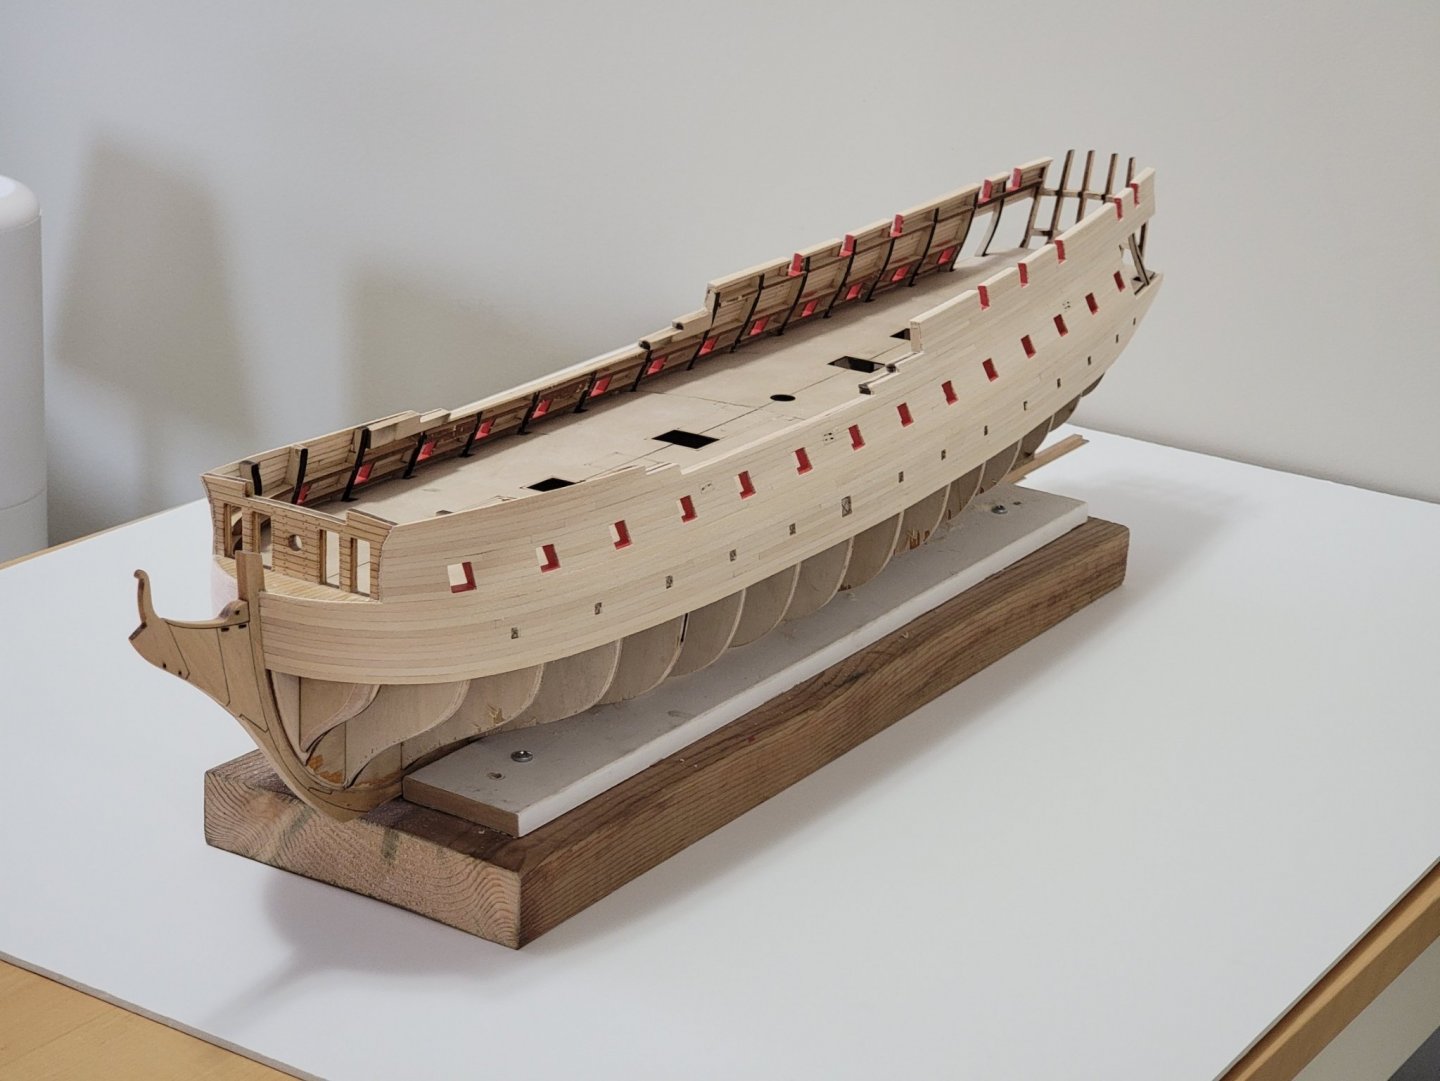
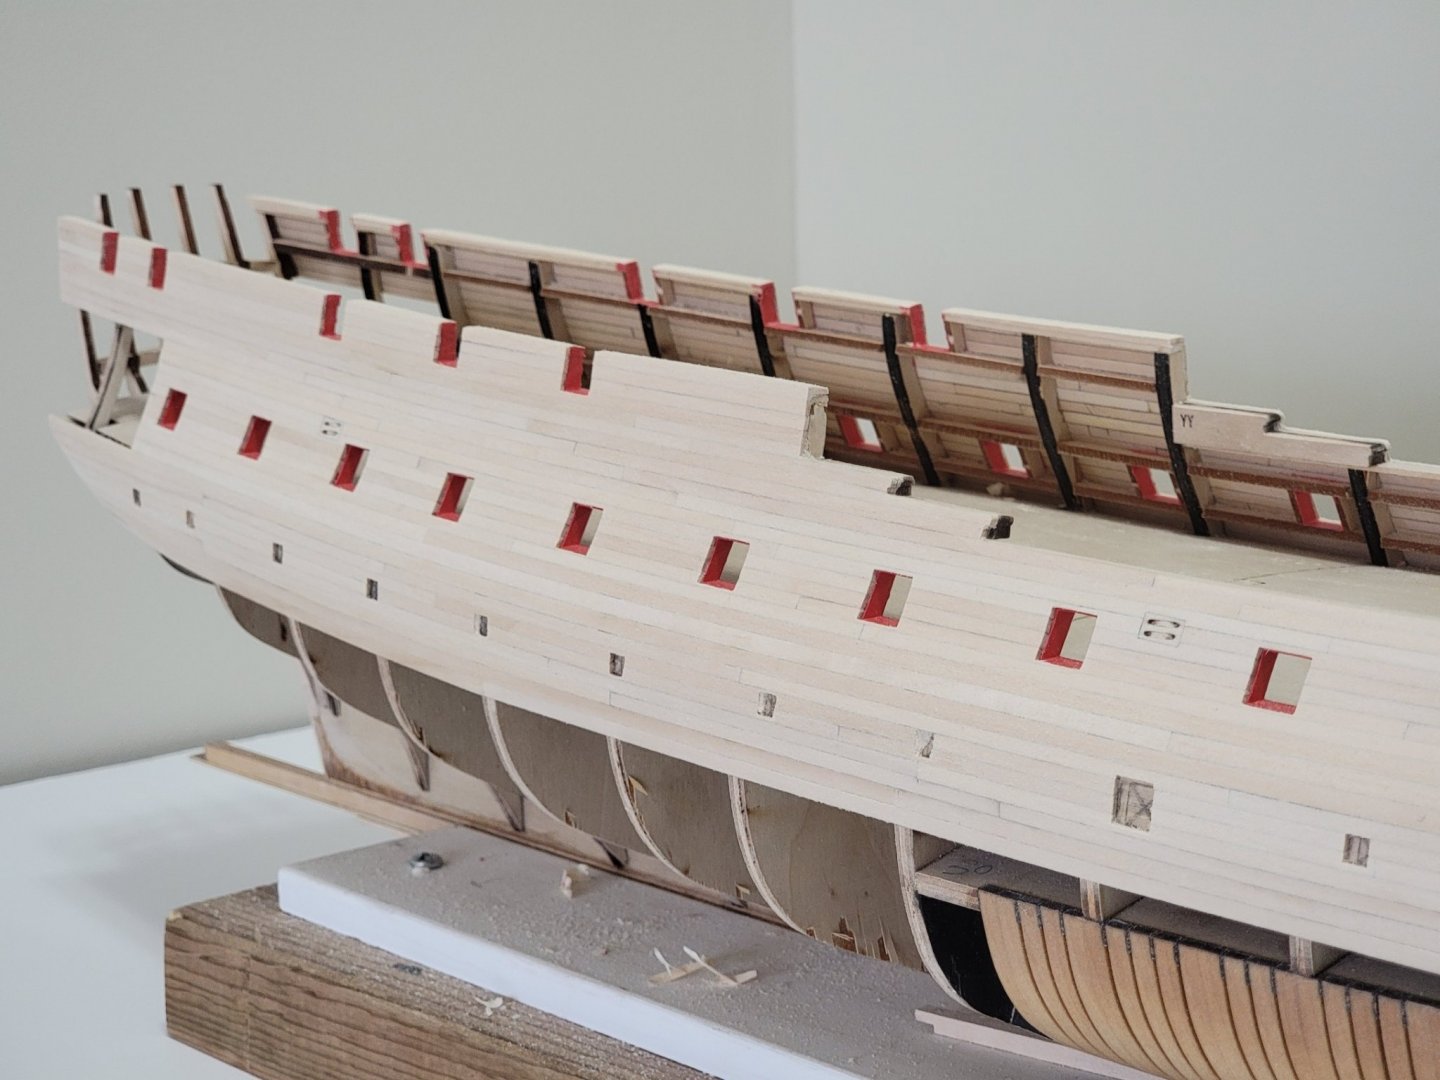
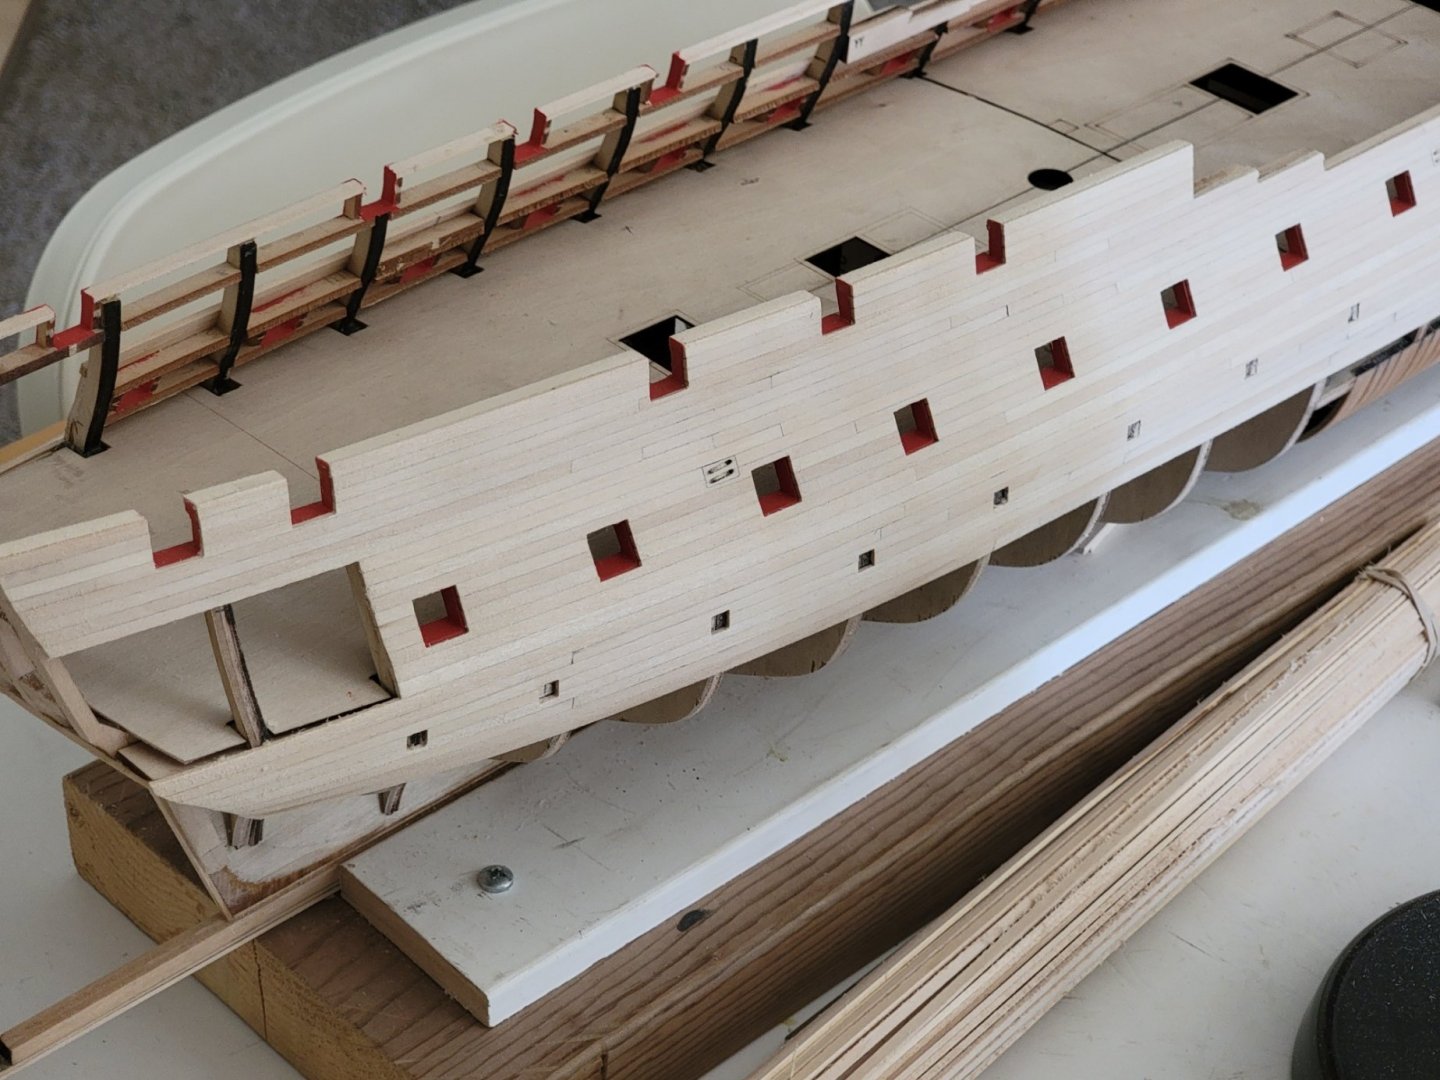
Hi Wahka, the planking is still going slow and steady 😁. I was actually going to wait till planking above the wales is finished to post an update. But this may be a perfect time to update the log since I just finished planking till the top of the first row of gun ports. Here are some pics after roughly sanding: I also encountered a bit of a problem, not sure how bad it would affect the build later on.. I noticed the planking midship is not very symmetric. The sheaves in this location are very symmetric (I measured from the top of the rail and both sides have the same distances). So planking midship starboard side appear to be higher than the portside. Here is a pic showing what I mean: Portside: Starboard: You can also kind of see this in the planks just below the gun ports. The spacing in the starboard side is smaller than the portside I have no idea how this happened since the initial plank run was symmetric (or perhaps I measured wrong!). Maybe this is not too big of a deal and I am overthinking it, so let's see what happens! Any input would also be appreciated 🙂