


ObviousNewbie
-
Posts
211 -
Joined
-
Last visited
Content Type
Profiles
Forums
Gallery
Events
Posts posted by ObviousNewbie
-
-
13 hours ago, Kyak said:
A question: The planks for second planking are very thin: 0.5mm and ther are difficult to bend sideways. Any tips????
Great job on the planking, congrats! Still trying to get my head around the technique, so your descriptions and pictures are really helpful.
The Sapelli veneer can be a handful, very brittle, difficult to cut into shape. I had no issue bending sideways as long as the strip was long enough. I used 2 strip halves, cut in different places so they wouldn't align on the hull.
I didn't use the cobblers glue which they're so fond of in the instructions, as you can hardly correct afterwards (and it stinks to high heaven). Used Mantua aliphatic glue, at key points (bow, any bends etc), used a small dab of CA to keep the strip into place until the PVA sets. Be especially careful around the bow, as the strips have a tendency to pop up and leave a nasty gap.
Hope this helps!
-
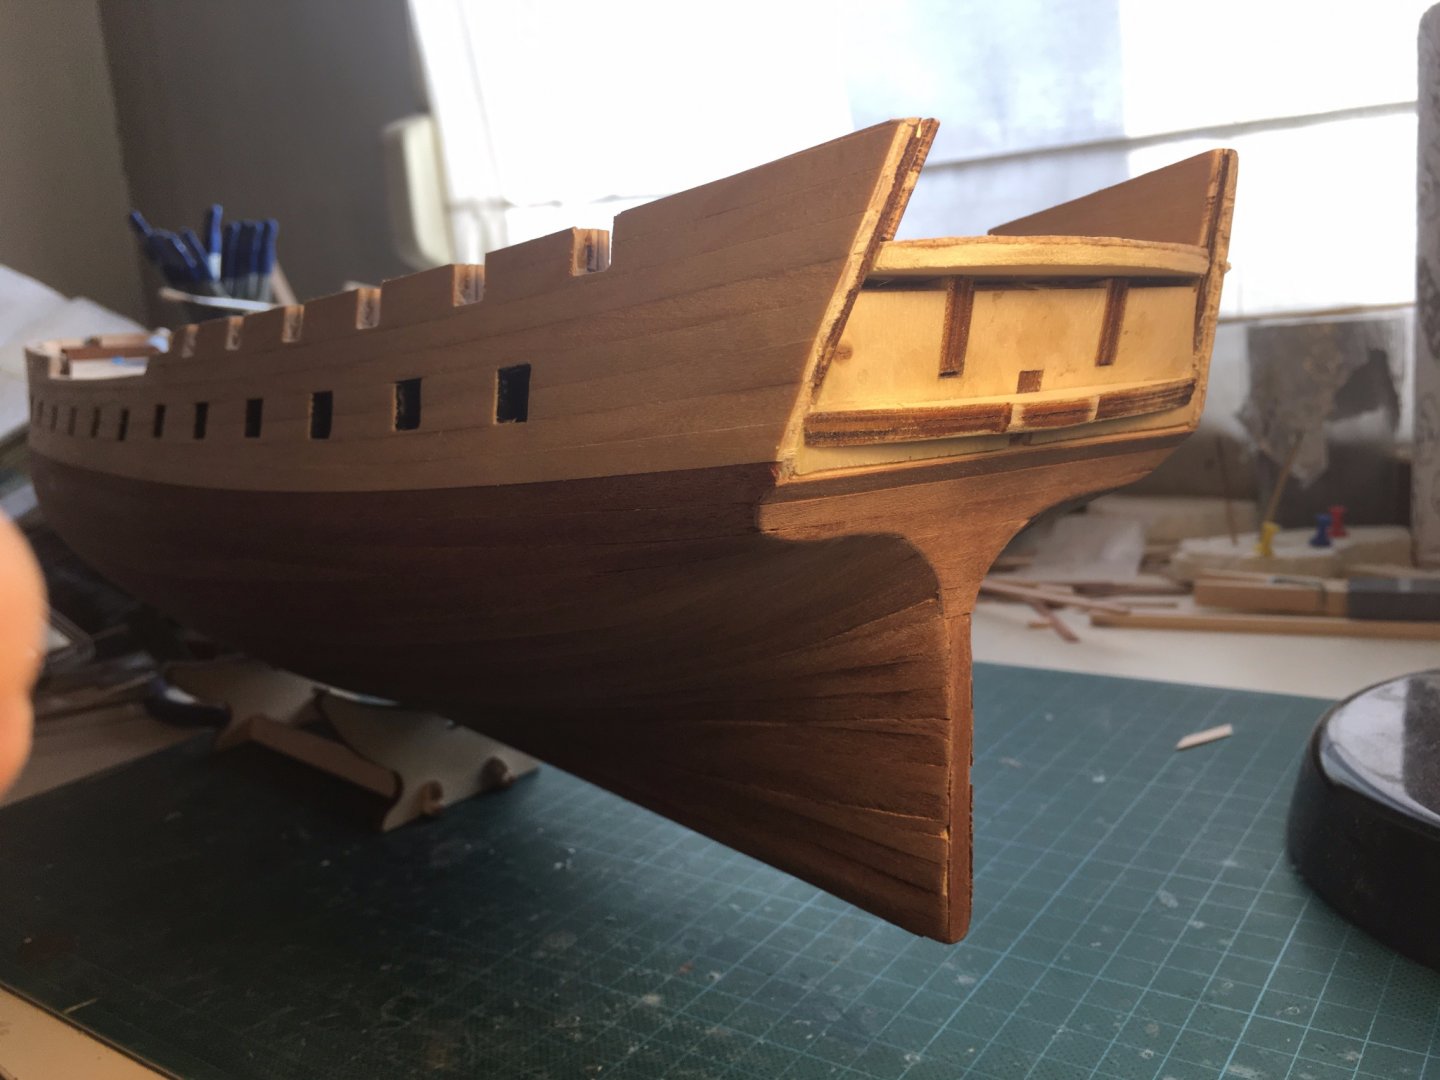
Hi all, thnx for checking in. It's been a while, but I've been busy:
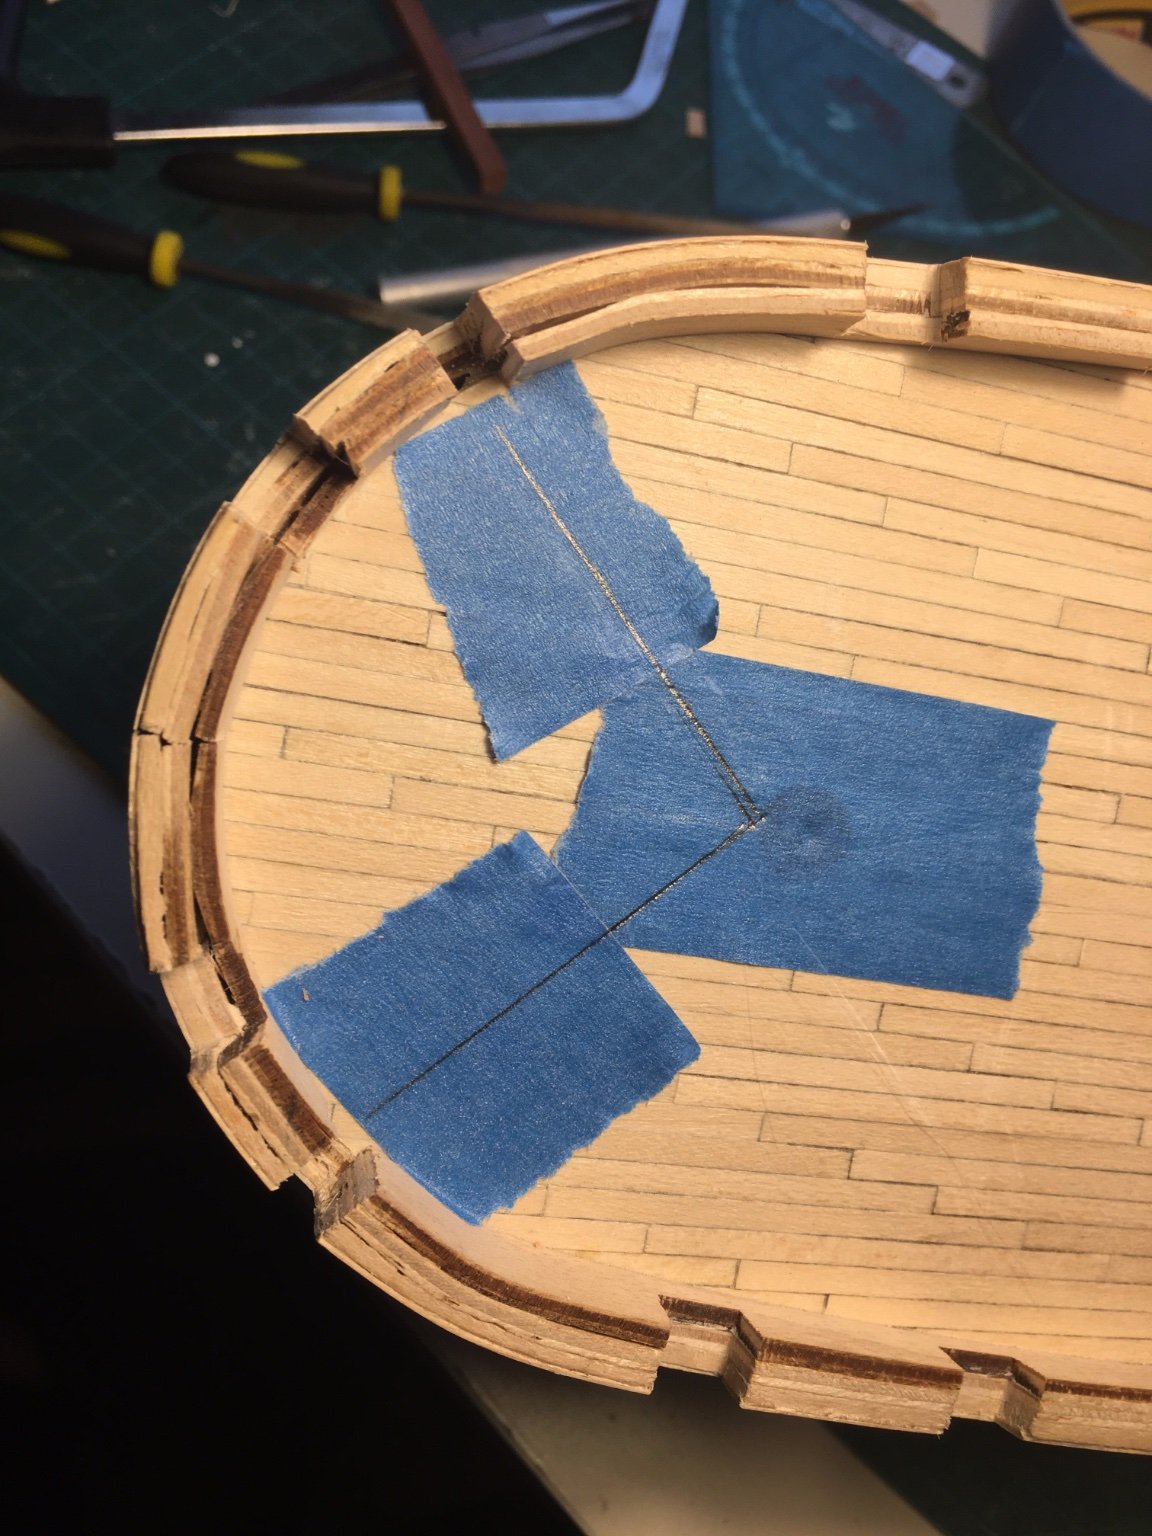
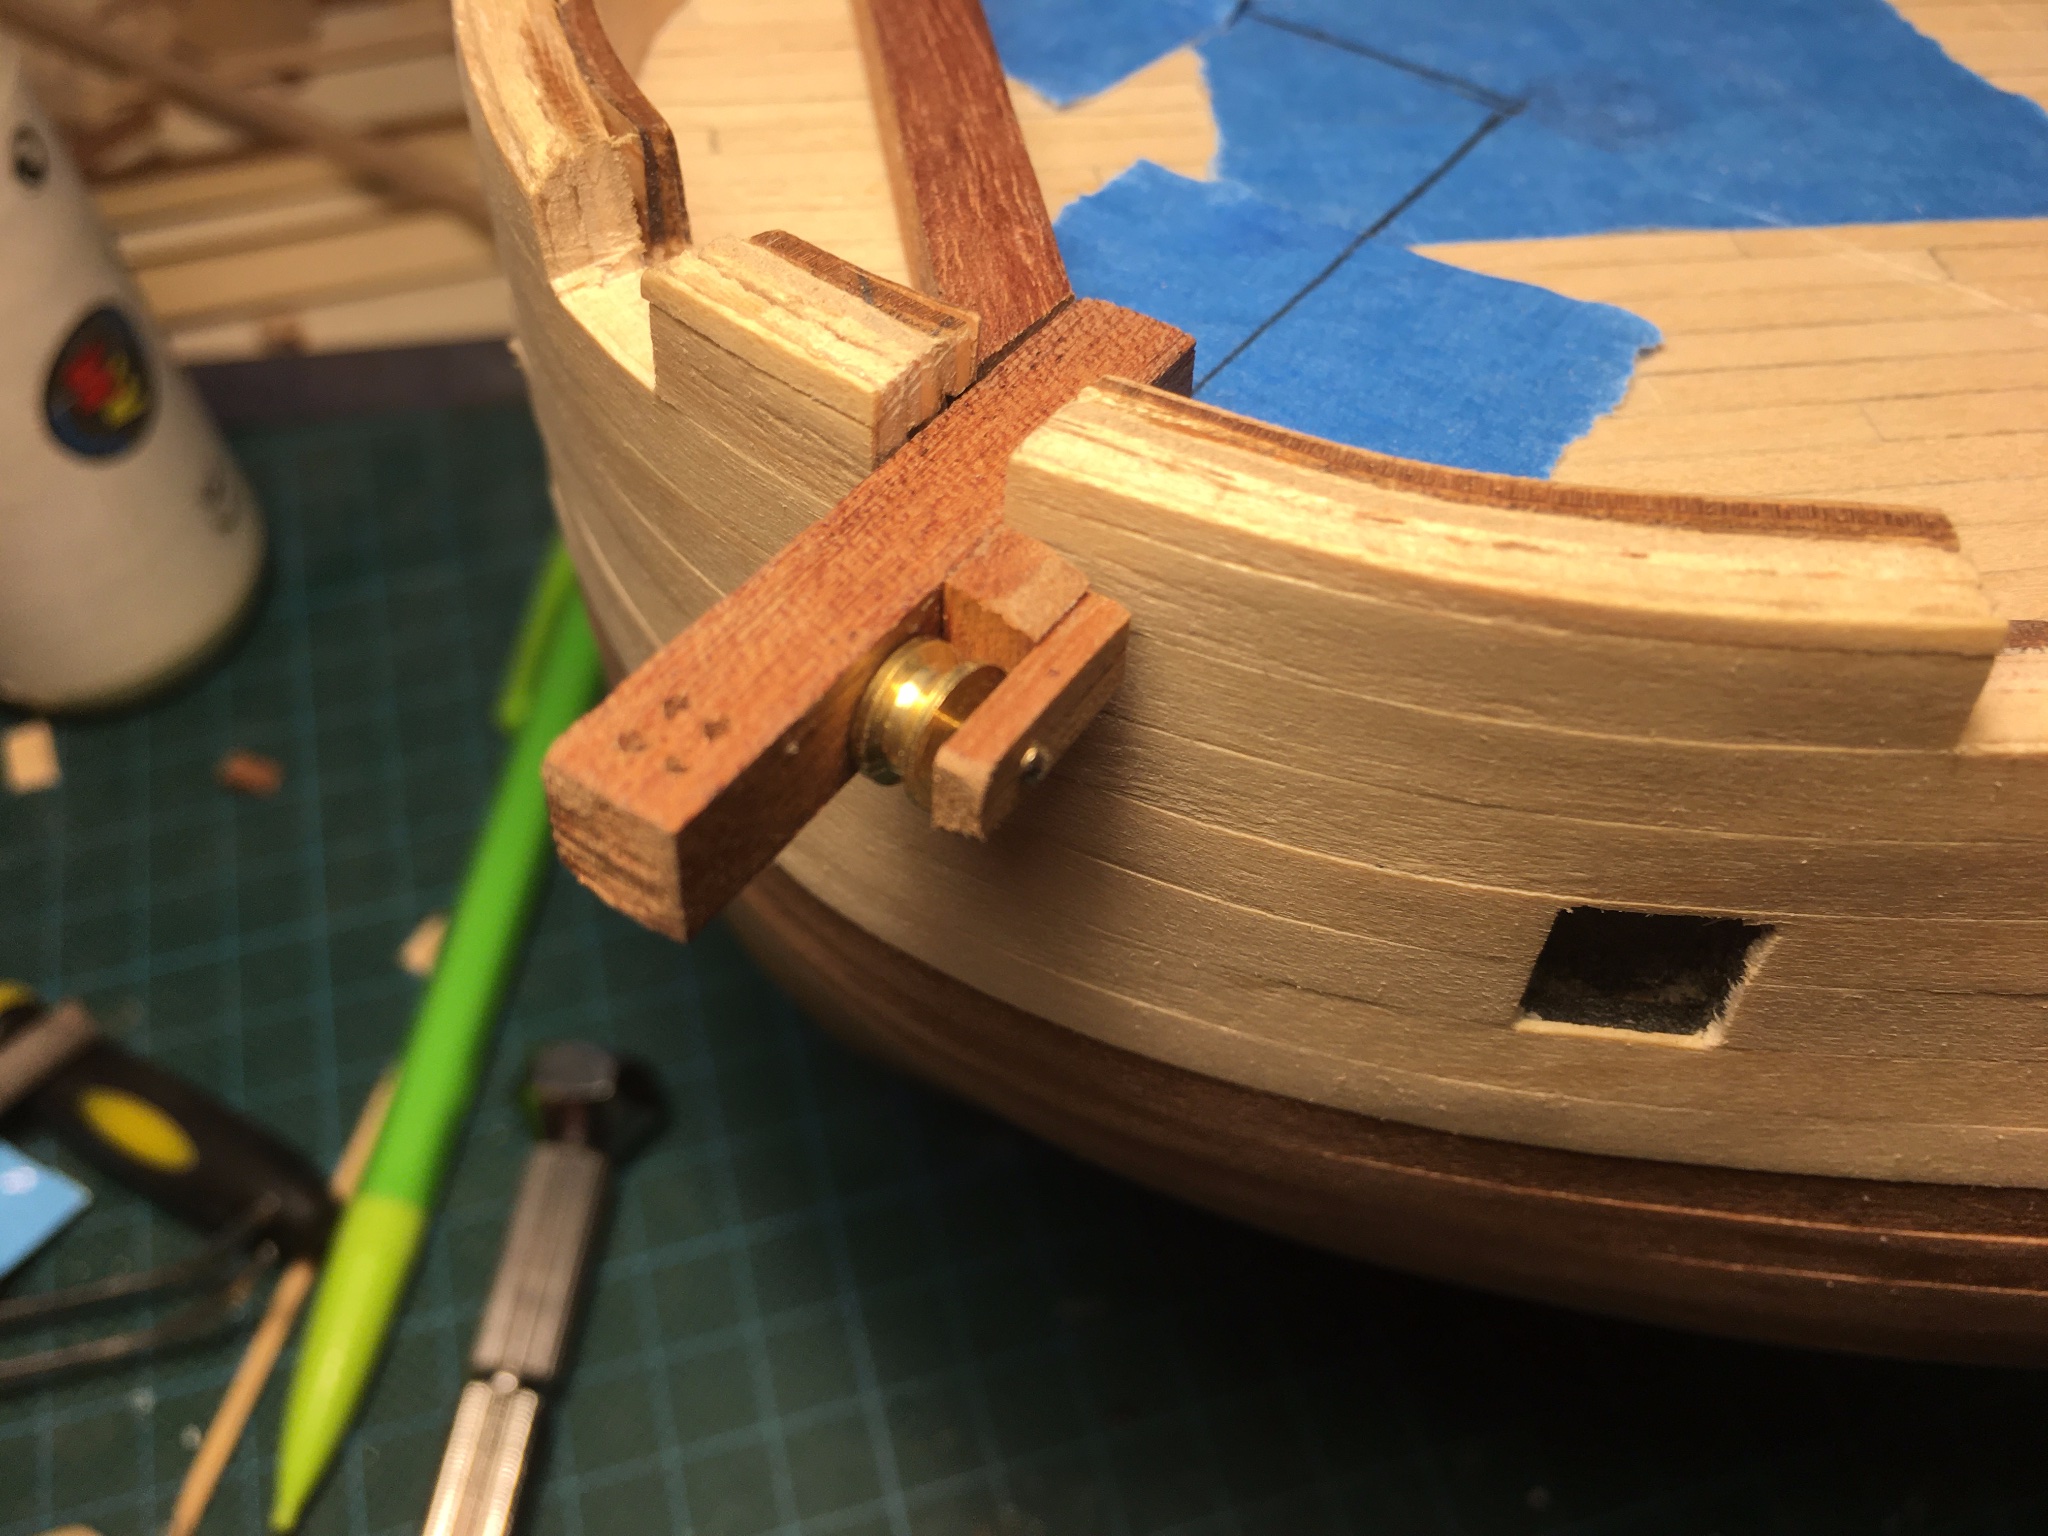
First the catheads: Occre's instructions show the catheads at a very shallow angle, but the plans mark a 45° angle from the heartline. This seemed to make more sense so I went with that. The instructions also showed how to construct off-boat, and then magically fit it into place. Didn't trust that too much, so went for a different approach:
Marked the angles on tape using the middle of the openings as a reference:

Then constructed the catheads off boat, making sure they fit properly, and marking the crossbeam:
After some fiddling, found the correct angles:

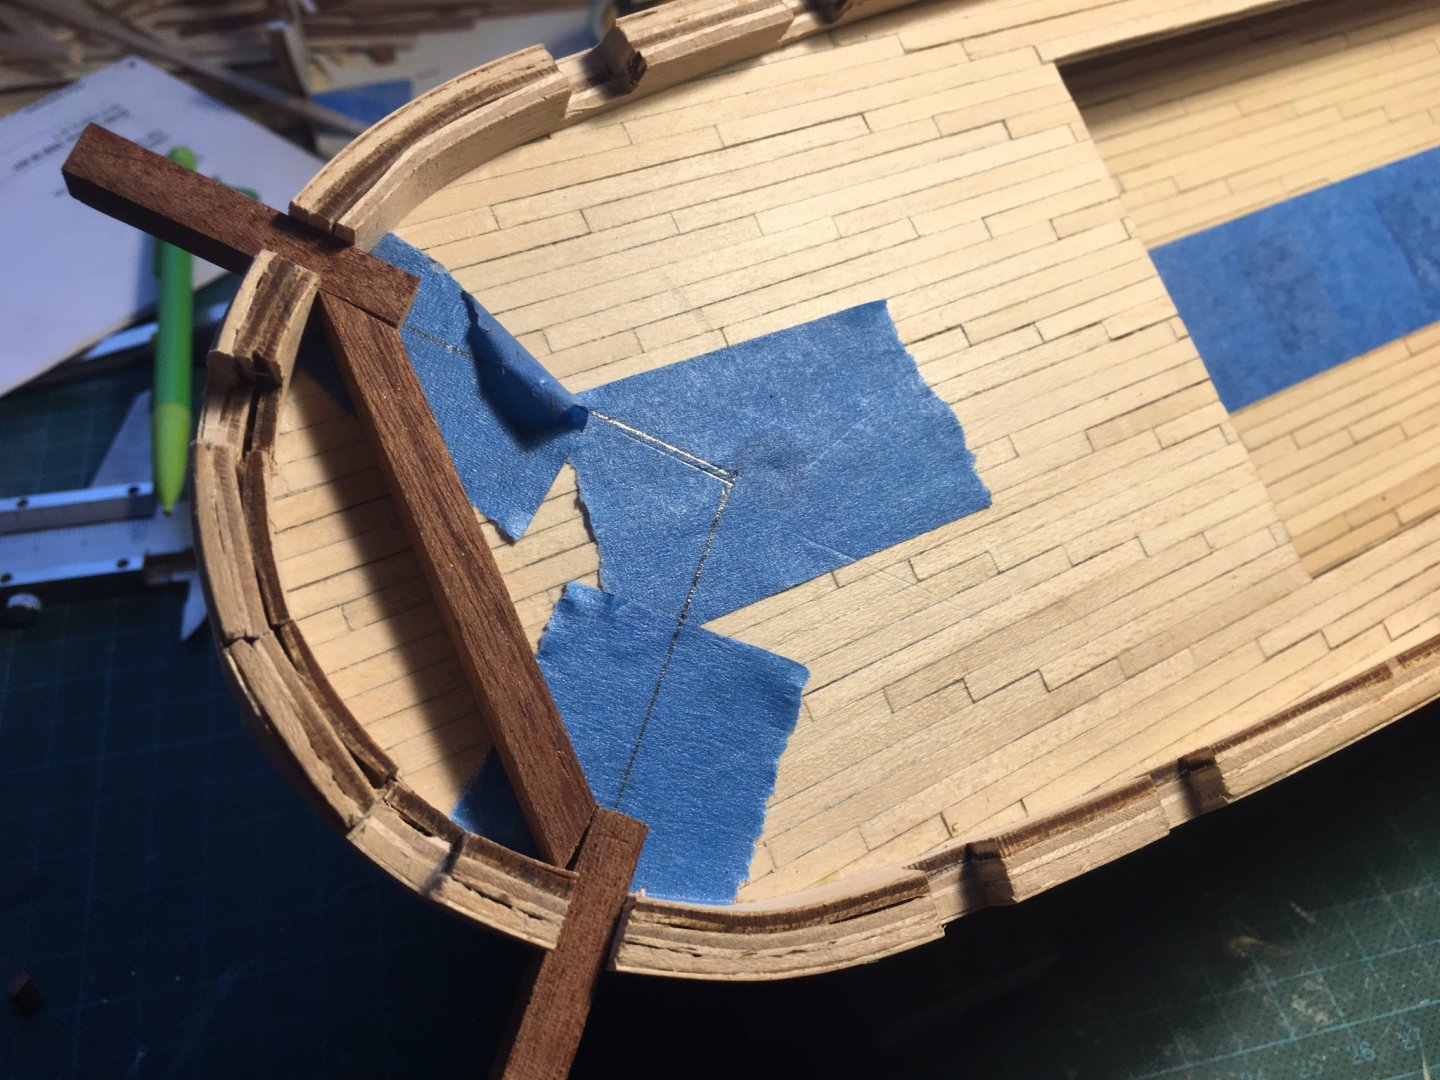
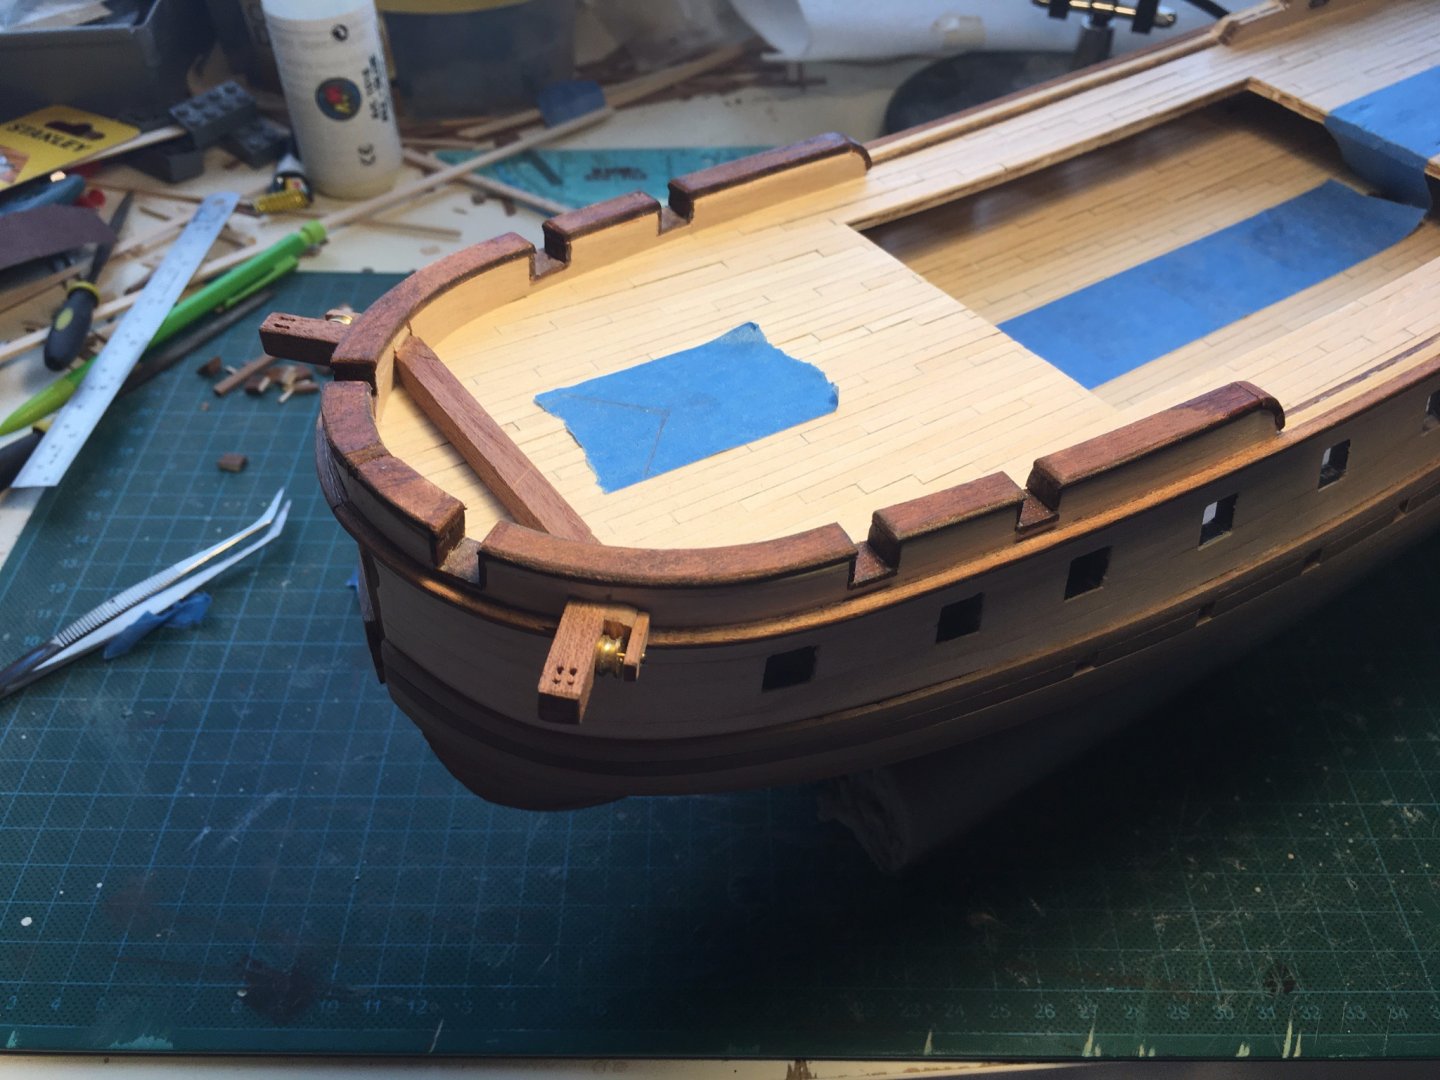
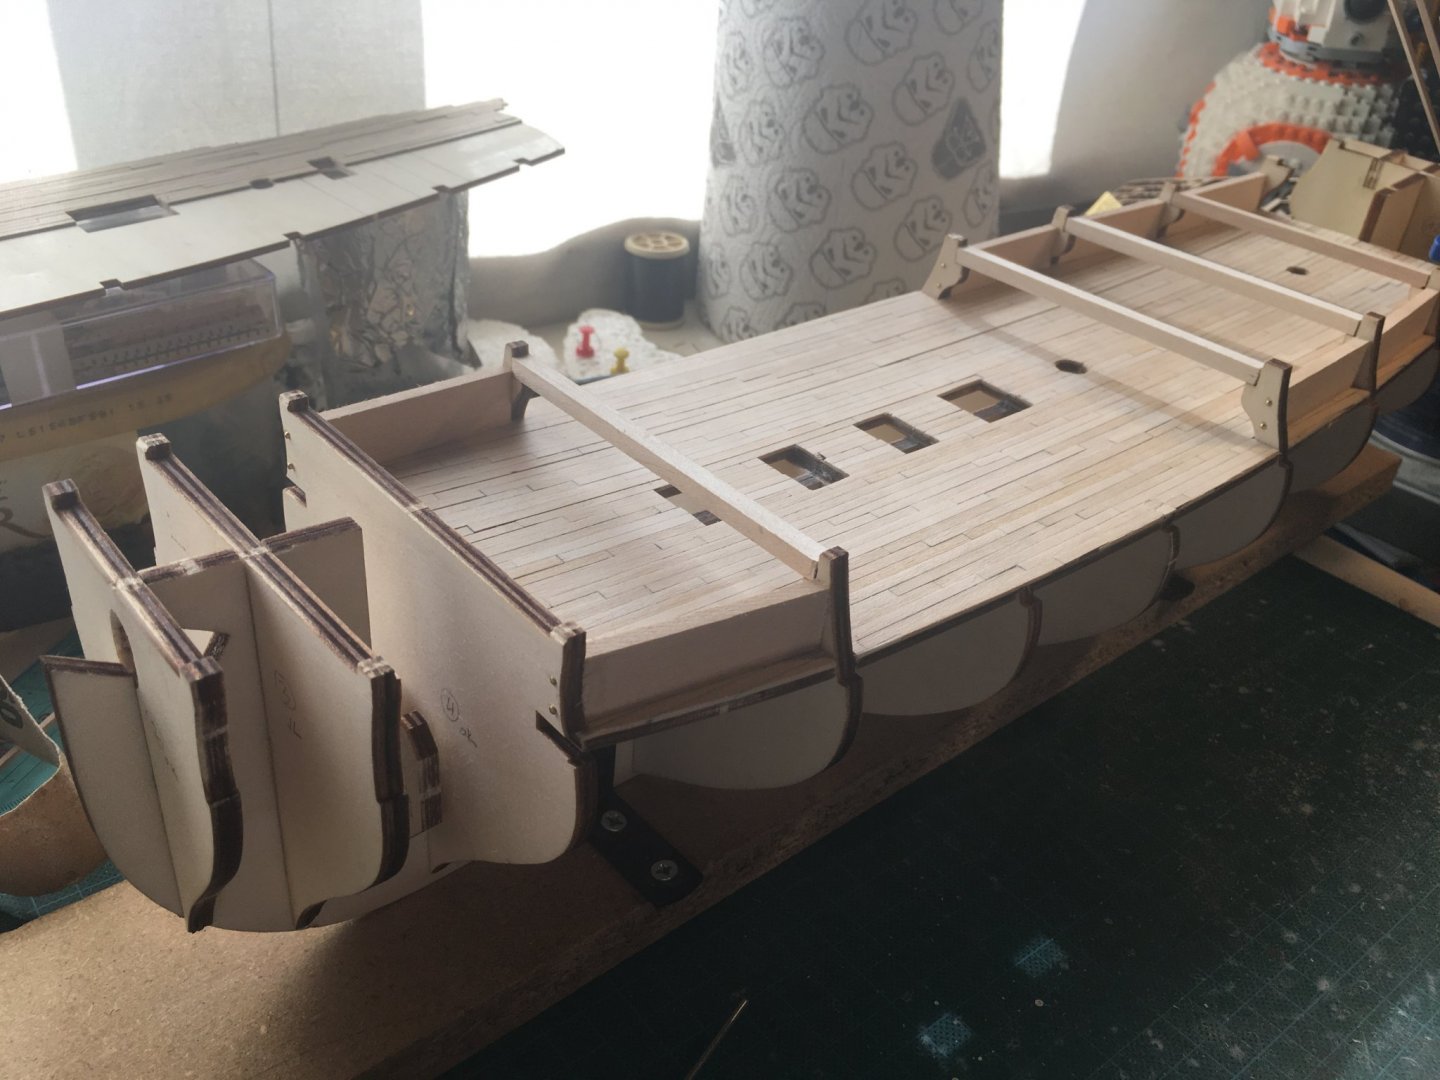
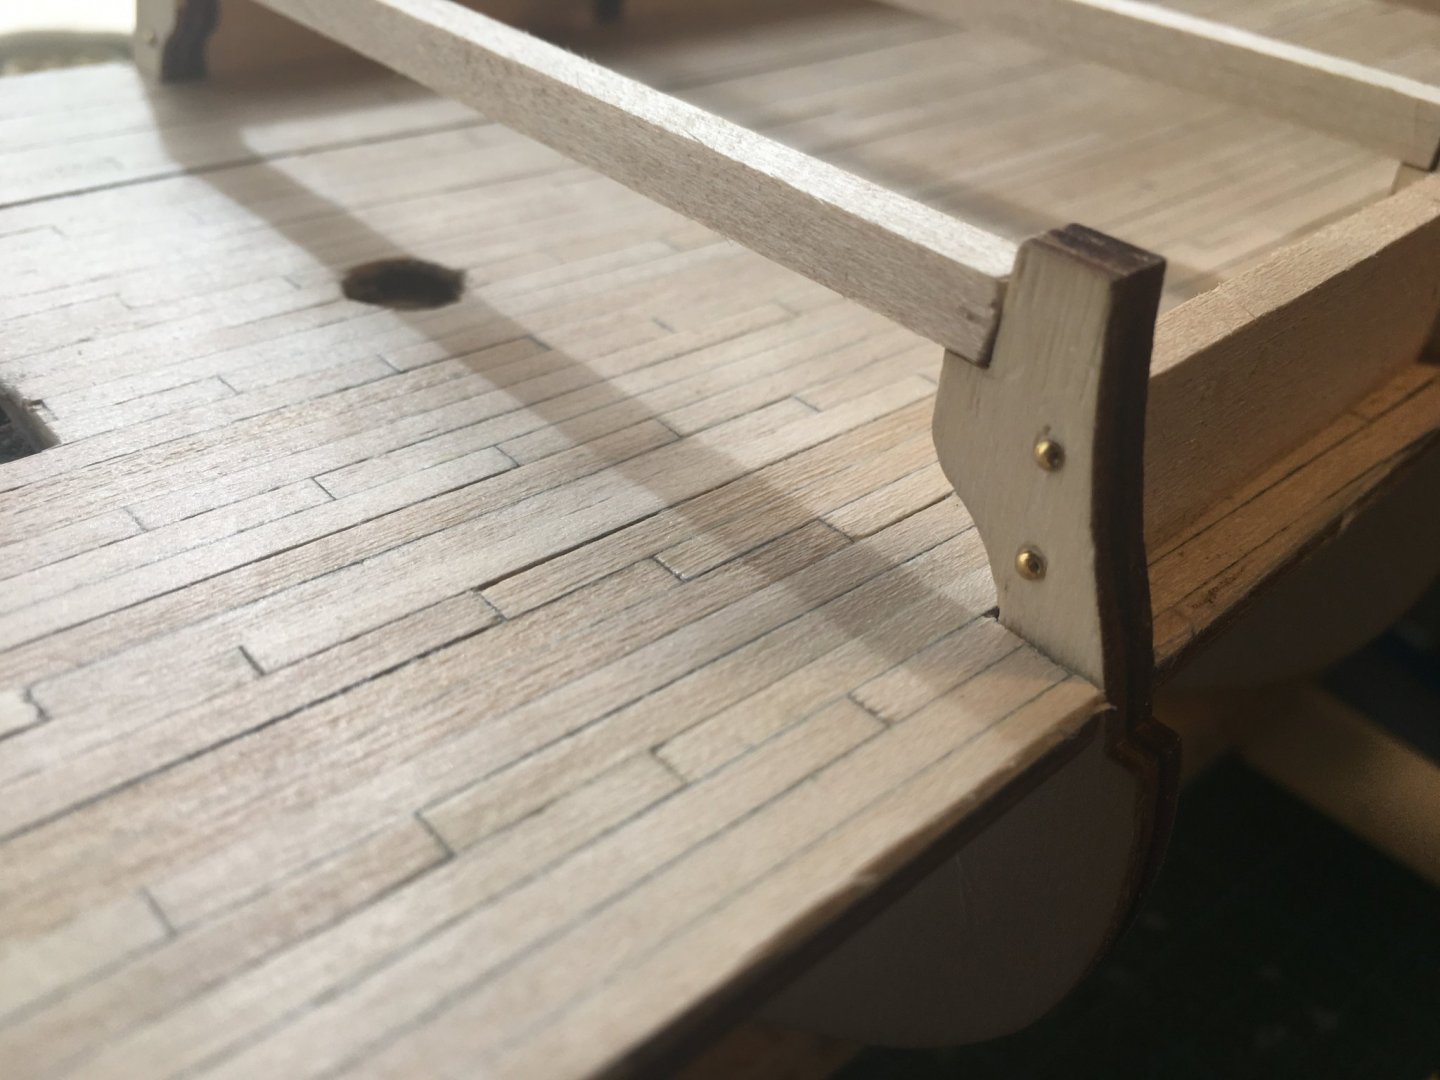
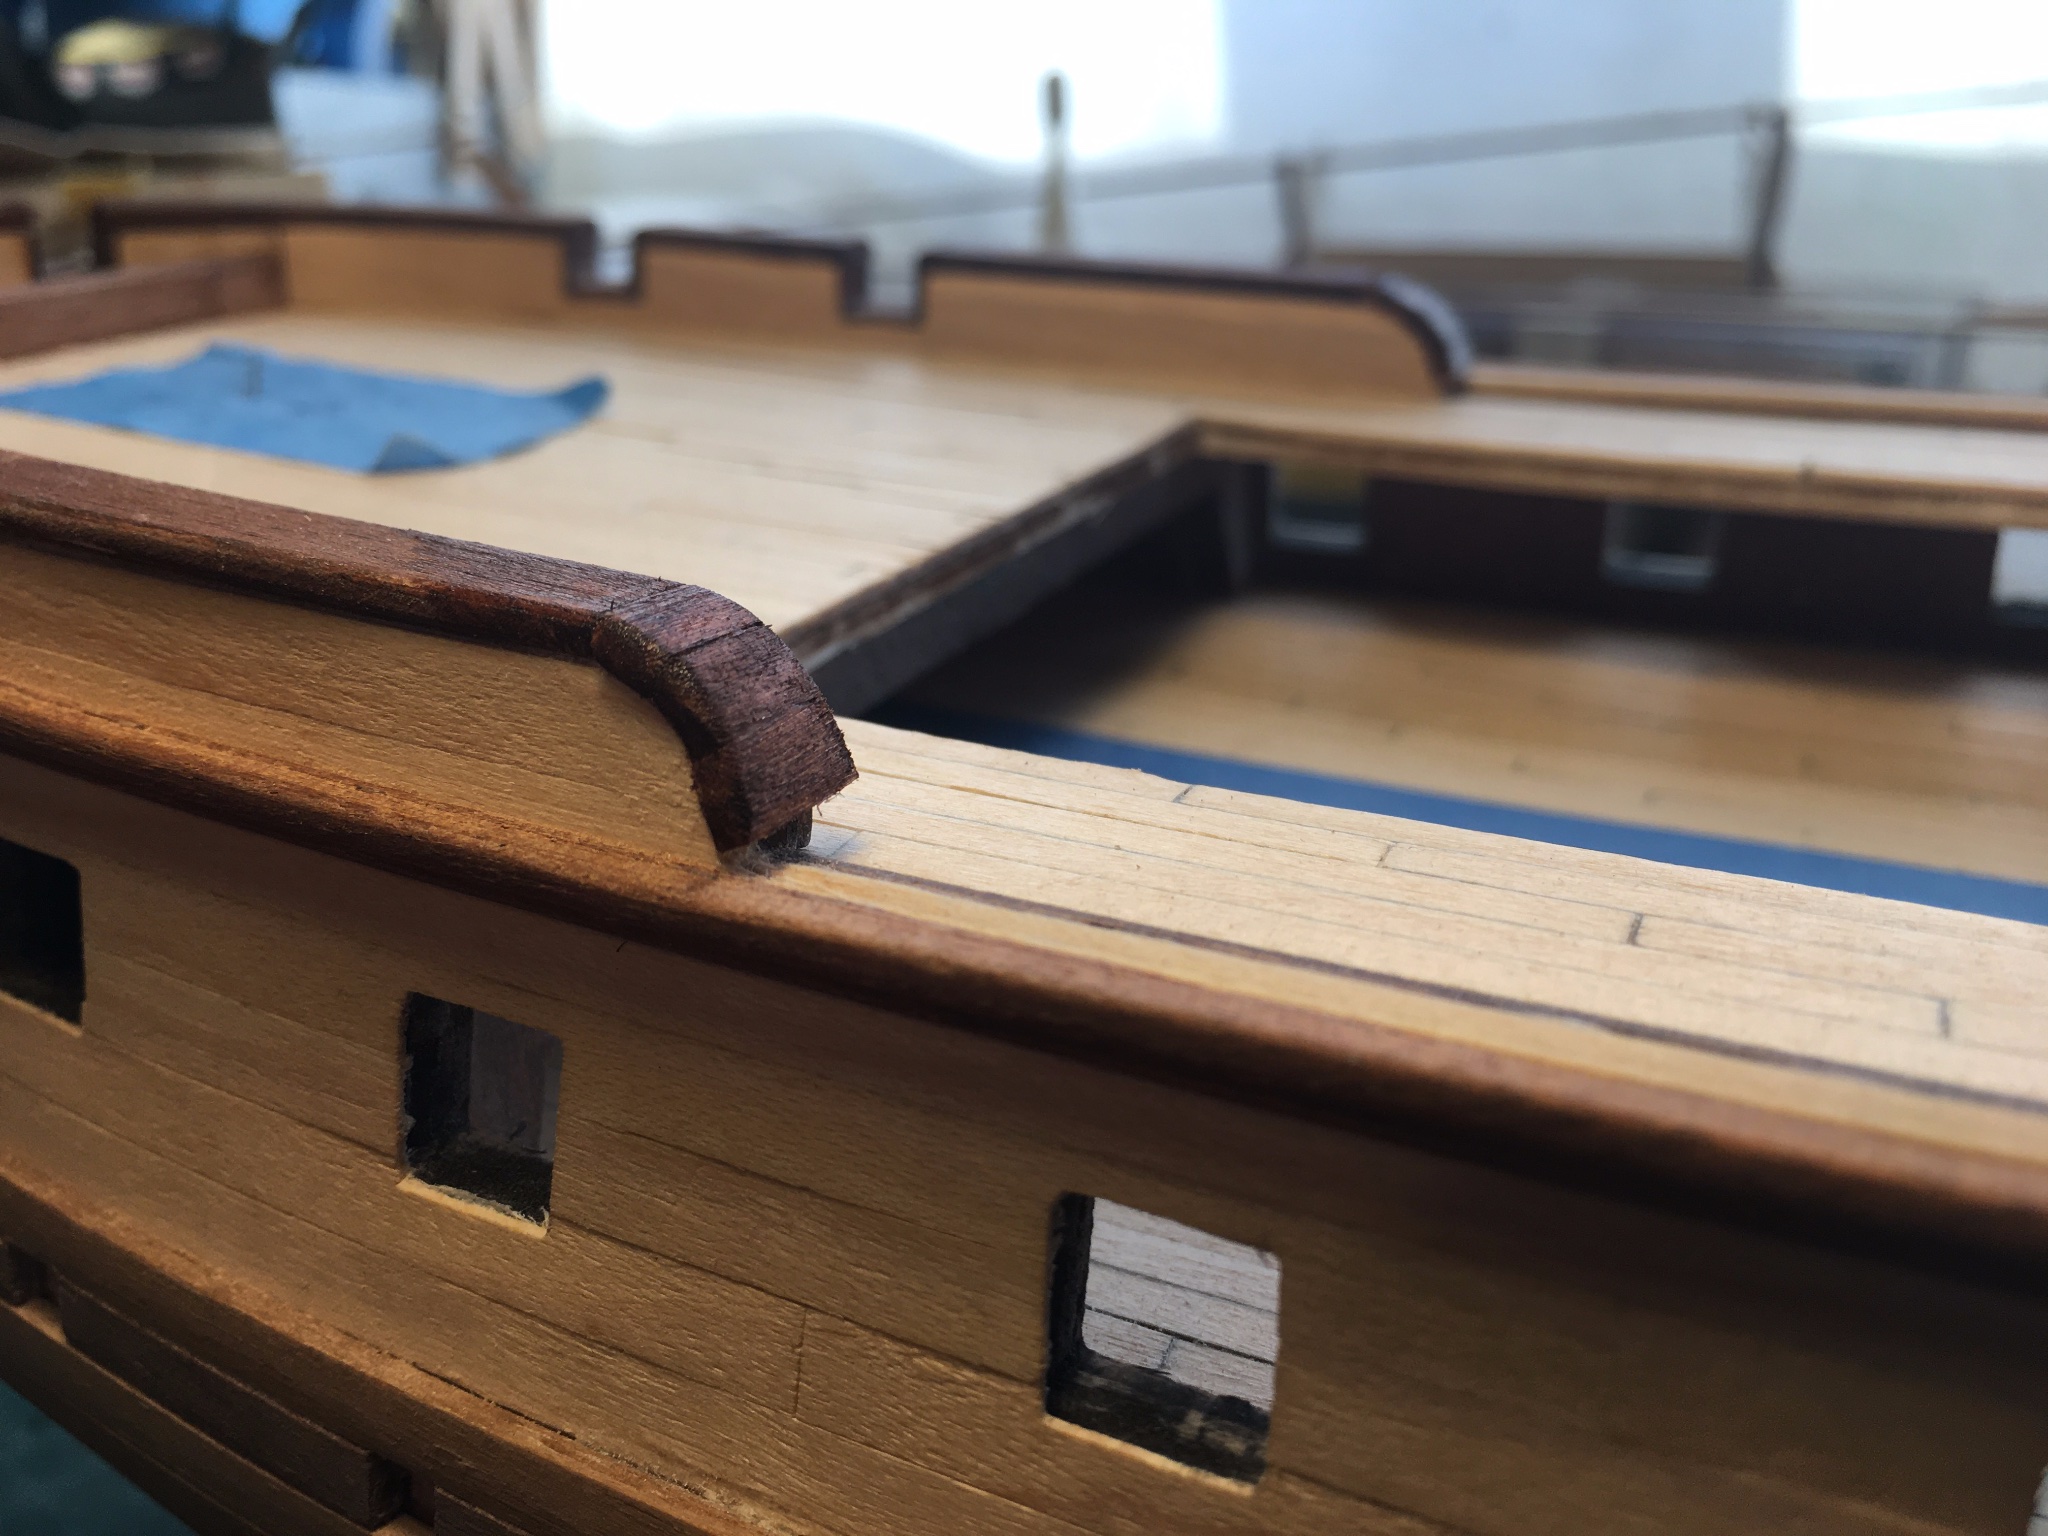
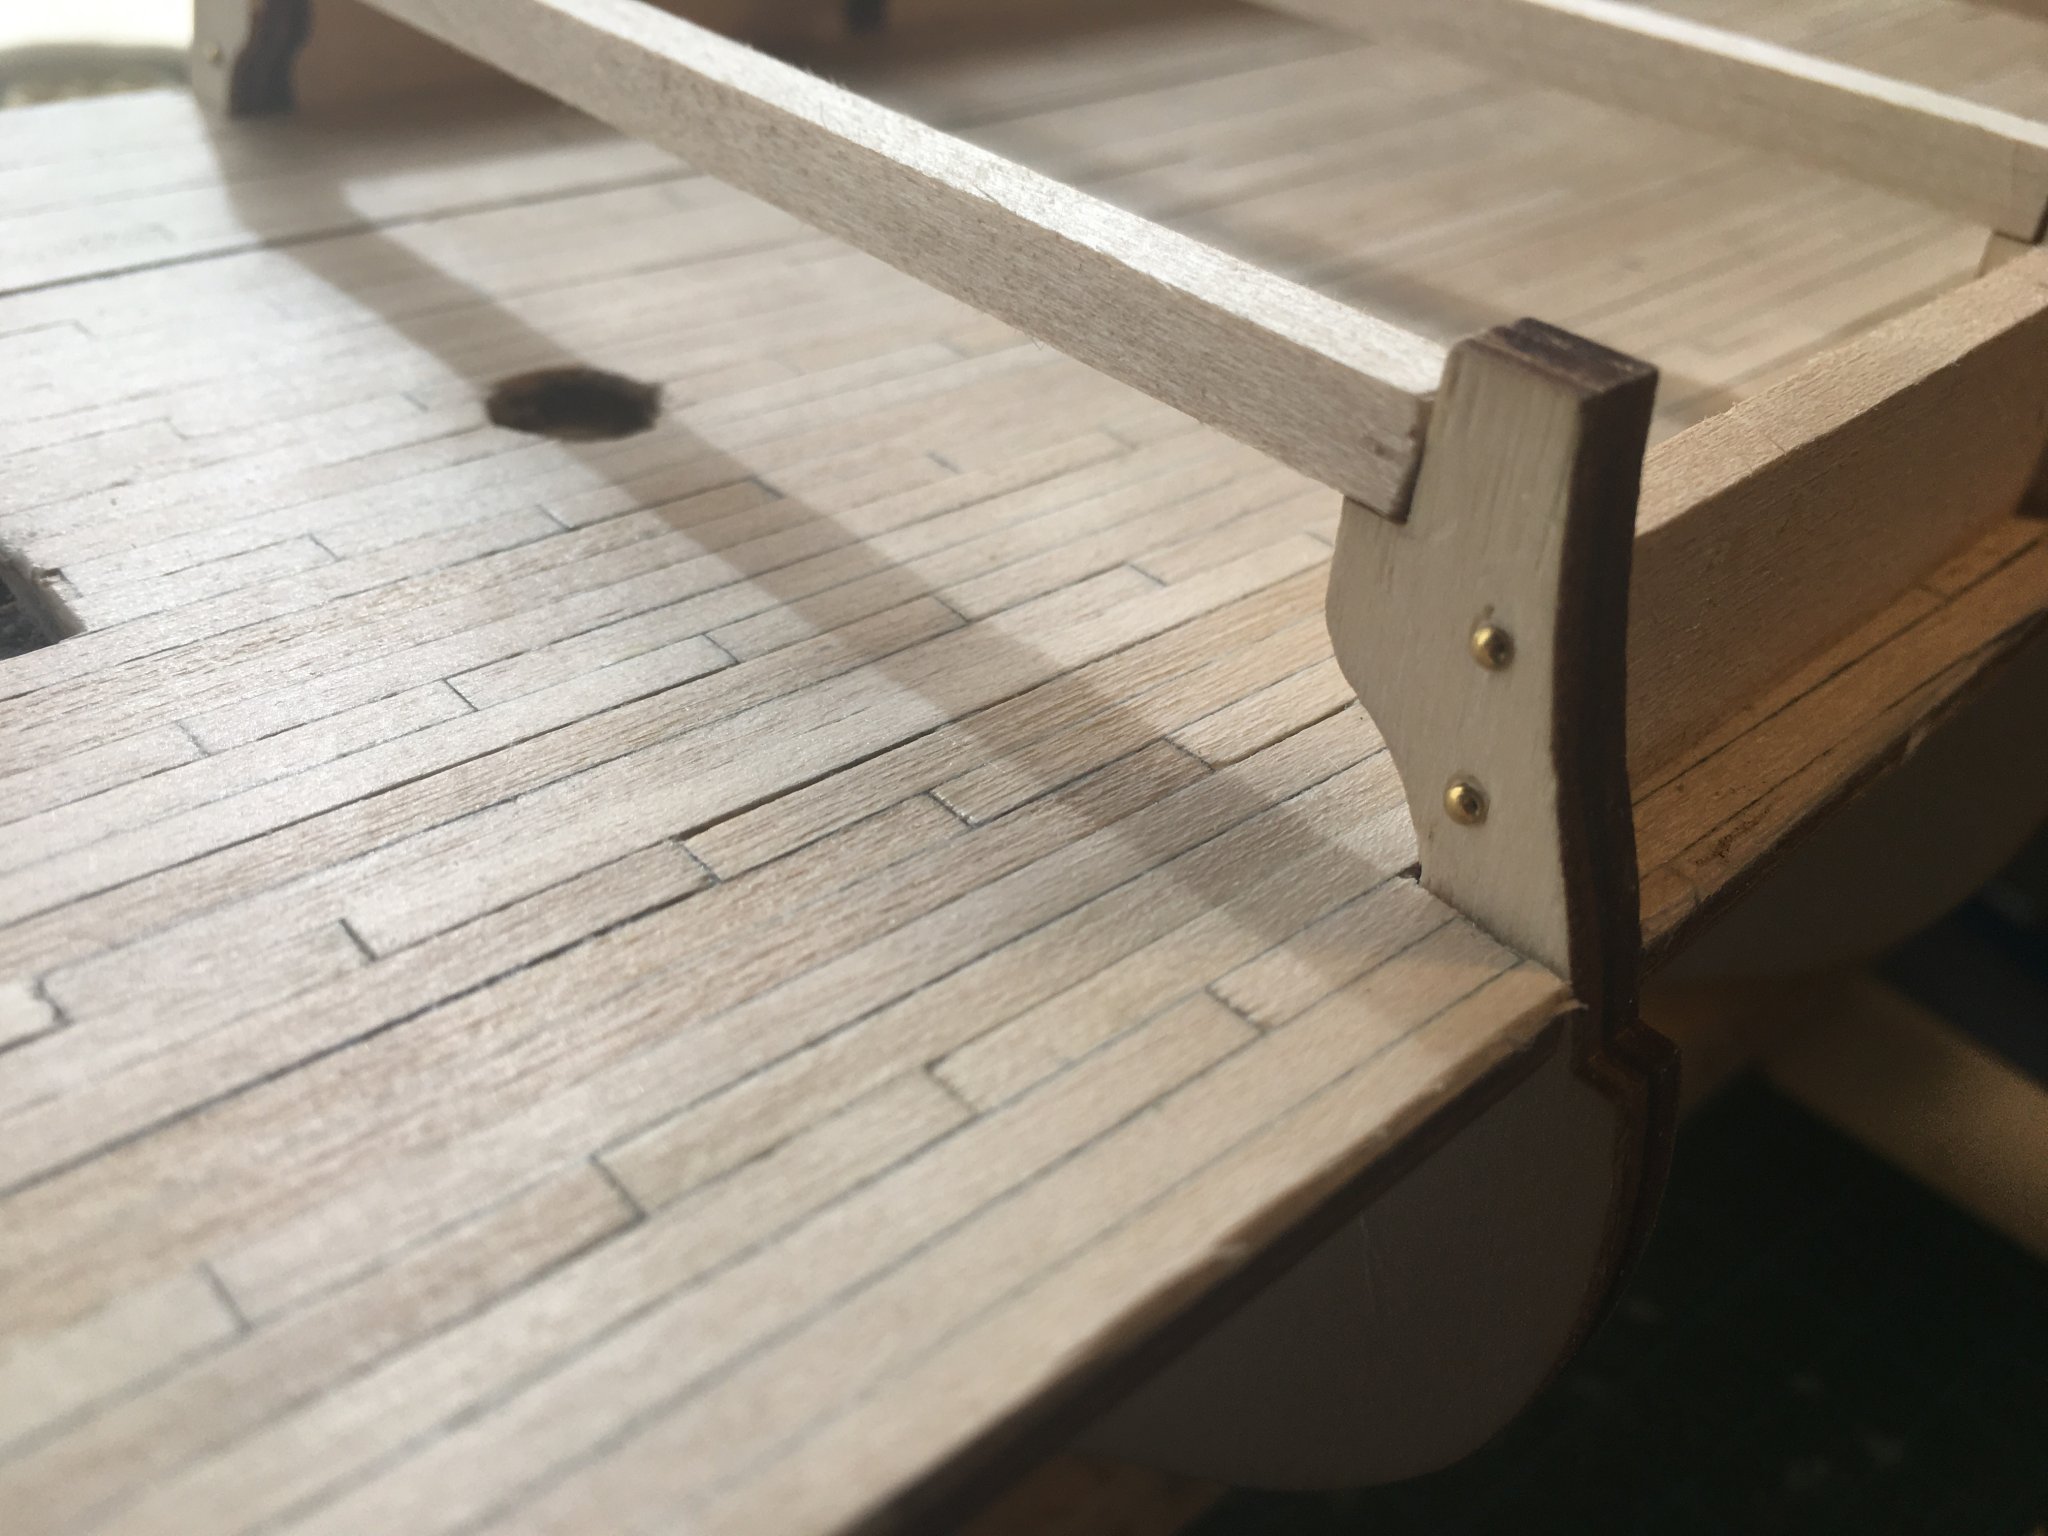
Next up, the limber boards, including the ornamental ends (a first for me):
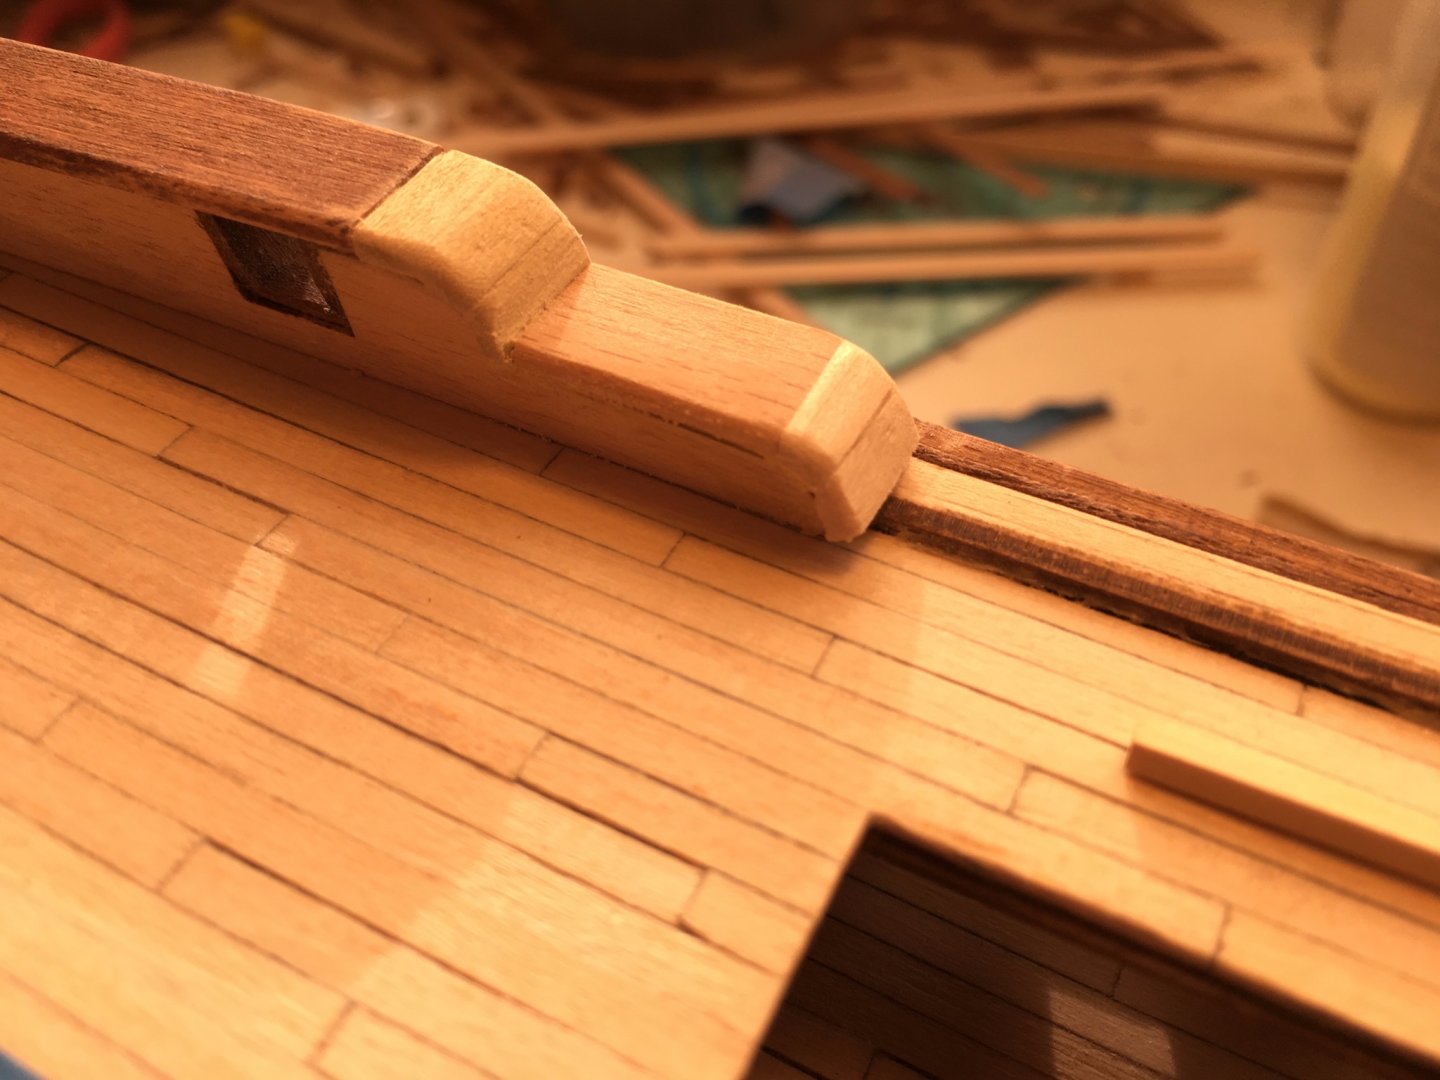
Some sanding and filling later:

Also decided to add a small 2x2mm strip to the base of the bulwarks, which wasn't included in the kit. Seemed a bit unfinished like that (Terror had this), so added them:

Drilled a 6mm hole in the stern for the rudder, always a pleasure taking a power drill to your hull.. NOT 🙂

Marked the hole, and then taped the circumference in the correct position, cutting the sapelli strips first before drilling a pilot hole, and then working my way up to 6mm.
After a first coat of varnish on the limber boards, this is what she looks like today:

Next up: placing the mirror (and bending it, oh joy), and then the bow details (also a first).
Interesting times ahead 🙂
Stay safe!
-
Hi all, thnx for checking in. DavidG, chose the hard way, also as a learning experience: fitted the African Walnut. In retrospect, your second option would have been the optimal one, as I'm painting the strakes anyway, and that would not have left me with a nasty carving mark 😞 think I can minimise it though.
Placed the top strakes and rounded off the corner strip:
Now working on the gunport sides, the catheads and the railings...
-
10 minutes ago, clearway said:
steaming/ soaking in water for a few hours will work.
Thnx for that! Just another question: I’ve read that glueing planks while they’re still wet is a nono, but I also saw some logs where bulwarks were put into place to dry. So what is the best way: soak them, then bend them into shape on a mold and leave to dry, or bend them and secure them in place?
-
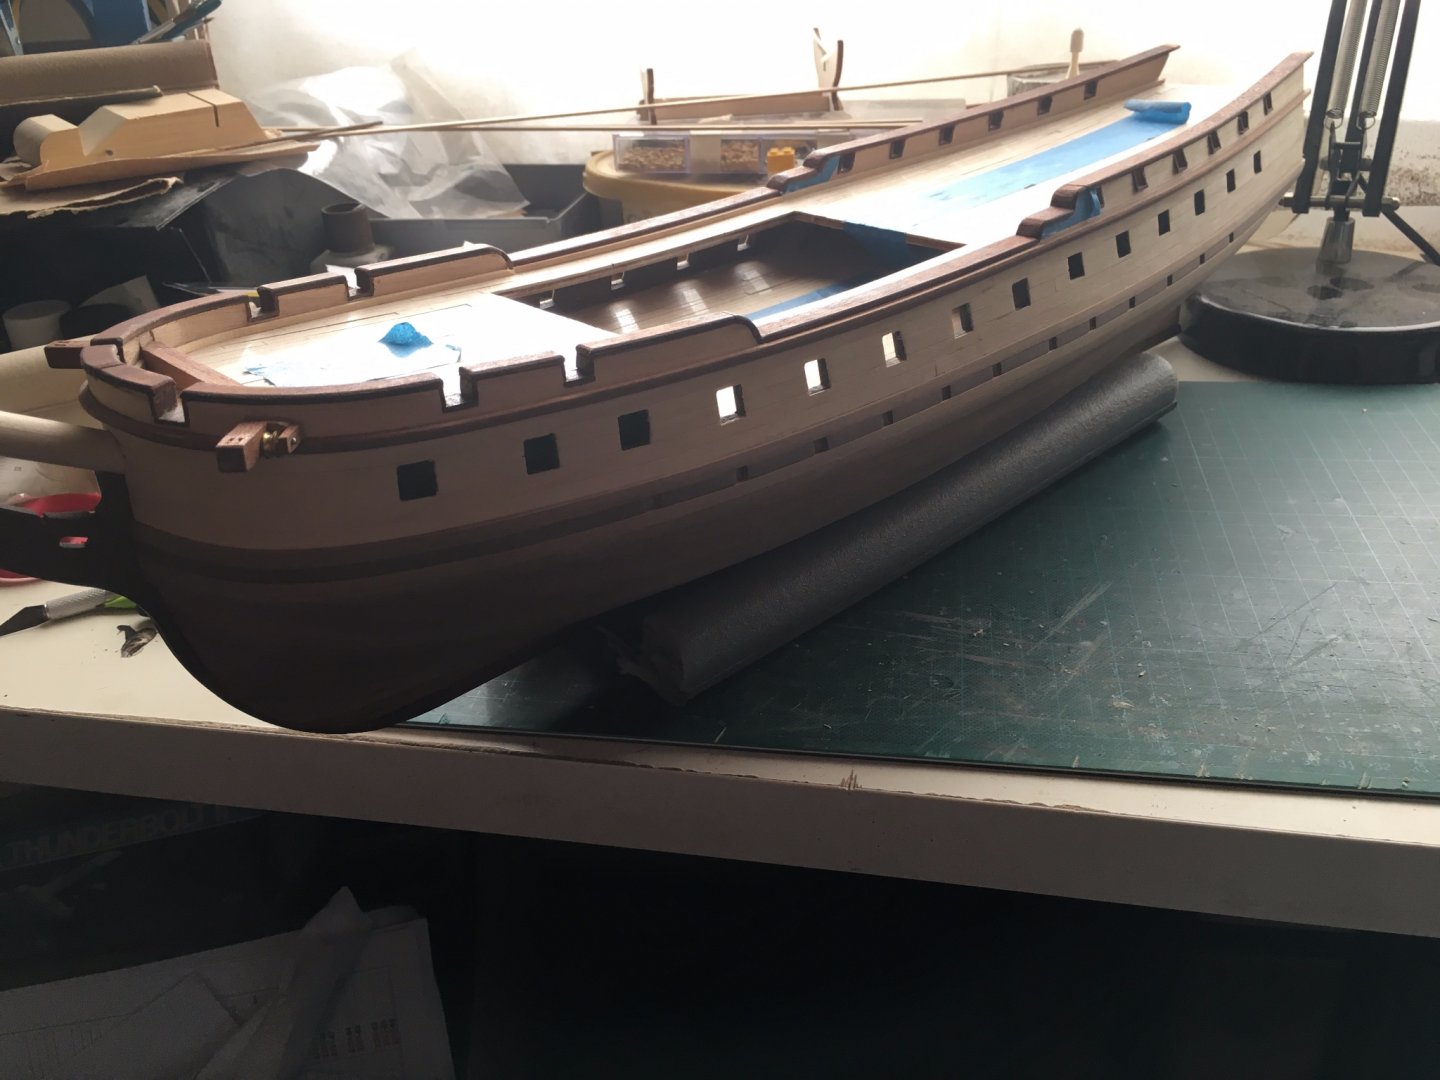
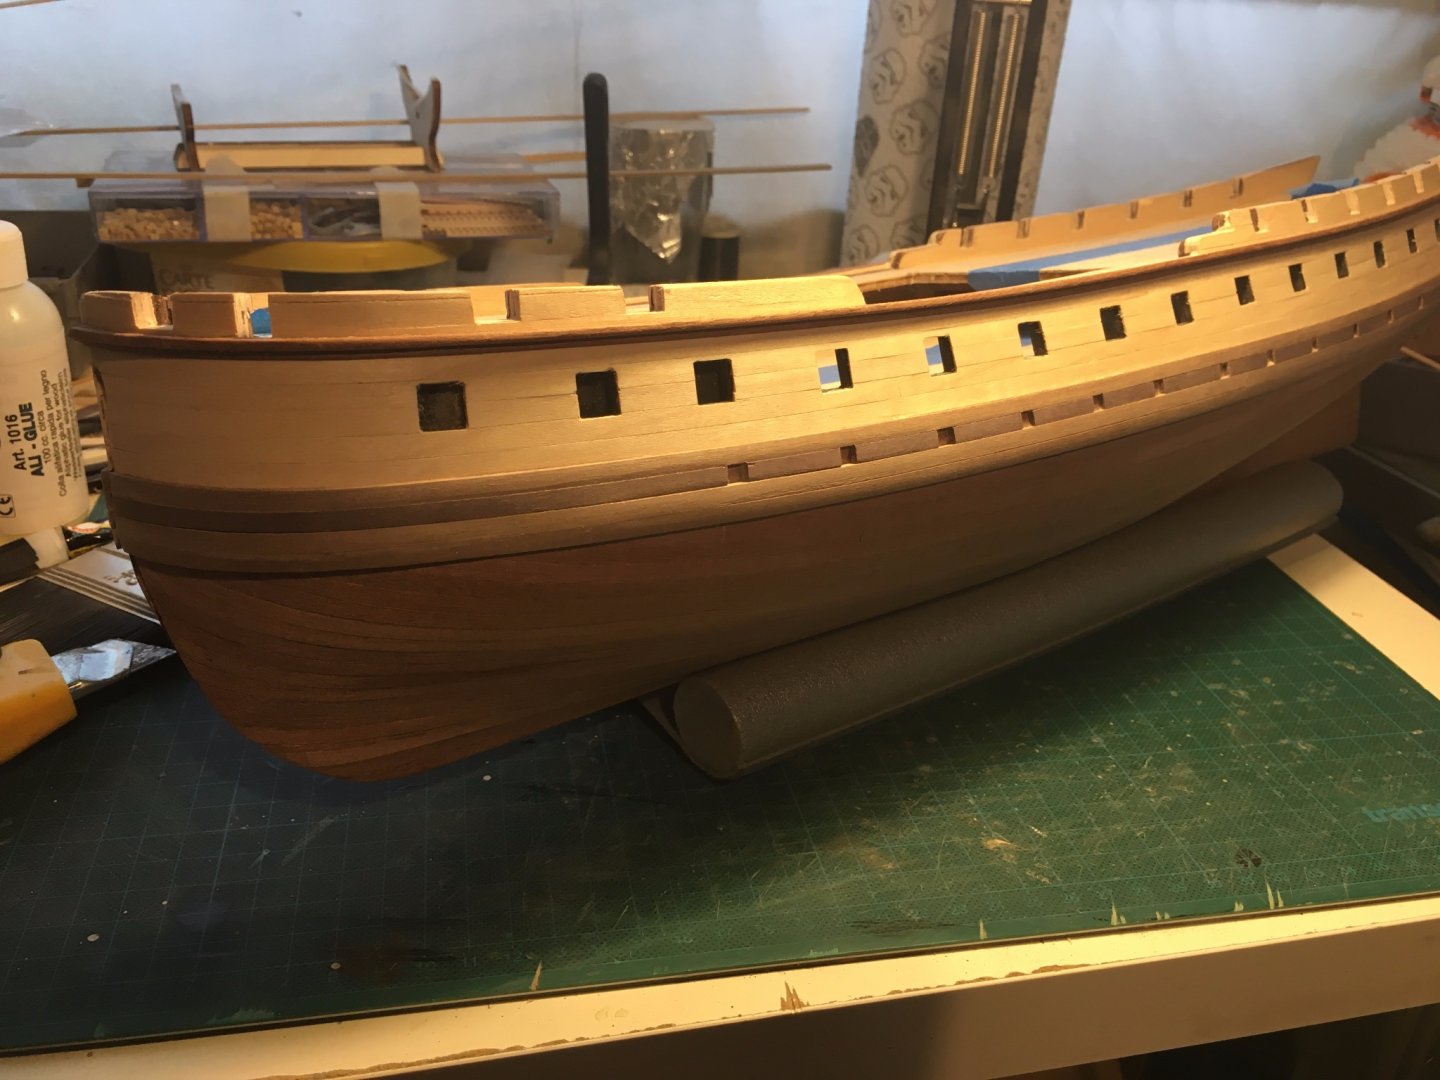
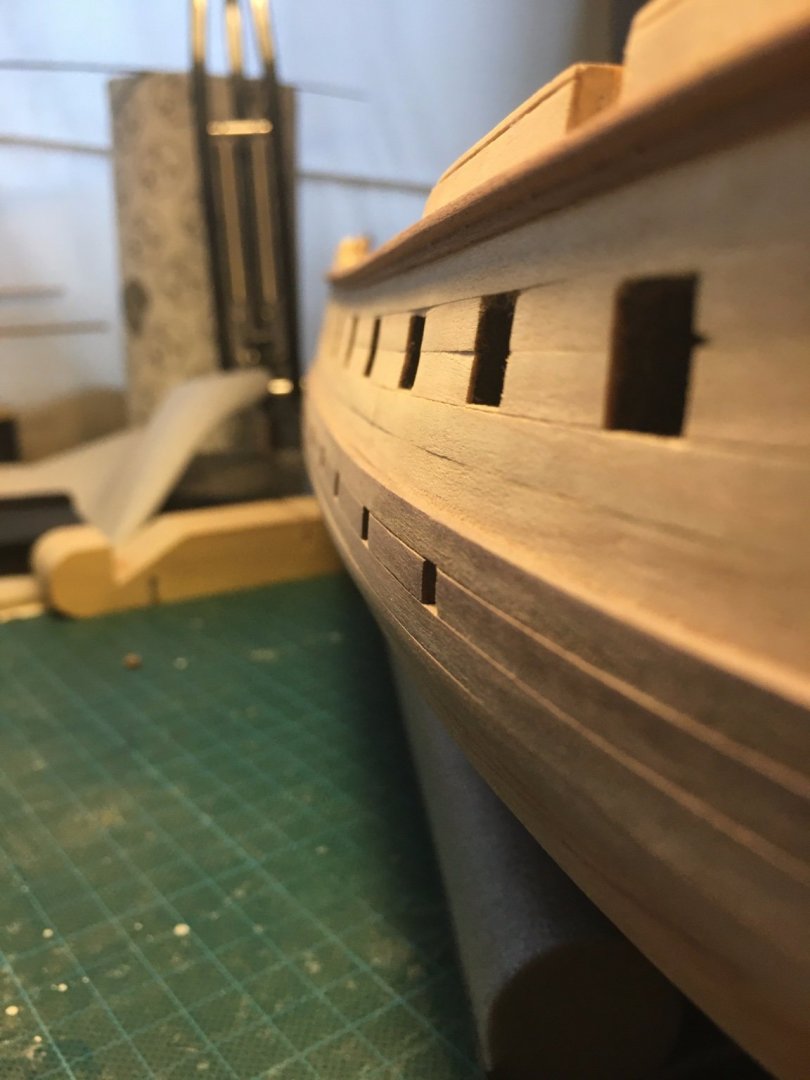
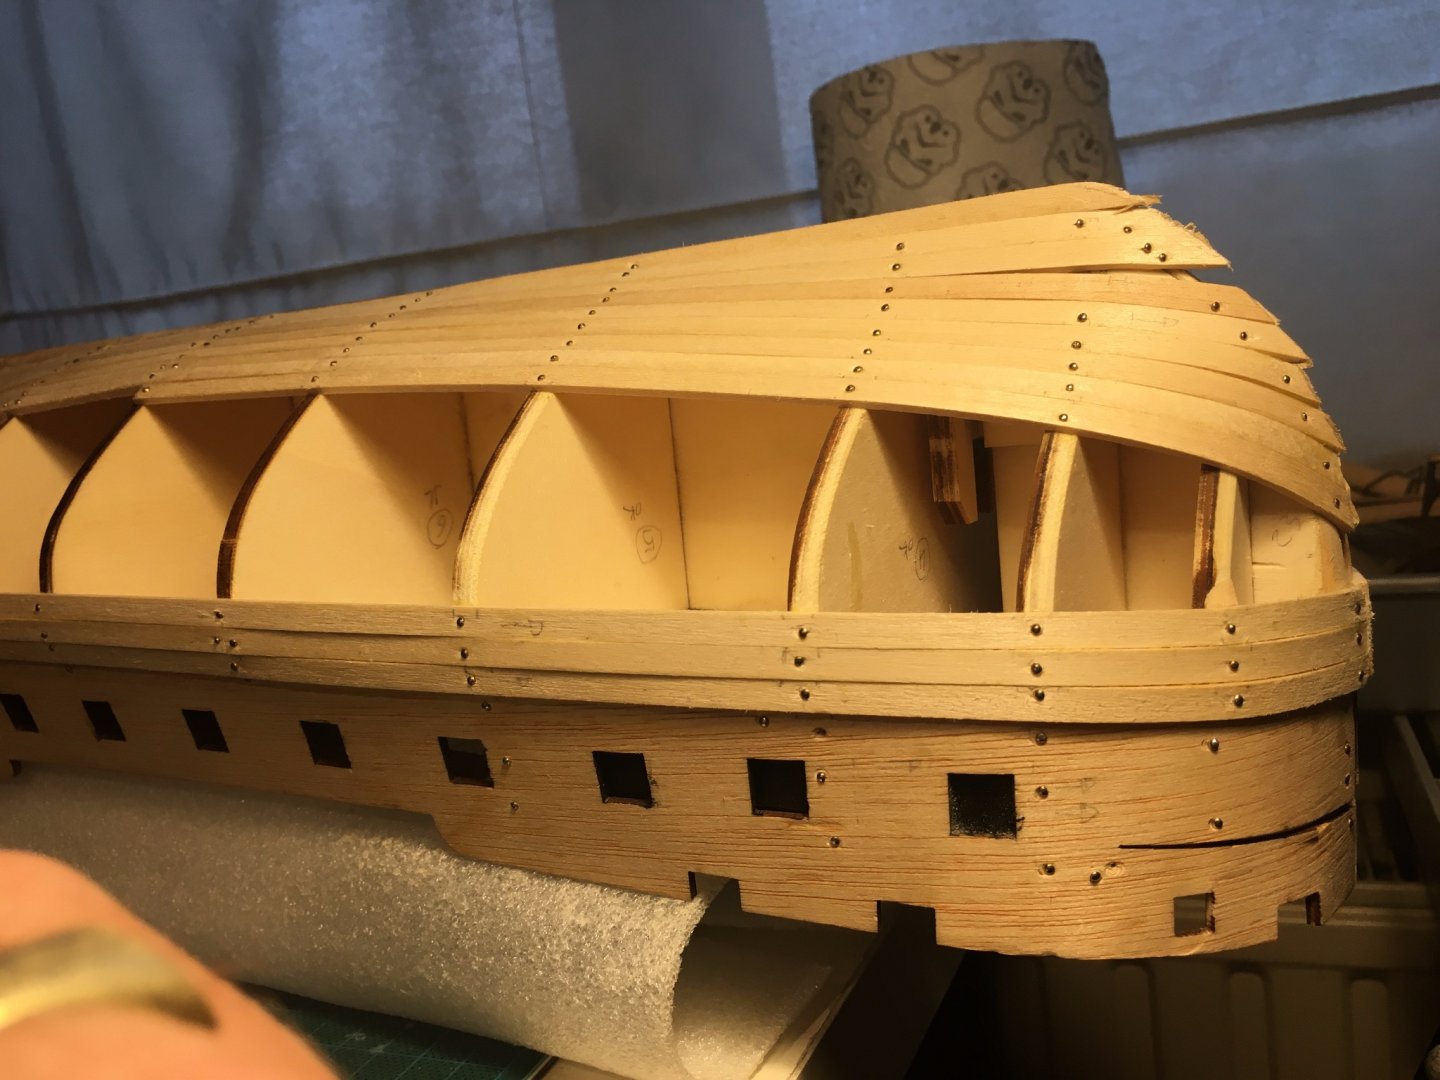
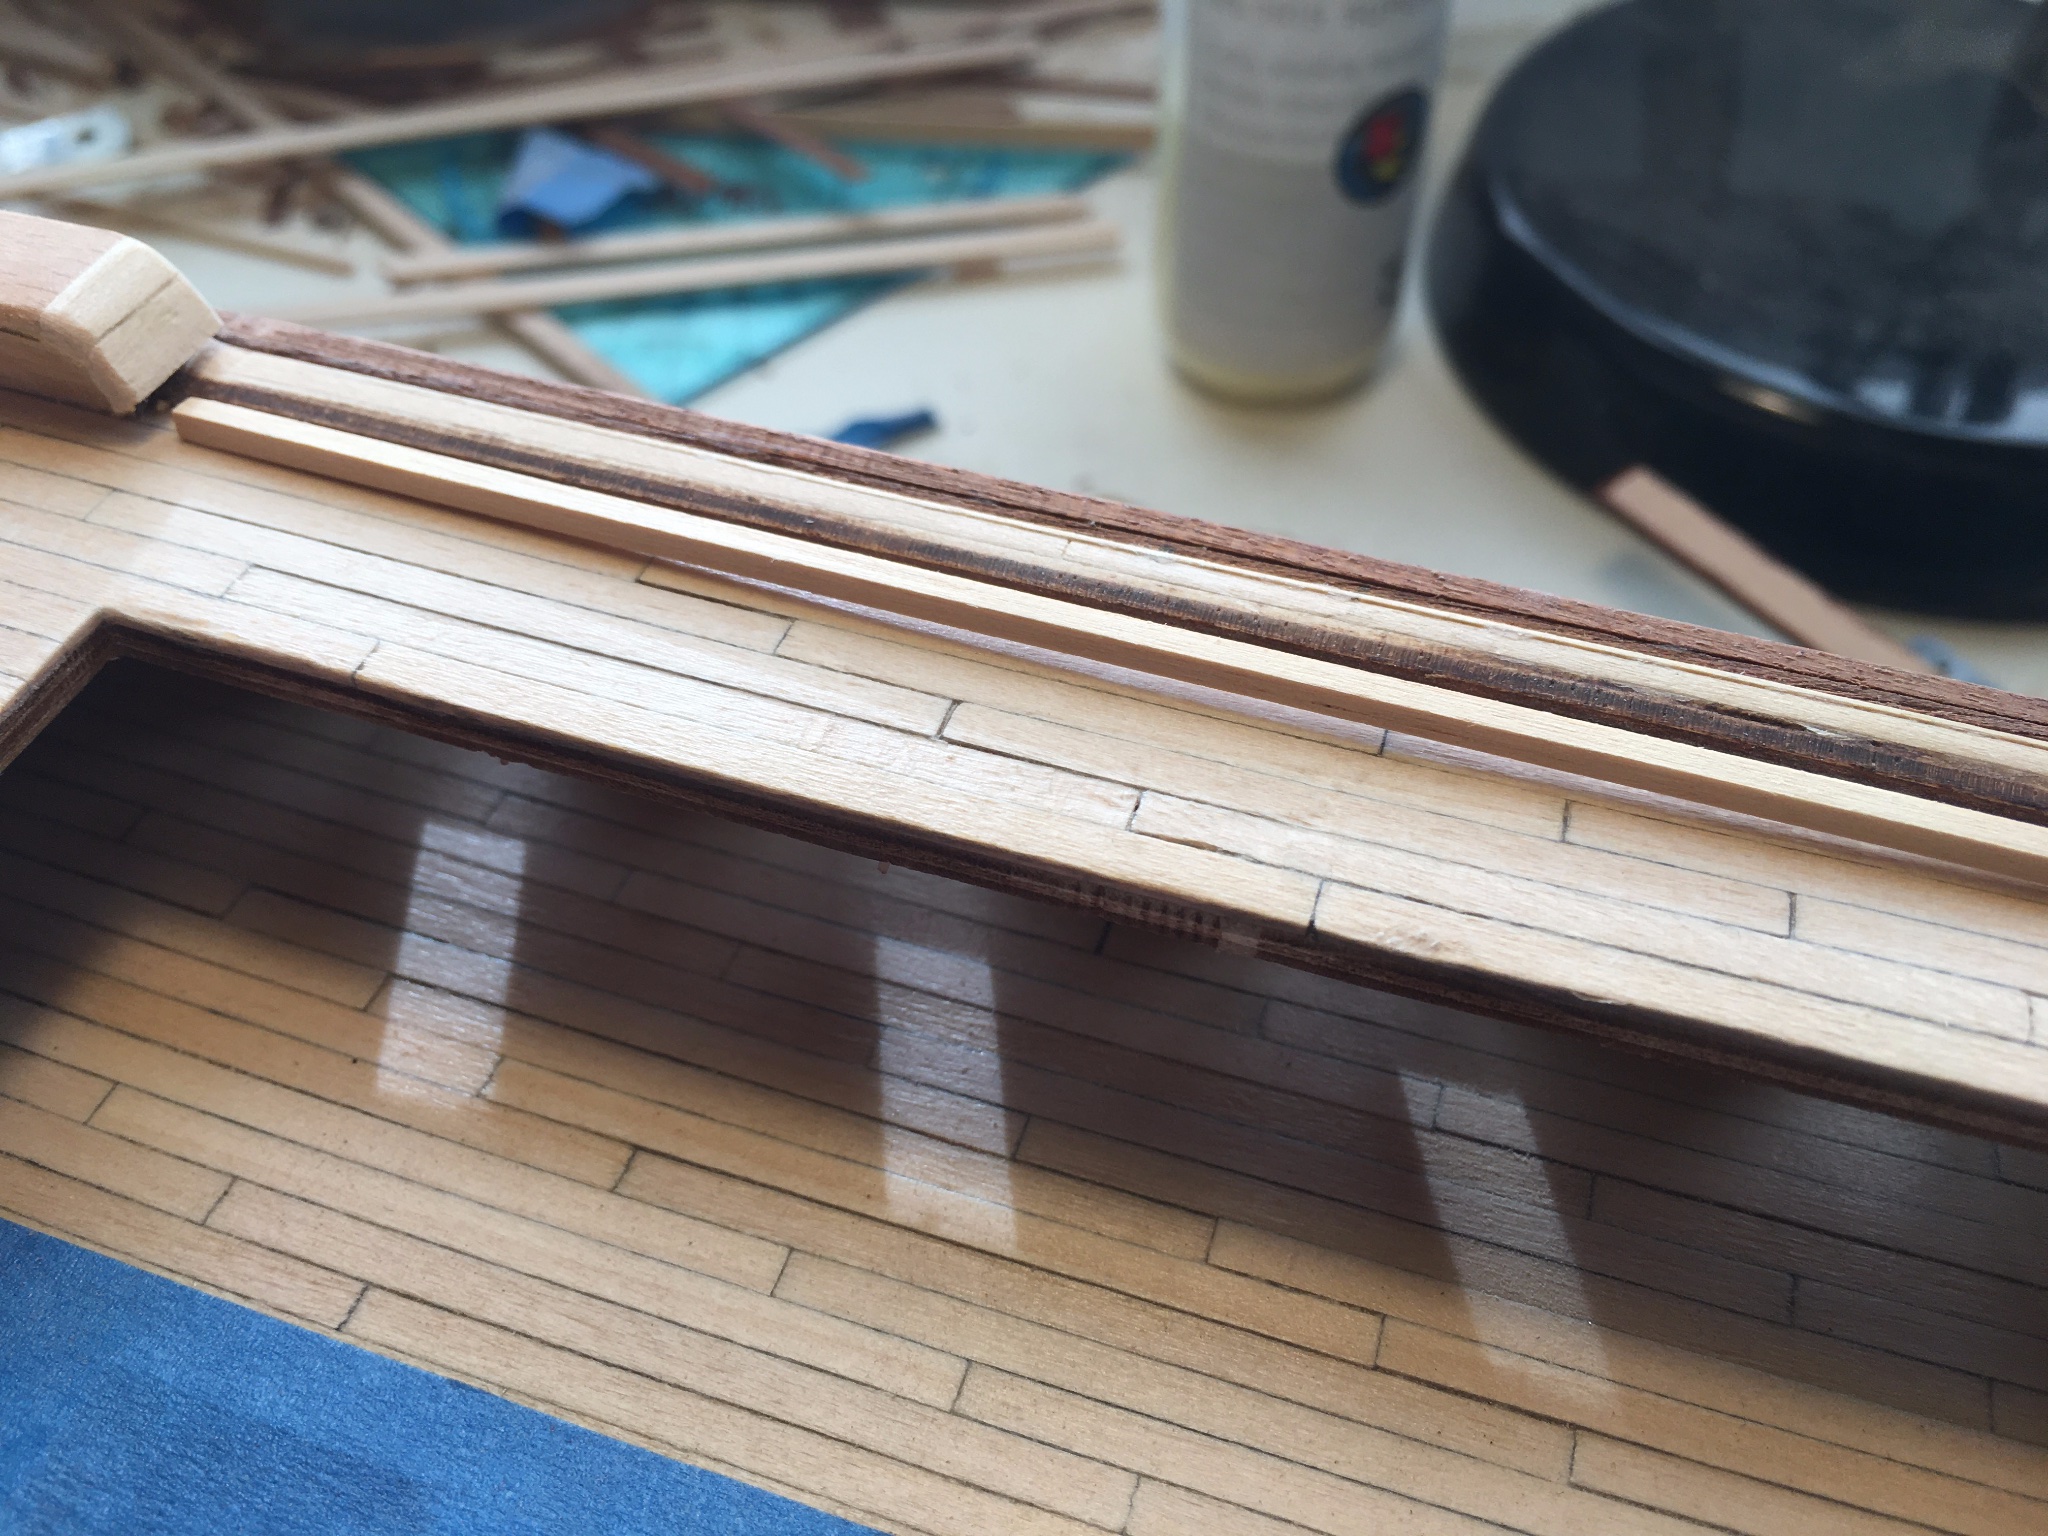
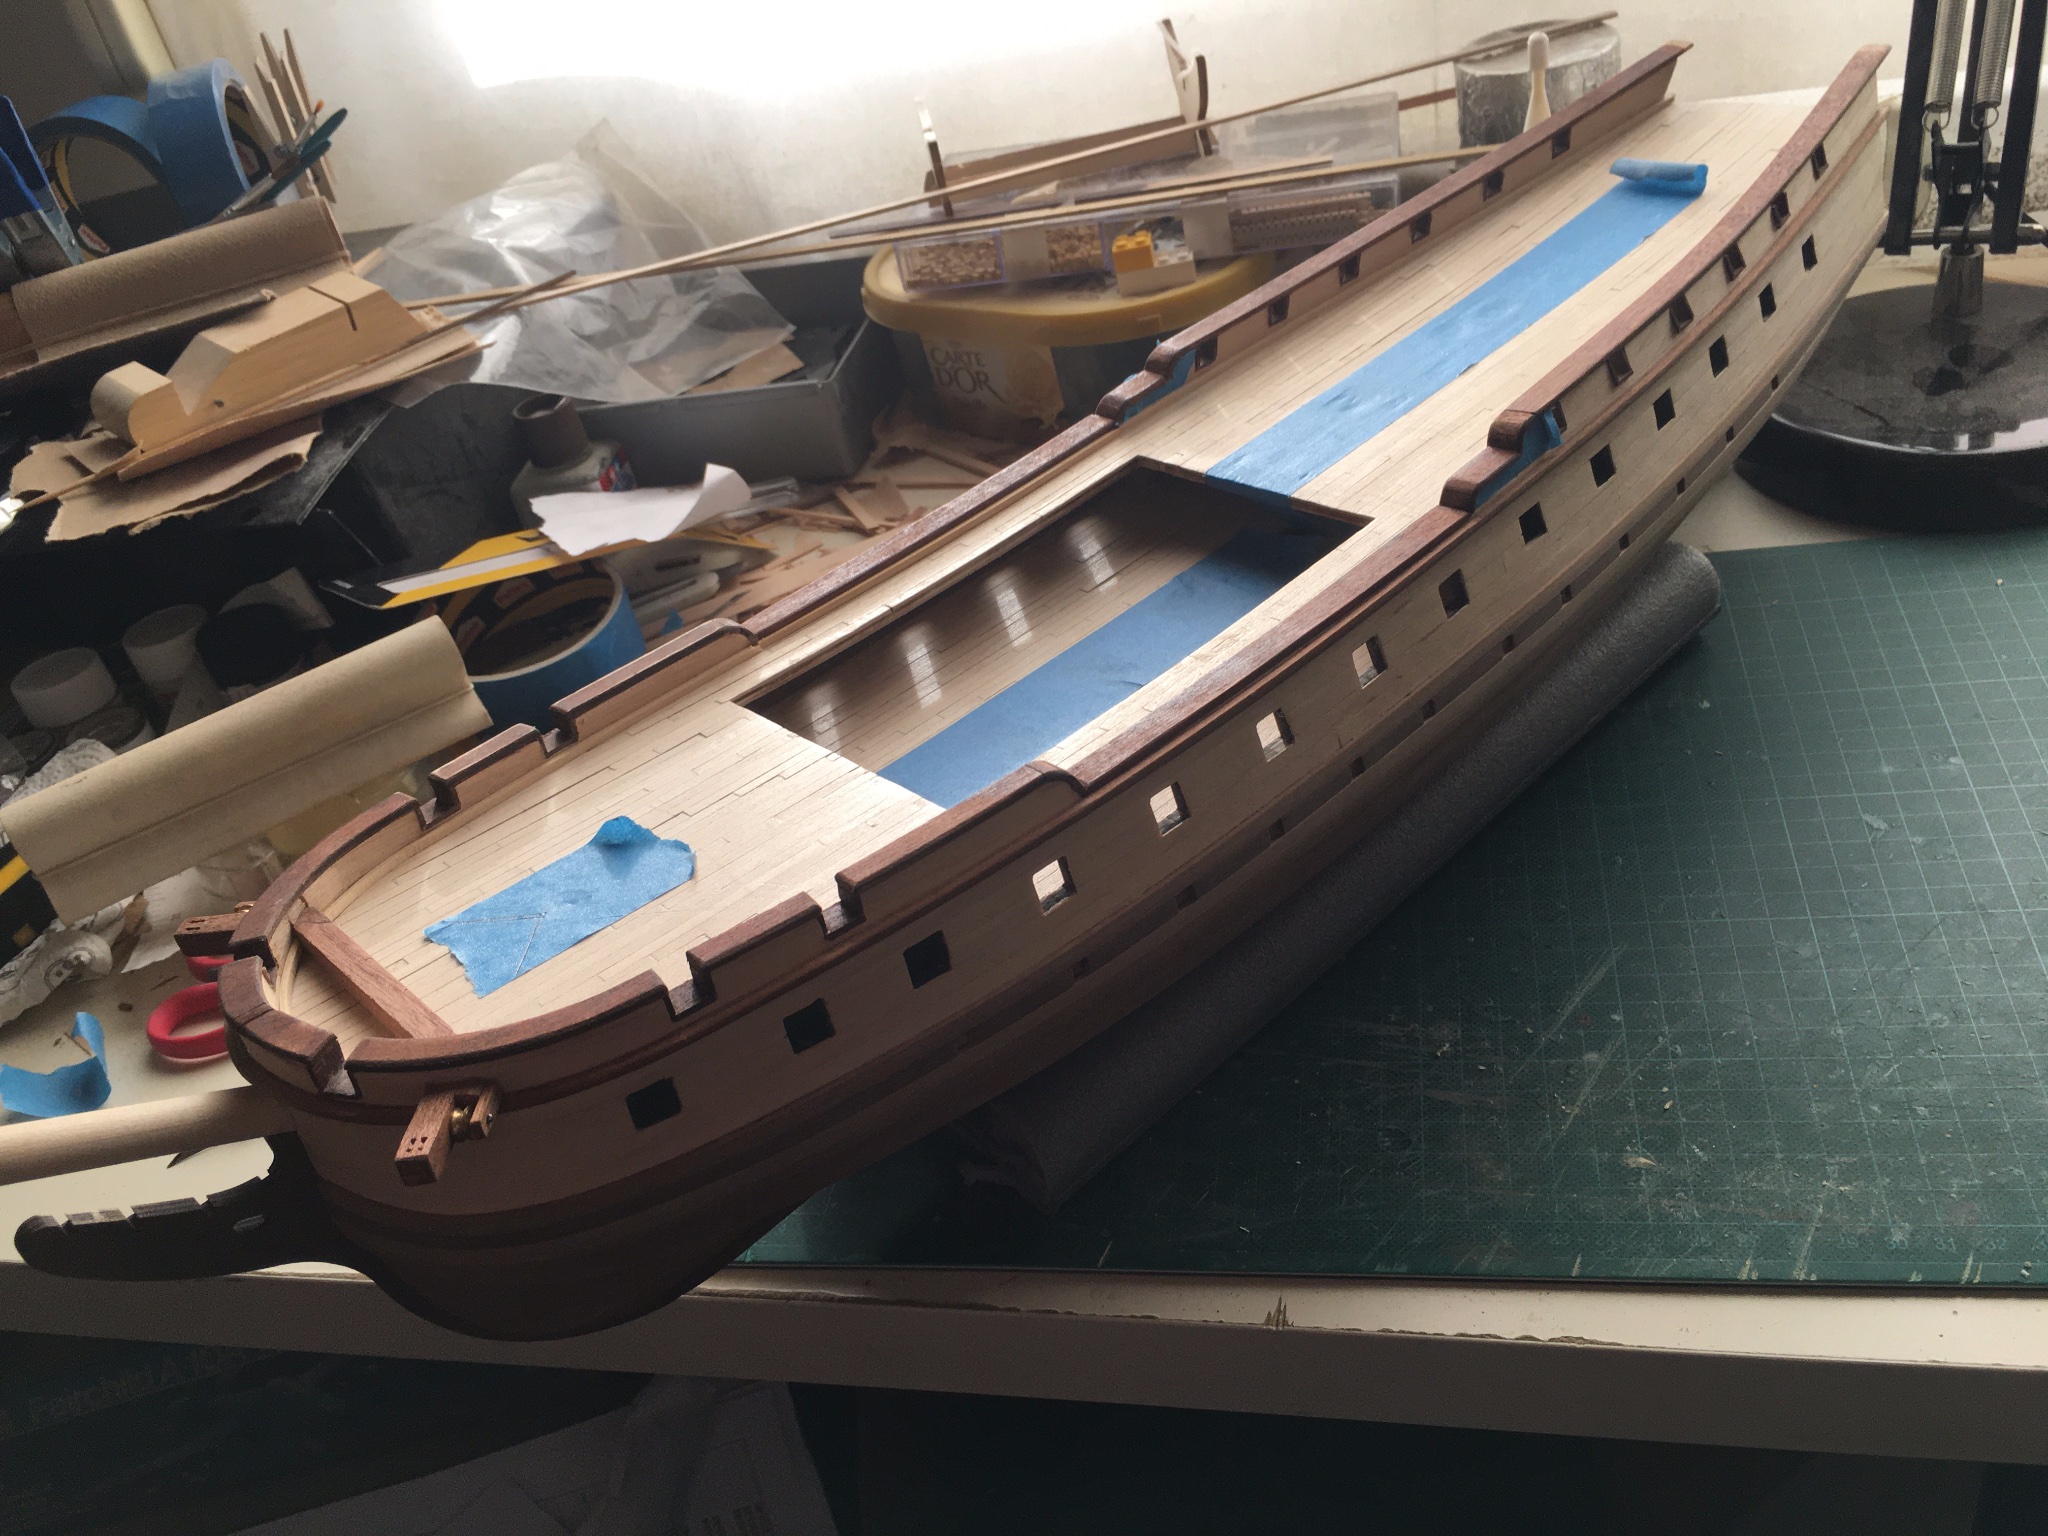
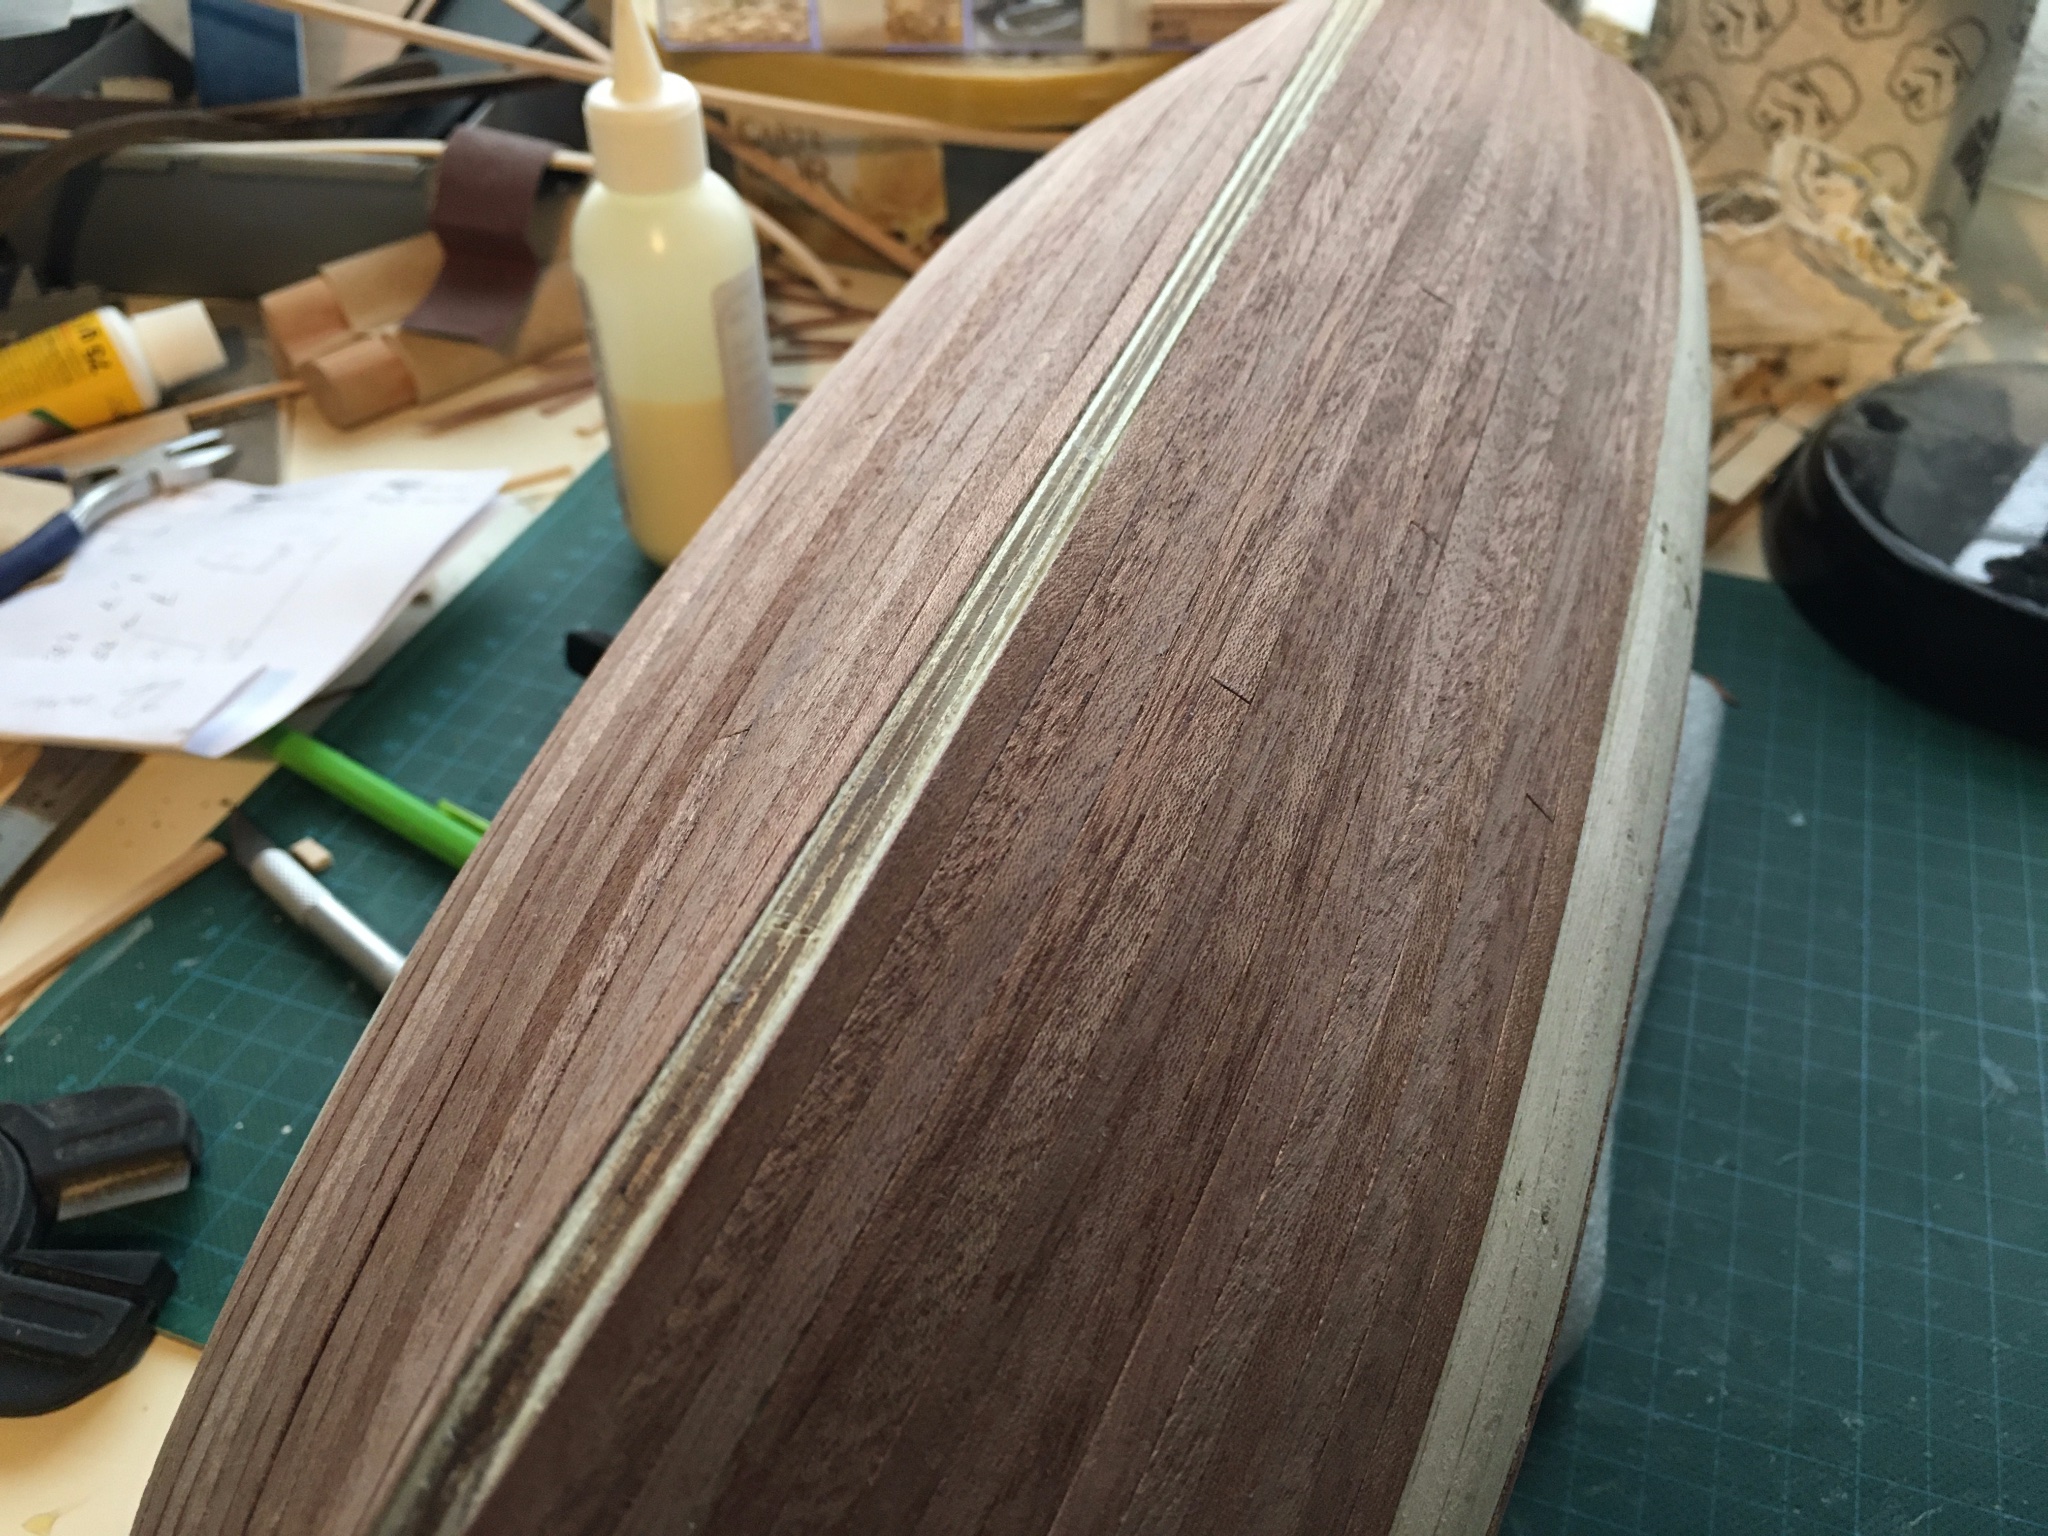
Hi all, thnx for checking in. Some work done and a milestone achieved: second planking is done:
Di needs some extra sanding here and there, but she's starting to look the part!
Starting on the cathead construction now, which is a real puzzler. Going to go with my gut instead of following the instructions, which don't seem to make sense.
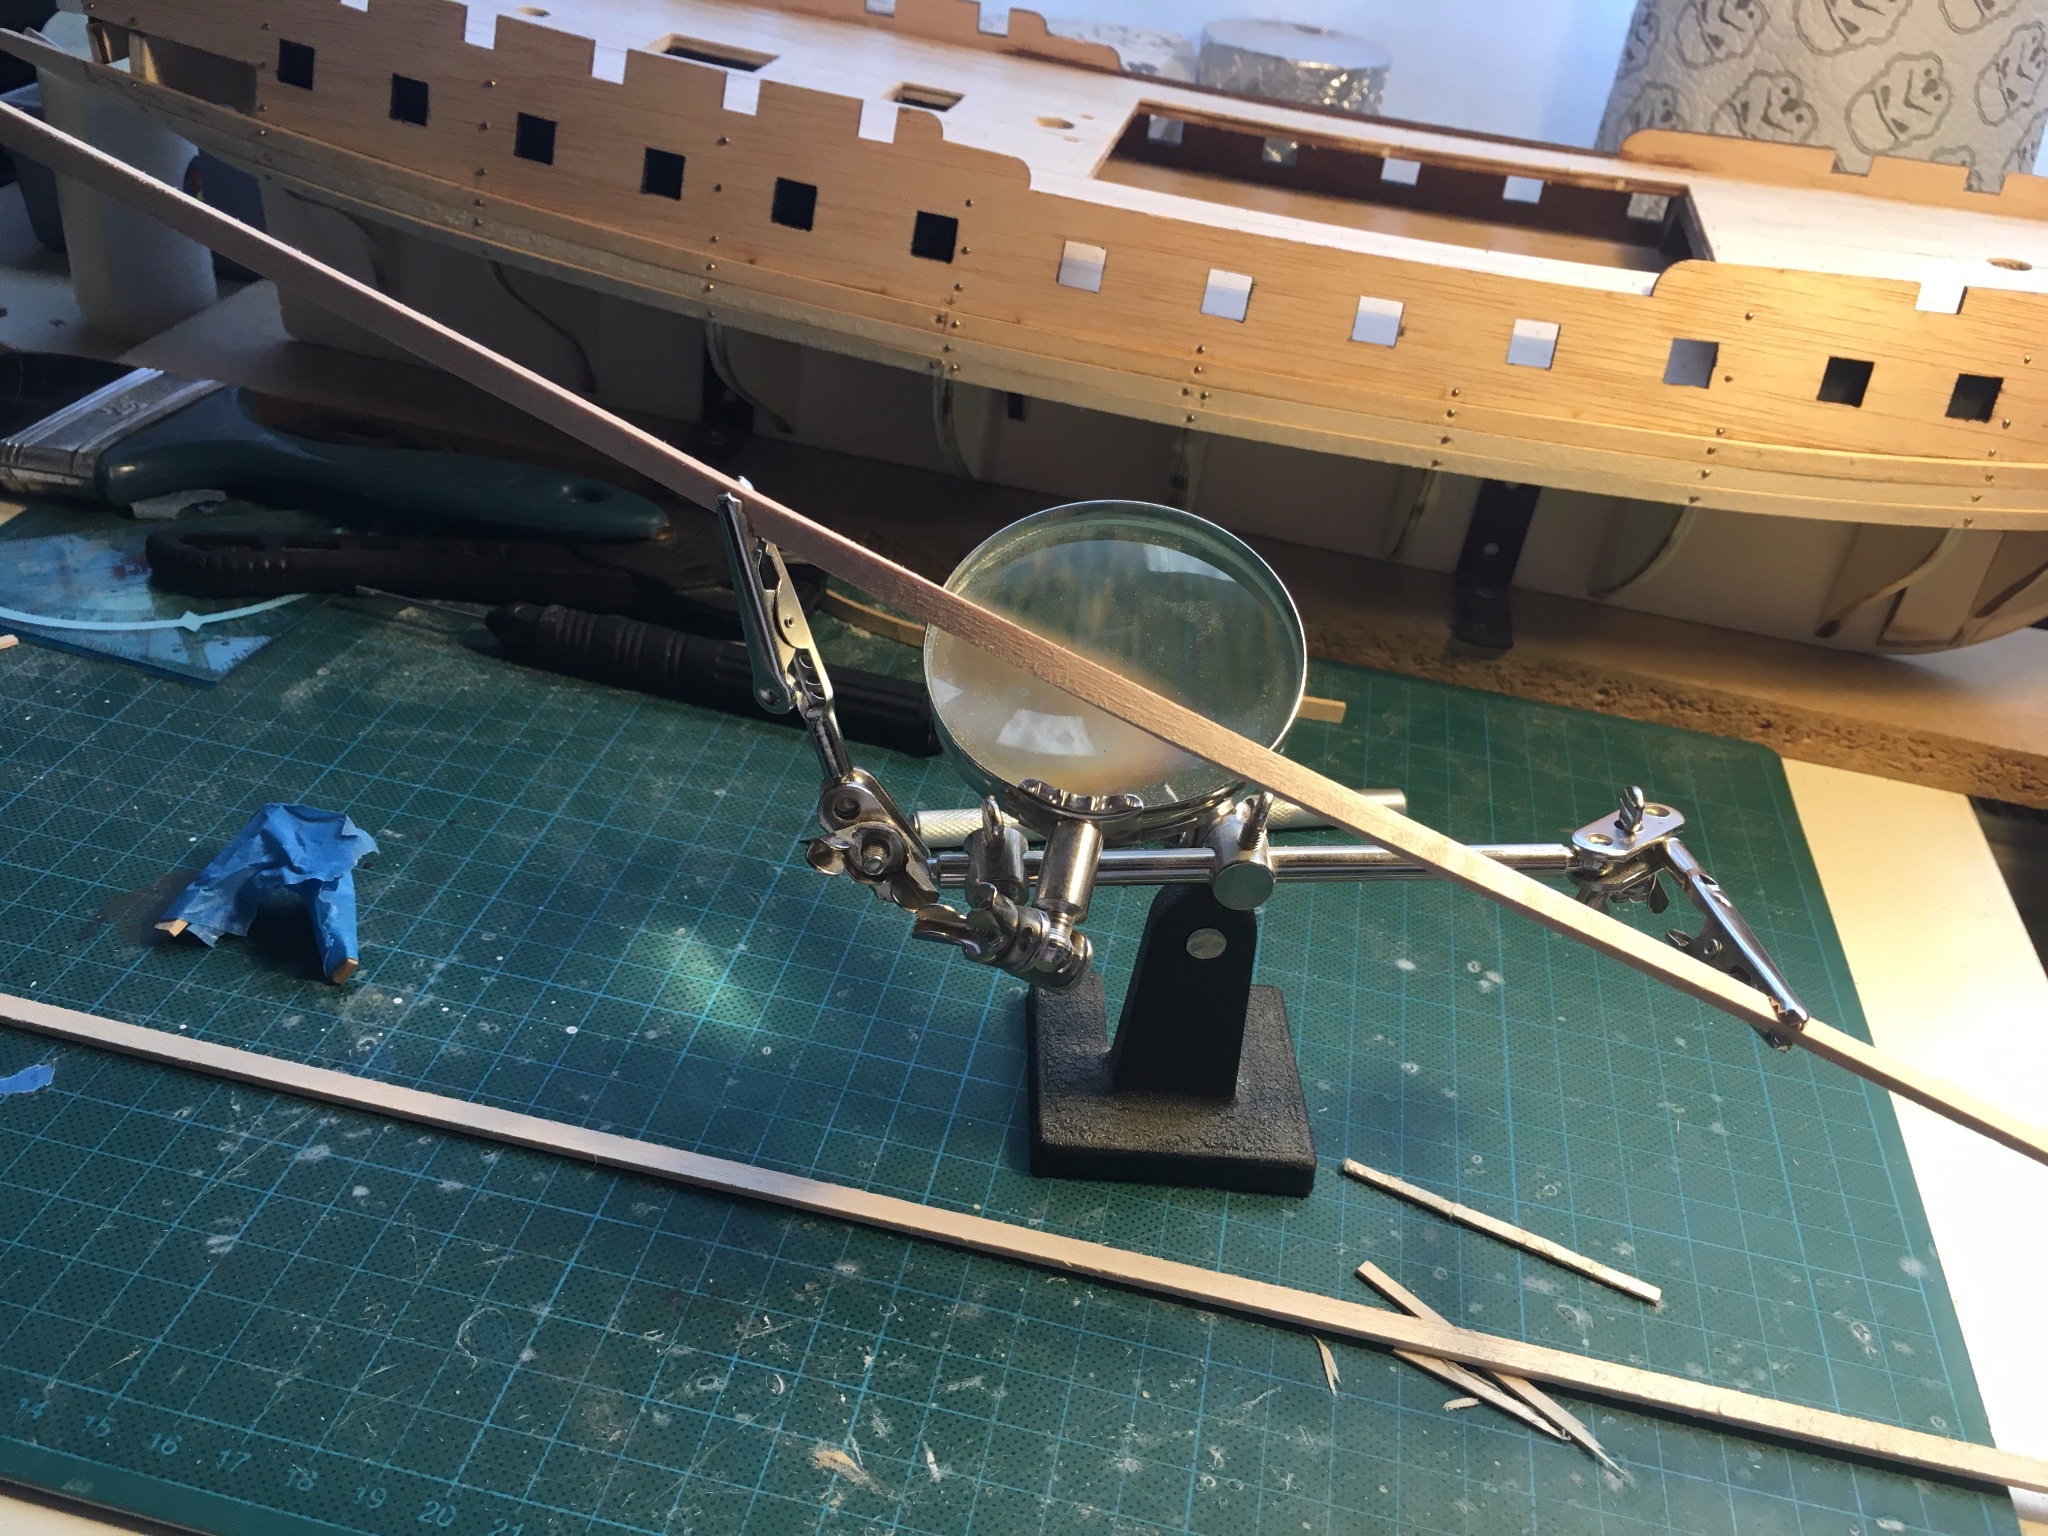
Also thinking of the rubbing strakes, which are made from African Walnut. Tried some cutting and bending on a test strip, and basically this wood behaves like your average concrete when compared to the rain I'm now more or less used to. Any tips on how to handle this wood, cutting and bending wise? My crimping tool is basically useless, and I'm having a hard time cutting it with an exacto...
Thnx in advance for any suggestions. Stay safe!
-
Hi all,
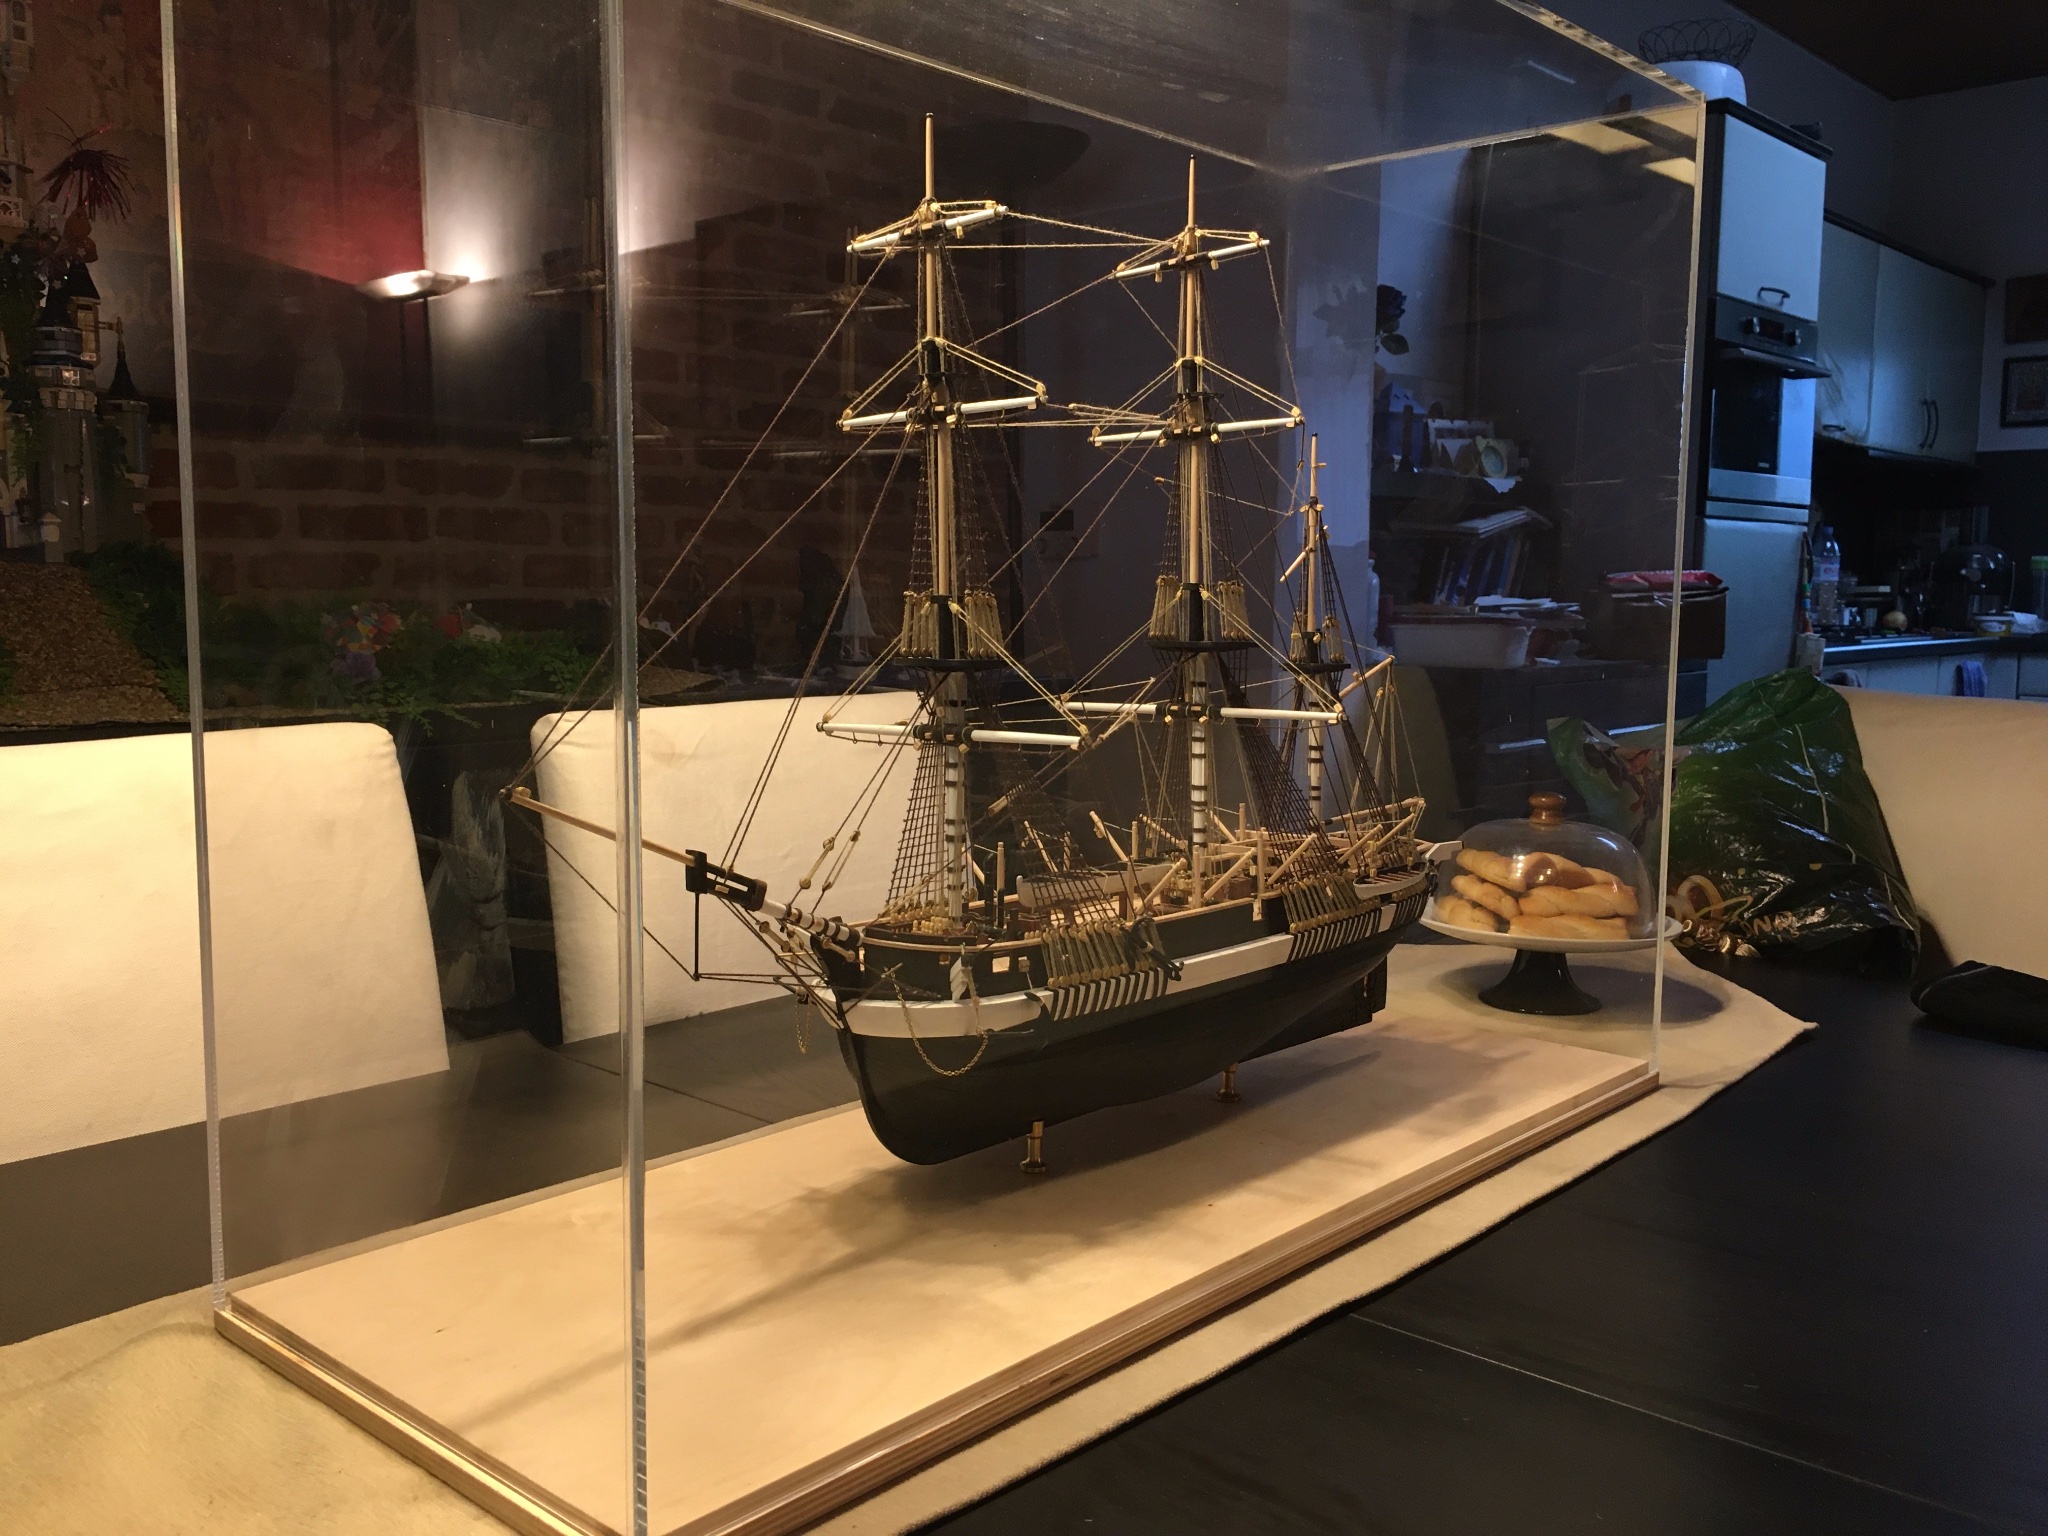
It's been a while, but Teror is finally where she should be:


There are probably hundreds of mistakes in there, but I can't help but feeling proud for my first build. The Admiral was equally impressed, so the display case has taken up a central space in our home 🙂
Thanks again to all of you for all the help, advice and support. Without you, I'd probably still be figuring out which rope goes where 🙂
Stay safe and take care!
-
Hi there, good to see someone else went for the Billing Boats solution 🙂 Did the same with my Terror, lined up the first chainplate from the middle of the mast, as you show in your picture.
Took a bigger measurement though, 5mm isn't enough for spacing the deadeyes. Tip, grab some excess planking wood and draw a line every 5,5cm, then transfer that in pencil on the ice-shocks. That gave me a good idea of where the chainplates would end up. Chainplates for the mizzen mast run almost to the end of the shock, so it might be worth measuring before you install them.
-
Hi Peter Thnx for your replies (I'm Robert, by the way), and thnx for the compliment!
1 hour ago, flyer said:Regarding your questions I would say:
- Option B
Thought so, that seems to make the most sense, but with my limited experience, what makes sense to me doesn't necessarily mean that's right 🙂
1 hour ago, flyer said:If you allow me to criticise something which irritates me quite strongly and will also irritate you as you improve your knowledge and skills fast and steadily:
In my opinion there is a grave mistake in the lay of your second planking of the bow. You should never allow planks to terminate against the side of other planks - do not hesitate to taper your planks and to use stealers and drop planks. The planking tutorials here on MSW are clear about that.
This rather ugly mistake is seen occasionally on these pages. Perhaps it seems easier and quicker to plank that way and perhaps some less scrupulous manufacturers even recommend it, but I find doing it the right way means hardly more work but is much more satisfying and pleasing to the eye.
Please excuse me for that rather harsh criticism but perhaps you still could correct it and your very promising build would certainly deserve a correct planking.
No offence taken, I was pondering that question for a long time before setting off planking Di. Indeed Occre's instructions don't see any harm, but I'm getting to learn that instructions are sometimes more guidelines 🙂 . I went through the articles elsewhere on MSW, beginning with Chuck Passaro's text, and to be hones, he lost me about one third of the way. I understand the calculations involved but I just can't bring it all together yet.
Frankly, I'm also trying to build up a bit of self-confidence here, I only started out at the beginning of the year, armed only with some experience of plastic modelling some 40 years ago. And maybe yes, I took the safer, more cowardly route by going with what I know, but Di already had so many new experiences I didn't want to take the risk with something as elemental as getting the hull shape right(ish). As planking has finalised, I don't see how to correct this, but a new approach to planking is on the cards for the next one.
Hope you understand, I still feel very much like a newbie, especially when seeing all the marvellous work done by other members.
Thnx again for your comments, stay healthy and safe!
- Gazzarian, Bill Morrison, Richard44 and 1 other
-
 4
4
-
Hi all, quick and probably stupid question: second planking is finalising and I'm prepping for the installation of the limber boards. Clear instructions for the bow portion, but I'm a bit unclear about the stern, as the bulwarks are not in a straight angle. A rudimentary schematic showing the stern:
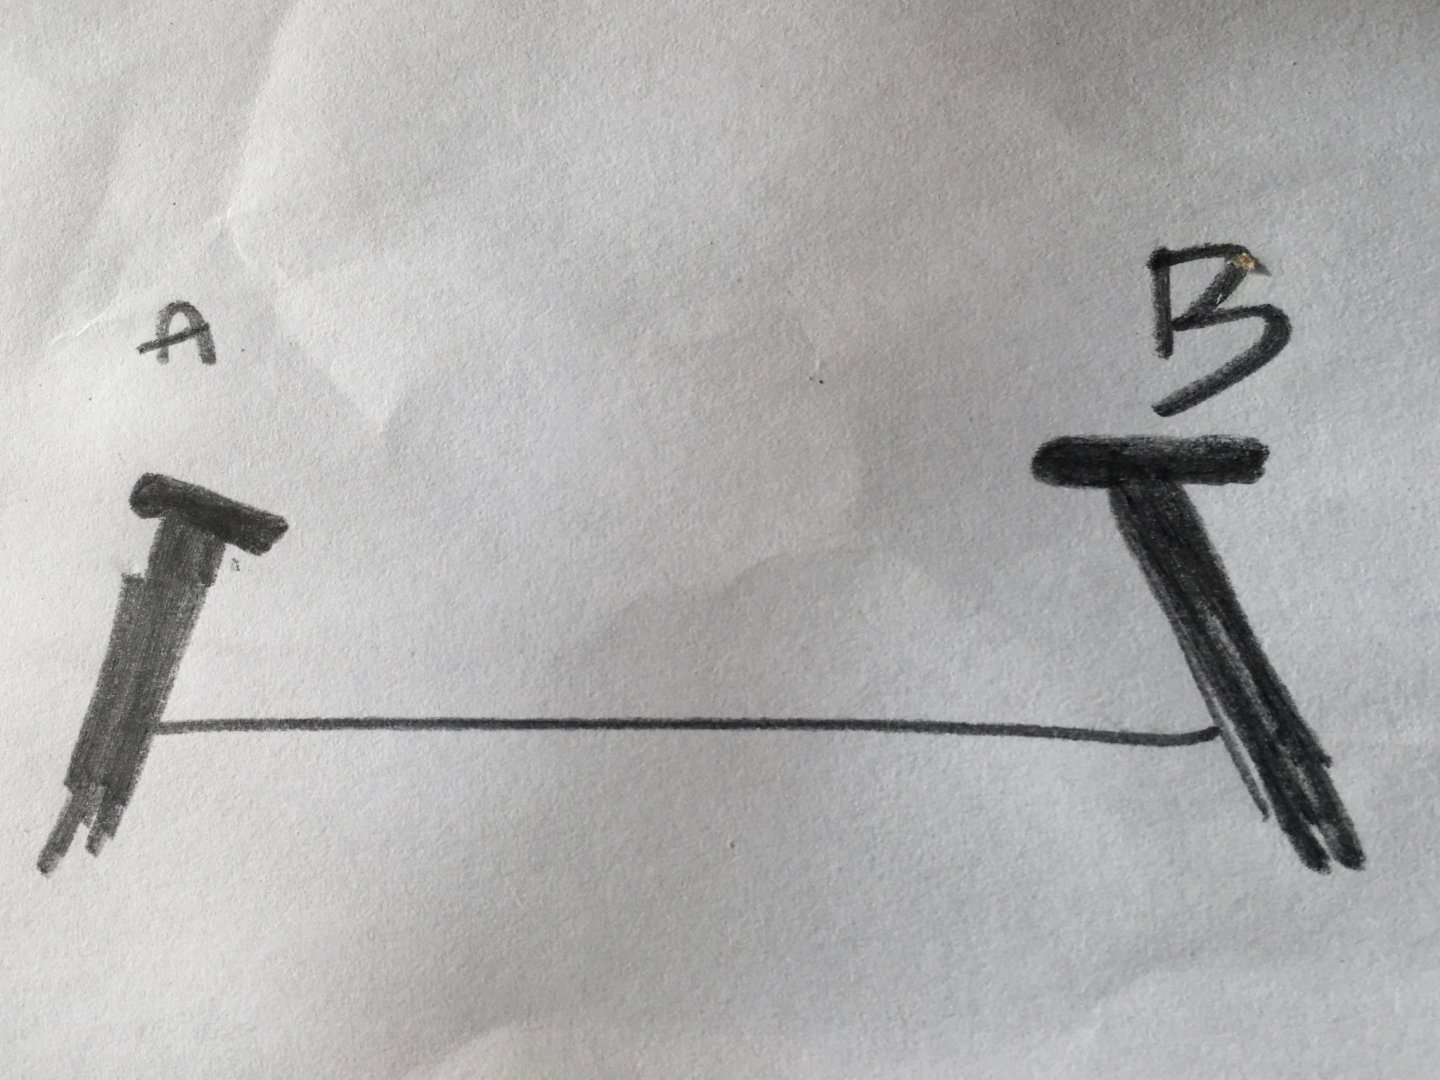
As for the question: do the limber boards get installed following the bulwarks (option A), or do the limber boards follow the alignment of the deck (option B)? This will allow me to sand the tops of the bulwarks correctly.
Thnx for your input!
-
Quick update: progressing slowly on second planking:
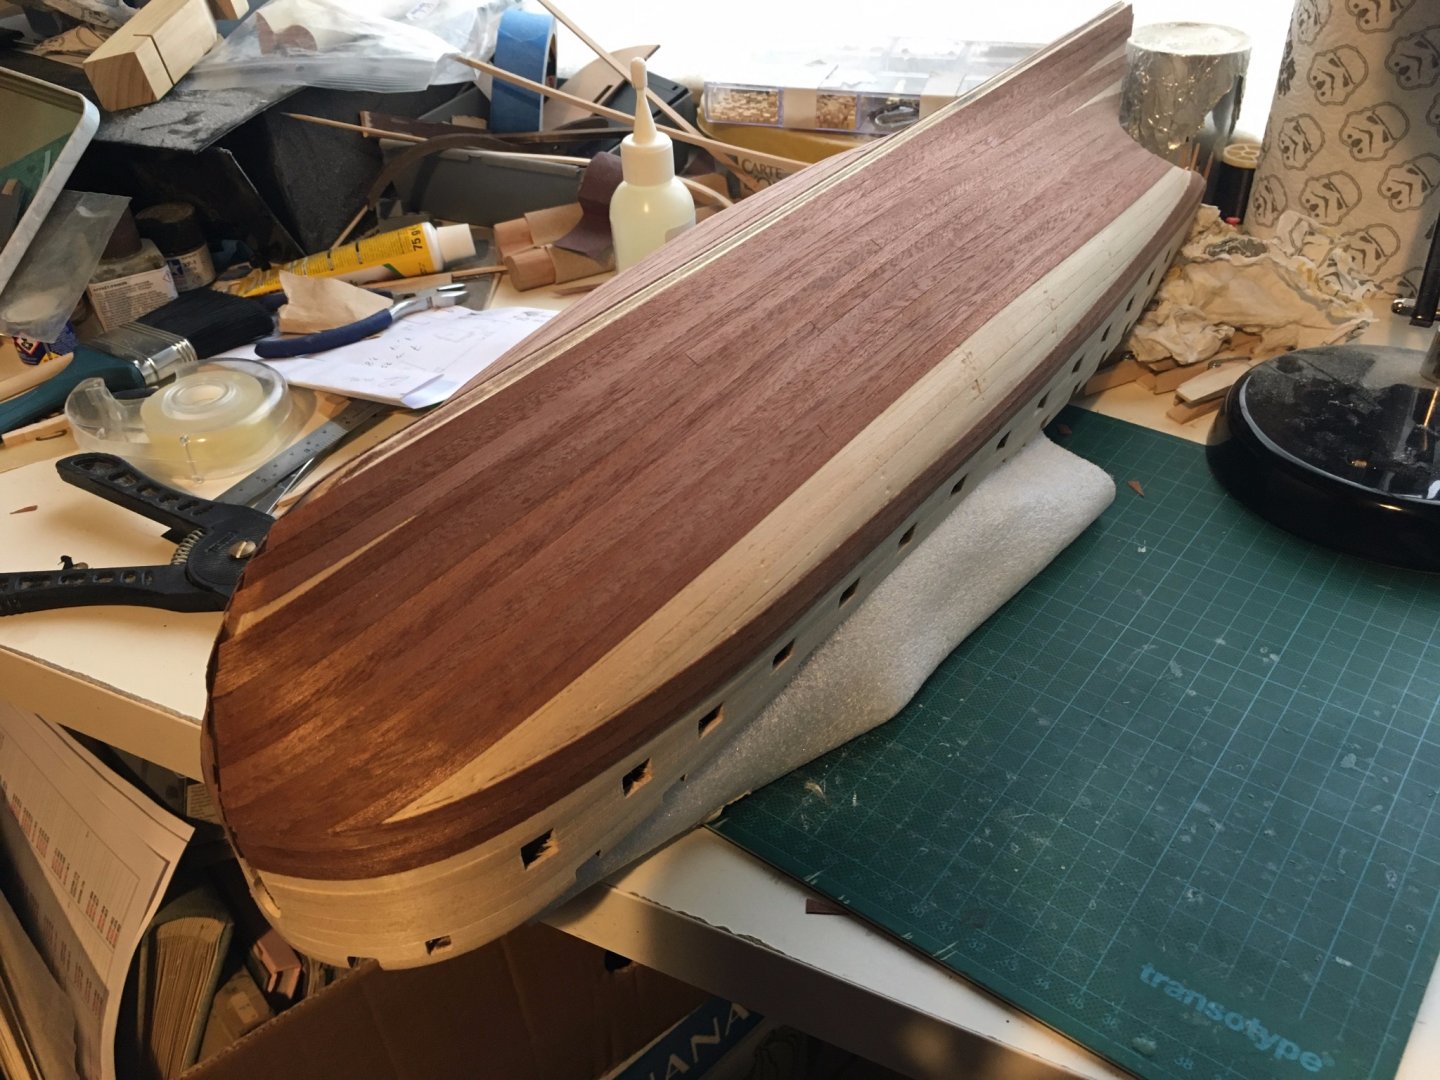
Took a new approach to this as I wanted to make sure the sapelli did not leave any gaps. Basically I put down CA gel at regular distances (closer whenever a tricky bend came up), and in-between used PVA for glueing the rest of the strip. It's probably overkill, but it keeps the strips in place nicely, basically using the CA as nails until the PVA dries.

4 more strips to go, and the way the Cover numbers are going in Belgium, I might have more time on my hands as of next week...
Stay healthy, stay safe!
- Lt. Biggles, Geowolf, clearway and 5 others
-
8
-
Hi there, I've made a template on paper, which I put behind the shrouds so I could follow the lines. Lines were set apart 5mm, after checking with the experts over here 🙂 . Securing them was a difficult choice, in the end I secured them with CA glue, tried the knot-tying but I kept on stretching the shroud lines in all kinds of wrong directions...
-
-
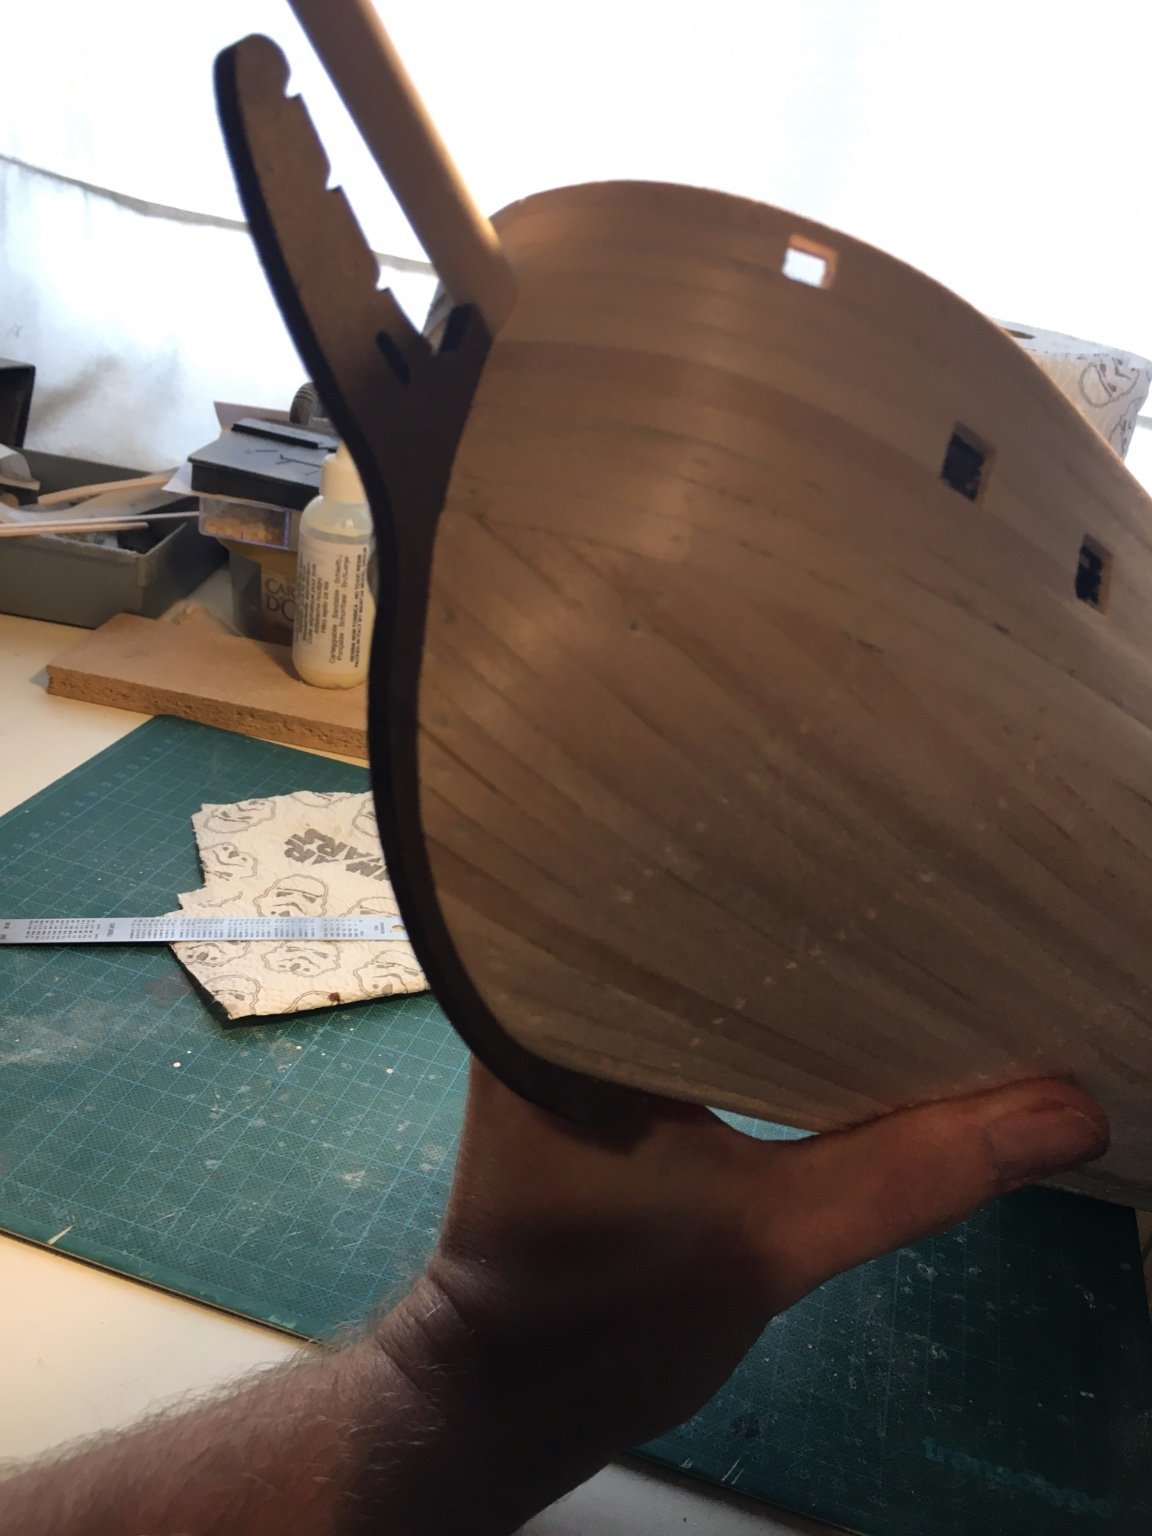
Hi all, Thnx for checking in. Finalised the first planking last week and gave Di her first sanding down:
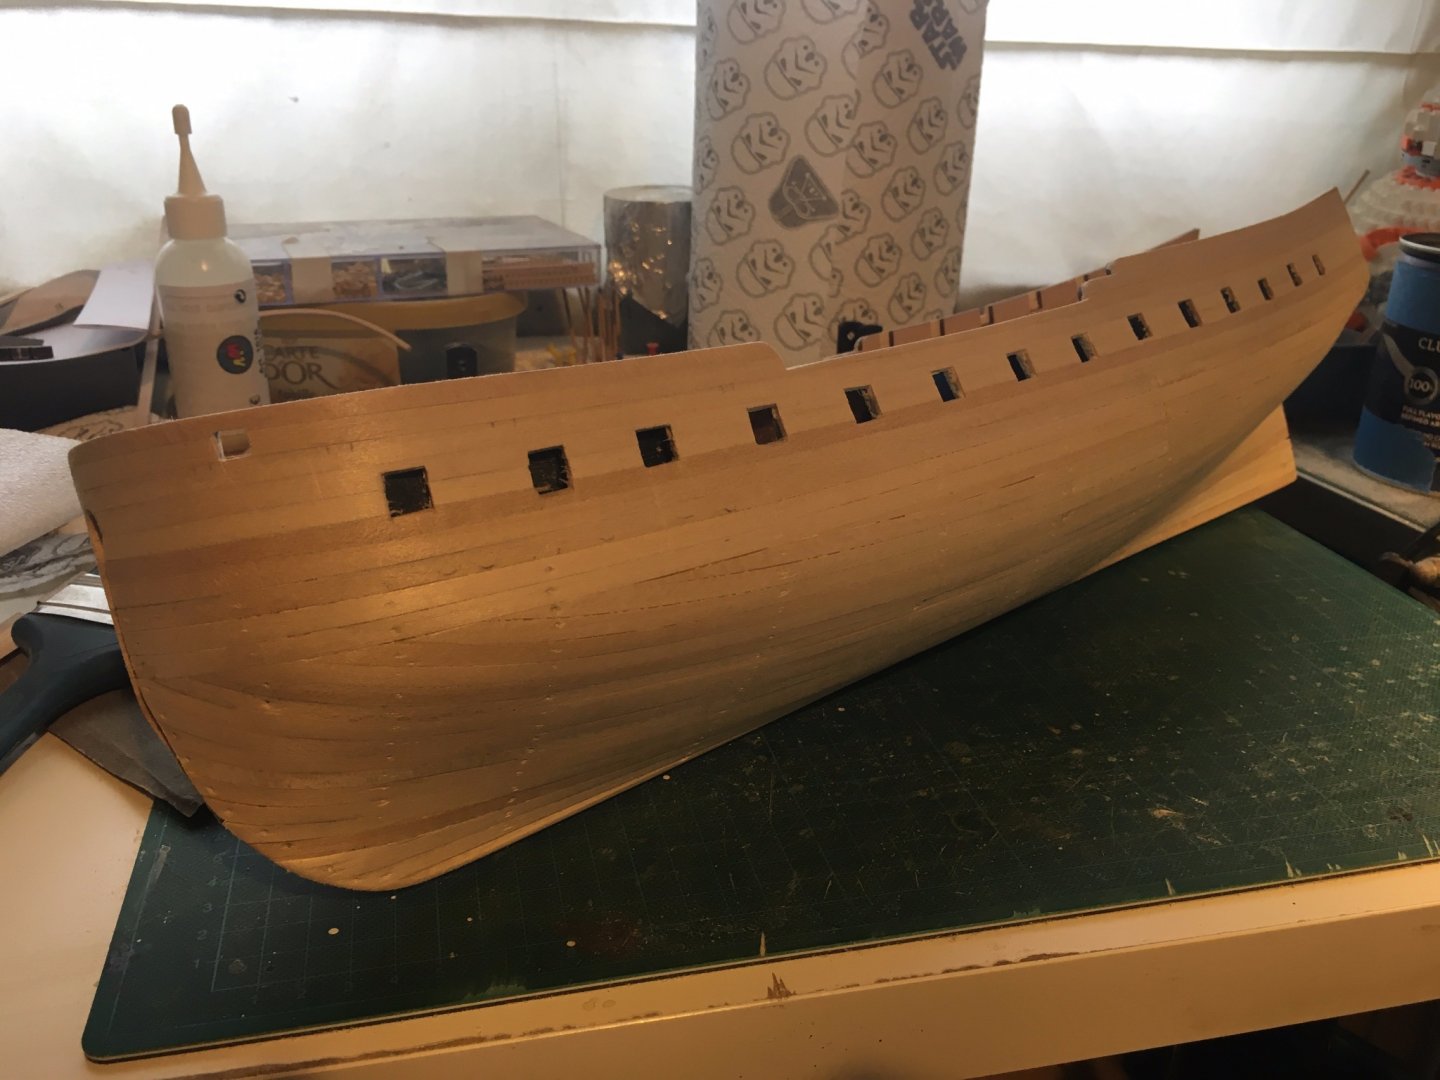

Still some smaller bumps to take care of, but she's smoothing out 🙂 As this was my first full bow planking, sanding was a bit of a nervous affair, but I think it worked out:
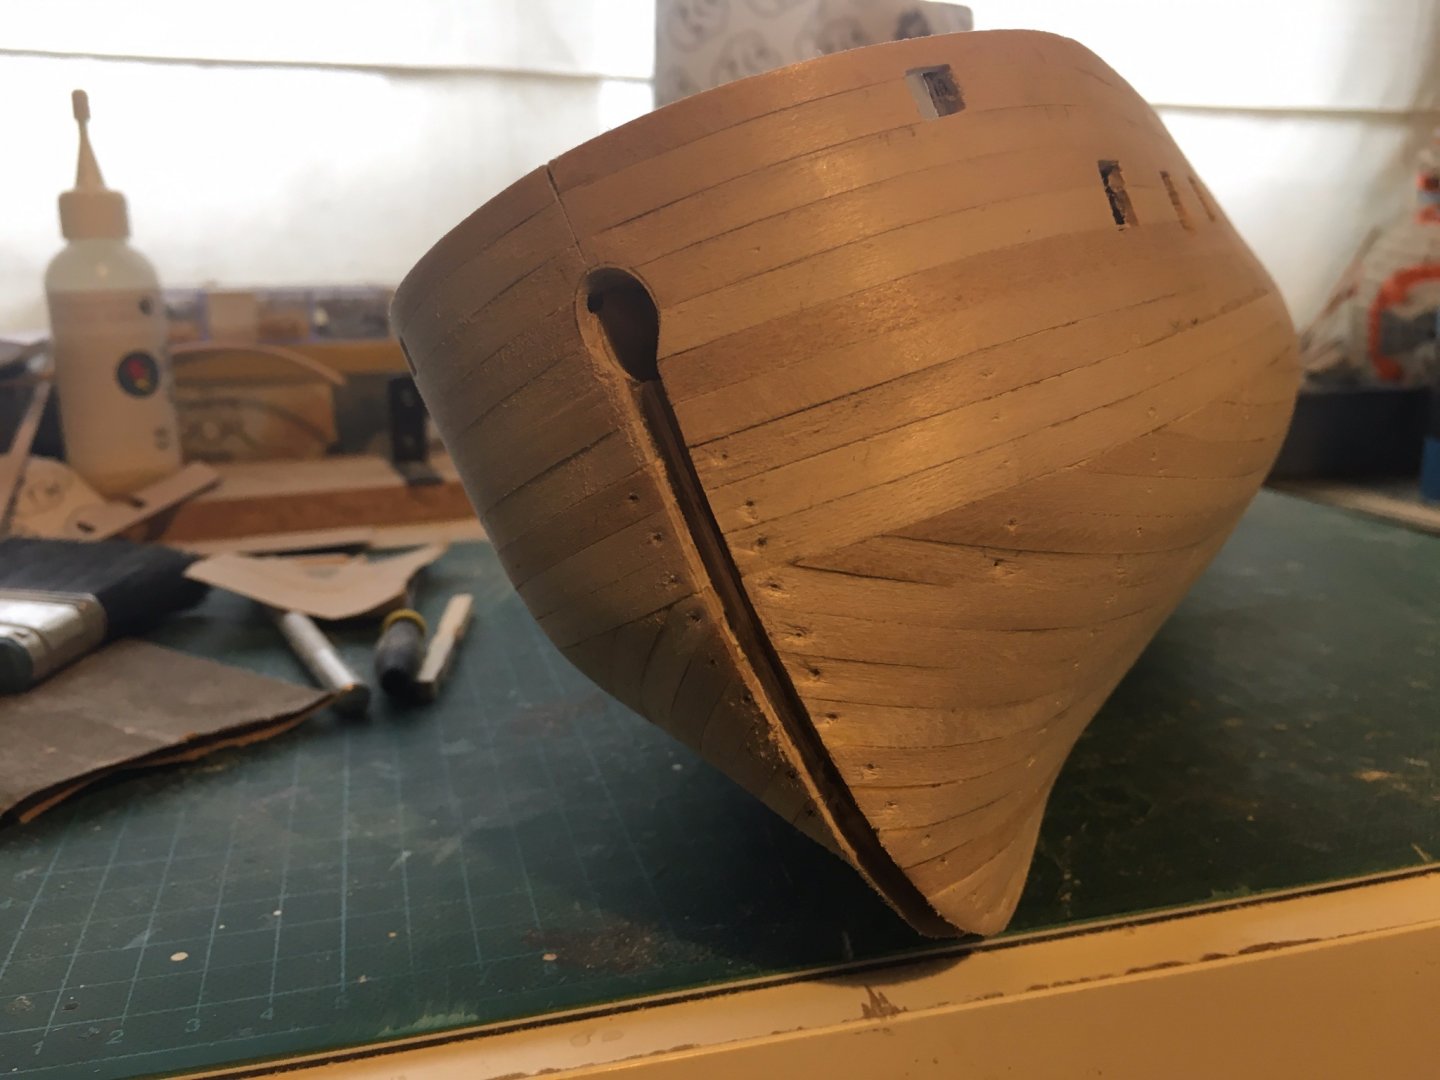
Dryfitted the stem and the bowsprit to check alignment, so far so good:

Next step: inner bulwarks. Still haven't made up my mind of using the plywood as provided by Occre, or use the plank surplus. Any thoughts? Idea is to leave the colour natural, with clear-ish varnish only. Correct me if I'm wrong, but wasn't the occhre red used only on English ships at this time? Can't really find a definitive painting guide to these ships..
Also, question: wood glue works wonders on untreated wood, but will it do the same on varnished wood? I'm asking because I thought about varnishing the lower part of the hull in a darker colour, so when I apply the second planking (sapelli) and I make any errors, there's no ugly white gap showing. Terror was a doozy in this area, as the hull was varnished black, but I want to keep the sapelli colour as much as possible for Diana...
Thnx for your help!
- Lt. Biggles, Rik Thistle, Baker and 2 others
-
5
-
On 9/28/2020 at 11:34 PM, Seems ok to me said:
The rigging pictures are a wash of red lines I haven’t even started to decipher. For my first major build, I may be in the “finish it and learn” category vs “historical accuracy”. Thanks for the head’s up.
They can be an. absolute maze. the way I dealt with it was one step at a time, following the instructions (although not correct). Start with the shrouds first, then ratting them up, then the stays. By that time you'll have some experience with dealing with rope and you're good to take on the next step: rigging the yardarms.
I dreaded rigging, but I realised for me this was one of the most satisfying parts of the building process. You really see the ship growing from a rough model to something more realistic.
One thing I didn't tackle though were the sails, partly because I liked the look for Terror without them, partly because the rigging schemes didn't make sense. I'm getting the courage together to equip Diana with her sails, as this scheme seems to be a bit more logical (although more complex). But that's still a long way away.
Good luck roping her up 🙂
-
Hi Geowolf, sorry to hear about the knee, get well soon! Nice work on the ice-shocks, they were a challenge to get right, I know I had my fair share of problems with them.
If it can help, I did most of my mast construction off-boat, rigging the blocks on the yardarms, attaching them to the masts, and only then did I mount them on the ship itself. I thought this would give me more control of the alignment between the mast elements, it also gave me a crash course in detailed rigging, something I put to good use afterwards 🙂
Anyway, just my two cents, again, I'm only starting, so take anything I say with a pinch of salt...
-
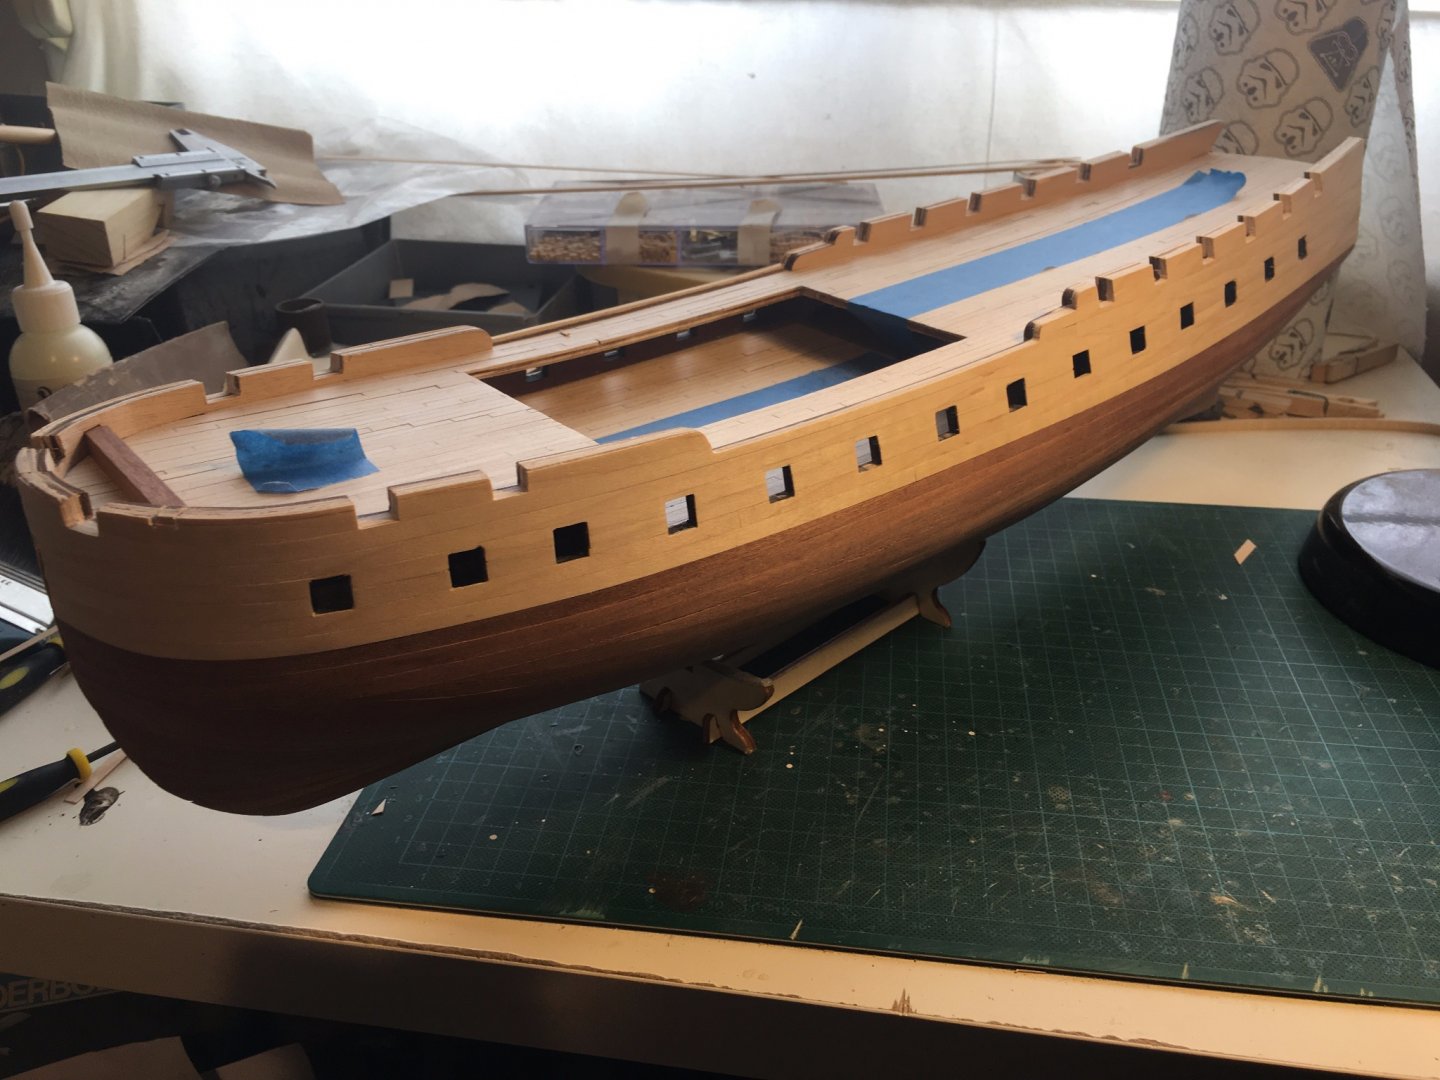
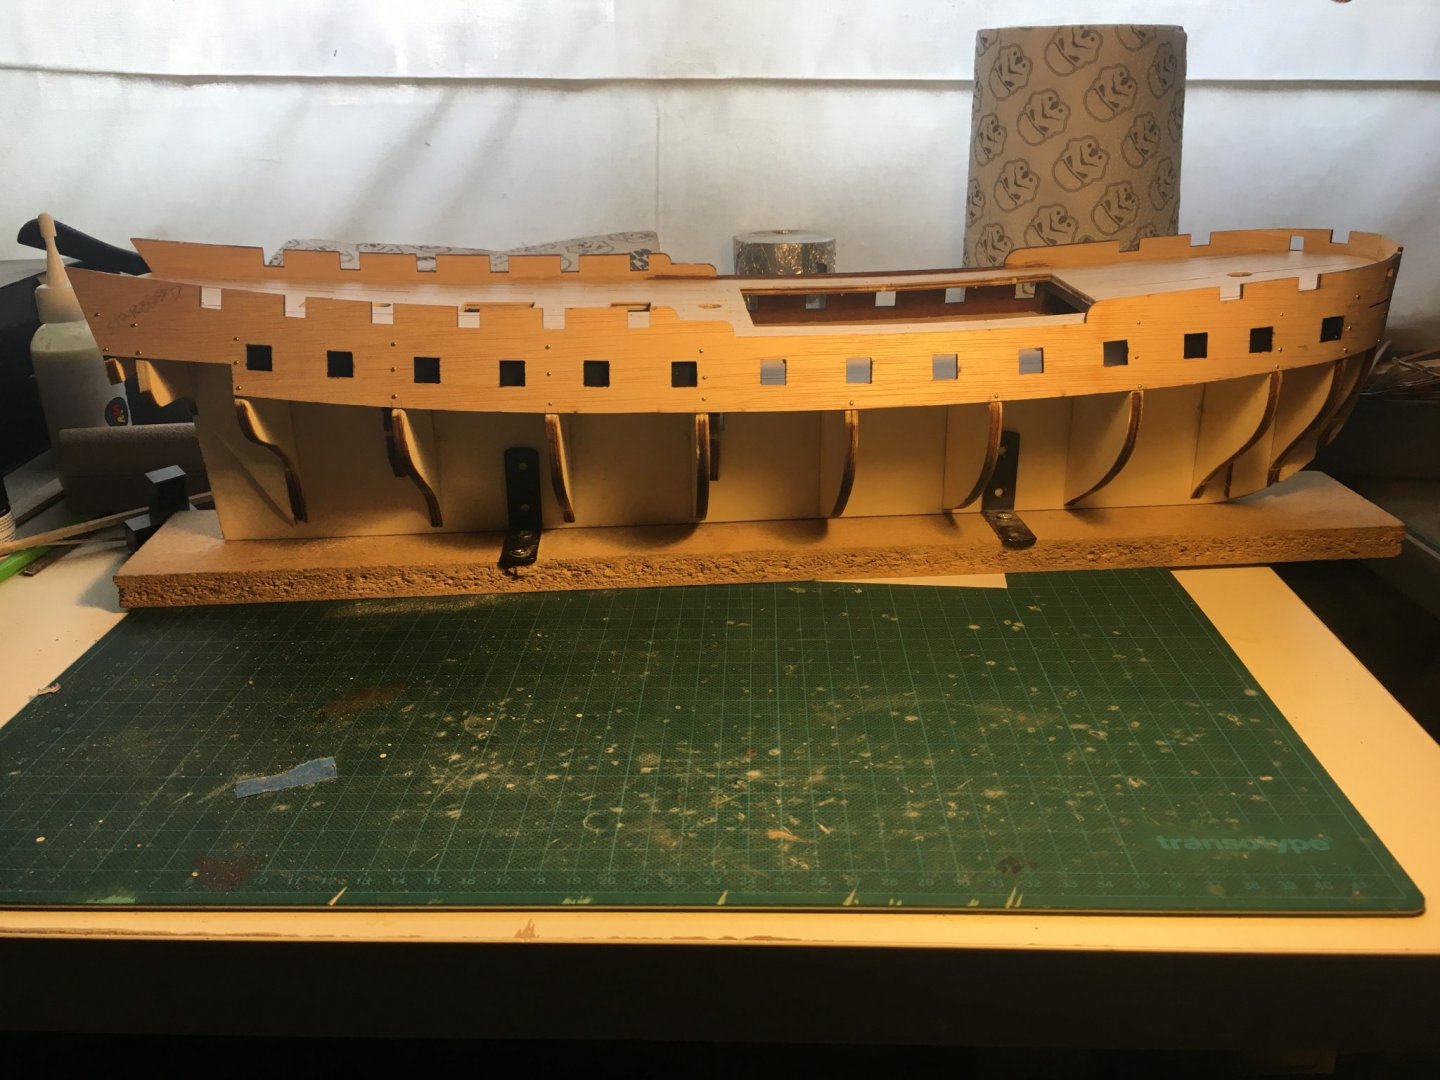
Hi all, thnx for checking in. Made some progress last week, although life kept me busy (what else is new).
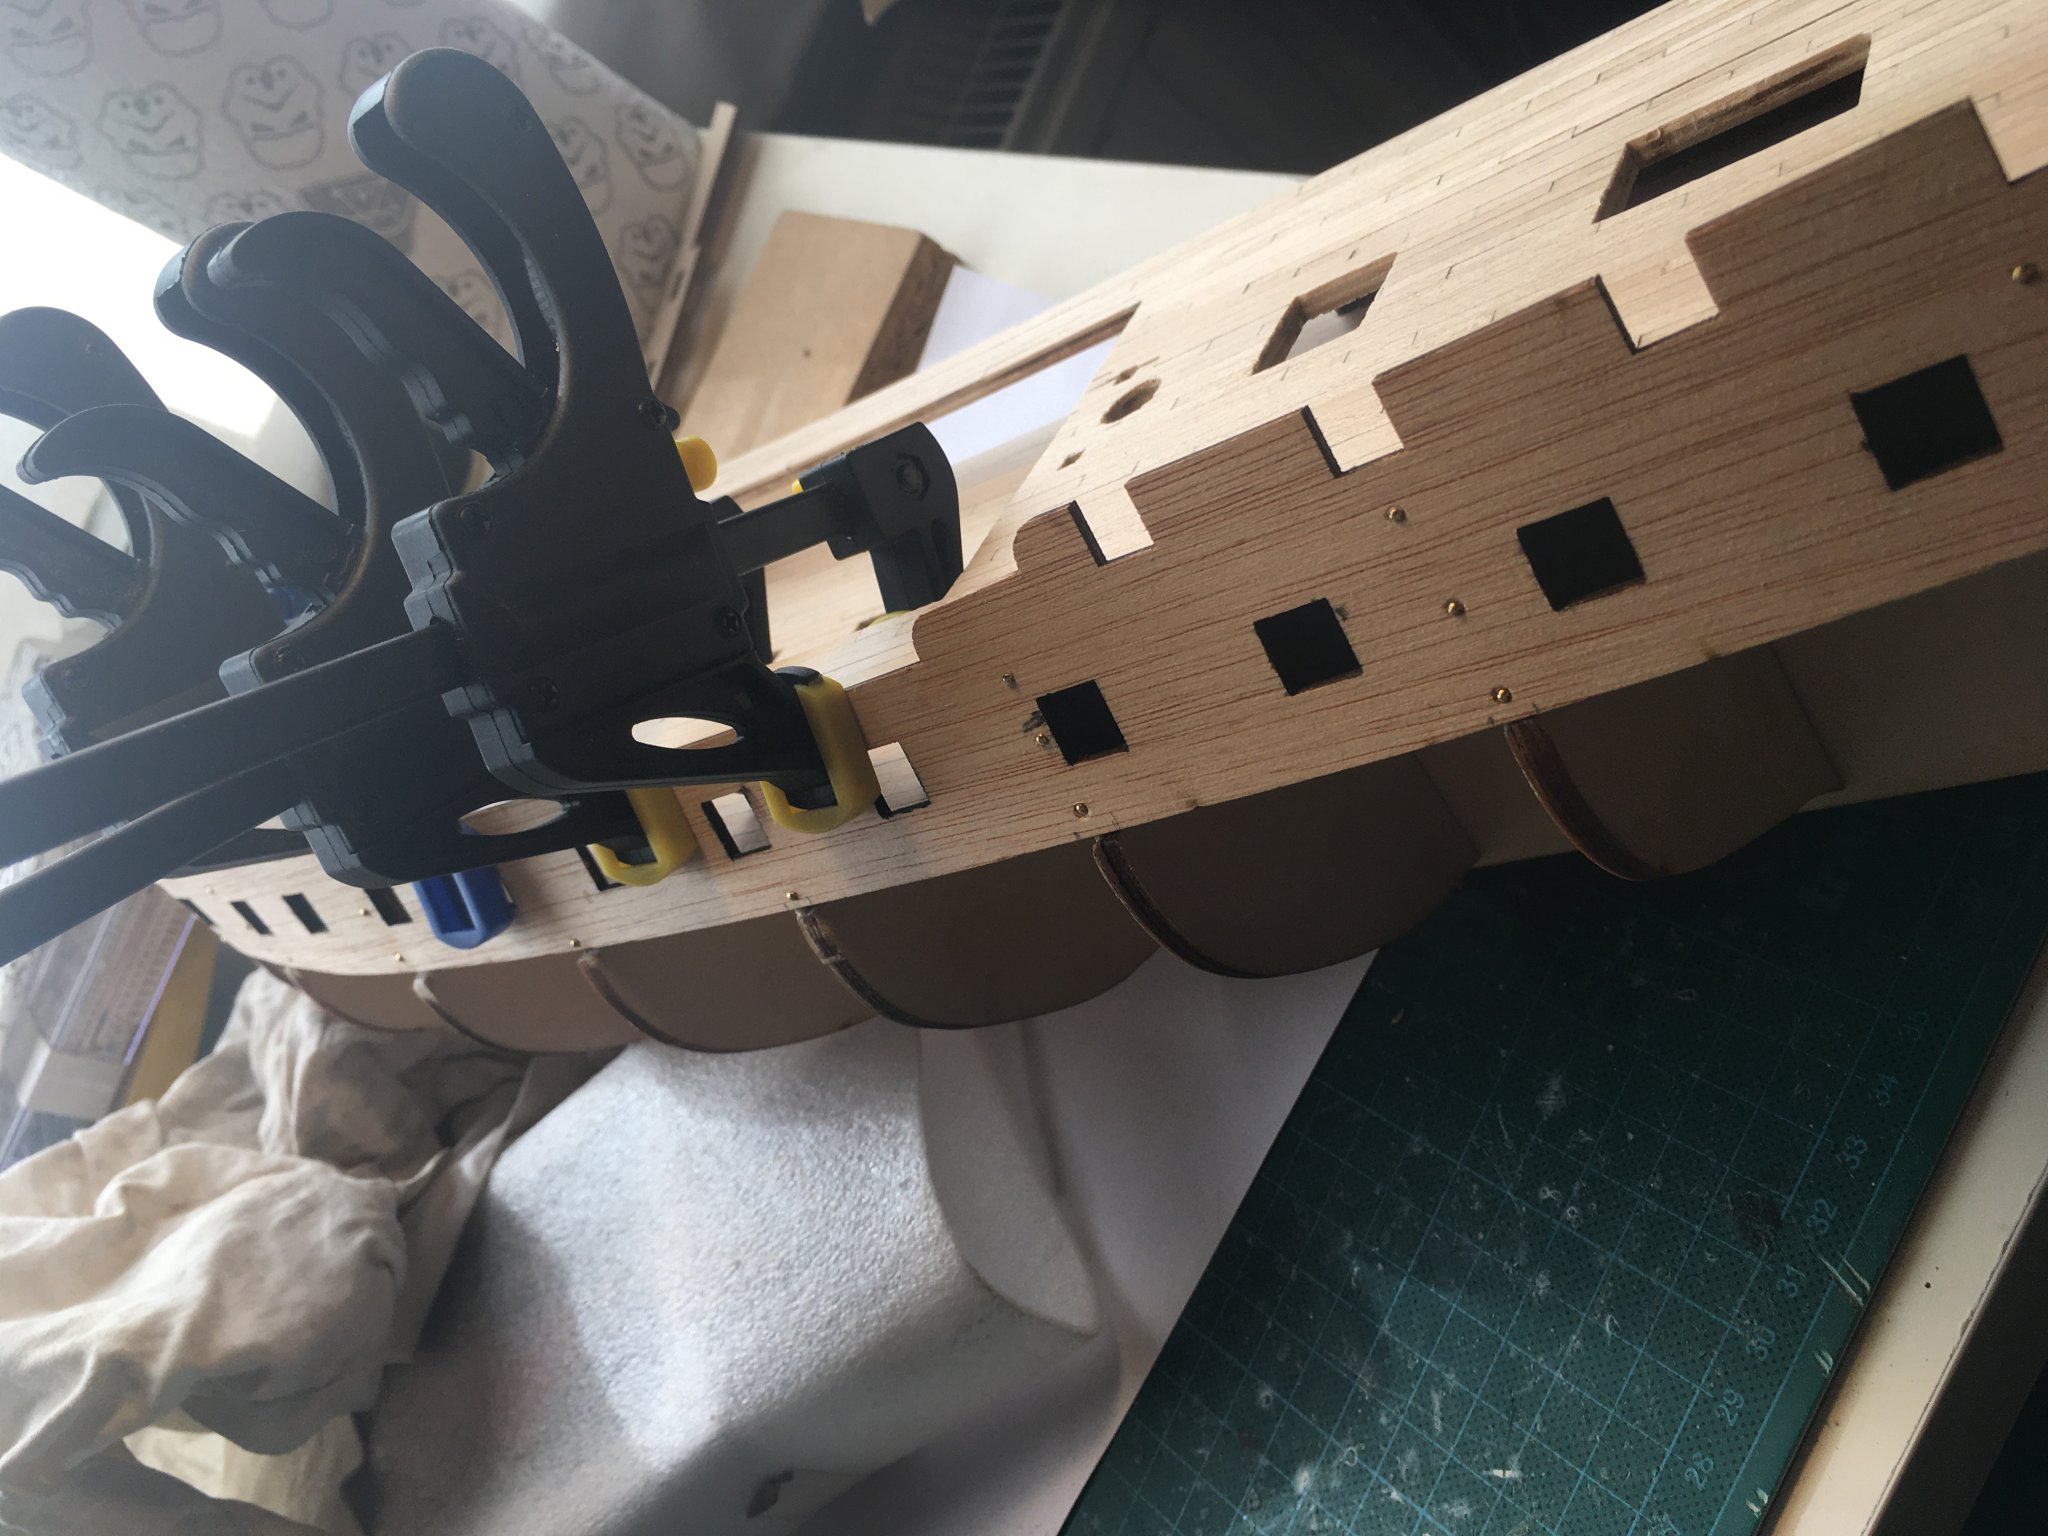
After fitting the bulwarks, fairing was upon us. No mayor issues, except the bulwarks did not sit flush with the bow, so I attach small wedges to make sure the planks that would go on there were level:
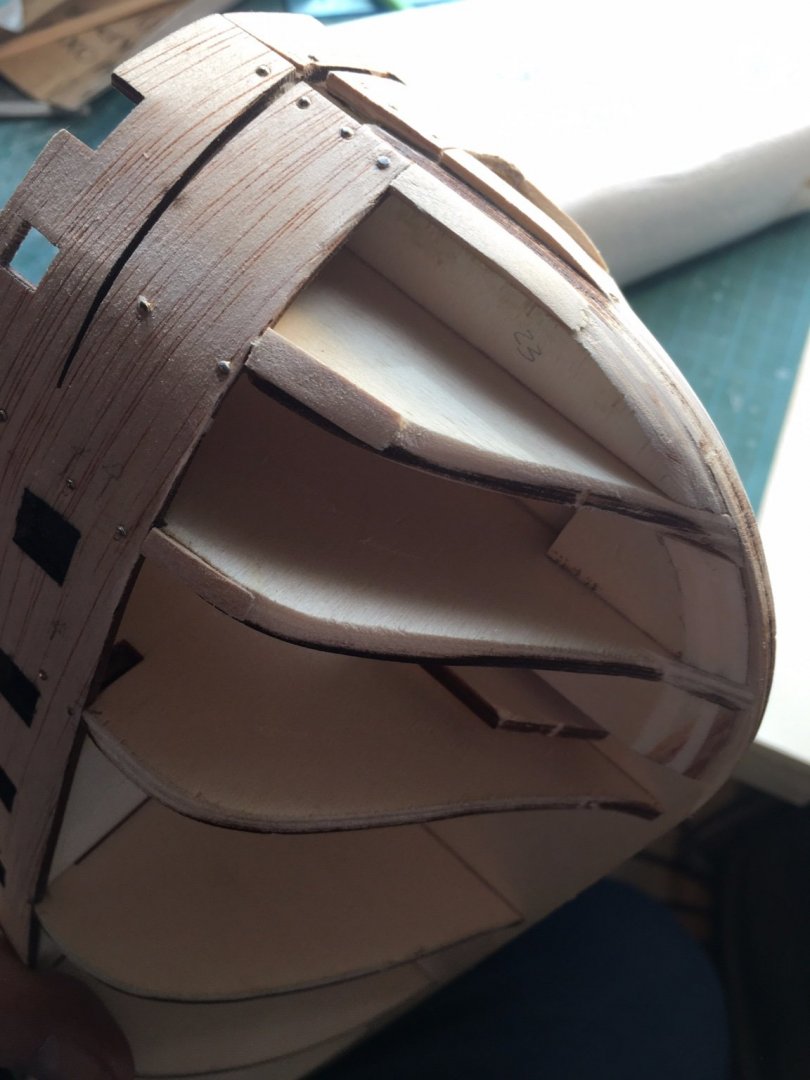
After that, planking began in earnest. I was a bit nervous, thought I'd forgot everything I learned with Terror. But you seen get into the groove (sorry). First up were the three planks under the bulwarks:
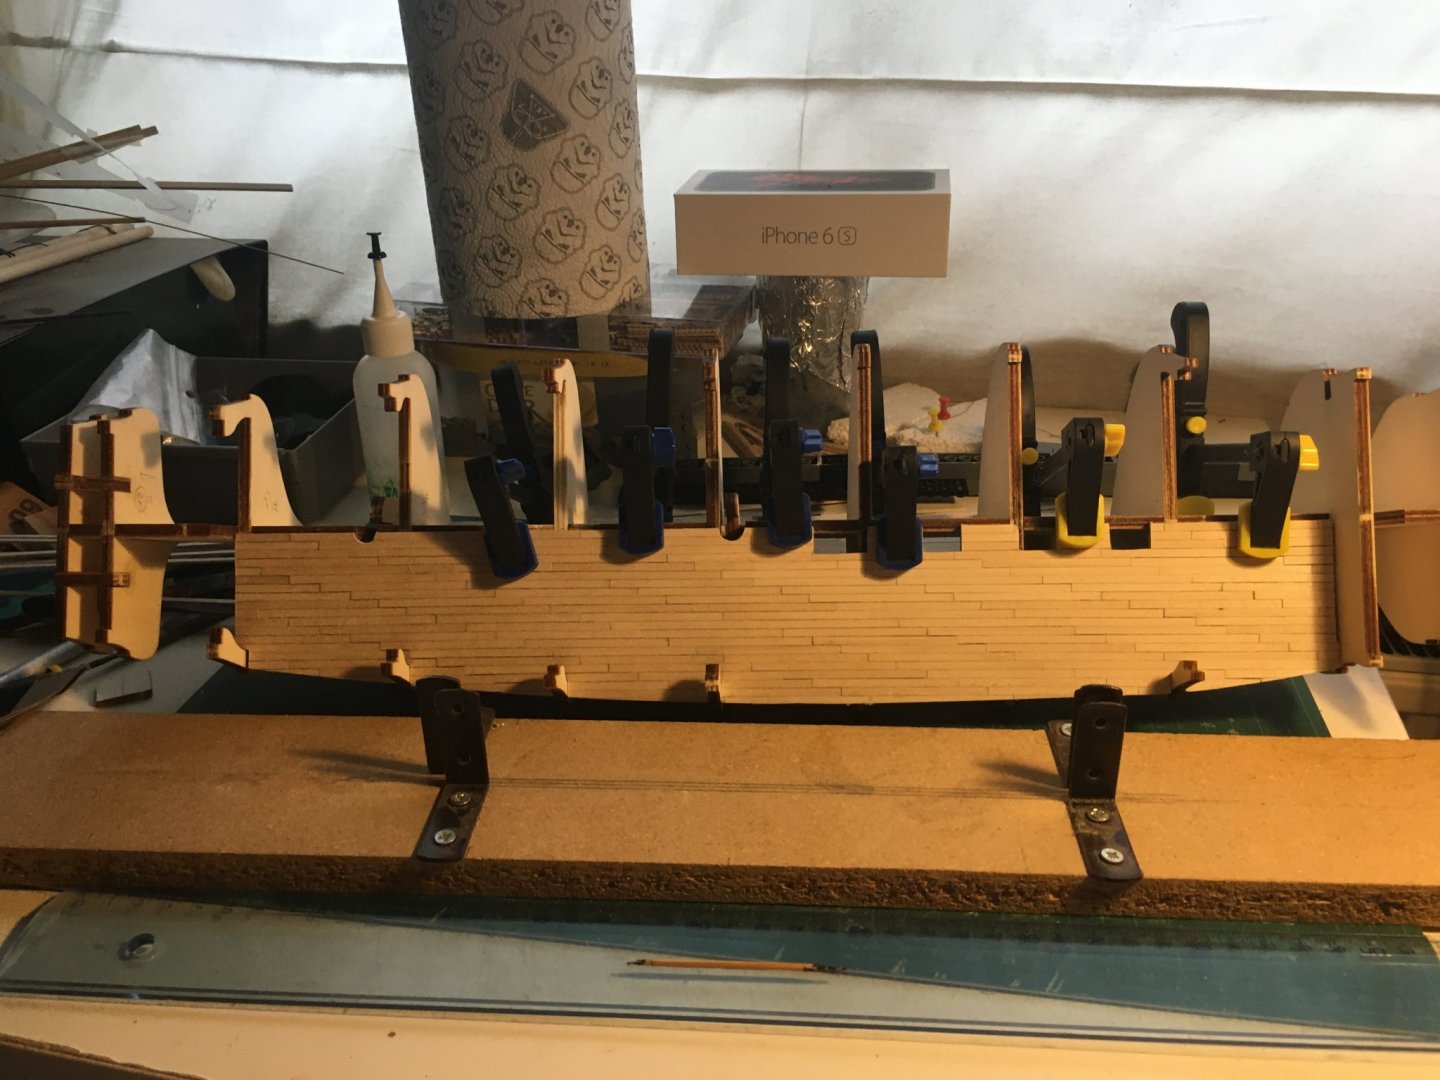
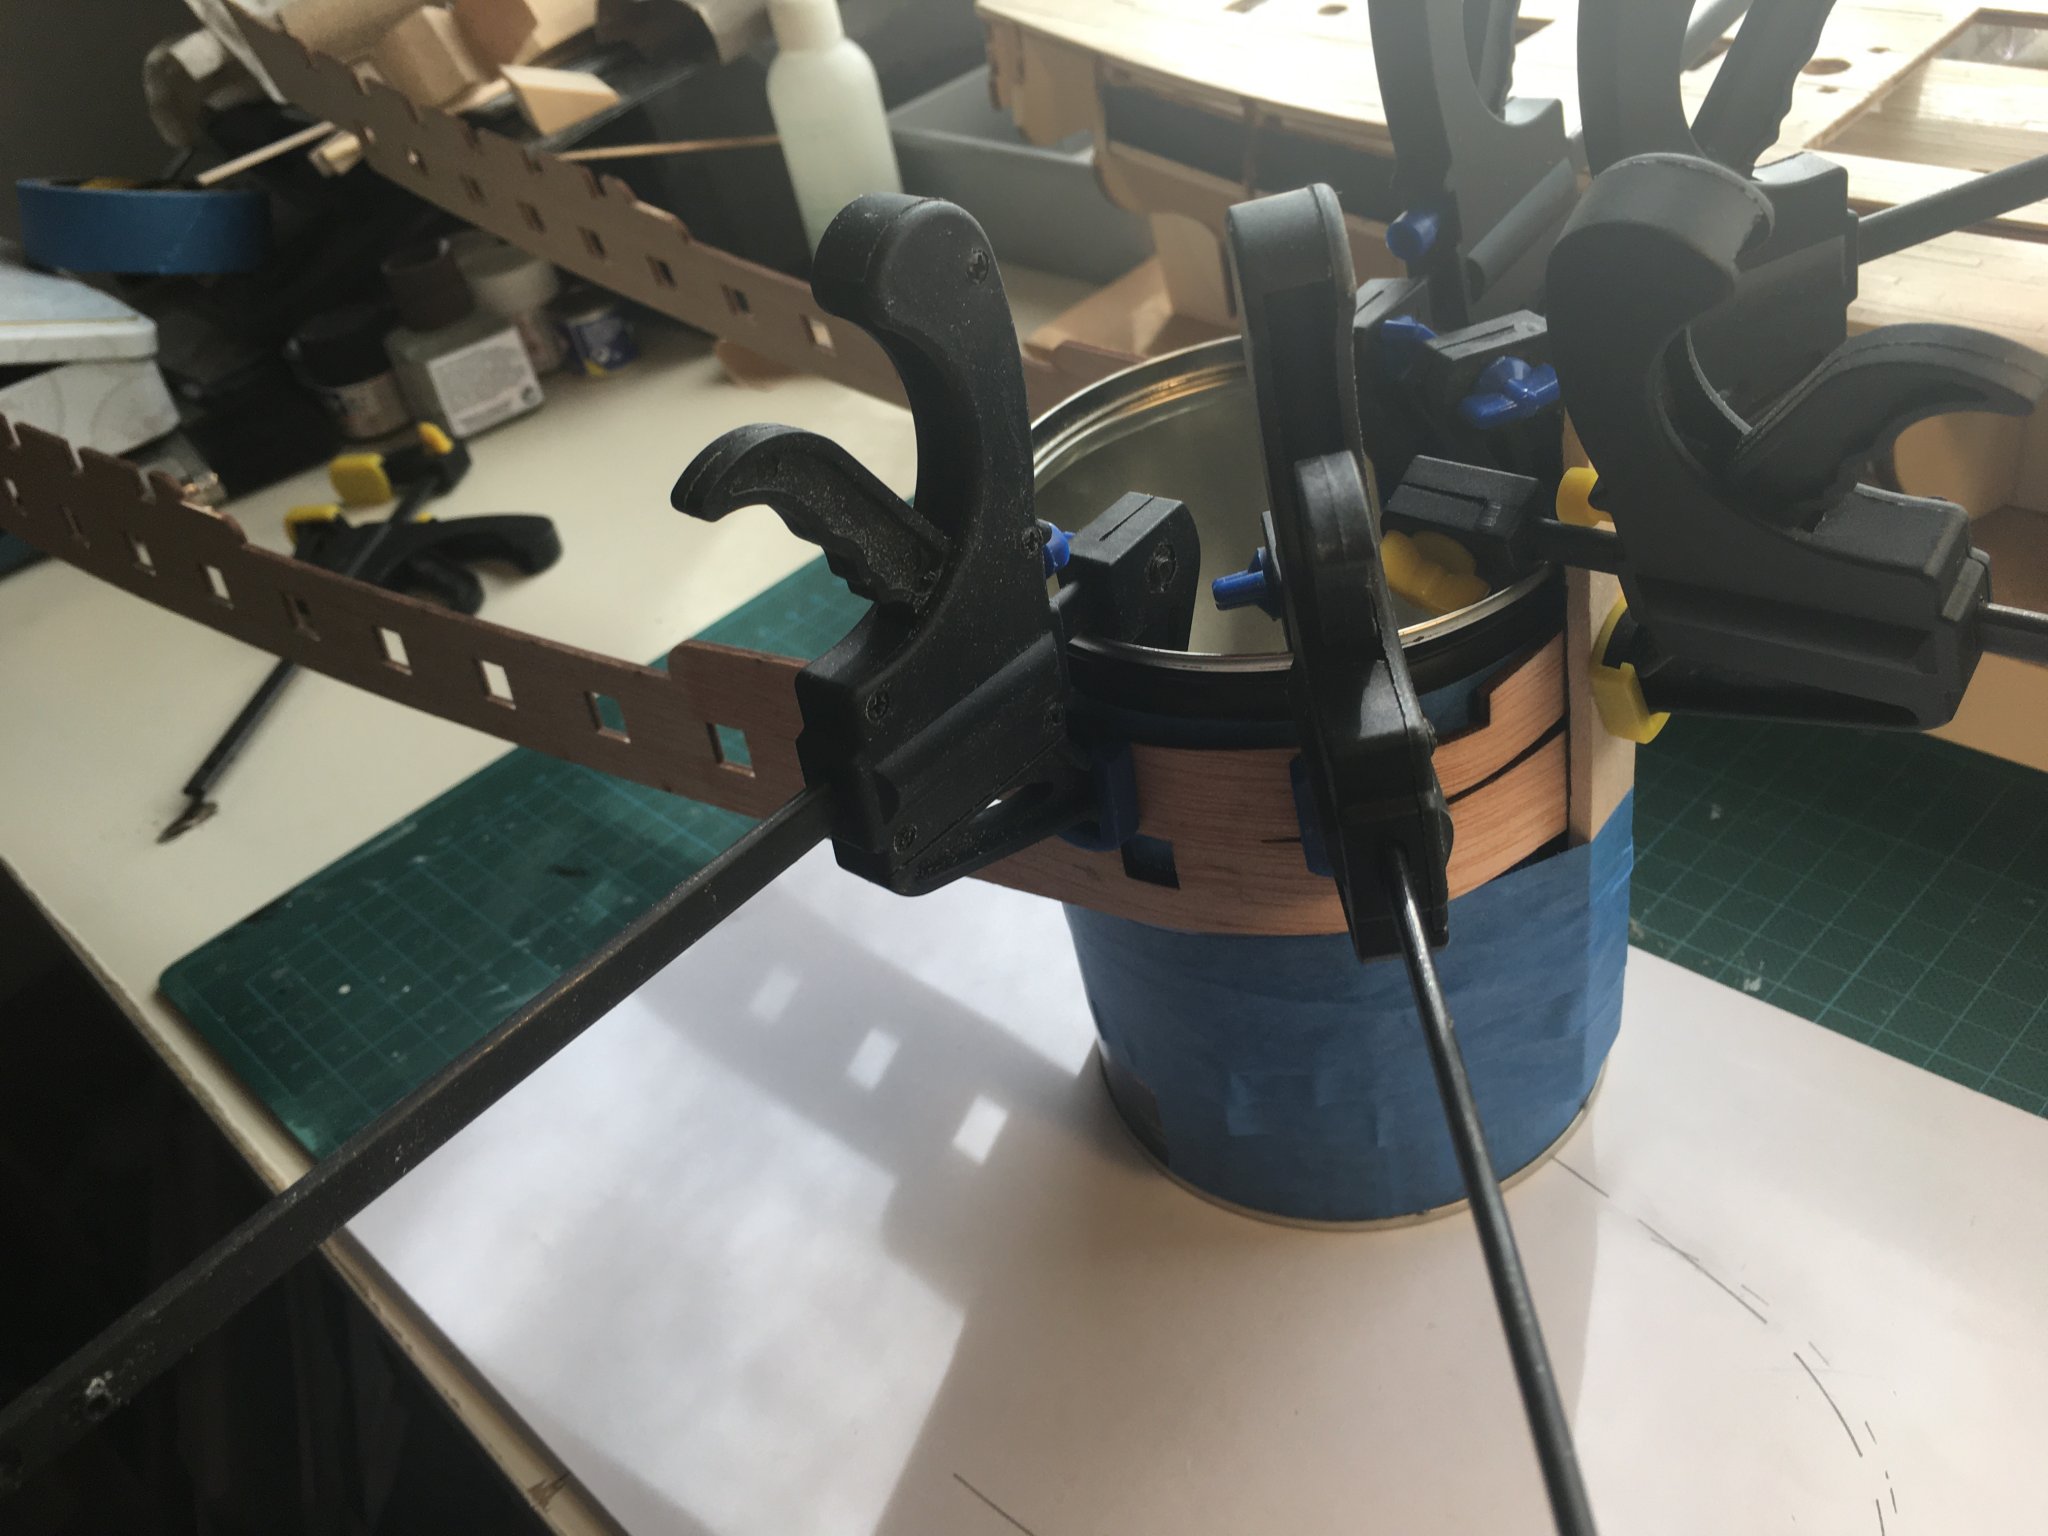
These will also serve to support the wales, so they needed to be in the right position. The plan then called to start from the keel up, with the garboard planks up next. My previous experience with steaming wasn't totally successful, so I took another route: soaked the strips in hot water for 90 minutes, then used my third hand to allow to bend and dry:

This worked quite well, soak in the evening, let dry overnight and start in the morning 🙂 Worked my way up and this is where we are today:
Progress is slower than Terror, but I'm spending more time ensuring a good fit for the planks, avoiding as much tension on the plank as possible. Also, I aim for symmetry as much as possible, working on one side, and then repeating on the other. This allows me to keep track of how the two sides are planked and make corrections if necessary.
While planking I realised I never planked a bow before! Terror was a stack of plywood planks to be sanded down. So first try for that (that's why ObviousNewbie still holds as a nick, too many things I still need to do for the first time😄 ). Ensured a good overlap, I'd rather sand a bit more than find out the strips were too short. This is how the bow looks so far:
As always, your feedback is much appreciated. Tomorrow on to the second half of the hull and planking the bulwarks..
-
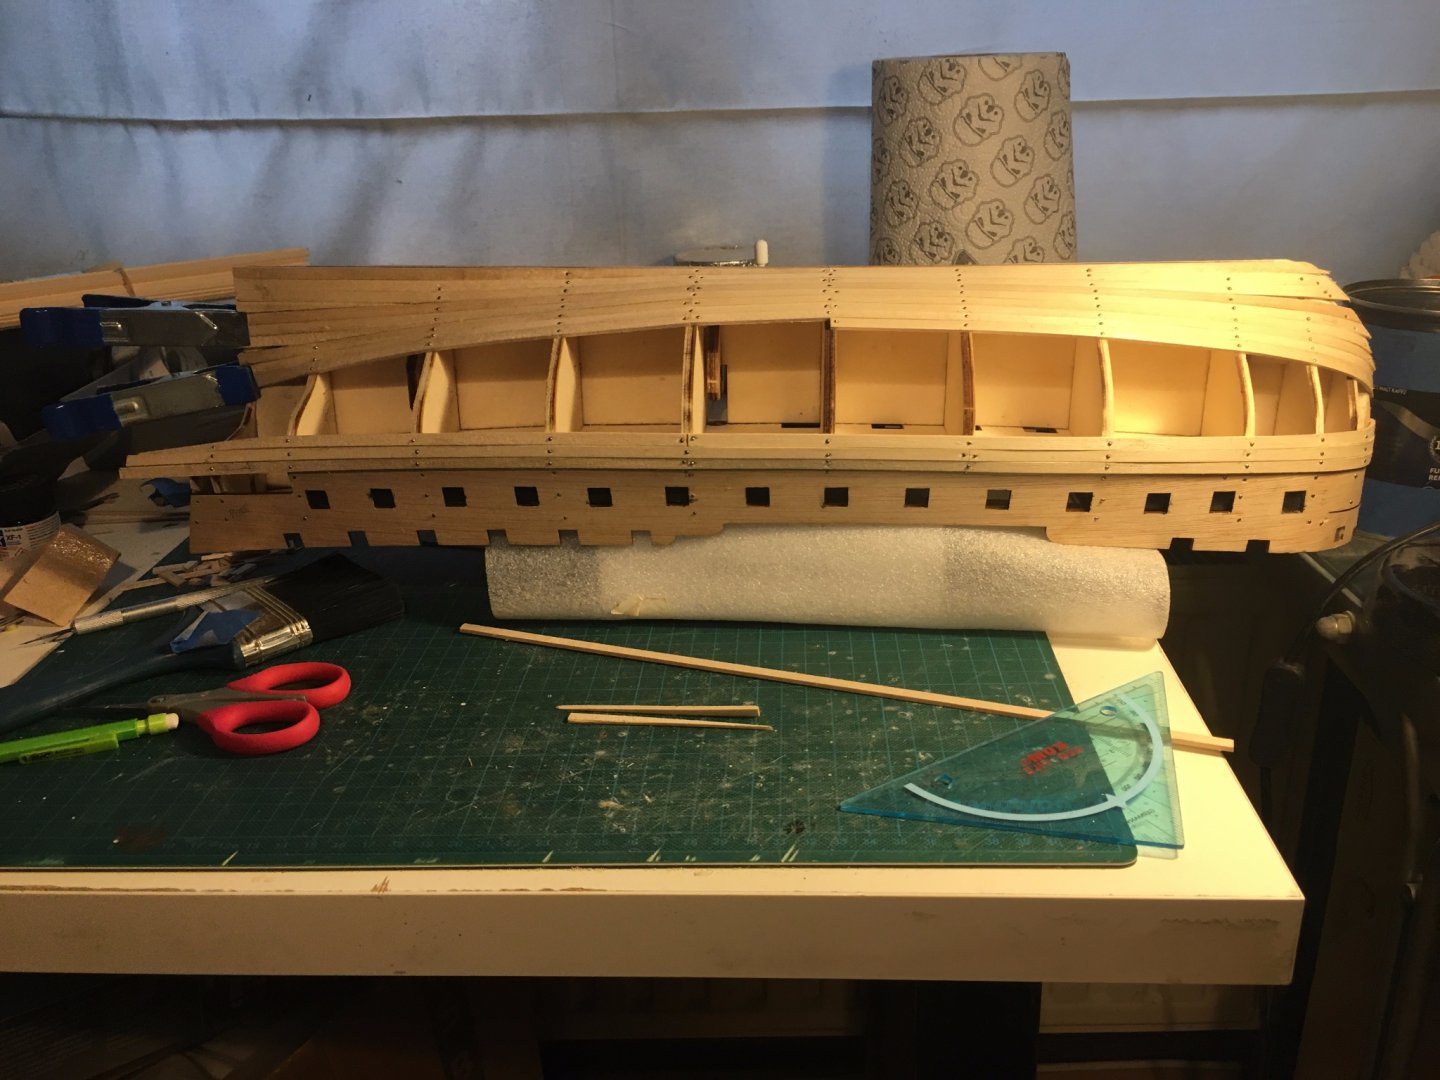
Busy week, not much progress, but managed to work on the bulwarks:

This time, I managed to actually bend them correctly on the first try 🙂 . Made a sketch of the bow to ensure the curvature would match. Still looking for a better way, as this is not 100% accurate.
Nevertheless, after 36 hours of drying (busy days), they were ready to be installed:

Preparation really paid off here, after about 2 hours, both them were fixed:

Letting the glue dry out now, then it's on to fairing the hull and planking. Longest bulkhead is 108mm, so 20 5mm strips per side and some change. As the Rear Admiral is moving to university, weekends are planned full, so more boat time next week, hopefully...
Enjoy the weekend!
-
12 hours ago, clearway said:
Welcome back. if modelled with gunports closed you would have saved putting the planks along the gundeck😁. There does seem a lot of discrepency with plank thickness on decks though (got to love occre)🤪.
Keith
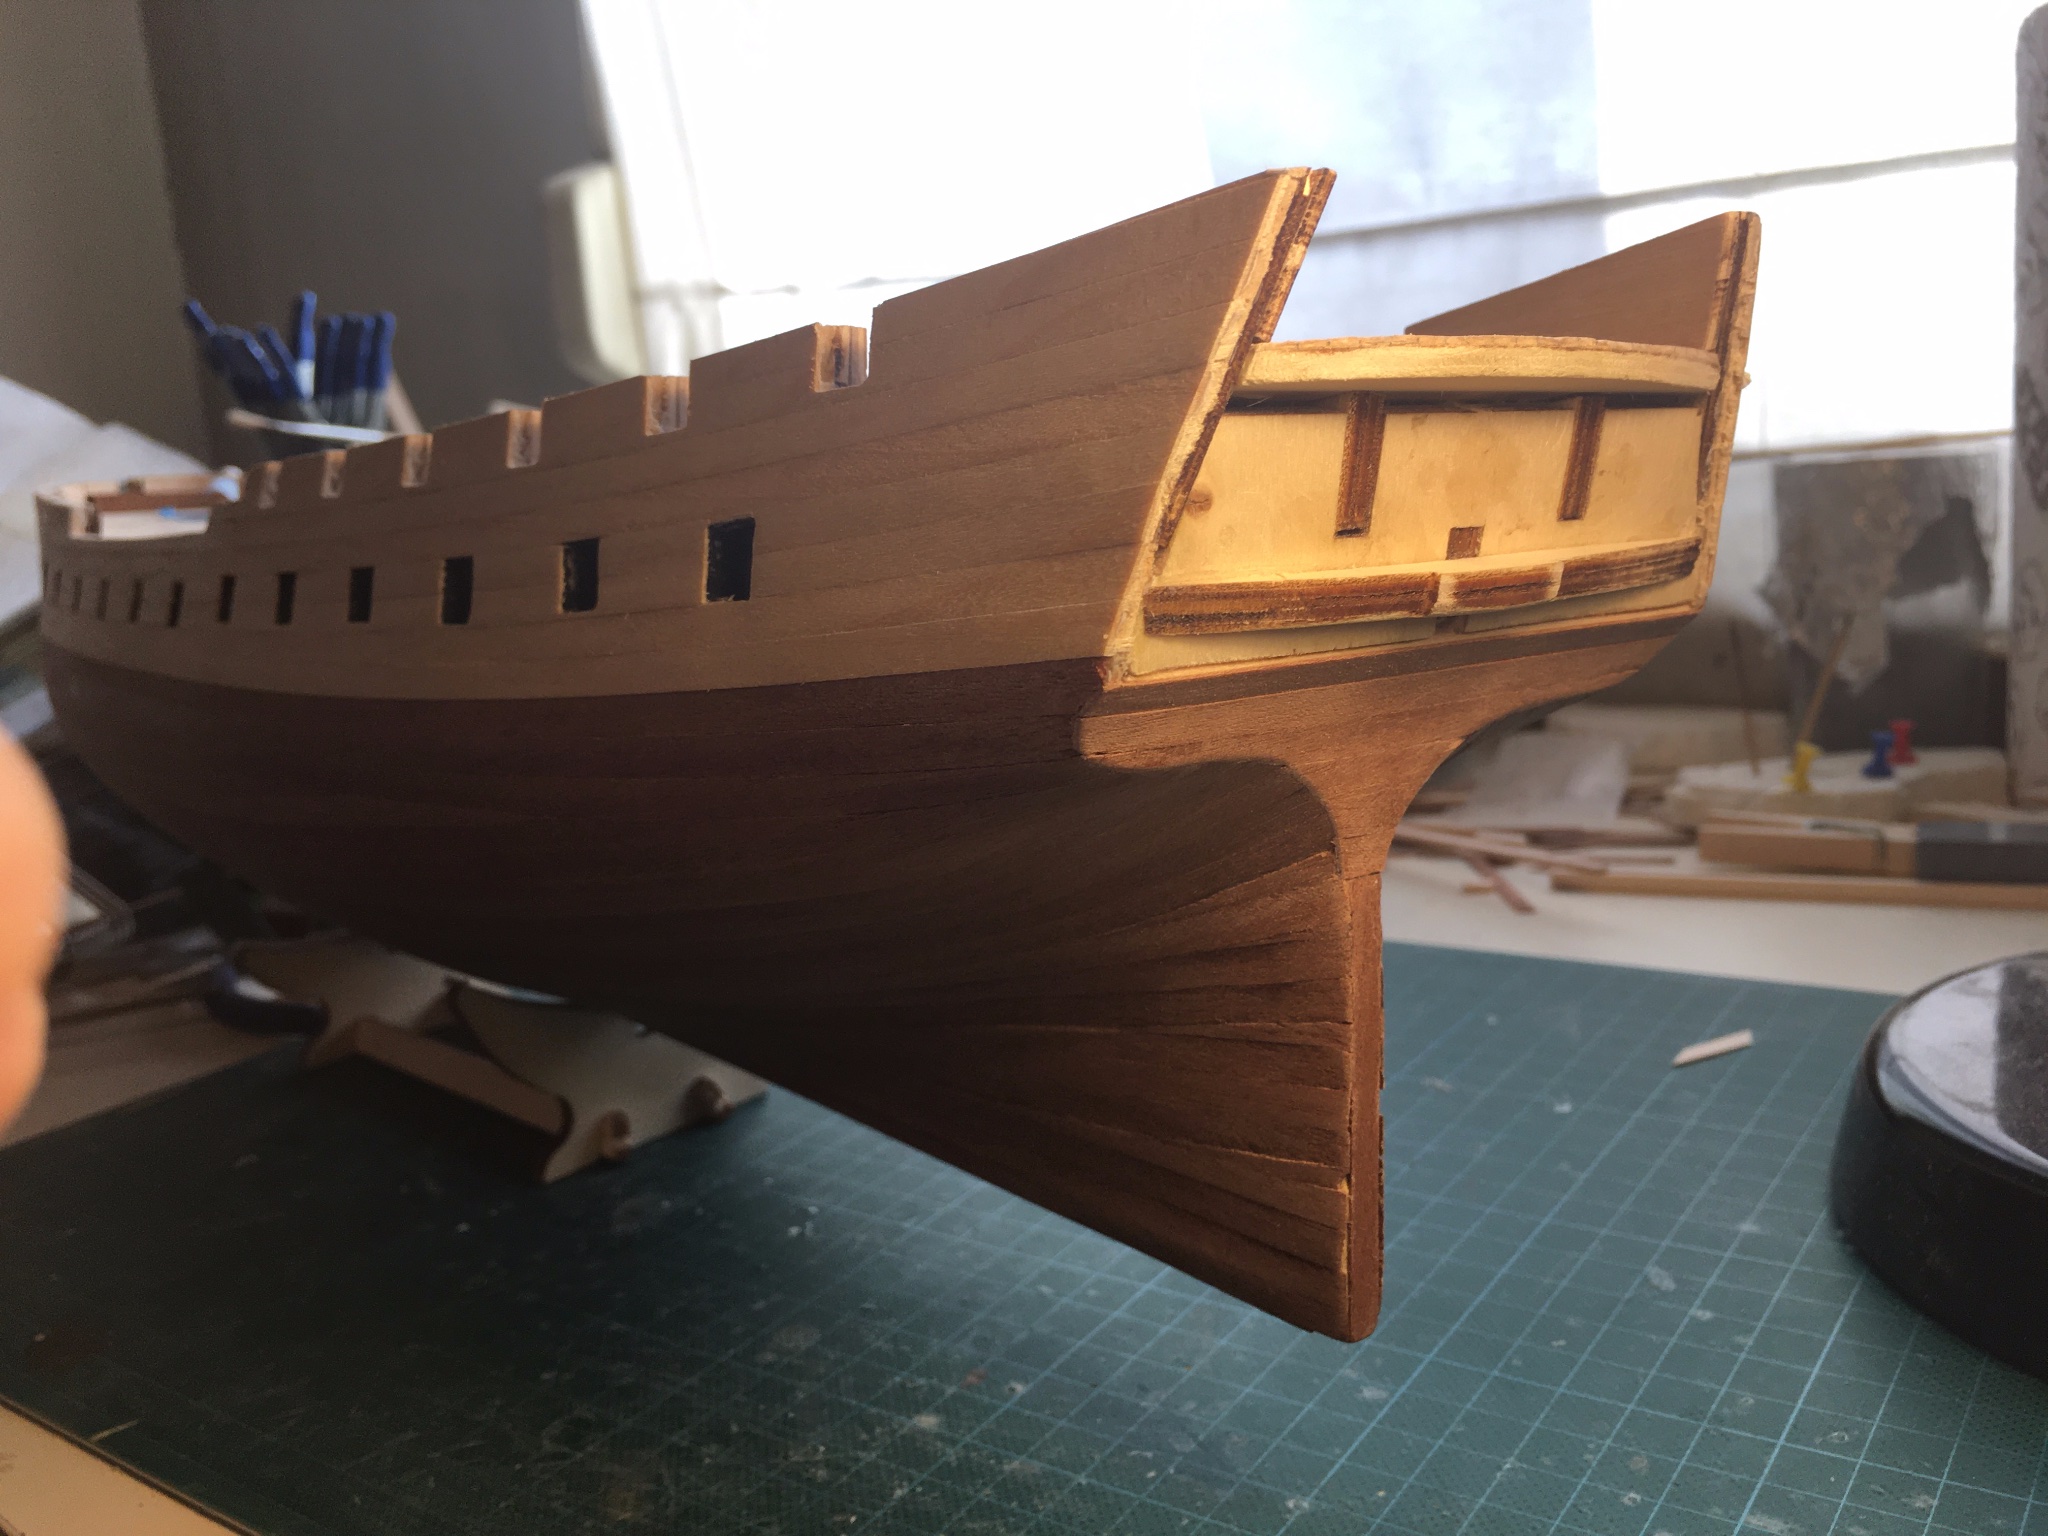
Hi, thnx for looking in! Well, the object of the second model was to try things I didn't get to do with Terror, and the cannons are a part of that, so gunports will be open. Still trying to figure out how to template the opening angle so they all align, but that's still far away. I sanded down the main deck, a lot of elbow grease, but this is where we are now:
There's improvement, but the difference is still visible in some areas. I have no experience with other brands, is this an issue they tackle better than Occre?
-
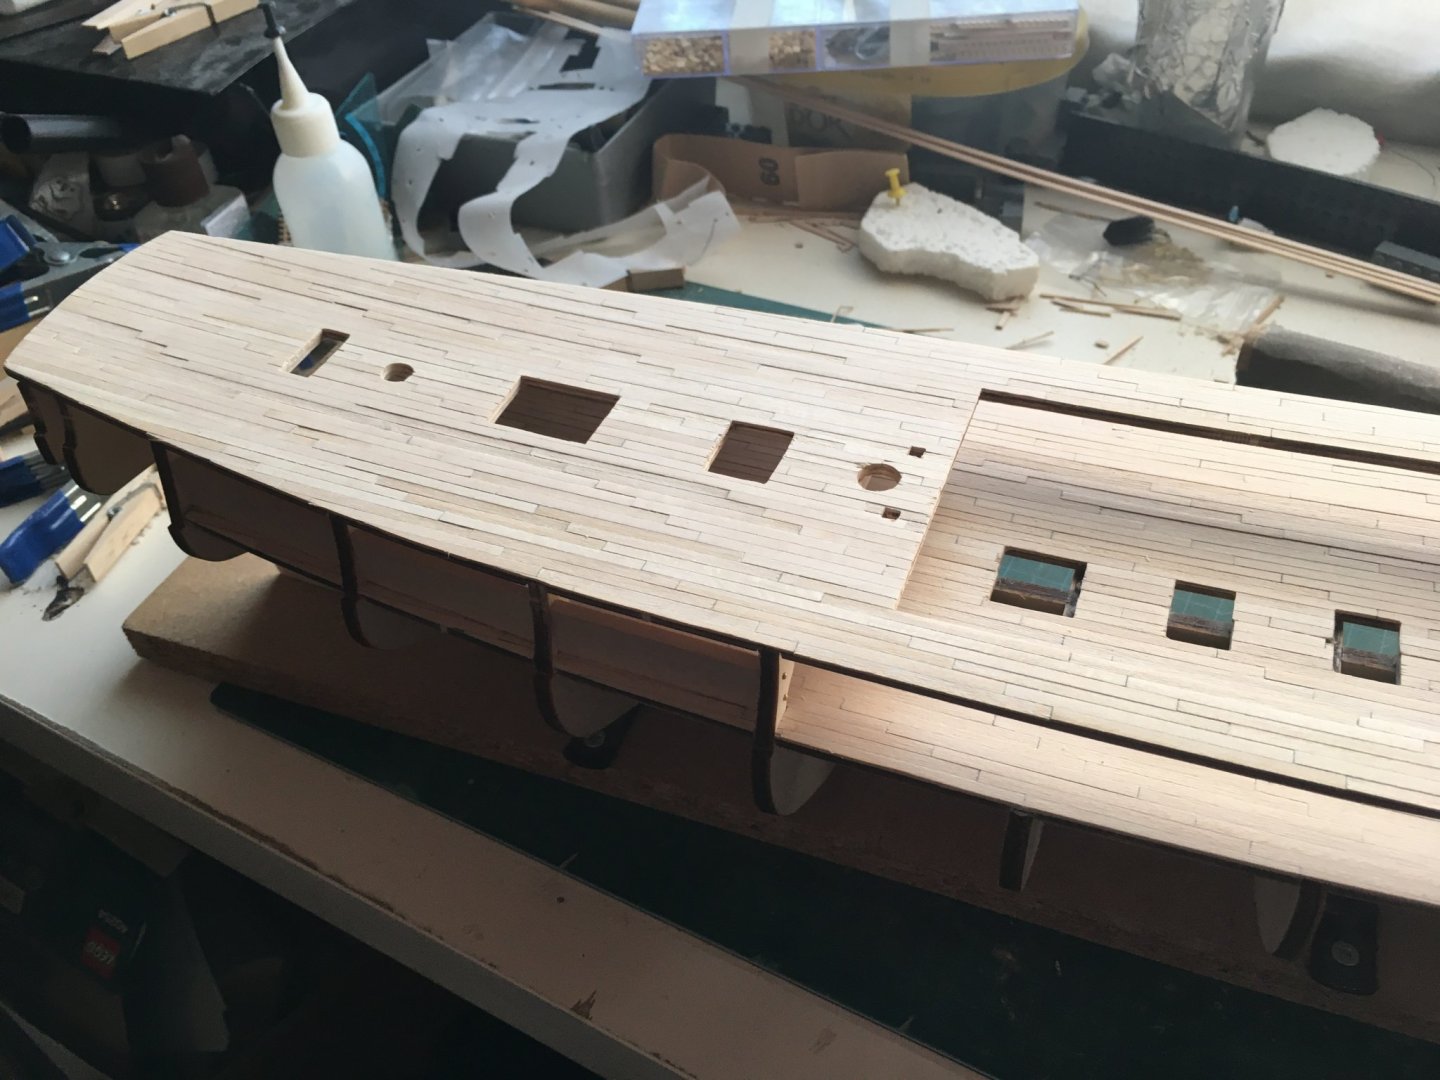
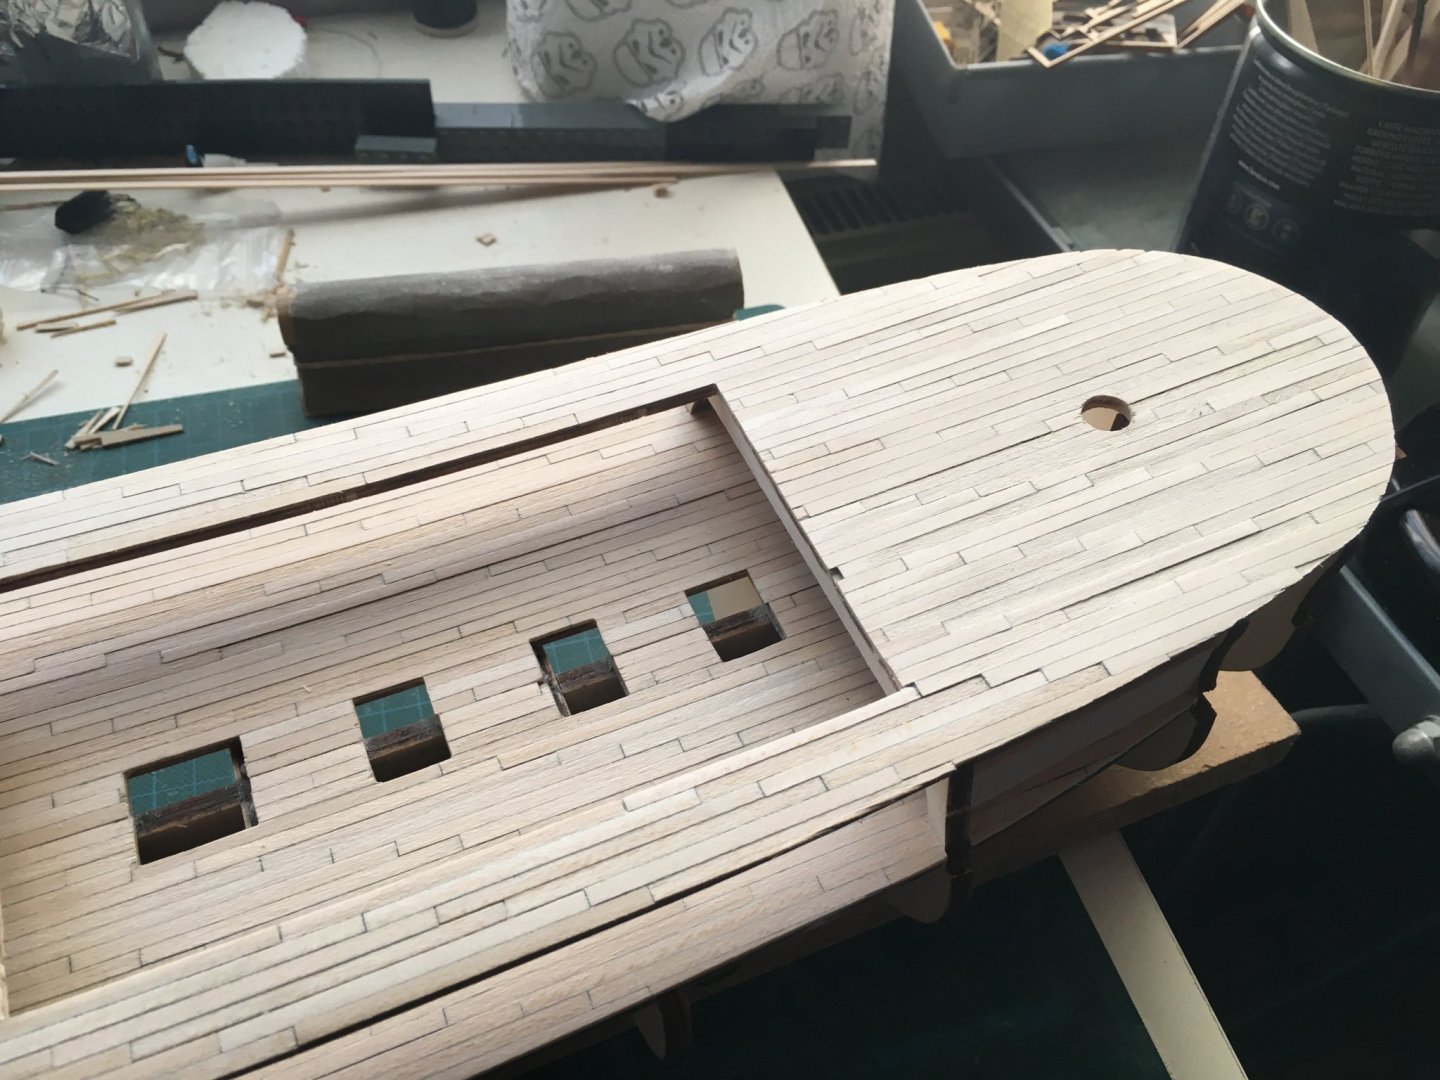
Hi all, back from relaxing holidays, opened up the shipyard to finalise the deck planking. Glued the gud deck halves in place first:
And then proceeded with the crossbeams to support the main deck:
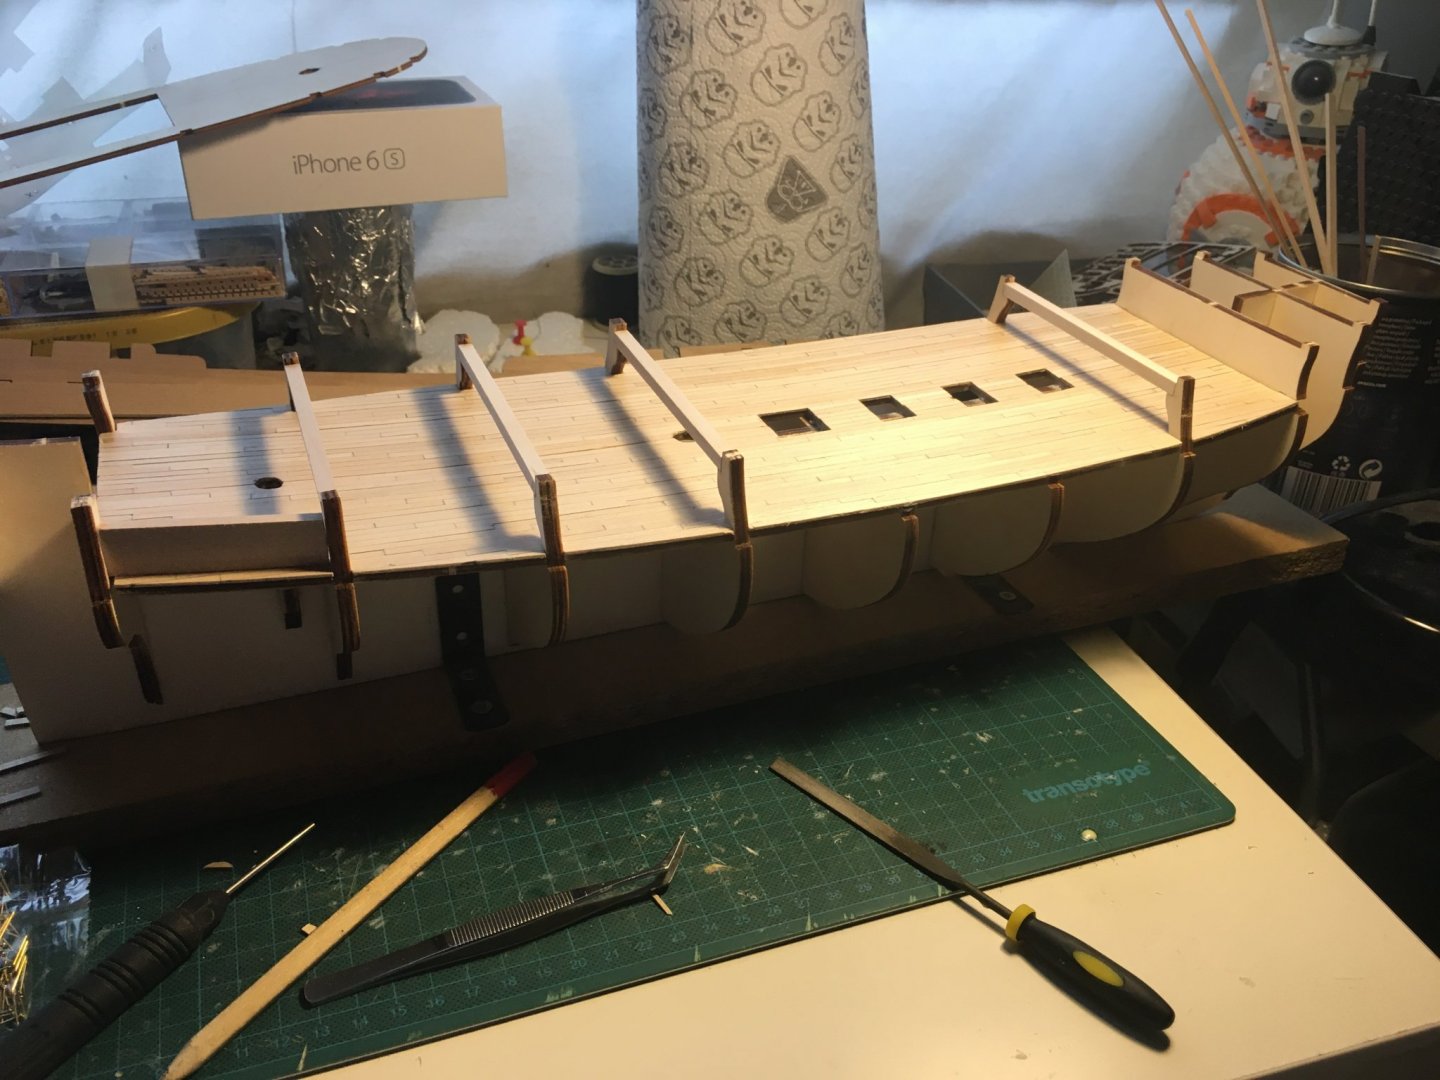
Then installed the sidewalls that will hold the gun mounts for the hidden cannons. Instructions called for secure fit as to allow for drilling, so I added some nails to ensure the strips do not move:
Then started on second planking, and I made my first blunder: after drawing the heartline correctly, proceeded with planking the aft of the main deck, working my way forward. But instead of continuing on the heartline after the opening in the deck, I added planks on the side. Took me about 6 planks to realise I was completely losing my straight line. Removed the planks (glued with white glue), straightened out the damage on the false deck and kicked myself repeatedly for making such a stupid mistake.
In the end, planking continued without anything major:

Now for extended sanding and levelling, and then painting the gun mounts and the interior of the gun deck.
Happy building!
- clearway, Edwardkenway, Jonny 007 and 2 others
-
5
-
On 9/12/2020 at 7:14 AM, Seems ok to me said:
Also, why make it longer if you just want me to cut it shorter?

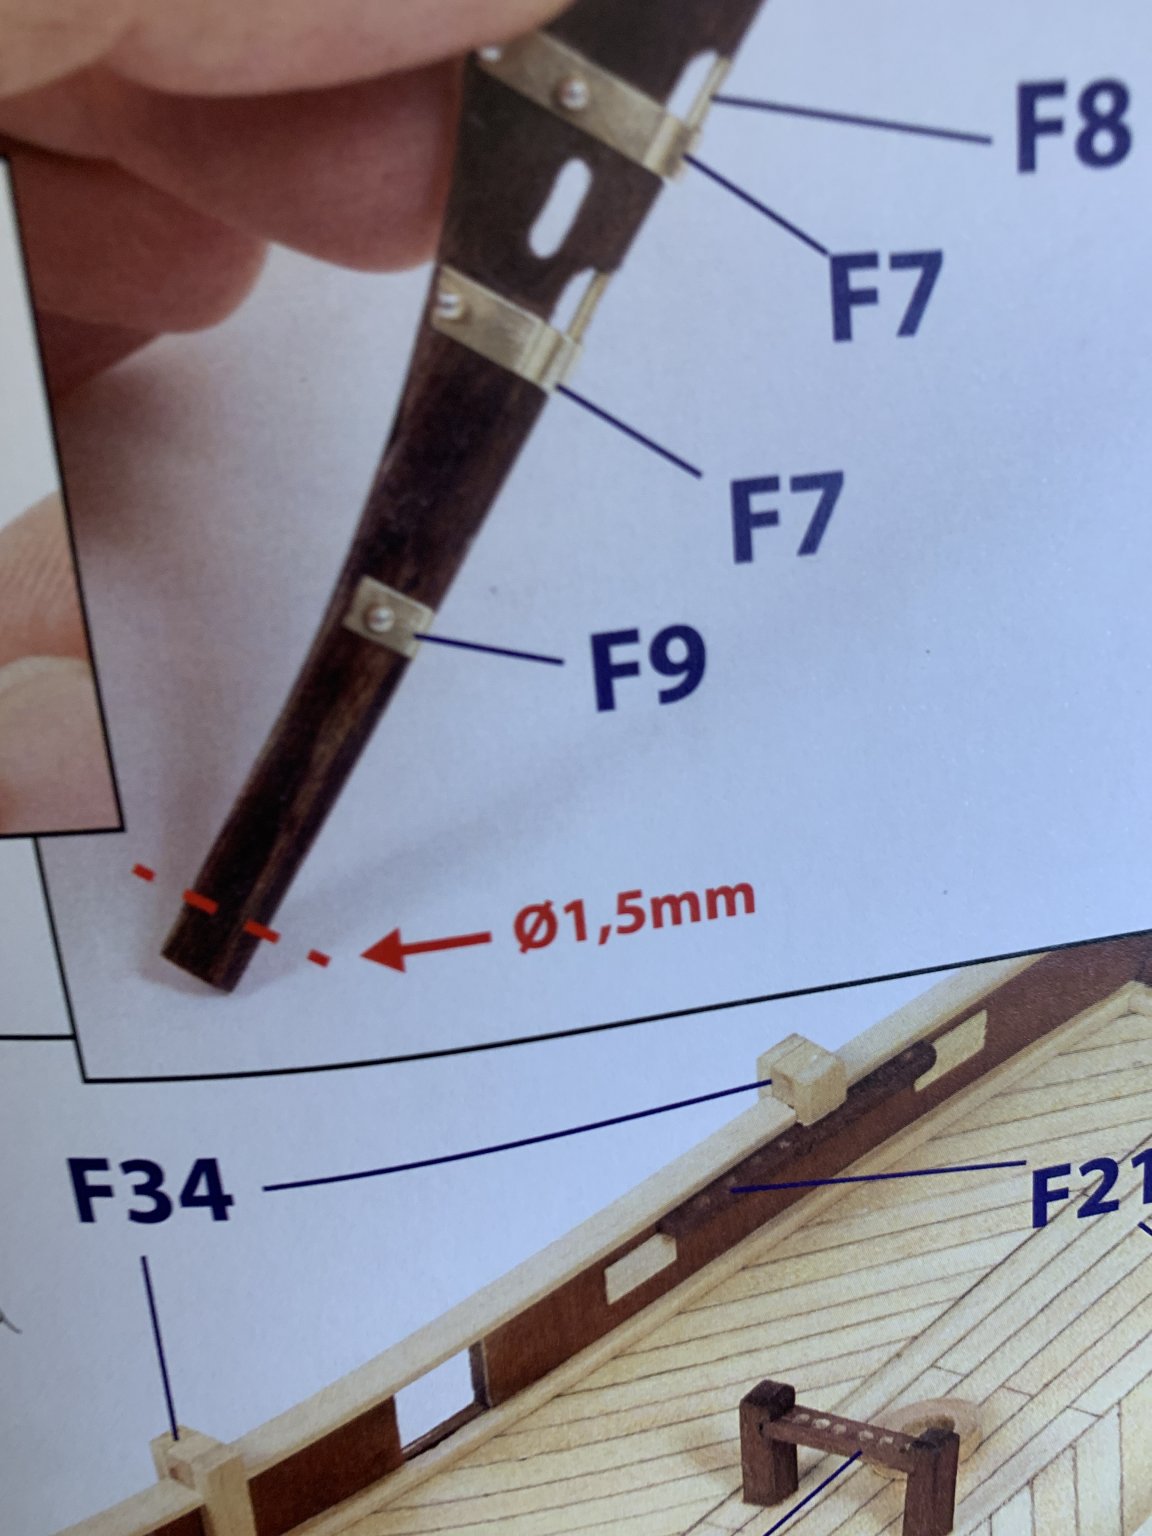
Hi there, mind this is not an instruction to cut, but to drill a 1,5mm hole in order to fit the rudder beam. Just so you know...
-
-
Looking great Broden 🙂 I staggered as much as possible, but more for sturdiness than aesthetics, as the first planking wil lbe covered anyway. I worked first top down for the top planks, as they're all pretty straightforward. Then I moved to the garboard and worked my way up, meeting in the middle. If you ant, there's more info on my build log (link in the sig below), but as this was my first build, I recommend you check other logs as well.
Good luck!
-
-
On 8/19/2020 at 3:55 PM, RussR said:
John's YouTube Channel is like a complete video tutorial on model building. He is currently building the Occre Montanes
I know, following it closely 🙂


Frigate Diana by ObviousNewbie - FINISHED - OcCre - Scale 1:82 - Second wooden ship build
in - Kit build logs for subjects built from 1751 - 1800
Posted
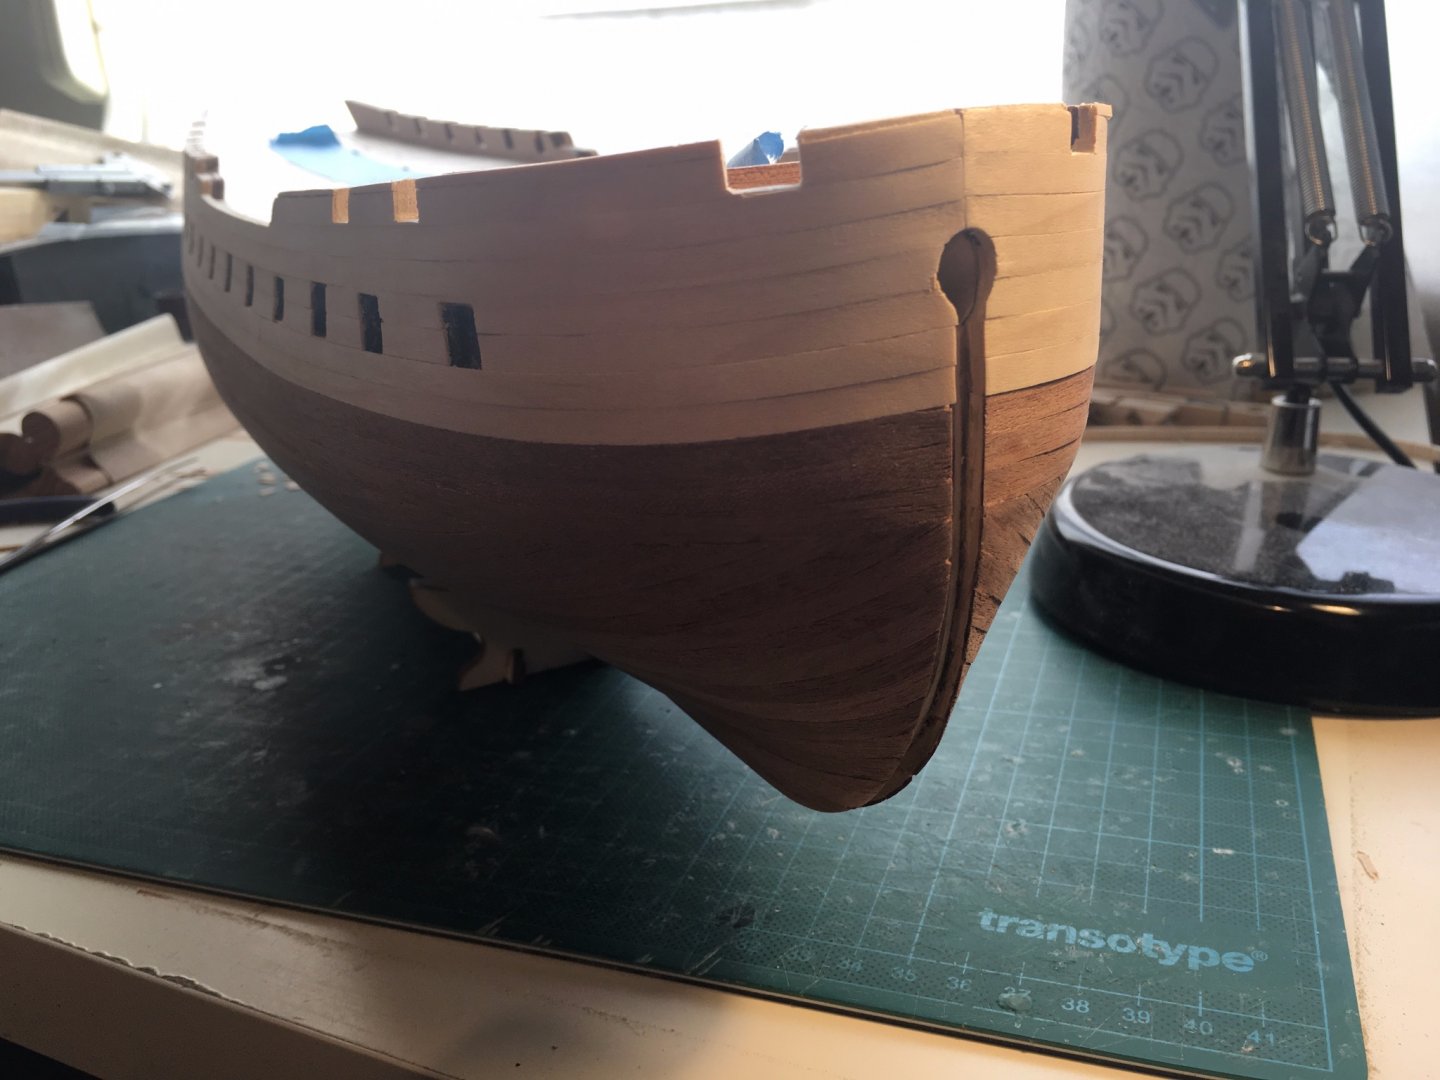
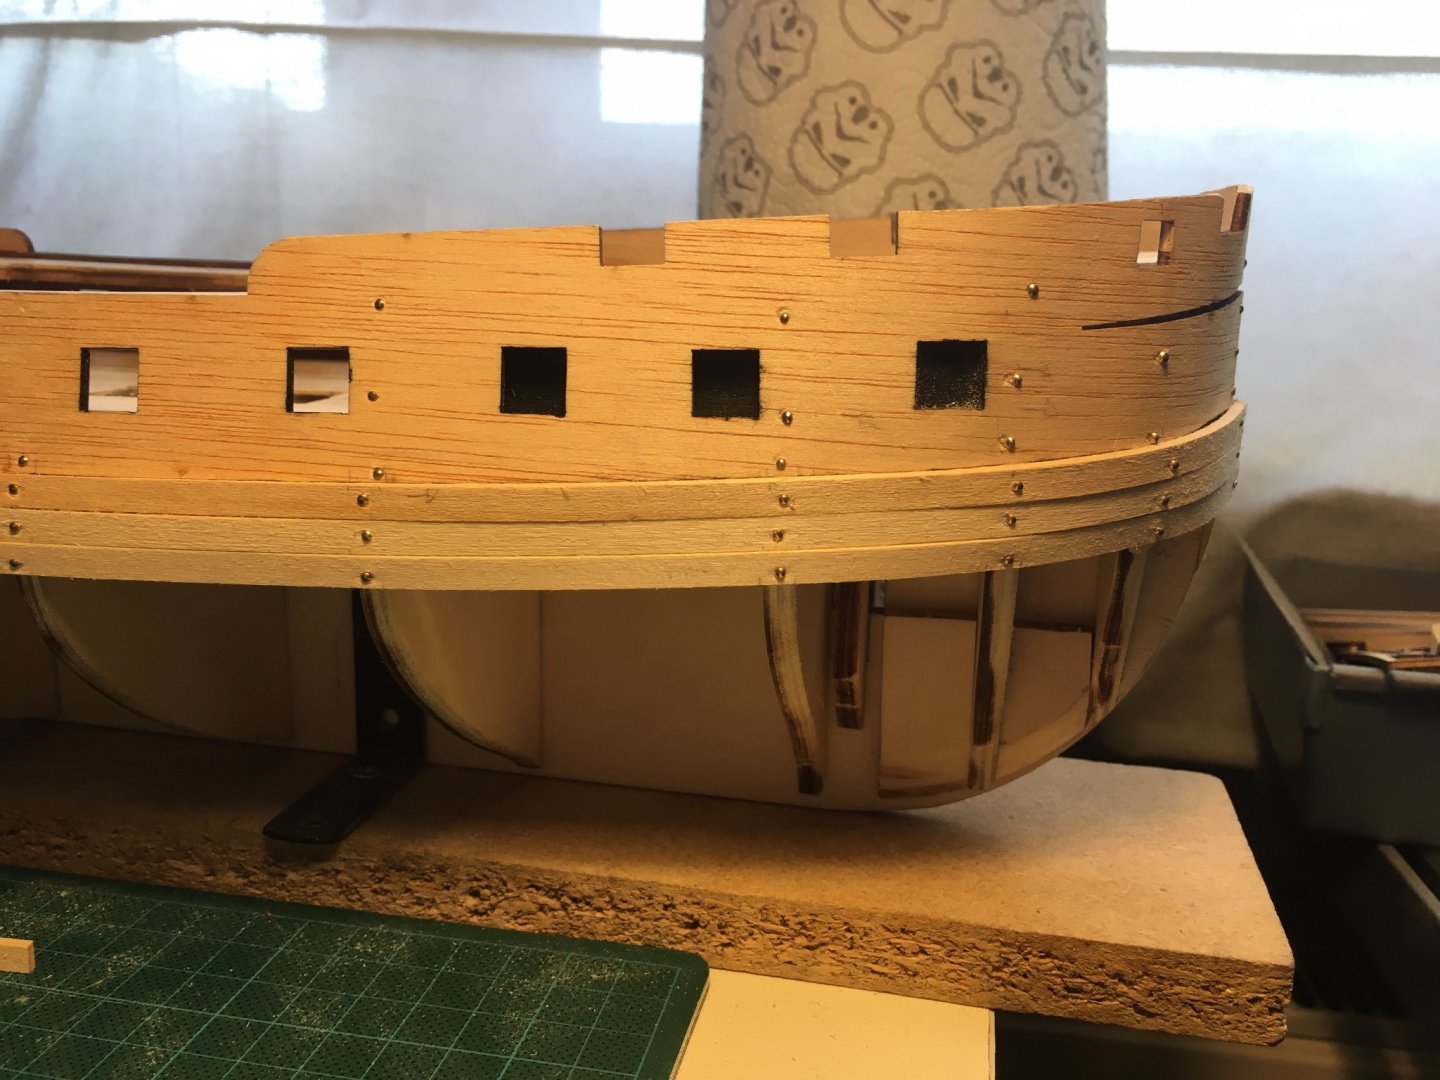
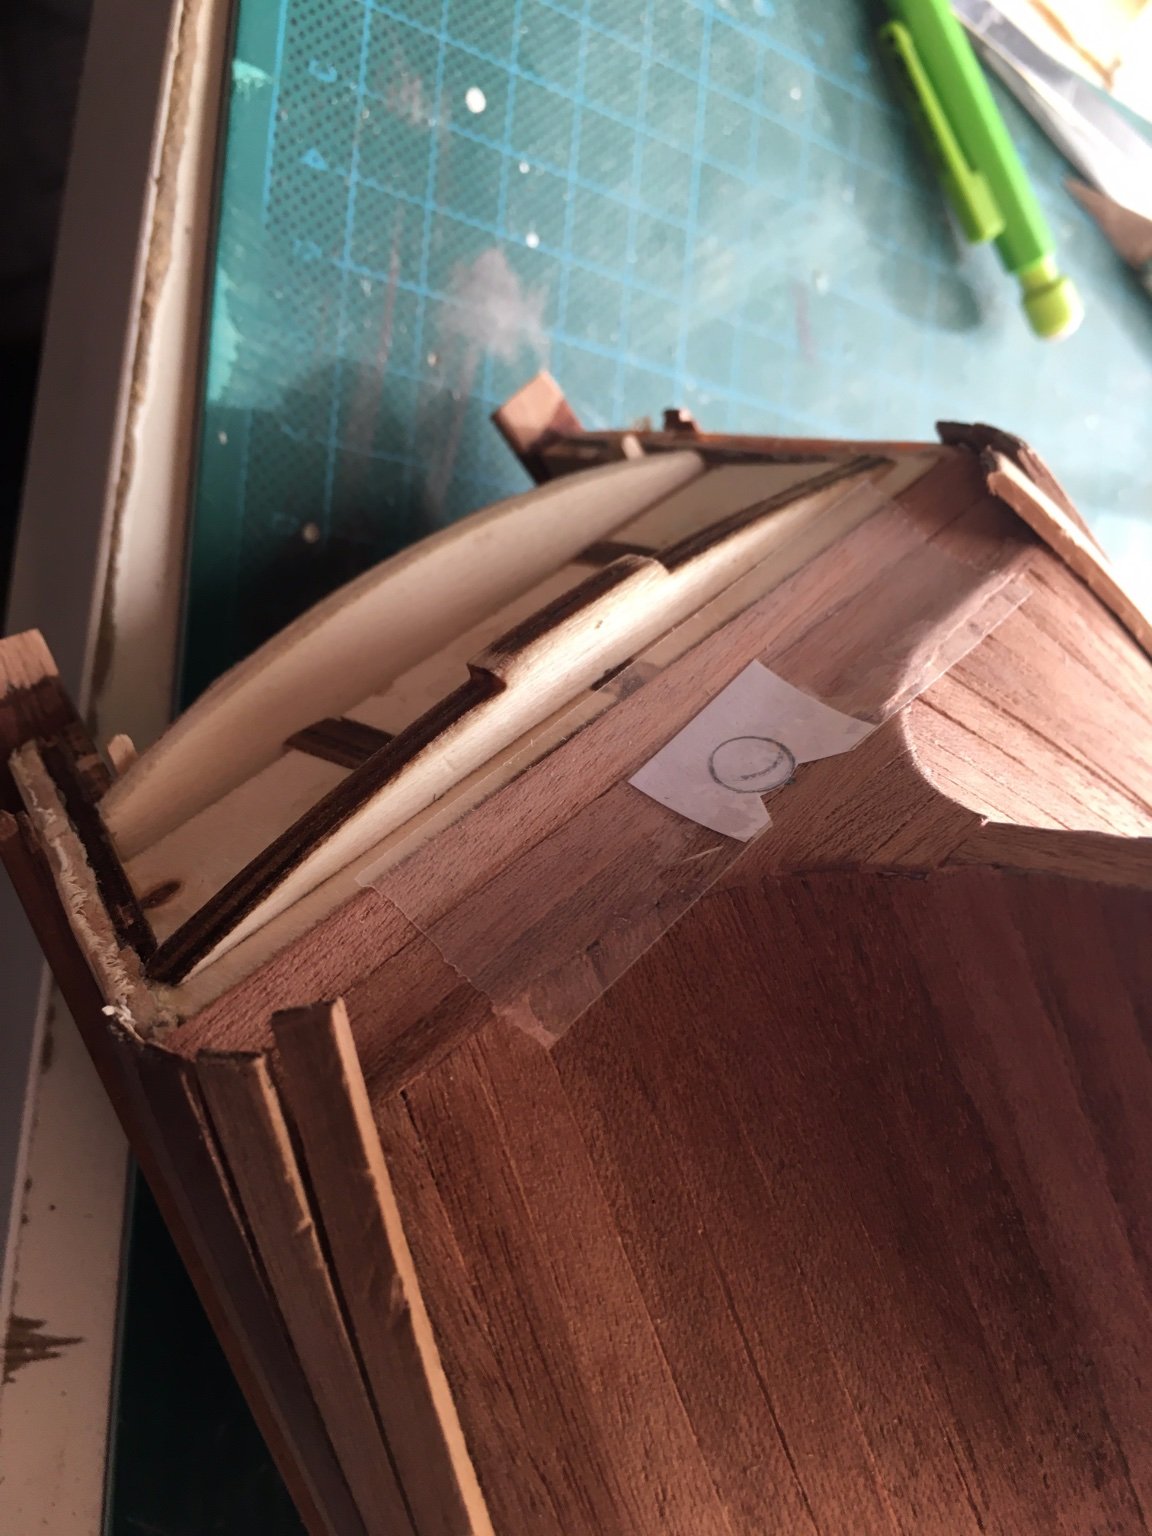
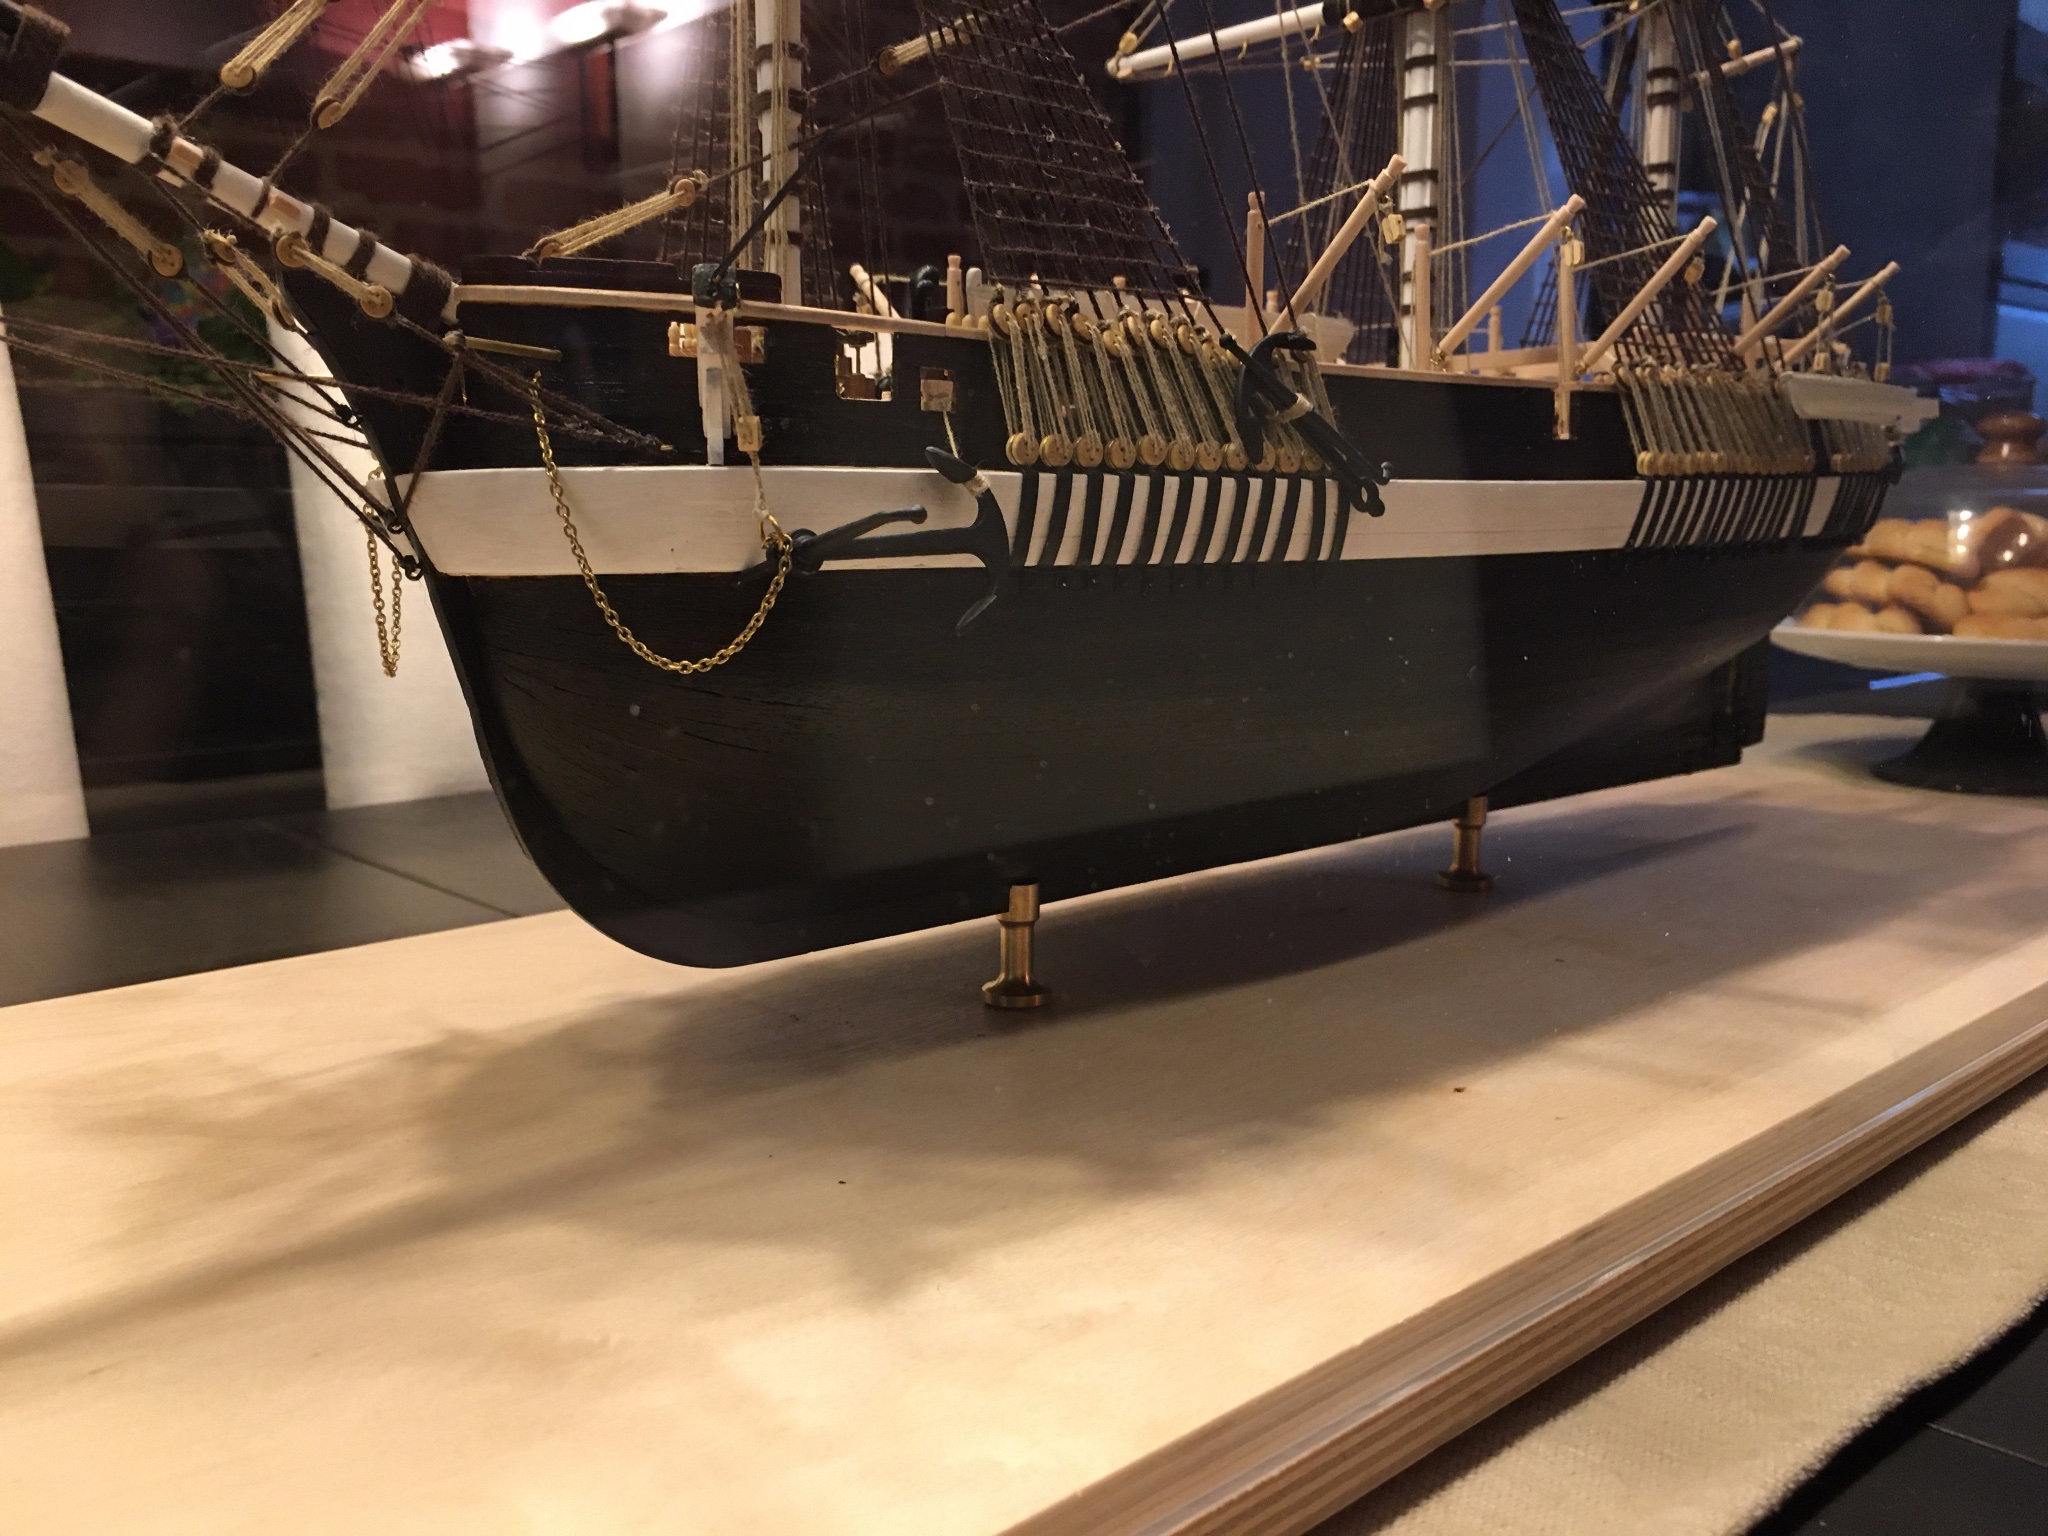
Hi all, thnx for checking in. Got the mirror in place after a bit of a struggle. Suffice it to say I have one nail hole to hide 🙂
Started on the bow ornaments, but after the first pieces I realised I was going to make my life very difficult painting the rubbing strakes after this section was finished. Soooo, put the ornaments aside and started painting. For one reason or another, the black varnish I used on Terror did not really like the African walnut; after two layers hardly anything took. So sanded down the layers and put on some matte black acrylic paint:
Quite happy with the result actually 🙂
Onwards now to the rest of the bow ornaments, then a double layer of matte varnish (decided I like the color scheme so I won't be using any dye on the lower hull). and then on to the deck fittings..