HOLIDAY DONATION DRIVE - SUPPORT MSW - DO YOUR PART TO KEEP THIS GREAT FORUM GOING! (Only 13 donations so far - C'mon guys!)
×


Mirabell61
-
Posts
7,407 -
Joined
-
Last visited
Content Type
Profiles
Forums
Gallery
Events
Everything posted by Mirabell61
-
 Very good scaling work Patrick, awsome looking "symphony" can imagine that you could make some pretty (from interior view location) pics from all your mini models with an "keyhole Digit-camera" Nils
 -
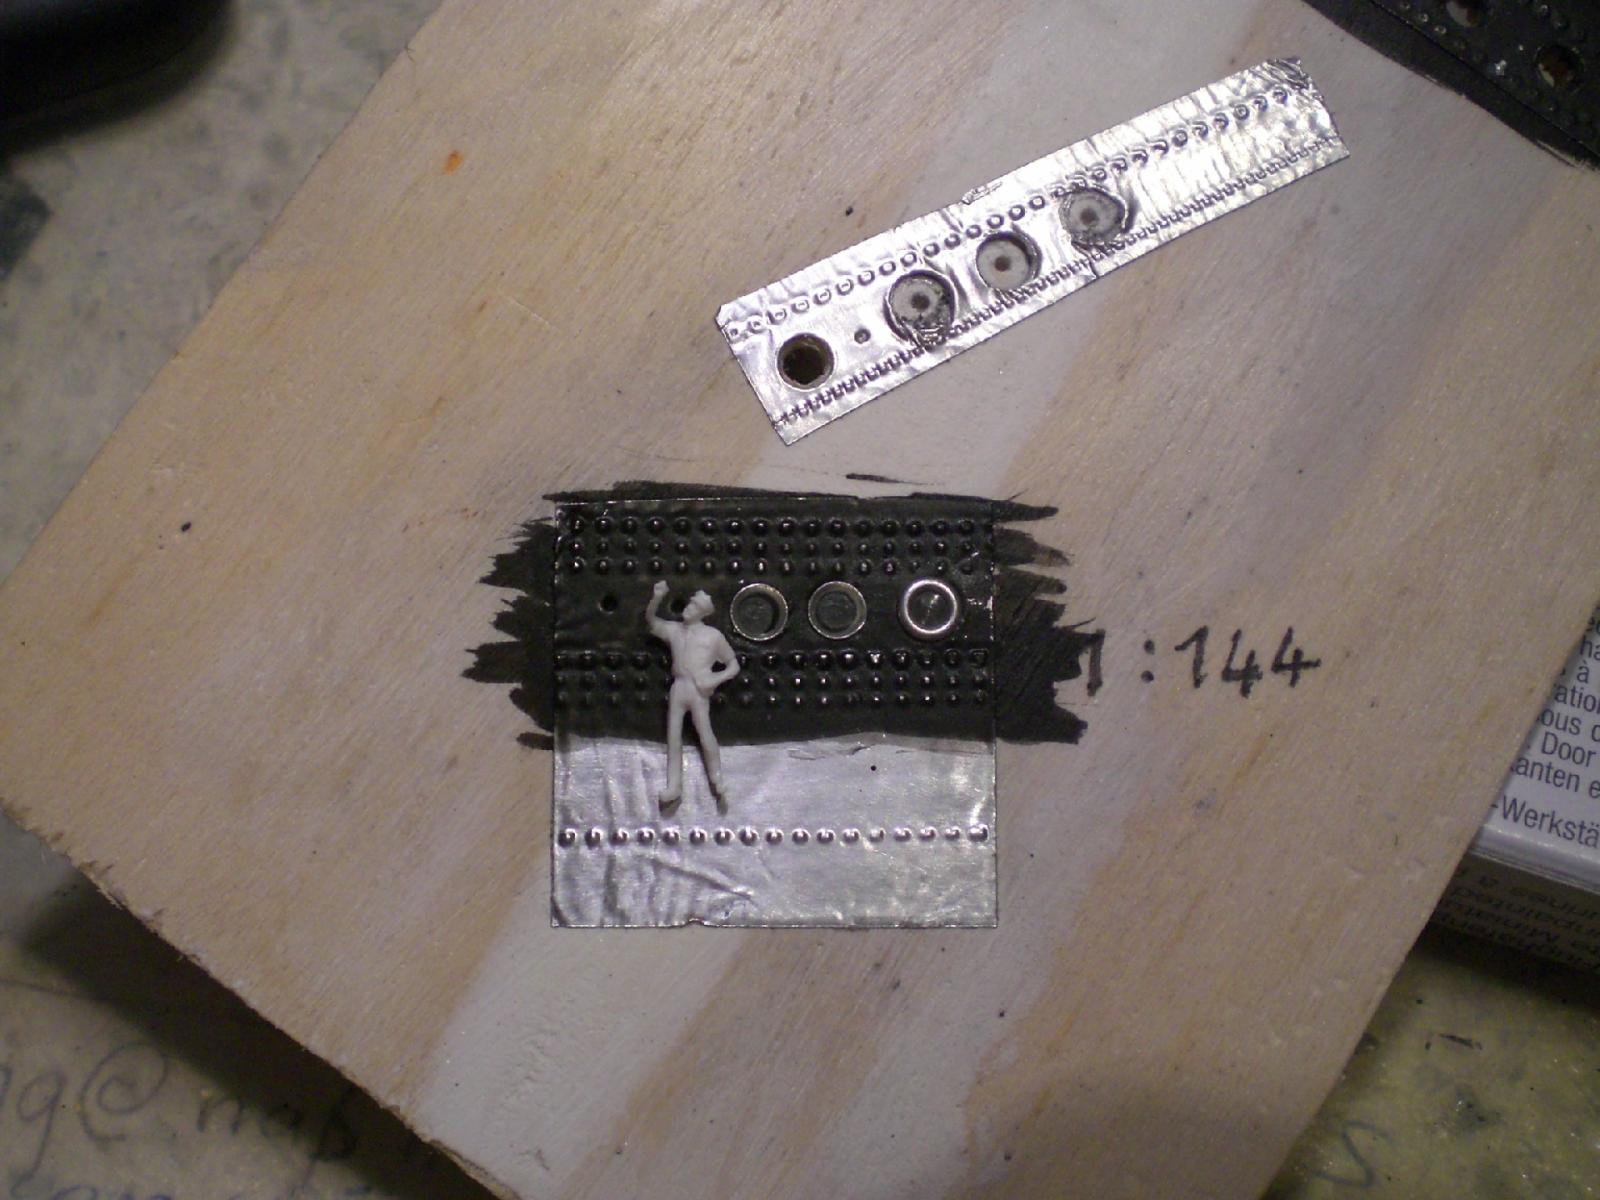
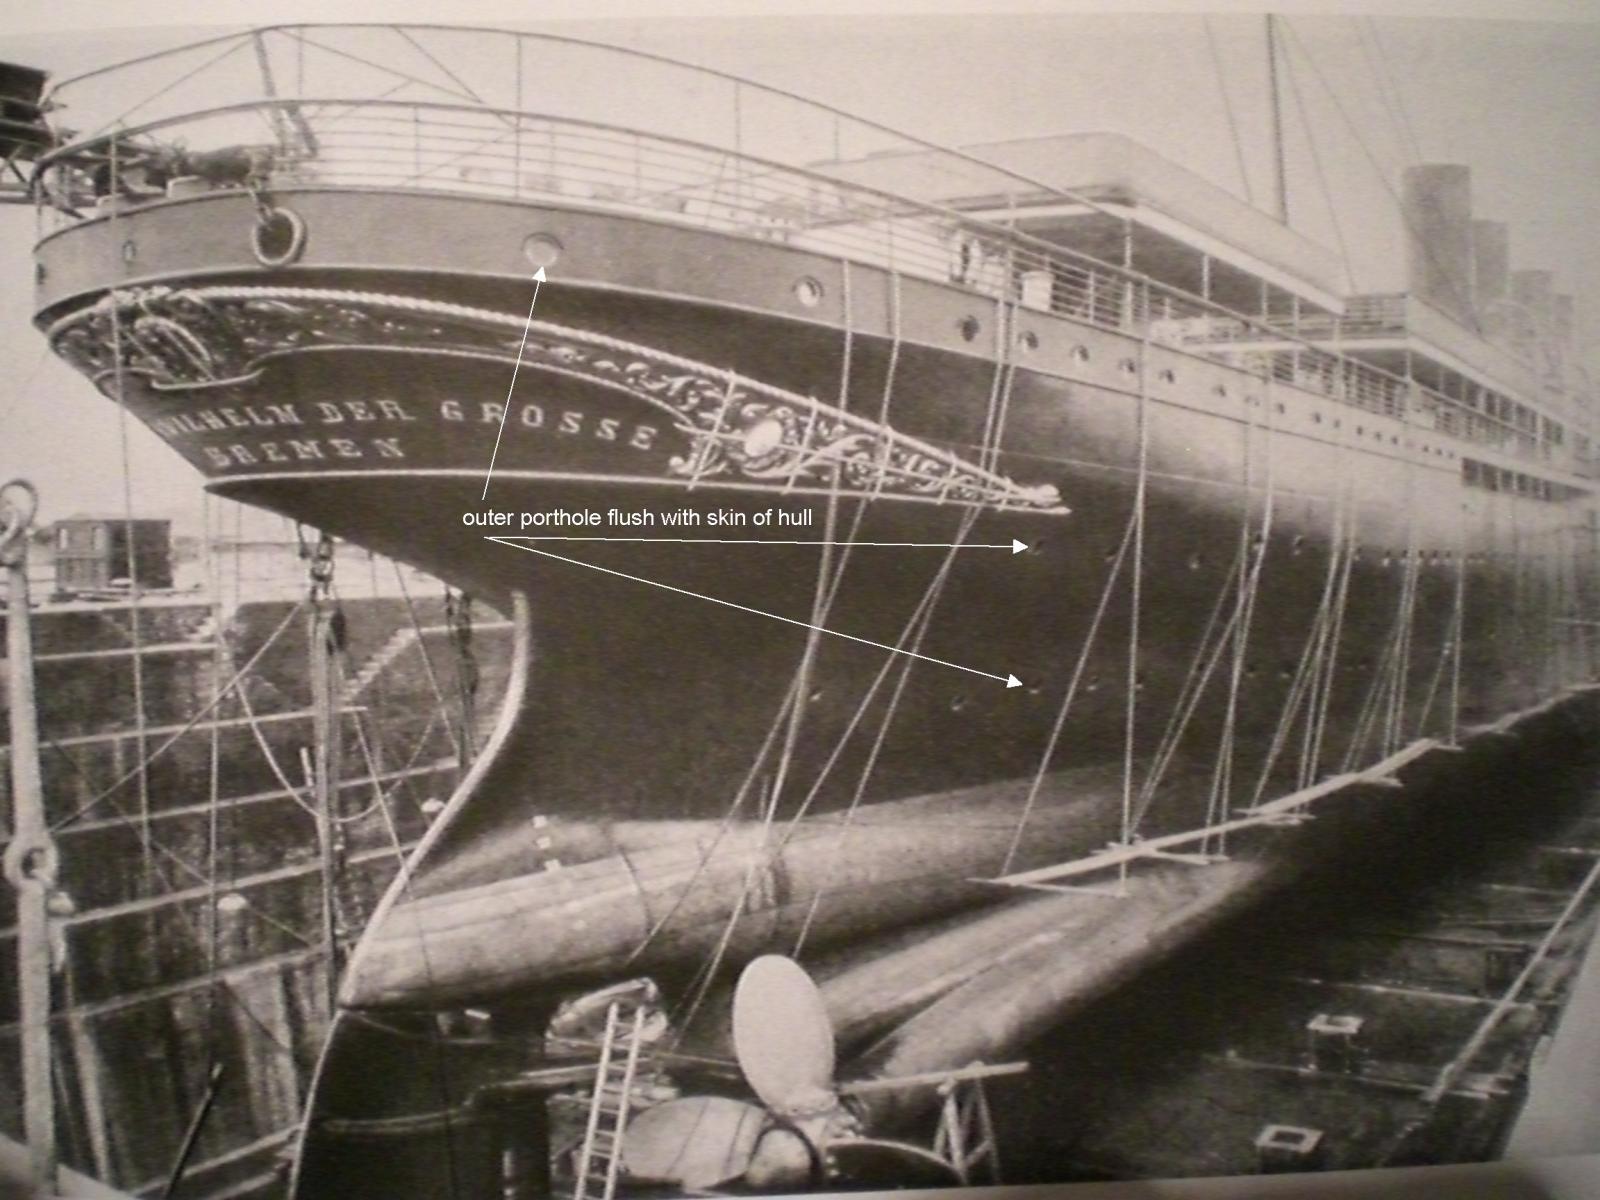
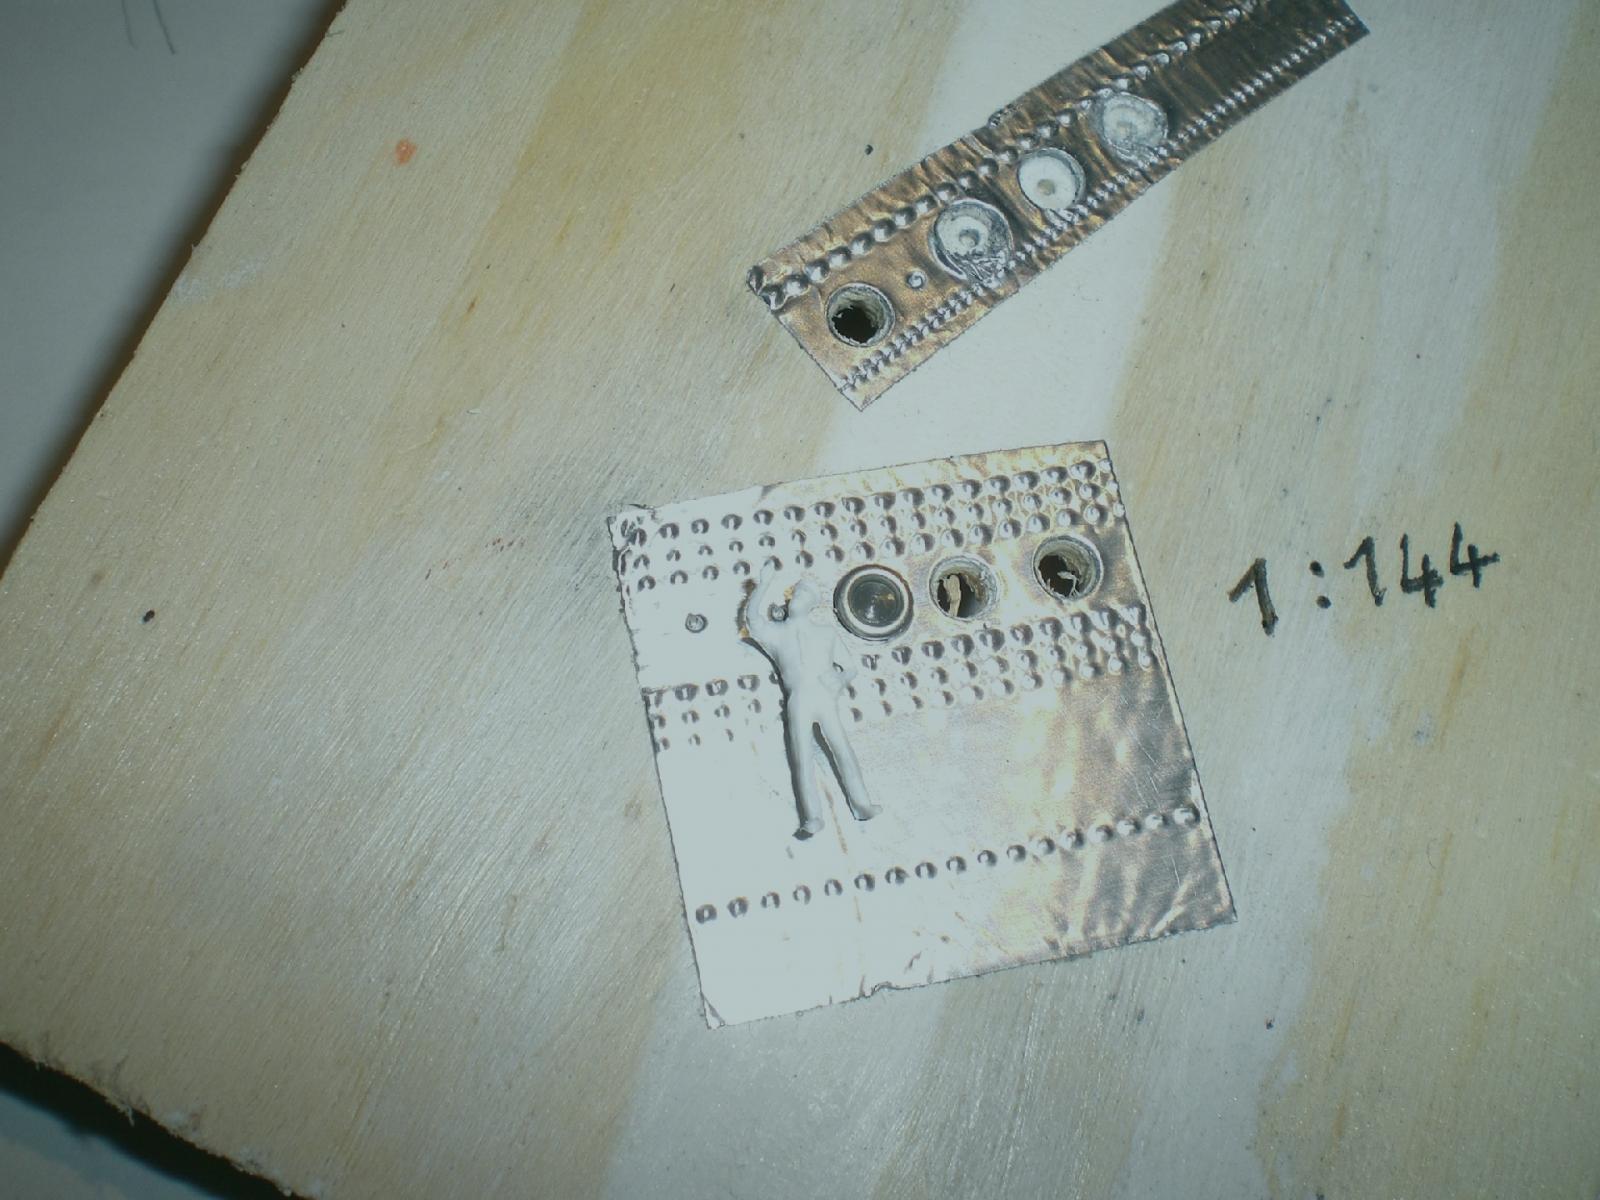
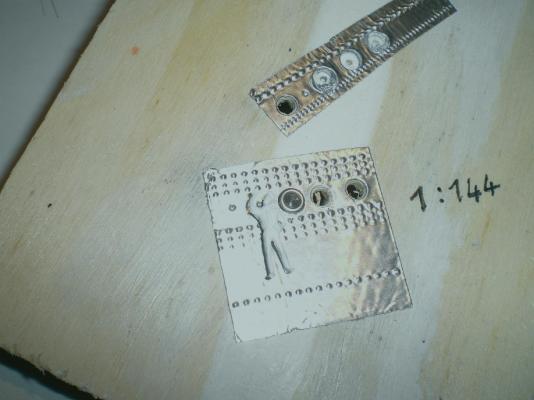
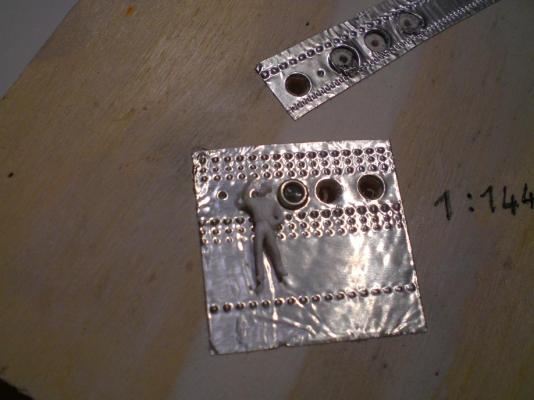
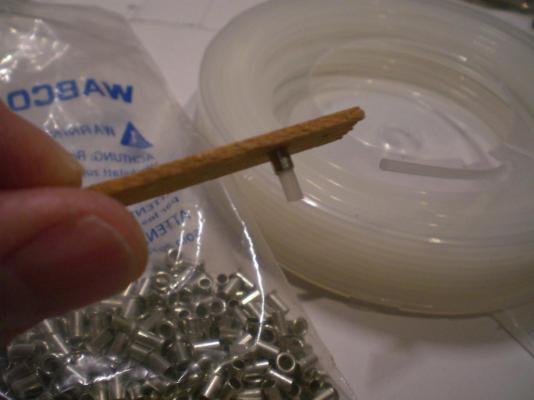
Hi Larry, there are so many portholes next to one another that that heat involved shaping would not provide a sufficient, repeatable look on the ships side surface. I am enclosing a little trial sample with three portholes. The little upper silver sample shows what hapens to the foil when the hole is not propperly cut, pre- to drilling the wood. The righthand one on the black colored sample is best looking, but I feel the rim is too prominent, ...... The next two are not so prominent and they are flush with the hull skin, which comes nearest to the actual look. The semi material I use for those are priceworthy lead end-bushings for electronic conduct wiring DIN 46288 Nils I feel the left two ports look more in scale of the actual ship`s ports the actual ports are flush with the hull skin, except for extra "eyebrows" on the upper side of the hull


- 2,625 replies
-
- 13
-

-
- kaiser wilhelm der grosse
- passenger steamer
- (and 1 more)
-
Many thanks Martin and David, and all the "likes"... Martin, yes, I counted the number of portholes from the card model ports pattern. I`m still trying to find some rivets with a smaller sized rim, otherwise they might be too prominent for the hull sides.... I may be putting "eyebrows" on just above the ports (upper porthole rows) in order to direct away rain and rough seawater splashing David, fortunately to date I never had Problems with dryed out adhesive gluefilm under the metal plating, Looks like its quite good Quality with that Aluminium foil, but I`ll have to see how it behaves after 10 years or more Nils
- 2,625 replies
-
- 4
-
-
- kaiser wilhelm der grosse
- passenger steamer
- (and 1 more)
-
Hi Dan, beautiful work, what can be seen so far, can imagine the amount of Wood Chips, -curls and -dust arising from the shaping sequence. Not an easy Task in scale 1:192, but you are doing it very well... Nils
-
A beautiful documentation of your work and Progress Danny, also the Pictures are of top Quality and Show all the Details, you`re Setting the rod very high for all who might orientate themselves at your build, and super model Nils
-
Thanks for your comment Dafi, and for dropping in to the KWdG build log, glad you like the Details... Nils
- 2,625 replies
-
- 1
-
-
- kaiser wilhelm der grosse
- passenger steamer
- (and 1 more)
-
Bob, I thank you very much for your nice appreciative words.... wish I were a Little further on already in order to see if the planed next sequences work out as intended... Nils
- 2,625 replies
-
- 3
-
-
- kaiser wilhelm der grosse
- passenger steamer
- (and 1 more)
-
Many thanks Nigel and Grant, and all the "likes" Nigel, thanks for your words, the ports will come on when the hull is plated, holes drilled through the skin and the hull painted Grant, ...glad you like it, the actual ship once lost it`s rudder on an Atlantic crossing, do`nt know the reason, onward manouvering to next repair port with individual rpm Setting of the two srews Nils
- 2,625 replies
-
- 3
-
-
- kaiser wilhelm der grosse
- passenger steamer
- (and 1 more)
-
Thank you Patrick, the fairing and blending reached a stage where filler will be of help now for real smooth transitions... Nils
- 2,625 replies
-
- 2
-
-
- kaiser wilhelm der grosse
- passenger steamer
- (and 1 more)
-
beautiful work Rob, it`s such a lovely fragile set of framing ribs, so clean and excactly built, well done Nils
-
Hi Karl, that picture really hurts, it`s like finding your boat up on the rocks after a hurricane passed through, I`m just thinking of all those hours of building and all in vain.. Nils
-
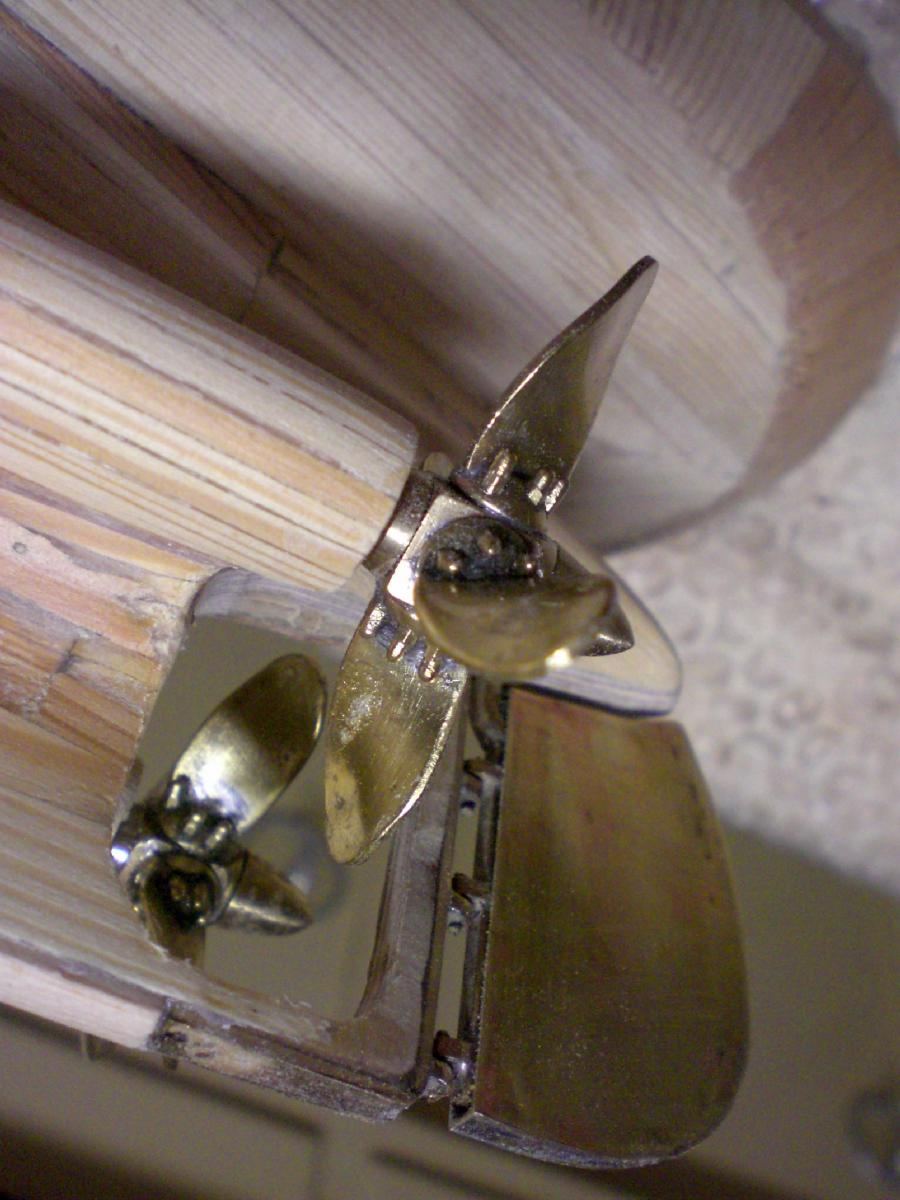
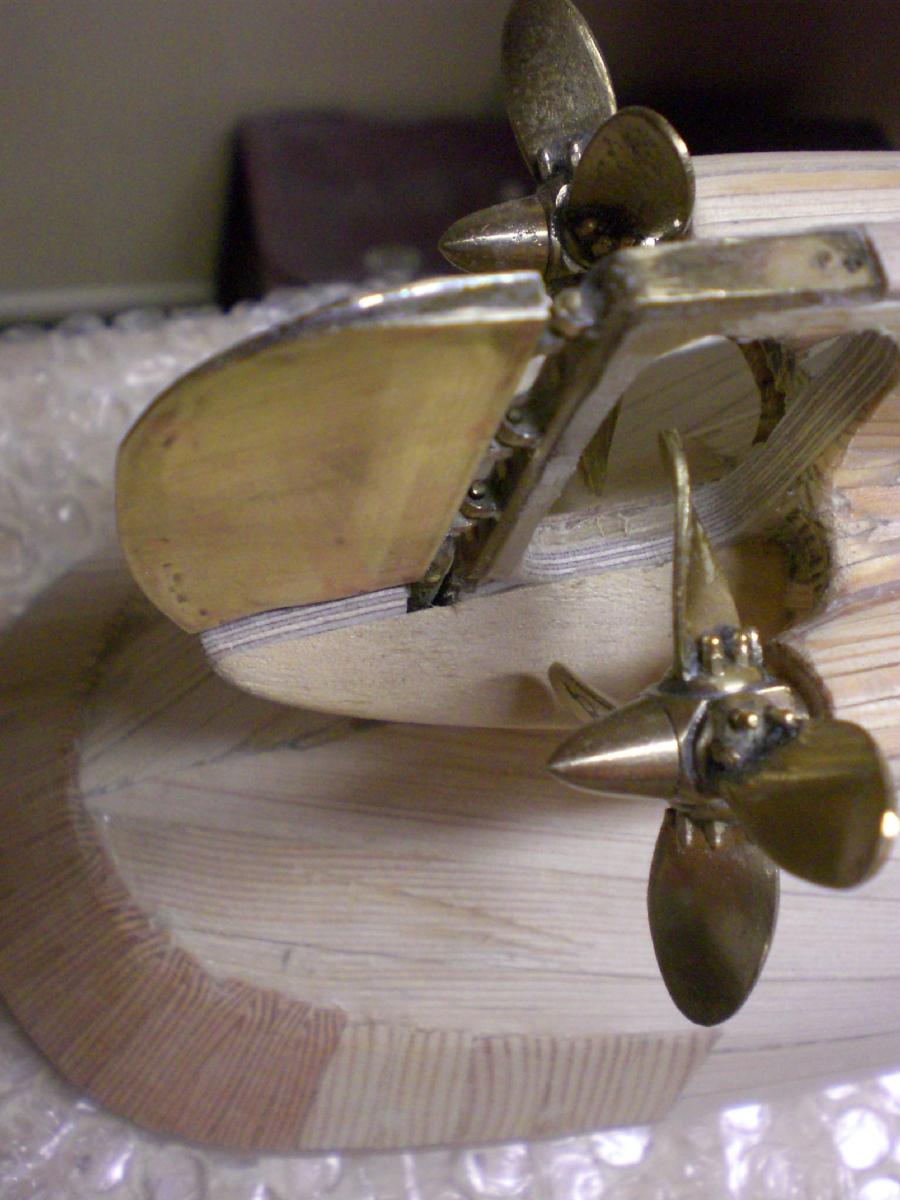
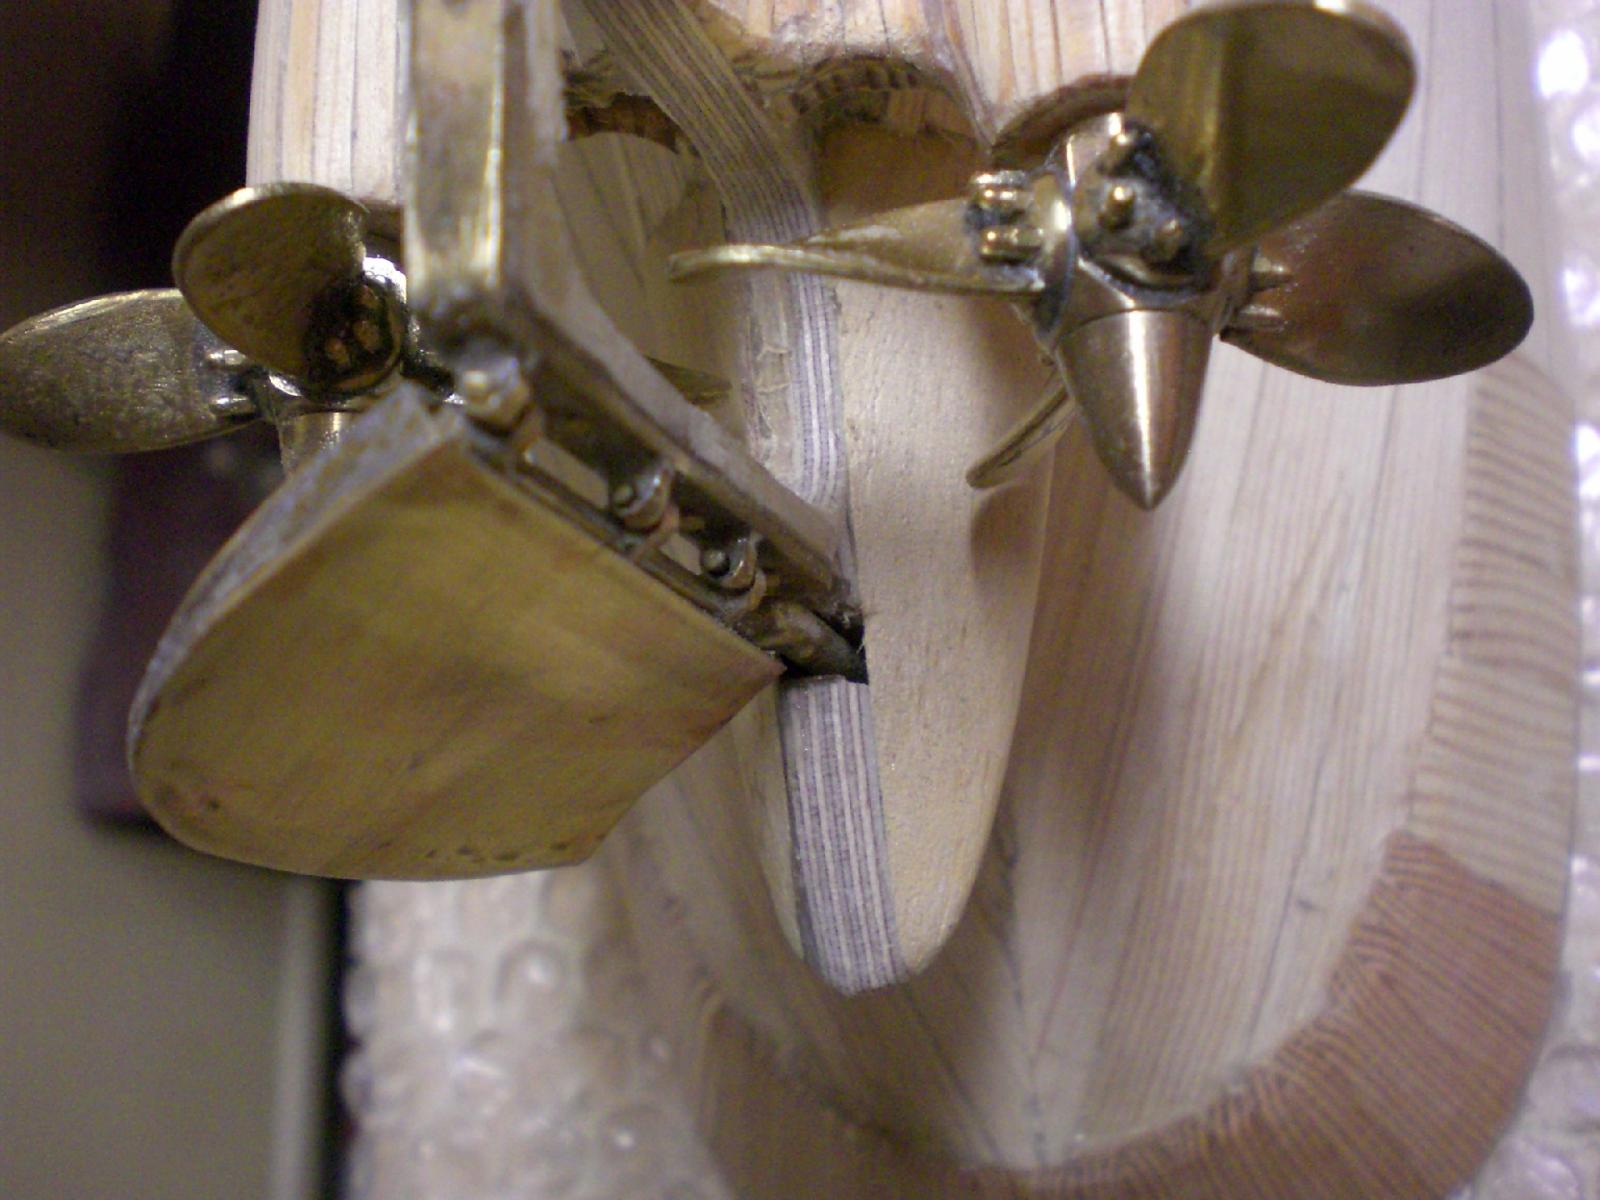
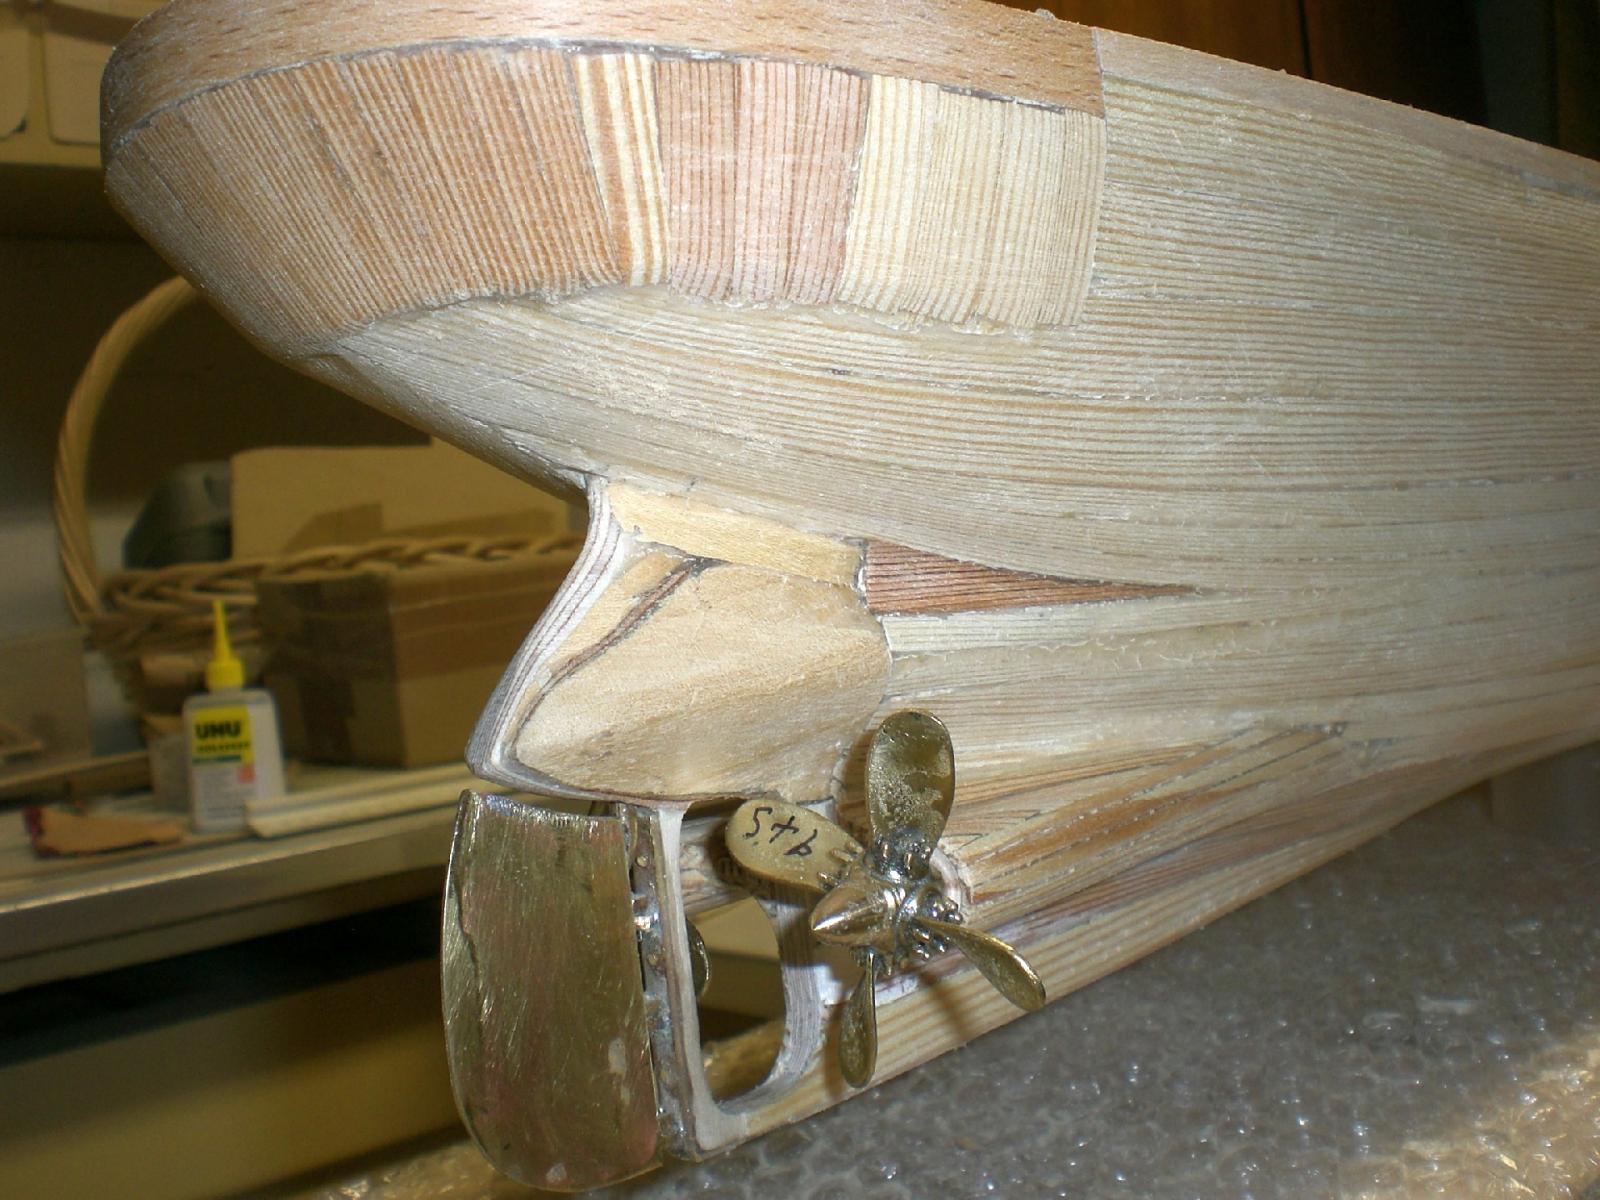
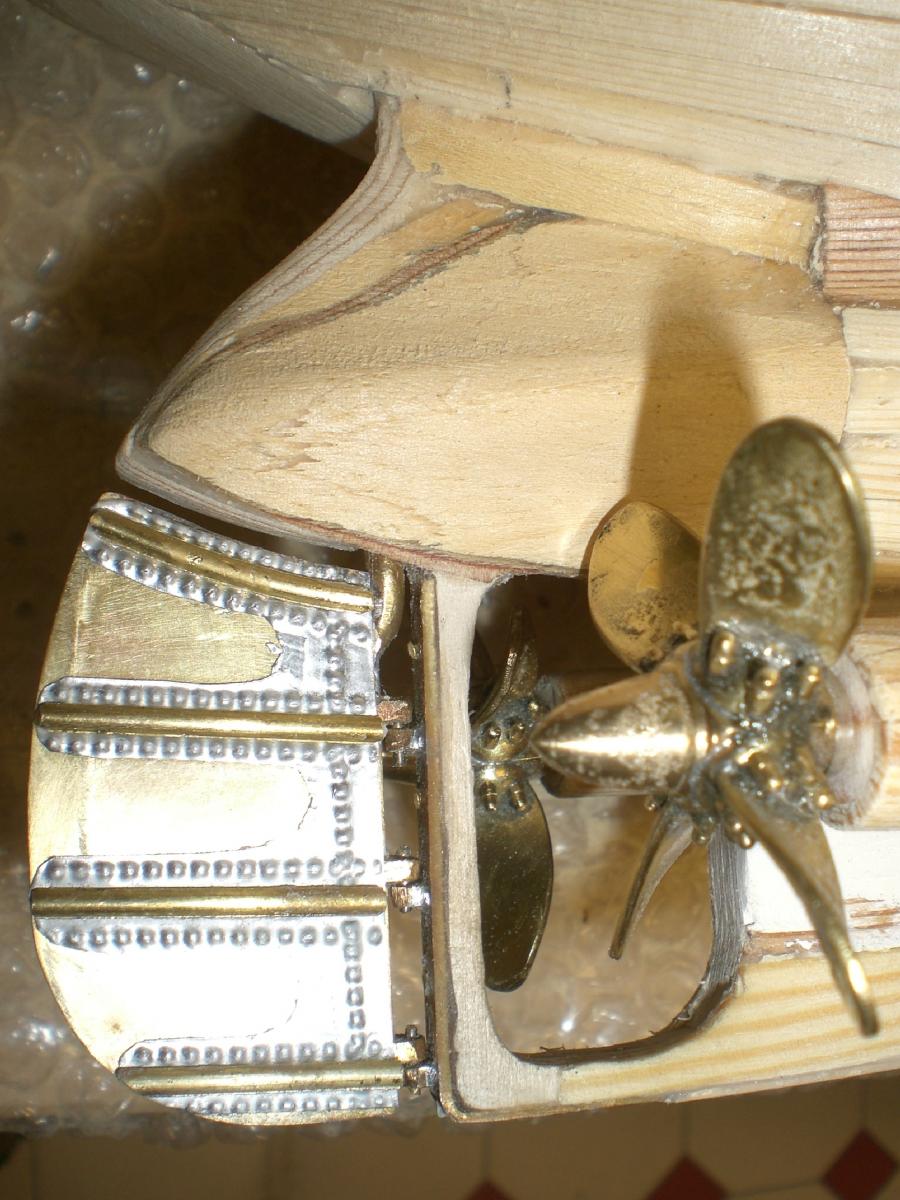
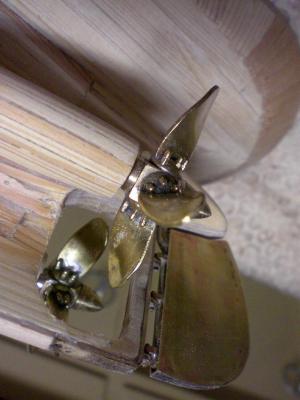
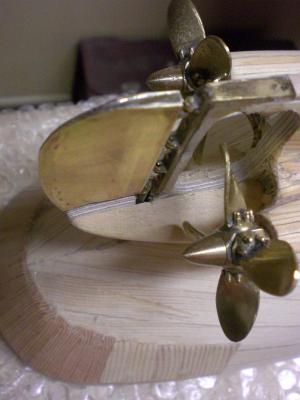
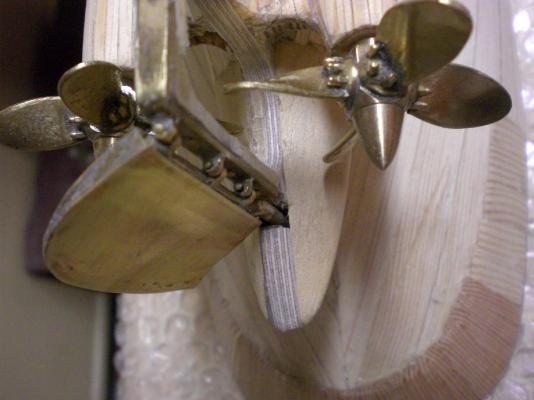
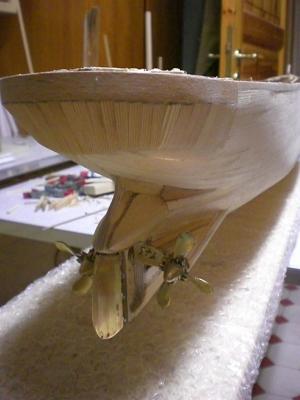
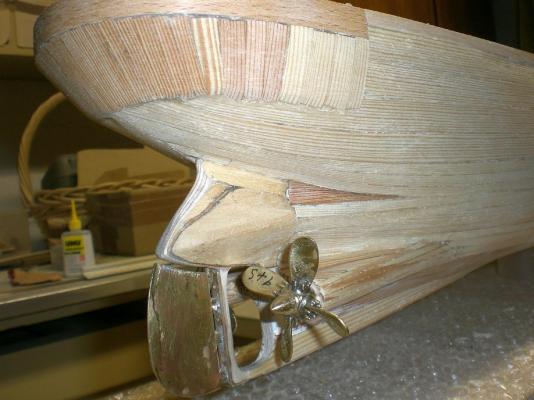
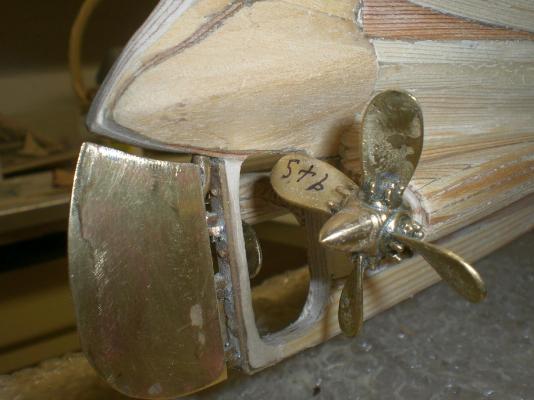
Update... its time to get the rudder further on.. two cladding brass sheets are soldered together on the aft edge, top and bottom a narrow triangle piece is soldered in, and that fits on the already installed hinged skeleton. Nils the rudder is preliminary mounted. The propshaft housings are faired down to a smooth and a little smaller diameter here the tapered rudder can be seen rudder full starboard.... and midship.... ready for primering, now the portside rudder must be done to the same status...

- 2,625 replies
-
- 27
-
-
- kaiser wilhelm der grosse
- passenger steamer
- (and 1 more)
-
Thank you Bob, there will be appr. 350-400 portholes on the hull, so its worth doing these trials upfront... Nils
- 2,625 replies
-
- 4
-
-
- kaiser wilhelm der grosse
- passenger steamer
- (and 1 more)
-
Many thanks to - John - Patrick - Grant, and all the "likes".. I`ve used this technique on the ports for my other ships before, so there is some experience with it already, but in combination with the "glassing" per littel cylindrical bits of cutter-line is new. There is another Advantage of this Methode : if the cutter-line insert stand out of the rivet-tube (inside the ship), it wo`nt bother anybody, but it has the capability to catch light, for instance from a central placed Illumination LED lamp inside the ship, for the effect of "fibre light optic"... Nils
- 2,625 replies
-
- 8
-
-
- kaiser wilhelm der grosse
- passenger steamer
- (and 1 more)
-
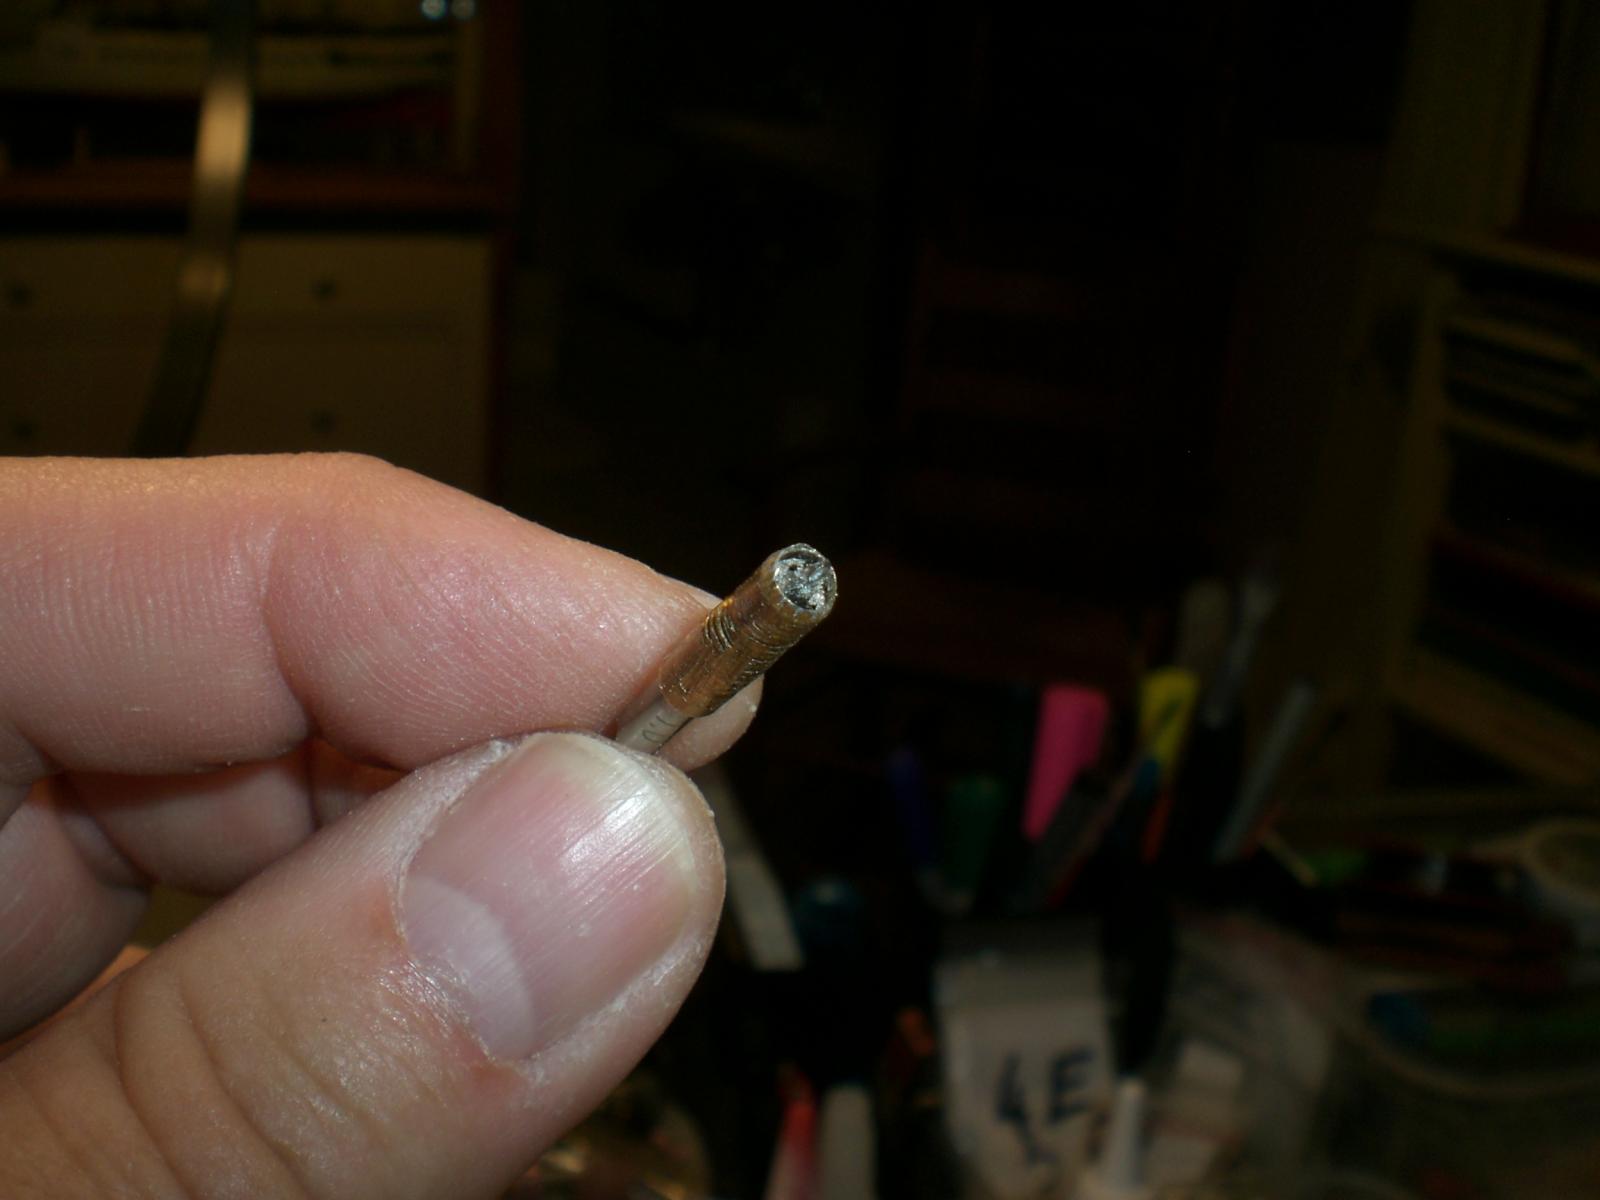
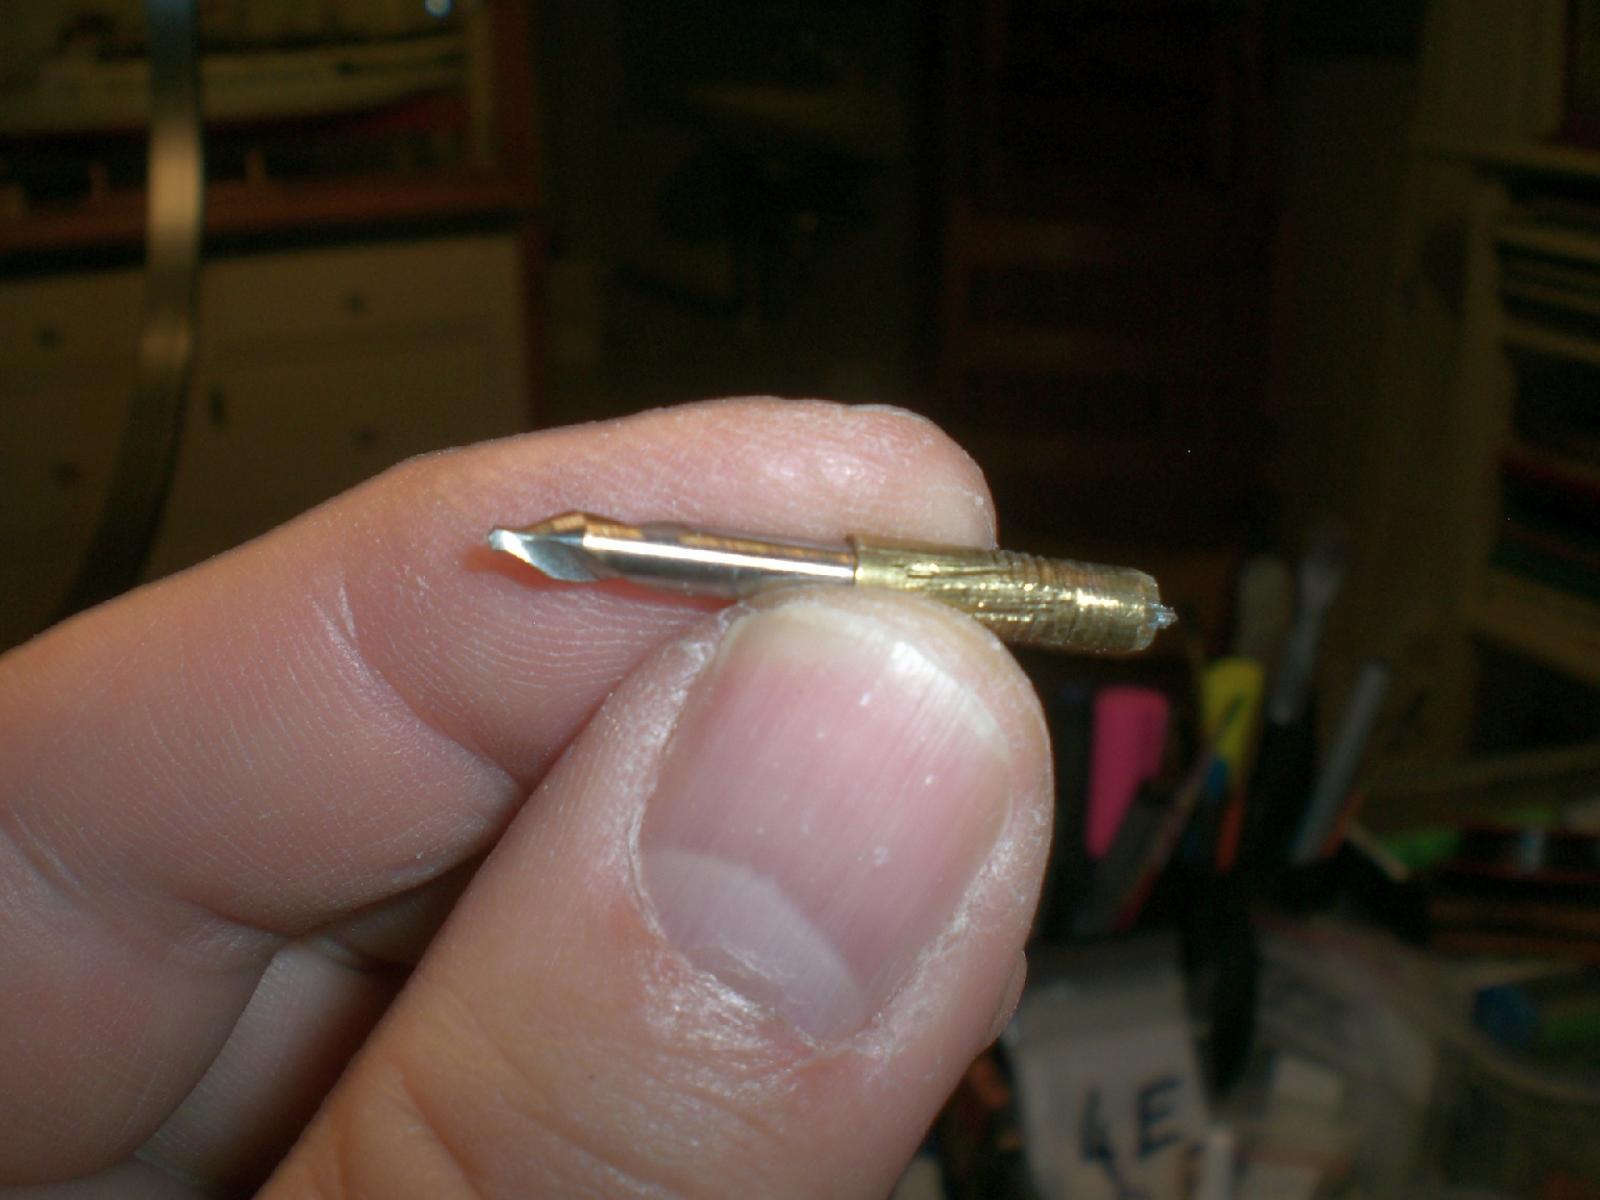
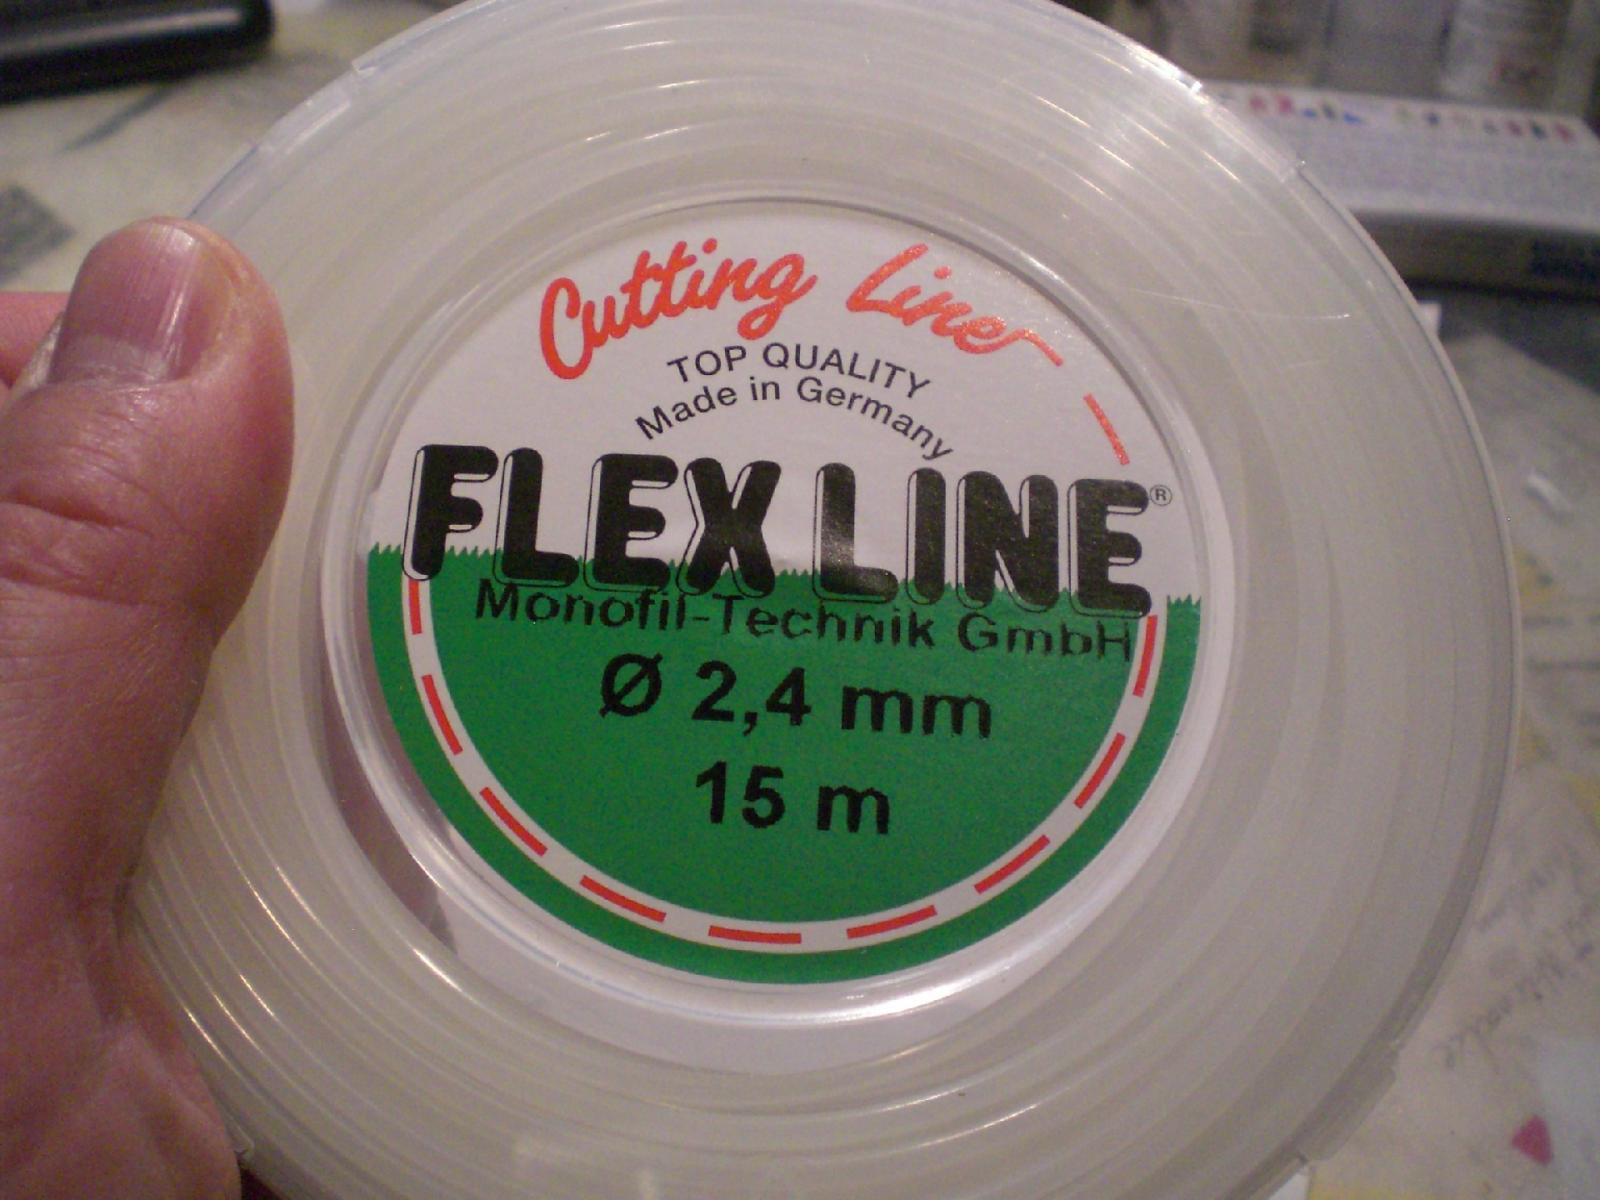
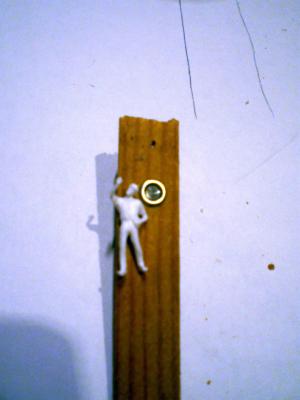
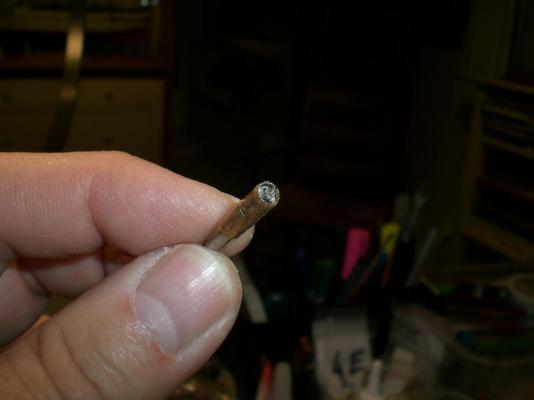
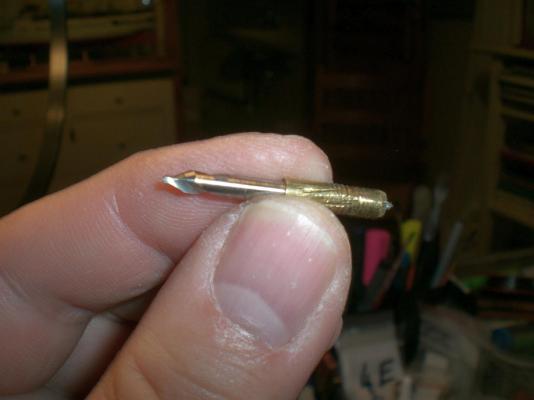
Build log part 12 today I did some preliminary trials for the portholes, Size, glassing, mounting in plated planked hull...... It suits scale 1:144, whereby the actual porthole inner diameter, when opened should pass a man through (in case of fire on the ship) The hollow rivets are from brass with galvanized tin coating. The hollow inside diameter is 2,4 mm The "glassing" is cut from a 2,4 mm diam. grass trimmer line, where the cut surface face becomes tranparent. A mini drop of low viscosity CA at the far end secures the safe fit to the hollow rivet tube The critical part is to drill through the plating foil without destorting it, by cutting a clean round hole through plating-foil and wood of the hull I`m quite happy with the results so far Nils The figure`s hight is 12mm, the hight from deck to deck will be 19-20mm The "glassing" stands back appr. 0,5 mm from the outer rivet face it is important to get a clean cut through the plating foil a little cutt off end of the grass trimmer line goes into the hollow rivet, secured with a tiny drop of CA for cutting through the foil I use a brass tube with sharpened end on one side, slid over a centering drill....., the function is: cut the foil clean, center and drill through the models planking with the other side of the centering drill remove the cut out foil piece from the tube with a pointed tweezer my special "tool"

- 2,625 replies
-
- 20
-
-
- kaiser wilhelm der grosse
- passenger steamer
- (and 1 more)
-
Cutter Cheerful 1806 by rafine - FINISHED
Mirabell61 replied to rafine's topic in - Build logs for subjects built 1801 - 1850
beautiful work Bob, Looks nice and clean for upper planking and wales... Nils- 525 replies
-
- 2
-
-
- cheerful
- Syren Ship Model Company
- (and 1 more)
-
Nice Progress Mike, "Cheerful" is looking great... And Happy birthday Mike ! Nils
- 452 replies
-
- 1
-
-
- cheerful
- Syren Ship Model Company
- (and 1 more)
-
Patrick, that interior of "Symphony" is a real treat to look at, you`re developing to a creative ship`s fitting out designer, well done Nils
-
Thanks Kevin and Denis, and all the "likes".... Kevin, you`re wellcome any time and your seat is booked already..... I`m glad you dropped in and that you shall be watching Denis, I`ll try my best for these details, just wanted my mind to pick up some thoughts now and get working, so that I have an acceptable solution when I reach that long ongoing sequence for the ships superstructure Nils
- 2,625 replies
-
- 2
-
-
- kaiser wilhelm der grosse
- passenger steamer
- (and 1 more)
-
Crackers, you`re so right with those fab pics/Details, I`m already thinking for some days since I saw the lovely, probably brass framed double elevation Windows in the deckhousing behind that couple (how to do it in scale 1:144 ) Nils
- 2,625 replies
-
- 4
-
-
- kaiser wilhelm der grosse
- passenger steamer
- (and 1 more)
-
wellcome Bob, I´m glad you dropped in, and that you`re staying to watch, you have`nt missed too much yet, because the most of the hull build is still to come...., let alone the core of the ship. The hull shall take some time, as there are still some details to solve and in lack of a building intruction Nils
- 2,625 replies
-
- 3
-
-
- kaiser wilhelm der grosse
- passenger steamer
- (and 1 more)
-
Super deframing pocedure Johann, the boat Comes off the plug without any destortions or broken off ribs, great work... Nils
-
Many thanks Tom, and wellcome to the build log, I`m glad you like it.... Nils
-
Christian, The criteria for the plating material (Aluminium, copper, brass, etc. ) is the availability in such required foils, (like 0,125 mm), and with suitable adhesive gluefilm Quality, and the suitability for poncing the "rivets". Because I had good results with Alum. for four "riveted ships" already, I`ll use it again. I know there are here and there shipbuilders plating plans indicating the pattern, but I also find those too complicated and too strict to follow. I look at the number of plating "chines" on the actual ship, the size of the steelplates, and how they run on the aftship section (if there are dry dock photos available thats a great help) In general I start with the first plating line, leave a gap with 90% platewidth and do the third, before the second plating line is put on, covering horizontal riveting lines of the first and the third row. The vertical rivet Joints are 2 or 3 or 4 rivet-rows, (Higher stresses) whereby the horizontal line are a rivet-row less. With the plating of These heritage Liners there were also reinforcing double and tripple plates, patches and Support plates, in some cases even as additional "belts" like it can be seen on many riveted and well built models of the Titanic, Lusitania, etc. (from there Comes the term "Rivet Counter....." The KWdG plating is basicly planed like my done plating on my other models. I will have to pay special attention to the aft area and around the propshaft housings, to get a good and acceptable result, that will cause some trials first and hopefully not too much headaches Nils
- 2,625 replies
-
- 8
-
-
- kaiser wilhelm der grosse
- passenger steamer
- (and 1 more)
-
Hi Johann, next to your outstanding work on the "La Creole" hull, also the boats manufacturing is beautifuly done The making of the plugs, the framing and the planking on the ribs is looking fantastic Nils