HOLIDAY DONATION DRIVE - SUPPORT MSW - DO YOUR PART TO KEEP THIS GREAT FORUM GOING! (Only 24 donations so far out of 49,000 members - C'mon guys!)
×


John Ruy
-
Posts
1,568 -
Joined
-
Last visited
Content Type
Profiles
Forums
Gallery
Events
Everything posted by John Ruy
-
 Bill, Maine has a great shipbuilding history. Maine’s forest certainly supplied many a shipbuilder, in particular the Royal Navy, before the Revolution and our own Navy during. I in particular like Red Jacket’s Historic significants being built here in Rockland Maine. Of course I live in Maine and it’s Maine Maritime history that got me started in this hobby, so I might be a bit prejudice. John
 -
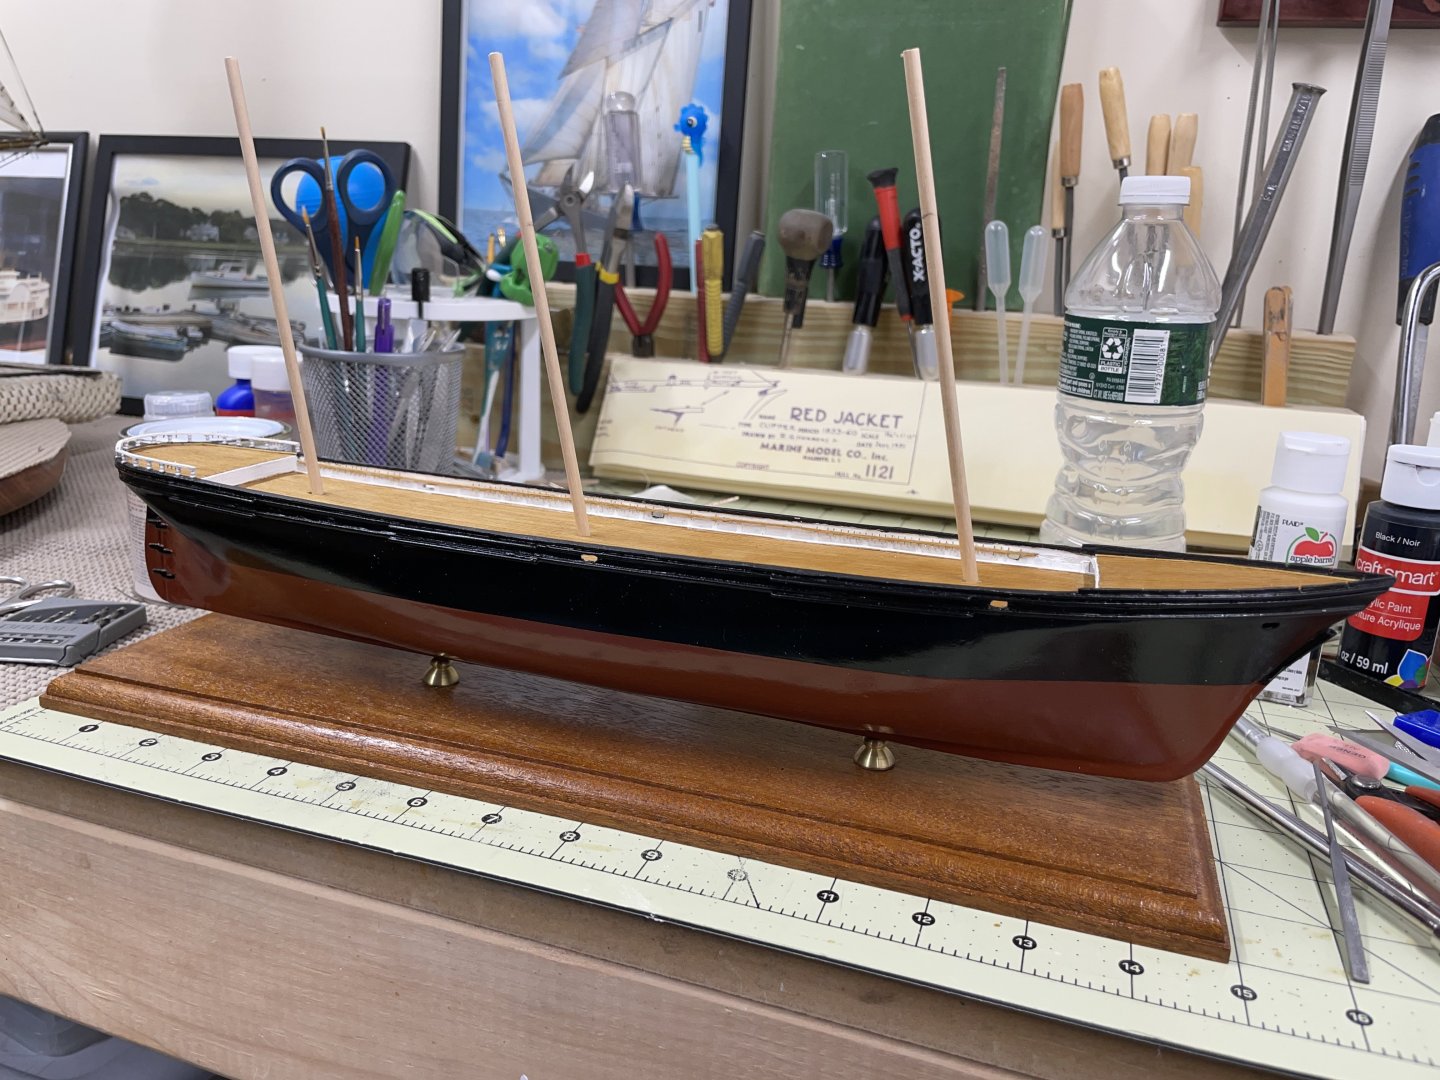
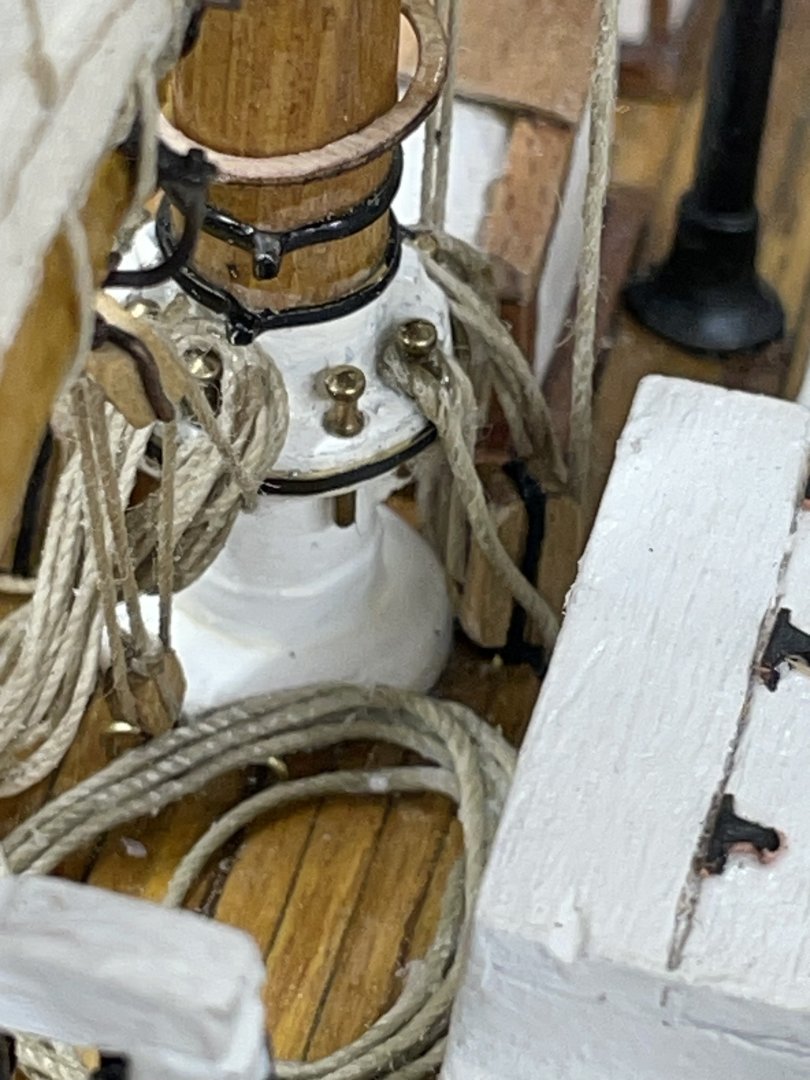
Hull Completed… Final coat of Semi Gloss Clear. Kit supplied base and brass pedestal… Onwards…

- 165 replies
-
- 3
-

-
- Red Jacket
- Marine Model Company
- (and 2 more)
-
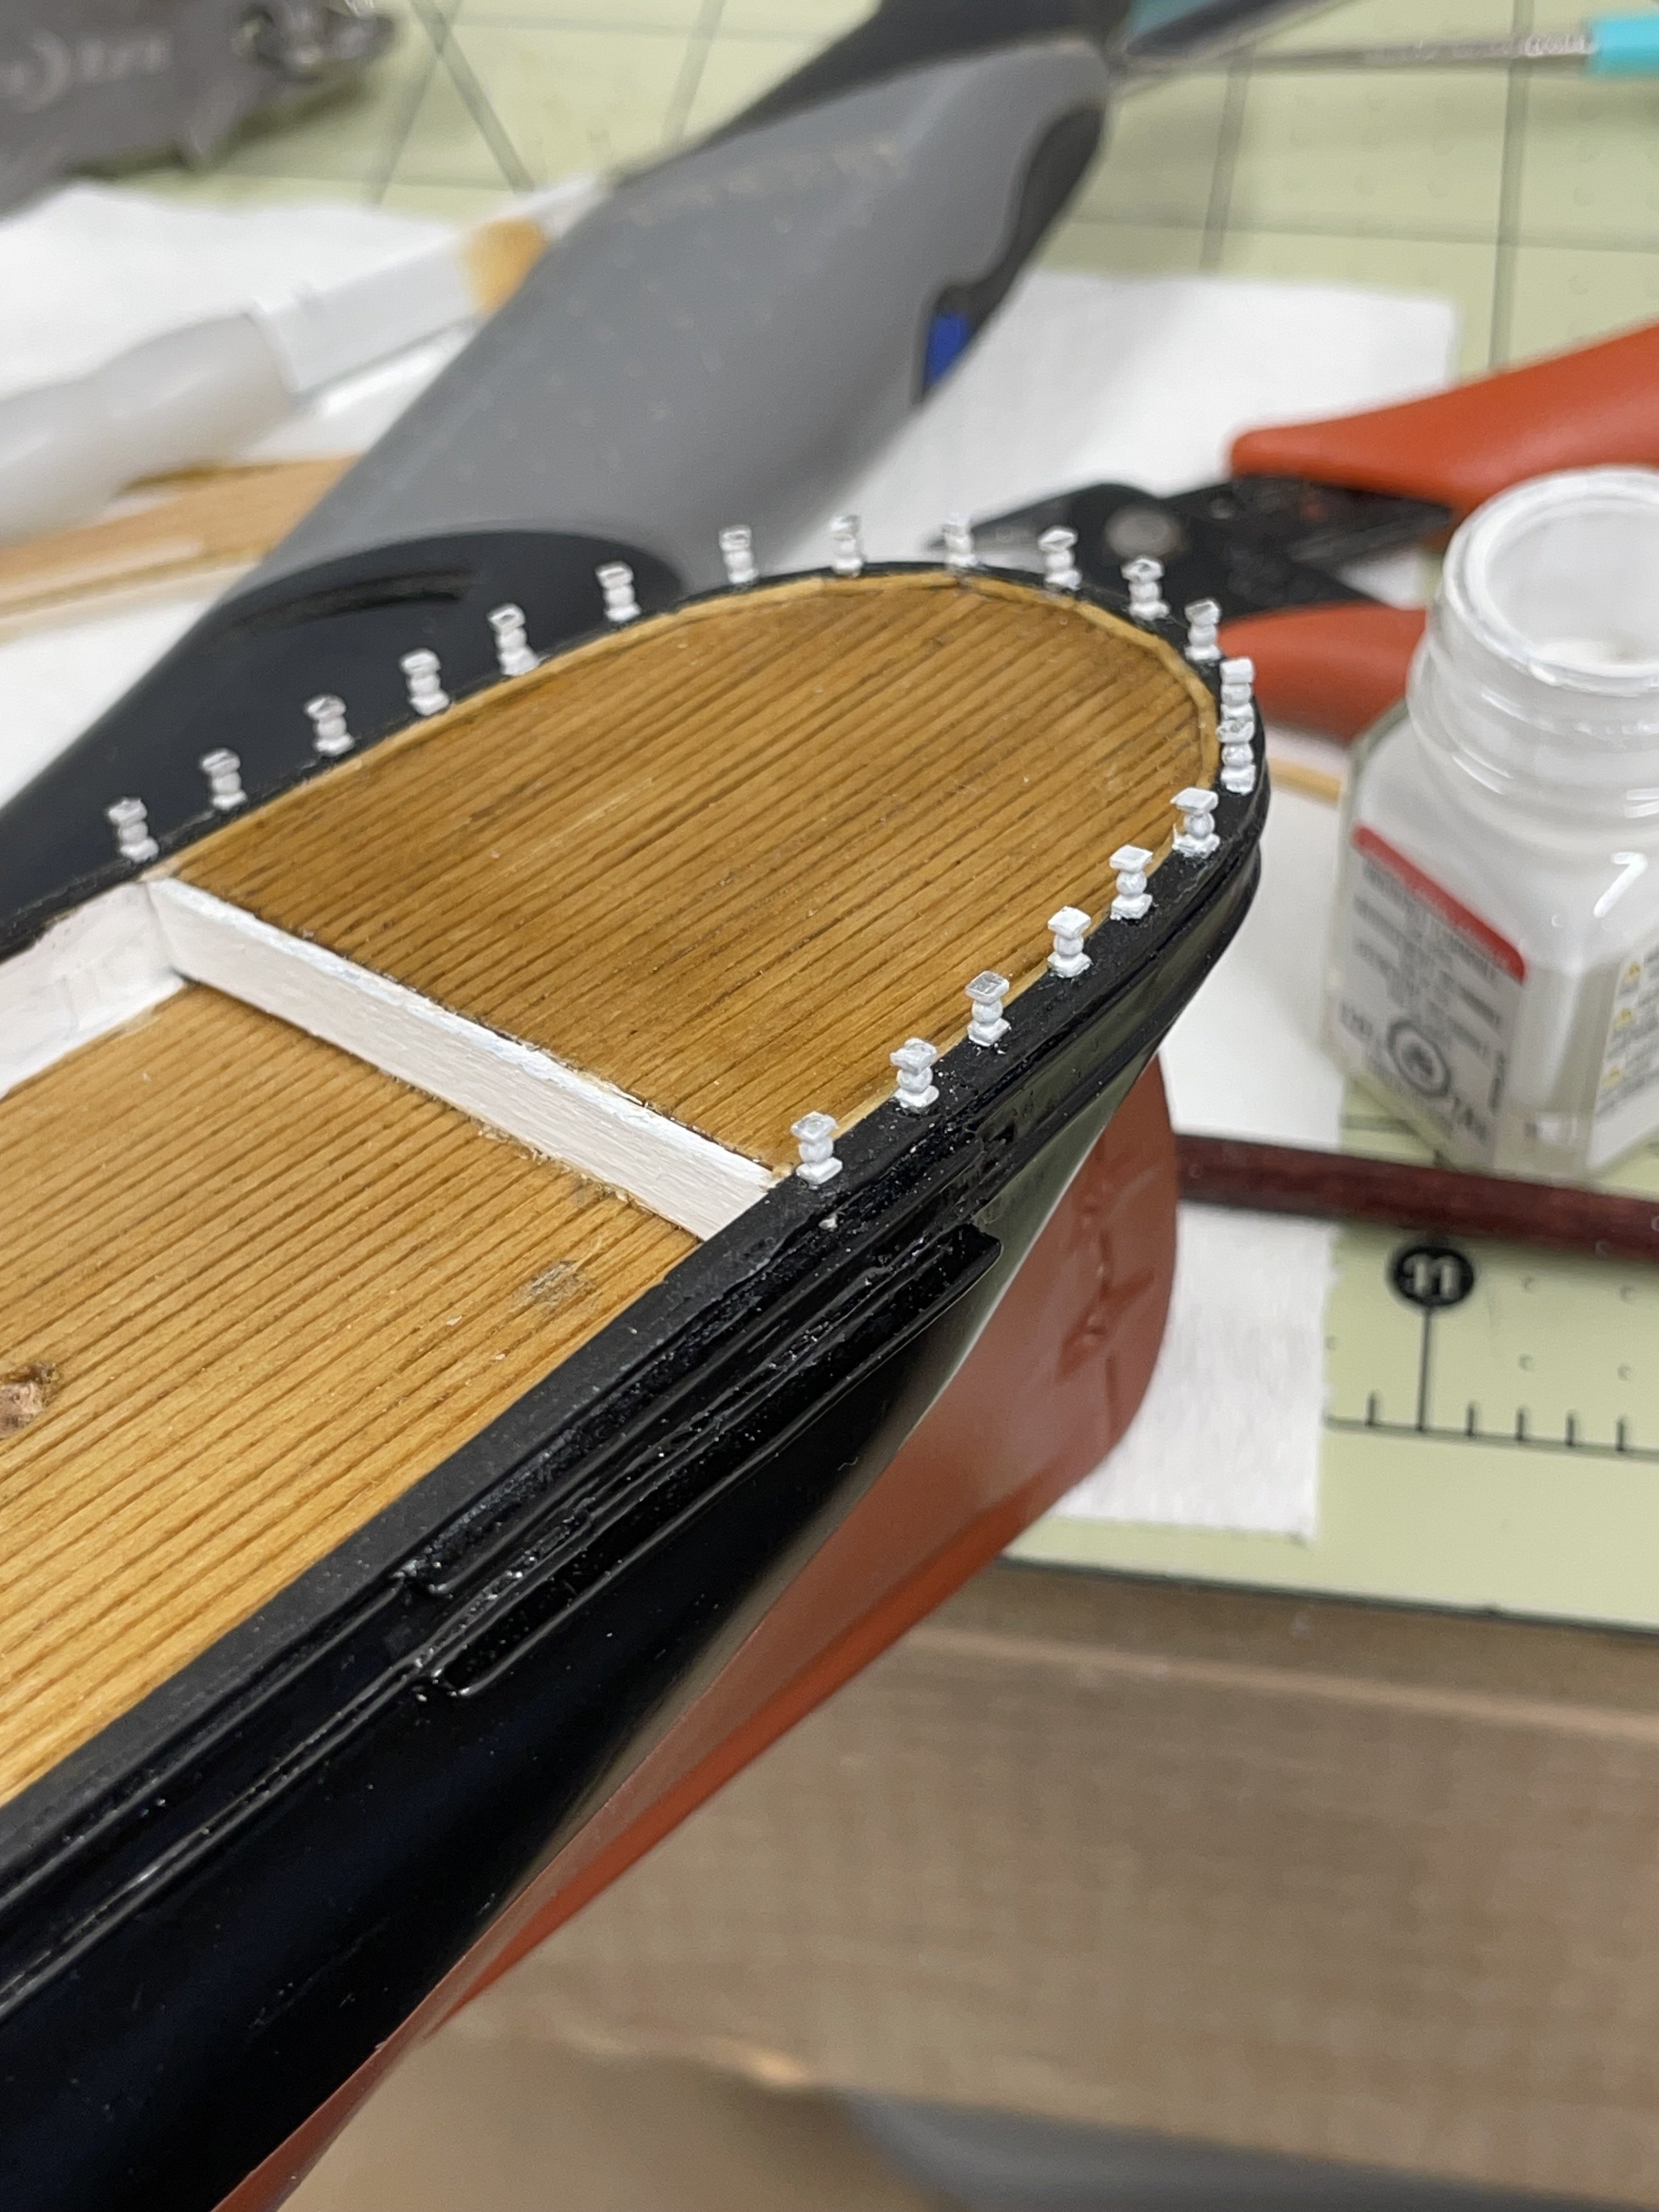
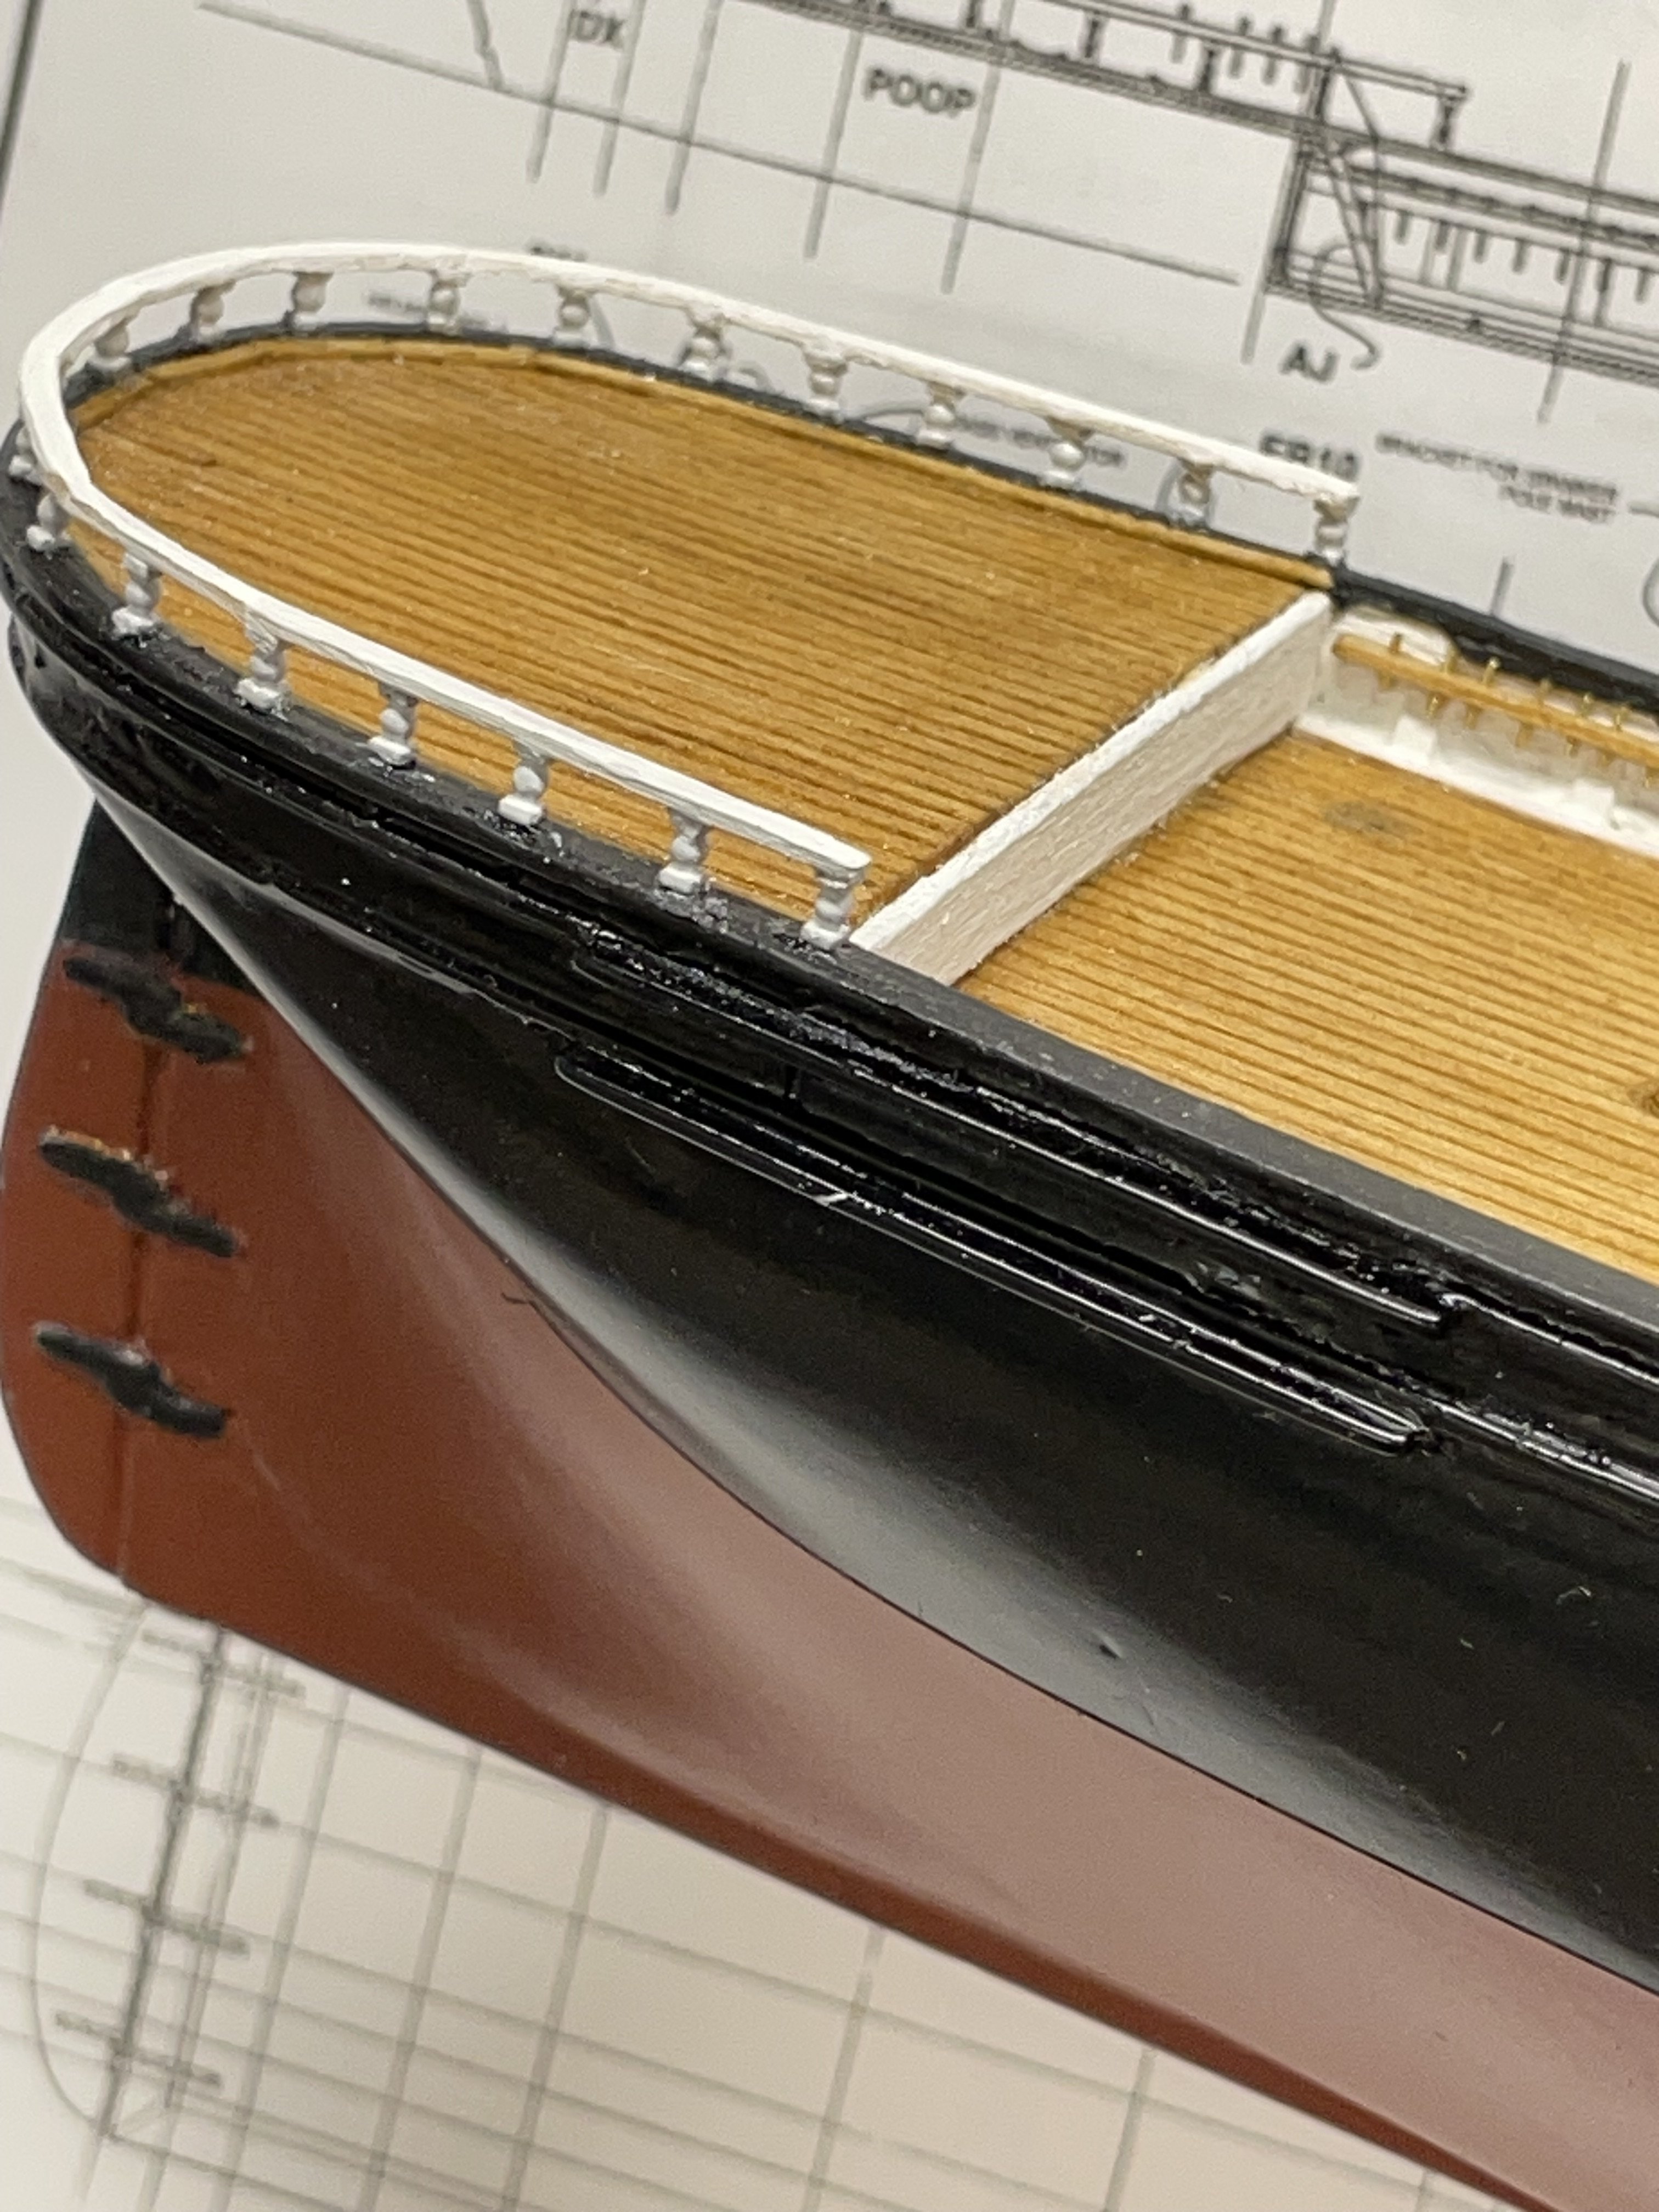
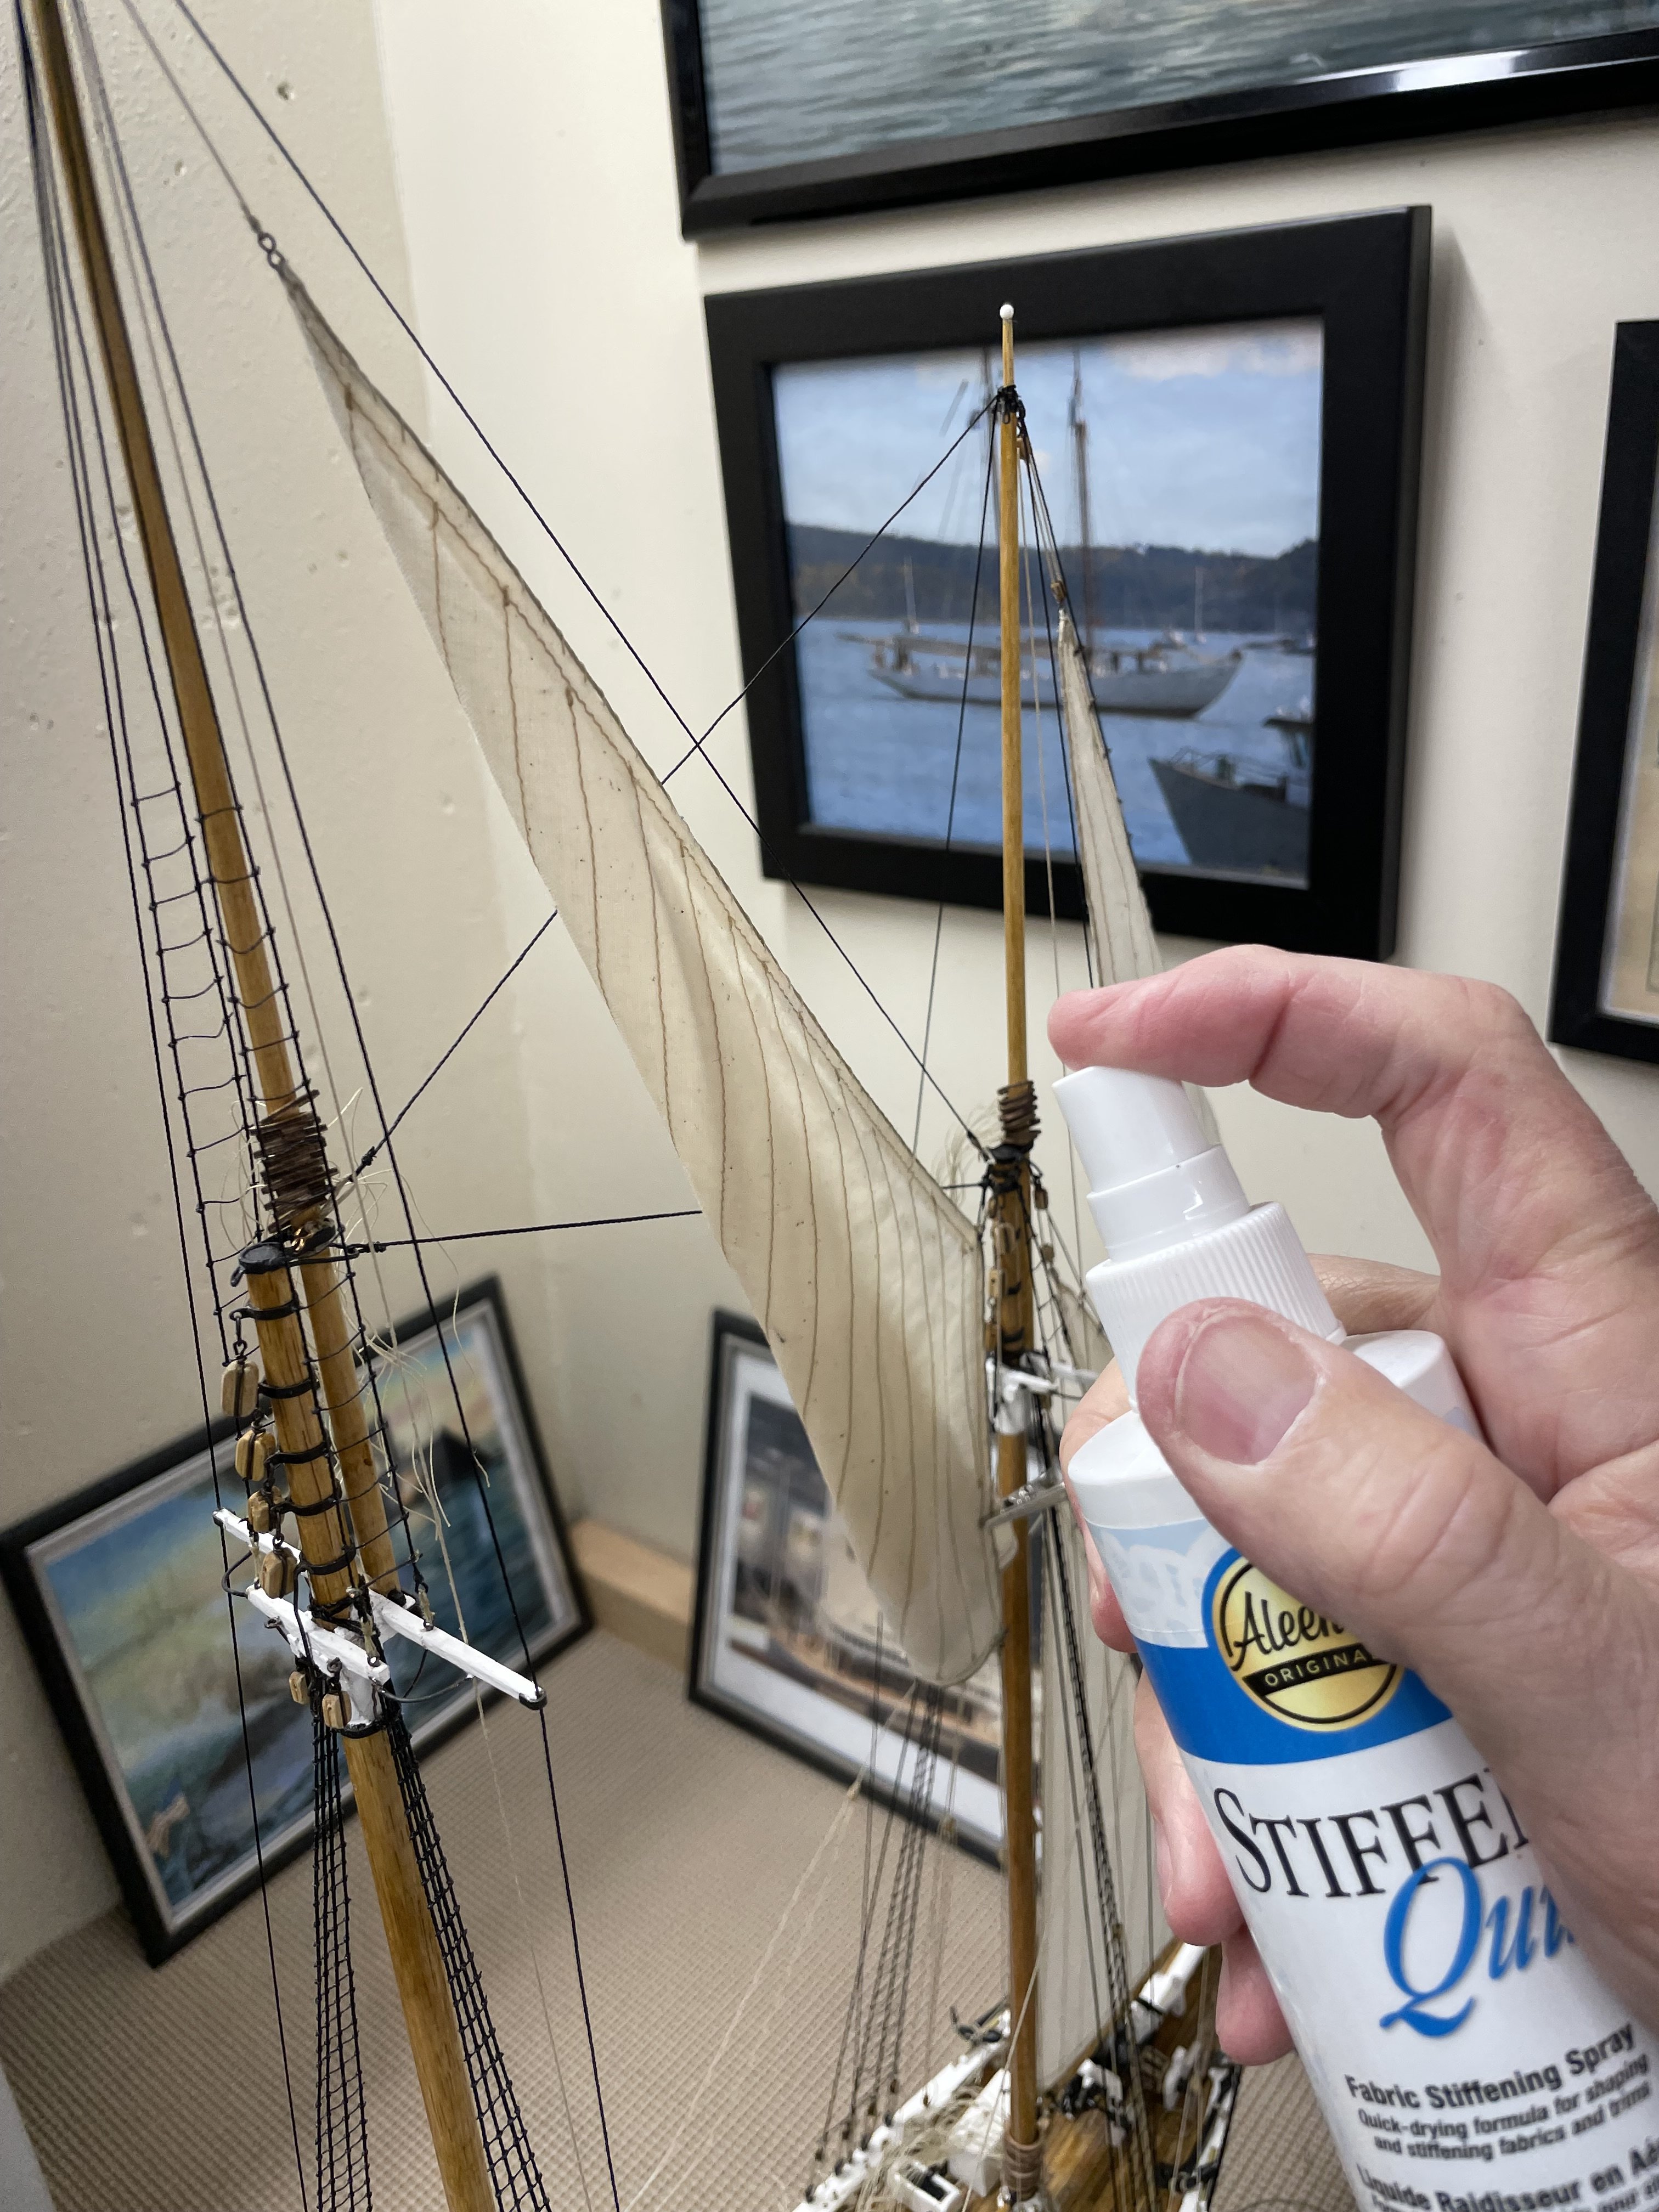
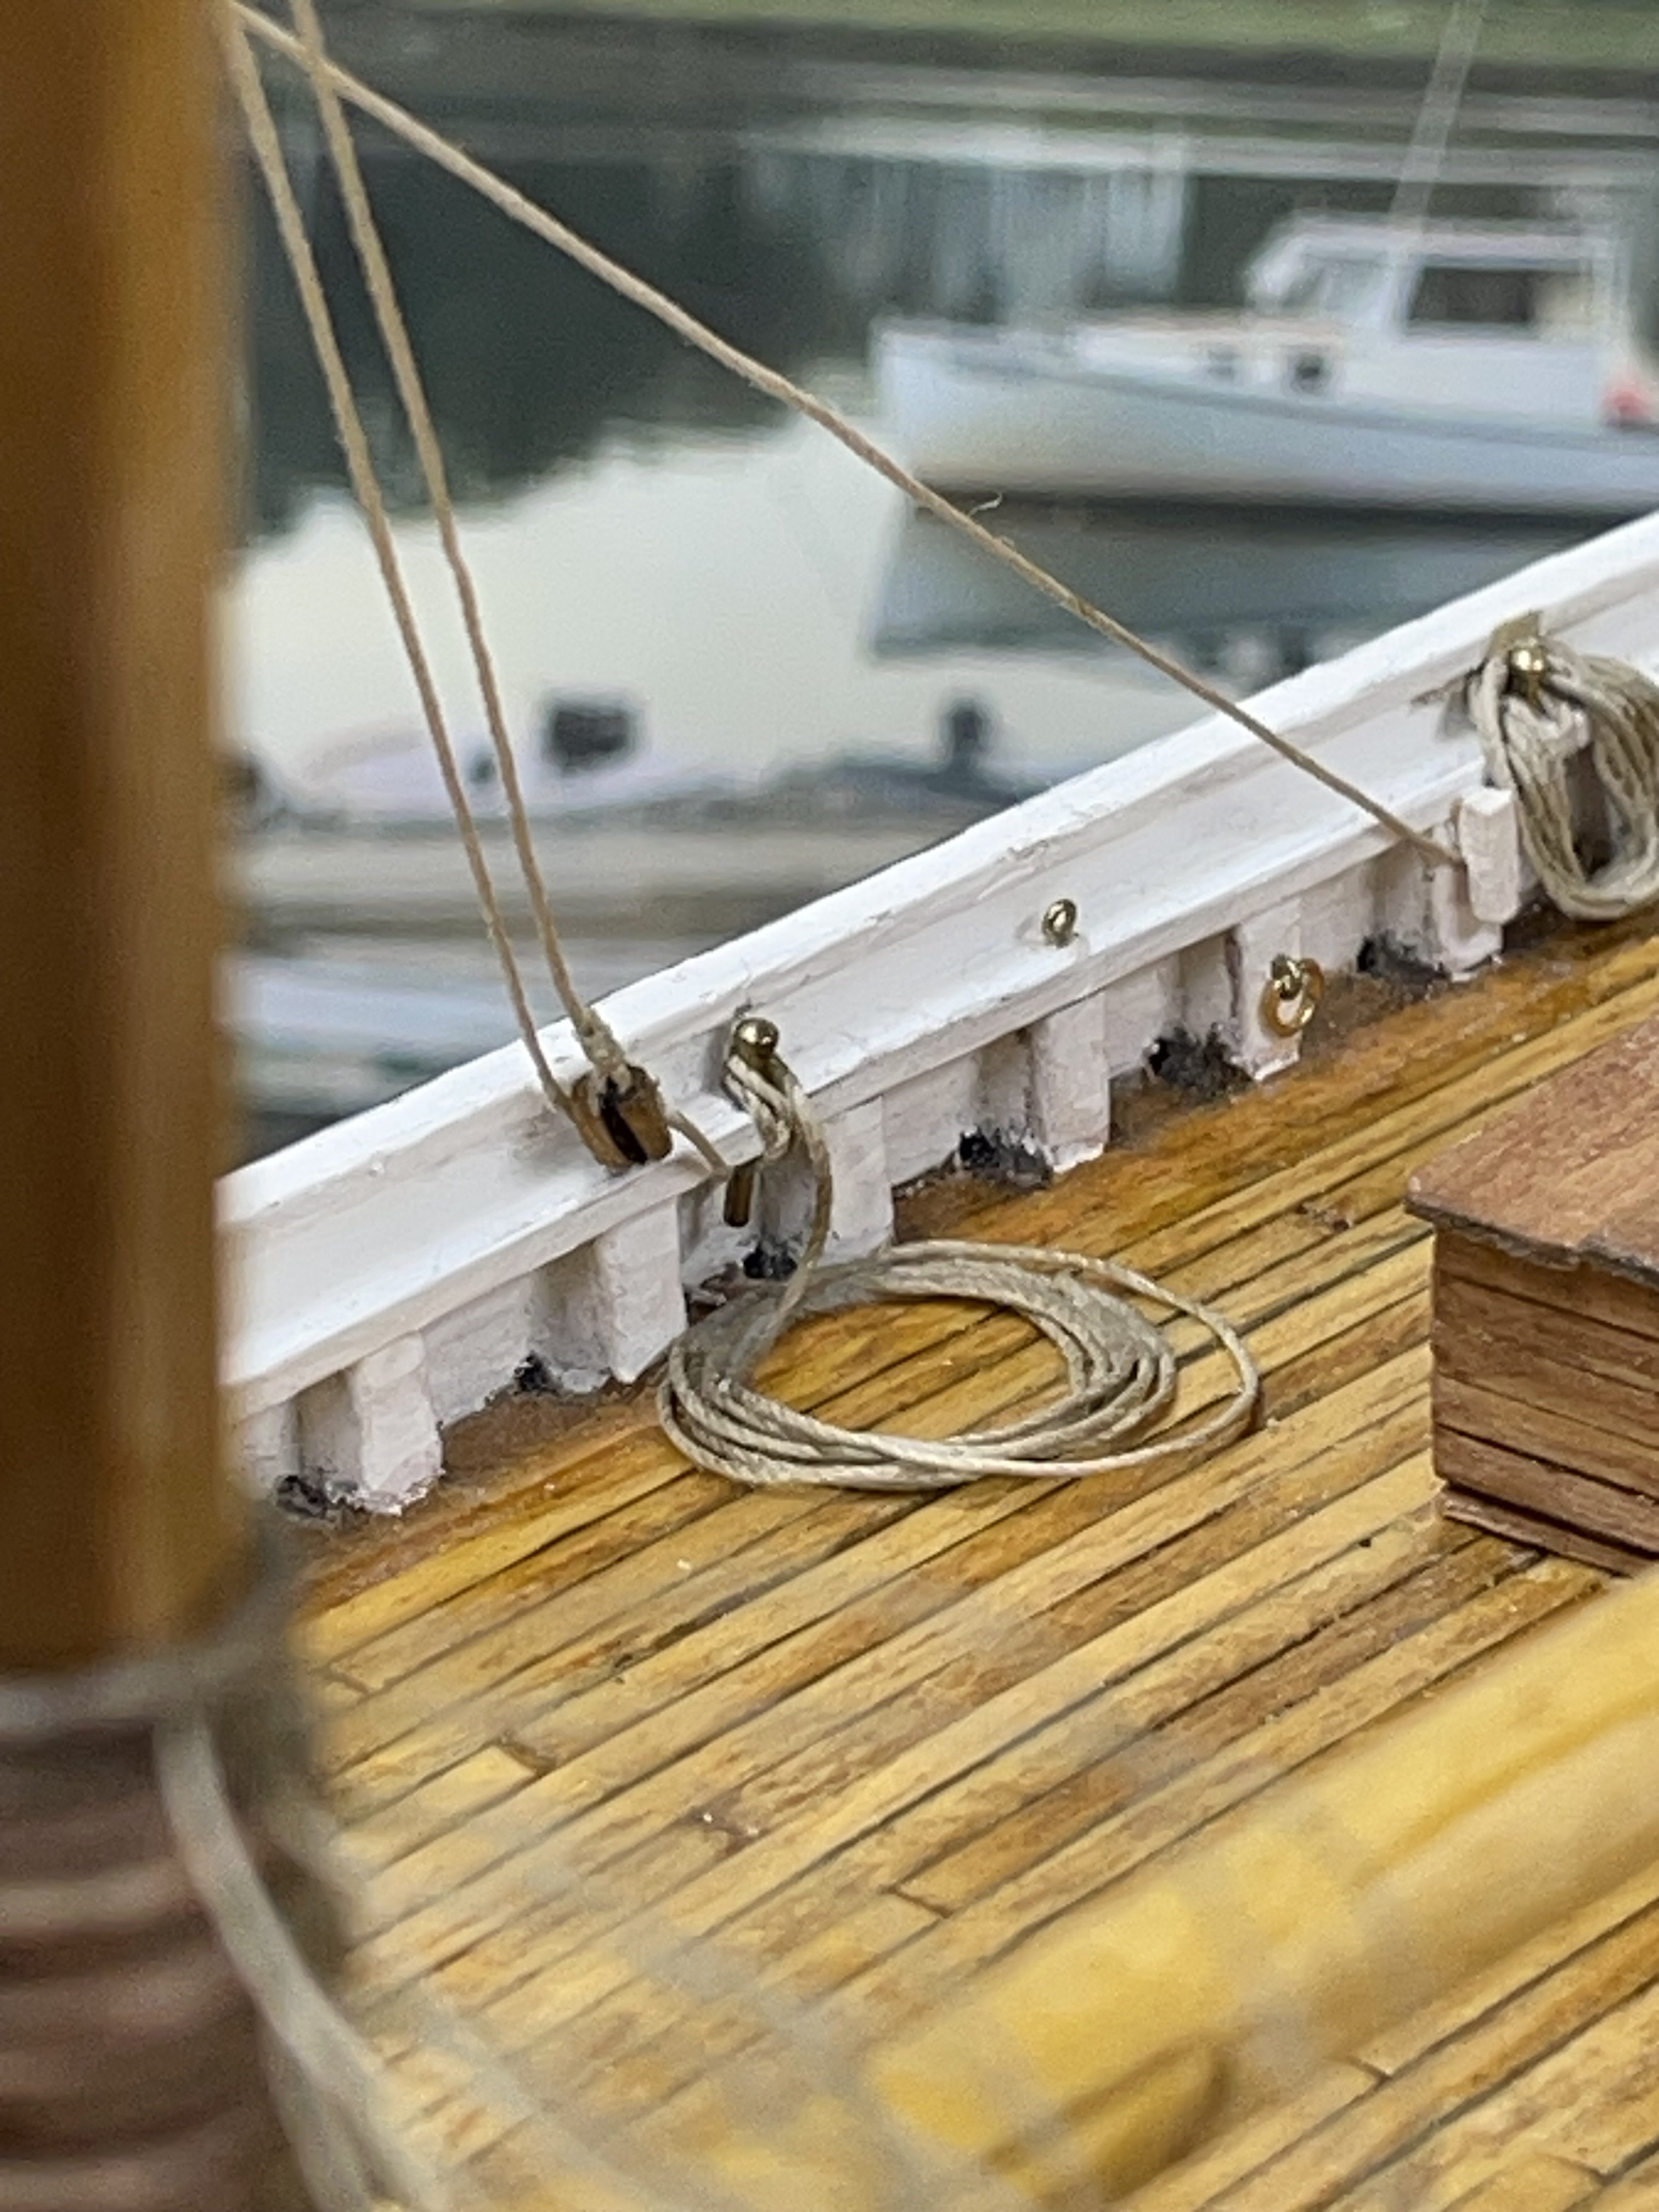
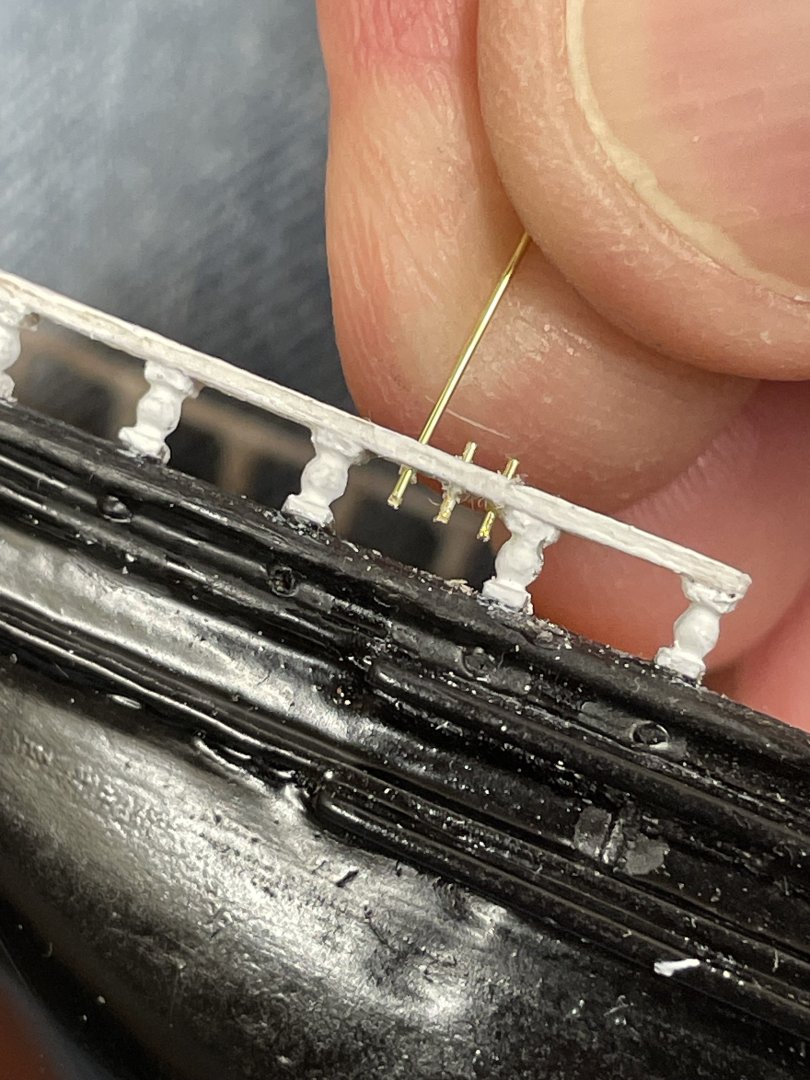
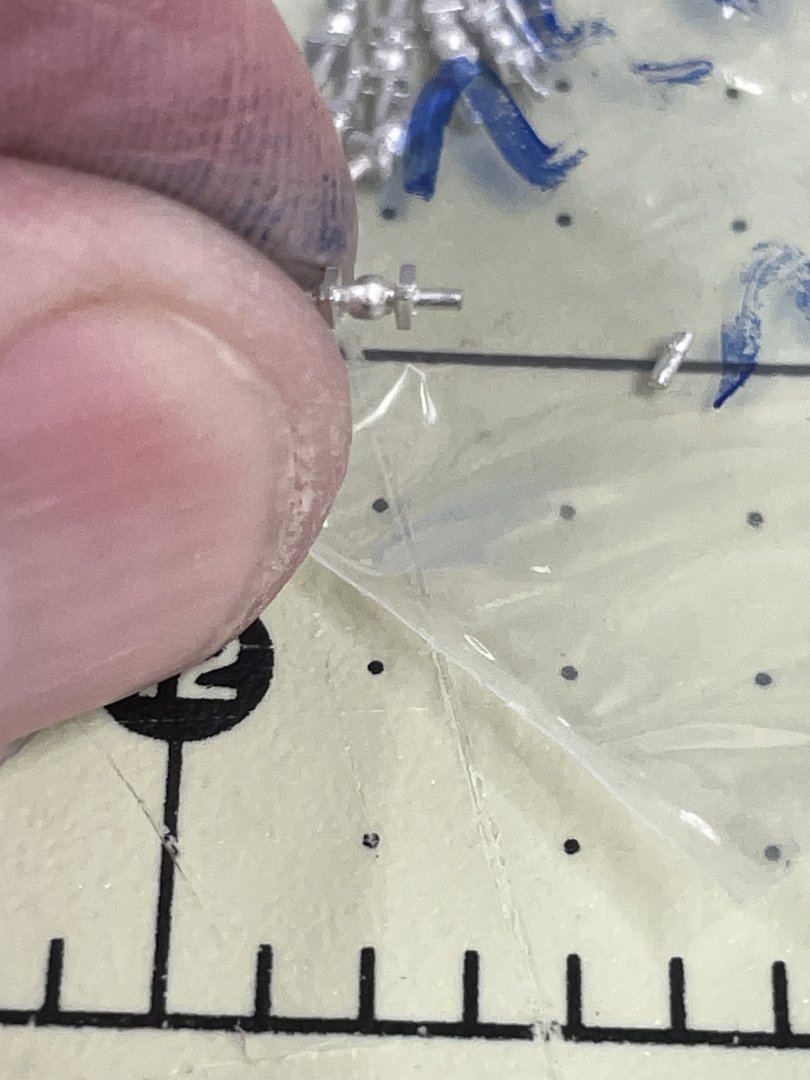
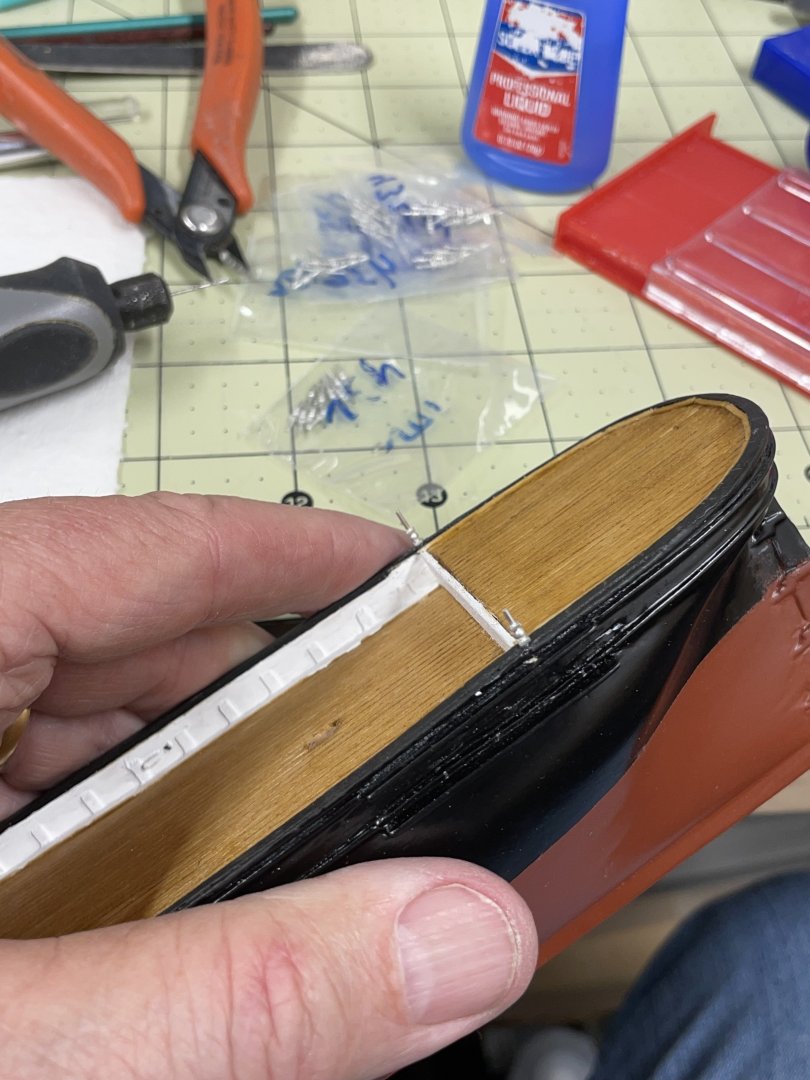
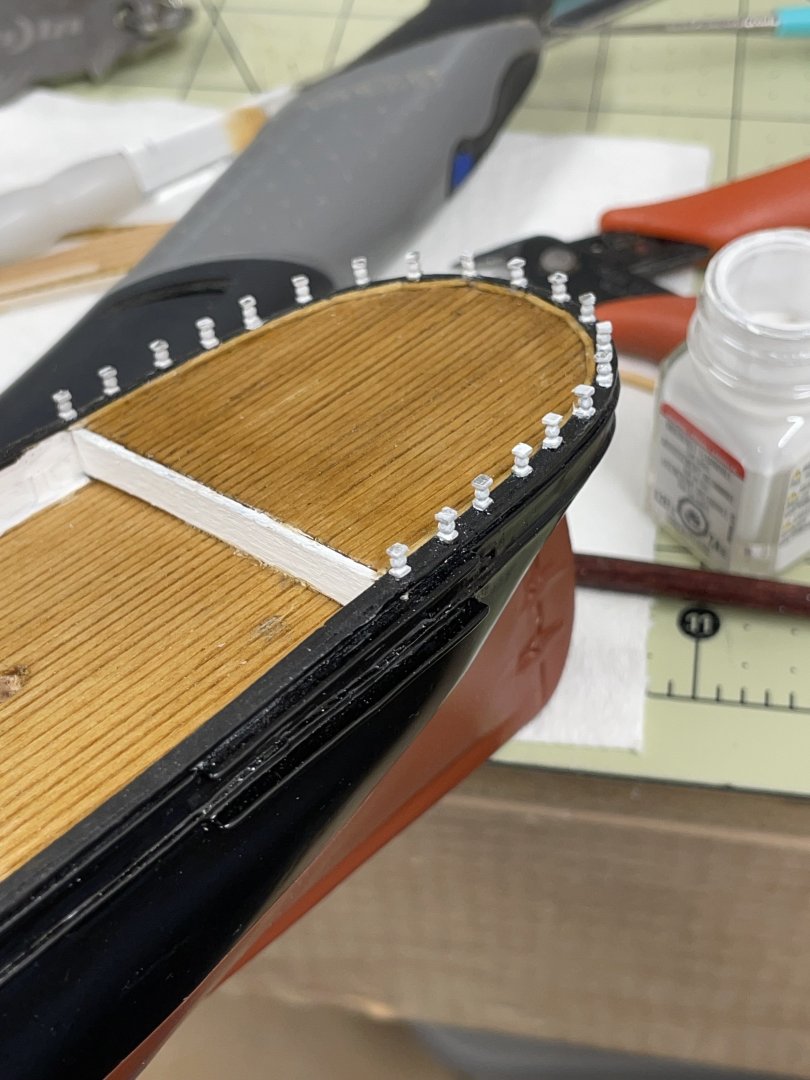
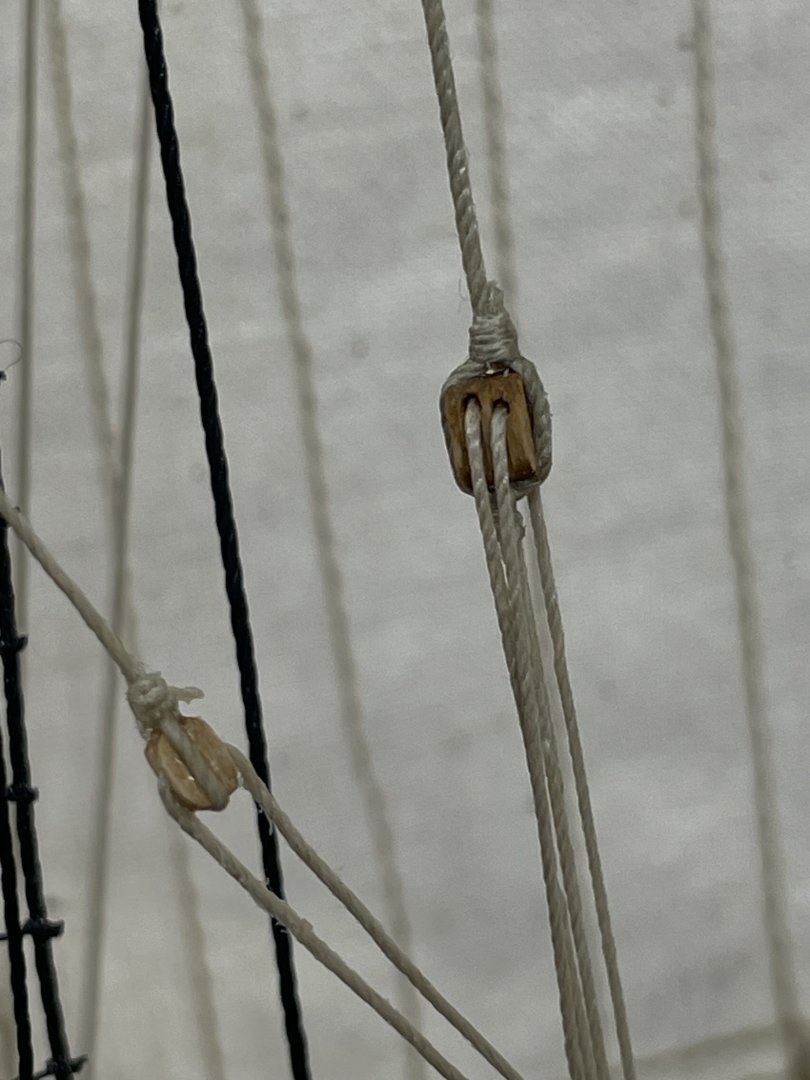
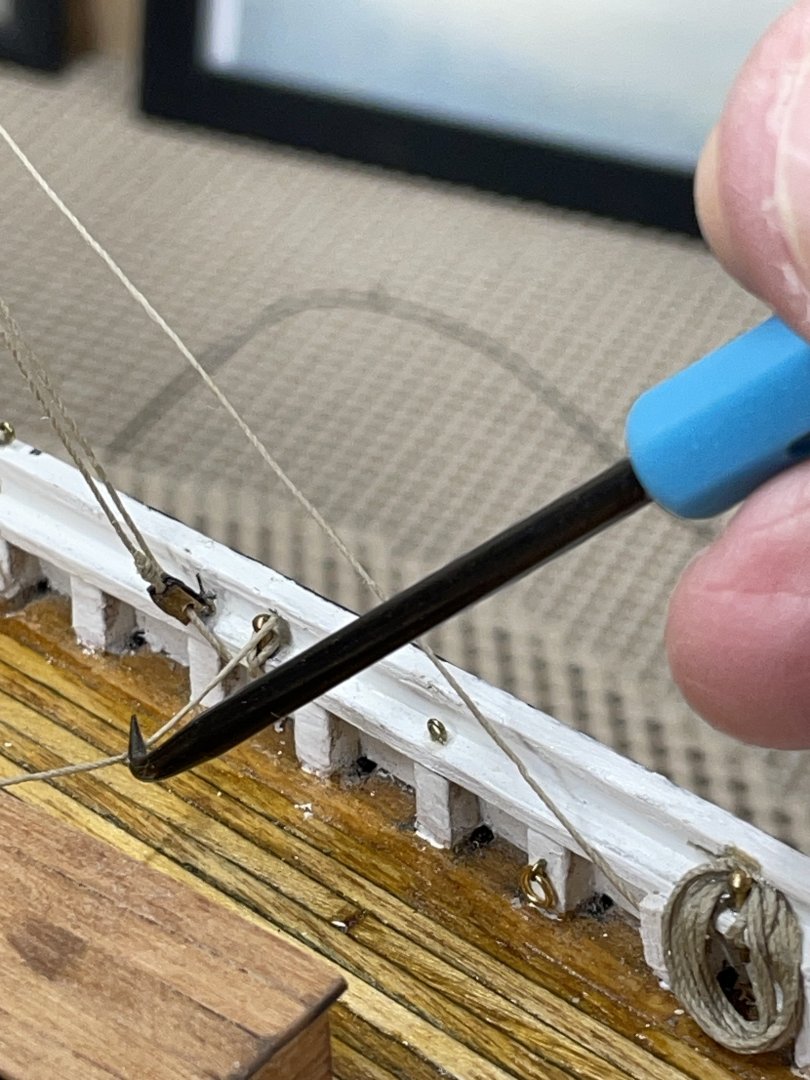
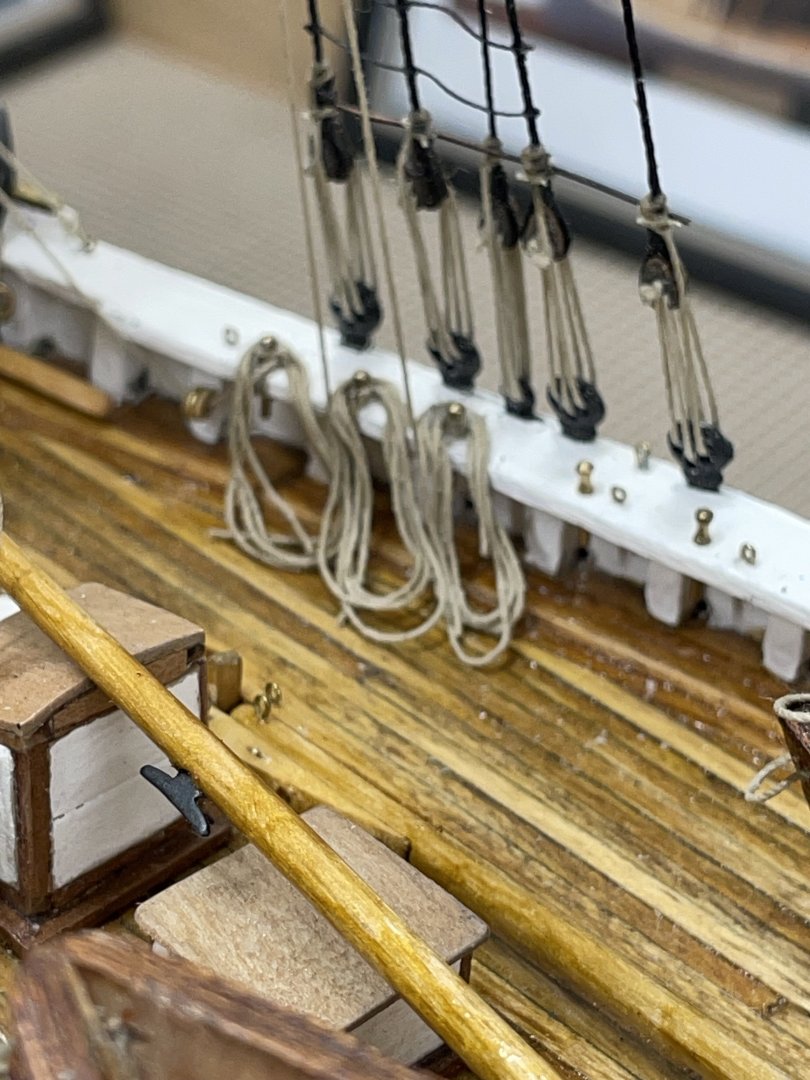
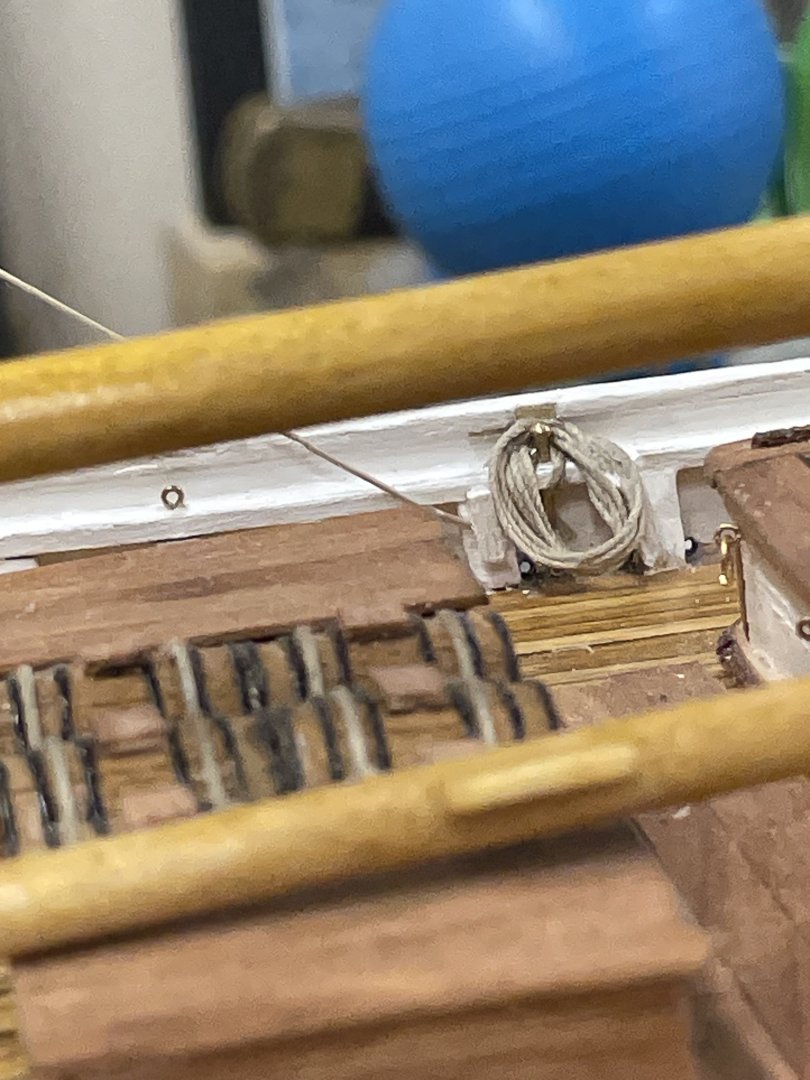
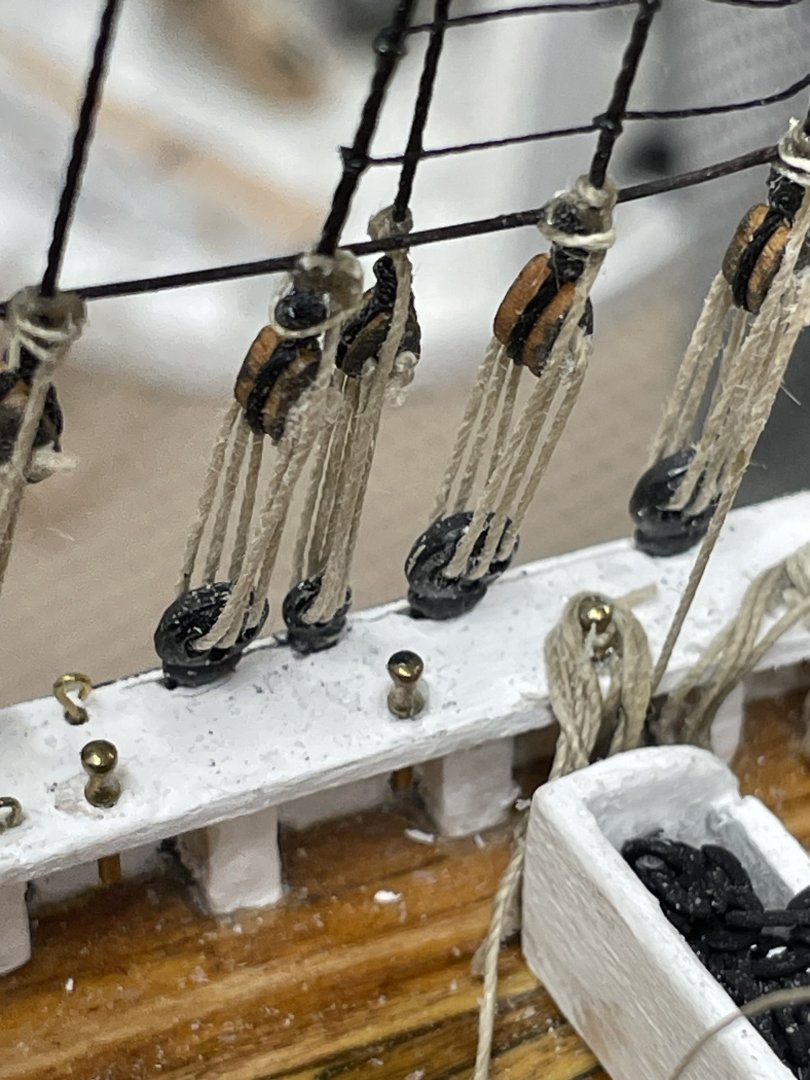
Taffrail Belaying Pins… I have officially gone x-eyed. 😜 Can’t wait to rig this little Red Jacket. Rope Coils? Say What!!! John


- 165 replies
-
- 5
-
-
- Red Jacket
- Marine Model Company
- (and 2 more)
-
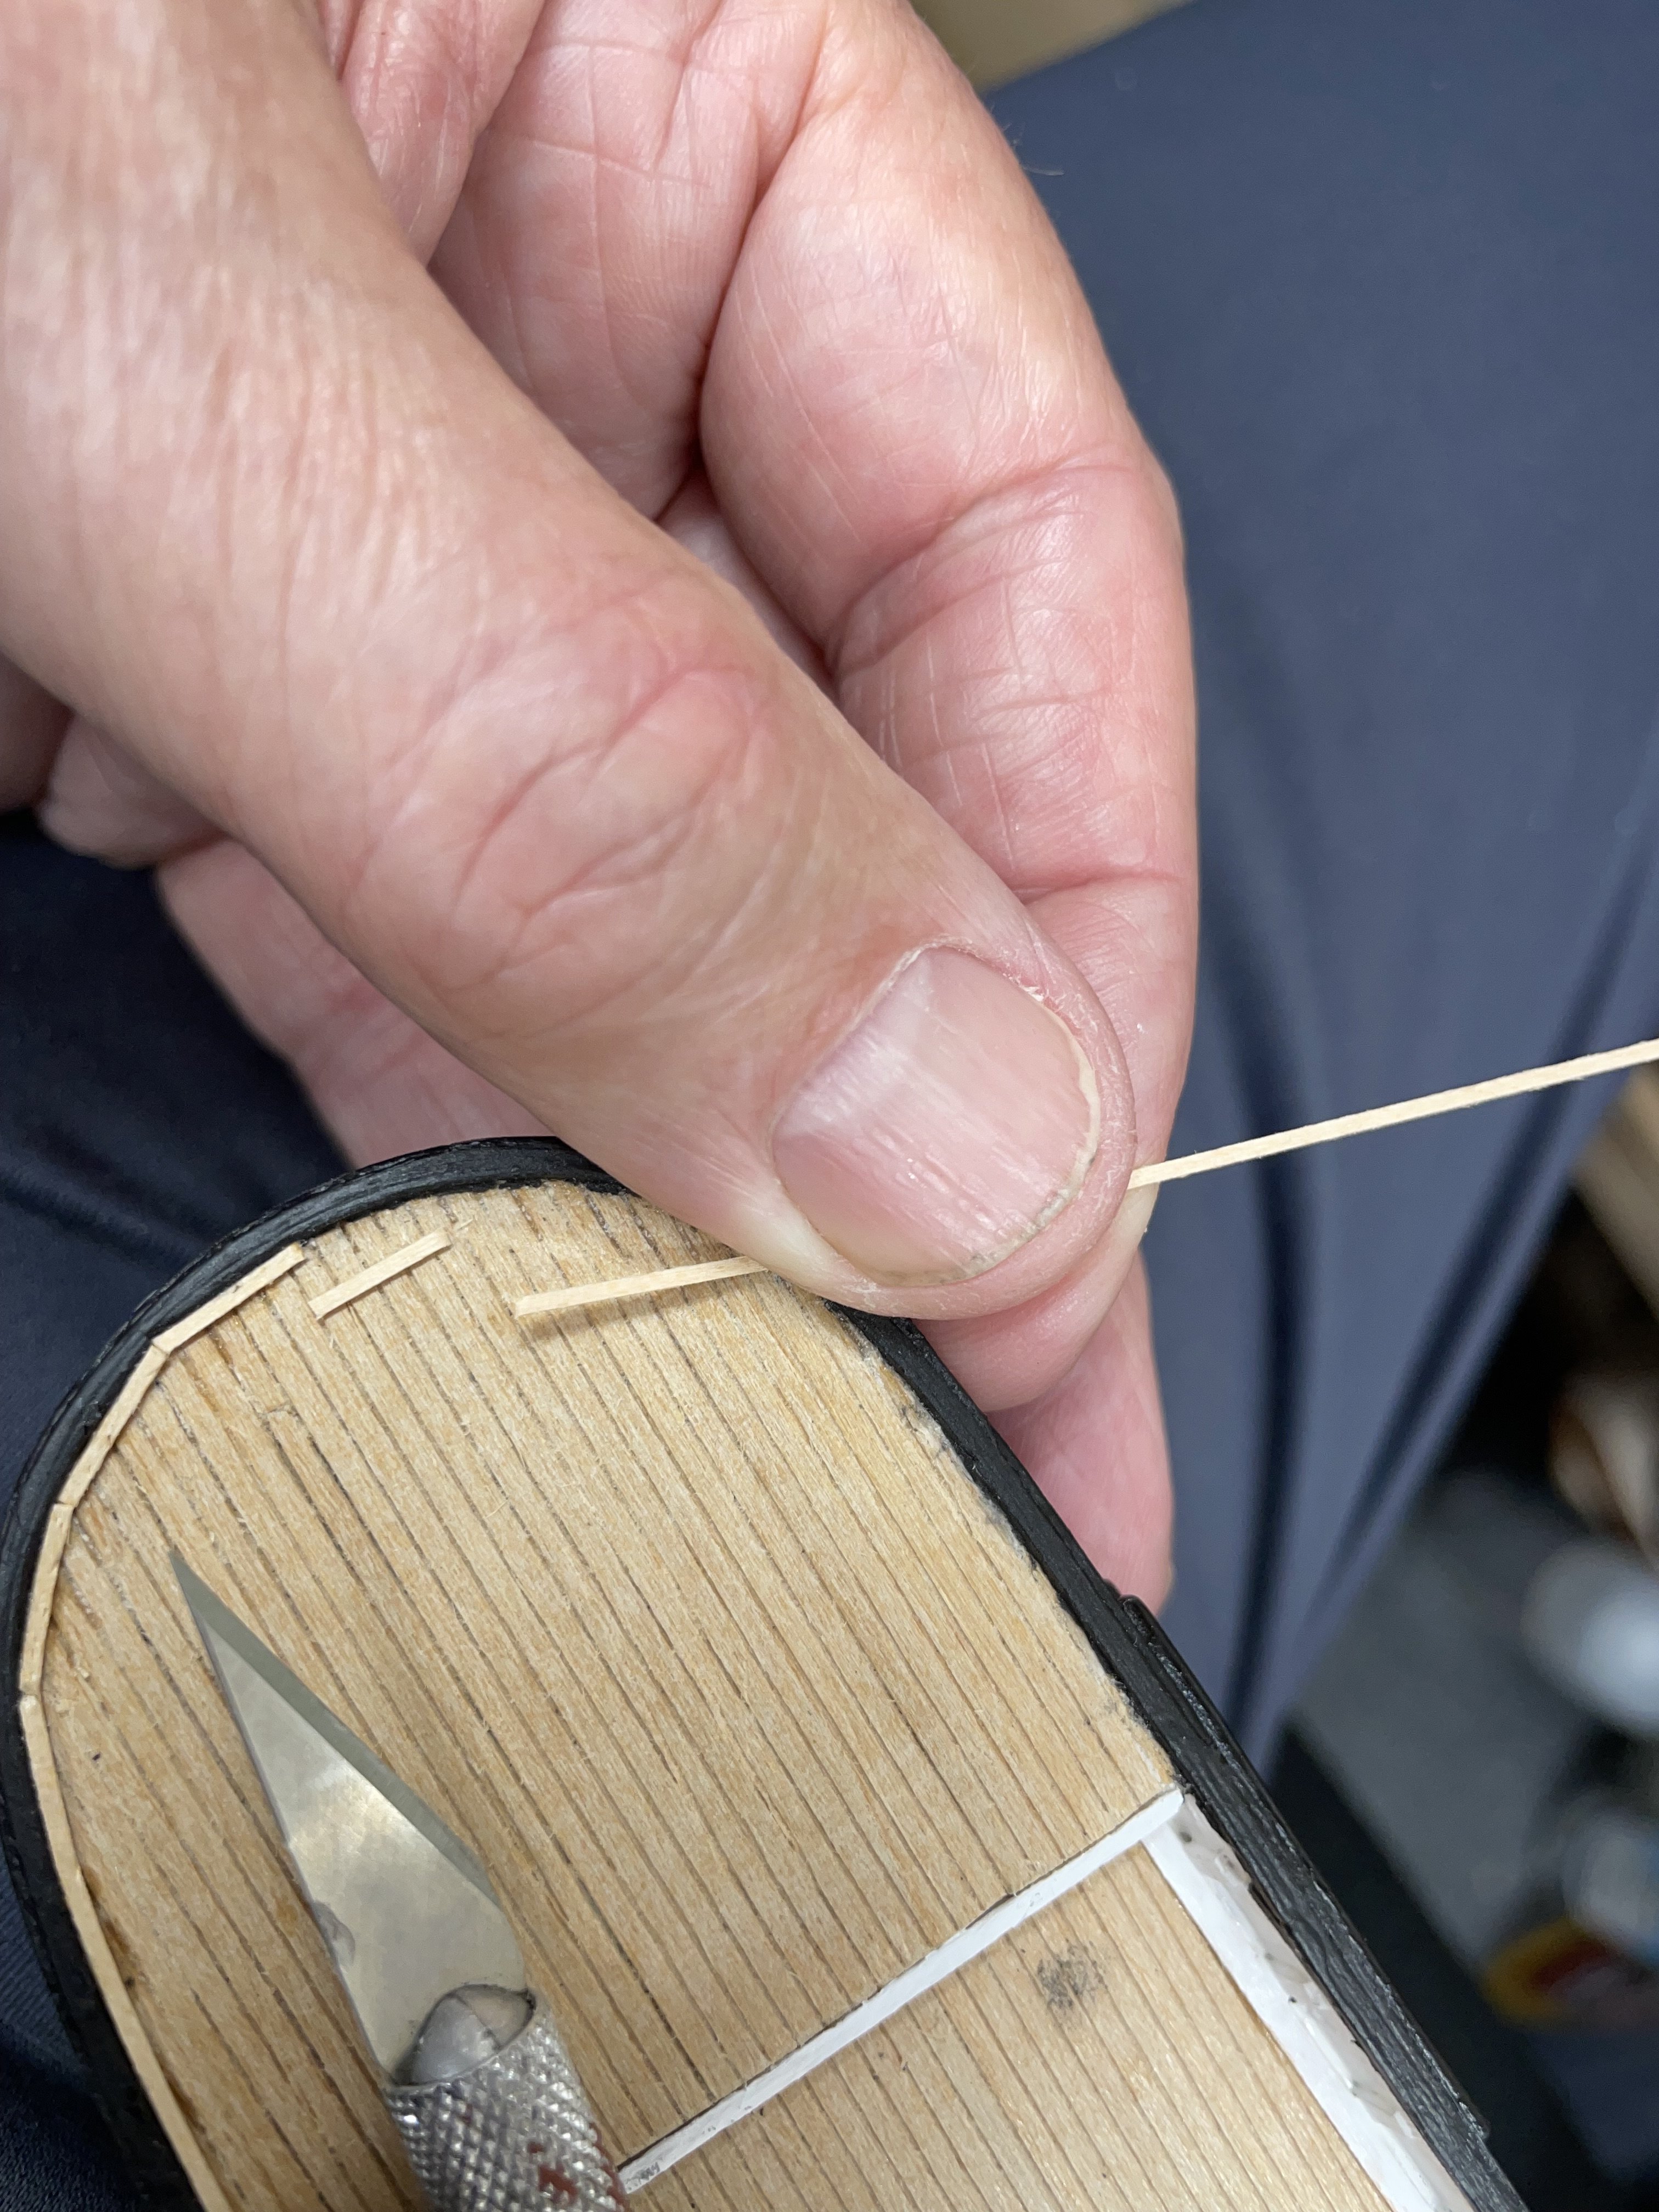
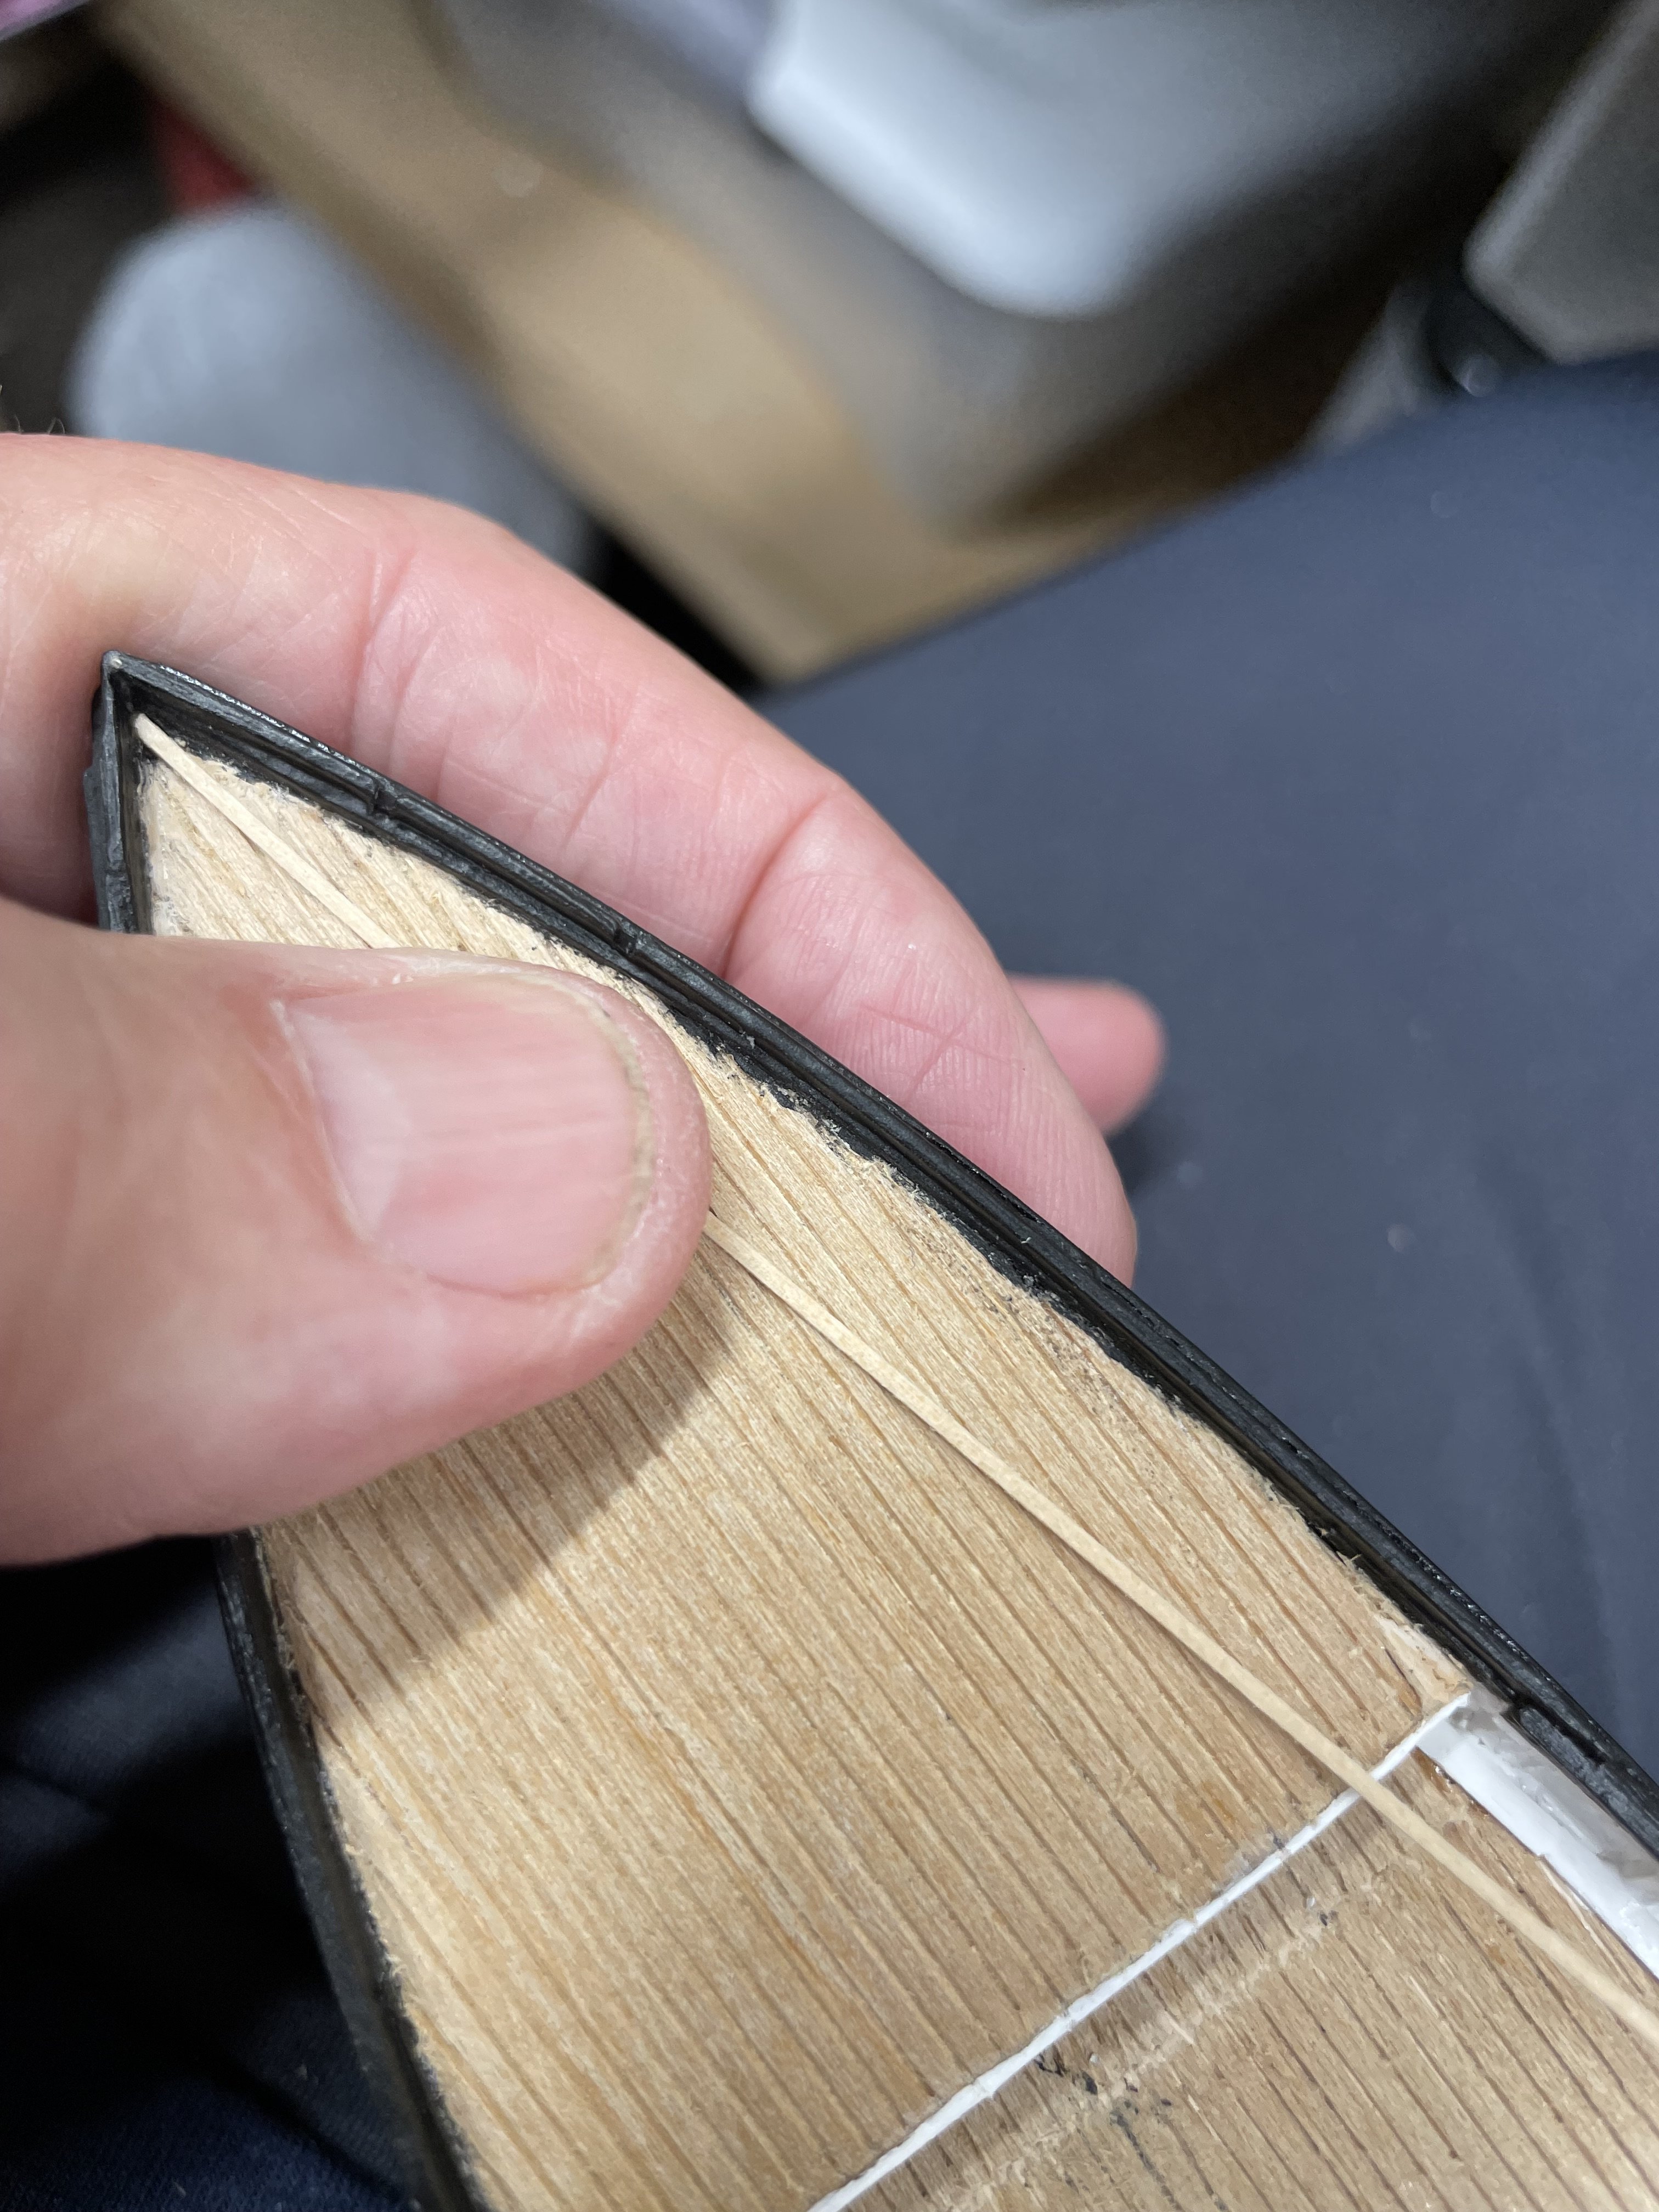
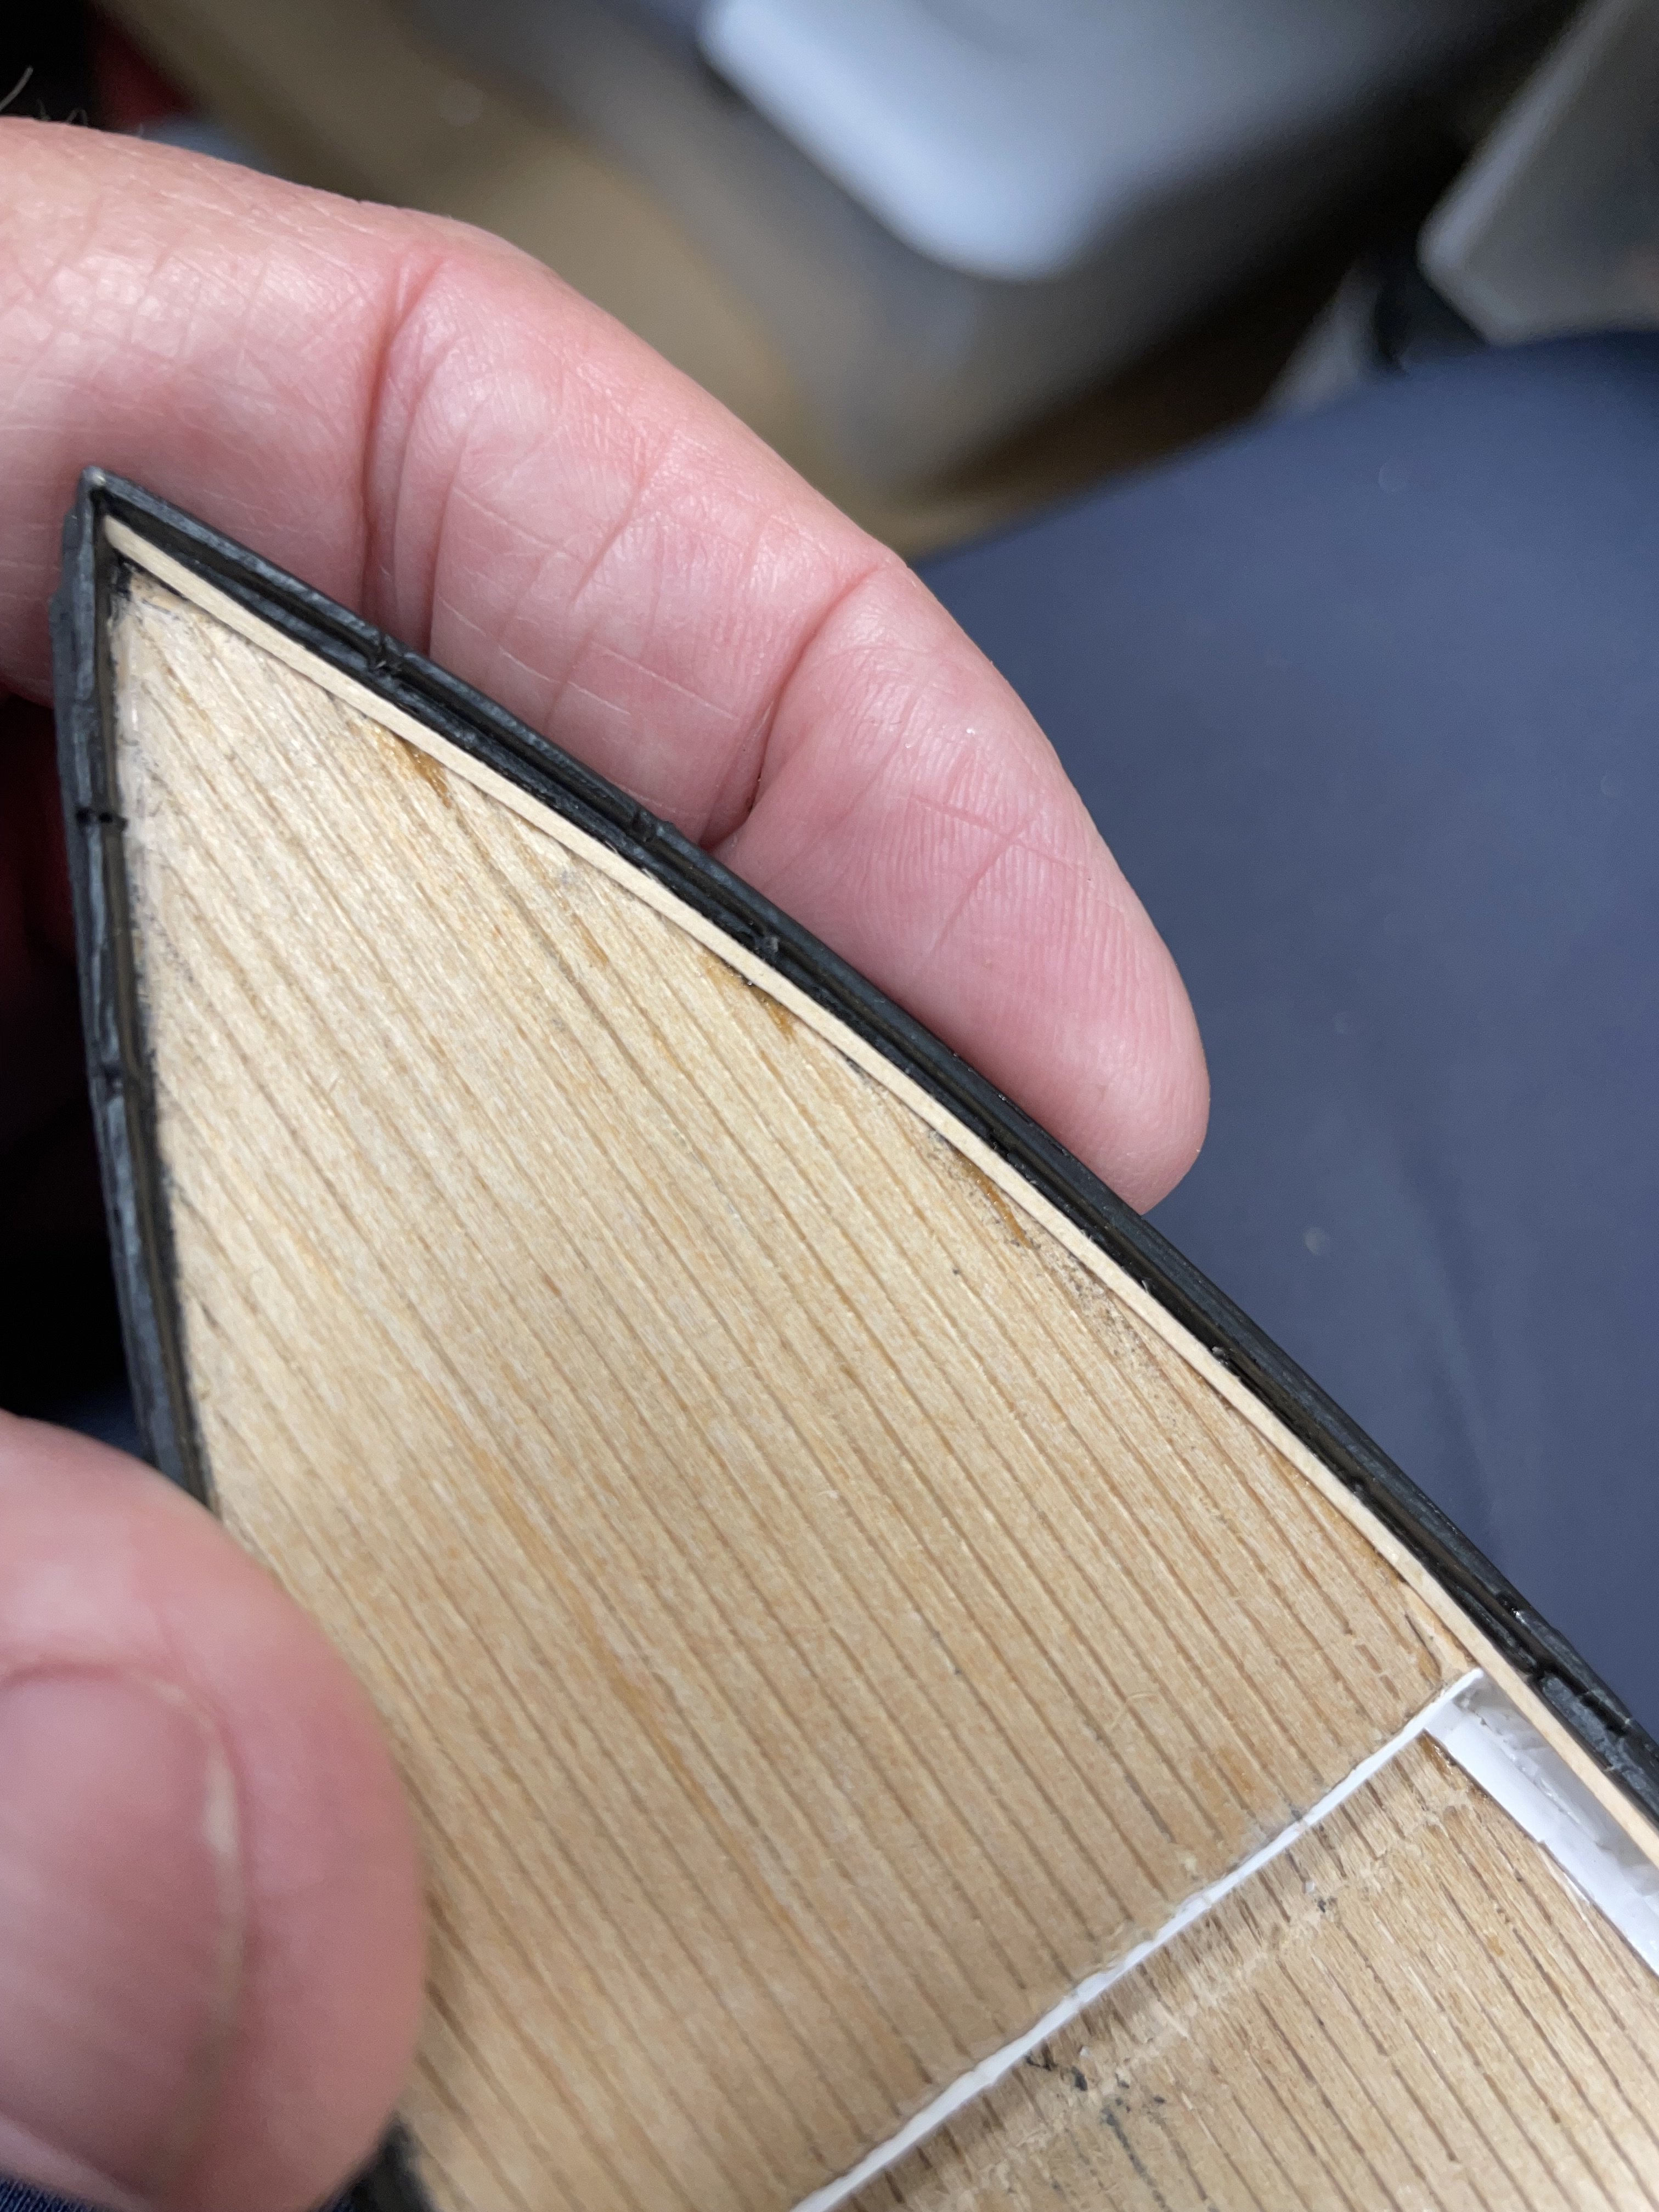
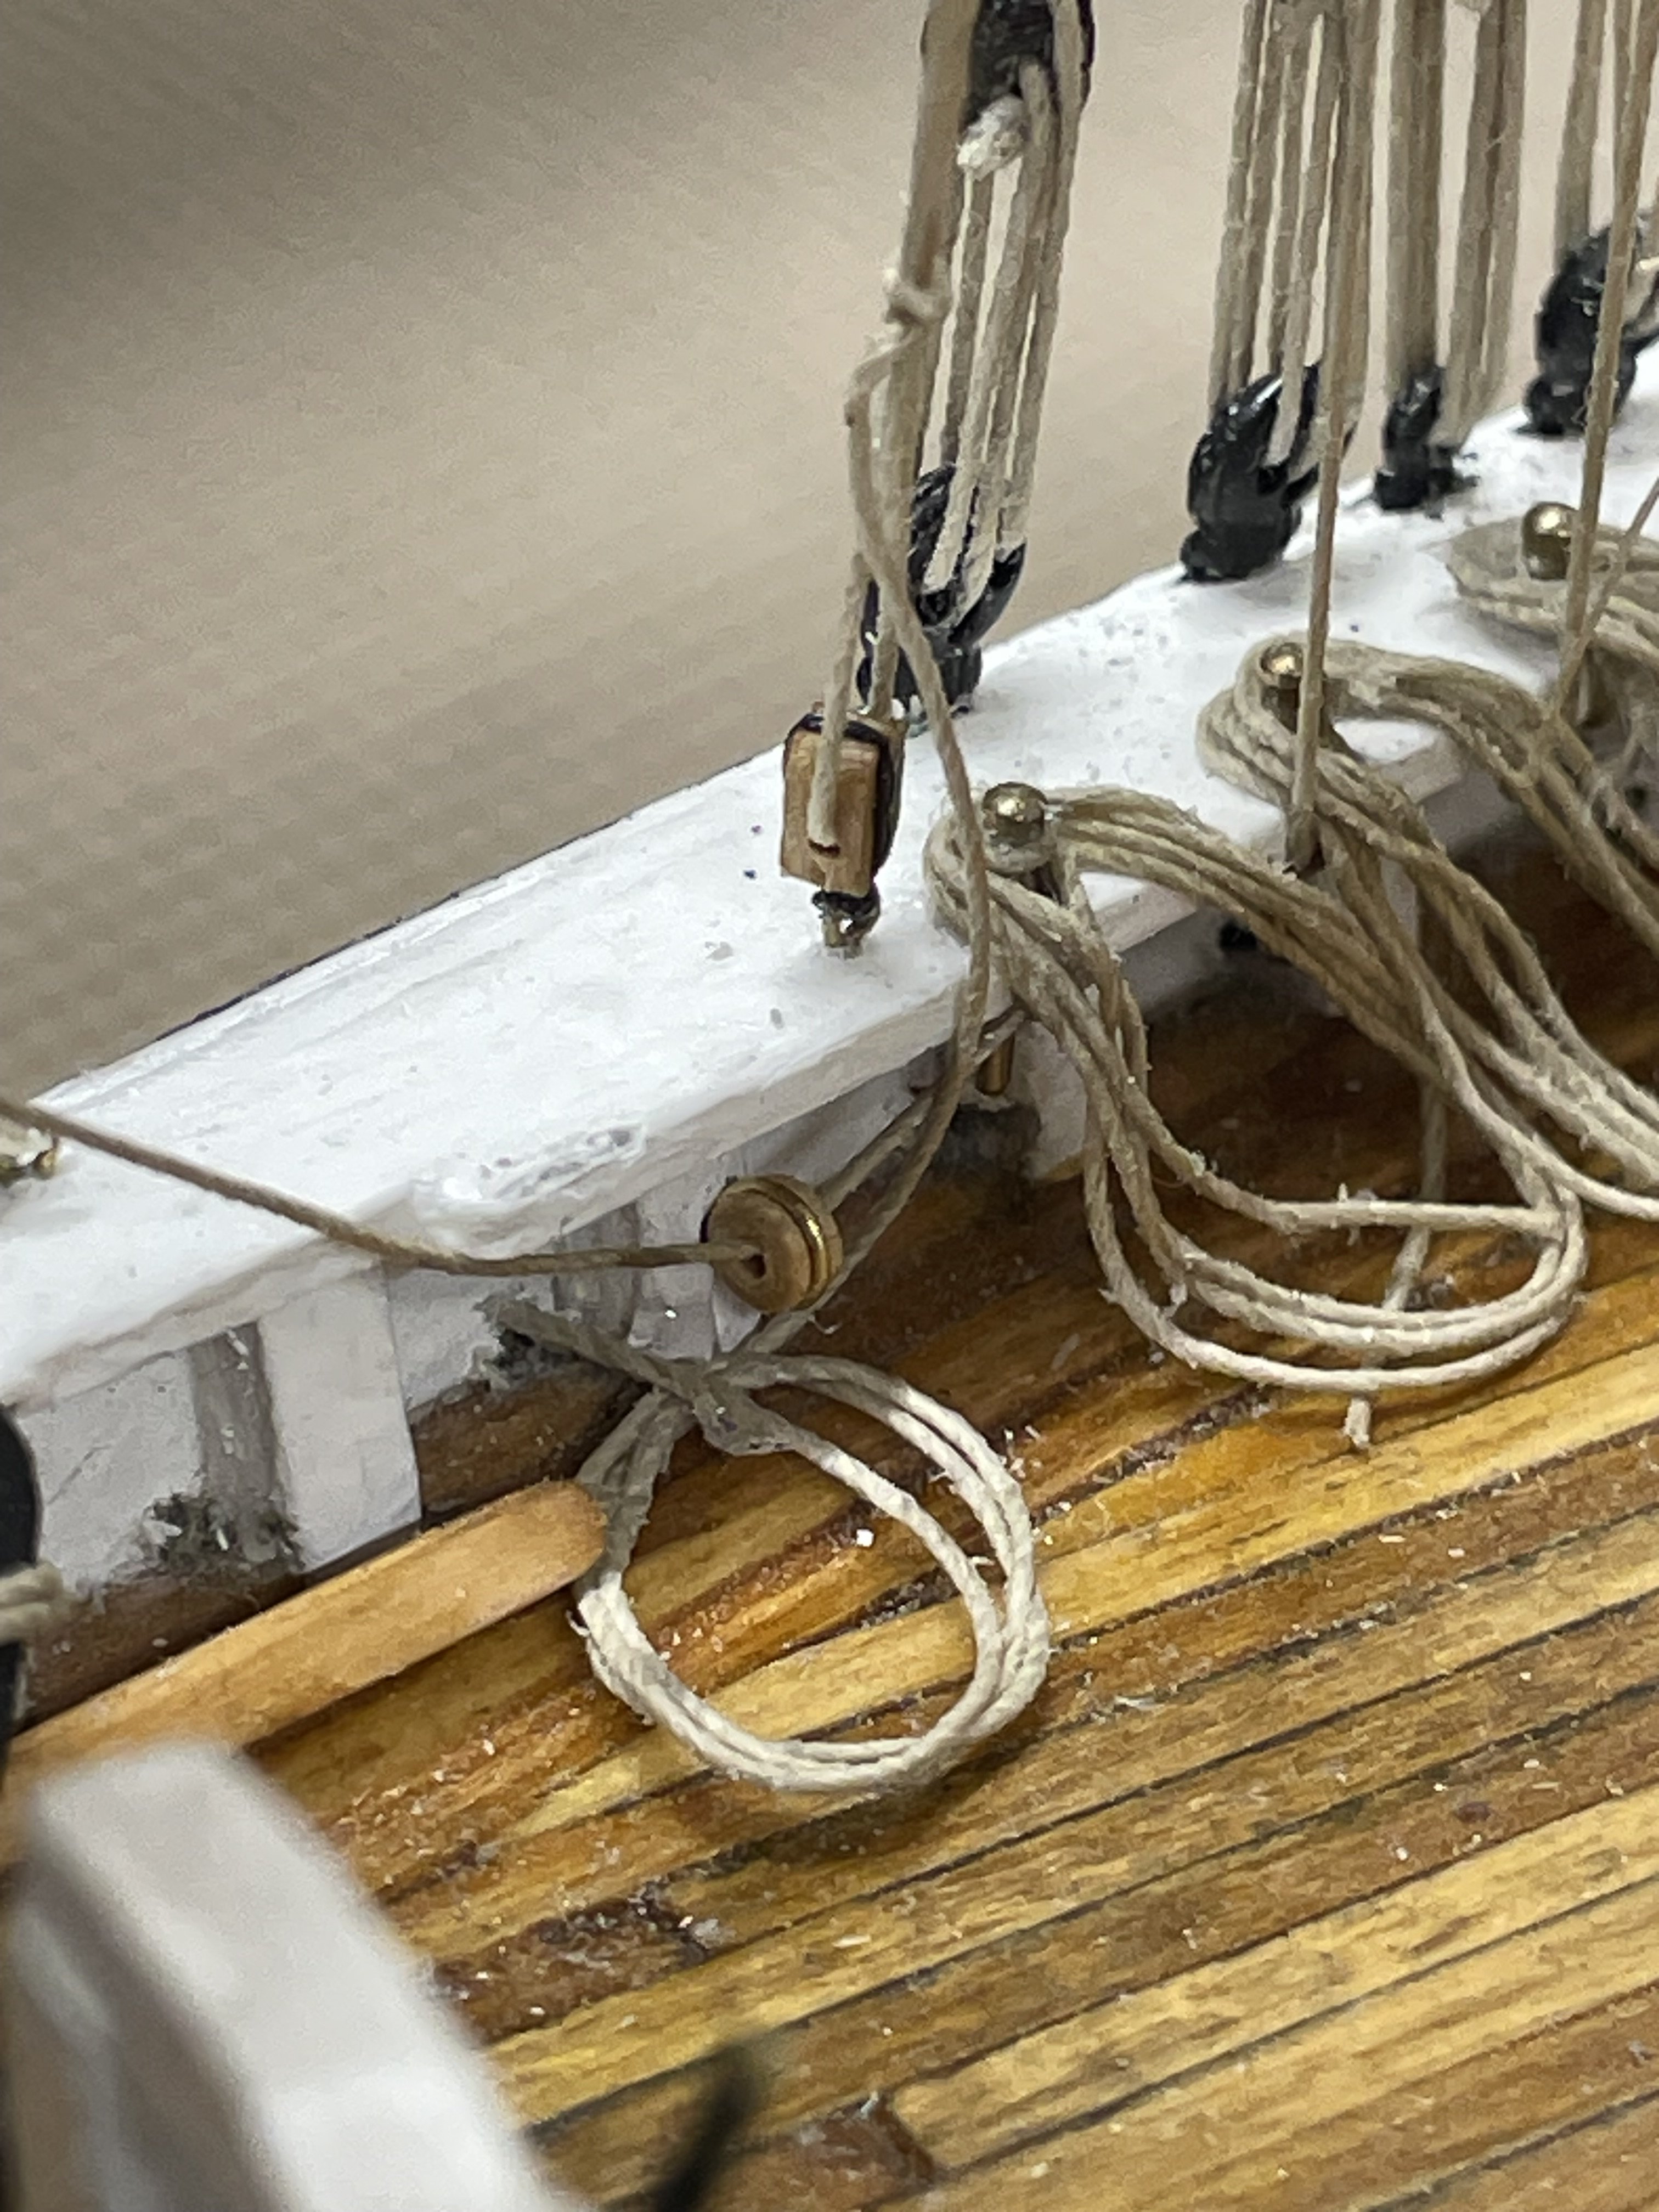
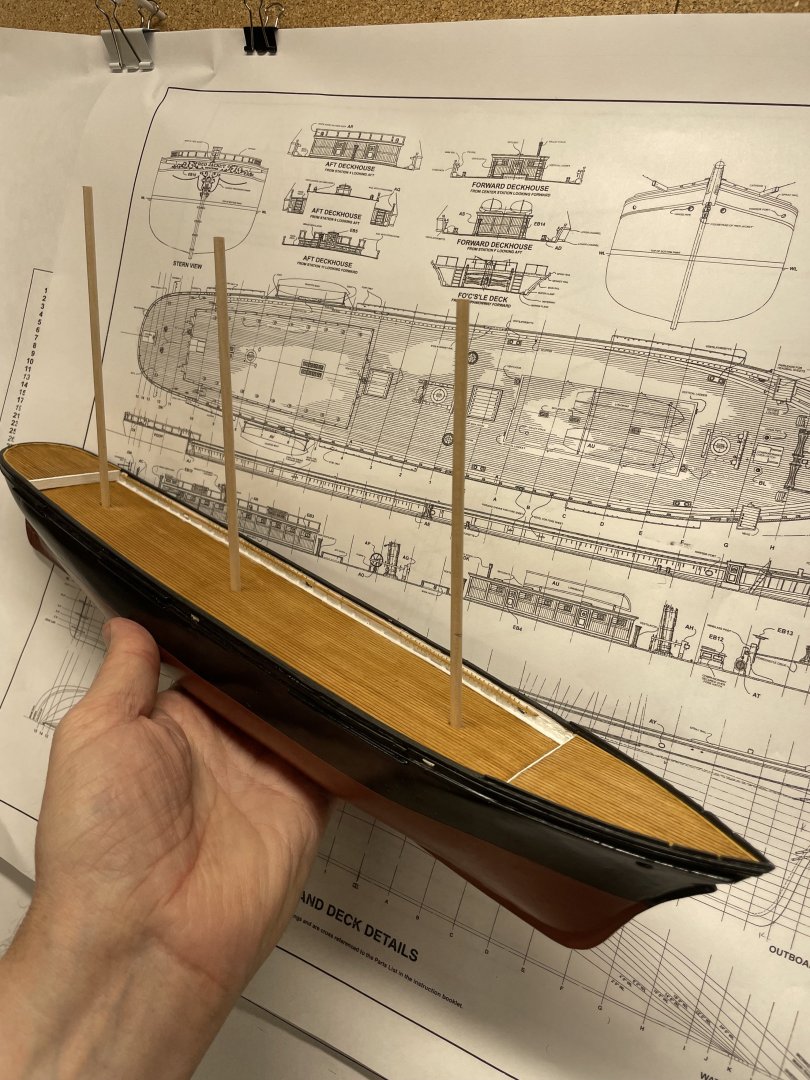
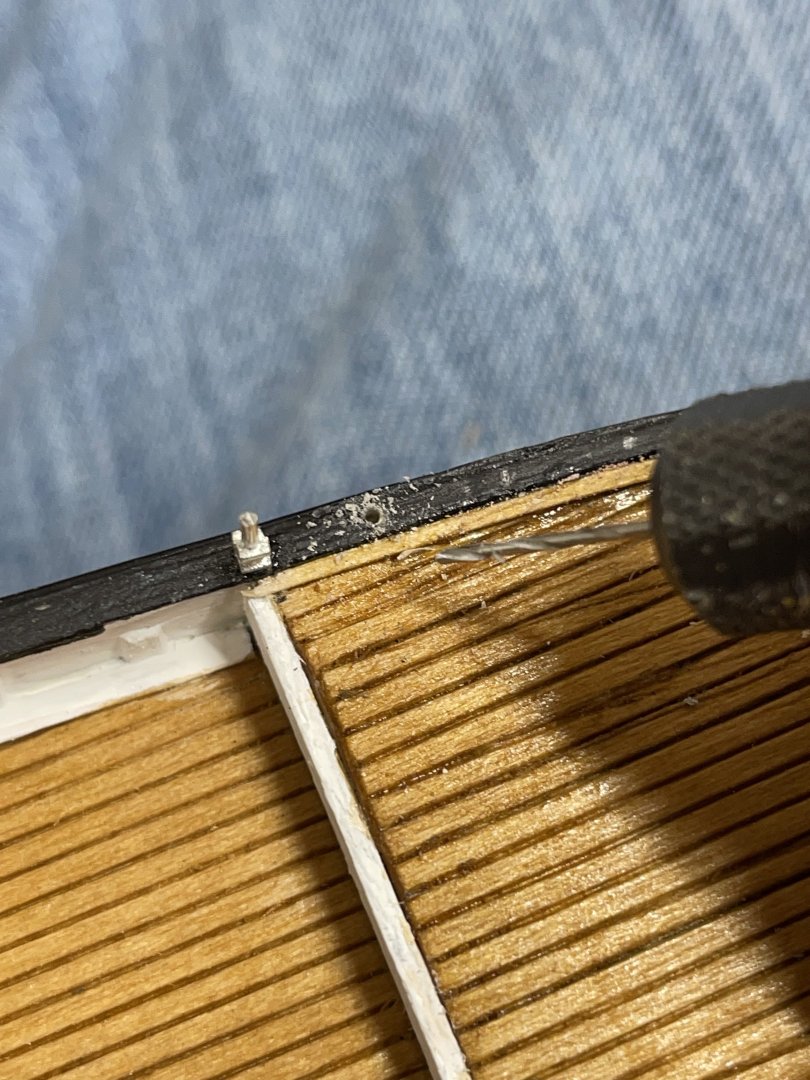
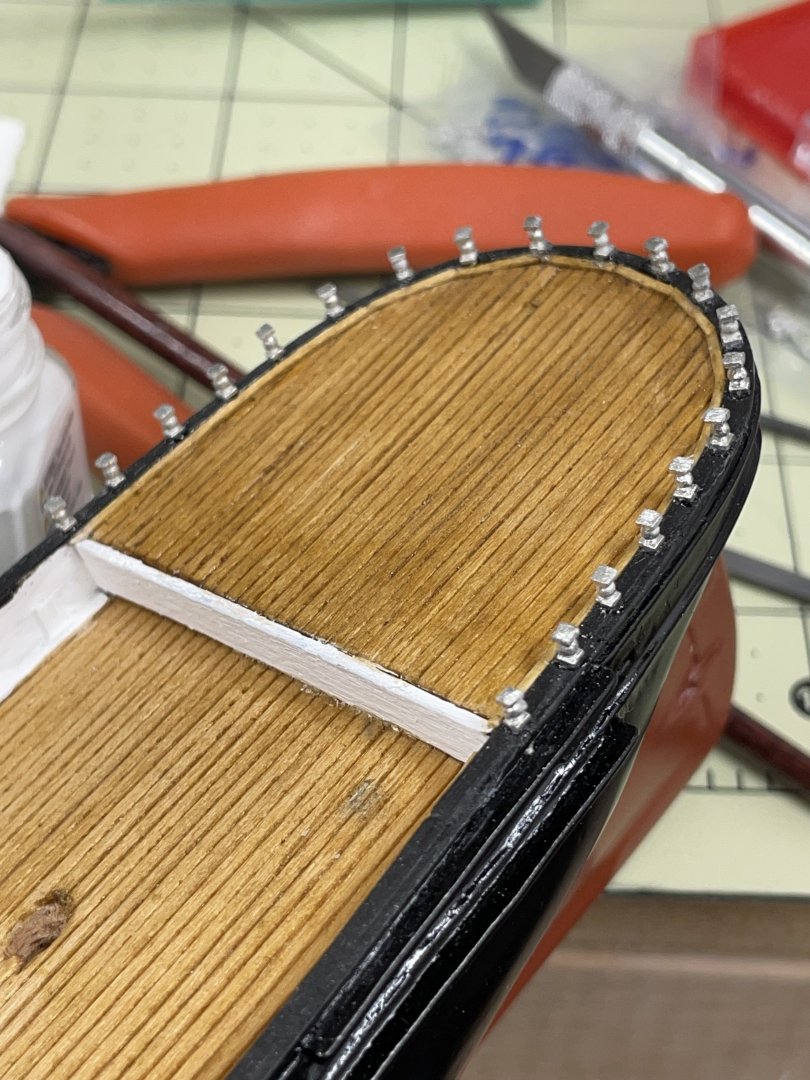
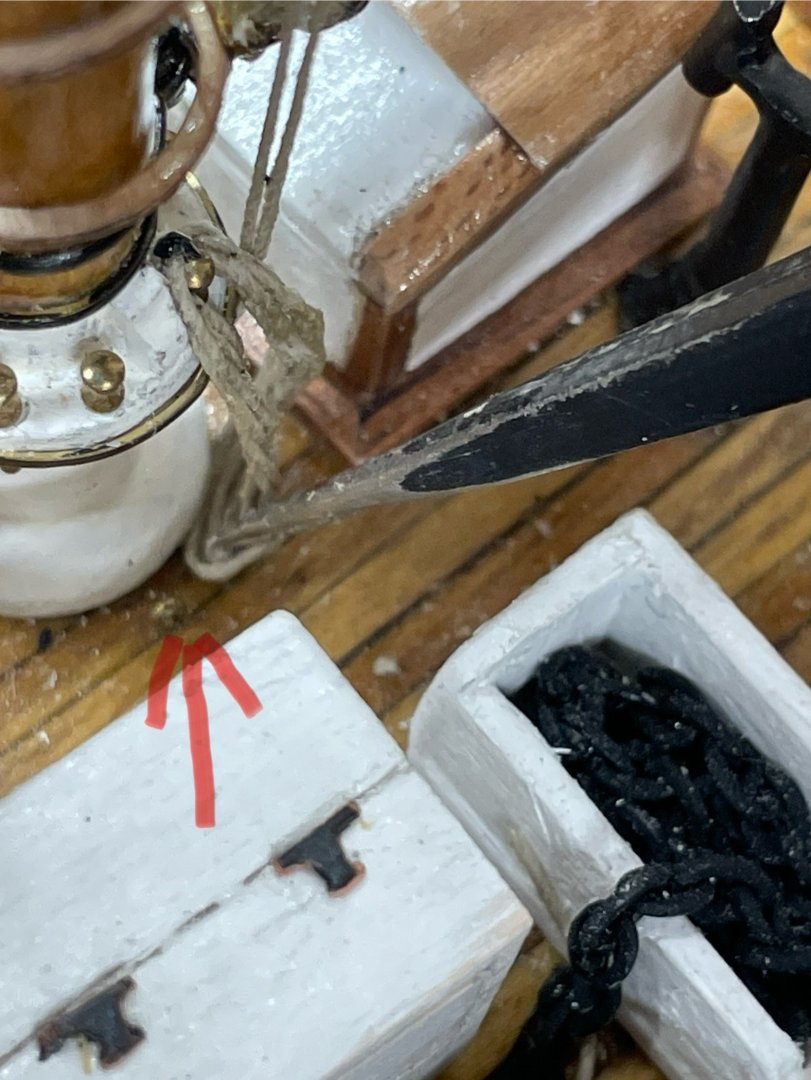
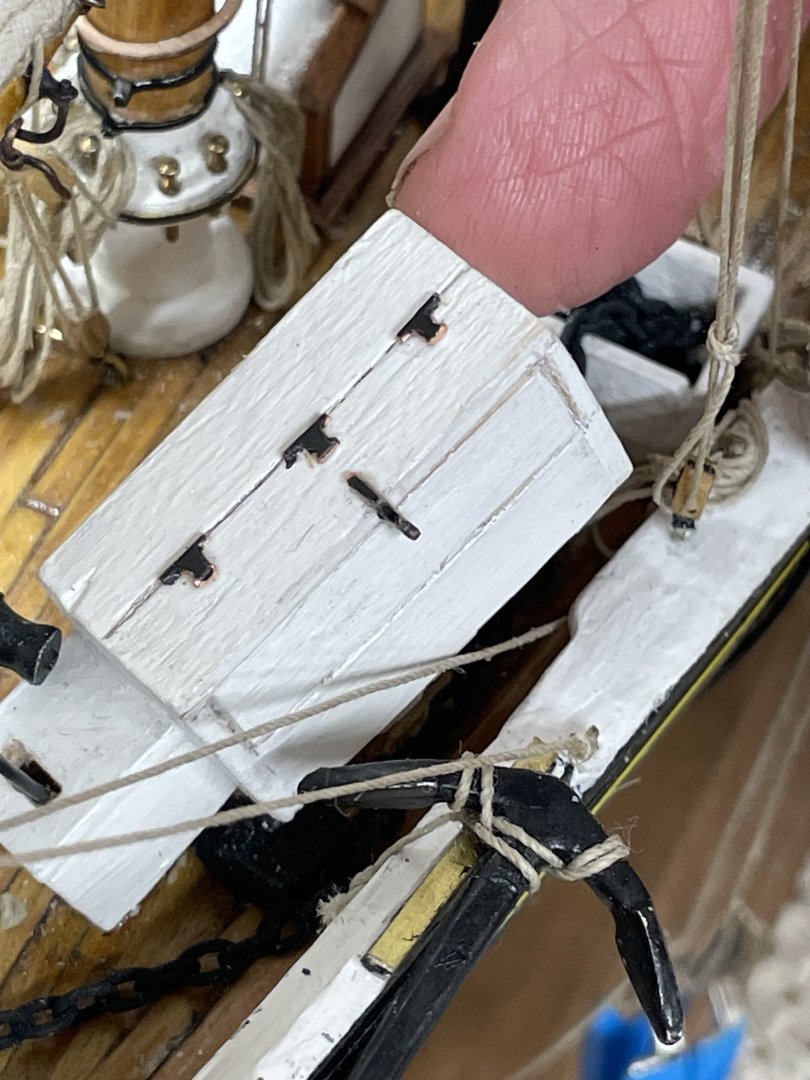
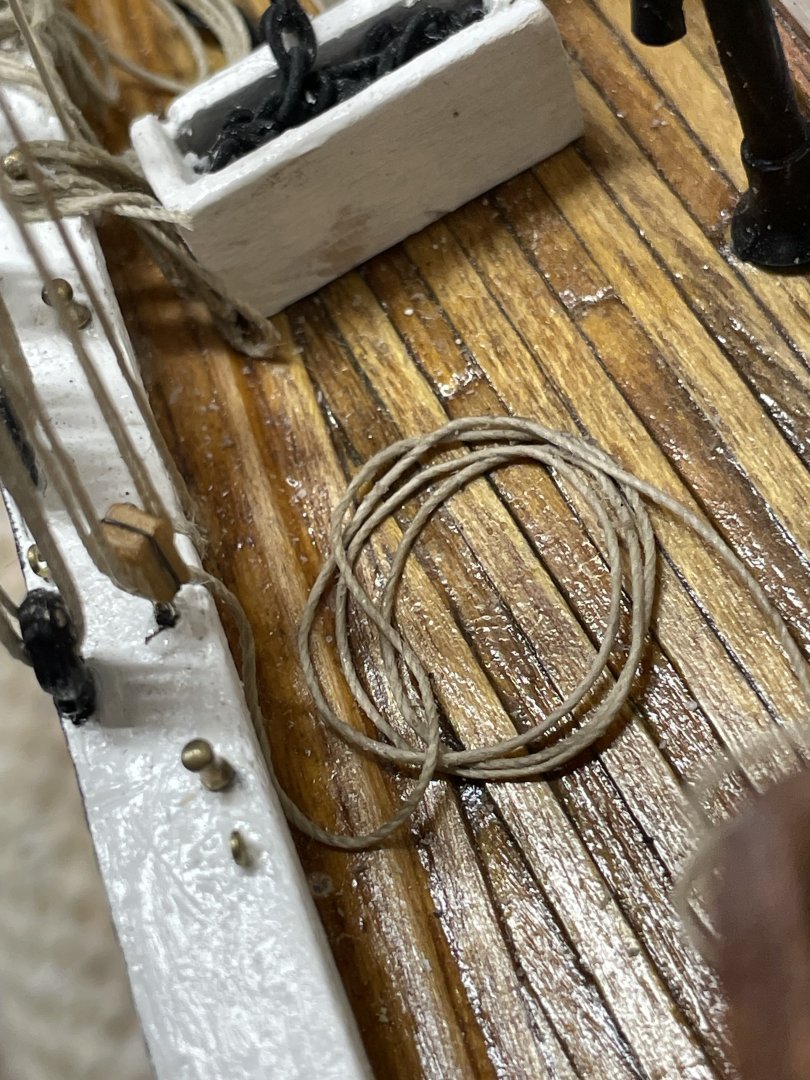
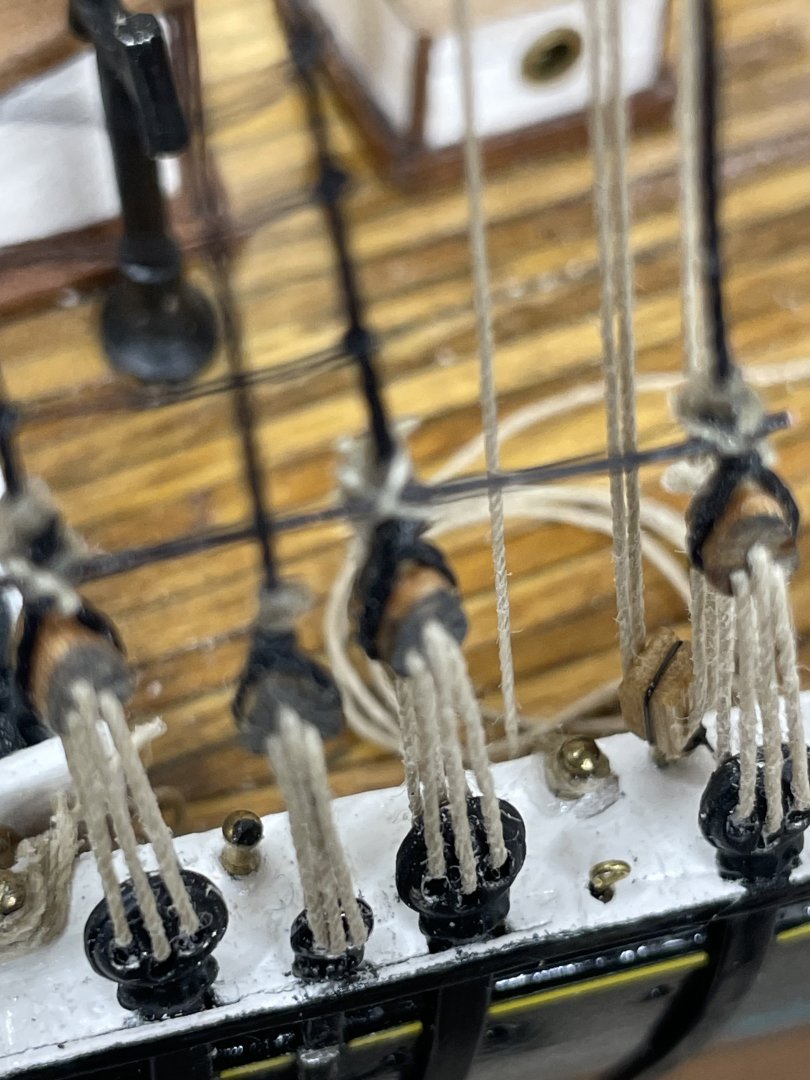
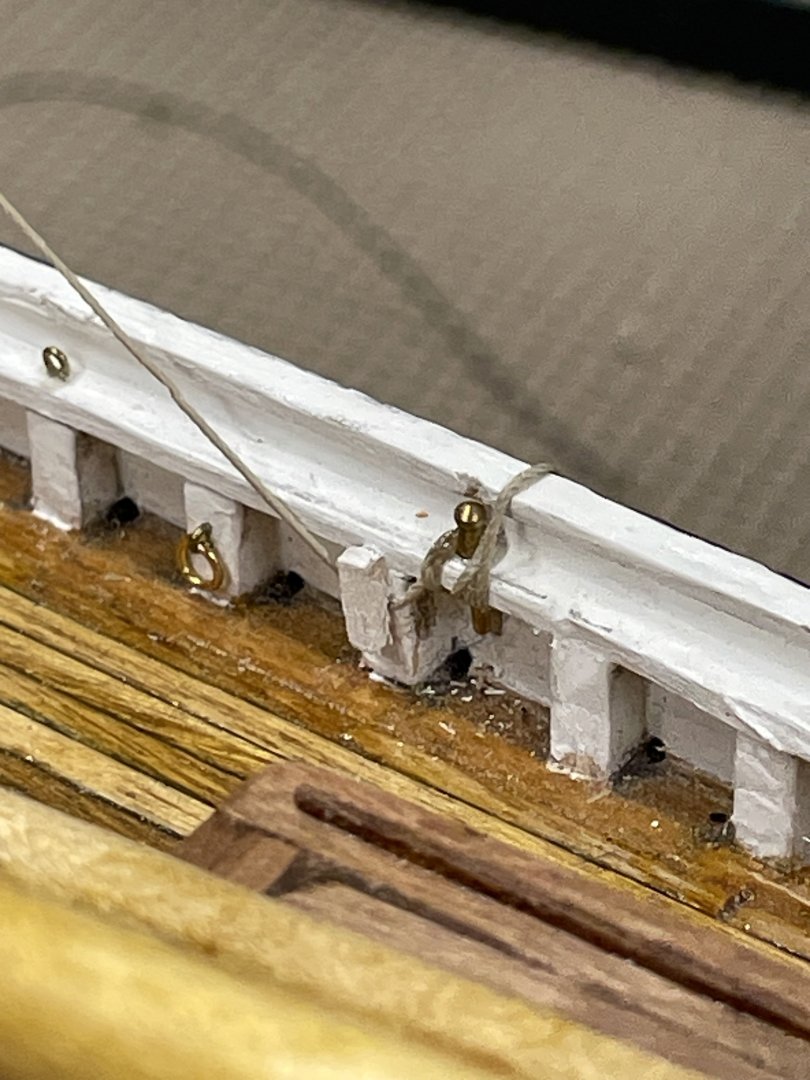
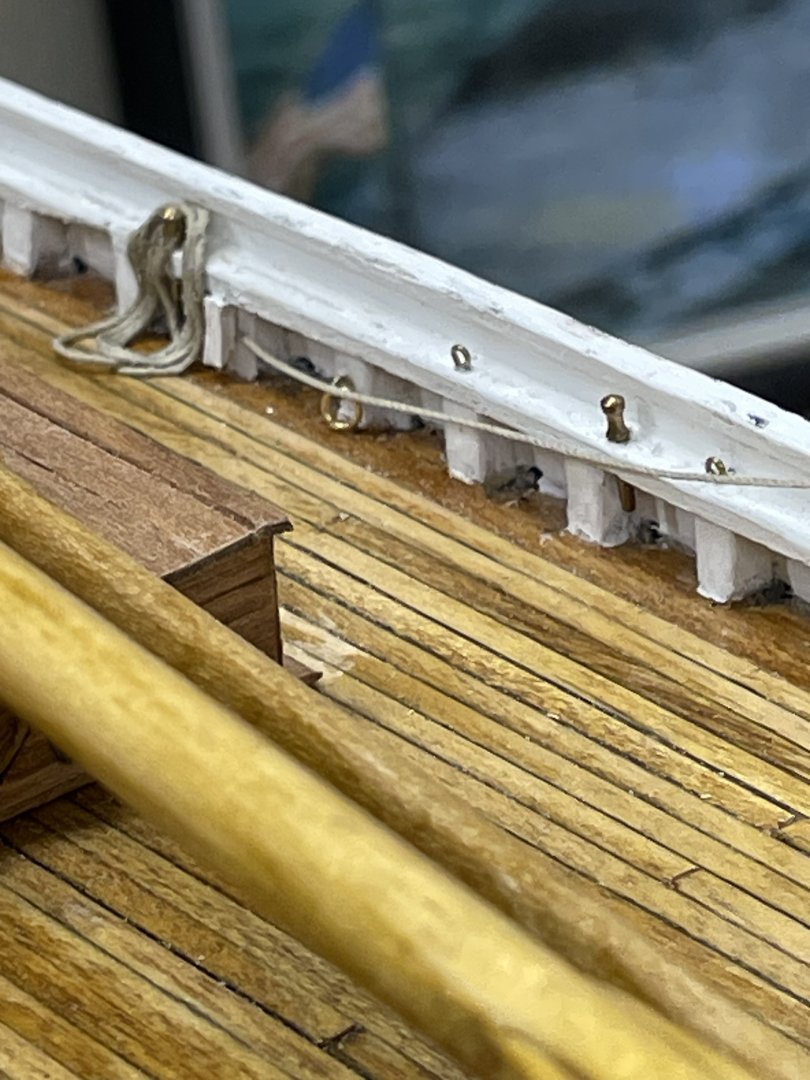
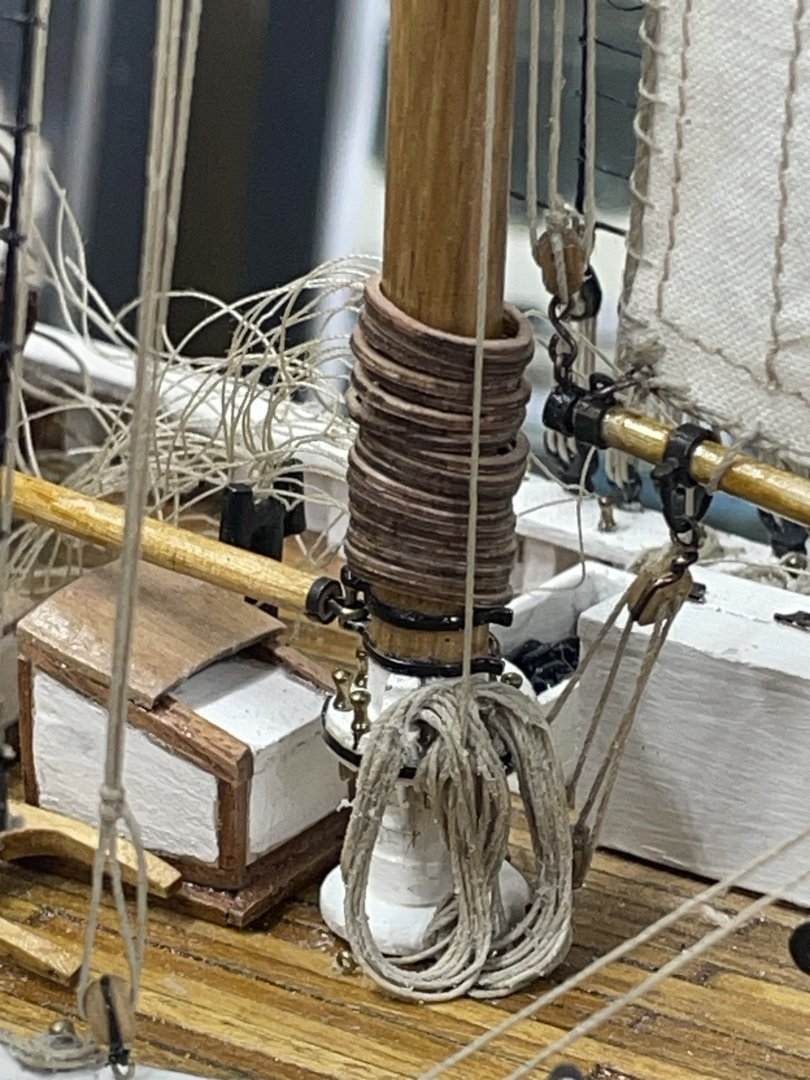
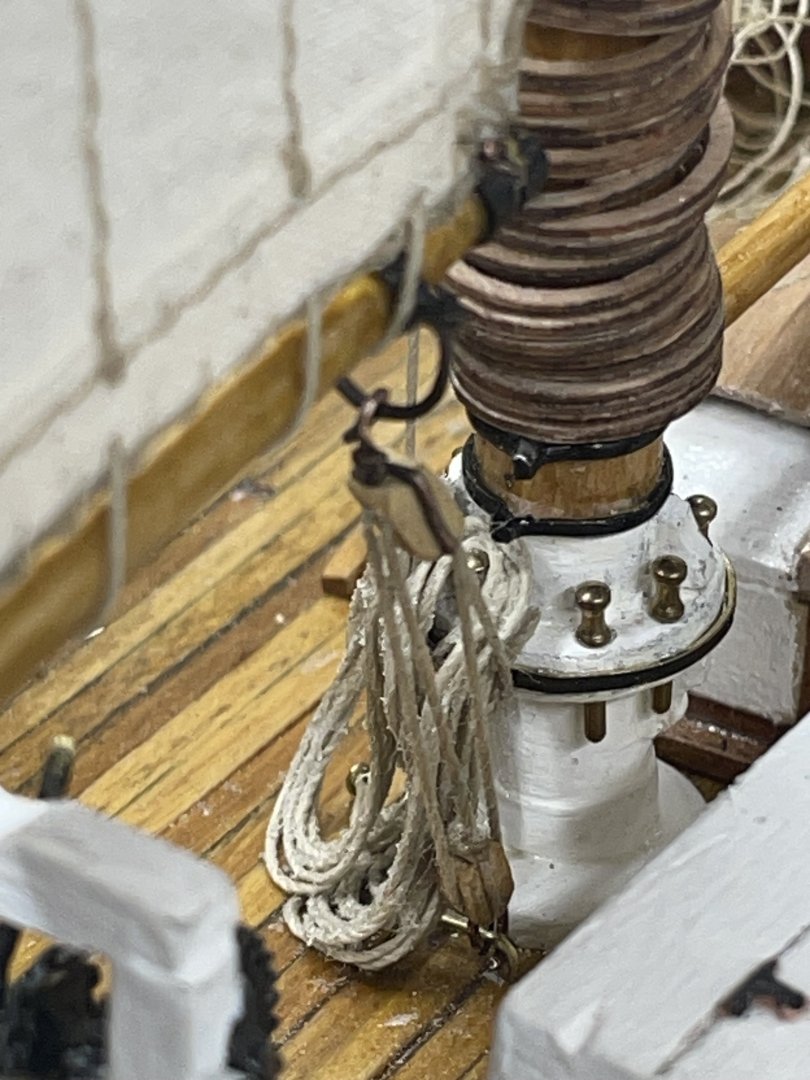
Finished Port Pin Rail… Waiting for a material order from www.northeasternscalelumber.com to finish Starboard Pin Rail. Taffrail… 1/8” Stanchions Made in Maine from https://www.bluejacketinc.com/ @MrBlueJacket Excellent quality parts. 👍 Now to drill holes for Belaying Pins in this Taffrail. 😜 Cheers 🍻


- 165 replies
-
- 5
-
-
- Red Jacket
- Marine Model Company
- (and 2 more)
-
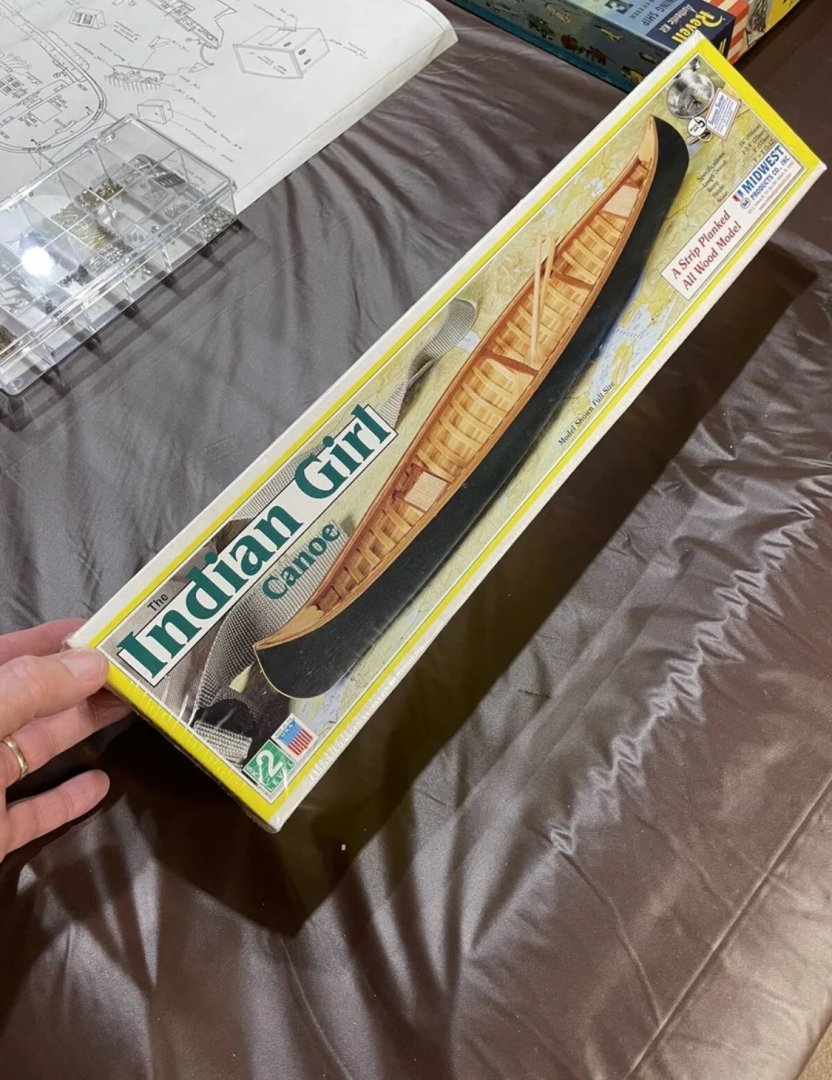
New Indian Girl Canoe for sale. Sealed in its original packaging. 99.00 + shipping or best offer Link is to my eBay store. PayPal accepted. 100% Positive Feedback. https://www.ebay.com/itm/266641316247?mkcid=16&mkevt=1&mkrid=711-127632-2357-0&ssspo=saHjlWAtSV-&sssrc=2051273&ssuid=saHjlWAtSV-&var=&widget_ver=artemis&media=COPY
-
- 1
-
-
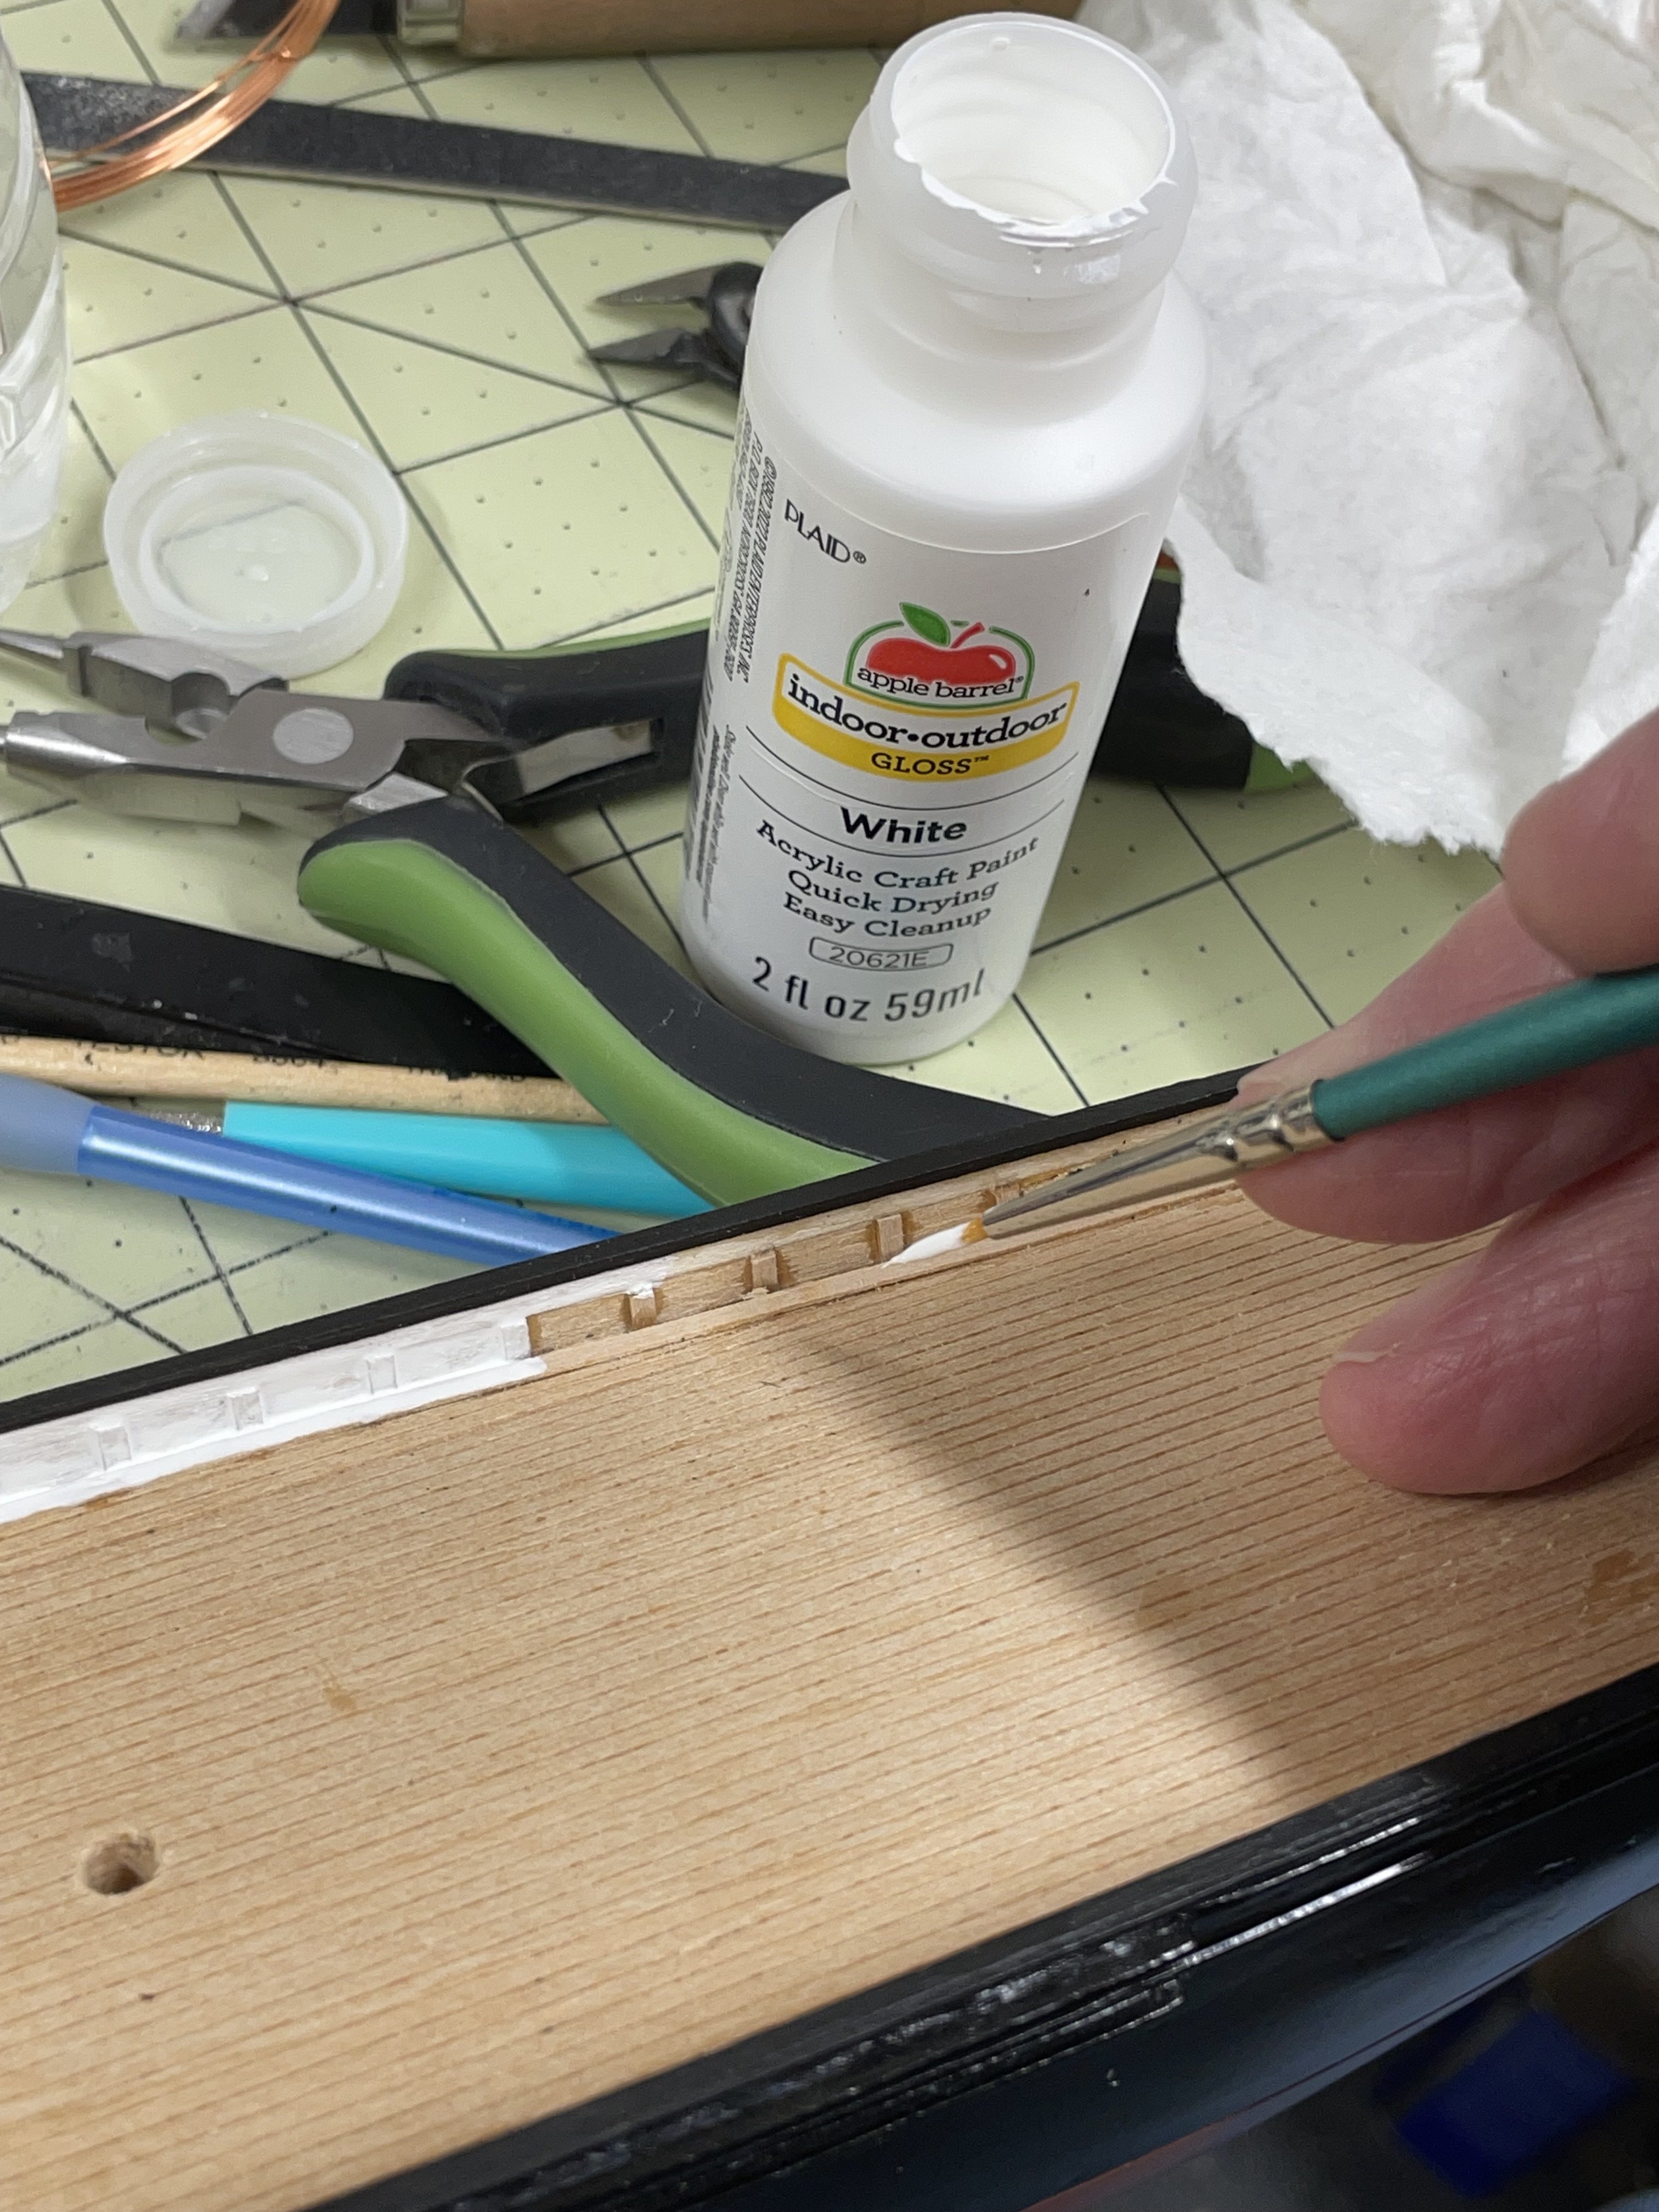
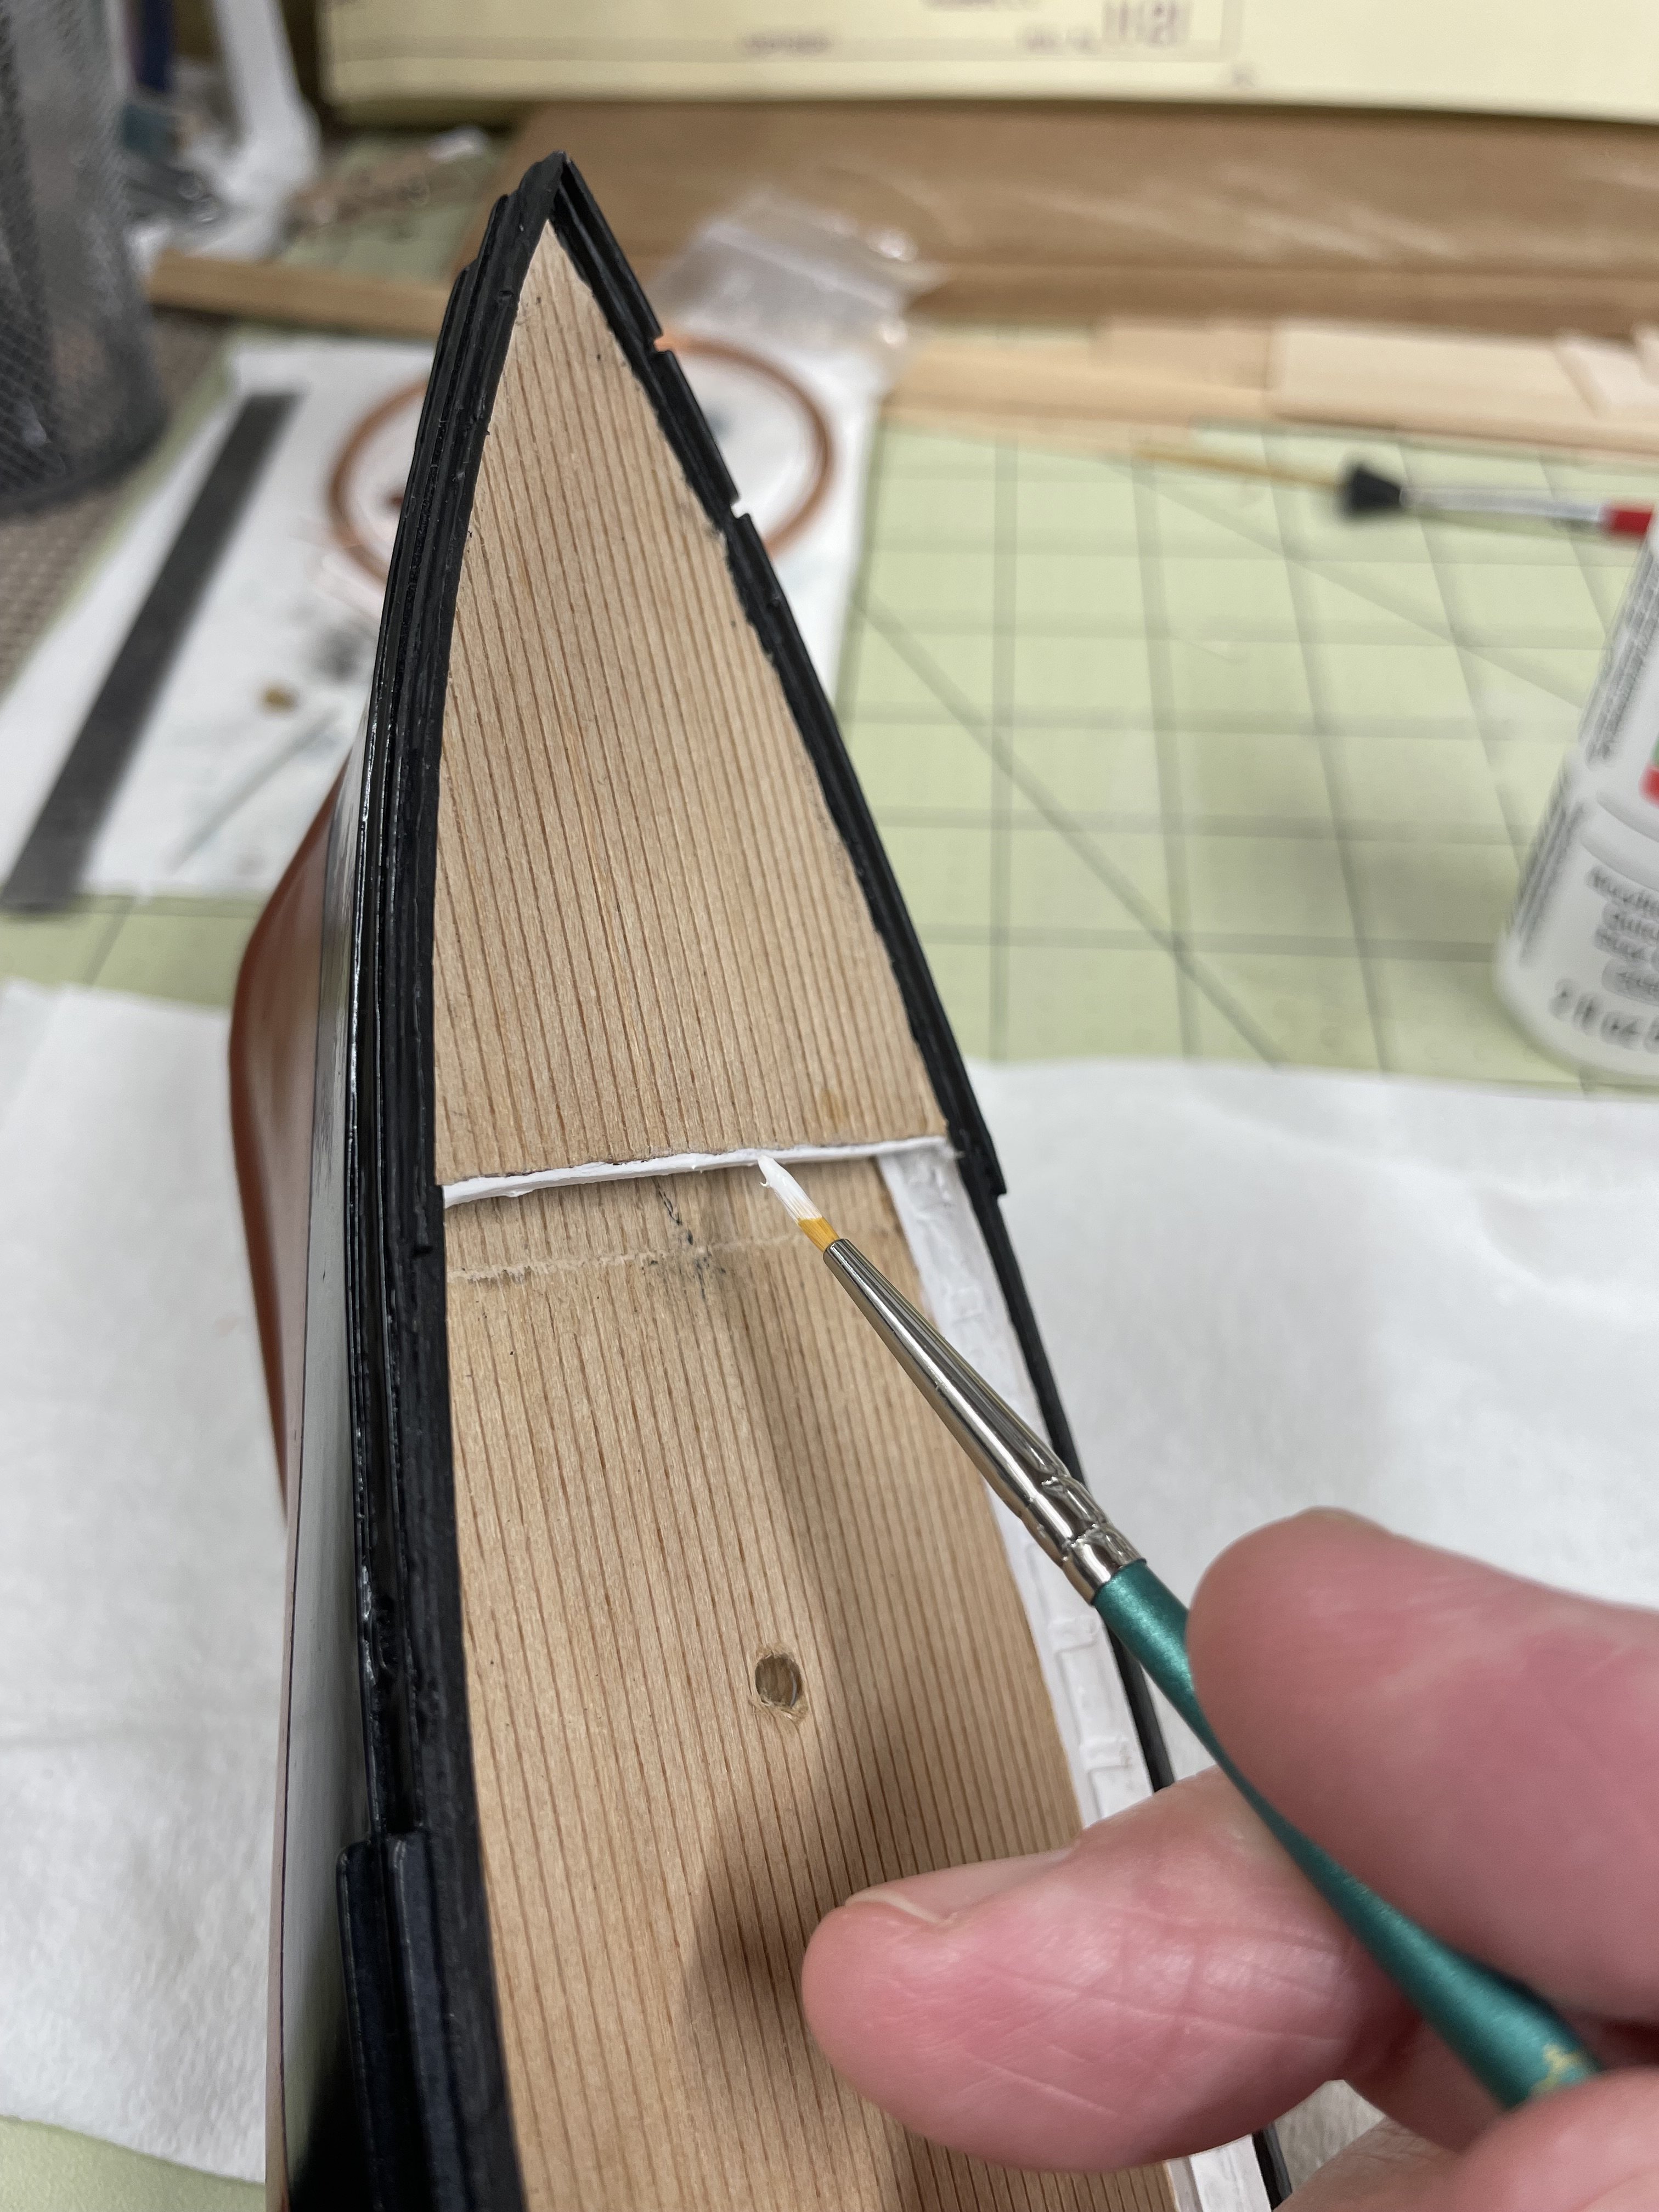
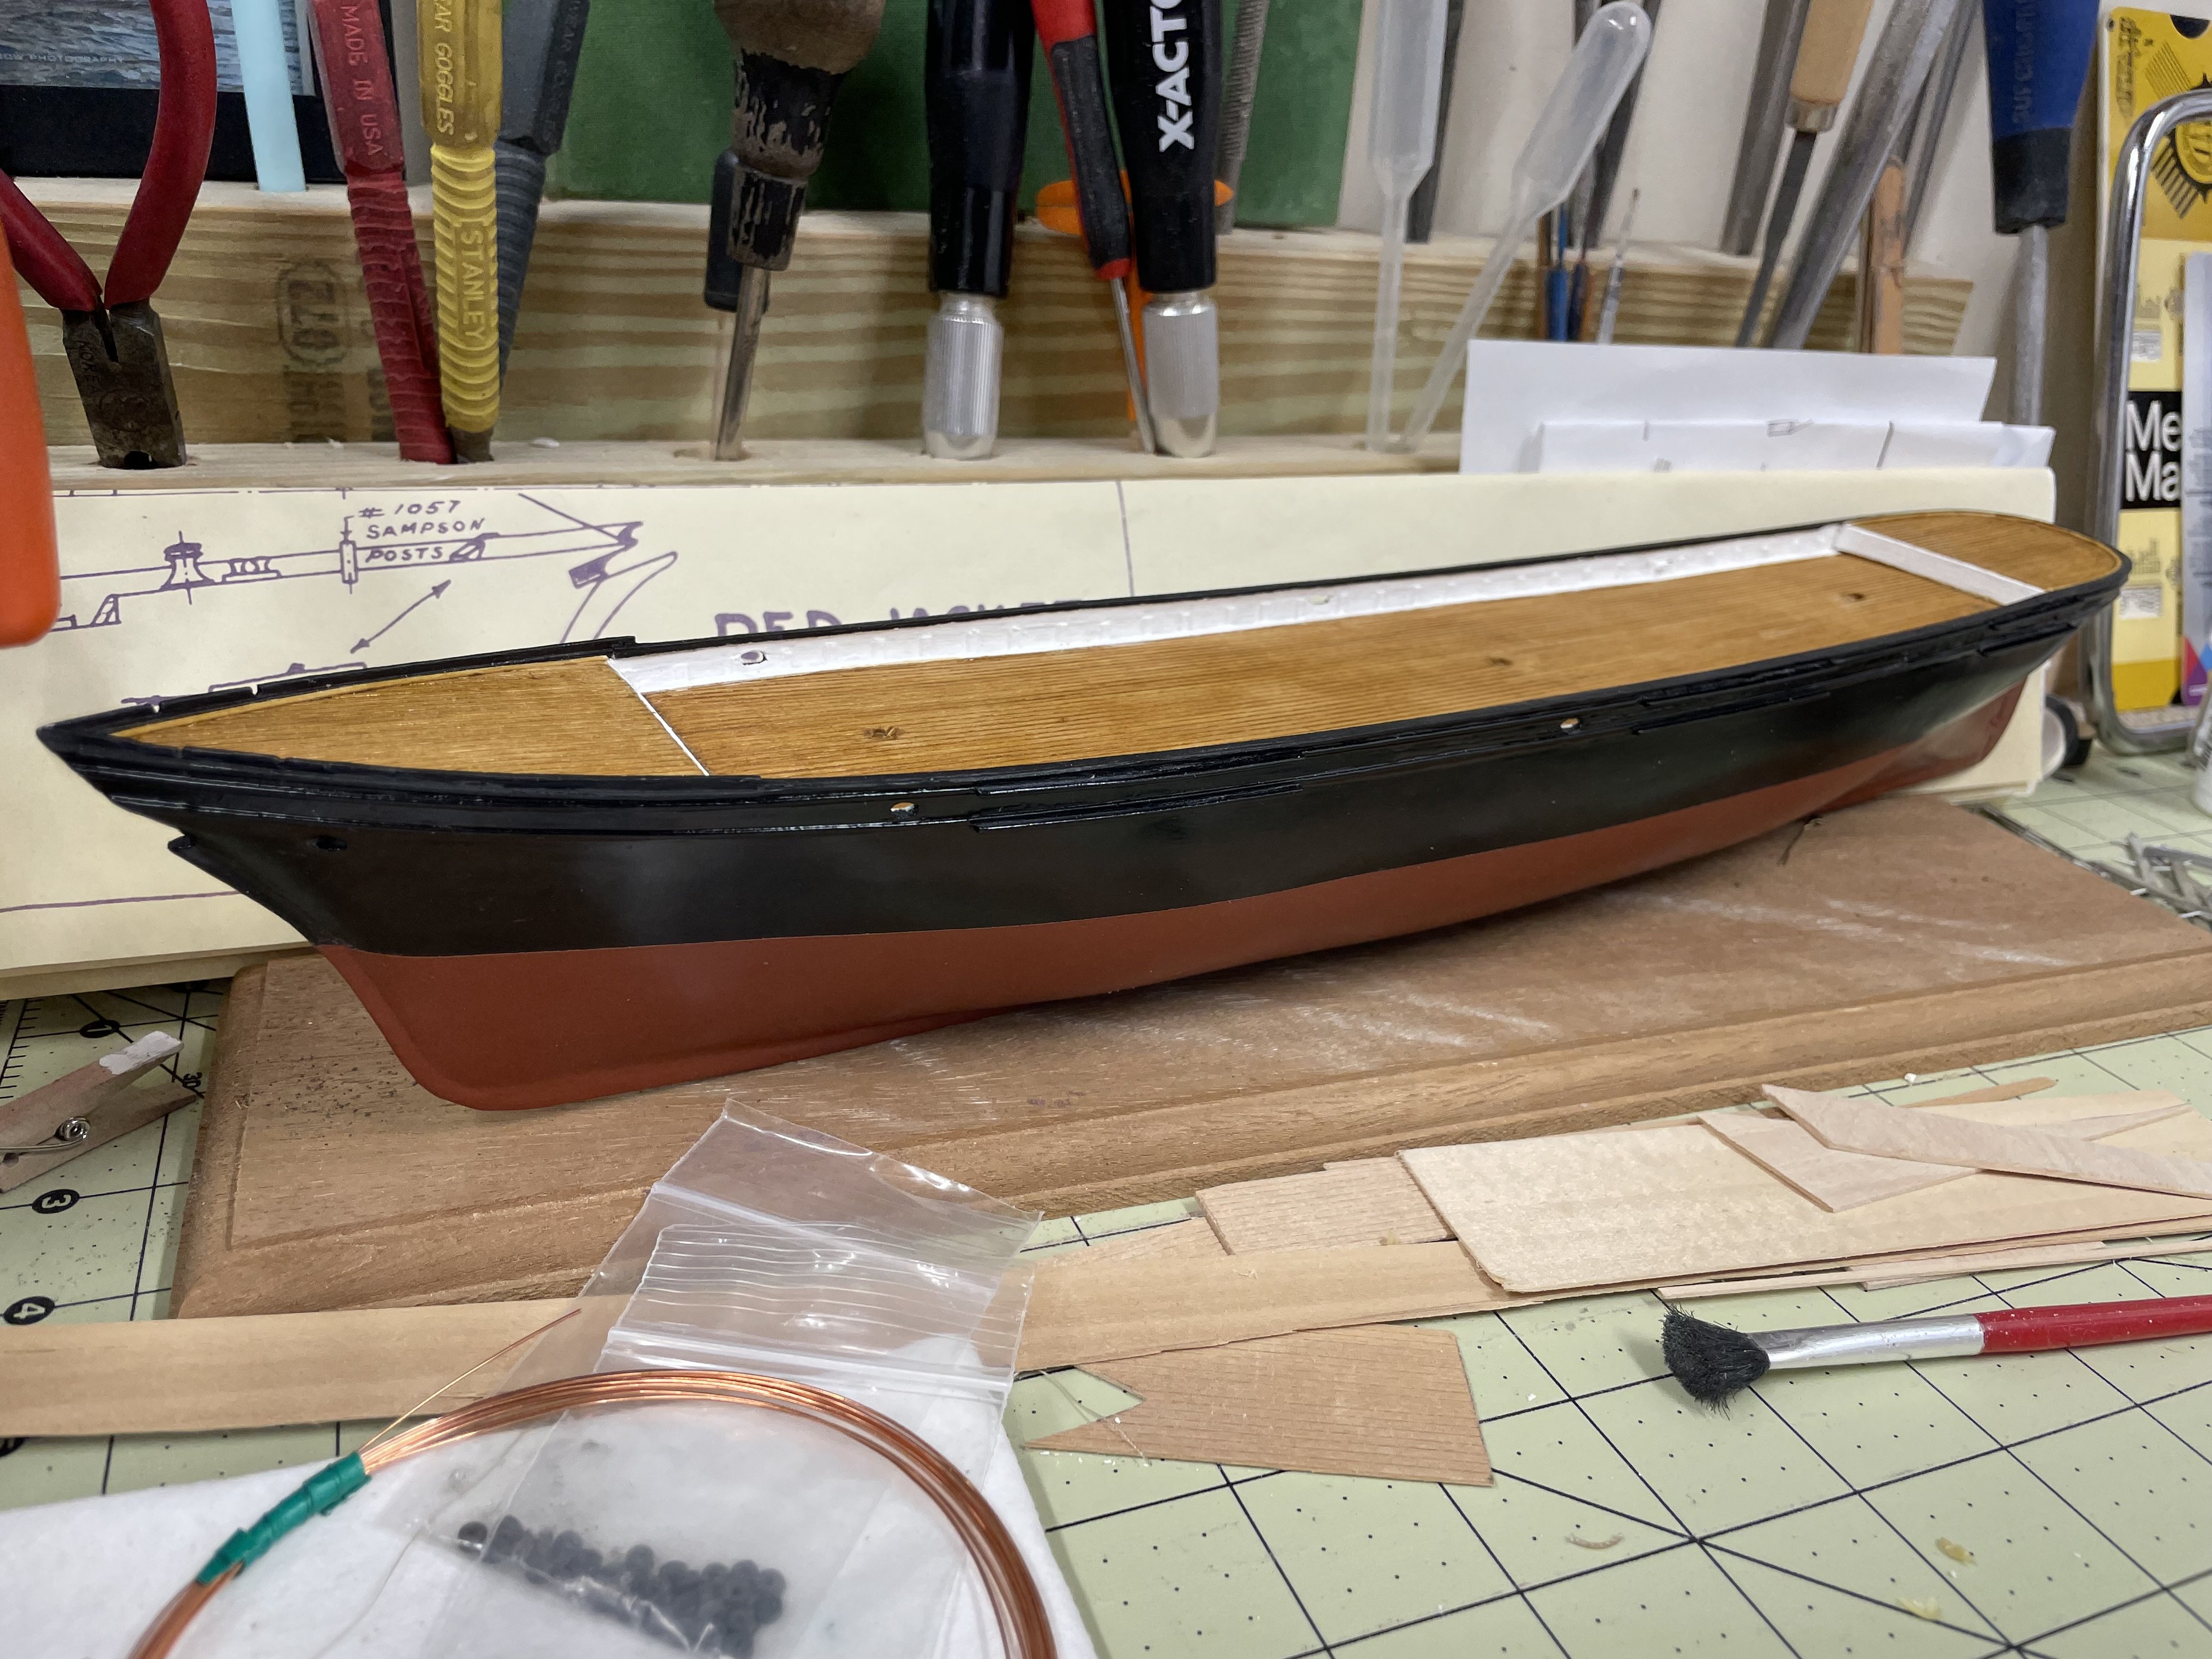
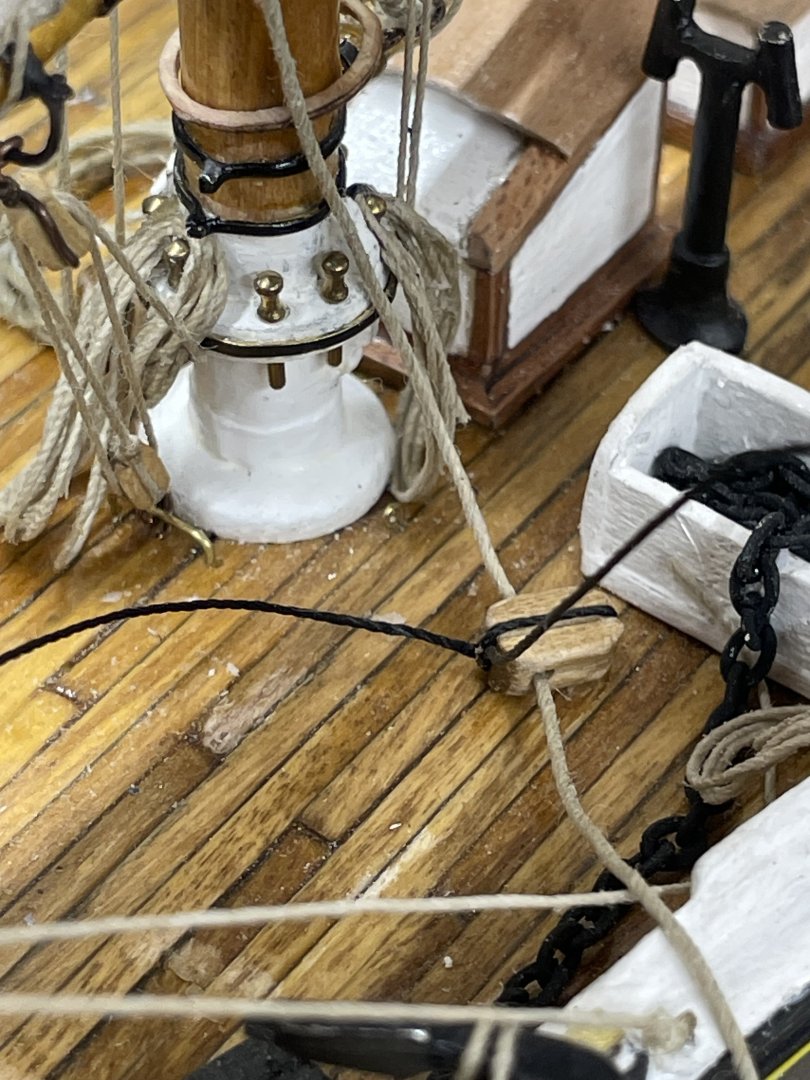
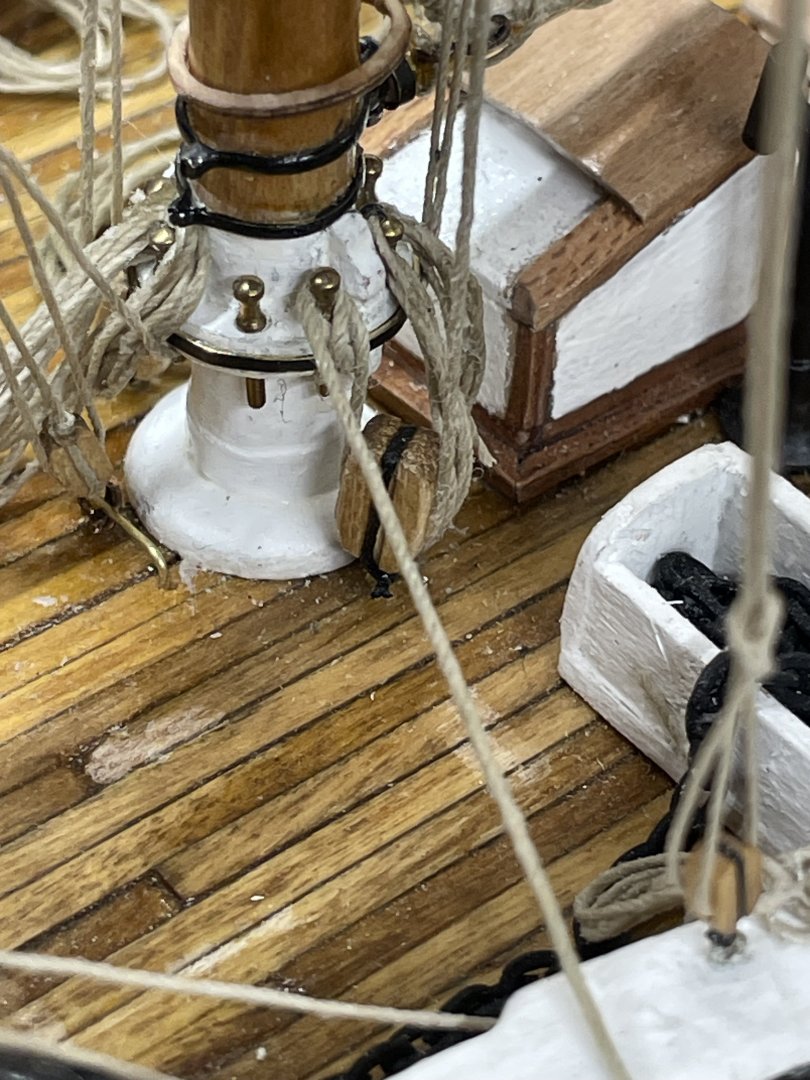
Finishing the hull… Painting the bulwarks… Deck prepared for finishing. I have chosen an Amber Shellac to finish the decking. Time to get started on those pesky belaying pins. Cheers 🍻


- 165 replies
-
- 8
-
-
- Red Jacket
- Marine Model Company
- (and 2 more)
-
That sounds like a great idea. 👍 I’ll have to give that a try on the next one.
-
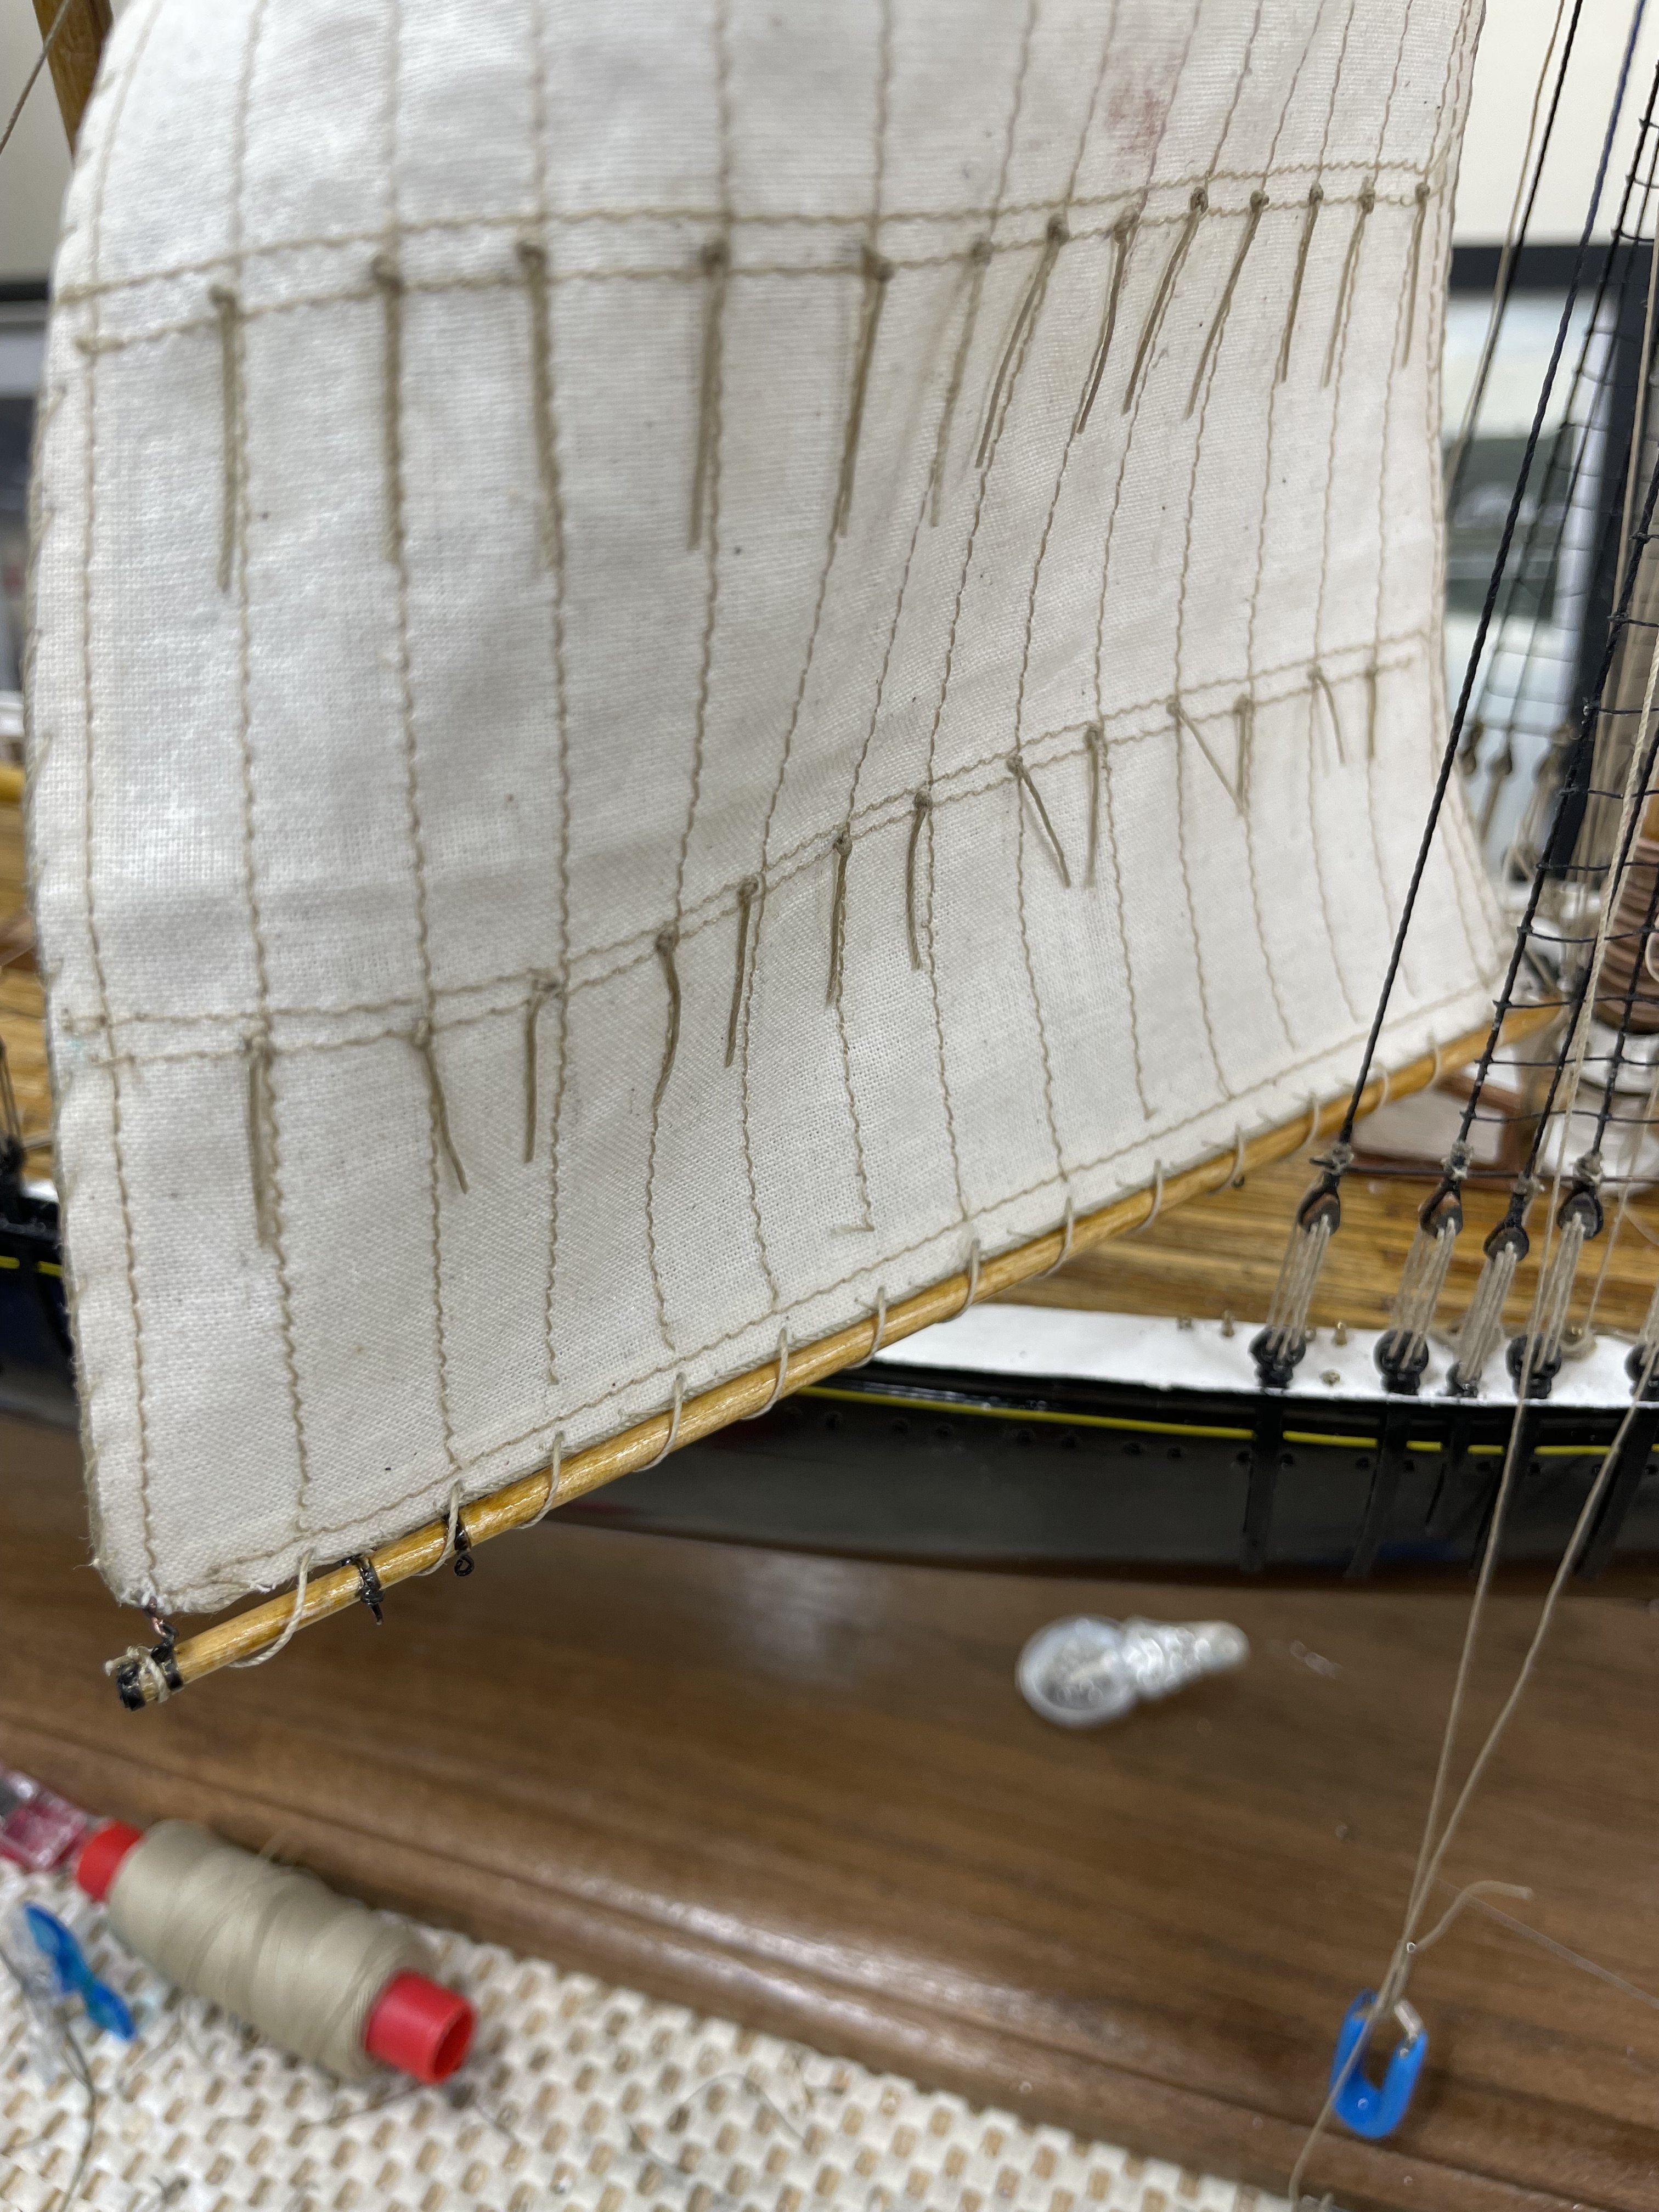
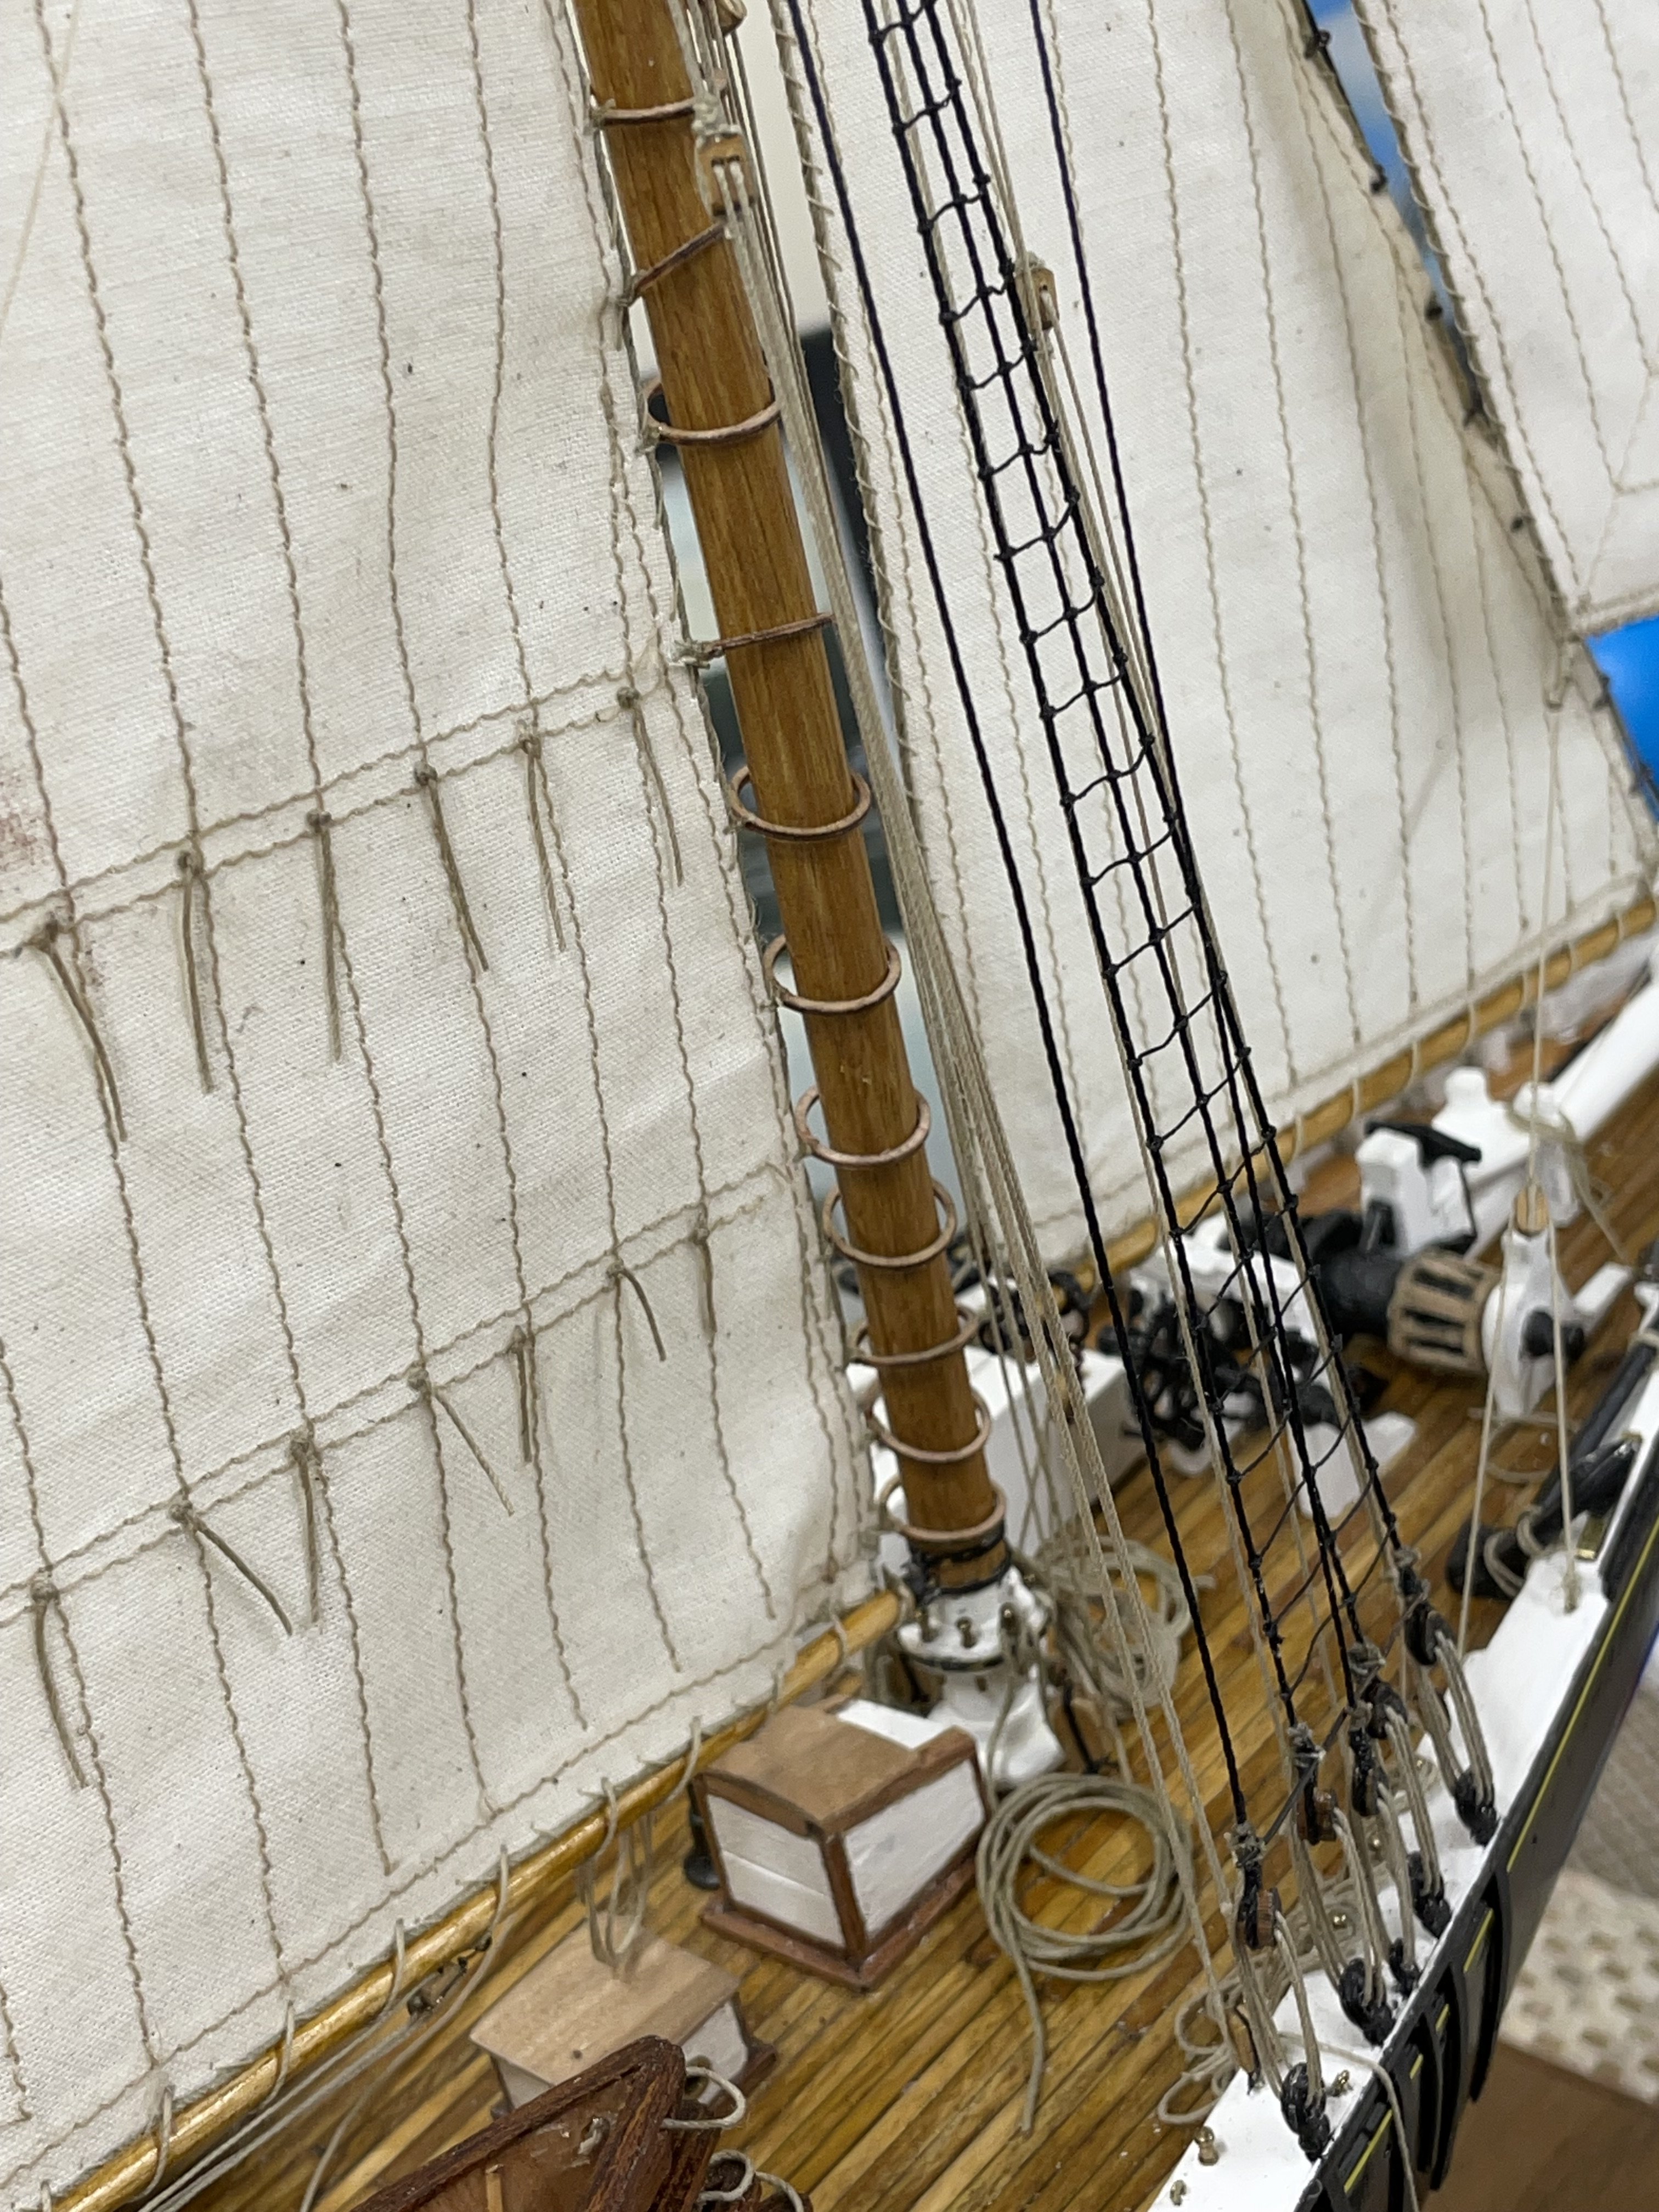
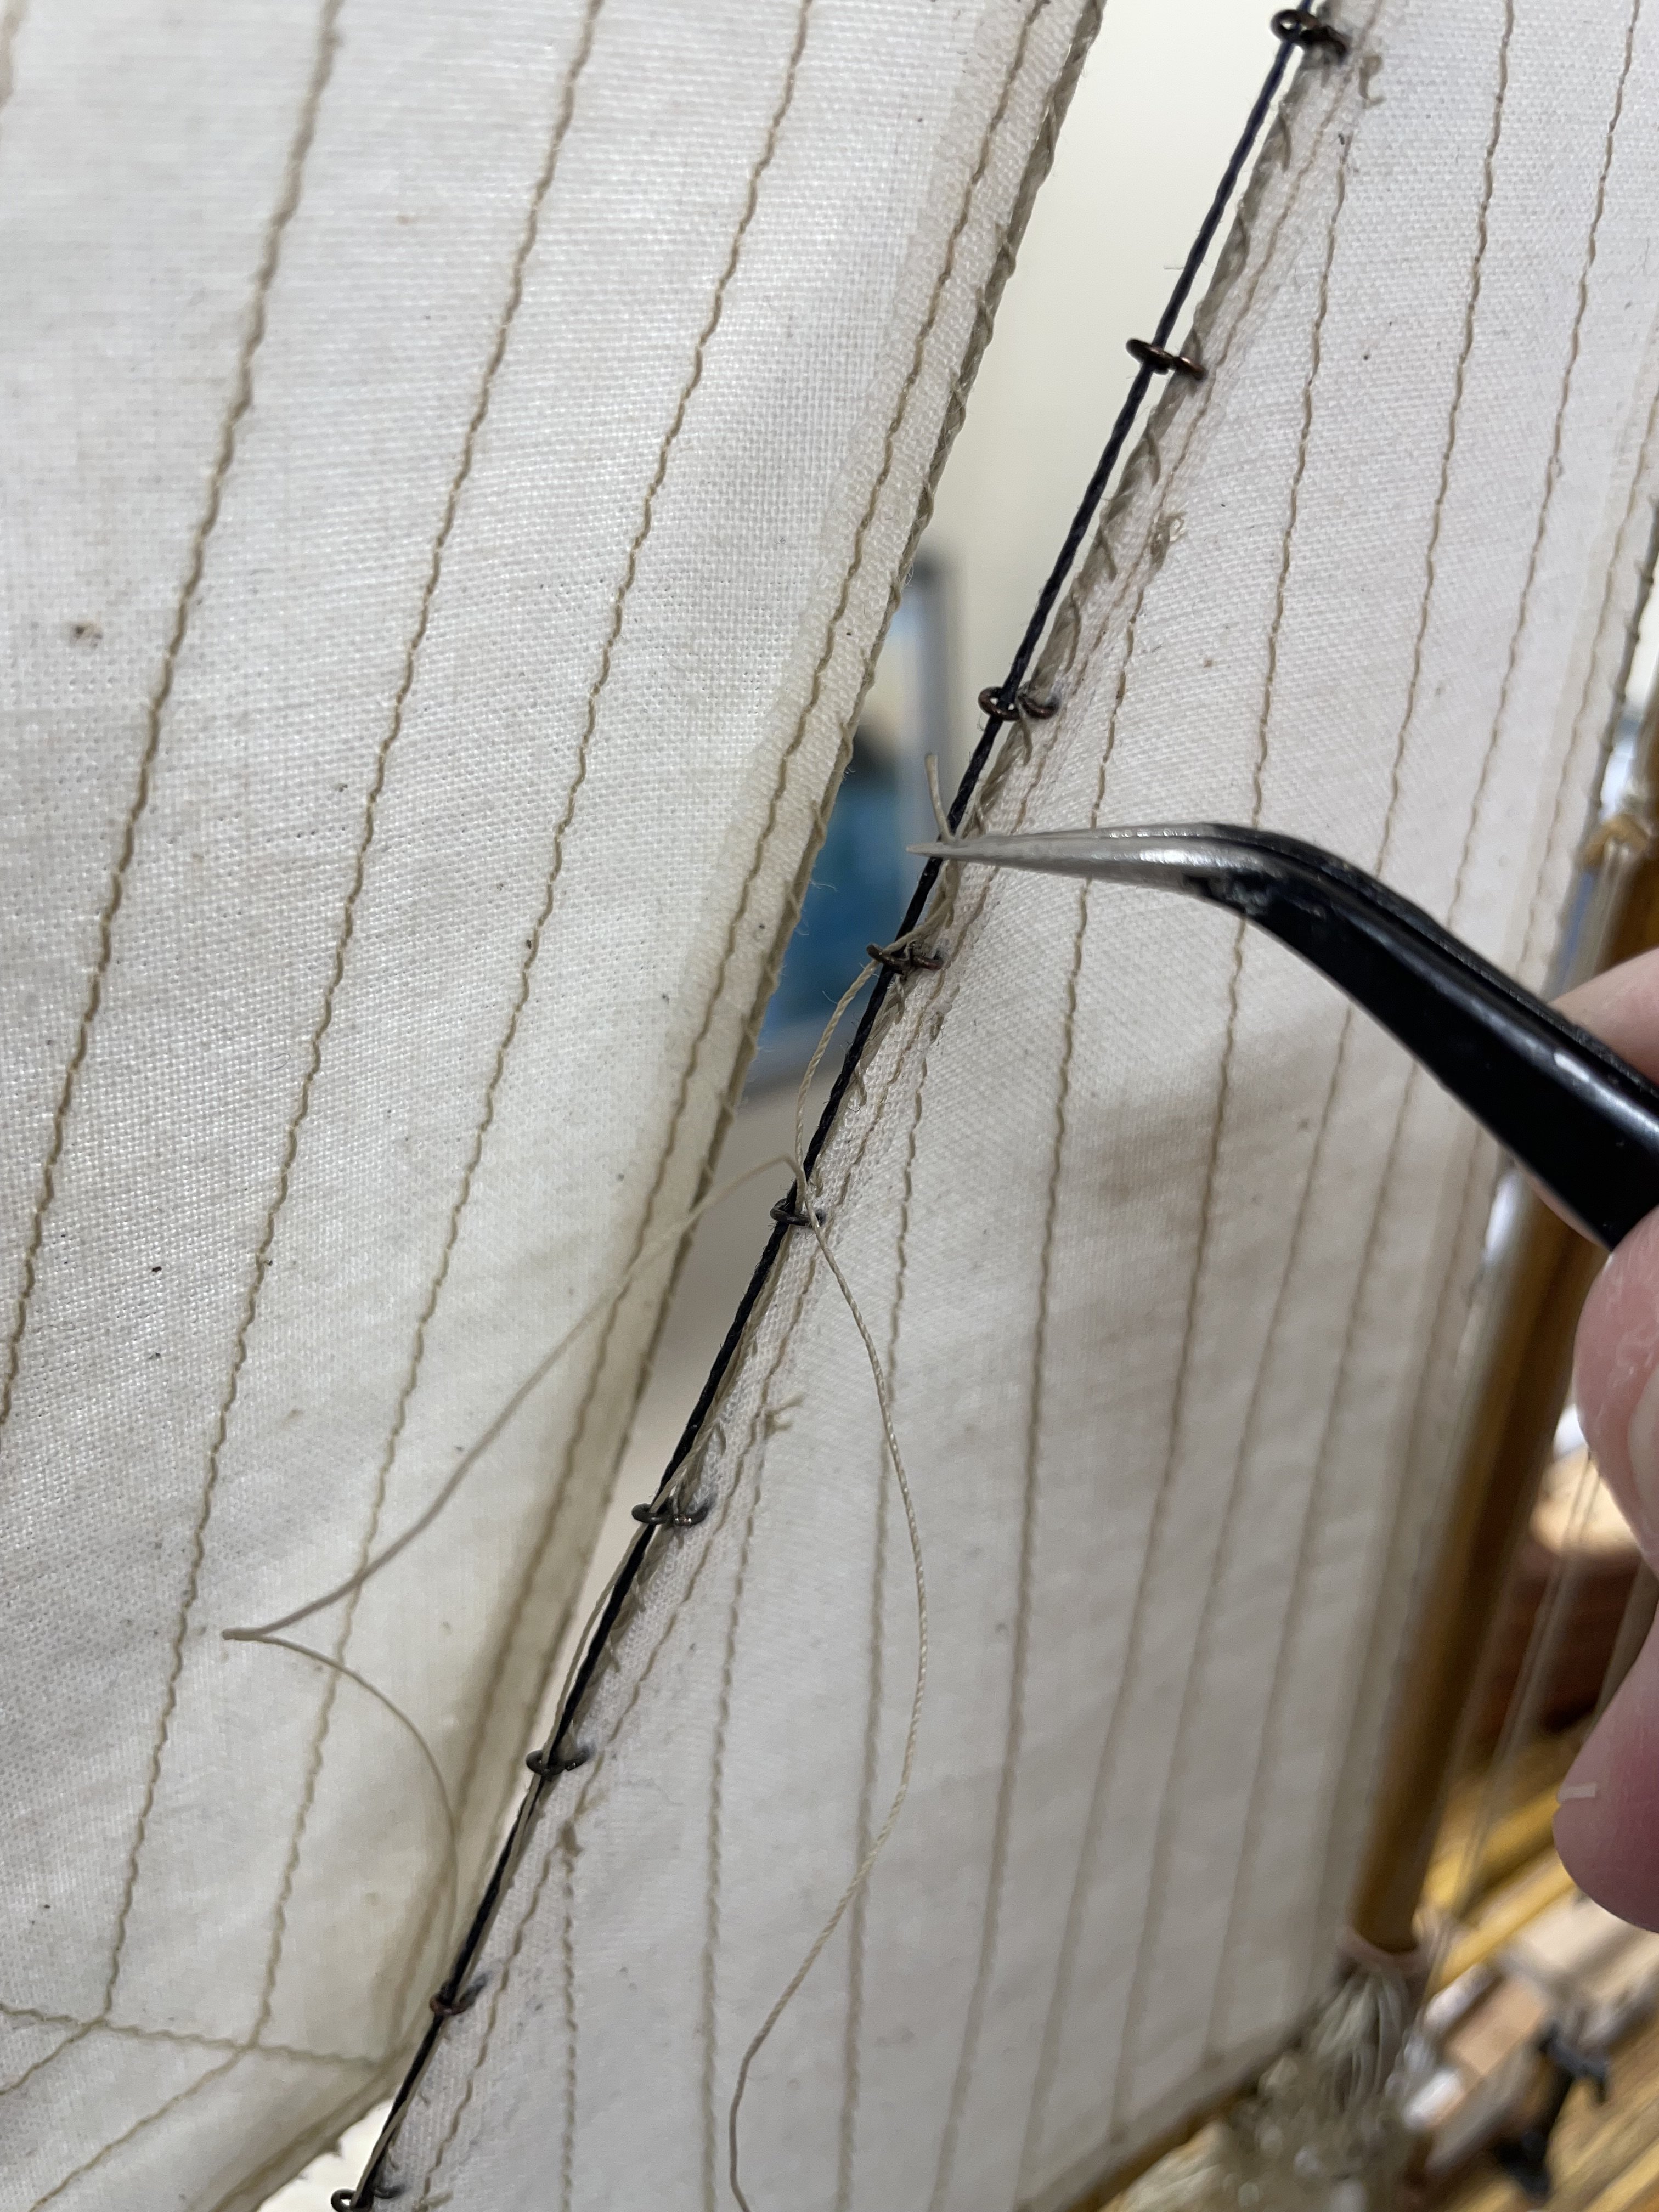
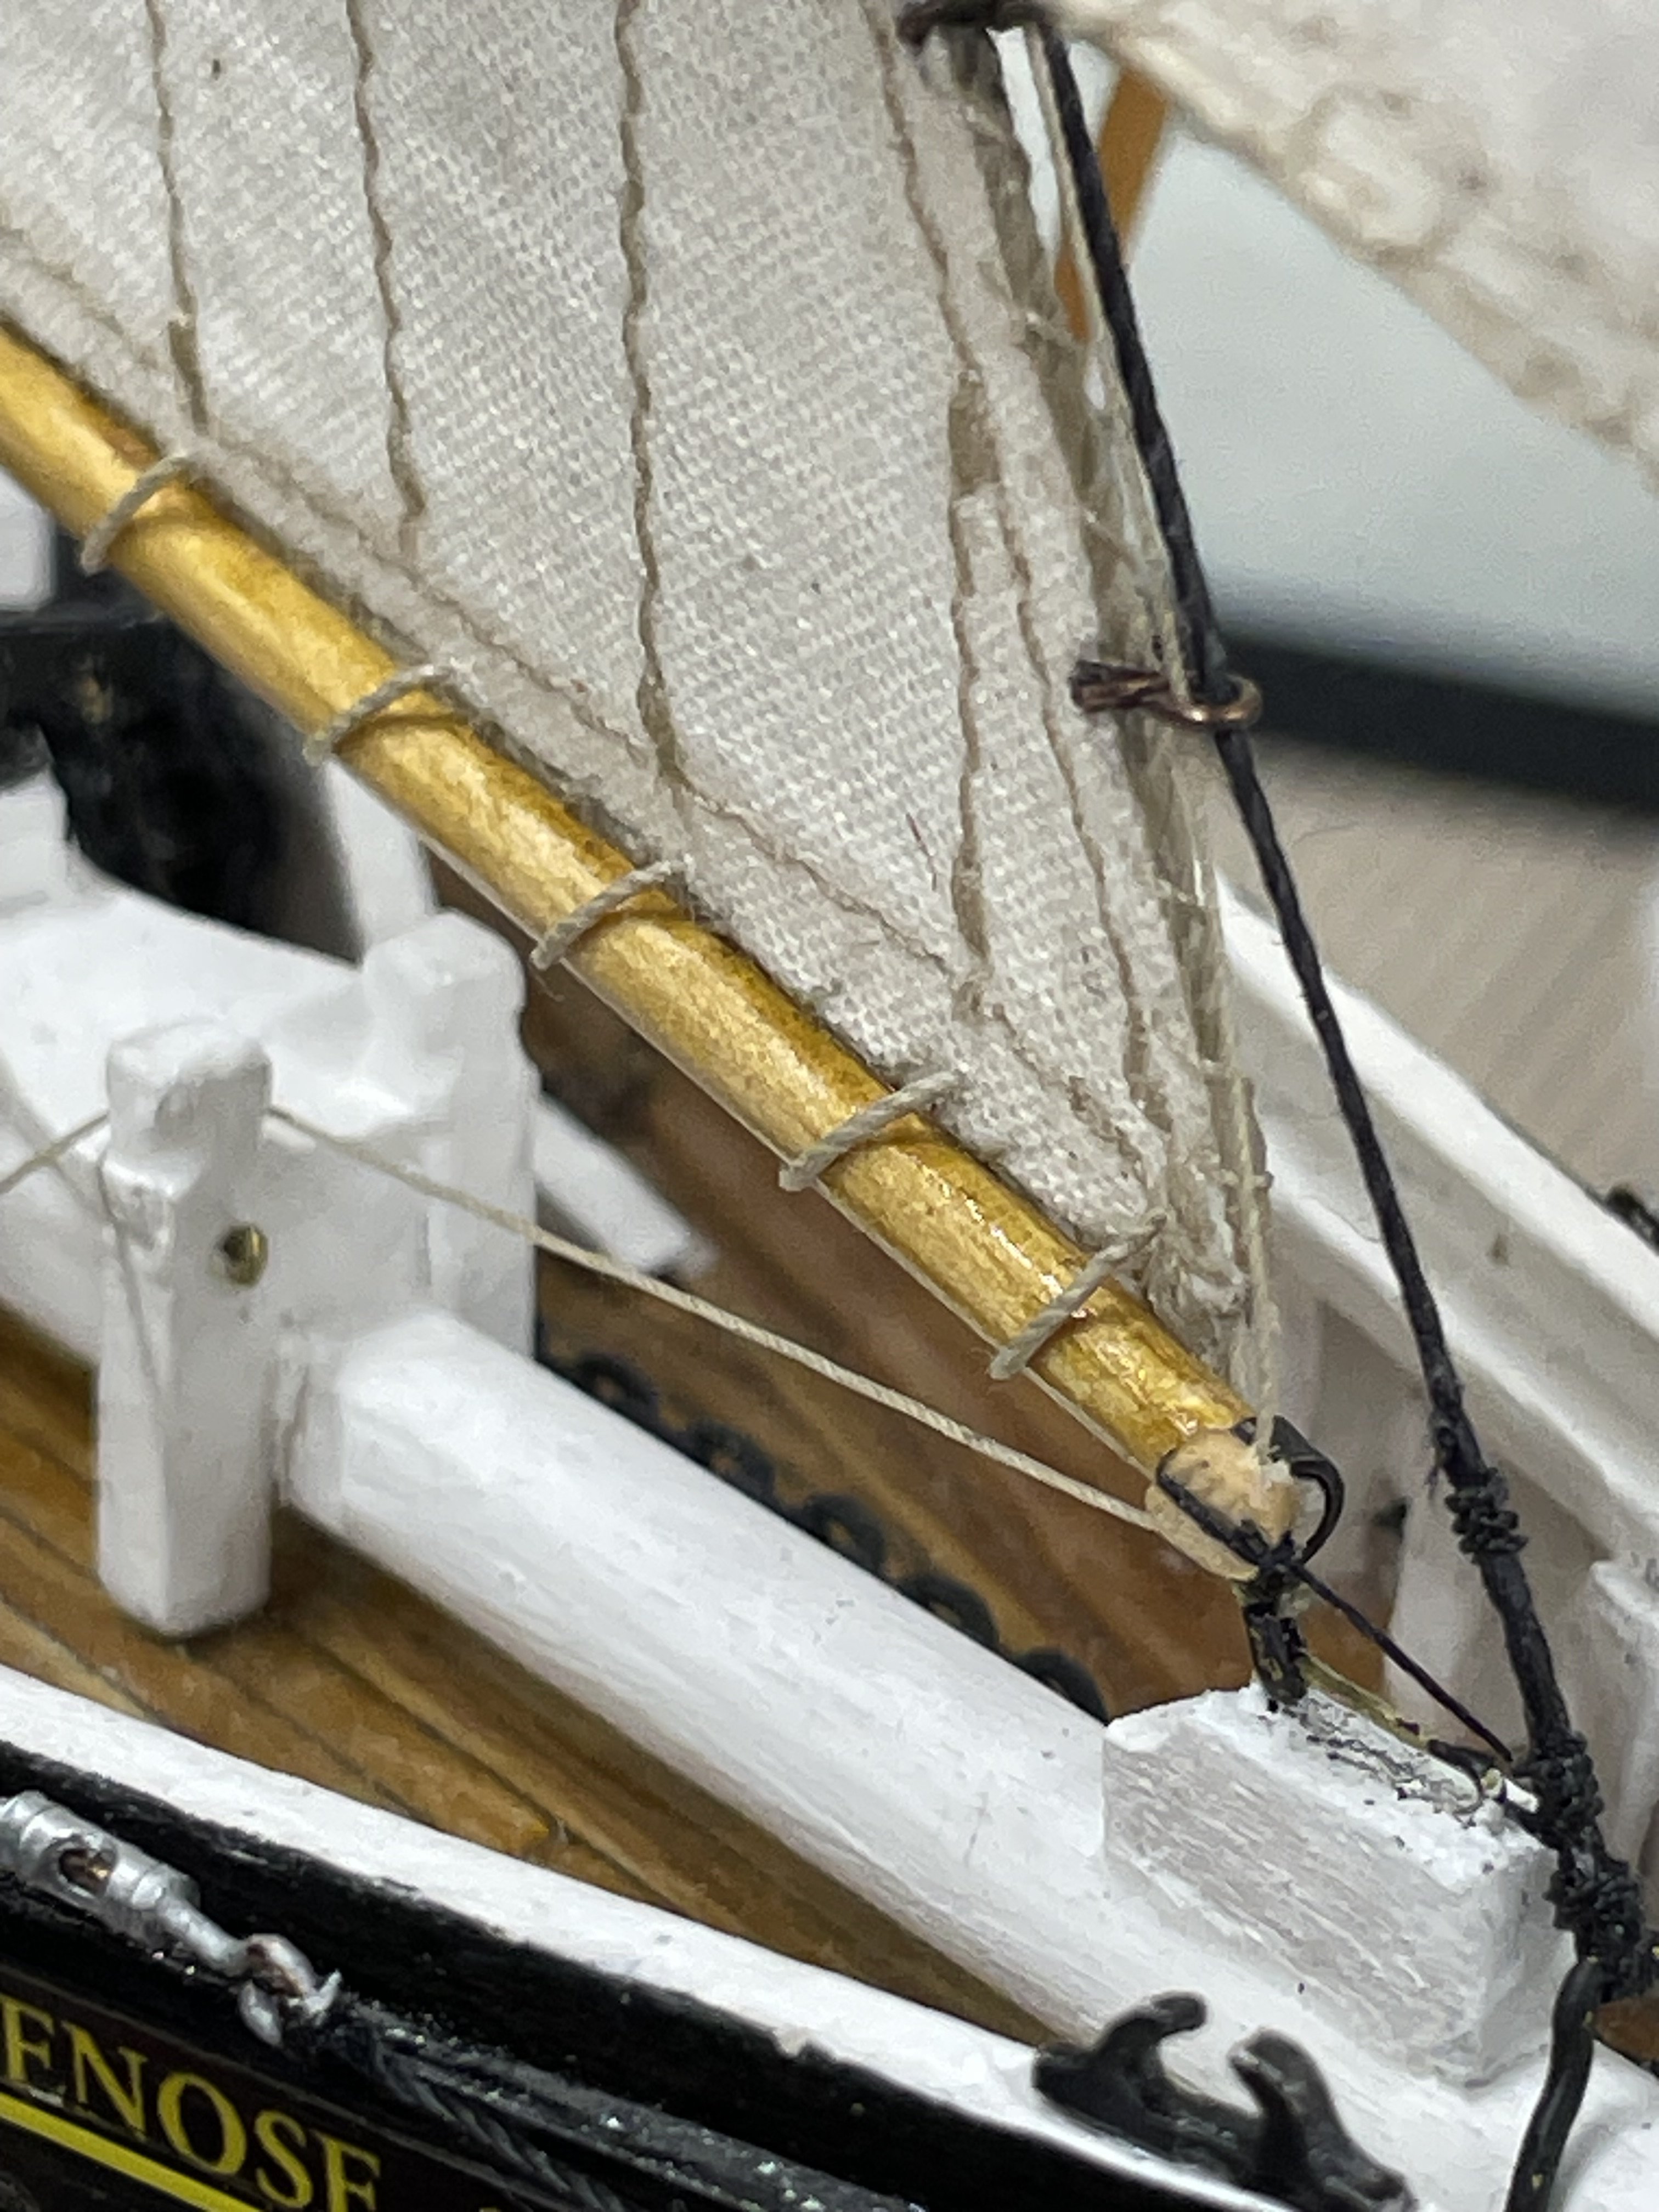
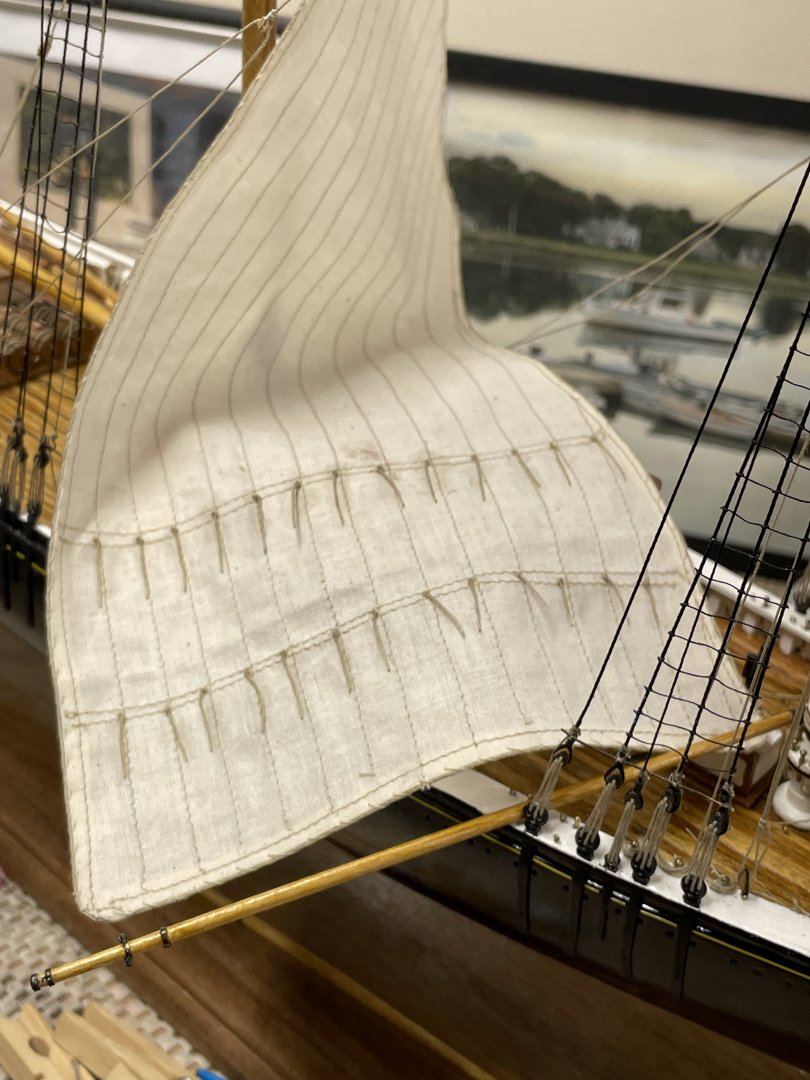
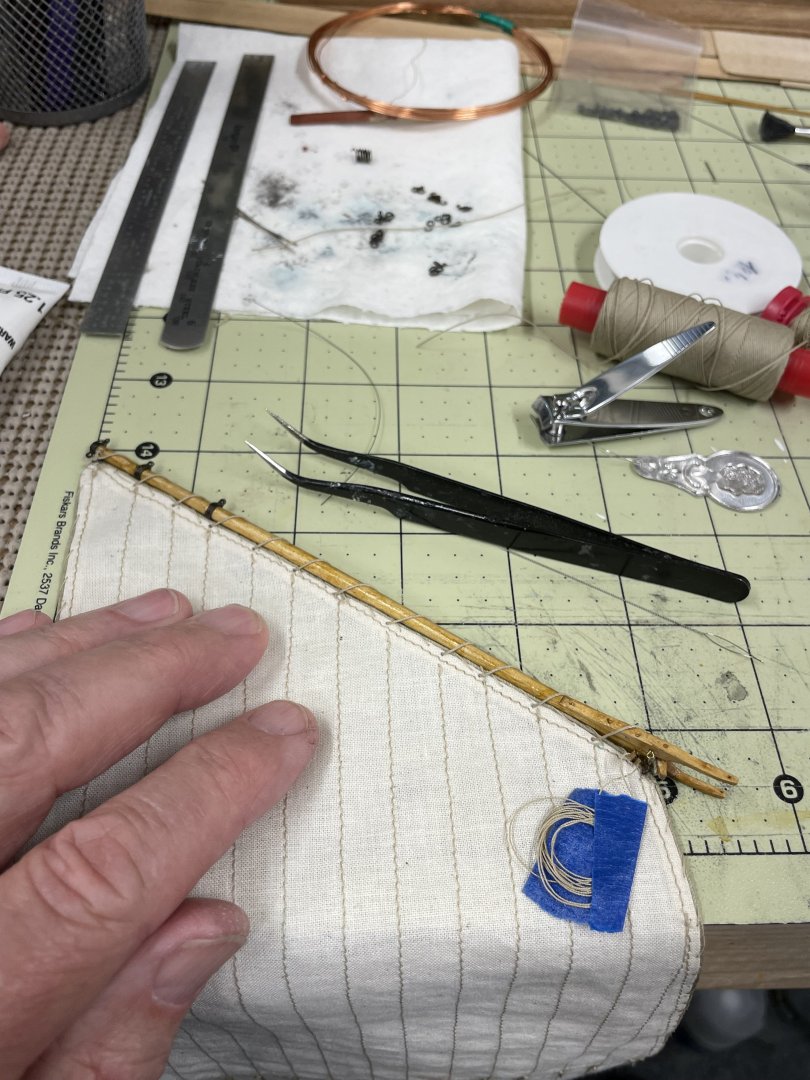
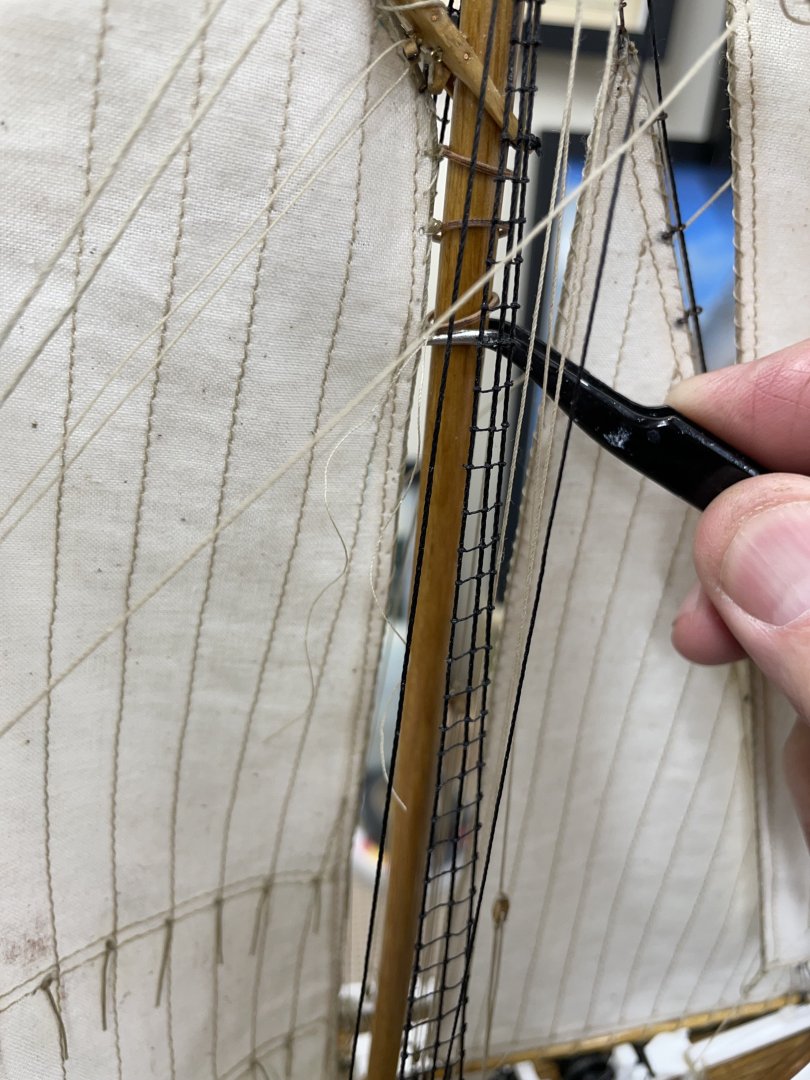
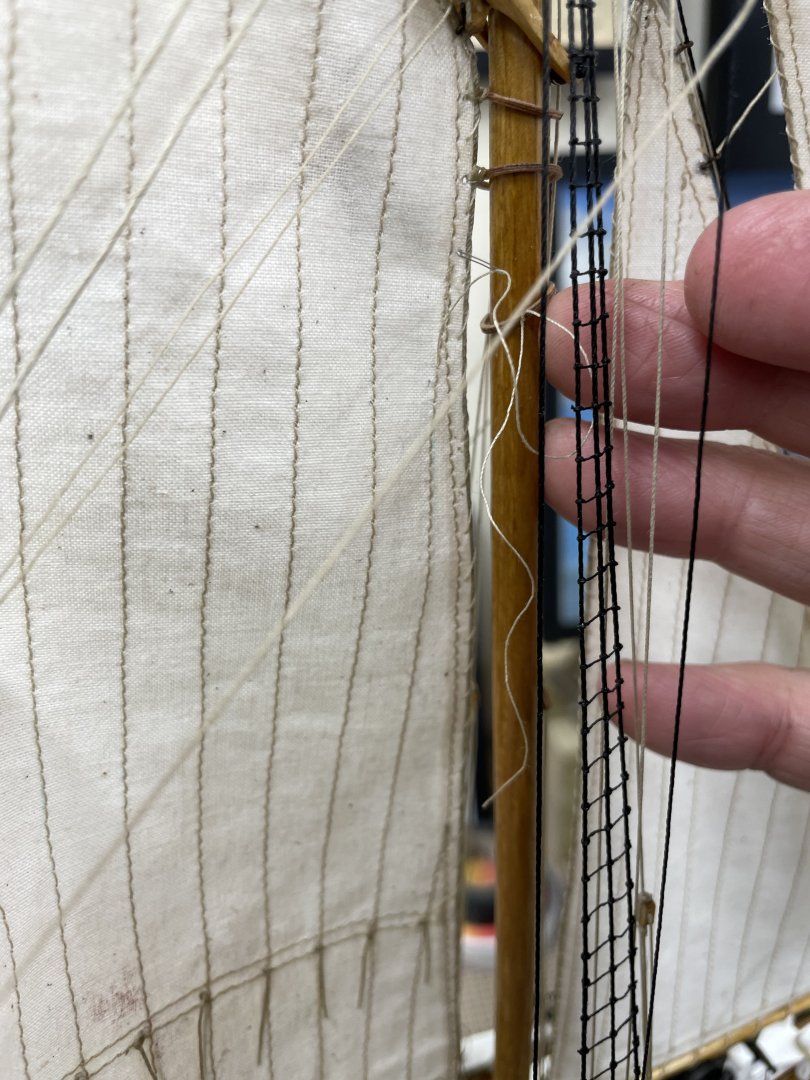
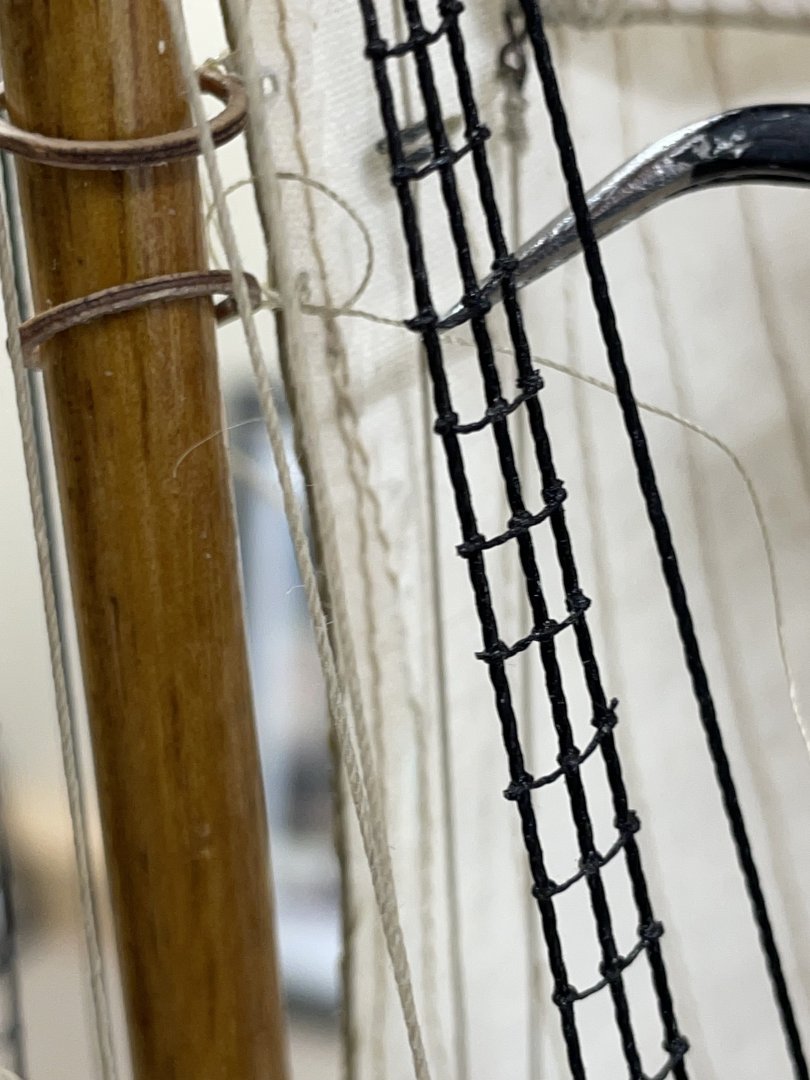
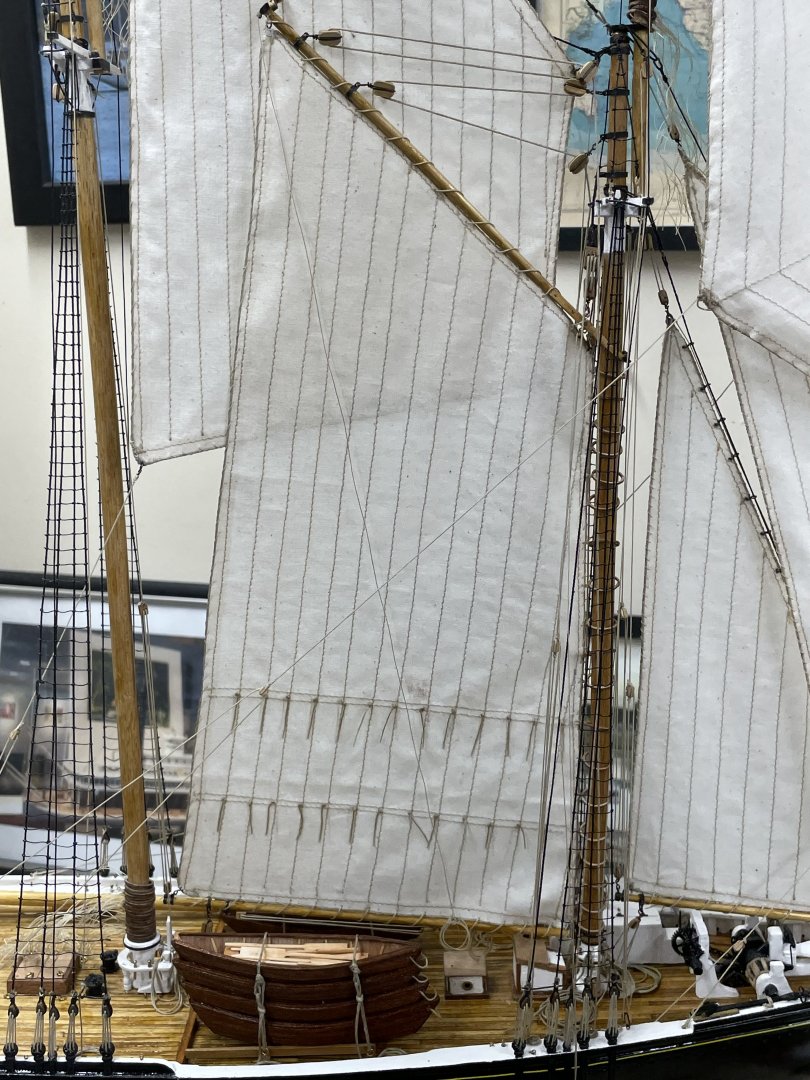
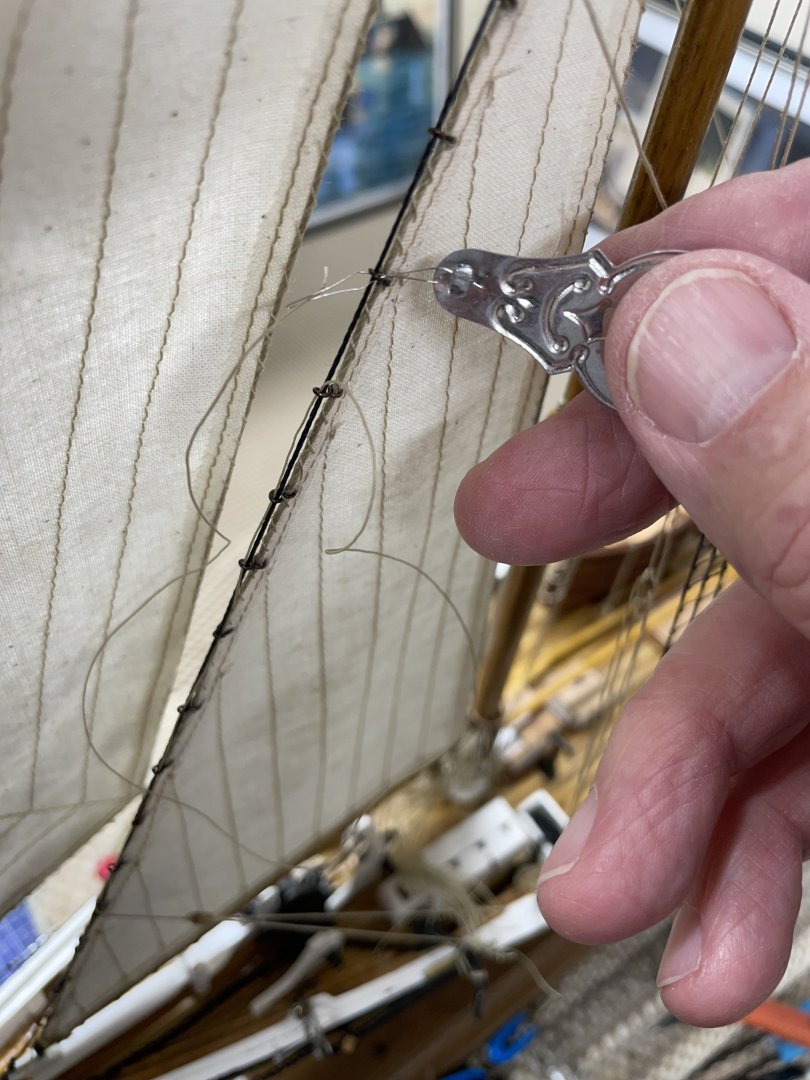
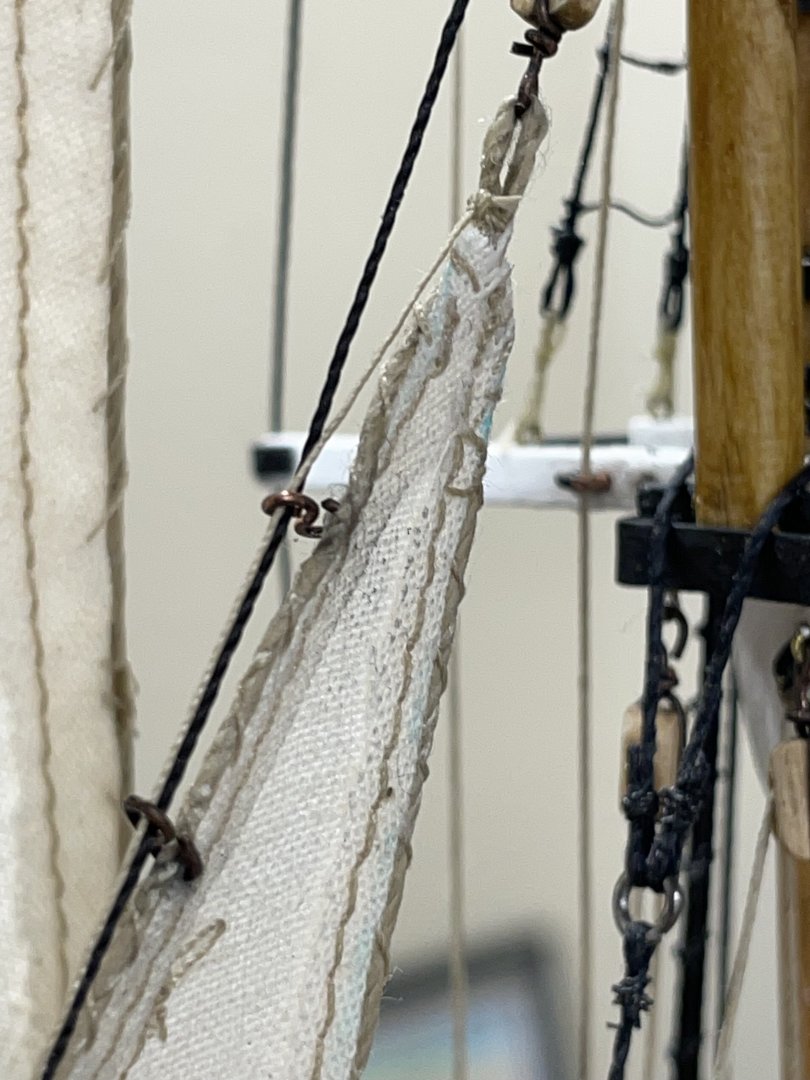
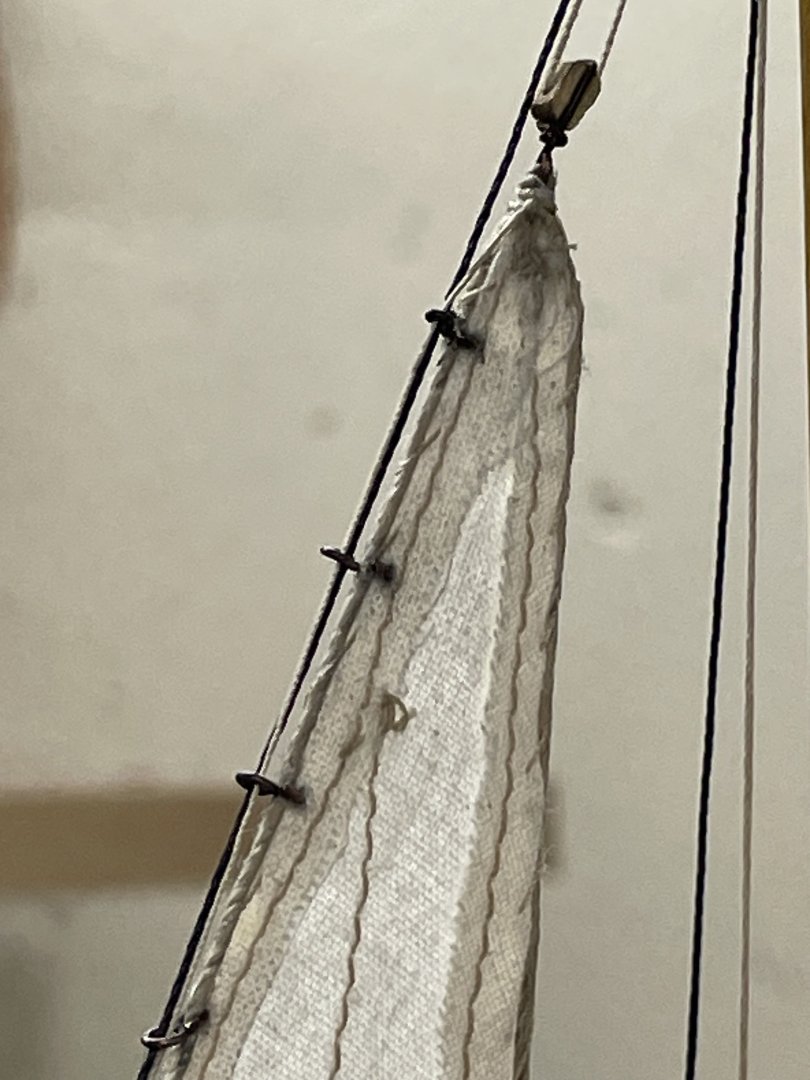
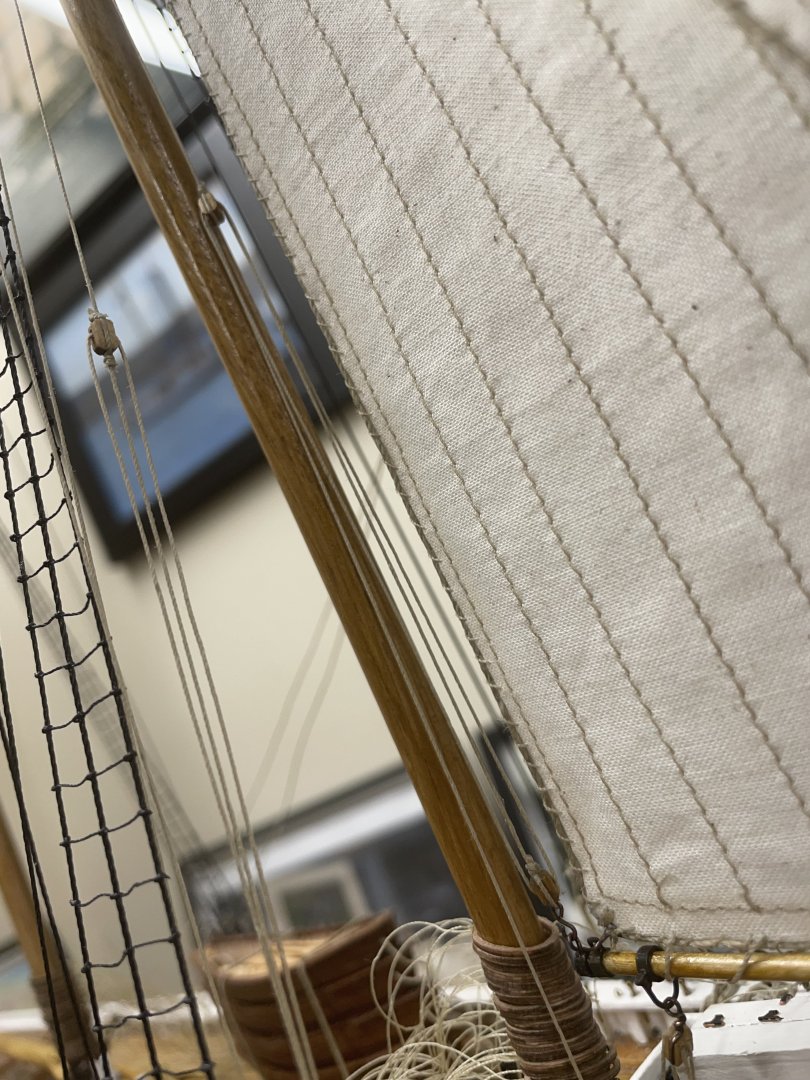
Phil, Those hoop ties were very tedious and took a couple of hours, just for the Fore Sail. In hind site I think it may have been better to rig the sails on the hoops prior to setting the masts. However it is what it is now. 😆 John
- 282 replies
-
- 1
-
-
- Bluenose
- Model Shipways
- (and 1 more)
-
Greg, No deadlines… That’s what makes it an awesome experience. Looks like I’ll hit two years on this one. But then I work on more than one at a time, so it’s really hard to say how long it really takes. But then it doesn’t really matter, does it. 😜 John
- 282 replies
-
- 1
-
-
- Bluenose
- Model Shipways
- (and 1 more)
-
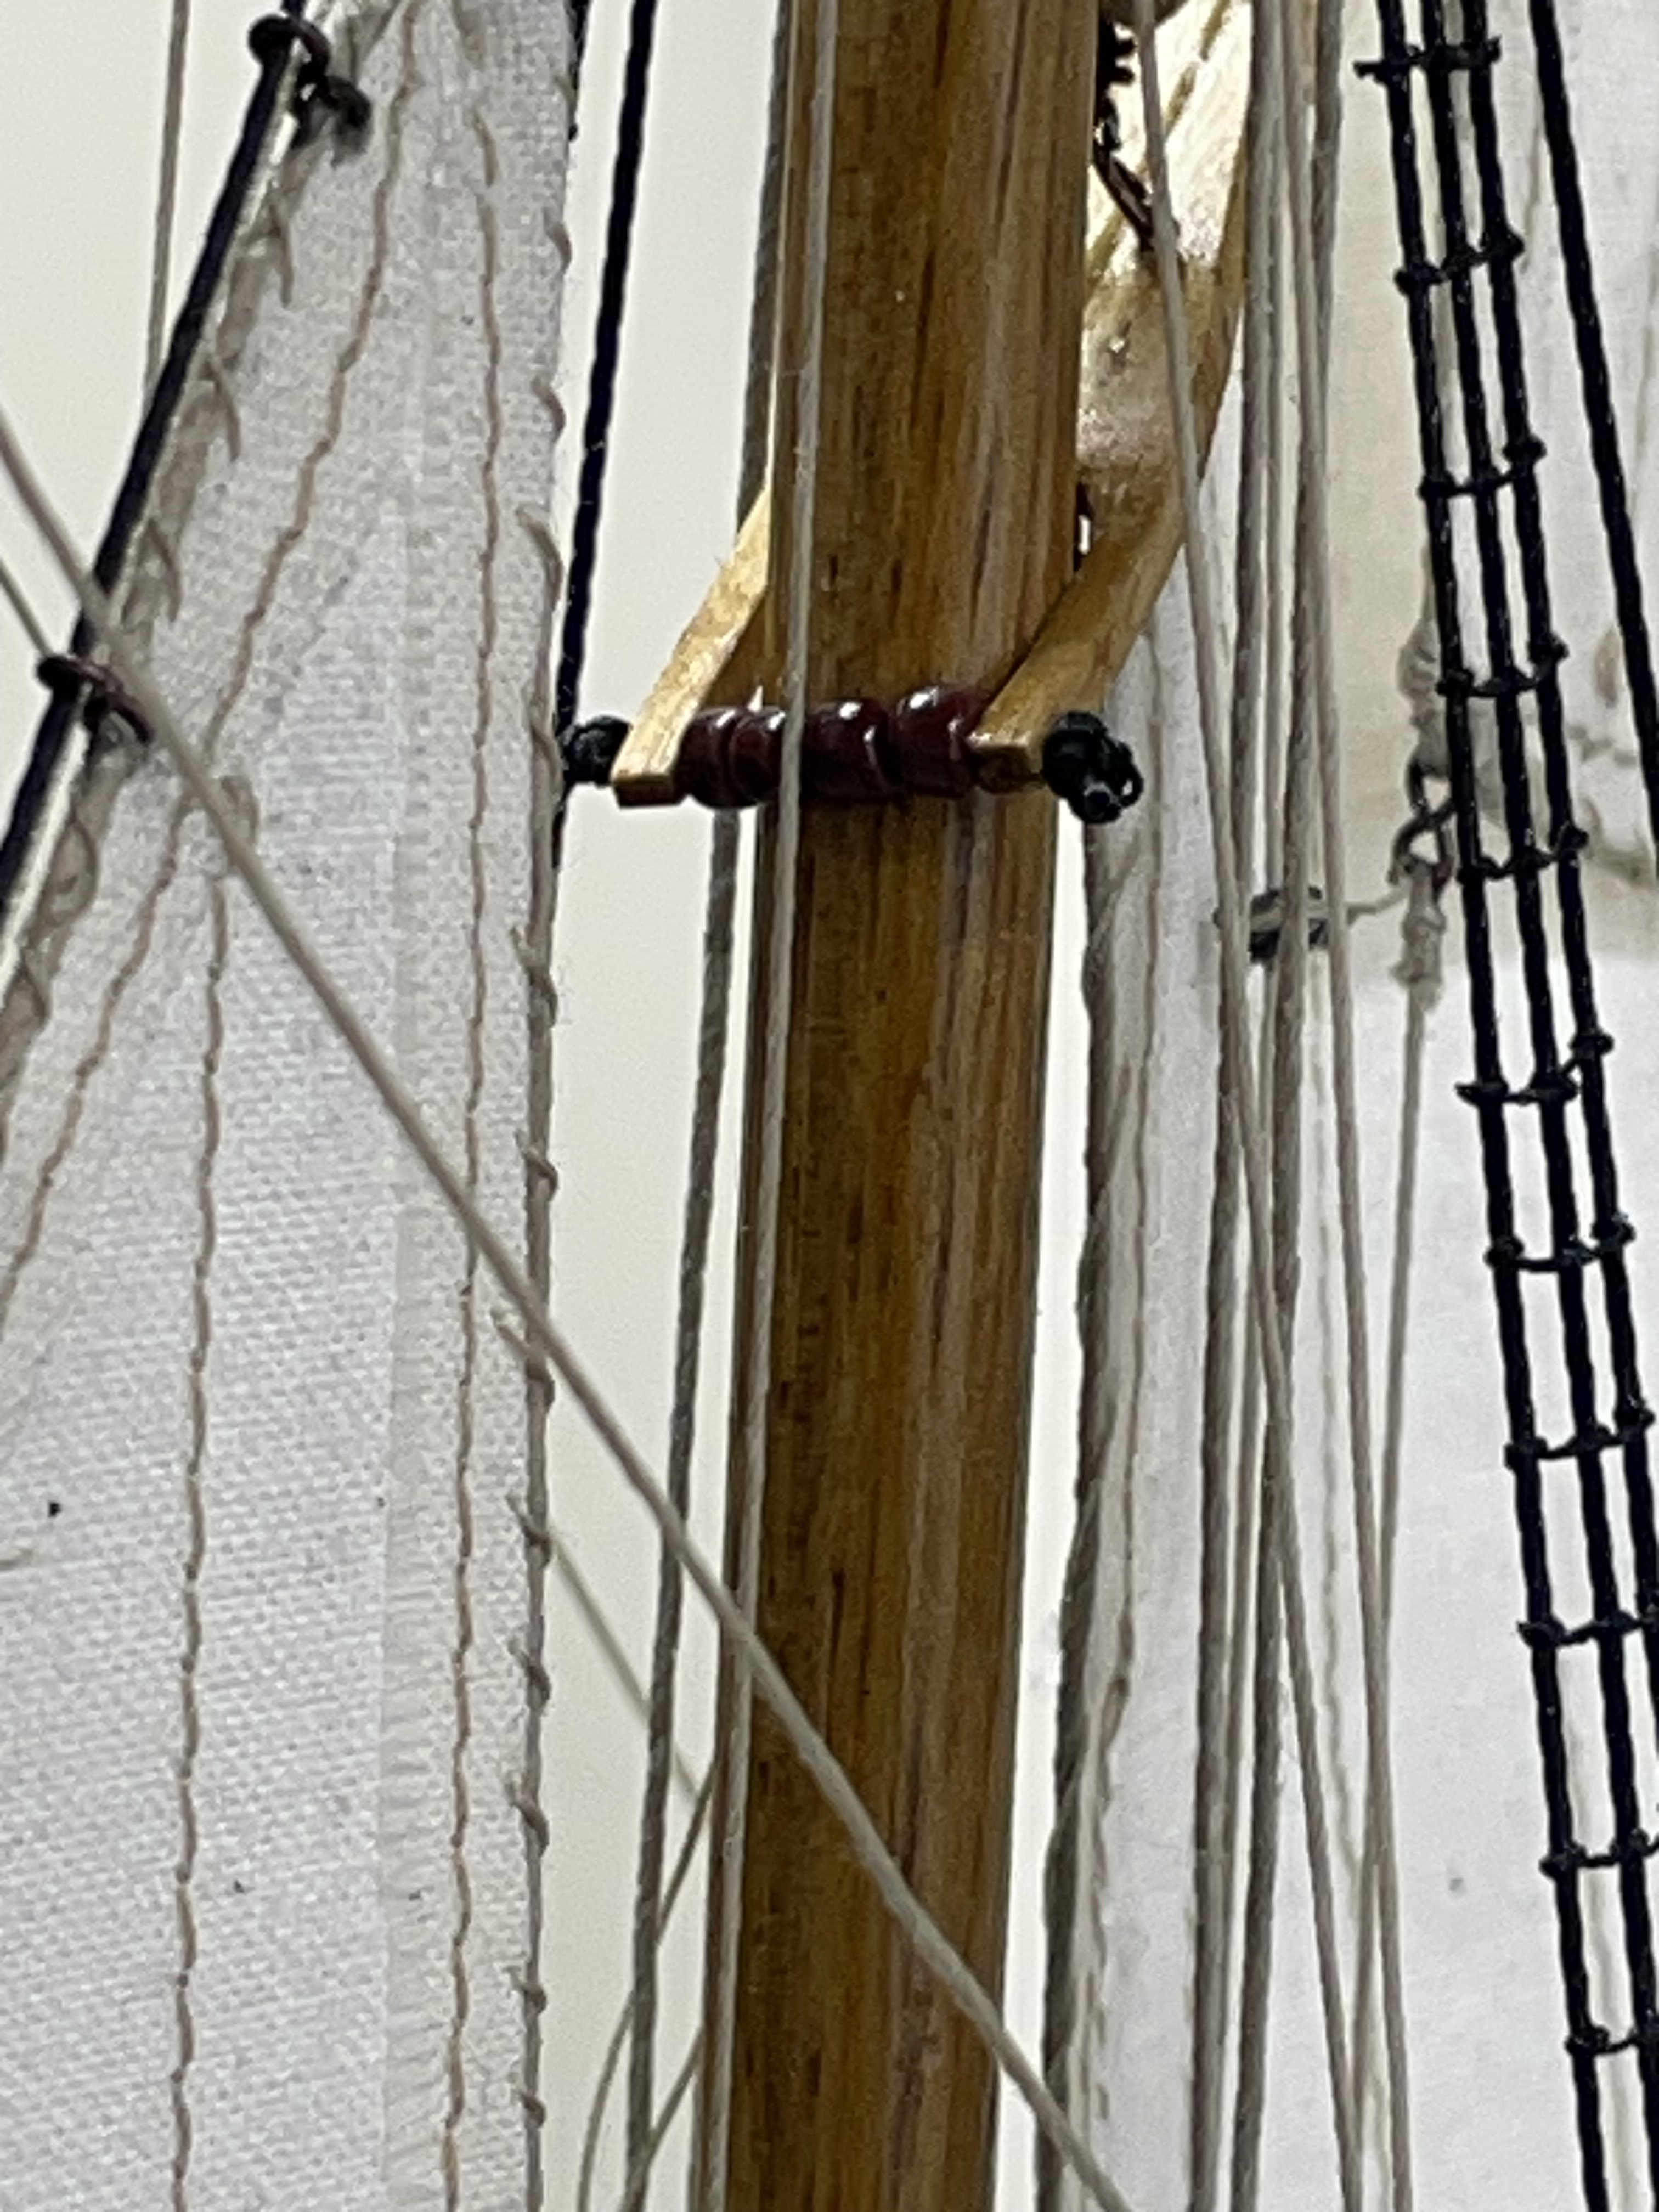
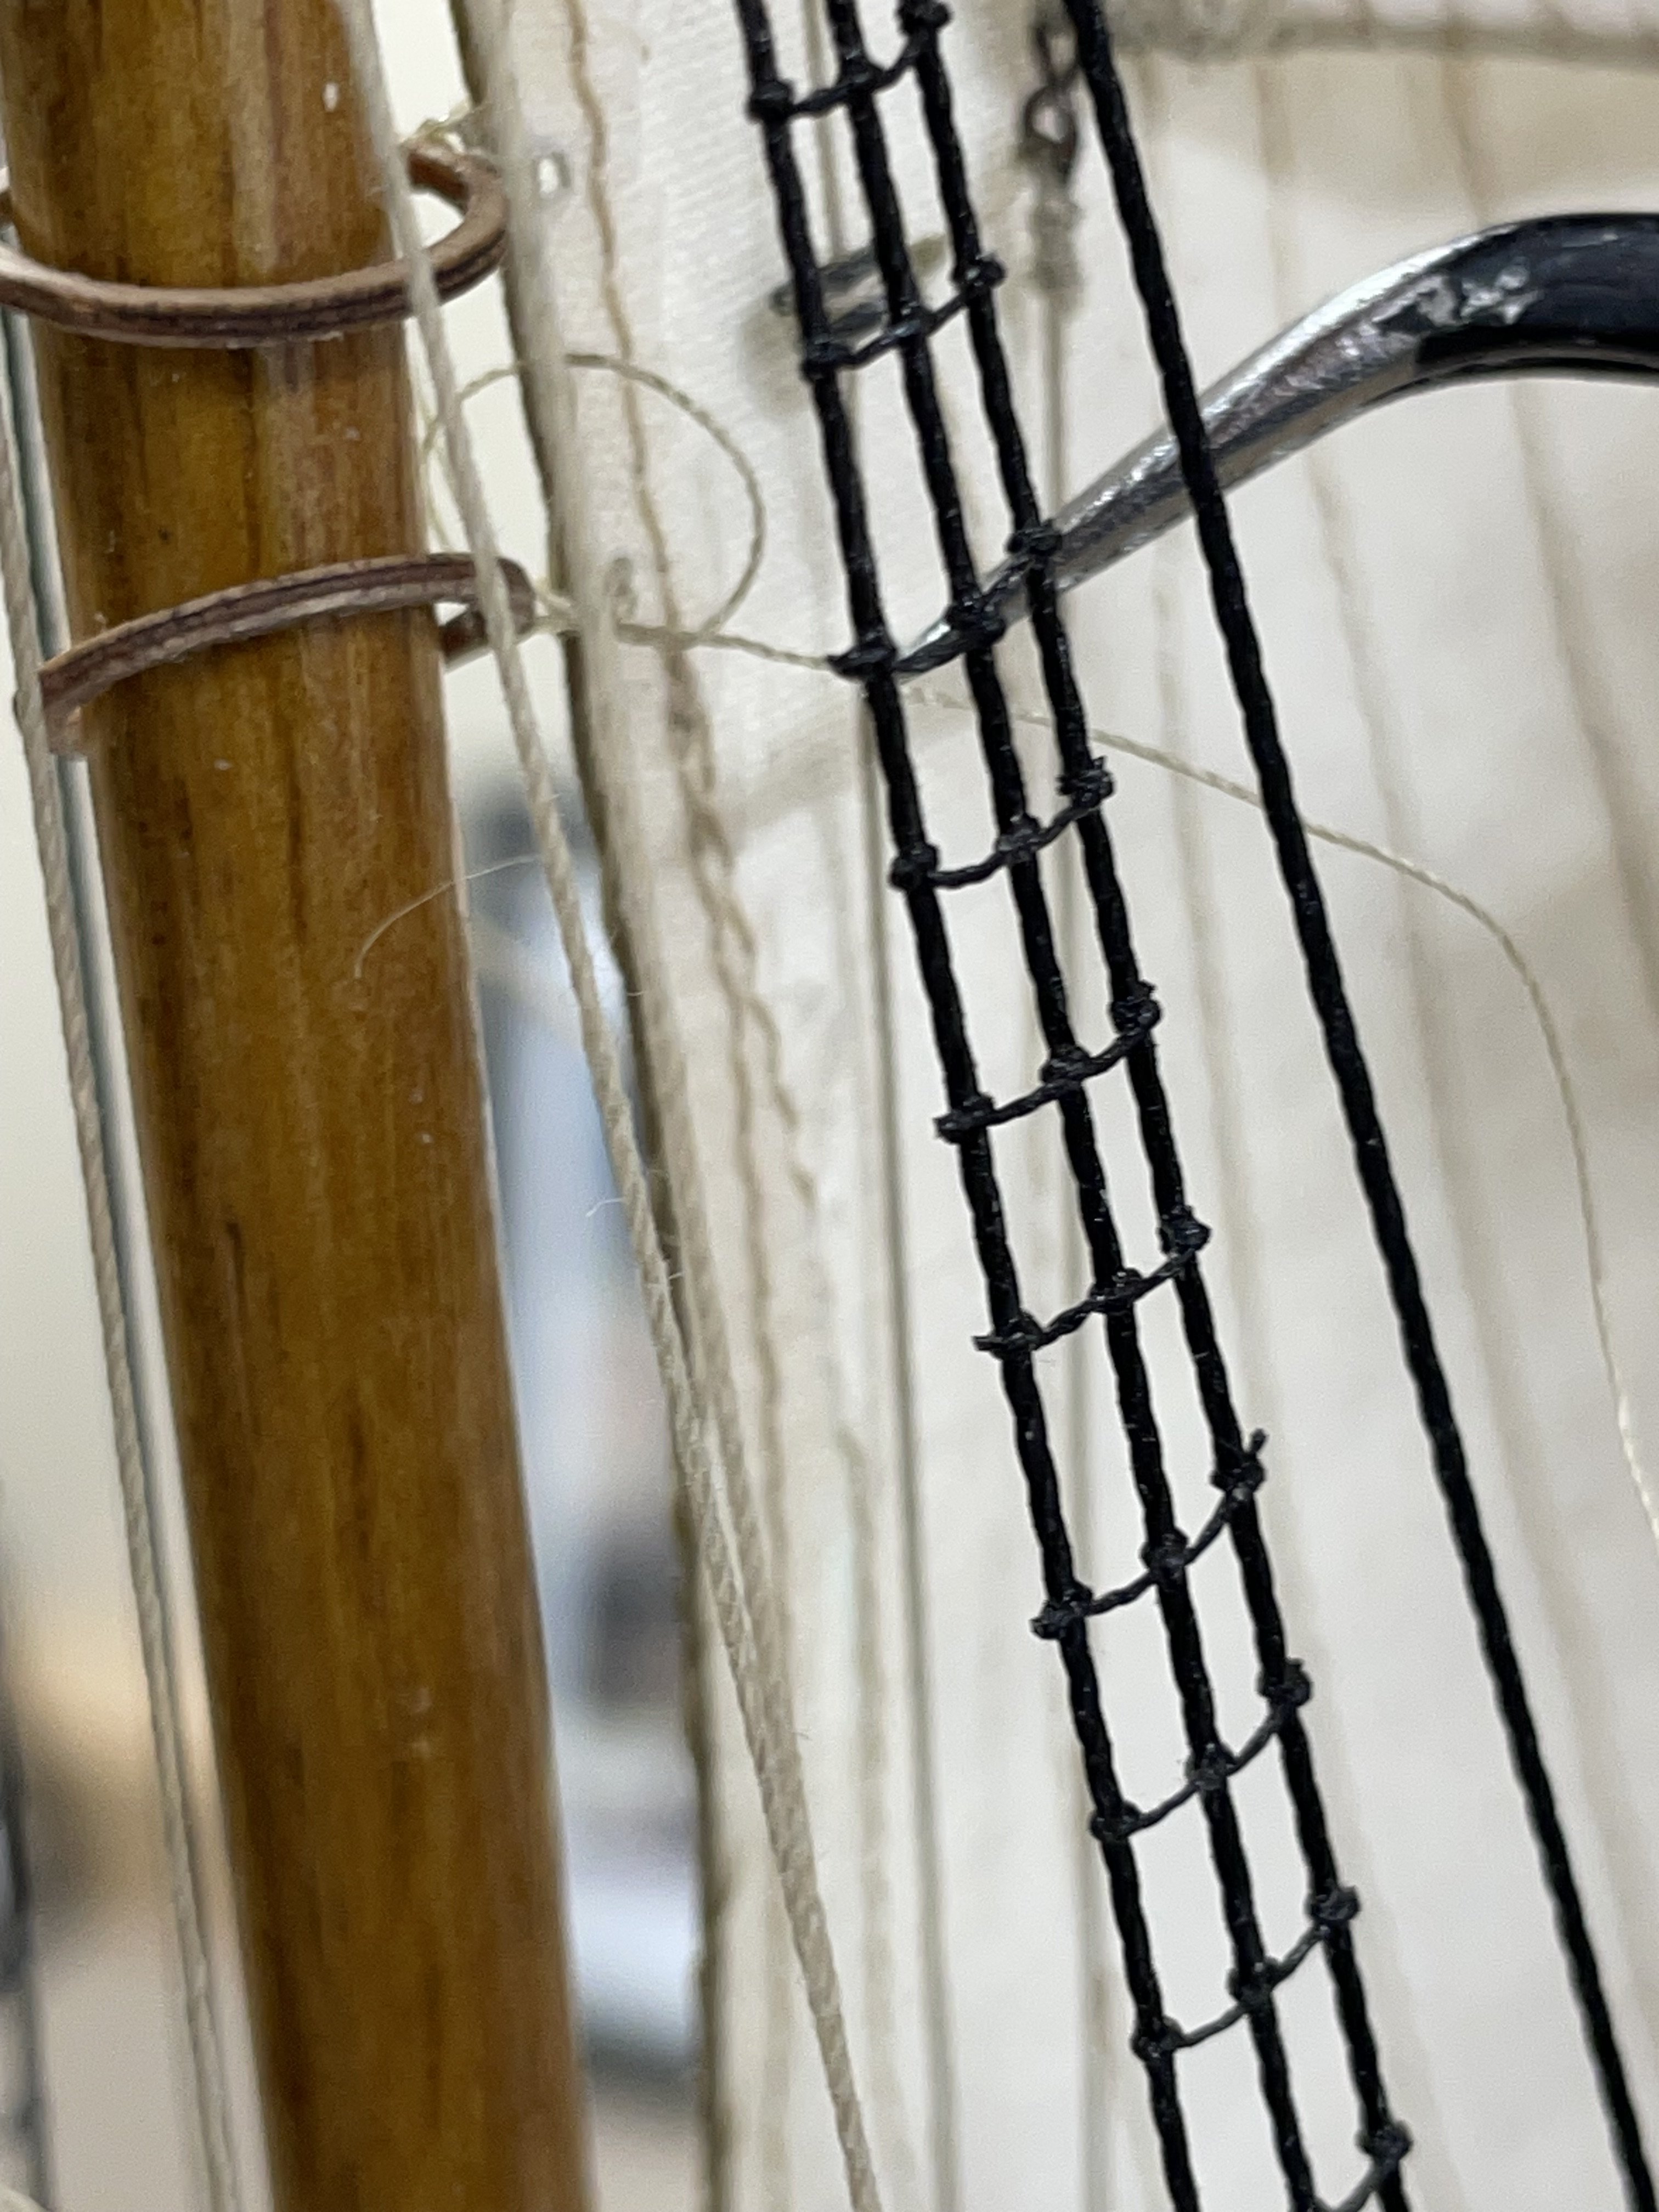
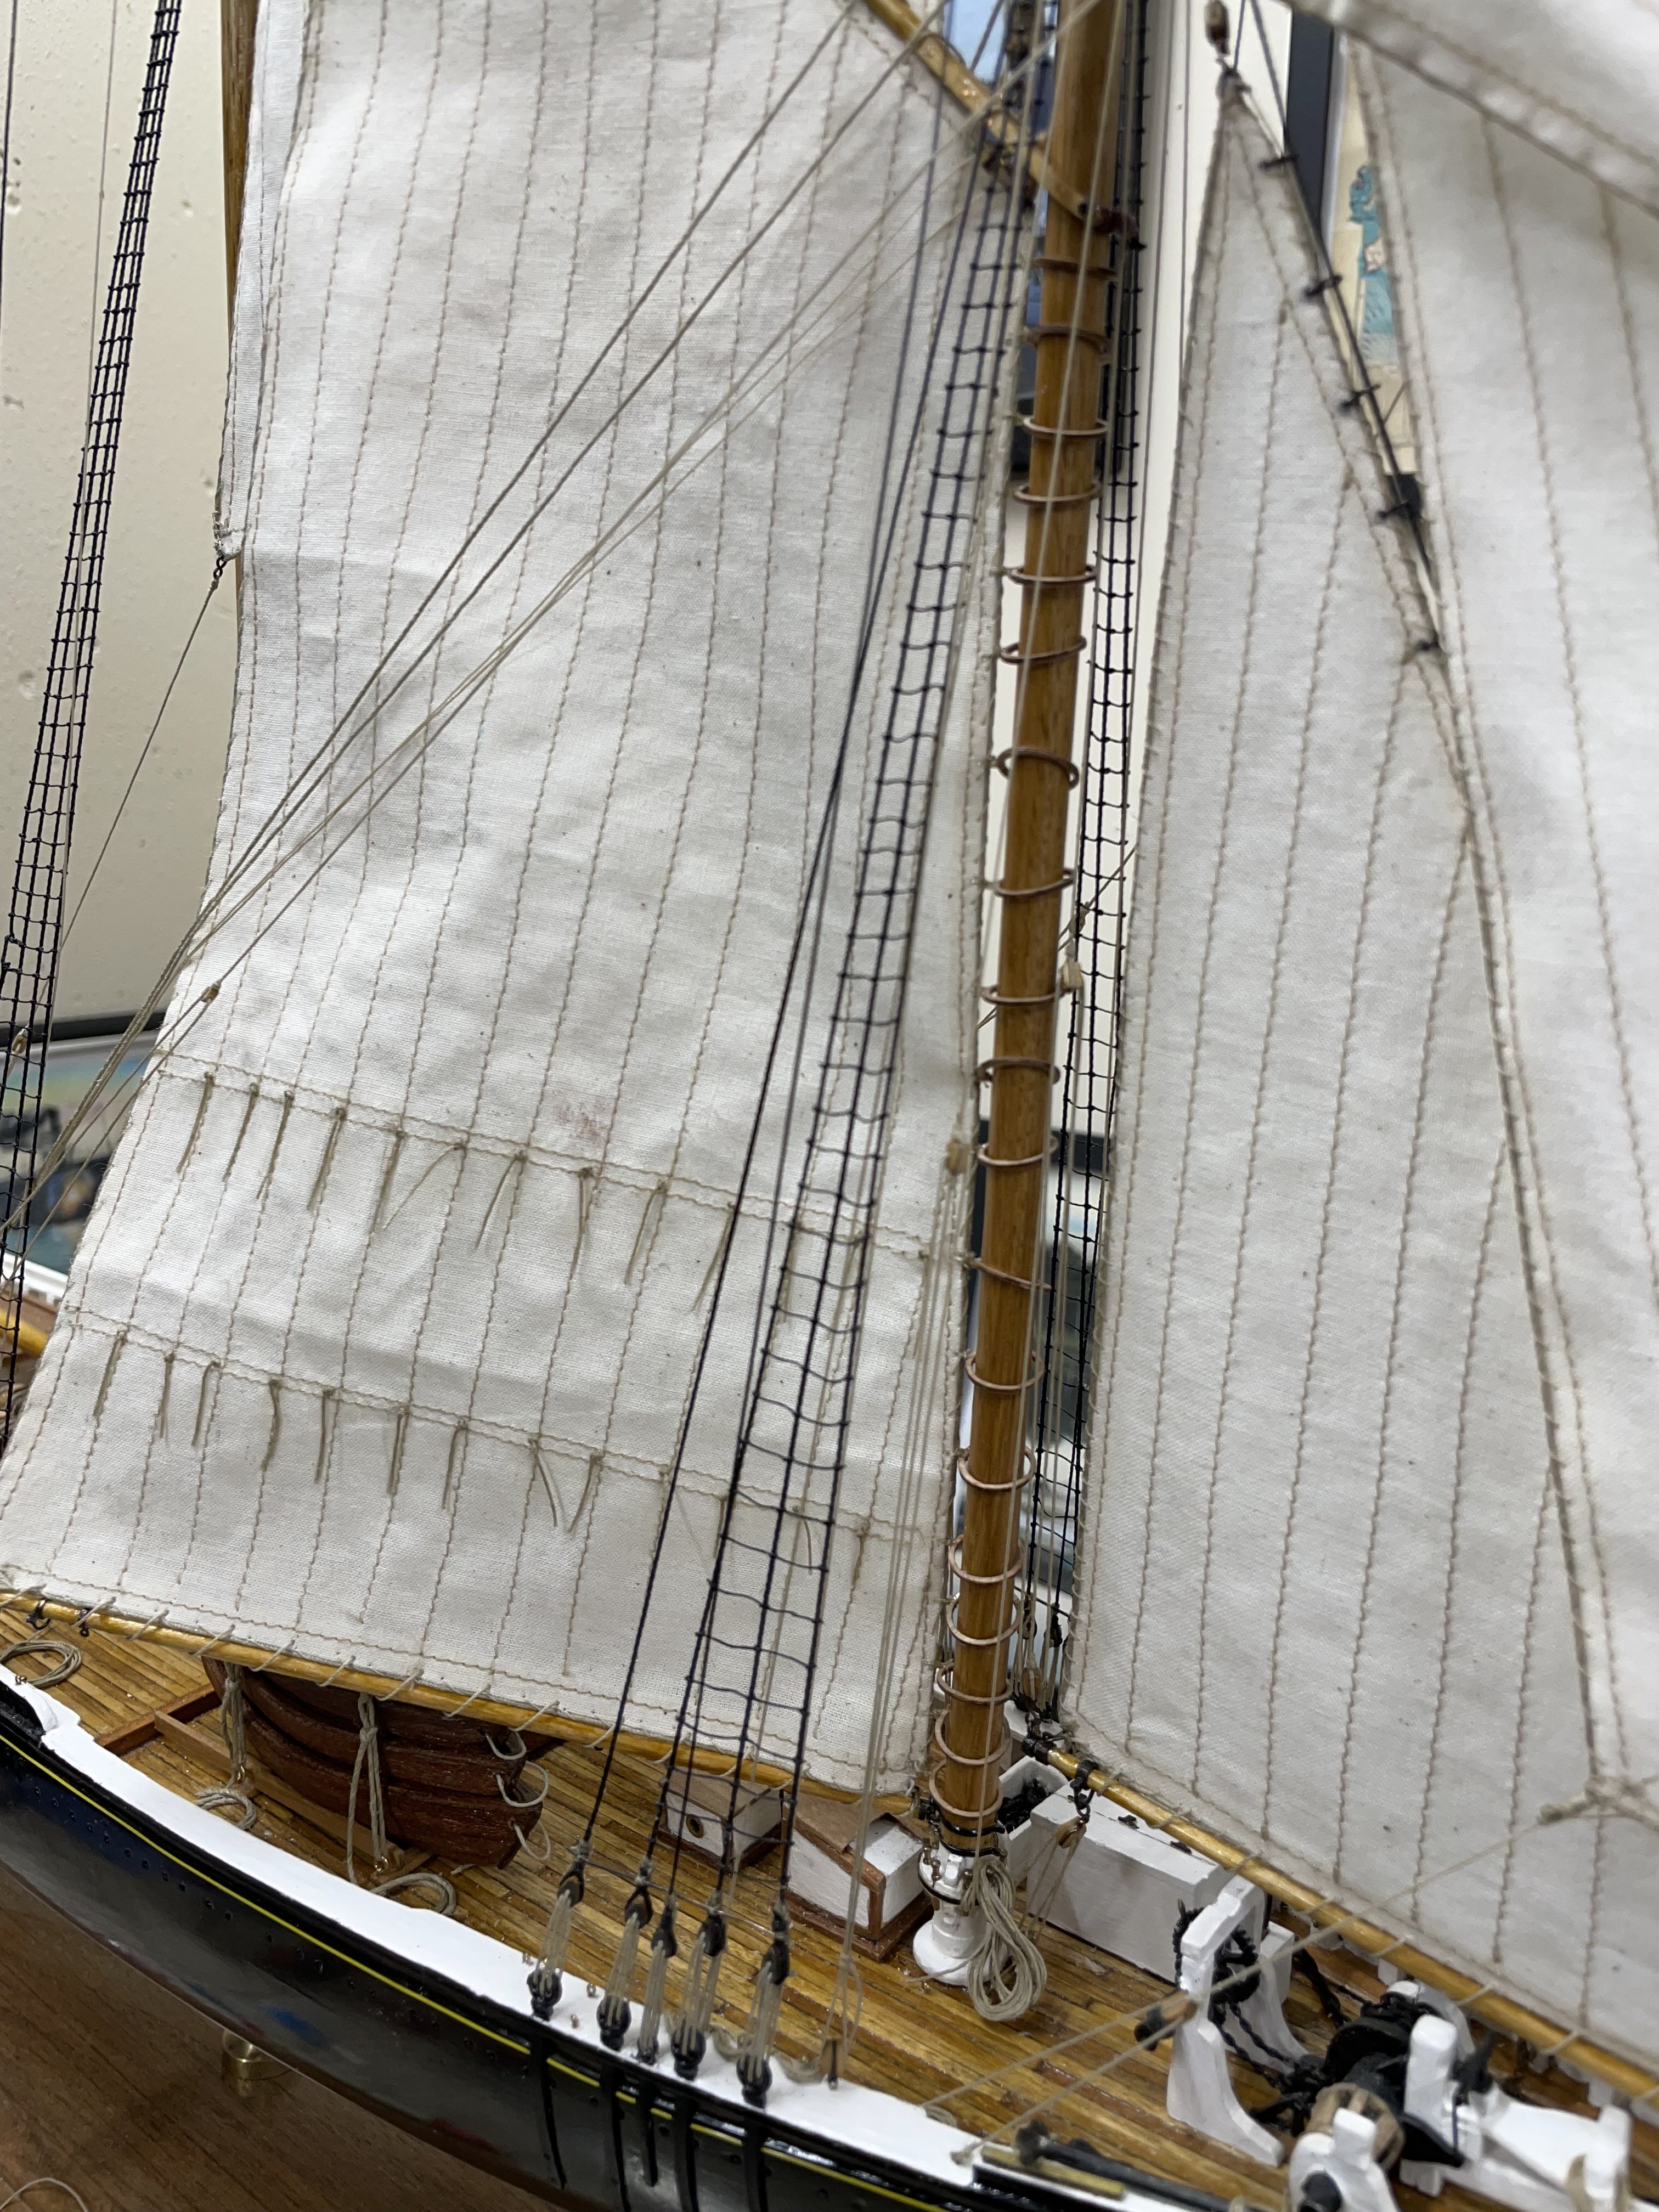
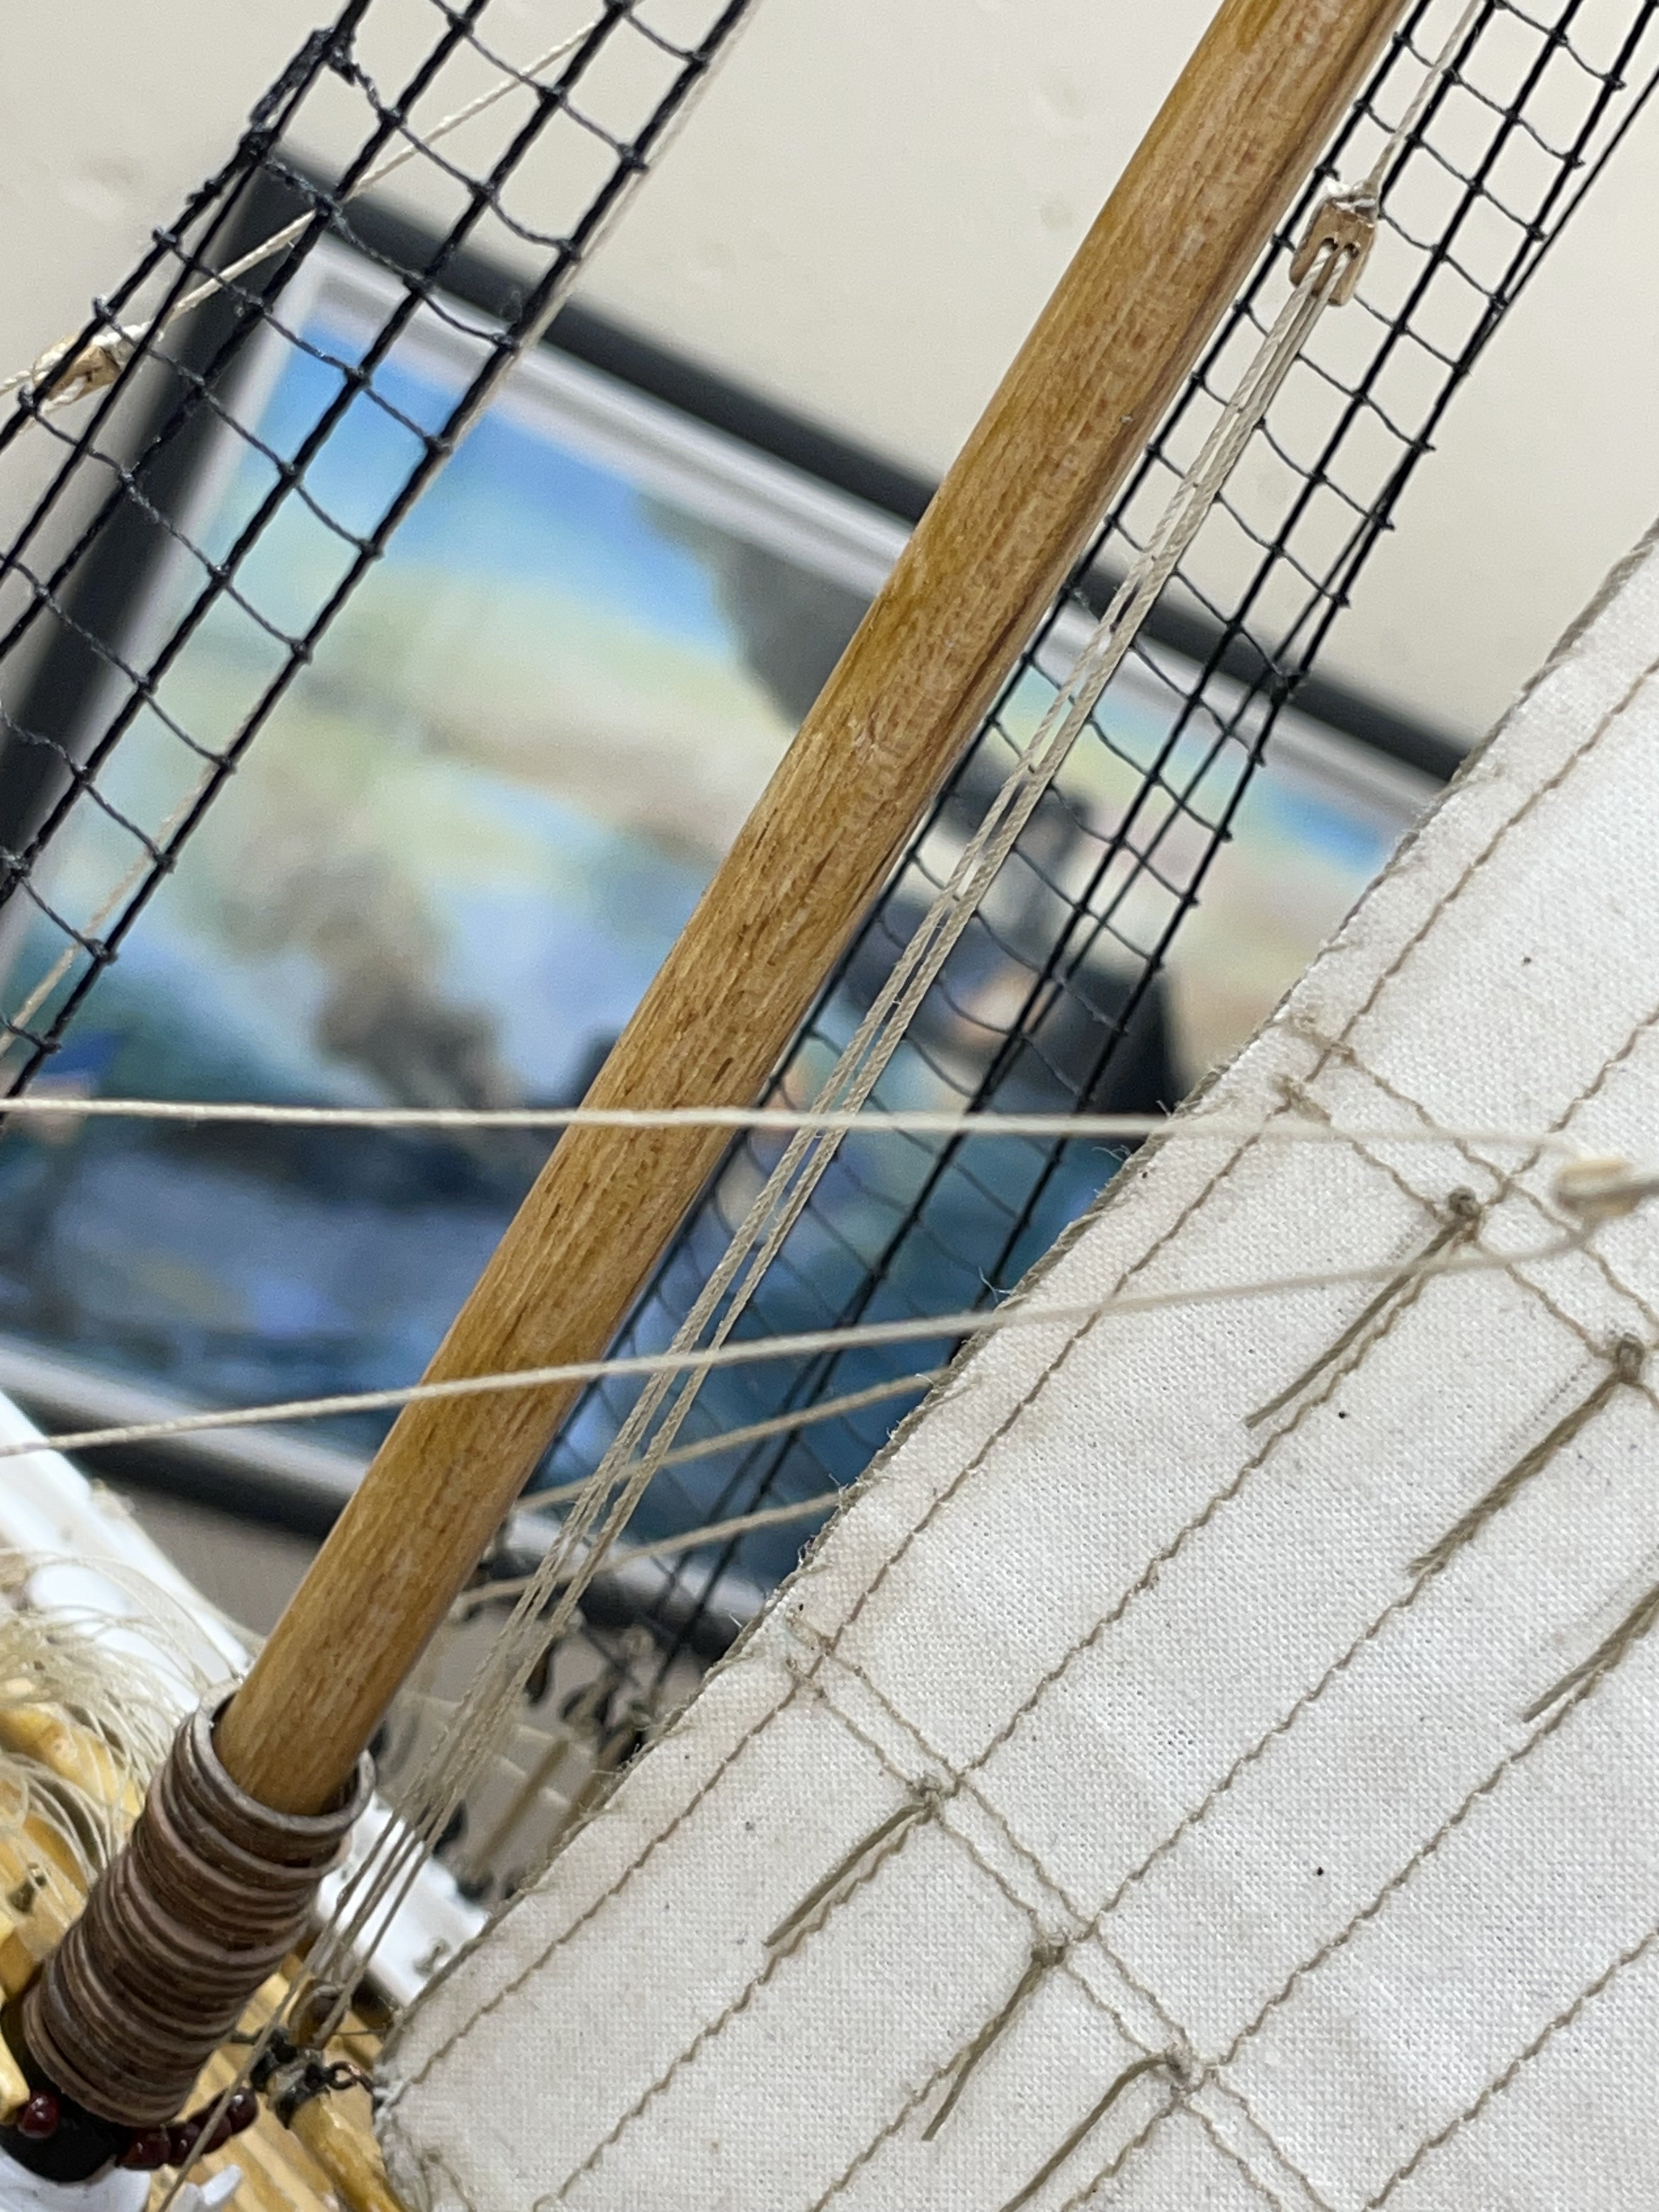
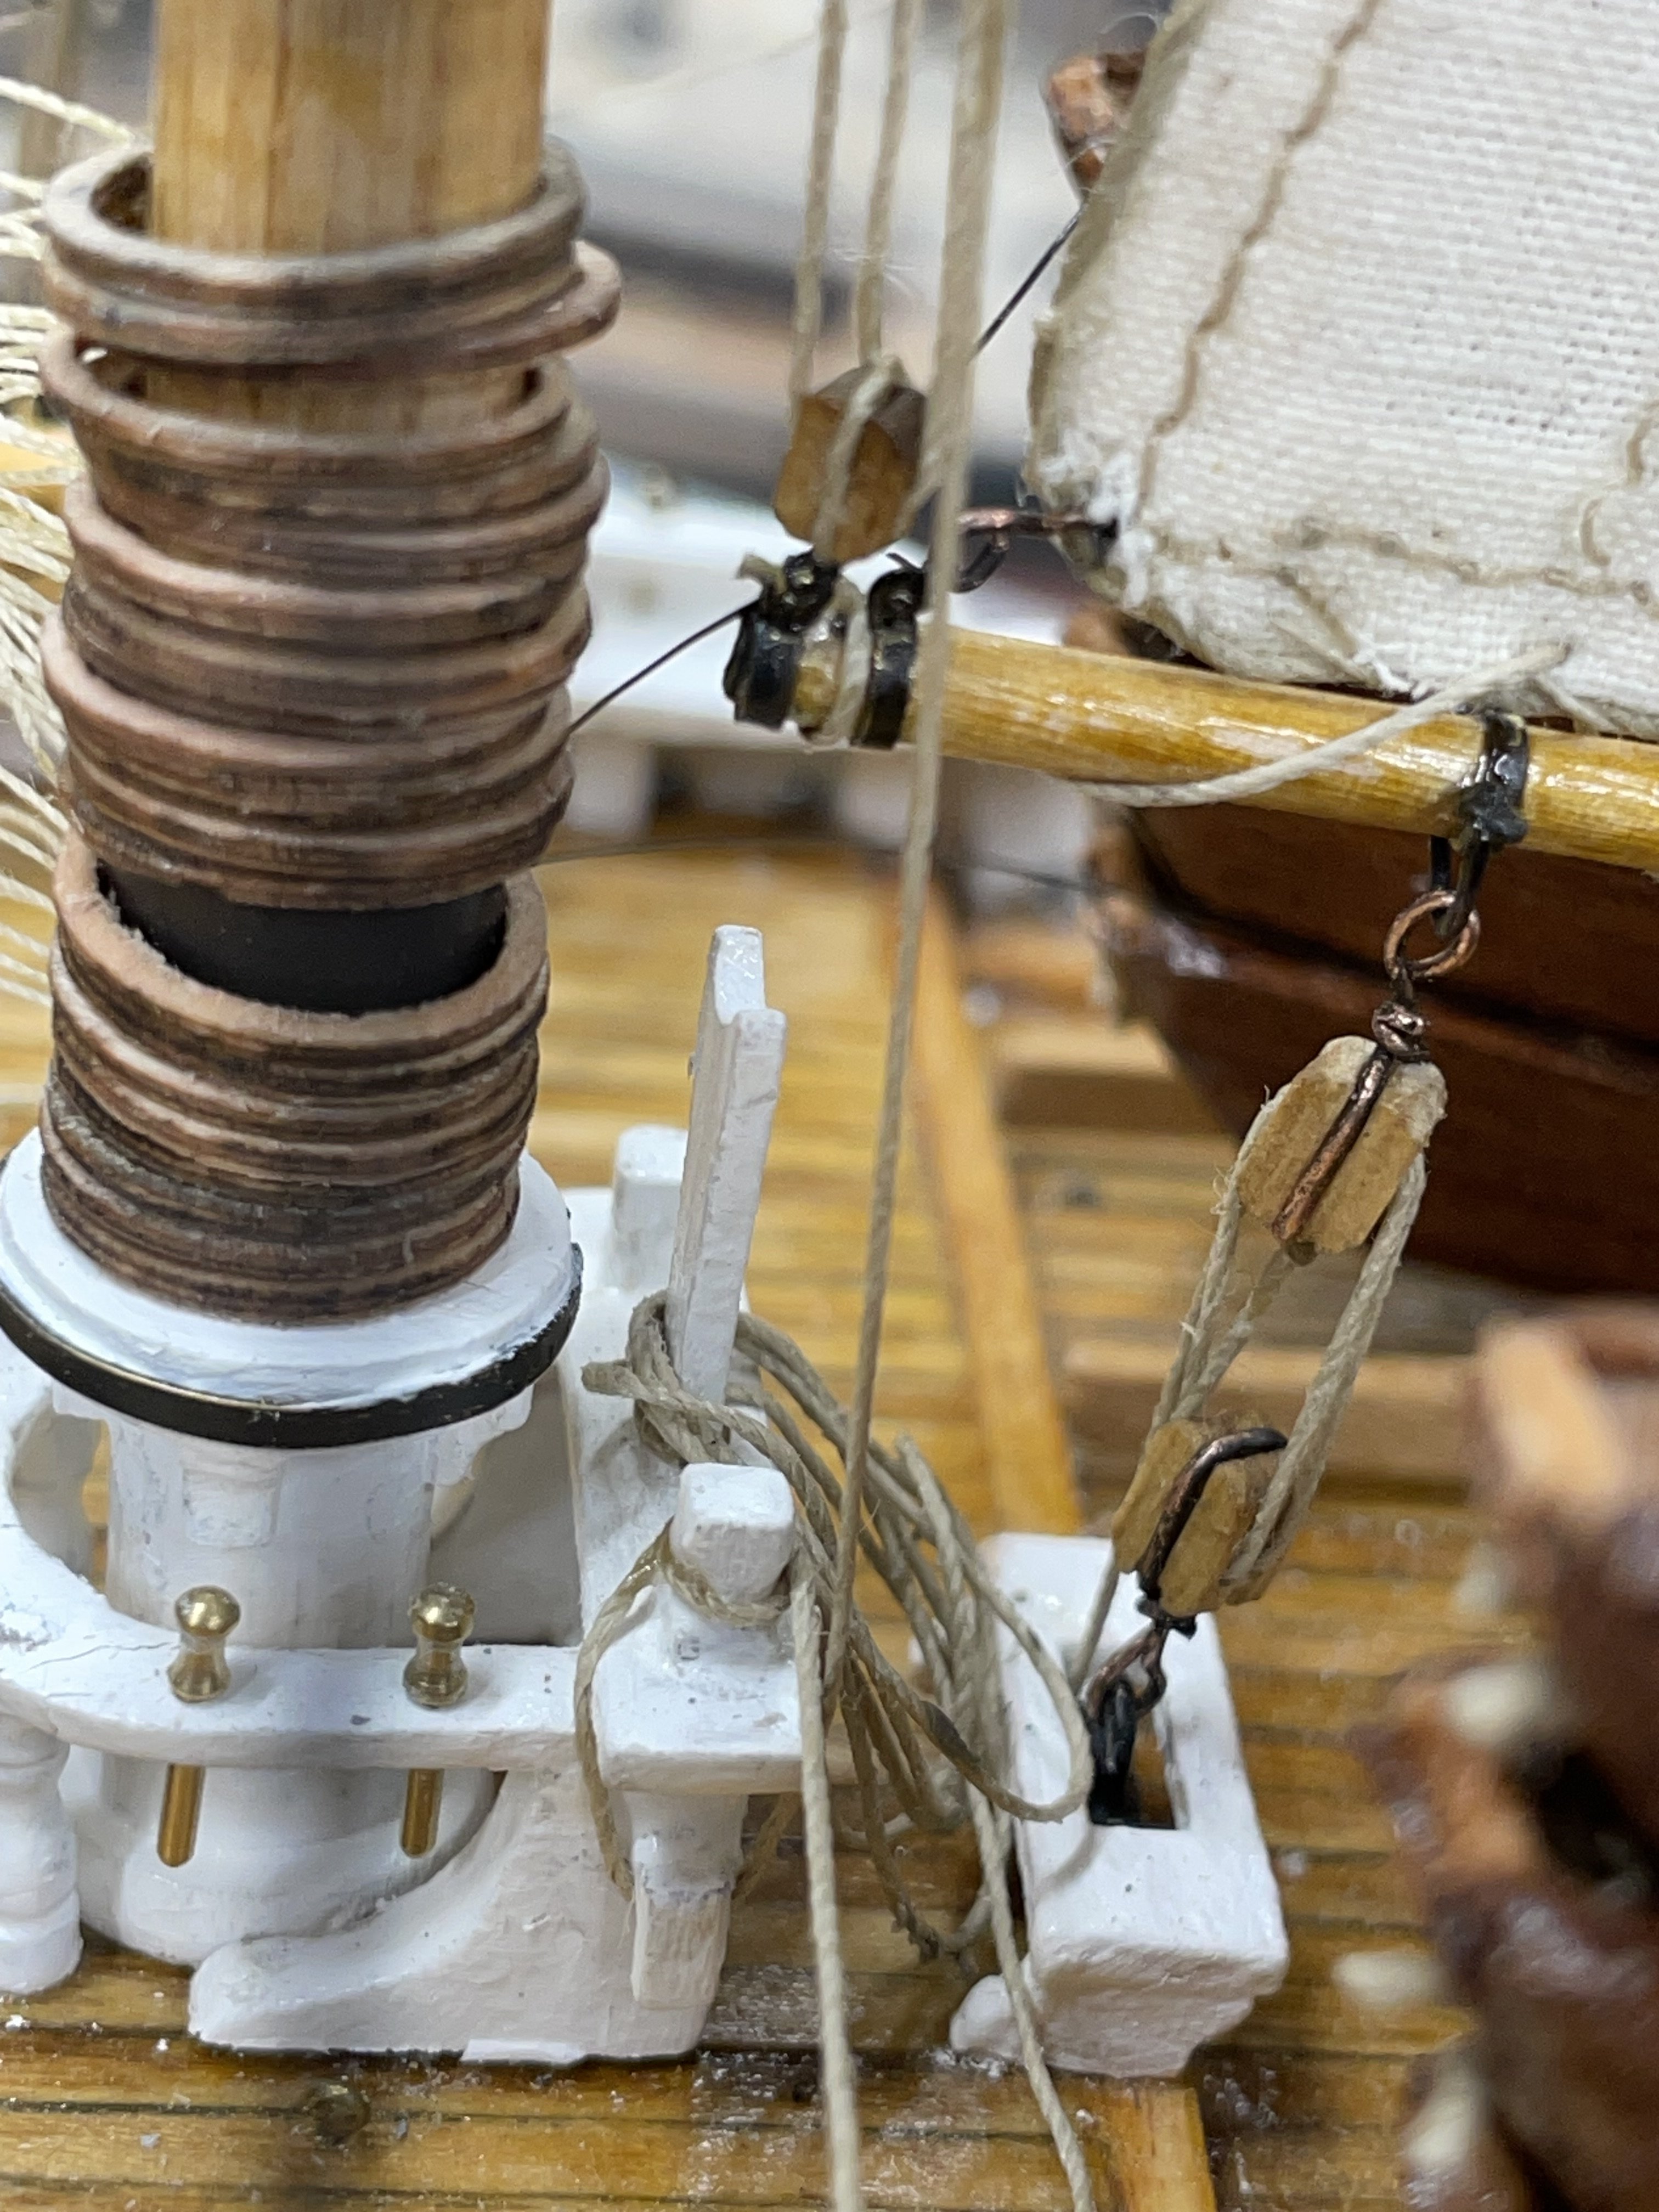
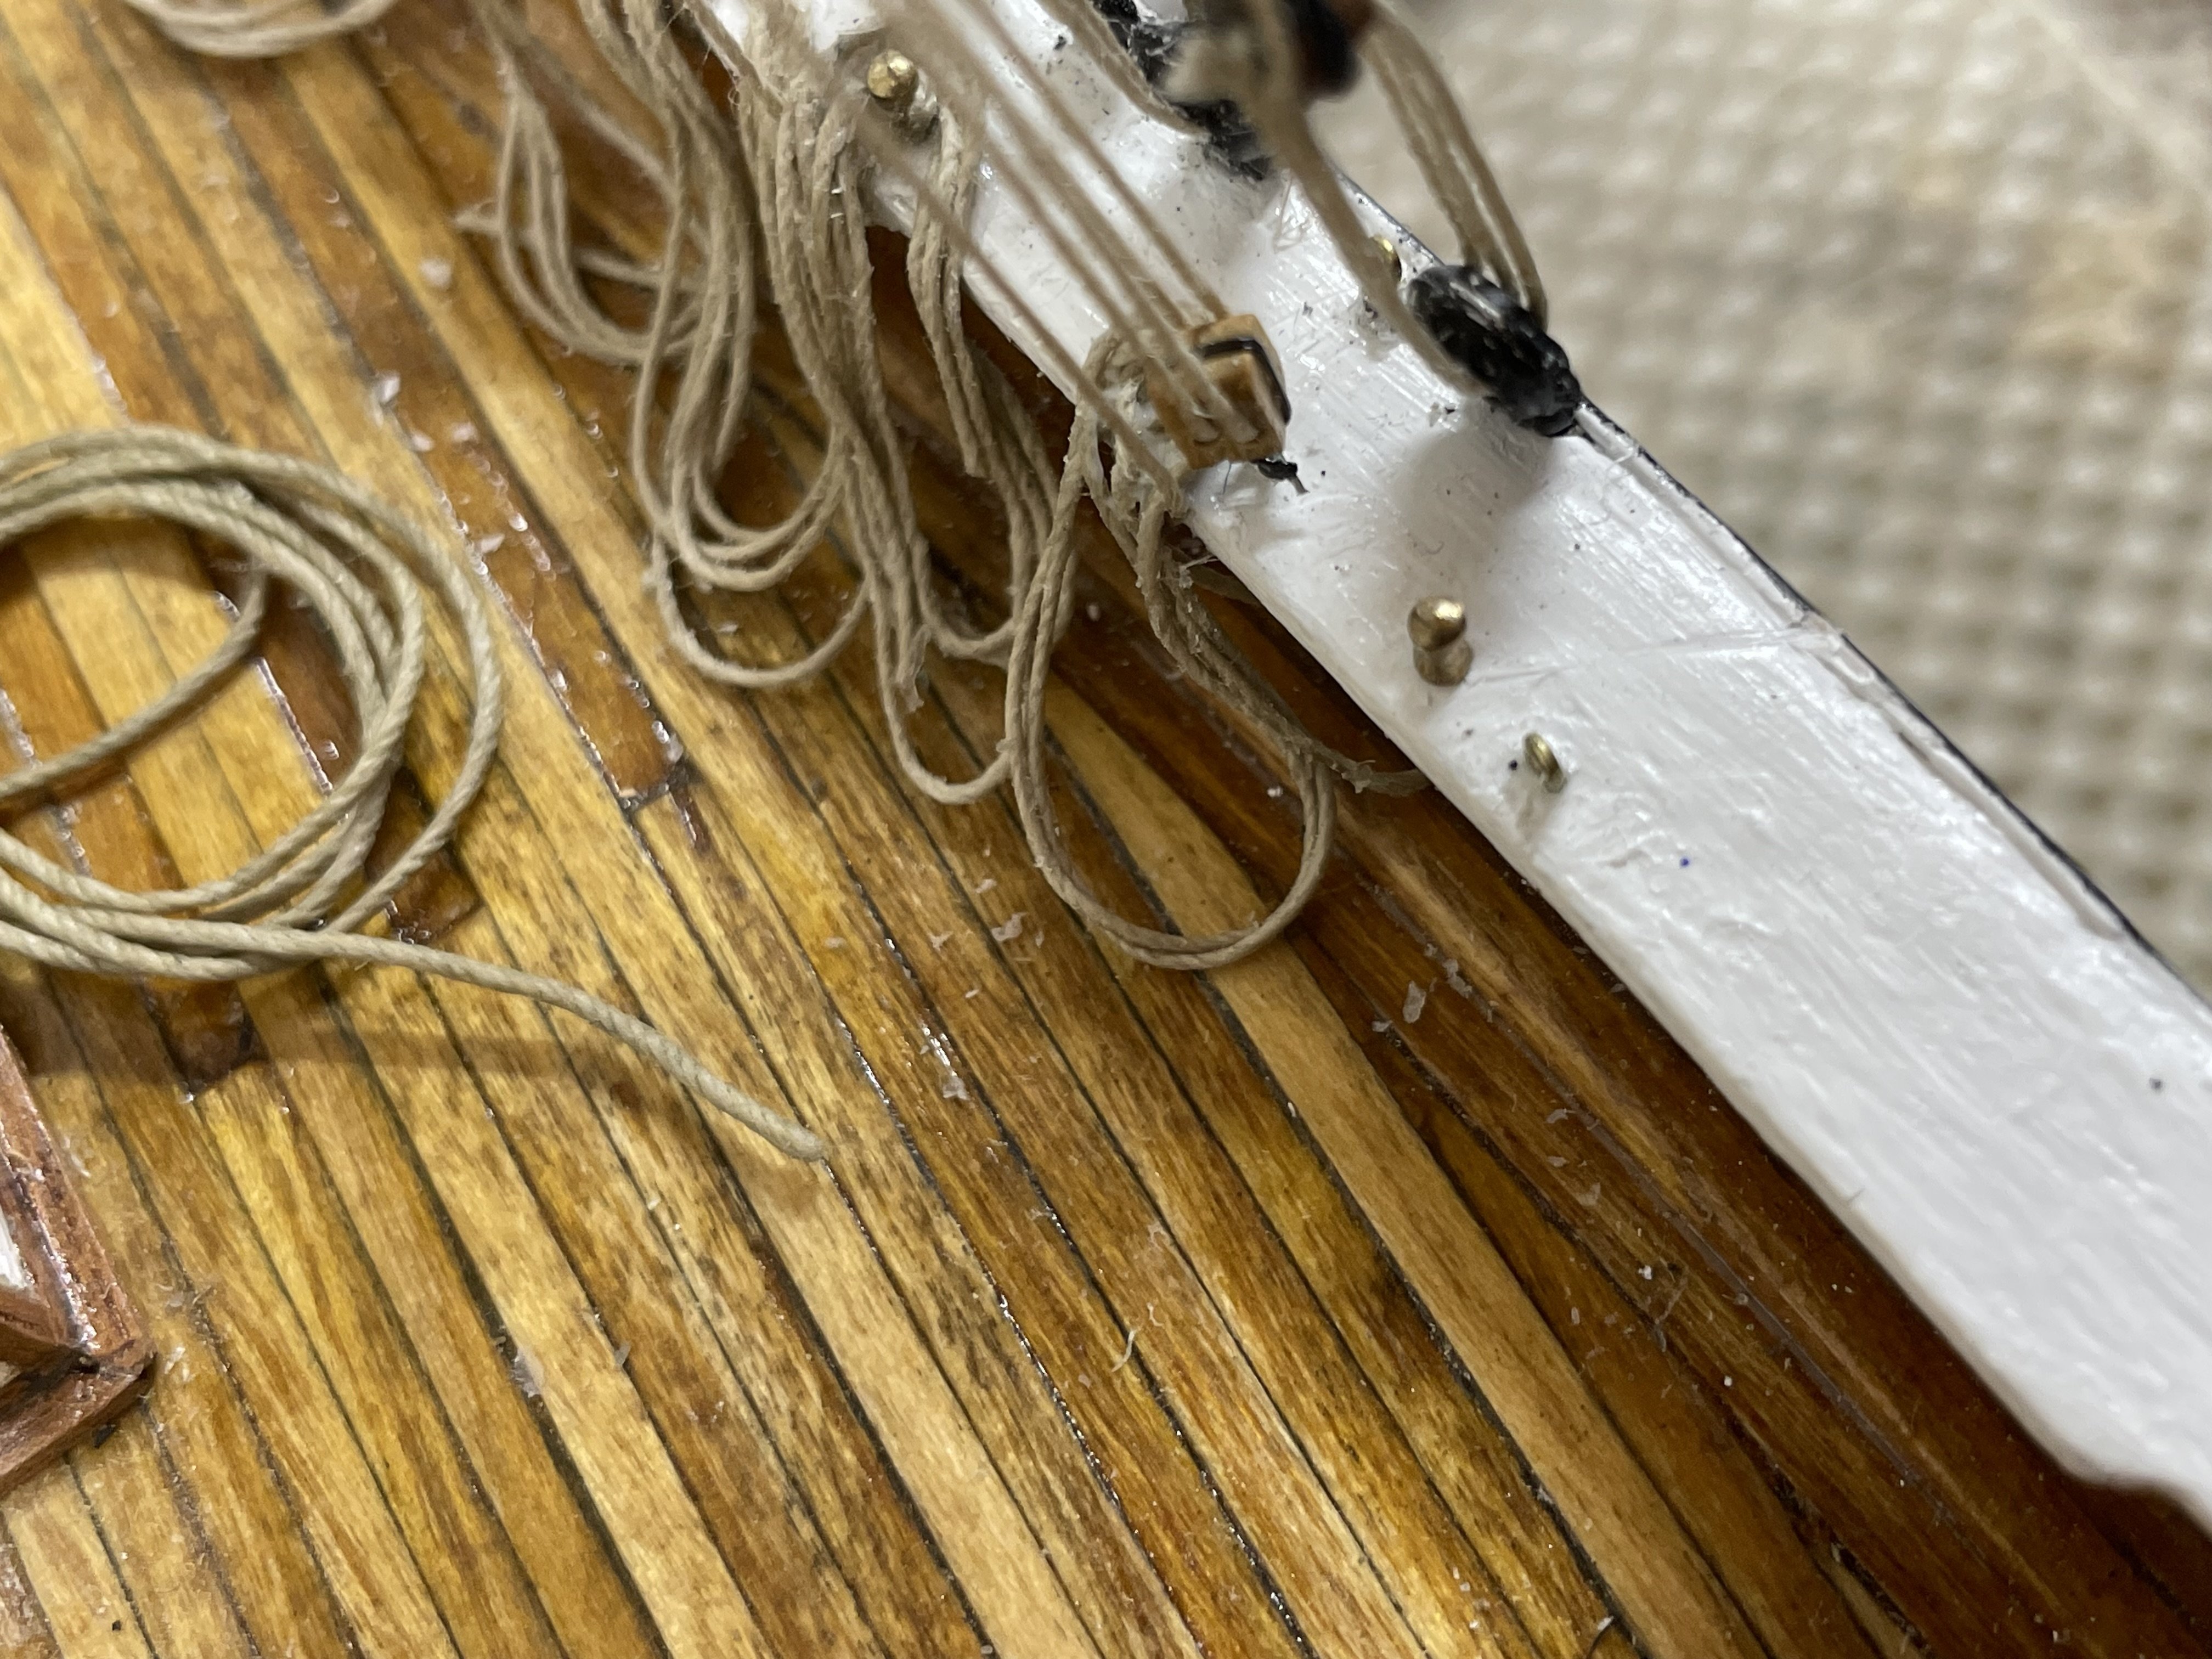
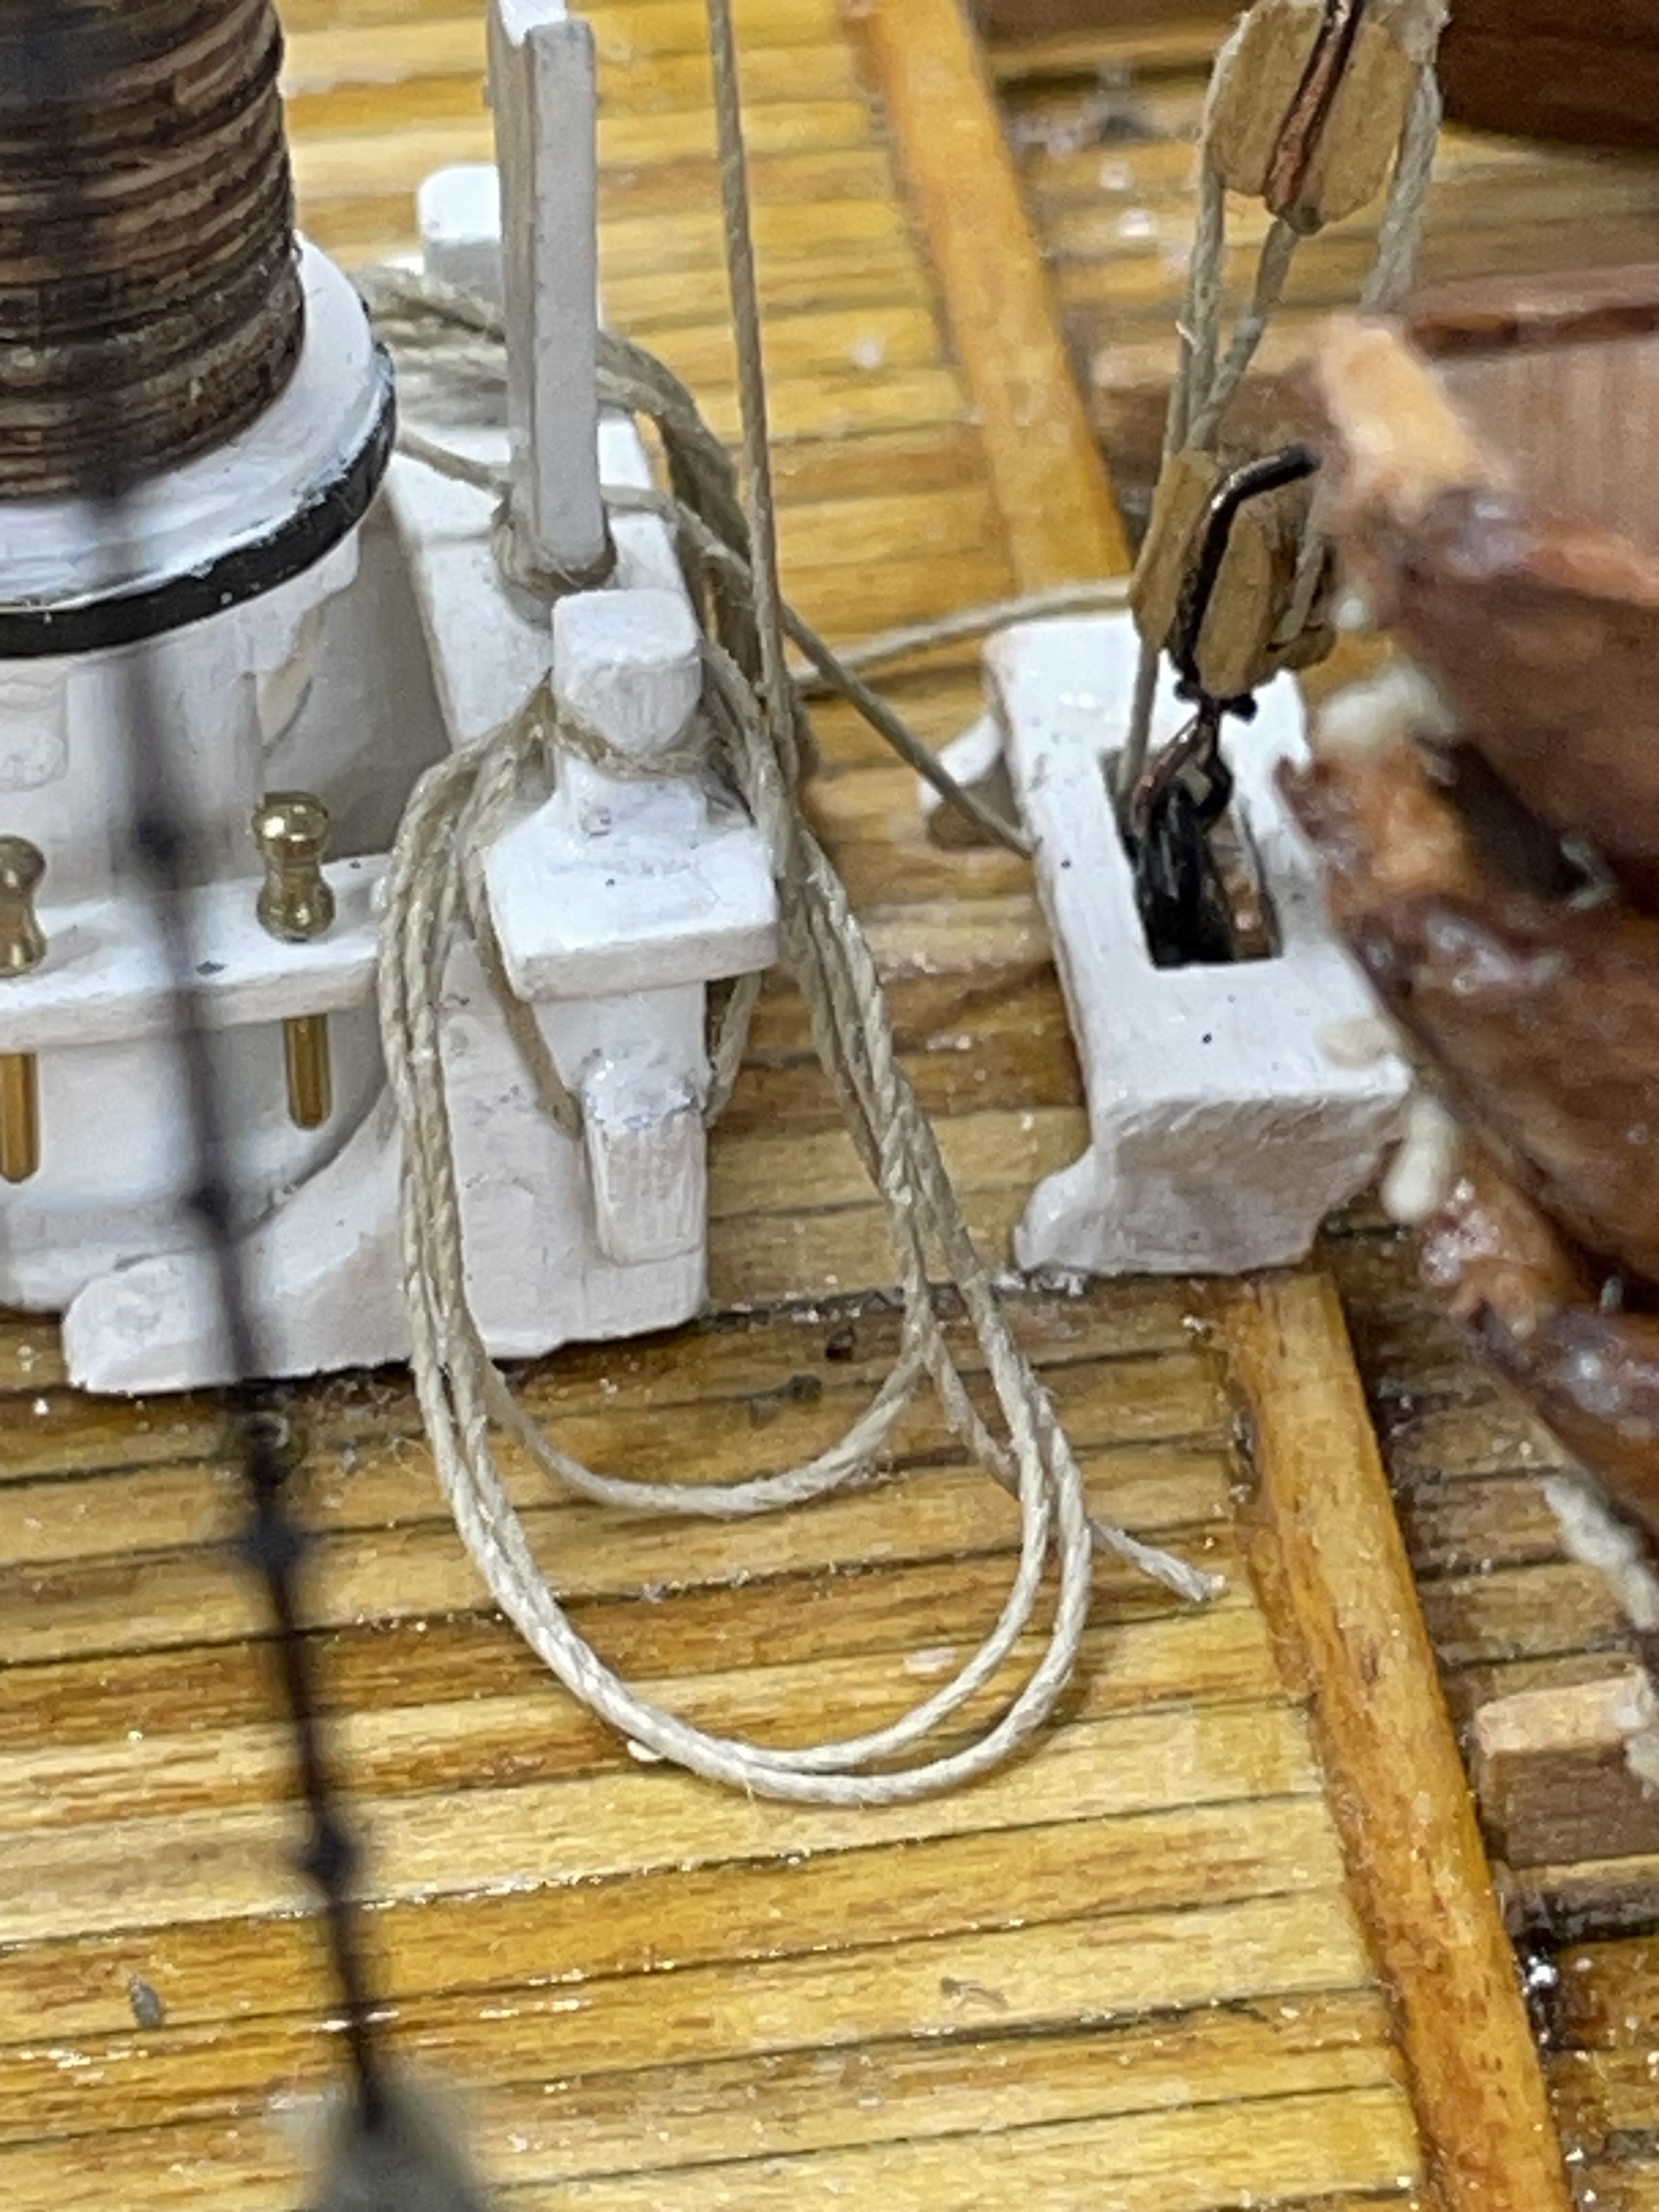
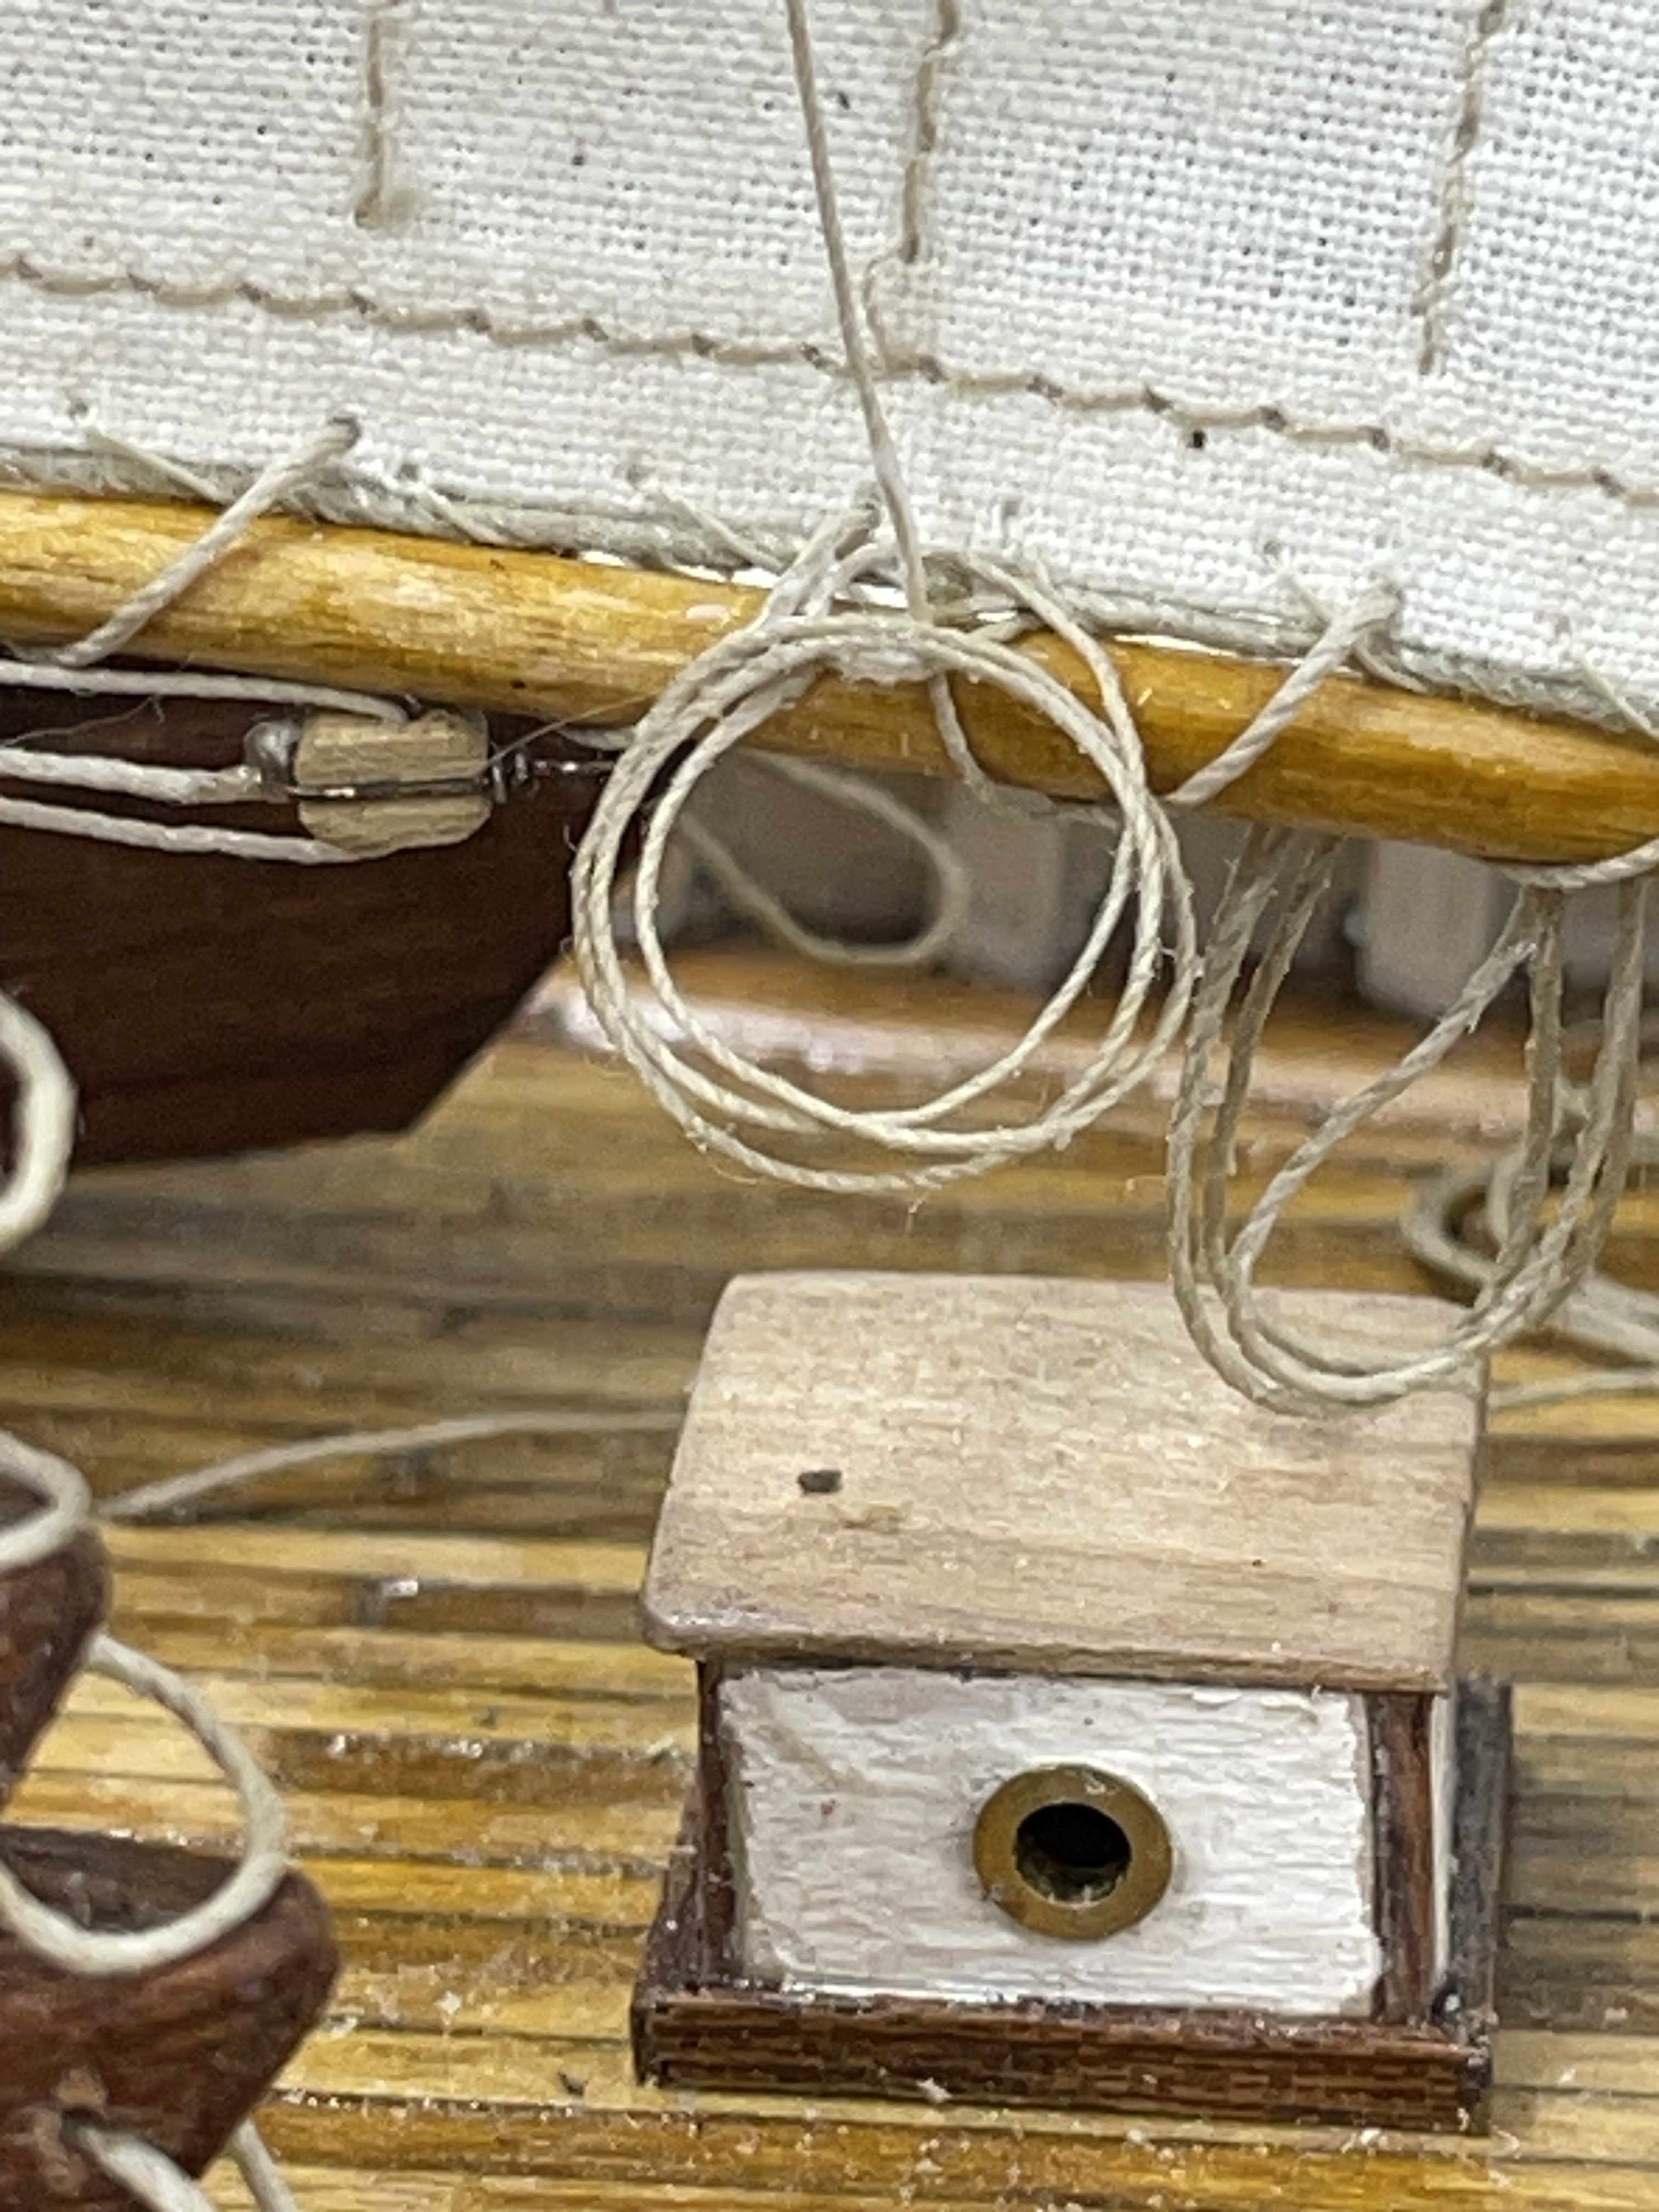
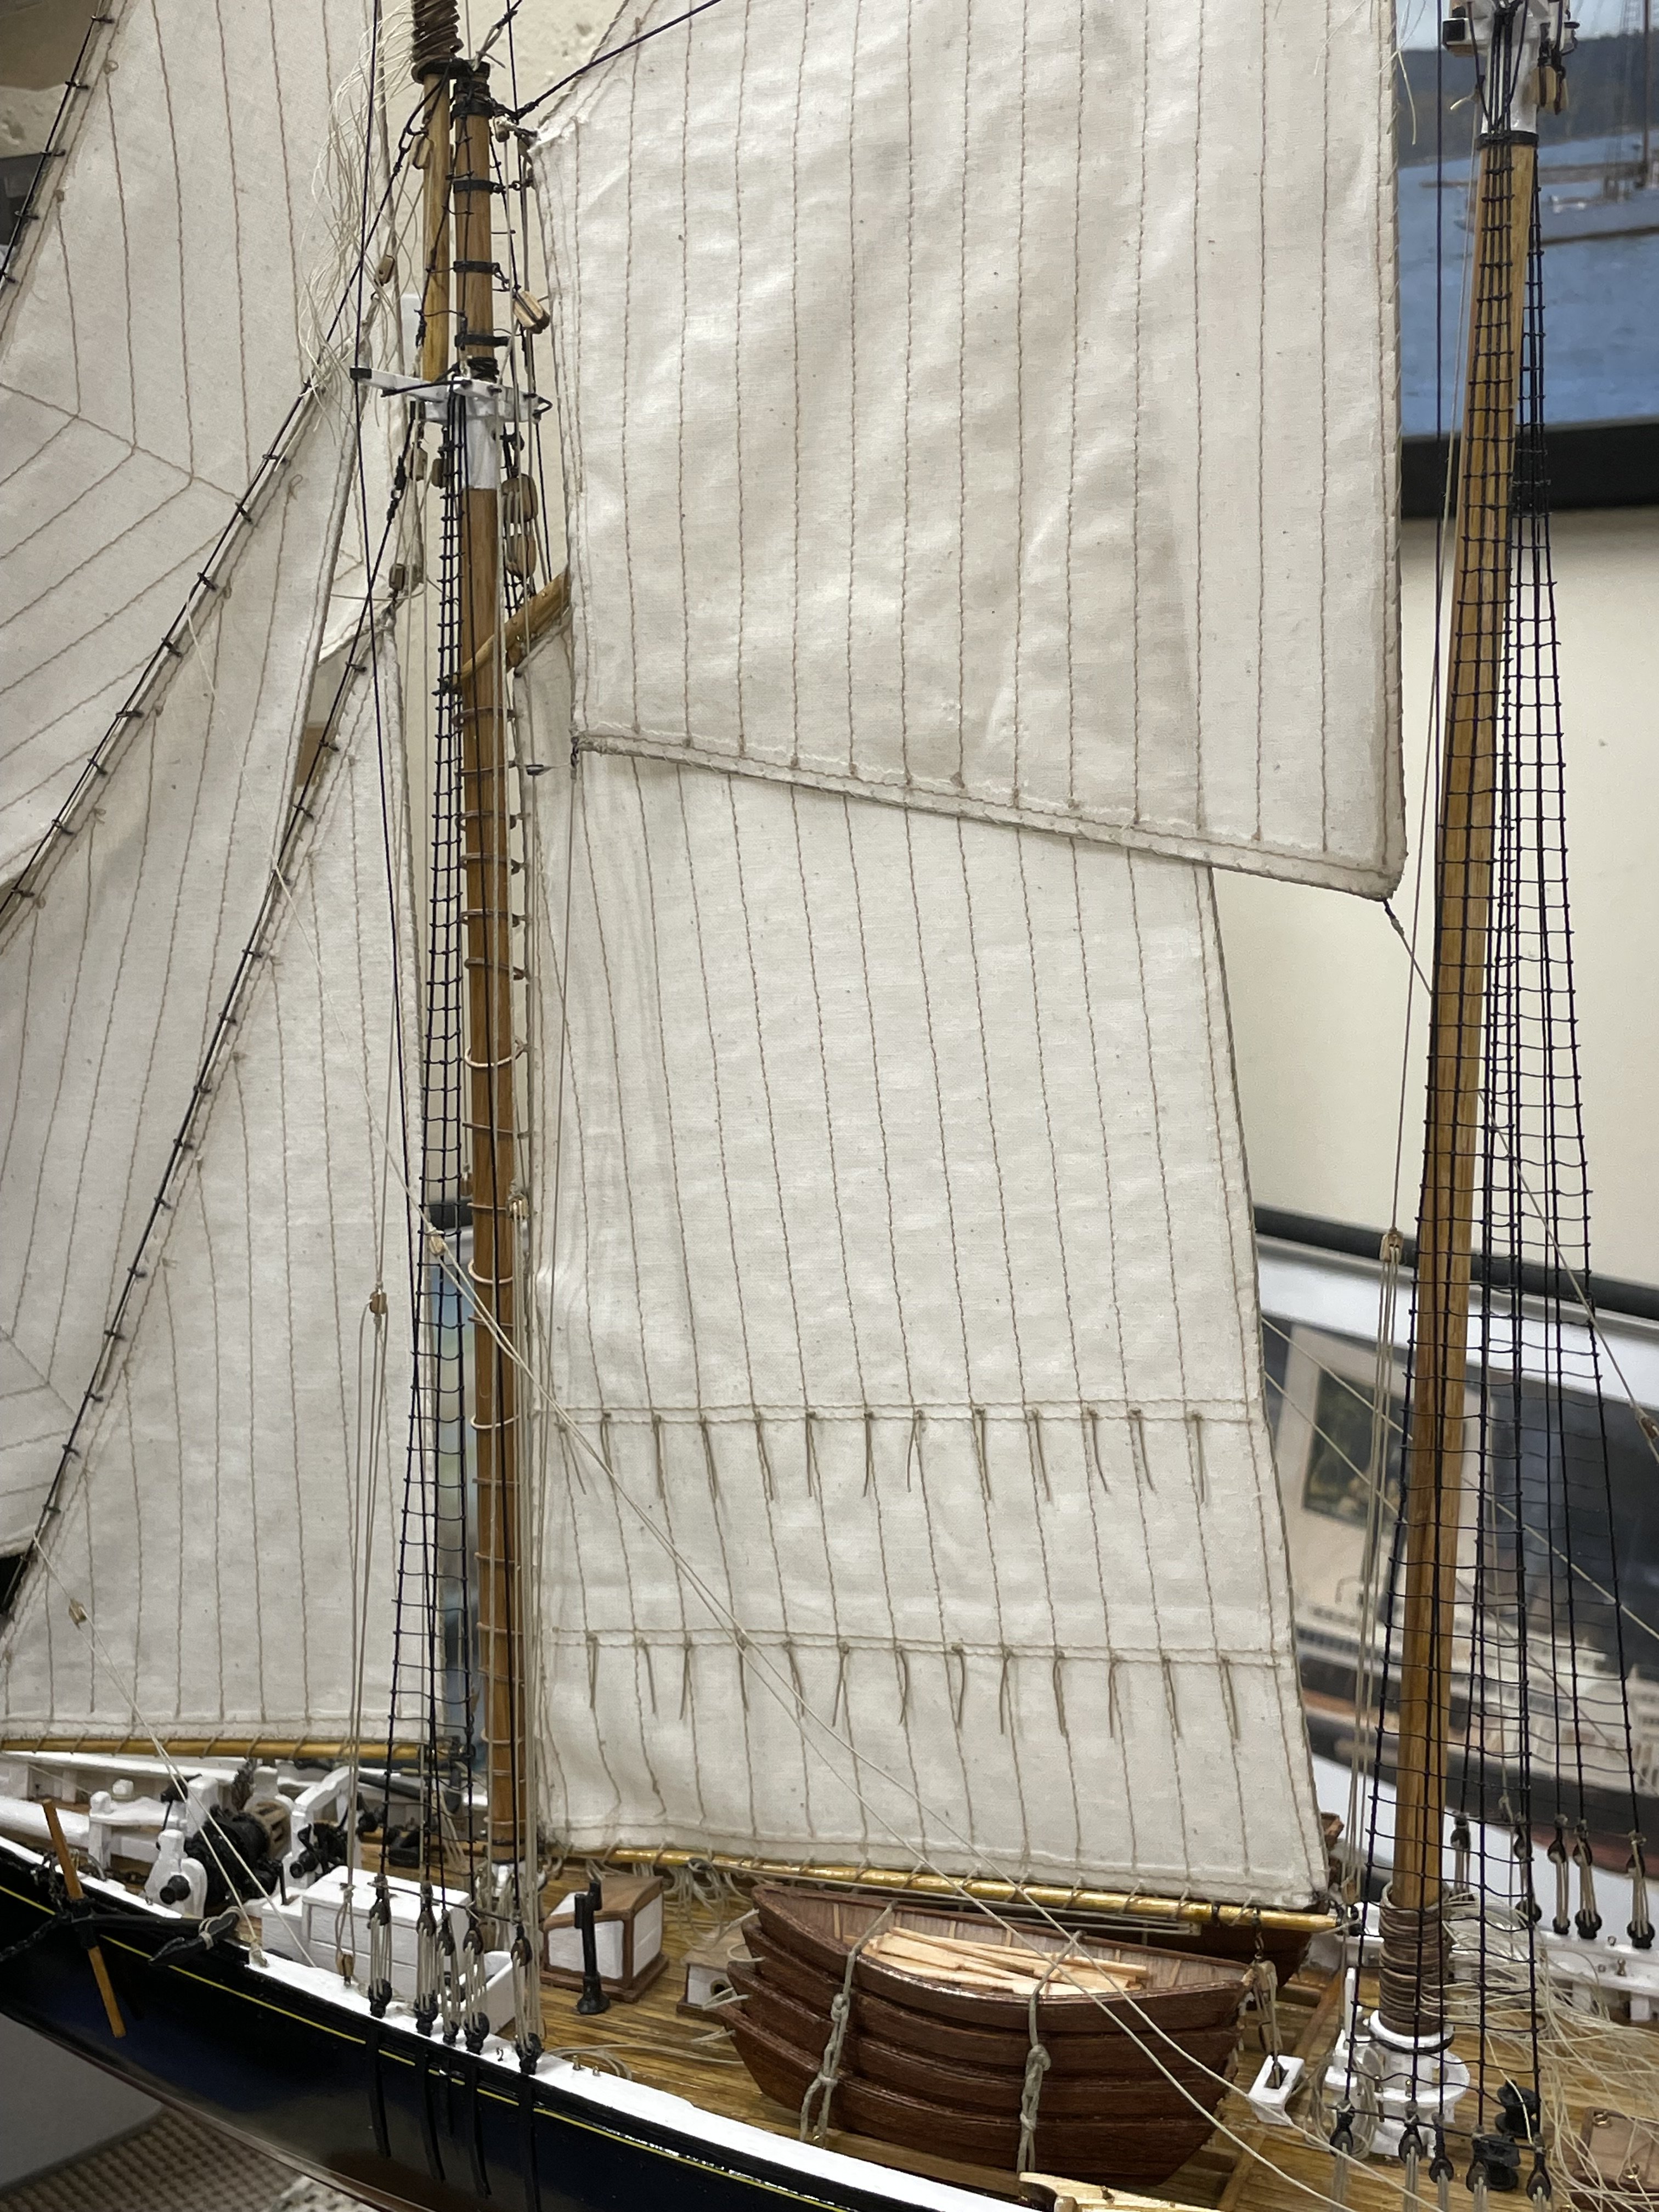
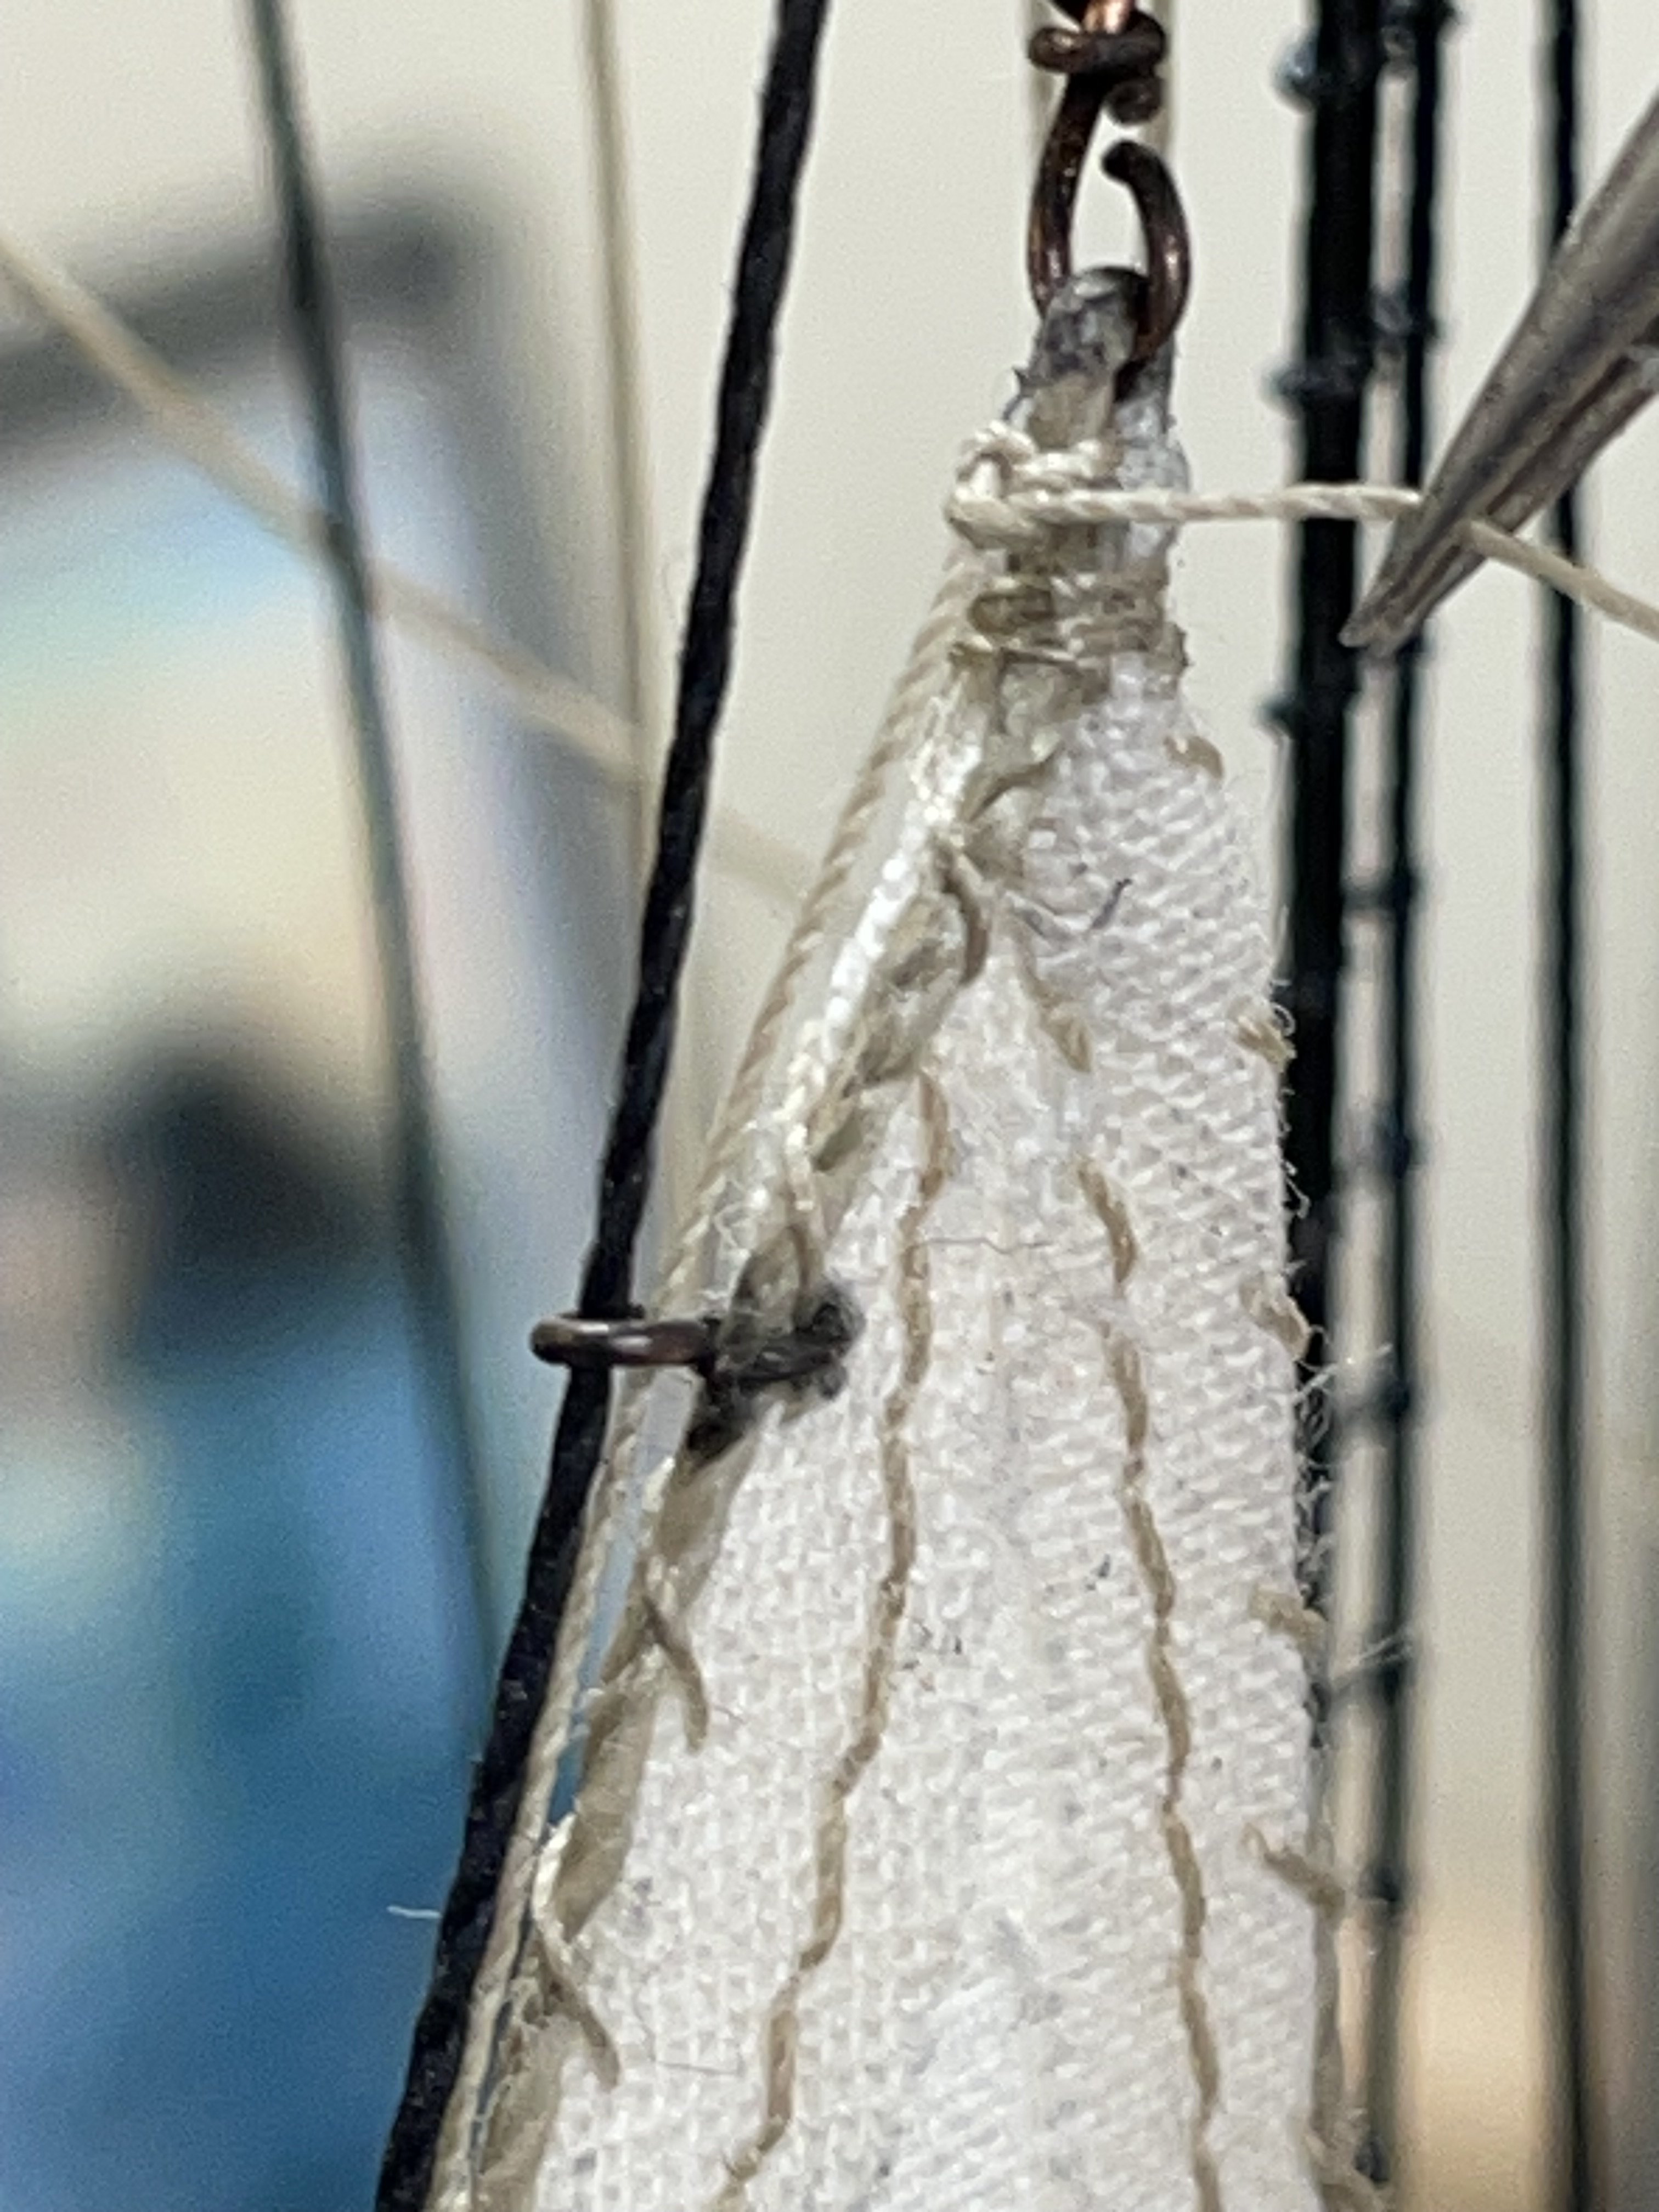
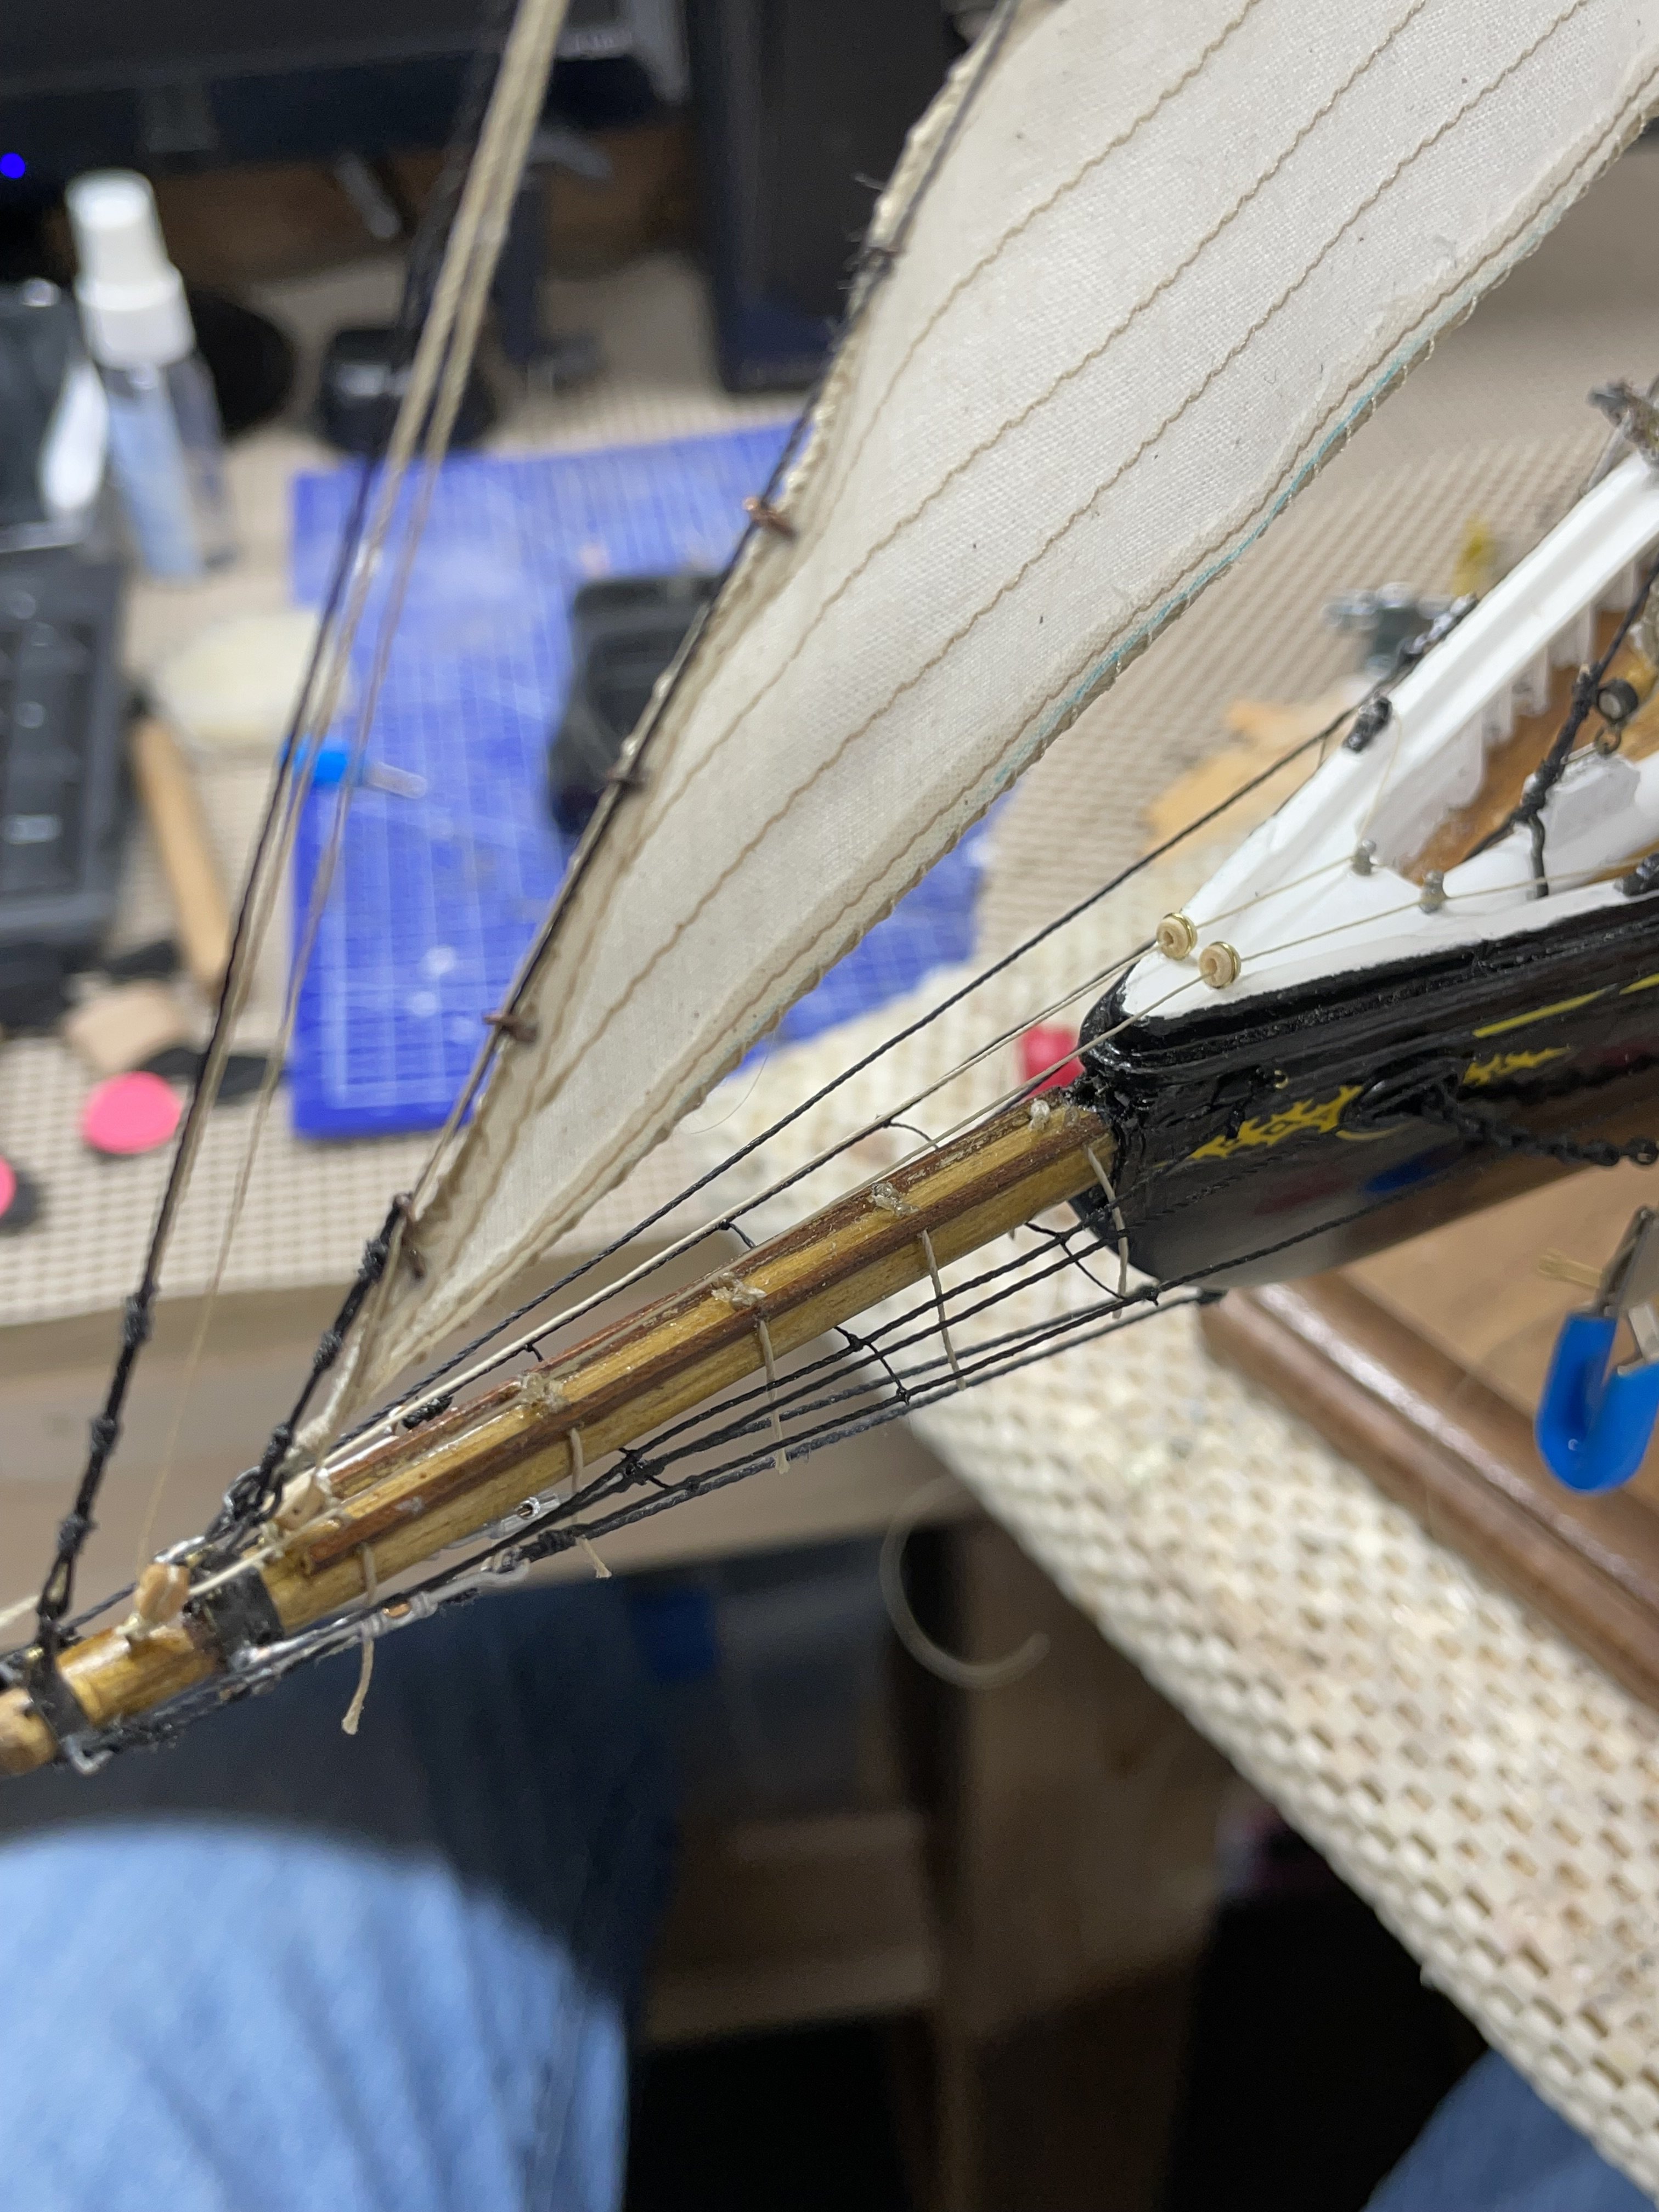
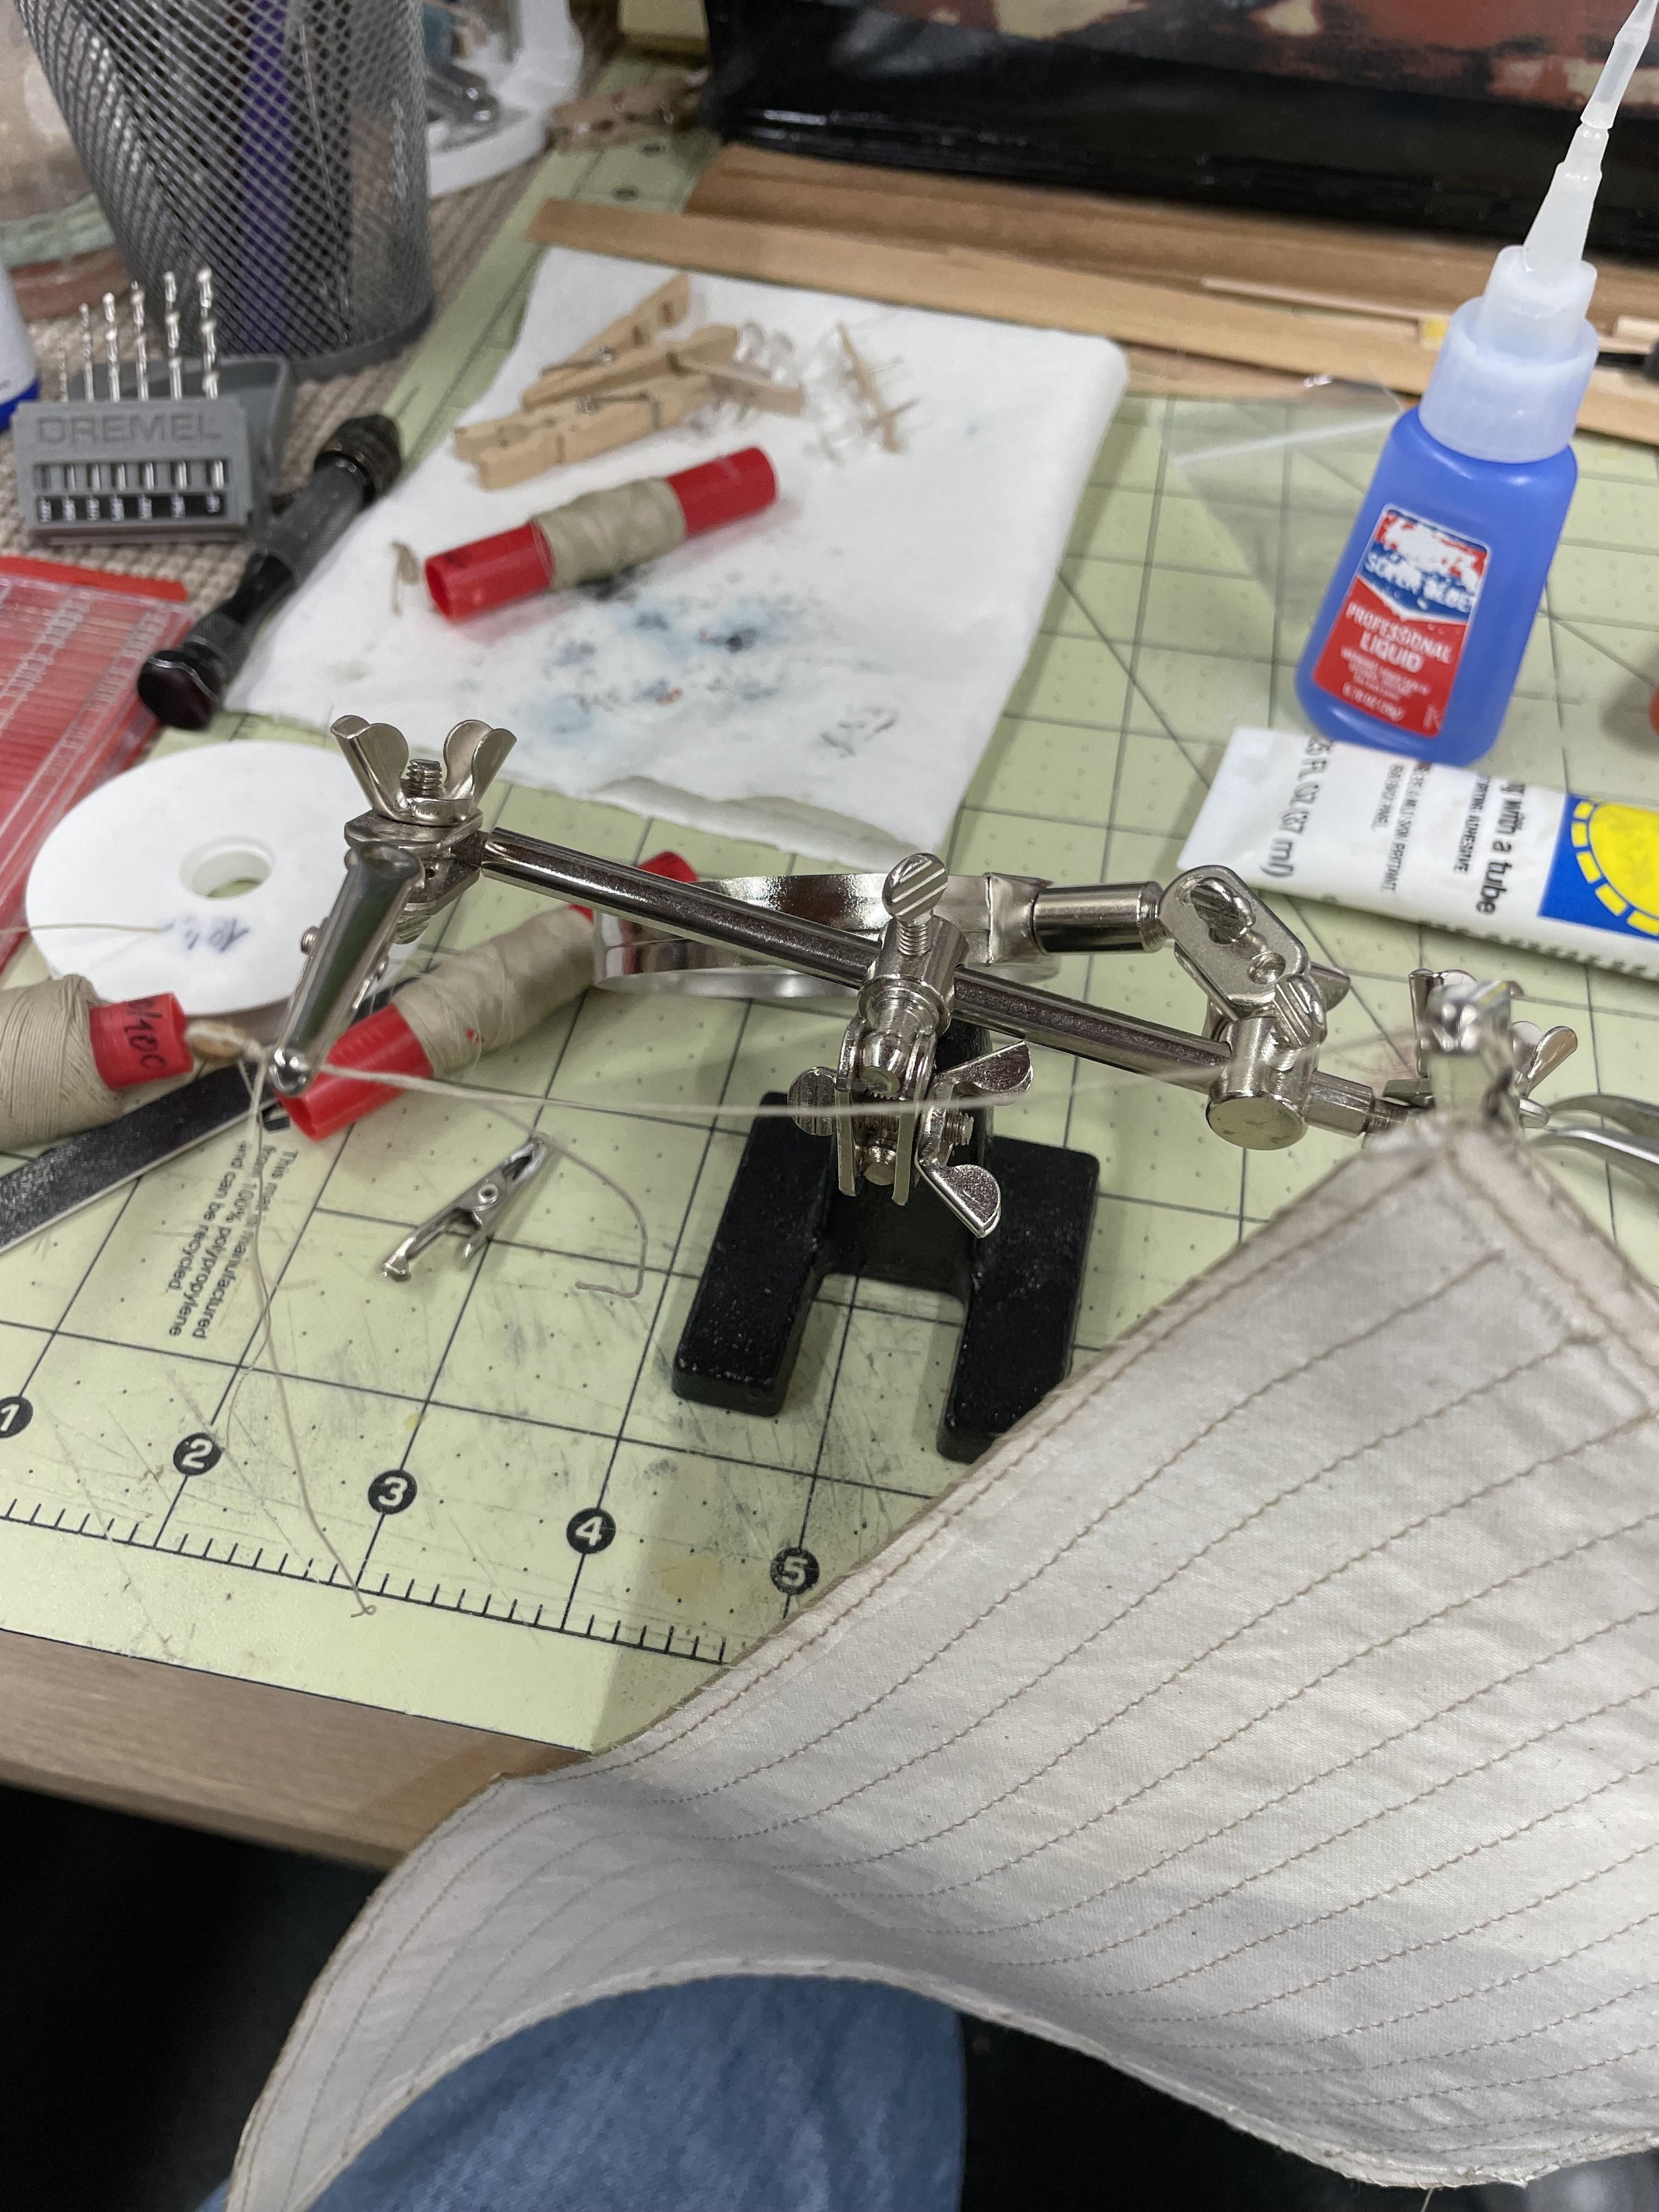
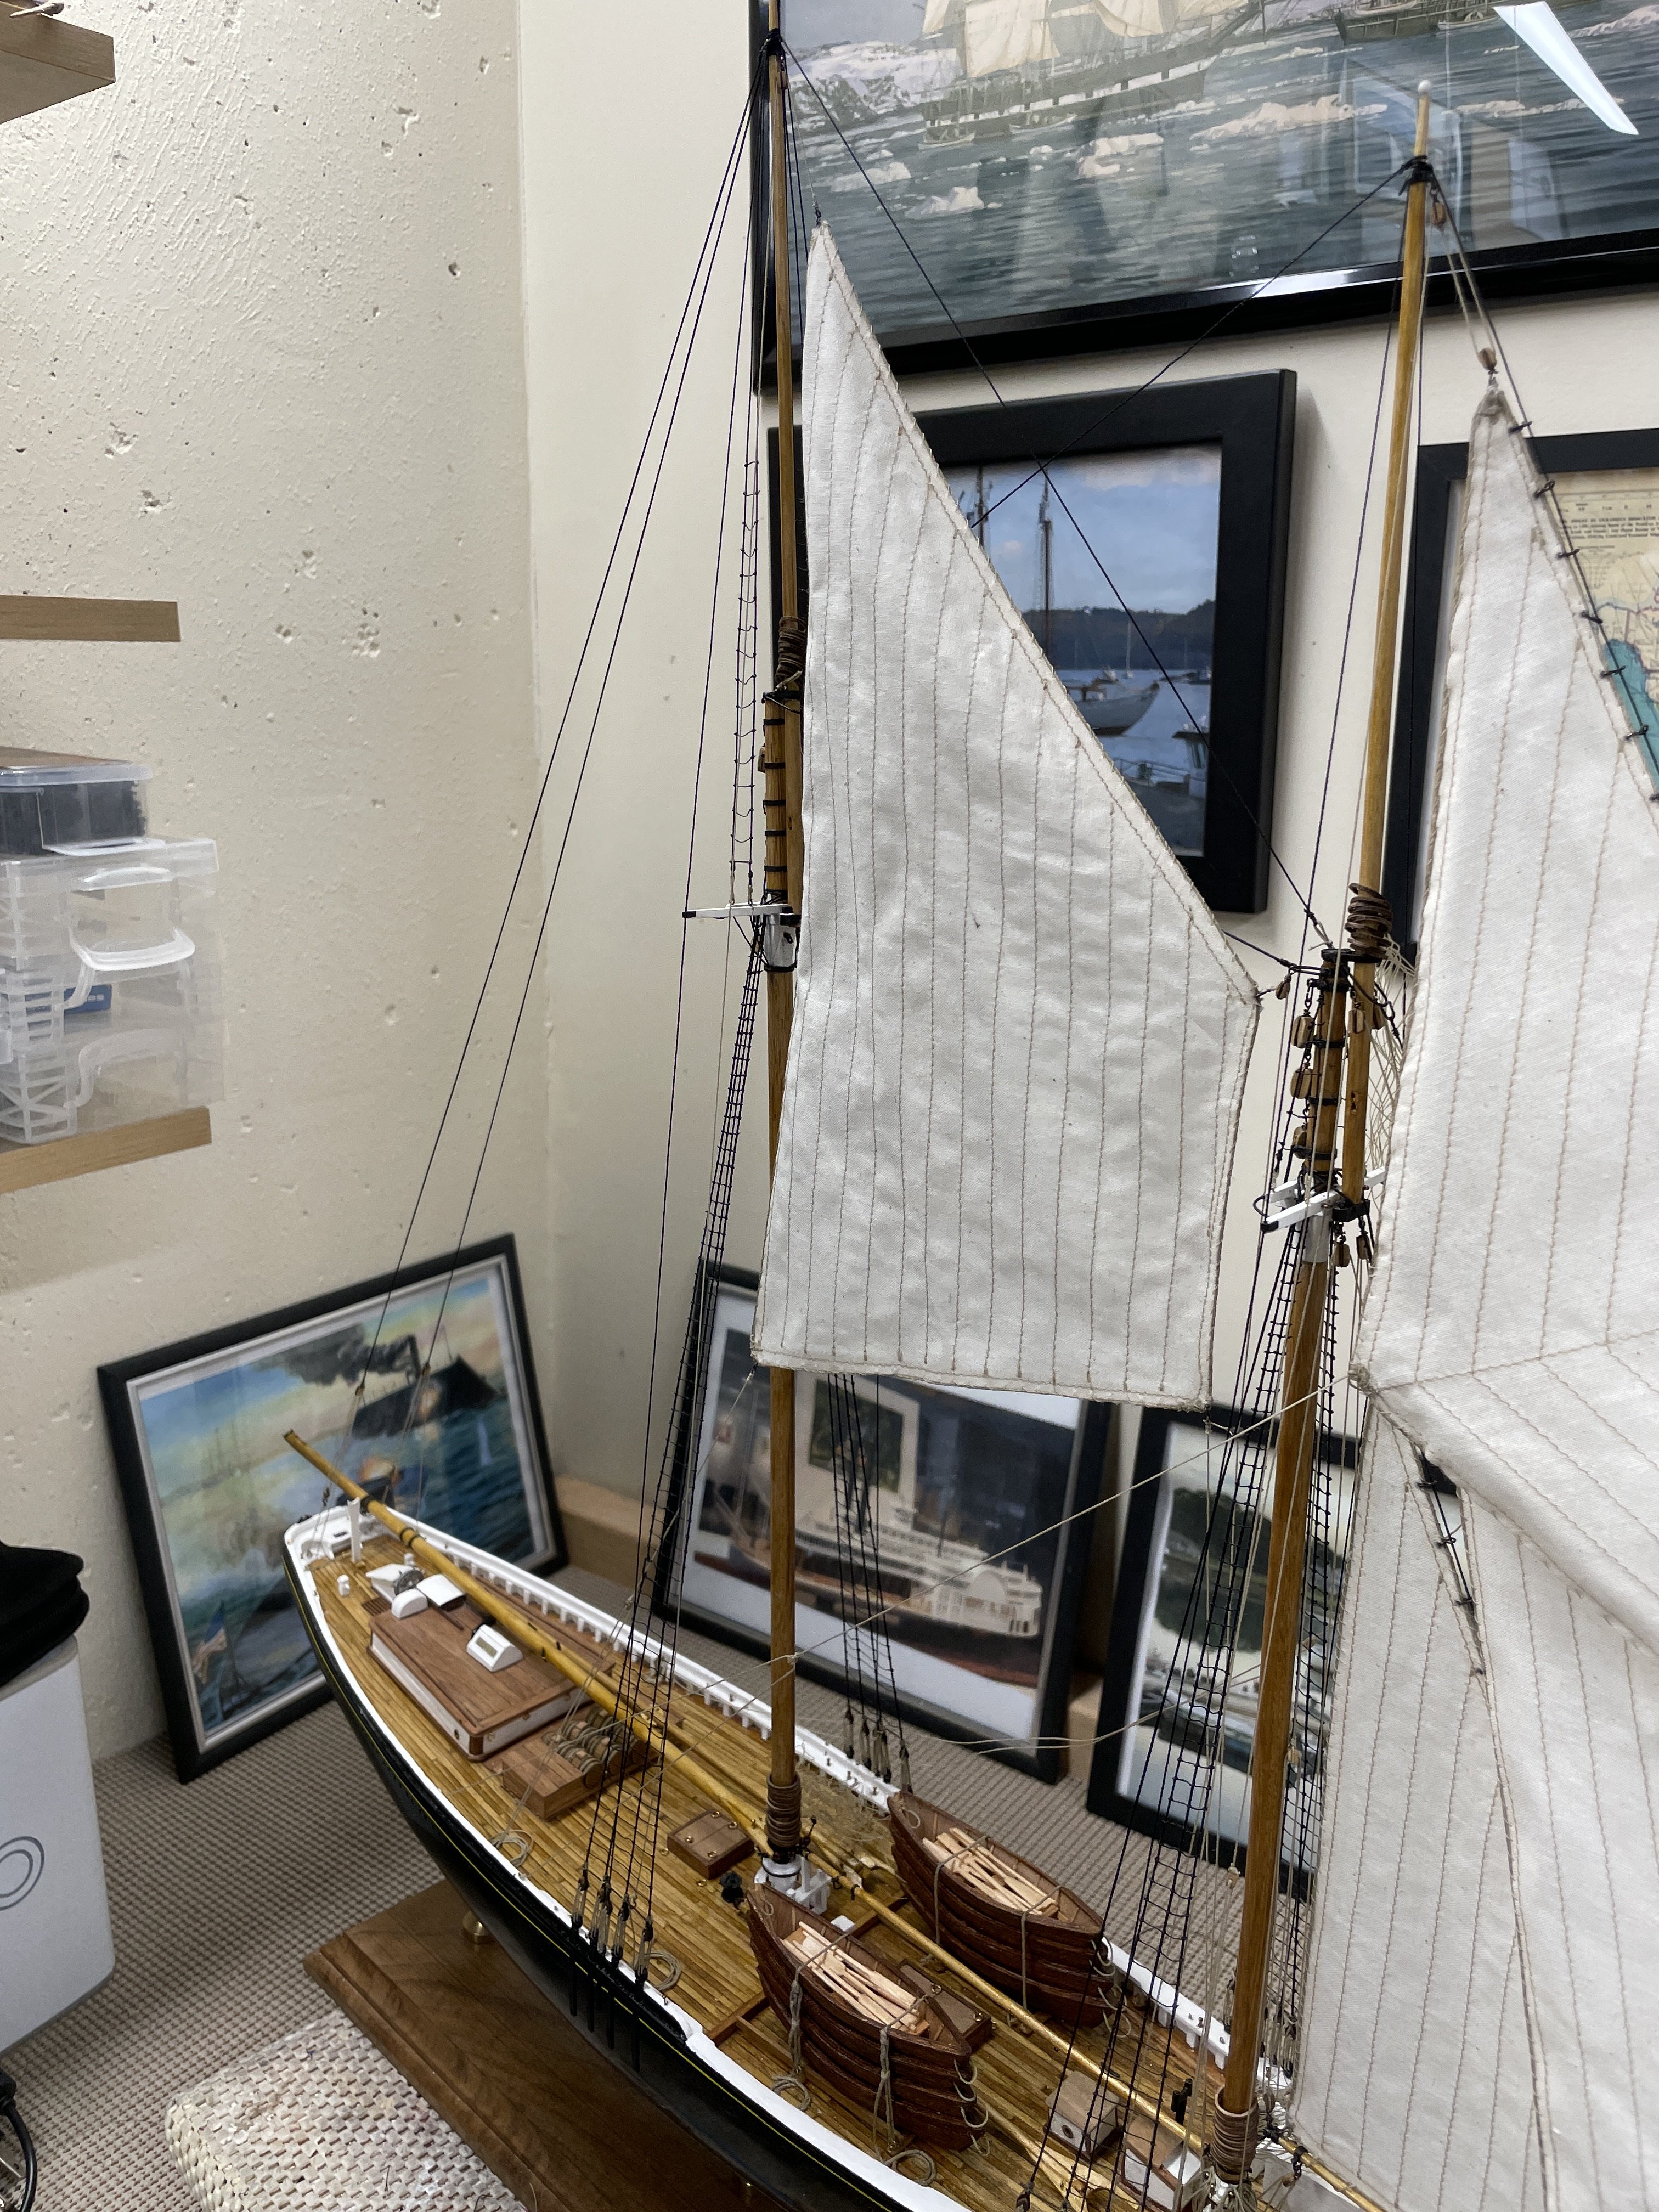
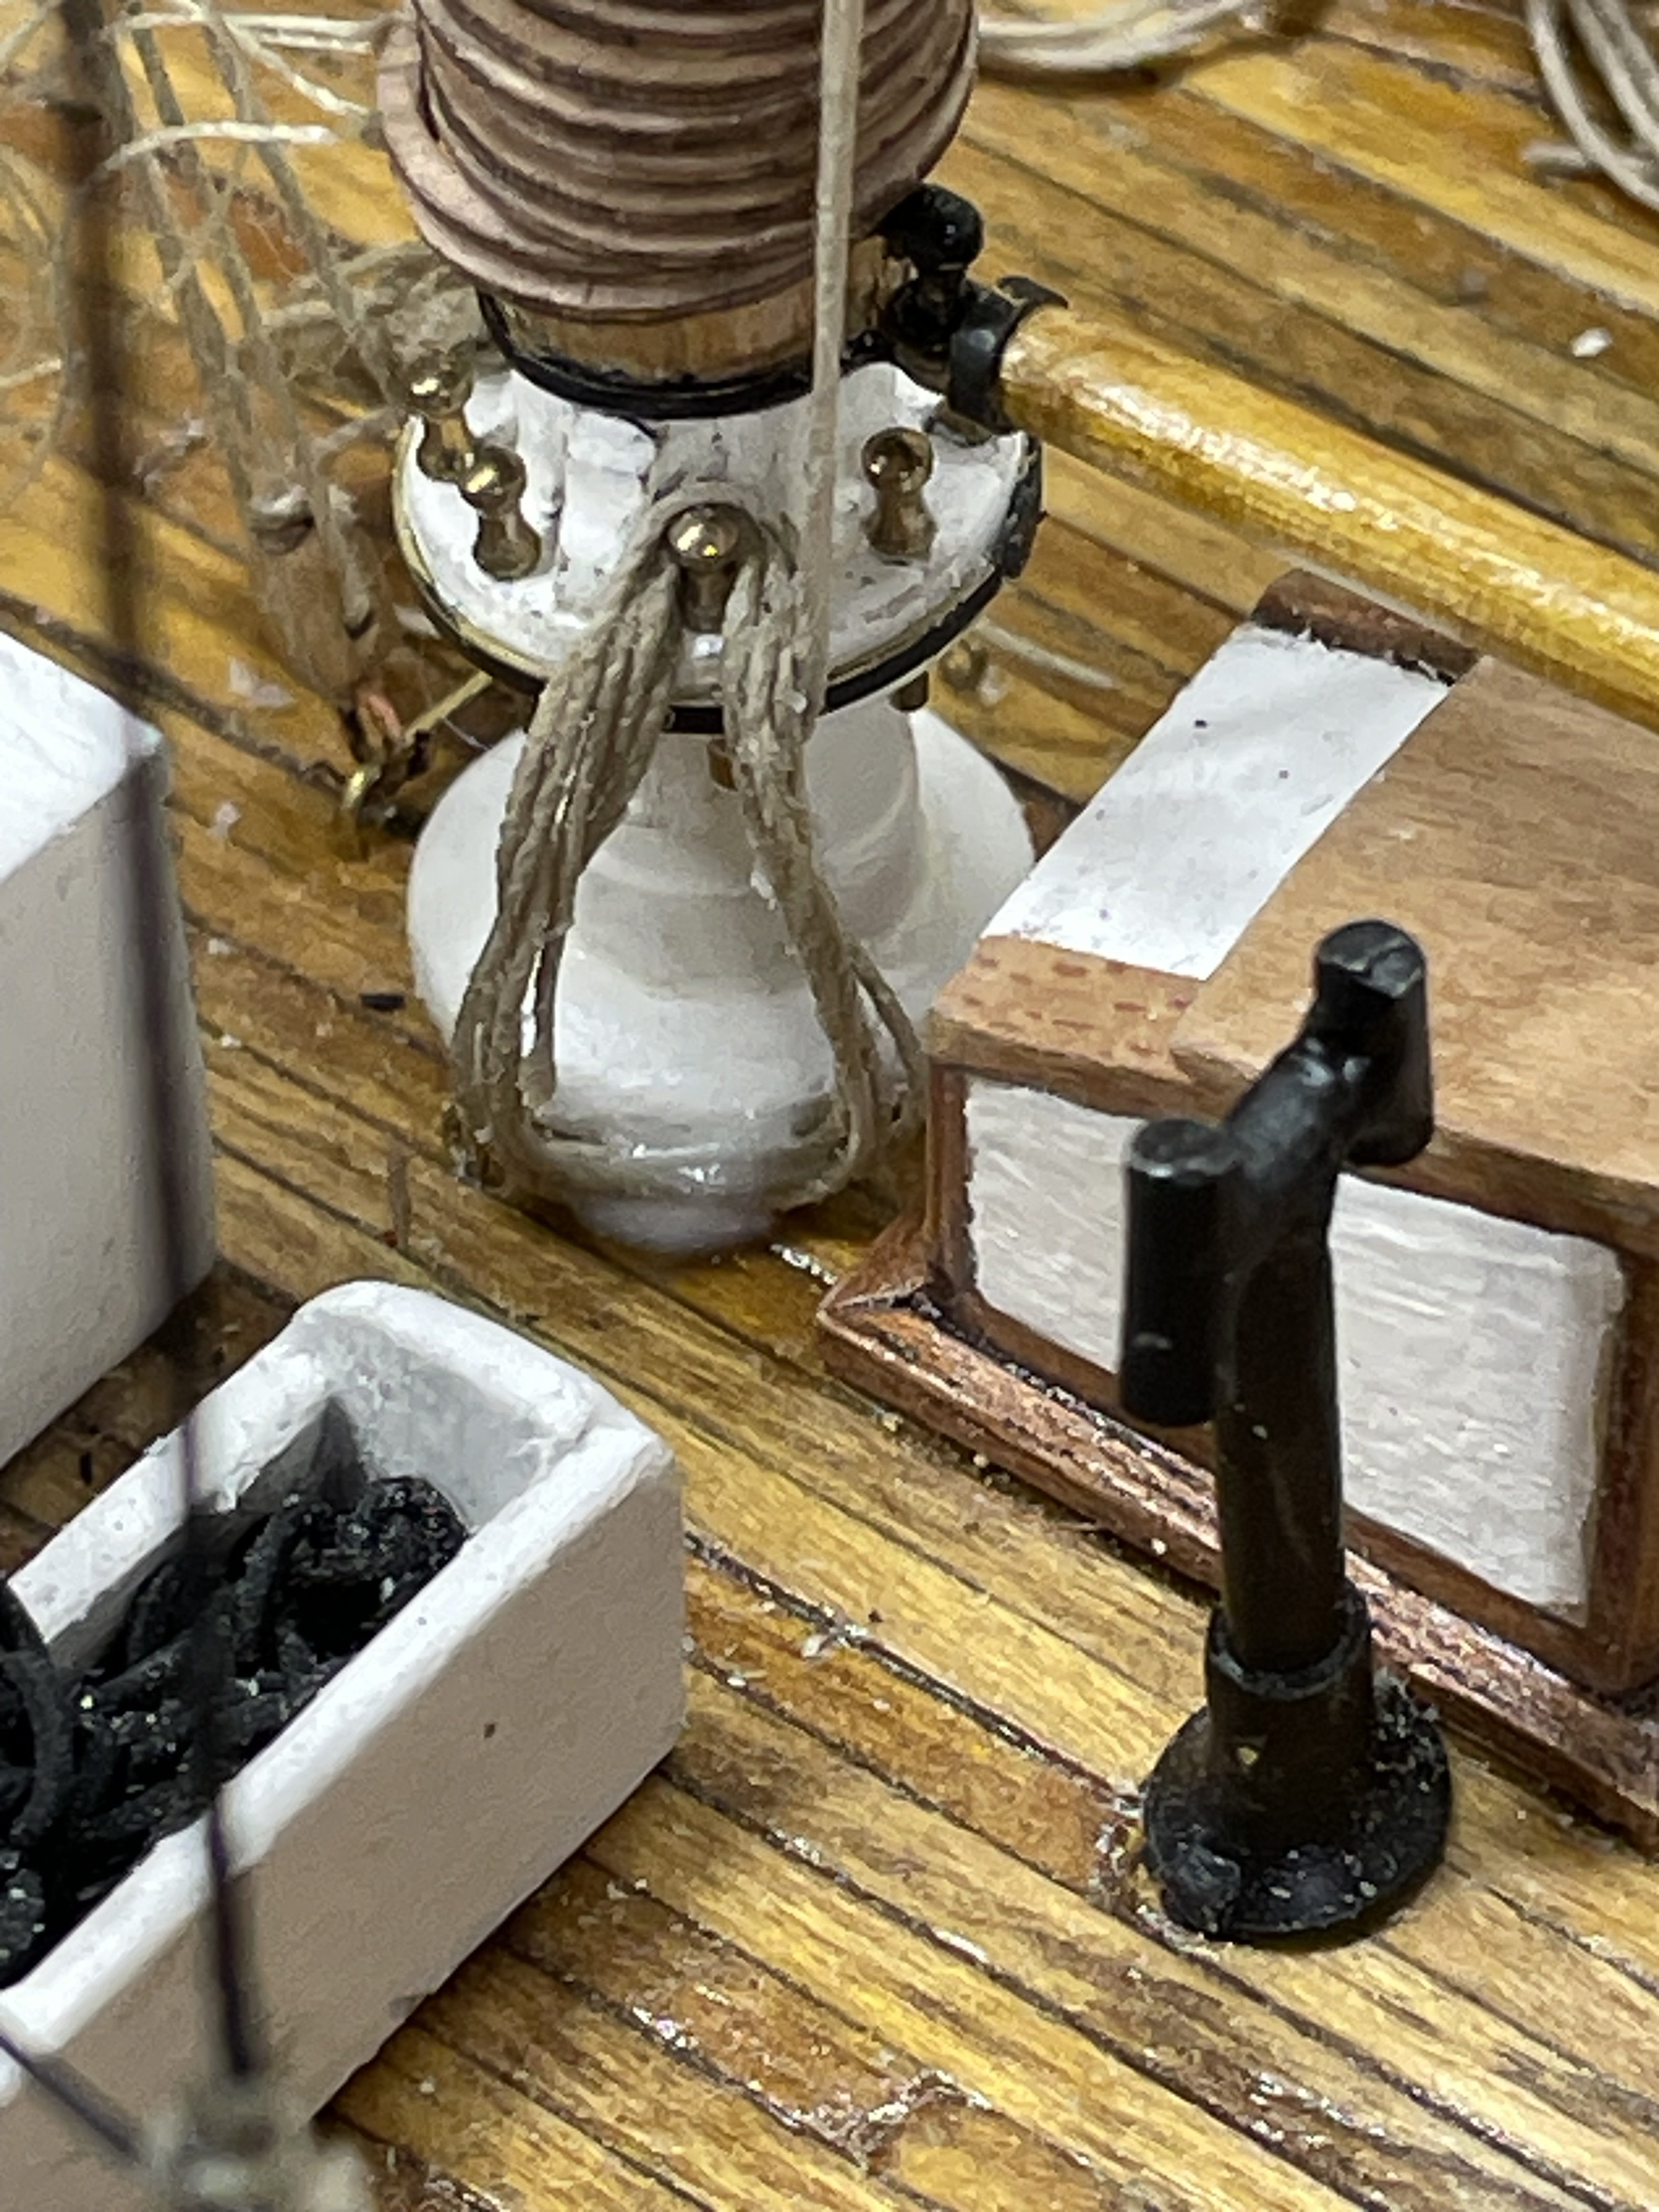
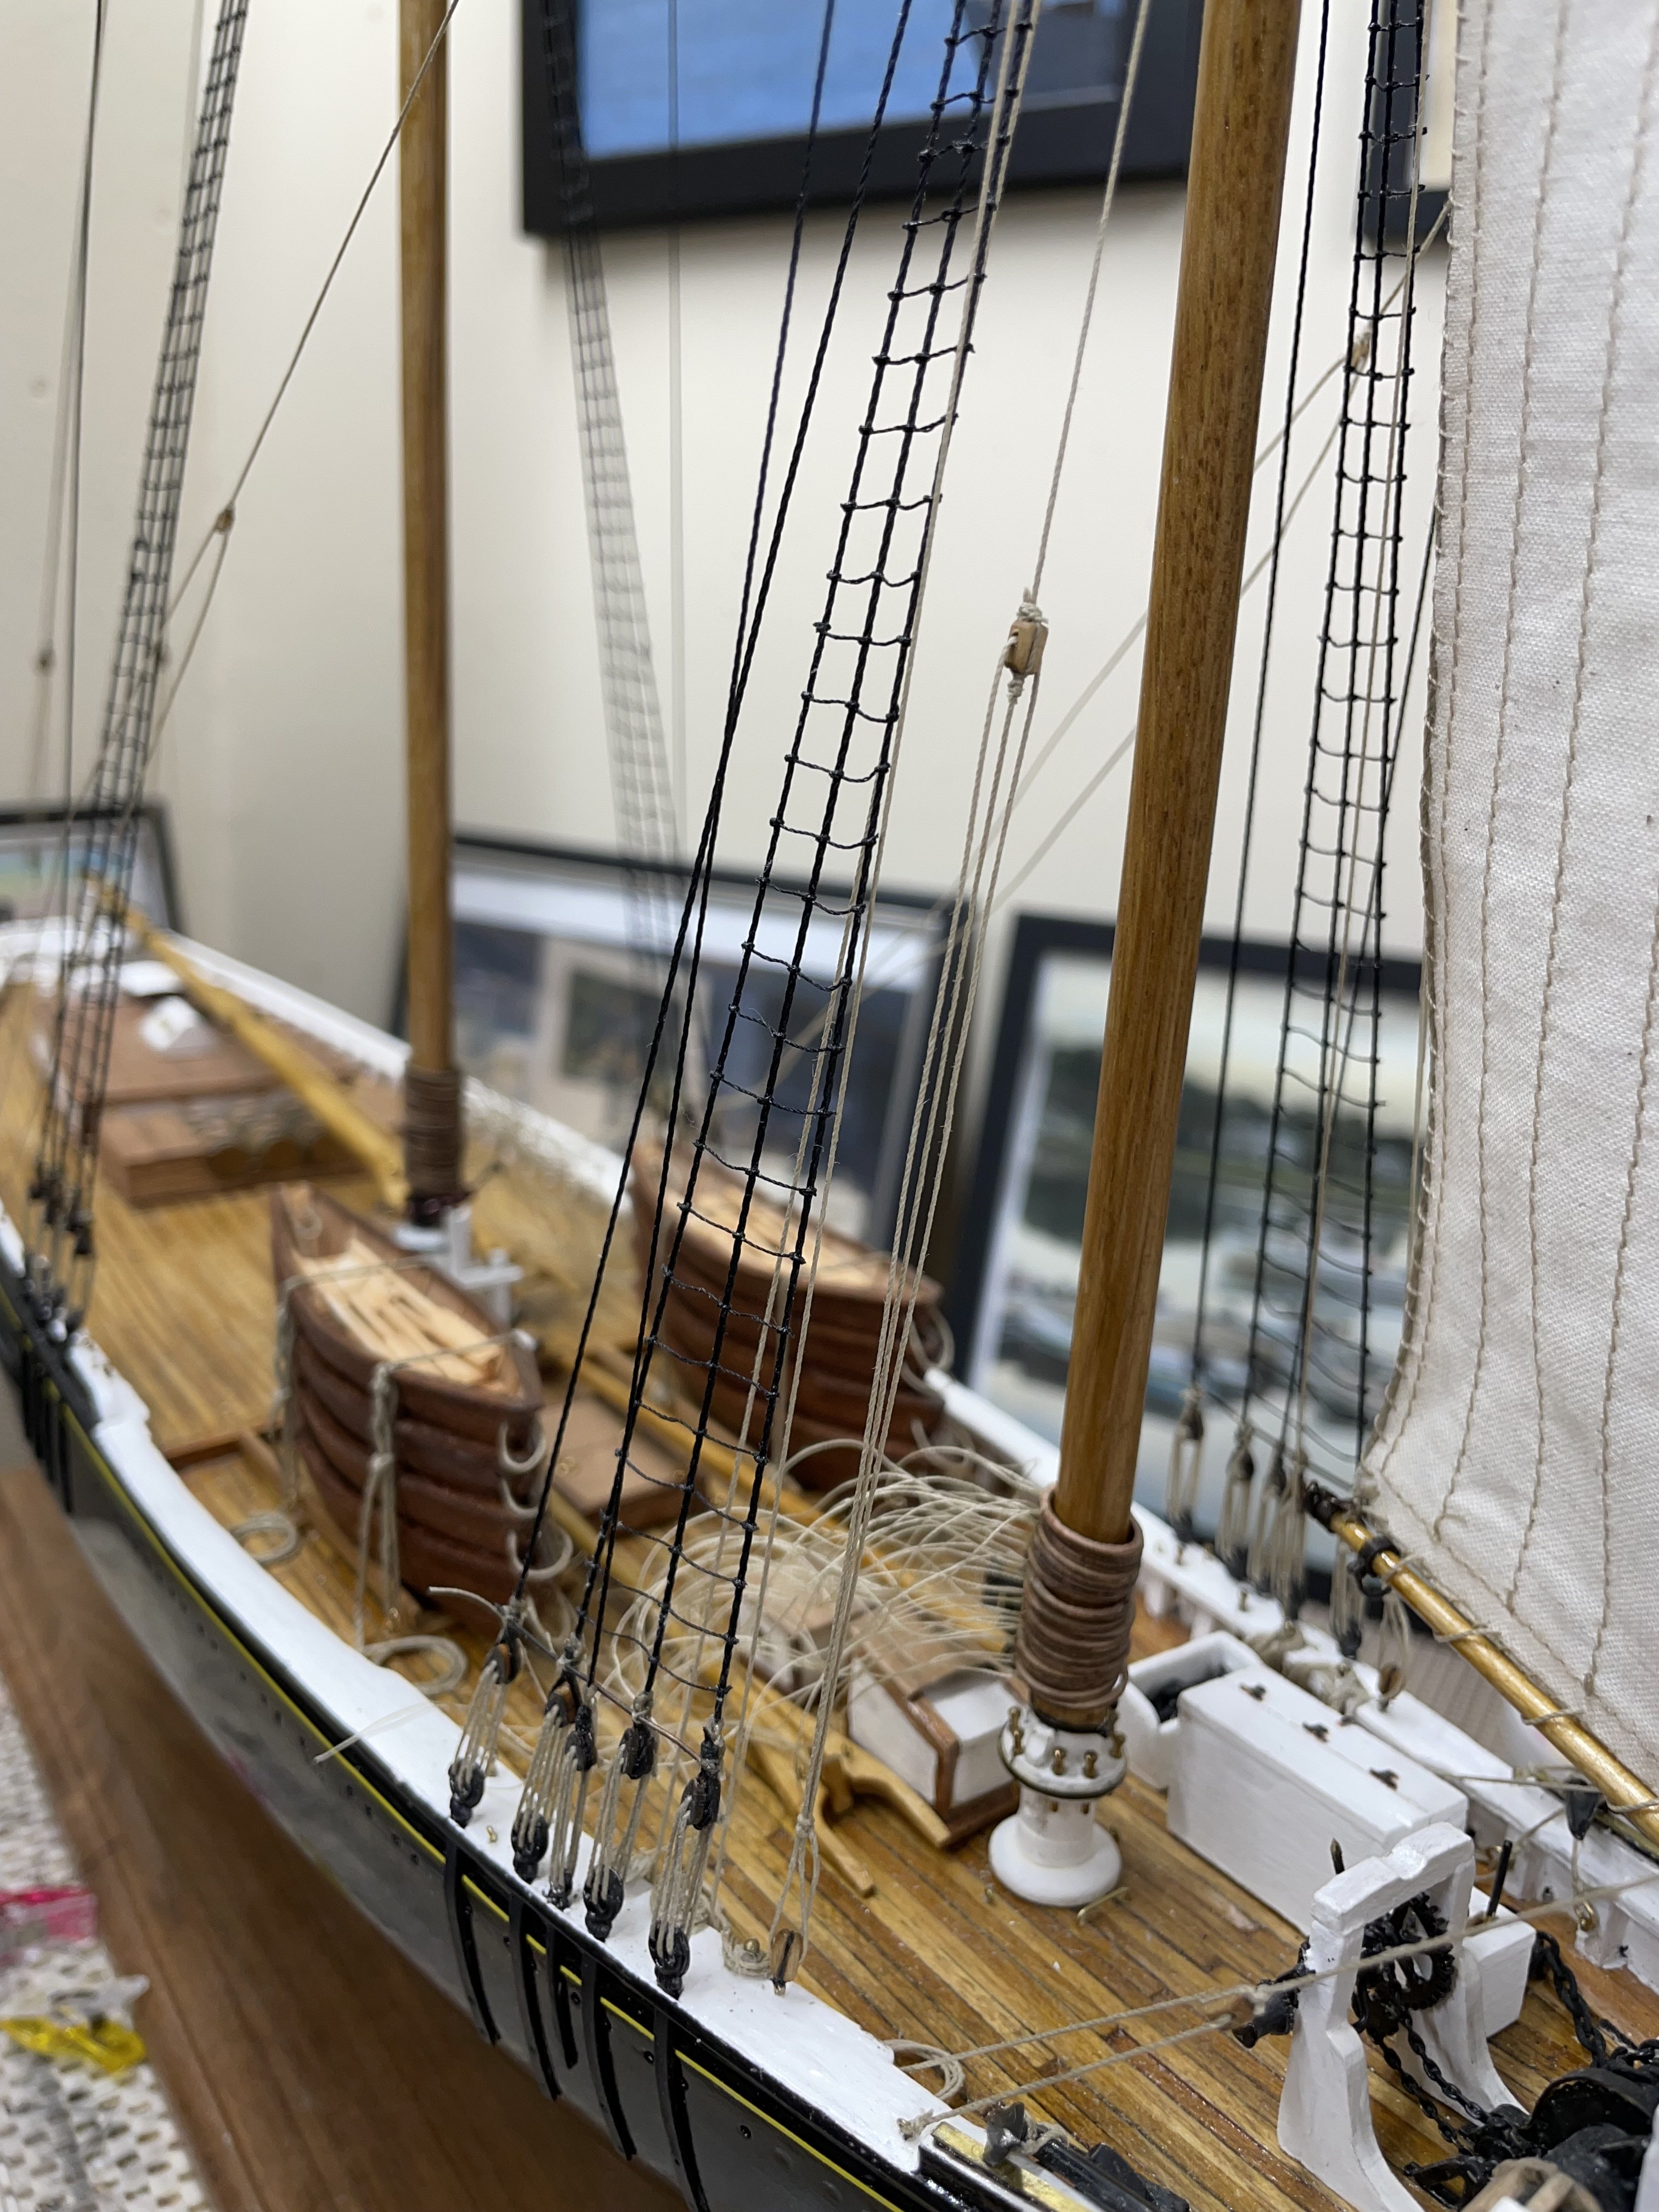
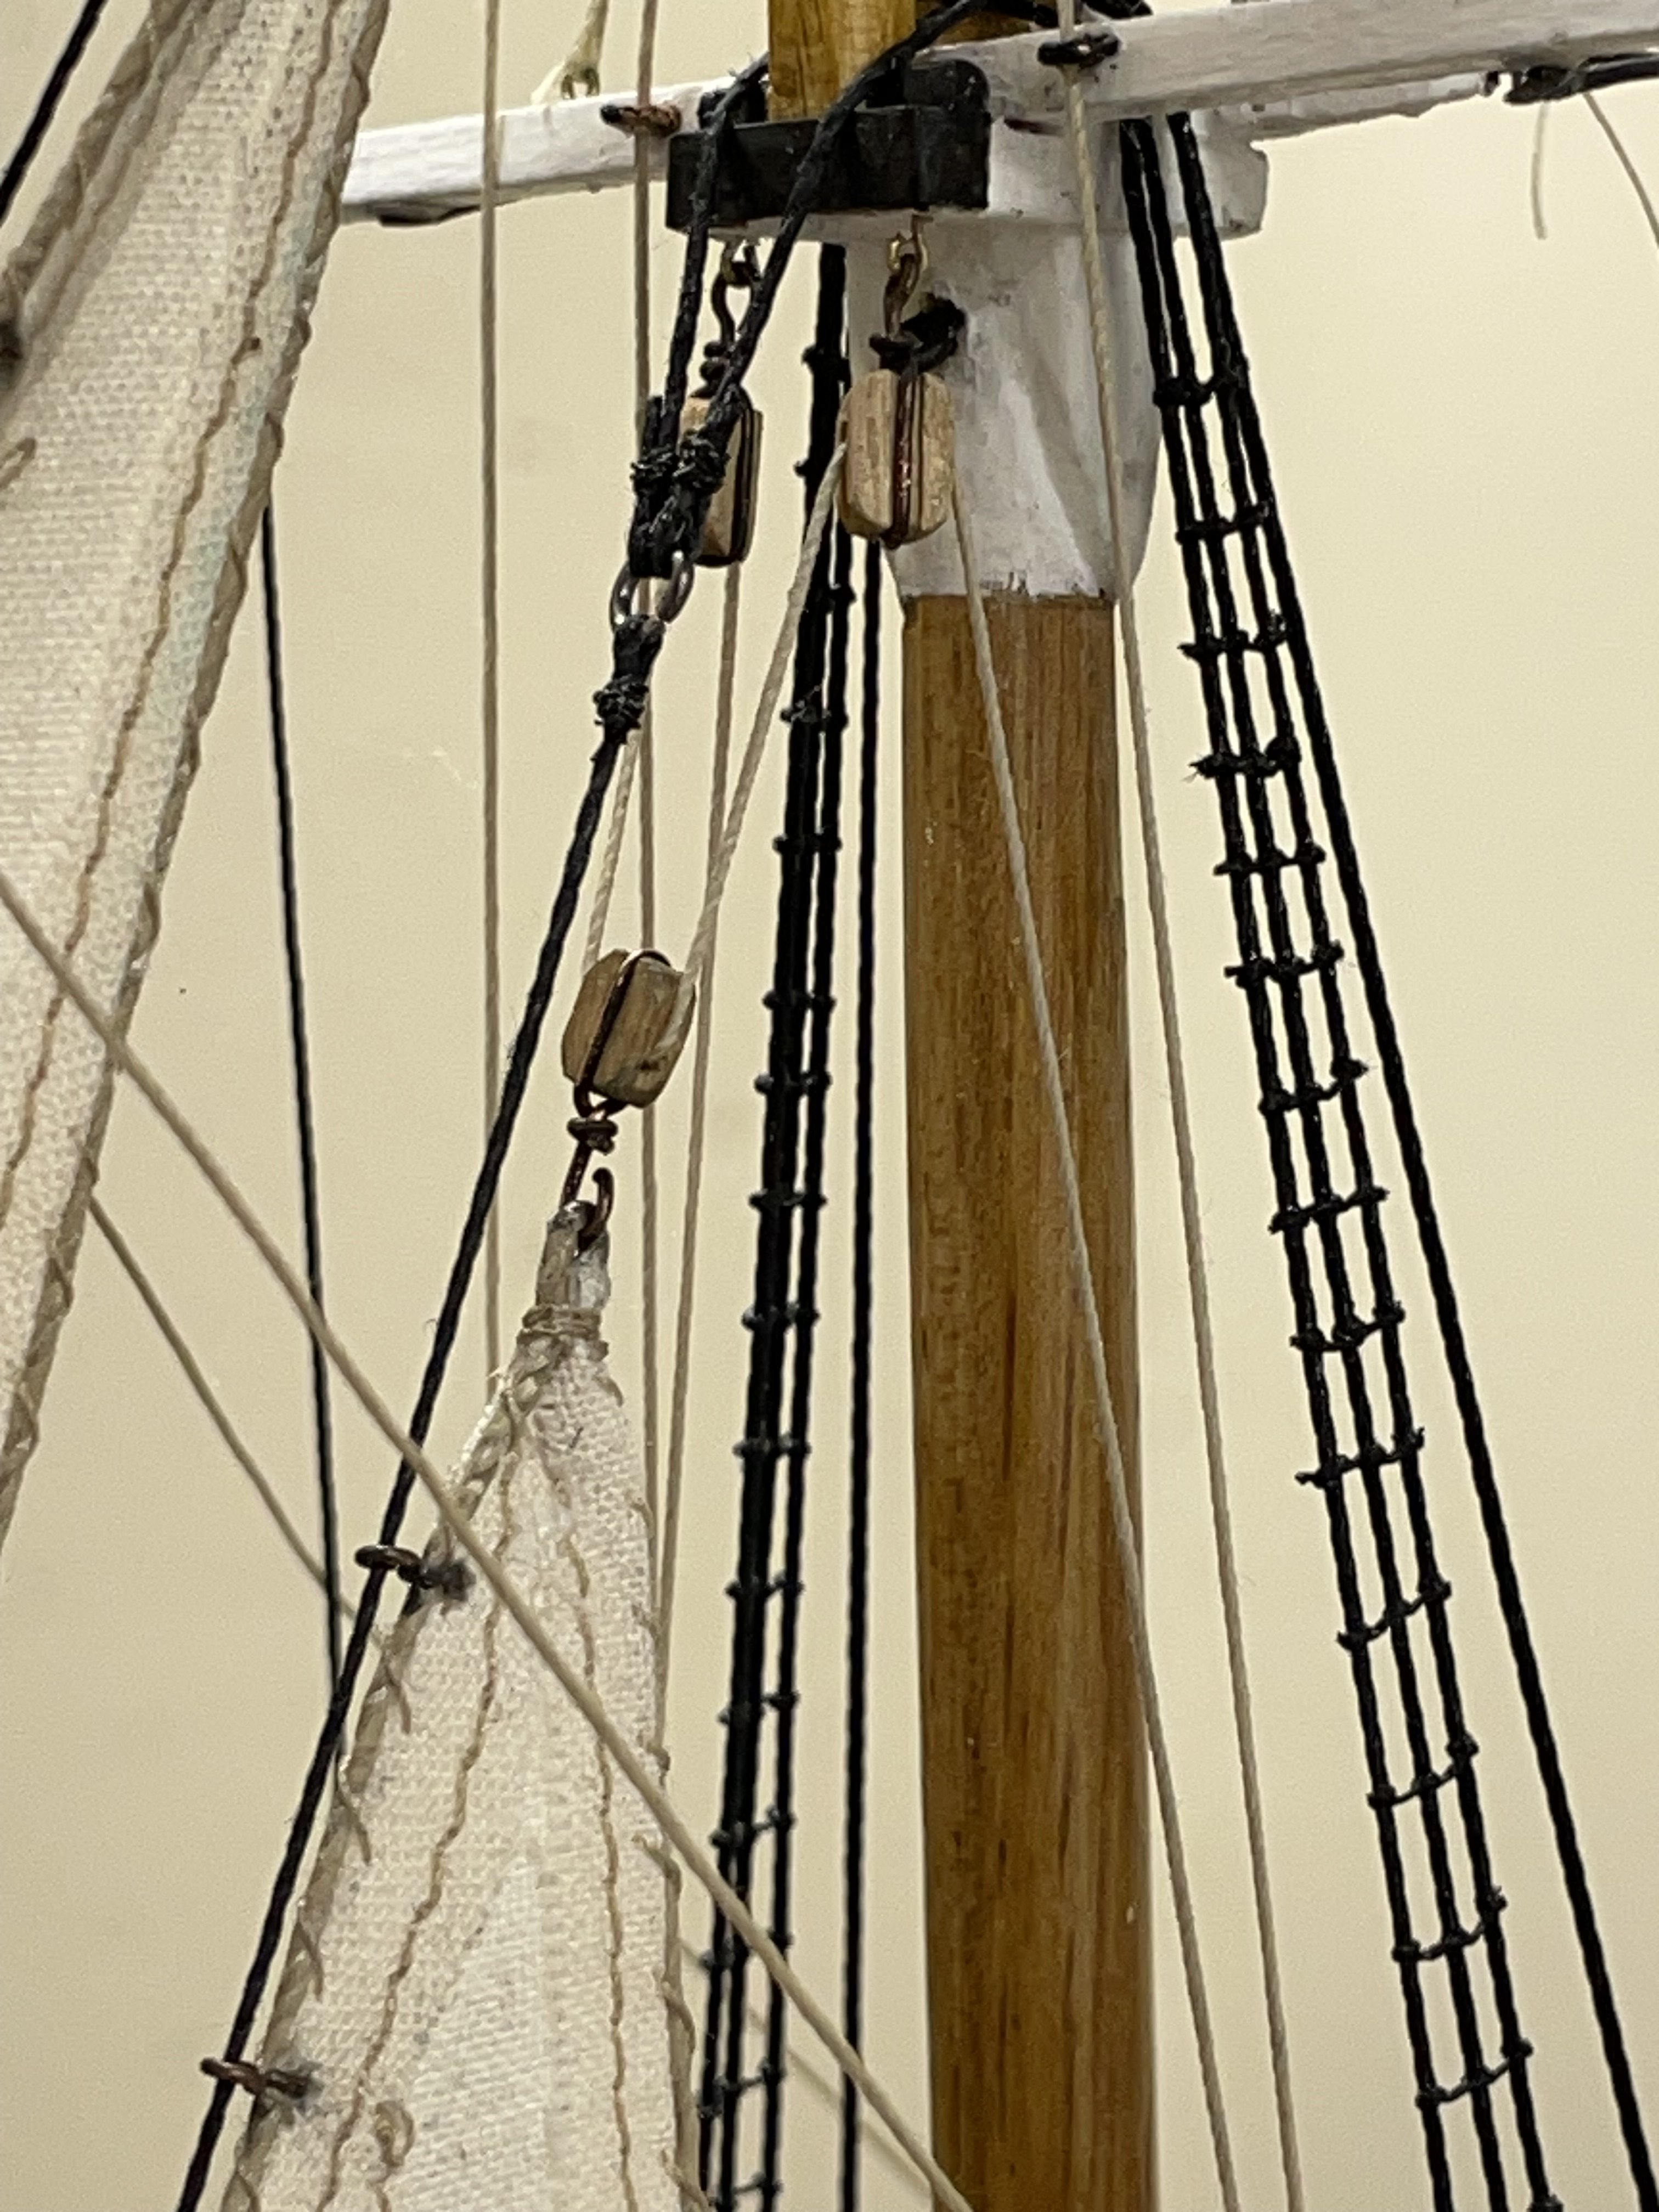
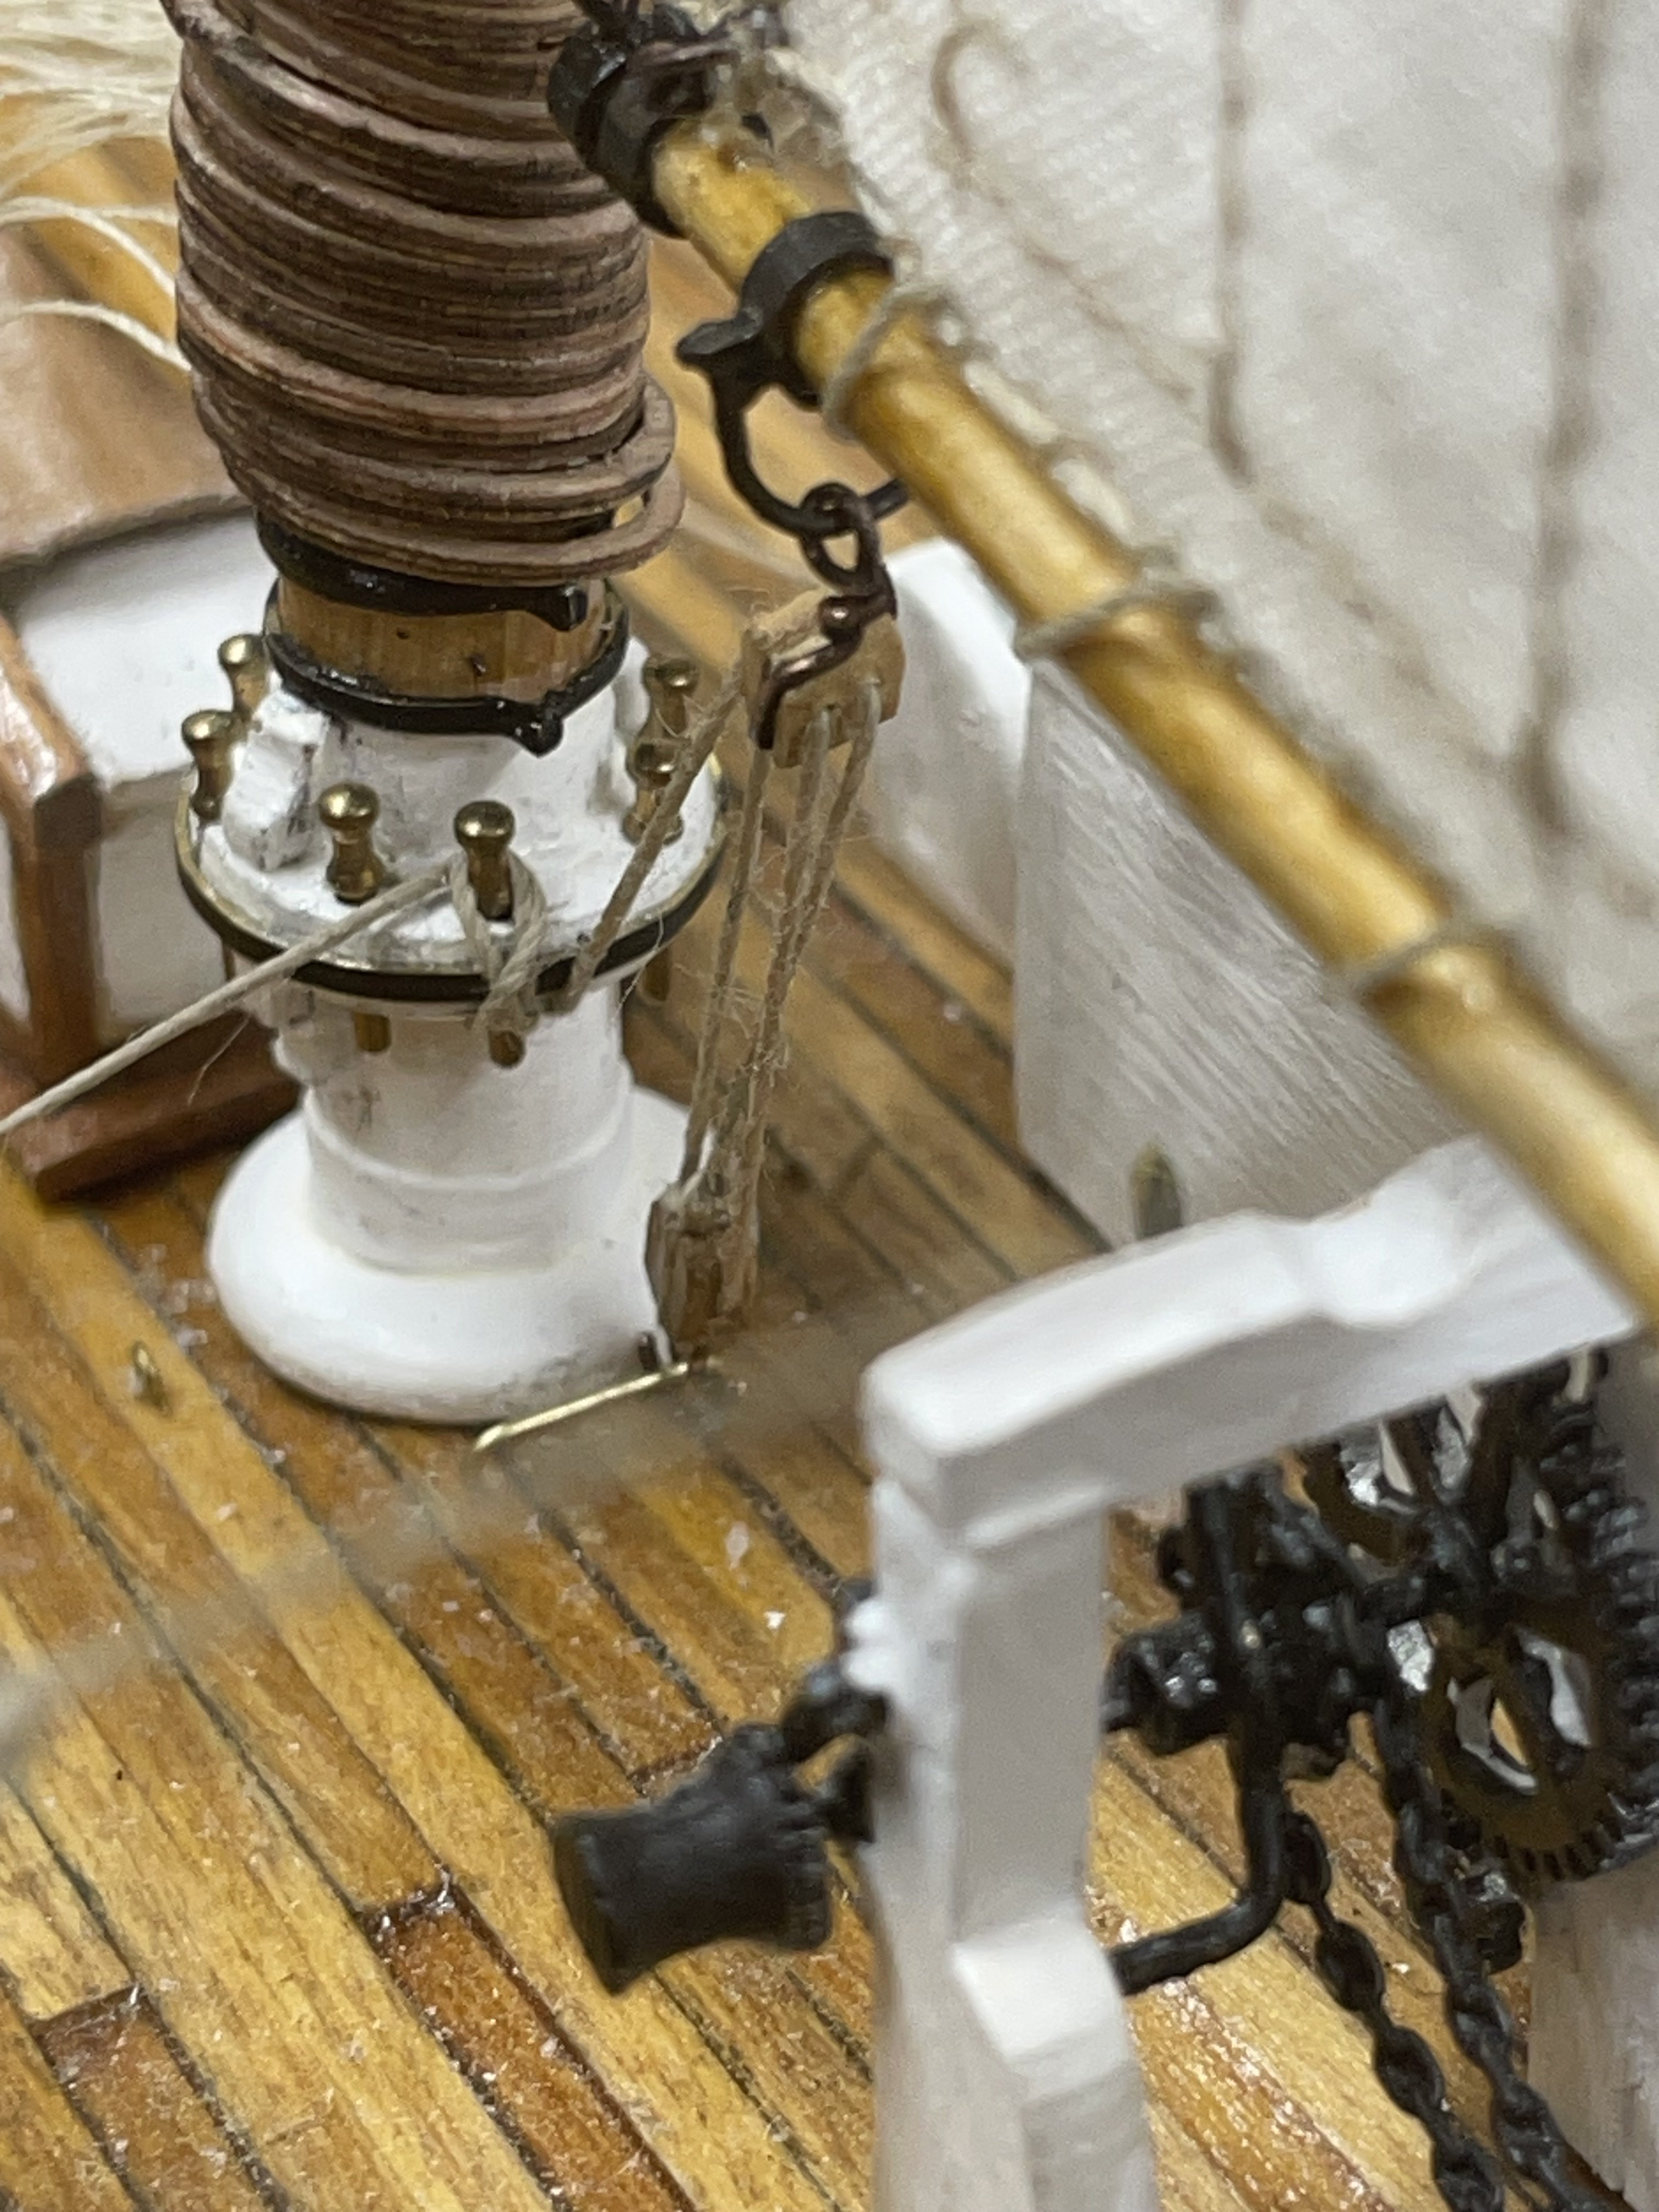
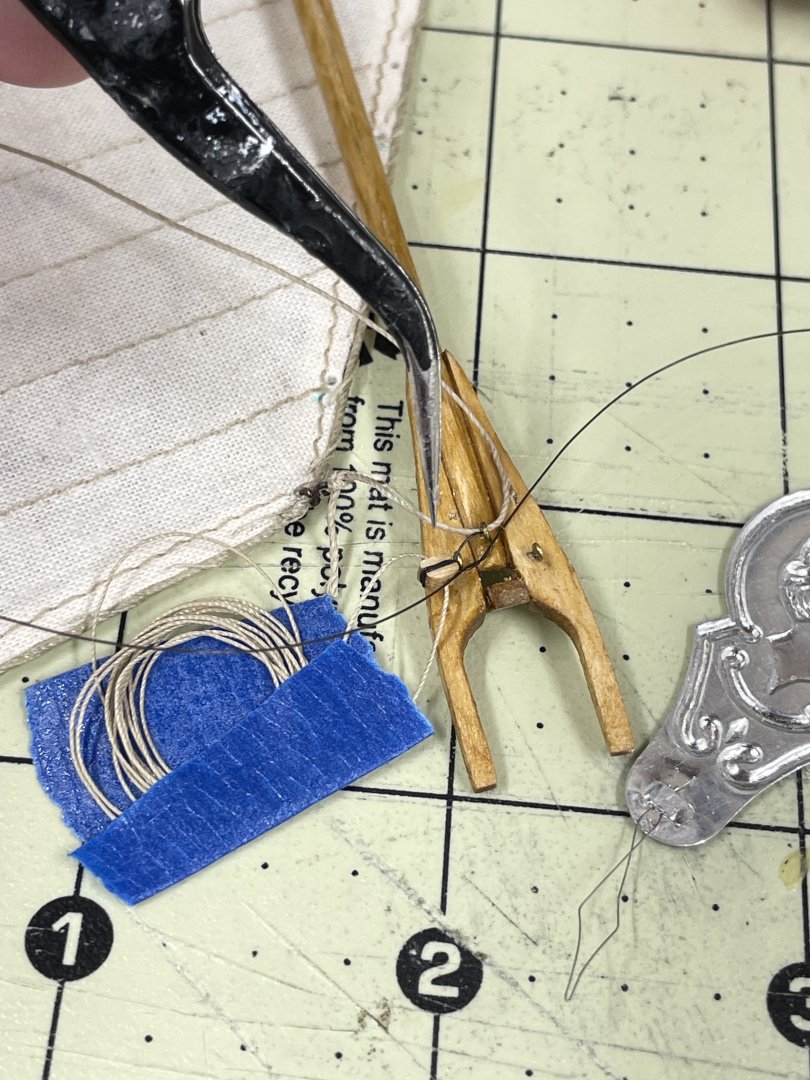
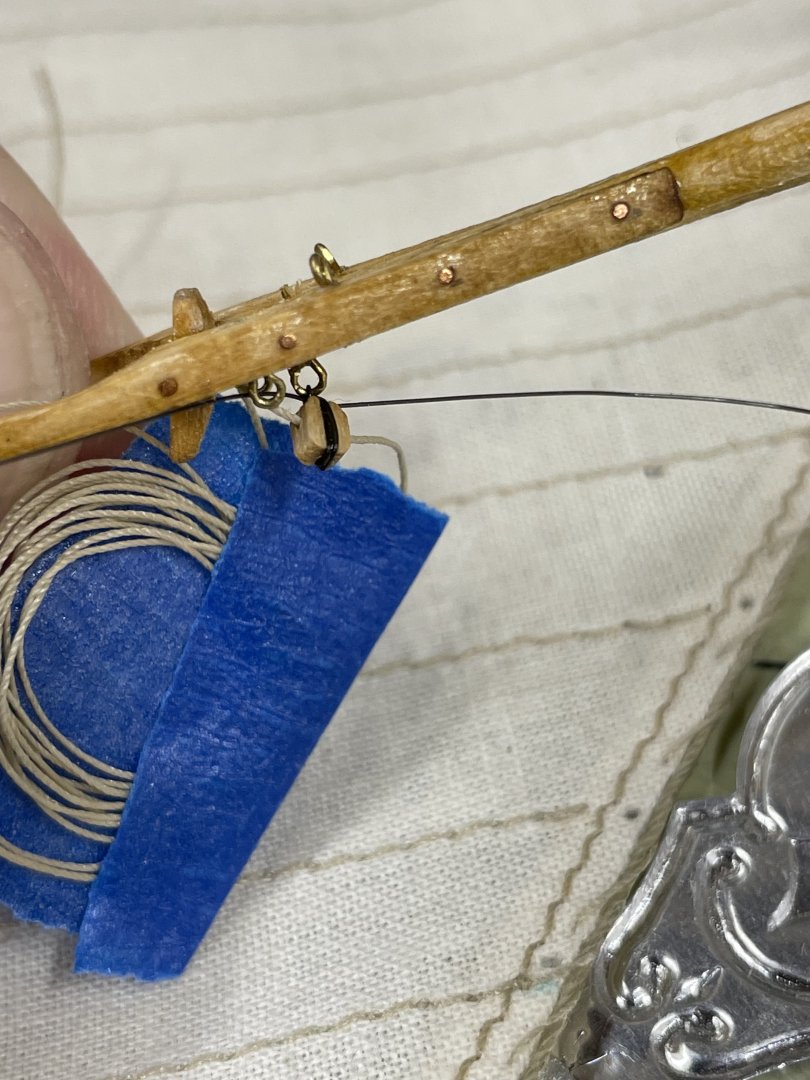
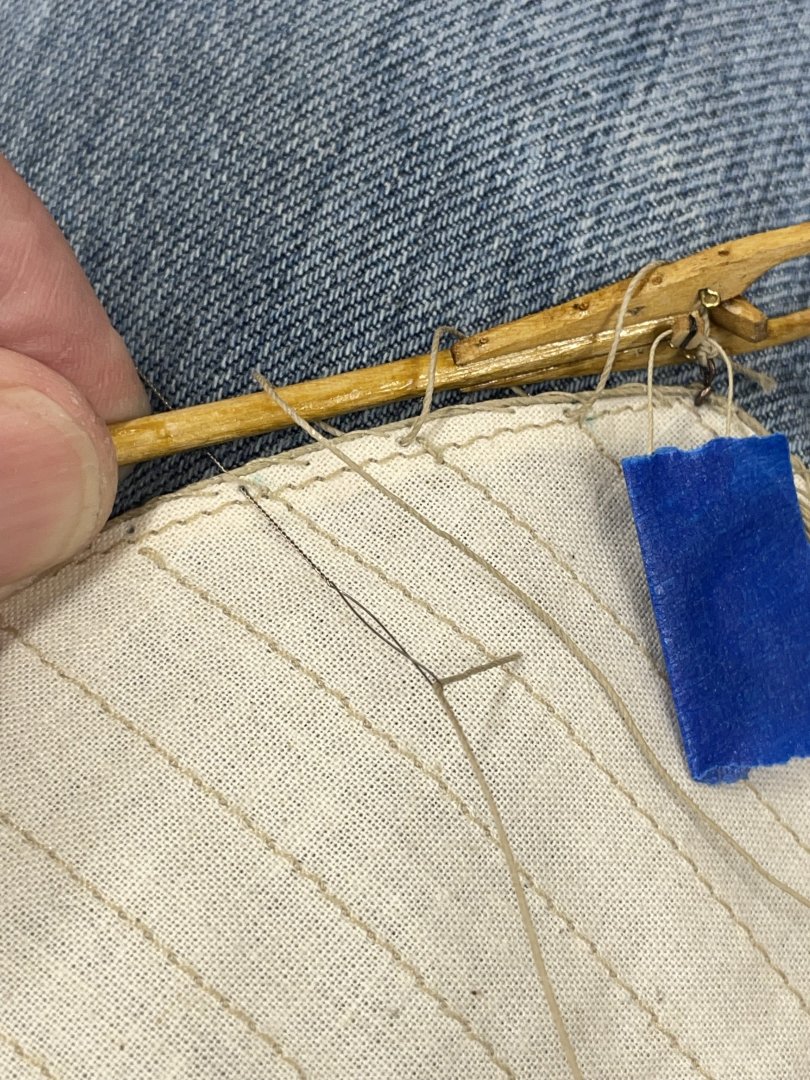
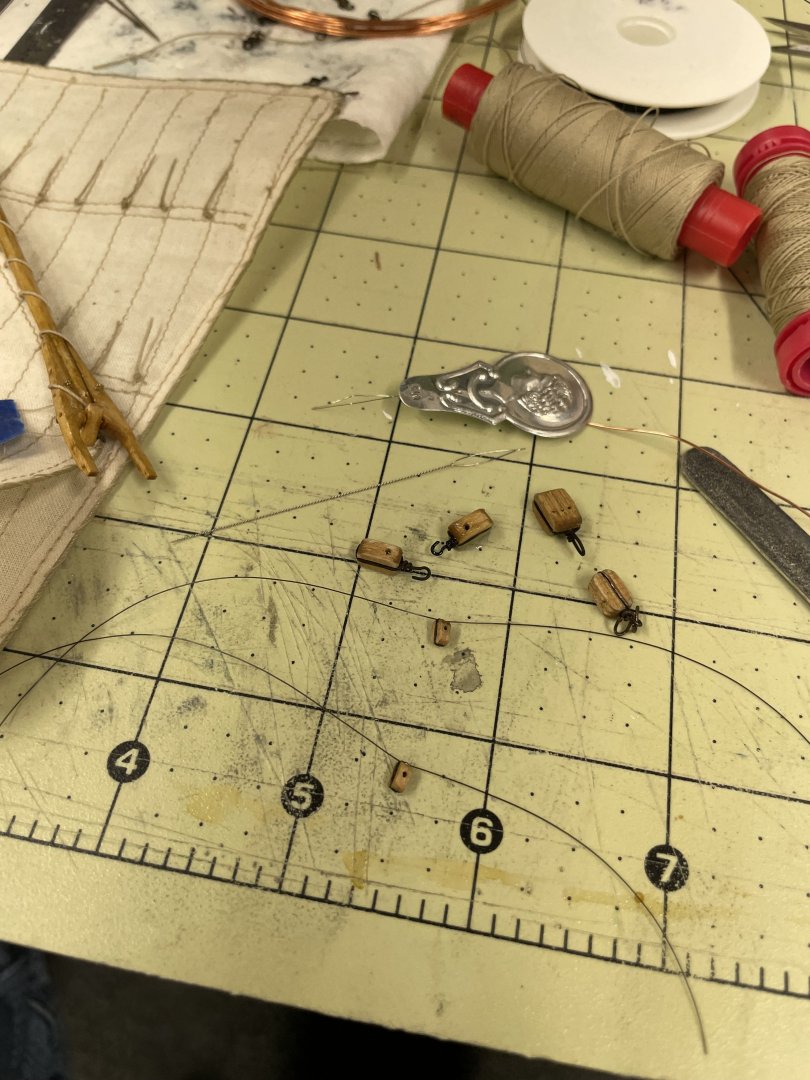
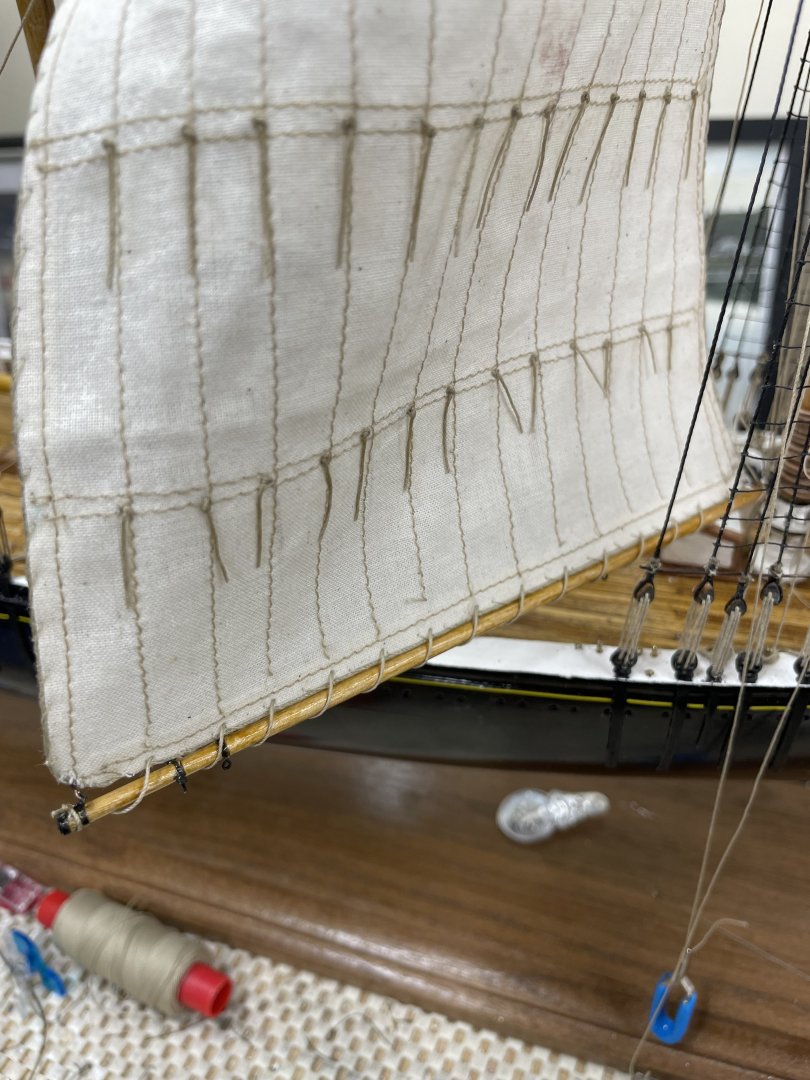
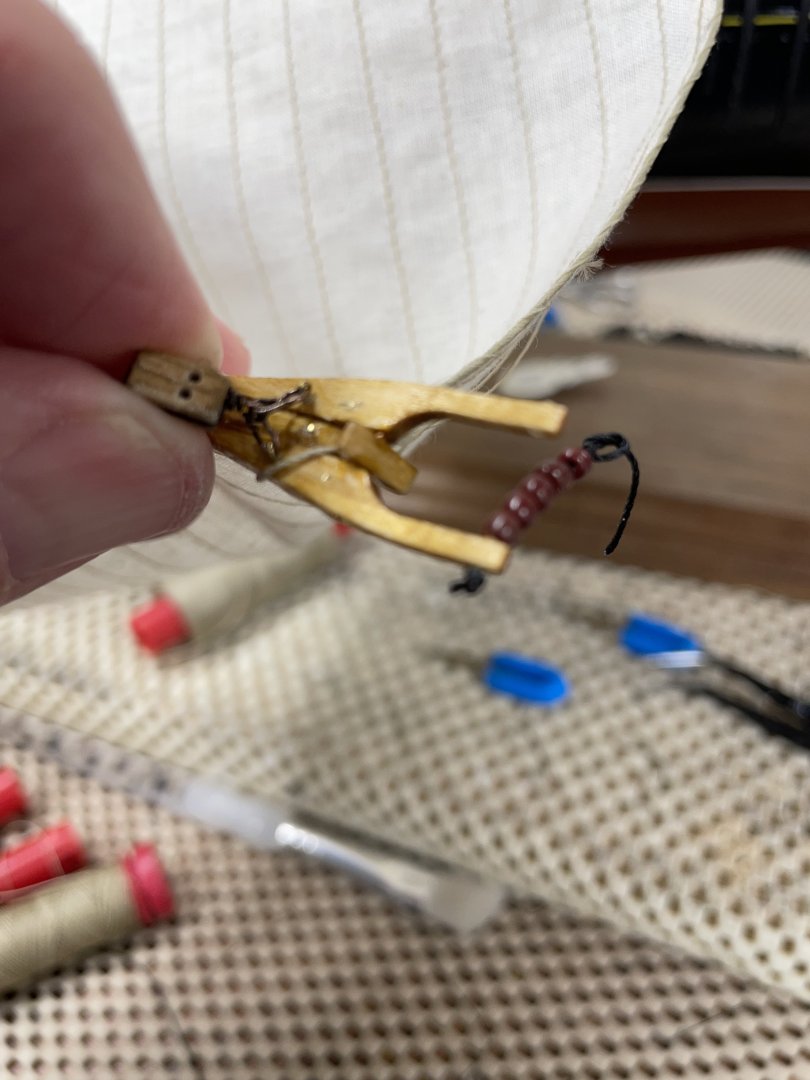
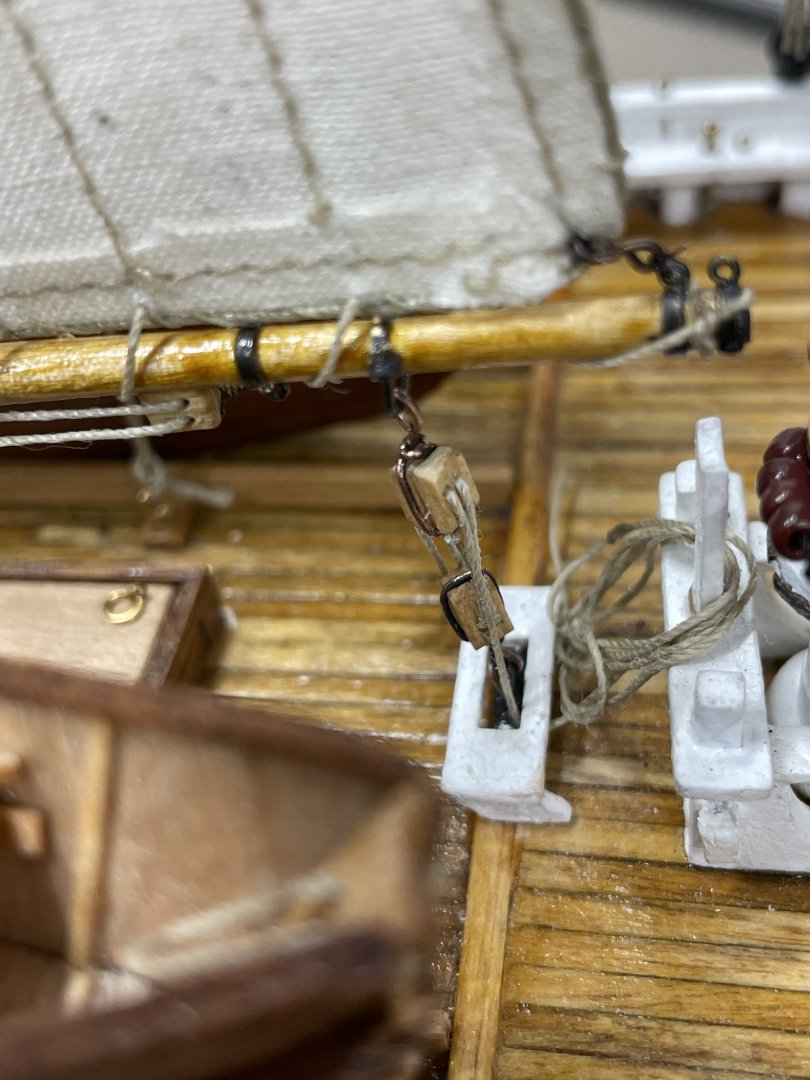
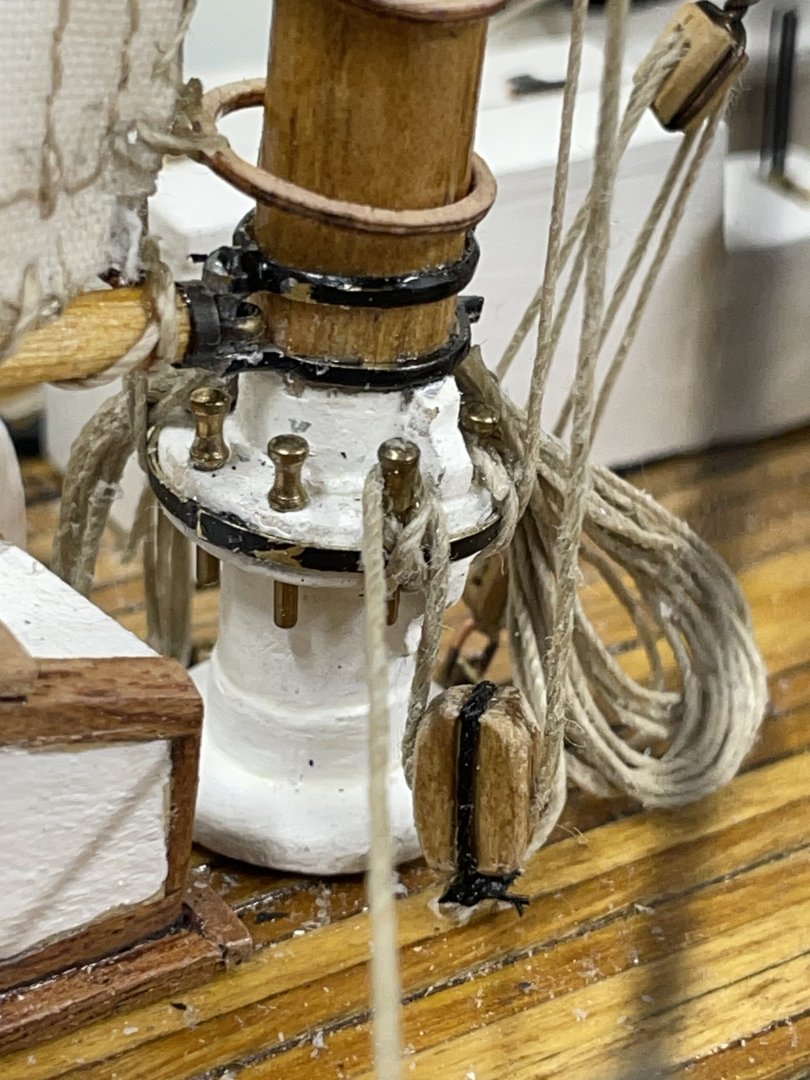
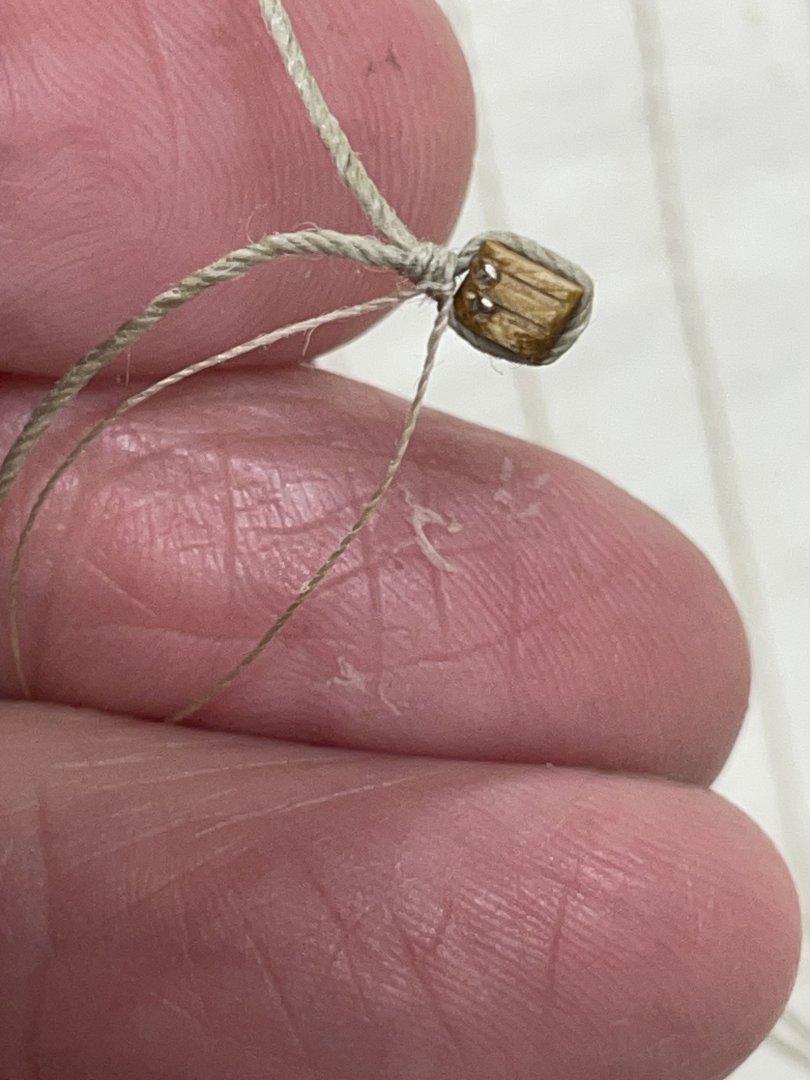
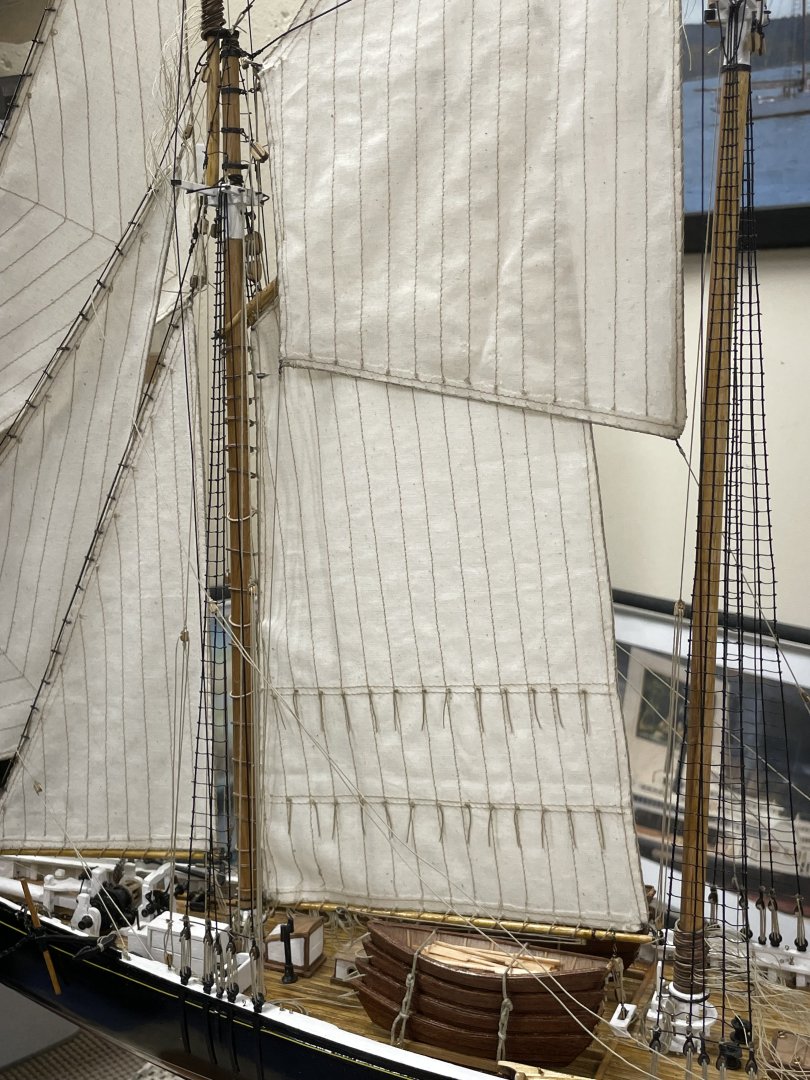
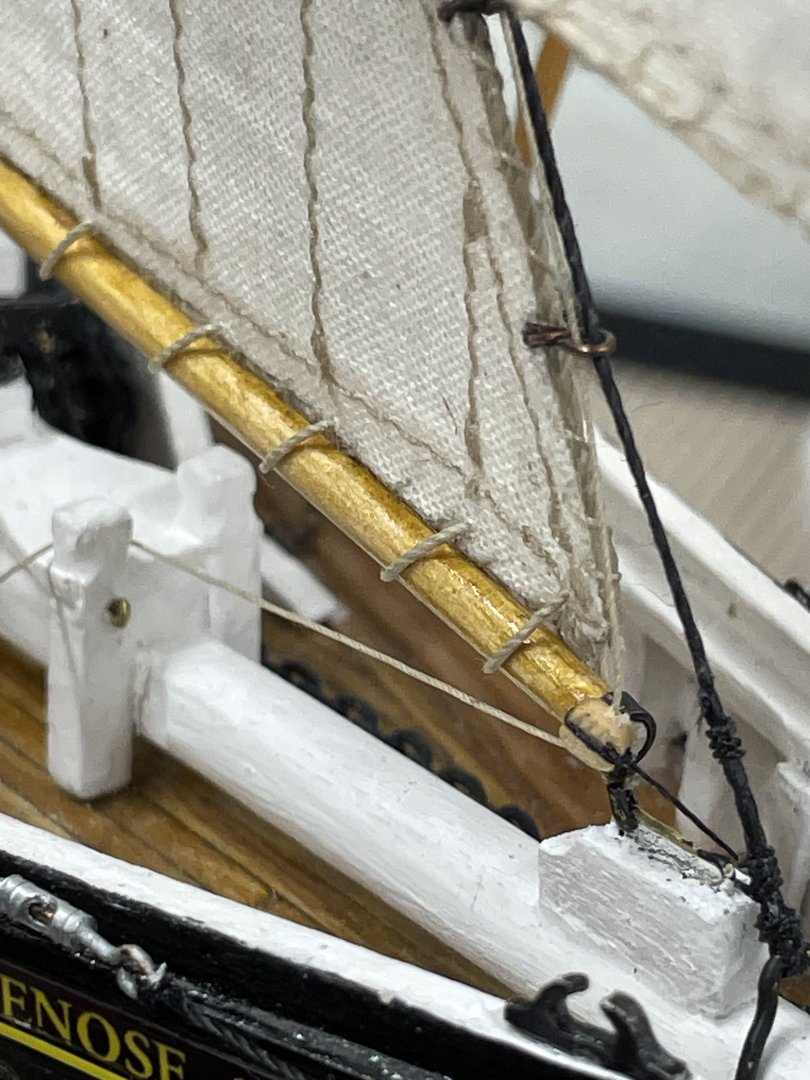
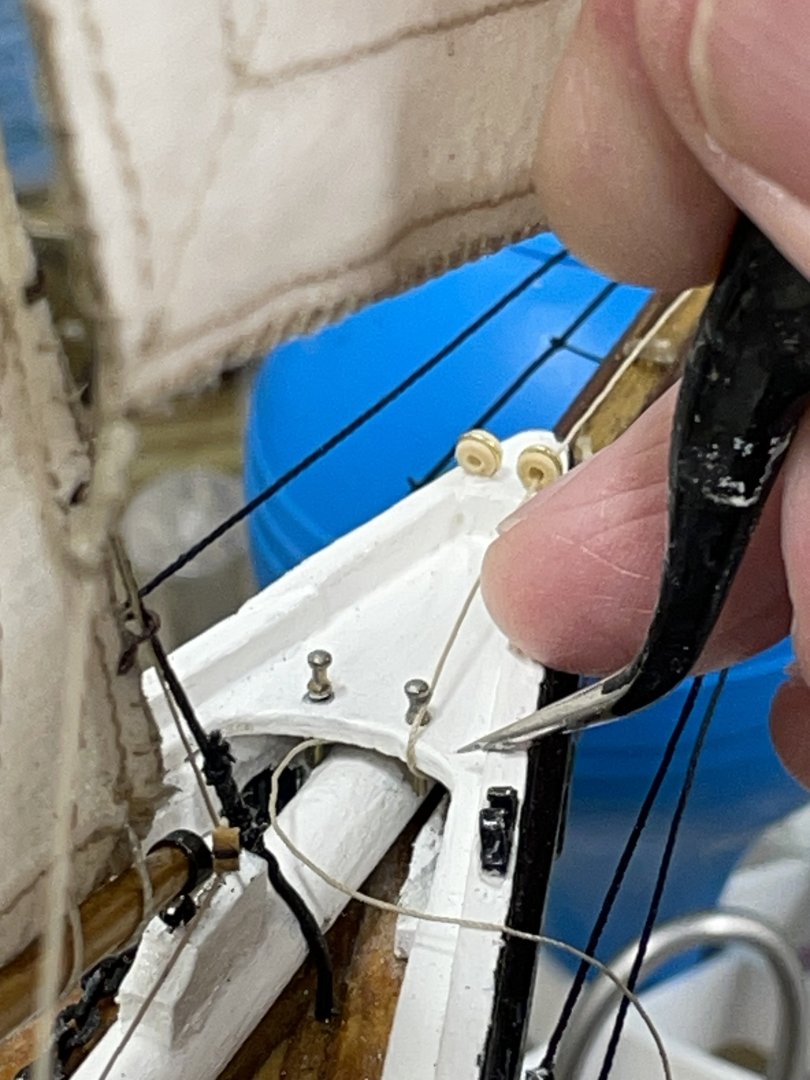
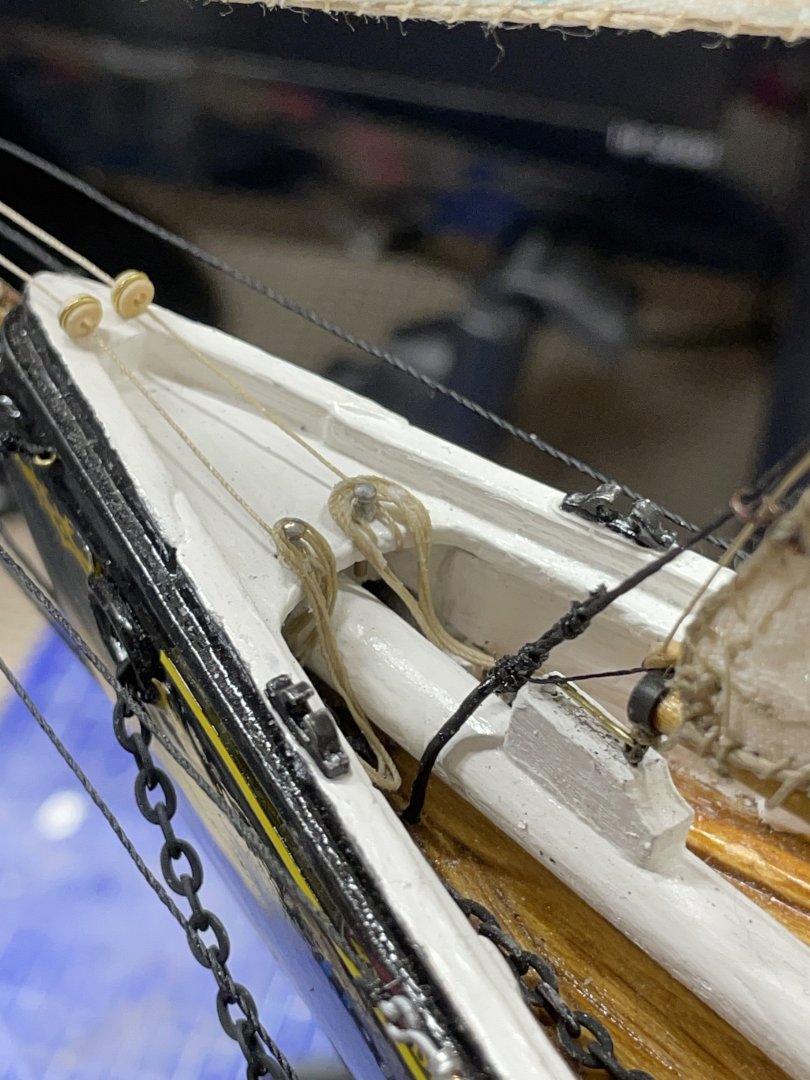
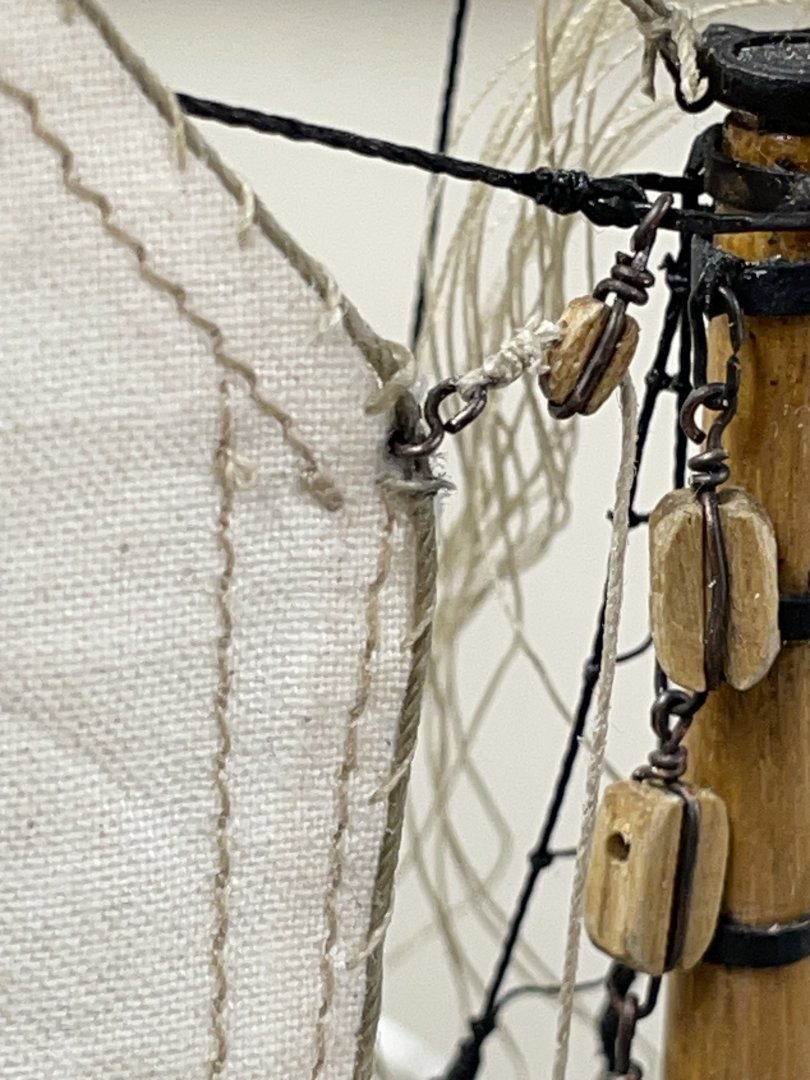
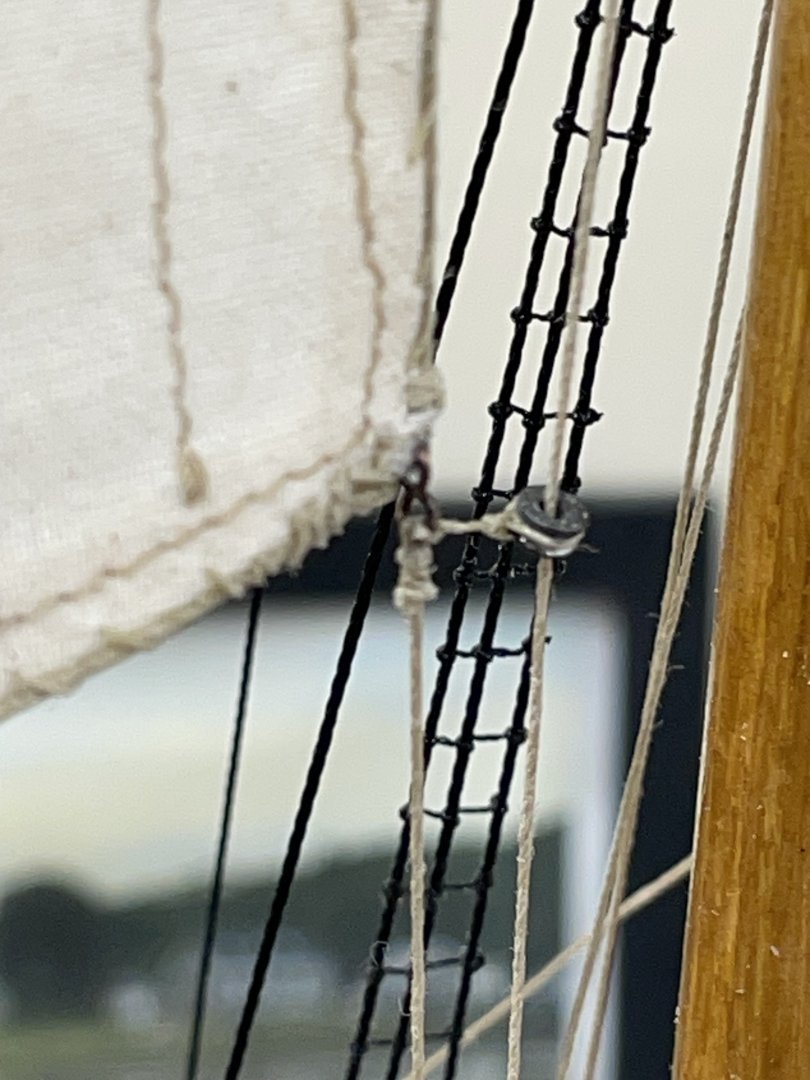
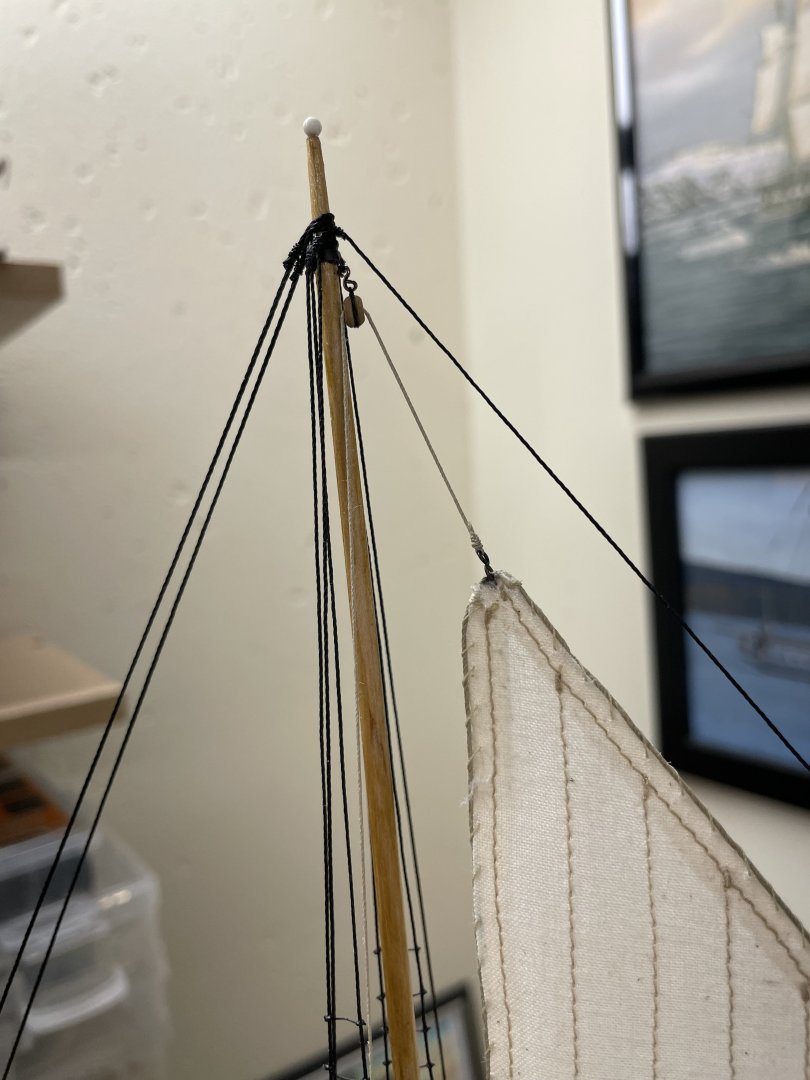
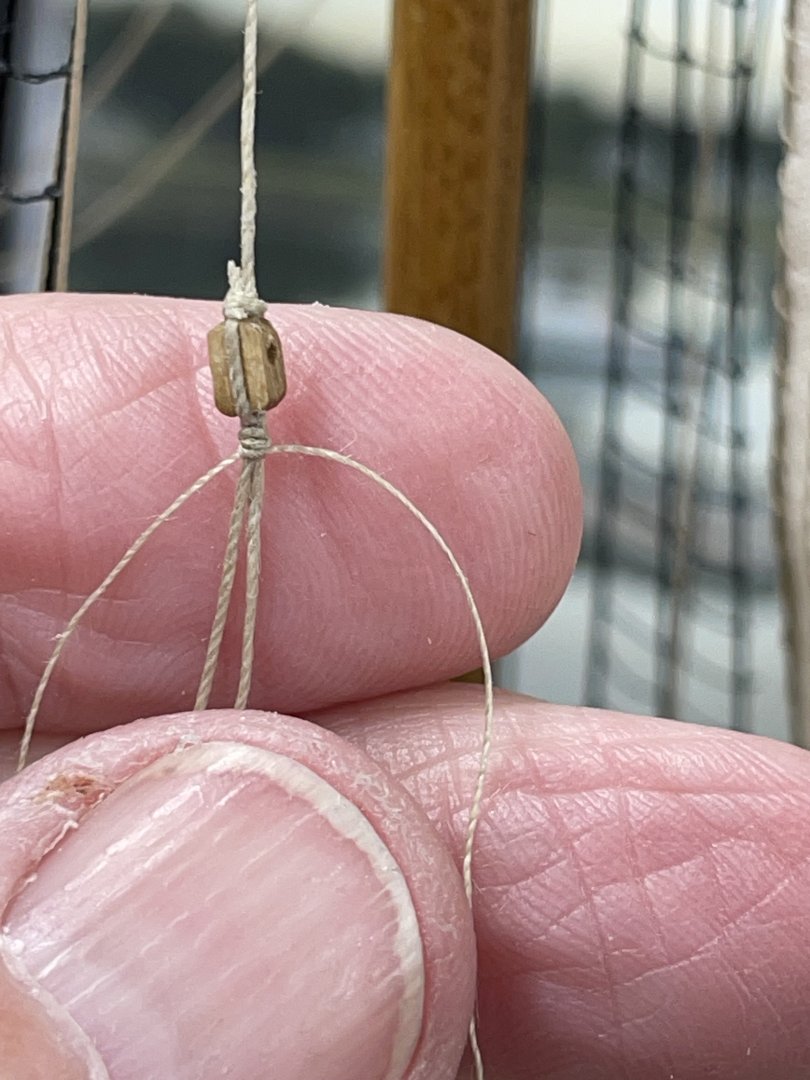
Fore Sail… Added Bolt Rope and Reef Points to previously sewn Fore Sail. Installed block and line for Top Sail Sheet. Laced Gaff to Fore Sail. Laced Fore Sail to Boom. Added Parrel w/Wood Trucks to Gaff. Blocks for the Fore Sail Rigging. Throat Halyard attached to Gaff. Connecting Gaff to Fore Mast. Throat Halyard in place. Peak Halyards in place. Sewing Mast Hoops to the Sail. Fore Mast Hoops attached to Fore Sail. Boom Tackle placed. Placing Fore Sail Sheet. Sheet belayed to Fife Rail. Topping Lift installed. Topping Lift belayed to Fife Rail. Peak Halyard belayed to pin #8. Eyelet for Throat Halyard Block inaccessible. Had to remove Engine Box. Fortunately, spot glued with CA and I was able to pop it out. Throat Halyard belayed to pin #7. Peak Halyard Tackle belayed to pin #17. Throat Halyard belayed to pin # 18. Fore Sail Downhaul belayed to Fore Boom. Fore Sail Rigging complete. Cheers. 🍻


- 282 replies
-
- 12
-

-
-
- Bluenose
- Model Shipways
- (and 1 more)
-
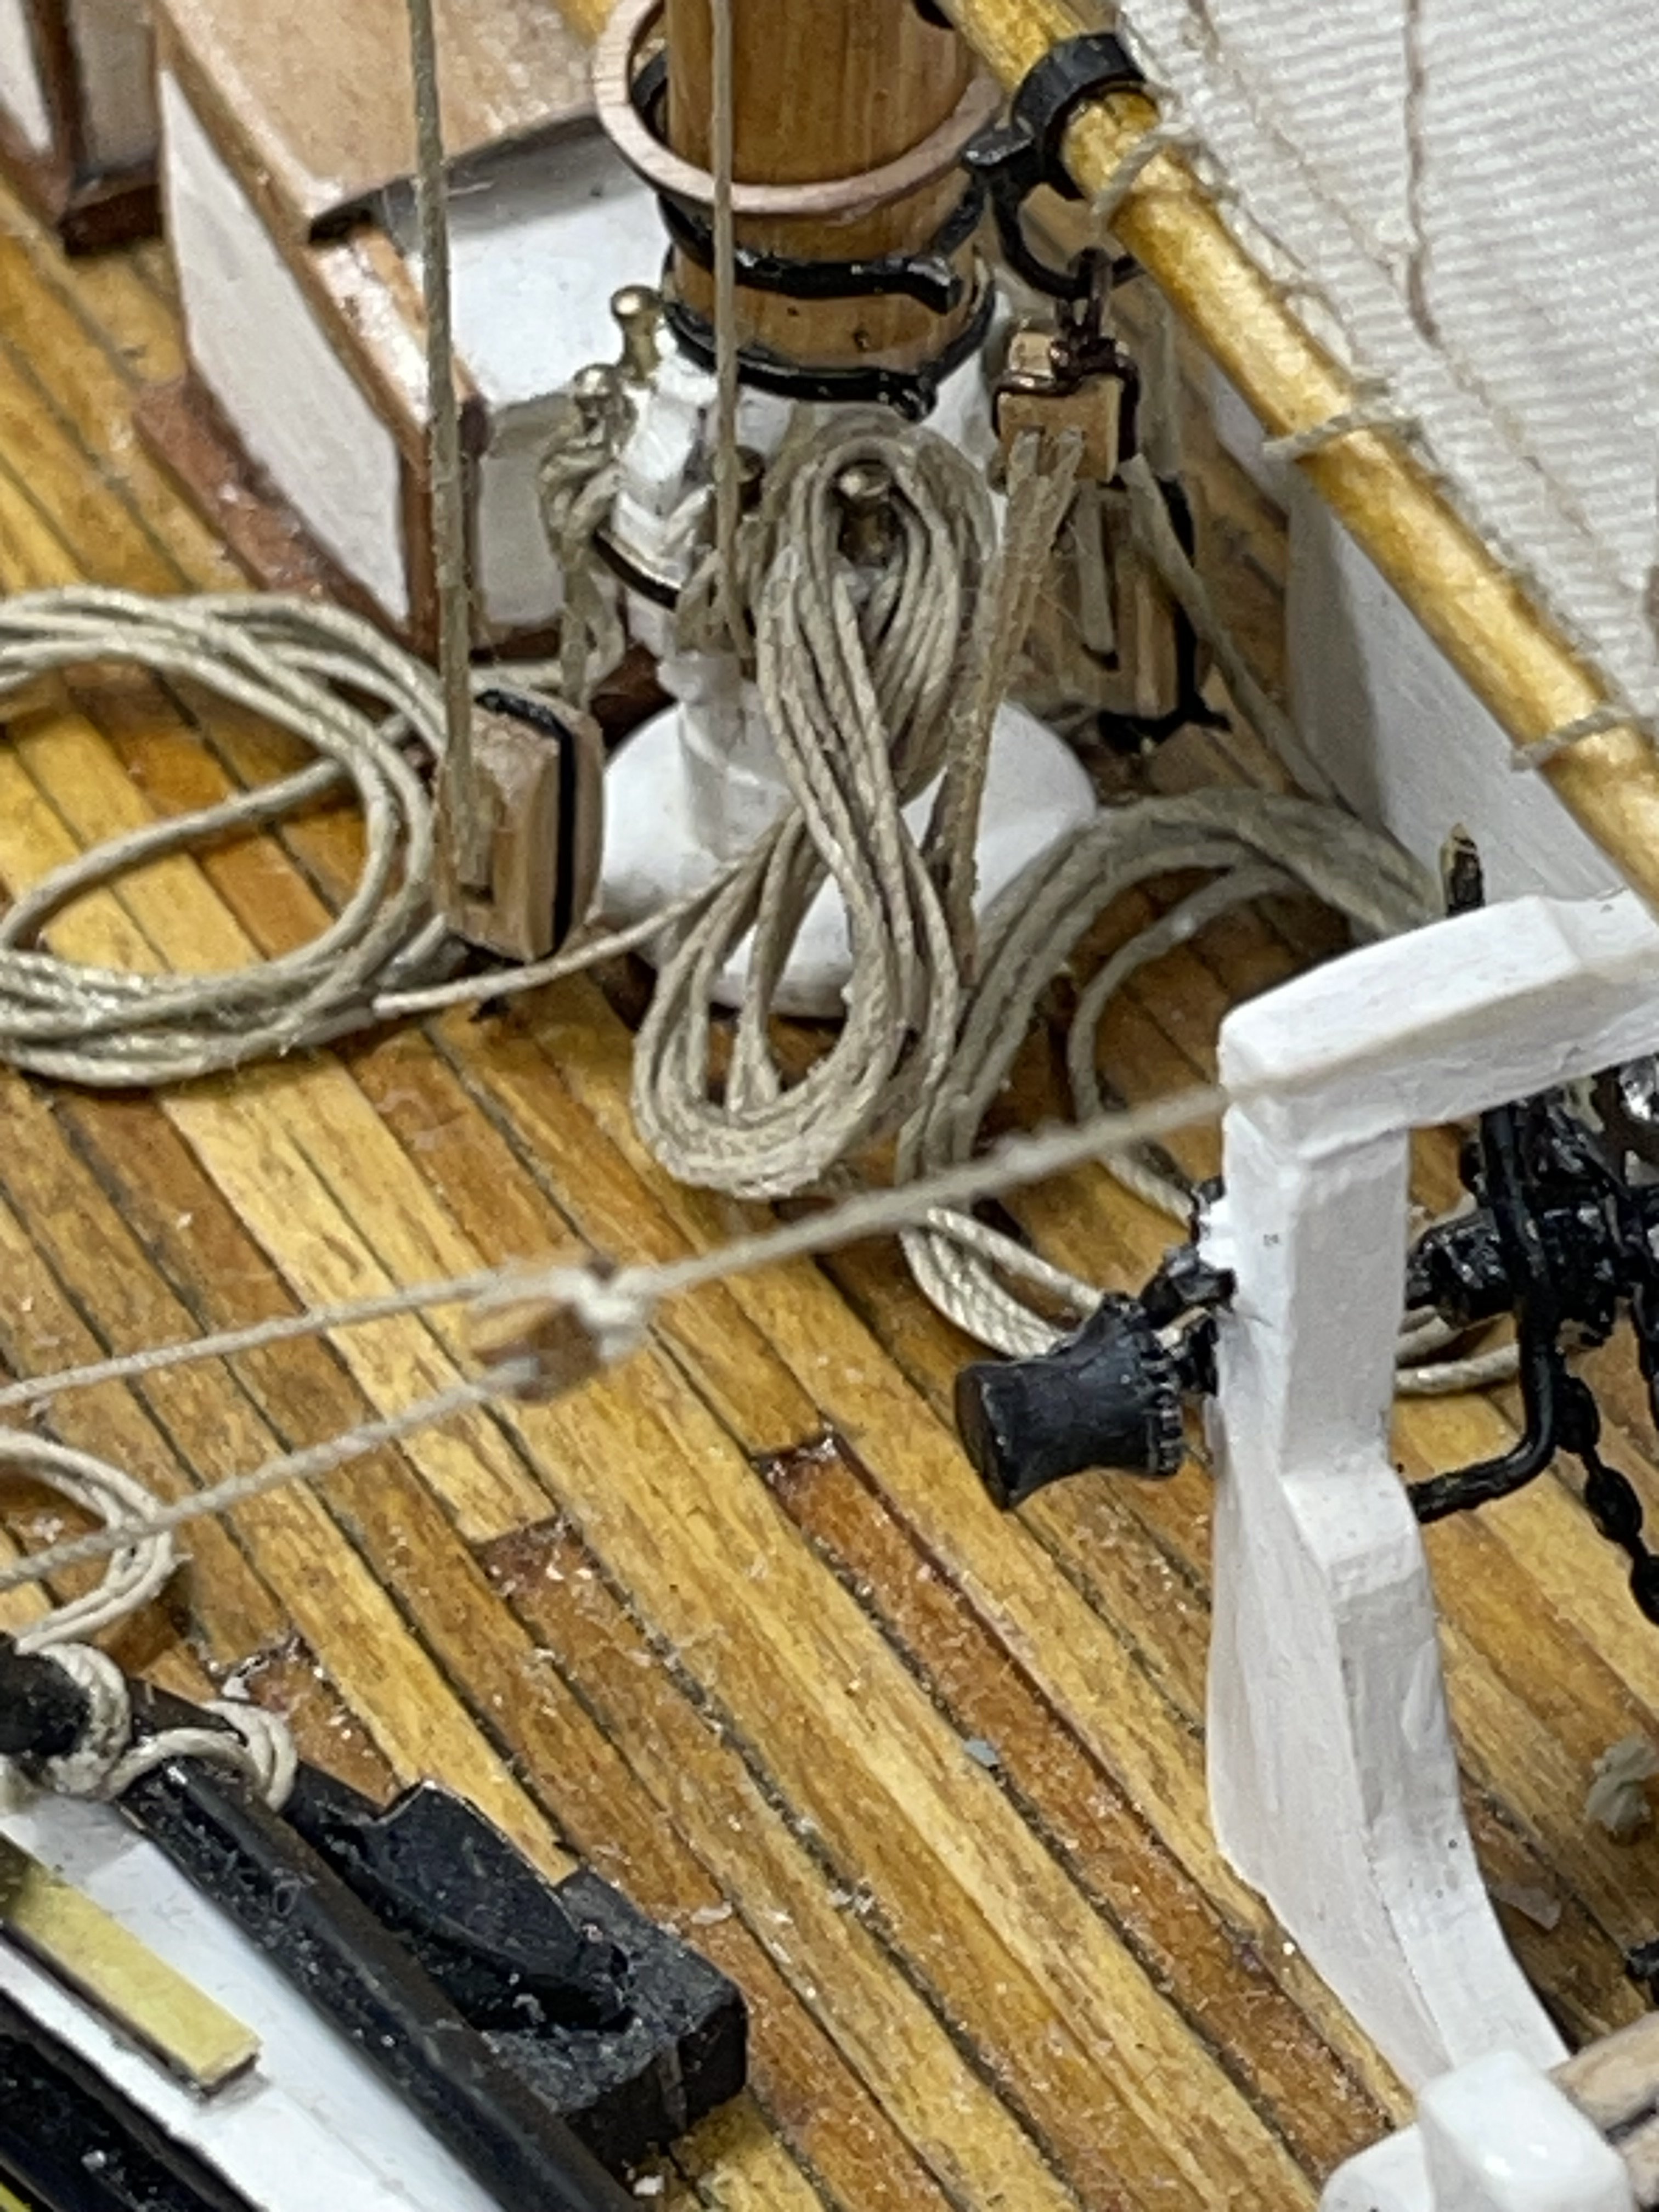
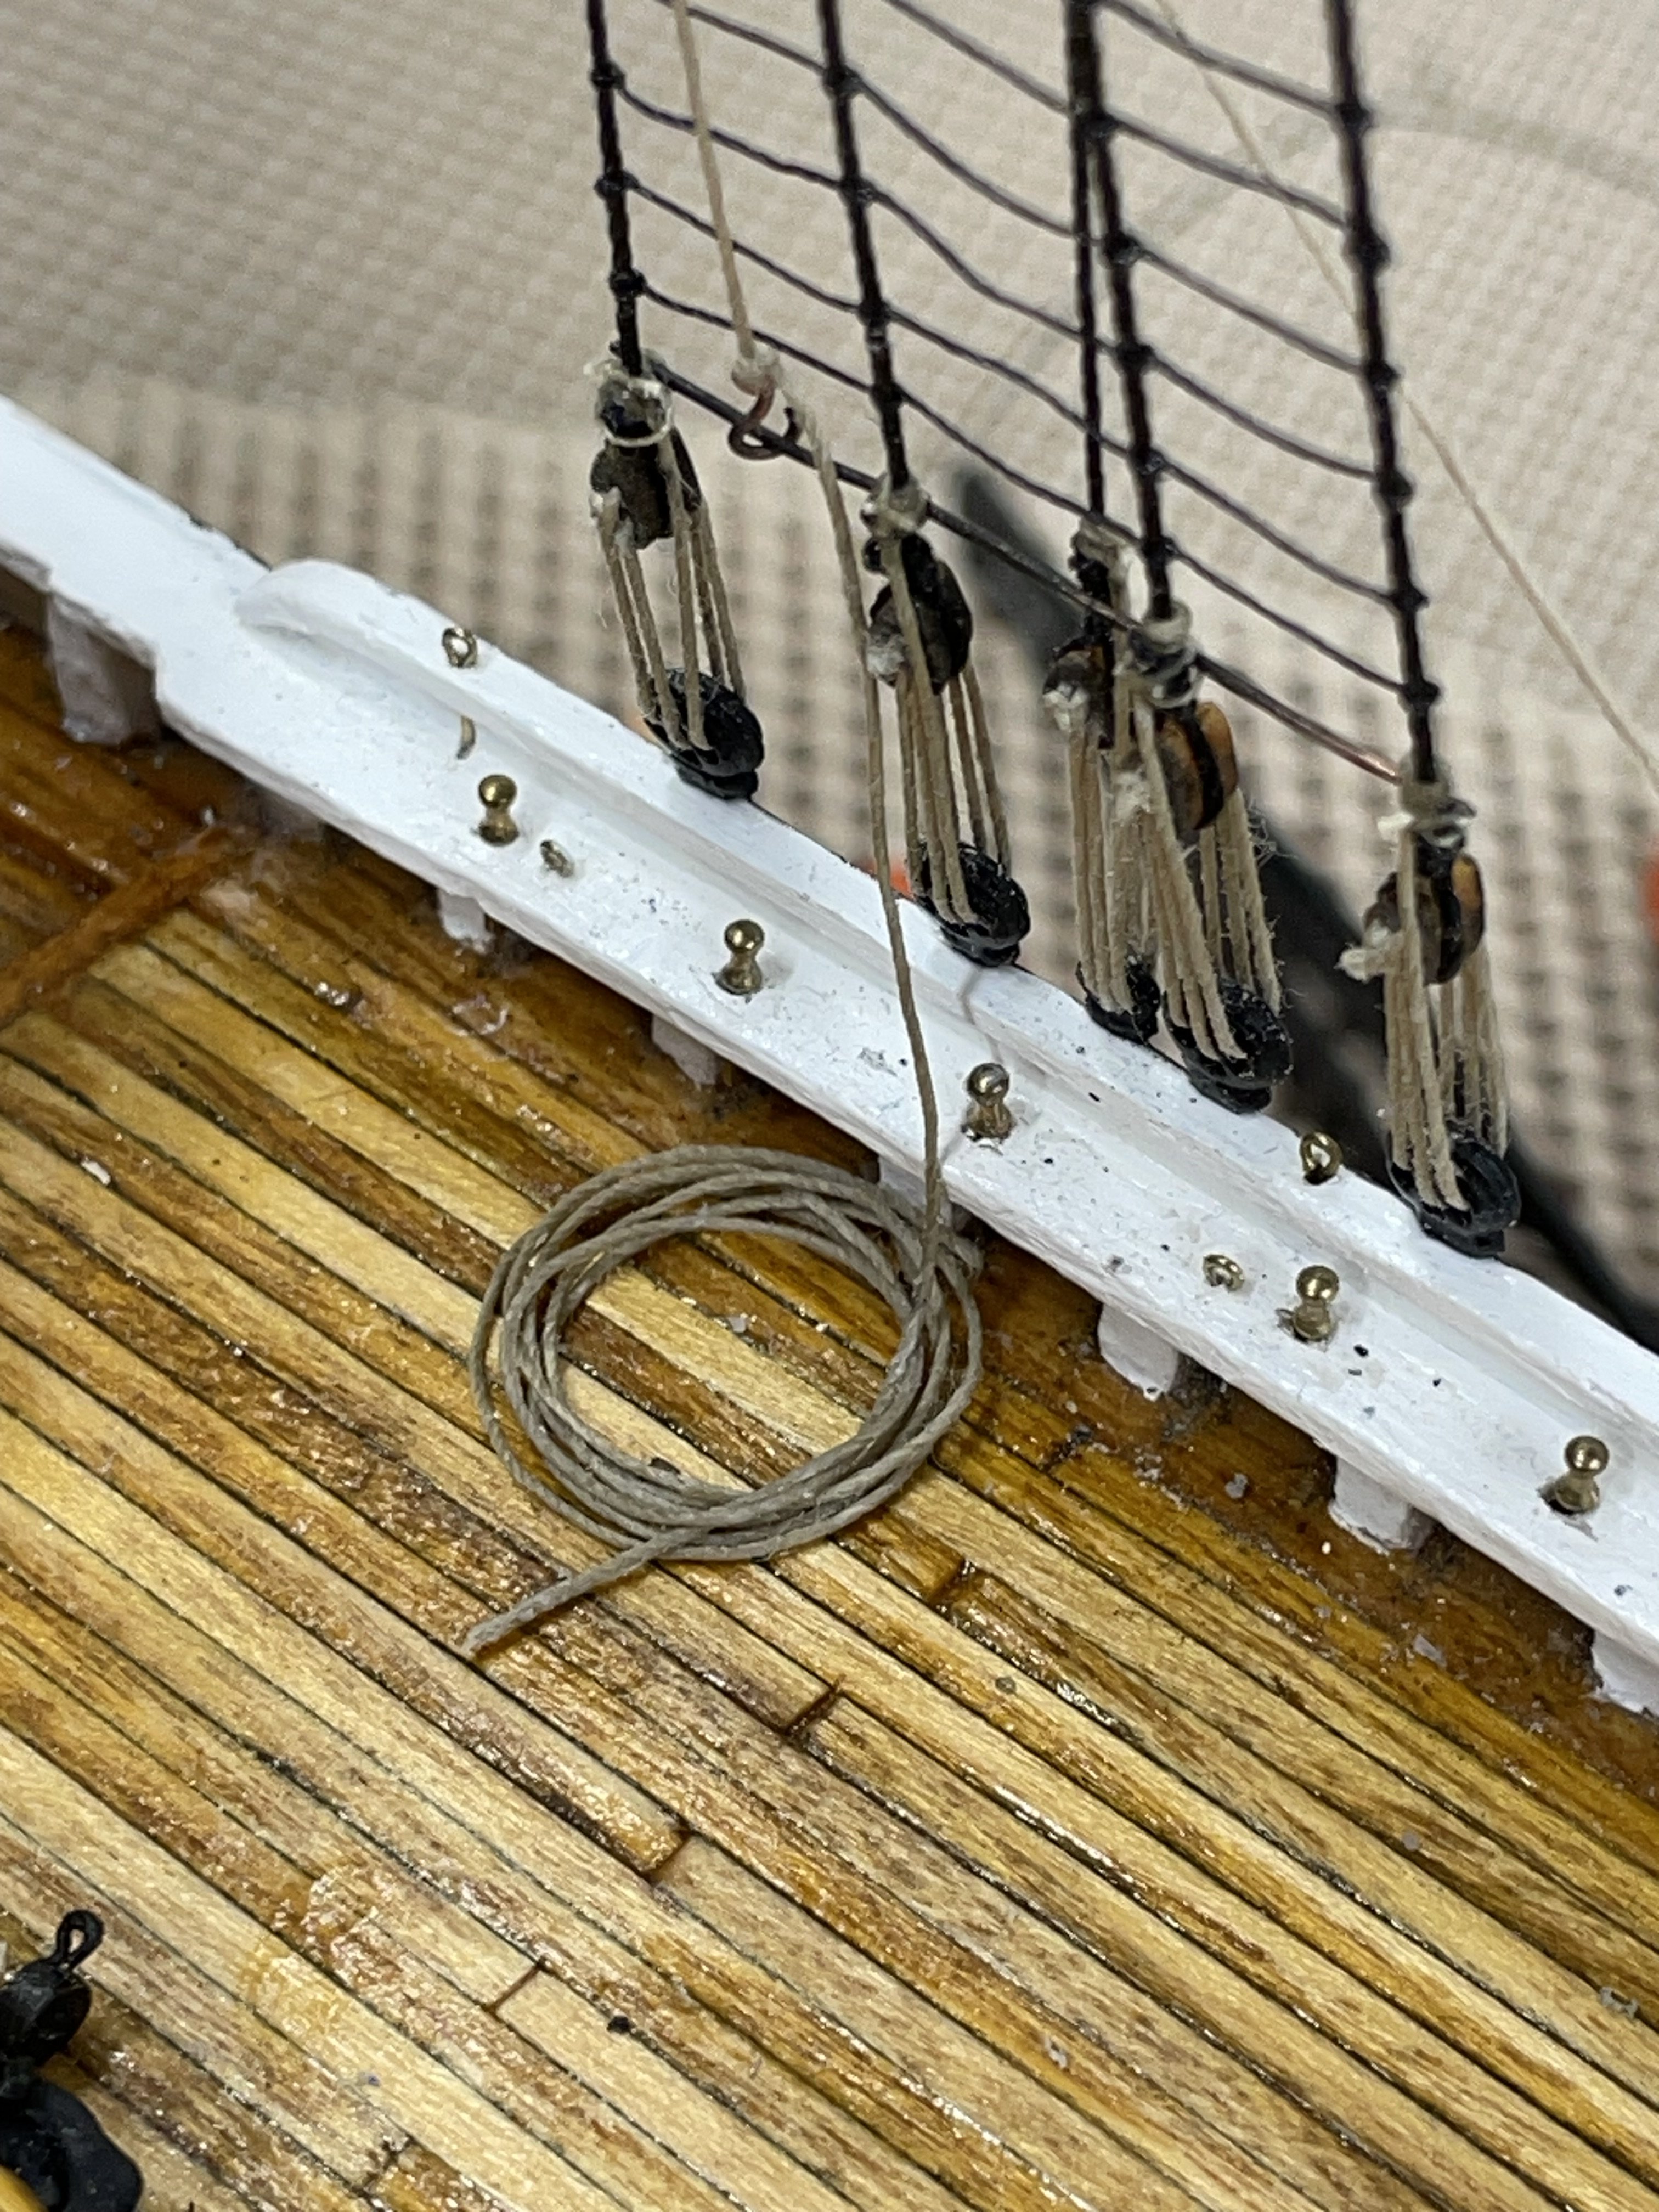
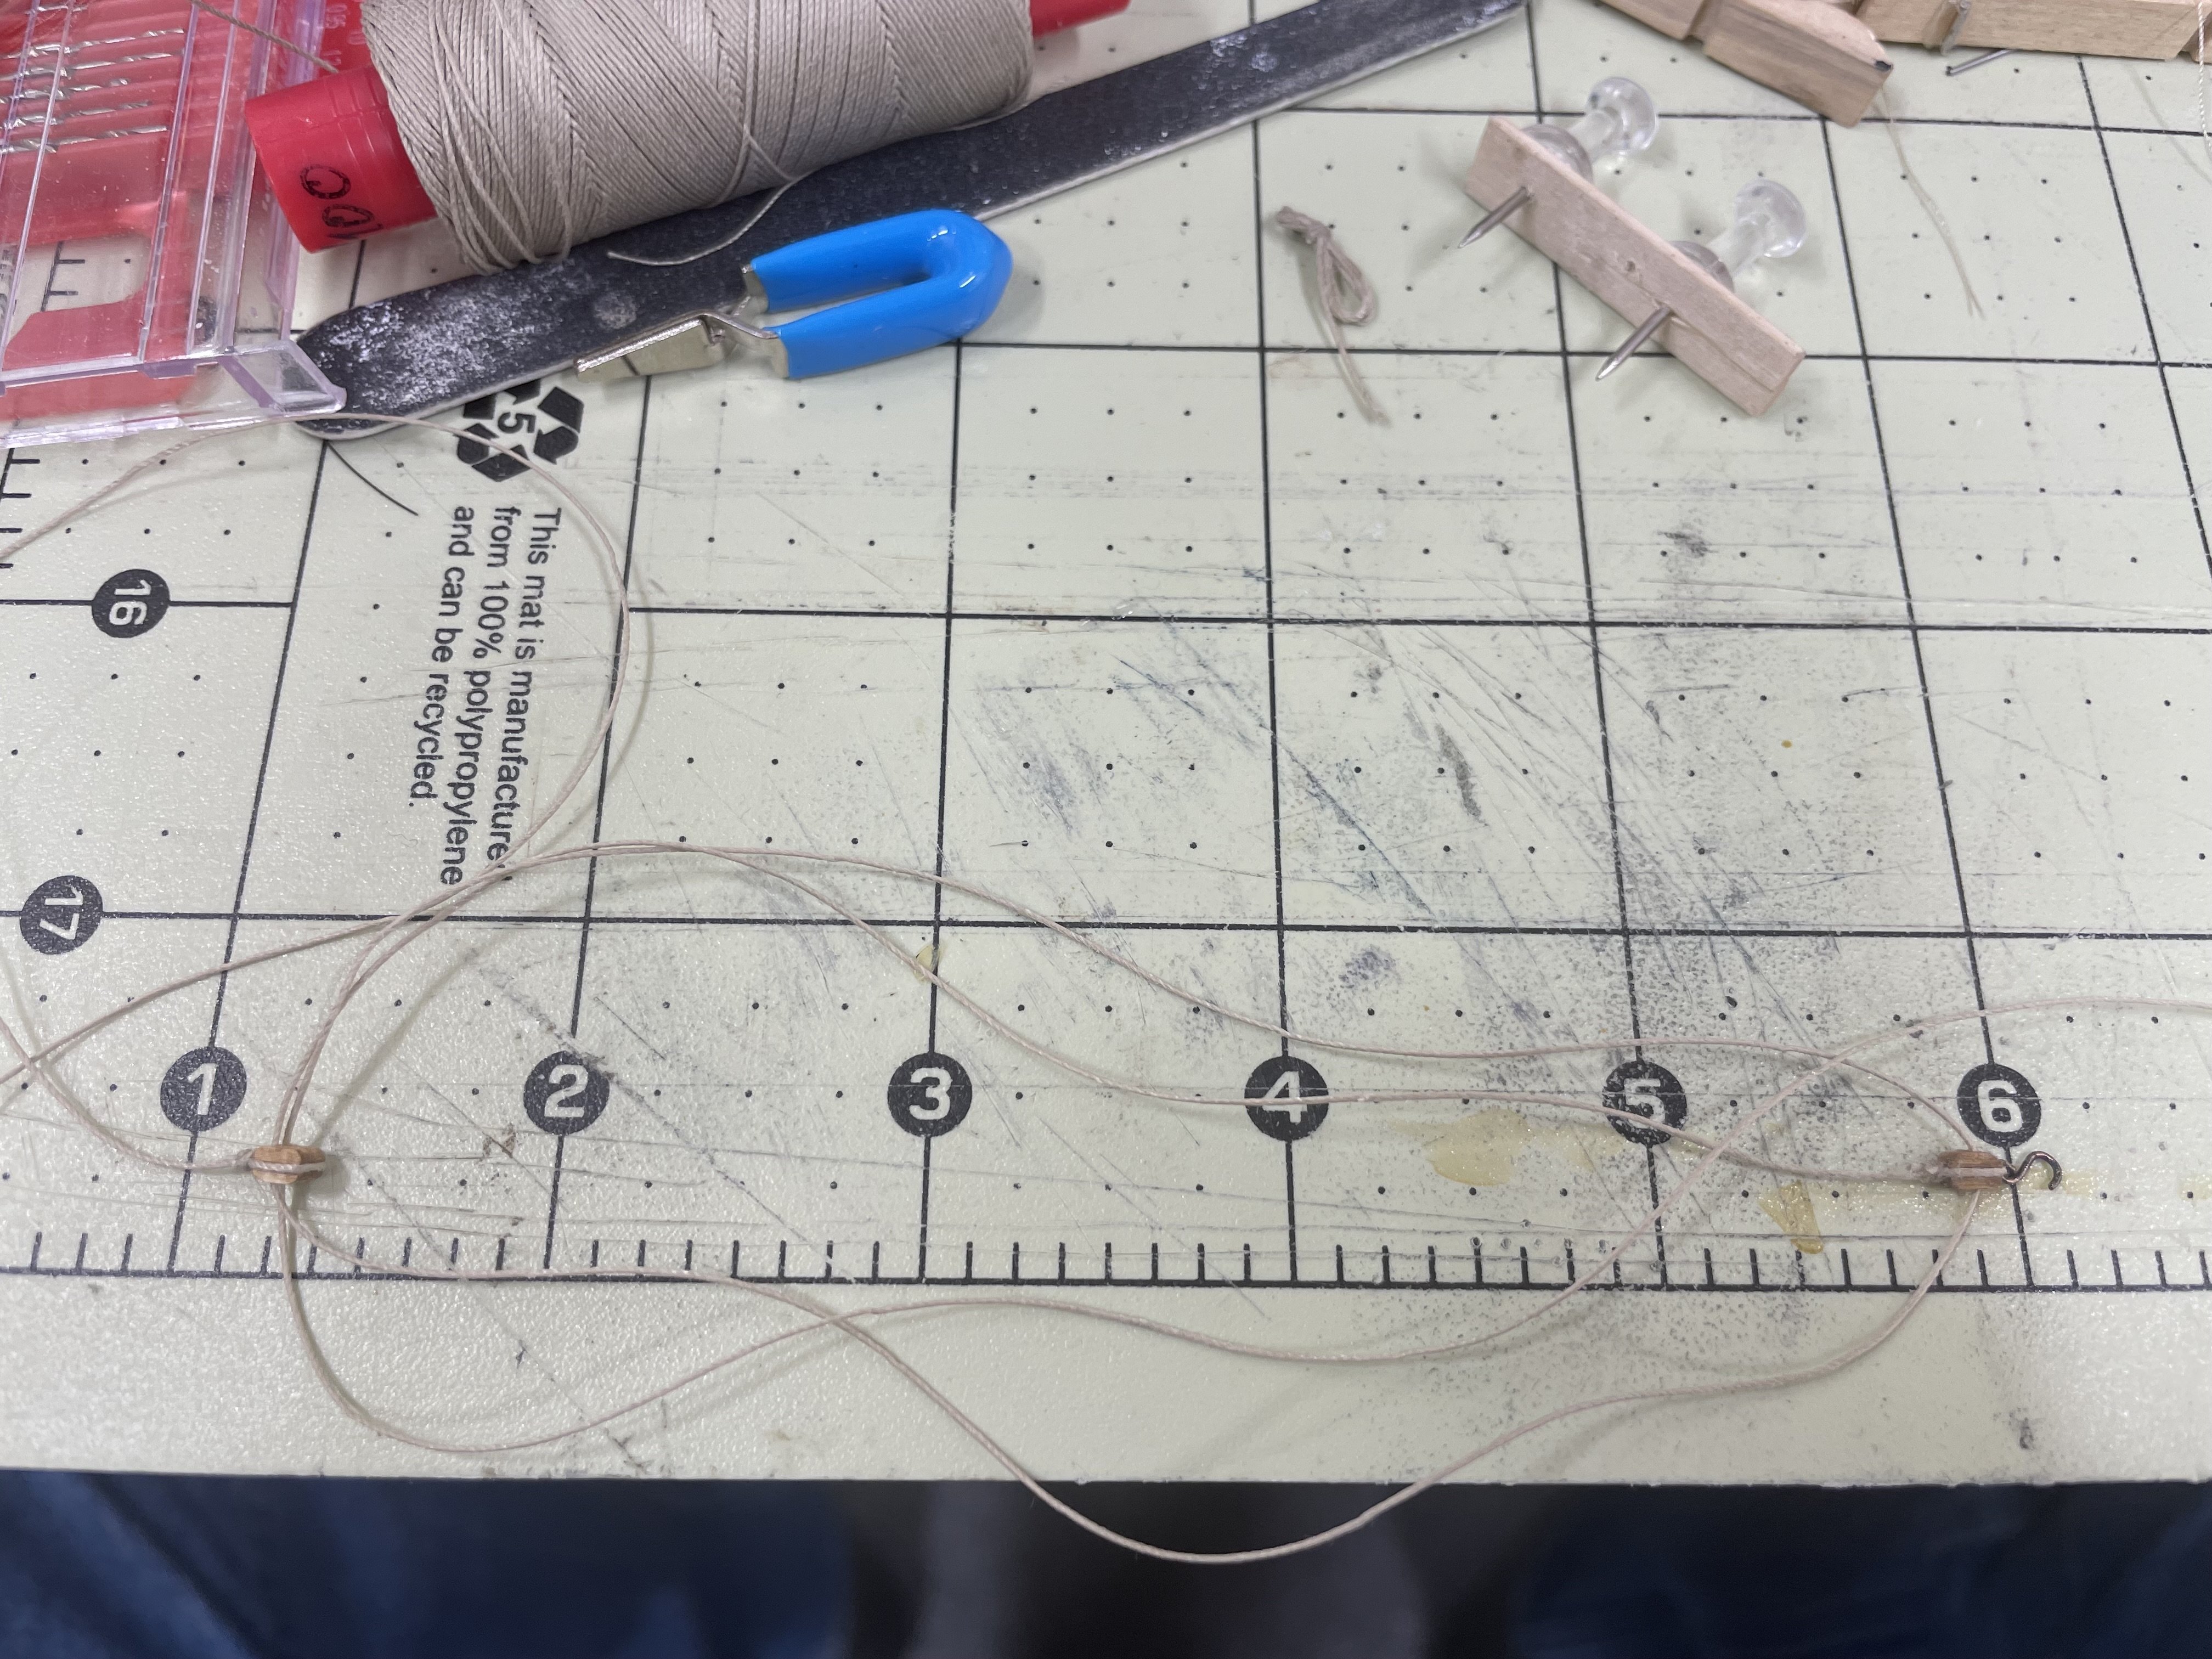
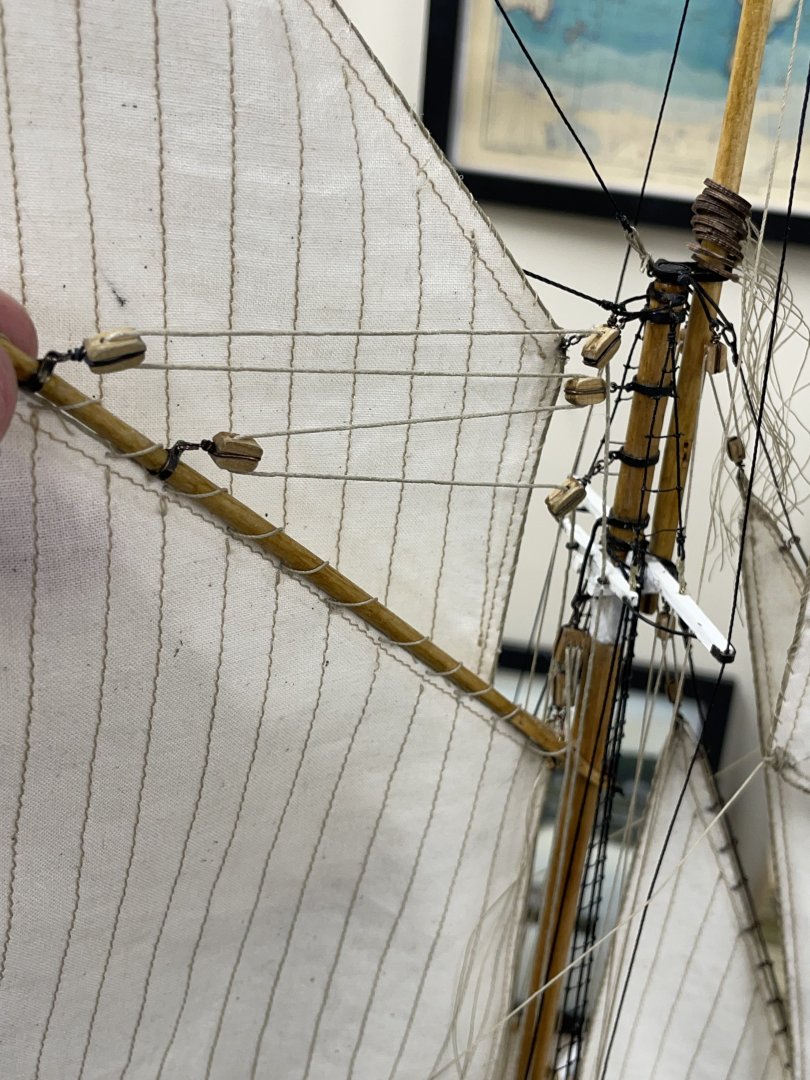
Jib Downhauls… Just in, Amati Rope for the downhaul rigging. Threading down haul through hanks. Tying down haul off to Jumbo Jib. Jumbo Jib down haul belayed to starboard bitt. Jib Downhaul belayed to pin #2 Balloon Jib belayed to pin #1. Jib Downhauls complete with rope coils. Cheers 🍻


- 282 replies
-
- 9
-
-
-
- Bluenose
- Model Shipways
- (and 1 more)
-
Greg, Nice Prep… 👍. What rope are you using? It looks good. I didn’t like the kit supplied Manila rigging, although the Black was good for the standing rigging. I have been using Amati rope I had on my bench, for the running rigging. John
-
I understand Bob… you did a great job rigging the Mayflower. Maybe rigging a schooner would be good practice. Carry on, Sir. 🍻
-
Congrats Bob, great job on finishing your Mayflower. 👍 Are you ready to get back to Pegasus? Cheers 🍻
-
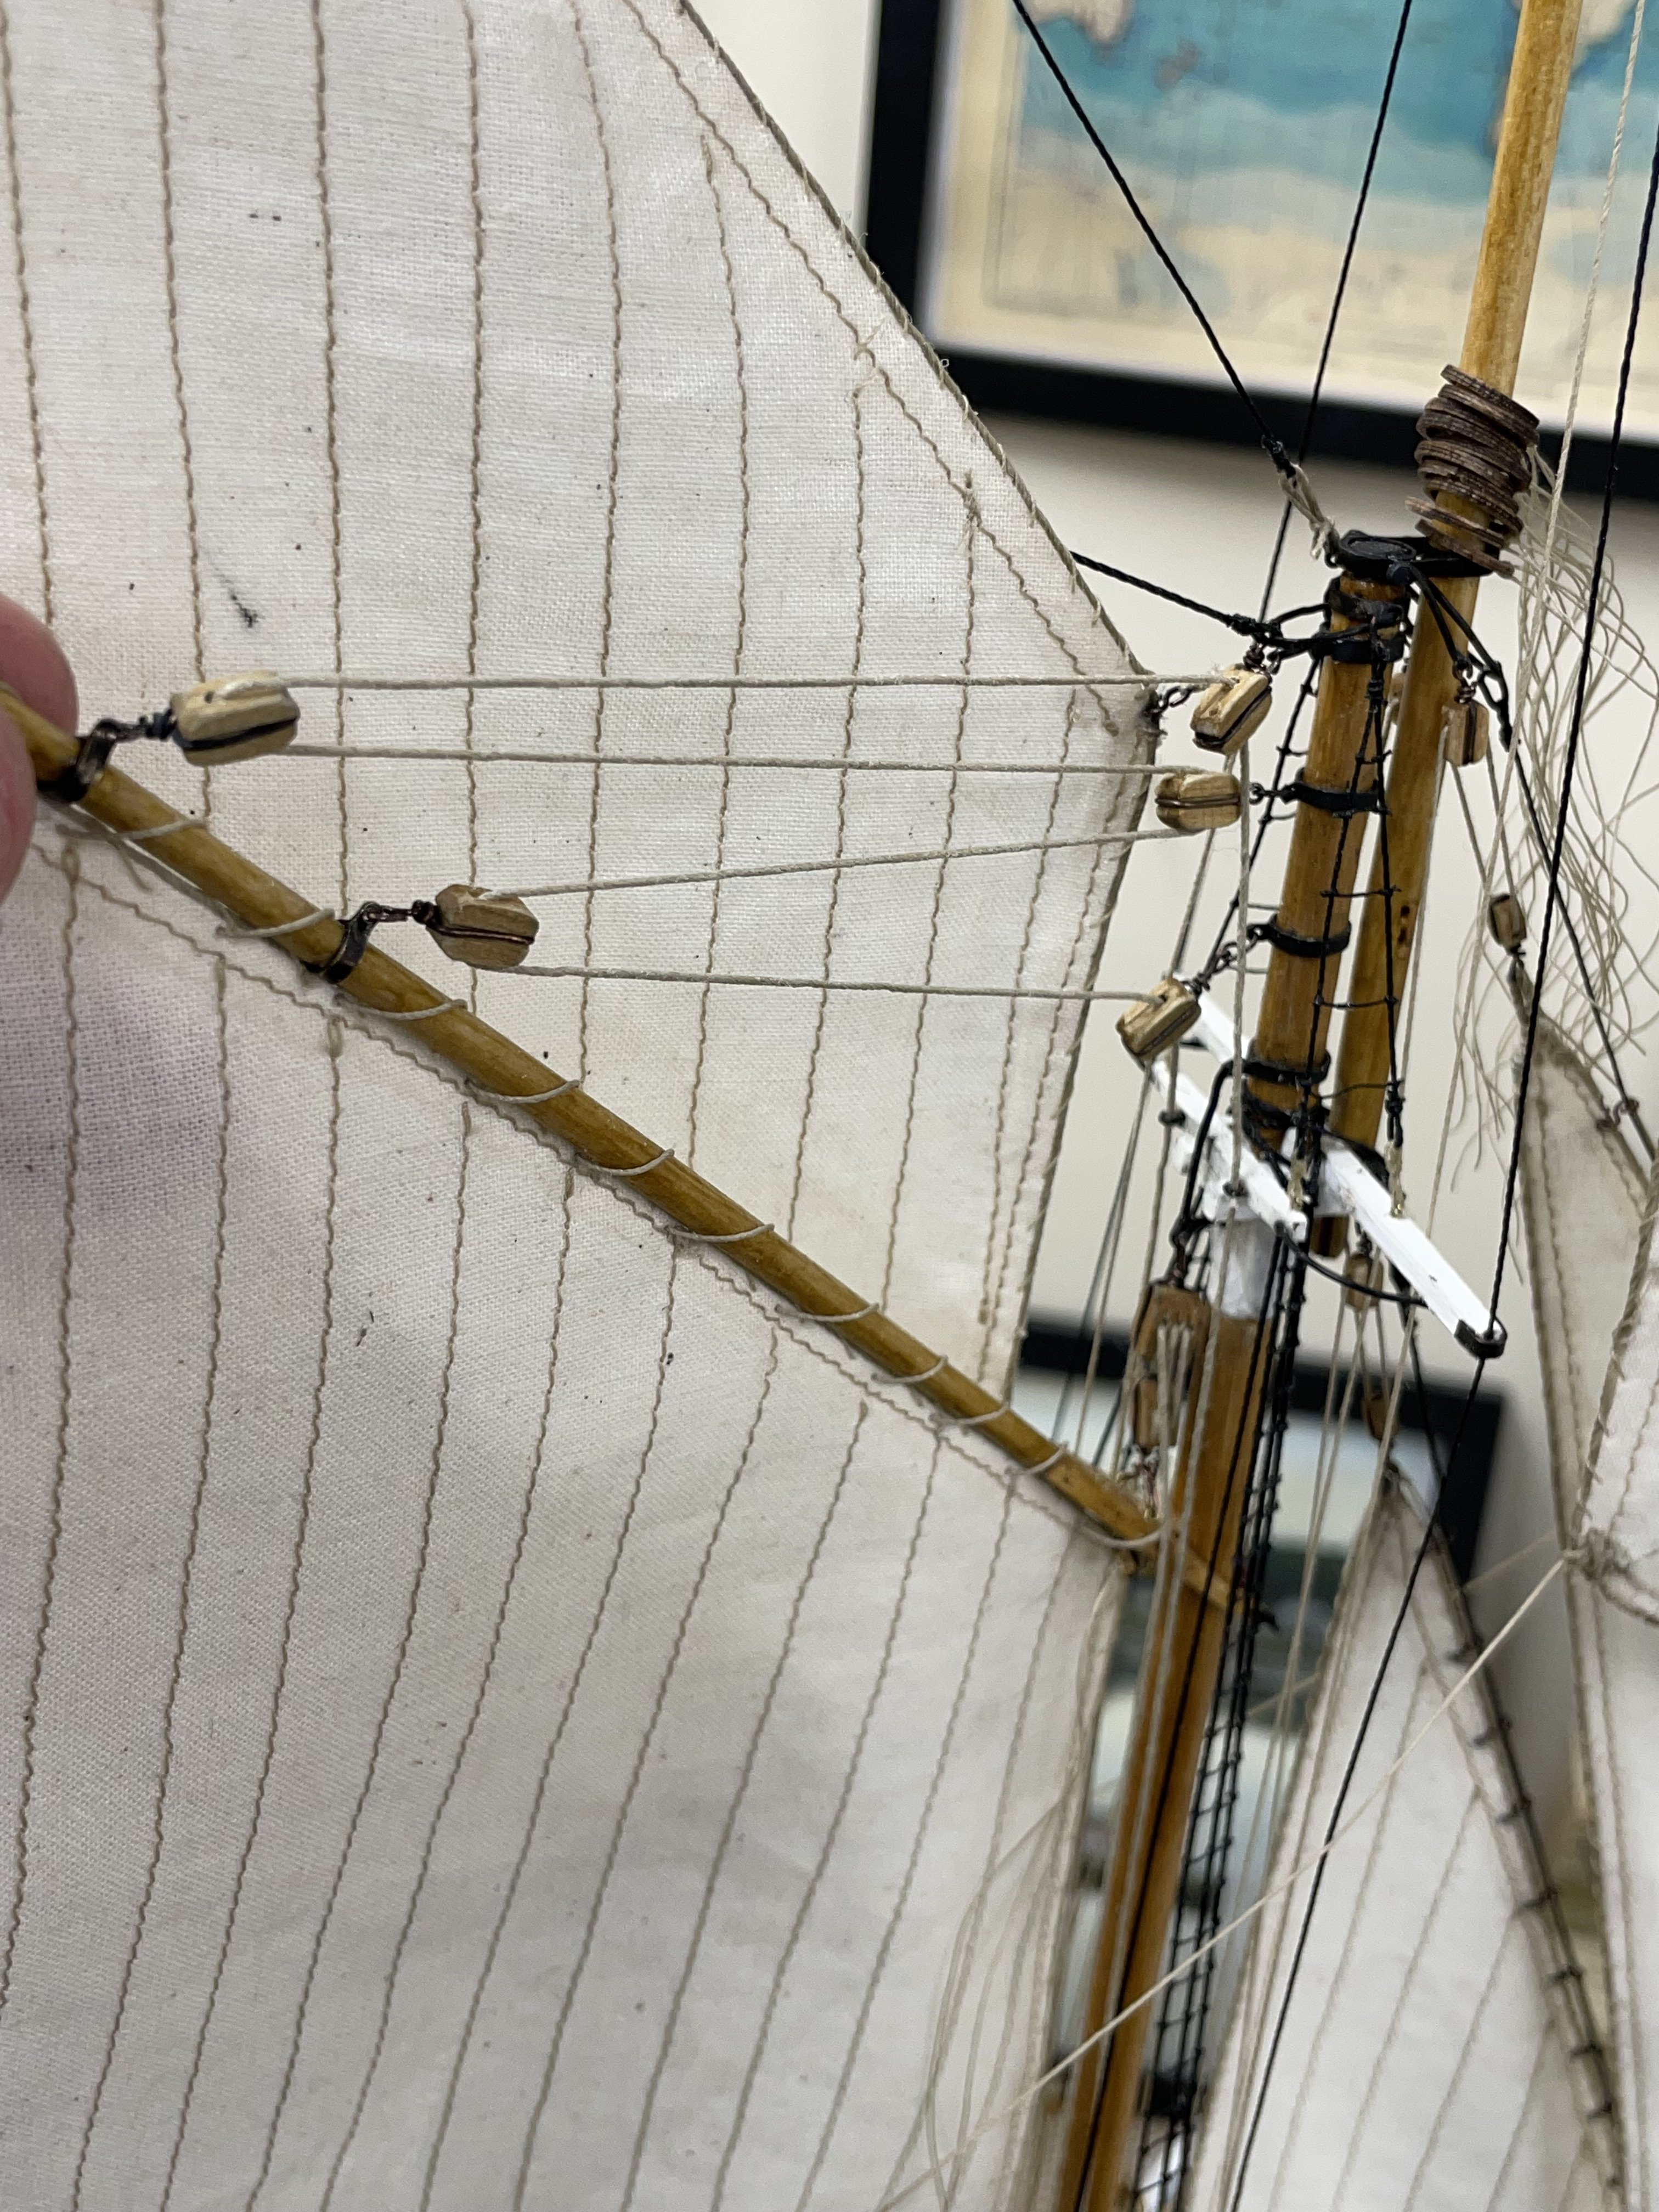
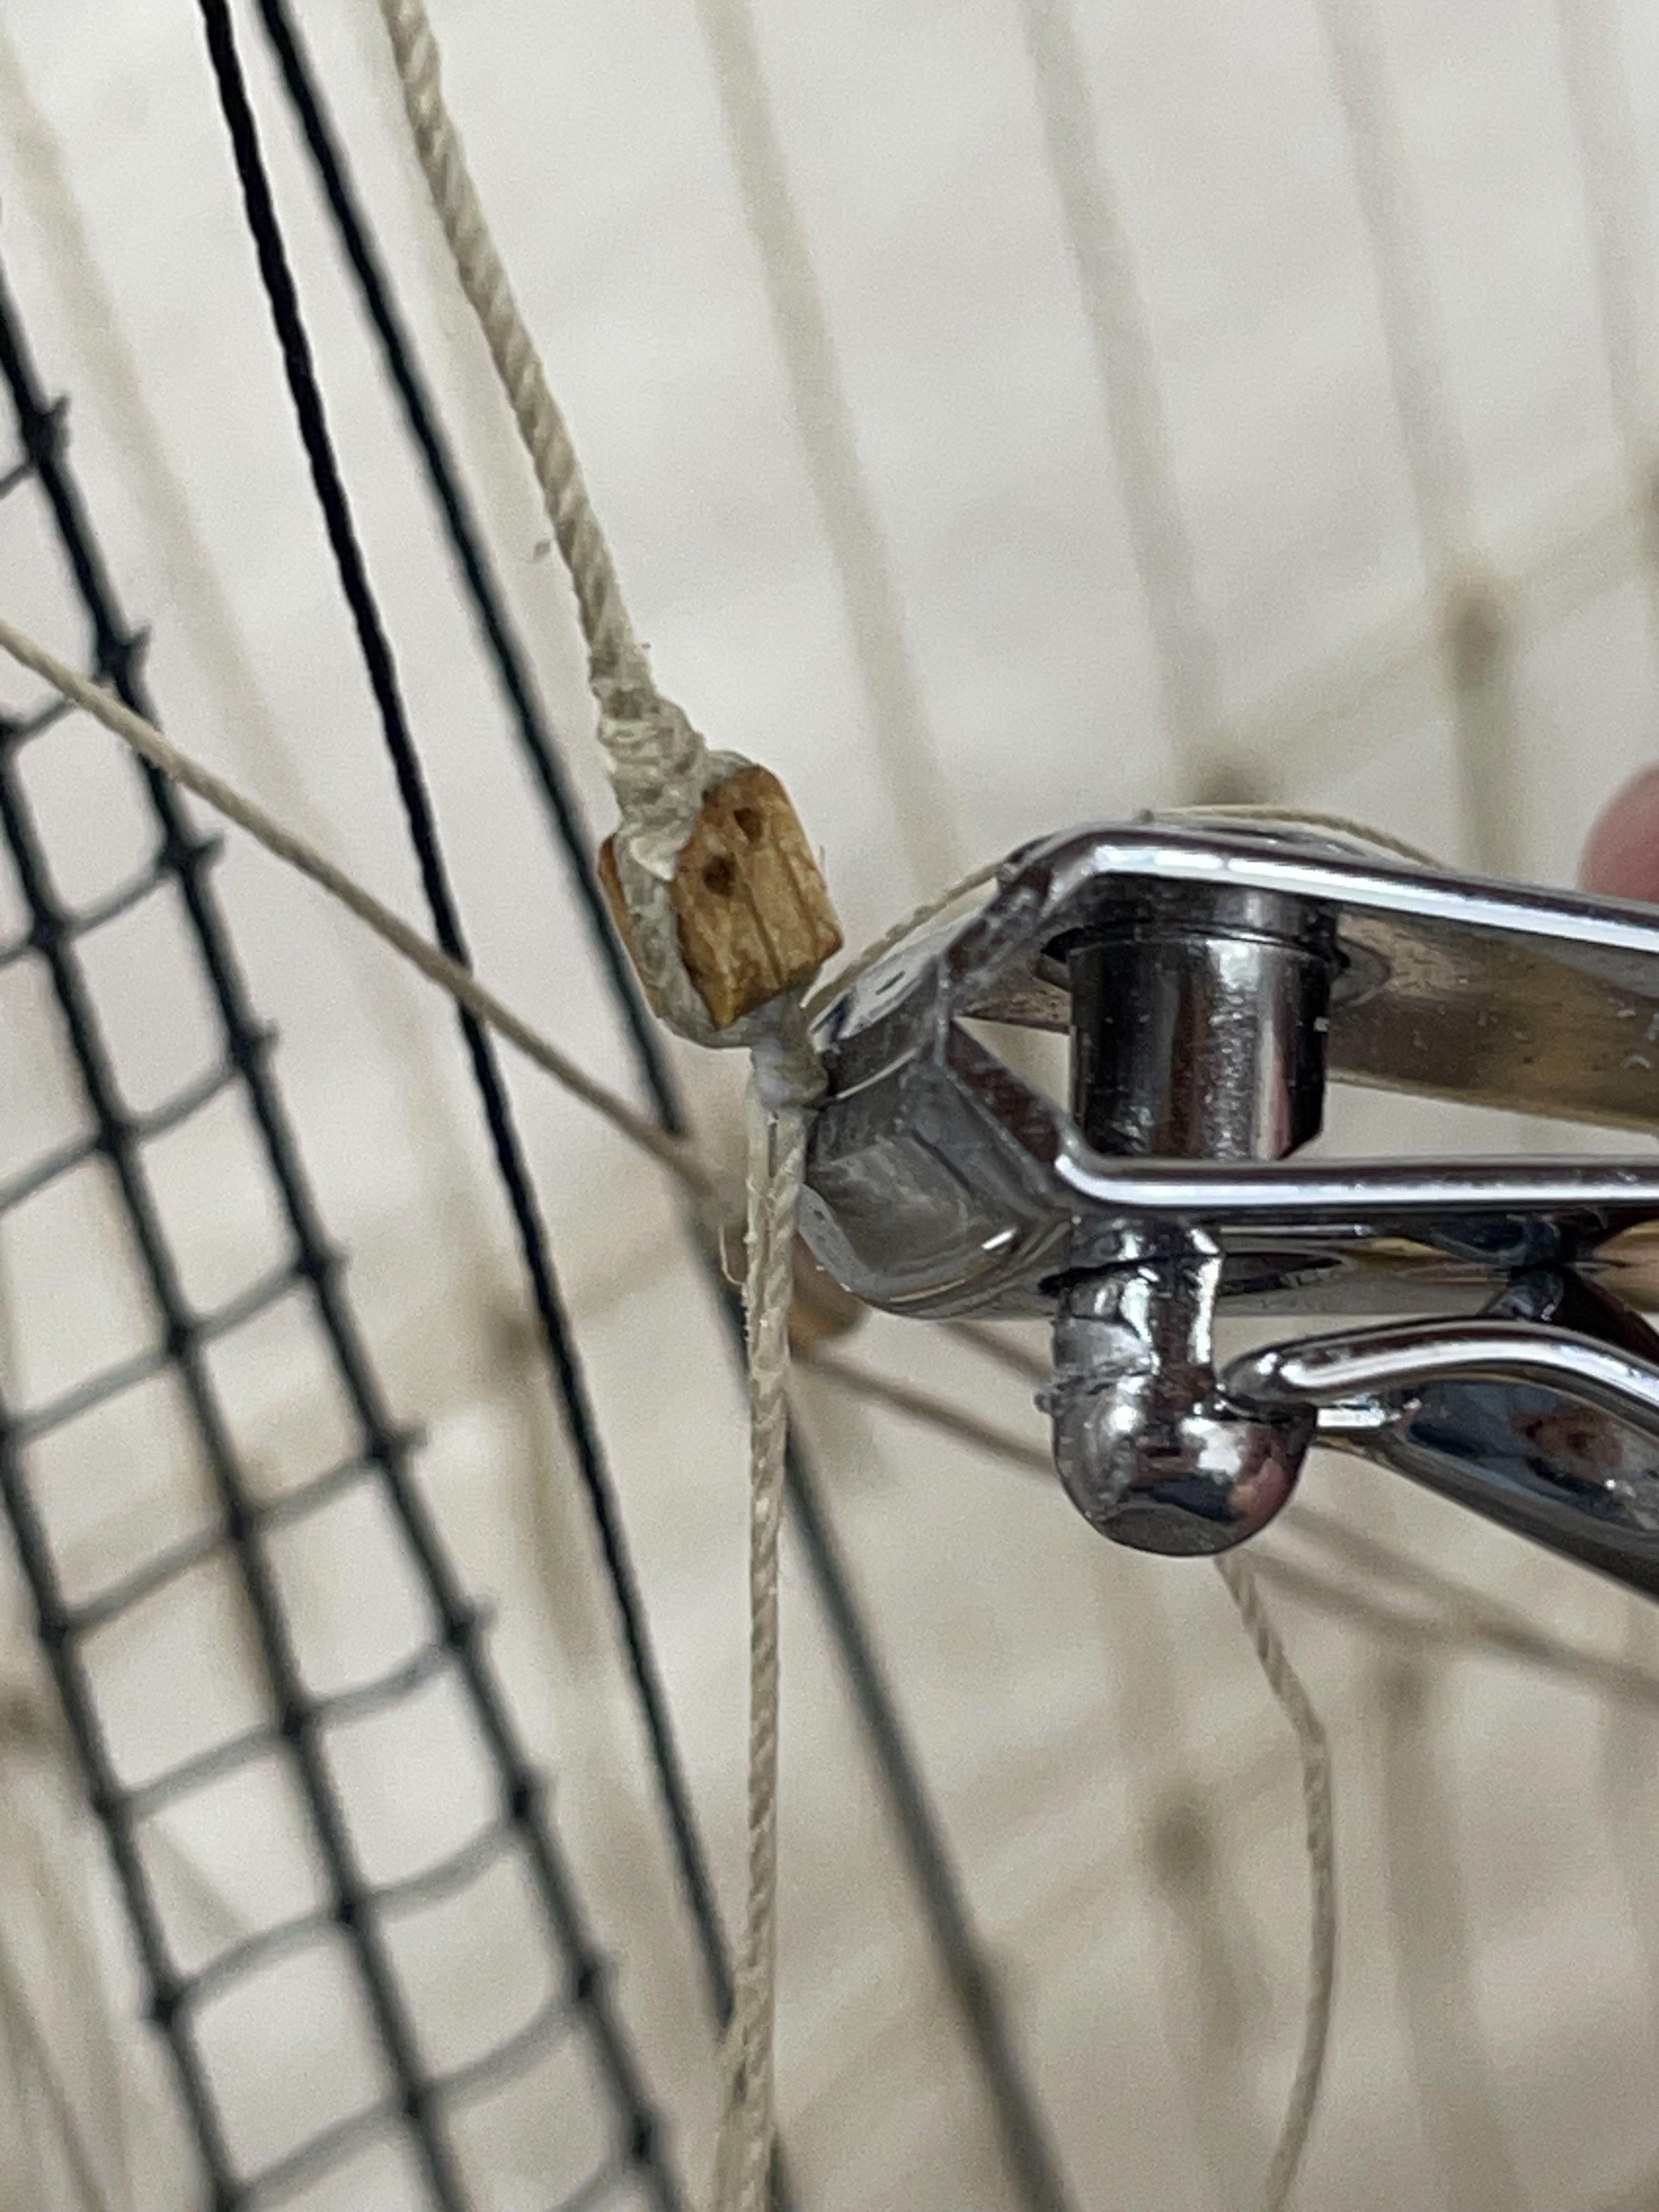
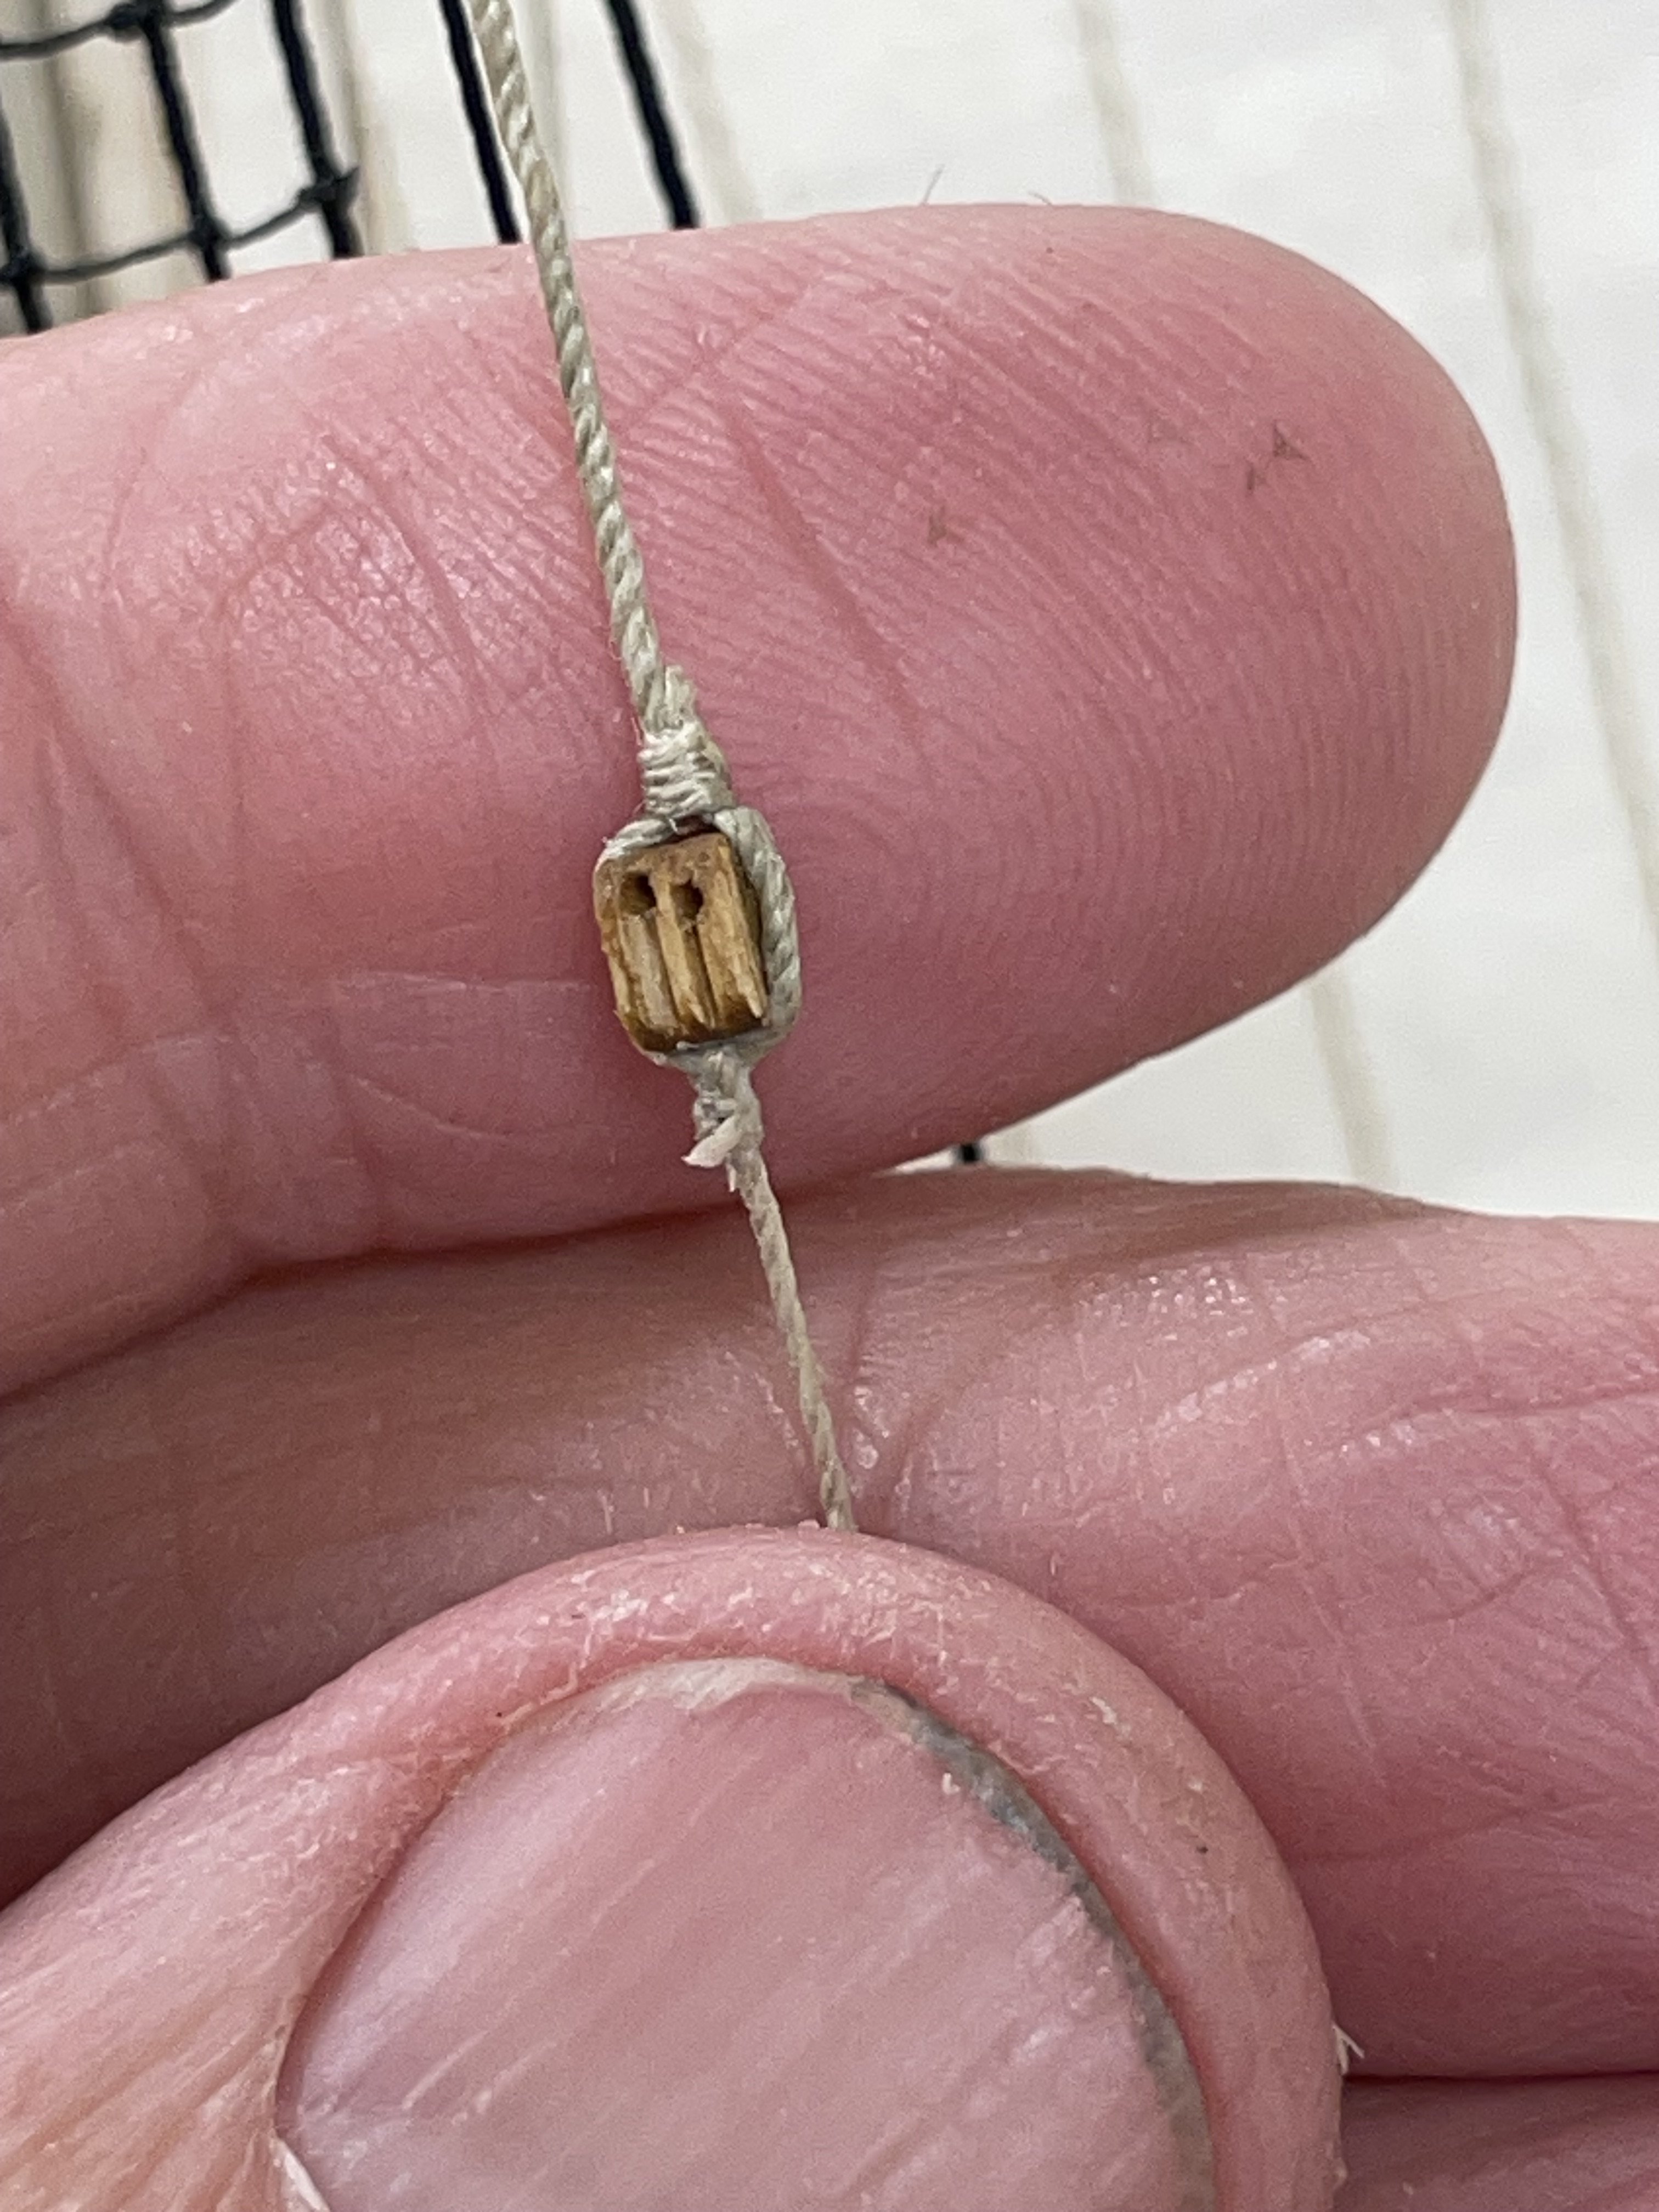
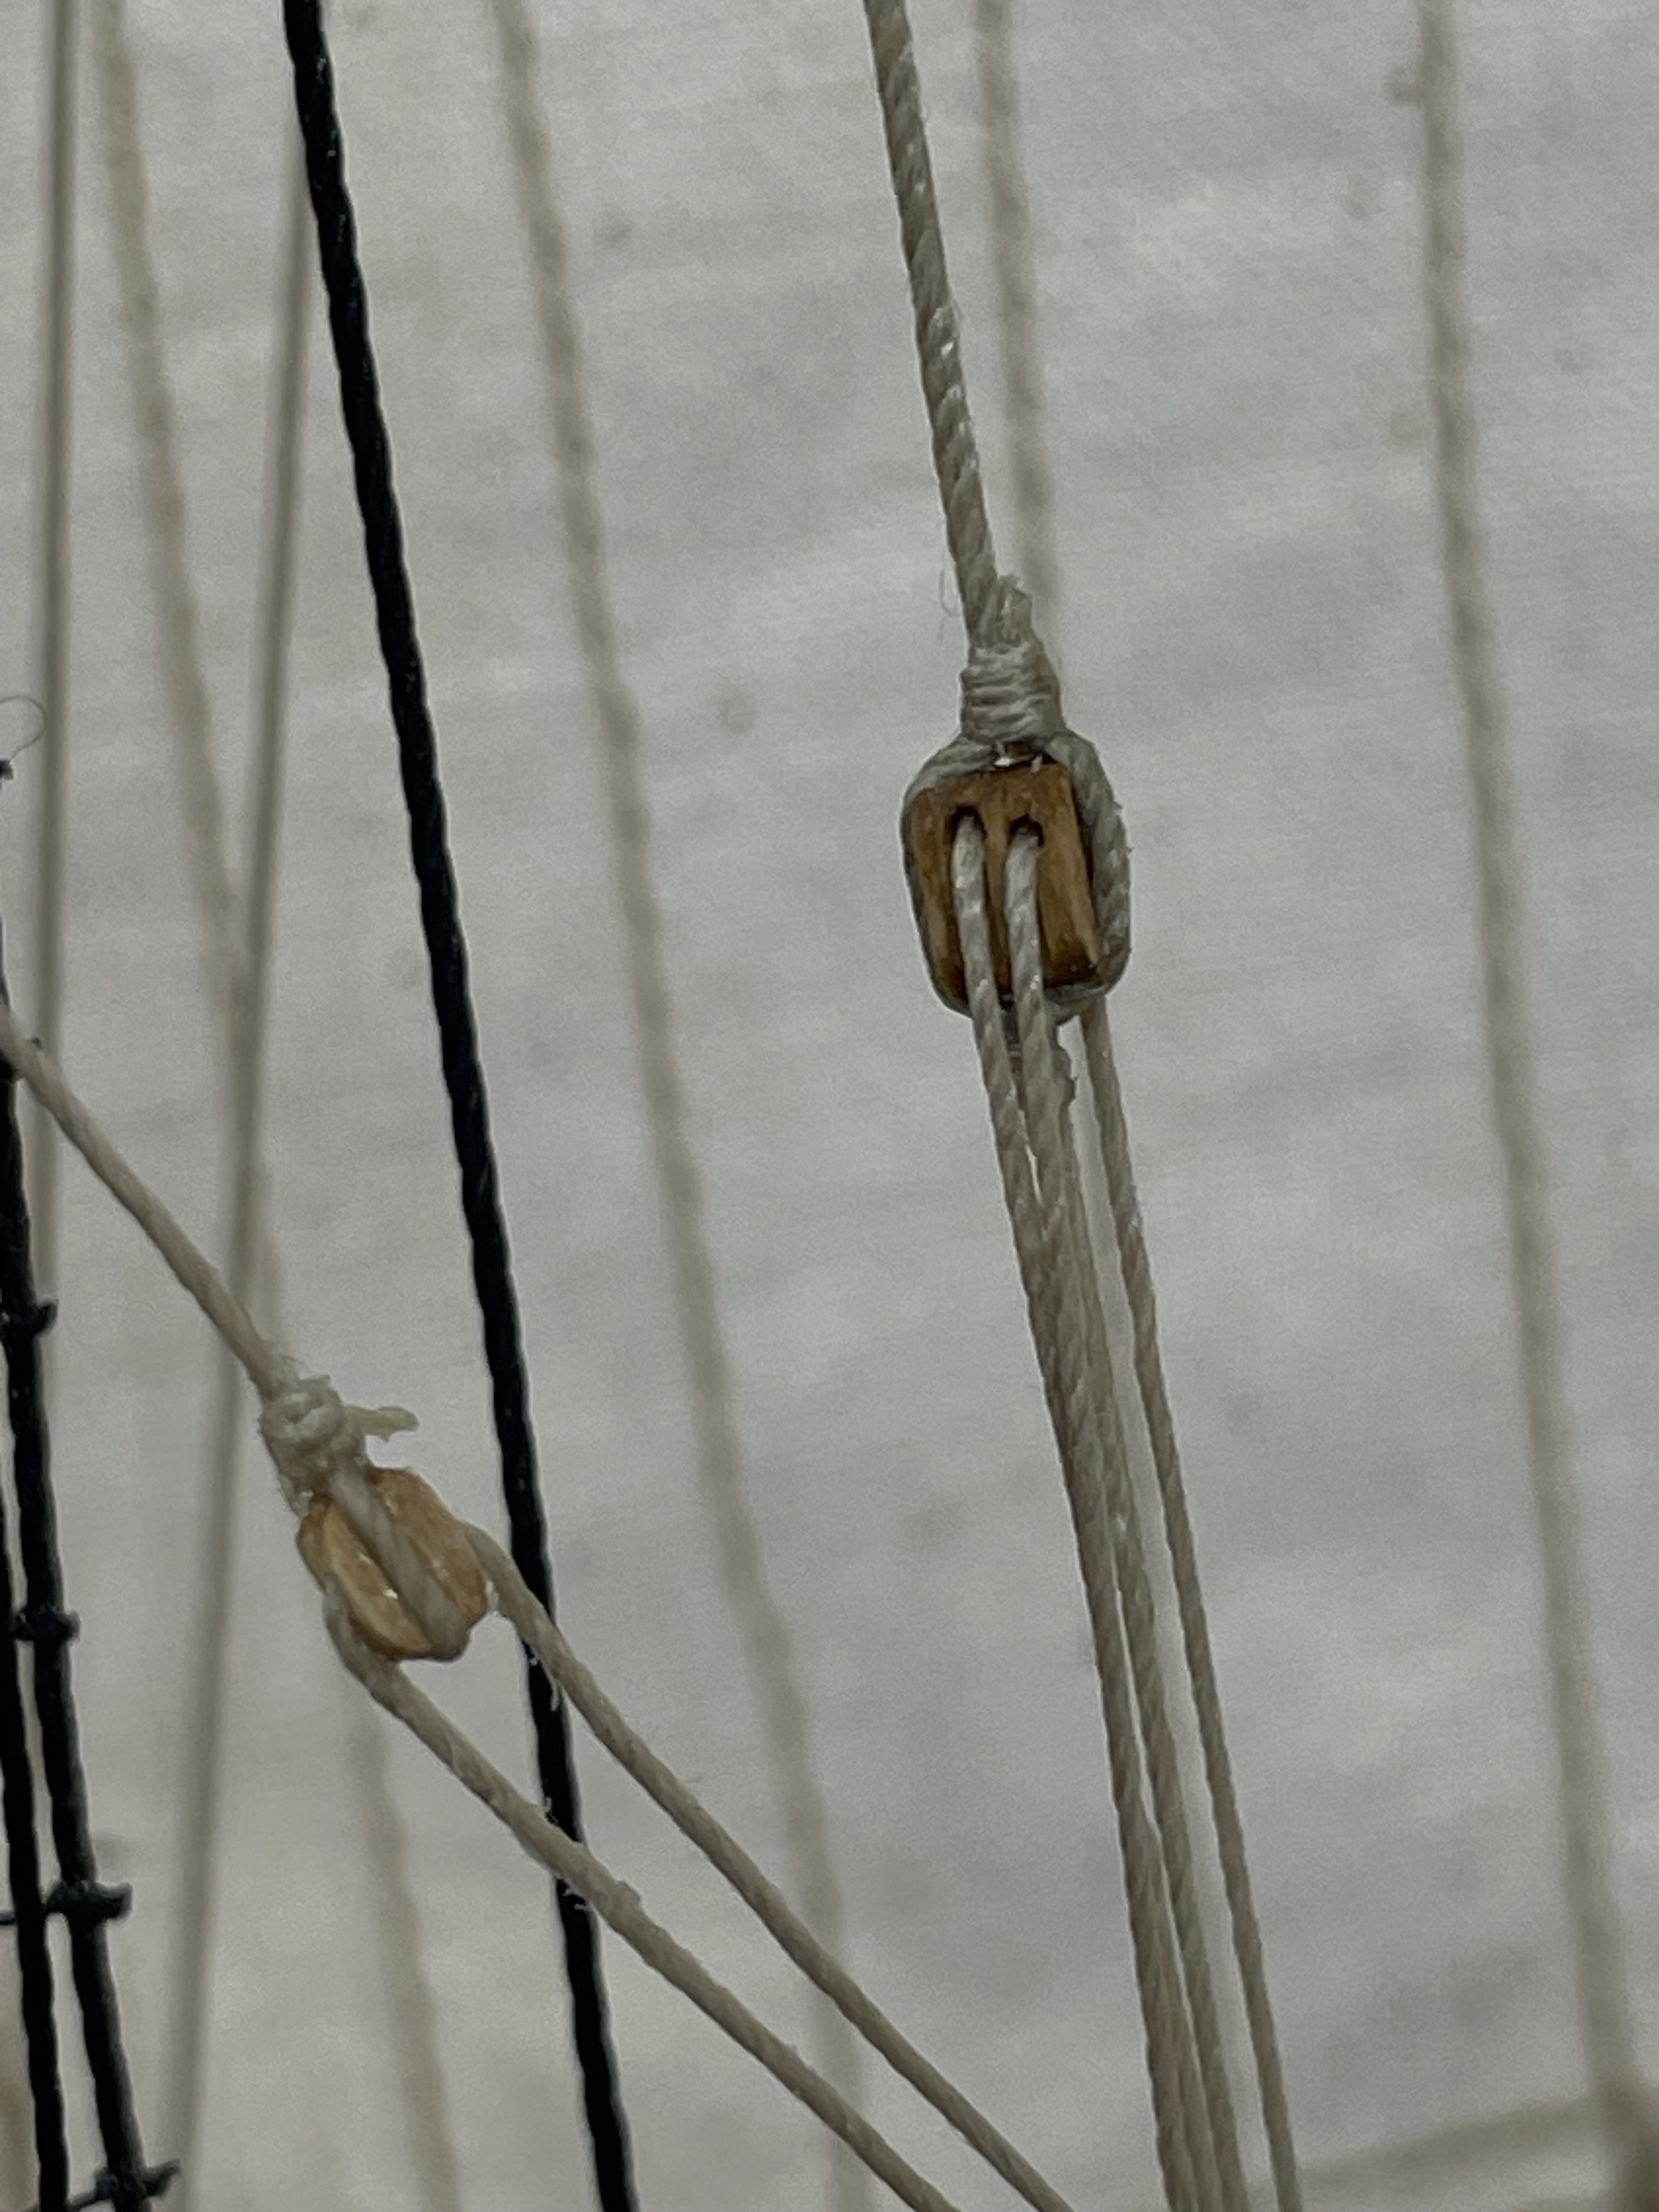
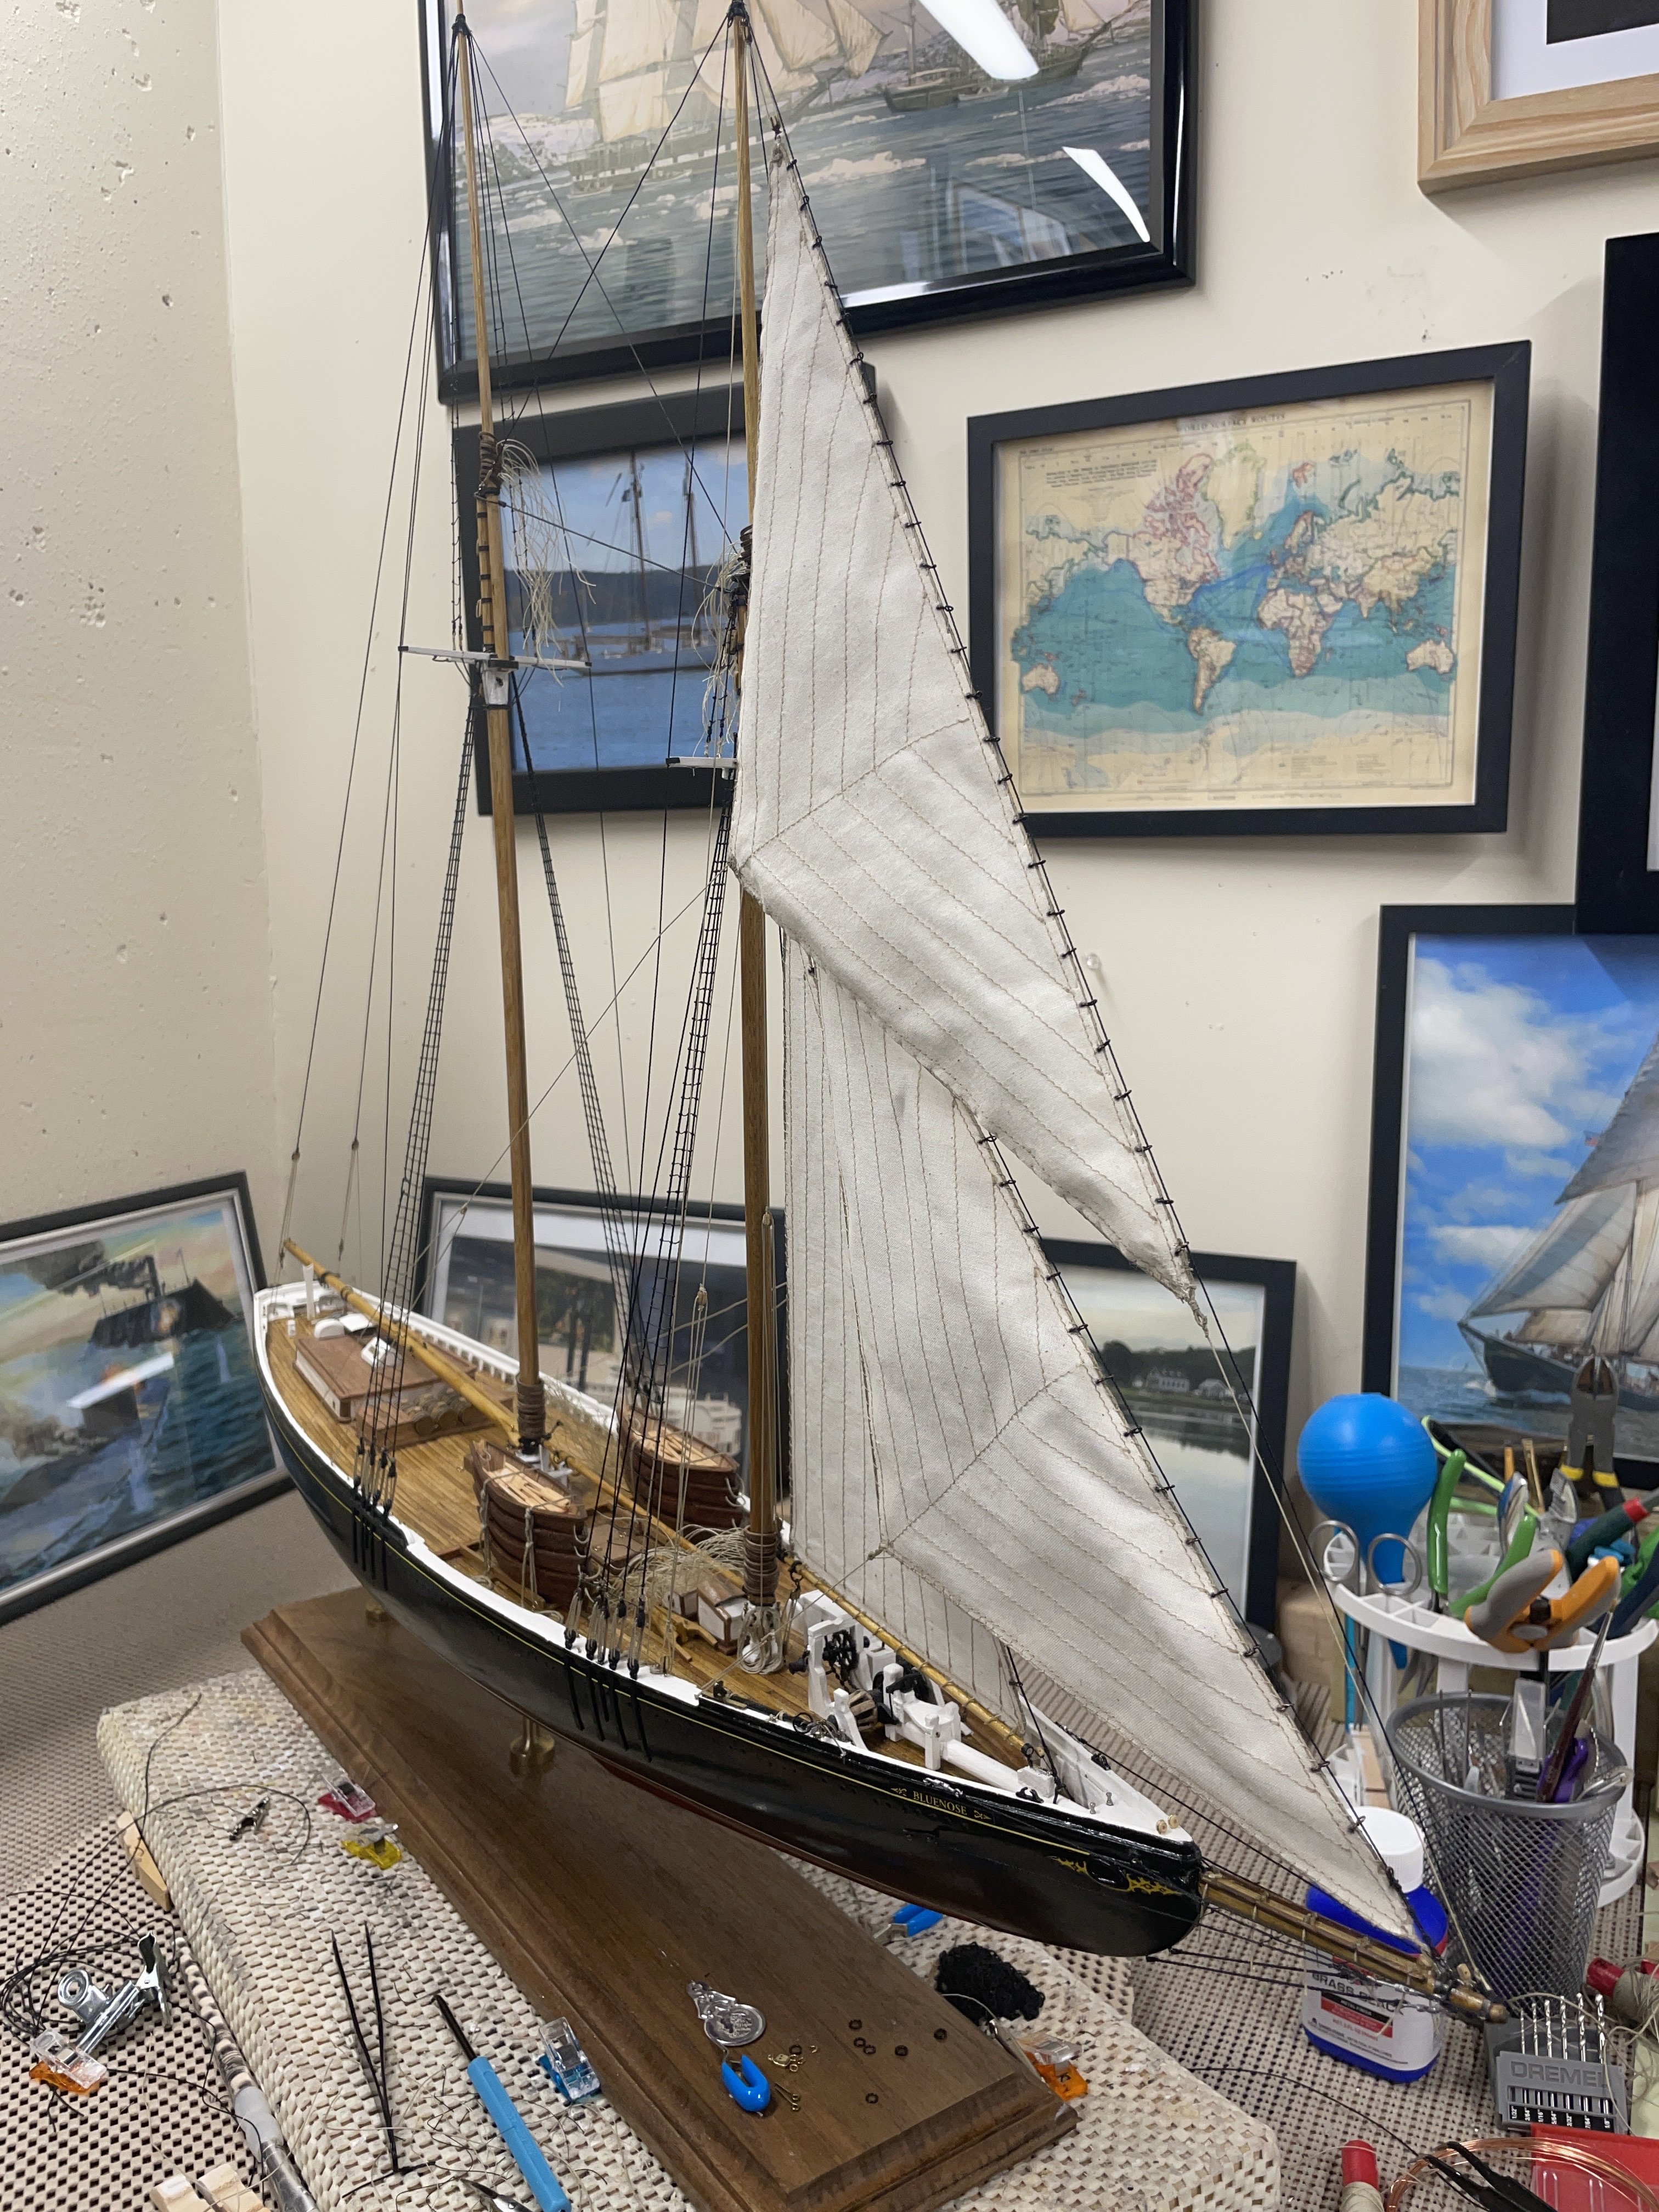
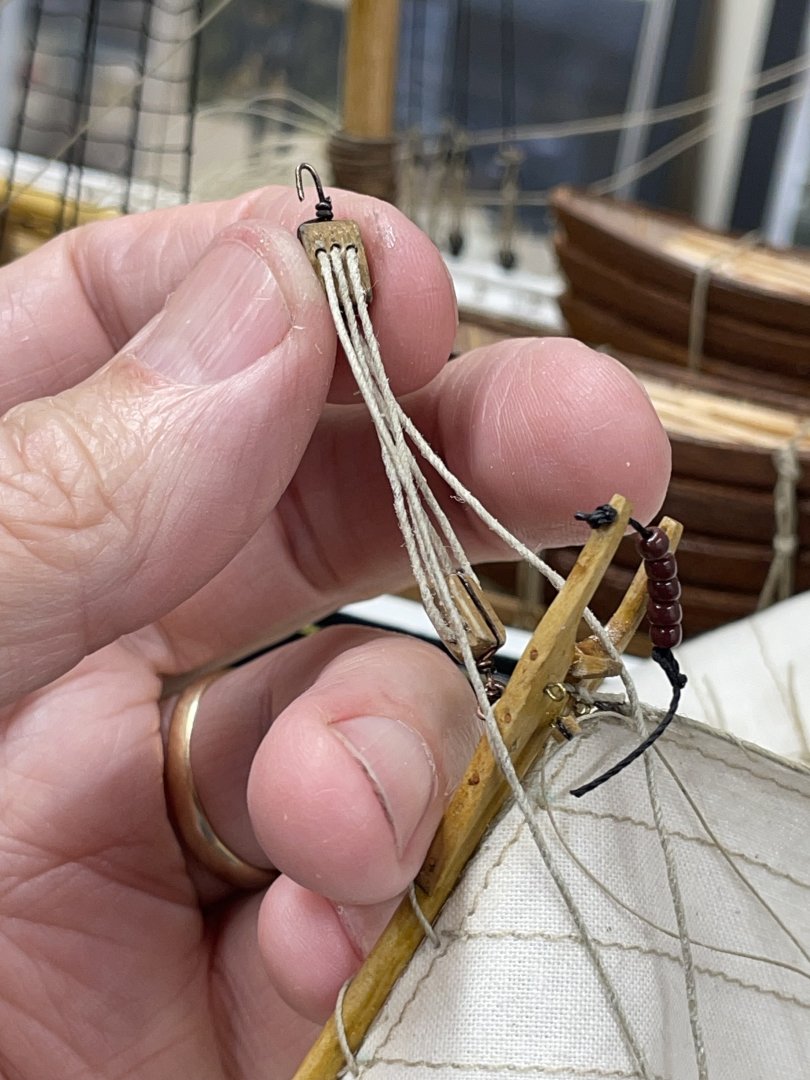
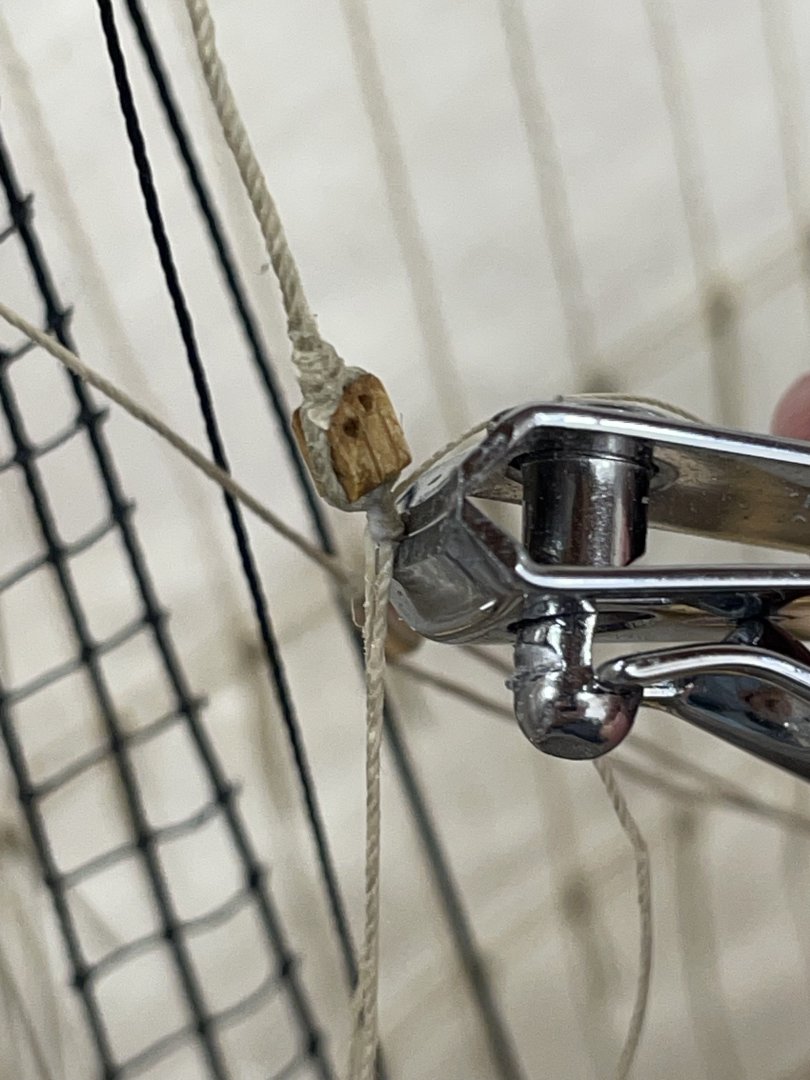
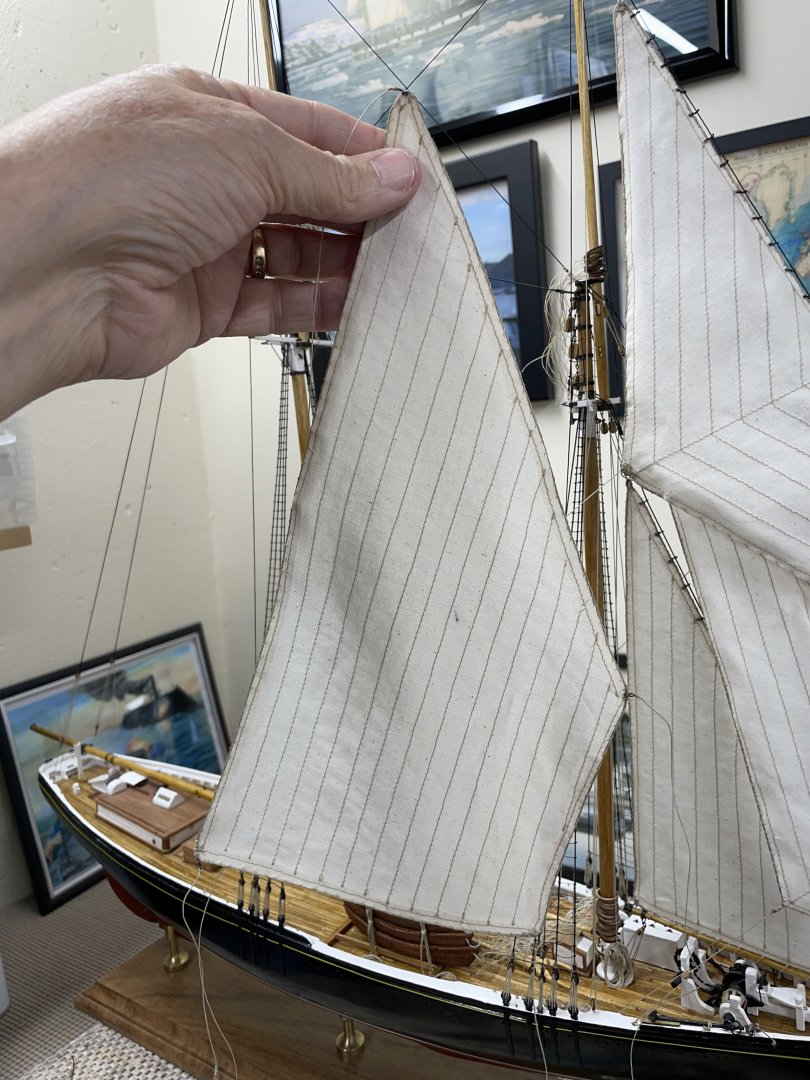
Stay Sail… Rigging Sheet Pendant Block… Halyard, Throat, Tack and Sheet rigged. Staysail Throat Halyard block… Staysail Tack Pendant with Fairlead… Staysail Halyard… Halyard belayed at Sheer Pole Starboard side. Putting some wind in her sails… Staysail Sheet Tackle… Staysail Sheet belayed pin #38 (starboard) Staysail Throat Halyard and Tack belayed to Fore Pin Rail. Staysail set… Cheers 🍻


- 282 replies
-
- 2
-
-
- Bluenose
- Model Shipways
- (and 1 more)
-
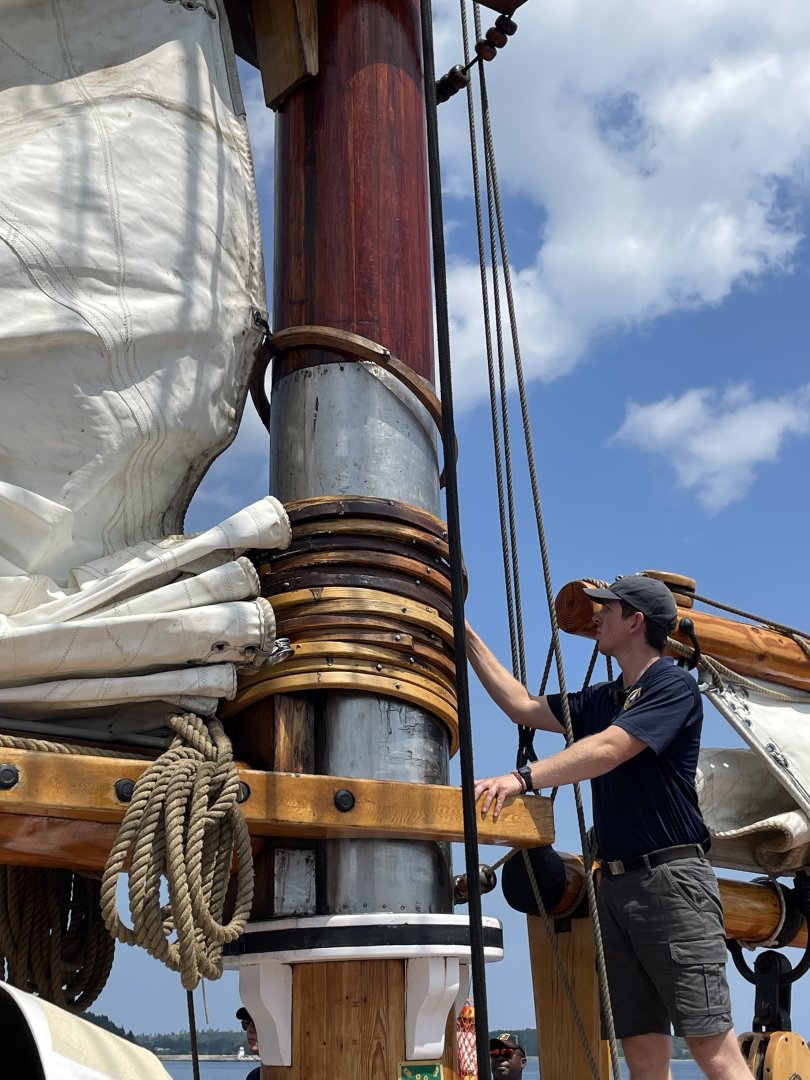
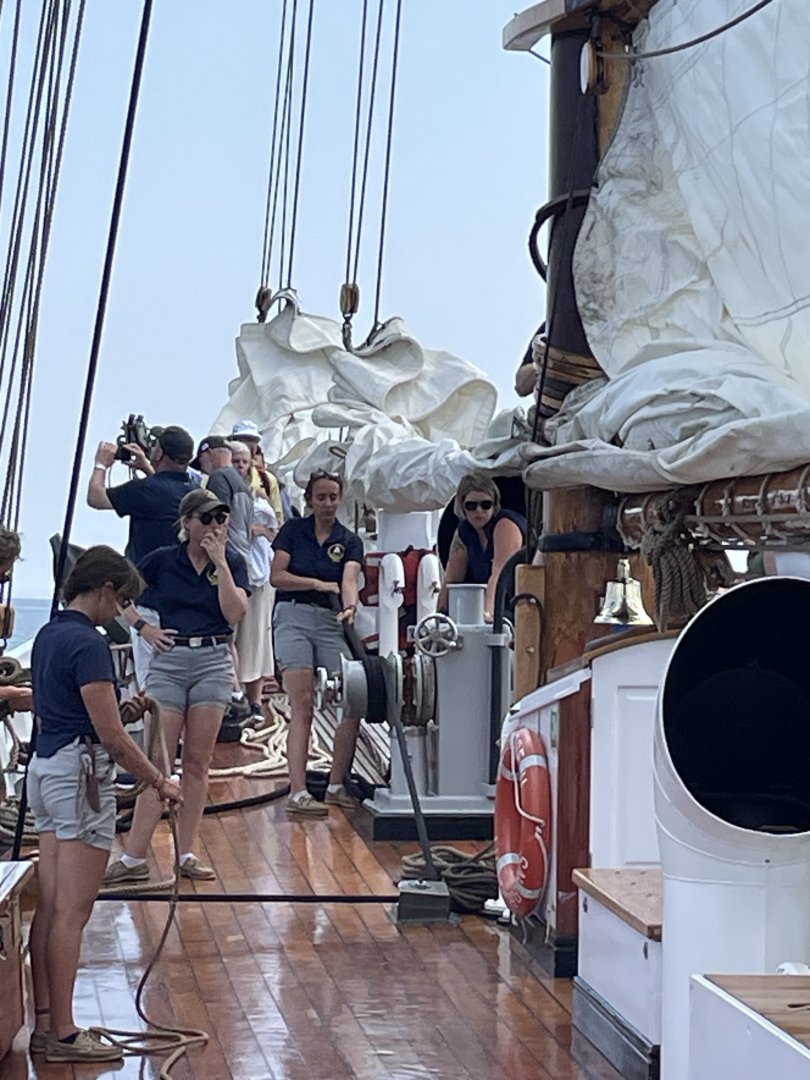
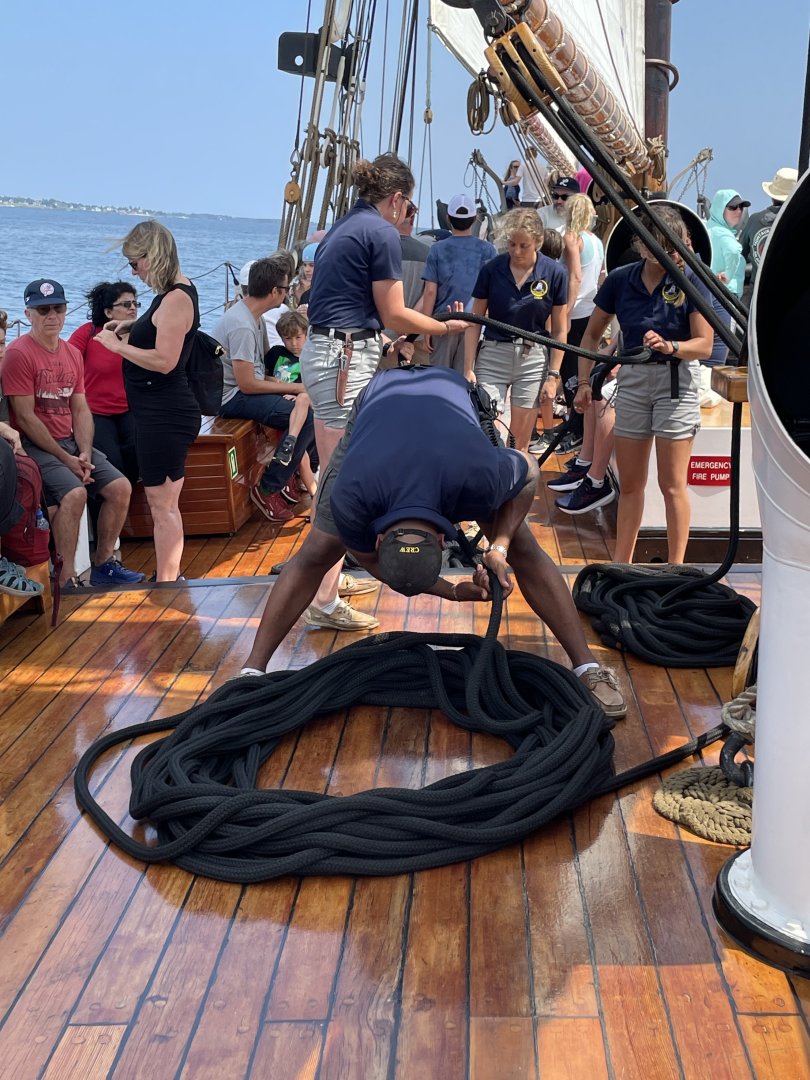
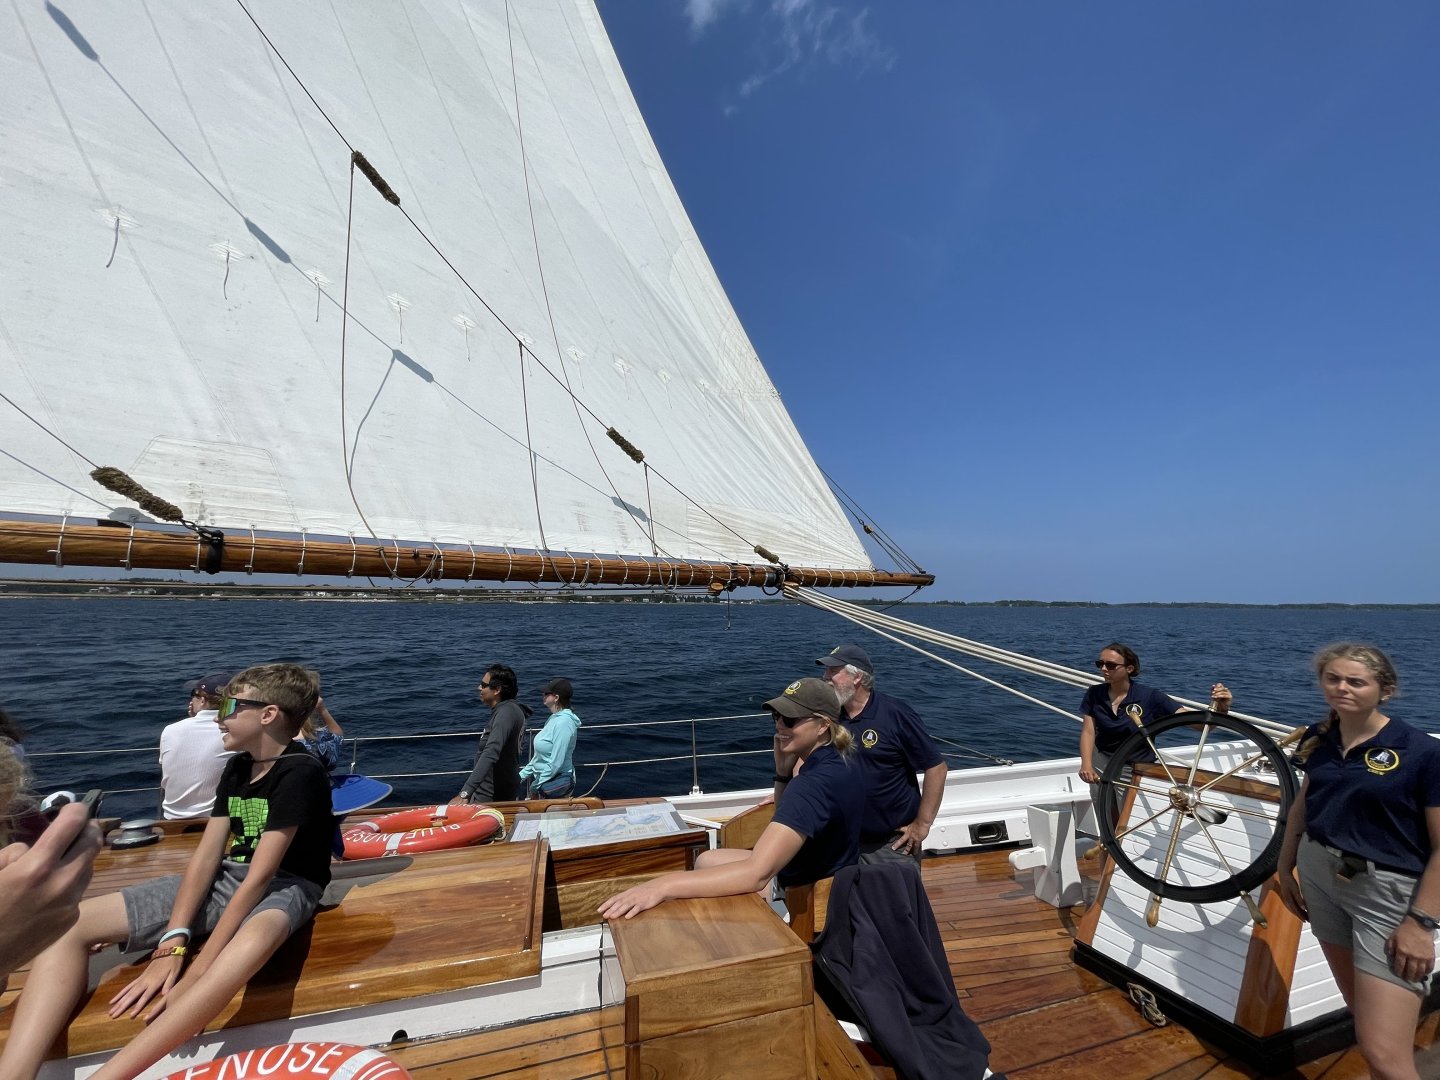
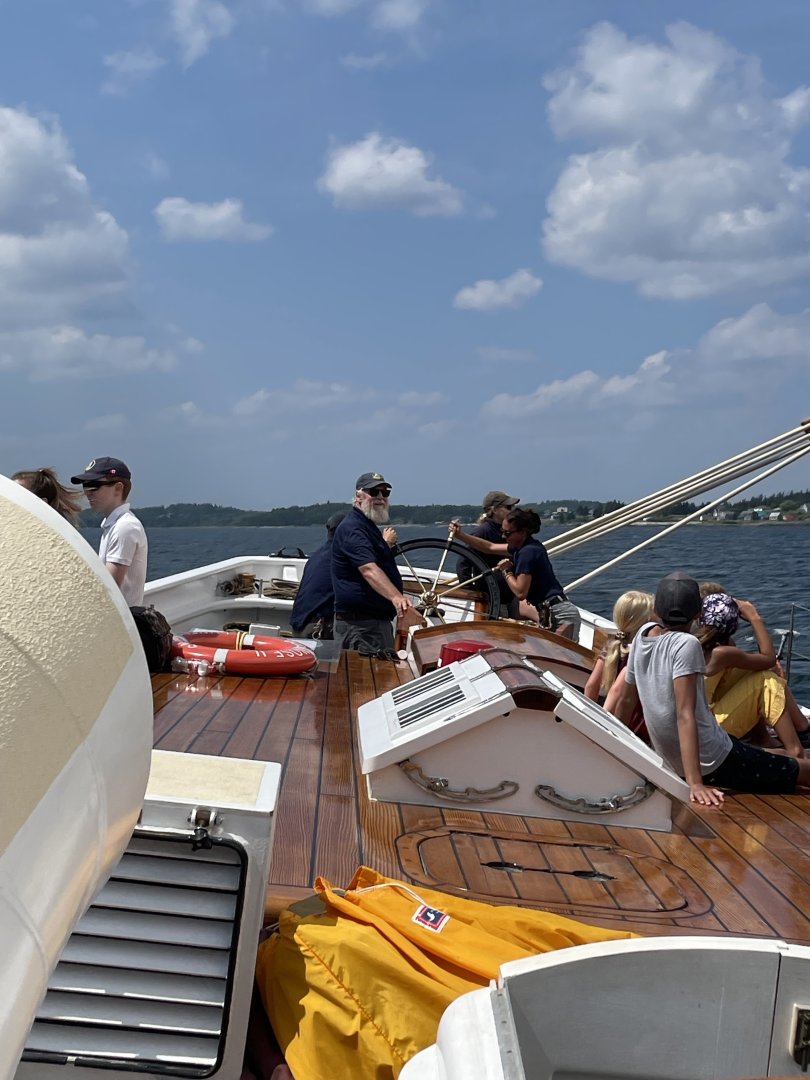
Thanks for noticing the detail Phil. I appreciate your comments. There certainly is a lot of detail. 🧐 I know I’m not getting it all perfect, but she is looking good. 😊 More interesting still is the crew coordination it takes to work the rigging to hoist the sails then sail the vessel. It was certainly fascinating to watch the Bluenose II crew on our short cruise on her last summer. It helps to understand how this stuff works. Cheers 🍻


- 282 replies
-
- 2
-
-
- Bluenose
- Model Shipways
- (and 1 more)
-
Thanks for commenting Greg. I appreciate the recognition and encouragement. I don’t mind you asking questions here either, that’s how we get better at what we do. 🧐 As for rigging blocks I do it on and off ship, it really depends on the situation one finds themselves. I don’t think I find any method “easier”. LOL 😆 John
- 282 replies
-
- 1
-

-
- Bluenose
- Model Shipways
- (and 1 more)
-
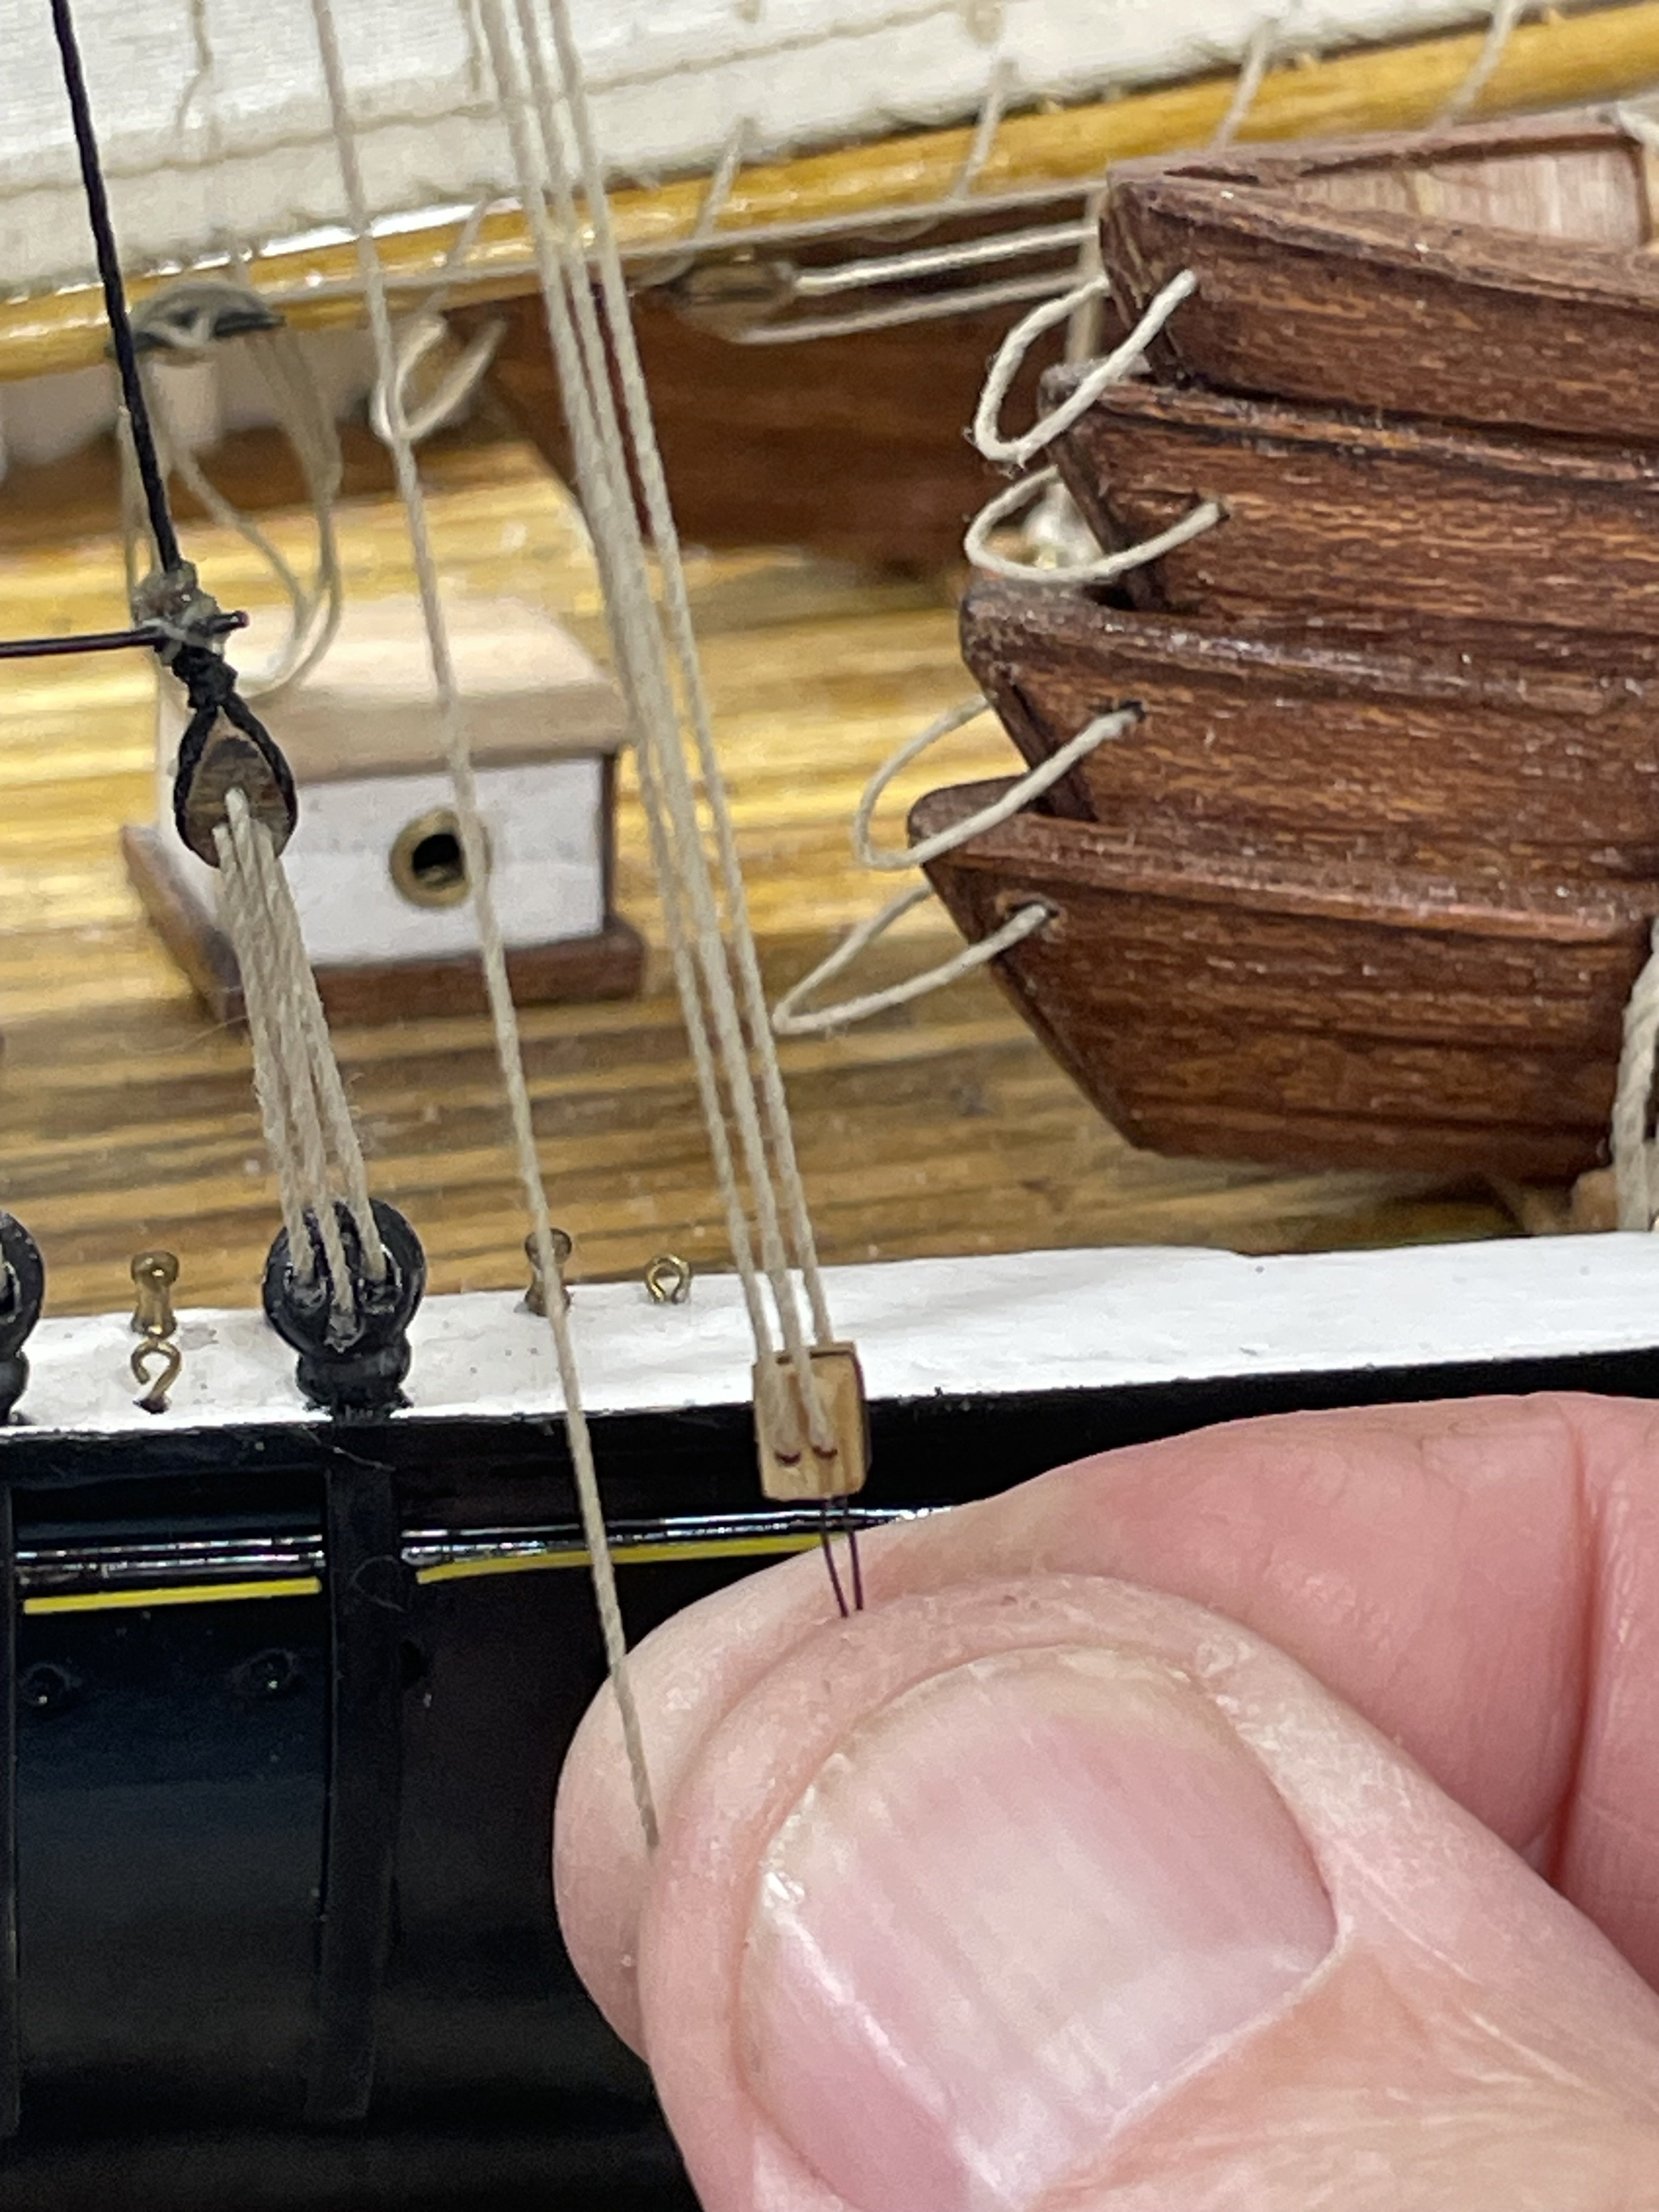
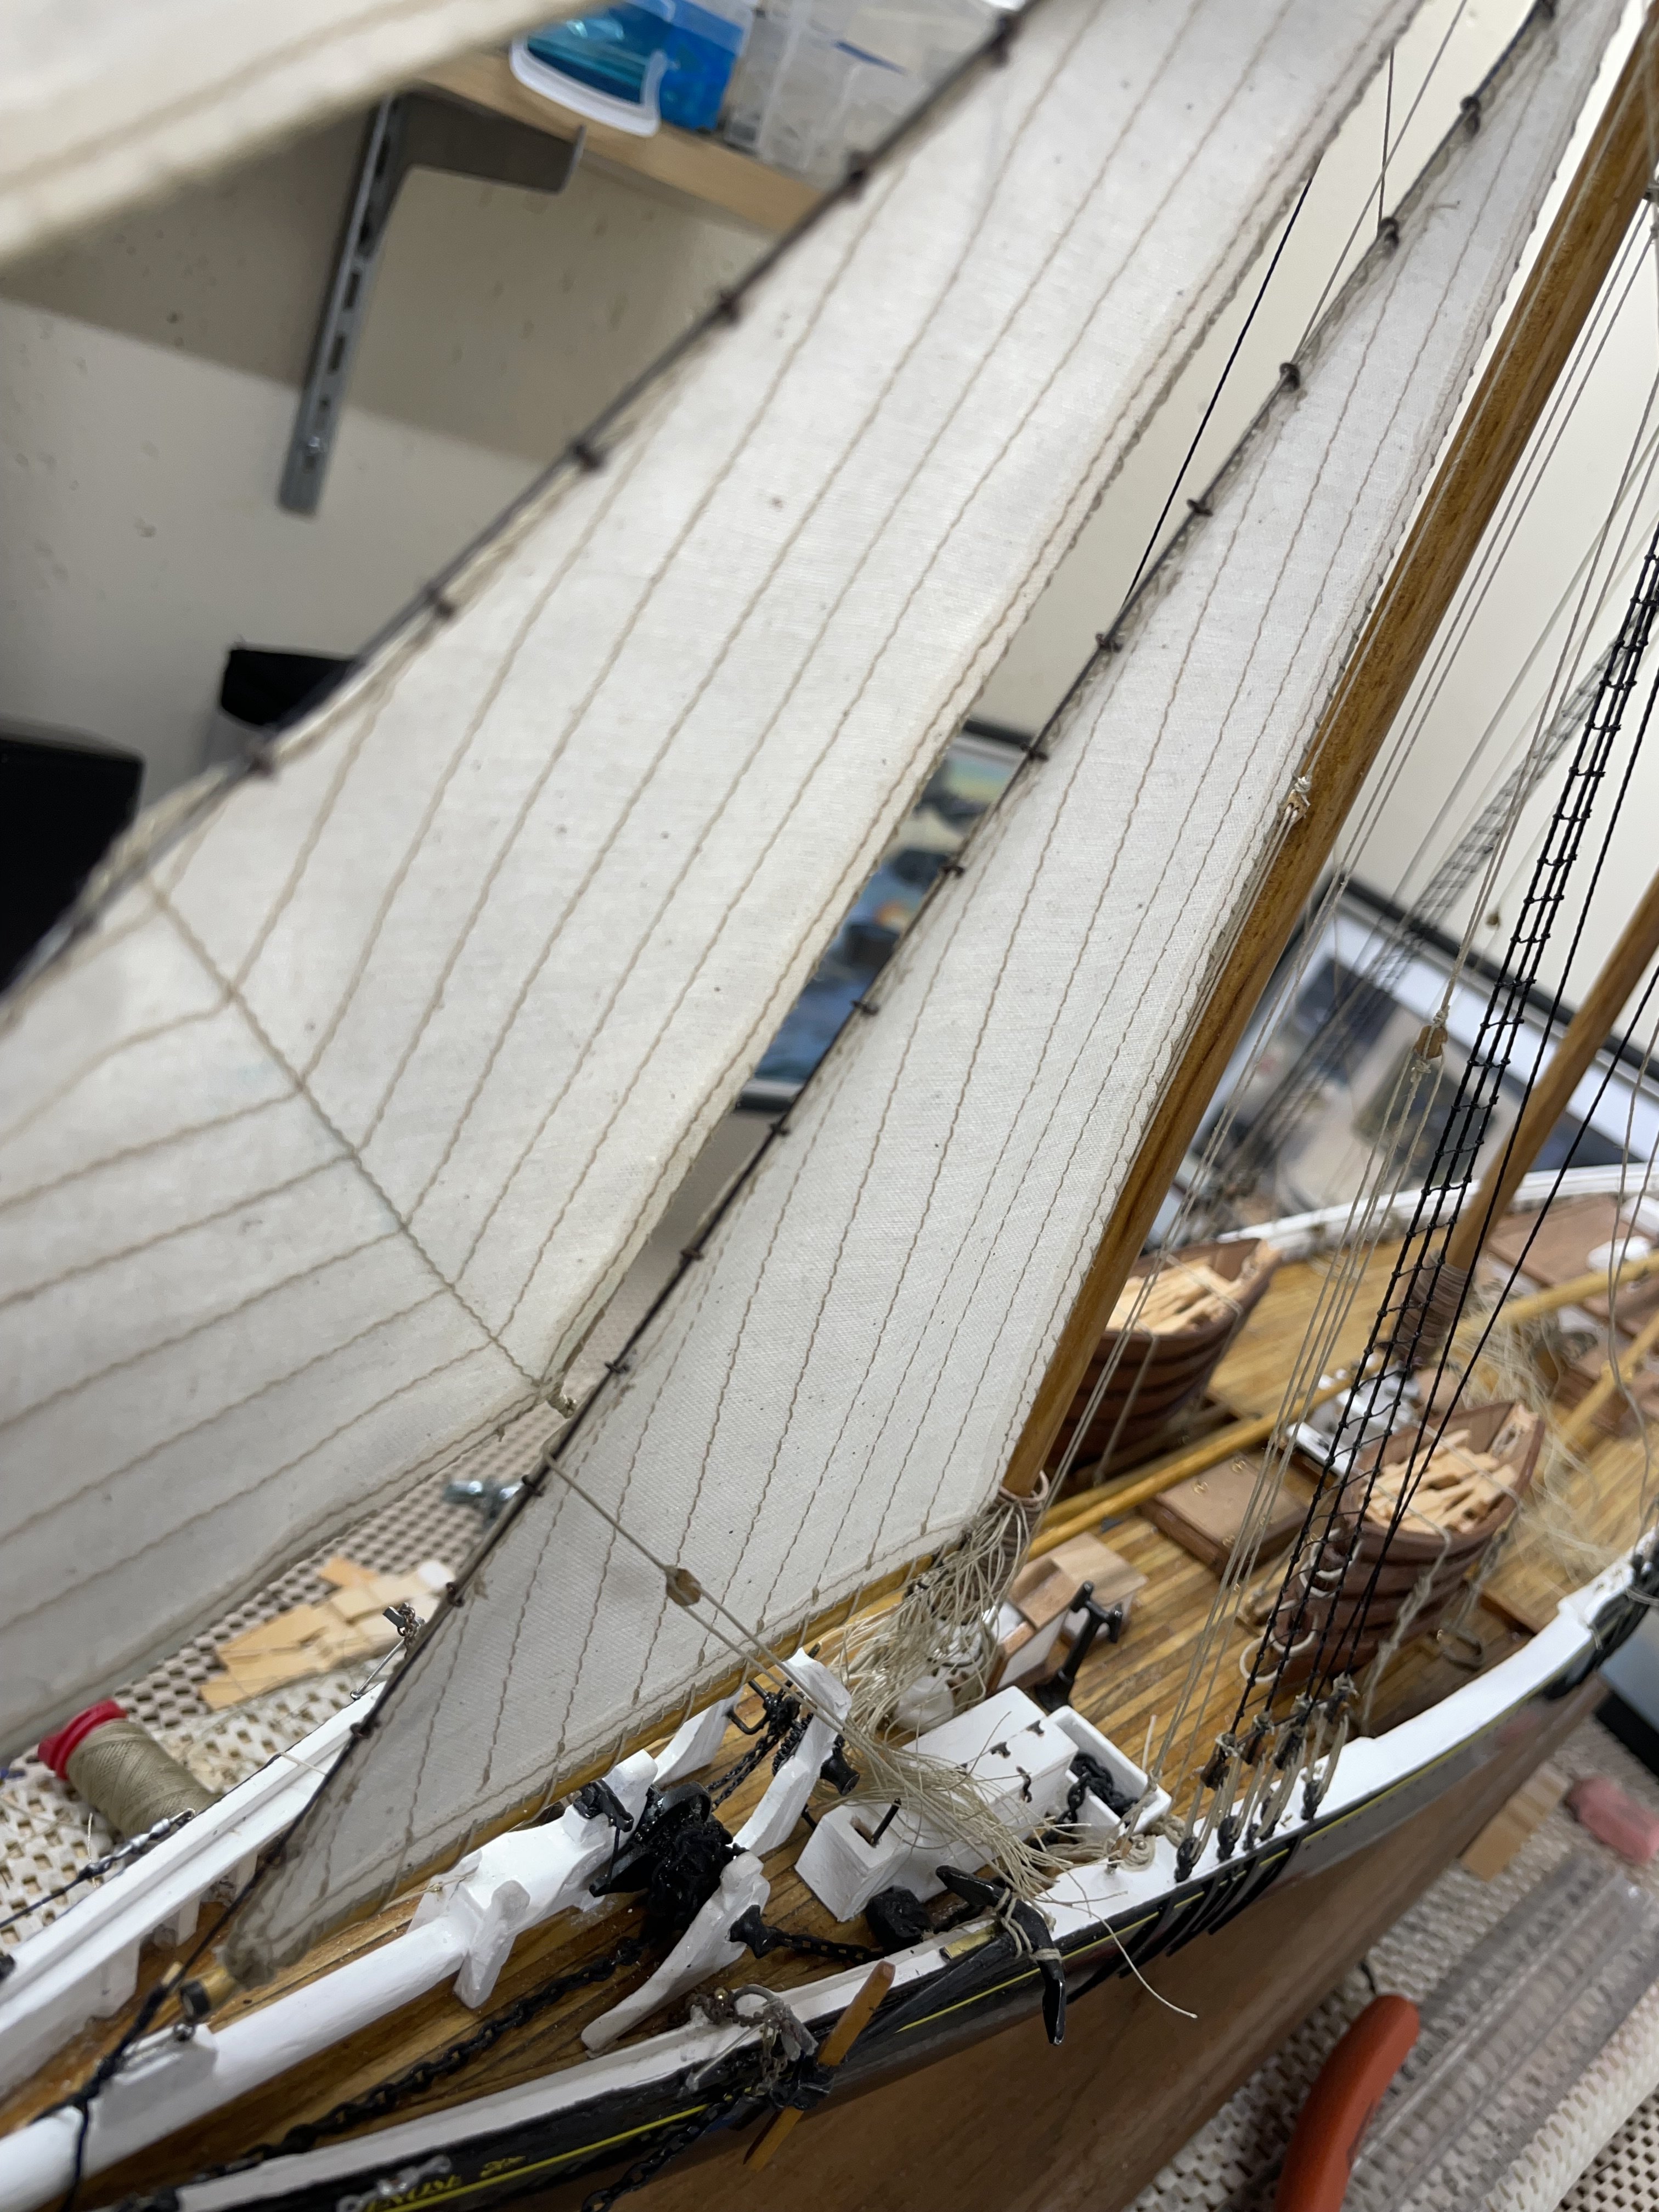
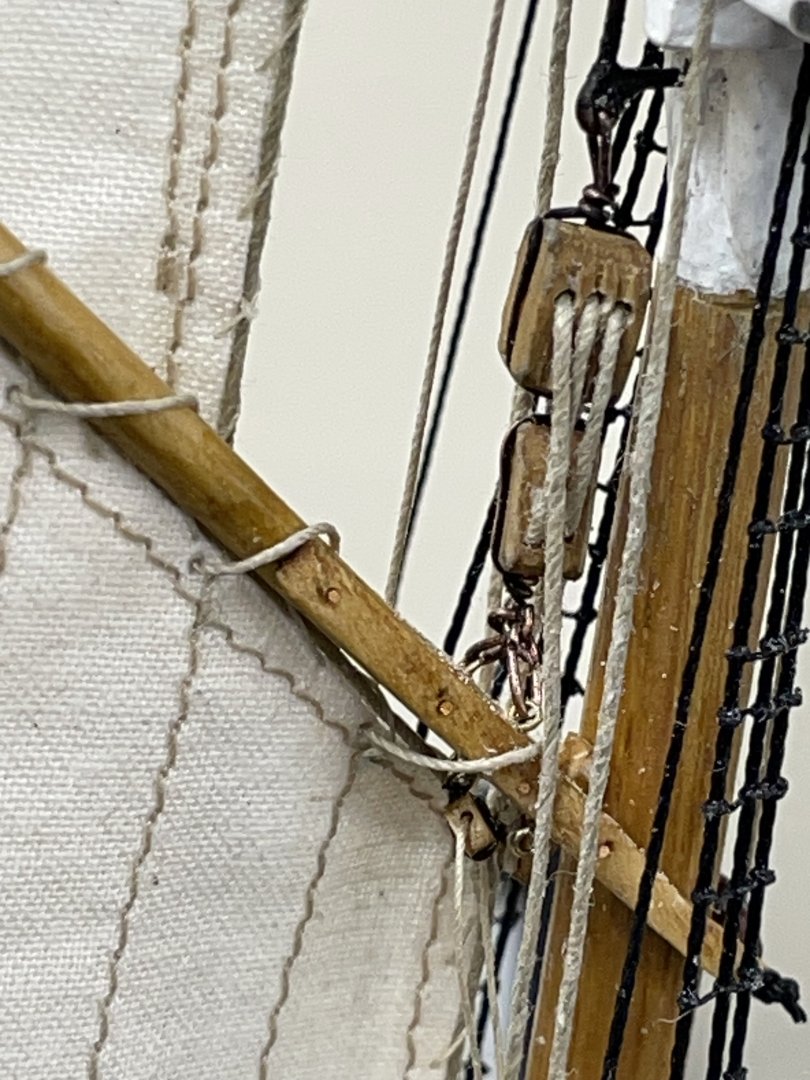
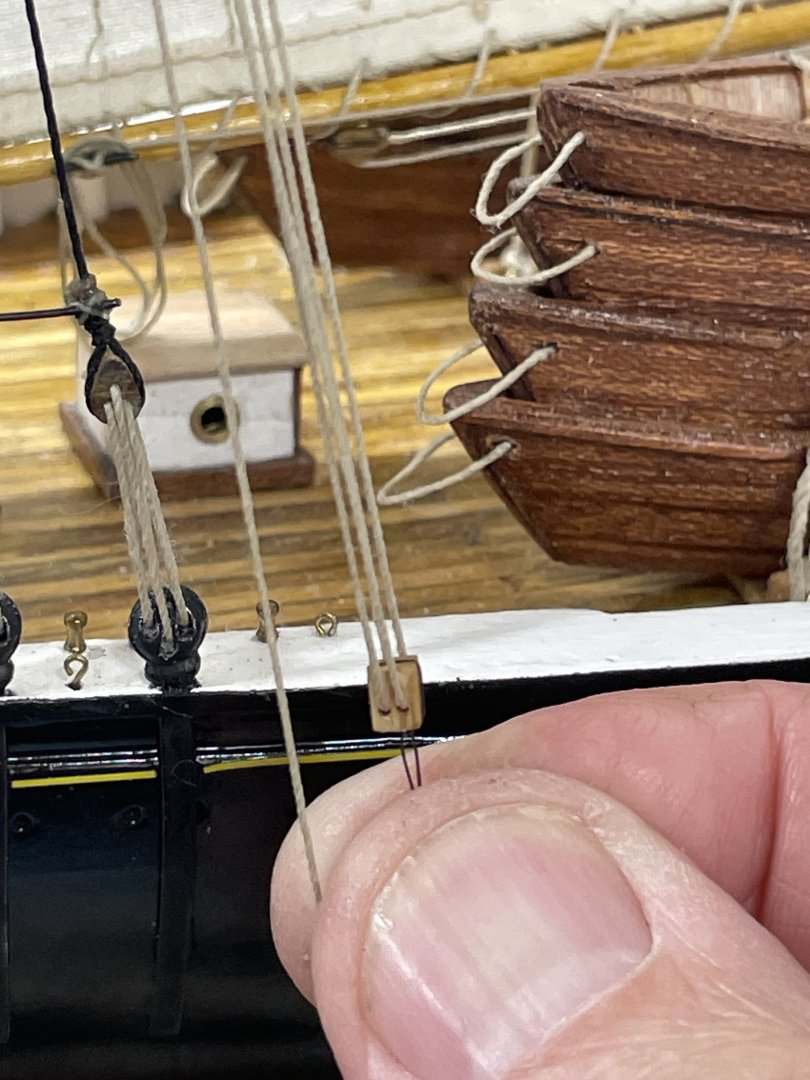
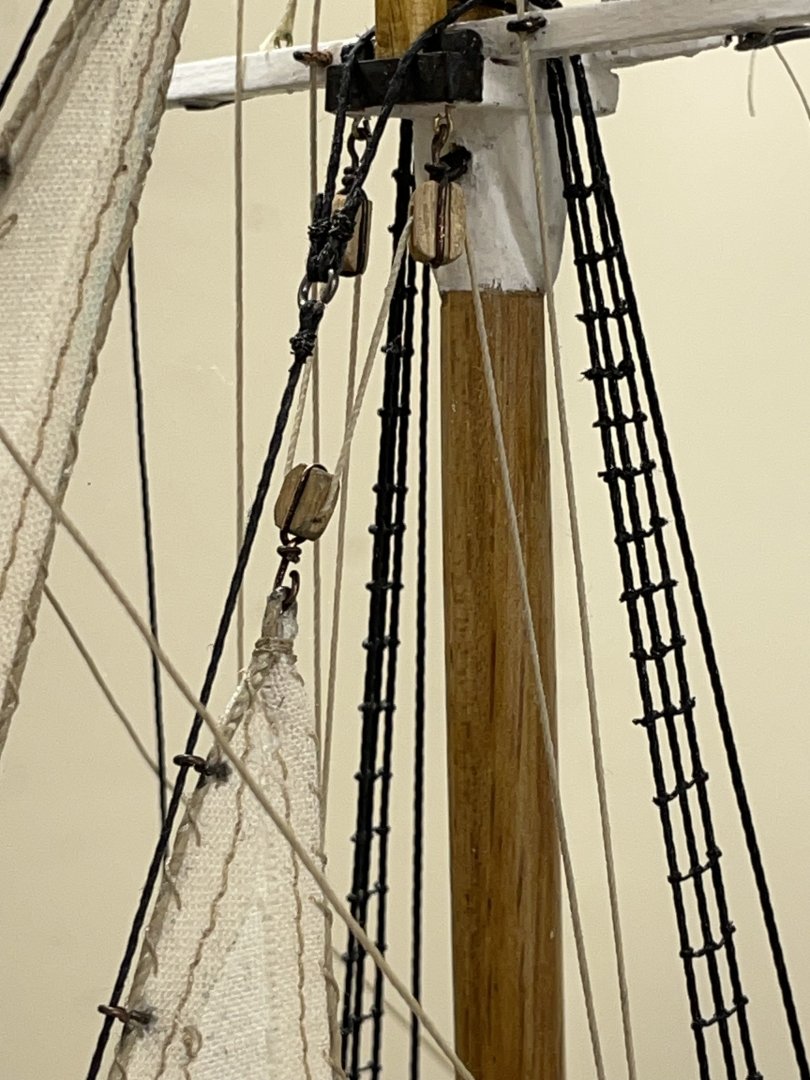
Jib, Balloon Jib and Jumbo Jib… Balloon Jib Balloon Jib Sheet belayed through snatch block to pin #41 Starboard side. Balloon Jib Halyard belayed pin #14 starboard side. Balloon Jib Sheet belayed (slack) through snatch block to pin #41 port. Jumbo Jib Preparing Jumbo Jib Halyard Pendant Block. Jumbo Jib Halyard Tackle tied off to itself. Jumbo Jib Halyard Tackle installed starboard side. Jumbo Jib Halyard Blocks aloft… Jumbo Jib Halyard belayed to Pin #13 port. Jumbo Jib Sheet Tackle belayed to Pin #5 on the Fore Mast Pin Rail. Prepared Topping Lift Tackle for Jumbo Jib Boom. Topping Lift installed… Toping Lift belayed to pin #6 Fore Mast Pin Rail. With the exception of downhauls, The Jib Rigging is complete. Cheers 🍻


- 282 replies
-
- 9
-
-
-
- Bluenose
- Model Shipways
- (and 1 more)
-
Yes I am! But it’s the OCD that keeps me going. 😆😆😆
- 282 replies
-
- 1
-

-
- Bluenose
- Model Shipways
- (and 1 more)
-
Your planking looks really good. 👍 John