John Ruy
-
Posts
1,269 -
Joined
-
Last visited
Content Type
Profiles
Forums
Gallery
Events
Everything posted by John Ruy
-
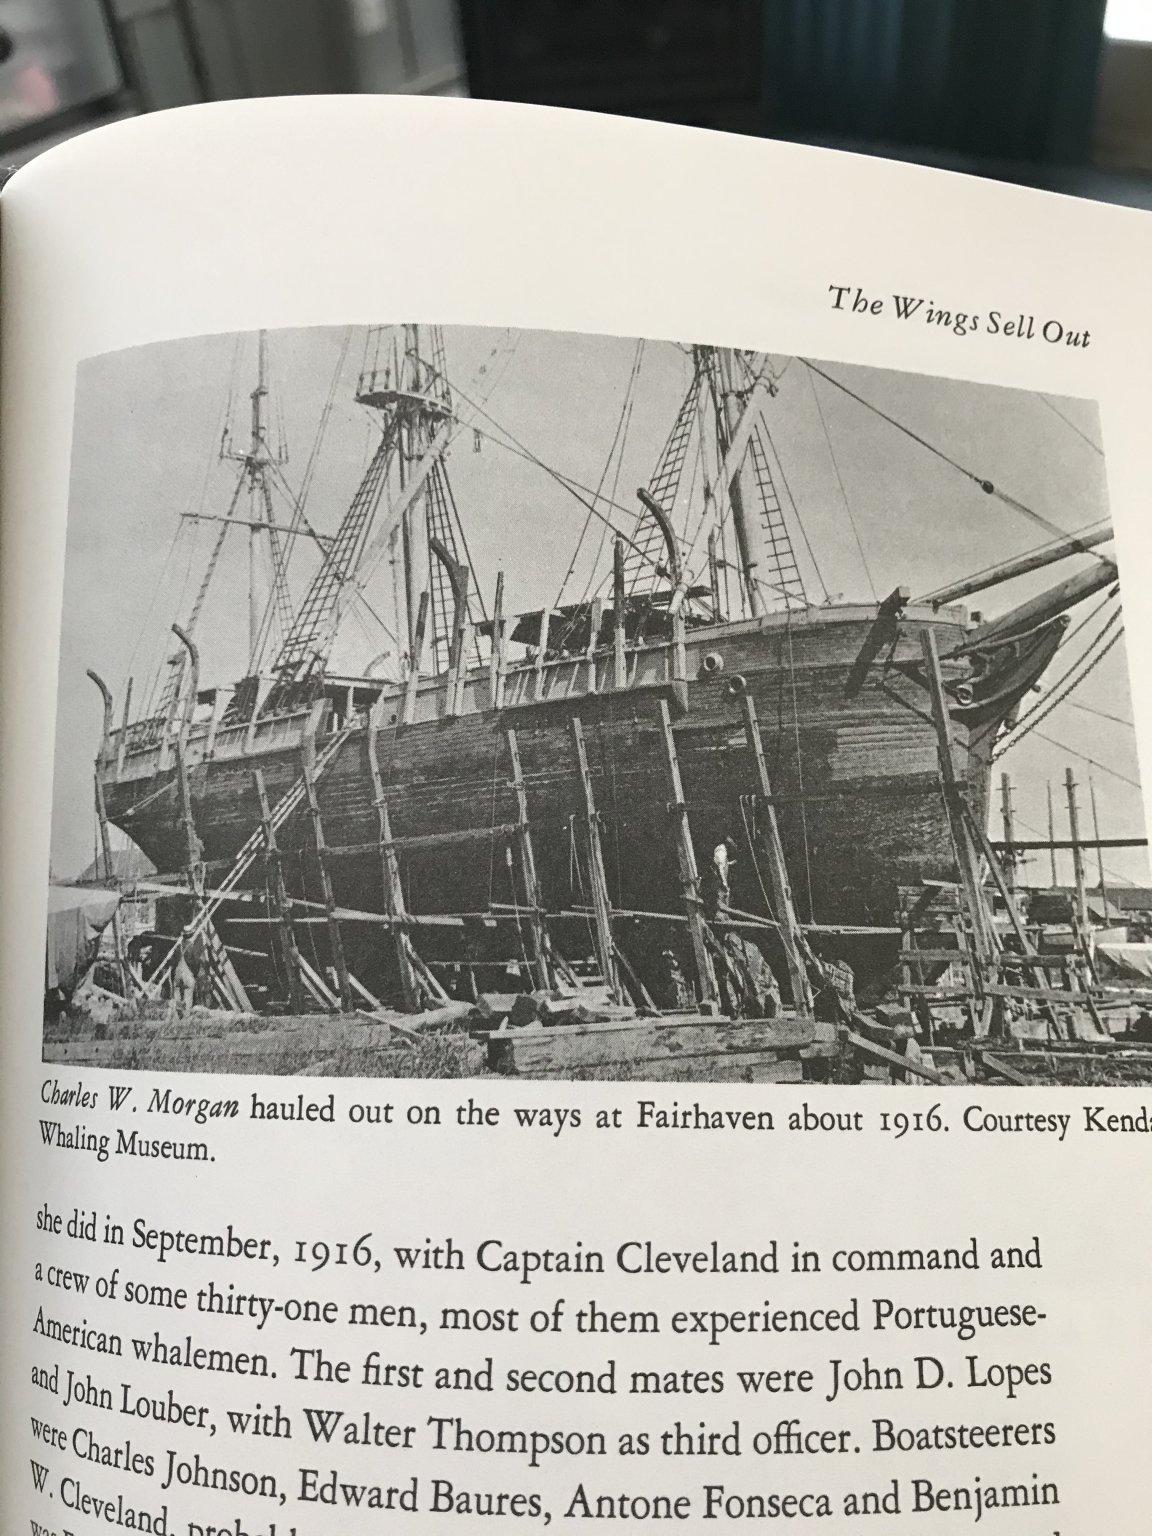
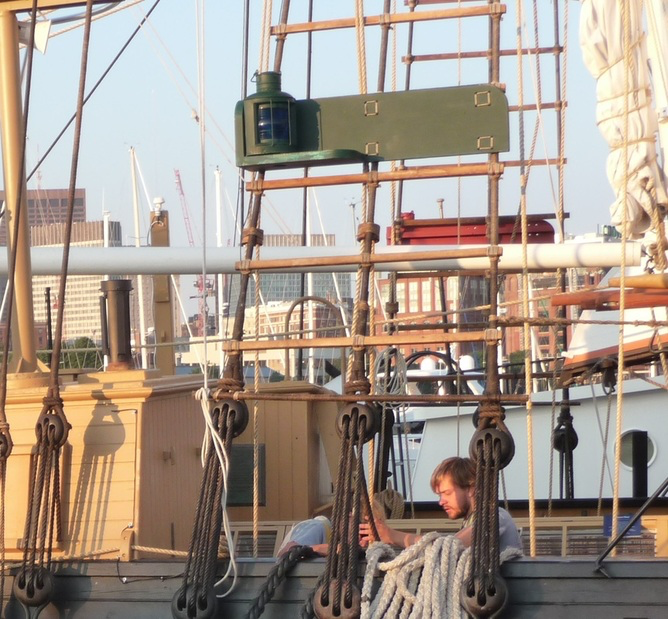
 Bob, Thanks for your historical perspective, I knew you would have some knowledge around this subject. I also knew the Deadeyes could not stay that way, it just didn’t seem right. I went back to The Charles W Morgan by John Leavitt published by the Mystic Museum and found this 1916 photo of her in dry dock for repairs. An up close look shows the forward Gallis roofing in place and the shrouds aligned on either side of the frame that extends through the shroud. Looks like I’ll need to reconstruct the Shroud Channel and the Gallis Frame to correct the alignment. Bottom line it looks like she had the forward Gallis roofing in her last days at sea.
- 196 replies
-
- 5
-

-
- marine model company
- charles w morgan
- (and 1 more)
-
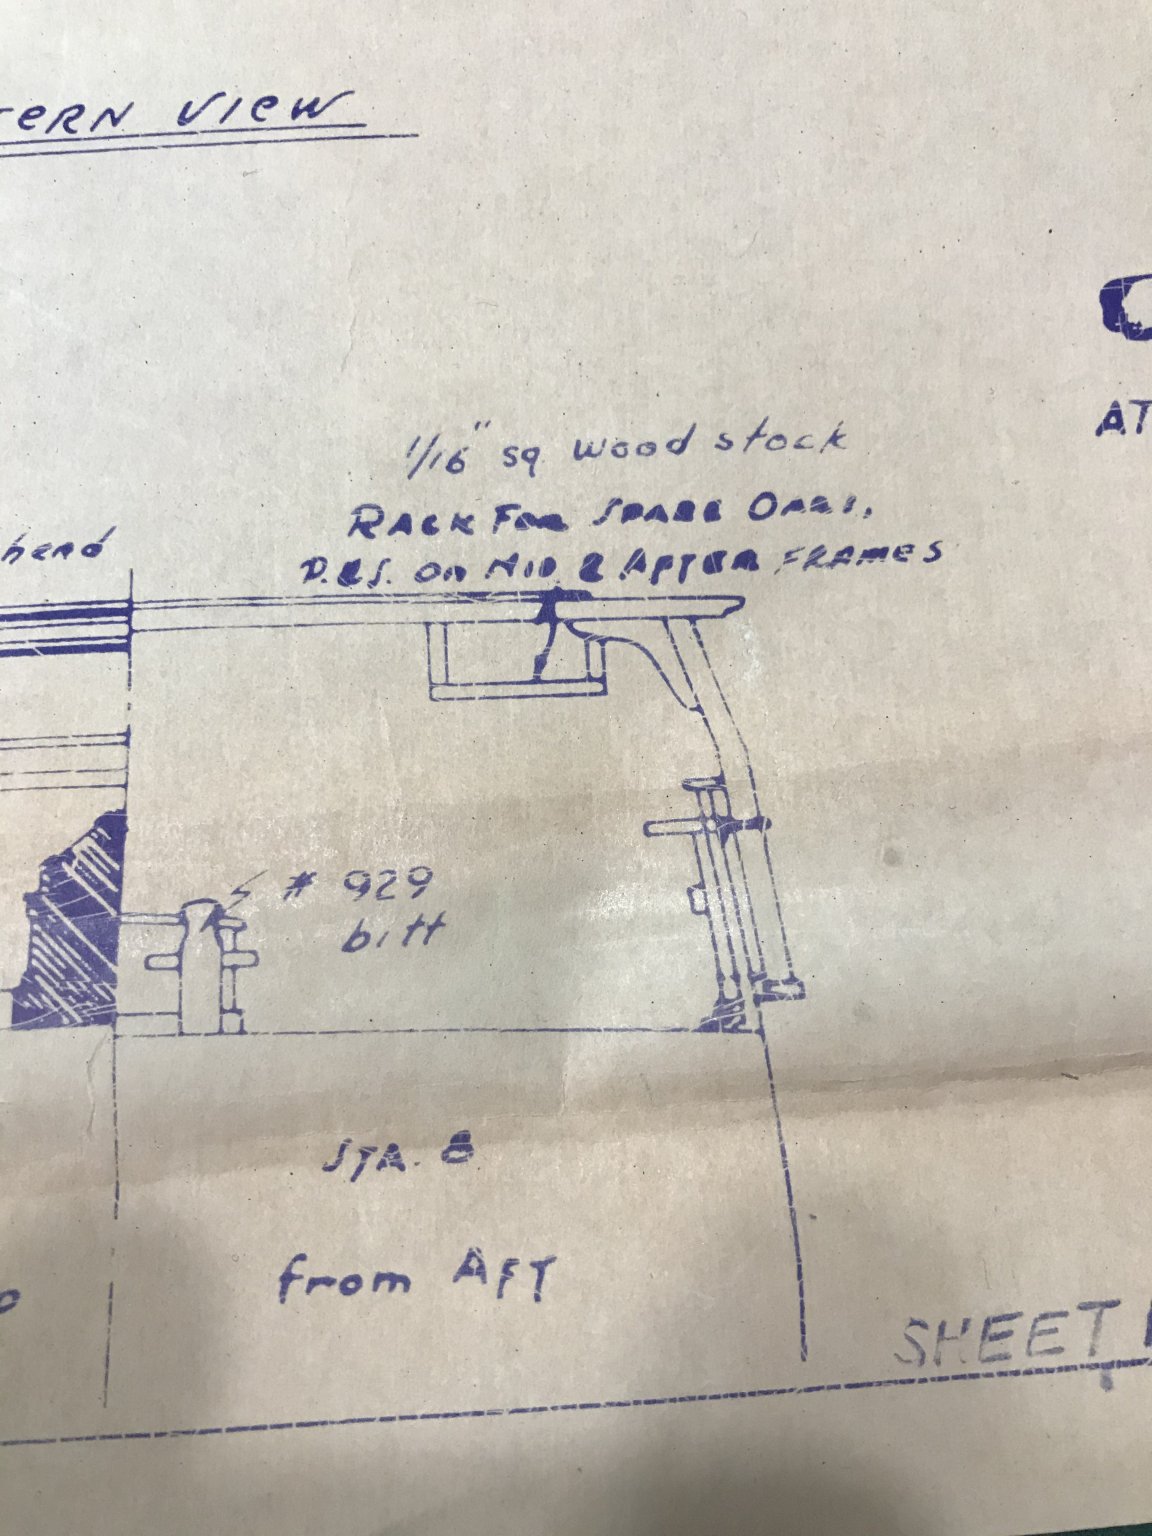
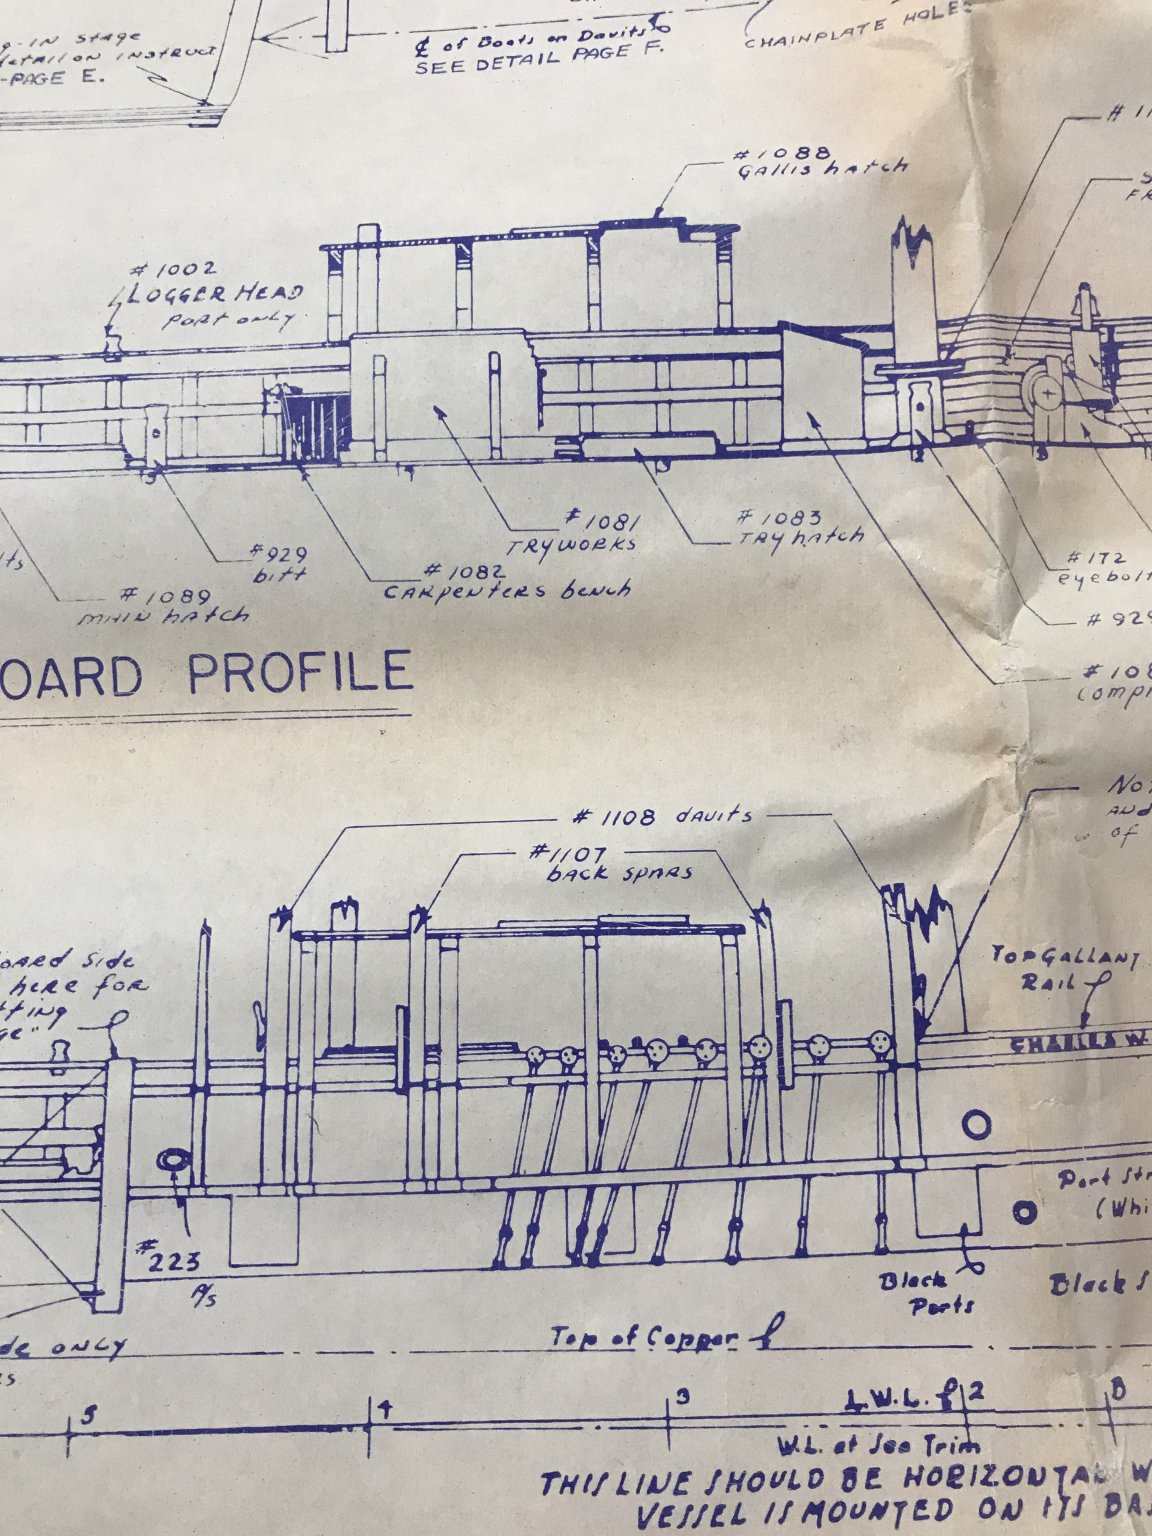
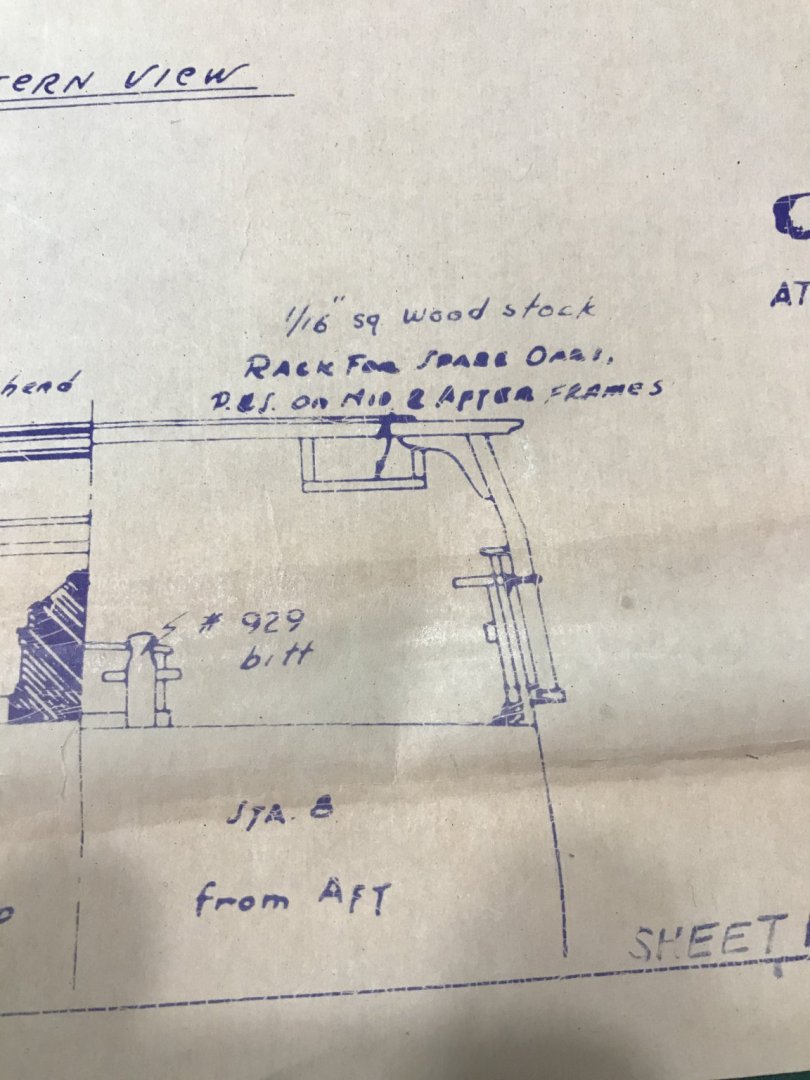
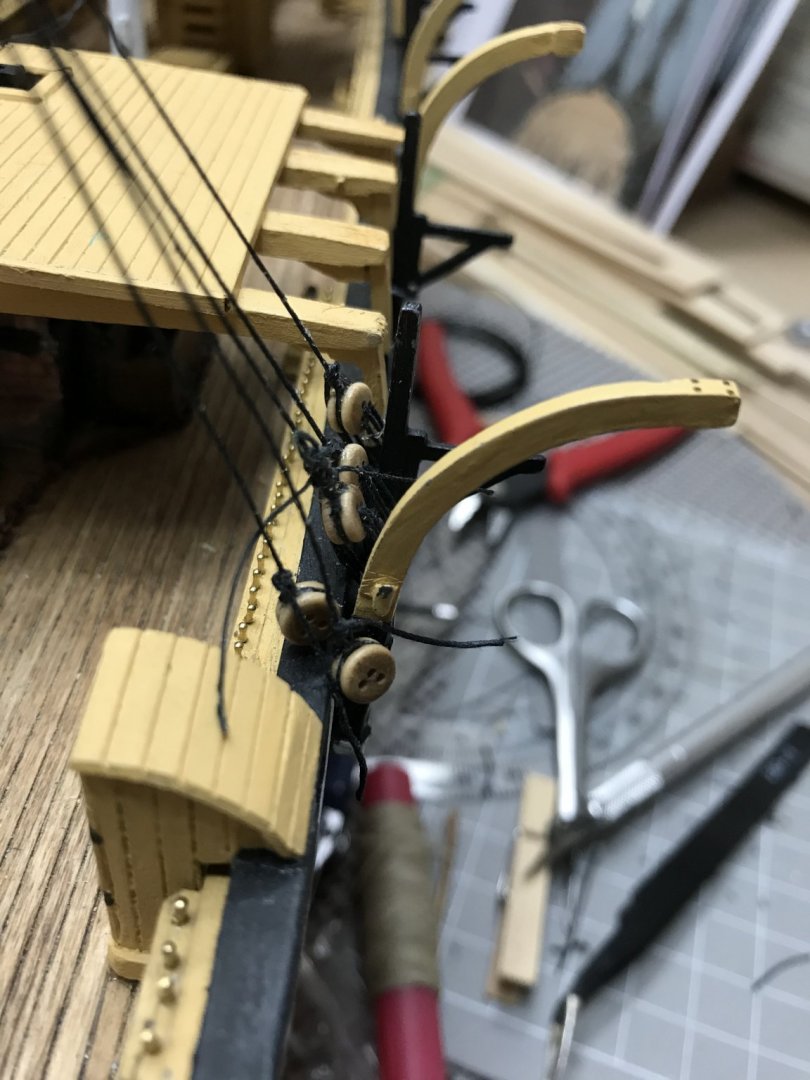
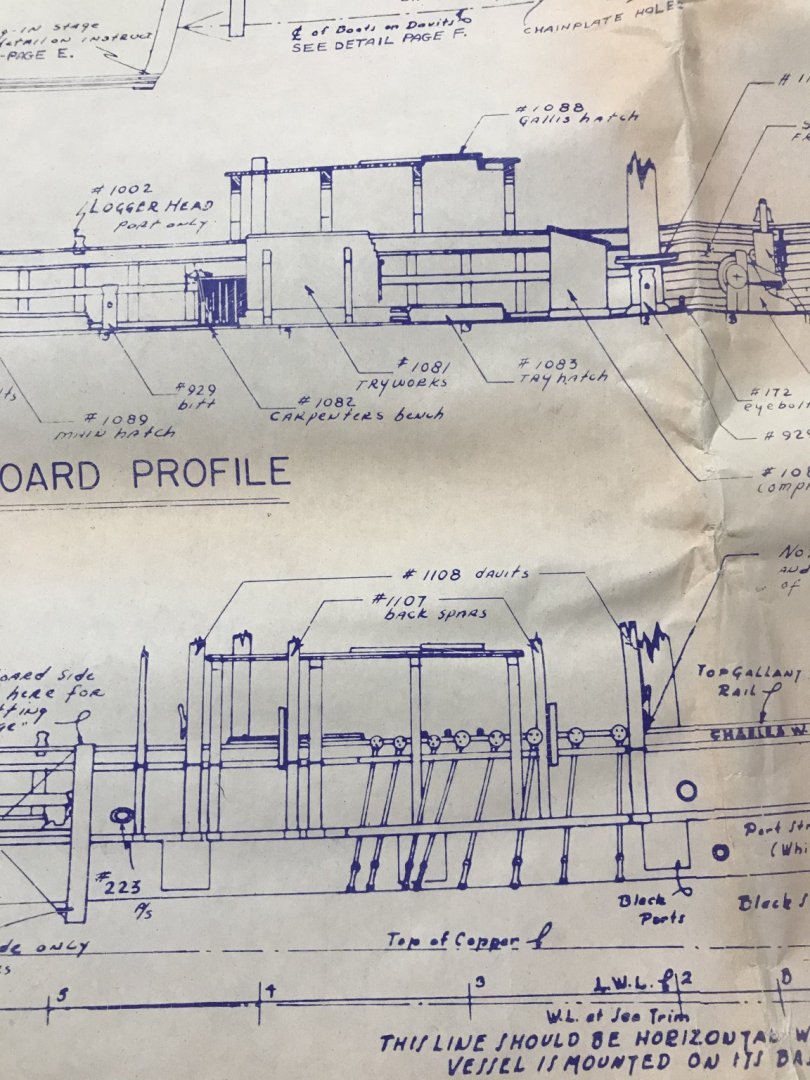
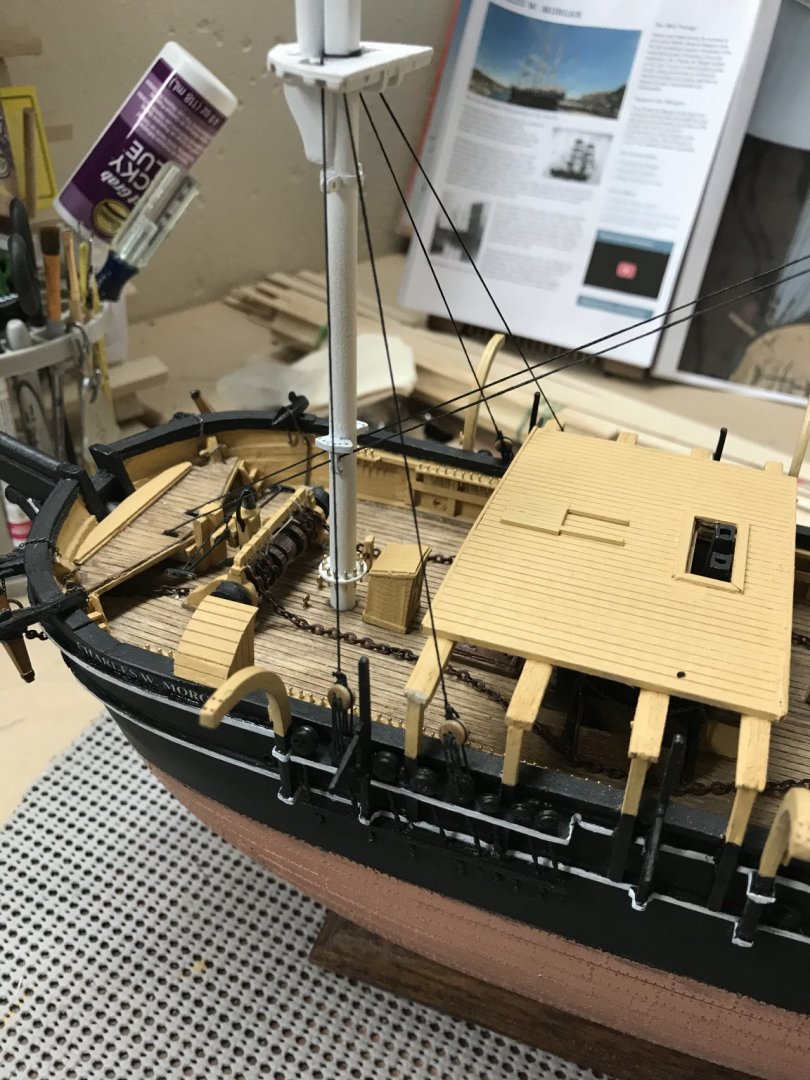
Upon another review of the plans. See photo... The Gallis Frames appear to be built correctly. However, I have noticed that the Mystic CWM does not have Gallis Roof over the Try Works on the forward deck. The 1939 drawings definitely show the Gallis Roof on the forward deck over the Try Works. See photo... This is the only Gallis Frame that interferes with the Fore Mast Shrouds. So I have noticed the fact that there was no roofing over the Try Works on other Models of the CWM. However, I would like to keep the roofing over the Try Works, if that is a historically correct feature. I can rebuild the Gallis Frame to lean inboard more and eliminate the interference with the shroud. Thanks again Voyageur for Your attention to the details, it was helpful. Now I need someone to let me know where this roofing fits in the CWM history. Bob Cleek, Do you have any historical input on this? 😎
- 196 replies
-
- 4
-
-
- marine model company
- charles w morgan
- (and 1 more)
-
Voyageur, Thanks for your photo. I know finding an appropriate reference is difficult. The Gallis frames are not in the photo. As I look at your photo it confirms for me that I may not have curved the Gallis frames inboard enough. It looks like I may need to revisit the Gallis frame construction. Thanks for your input, sometimes it takes a village to see these things from different angles. 👍 I’ll let you know what I come up with.
-
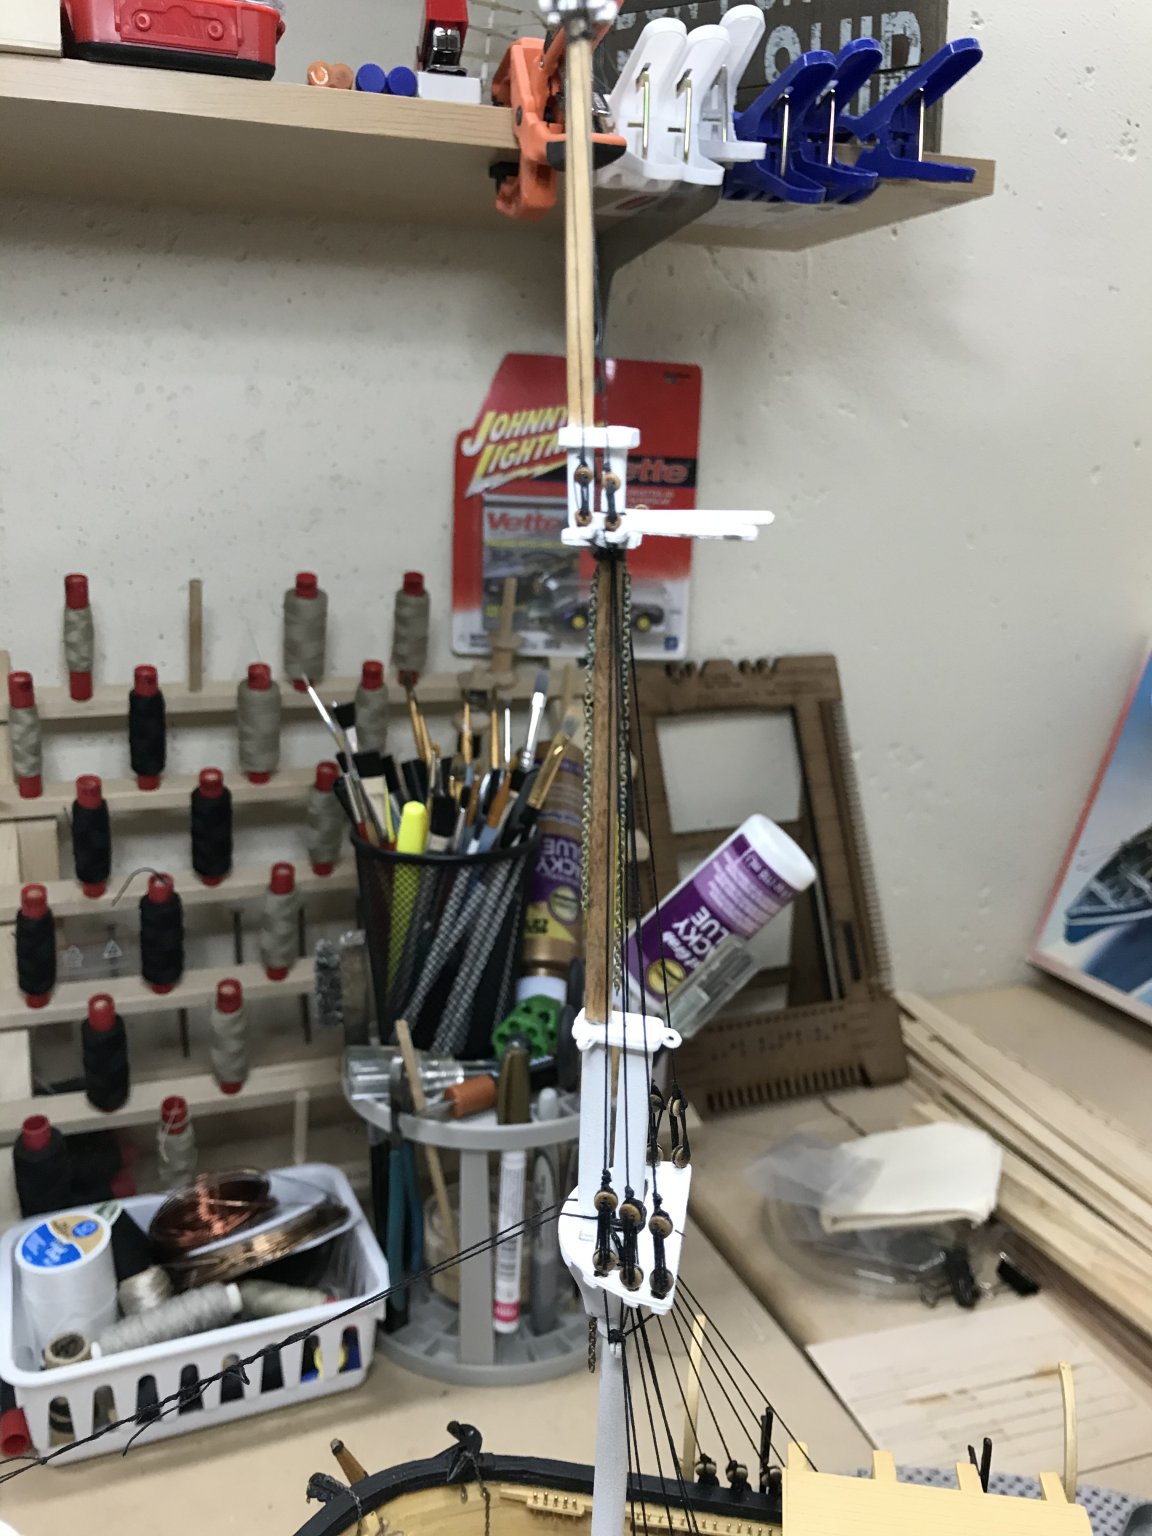
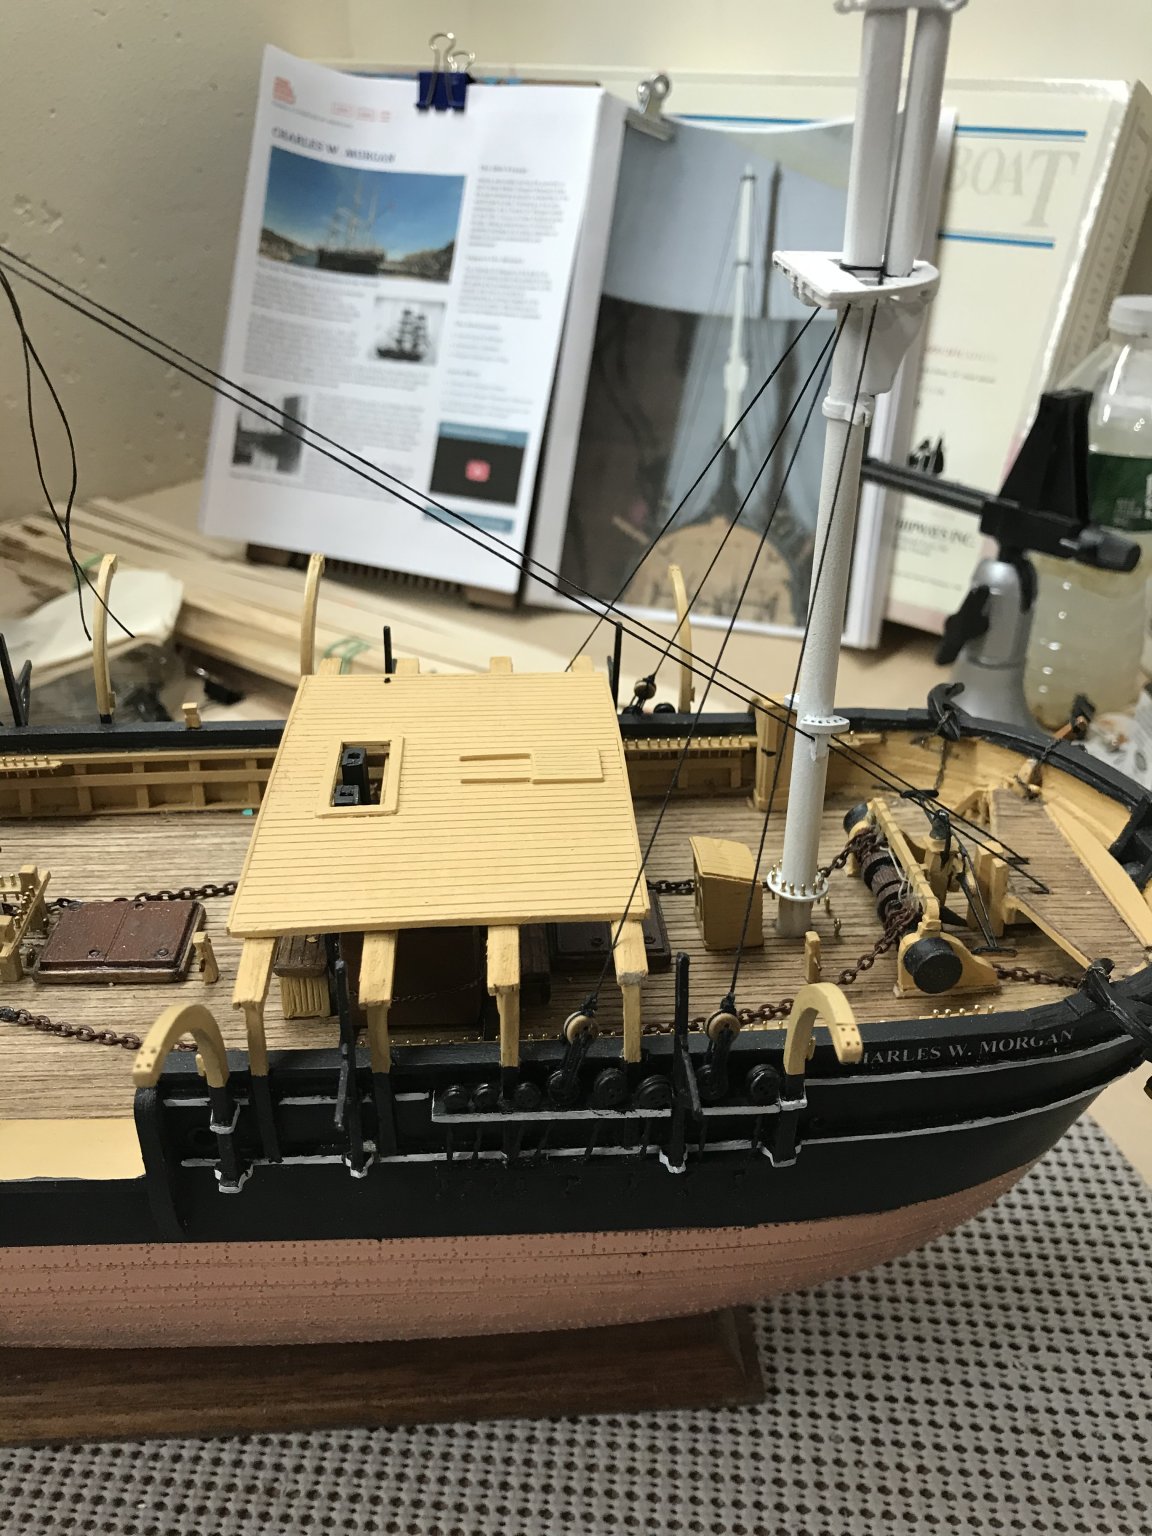
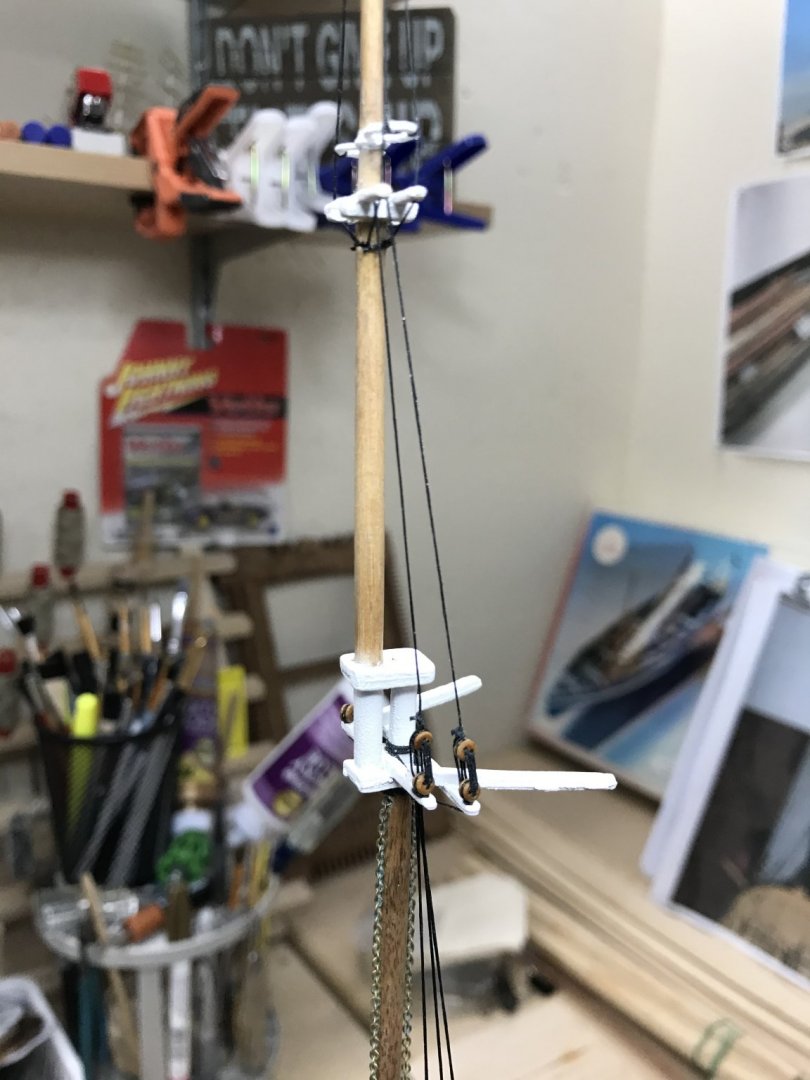
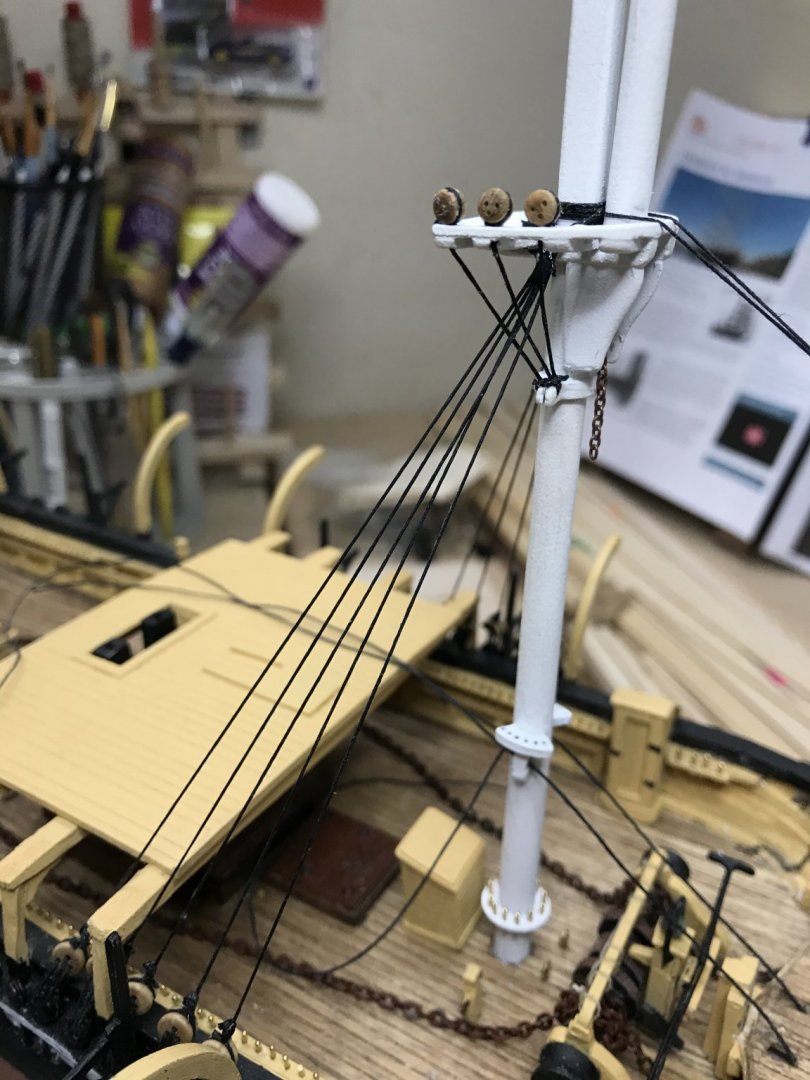
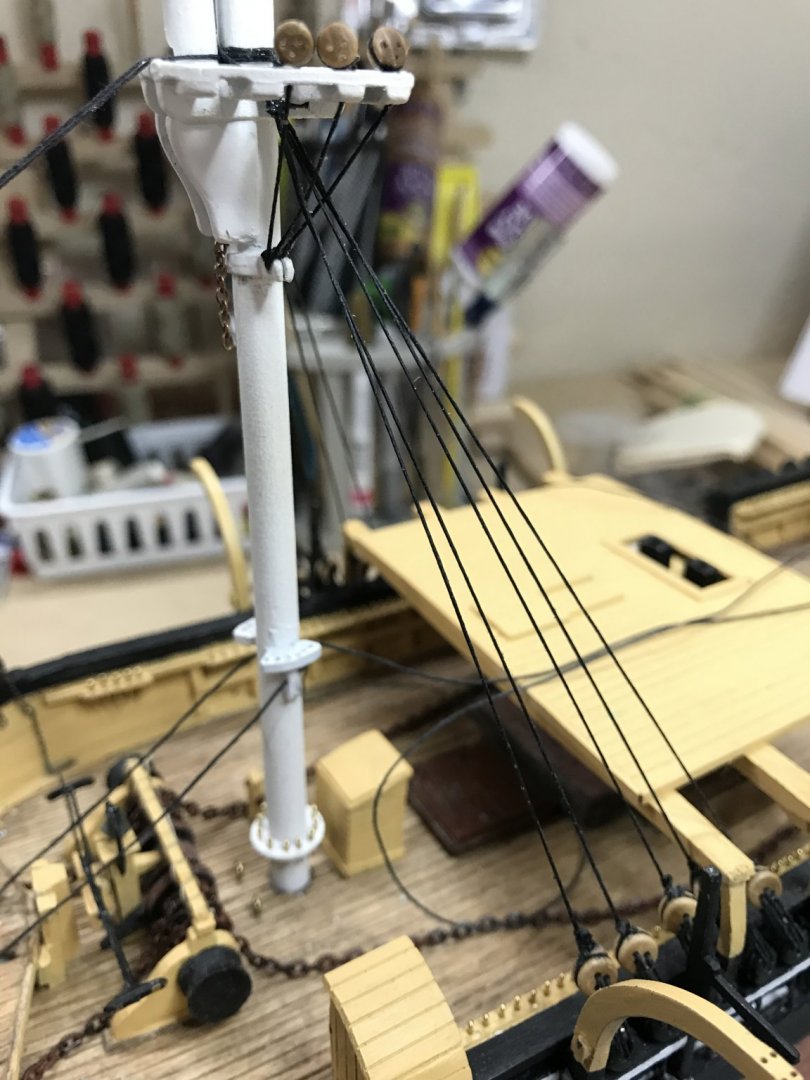
Completed the upper most Fore Shrouds last night. I must say vary tedious. That’s a good thing. 😆 Photos of how they turned out. Did some research as I get ready for rat lines and found they I may have installed the lower Deadeyes a bit short. Photo from Charles W Morgan .com shows these Deadeyes higher than they are on my plans. Here is what I have now. Hate to say this by I think a redo of the lower shrouds is in order. I guess that’s part of my OCD. I have time, I would just as soon get it right.


- 196 replies
-
- 4
-
-
- marine model company
- charles w morgan
- (and 1 more)
-
Thanks for the info ClipperFan. I was a bit confused by the transom metal part having windows while the 1939 drawings that came with the kit showed no windows. Every step in building this kit has been a decision between what is On the plans, in the history books and other kits. She obviously underwent many changes as she sailed the seas Throughout her whaling career. Thank you for your comments and encouragement on my progress. I hope to create a replica of her sailing the whaling grounds more so than her current restored appearance in Mystic. Of course that’s all matter of opinion, I just enjoy the process. Cheers 🍻
- 196 replies
-
- 2
-
-
- marine model company
- charles w morgan
- (and 1 more)
-
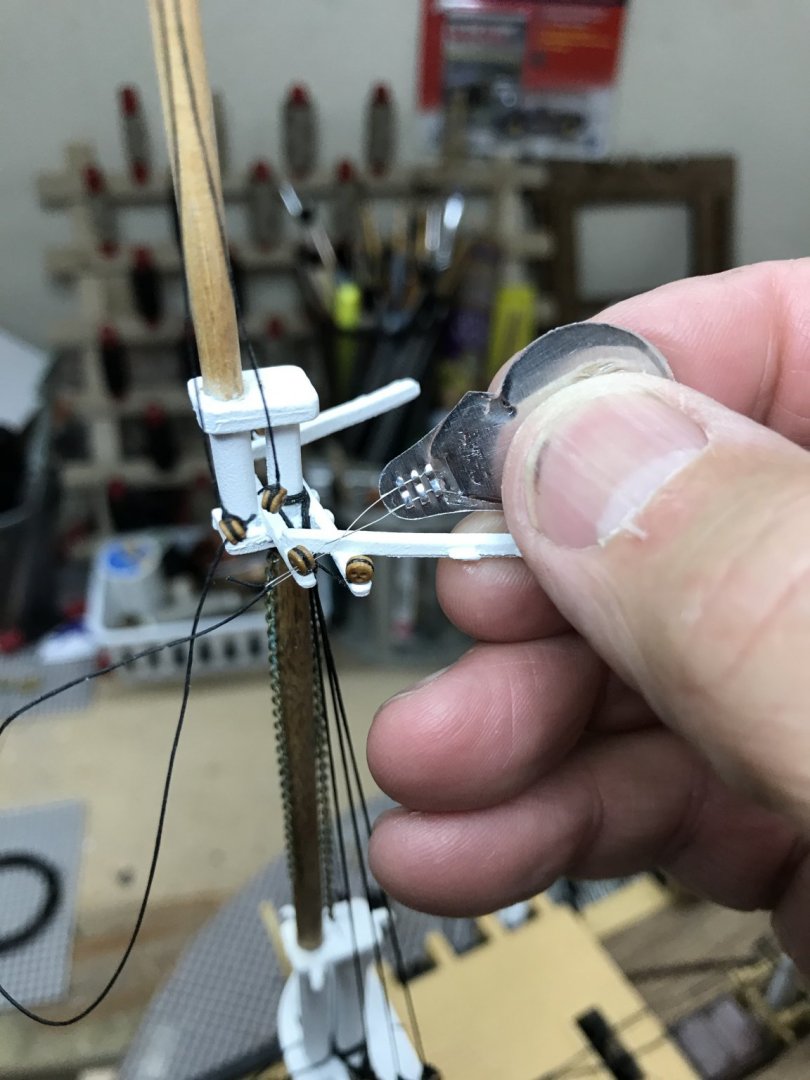
Continuing work on the shrouds. Progress is slow, but I am growing more skillful at rigging the Shrouds and Deadeyes. This pair of Shrouds only took 2 hours. 😆 Deadeyes are getting smaller as I move up the masts. Needing the mag light for everything. 🧐 Steady as she goes... 😎


- 196 replies
-
- 5
-
-
- marine model company
- charles w morgan
- (and 1 more)
-
David, Yes I have been referencing that site also. The Marine Model Kit uses 1939 plans that don’t exactly match up with how she sits today. Hopefully, I came make her appear as she did at the end of her whaling career. Any tips or advice you have is greatly appreciated. John
-
Thanks David... I do like the vintage kits. This one has a lot of detailed metal parts, although there is some controversy around how long these Lead parts may last. The metal parts are better than having to build many parts, such as cross trees, Davits, etc... from scratch. At this scale those would be difficult. I did a custom mix of acrylic ochre and white to get the yellow where I wanted it. I used photos from my visit aboard the CWM last summer to match up the color. Wish I had taken more pictures of rigging aloft. I also reference your MS CWM build log a lot, it’s been very helpful. Thanks again for your comments, very encouraging. I still have a ways to go. Onward... John
- 196 replies
-
- 1
-
-
- marine model company
- charles w morgan
- (and 1 more)
-
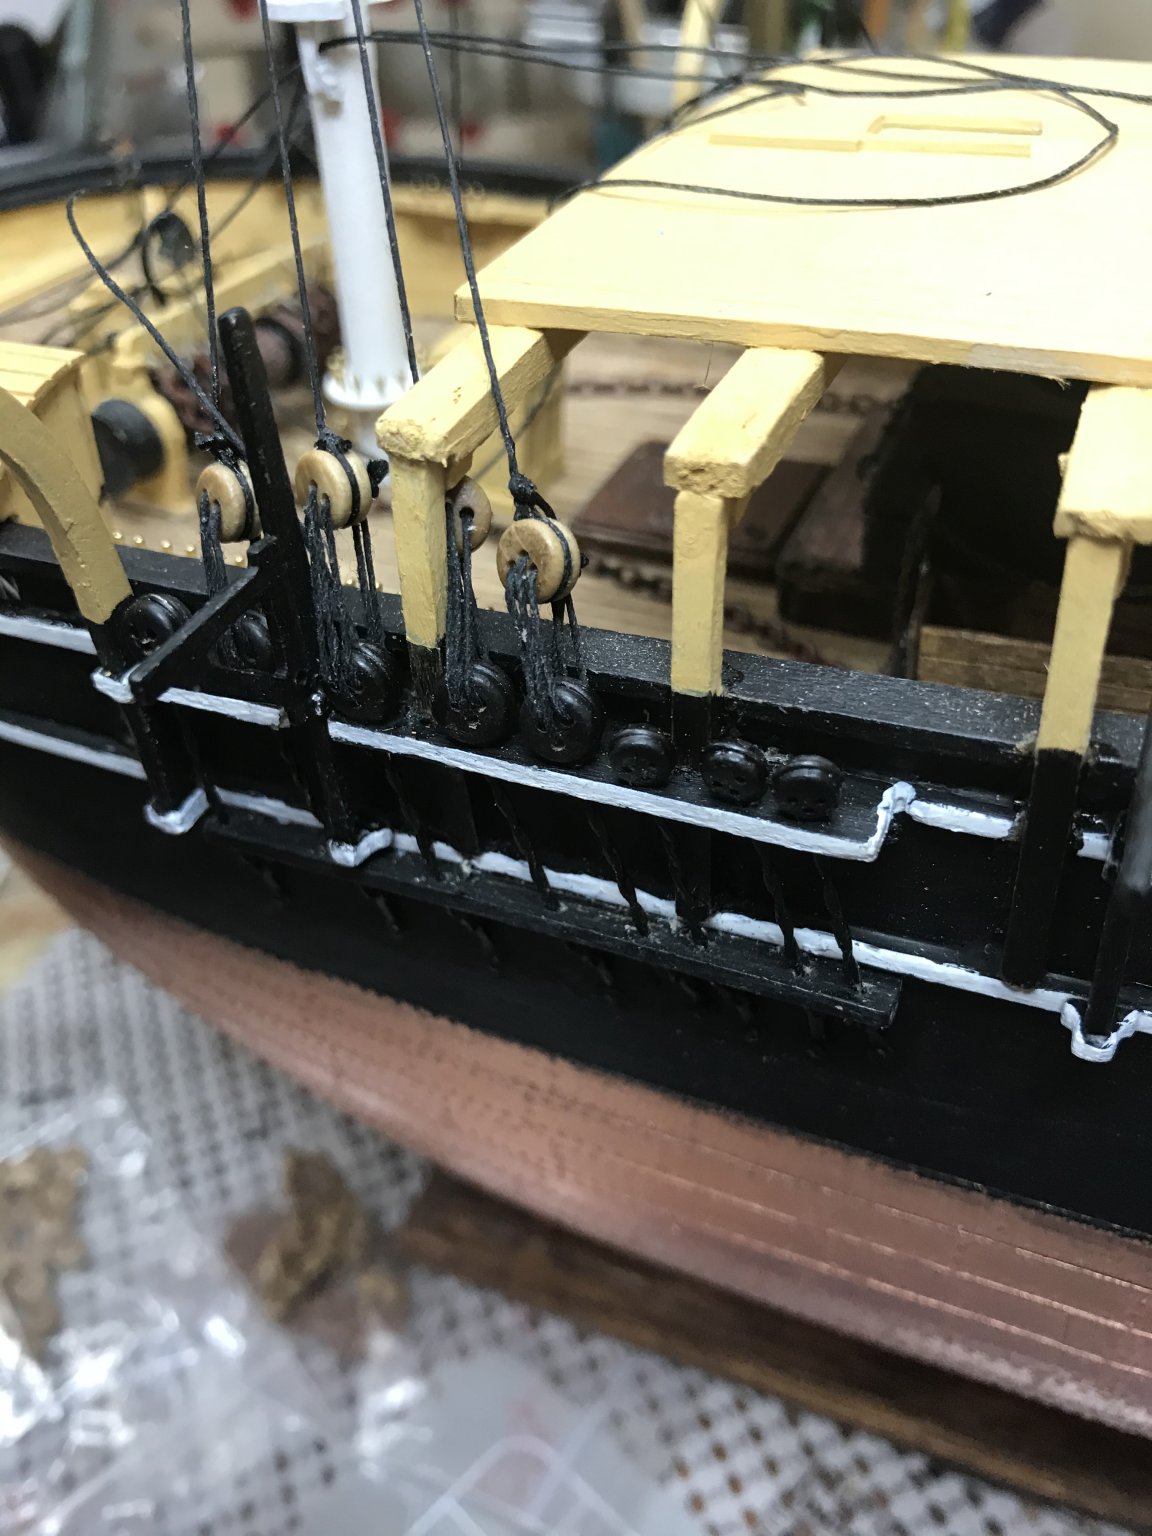
Fore Mast Lower Shrouds completed. Had some difficulty working around the Gallis Framing. However I did persevere rigging the Deadeyes. Lots of Deadeyes and Shrouds to go.... 😆


- 196 replies
-
- 10
-
-
- marine model company
- charles w morgan
- (and 1 more)
-
The crew were purchased from an eBay seller in Russia. I special ordered additional oarsmen. I also did a lot of additional detail work, such as planking that was not part of the original kit. Thanks for your compliments.
-
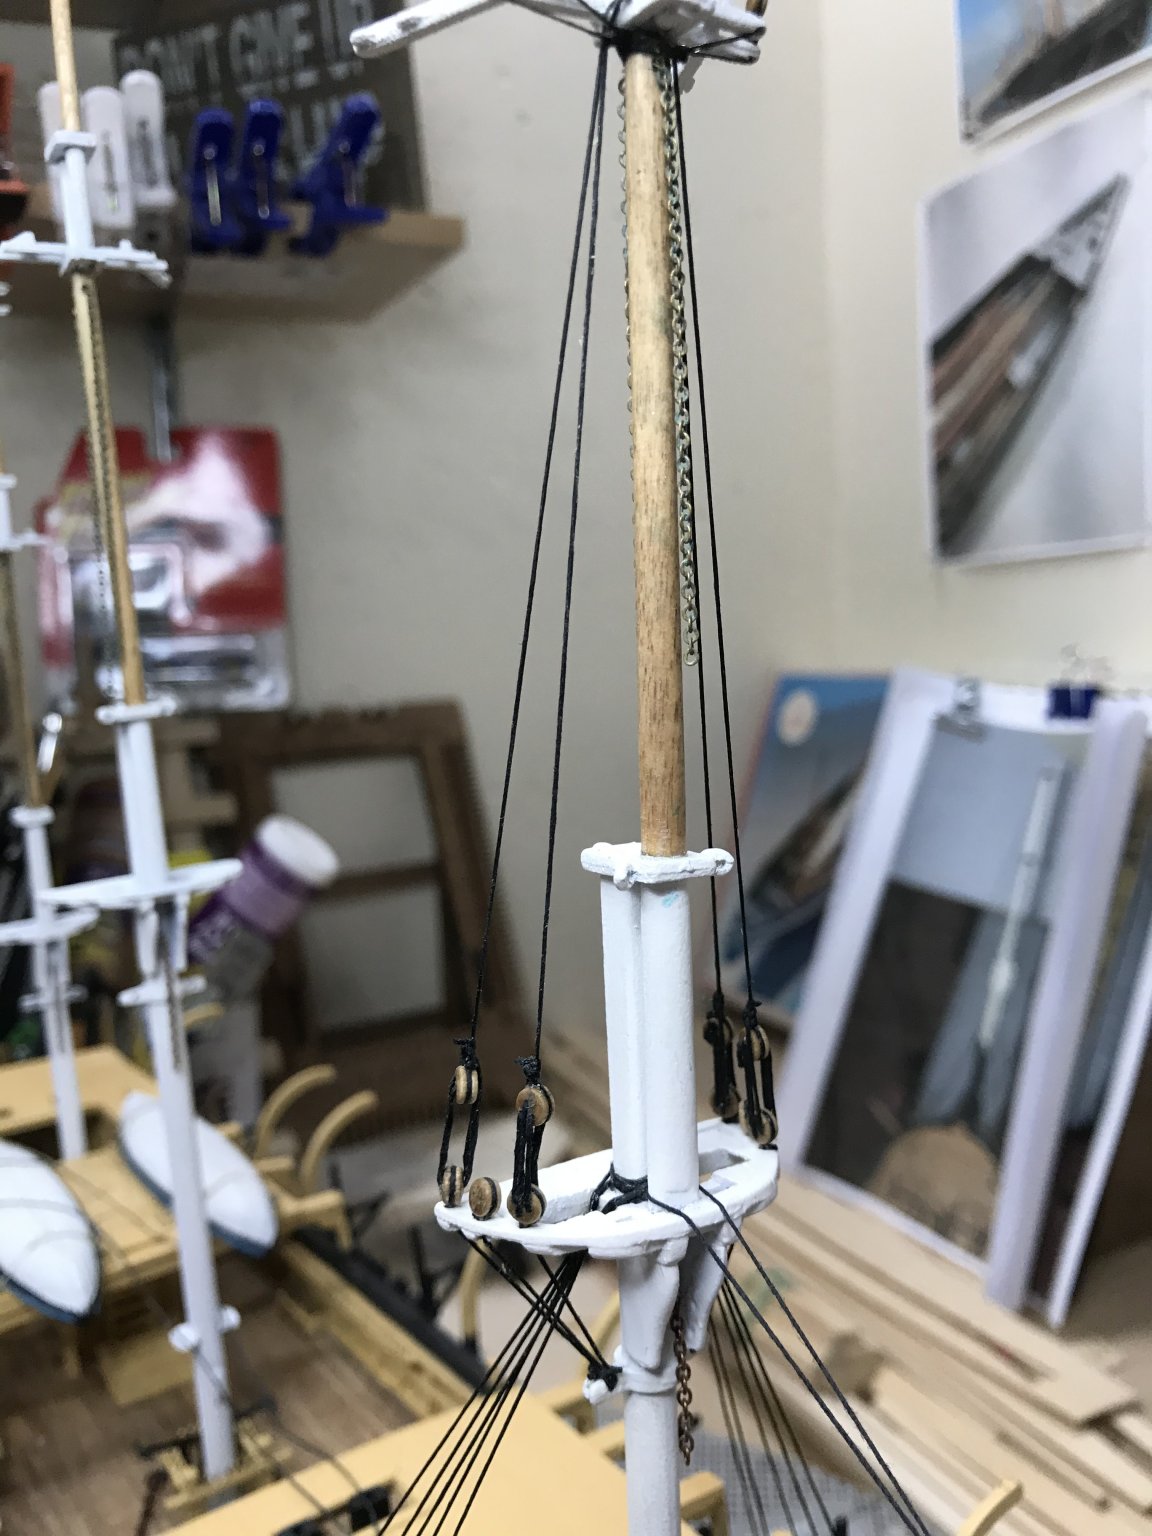
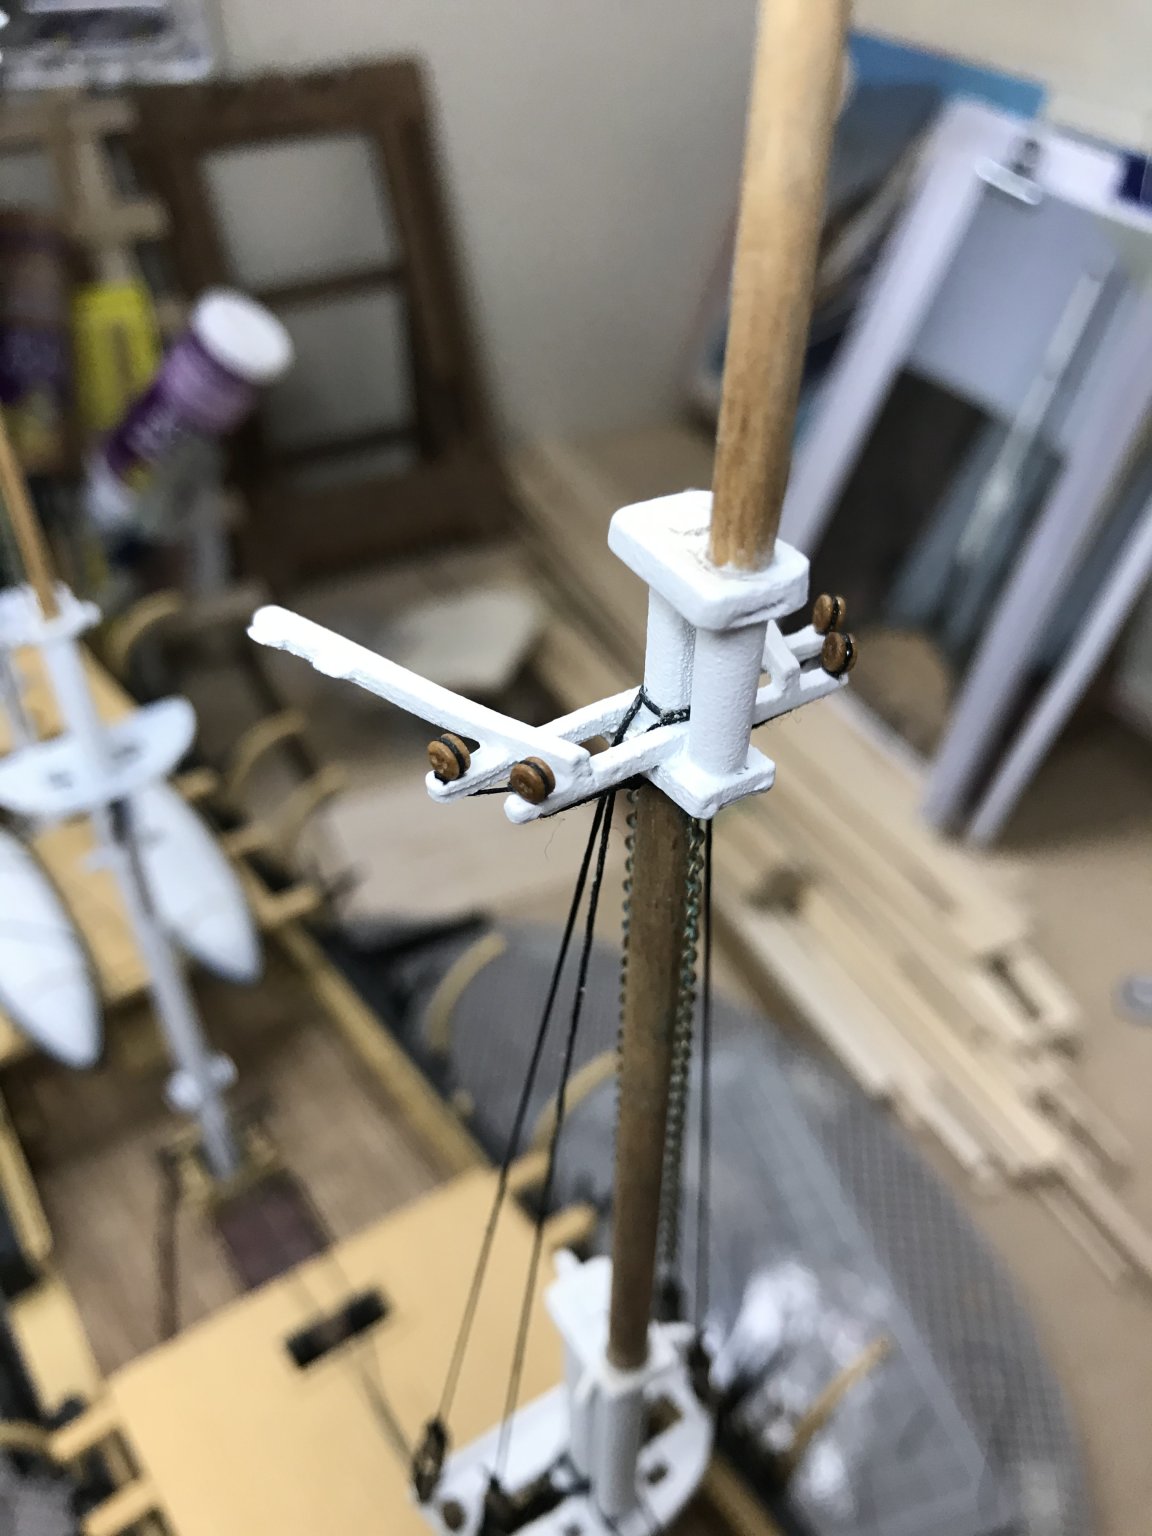
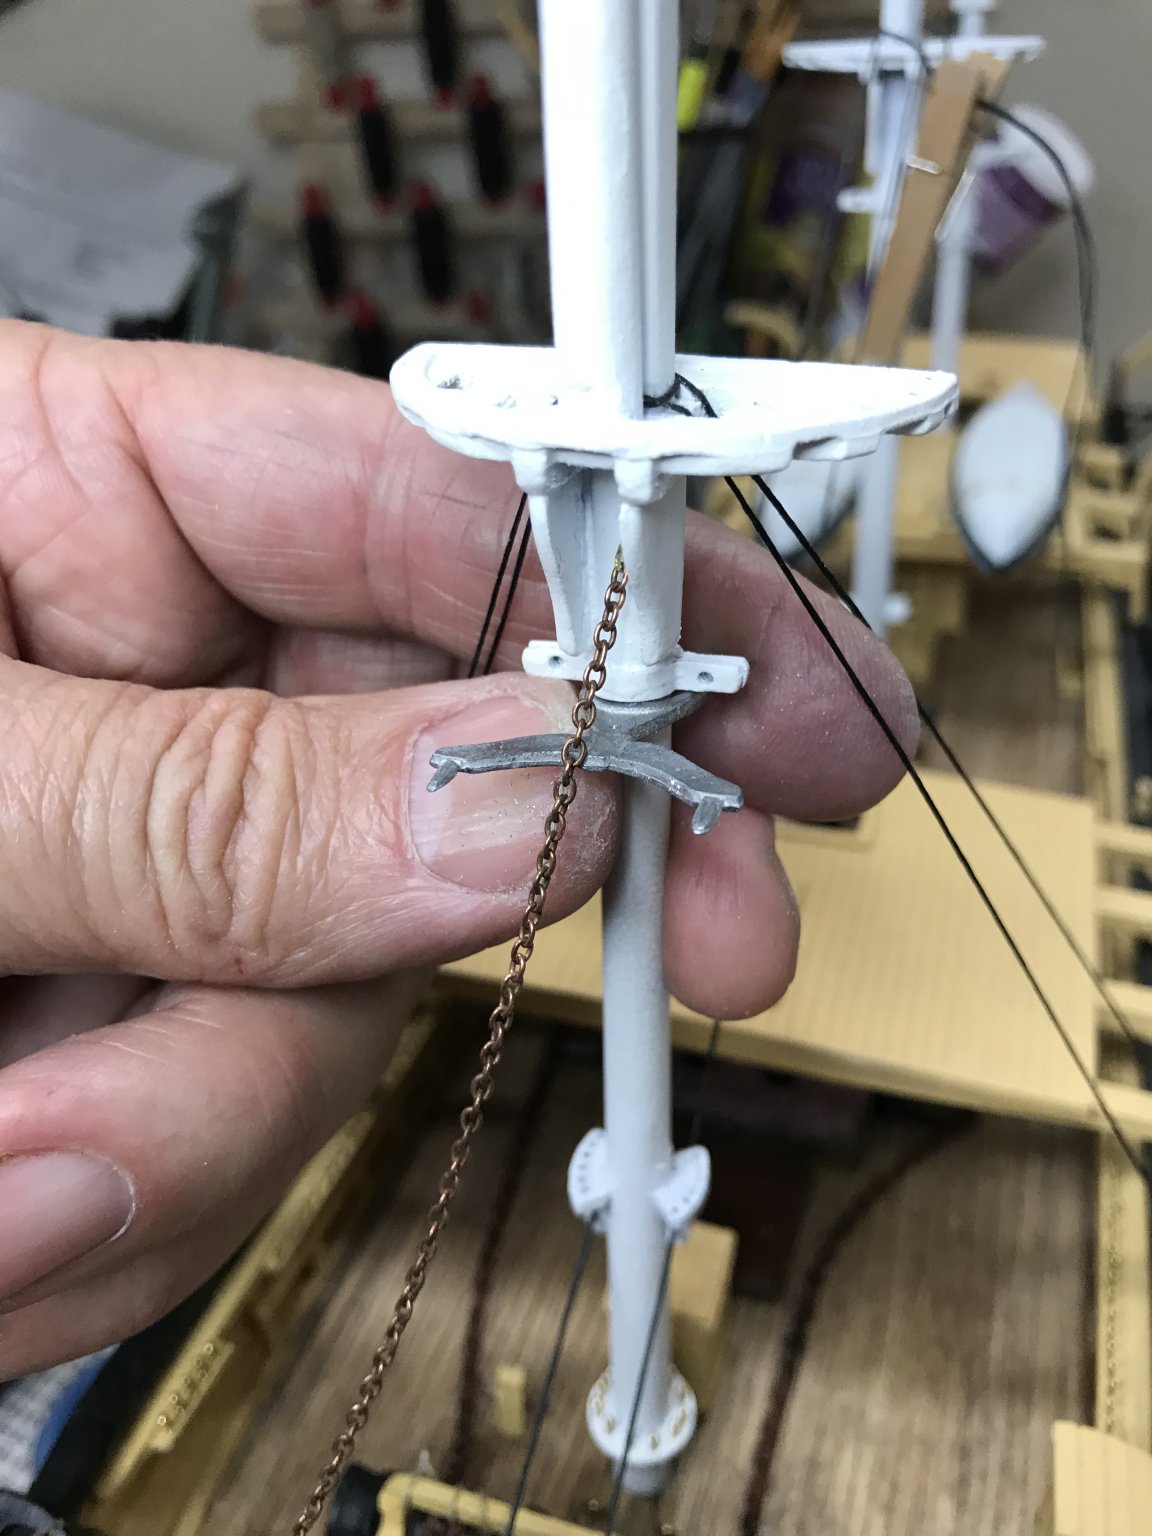
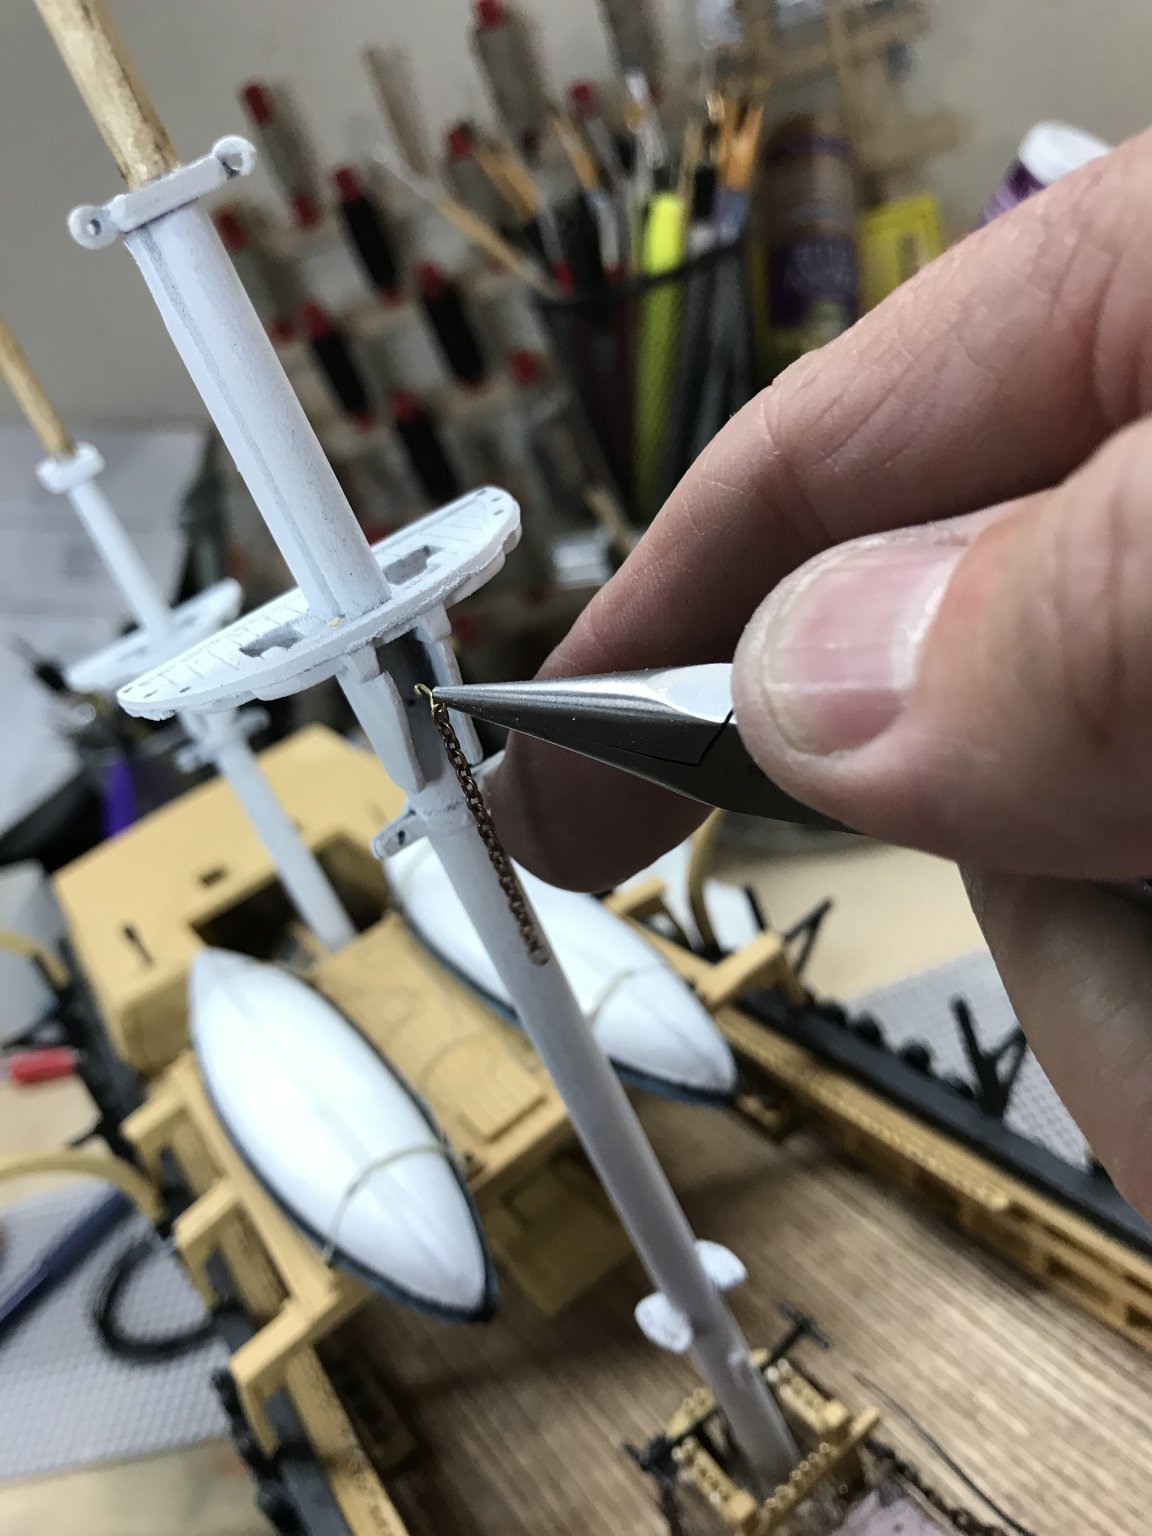
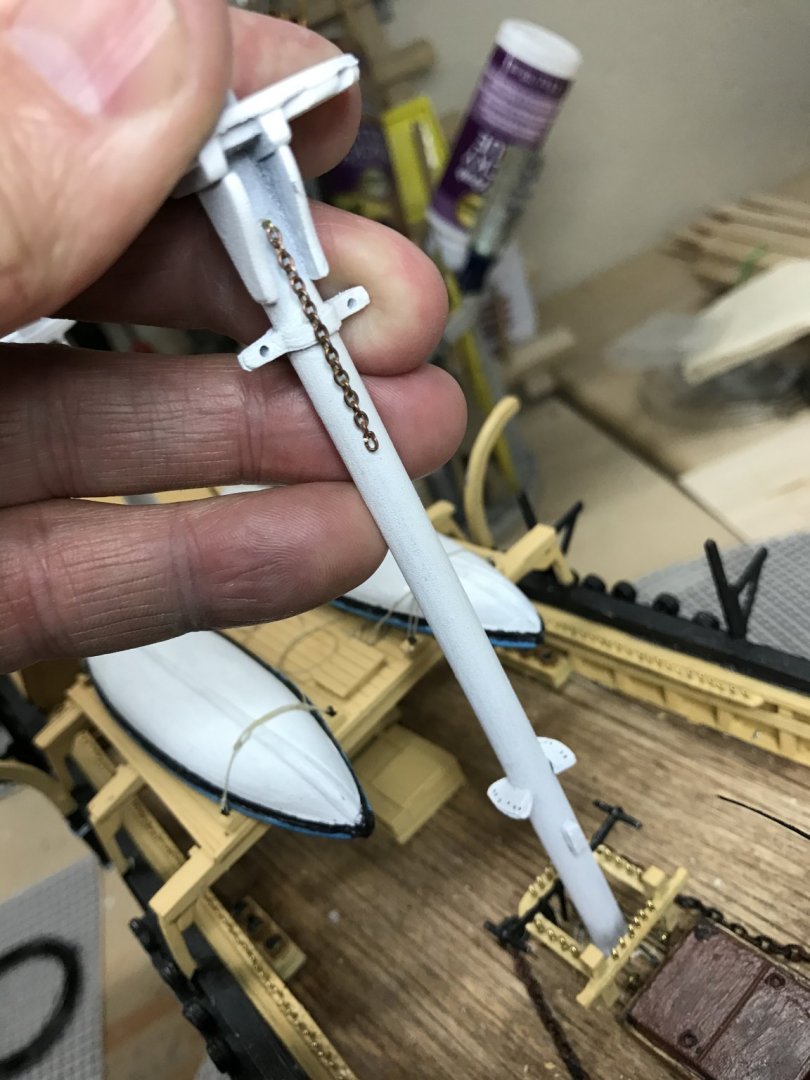
Sheave Holes, Topsail Halyard Chains, Lower Yard Chain Slings installed. Later...😎


- 196 replies
-
- 9
-
-
- marine model company
- charles w morgan
- (and 1 more)
-
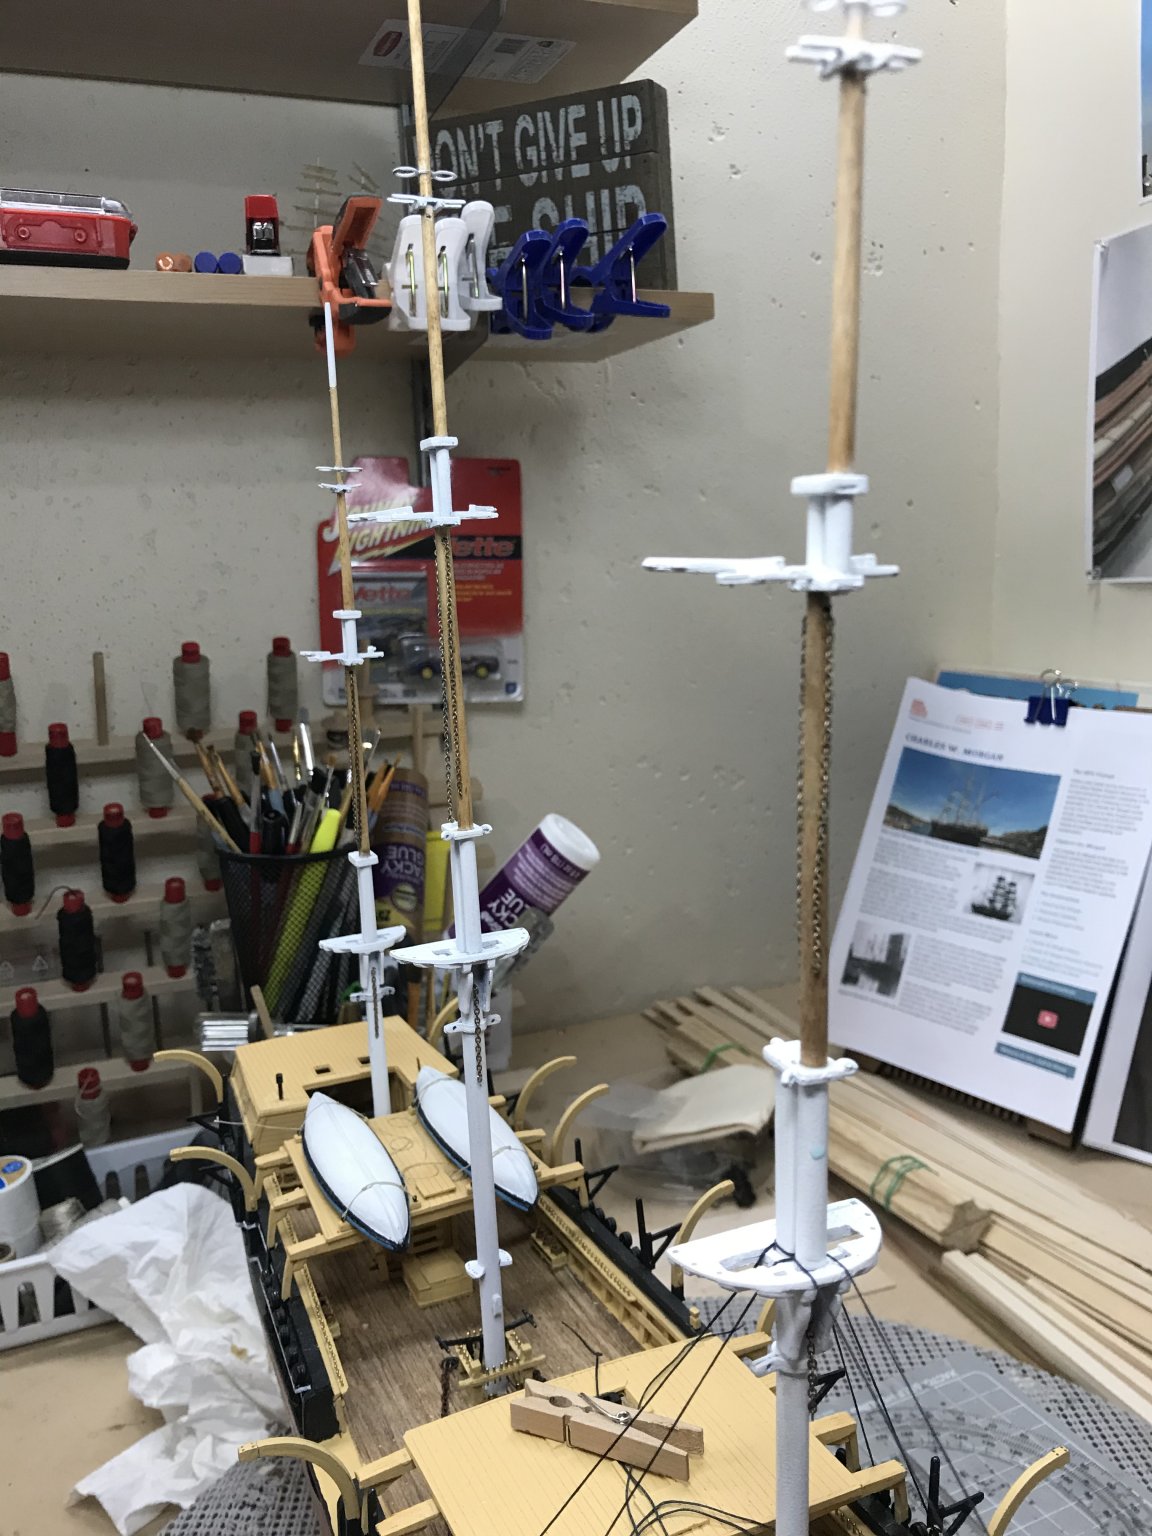
Standing rigging is officially started. Two pair of Fore Mast Lower Shrouds installed. This too shall be very time consuming. It’s all good, I do need something to fill my evenings. Cheers 🍻

- 196 replies
-
- 8
-
-
- marine model company
- charles w morgan
- (and 1 more)
-
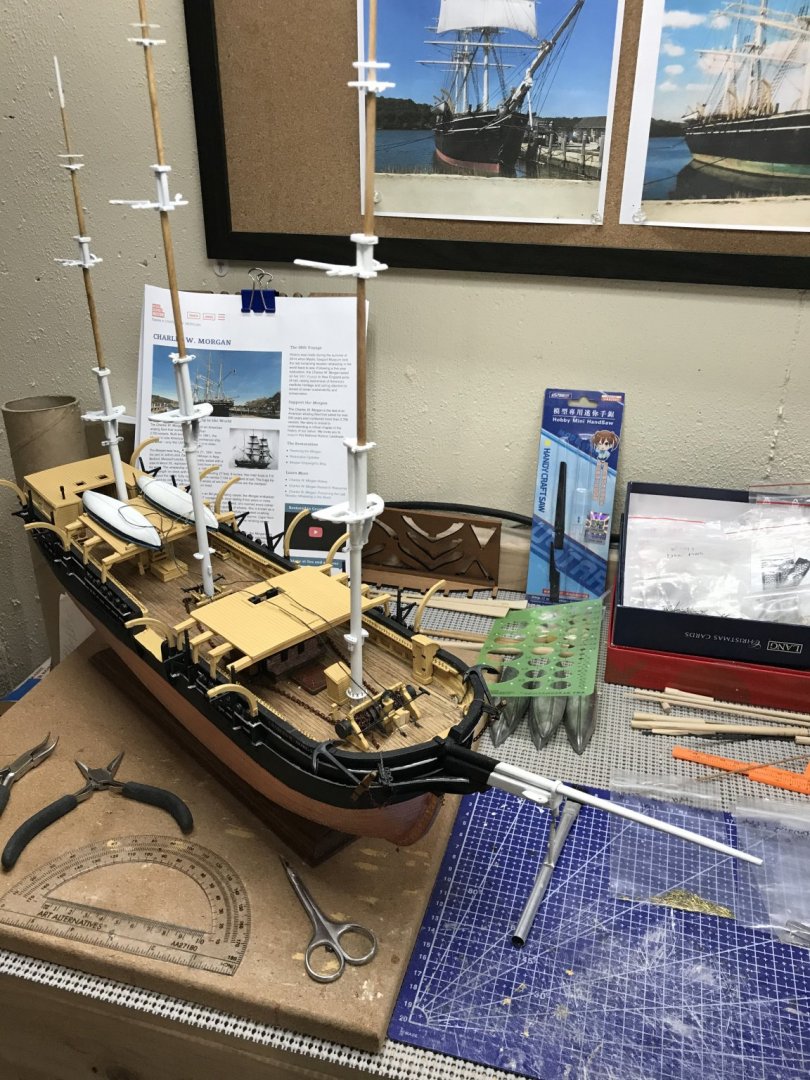
Laying out the spars and hardware as I review Standing Rigging Plan. I will begin with the shrouds and build the yards along the way as I complete the standing rigging. Feels good to be back on the Charles W Morgan. The break to work on the New Bedford Whaleboat was good. Now I can start tackling the Rigging. 👍

- 196 replies
-
- 5
-
-
- marine model company
- charles w morgan
- (and 1 more)
-
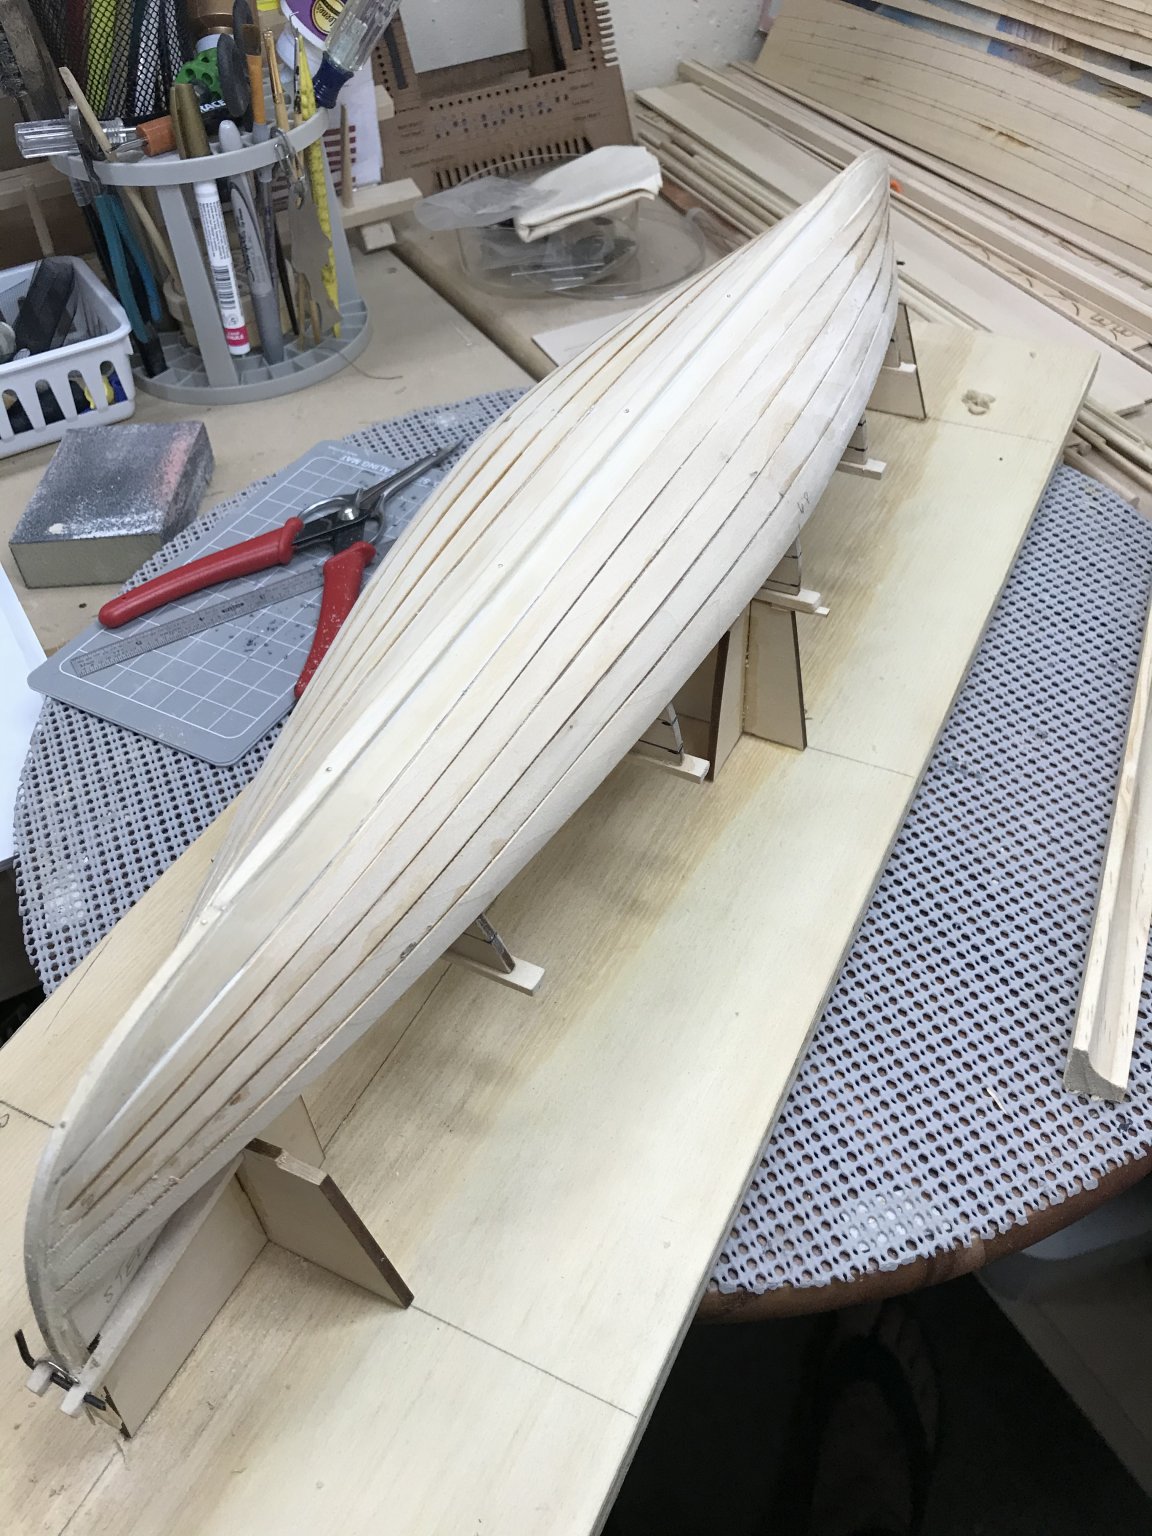
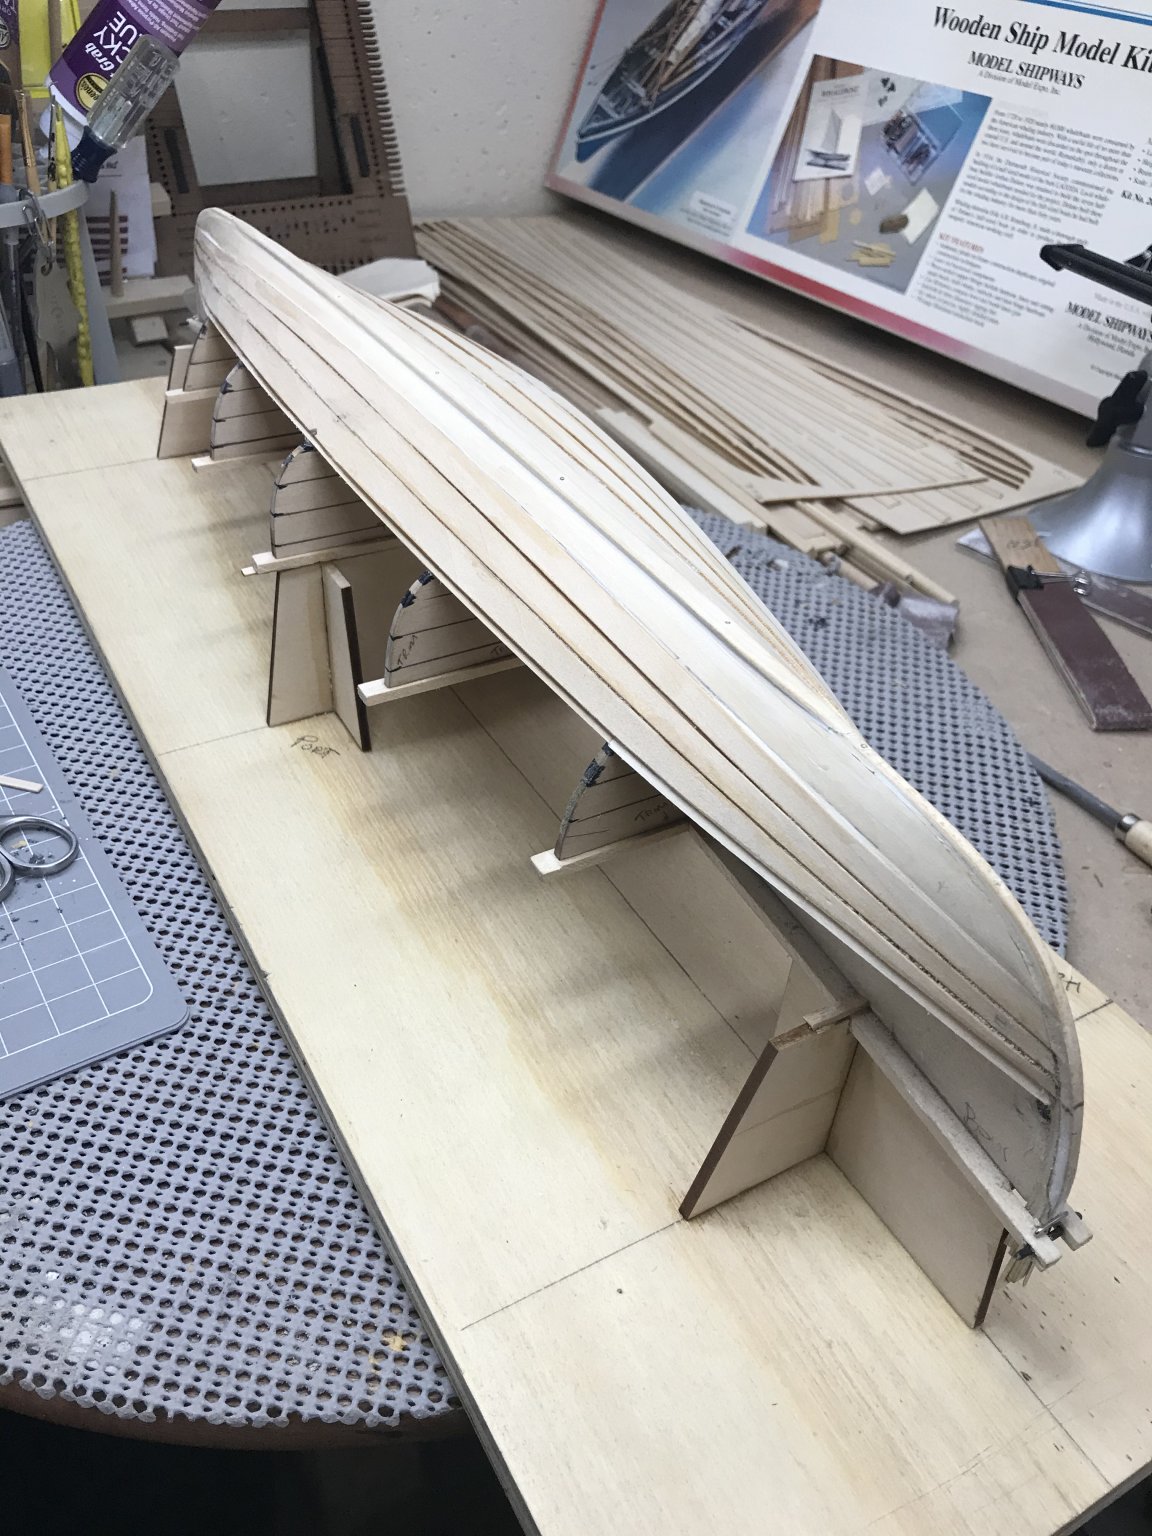
Hull is completed and successfully remove from the build board. Woo Hoo! 🍻 Major Milestone!!! Next up is framing the hull. Looks like it’s time to return to the Charles W Morgan and take a break from the Whaleboat. The CWM keeps looking at me from the bench and calling me to start the Standing Rigging. I’ll be back here before you know it. Stay Safe out there COVID is on the rise again. Glad I have this hobby to keep me in and focused on something other than the news. See ya soon...😎

- 104 replies
-
- 8
-
-

-
- model shipways
- new bedford whaleboat
- (and 1 more)
-
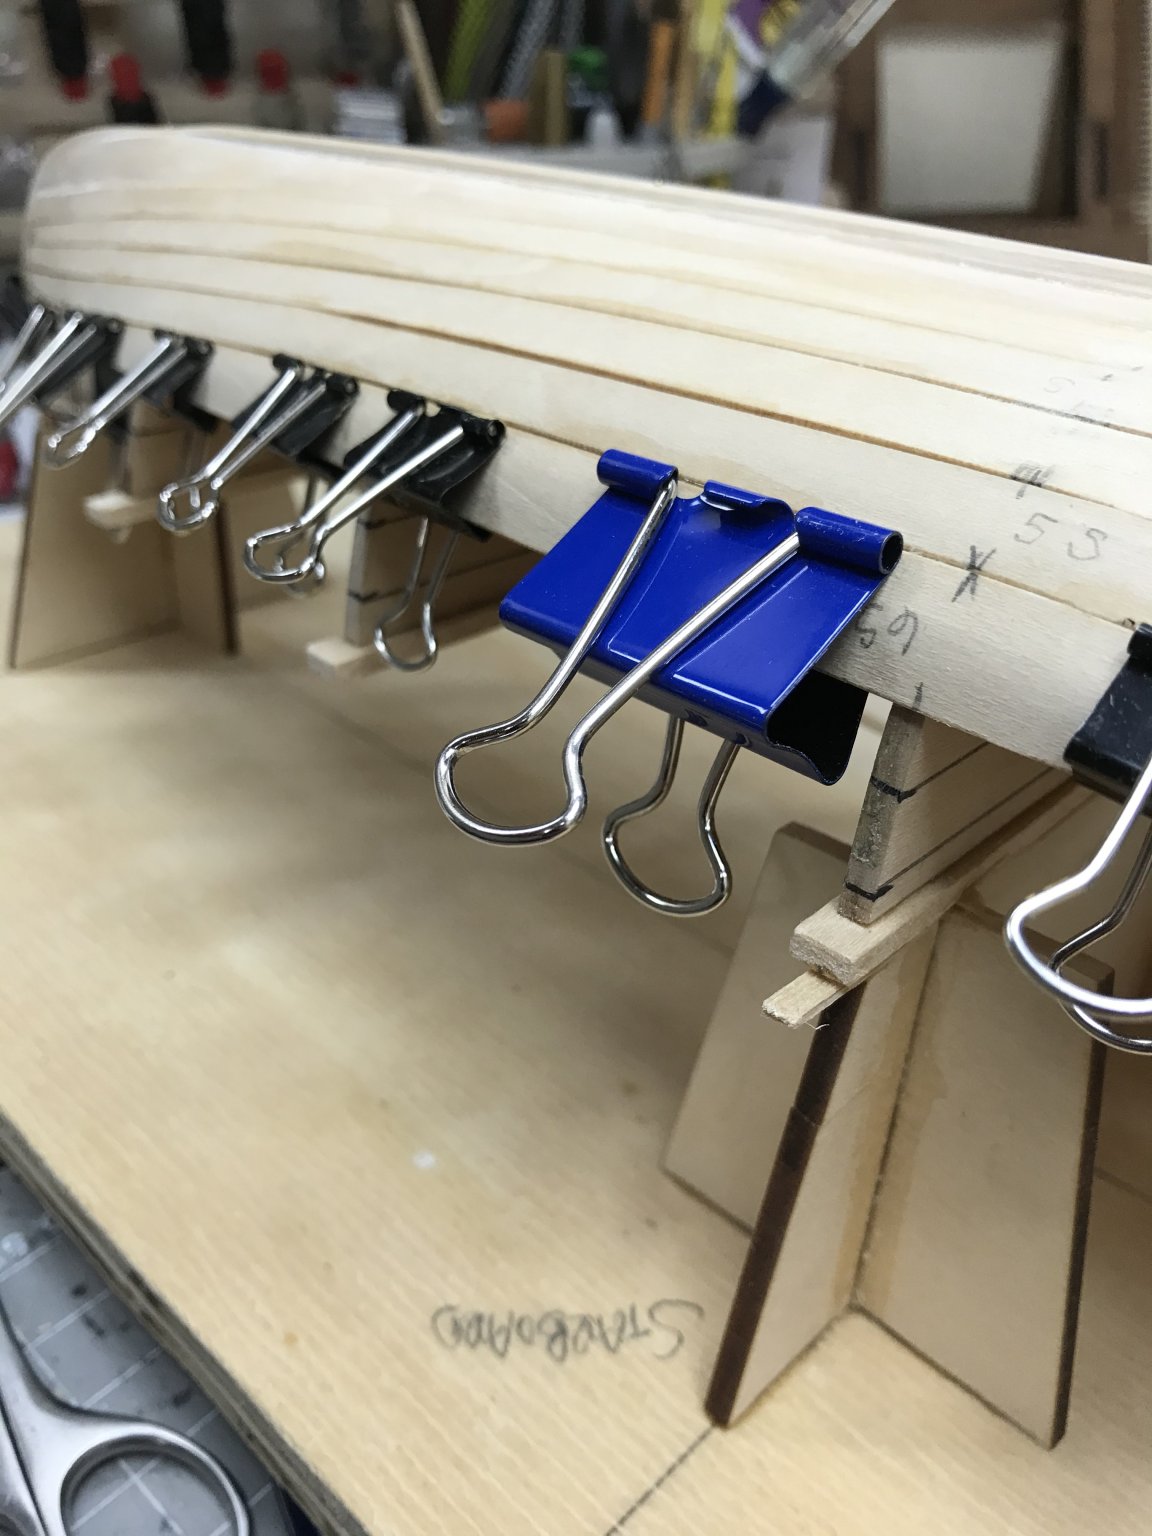
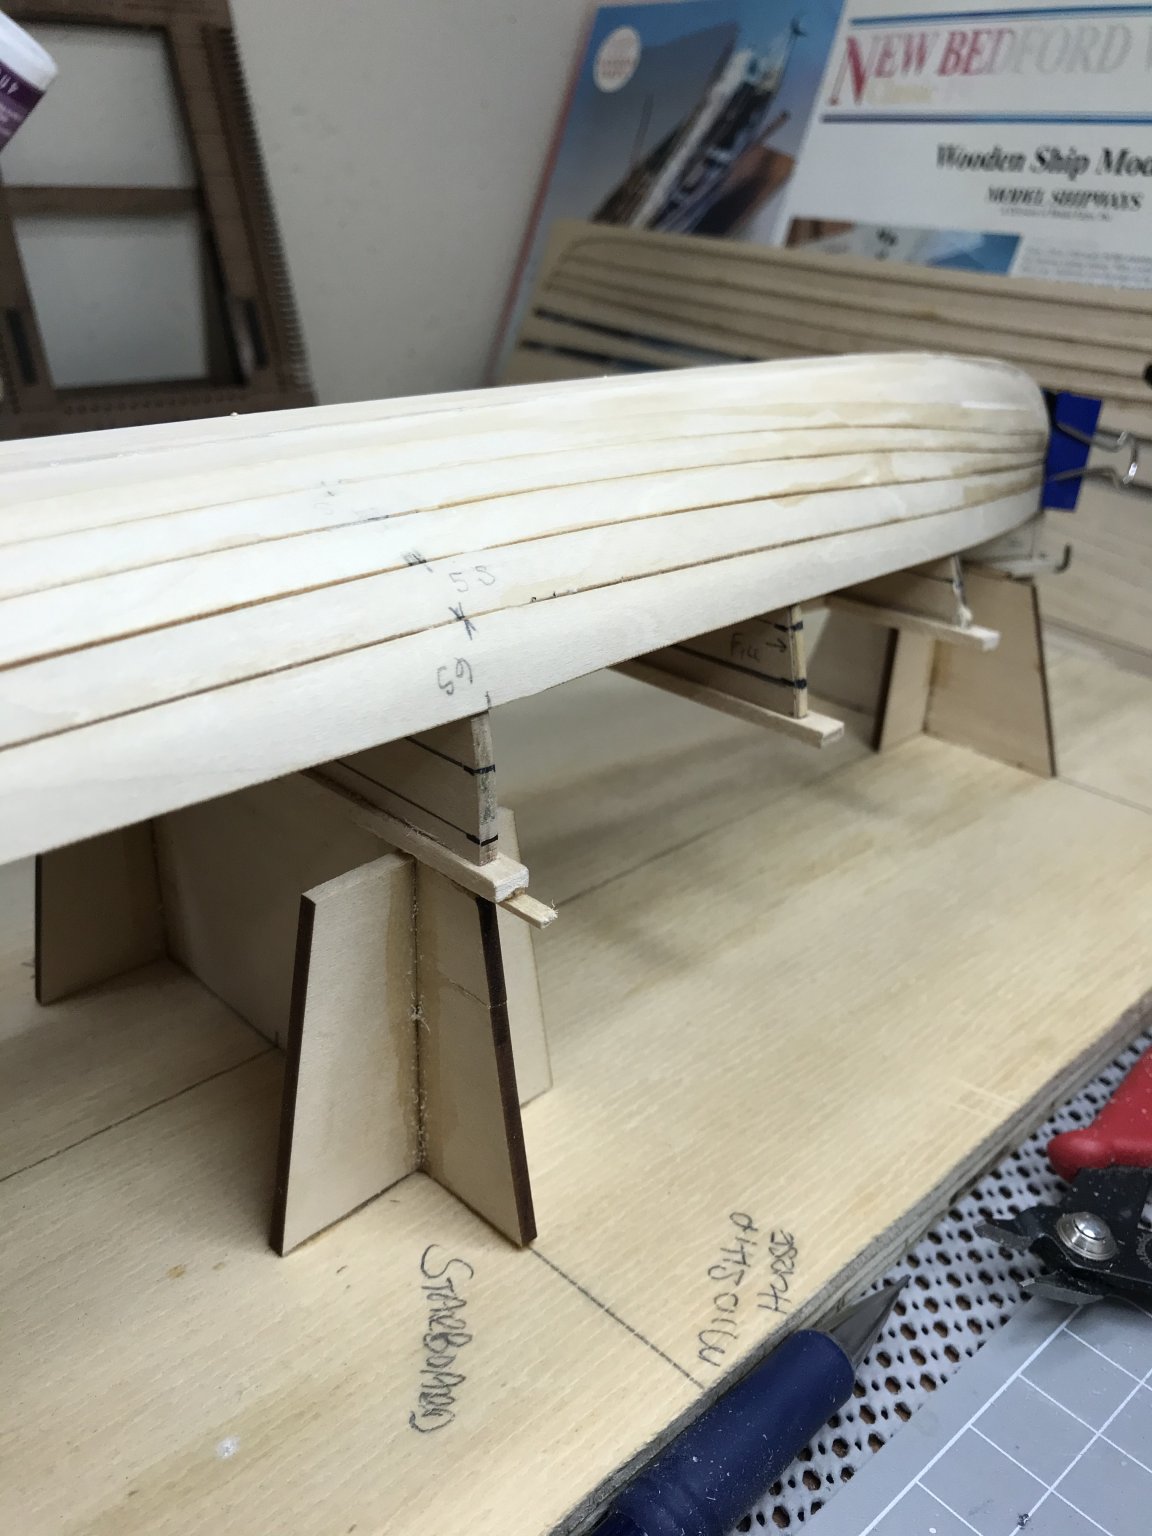
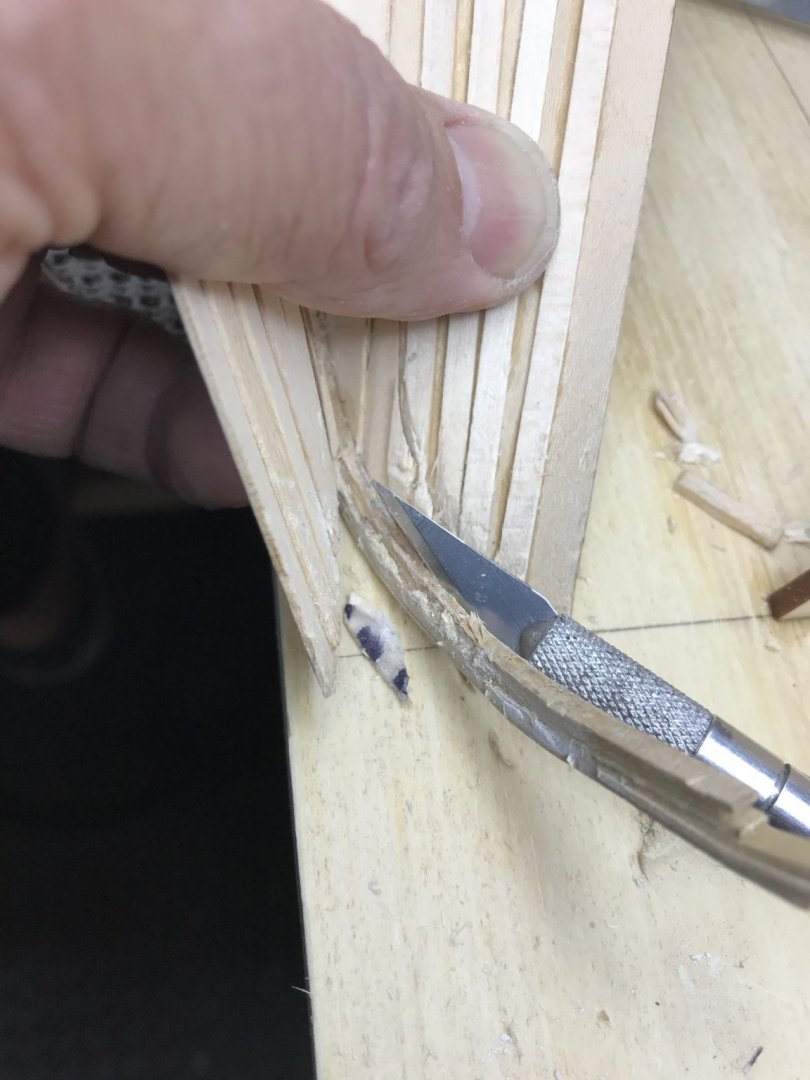
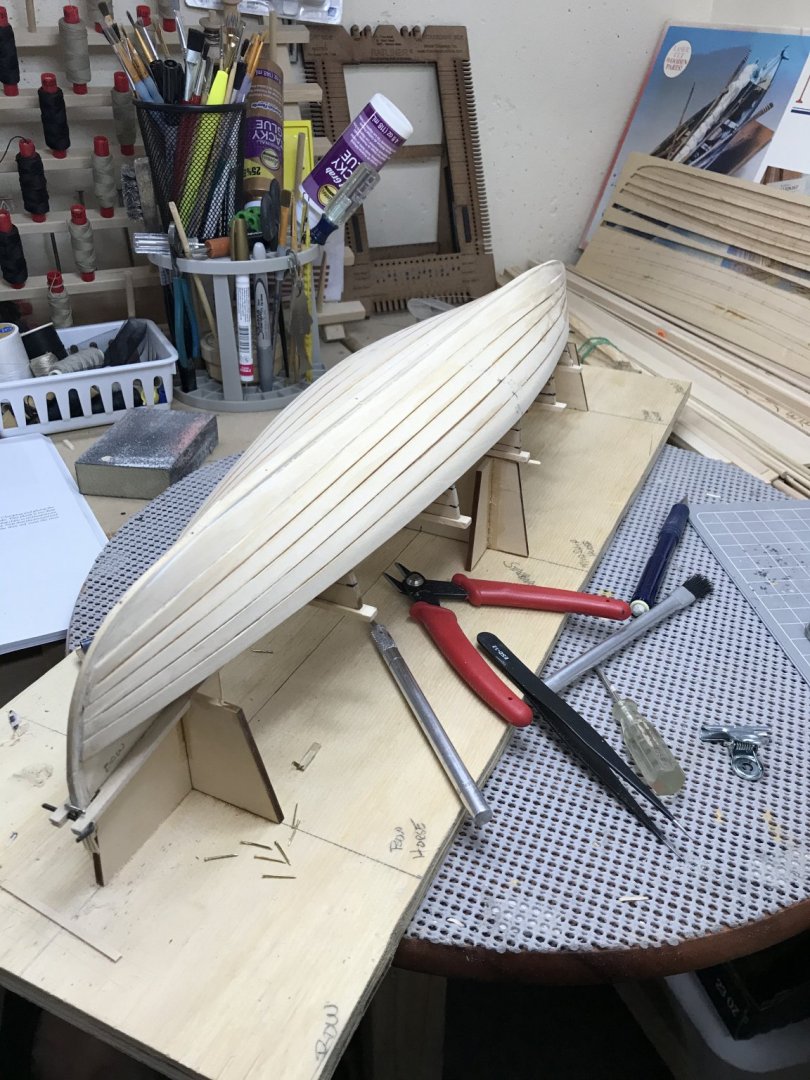
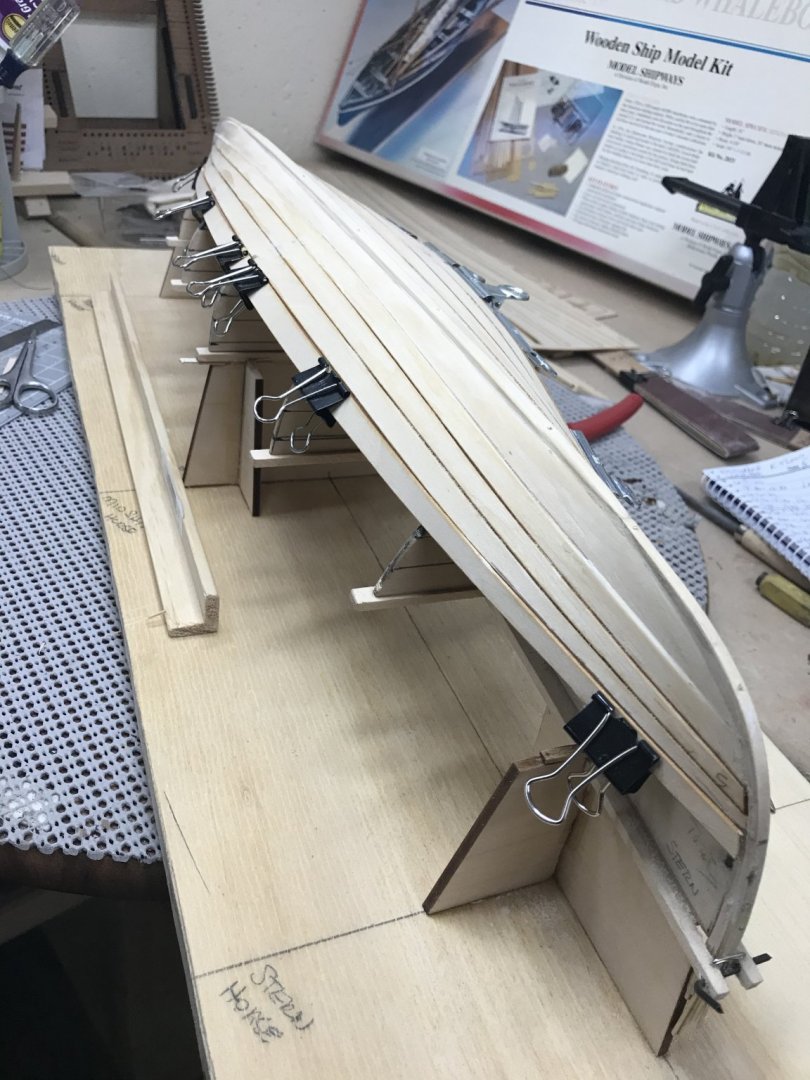
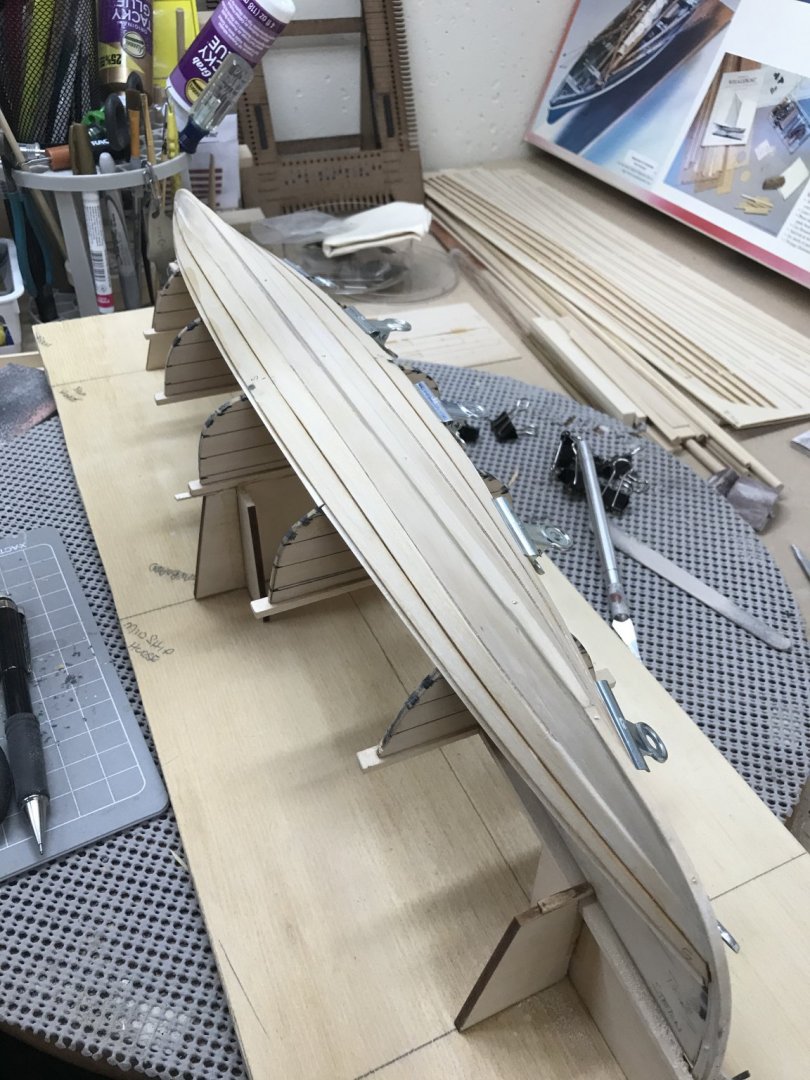
Sheer planking set and beveled for the Gunwale. Gunwale is the last stake again its a lap joint by 1/16th. Clamps do not fit need to use close pins. Once the Gunwale sets the hull will be ready to pull from the build board horses. Next steps add strips to stabilize the hull on the mold before removing the hull from the build board. Latter...😎
- 104 replies
-
- 8
-
-
- model shipways
- new bedford whaleboat
- (and 1 more)
-
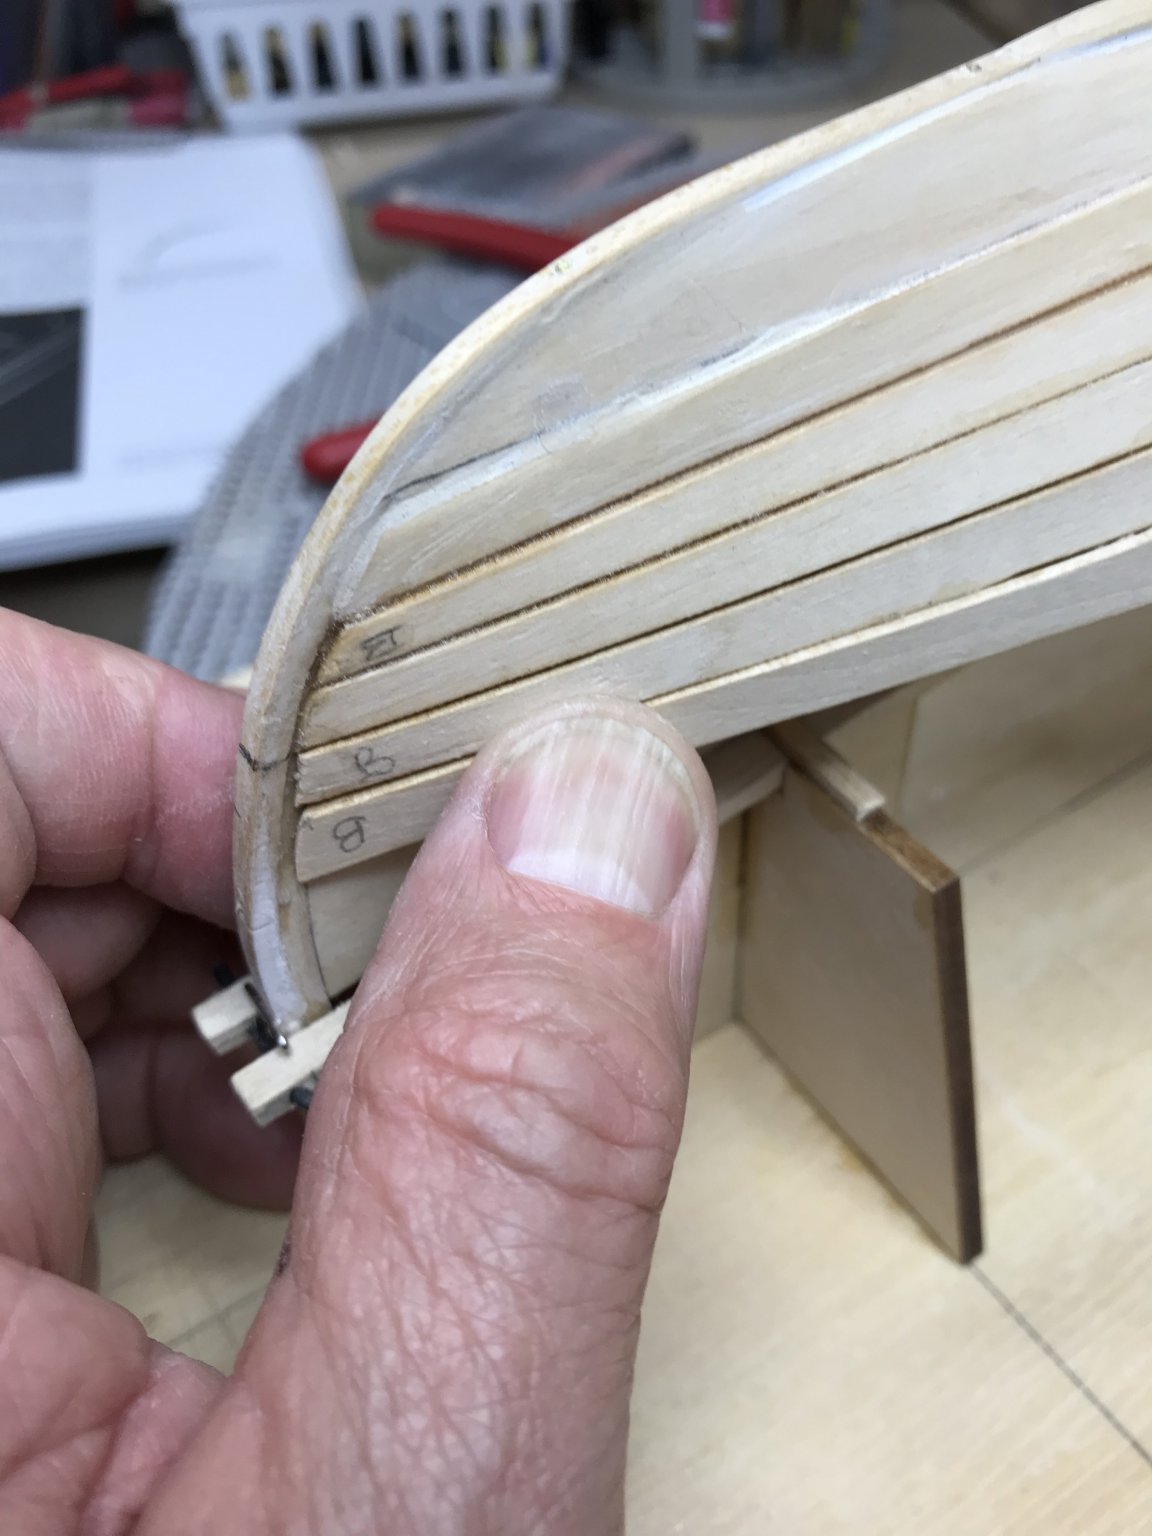
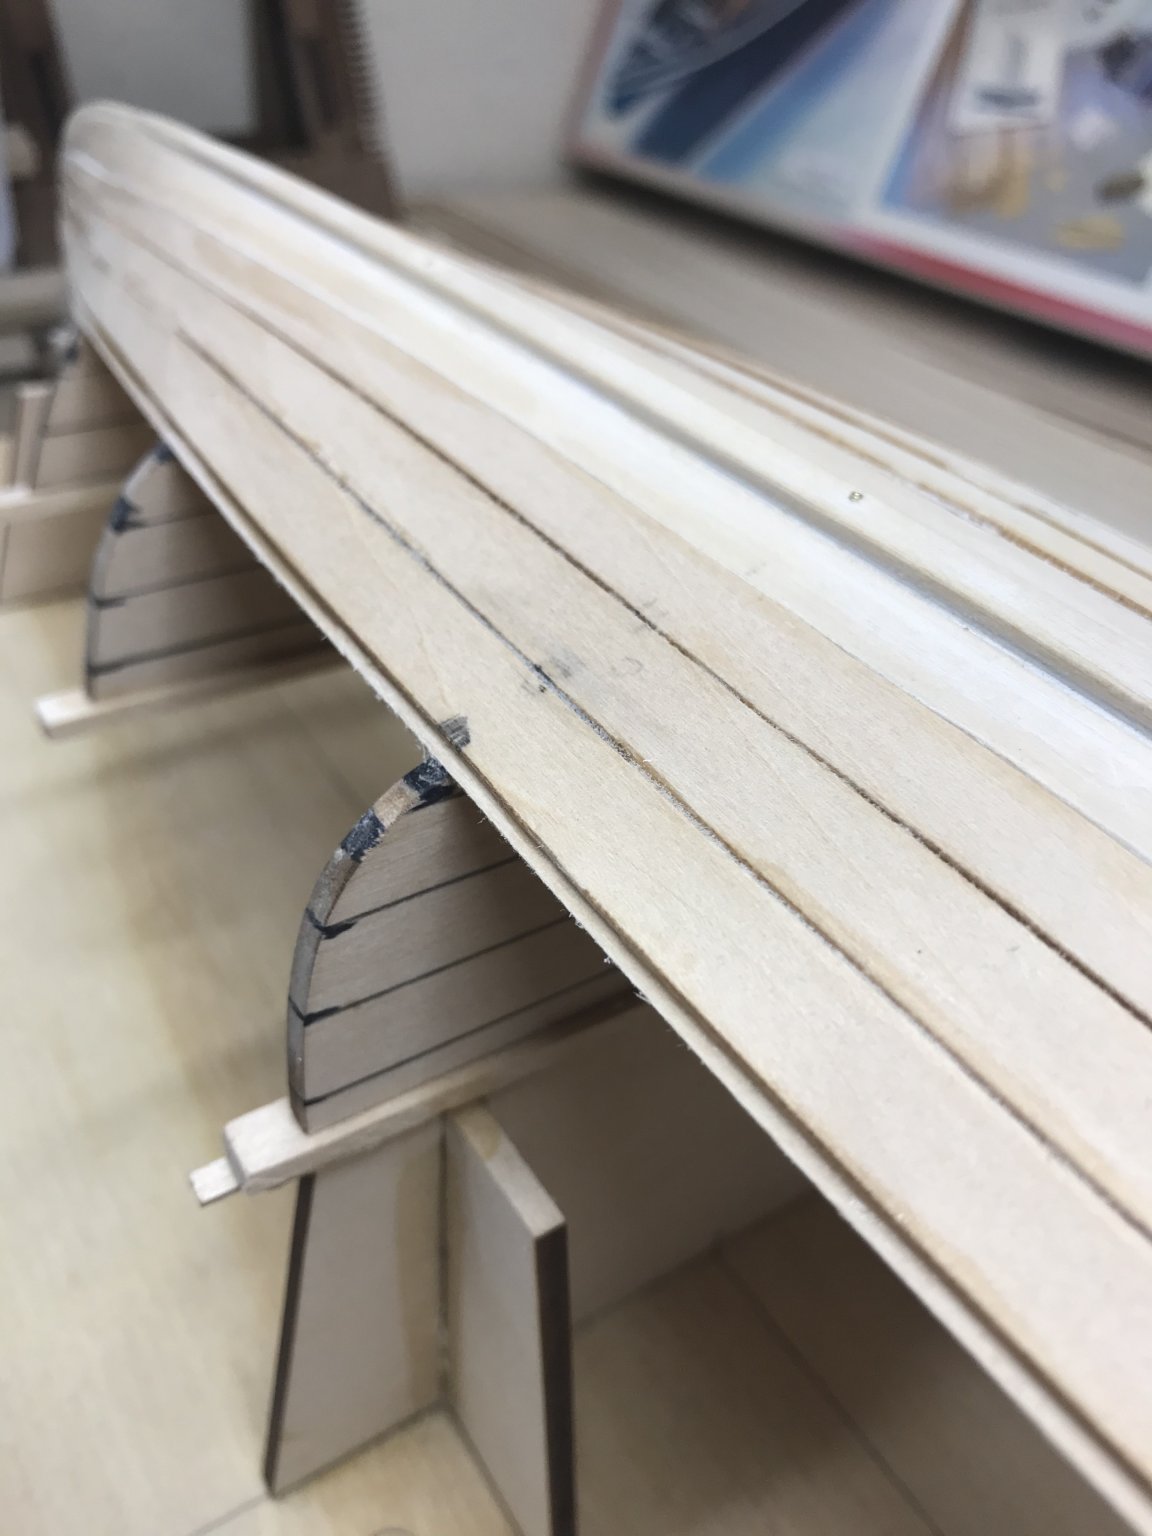
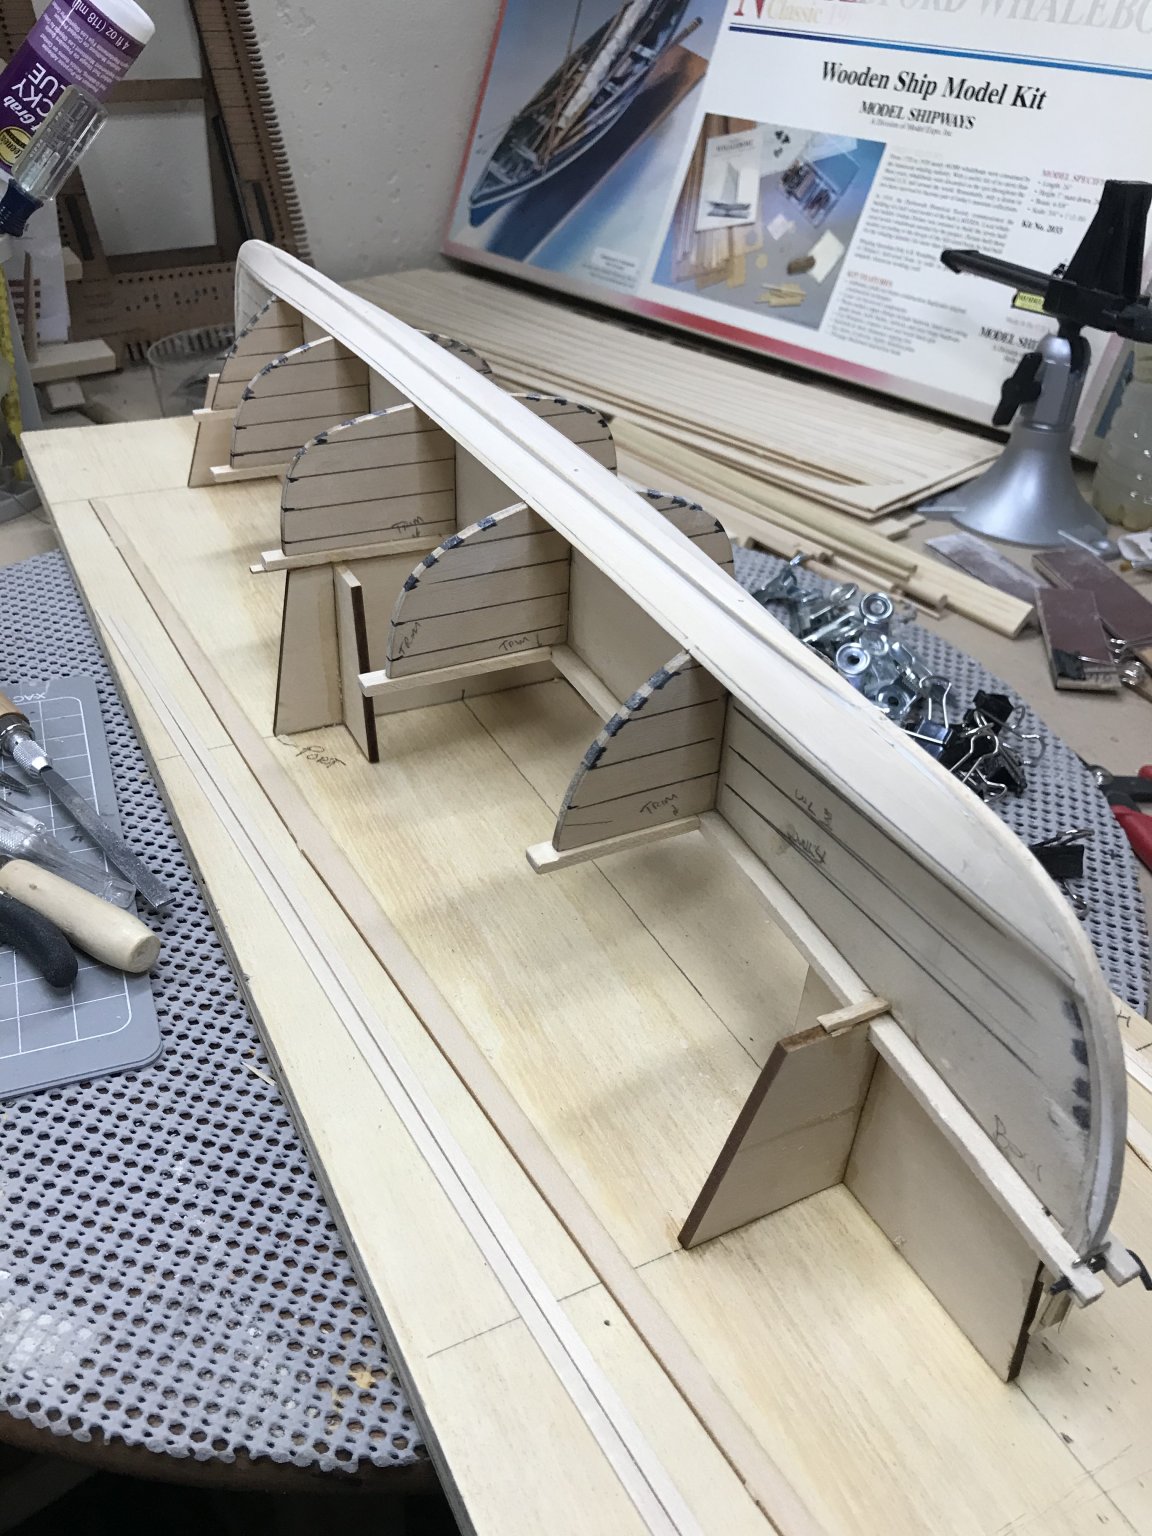
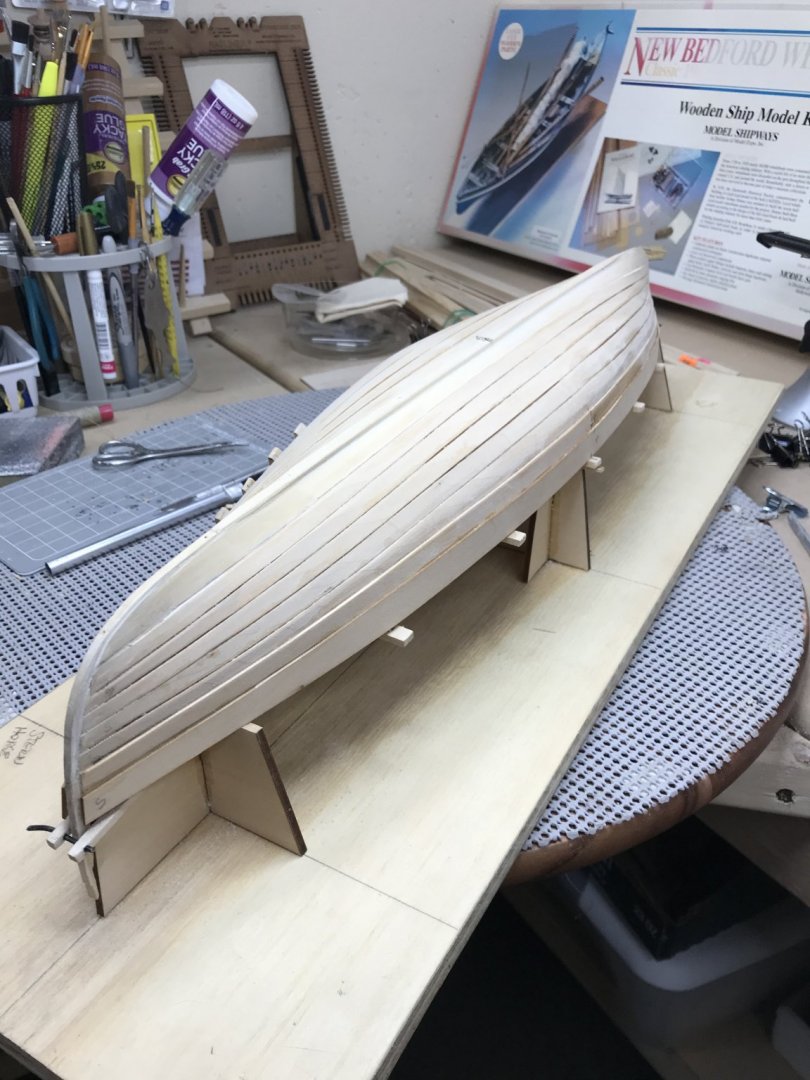
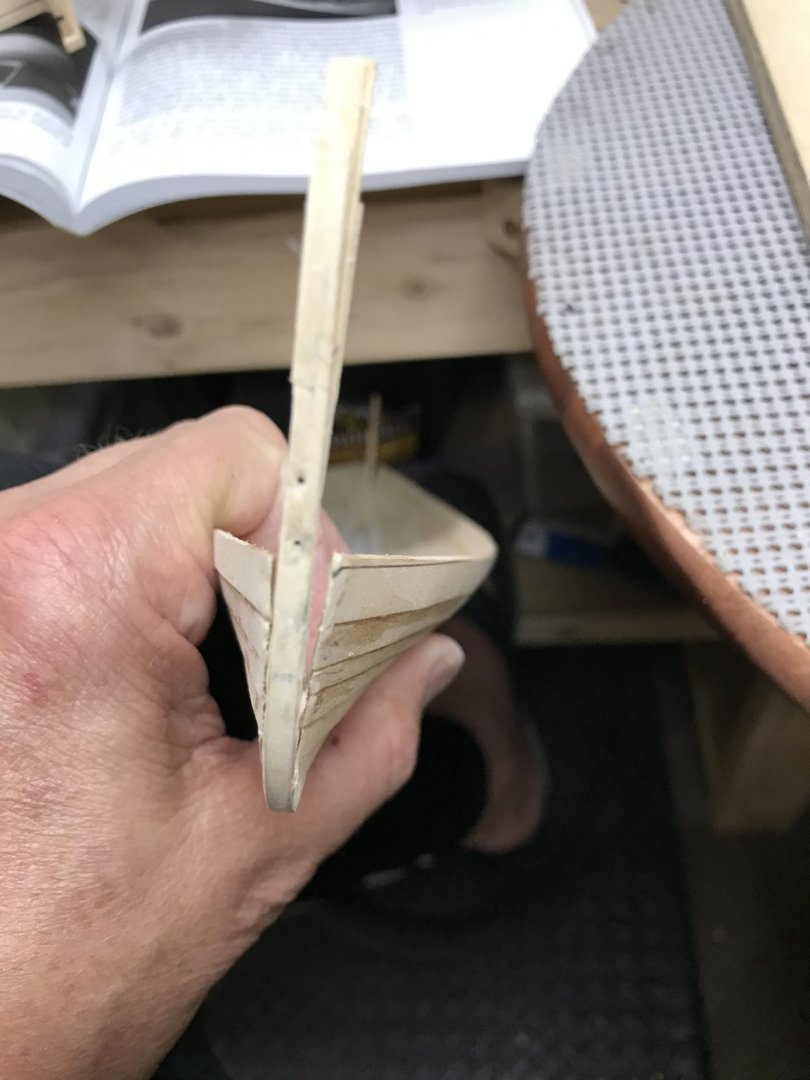
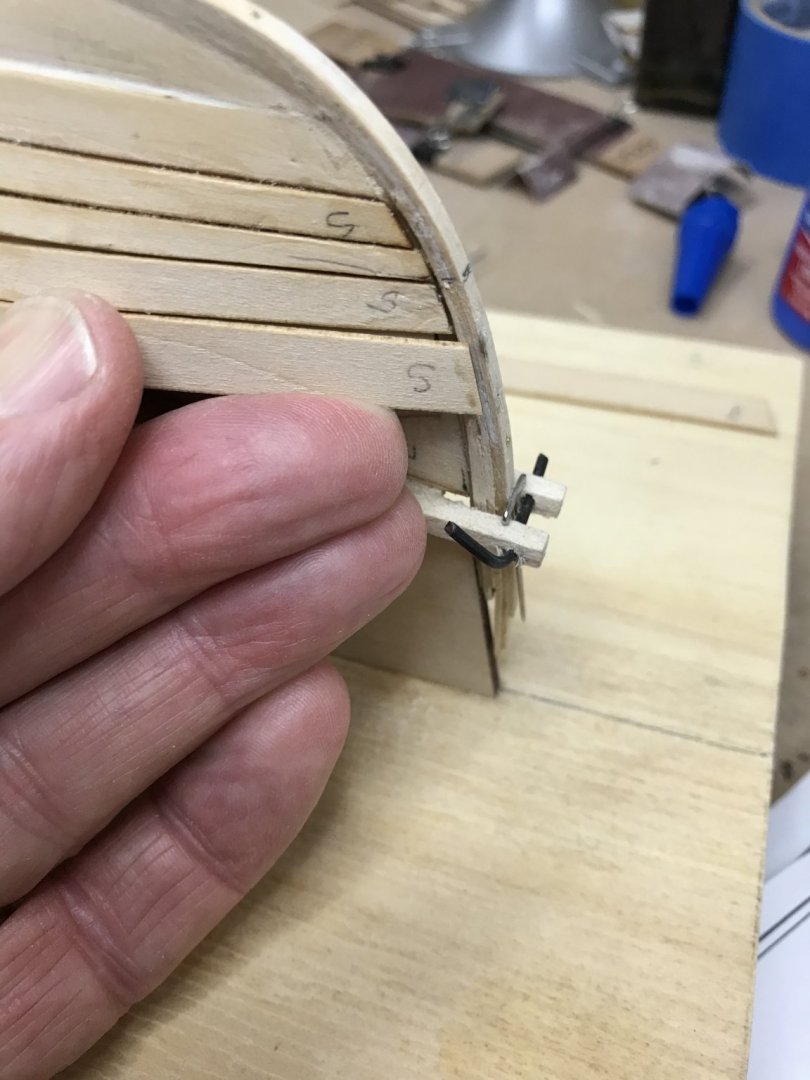
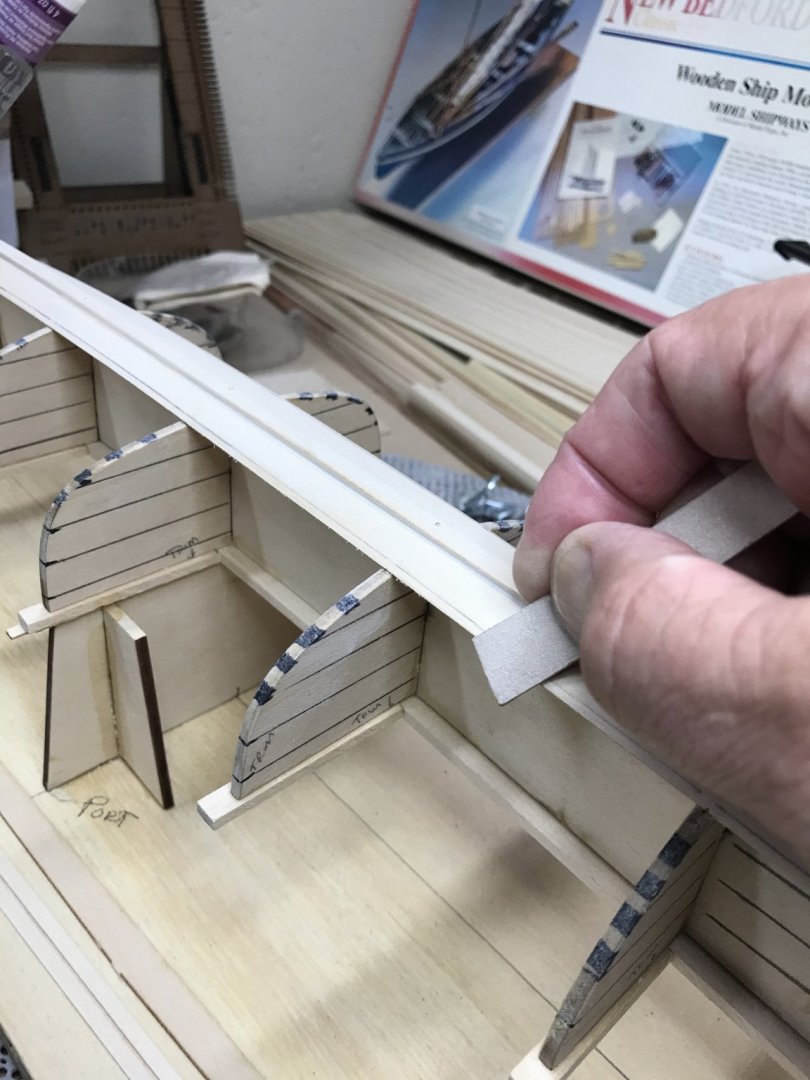
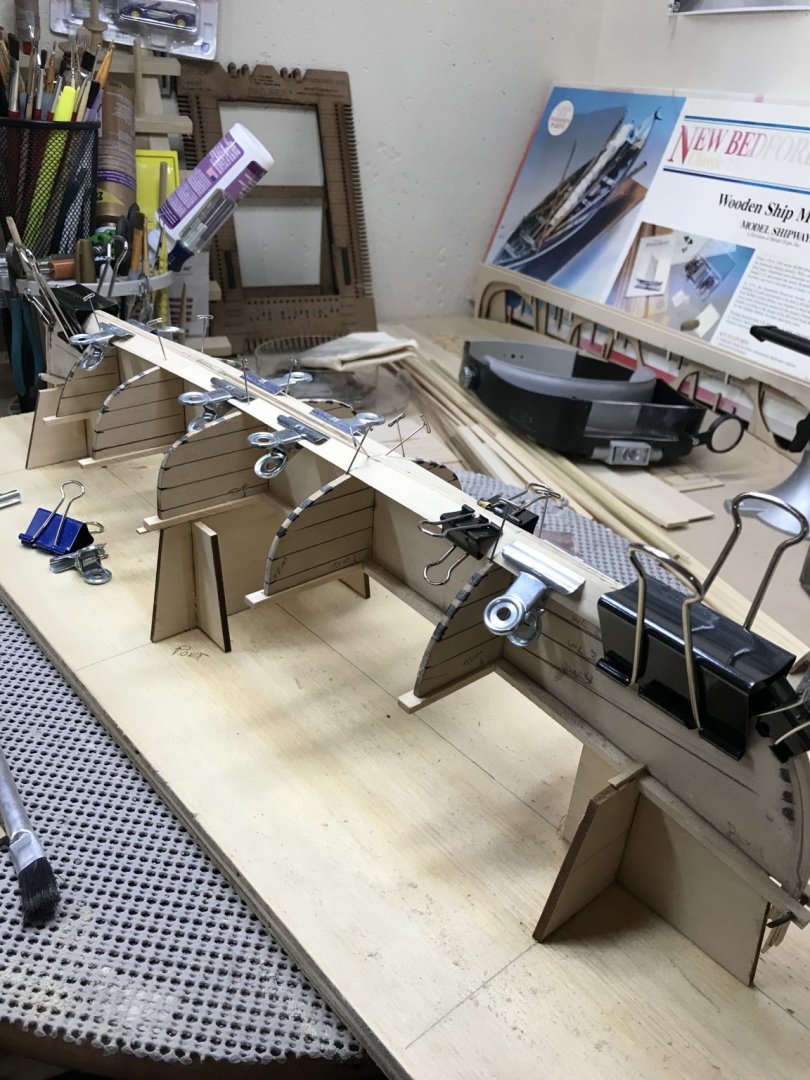
Before mounting the hull back on the mold I thought I would bevel the 6th strake for lapping the sheer plank. Now she is mounted back on the mold and ready for the Sheer Planking. The Sheer Planking does not get a batten. It overlaps the 6th strake by 1/16th of an inch. I used a compass to strike a line on the 6th strake to get a proper lap joint. Hopefully, no gluing errors to night. tomorrow is another day. Cheers 🍻


- 104 replies
-
- 7
-
-
- model shipways
- new bedford whaleboat
- (and 1 more)
-
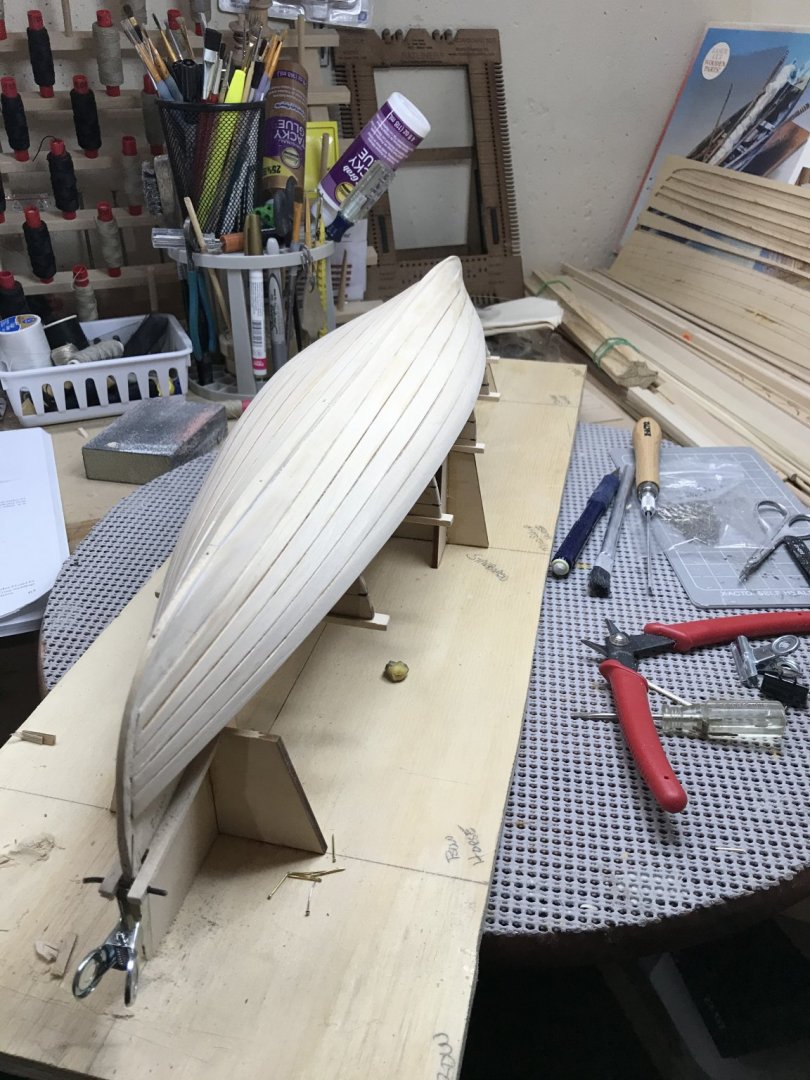
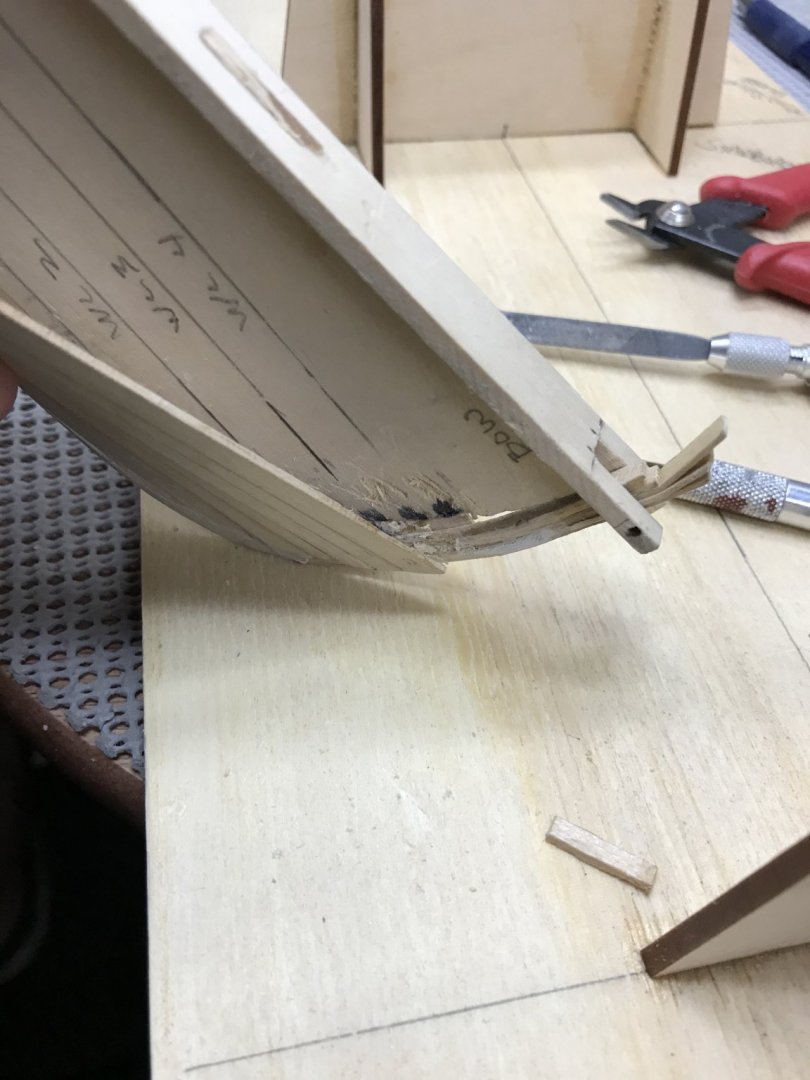
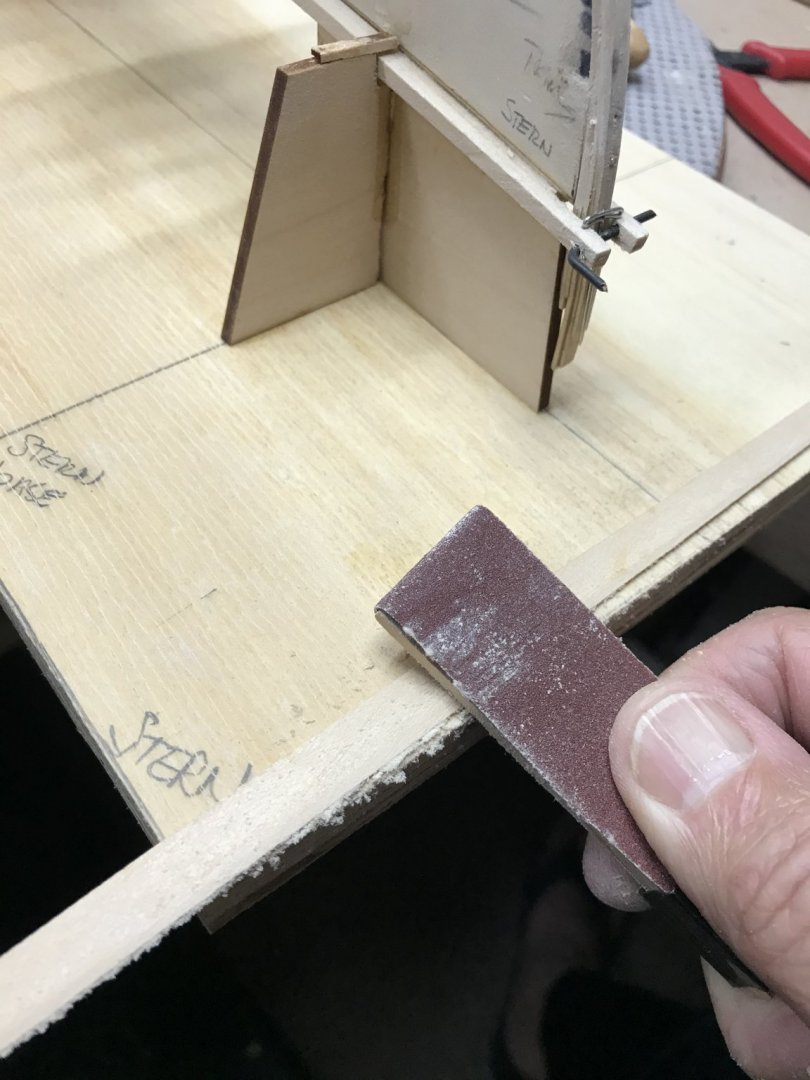
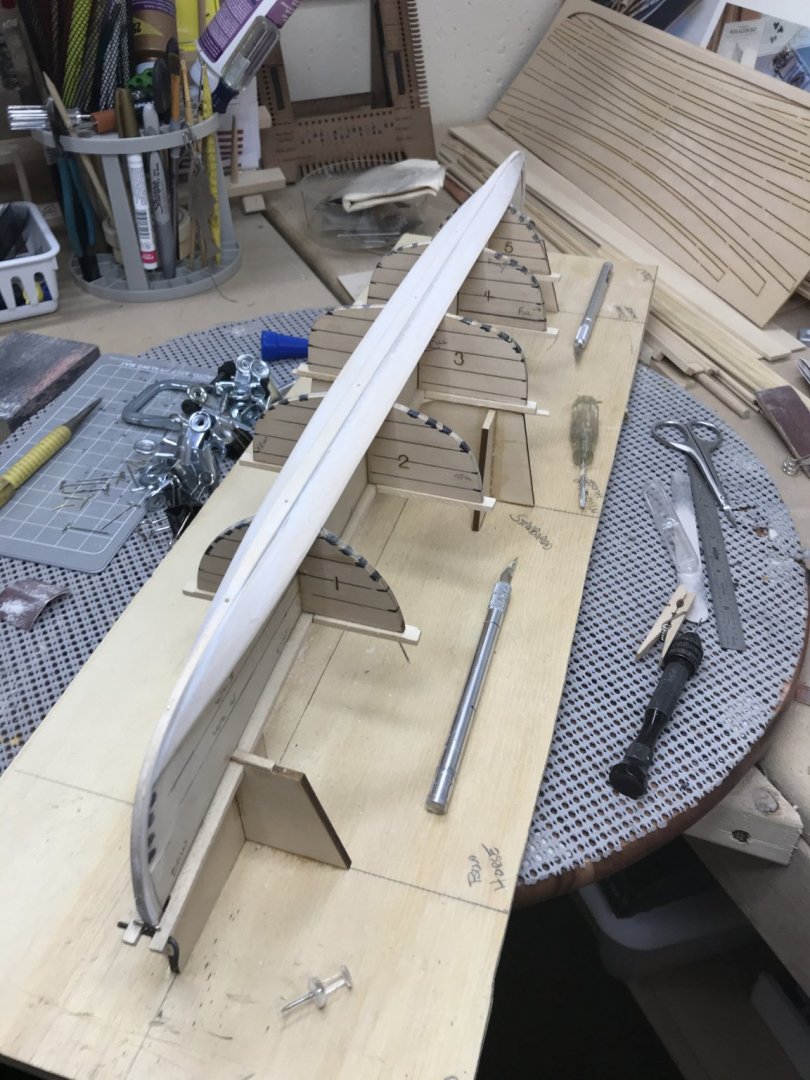
Thanks Moab... I have some great photos coming right up. In my last post I mentioned the need to be careful with the glue, well my worst nightmare occurred. The Stern and Bow Stems became glued to the mold. CA glue is so hard to see, it obviously ran down the stem as I glued the planks into the rabbit joints. I ended up cutting the hull out of the mold. The good news is all things wood can be repaired, right? 🤨 While cleaning it up to re-glue, I took time to true up the bow and stern. All trimmed up, I re-glued. It’s all good now and ready to set back on the mold. Not too bad, salvaged. 😆
- 104 replies
-
- 8
-
-
- model shipways
- new bedford whaleboat
- (and 1 more)
-
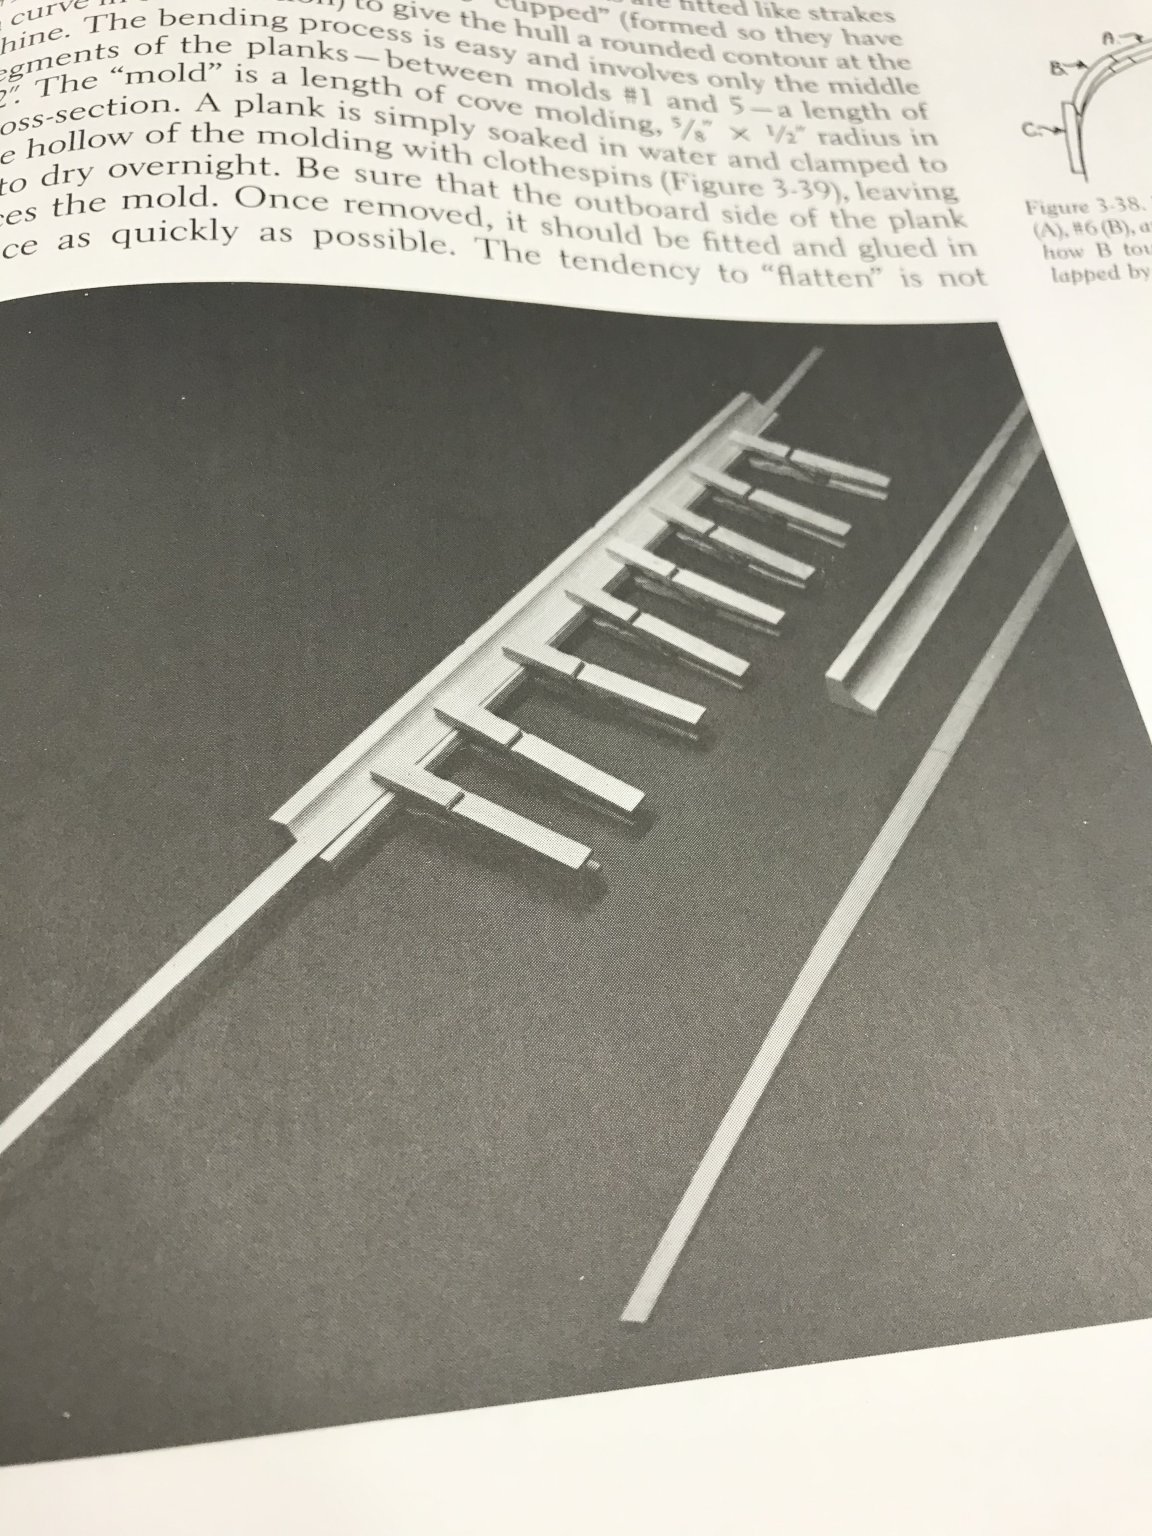
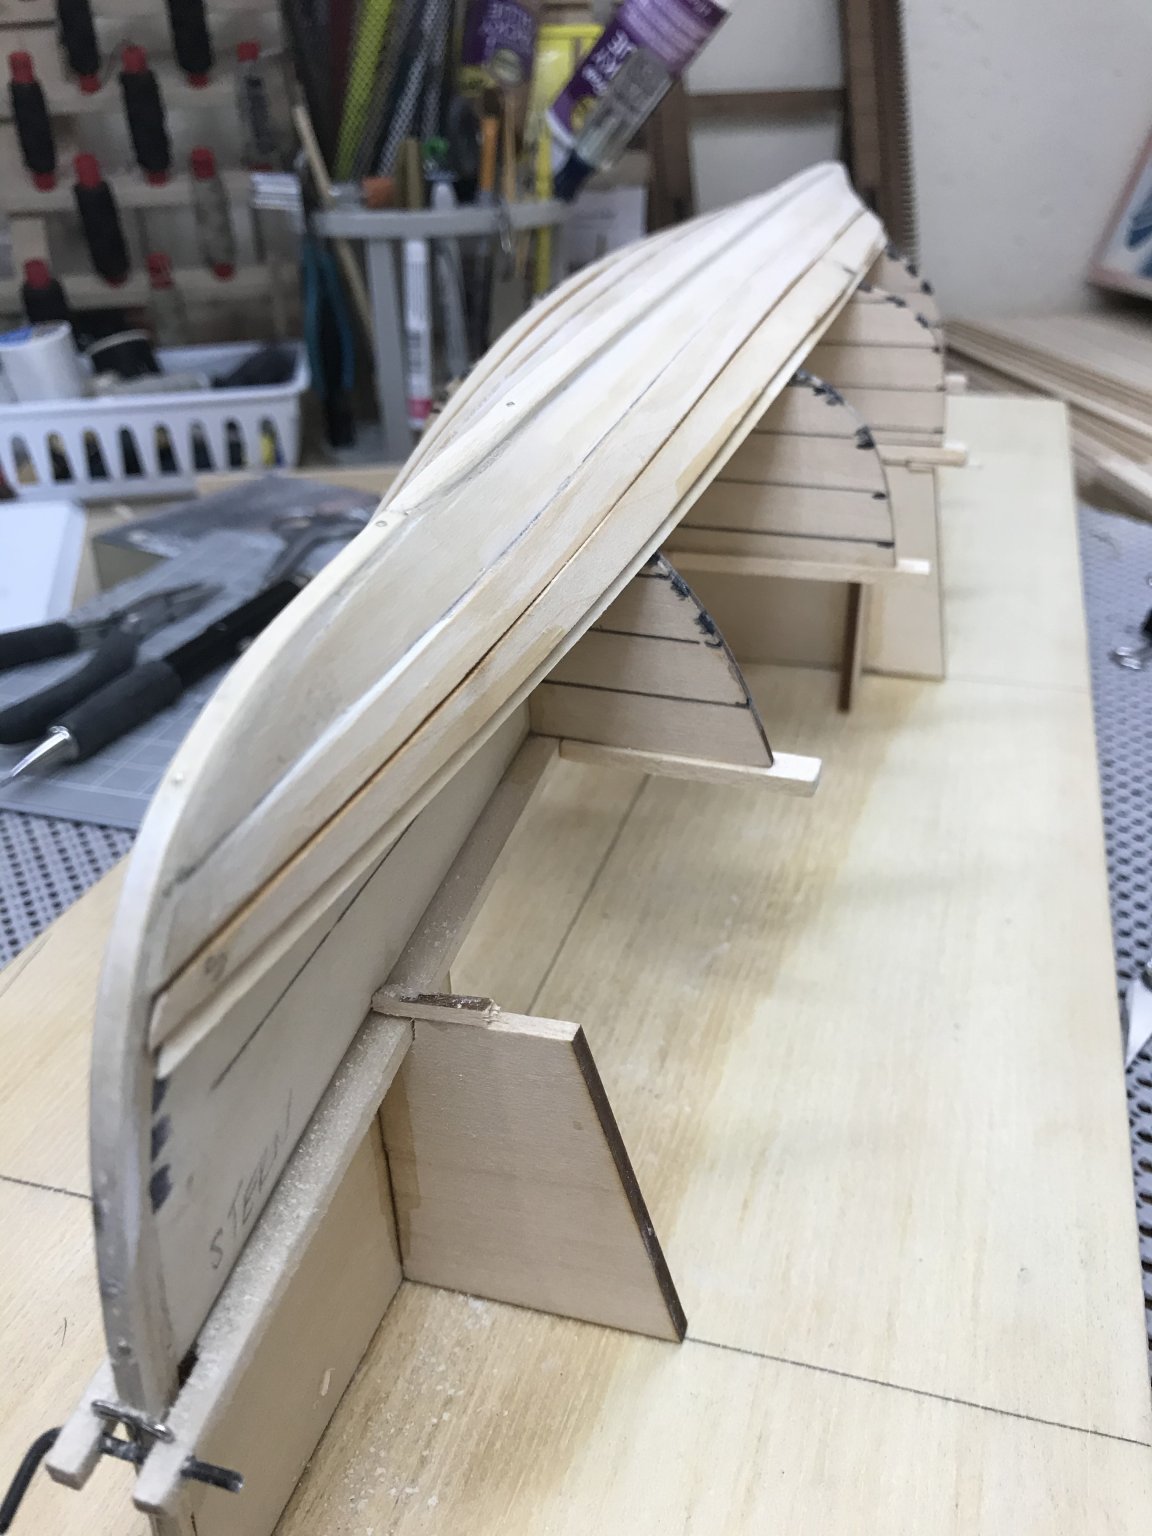
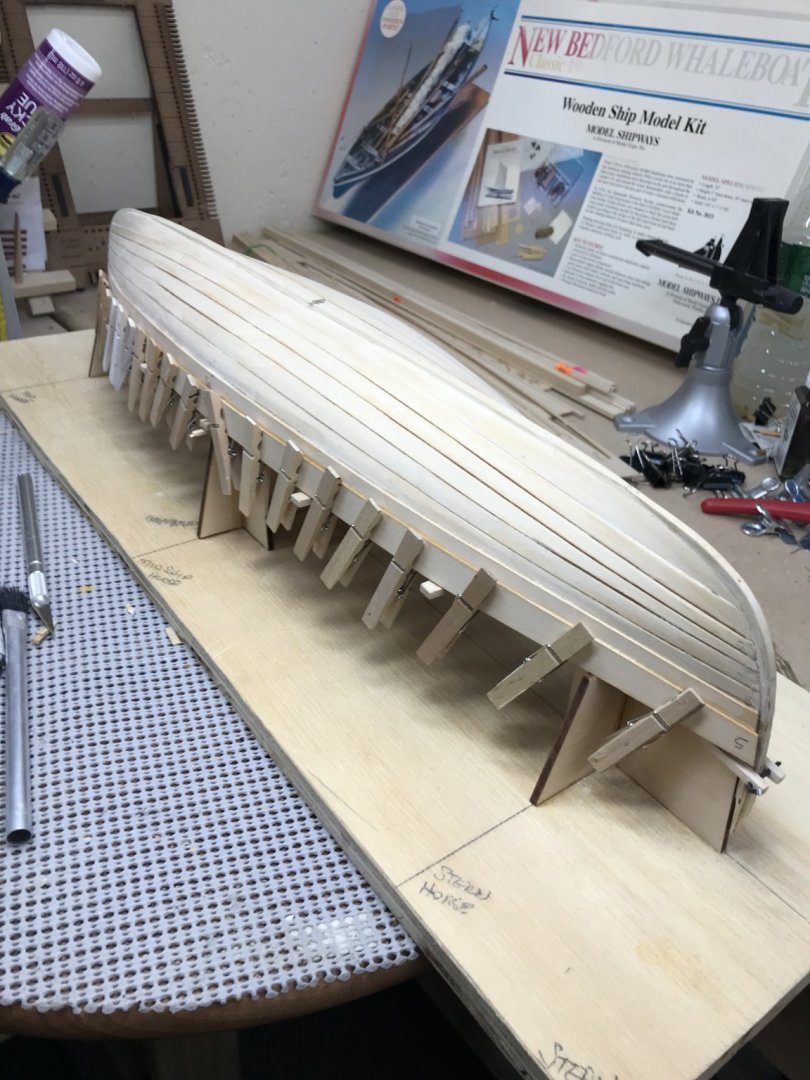
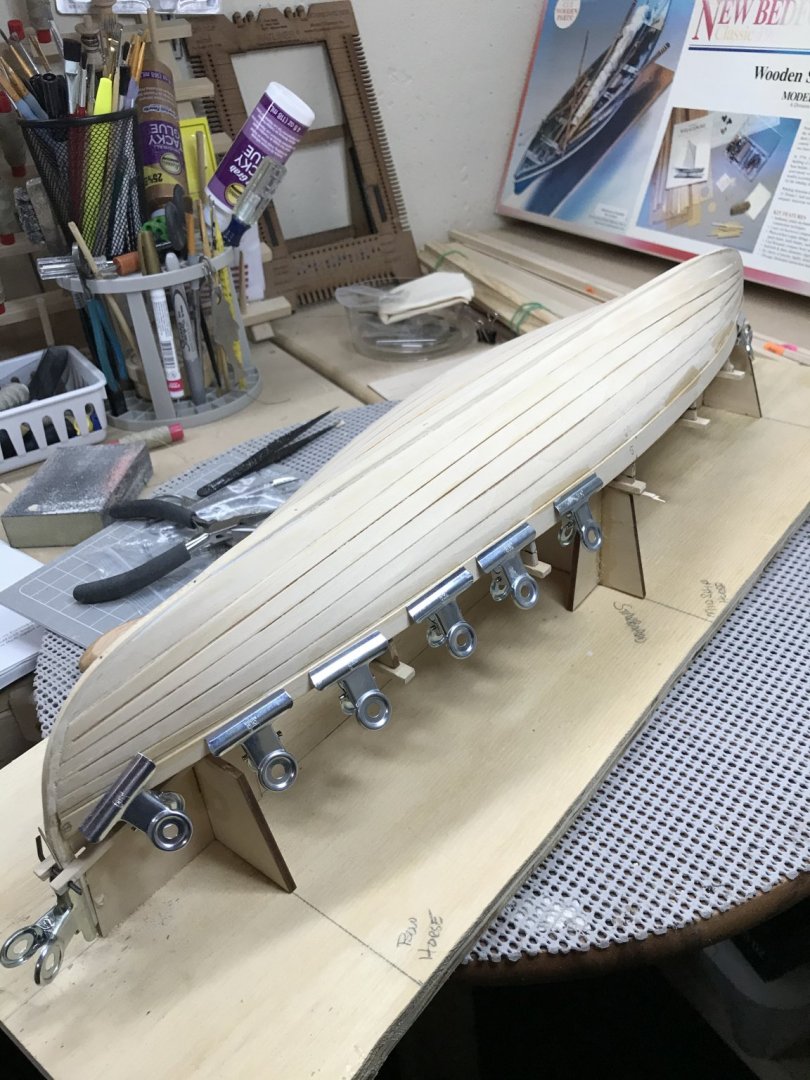
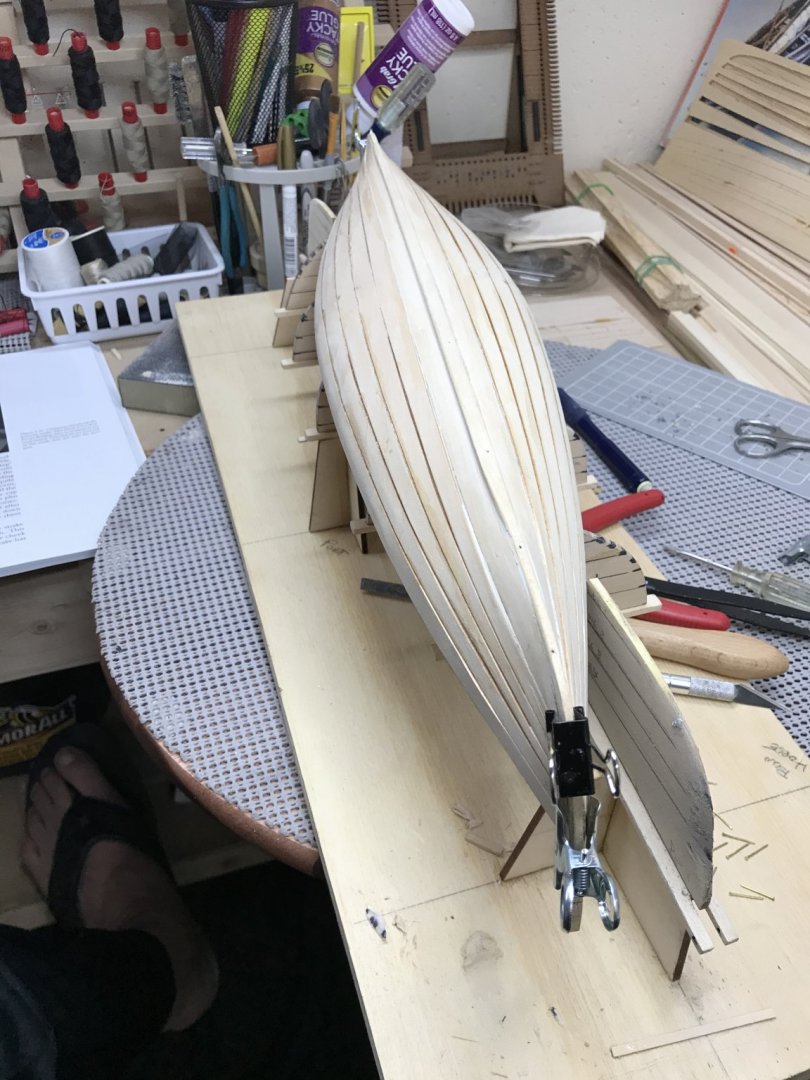
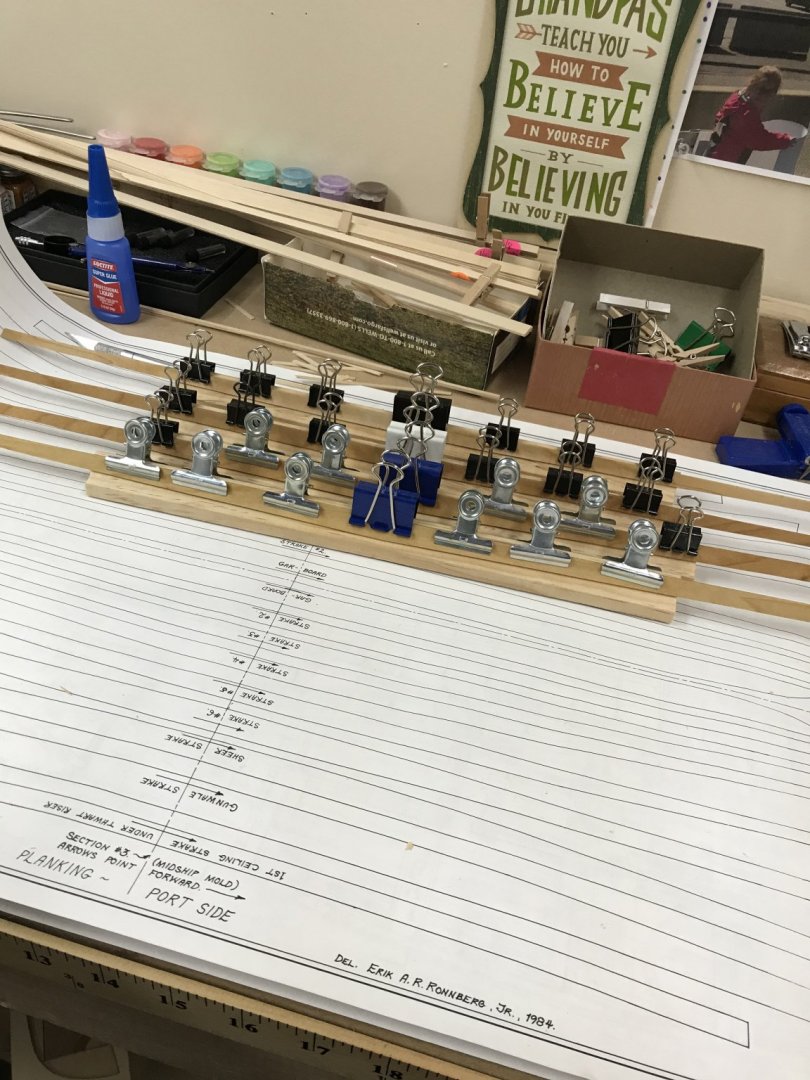
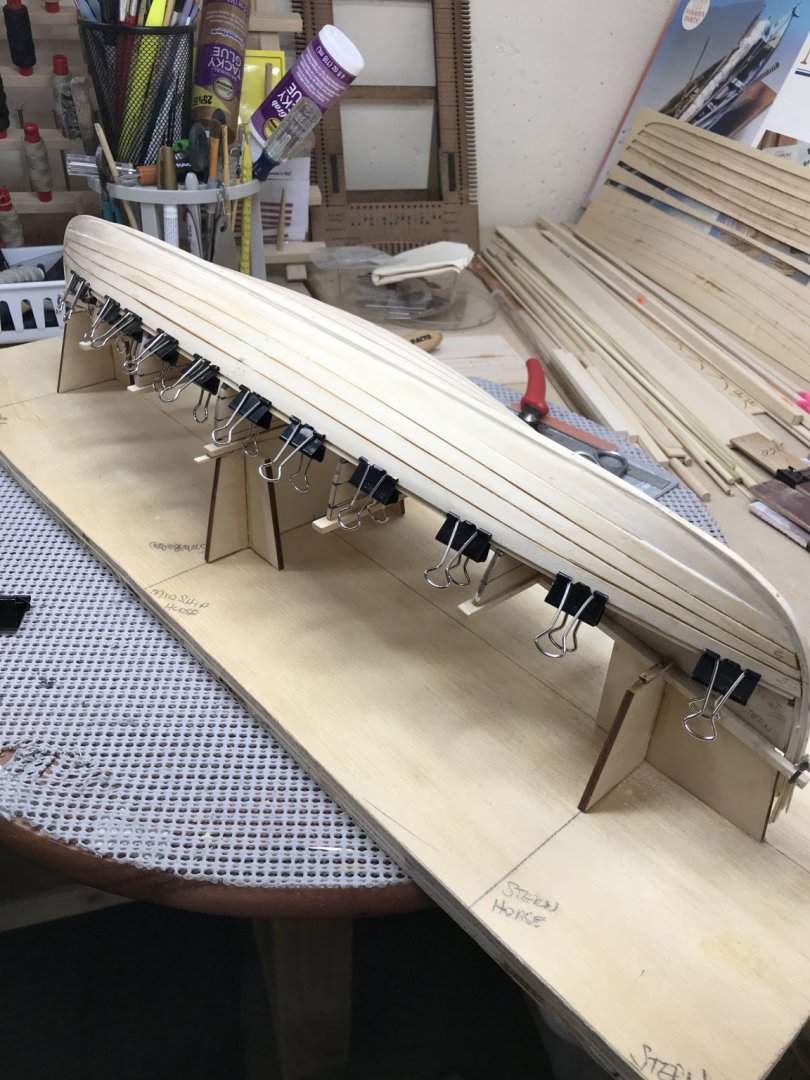
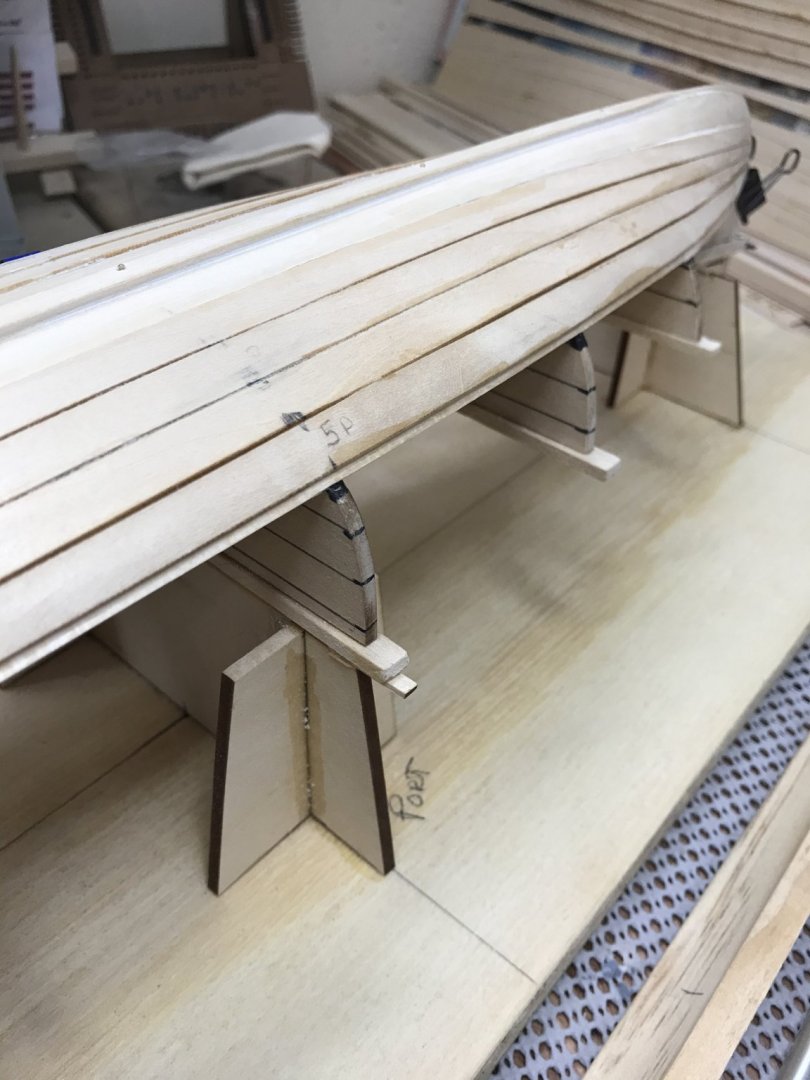
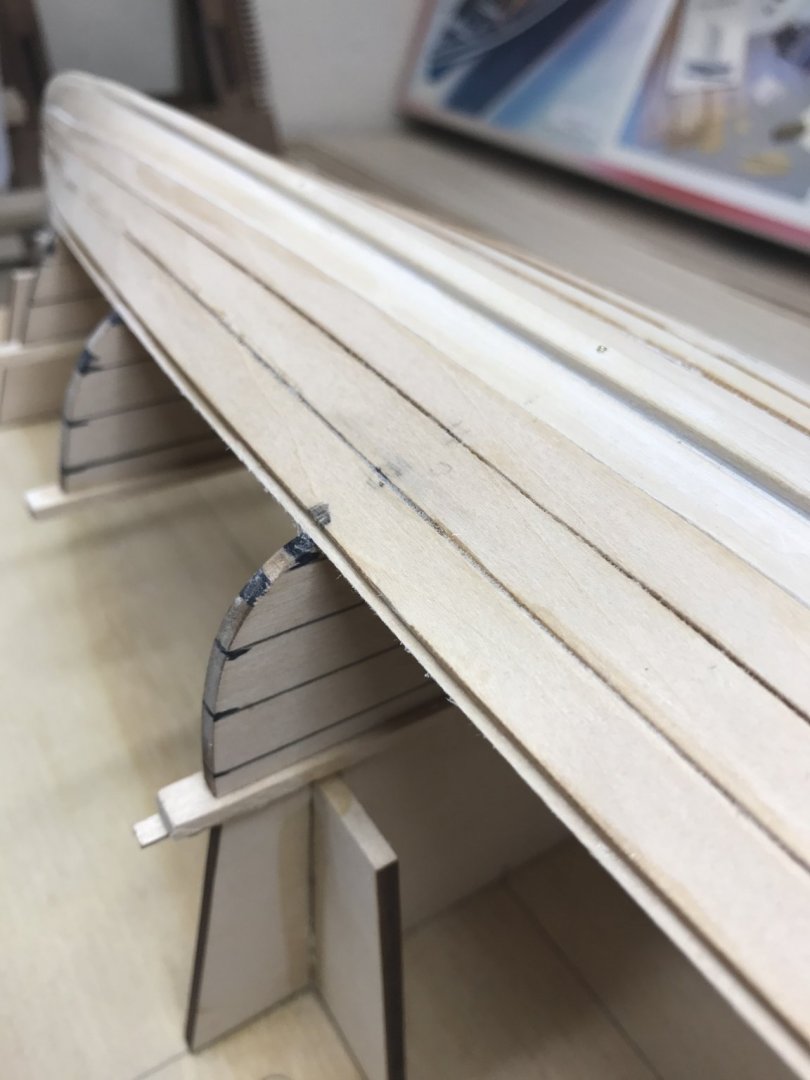
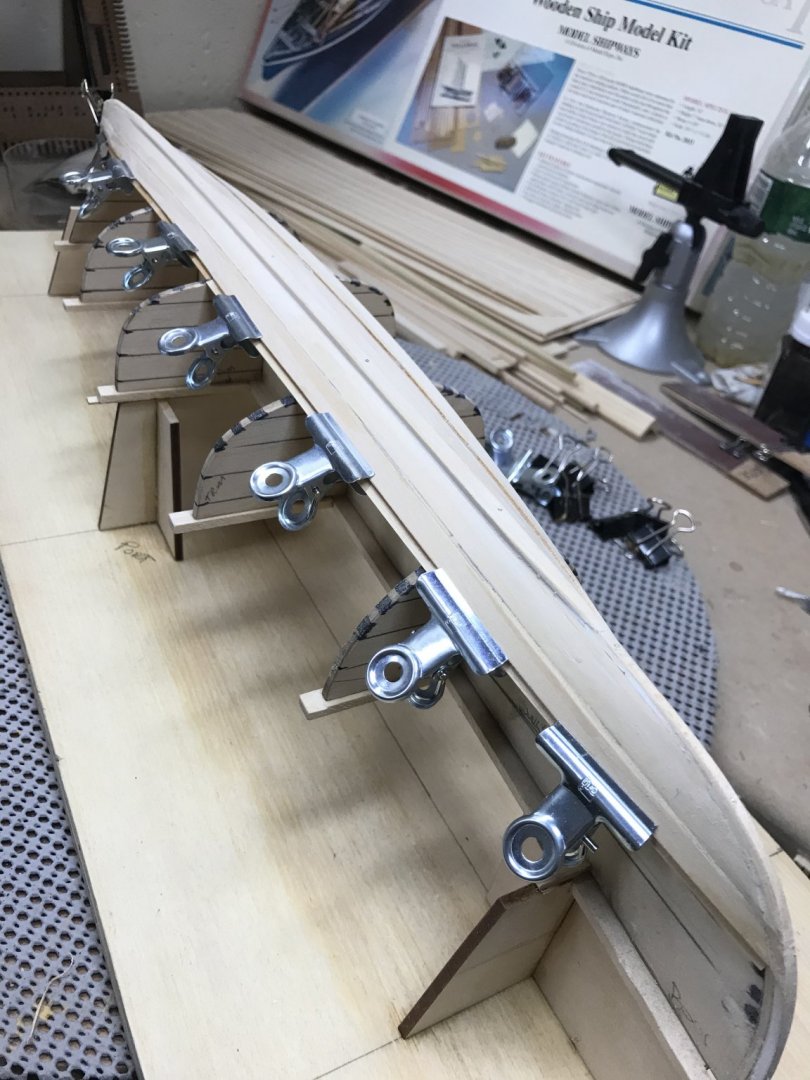
Ok, got the cove molding from Home Depot. Had to go anyway for some “Honey Do” yard projects. 😎 Soaked the 5th and 6th strakes in water with some ammonia to quicken the process. Only about an hour required. Rubbermaid Lid made for a great tray that was long enough. I had gotten 4ft of cove molding, so I could clamp all four pieces at once to dry over night. The 5th strake went on well and then on with the next batten. The 6th strake has a lot more cup to it, just because it is wider. As with all strakes I clamped the 6th strake in place at the center. And trimed both the bow and stern ends to meet the rabbit joint in the keel. Well as Precise as possible, seems that as careful as I was to get this right, I do have some gaps in this area. That’s what they make plastic wood for, right? 🤔 CA glued the 6th strake to the batten on the starboard. Here is a photo the Port side batten prior to glueing on the 6th strake. Must be very careful to not glue the hull to the mold throughout the process. I did use beeswax on the mold prior to starting the hull build to minimize the hull sticking to the mold. With the 6th strake in place it looks like I may have “turned the corner” on the building of this hull. 😆 Now for some filling and sanding before moving on. A bit more than 30 hours into this build and I’m feeling pretty good about it. 😎 Latter...


- 104 replies
-
- 10
-
-
- model shipways
- new bedford whaleboat
- (and 1 more)
-
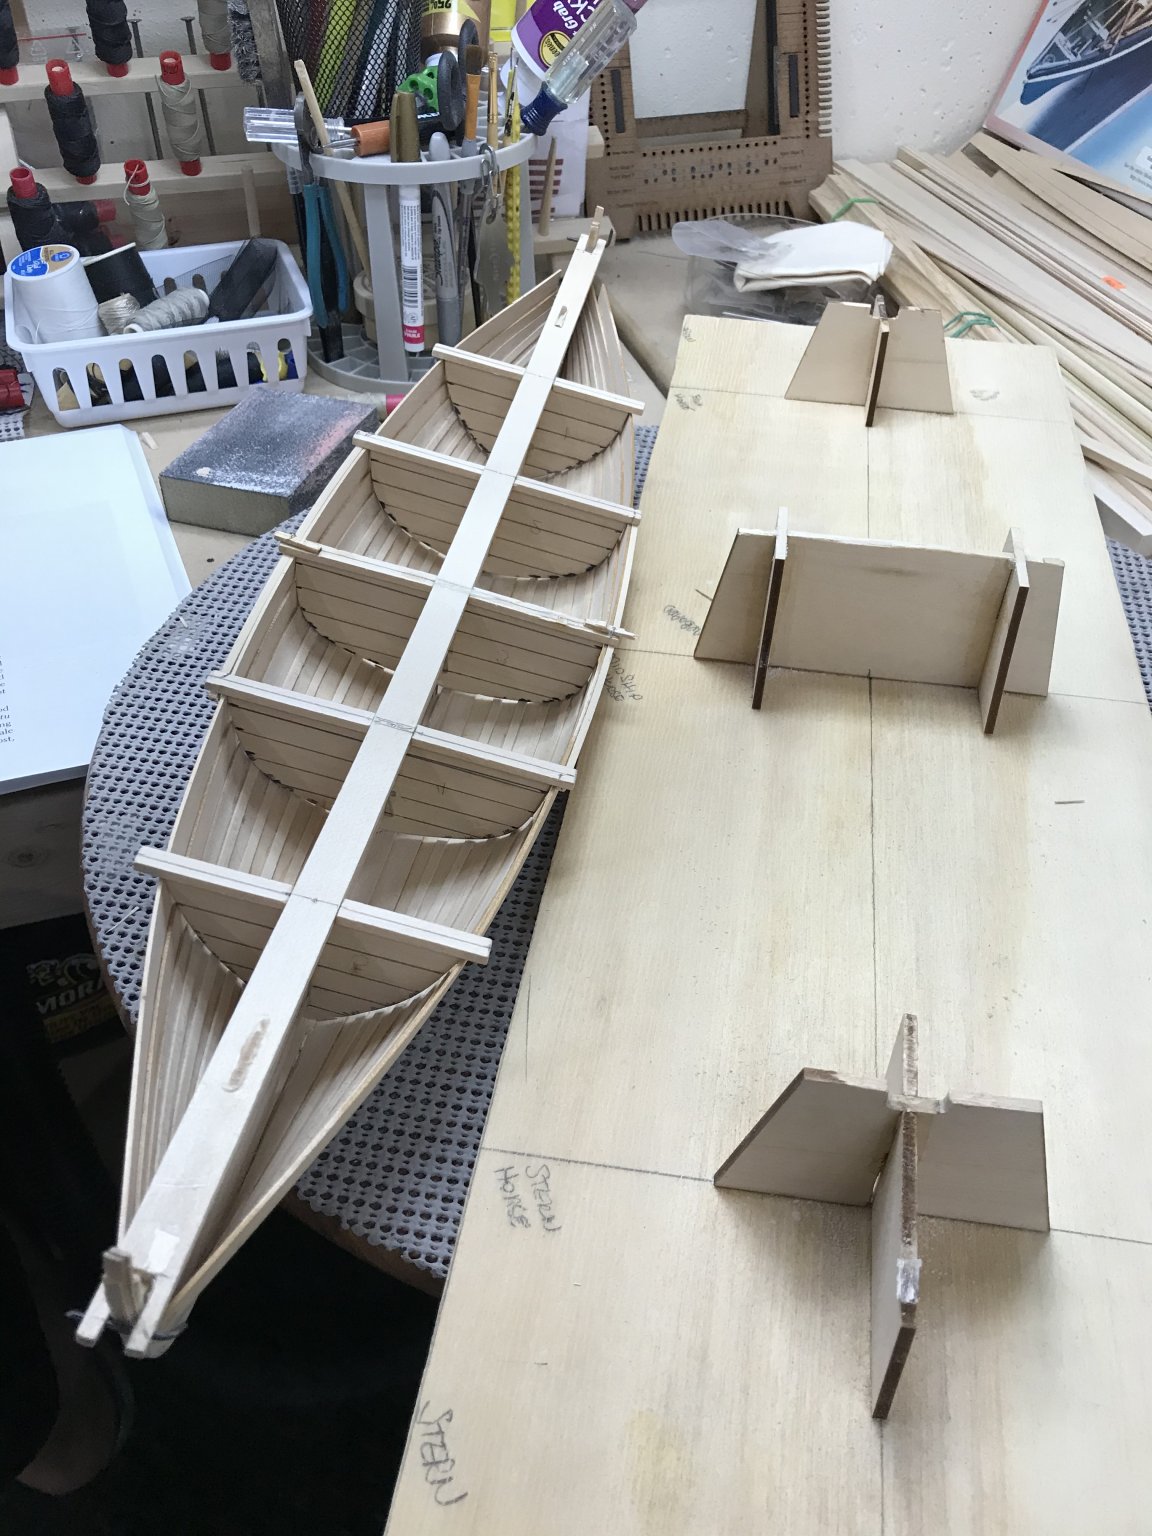
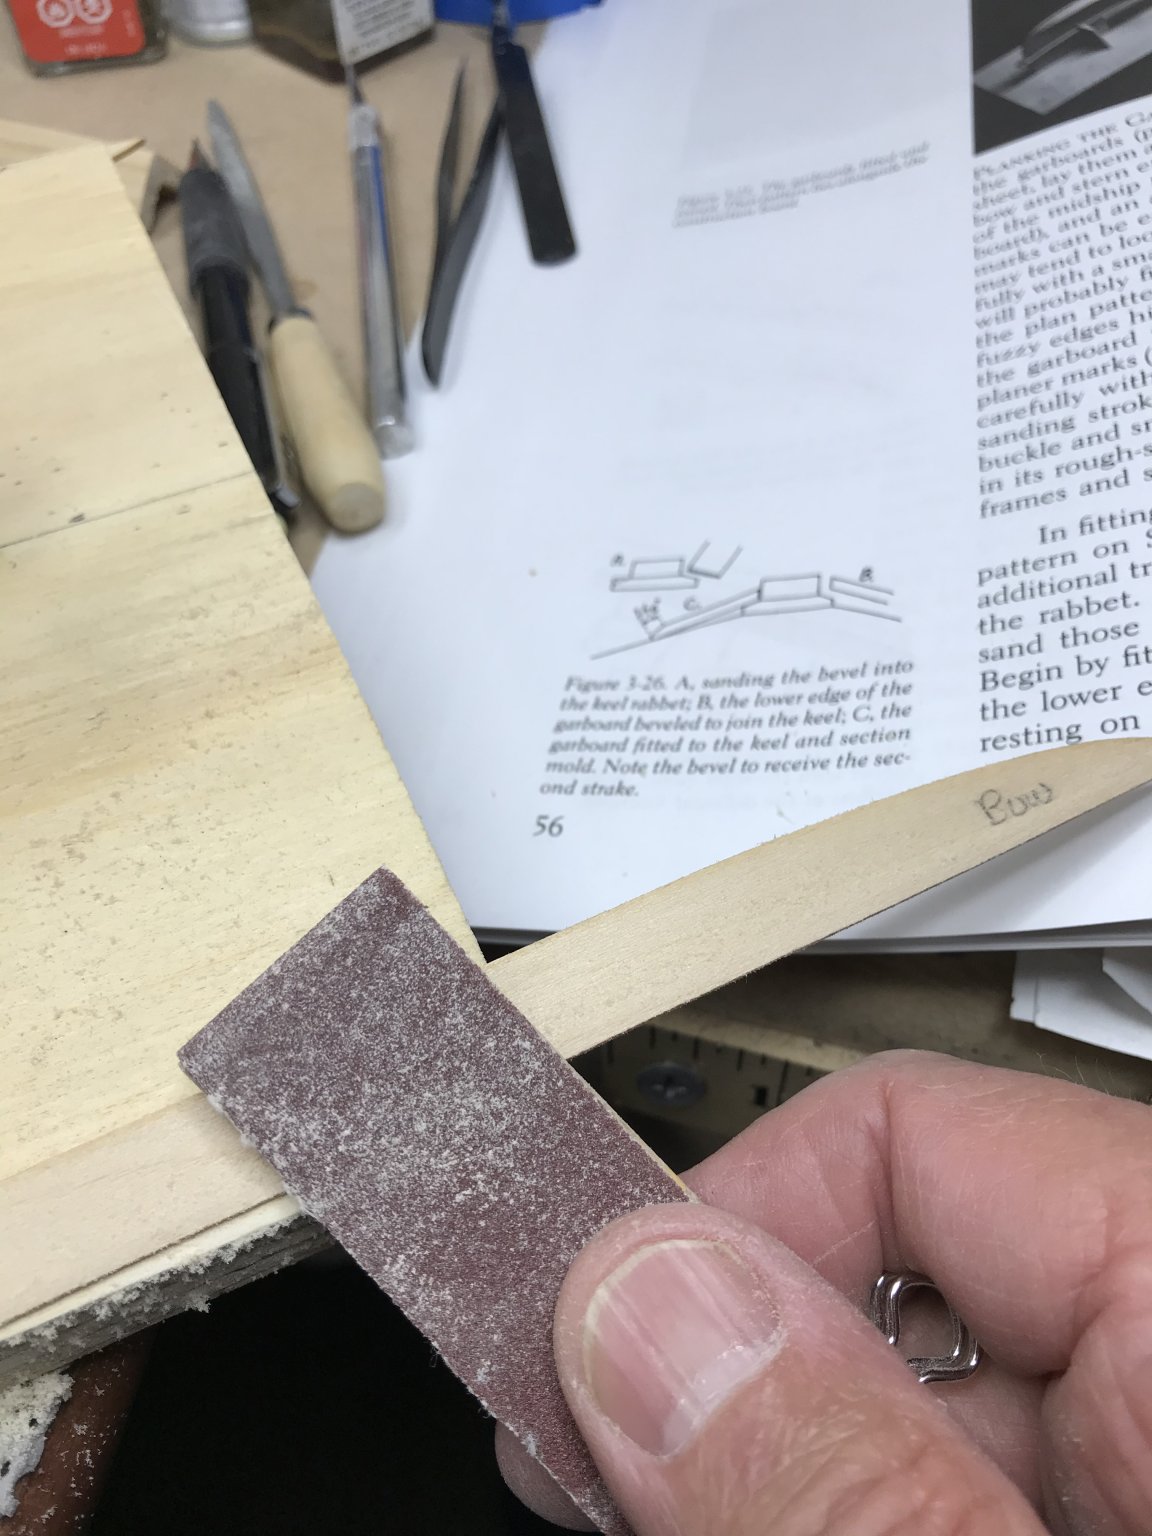
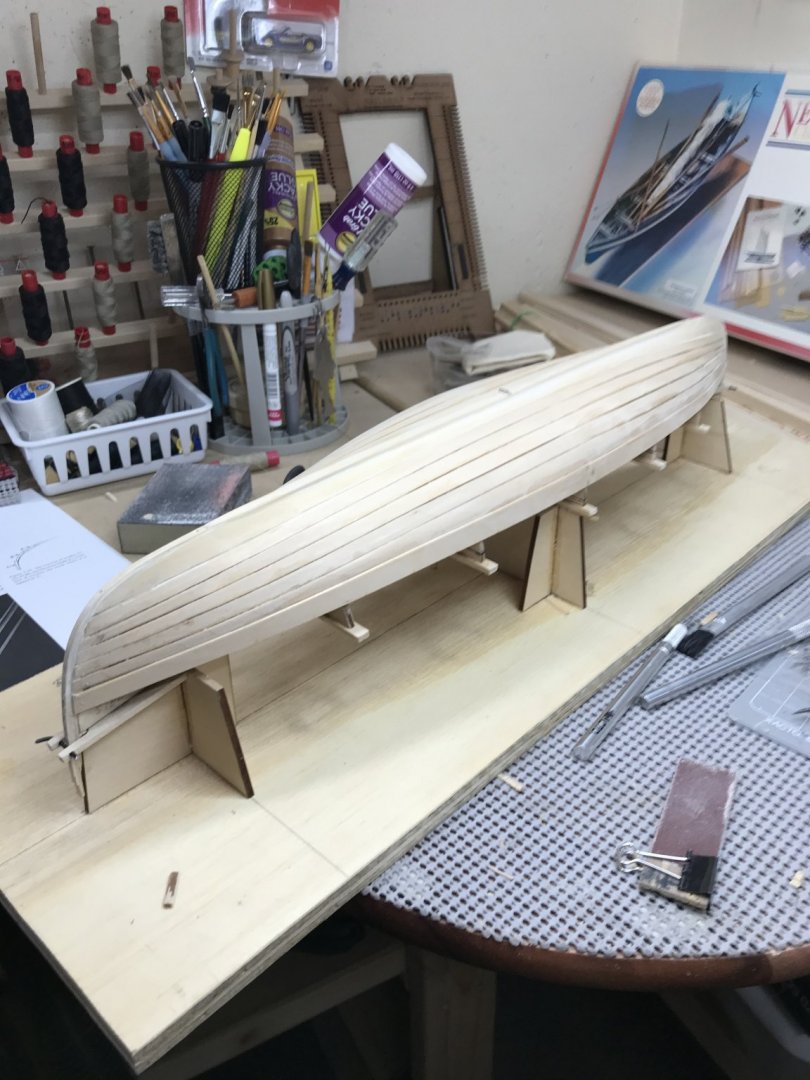
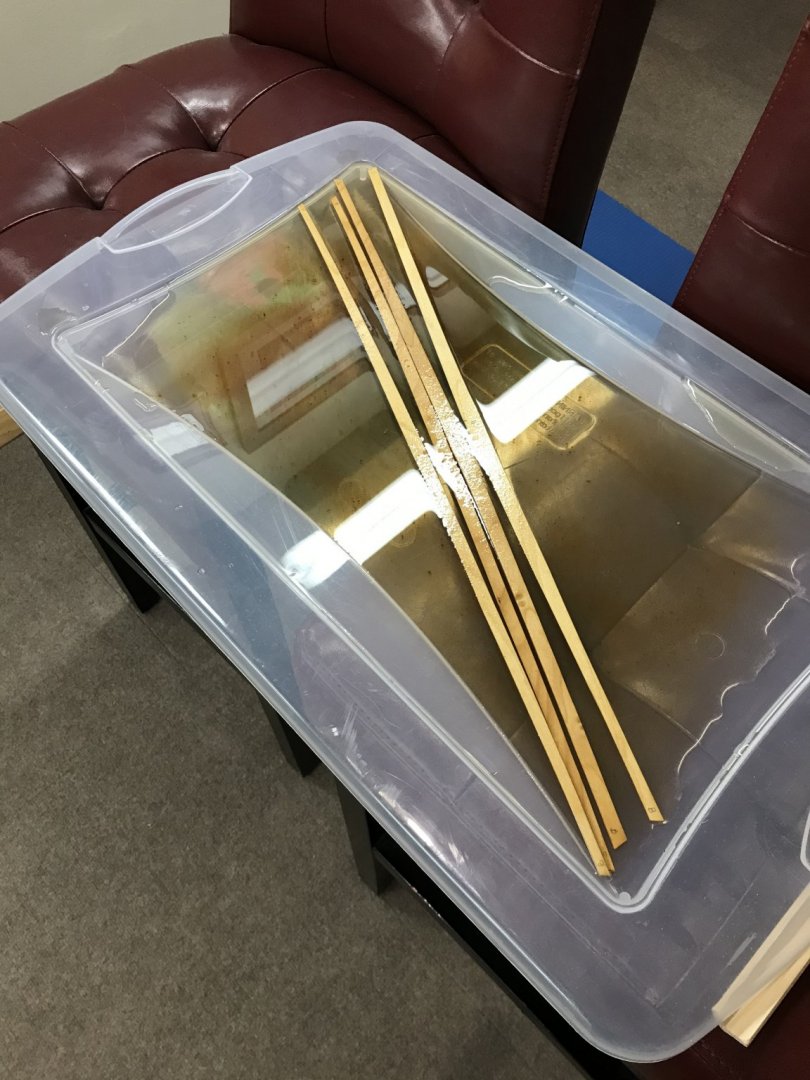
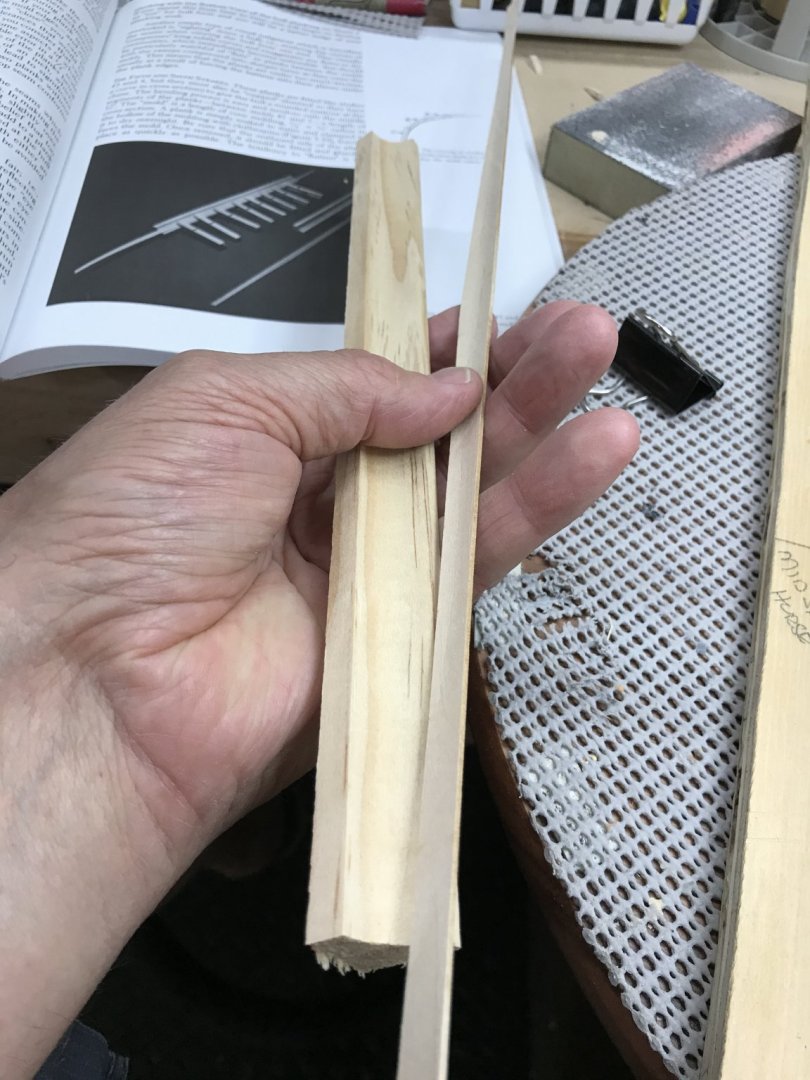
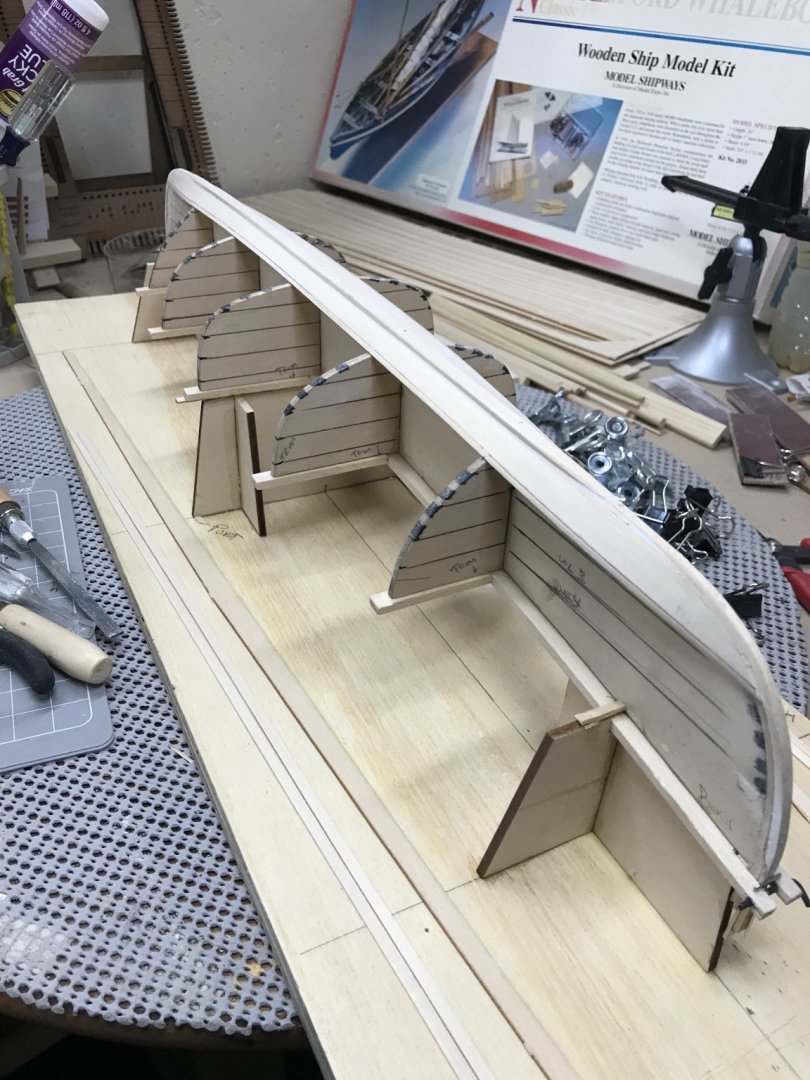
Added the 4th Strake and noticed I needed to true up both the bow and stern ends of the strake so they were even port and starboard. Just a bit shaving and sanding before installing the next batten. Ready for the 5th Strake. Both the 5th and 6th strake will need to be cupped to curve the hull. Note the curve of the mold cross section. Cupping the stakes is accomplished by soaking the strakes and clamping them to a piece of cove molding. The cove molding is supposed to be supplied in the kit, however it was not cove molding. See photo below... So... I will have to call it a night and venture out to Home Depot tomorrow. To be continued... 🍻


- 104 replies
-
- 8
-
-

-

-
- model shipways
- new bedford whaleboat
- (and 1 more)
-
2nd strake added more beveling. Adding seam battens for the lap joints for the 3rd strake. ready for the 4th strake I’m going to call it a night, good progress today.

- 104 replies
-
- 11
-
-
-
- model shipways
- new bedford whaleboat
- (and 1 more)
-
After 12 hours of reviewing/studying the instructions, I have installed the Garboard. I spent a lot of time prepping the Keel and Garboards with proper beveled edges. Per instructions verified and reverified the fit of the garboards prior to glueing. I chose to use CA glue knowing I would get one chance to lay it down properly. Once glued into place I was not satisfied with the the reveal of the keel and decided to laminate another layer on the lower keel. I also did a bit of fill and sanding work on the Keel and Garboard seams before moving on. More final sanding work on the keel will be needed after the planking is completed. Now on to the 2nd strake.

- 104 replies
-
- 5
-
-
- model shipways
- new bedford whaleboat
- (and 1 more)
-
Count me in, should be great ride. What a great find and an opportunity to honor your Dad finishing his build for him.
- 51 replies
-
- 2
-
-
- miss unlimited
- dumas
- (and 1 more)
-
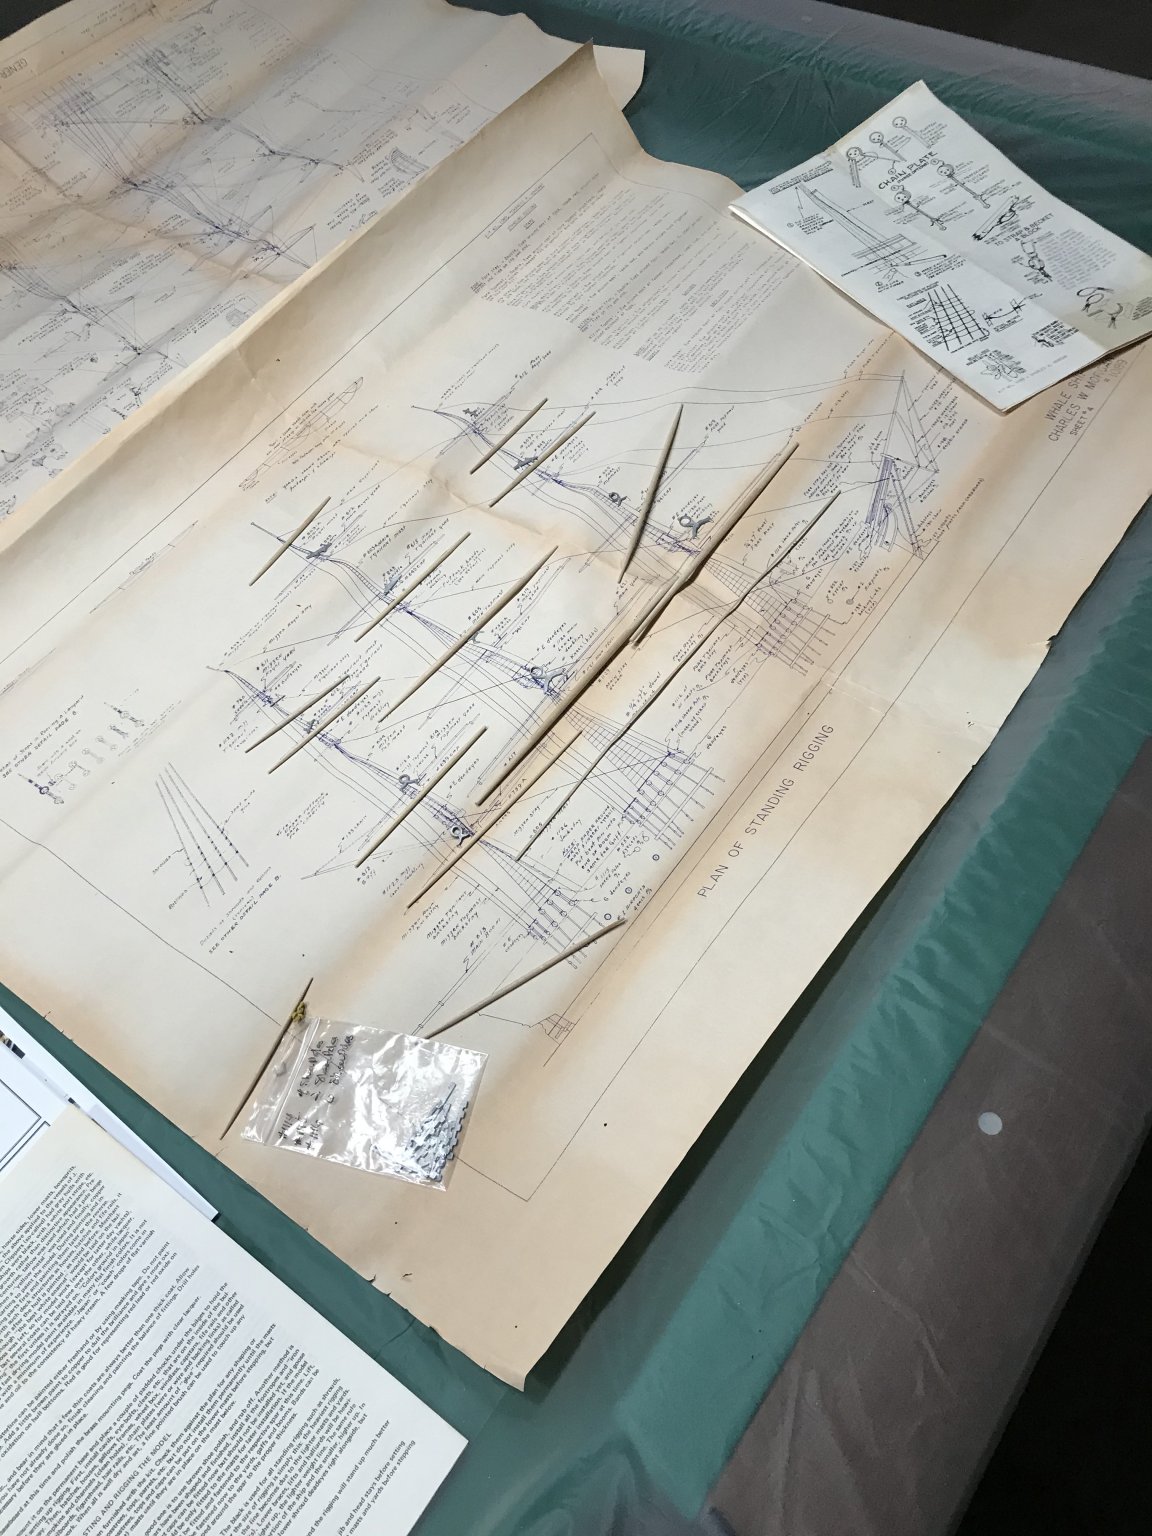
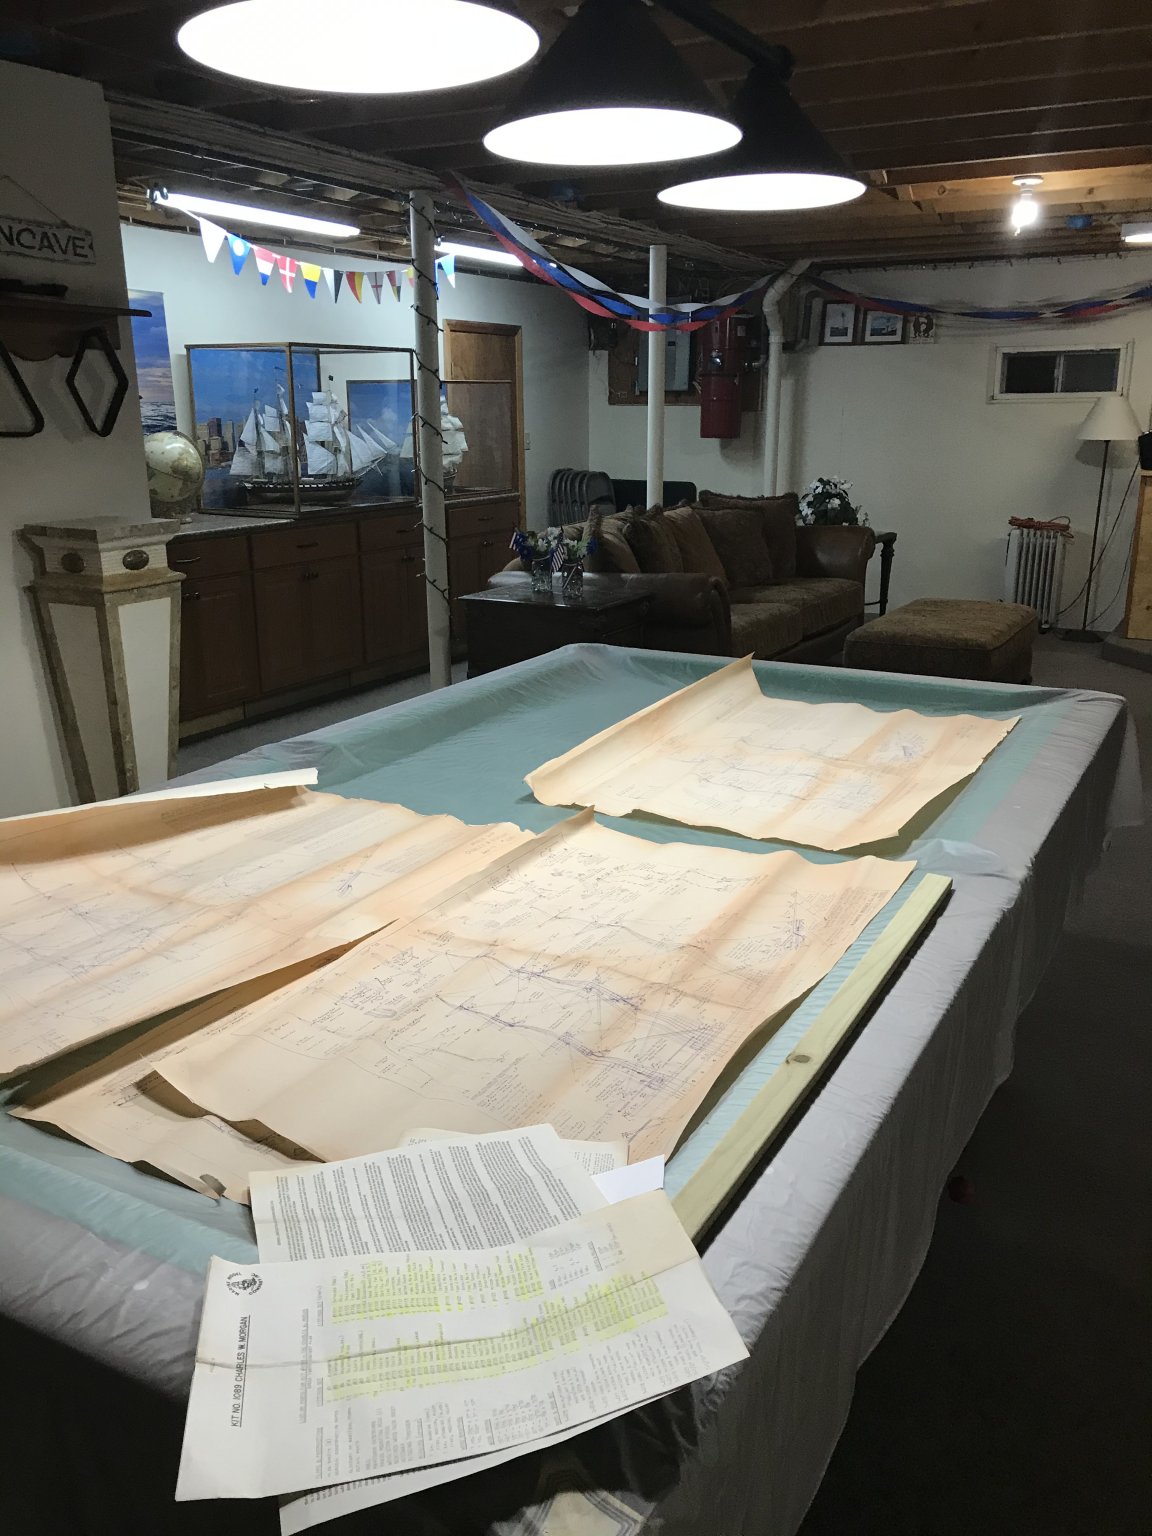
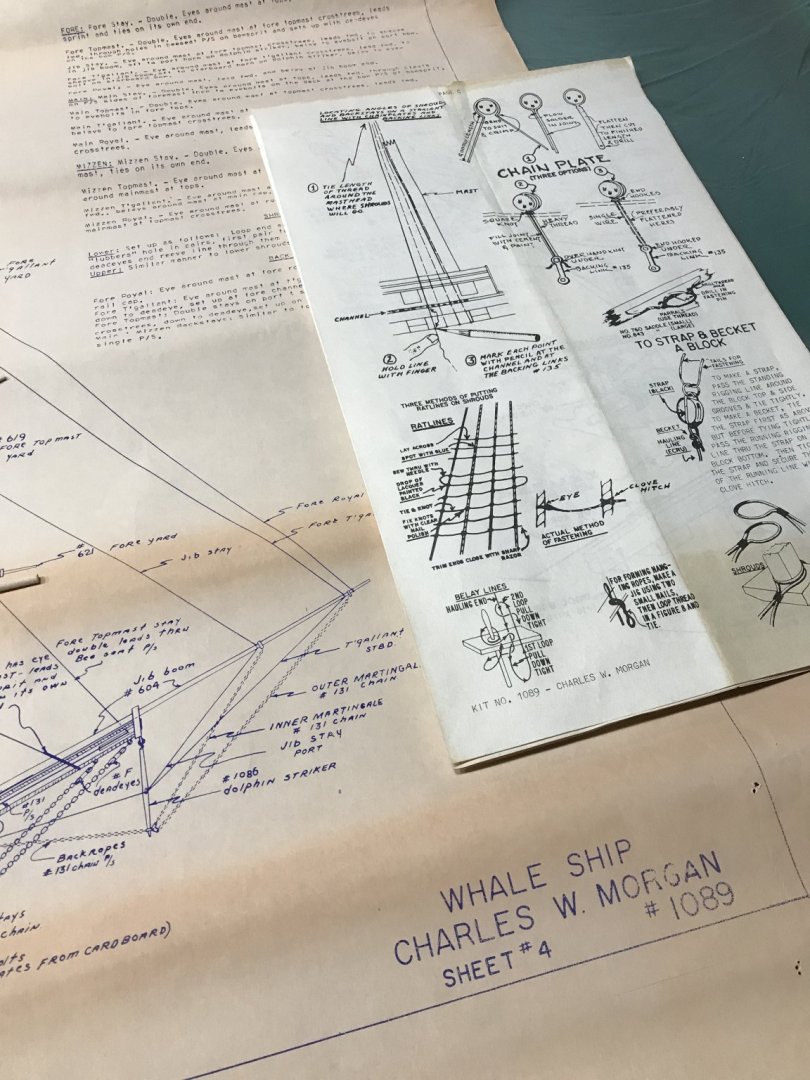
Thanks Tom for your affirmation It is very encouraging as I hone my craftsmanship on this Vintage Kit. The plans I have in this kit are copies of the 1939 plans used to restore the CWM. I too think she is a beauty. Stay in touch and I would be glad to share the plans with you once I have completed her. They are very yellowed and a bit tattered, but would only gather dust for eternity. I would love to see you get some use out of them. That is if you can wait a while, not sure how long it will be to completion although she has been coming along quite steadily as I have nowhere to go right now. Cheers 🍻

- 196 replies
-
- 2
-
-
- marine model company
- charles w morgan
- (and 1 more)