

Vladimir_Wairoa
-
Posts
1,512 -
Joined
-
Last visited
Content Type
Profiles
Forums
Gallery
Events
Posts posted by Vladimir_Wairoa
-
-
7 minutes ago, rwiederrich said:
Very good observation. It can't be erroneously assumed her bowsprit had any real distance between it and the naval hood...solely based off of her images with no jibboom. Stresses of her tightened bobstays and martingale tension and the stays stresses would have surely applied forces not seen in her *SPRUNG* state without any jibboom and head gear stresses. Rigging and sparring designs took into consideration the stress loads and flexure that would be attained...thus requiring the nautical engineer to calculate that into his design. both hull and rigging. Bob Cleek would know exactly what I was talking about and could probably explain it far better.
He's a professional....I'm not even an amateur.
It is true what Vlad says...it's nice to have your eyes and opinion at our beckon call....heeheehee

Rob
Ok than. noted. I will try to observe it and fill in. Thank you . V.
-
4 minutes ago, ClipperFan said:
Vladimir I'm honored that you value my input so much. Just to set the record straight, I am continually in awe of the natural skills you and Rob display in crafting these glorious Clipper Ship models. As for my abilities, maybe someday I'll consider attempting one of my own and boy howdy will you know an amateur at work when, if you see one!
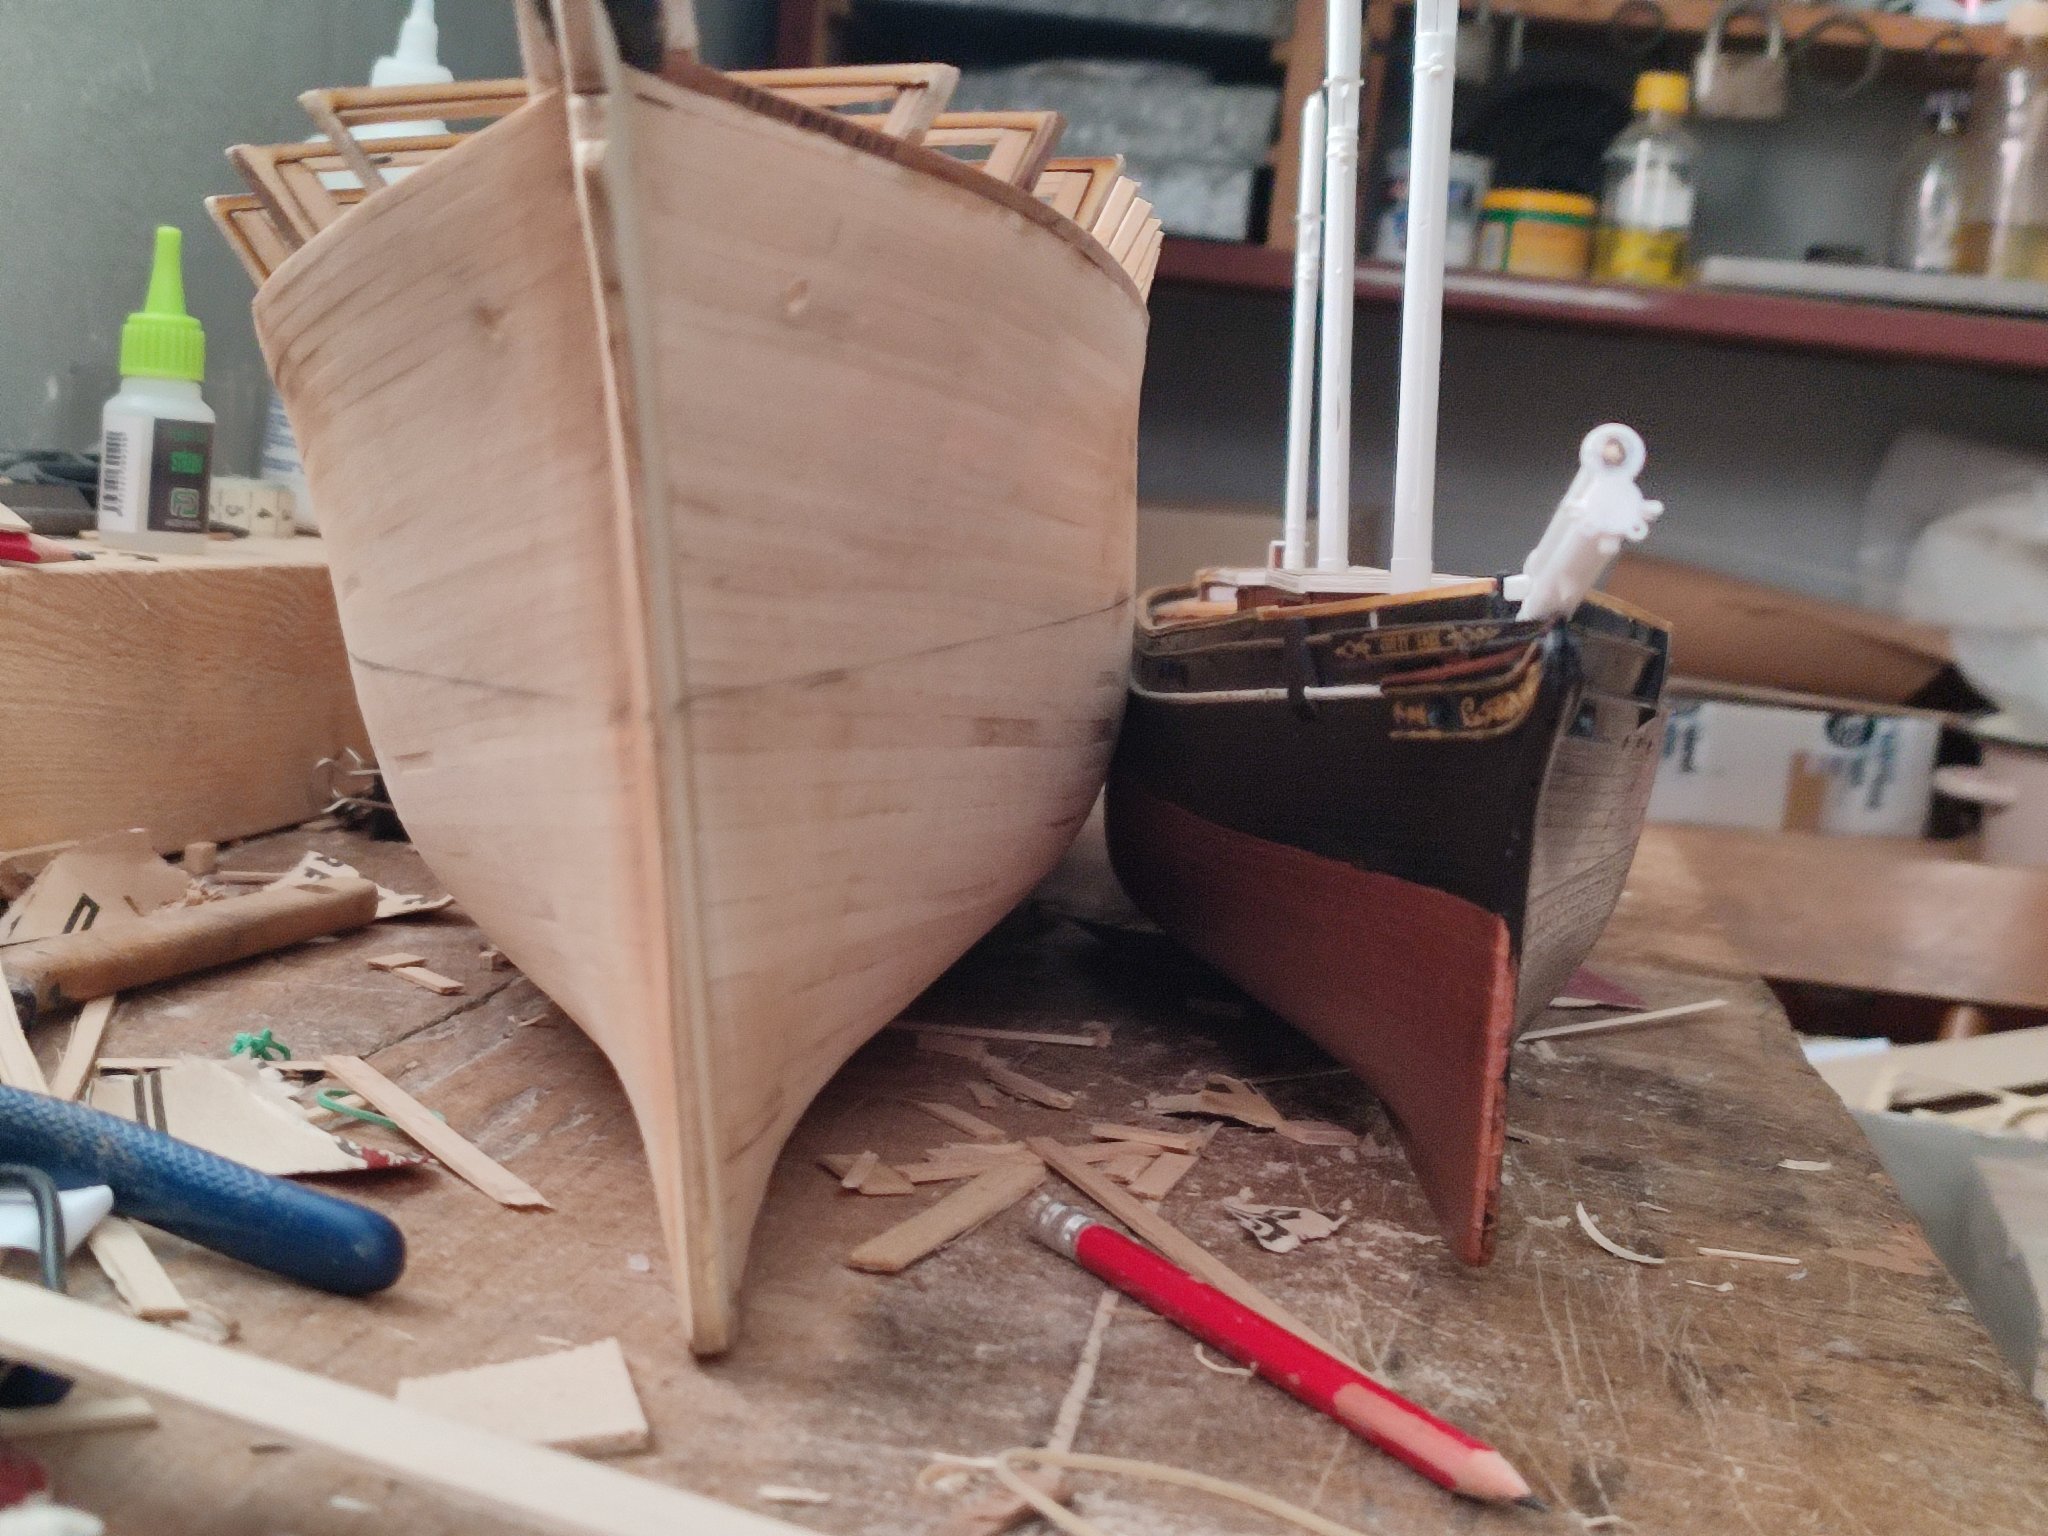
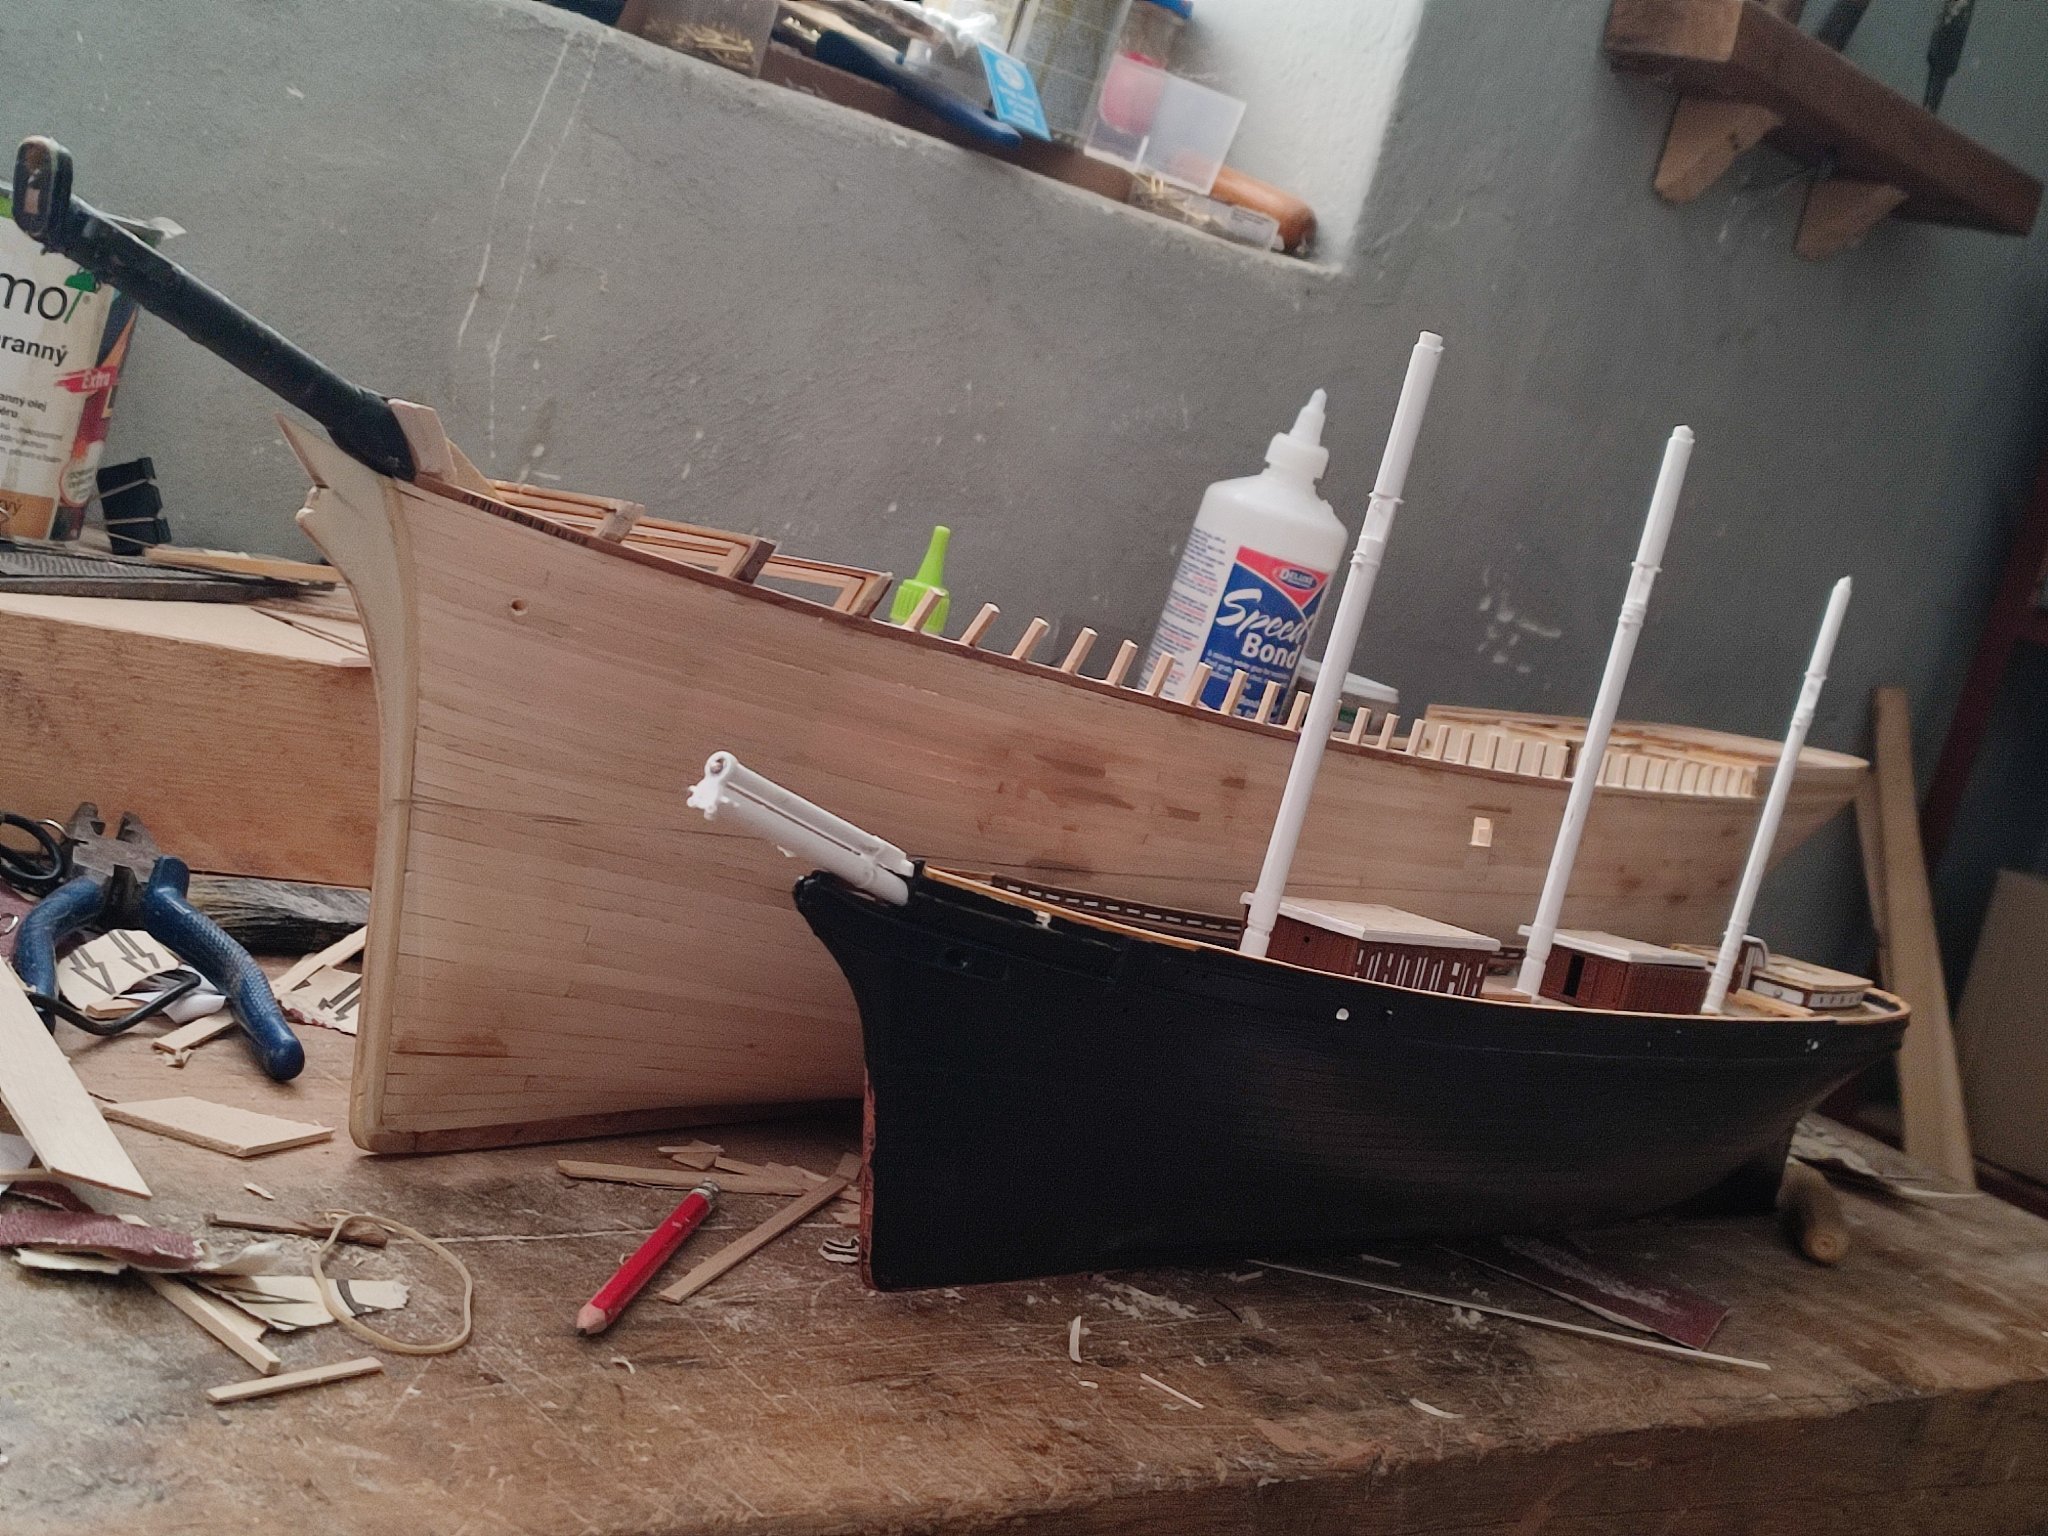
What astonishes me about your work Vlad is that, not knowing this is a miniature replica, there are some close ups that make it seem like you're actually staring at a real ship under construction!
I agree fully with Rob's observation too, you have managed quite nicely to follow the challenging complexity of Glory's Hull which even Duncan MacLean described as transitioning smoothly from concave to convex.
Again, especially as I see both of your impressive ships come to fruition, it becomes ever more clear to me that Donald McKay did indeed meld lines of his famous Extreme Clippers "Stag Hound" and "Flying Fish" with the largest, flattest cargo carrying capacity imaginable combined with an incredibly lofty and powerful sail plan.
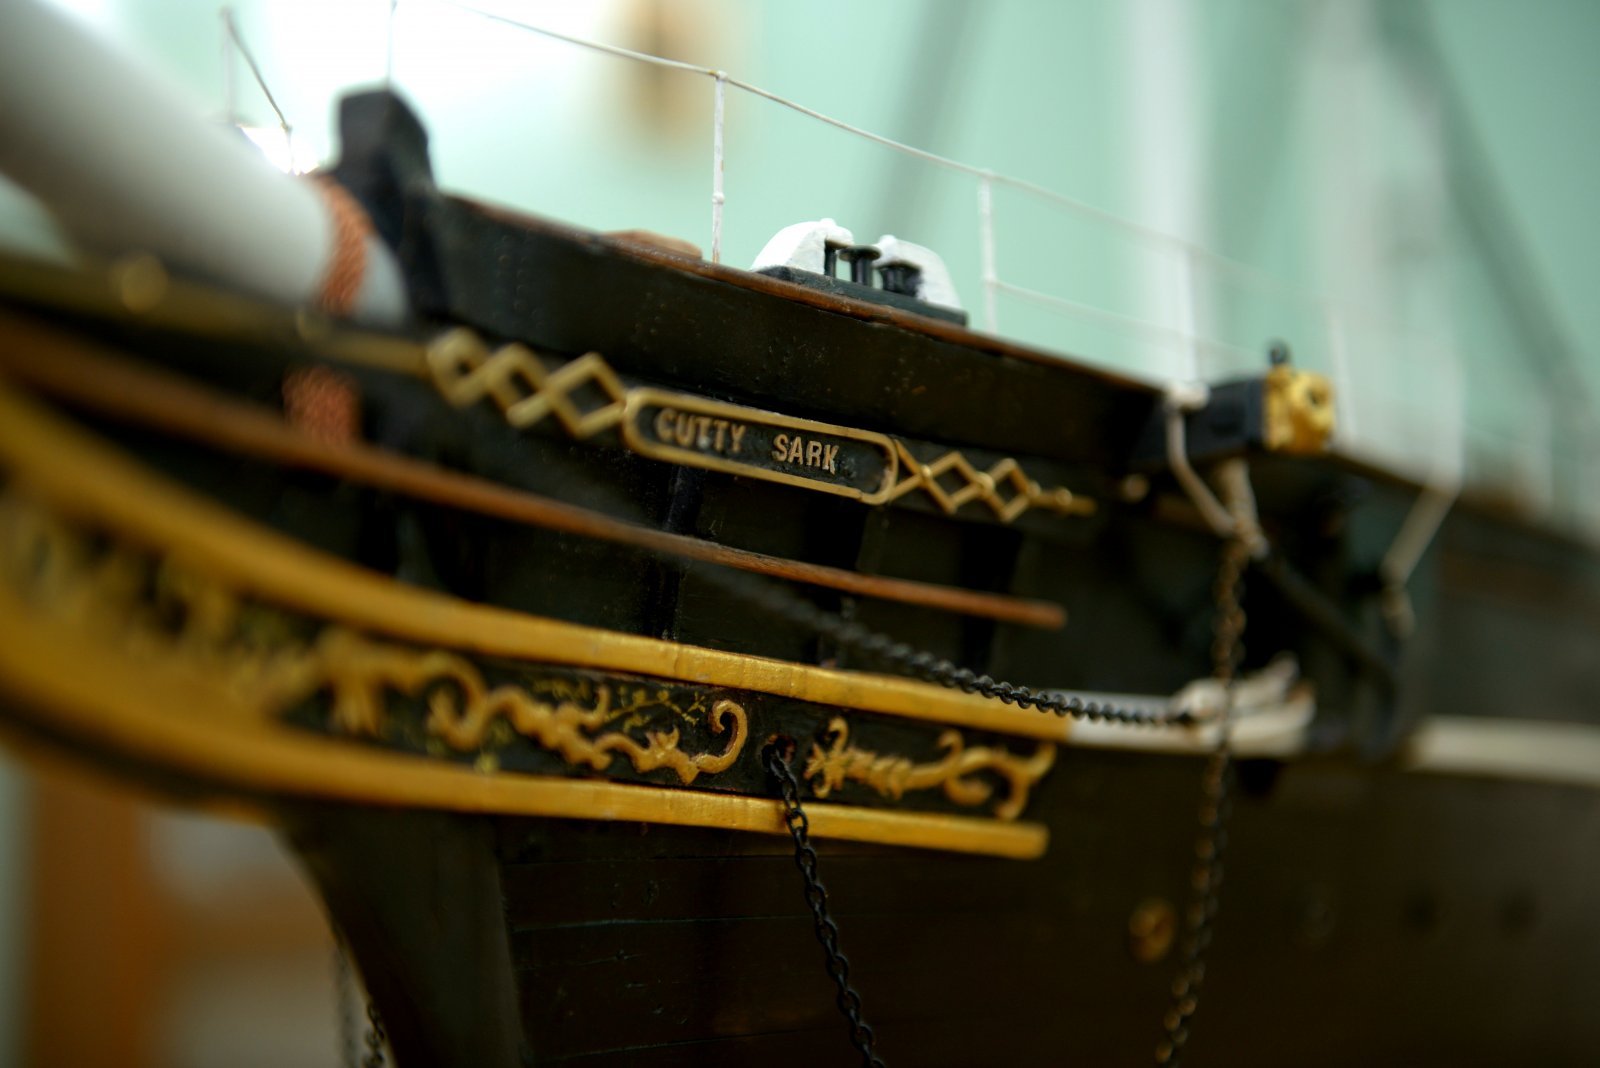
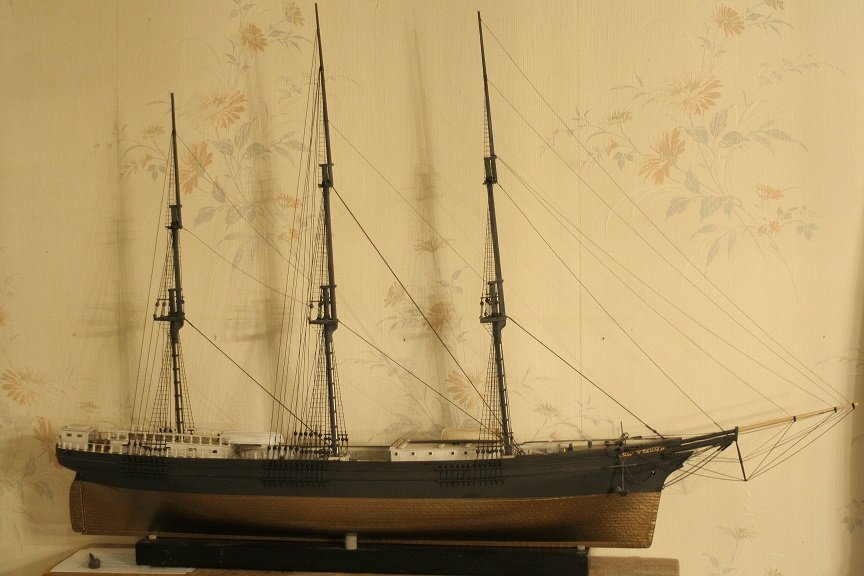
As for your lovely Cutty Sark model, is that 1:96th scale?
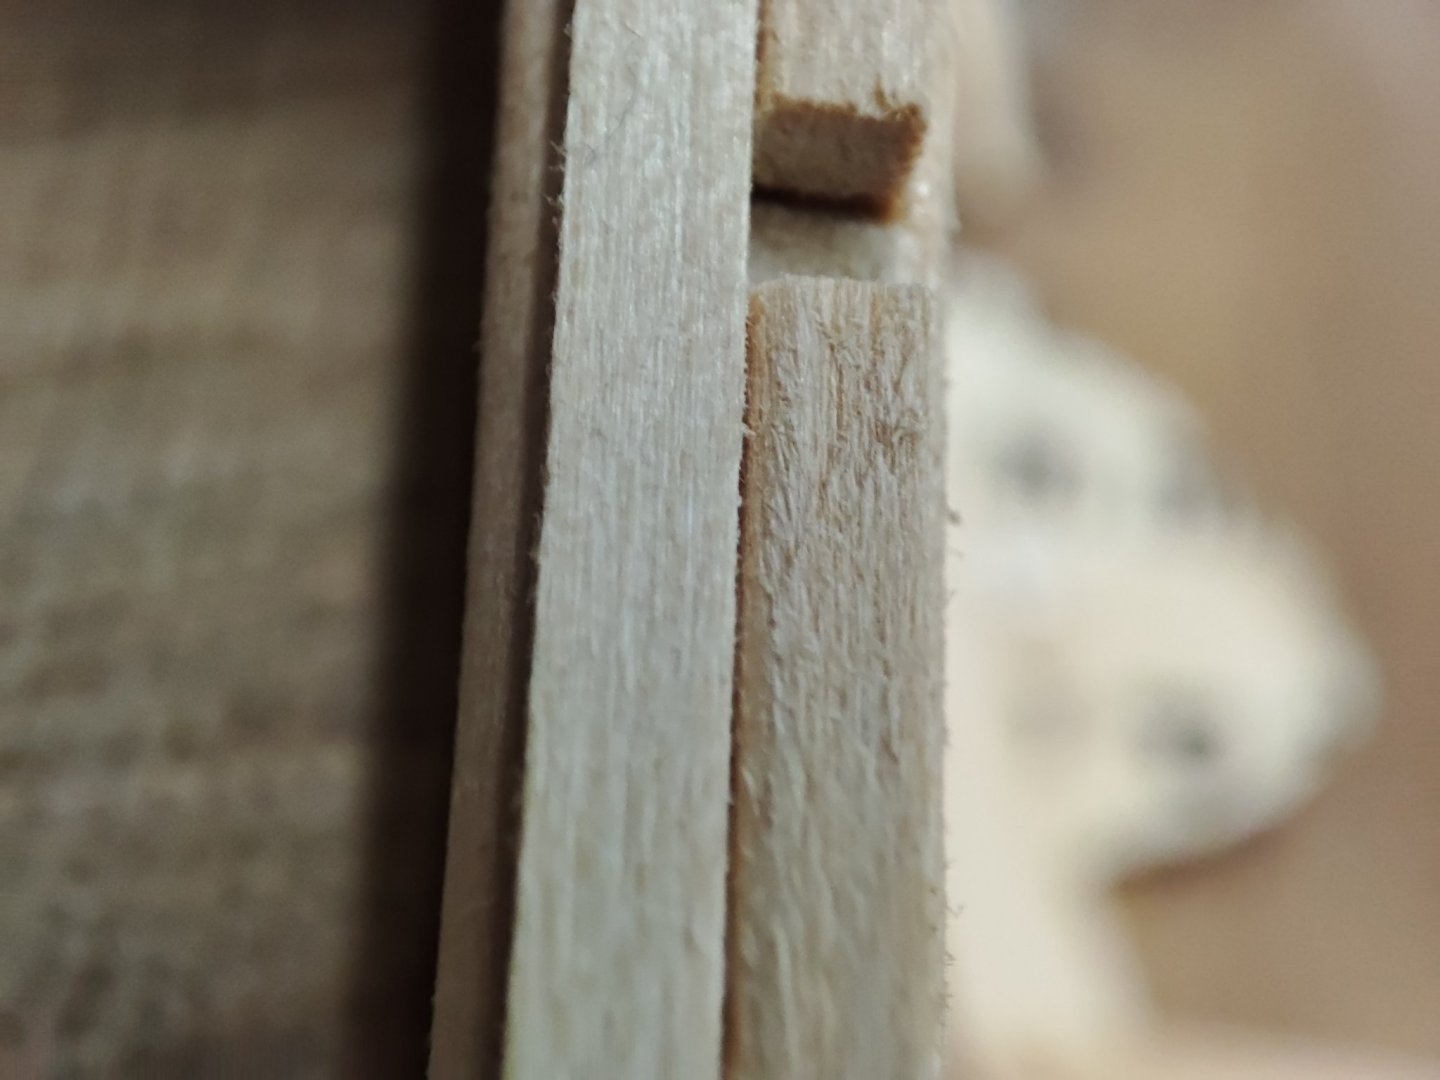
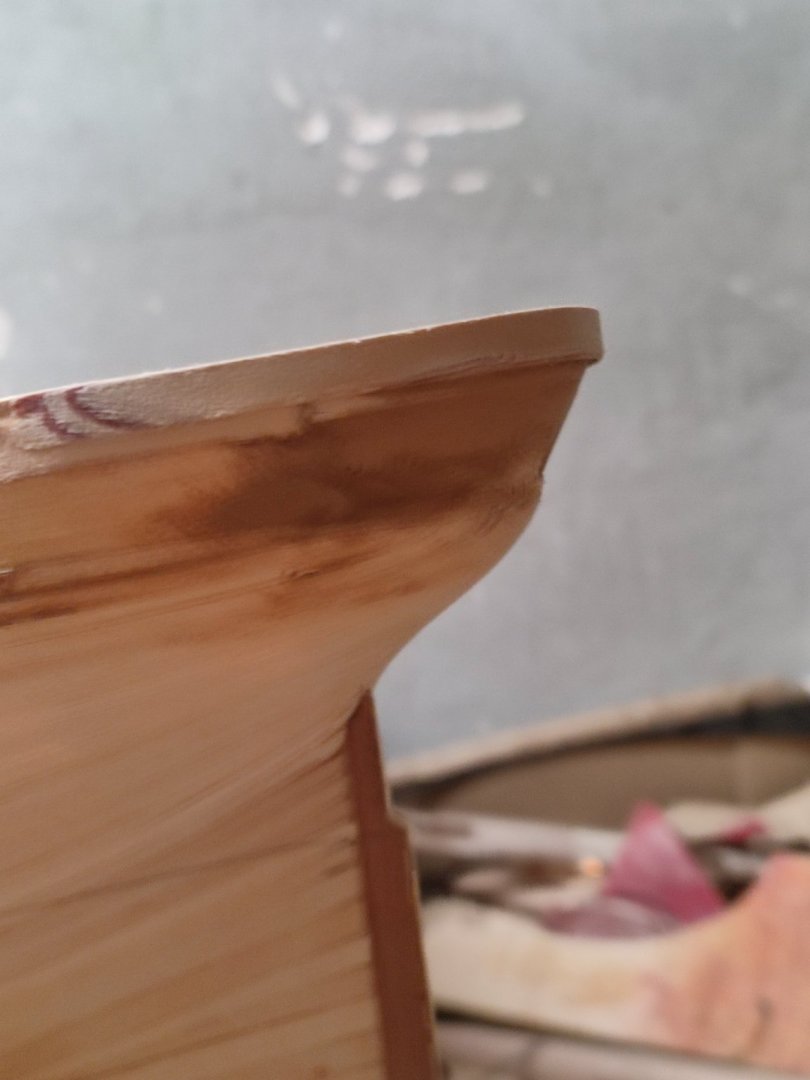
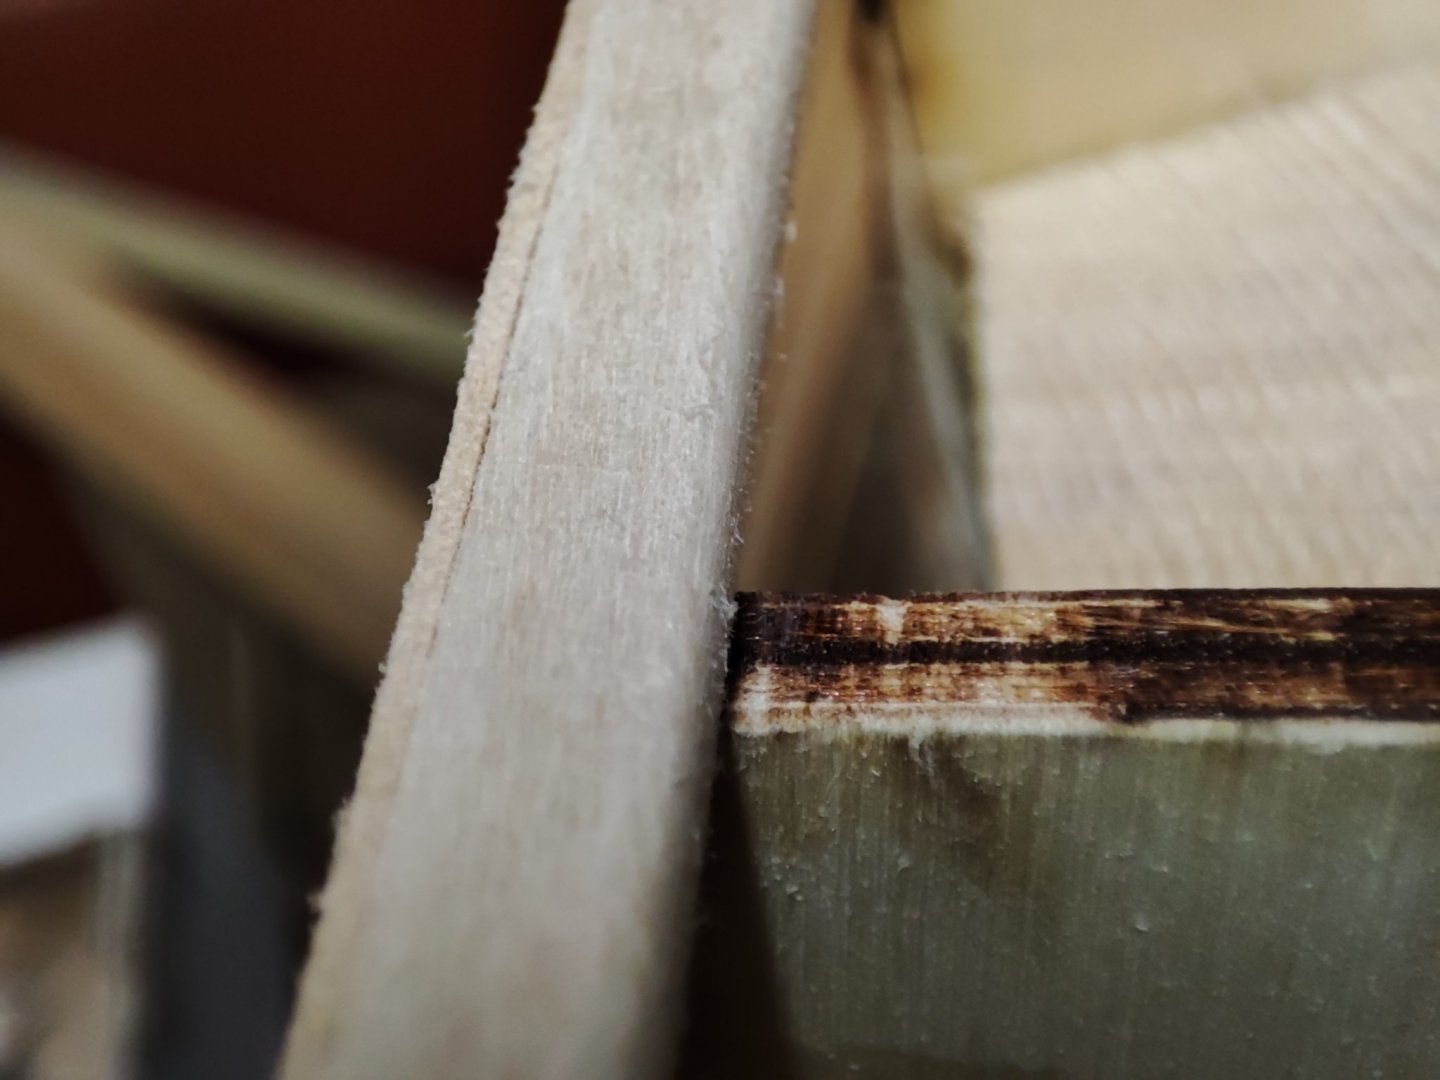
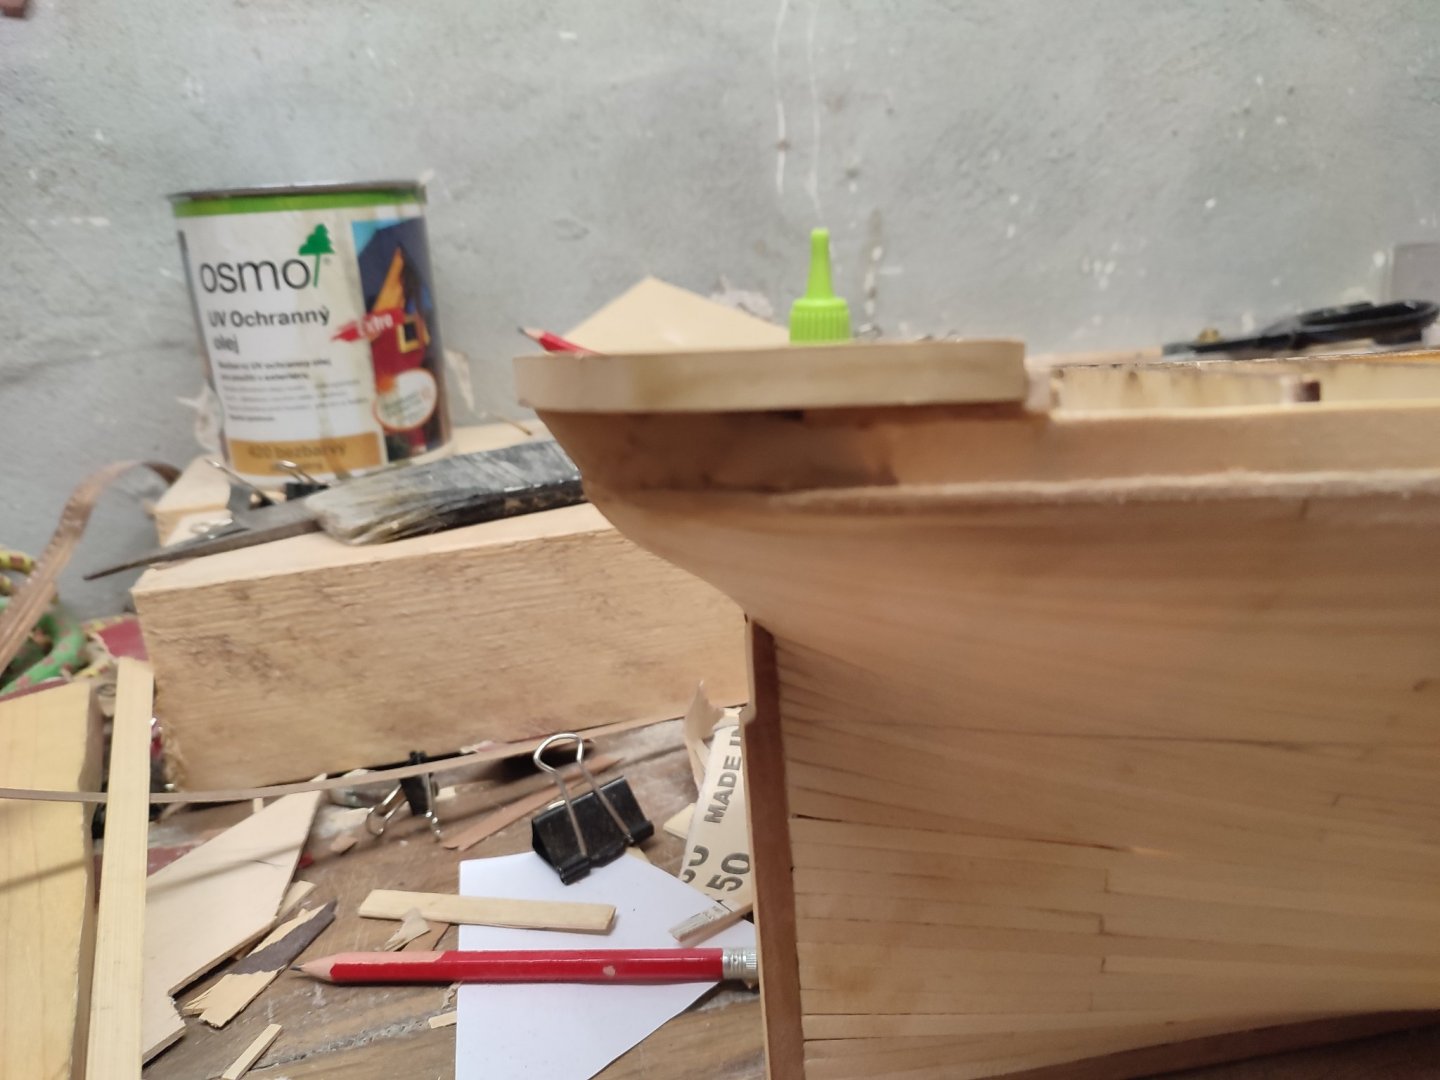
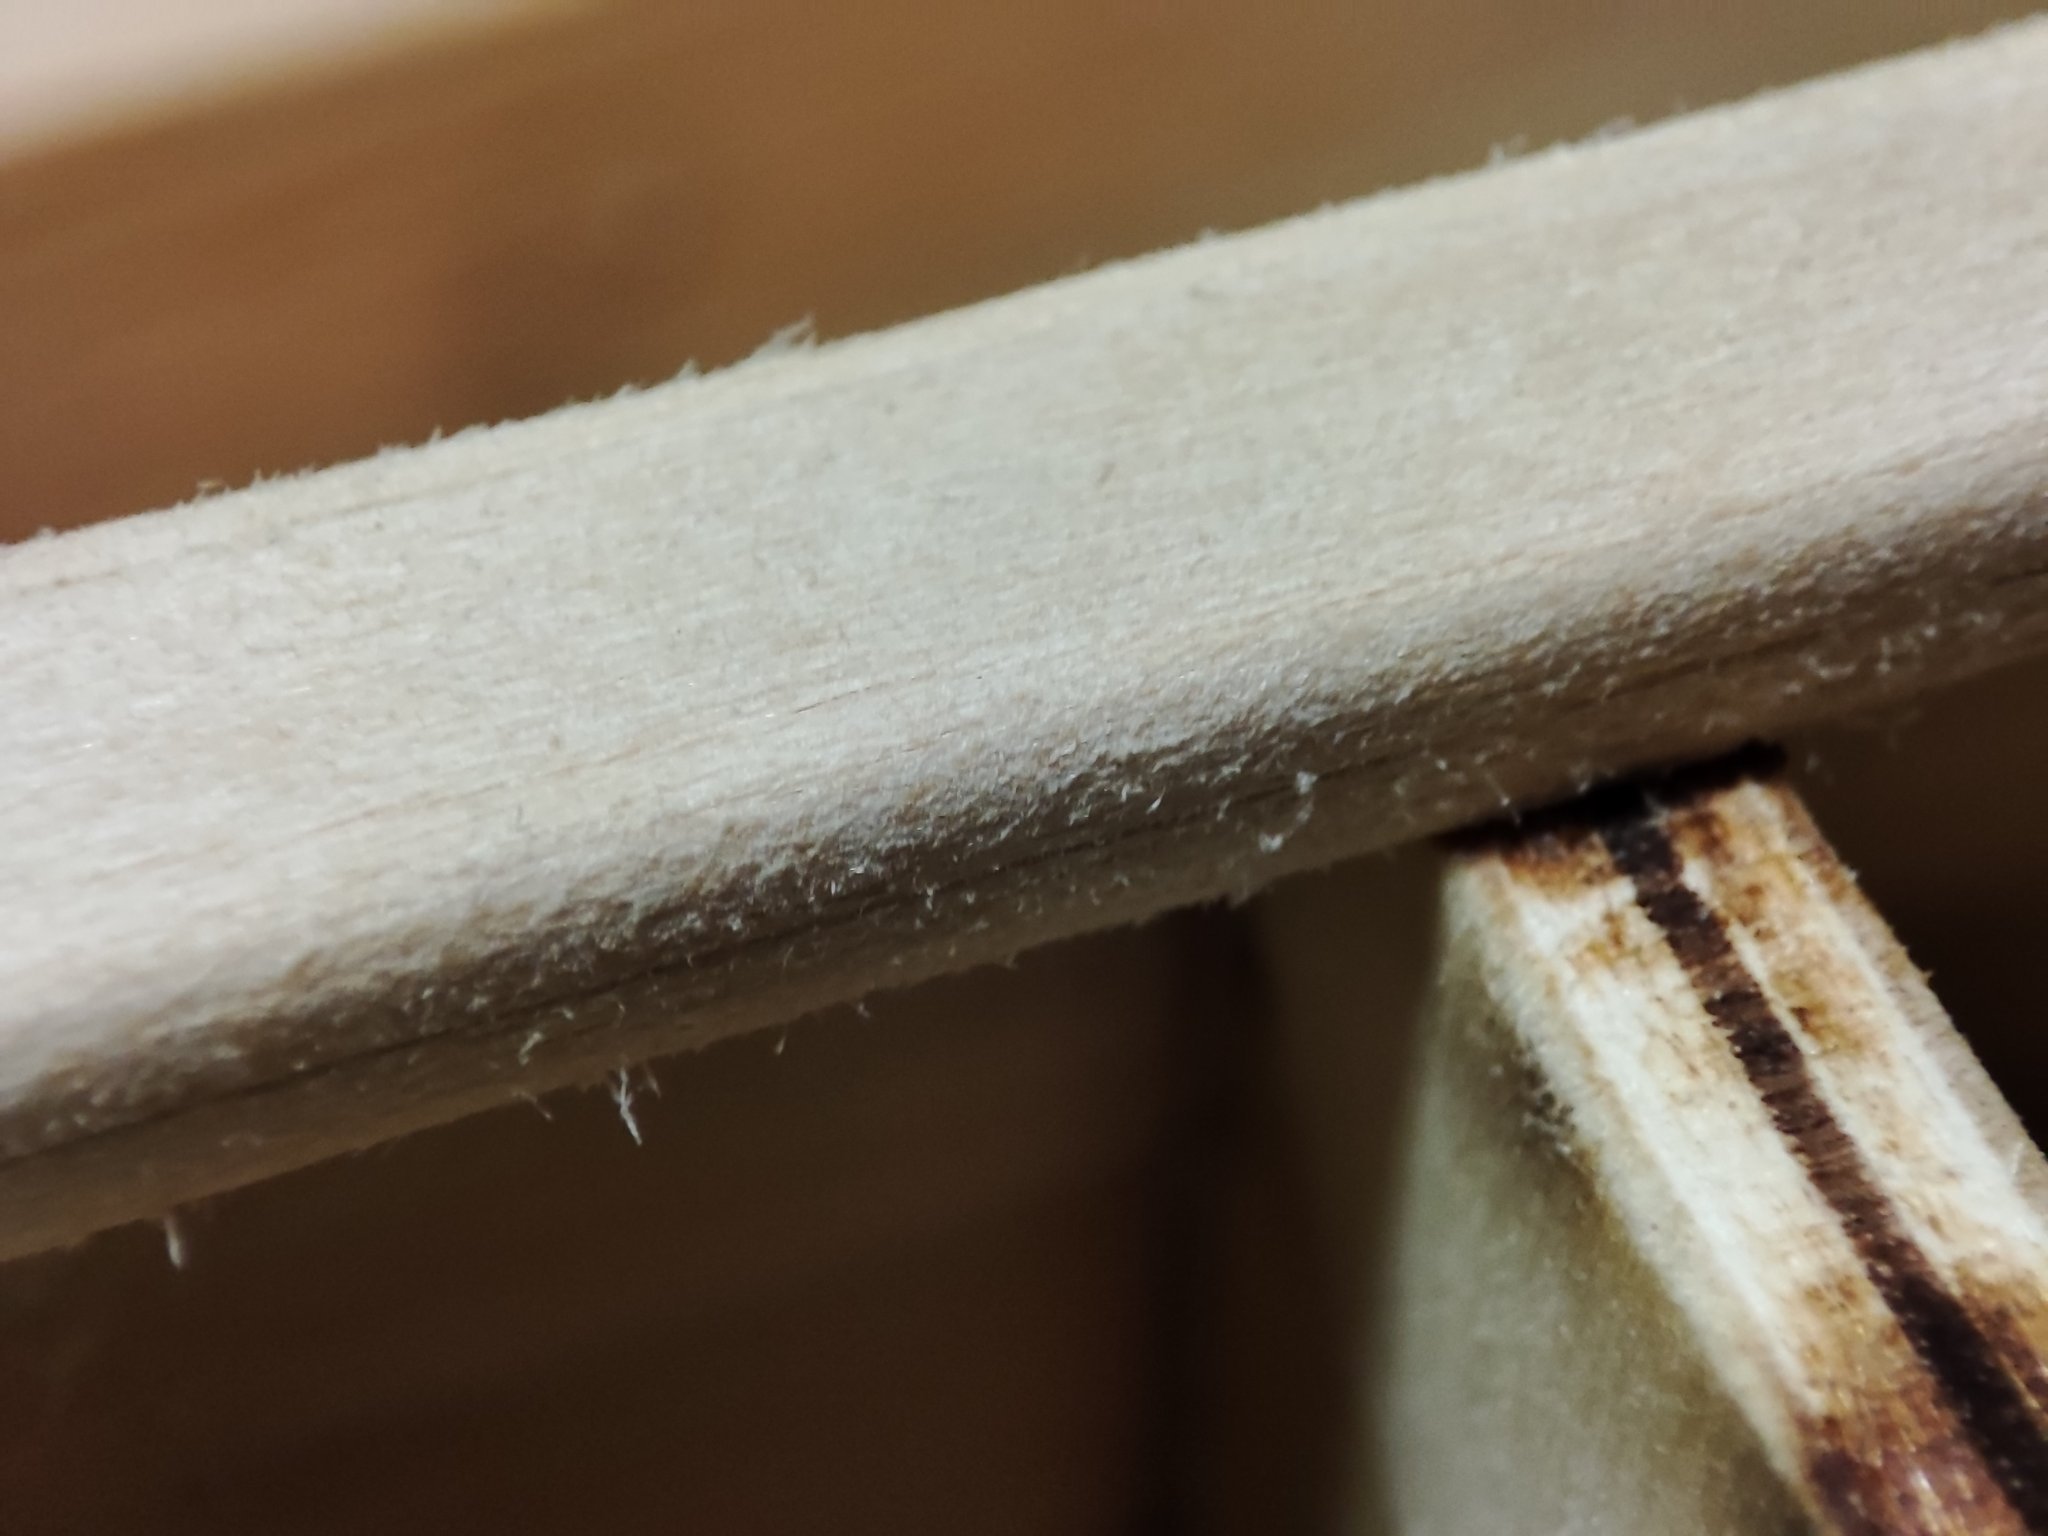
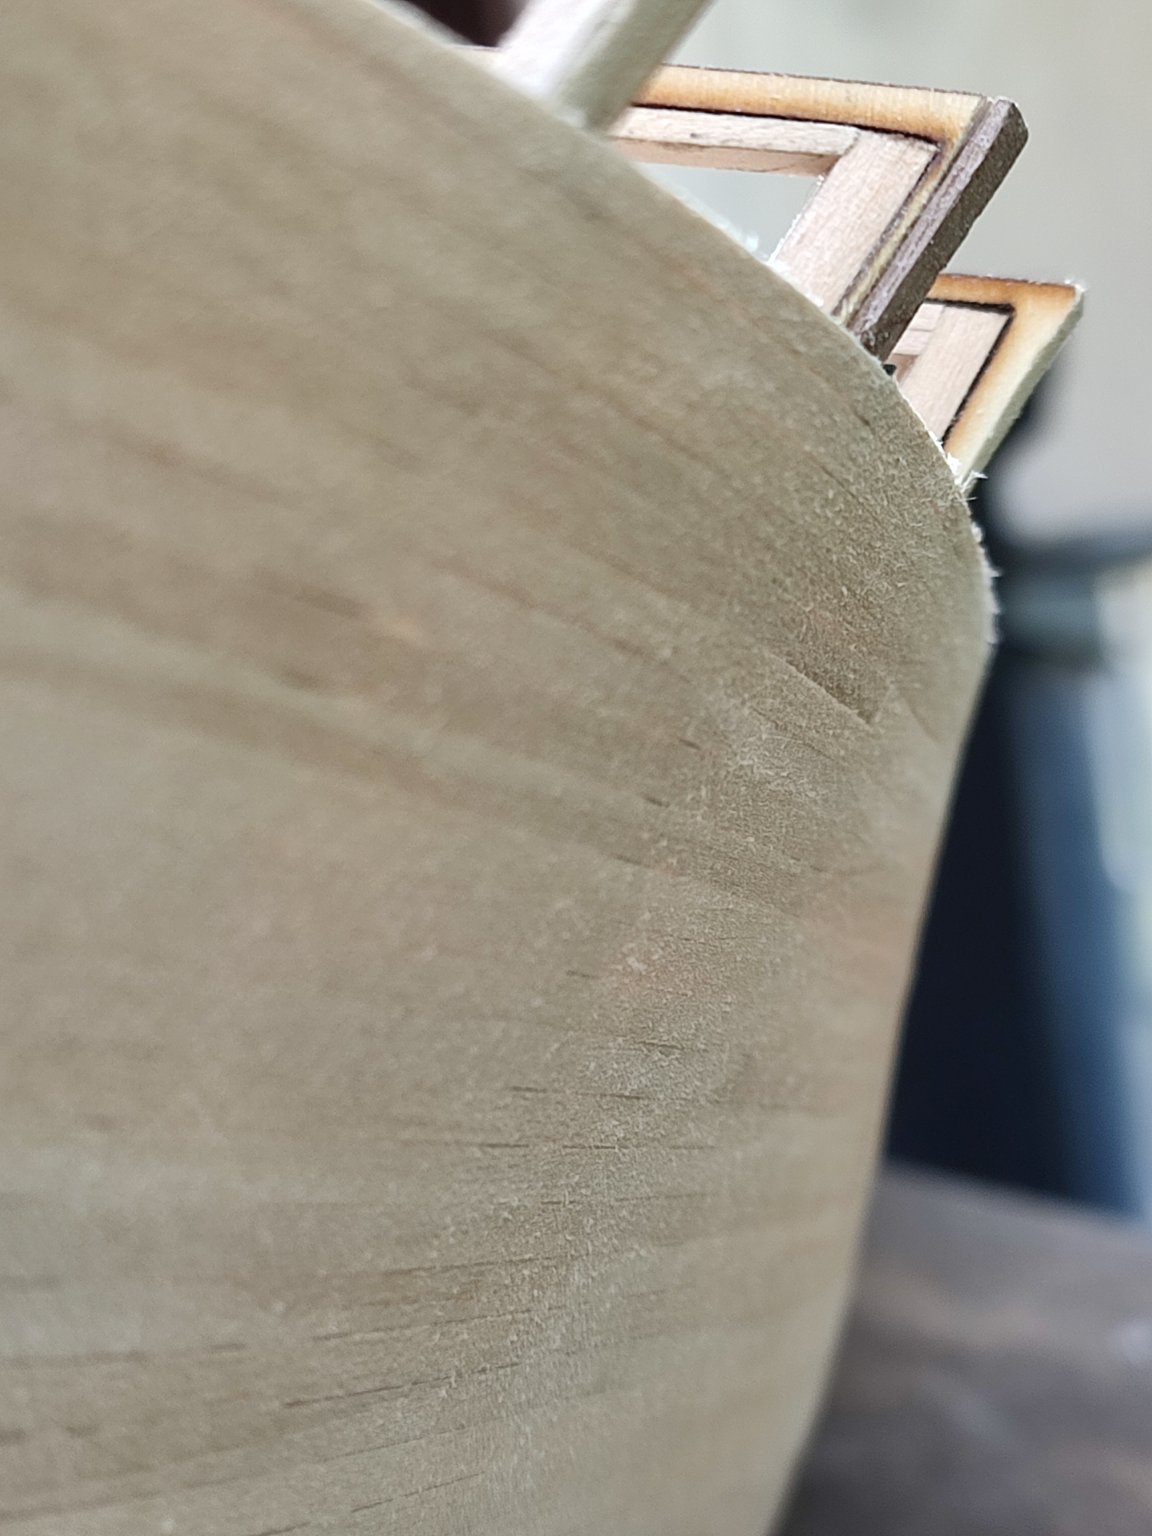
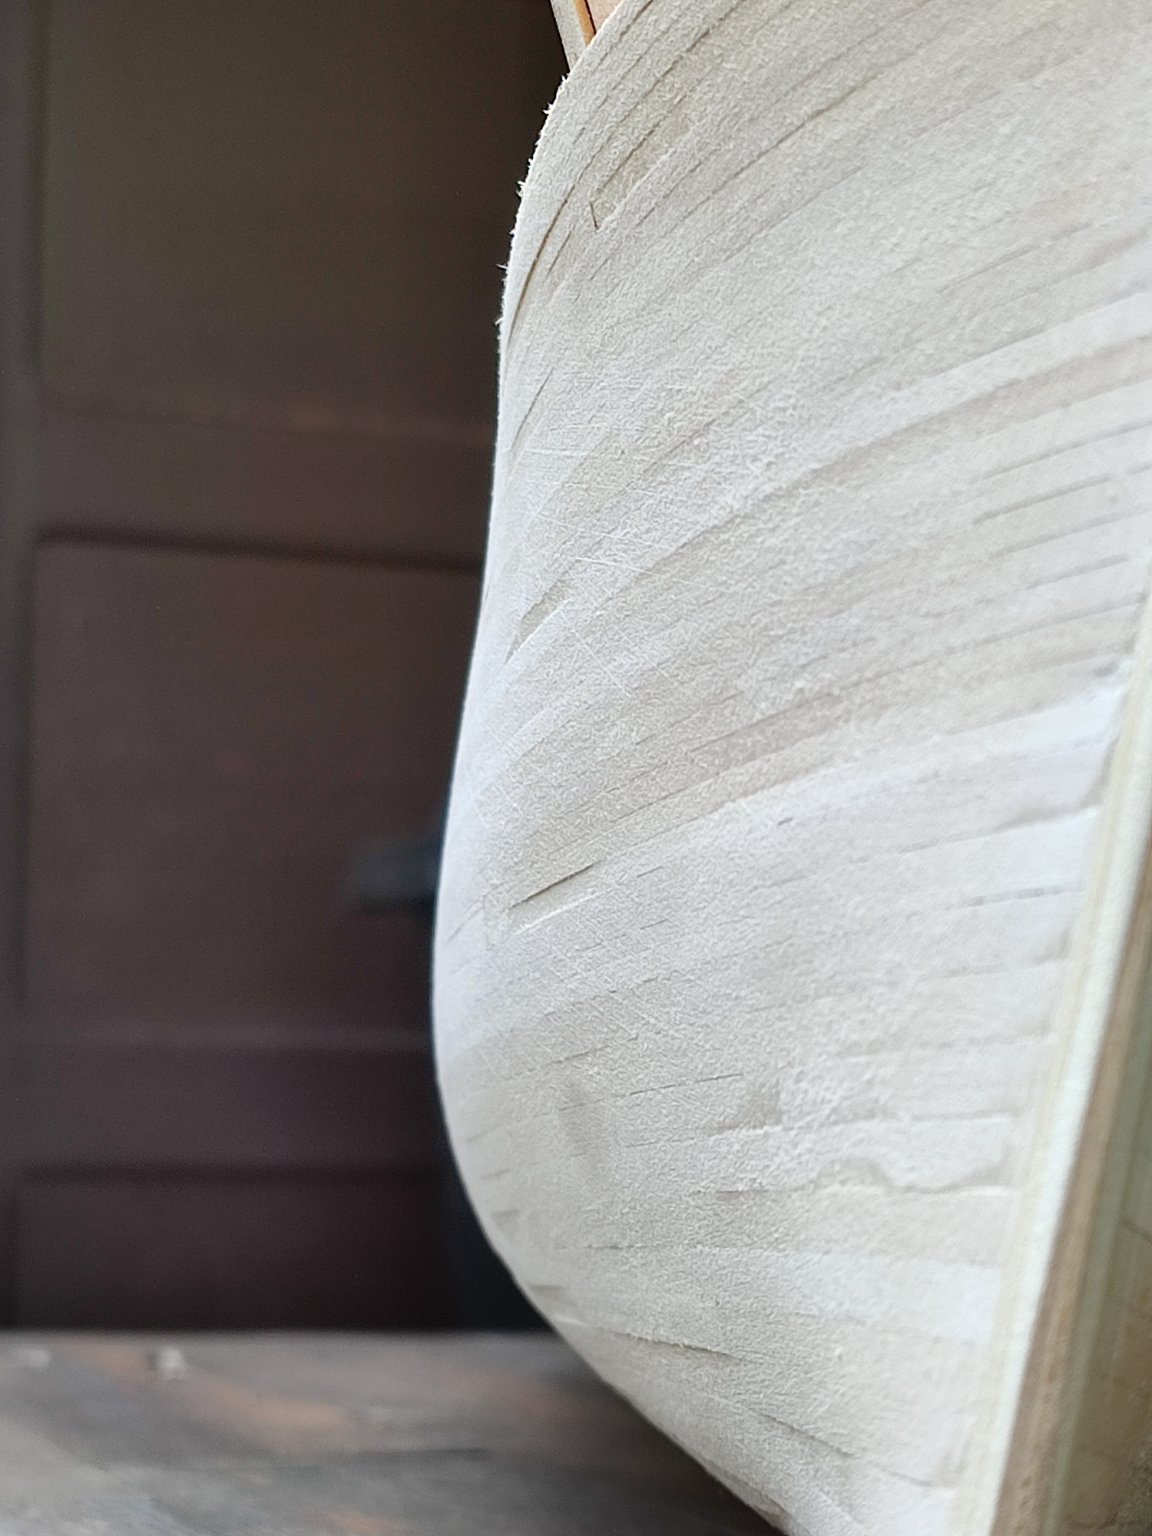
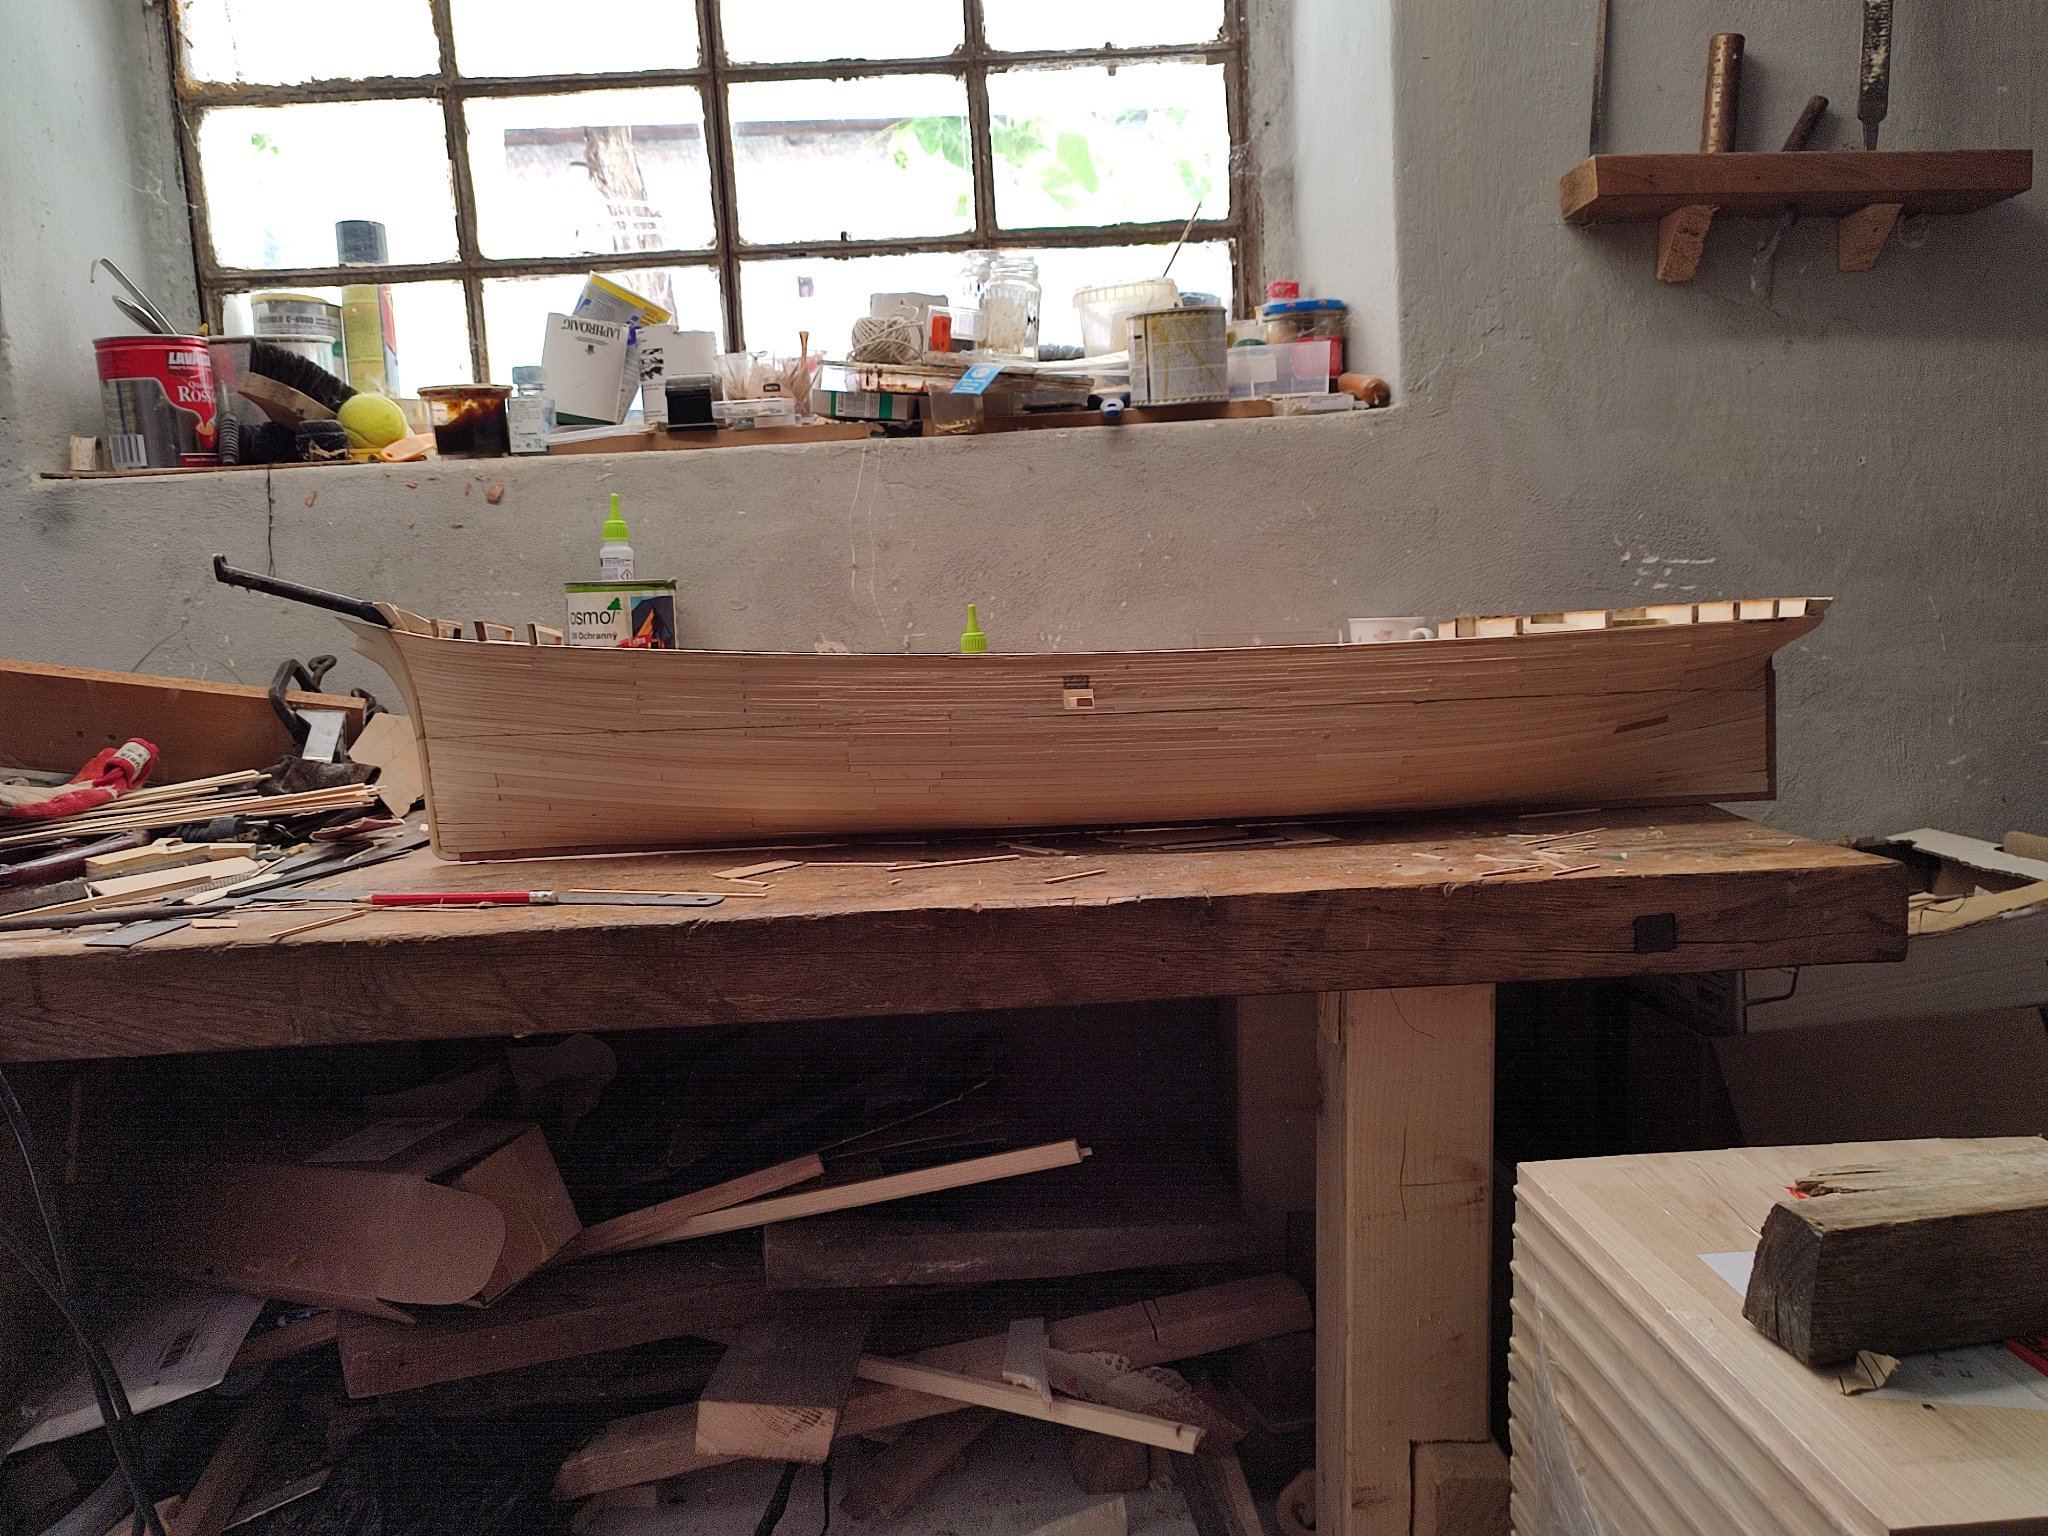
Rich yes its 1:96revell plastic indeed. On that photos i got new mobile phone with quite aparently useful and pretty nice macro feature so im trying to use it here and there.
") i must say it magnifies it hugely. cant wait taking ornamentation down with it . Dont worry Rich modeling should be fun ! so there is no pressing or anything. sure i got better after two quite a years but fo example i will never return to soldering as i danaged my hands skin. but recovered hopefully fully. but it took a year and it was nasty. so i made some irreparable mistakes and i ahould have started with easier models. but well here we are. almost painting Glory ! gosh. im playing with an idea id like you to see my glory in person so when is ready without masts i wll probably send her to you guys to inspect her in person well im not sure how crqzy that idea is but ...anyway. have a good weekend my friends.
i must say it magnifies it hugely. cant wait taking ornamentation down with it . Dont worry Rich modeling should be fun ! so there is no pressing or anything. sure i got better after two quite a years but fo example i will never return to soldering as i danaged my hands skin. but recovered hopefully fully. but it took a year and it was nasty. so i made some irreparable mistakes and i ahould have started with easier models. but well here we are. almost painting Glory ! gosh. im playing with an idea id like you to see my glory in person so when is ready without masts i wll probably send her to you guys to inspect her in person well im not sure how crqzy that idea is but ...anyway. have a good weekend my friends.
-
5 minutes ago, rwiederrich said:
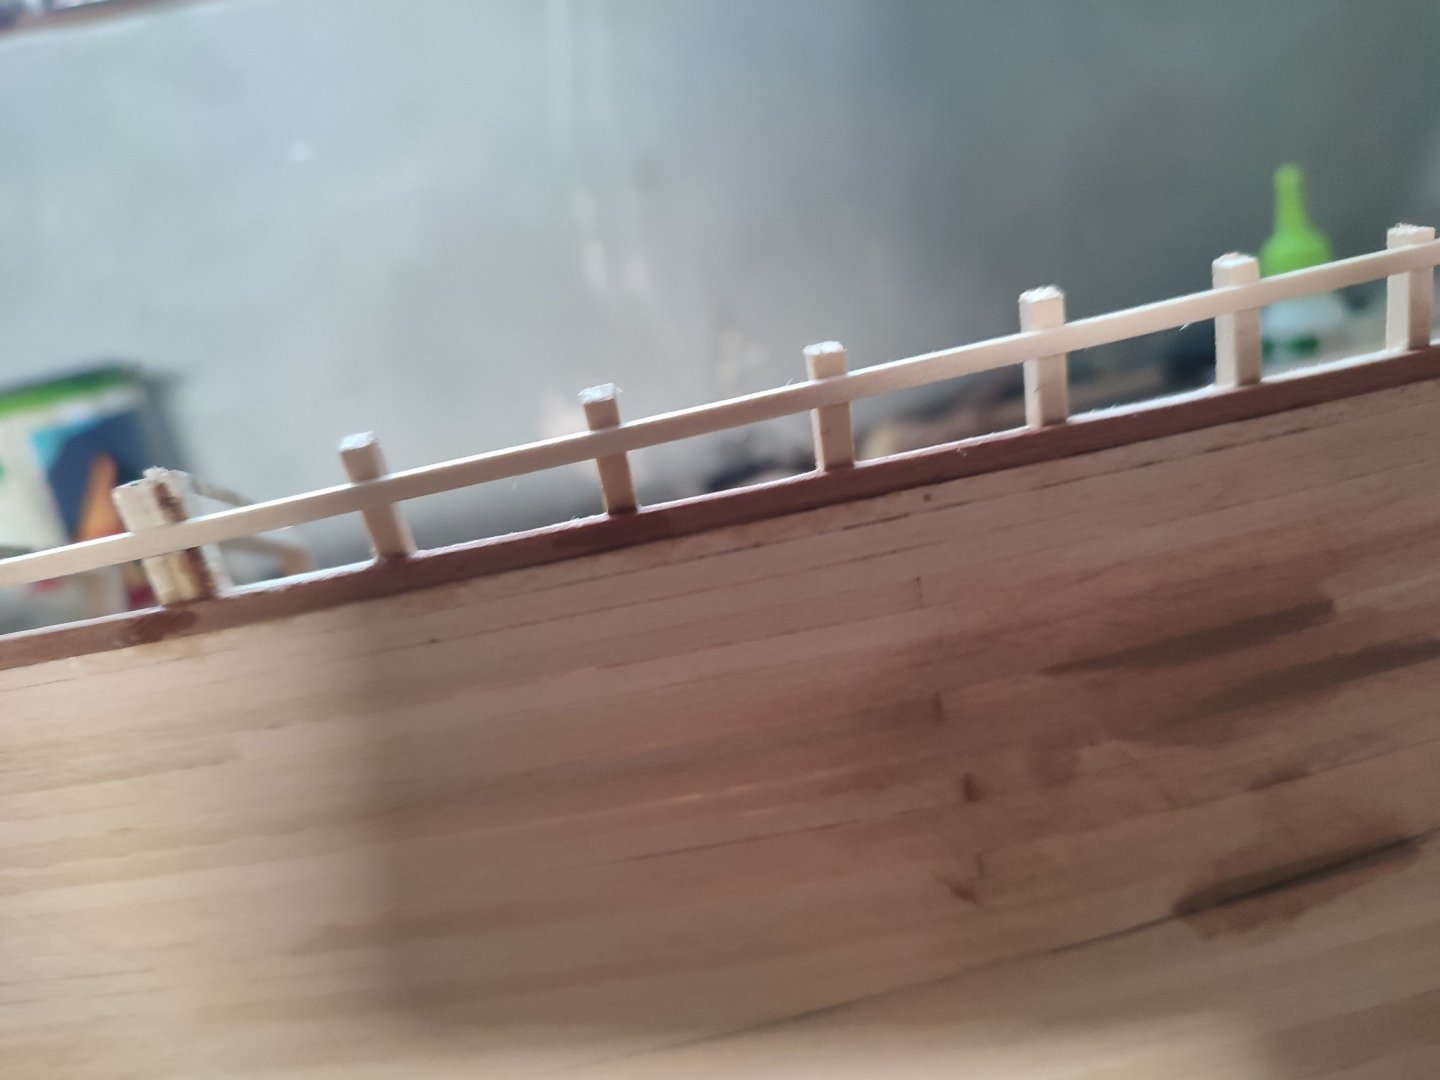
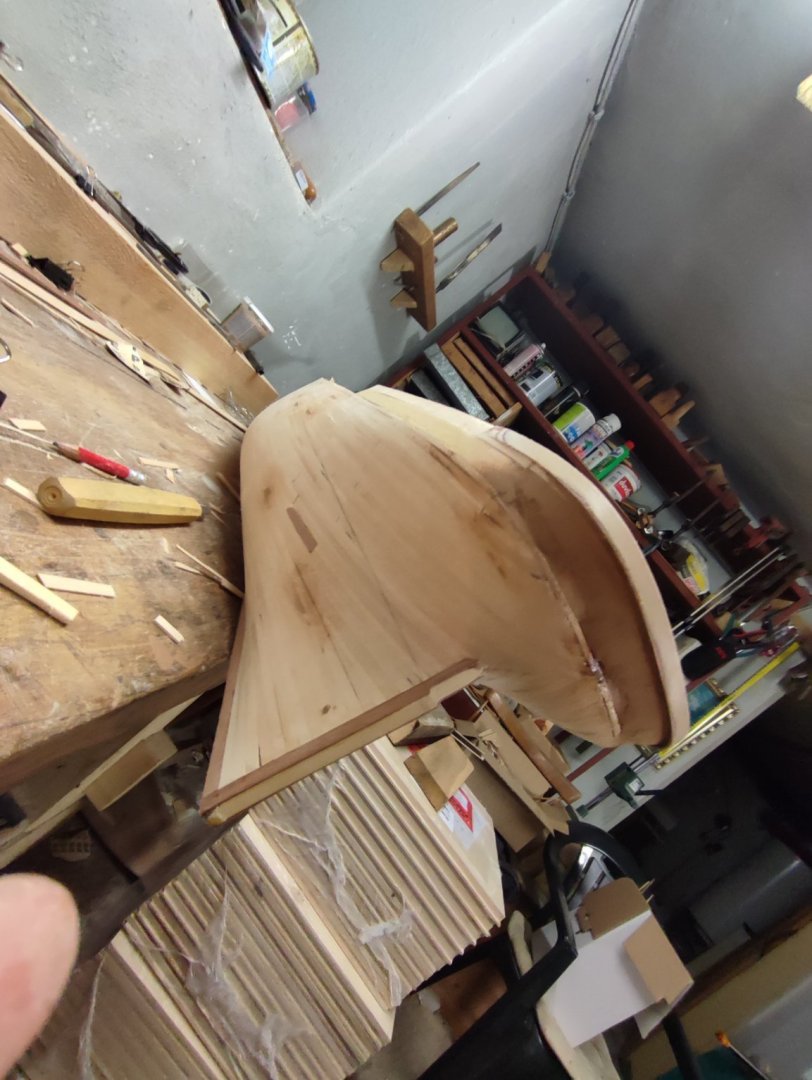
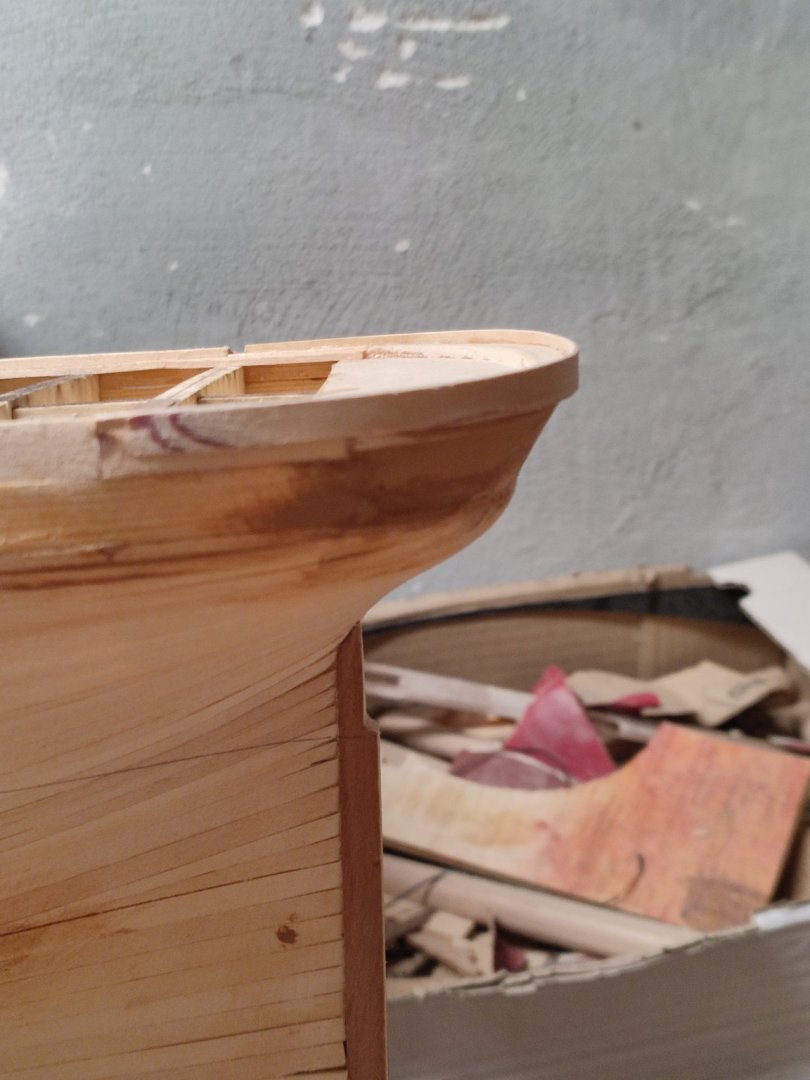
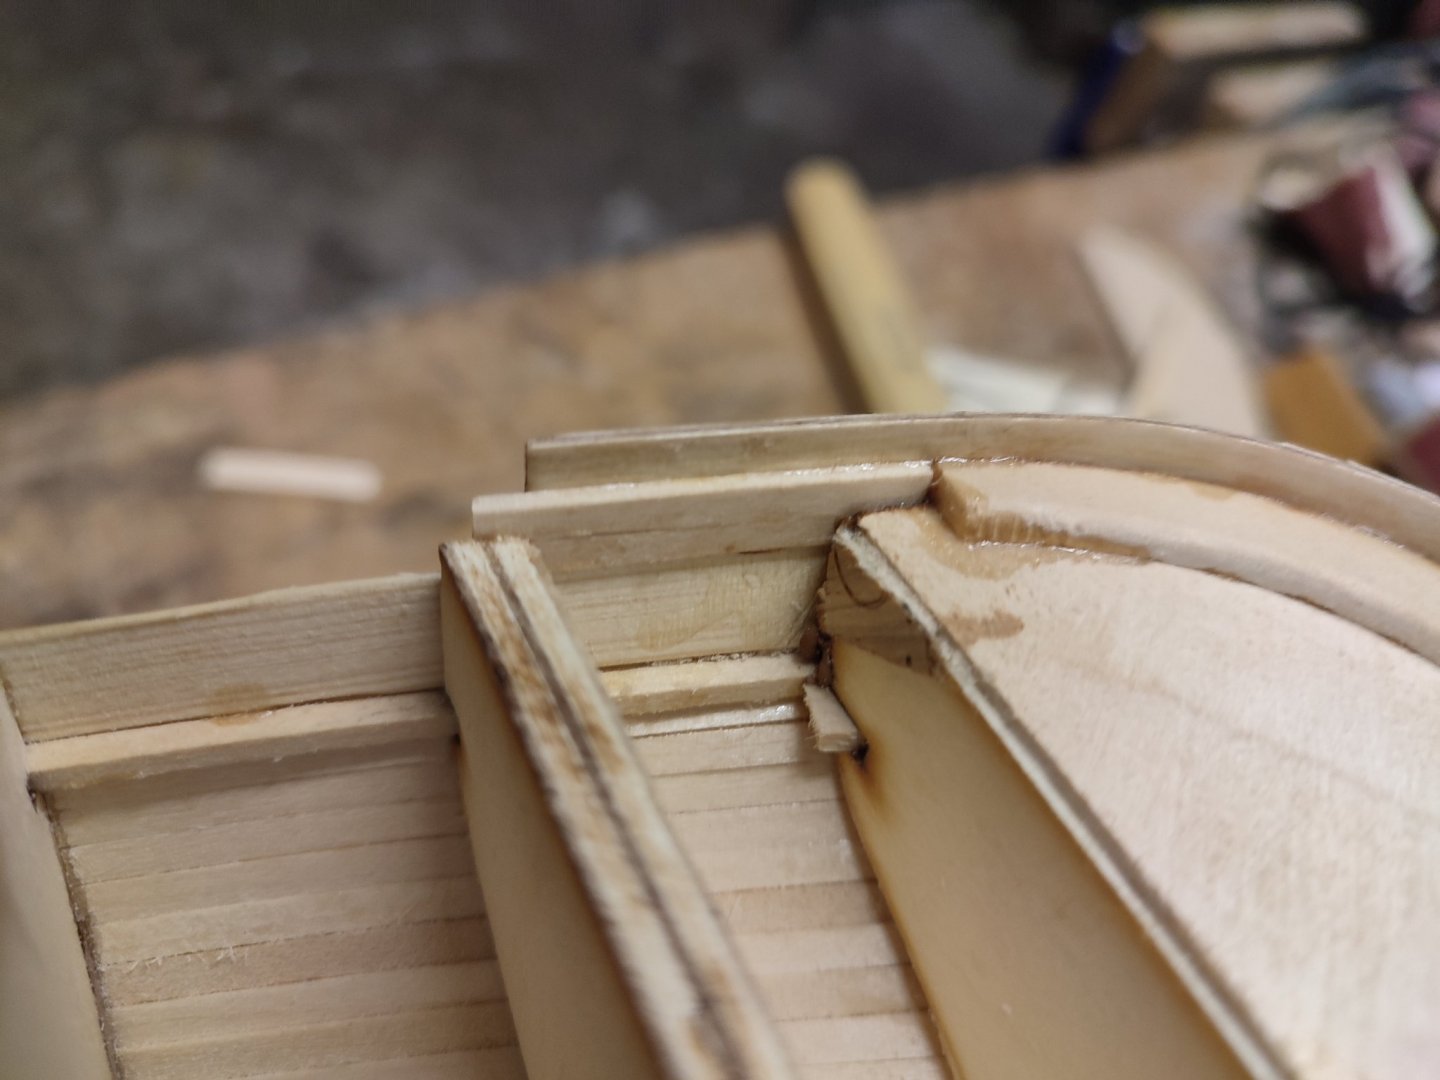
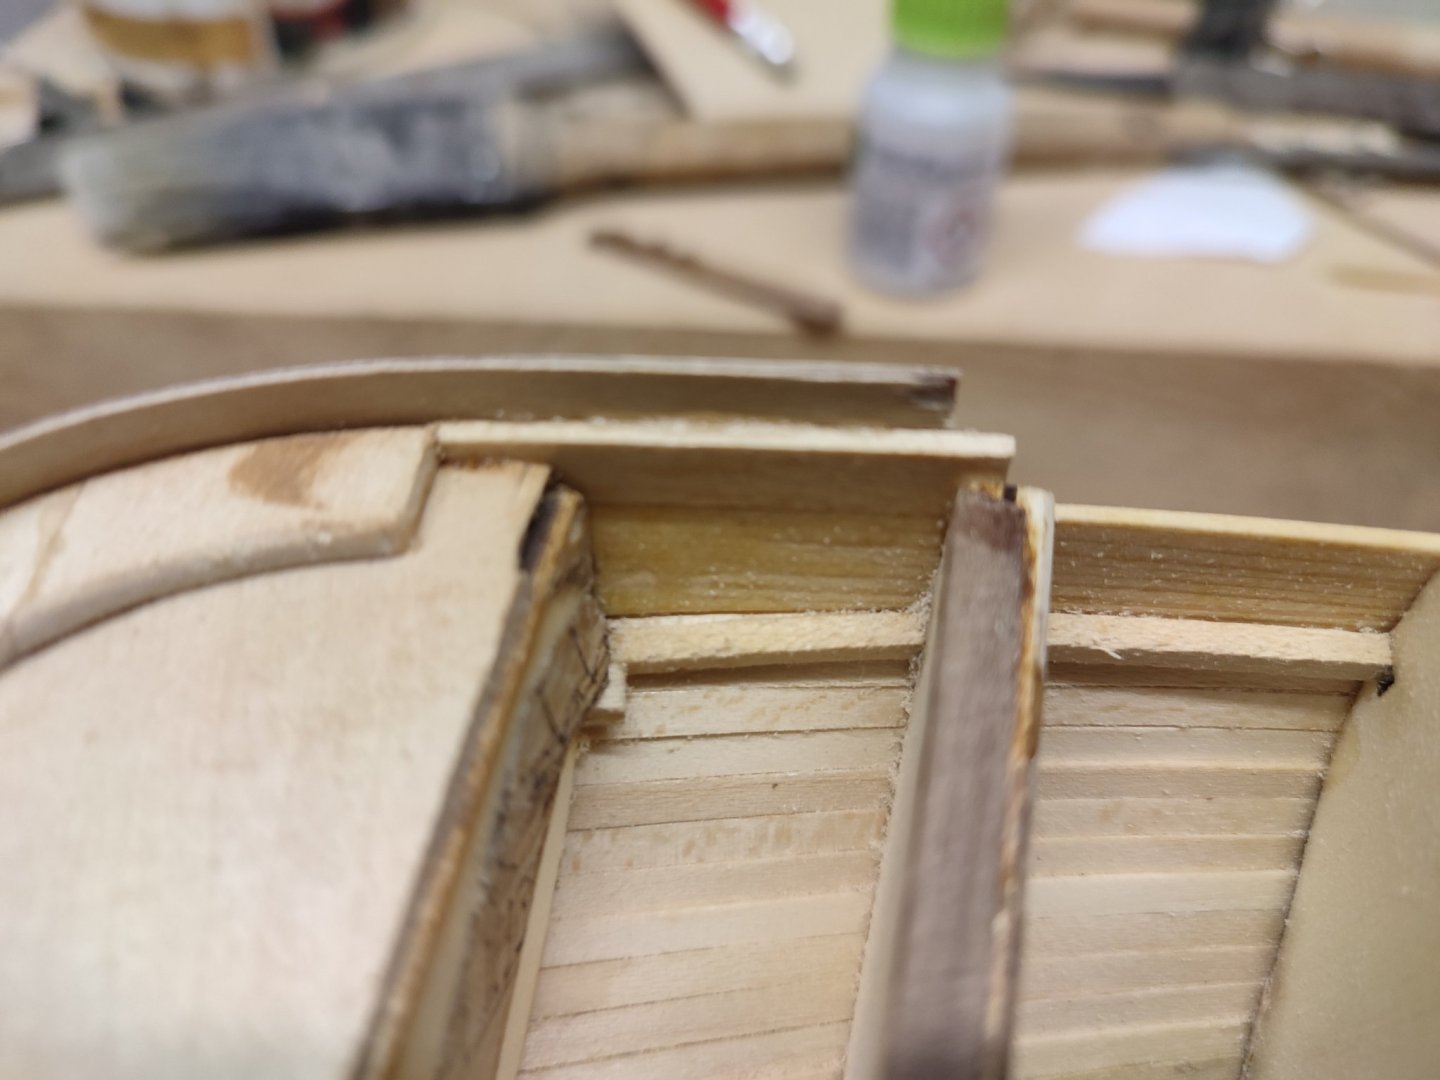
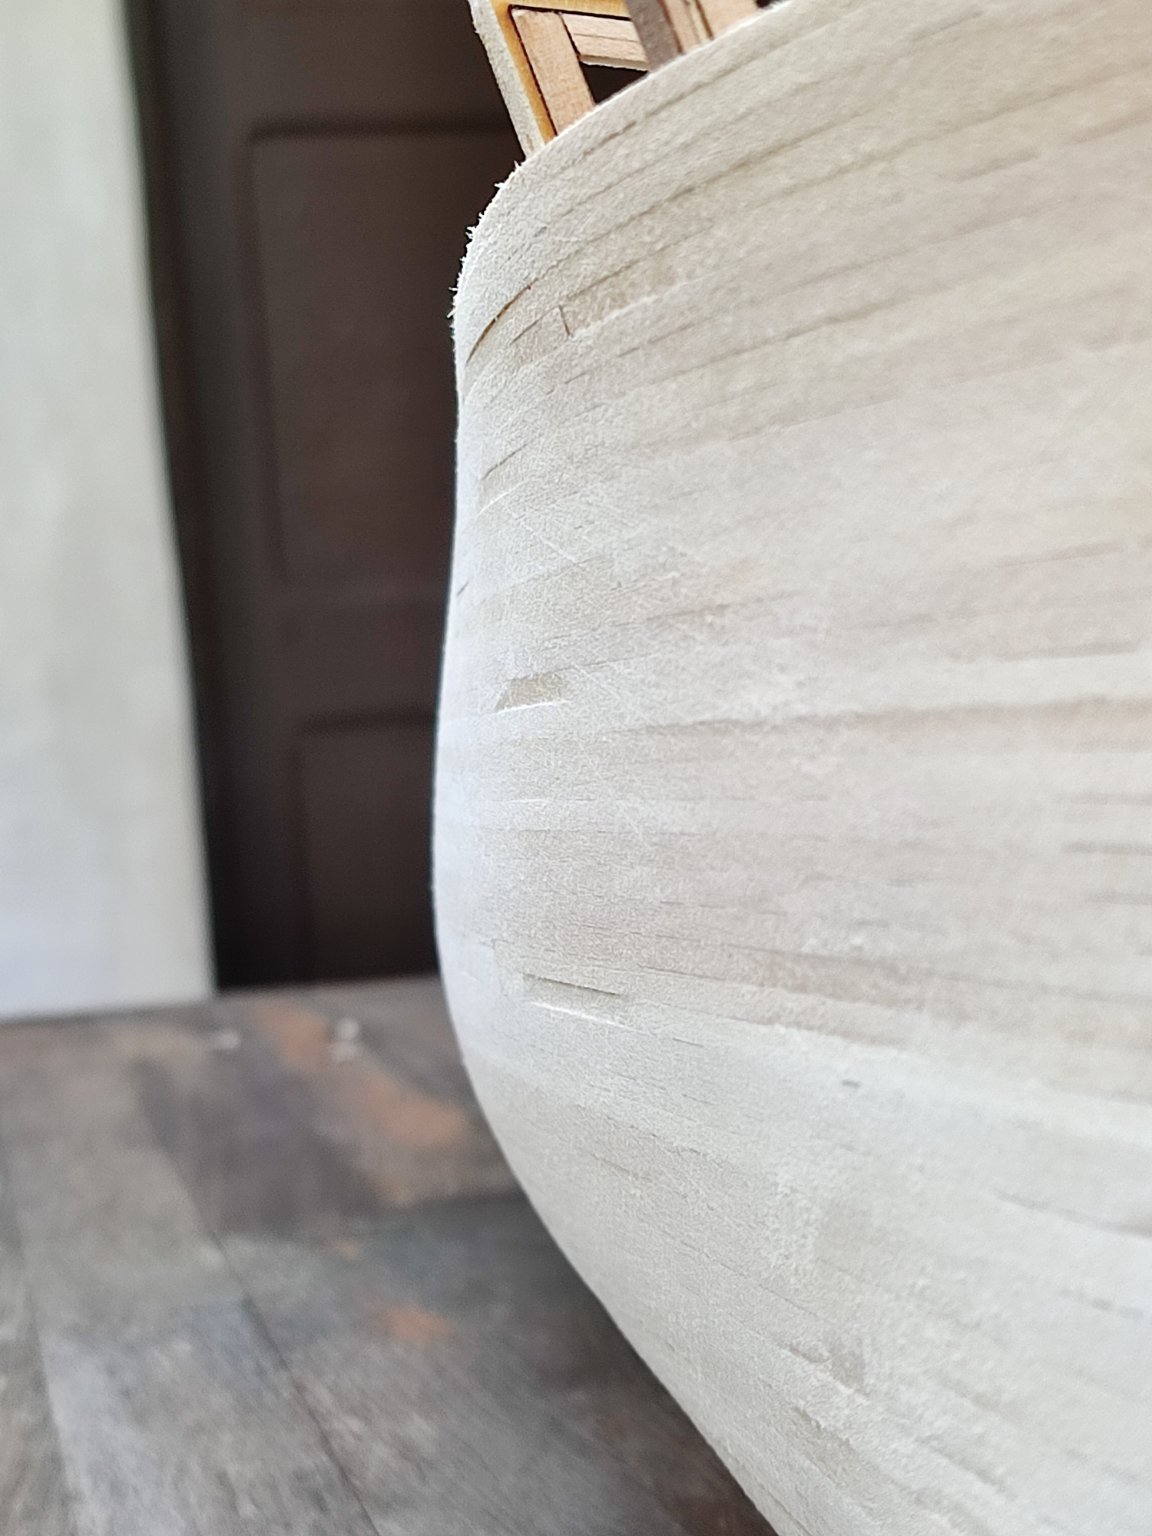
Looking good Vlad...the bulwarks are very clean and it is important to maintain proper convexity as you approach the bow.
Good work for sure.
Love the progress.
Rob
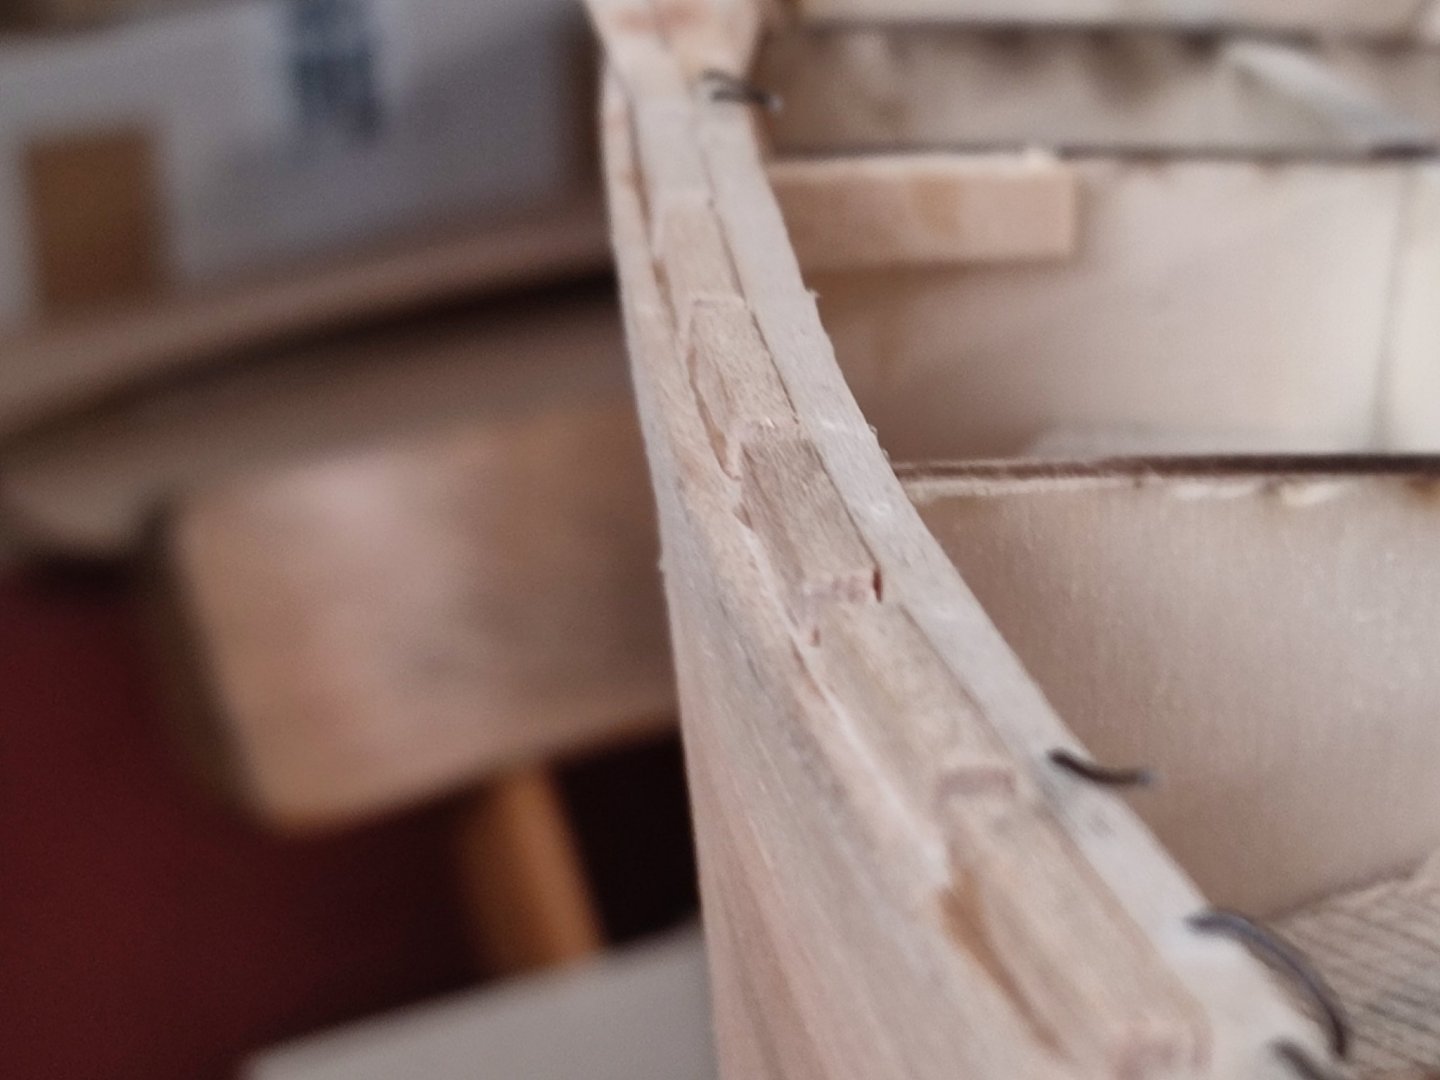
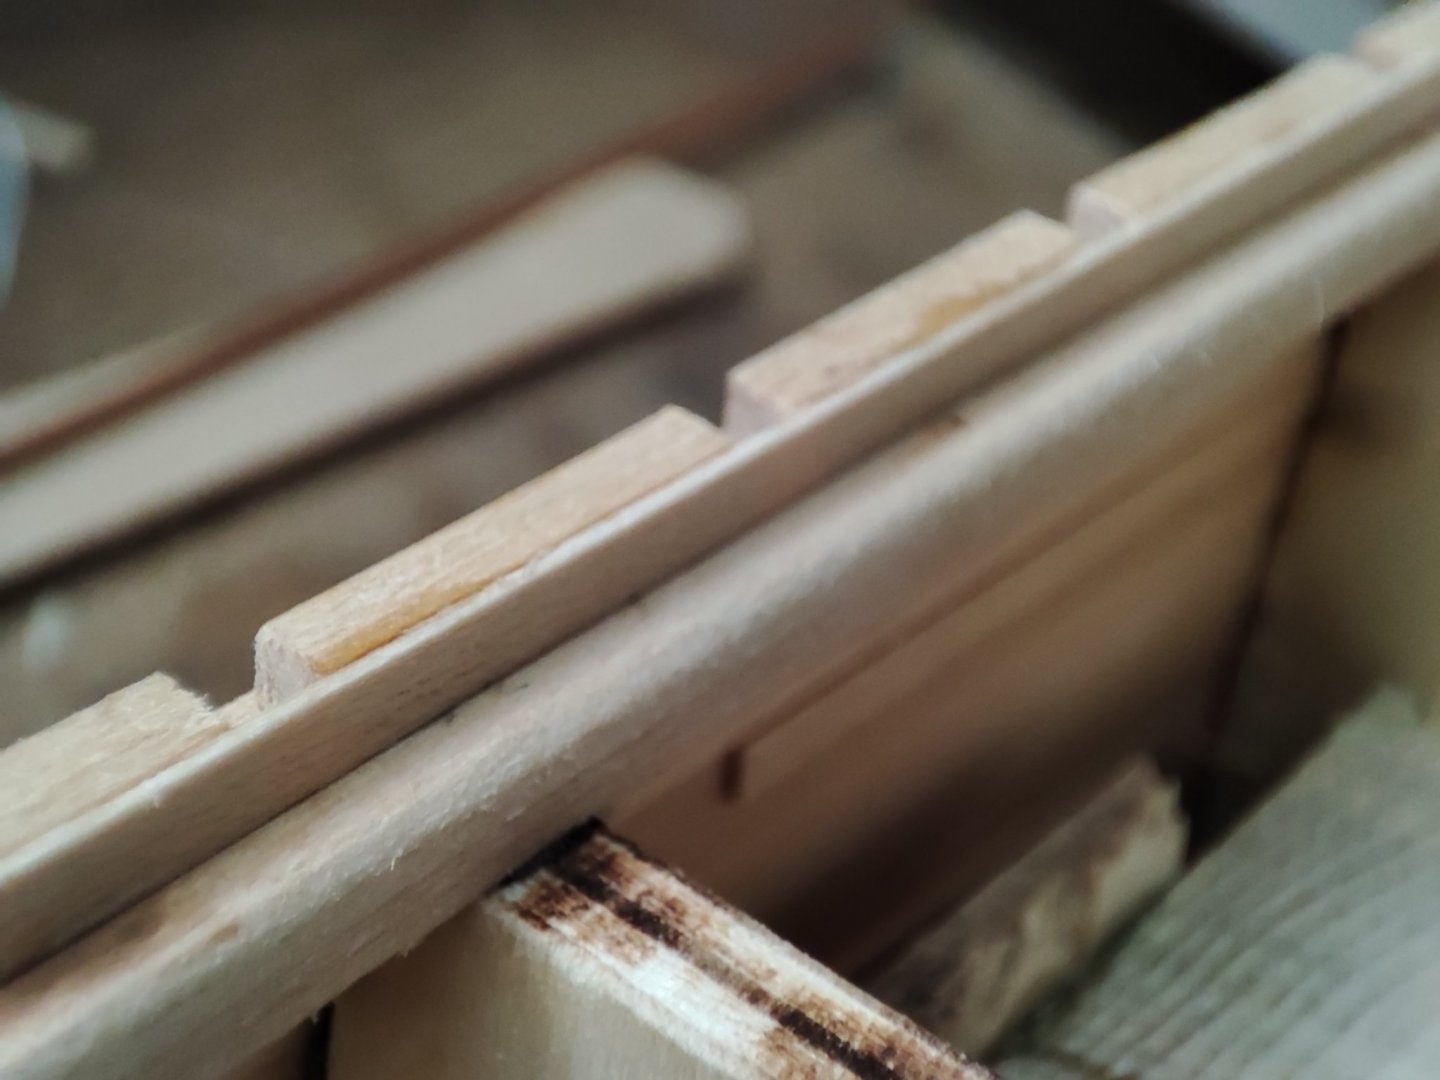
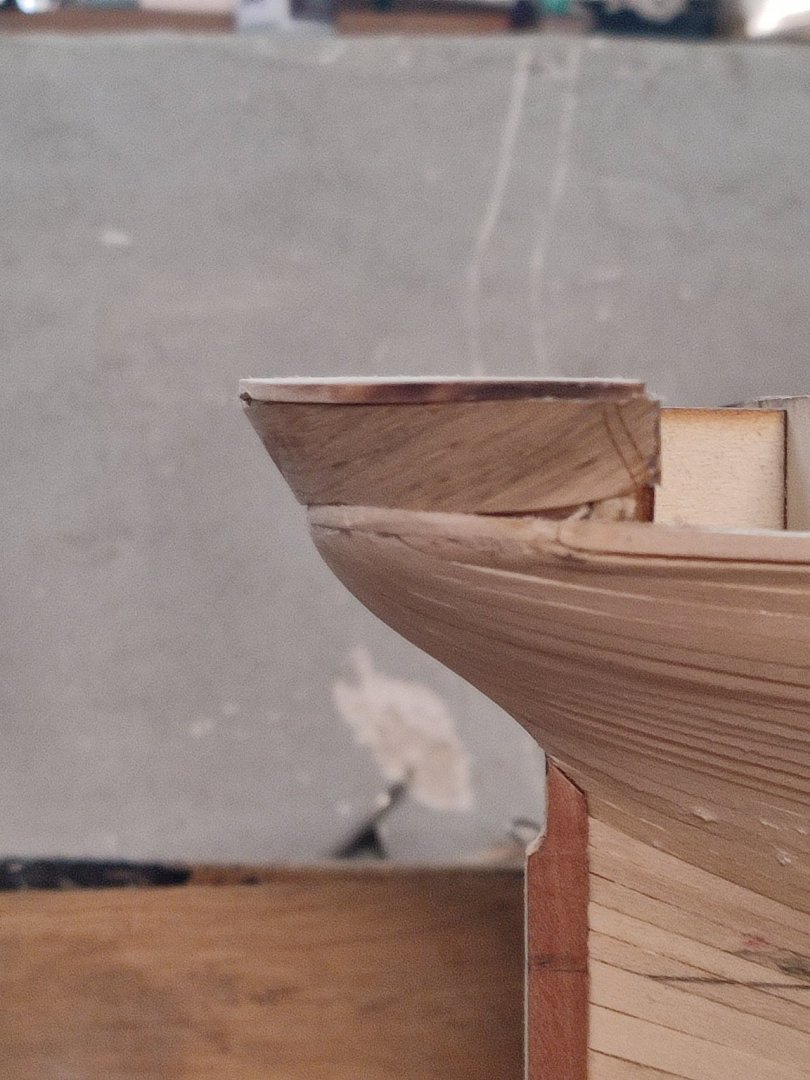
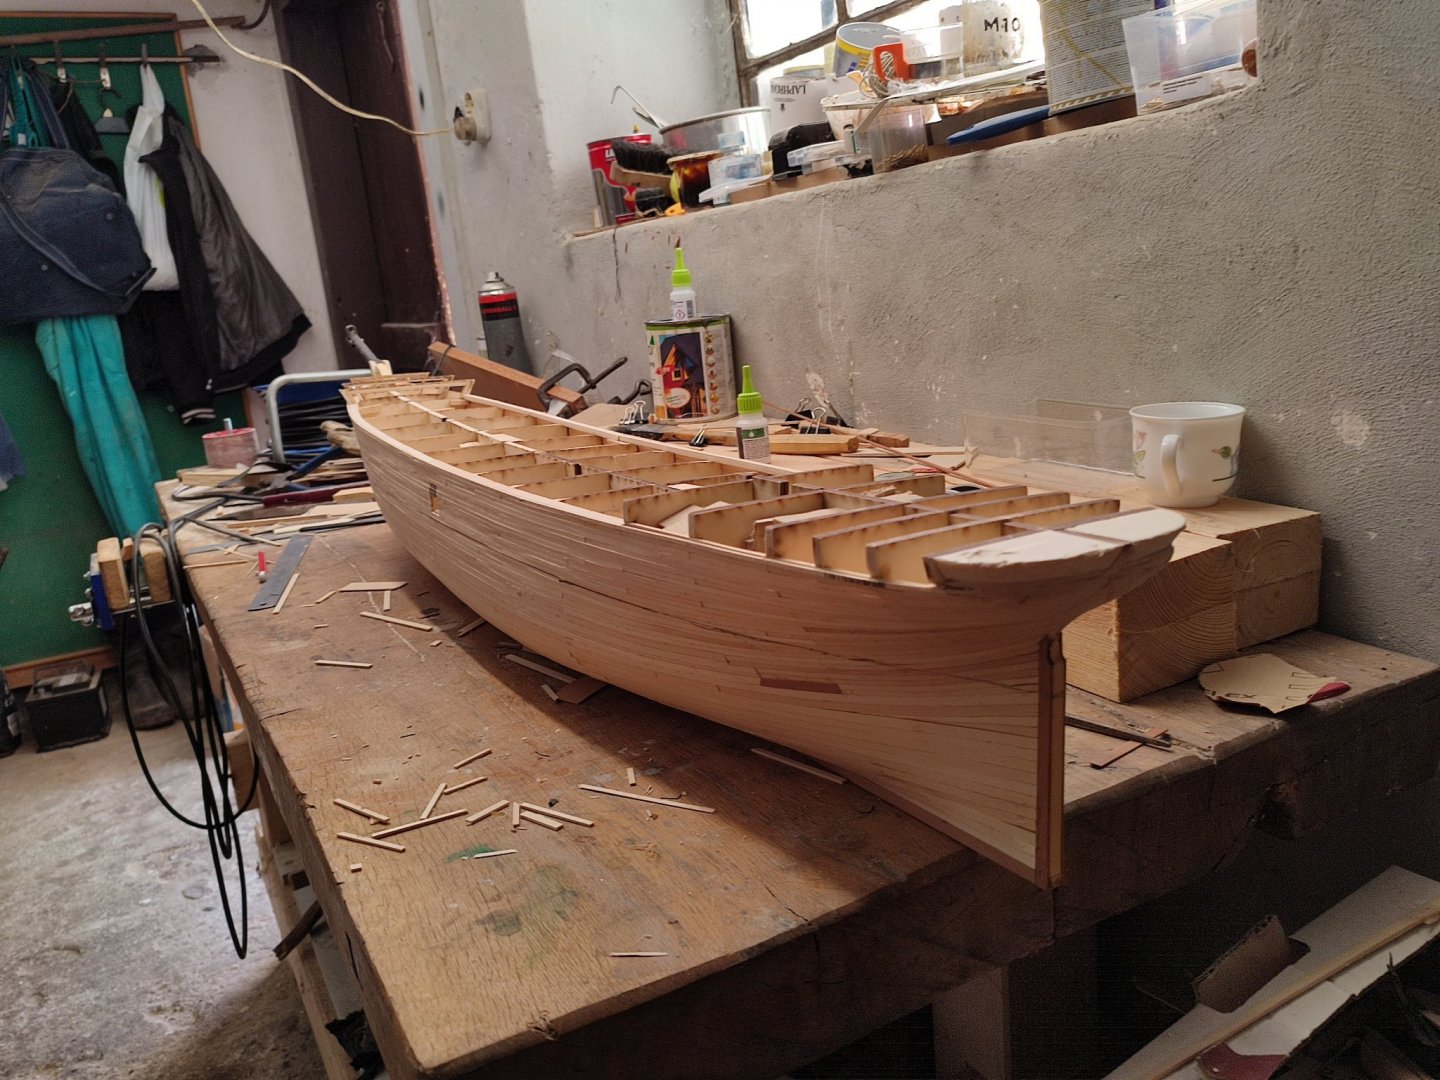
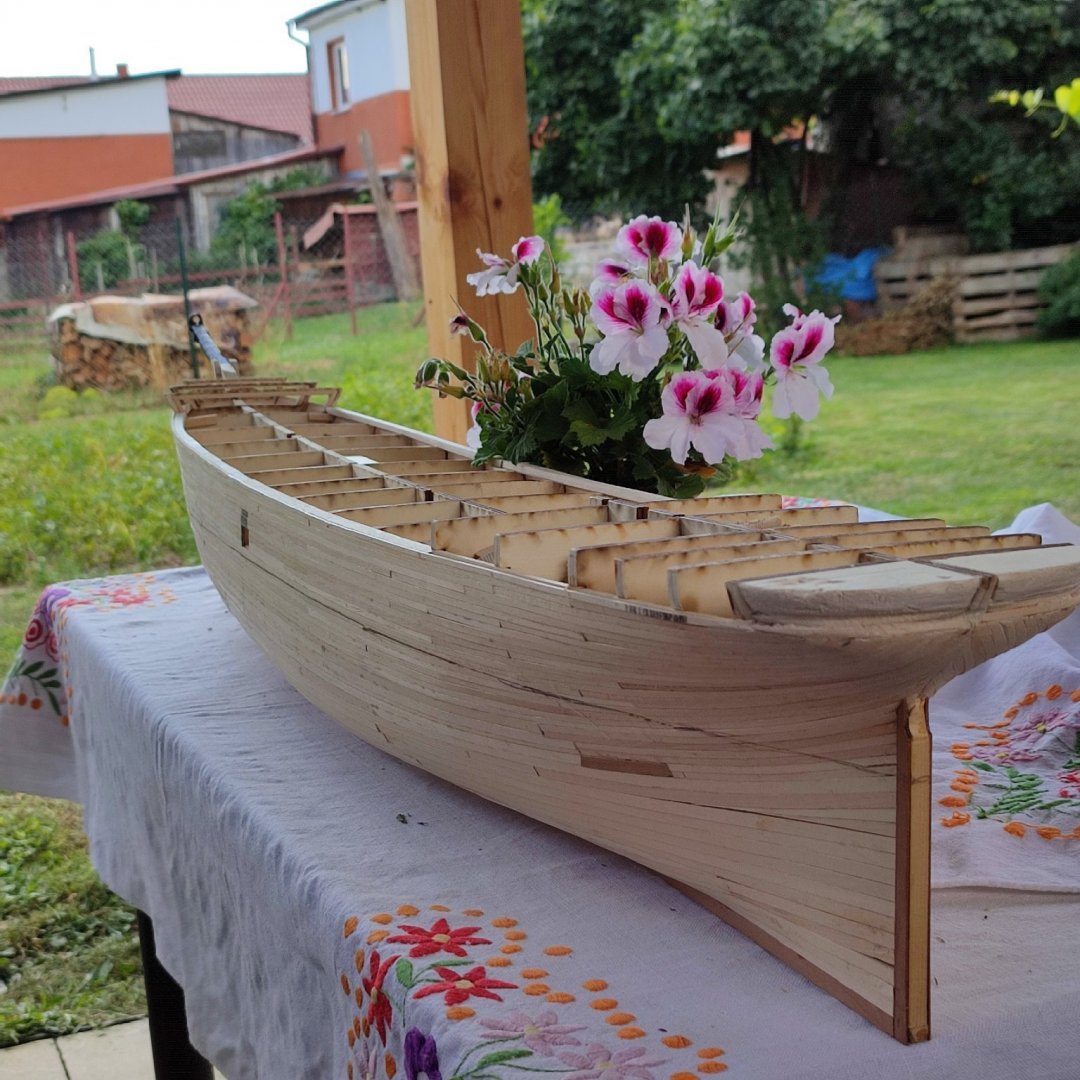
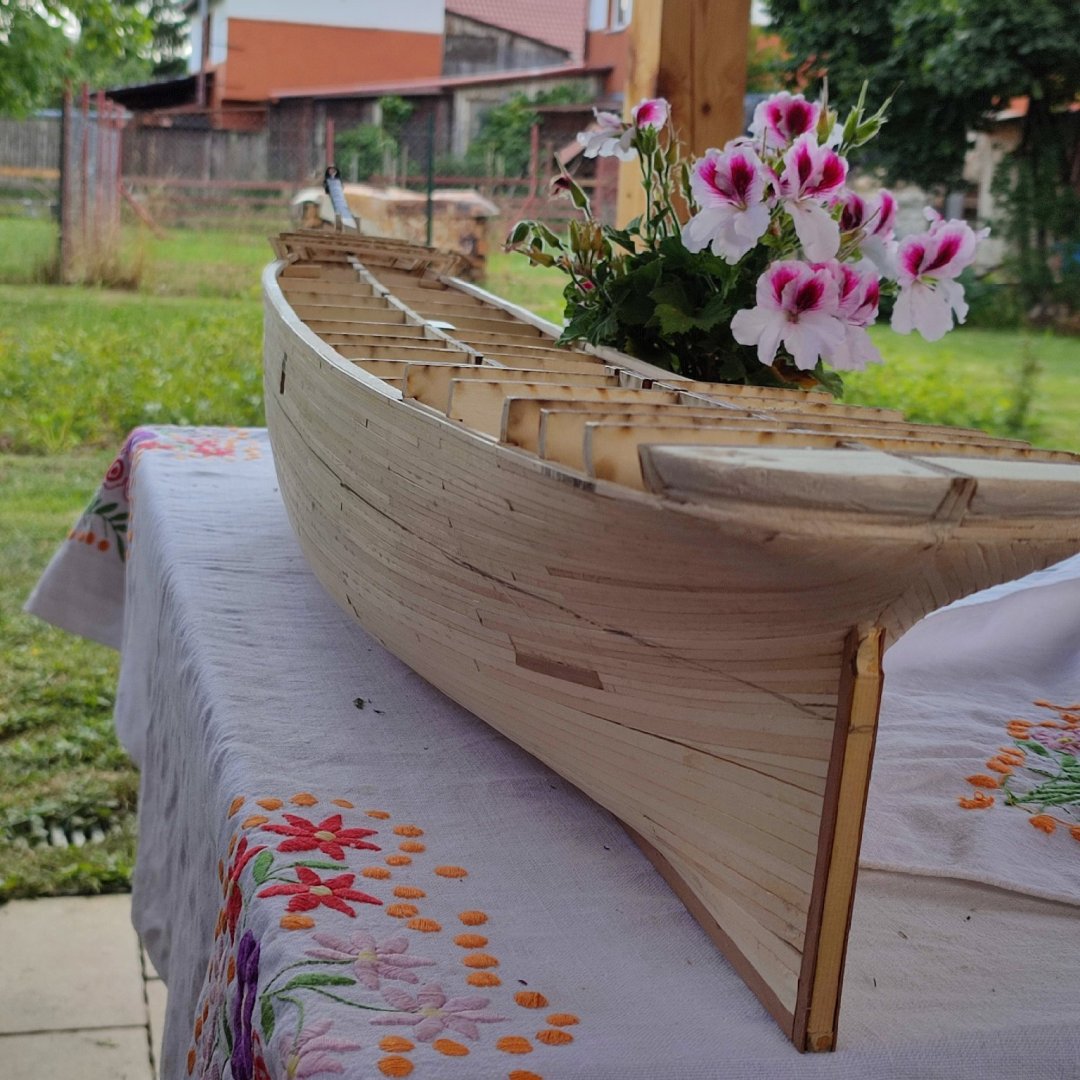
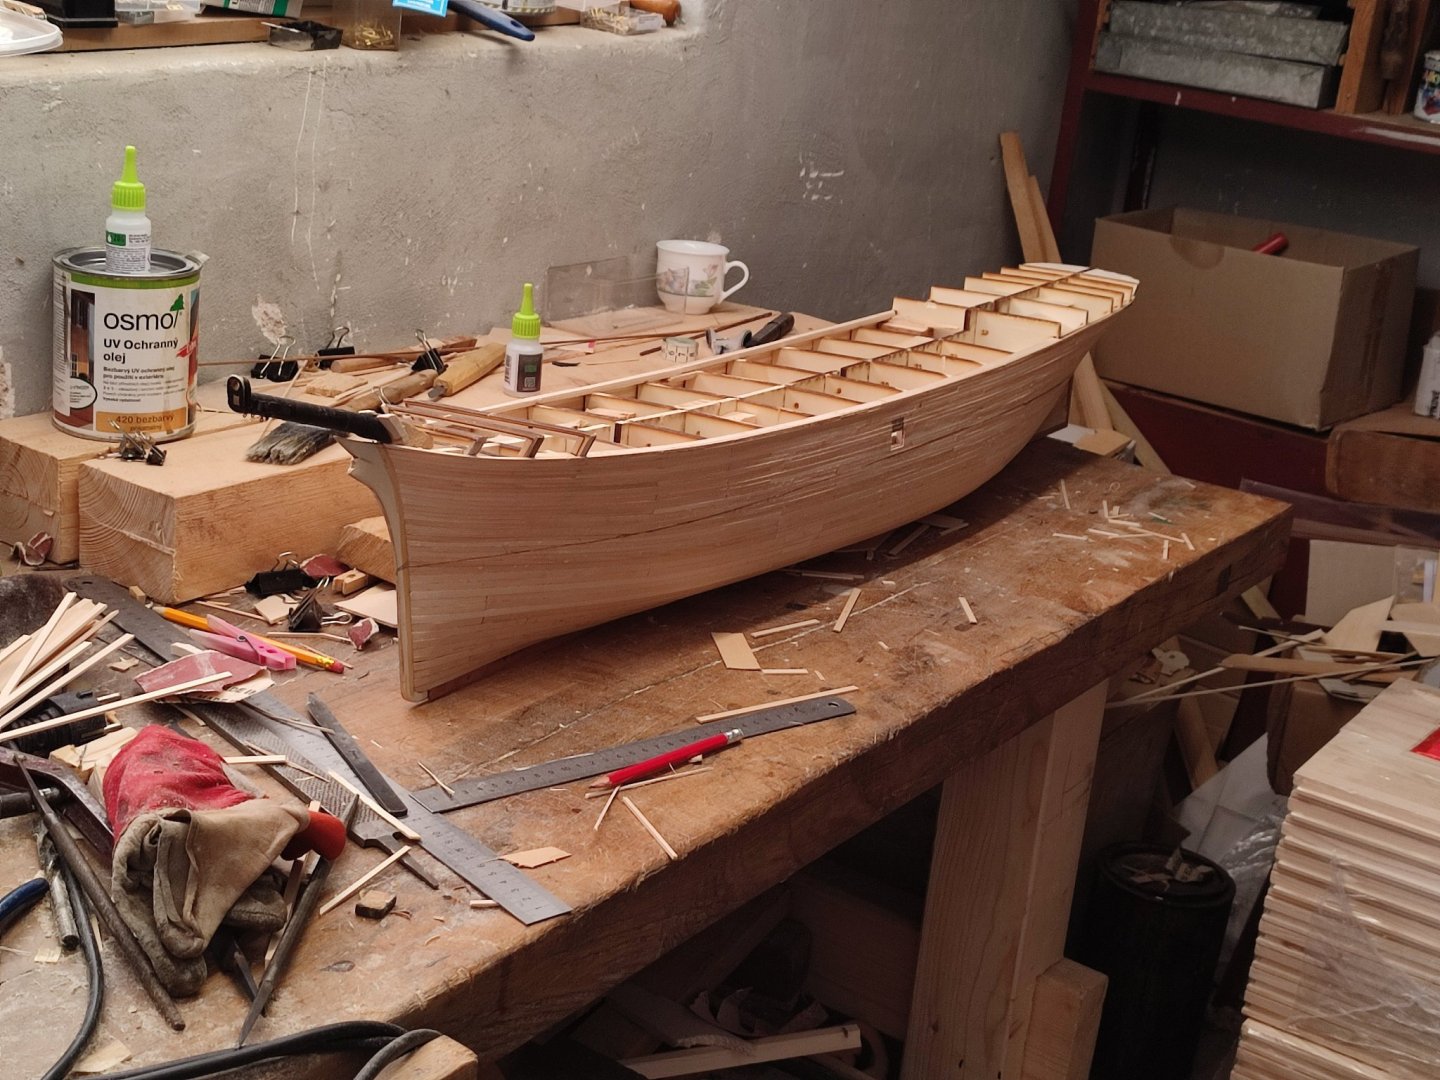
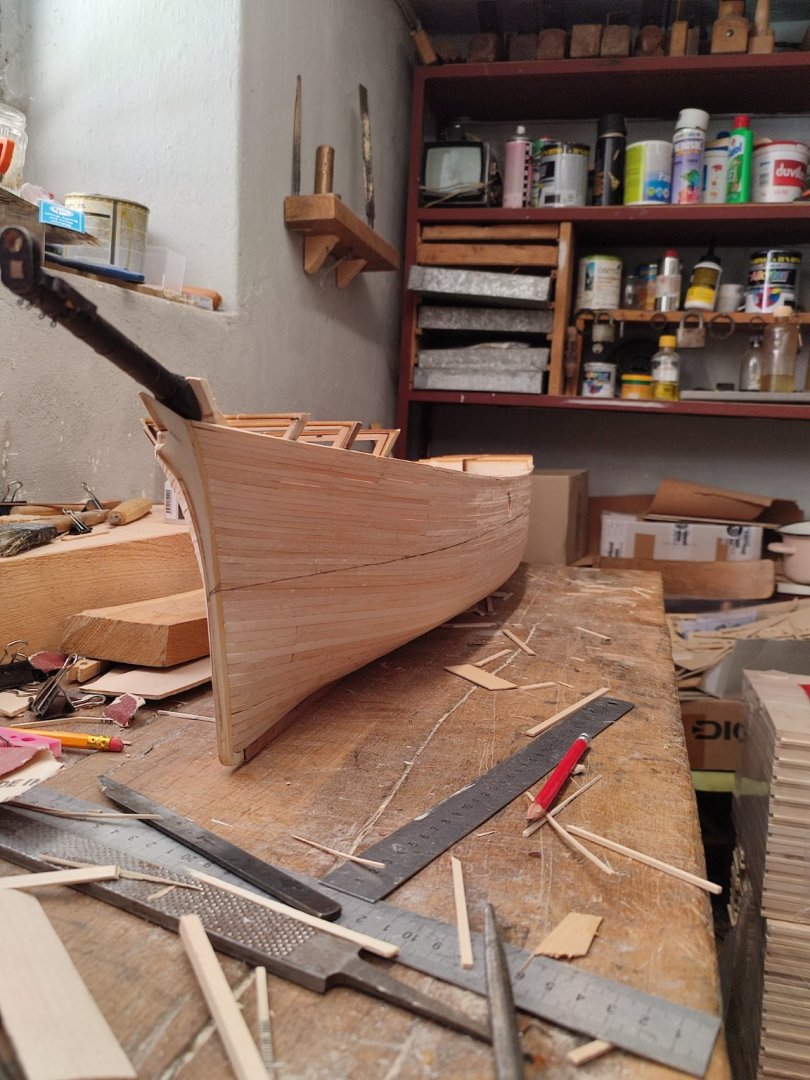
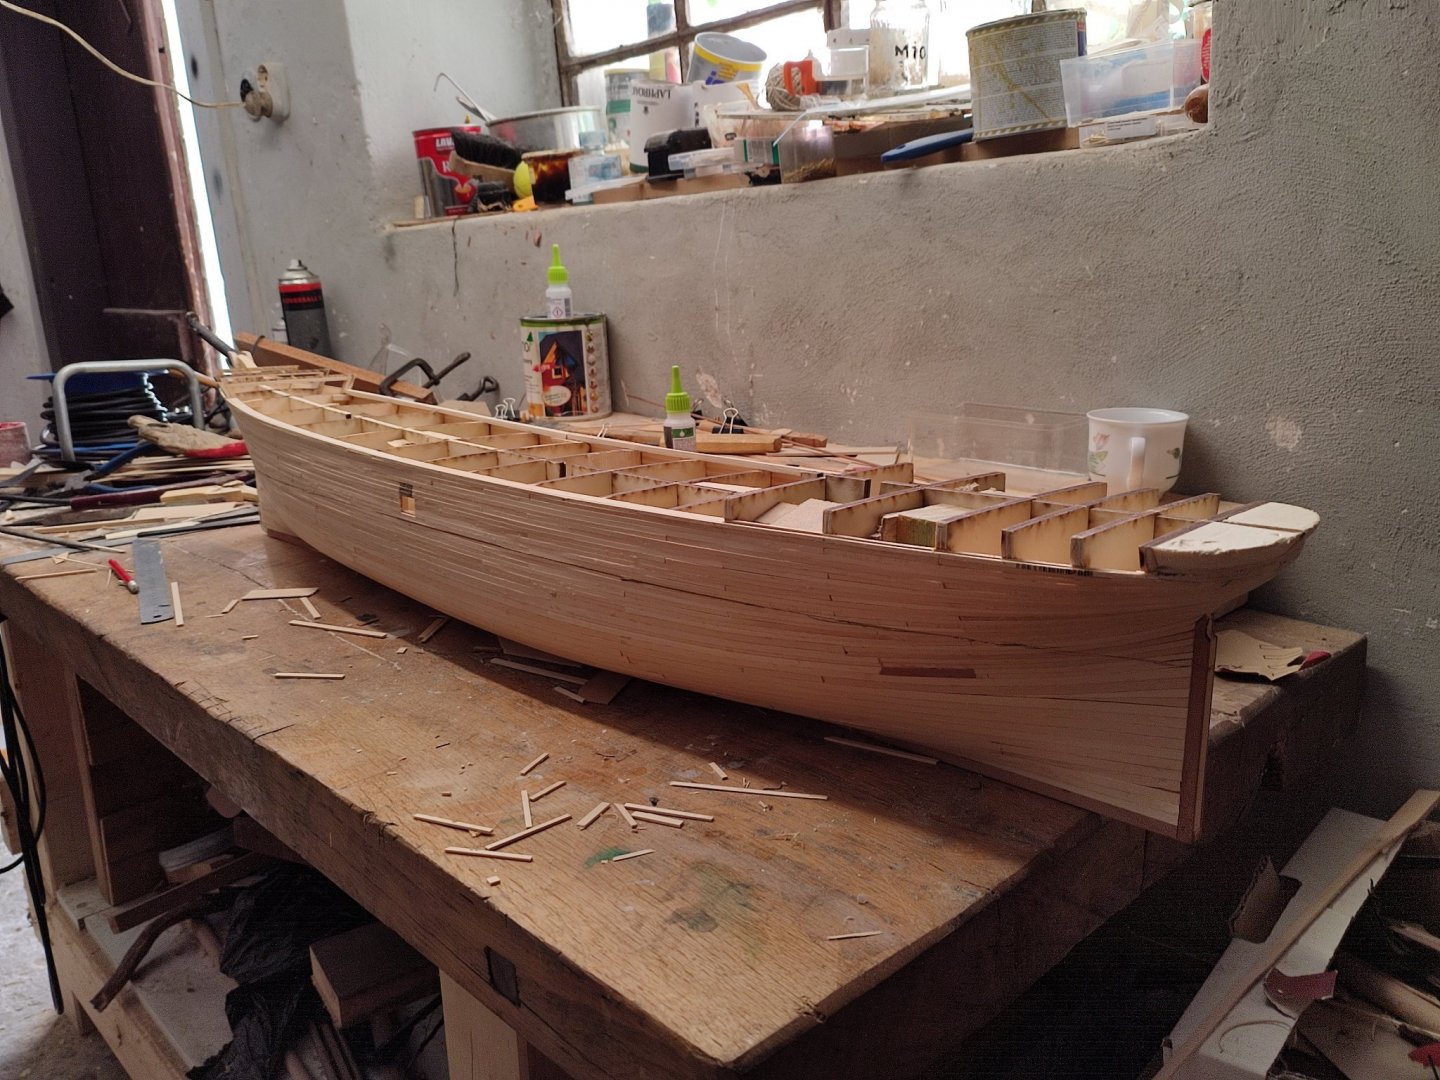
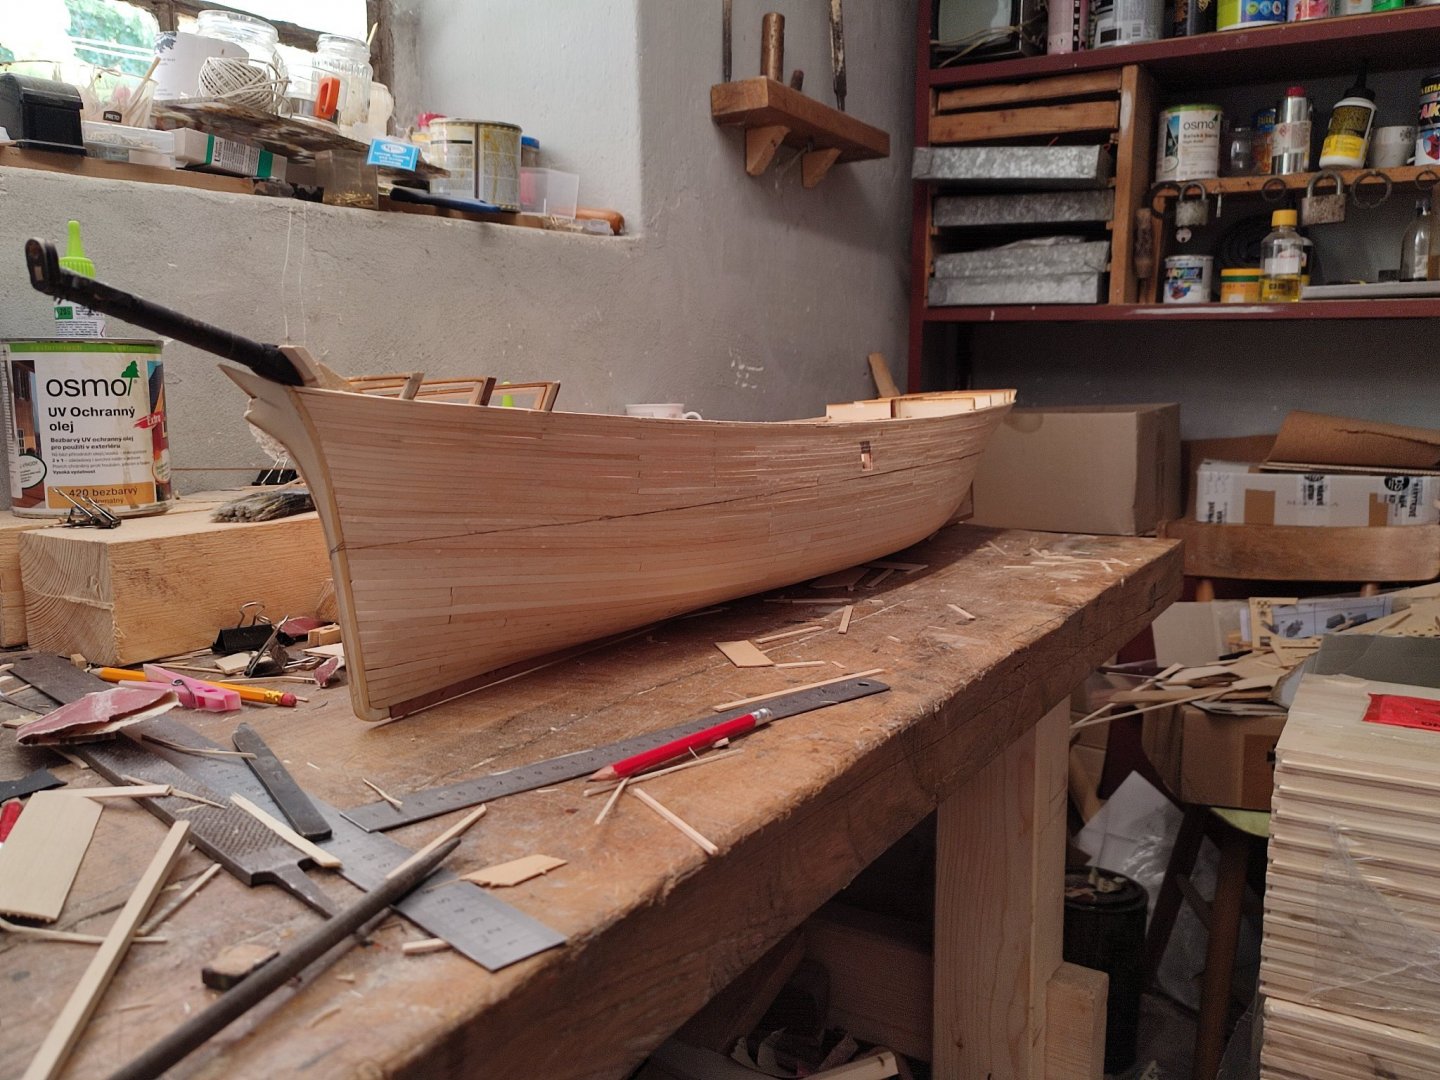
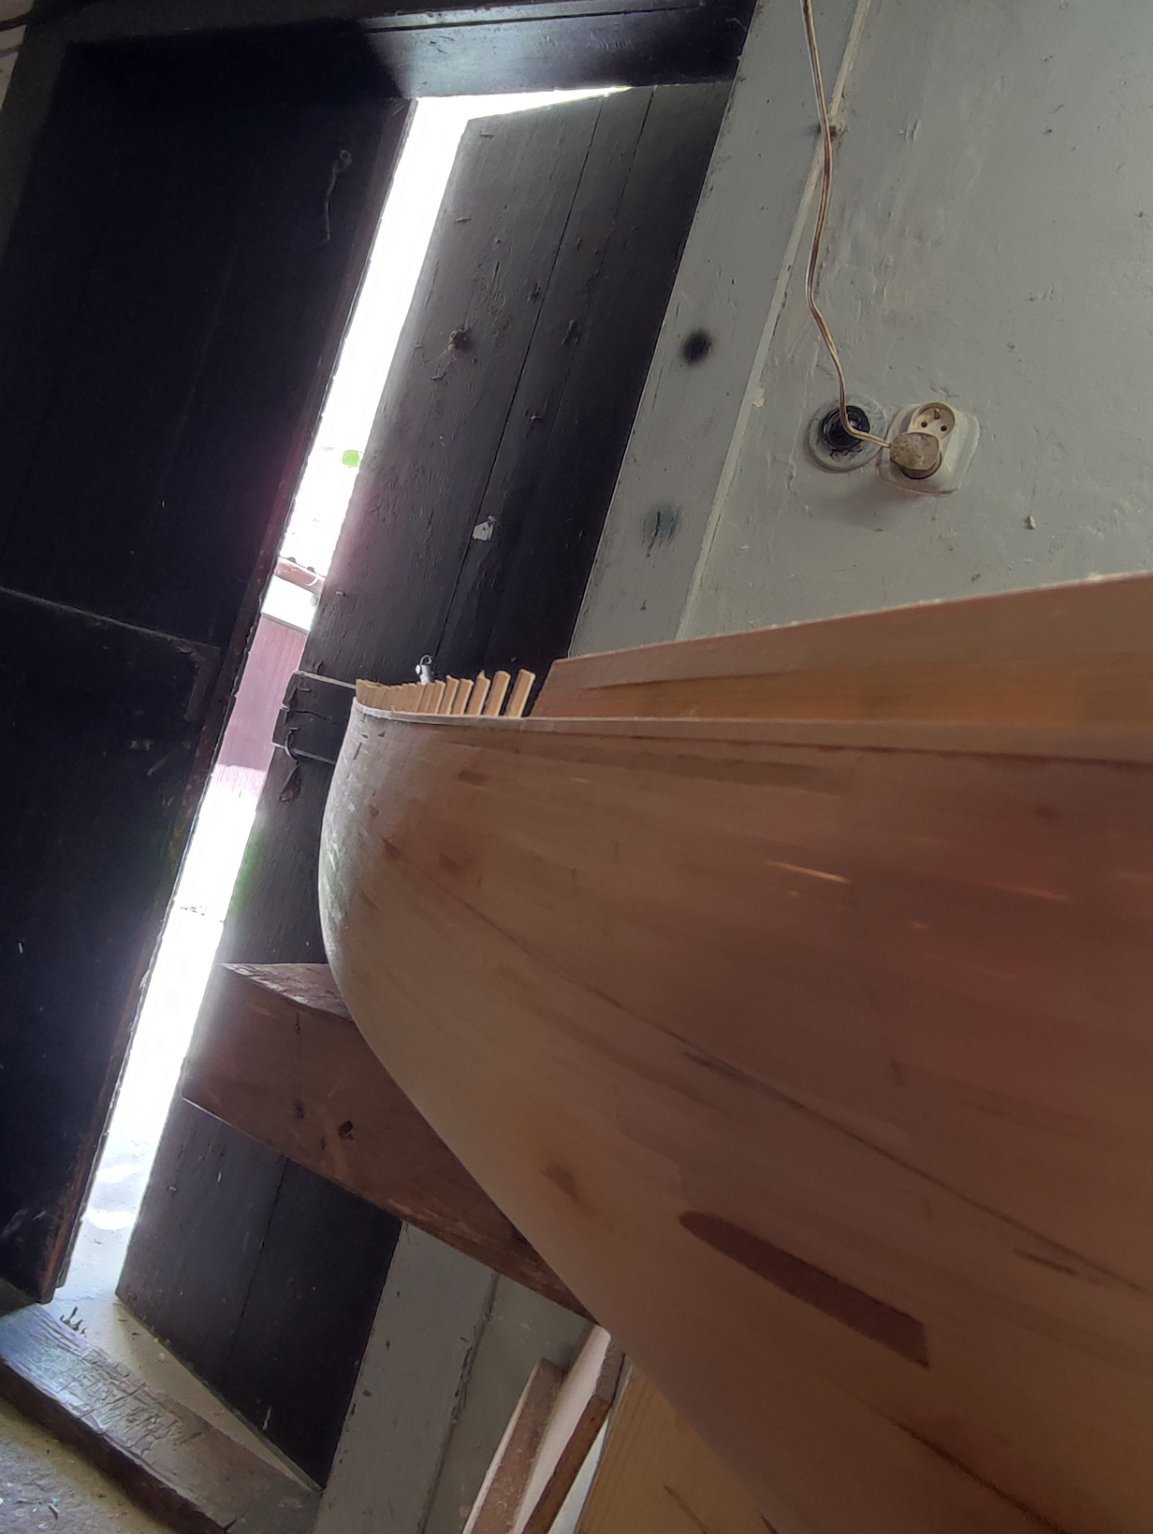
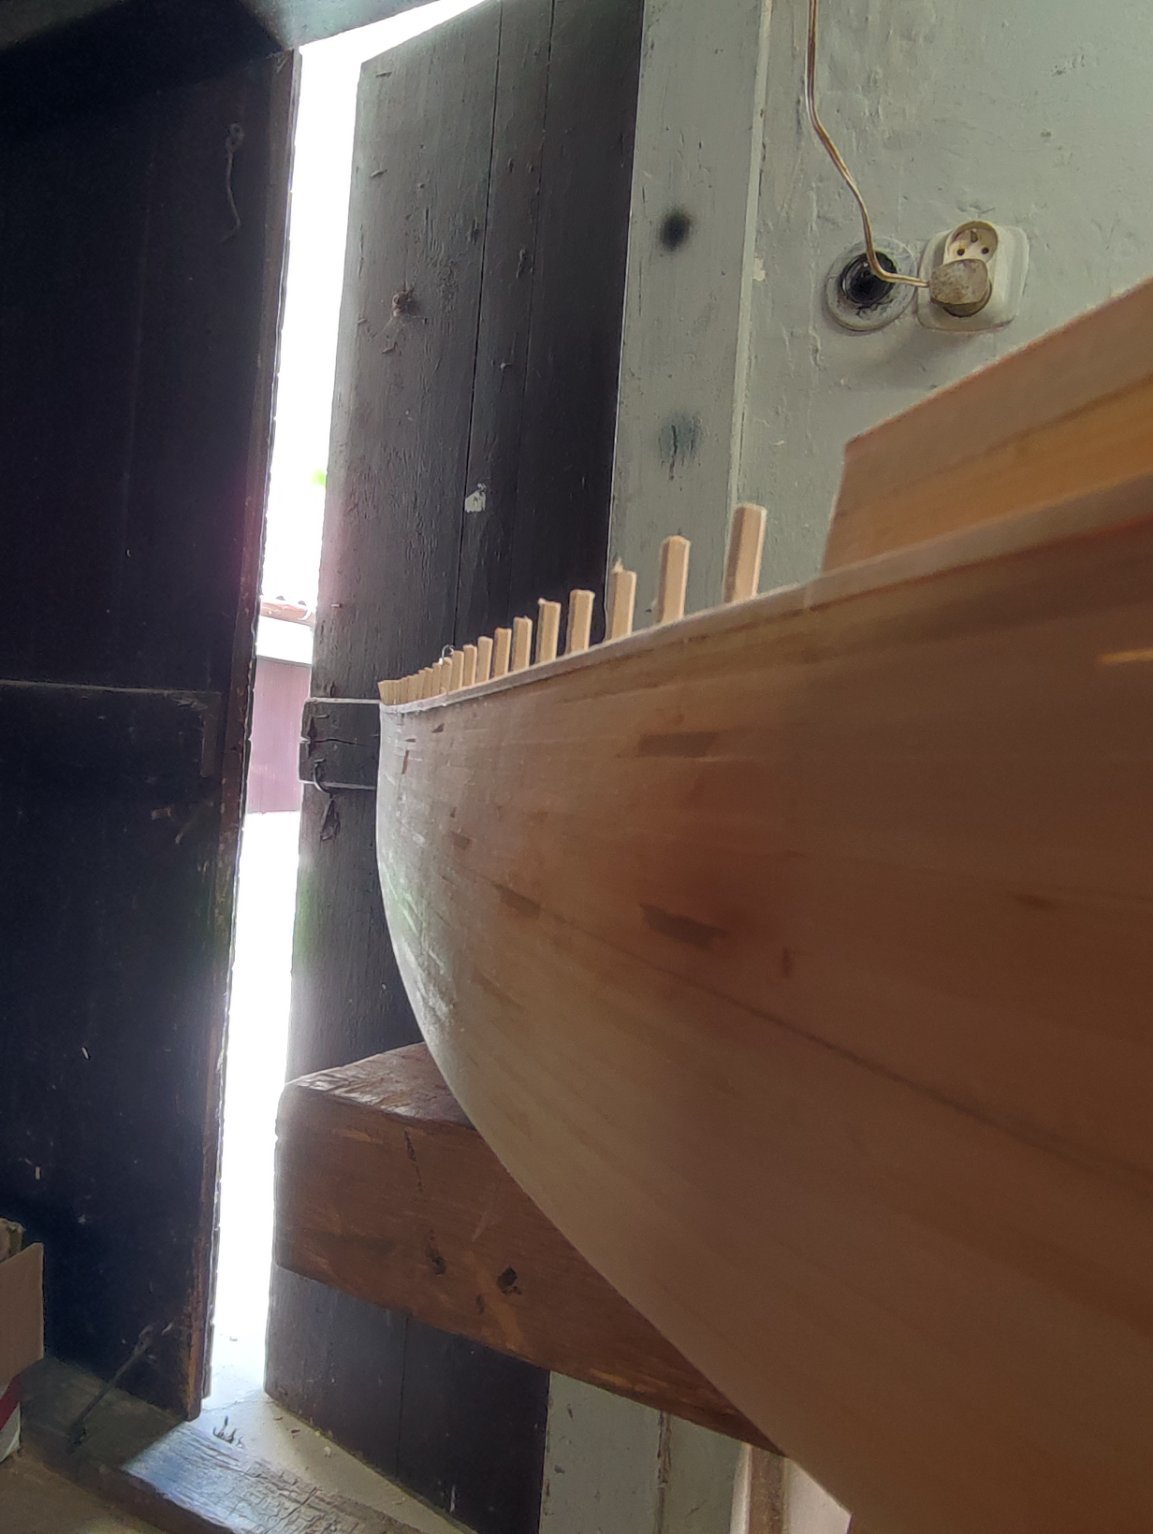
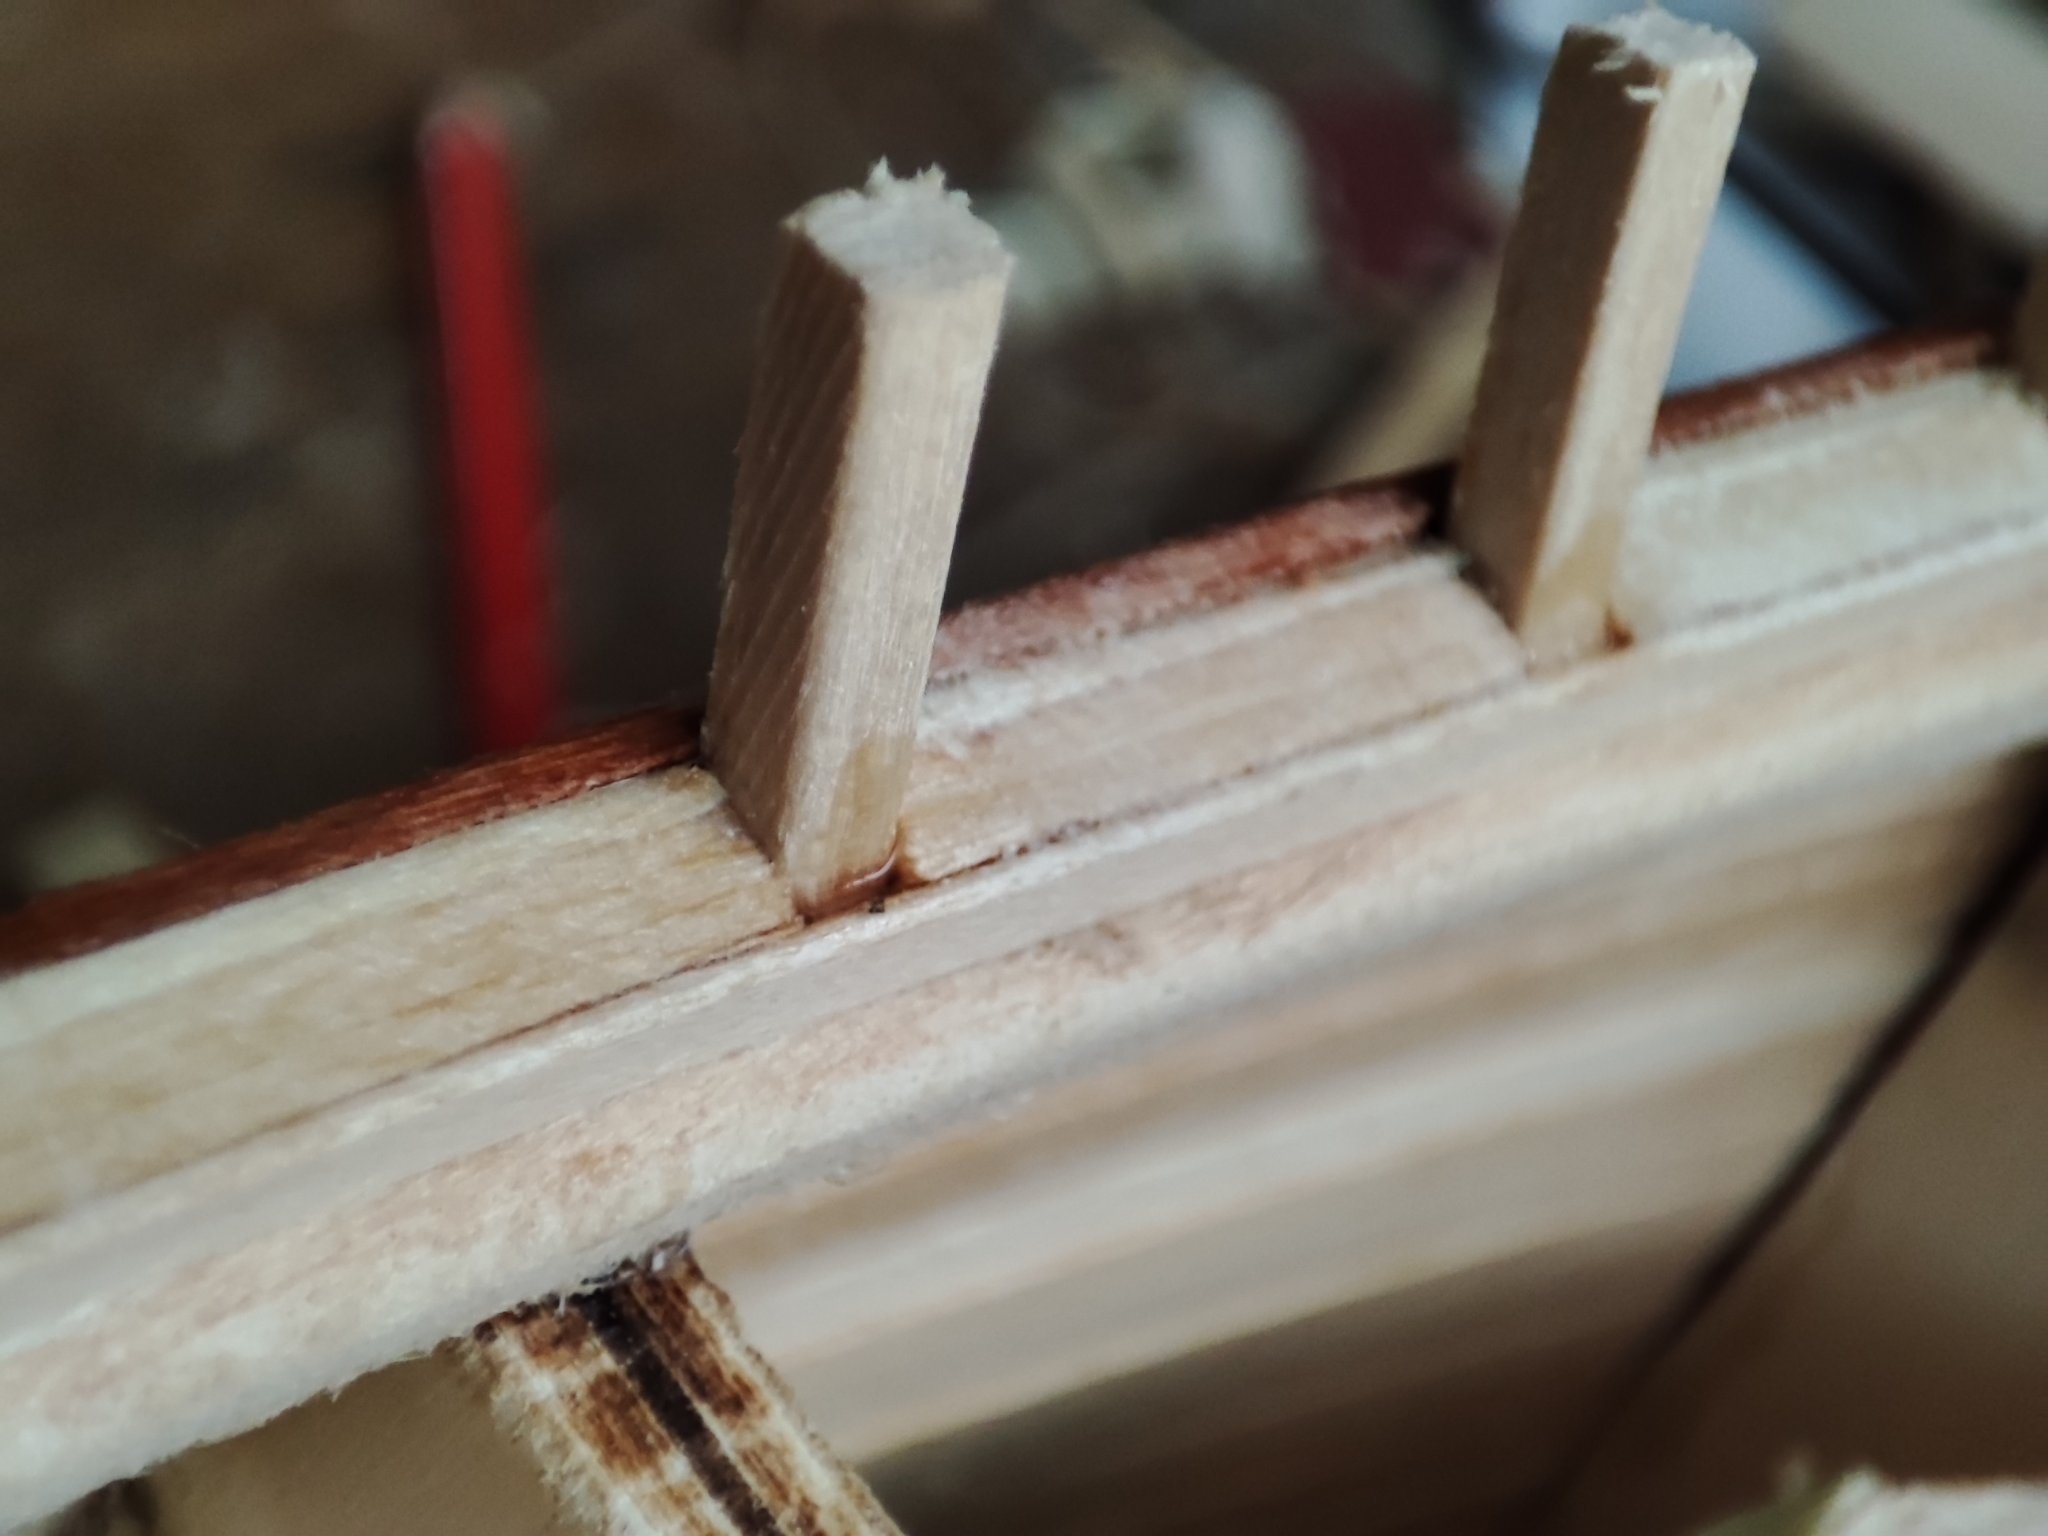
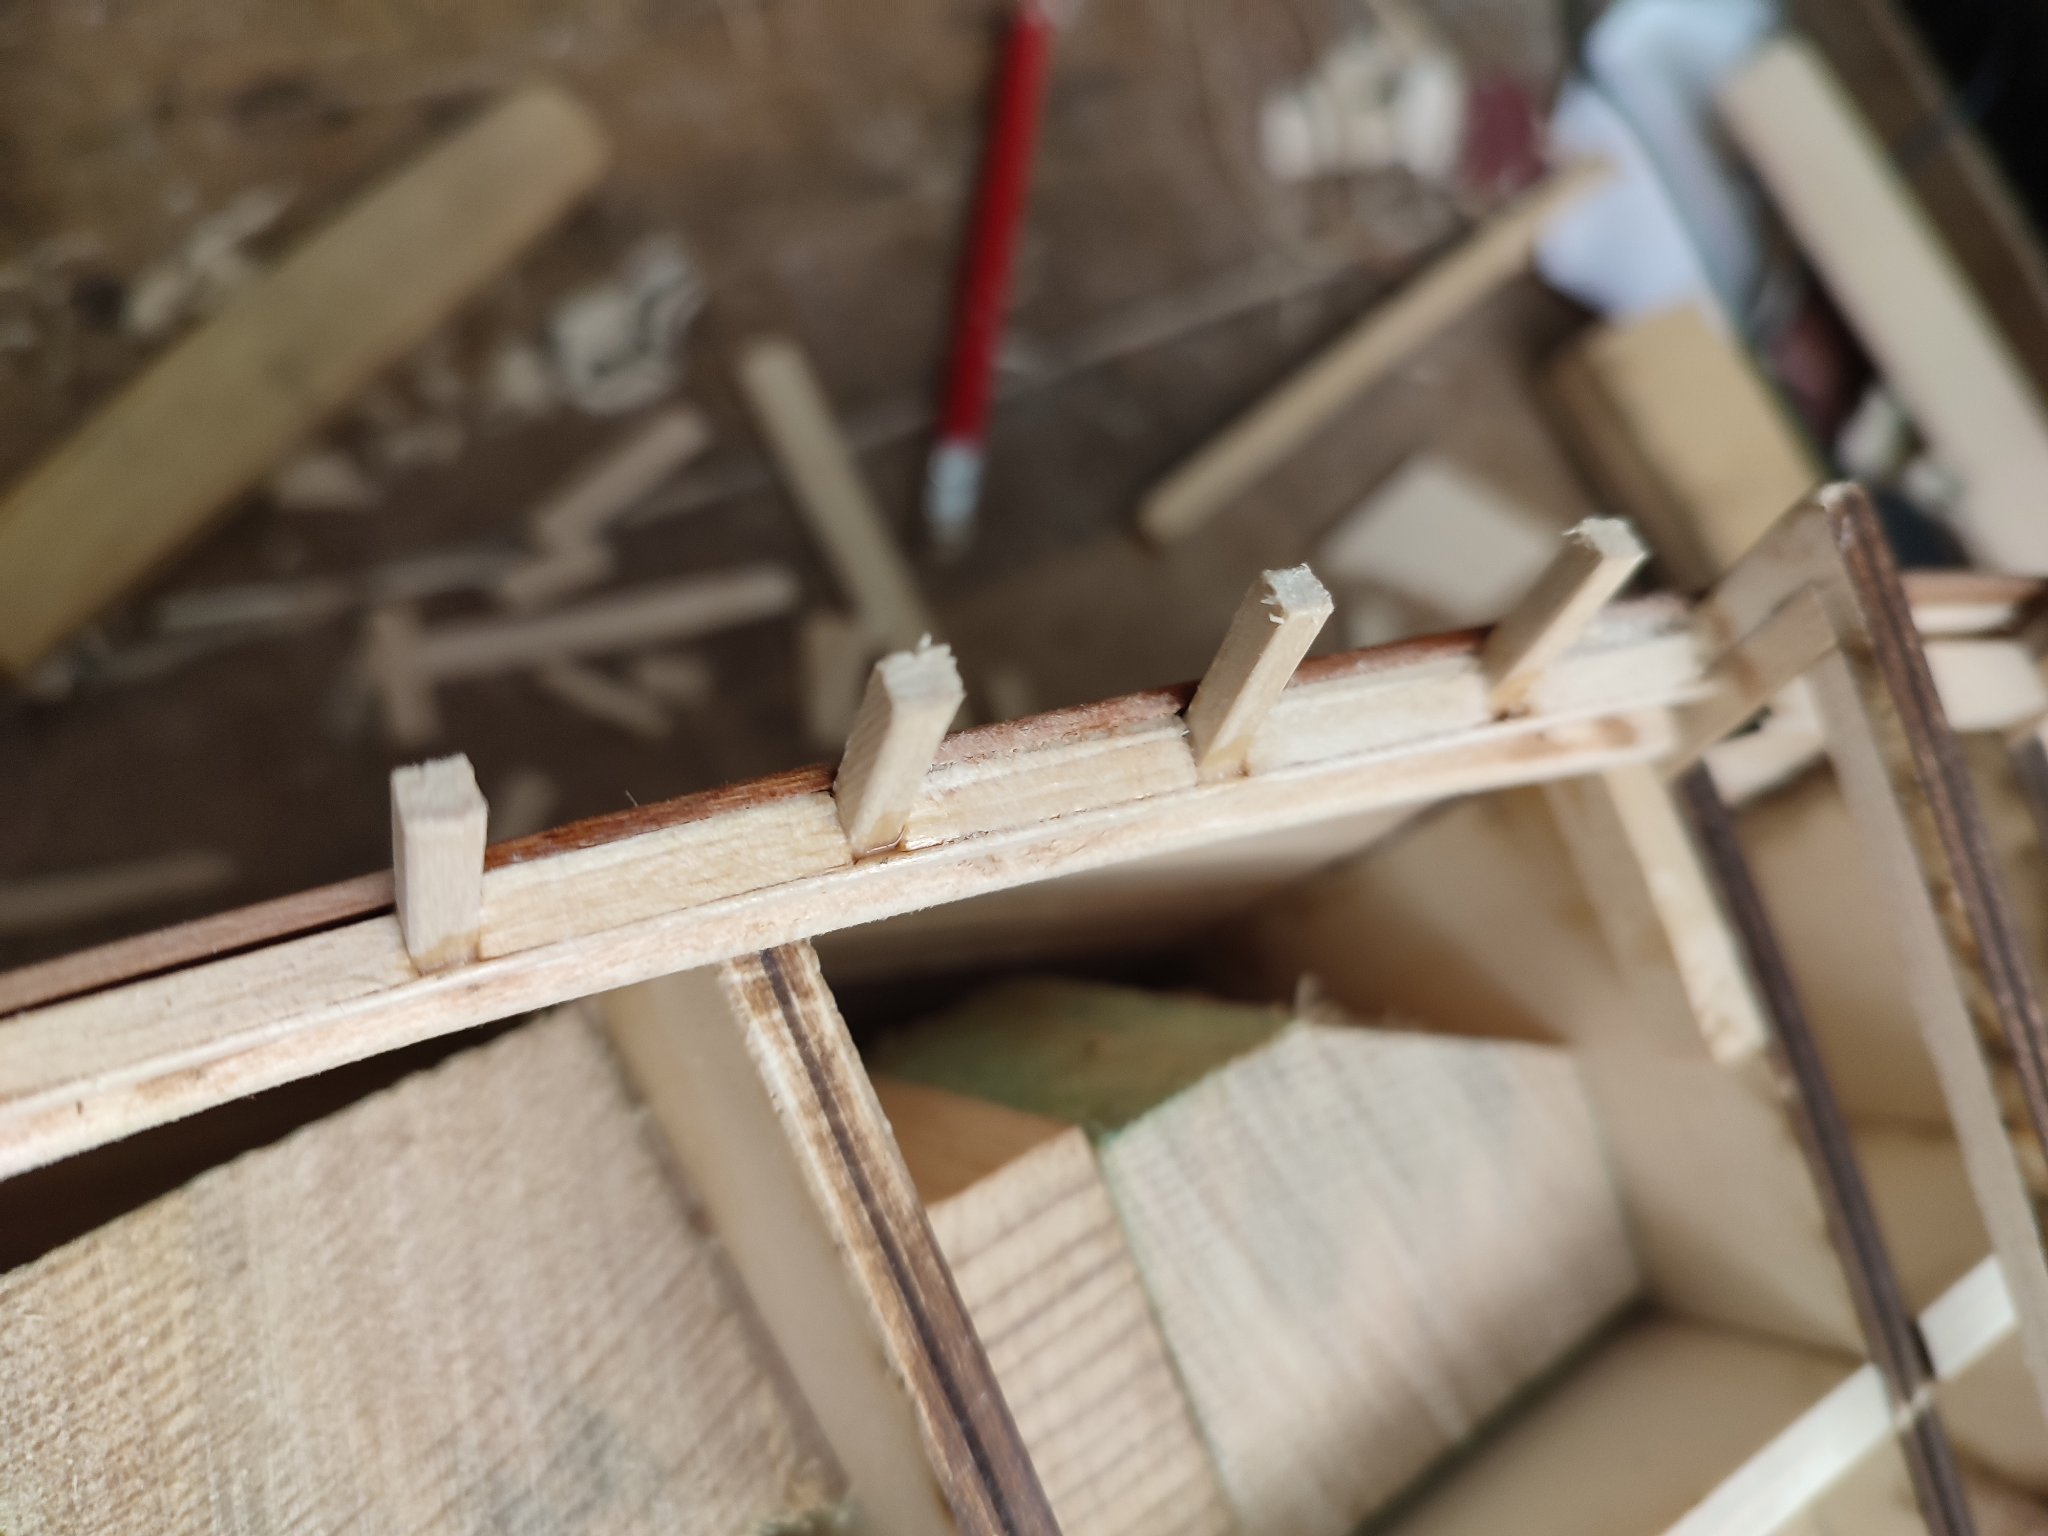
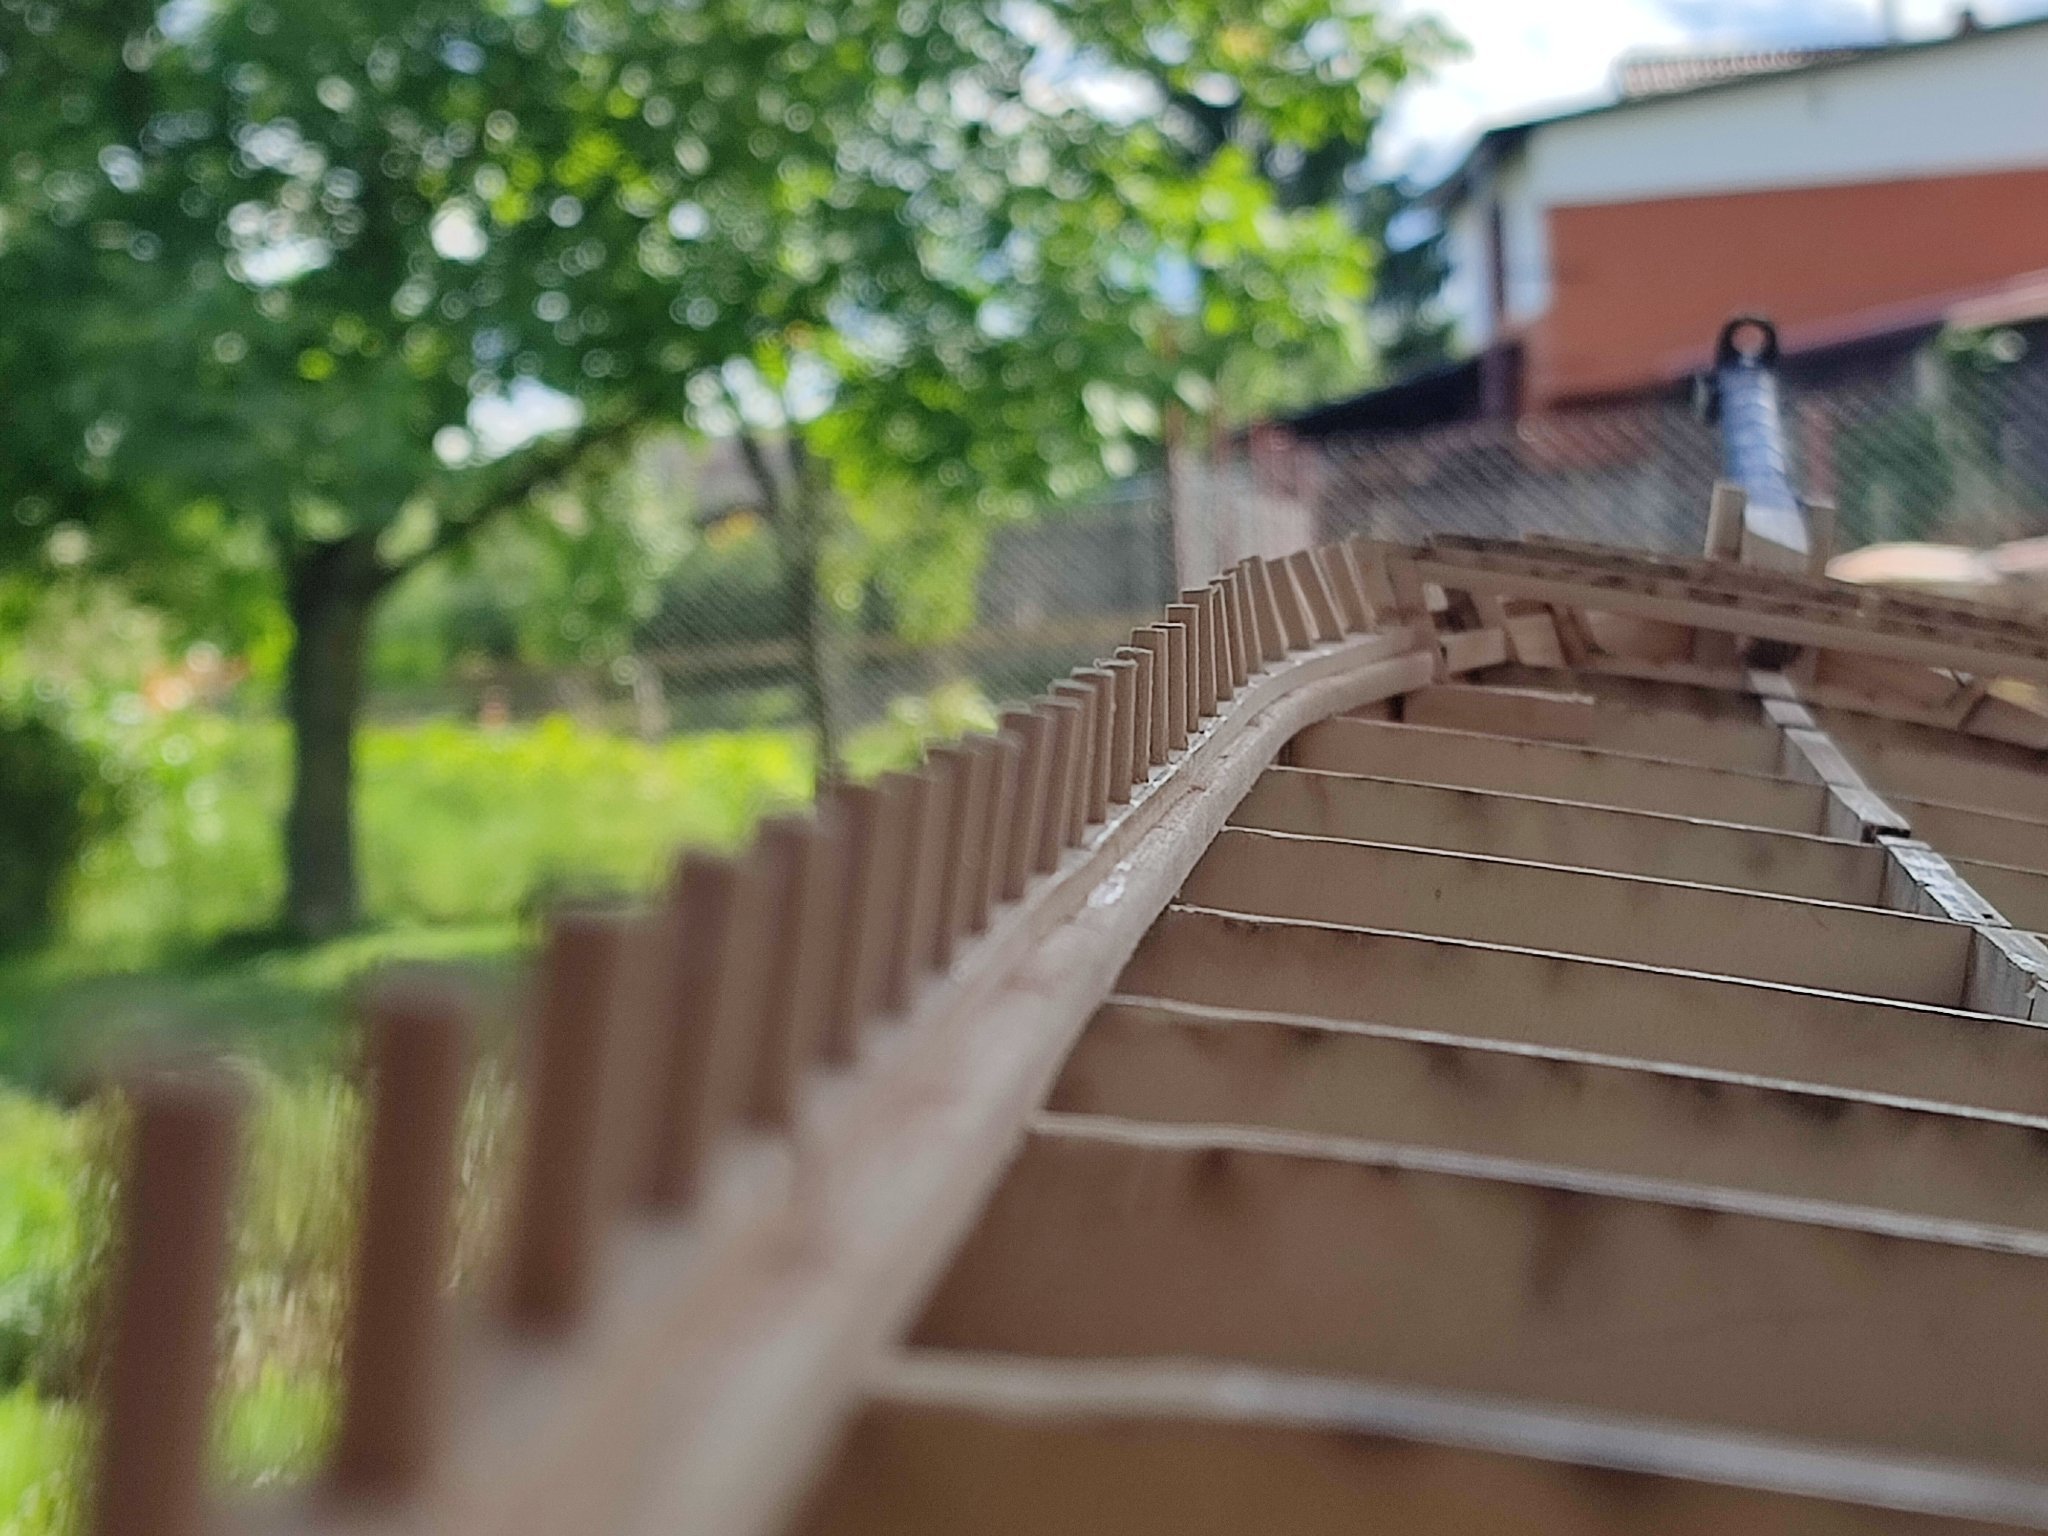
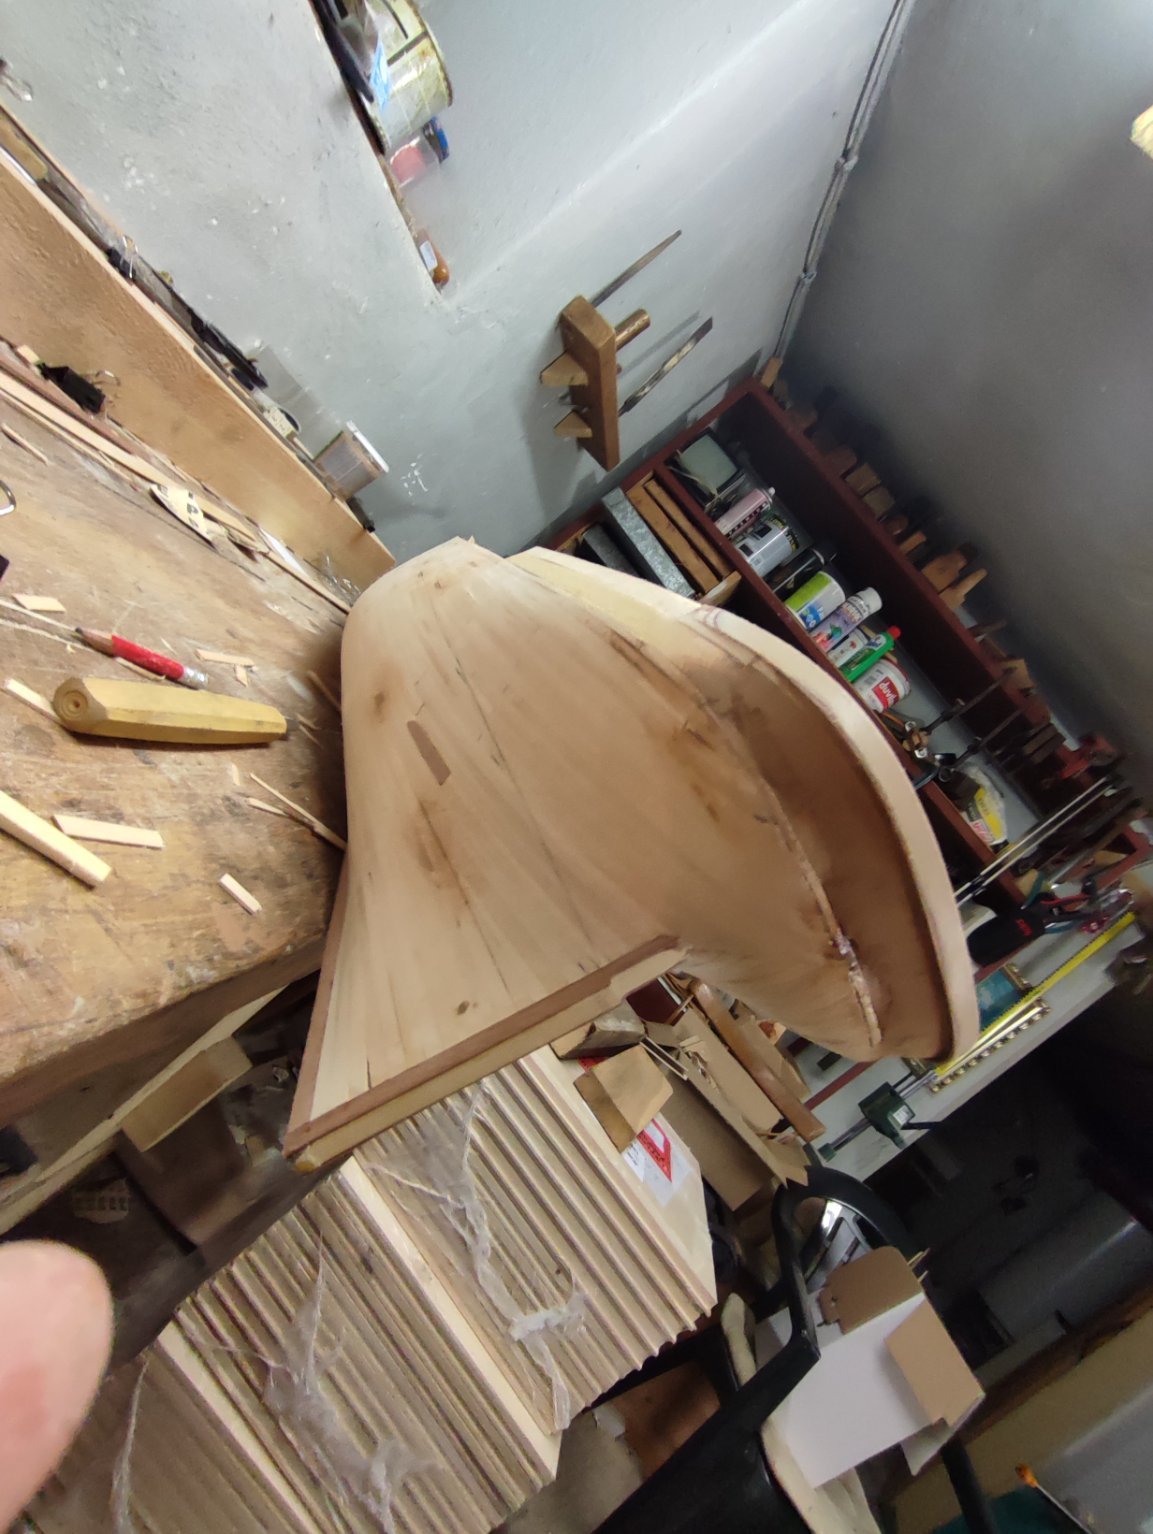
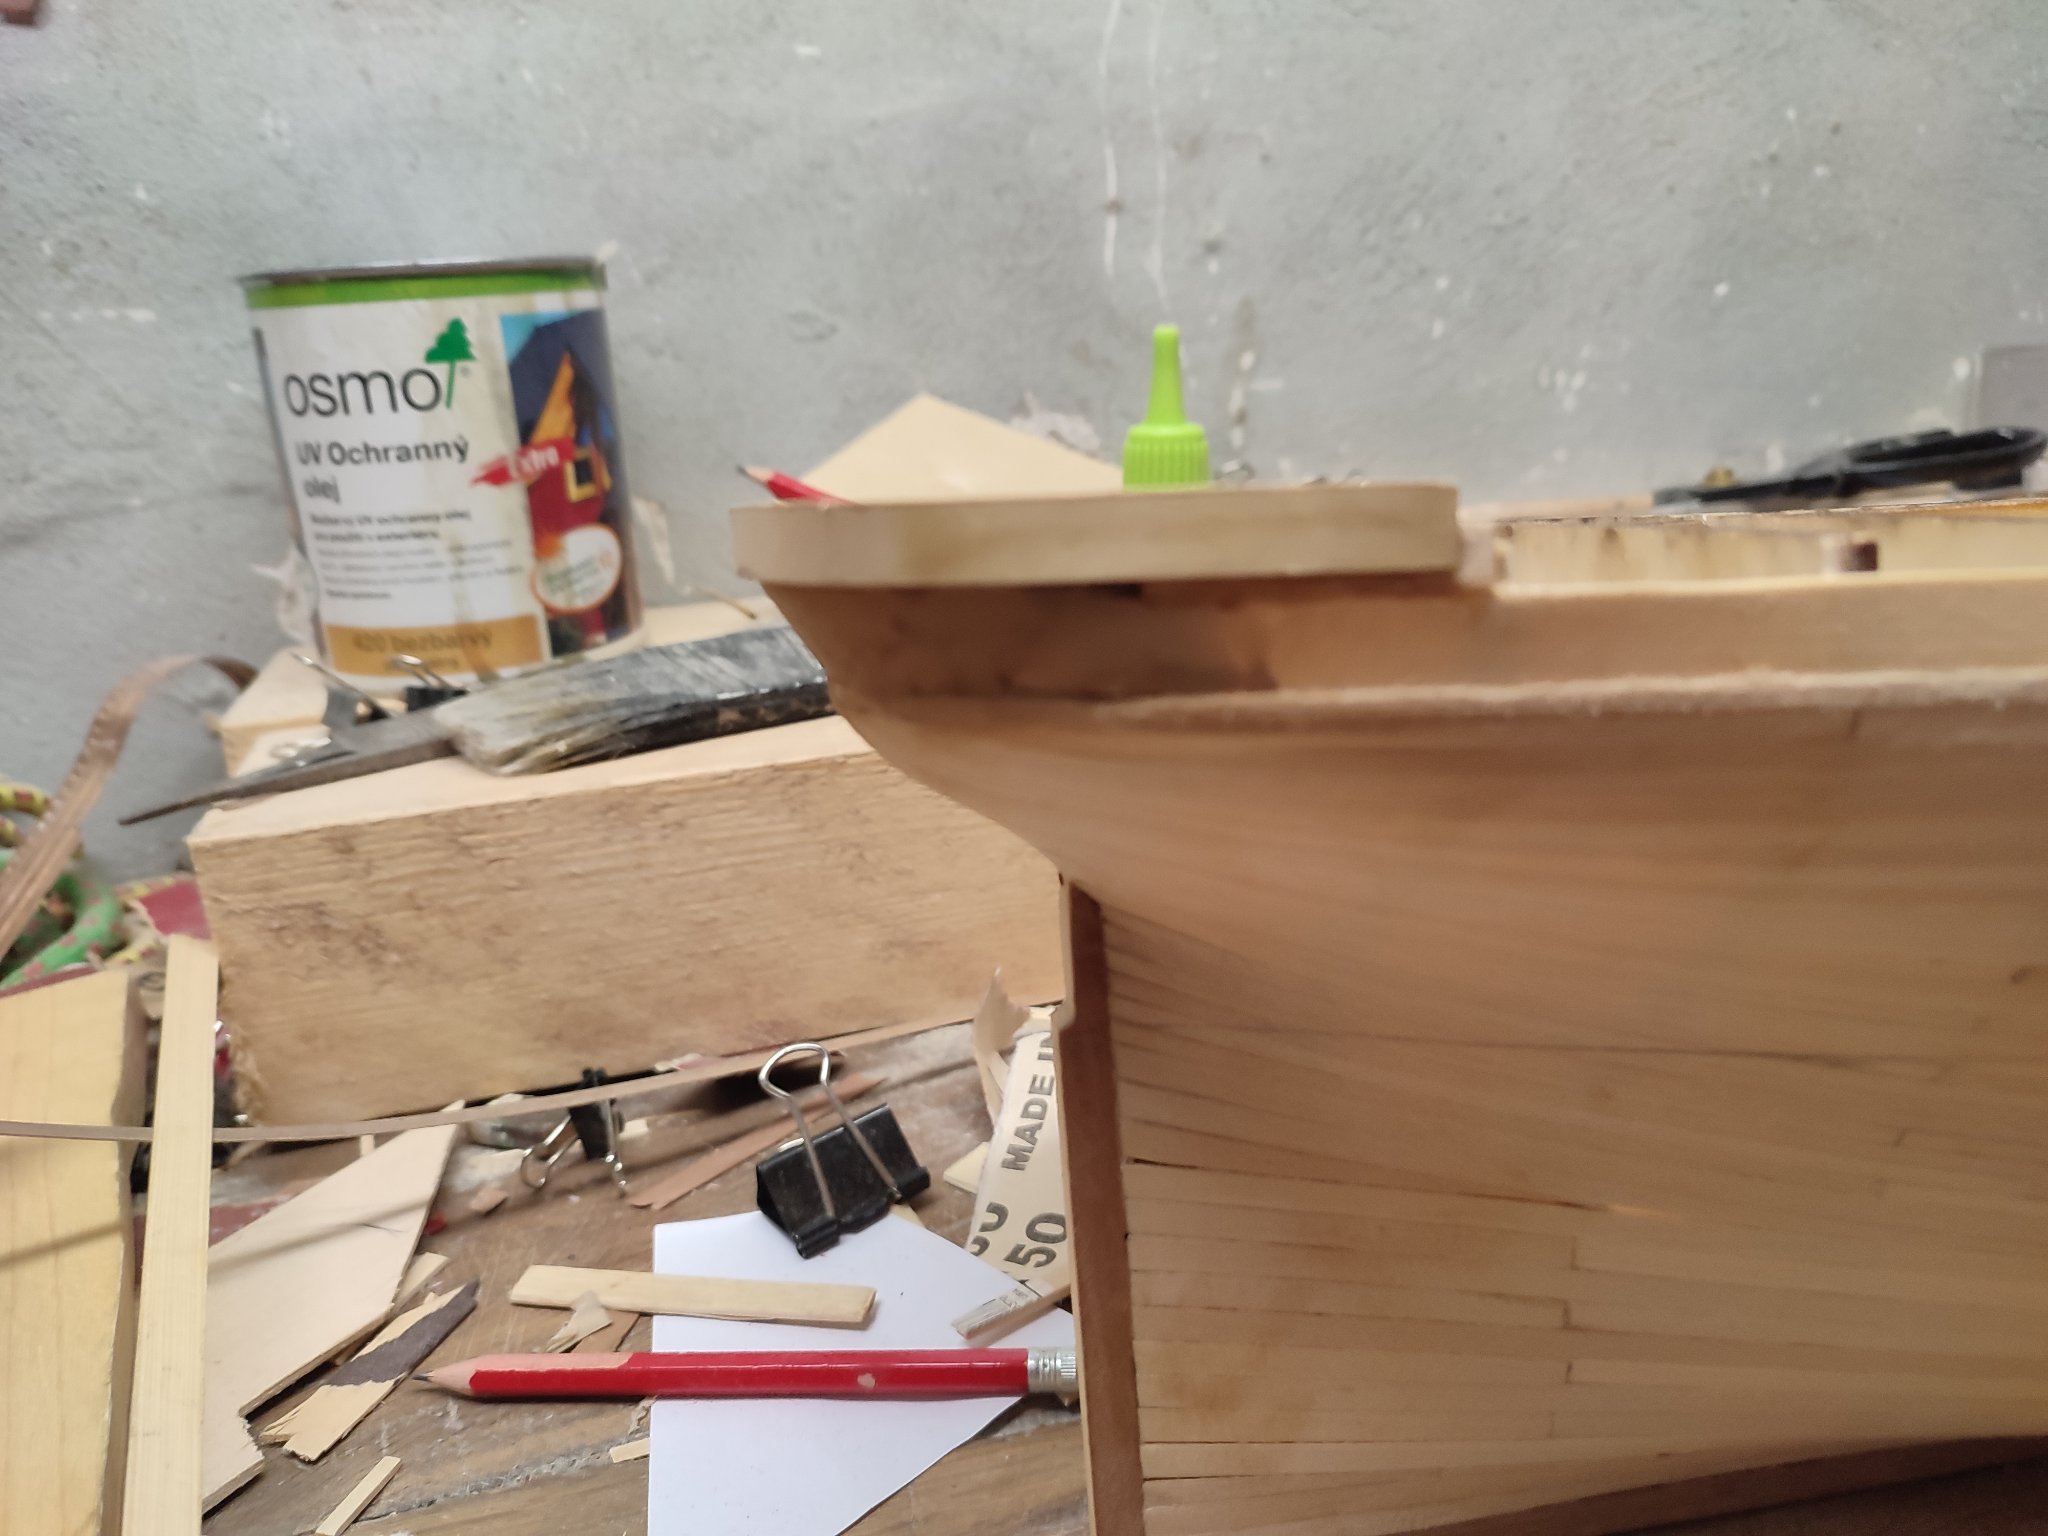
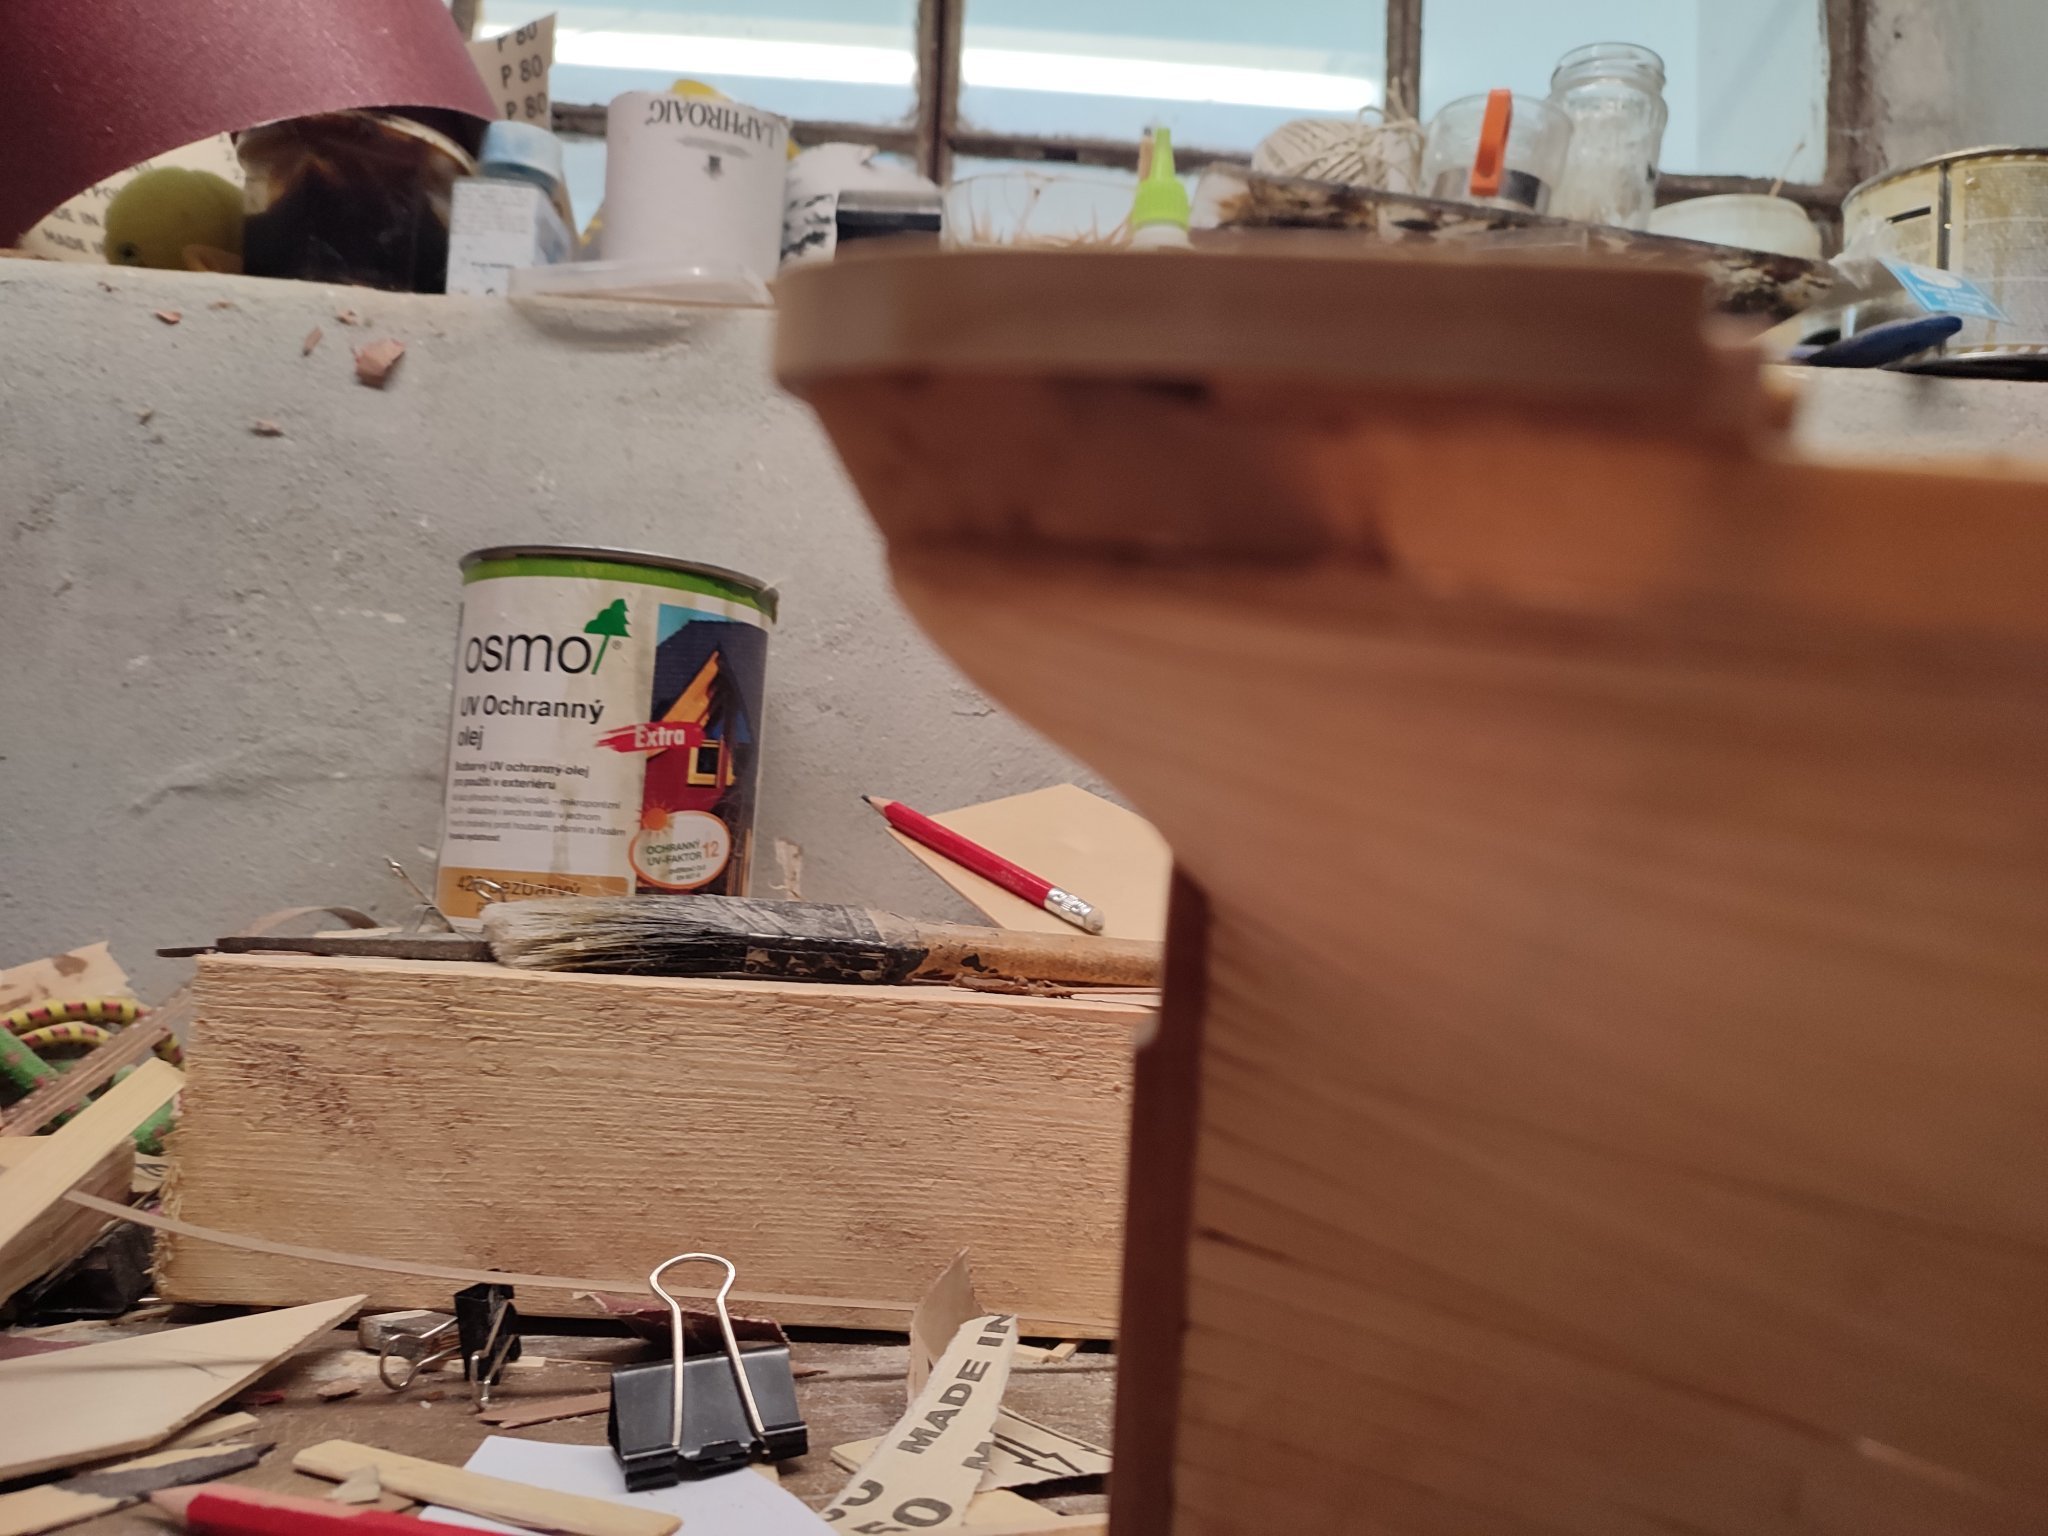
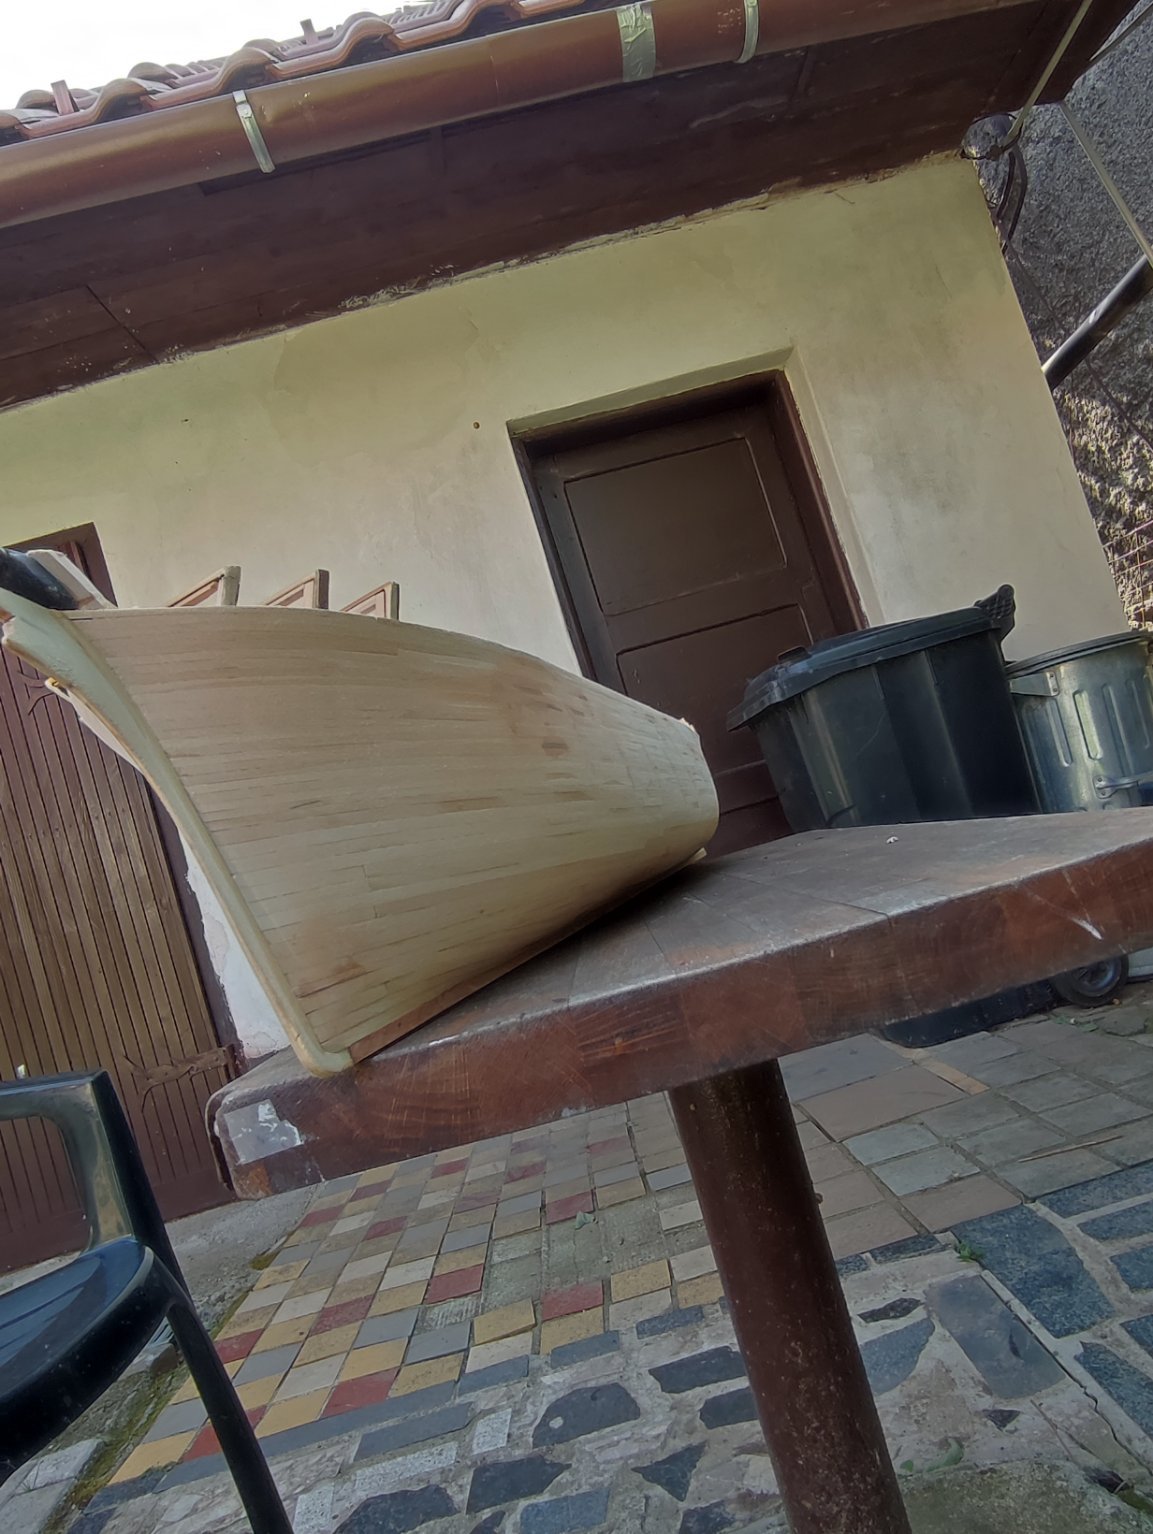
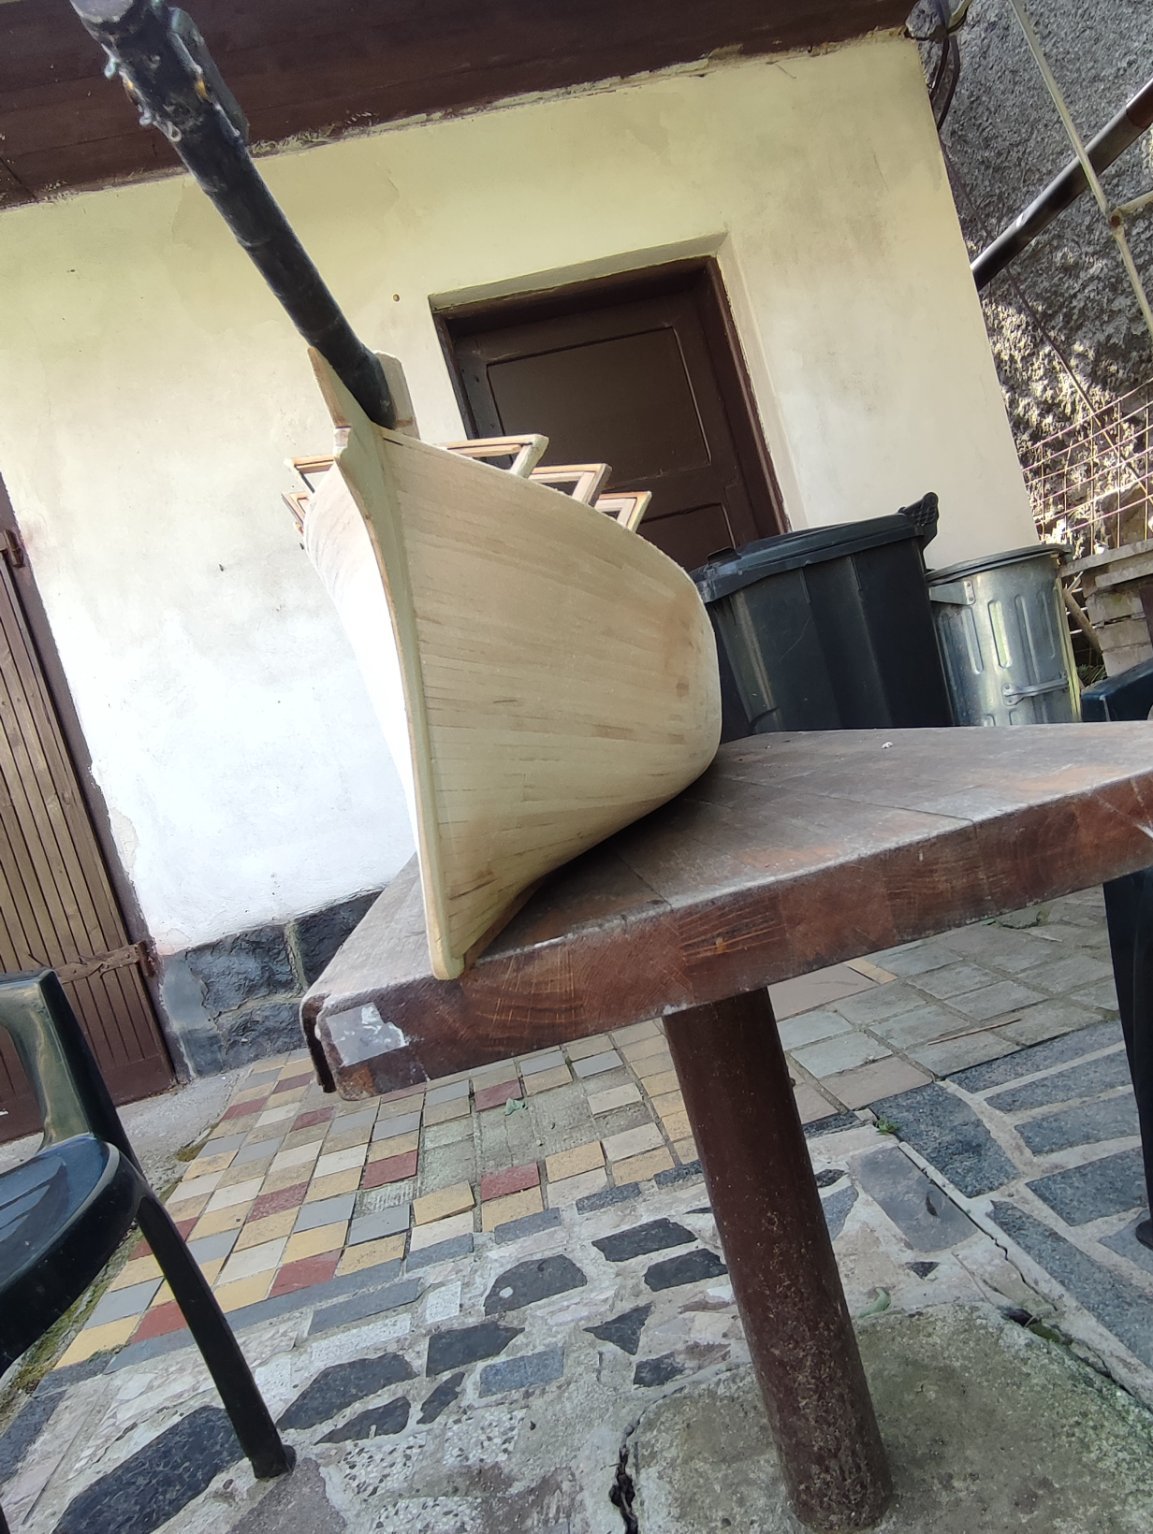
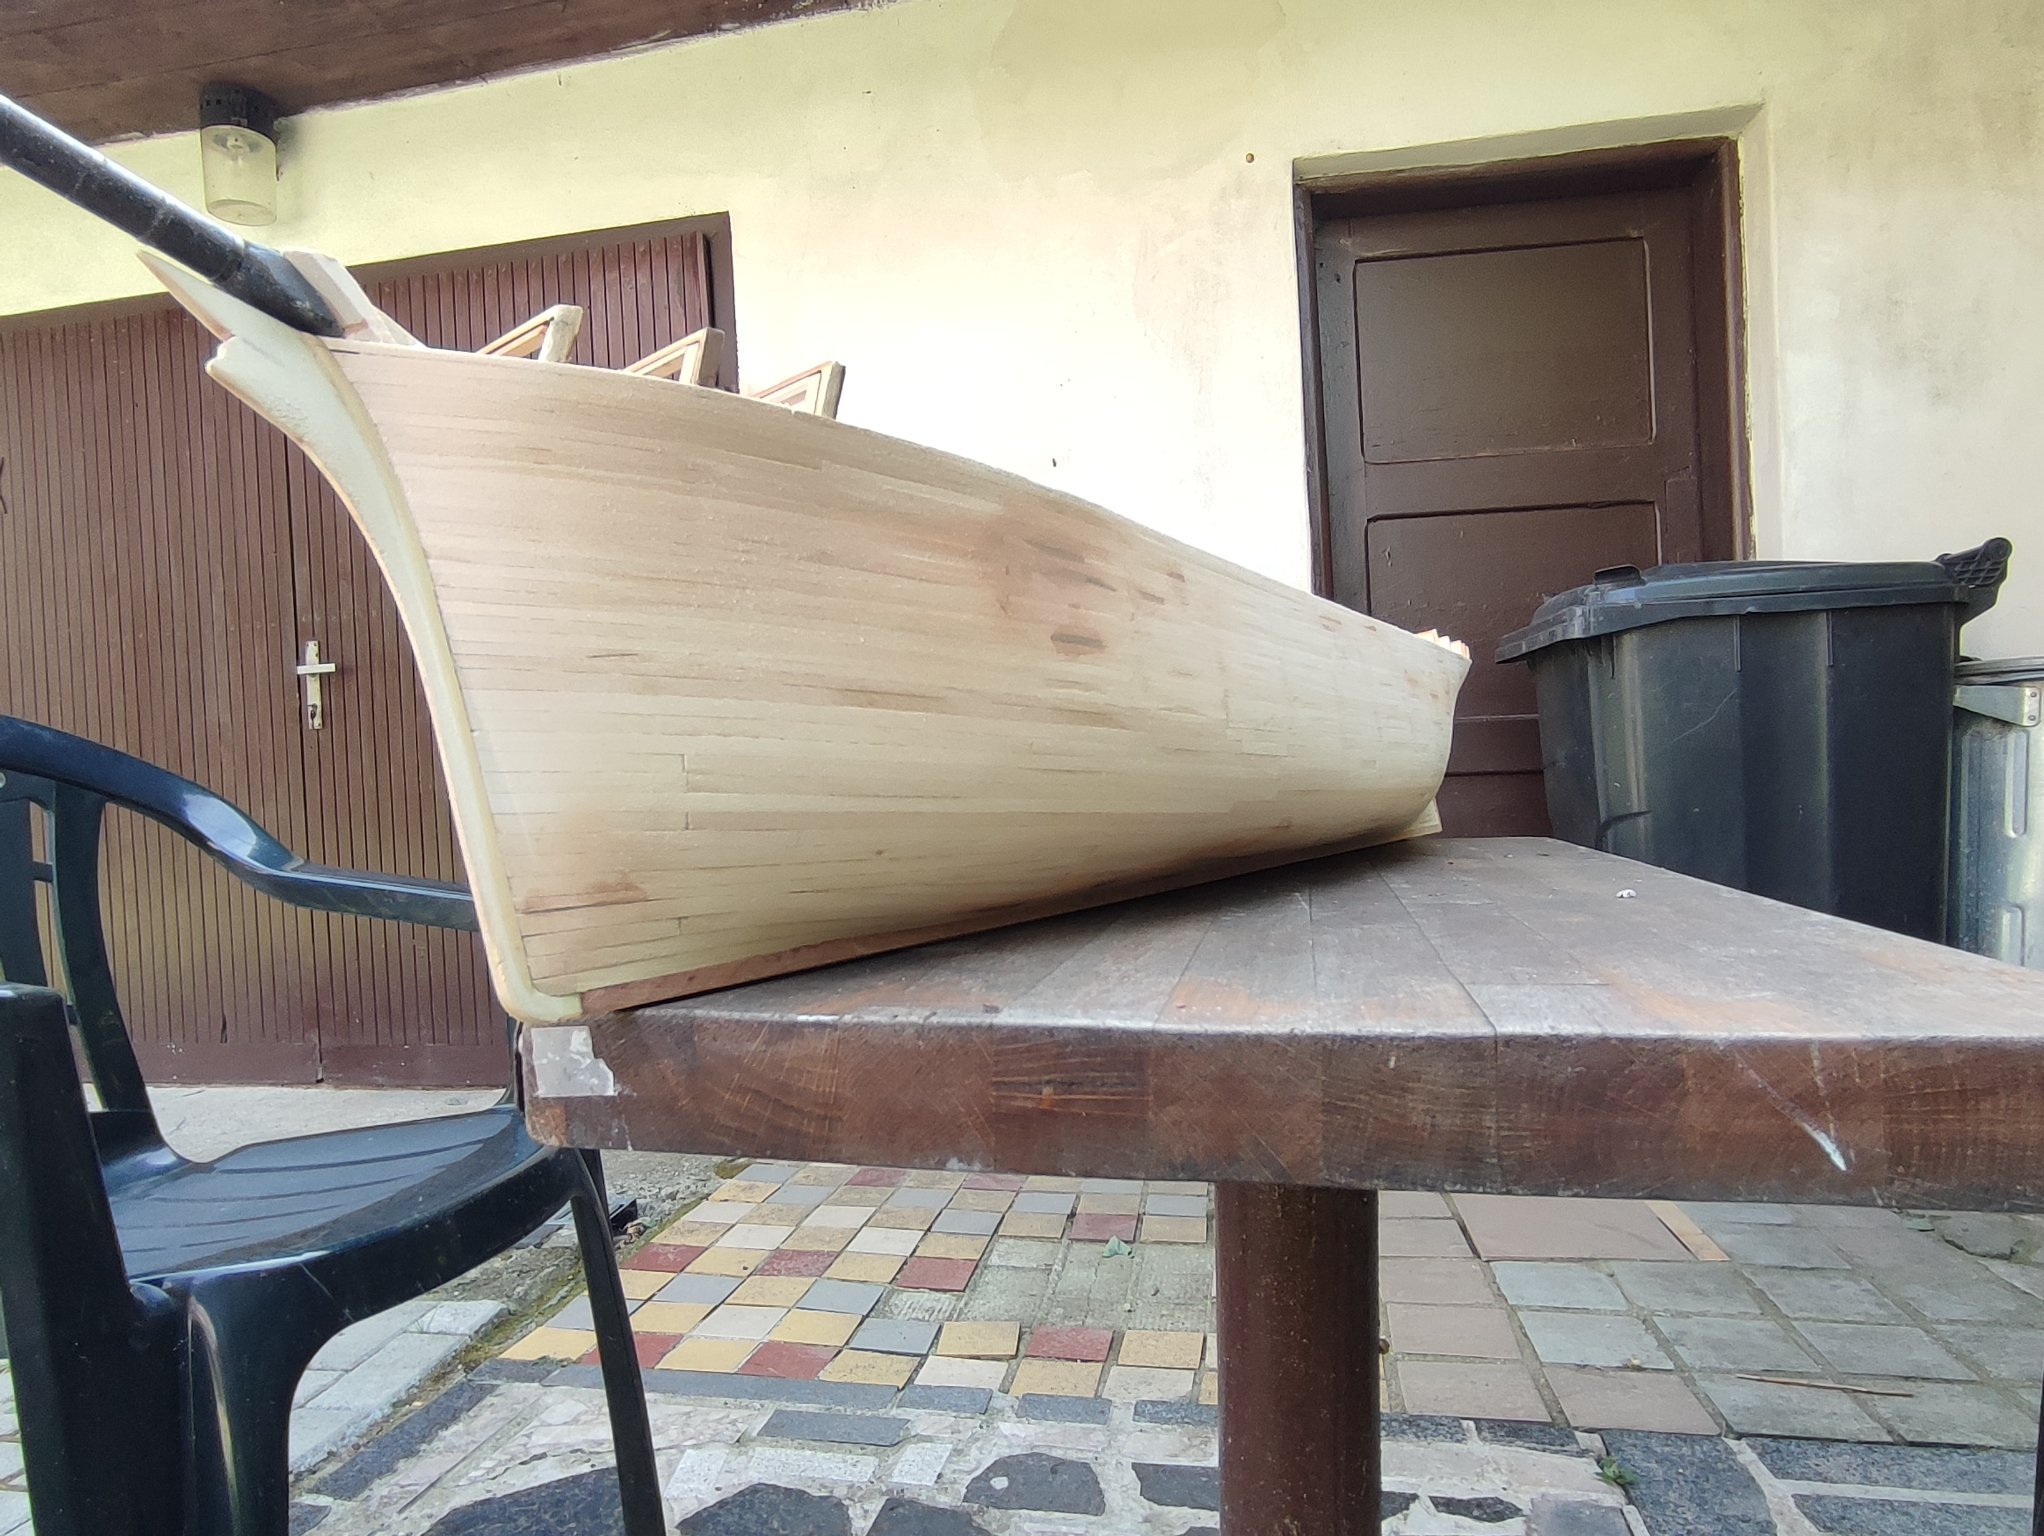
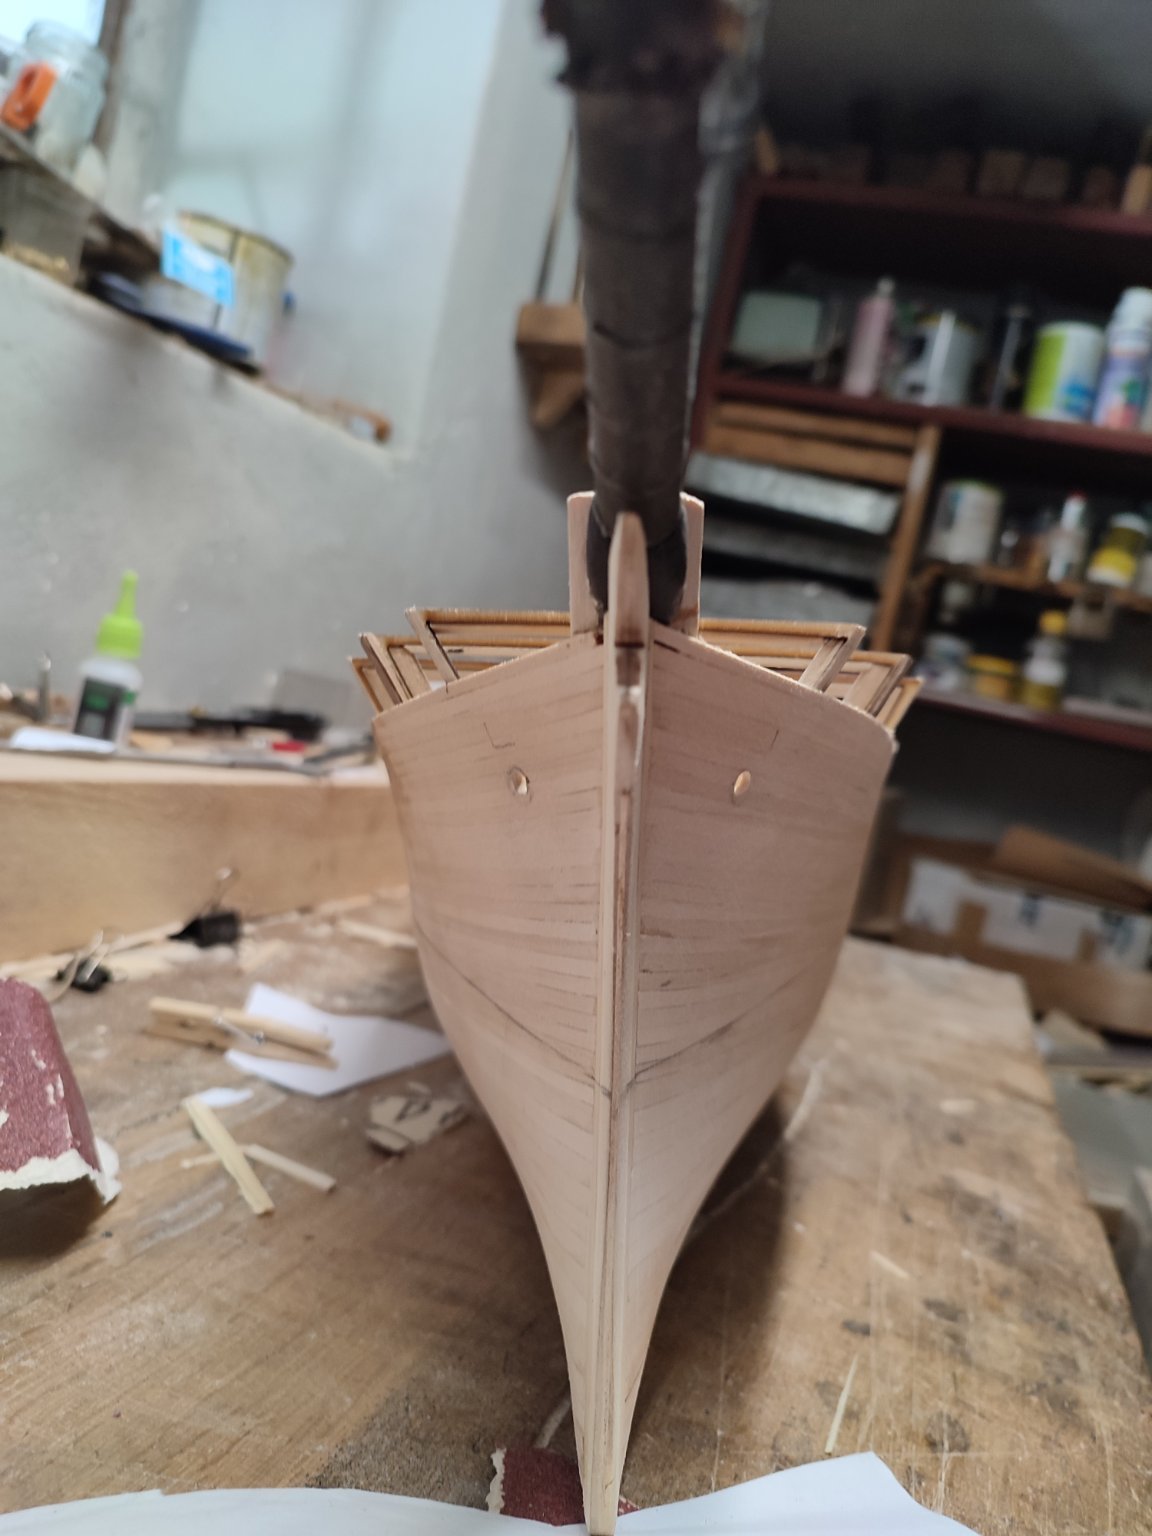
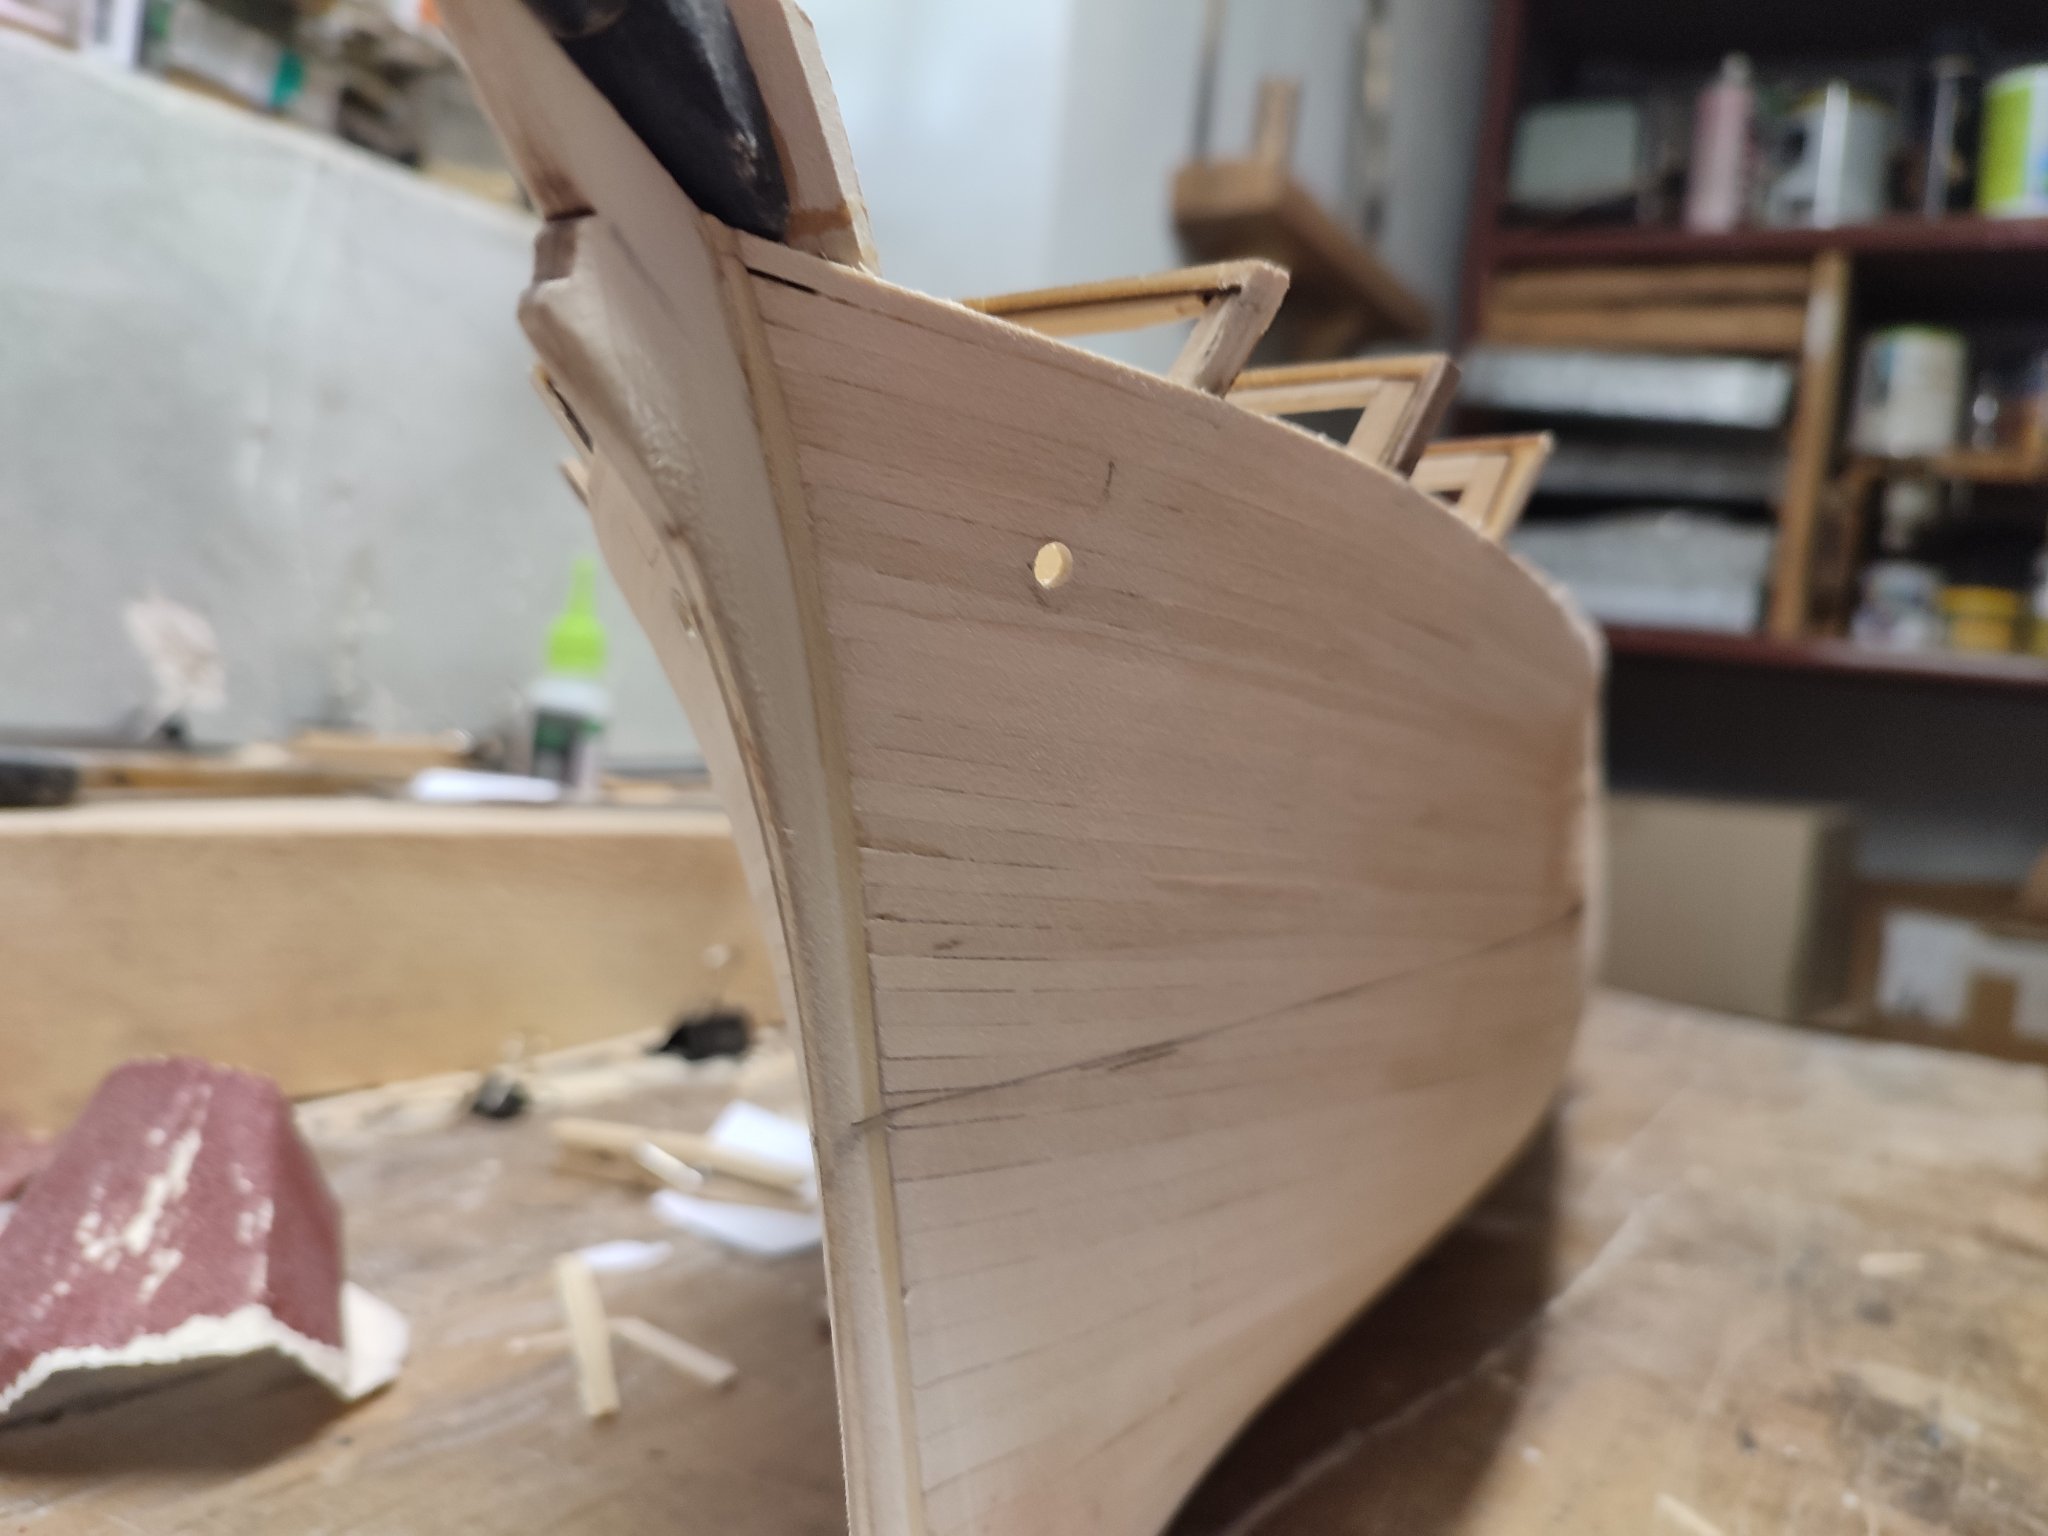
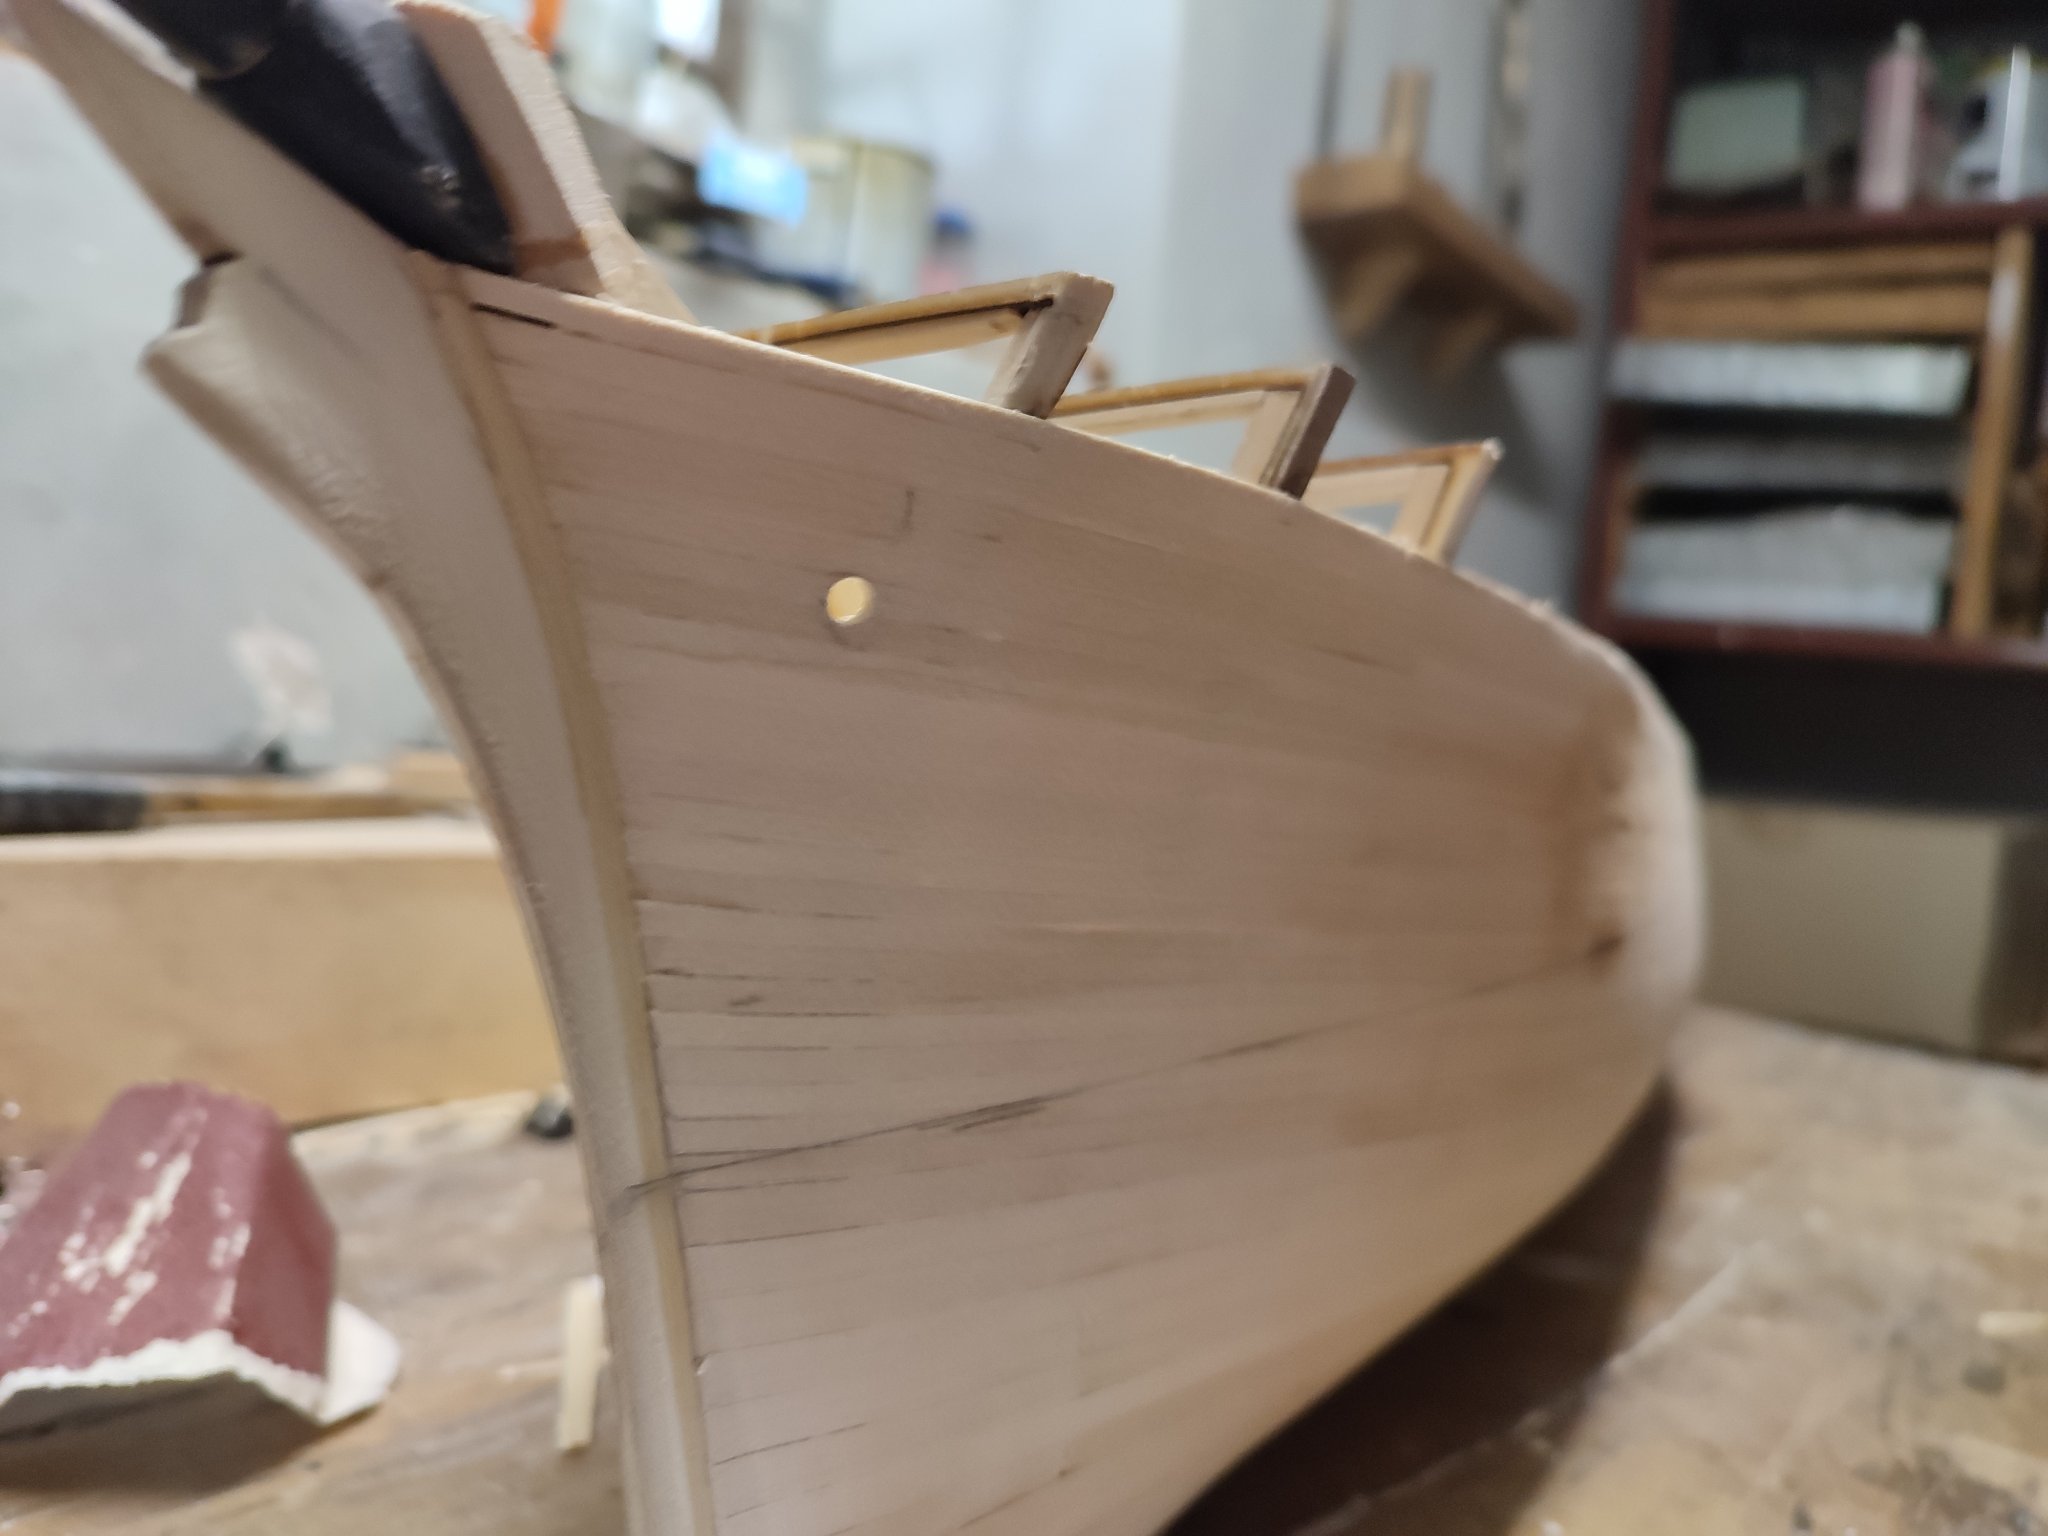
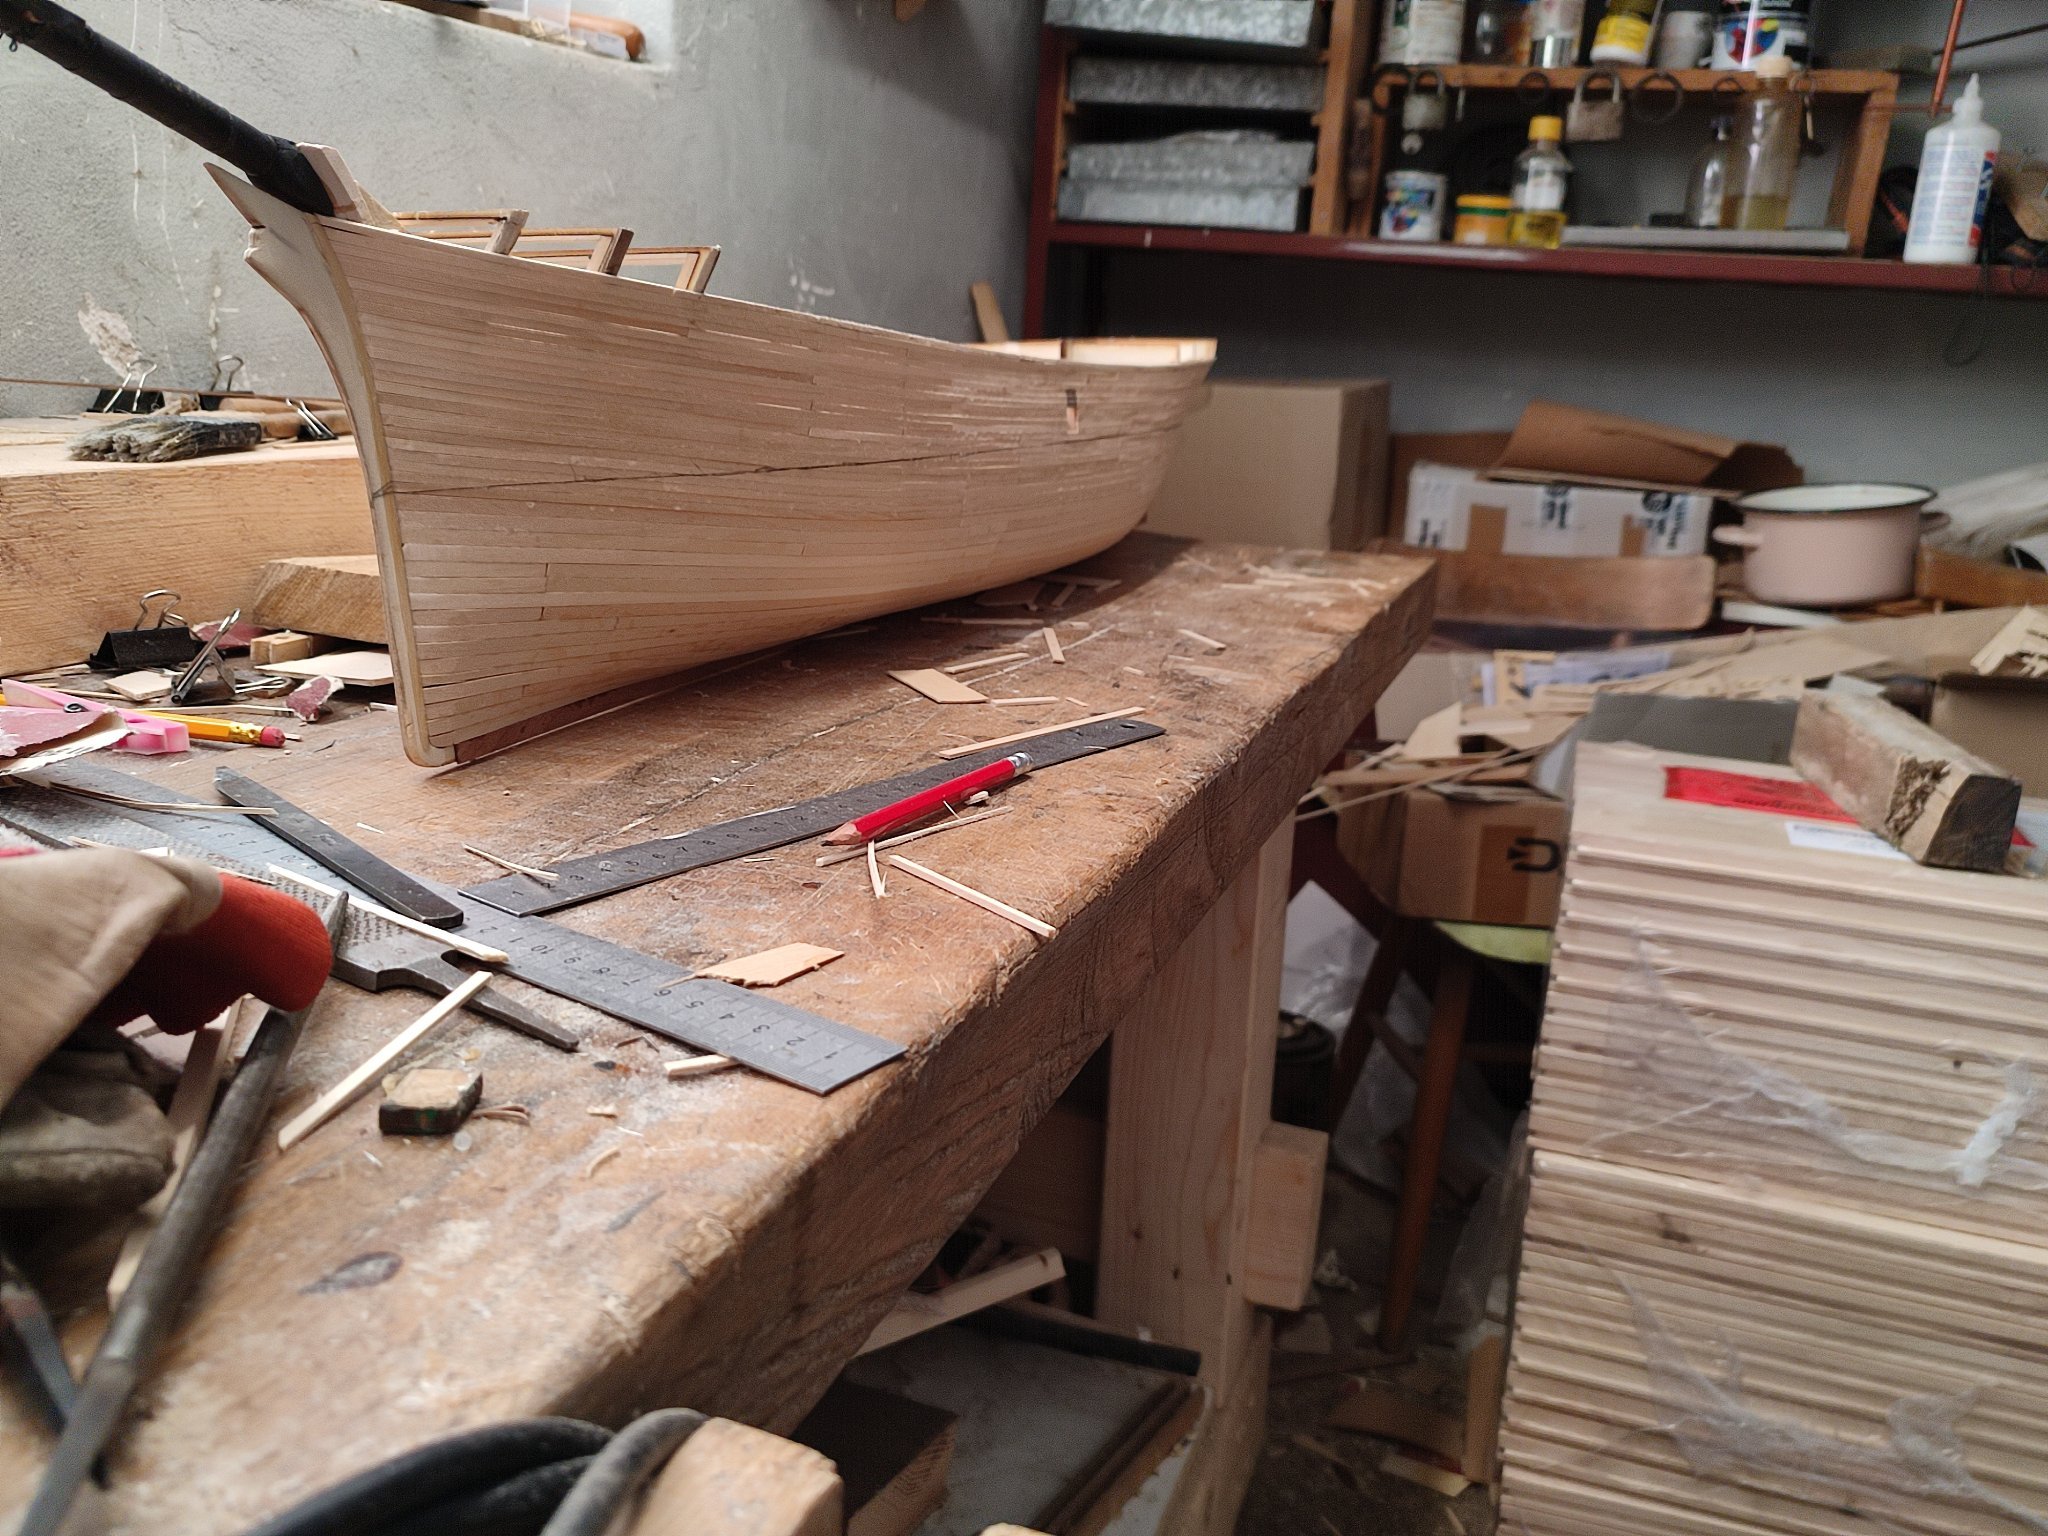
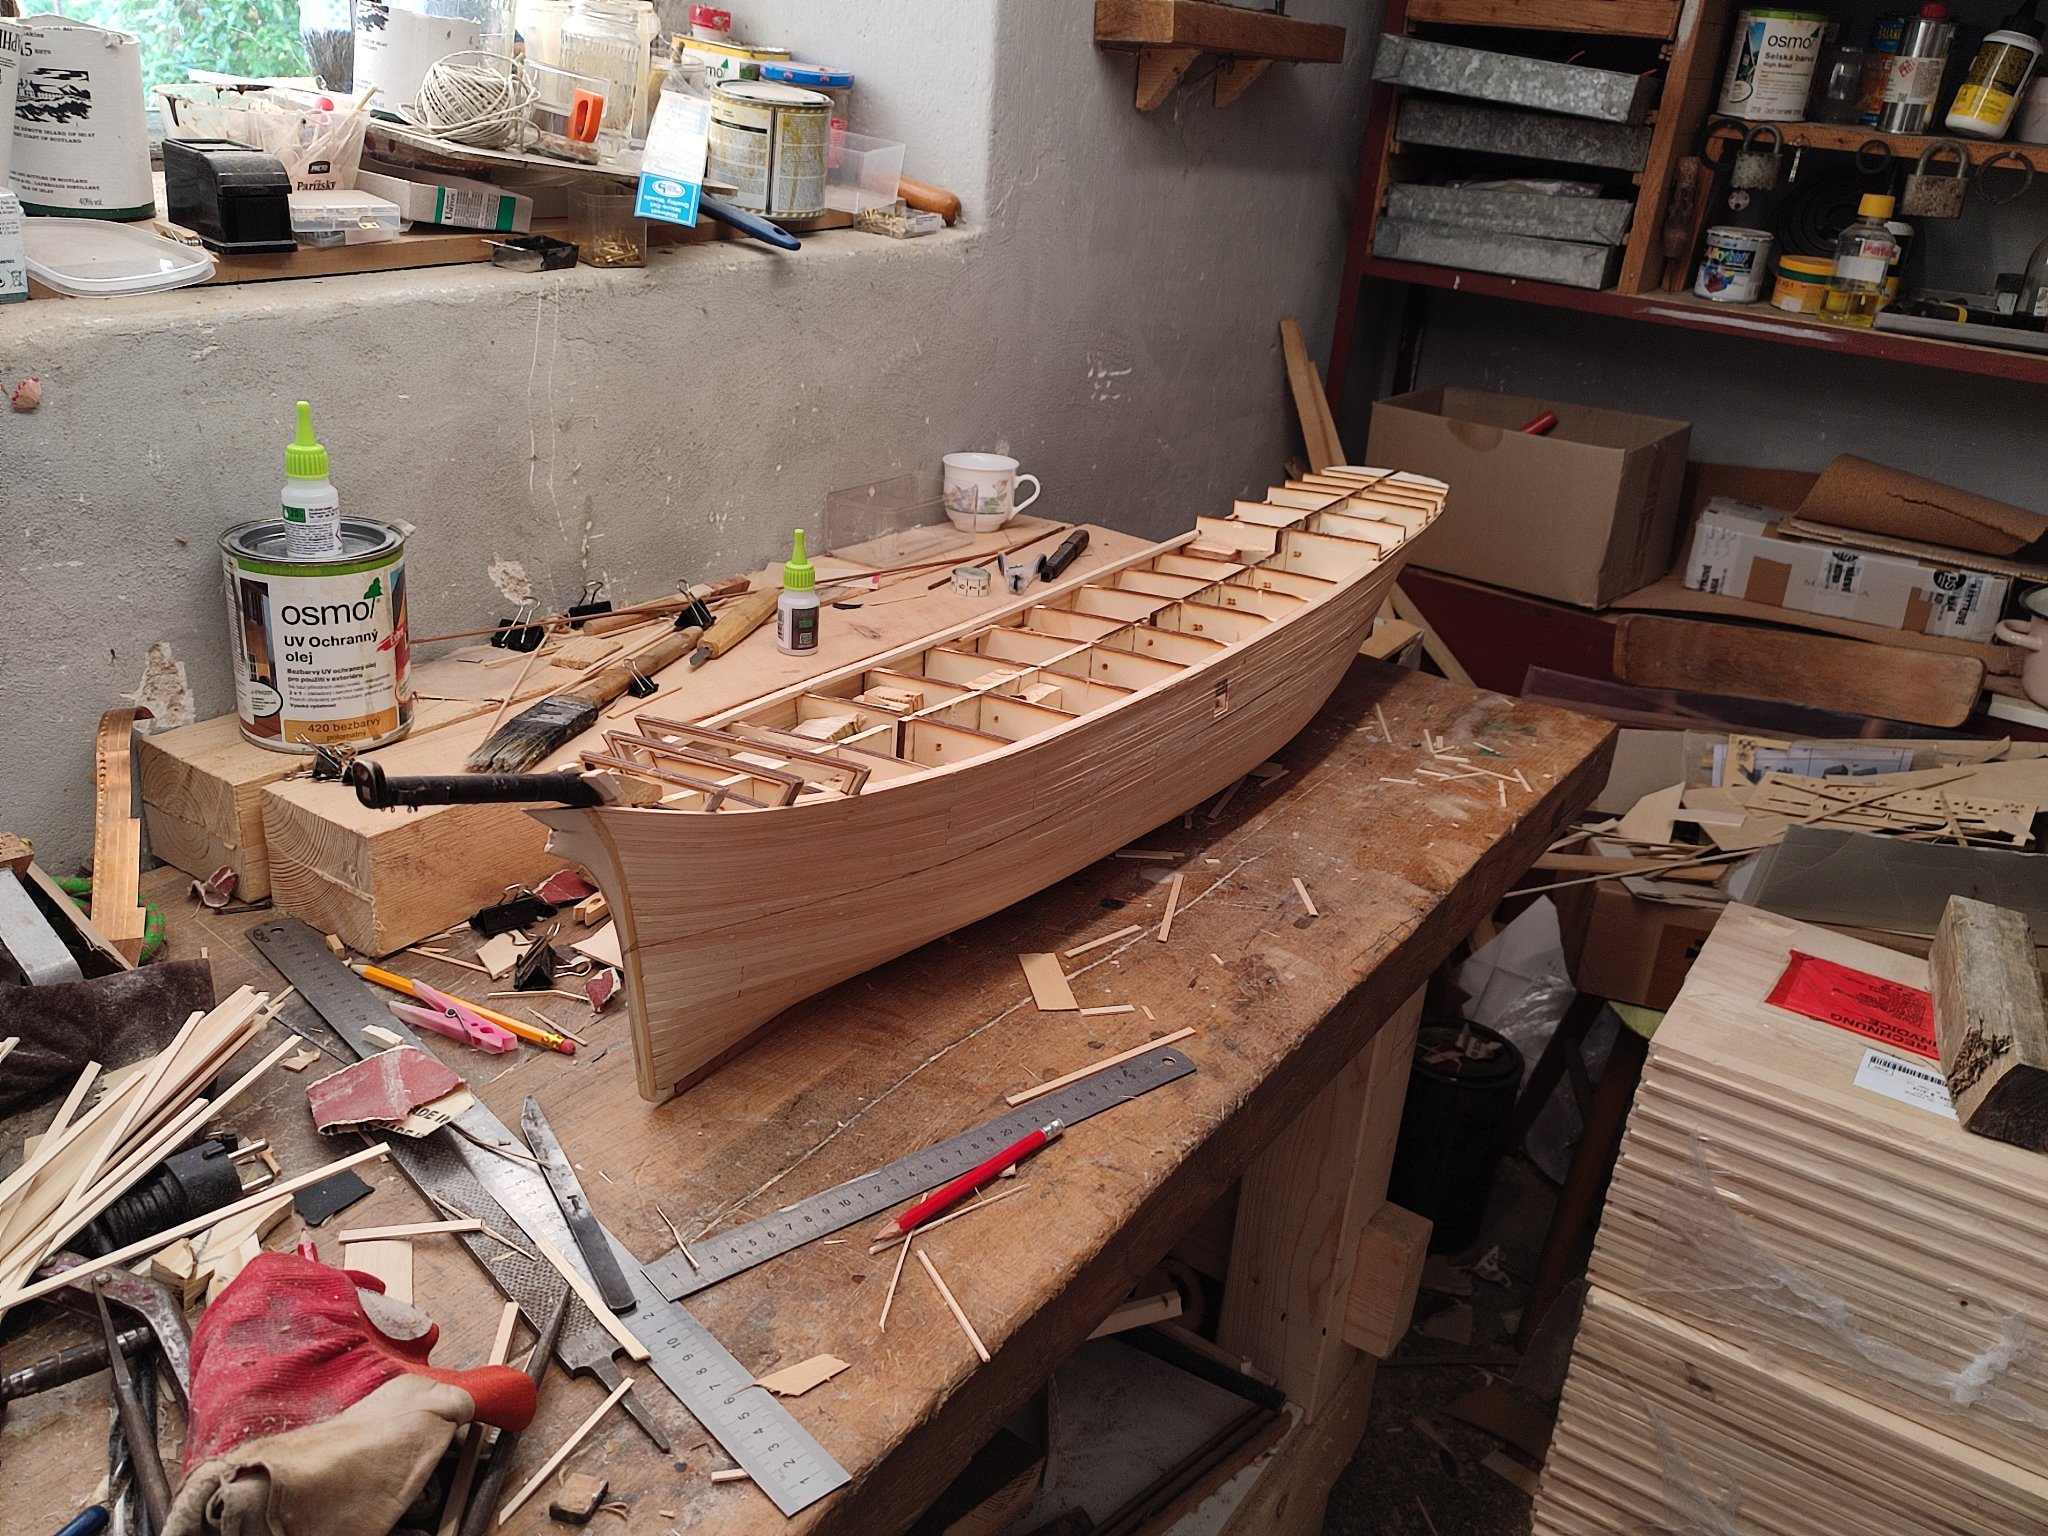
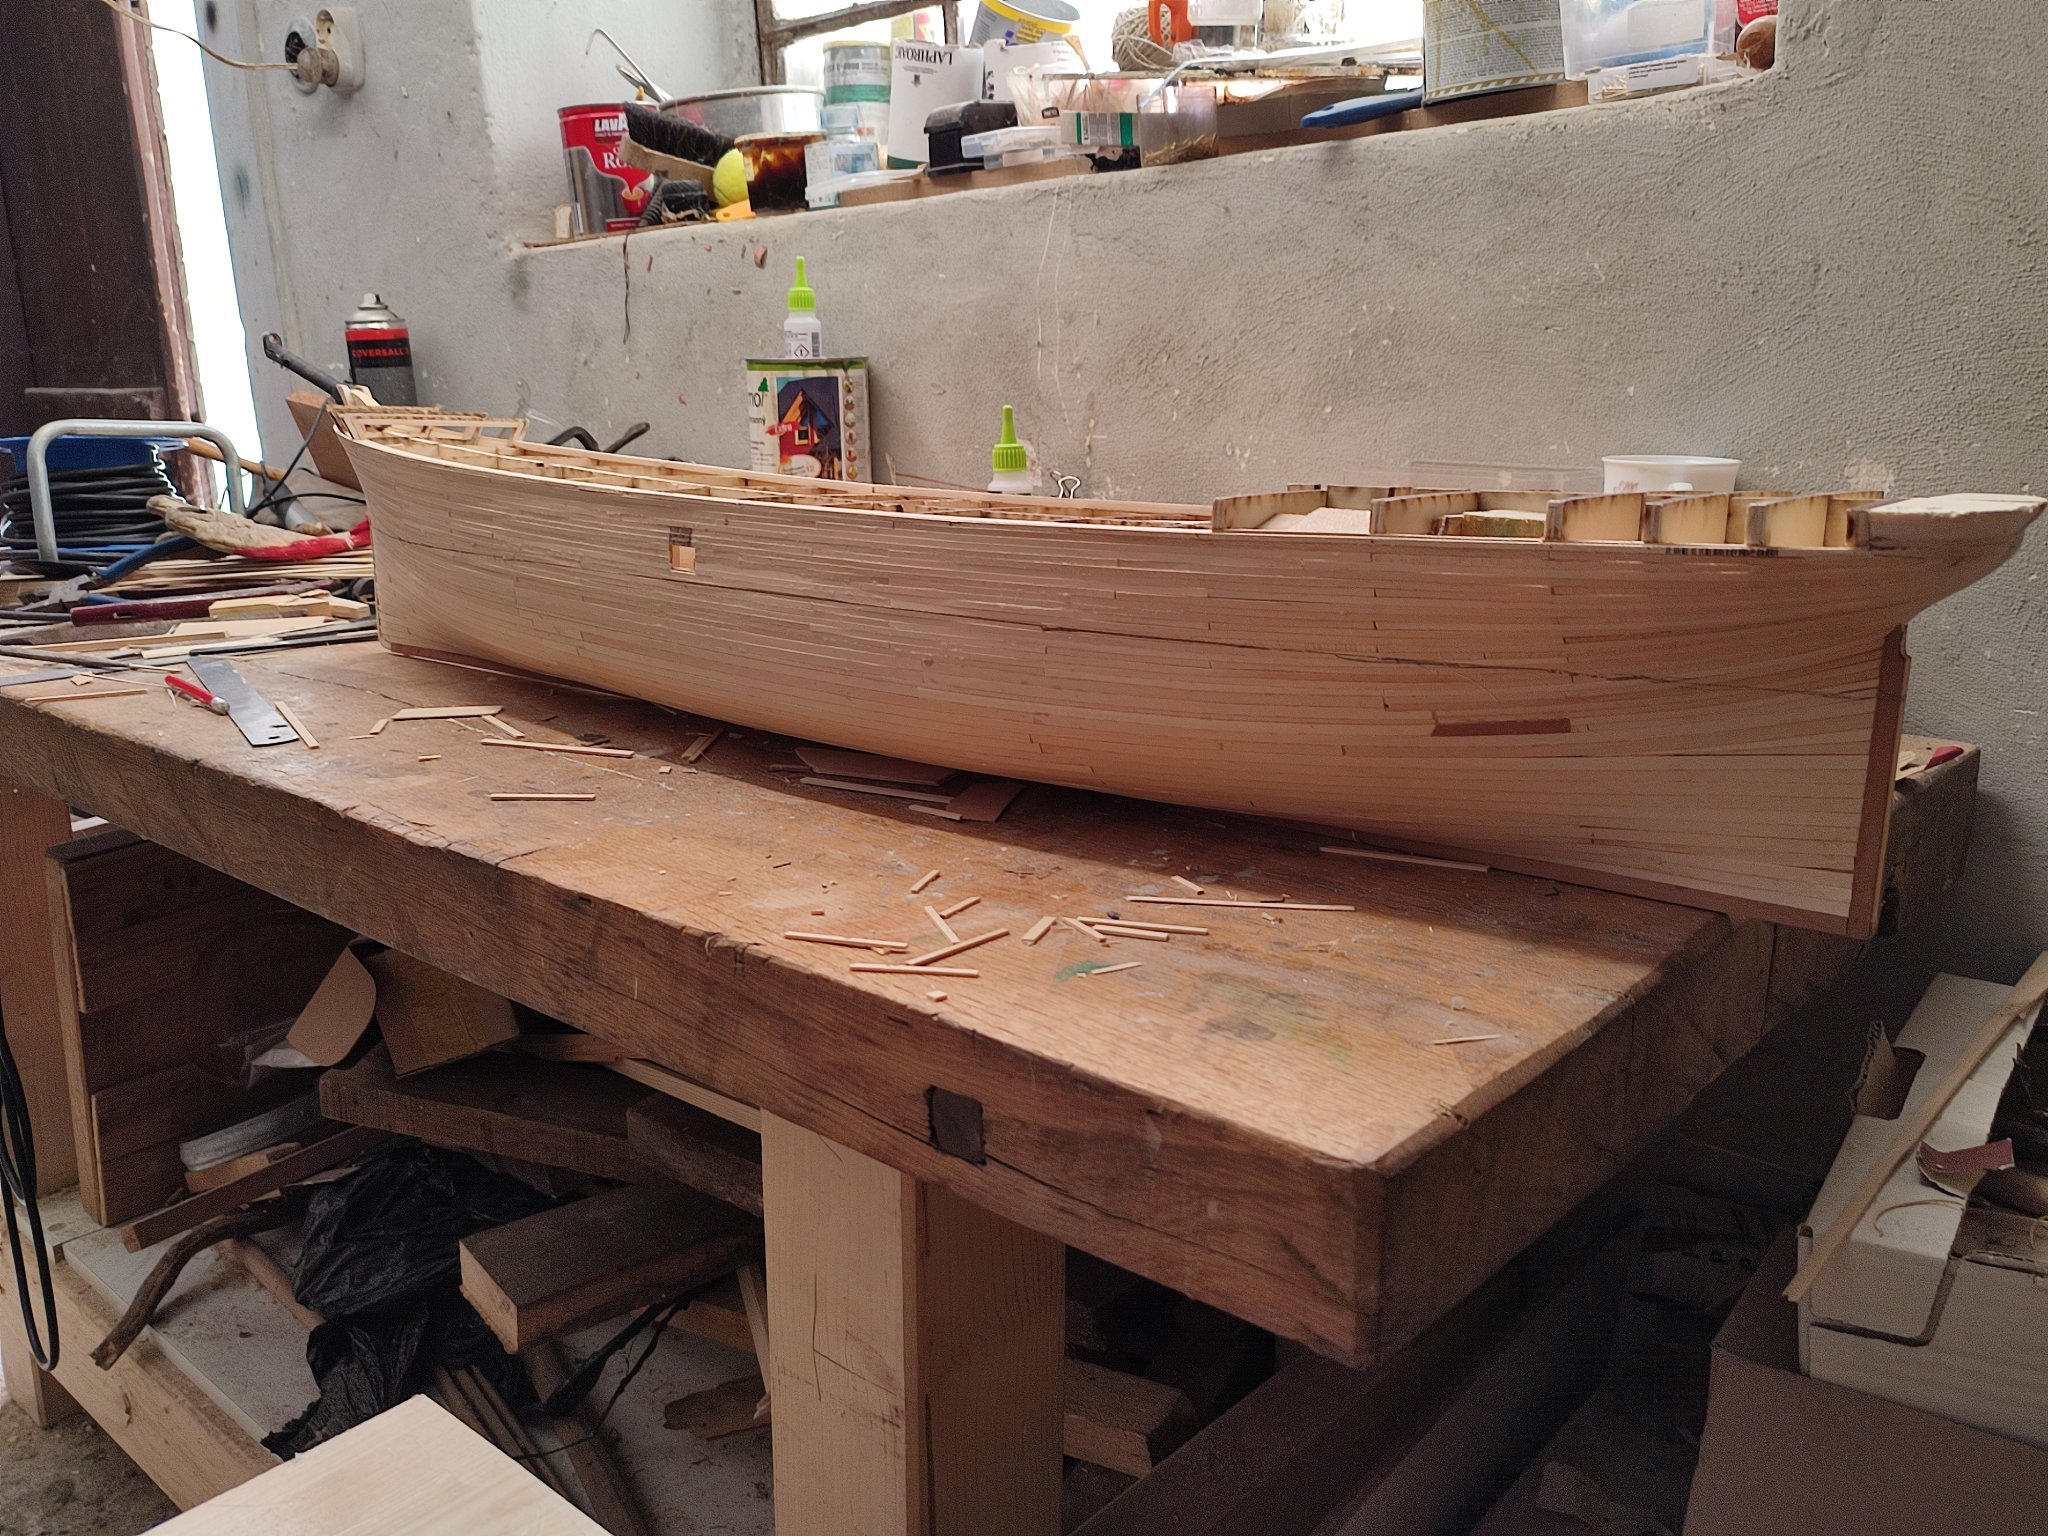
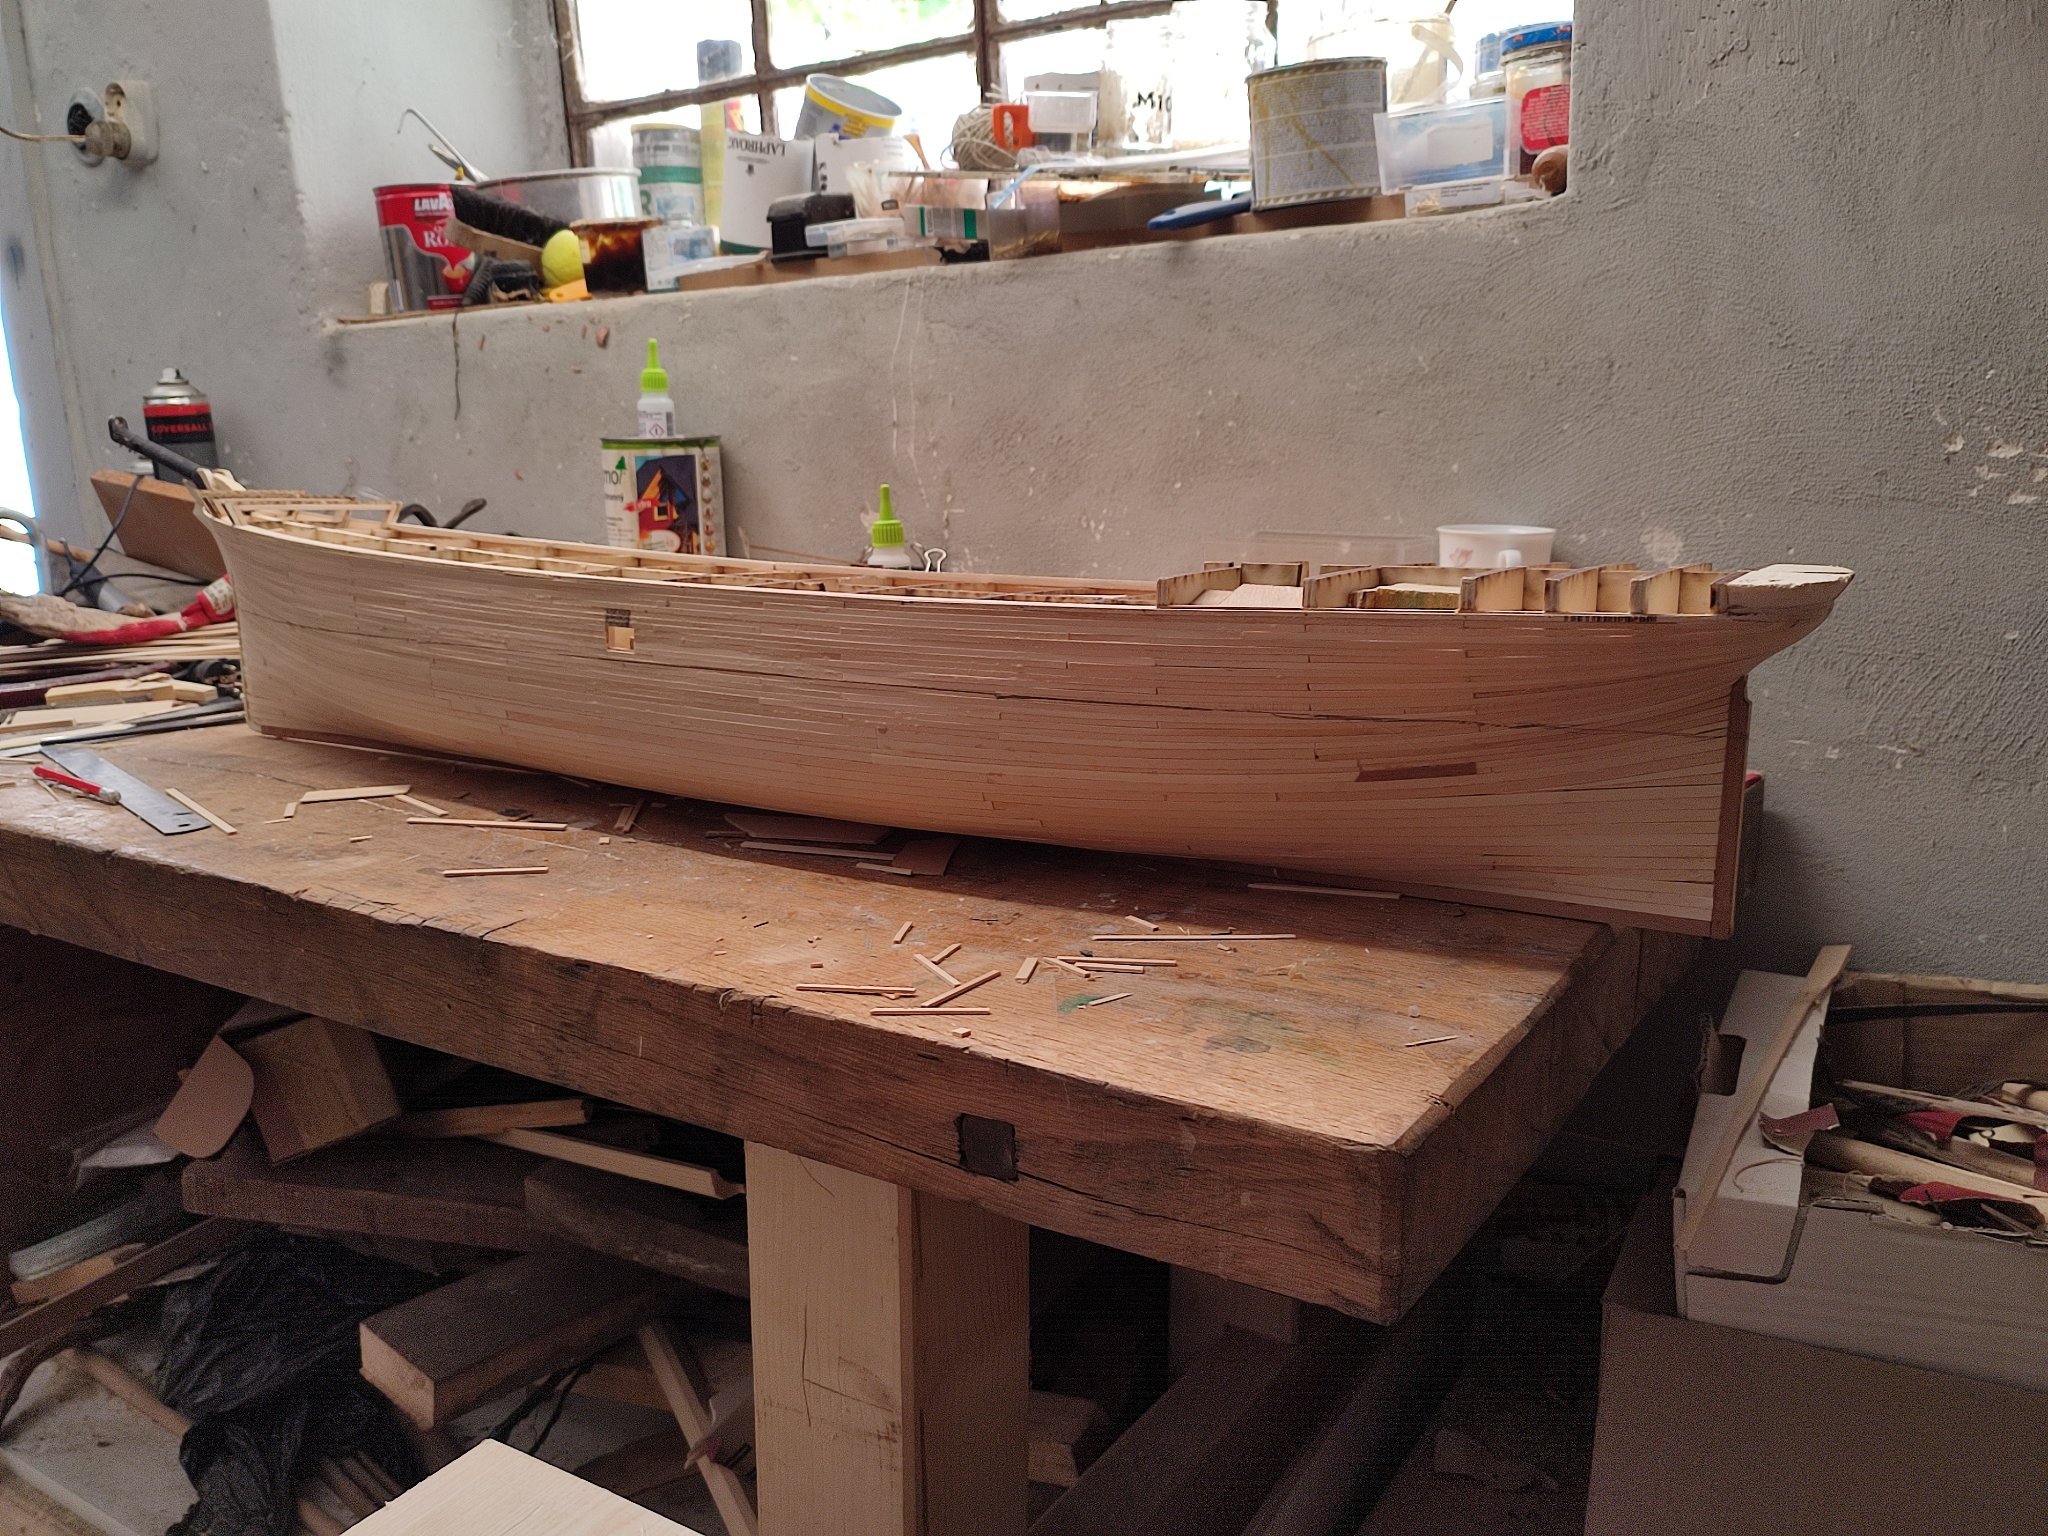
Thanks Rob, yes that was trickiest part. I tried to follow plans and natural curvature of hull below, although i regret a little bit i should lean them even more inside in the middle not striaght but i Can live with that. Im opened to aby comment or observation although iwpuld not be Happy reworking it. But IT surely doeant look like Michaels sharp turn off coverboard rather like between his and flying fish very long convex Curve. Seems we have it identical more or lesa. I Will check on IT more tmew, Im curious what Rich Has to say. Evening them was not easy so i focused on that to make sure there IS no ugly bump in the line. V.
My fleet
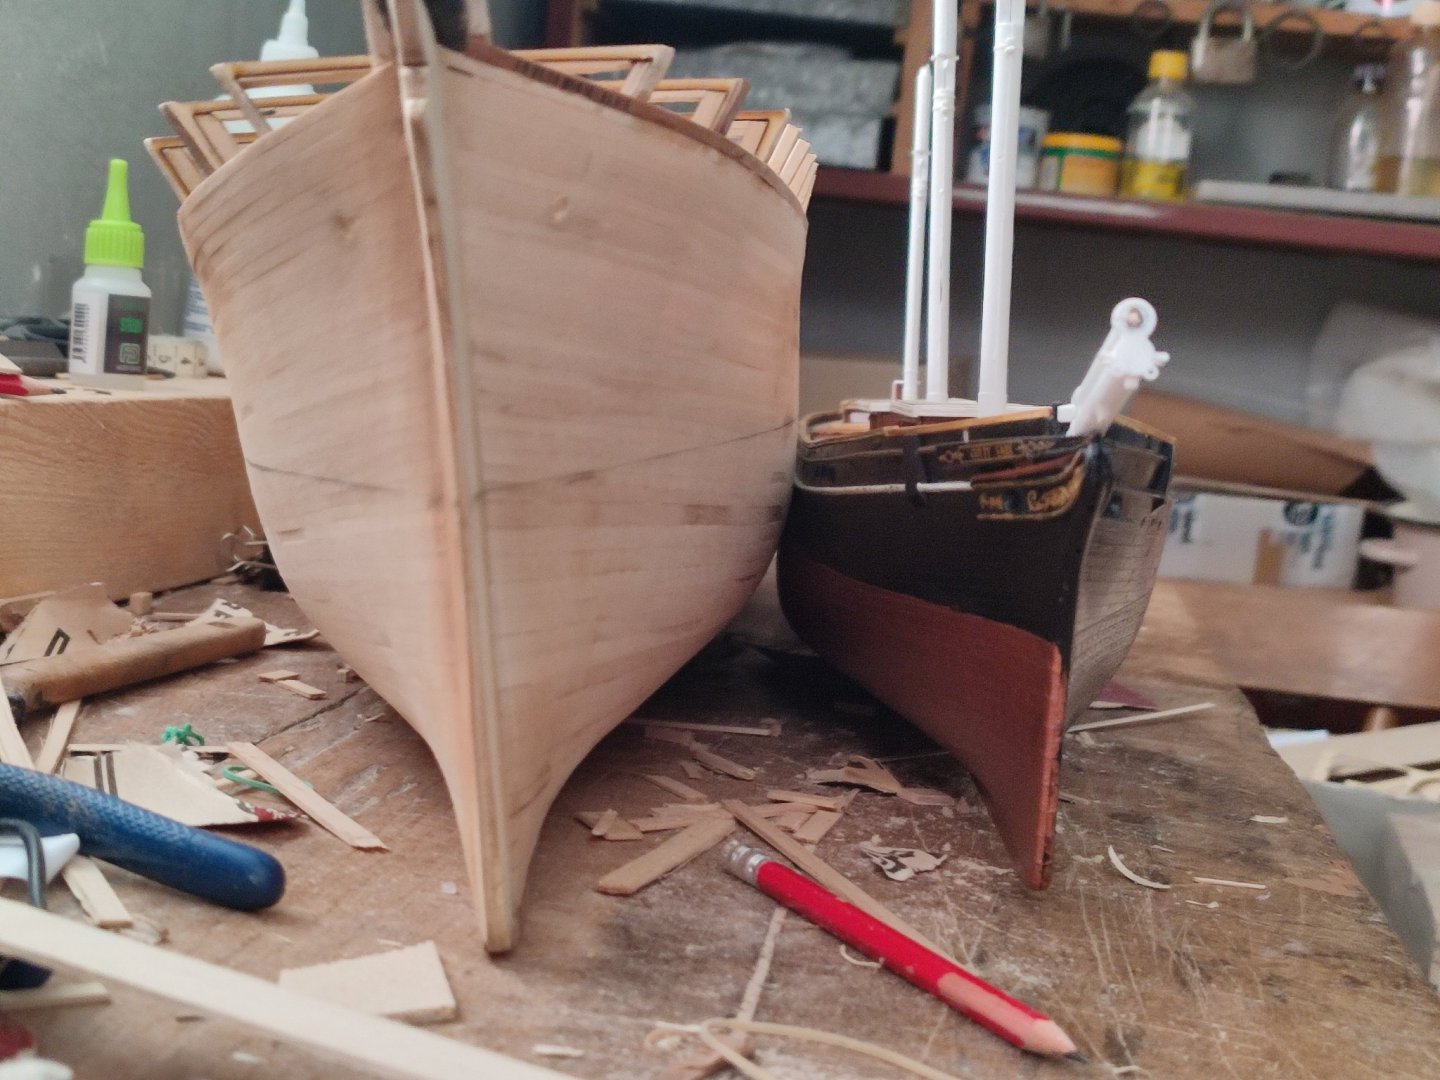
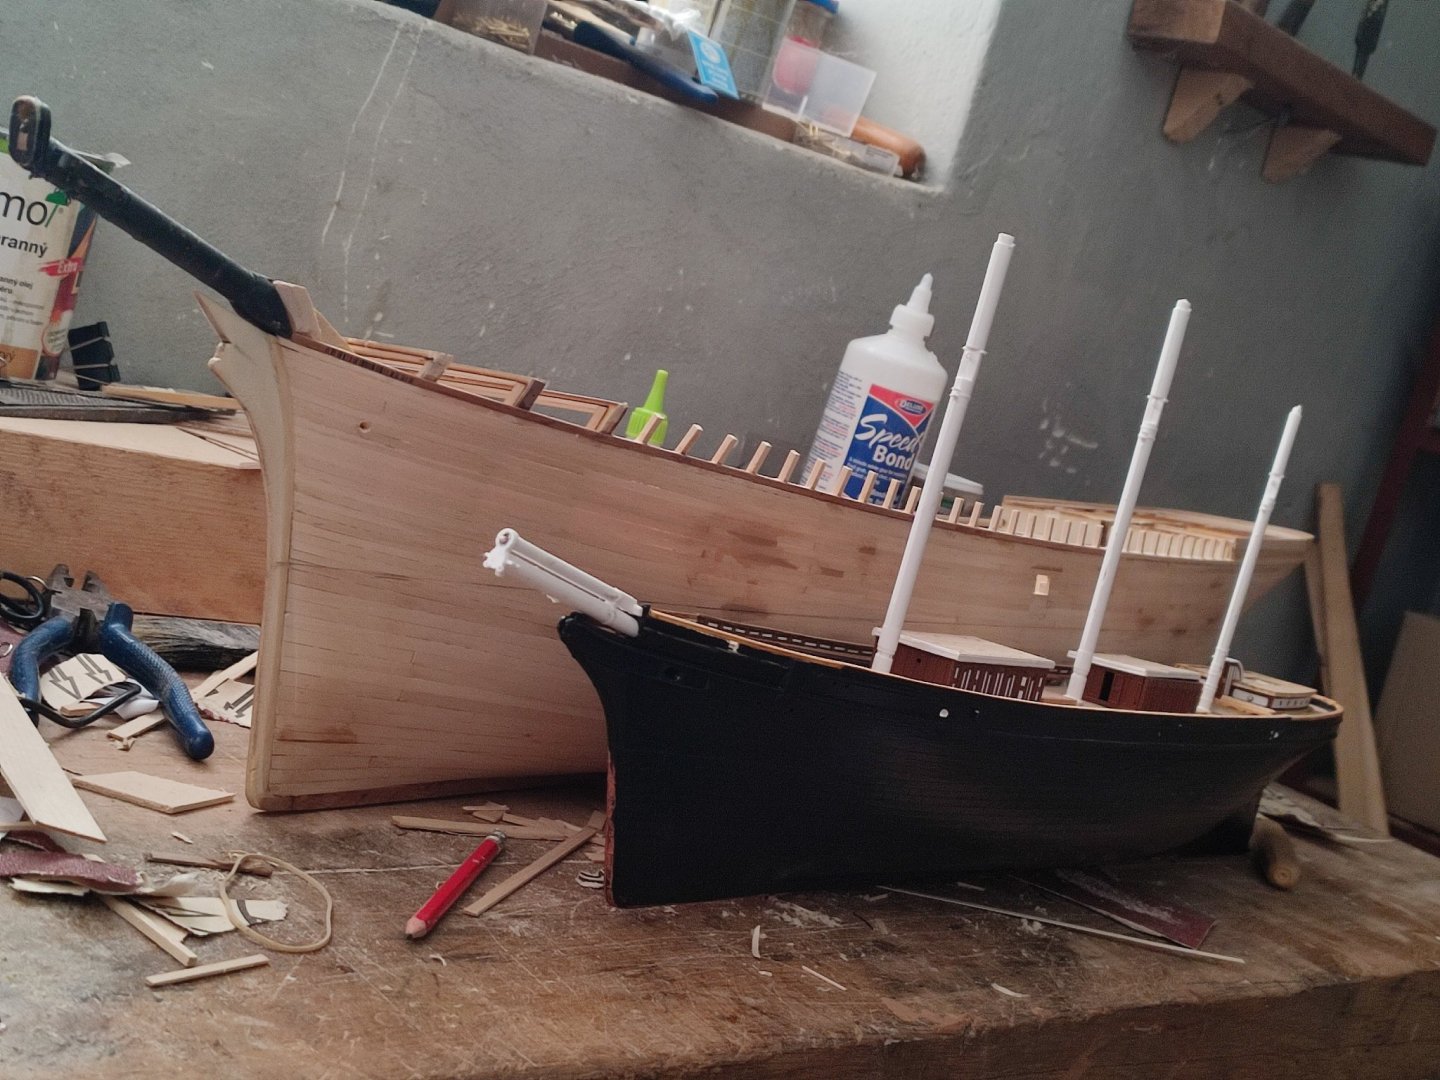
 mammoth and his little sister from same year.
-
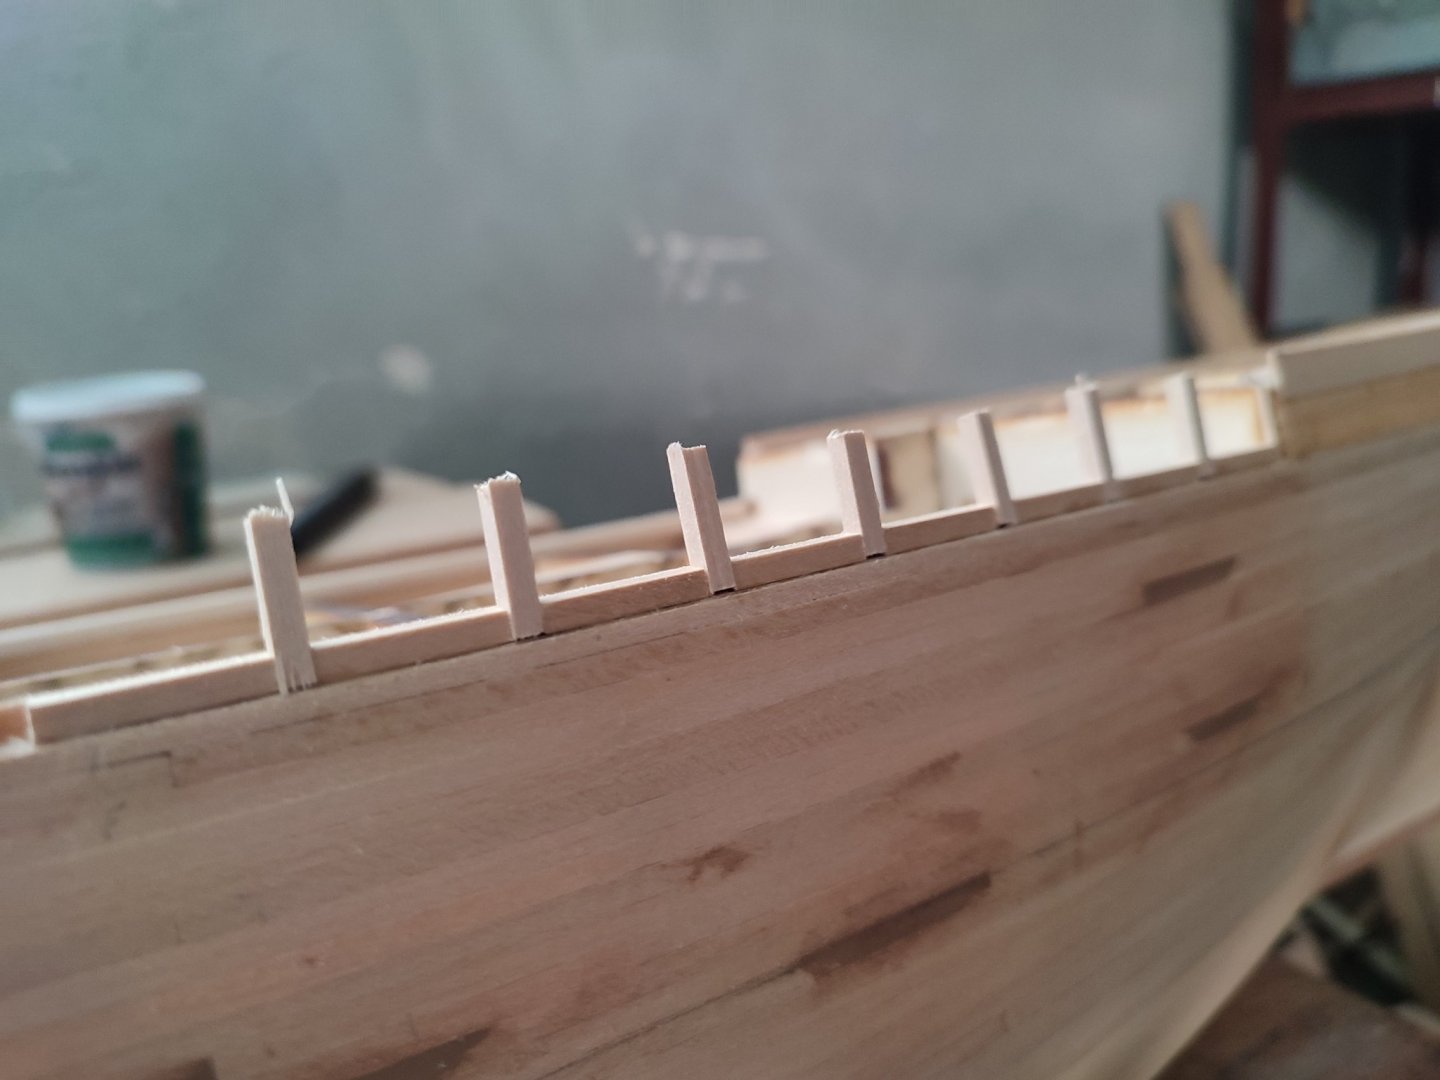
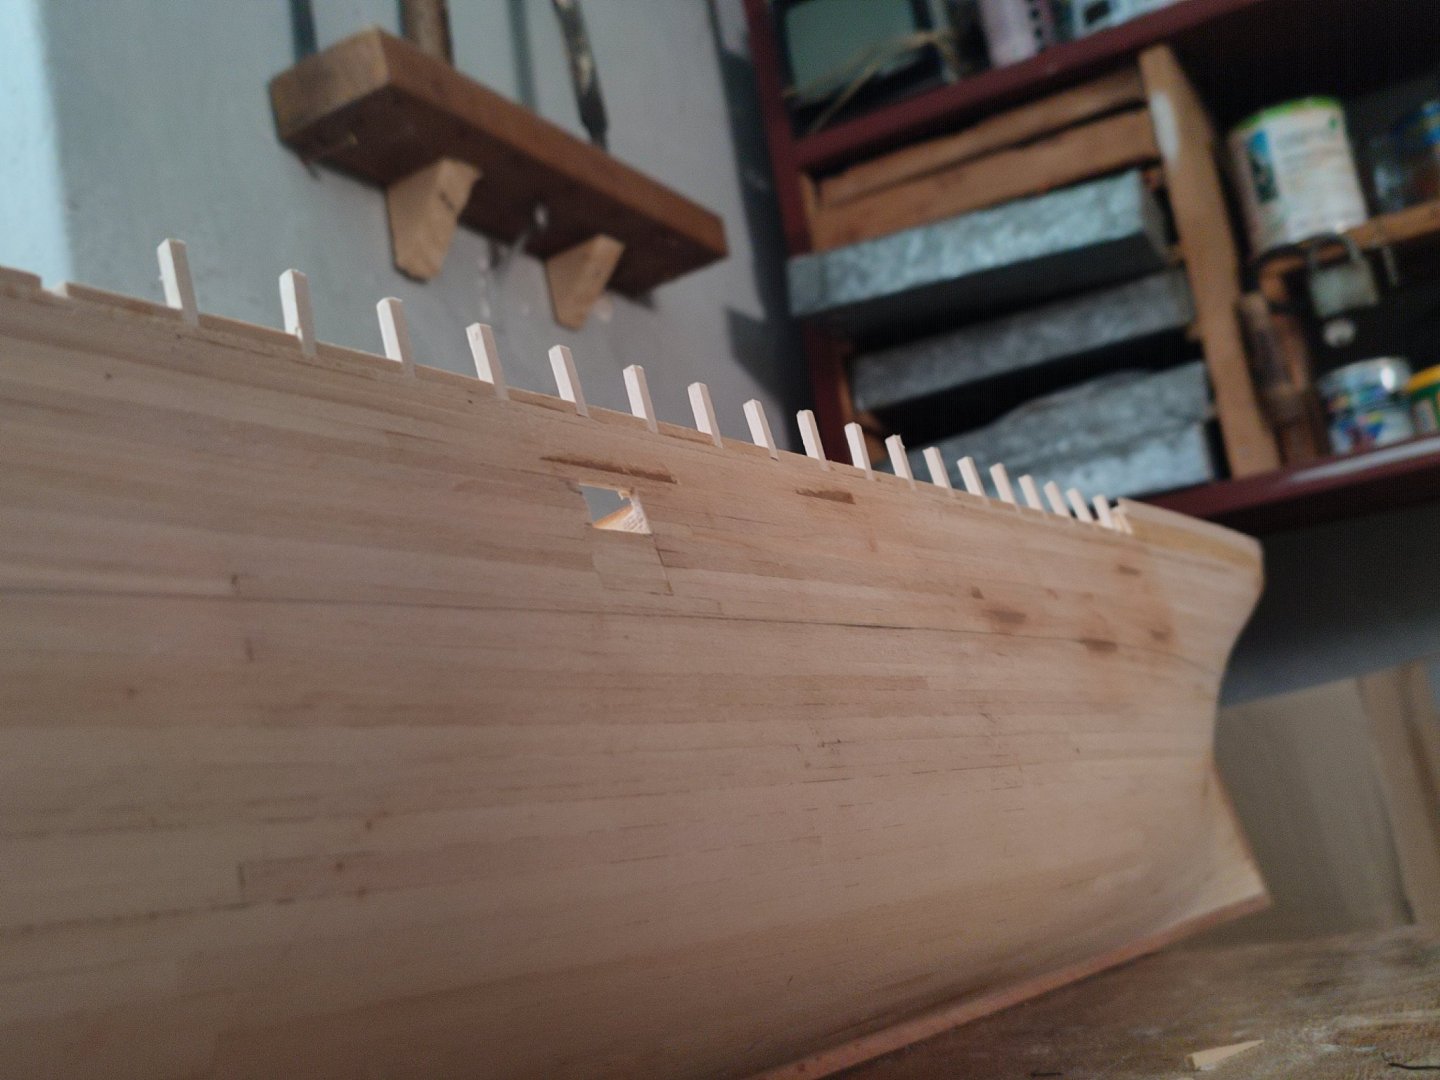
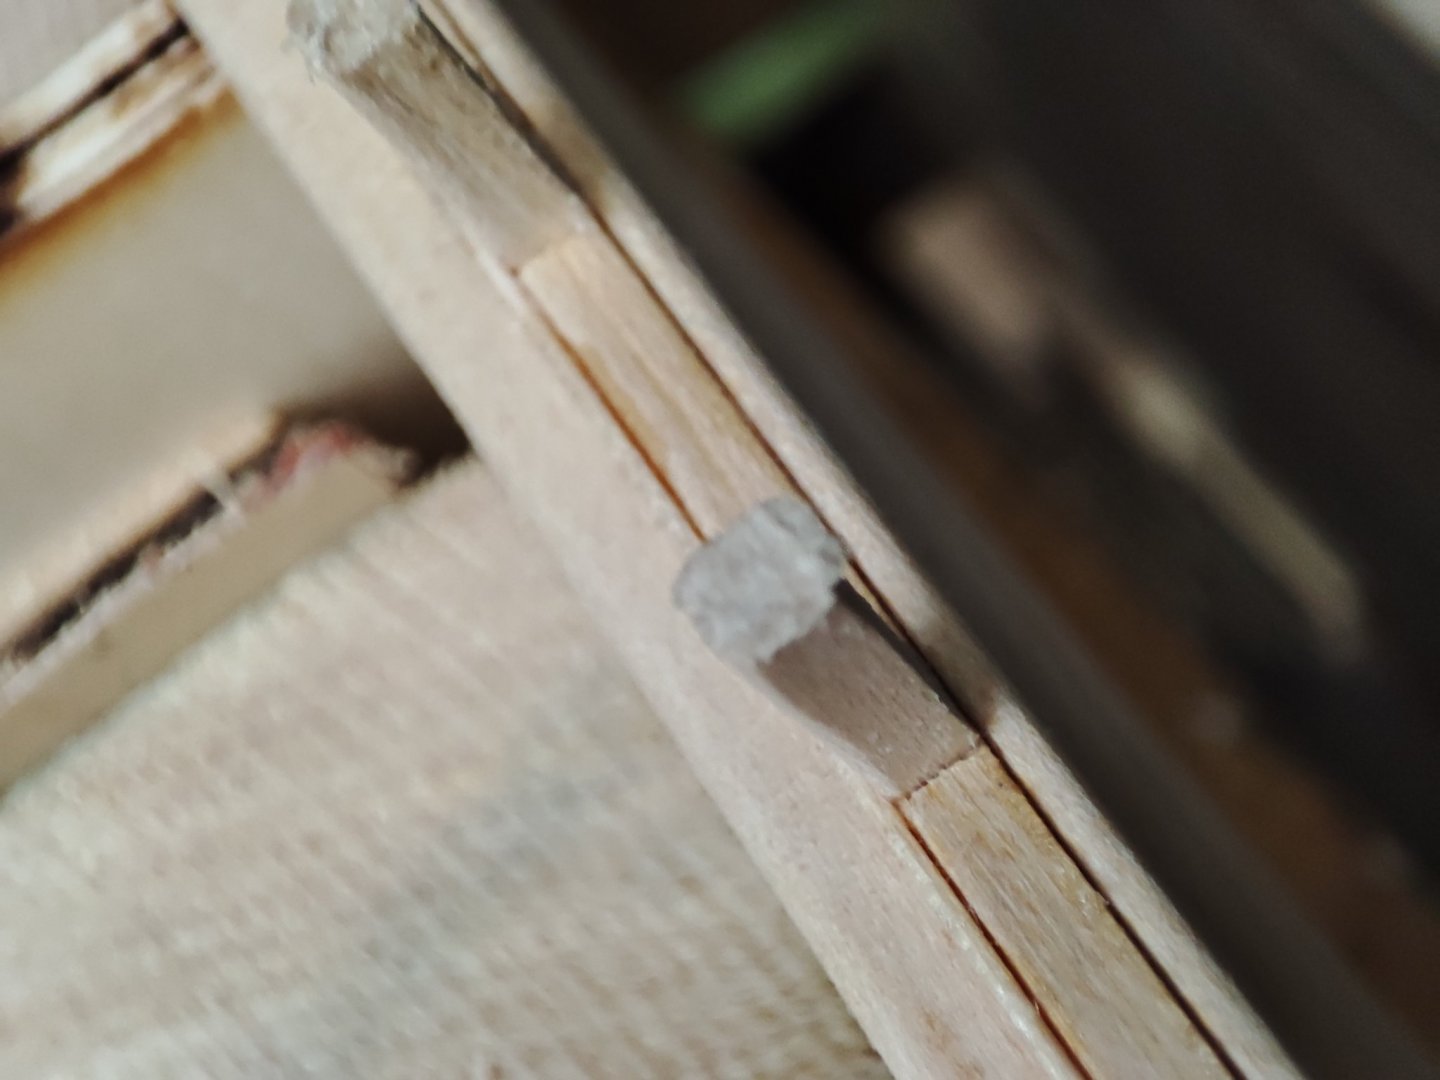
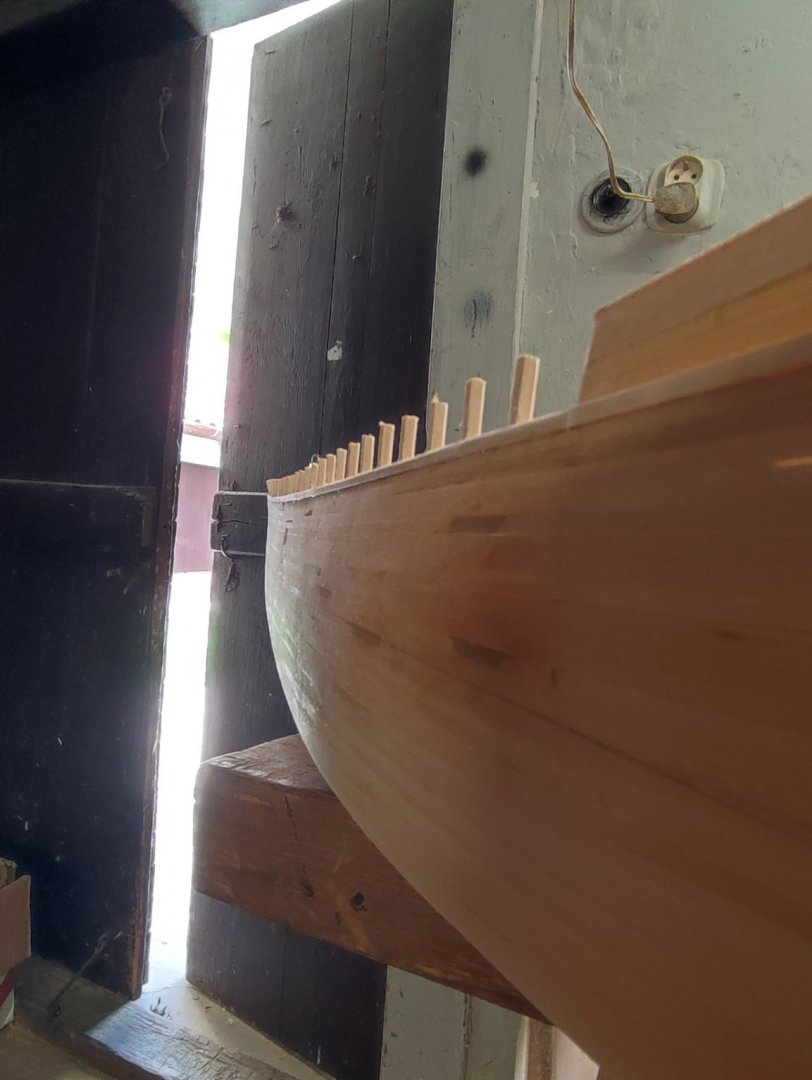
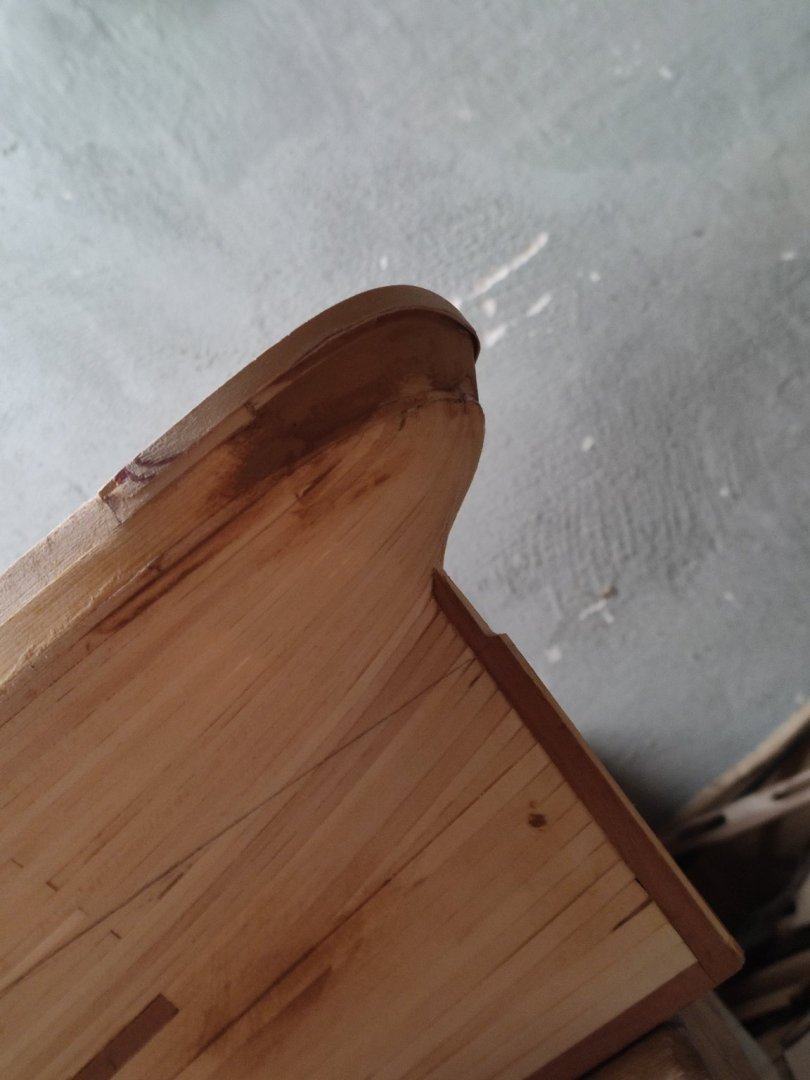
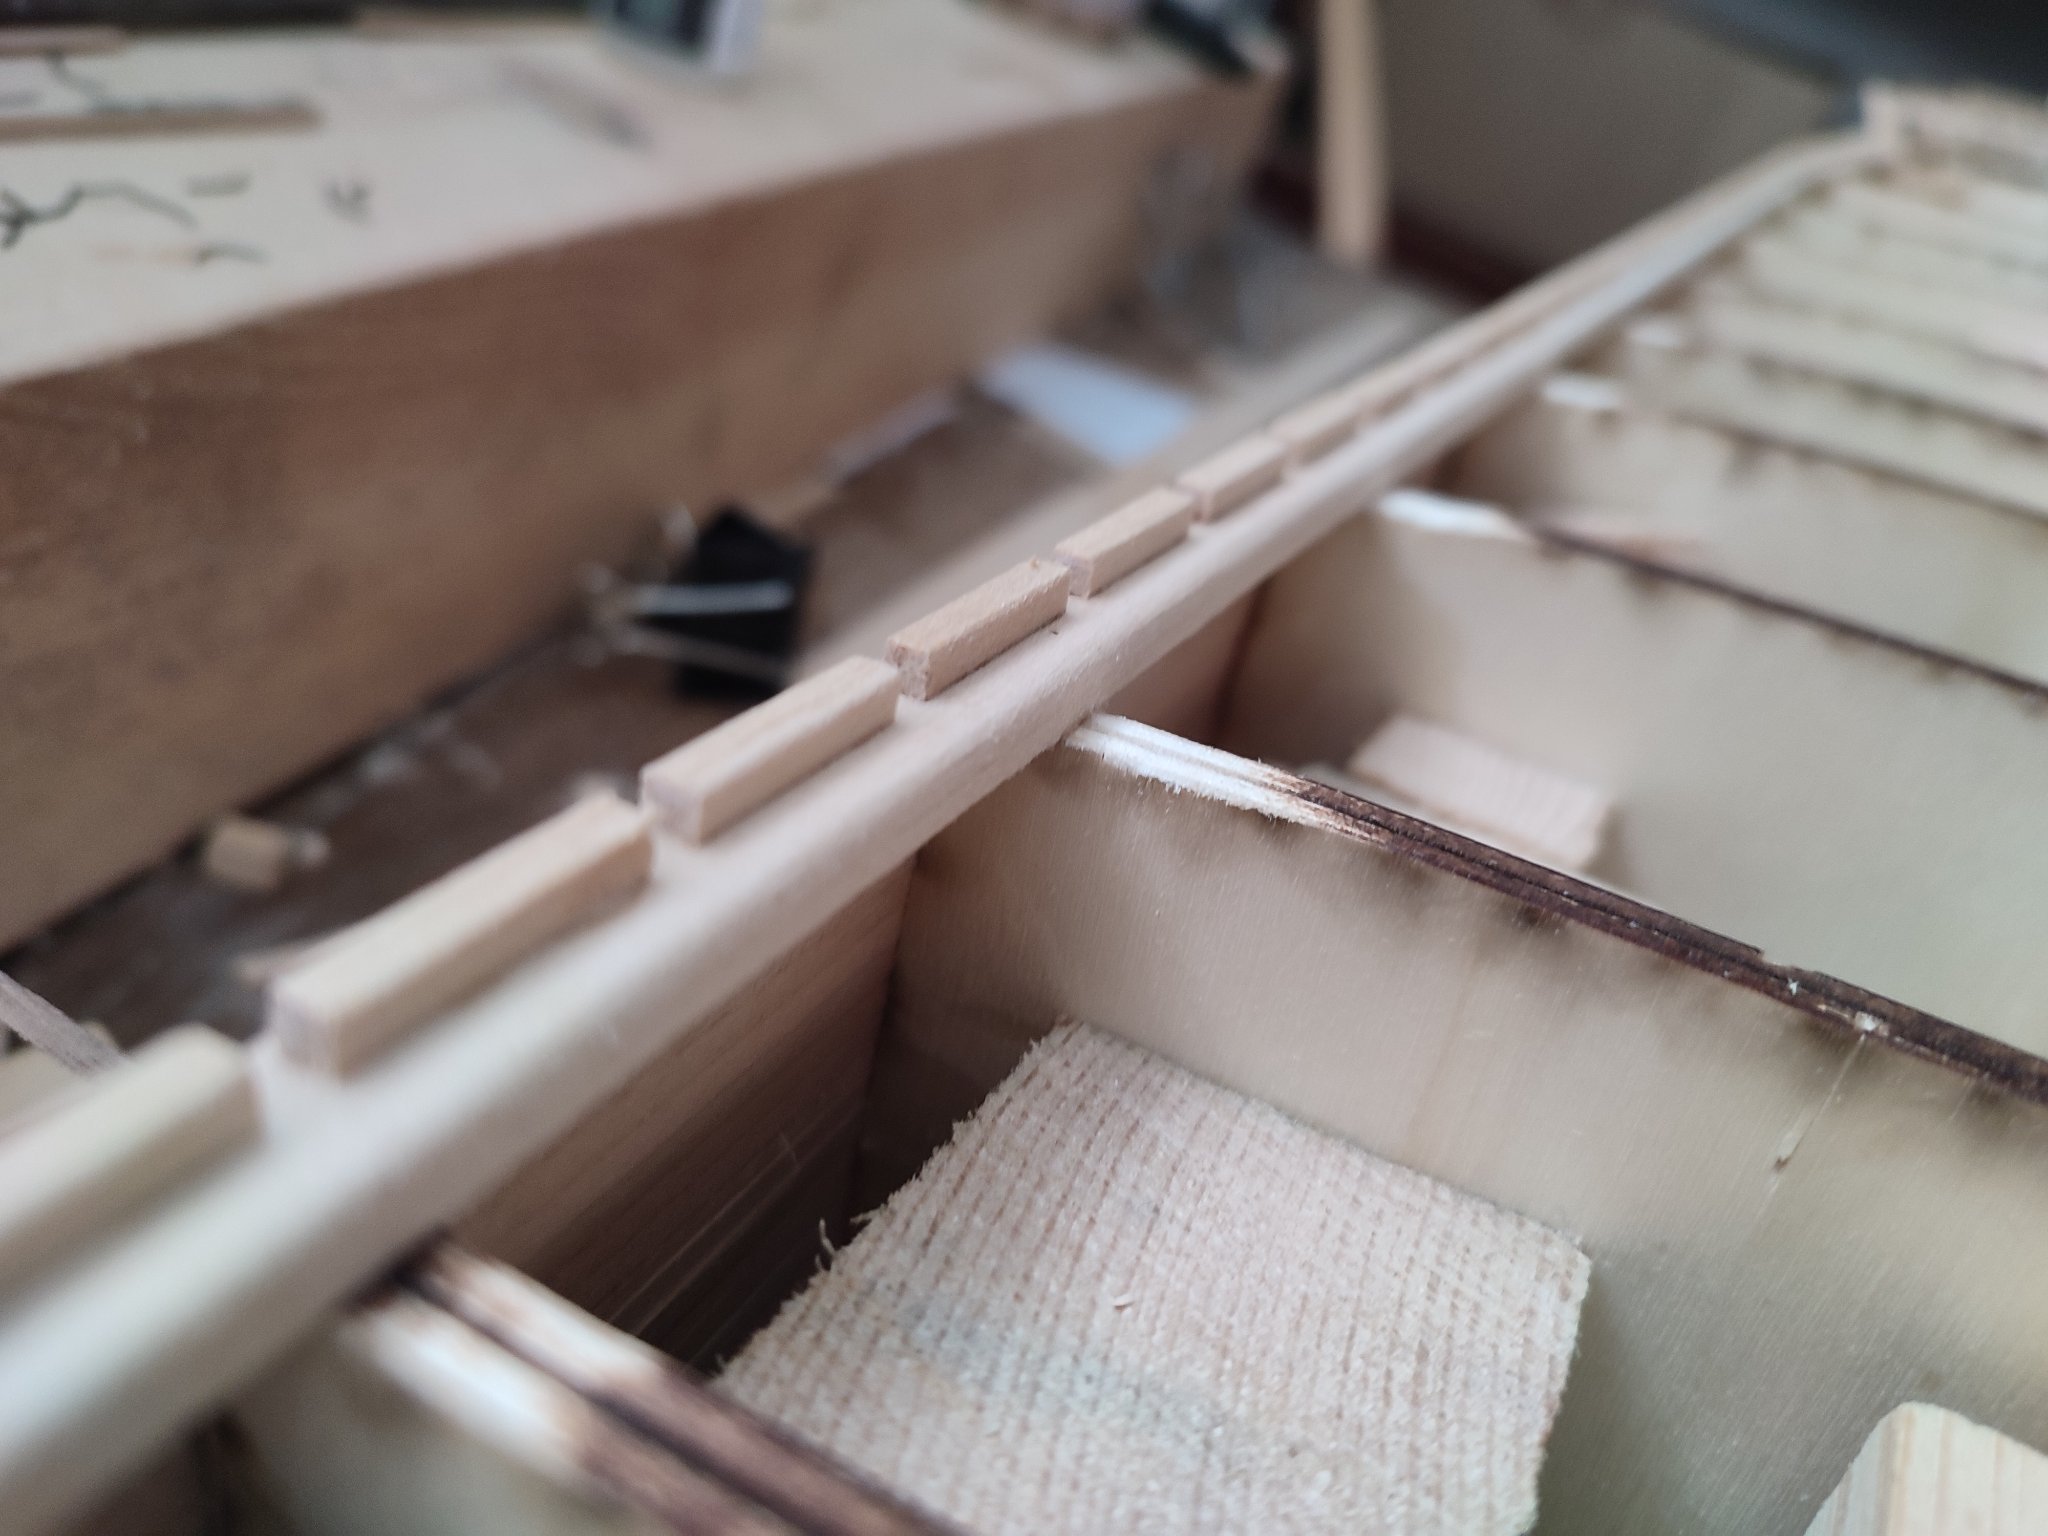
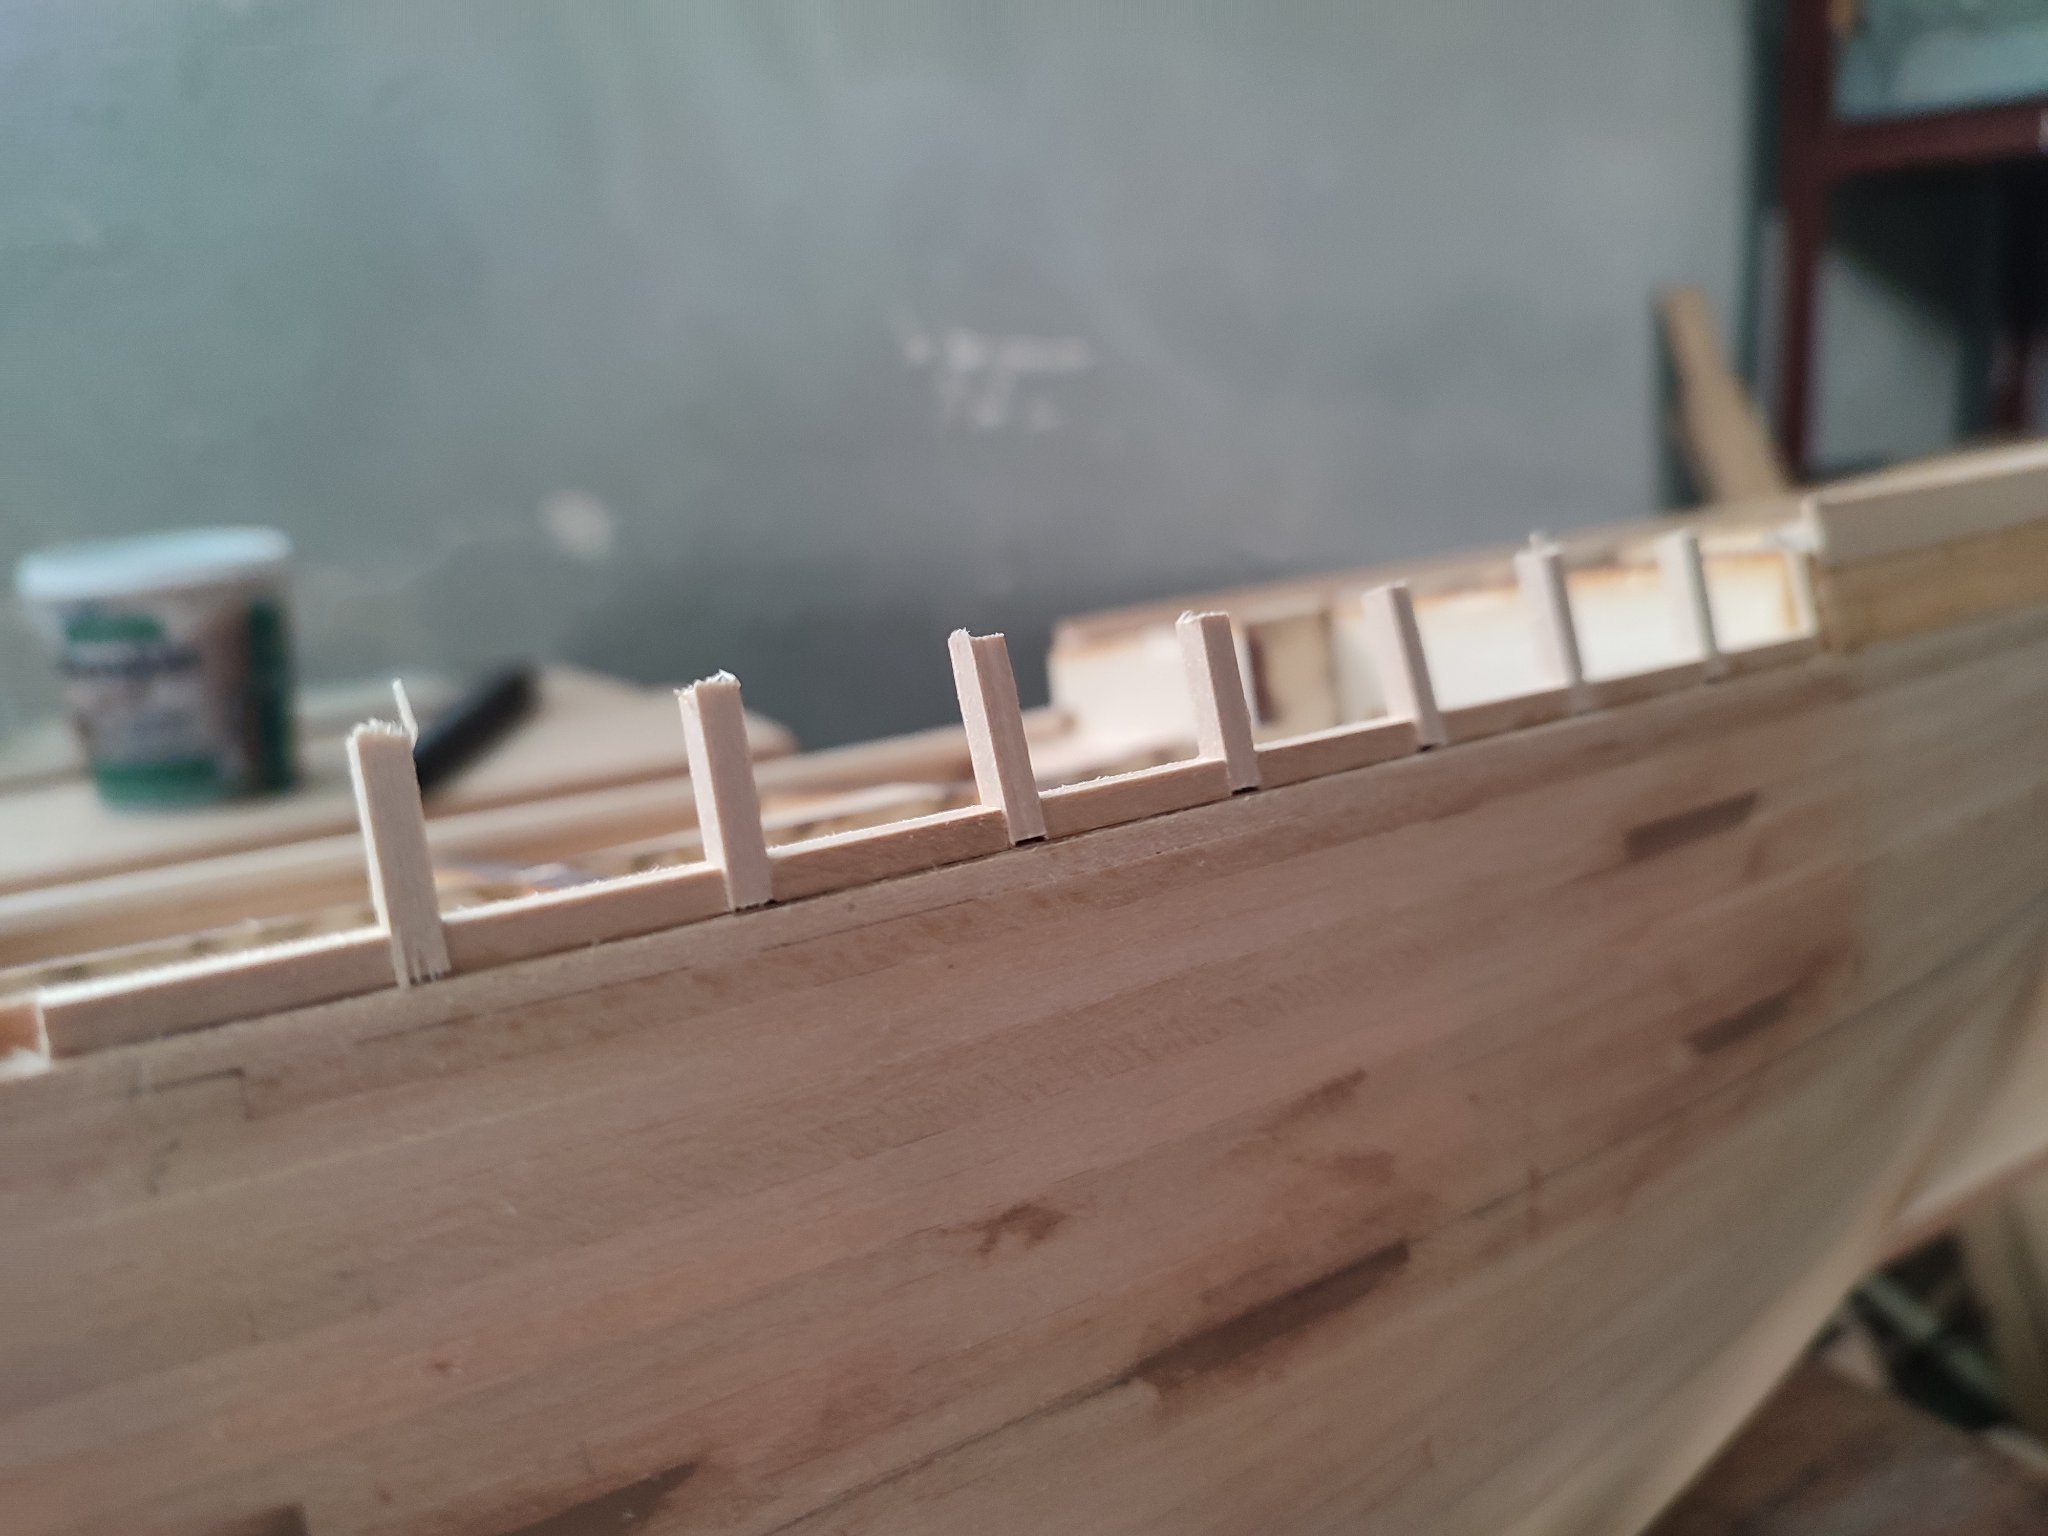
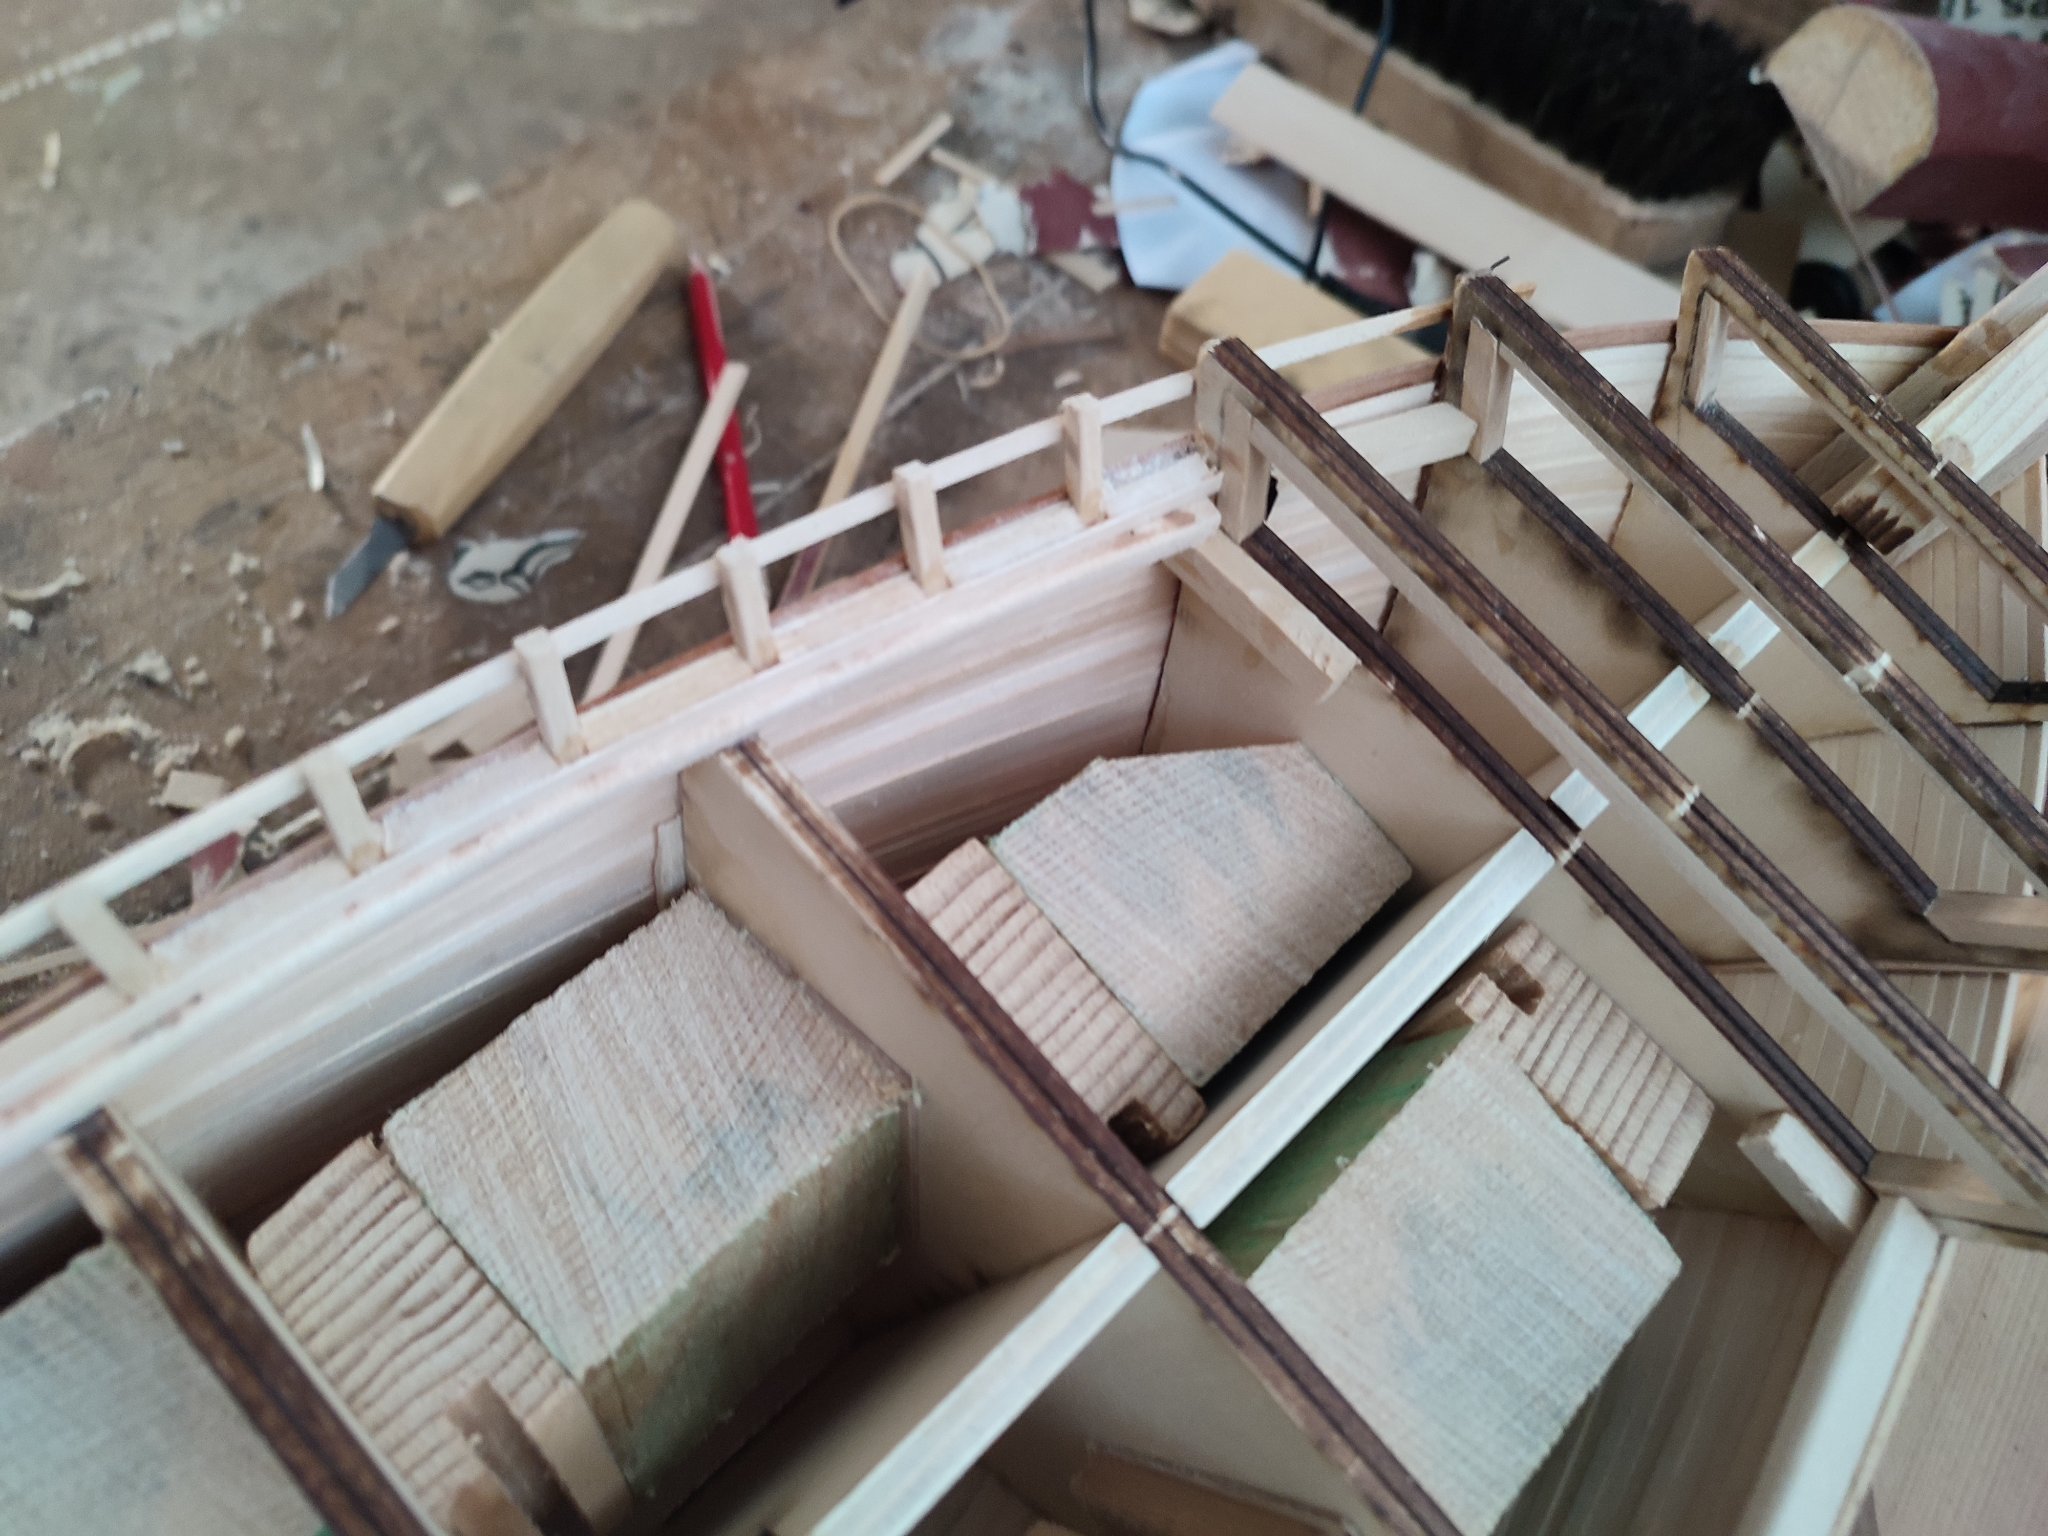
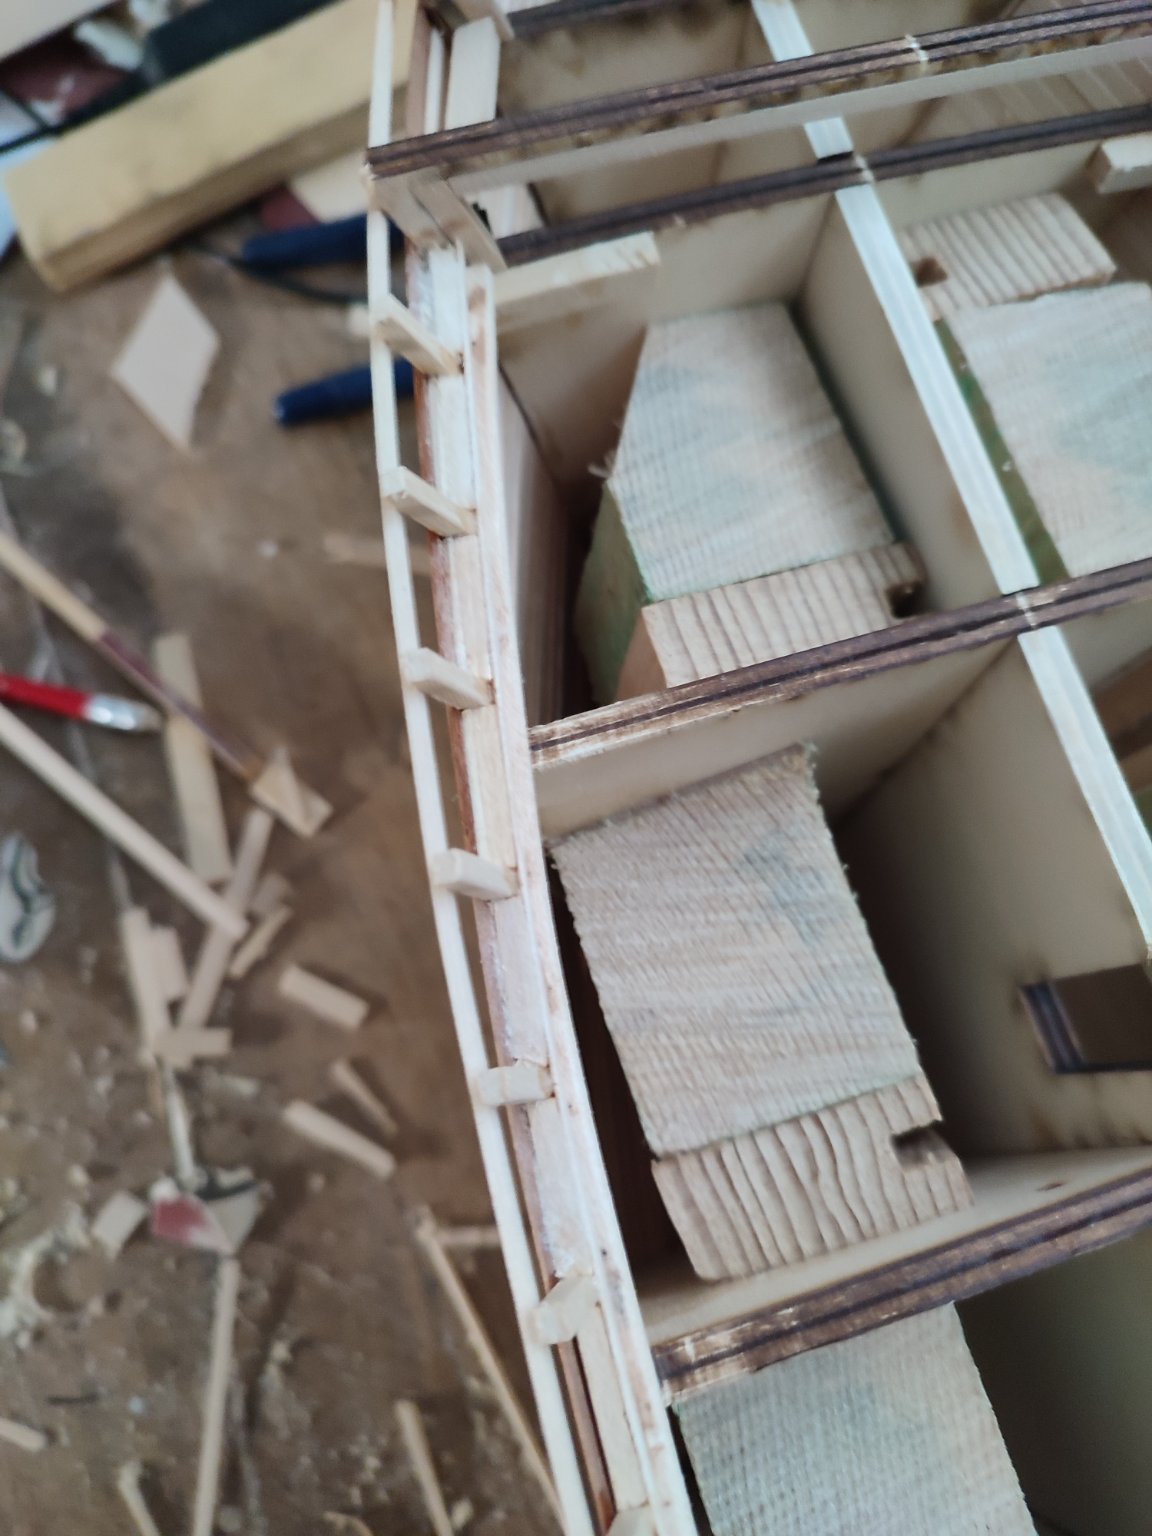
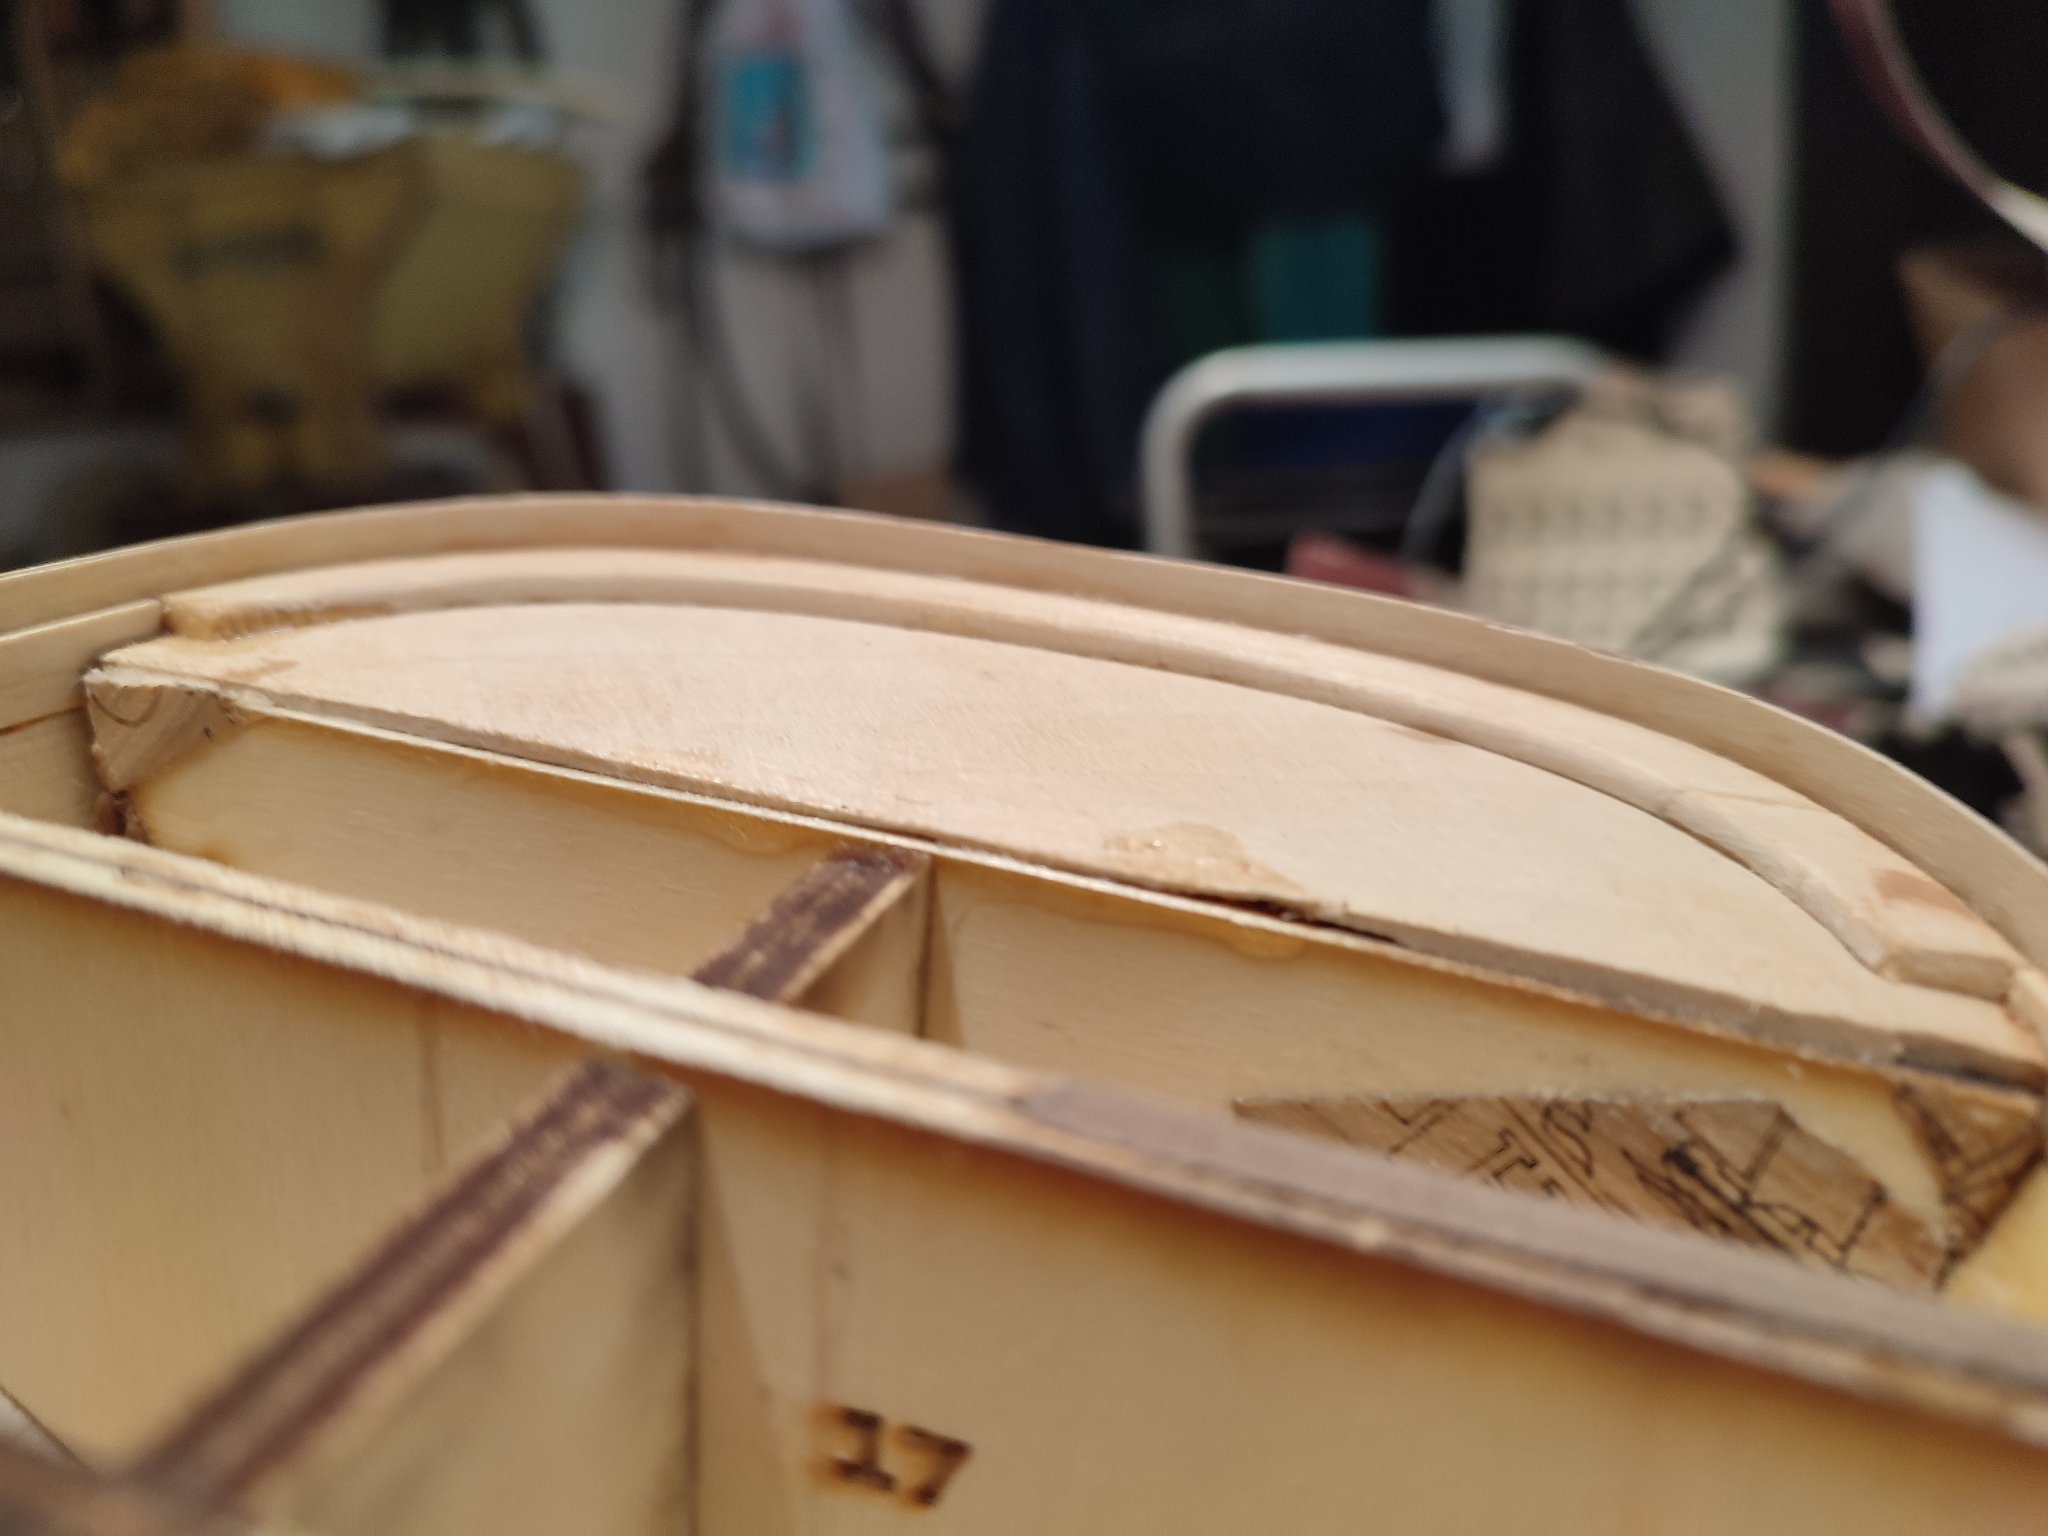
...Bulwark stanchions angles were smoothered and rounder ( as much as All wooden corners...) So i did try to be honest to this idea...
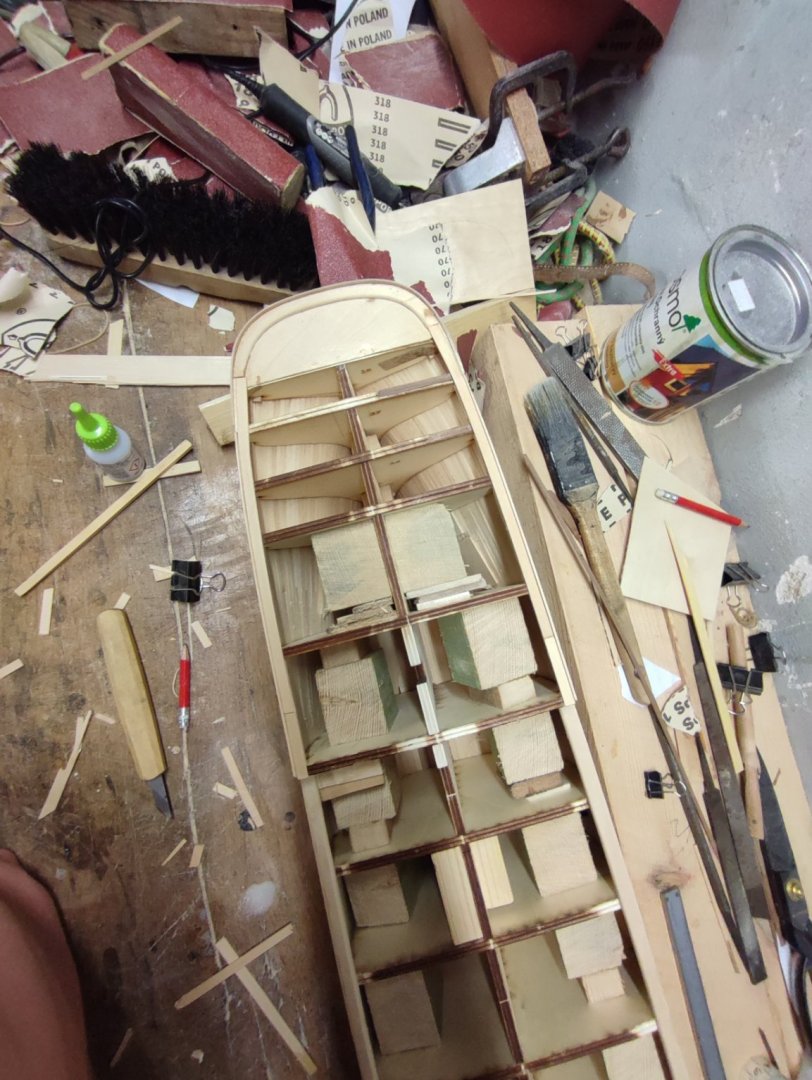
I didnt copy any method looked how its done by model expo but invented my own process how to firmly fasten them. Helped by stringer as my usual friend here...filled holes ať the end. IT was beautiful day ....looks like waterways Will get color soon ! I mušt say there IS something astonishing following almost original process ...so much to learn and so far entire Boat IS wooden. Wow. When i stand a person in scale IT was Mammoth! Thanks for watching comment etc...Everyone have good weekend ! V.


-
58 minutes ago, rwiederrich said:
Fun astronomy stuff…….reinactments are fun too.
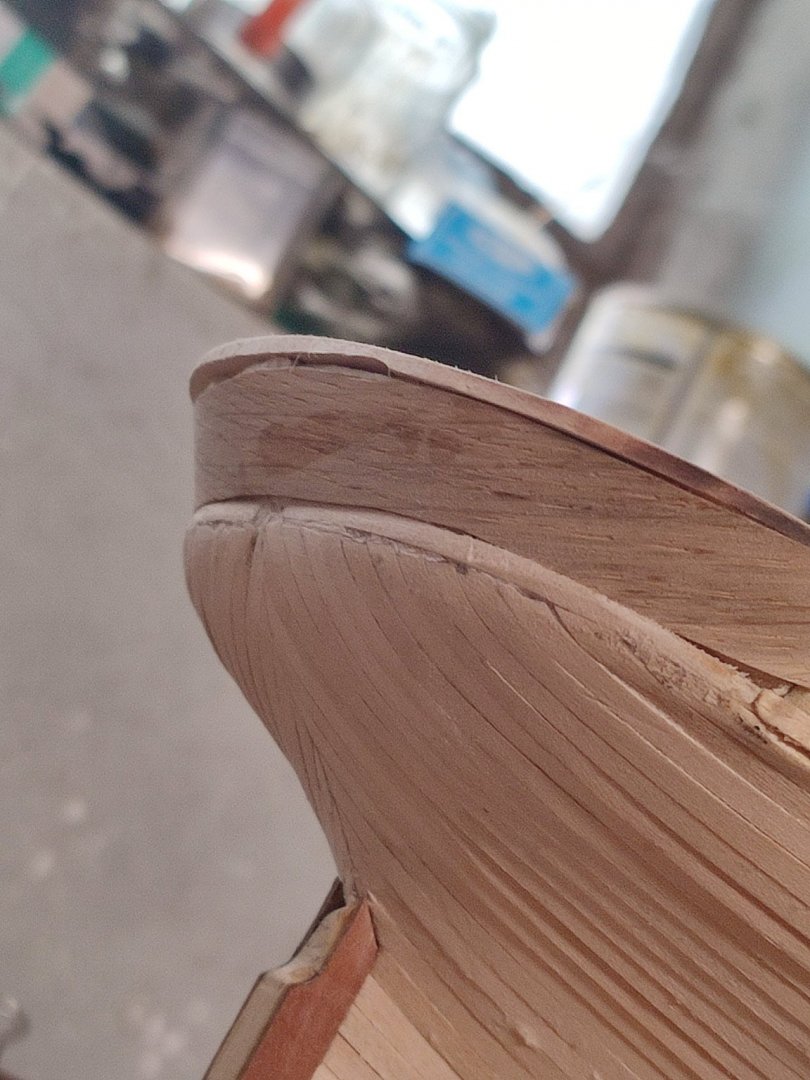
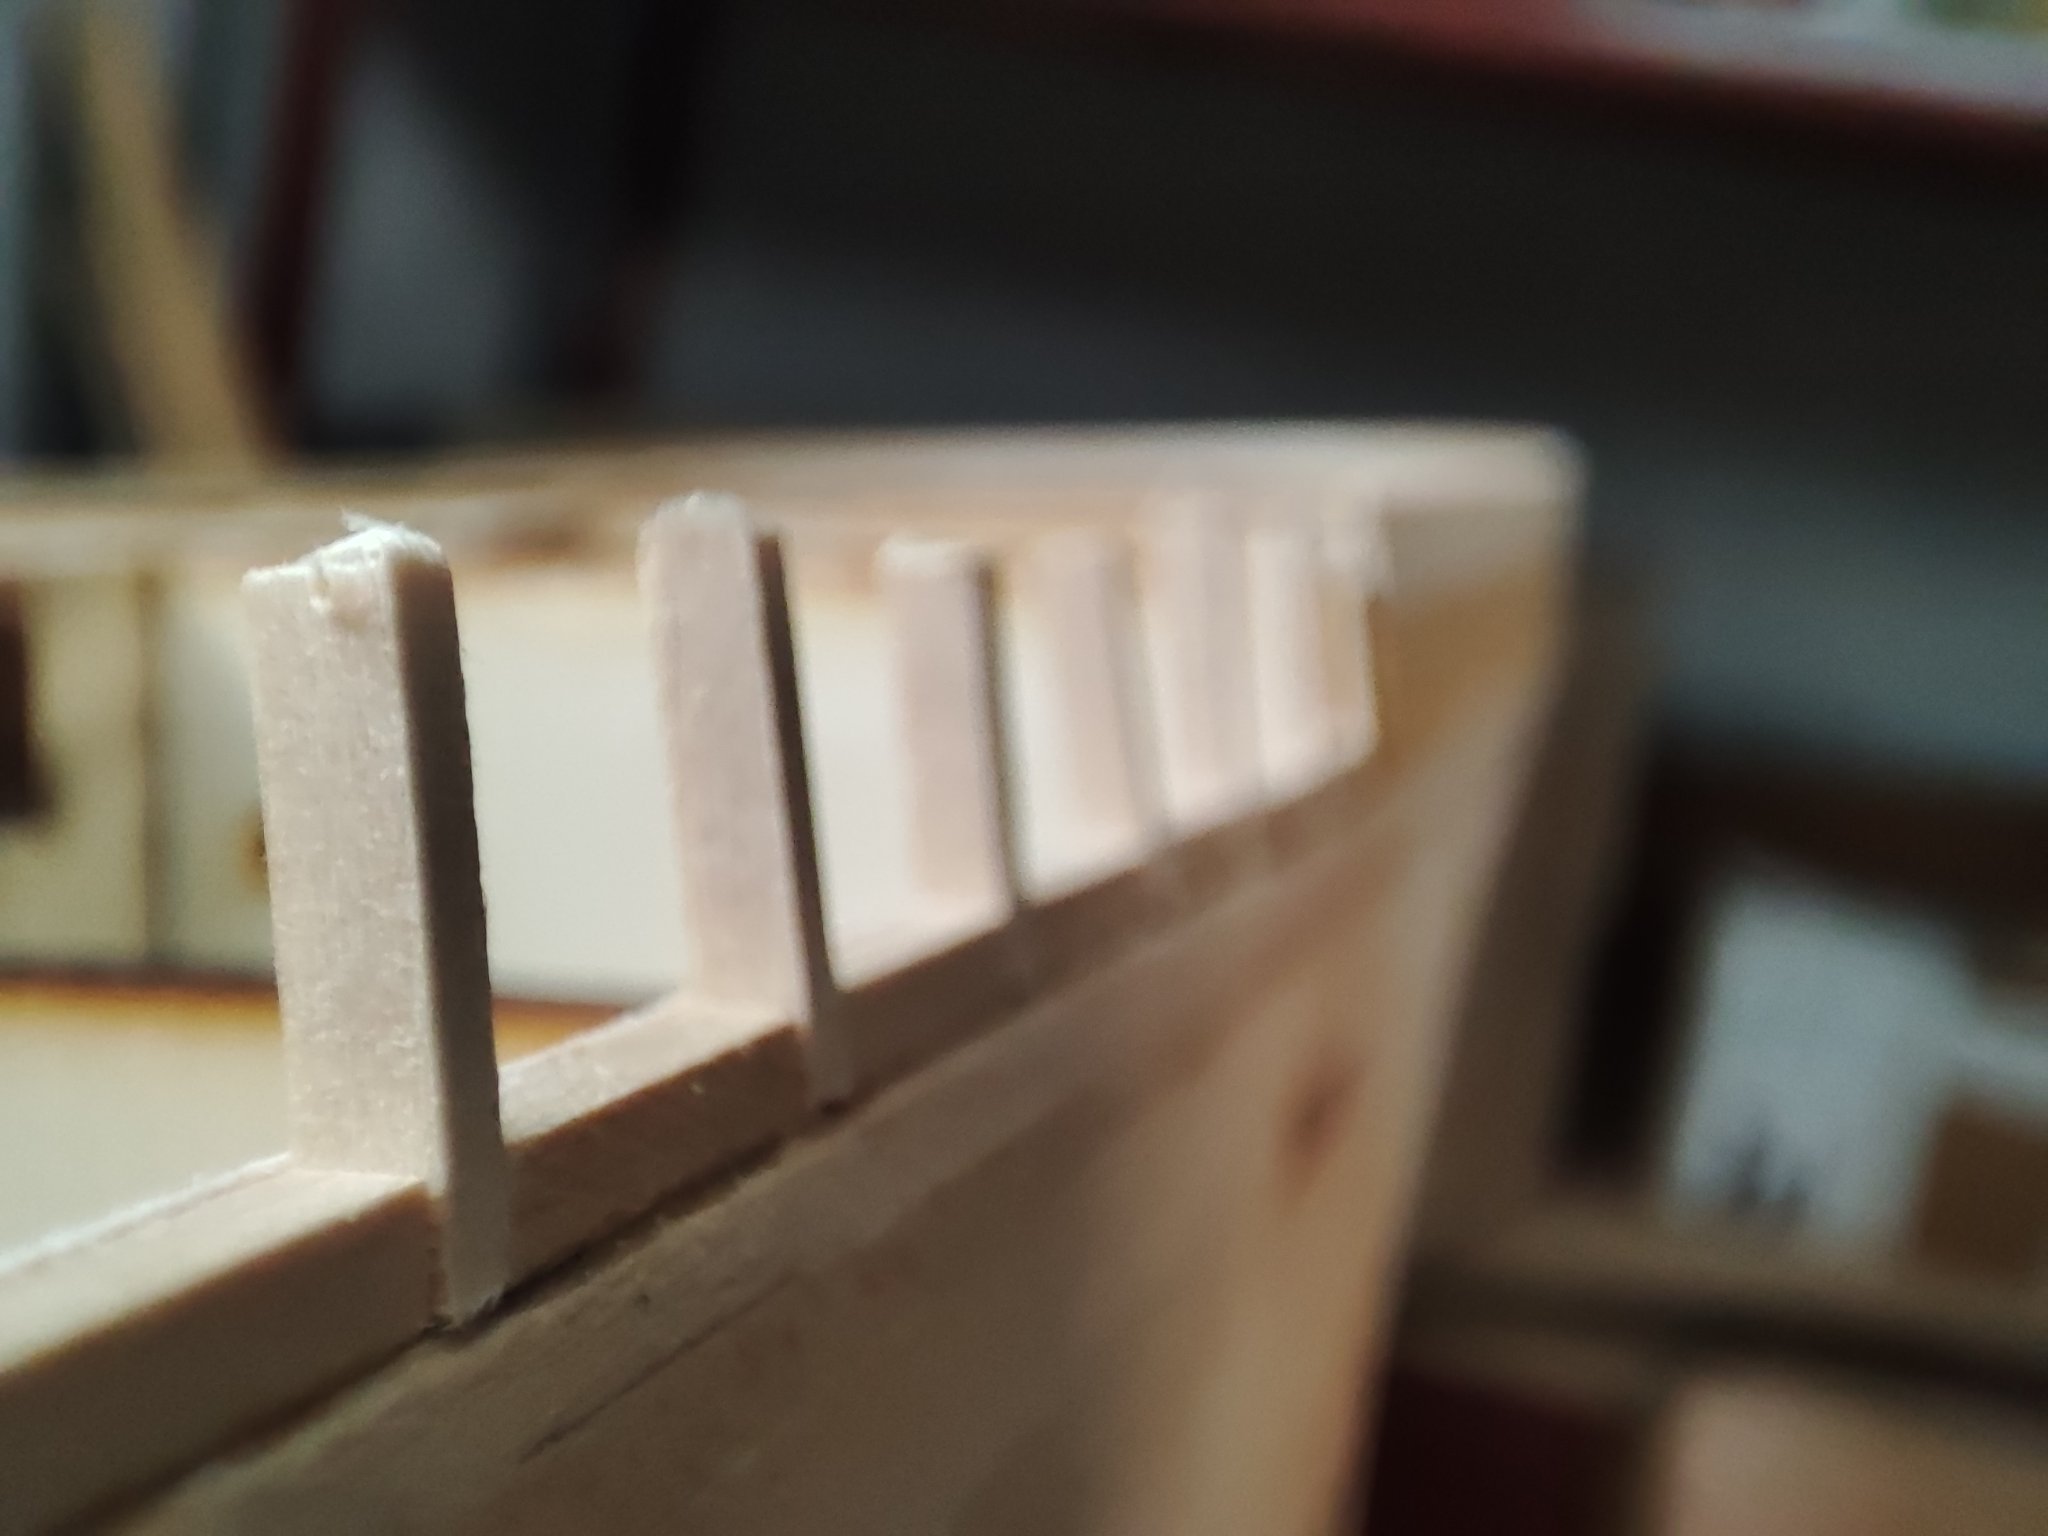
Spent some time finishing up the top gallant rail cap. Scribing both sides was a challenge.
Rob


I aplaud Rob. Well observed and truly believably executed. in your tiny scale this is mastery really. you getting dressed her by jevwellery already , soon to be ready go dancing
")
-
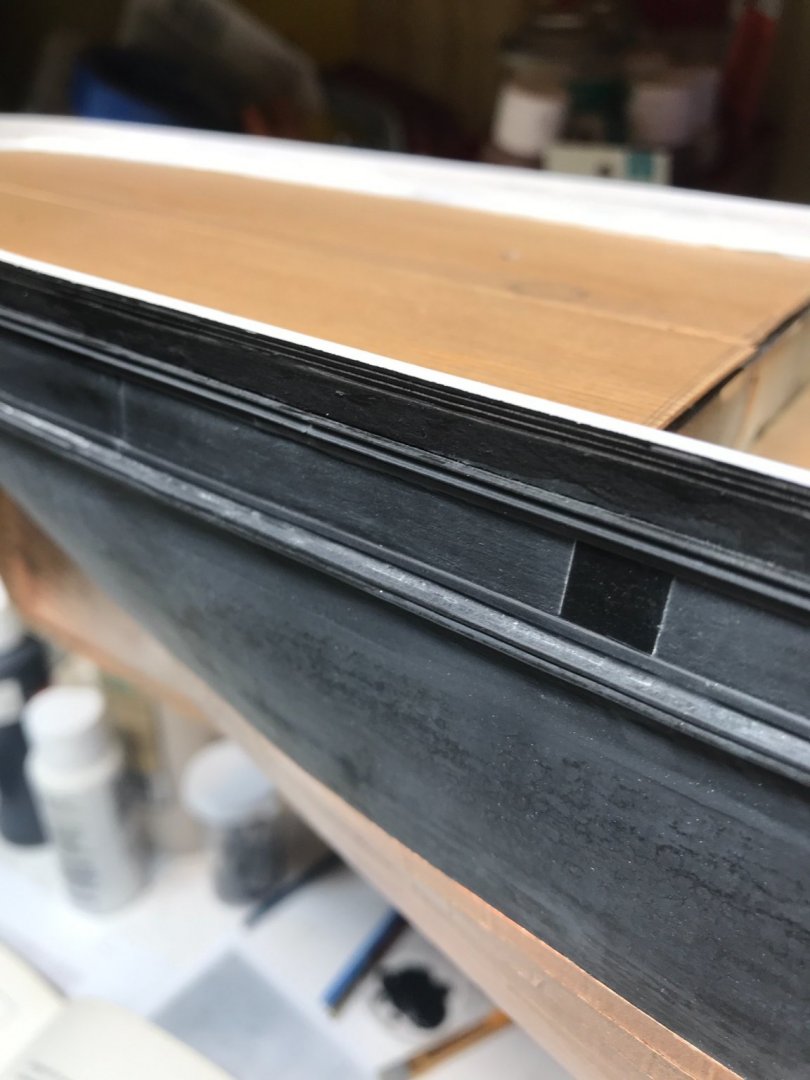
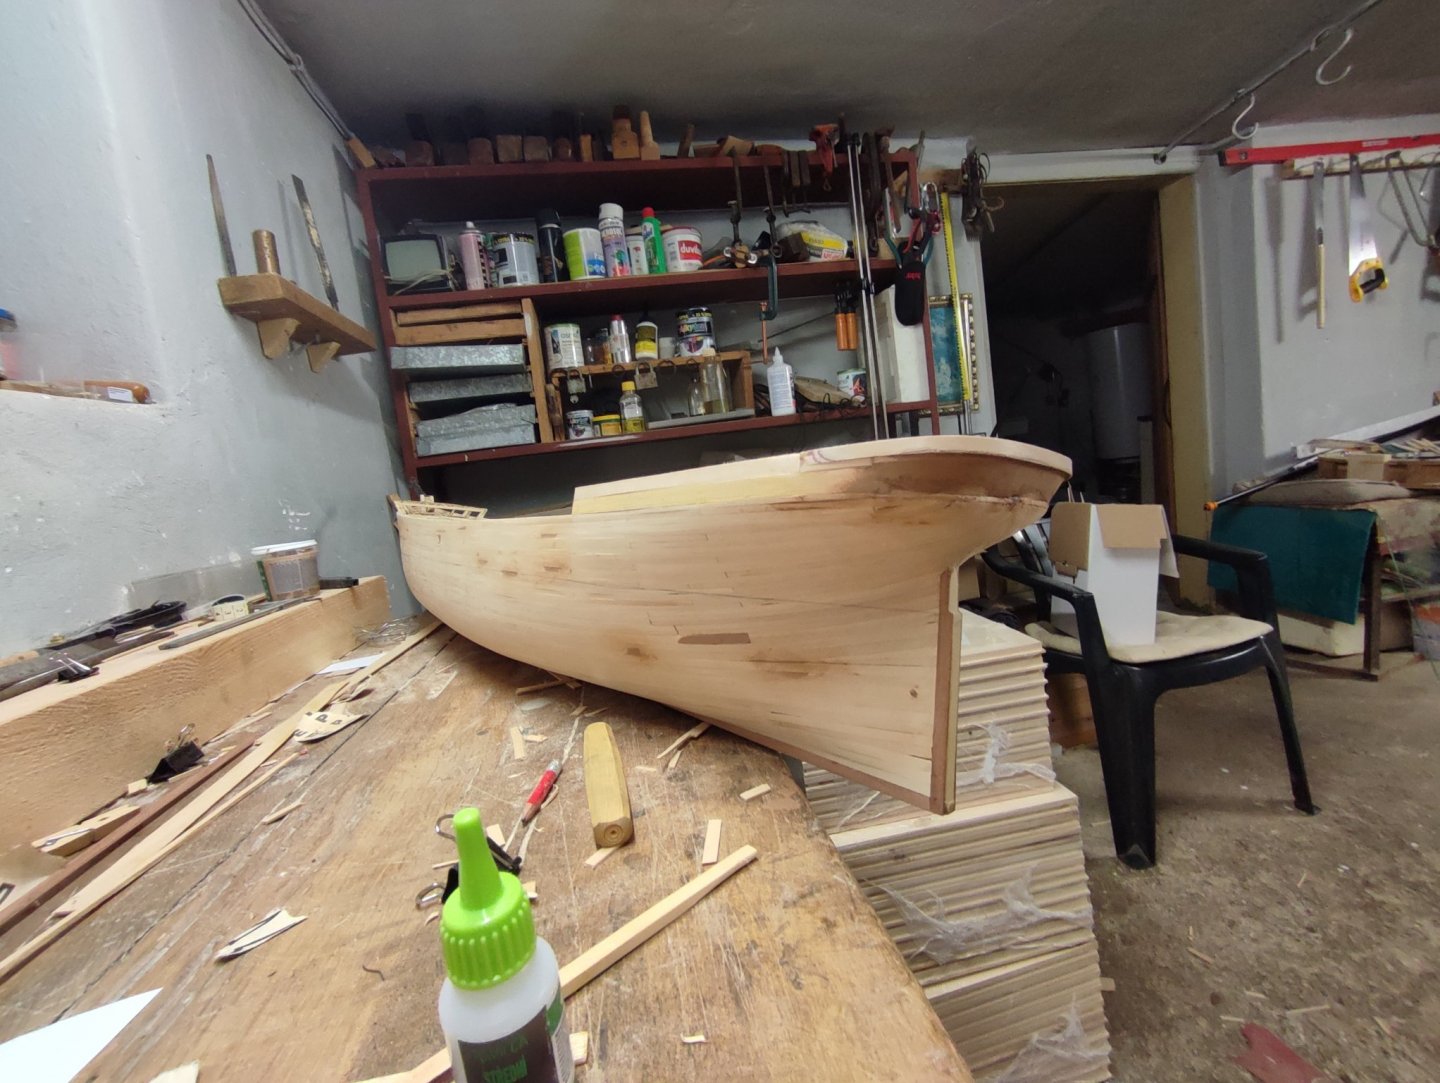
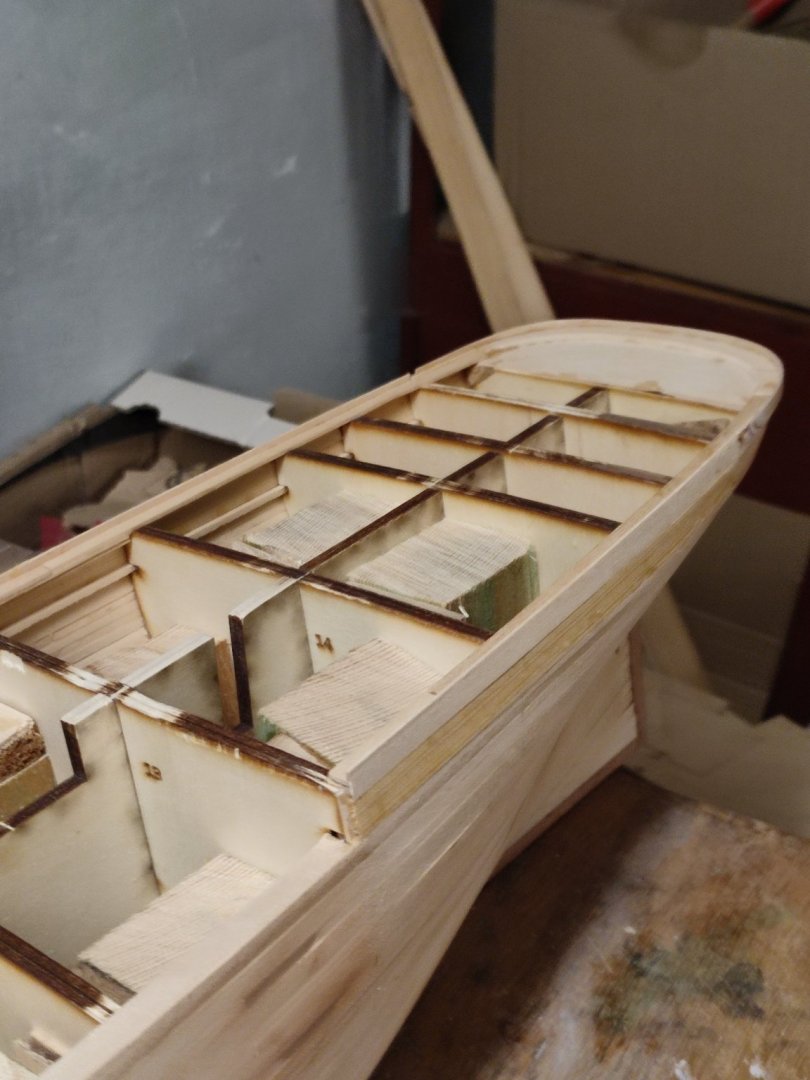
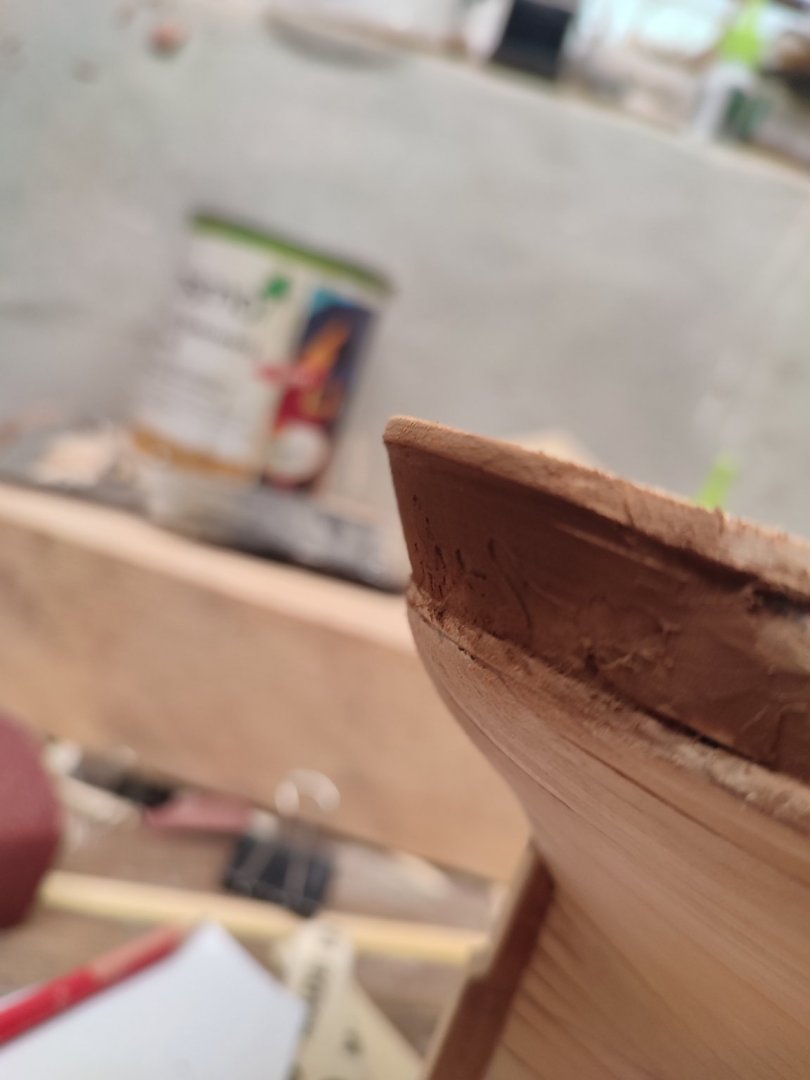
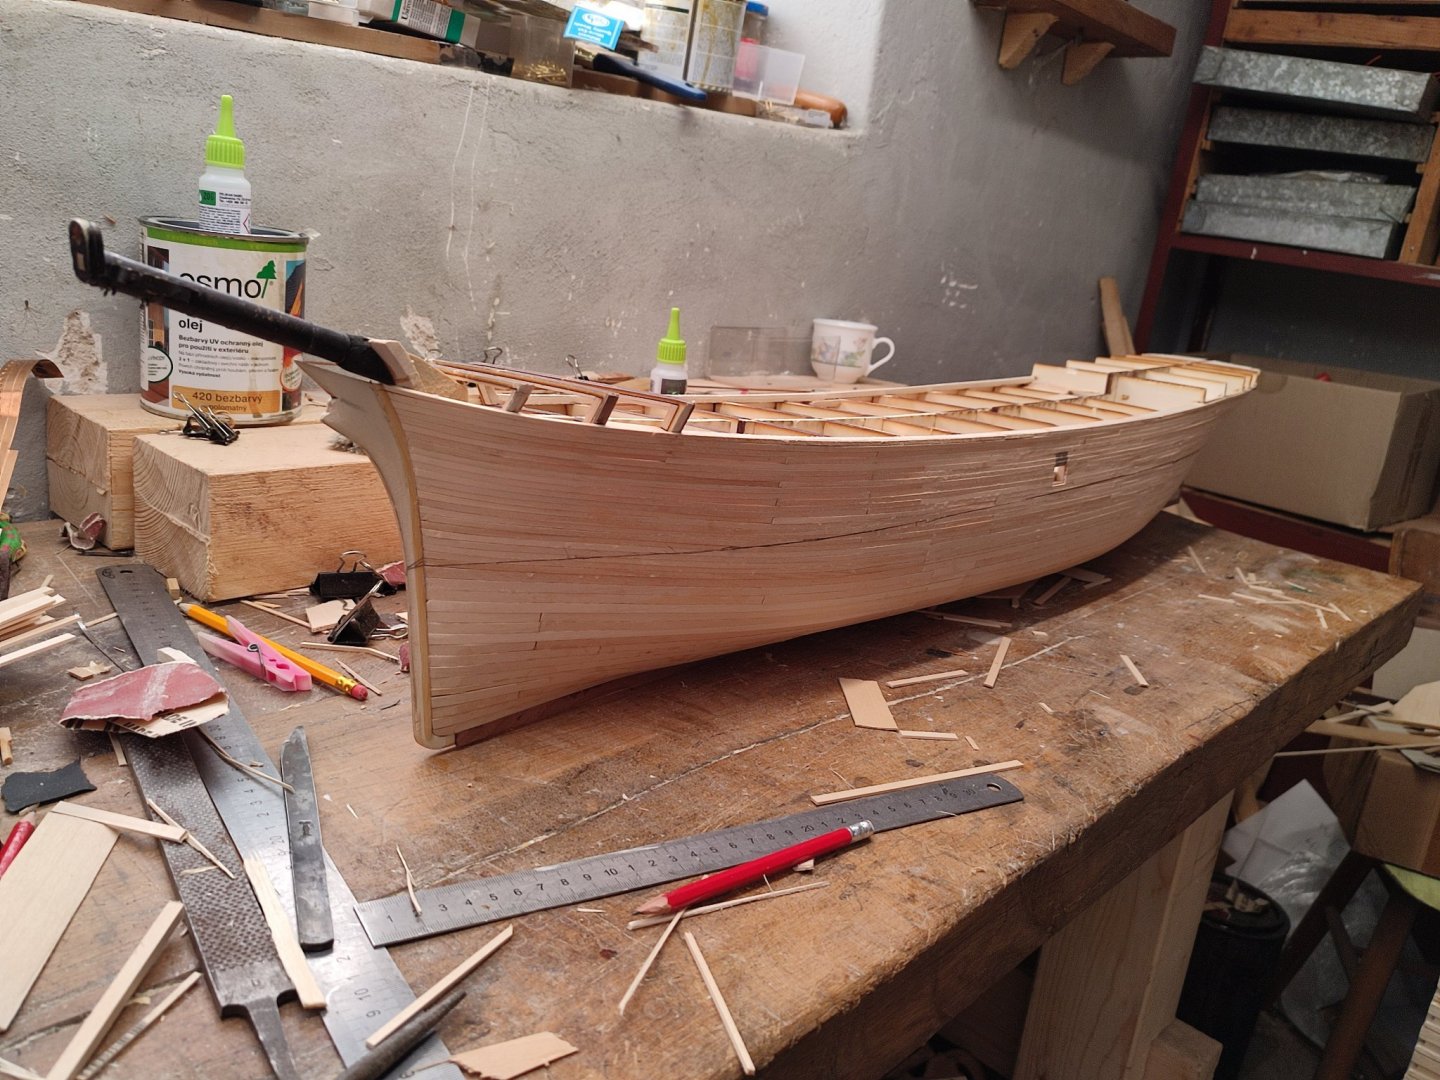
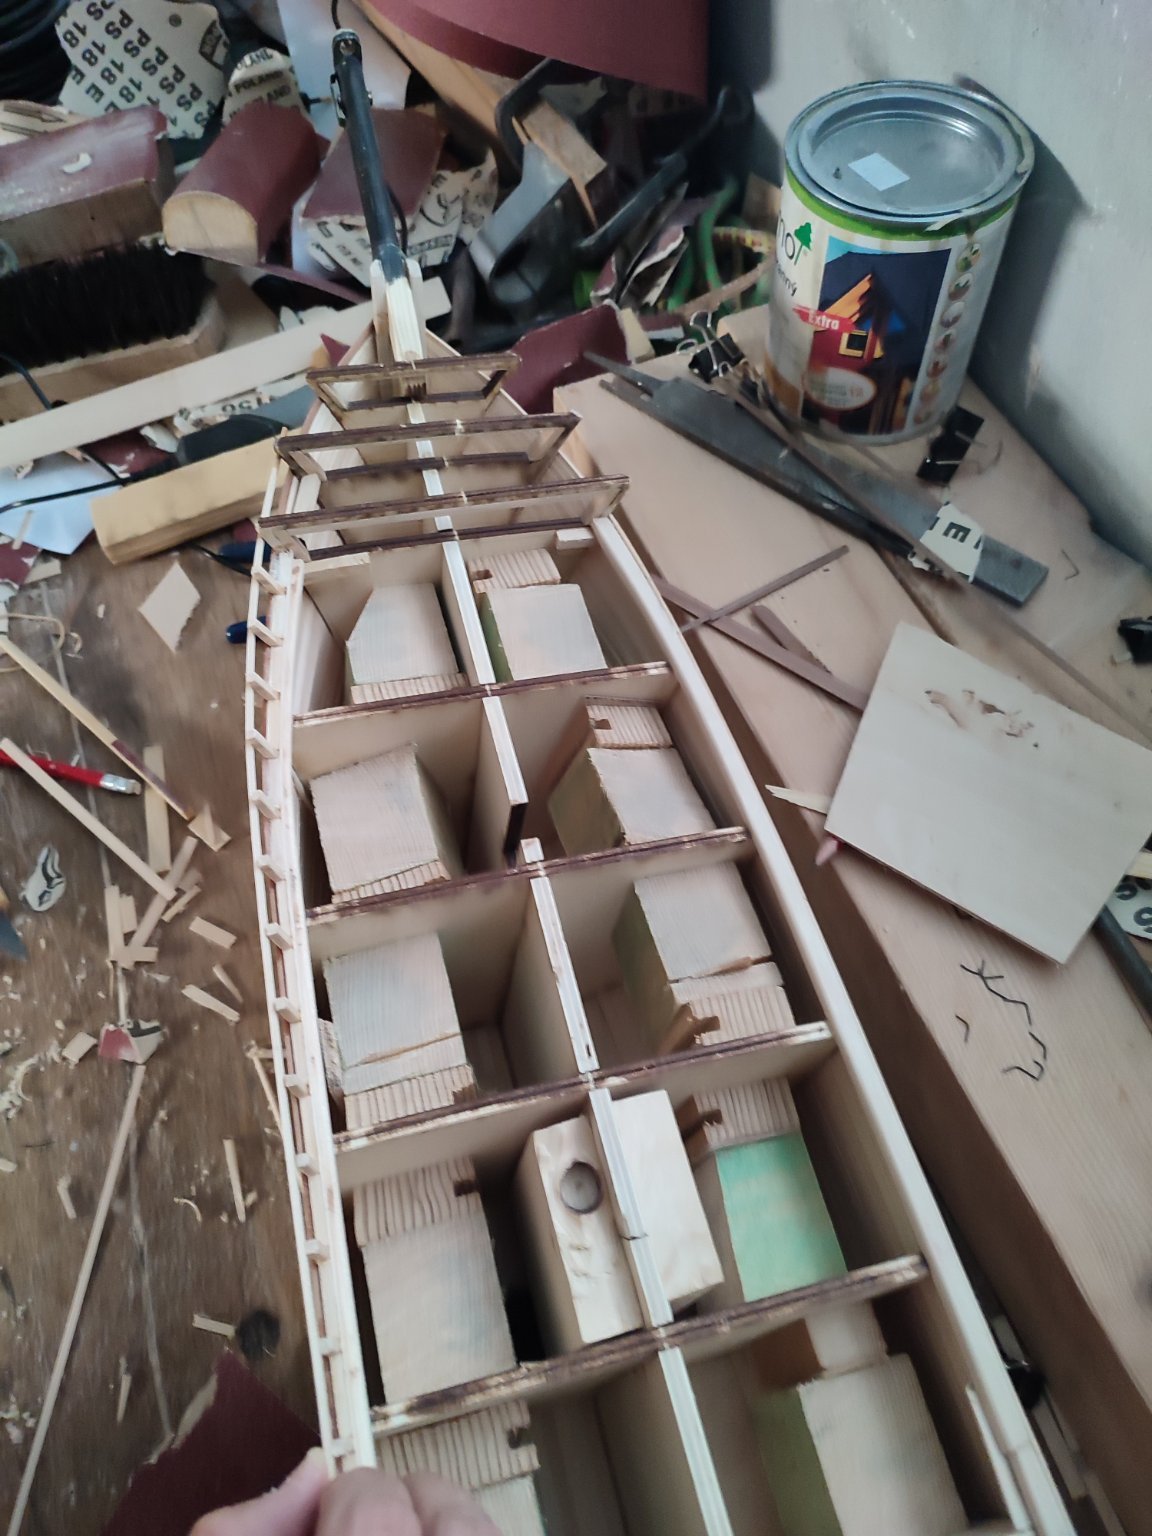
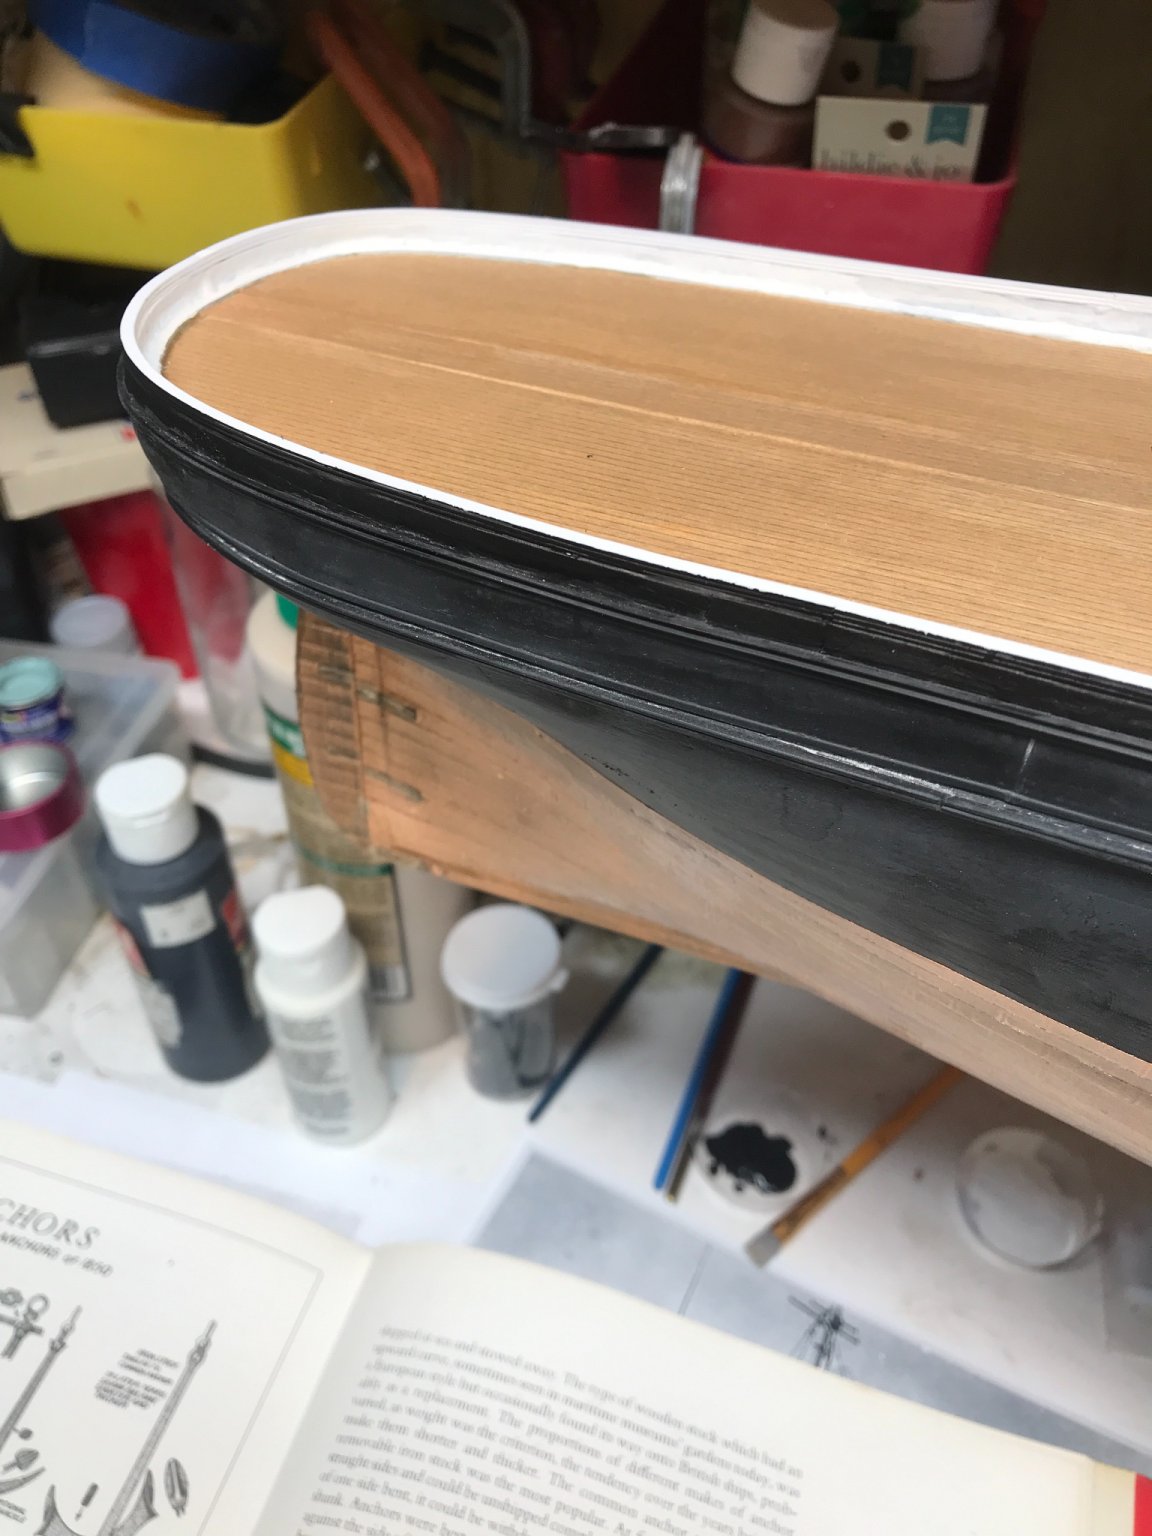
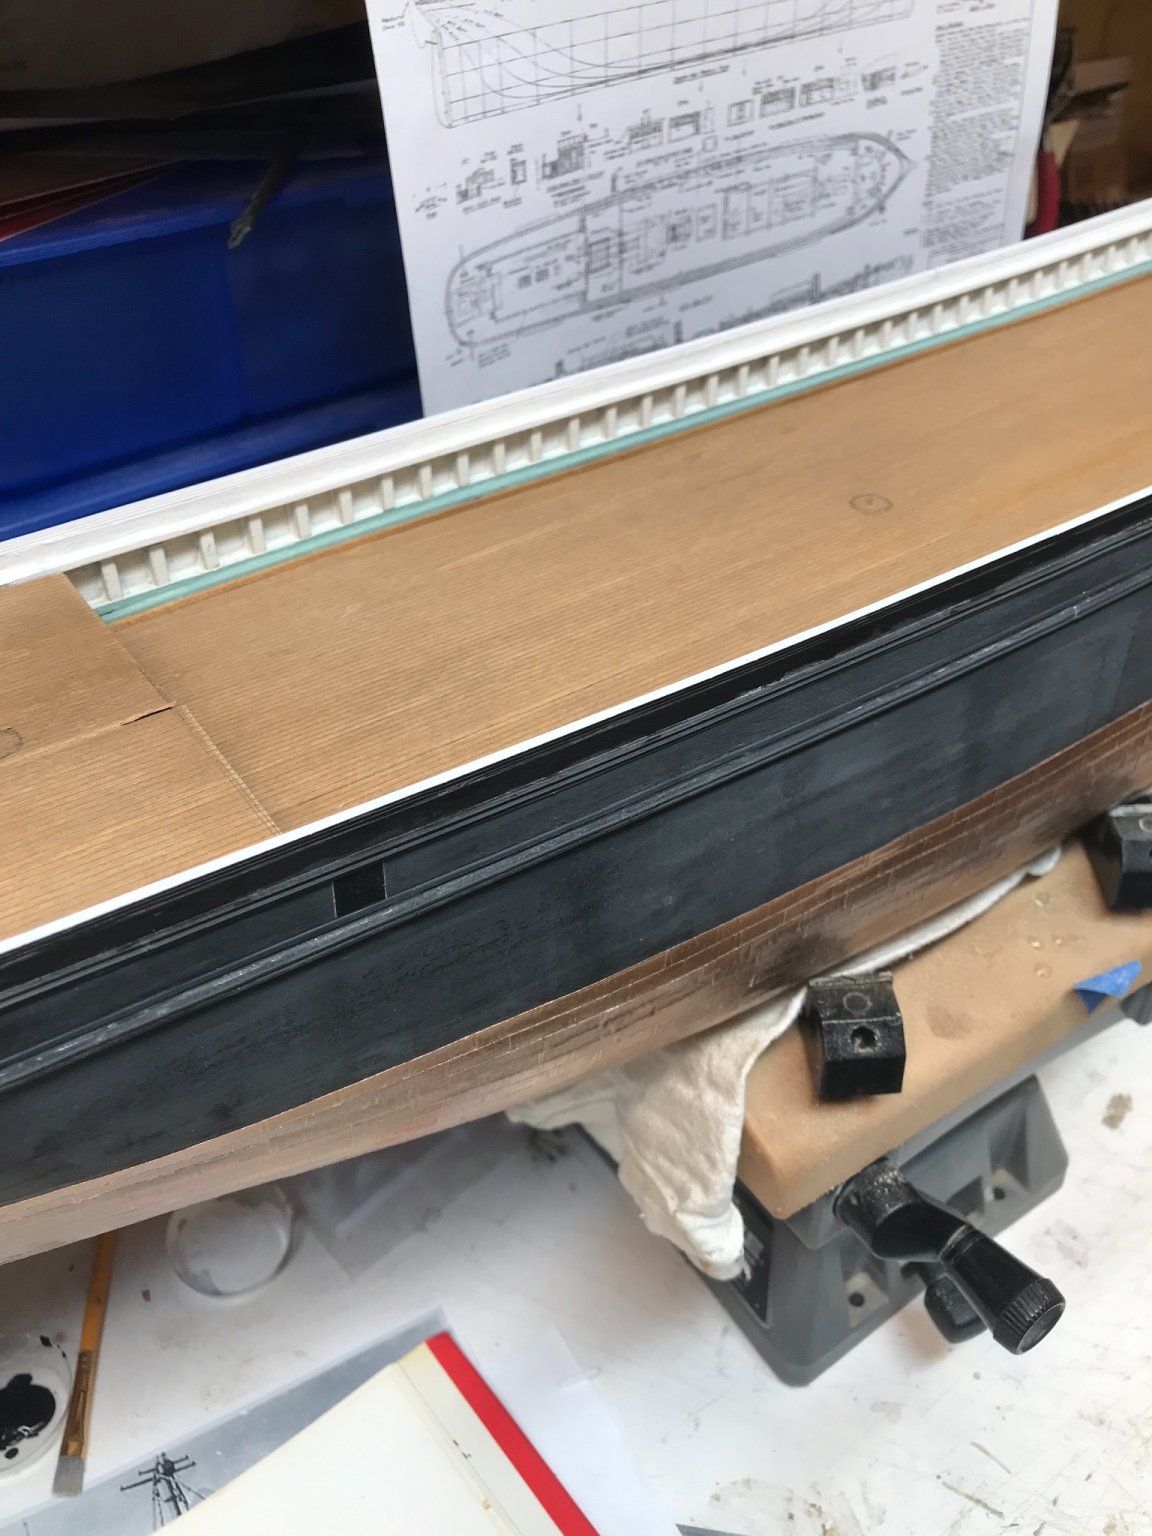
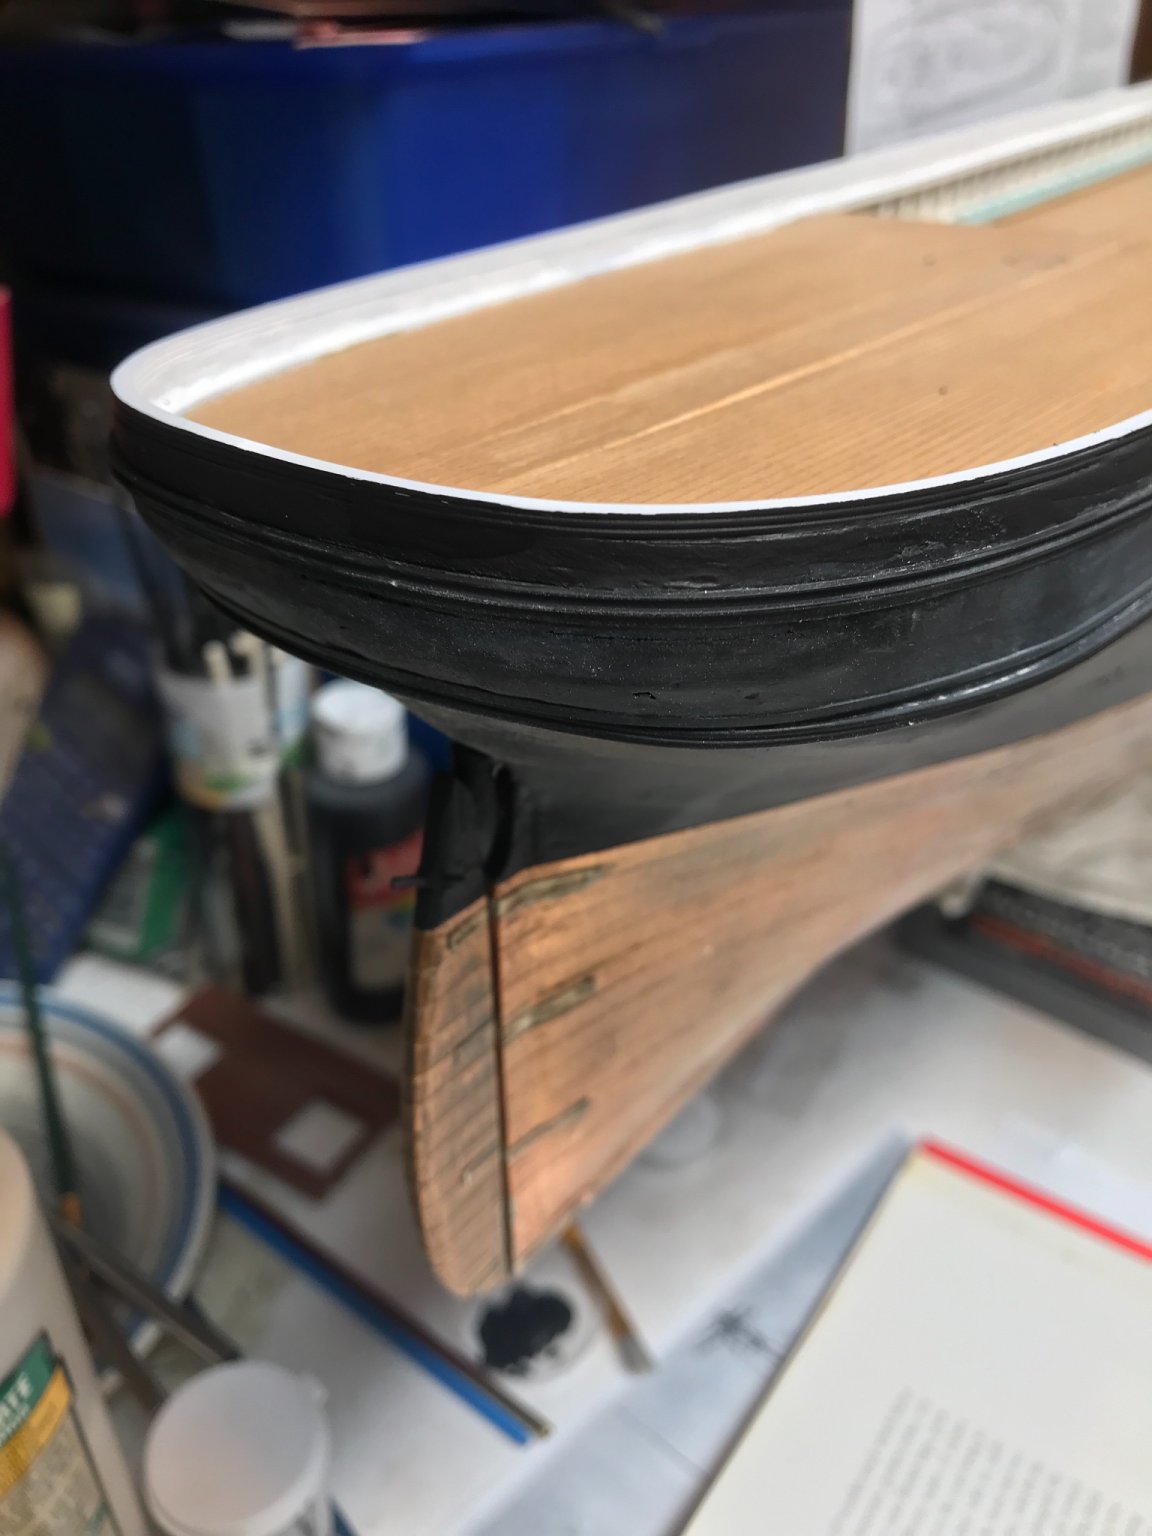
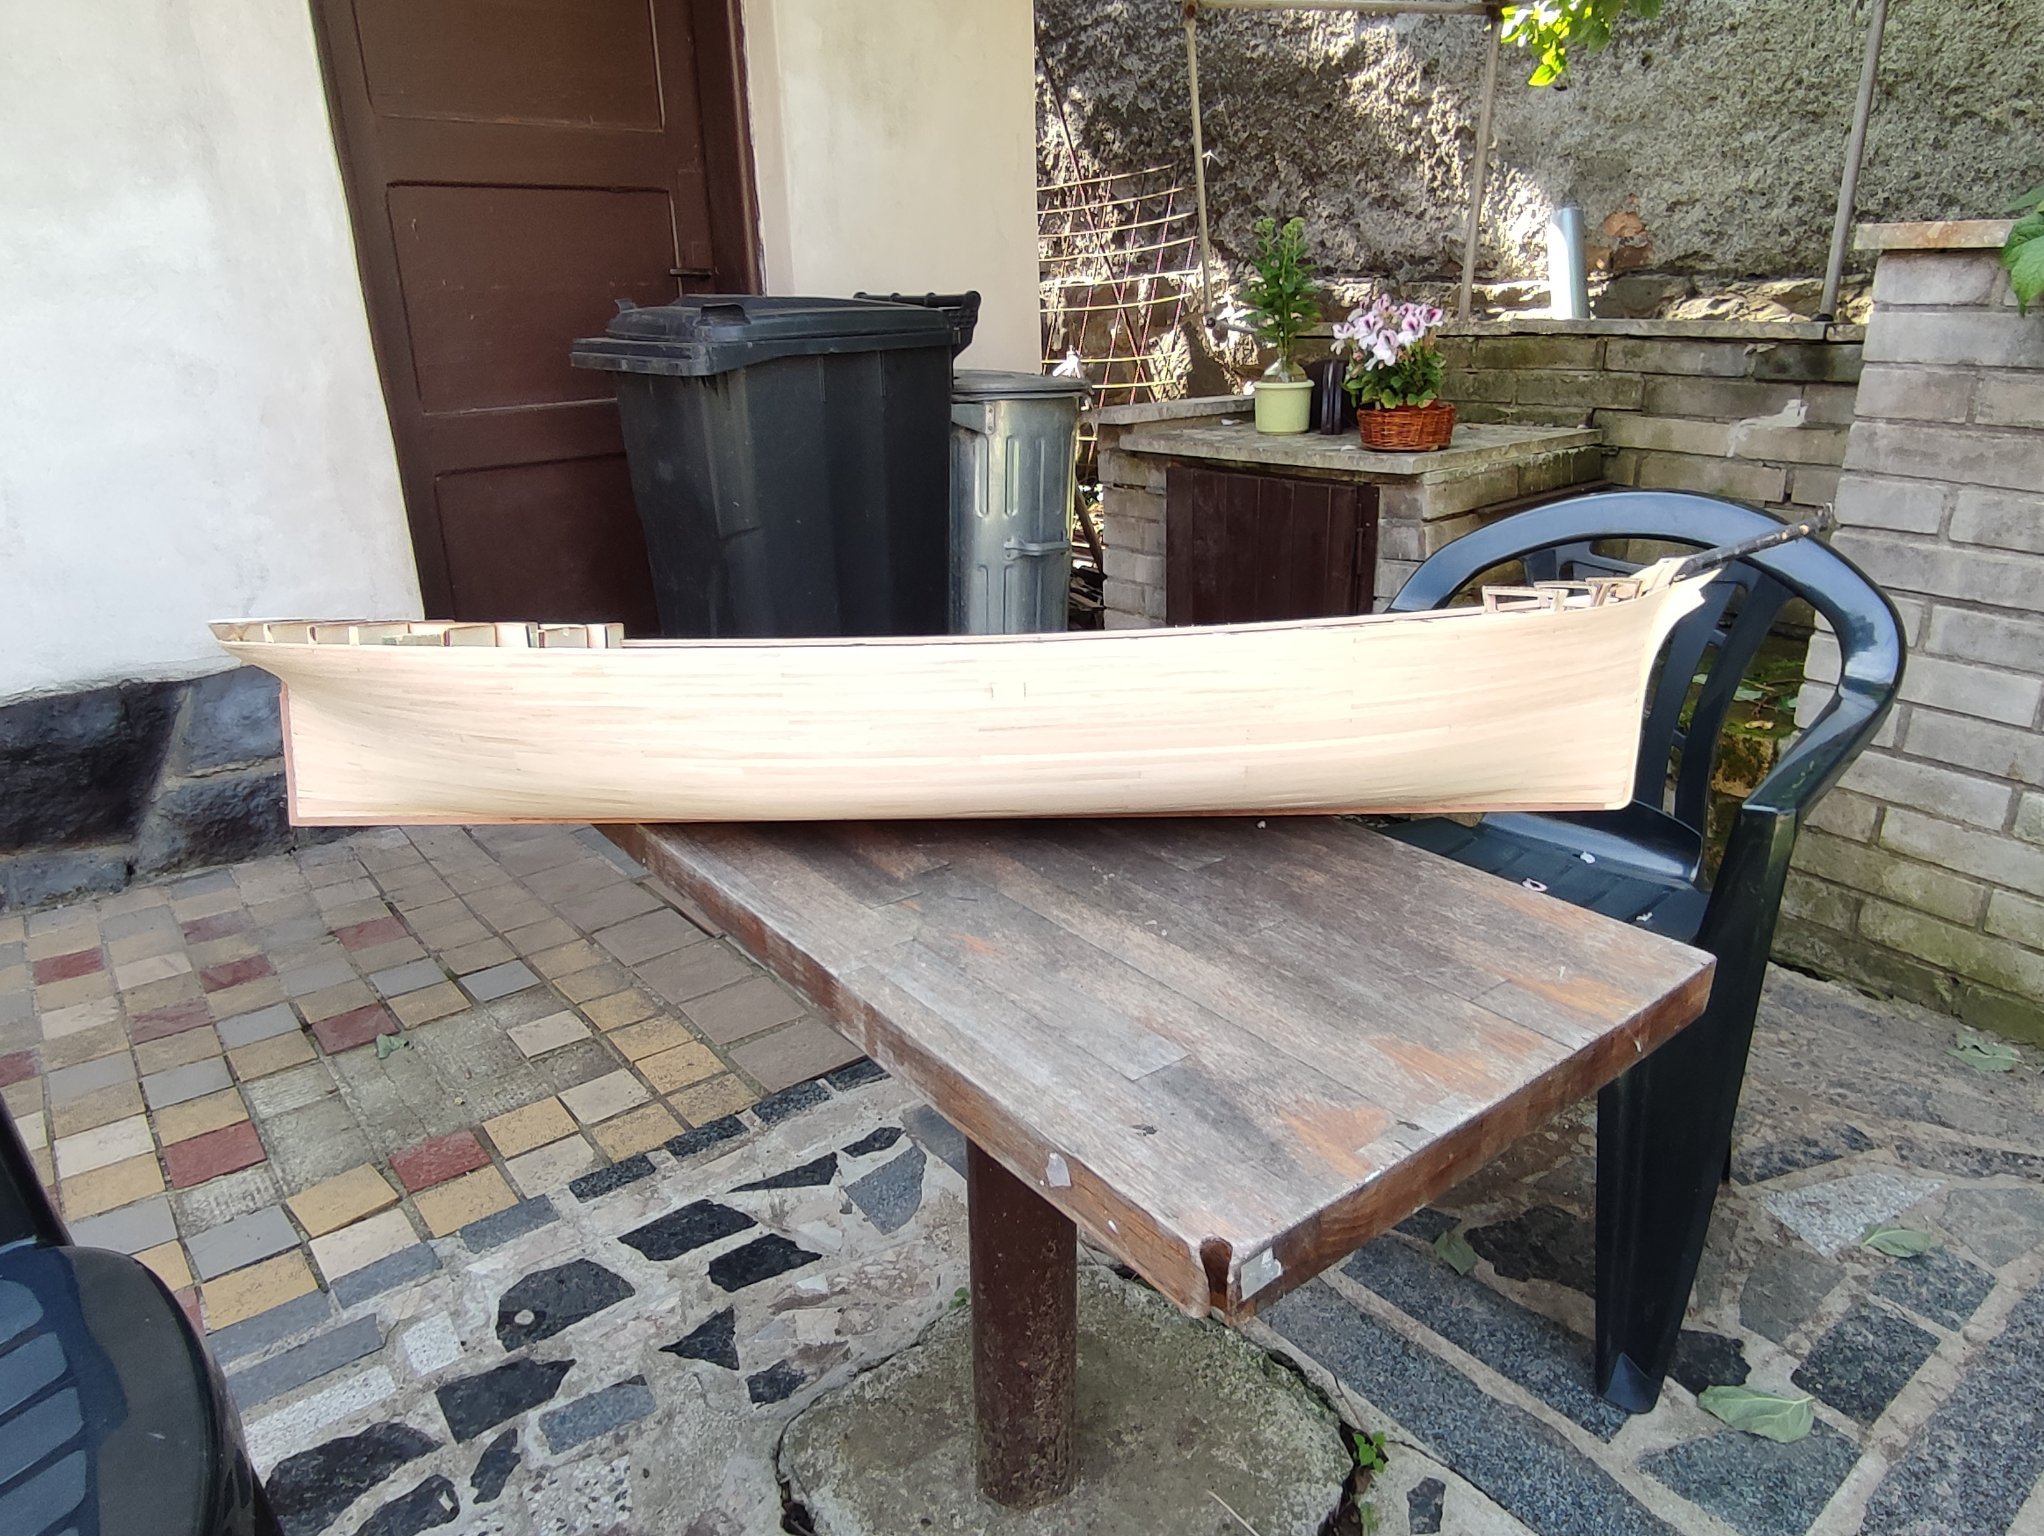
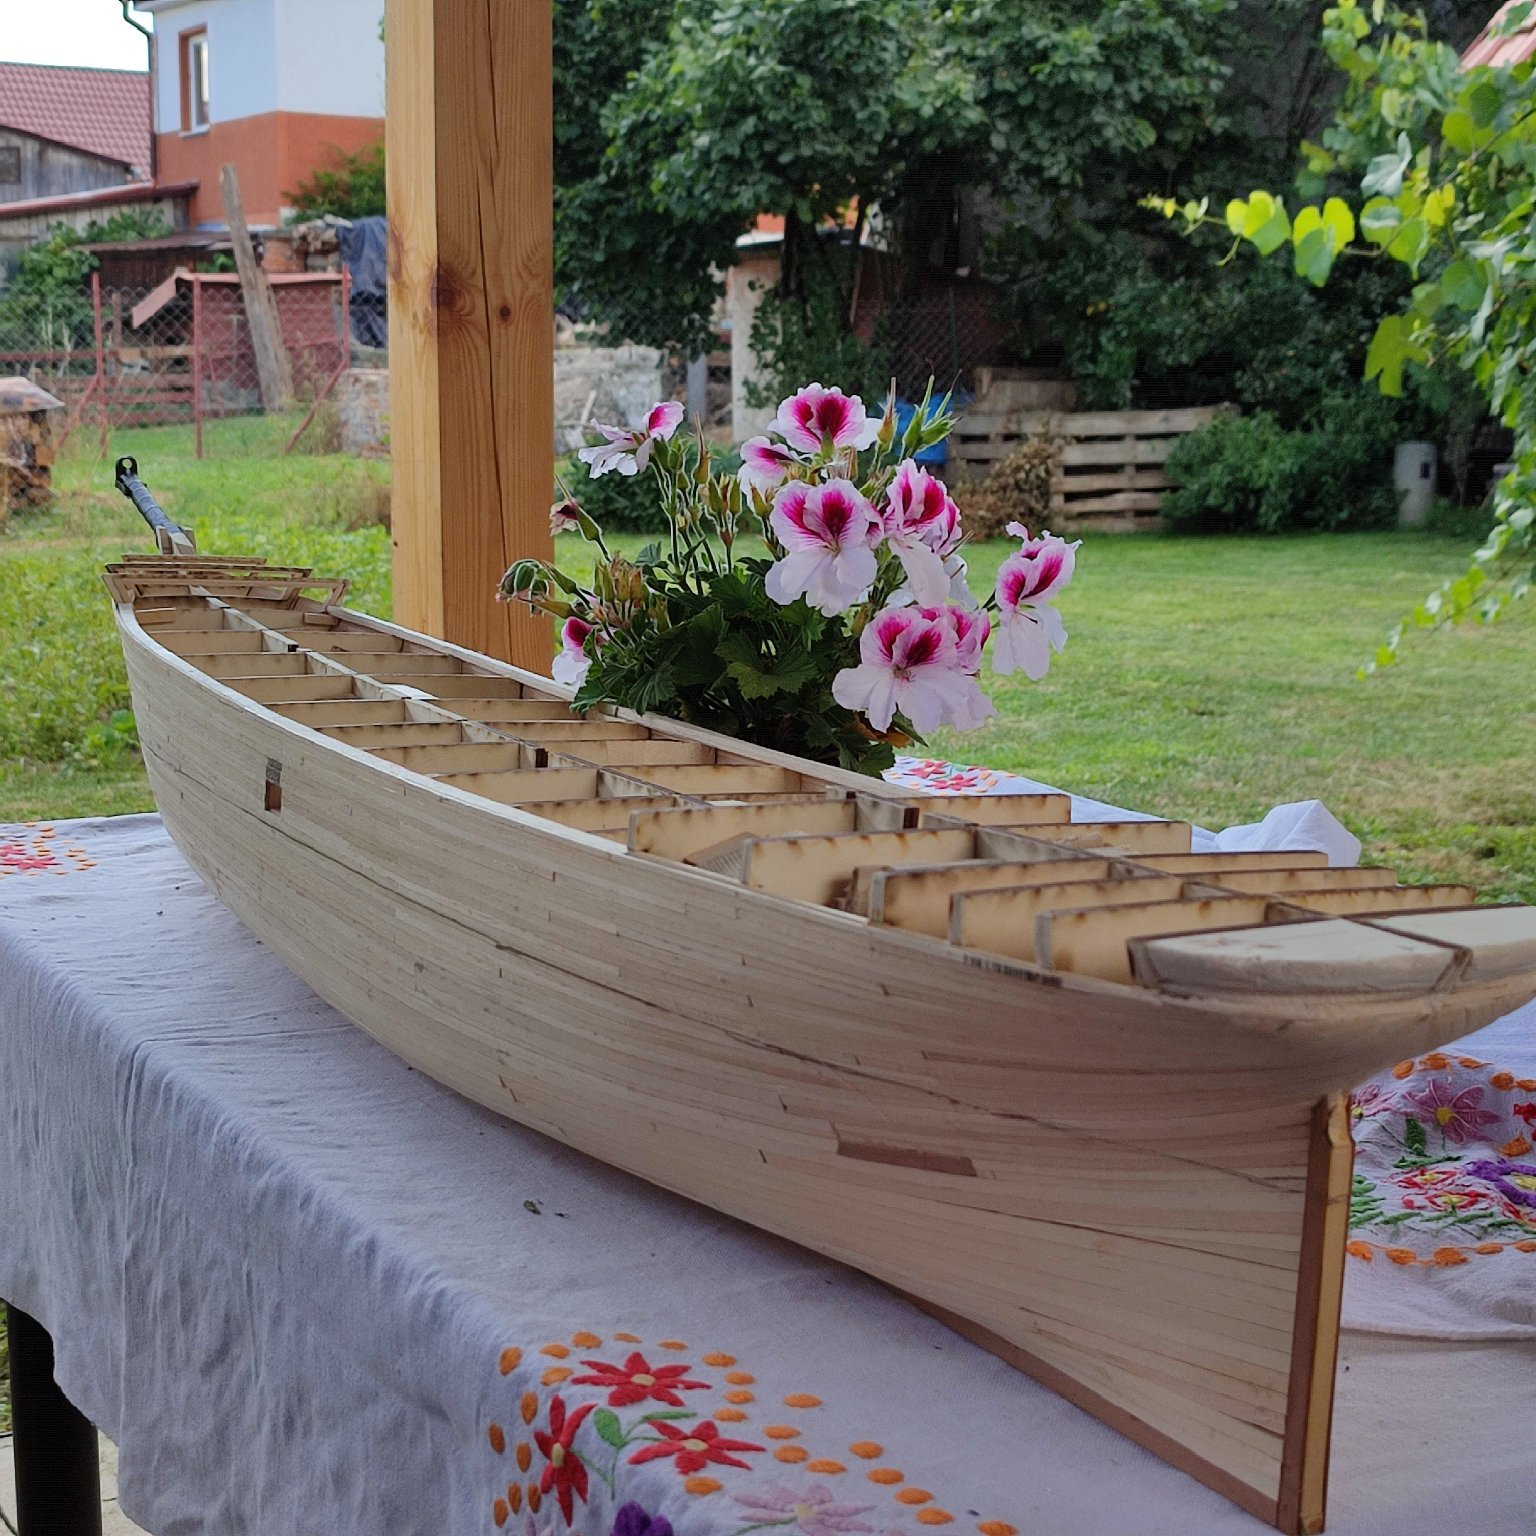
Its raining All day long so i have moved along today....entire poop IS done.


- GrandpaPhil, druxey and mtaylor
-
 3
3
-
1 minute ago, rwiederrich said:
Yeah, once you’ve laid about 2000 plates you can easily be persuaded to NOT do it again. And you only plated half the hull of Curry. You have plenty to do till Christmas , so full steam ahead. You have bulwarks to build , and another delay in wood delivery. Getting old is a major contributor, especially when having to tackle something that tries your patience. You’re doing a great job, I love it.
Rob
Exactly Rob. Noone knows what future brings, and with covid Madness i Can be thrown workless lazying in winter maybe i Will get joy to make plates
who knows. Fór this im leaving coppering off my back...but im sure when i paint half black IT would be hunting le to get done test of the hull AS Well ...Will see...
-
Just now, ClipperFan said:
Vladimir, no problem. It was just a thought. Anyway if you're considering modeling Glory as first launched, this gives you an idea of what shade her Muntz plates would have been when new.
Yeah, I would never accepted copper red myself Once i discovered lovely muntz
😉 be IT Liverpool shipped or American one ..
-
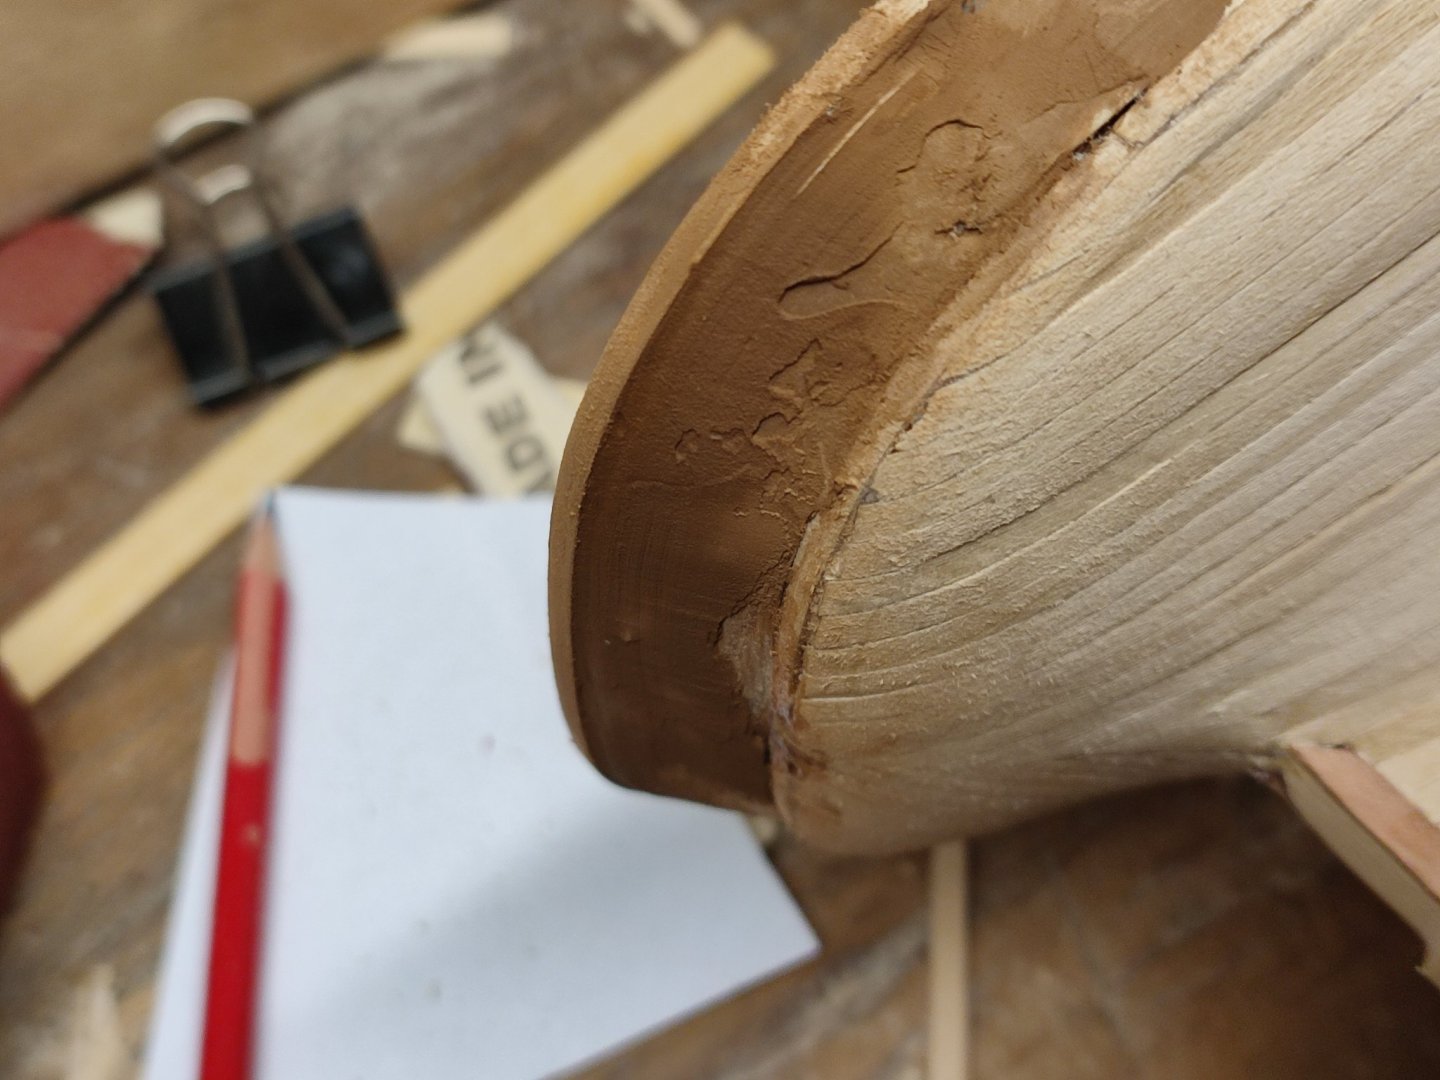
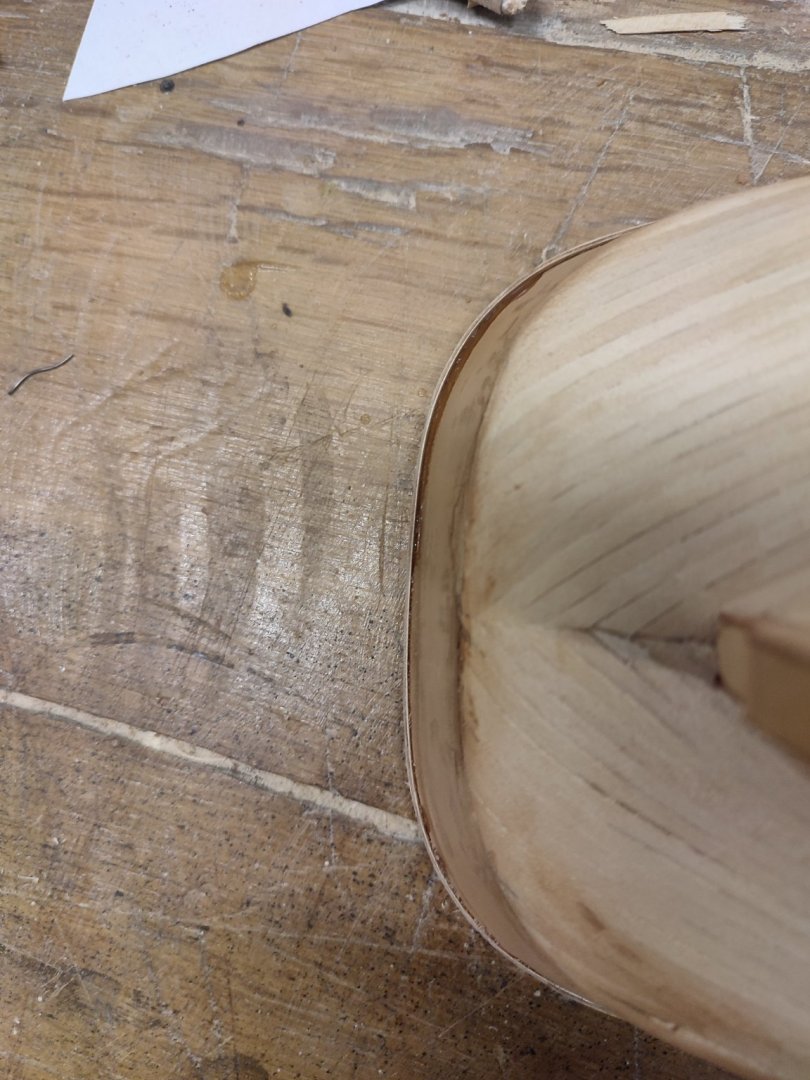
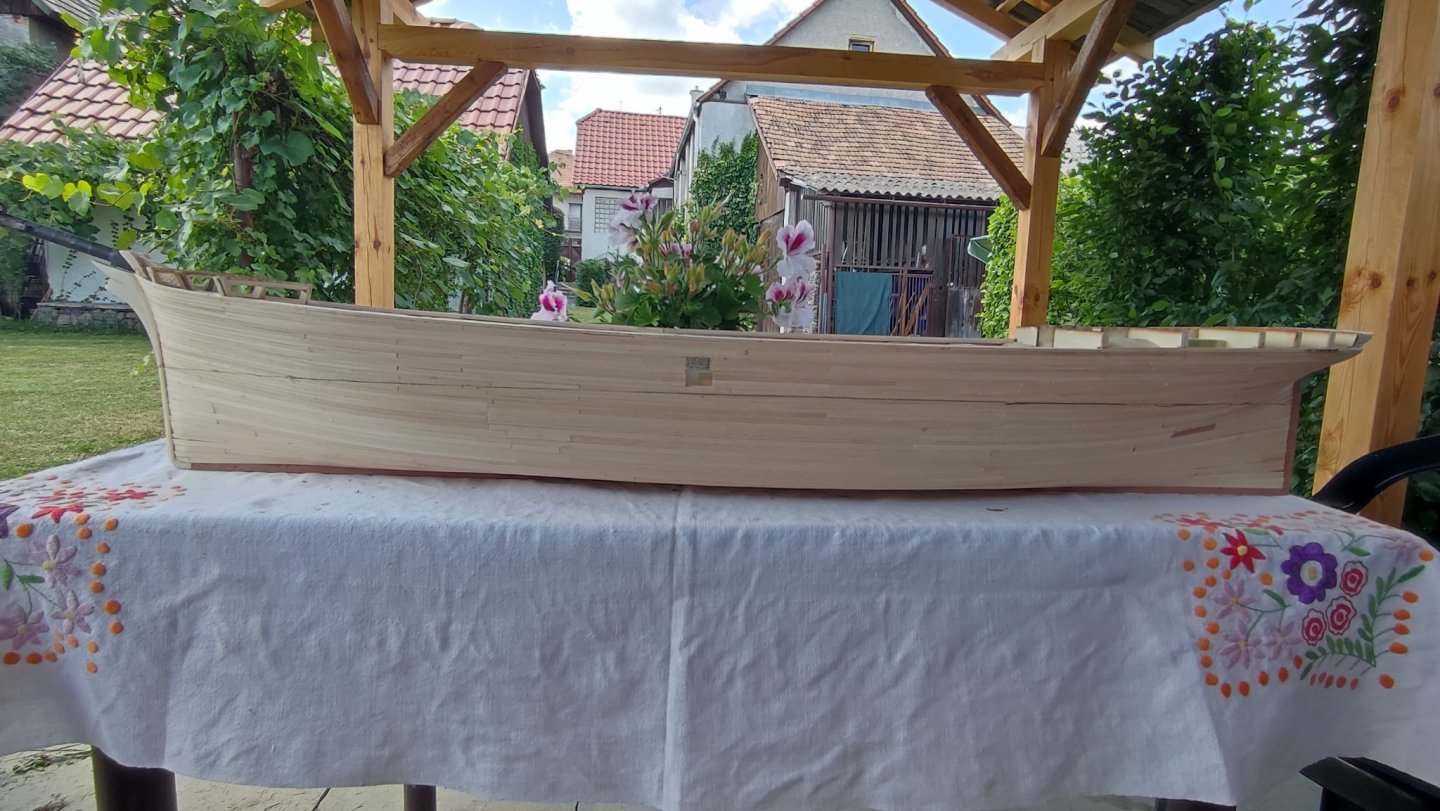
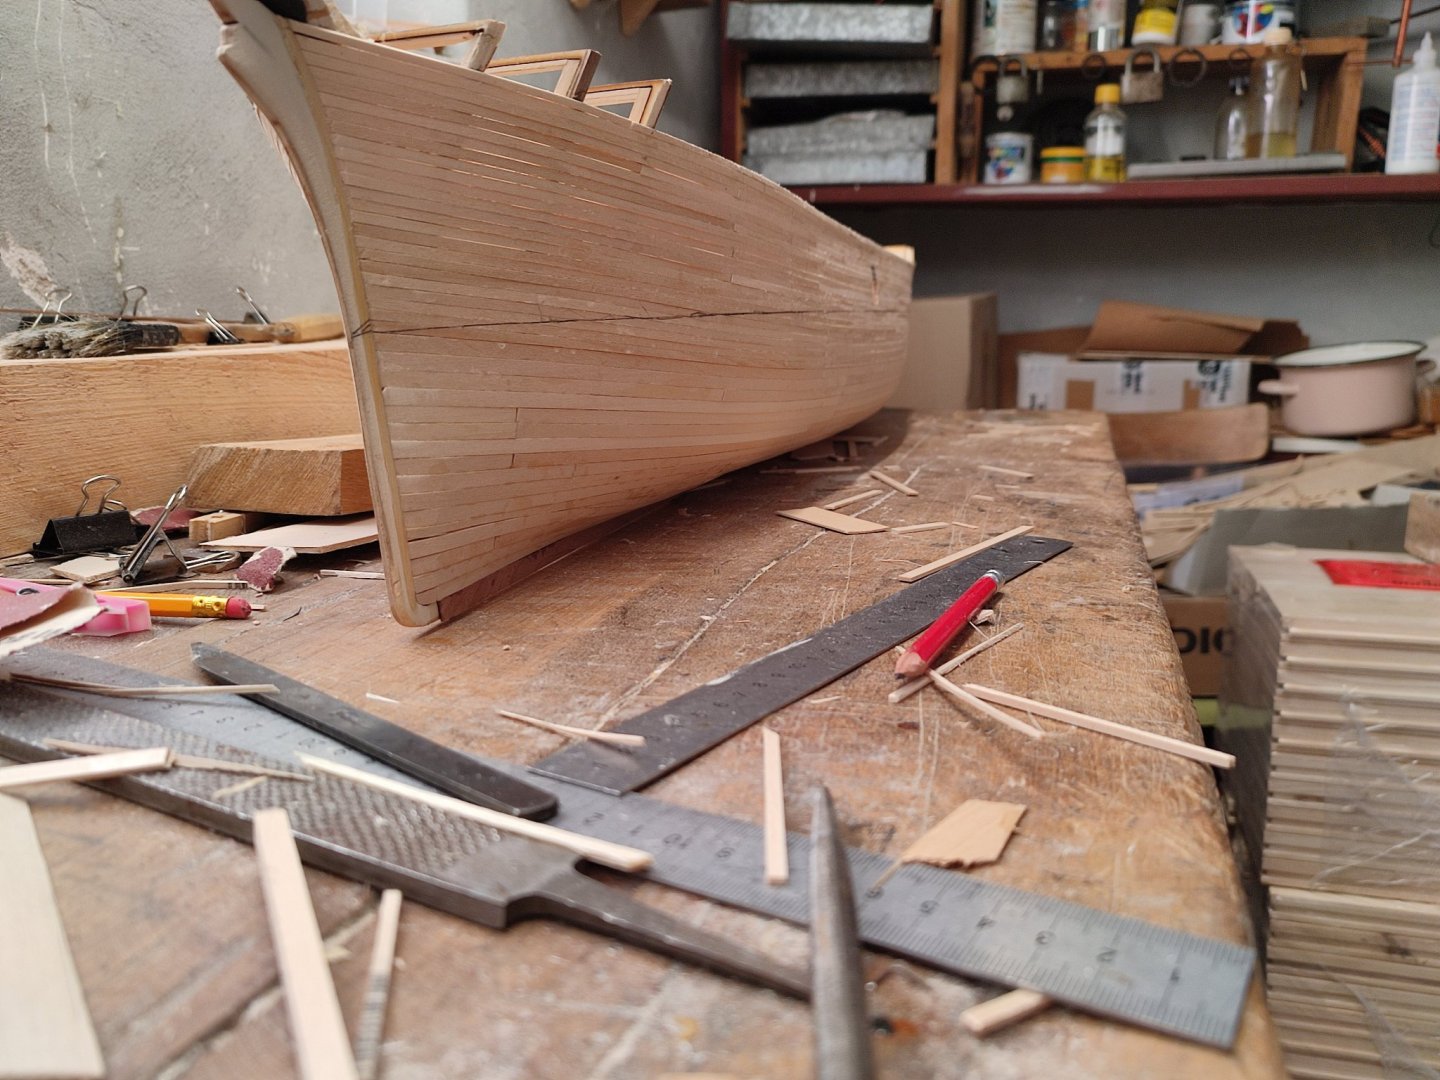
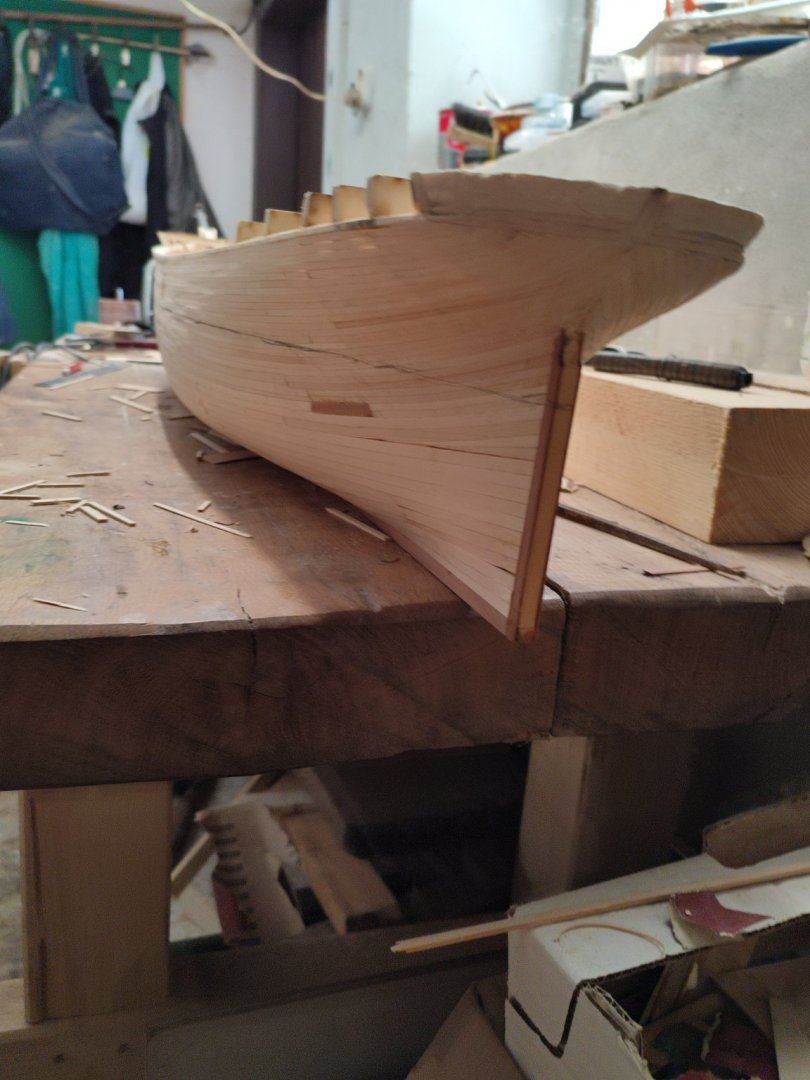
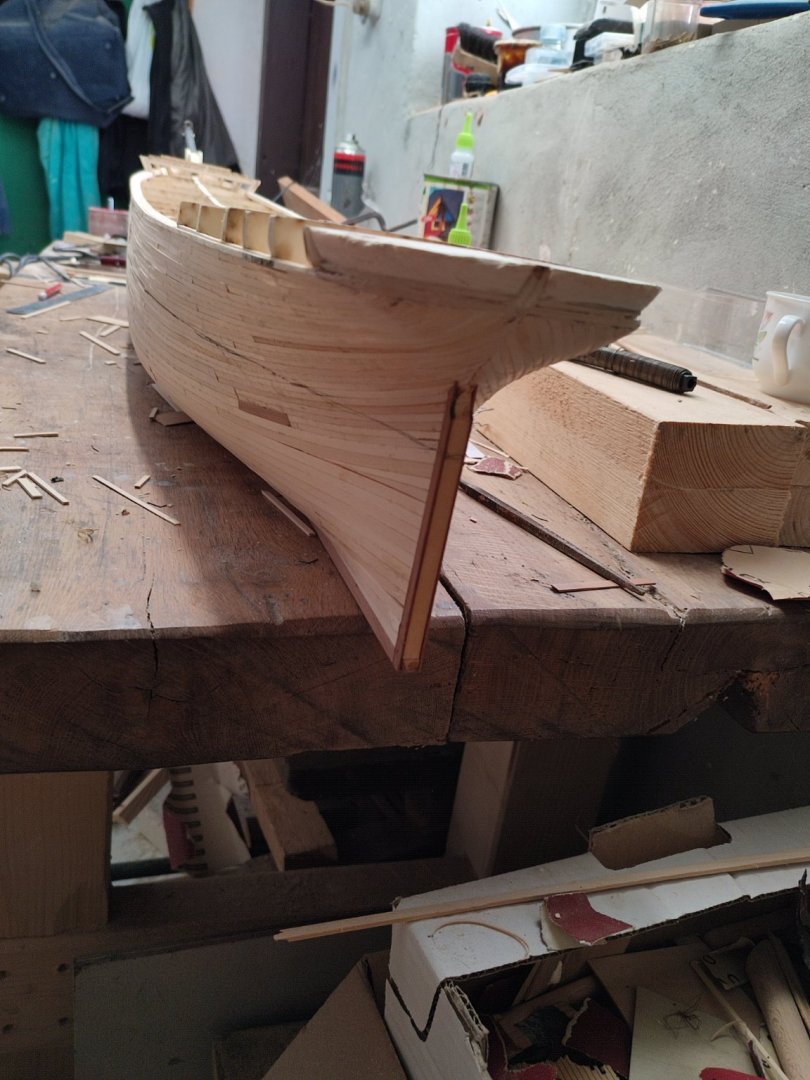
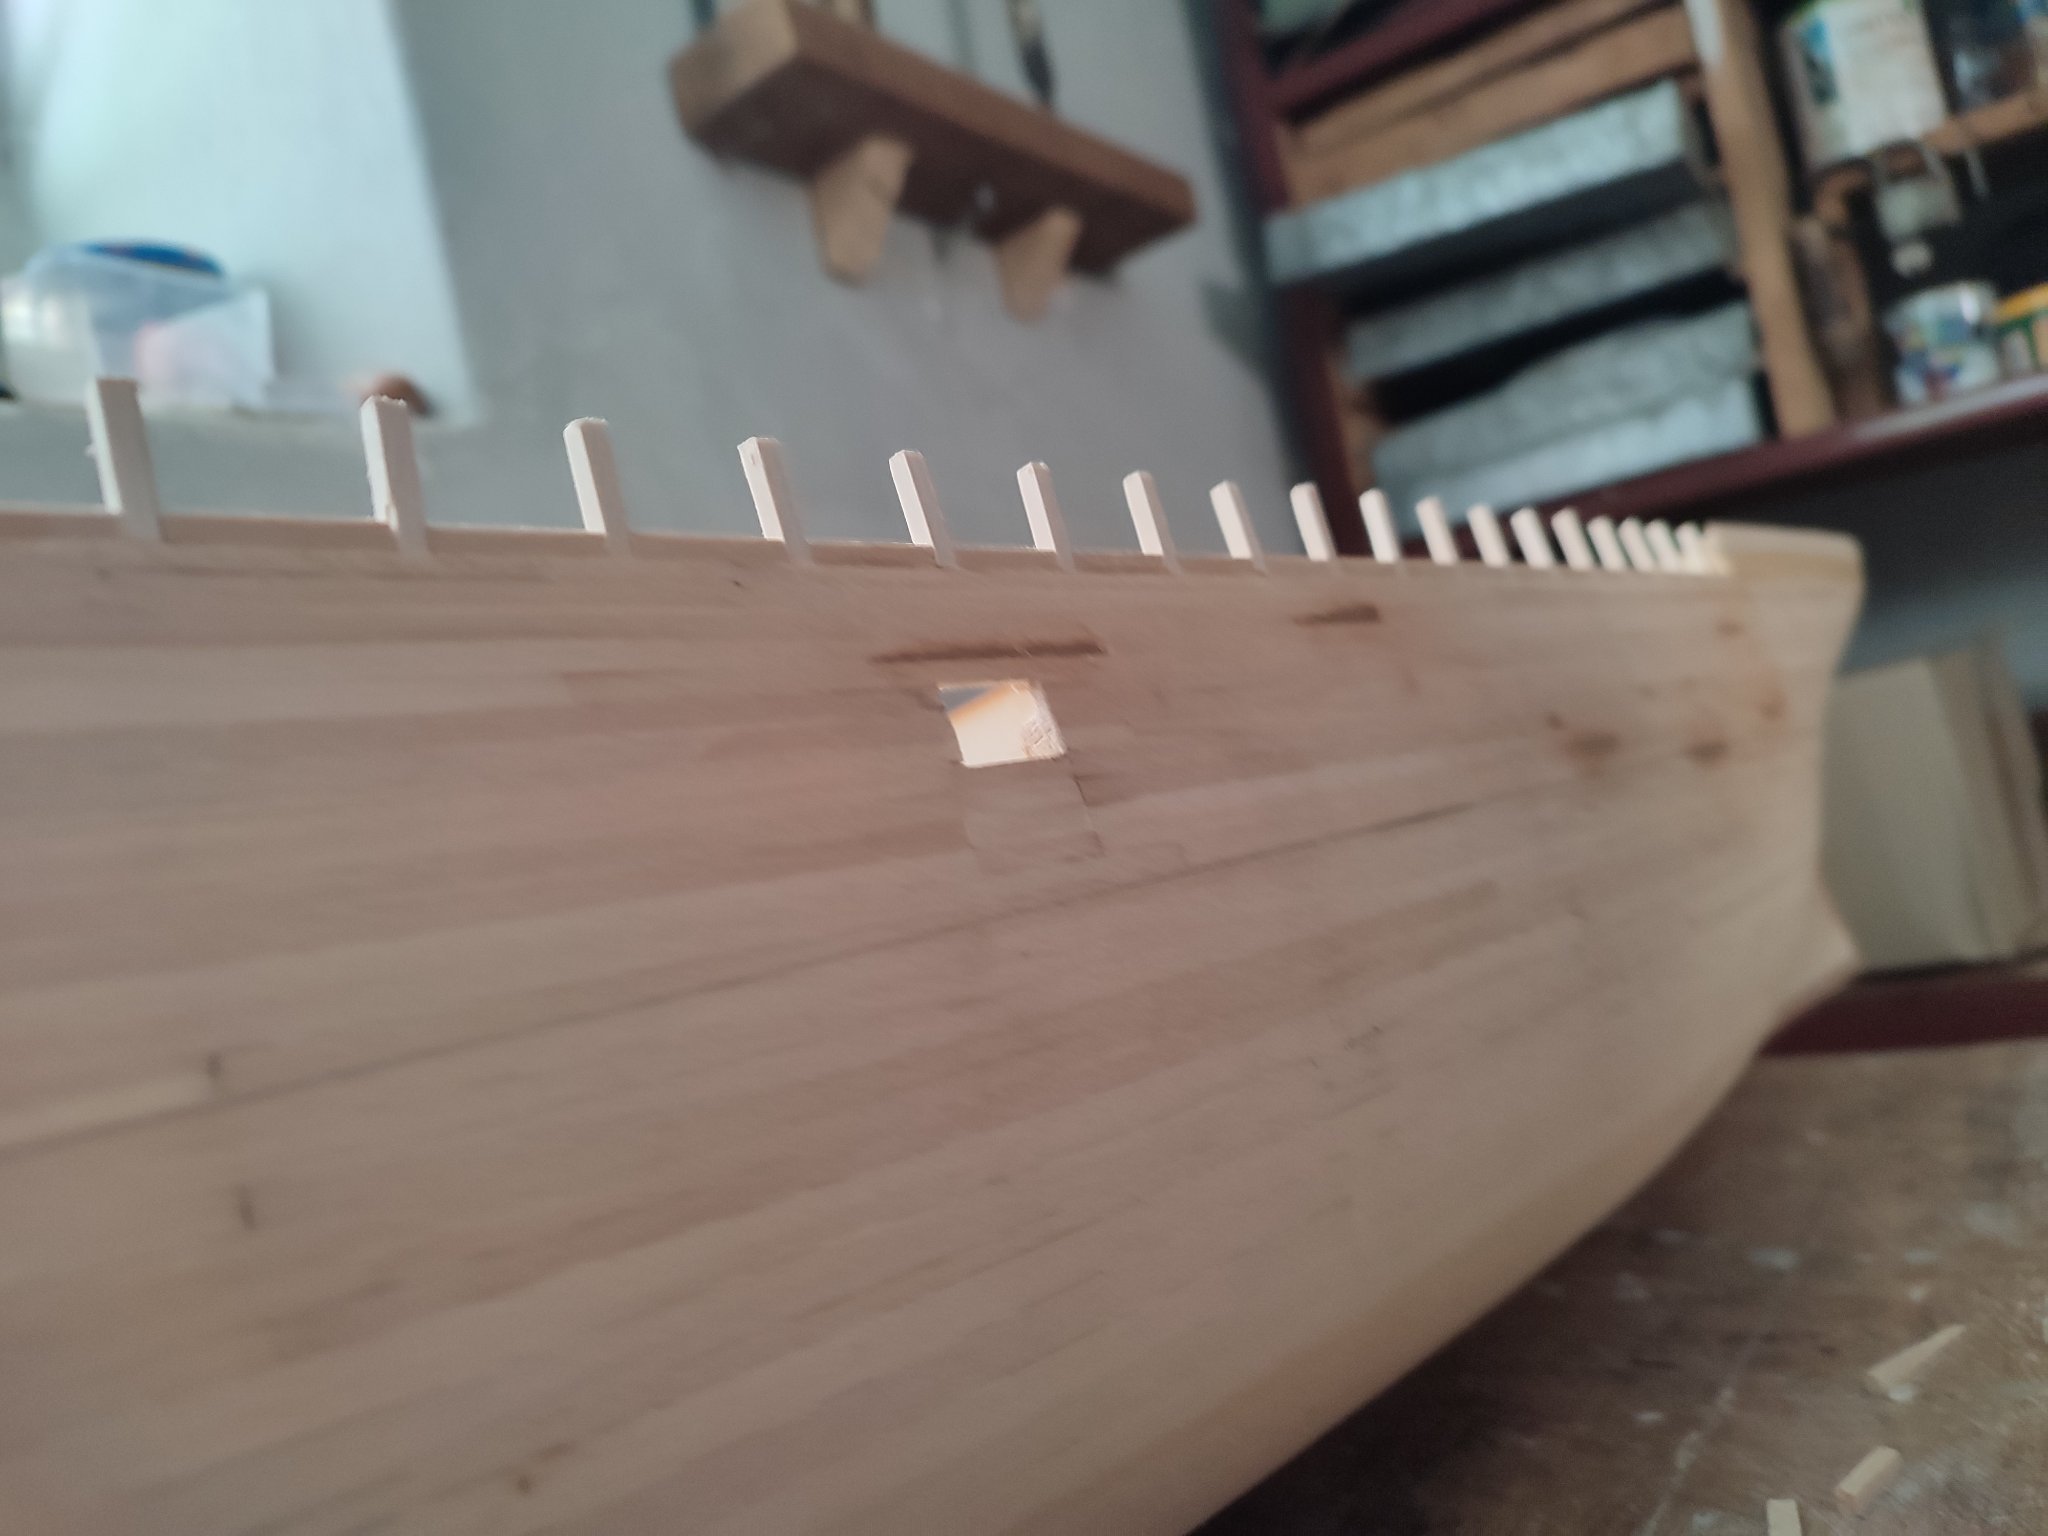
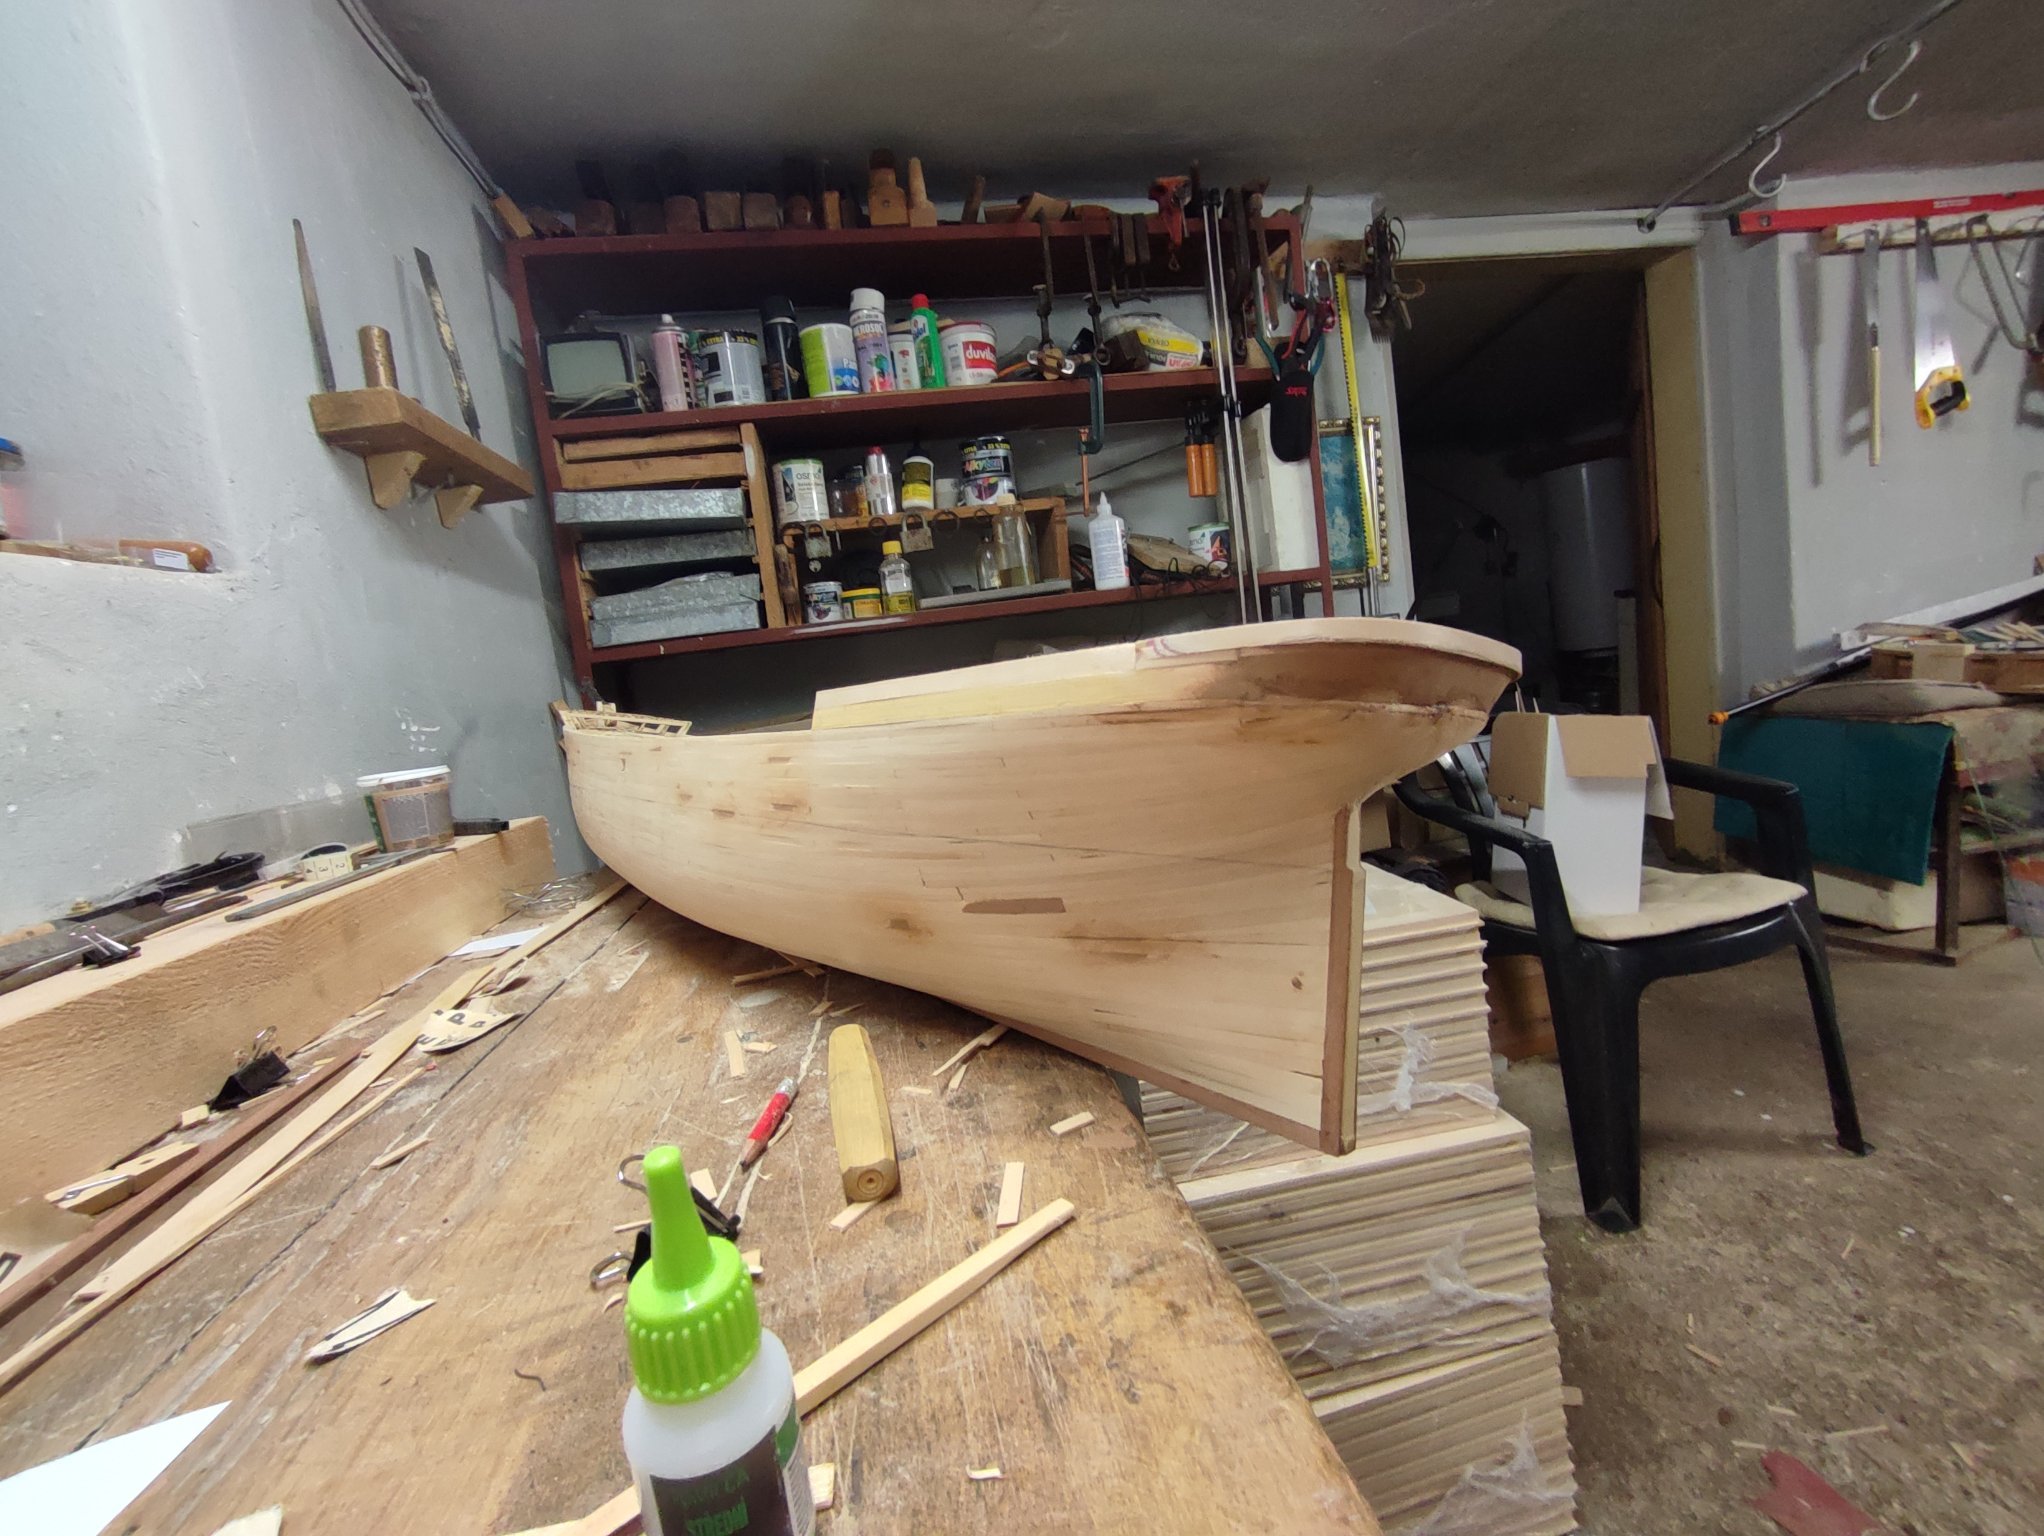
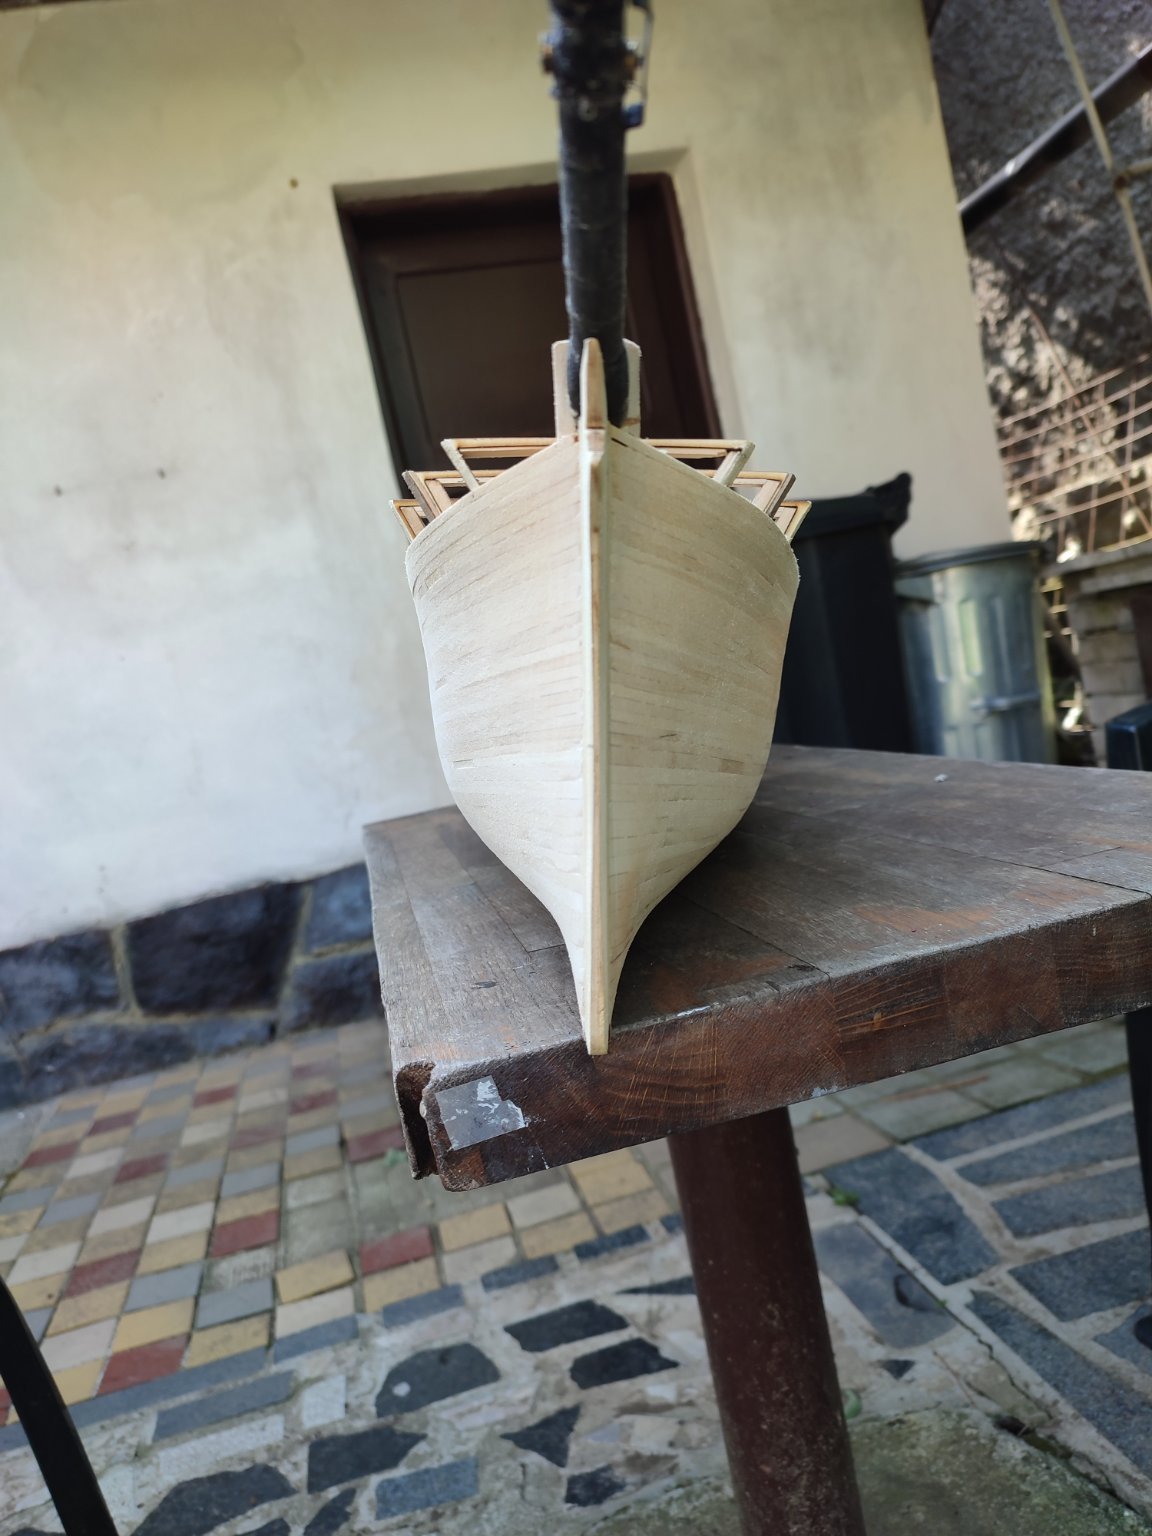
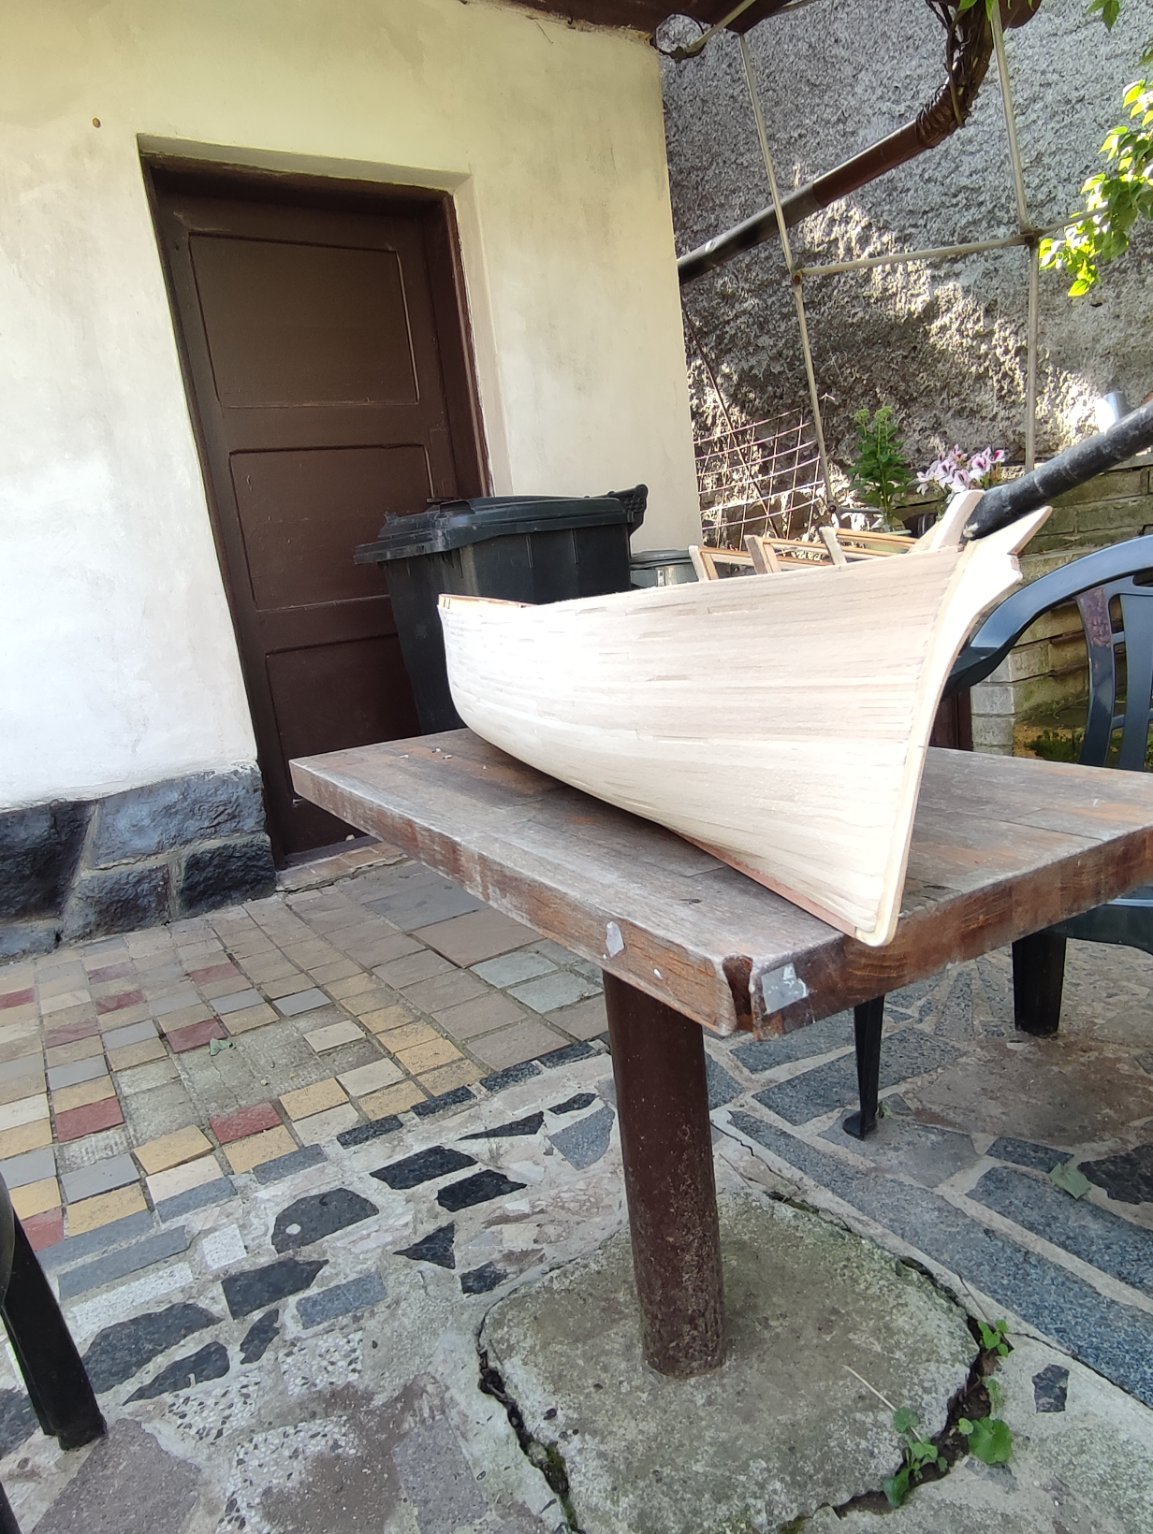
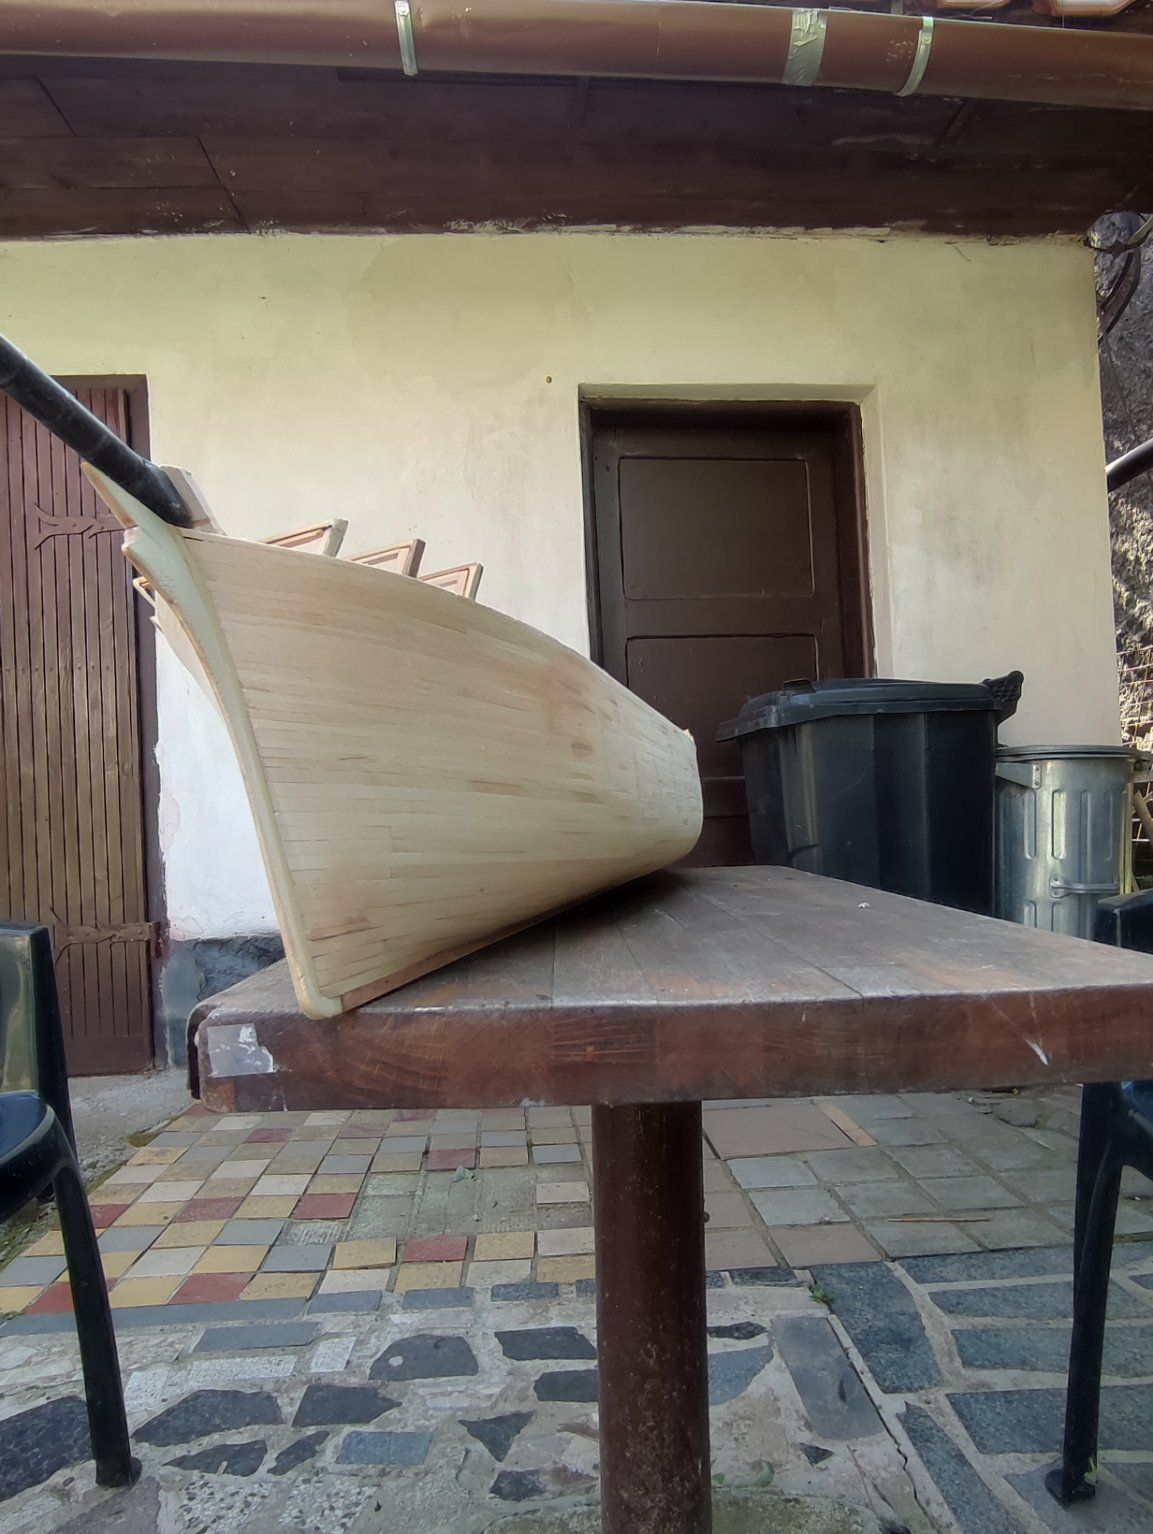
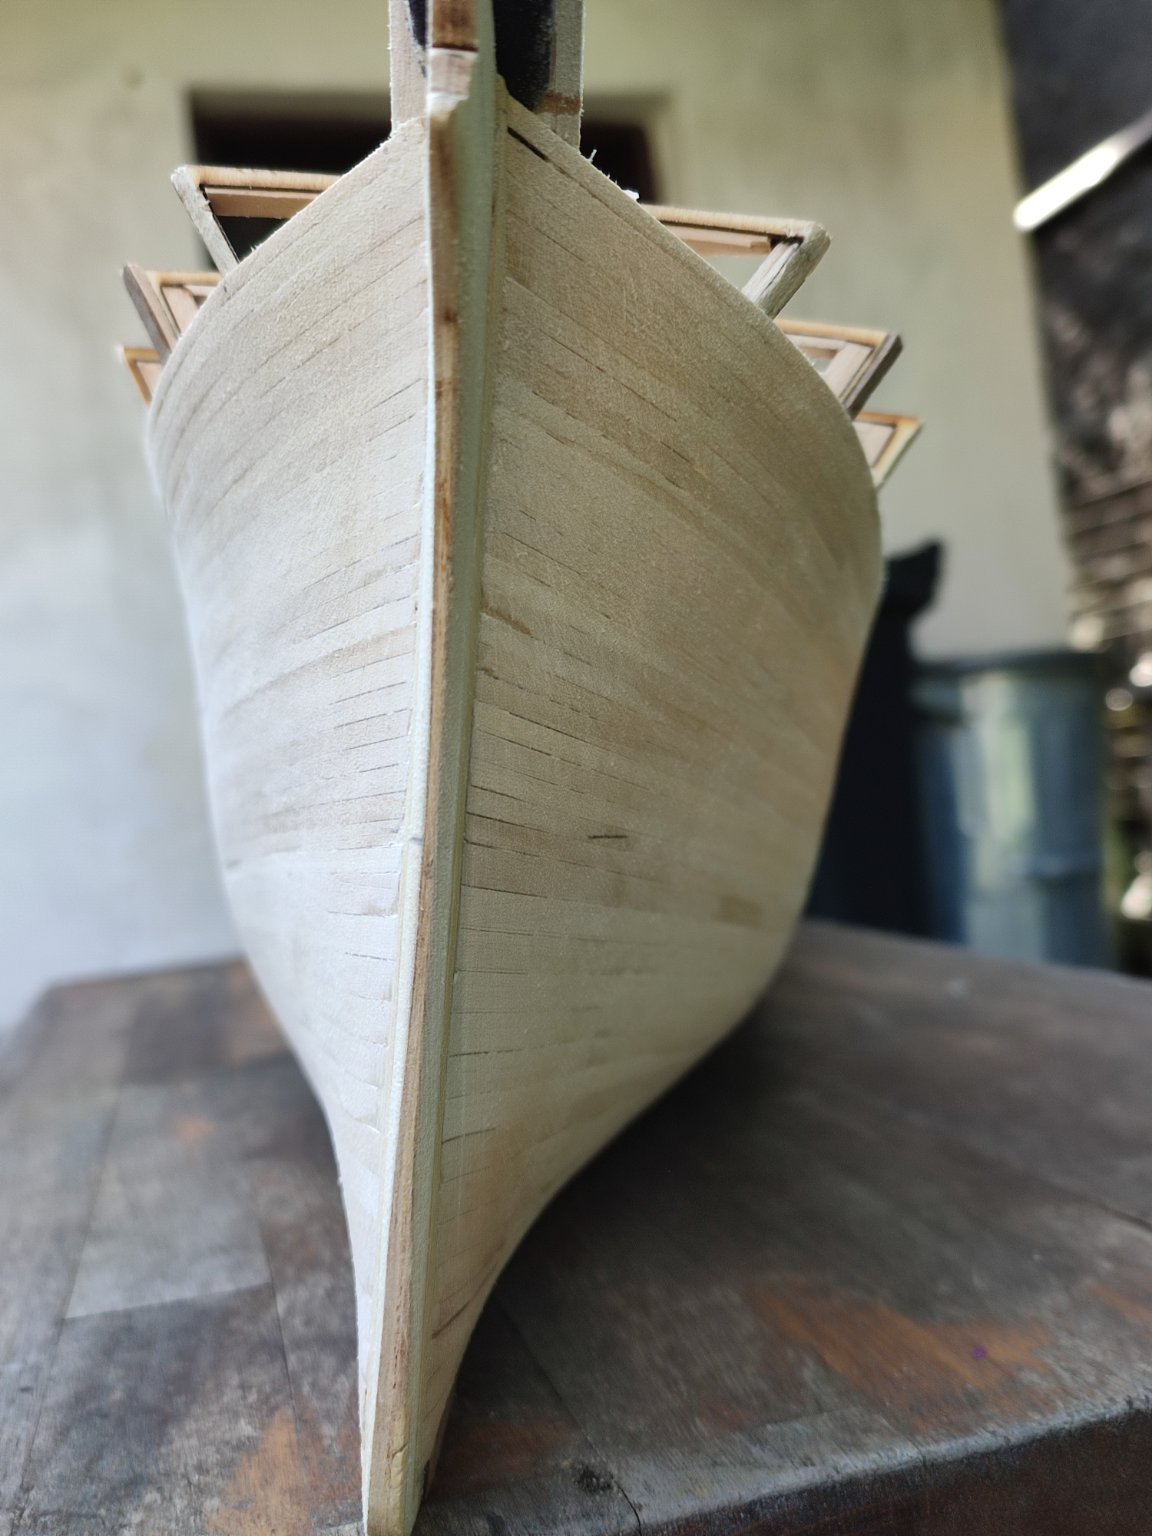
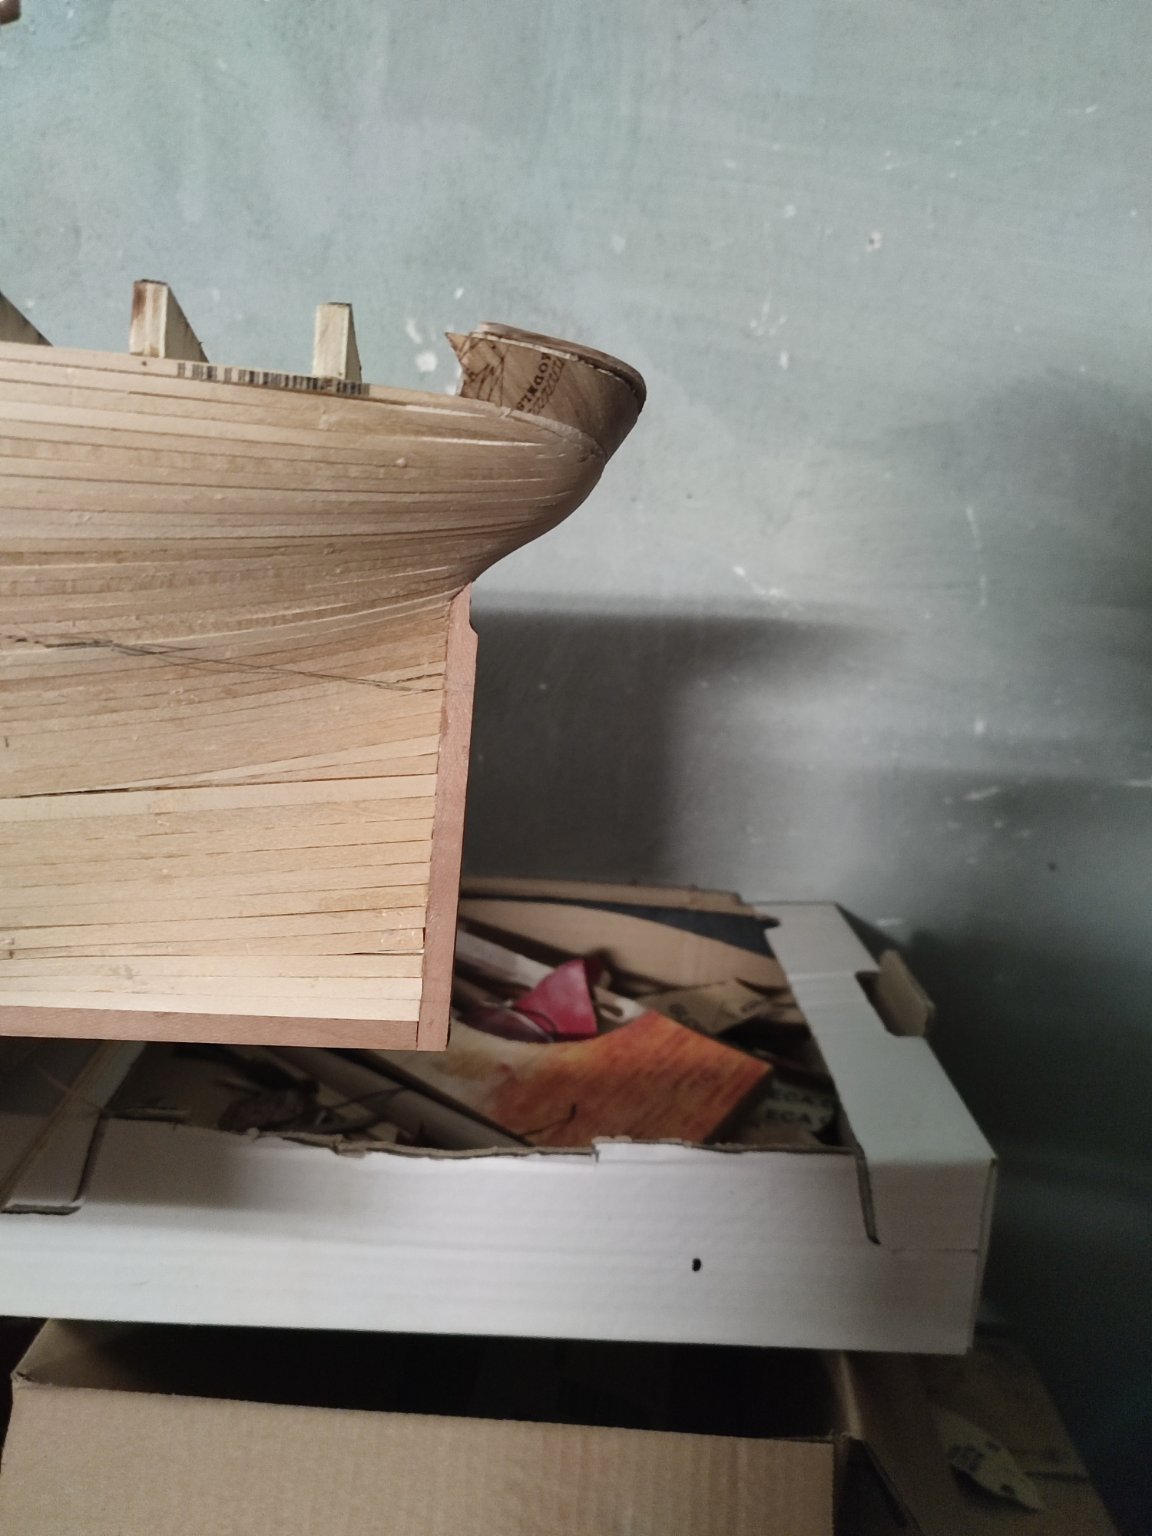
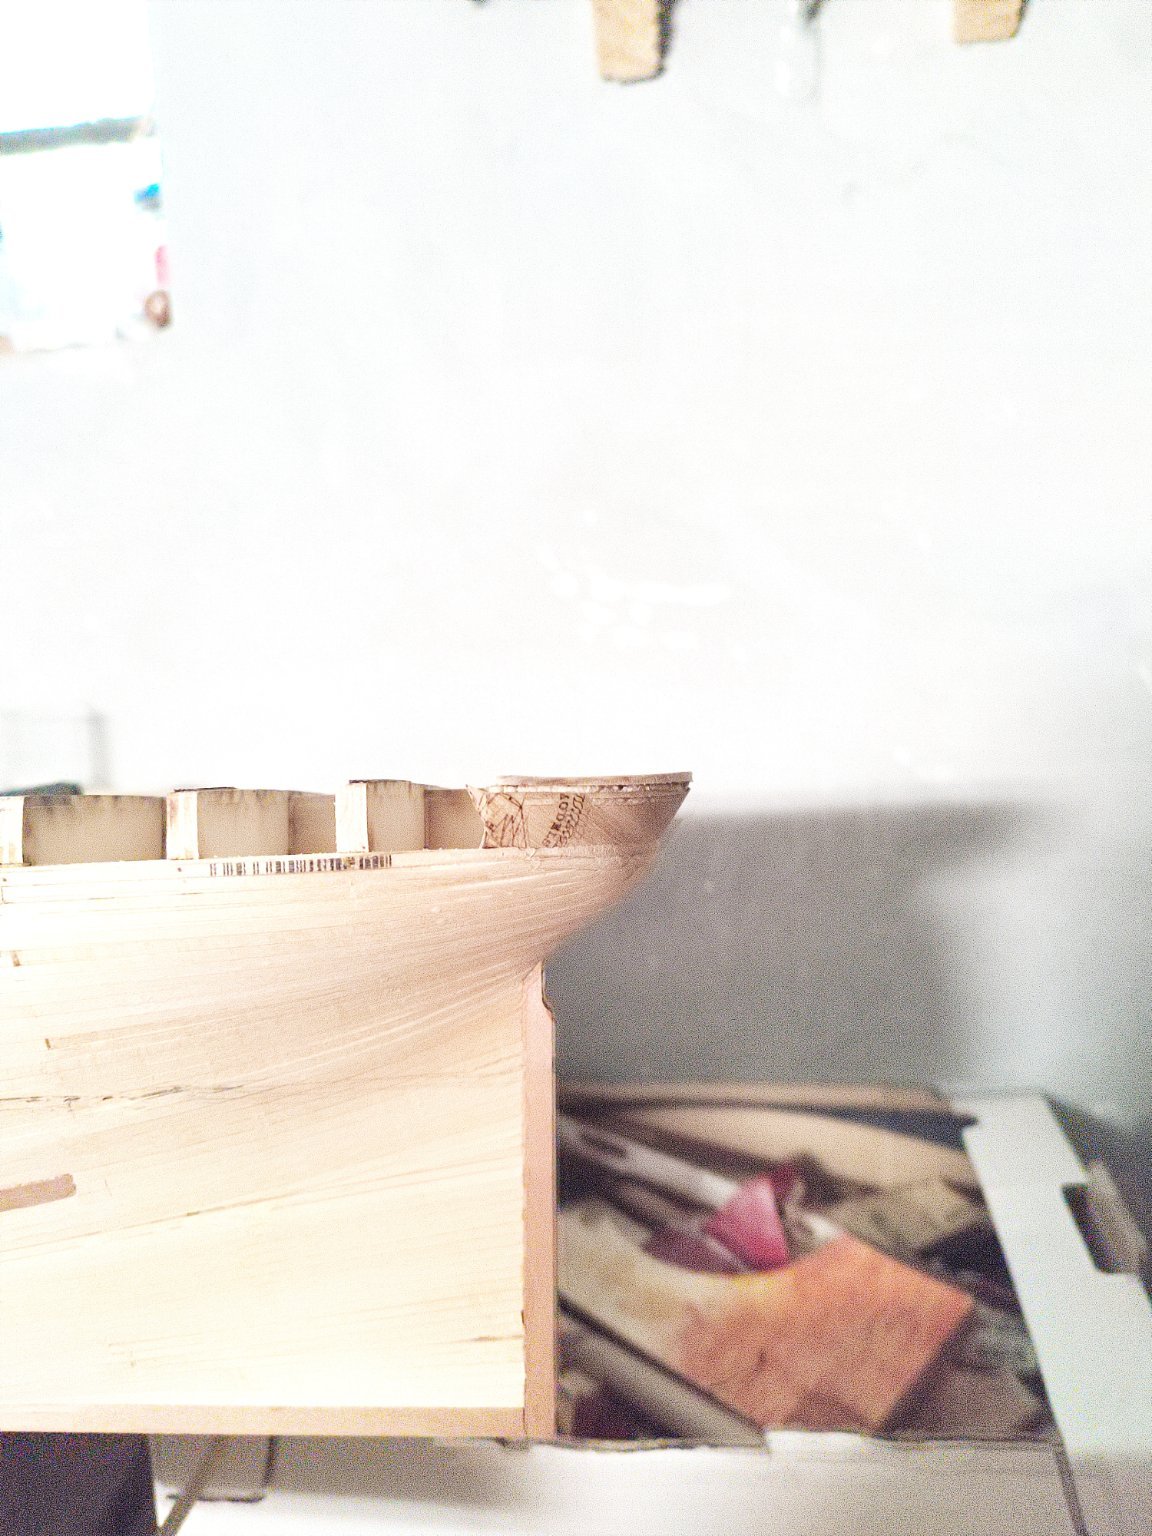
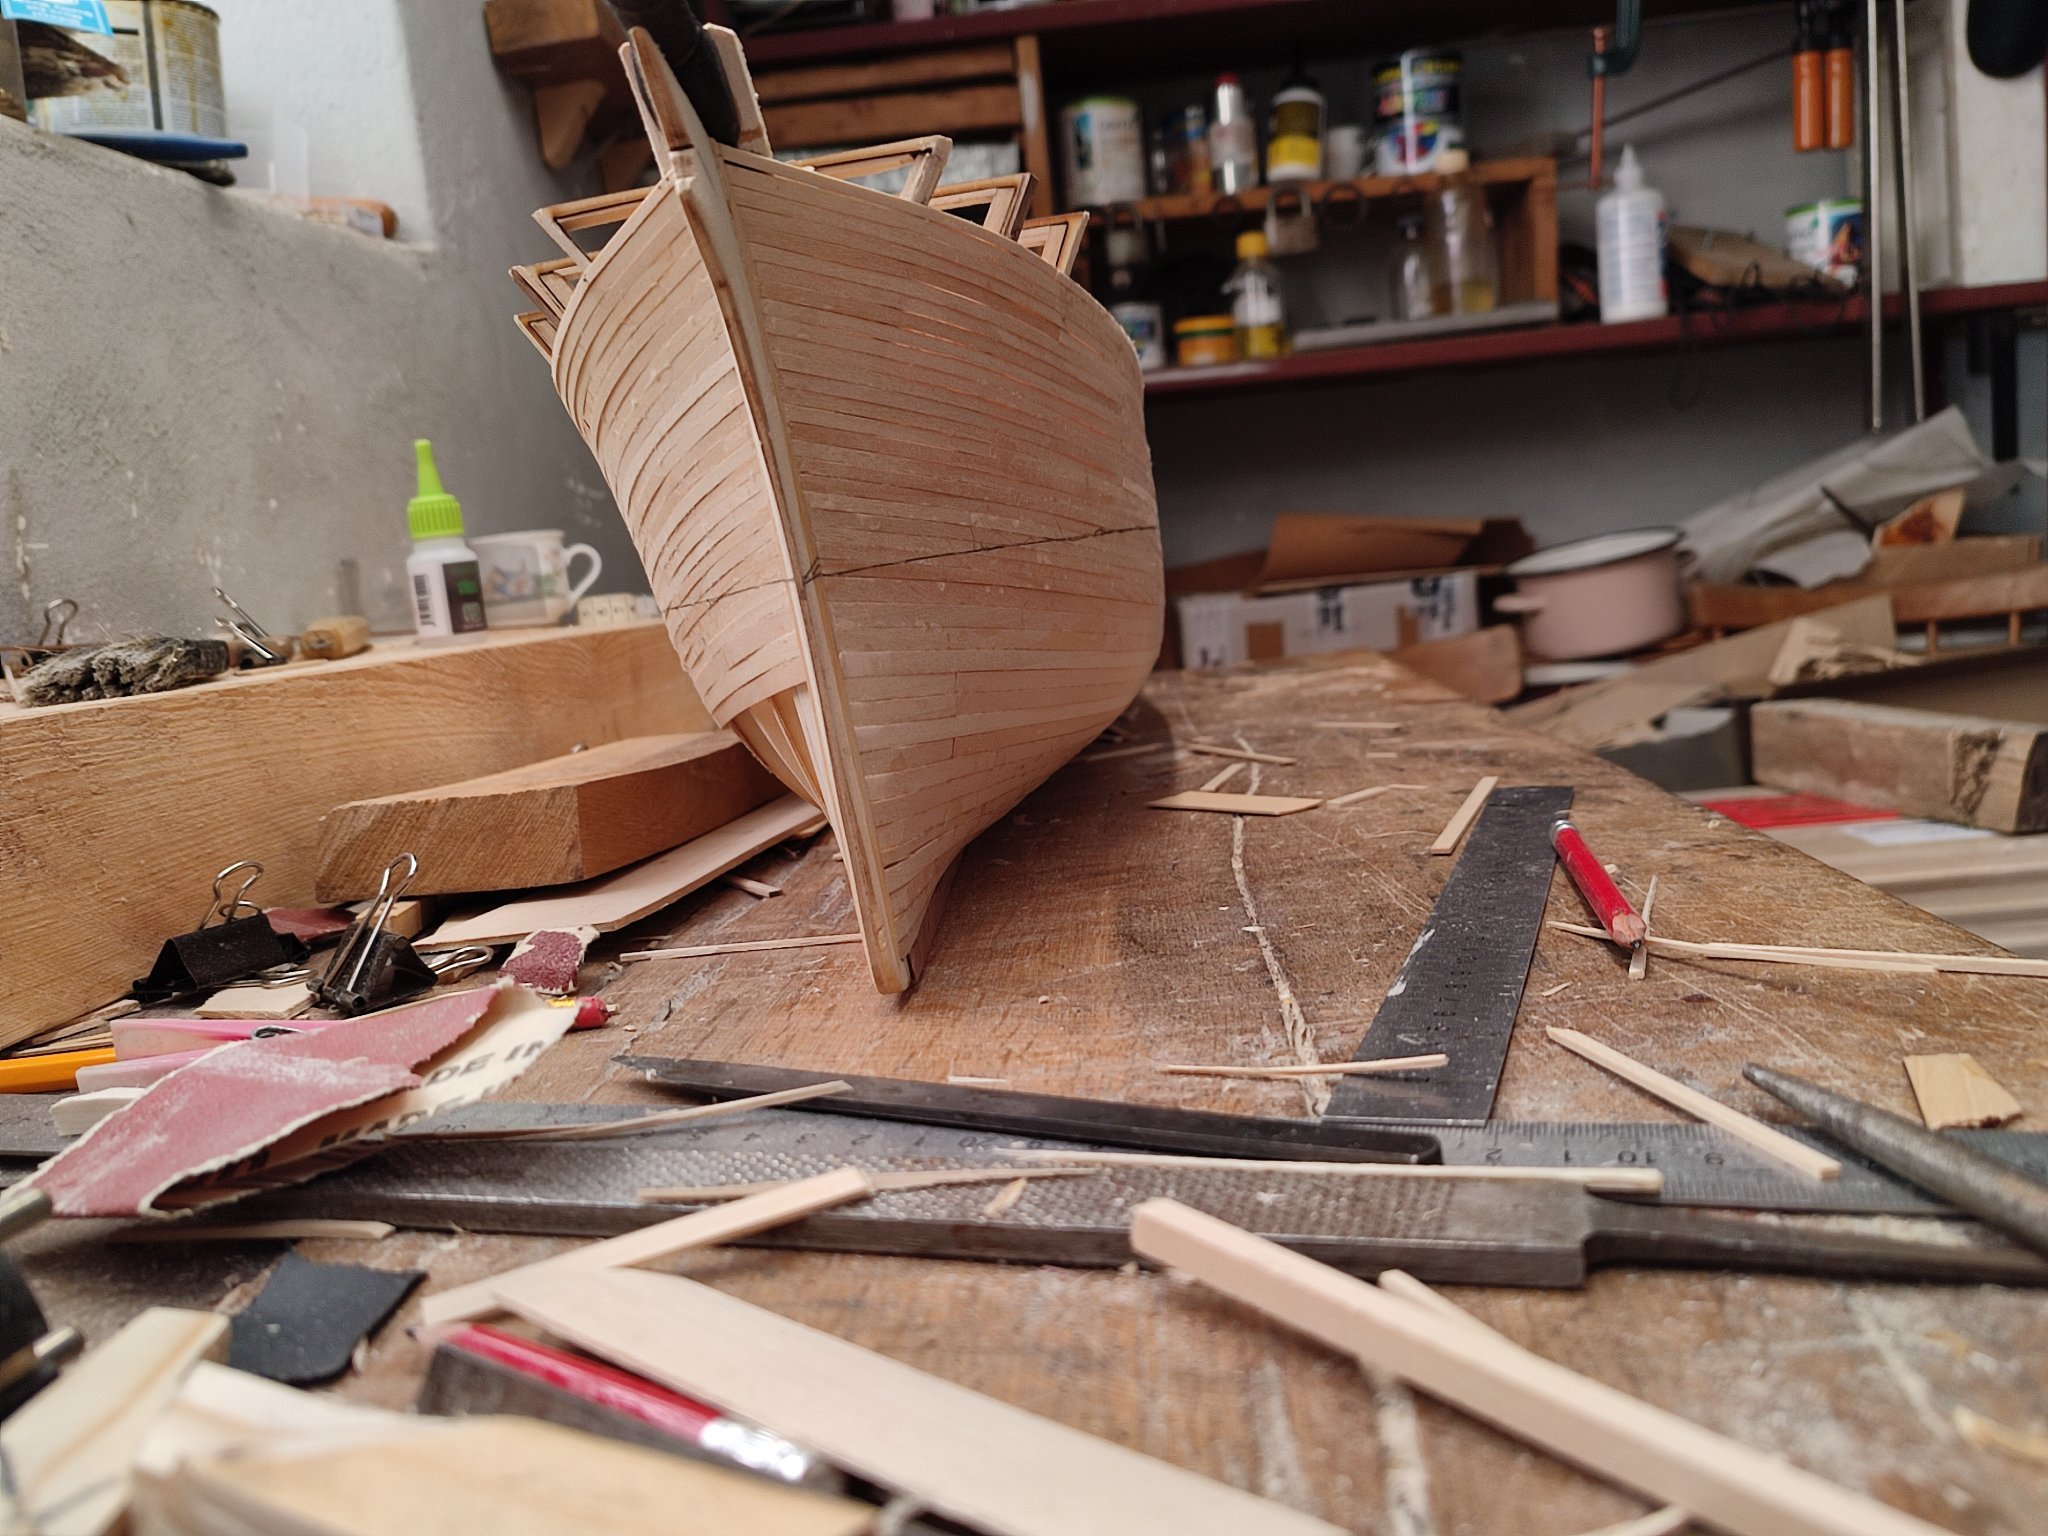
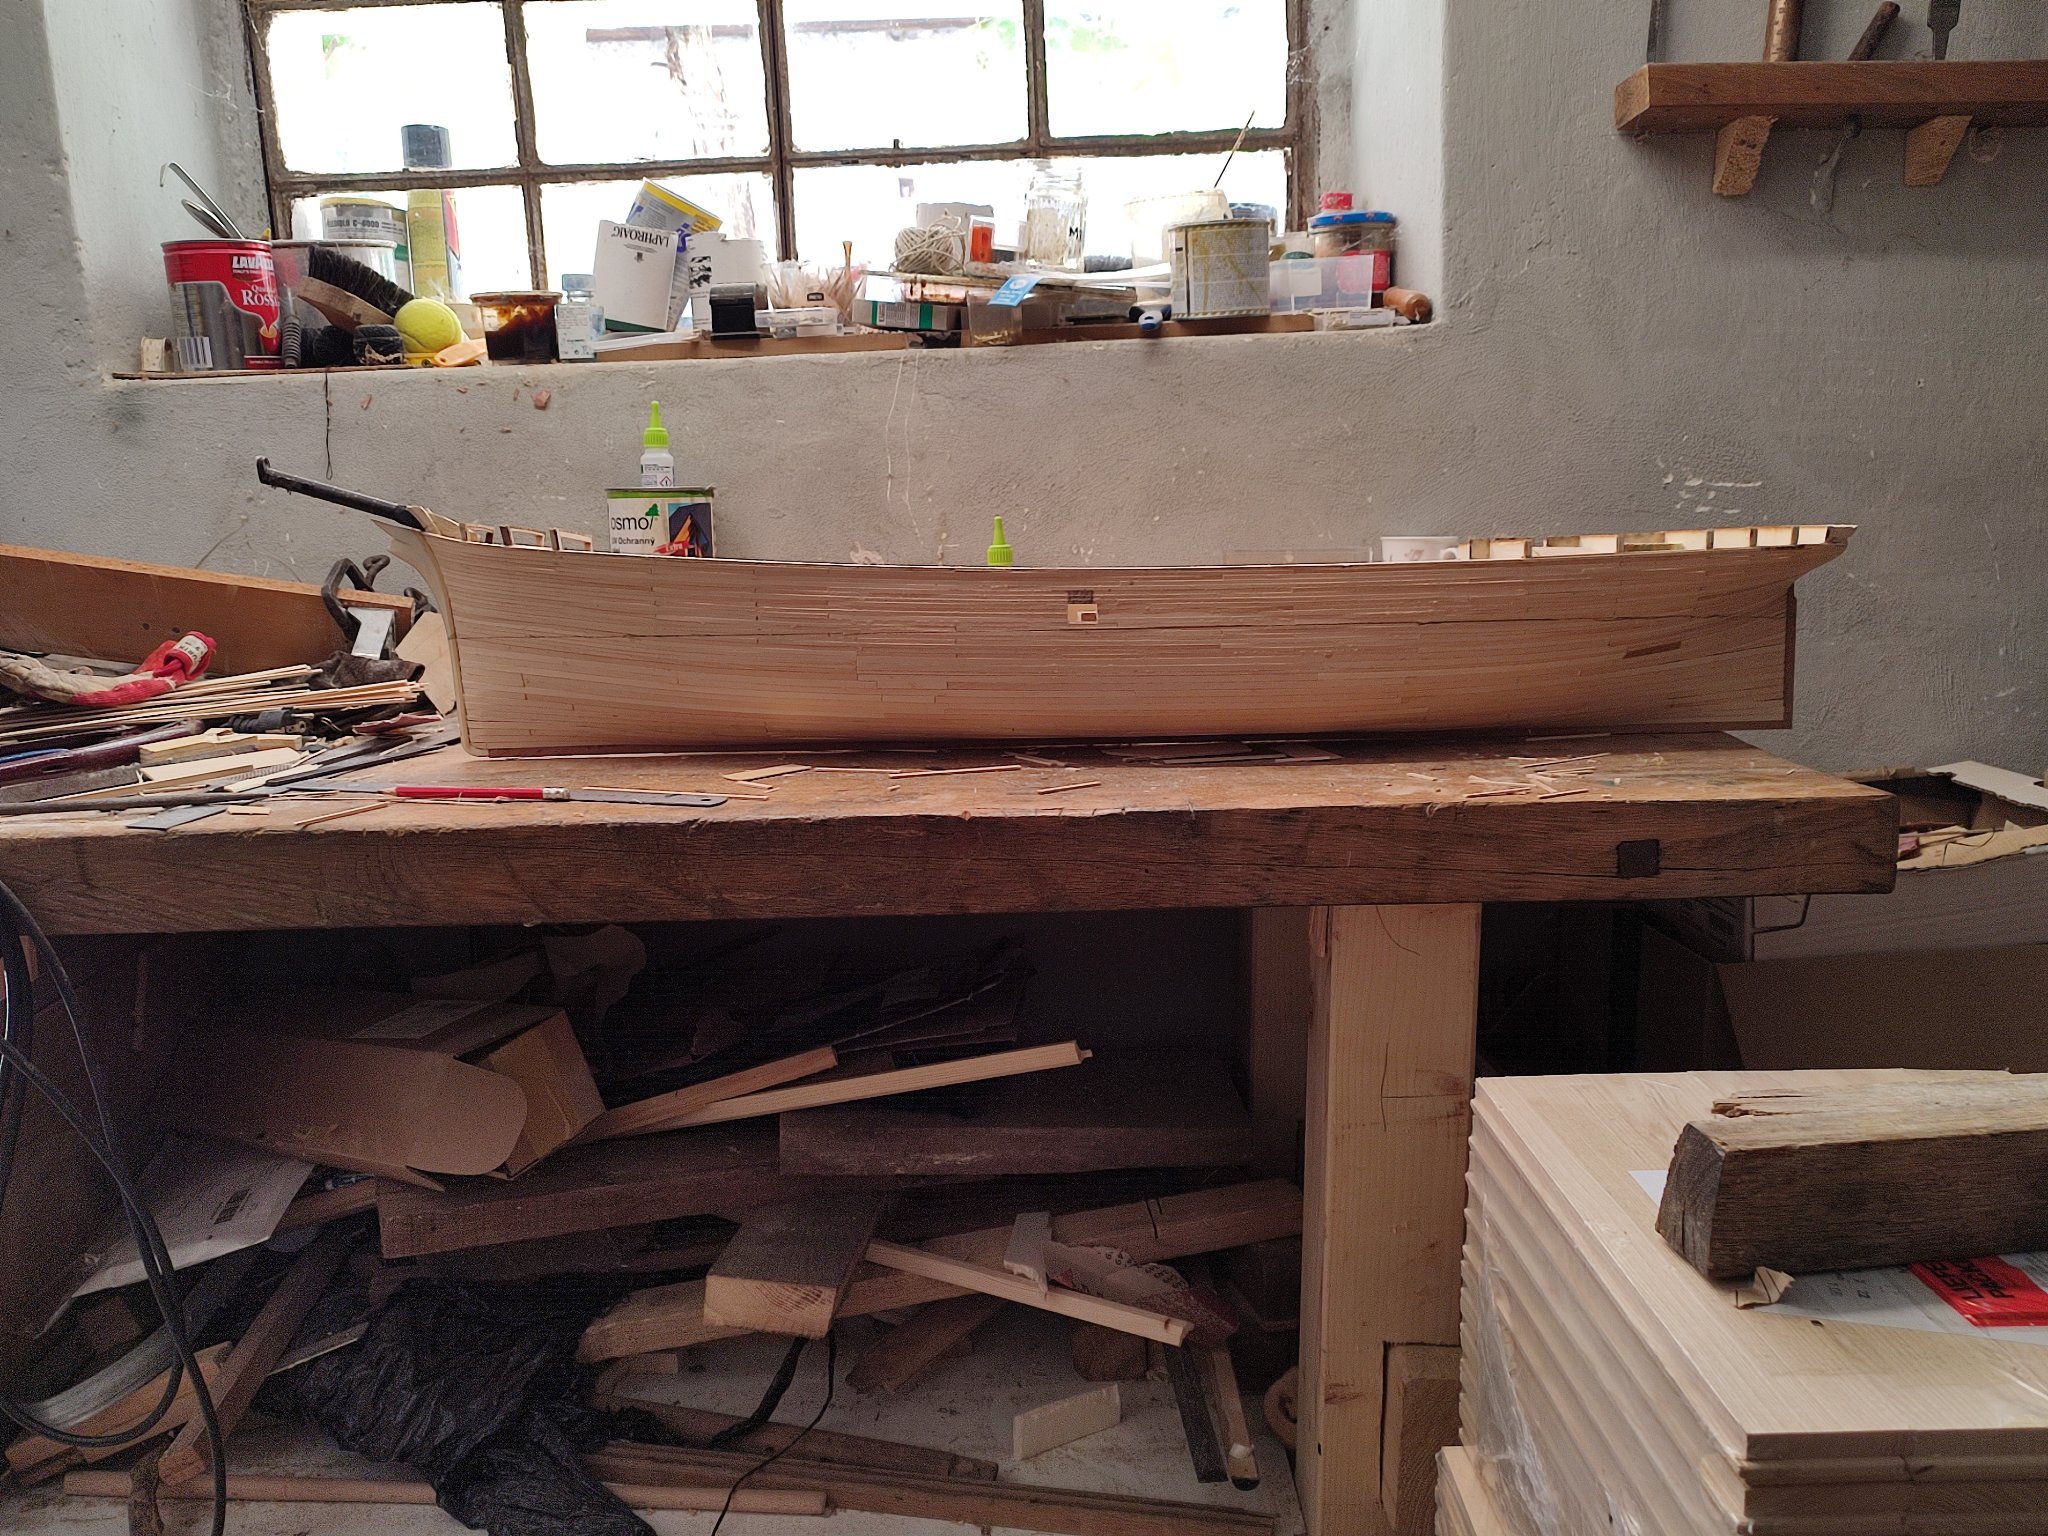
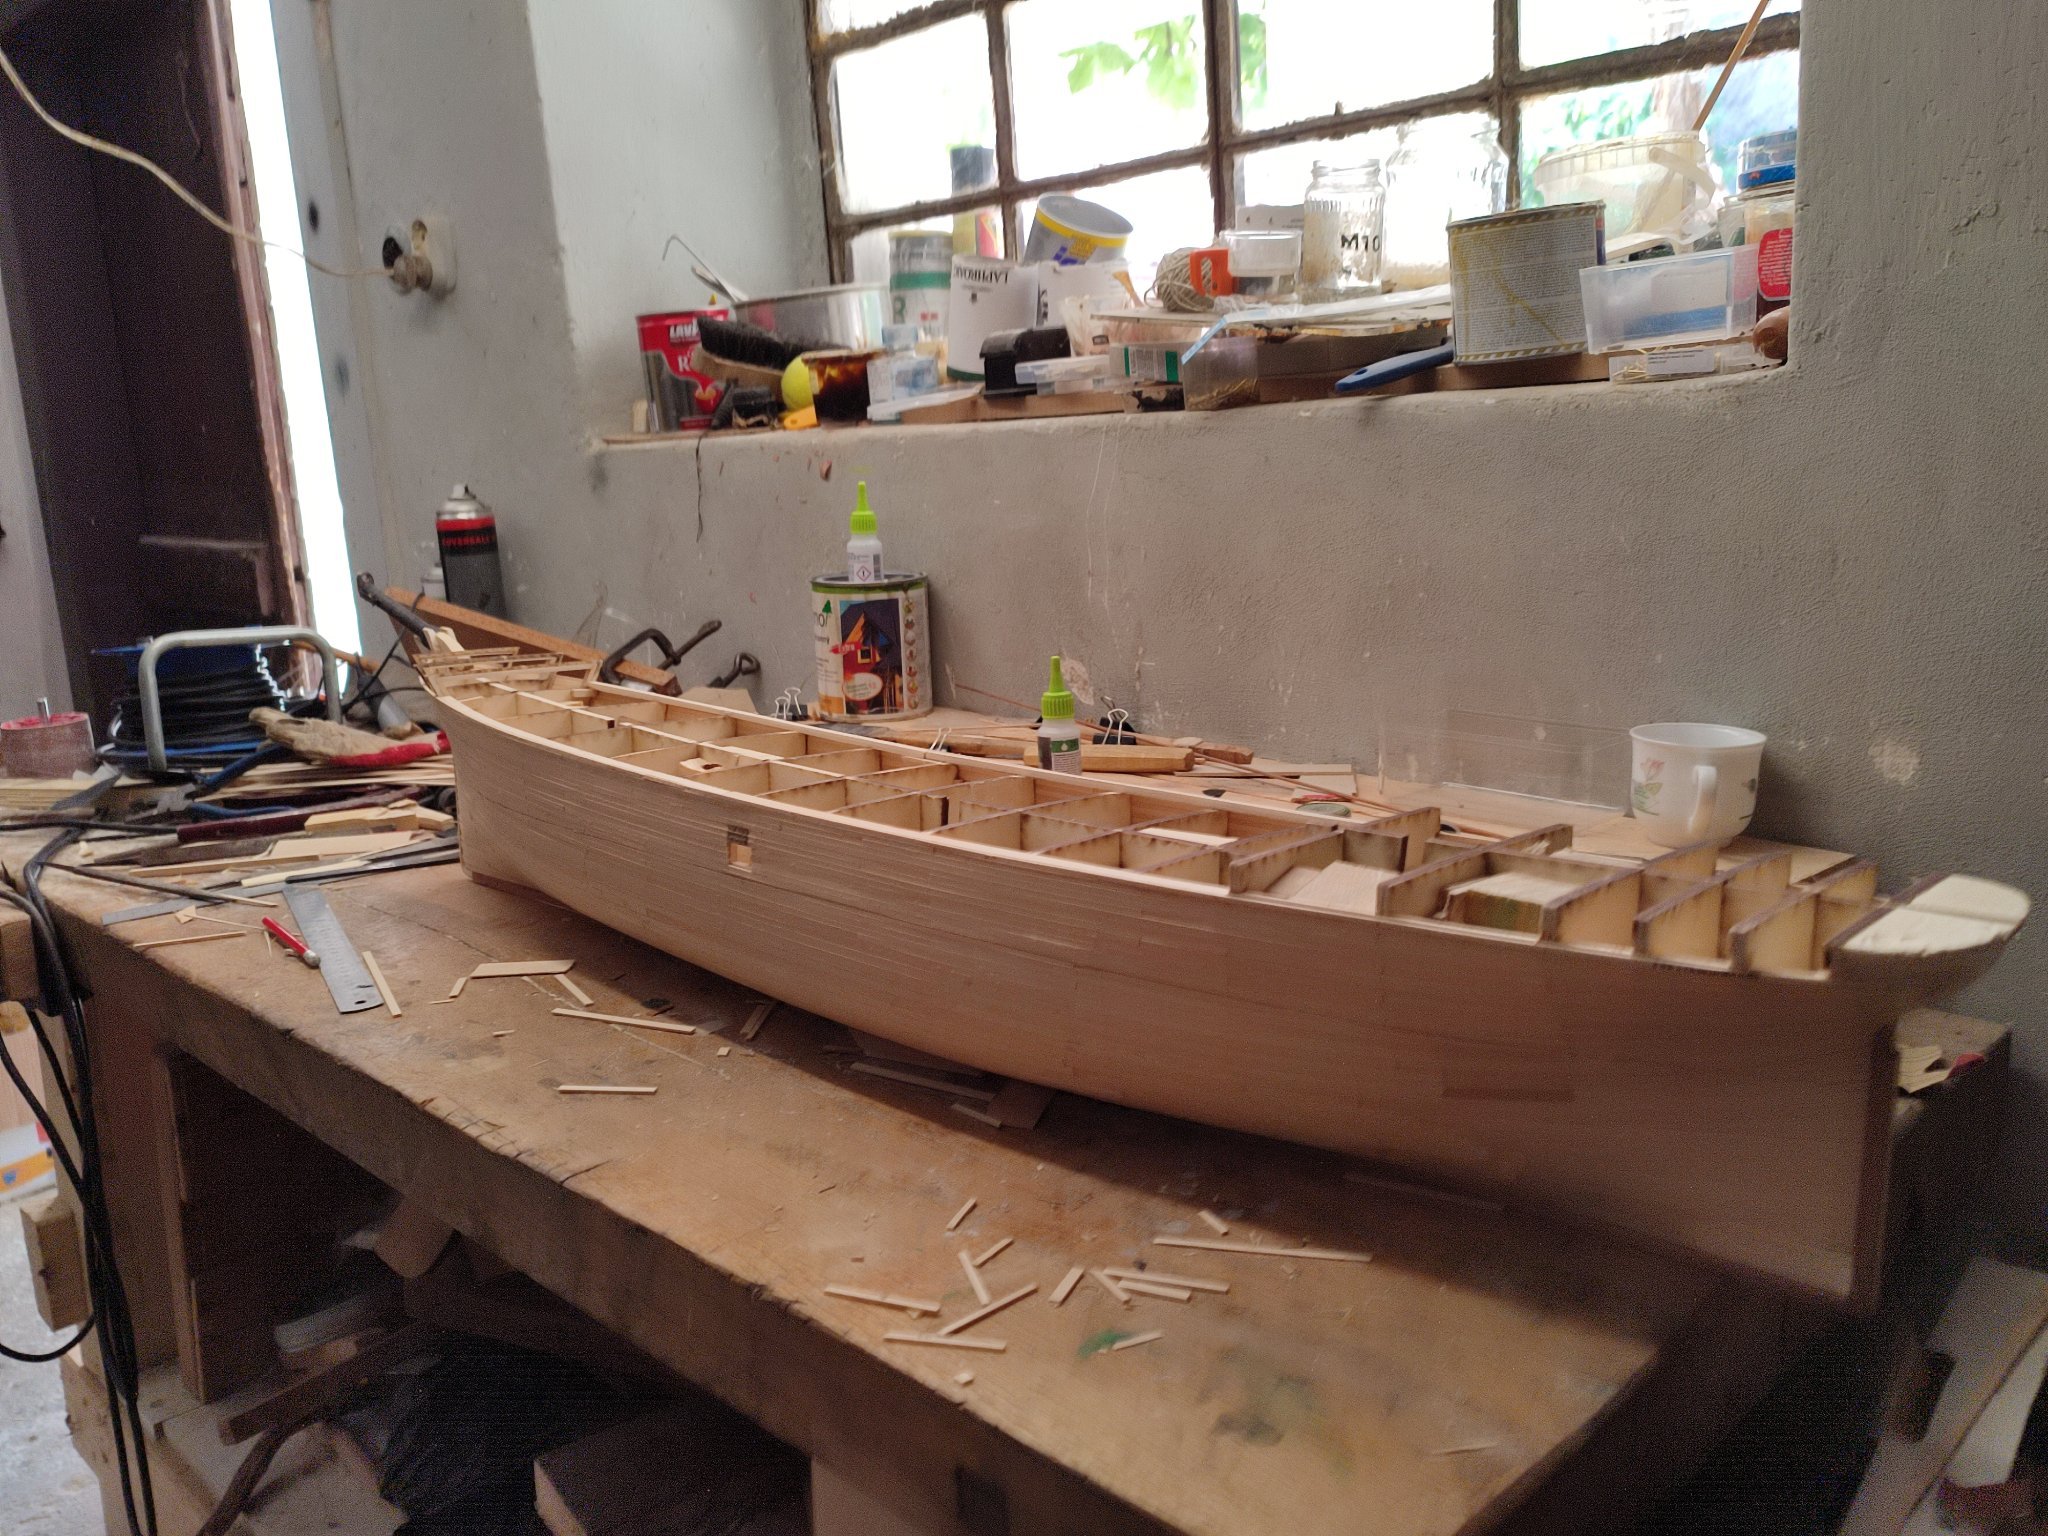
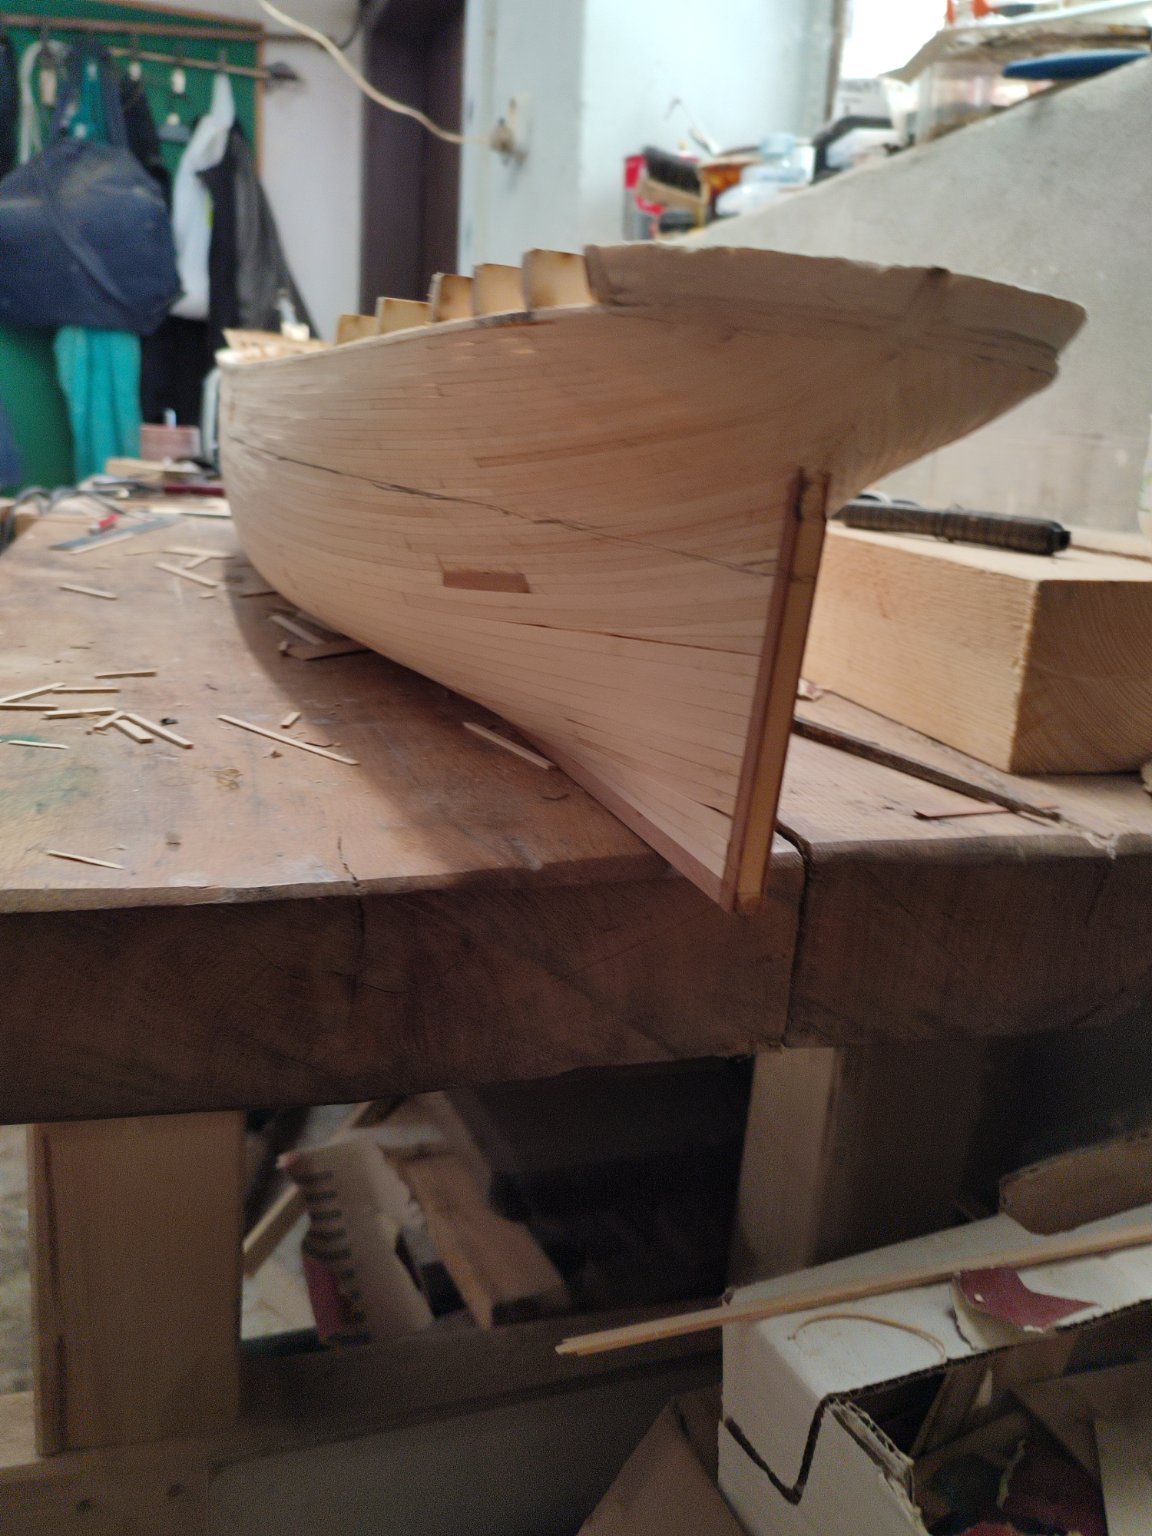
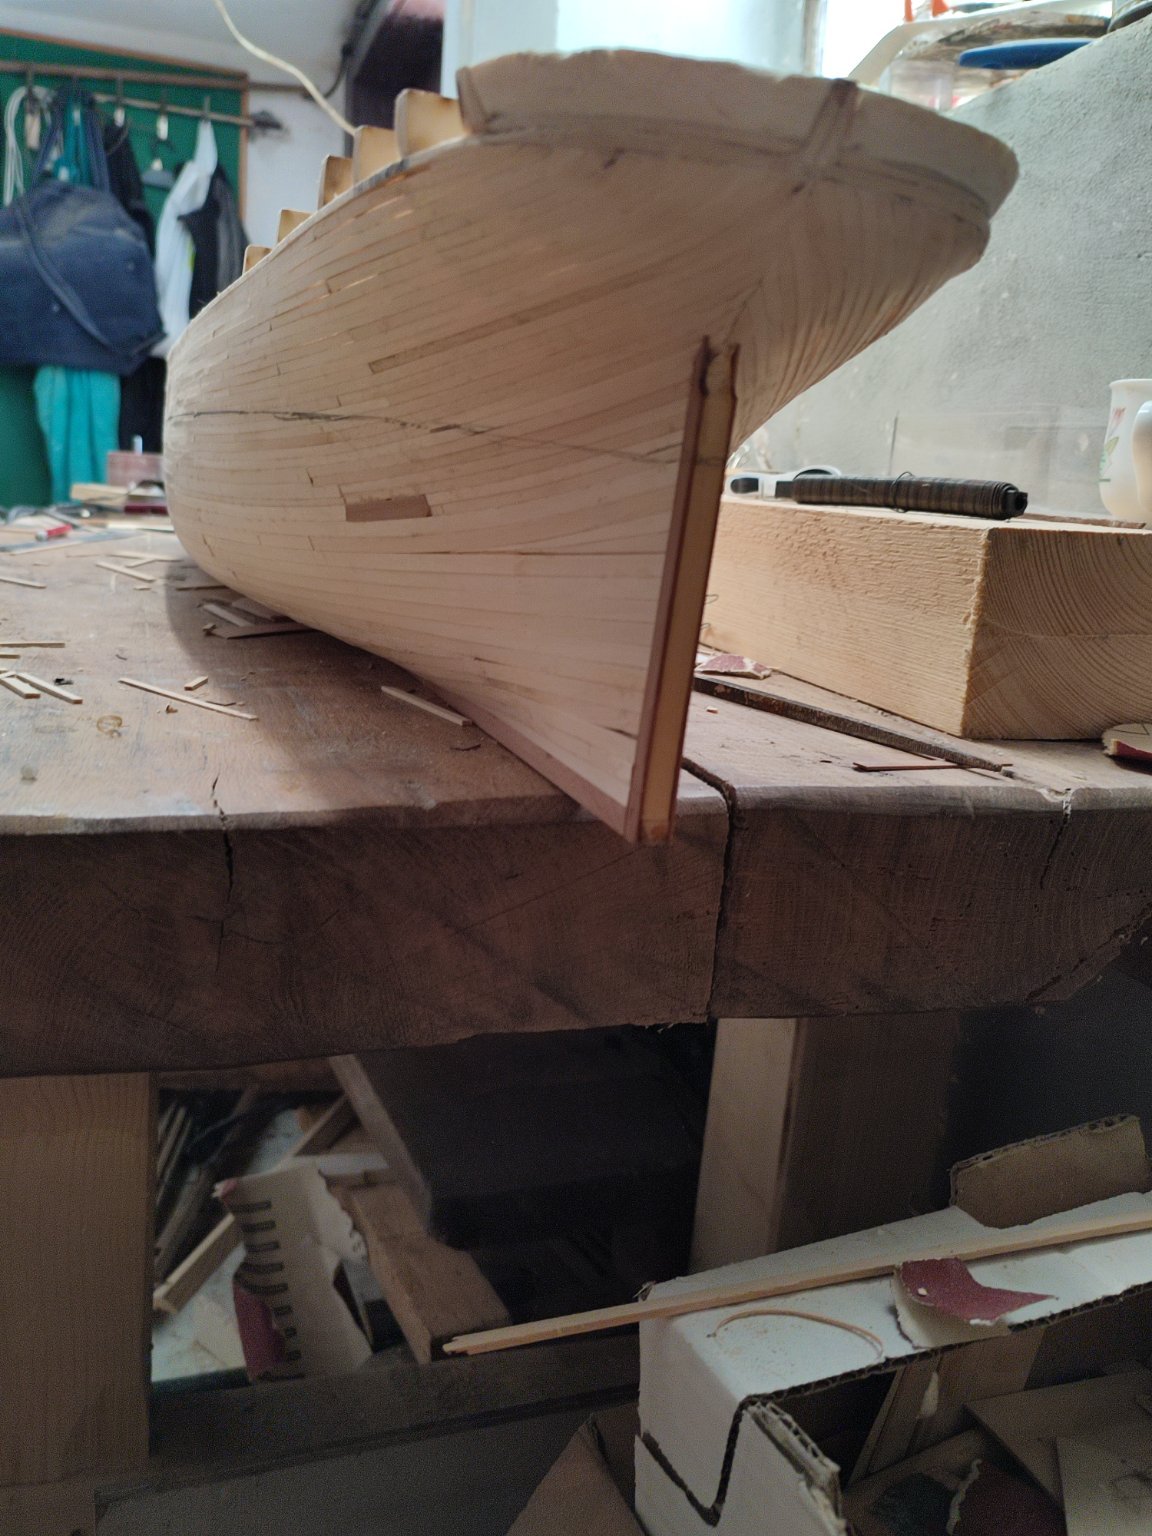
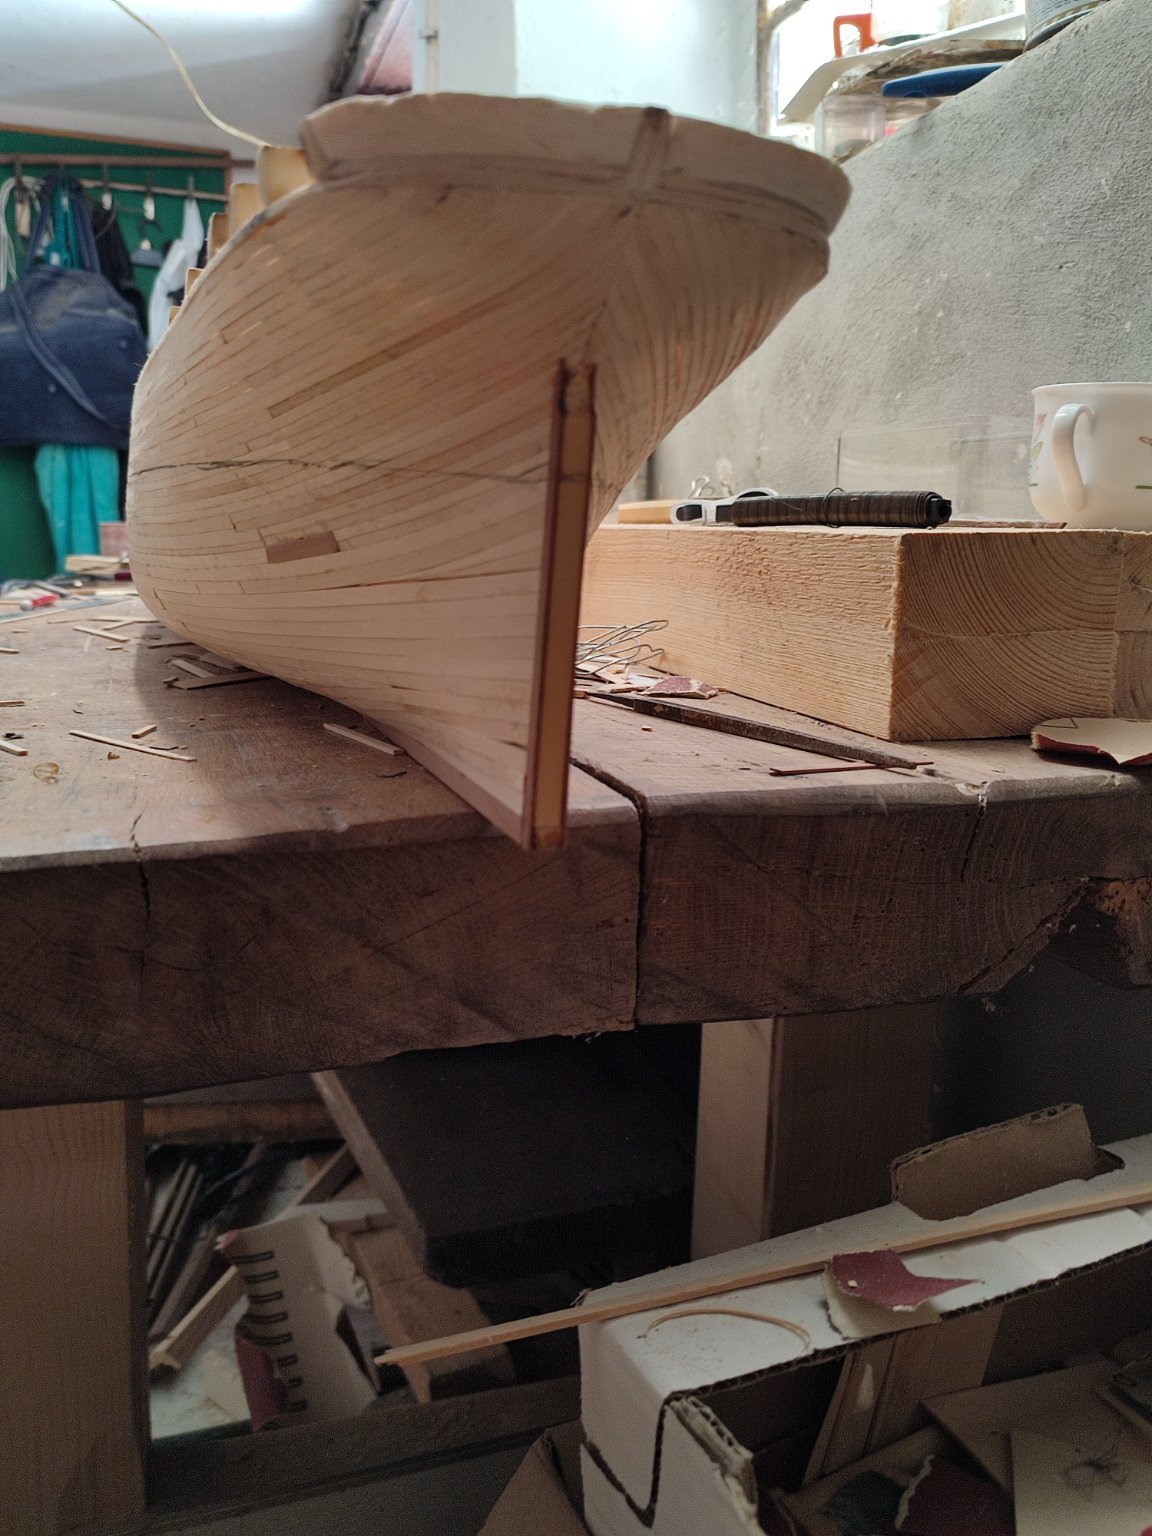
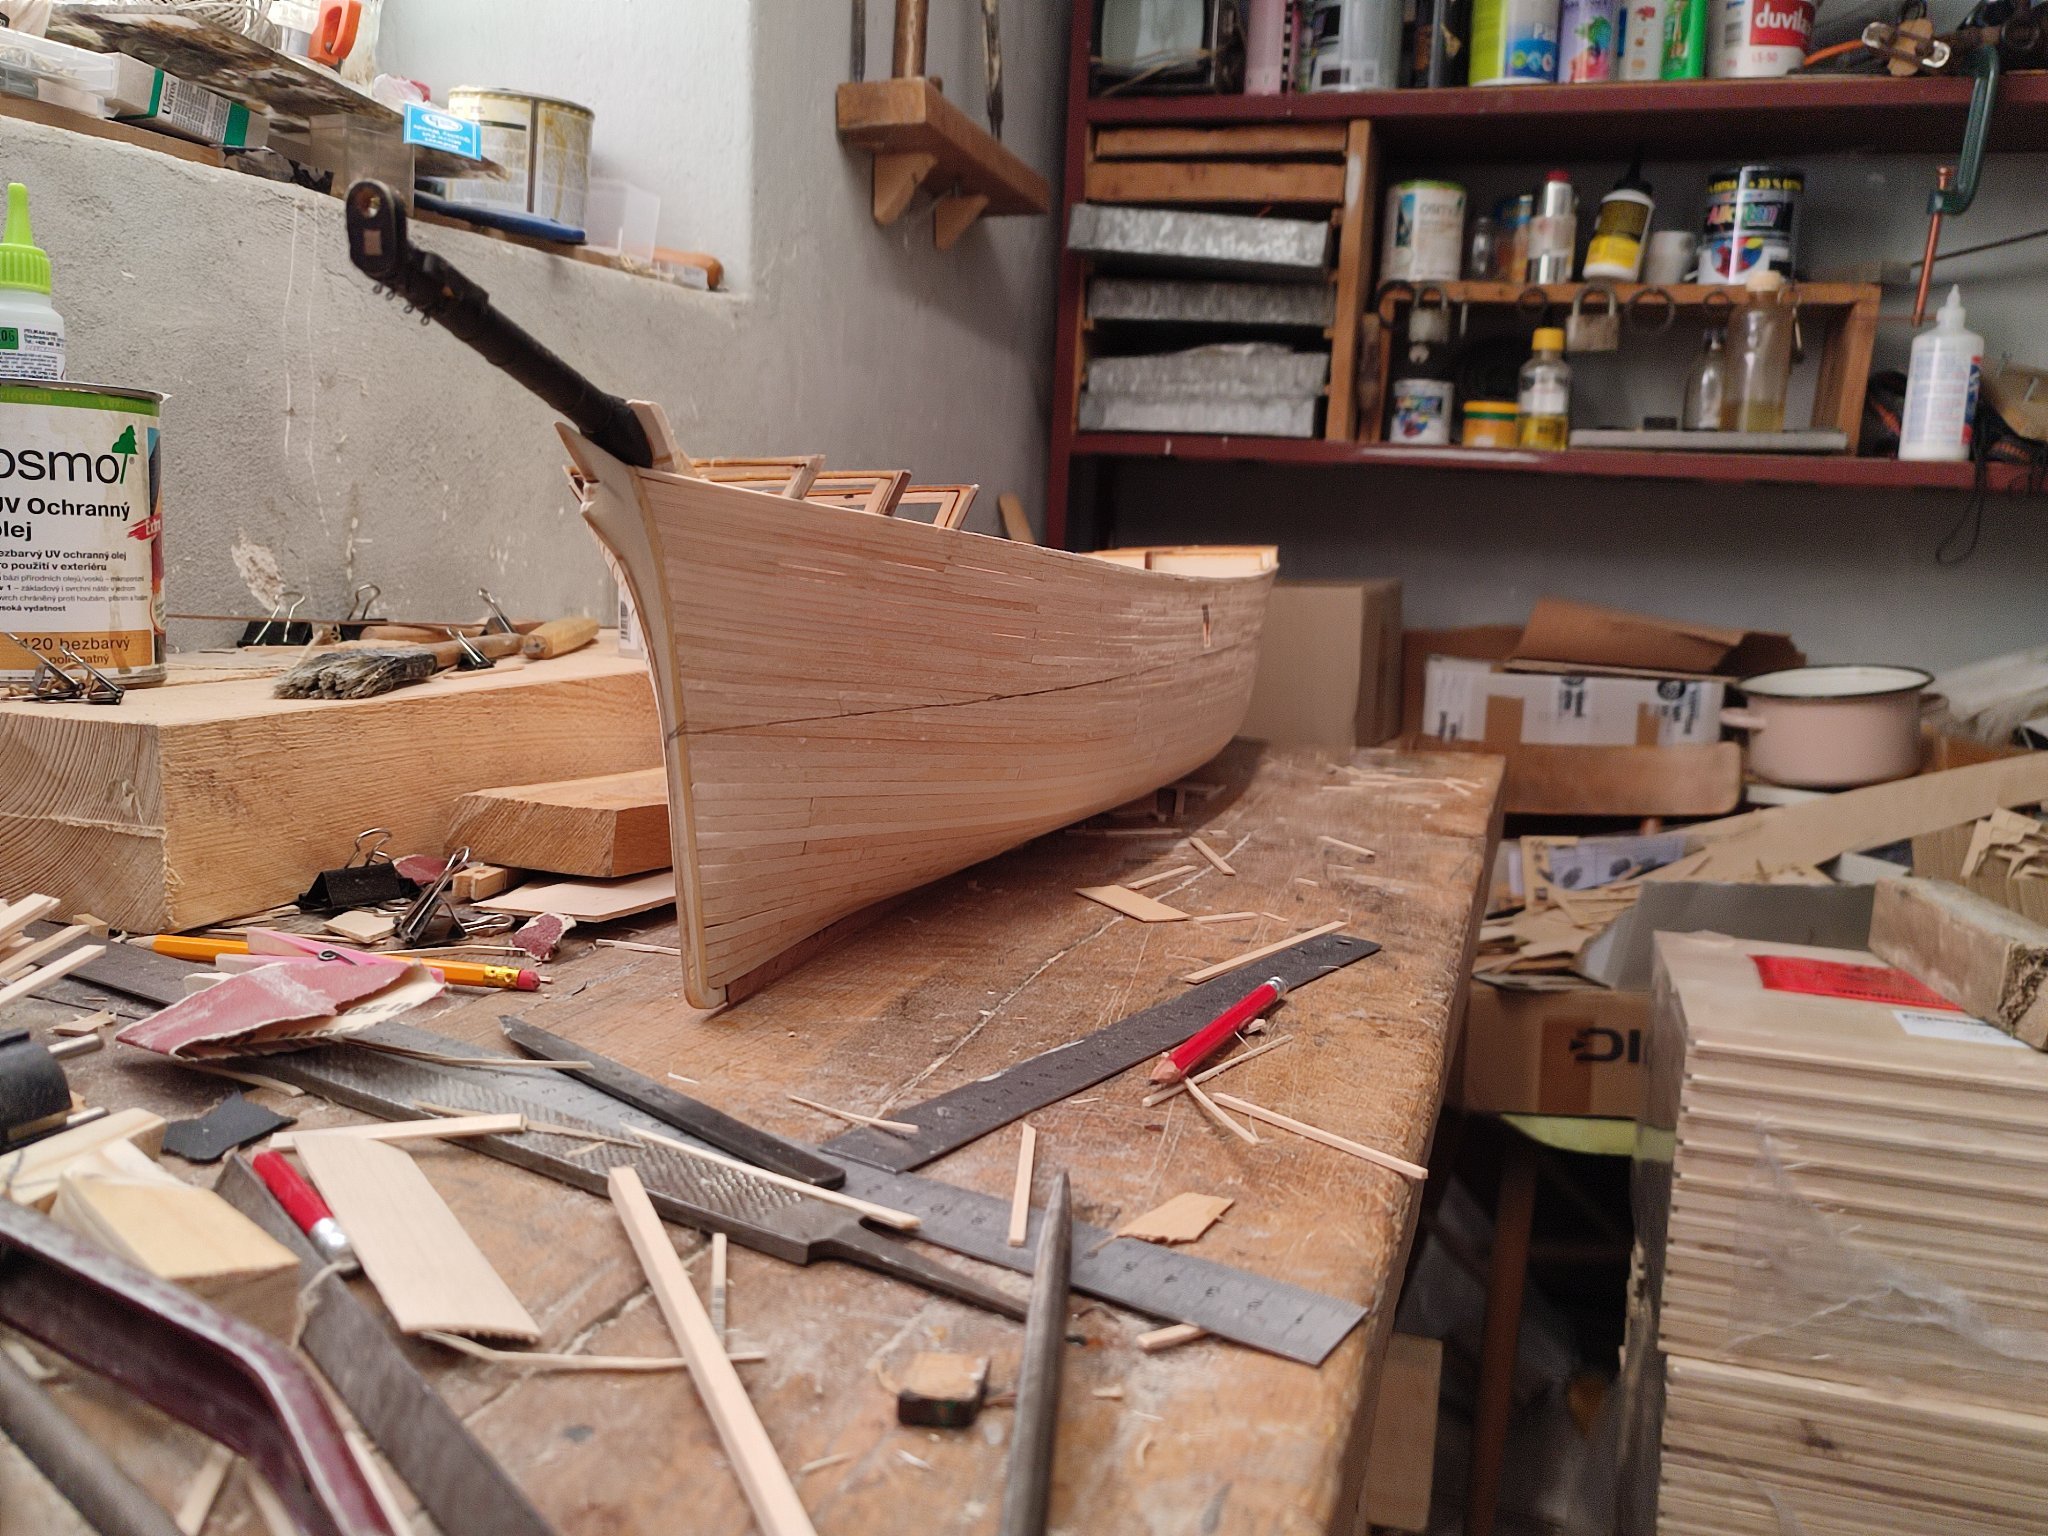
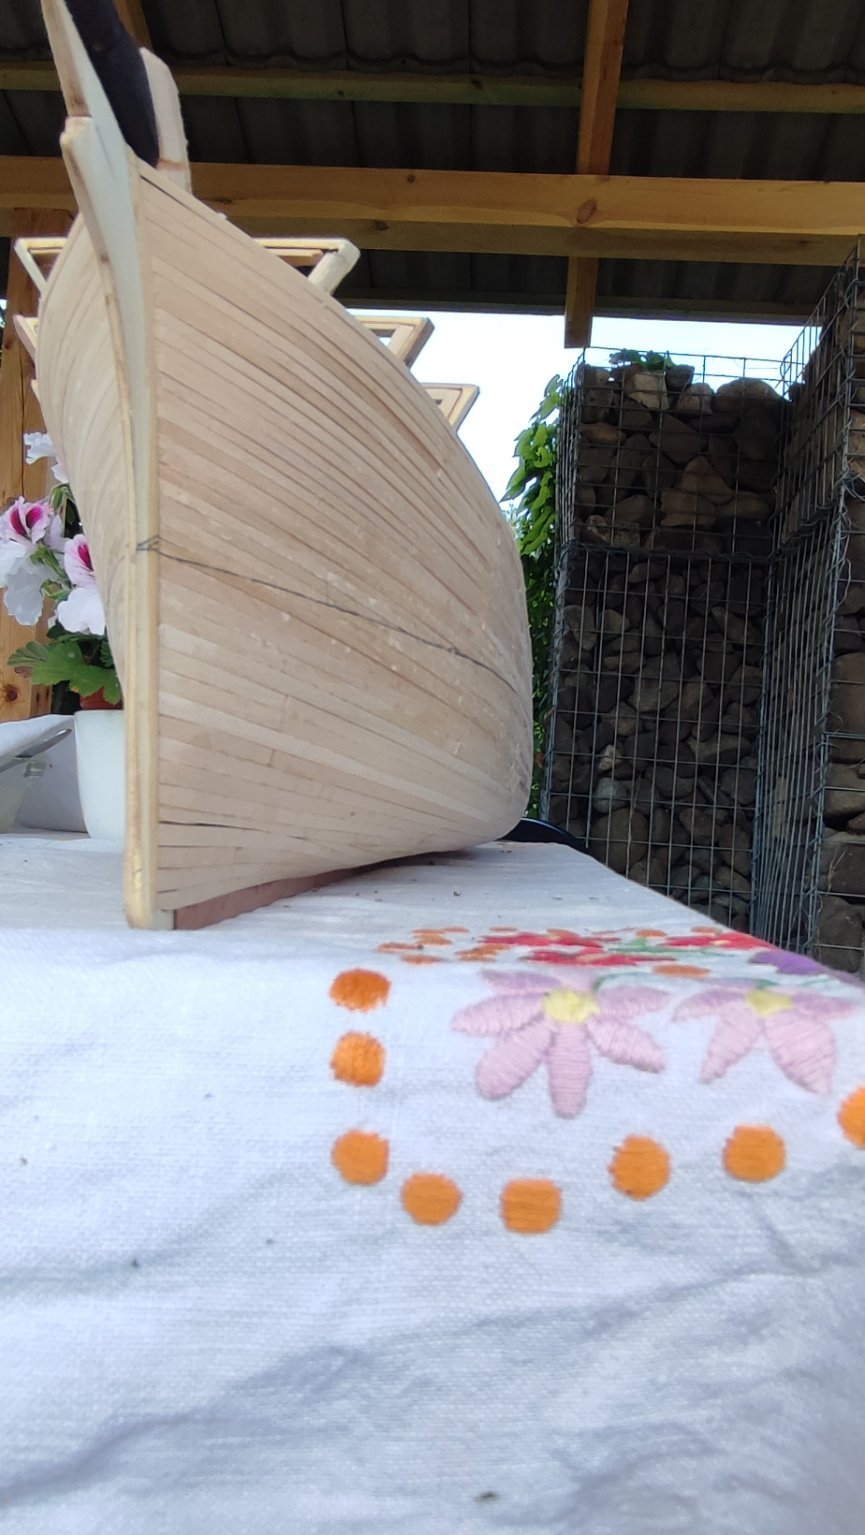
One could think there IS not much to do now...hell yeah. My package arrives tmw.and i faired waterways to round angle with 320 grit, and almost built Up stern All the way. She starts looking Smart isnt IT?
Here IS the progress...


- GrandpaPhil and Tigersteve
-
2
-
11 hours ago, ClipperFan said:
Vladimir old buddy, old pal. Not to throw a "monkey wrench" into your plans to invest in relatively expensive Amati copper tiles but I thought you might just appreciate seeing a less costly alternative. Granted, this real brass foil would have to be modified ala Rob's technique but think of the amazingly similar results to new Muntz metal. Of course, this would have to be dulled down but it's dramatically different than copper. Besides, I'm pretty sure that the replications of the Amati tiles are in reverse.
 Rich, my friend. Appreciated the effort, i really am, but Guess what? I have brass sheets left from cutty sark that would maybe covered entire glory. But im ageing i guess. I cant imagine púť myself into making each individual plate again and even smaller. Not anymore. Besides. Its All different if its tápe and strips. Not pieces. No anyway, its still christmass Topic in my čase lets FOCUS whats Actual shall we?
-
4 hours ago, rwiederrich said:
I hate delays. It's like knocking the wind out of your sails...just when your getting in your groove.
Yes...I too looked into the premade(very detailed) copper plates...but the price tag was just not acceptable after I calculated the number of them needed to complete the job. NOT to mention that since I was able to complete the job in just over 13 hours(with my method)....that would not have been possible laying one plate at a time. Not withstanding, I might have become either homicidal or suicidal trying it one at a time. It's not in me to have that kind of patience.
*Warp speed Mr. Sulu*
I'm looking forward to your next installment.
Rob
yours are fantastic. yes i didnt calculate cost yet so i will come to that point later. but its always with me. i sometmies rather pay than pay twice sith nerves wracking bad outcome etc. i hate that somwtimes more than money left. i was almost thinking of paitnitng hull to mimic muntz but it would be proabably very plain poor aproach ...so i stick with coppering for now. but its thing of next 3 or for months. i want to focus on bulwarks and rails - ver important and lst structural form to complete hull and sgio apearance...for now and that wont be simple task but im looking fwd to it. than i will paint hull black and rest.
fingers crossed.
-
-
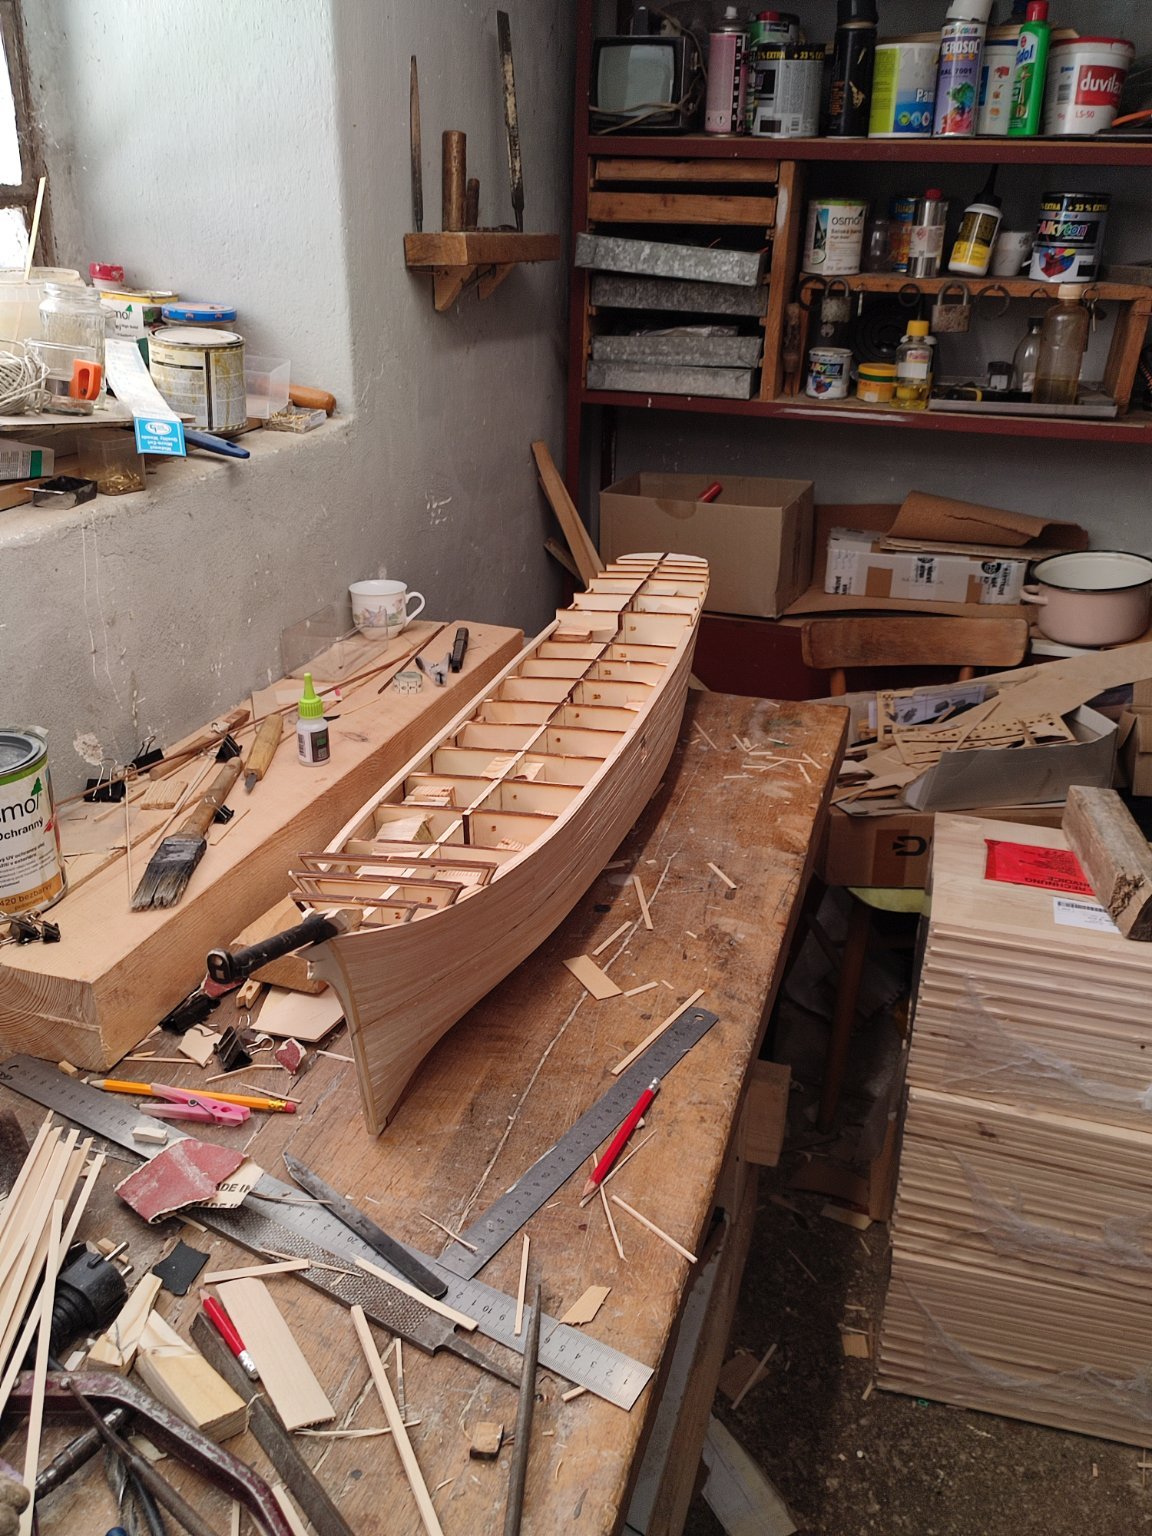
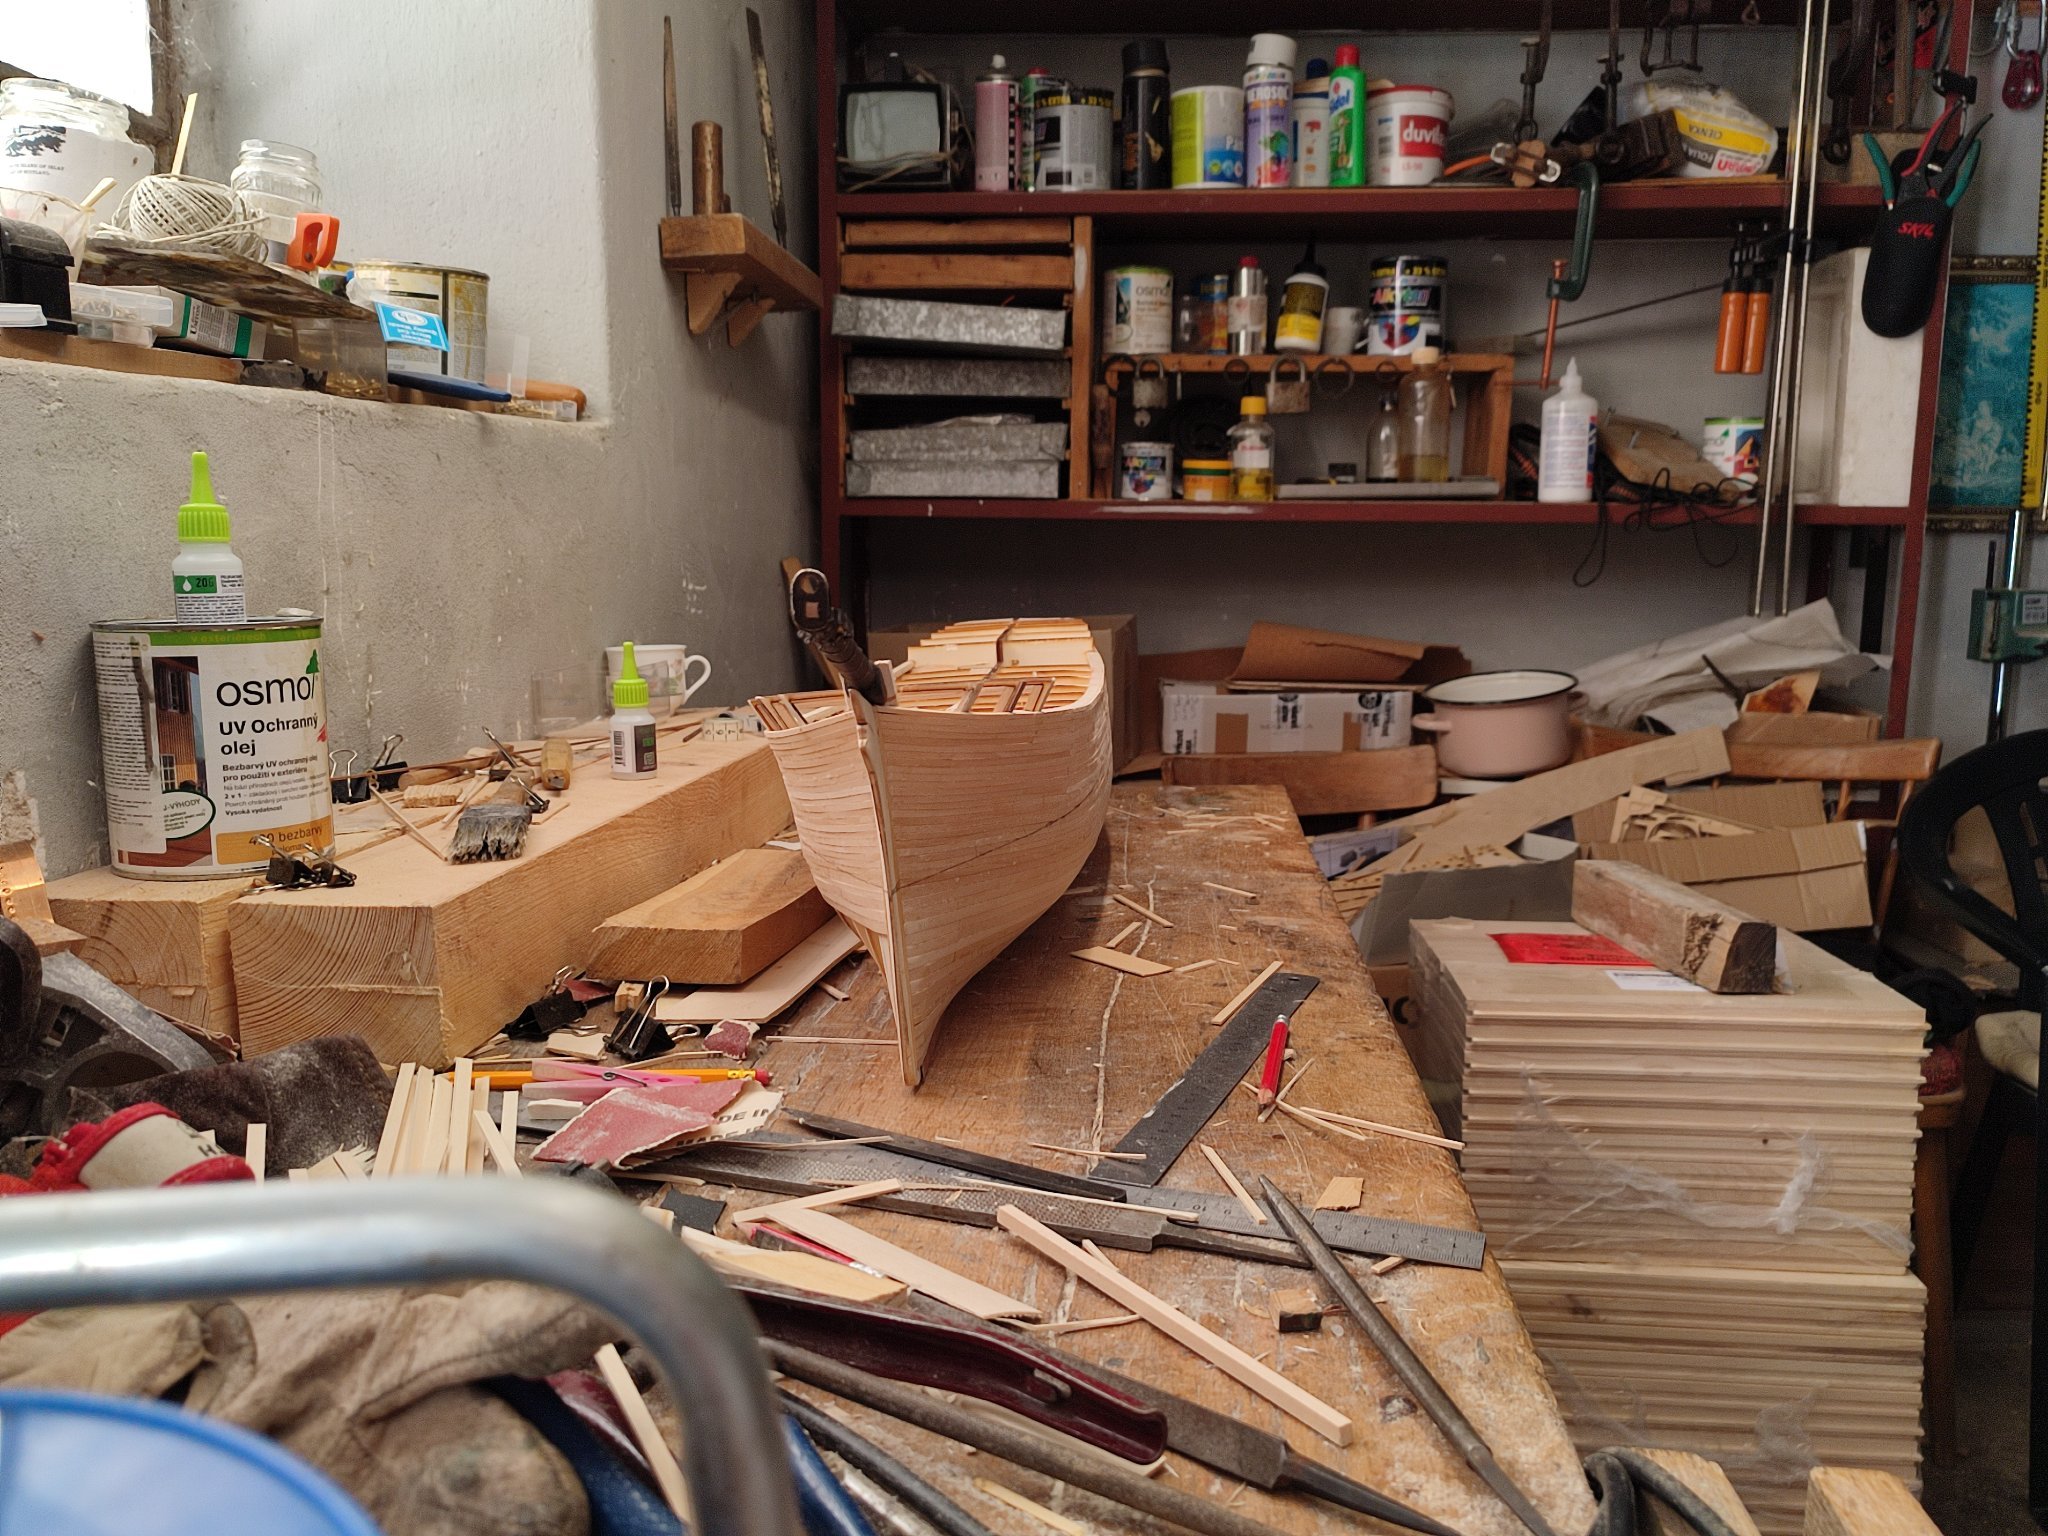
delay. My lumber provider reached out to me that messed up between adresses so actual bulwarks section is on hold. what now?
i will apply shellac on hull as primer. after painting black up to copperline, i decided to postpone coppering itself tothe winter snowy months. i decided im not up to Robs taping procees and i dont have experience with it. closest to real thing with no exagerated rivets in 1:72 i found premade copper plates from amati. i will most likely do that. it looks like free weekend. till next. cam wait for bulwarks stuff. that will be tough but i hope fun part.
- ClipperFan and mtaylor
-
 2
2
-
1 hour ago, ClipperFan said:
Vladimir you did indeed "make some serious dust." Awesome results worthy of "GLORY of the SEAS" herself! When she was first launched, Duncan MacLean commented that she sides were polished as smooth as glass. Your miniature vessel replicates that look impressively.
Thanks Rich.
- ClipperFan and mtaylor
-
1
-
 1
1
-
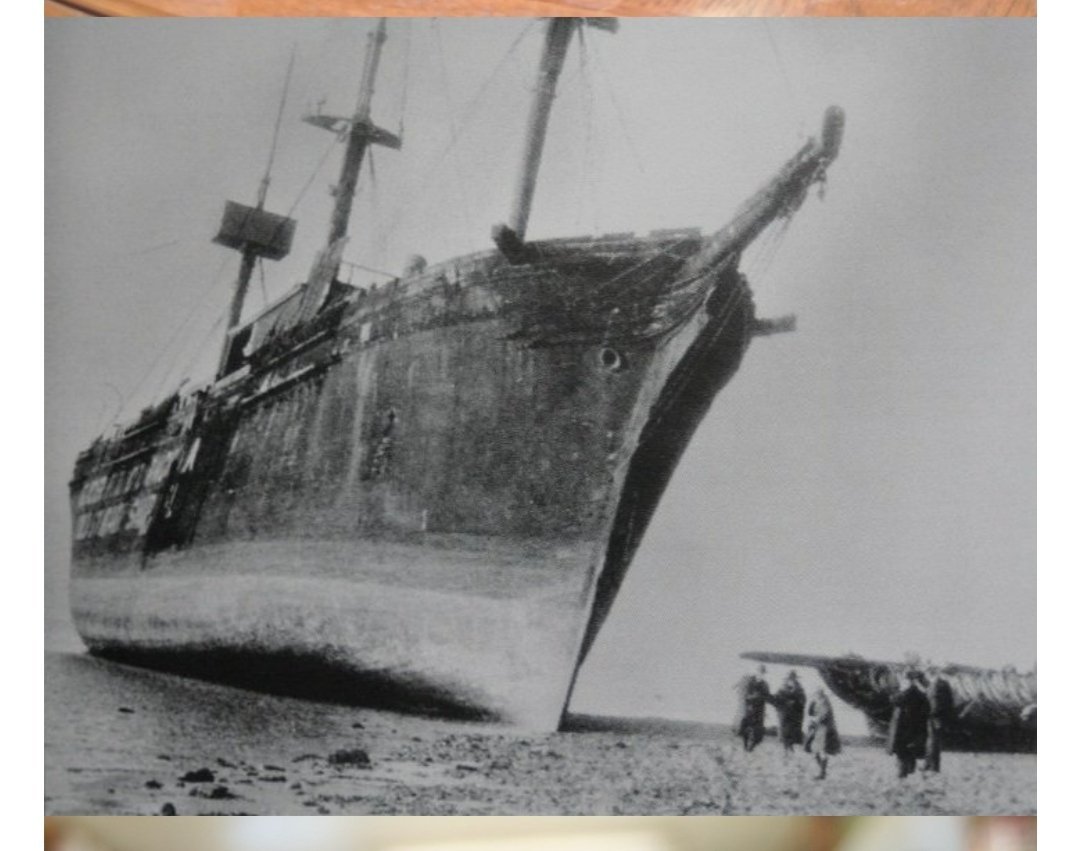
3 hours ago, ClipperFan said:
Vladimir, Rob just made an amazing discovery which will require you to adjust your rudder cut out significantly. It turns out the rudder post extends 6 1/2' from where it exists the Stern (this is the length I calculated by comparing this device to the 4' main bulwarks added to the 2' drop which is formed by the transverse structure which shows up as a shadow in the same scene. Rob has circled the picture where he discovered it.

Thank you. im observing your discussion. apreciated.V.
-
-
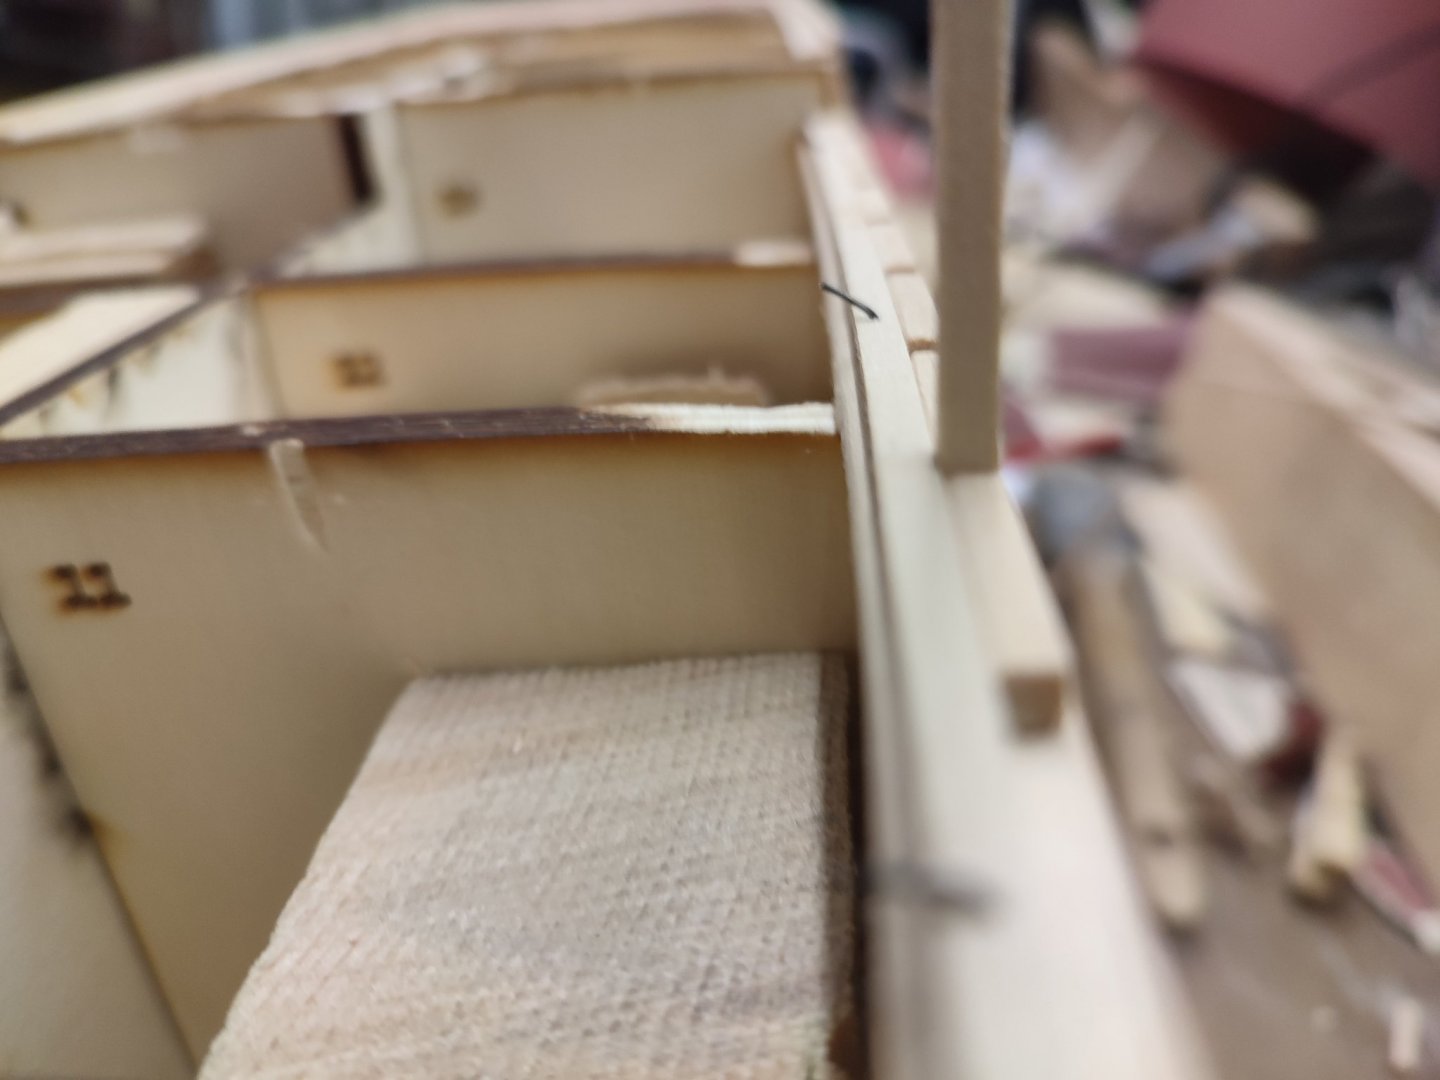
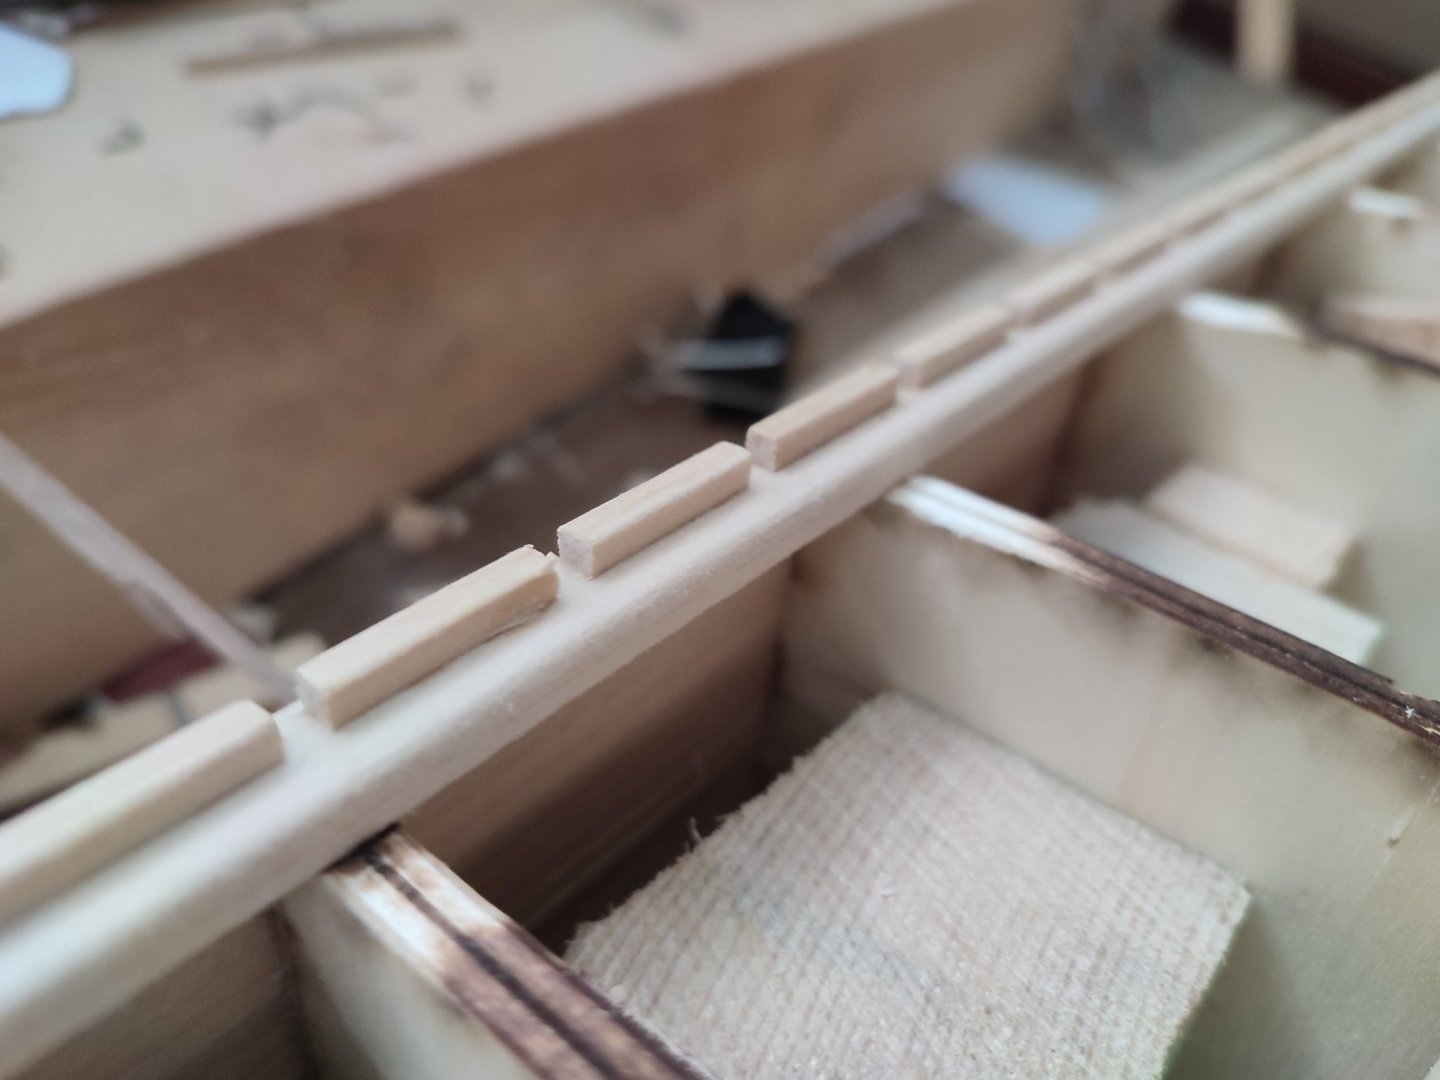
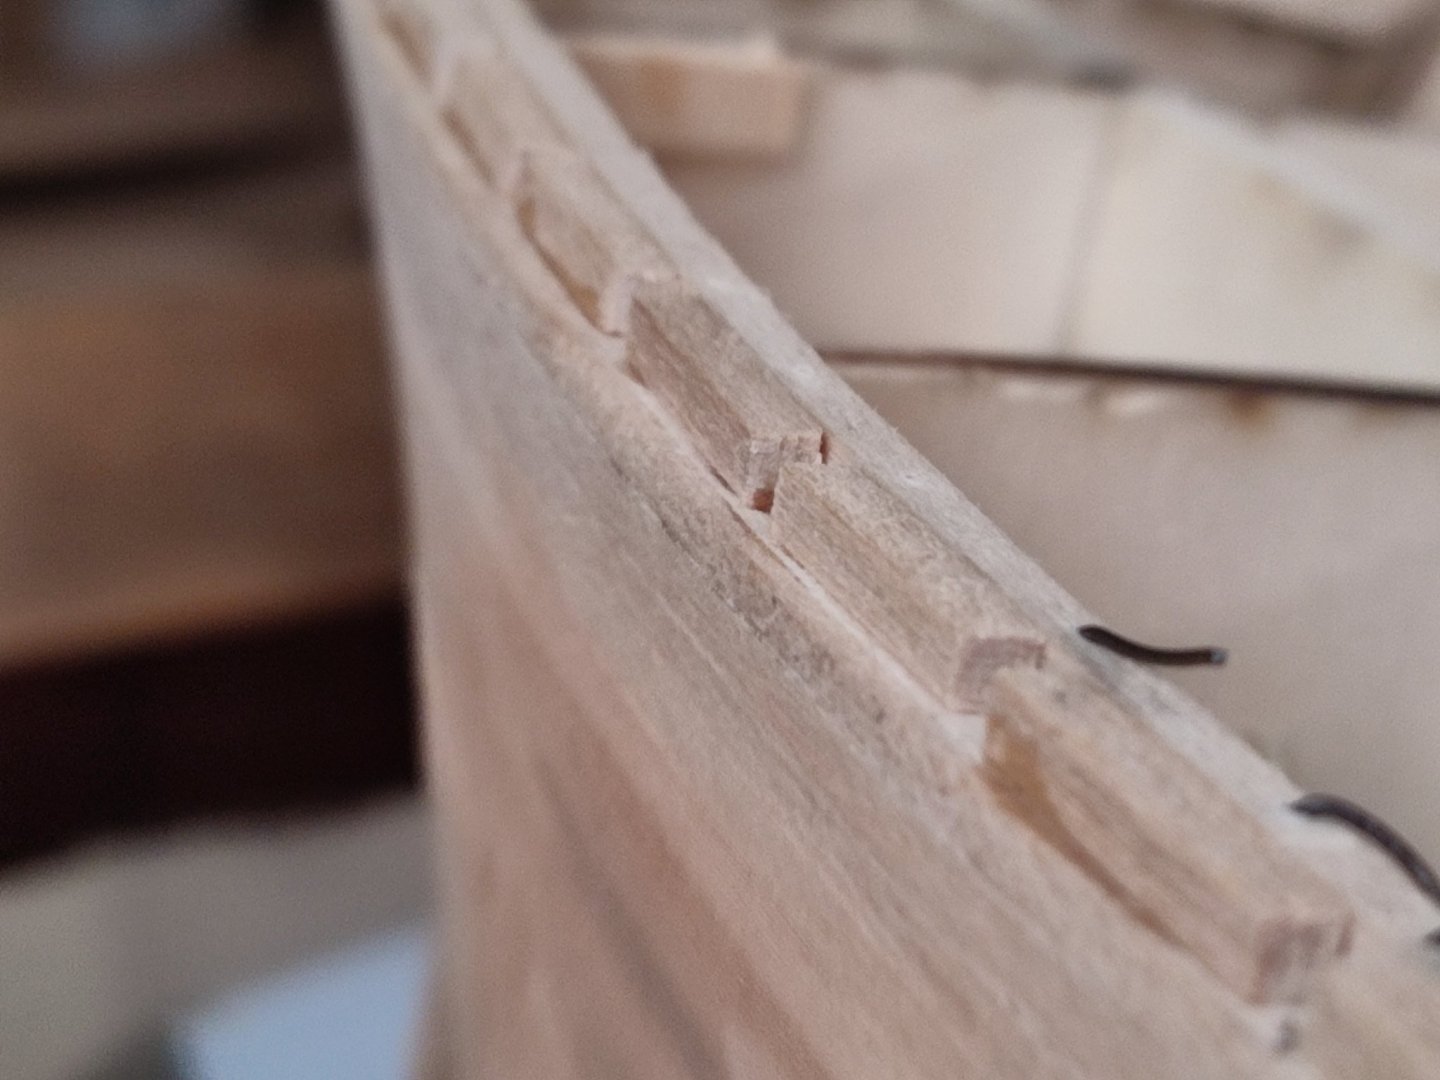
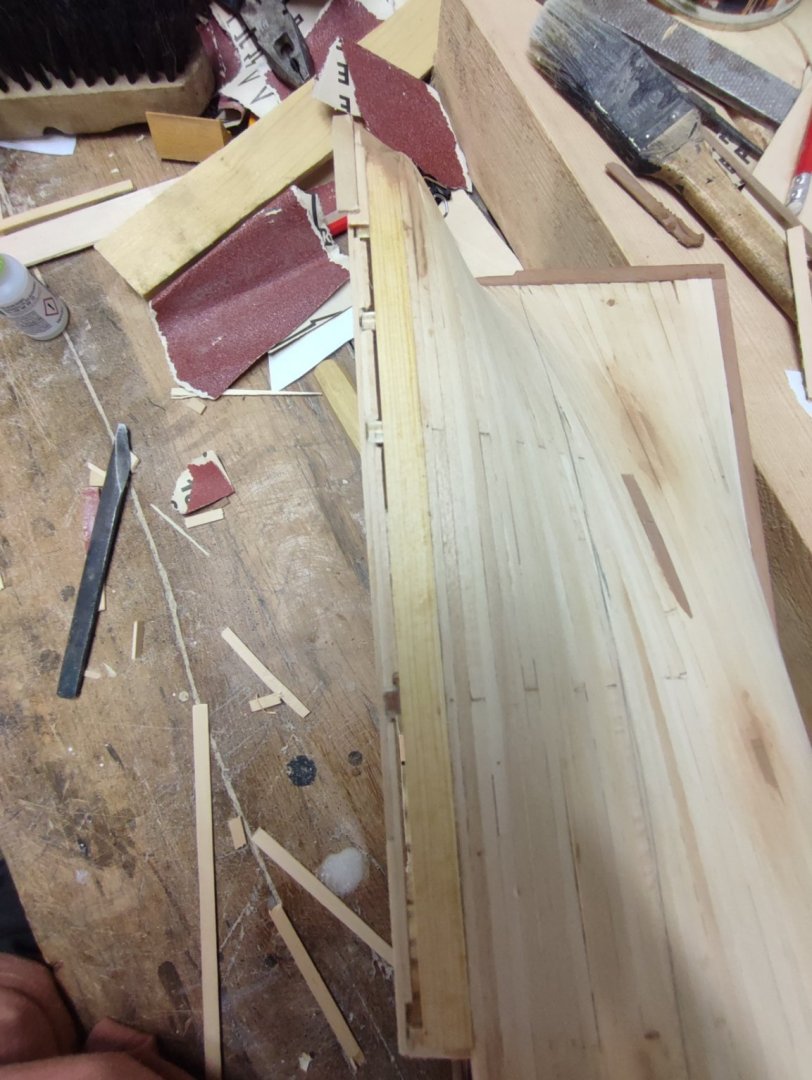
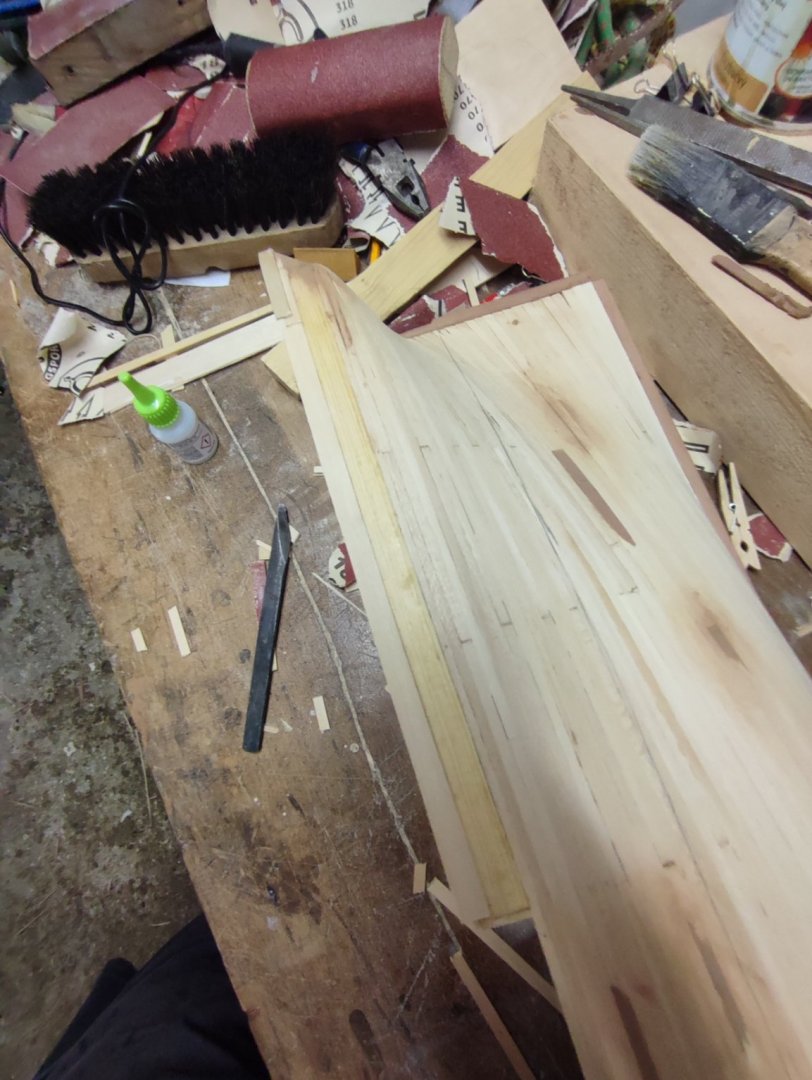
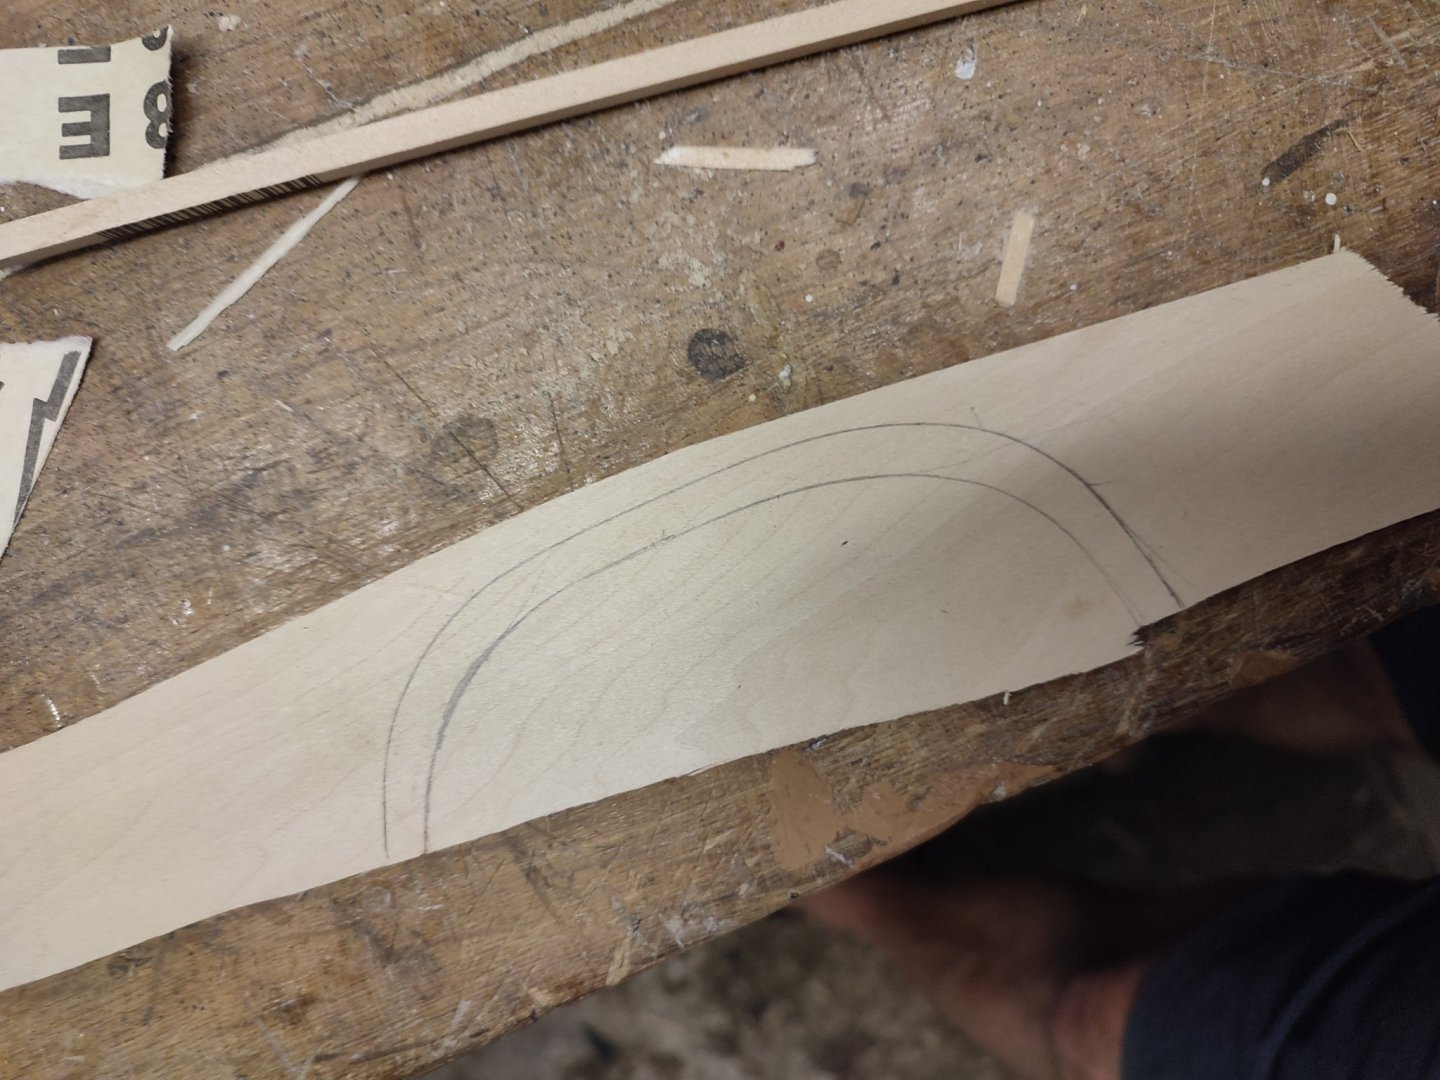
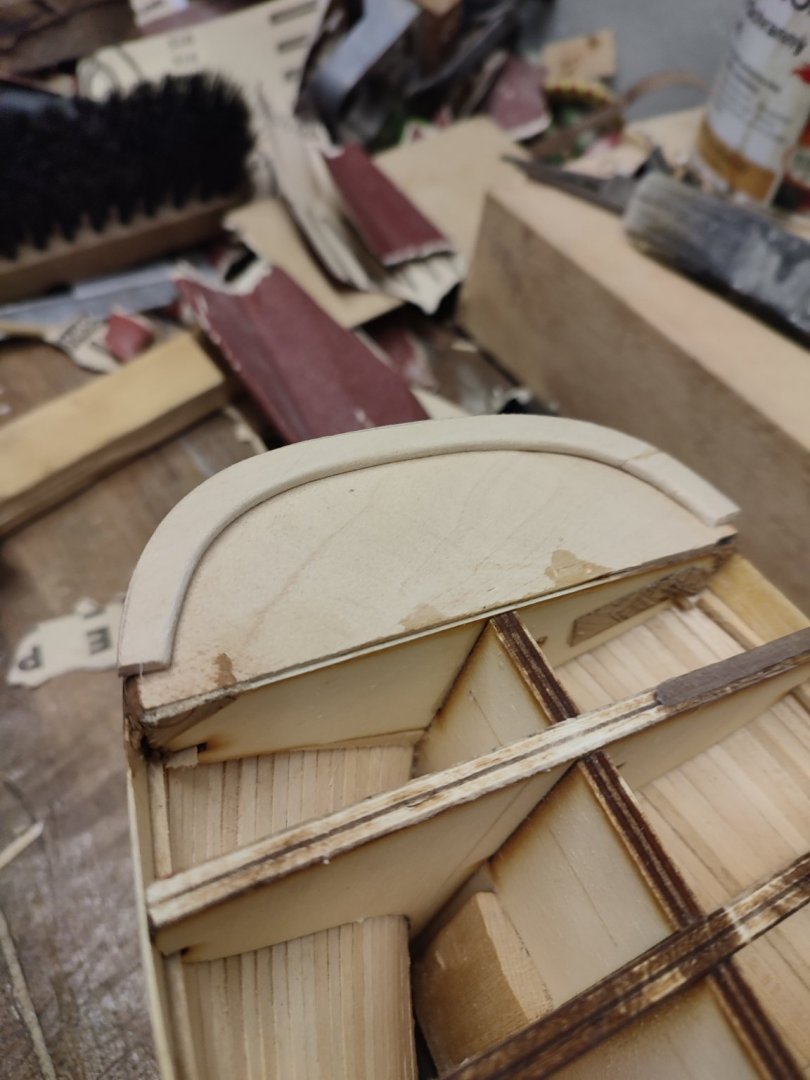
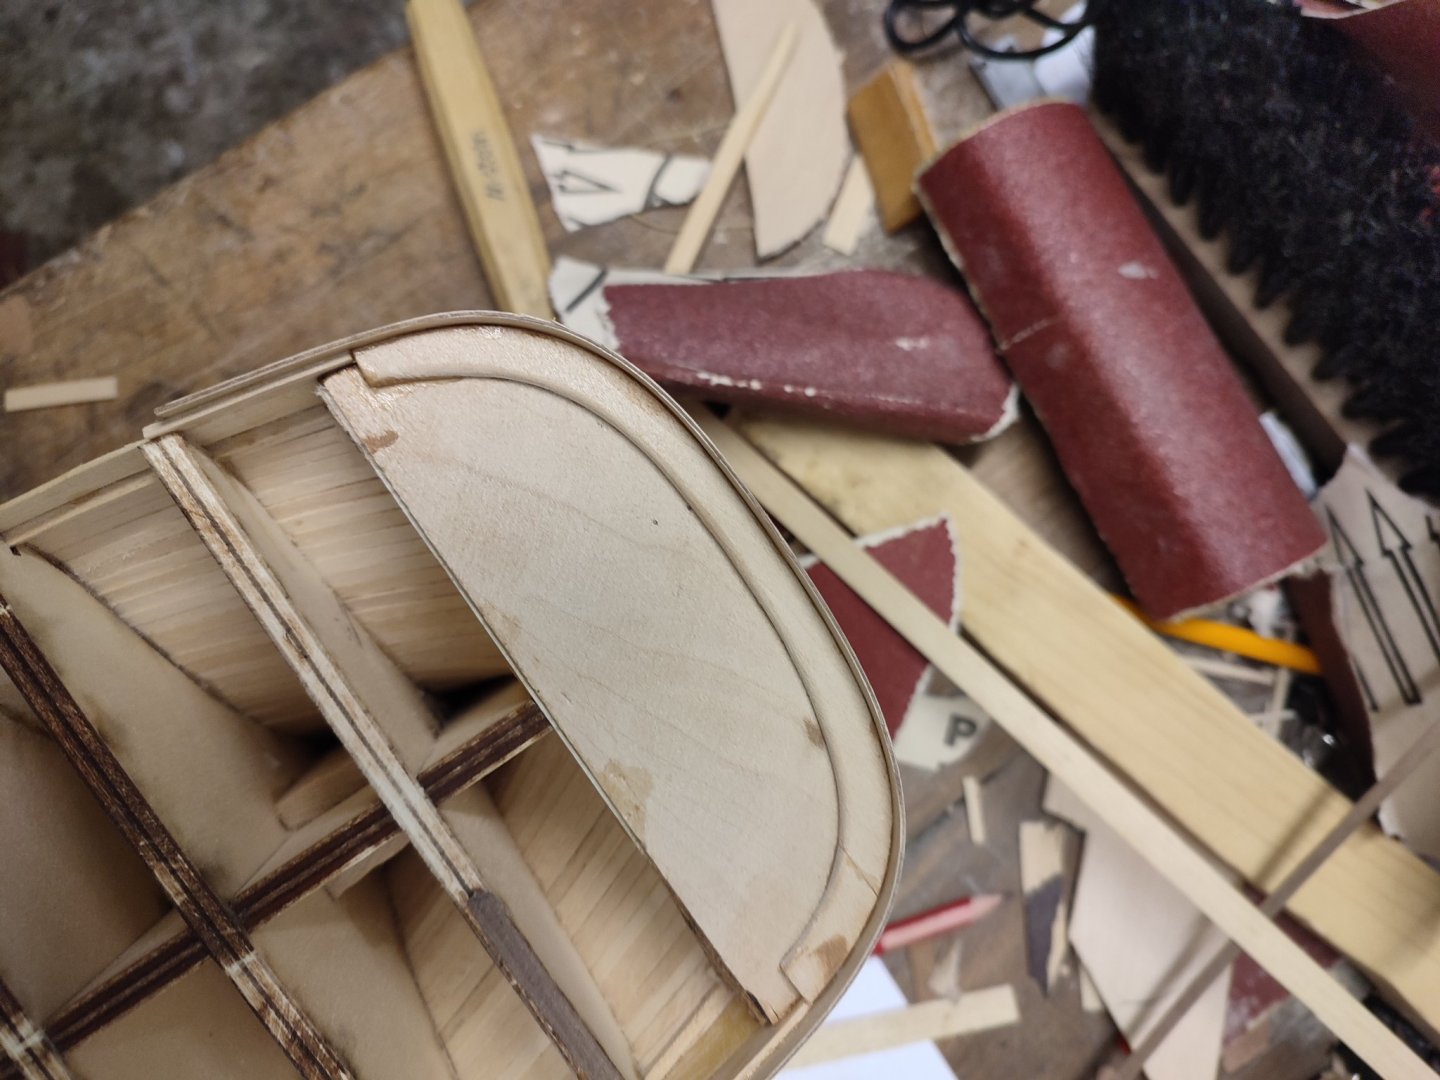
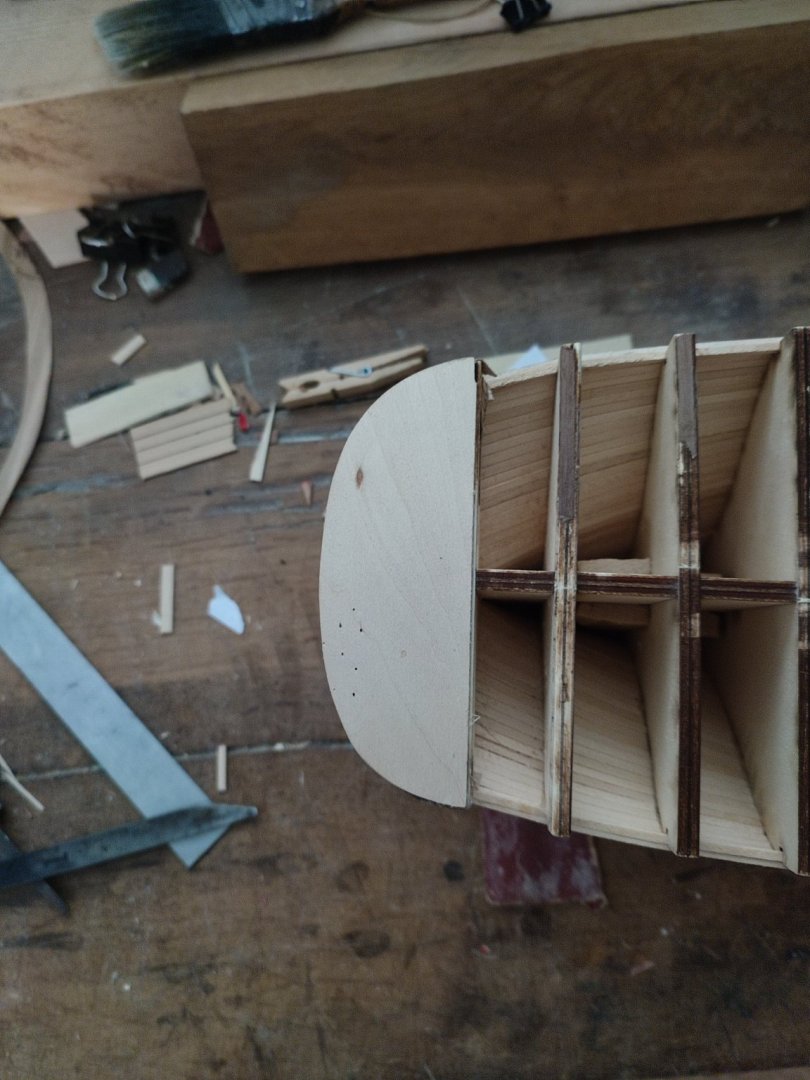
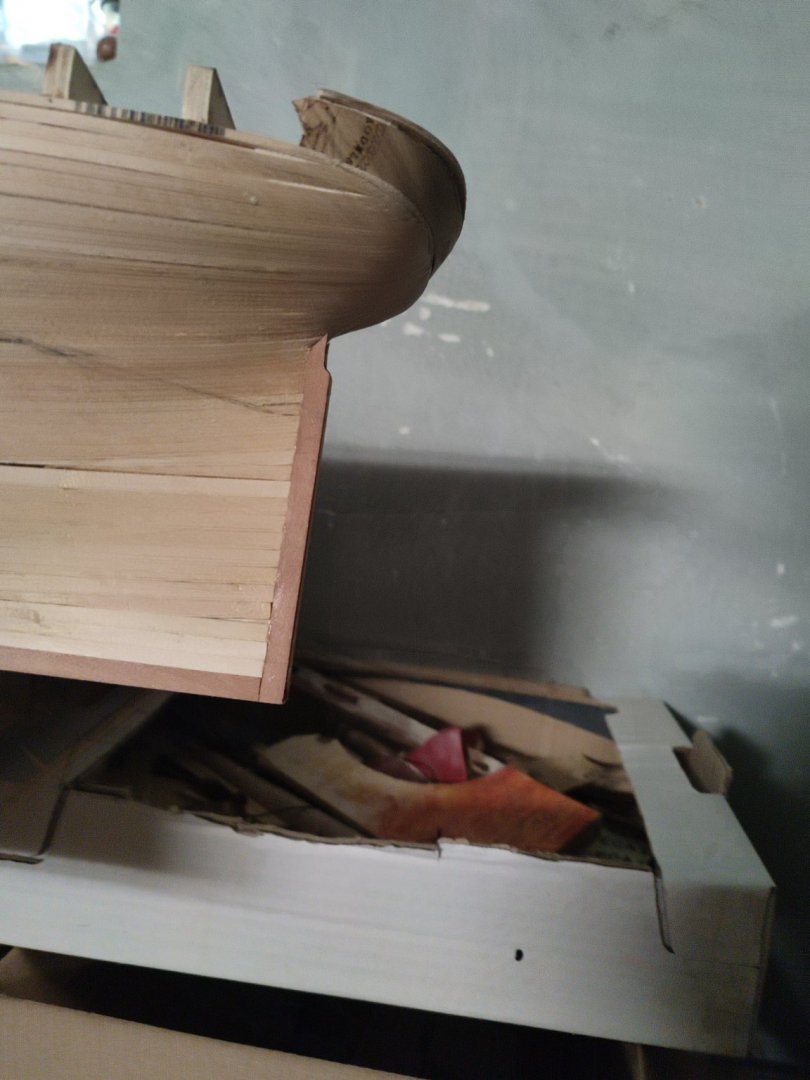
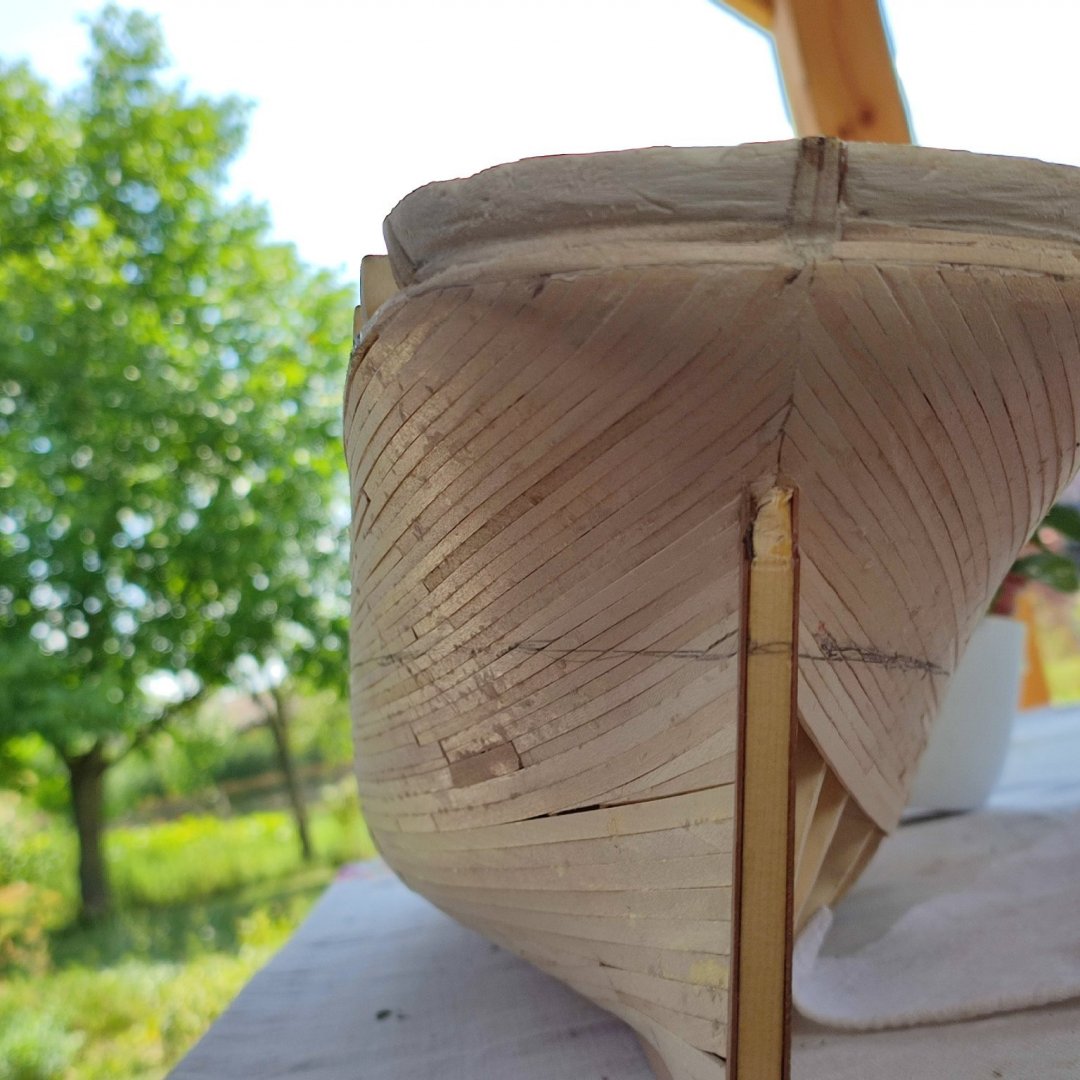
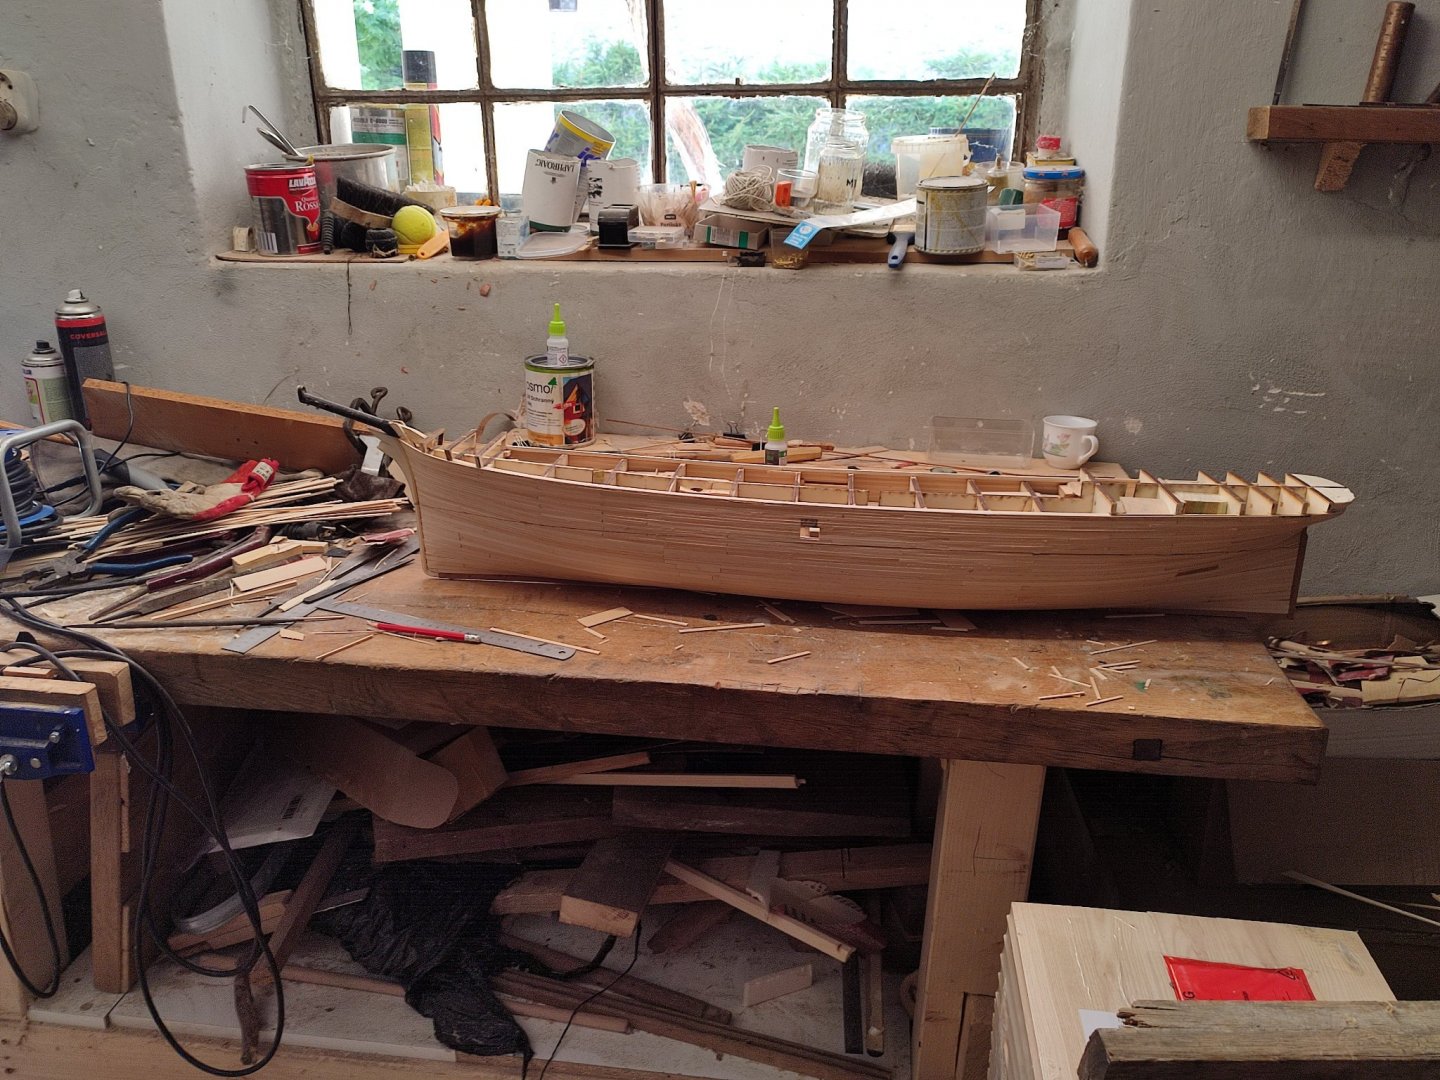
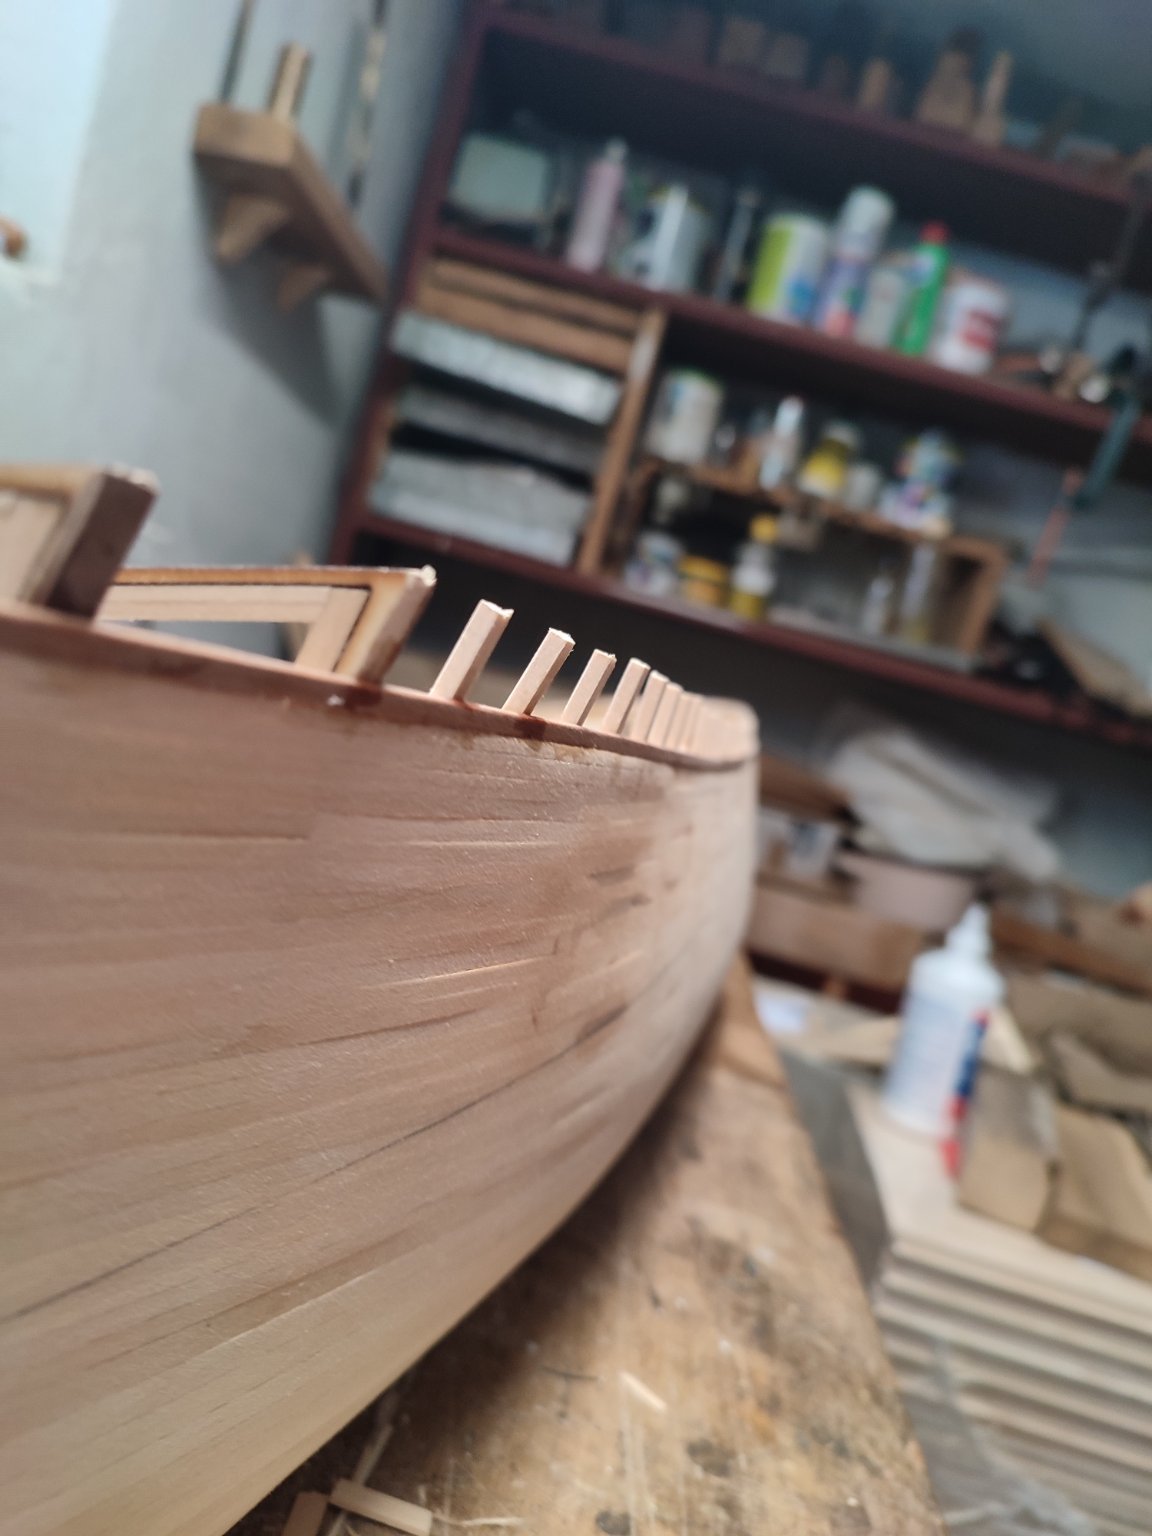
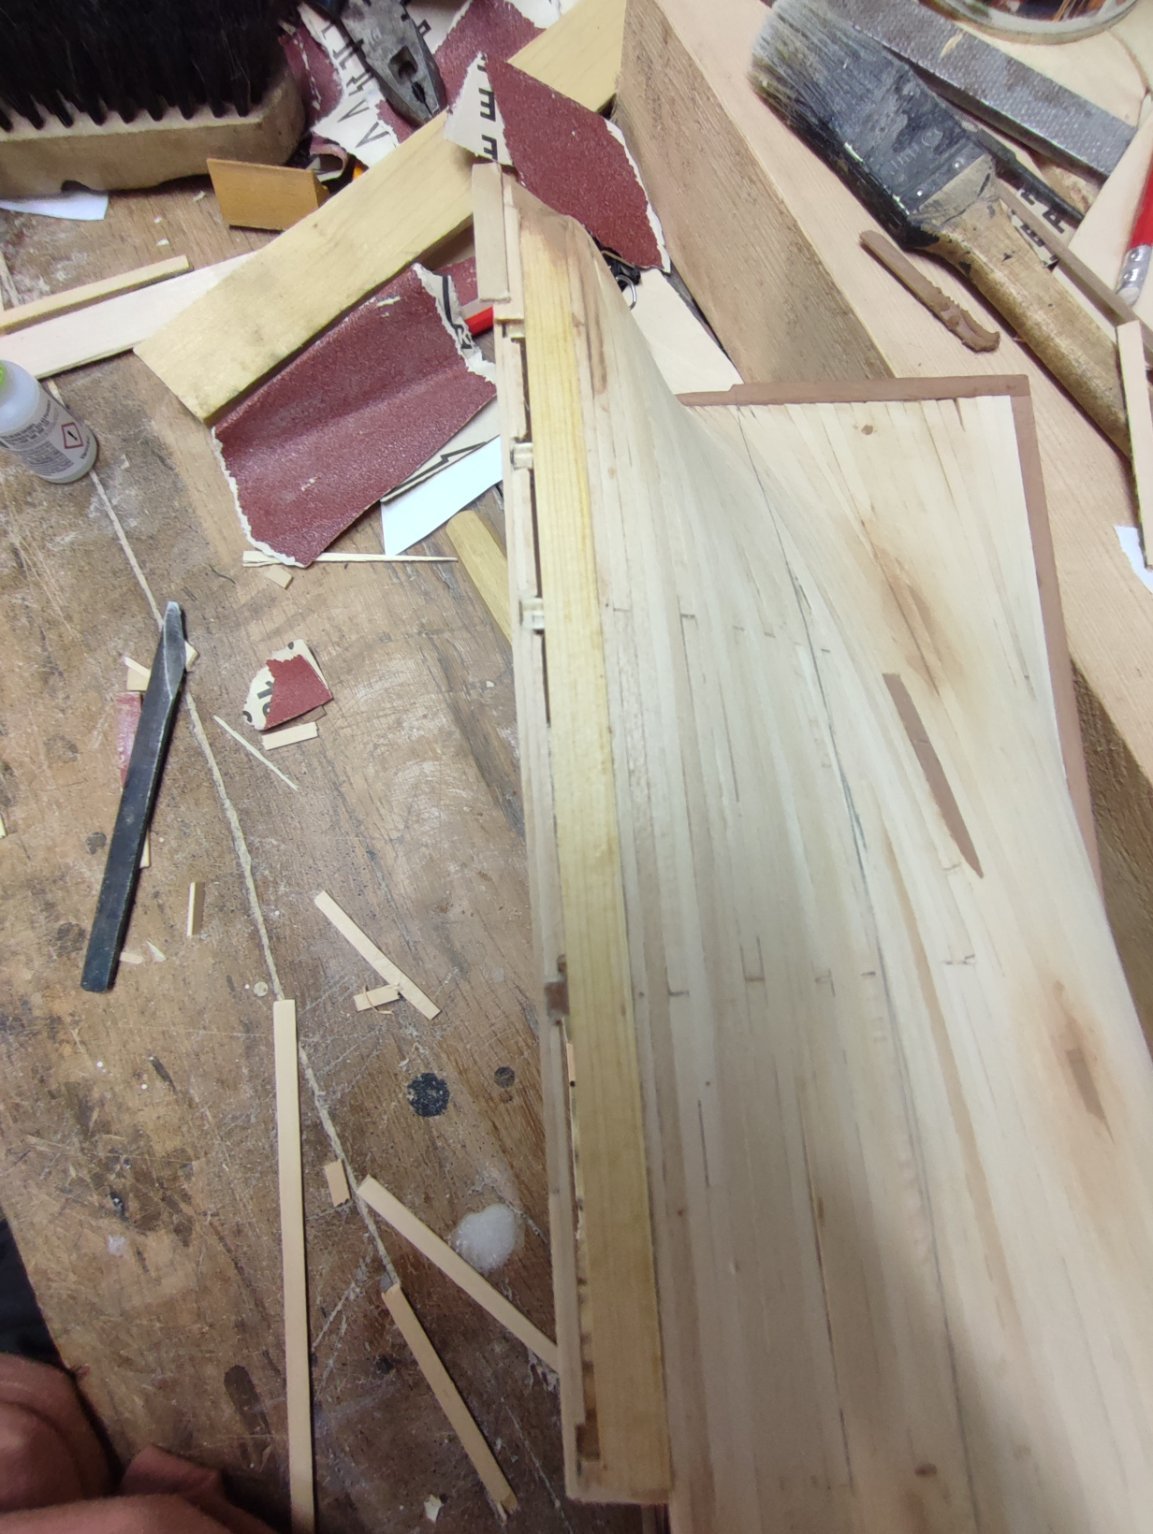
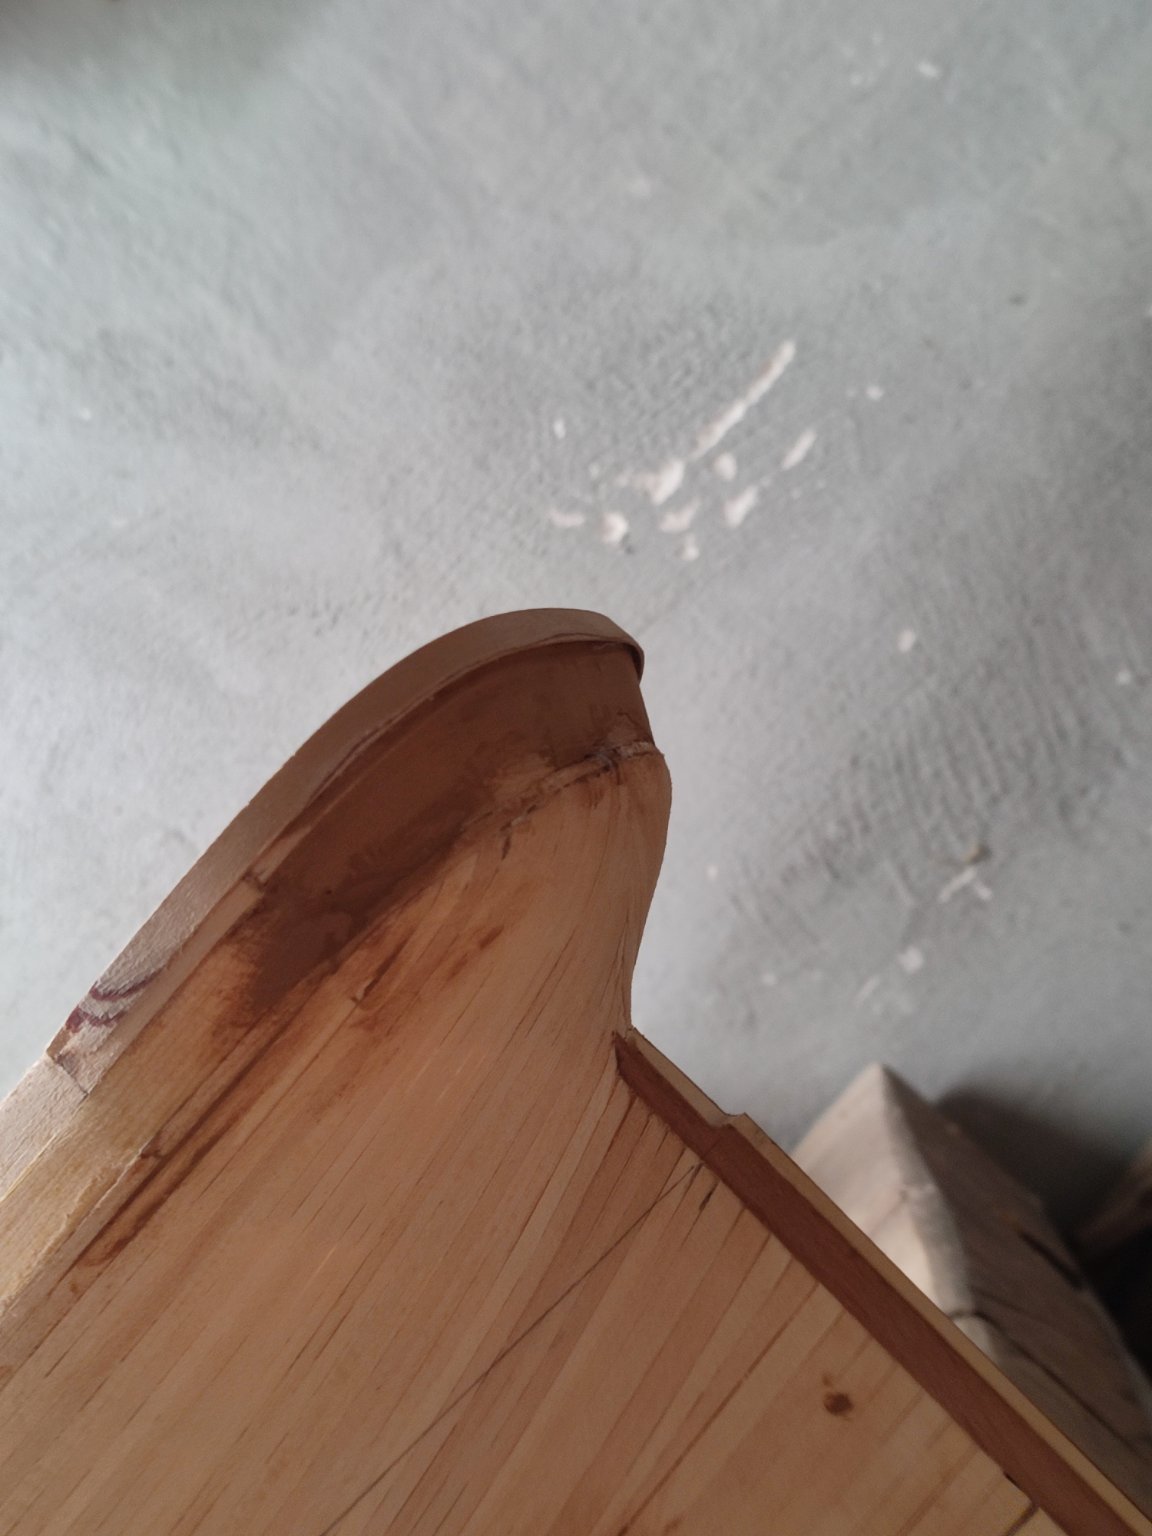
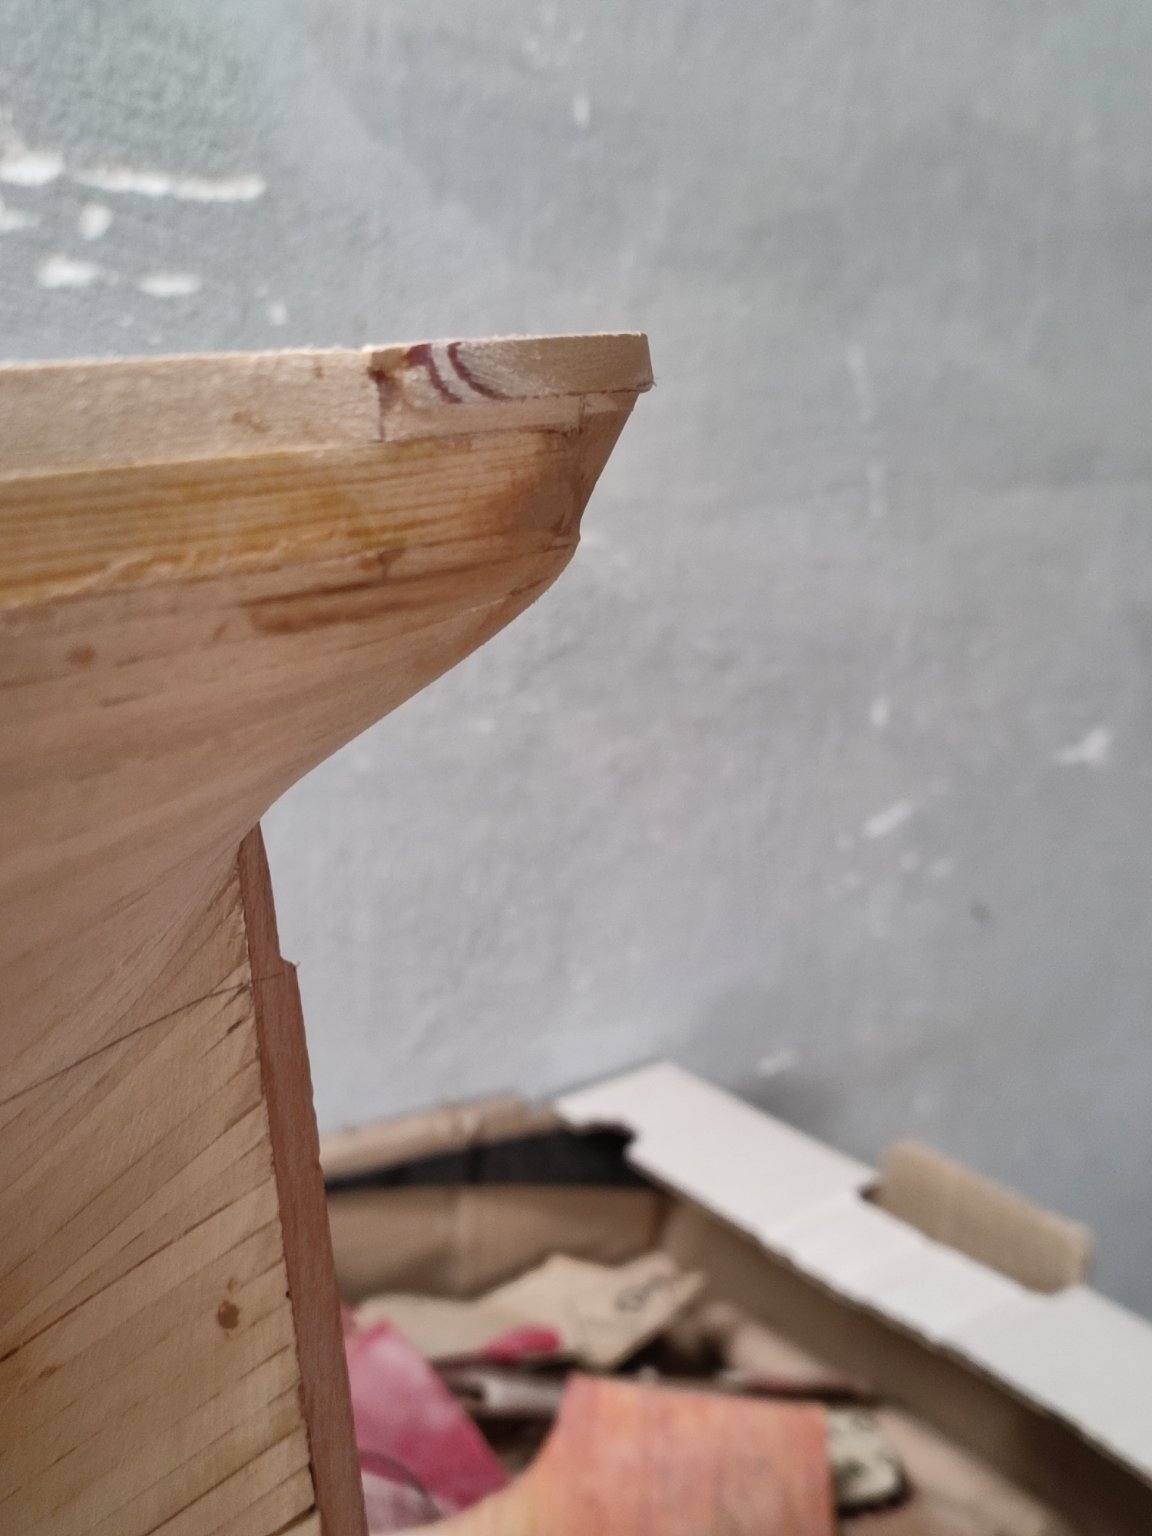
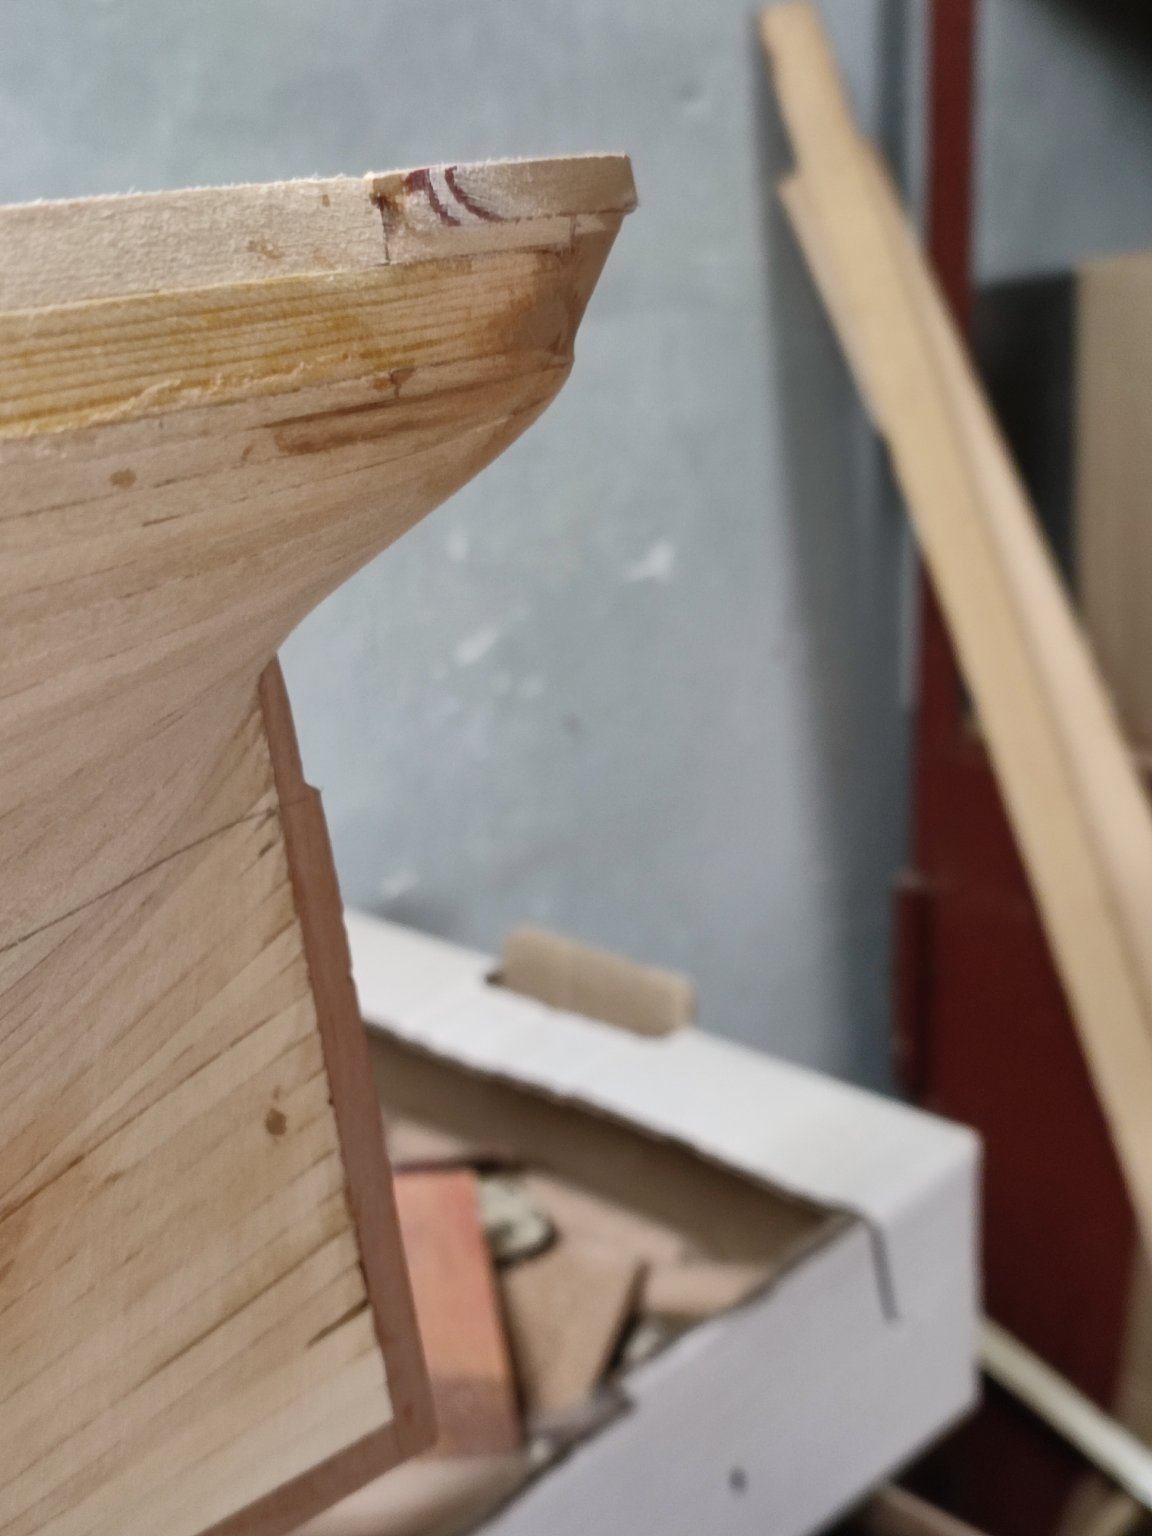
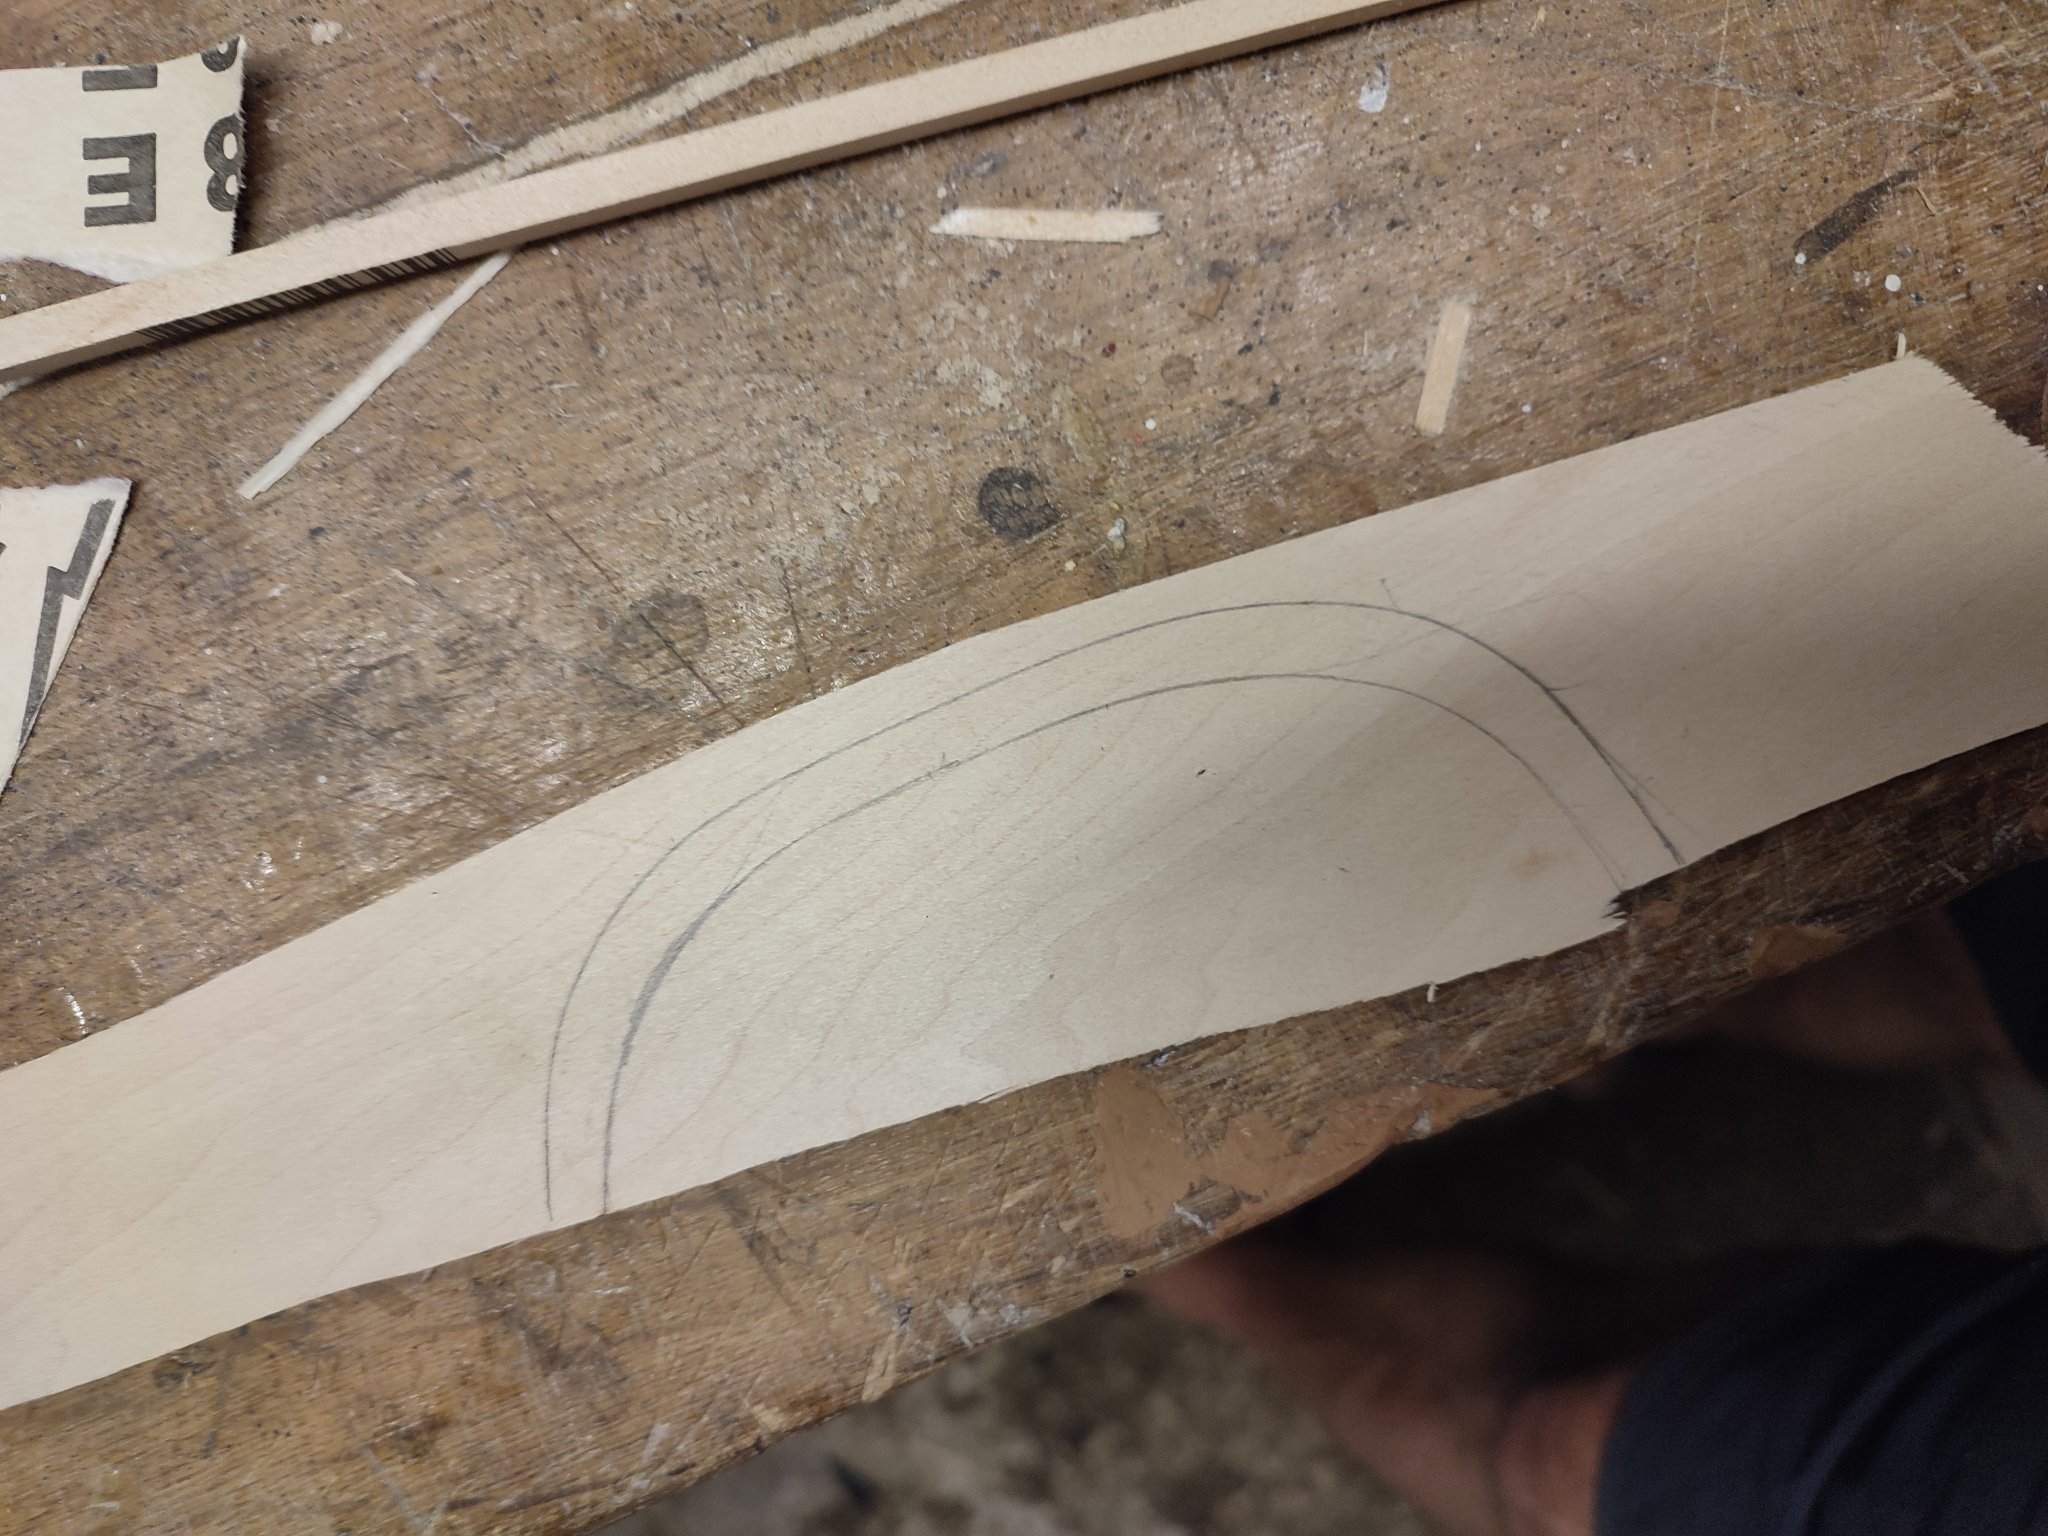
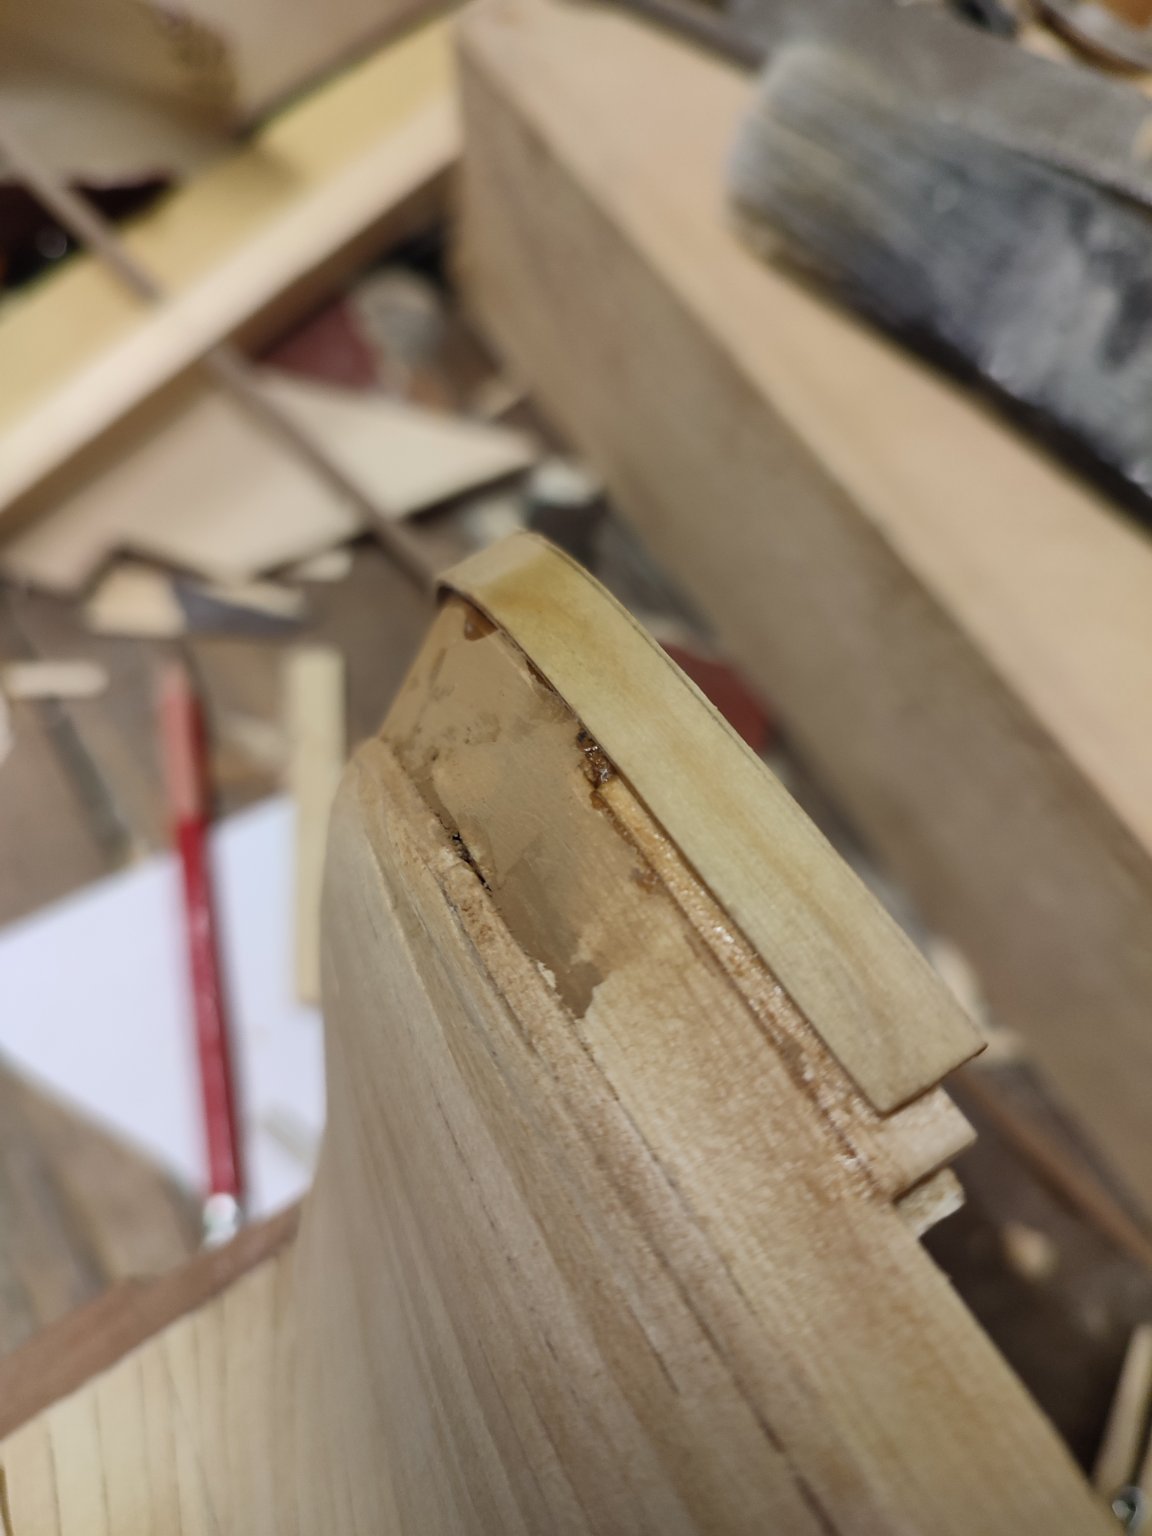
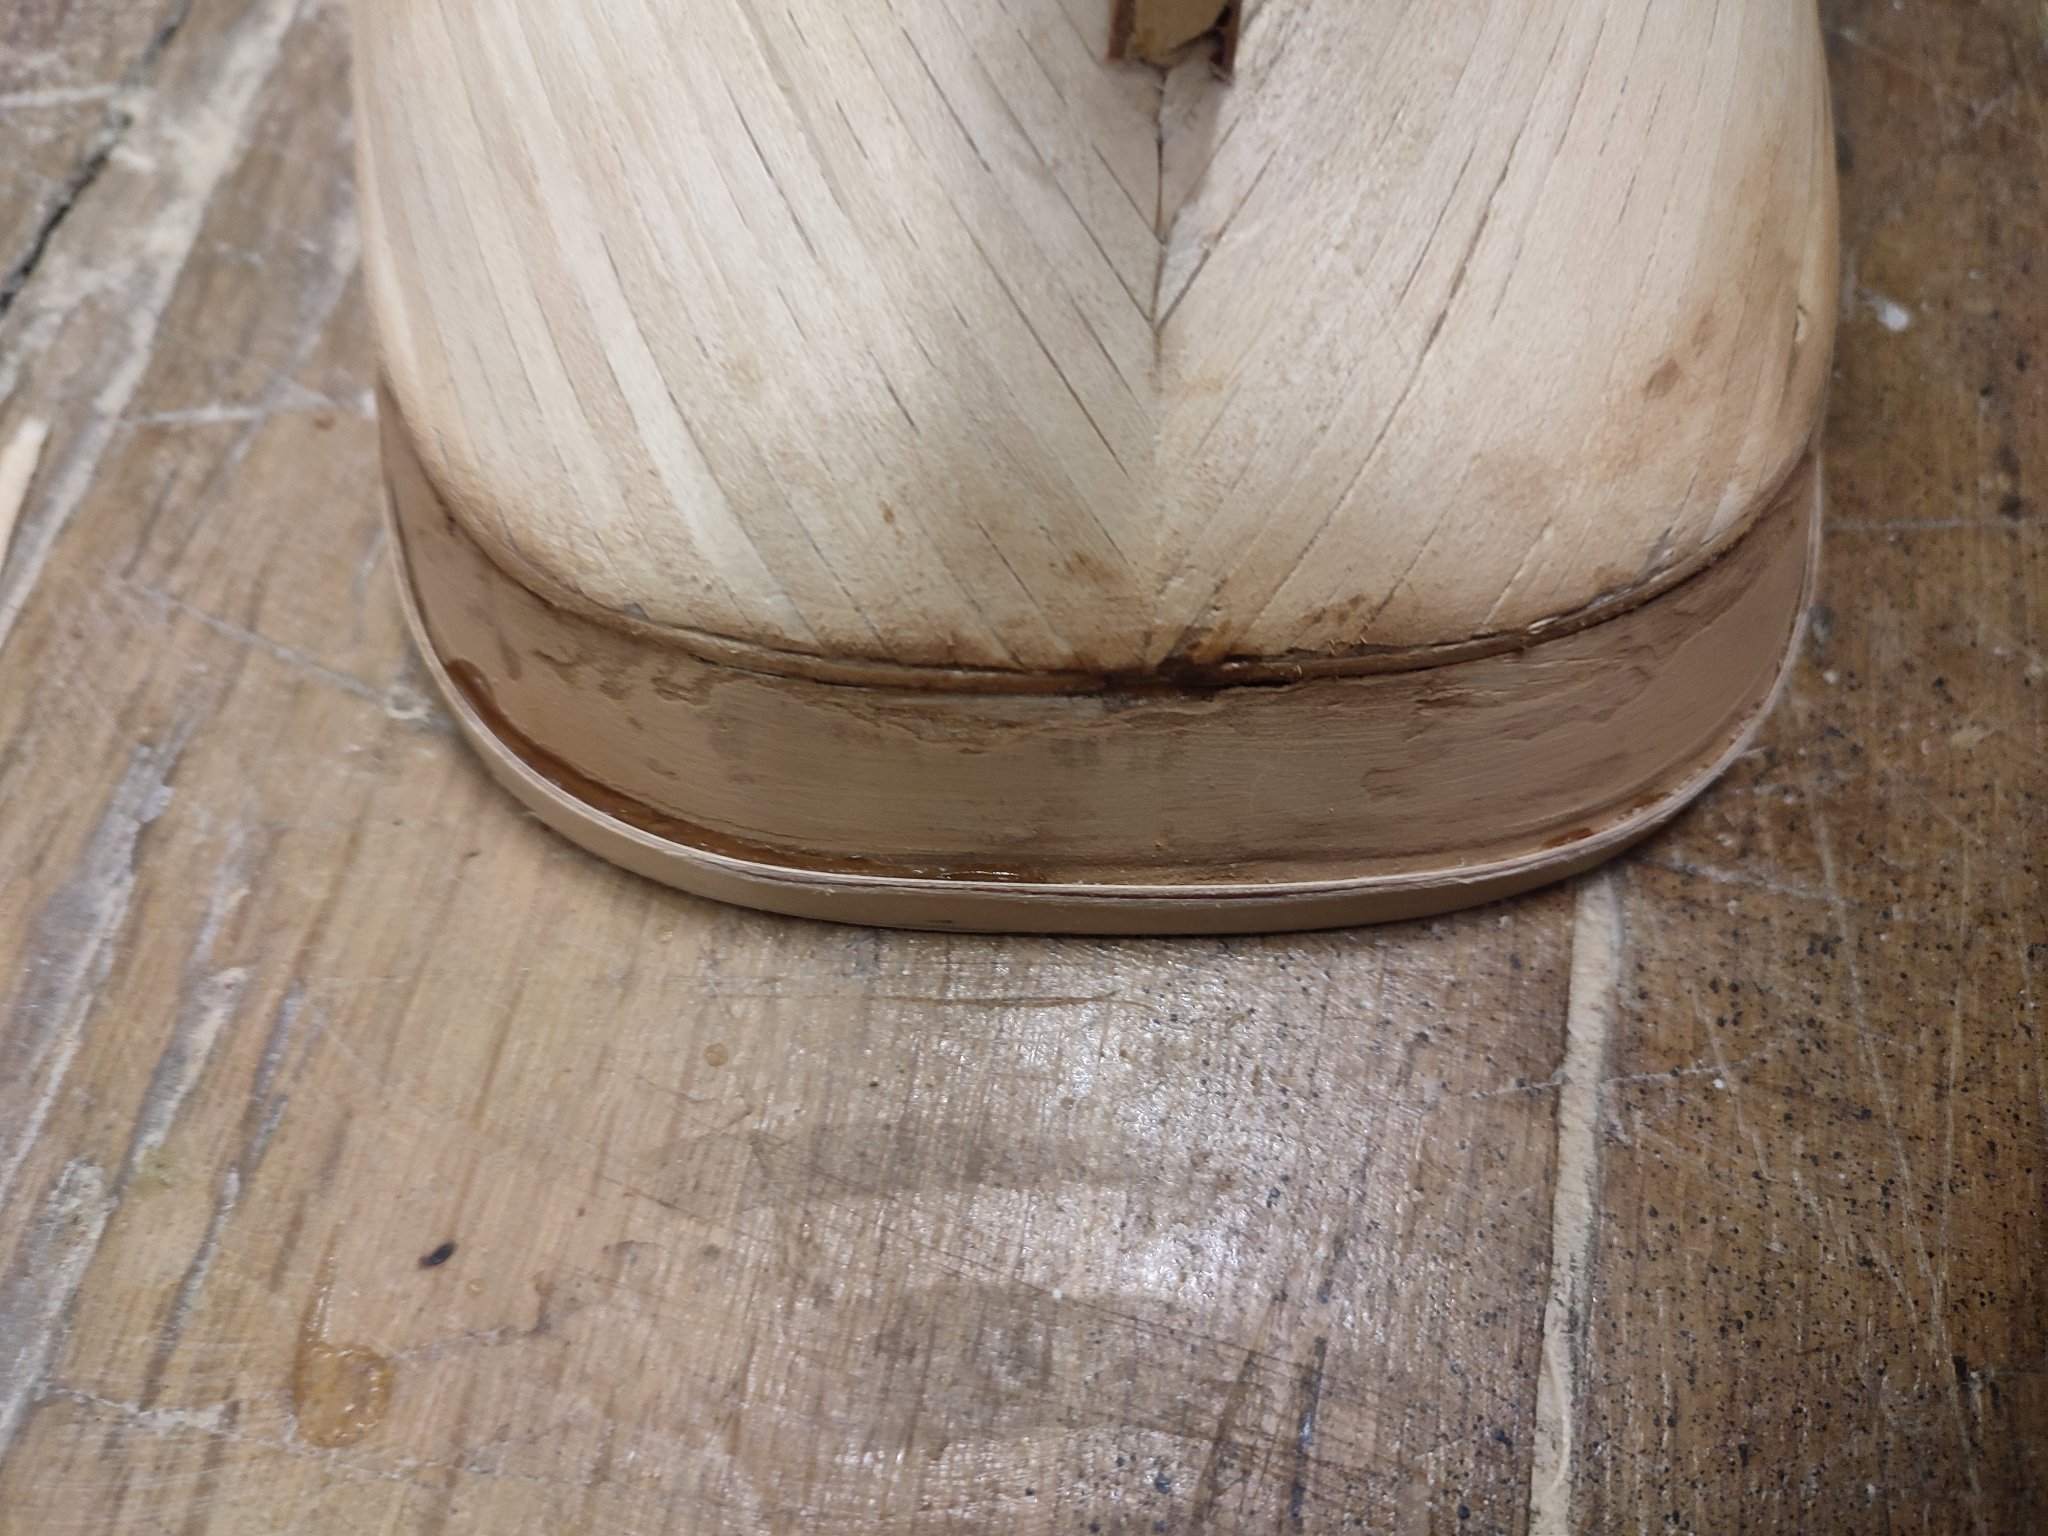
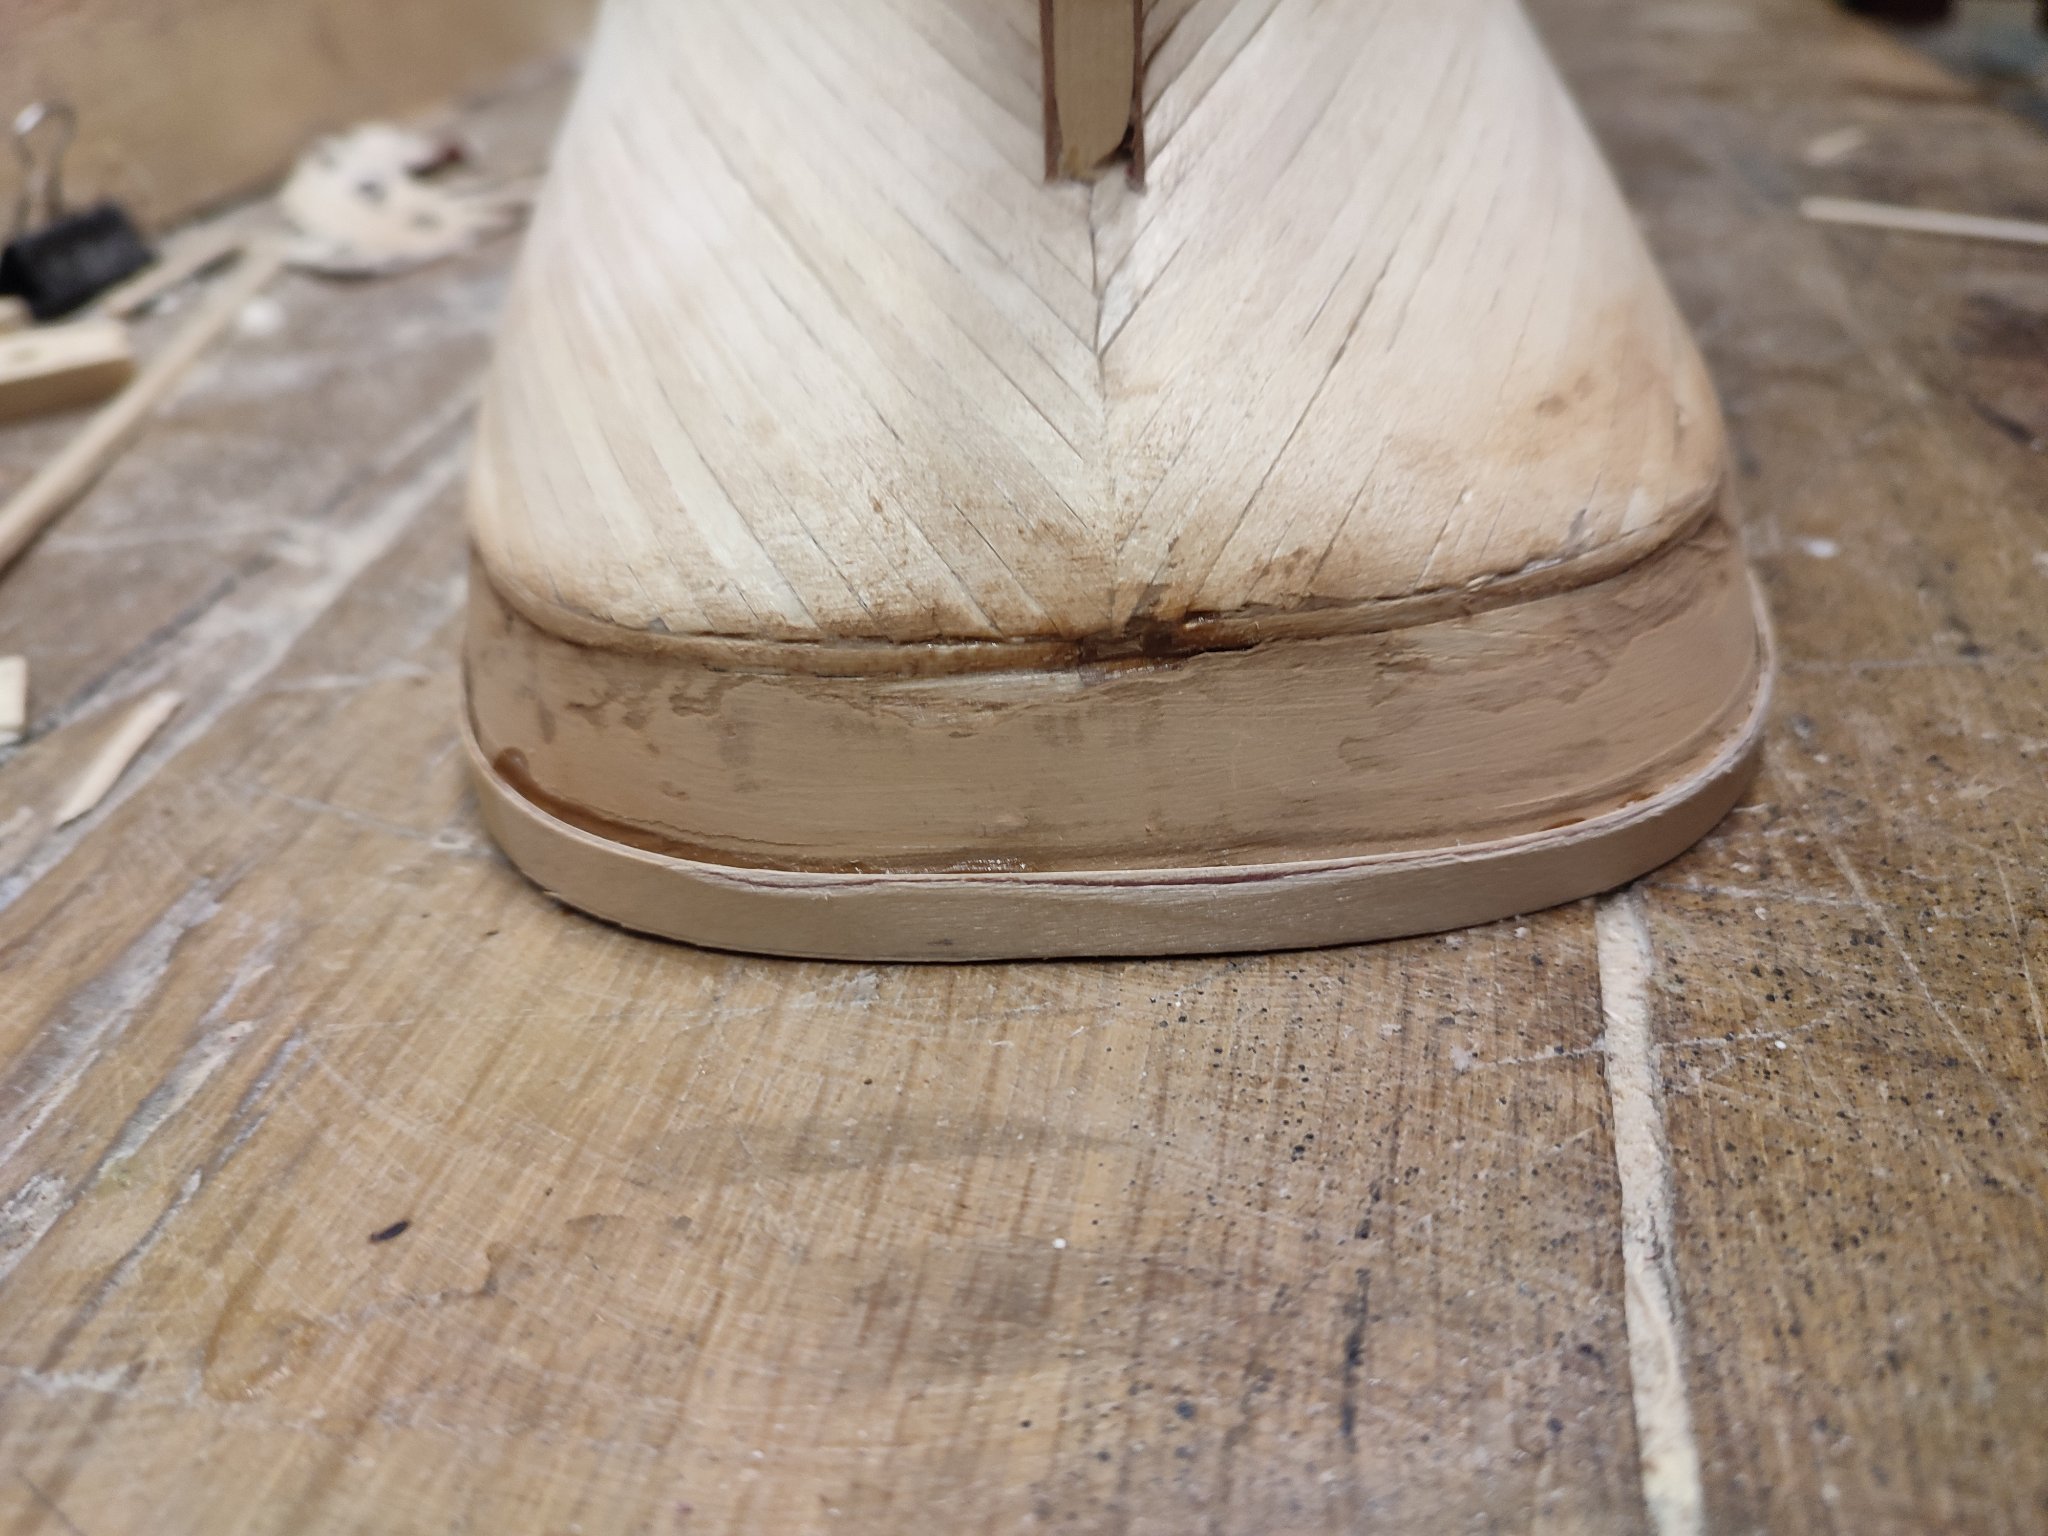
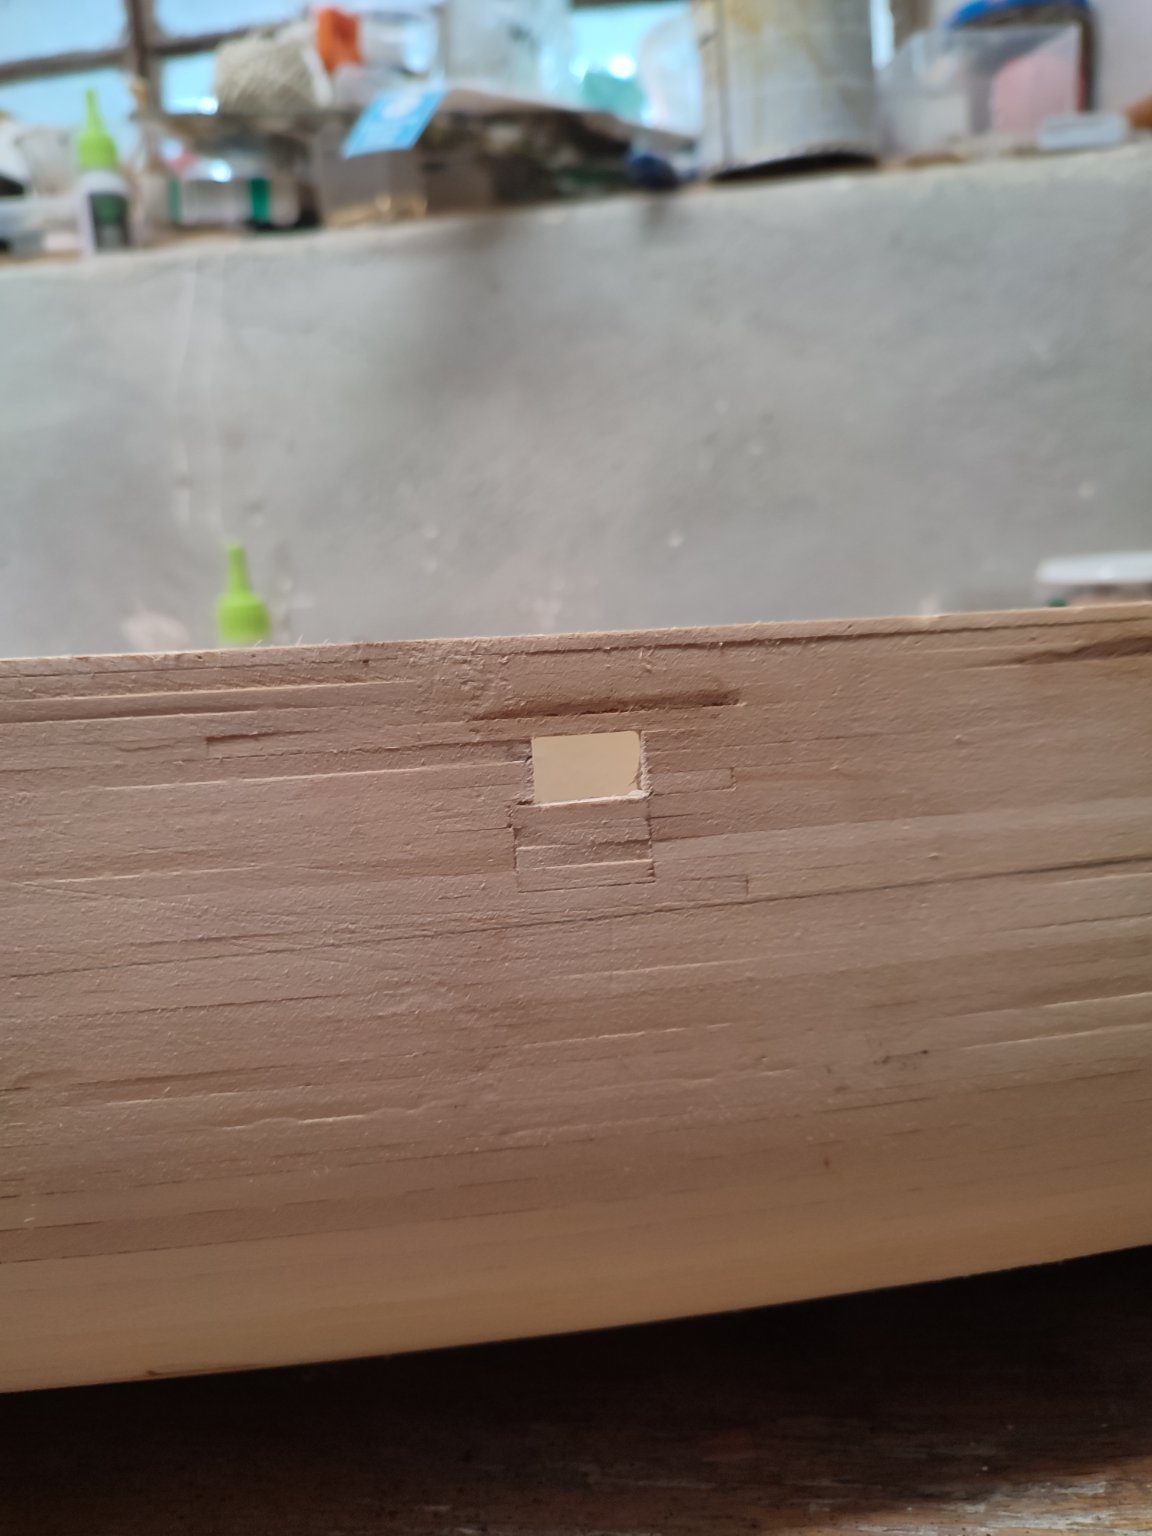
Today i was playing with stern.
Tried to make scarf and platform for main and monkey rail. Its still shabby looking - need fillers and thin strakes but pretty much definite shape. Molding Will go where the step IS...
Thanks for watching etc...


- GrandpaPhil, PRS and mtaylor
-
3
-
-
24 minutes ago, ClipperFan said:
Rob,
Since I have haven't replied to his request for a couple days now, I want to send him something. Don't worry, you've already shared enough progress pics that I can work with what's already been posted. That goes for Vladimir too. I was just thinking if you had the chance you could shoot maybe a couple more. Either way, I'm very confident Mike is going to be major impressed with both of your projects.
Rich i wont have more next week than just sanded hull smoothly without rails...if thats enough. i ordered wood for bulkheads just about now... Than from there i will try to finish bulwarks...and later coppering and rails with laser cut samples of ornamentation and nameplate and that would end this yea of actual working on model for me for now. i will go back to computer looking at cabins and elarning things from Rob in that regard. V.
-
4 minutes ago, ClipperFan said:
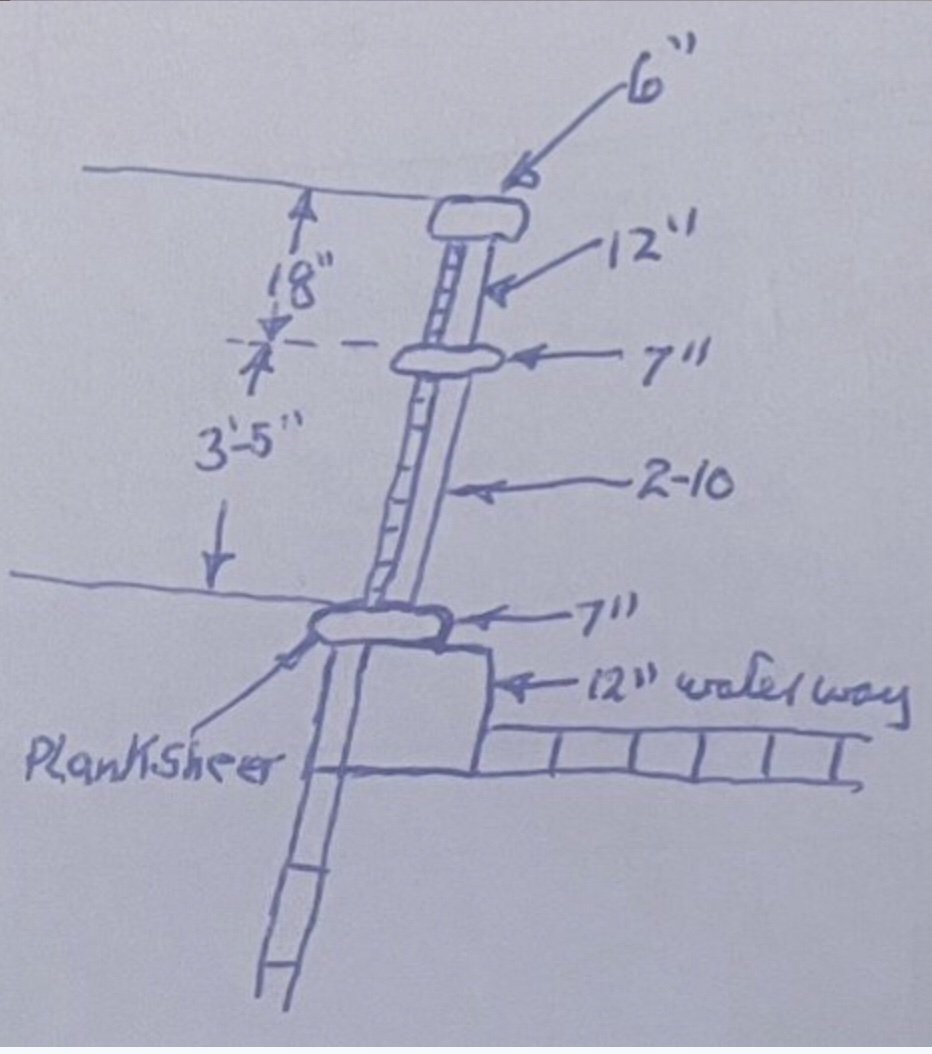
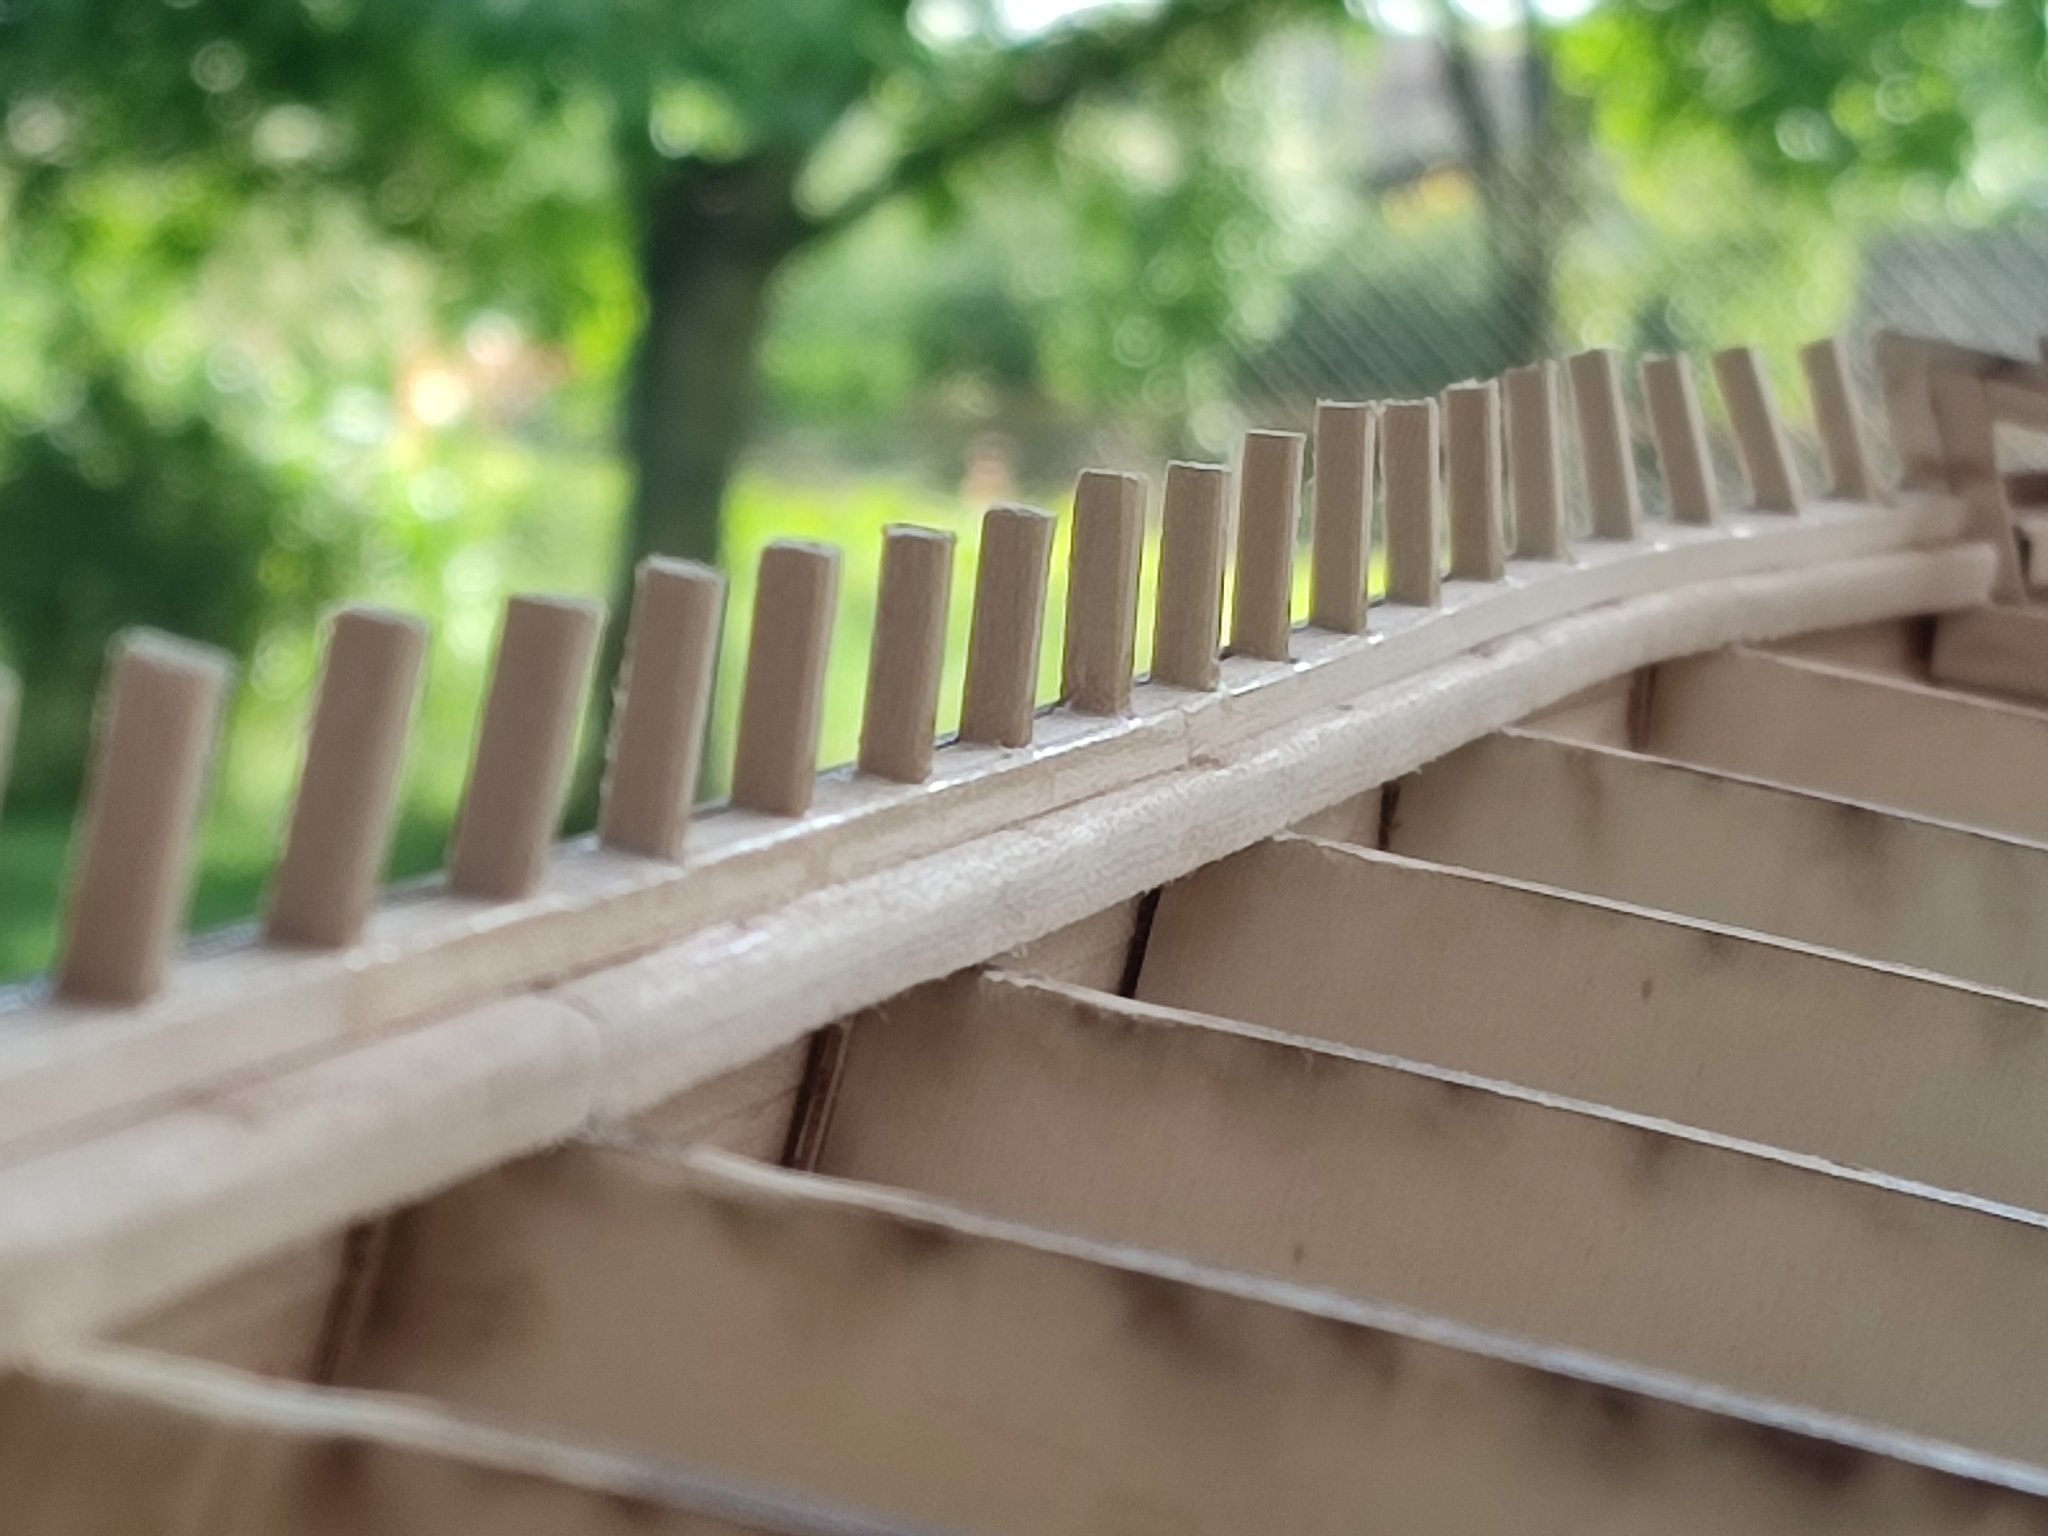
Vladimir, this is word for word, as taken from Seaways, Ships in Scale Jan/Feb 1992, Vol III, No 1 Michael Mjelde's article "Glory of the Seas - Medium Clipper Ship" an excerpt from Duncan MacLean's 1869 description of Glory's construction details:
"the floor timbers are sided 15 inches and moulded 20 inches on the keel with 28 inches space of frames from center to center, and as the frames ascend, they vary from 12 inches by 14 inches to eight inches by 11 inches, and the bulwark stanchions at the plank sheer are sided 11 inches and moulded 8 inches."
The way I interpret moulded vs sided is that the thicker dimension "sided" would be the part that makes up the backbone of the ship's ribs and "moulded" would be the visible width. So your visible stanchions would be 8" each, 28" apart center to center.
Of course, Rob can correct me if I have these dimensions backwards.
Much obliged Rich. i will chech photographs if those are square. V.
-
im starting up with bulwarks Gentlemen. need to order wood but...
do you know thickness of stanchions and how far they are from each other please? i cant find an info about that.
Thanks a milion
Vlad
-
15 hours ago, rwiederrich said:
Then roll it on through and there you go...
Do this a couple dozen times and you will have ample tape/plates to do a lot of plating....
Enjoy.
Rob
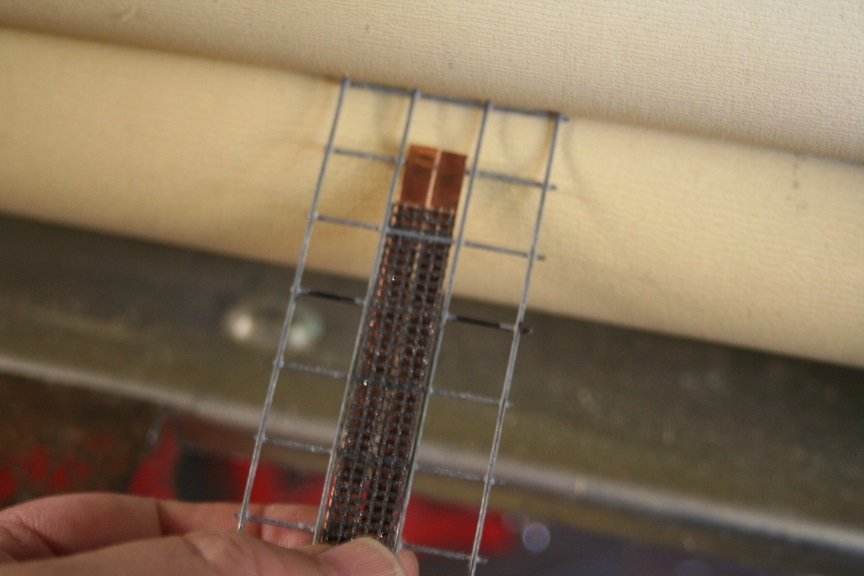
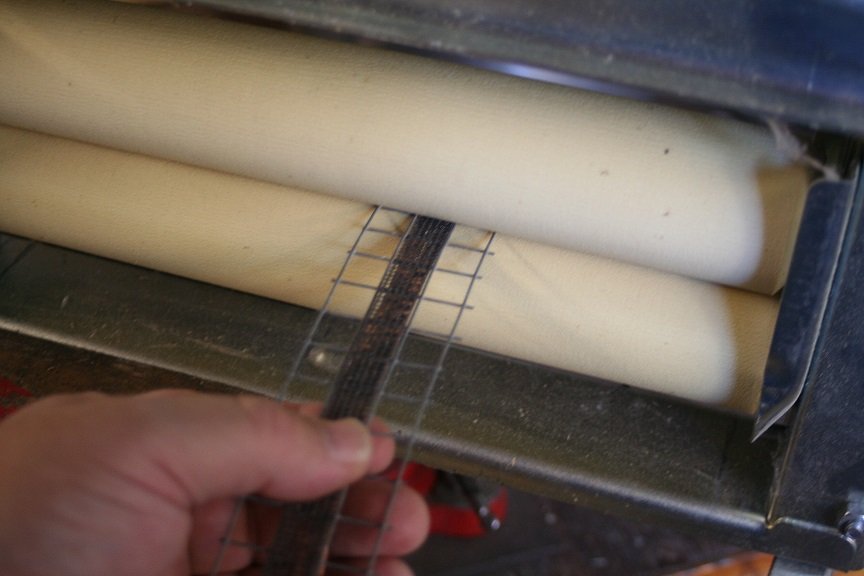
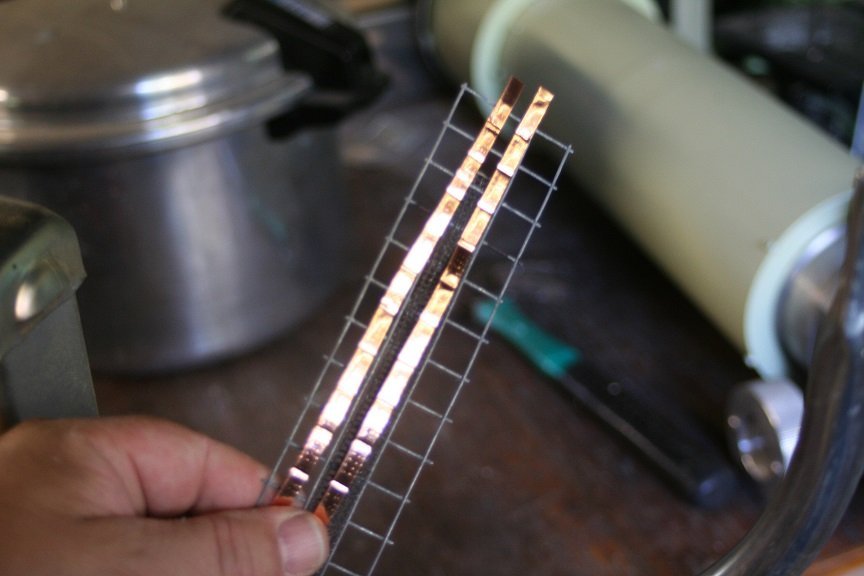
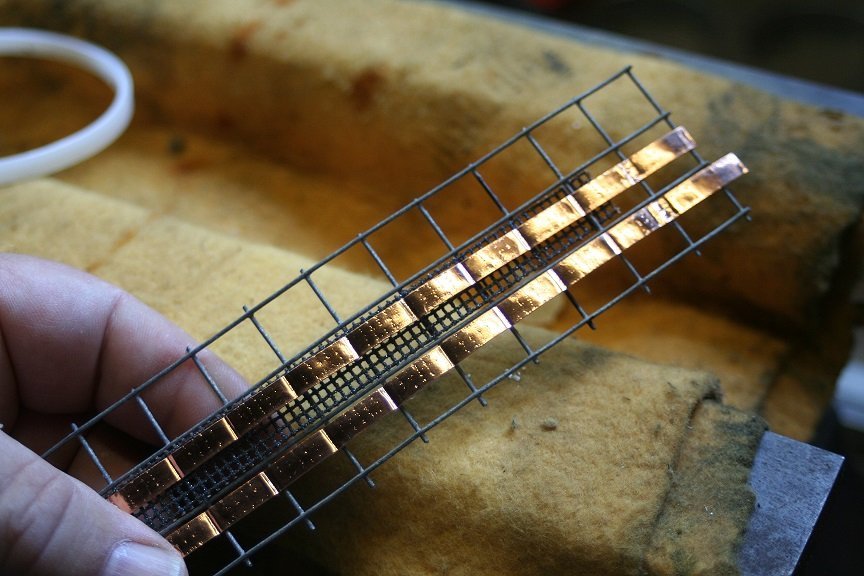
This is Wow Rob. vthanks for sharing these unique recipes with us.
-
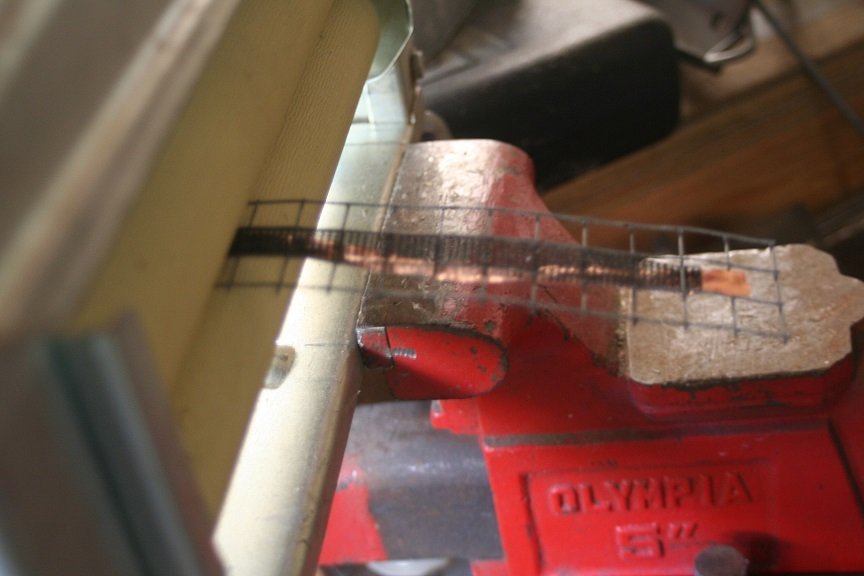
41 minutes ago, rwiederrich said:
This particular color of paint IMV replicates weathered muntz......NOT......brand new brassy muntz that has not seen water or wear.
I know that Vlad is attempting to build his model as clean and flawless as he can...representing a new Glory, as one might expect to see when she came off the *line*.
That is not my way. I prefer weathering...it represents IMV a more accurate representation of the subject. Someone once said that a modeler who weathers his model is after effect...while a modeler who models clean spotless models is showing off their skill and prowess as a modeler.
Though this notion appears to be on line...IMV it takes more skill to accurately weather a model and not over due it then to simply leave it un touched in an out of the box state.
This particular paint is lightly painted on and along with the shinny copper...blends to produce a convincing aged, browning, oxidized muntz metal.
It's all perspective anyway.
A couple of examples using this technique...changing copper into muntz. And what real old weathered muntz looked like on Cutty Sark
.jpg.4ae508bd2388854f3c3d455e6116ca72.jpg)
Rob I wholeagree that replicating usage is tougher than clean aproach. Therefore i would never attempt it. abut I already learnt from you - finished quickly dirt whats under copper line
-
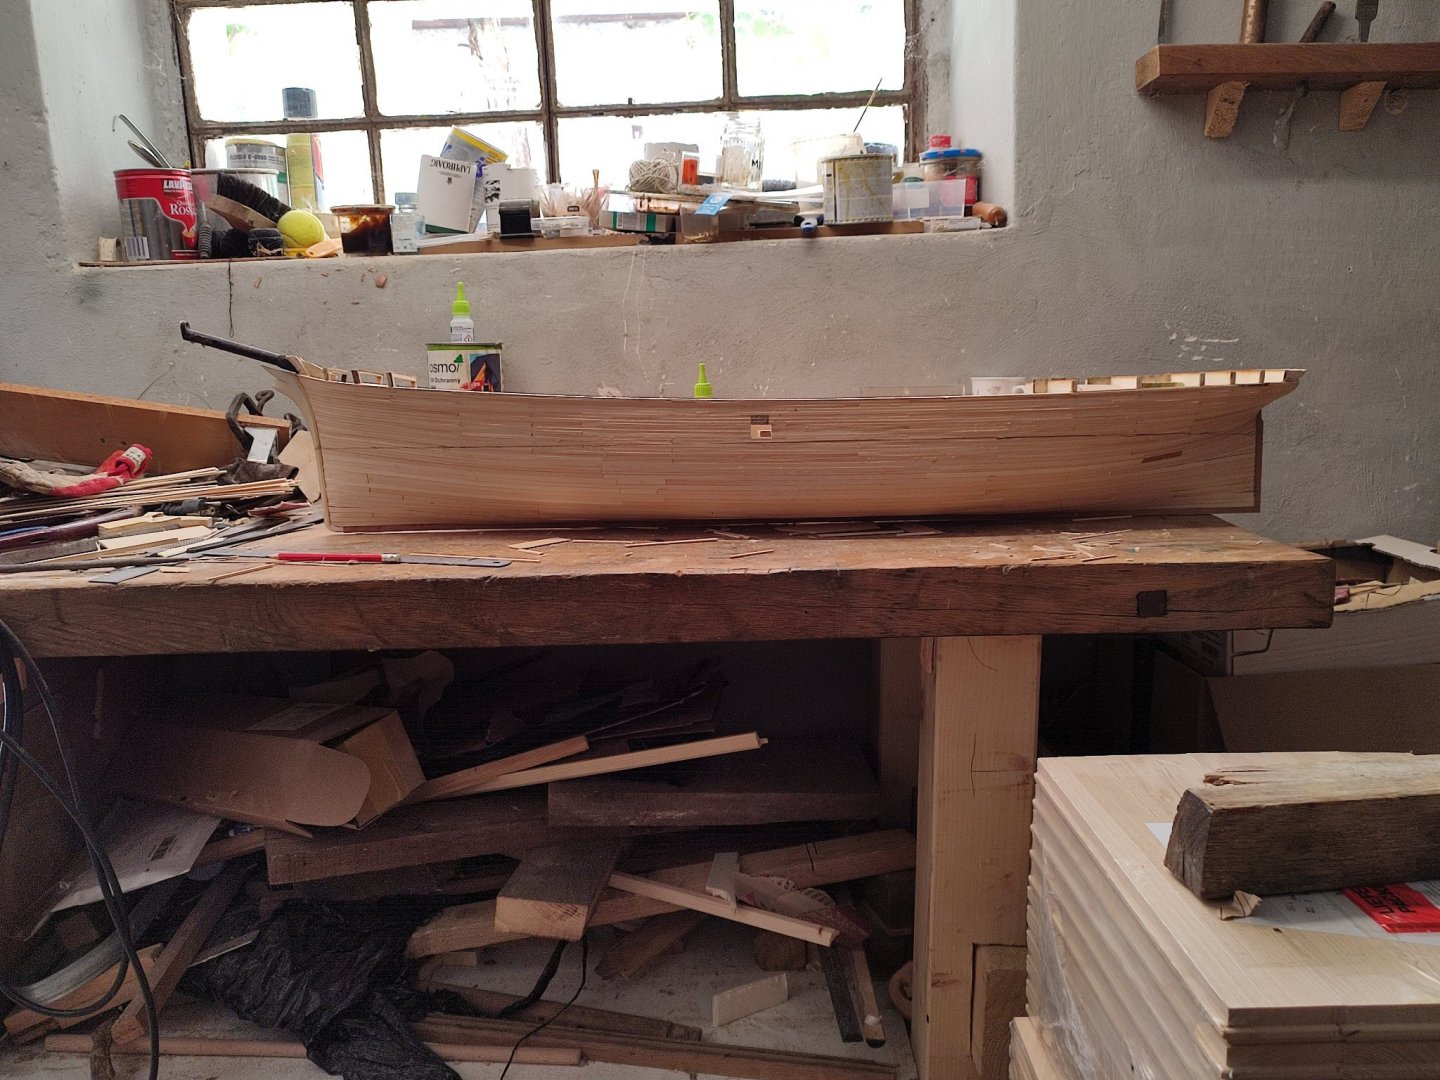
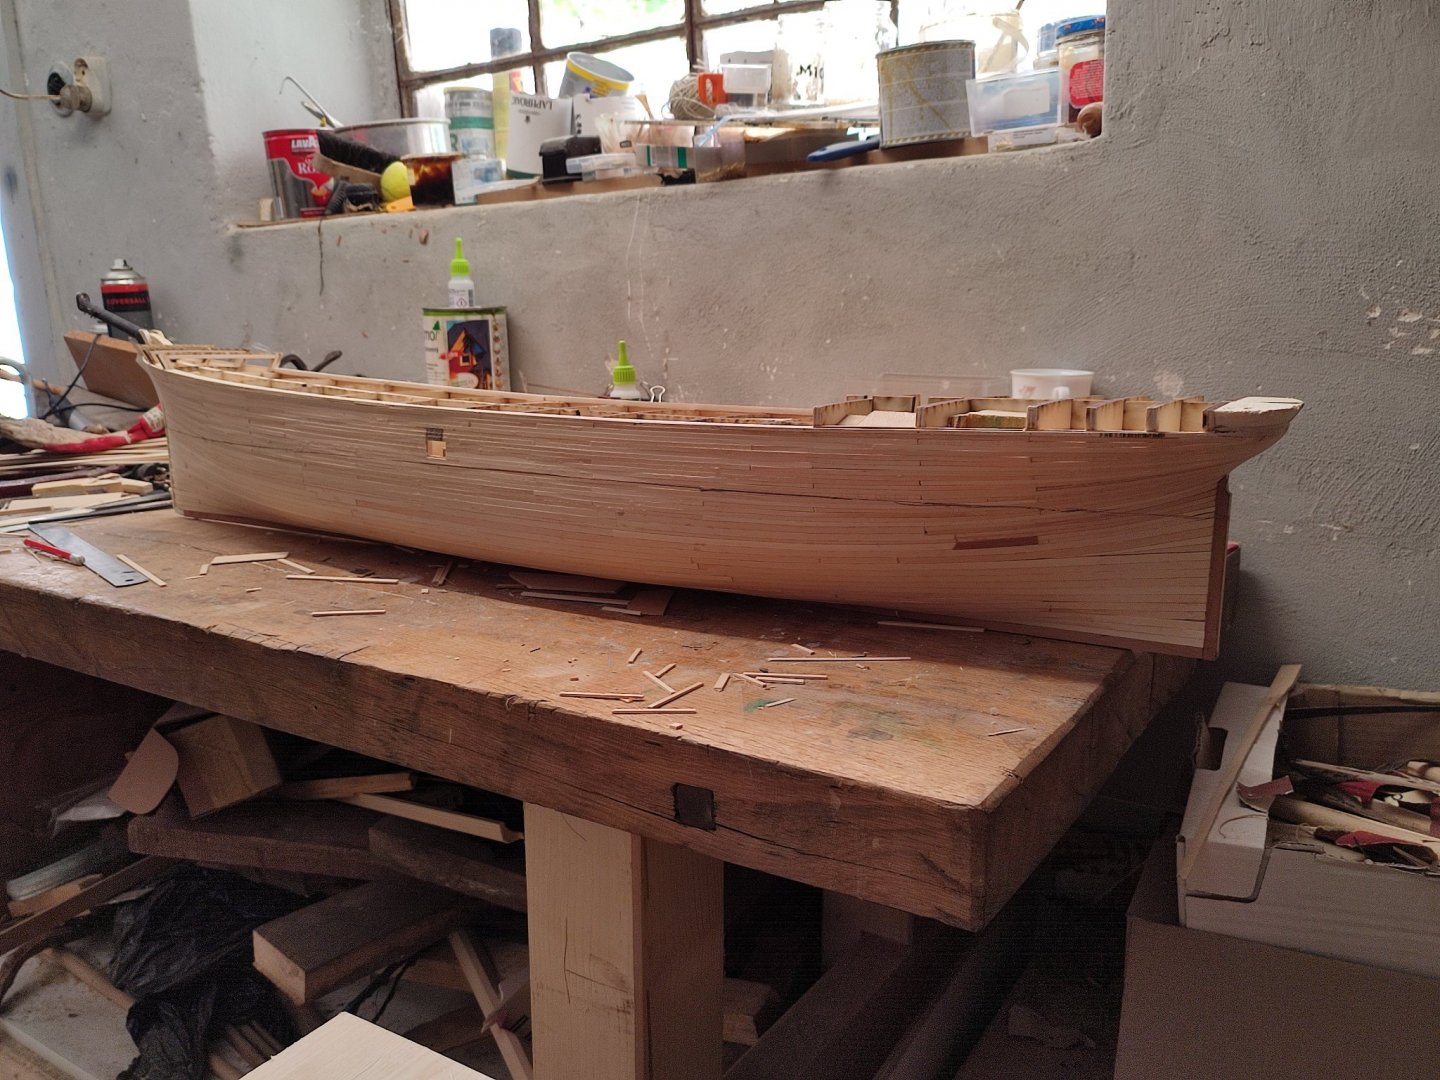
Half od Boat IS done. Enough for this week


- GrandpaPhil, mtaylor, dvm27 and 2 others
-
5


Glory of the Seas 1869 by rwiederrich - FINISHED - 1/96 - medium clipper
in - Build logs for subjects built 1851 - 1900
Posted
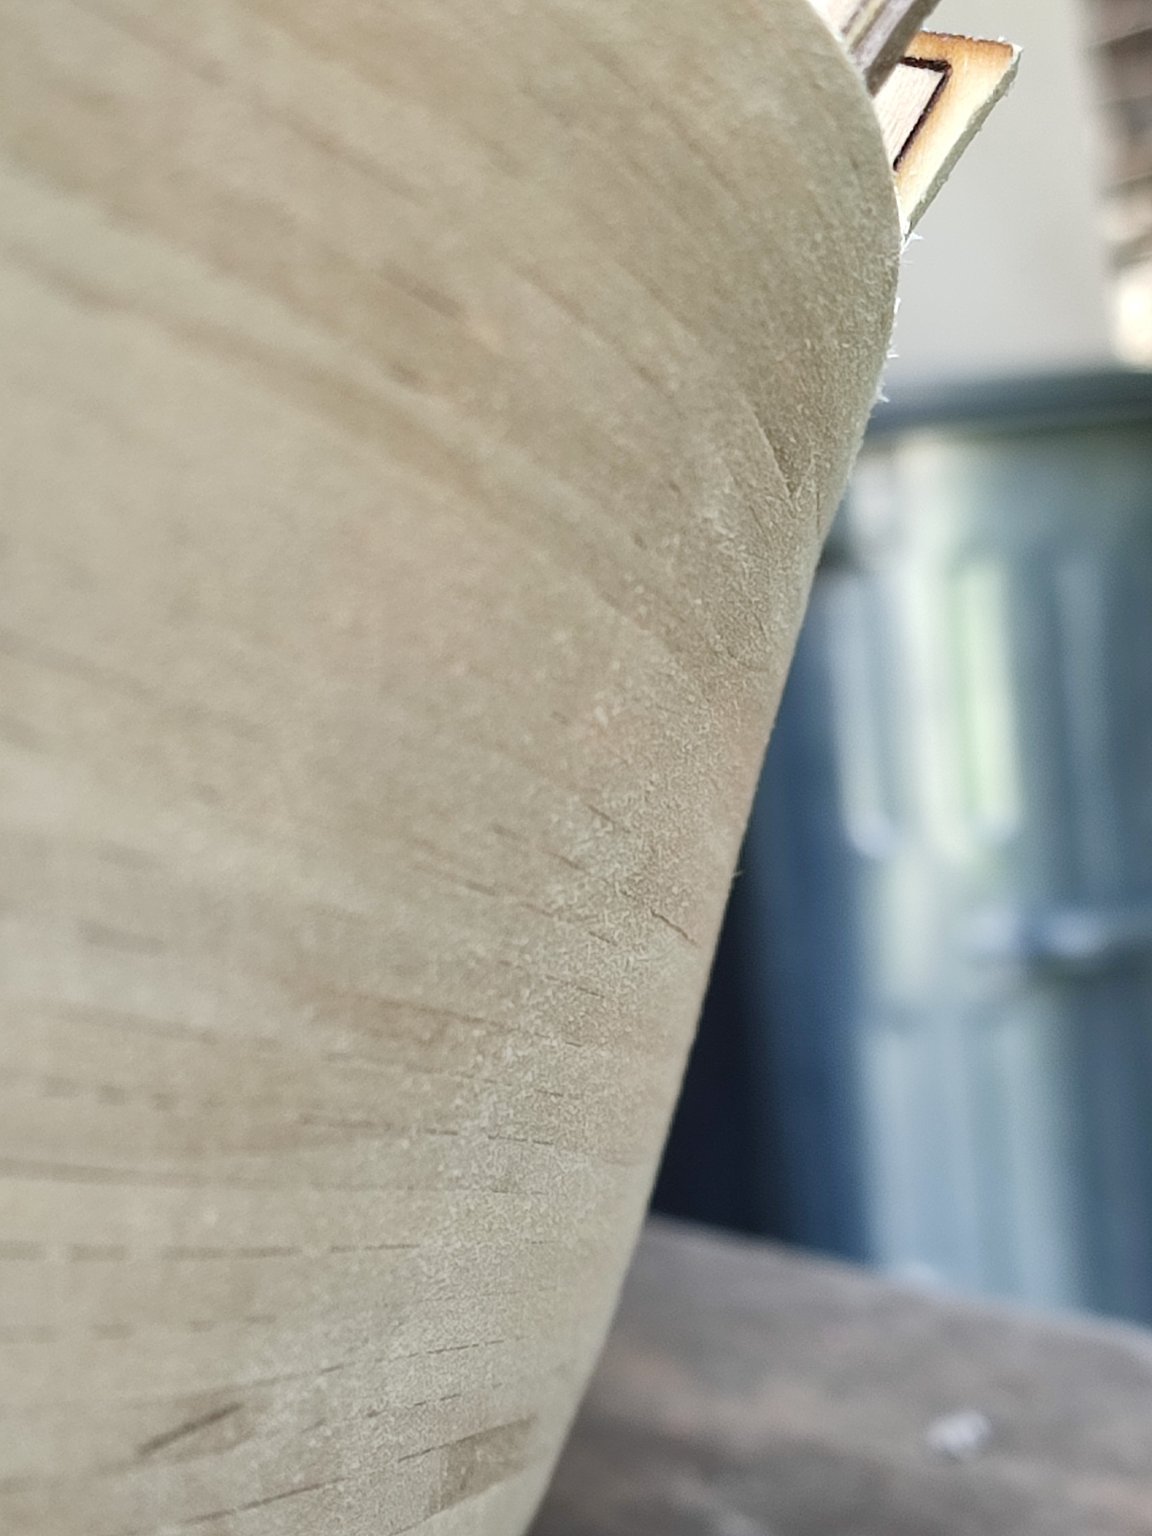
i would say upper part ( not know the name) should be way smaller in diameter comparing to massive bowsprit . it looks almost the same on pic. I rescaled original diameter when making mine. id be lazy but its up to you") V.
V.