Micklen32
-
Posts
619 -
Joined
-
Last visited
Content Type
Profiles
Forums
Gallery
Events
Everything posted by Micklen32
-
 I wish I understood this build a bit But most of it goes straight over my head The build is certainly coming along nicely though Good work
 -
Super work Theo Really nice clean posts All the same size, unlike some of mine They really really looks good
-
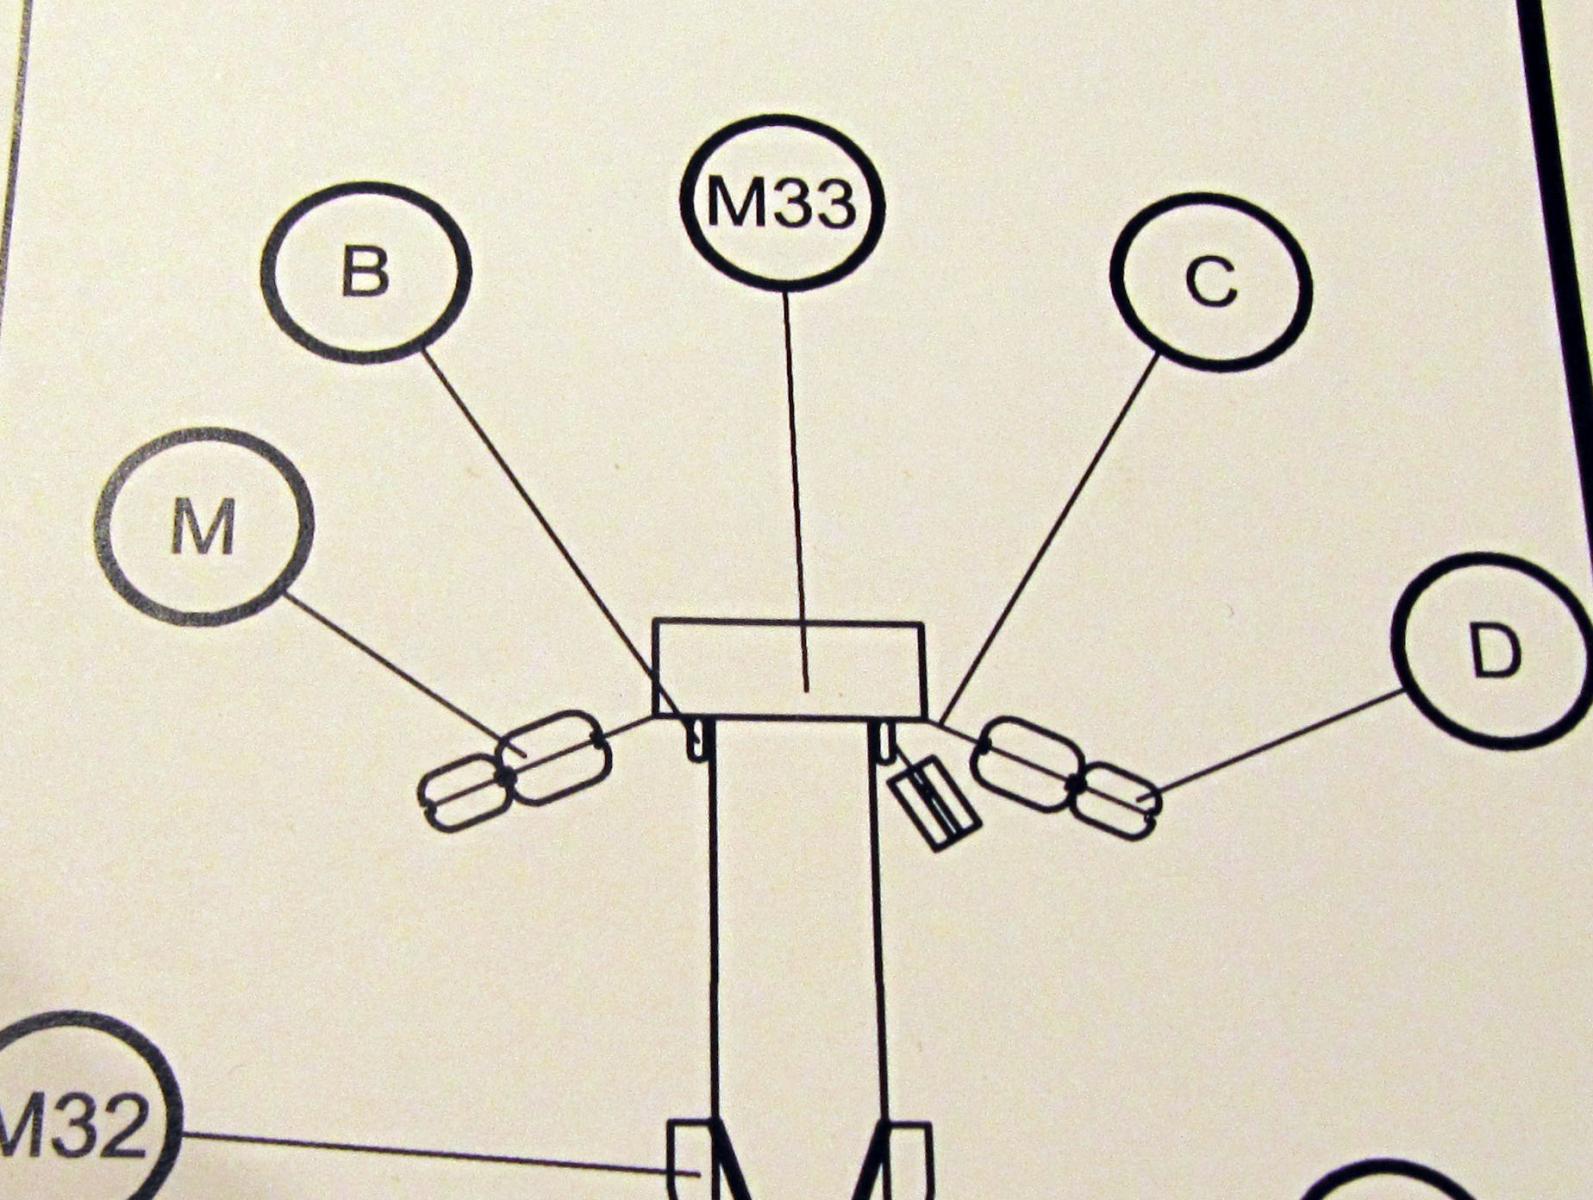
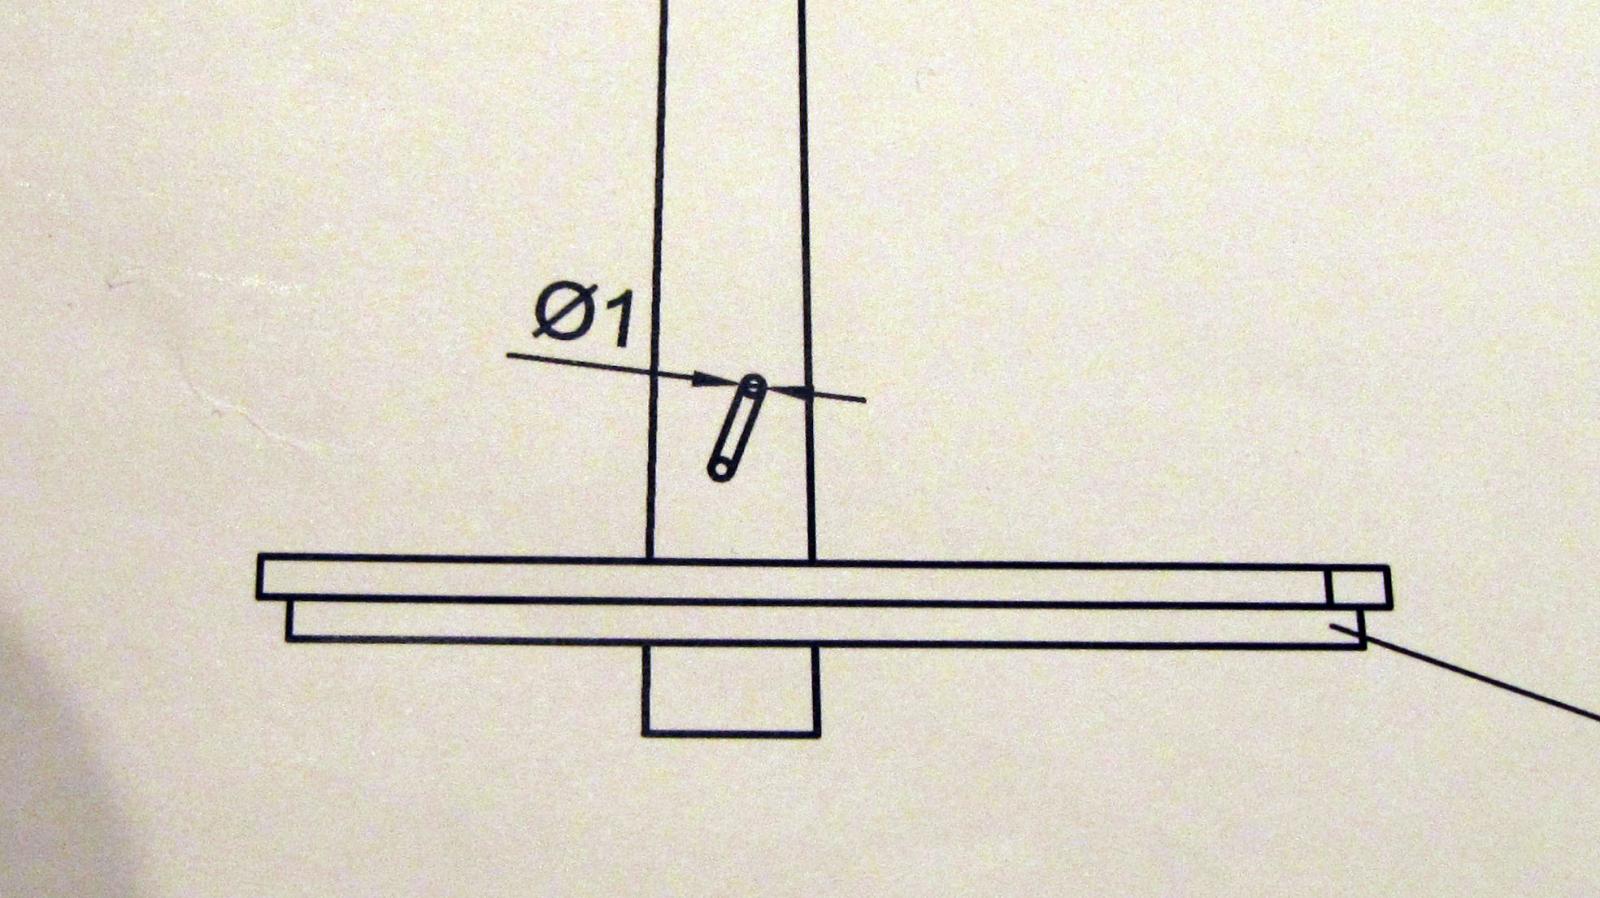
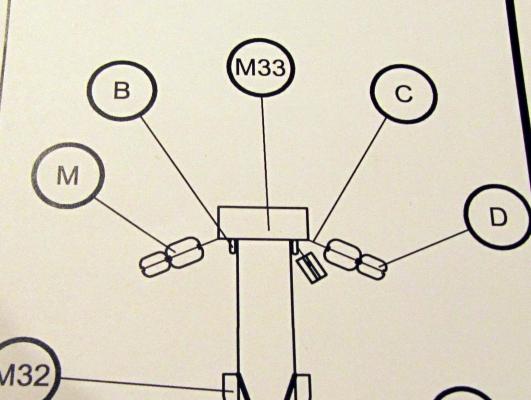
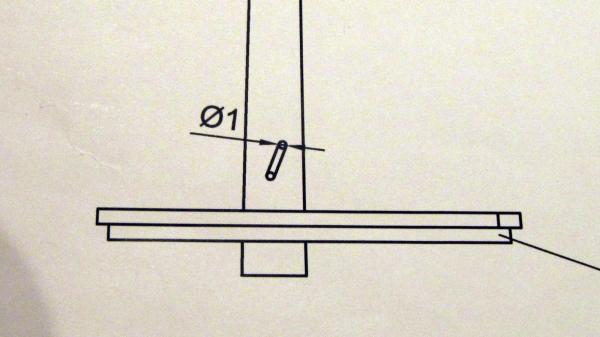
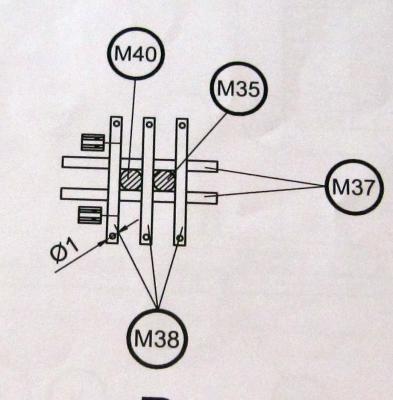
Ok questions please people Couple of things on the plans One I am fairly sure of the other not Now I am pretty certain that this is showing two blocks joined together A D is a 4mm single block and am M is a 5mm one On the side photo they are still shown joined I am presuming I am right, am I ????? There are a few of these dotted over the masts What are they for??? Now this one I am not sure about at all Is it a 1mm slot?? Is it two 1mm holes and if so are they joined with a groove ??? And what is it for anyway ???? The photo is the bottom of the middle foremast section
-
Hi Slog Thanks a lot Actually no Slog I will not be very traditional I will be using finishing from http://www.specialistpaints.com They say their paint is suitable for guitars http://www.specialistpaints.com/image_uploads/large/Silver_Holo_flake_over_black_and_Blue.jpg And I want a totally different finish I have virtually decided on Kiwi Passion for the back and sides http://www.specialistpaints.com/image_uploads/large/SPECIALISTPAINTS.COM_GREEN_PASSION.jpg That sits on a black base to give the effect And a translucent mist of candy apple green on the front http://www.specialistpaints.com/image_uploads/large/Green_Candy_paint_www.specialistpaints.com.jpg I am hoping to get a bit of a sunburst effect by just coming round onto the top with a tiny misting line of the dark paint and also taking it over the front bevelled edge A bit like this but with less dark round the edge http://www.cmcguitars.com/v/vspfiles/photos/RFOTTGB-2.jpg That's the plan at the moment anyway
-
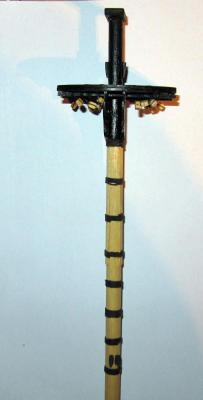
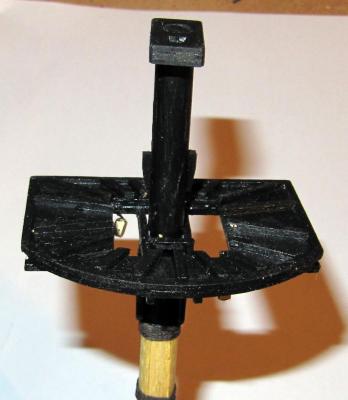
Hi Sjors Thanks a lot The blocks that are on there now wer fixed to the crosstree before assembly I have got a few eye bolts to fit before it is finished but the plans showed the blocks attached direct to the crosstrees
-
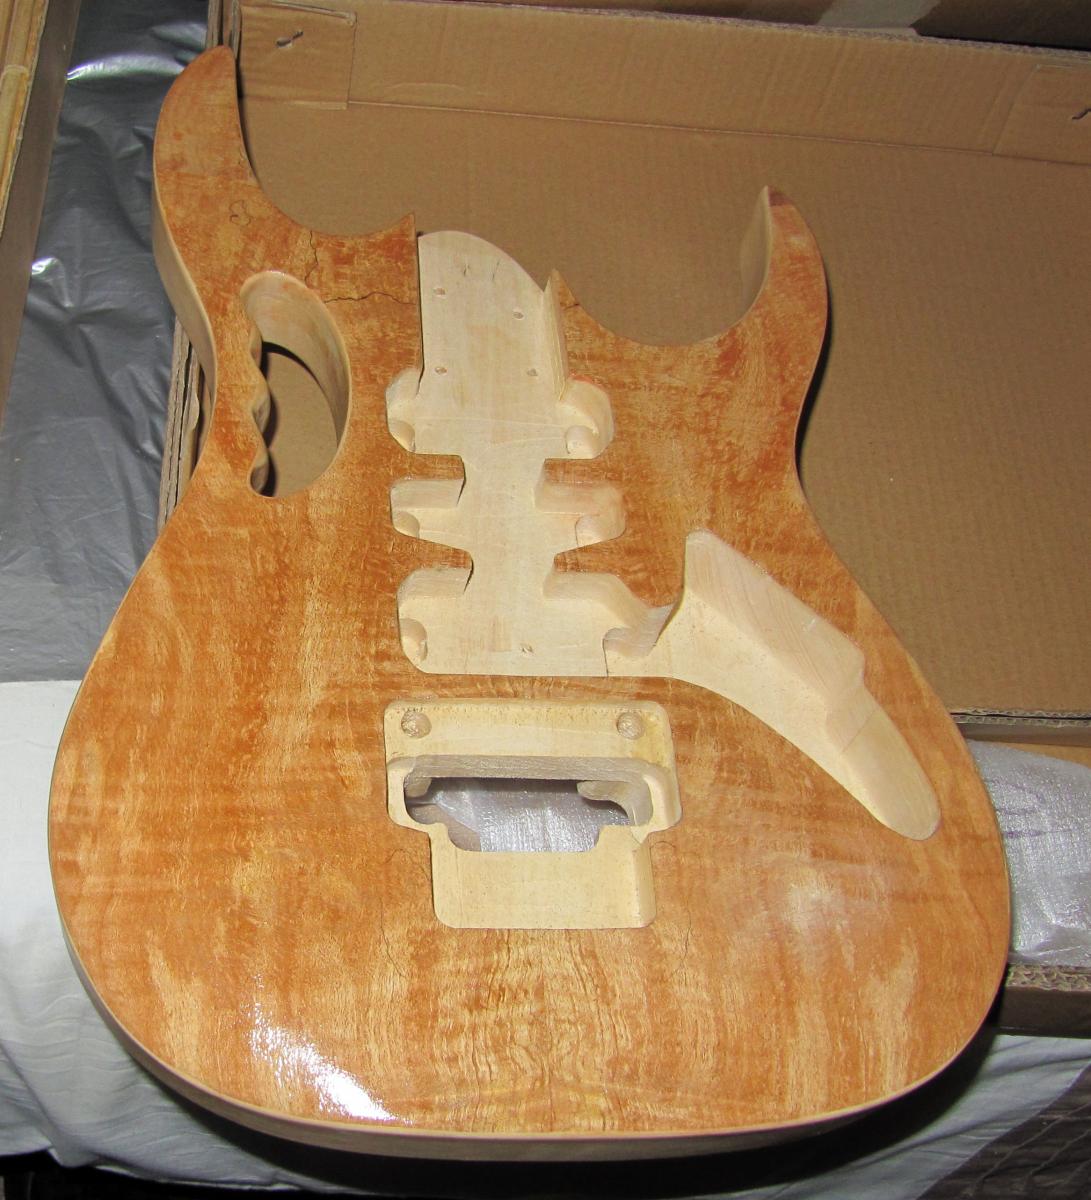
Hard at work today I did quite a bit of work on the lower section of foremast There are a few more blocks to be fitted above the top and then she is done and I can start on the middle section I need to rope some more blocks first though Aren't there a lot Also been hard at work on the guitar which is getting close to the painting stage Here is what the body looks like No point showing the neck as it is all masked up to keep stuff off the fretboard She's not looking too bad though I cannot decide whether to mist a translucent coat of green over the maple front or leave it clear coated natural

-
That looks really awful Adriaan I hope you are fairly safe where you are On a better note that grating is looking super good
-
Looking real good Tom Painting looks smooth and bright and the inside is looking really realistic Nice work
-
HMB Endeavour by mikec - Eaglemoss
Micklen32 replied to mikec's topic in - Kit build logs for subjects built from 1751 - 1800
Great job Mike They certainly look a lot better than mine I must admit I am not bashing the kit very much Looking at other peoples work though maybe I should have -
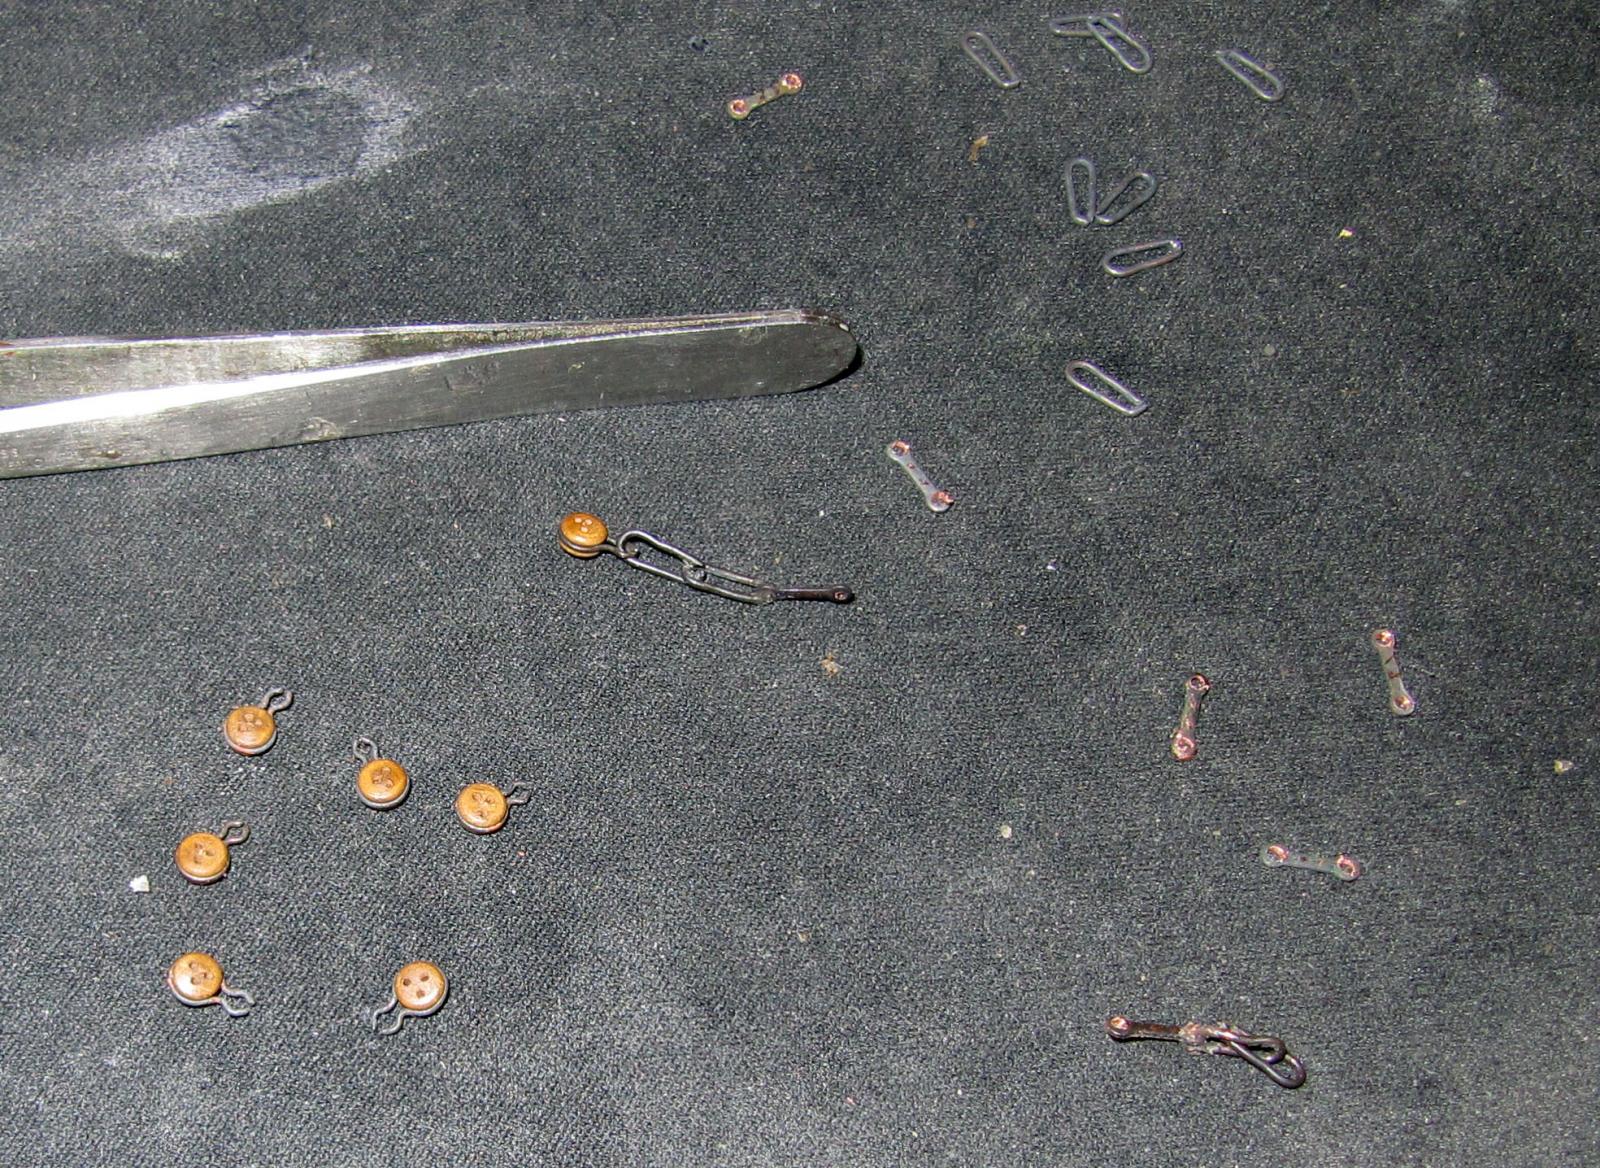
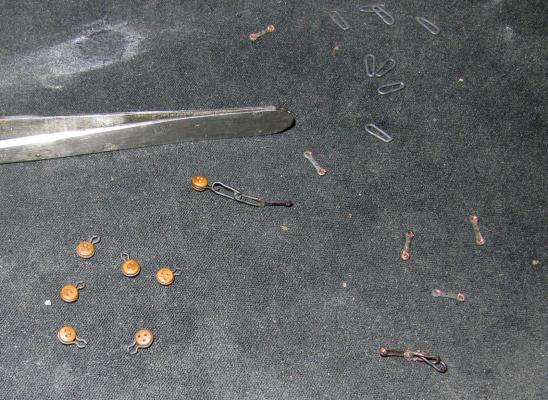
I have been working quite hard on the guitar the last couple of days But I have also been doing boat bits I have to admit I haven't finished the foremast top What I have been doing is destroying my fingers making up blocks That is fixing the length or rope to a block I need quite a few If anyone whats to know how I do it For speed I simply get the block on the surface in the correct position Holes facing up and to my right as I am right handed I get the length of rope you need in my left hand, folded in half with the end protruding in an O I put a drop of CA on the furthest point of the O I then put the O round the block, or deadeye with the glued rope in the groove Right finger on the block, pull gently with the left Make sure the rope is sticking to the correct part of the groove and that it is coming down the sides nicely Pick up block with right hand and twist Put a bit of glue on the rope below the block and twist, tightening the rope onto the block Job done I would have made 3 or 4 in the timer it took to write this One thing You can't afford to shake
-
I don't have any of those Adriaan I think I can remember making them for the Thermopylae I think I also remember that at that scale they were right ******* to make You certainly have made a good job of those Sent from my iPad. Lying on the bed watching TV. Chewing a raw carrot
-
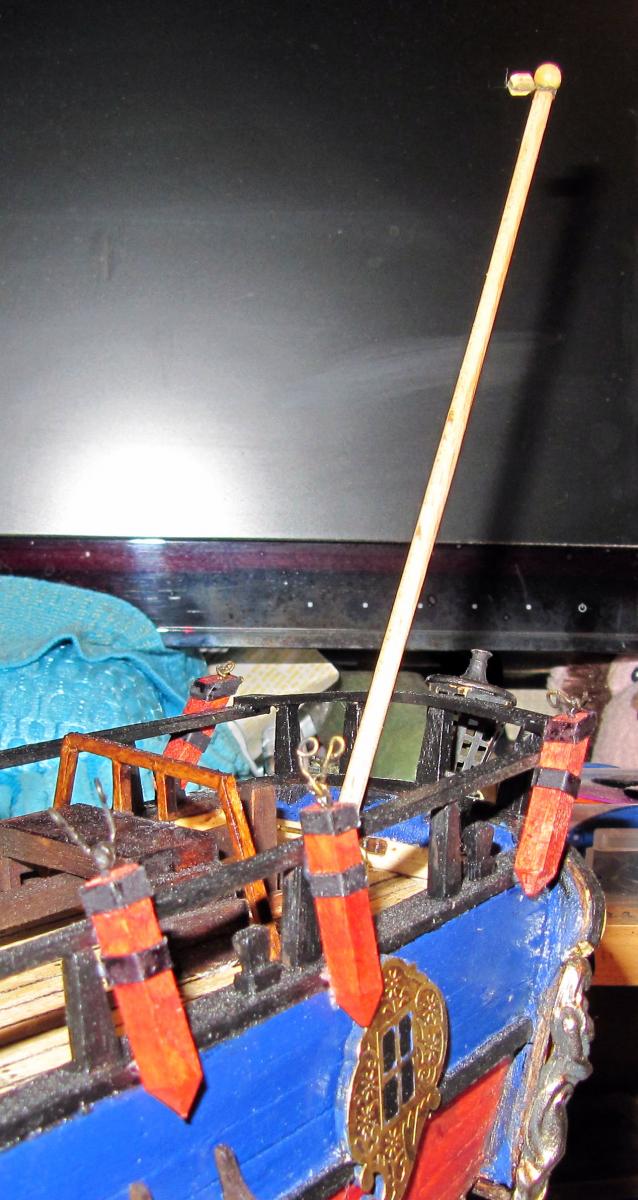
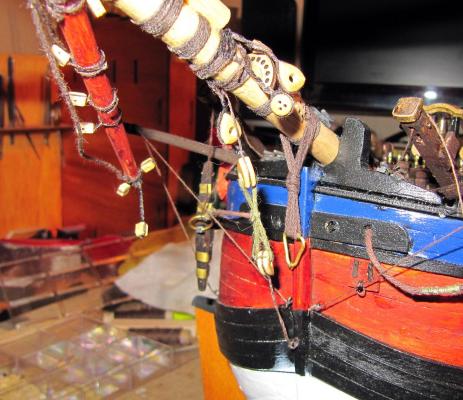
Hard at work today on the Endeavour and the guitar body I finished the ropework at the bow and also fitted the flag mast but didn't glue it in place The bowsprit is now firmly in place and does NOT want to be moved The last thing I did was put the chainplates and deadeyes on the port side Not the easiest thing is the world as the last time I did this I had made my own with twisted rope These did not go in easily as there was only the smallest of indentations to fit them in to What I did was make big grooves on the strip that went over them so that it fitted well and secured everything Then I stained the wood to match the Cherry strip on the hull I will attach the chainplates to the hull when I have the shrouds on to get the angles right I also made a start on the foremast top but that wasn't worth a photo yet I will finish that tomorrow and also give the guitar another gentle sanding
-
Coming on very nicely Sjors I will be there on the Endeavour soon I just have the chainplates to get in place then I will be on to the masts with gusto Great stuff
-
The weather all over the world is just going crazy I don't think it matters where you live You are going to get crap weather you are not used to Our papers were full of "Worst winter weather for decades" Can't wait
-
Looking at those they make you feel as if you want to rip all the rigging out you have ever done and replace it all Superb work Grant
-
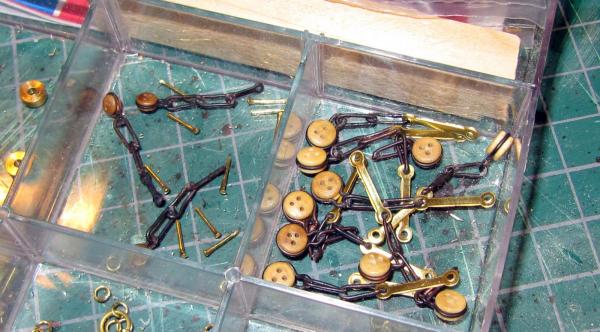
Beautiful work with the cannon Steve You are inspiring me as to how to do mine The blocks have arrived so I will have to have a play around with them to see how I can get them to look
-
Ah ok thanks Slog I will amend that I did have a problem fitting the rudder as I must have made a mistake somewhere very early on as the hole was blocked and I had to drill it out and the angle wasn't quite right Not a clue what I had done wrong I did have a look at the photos and the plan and I couldn't see how I could have made the problem But hey, when you try hard enough you can do anything
-
Just been watching proposed Australian weather on the news Adriaan and it looks awful. Super high temperatures, loads of cyclones, chance of more bush fires. The weather's gone mad. I'd move back to Europe I tell you
-
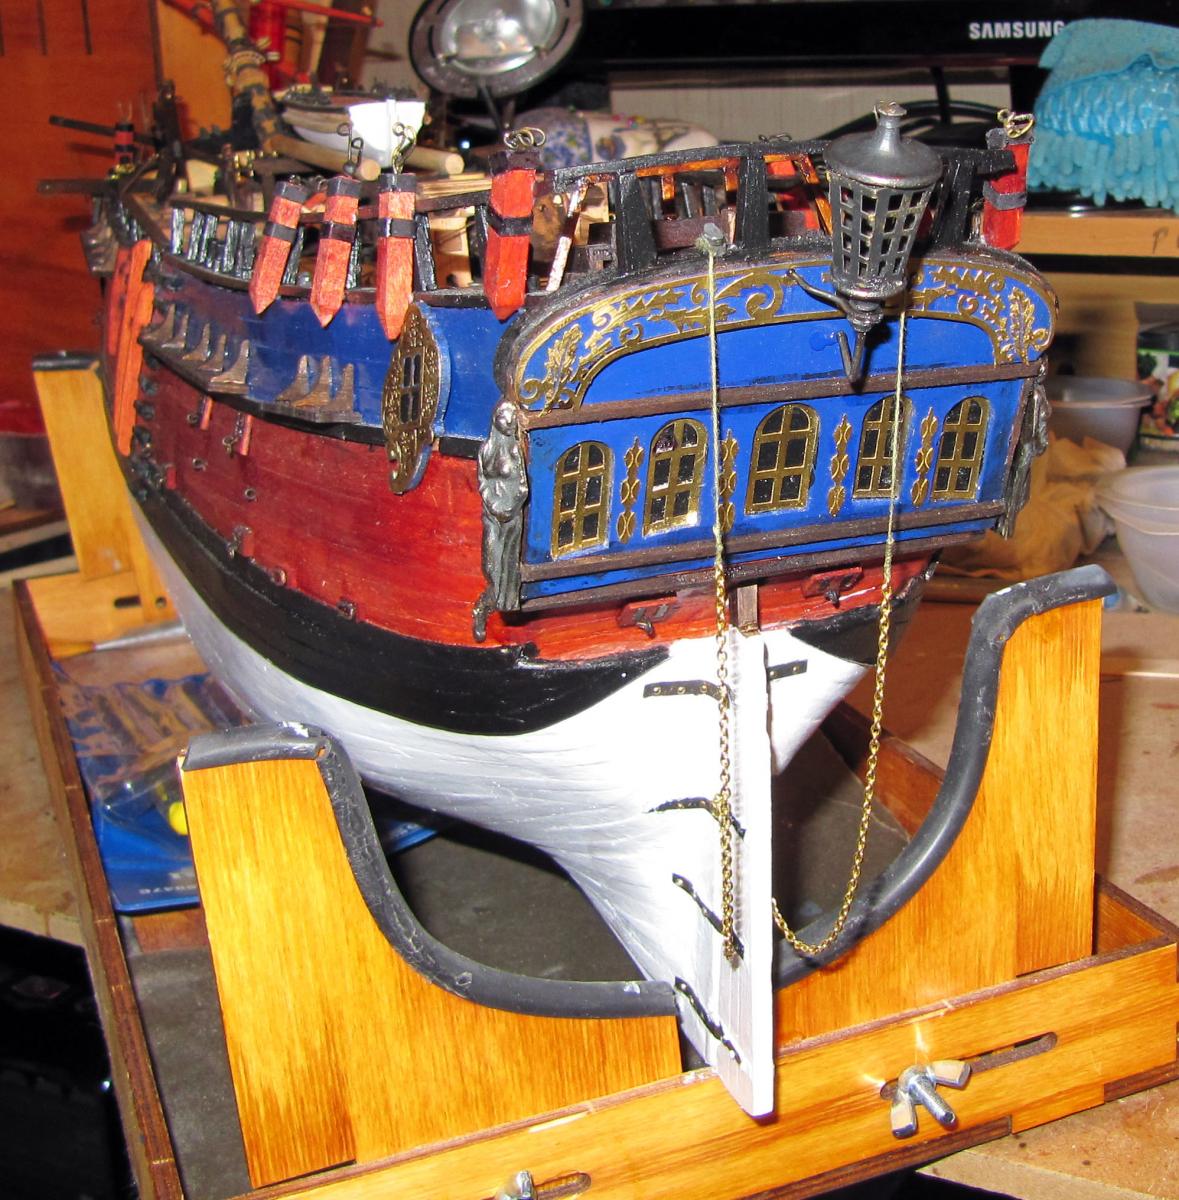
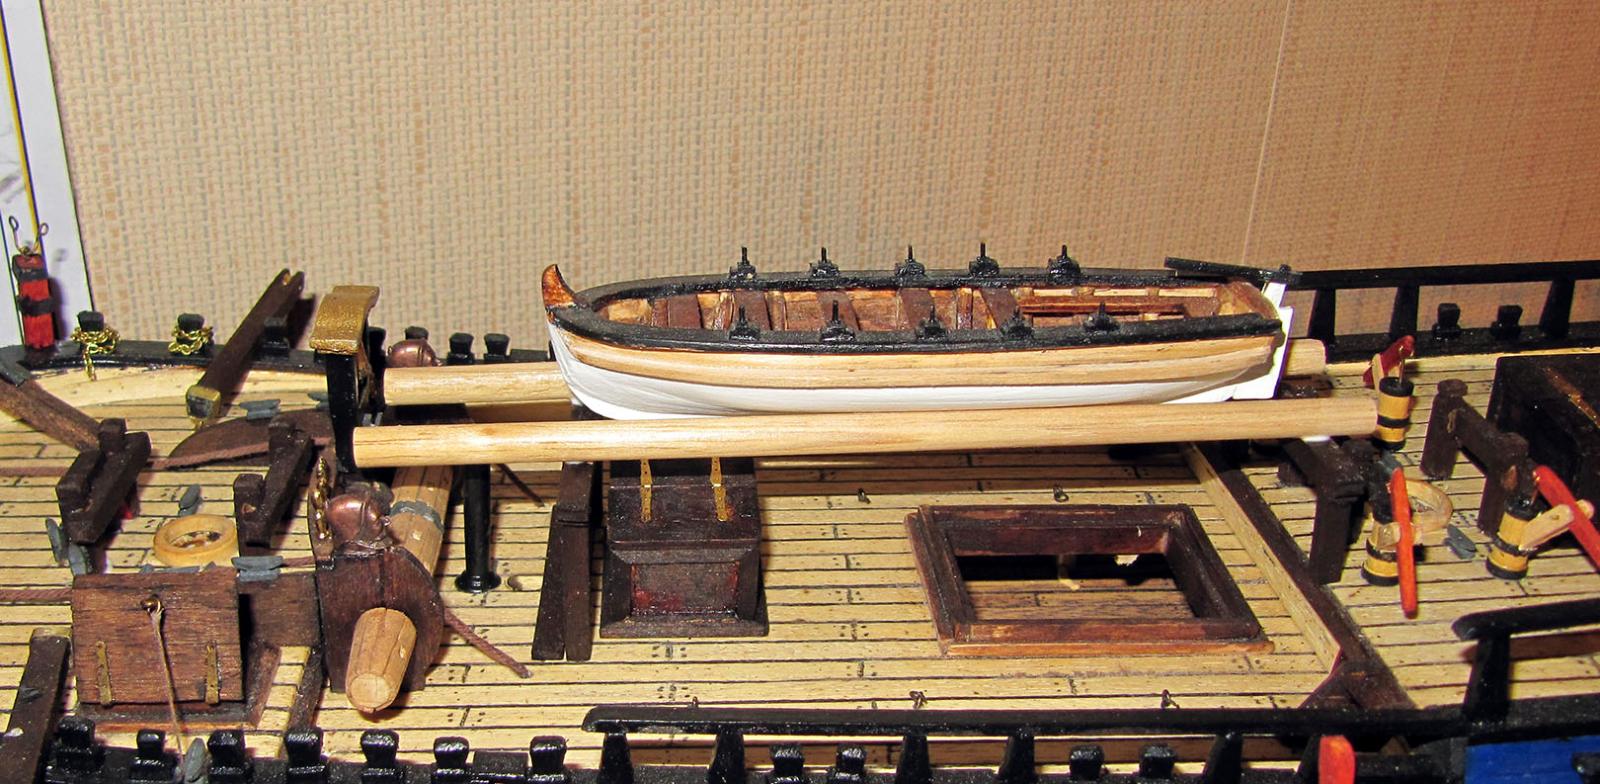
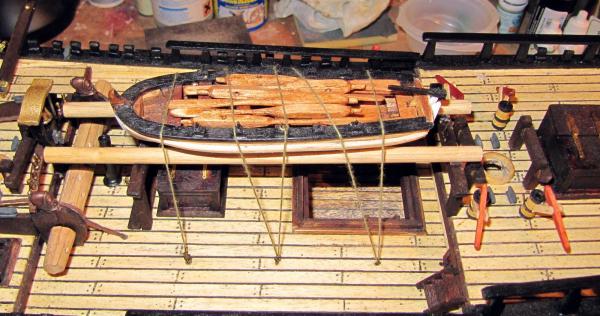
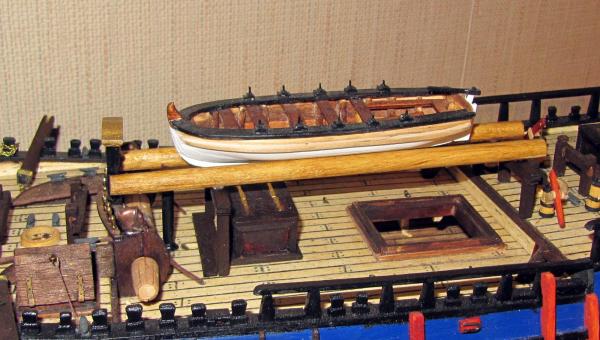
Done a bit on the Endeavour today Lashed the launch down, added the light at the back and some rope and chains the use of I haven't a clue Main thing I did today was make a start on the guitar That will be a very off and on build as I need to save for the finishes, If you want to follow the blog the address is in my signature with all the others

-
HMB Endeavour by mikec - Eaglemoss
Micklen32 replied to mikec's topic in - Kit build logs for subjects built from 1751 - 1800
I hesitate to say it Mike, but the Queen has two birthdays Not sure you would like to be called a Queen though Whoops sorry The Queen -
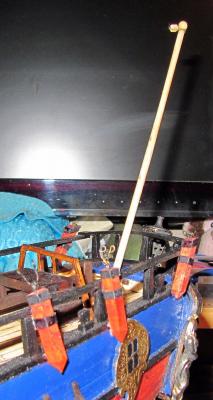
This has reduced the size of those spare masts by quite a bit I think it looks a lot better Right, back to the chainplates

-
Looking good Sjors Not sure what finish I will give mine yet The top two aren't platforms as such but just a few planks laid down I presume they are there to hold the shrouds or whatever the ropes are that hold the ratlines are called Still more to do than you think when you look at the plans The guitar kit has arrived but I think I have a bit problem with the neck fit in the body that I have to sort out
- 1,873 replies
-
- 1
-

-
- occre
- san ildefonso
- (and 1 more)
-
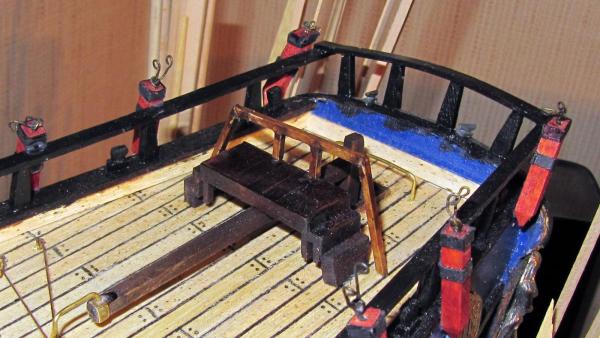
Thank you all Captain Cook if you didn't already know Anja Been exercising my eyes and fingers today They are not the easiest things to put together :mellow: Got a few more to make yet I also did a couple of small jobs on the ship I made a couple of spare masts to hold the launch I think they look a bit heavy for the job, but they are the right size for the upper mast I also put a handrail on the stairs over the steering gear Not happy with the stain though Obviously doesn't look as bad as the macro but I am not 100% happy Isn't it amazing how quickly dust collects though And how bad it looks in a macro
-
What a great shame for you both David I hope you do get it sorted
-
HMB Endeavour by mikec - Eaglemoss
Micklen32 replied to mikec's topic in - Kit build logs for subjects built from 1751 - 1800
Happy birthday Mike Have a great day