NAZGÛL
-
Posts
1,365 -
Joined
-
Last visited
Content Type
Profiles
Forums
Gallery
Events
Everything posted by NAZGÛL
-
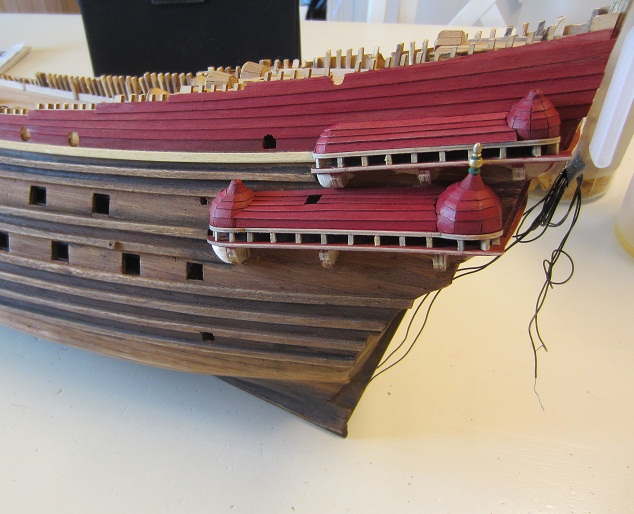
 Hey all! Did the topside of the galleries. The front parts of the top ones took some work to get done. Now on to the backside parts, and after that I can start with the bottom parts. /Matti

-
I like the look of your deck, and Its great to see how you make it better and better! You must have been scared when you took the gratings off... You also have the chance to make one of them closed with a hatch like the Vasa on the museum has. Something I would have done if Ive thought of it from the beginning. /Matti
-
Thanks! Hmm, Ive read it and if I dont misstemember they are the same, at leat as mine. I have the latest release I think. The us site is up, billingboatsusa.com Heres a link to the instructions: https://docs.google.com/folderview?id=0Bw40frlcNqbjOTNlYTE5Y2YtMGUyNC00NGE0LWE0ZTktNTRmZjFhNmM0MjM4&usp=drive_web&hl=en The instructions are quite unstructured, but so far everything is there, but you have to jump around between the different parts of the instructions, and the big plan is often helpful. Just think the steps through and youll be fine. /Matti
-
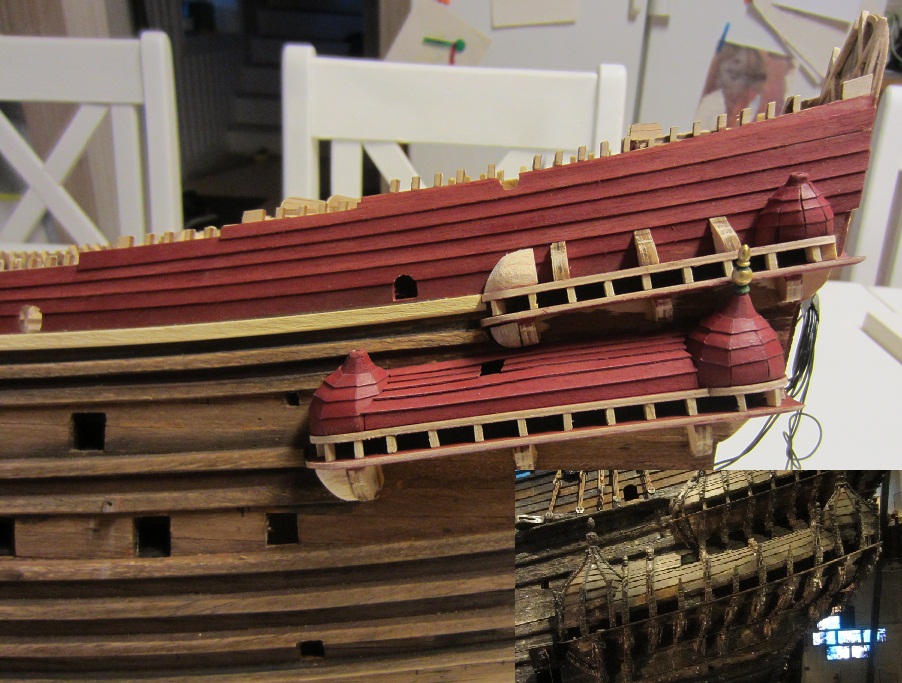
Thank you for the kind comments everyone! Cheers Kriss and Lawrence! The red used is a bit tricky to photo. It looks like in the pic when its in normal inside lights, perhaps slightly darker. When in sunlight it goes more vibrant. It makes the shadows more prominent and the paintjob alive. Thanks Mark and Michael! I wish I could have gotten the rounded shape of the horizontal parts that follows the line from the wales, but I cant see how to do that without getting a mess when continuing the build, so I went with them starght. I also would have liked the vertical pieces between the vertical parts tilted correctly, but I had enough problems getting them straight like they are now. Overall Im still liking the result, and that it can be done with the original kit parts (except using the middle sized towers from the spare parts I have, instead of the big ones). I love wonky constructions, it gives life and personality. Thank you Ferit, most apreciated! Im worried about getting the lower rounded parts planked correctly, they are rounded with sharp edges like the towers, but its hard to shape the wood pieces without having them in place. Hopefully I can sand or file them in place if needed. /Matti
-
Looking good, not many models gets the white line on the galleries. You are fast also. /Matti
-
Lol at the little red guy! You could make a Agatha Christie mystery with him. The Whaleboat Murder. Did he get murdered with the knife, the axe or... the cheese? /Matti
- 515 replies
-
- 2
-

-
- artesania latina
- whaleboat
- (and 1 more)
-
Thanks Nigel! /Matti
-
Nigel, I love the attention to detail you have. It looks very clean yet realistic. Great work! /Matti
-
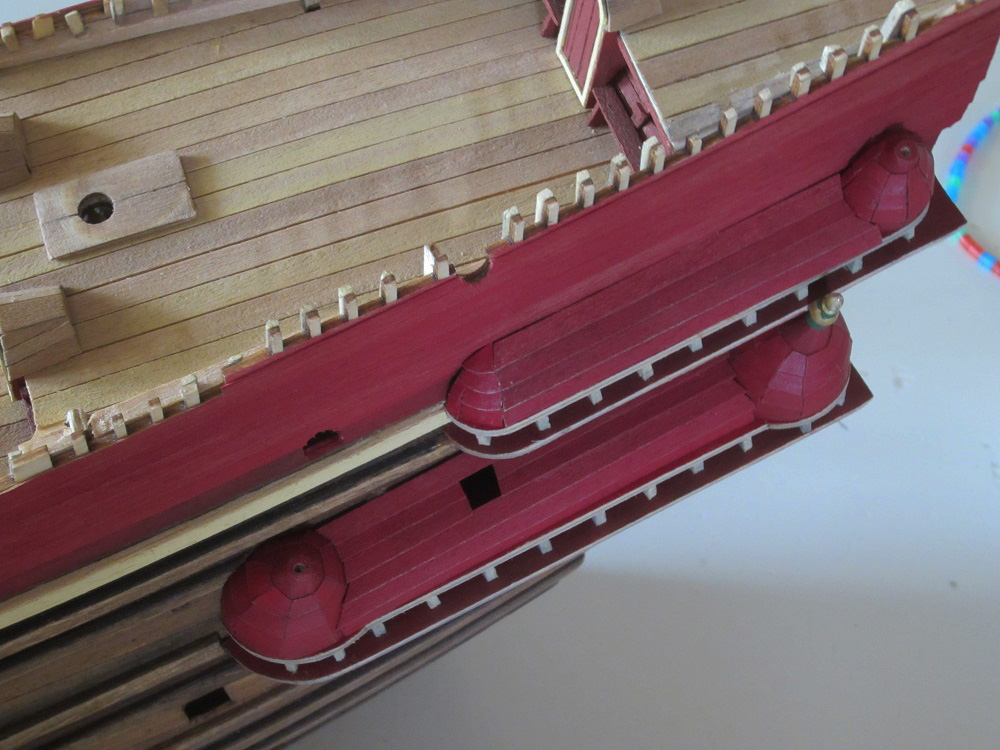
Cheers Alistar, Im glad for your nice comments! Me and the family been on a trip to Riga for a few days. The city has a very interesting history, especially if you are into swedish history like me. The museum of history and maritime is nice and can be recommended, as there are a lot of old war objects there. Had some work done on the galleries. I thinned down the lower vertical parts as I missed to do that before assembly. I had to repaint those parts, but not to much work. Its not very noticable in the pic, but it made a big difference. Also did the small rounded parts in the fronts. Those small fellows take some time to do. And I also planked one of the lower galleries. I tried to get some of the wonky style of the original, wich I find very beautyful. Paintjob as before: different shades of red on the planks, dark wash and a light dry brush to blend and give some deph and life to it. /Matti

-
Cheers everyone! Finials, thanks Nigel. My ship vocalubary is limited and a mess of swedish and english terms, lol. Rinkensk, thanks. Looking forward to follow your build! Im happy with the BB kit as its quite true to the original in shape and details. Thanks for the nice words Michael and Mark! Im off to Riga for a few days. /Matti
-
Thanks Andre, Im glad you like it! I dont know the english word for the tops. Spira is the swedish word for tips on churches and castels and also the staff a king holds. /Matti
-
I went back and looked at the pics and I really like the rough look she has. I really like it and the character it gives. Its always hard to judge by pictures, but I would consider keeping the raw look and not put on any oil. /Matti
- 124 replies
-
- 1
-
-
- santa maria
- mantua
- (and 1 more)
-
That must have been great Pawel, and thanks! Here are spirorna for the towers. I looked at the 1/10 and tried to do muted versions of them. The original have different designs on them, but the ones included in the kit are uniform, but I hope the different paint will make up for that. The paint: gold for basecoat, the brass looks way to shiny. Then add green in the pattern needed. Yellow and red details. Finally a few brown/black washes to mute them and make them blend more with the rest of the ship. I only glued the two that had to be done before gluing the towers, the others Ill mount later on so I wont break them by misstake. I didnt get everything like I wanted, but there are so many angles and shapes and therefore easy to make some misstakes. /Matti

-
Looking really good, Im glad you are posting pics of how you do it! It will help us new to this. /Matti
-
Very very nice work! /Matti
-
Excellent! You have great talent! /Matti
-
Thanks Kevin! Im happy you like it. Cheers Pavel! Yeah, but if I undertand it right, I have way more detail work ahead of me when I star the rigging, wich you master. Thanks for the kind comment.I think Im close to the look I want now. Tarred hull with different shades of brown, but untreated deck with only moderate washes and many nuances between planks. Im inspired by Götheborg when she was new and also by Batavia. The artist Vroom is a big inspiration for me, his paintings blow me away. Jan, thats wires for the light. They go in below her, but I have them taped at the stern so they will not be in the way or get pulled off. /Matti
-
Cheers for the kind comments! Thanks Nigel! They are not perfect, but Im glad you are liking them. I try get good ref and only use my eyes and dont measure when I build, that way I can try to fokus on the look and try to get some of the shape and lines of the original. The backside is that Its easy to get things to wonky... Lawrence, thanks for the nice comment! Yeah it feels good to be able to progress. I didnt know if I would mess them up when getting the badic shape, so its nice to have them done. They are not glued yet, as I will test fit the sculptures on top of them first. Thank you Ferit! Im glad you like it, Its good that I changed it, as it also works better with the brown. /Matti
-
Man, that knife is so nice, and at that scale! What a smurf killer! Brillant work, Buck! /Matti
- 515 replies
-
- 1
-
-
- artesania latina
- whaleboat
- (and 1 more)
-
Thank you again for the tutorial, very informative and I hope you can take the time and make more of them. /Matti
-
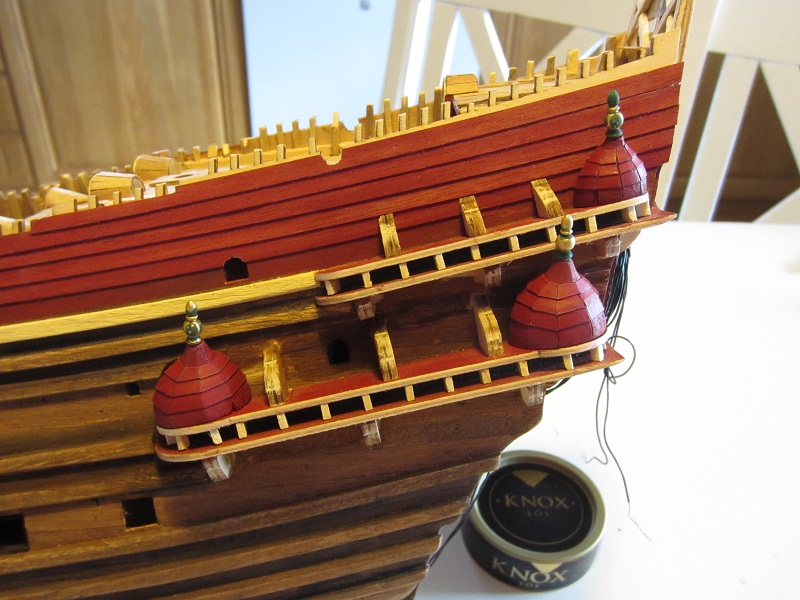
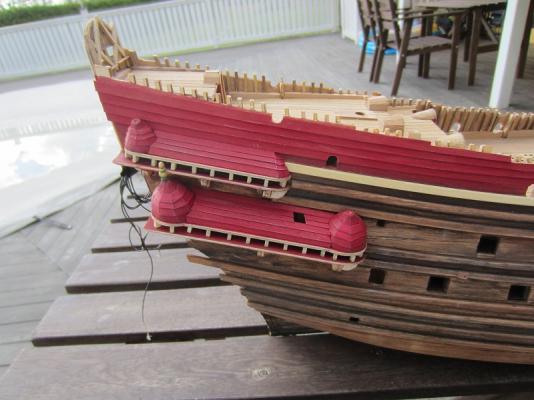
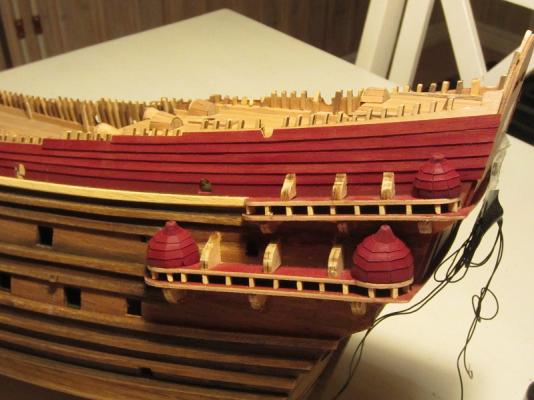
Hey all, did all the towers. Also painted them. Because of the different materials I had to put on a thicker basecoat of red on them to get them looking uniform. To give them scale and make the surface more vibrant I used black washes and then light drybrushing. Now I can start with the details and sculptures for them. /Matti

-
Nice ladders Michael! I also like your style, and its distinct for you. You made a great decision when going natural with muted painted figures. /Matti
-
Ah, thats very informative, thanks! Im starting to get an urge to do the big lion on my Vasa. Michail/Schriper did it on his BB and it looks great. /Matti