

.jpg.2c2c29e54623bd7b752bc2cdab599665.jpg)
Danstream
-
Posts
755 -
Joined
-
Last visited
Content Type
Profiles
Forums
Gallery
Events
Everything posted by Danstream
-
.thumb.jpg.c459ce4140b54c12eddb8eedfd446df3.jpg) Hi all. just one little note in addition to the discussion above: Actually, hinged control surfaces (i.e. elevators, rudder and ailerons) are statically compensated. In other words, there are balancing masses - located inside or visible outside - that bring the center of mass ( or center of gravity if you want) of the surface to lay on the hinge line. (this is done to avoid that inertia forces trigger unwanted dynamic effects on the controls). Therefore, once left alone, control surfaces remain in their last position and are not influenced by gravity. Now, in most of cramped cockpits, before getting off, the pilot often pushes the stick forward to make room for his legs. This results in the elevators hanging down in most cases before the ground crew take the plane under their care. Other times, if a control locking device is not at hand, the control stick gets tied up using the seat belts and this might often results having in the elevators pointing up. I though you might have been interested about the above and it is not my intention to appear pedantic. Kind regards, Dan.
Hi all. just one little note in addition to the discussion above: Actually, hinged control surfaces (i.e. elevators, rudder and ailerons) are statically compensated. In other words, there are balancing masses - located inside or visible outside - that bring the center of mass ( or center of gravity if you want) of the surface to lay on the hinge line. (this is done to avoid that inertia forces trigger unwanted dynamic effects on the controls). Therefore, once left alone, control surfaces remain in their last position and are not influenced by gravity. Now, in most of cramped cockpits, before getting off, the pilot often pushes the stick forward to make room for his legs. This results in the elevators hanging down in most cases before the ground crew take the plane under their care. Other times, if a control locking device is not at hand, the control stick gets tied up using the seat belts and this might often results having in the elevators pointing up. I though you might have been interested about the above and it is not my intention to appear pedantic. Kind regards, Dan. -
Spitfire MK I by Danstream - Tamiya - 1/48 - PLASTIC
Danstream replied to Danstream's topic in Completed non-ship models
@Bedford, thanks for your comments. For your questions see also this discussion of Britmodeller: Gloss, Satin or Matt? - WWII - Britmodeller.com In general, during WWII, aircraft finish were matt to kill reflections of sun light beamed off along one narrow direction. A non-glossy surface reflects incoming light with a spread on all directions. (see what also @Egilman said above). However, it must be said that military matt finish in real size do not appear as dead matt as it is obtained on models with modelling paints. Often you find 'eggshell' as a comparative description. An eggshell looks smooth and satin and reflects light diffusely. On a model, I never use a dead matt finish, but rather a matt-satin one which in my eyes looks more realistic. RAF adopted true glossy paints for a period after the WWII. It is true that for aircraft which are already well aerodynamically designed, improving the overall surface smoothness results in an increase of max speed (i.e. a decrease of parasite drag). However, I do not know if this requires achieving a truly glossy finish for which the roughness needs to be really small (smaller than visible light wavelength). Best regards, Dan. -
Very nice work, Bob. Dan.
-
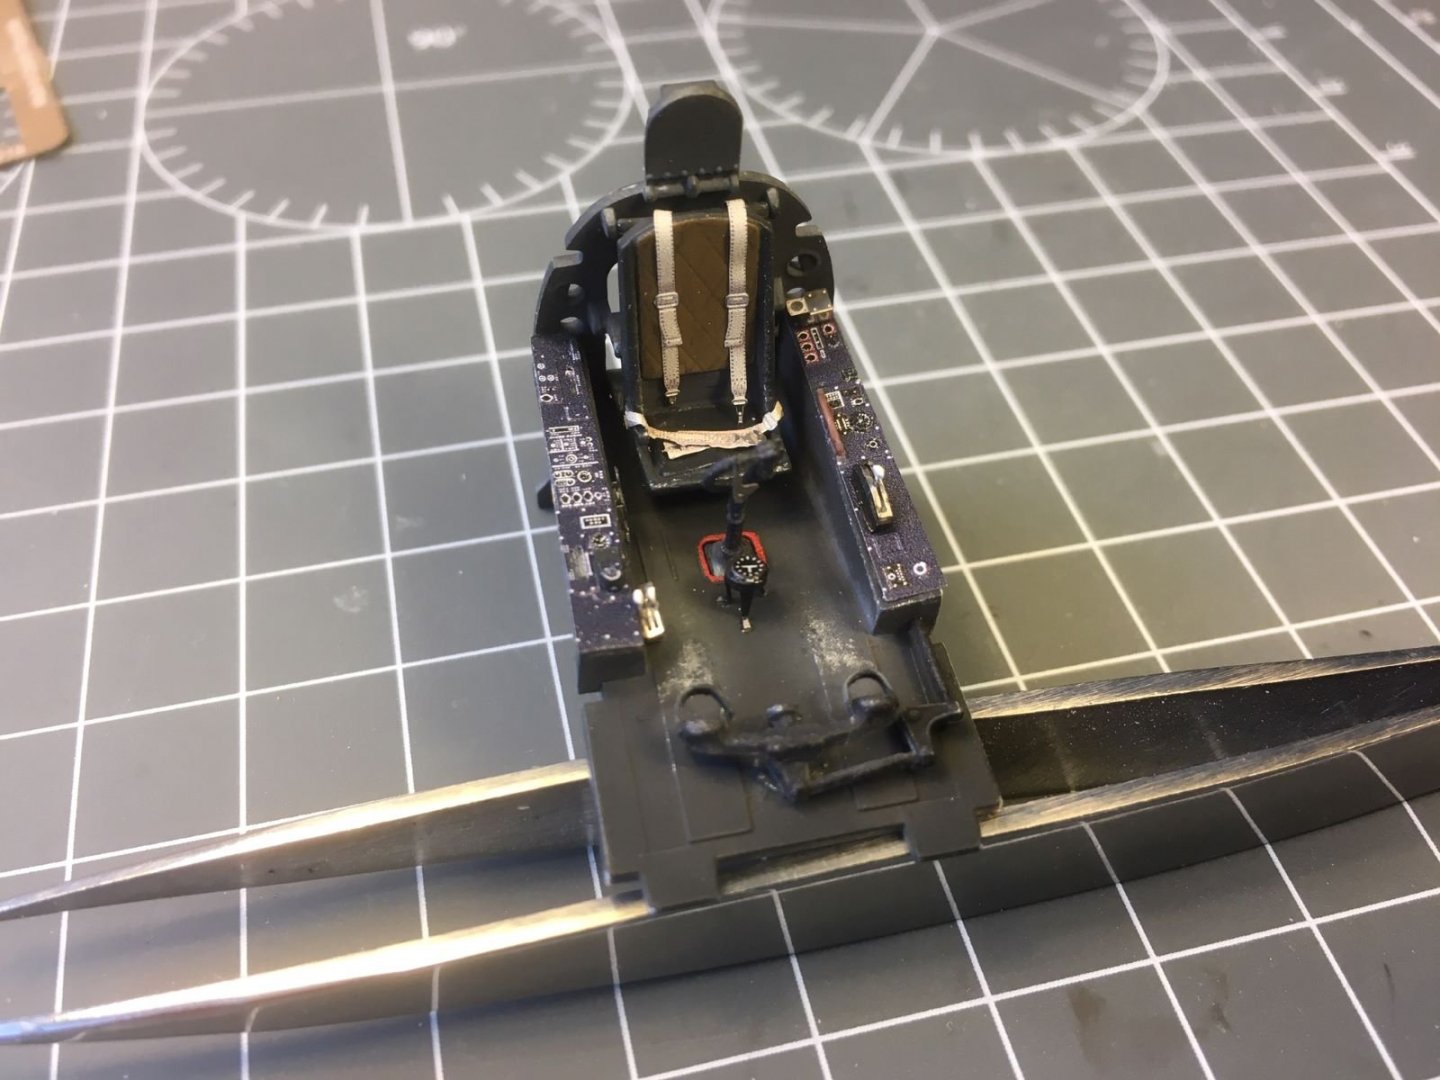
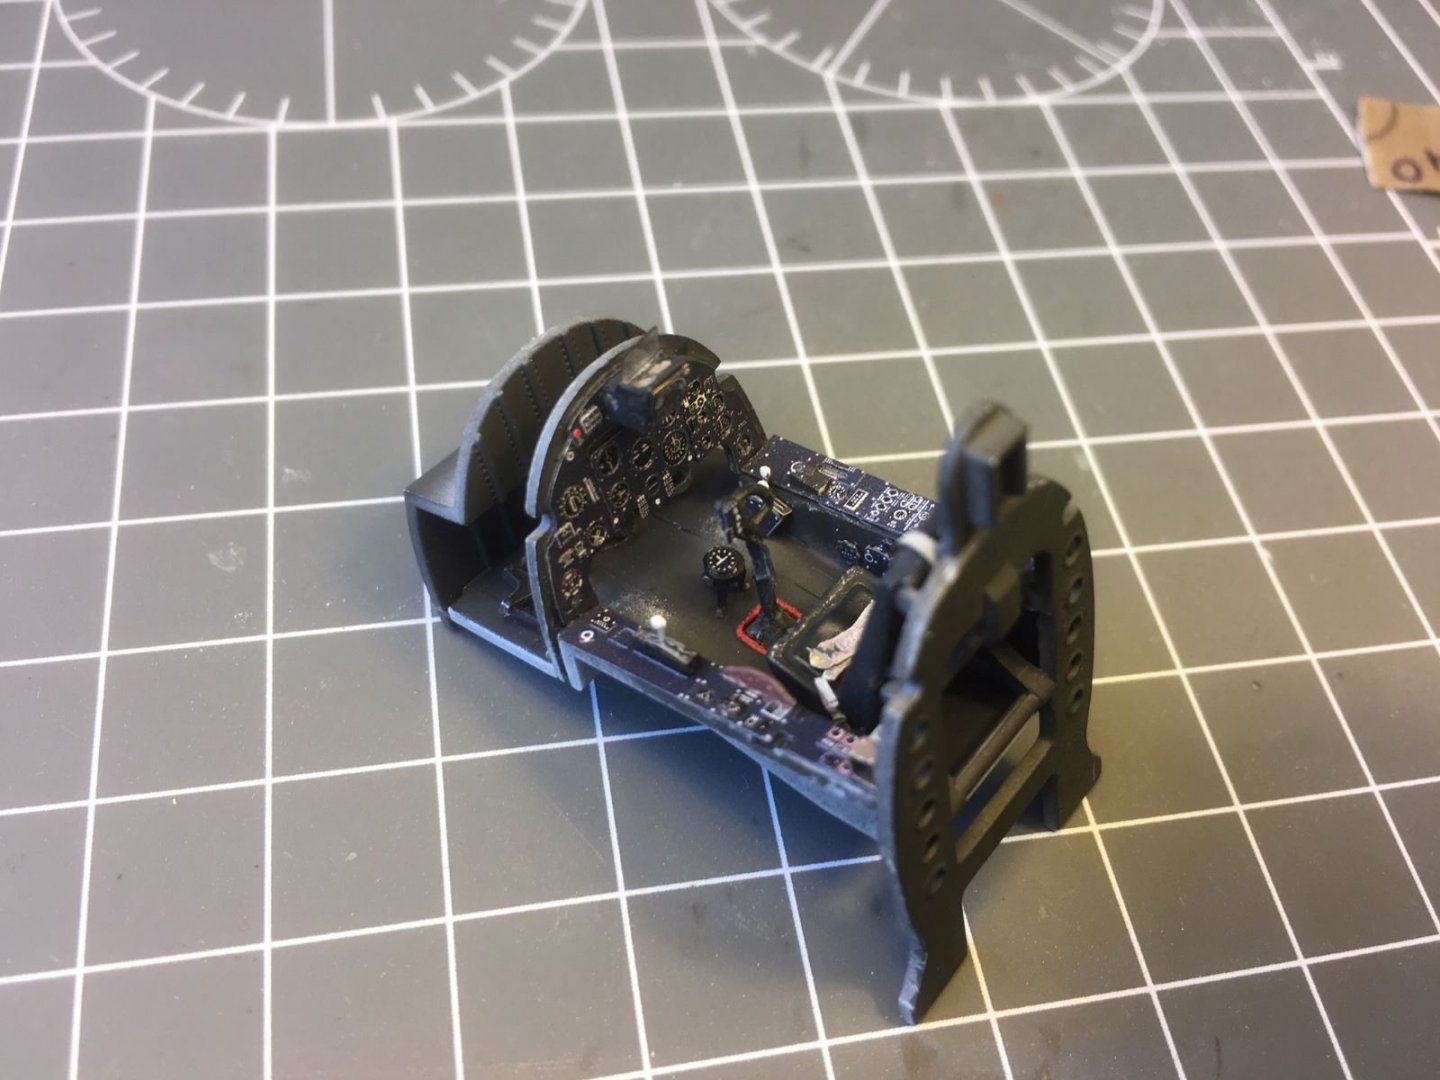
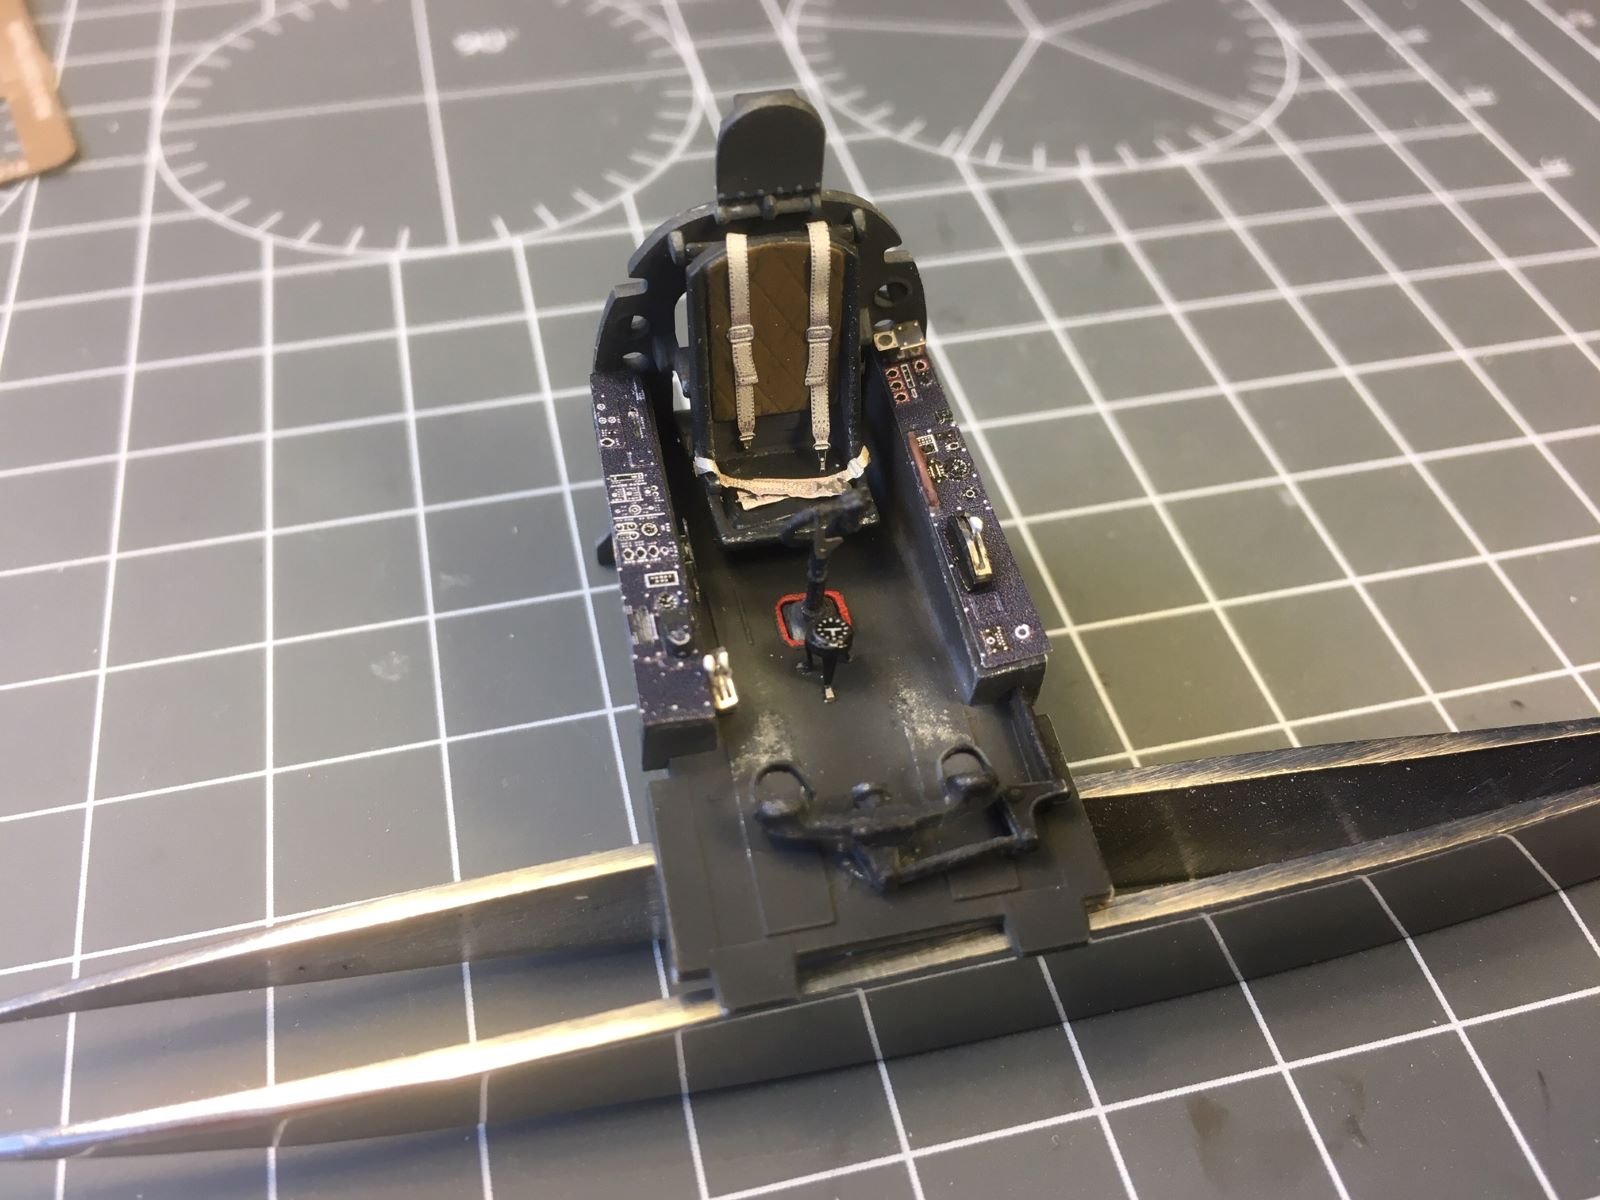
Dear all, a small update on my Sea Fury interiors. I completed the cockpit bathtub with the still missing photoetched parts and added some more wear on the floor below the pedals, as suggested above by Ken: The seat was completed with the Eduard seatbelts: The gunsight was added to the instrument panel. As I said before, the gunsight was not included in the parts of the kit and the compass was missing as well. These are some of the few omissions in this otherwise very good kit. Finally, the cockpit is assembled: Clearly, the Eduard set adds another level of detail, at the cost of a bit of time (quite a bit) to be spent in folding and assembling the various components. The drawback is that all that work will be hardly seen from the rather small cockpit opening. 😒 This is the last work done on this model for now. I still want to do some more work on my ship before the close of the year. I wish you all a great and more 'normal' new year. Best regards, Dan.

- 61 replies
-
- 14
-

-
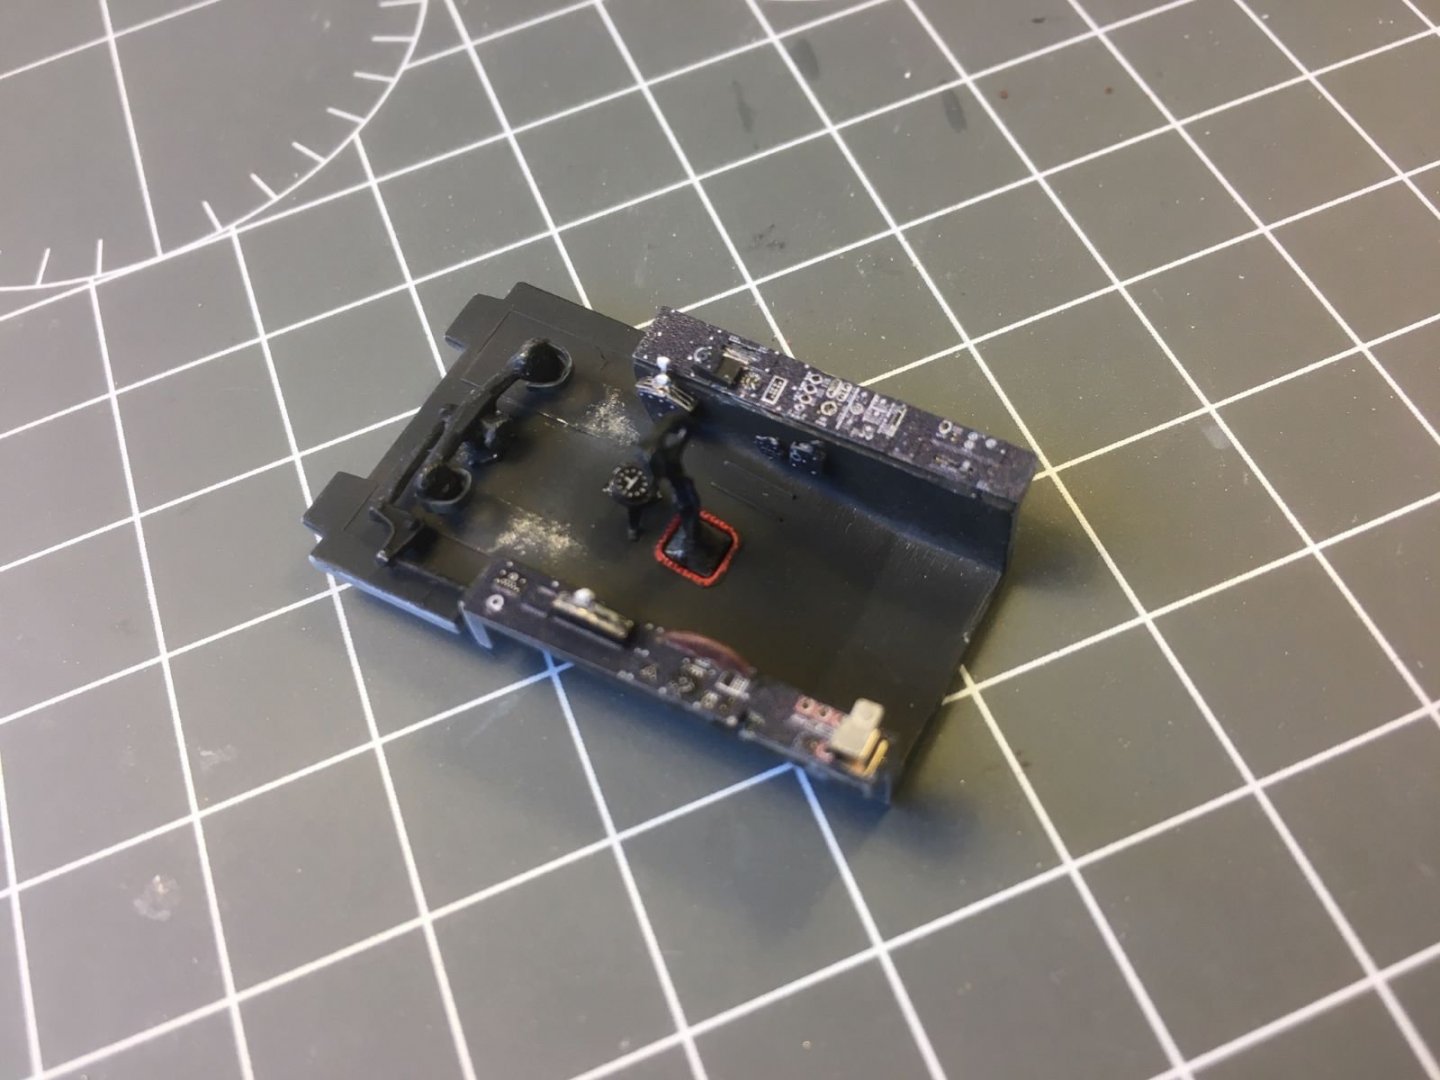
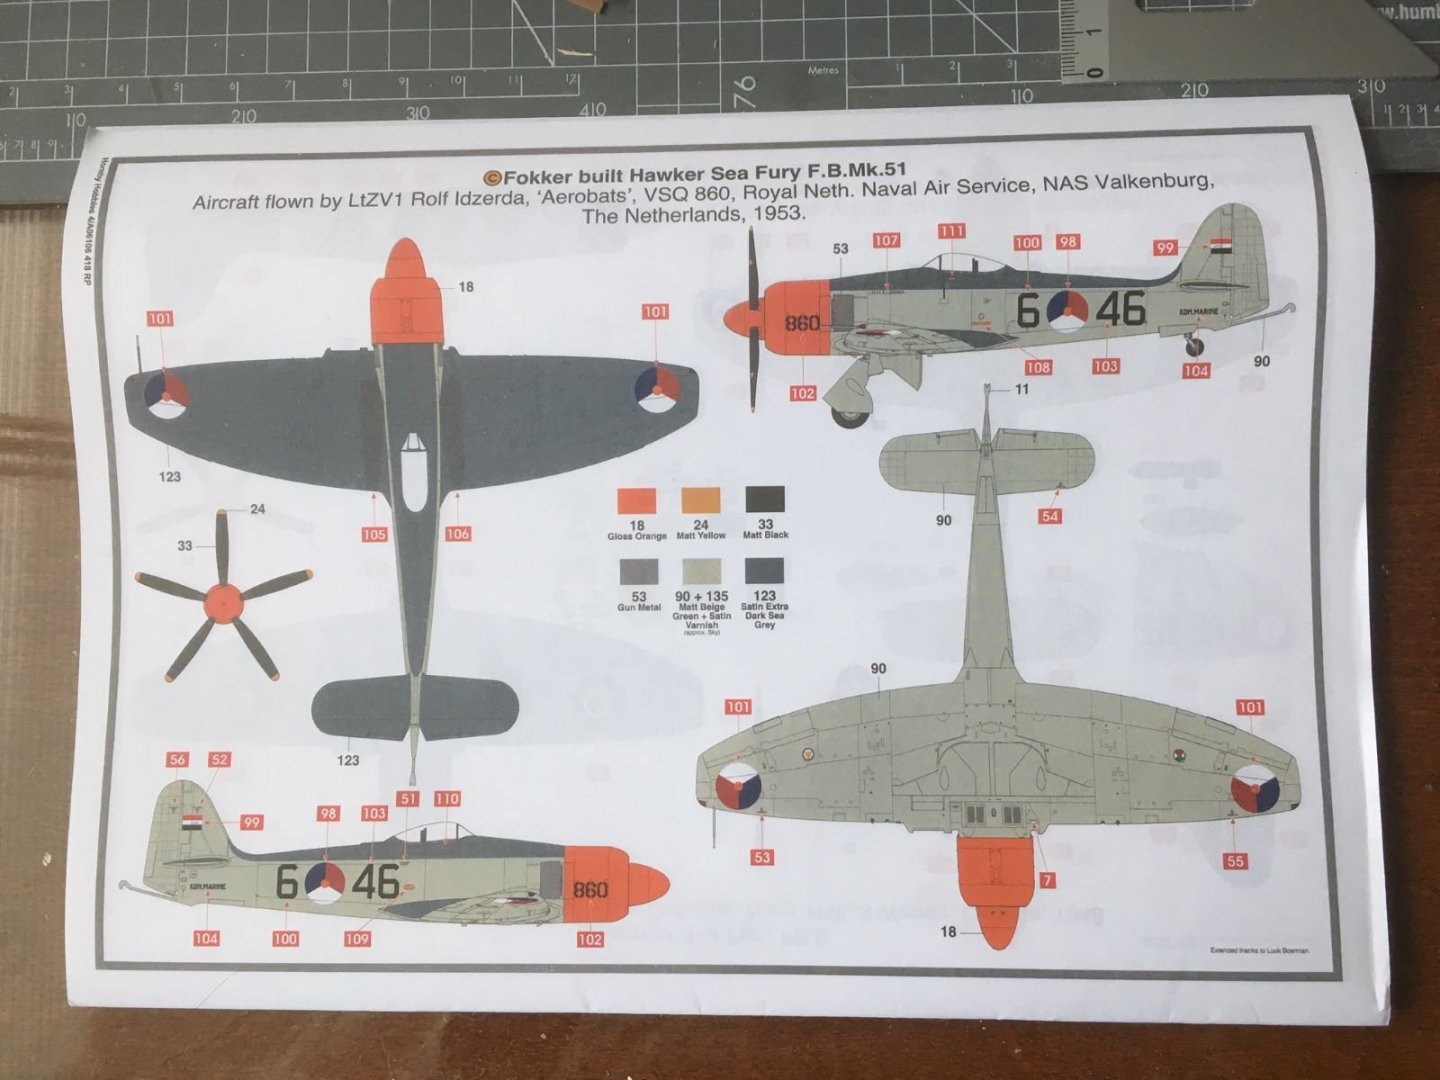
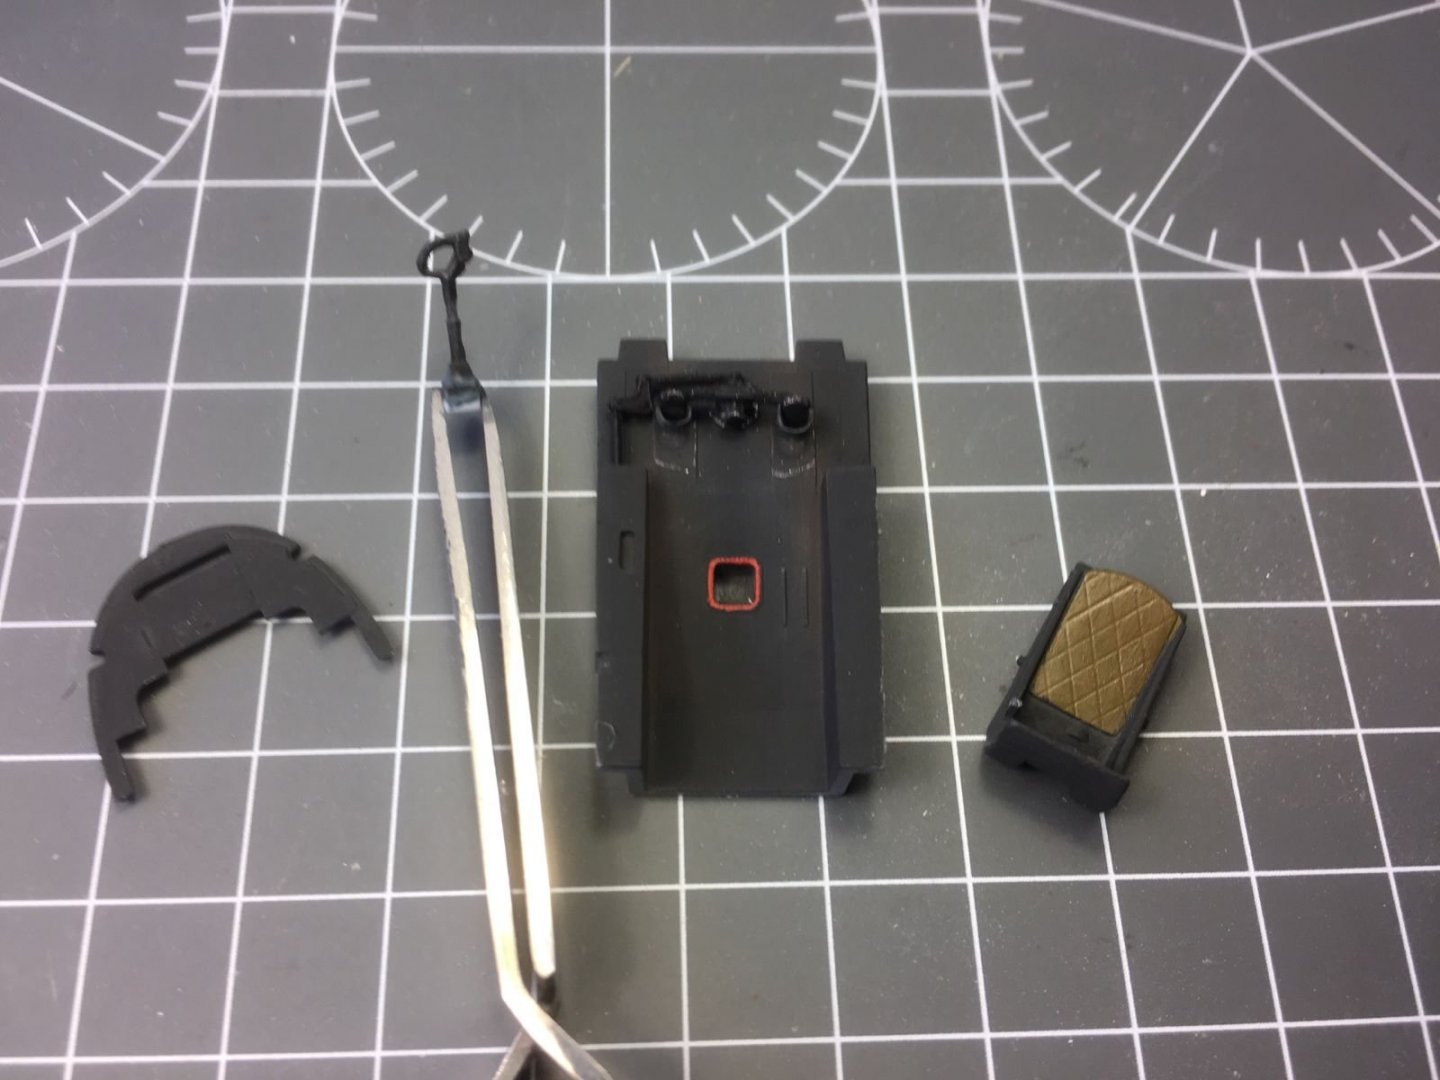
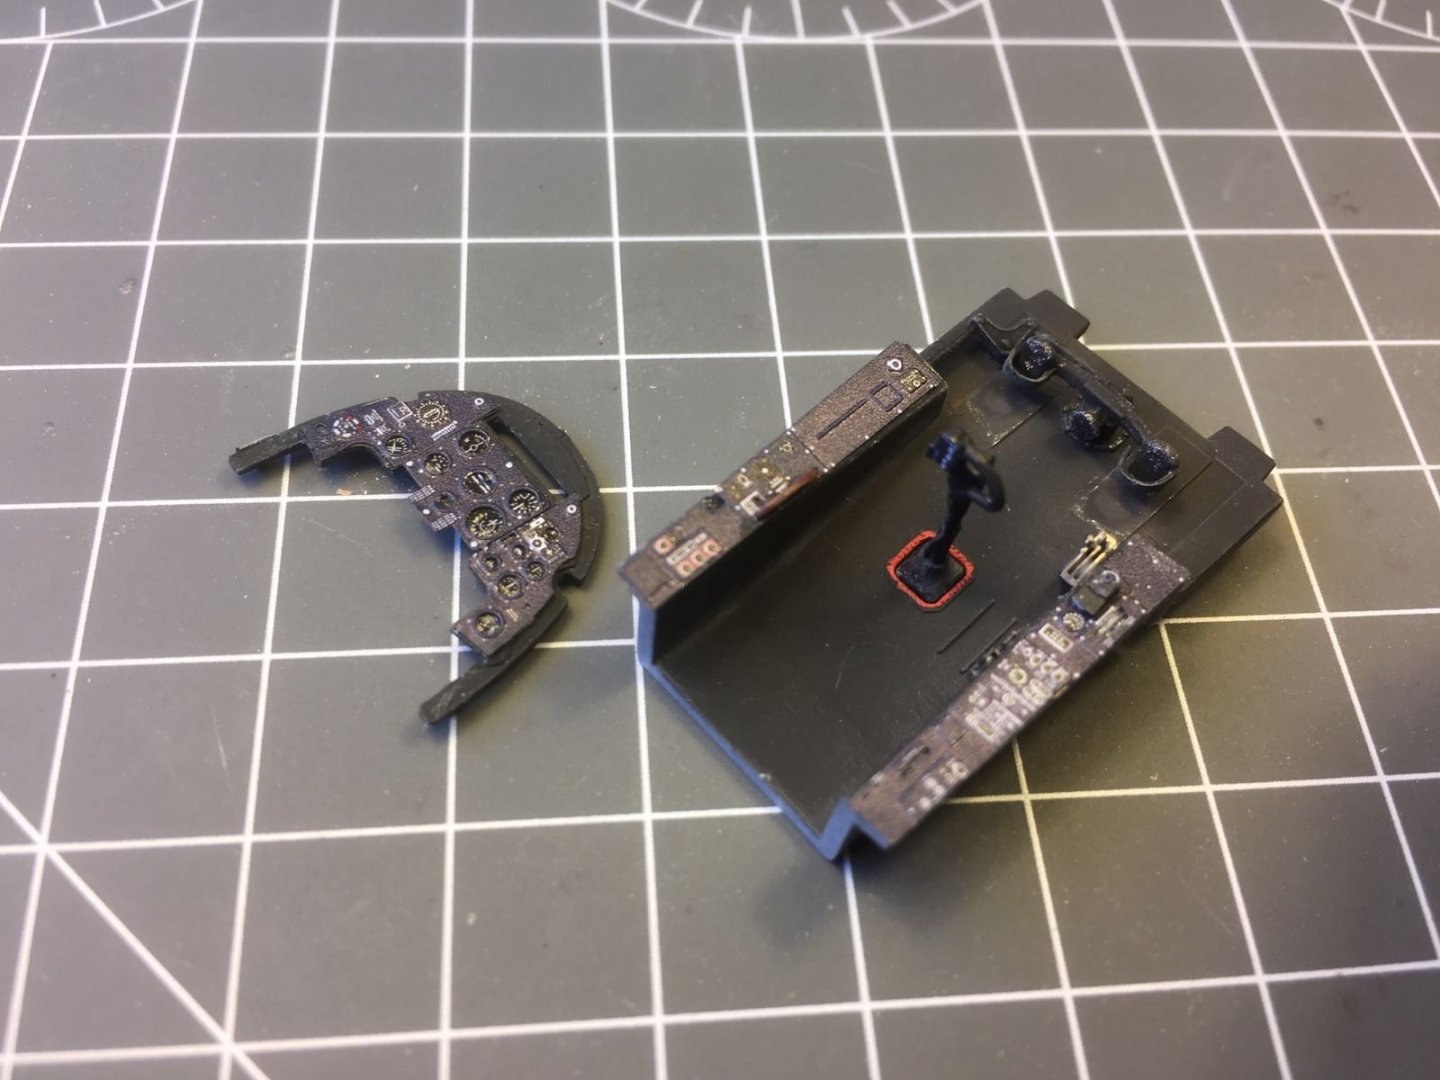
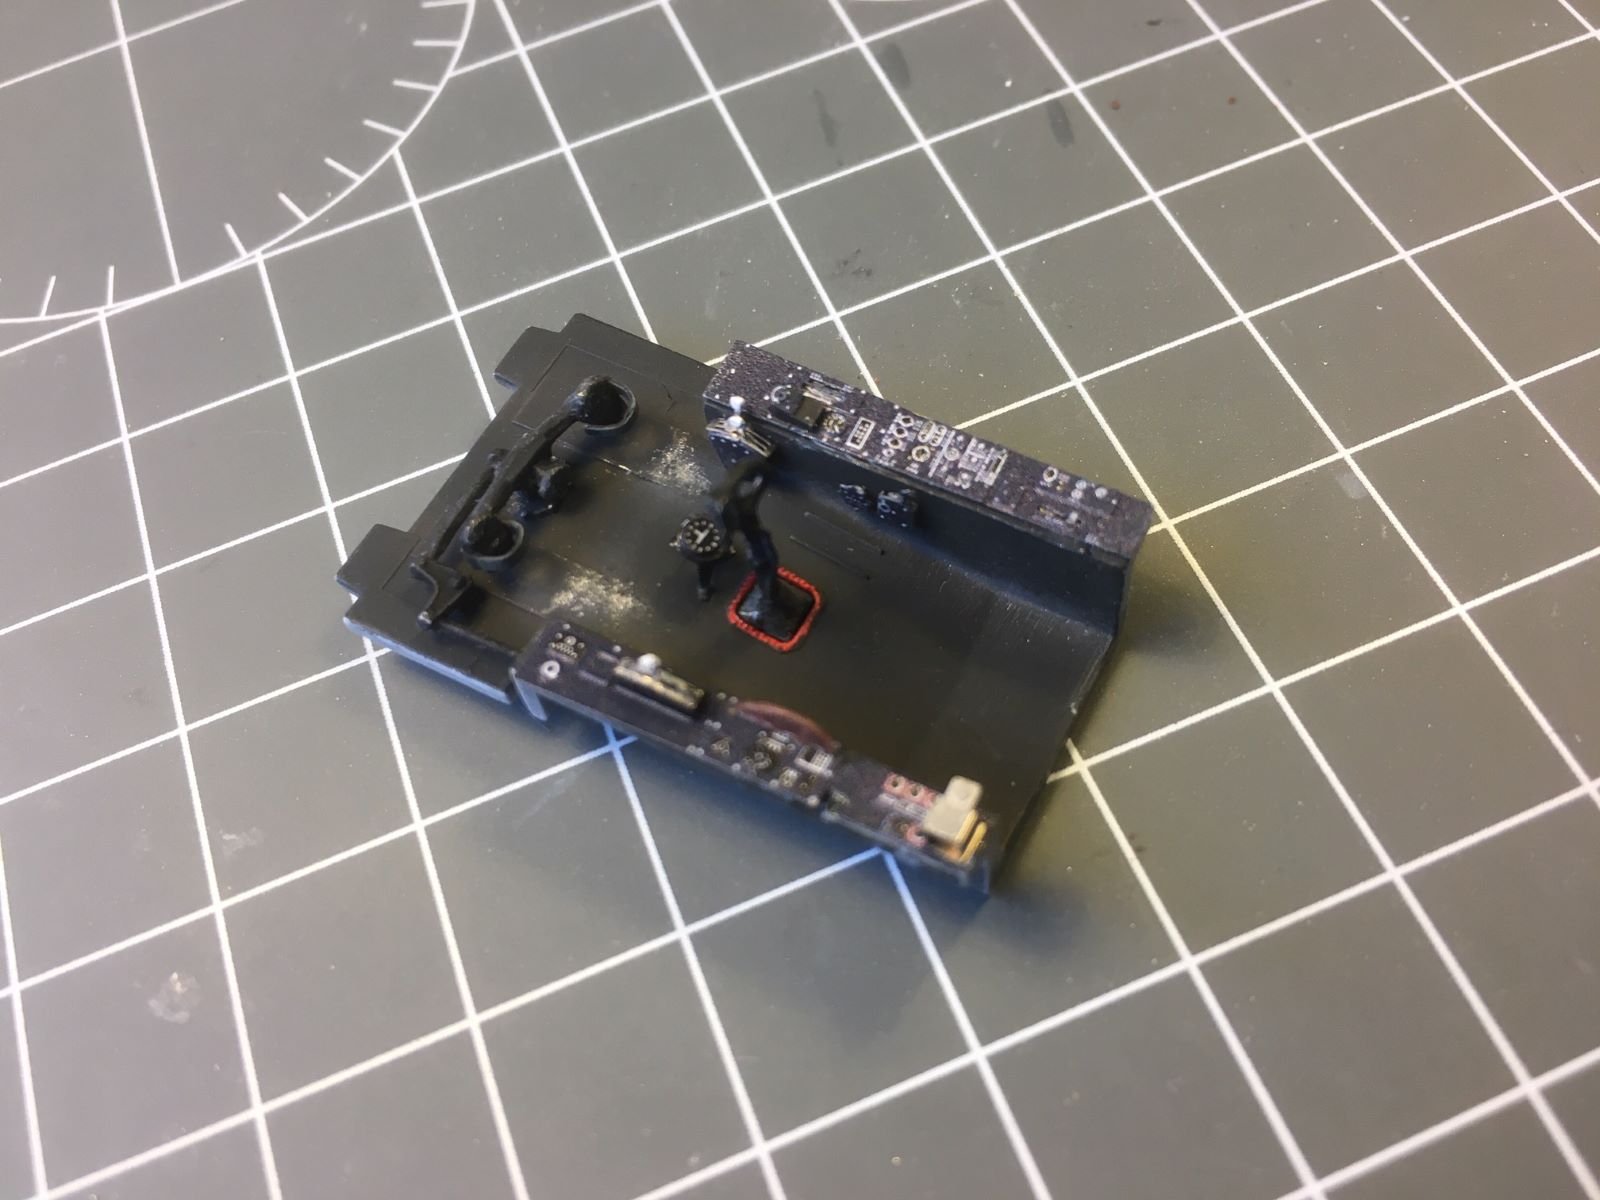
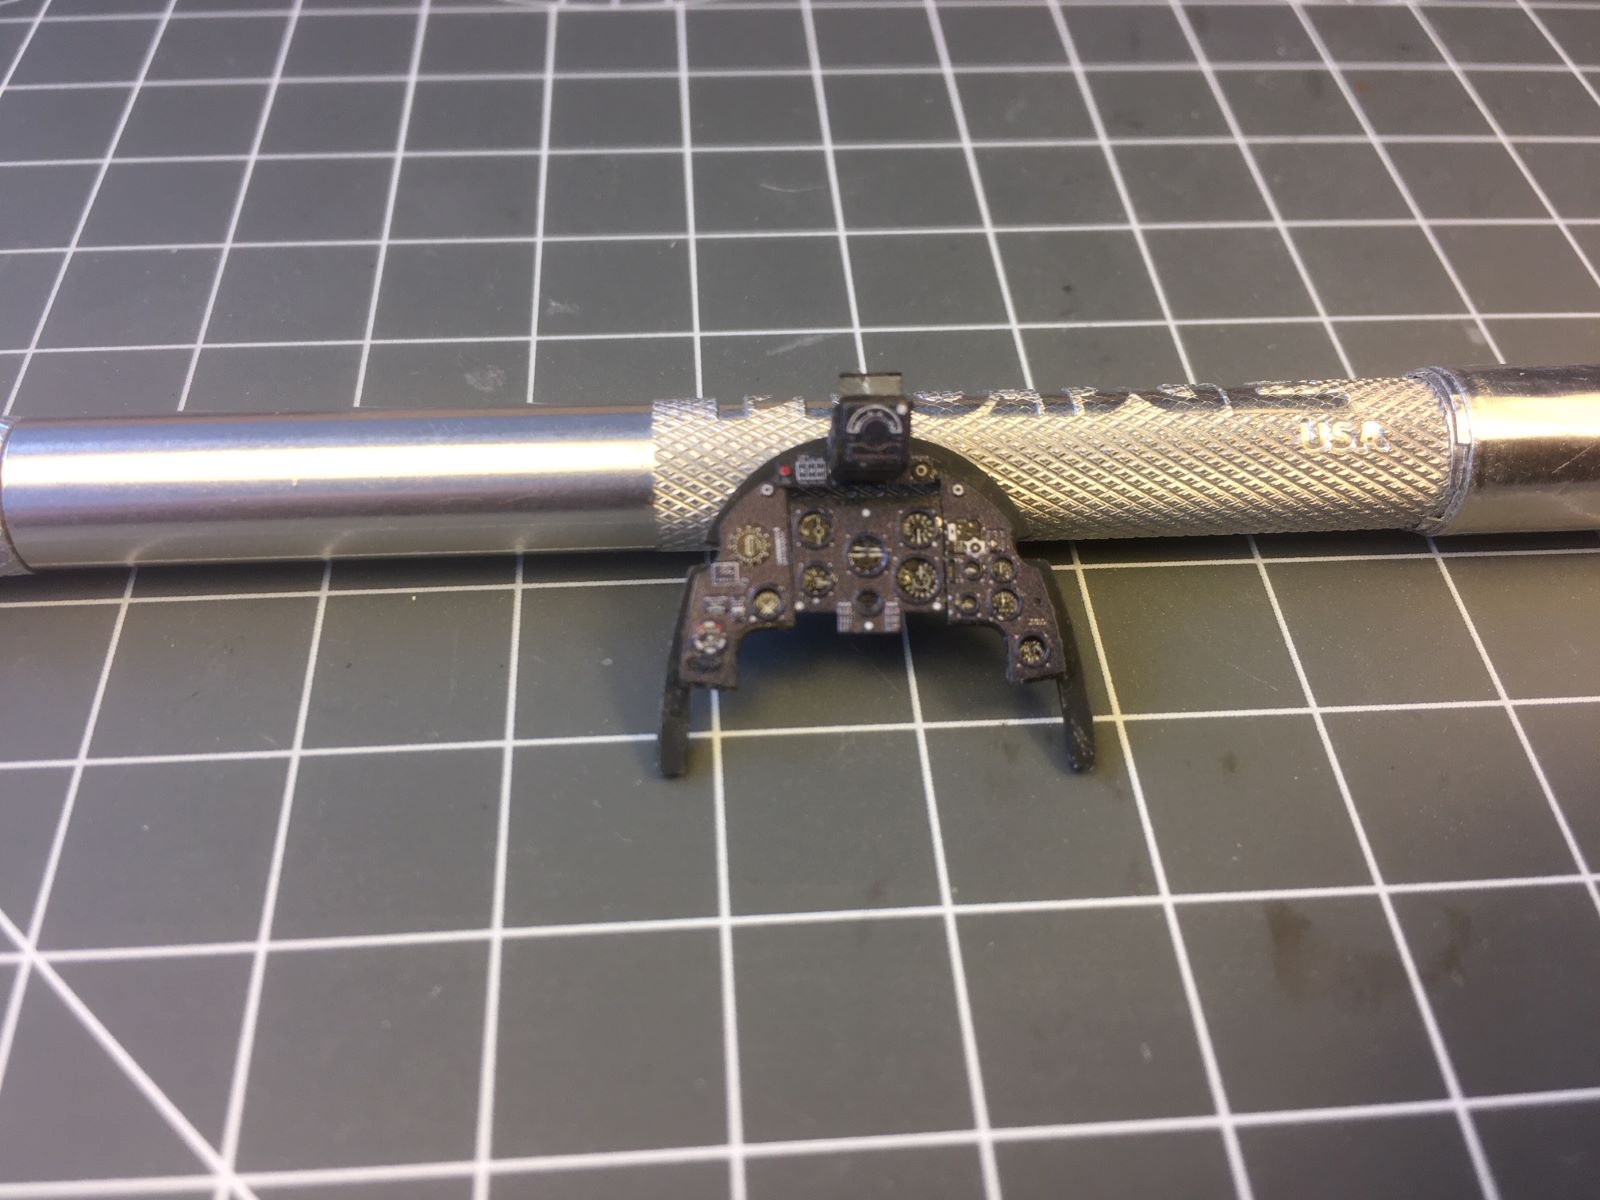
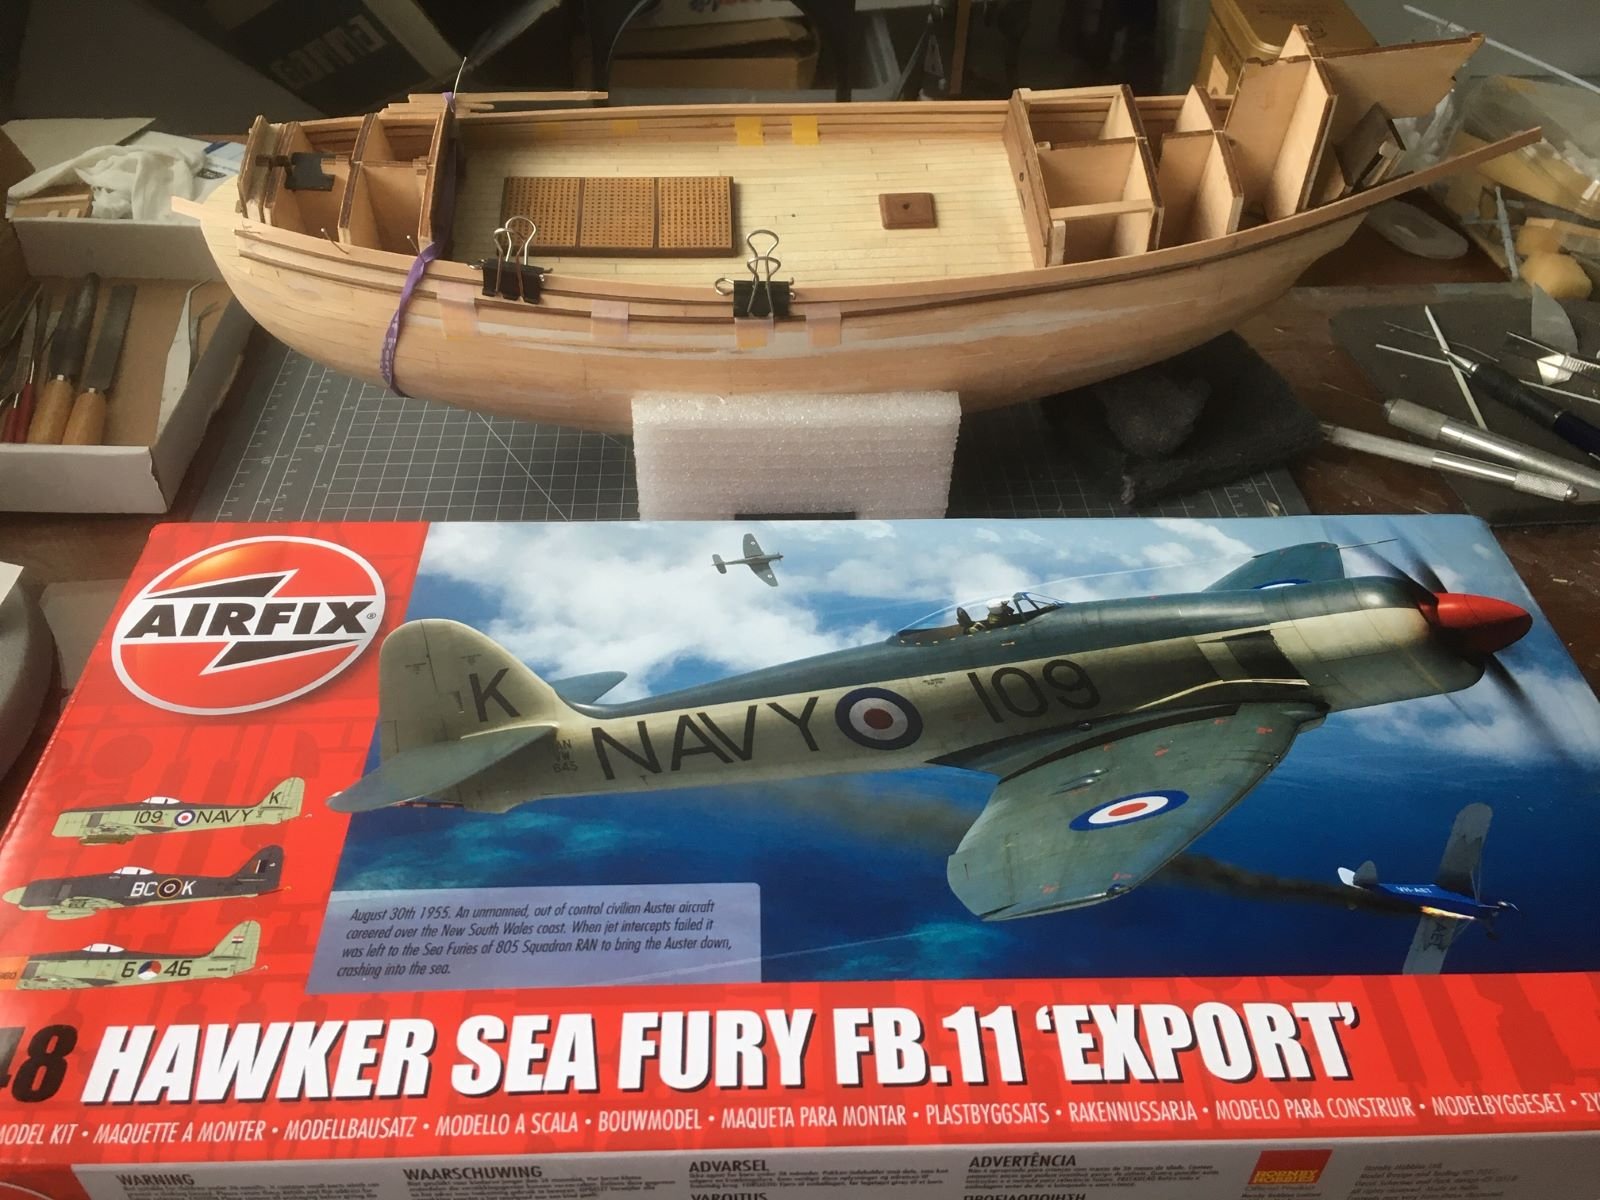
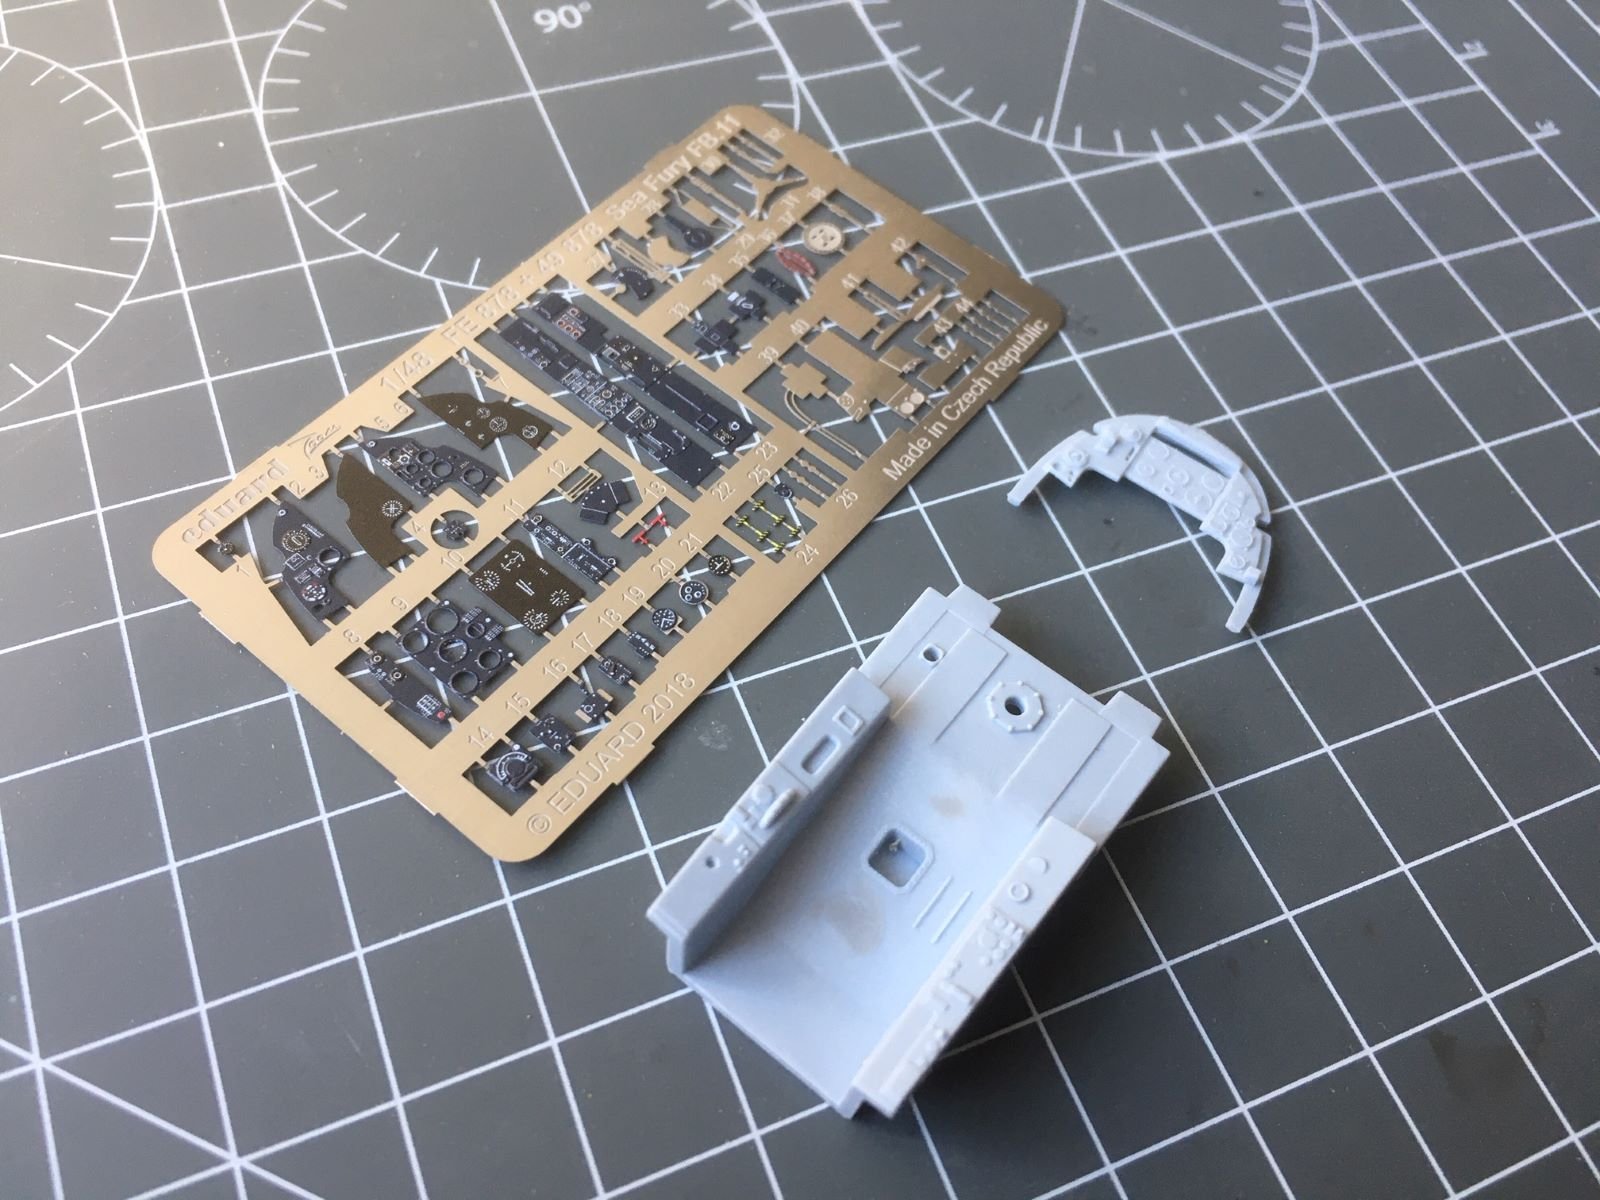
Hi all, visiting this part of the forum stimulated my appetite for aircraft modelling, so I decided to start this little beauty that landed on my desk for Christmas: I always wanted to have a model of this handsome aircraft which was one of the pinnacles of piston, propeller driven fighter development. Unluckily, it appeared at a time when the era of piston engine fighters was at a close and jets were starting to dominate. It was, however, one of the fastest propeller driven plane ever, had outstanding handling qualities and flighted effectively against MiG-15 jets. It was exported with some success to other navies and air forces and, indeed, the version I would like to build is the one of the Dutch Royal Navy which is included among the options of the kit: I started, as you can easily guess, from the cockpit. I knew that for some reasons, Airfix did not include the gunsight in the kit, so I outsourced a Eduard detail set that included it. Assembling the photoetched details implied that the molded in details, had to be completely removed. Although a bit soft, the original details are quite alight. These are the concerned pieces, filed, painted and ready to accept the Eduard parts: The cockpit, being painted black, presents a small challenge because there is the risk that it will appear just as a black hole. A true black color does not have a place in my models, hence I painted all the parts with NATO black. To highlight some details and add a bit of a 'lived' look, I brushed some pastel powder on the more exposed parts. I also added footstraps to the rudder pedals that looked a bit basic otherwise. Then, I started to add the photoetched parts getting this intermediate result: Indeed, the instrument panel looks quite well detailed and I am pleased with the outcome so far. At the moment, there are still a large number of parts still to be added and it is not advisable to rush with them, so I will need some more days to complete this work. That is all for now, to the next time, Dan.


- 61 replies
-
- 12
-
-
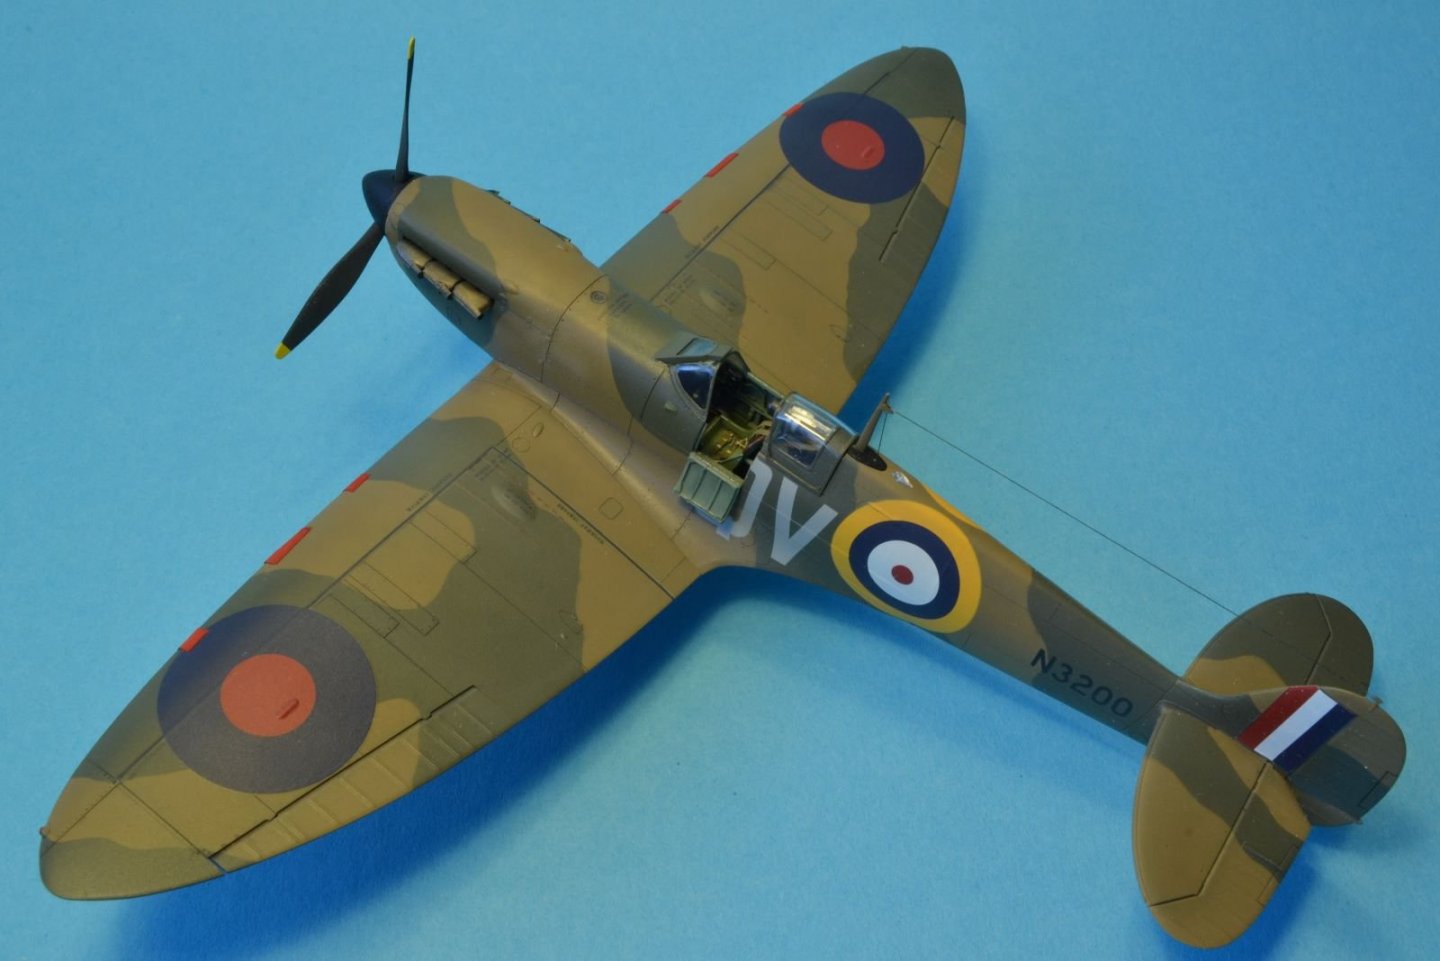
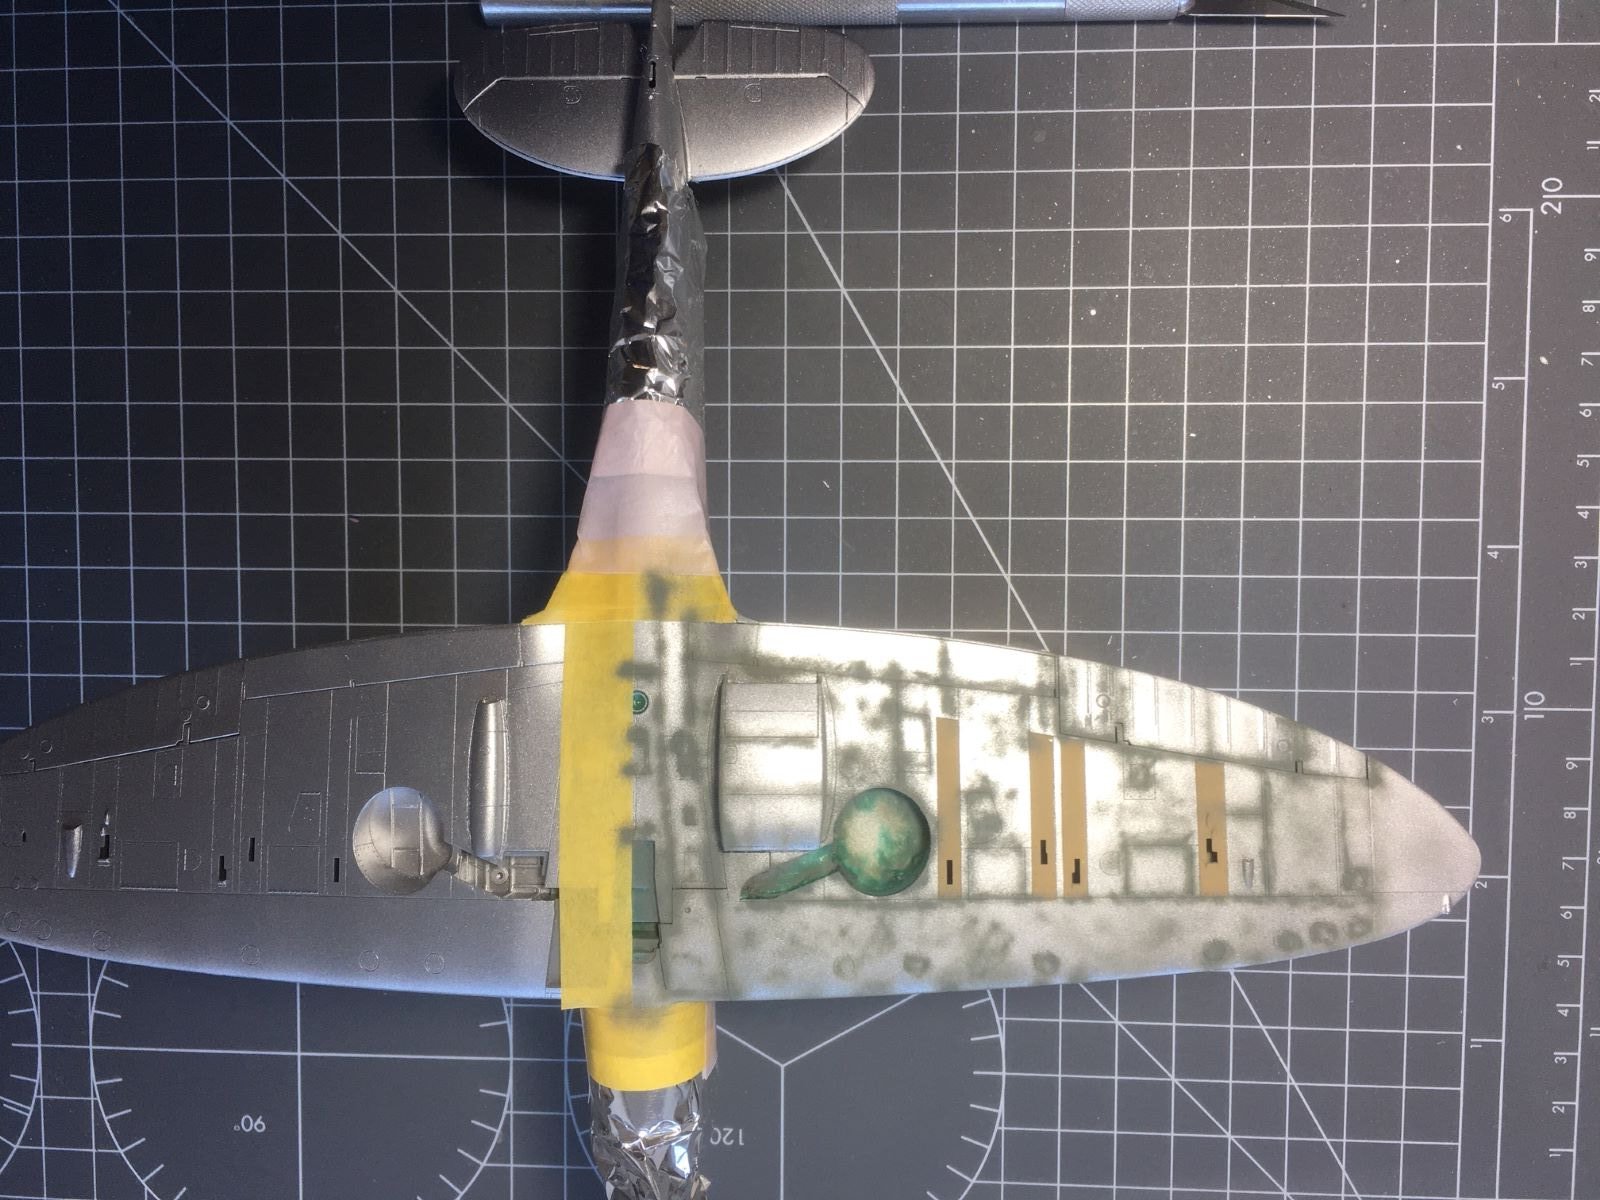
@Javlin, indeed. The only limit that I keep, as far as possible, is the observation of period pictures. For example, I saw on a picture showing the underwing of a Spitfire, that the panels below the guns had a slightly different shade than the rest. 😉 Dan.
-
Hi Mike, surely you can try different colors. Just as an example, for the white part of my Spitfire this is what I started with: ... and this is what I ended up with, before weathering: There is no limit to creativity and experimentation. 🙂 Greetings, Dan.

resized.thumb.JPG.121bde217ba925fd1139426b77994b1f.JPG)
- 241 replies
-
- 10
-
-
For a naval plane, the black basing can give very appropriate and interesting paint effects. Especially if you apply light mottles before the final paint. It might result in a non uniform top color that is seen often in period pictures. I did that on my Arado build and I was satisfied with the results. About chipping, I would not be too obsessed about that. Even if you can see some chipping in pictures, there must have been a time when the plane did not have that. If you want to depict a worn and beaten plane, you can always add some later. I have the impression that if you apply the black, followed by whatever else treatments then you deny its effects if you cover it with metallic paint. Of course, the model is yours and yours is the choice. Greetings, Dan.
-
Great, better than before. Waiting for seeing it completed. Greetings, Dan.
-
Tamiya panel accent liner (I assume this is the wash you refer to) goes over the Tamiya gloss. If you apply it on matt finish, it will not run and it will get absorbed by the roughness of the paint and it will not get removed anymore. But note that it is not acrylic solvent based (otherwise it would dissolve the base color). It can be removed by its specific solvent or turpentine (white spirit). Basically, it works as an oil color wash. Please try it out on a sample before. Dan.
-
Nice job on the instrument panel. Greetings, Dan.
-
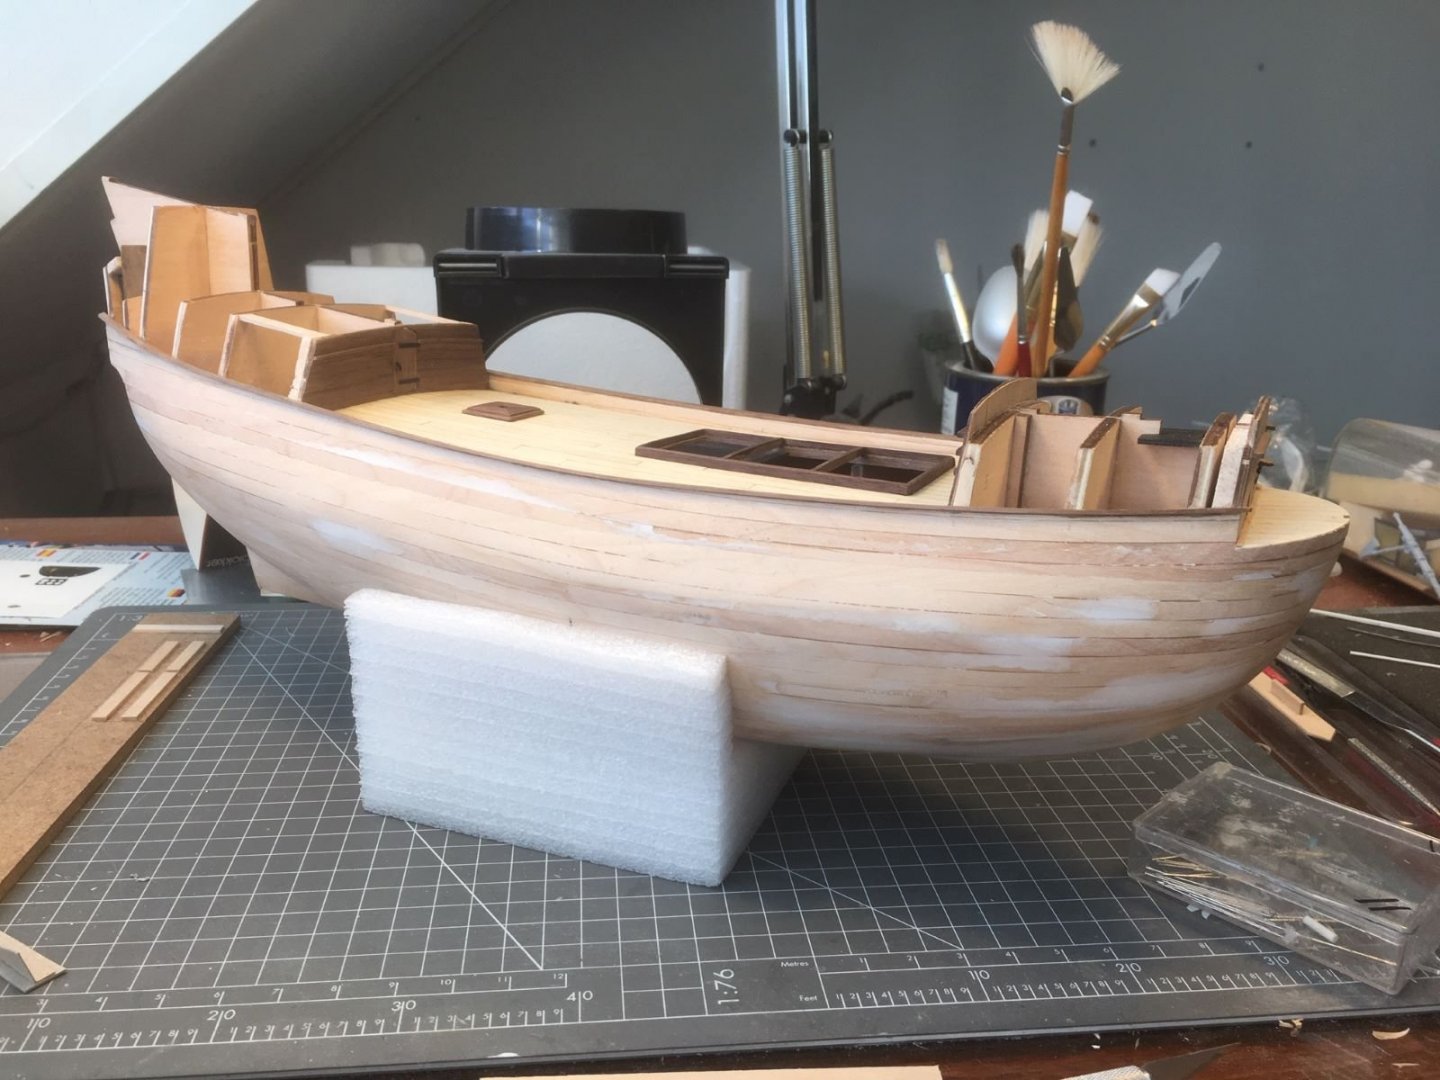
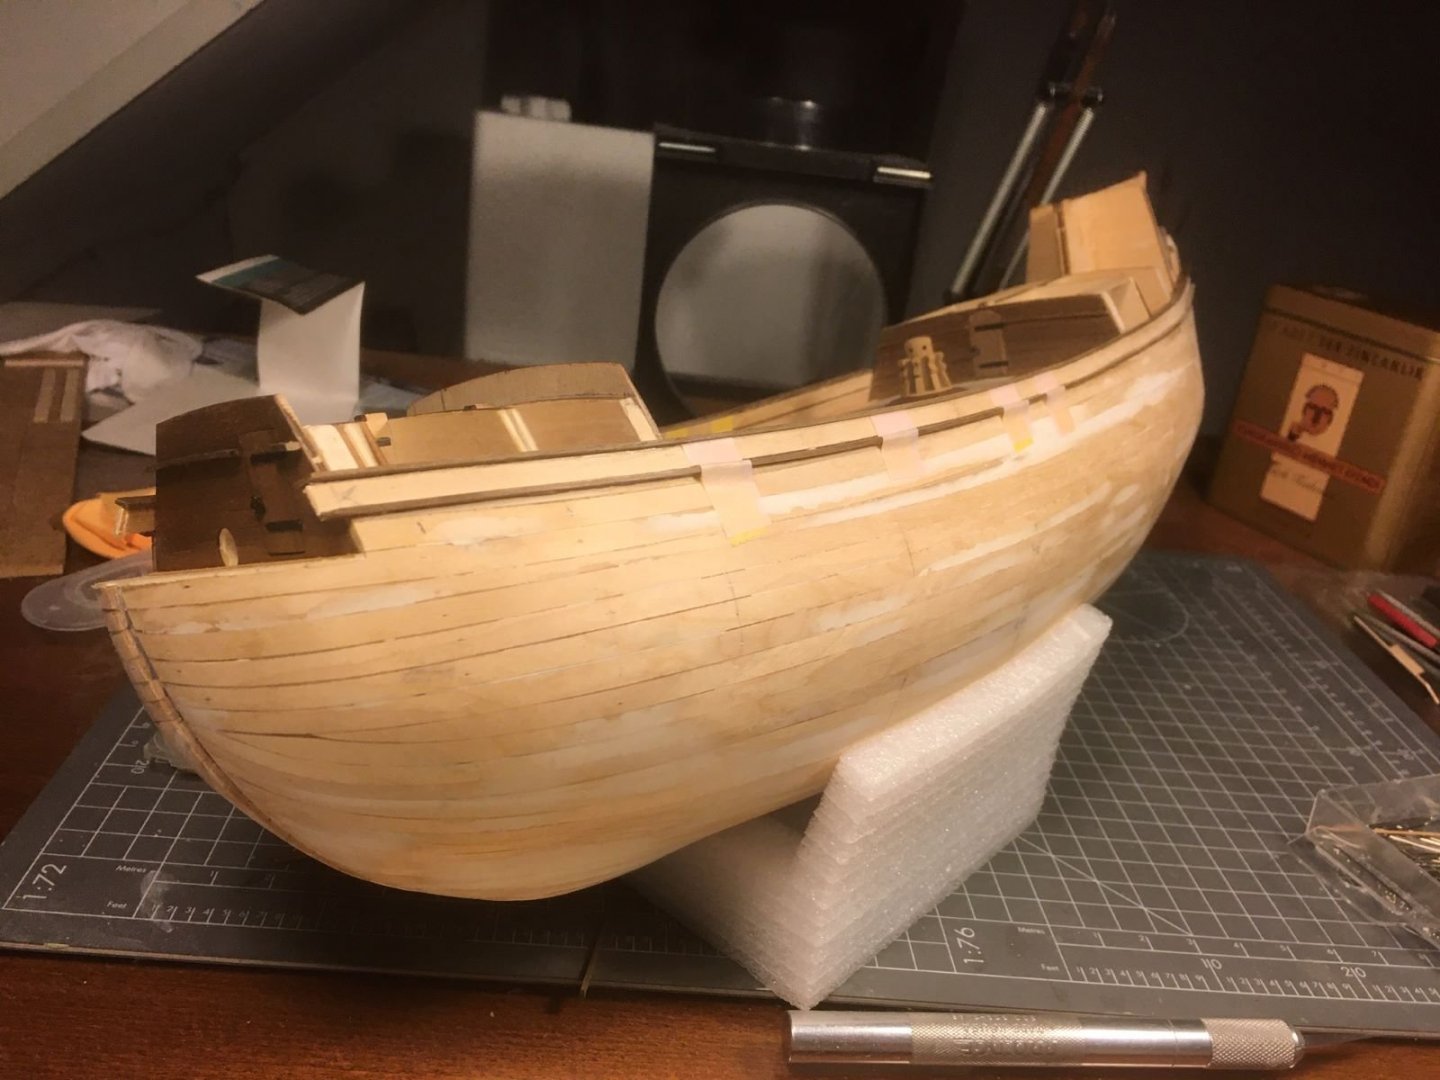
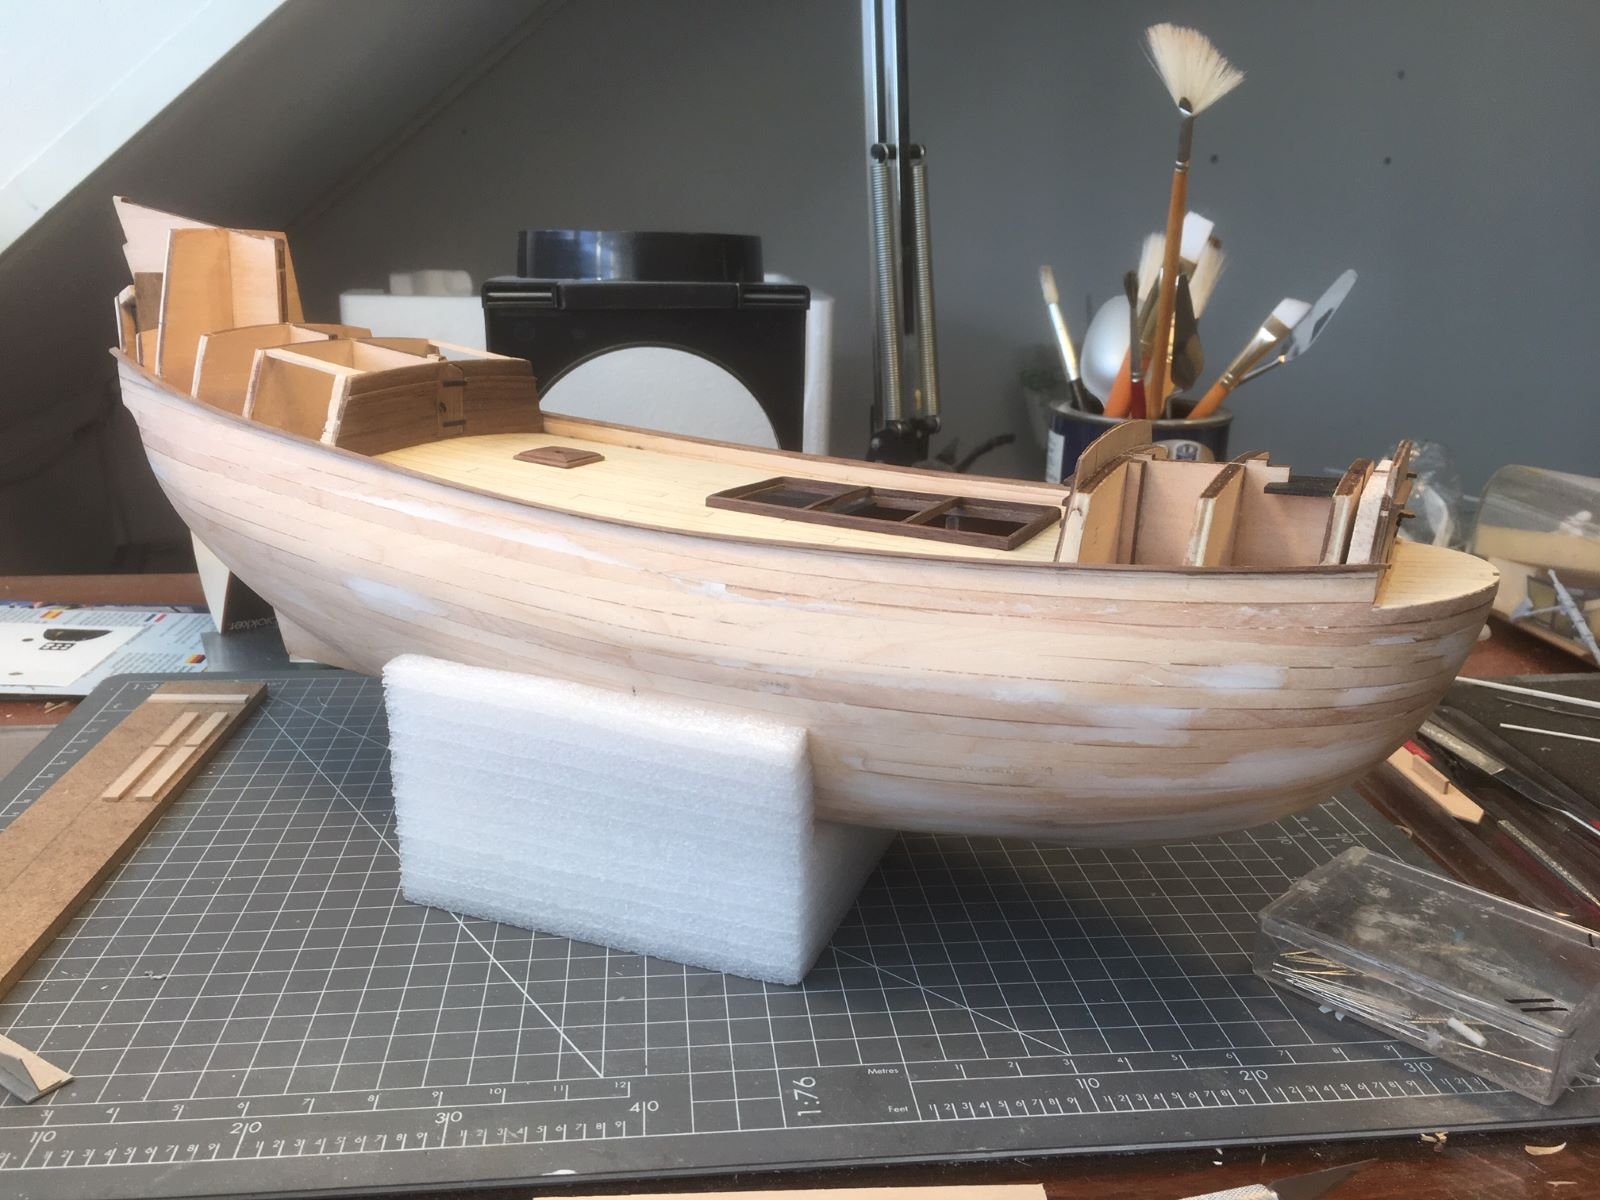
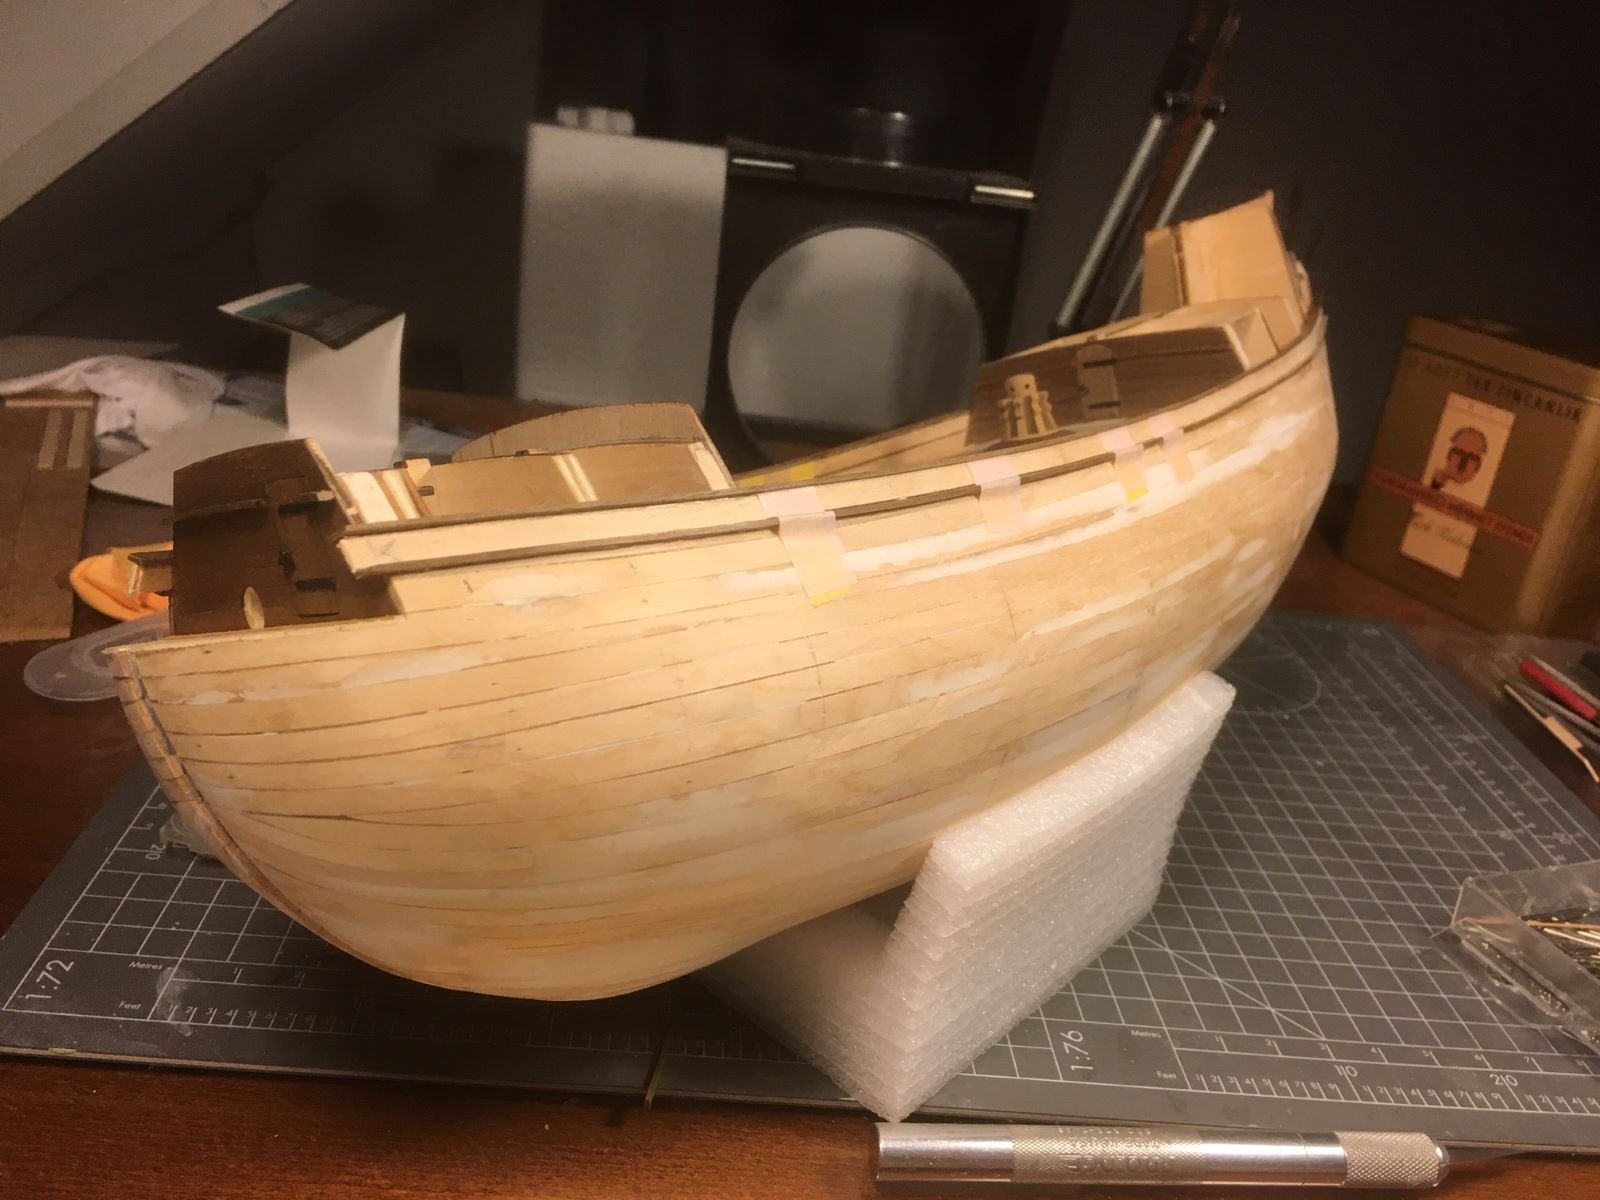
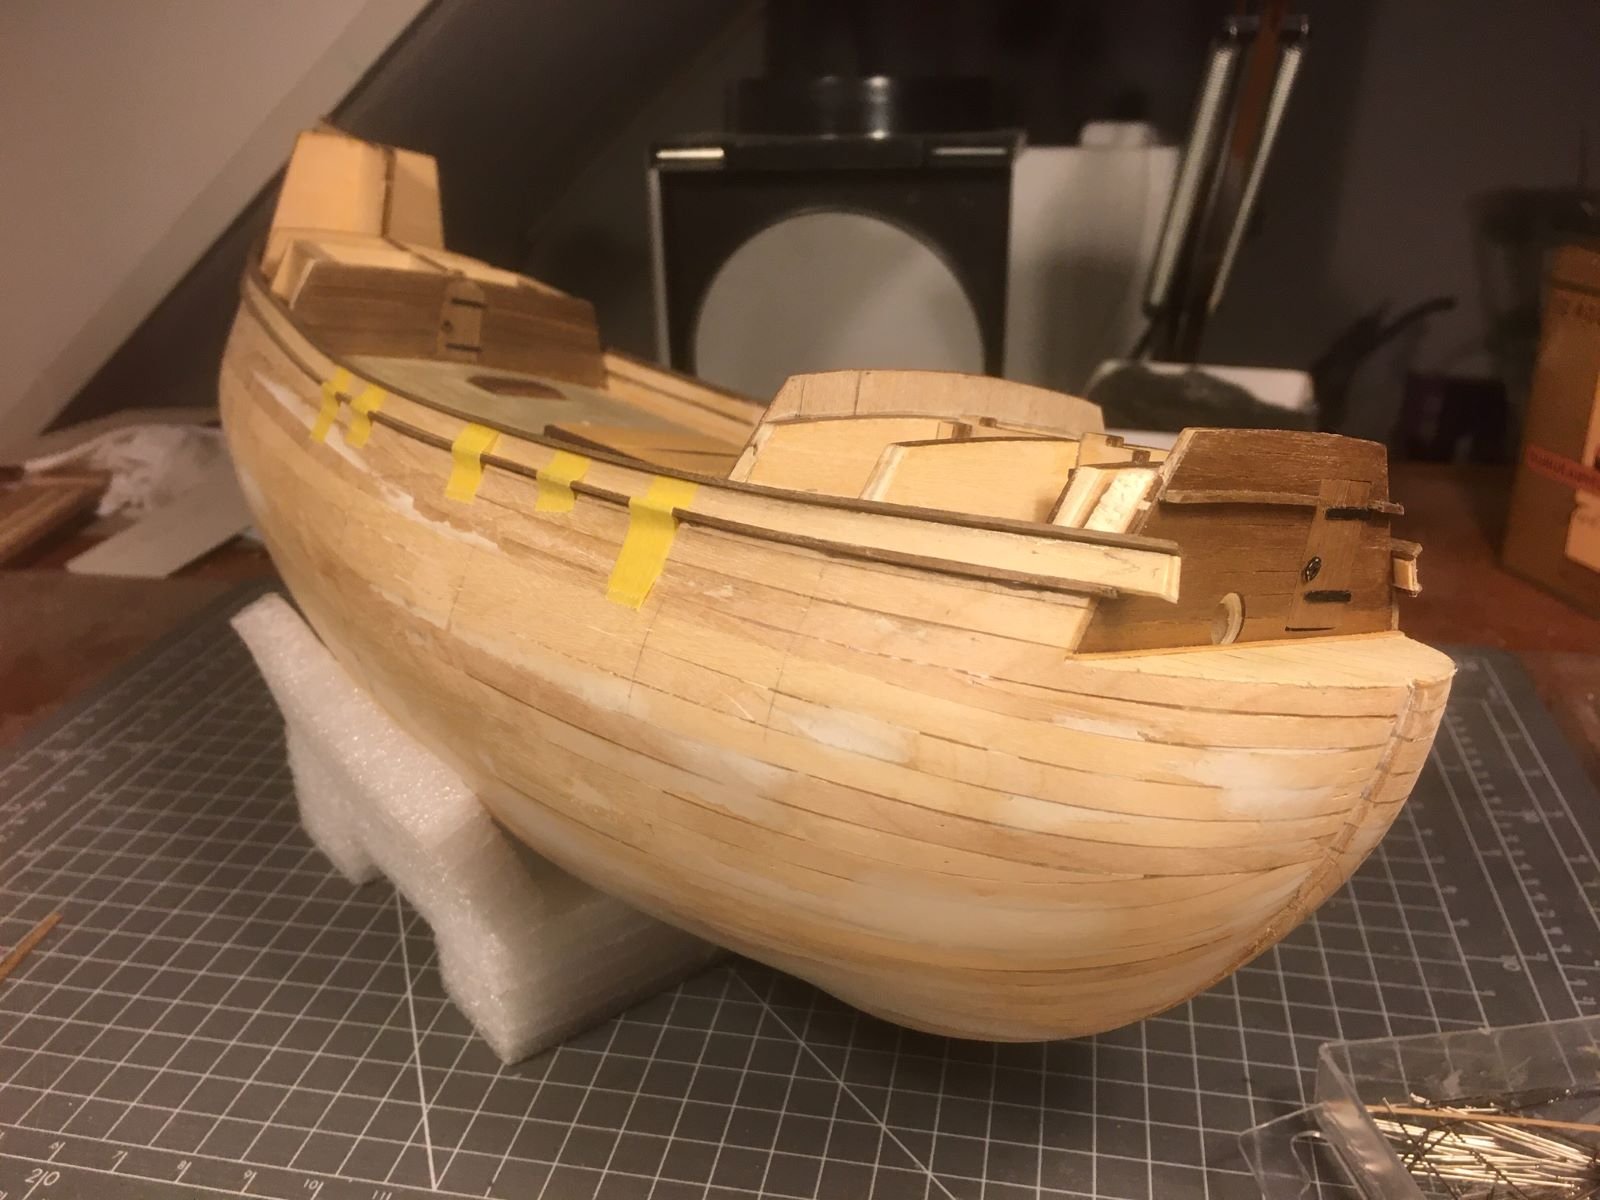
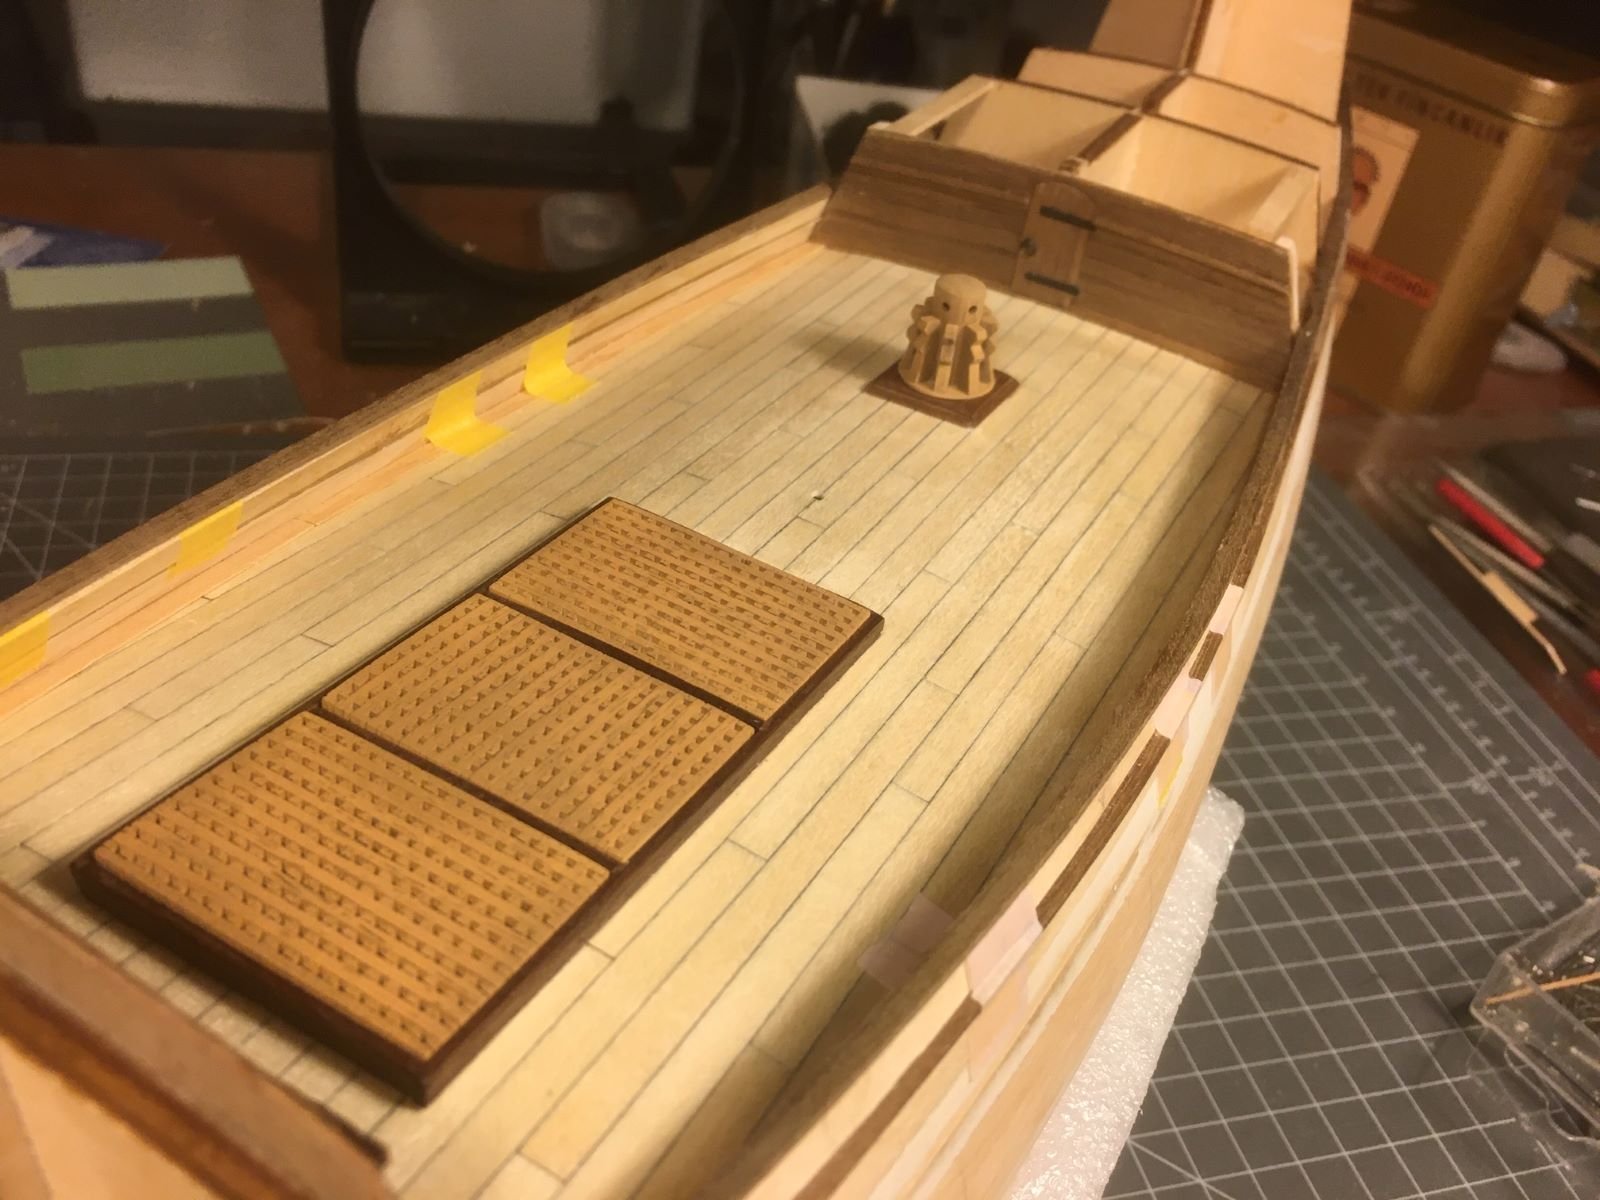
Hi, I glued a small wale (I do not know the term for it) on top of the upper edge of the planking that I recreated as shown in my post above: Then, I went up with few strakes to form the bulwarks. I had to shape the planks quite precisely because I do not have any bulkhead extensions to support them. I interposed pieces of tape between the planks for those parts that I will remove later. Inside, I prepared the capstan and glued additional strips along the borders of the deck. Work proceeded very slowly, but I hope to speed it up during the festivity break. Until next time, Dan.


- 42 replies
-
- 6
-
-
- first build
- artesania latina
- (and 1 more)
-
I have done it in reverse, i.e. gluing the lower part first and then, after removing the centering pins, the two upper halves making sure that the junction at the root is tight and nice. Certainly, you might have a small mismatch between the parts of some fraction of mm. At the tips, it is not a problem because few strokes of a sanding stick will solve the issue. The most visible drawback is the alignment of the panel lines at the leading edge and the holes of the guns. For the panel lines, I anyway end up with rescribing them because I putty and sand the junction at the leading edge. The holes of the guns should not be a problem in your case because I understand that they are located on separate parts to be glued in place afterwards. Good luck, Dan.
-
I like how you managed to highlight details on the otherwise dark colored surfaces. Very nice build! Greetings, Dan.
-
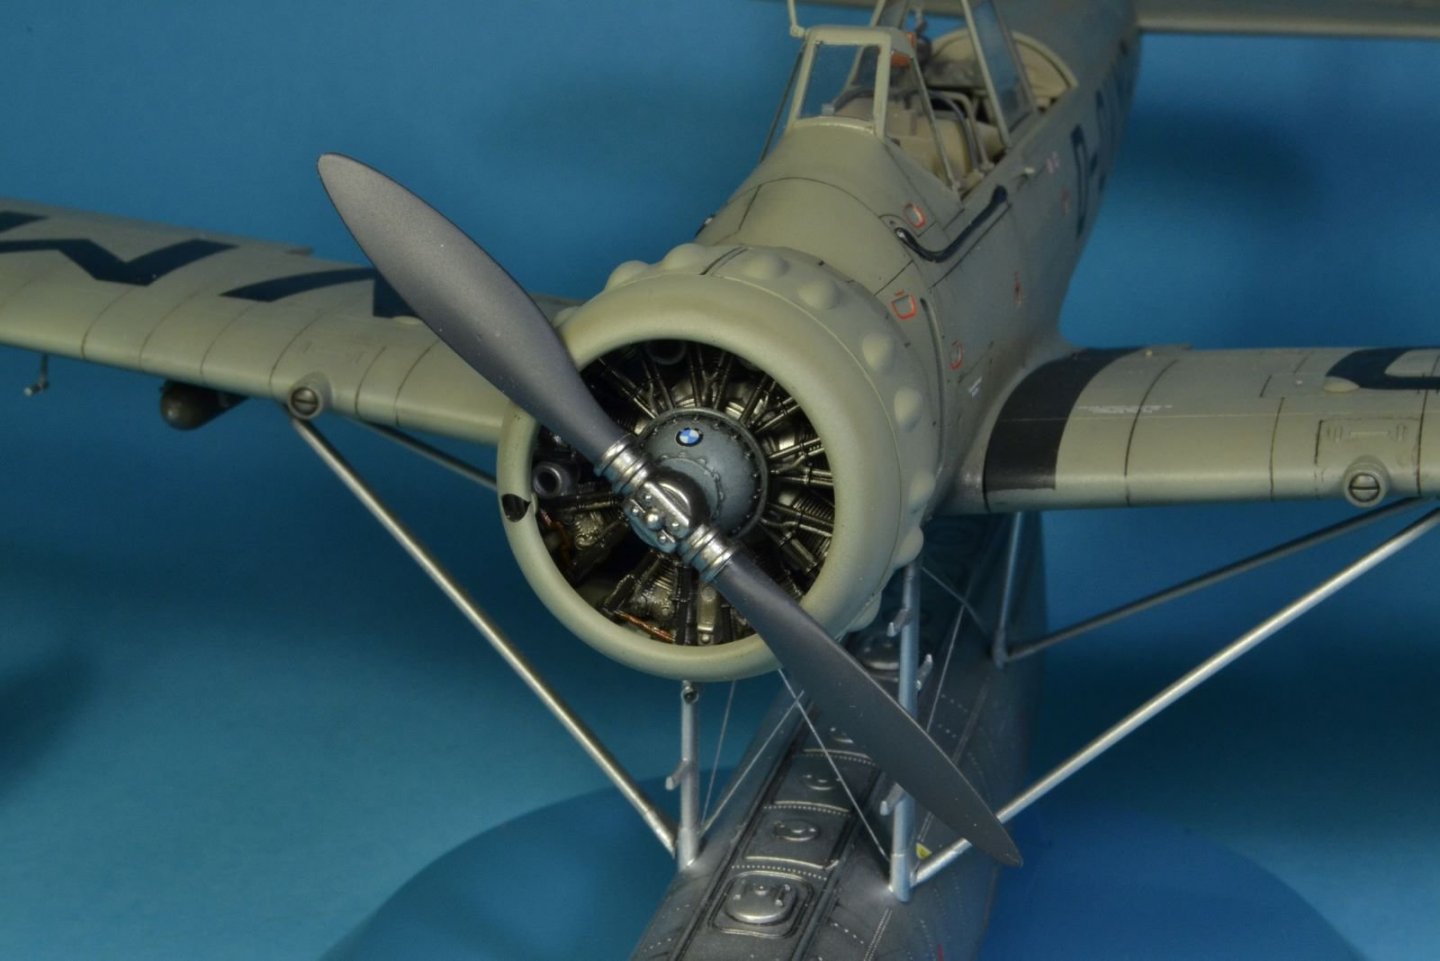
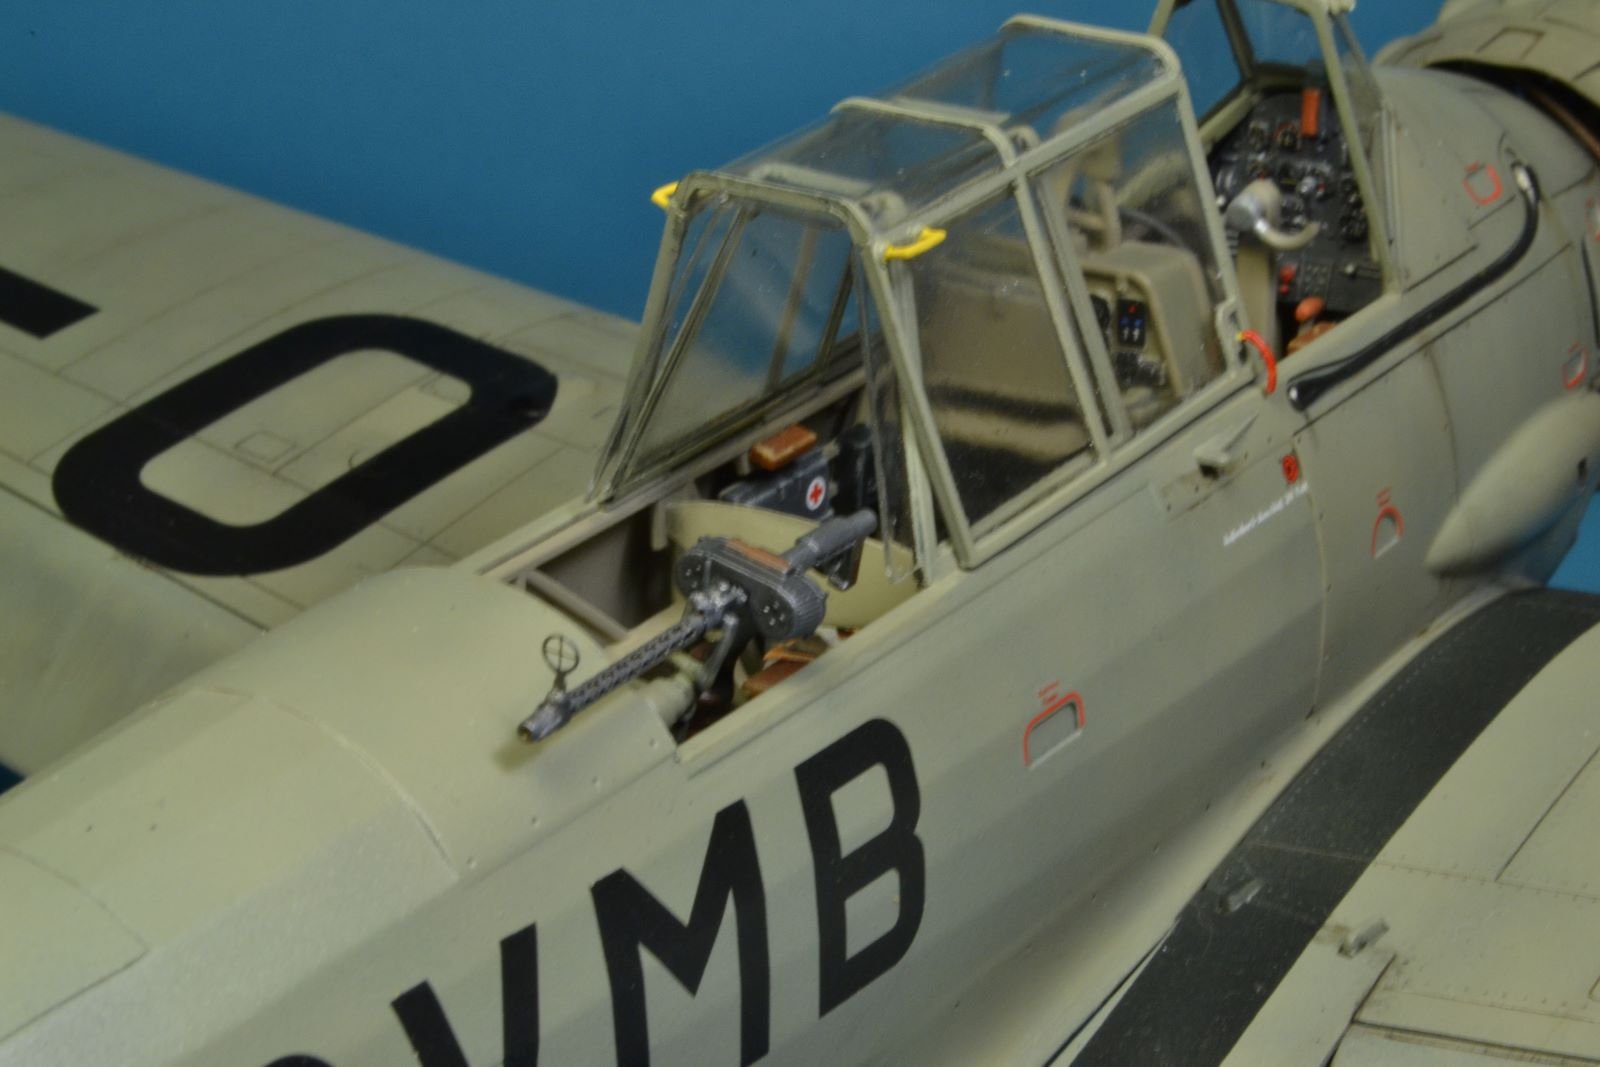
Nice to have the hand grip carved out. If you leave it open, you might want later to extend also the footstep located on the underside of the wing root. The two were mechanically linked (the hand grip opened when the footstep was extended). Best regards, Dan.
-
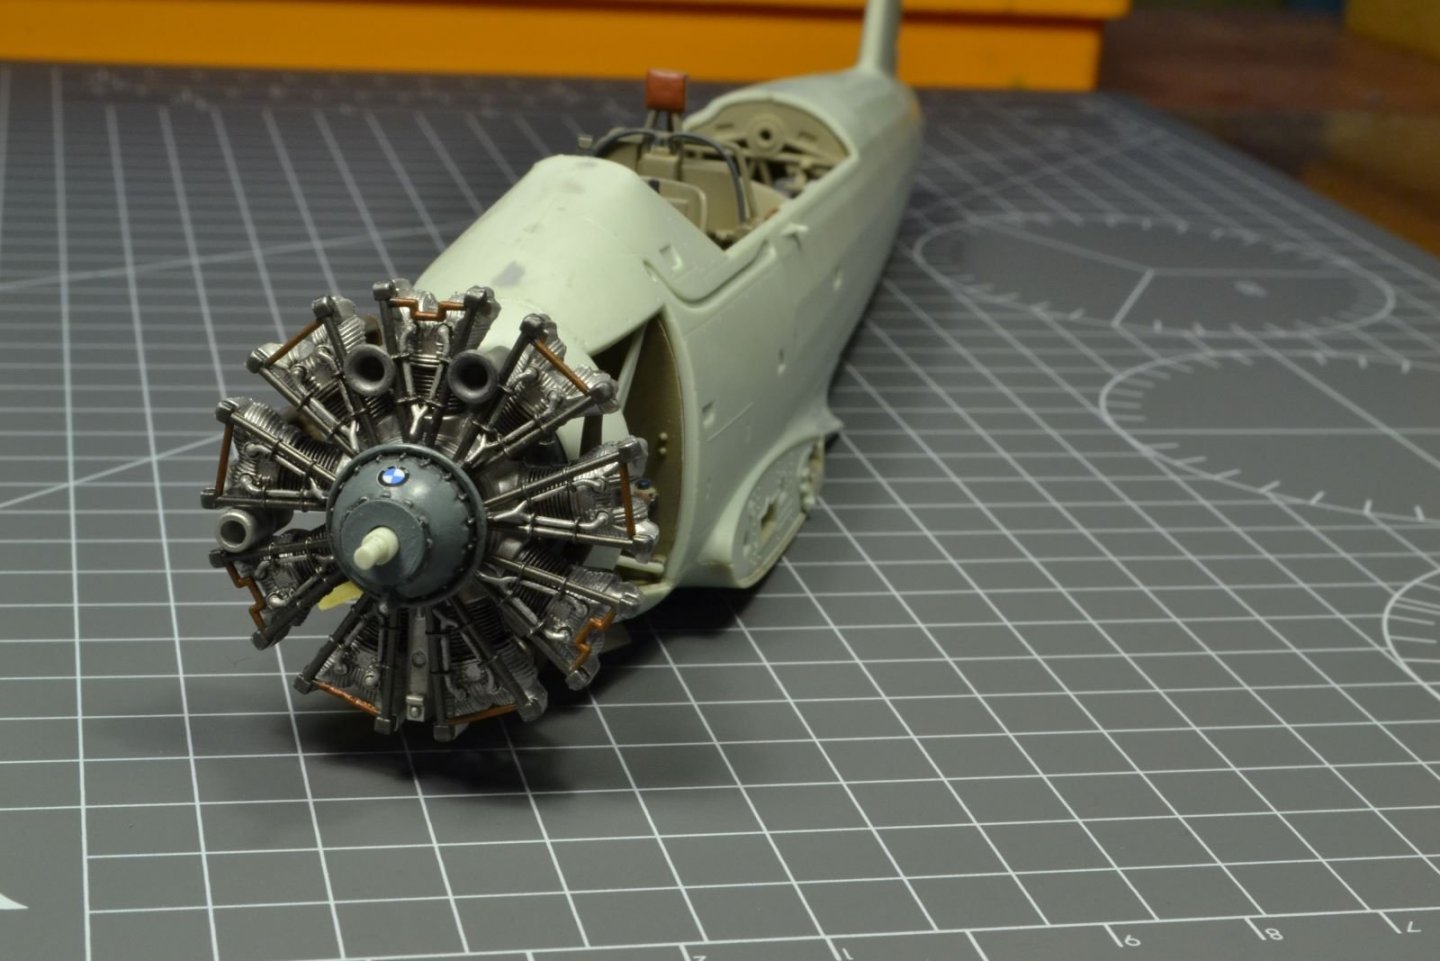
Yes, the engine was a radial BMW 132, one of the engines that have a place in the aviation history. Thanks for your comment. Dan.
-
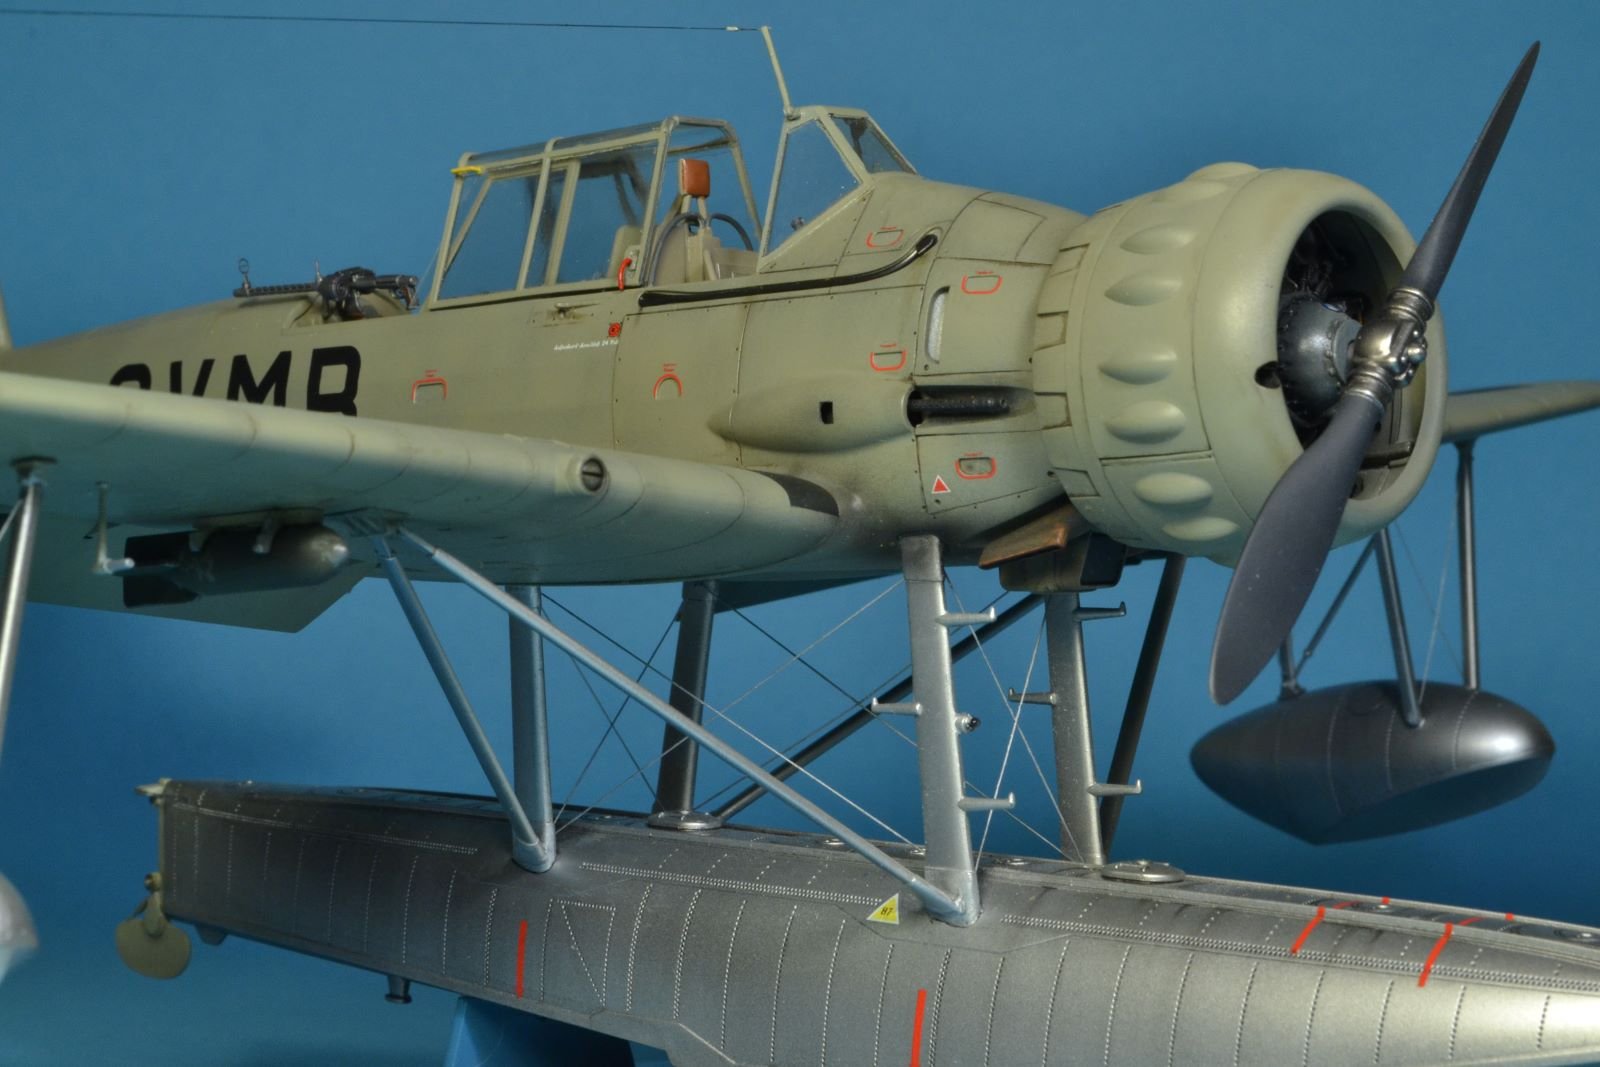
Dear all, first of all let me to collectively thank you all for your benevolent comments about my model, I am really flattered by them 🙏. Few answers: @Egilman, @Old Collingwood, @popeye the sailor, as I wrote in my other build, I will restart with my planes when I have finished with the 'dirty' sanding job on my ship. When I will start a new build, it will be only a pleasure to share it with all of you. @Javlin, one advise for when you will start your kit; the kit is very good, but the transparent pieces are broken down in several parts in an odd way and I could not assemble them satisfactorily. Eventually, I sourced an aftermarket replacement set. @Landlubber Mike, the engine is the one coming with the kit. It is a good reproduction and need only some cleaning. The metallic parts are painted with Vallejo metallic of various shades and then details are highlighted with Tamiya panel liner. I thank you for your comment, but don't be too harsh with yourself 😉, everyone has his own way of enjoying the hobby and there is not a right or wrong way of doing that. In my case, I start with looking carefully at period pictures of the subject trying to understand the way a specific aircraft ages and then trying to copy that. Furthermore, practice, as for any other field, from playing an instrument to making drawings or doing mathematics, is a key for skill improvement. Greetings to all, Dan.
-
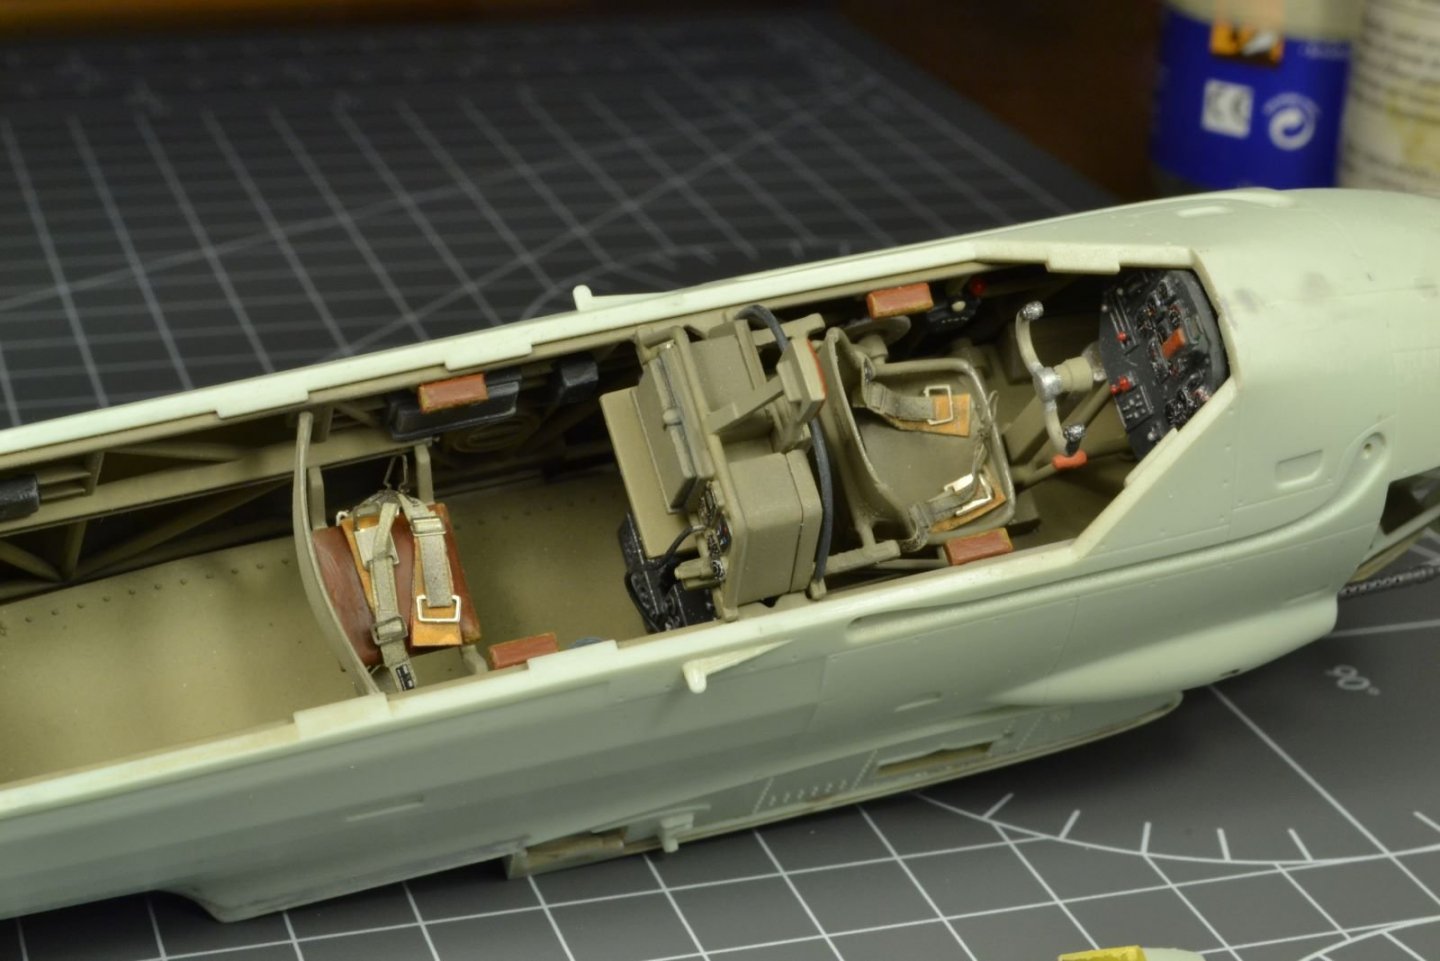
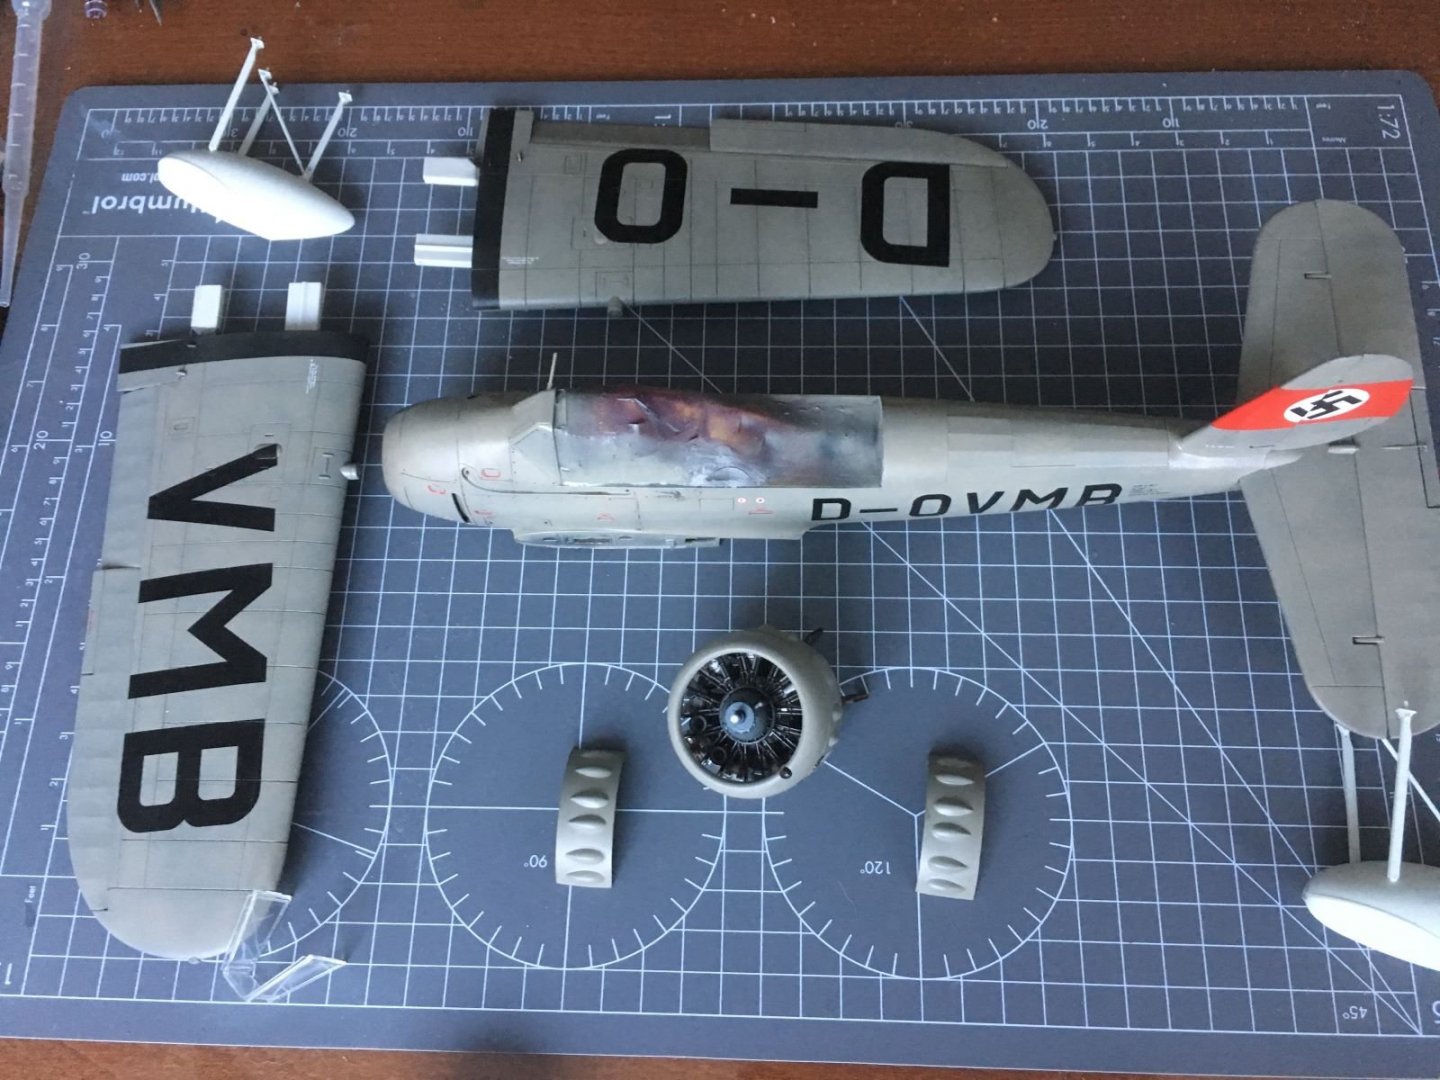
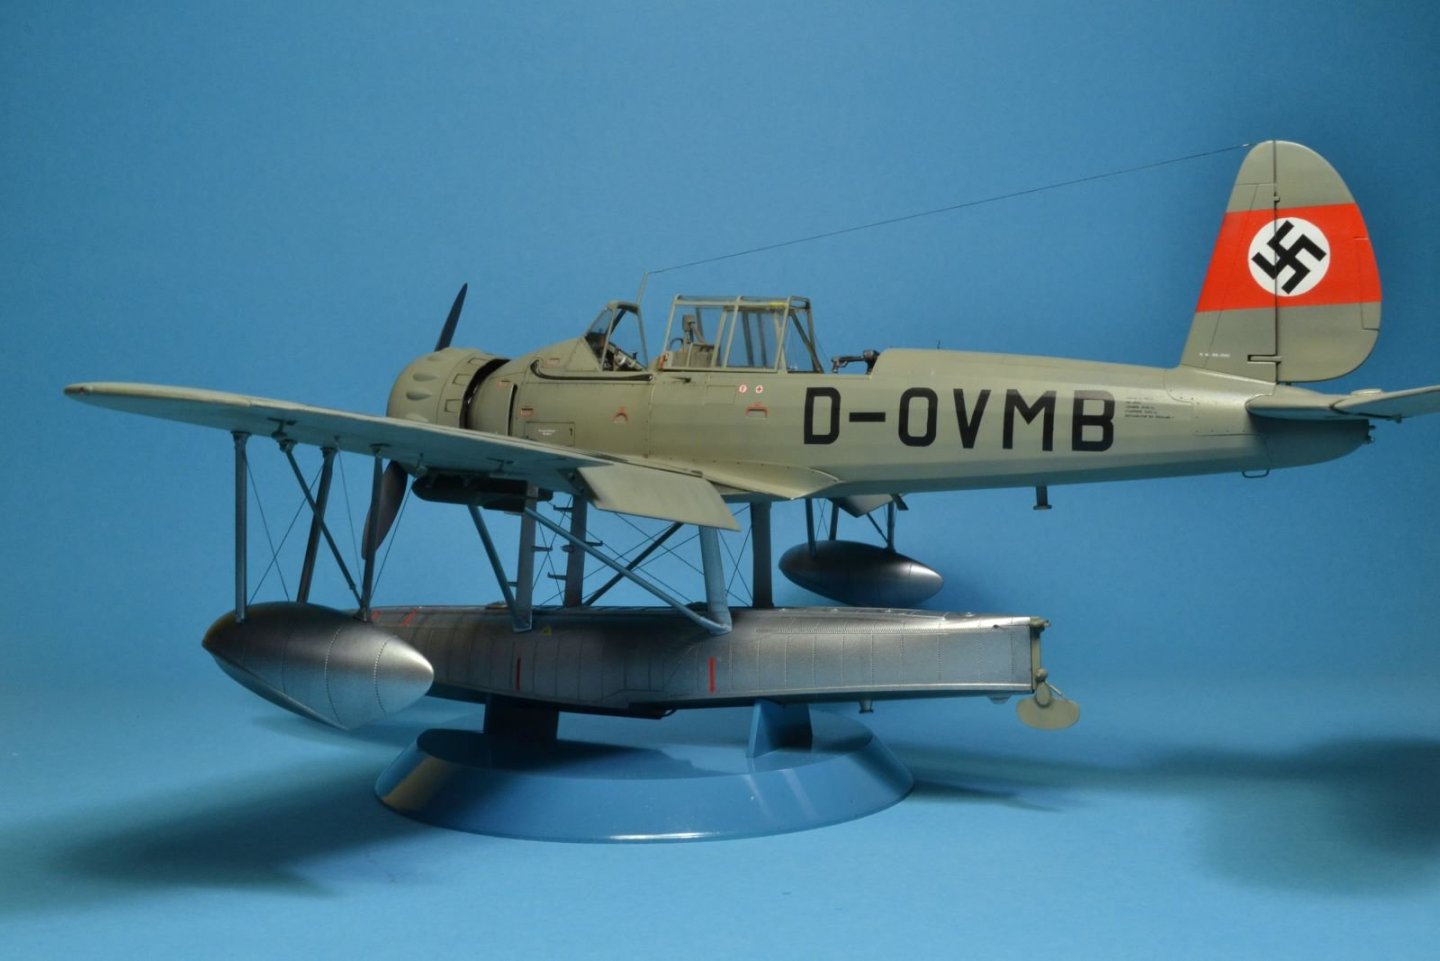
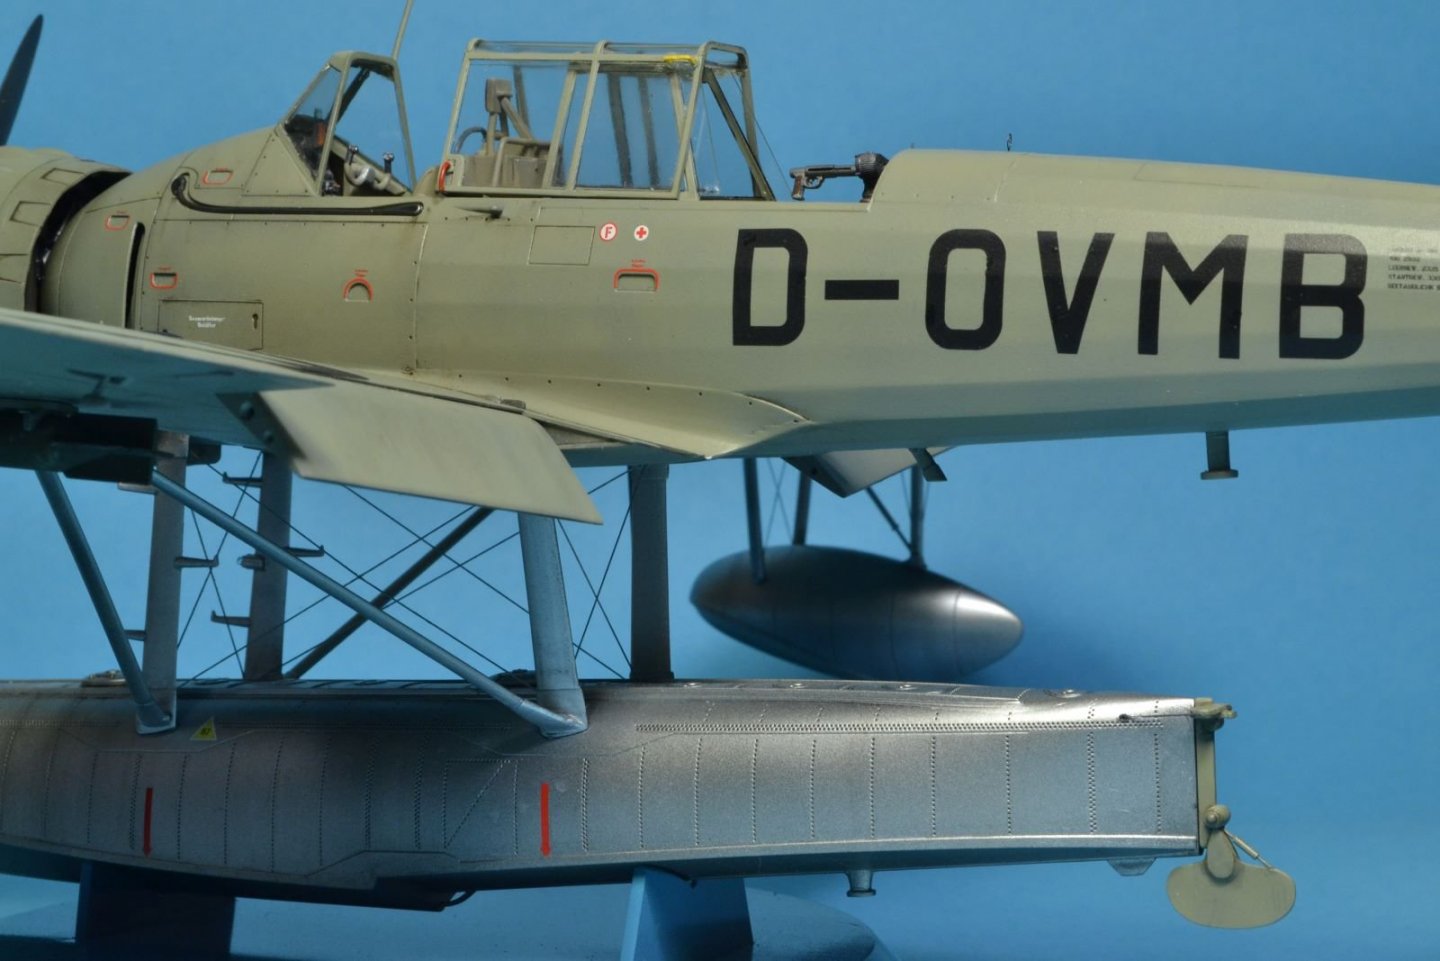
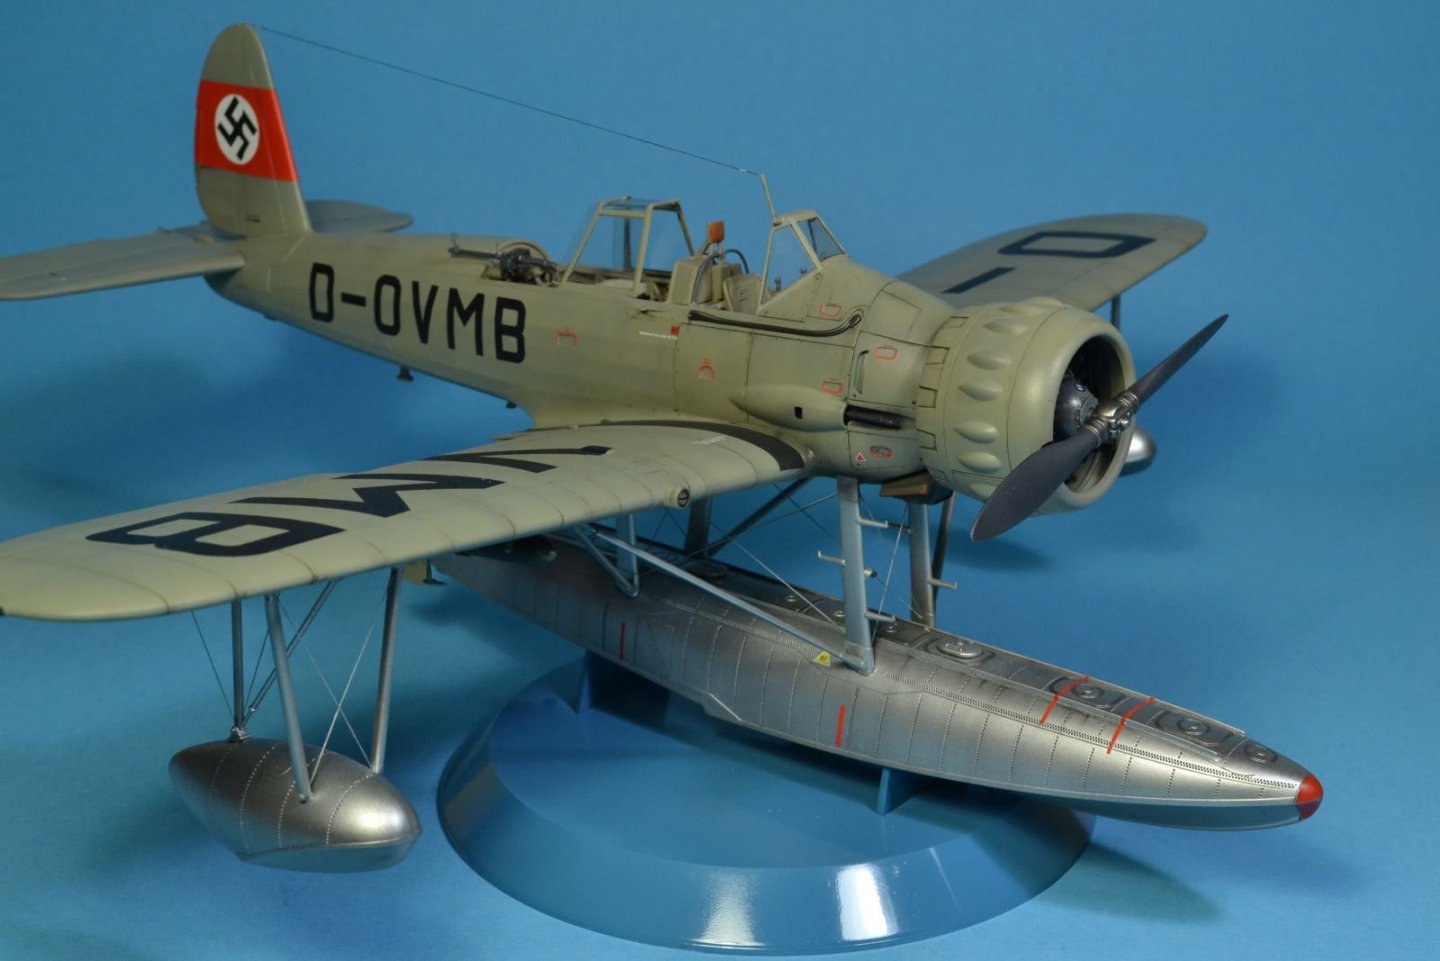
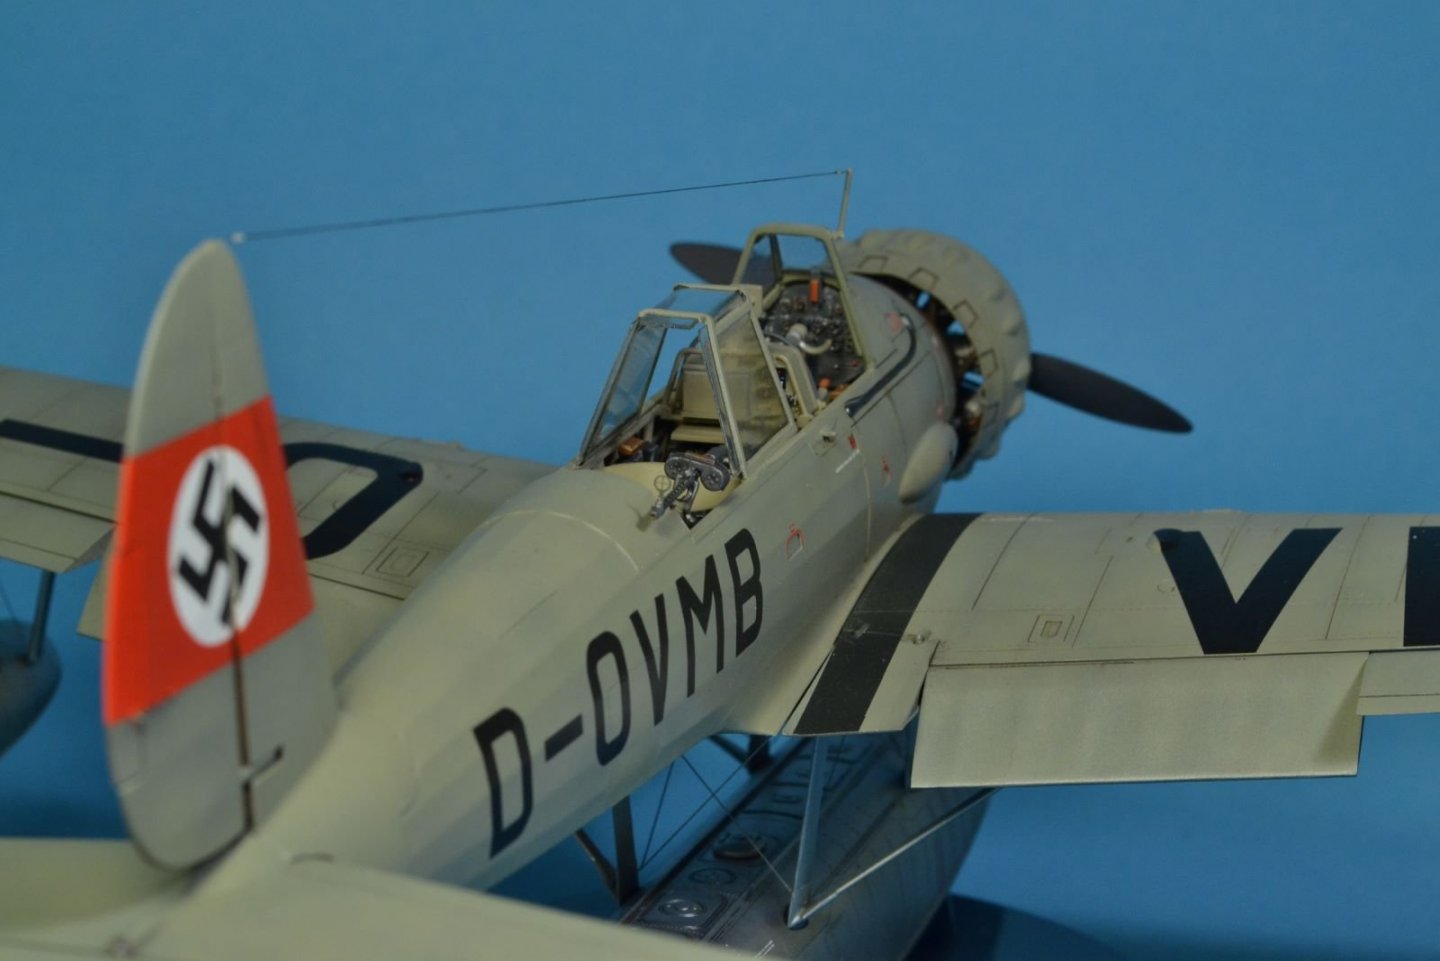
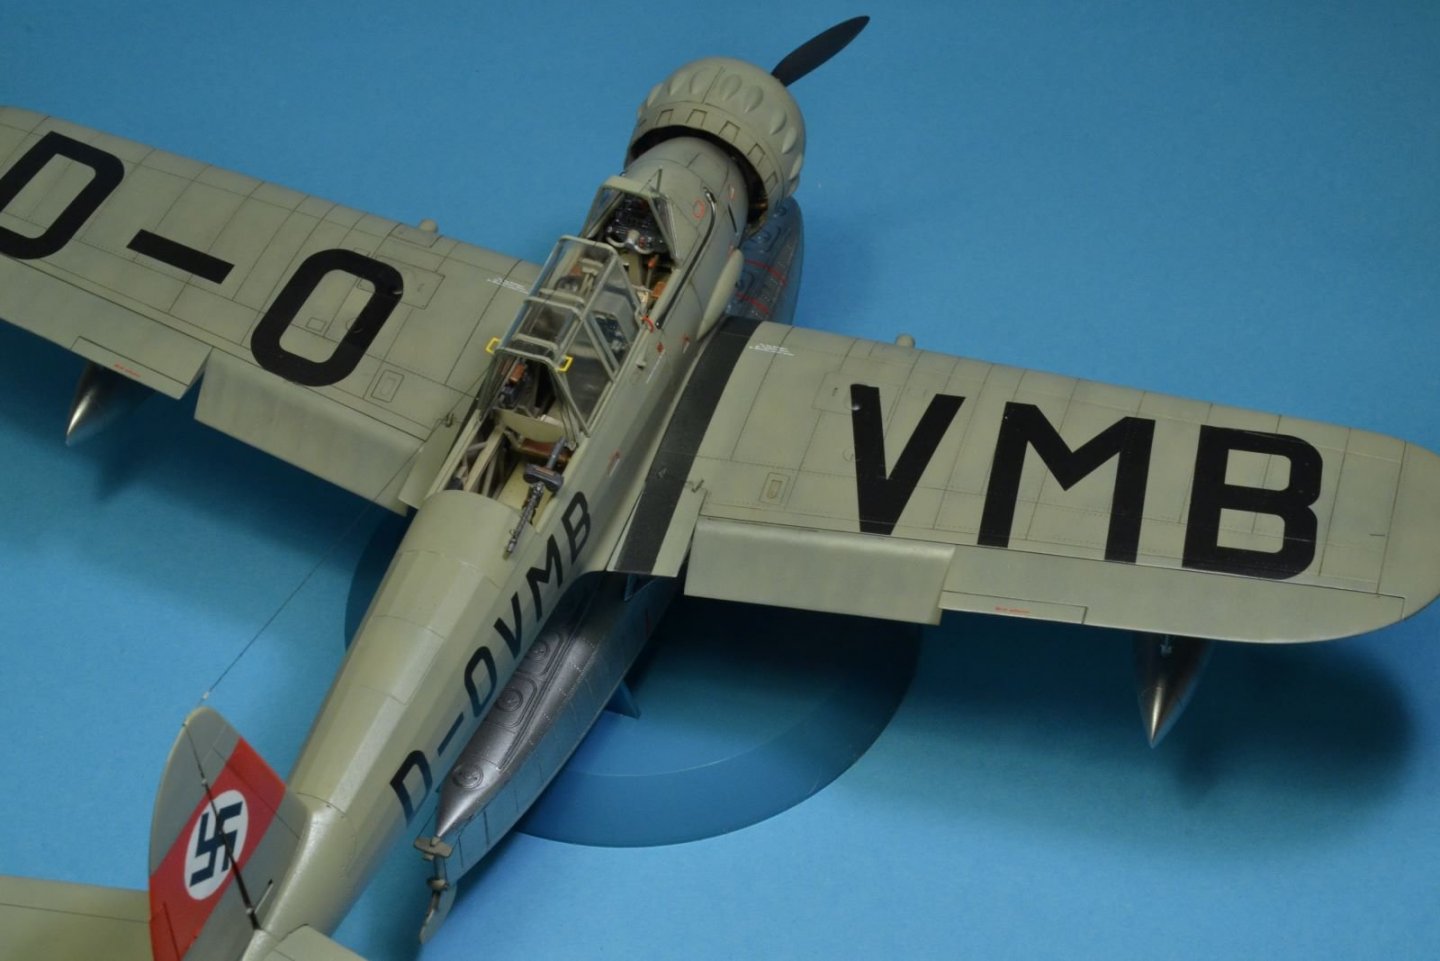
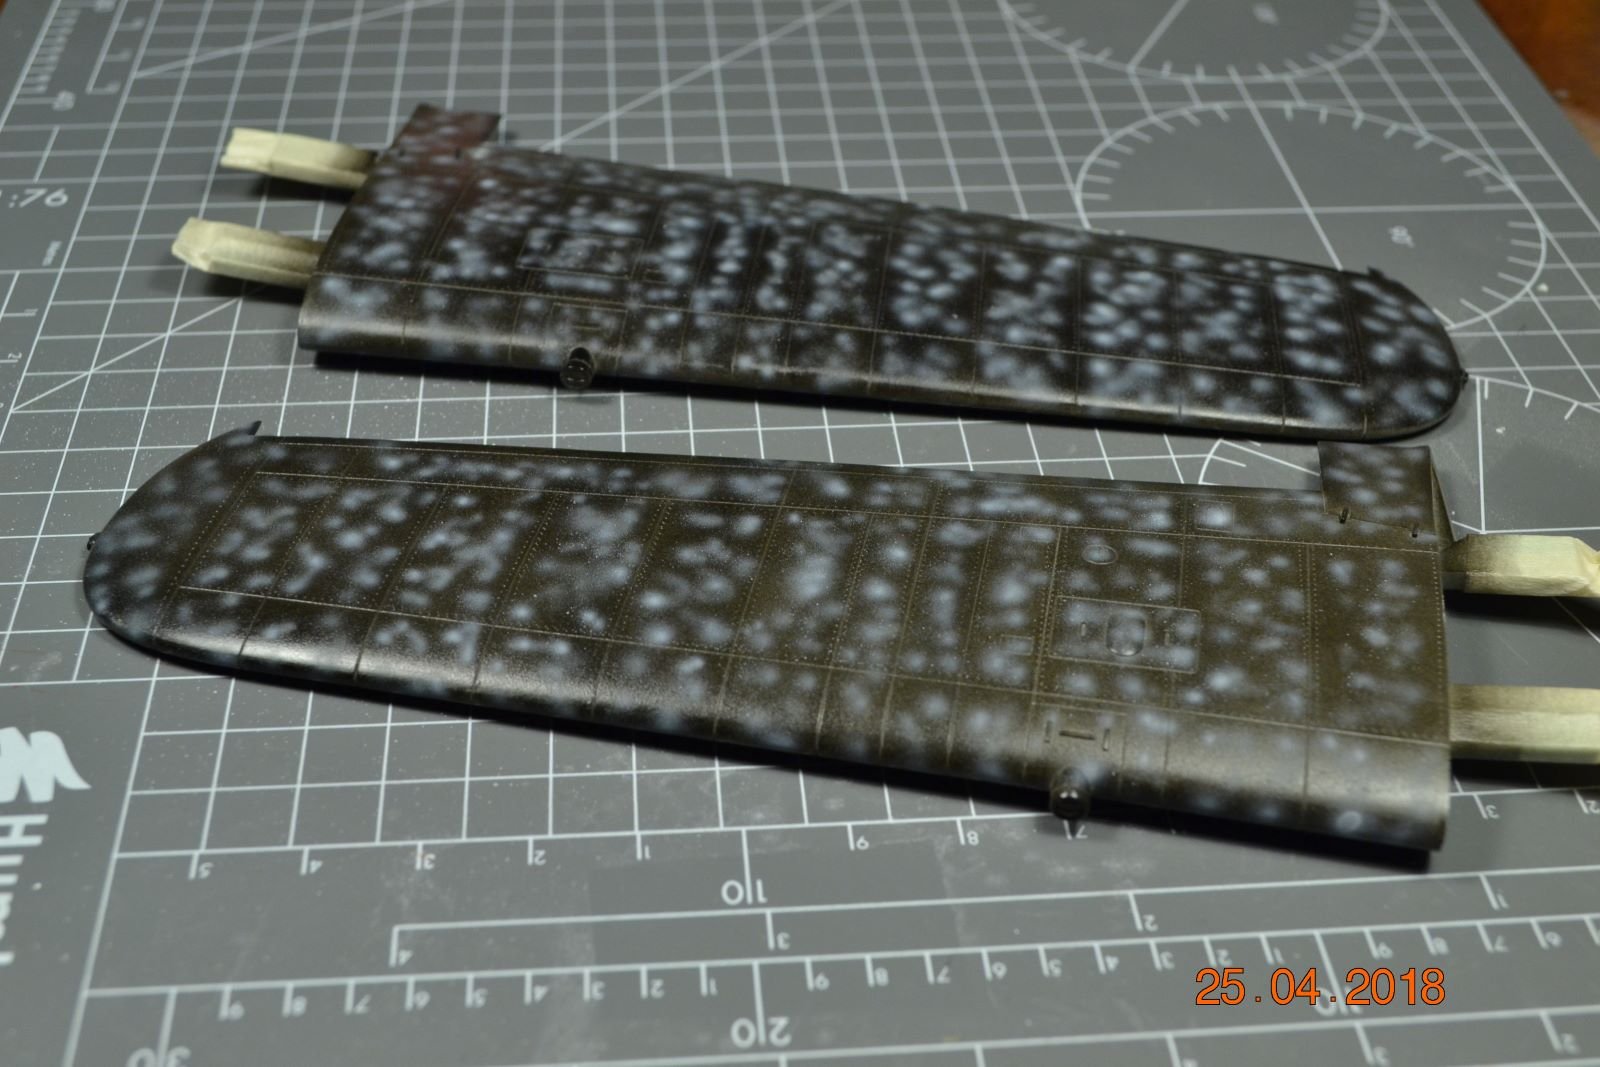
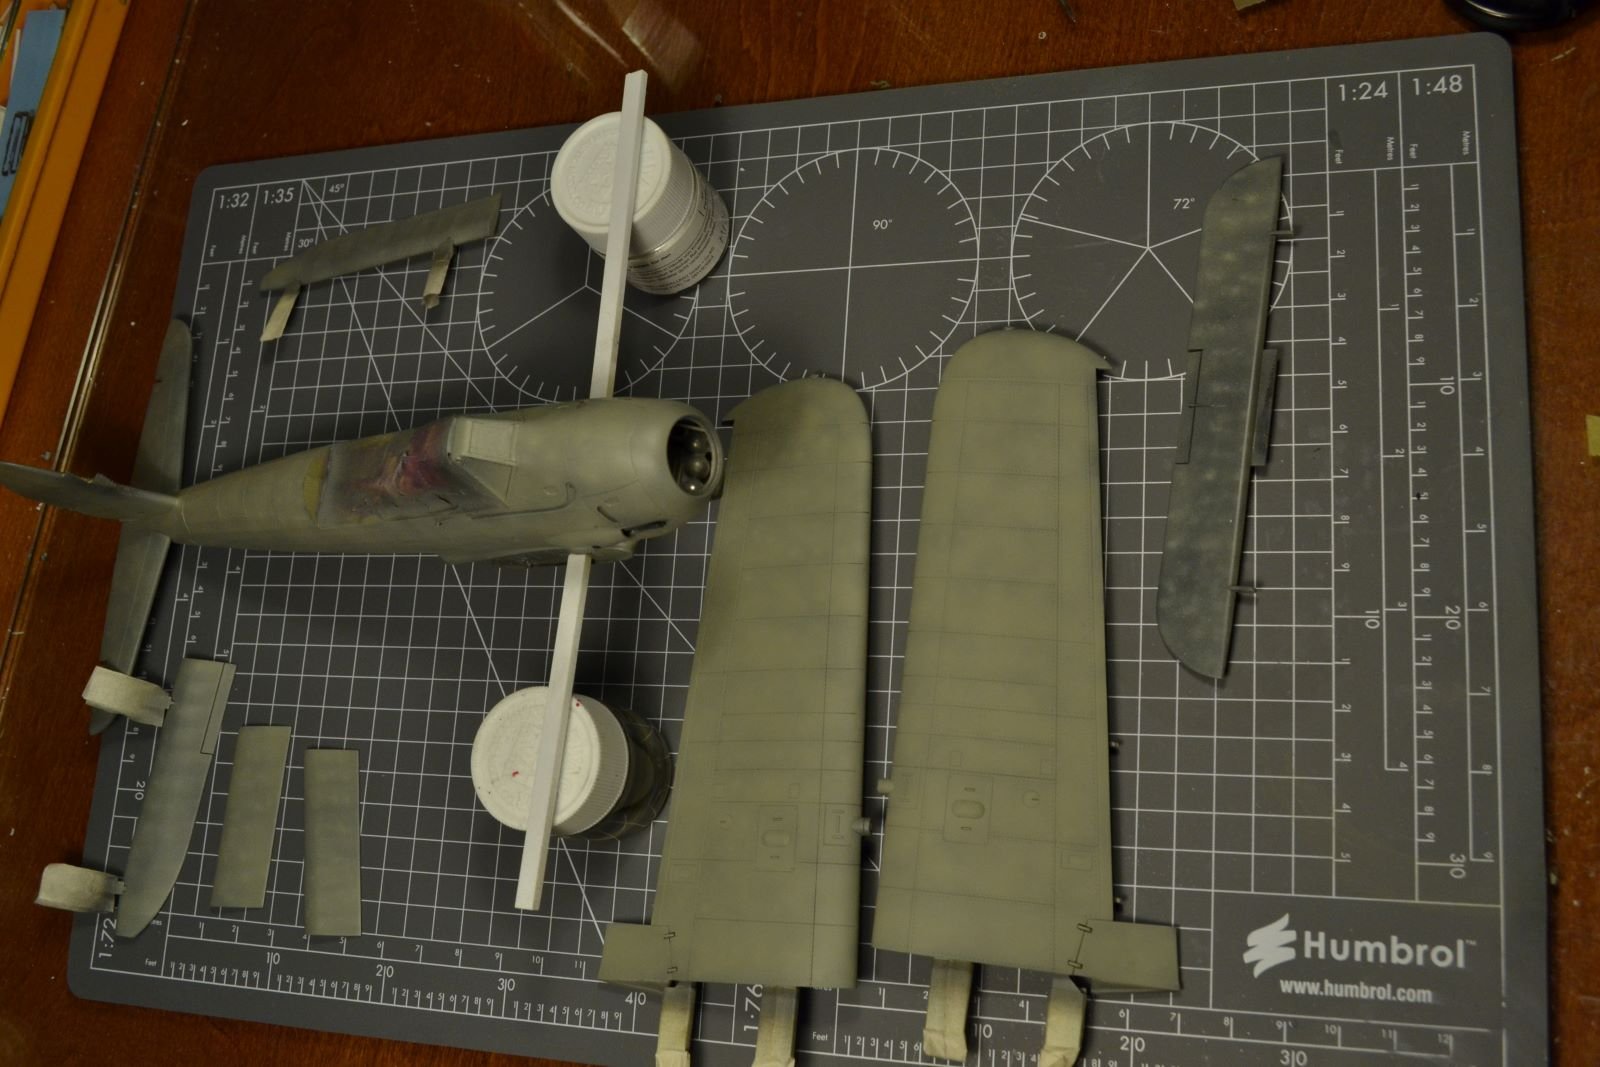
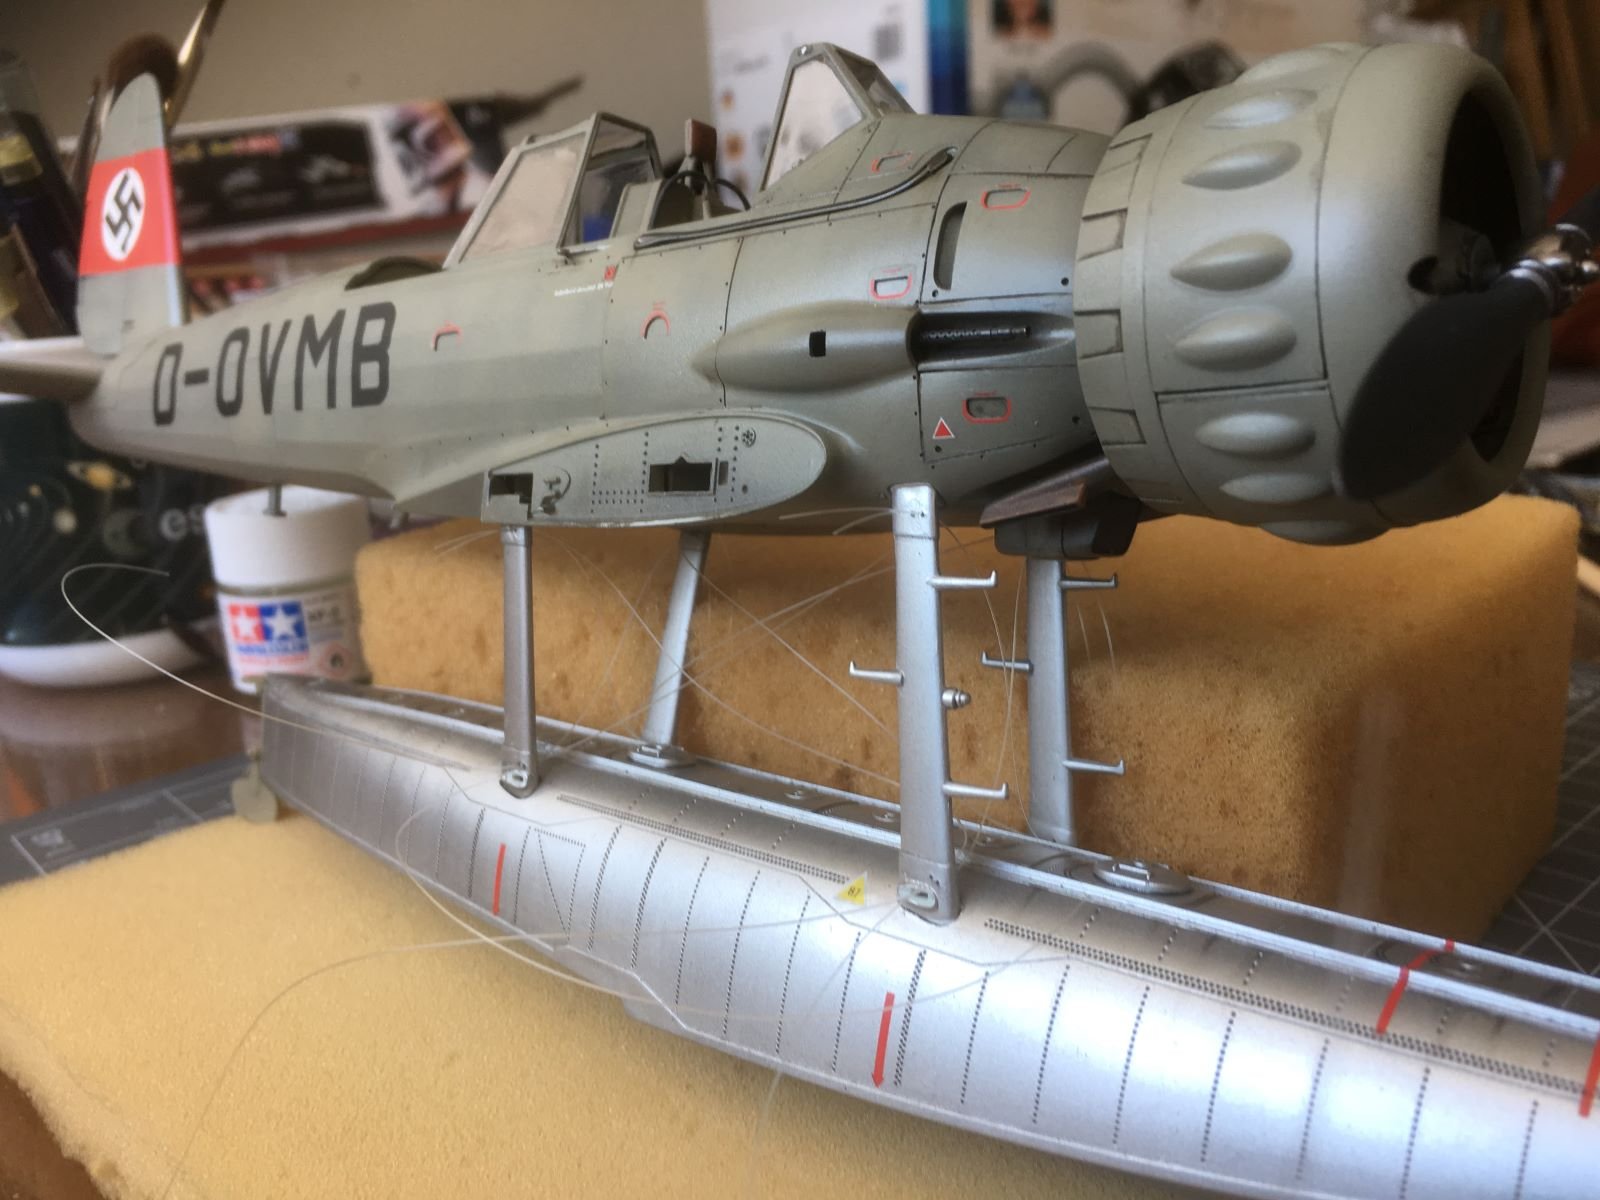
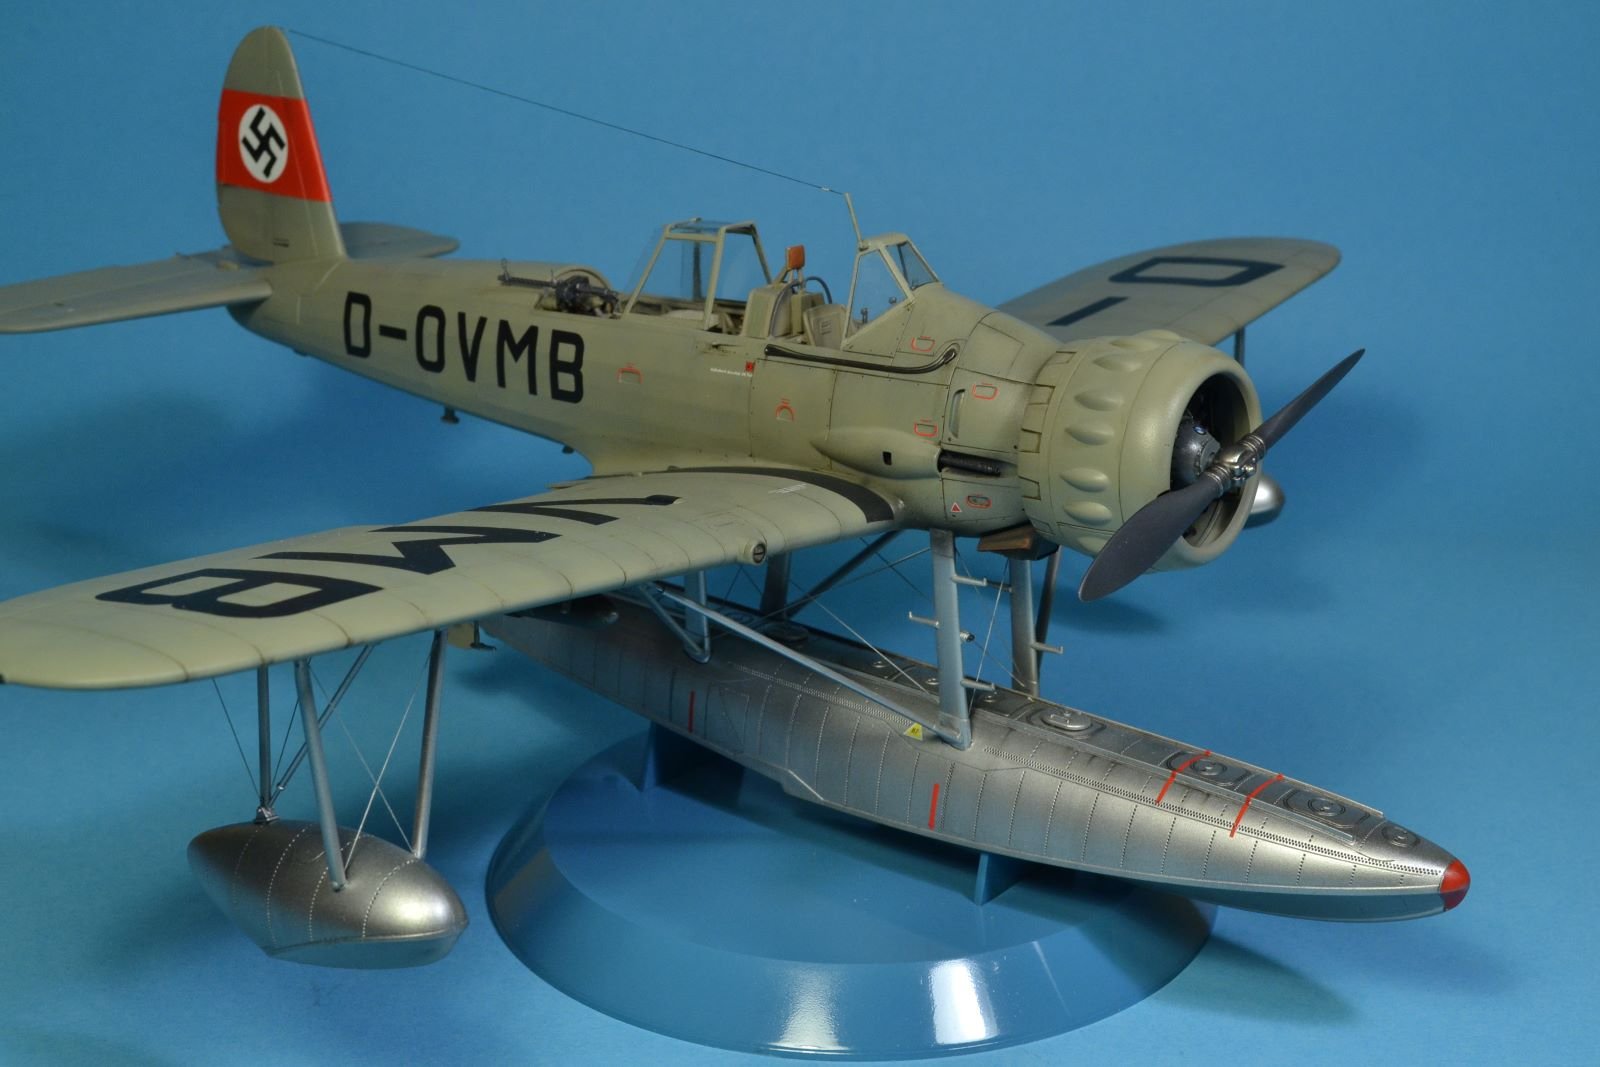
Dear all, seen the many positive feedback that I received from you about my Spitfire 1/48 in my previous post (thanks again), I decided to upload another build of mine finished a couple of years ago (I am a slow builder not only for ships, but also with aircraft) for your consideration. As written in the title, the subject is the Arado 196B, a much less known version than the Arado 196A, built from the good Revell kit in 1/32 scale. With few additions, the kit builds into an impressive model. This time I included also few picture from the build log. This time, the challenge was to make an interesting rendition of an aircraft with a dull uniform grey livery. I riveted the panels and applied a pre-shading as shown in the following. The mottled pre-shading was followed by several light coats of a Tamiya grey mix that reproduced the RLM 02. After assembly, I used washes of oil colors to weather and highlight panels and surface details. Exhaust stains were airbrushed. I hope you like it. Comments and critiques are welcome. Greetings to all, Dan.
resized.thumb.JPG.46e7a4ff644a4bbd816a0a0d9876b3dd.JPG)


- 12 replies
-
- 17
-
-
Hi, @Lt. Biggles, for searching aftermarket parts, try to visit 'Scalemates.com'. It is a huge data base of virtually all kits in circulation. You search for a specific kit, f.i. 'Hurricane Airfix 1/48' and you get all the kits built of this type and at the end all decals and parts associated to it. Good luck, Dan. PS. Sorry, I have just seen that Scalemates was already suggested above!
-
Spitfire MK I by Danstream - Tamiya - 1/48 - PLASTIC
Danstream replied to Danstream's topic in Completed non-ship models
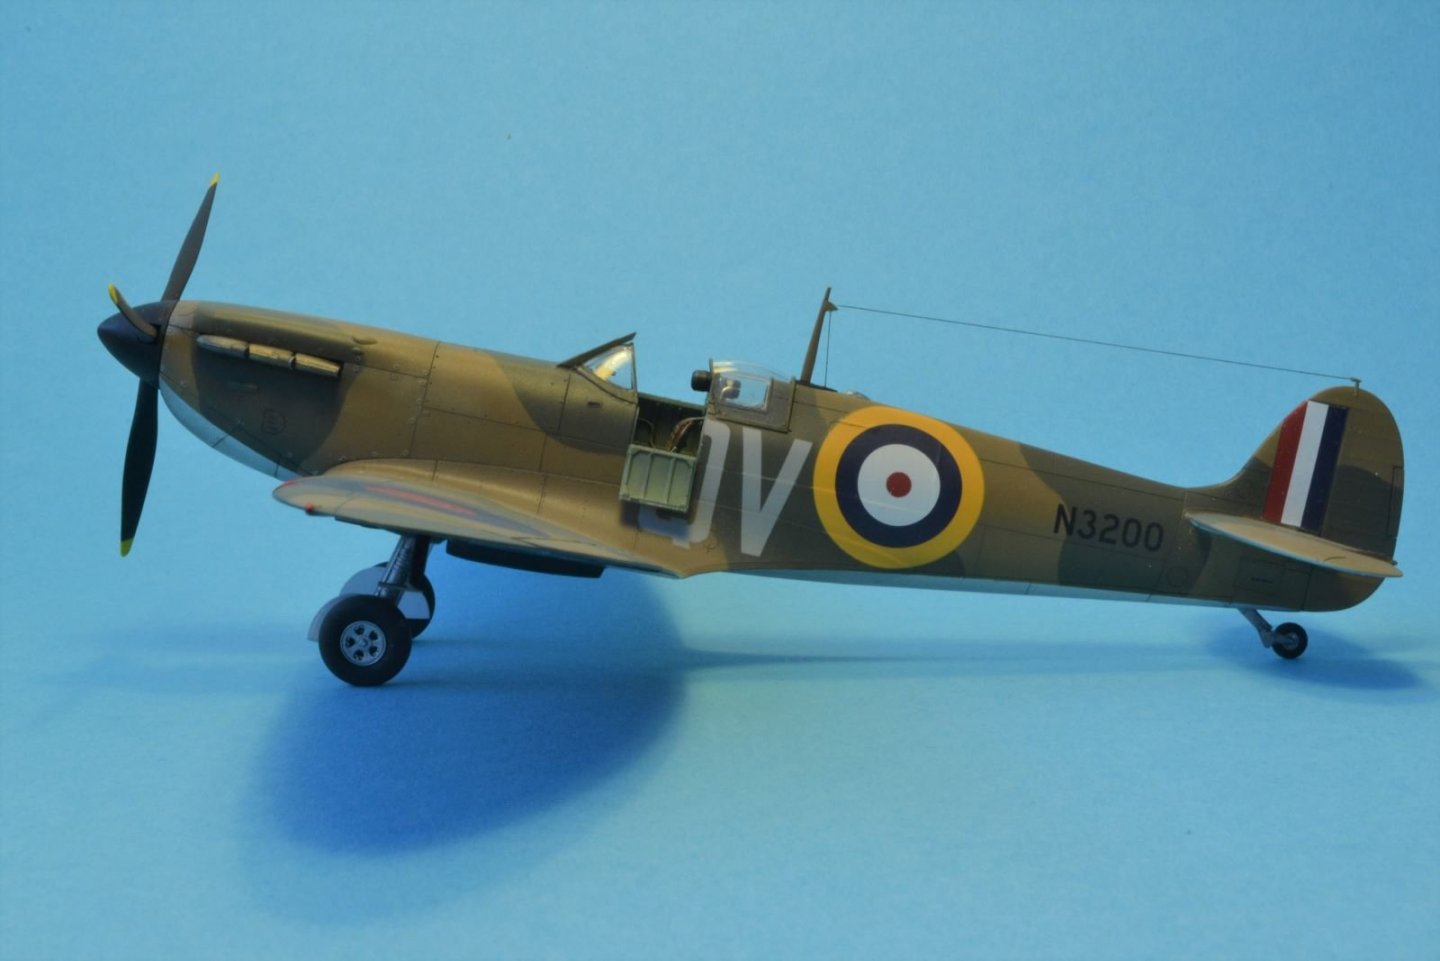
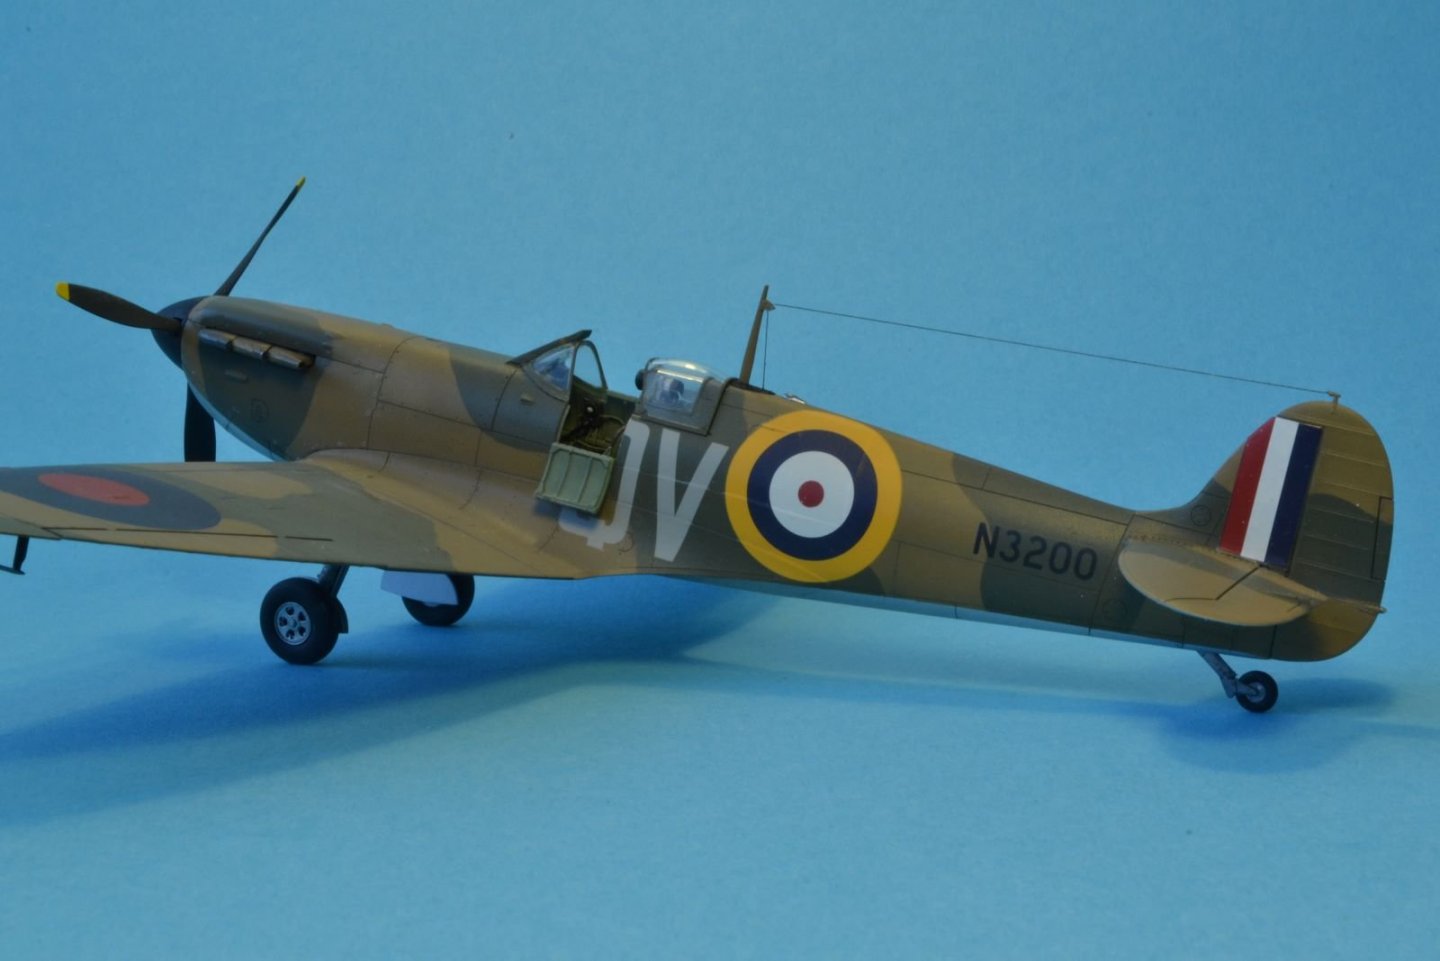
Thanks, @Javlin. I am not sure I understood your question. Panel lines were highlighted with Tamiya panel liner and panels weathered by pre-shading, post-shading and oil colors. I avoided chipping because they would have distracted from the other weathering and also because aircraft not always have chippings in their operative life. Thanks, Dan. -
Spitfire MK I by Danstream - Tamiya - 1/48 - PLASTIC
Danstream replied to Danstream's topic in Completed non-ship models
Many thanks for the likes and the comments! @Old Collingwood, at present my production of aircraft models is on hold because of my Mayflower build. In addition, my Mayflower required so far a lot of sanding with associated production of dust which is not ideal for the airbrushing activity. Probably I will restart with aircraft in a short while. However, if not considered out of place, I can post pictures of few more finished aircraft in the next future in other separate posts. Thanks and greetings to all, Dan. -
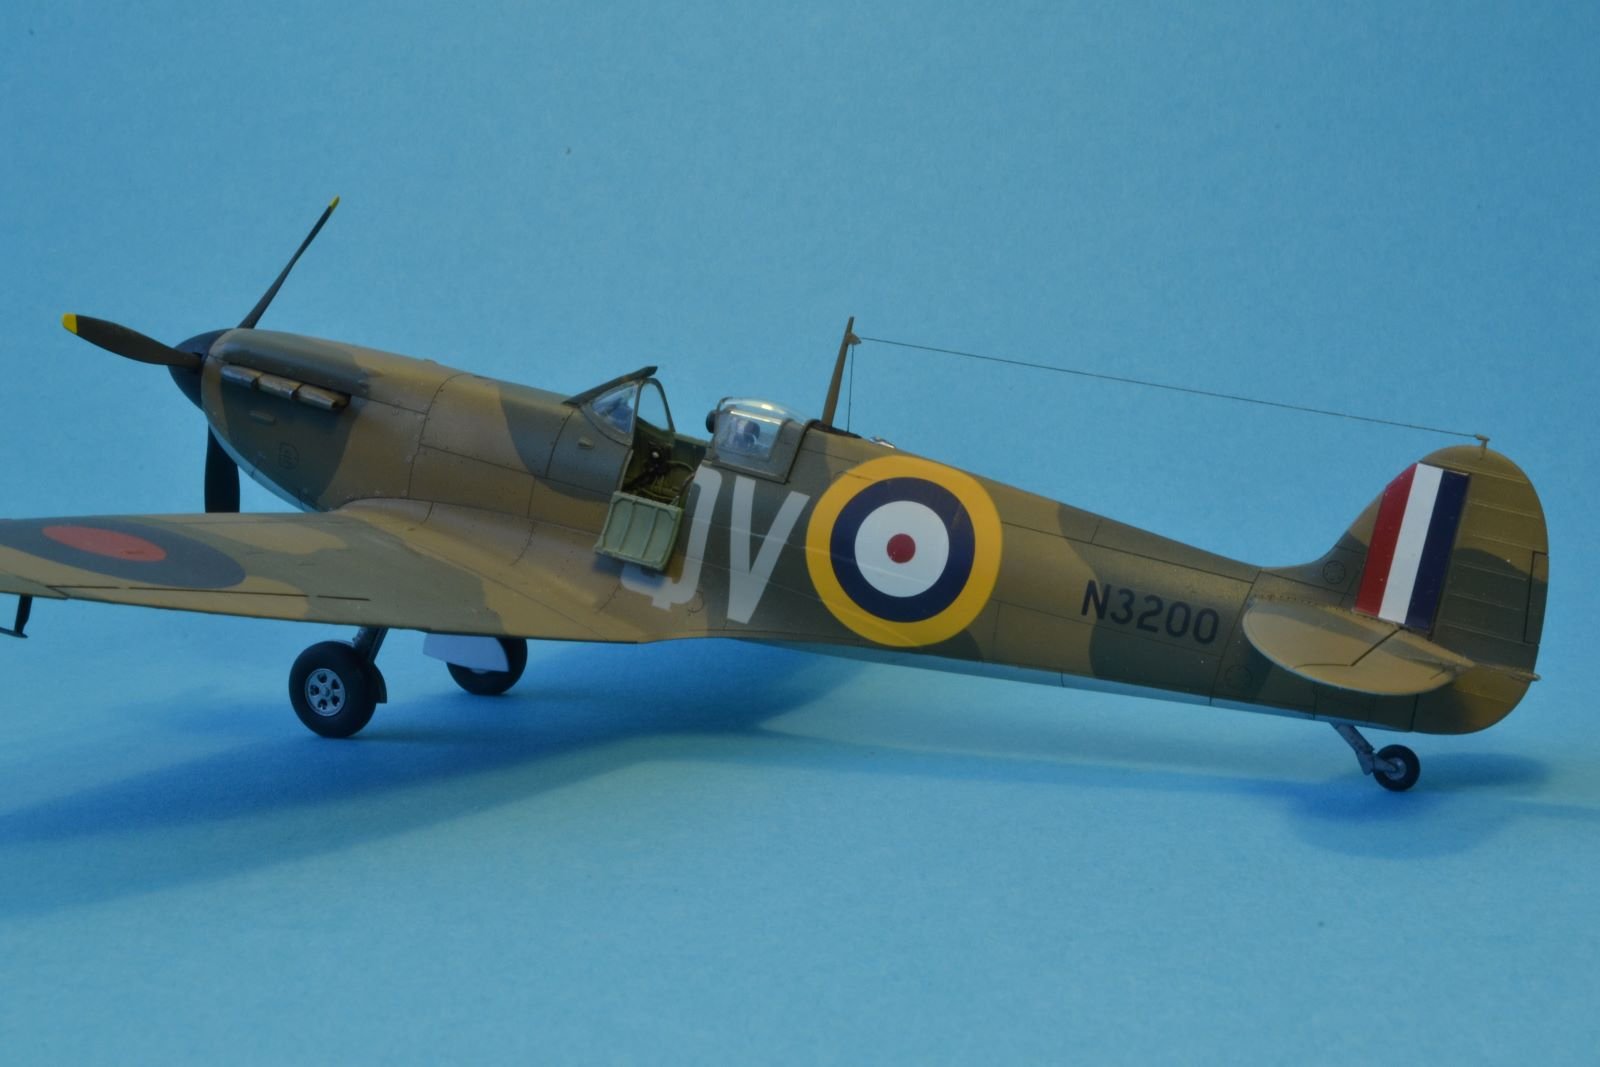
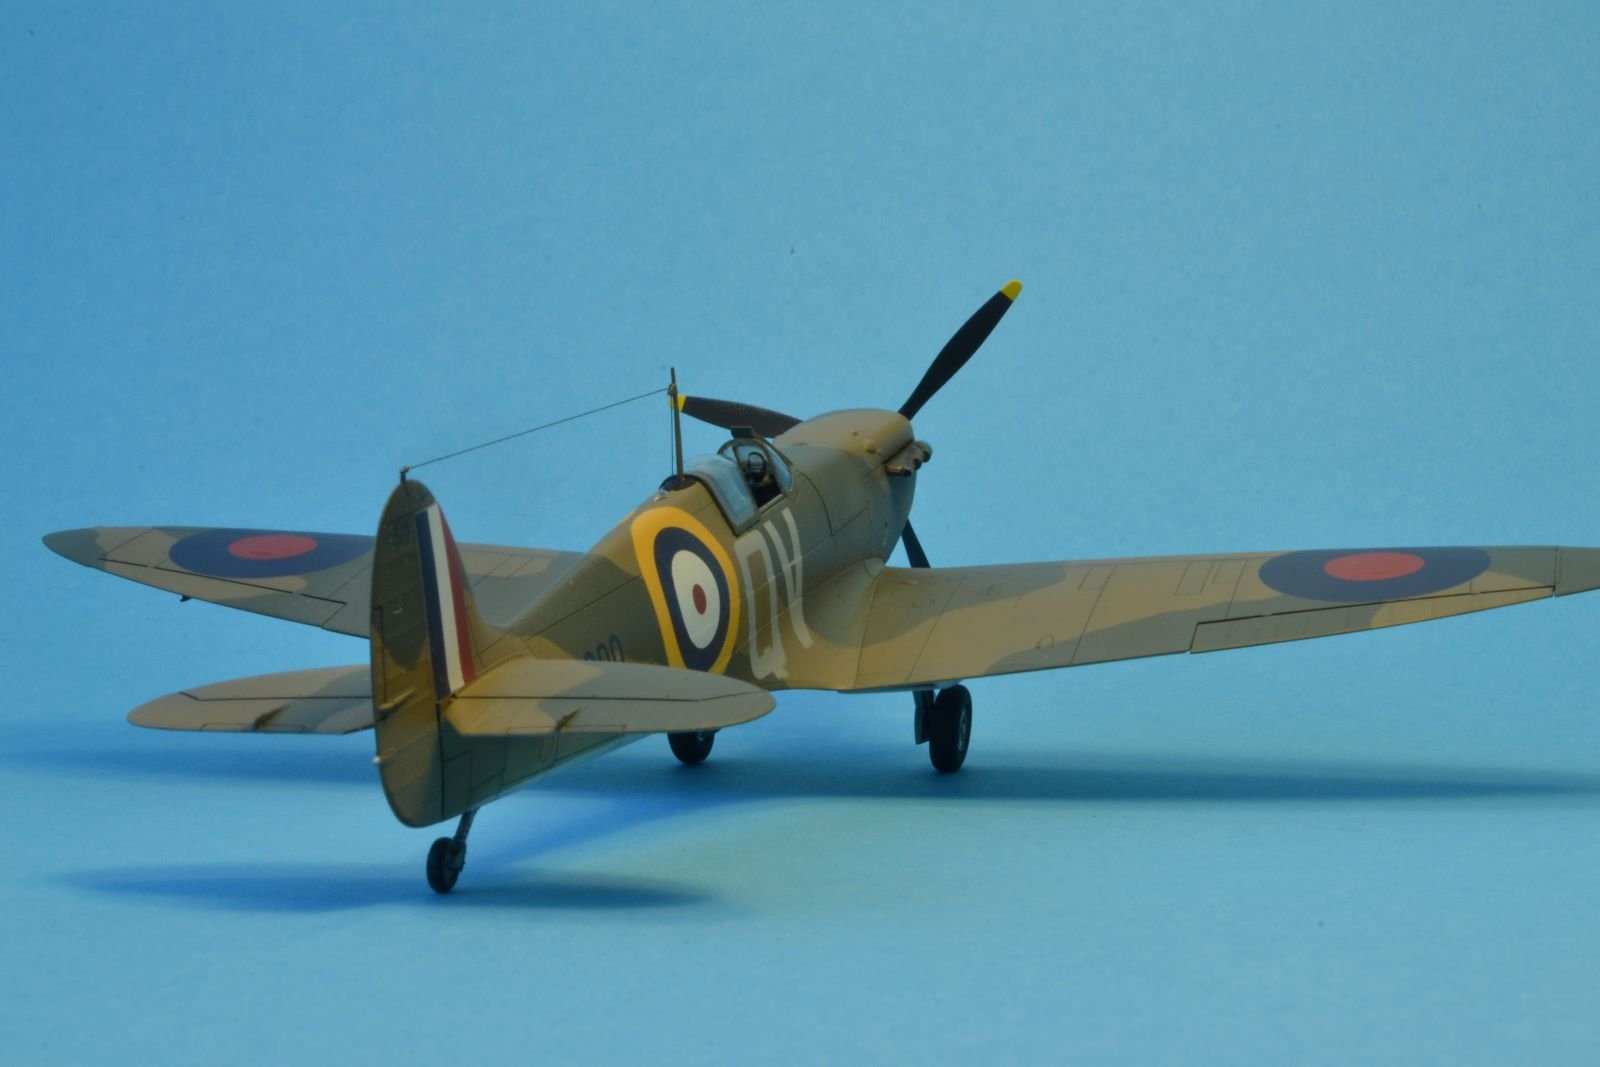
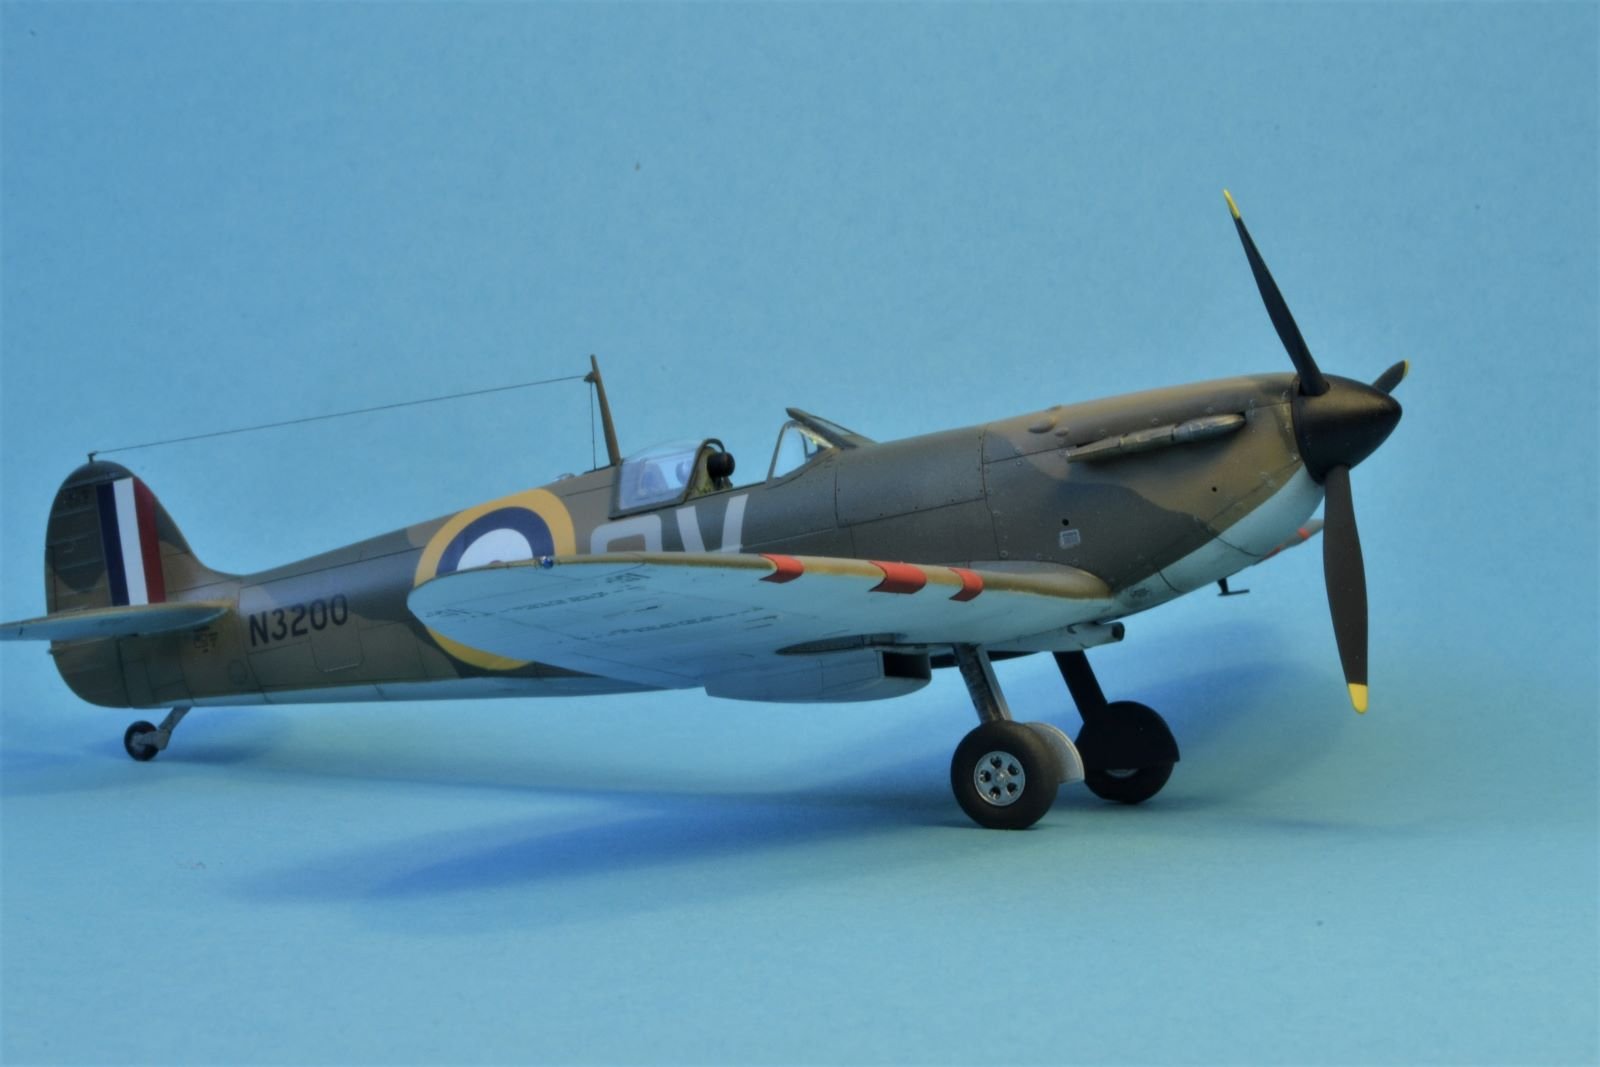
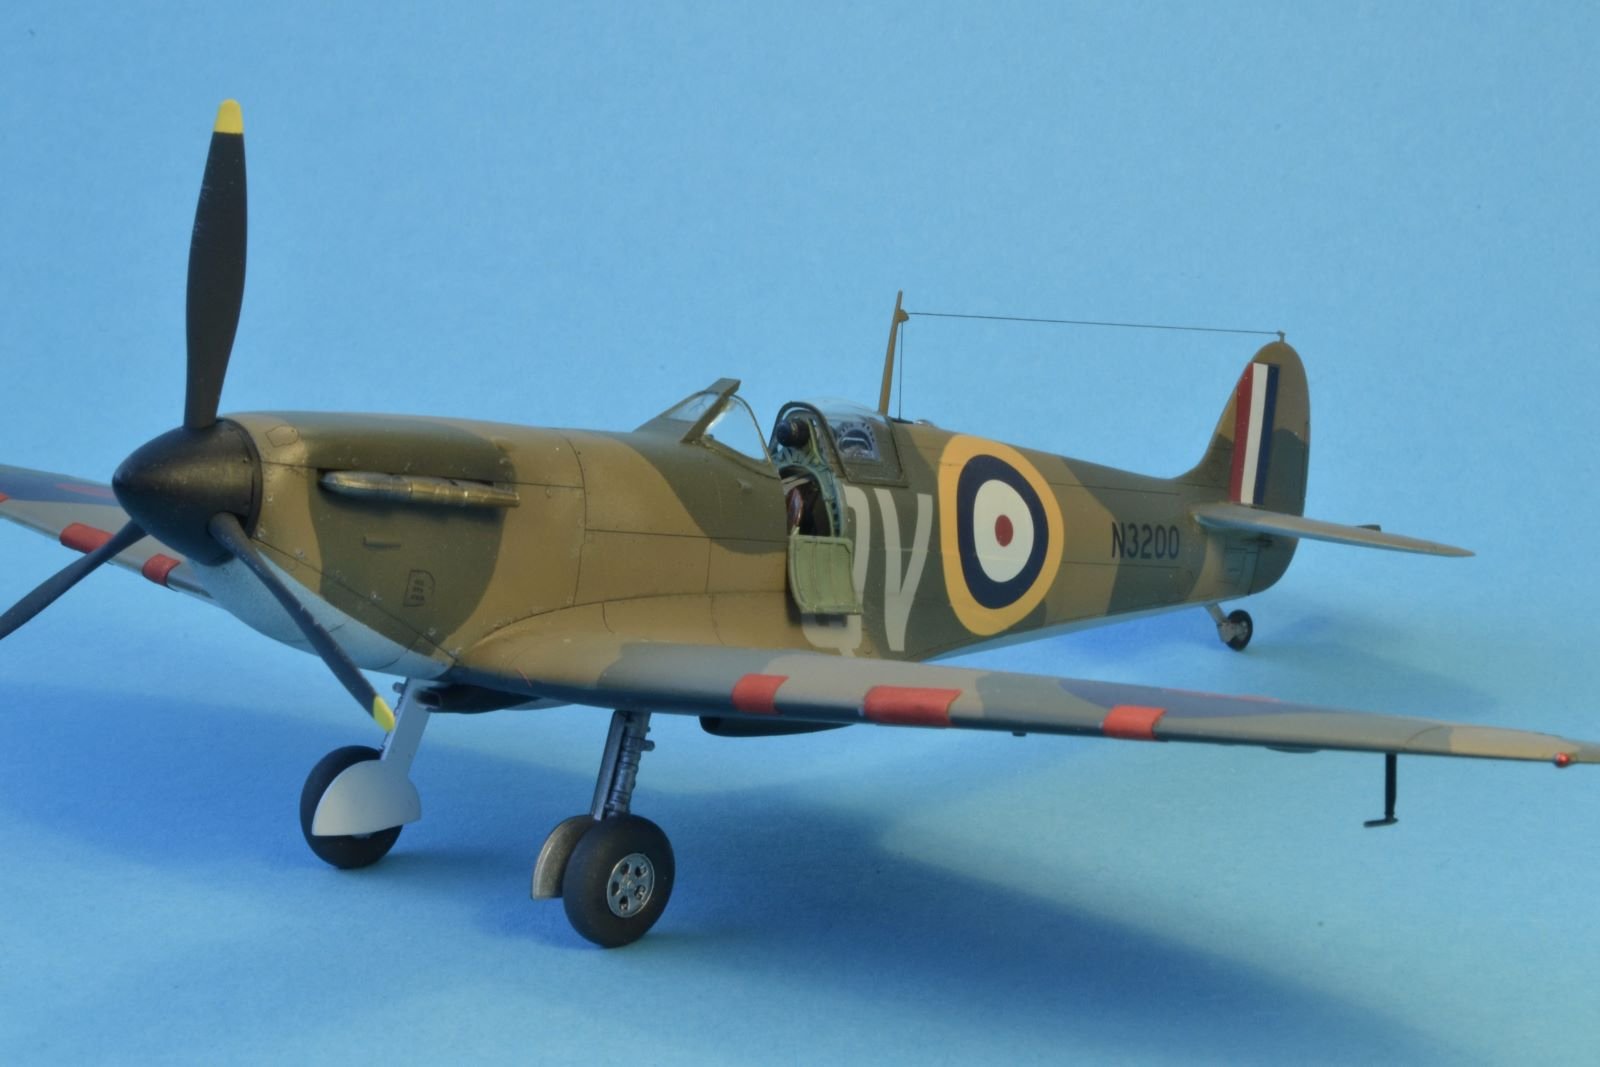
Hi, seen my glacial pace at progressing with my ship build log, I thought of showing here my last aircraft kit that I completed before starting my present Mayflower build. It is built from the excellent Tamiya kit 1/48 and it depicts an aircraft that took part in the Dunkirk operations. Finish is obtained with Tamiya acrylic paints and oil weathering. I hope you like it. Comments and critiques are welcome. Kind regards, Dan.


resized.thumb.JPG.127932d5ff3df81022fef9d1700a62a4.JPG)

- 20 replies
-
- 25
-
-

-
I like your nice paintwork. I might steal some of your ideas for my Mayflower build. About weathering, please allow me a couple of advices. Yes, you are correct to say that a matt finish is not ideal for oil washes, but there is also another very important reason to consider: the oils work with the same thinner agent of the enamel that I understood you have used. Therefore, the washes would mar your nice paintwork by dissolving it. You should apply a layer that isolate the paintwork from the oil. I am used to build aircraft models, and I used for this purpose a layer of Tamiya clear which, being an acrylic paint, uses a different thinner. Then, on top of that, you can apply oil washes that will also be helped running into the crevices by the glossy surface of the Tamiya clear. Once finished, you have to apply a matt or satin clear to eliminate the glossy shine. In substitution of the Tamiya clear, which I always applied by airbrush, you can use a floor polish called 'Future' or a Johnson 'Pledge' which both are very easy to apply by brush (you will need at least two layers). On line, you can find plenty of instructions about oil weathering, but if you need more details, do not hesitate to ask here. Best regards, Dan.
-
Spectacular model, Patrick. In some of the pictures, the model is so imposing that it is really difficult to tell that its scale is 1/110. I noticed that you are used to paint with Tamiya acrylic paints. I understood you apply them by brush. If yes, how do you manage that? I largely use them, but only by airbrush. In other builds of yours, I have seen that you brush them also on wood with quite realistic results. Also in that case, how do you do that? Again, my compliments for a very nice and very credible model. Best regards, Dan.


resized.JPG.008d4091173b696bfaf404972b9453f3.JPG)

resized.JPG.dbe4b9e1b2a155b0a3c9fe5c0ff1ab6d.JPG)


resized.JPG.980e80072cef626599a80476c35ceb80.JPG)
