

.jpg.2c2c29e54623bd7b752bc2cdab599665.jpg)
Danstream
-
Posts
713 -
Joined
-
Last visited
Content Type
Profiles
Forums
Gallery
Events
Posts posted by Danstream
-
-
Very nice, I think that your interpretation is correct, certainly much more plausible. I will see what to do when I will be there. By the way, anyone knows where are the poles used for actioning the pawl stored on the deck (or one can assume that they are stored under the deck)?
Best regards,
Dan
-
Hi,
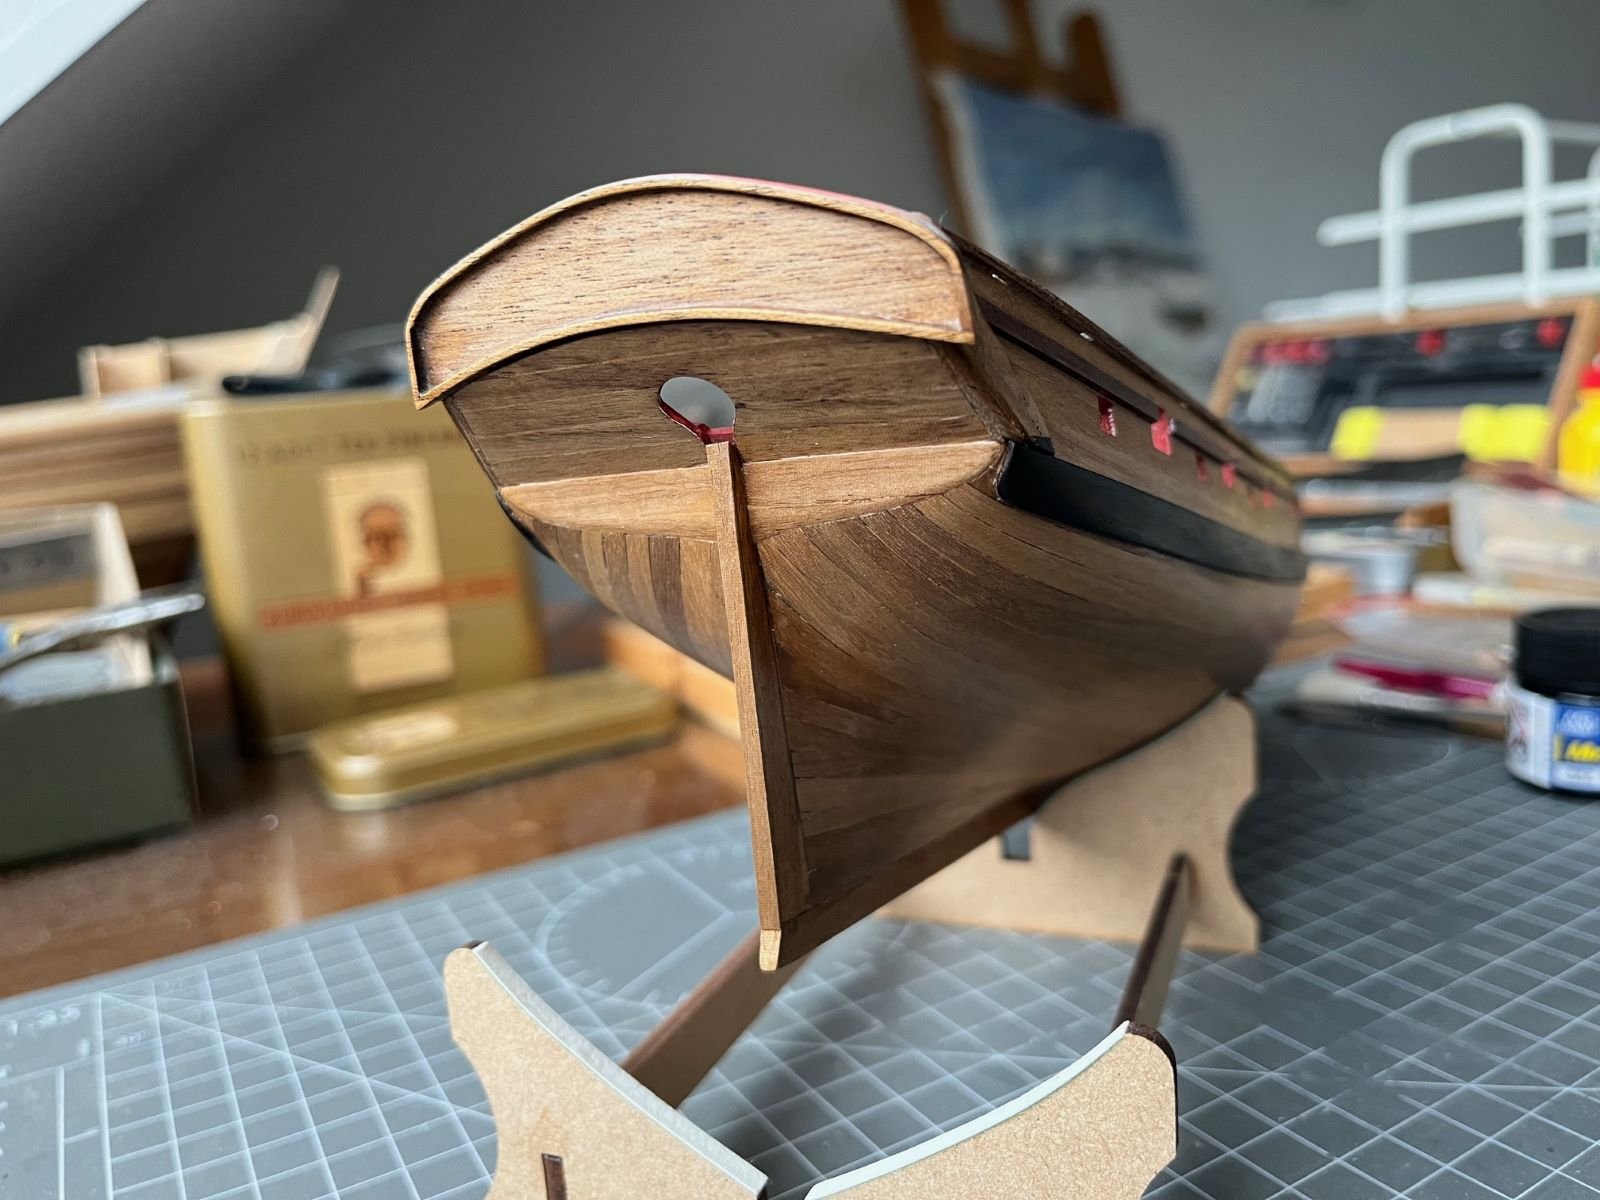
I affixed the nameplate of the ship and painted black the stern panels:
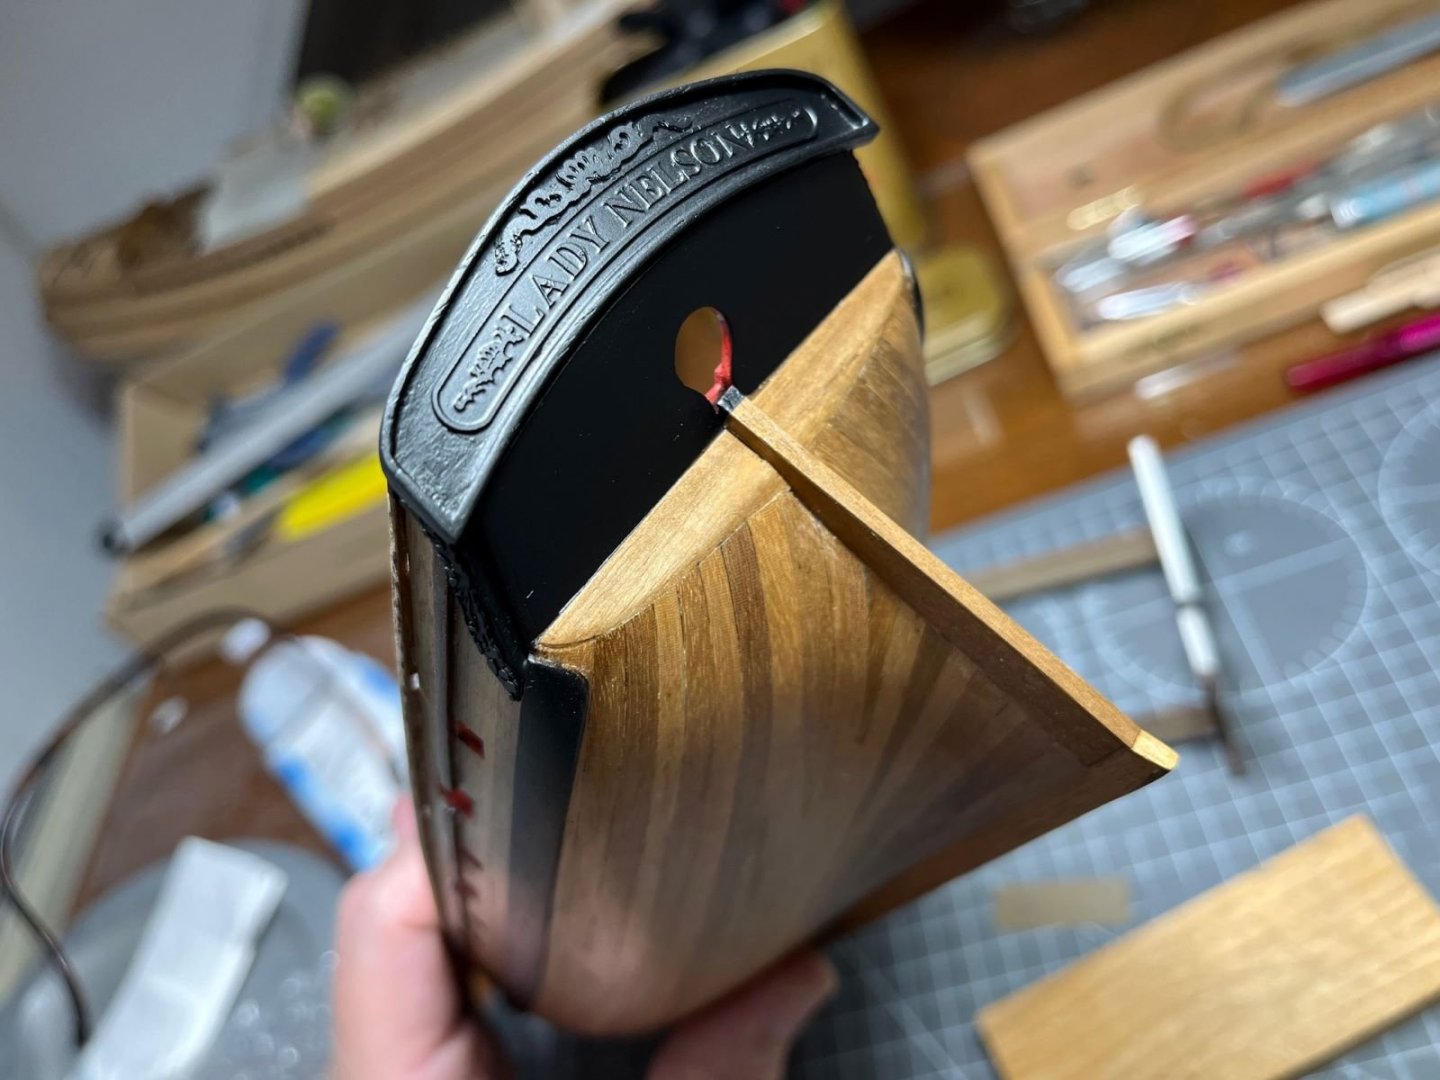
I must admit that this end of the ship now looks quite spiffy. I finished the cap rails and painted them also black:


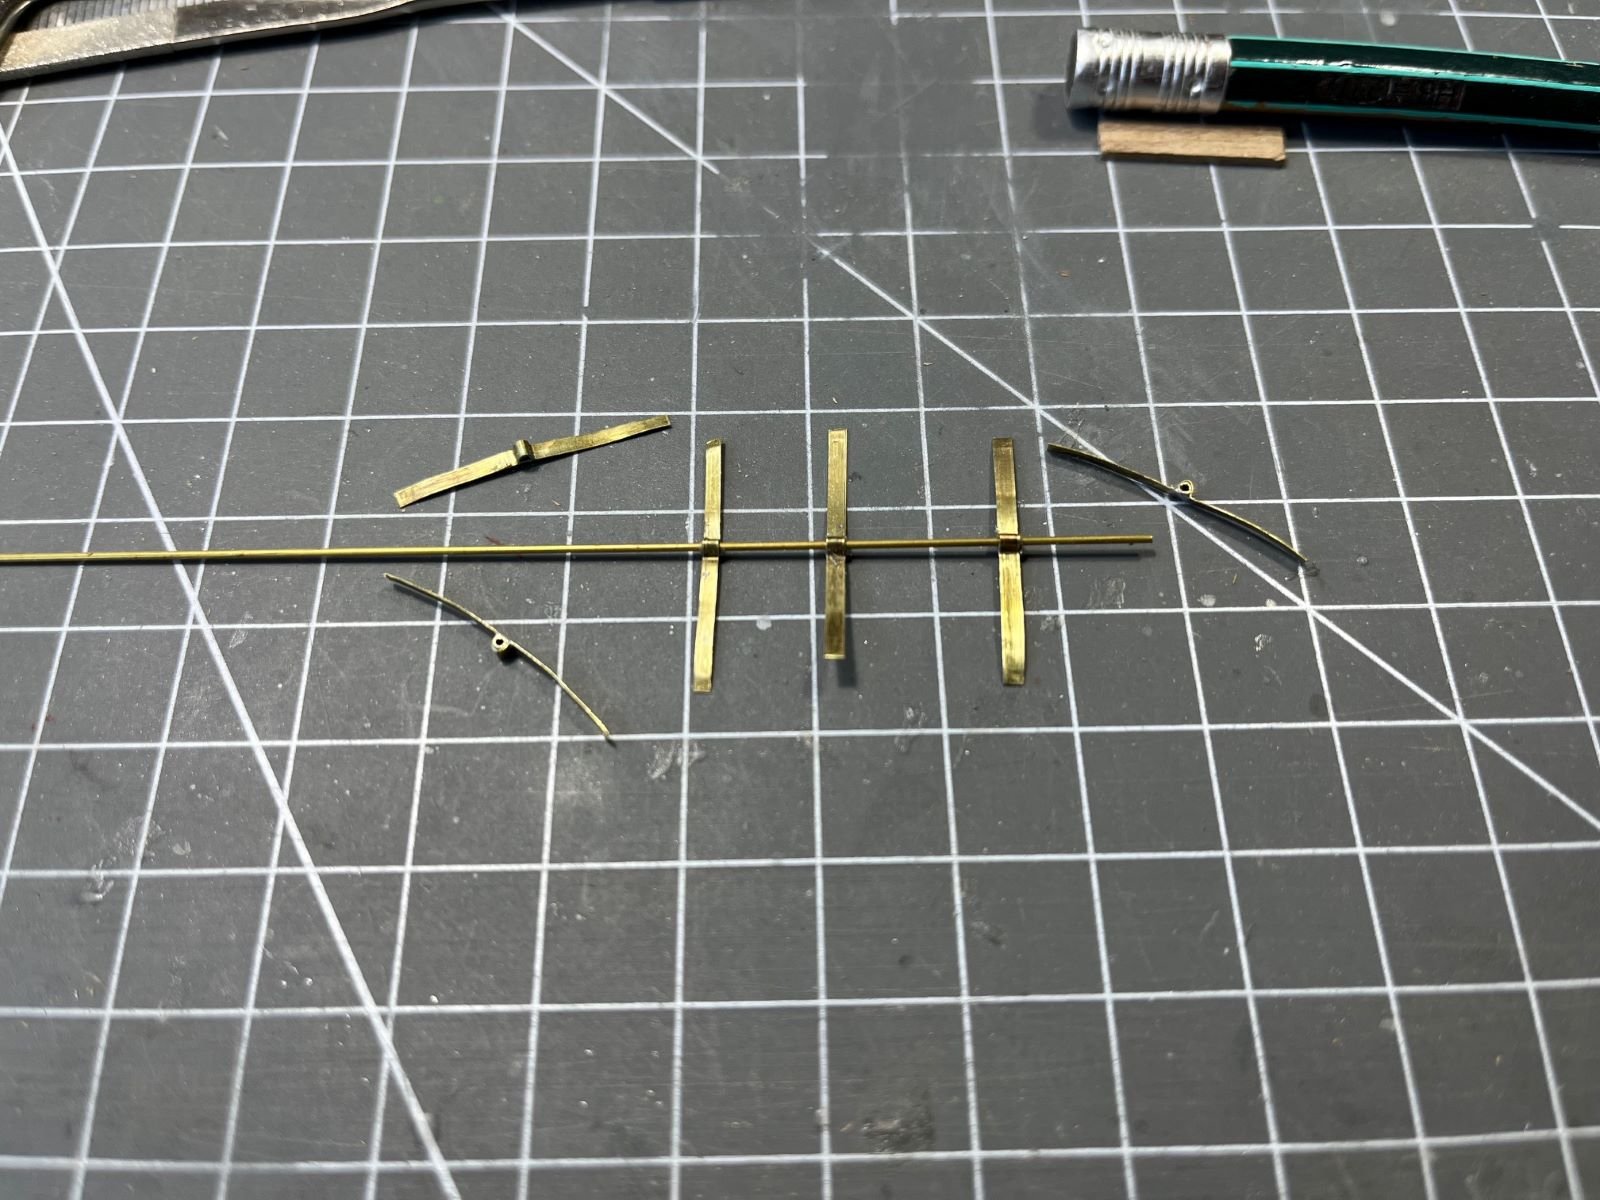
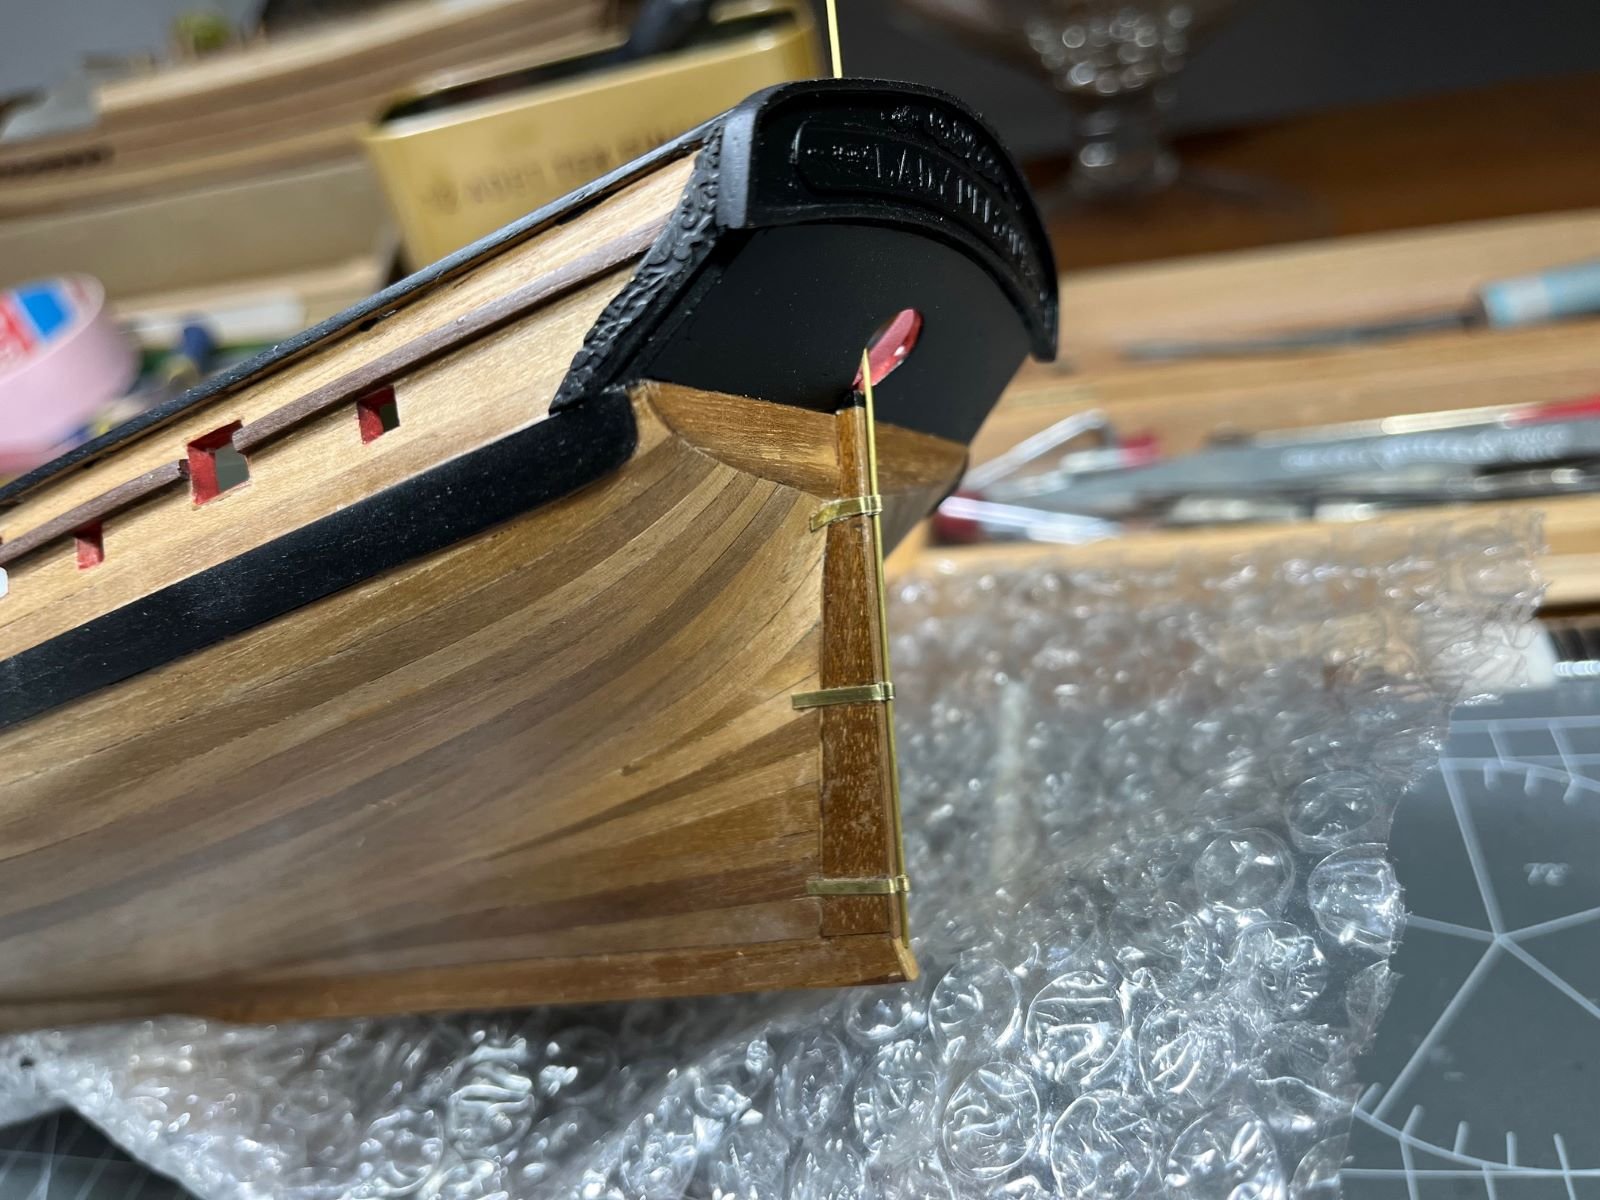
Now only the white bottom part is missing to complete the main painting steps. To do that, I have first to finalize the rudder with its tiller and hinges. Actually, I didn't like the solution proposed by the kit for the rudder hinges, therefore I gave a try to scratch build my owns. I started by soldering small portions of brass tube to brass stripes:
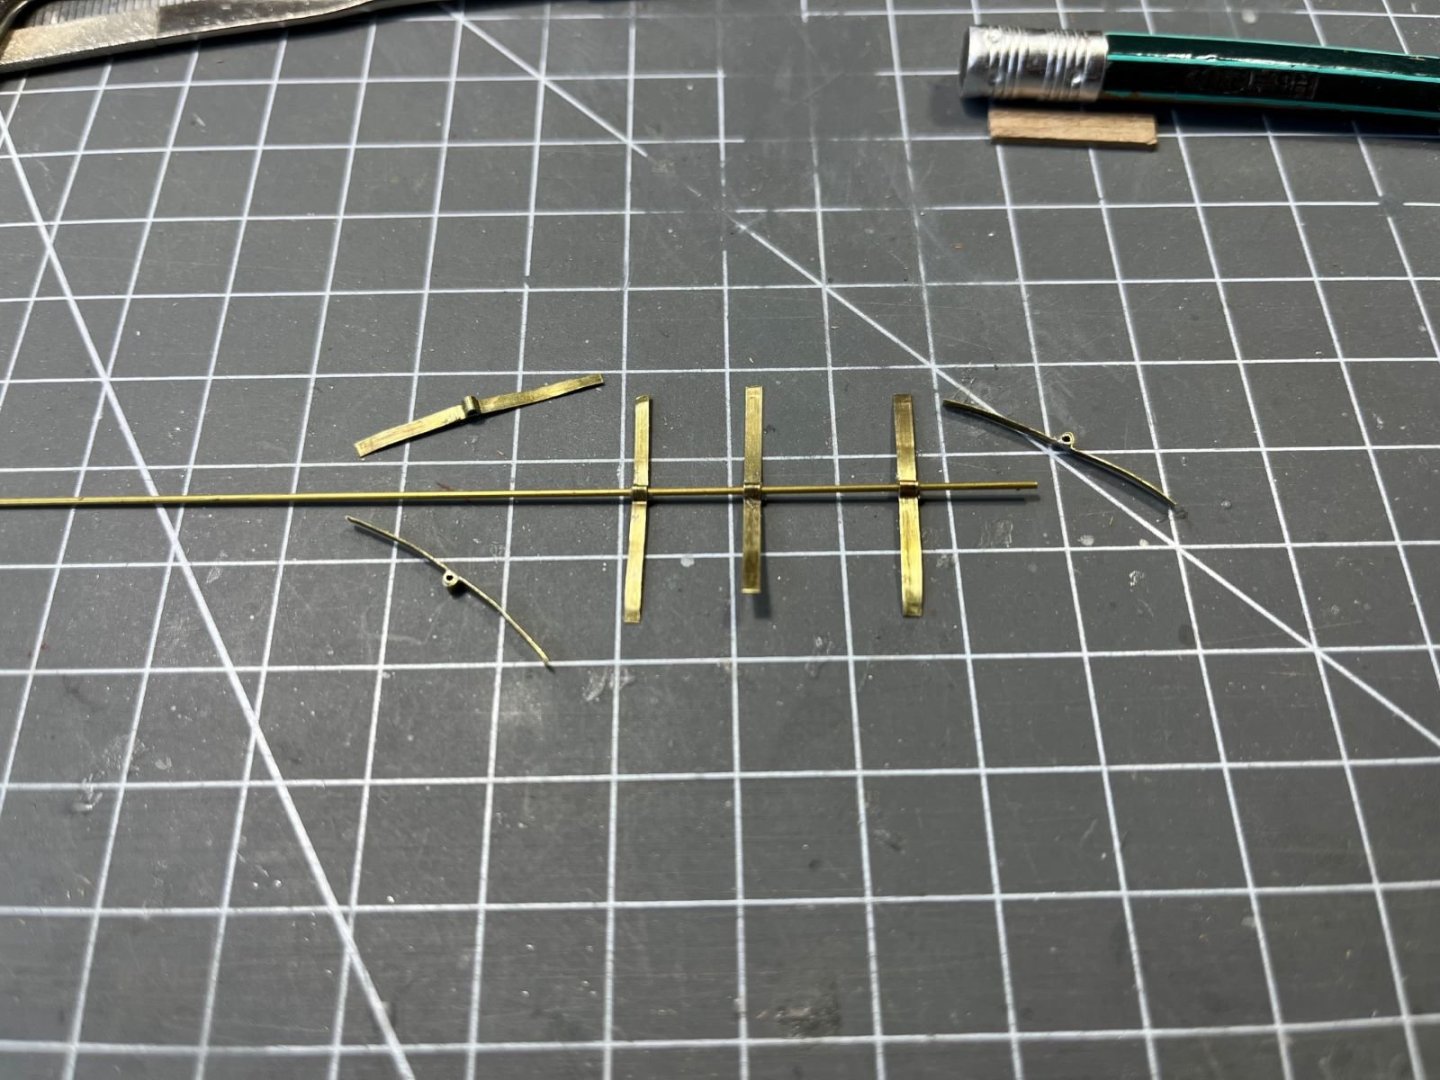
The rod in the picture is the one I will use for the hinge pins. Then, I glued the obtained hinges to the stern post using the brass rod to maintain them aligned.
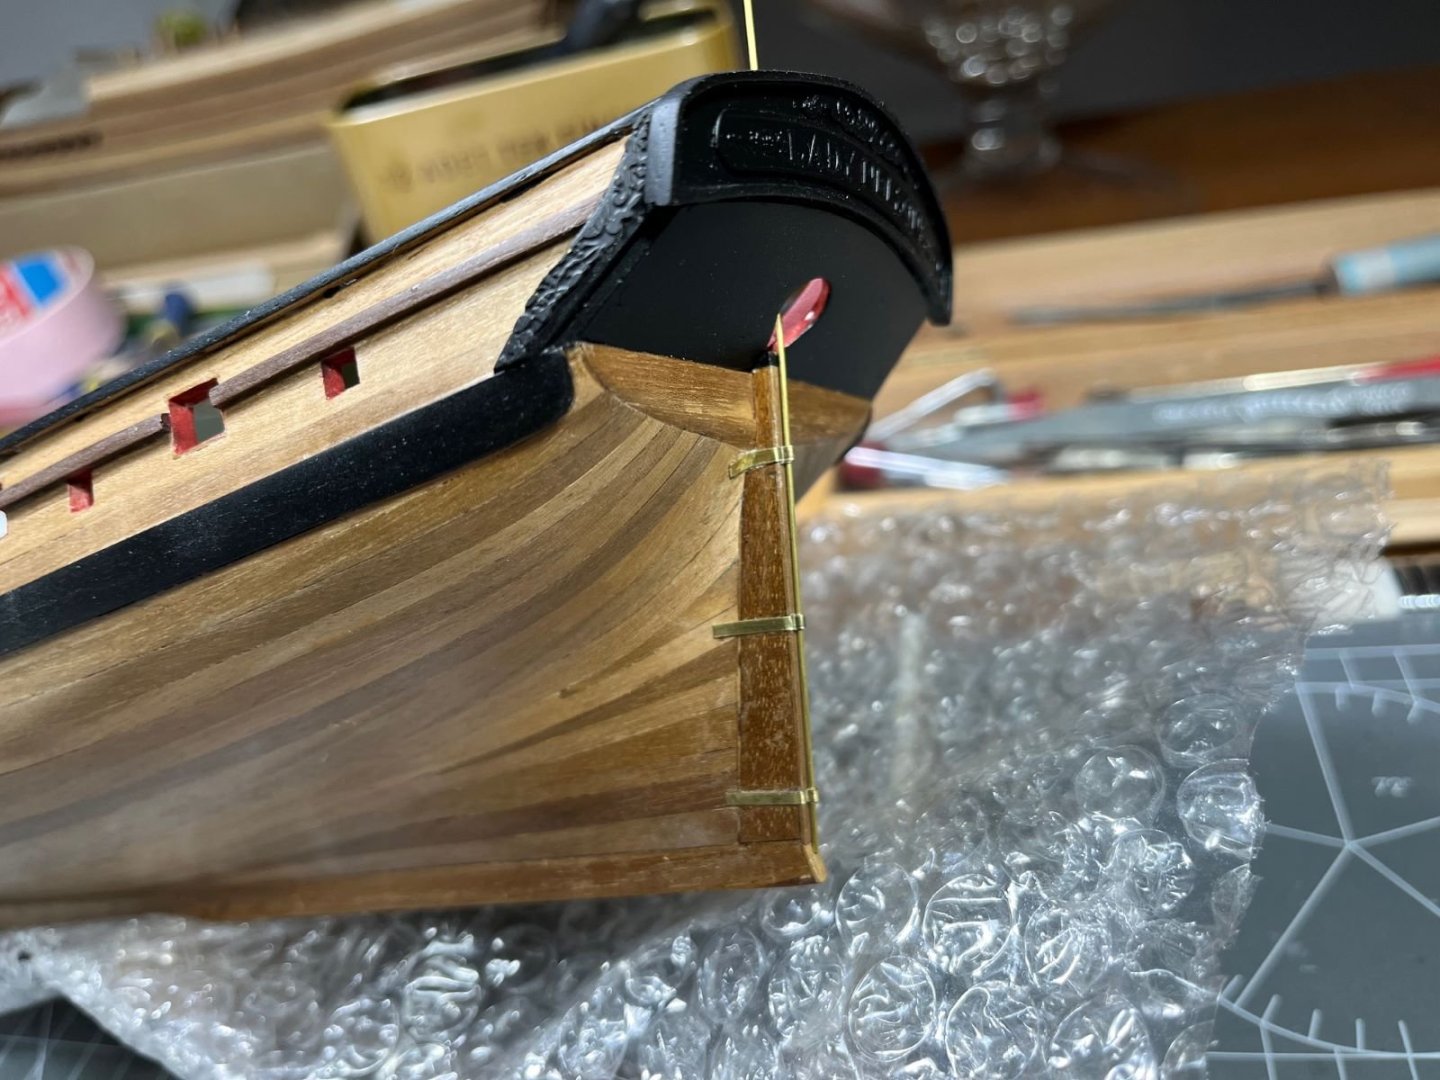
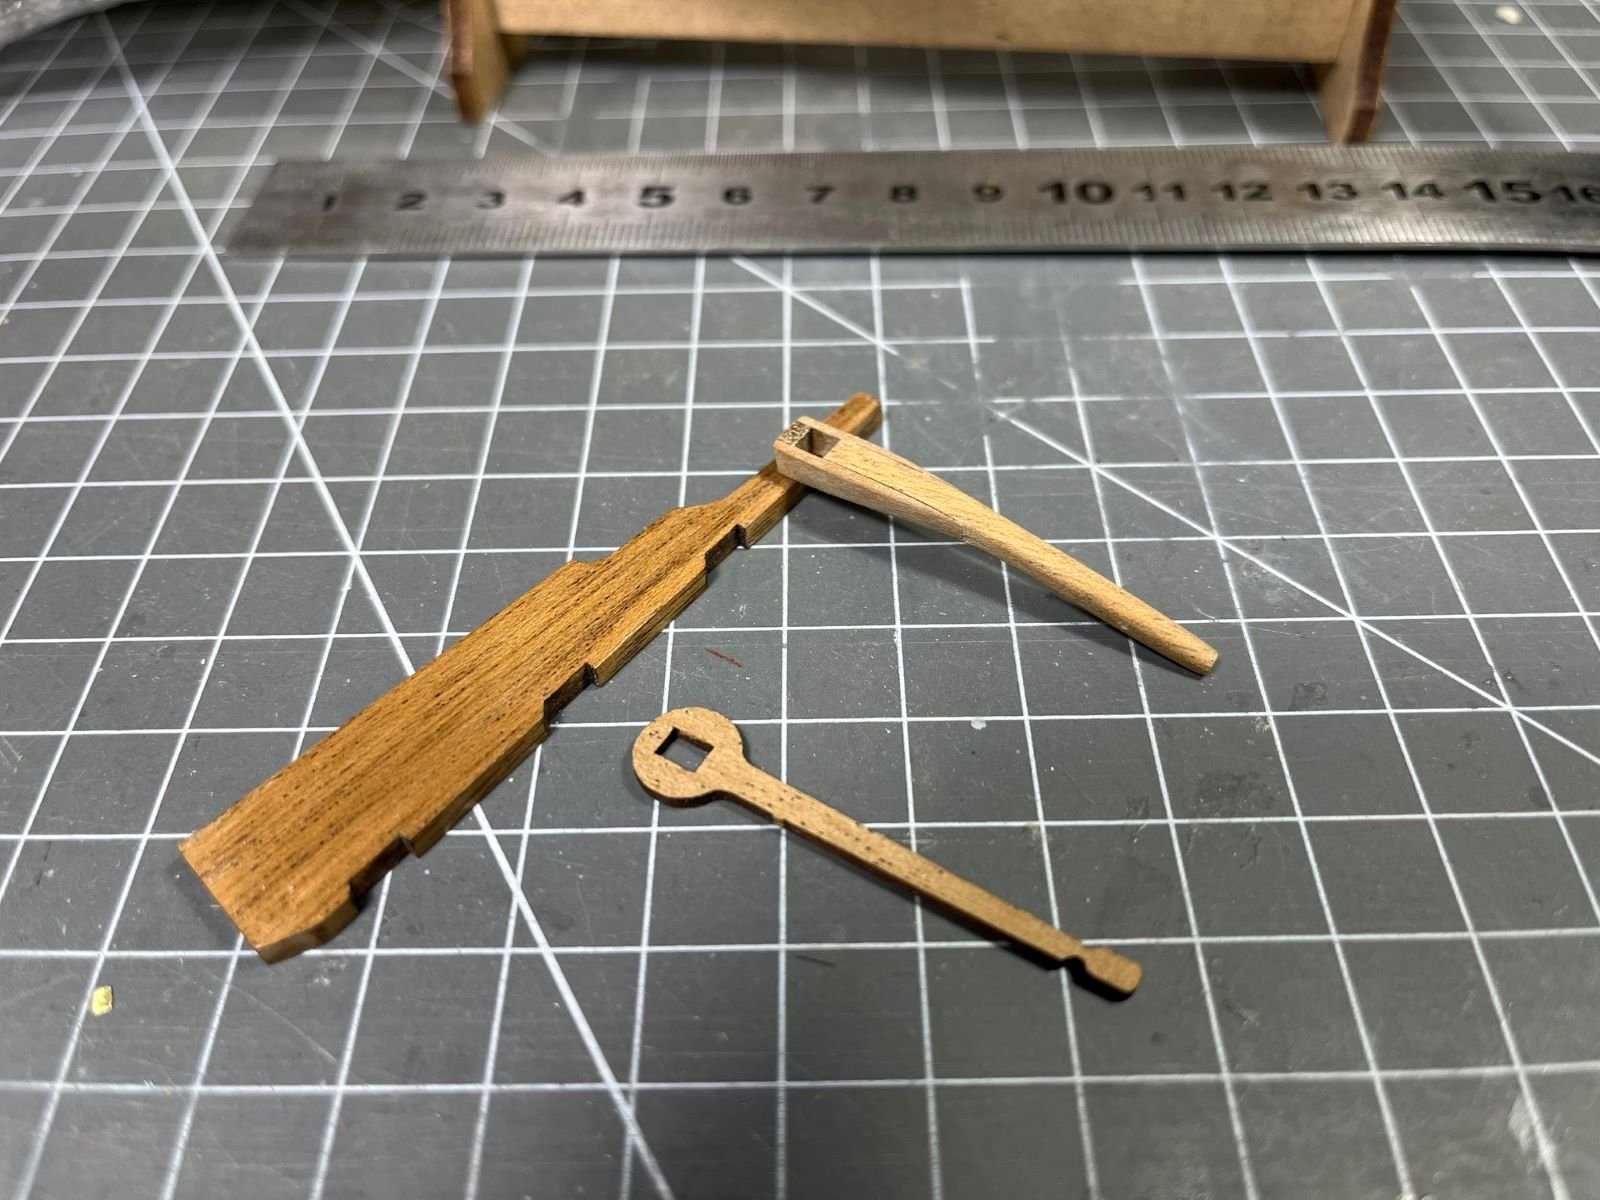
Next, I will prepare the rudder piece to be put on. Incidentally, I am going to replace the tiller with one that I scratch built shown in the picture and that I think looks less obvious than the one of the kit:

That's all for now,
best regards,
Dan
- PaddyO, AJohnson, JacquesCousteau and 2 others
-
 5
5
-
-
-
Hi,
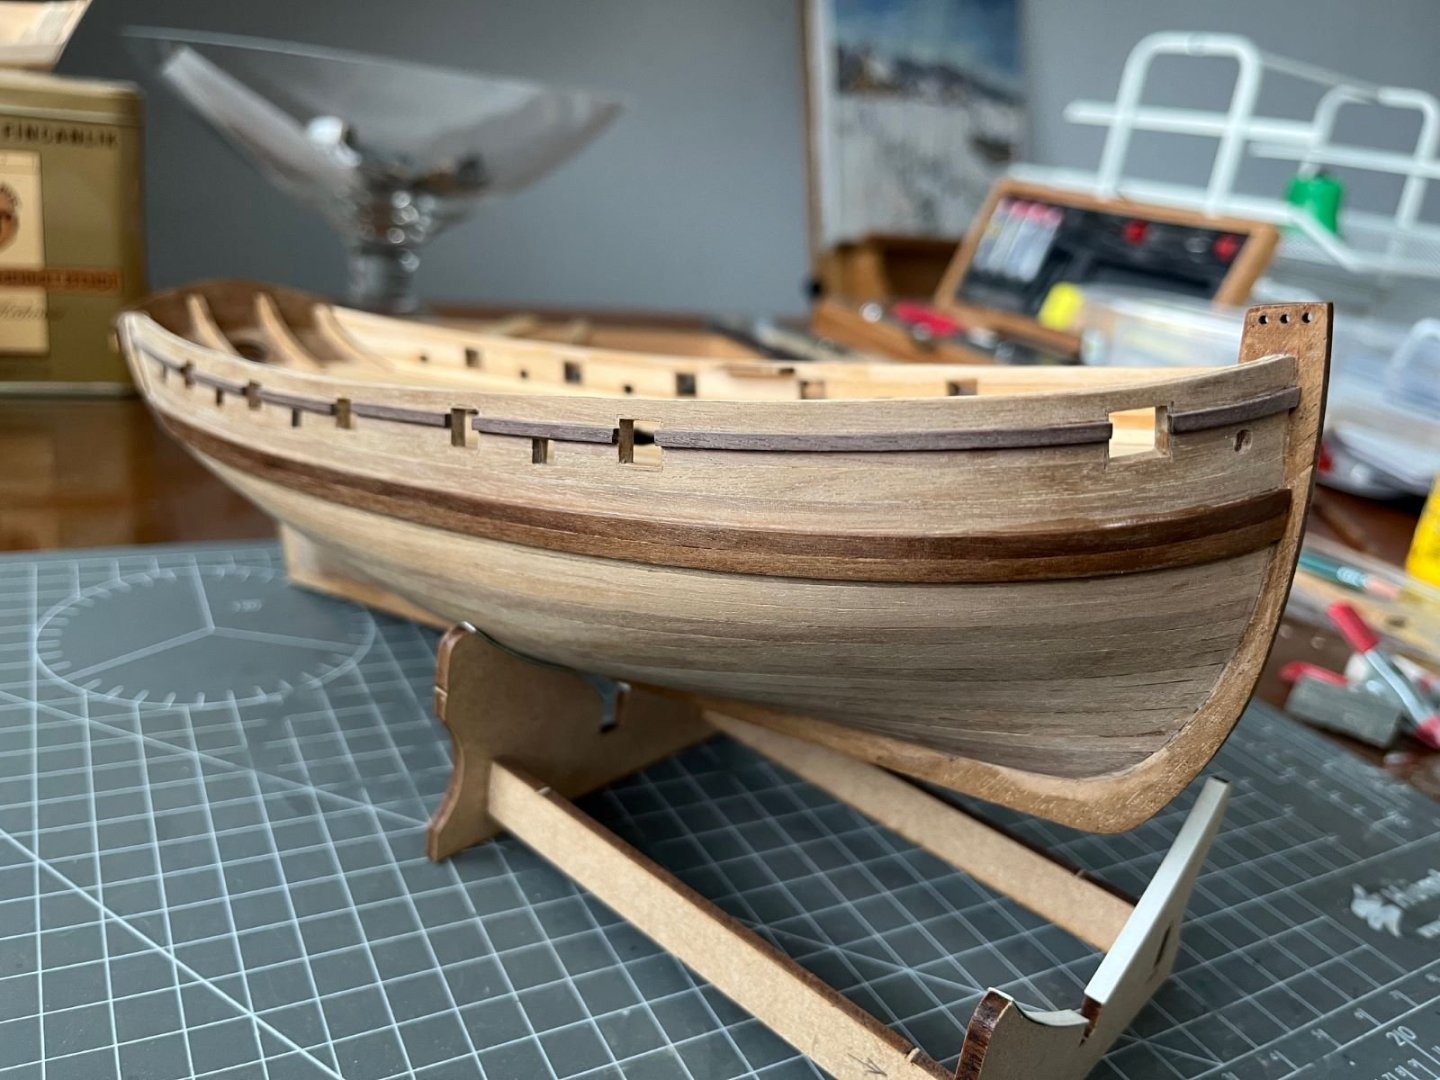
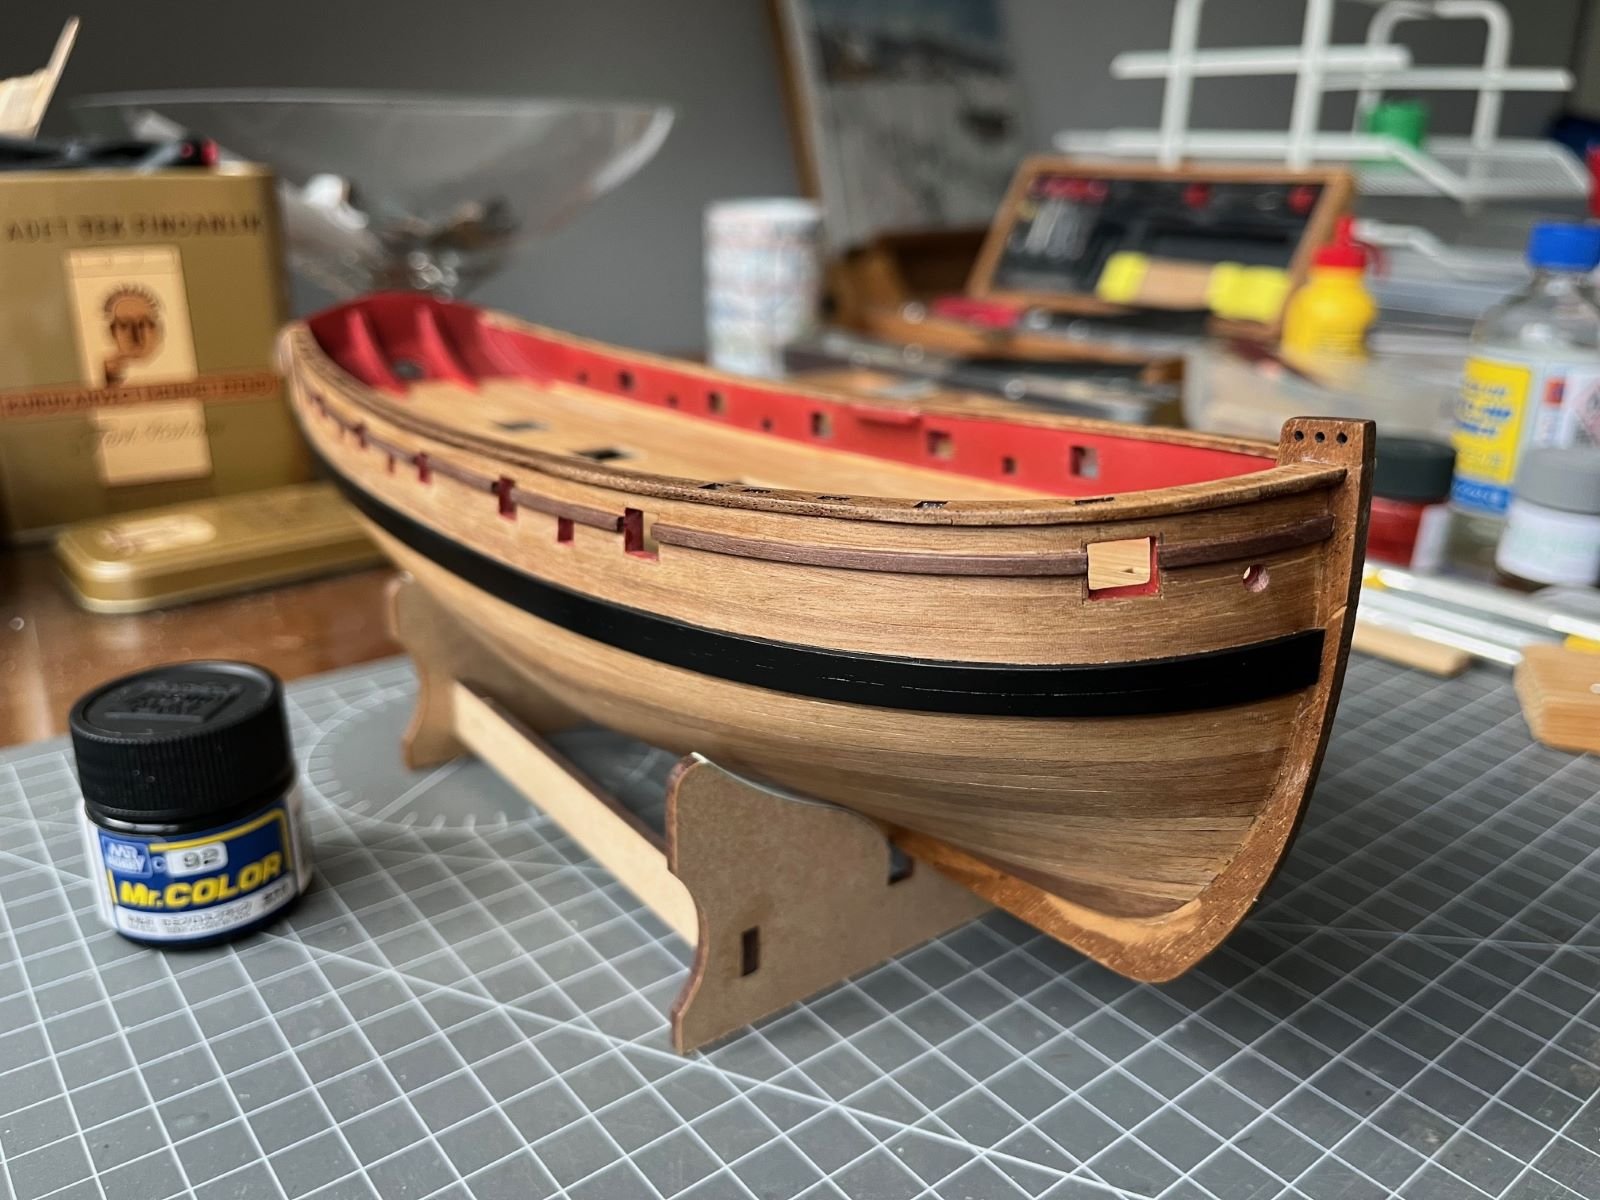
after a final sanding of the hull with a fine grit, I applied a coat of satin varnish which uniformed the shine of the hull and gave the opportunity to finally evaluate the resulting, long lasting planking work.


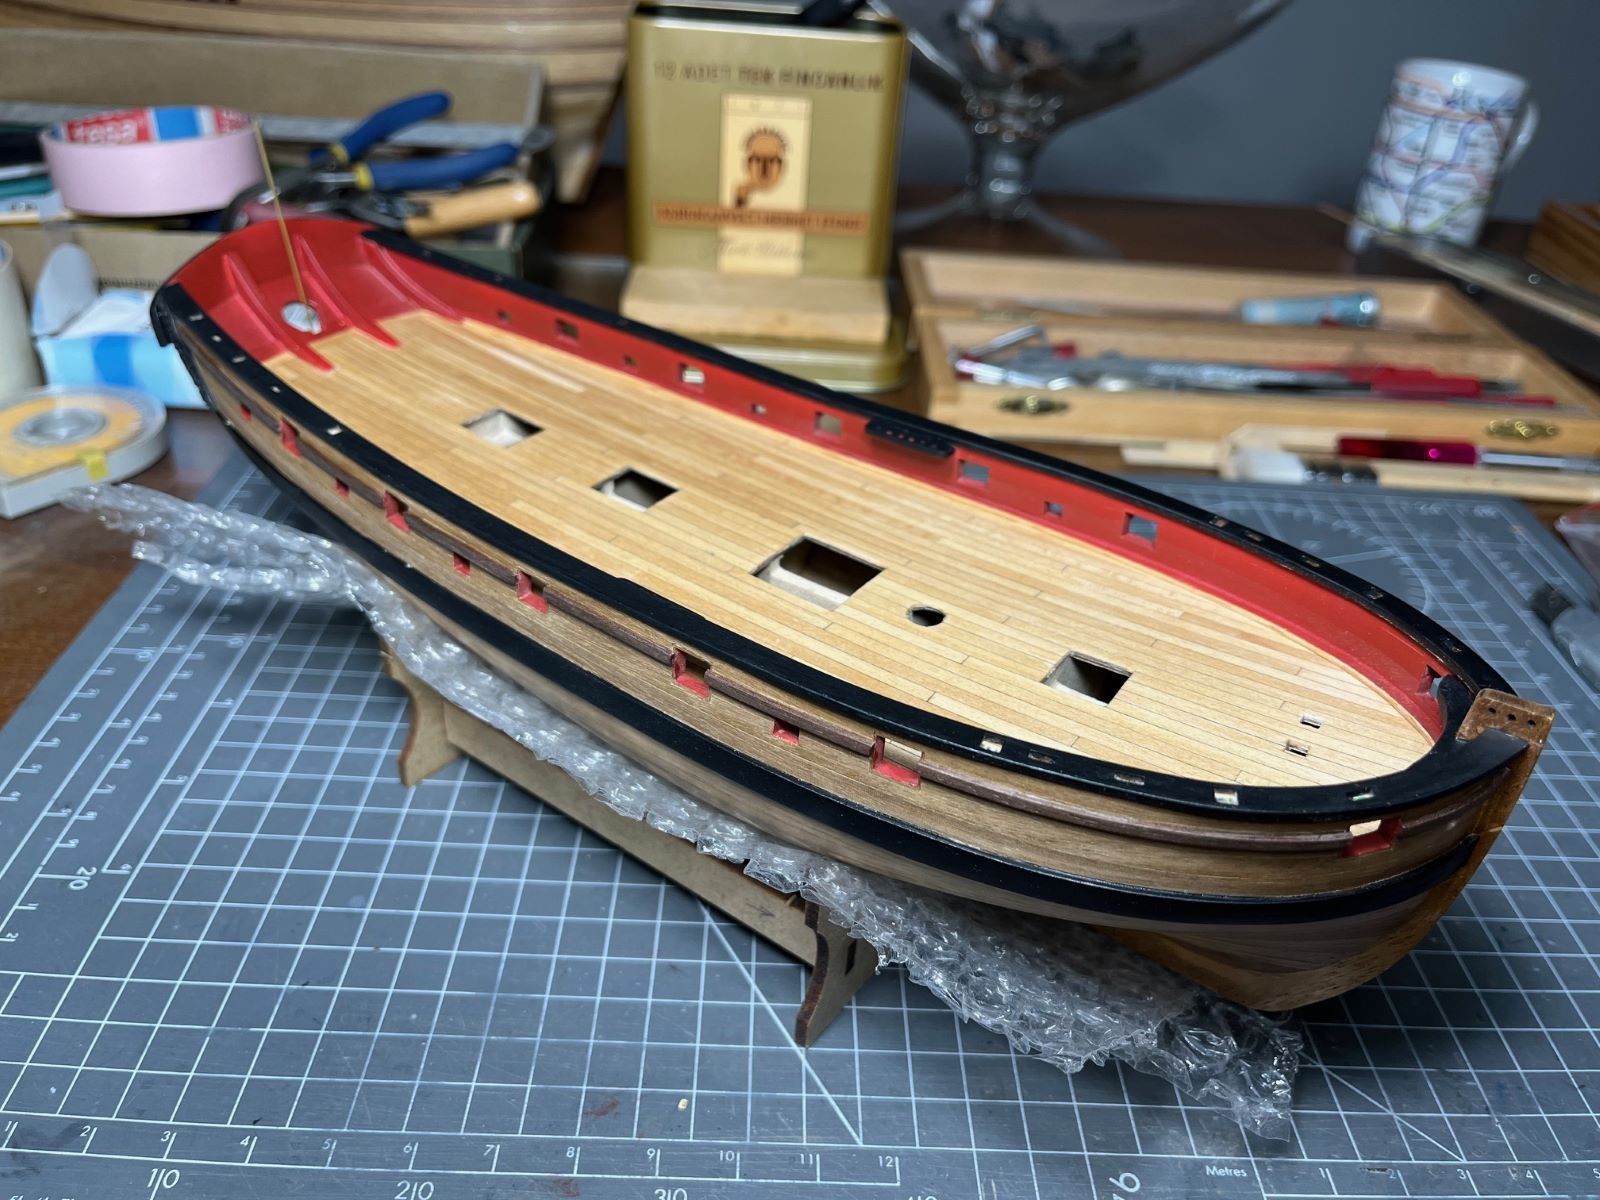
Then, I started painting various details and, after masking, I sprayed a black color on the main wales as suggested by the kit instruction and seen on many models.

From my hobby of building plastic model planes, I have a collection of Gunze Mr. Color paints, so I picked up a semi-gloss black paint for this work. These paints spray beautifully and their finish is a bit more resilient than the matt acrylic ones.
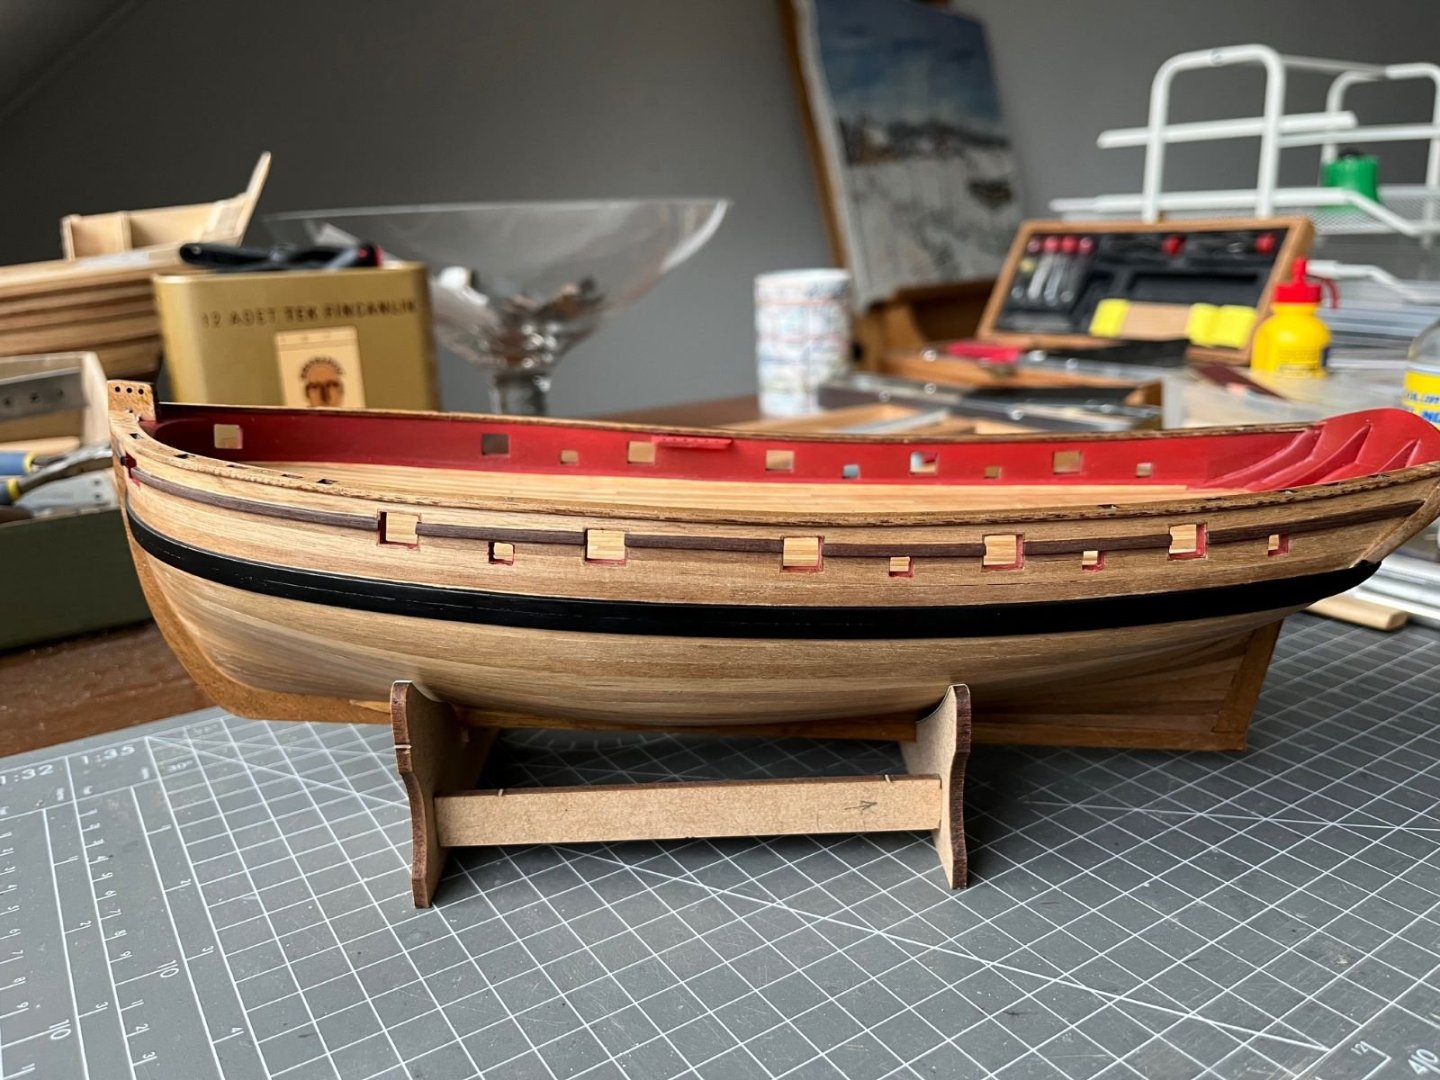
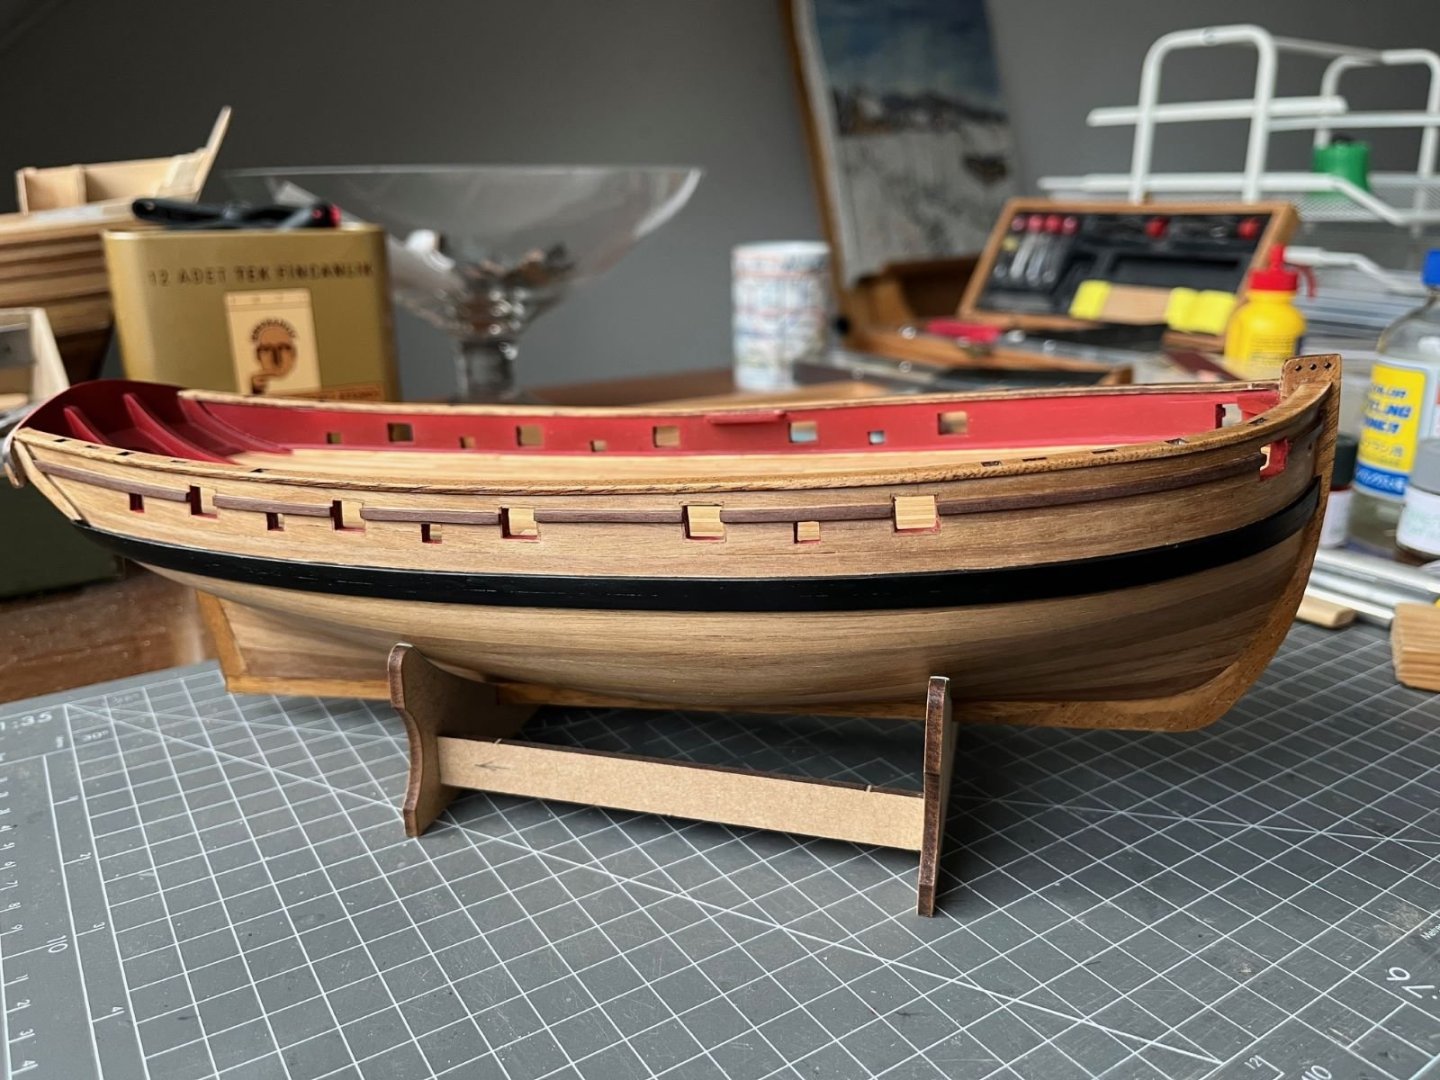
I am now going to start decorating the stern using the same paint, after the application of the provided photo-etched friezes.

Meanwhile, as explained the earlier post, I completed the modification of the bowsprit support:
Next, I will have to paint it (red) and the cap rails as well (black).
That's all for the moment, I will appreciate any suggestion,
best regards,
Dan
- PaddyO, ccoyle, woodartist and 3 others
-
6
-
Hi,
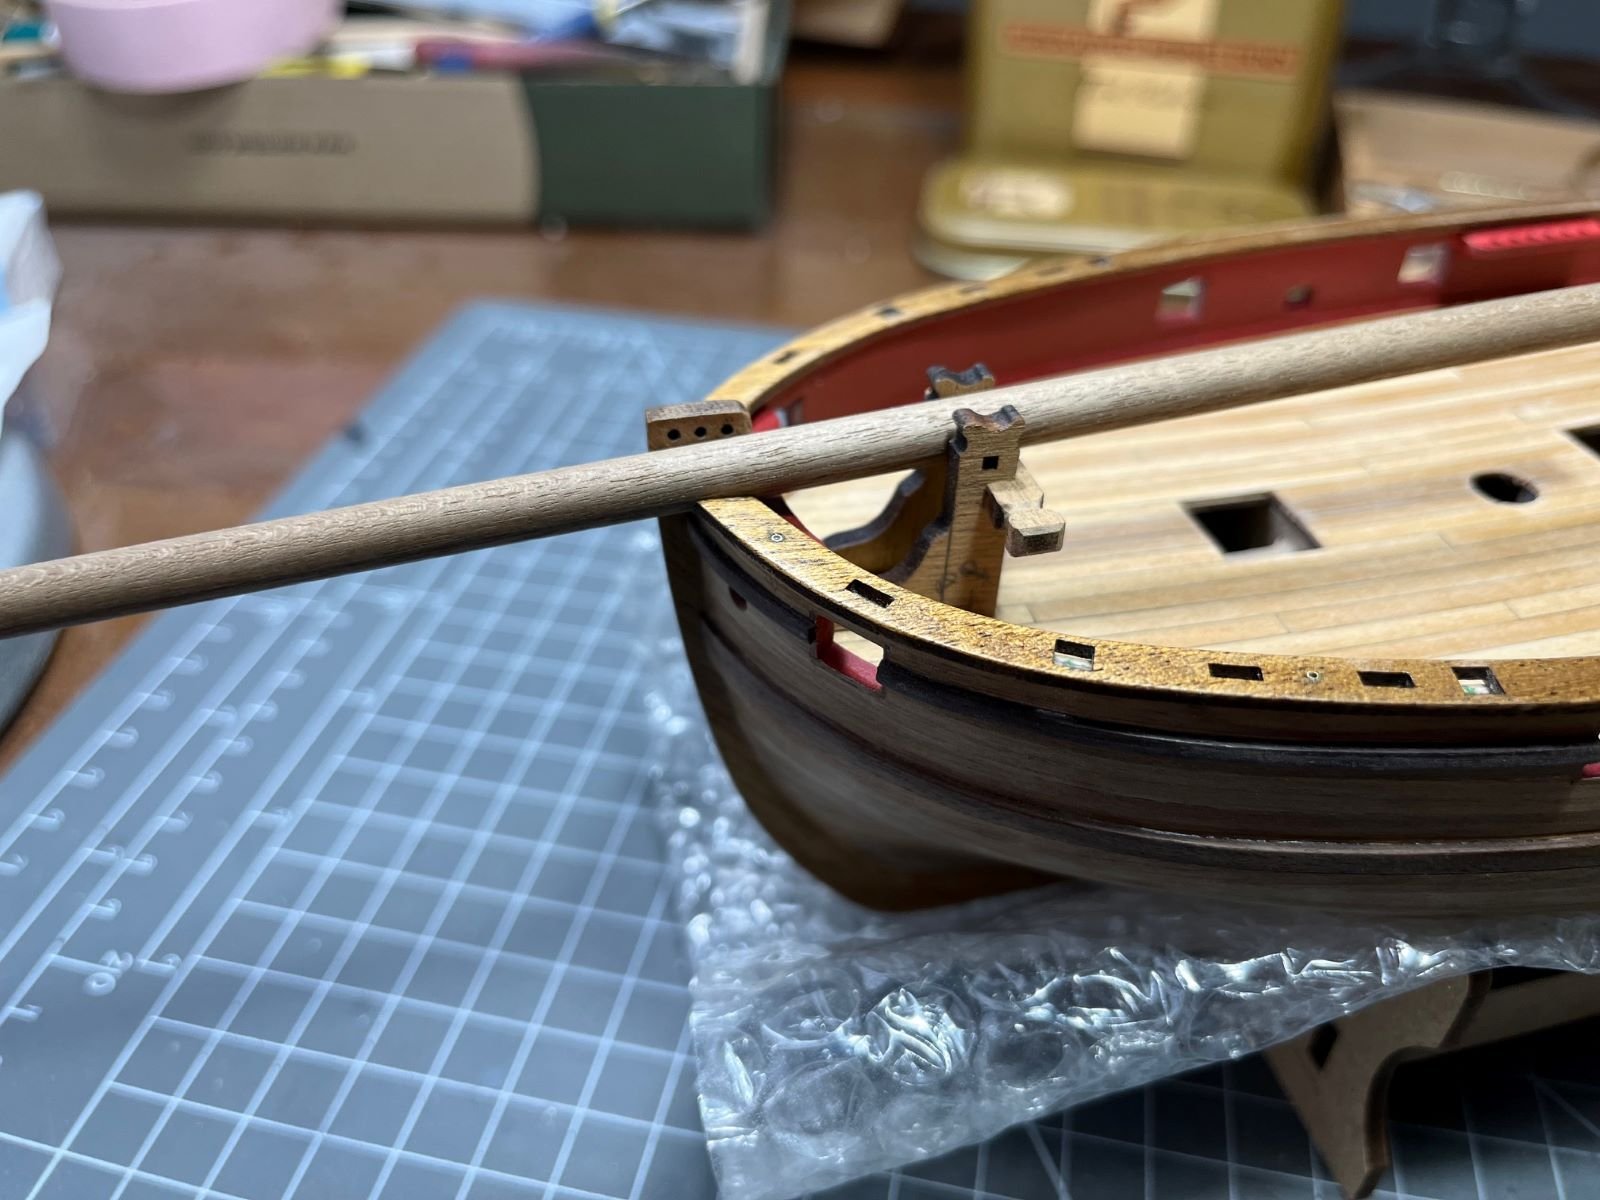
I went on with the installation of the cap rails, but I had to slightly extend the length of the provided parts because they resulted to be too short:
These are the cap rails finally installed:
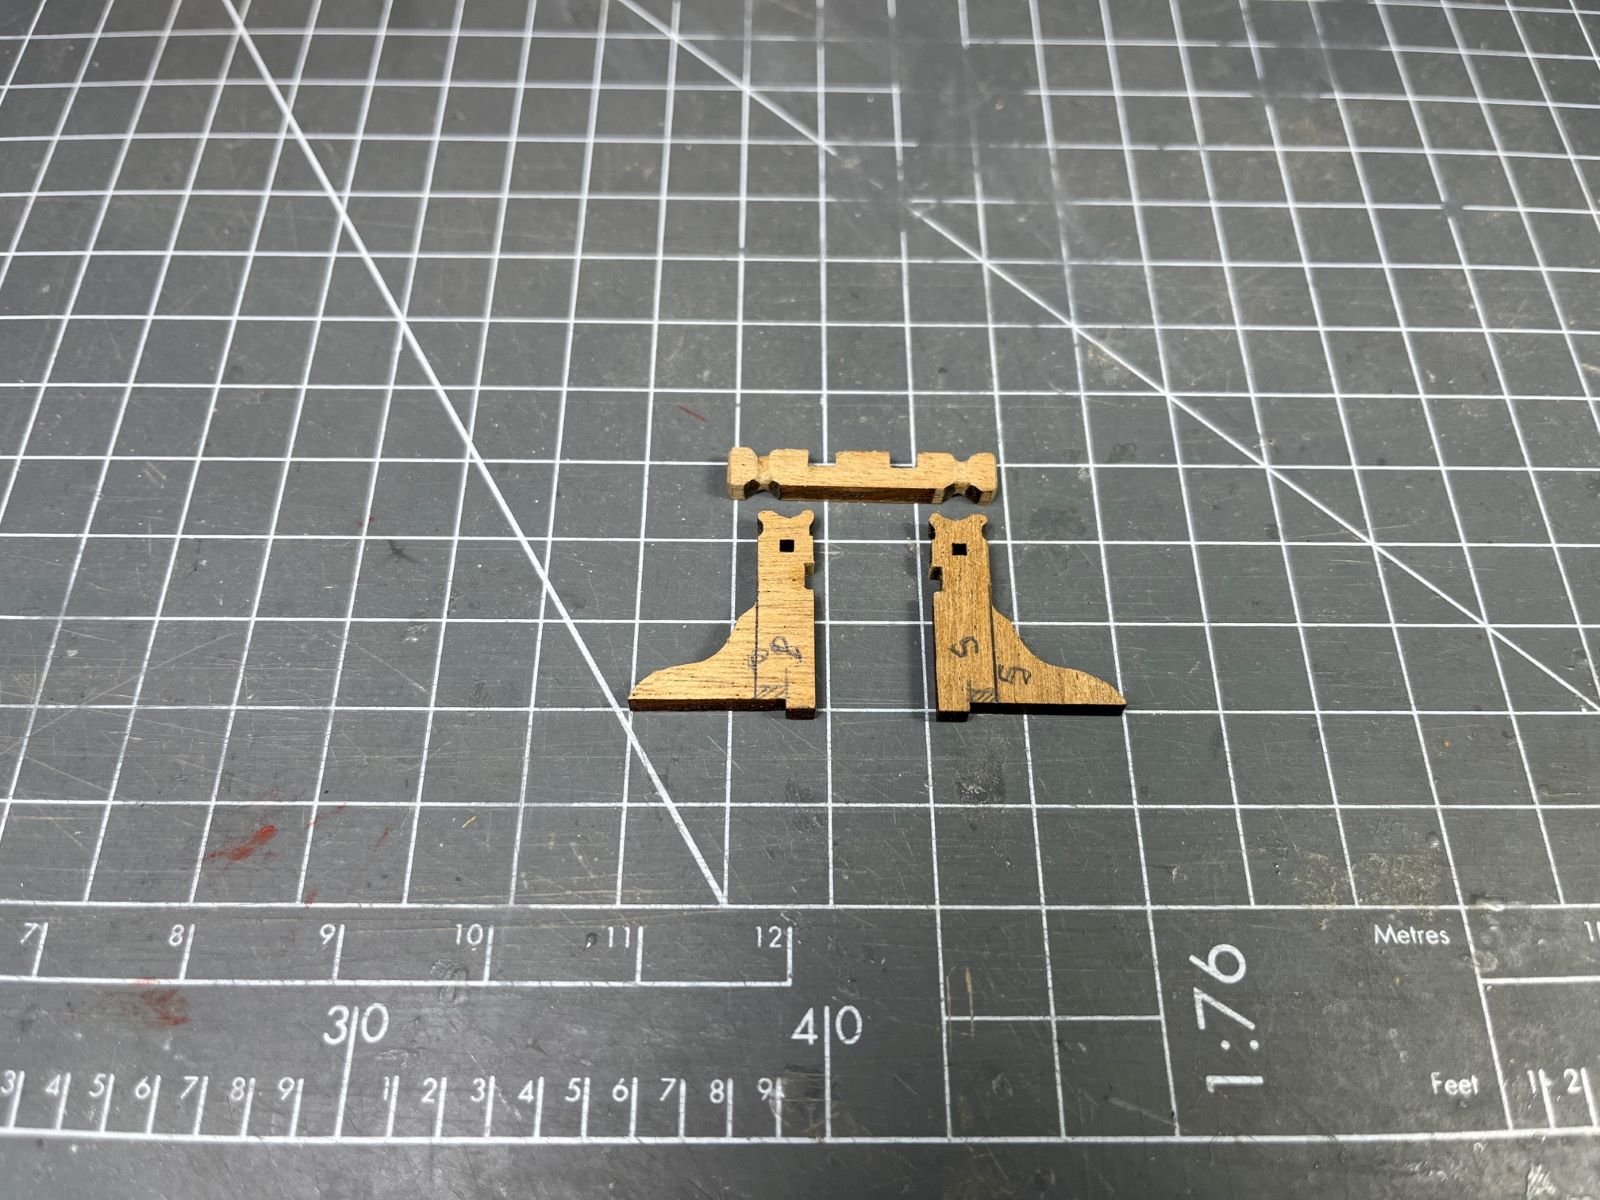
Following the previous discussions, I tried the bracket that supports the bowsprit:

Indeed, it seems that the bracket provides a support that is a bit too high. Therefore, I will modify the provided parts as in the following:

I will cut away the foot of each posts along the penciled lines. I will replace them later with new ones of the same shape but with a thinner thickness. Then, I will remove the hatched rectangles so to shorten the height of the posts and the new feet will then be re attached.
Best regards,
Dan
- flyenrw, PaddyO, Paul Le Wol and 3 others
-
6
-
Gorgeous model Chris, sharp details and beautiful construction.
Congratulations,
Dan
- Keith Black, ccoyle, mtaylor and 1 other
-
4
-
Good job on the first and second planking. The second one looks beautiful. I am impressed with how much you manage edge bending the planks in the bow area. I always crack them if I exceed a reasonable entity. Surely another build of yours that I will keep following.
Cheers,
Dan
-
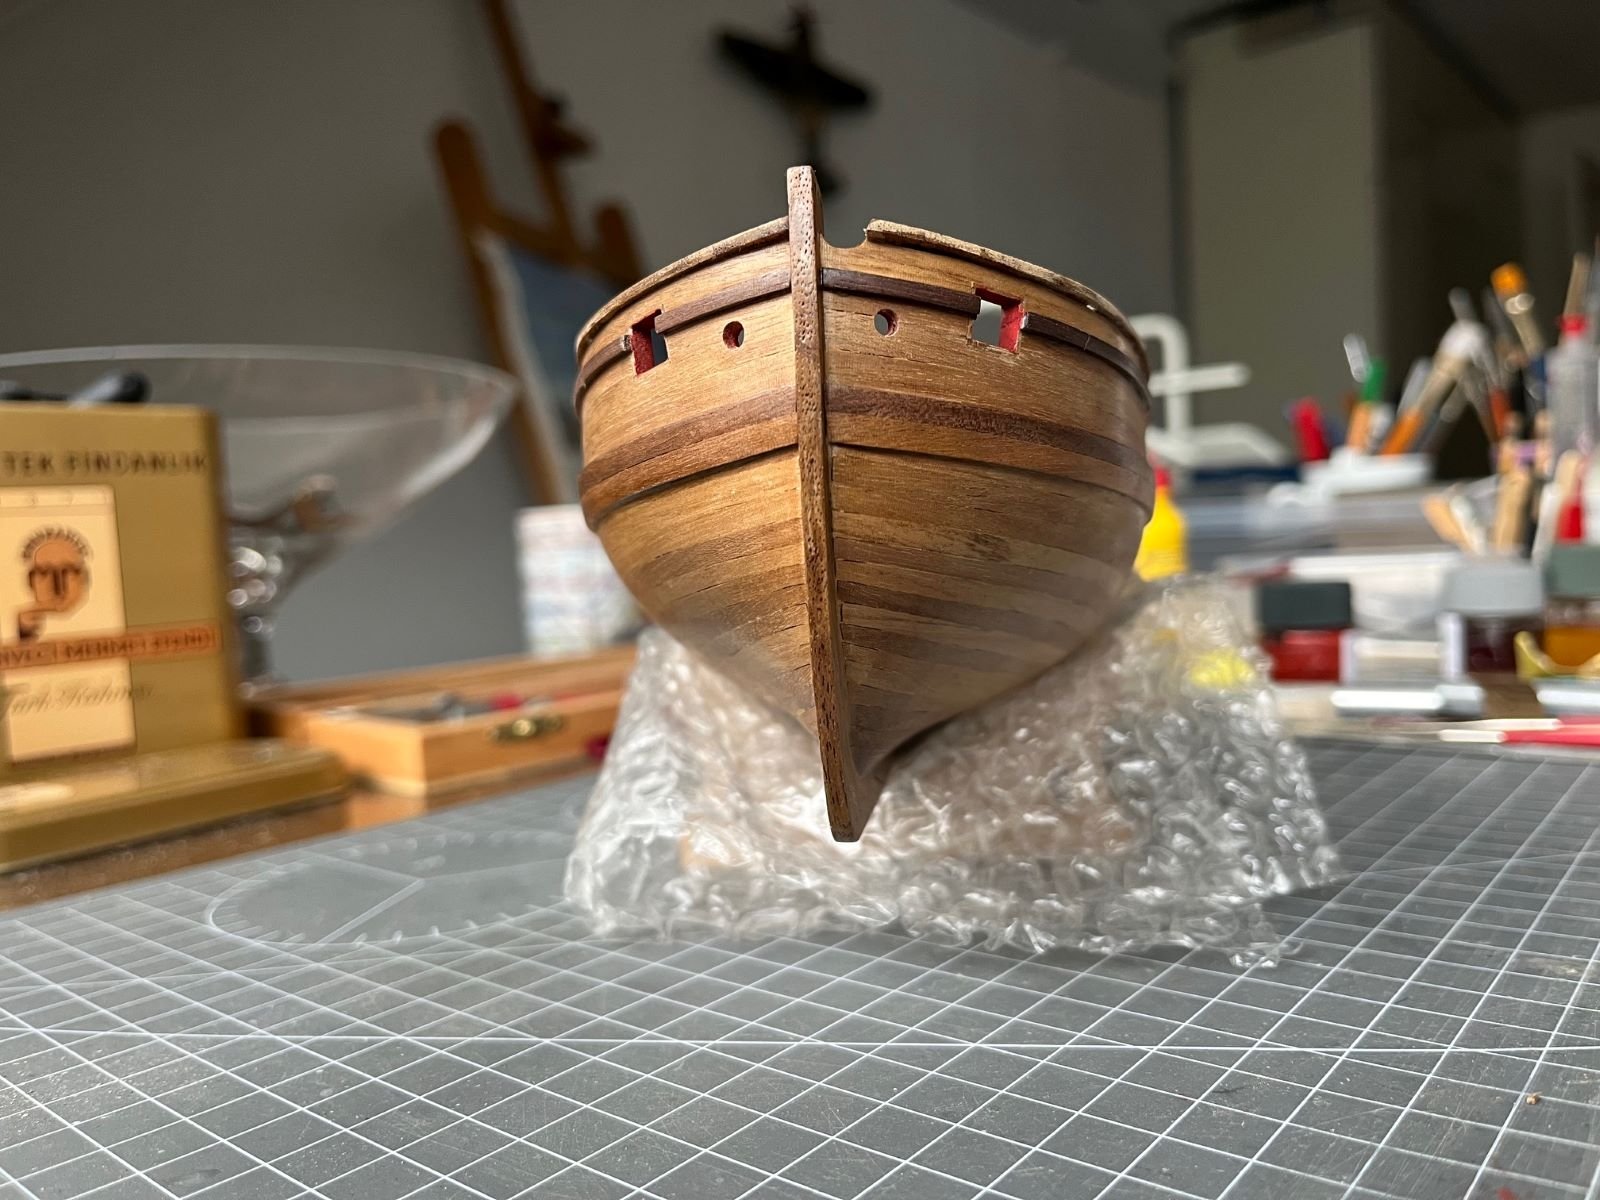
Hi all, some progress on my Lady.
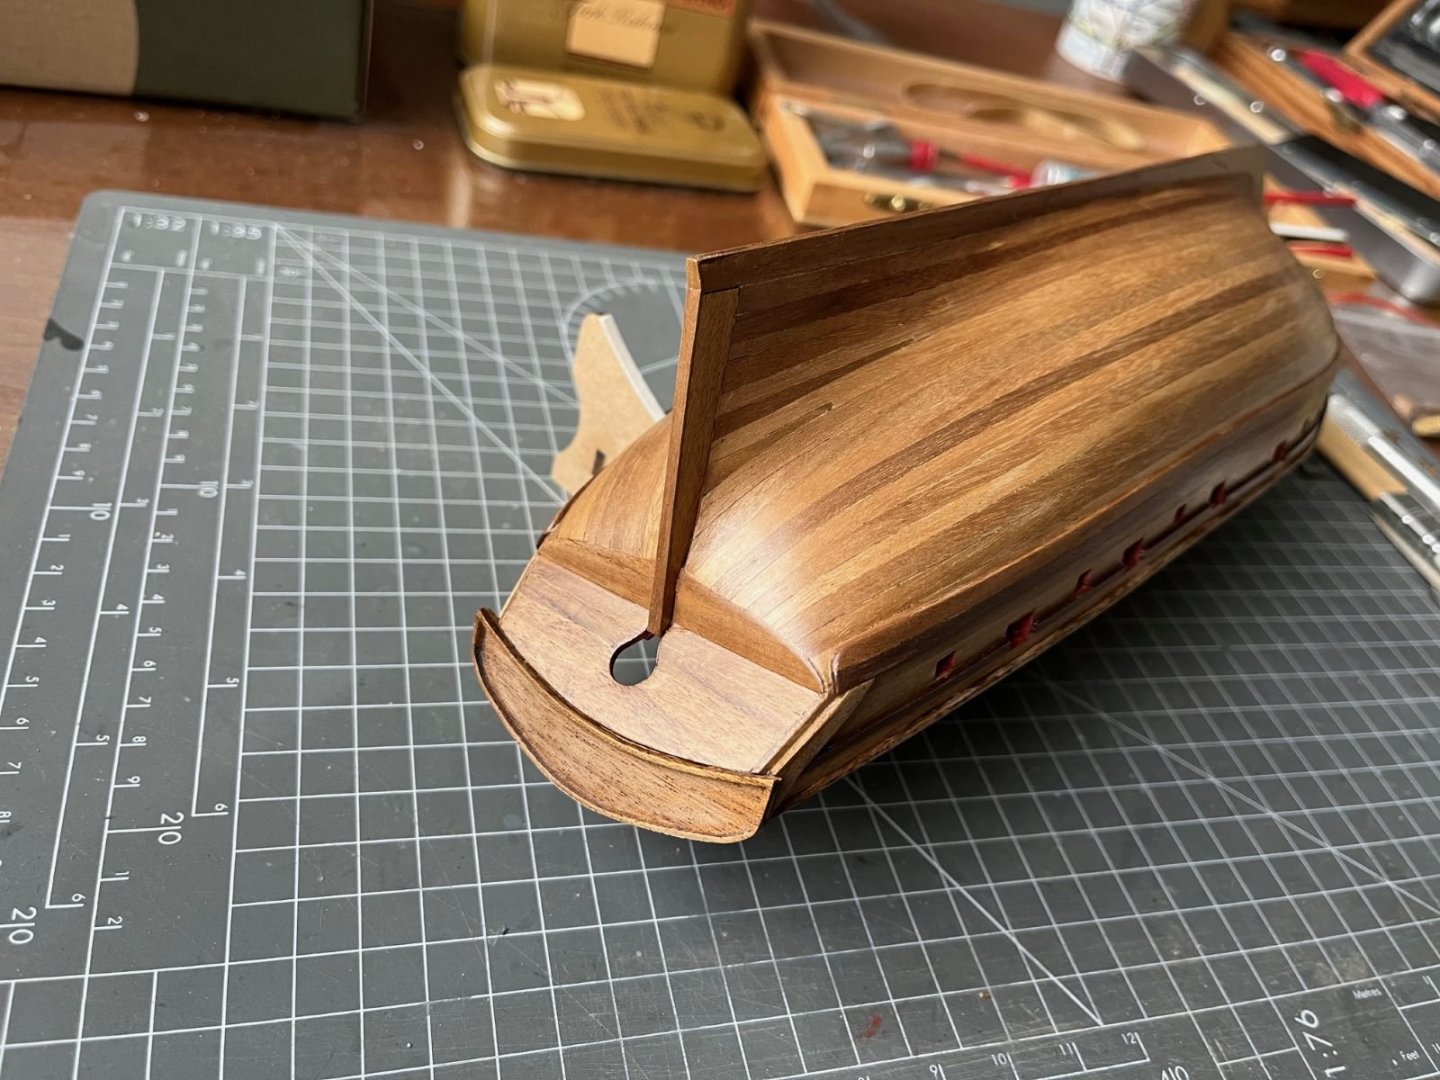
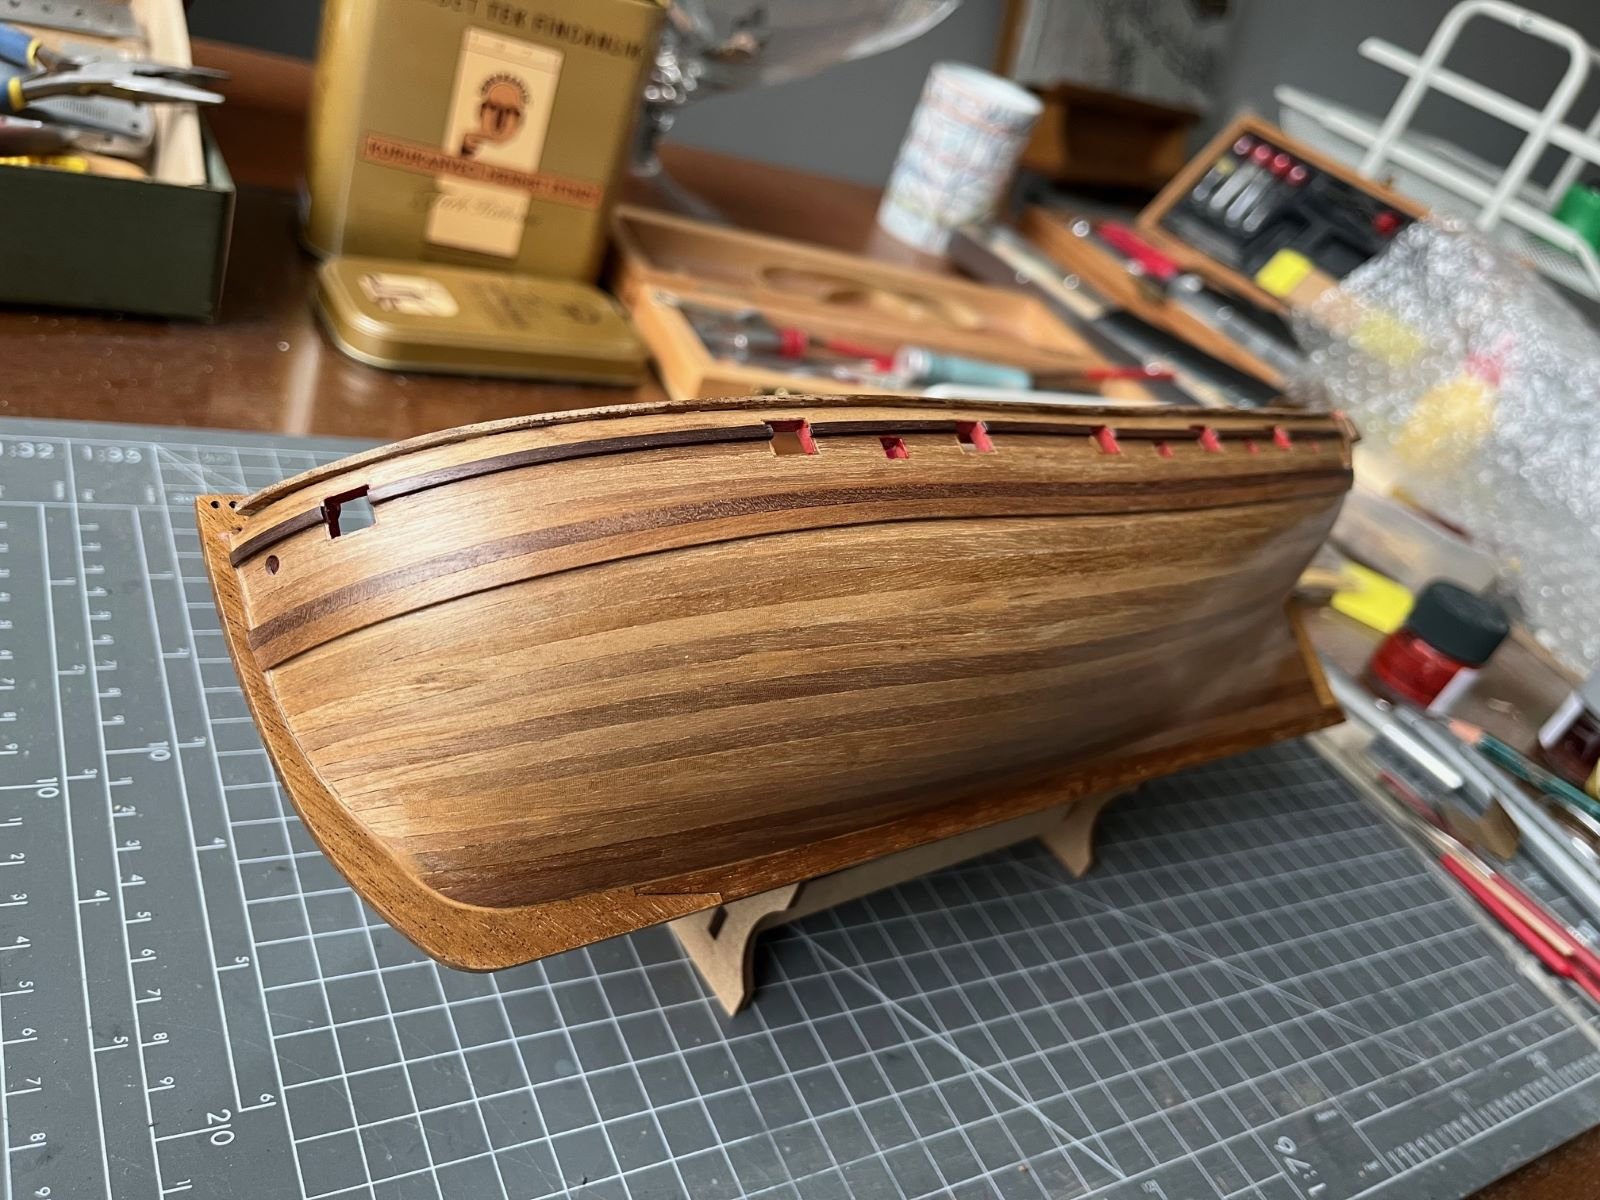
After the wales, I finally ended the major works on the hull on its stern area. As I wrote previously, I didn't like to see the ends of the planking strakes because their bond lines looked bad. Hence, I covered those with an additional layer of thin walnut obtaining a configuration that I think looks nicer and cleaner.
The sheen is due to the varnish that I used to seal the grain of the wood and that I brushed with a fine steel wool. Next I will brush on a satin clear. Then, I masked the hull to prepare it for painting the inner sides of the bulwarks.
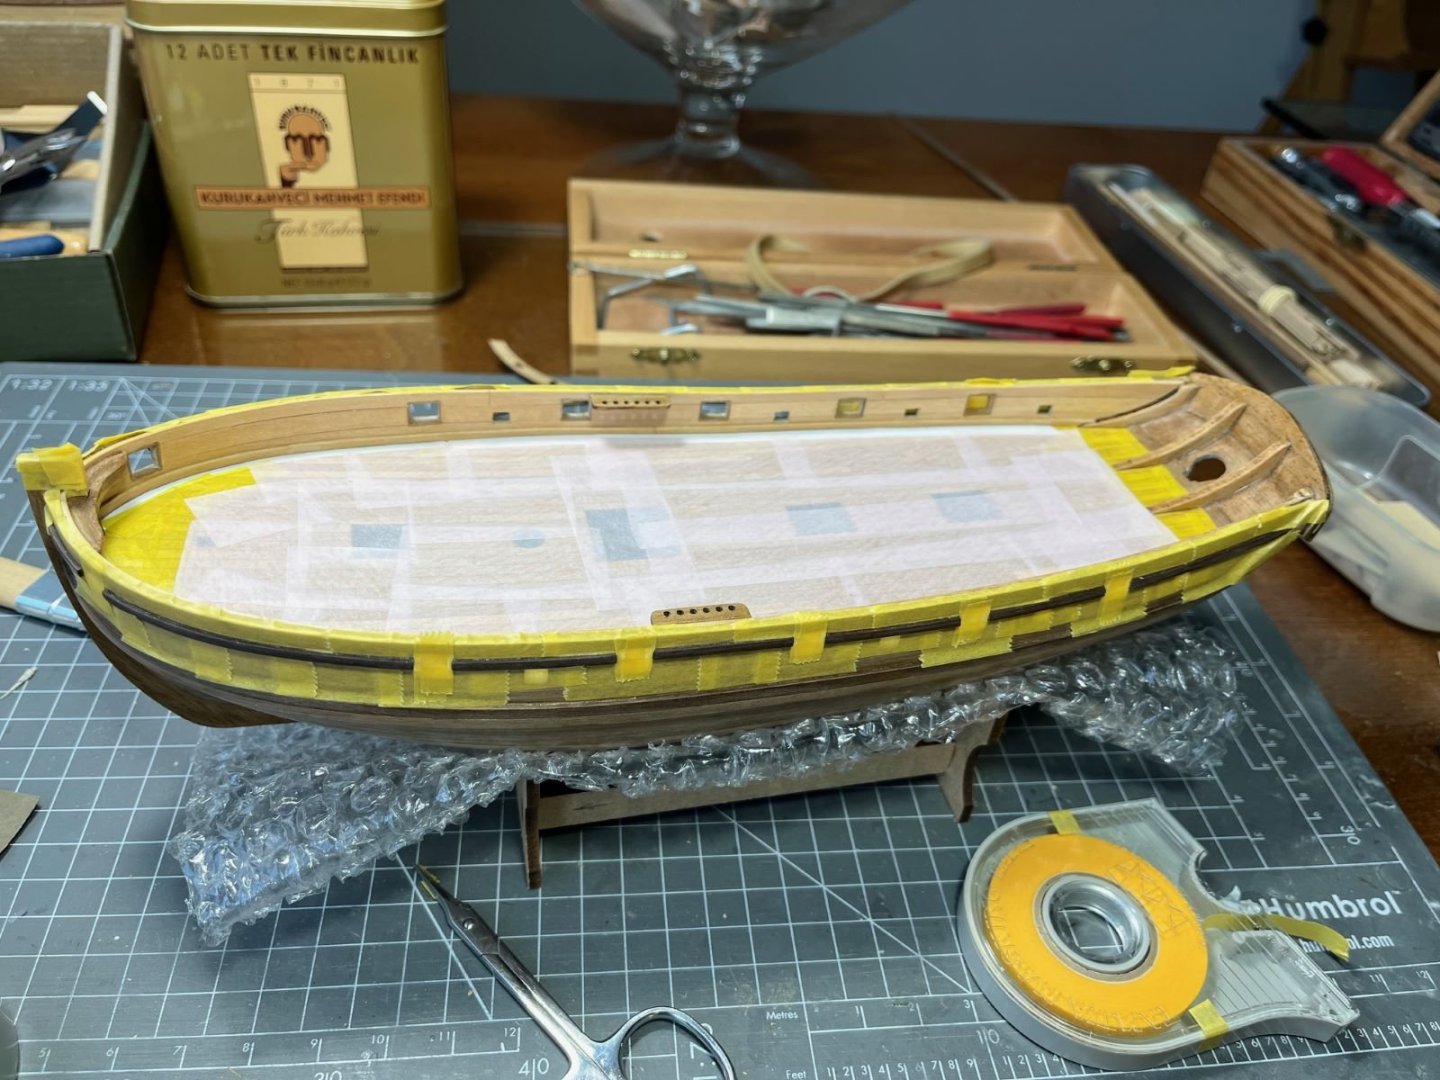
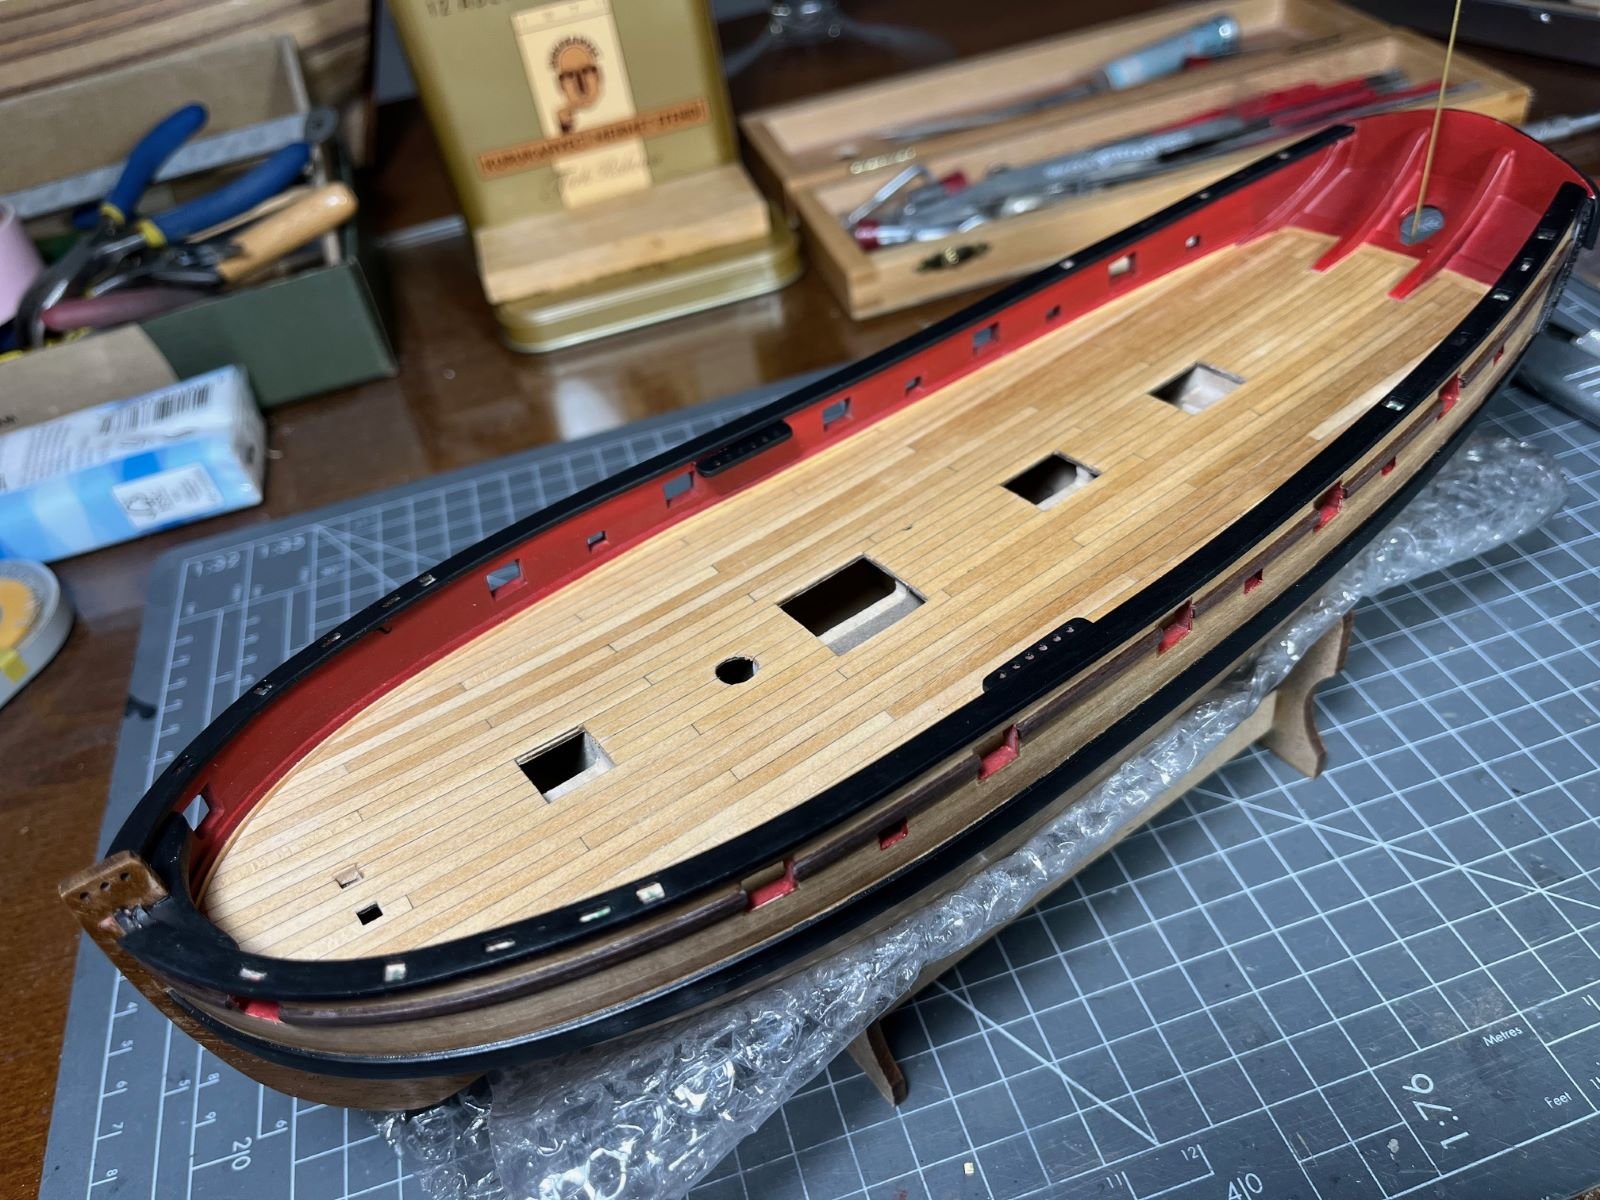
To obtain a good uniform base for the red paint, I sprayed a coat of Tamiya white primer, which also revealed few blemishes that had to be filled and smoothed.
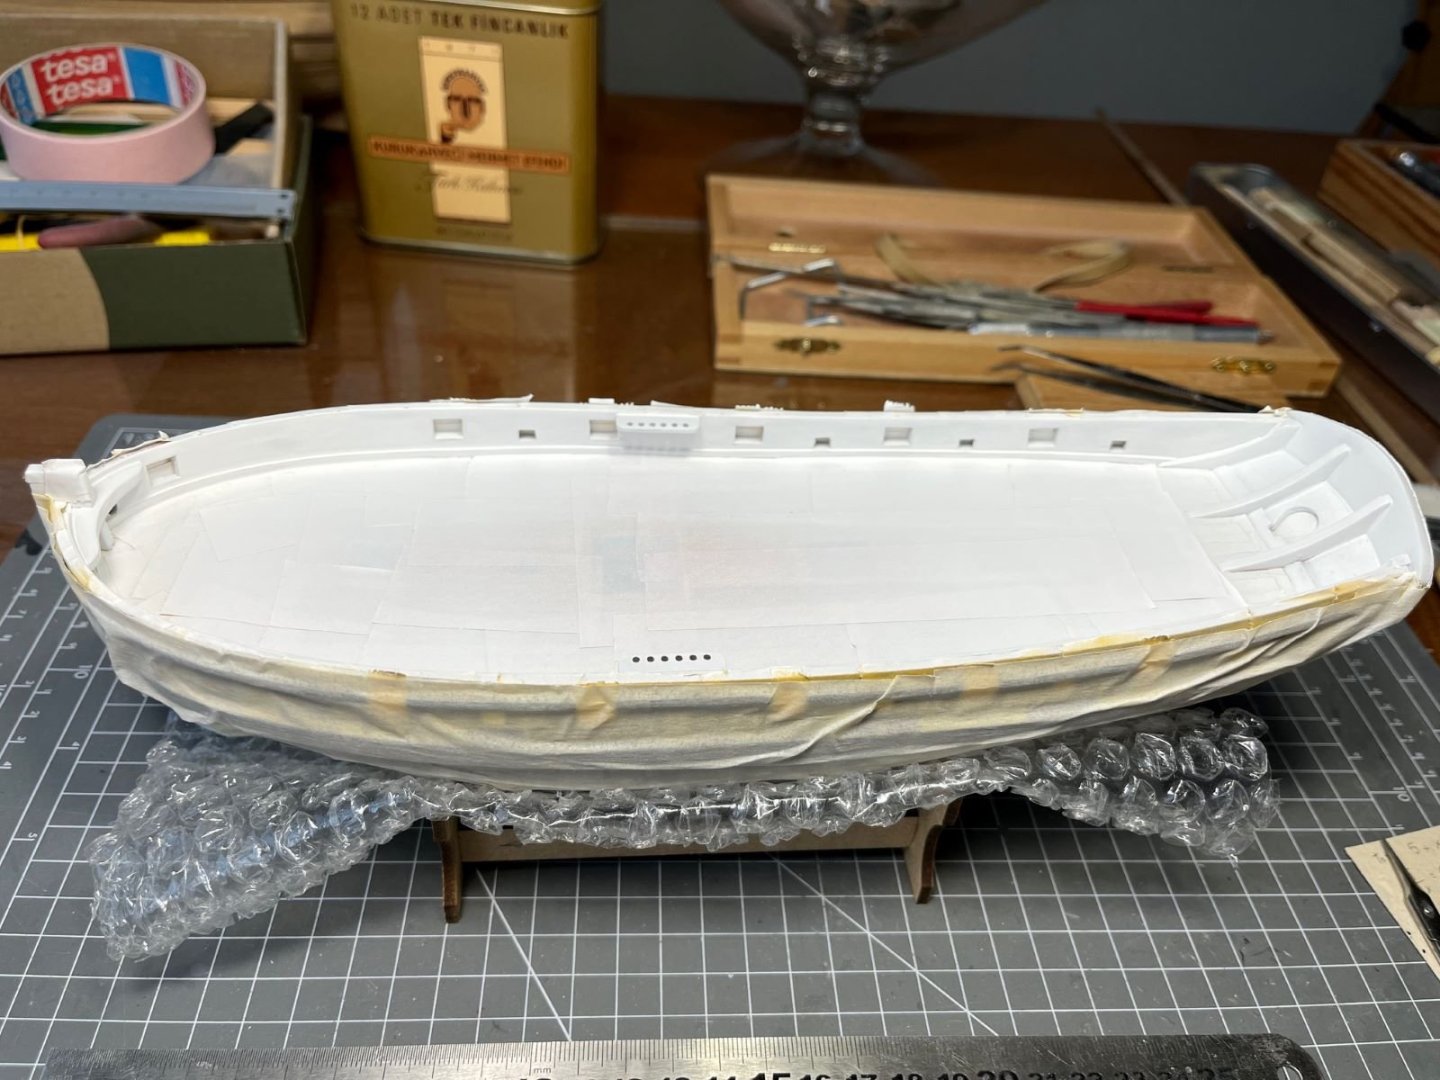
Finally, I airbrushed the red paint which I obtained with a mix of 80% of Tamiya flat red and 20% of Tamiya flat red brown to make it darker than pure red.
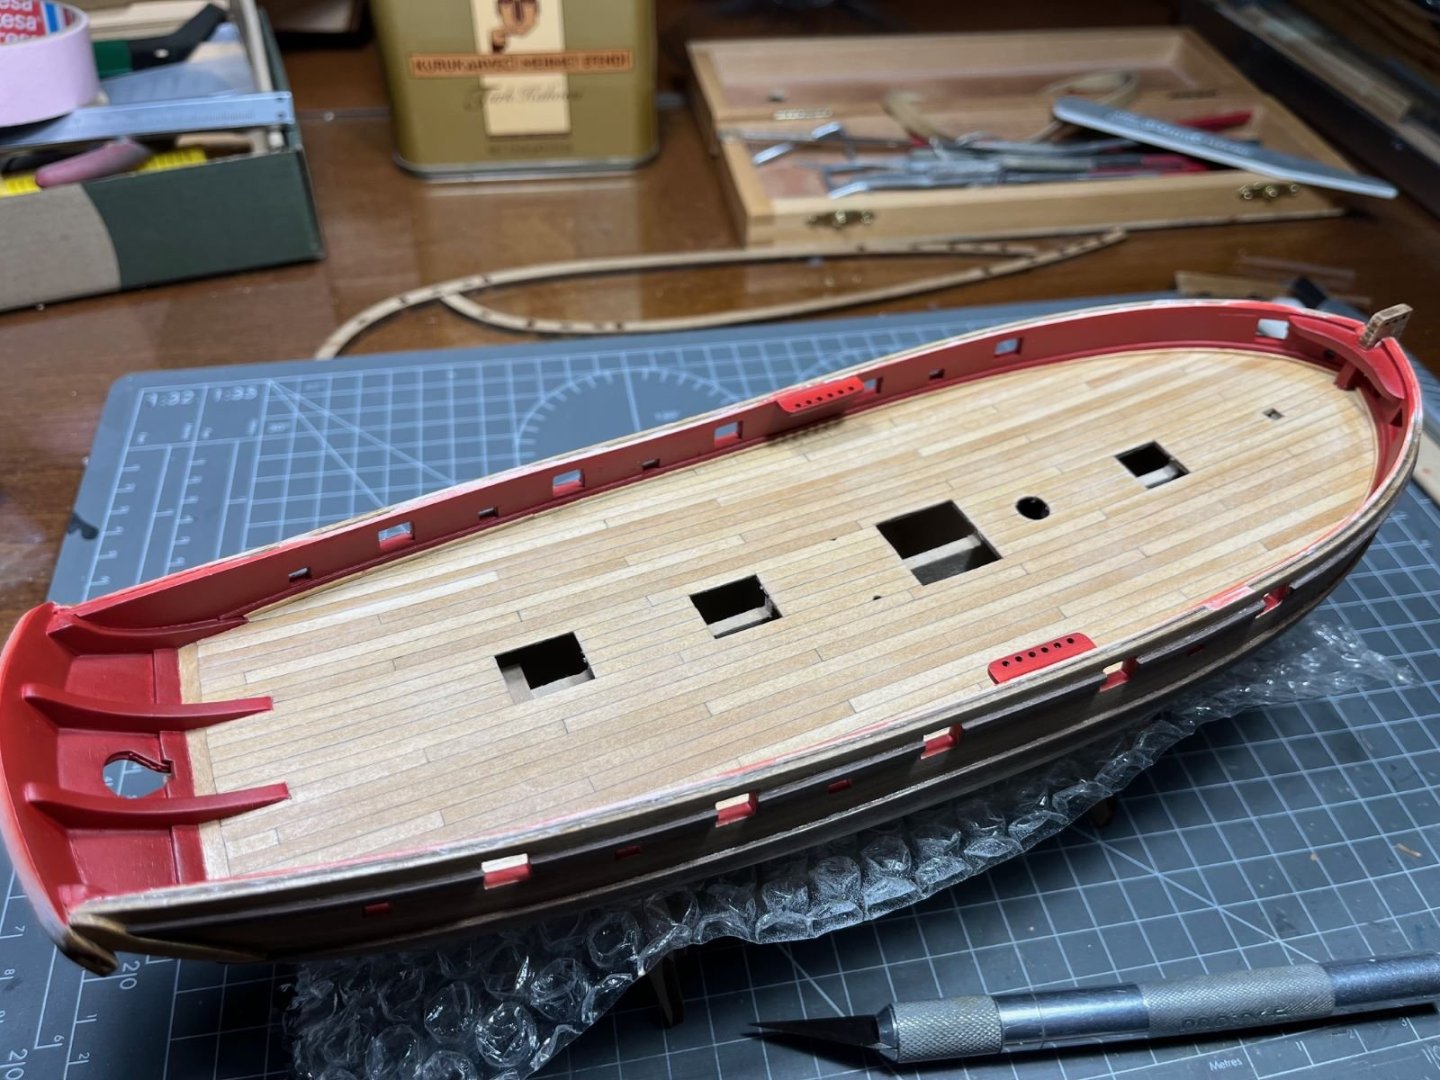

To finish the waterway, I added a small wooden strip at the base of the bulwarks.
The paints that I used were from the Tamiya acrylic line which spray very well, but they are very matt, almost chalky when dried and their finish is very delicate getting very easily spoiled just by touch. Hence, I brushed on a coat of Humbrol satin clear which made the surface less matt and more resilient.
That's all for now, next I will paint the exterior of the hull and install the cap rails.
Best regards,
Dan
- PaddyO, Thukydides, GrandpaPhil and 5 others
-
8
-
-
I didn't comment much, but I am following your build. Dutch vessels are not seen often around, but as other have said, they have played an important role in history. In addition, they have set the standards for others. I have one of these in my wish list. Congratulations for your build so far, it is evident that your modeling skills are improving.
Kind regards,
Dan
-
-
10 hours ago, flyenrw said:
In my opinion, this area of assembly is a necessary total redo.
Indeed, this is the natural conclusion. I will redo it as well, so I am not bothering more than necessary. I suggest you inspect the pictures of period models of British cutters published in this forum (if you have not seen them yet) to get inspiration about plausible configurations for the new pieces:
In addition, I visited the build log of a Lady Nelson model built by @glbarlow, who discussed the problem and re-built the parts in subject (but probably this issue had been treated also by other modelers). You could have a look also on that.
Cheers,
Dan
-
-
12 hours ago, flyenrw said:
you have spotted a discrepancy of height difference, to support the butt end of the bow sprit to the rail
Hi Roger, thanks for your comments. It took a while to me to understand the position of that part and to decide the position of the catheads. The drawings and the pictures are neither clear nor unambiguous. Eventually, I decided that the catheads will be positioned right past (astern) the first openings. I also slightly reshaped that 'V' part making it a bit slimmer.
As far as your quote is concerned, I positioned that part in subject just below the the indent for the bowsprit, but I didn't do any fit check with it and with the other supporting superstructures that I haven't yet removed from the package hoping that it will be ok (I know this isn't the correct approach...).
I think that I will glue in place the cap rails after having painted the inner sides of the bulwarks.
Looking forward to seeing your progress,
Dan
-
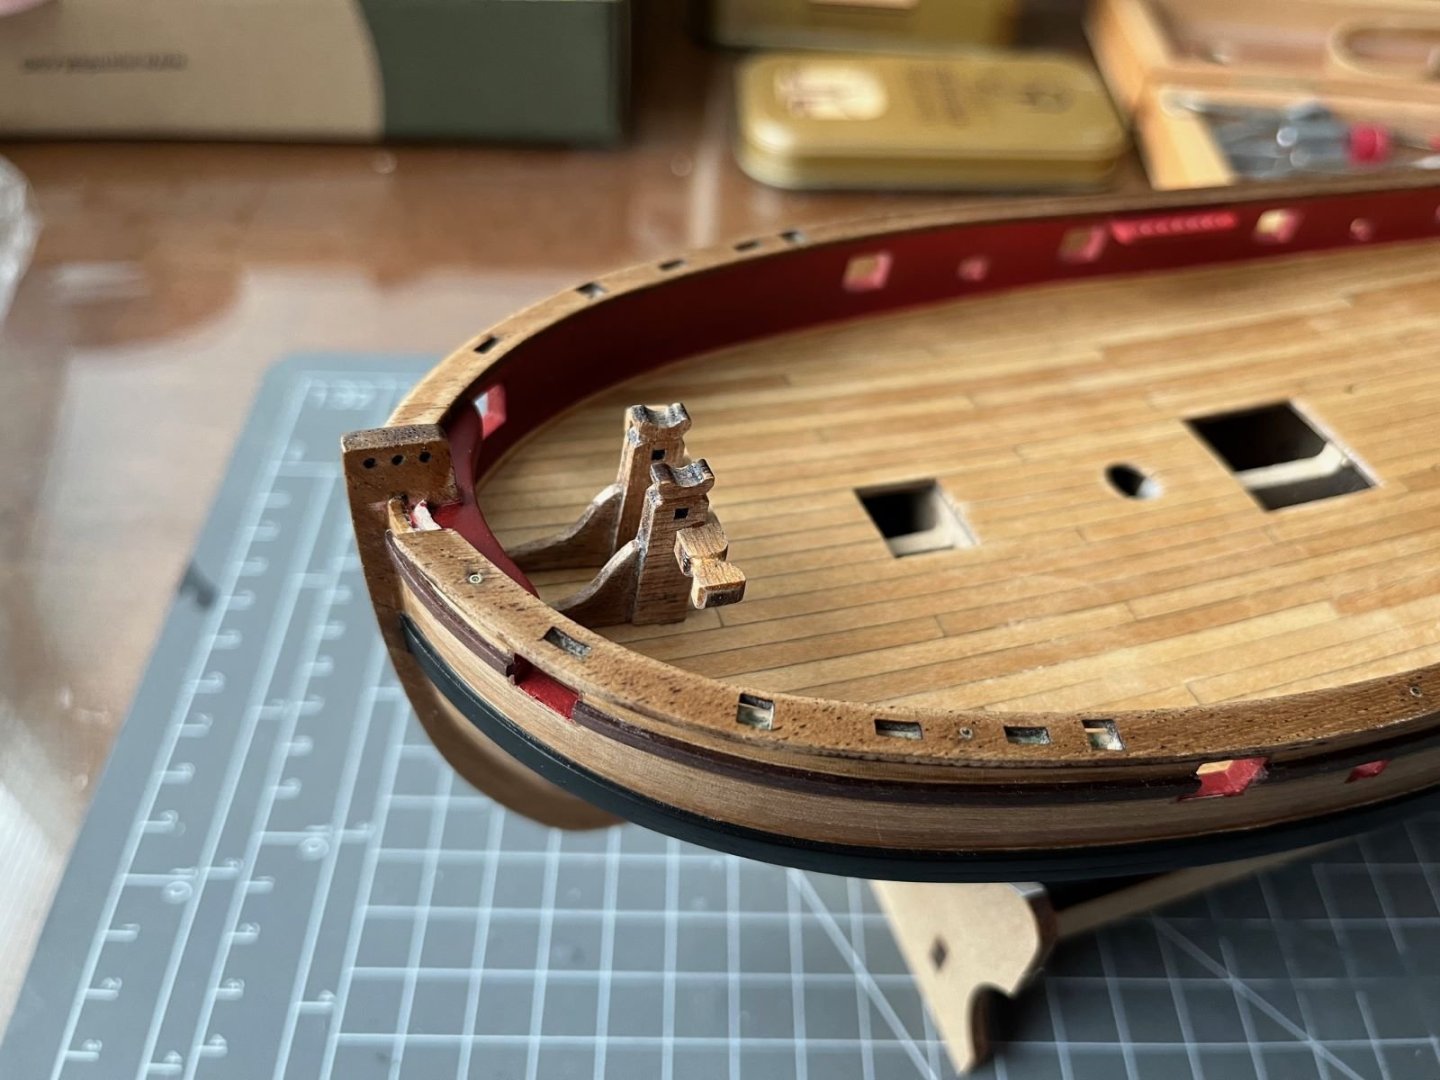
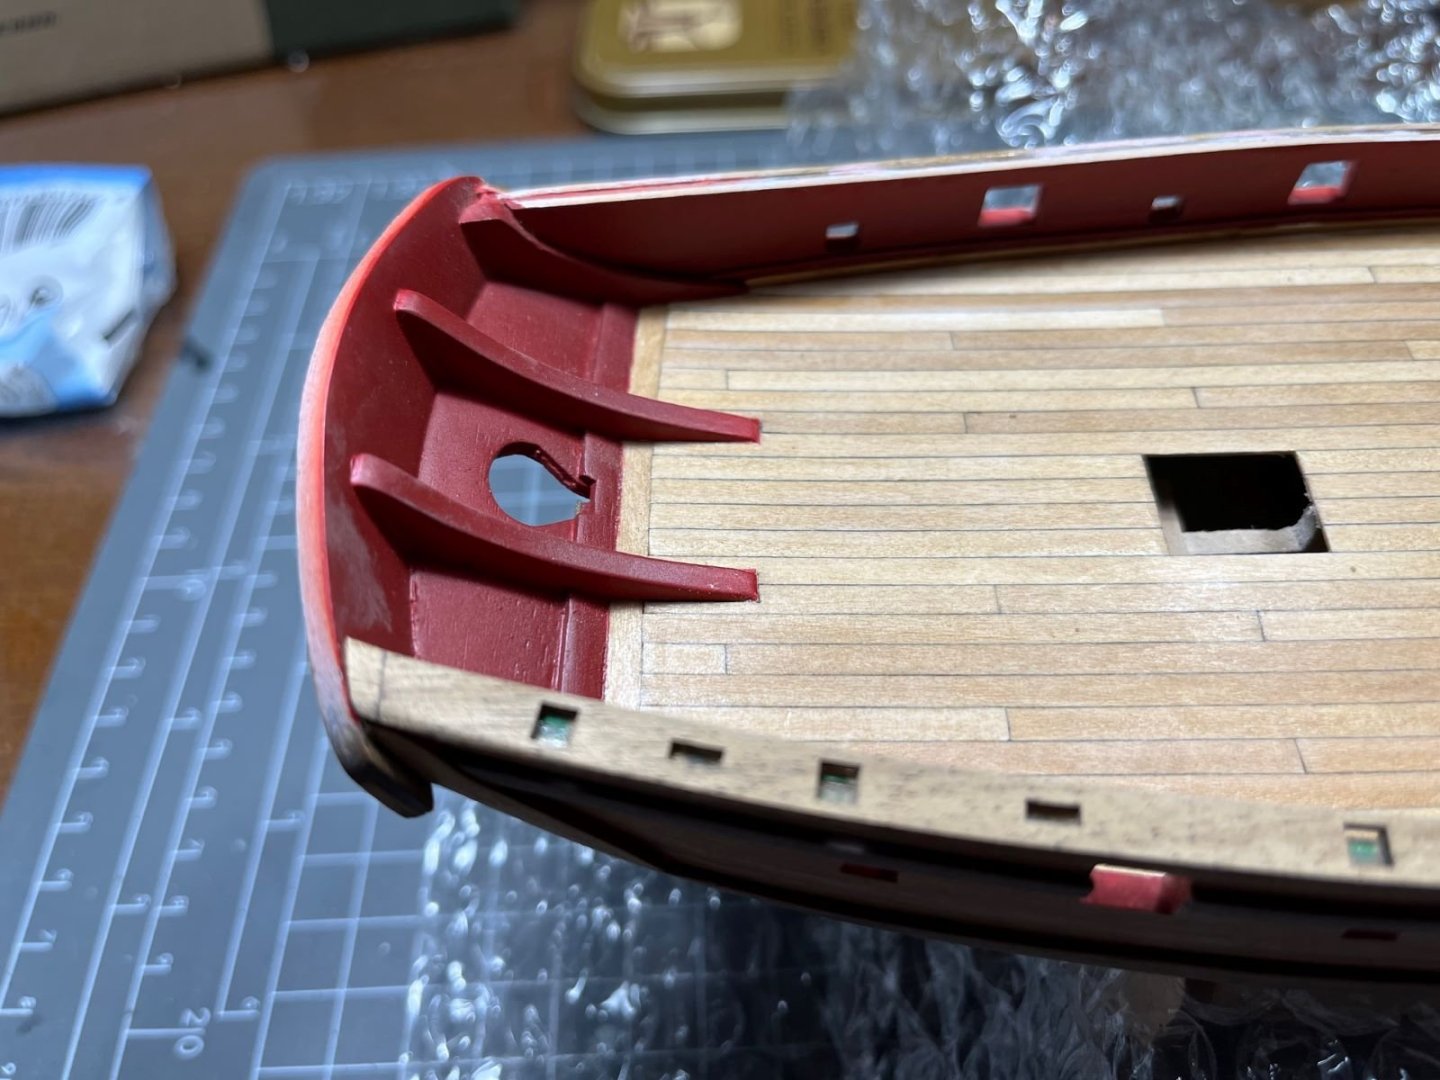
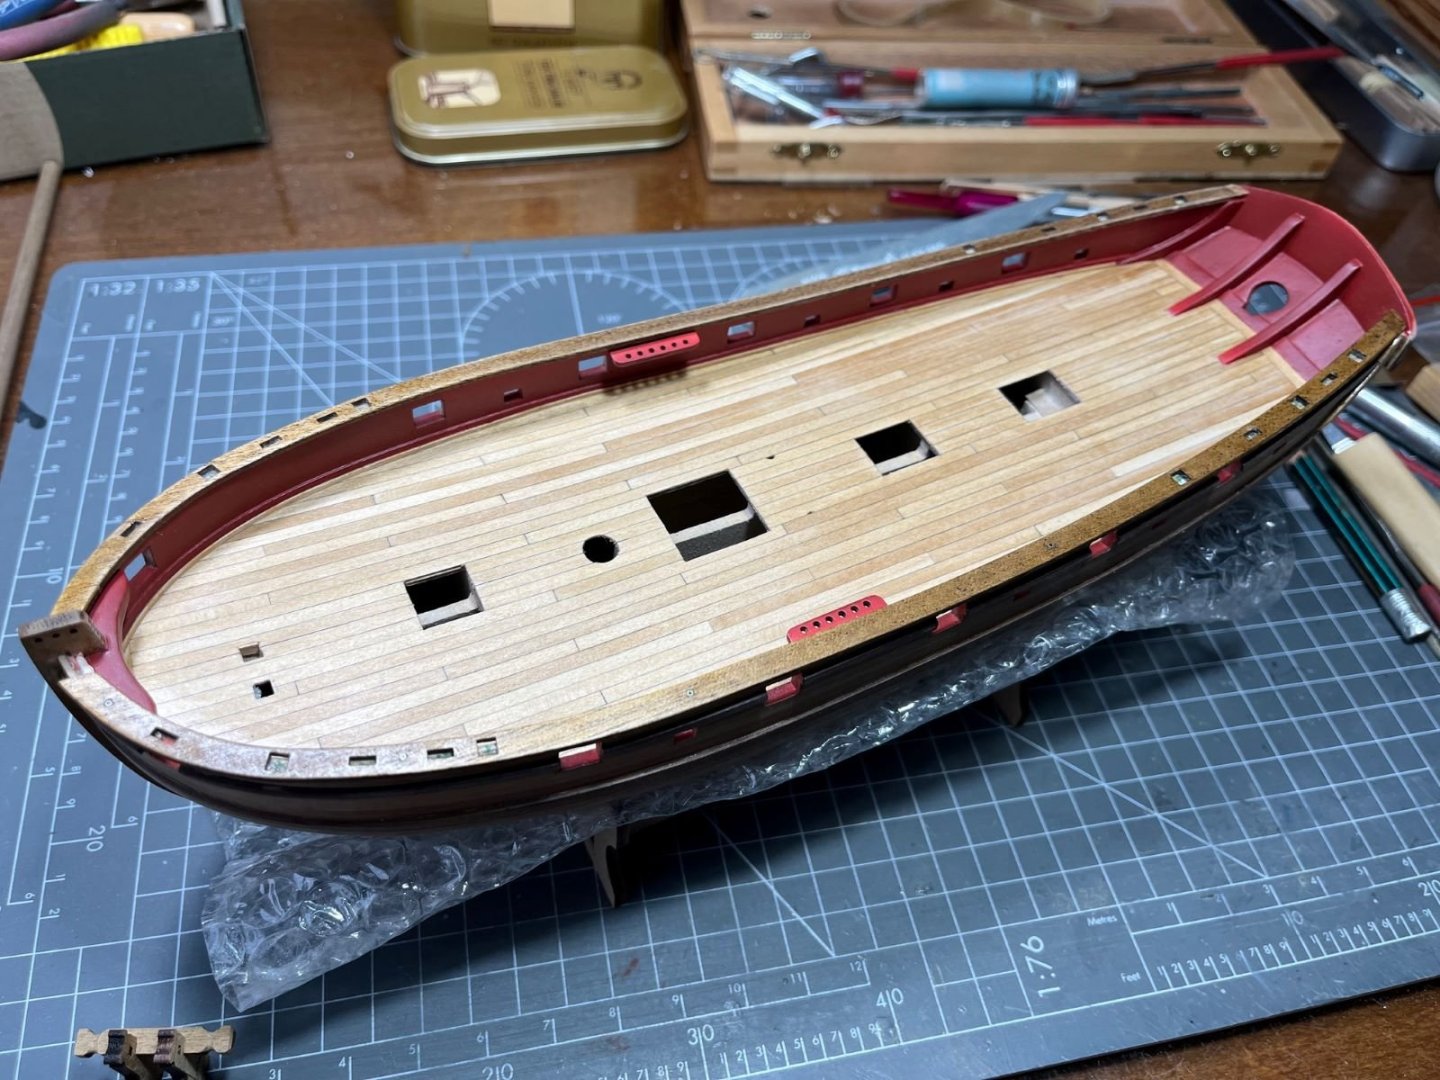
Hi all,
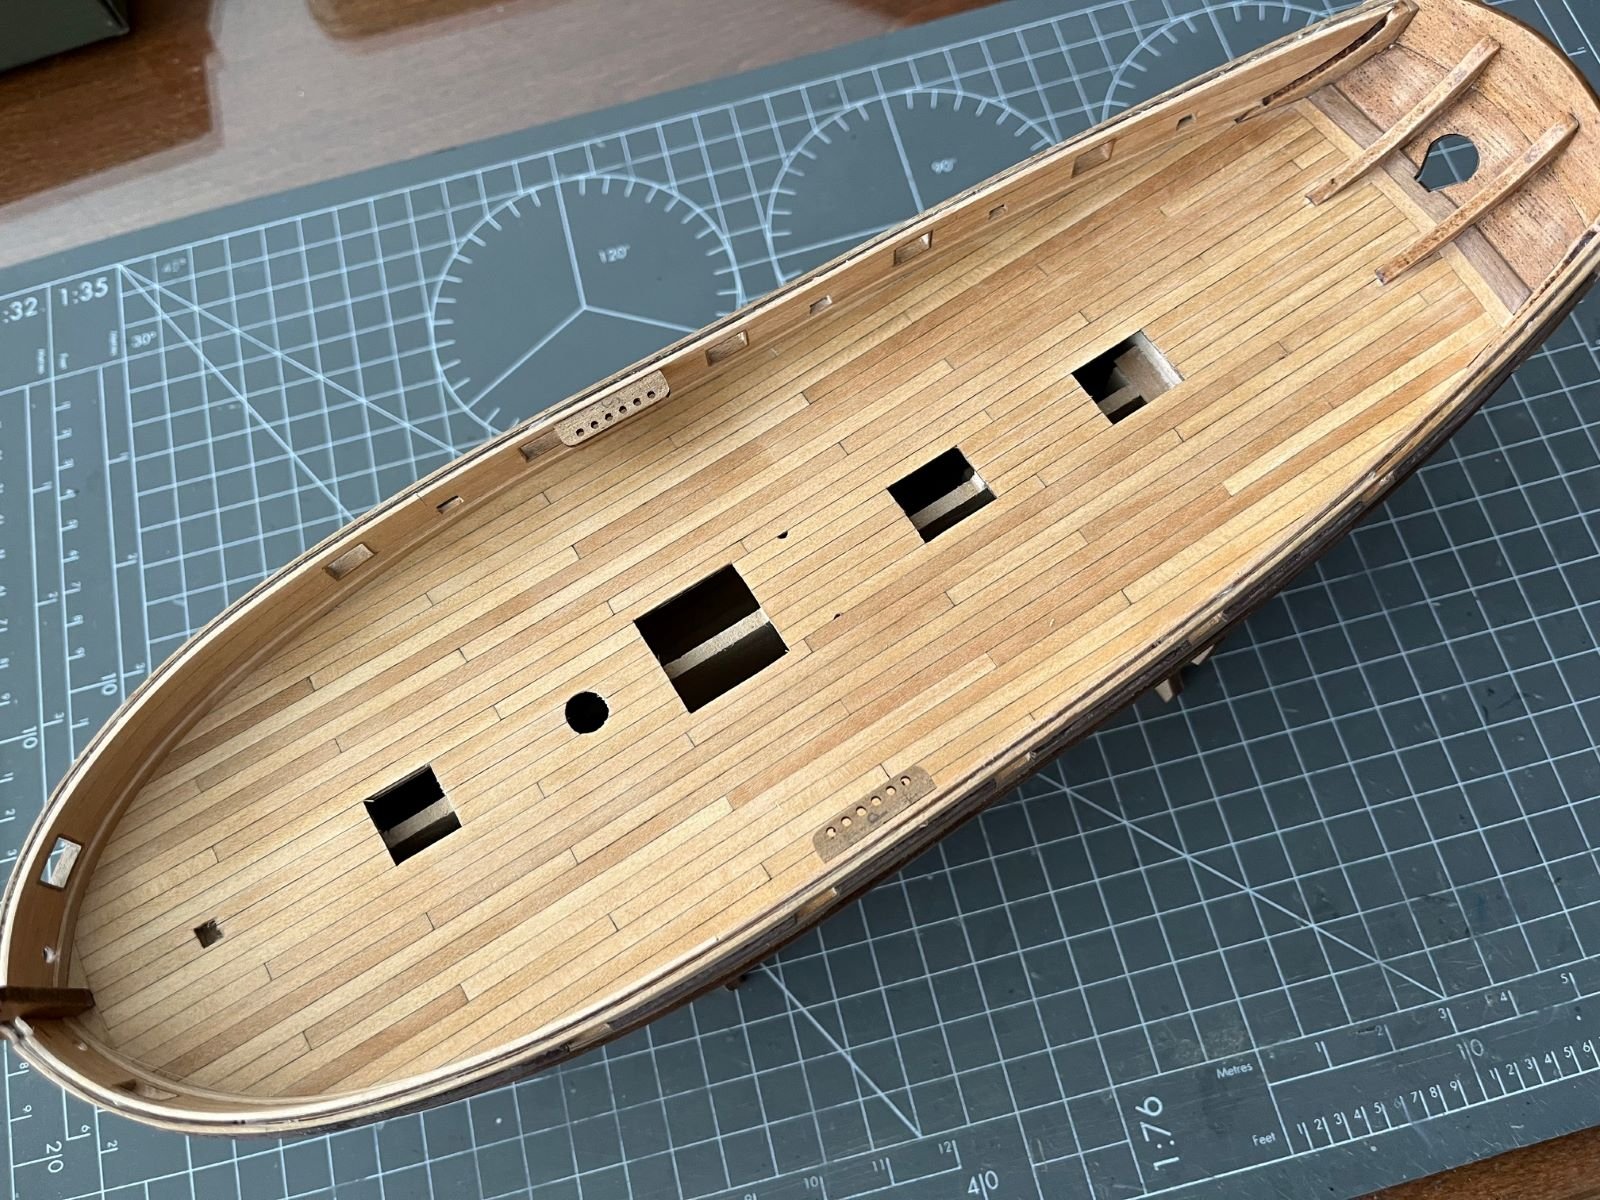
I went on with attaching the 'small' wales to complete the hull.
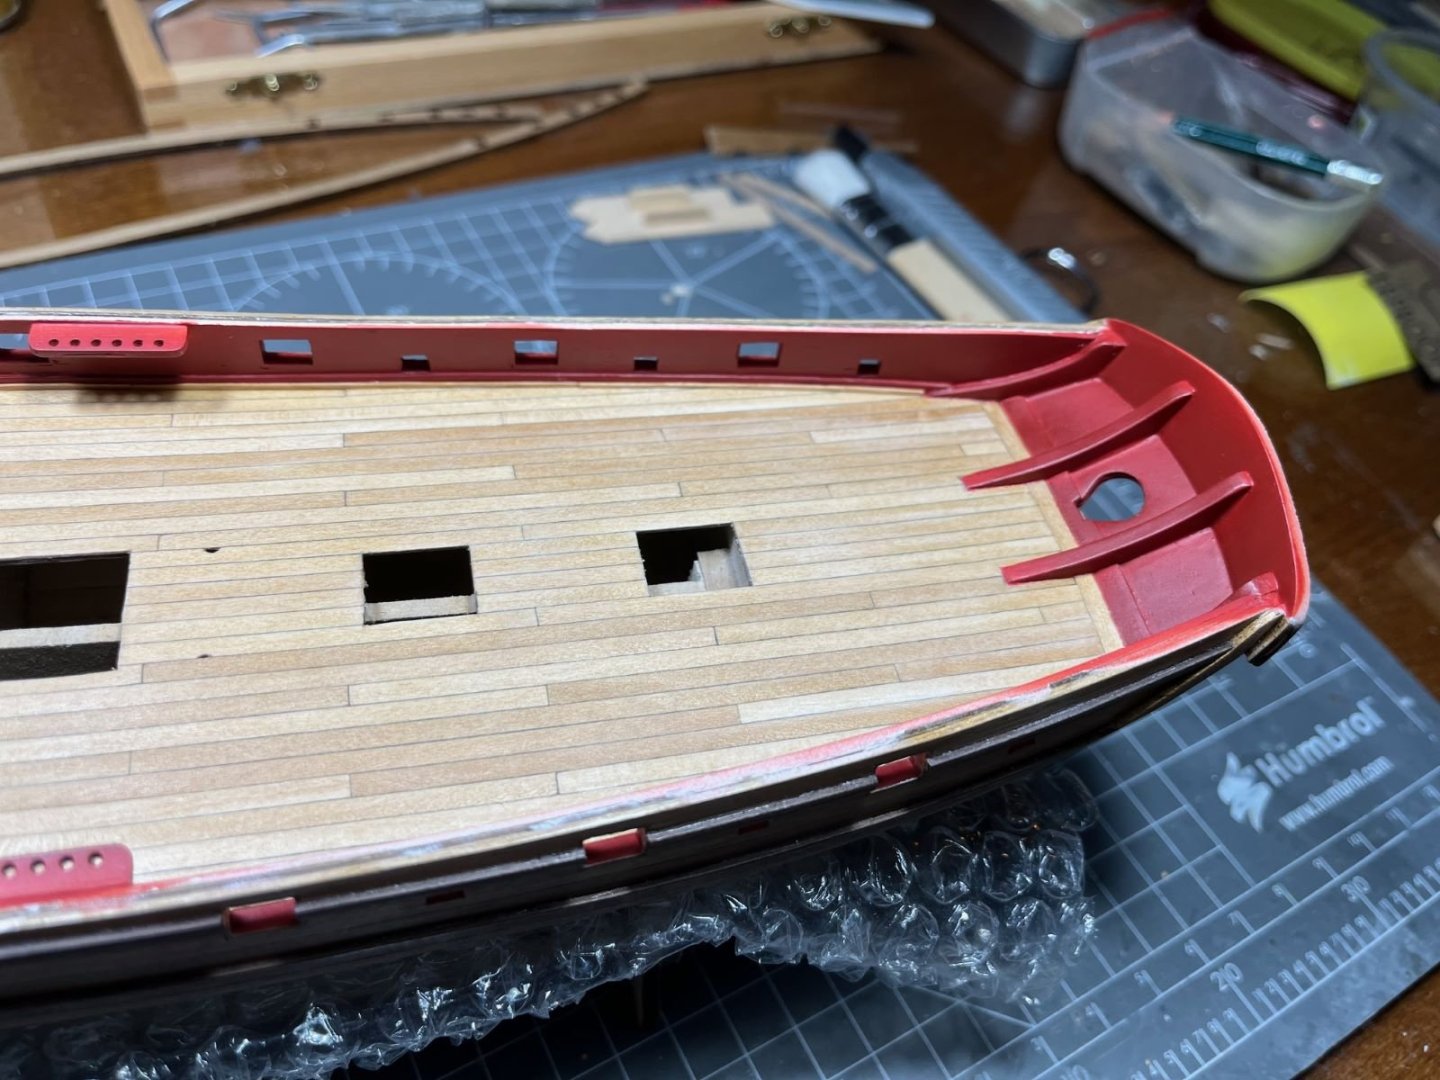
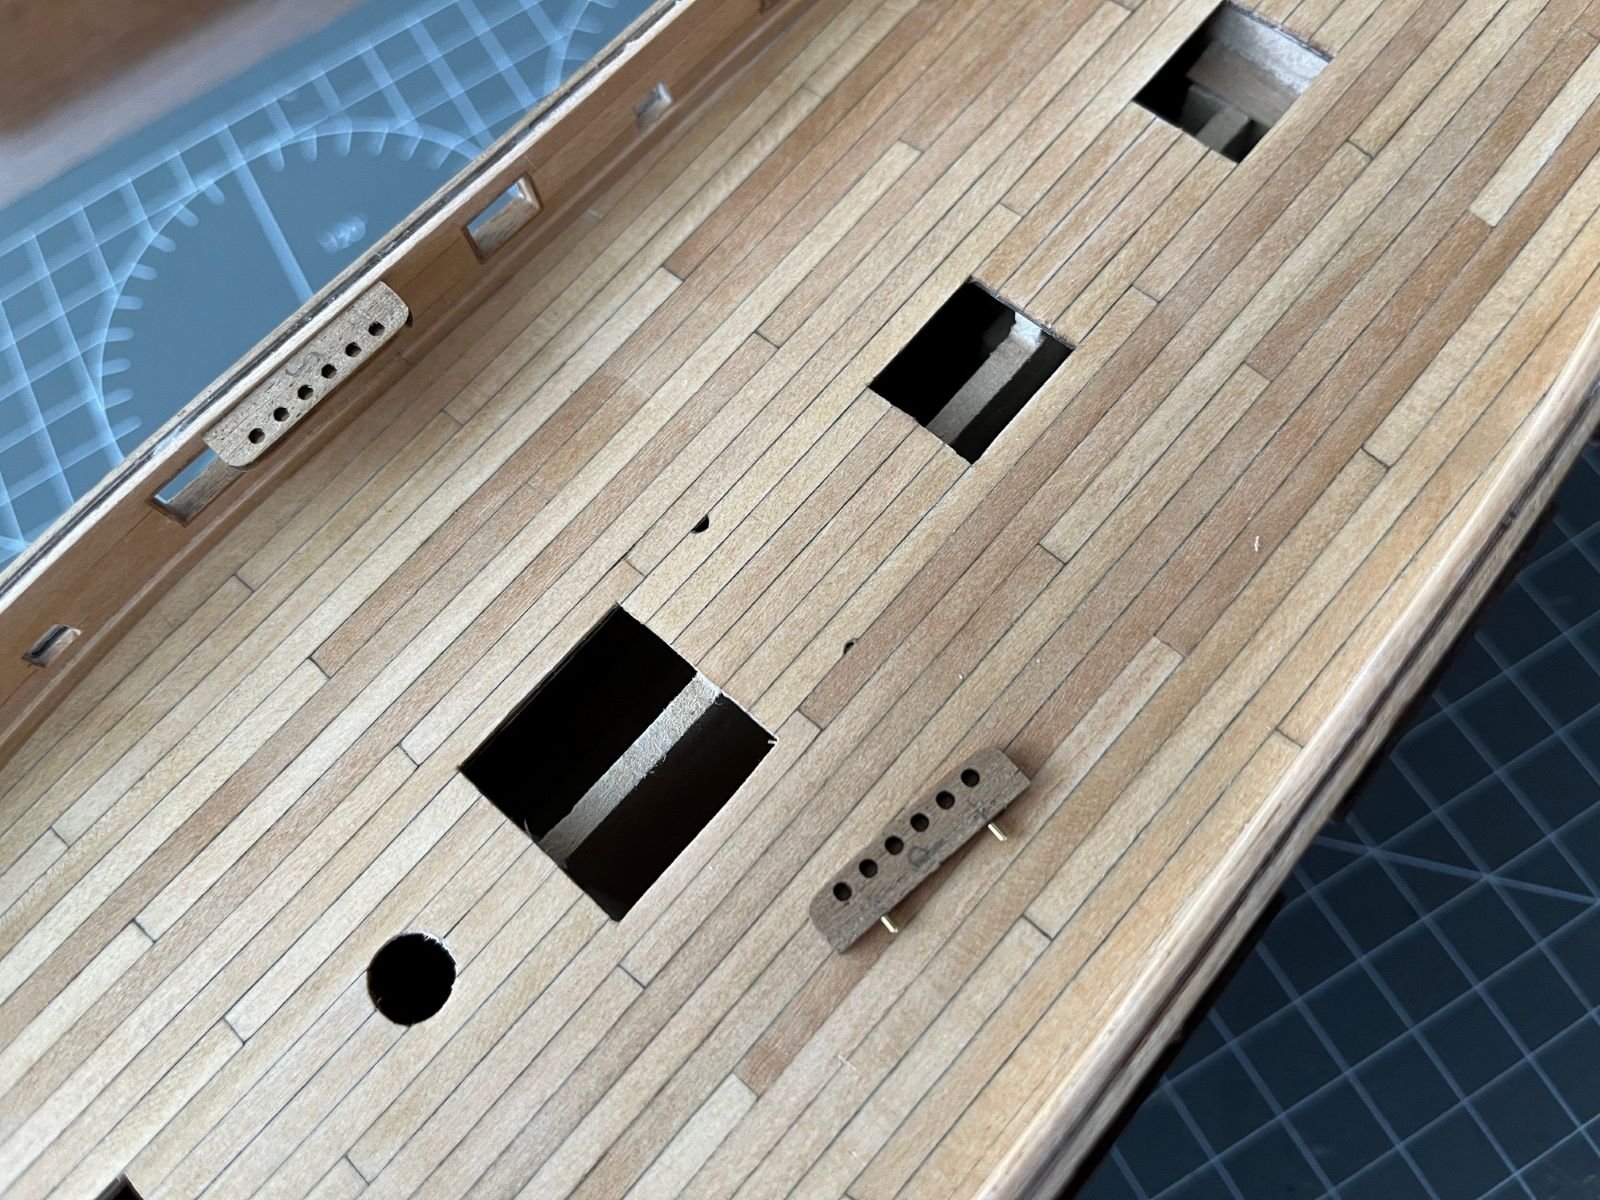
The function of these 'wales' is not clear to me being them interrupted in many locations by the opening for the guns. I guess they functioned as load spreader for the concentrated loads transmitted by the gun carriages attachment points. I started to prepare the inner sides of the bulwarks for painting and I started to set up the pin racks. I assume that there will be quite some tension applied to them by the rigging, hence, I pinned them to the bulwarks with brass pins.

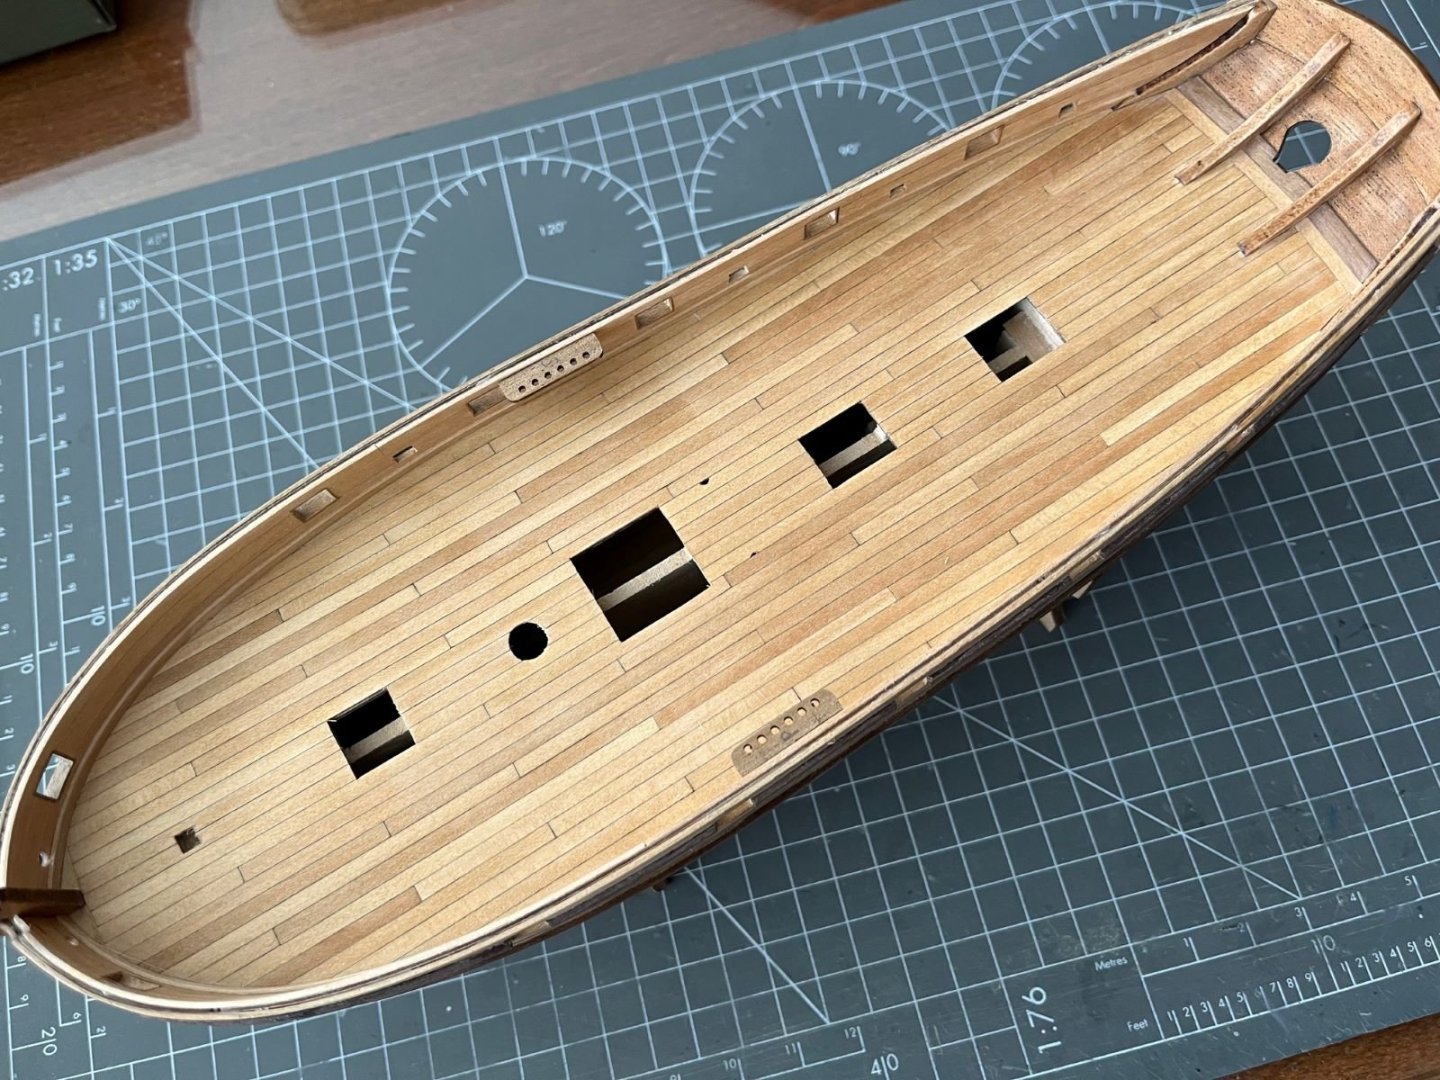
I also brushed the timbers of the deck with a transparent varnish which gave fuller colors to them.
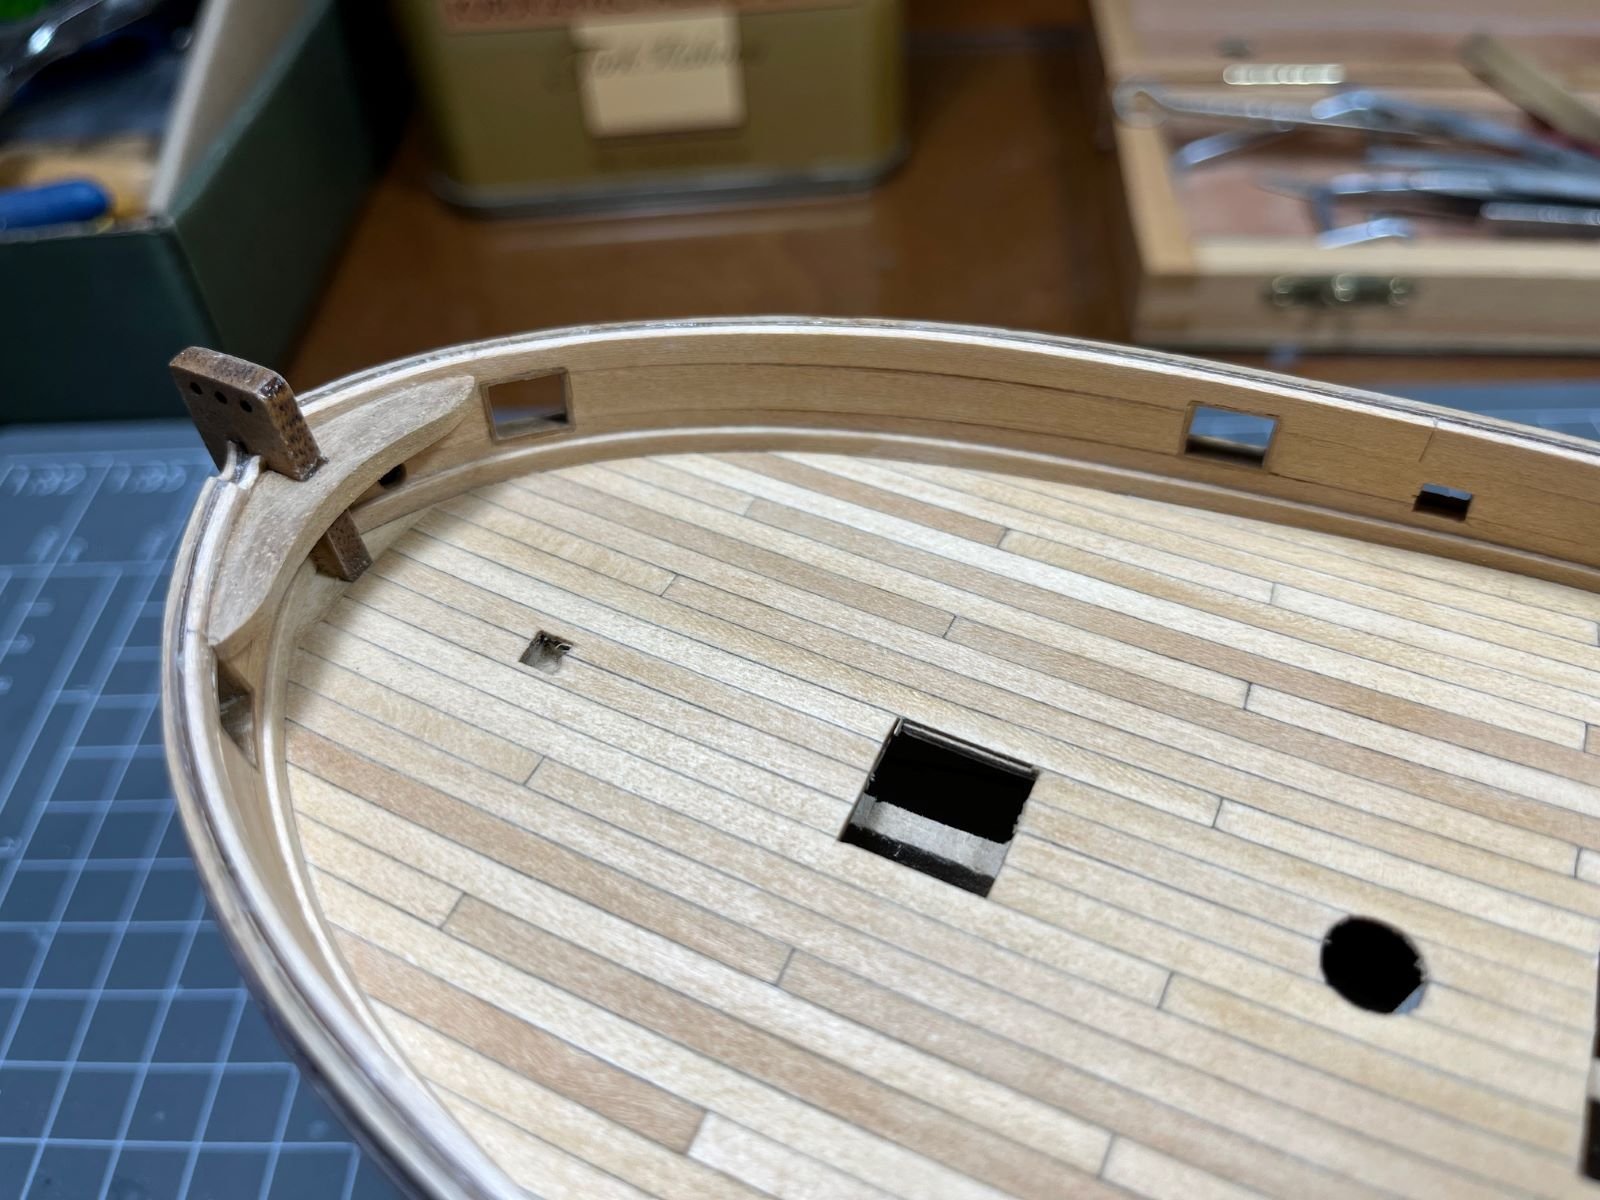
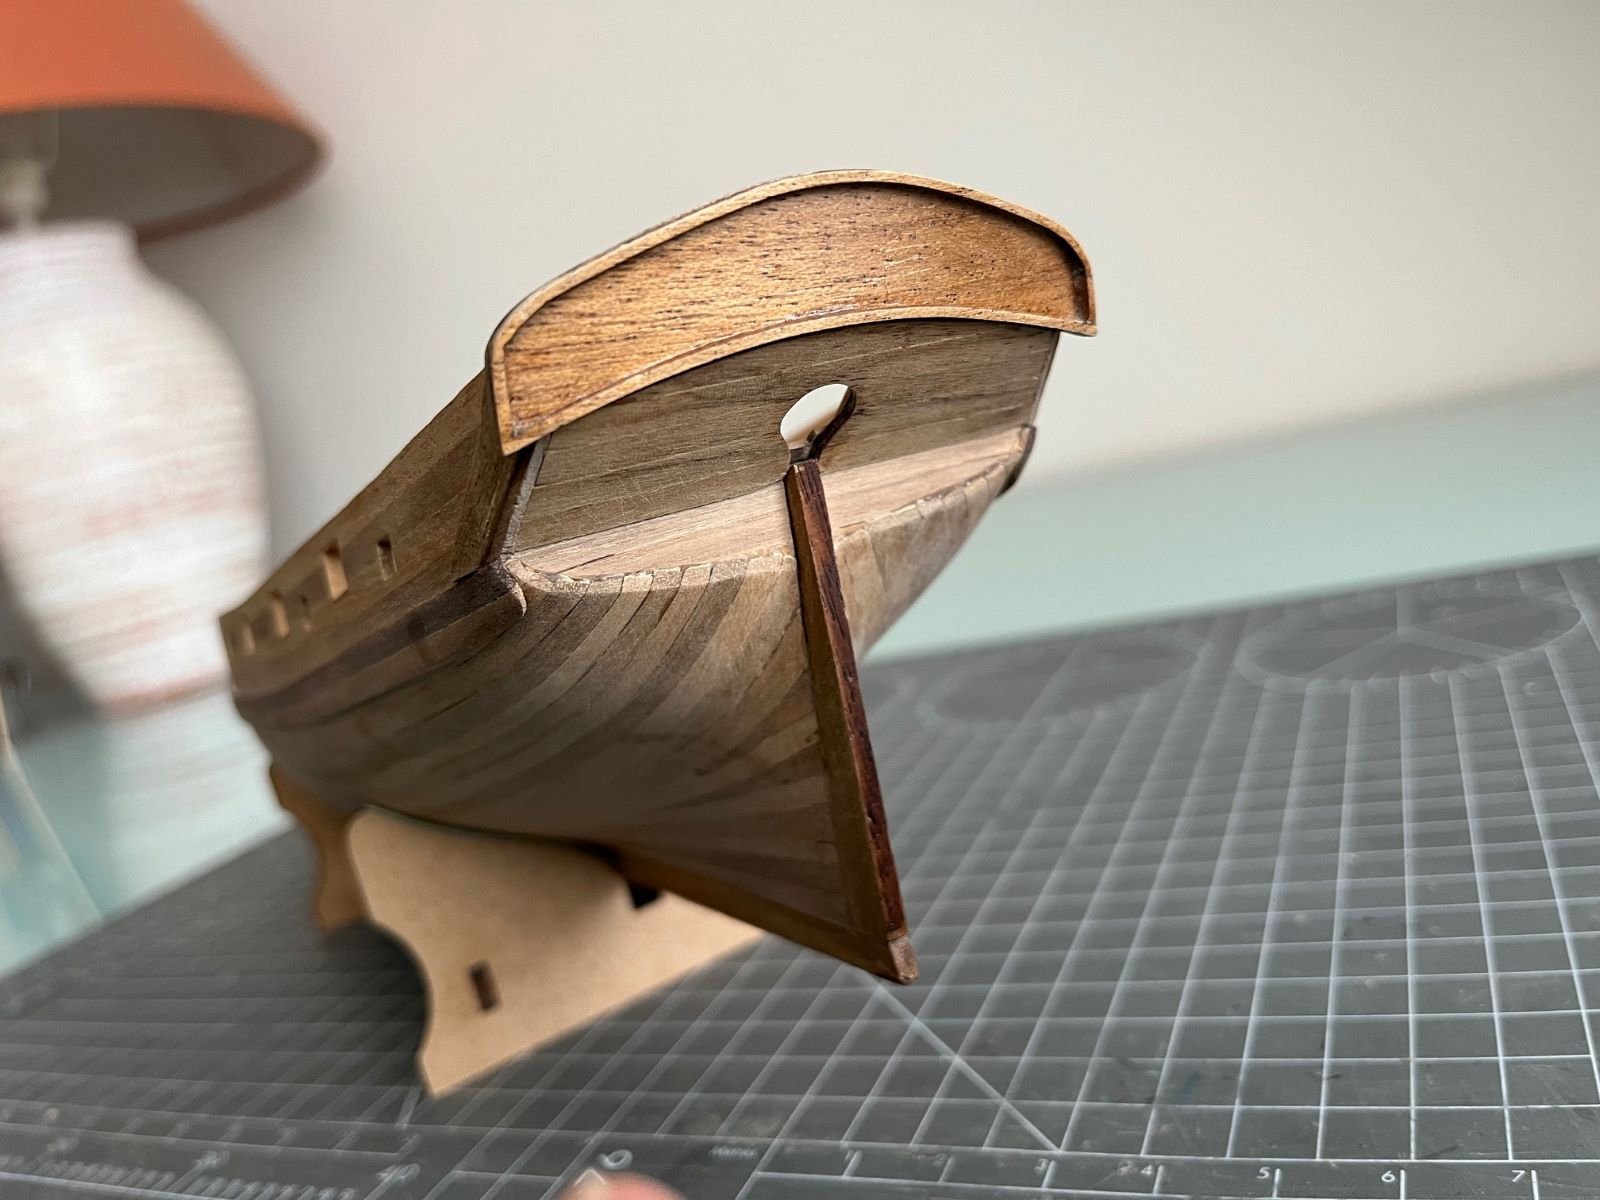
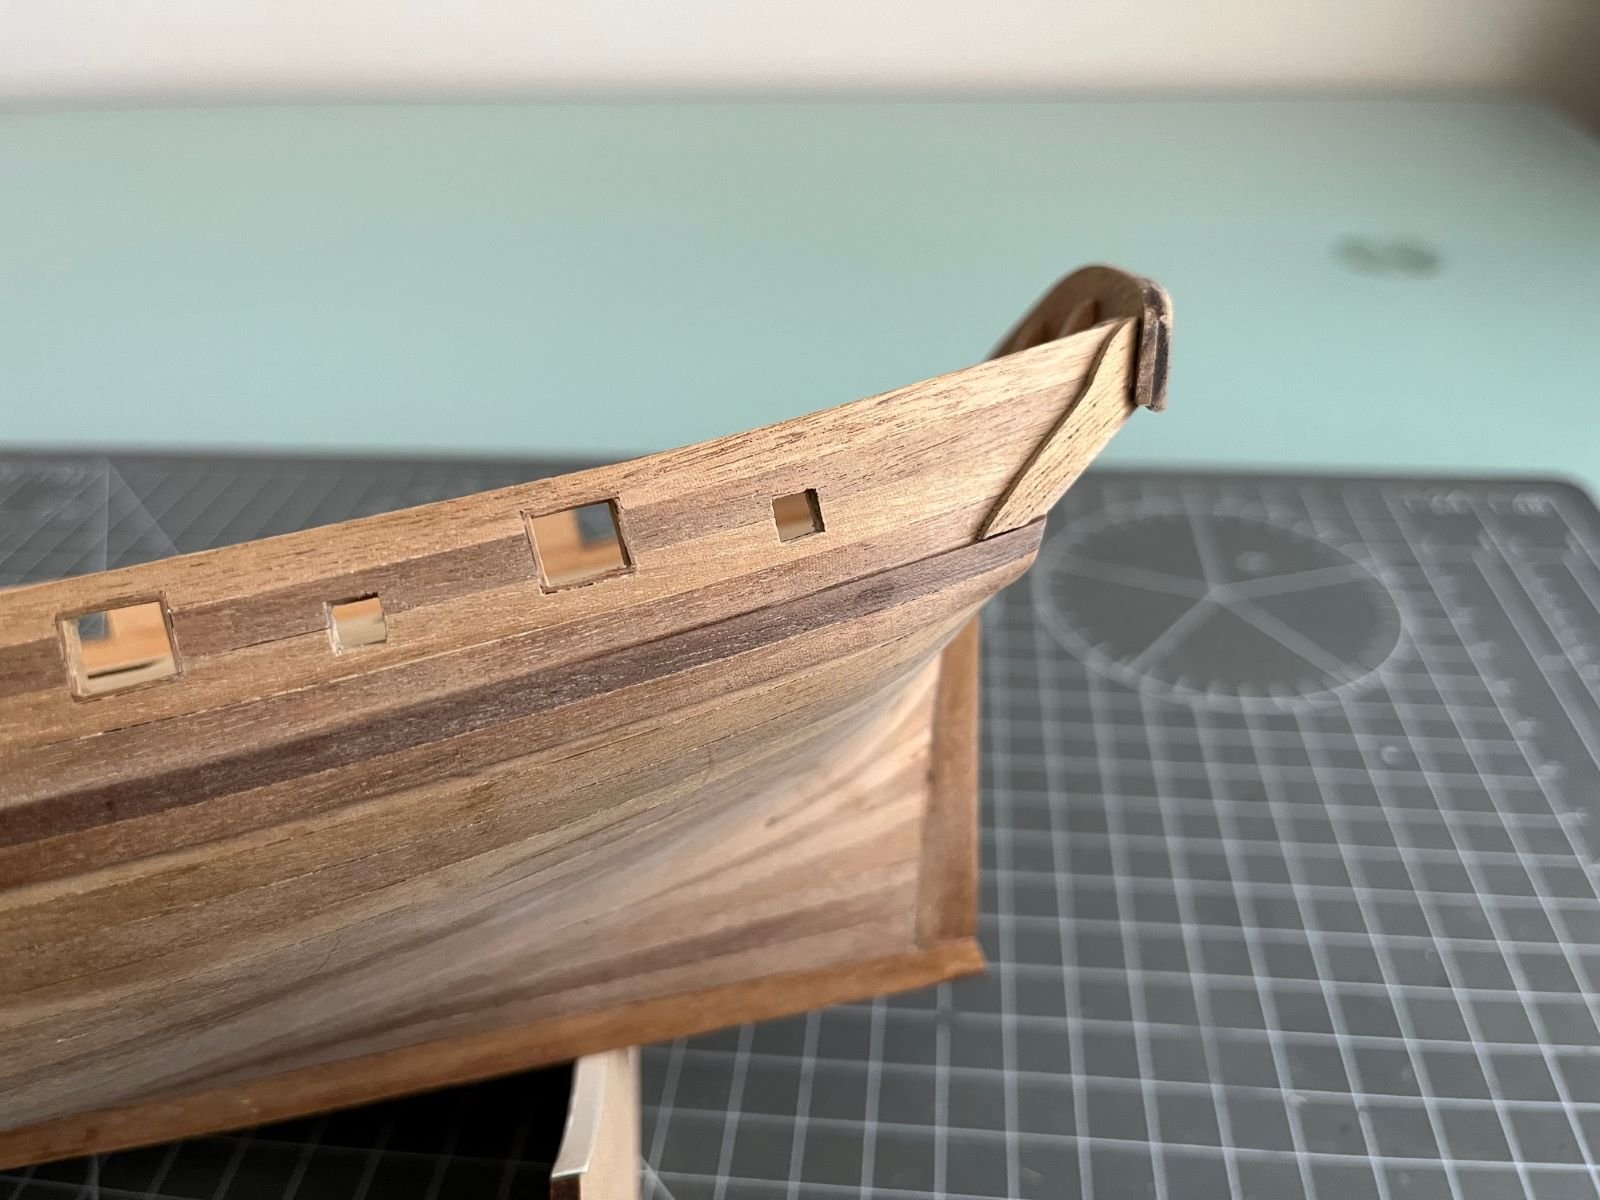
Finally, I installed the 'V' reinforcement on the tip of the bow after having discarded the part supplied by the kit because it didn't fit and having rebuilt it.

That's all for now,
best regards,
Dan
-
-
-
-
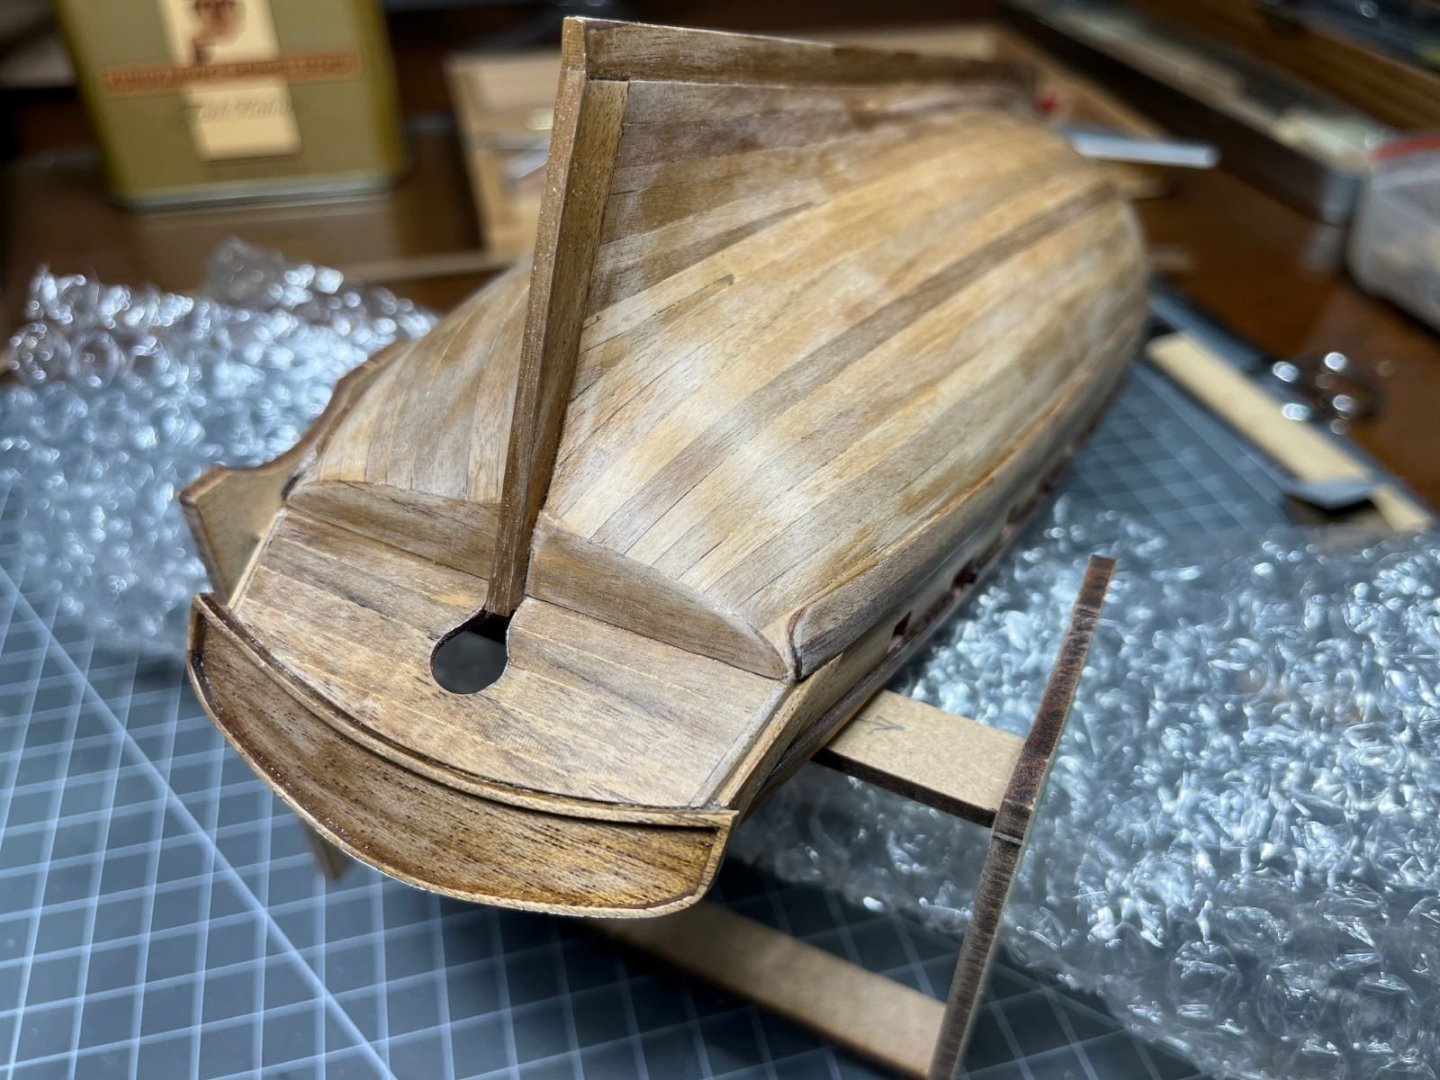
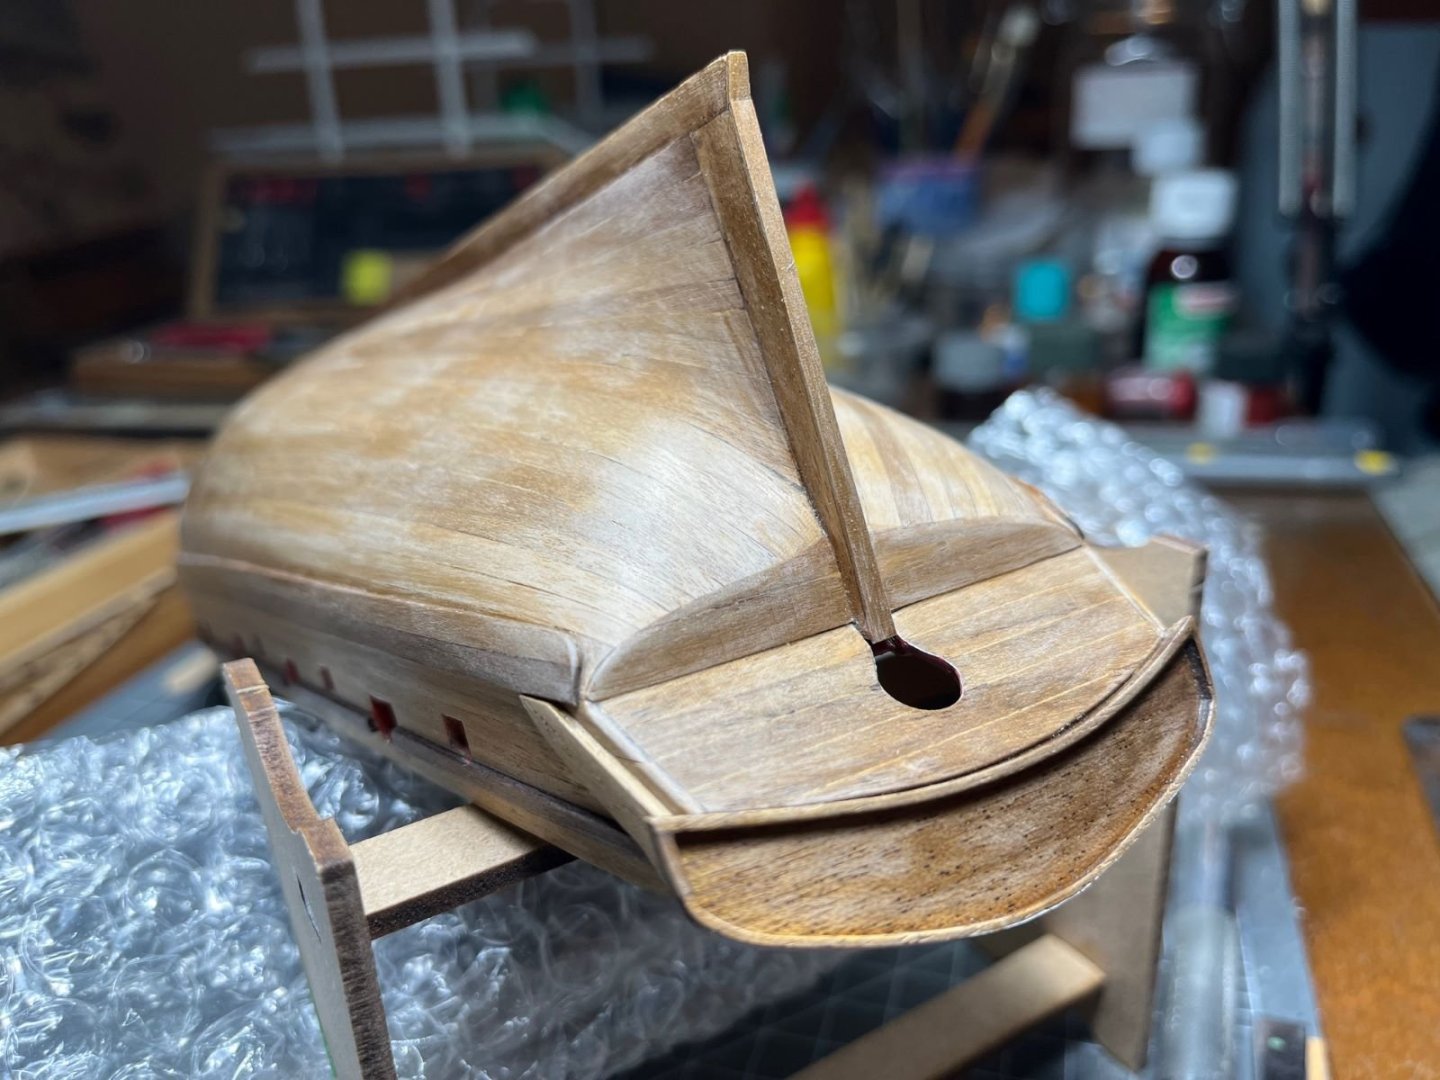
Hi all,
just a very small update of my build. I prepared and framed the stern fascia and after some bending and tweaking, this part was eventually glued to its place.
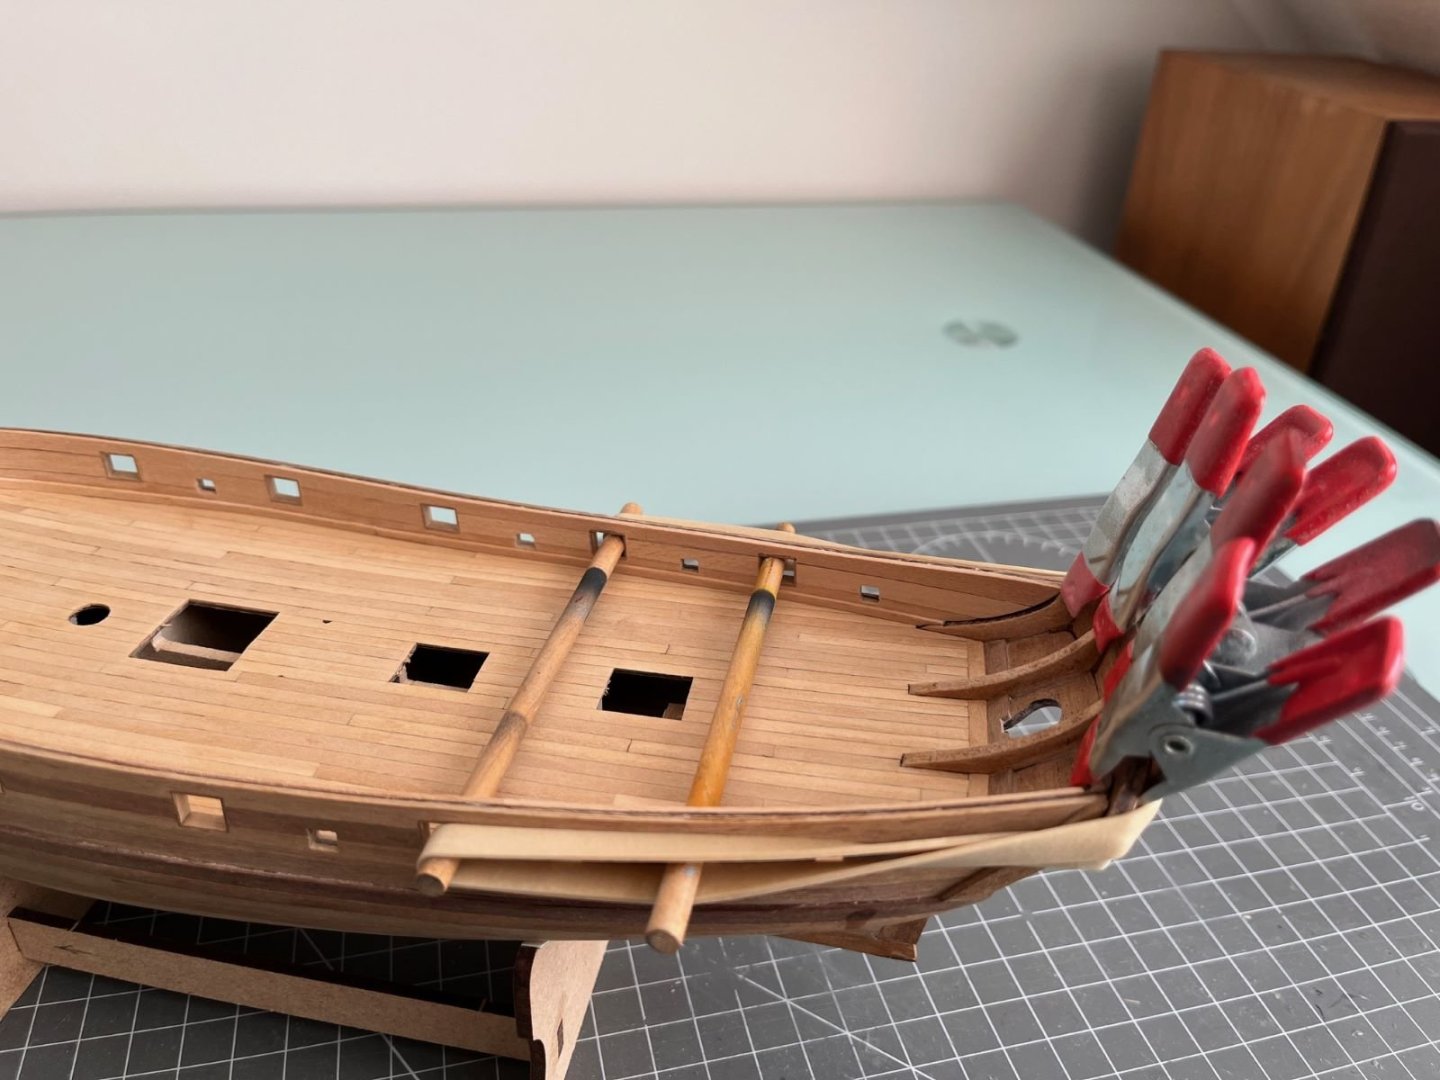
The result is not bad:

The grain of the wood is very obvious and it needs to be addressed before painting it. The quality of the wood used for these type of pieces is quite poor, in my view. On the stern sides, I rebuilt anew the lateral fascia supports trying to match the involved angles and maintain the possibility of decorating them with the kit provided photoetched friezes.

Finally, I went back to staining the deck with the aim of reducing the contrast between lighter and darker planks. After three light passes, I think I achieved a reasonable result.

Just as a side note, because I didn't have any proper staining powder at hand, I ended up using my strong Italian espresso coffee as a staining agent that left a good coffee aroma to my model.
Best regards,
Dan
- Scott Crouse, JGoff, chris watton and 4 others
-
7
-
Great Mustang! I like also your photography. It was also enjoyable for me to follow your build.
Good luck for your next activity.
Best regards,
Dan
- Lt. Biggles, AJohnson, mtaylor and 5 others
-
8
-
It looks so nice!
In my opinion, I would avoid a total dead matt finish (I have seen that sort of finish on wrecked planes only) and keep a bit of shine in the finish. But that's my opinion and this is your model.
Best regards,
Dan
-
Good result Alan! I use the Vallejo Metallic on top of Tamiya gloss black and they work fine (I find the Tamiya X-1 better than the Vallejo's). As you noted, the preparation of the surfaces is as important as the finish itself. Note that these paints can be happily mixed with each other and you can obtain subtler tonal variations if needed.
Following your build, though I am a bit silent in these days.
Best regards,
Dan
- mtaylor, Canute, Old Collingwood and 1 other
-
4
-


Messerschmitt Bf 109E-7/Trop by ccoyle - FINISHED - Halinski/Kartonowy Arsenal - 1/33 - CARD - Werner Schröer's 'Black 8'
in Non-ship/categorised builds
Posted
Gorgeous bf 109, one of my favorite version and painting scheme! Well done,
Dan