

.jpg.2c2c29e54623bd7b752bc2cdab599665.jpg)
Danstream
-
Posts
551 -
Joined
-
Last visited
Content Type
Profiles
Forums
Gallery
Events
Posts posted by Danstream
-
-
23 hours ago, AJohnson said:
That’s a very nice model Dan, well done!
Thank you, Andrew! I am glad for your comment.
Cheers,
Dan
- Old Collingwood, Egilman, Canute and 2 others
-
 5
5
-
@ccoyle, @king derelict, @Canute, @FriedClams,
thank you for your kind comments to my work 🙏.
Thanks also to those who left a number of like's and even wow's.
Alan, Gary, I am glad if you find some ideas reading my WIP, the idea behind these blogs is also that, to exchange mutual knowledge and experience. Should you need some more detailed clarifications, please don't hesitate to ask.
Thanks to all,
Dan
PS - thinking of the next model, a modern type (according to the standard of my age, i.e. cold war) or WWII?
-
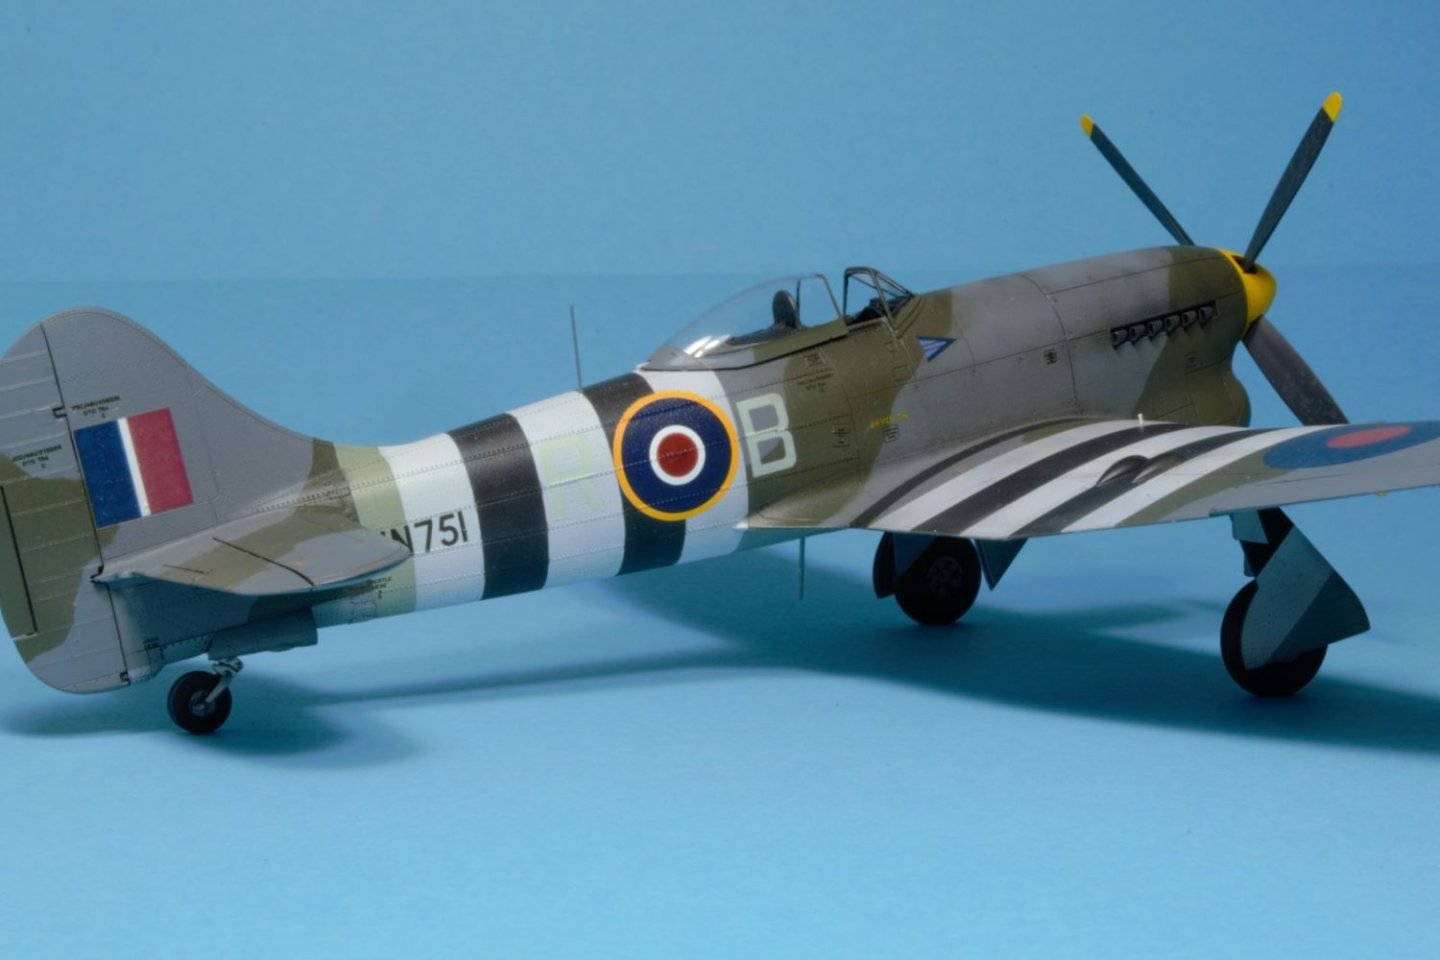
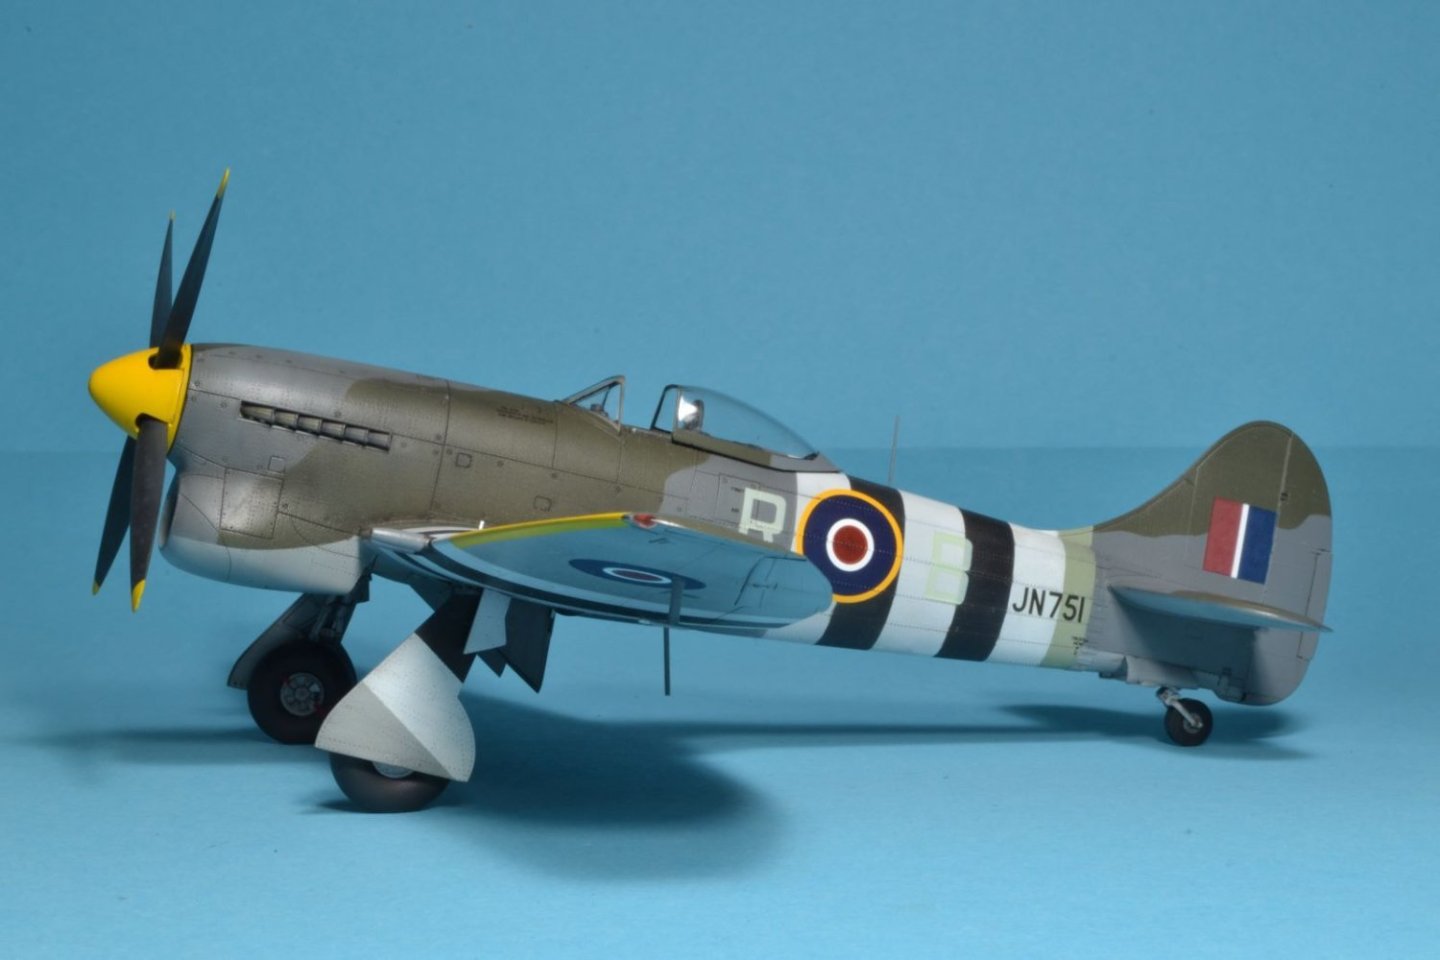
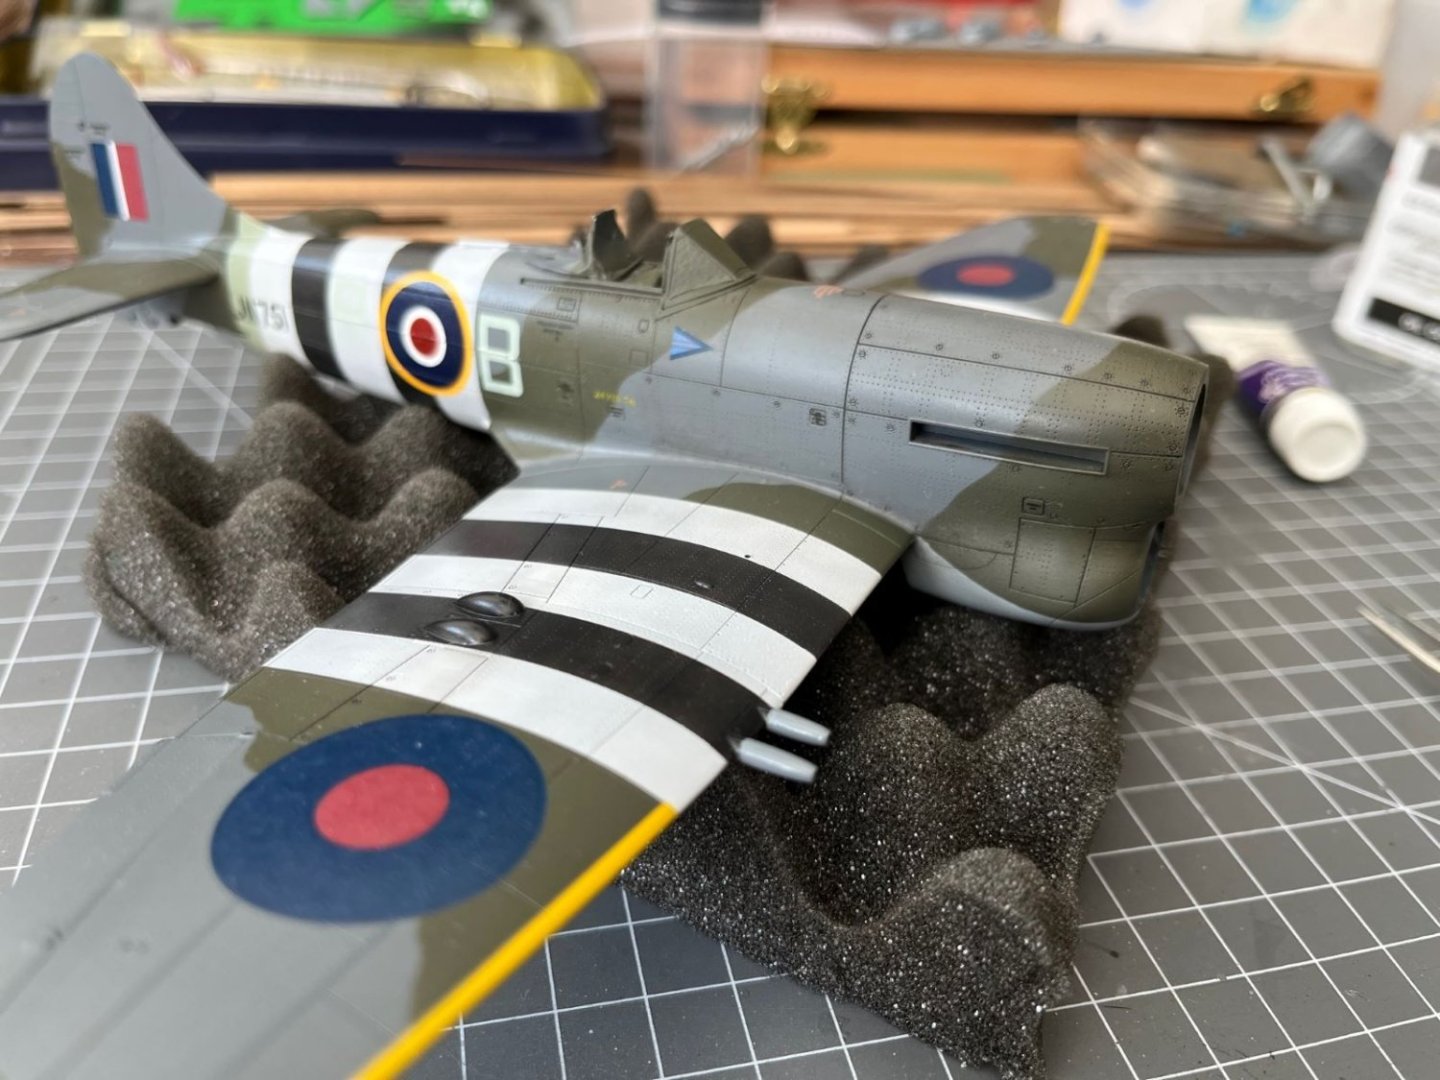
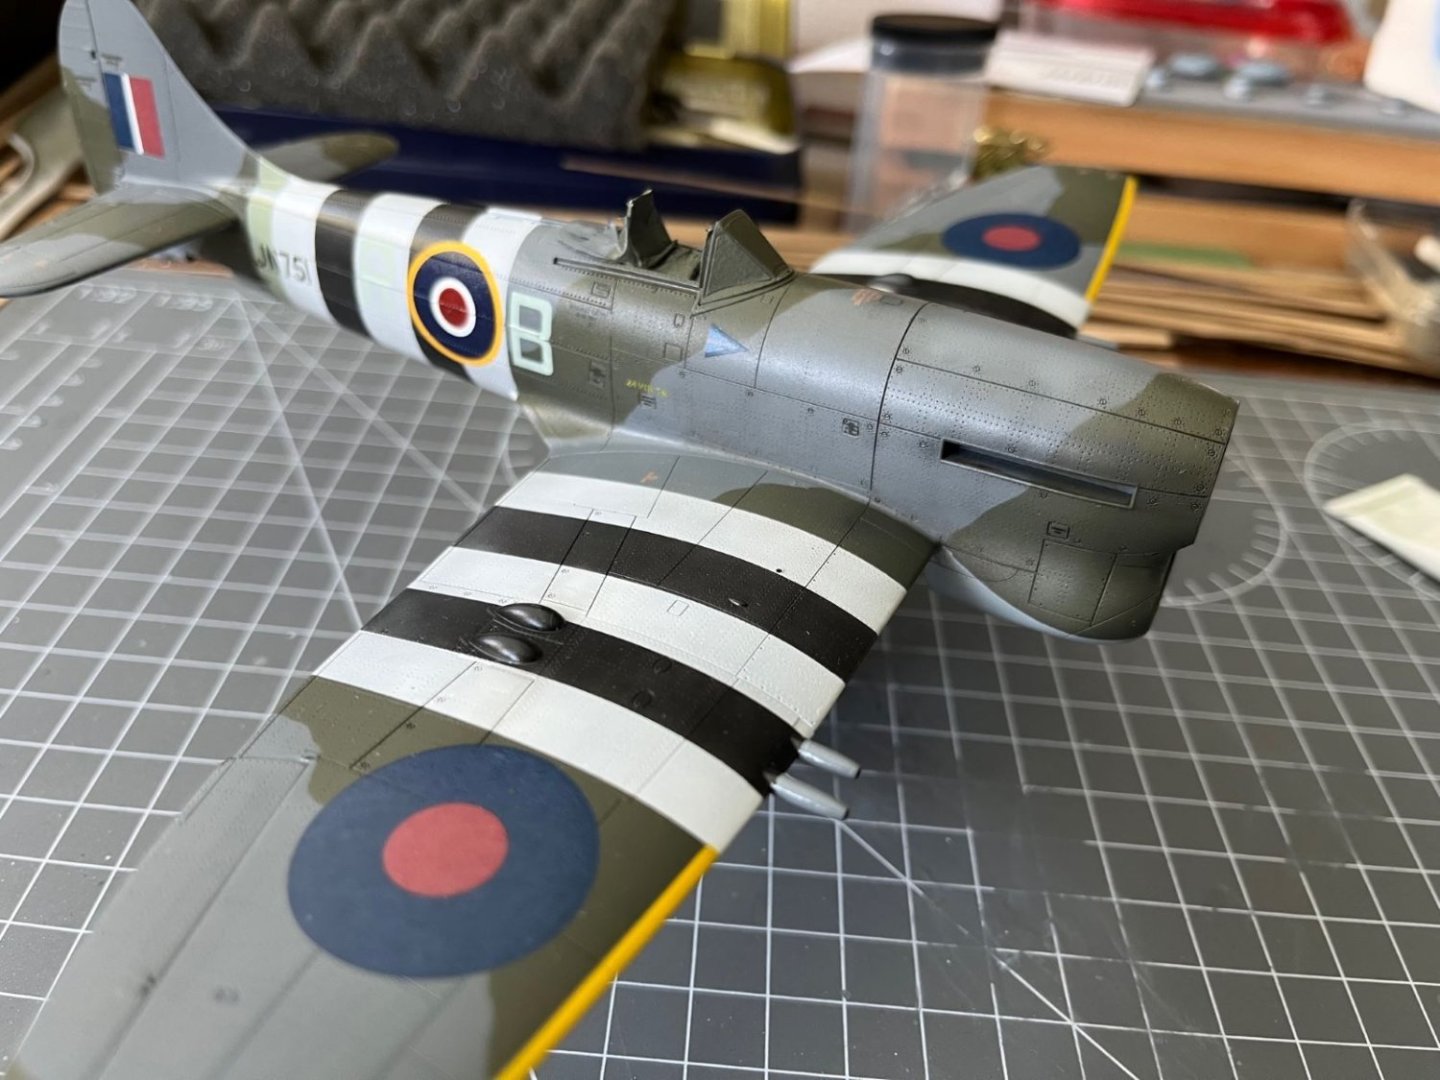
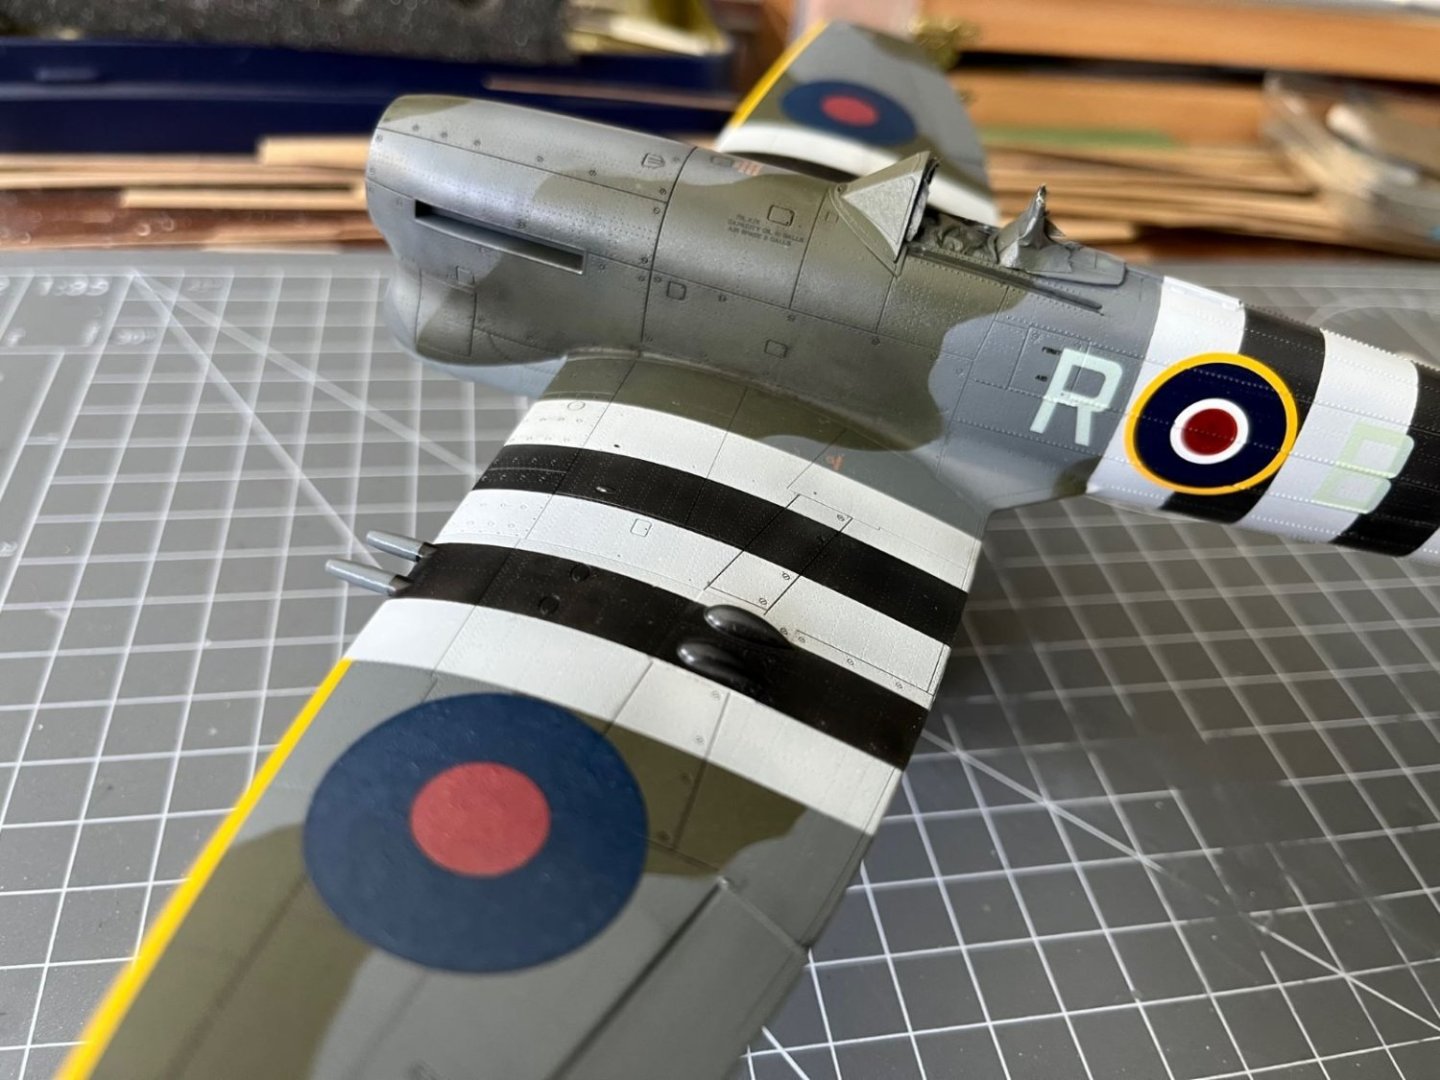
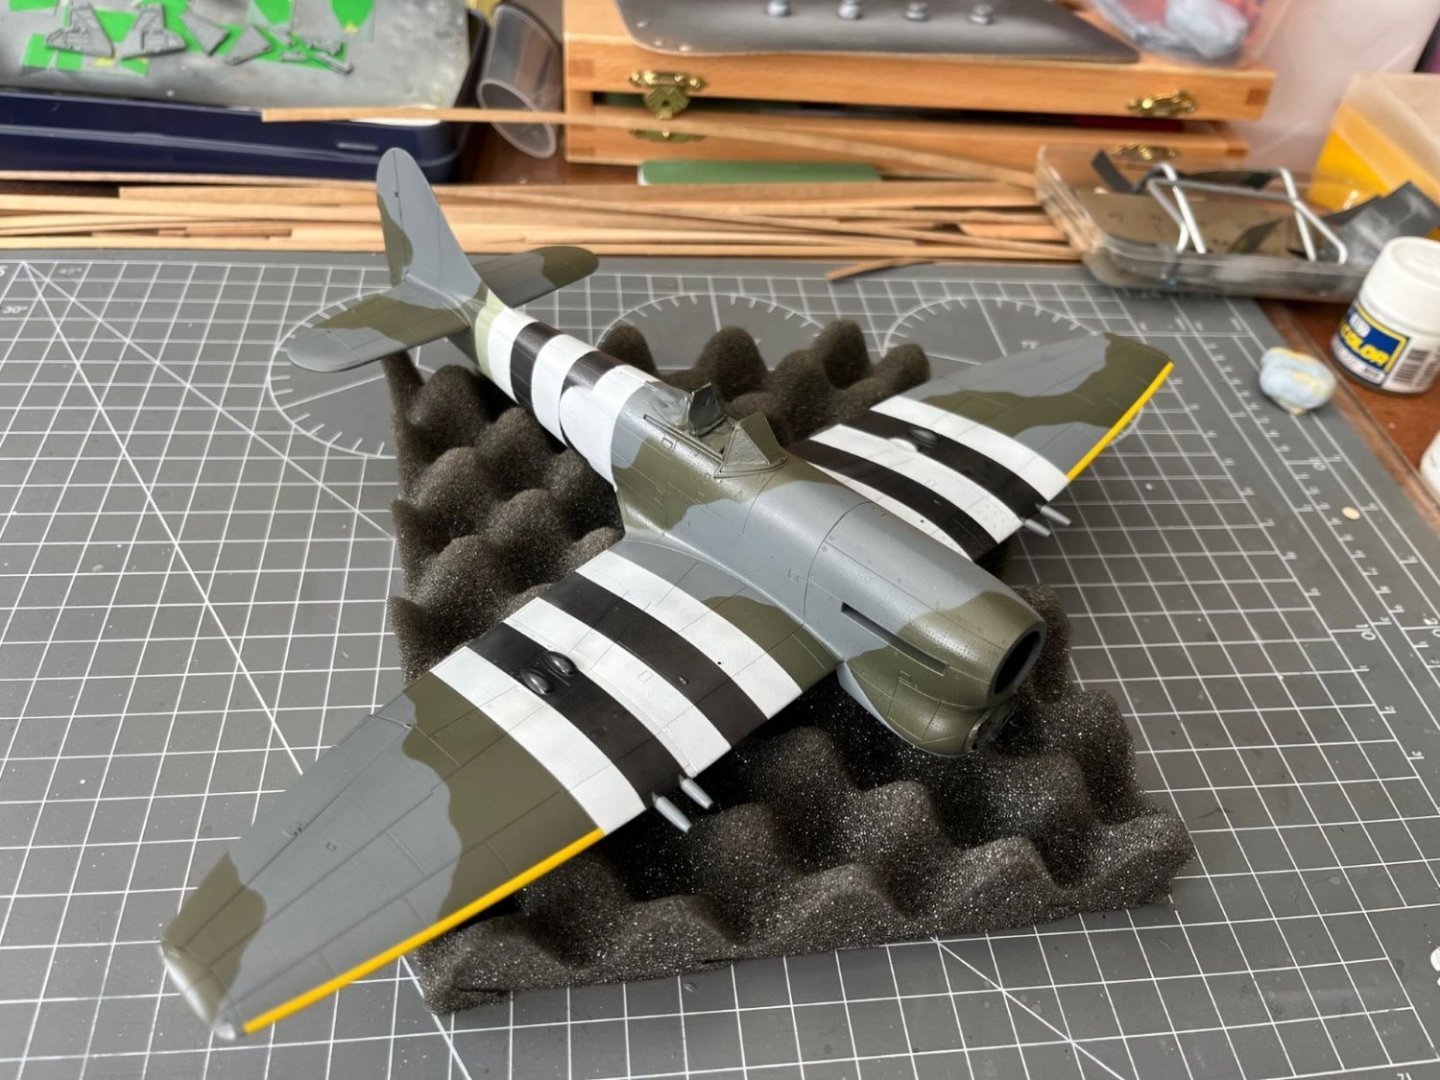
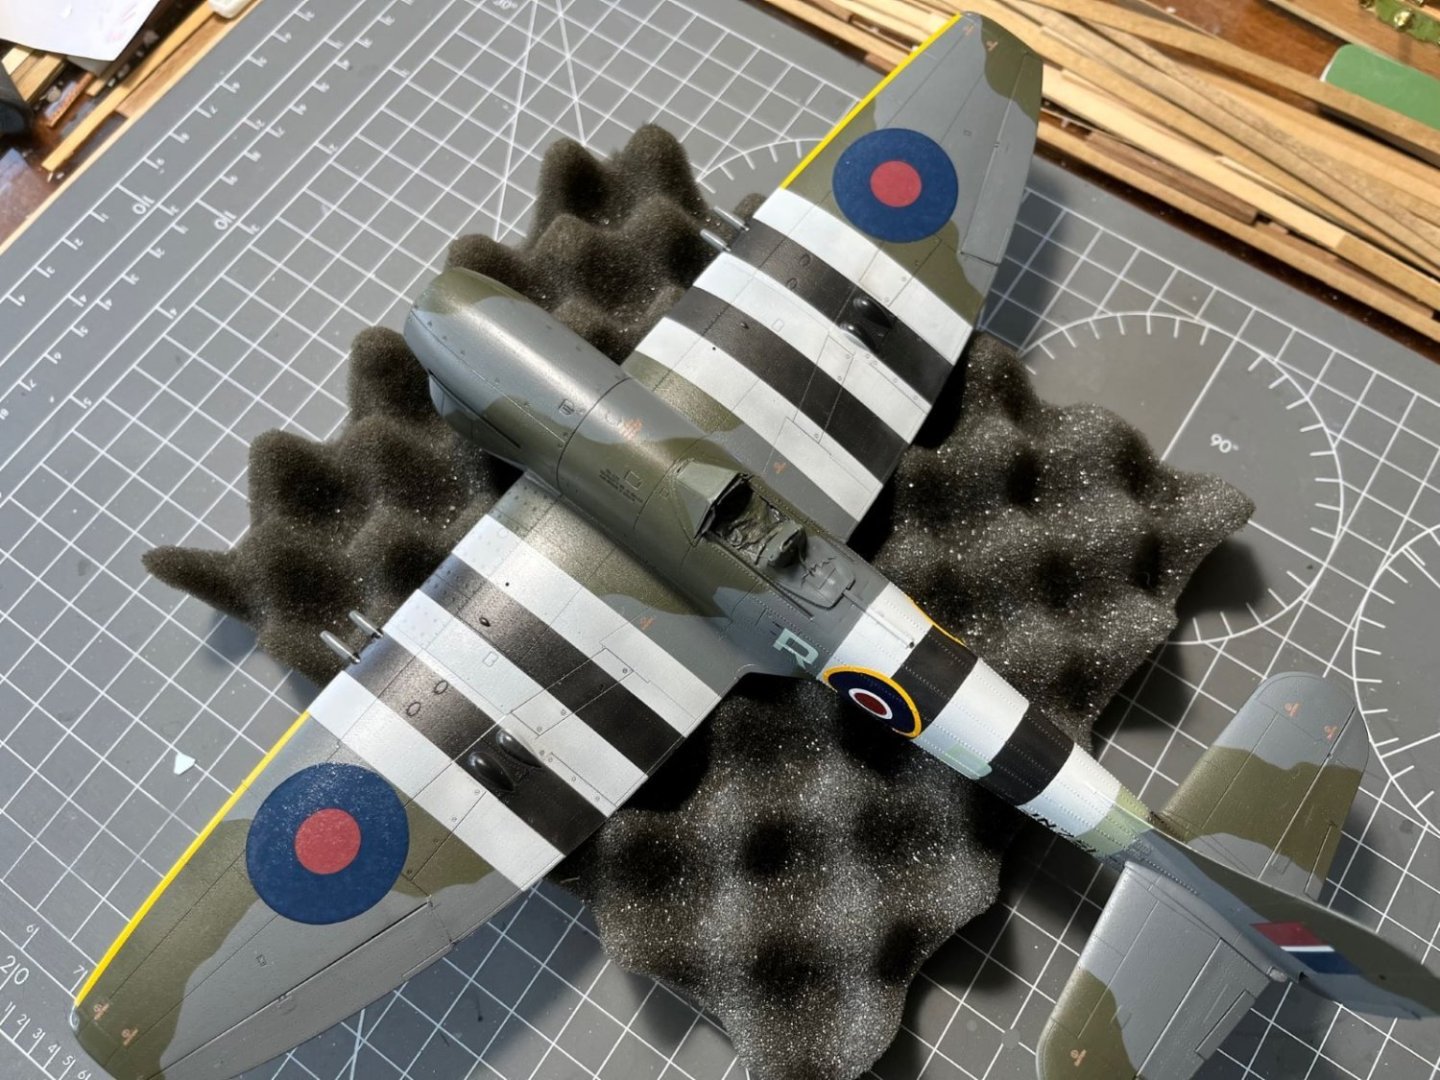
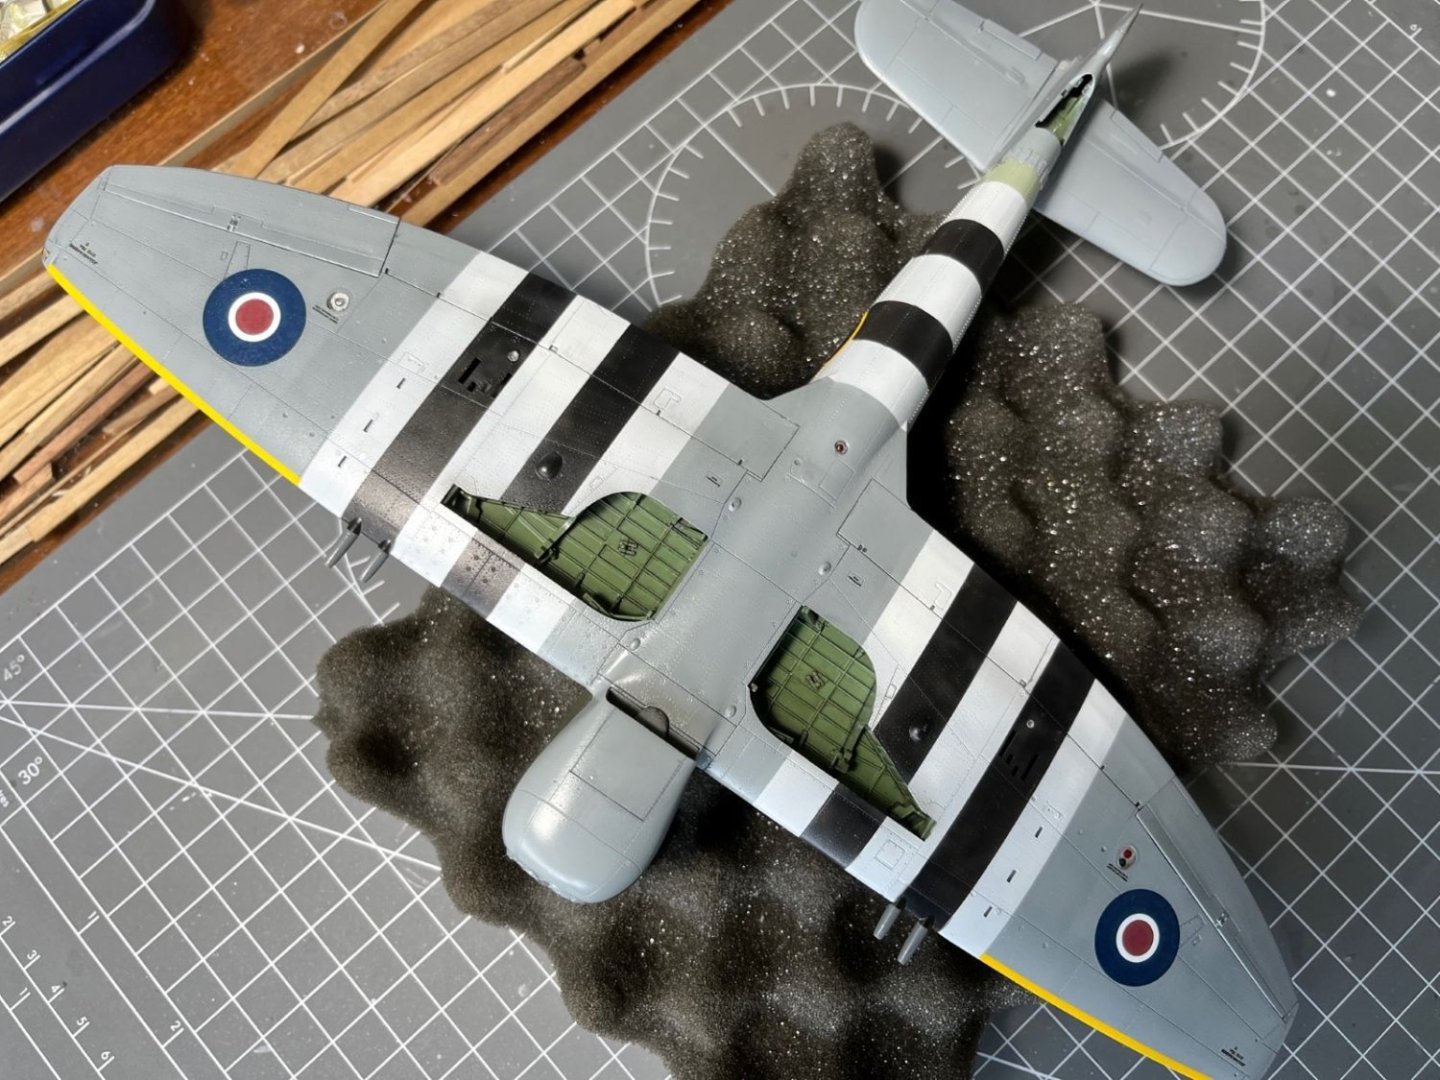
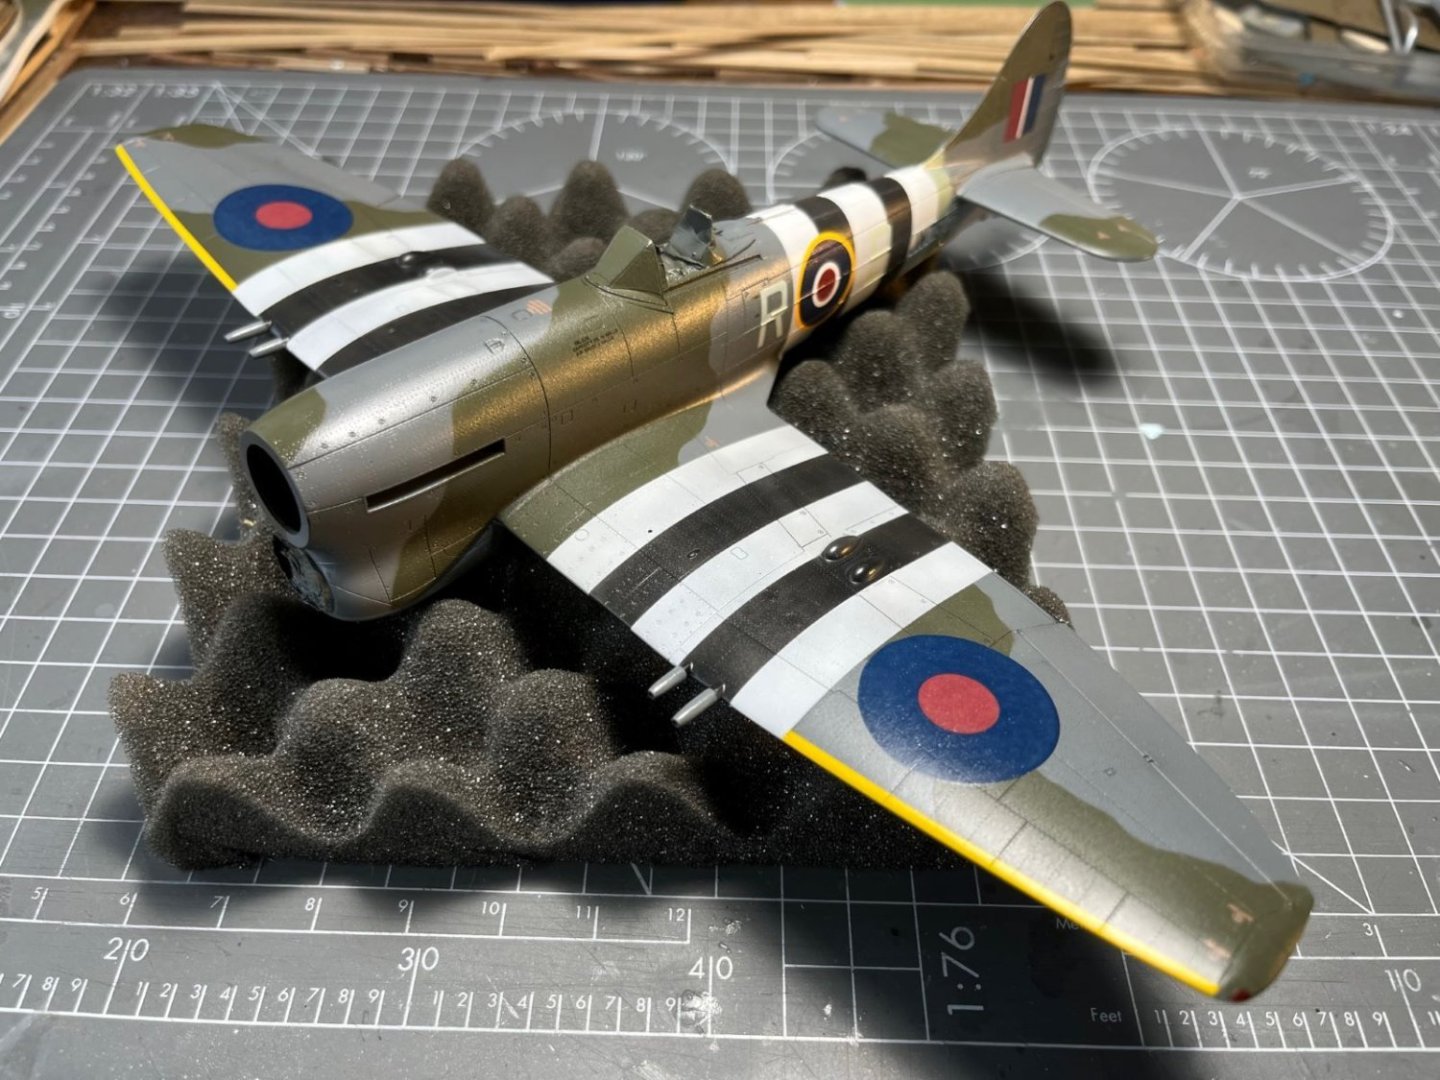
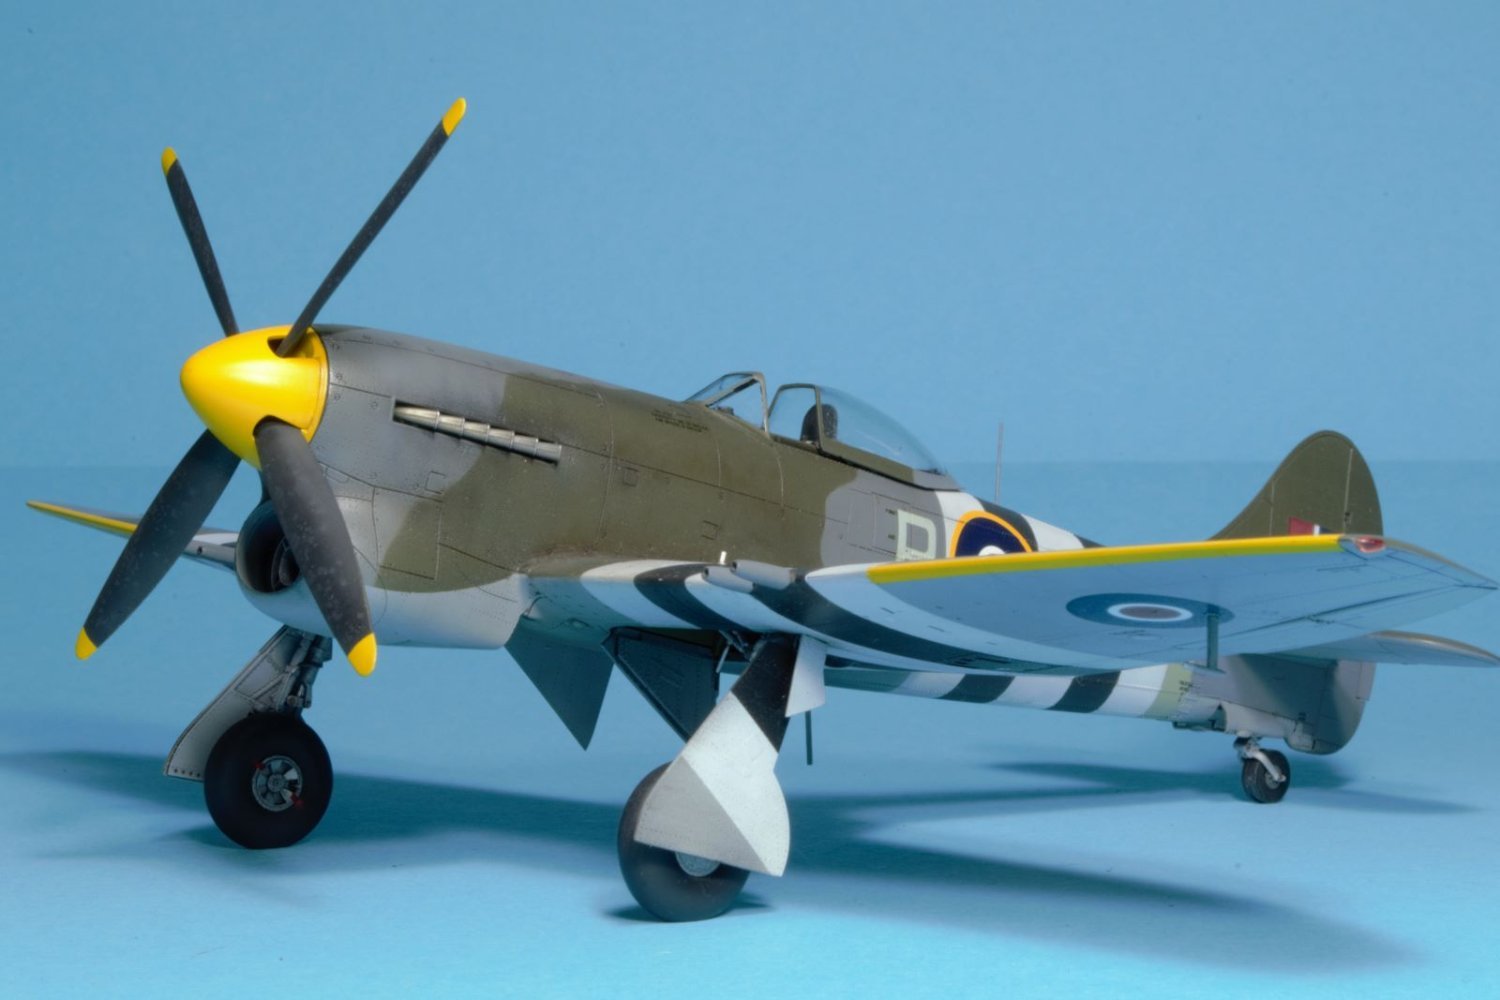
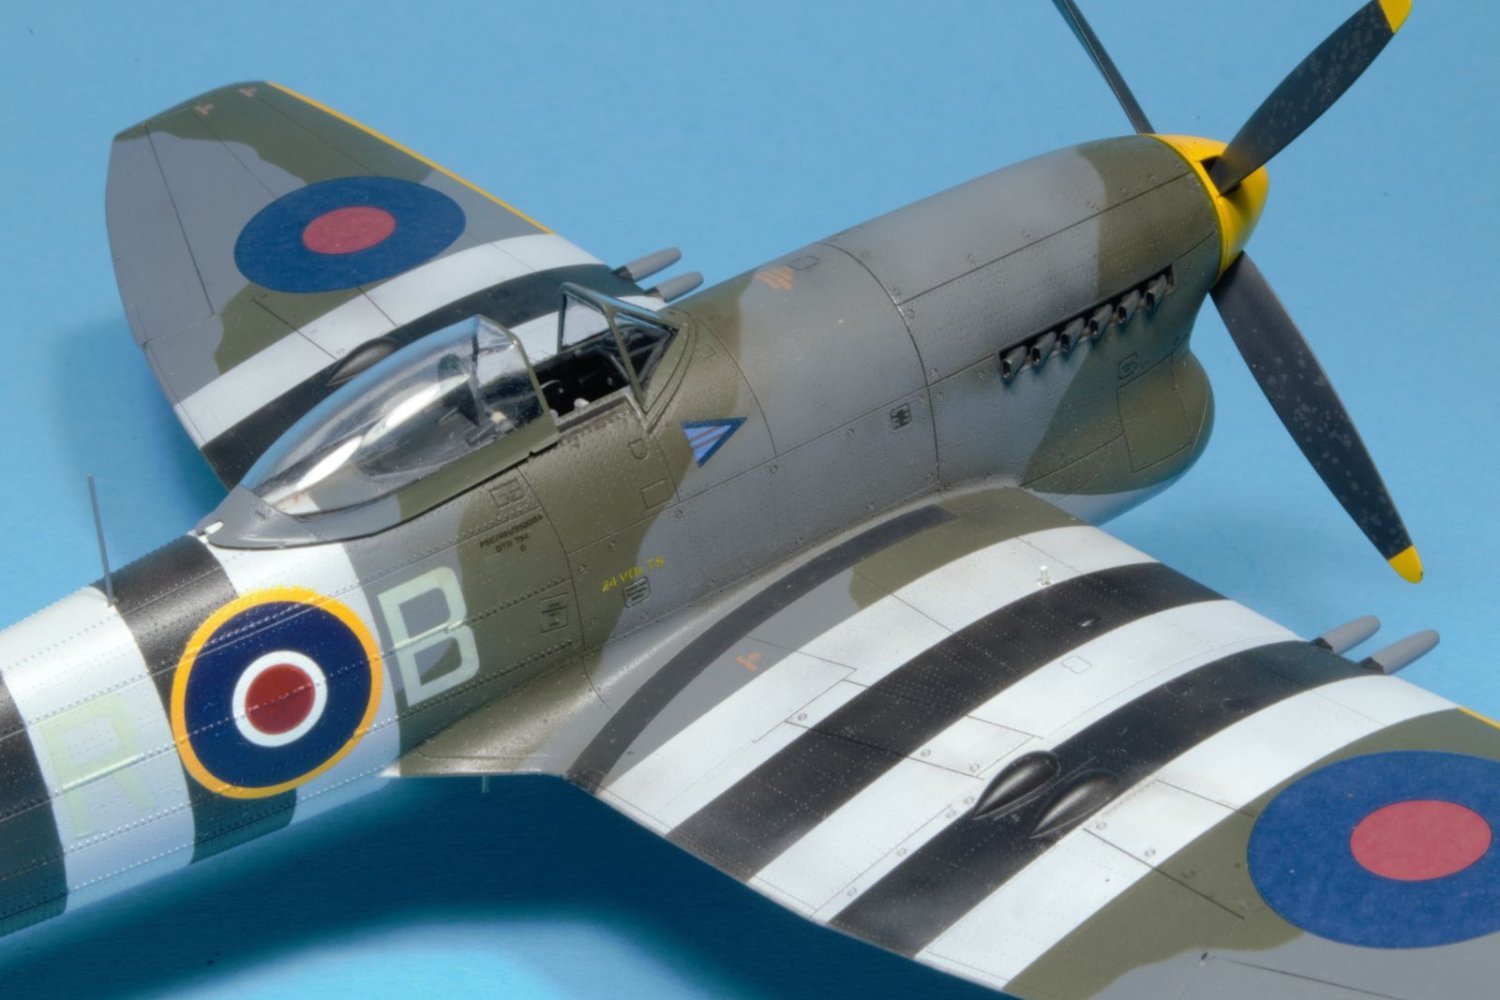
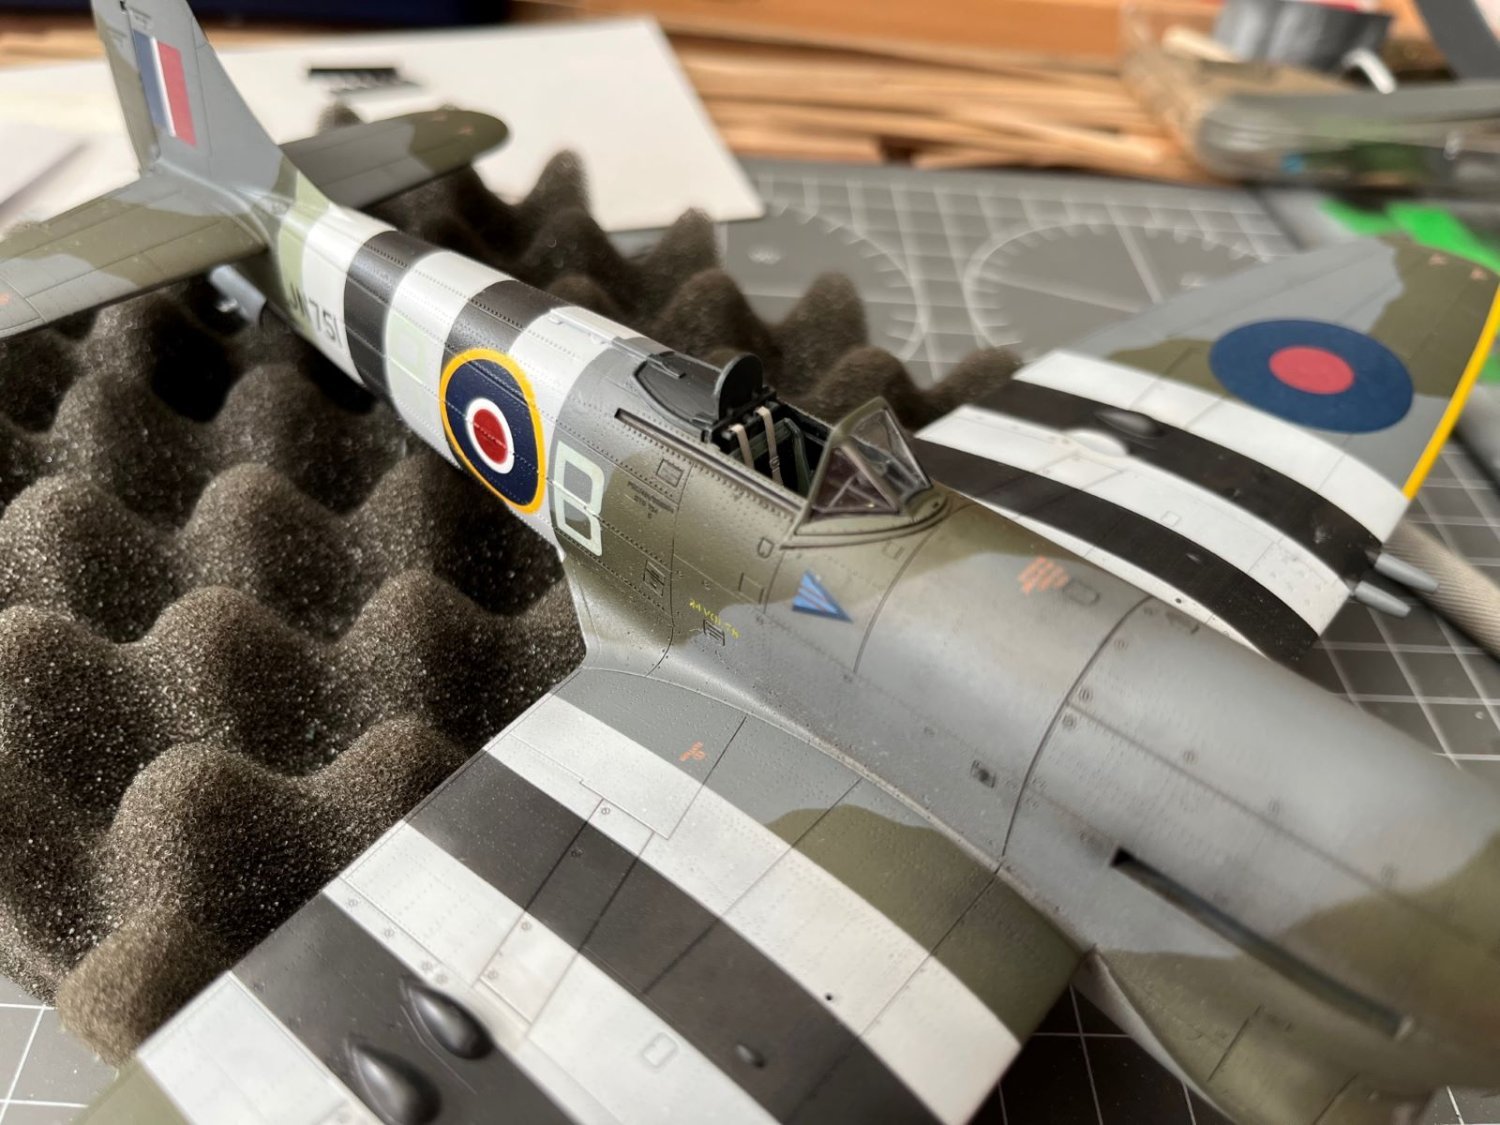
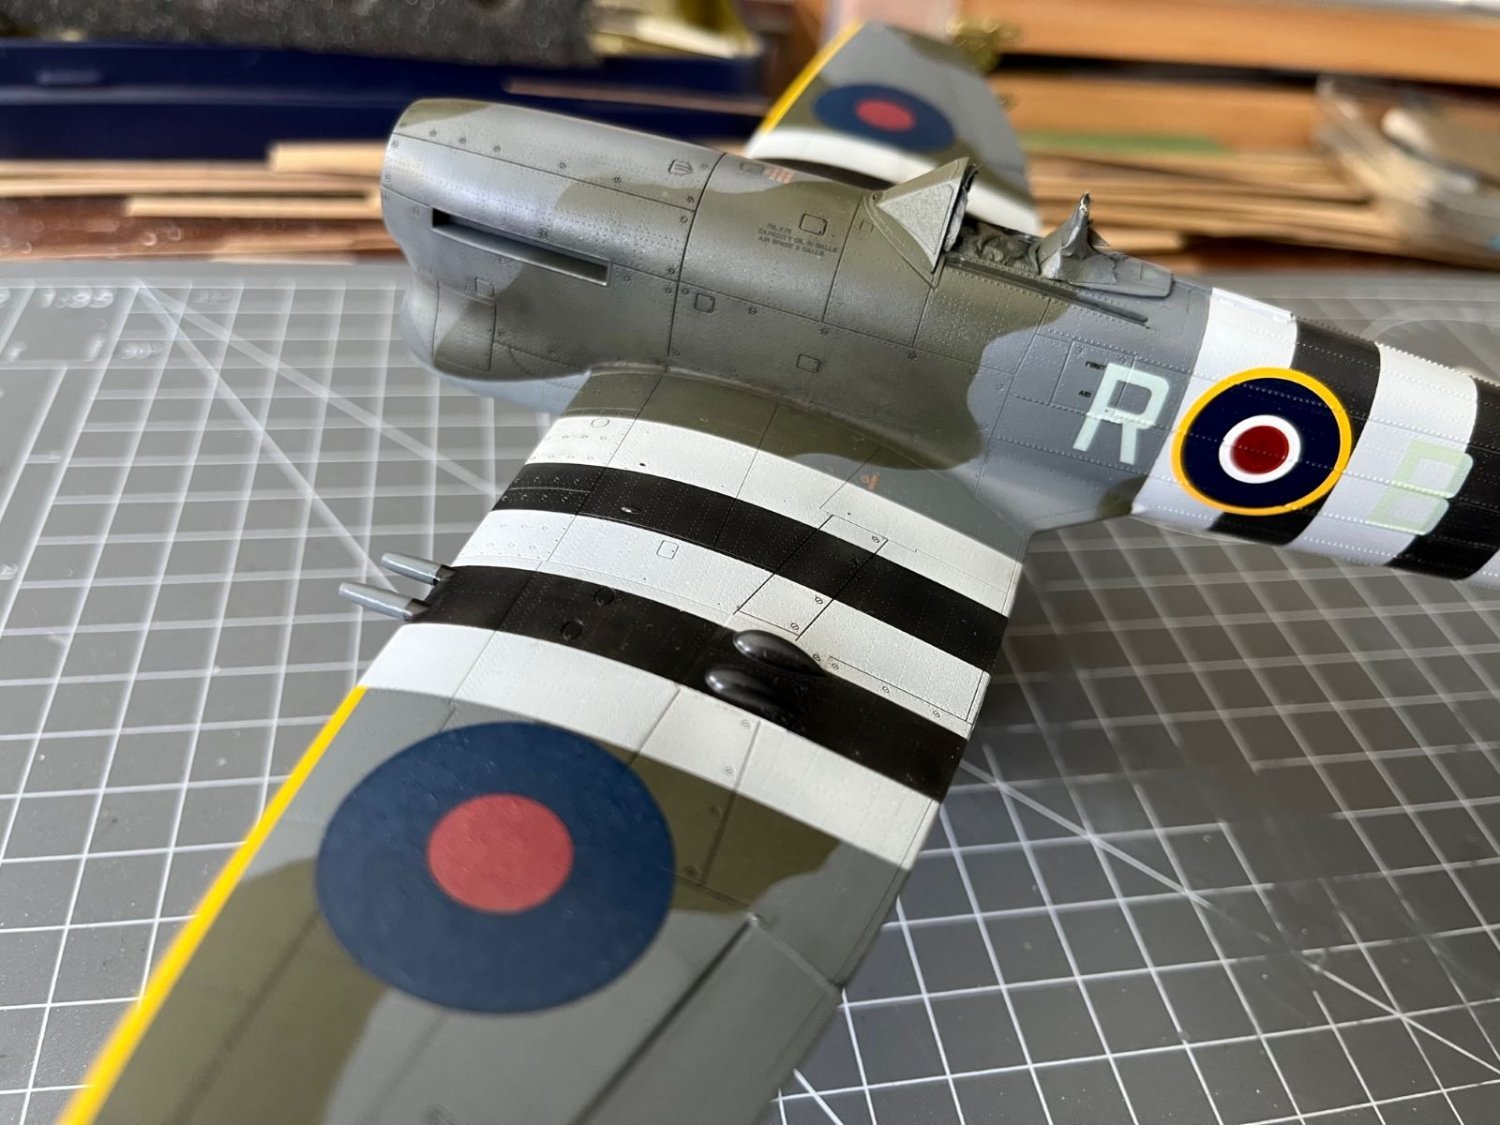
Hawker Tempest Mk.V
Eduard 1:48.thumb.jpg.4ef7e68227df43b75a63cab22fe22994.jpg) Mount of Roland P. Beamont, CO of No. 150 Wing, Newchurch, Great Britain, June 1944
Mount of Roland P. Beamont, CO of No. 150 Wing, Newchurch, Great Britain, June 1944
The kit was a Eduard Profi-Pack Edition and my WIP is in the pages above.
I sourced the following after marked:
- Eduard resin central barrel radiator
- Eduard resin exhaust stacks I used the following colors for the RAF camouflage:
Gunze Mr. Color 361 (RAF Dark Green); 362 (Ocean Grey); 363 (Medium Sea Grey).

I found this kit excellent, with a level of details (cockpit, landing gears, landing gear bays) and an overall fit both extremely good. The surface details are crisp and very nice, the transparent parts are thin and clear.


I think that it is not a kit for beginners with many small parts and assembly needed particular care in few places. Personally, I enjoyed a lot this kit. In my opinion, these are its negative points (although they do not detract much from the high rating of this kit):
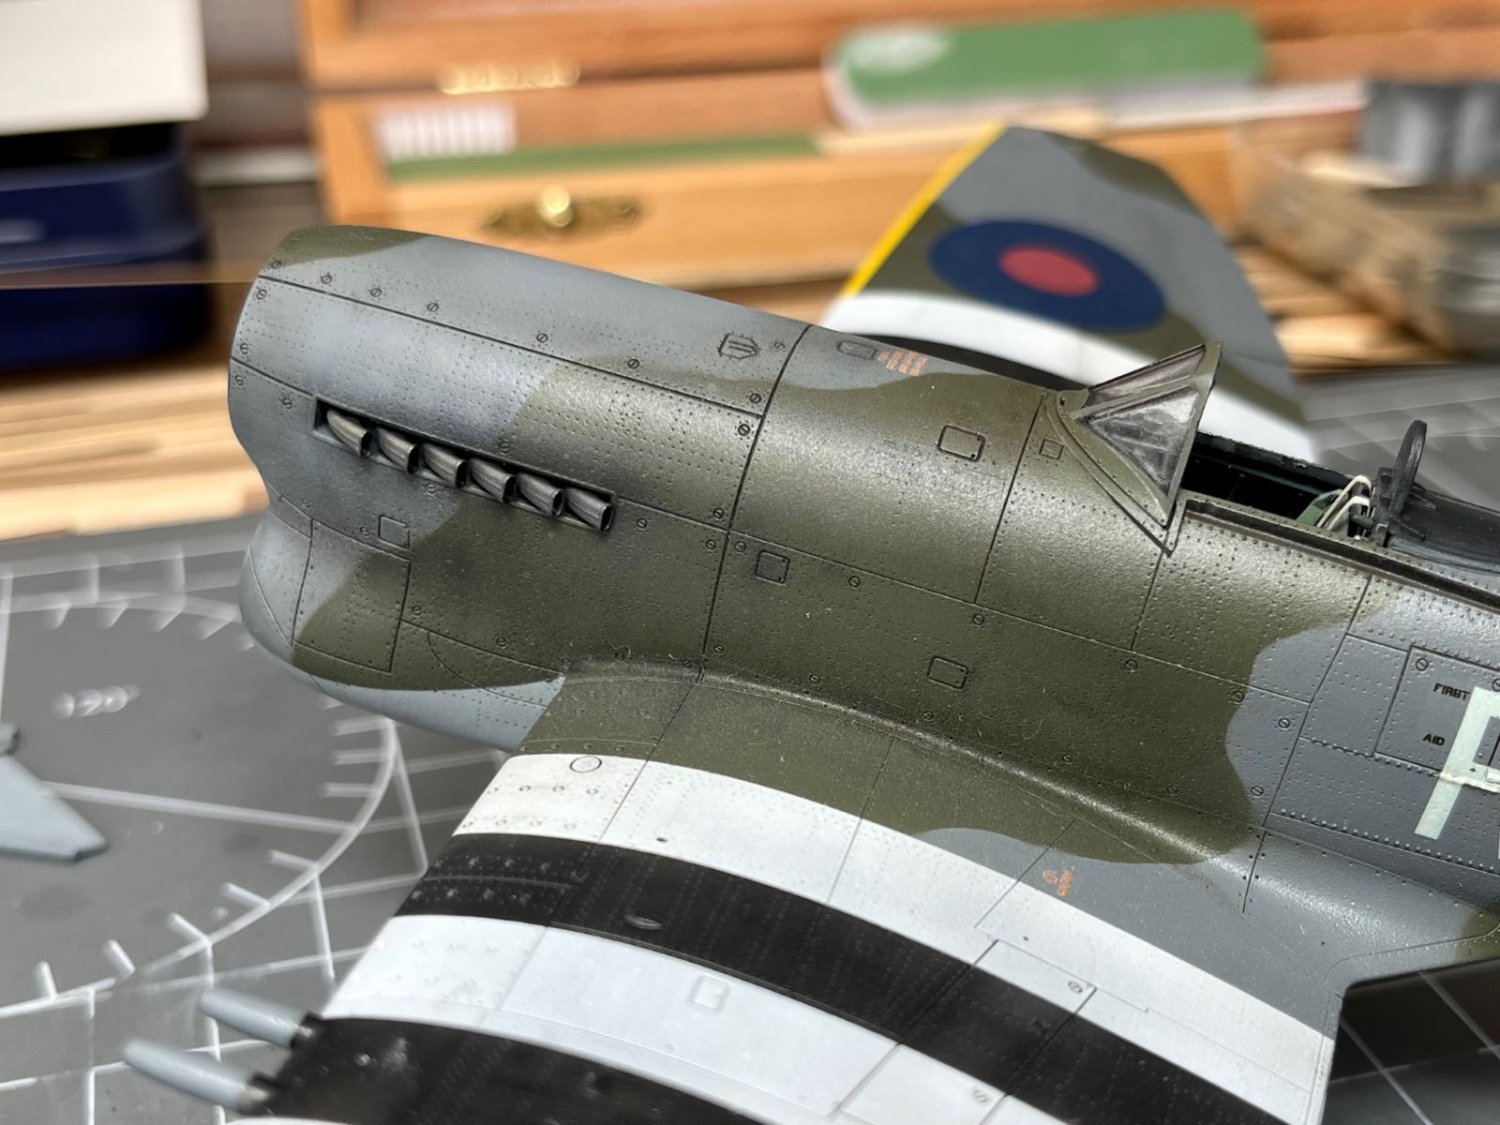
- Overstated rivets on the fuselage.
- Sink markings on control surfaces which are molded in one thick piece.
- Yellow contour of the RAF roundels on the fuselage is too light and cold yellow hue (it tends to lemon). I replaced them with my spare decals.

In one of my seniority moments, I applied incorrectly the decals for the letters on the fuselage! (they are not symmetrically posed with respect to the roundel).
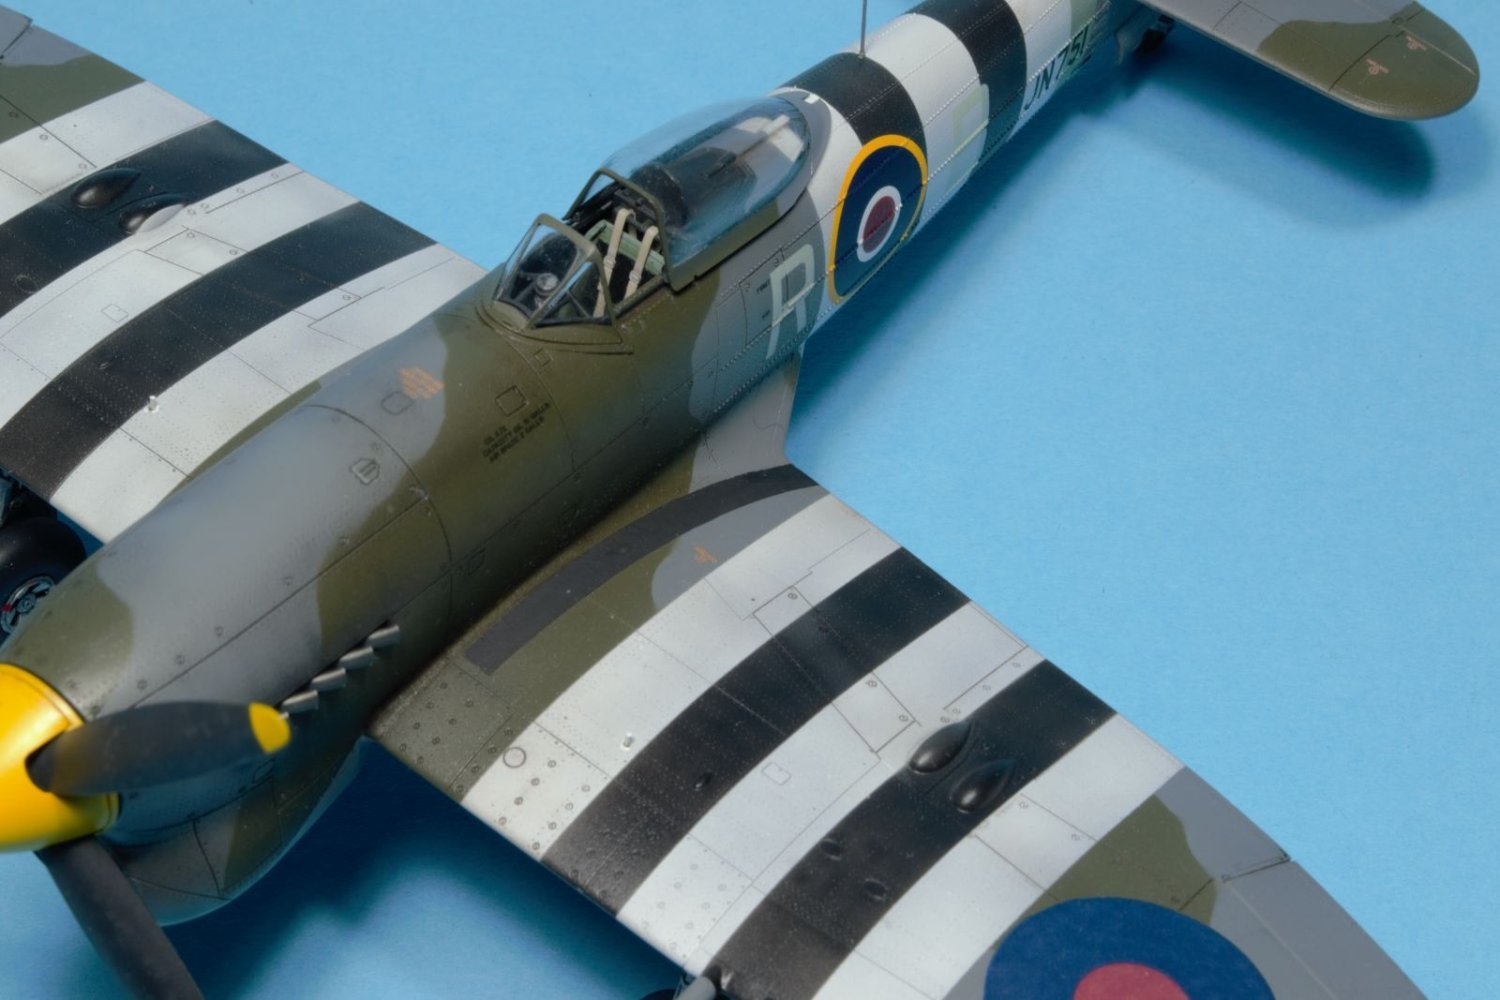
After assembly the airframe and filling the gaps, I sprayed the plastic with Mr. Surfacer black primer. After painting the strips and the camouflage, I applied black oil color on selected areas. A light weathering followed consisting mainly of post-shading of Tamiya smoke around movable panels and radiator and dark stains made with sprayed diluted black paint. Oil and leak trails were made by brushing oil colors.


I thank all of you who patiently followed my long build and have given suggestions and support.
Kindest regards,
Dan
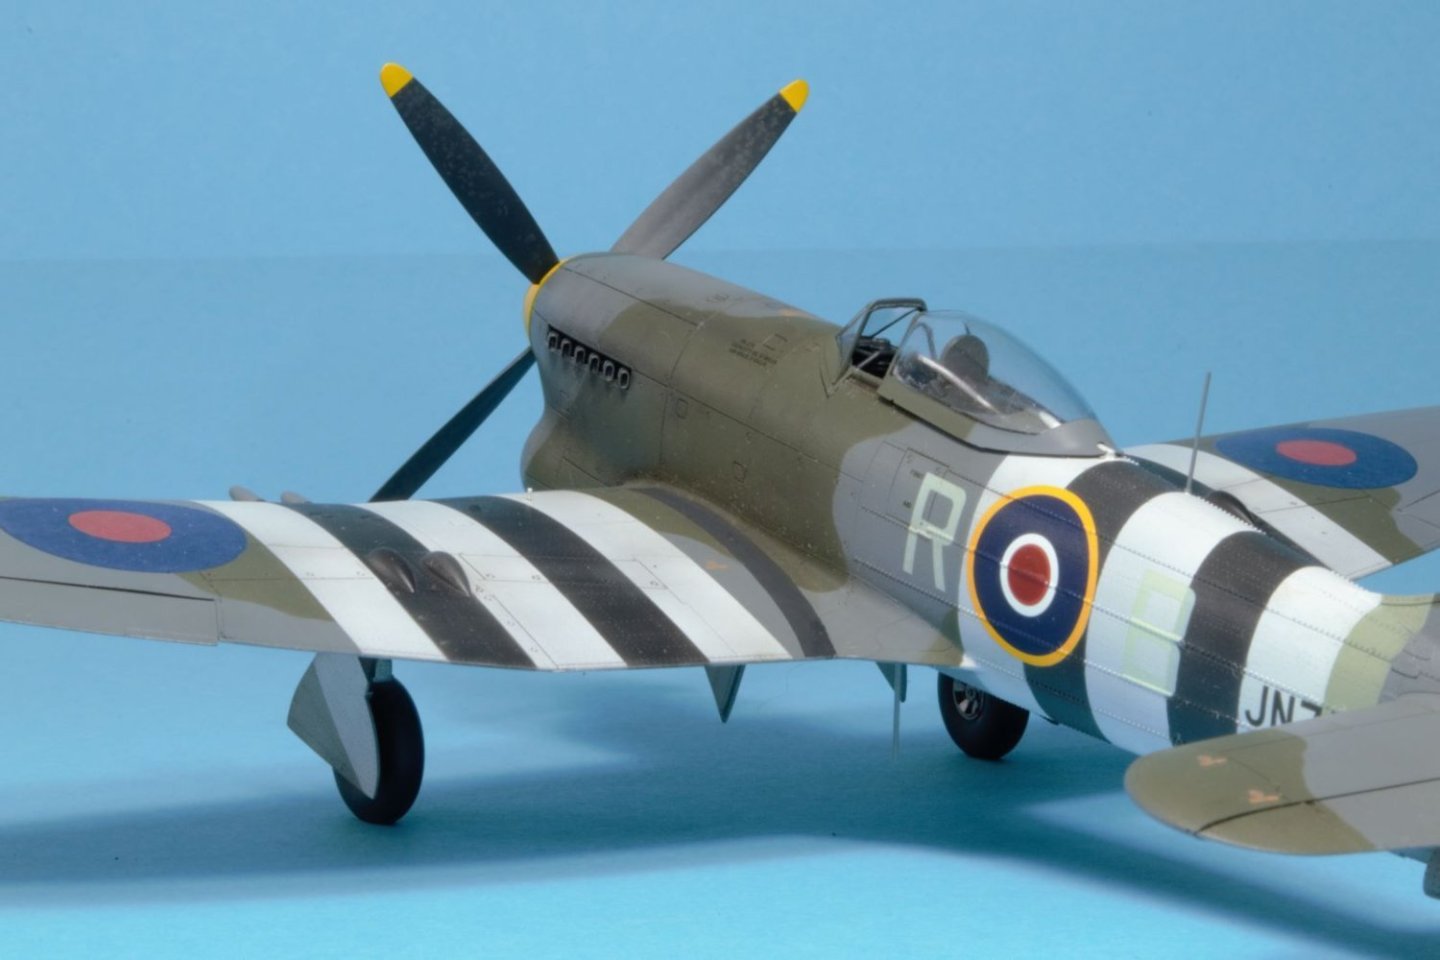
P.S. - Following the suggestion of @Egilman, I still have to take few shots in sunlight!
-
My ... this is difficult. What would intimidate me most is the fact that the assembly and gluing doesn't allow for mistakes. The first time you commit to glue needs to be the good one with the final finish.
Clearly, you are mastering these models by now, still I wish you best luck.
Kind regards,
Dan
- Richard44, mtaylor, Ryland Craze and 4 others
-
7
-
-
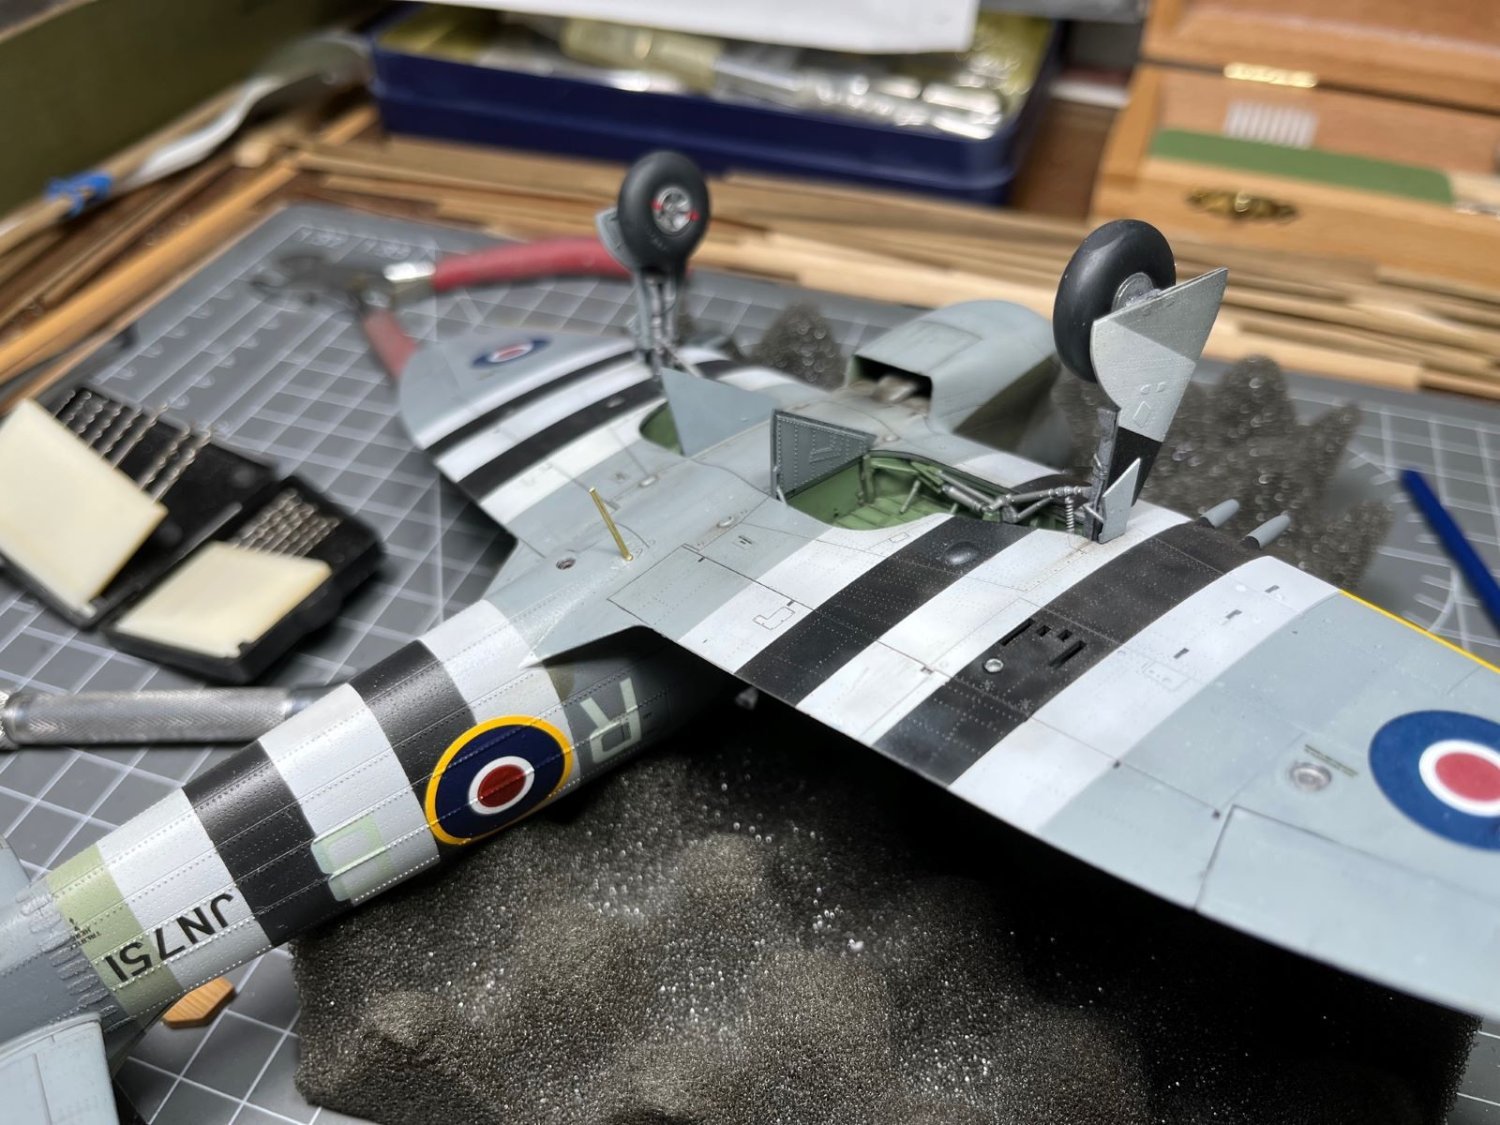
Hi,
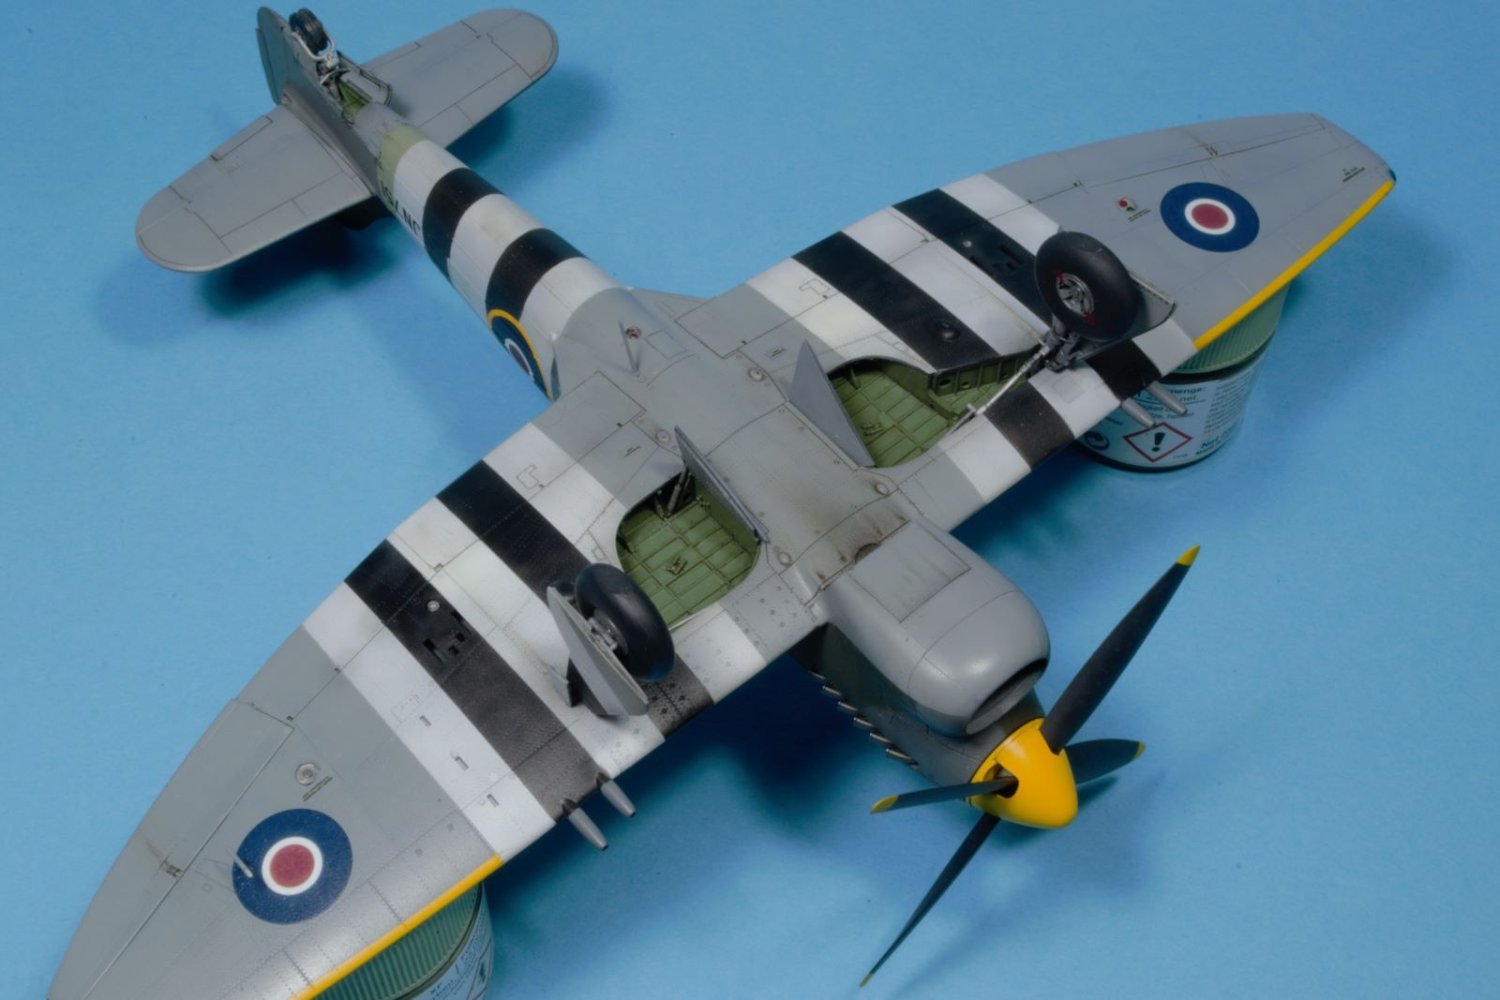
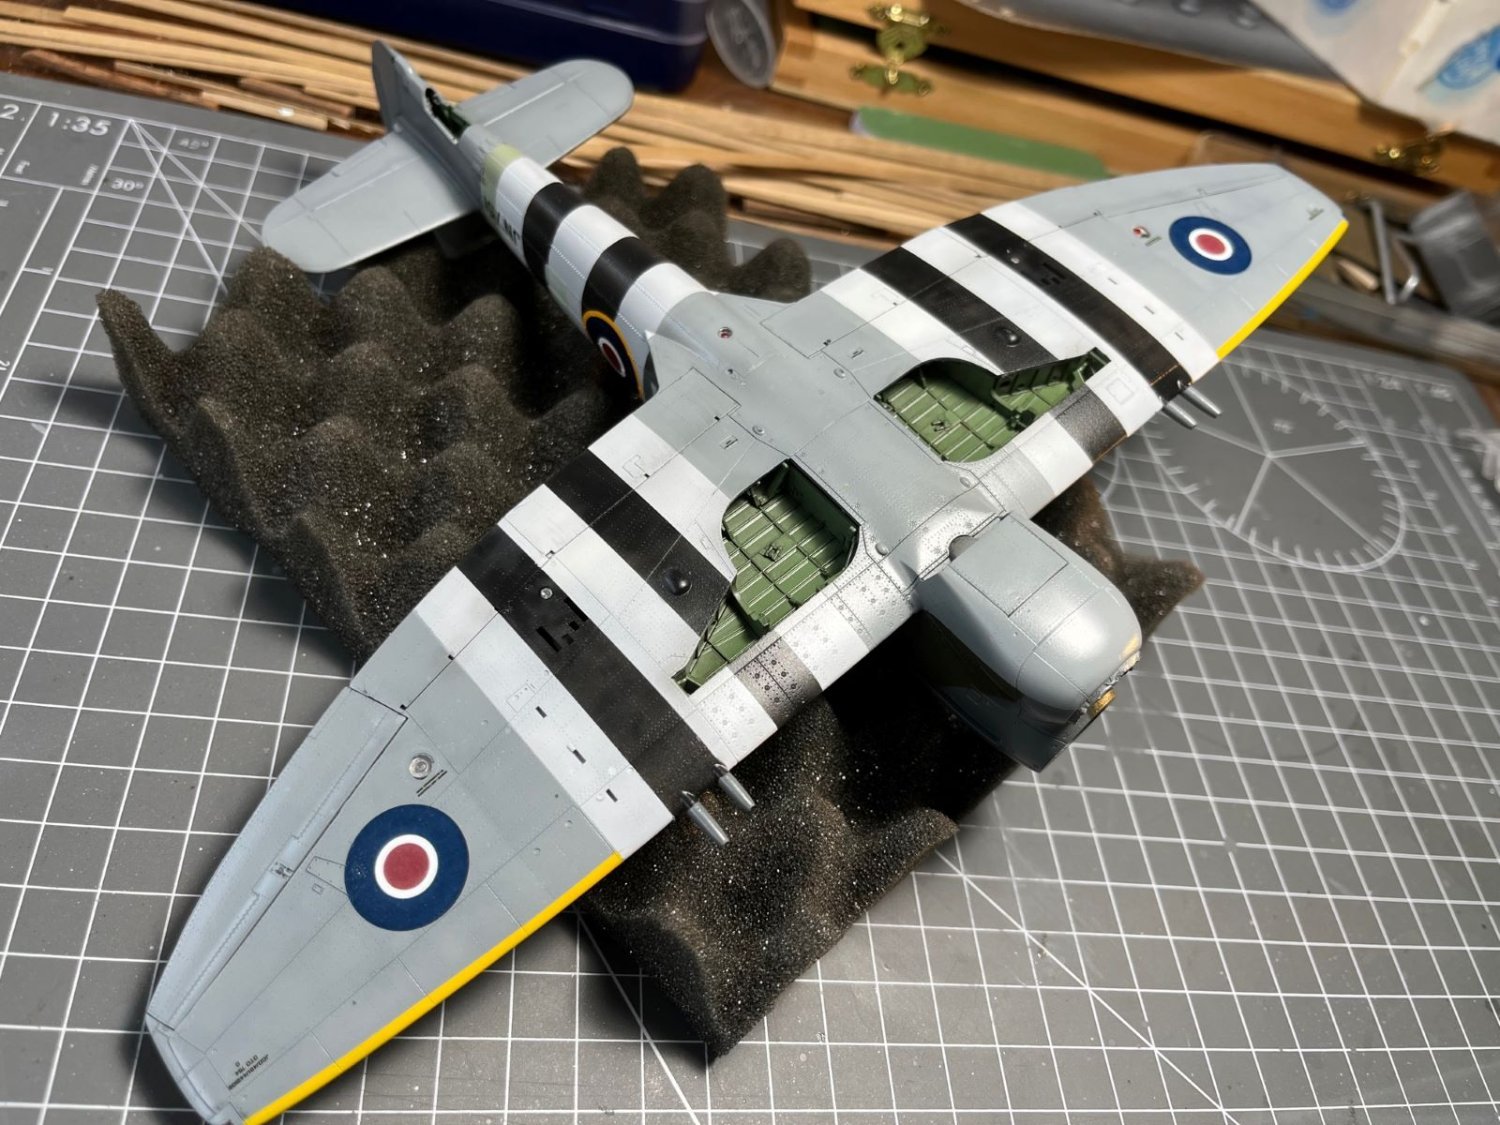
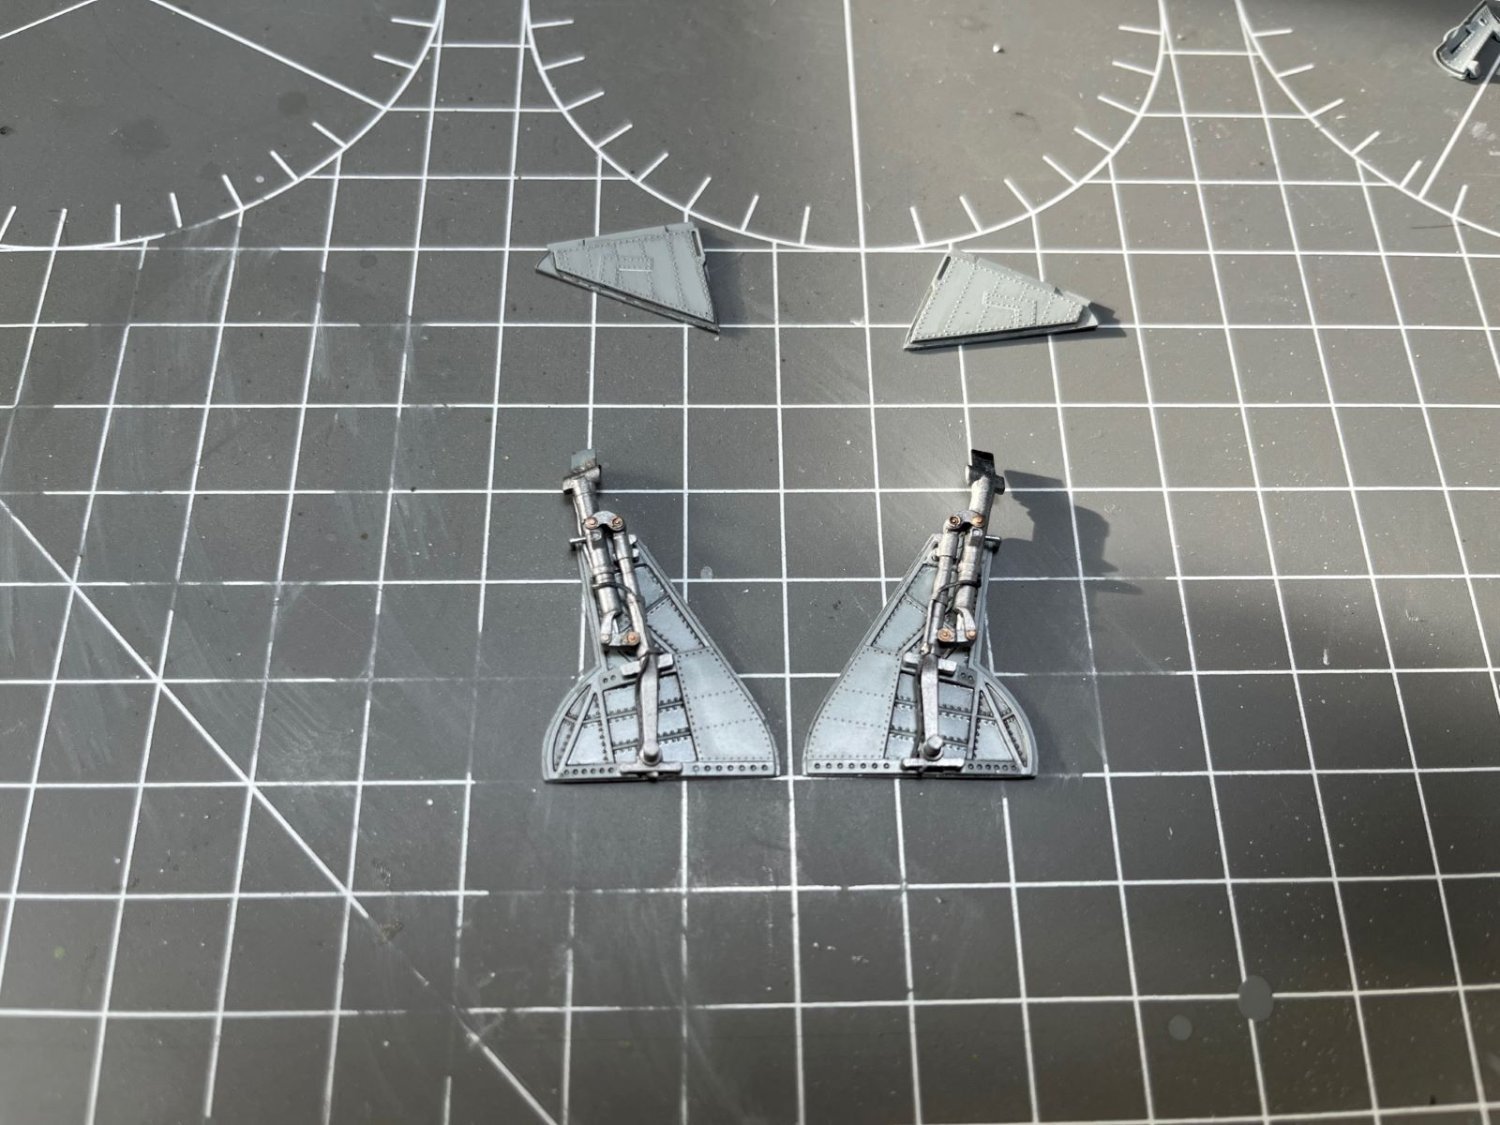
the last bits were glued in place and the model is almost finished. I completed all the landing gear linkages along with the LG bays doors and the assemblies now look indeed quite detailed.
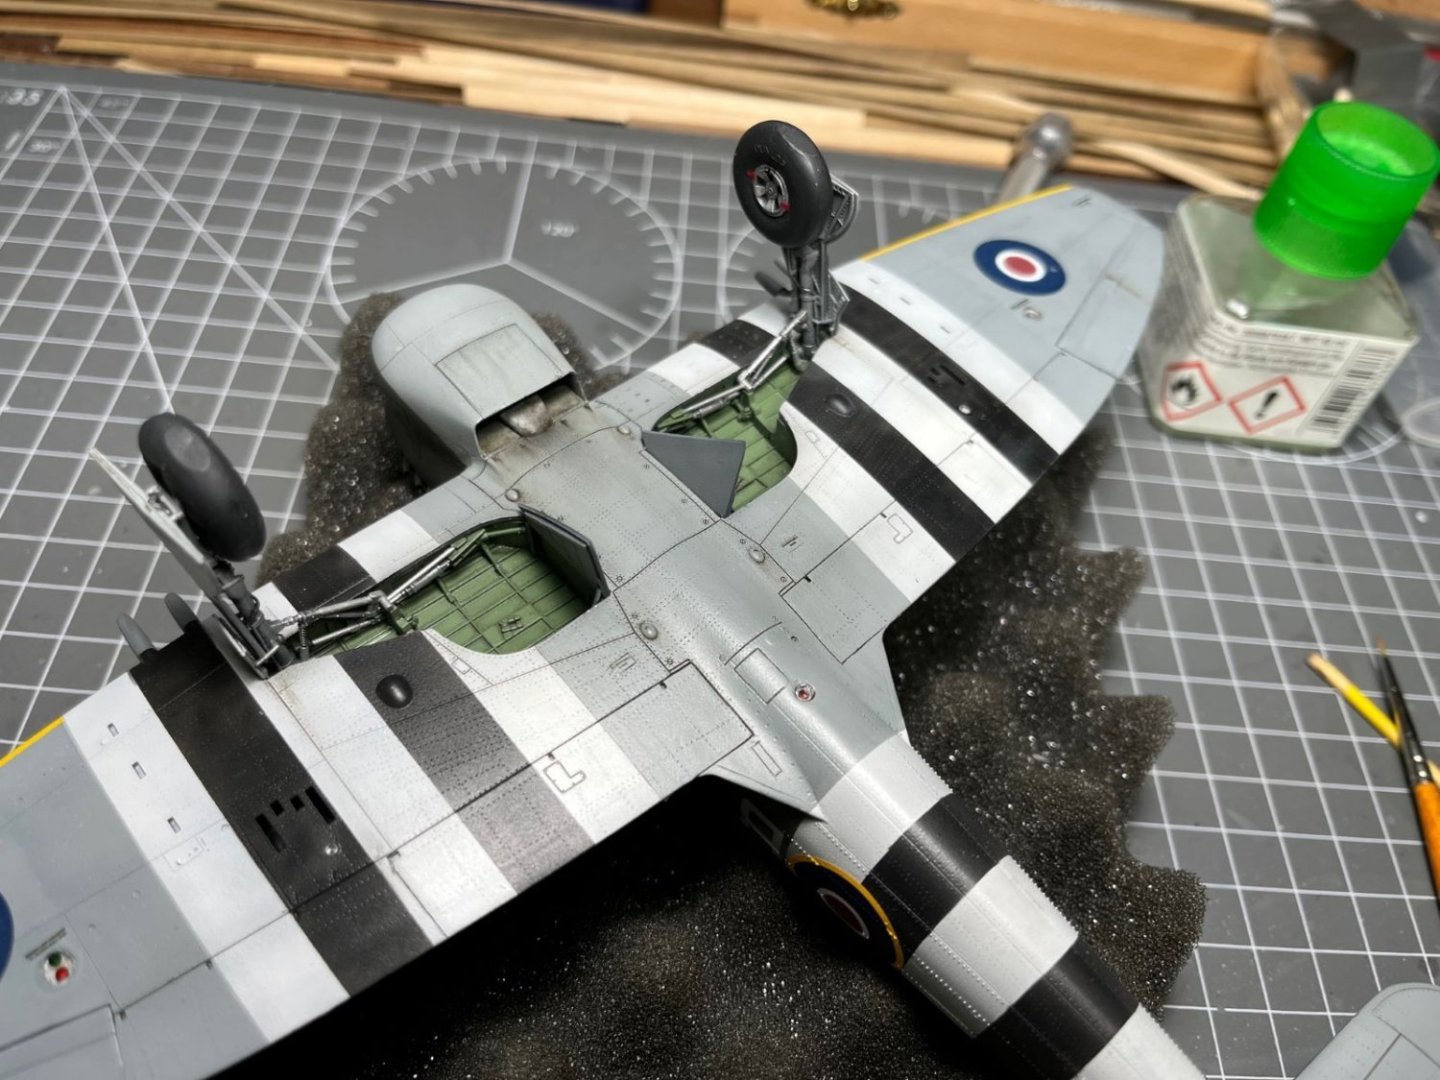
A brass antenna obtained by a flattened brass tube replaced the kit parts which would have been too fiddly.

The pitot tube was pinned in place and the dorsal antenna also replaced by a thin brass tube.

These final bits need now to be painted and the still missing parts, the canopy hood and the propeller will go on without glue.
The next installment will be the final one with the final pictures.
Kind regards,
Dan
-
3 hours ago, Javlin said:
So were did the Gold come in Dan?
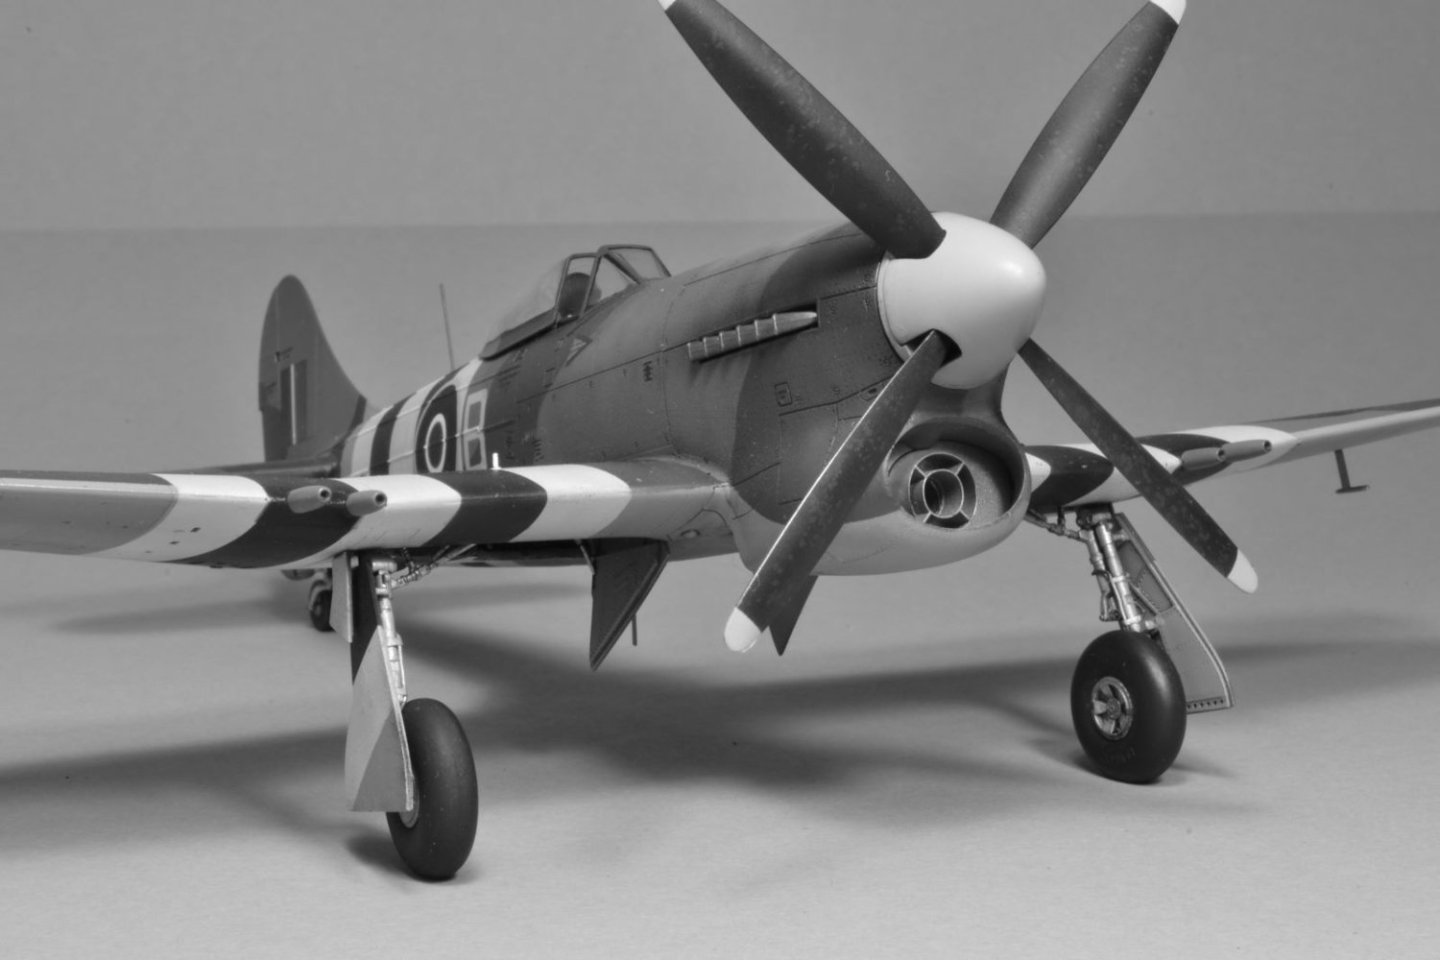
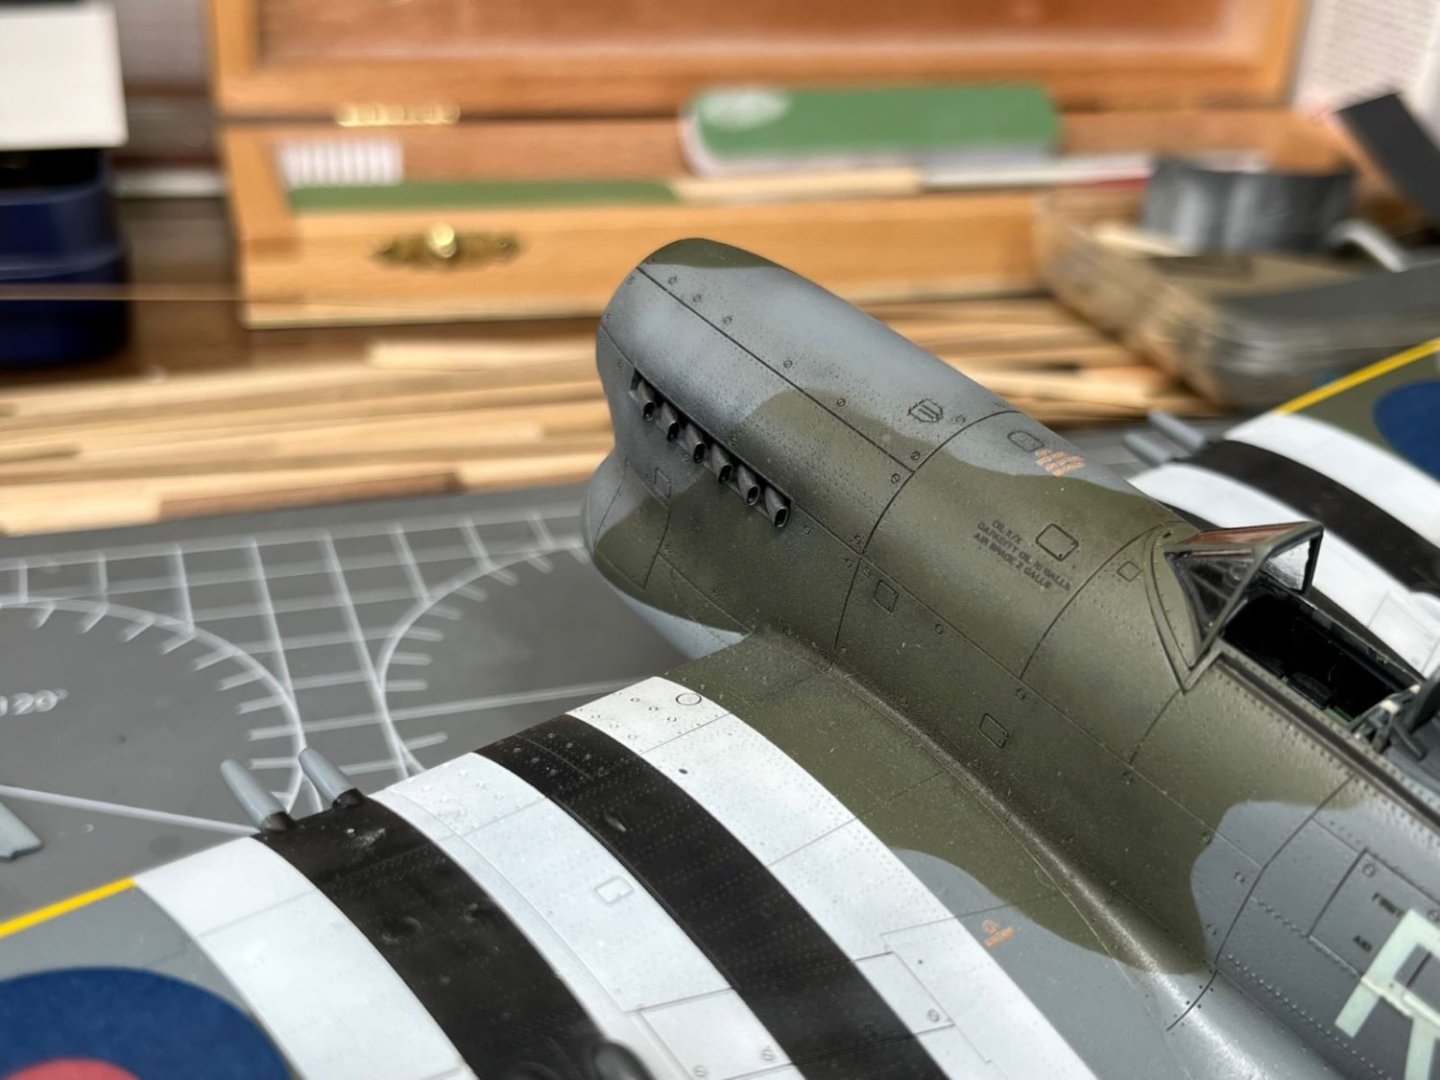
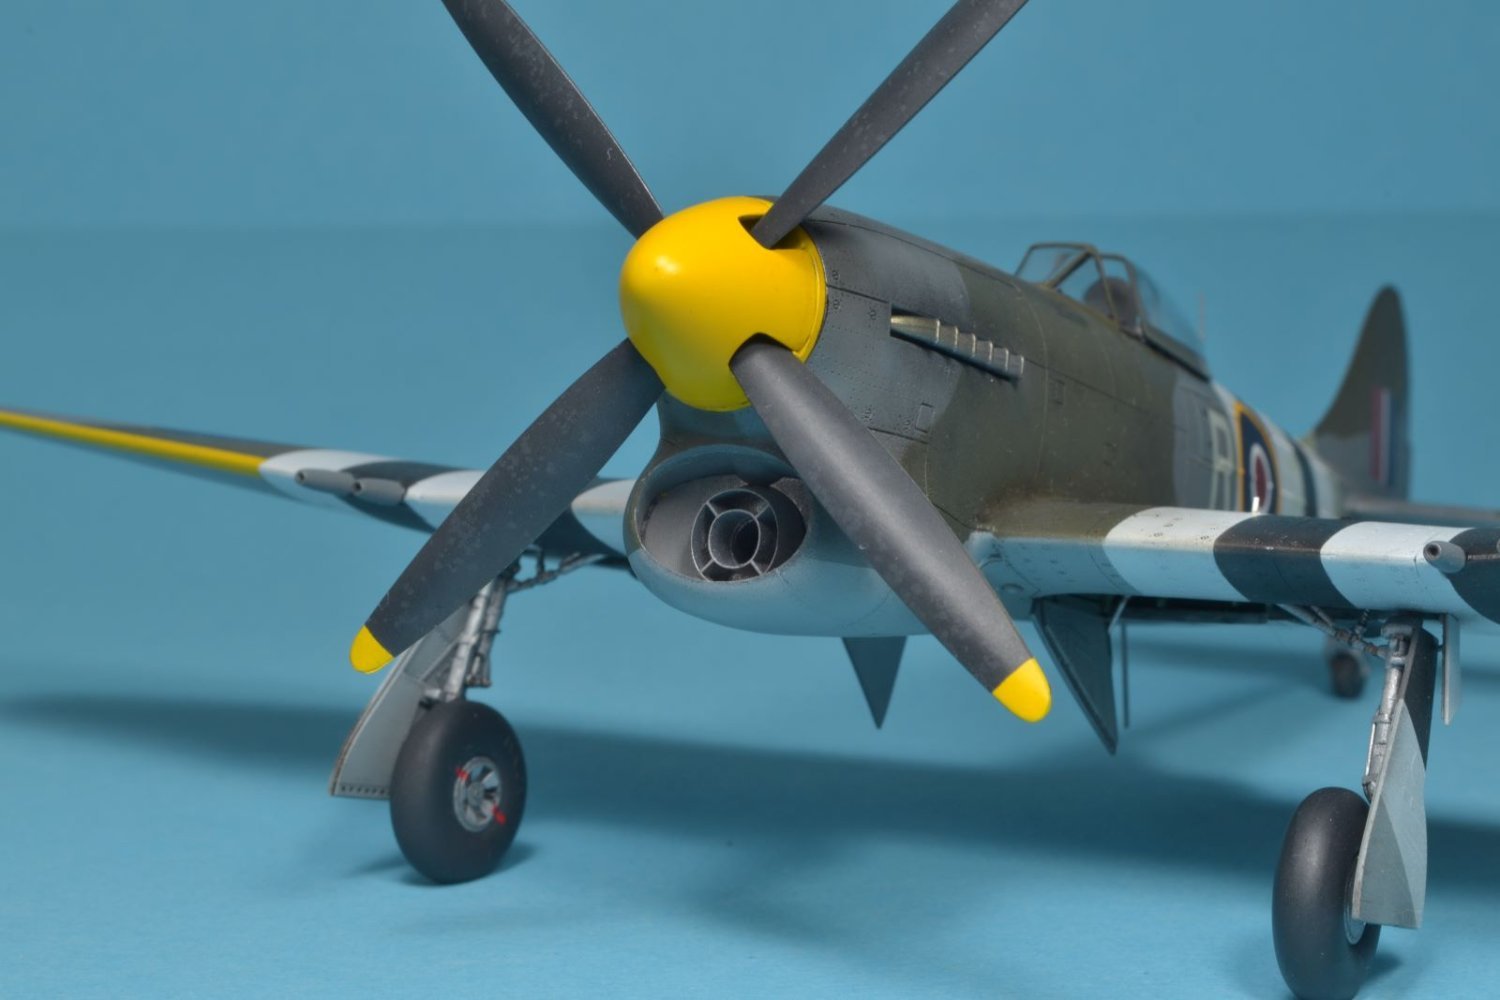
Ok, looking at few period pictures, the exhaust stacks are mainly dark steel color and mainly matt. Hence, after the black base, I sprayed a metallic steel paint (for all the metallic, I use the Vallejo 'Metallic' line, which we discussed in another WIP). After that, to give some tonal variation and also because sometimes I note from pictures that the first tubes are lighter in color than the last ones, I added some gold to the steel that remained in the airbrush and sprayed with that mix the first tubes trying to obtain a color gradient between them. This was quite subtle and can be noticed in the second last picture. Let's say that it was more something for fun than really necessary. At that point, because the part was very shiny, I sprayed a mist of matt 'Dark German Grey' to mute down everything. Then, after having painted with matt black the interior of the openings, to finish off everything, I rubbed the rims of the tube openings with the graphite of a pencil tip.
As said, it was more for having fun than else.
Best regards,
Dan
-
Tagging along, I always liked this type.
Dan
- Old Collingwood, AJohnson, Canute and 3 others
-
6
-
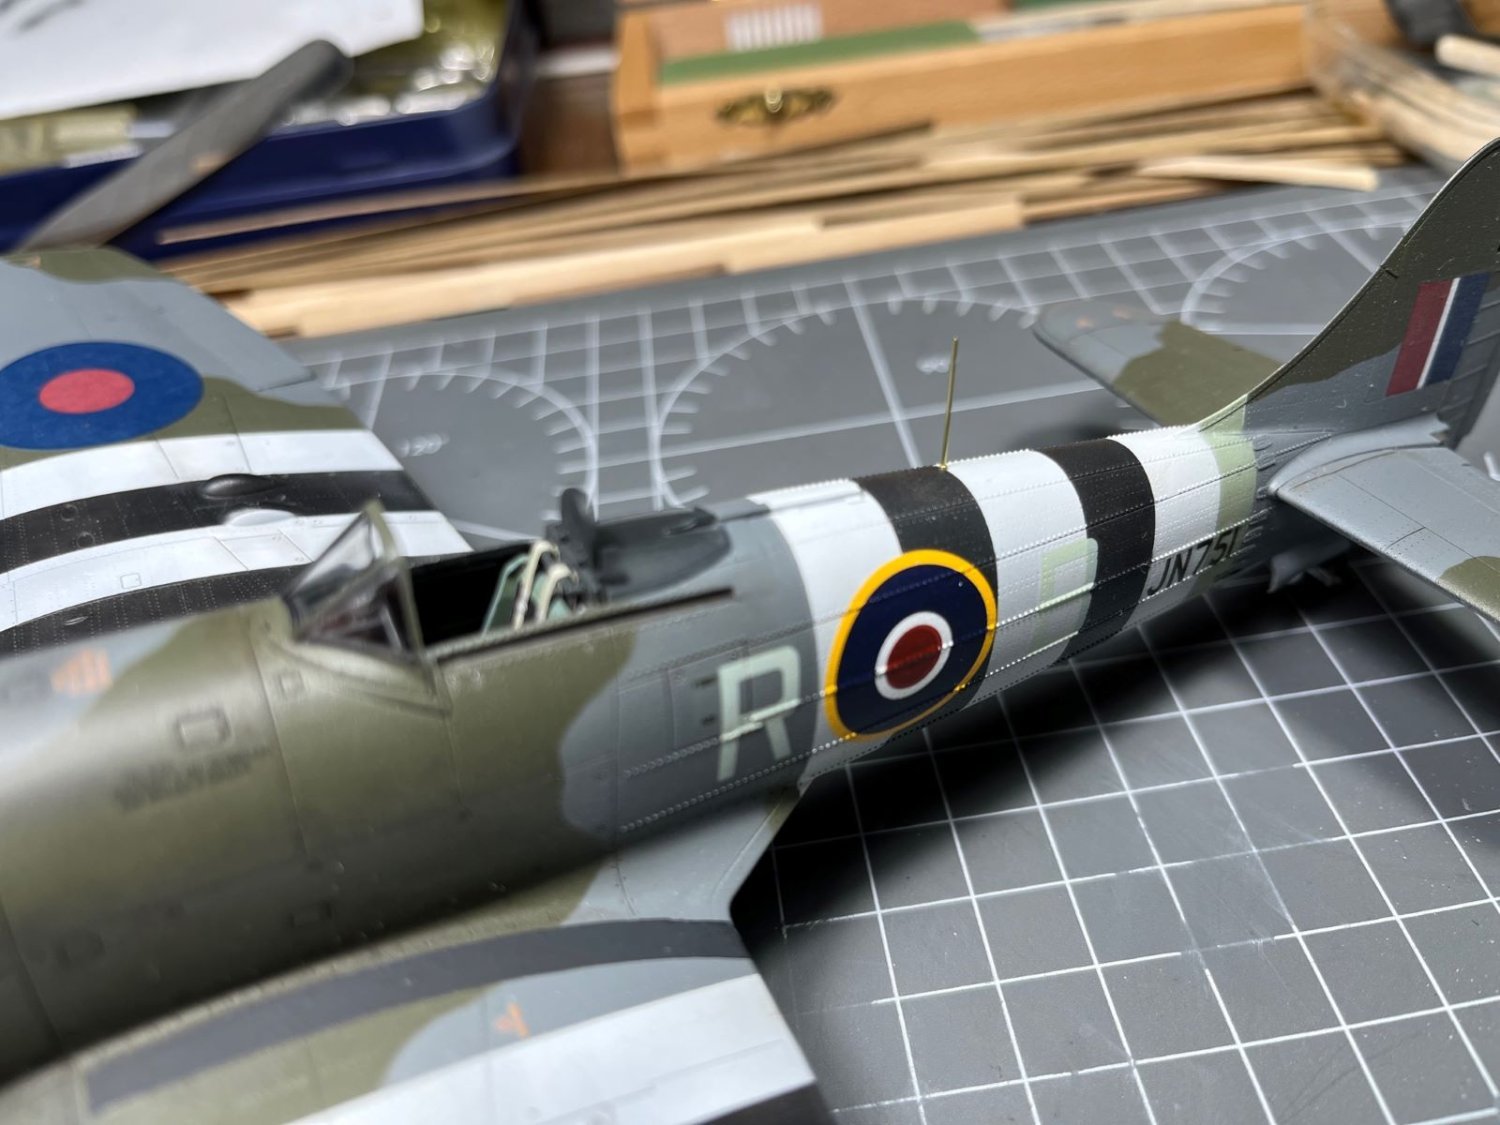
Hi,
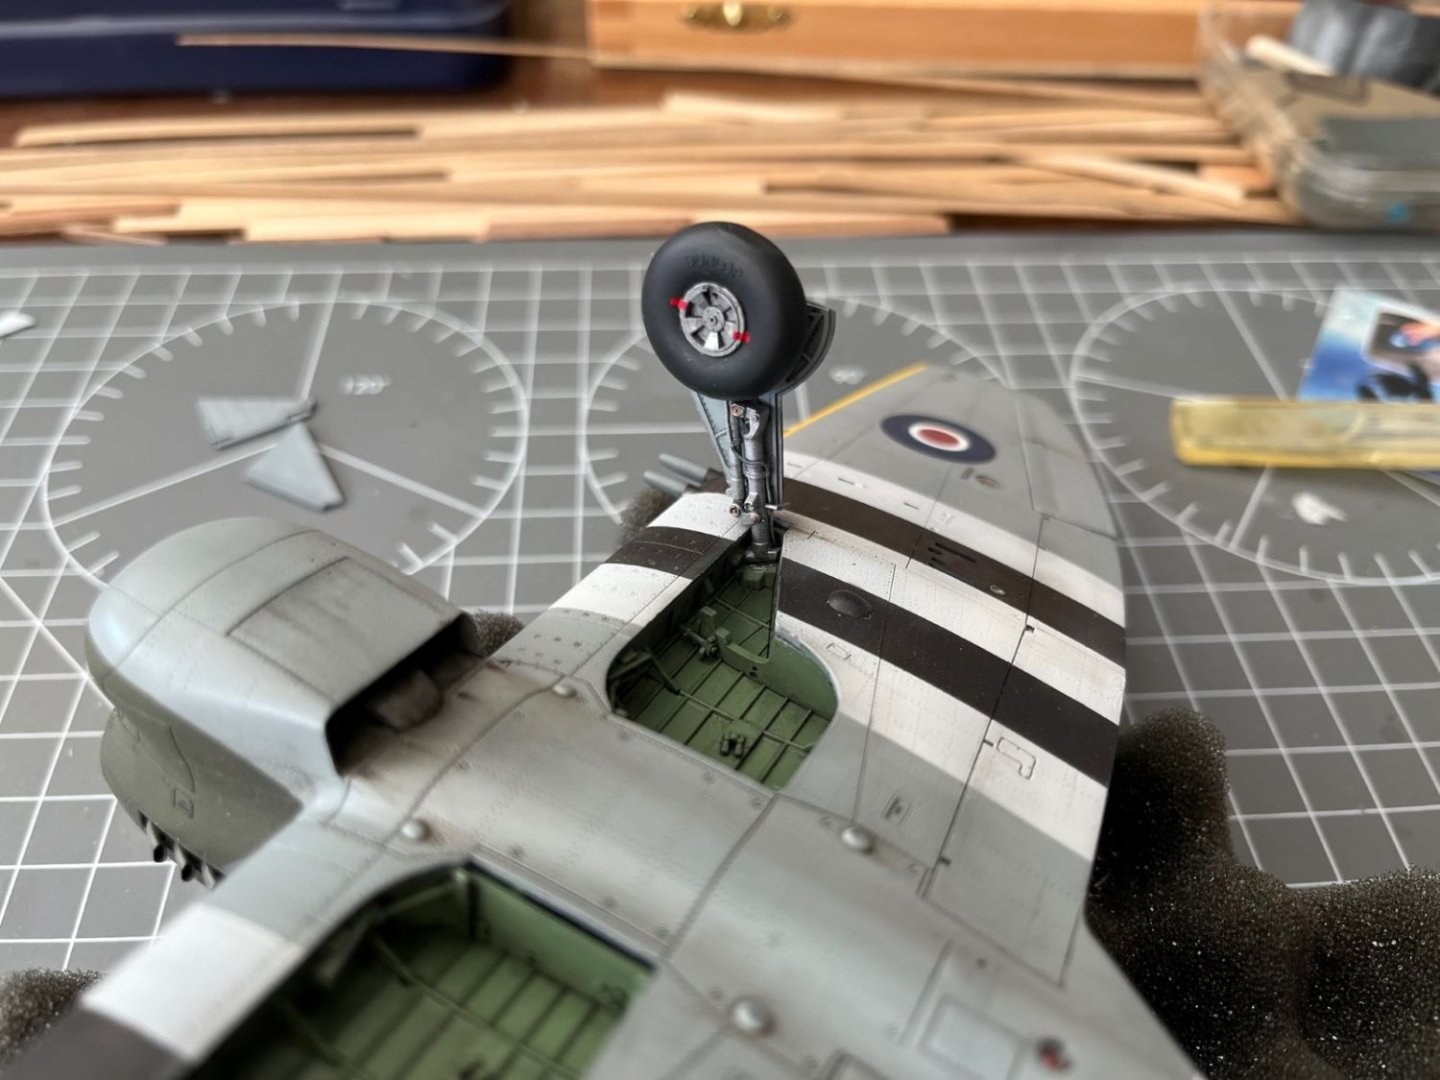
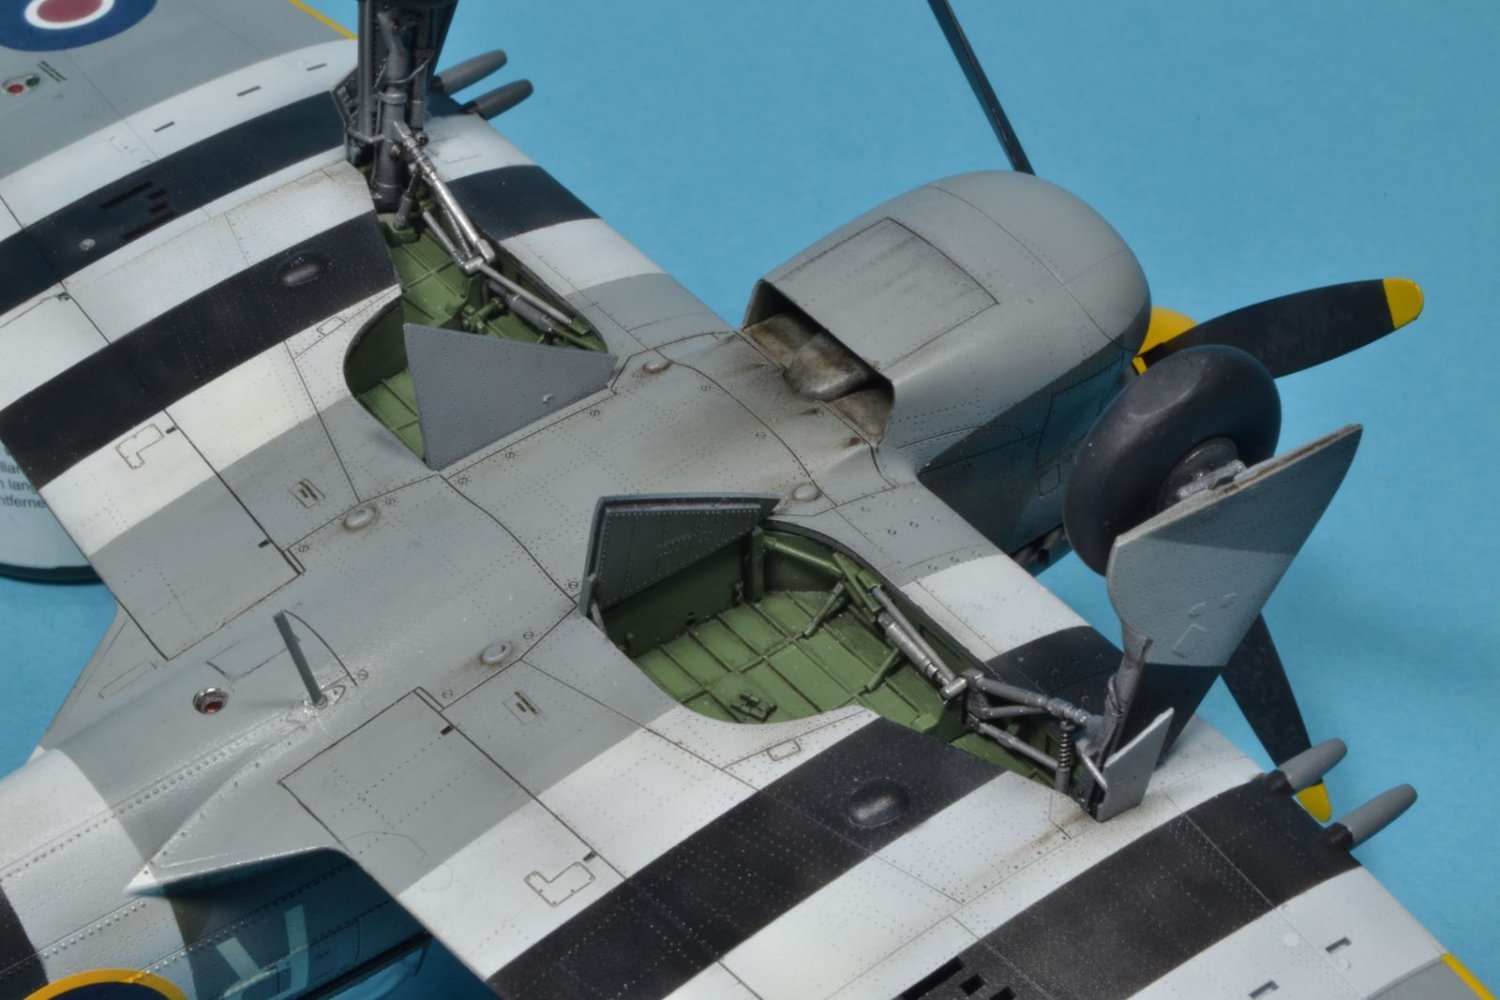
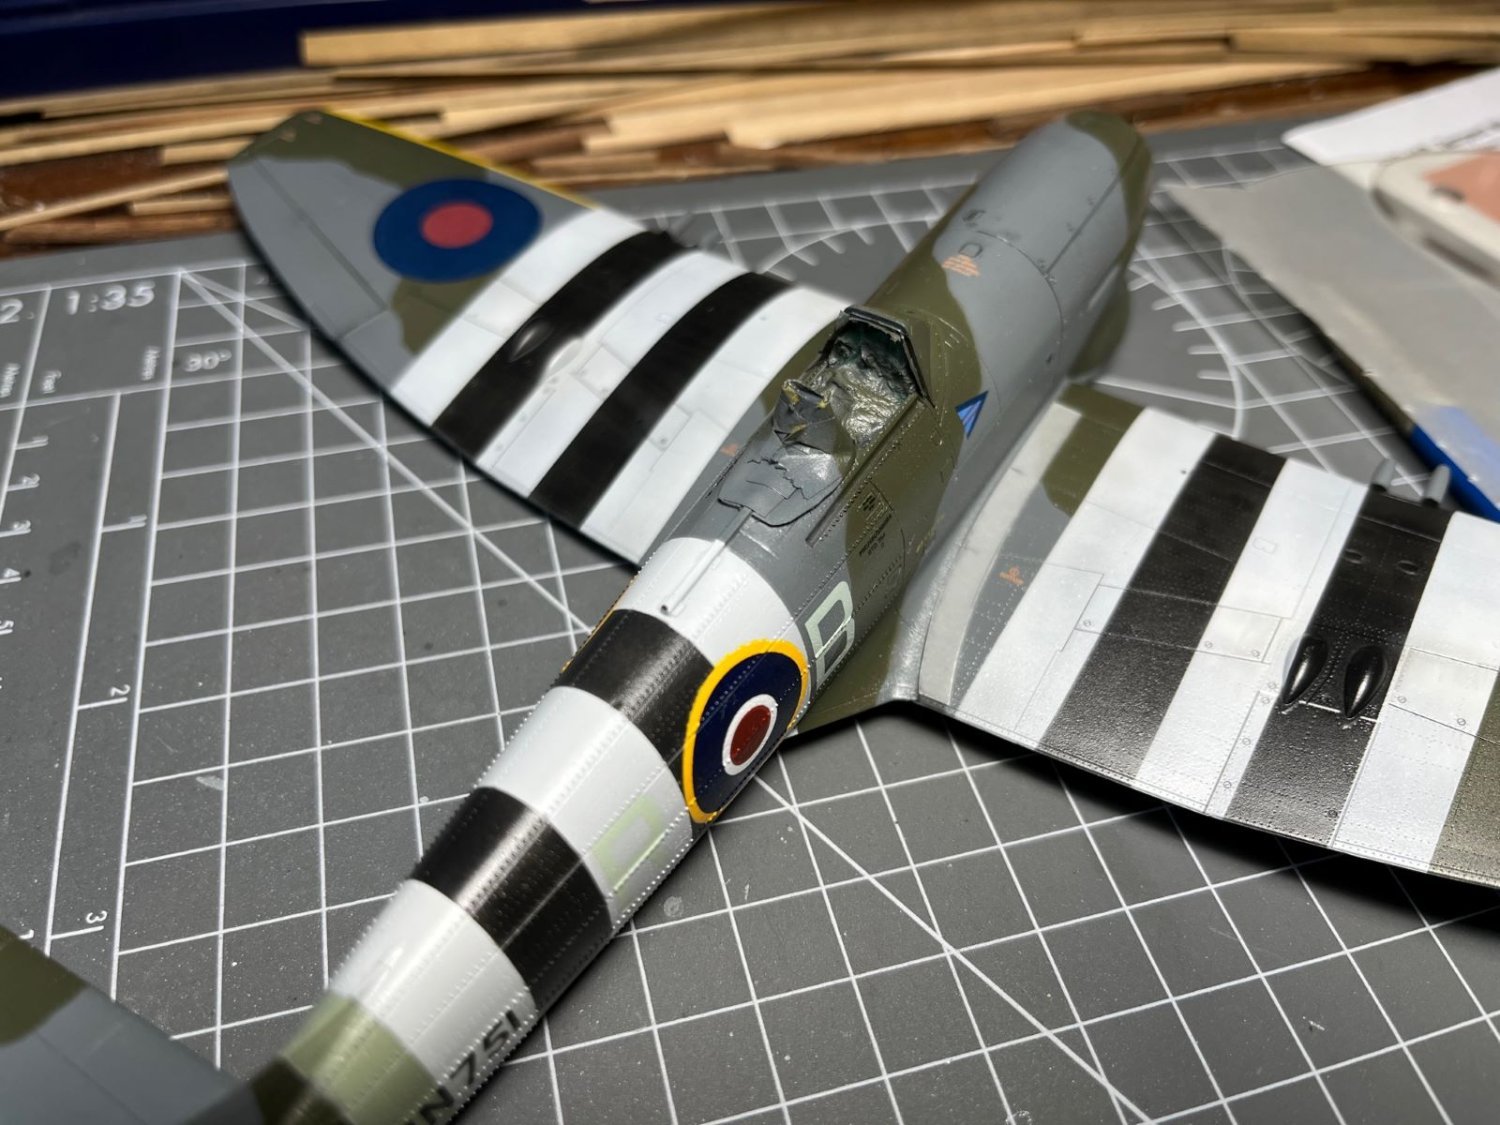
finally, once competed the work with oil colors, I sprayed on everything a coat of matt varnish (a little tip: I mixed few drops of Tamiya smoke into the varnish to age a bit the stark white of the decals). After this step, I could remove the remaining masking materials to reveal the cockpit and its windscreen.


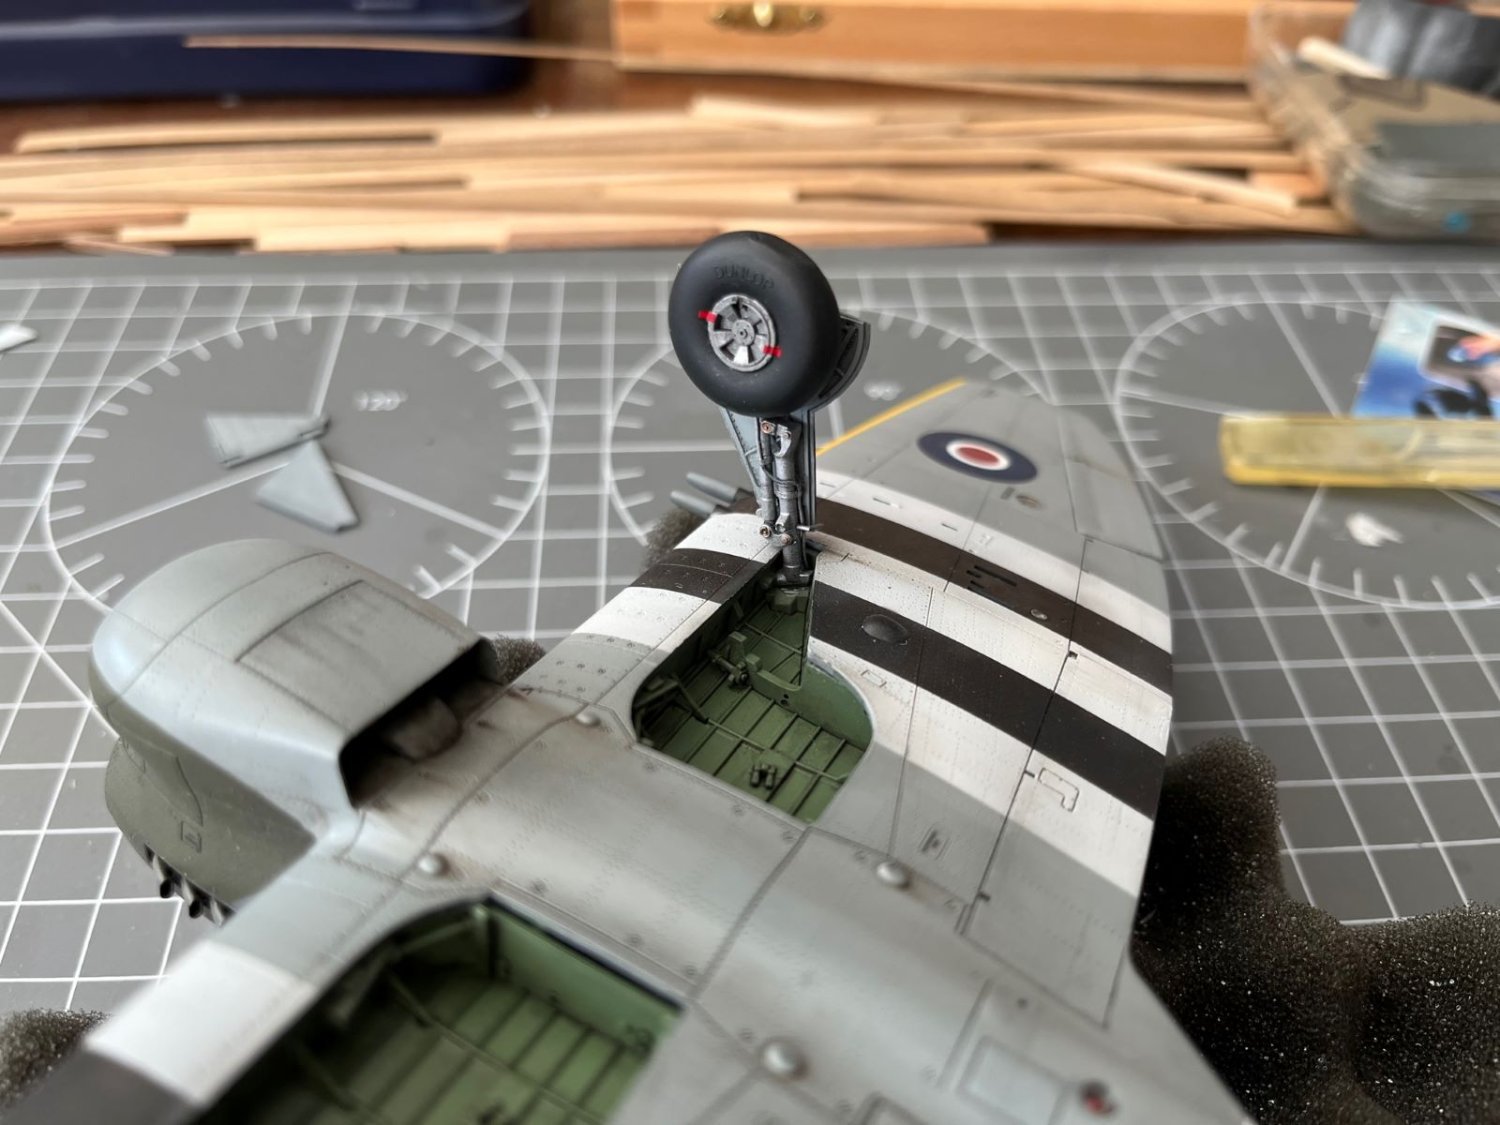
The tail dragger went on with its doors (I see that the picture is slightly out of focus, I will take another one later).
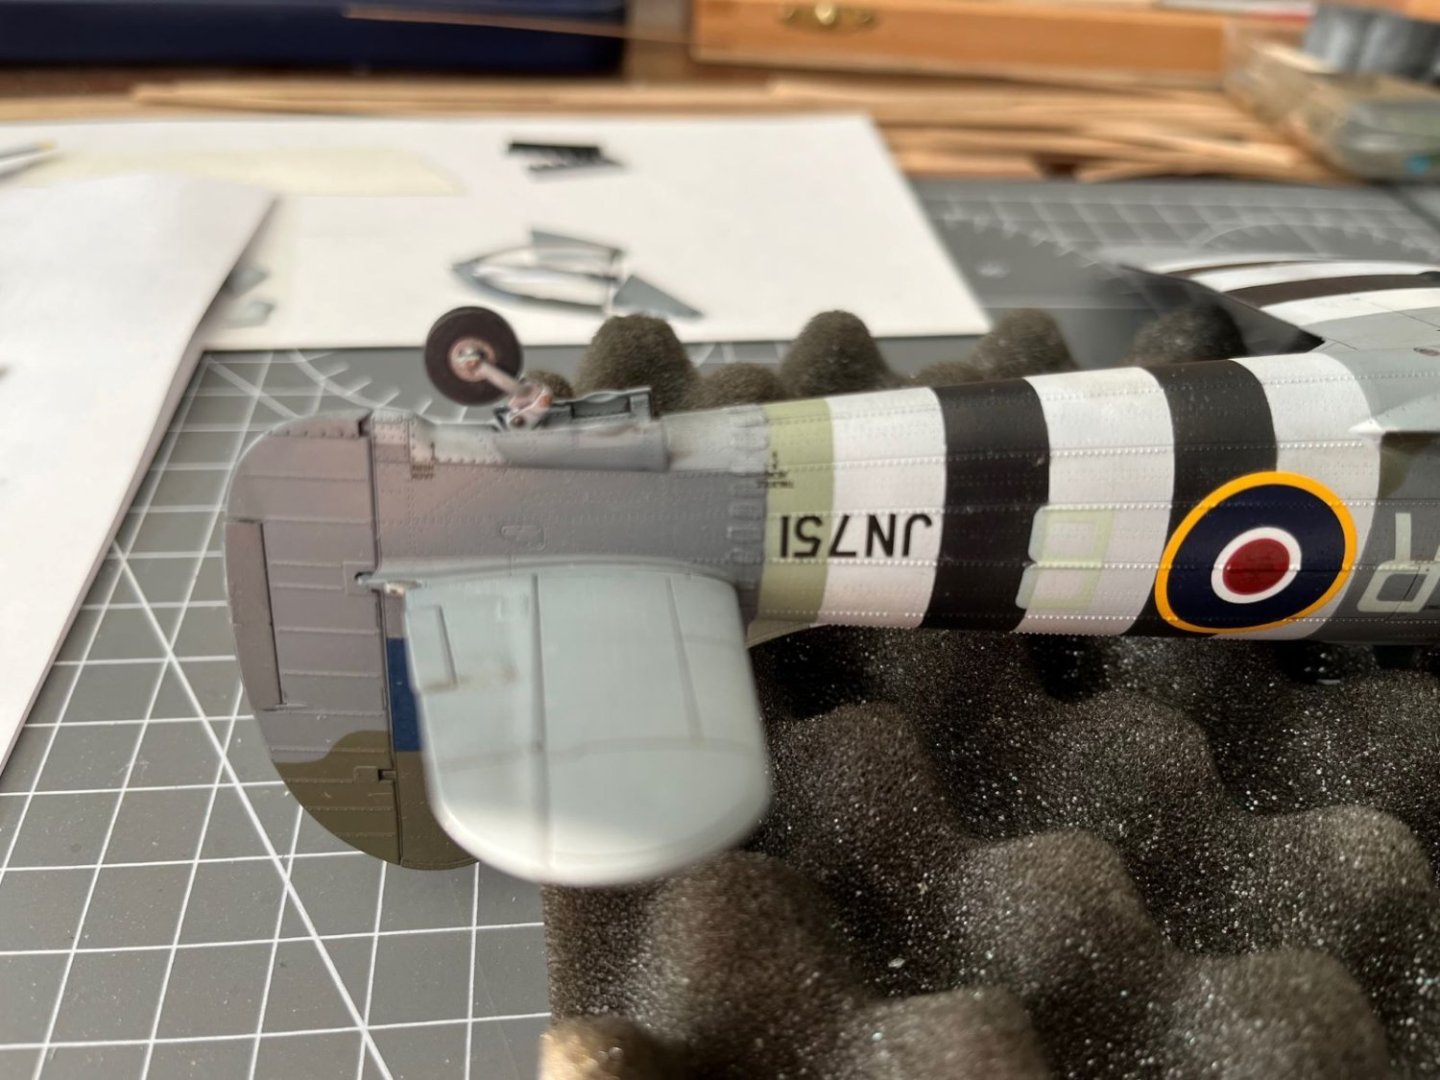
And also the main landing gear. She is now standing on her legs.

The exhaust stack provided by the kit is quite good, but I bought a resin replacement from Eduard which was even nicer having the tubes already hollowed for you.

I coated with a black primer. Then, shades of metallic steel and gold followed. Finally, I toned down the shiny finish with a mist of very dark grey. After having painted black the inner tubes, this is the final result:

My build is approaching the end, but the final small bits are going to take still some time and it is advisable not to rush at this stage where a small mistake can ruin months of work.
Best regards,
Dan
-
Great!
You might consider the strange arrangement of seat harness of Italian planes that were a mix of belts and metallic chains.
Dan
- Old Collingwood, mtaylor, AJohnson and 2 others
-
5
-
As usual, I will follow this one. Curious to see how the 'hump' will turn out with paper.
Dan
PS: the C.200 never had an hinged canopy, early production had a sliding hood, but that was soon eliminated apparently because of the pilots fearing for not being able to bail out.
-
Thank you all for your messages!
In particular:
16 hours ago, Jack-in-the-Blue said:You don't have to limit your palette to black. Yellows and browns also work really well for fluid leaks as well as for general muck and grime.
Indeed, I use also browns. Never used yellow as oil colors (used with airbrush to make particular shadows on metallic parts of jet engines). I will give a try to it.
11 hours ago, Egilman said:What you got doesn't need much if anything, remember, get some shots in real light, (bright sunlight) before you finish it, you will be surprised in how it changes the look...
Yes, you are right, I very rarely take shots in real sunlight, but that would be the best illumination. I will keep that in mind this time.
Cheers,
Dan
- Egilman, Old Collingwood, Canute and 2 others
-
5
-
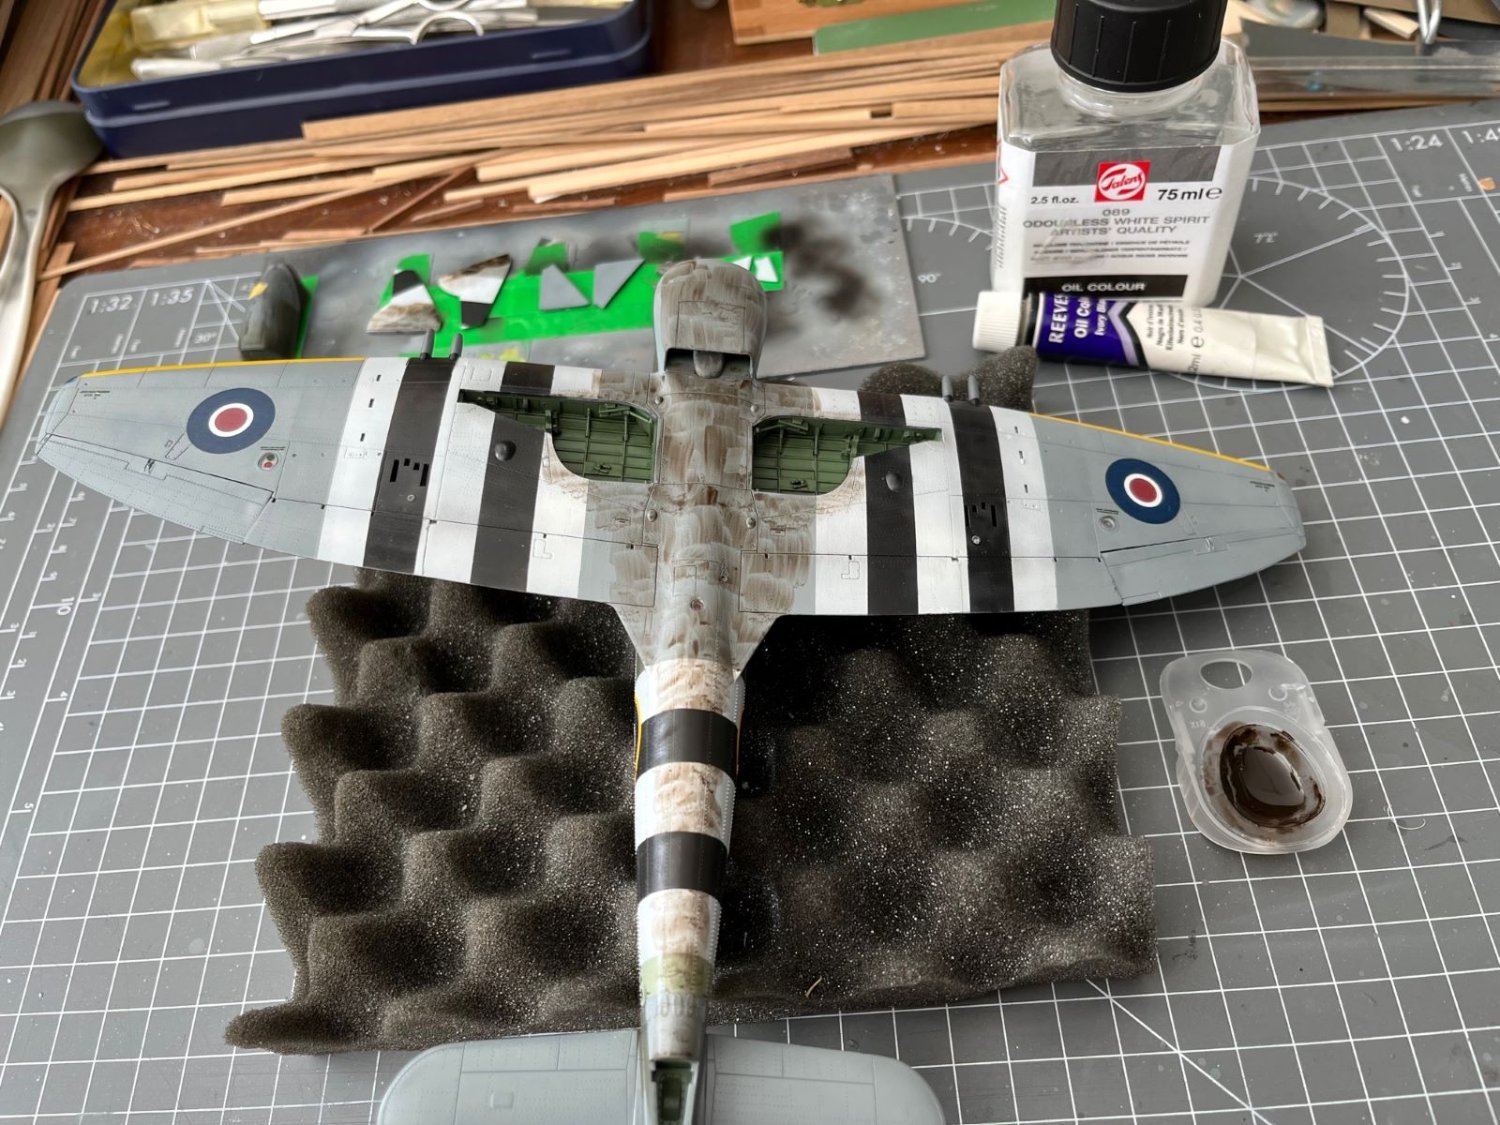
Thank you for all the likes!
With a bit more time in the week end, I went on with the funniest part which is the application of weathering. I use an oil color labelled 'Ivory Black', which once diluted appears as a very dark brown. I thin it with odorless white spirit and spatter it on the parts which I want to treat.
 I will limit it to the surfaces that could be likely affected by the dirt coming from the engine and to the surroundings of the LG wells, as I sow in period pictures. Once dry, I selectively removed the wash and added by brush some oil leaks and rivet trails.
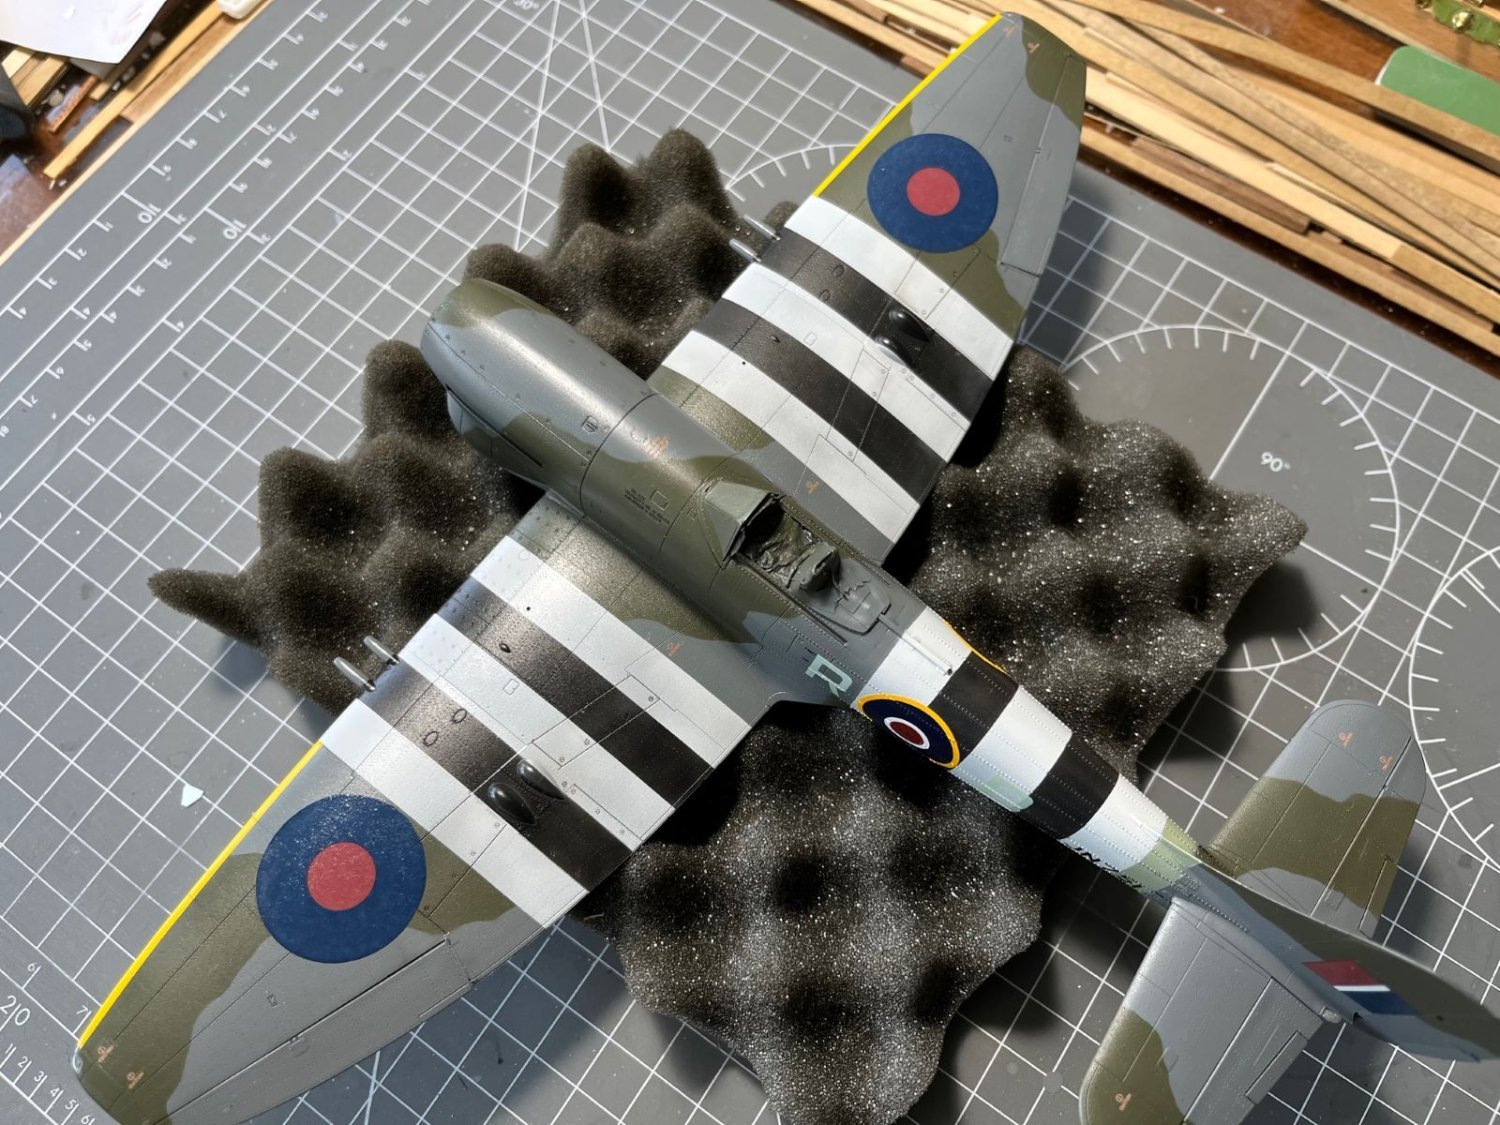
The upper surfaces received the same treatment.

The good thing of the oil colors is that you can correct, remove or add them as it most pleases you. I might come back to that if I see it necessary after I let it pause for a while. Finally, I complemented the oil staining with some airbrushed black, which, in my view, is supposed to mimic the staining of the fumes coming for the engine.

The light of the desk lamps flattens the contrast, but shades are more visible in person.
I don't want to make it too dirty, so I hope you like it like that.
Any suggestion is welcome, thanks for following,
Dan
-
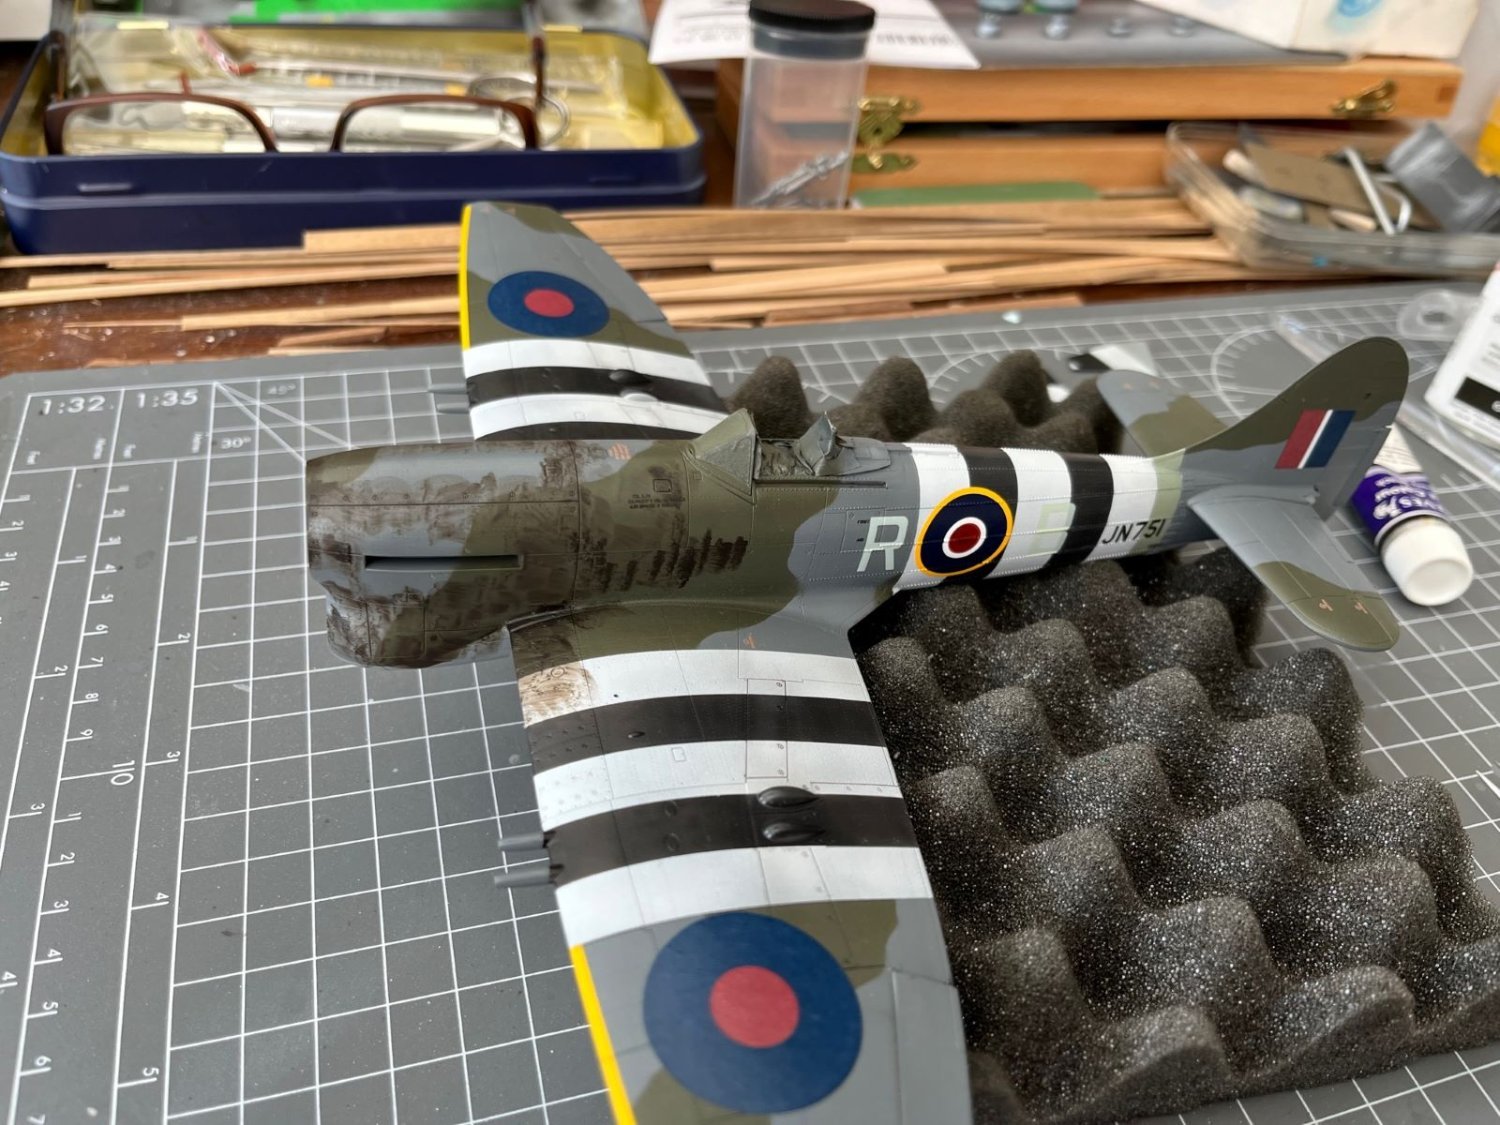
Hi, in view of the application of the decals, I sprayed a coat of gloss X-22 on everything.
For few days I was busy with the decals and with the service stencils. I find these latter really boring to apply, therefore I omitted at least those that fell within the invasion stripes. I had also few seniority moments and I misplaced the code letters on the fuselage. They couldn't slide easily, so I have to live with that.
I also started to highlight some panels and apply discolorations around the engine and ammunition panels. After the decals, I sealed everything with another coat of X-22.

It is now ready for some oil color playing. While waiting for the paint to cure, with the help of tracing paper and french curves, I drew the contours of the walkways which will be applied later.
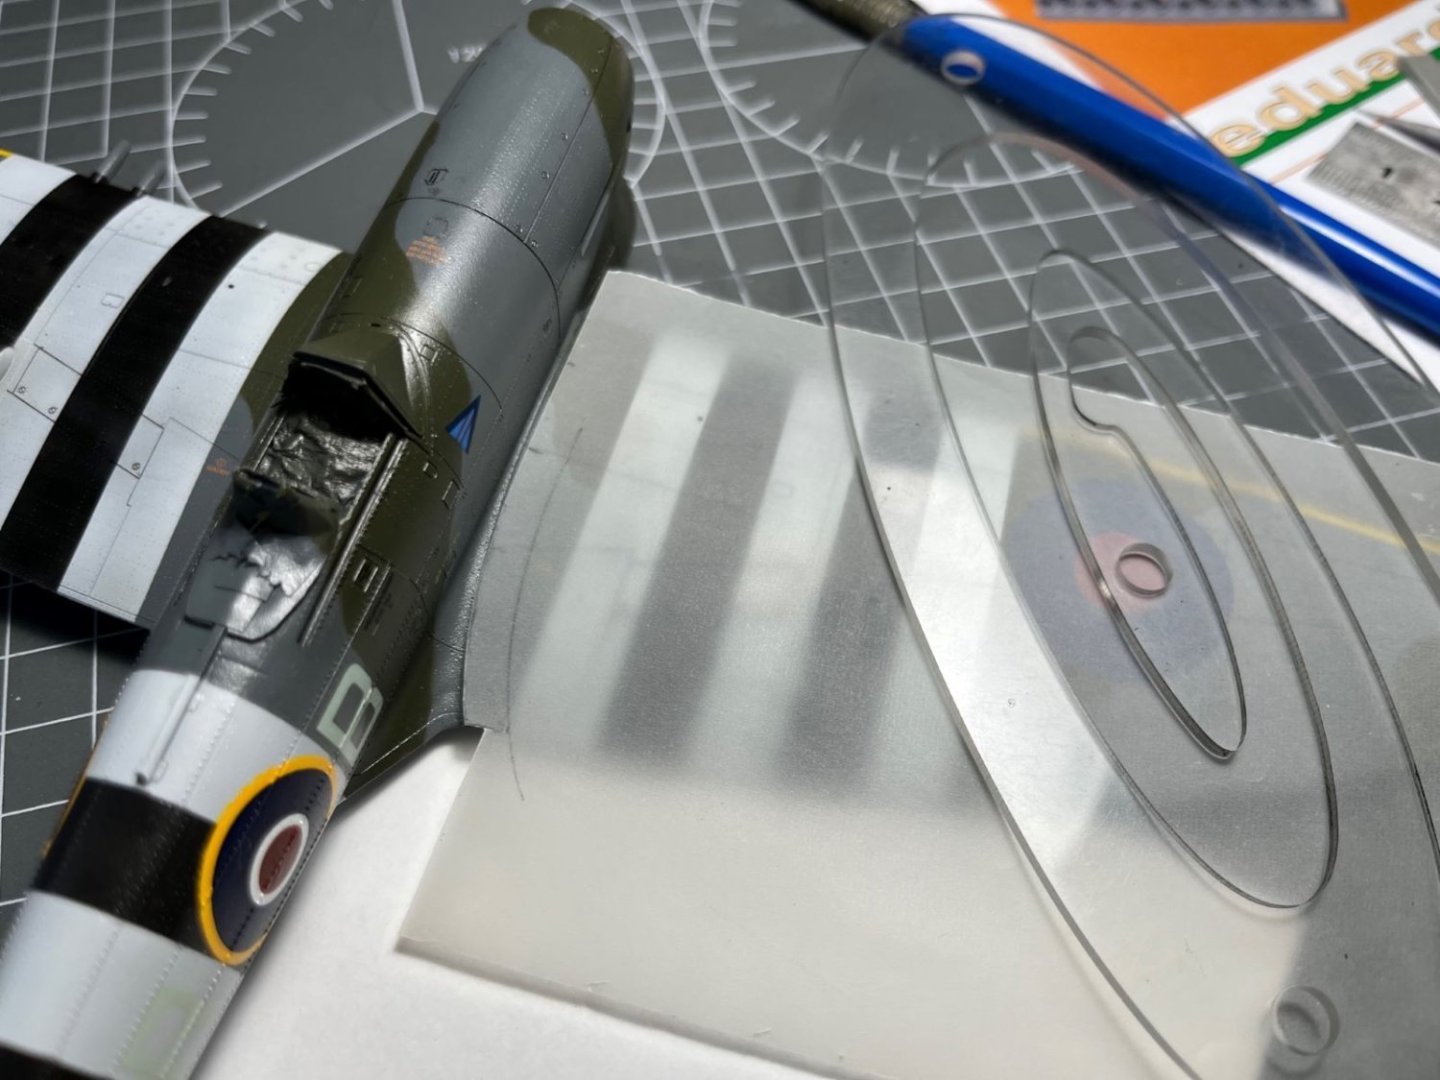
I obtained a walkway template which I will transfer on a black painted piece of decal.

The decal will be eventually painted with a different black and will be applied after the final coat.
That is all for now, thanks for following,
Dan
-
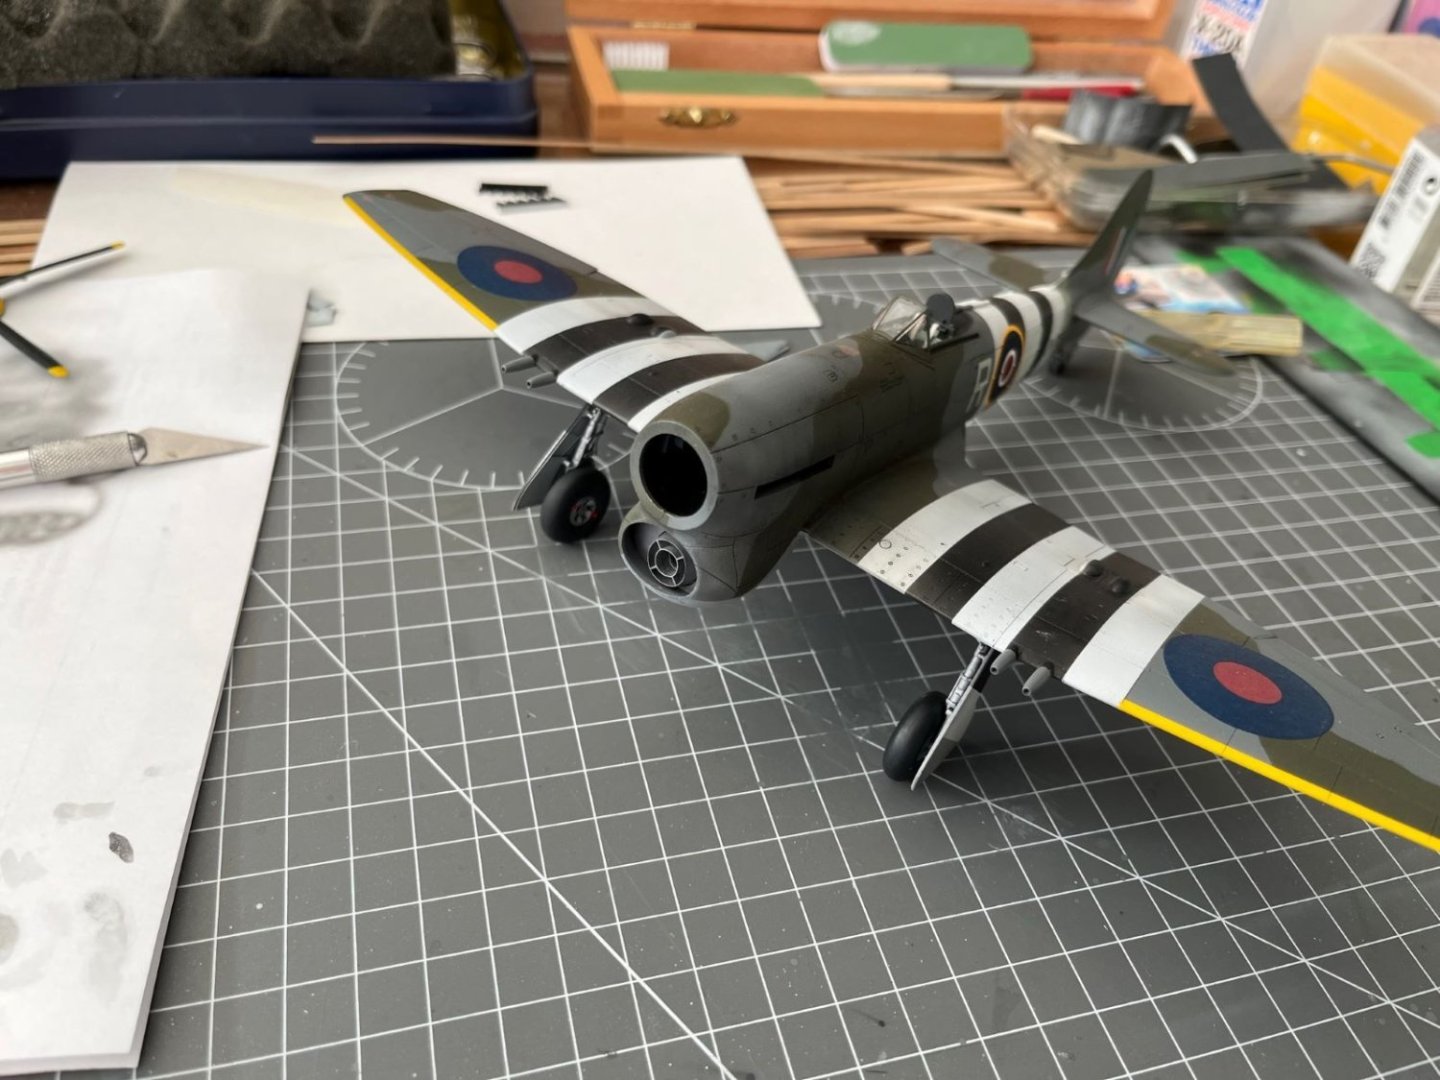
Thanks Alan, it's not hard to get the landing gears fine, in this case the kit parts helped a lot. I just finished the landing gear doors removing an annoying extractor mark, and the is how they look now under the morning light
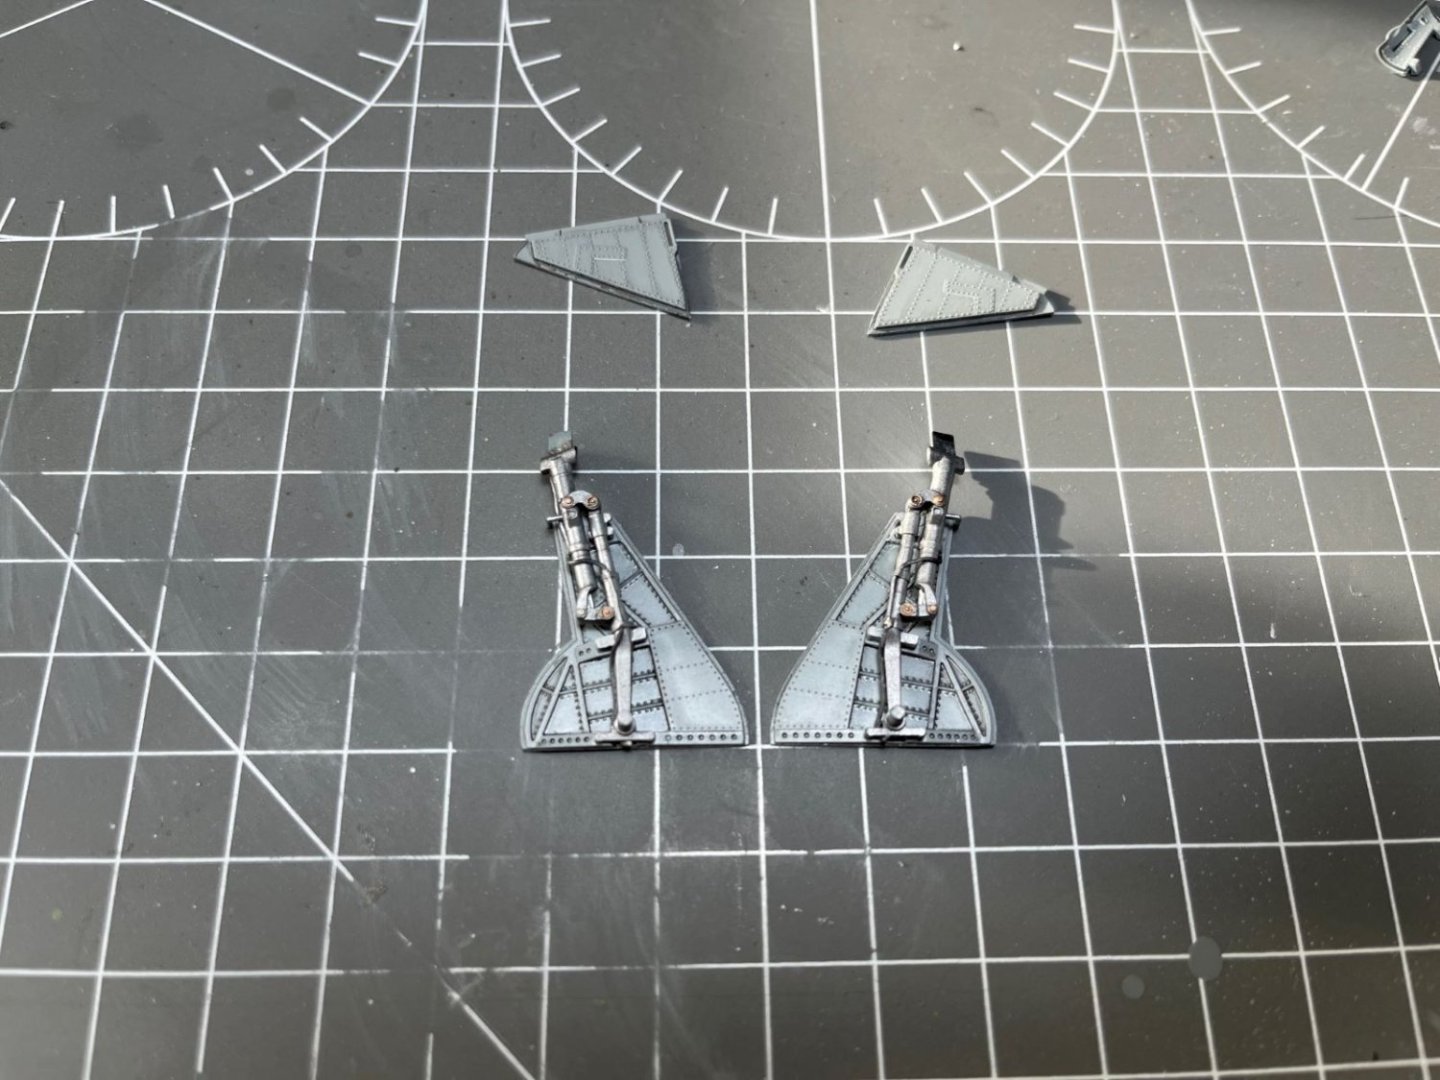
kind regards:
Dan
- Landlubber Mike, Egilman, Javlin and 10 others
-
13
-
Hi, thanks @king derelict and @landlubber for your kind comments above.
Before tackling the finishing of the main airframe, I am tackling now the small bits.
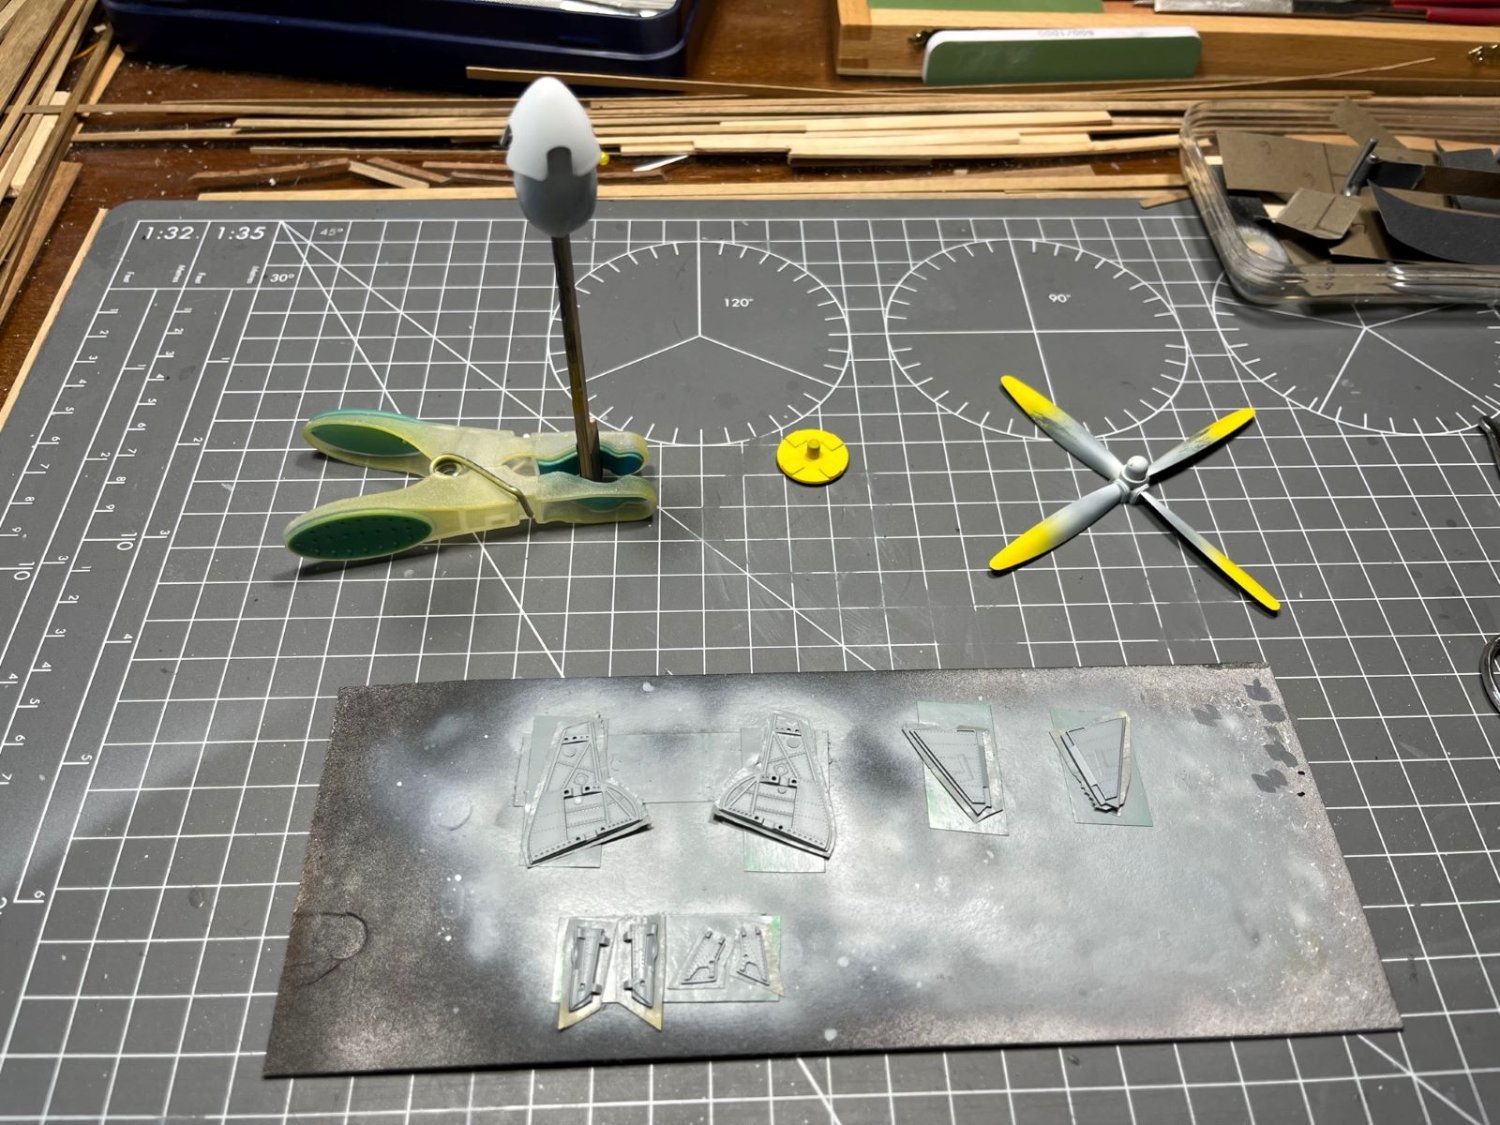
I pre-painted with white all the details that need to be yellow, to avoid that the gray substrate make the final yellow shade to appear too cold a tint.

I also sprayed the interior of the landing gear well doors with the same color of the underside. After, I applied a clear gloss and some black liner to the doors. In the same picture, you see the landing gear struts cleaned and furnished with a brake line.
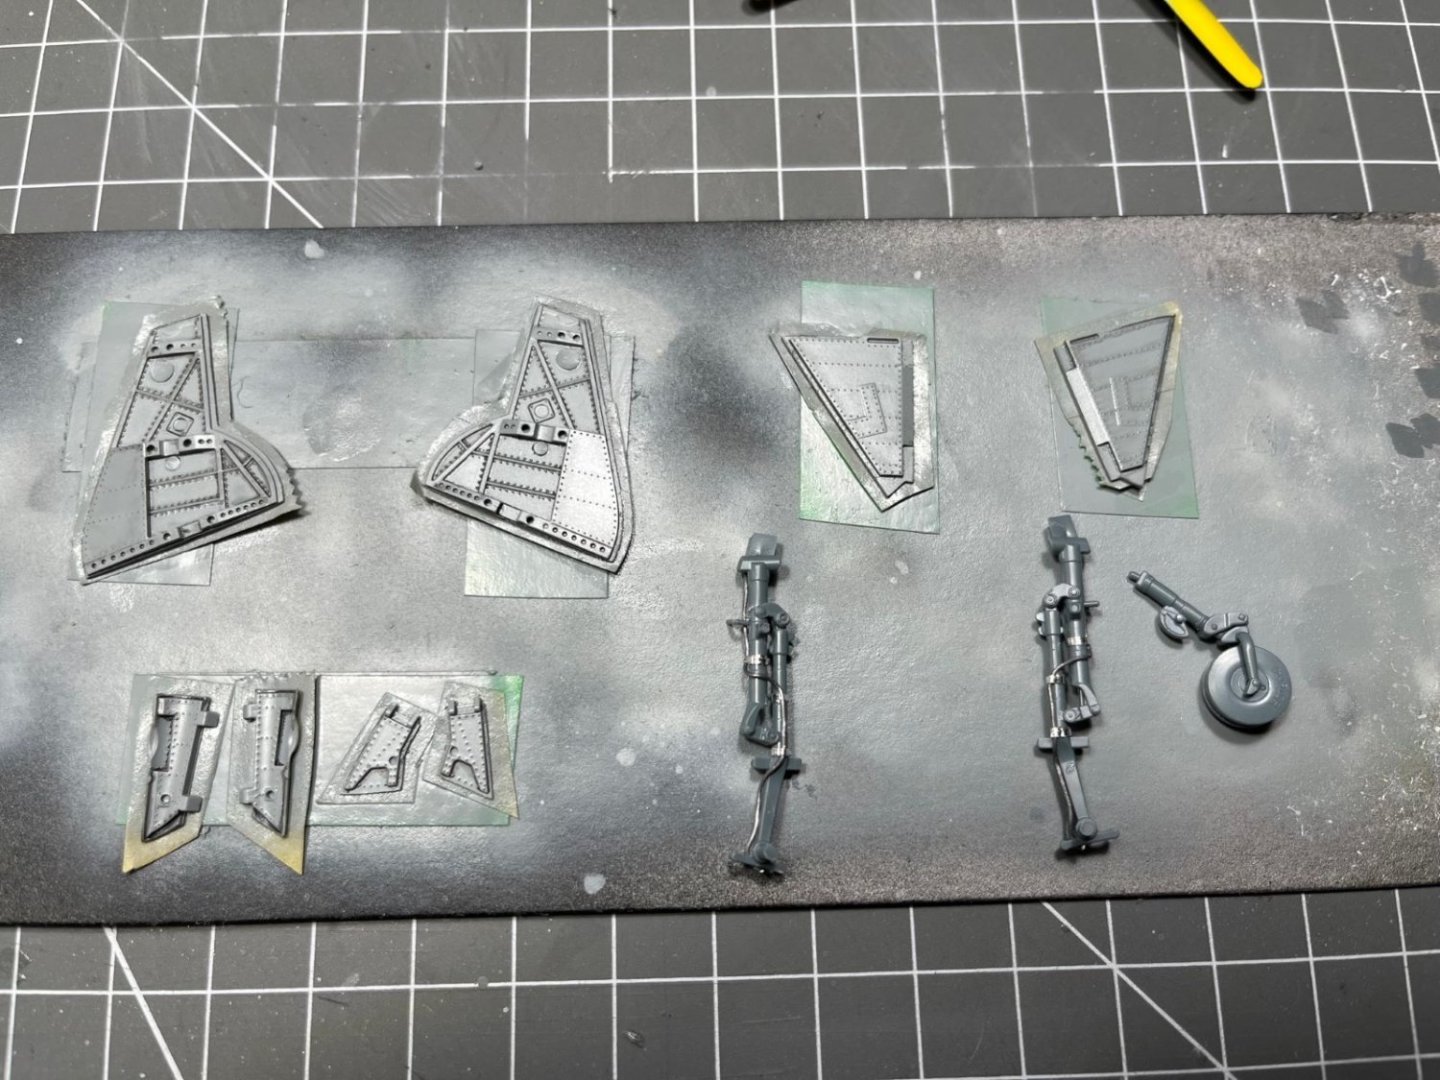
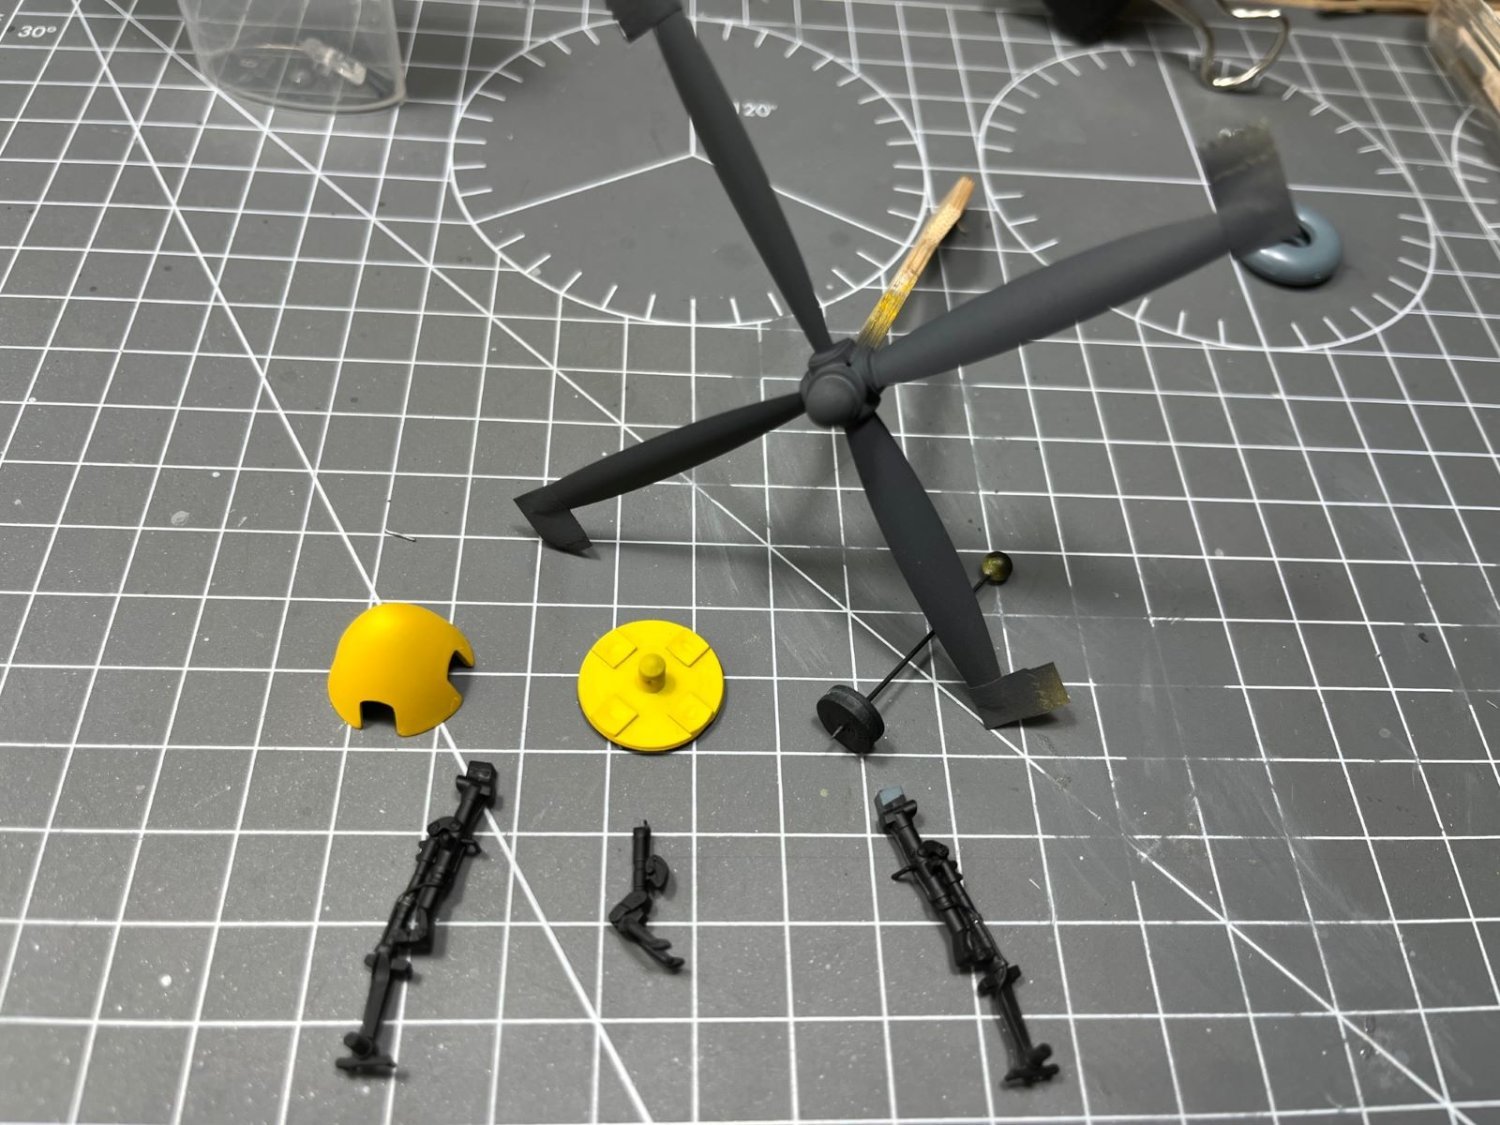
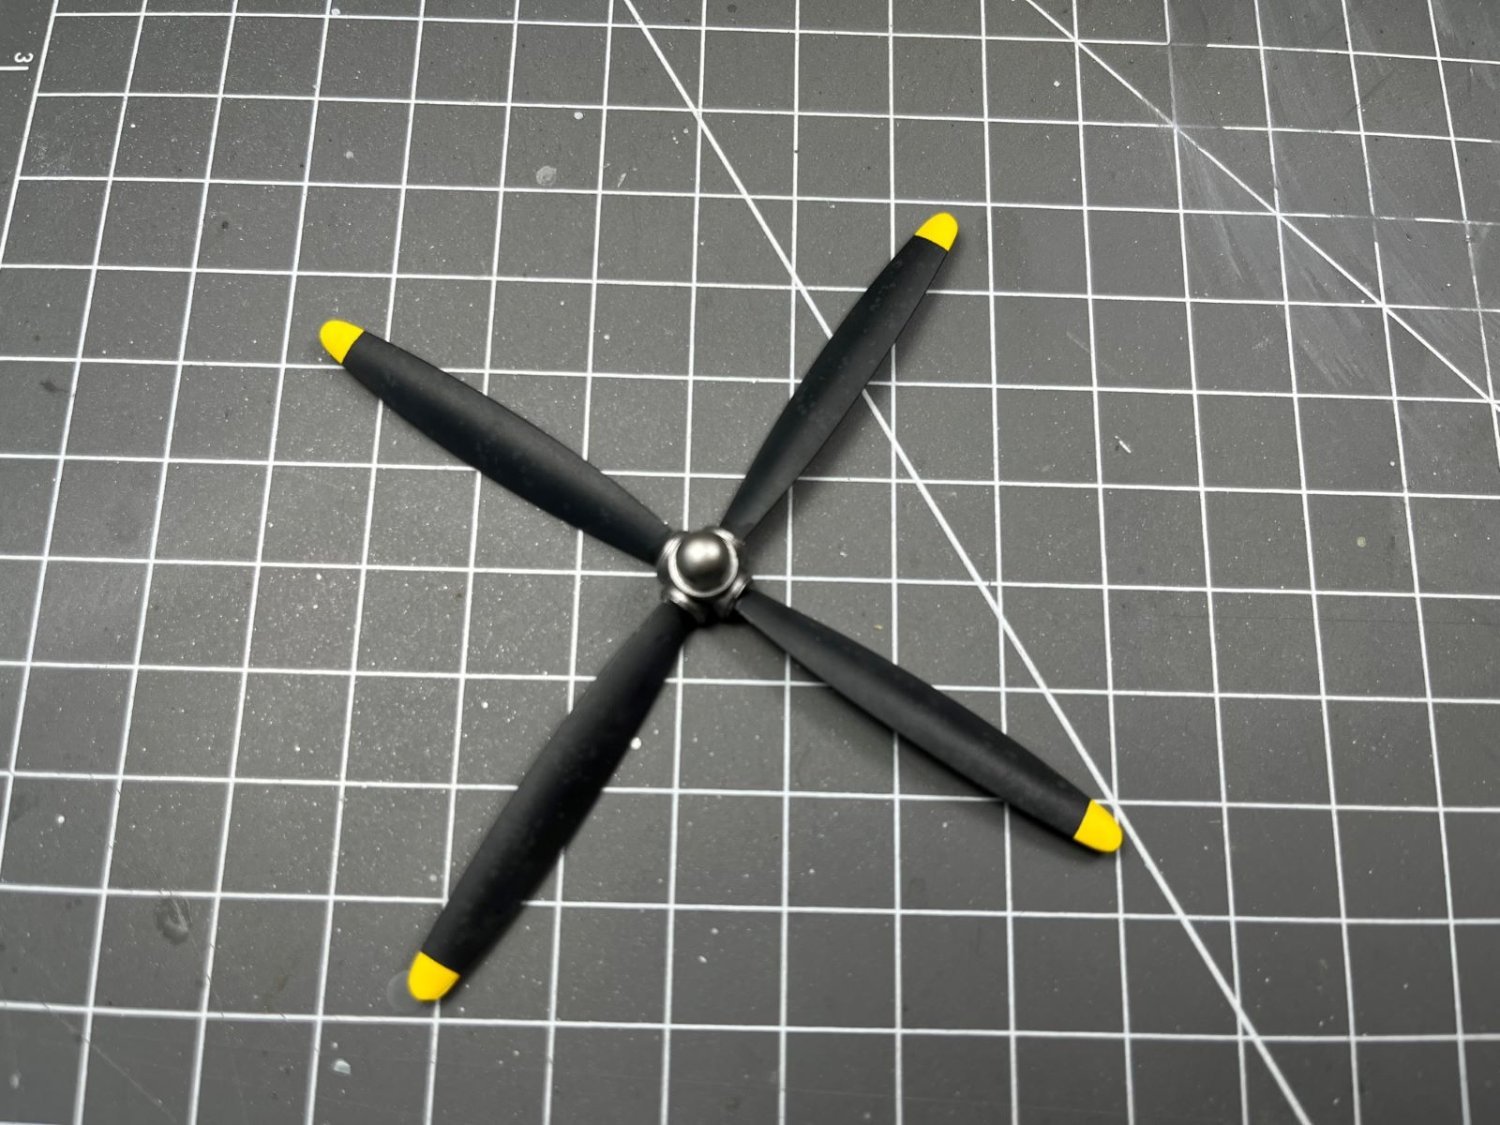
Then, I applied a very dark grey to the propeller and a black primer to the landing gear.

I used the dark grey because I want to reproduce some discoloration of the blades. For this, I sprinkled some sugar crystals on the wet blades and then I sprayed the same dark gray with some more black added to it. It is difficult to capture the result in the pictures, but, in presence, is quite subtle and nice.

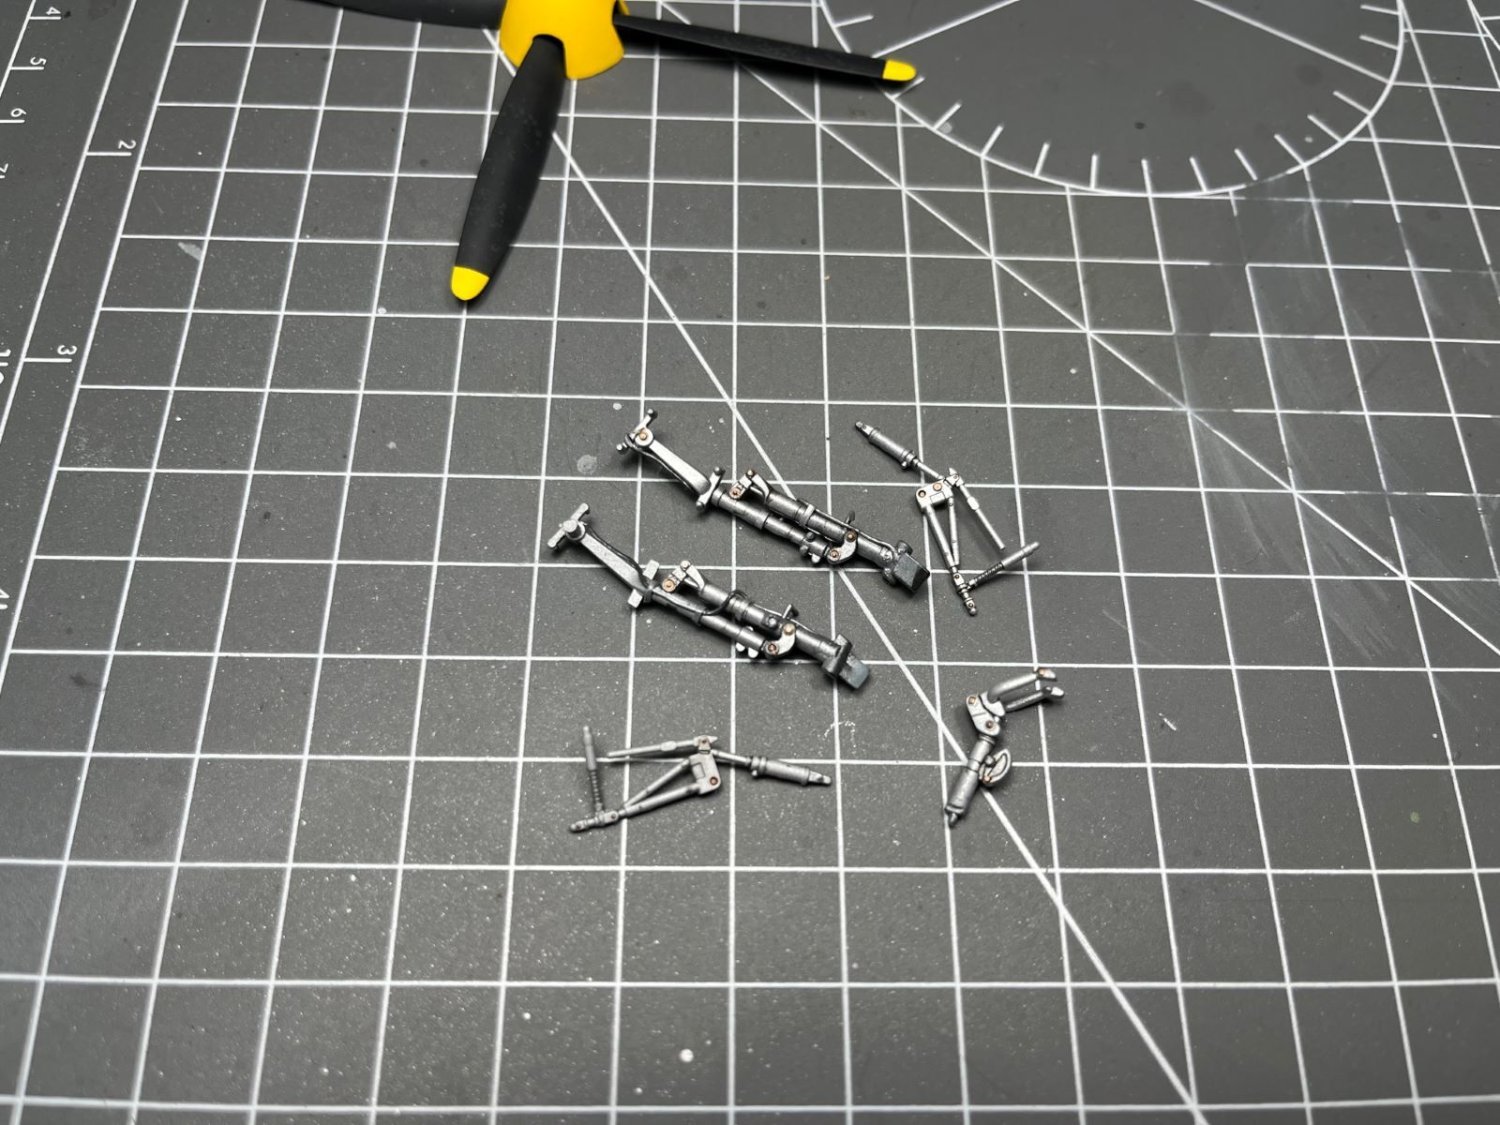
Finally, these are the landing gear parts, aluminium painted, with some details picked up and with a final coat of matt transparent.

That's all for now, thanks for keeping an eye on this build,
best regards,
Dan
-
-
This is an exquisite model, it looks so real. And I love the vintage character of this subject. I congratulate with your skills, but above all, with your capability of remaining focused on the final result, despite all the problems you went through.
Well done,
Dan
- king derelict, Egilman, Canute and 2 others
-
5
-
Really nice build, OC. A clean, precise and very well painted model.
Congrats,
Dan
- Edwardkenway, Canute, mtaylor and 1 other
-
4
-
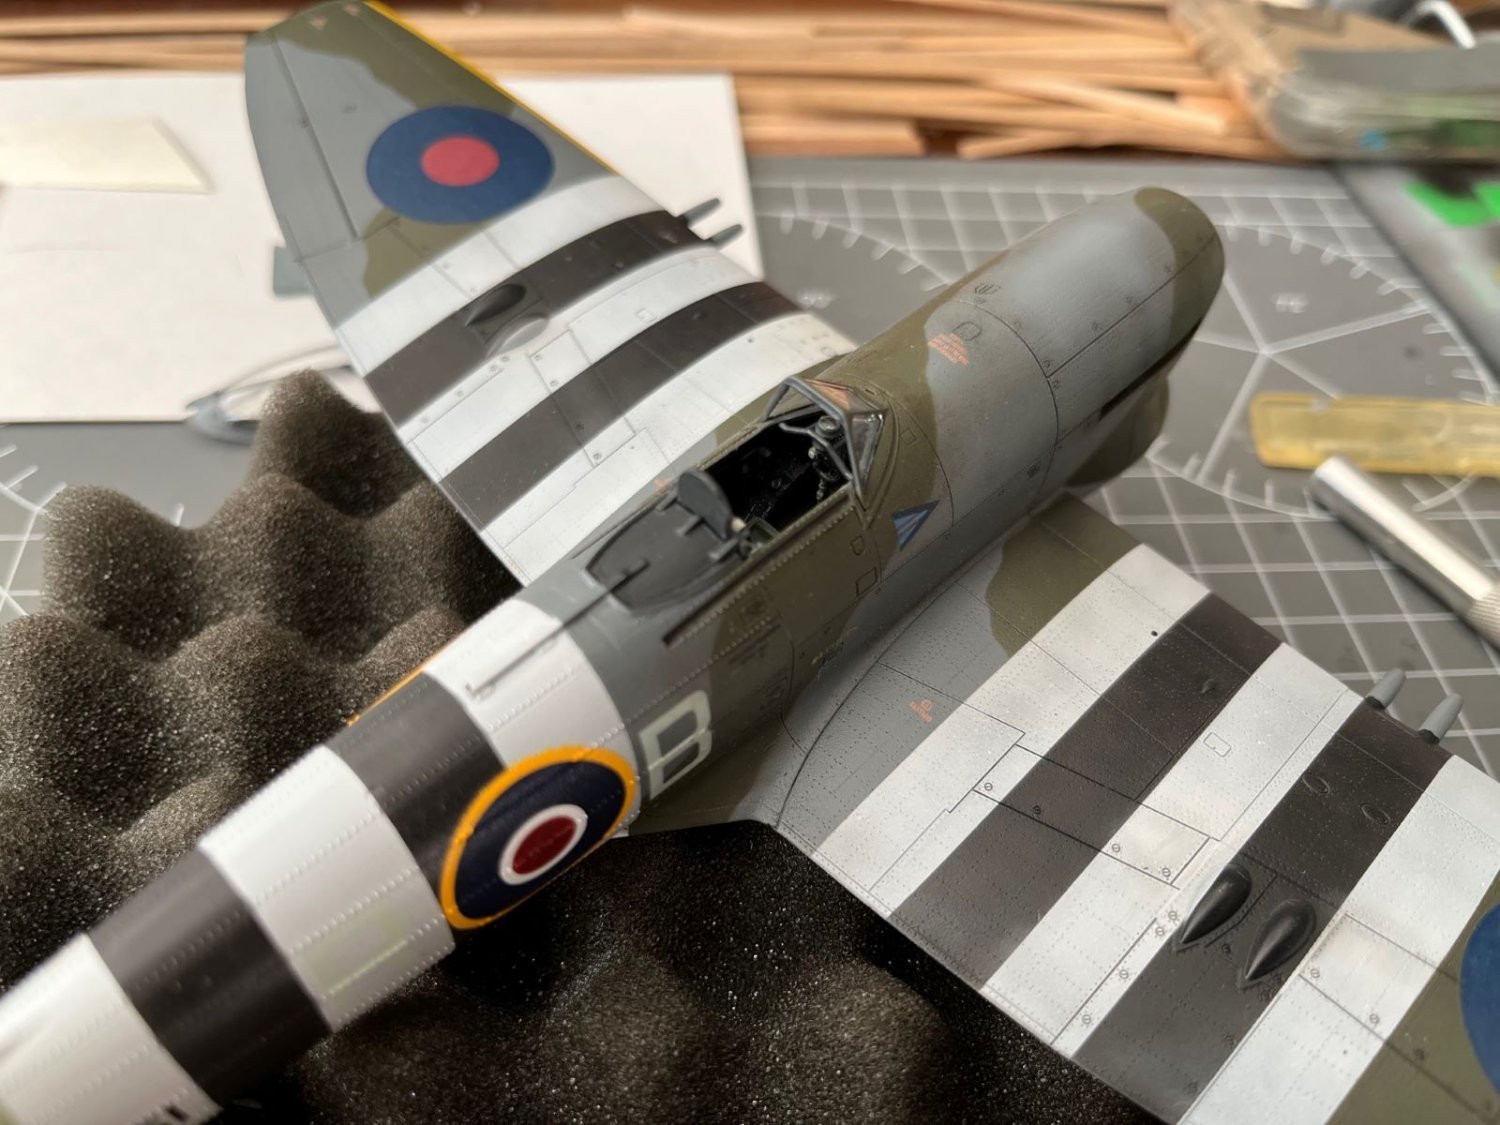
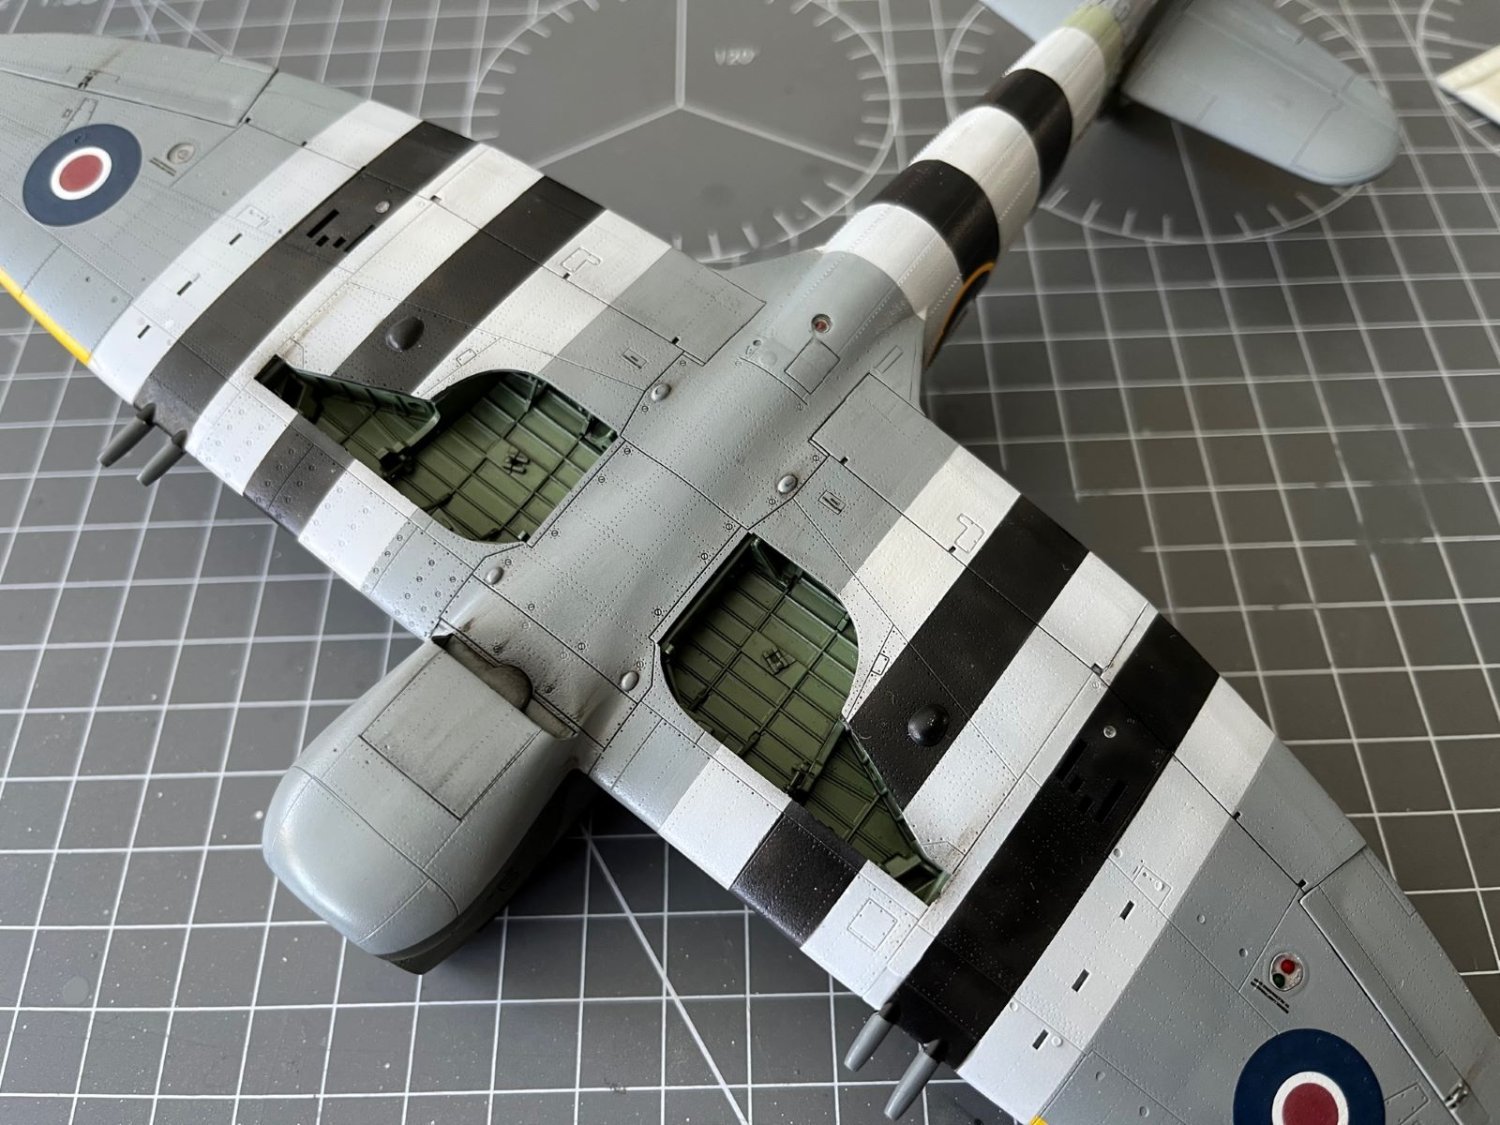
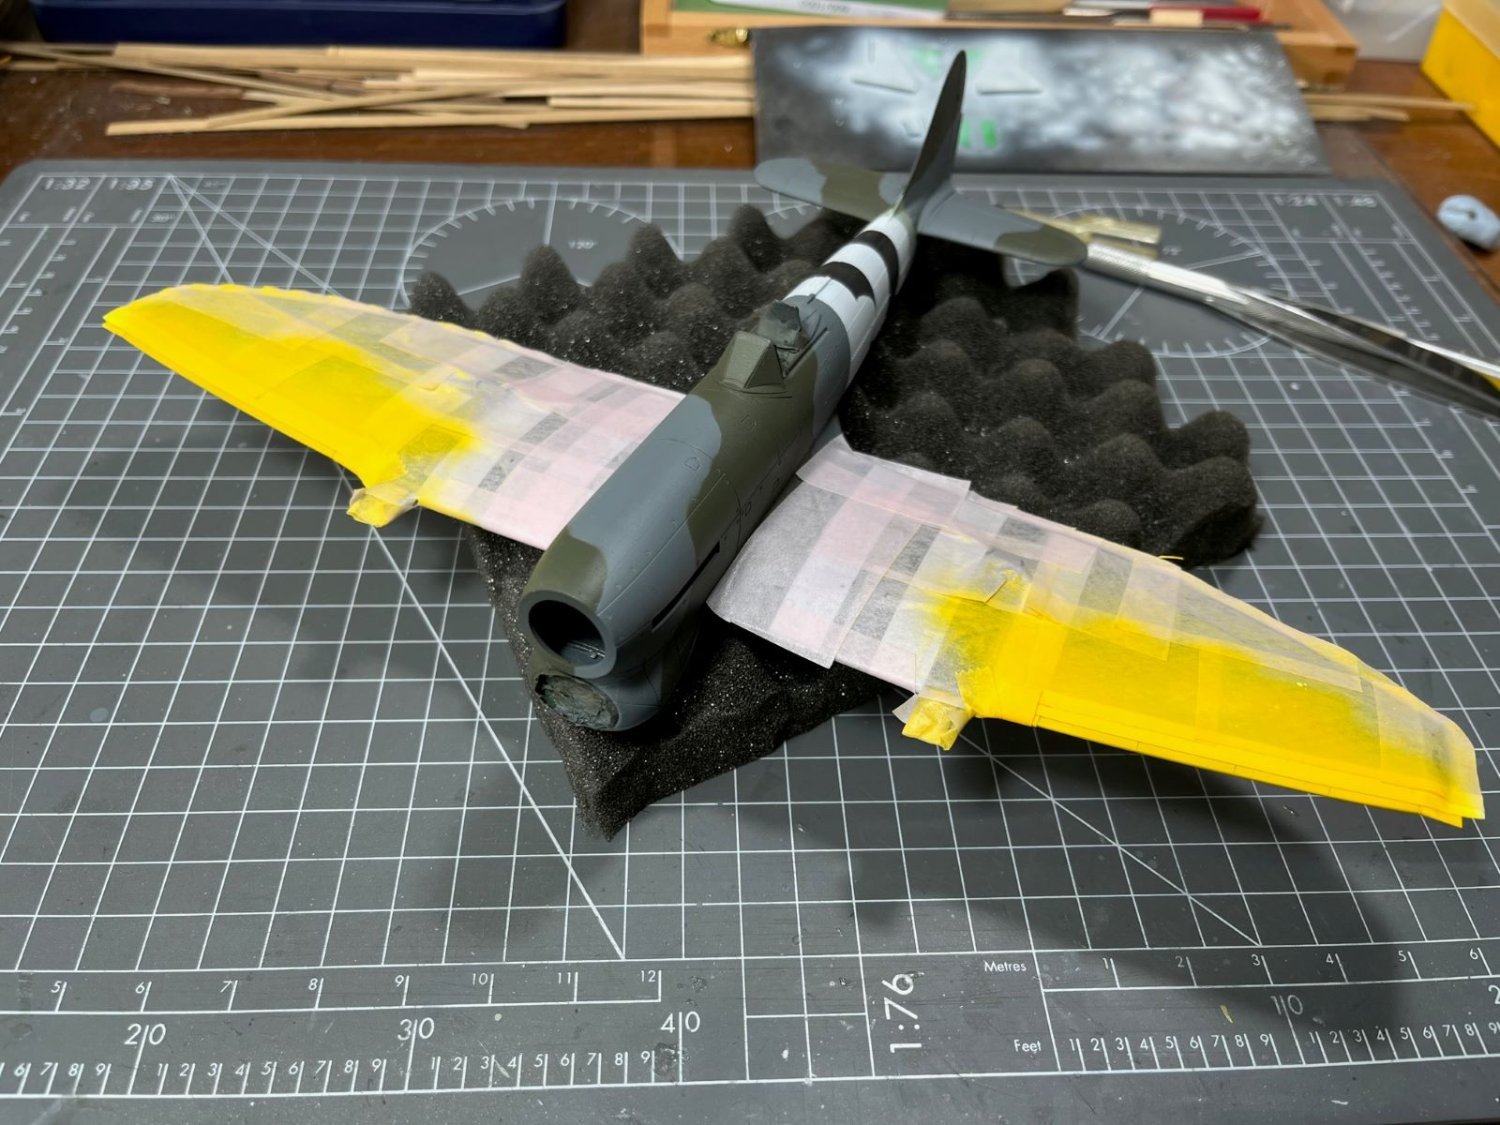
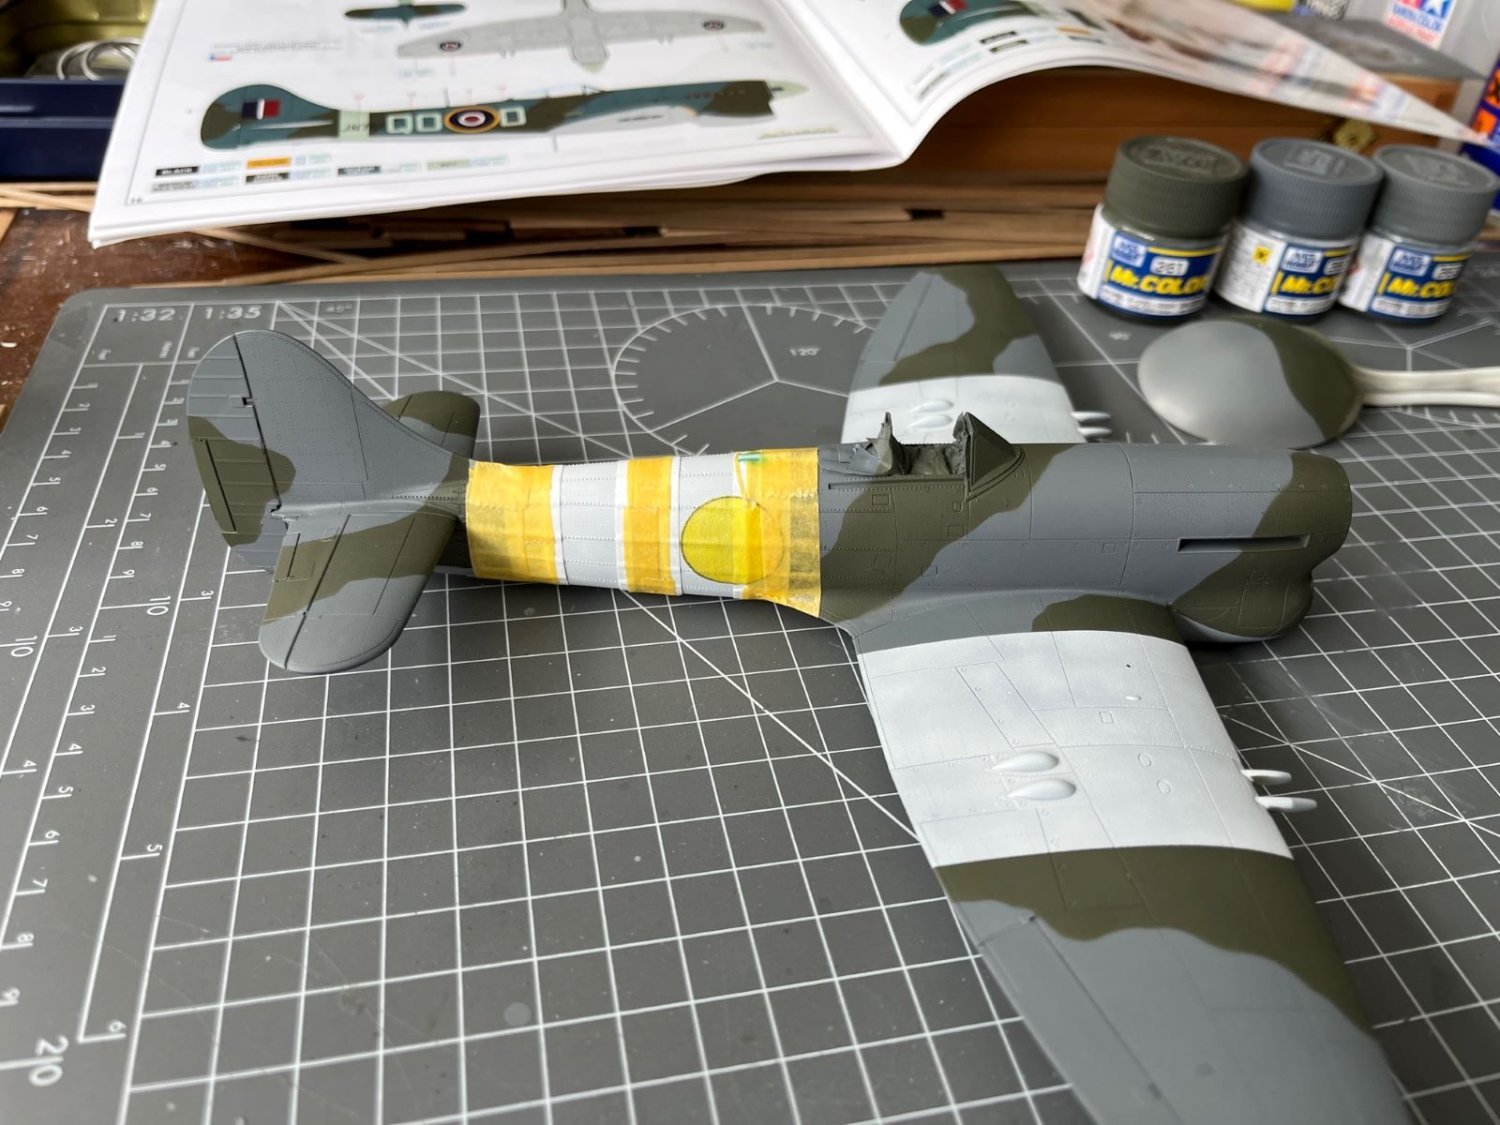
Hi,
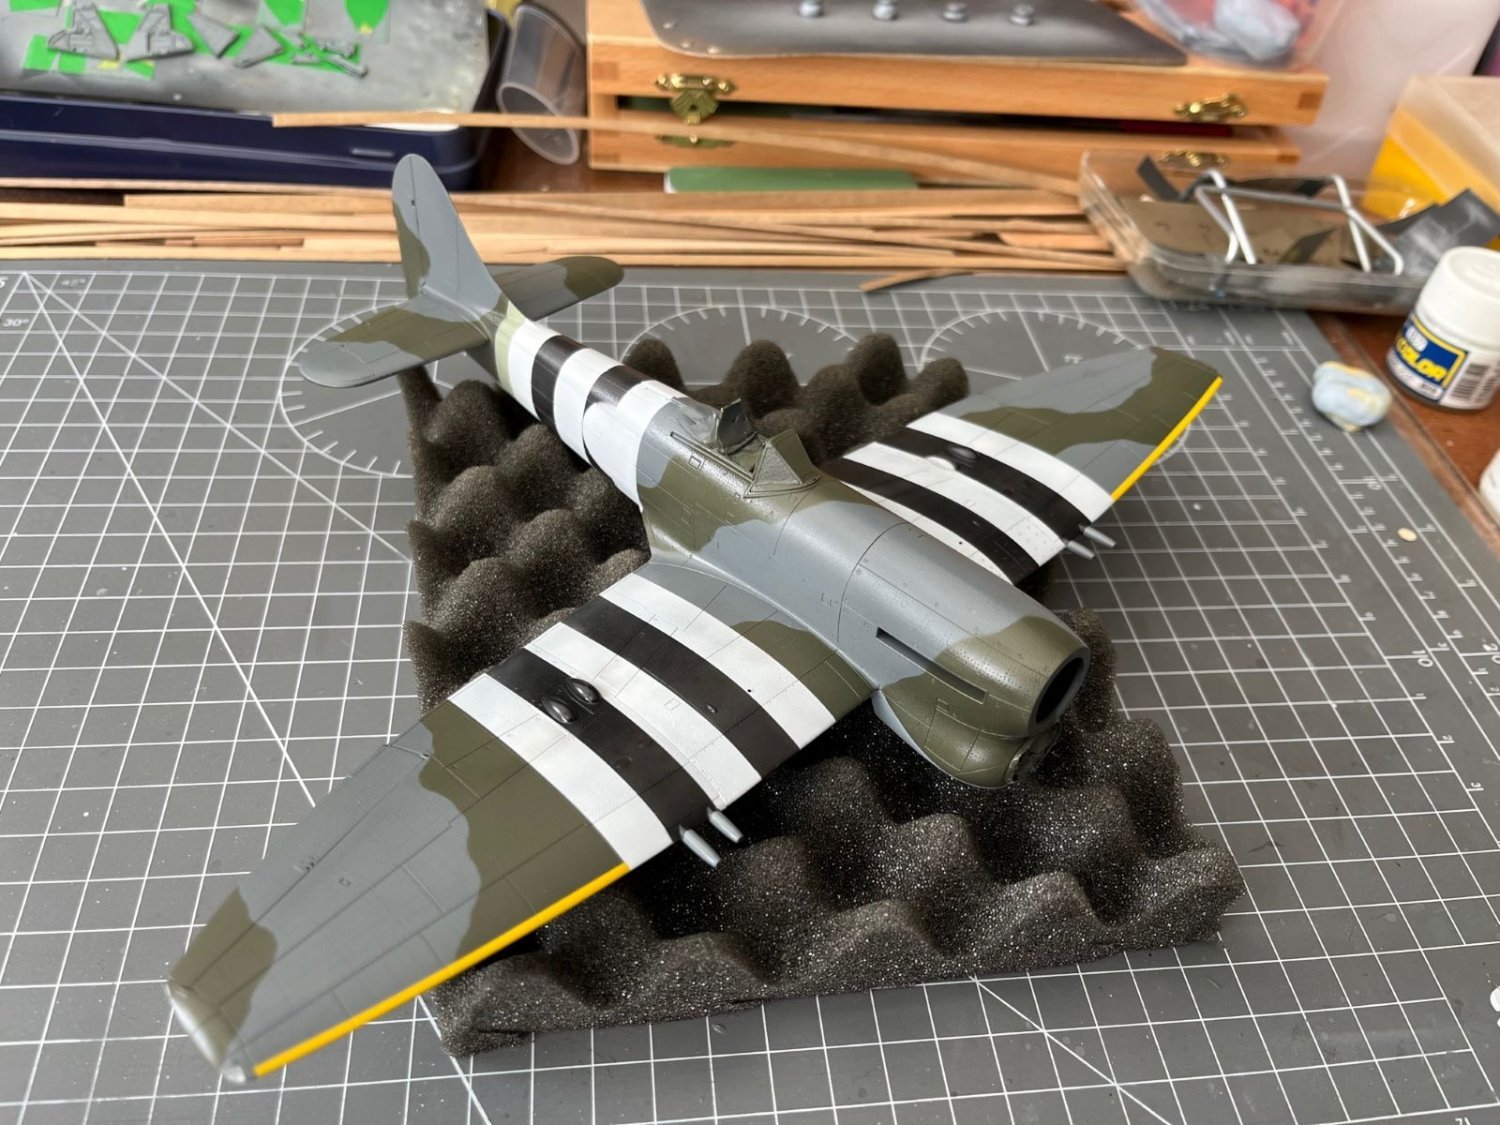
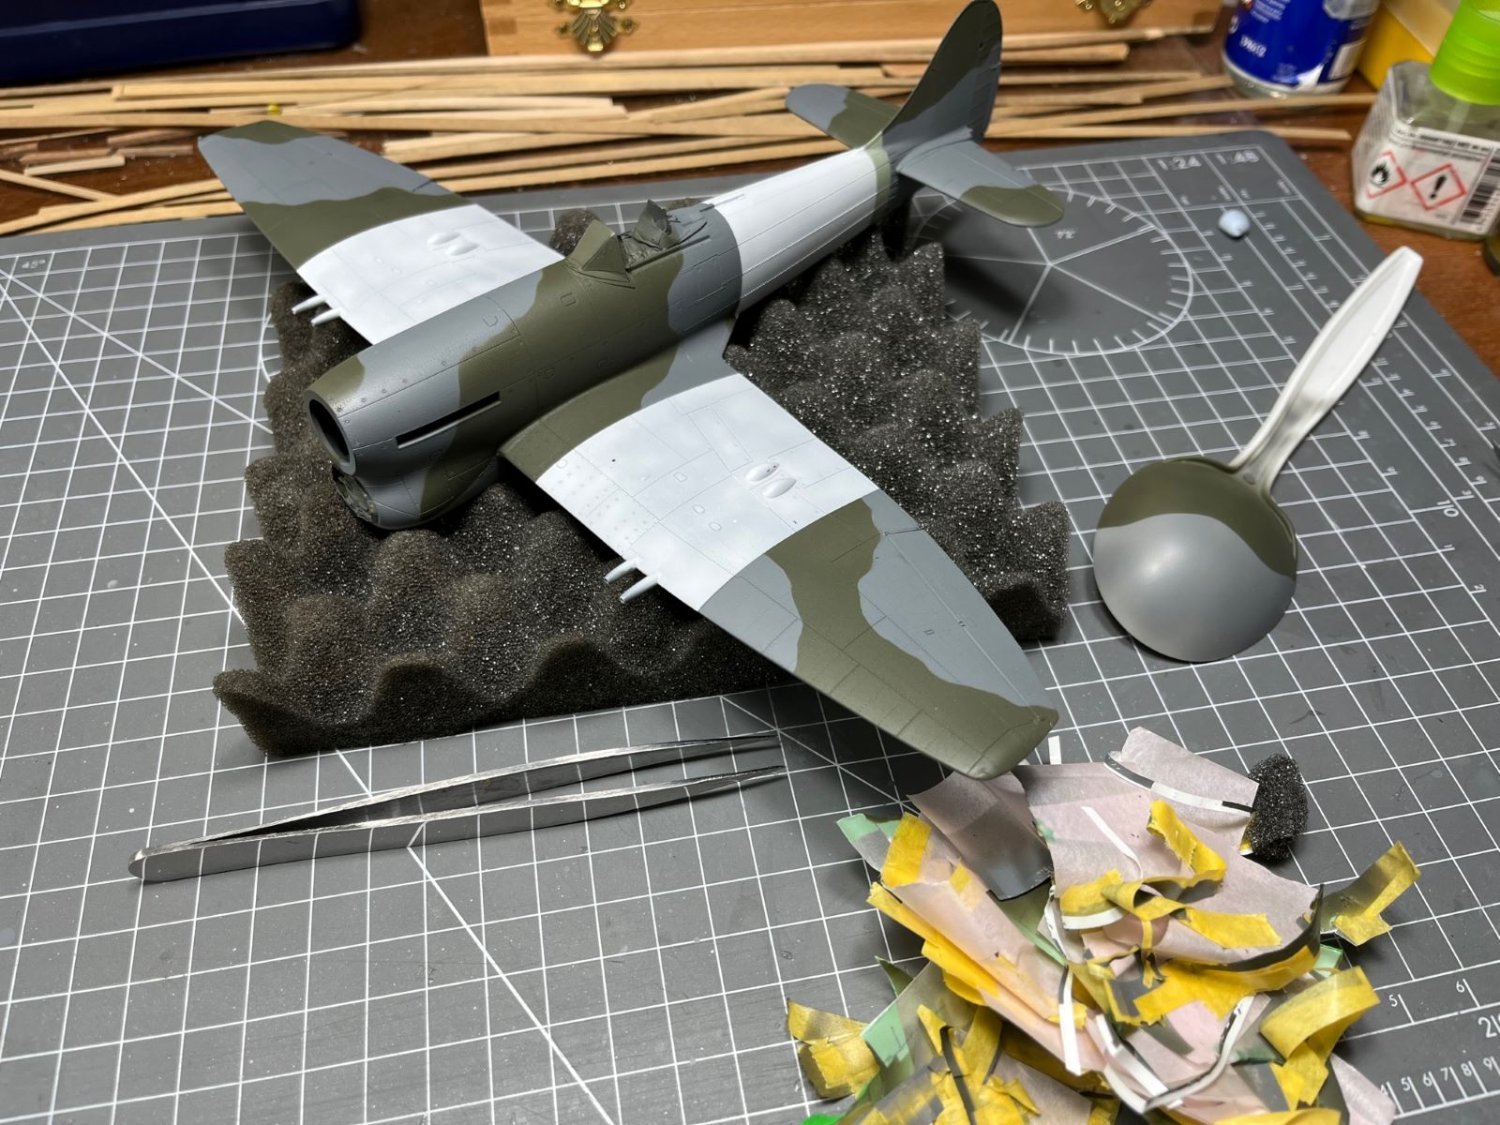
I masked the yellow stripes on the leading edge and after having sealed the edges of the tapes, I sprayed a light coat of white and then several coats of yellow.

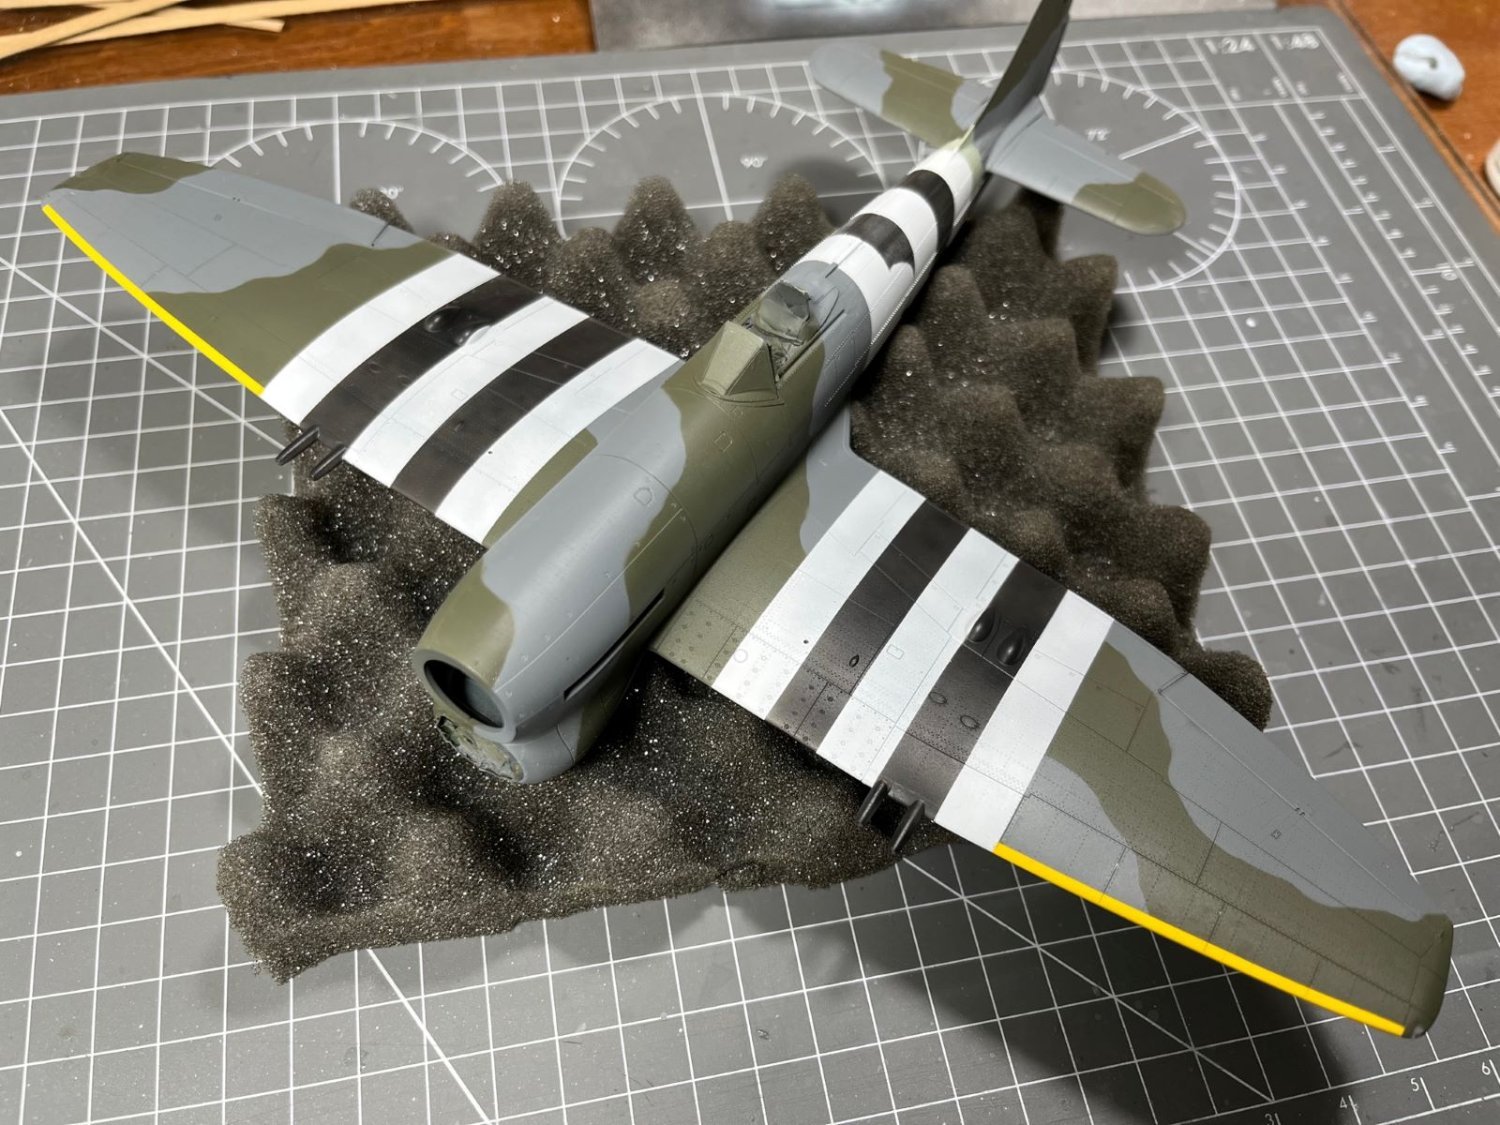
This is the result after removing the tapes which basically conclude the main painting phase of the airframe.

The edges of the yellow bands now need some light sanding to eliminate the little ridges that were formed by the many layers of paint, but this is not a problem. On the lower side, I removed the masking material from the wells and started to apply some dirt inside and some slight discoloration on the surrounding surfaces.
Thanks for following,
cheers,
Dan
-
@Egilman, I am not a big fun of heavy weathered aircraft models, therefore I will keep the dirt and wear constrained anyway, in addition, by coincidence, I had in mind to make this model pretty new, just with a minimum of wear to remove its toy appearance.
About the LG doors, good question, I don't remember exactly why, perhaps there were details and tabs which made a perfect closure difficult. Generally, if I can, I close the LG doors as you indicated for masking the wells. By the way, I have now removed the masking material and I am presently working on that area.
Thanks for your comments,
cheers,
Dan
-
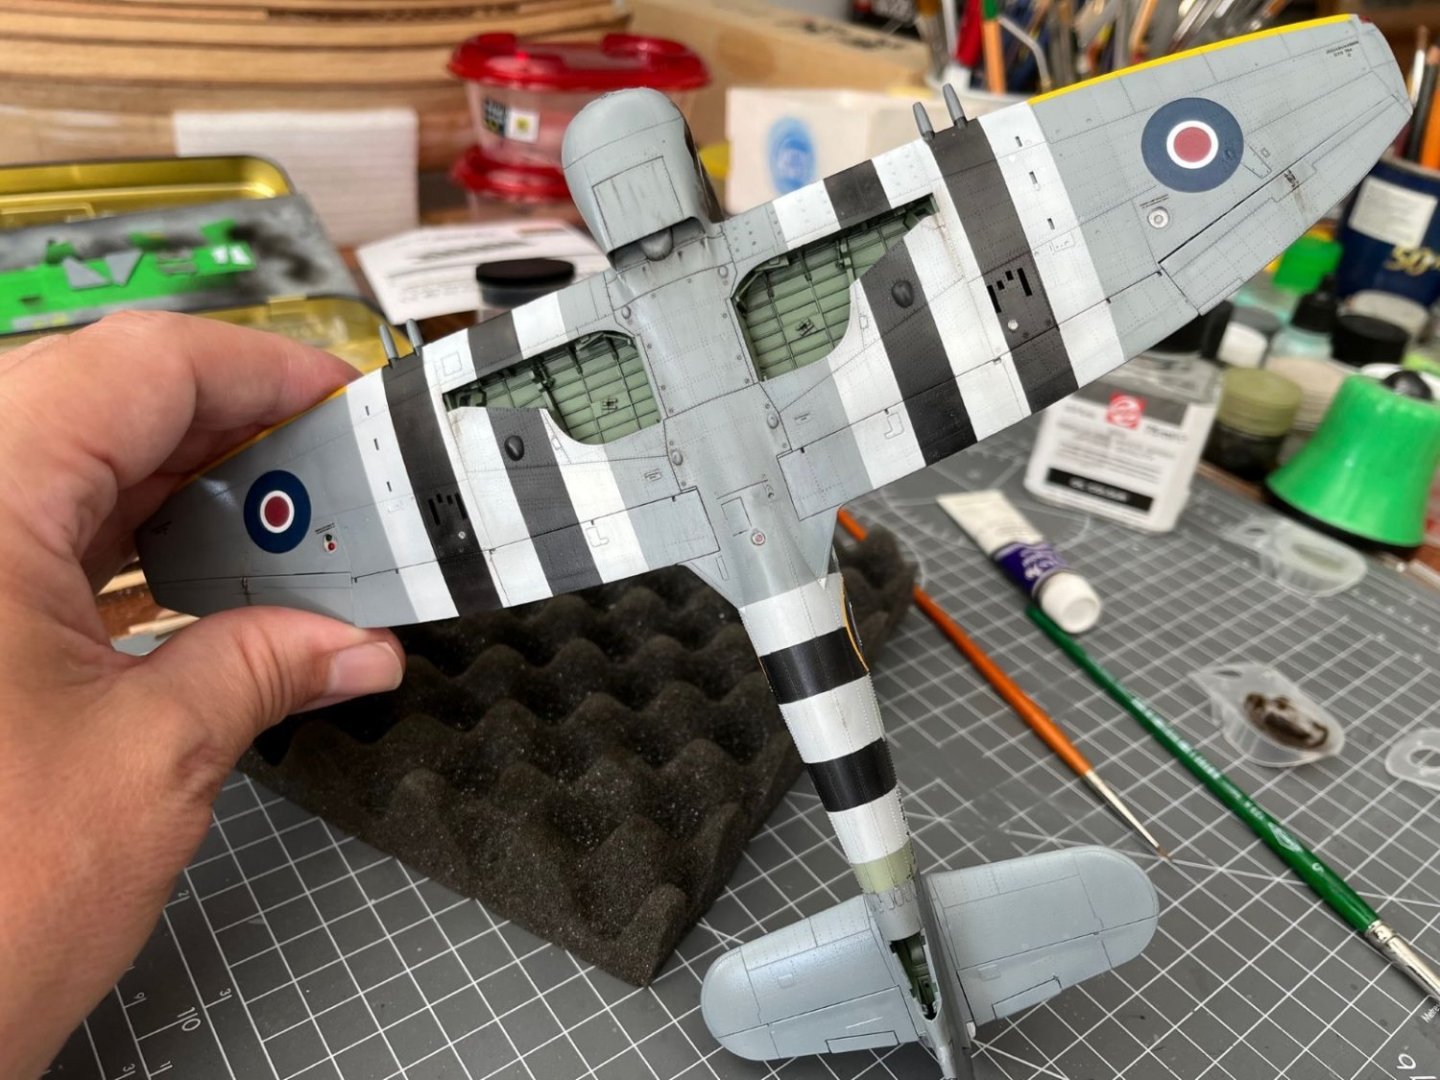
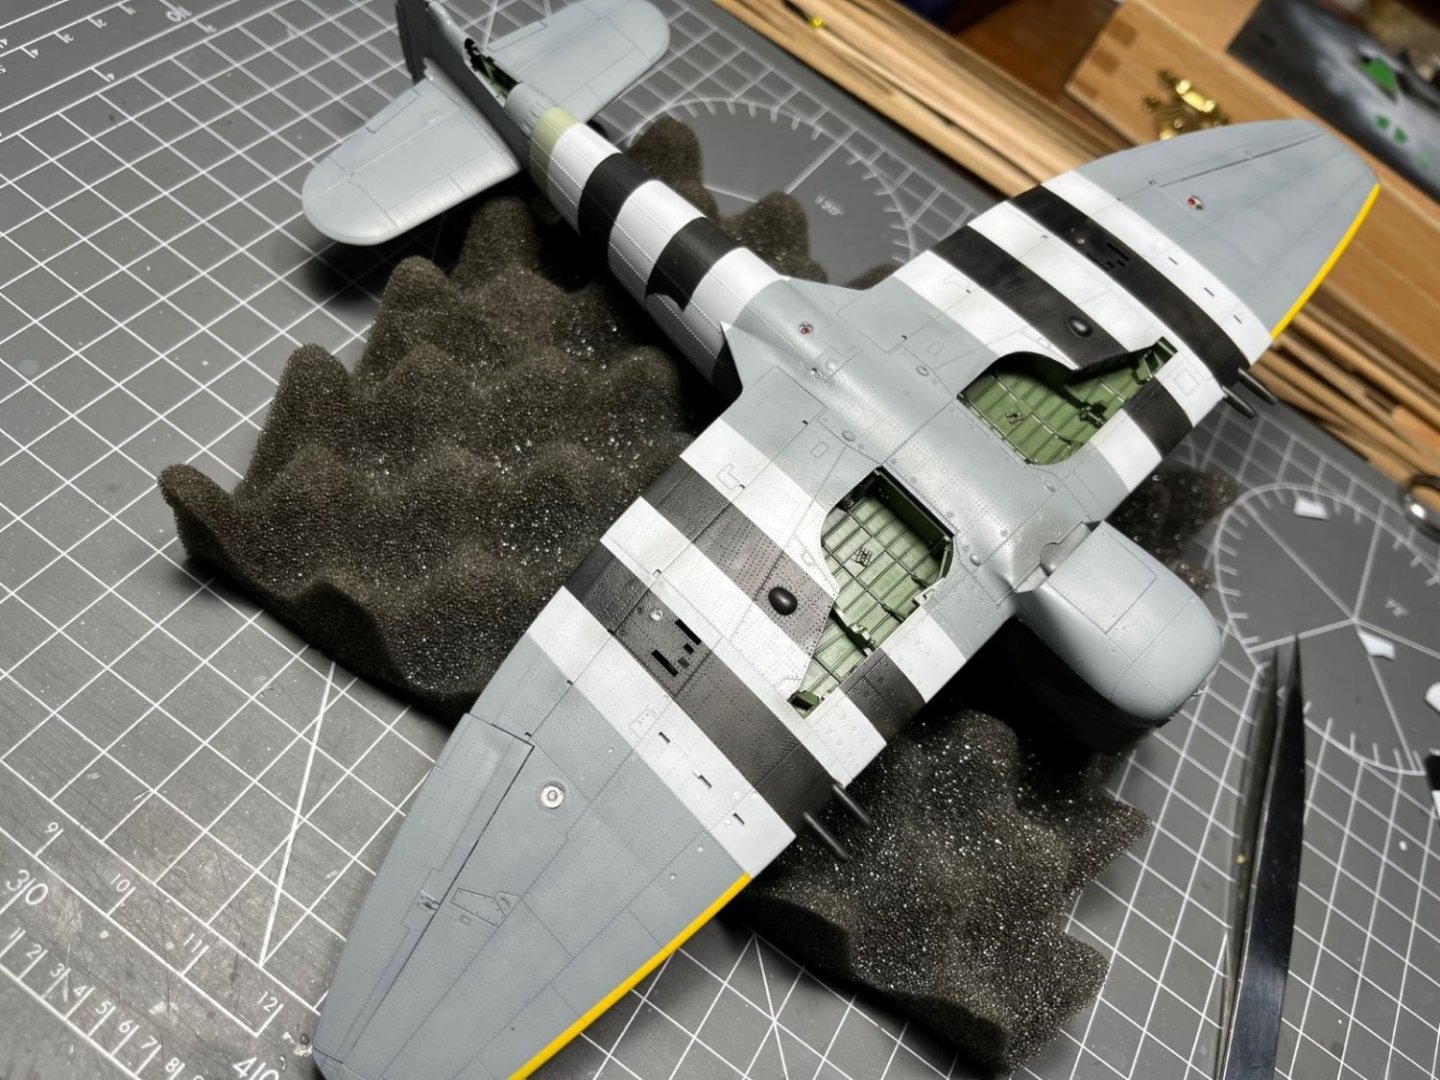
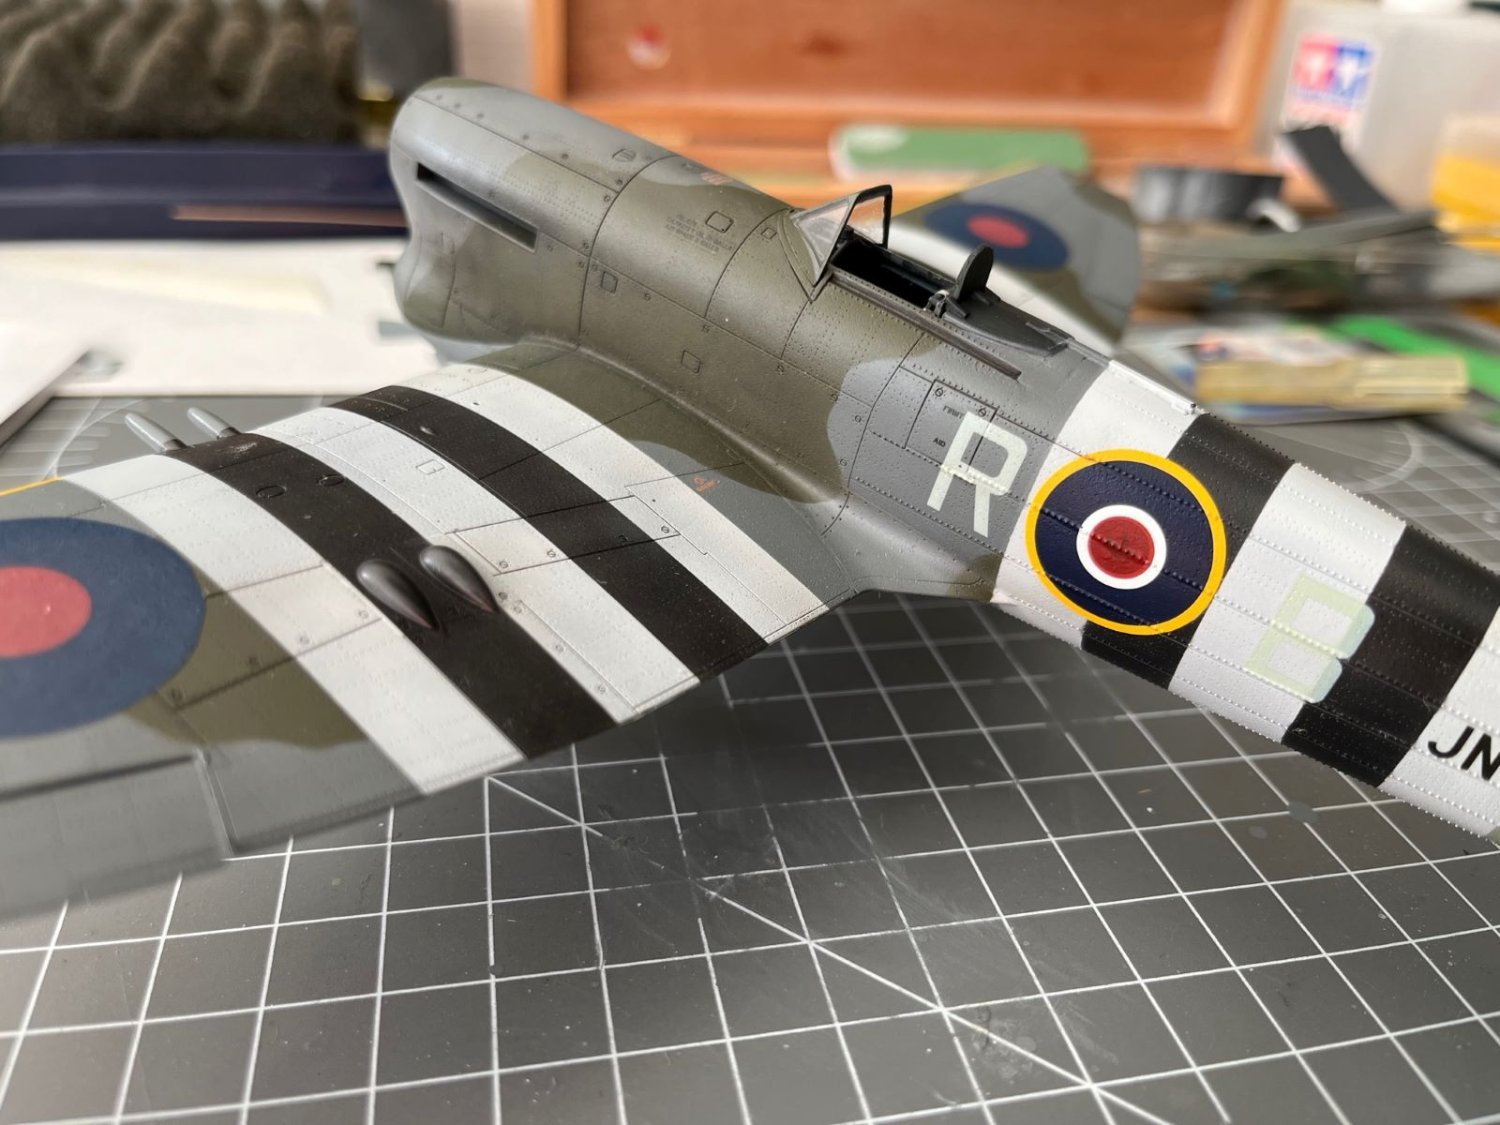
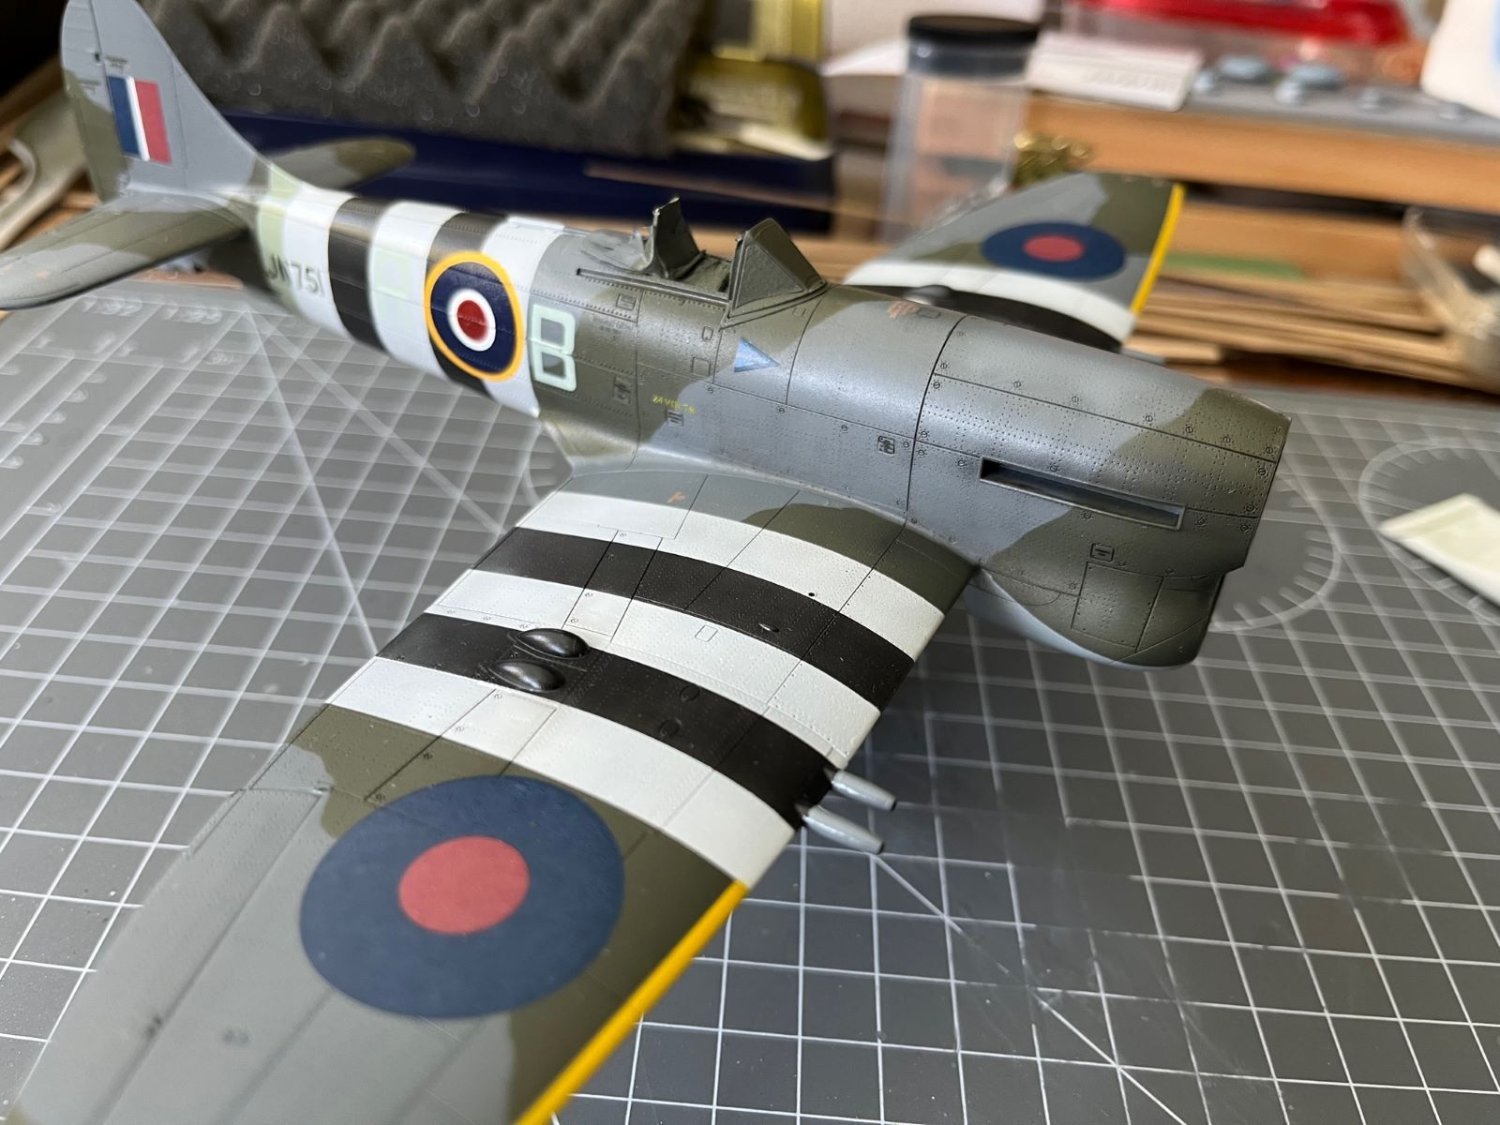
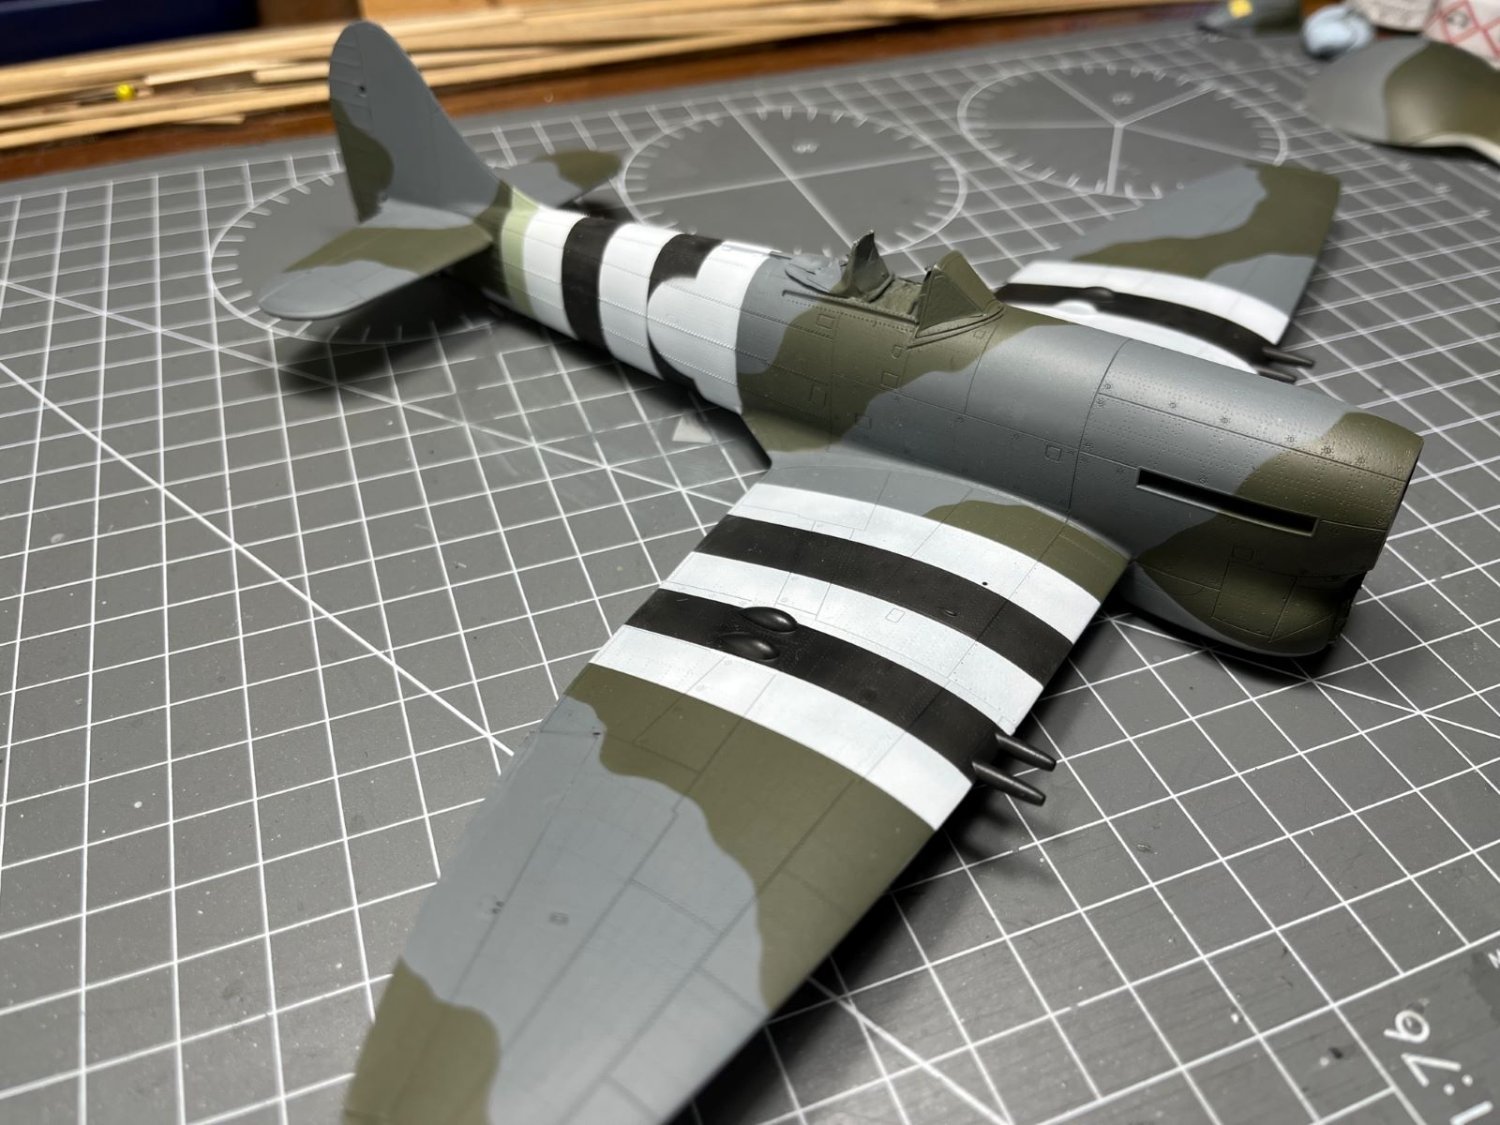
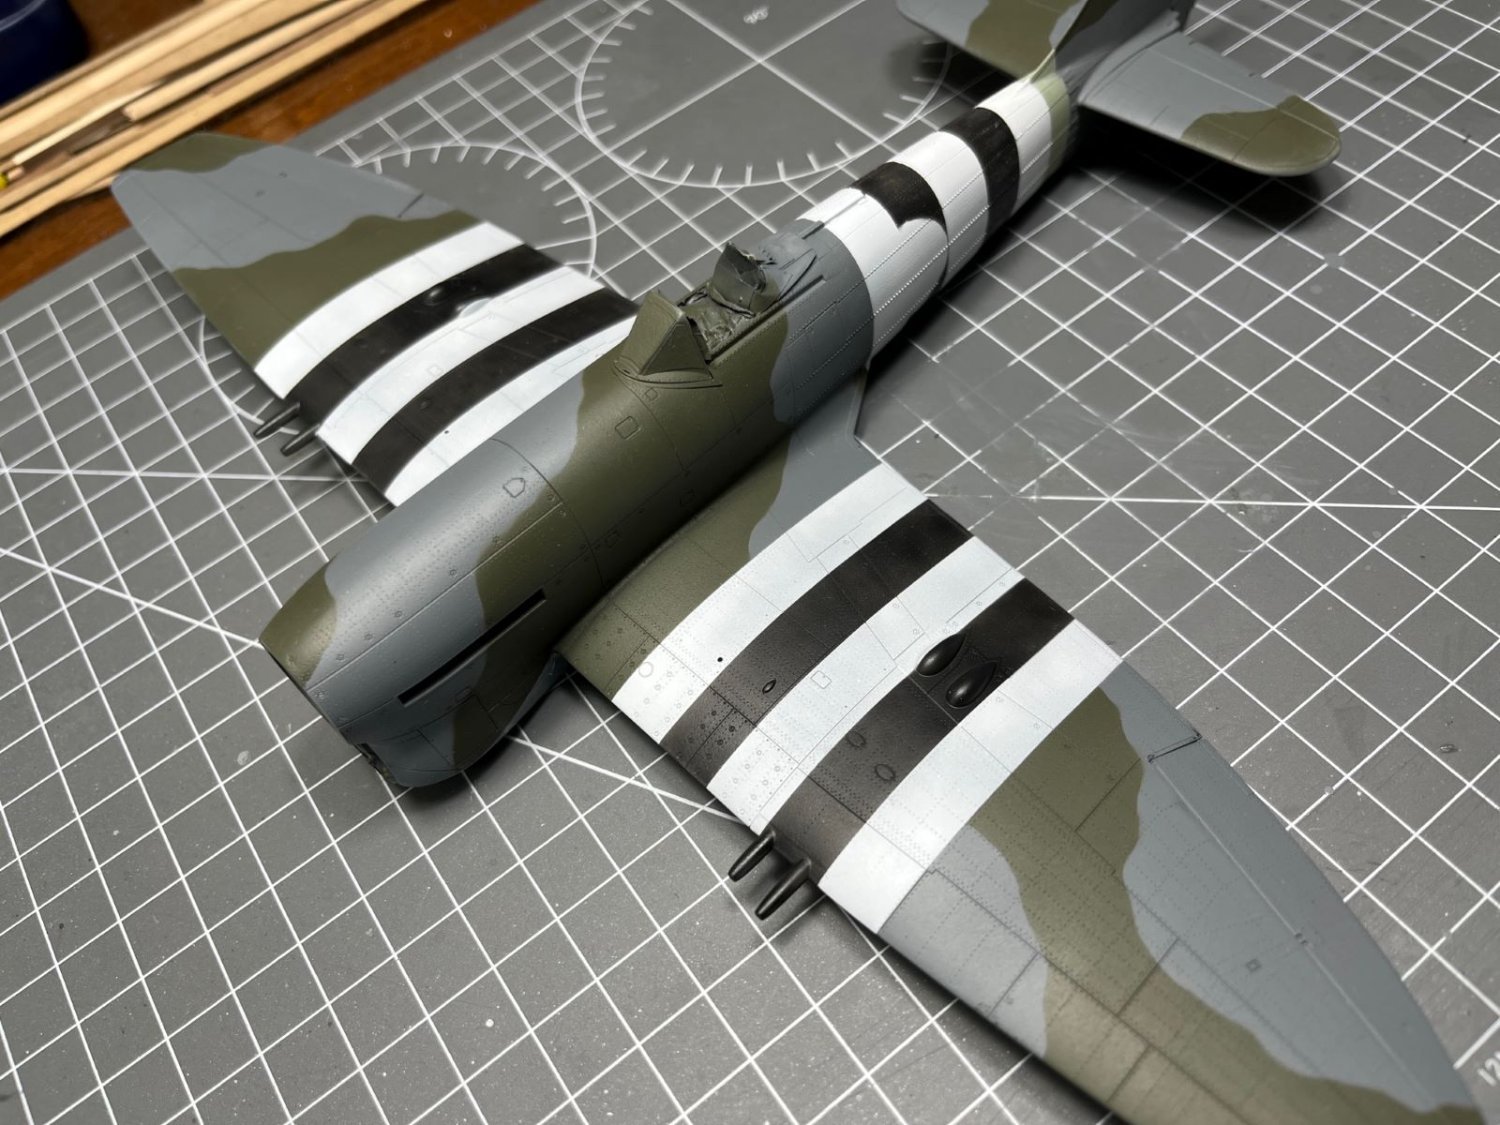
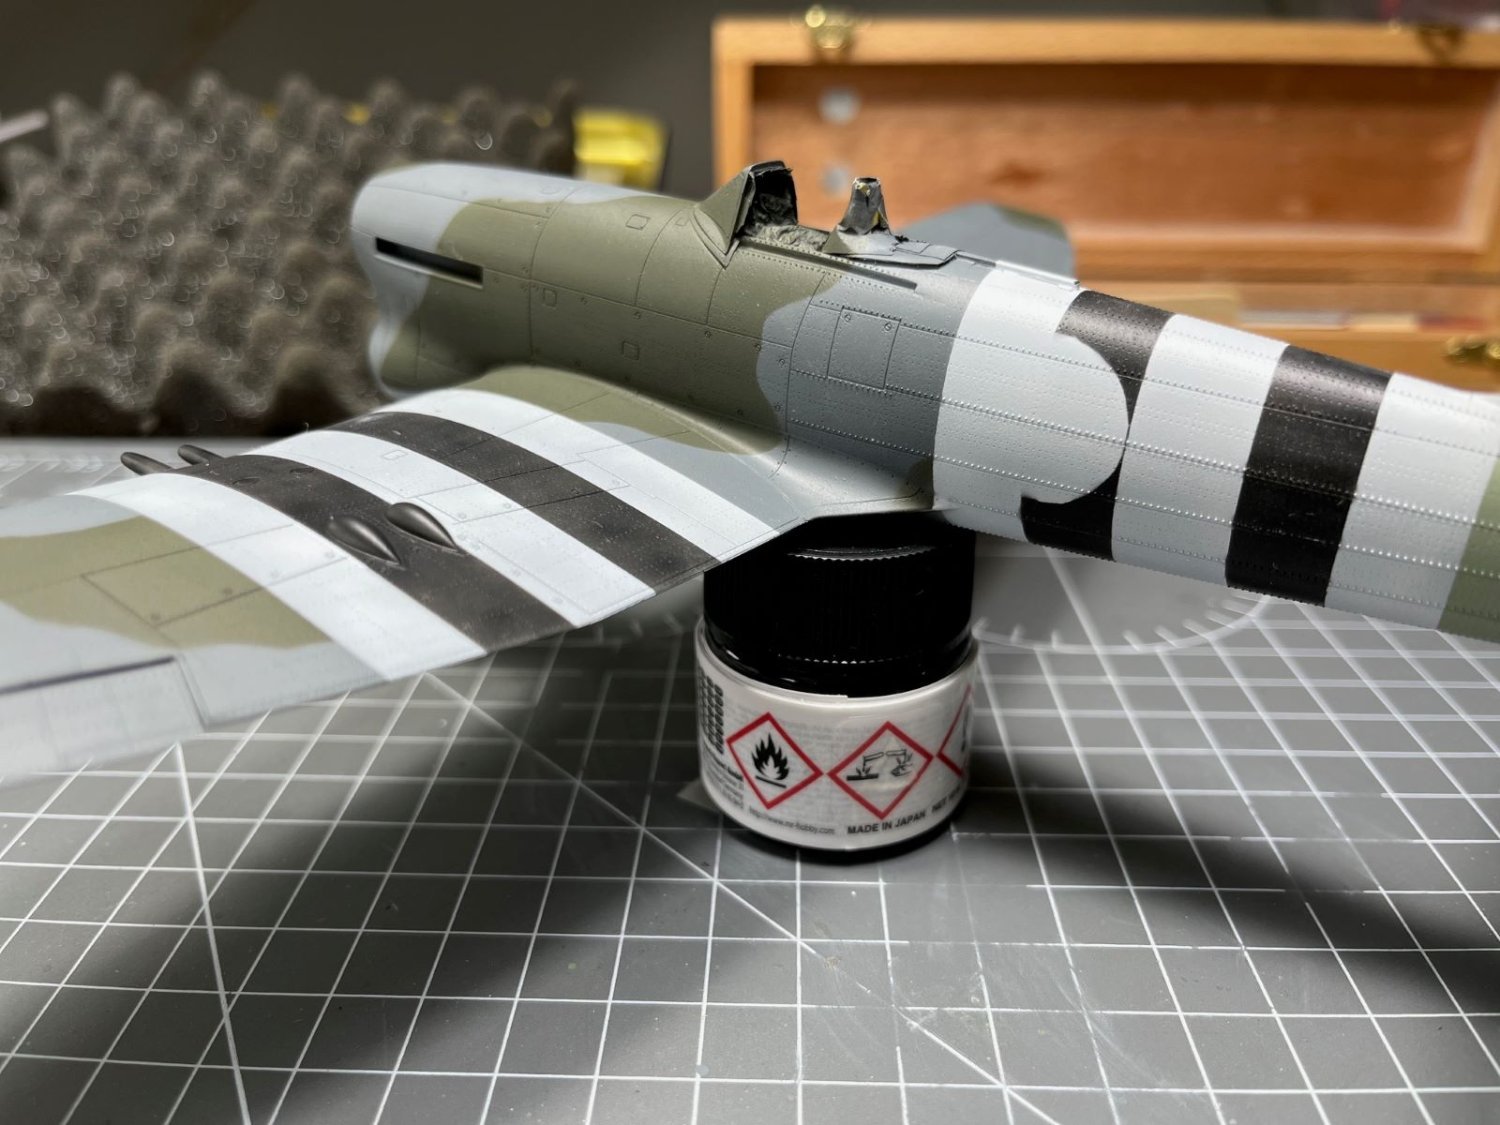
Hi, after having masked the stripes, I sprayed the black color. Actually, it was a mix of pure black with some white to obtain a sort of off-black hue. It was sprayed in a non-uniform way to leave a blotchy appearance, although not very visible in the pictures.

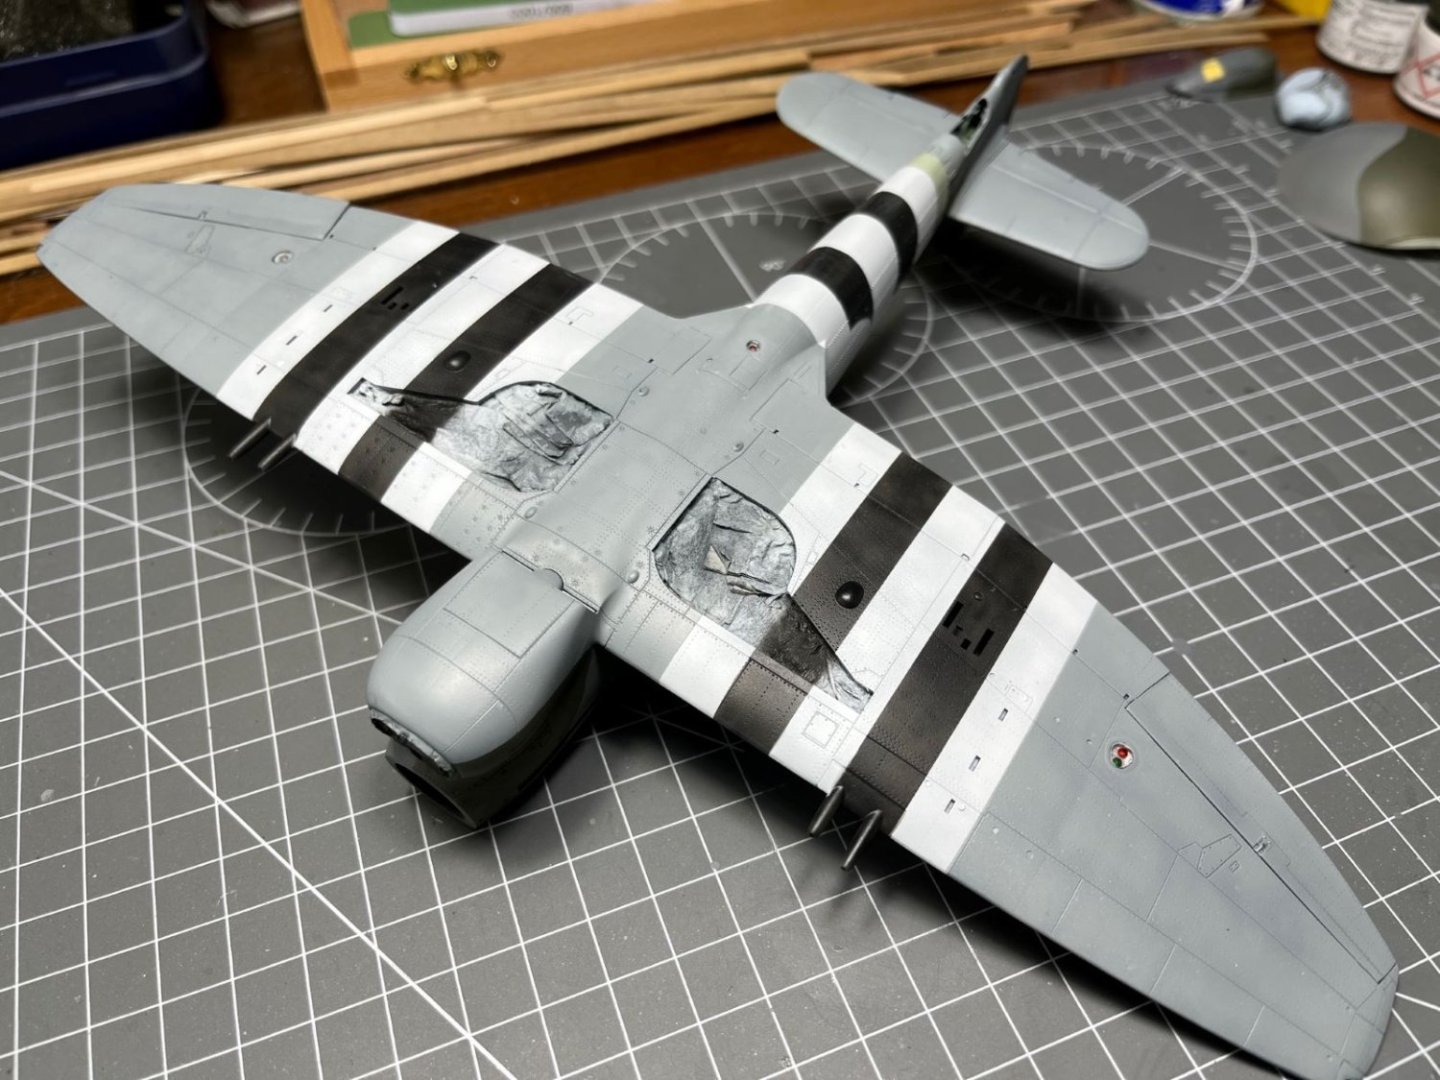
Next, the yellow stripes on the leading edge of the wing will follow.
Best regards,
Dan
-
10 hours ago, Egilman said:
Looks good Brother, you going to paint the invasion stripes?
Yesss! Prepared the ones on the fuselage for the black paint:

Cheers,
Dan
-
Thank you Mike for you comments and thanks for the 'like's.
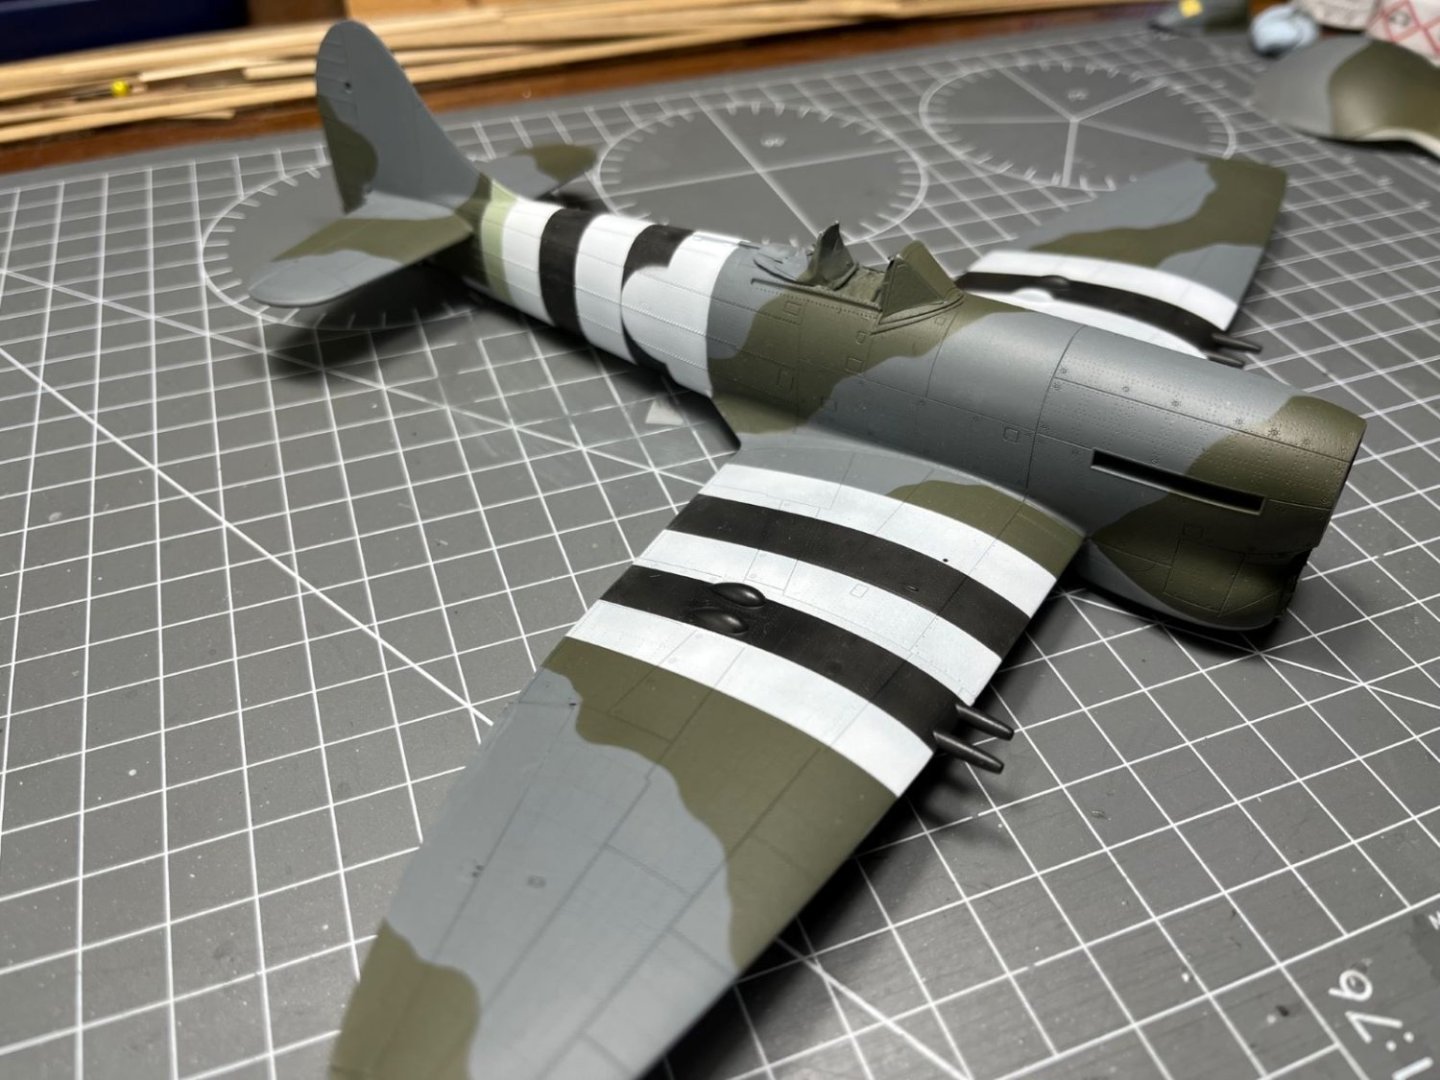
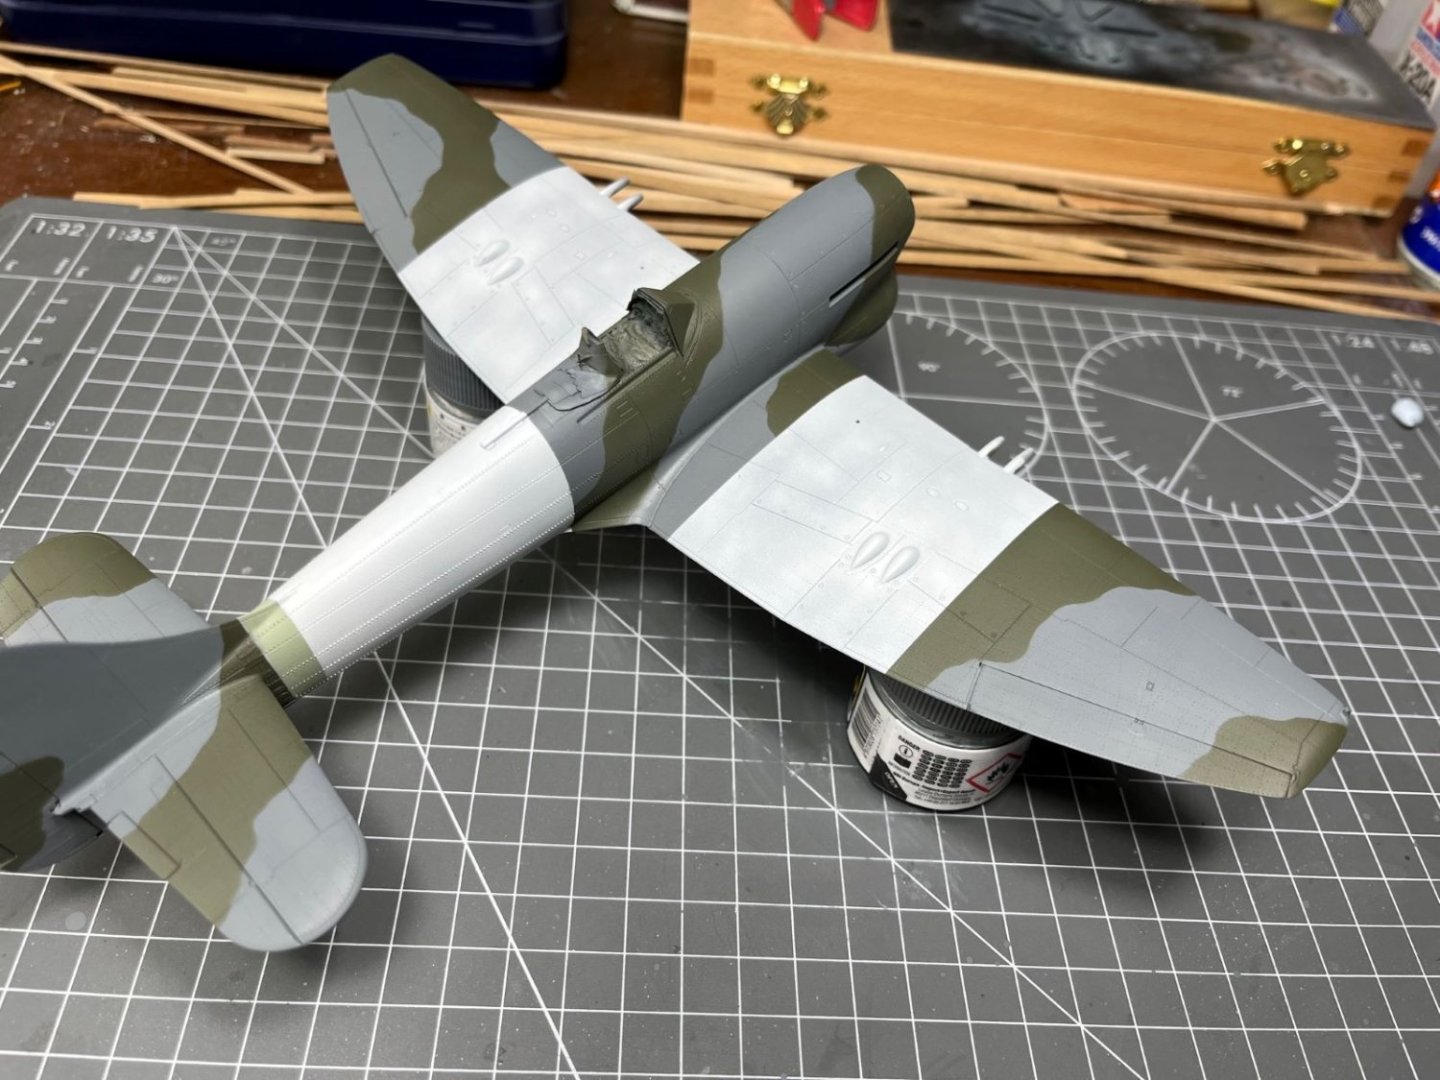
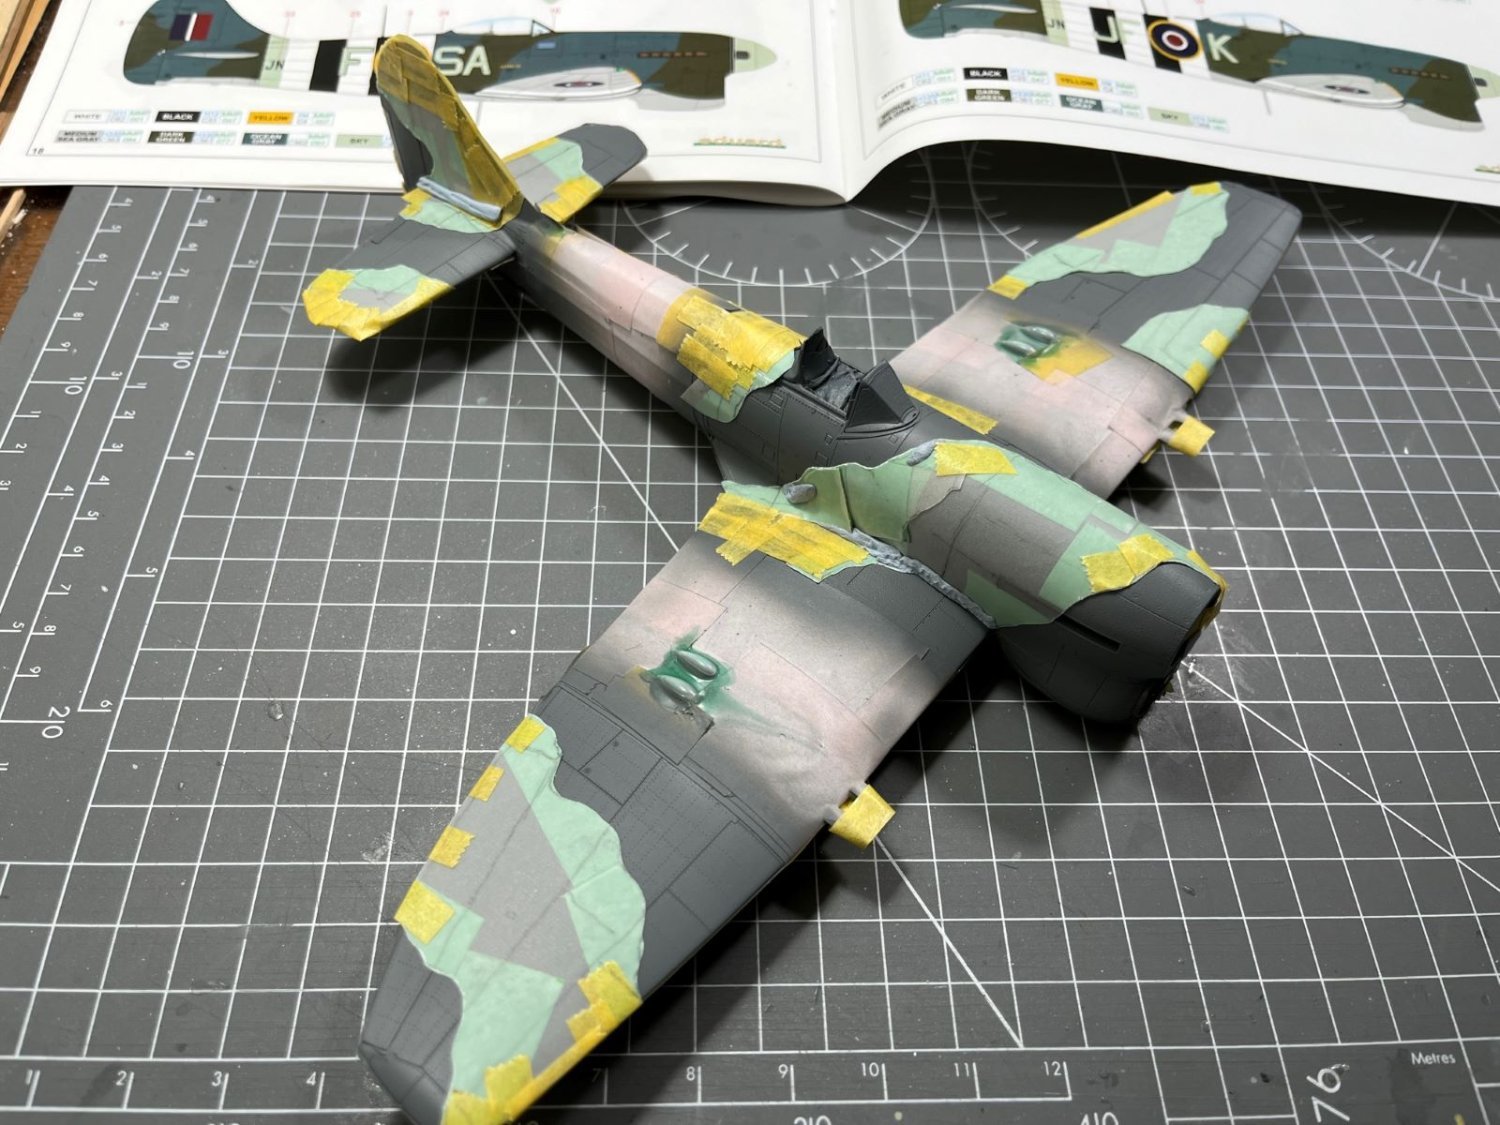
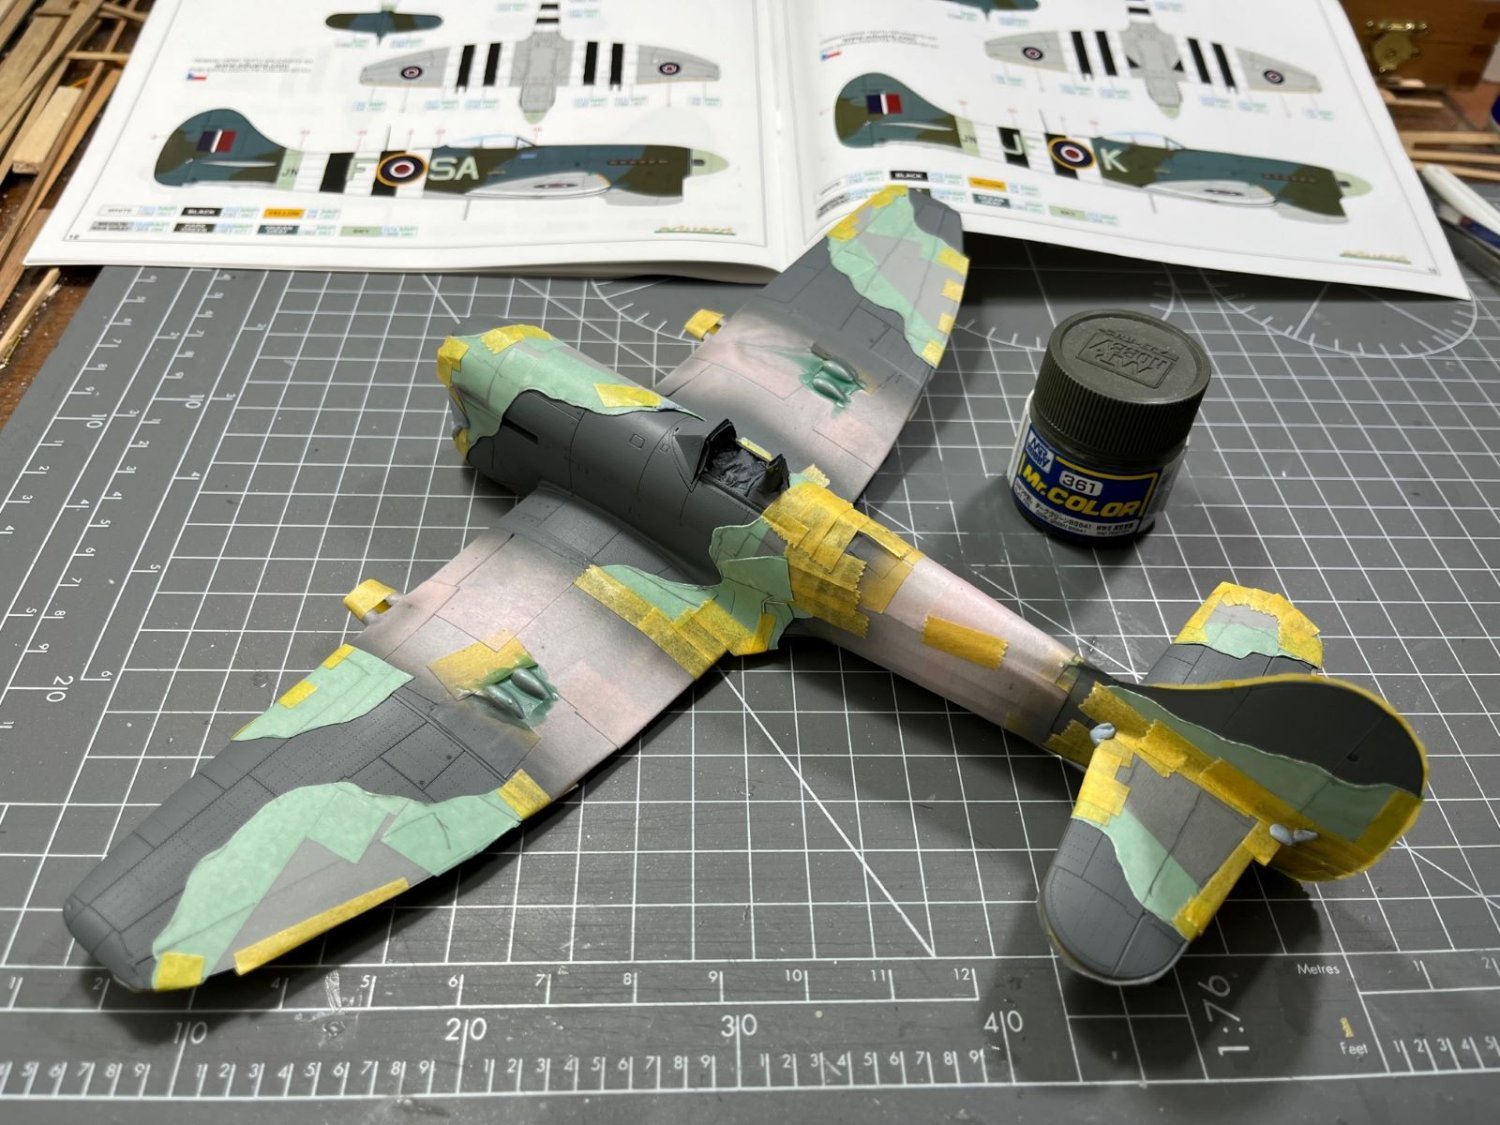
After the Ocean Grey paint was cured, with the help of tracing paper and a double adhesive tape, I made the camouflage masks reproducing by eyeball the scheme provided in the Eduard's instructions.

It is known that RAF had a precise pattern for the camo bands and I tried to reproduce the scheme as accurately as possible. The double adhesive tape kept the masks in place fairy well, but I had to use also normal Tamiya tape and blu-tack to press down and seal the most recalcitrant spots where the masks were too stiff to comply with 3D compound surfaces.

Overall, it was not too difficult a job and I even enjoyed it. The the airframe was then ready to receive the Mr Color RAF dark green 361. The color went on flawlessly, leaving a nice satin finish. The final result, with a pile of masking material beside it:

The masks worked pretty well, with no obvious overspray.
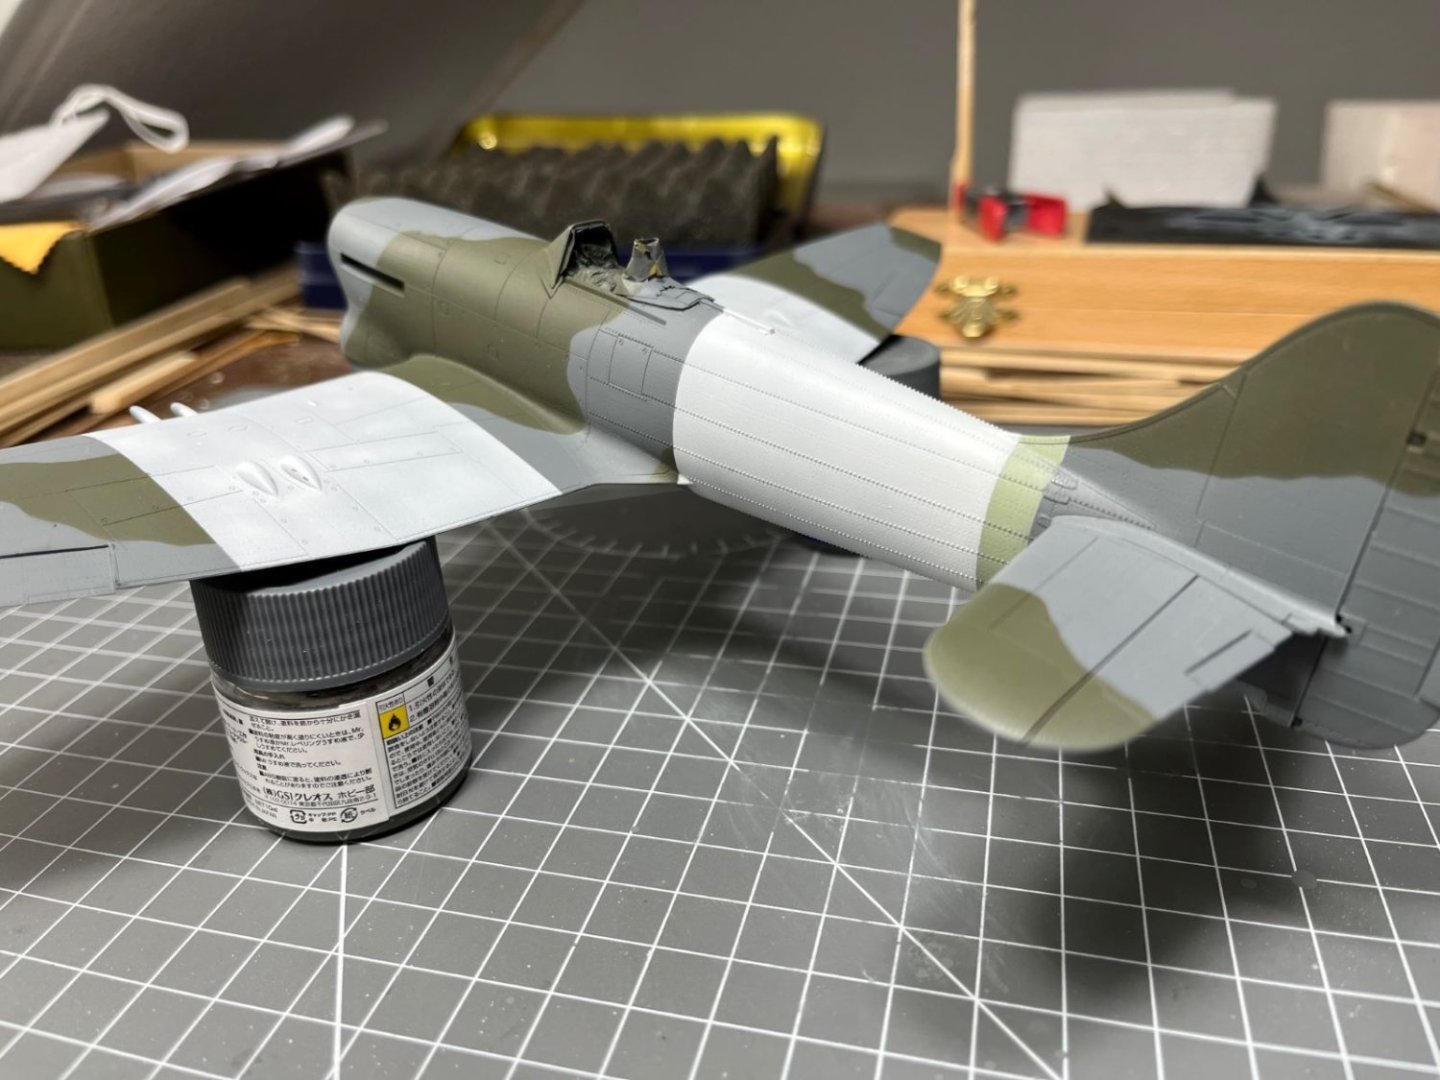
Although I was very positive about the surface details of this kit, now I am rather dubious about the rivet rendering on the fuselage which I am afraid is a bit overstated. If I noticed it earlier I could have it sanded down, but now it is too late. I will be careful not to enhance it with the application of dark oil washes later.
I chose to spray the camouflage colors plane, with no tonal variations and I am quite pleased with the results delivered by Mr. Color paints. My intention is to apply some weathering variations later.
That's all for now,
best regards,
Dan
.jpg.775667f2dd19ecfdbad9bef7e03ed883.jpg)
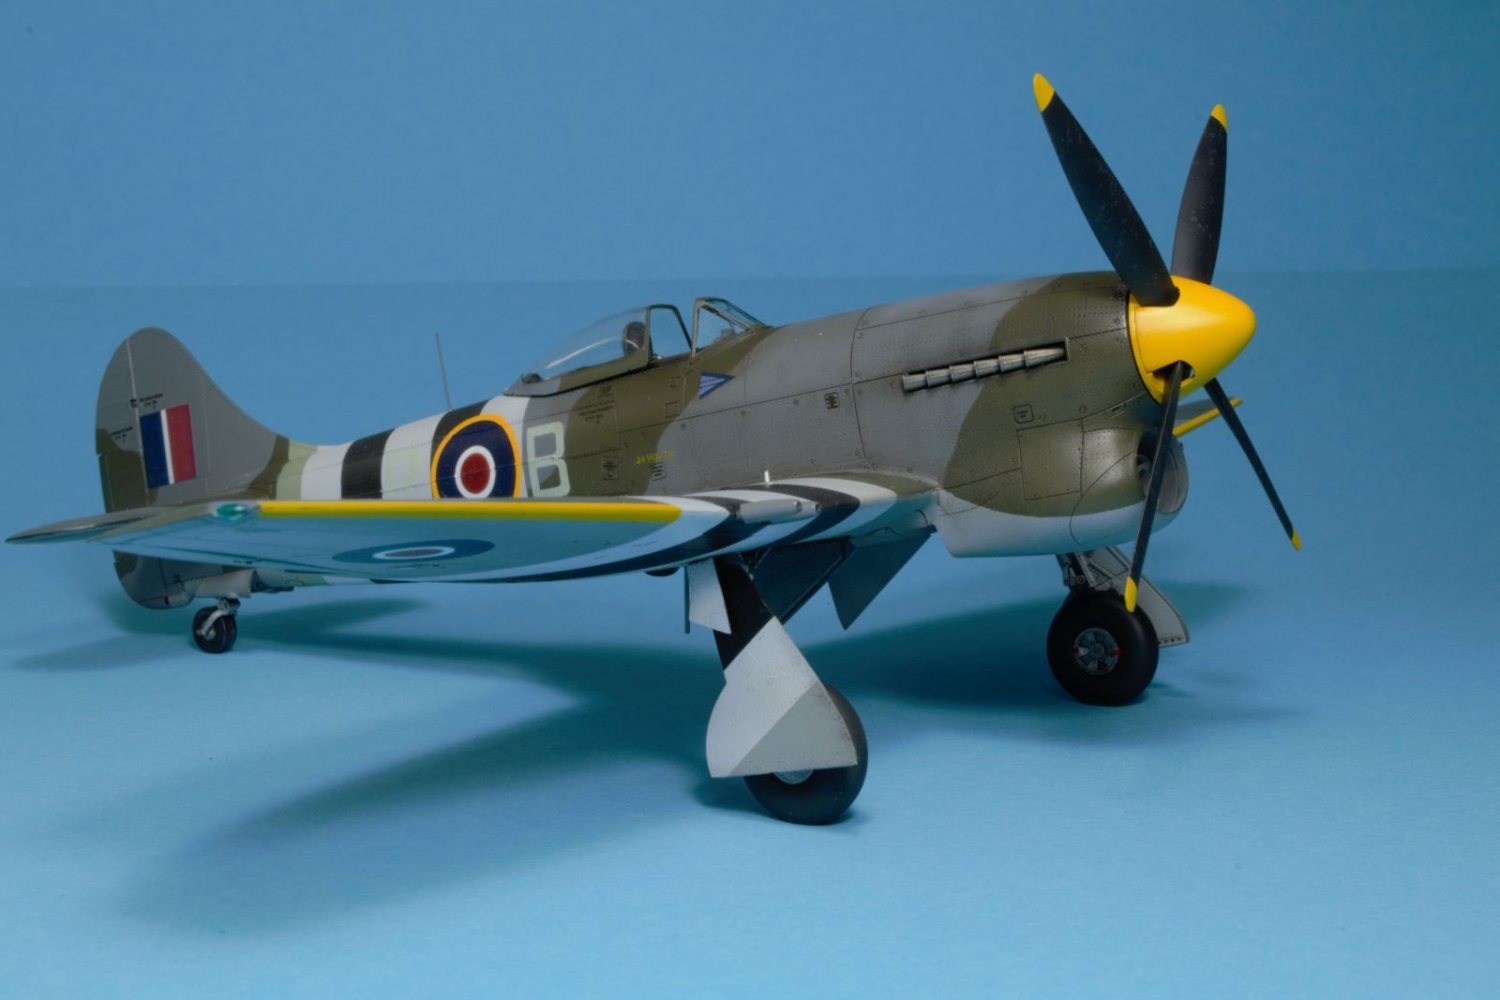


Hawker Tempest Mk. V by Danstream - FINISHED - Eduard - 1:48 scale
in Non-ship/categorised builds
Posted
I like a lot both the EE Lightning and the Hawker Hunter and they are surely on my list. However they are not yet in my stash. Seen that the cold war got 100% of consensus, I will stay within that period, but with something from my pile. I think I will pull out a F-104 Starfighter, which is the oldest kit I presently have. It will wear an old NATO camouflage.
Hope you will not be disappointed,
cheers,
Dan